1965 Amphicar 770 Restoration Update
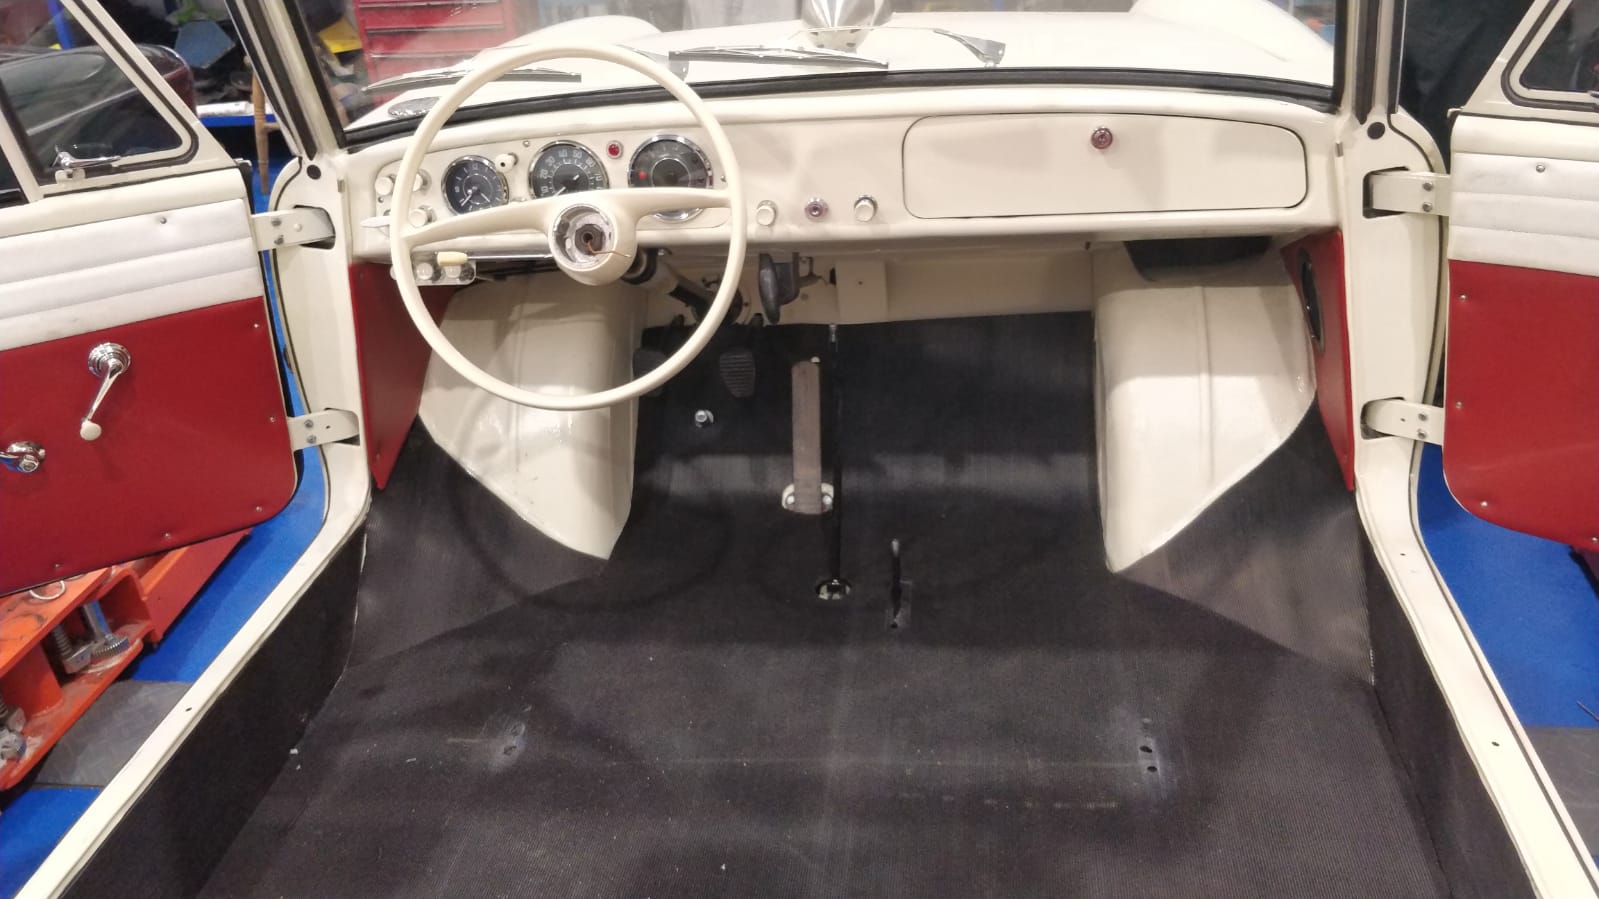
Tom has been making progress on our rare Amphicar restoration. After installing the new floor he has fitted the rubber lining to the floor, vehicle


Tom has been making progress on our rare Amphicar restoration. After installing the new floor he has fitted the rubber lining to the floor, vehicle
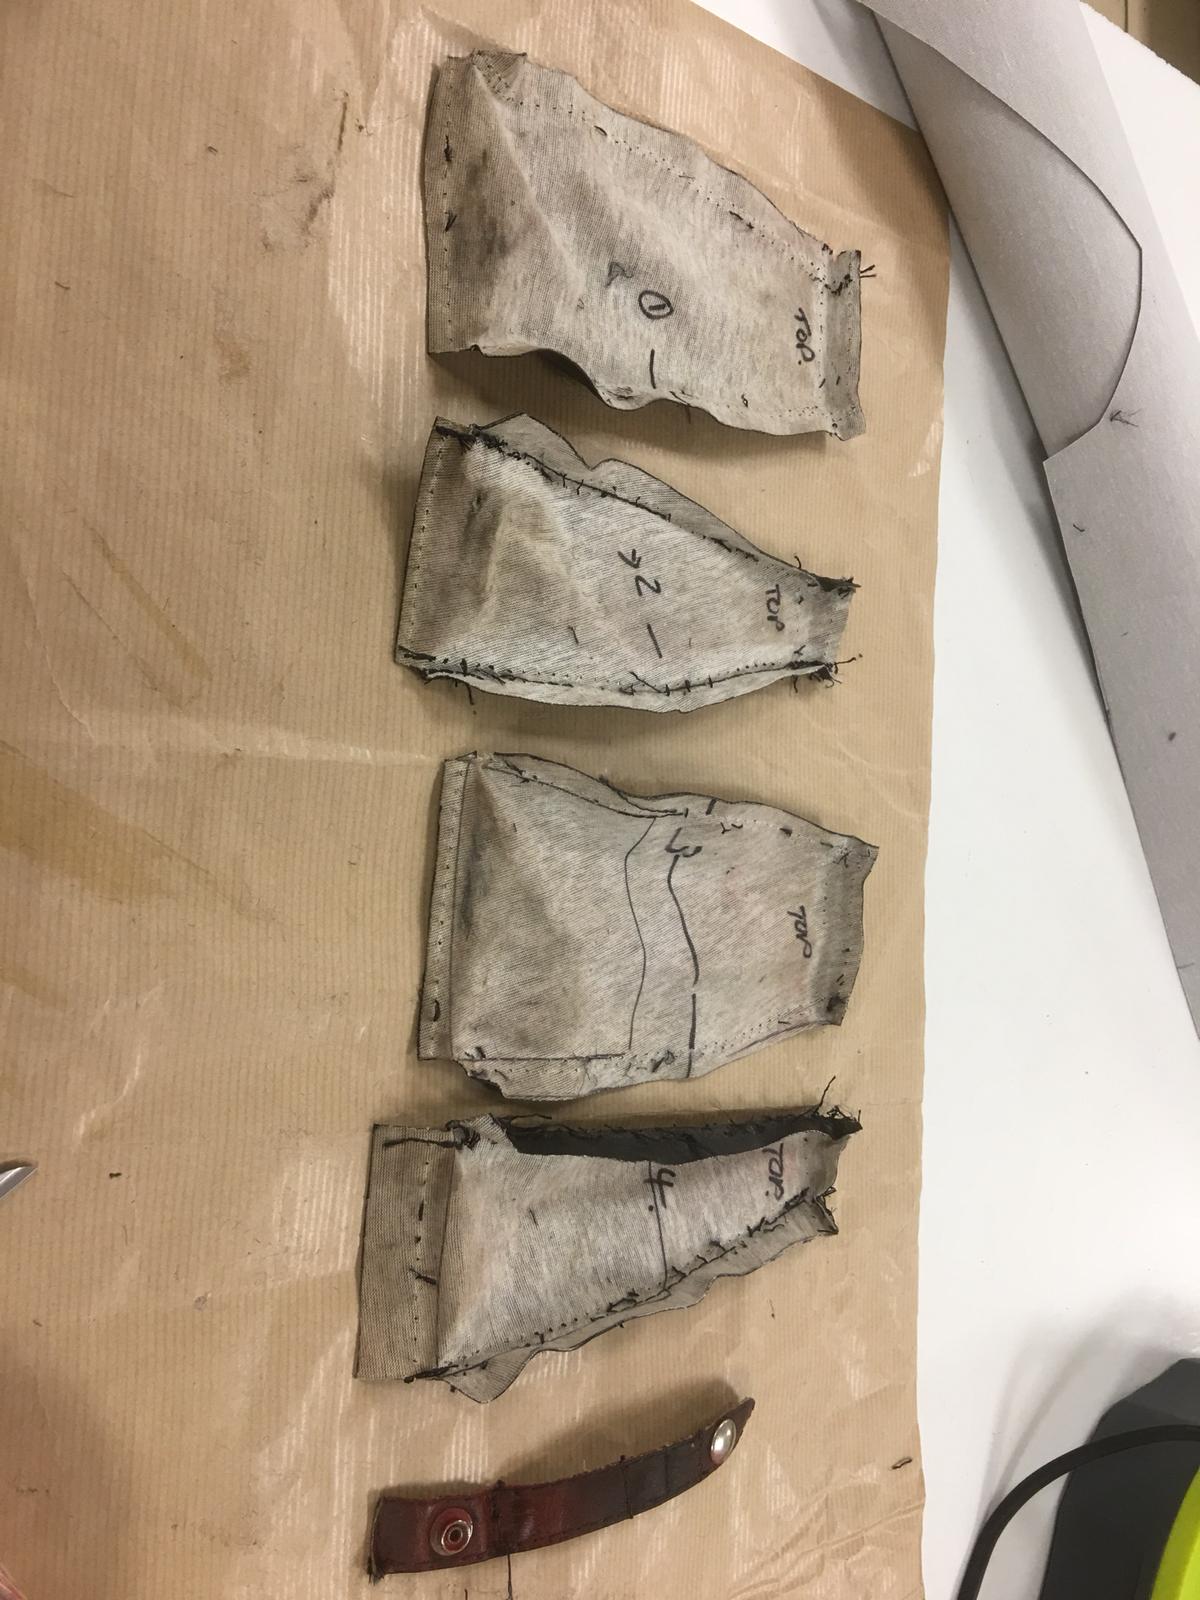
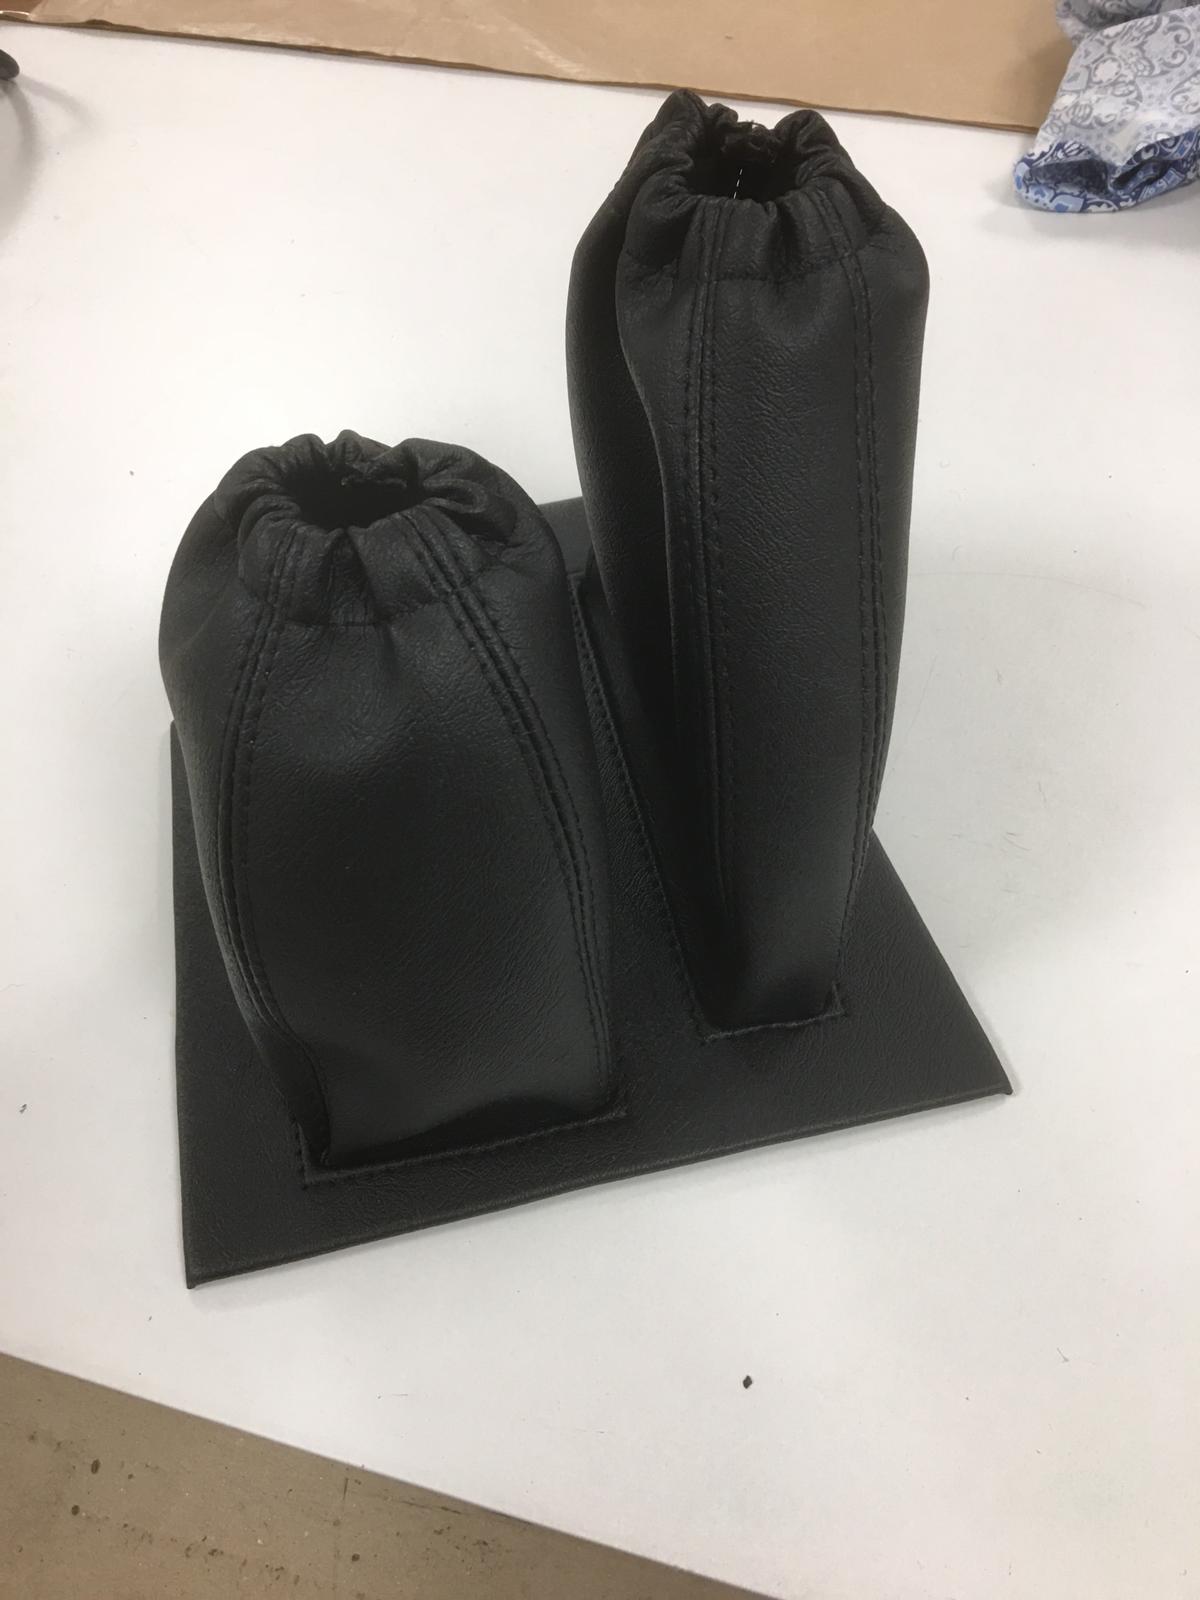
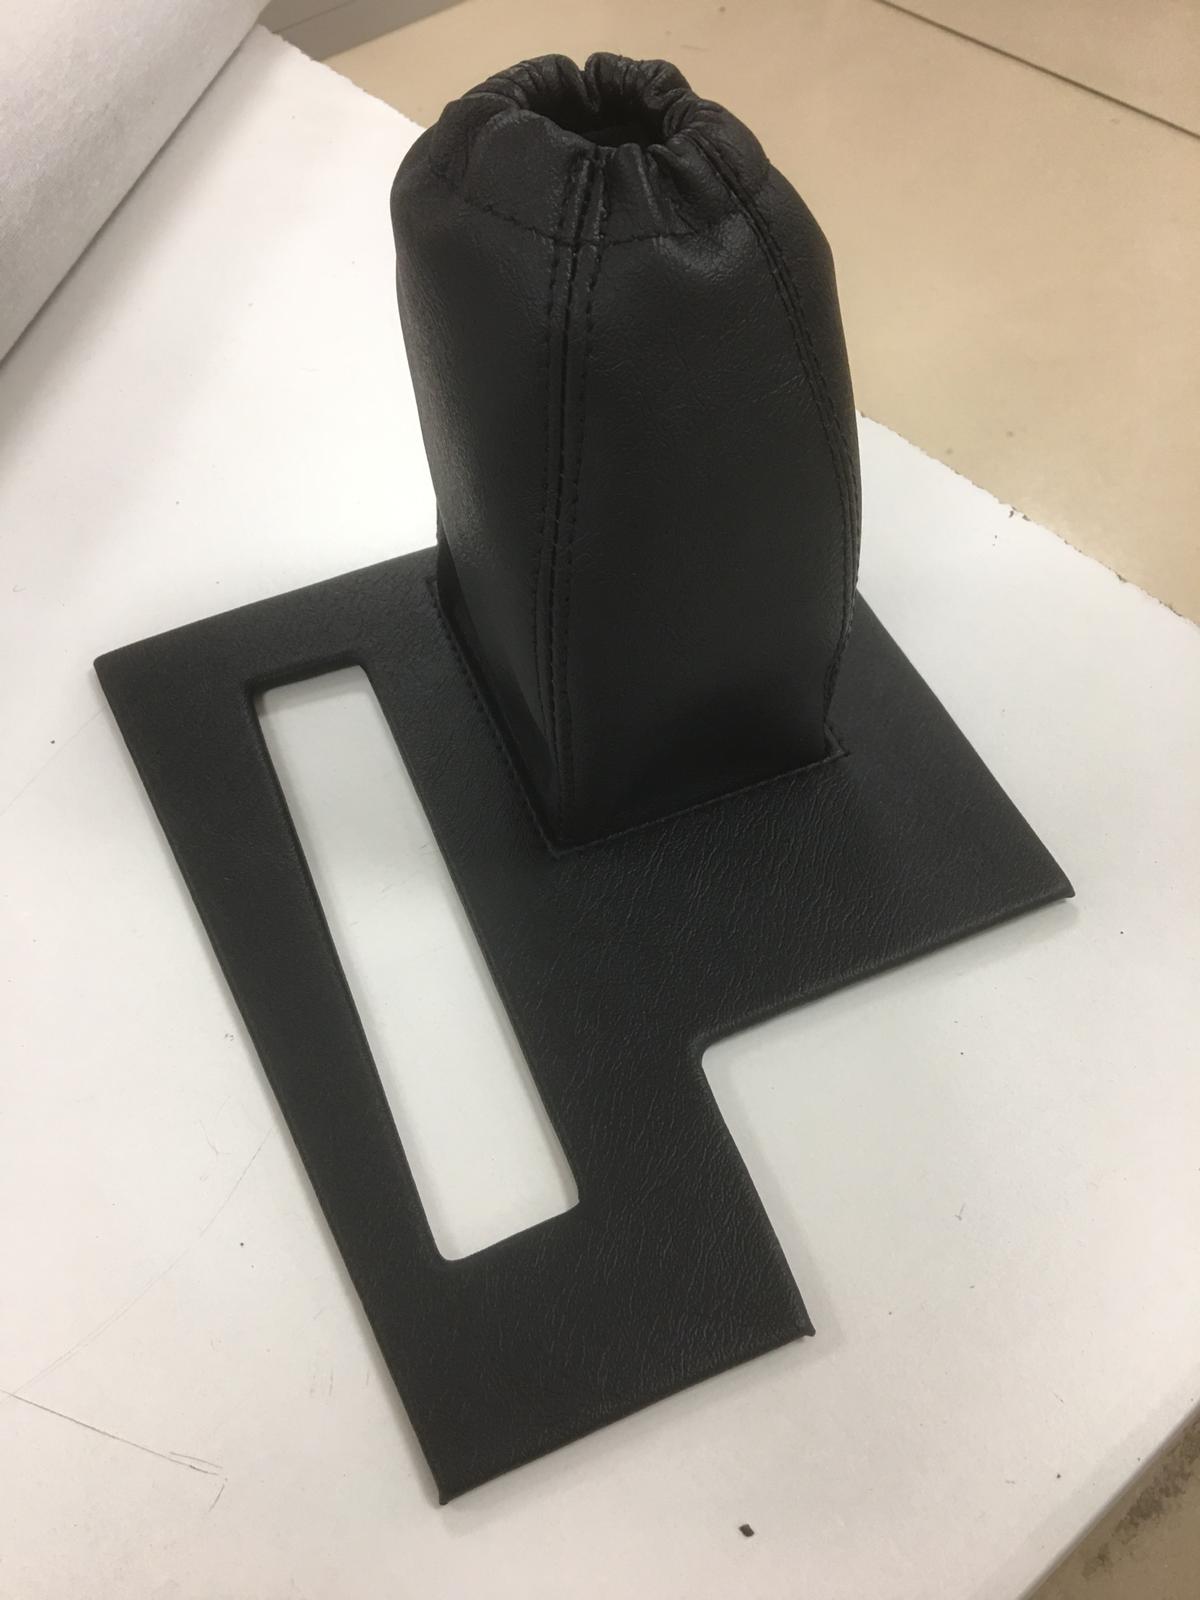
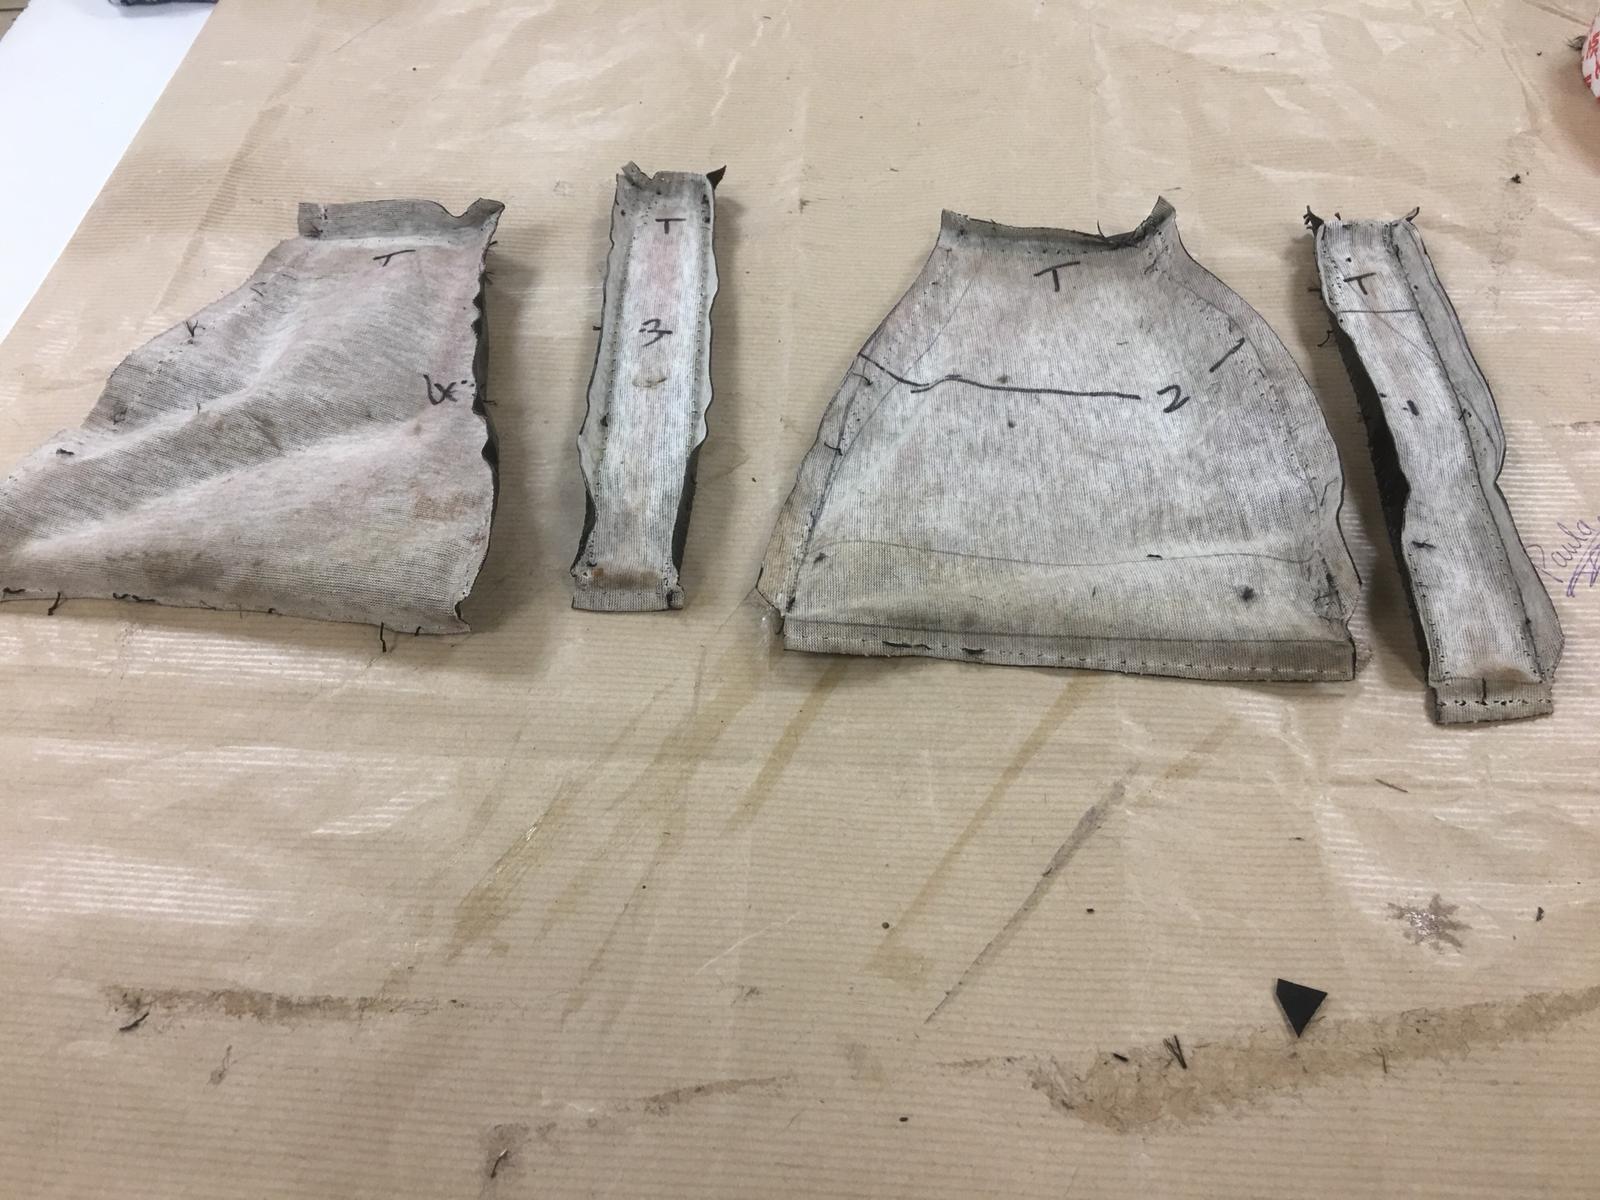
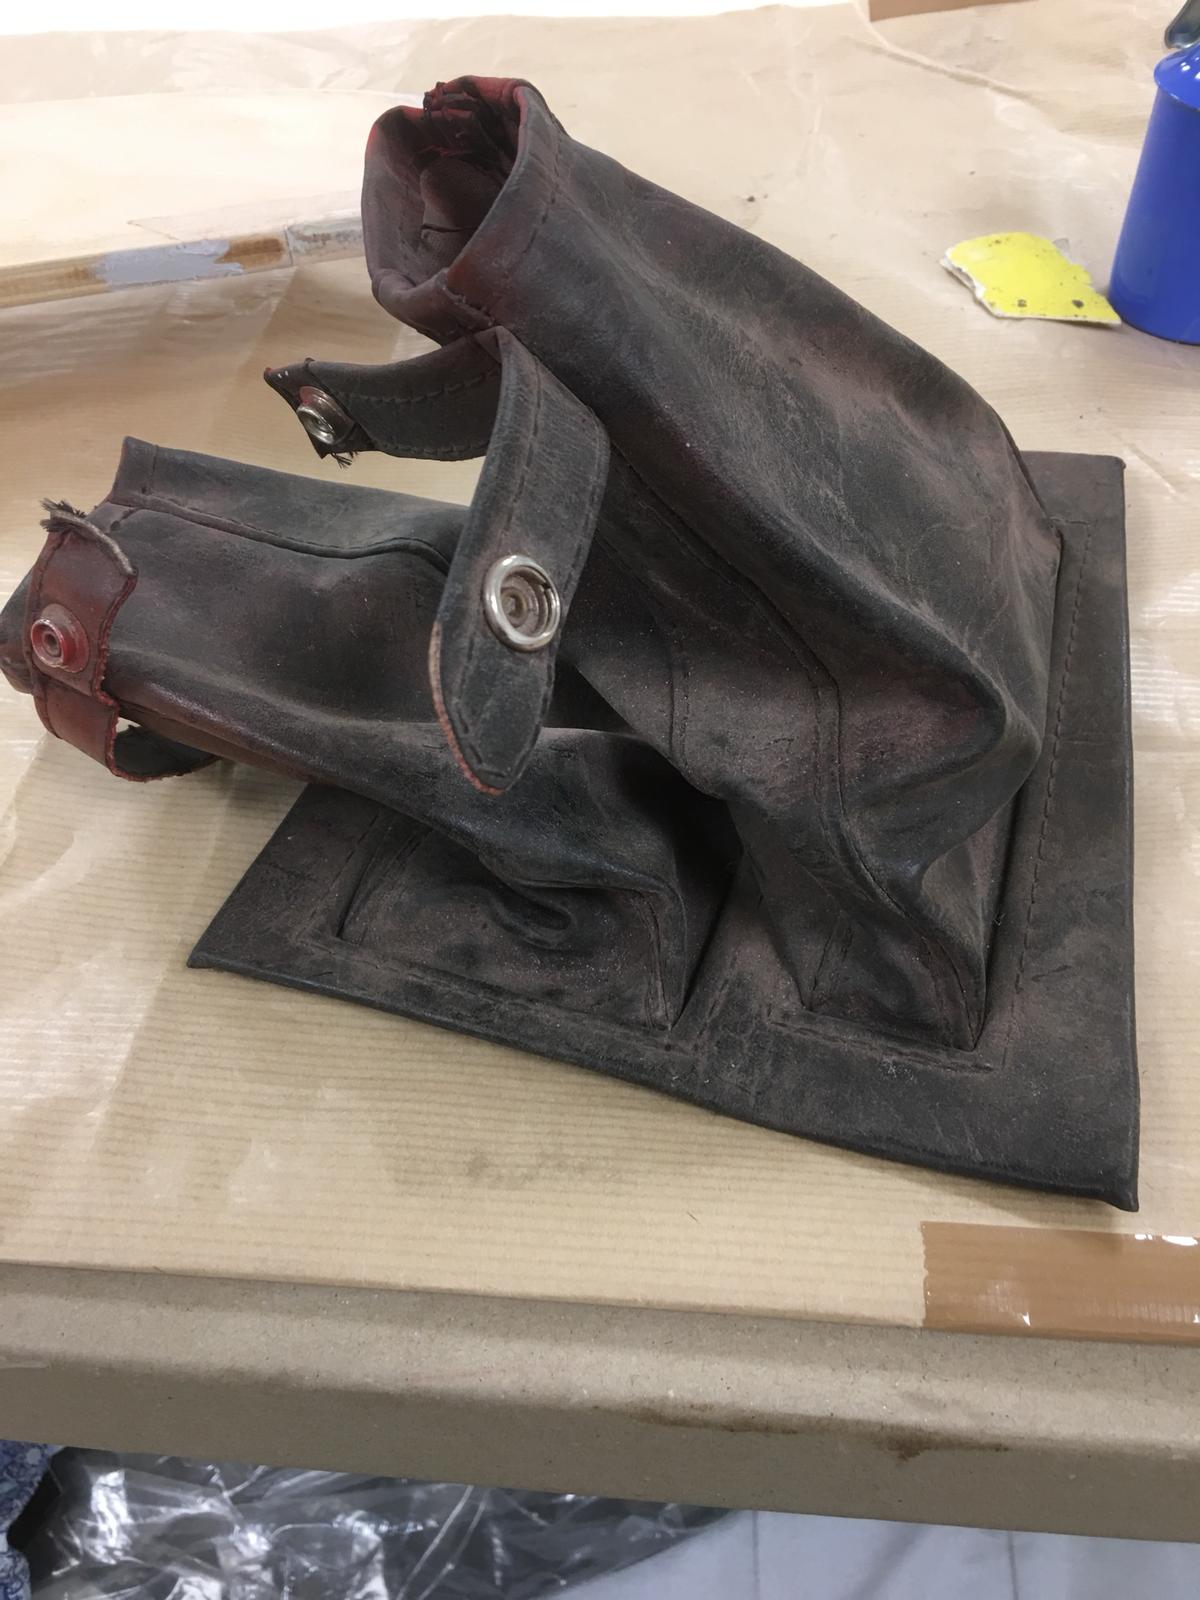
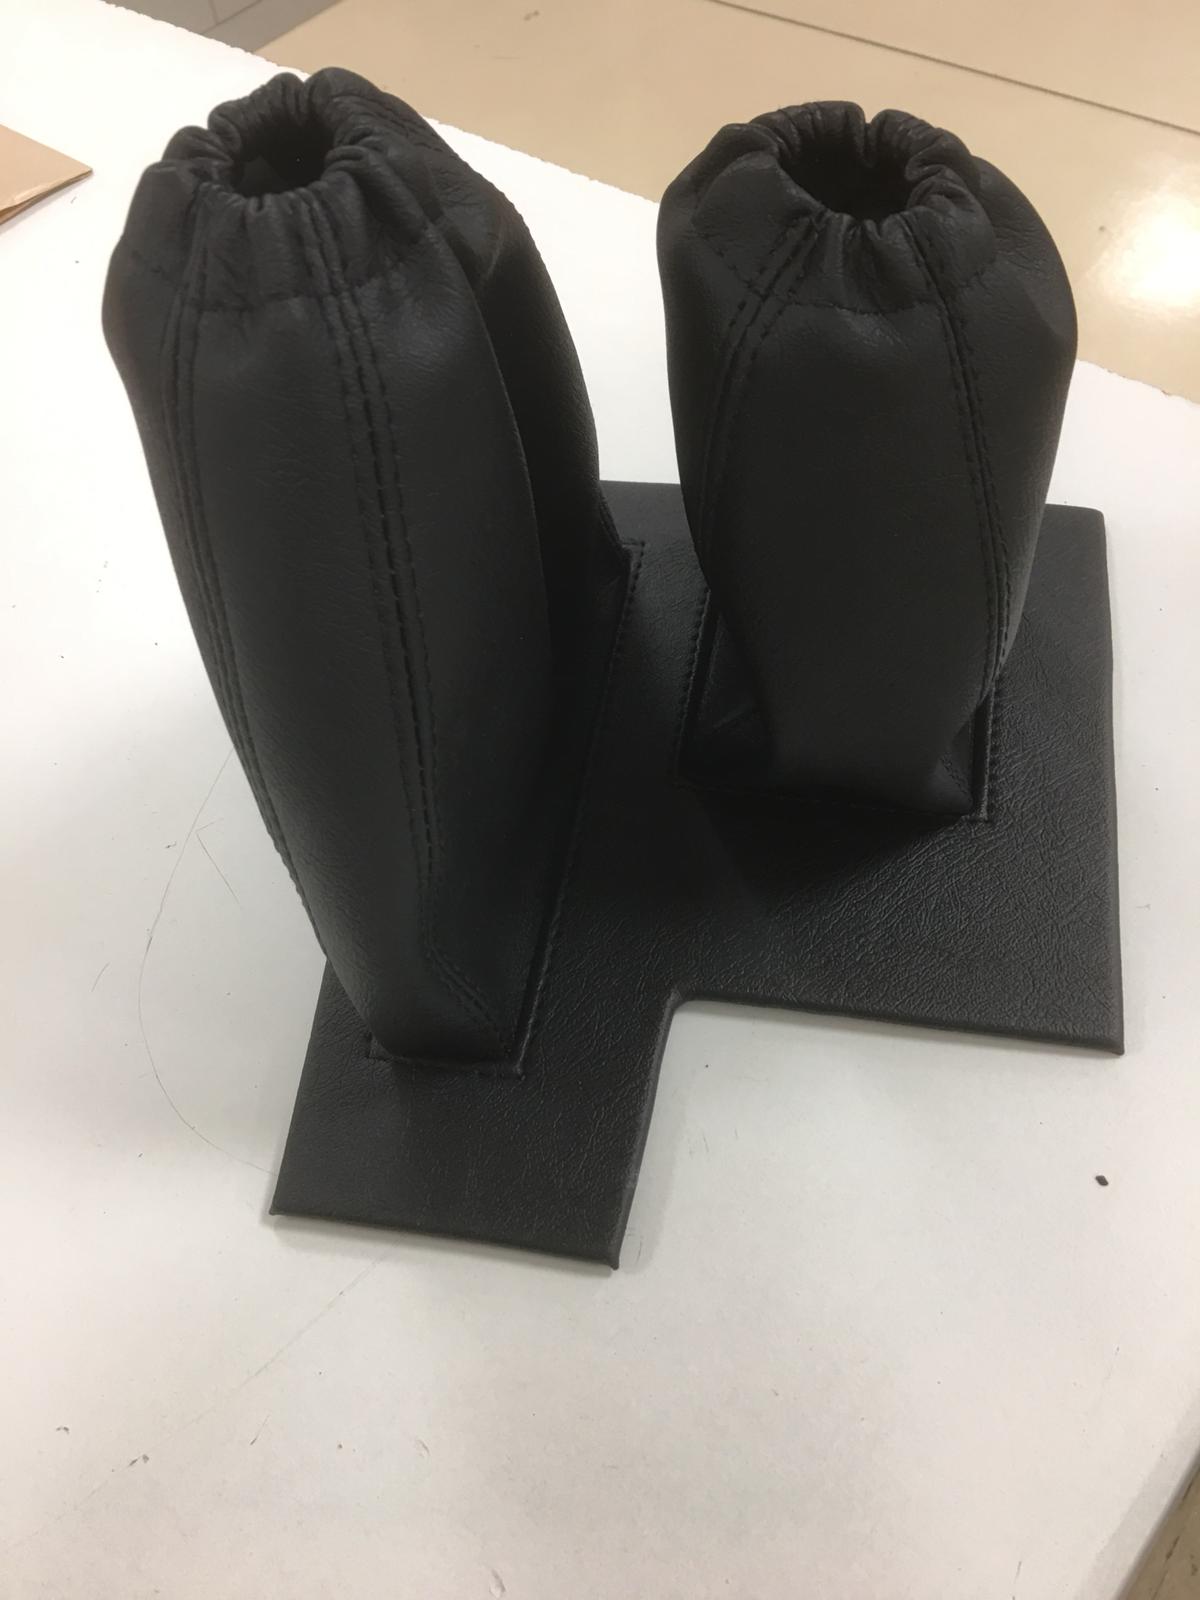
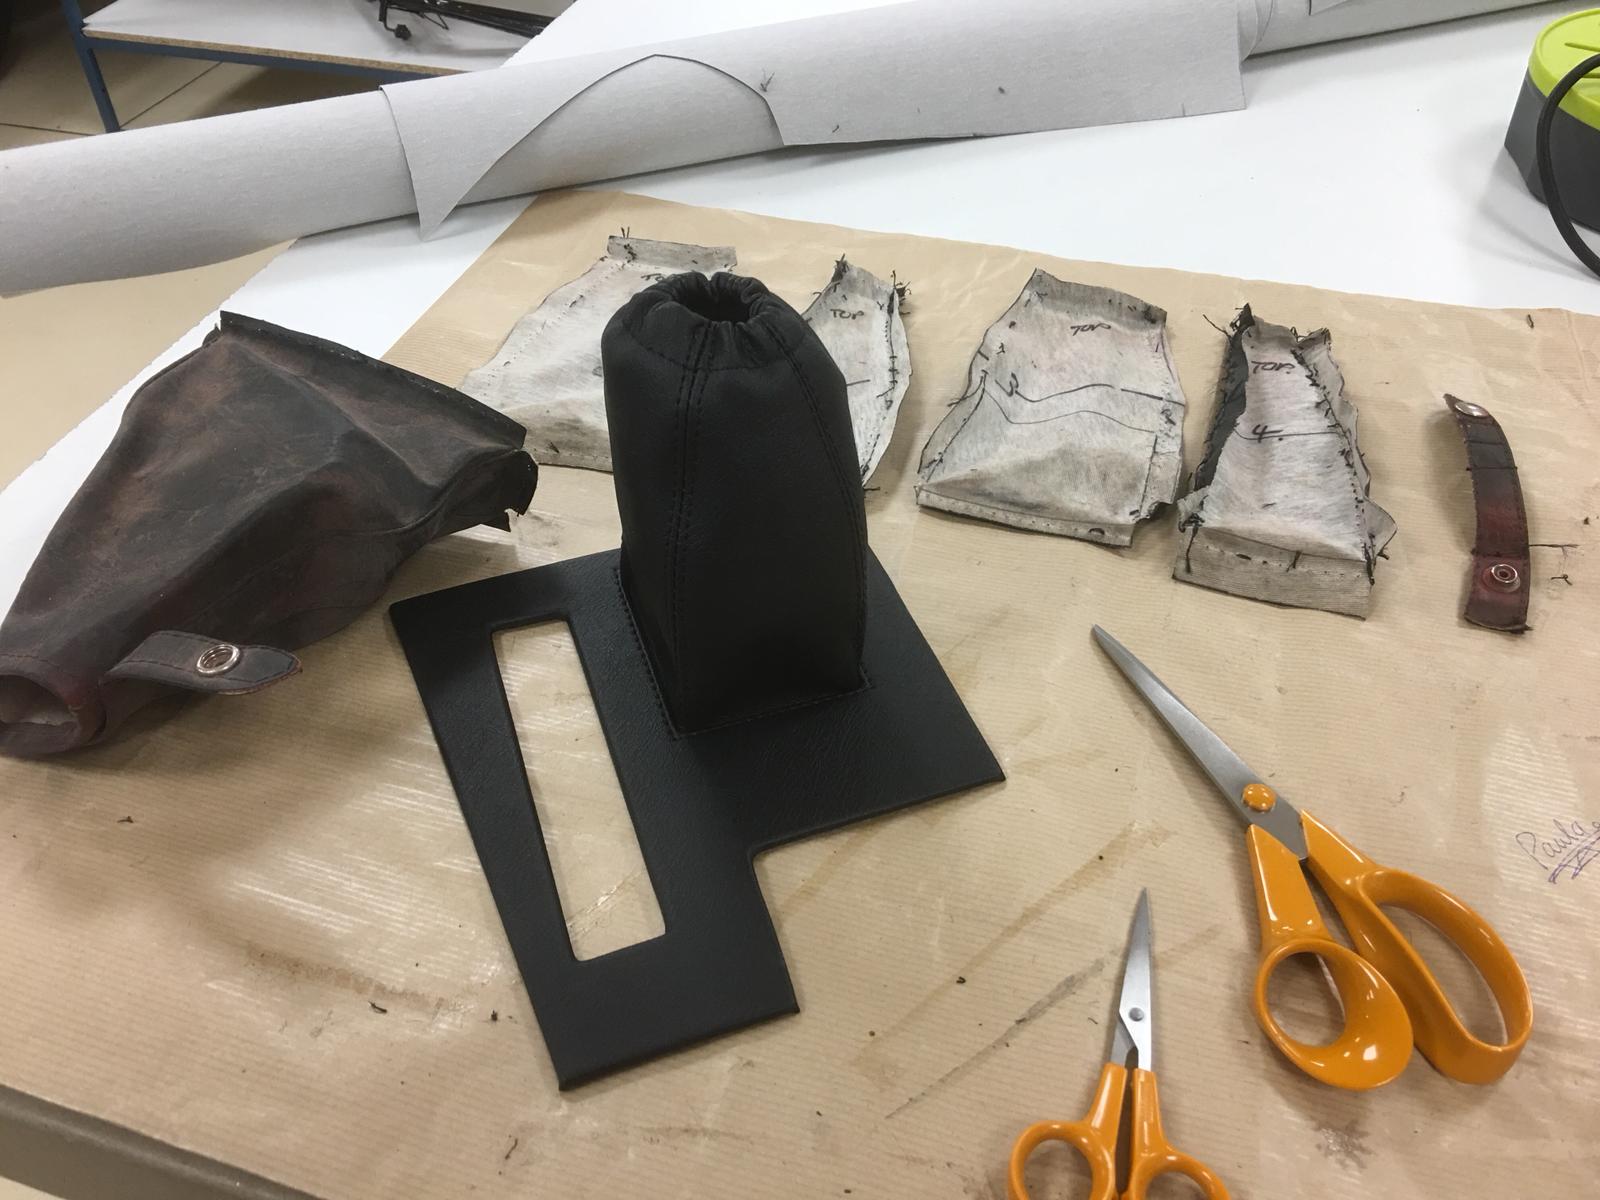
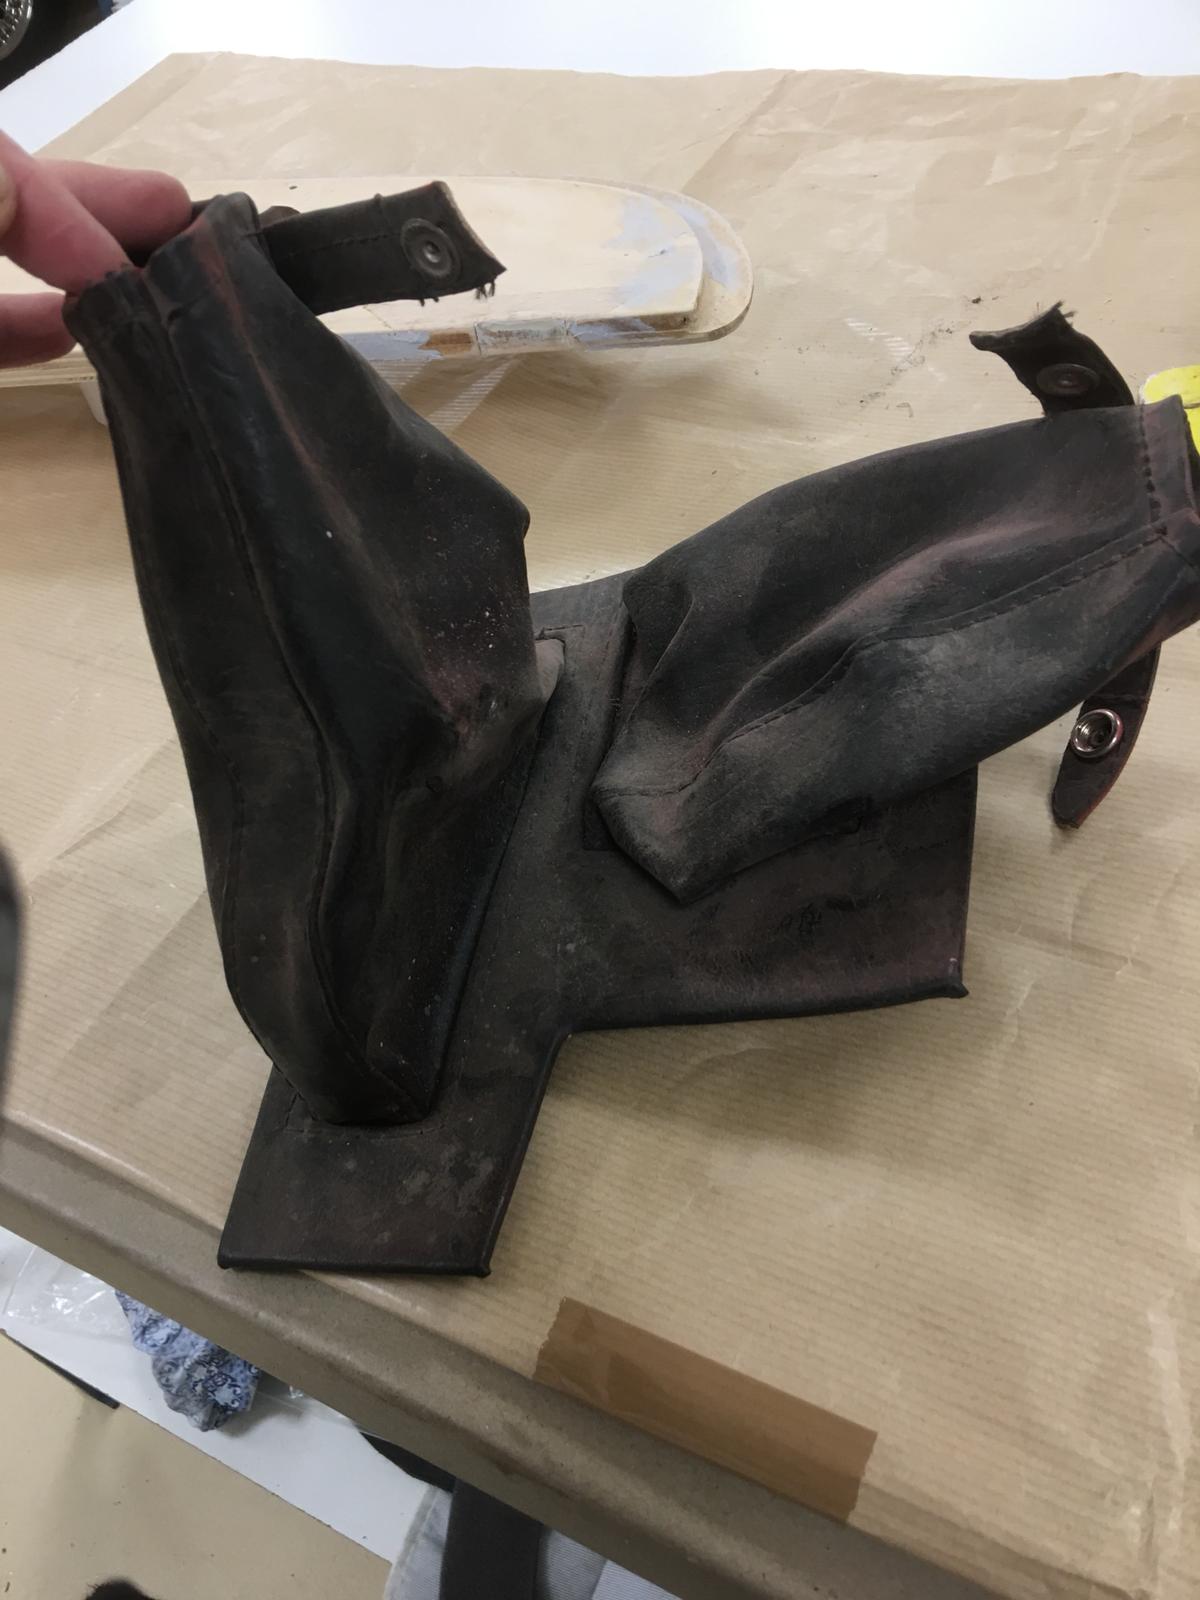
Kath, Bridge Classic Cars’ in-house trimmer has made a new double gear lever gaiter for our Amphicar. She started by dismantling the old, worn gaiter.
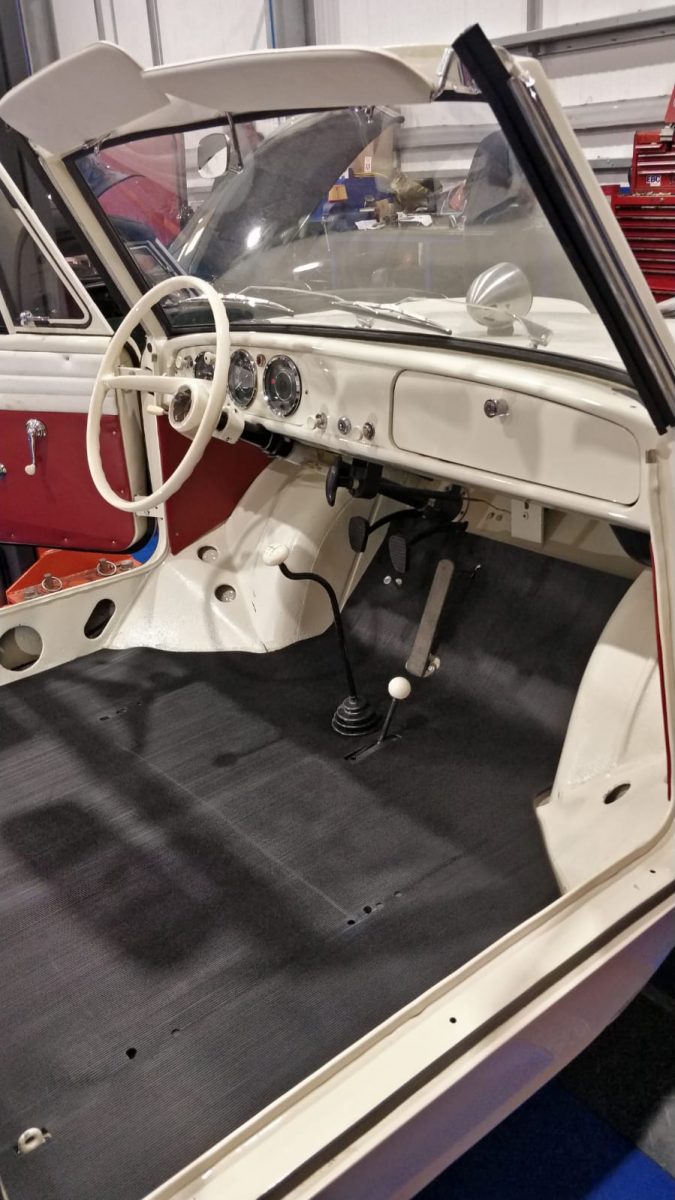
Tom has picked back up work on our 1965 Amphicar, a vehicle that can travel both on land and water. Tom has been busy fabricating

Over the weekend Gordon and Craig were busy picking up two fantastic, unusual classics. Both cars will go up for sale in our showroom. The

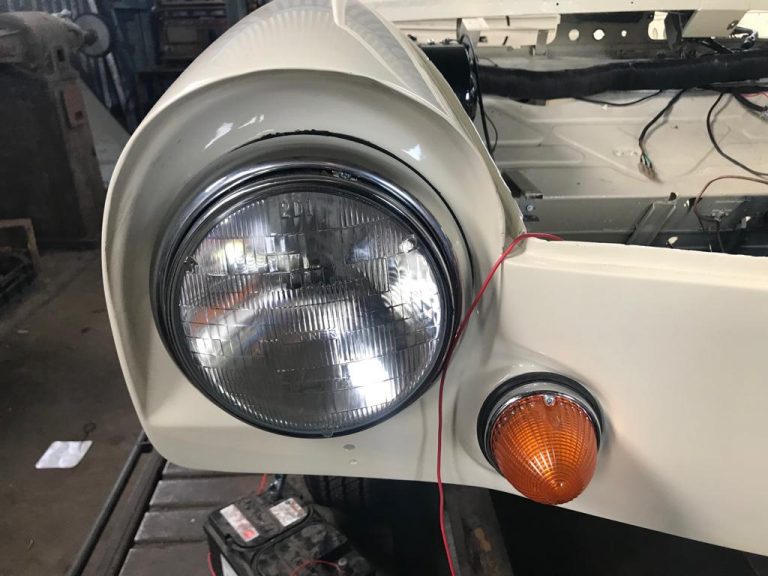
Gary has been making great progress on the Amphicar restoration. He’s fitting either fully refurbished or new parts to get this vehicle into concours condition.
Work has continued on our unique Amphicar project. Our Amphibious vehicle is now well and truly on her way to becoming fully ship-shape. We’re refitting
After other work commitments and a busy work diary taking priority over our 1965 Amphicar it was time to give the project a new lease

We have made the decision to revisit the underside of our Amphicar. the reason being is that we collectively felt that it could be better.
Brian’s been busy this week fitting new wiring looms into our 1965 Amphicar and our 1972 Jaguar E-Type.

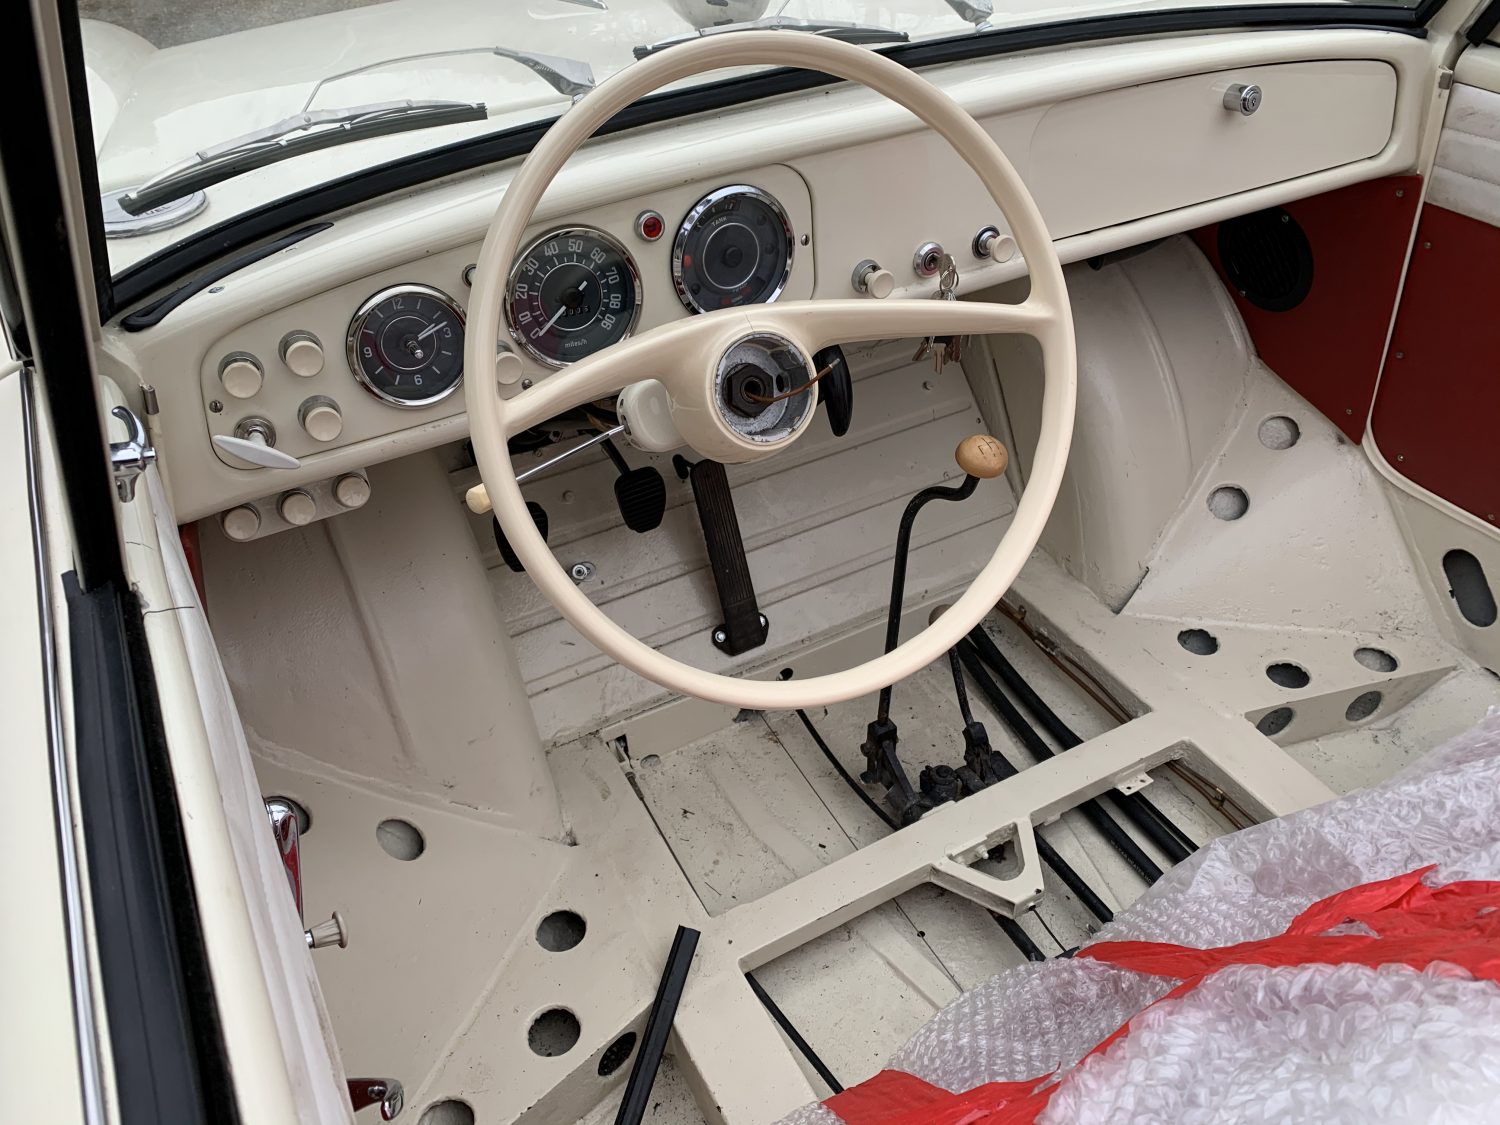
The Amphicar dash is starting to be built up today with the freshly painted dash being filled with the refurbished dials.
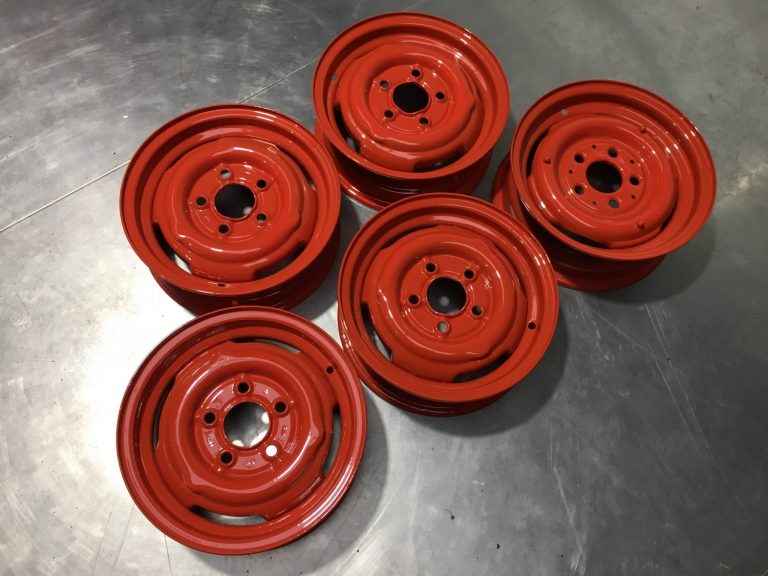
Our 13″ wheels have now returned from our good friends at Wheelcare in Colchester having been welded, repaired, stripped and painted. They are now ready for
[vc_row][vc_column][vc_column_text]We say this time and time again but if you are restoring (or even working) on your own projects it is so beneficial to take
[vc_row][vc_column][vc_column_text]With the engine now successfully refitted into position we can now look to rebuild the car with all of the brand new and refurbished components.

With so many projects currently being worked on our very own 1965 Amphicar as taken somewhat of a back seat recently. With the new year
Our 1965 Amphicar is now ready to leave the paintshops and return for refit. The red colour has disappeared to be replaced by the original Beach

On a recent trip with the family to Florida, John was seen getting to grips with the running of the Disney Amphicars. Whilst he family
[vc_row][vc_column][vc_column_text]Who wants first dibs at testing our Amphicar when the restoration is complete later this year? In a couple of weeks time our 1965 Amphicar

The thick layer of external filler has now been successfully removed and a new door skin has been rebuilt and fitted. We are not too

[vc_row][vc_column][vc_column_text]Whilst preparing the body for paint we discovered that the car had a large quantity of filler in places (see previous article) This all needed
As you can see from the images below, we have had to remove a large quantity of filler from our 1965 Amphicar. At some stage
In preparation for the return of our Amphicar body shell from the paint shop, we have started to go through the parts to decide whether
With only the rocker box cover a different colour, the Amphicar engine is actually one of the simplest engines to paint as it is all
[vc_row][vc_column][vc_column_text]We are well on with the preparation of our 1965 Amphicar body ready for the full respray which we have planned for early next year.

The major welding work is now complete on our 1965 Amphicar so we are off to the paint shop to have her stripped back and
[vc_row][vc_column][vc_column_text]Found in the archives of Beverly Hills Car Club sold inventory is our 1965 Amphicar in it’s original colour combination of white with red and white
[vc_row][vc_column][vc_column_text]We are taking lots and lots of images whilst stripping down our 1965 Amphicar. It is critical on all restoration projects to take as many
[vc_row][vc_column][vc_column_text]With the engine now out of the car Dave can concentrate on removing the final remaining pieces ready for the body shop to take over.[/vc_column_text][/vc_column][/vc_row][vc_row][vc_column][vc_gallery

[vc_row][vc_column][vc_column_text]After years in storage we are now underway with the restoration of our 1965 Amphicar. Today we are running up and testing our the engine and
[vc_row][vc_column][vc_column_text]Dave is now well on with stripping back our 1965 Amphicar ready for paint. We have since discovered that the original colour was white and
[vc_row][vc_column][vc_column_text]As we always say, it is very important to take lots of pictures when carrying out a restoration. Angles you don’t think are important and
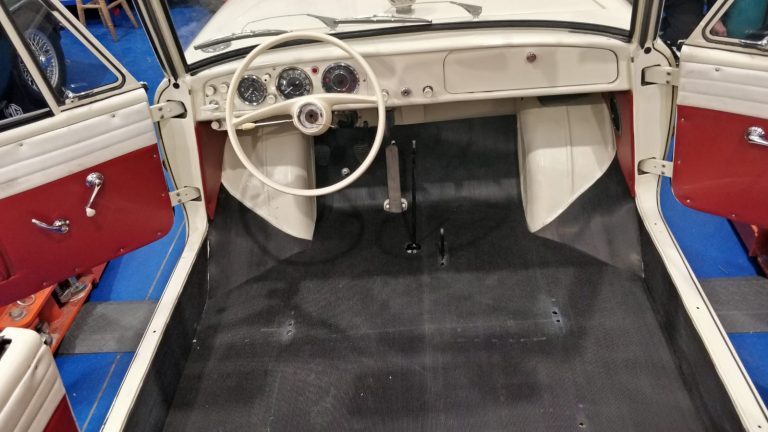
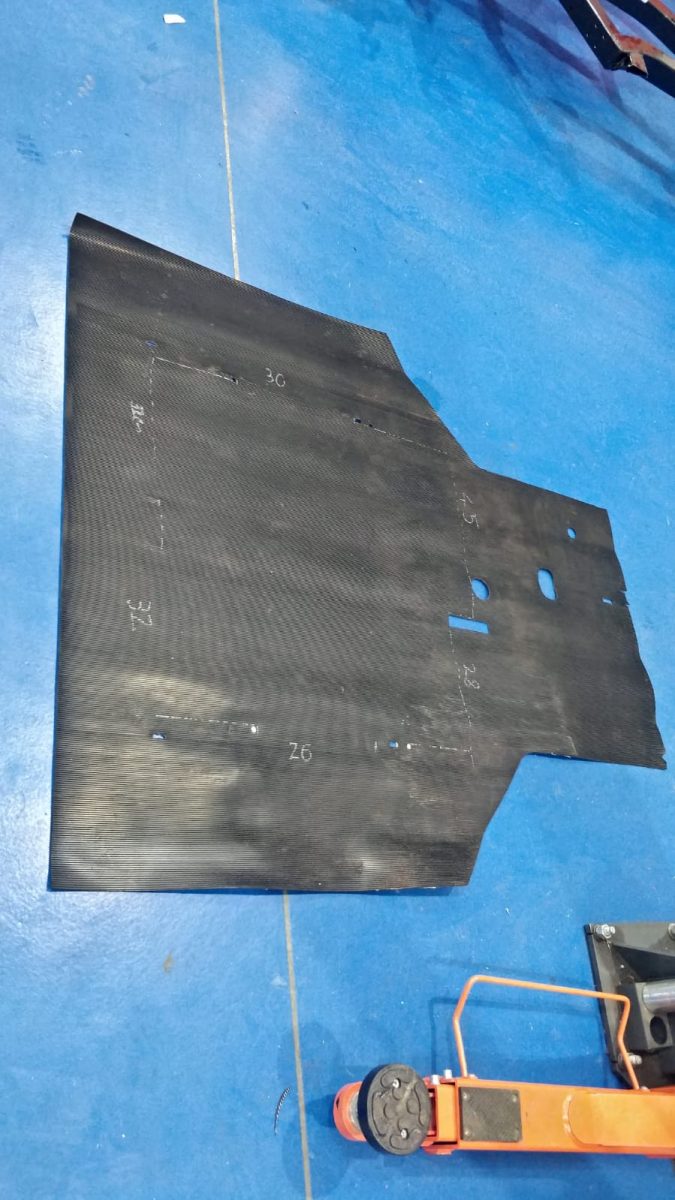
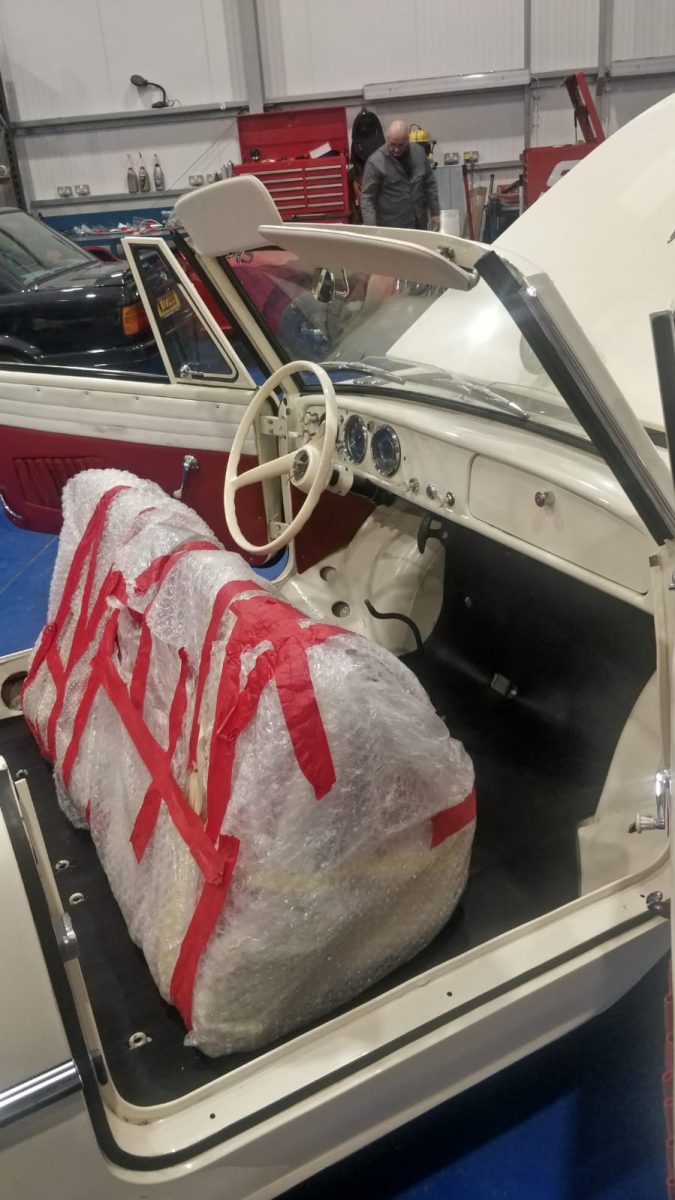
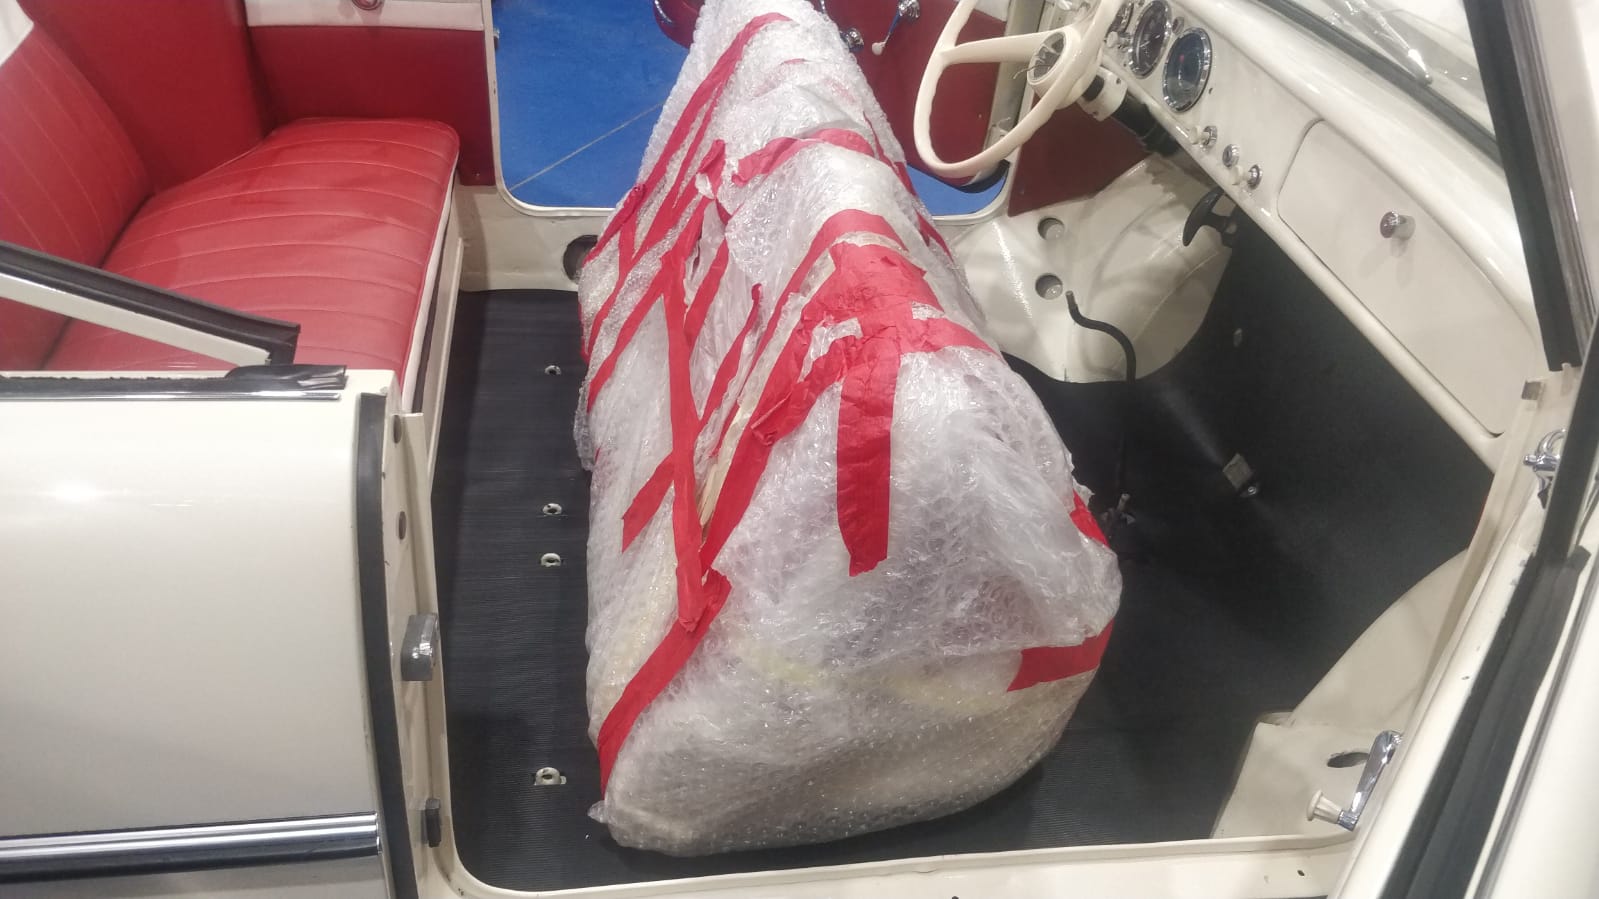
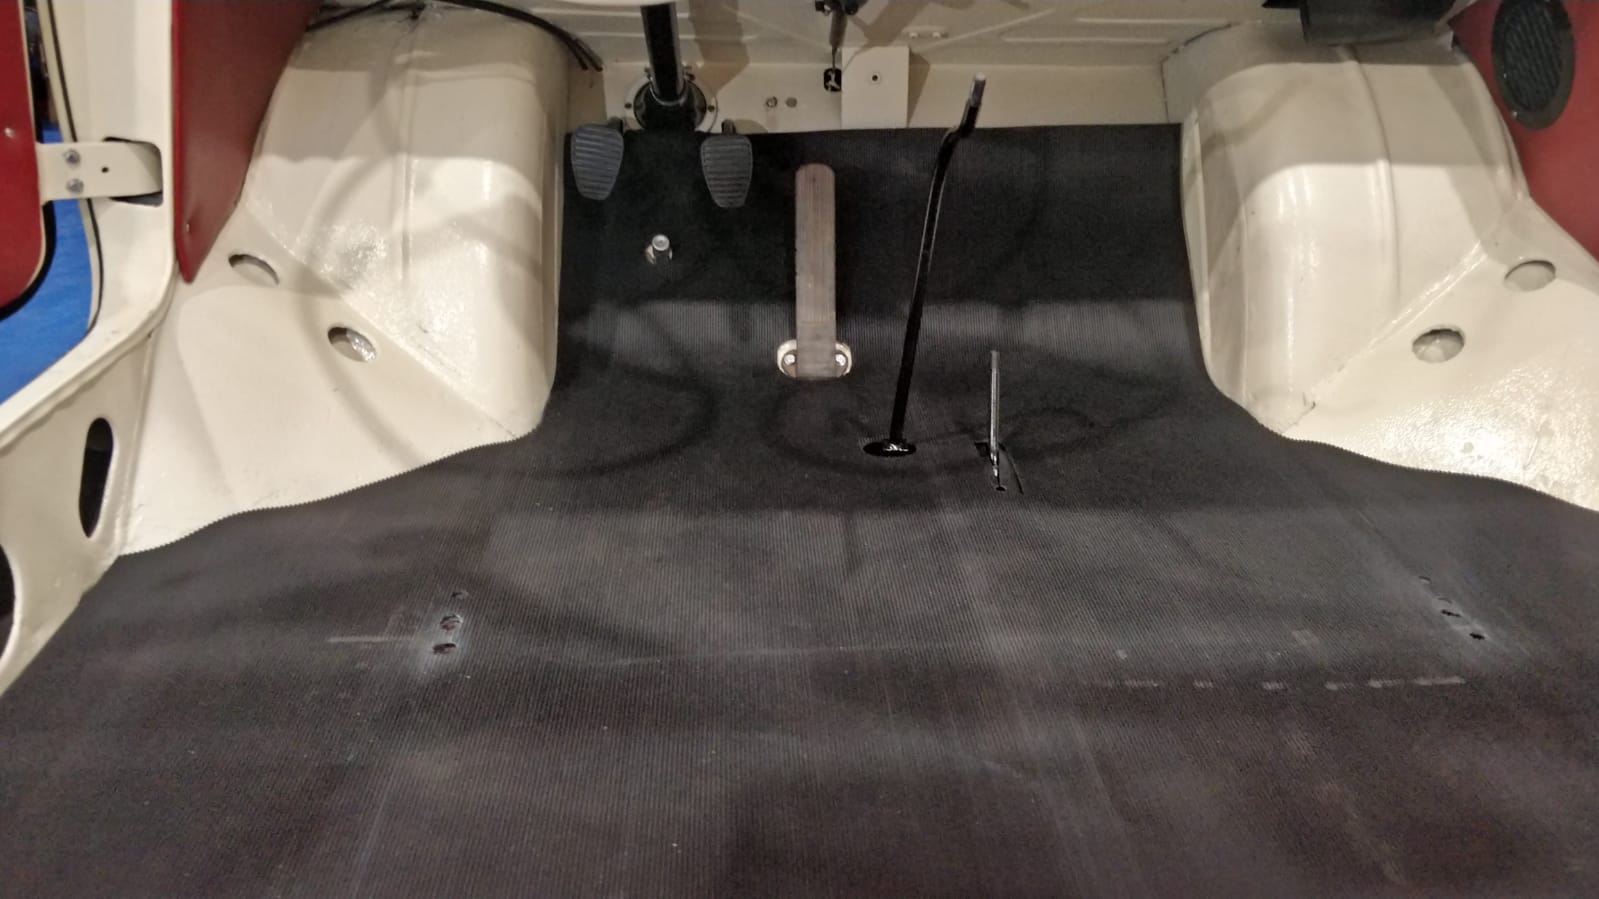
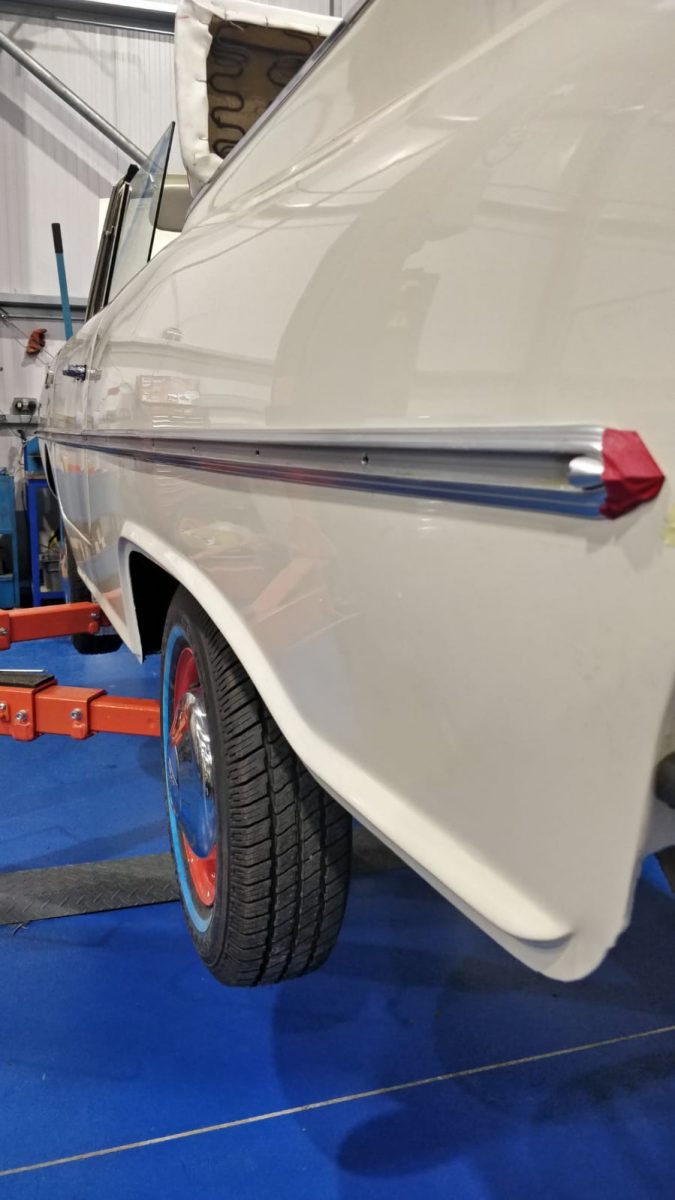
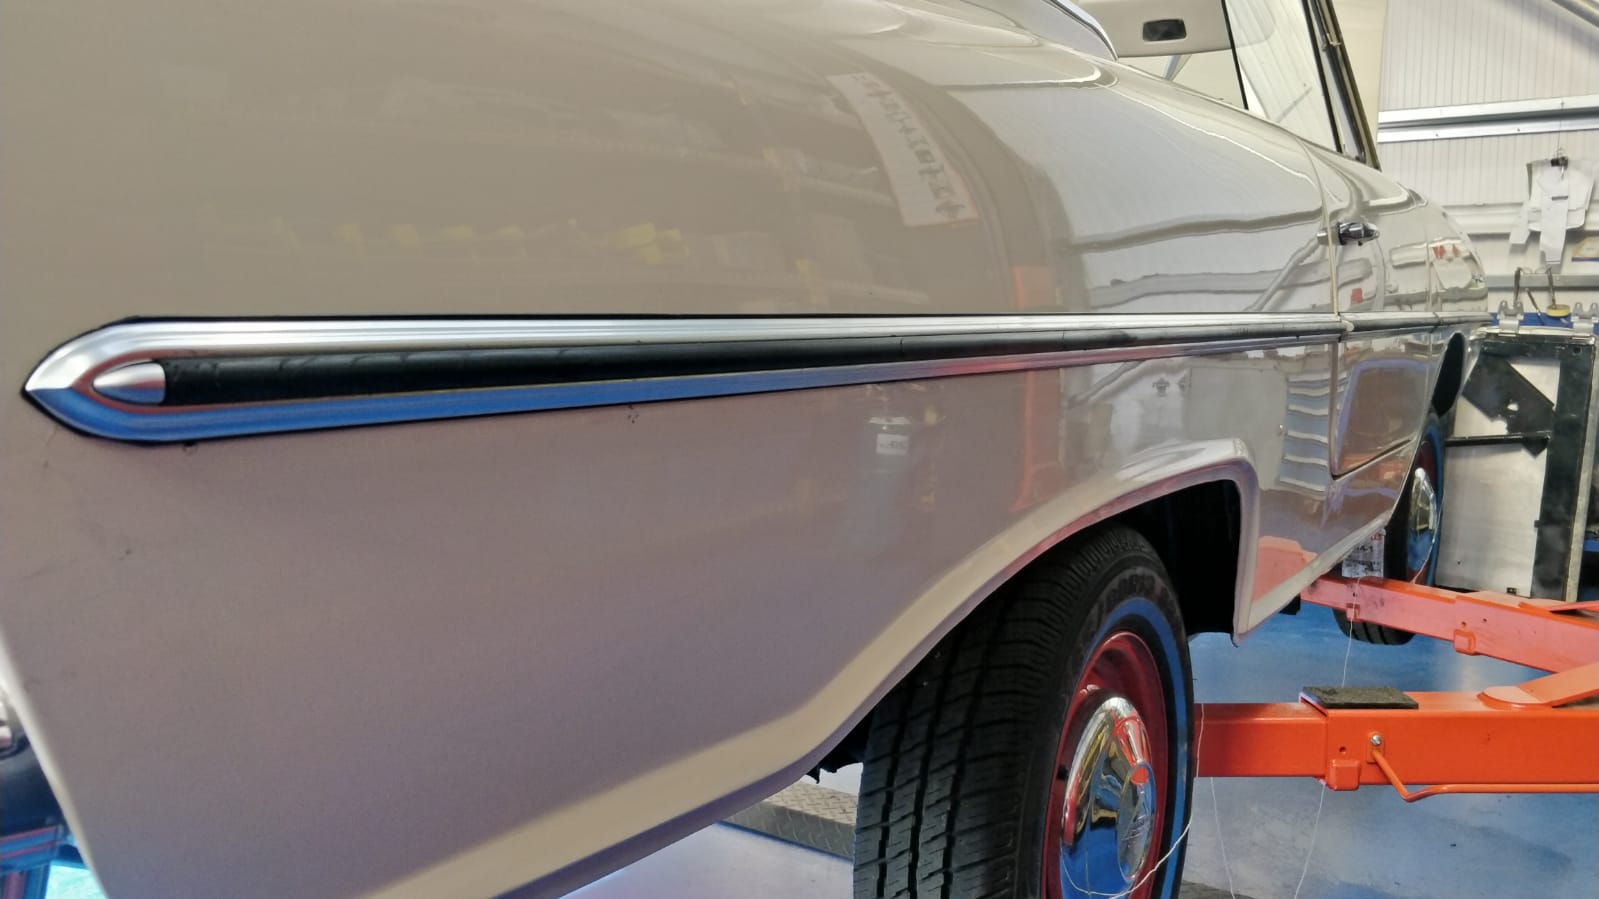
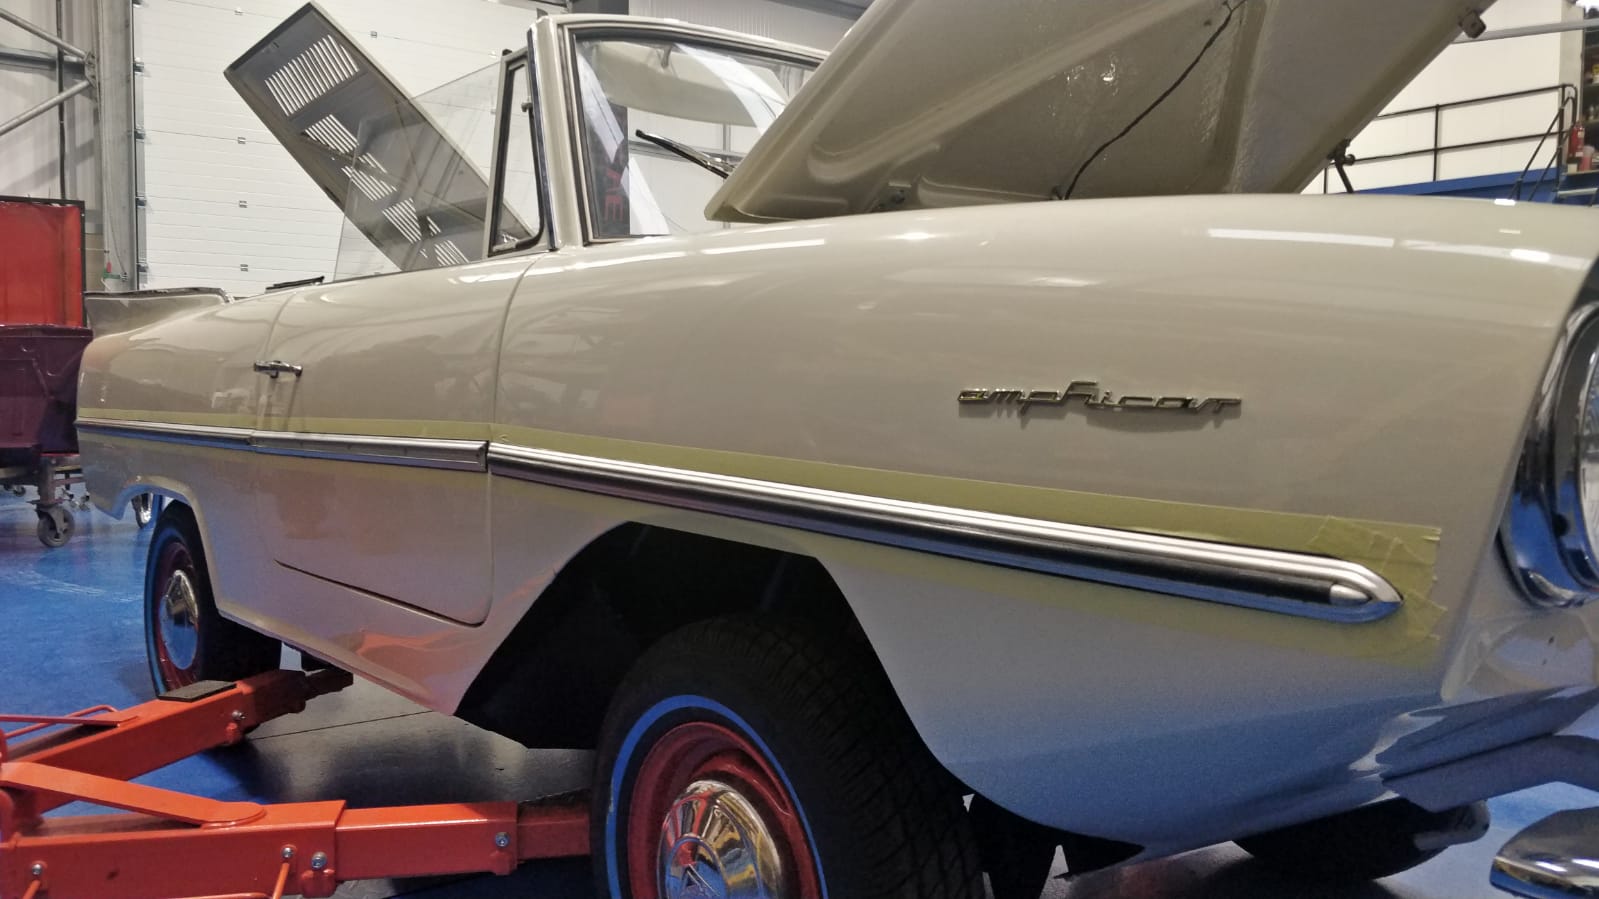
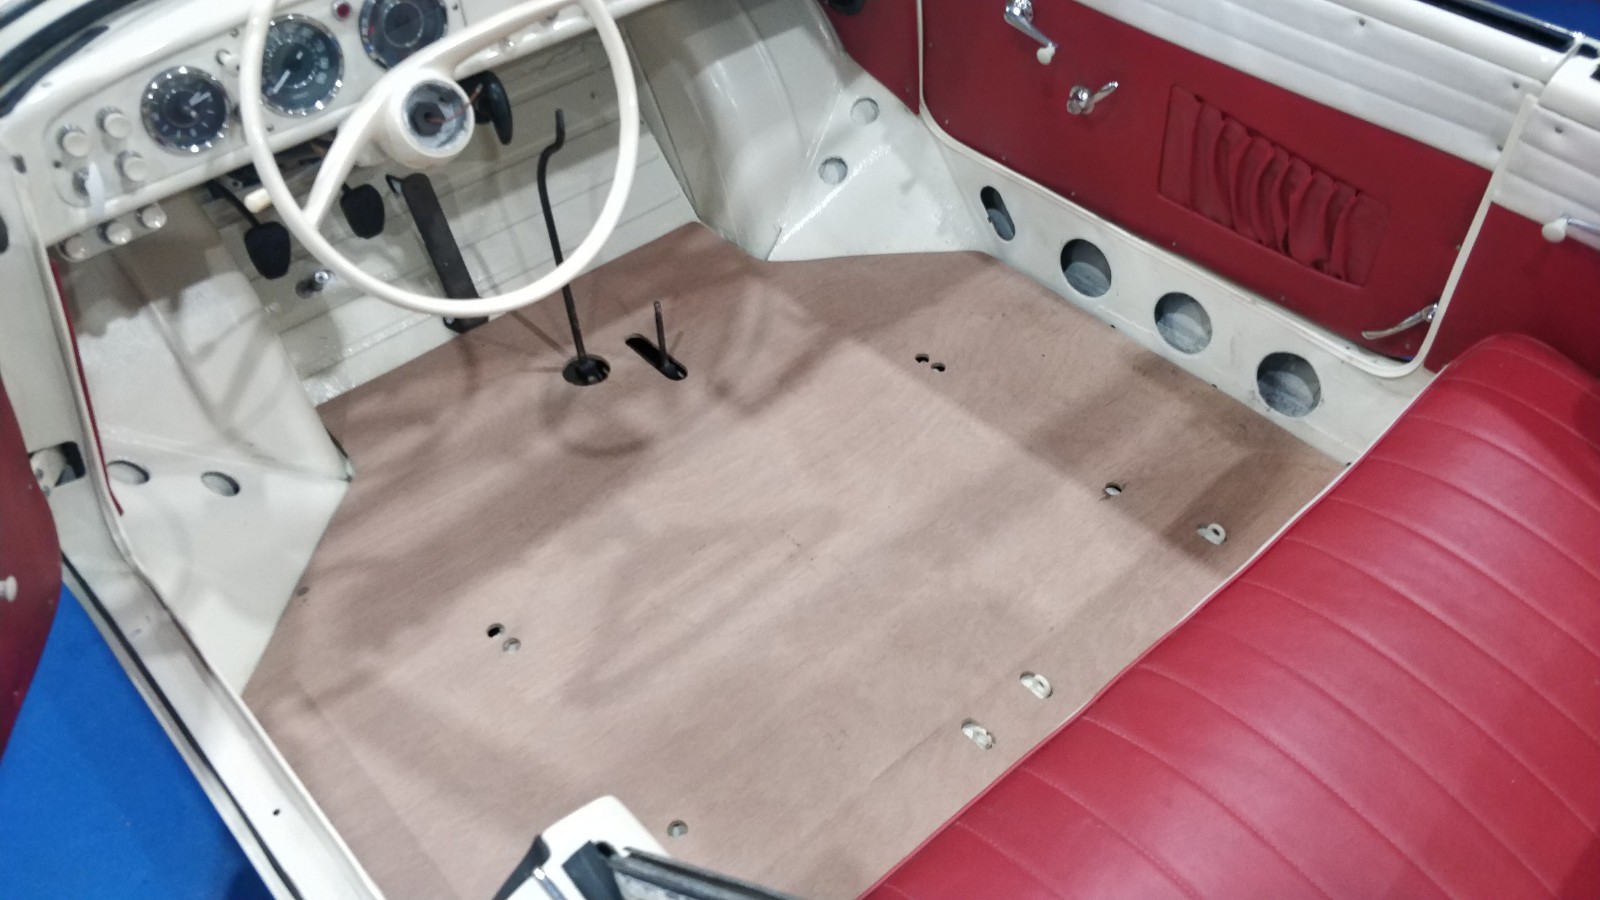
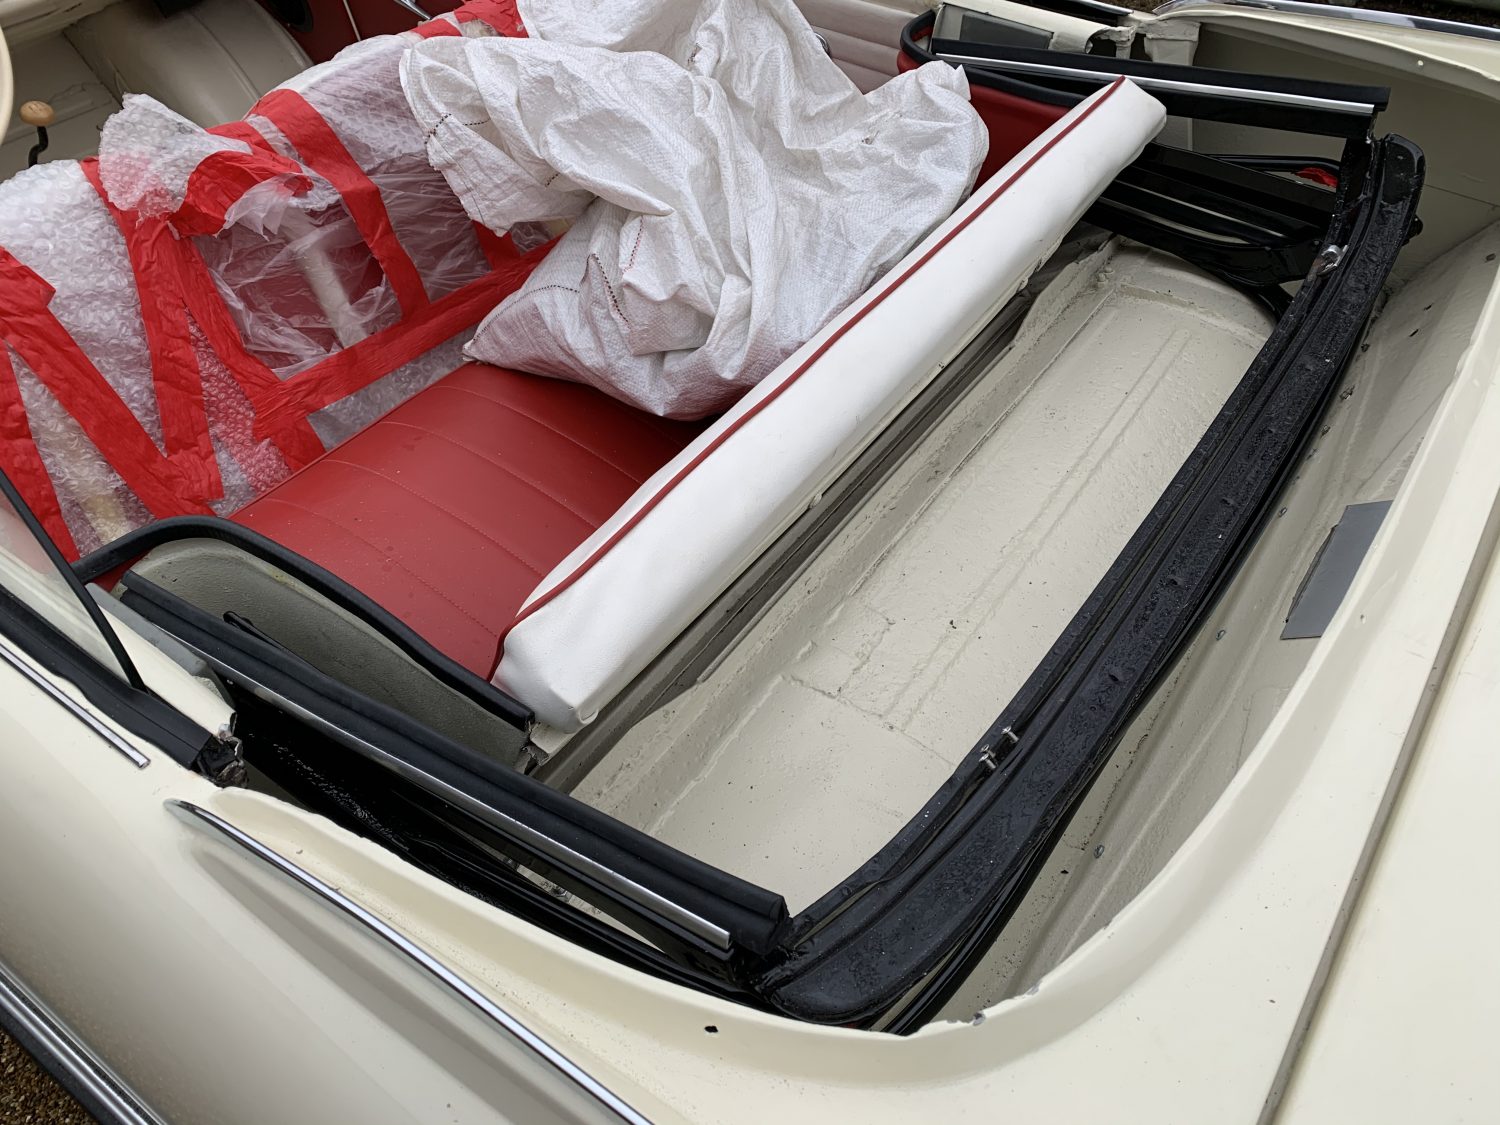
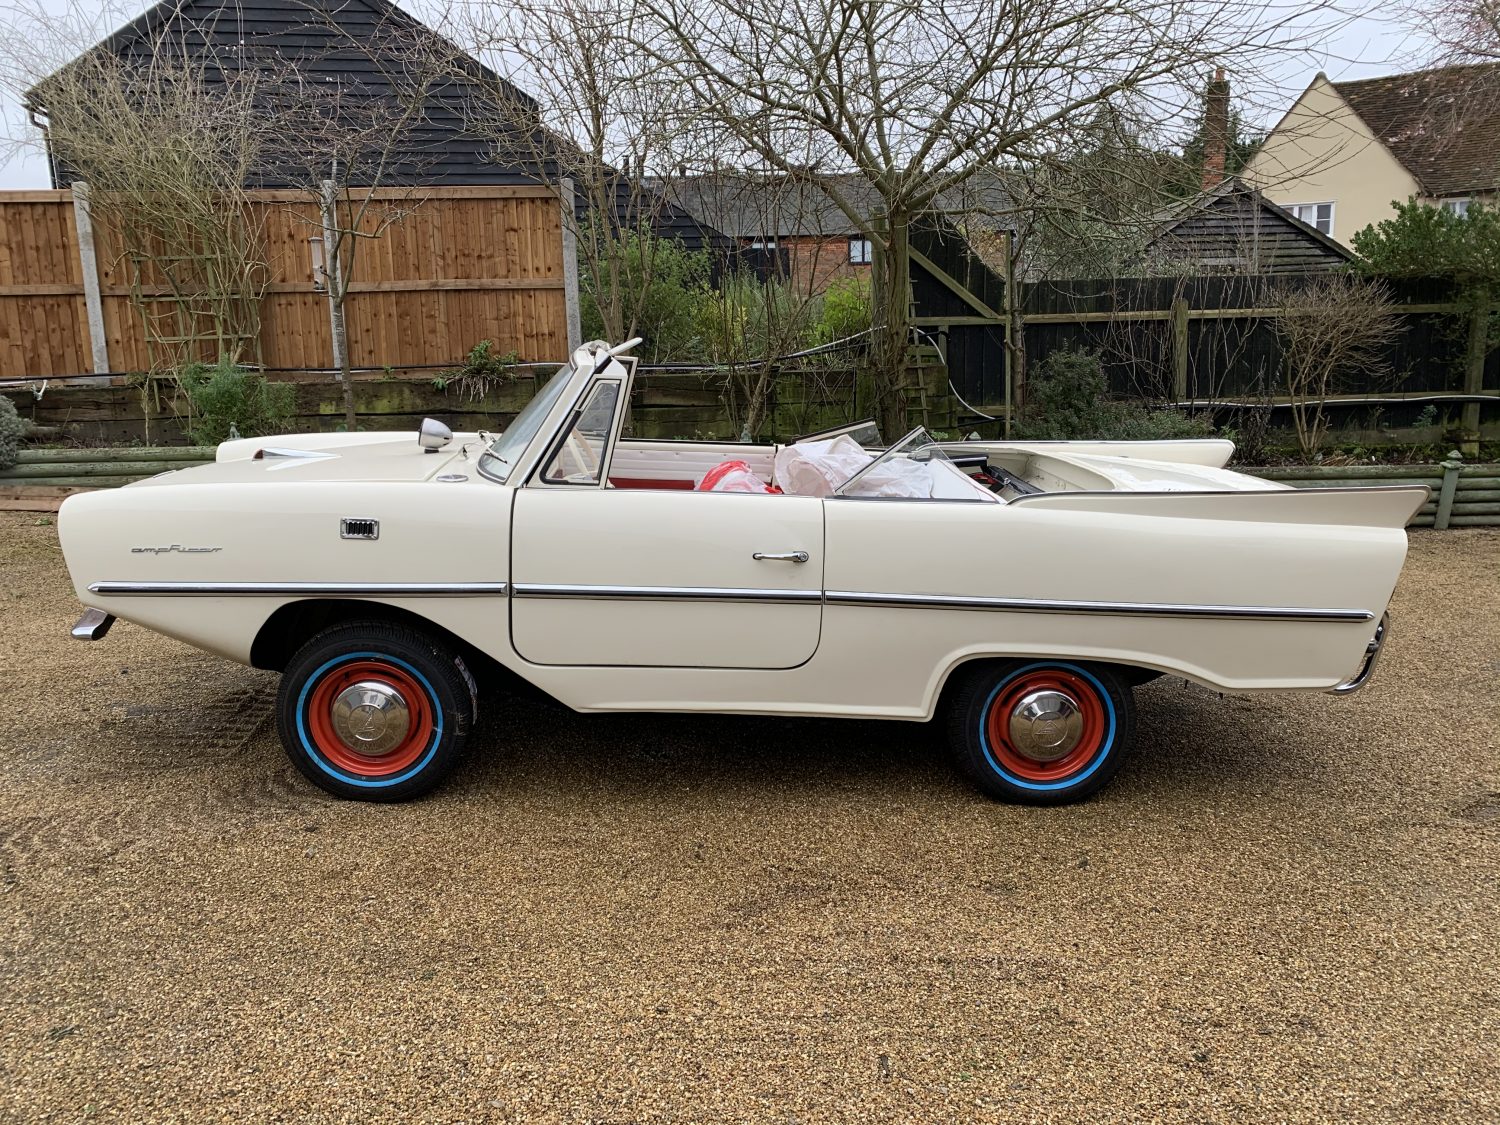
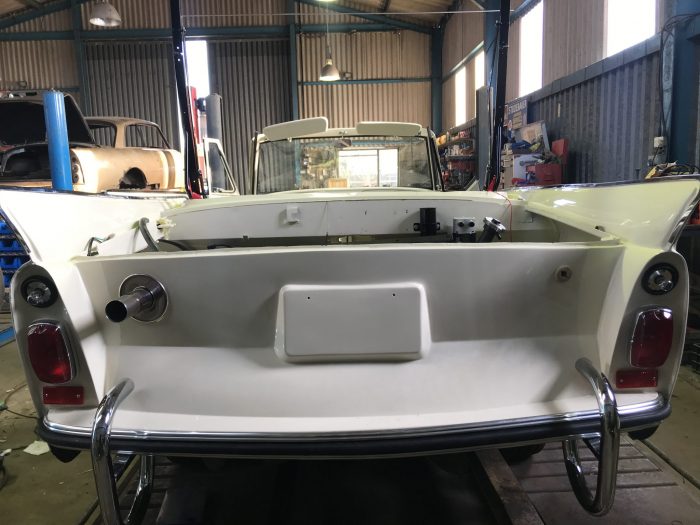
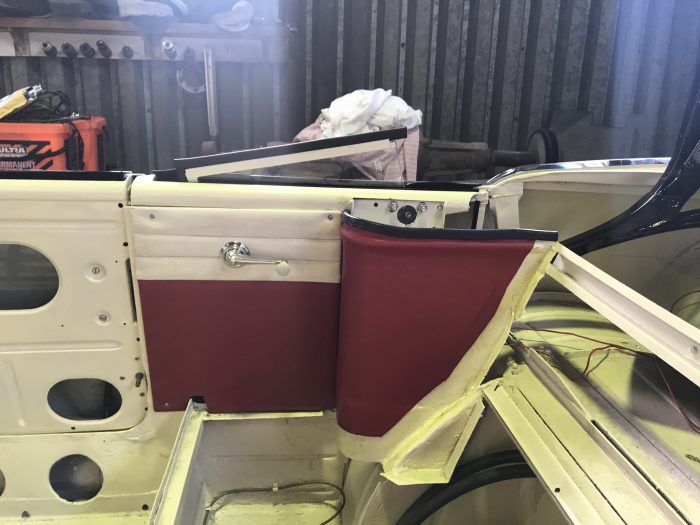
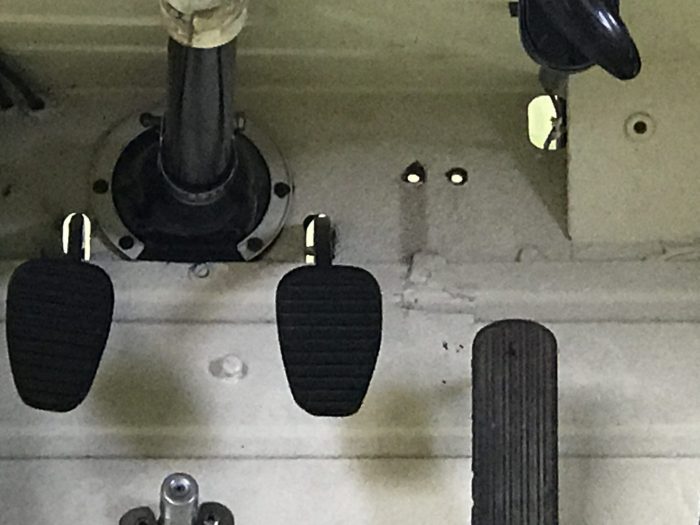
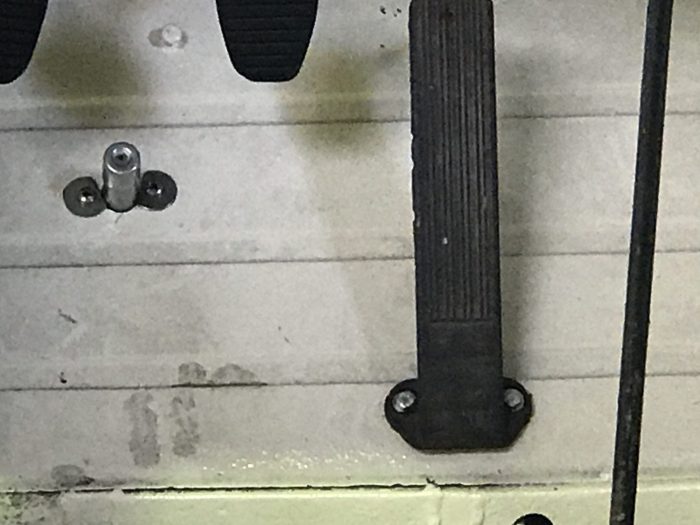
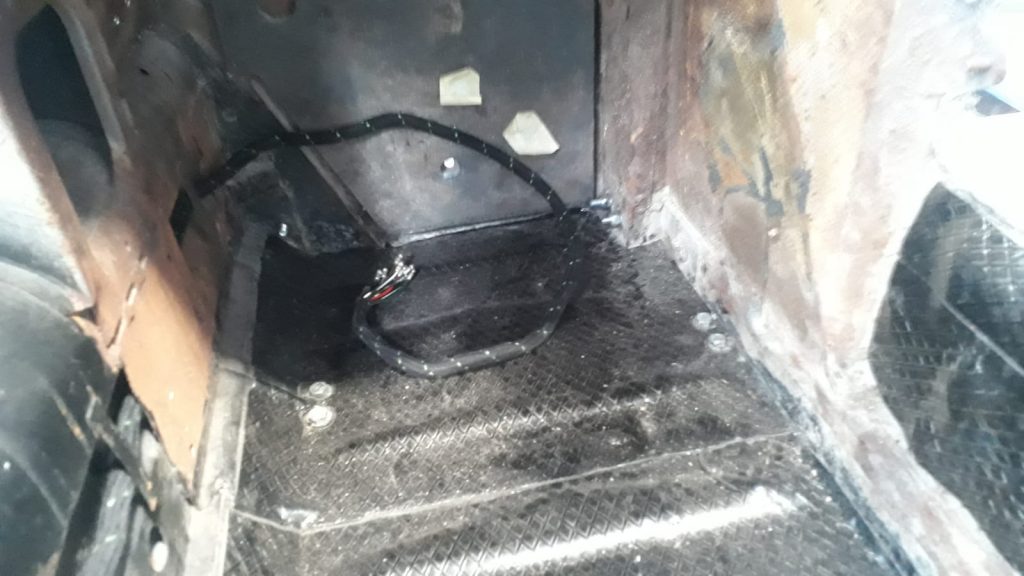
Tom has been making progress on our rare Amphicar restoration.
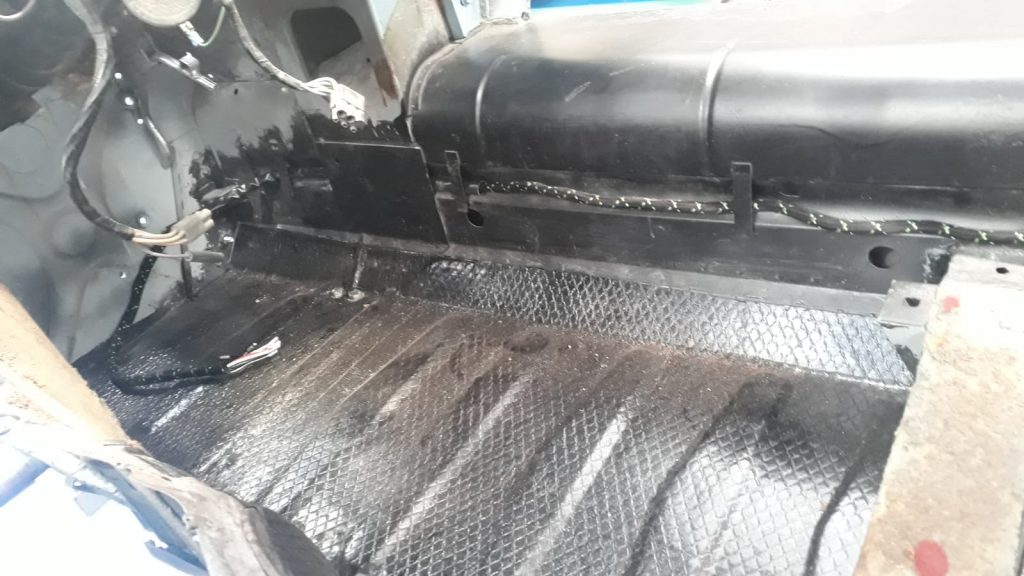
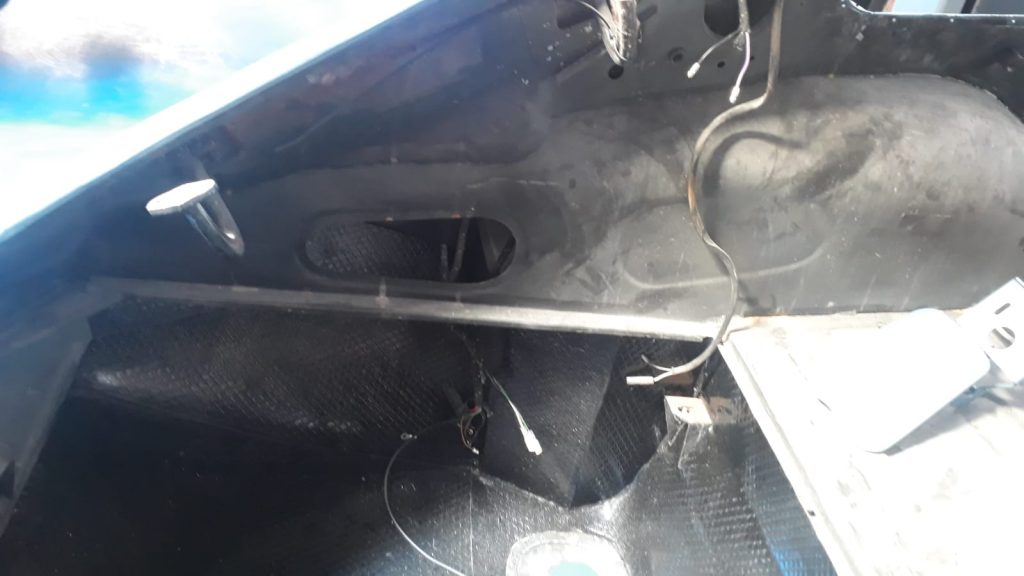
After installing the new floor he has fitted the rubber lining to the floor, vehicle sides and door cards. Being an amphibious vehicle, the interior needs to be waterproof should any spray enterer the vehicle cabin.
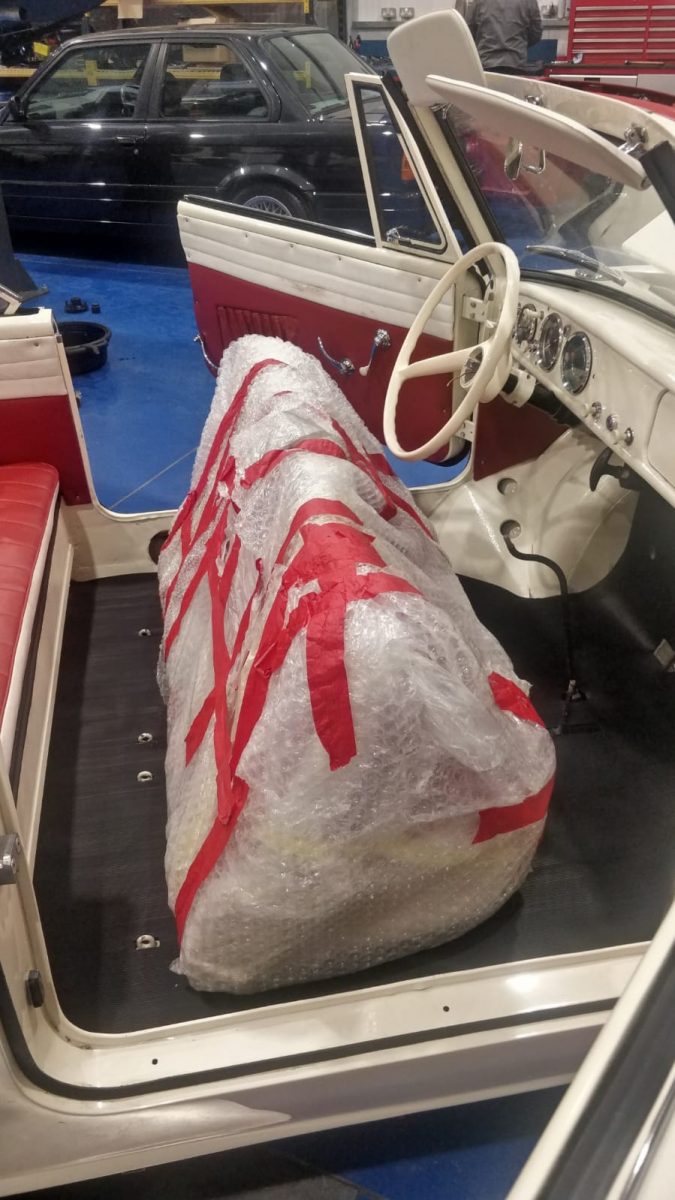
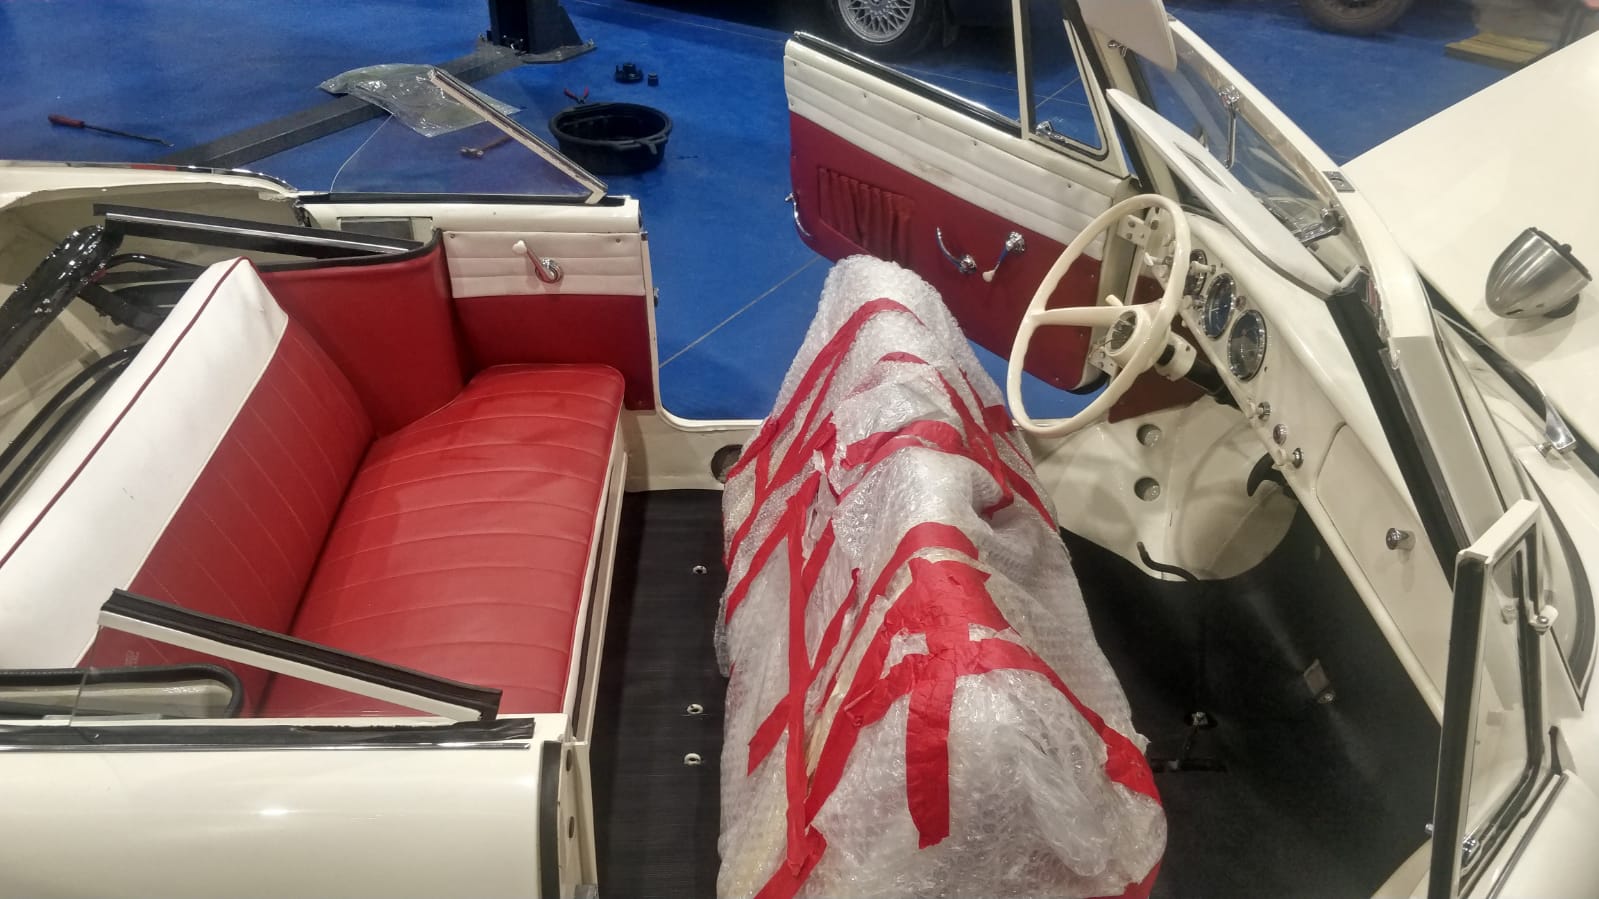
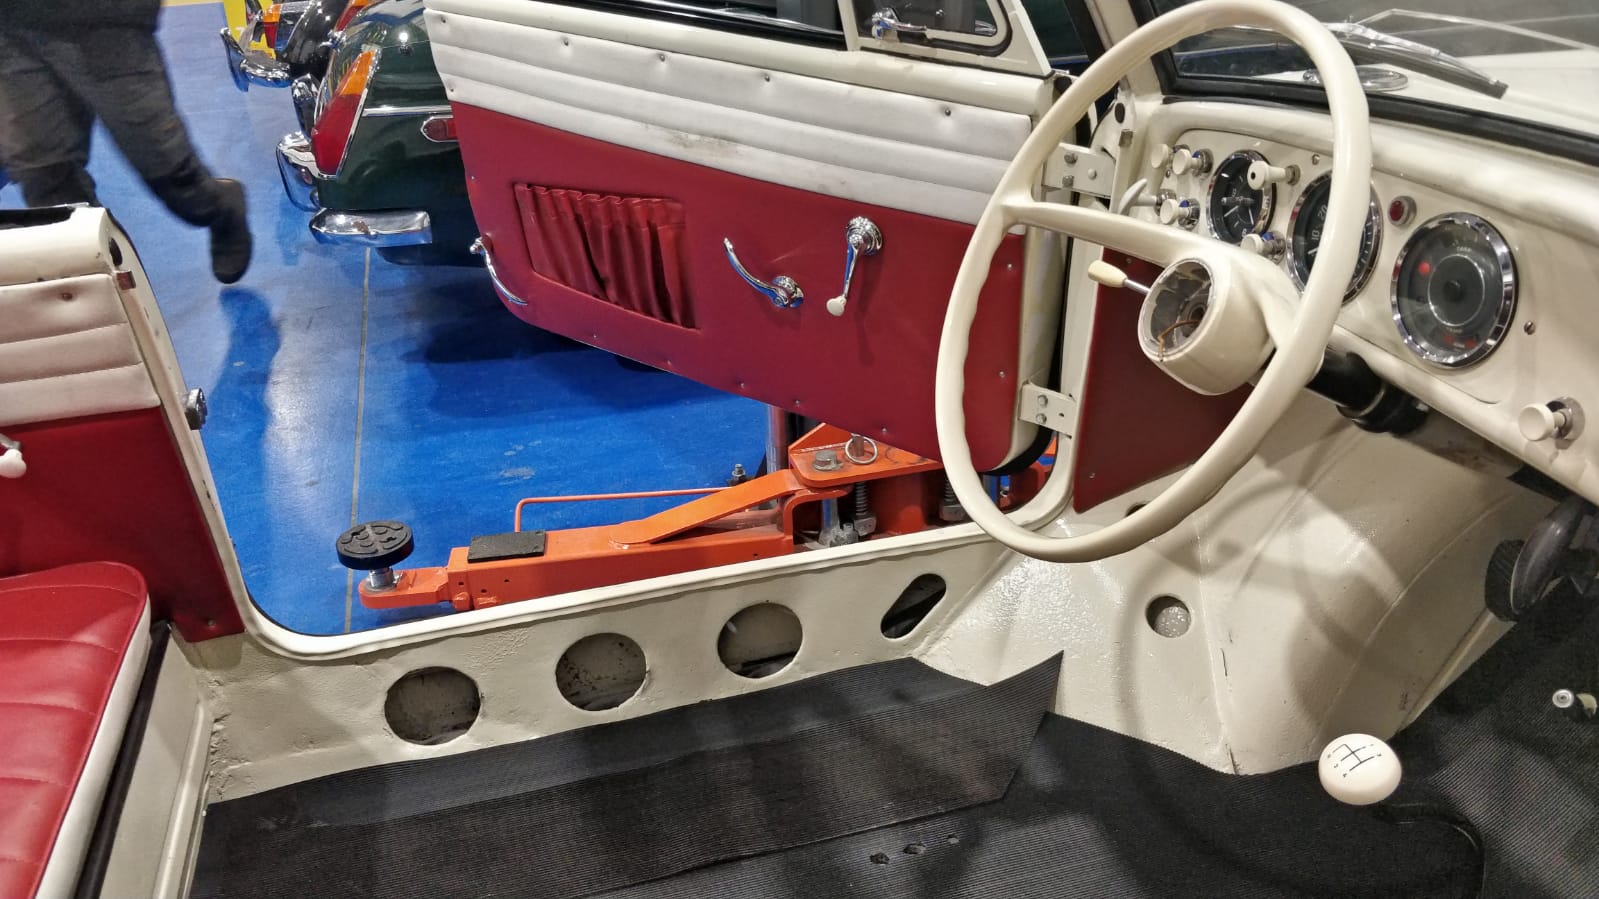
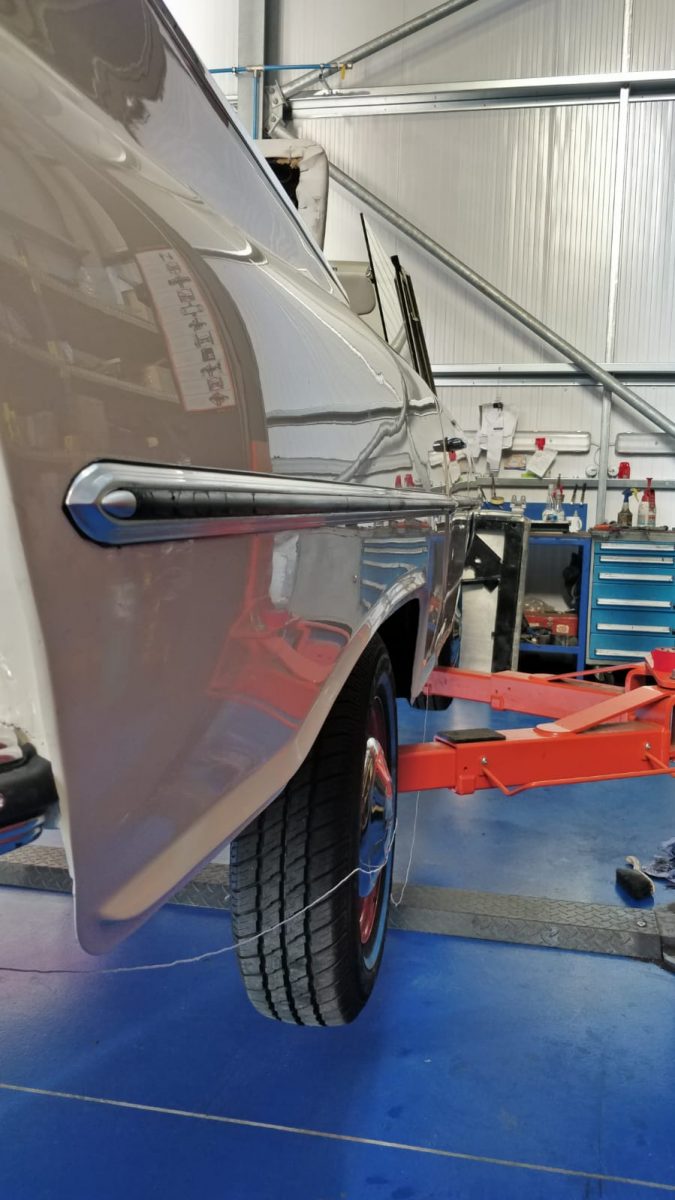
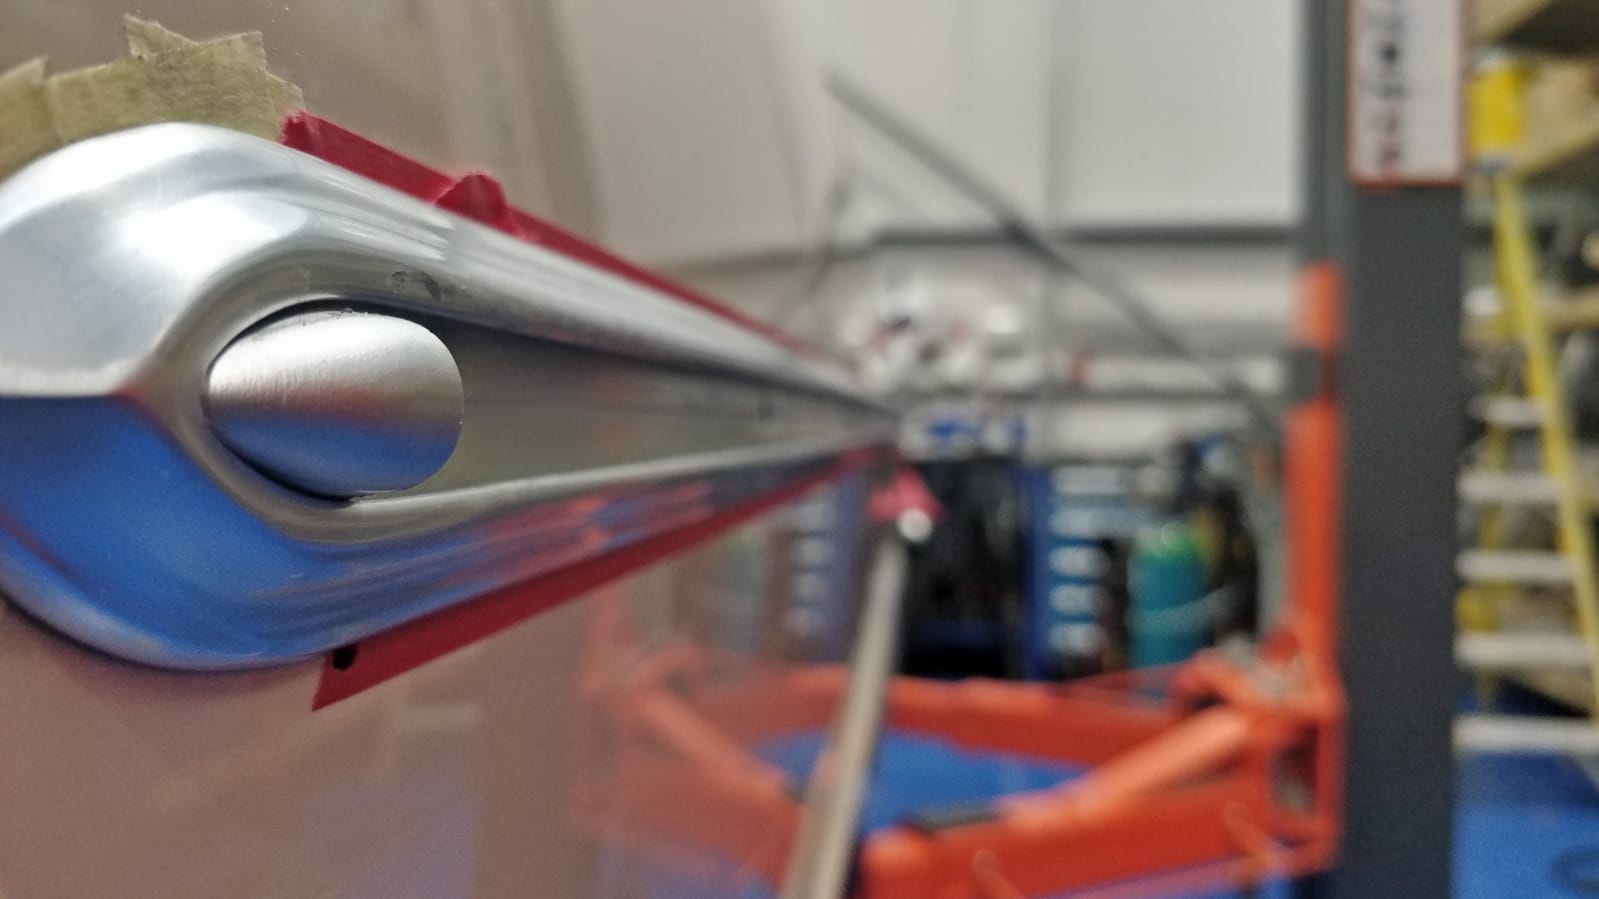
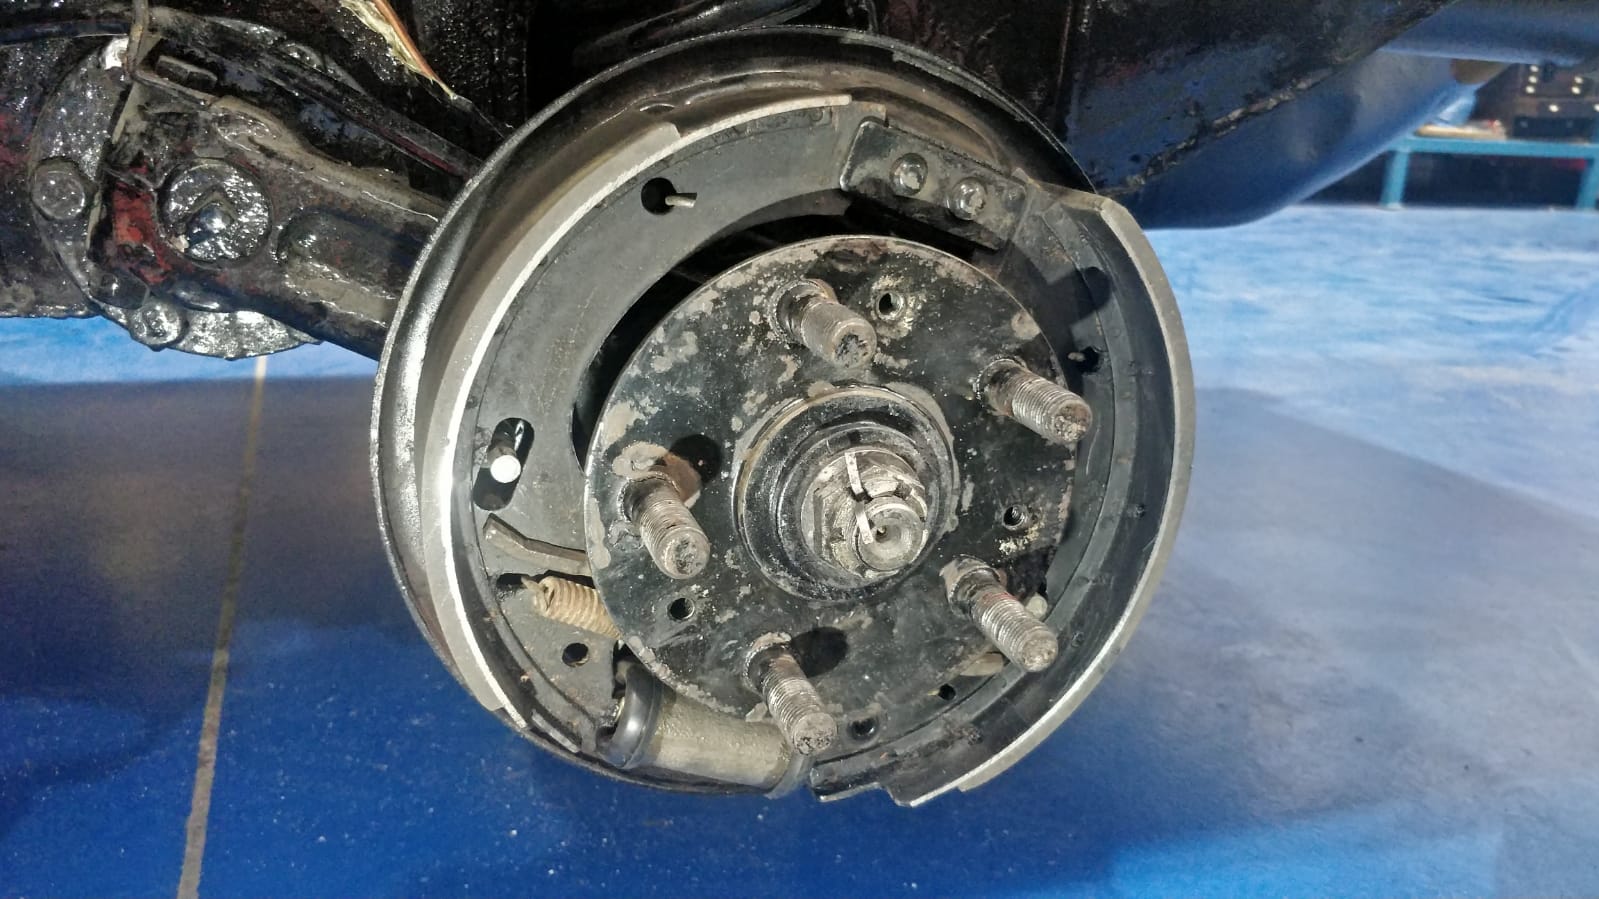
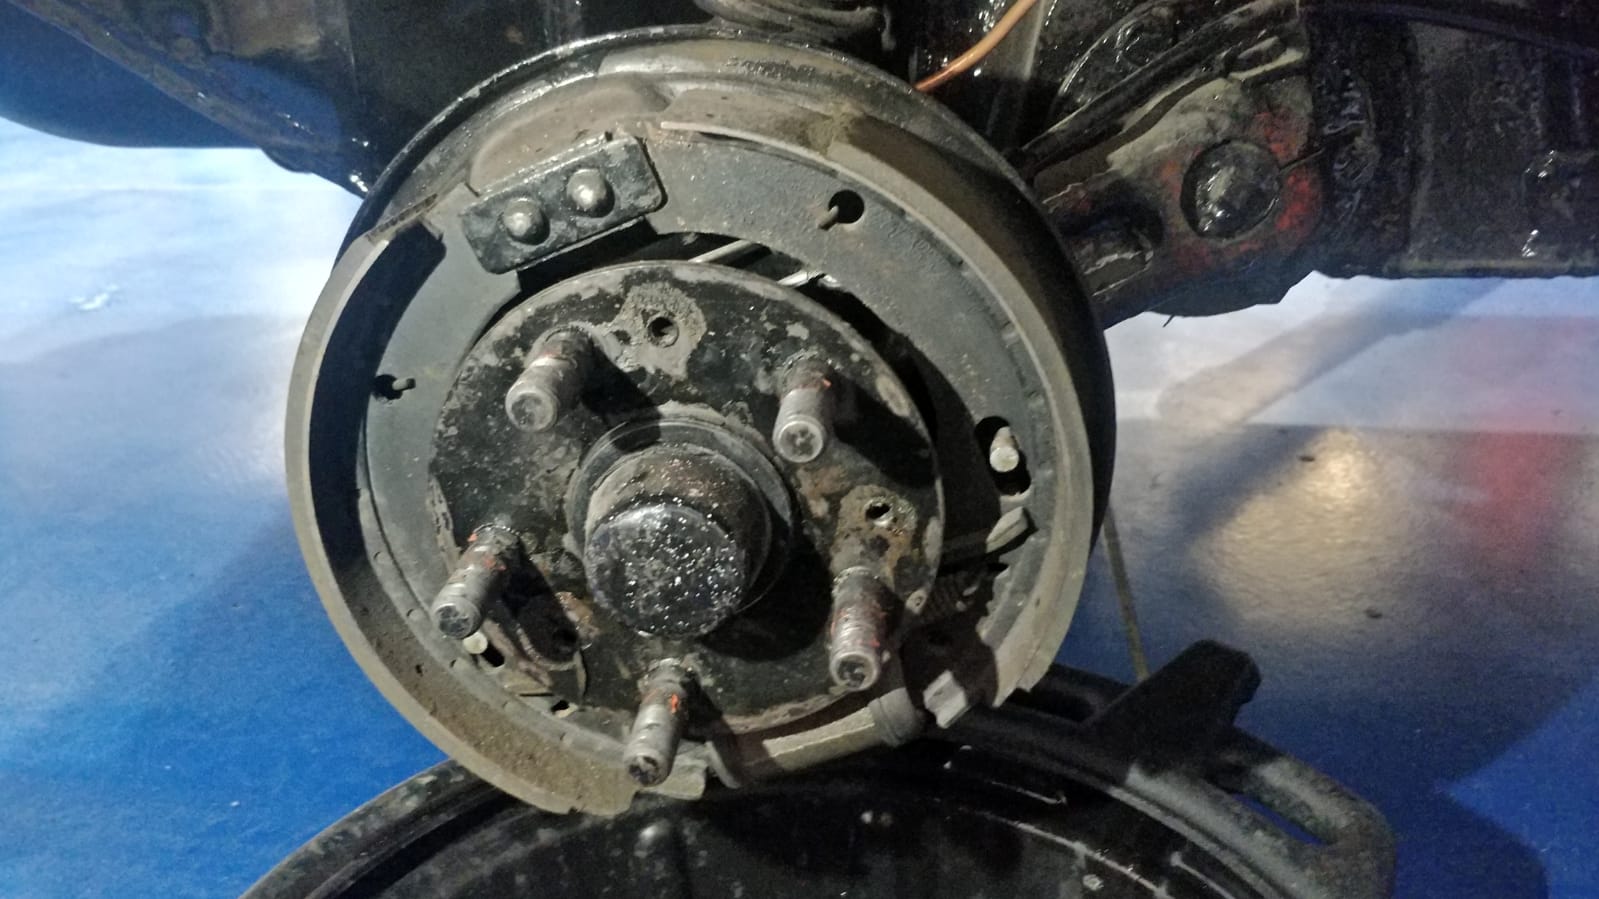
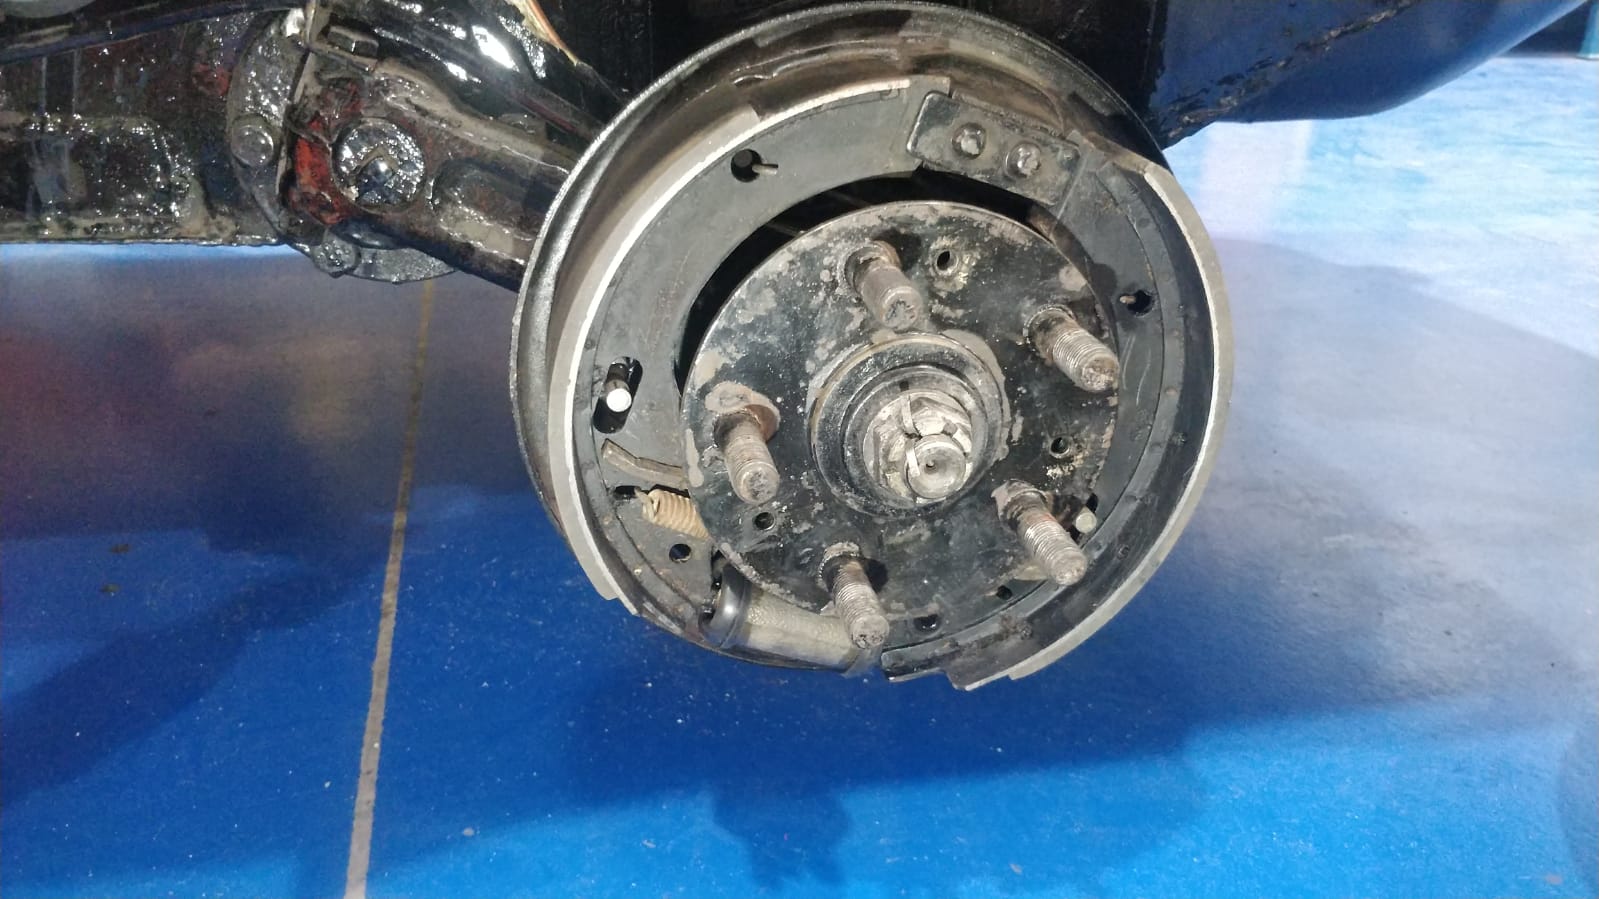
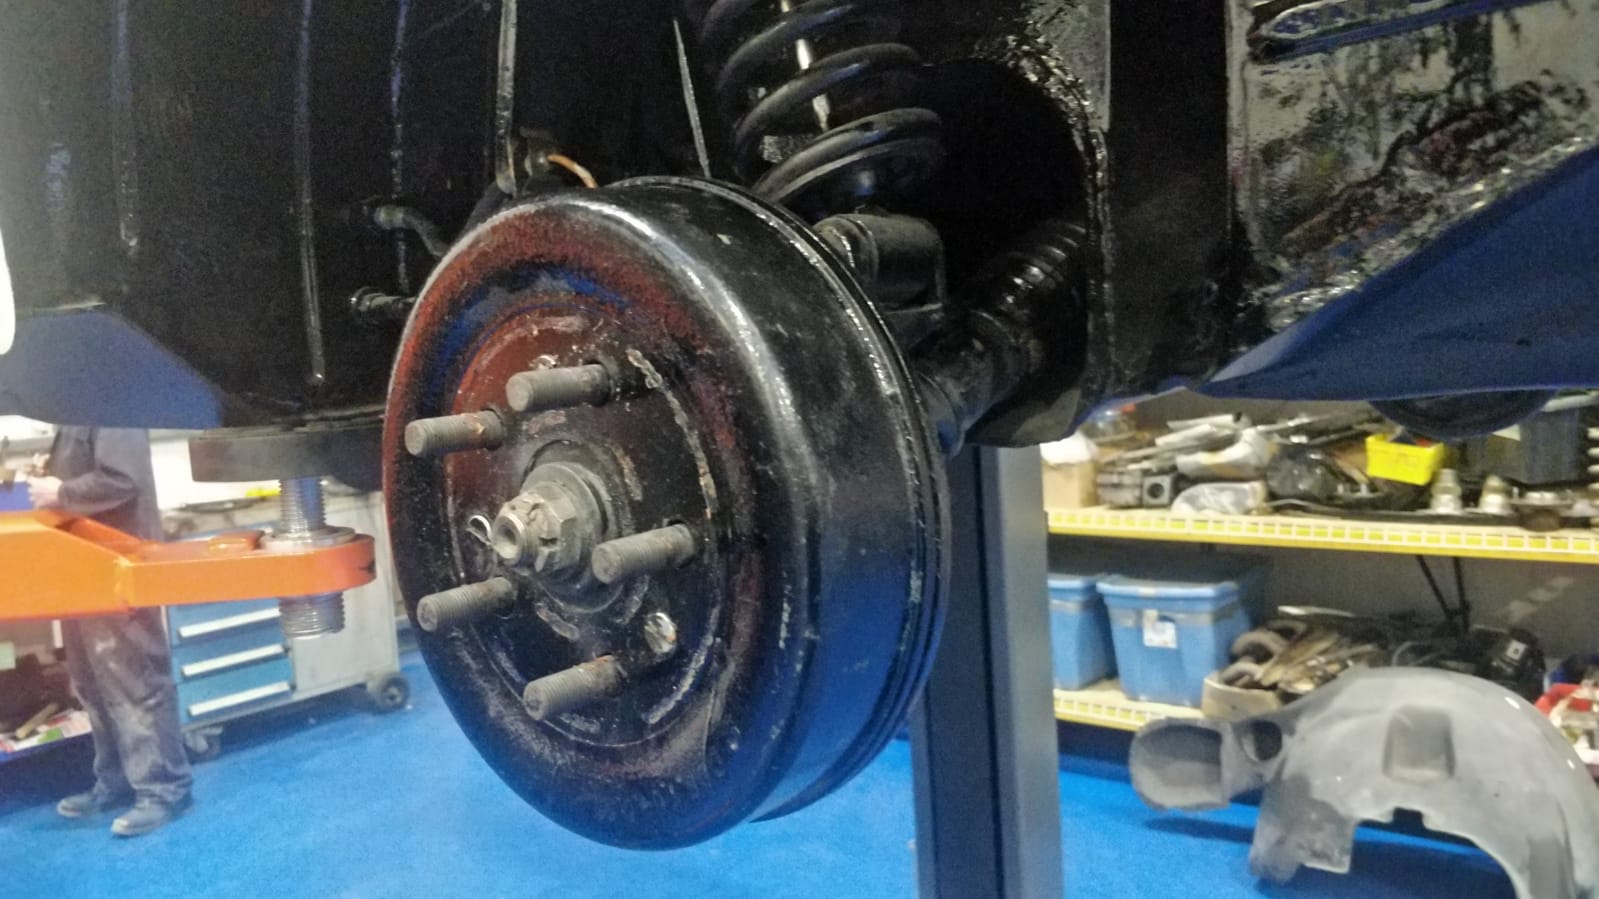
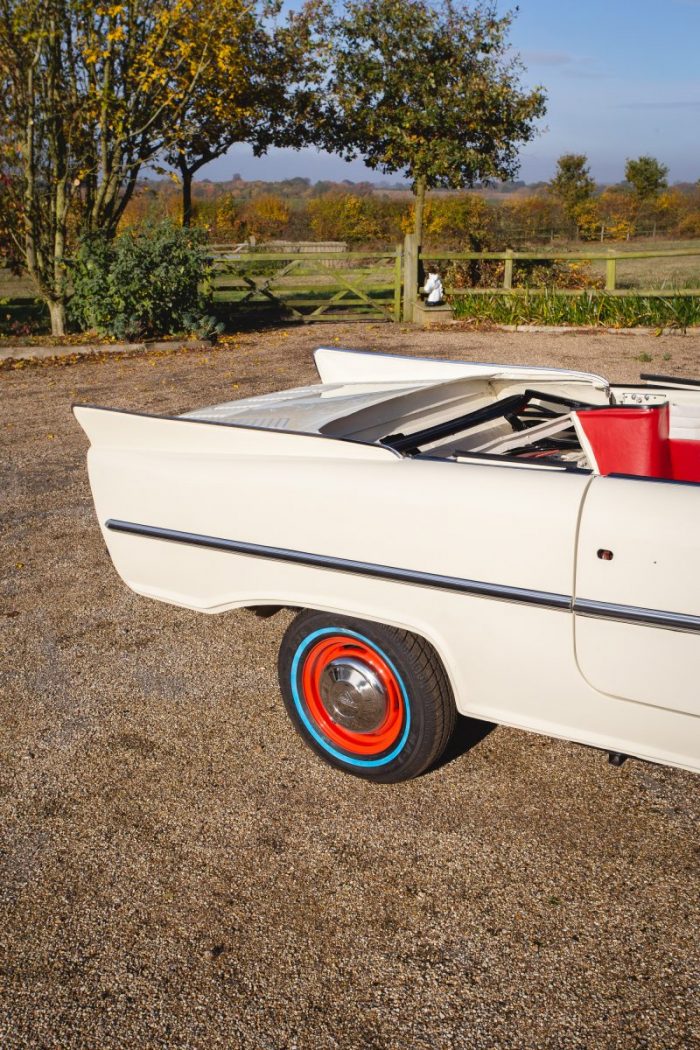
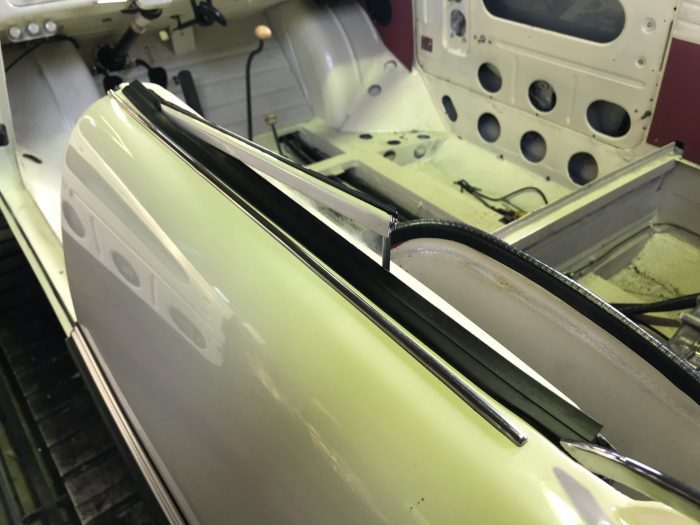
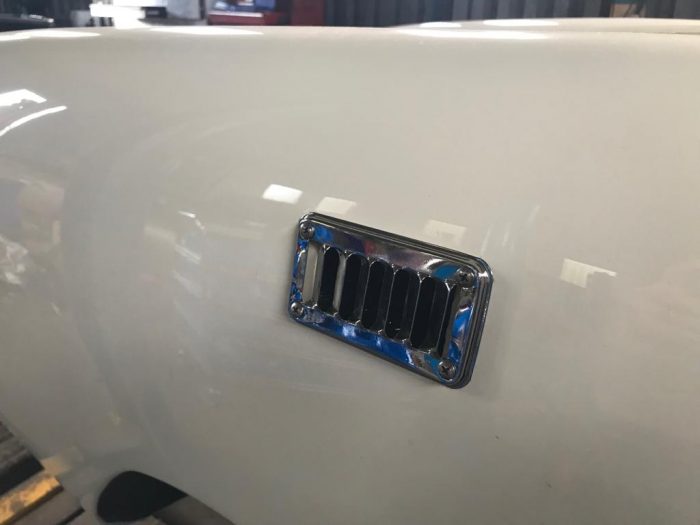
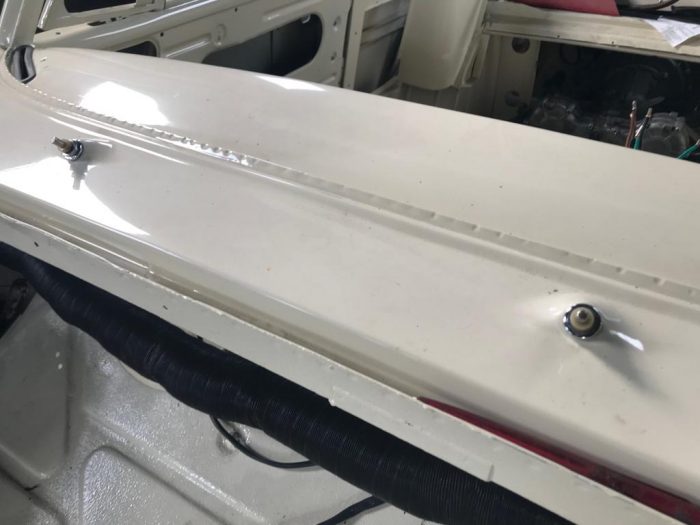
Tom has also adjusted the handbrake to bite sooner and for pressure to be applied evenly across both of the rear brakes. We’ve aligned the metal exterior trim to sit as a perfect pinstripe across the side of the car.
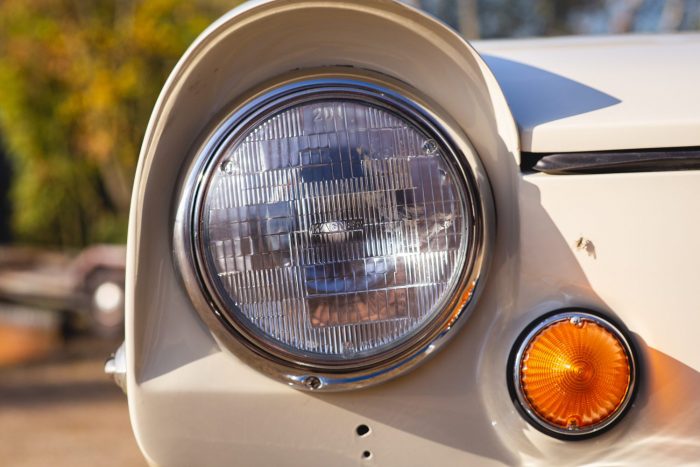
The front seats have also been now been installed. The next steps in our Amphicar restoration will be to install the seatbelts, make rubber matting to cover the soft top well and install front and rear chrome light surrounds.

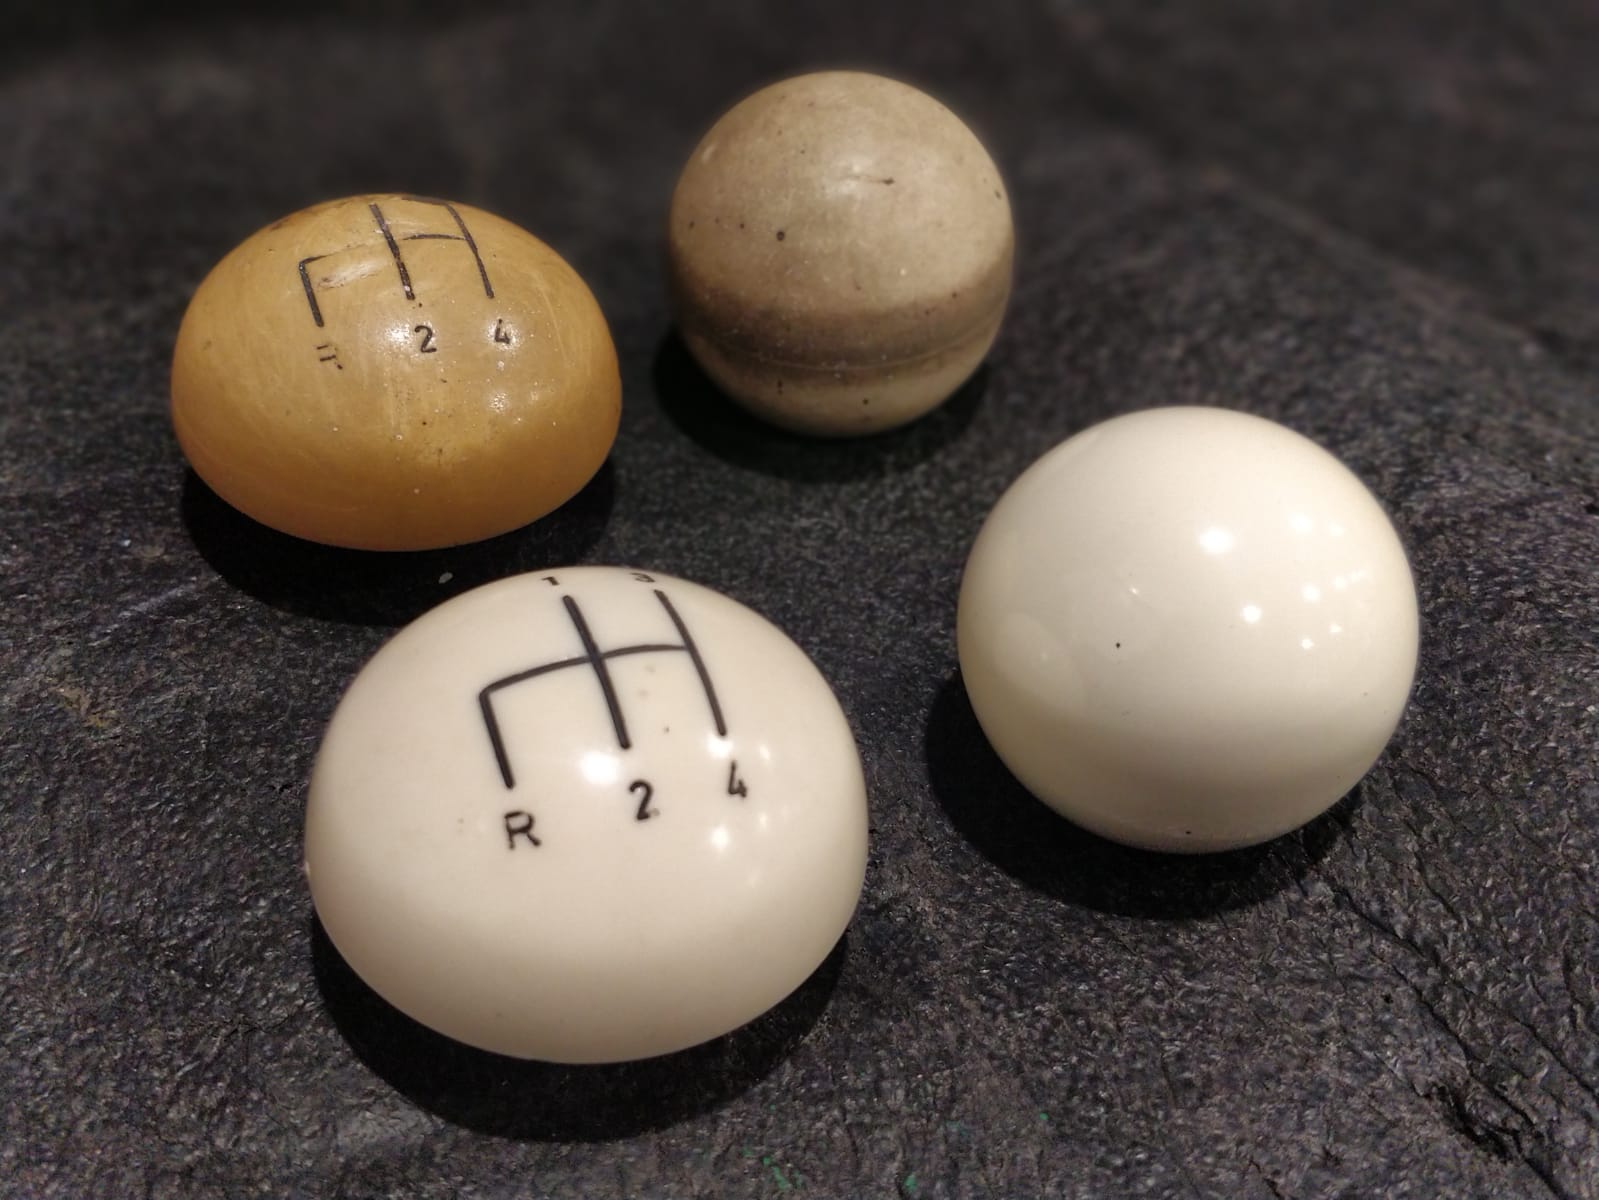

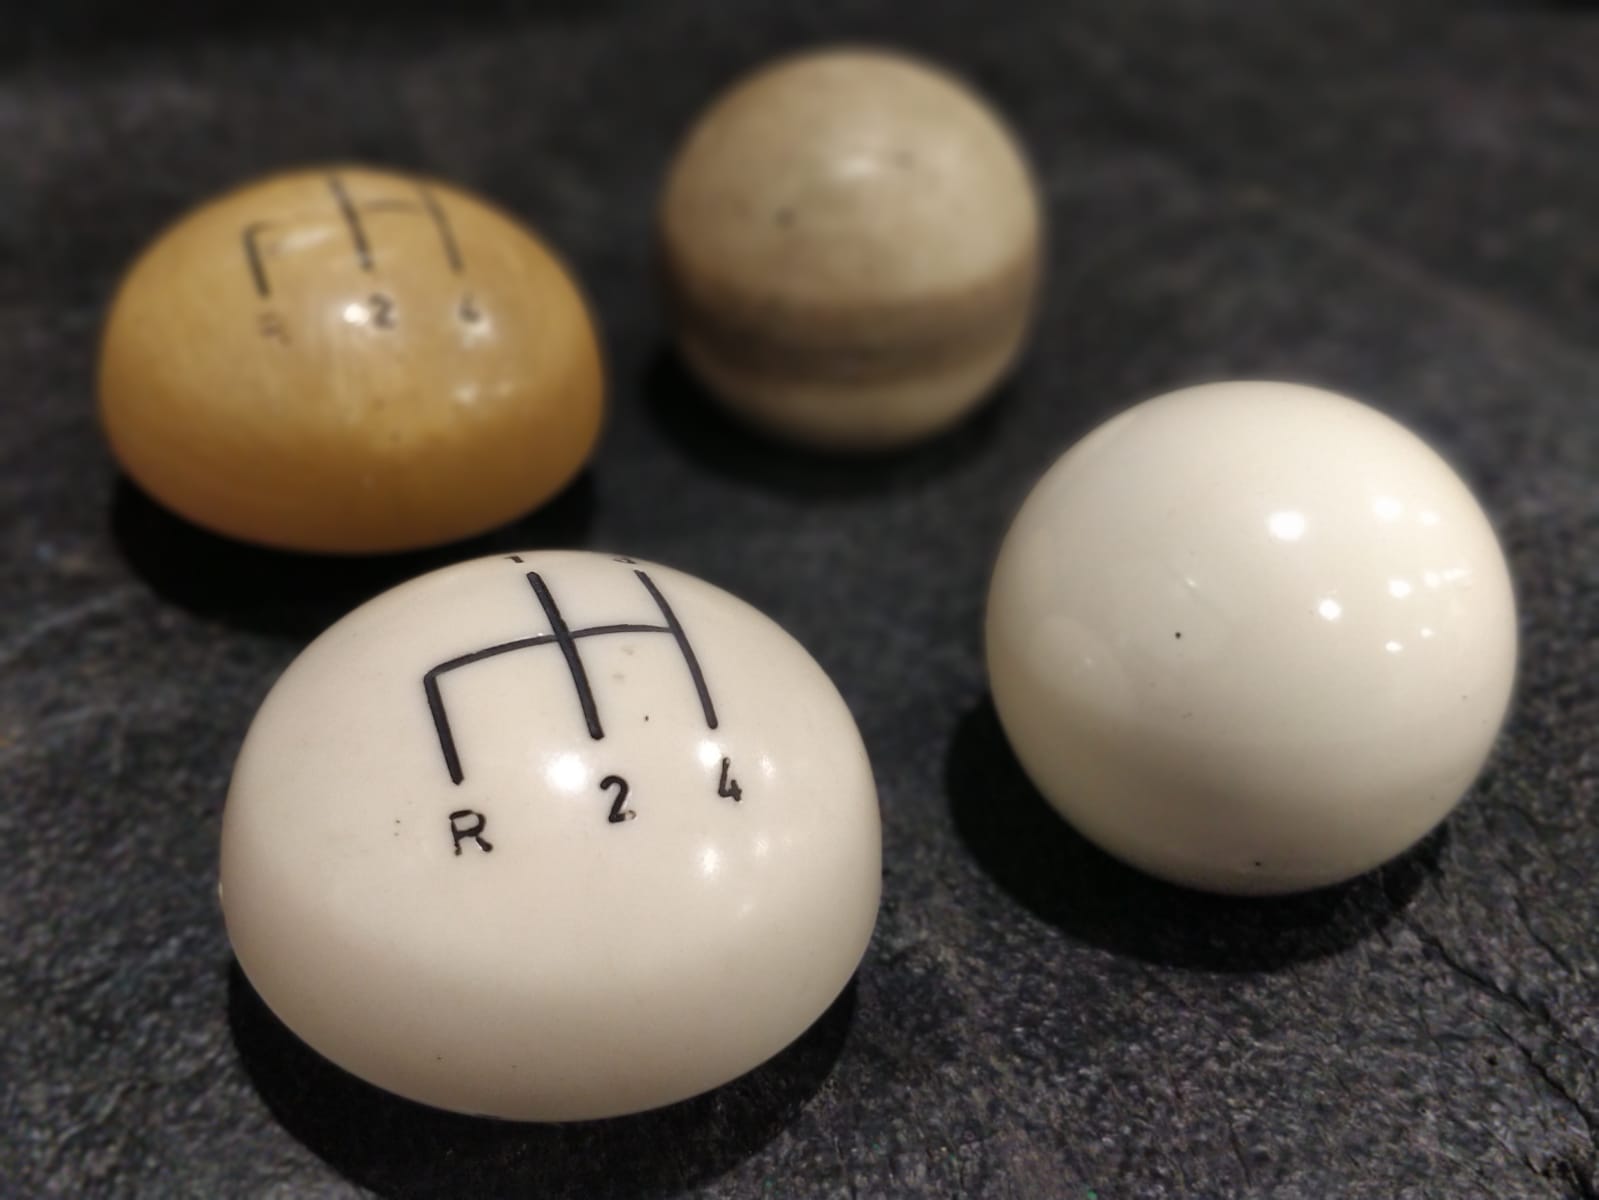


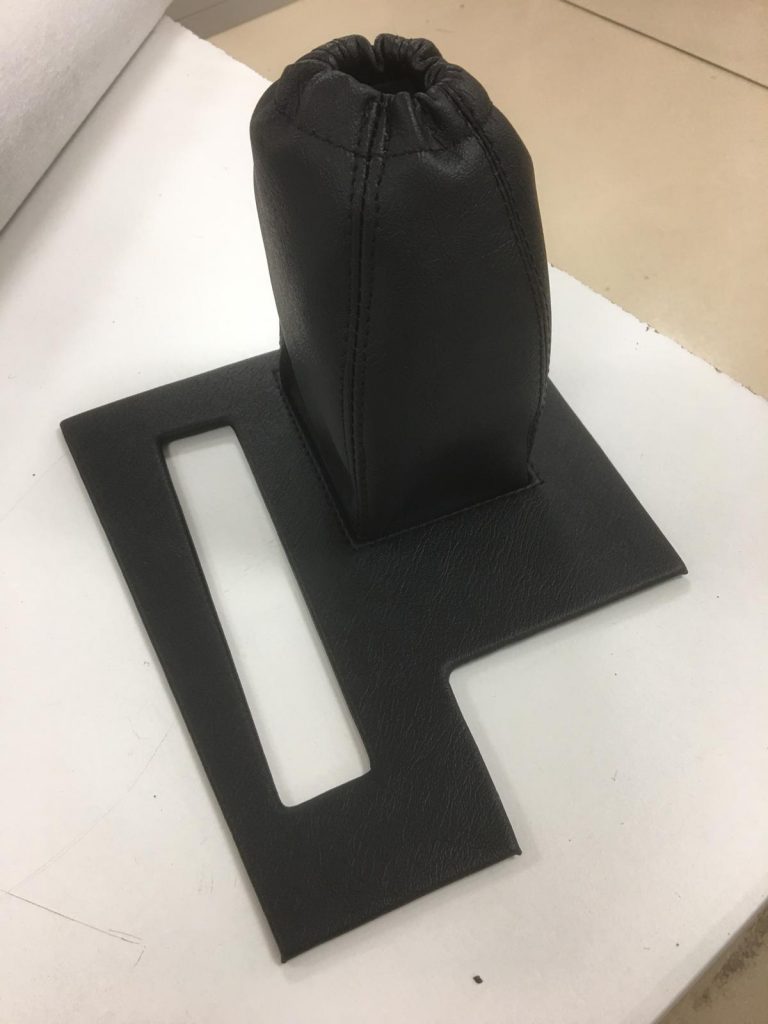
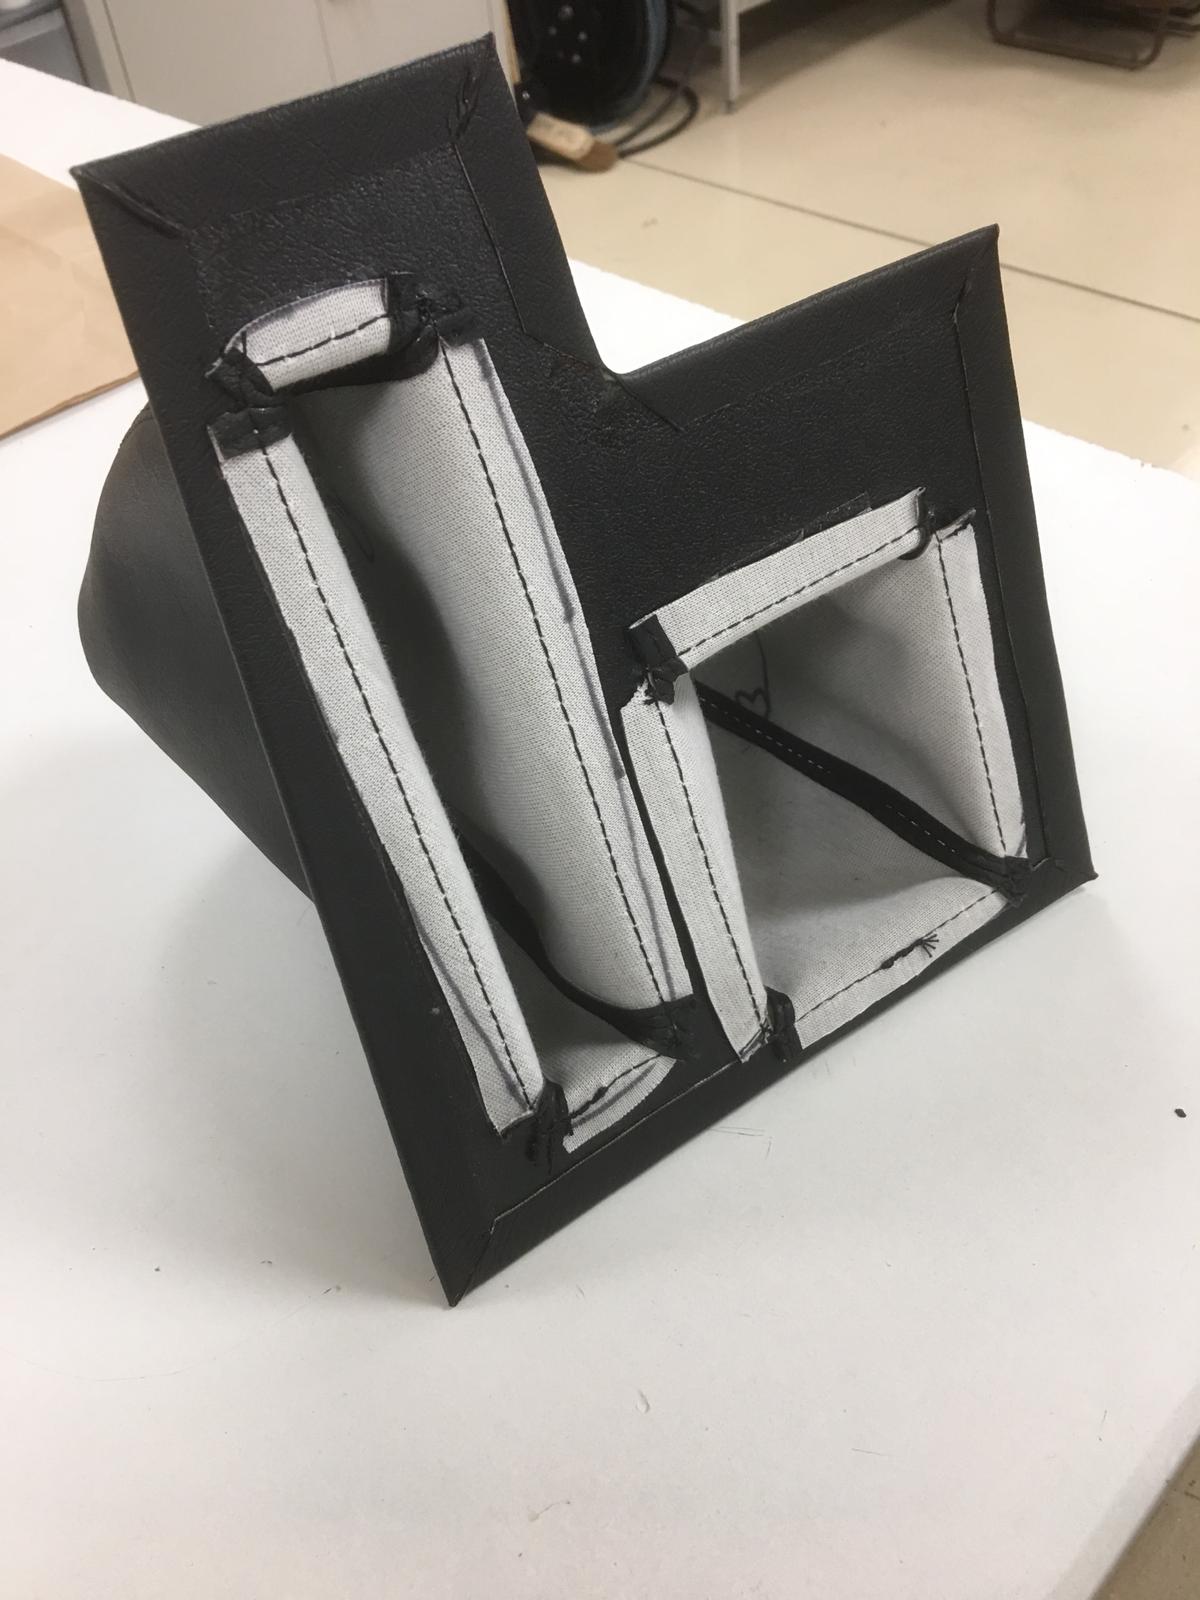
Kath, Bridge Classic Cars’ in-house trimmer has made a new double gear lever gaiter for our Amphicar. She started by dismantling the old, worn gaiter. Then Kath used the old components as a reference for the new materal to be cut to. She then stitched and re-assembled the fabric into shape.
Wonderful work, Kath!
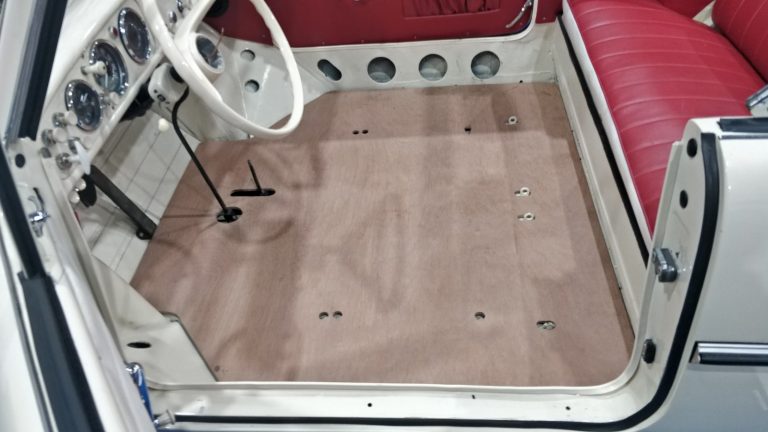
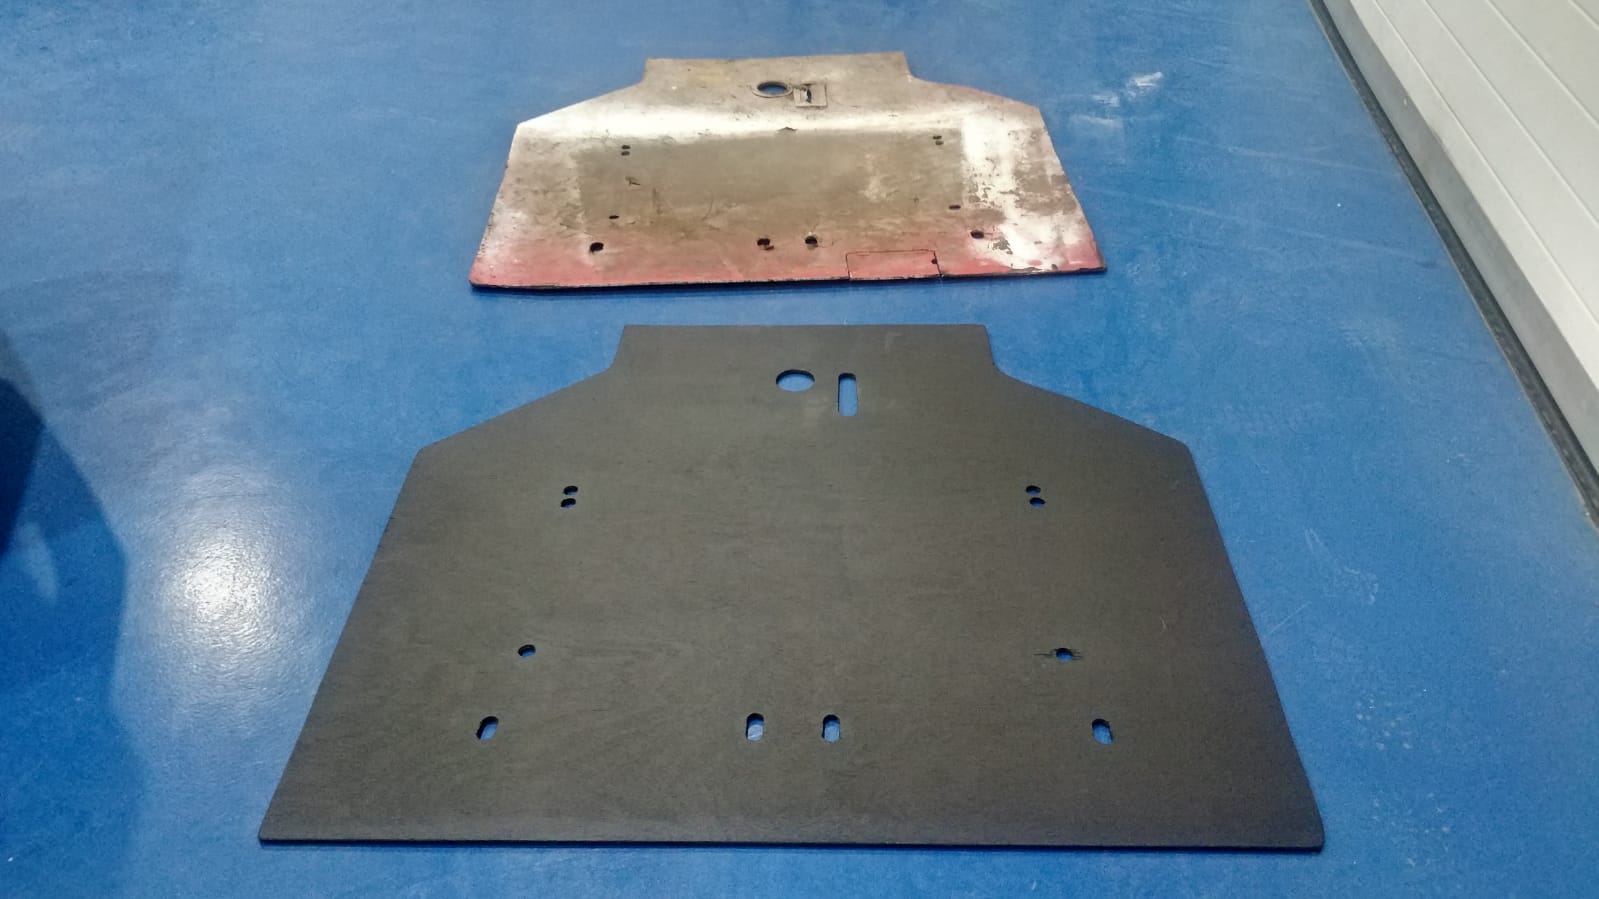
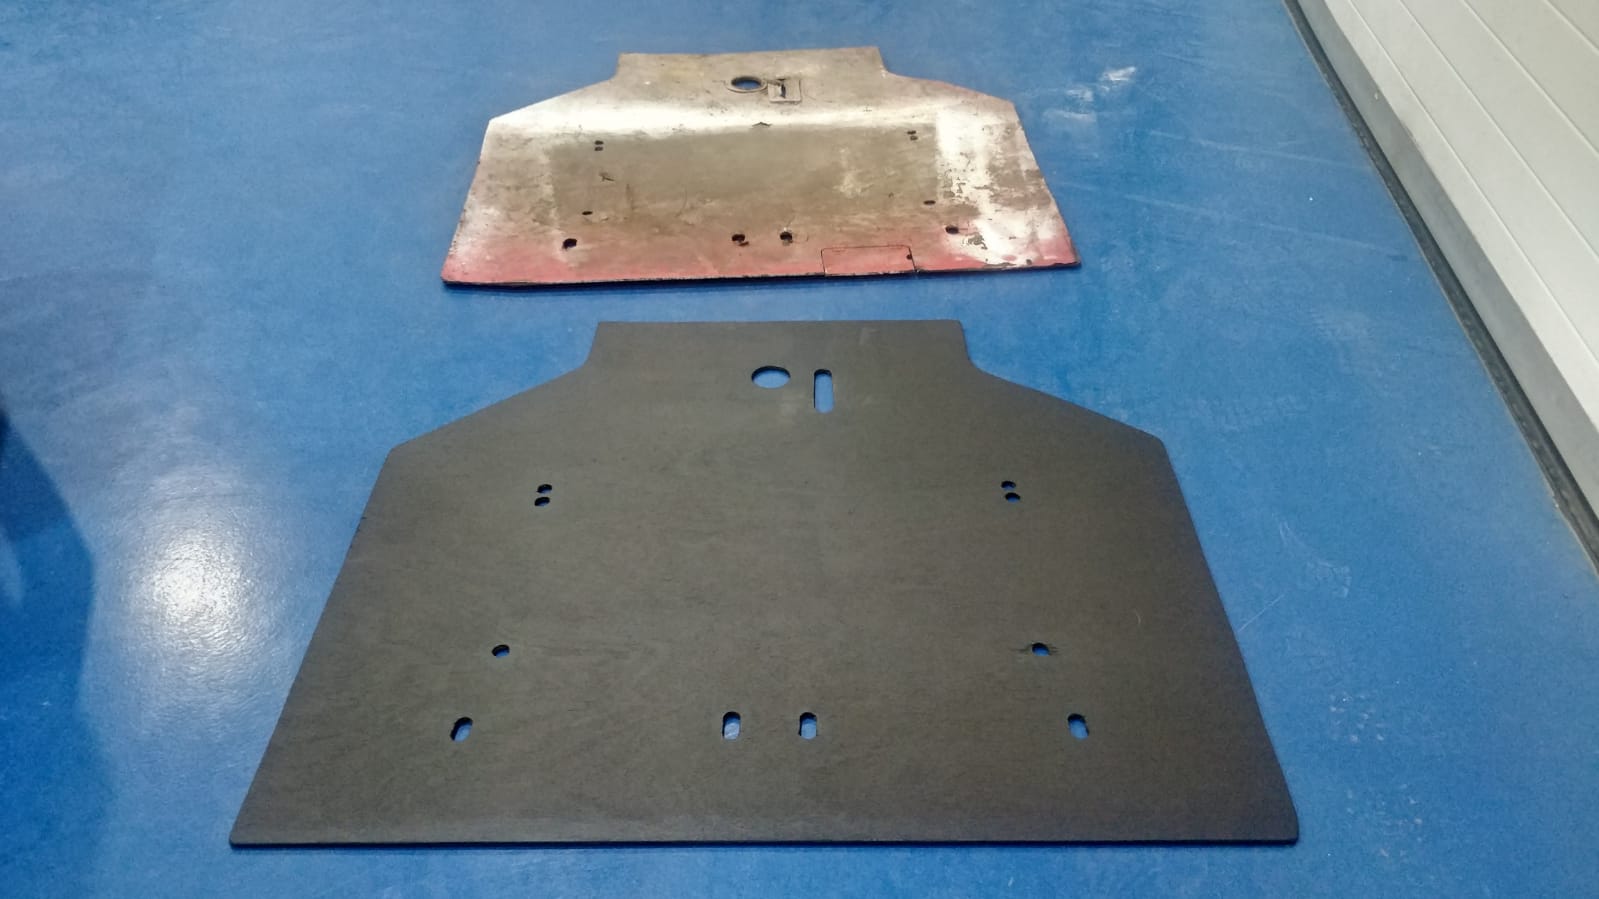
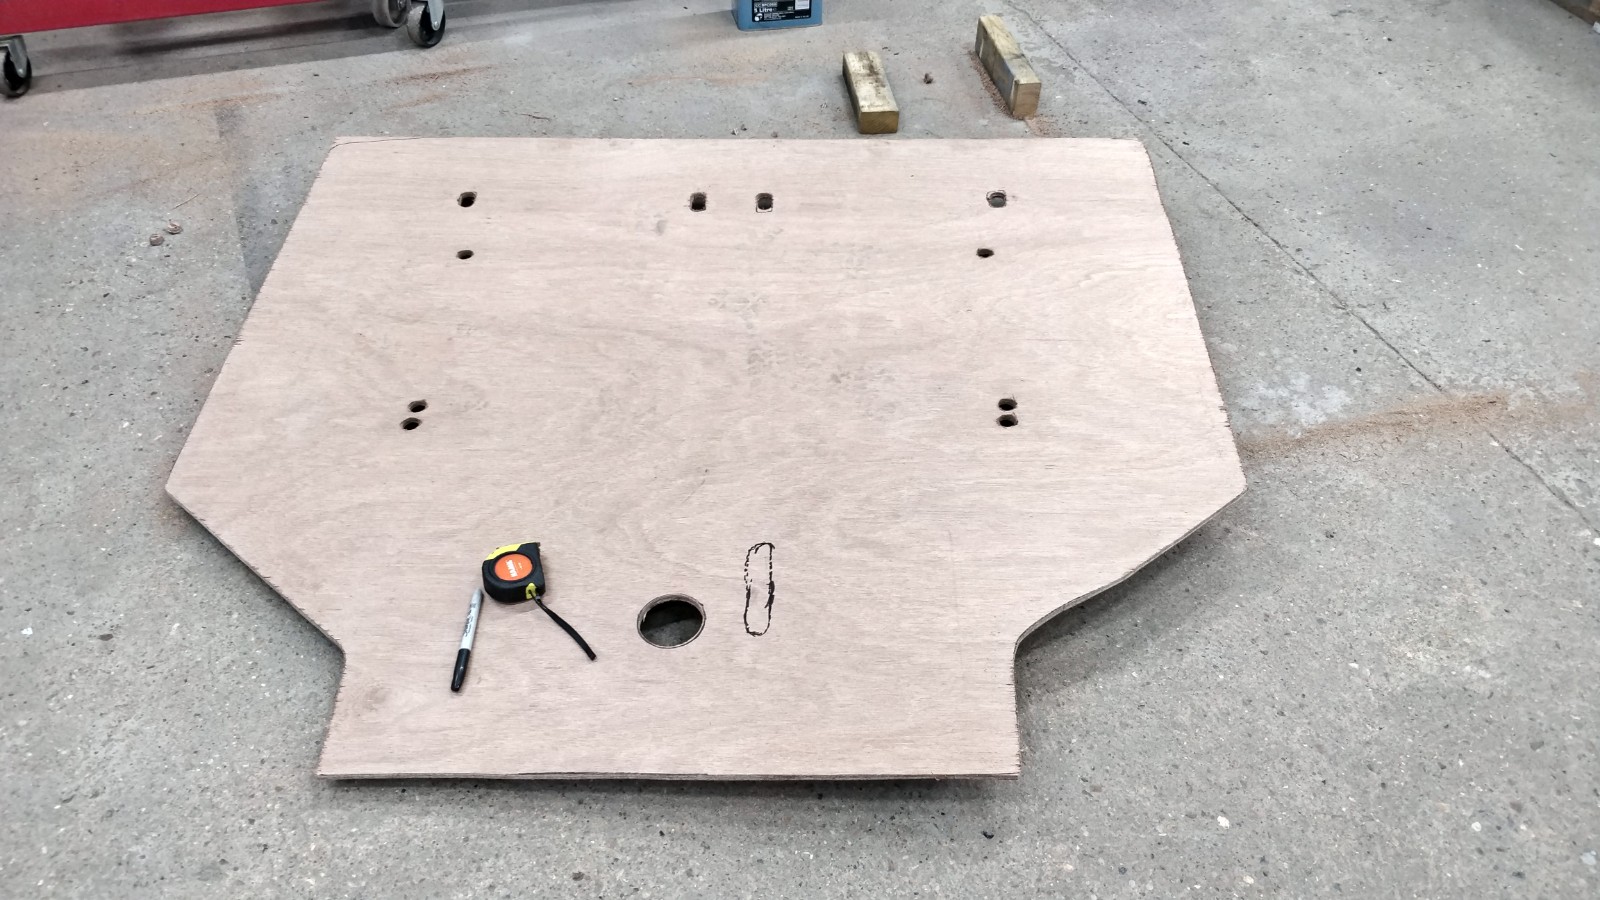
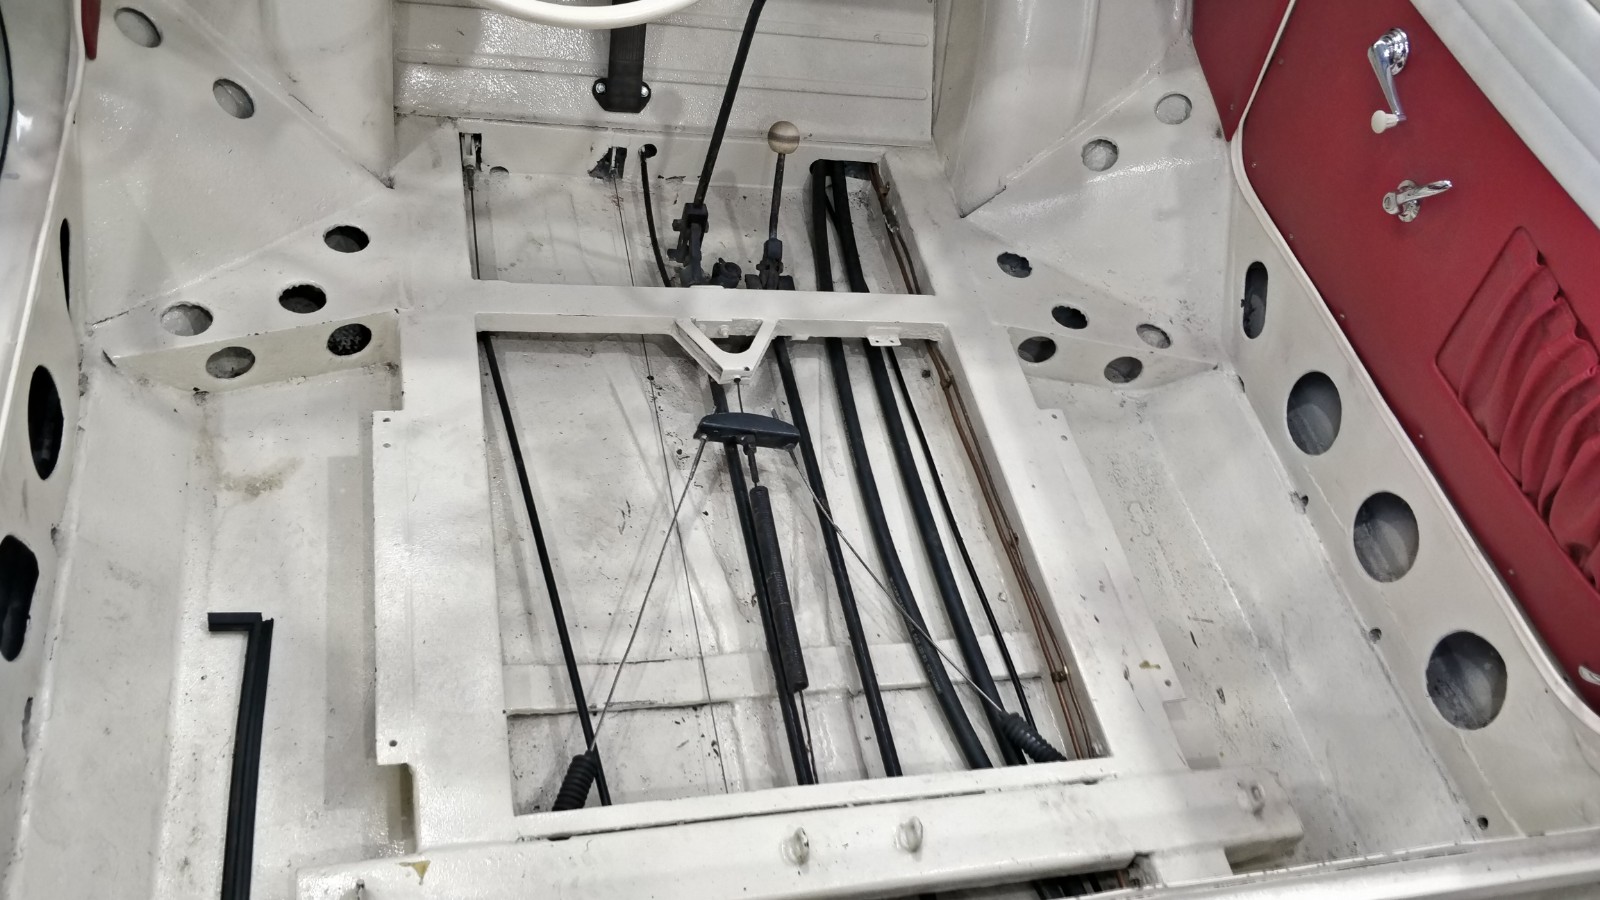
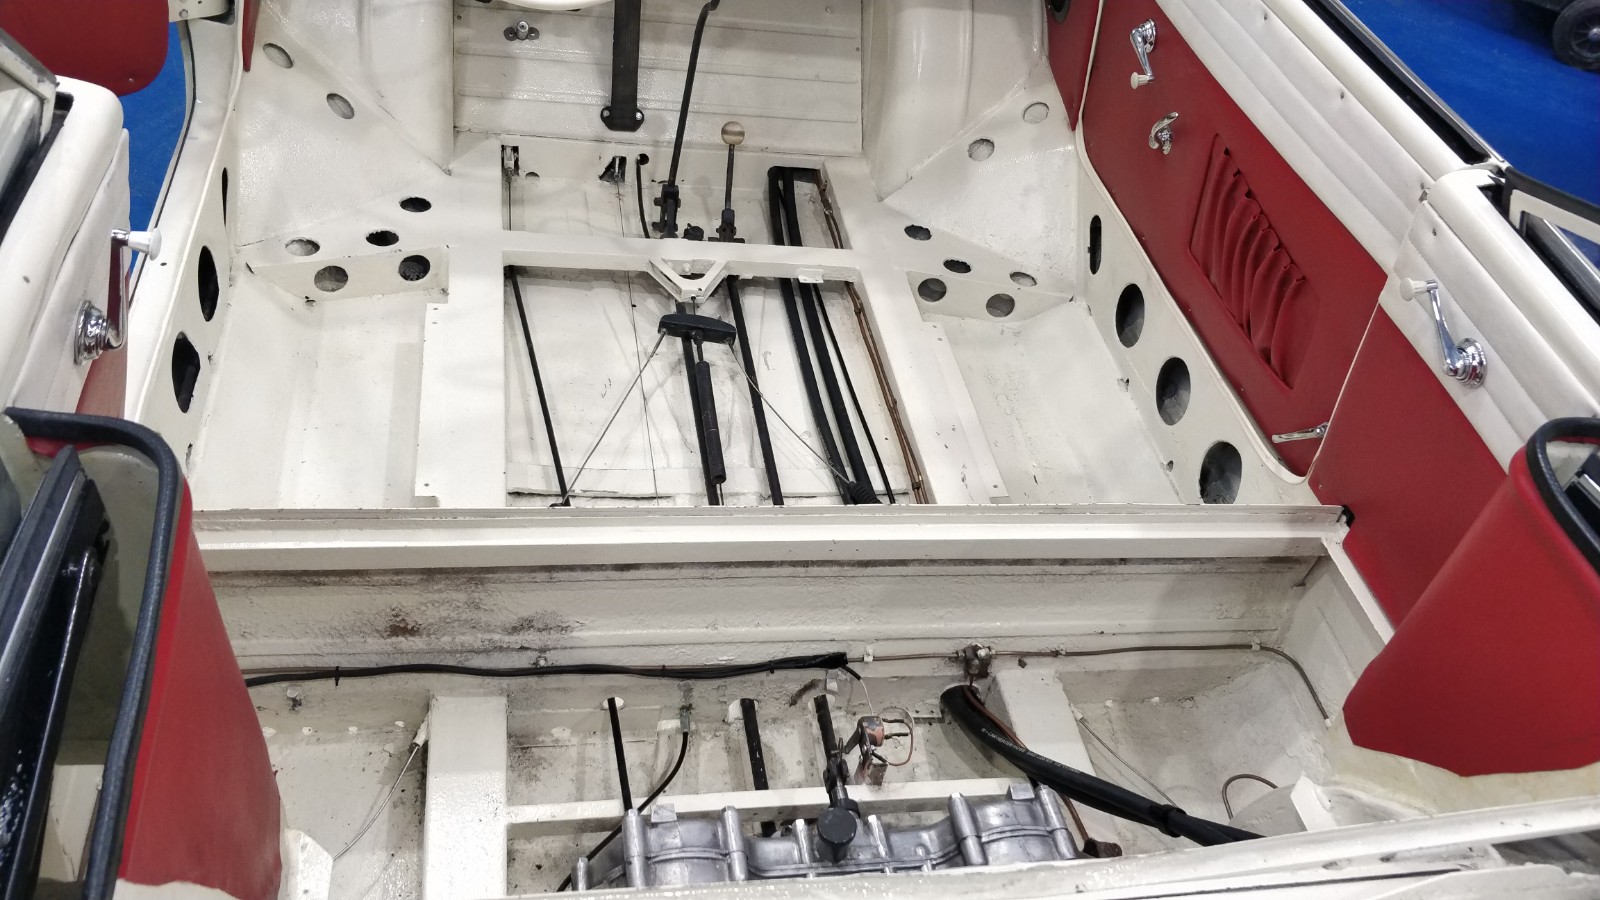
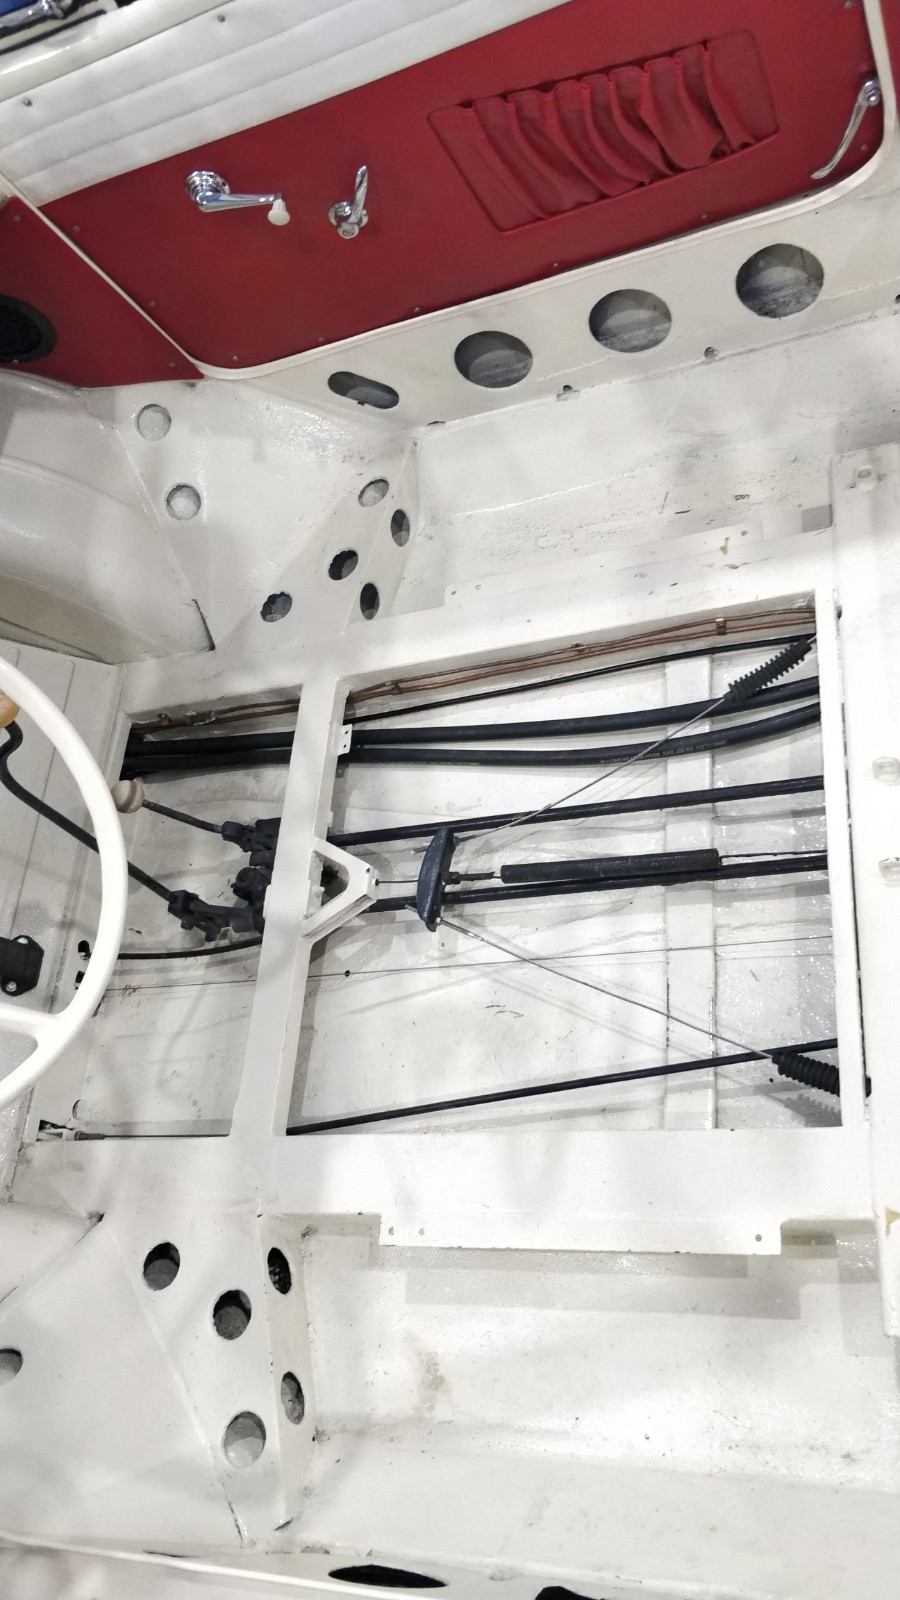
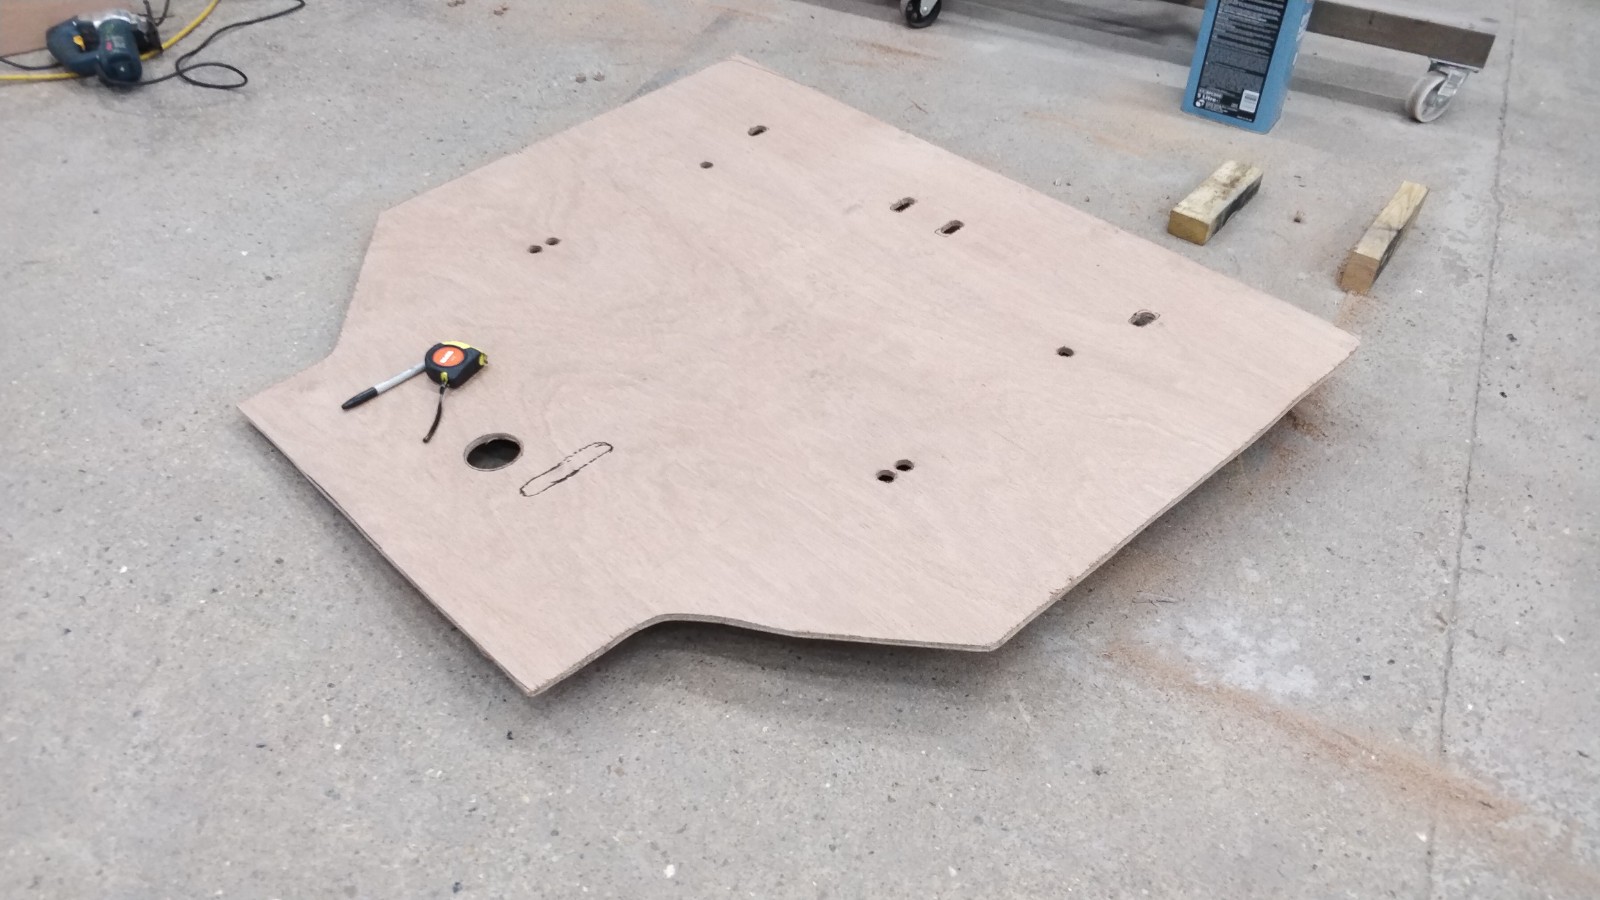
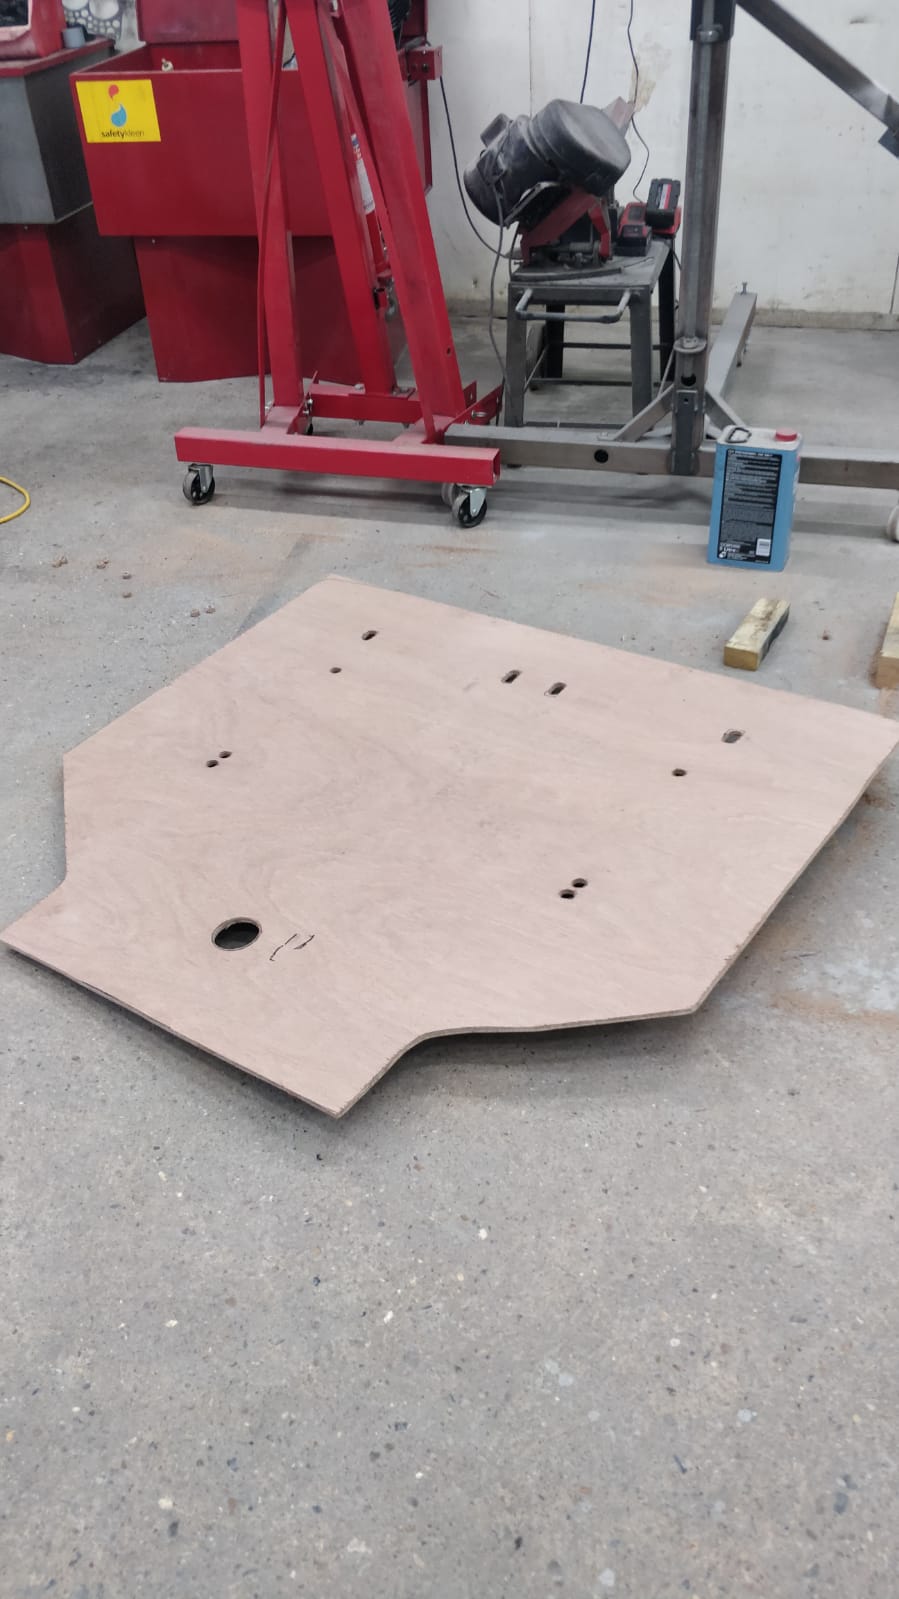
Tom has picked back up work on our 1965 Amphicar, a vehicle that can travel both on land and water.
Tom has been busy fabricating new floorboards, using the original, rotten flooring as a template. He’s also refitted all the rubber seals and started assembling the rear seats.


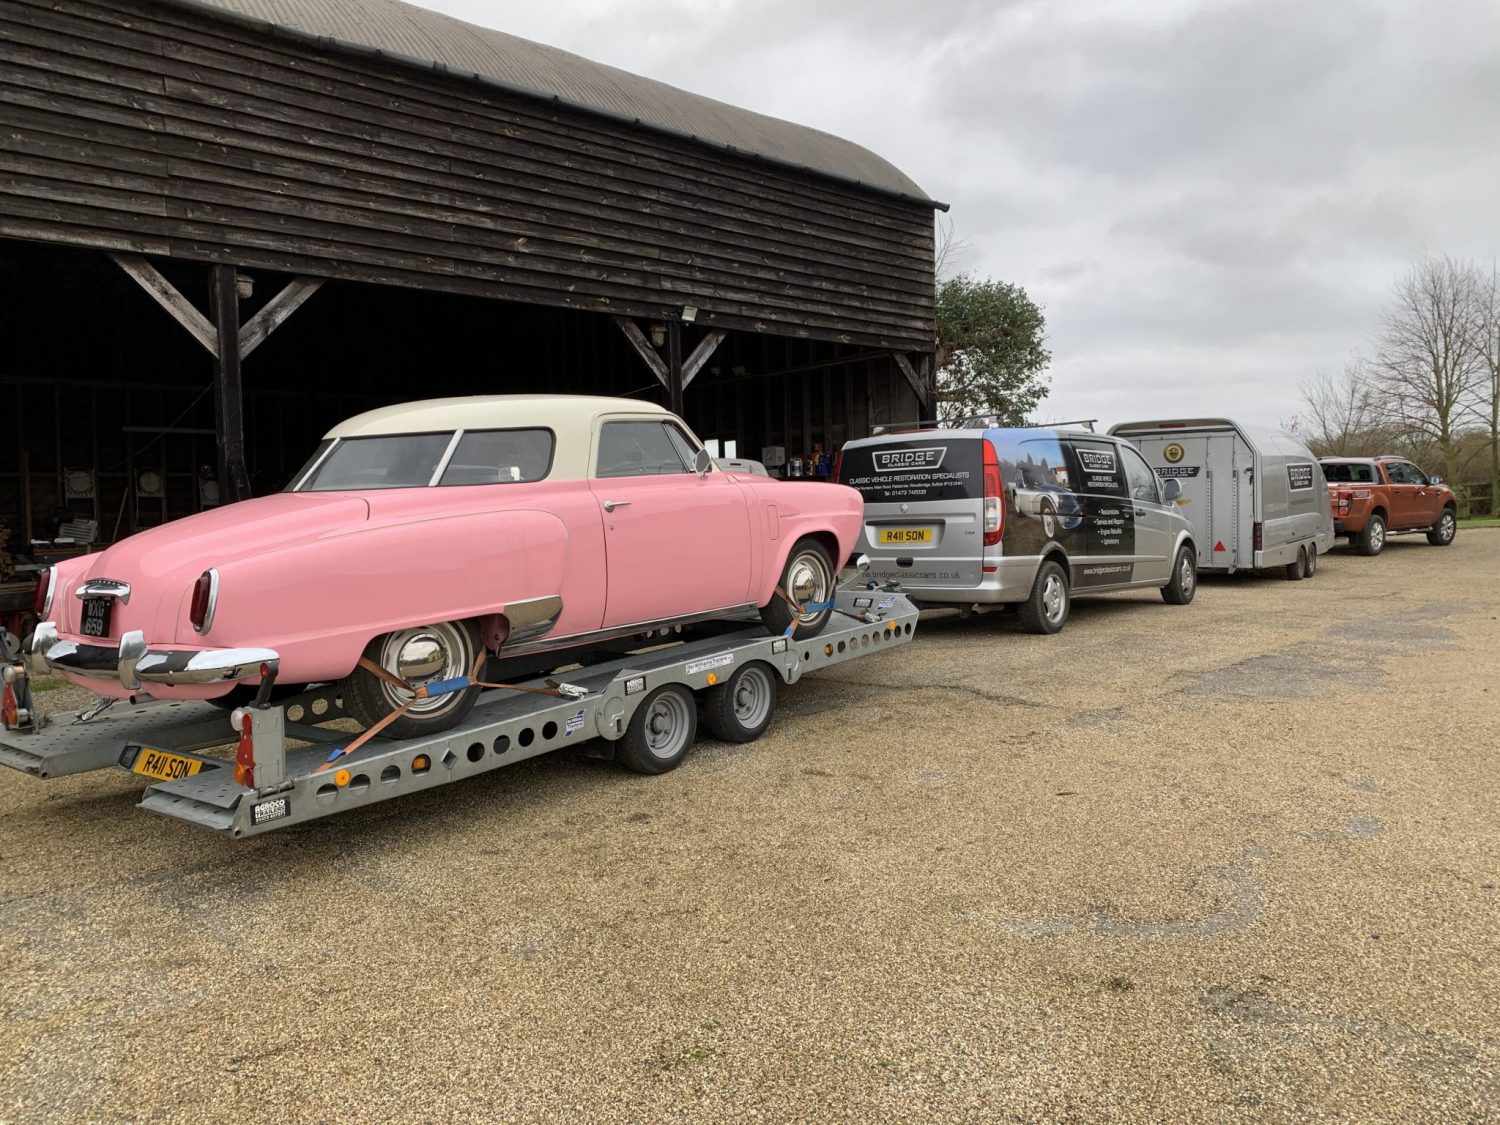
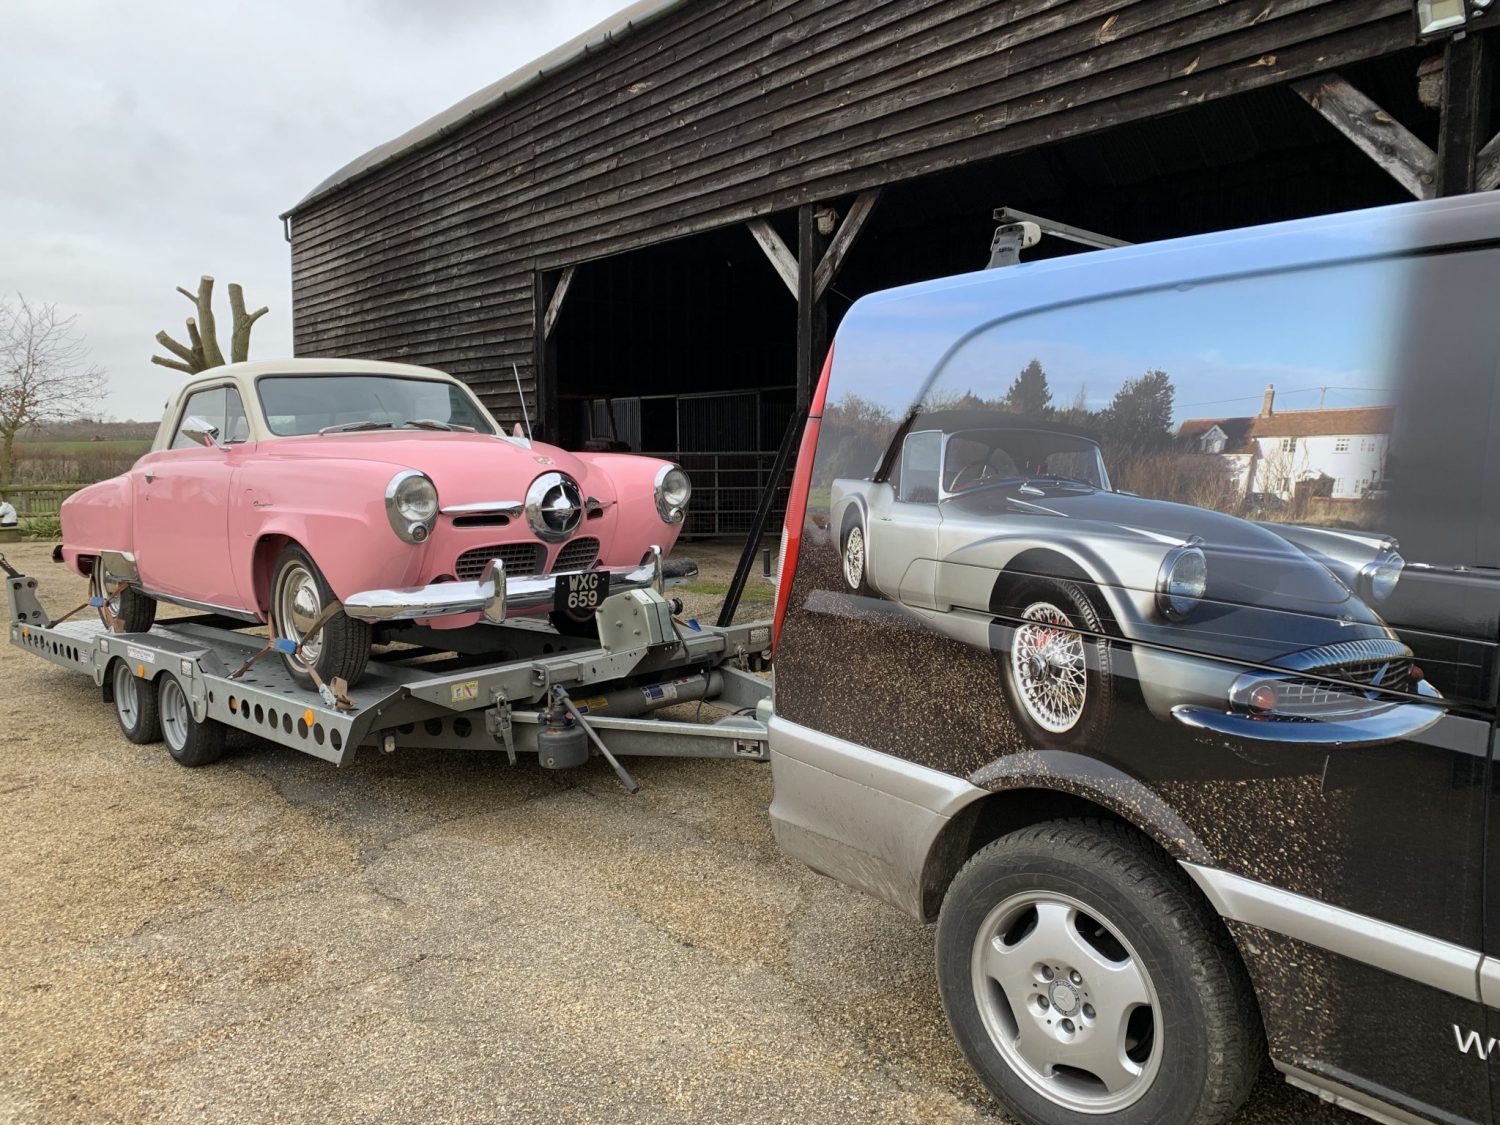
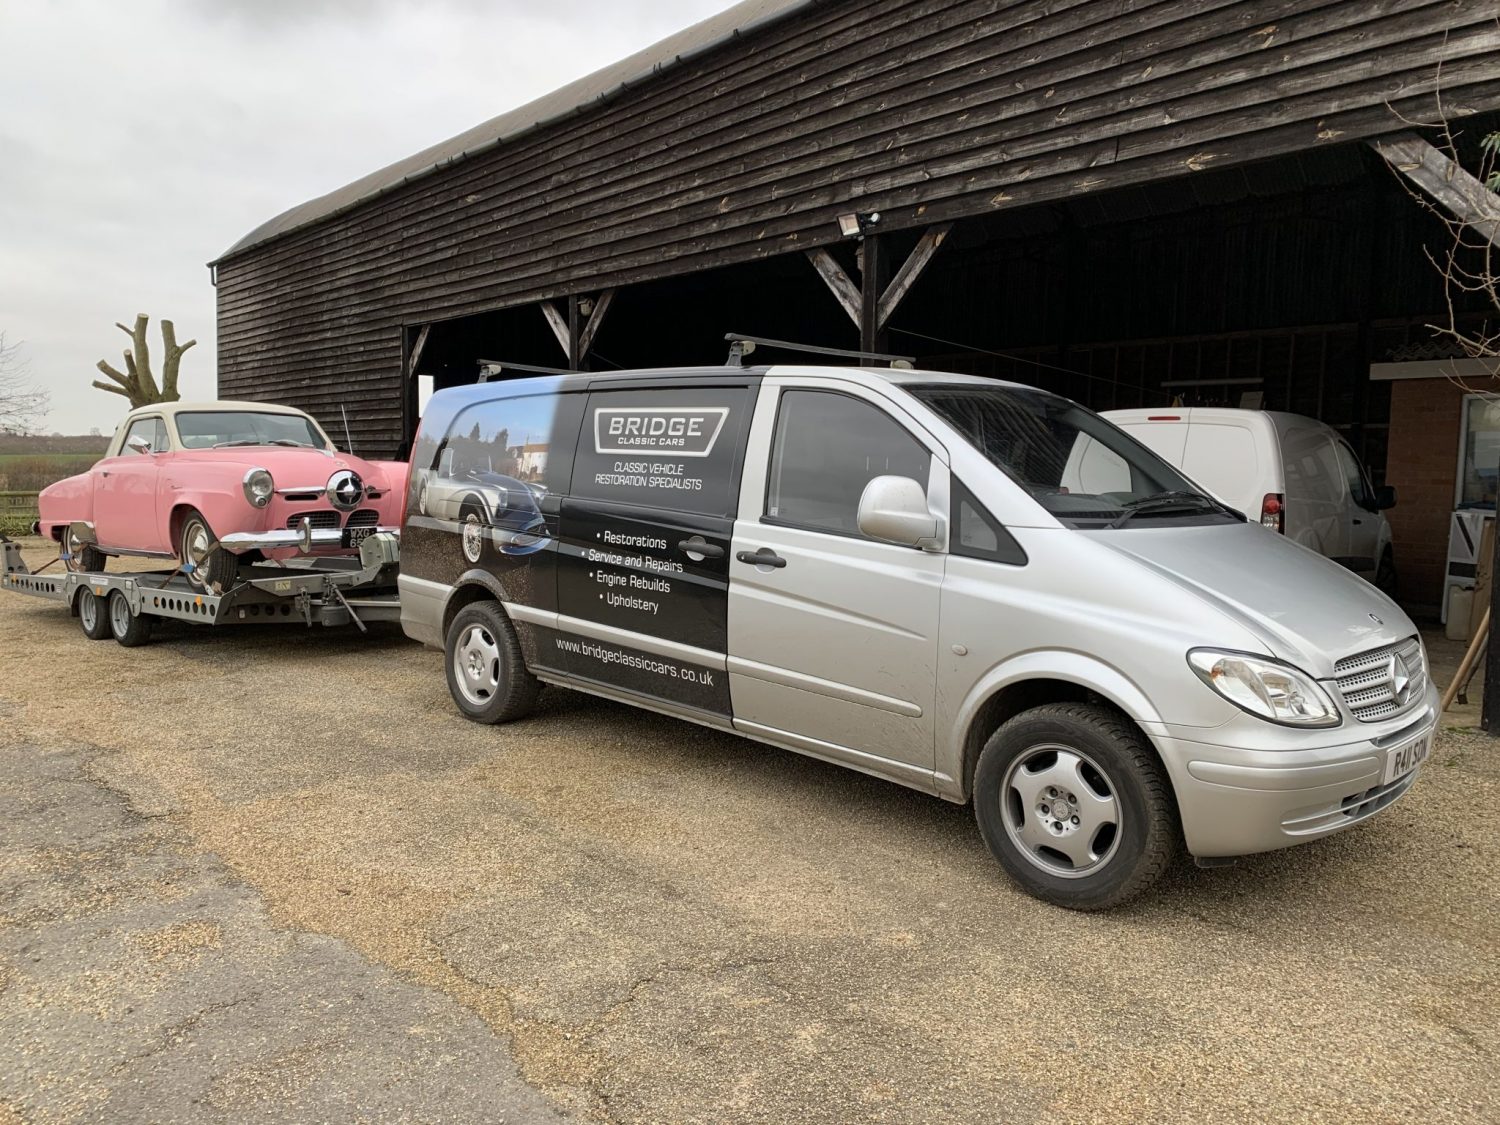
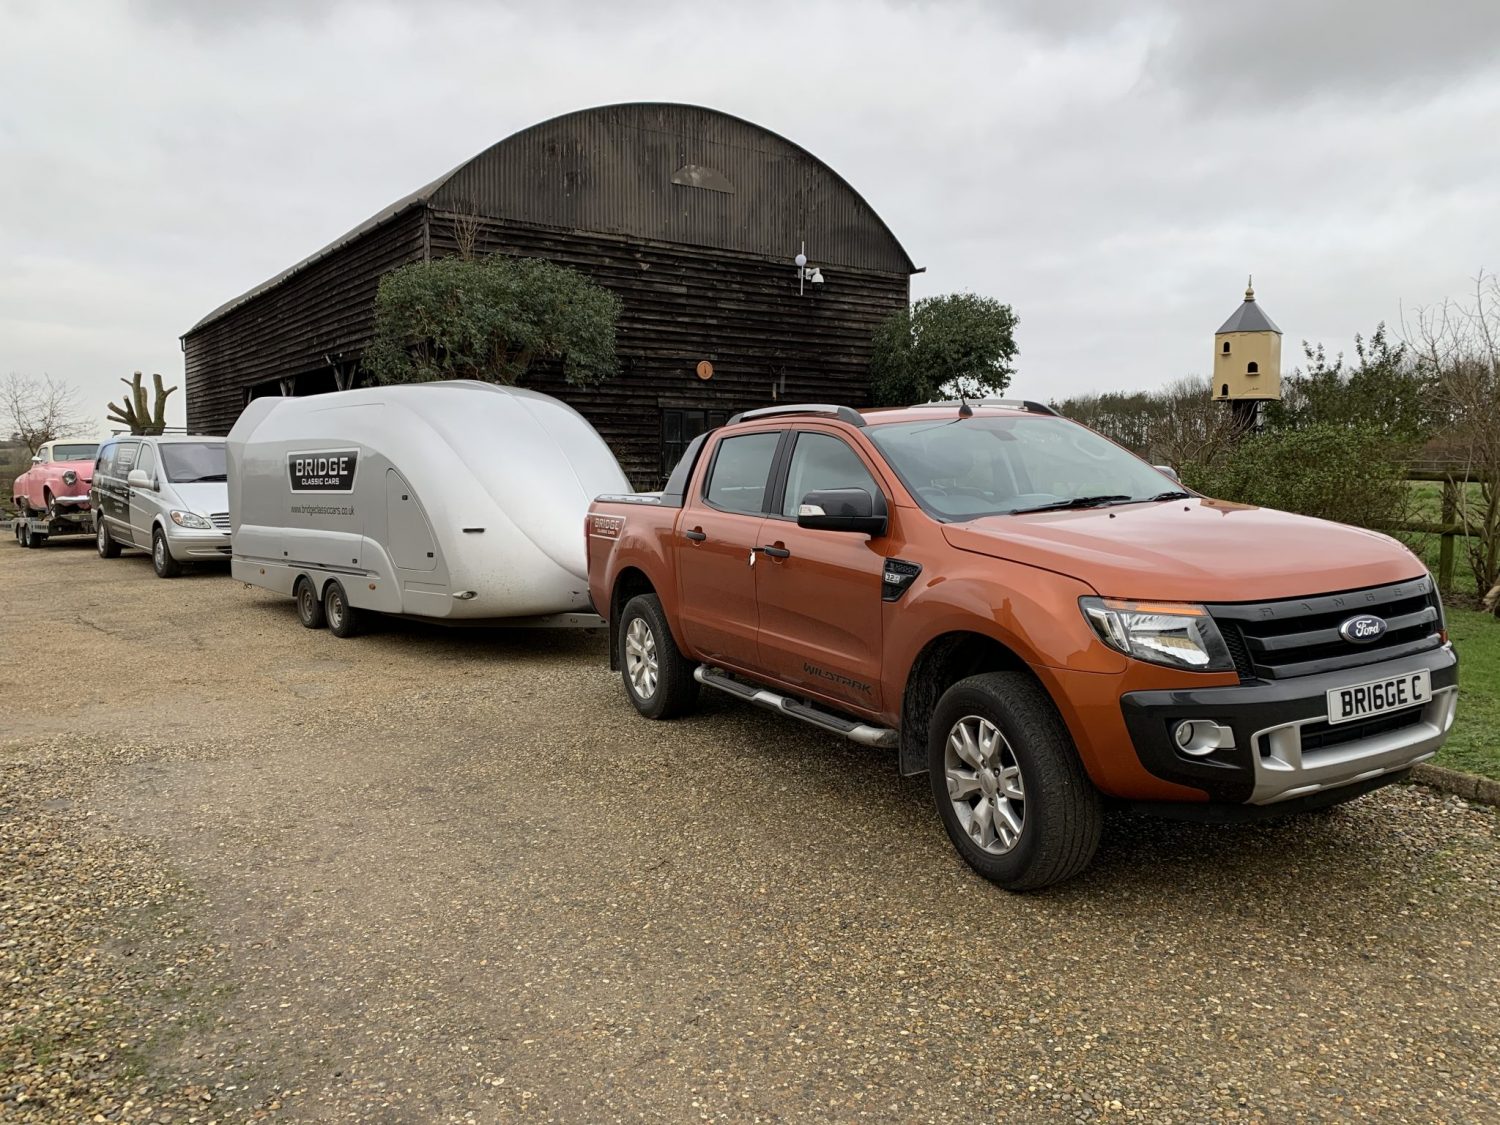
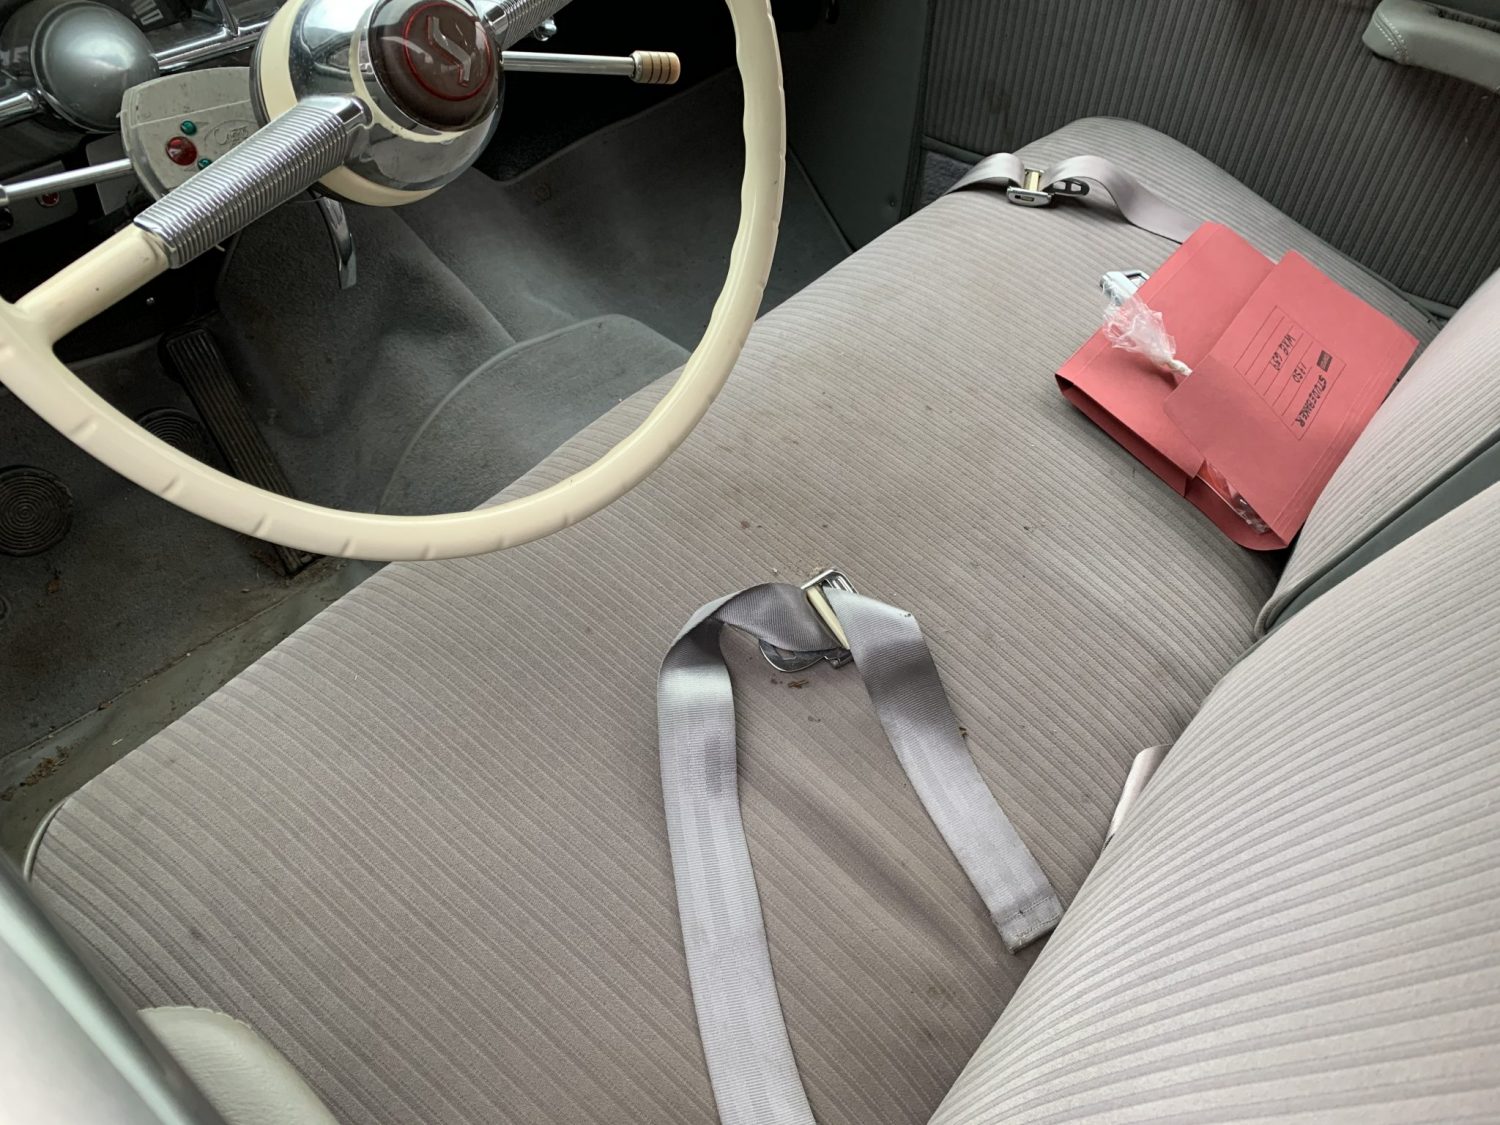
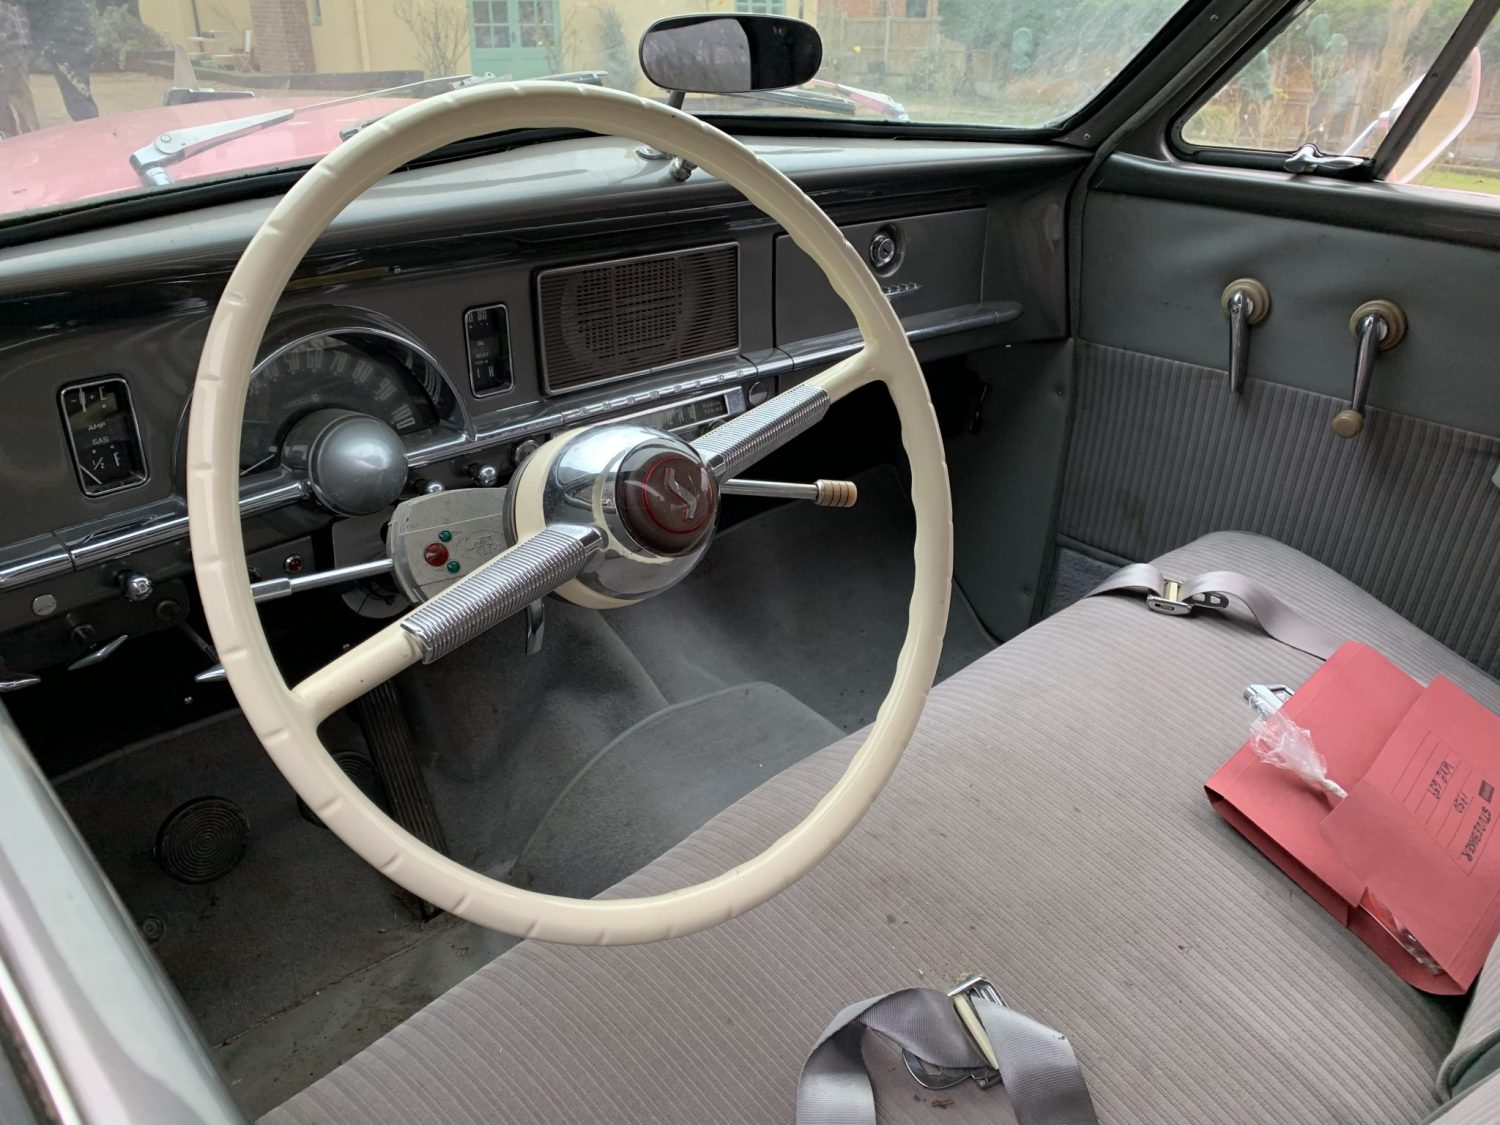
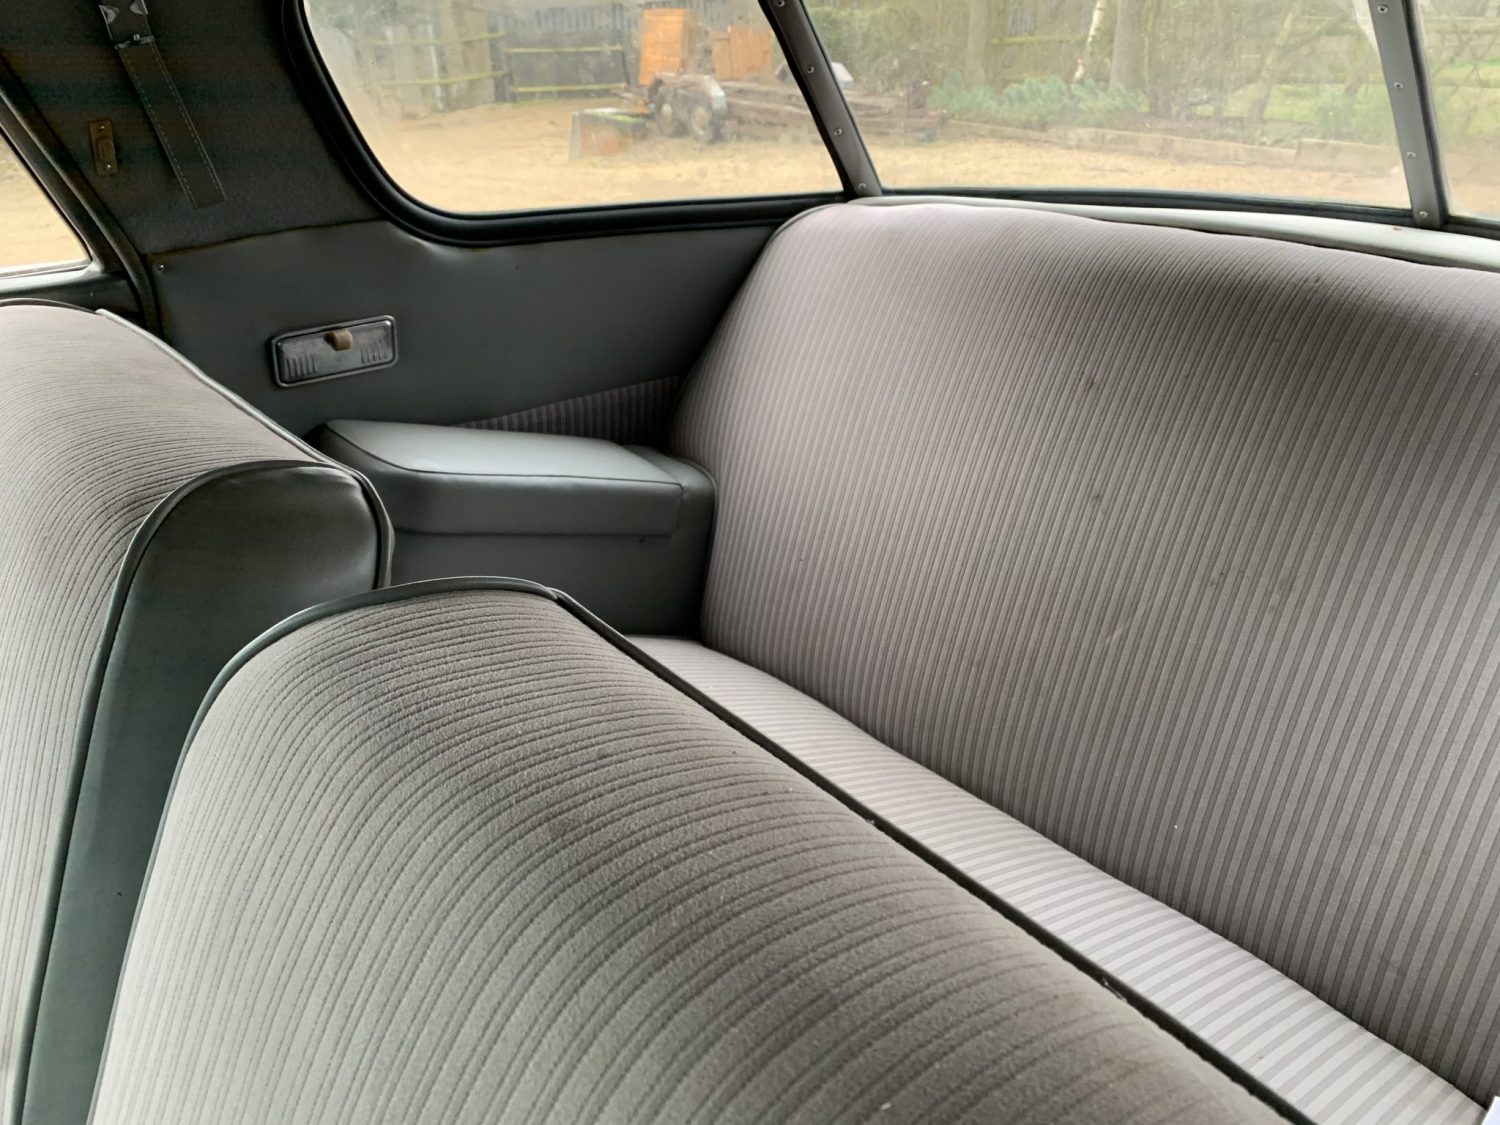
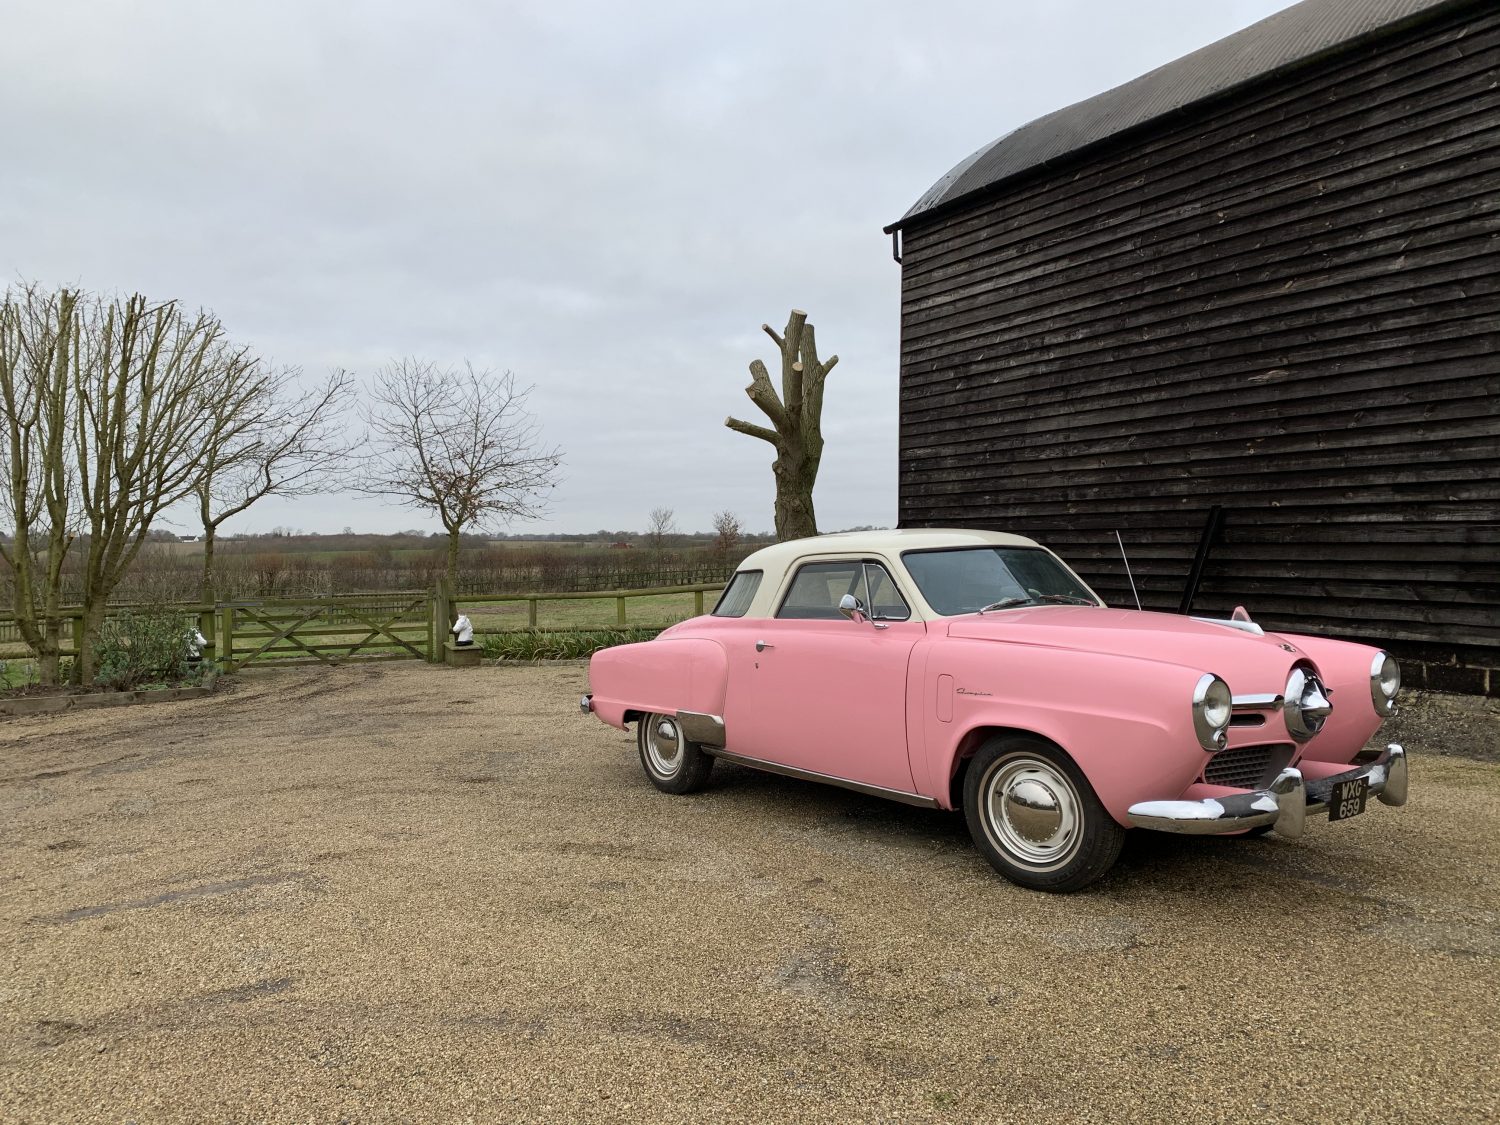
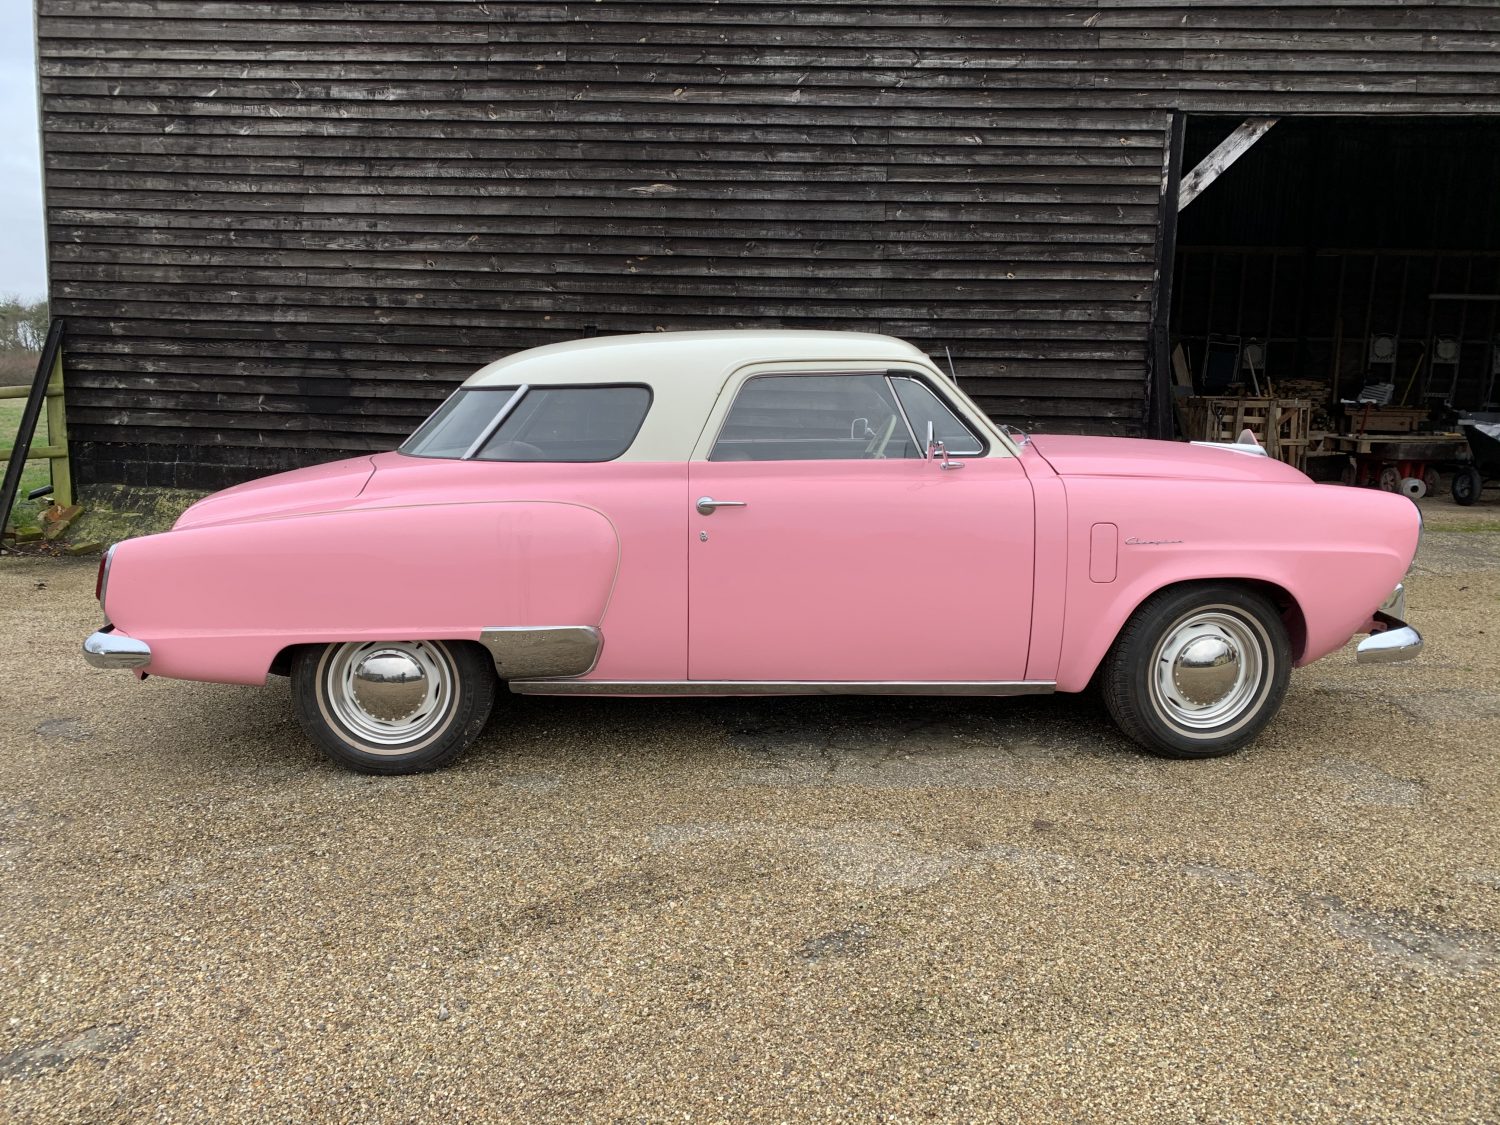
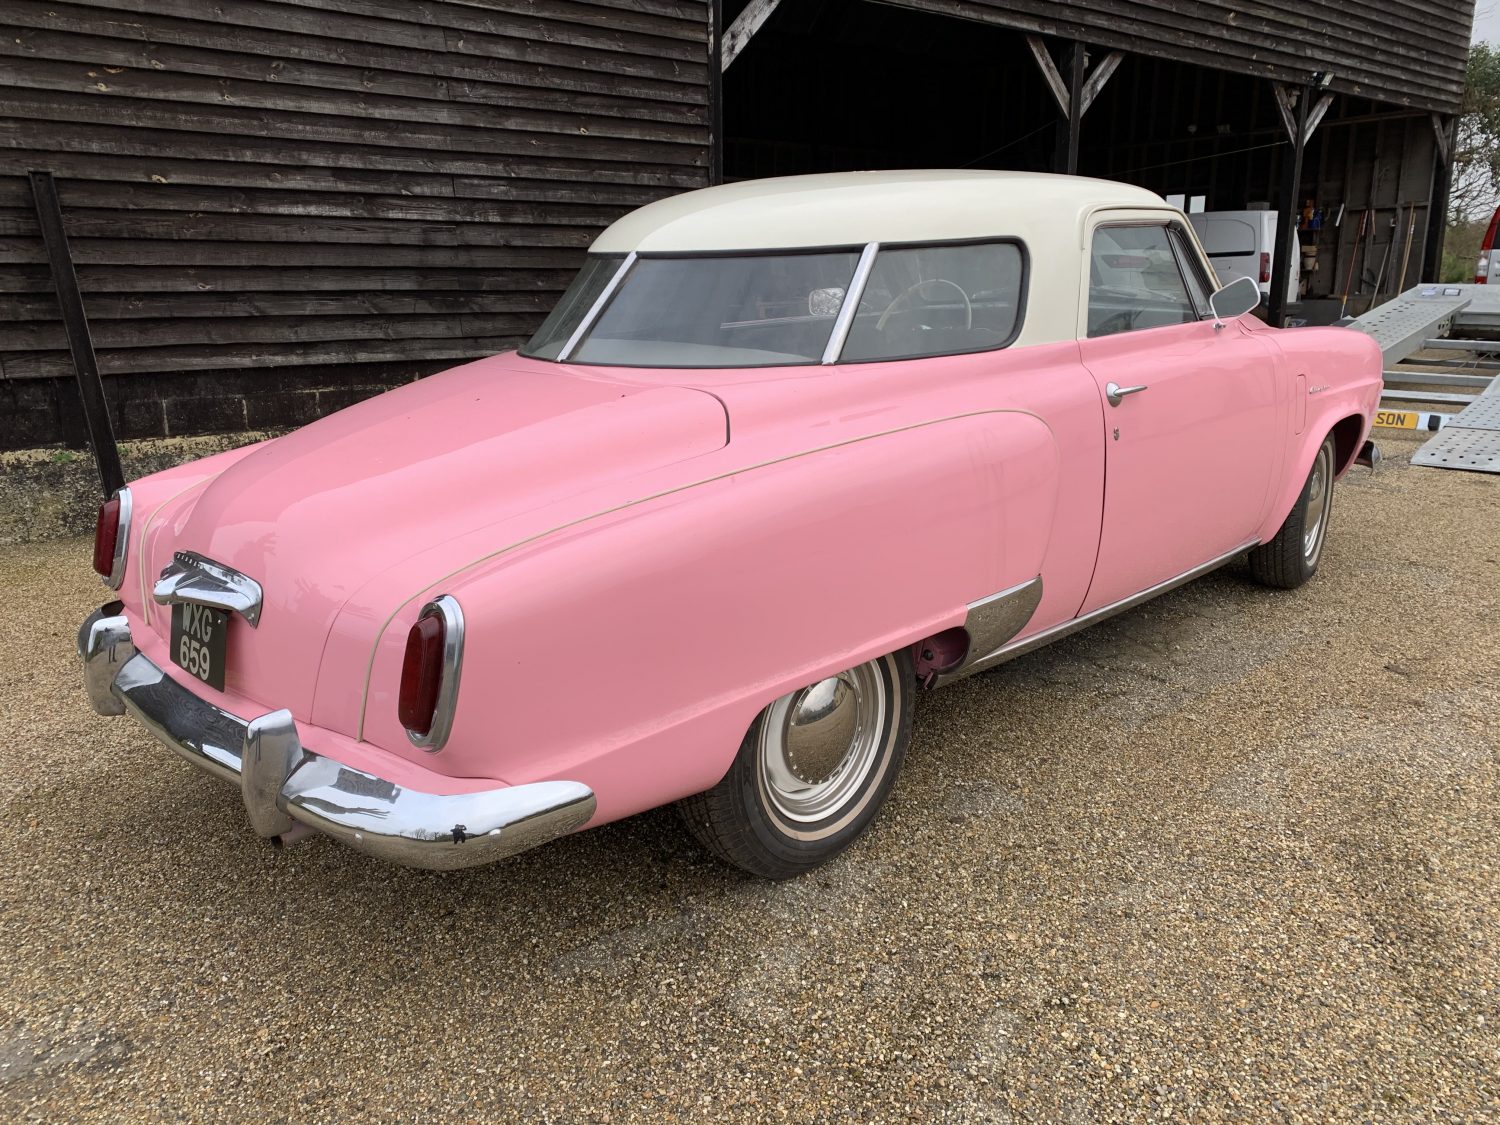
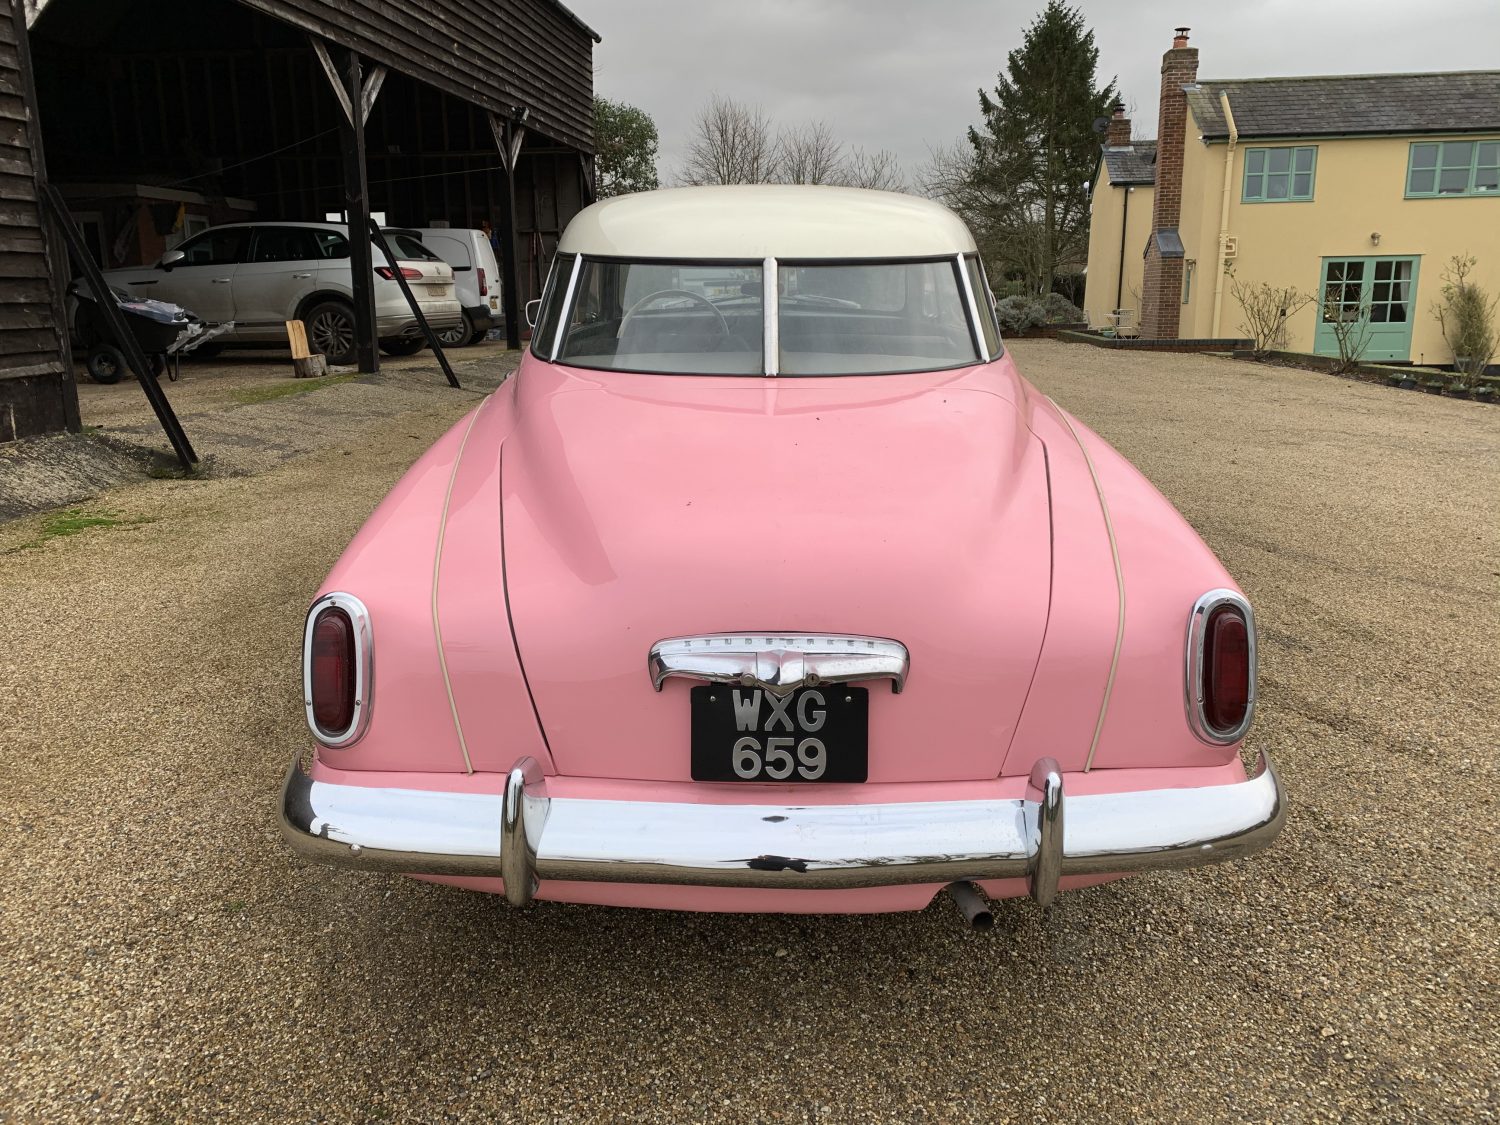
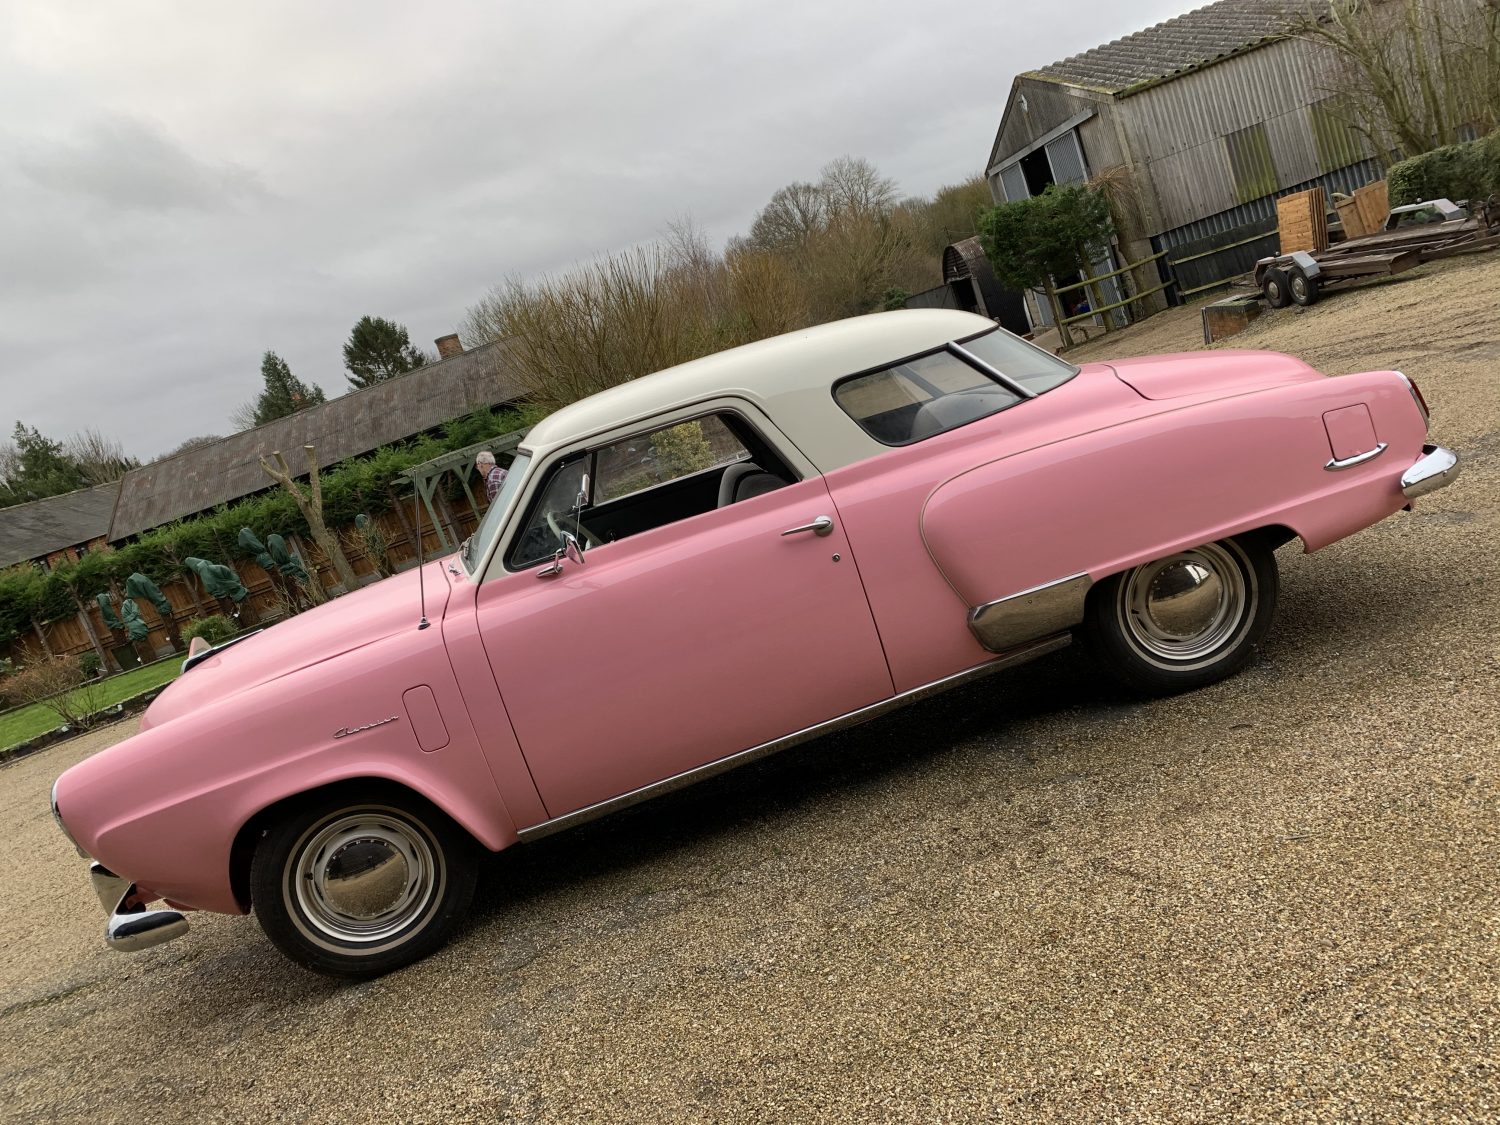
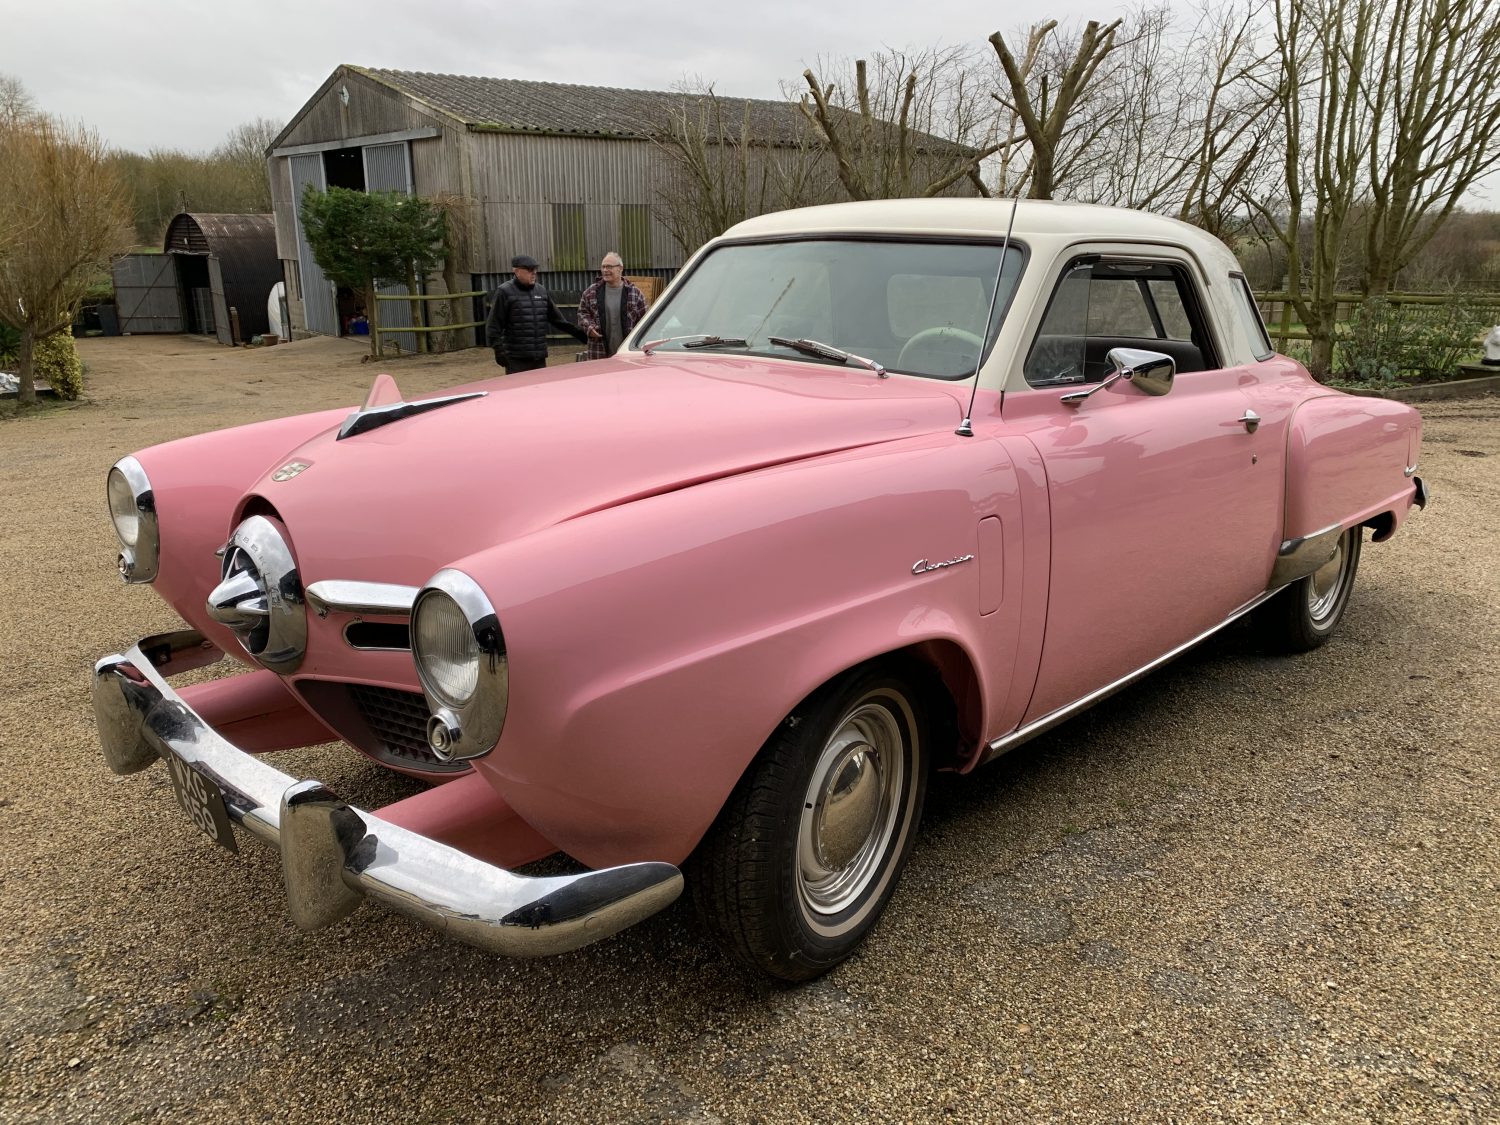
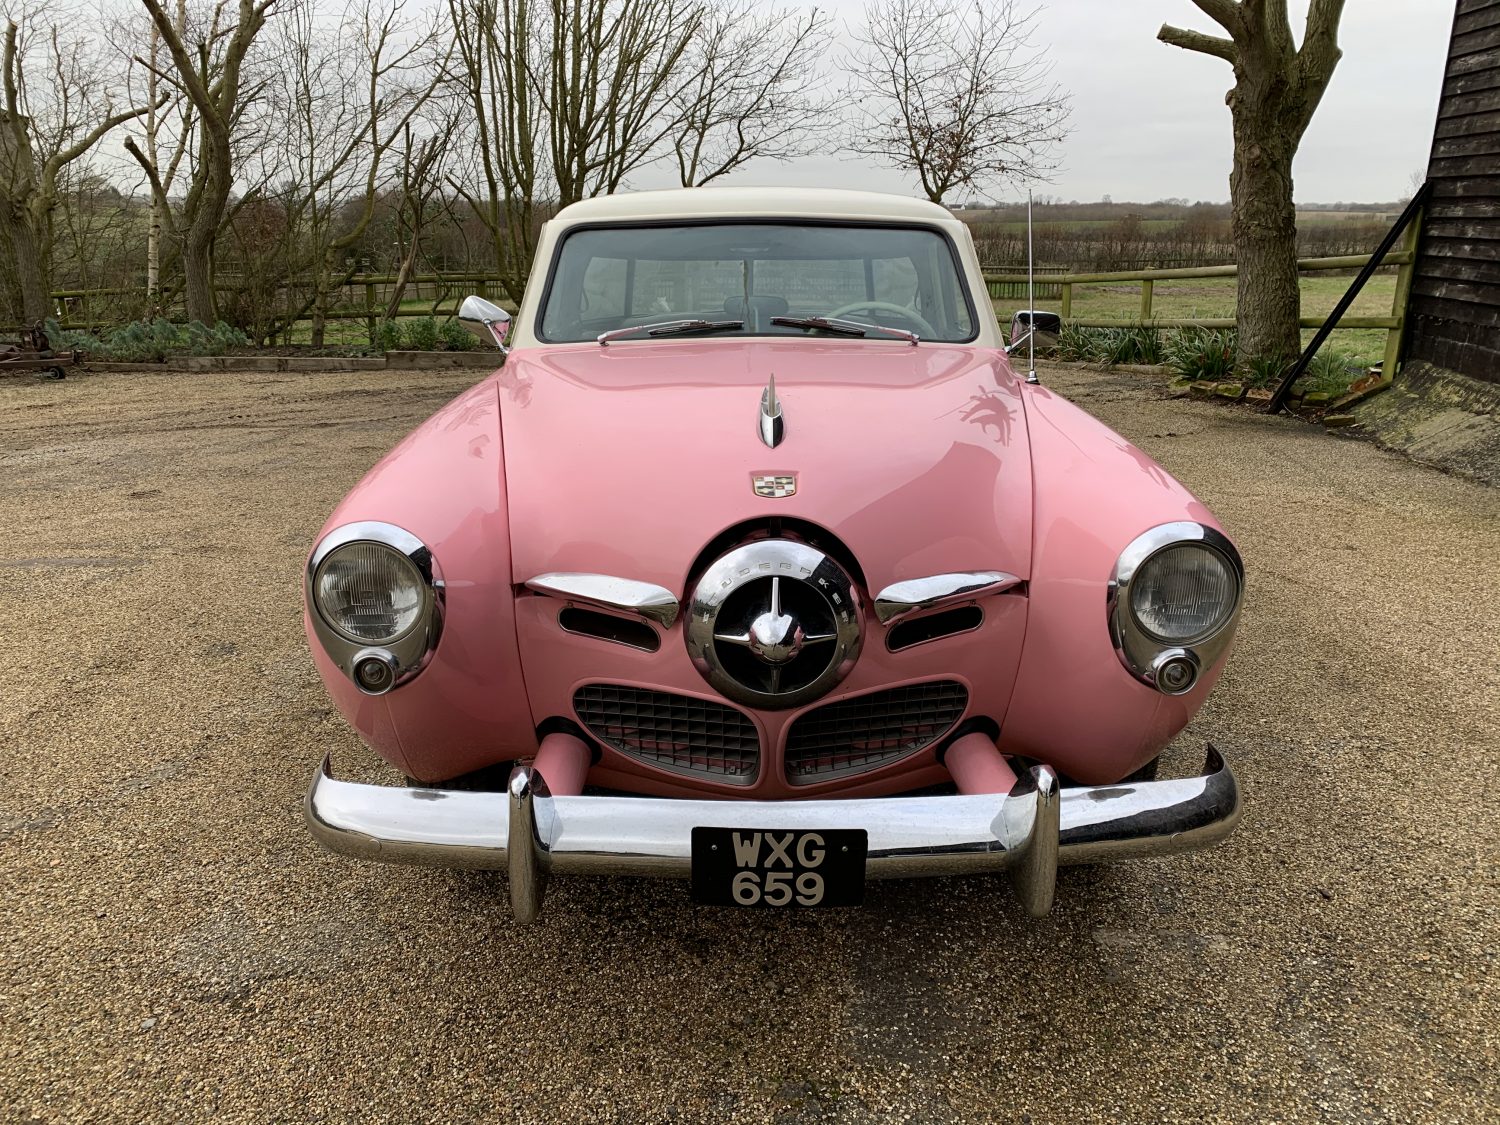
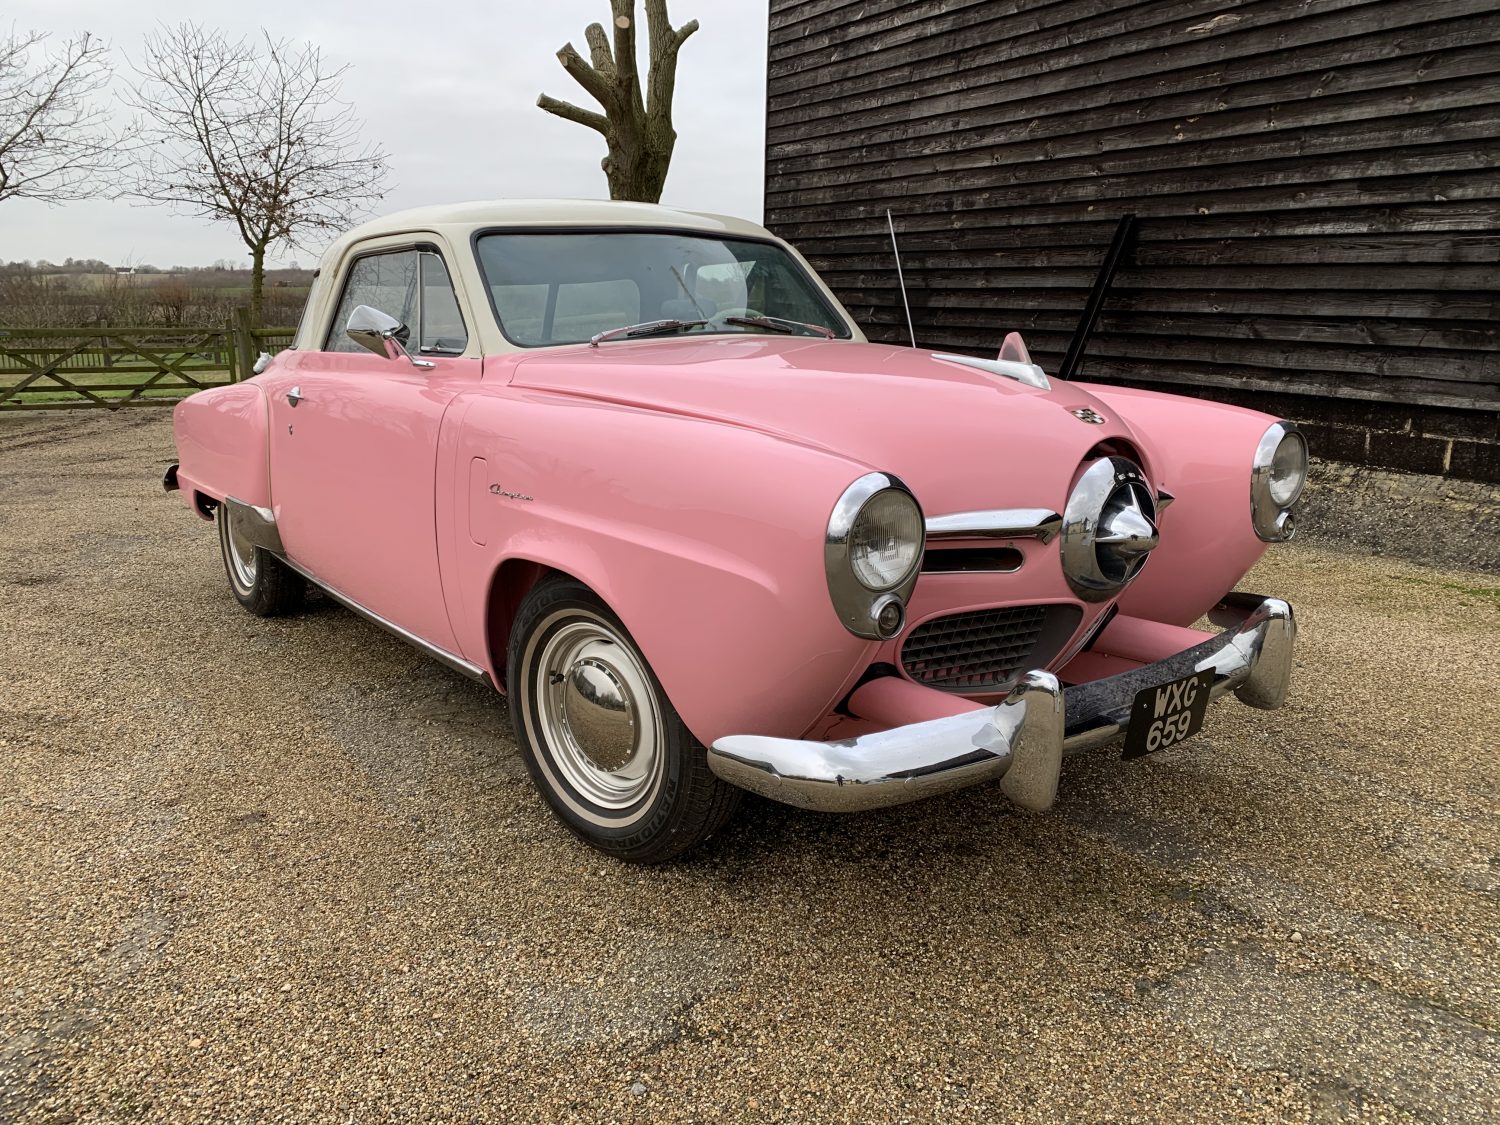
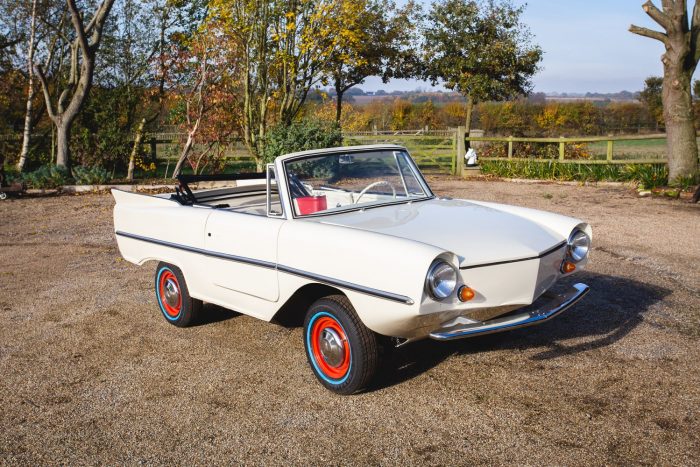
Over the weekend Gordon and Craig were busy picking up two fantastic, unusual classics.
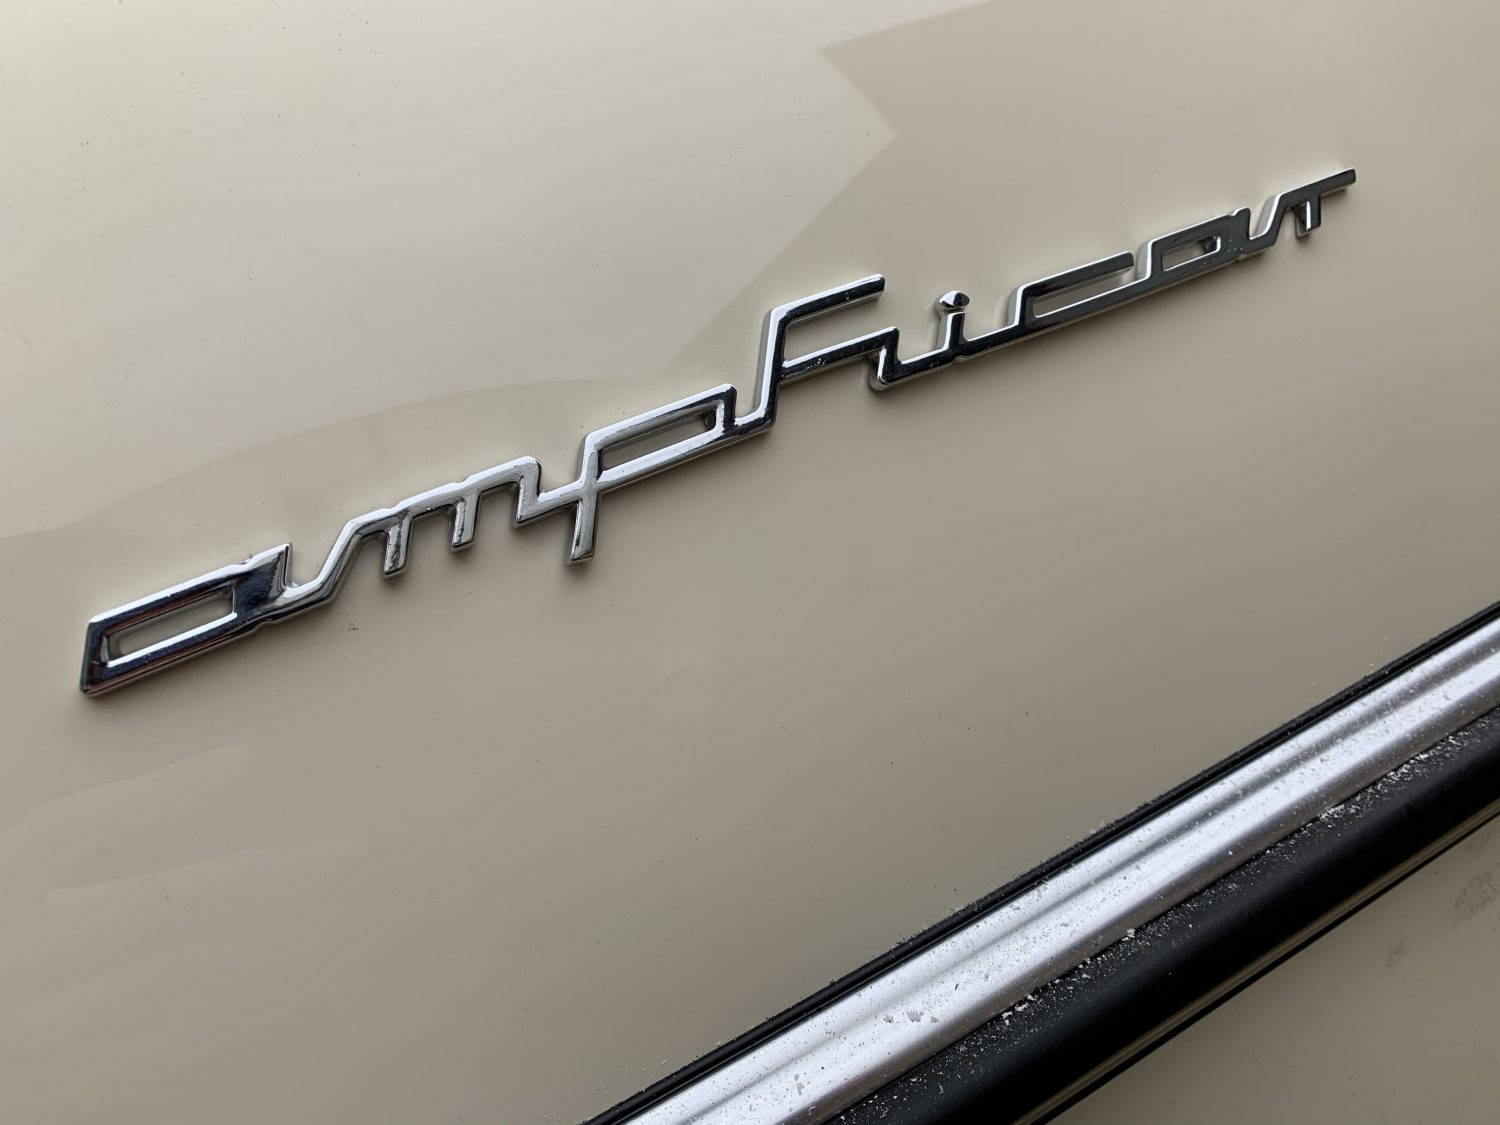
Both cars will go up for sale in our showroom. The Studebaker Champion will be available for sale in its current, beautiful condition. The Amphicar concours restoration is almost complete and will be available for purchase upon it’s completion.
Here is a little bit of information about the Stuedebaker;
Studebaker entered the automotive business in 1902 with electric vehicles and in 1904 with gasoline vehicles, all sold under the name “Studebaker Automobile Company”. Until 1911, its automotive division operated in partnership with the Garford Company of Elyria, Ohio, and after 1909 with the E-M-F Company. The first gasoline automobiles to be fully manufactured by Studebaker were marketed in August 1912. Over the next 50 years, the company established a reputation for good quality and reliability.
Studebaker: One can do a lot of remembering in South Bend. New Albany, Indiana: Automobile Quarterly. pp. 228–275. Vol X, 3rd Q, 1972


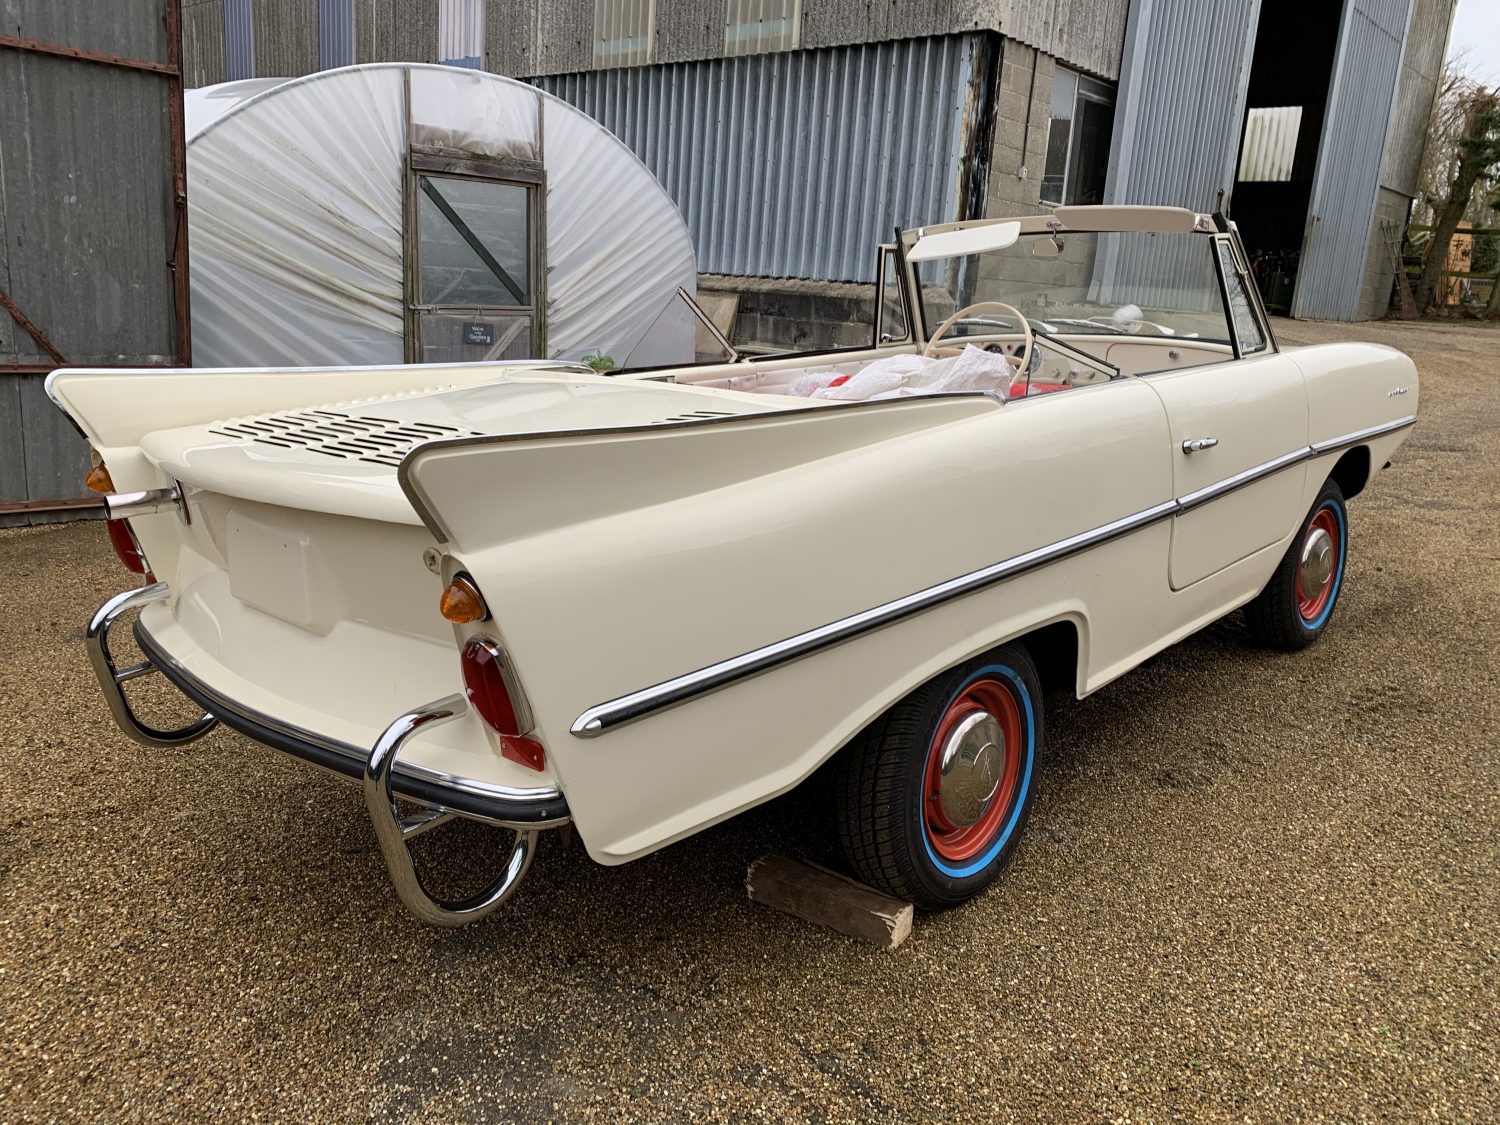
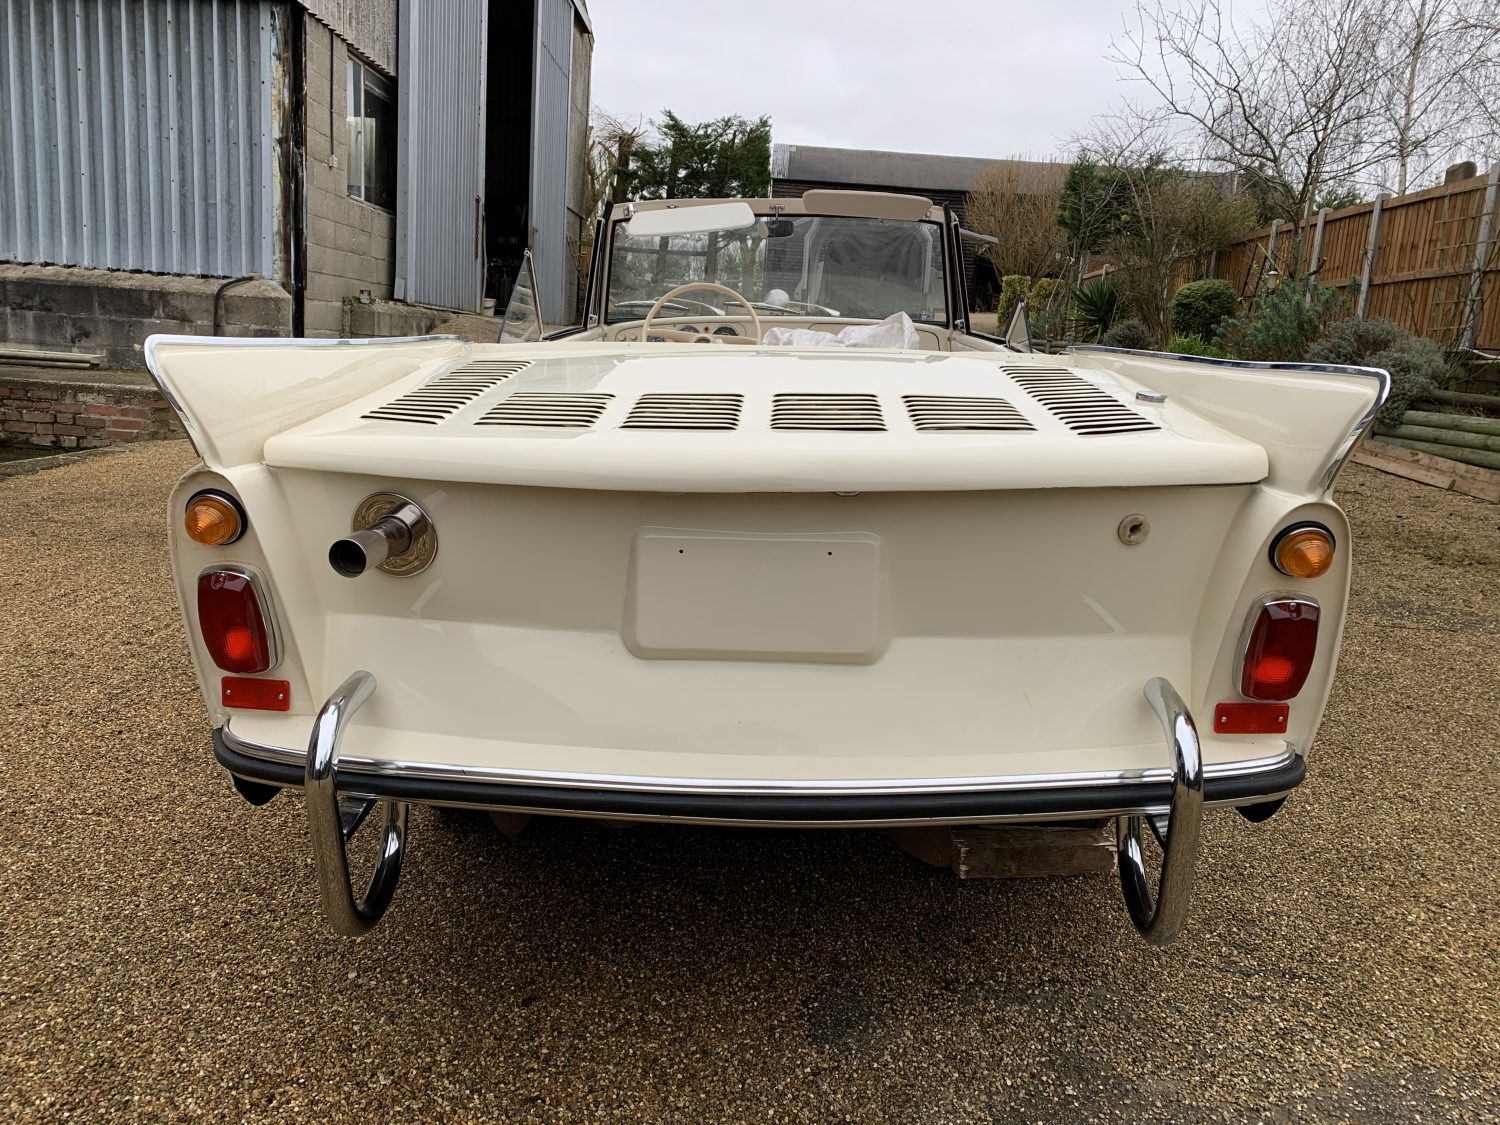
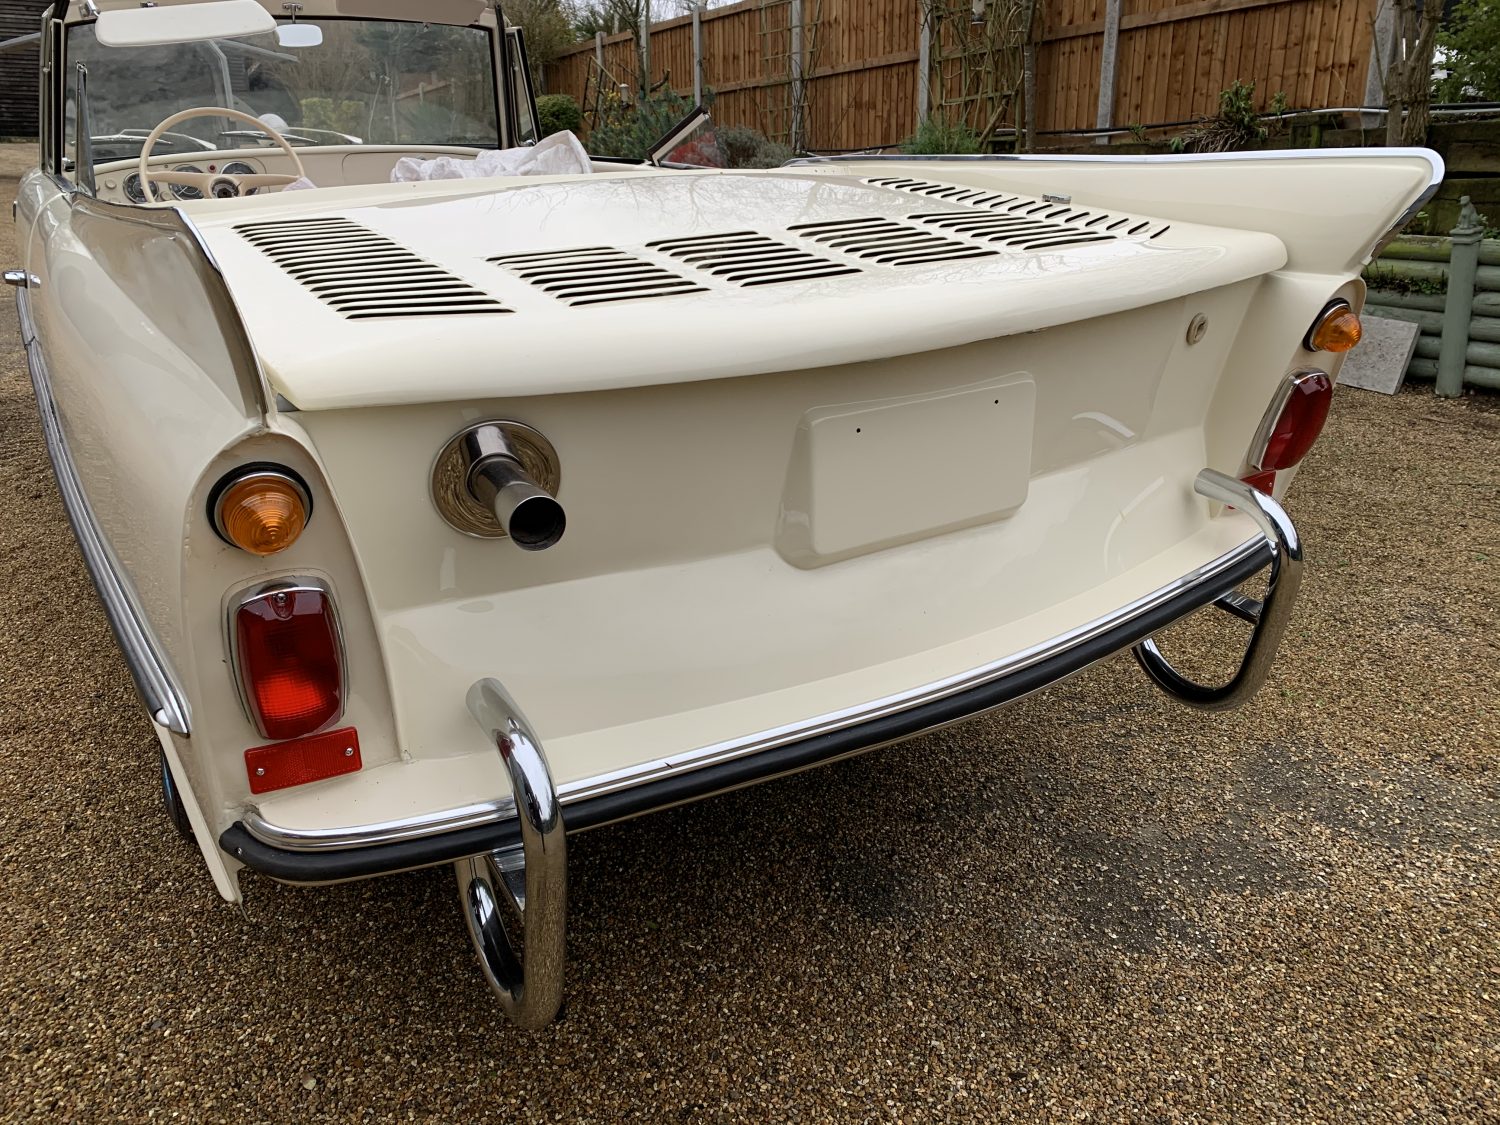
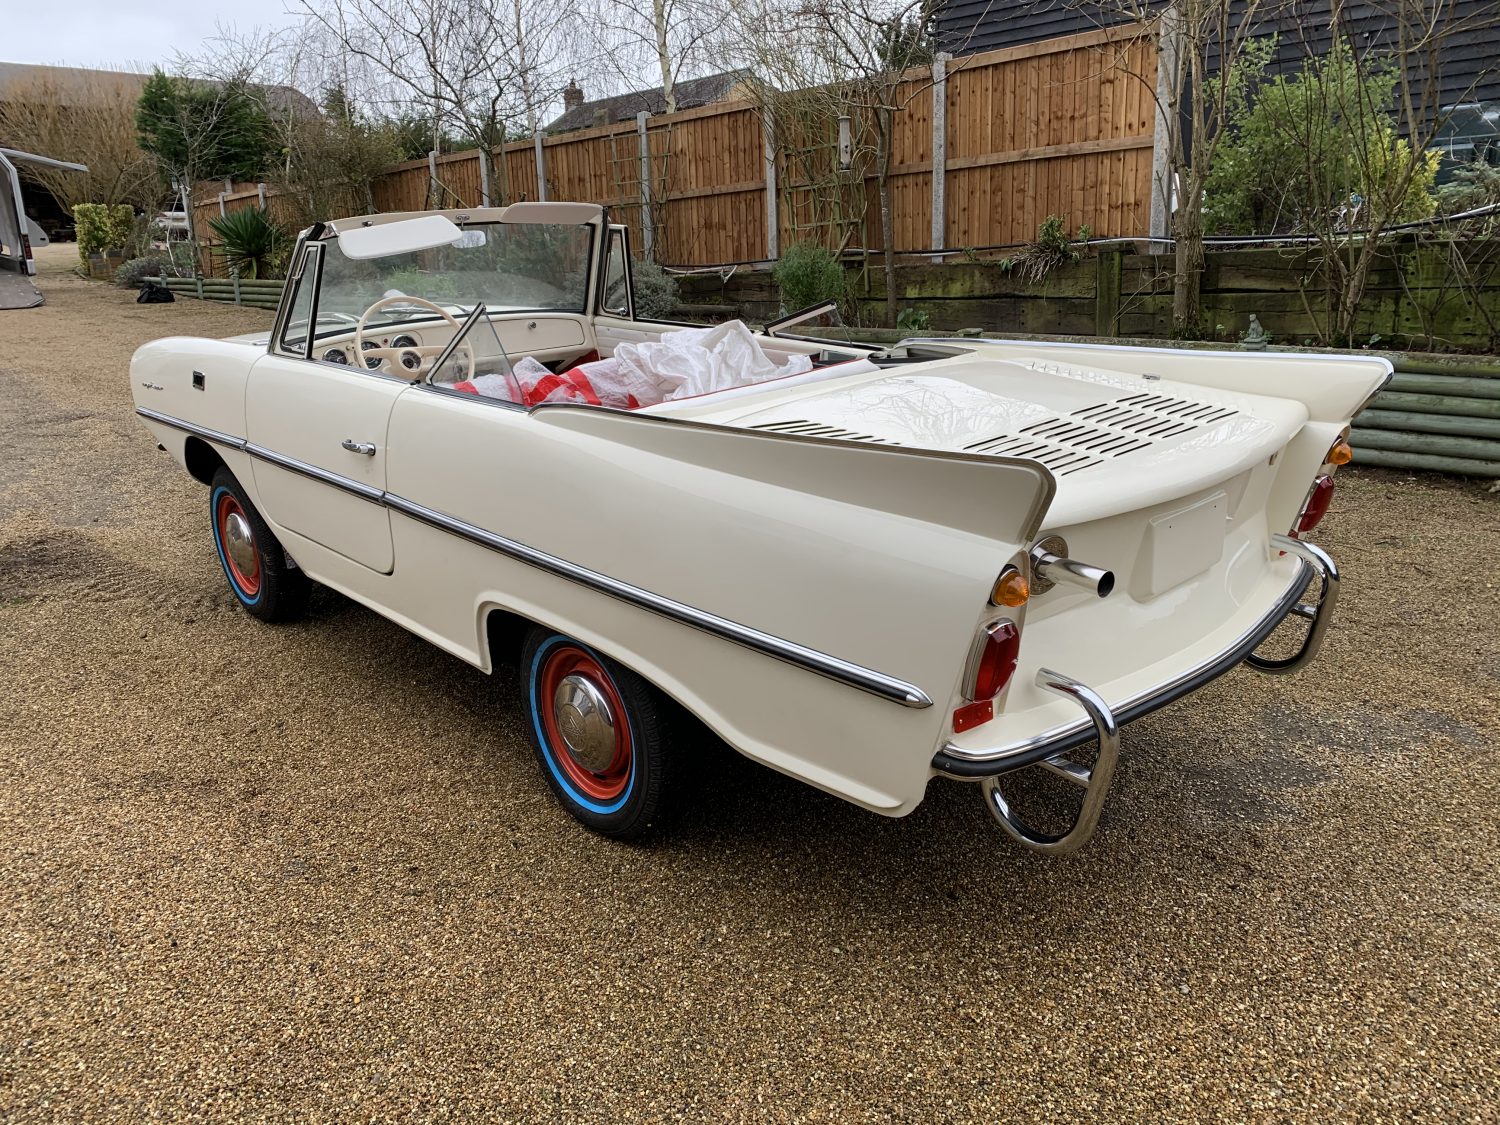

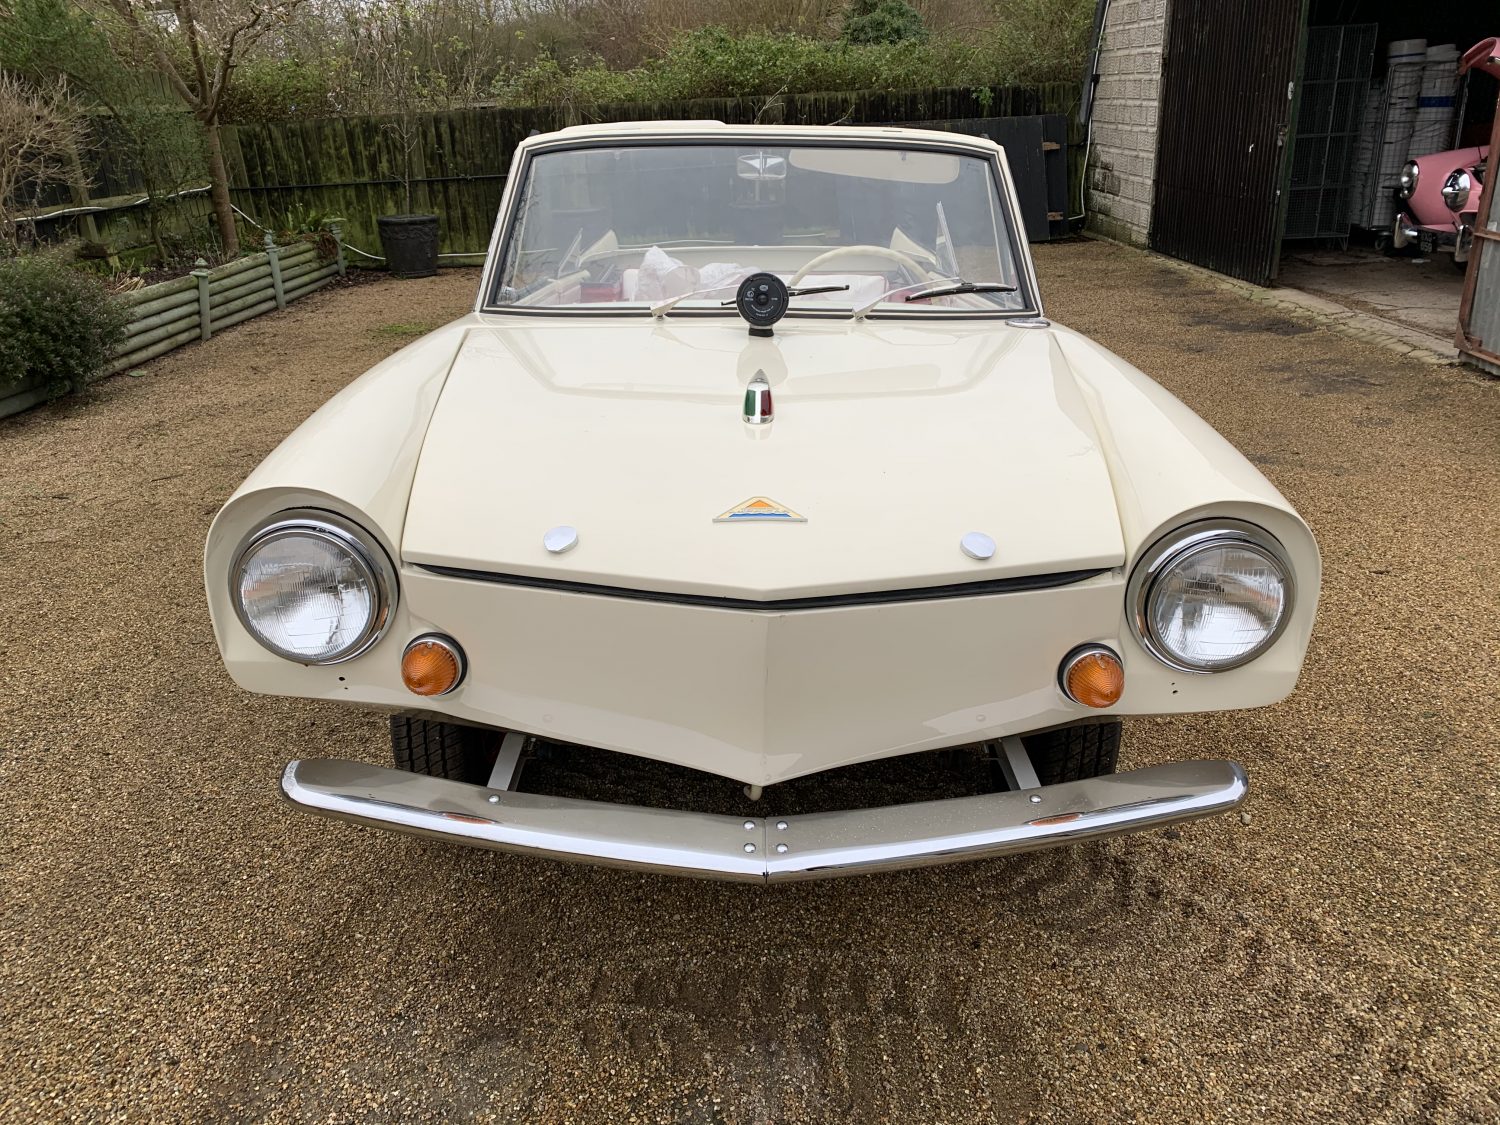
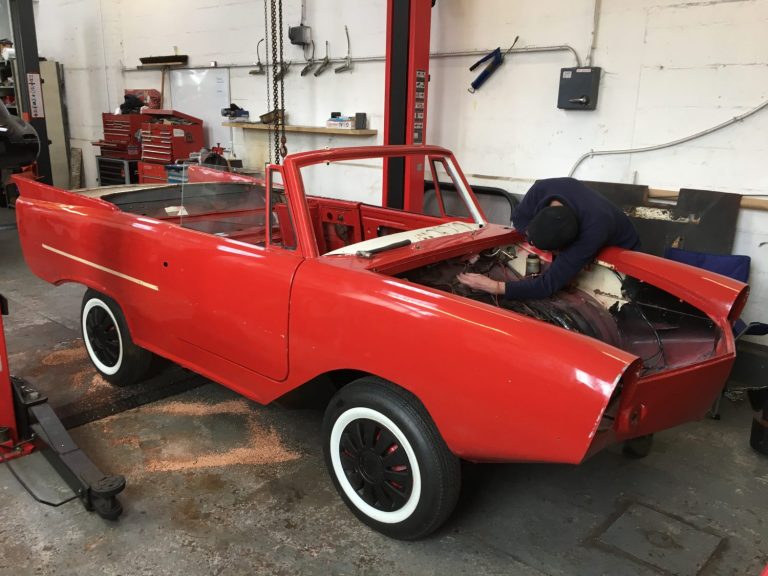
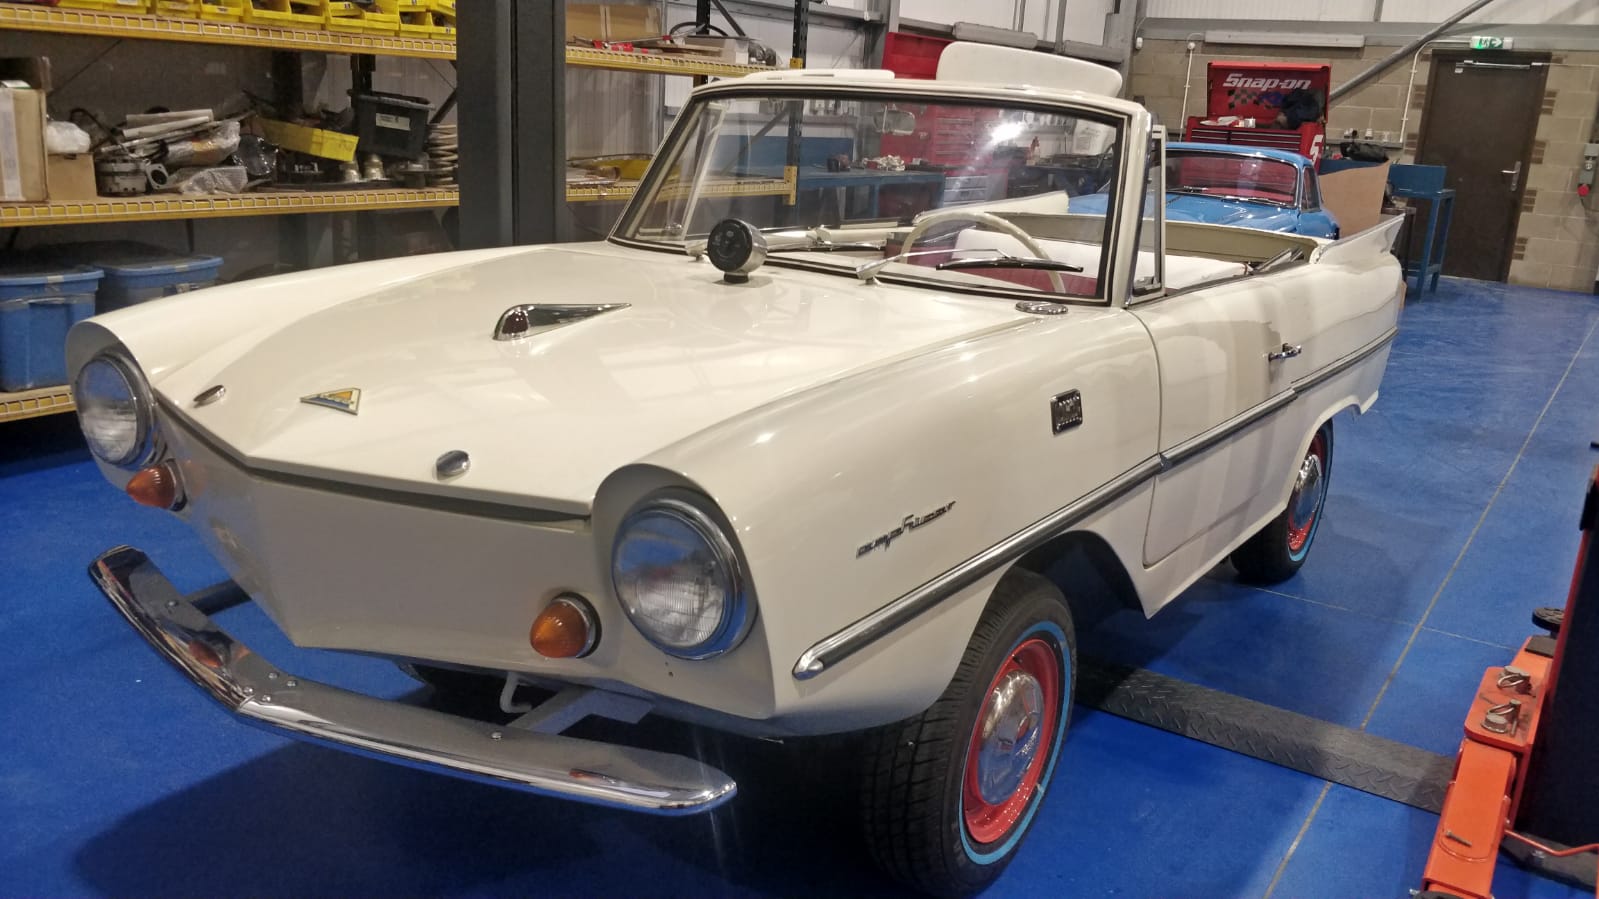
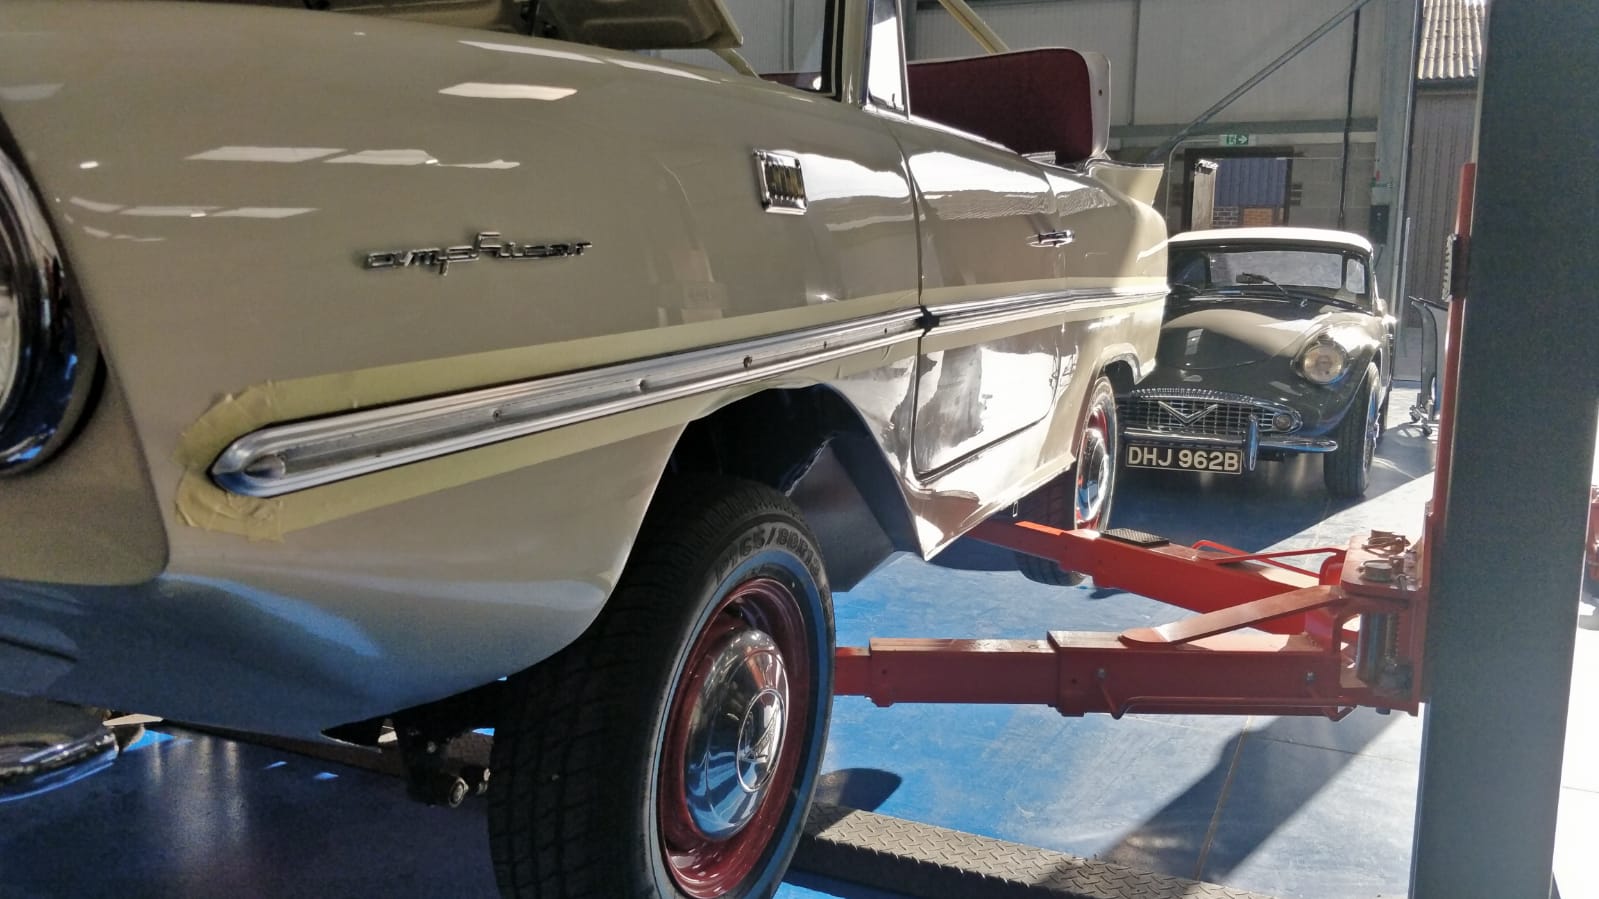
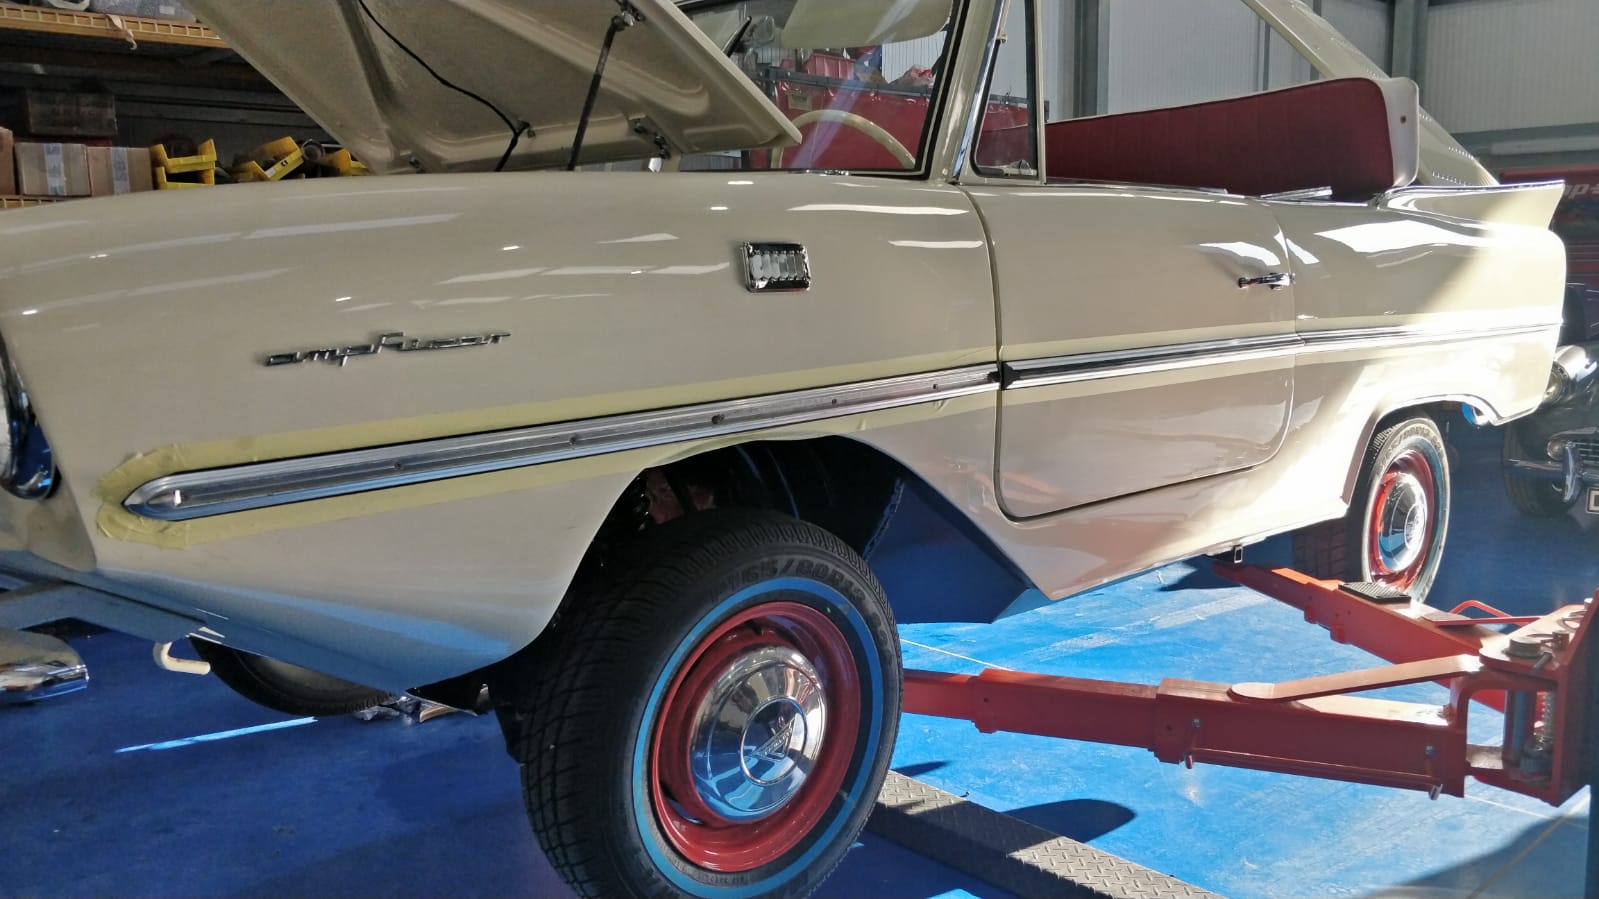
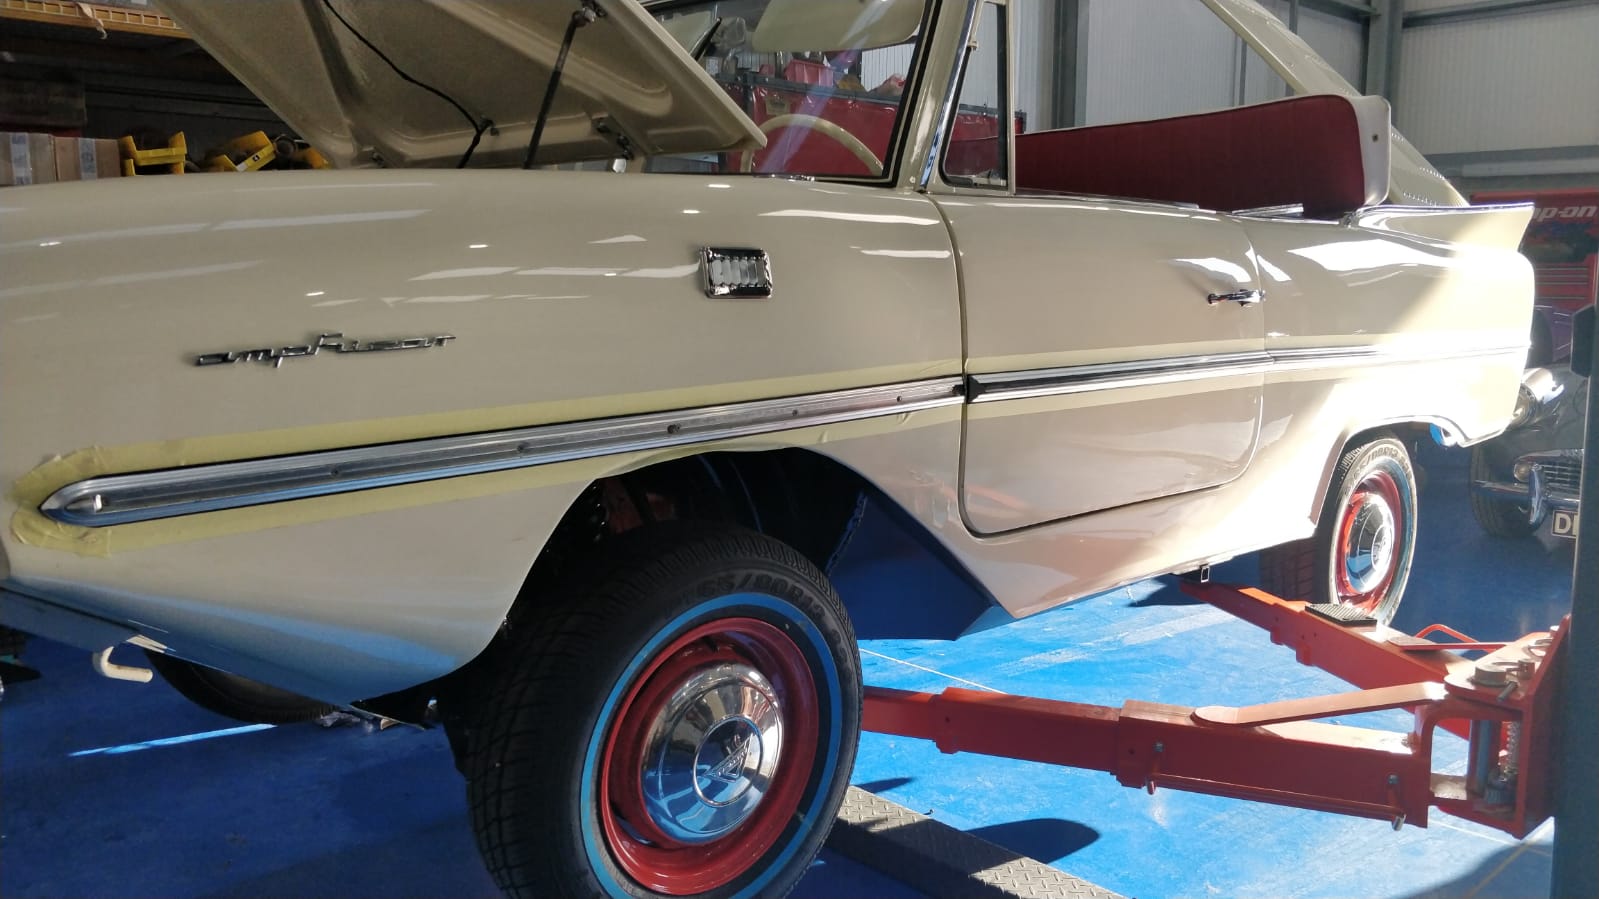
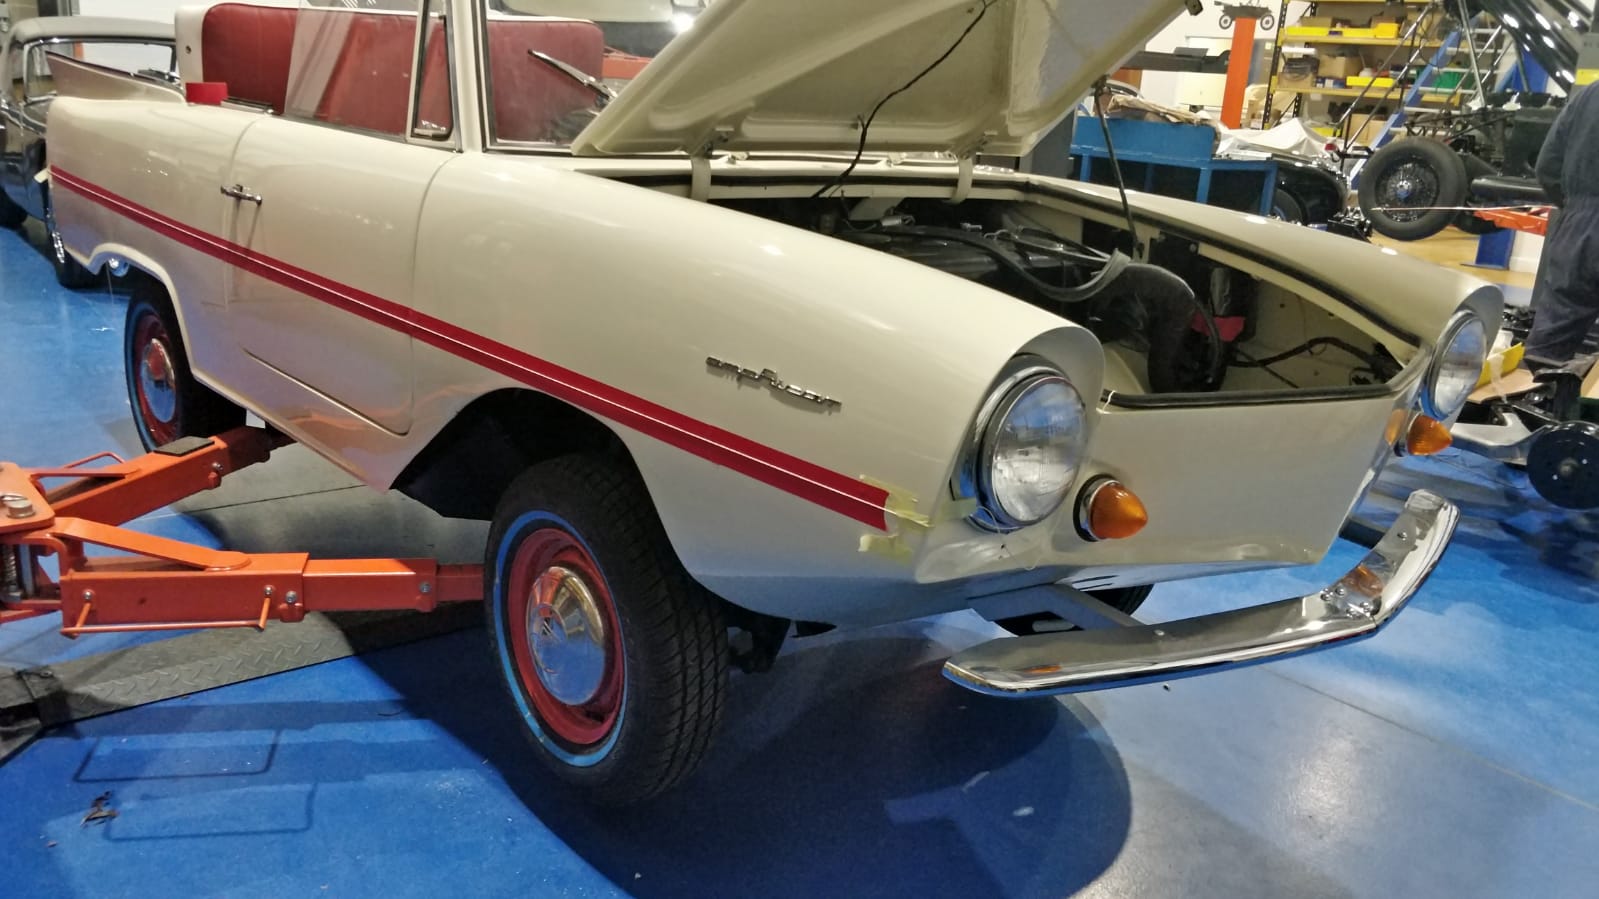
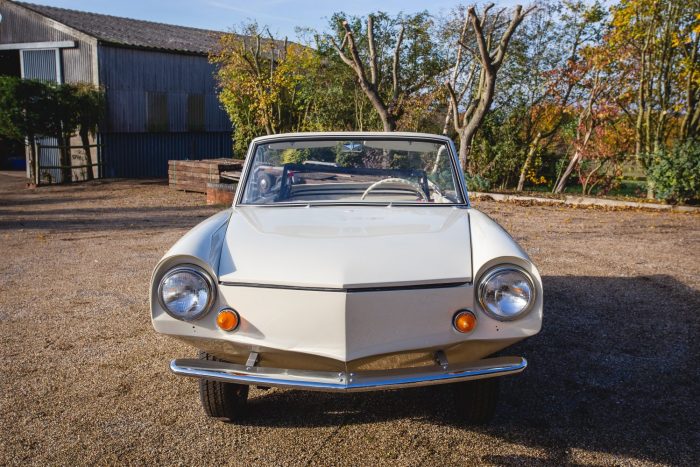
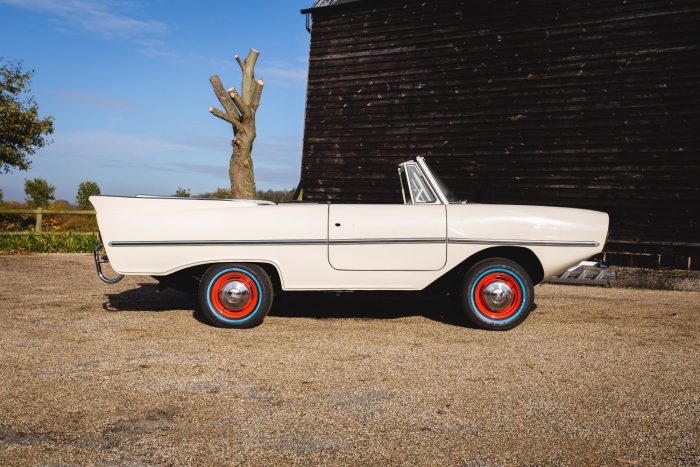
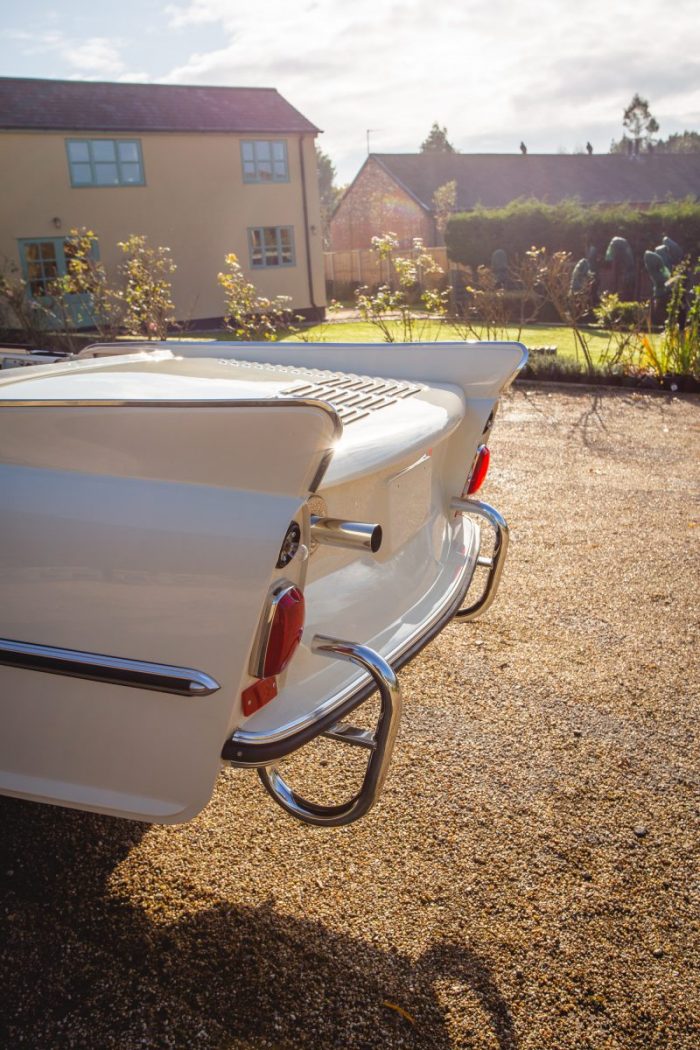
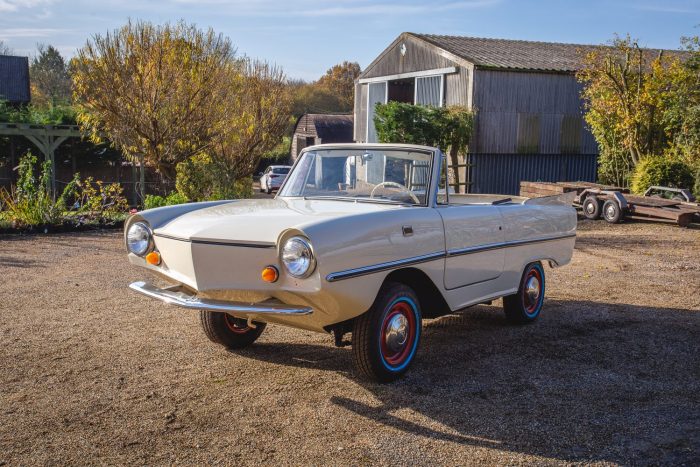
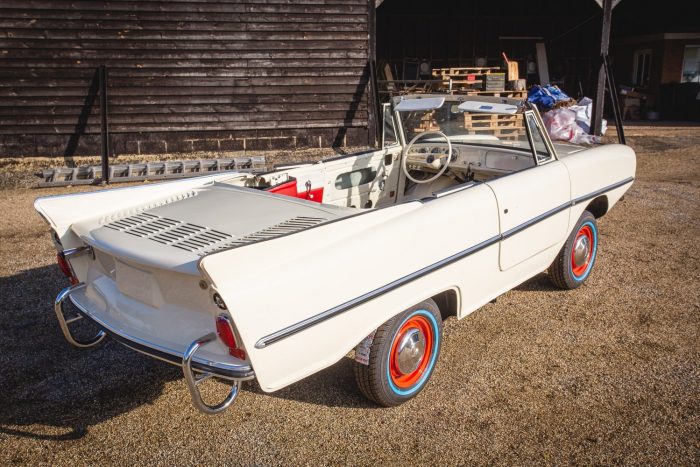
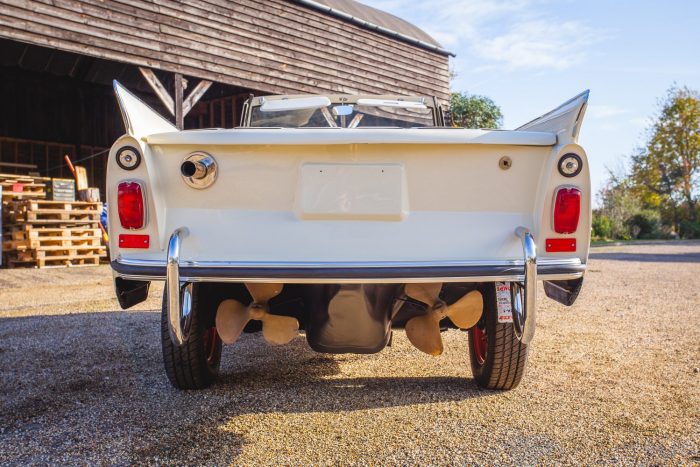
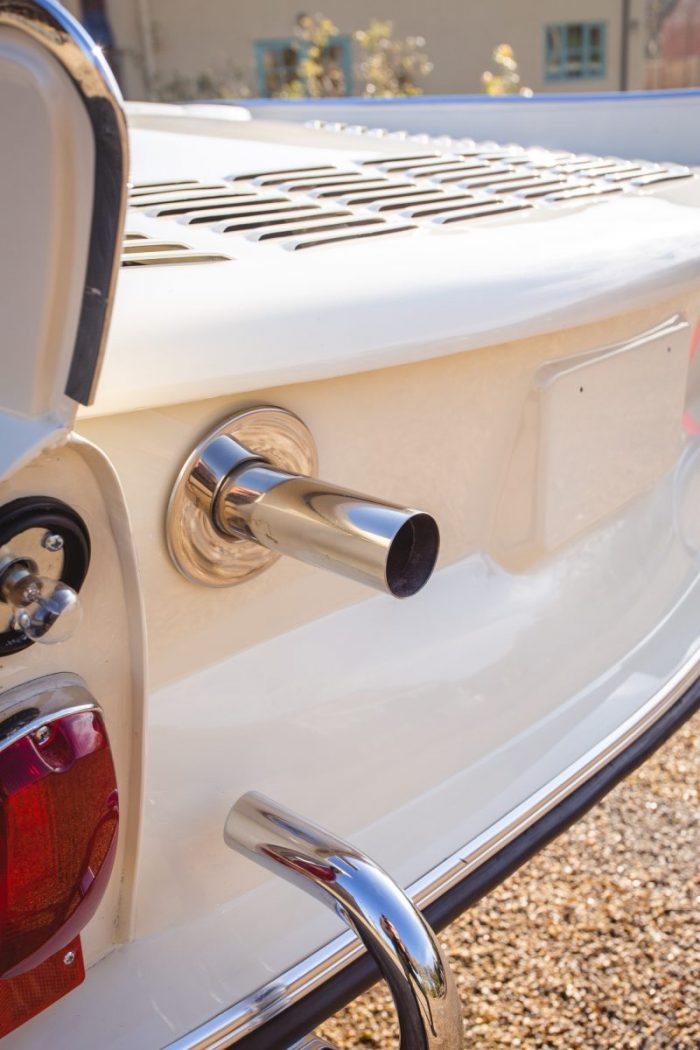
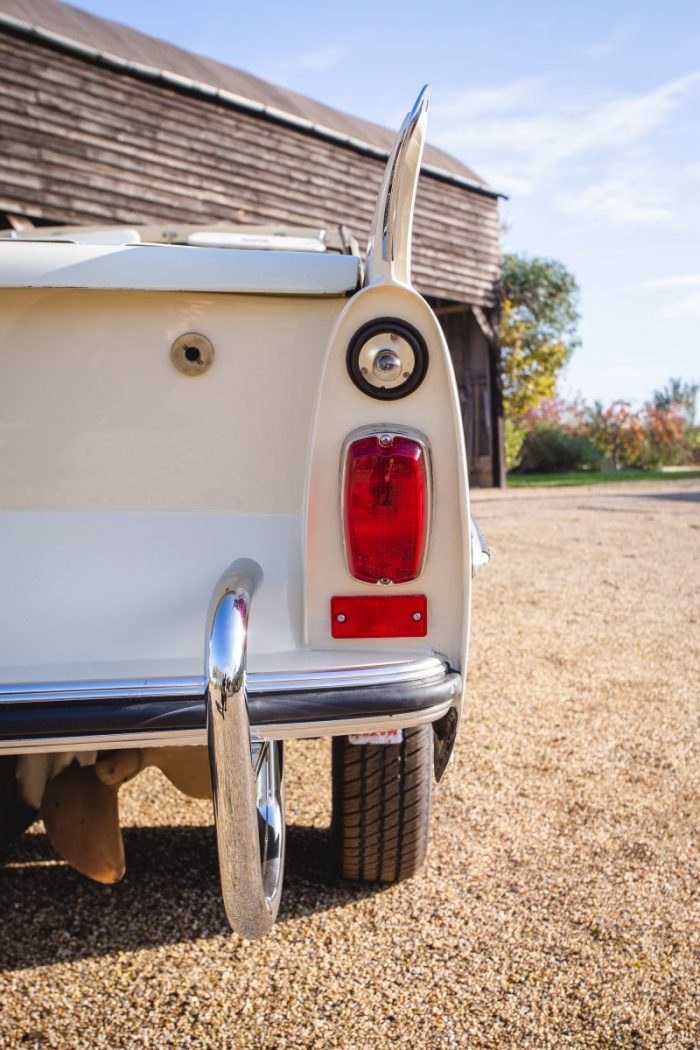
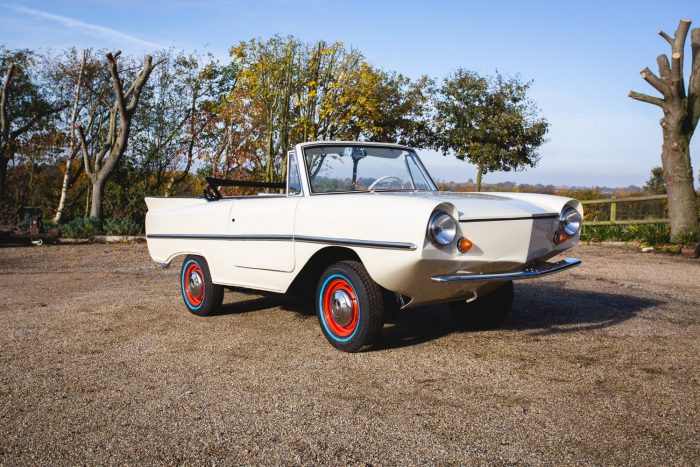
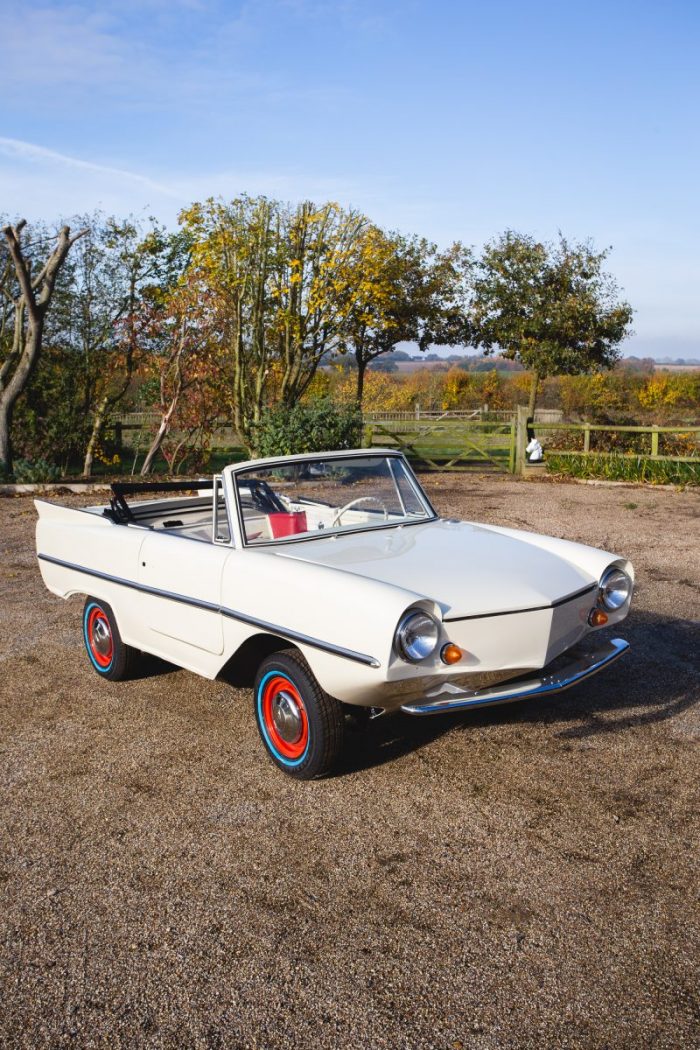
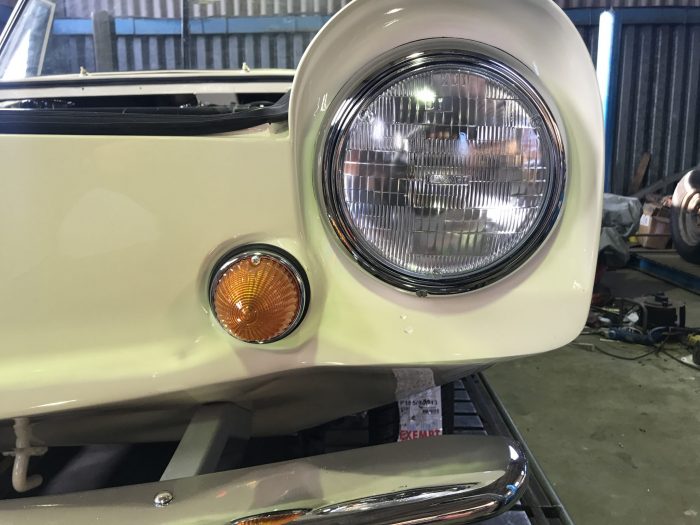
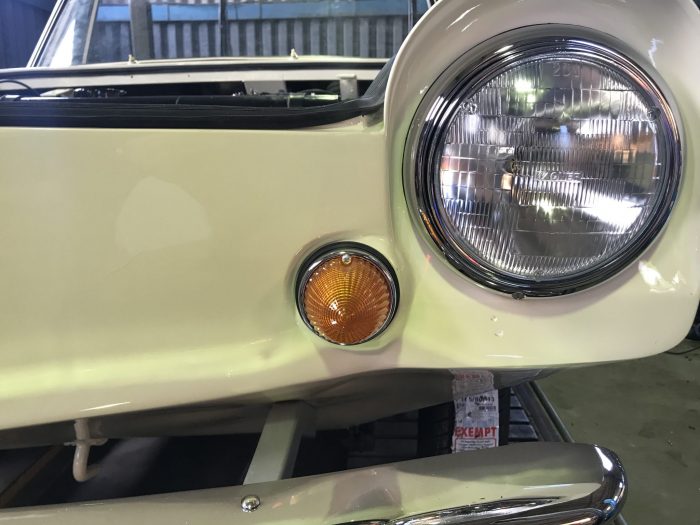
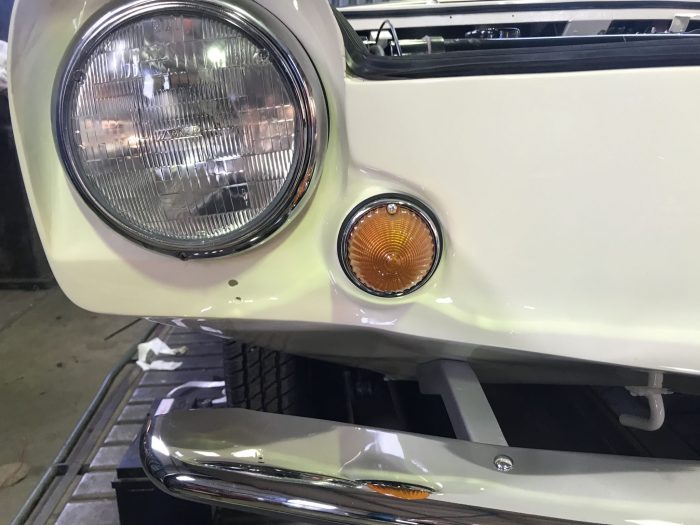
Gary has been making great progress on the Amphicar restoration. He’s fitting either fully refurbished or new parts to get this vehicle into concours condition.
This car is in our showroom for sale as a completed restoration. This appreciating classic vehicle truly is a unique piece of history. Please note, the current images are of the car in it’s current state. It will be finished to our exacting standards of excellence.
To register your interest in this vehicle please call Craig on 01473 742038


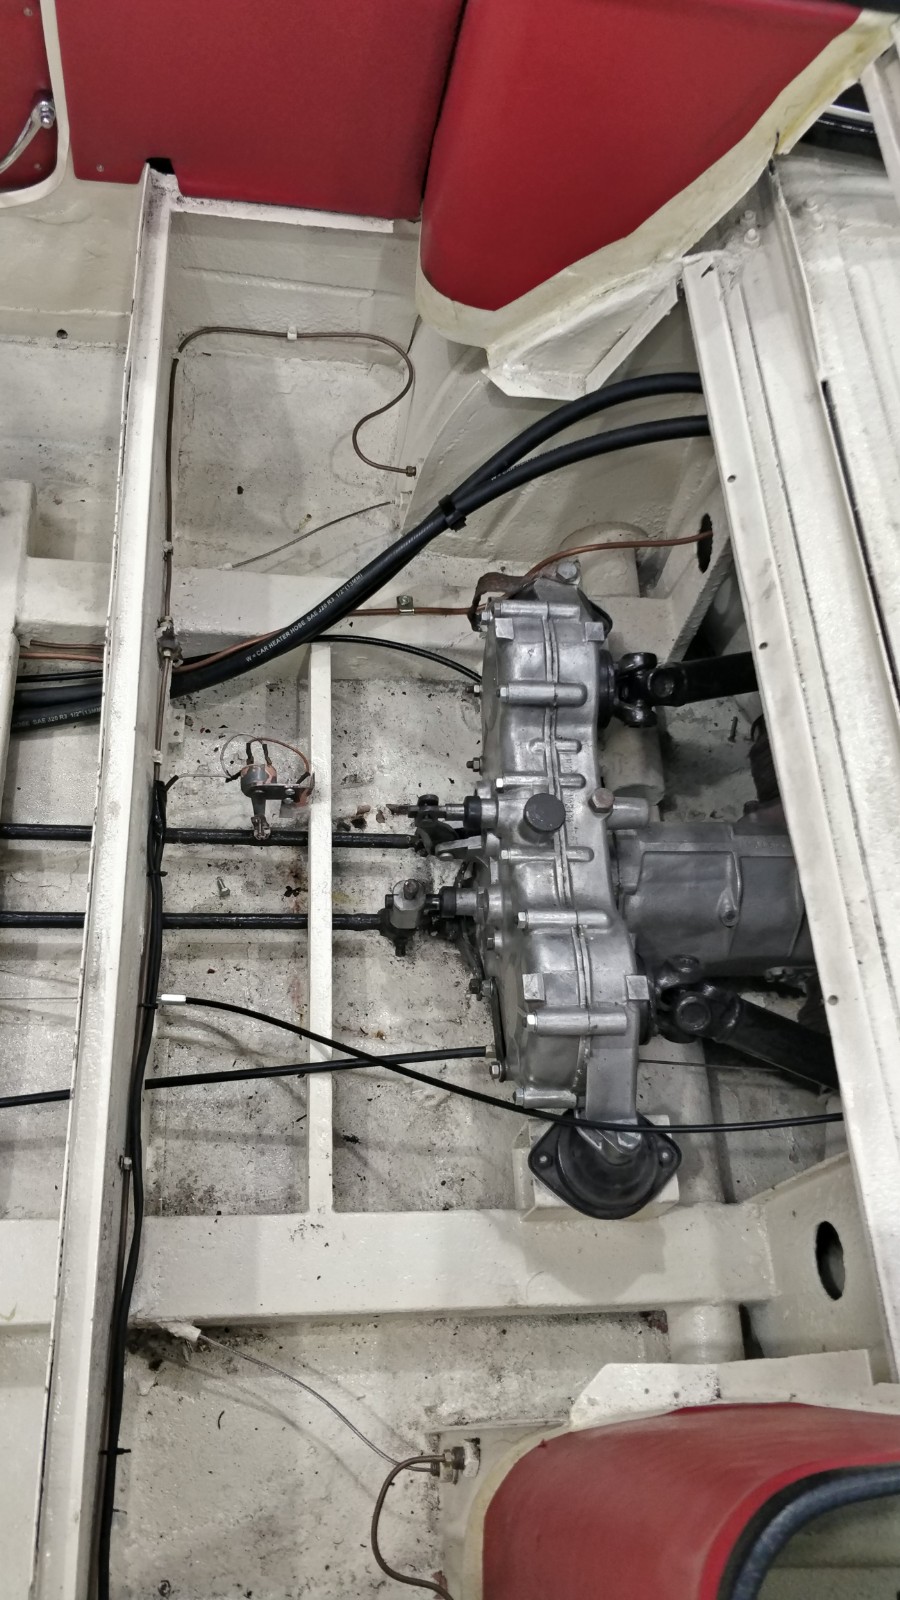
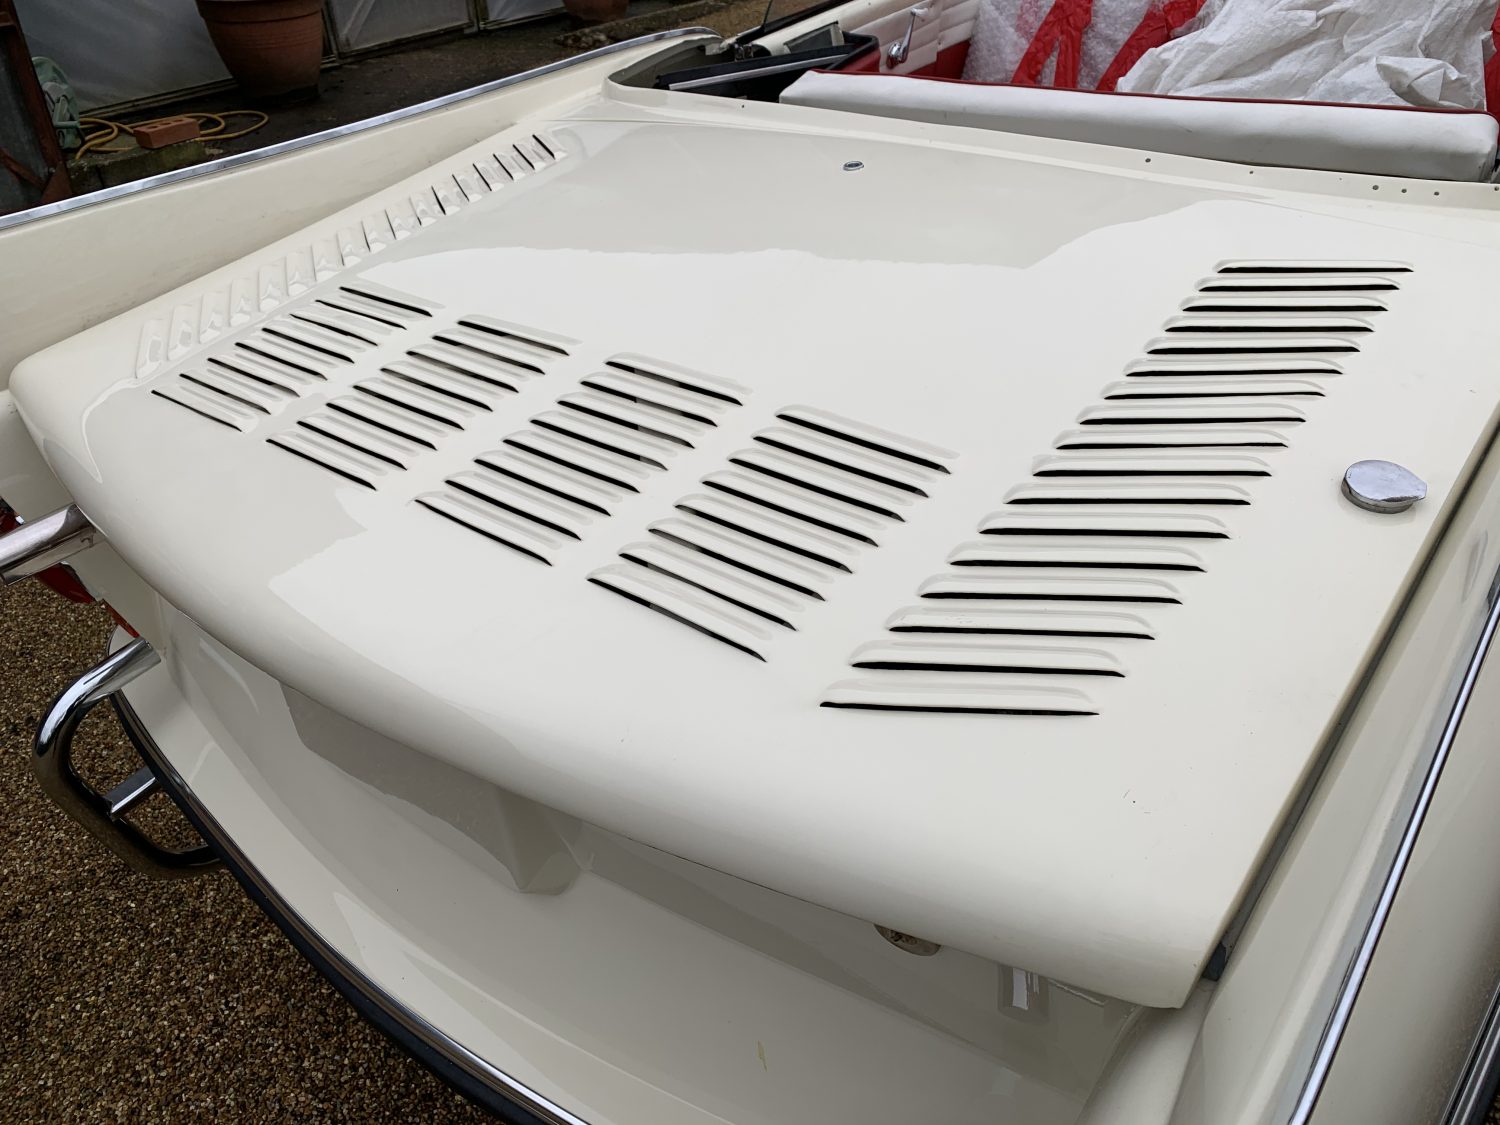
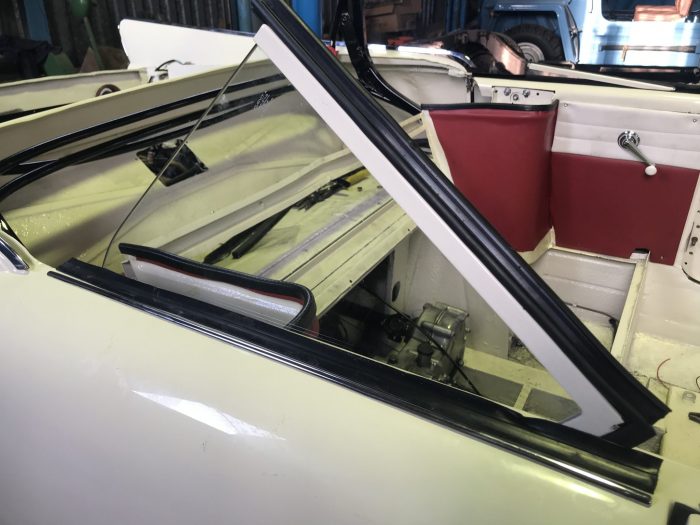
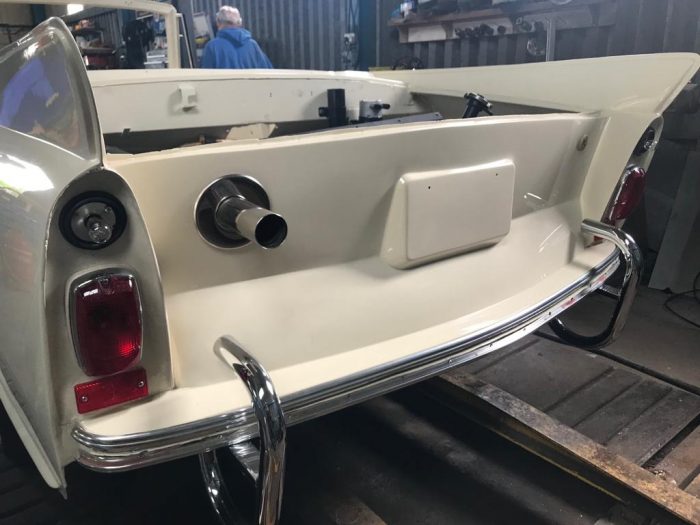
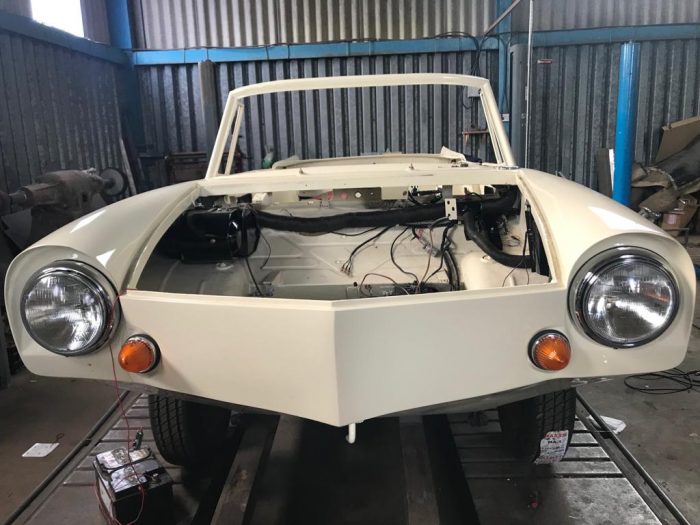
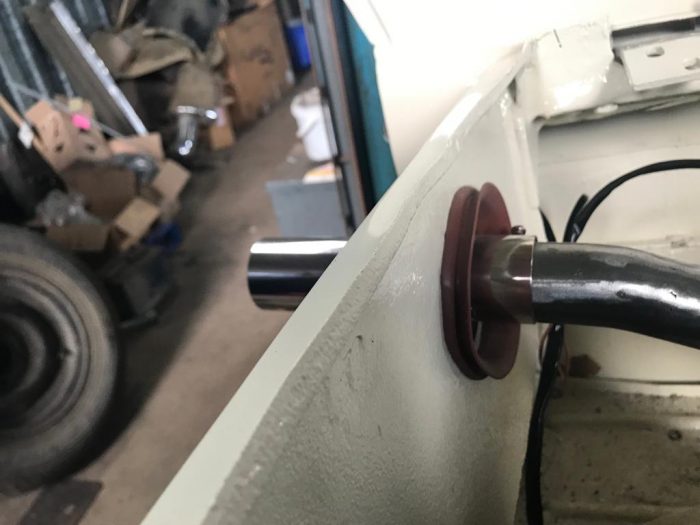
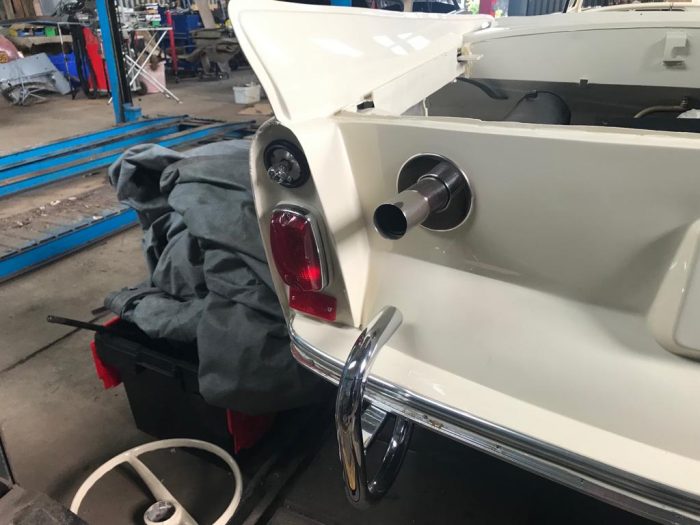
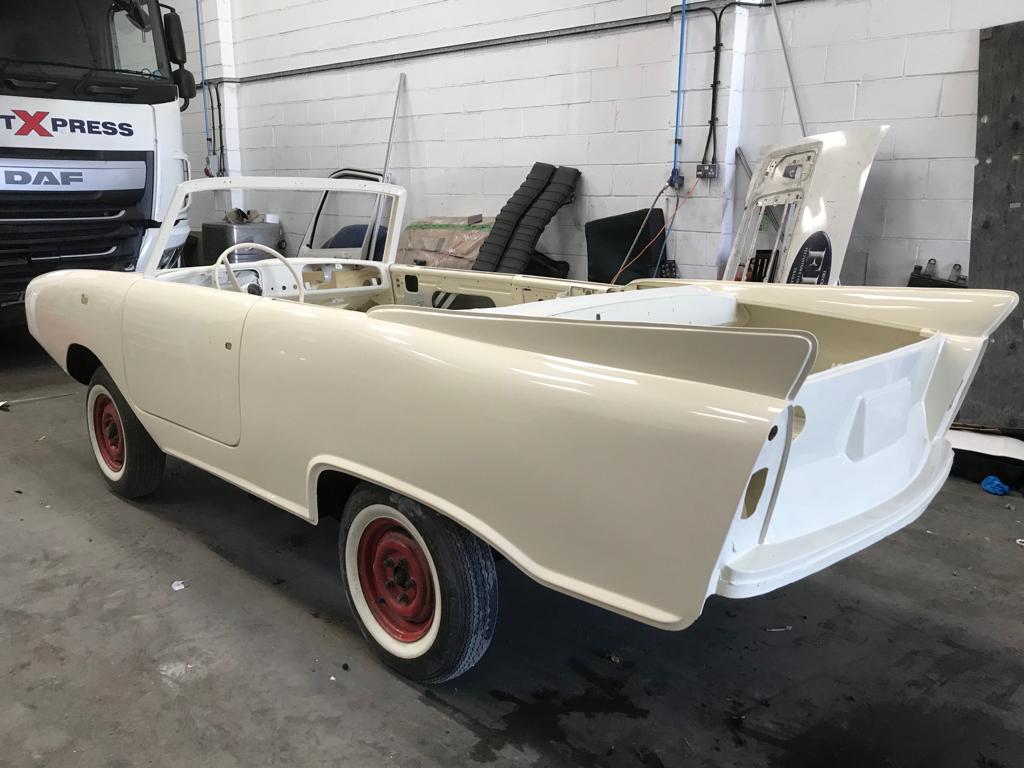
Work has continued on our unique Amphicar project. Our Amphibious vehicle is now well and truly on her way to becoming fully ship-shape.
We’re refitting all of the following parts back on to this vehicle:
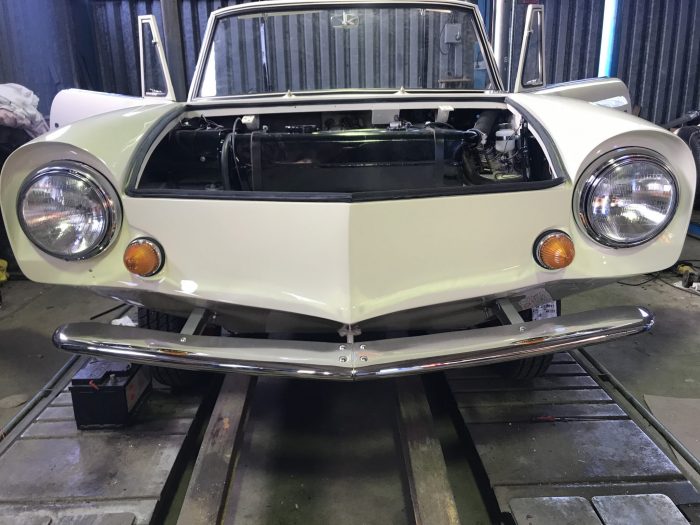


After other work commitments and a busy work diary taking priority over our 1965 Amphicar it was time to give the project a new lease of life. We are now on with the rebuild process, the start once again, of our full restoration of this iconic car. We have drafted in a good friend of ours, with years of experience in the restoration game for assistance. Garry now has the body shell. All of the replacements parts have been waiting on the shelf, the parts not replaced have all be refurbished and stored away so now with everything down off the shelves and a good man working full time on her, the car will start to take shape very rapidly.

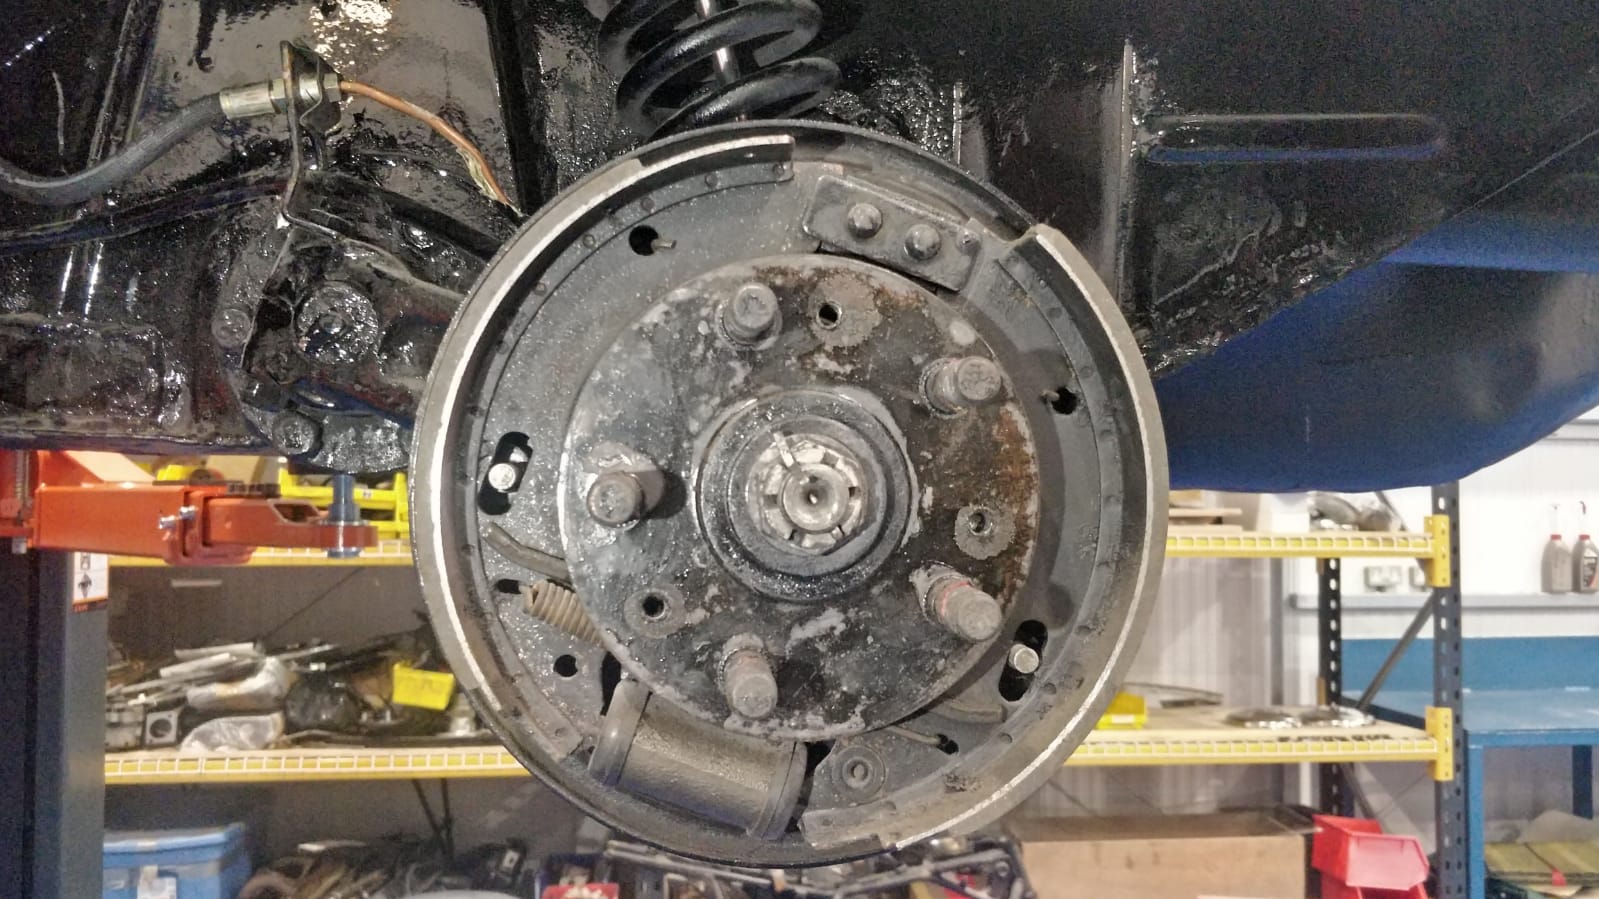
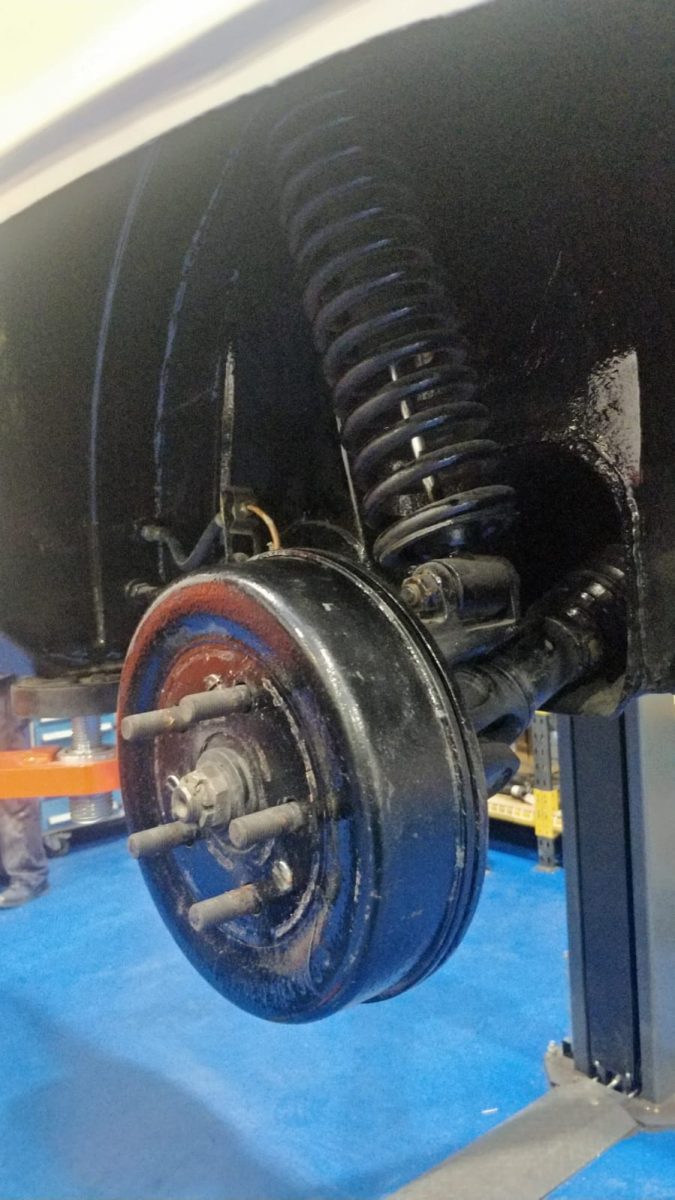
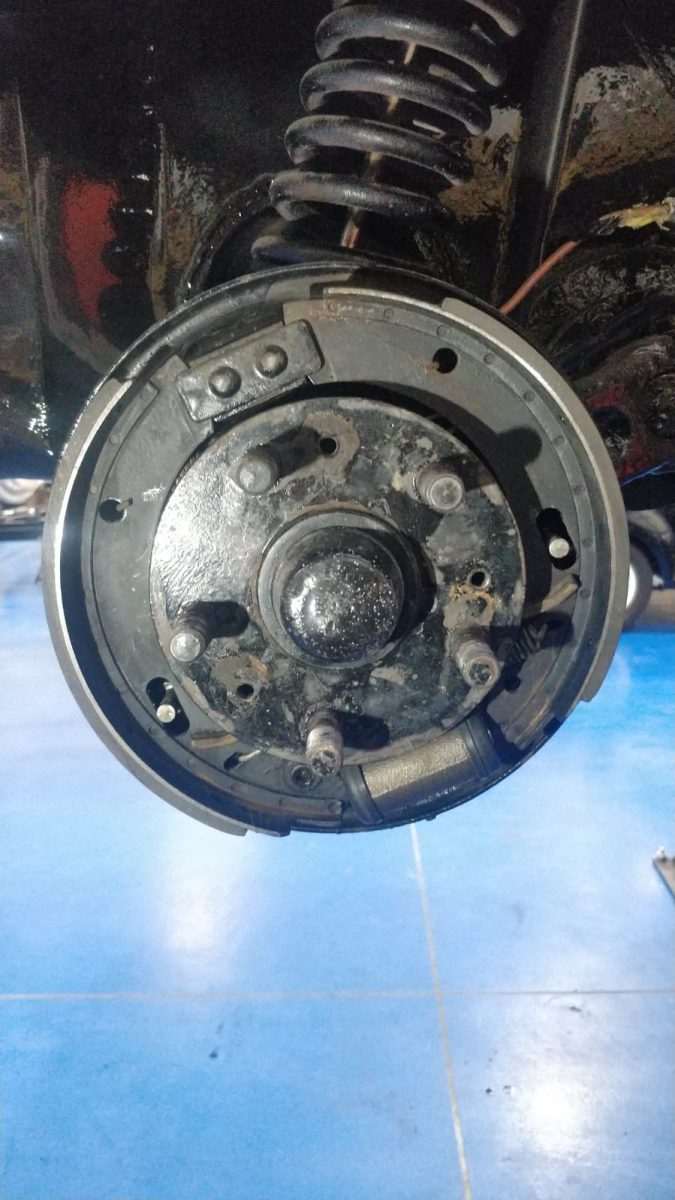
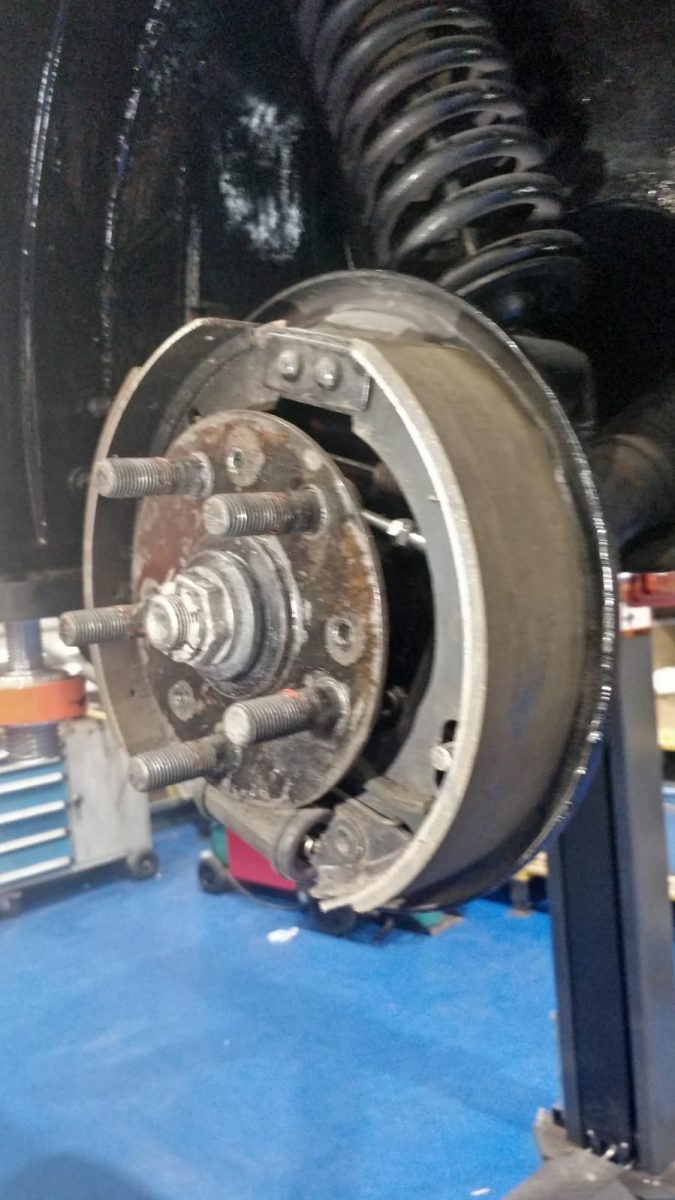
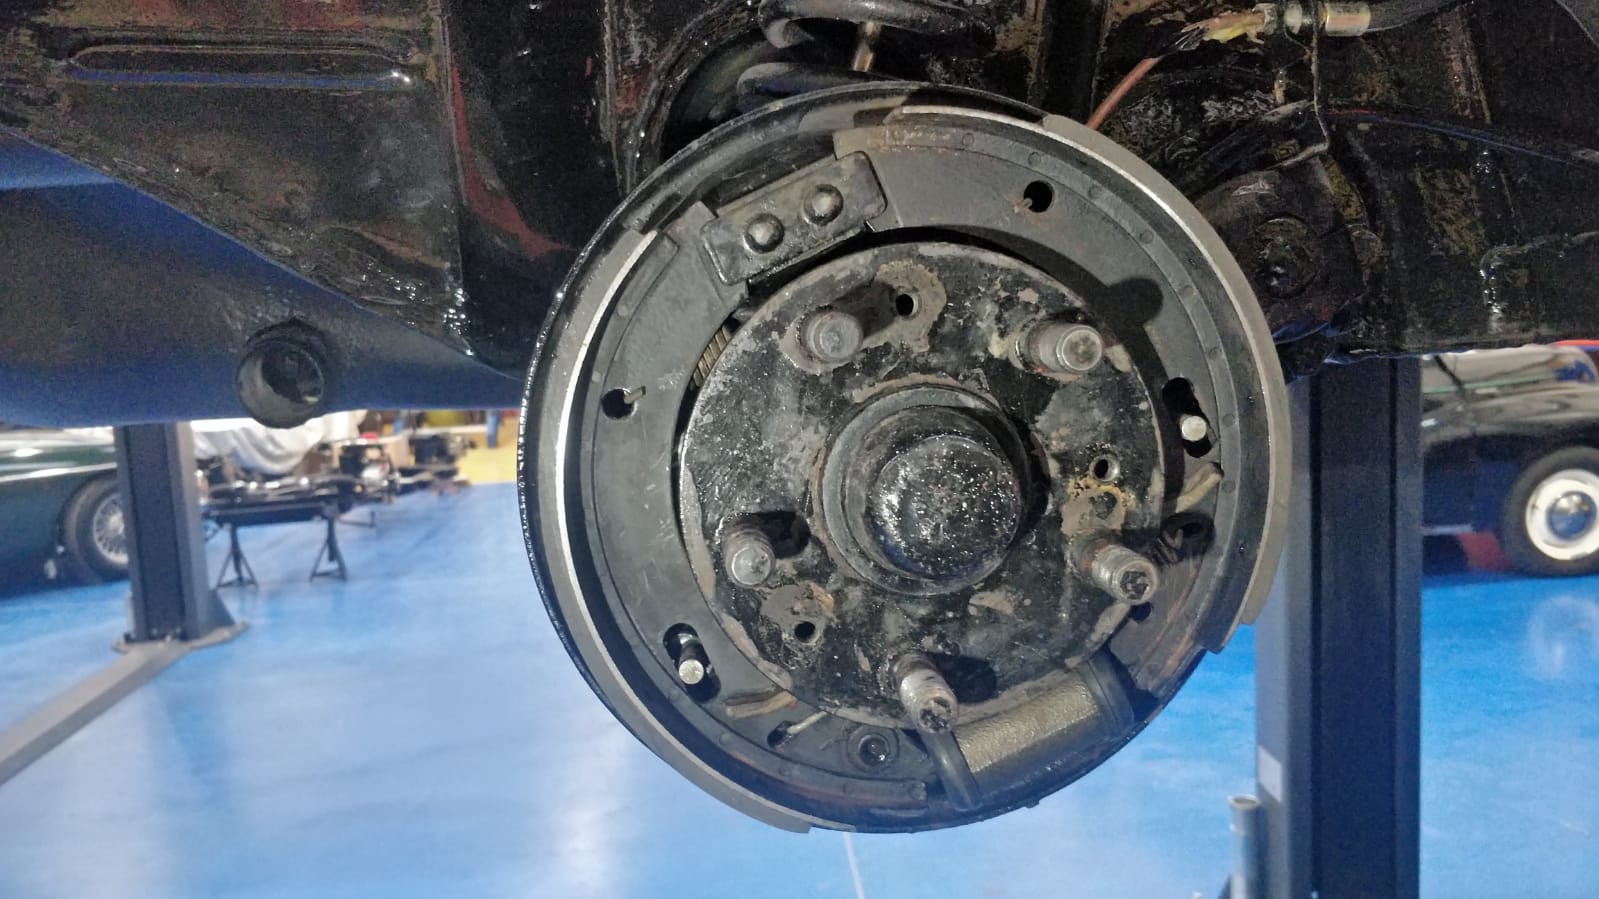
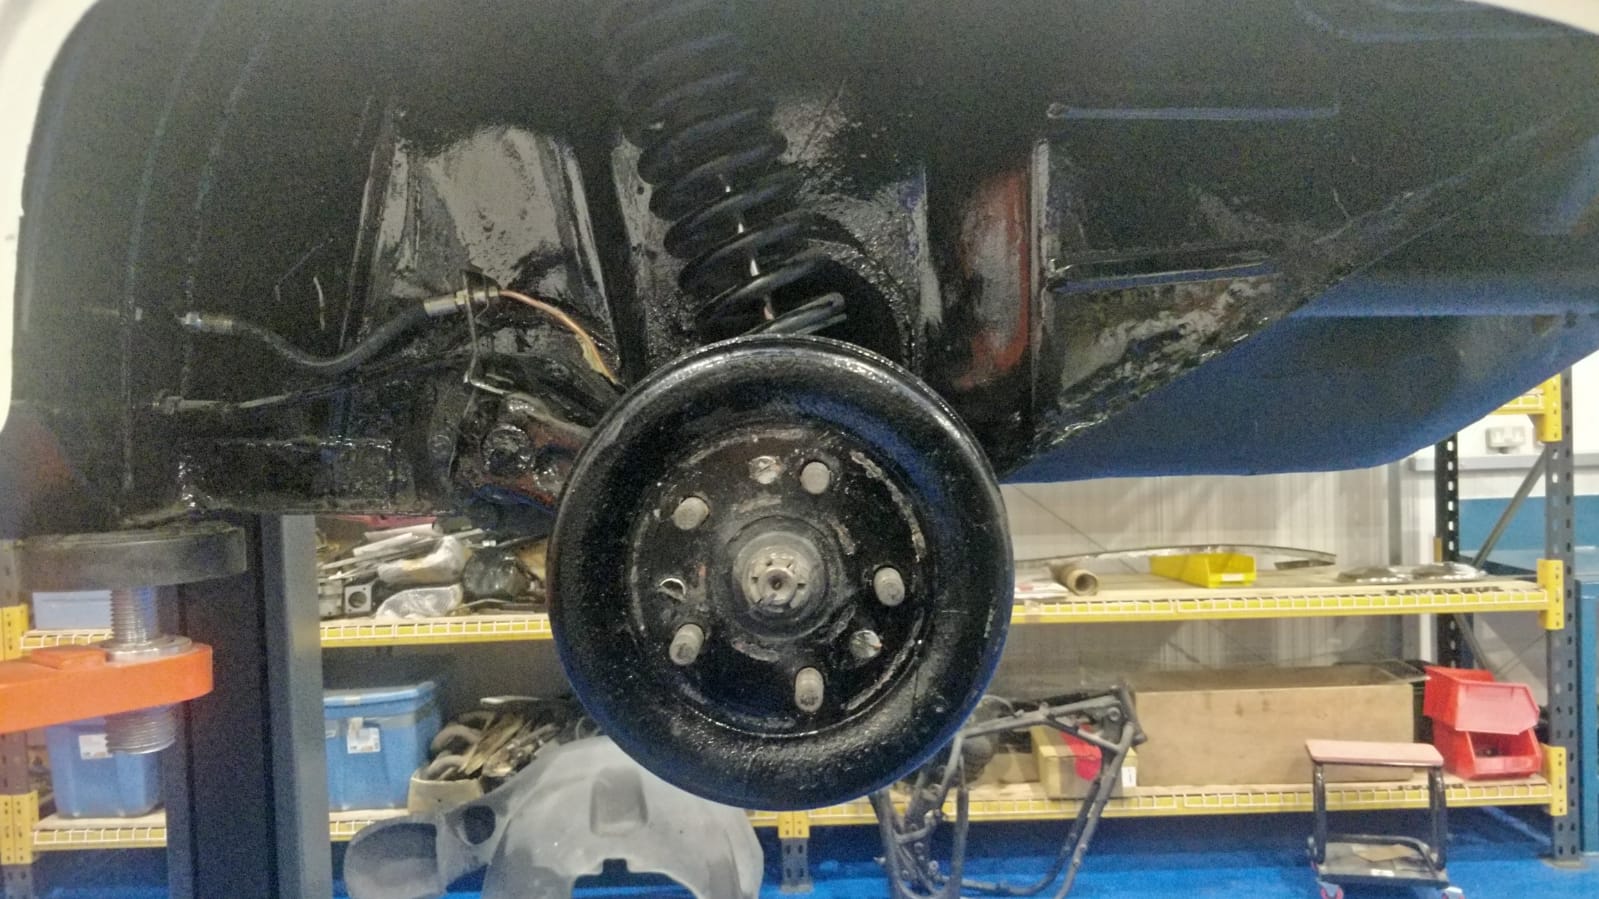
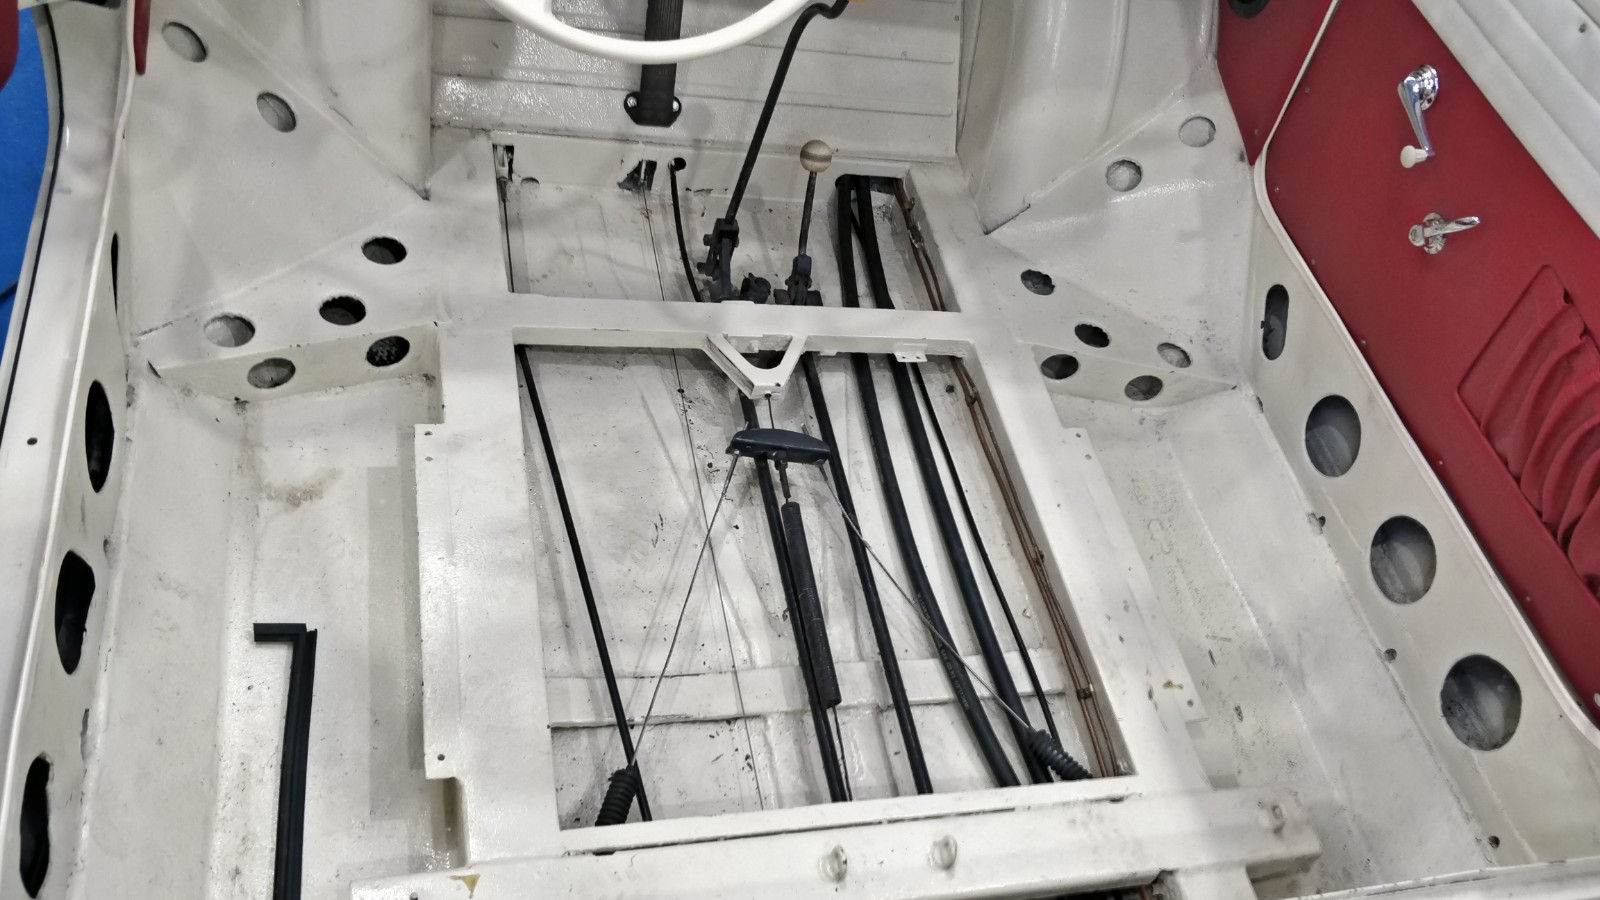
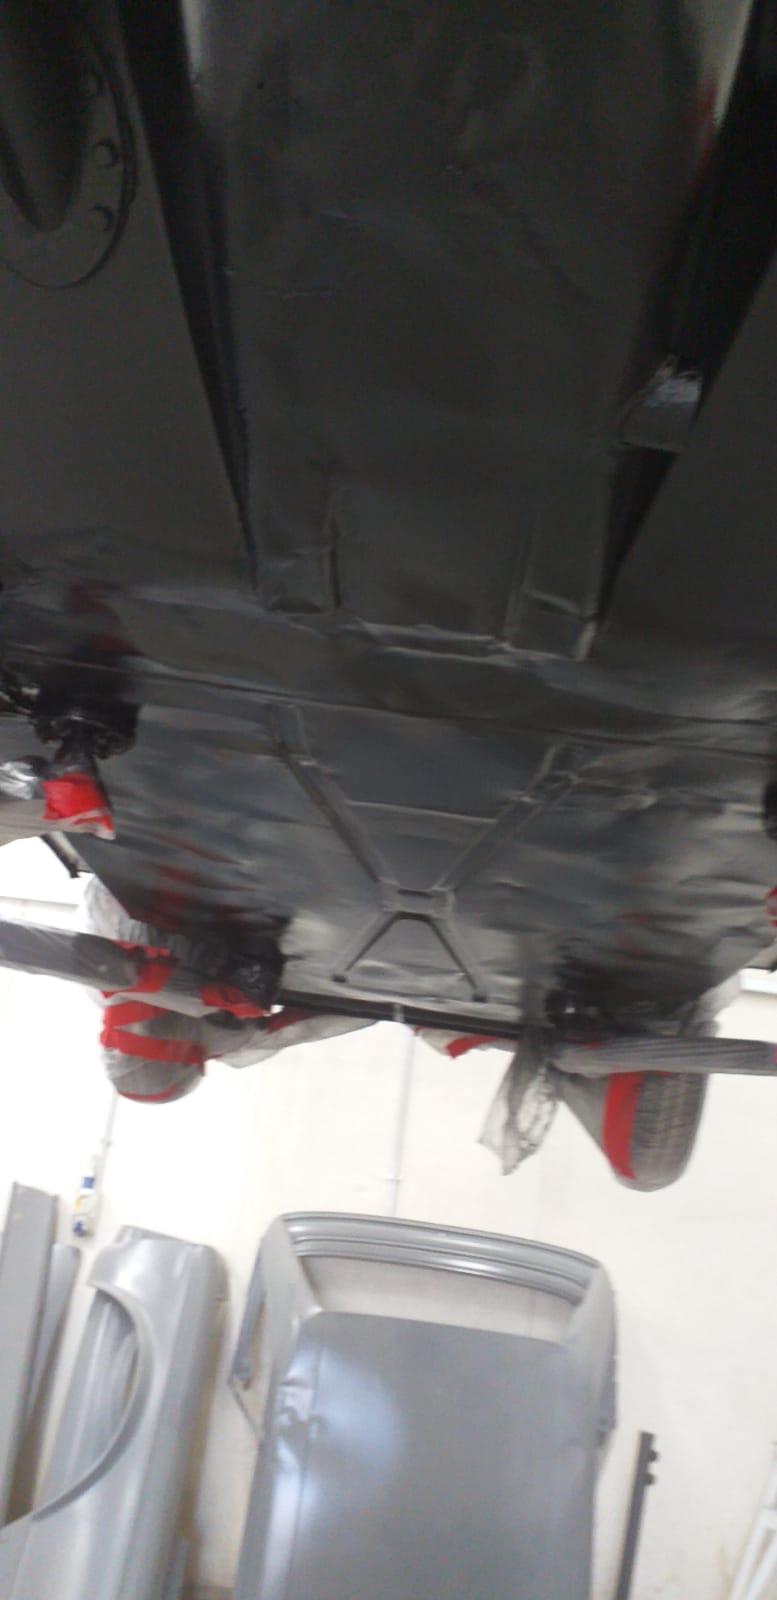
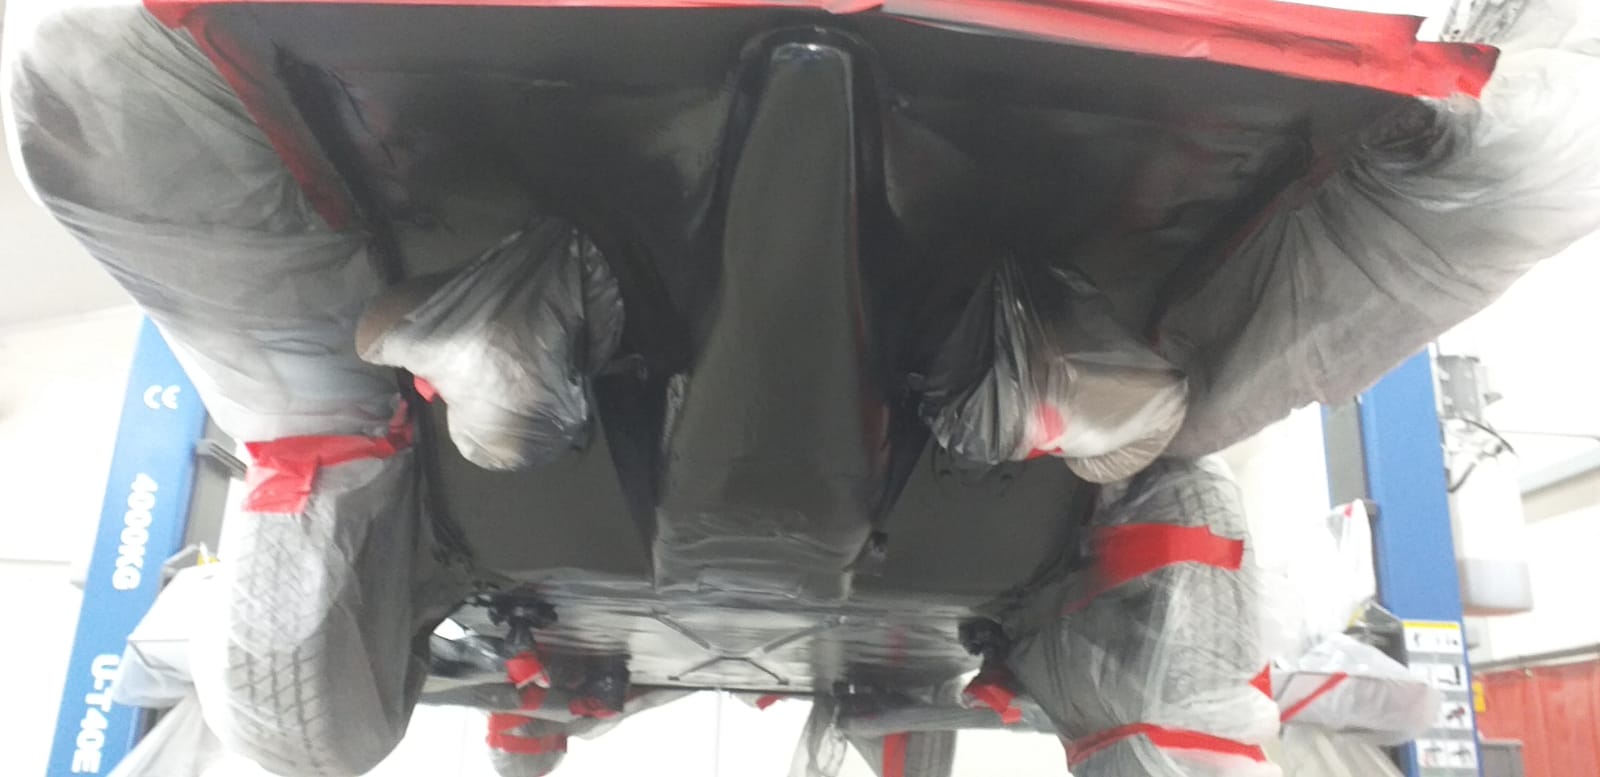
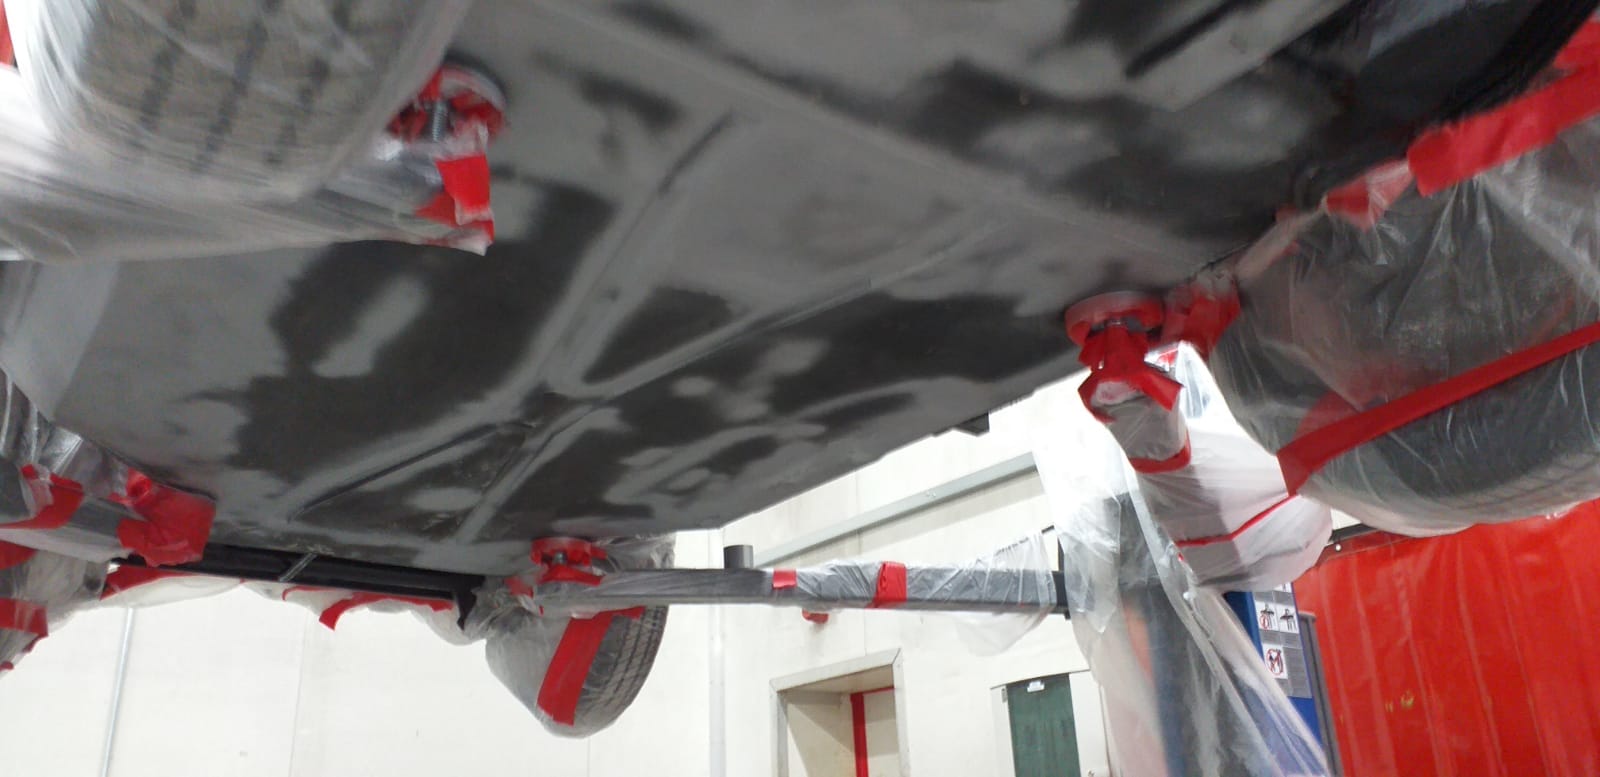
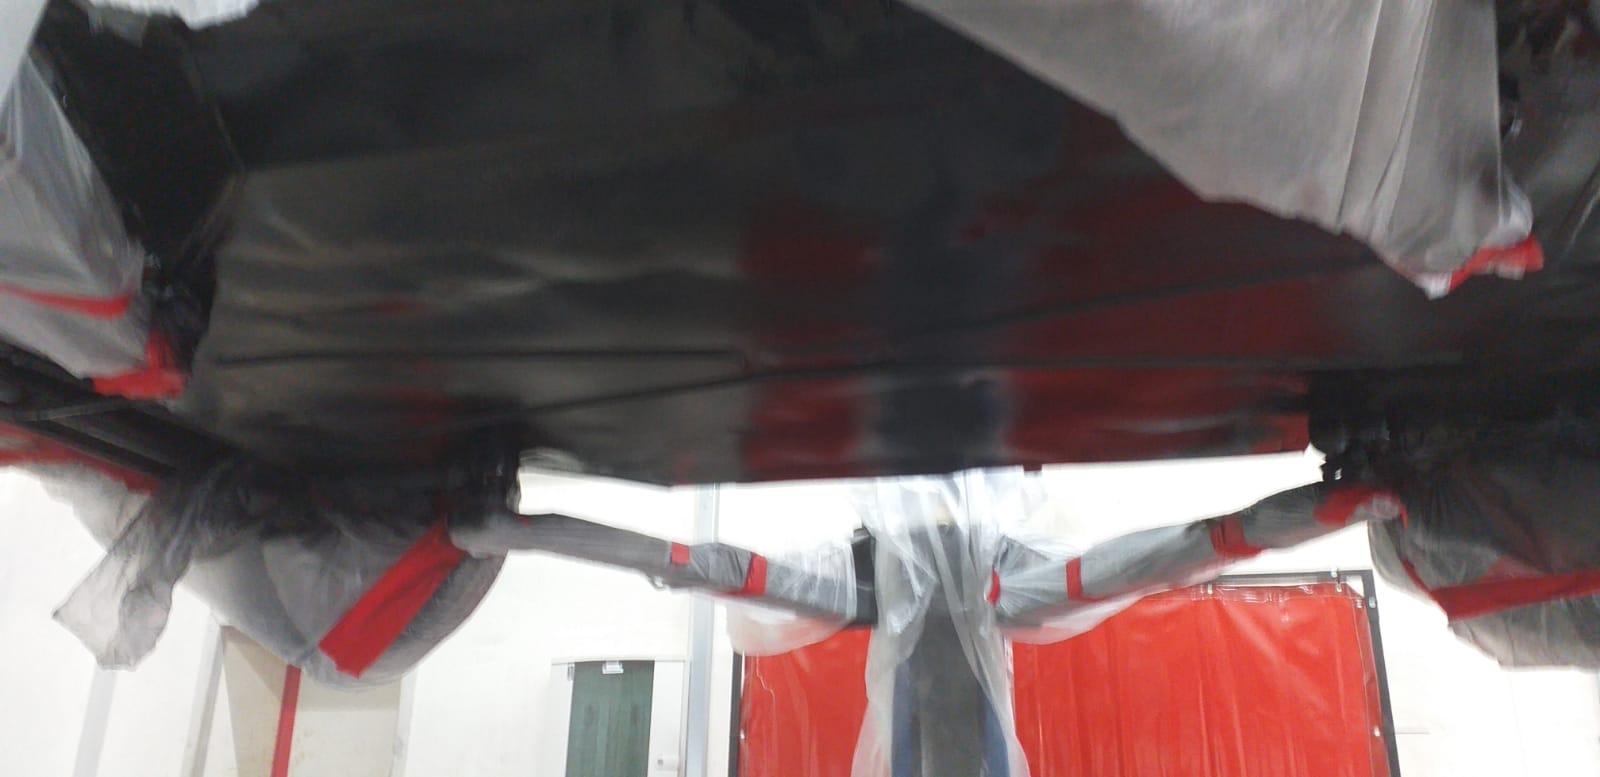
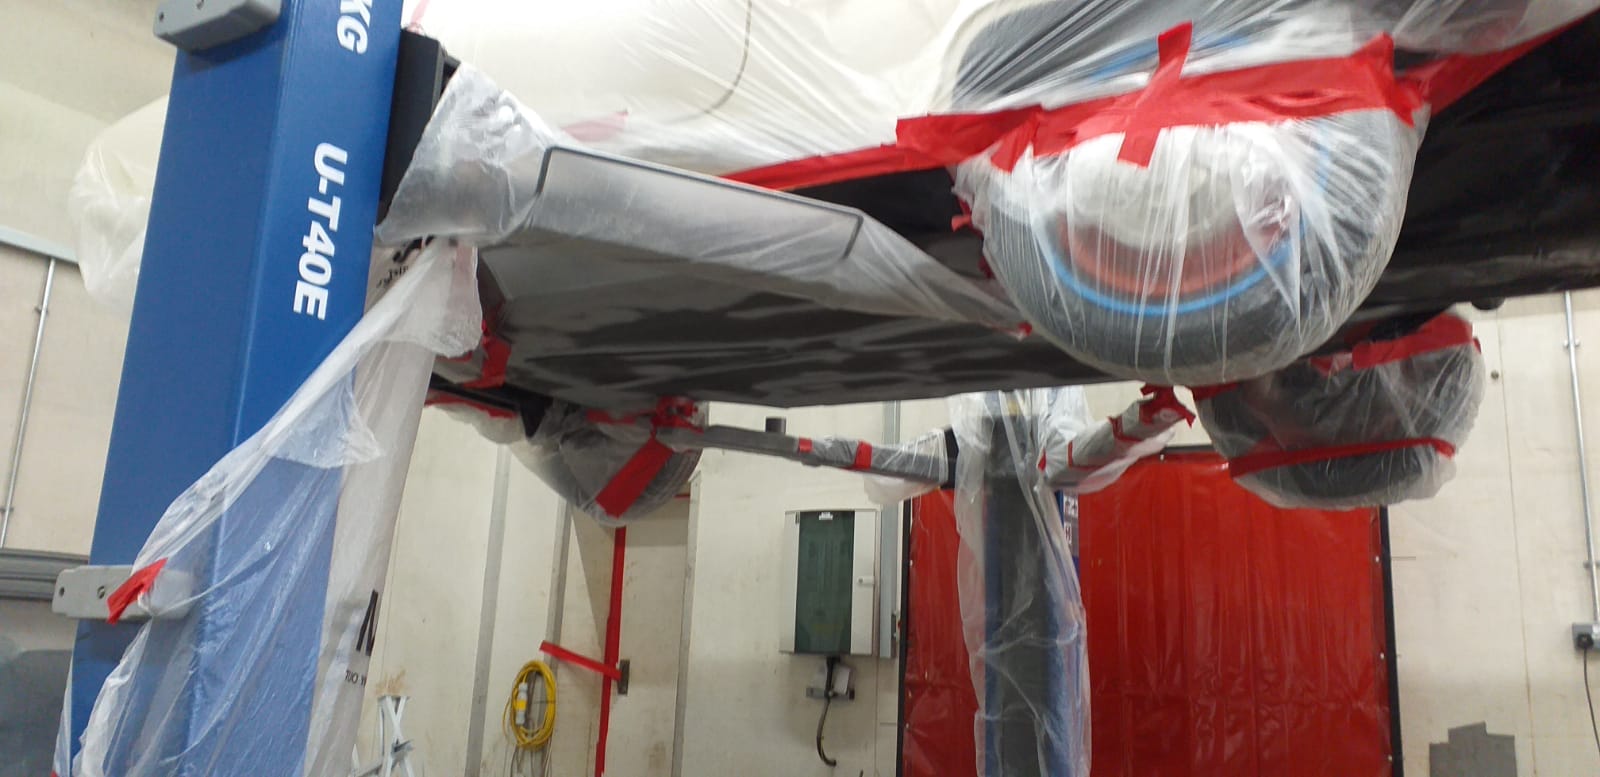
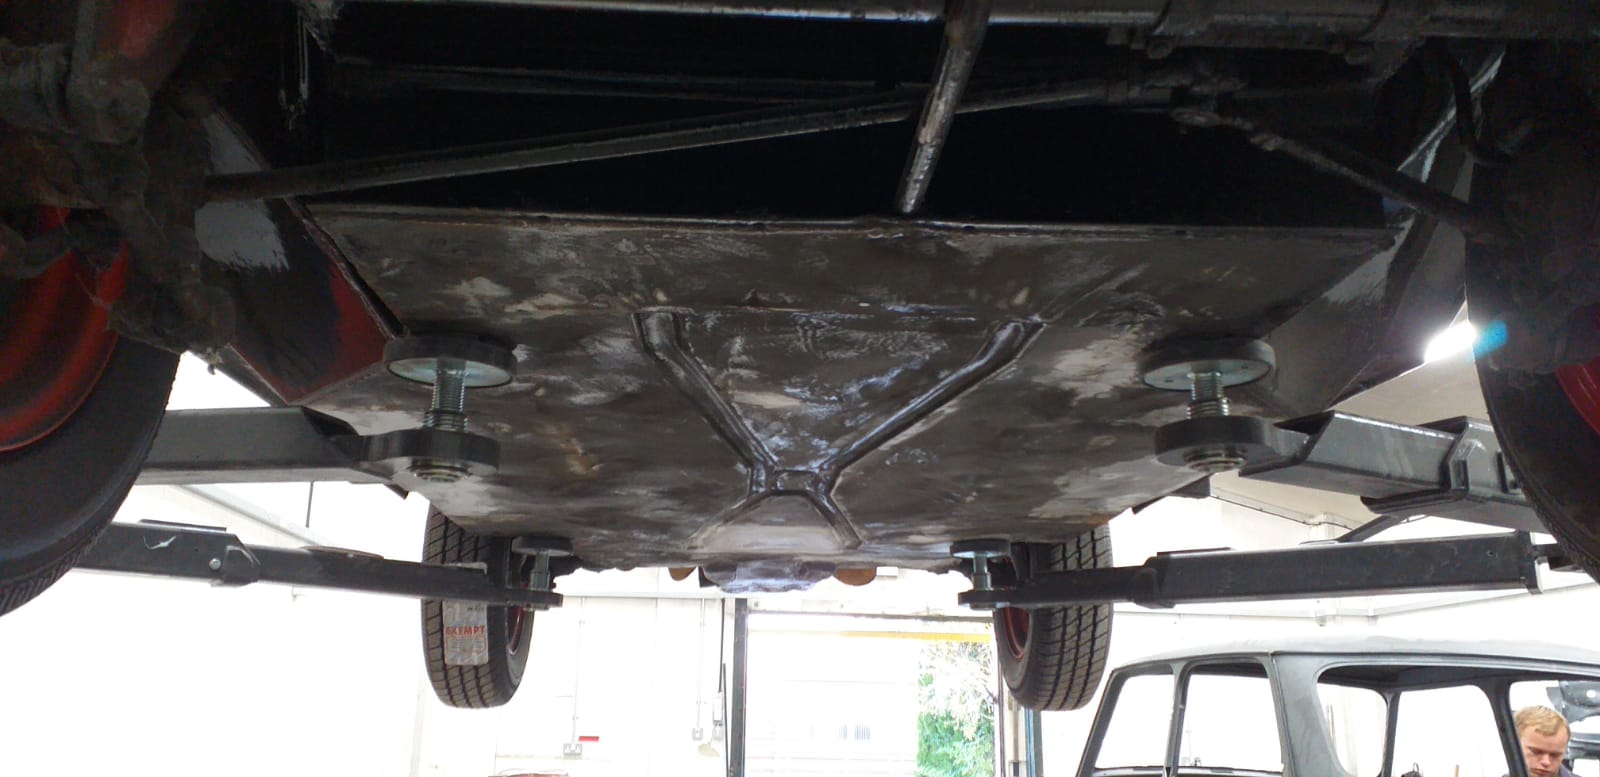
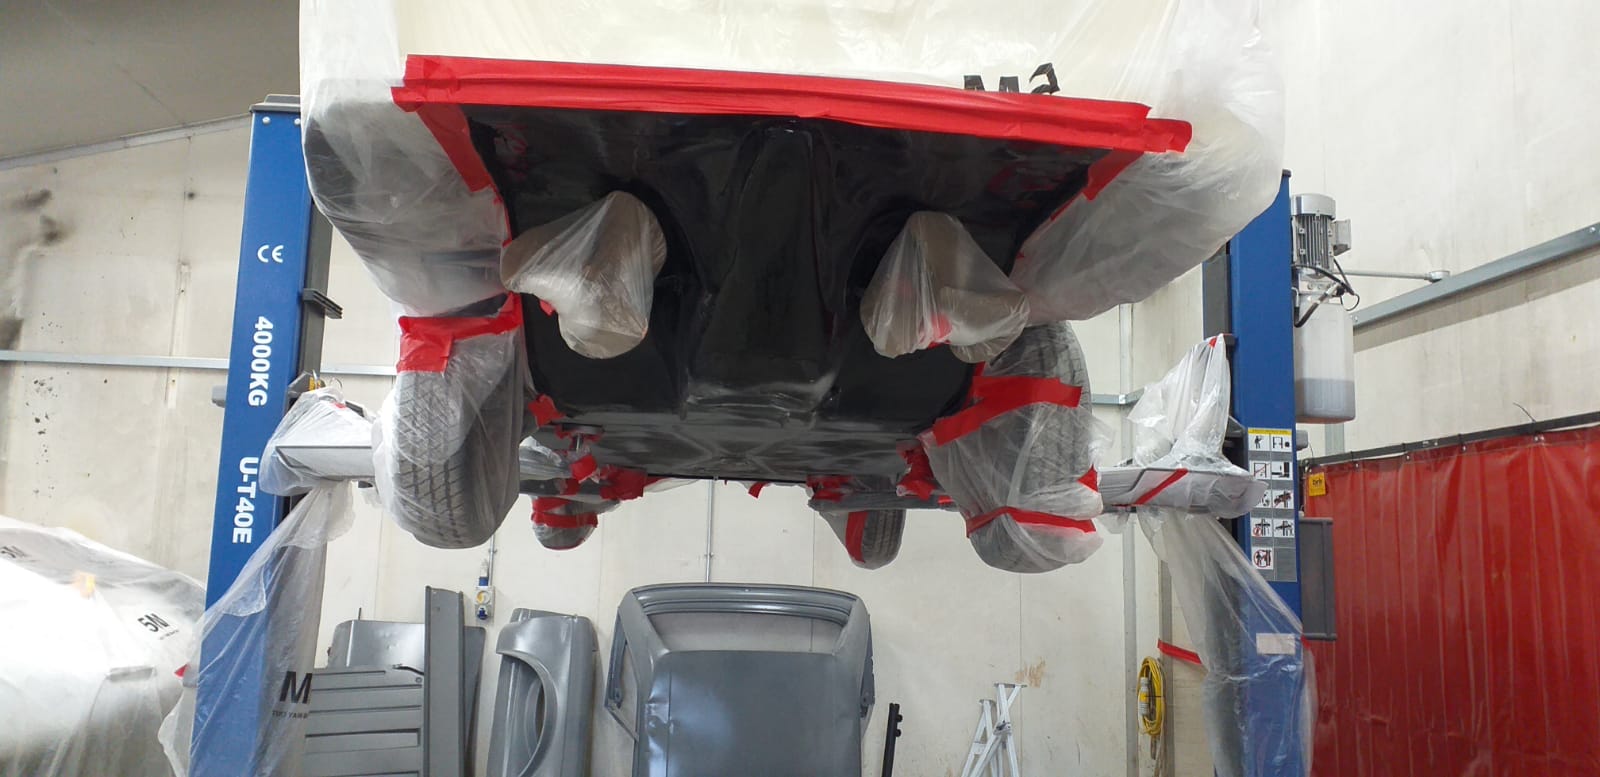
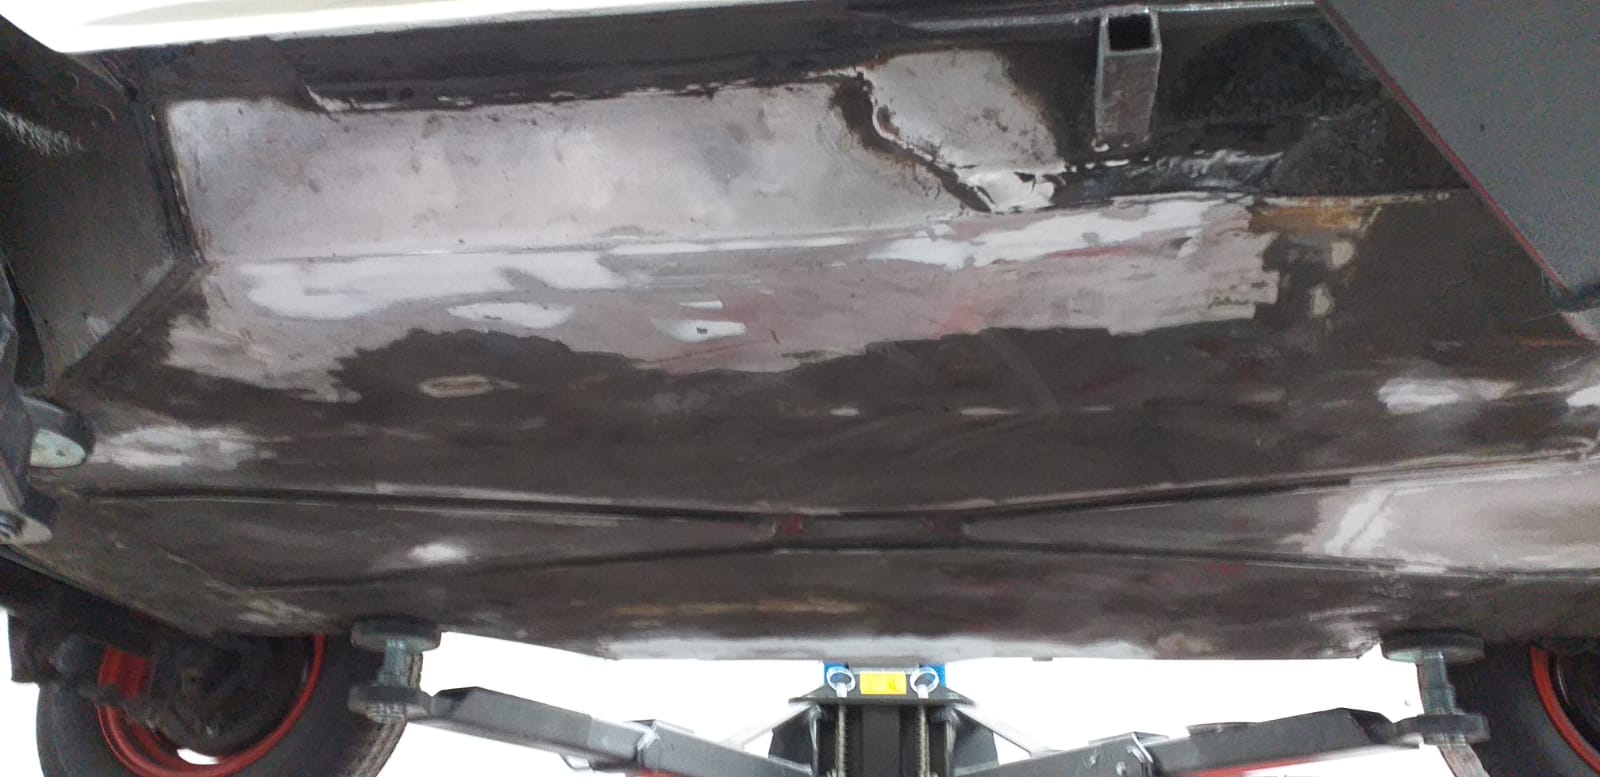
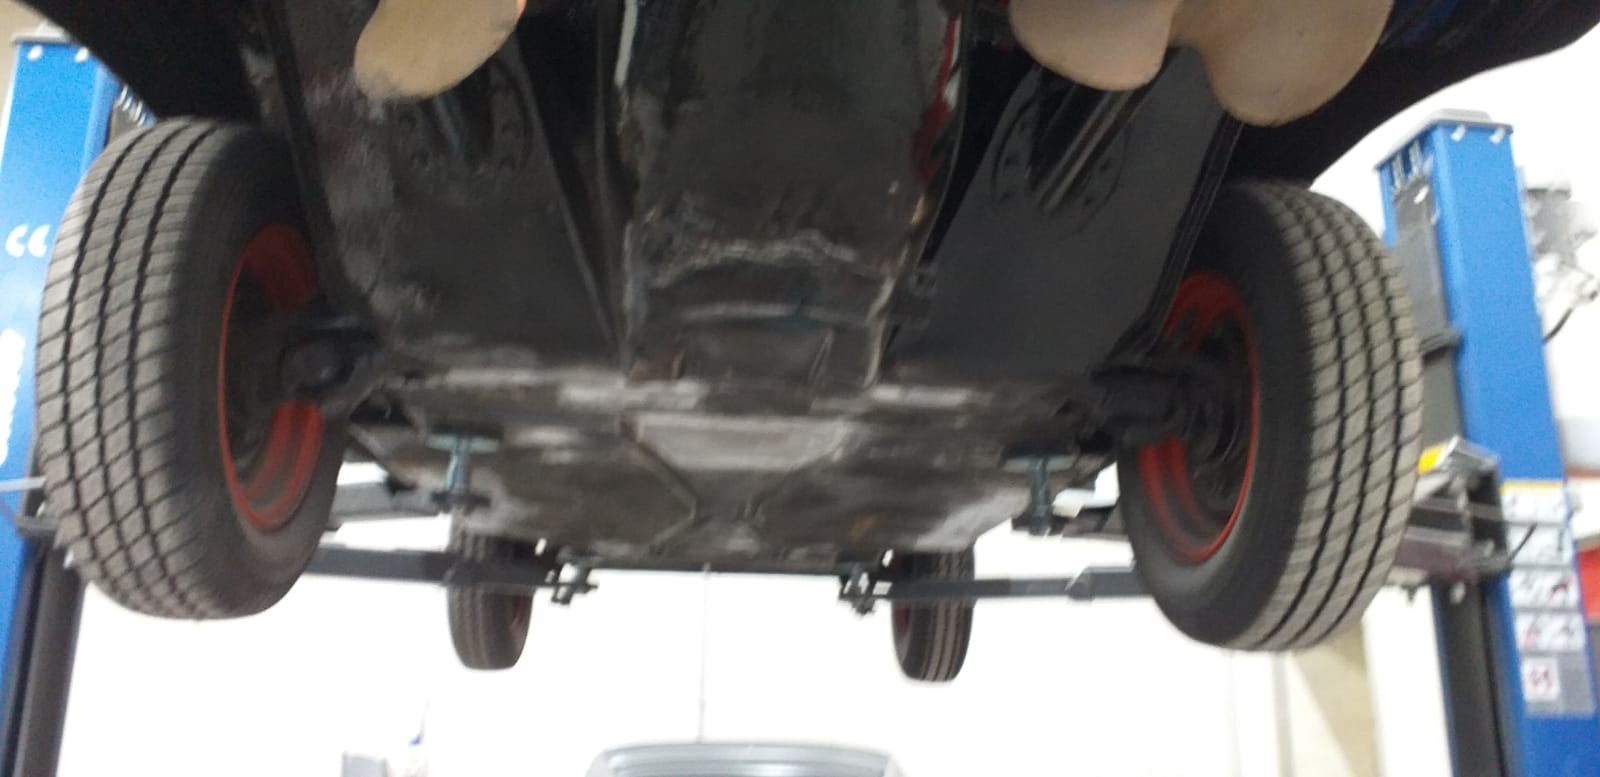
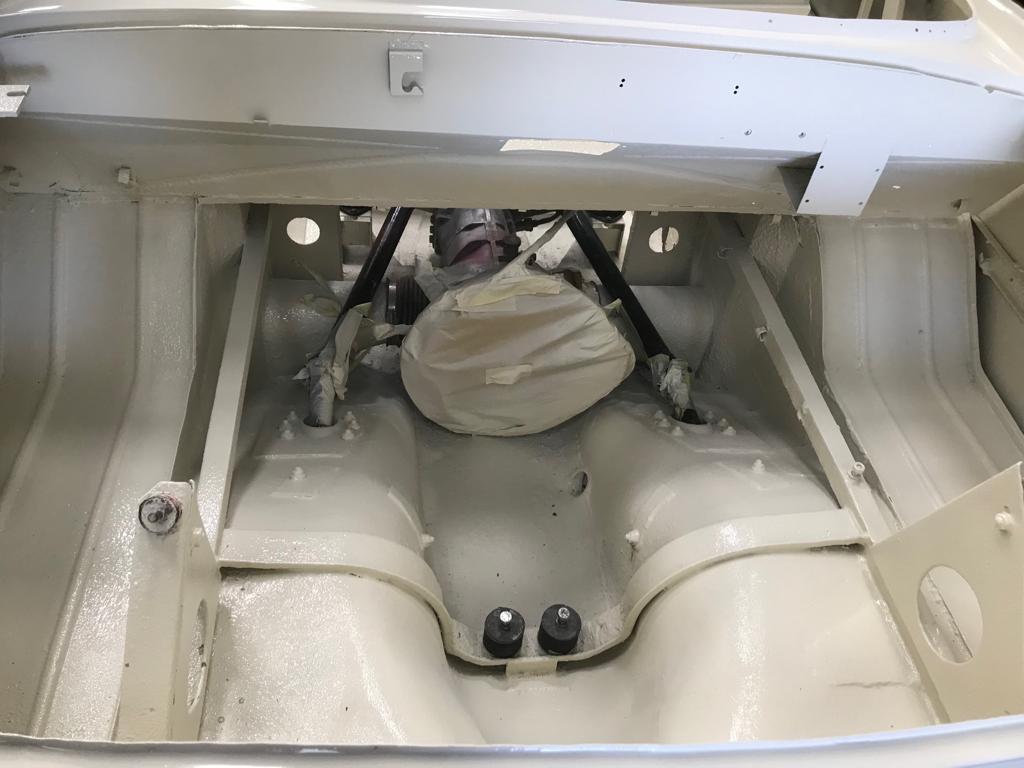
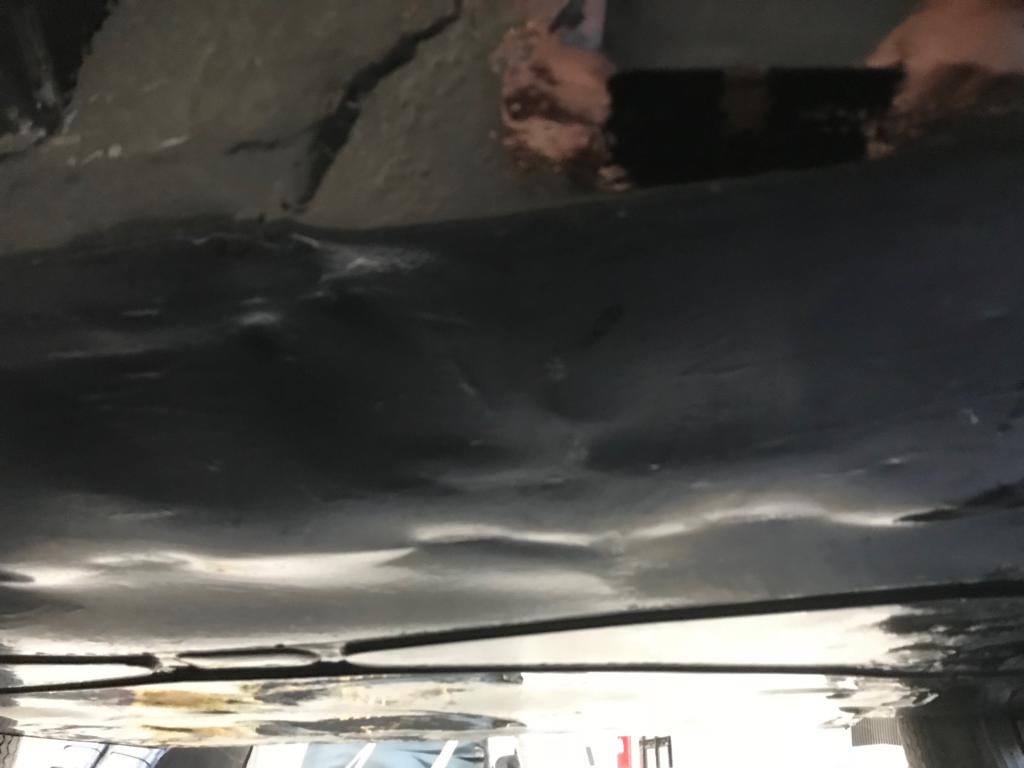
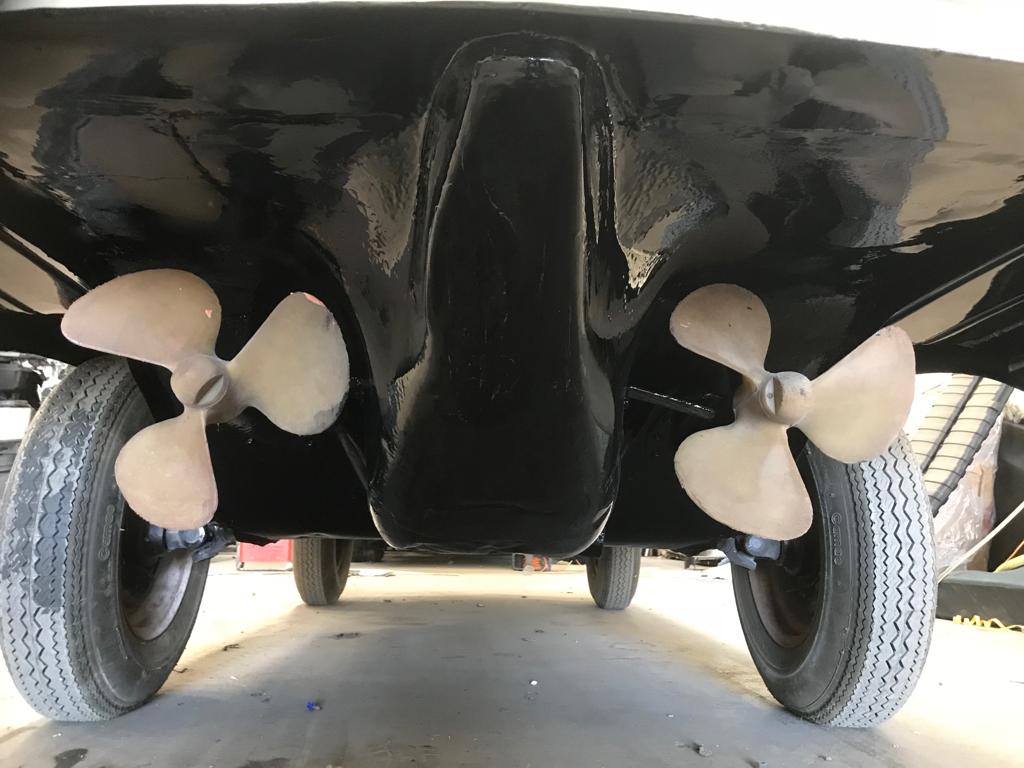
We have made the decision to revisit the underside of our Amphicar. the reason being is that we collectively felt that it could be better. We stripped back what had already been done, repaired and repainted.
We are all now much happier with the results.


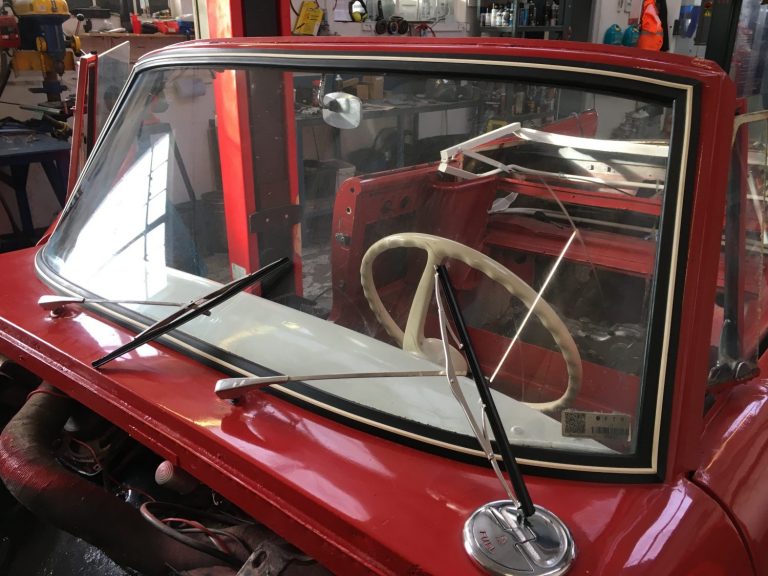
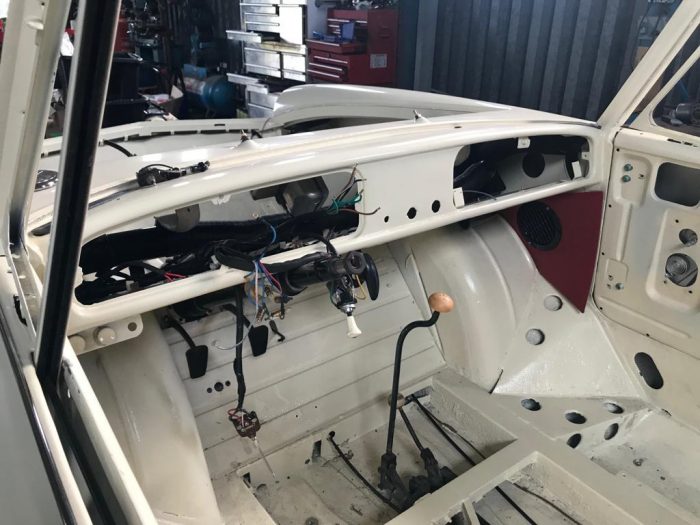
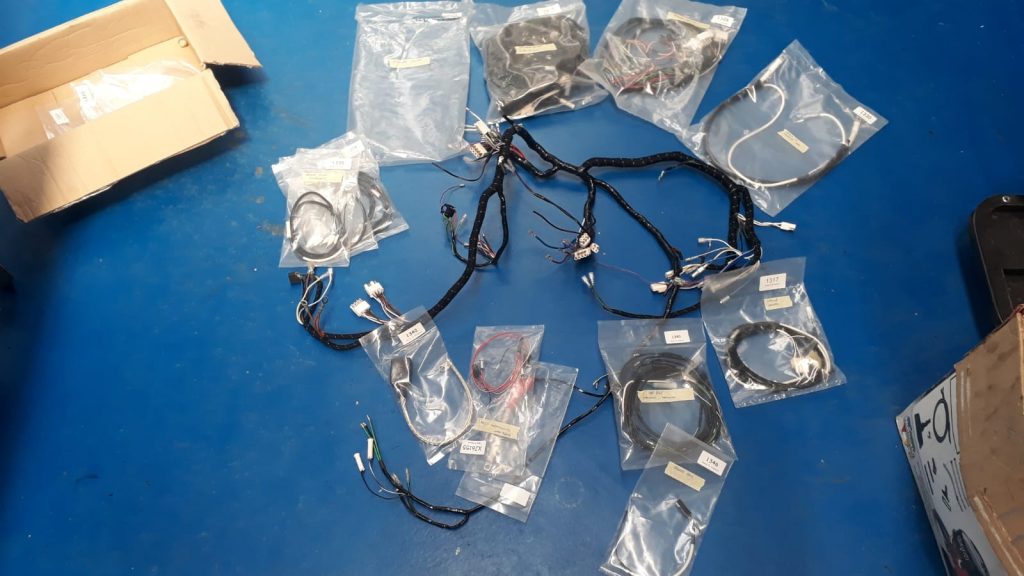
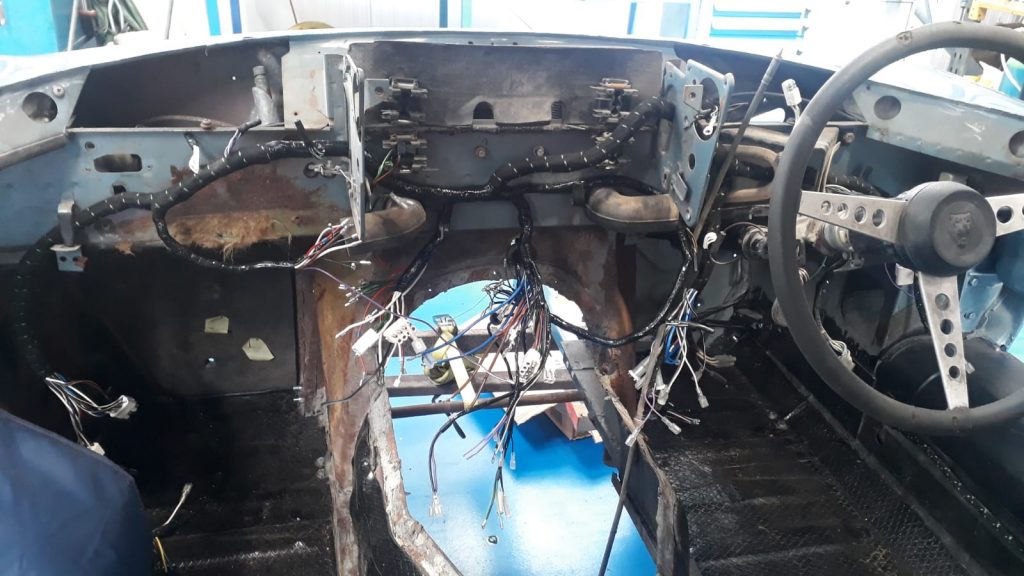
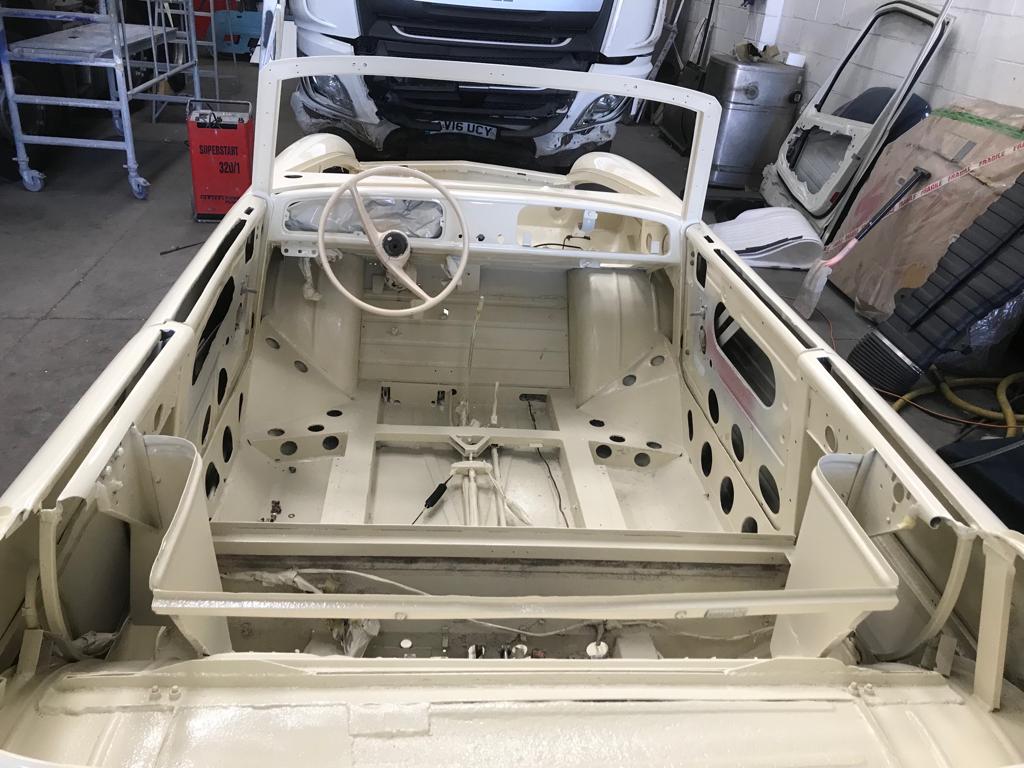
Brian’s been busy this week fitting new wiring looms into our 1965 Amphicar and our 1972 Jaguar E-Type.
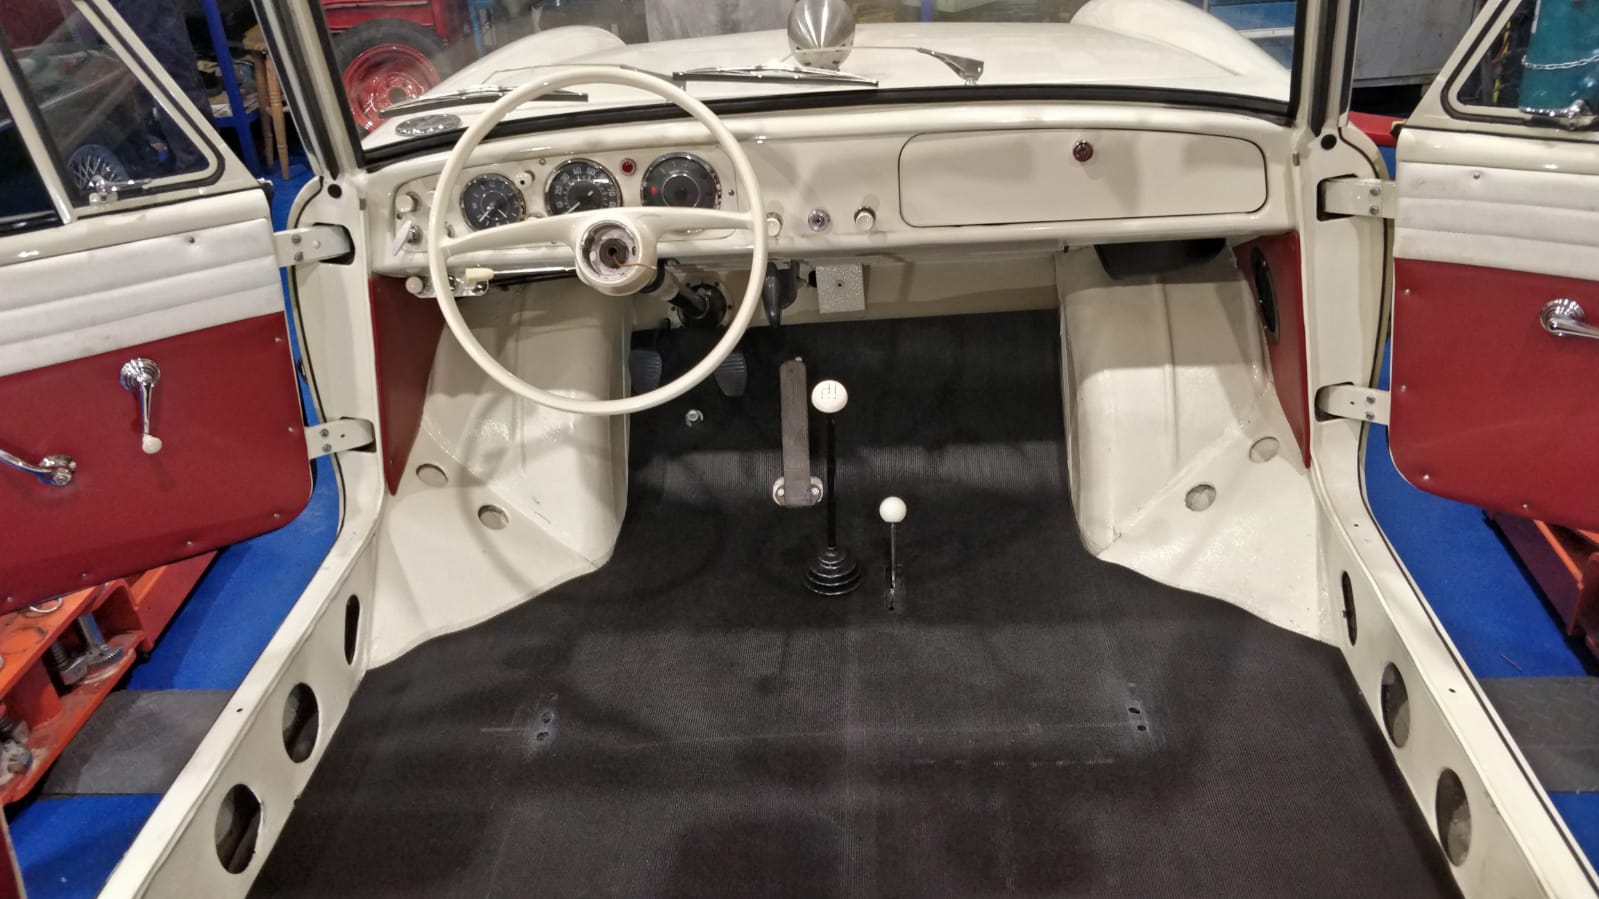
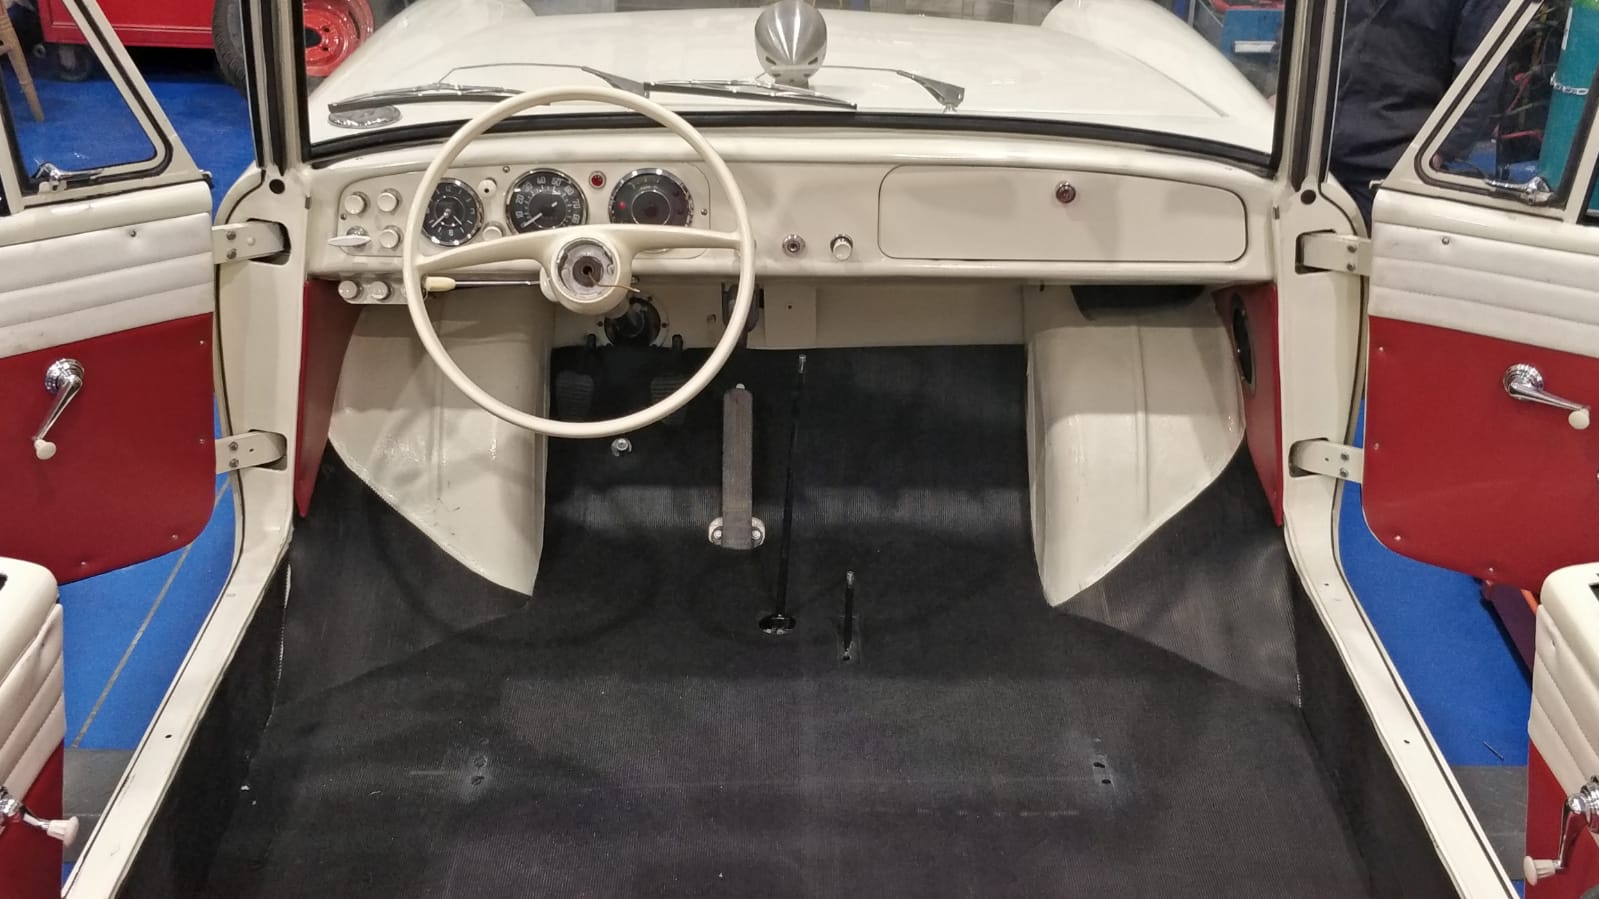
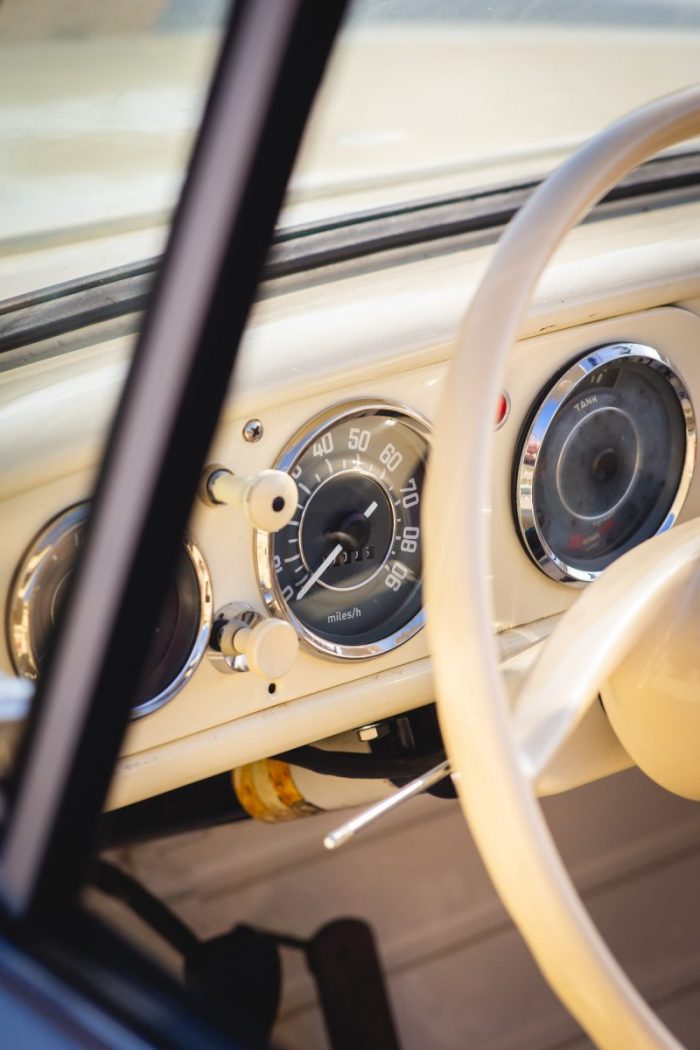
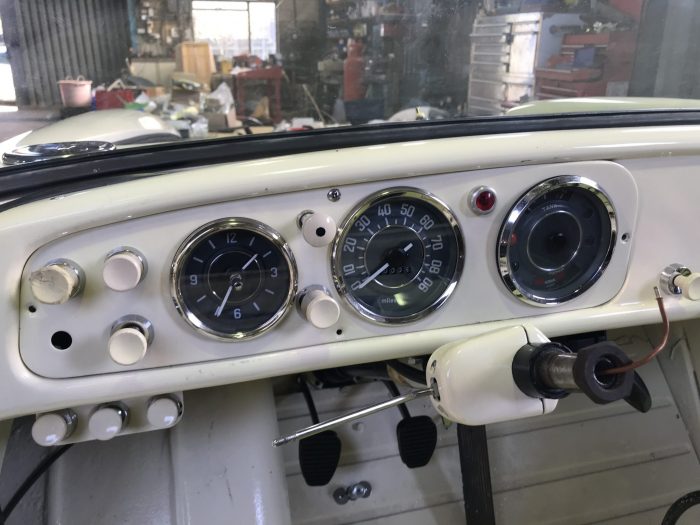
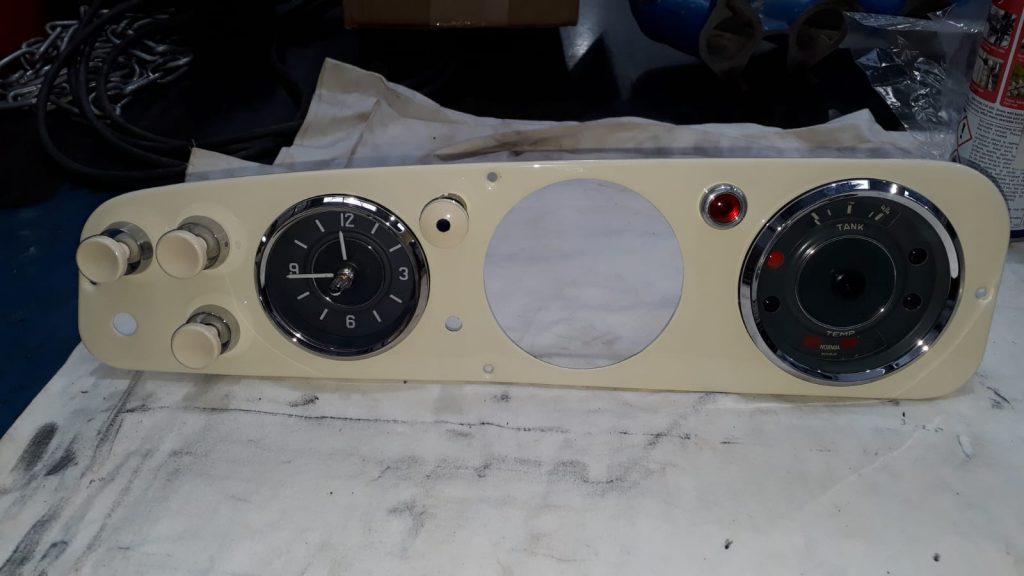
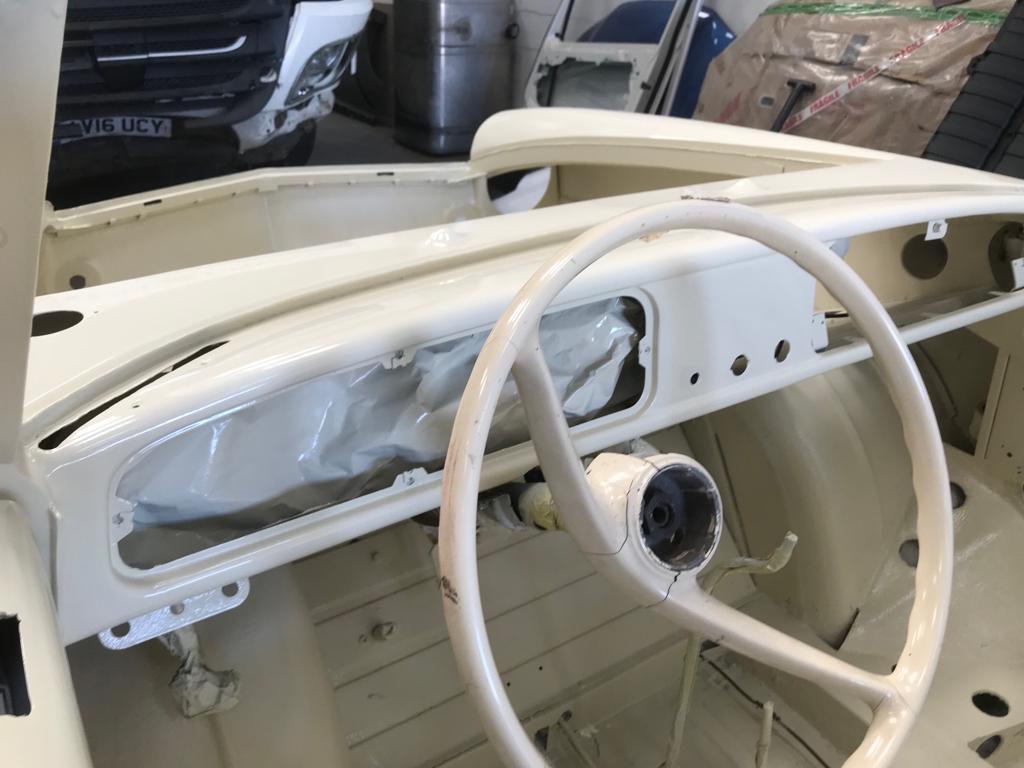
The Amphicar dash is starting to be built up today with the freshly painted dash being filled with the refurbished dials.
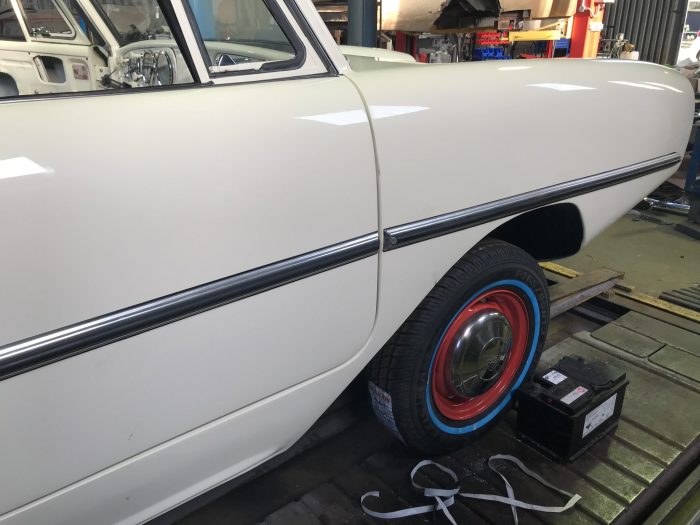
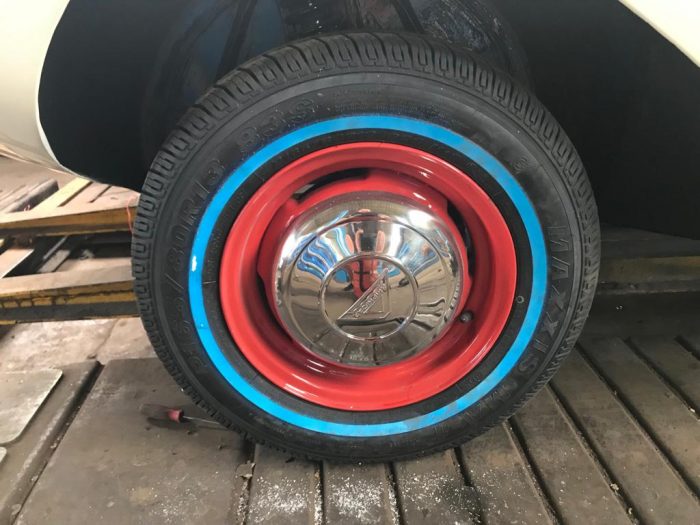
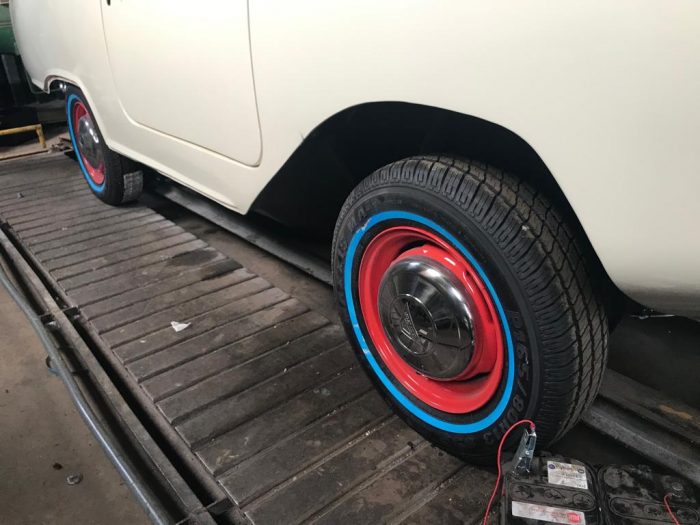
Our 13″ wheels have now returned from our good friends at Wheelcare in Colchester having been welded, repaired, stripped and painted. They are now ready for the tyres to be fitted so the car can go back on it’s wheels.


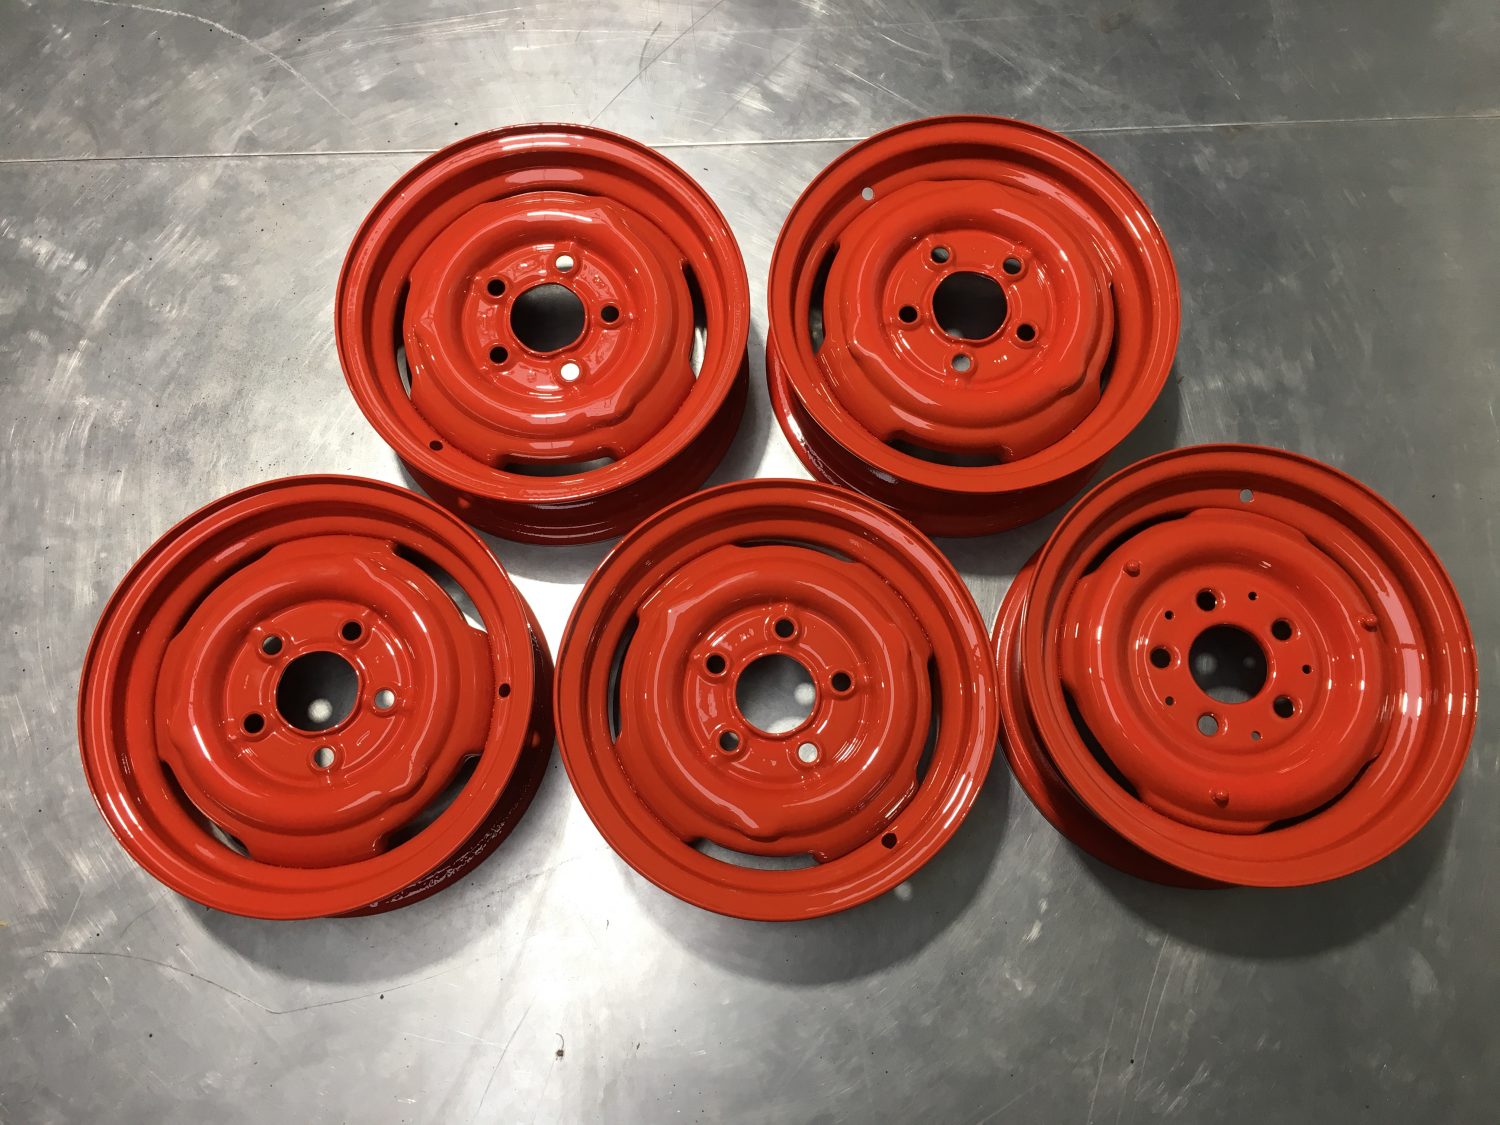
Wheelcare repair all makes and sizes. It doesn’t matter whether they are polished, painted or machined. They also offer bespoke custom painting, powder coating, polishing and wet-spraying to further enhance the look of your car.
[vc_row][vc_column][vc_column_text]We say this time and time again but if you are restoring (or even working) on your own projects it is so beneficial to take lots of photos. At the time, it may seem like a fruitless exercise but months down the line when it is time to rebuild what you have taken apart you may find these photographs a life saver.
Here are more images of our 1965 Amphicar.[/vc_column_text][/vc_column][/vc_row][vc_row][vc_column][vc_gallery type=”image_grid” images=”25389,25390,25391,25392,25393,25394,25395,25396,25397,25398,25399,25400,25401,25402,25403,25404,25405,25406,25407,25408,25409,25410,25411,25412,25413″][/vc_column][/vc_row]
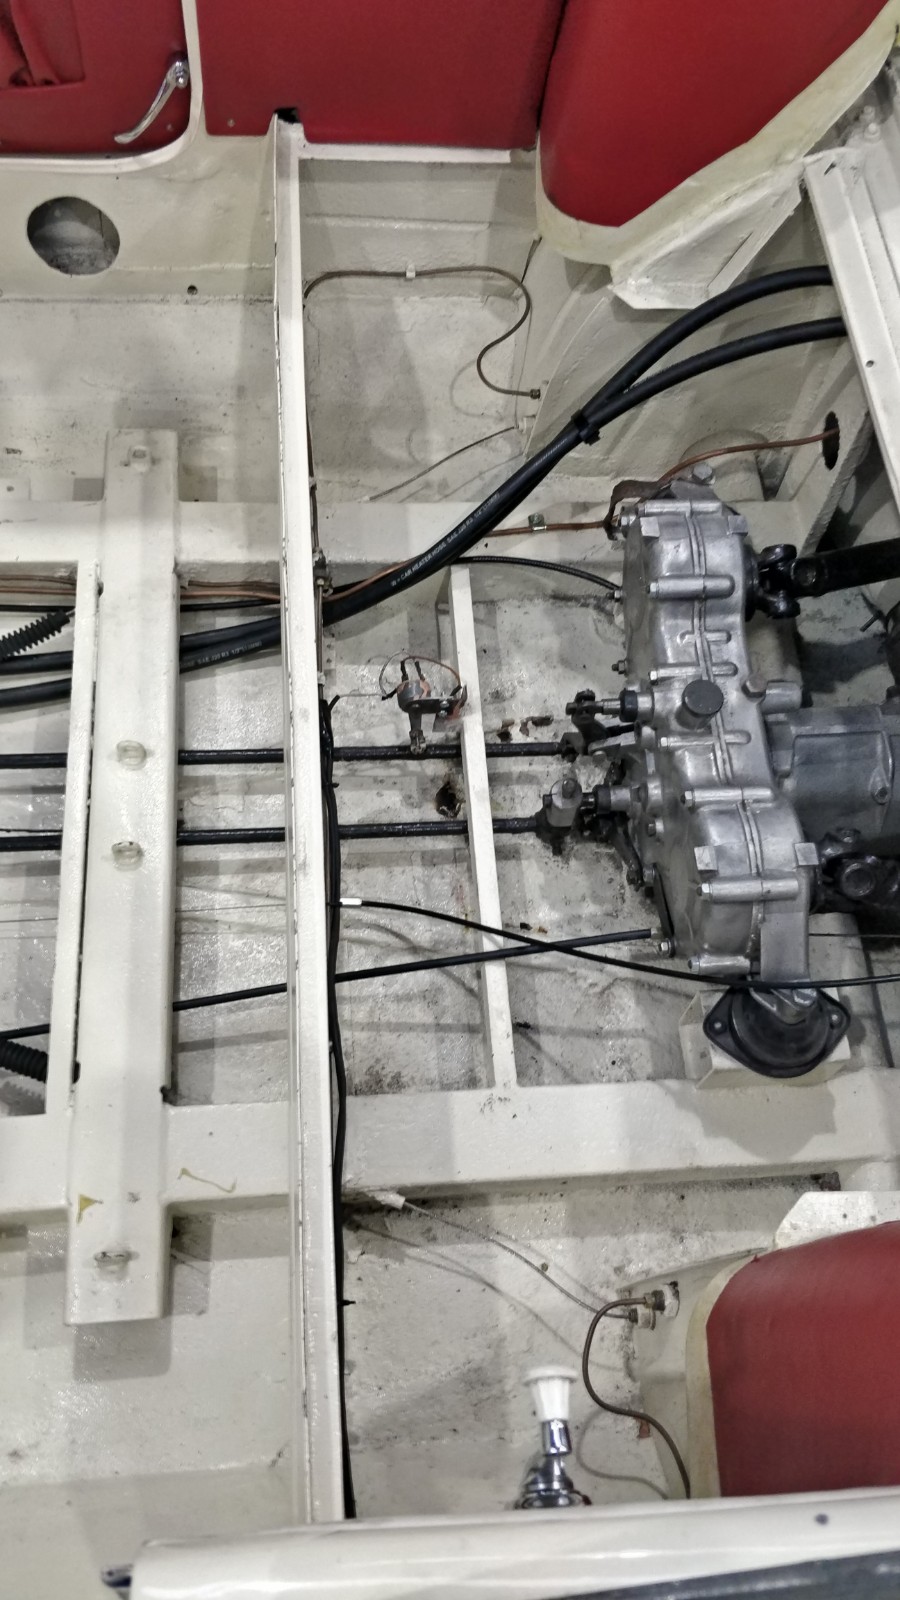
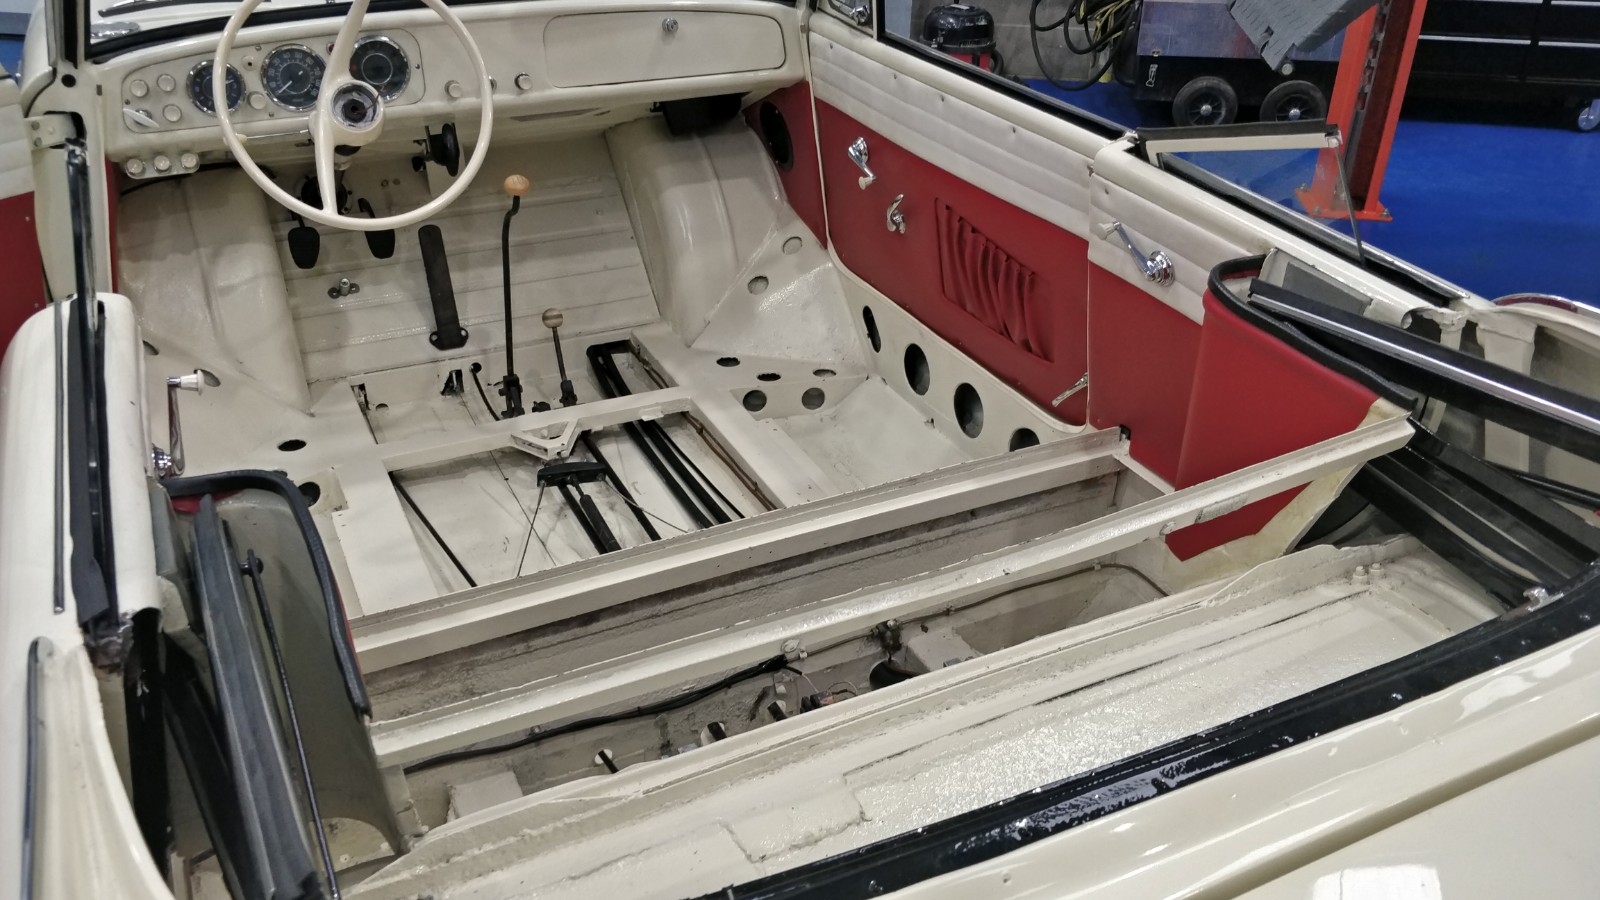
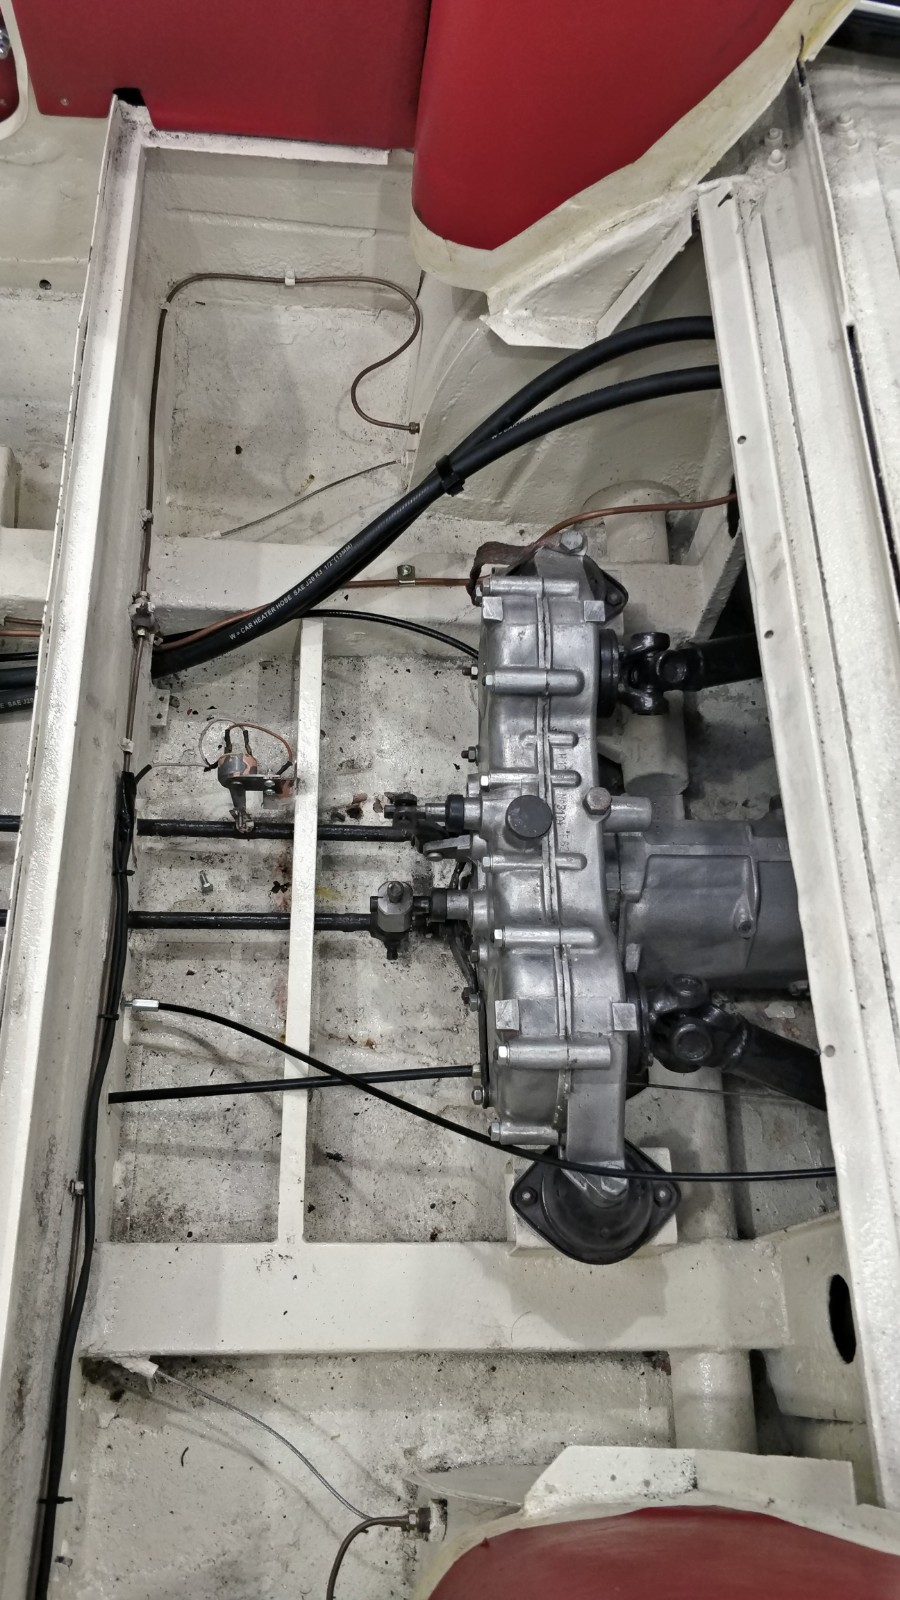
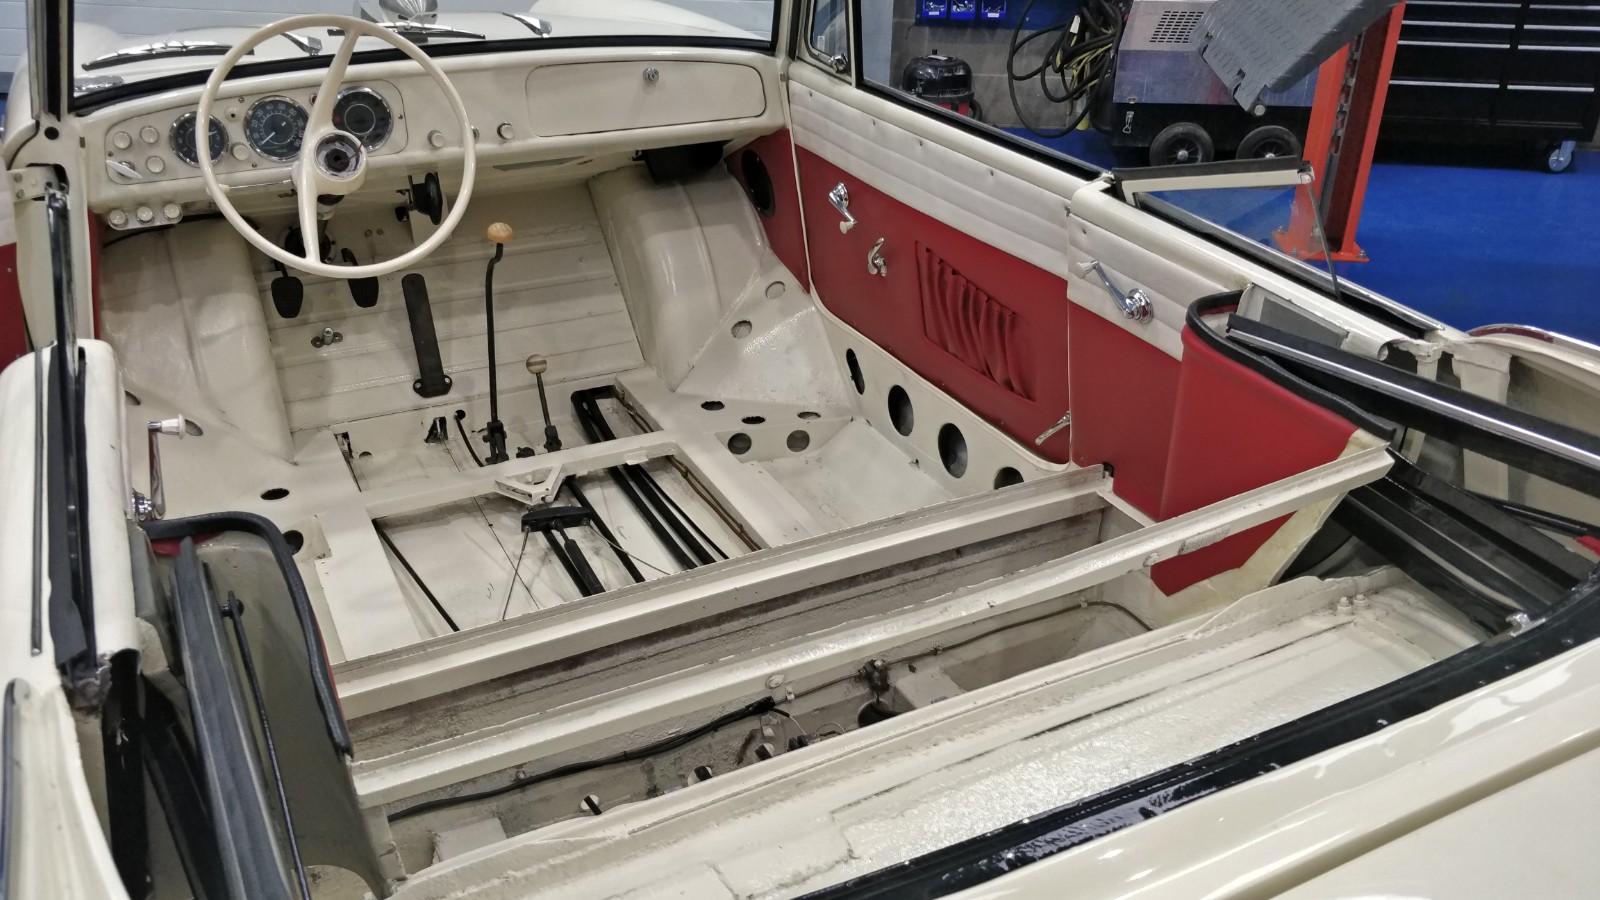
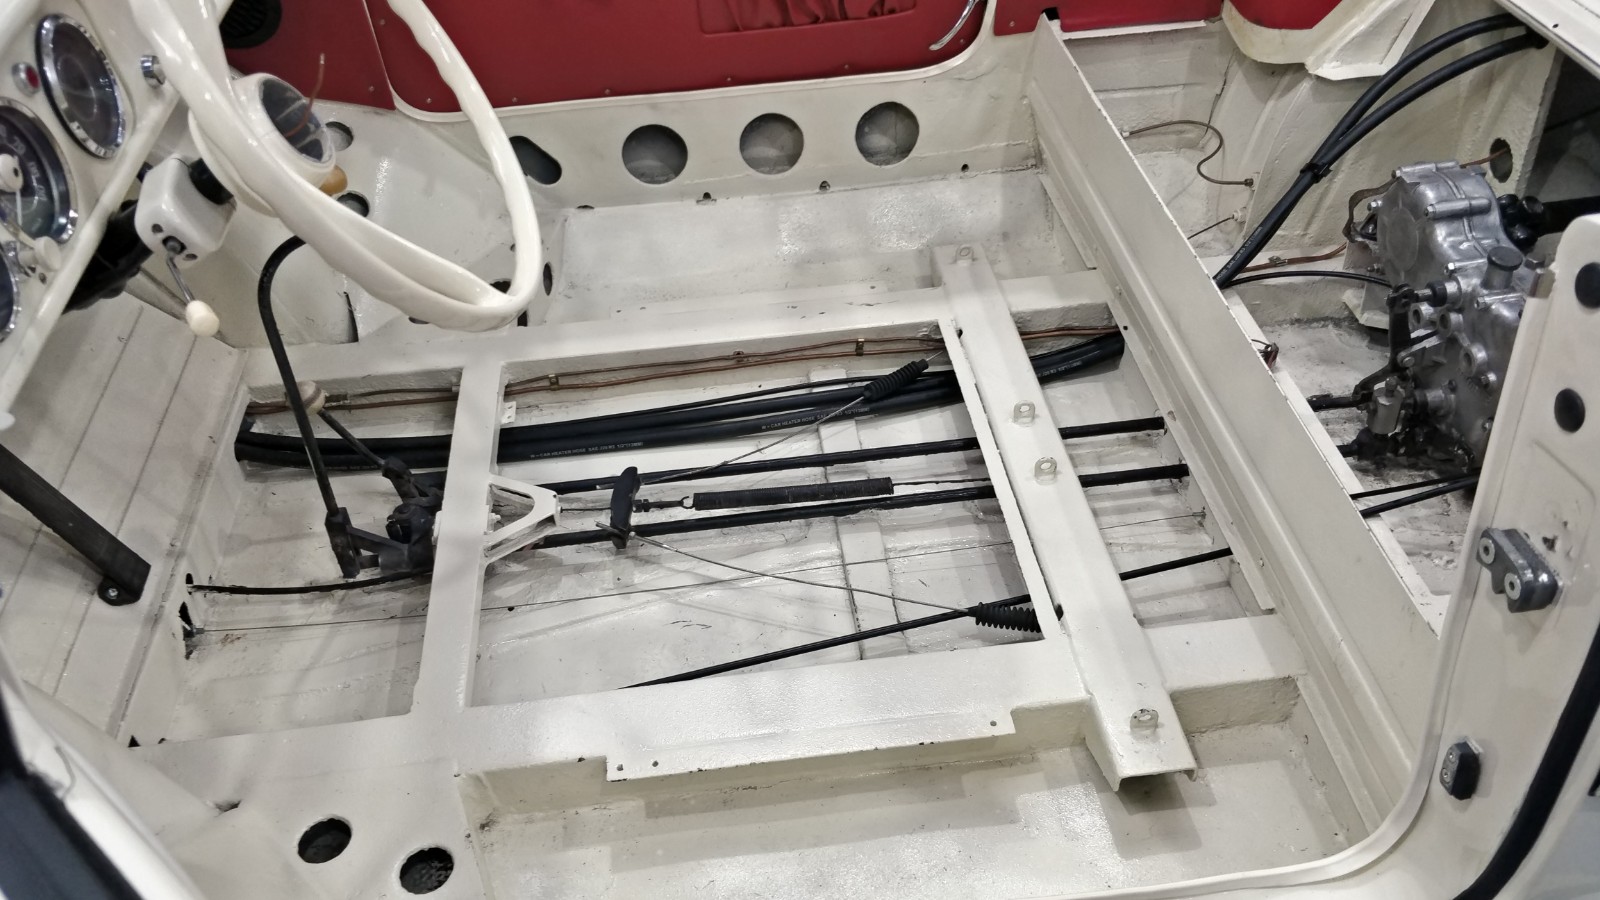
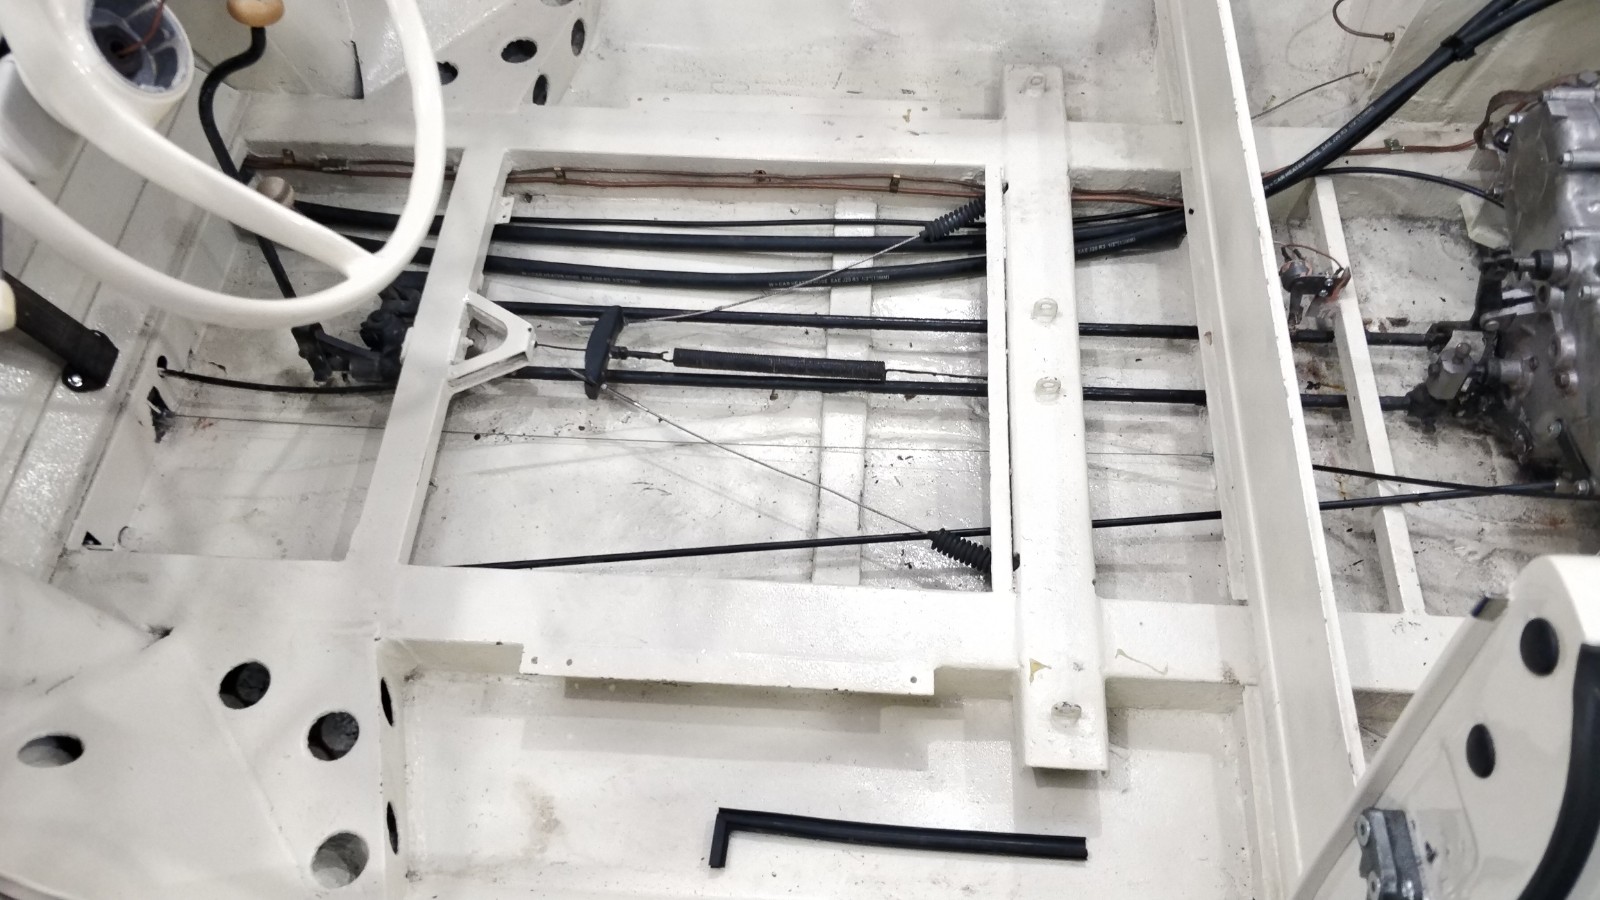
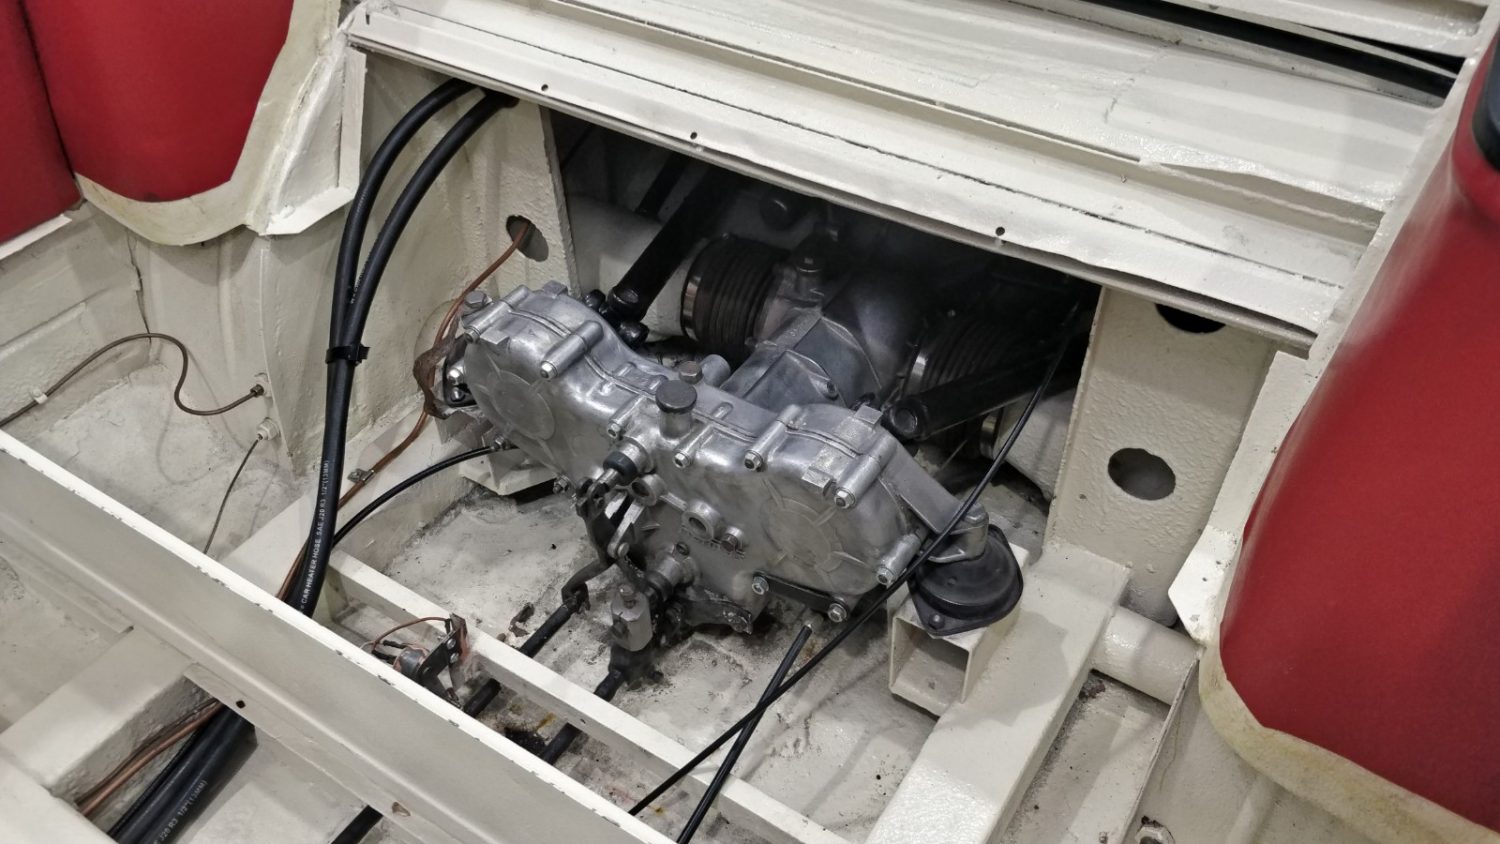
[vc_row][vc_column][vc_column_text]With the engine now successfully refitted into position we can now look to rebuild the car with all of the brand new and refurbished components.
[/vc_column_text][/vc_column][/vc_row][vc_row][vc_column][vc_gallery type=”image_grid” images=”24664,24663,24662,24661,24660,24659,24658,24657,24656,24655,24654,24653,24652,24651,24650,24649,24648,24647,24646,24645,24644″][/vc_column][/vc_row]
With so many projects currently being worked on our very own 1965 Amphicar as taken somewhat of a back seat recently. With the new year just round the corner our aim is to somehow squeeze our Amphicar into the projects list and get her back on the Suffolk roads (or water), hopefully by next summer.
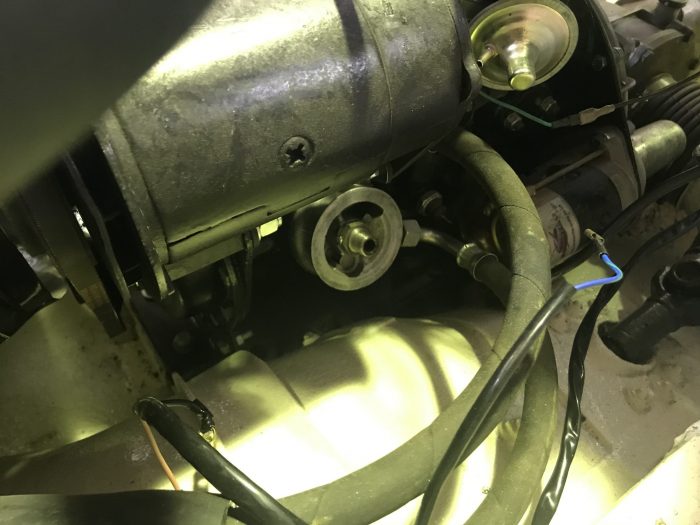
The engine was completed some time ago so this week Pete, with the assistance of Dave and Brian when required has been able to re-instate the engine.

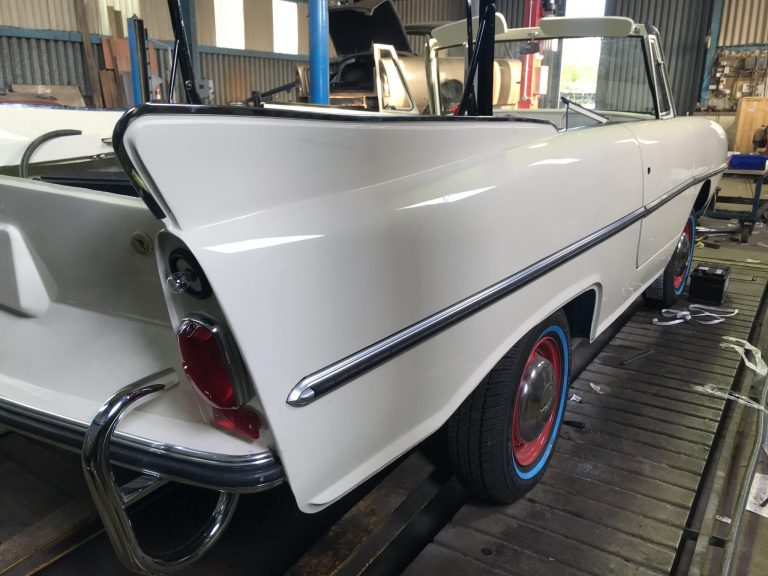
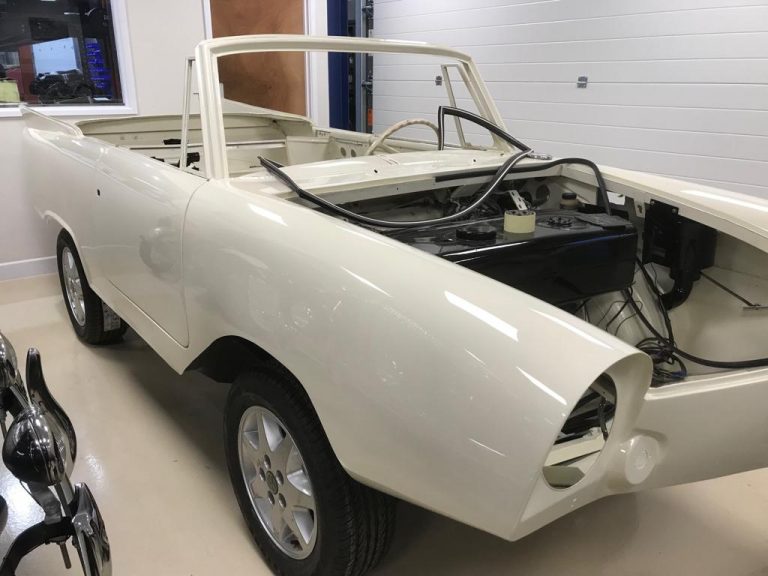
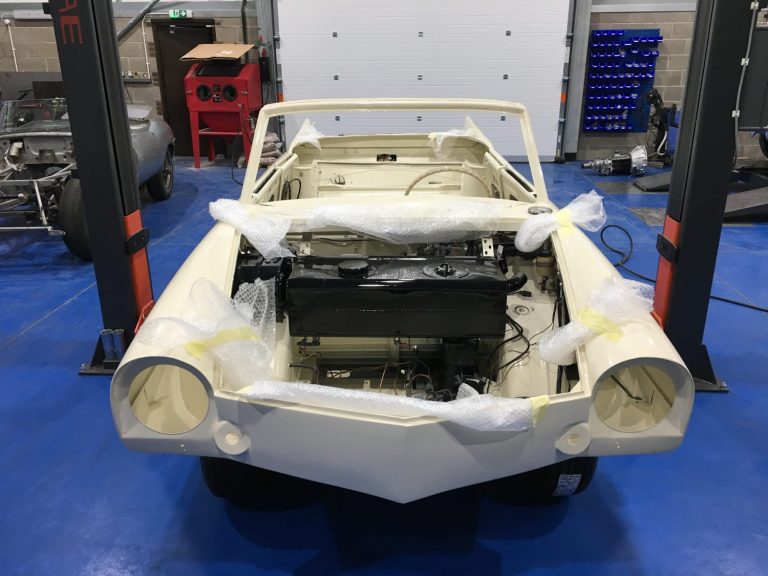
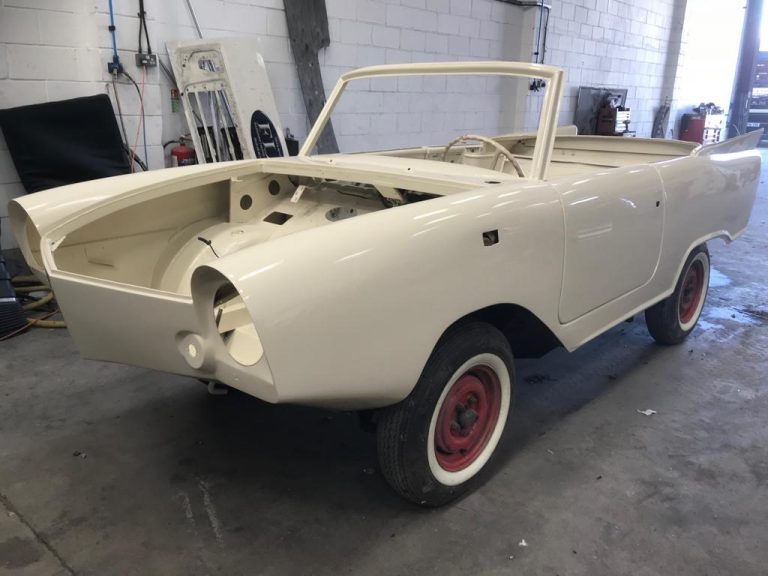
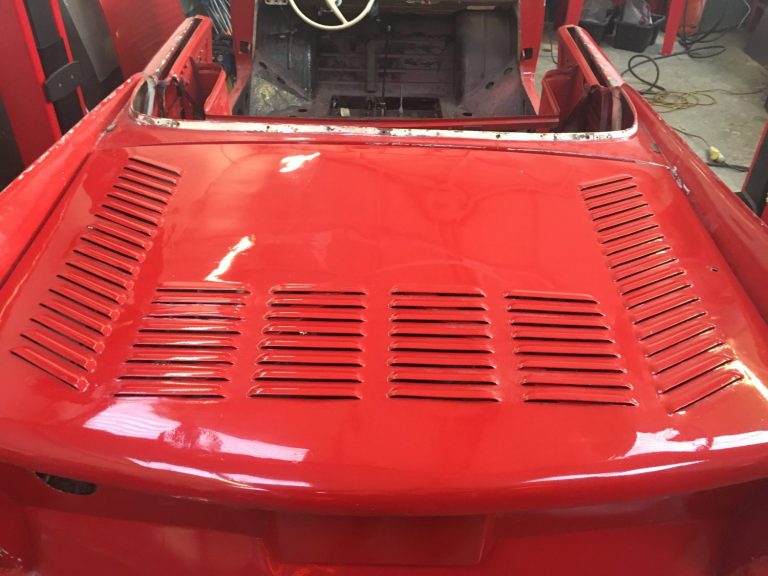
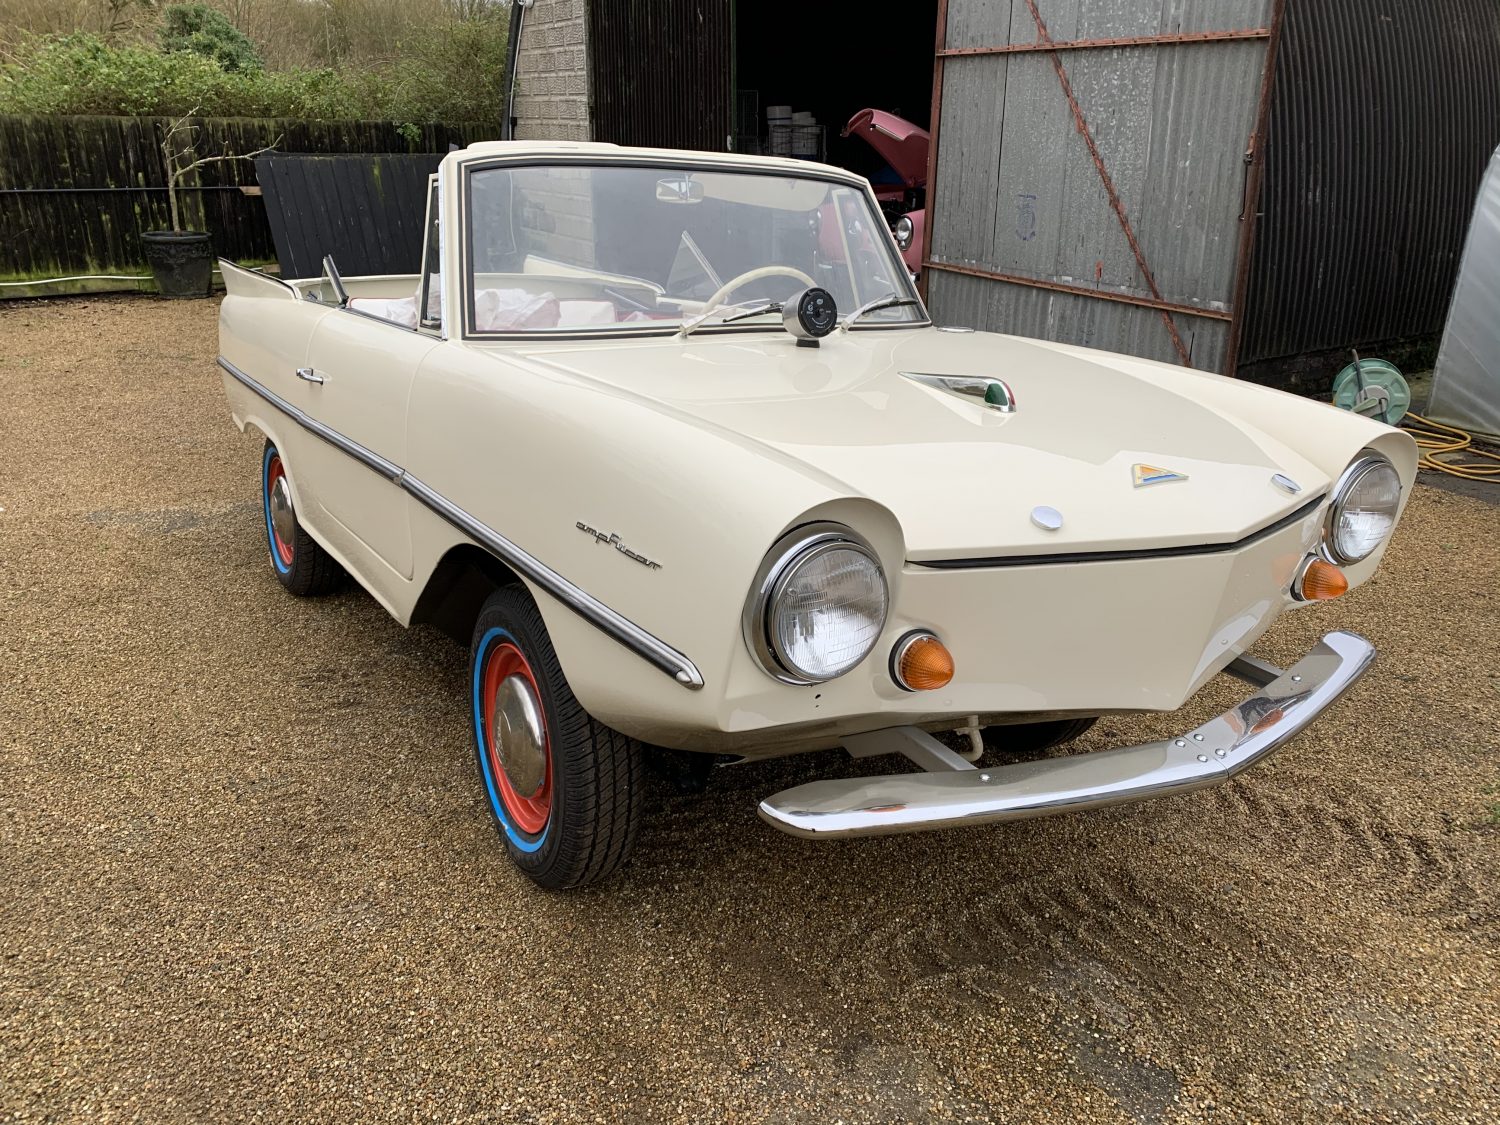
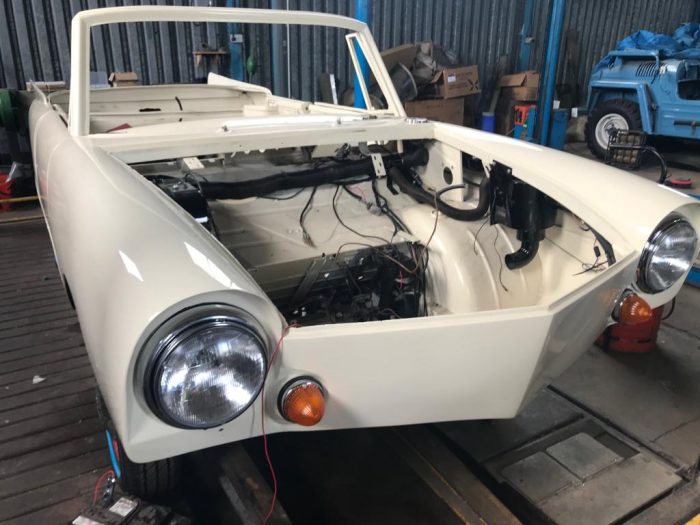
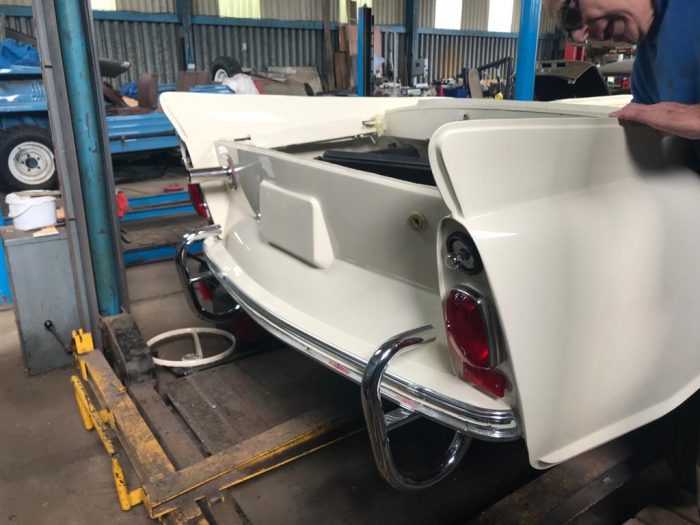
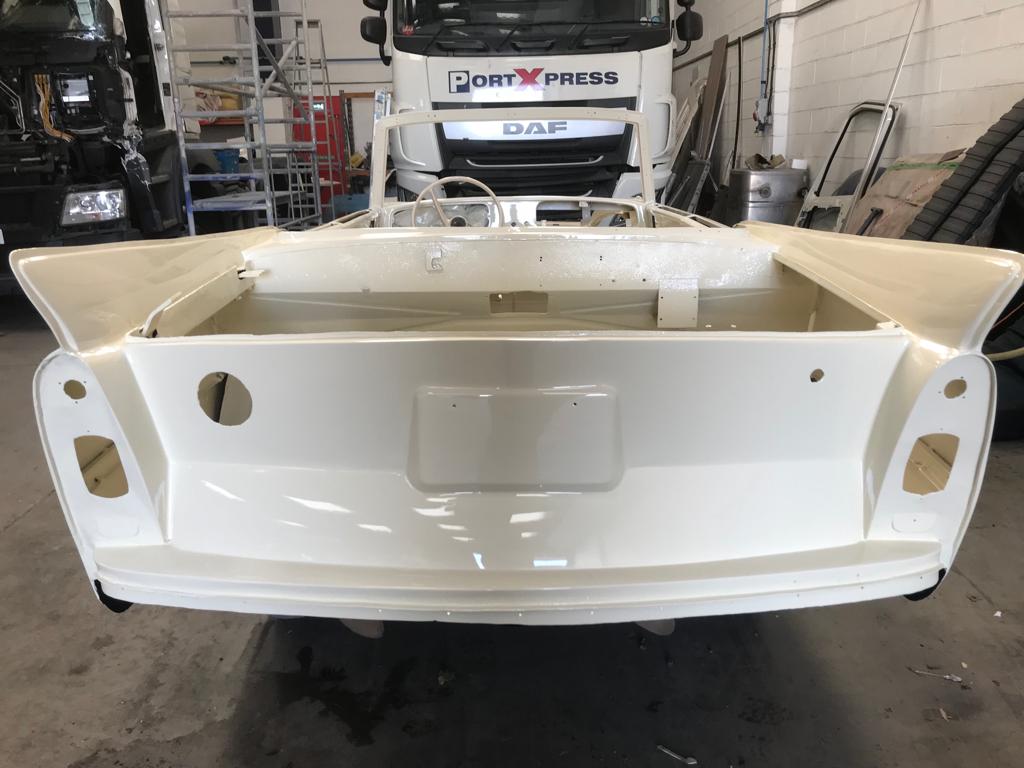
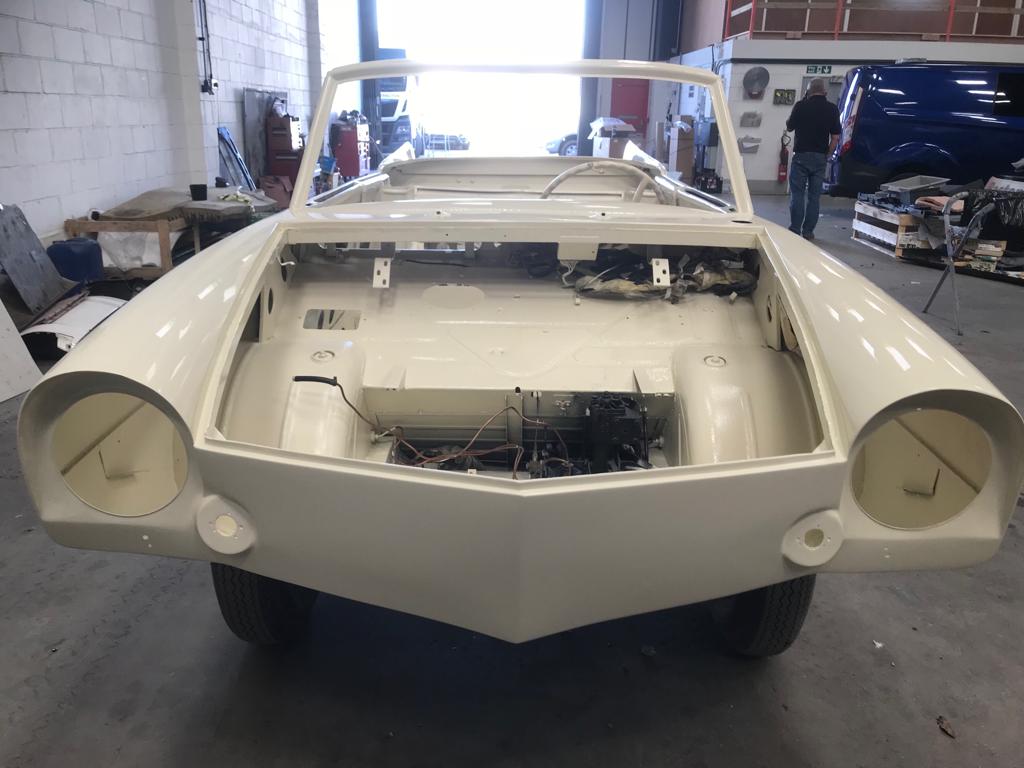
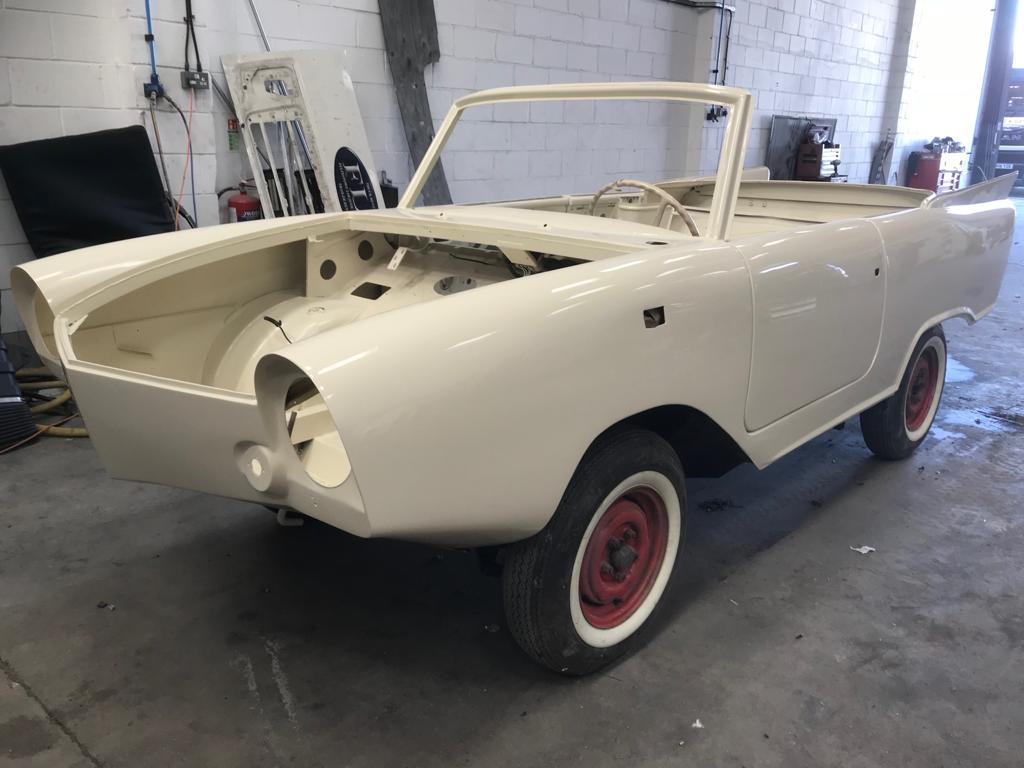
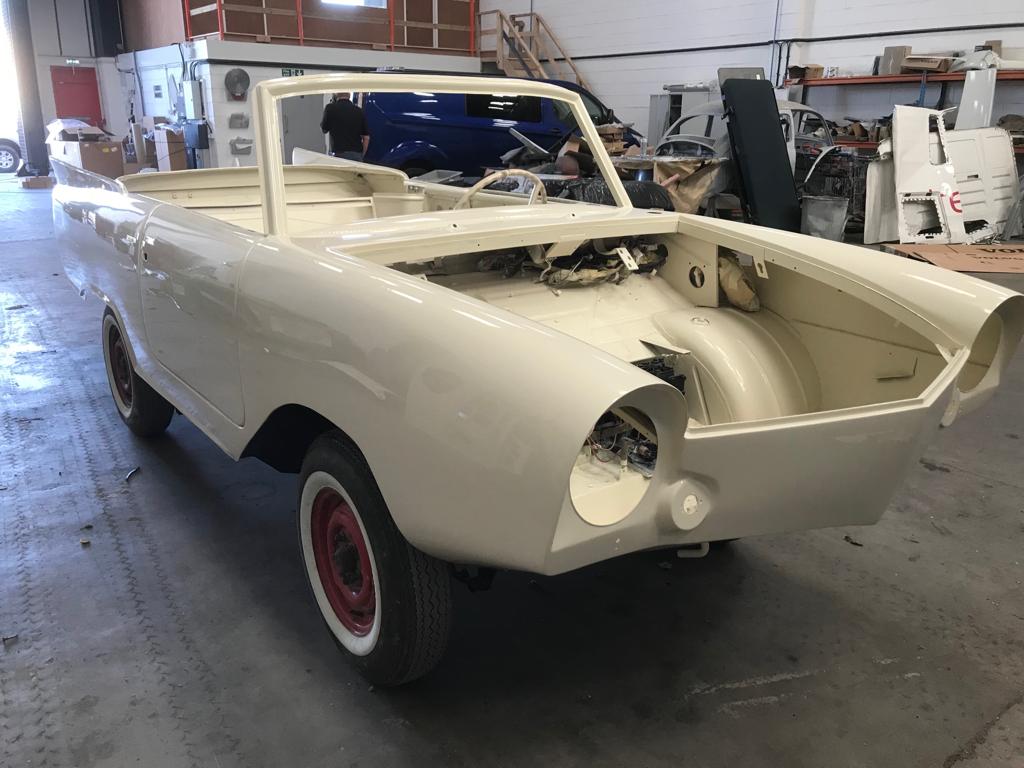
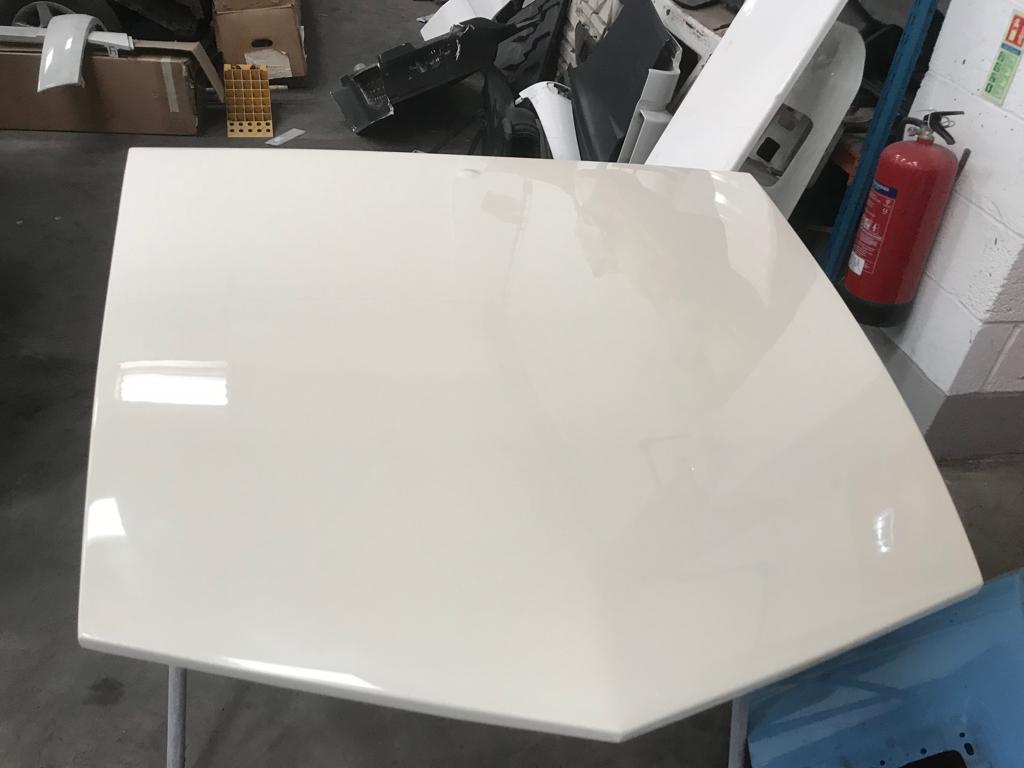
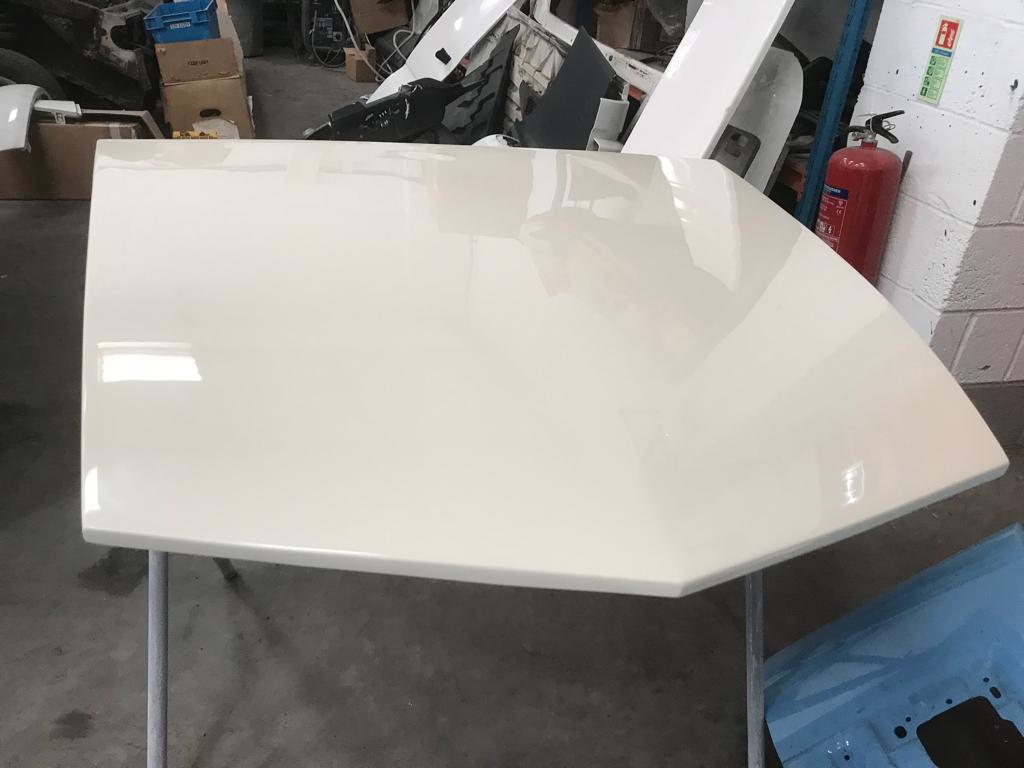
Our 1965 Amphicar is now ready to leave the paintshops and return for refit.
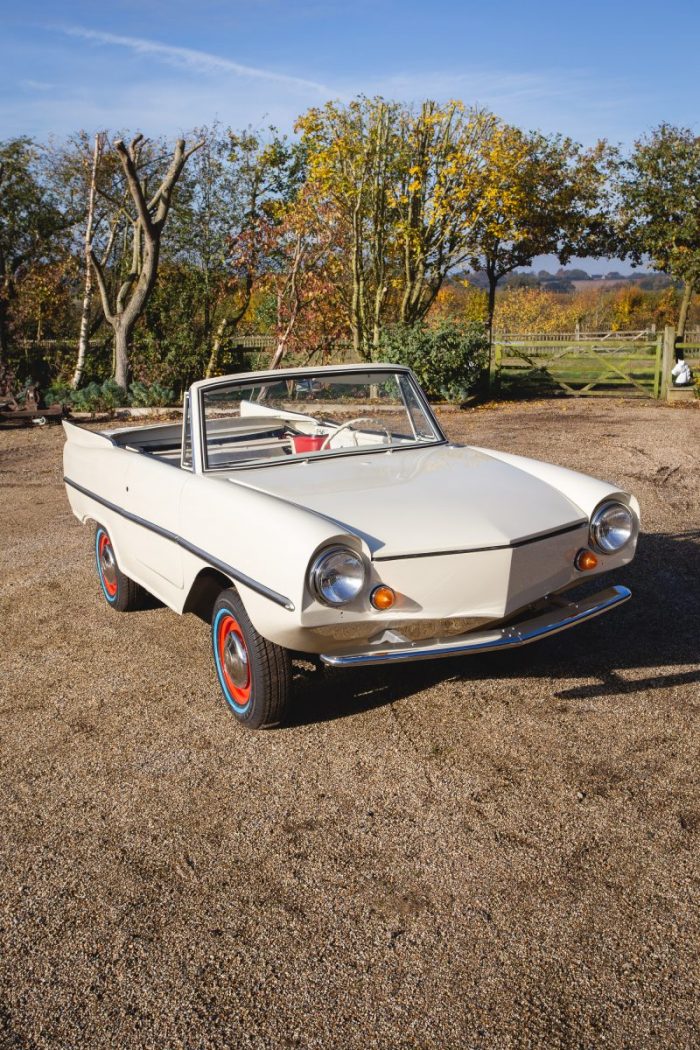
The red colour has disappeared to be replaced by the original Beach Strand White finish – Ditzler Code 8703=DAR offset 90113. Supplied by PPG Industries who bought out Ditzler.
The car will be returned to the original specification and will be restored to concours condition to include all UK paperwork required for use both on the road and water.


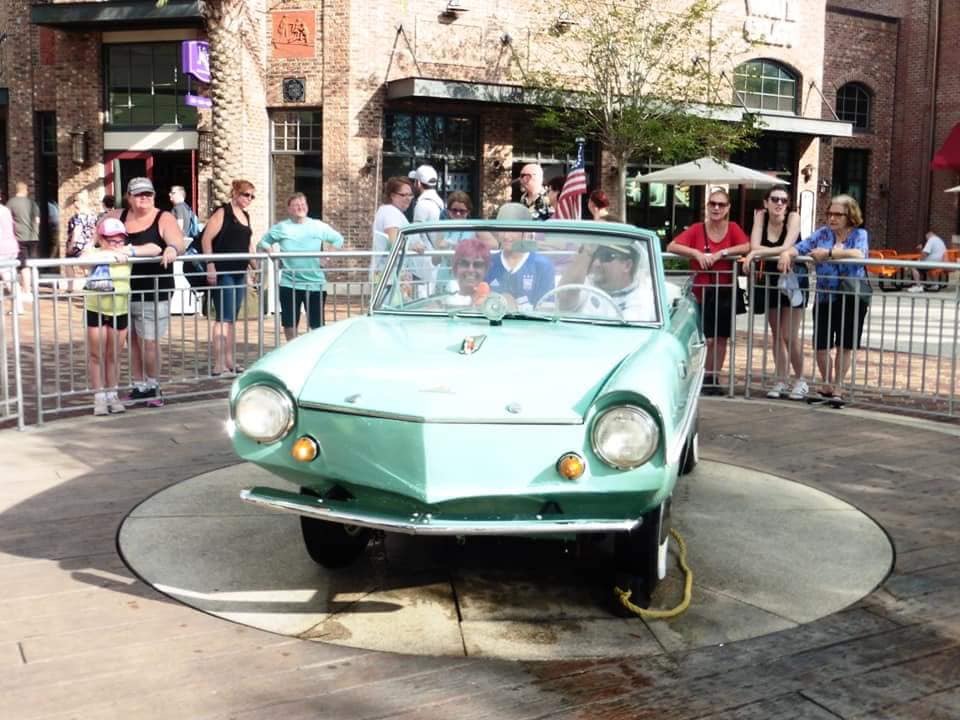
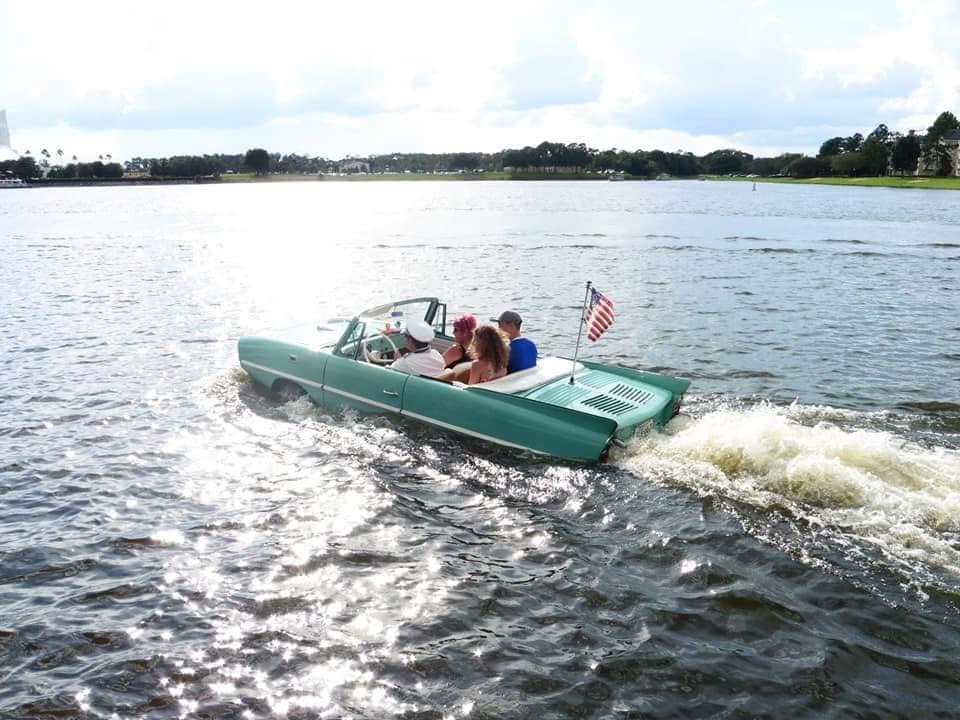
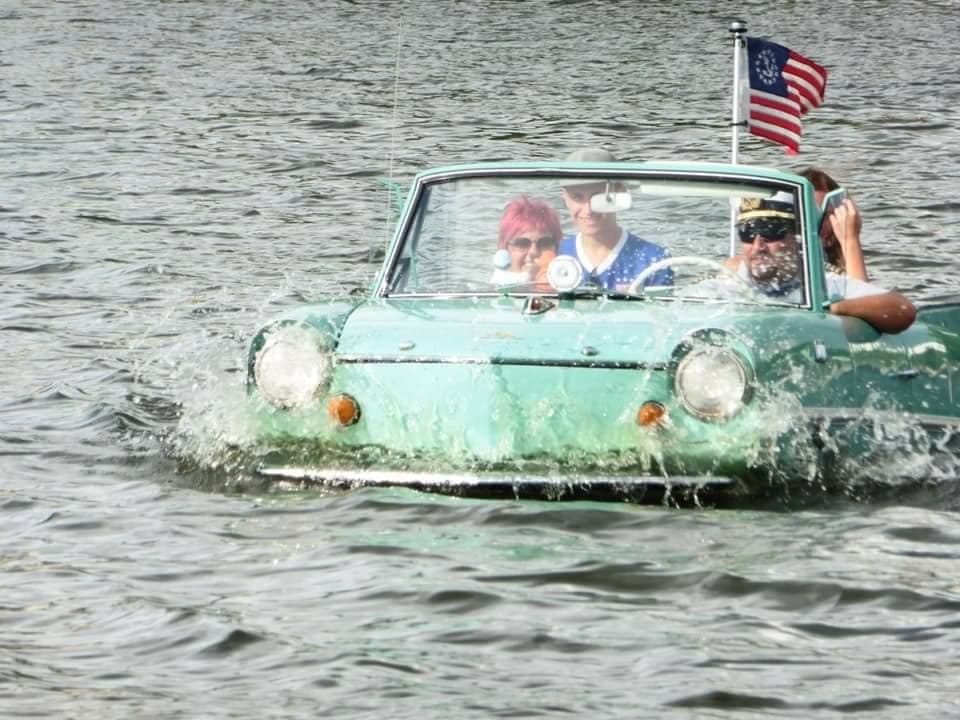
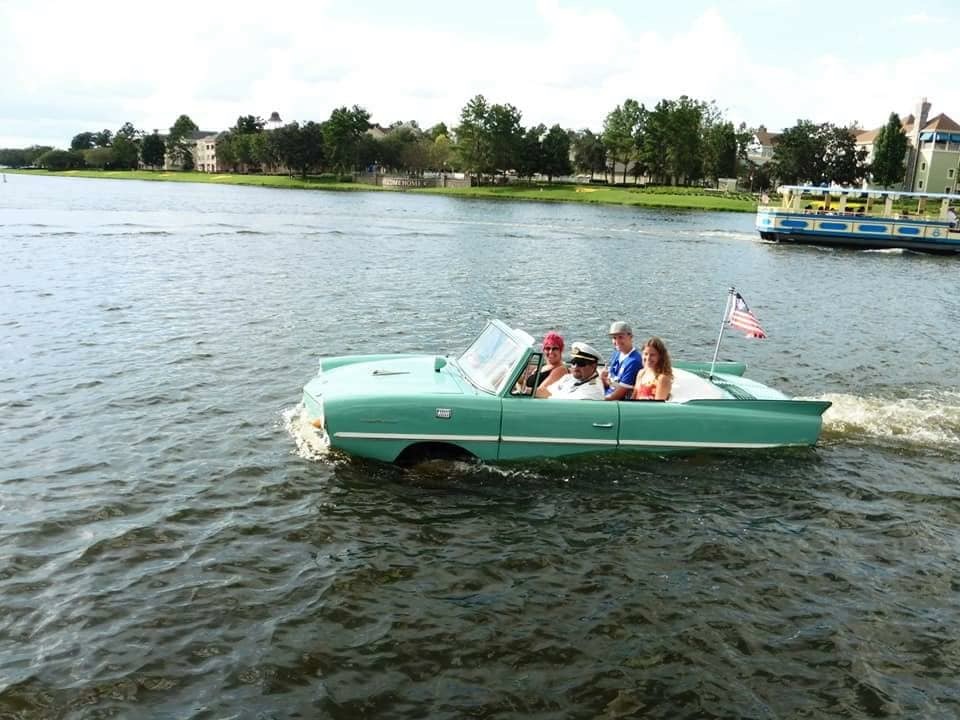
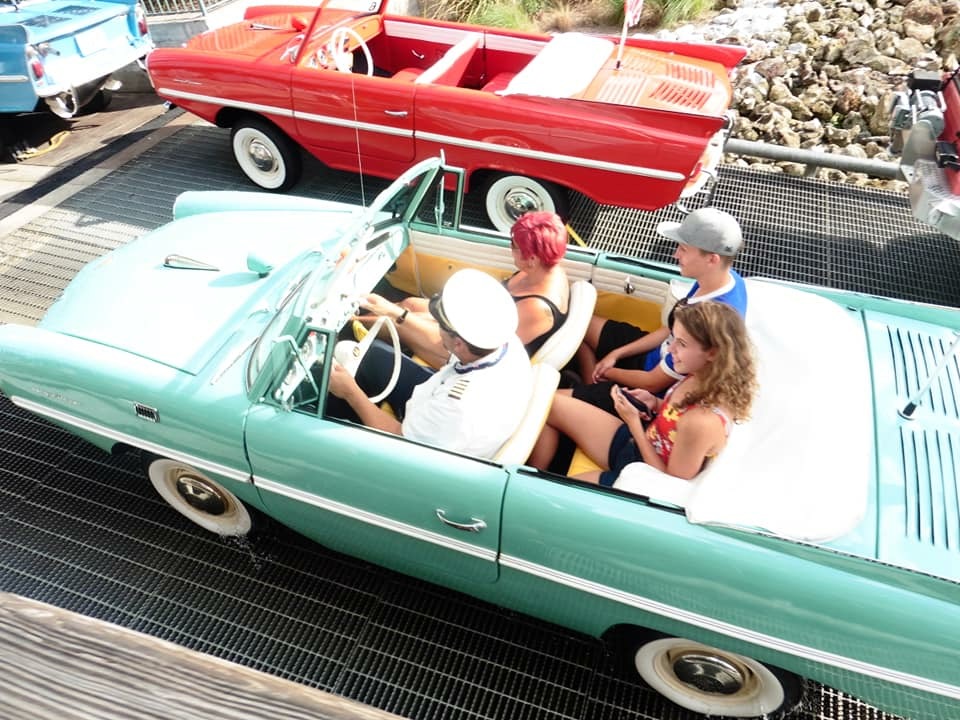
On a recent trip with the family to Florida, John was seen getting to grips with the running of the Disney Amphicars.
Whilst he family went out to enjoy the open water John stayed back to chat with the technicians who work on these amazing cars every day of the week.
Of course, he got to have a go in one too…
We’d like to think this was all in preparation for when ours arrives back ready for rebuild. Seeing as John now has the experience in these machines we would most probably look to him to perform the first full test drive!!
[vc_row][vc_column][vc_column_text]Who wants first dibs at testing our Amphicar when the restoration is complete later this year?
In a couple of weeks time our 1965 Amphicar will be returning to our workshops for the re-build. Now back in it’s original colour the red is no more. Surprisingly, a large quantity of the parts are still available over in the US so once we have her back we’ll be able to put together a full kitting list of parts that are required and hopefully call upon the assistance of Gordon Imports.
[/vc_column_text][/vc_column][/vc_row][vc_row][vc_column][vc_gallery type=”image_grid” images=”21209,21225,21224,21223,21222,21221,21208,21220,21219,21218,21217,21216,21215,21214,21213,21212,21211,21210″][/vc_column][/vc_row]
The thick layer of external filler has now been successfully removed and a new door skin has been rebuilt and fitted. We are not too far away now from having the body shell ready for paint.

[vc_row][vc_column][vc_column_text]Whilst preparing the body for paint we discovered that the car had a large quantity of filler in places (see previous article)
This all needed to be removed so we could fully investigate the extent of the work required.
 [/vc_column_text][/vc_column][/vc_row]
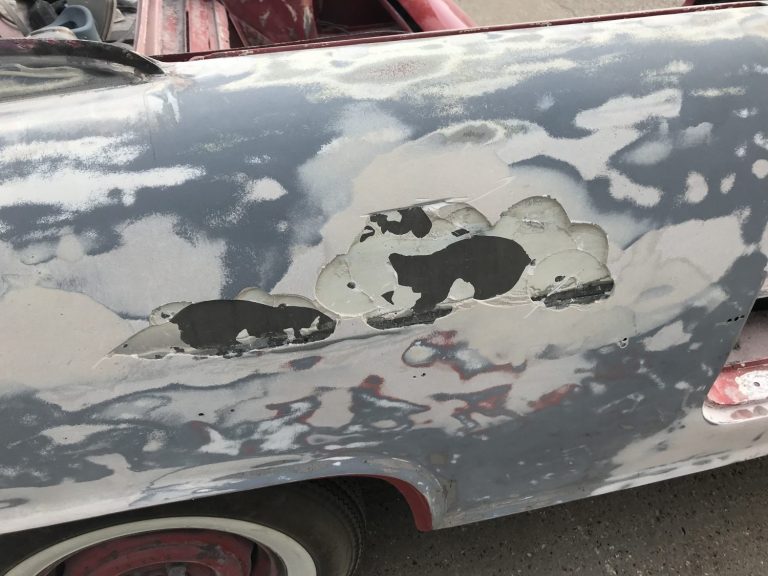
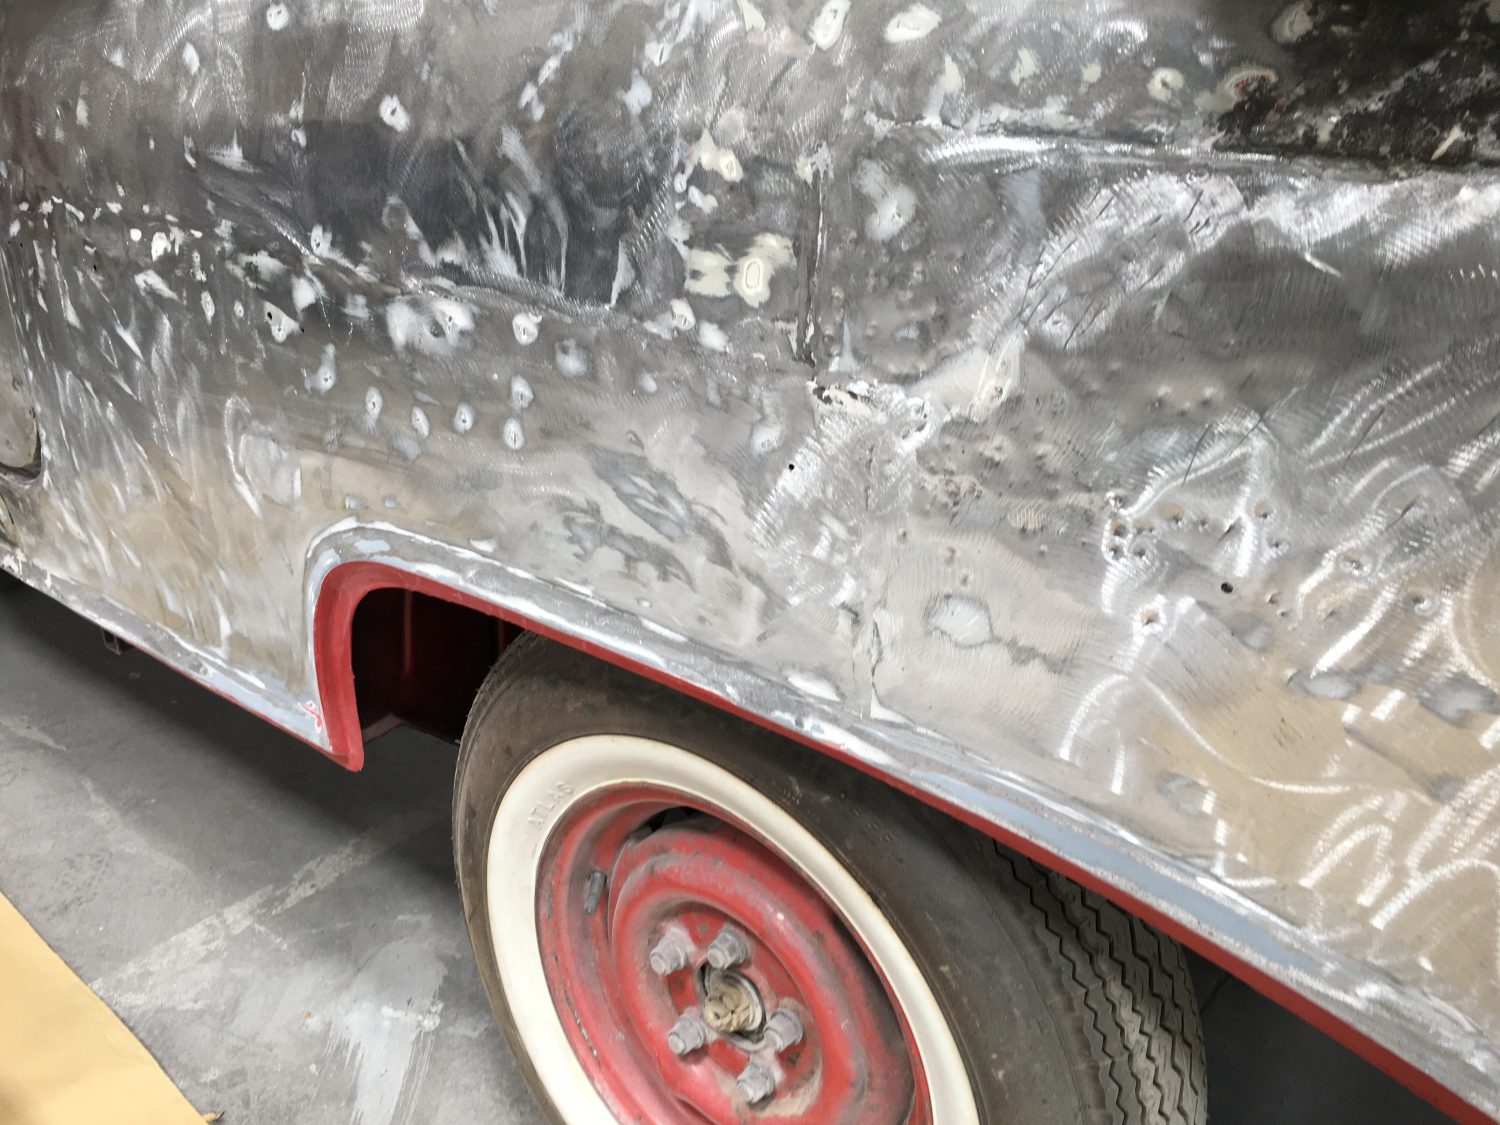
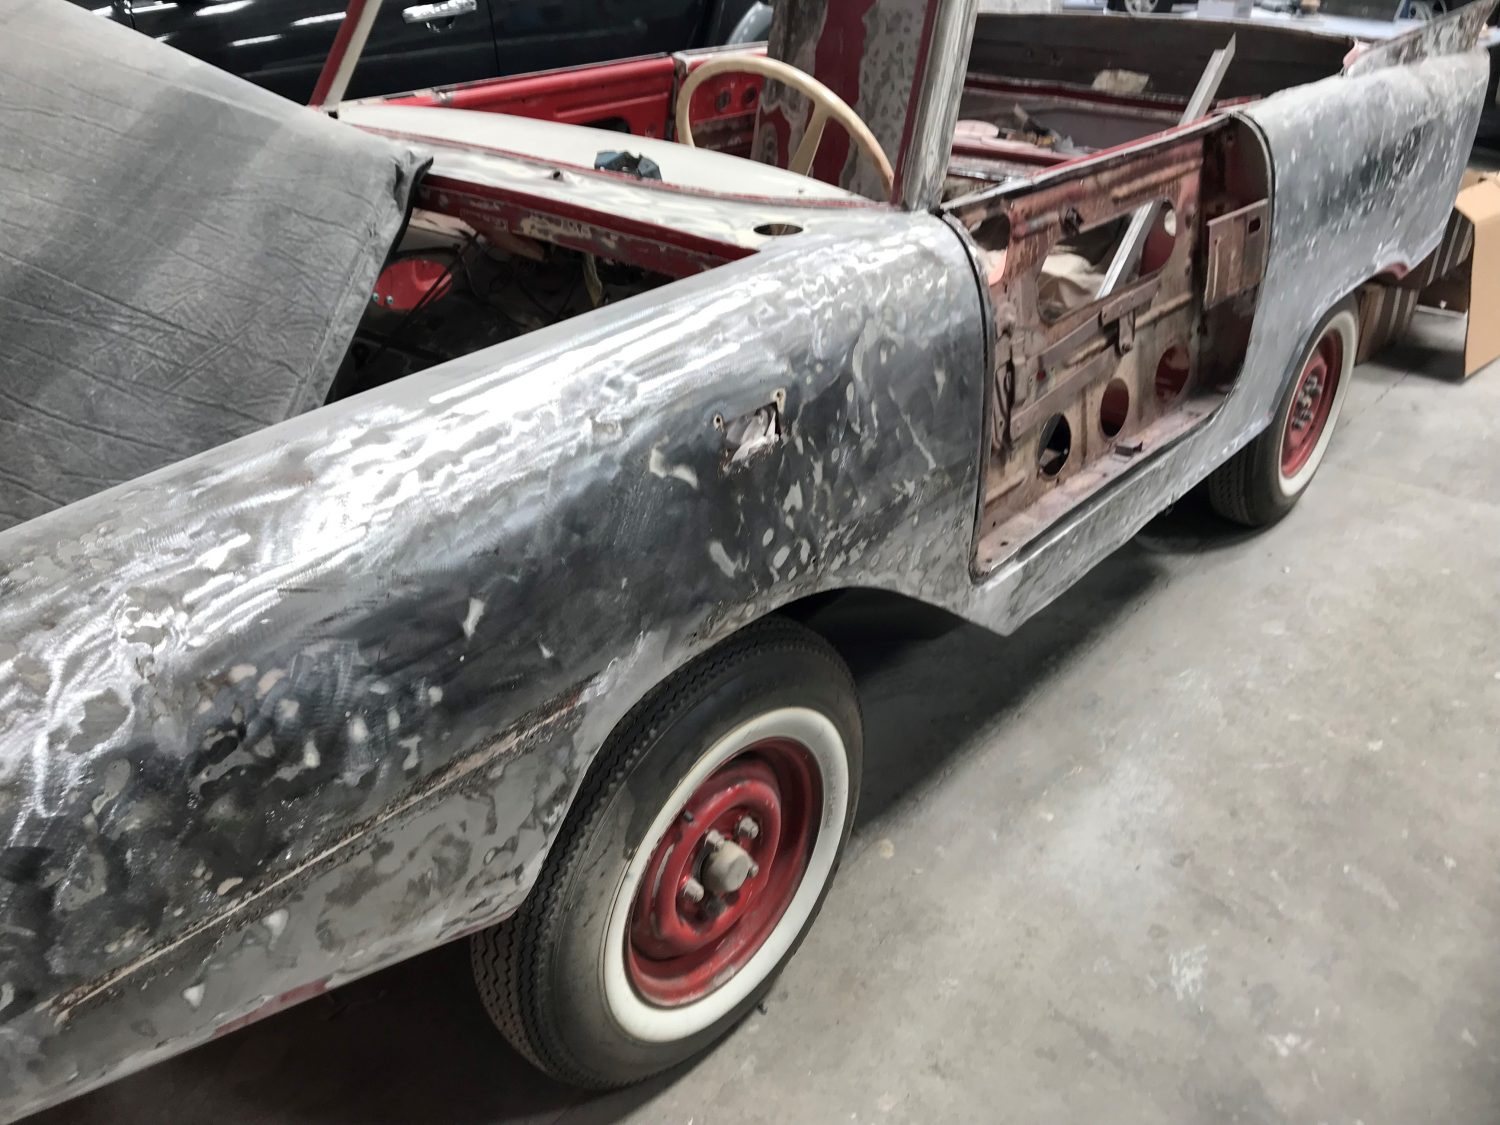
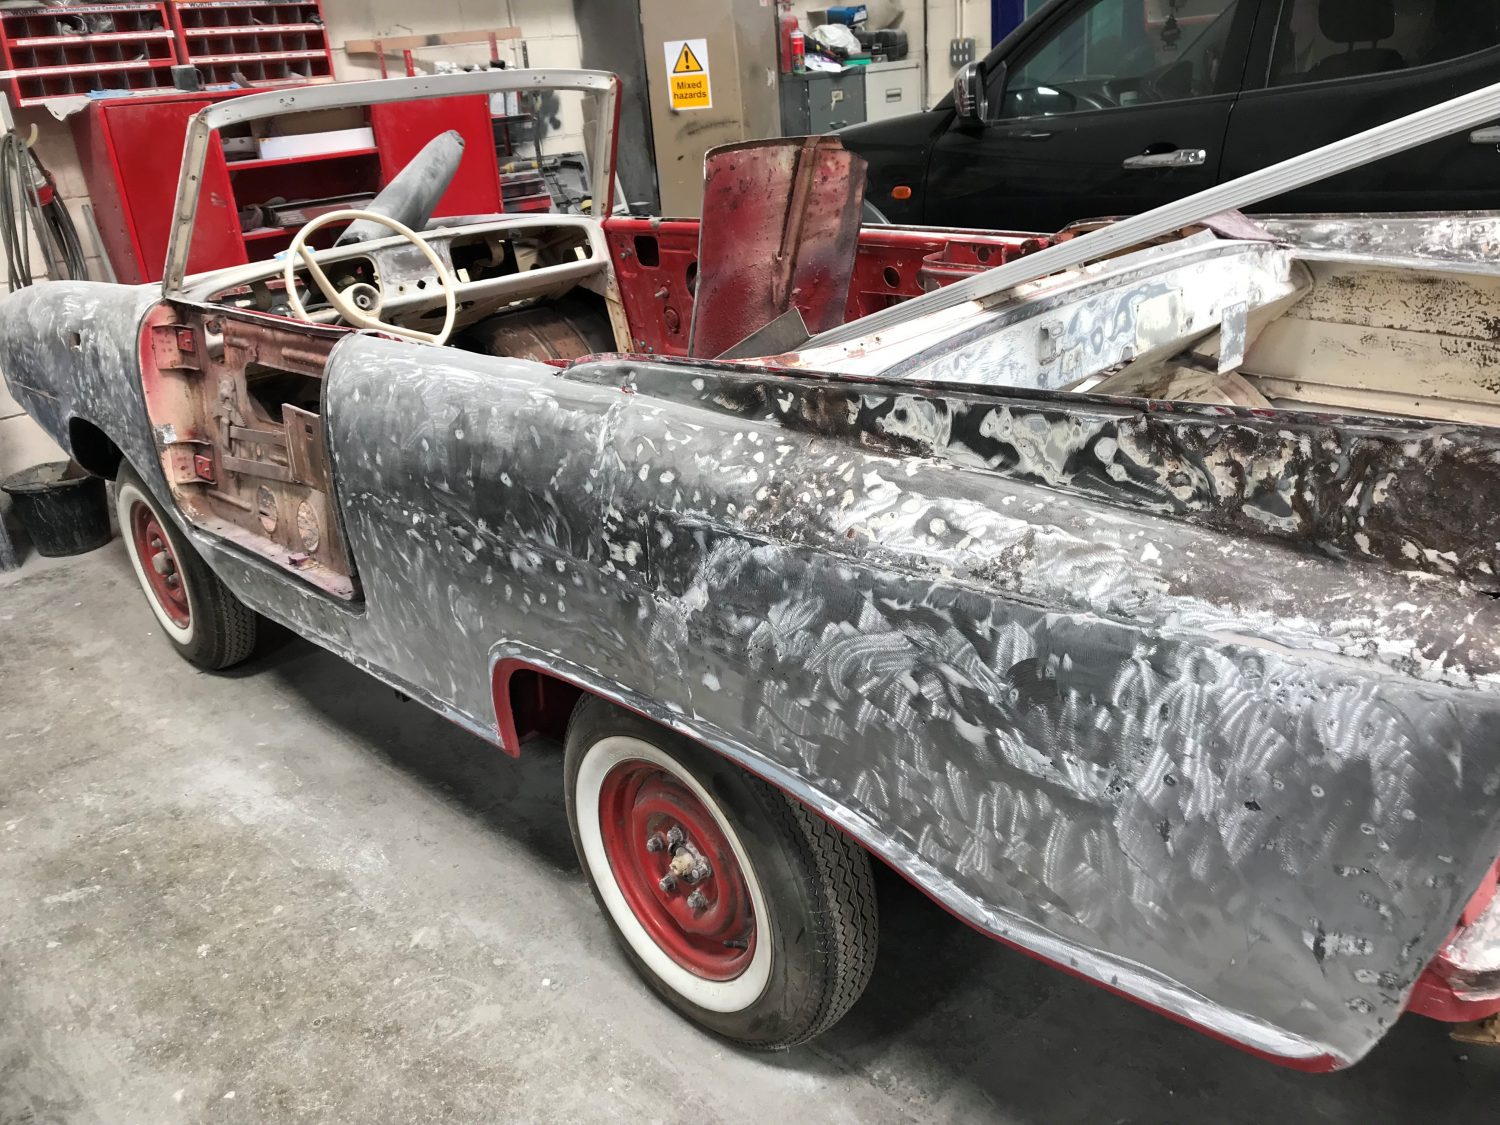
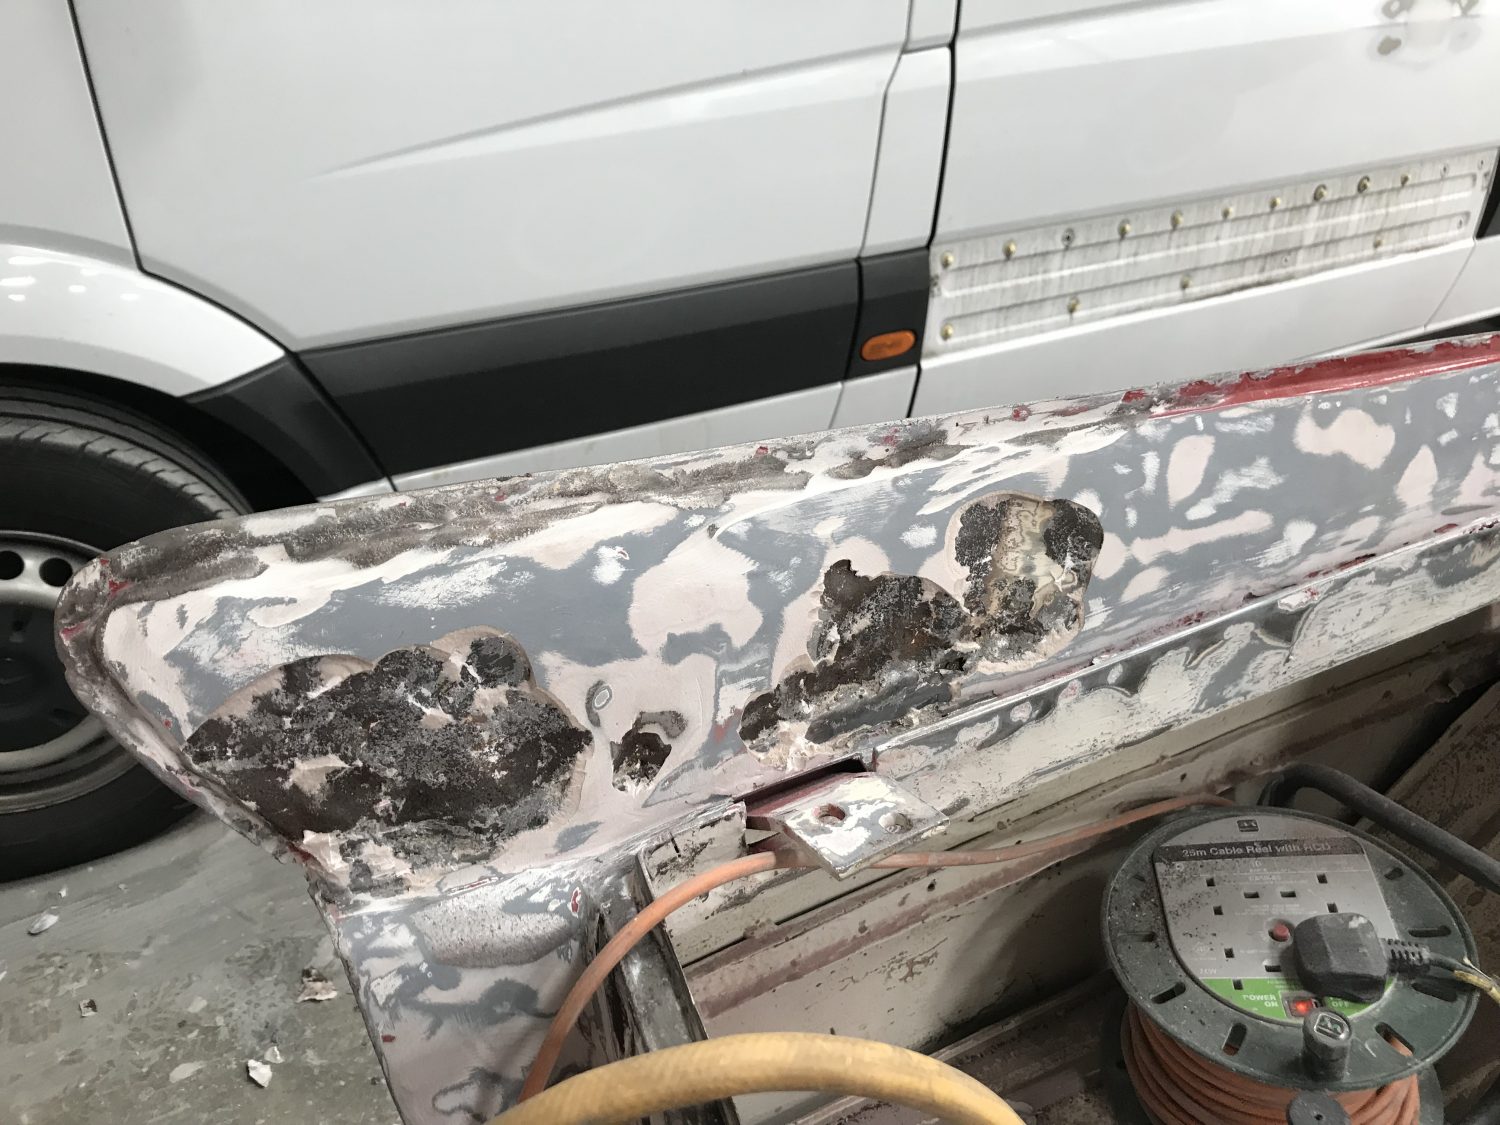
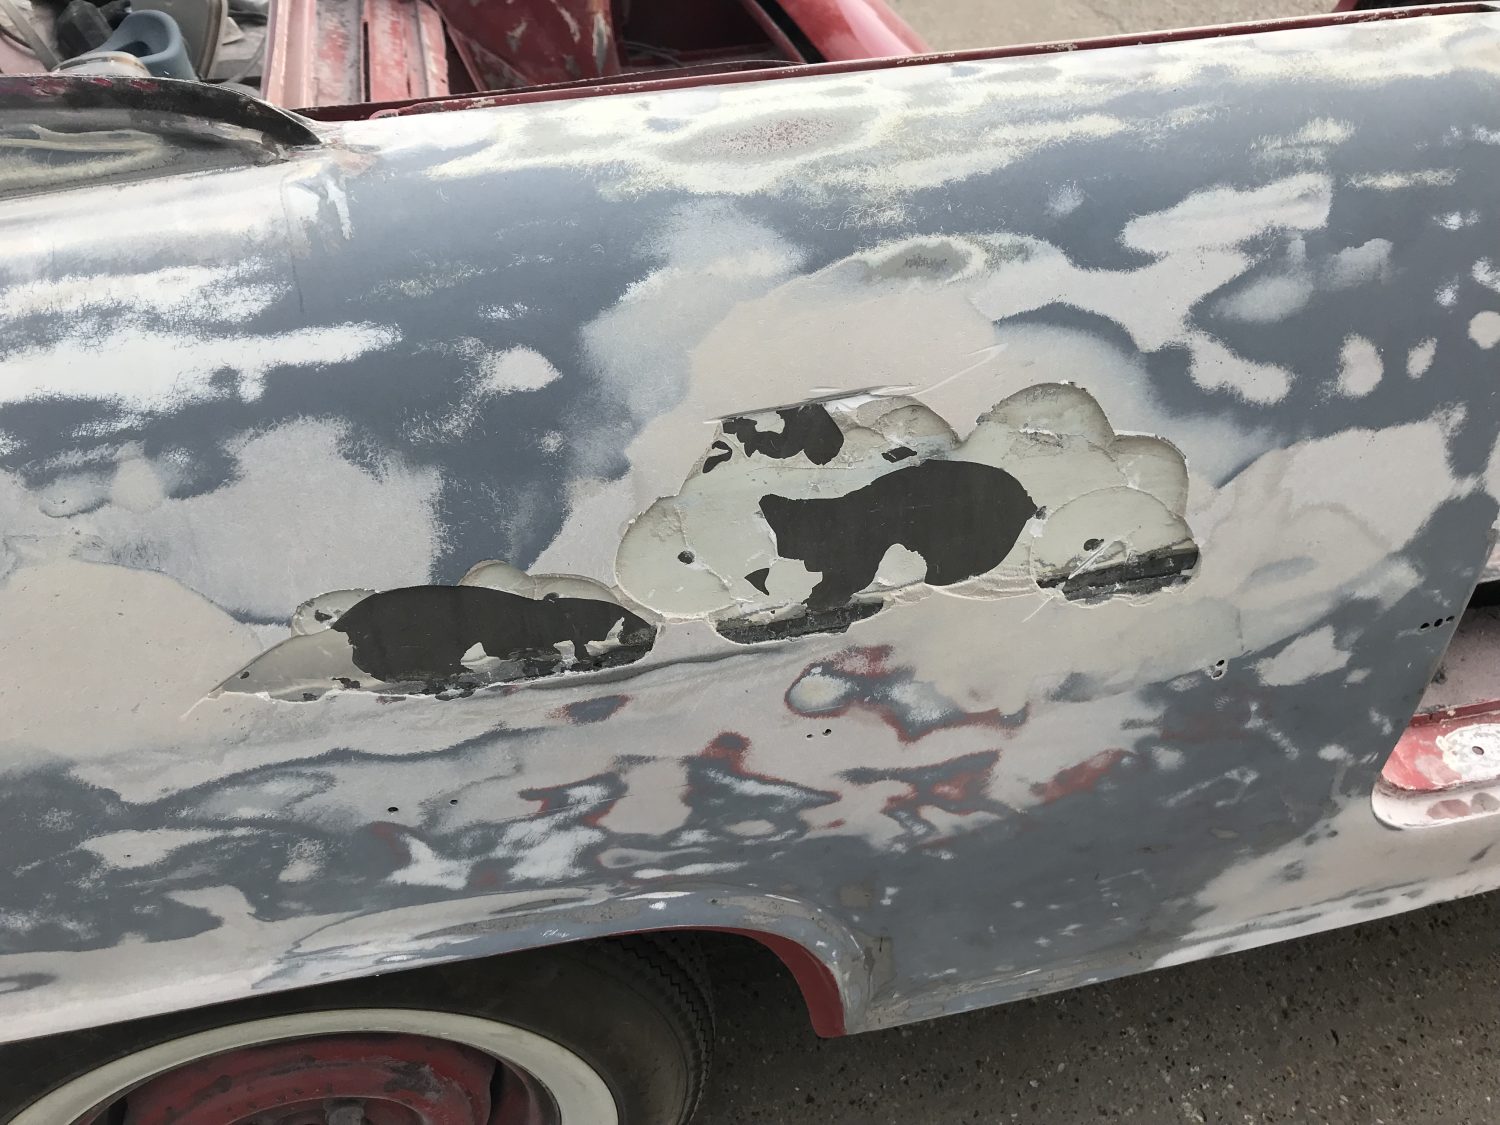
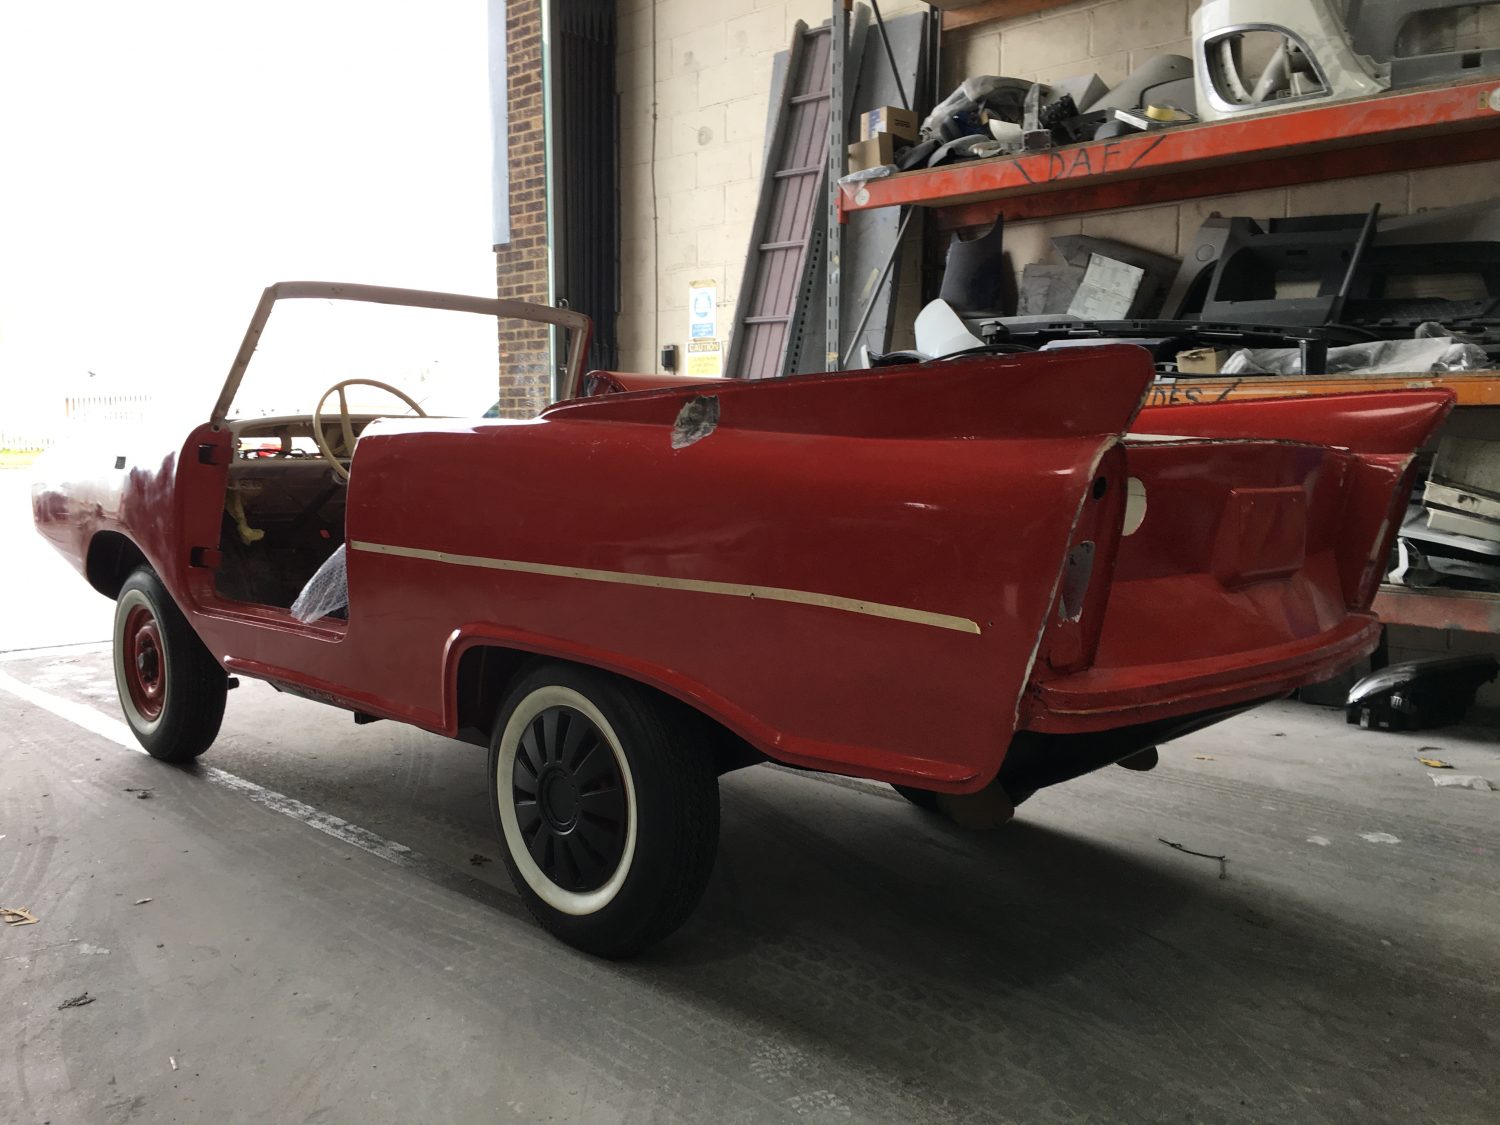
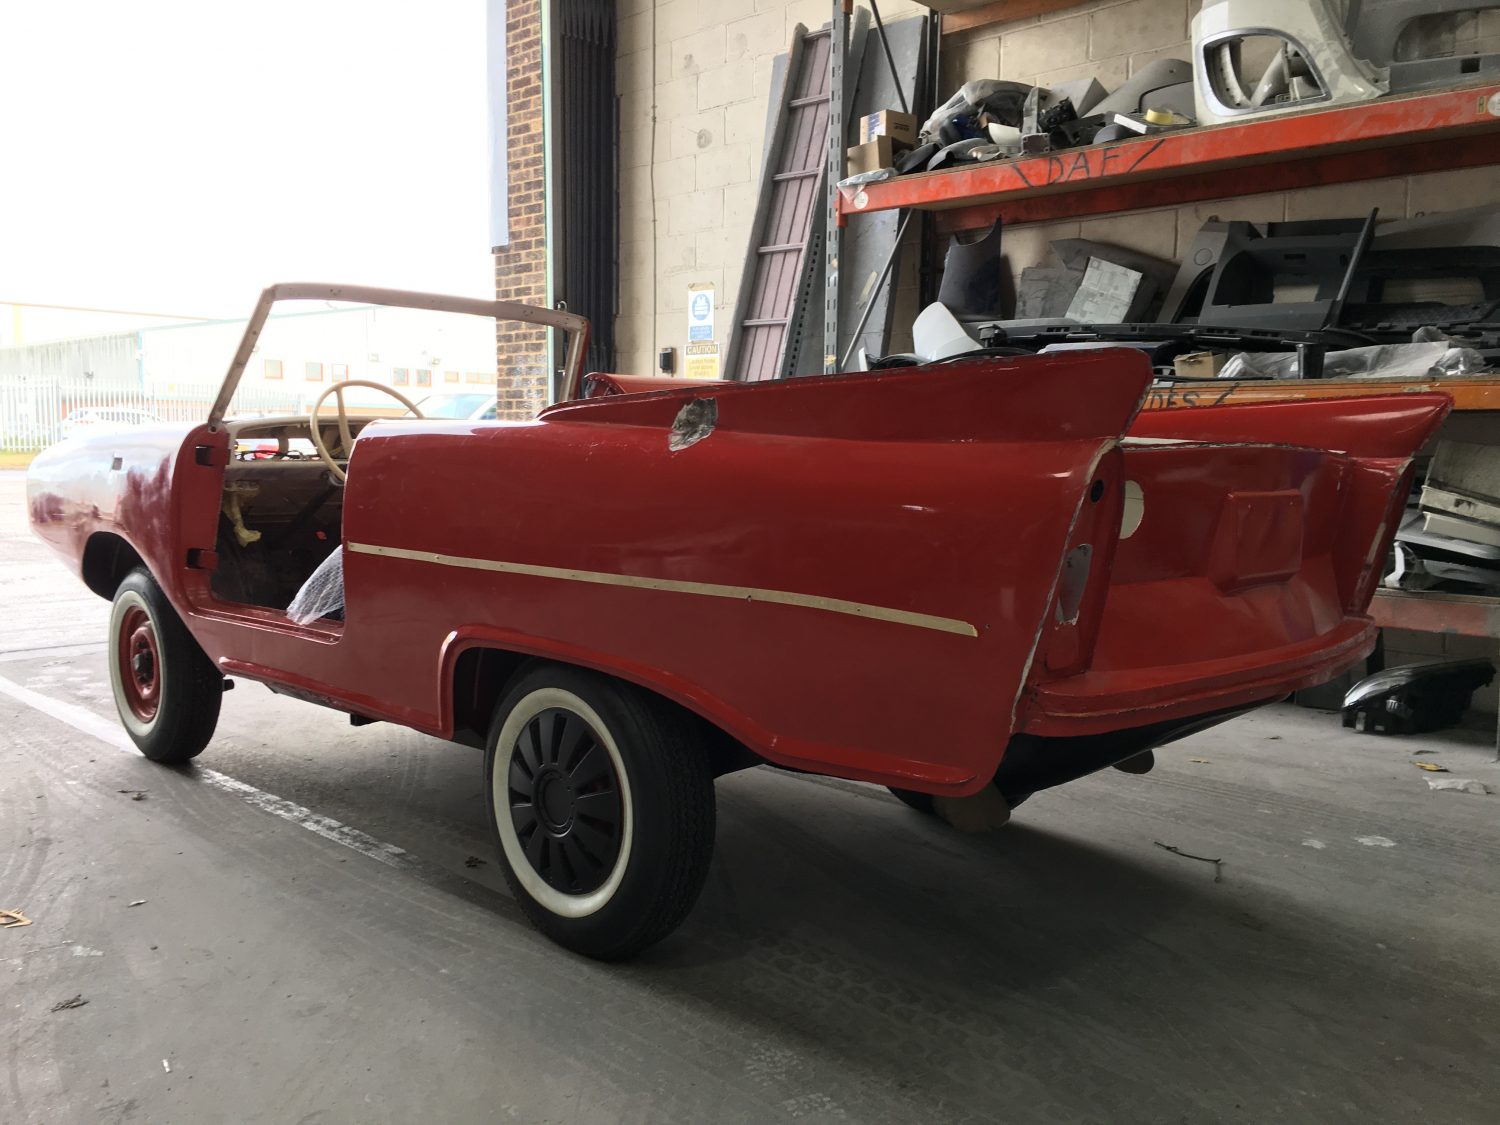
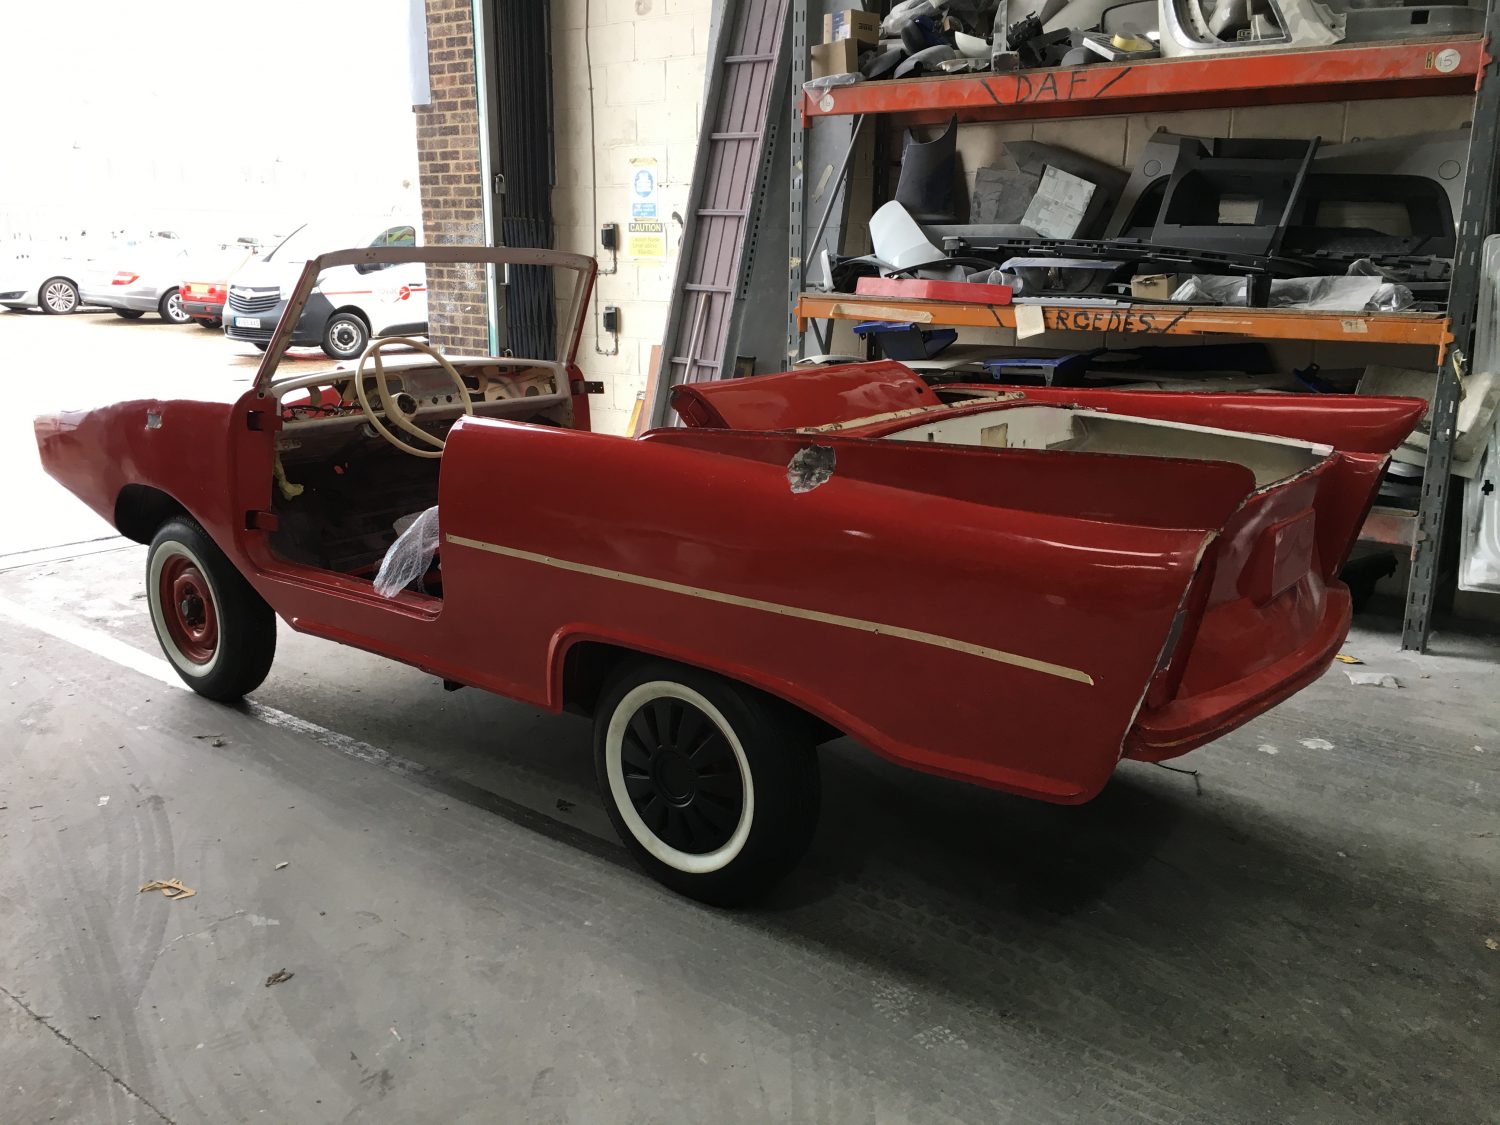
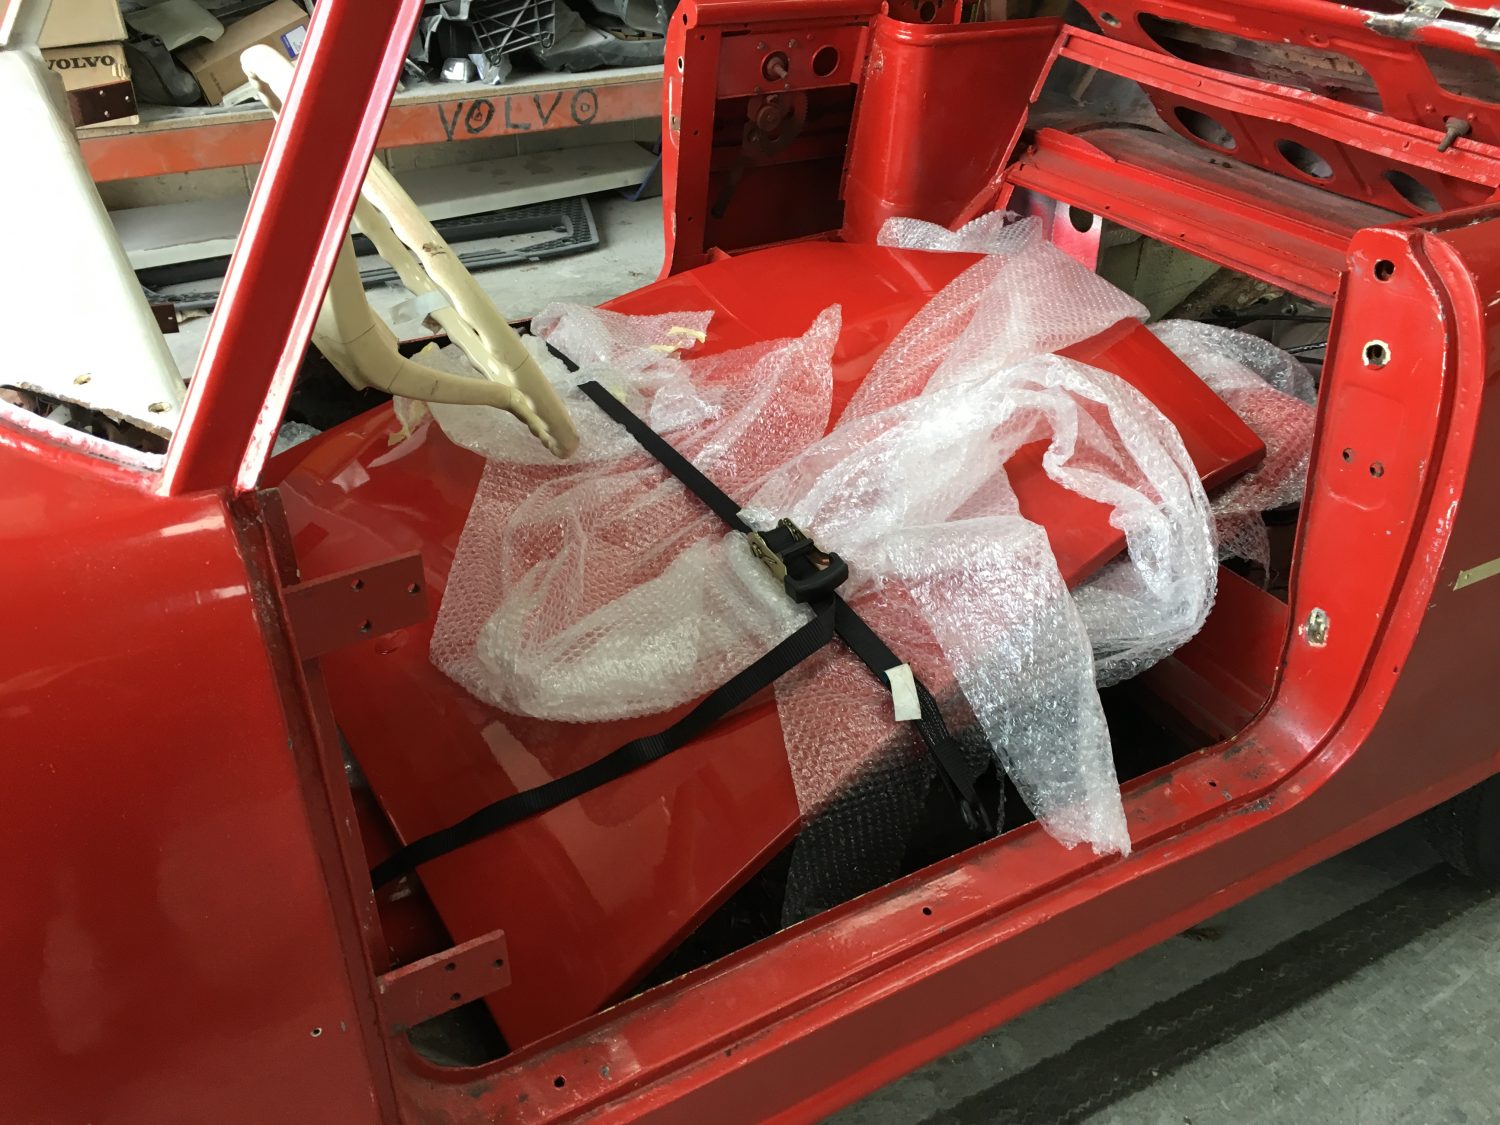
As you can see from the images below, we have had to remove a large quantity of filler from our 1965 Amphicar.
At some stage in it’s previous life someone had applied filler excessively which is not ideal and in order to carry out the repair and preparation work correctly we will look to remove it all. Once the body preparation is complete we can then look to re-paint.
Although the car arrived with us in red we will carry out the re-spray to match the original factory specifications of it being Beach Strand White. (Ditzler Code 8703 = DAR offset 90113)


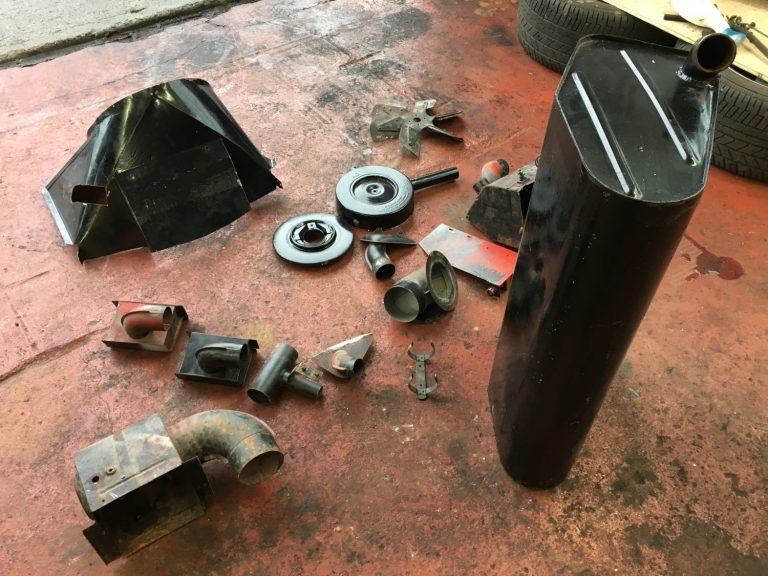
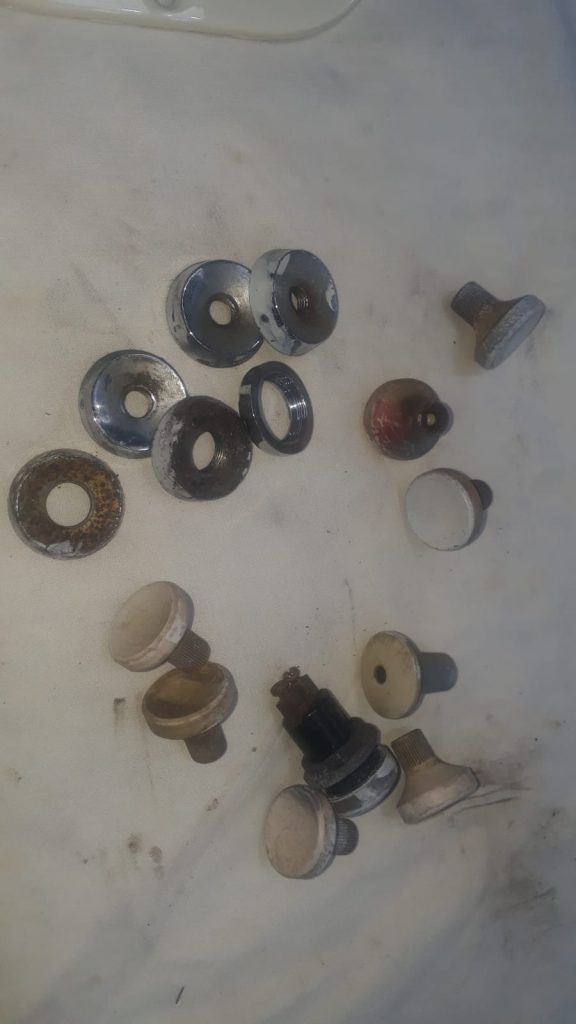
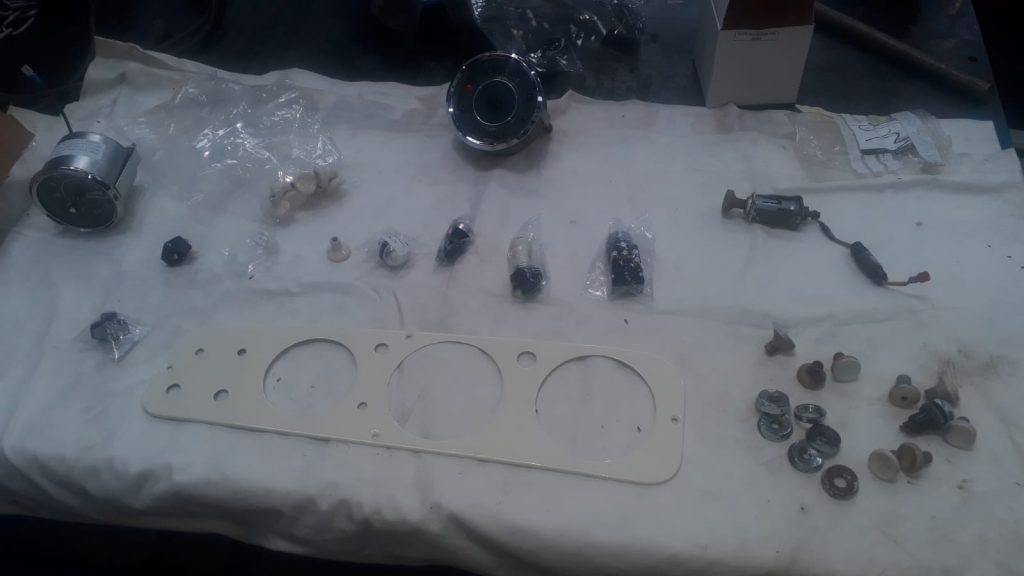
In preparation for the return of our Amphicar body shell from the paint shop, we have started to go through the parts to decide whether to renew, replace or refurbish existing components.
We have put together a selection of parts that require a clean and paint. This will keep Pete busy on the project whilst we wait for the return of the car.
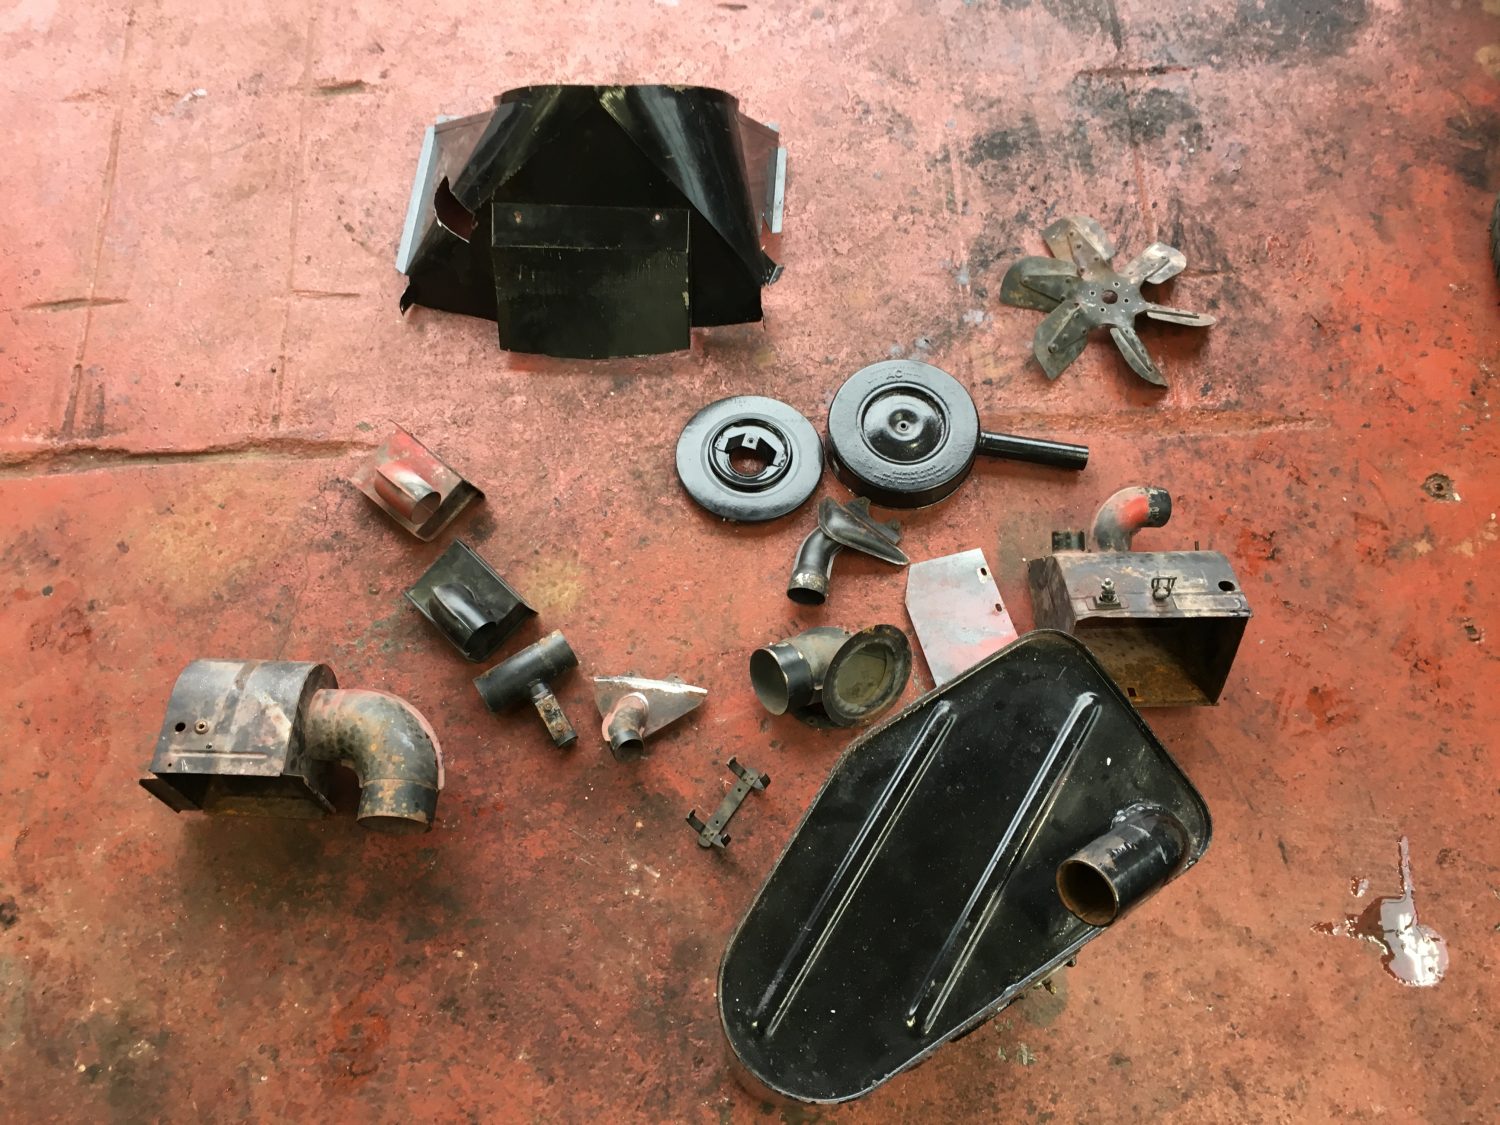
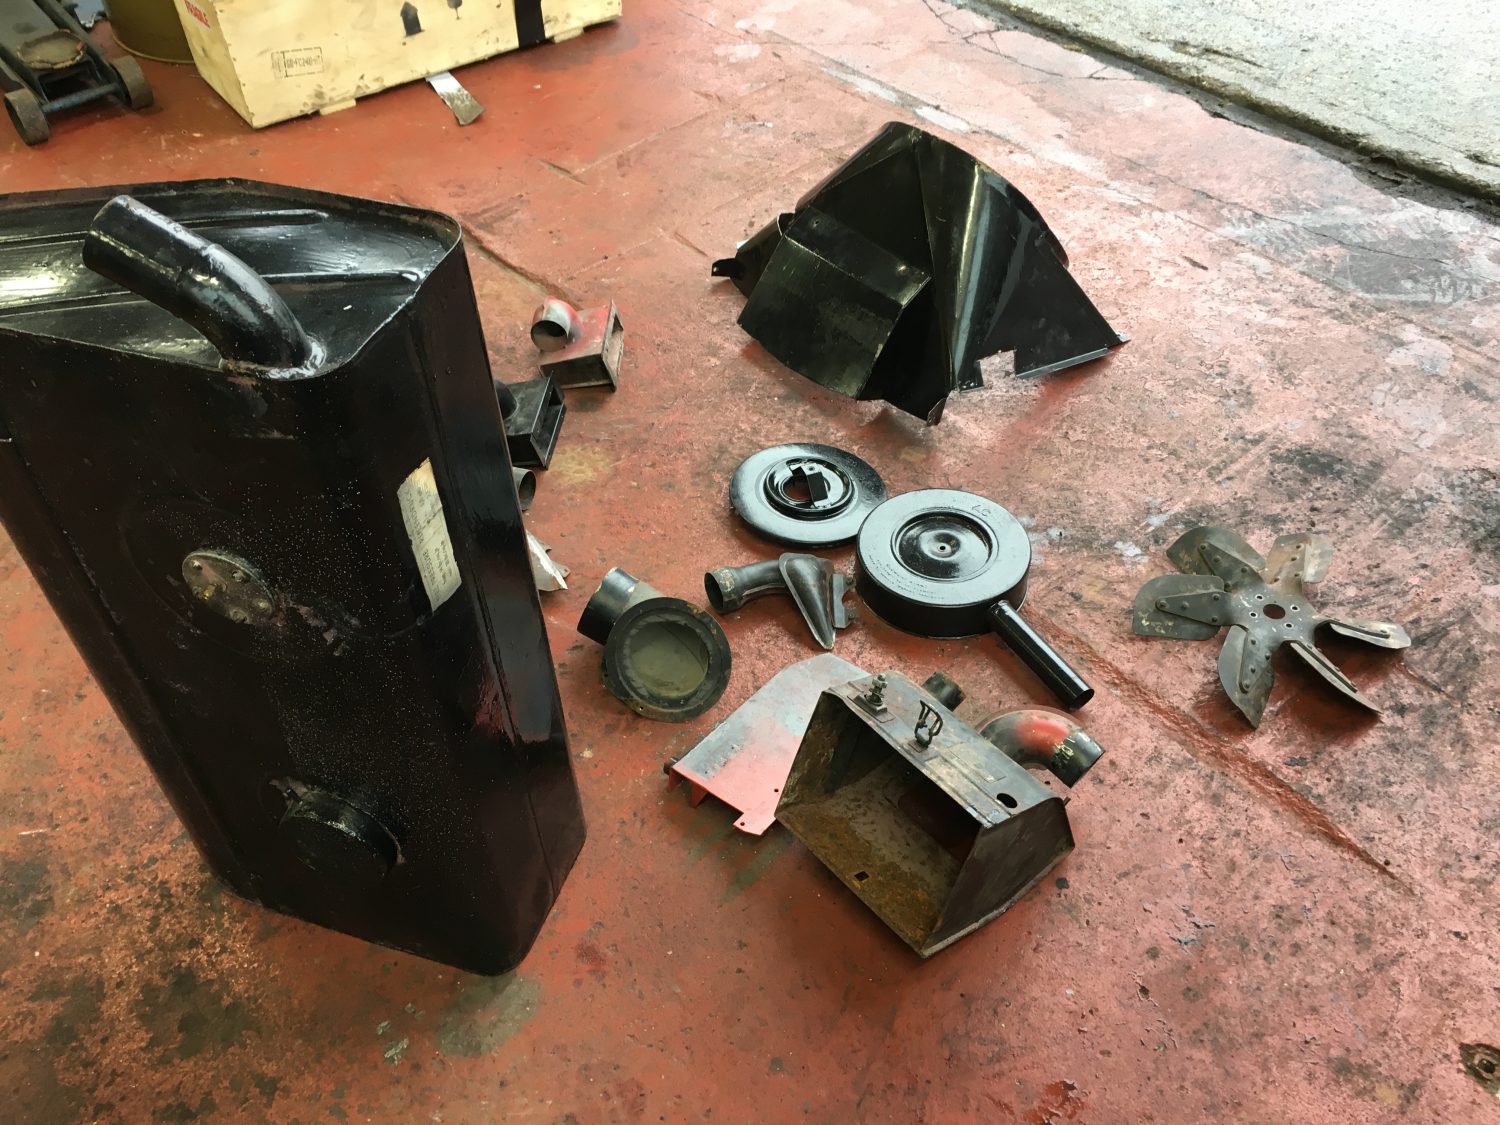

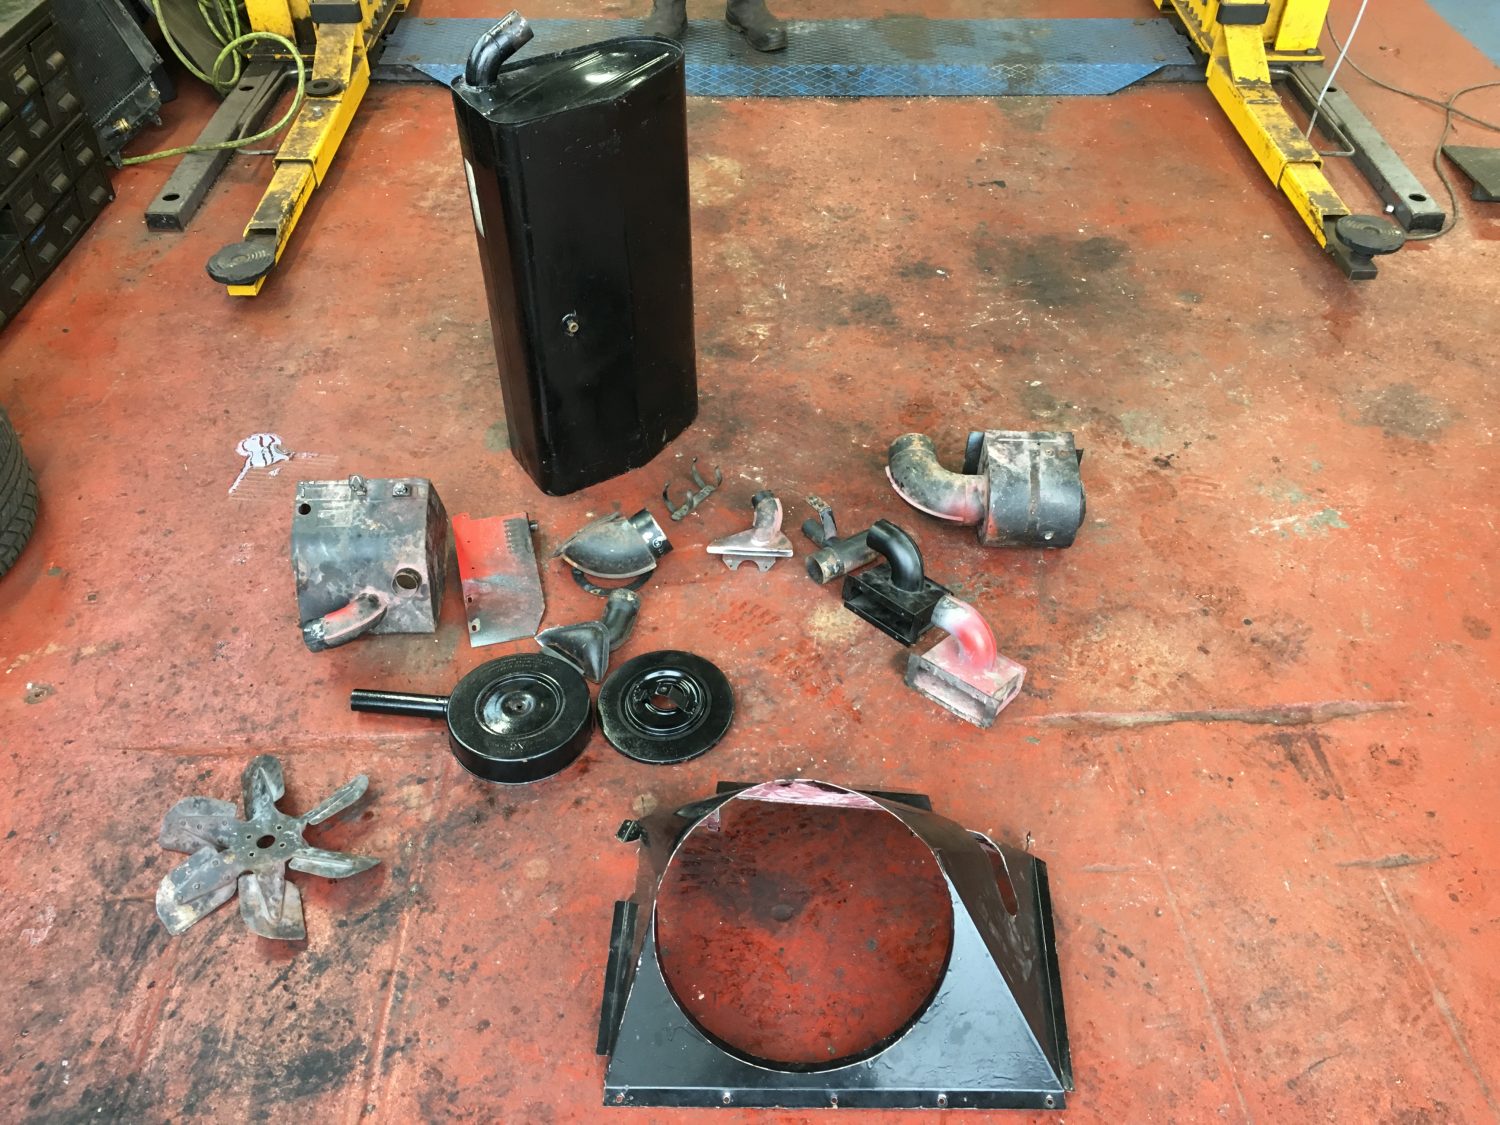
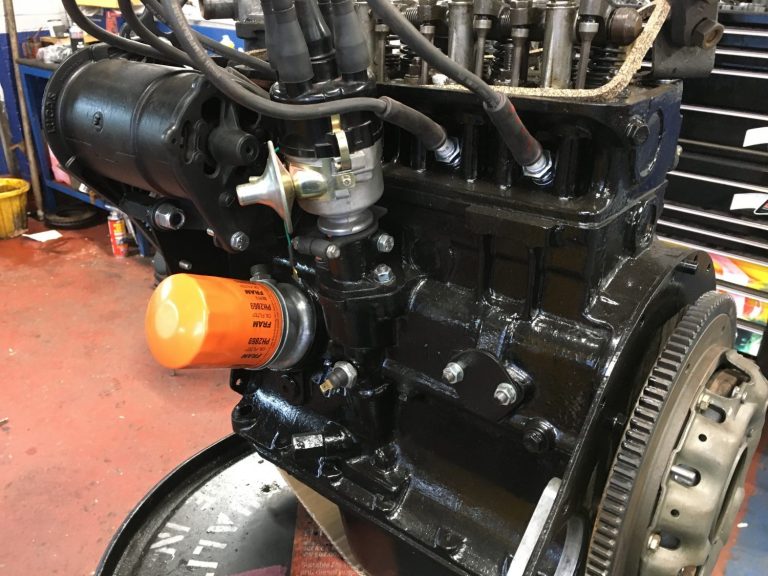
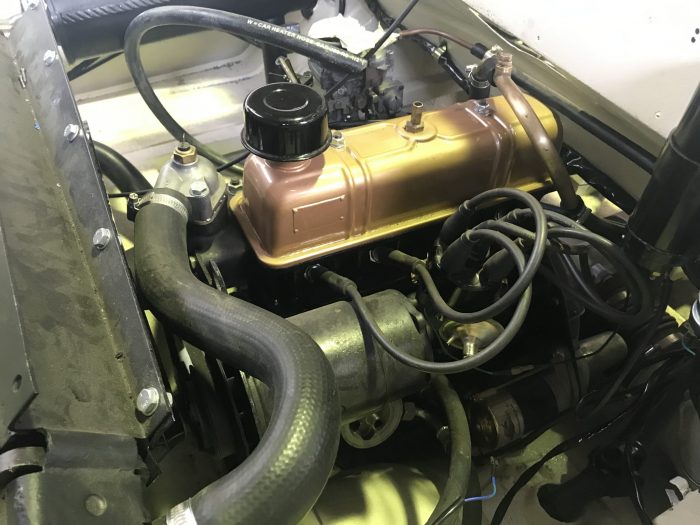
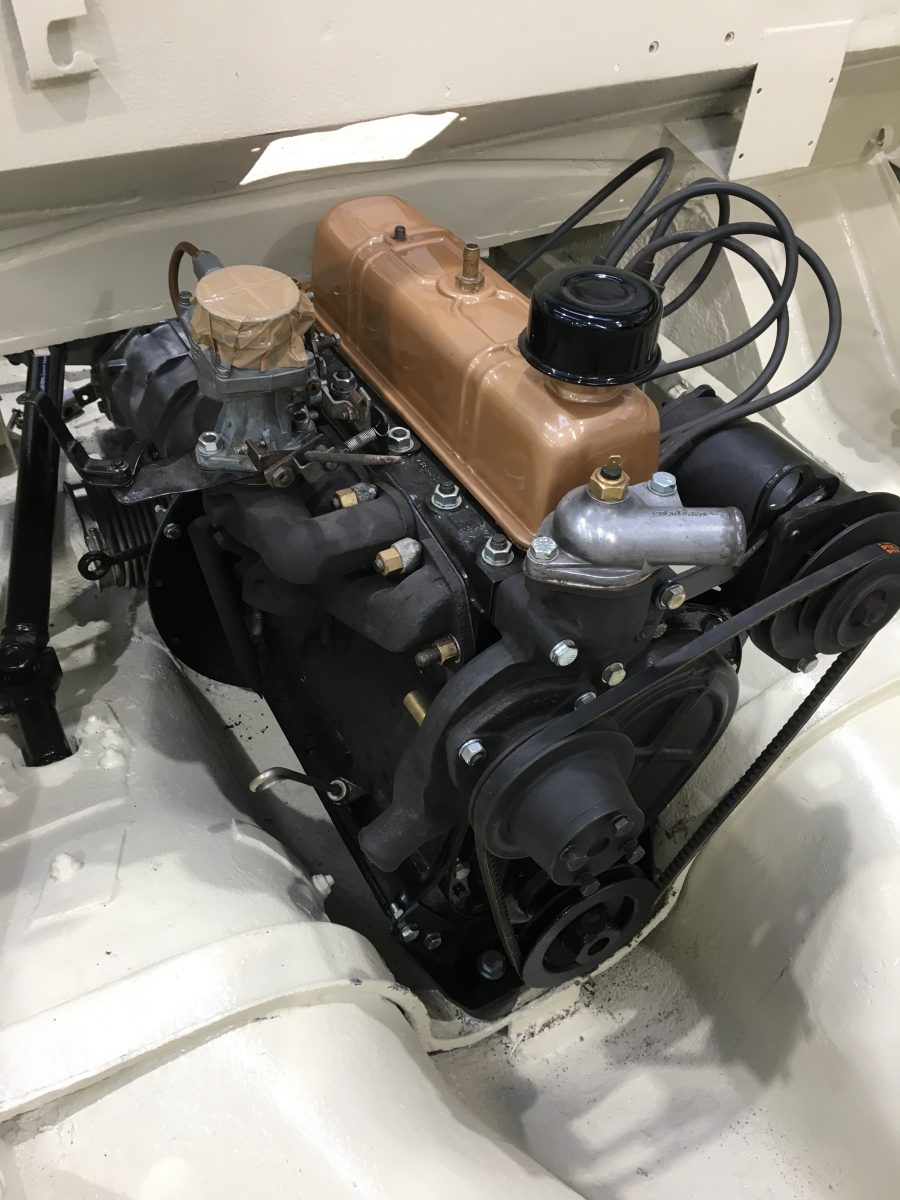
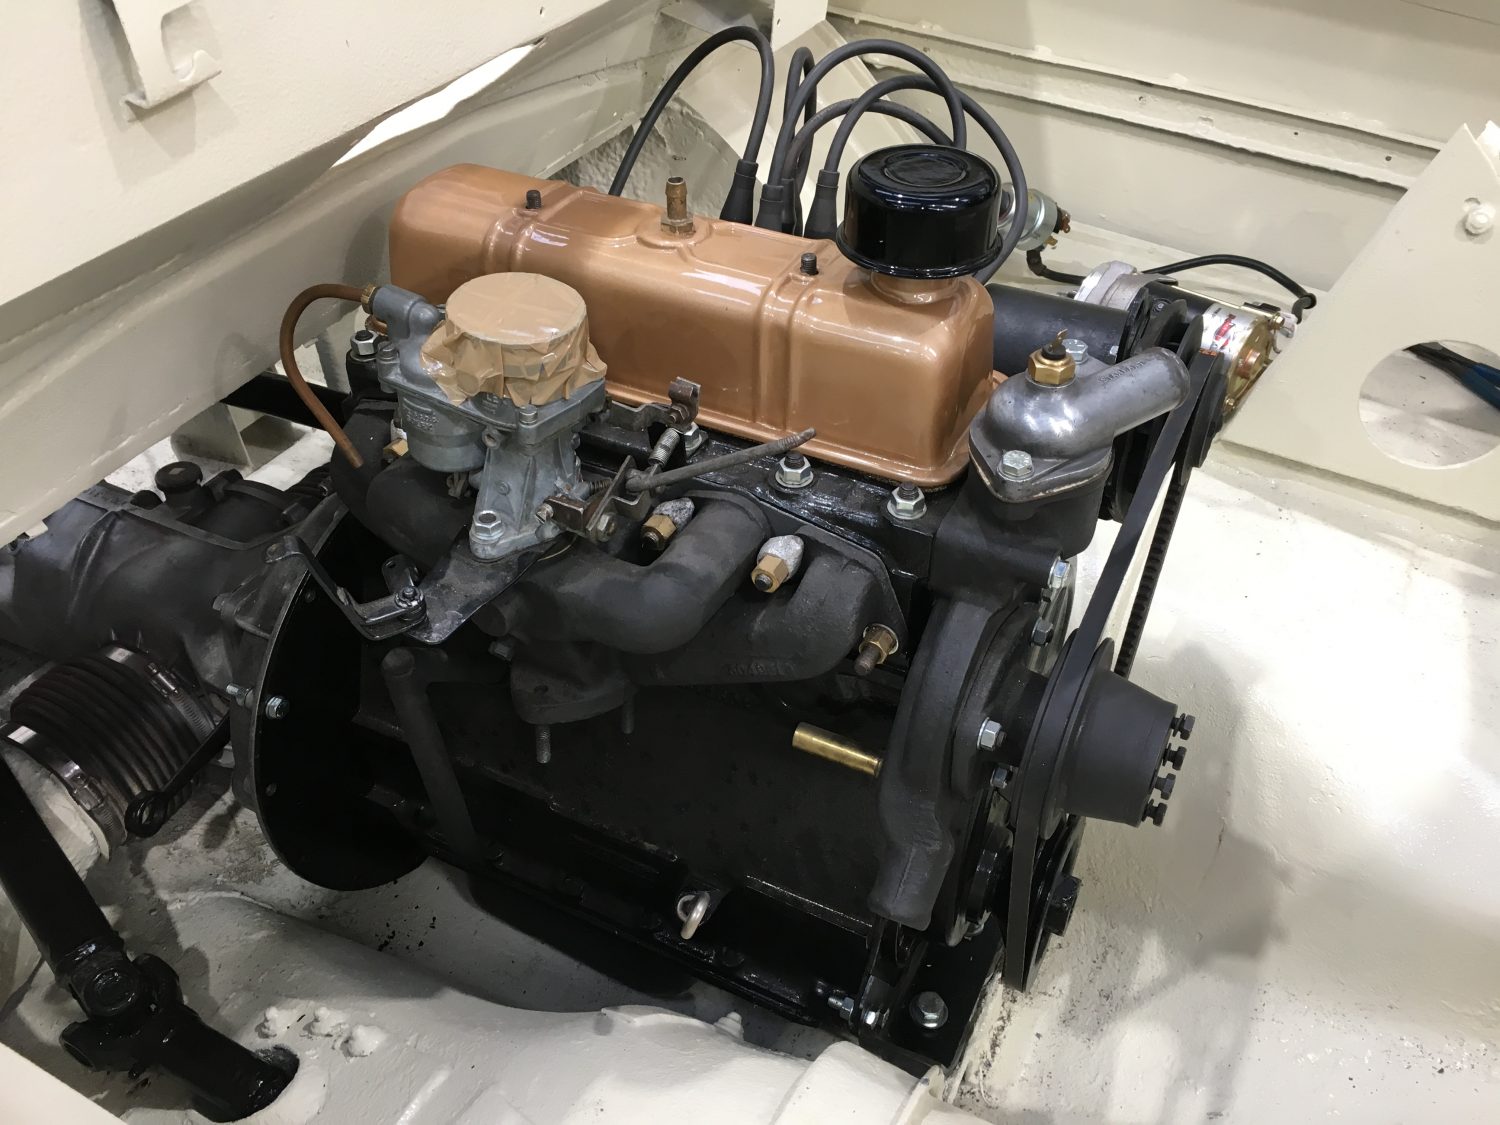
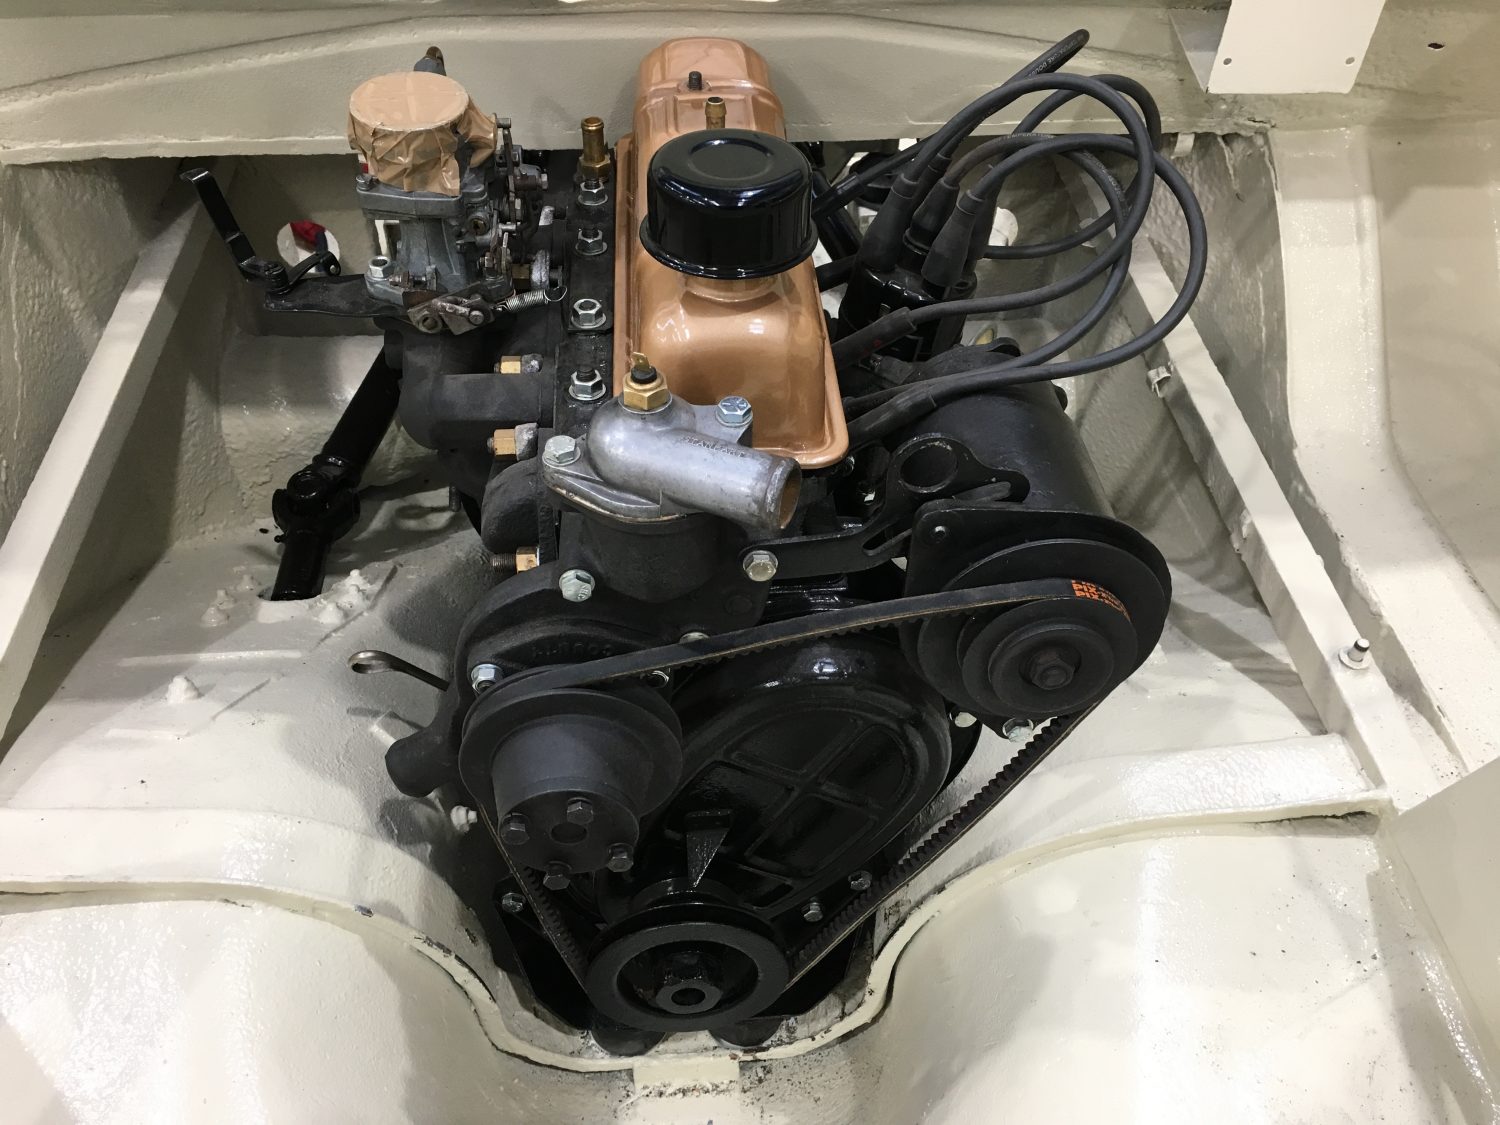
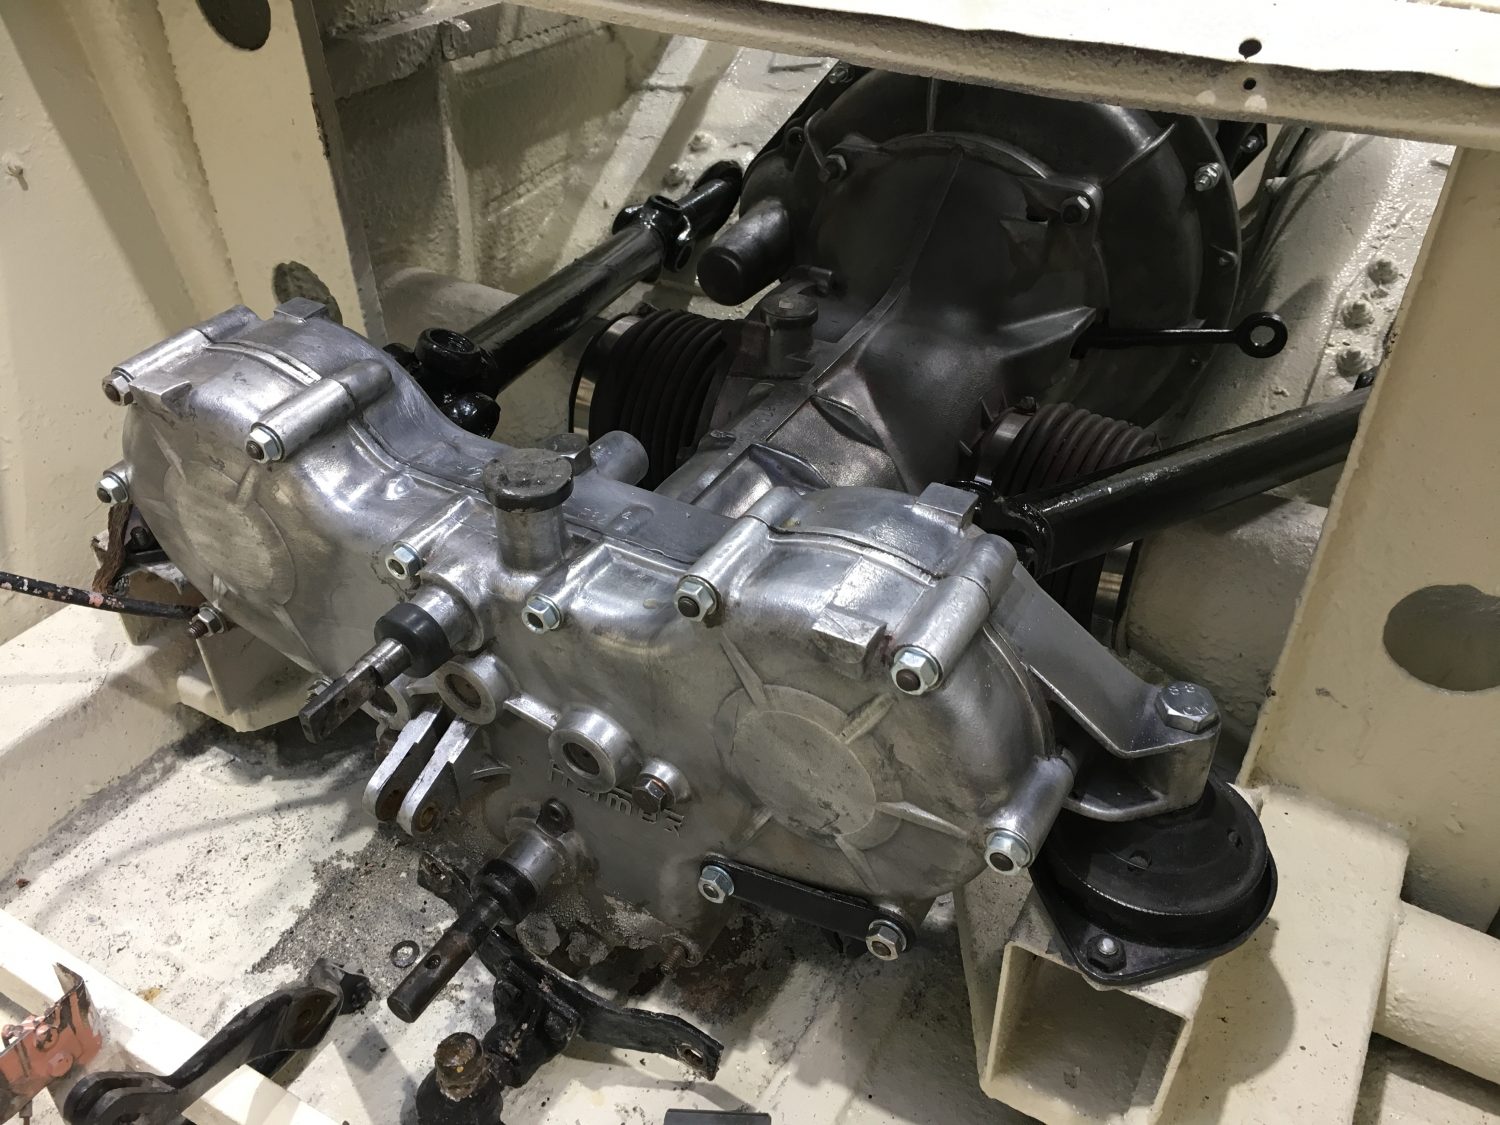
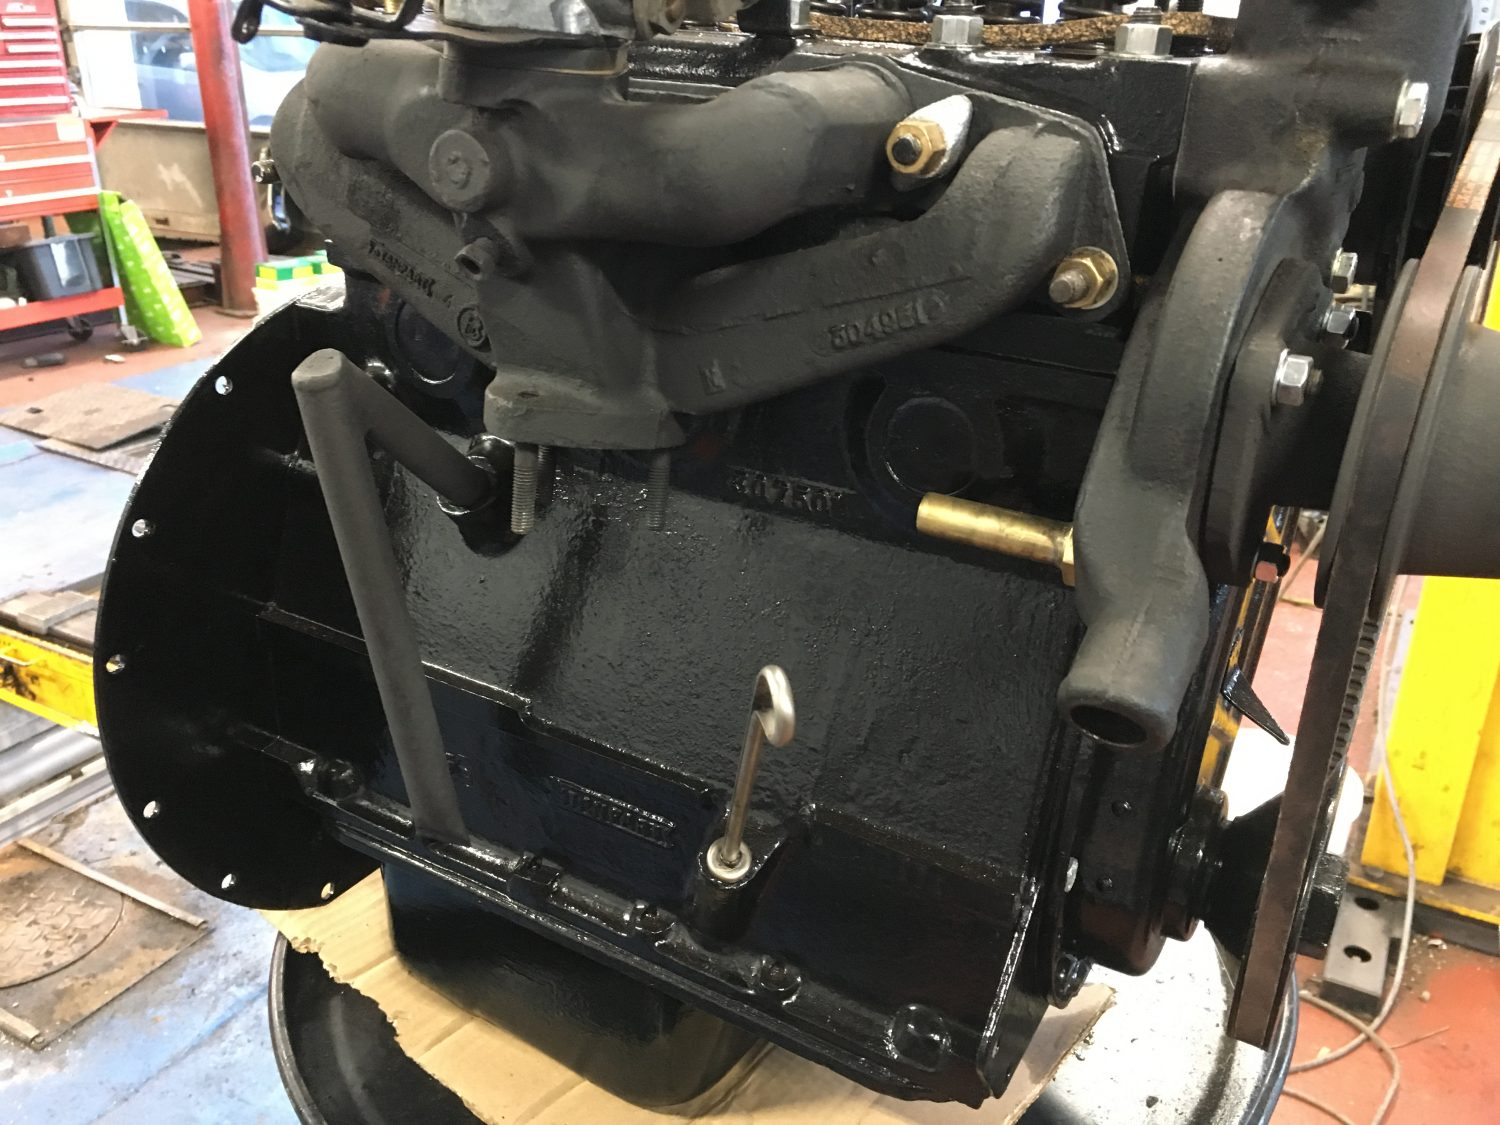
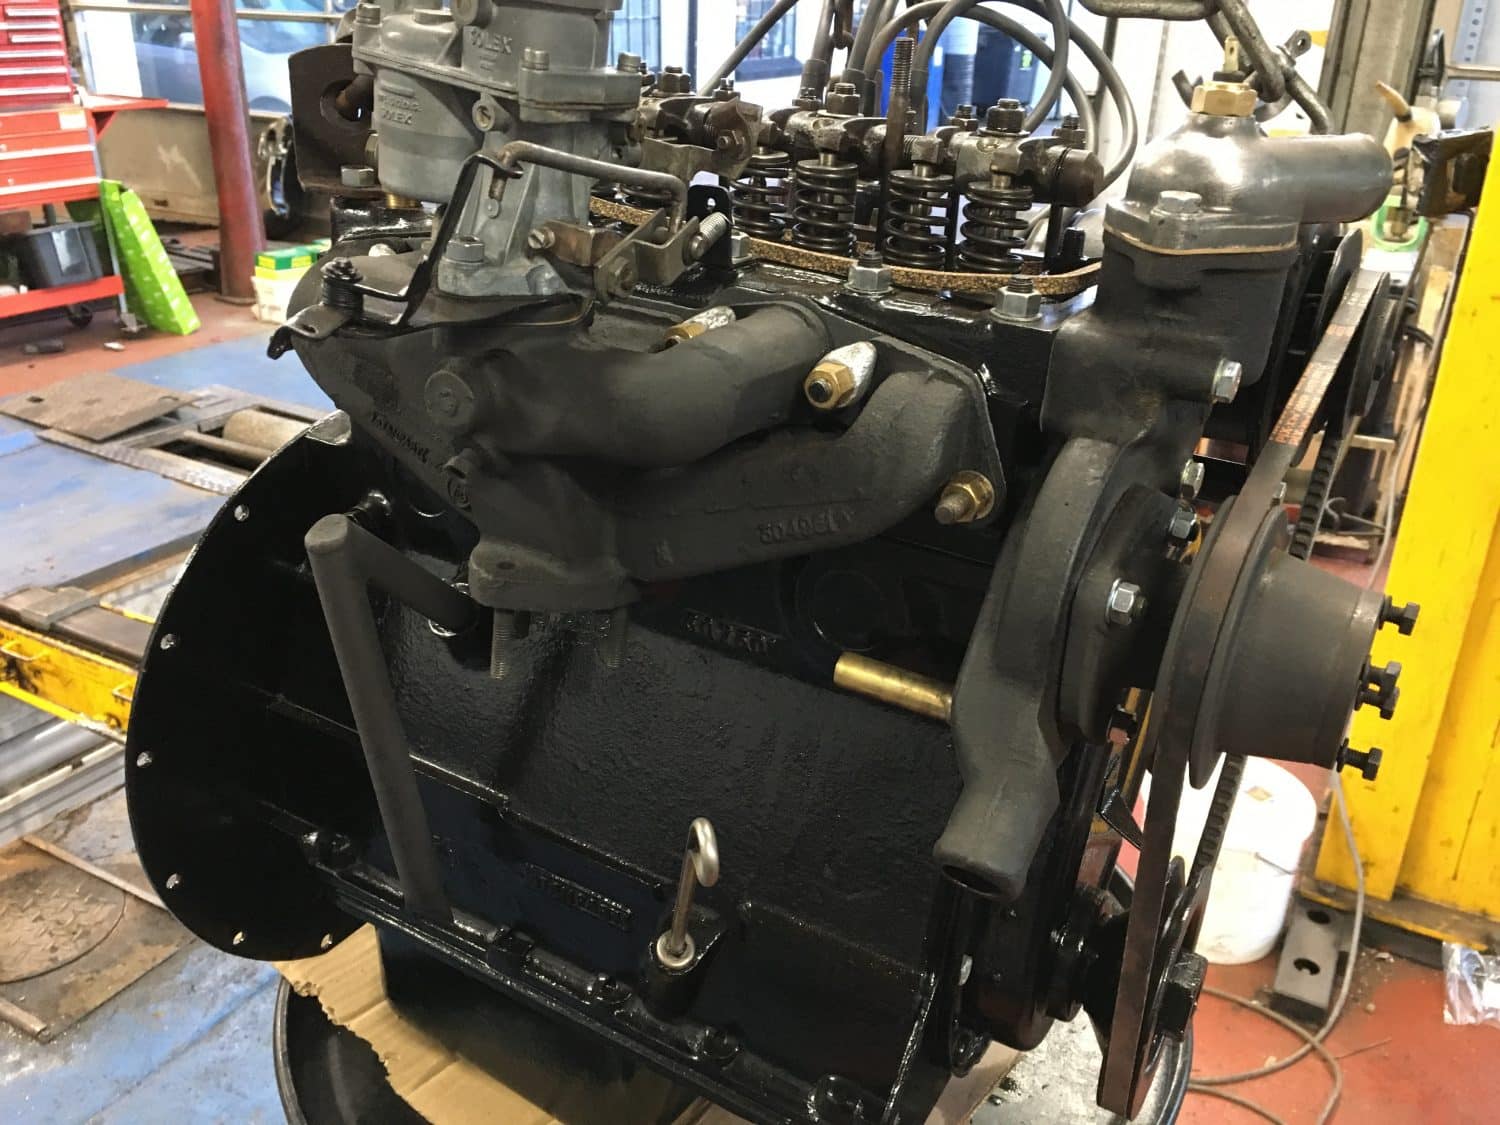
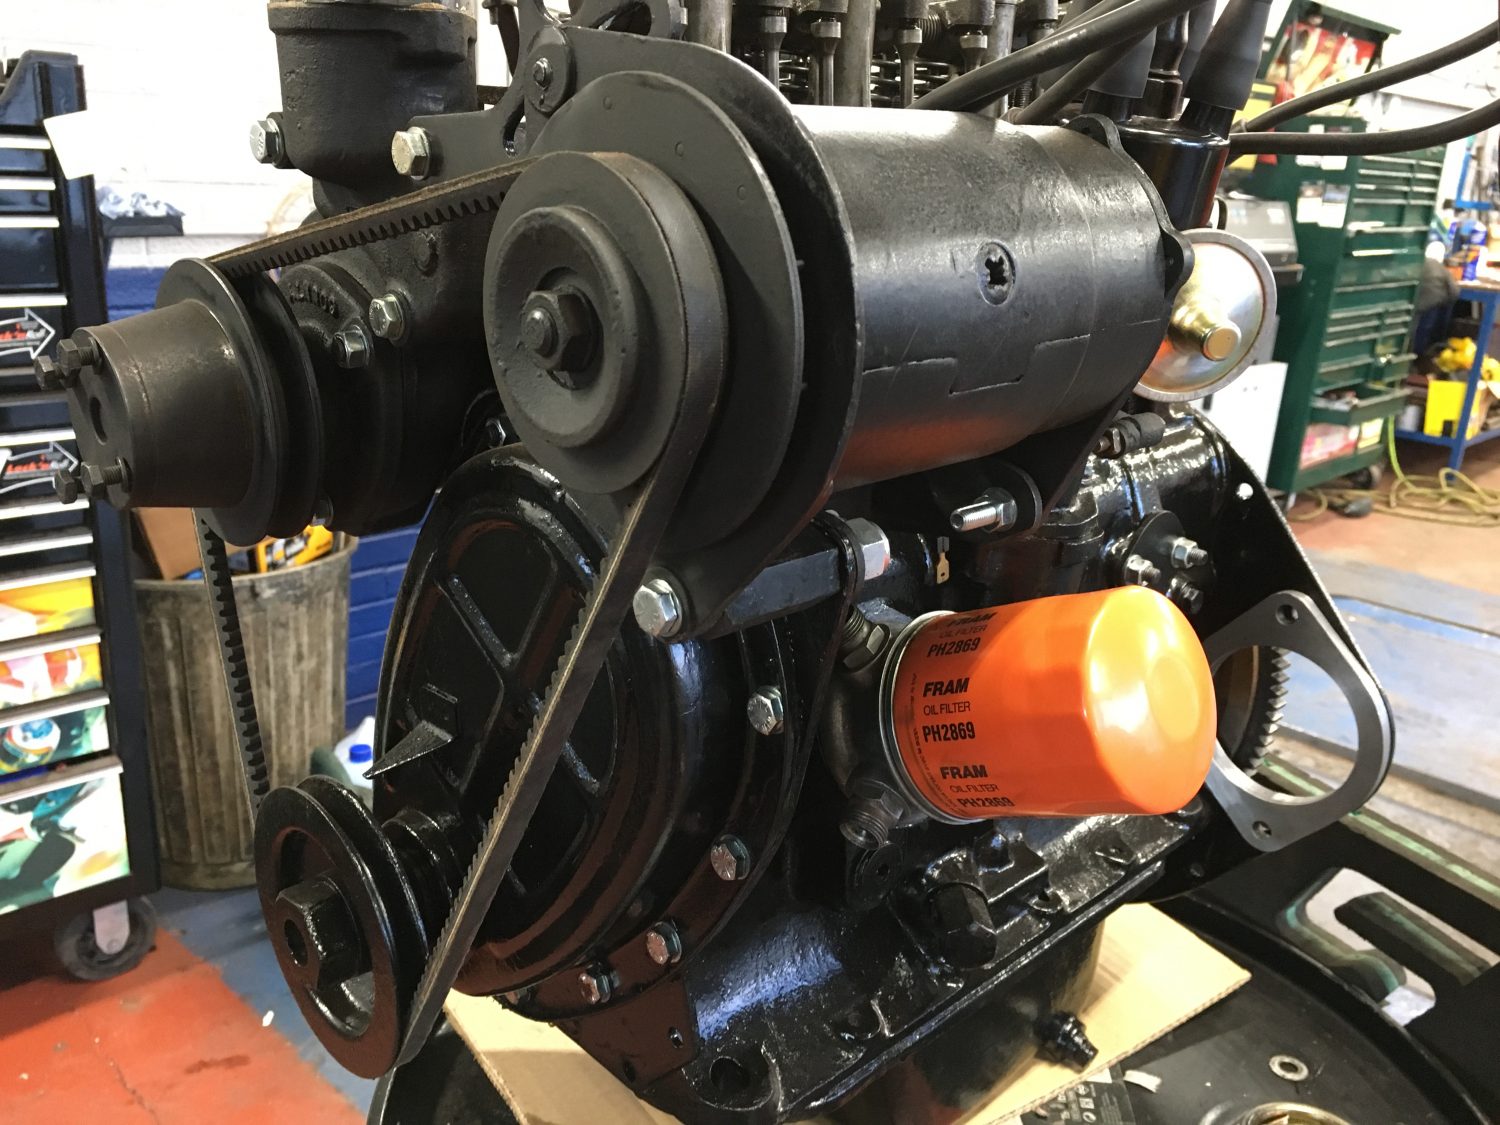
With only the rocker box cover a different colour, the Amphicar engine is actually one of the simplest engines to paint as it is all black.
Before removing the engine from the car we had it all up and running as it should.
Pete has since been busy stripping it off it’s loose components before cleaning and painting the bulk of the engine ready to be built back up again.

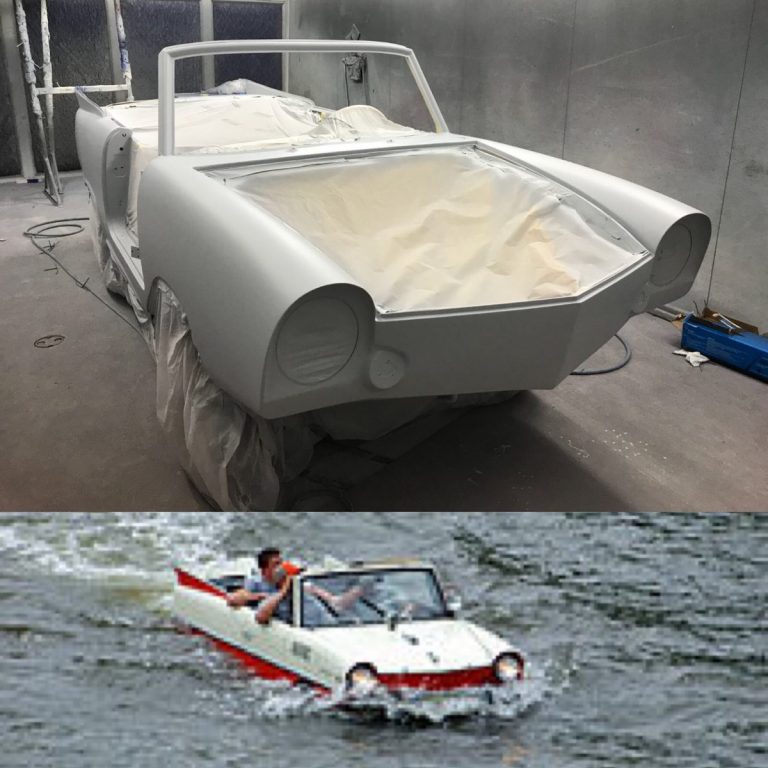
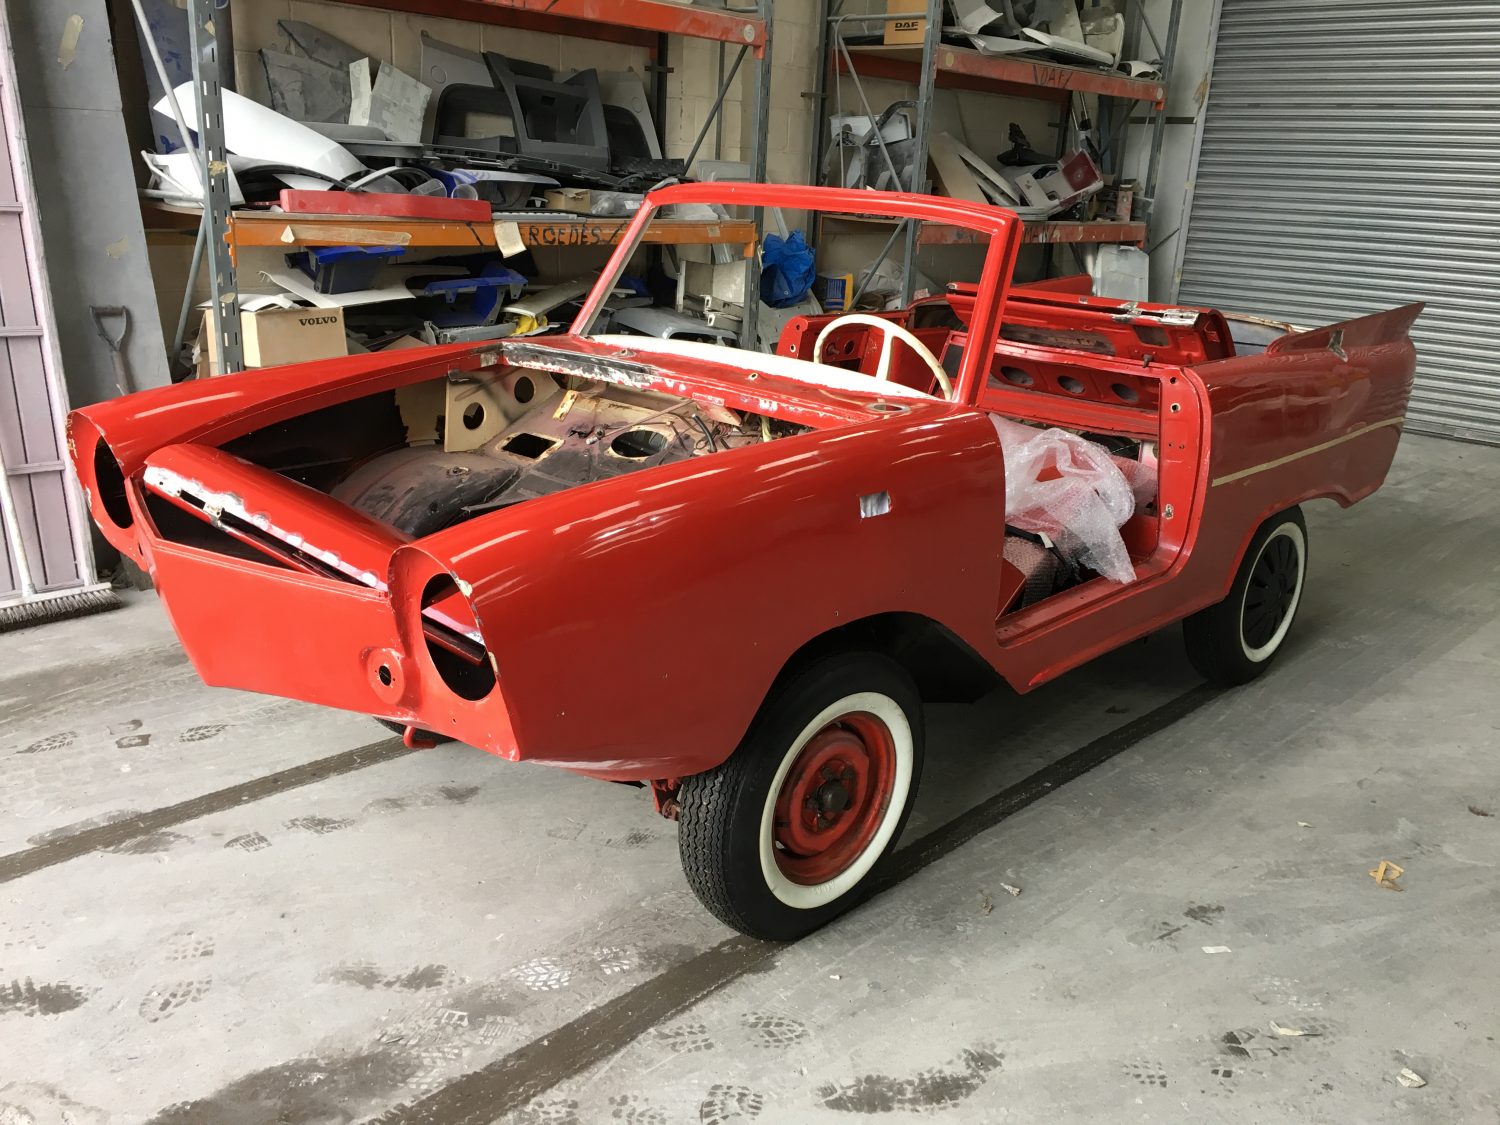
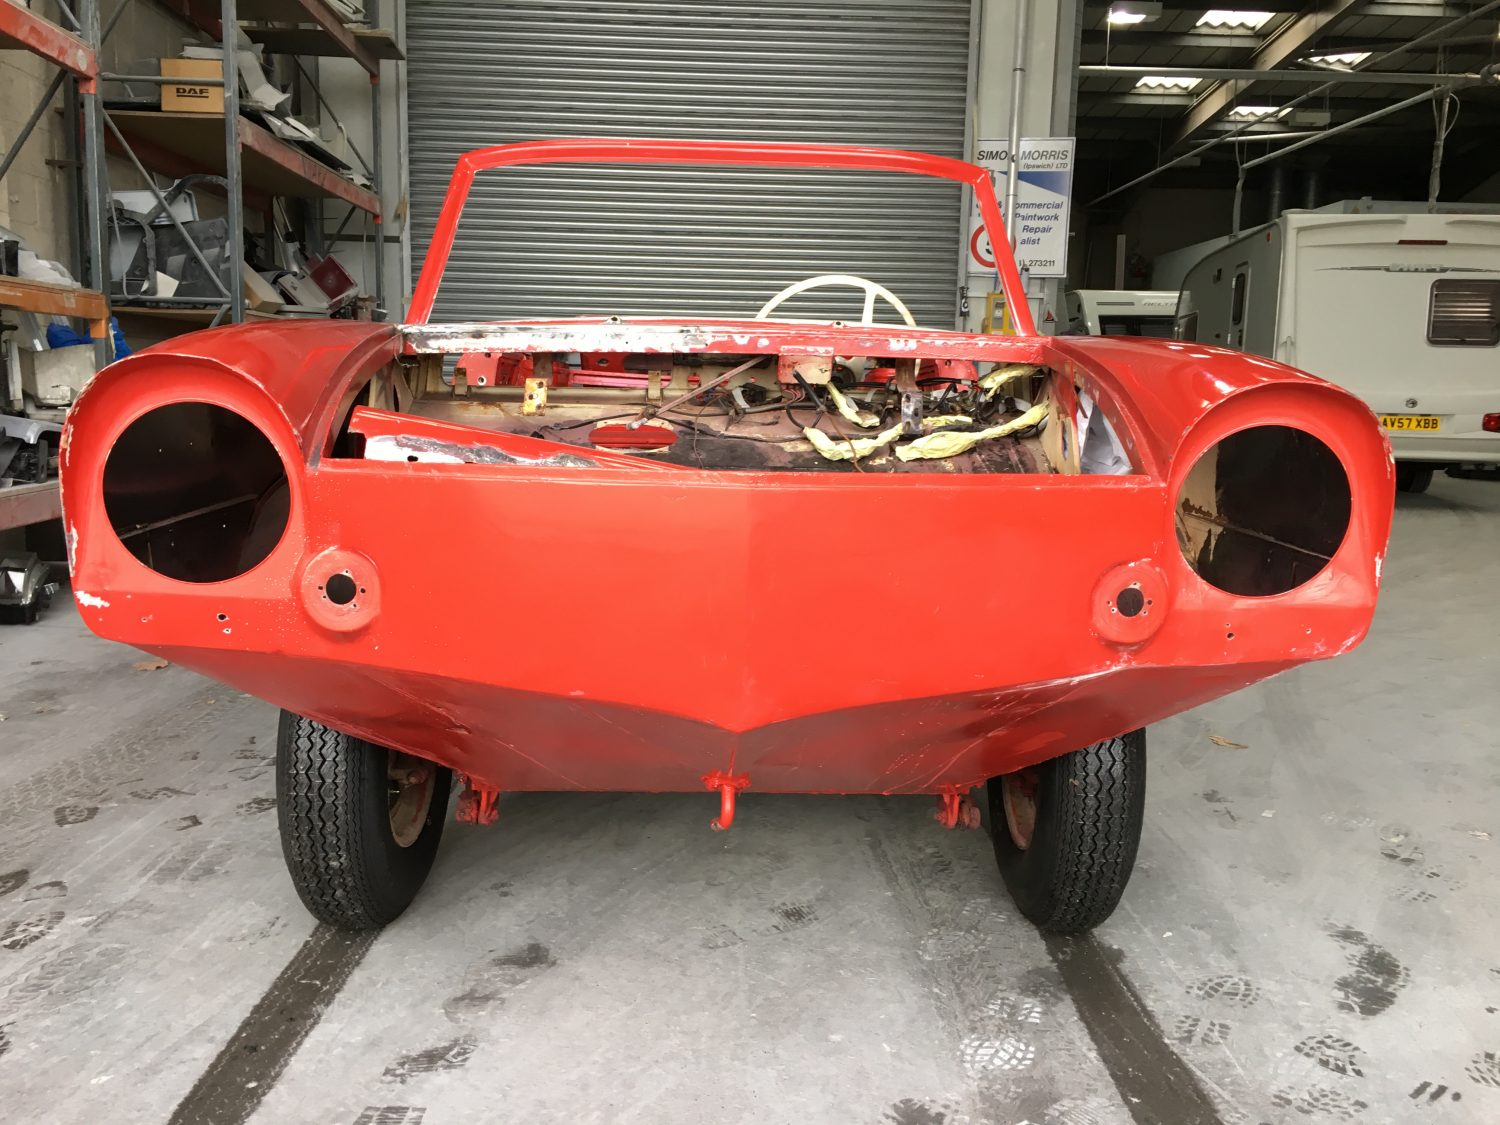
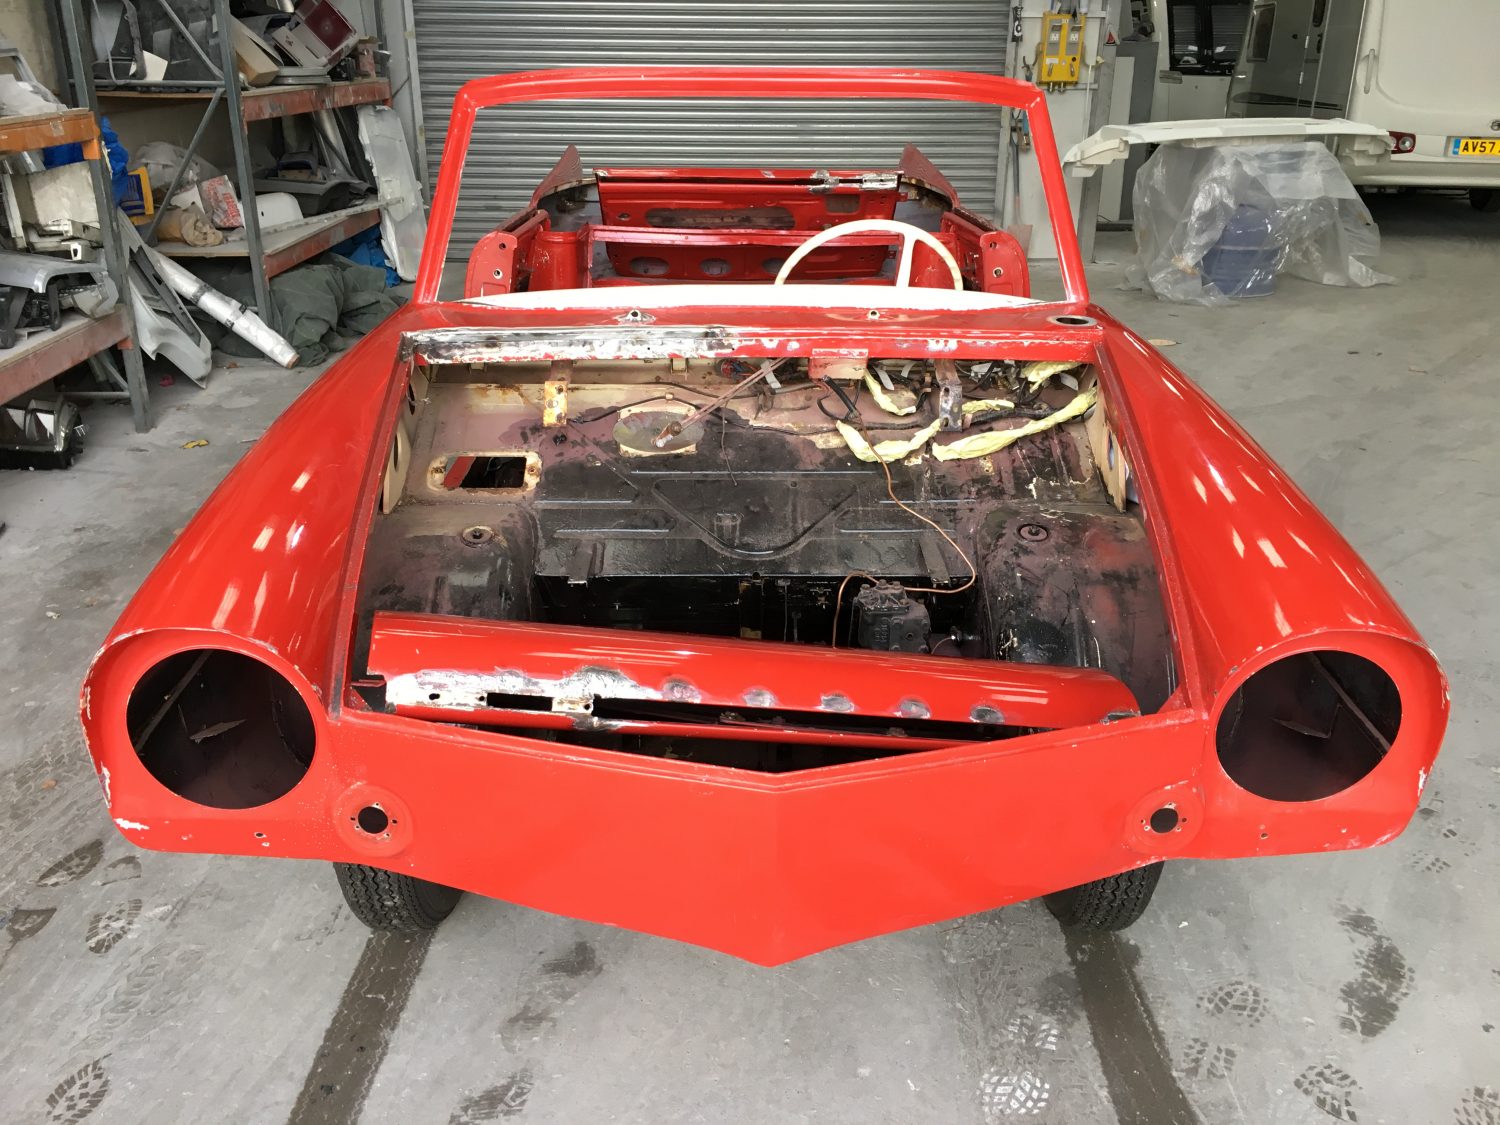
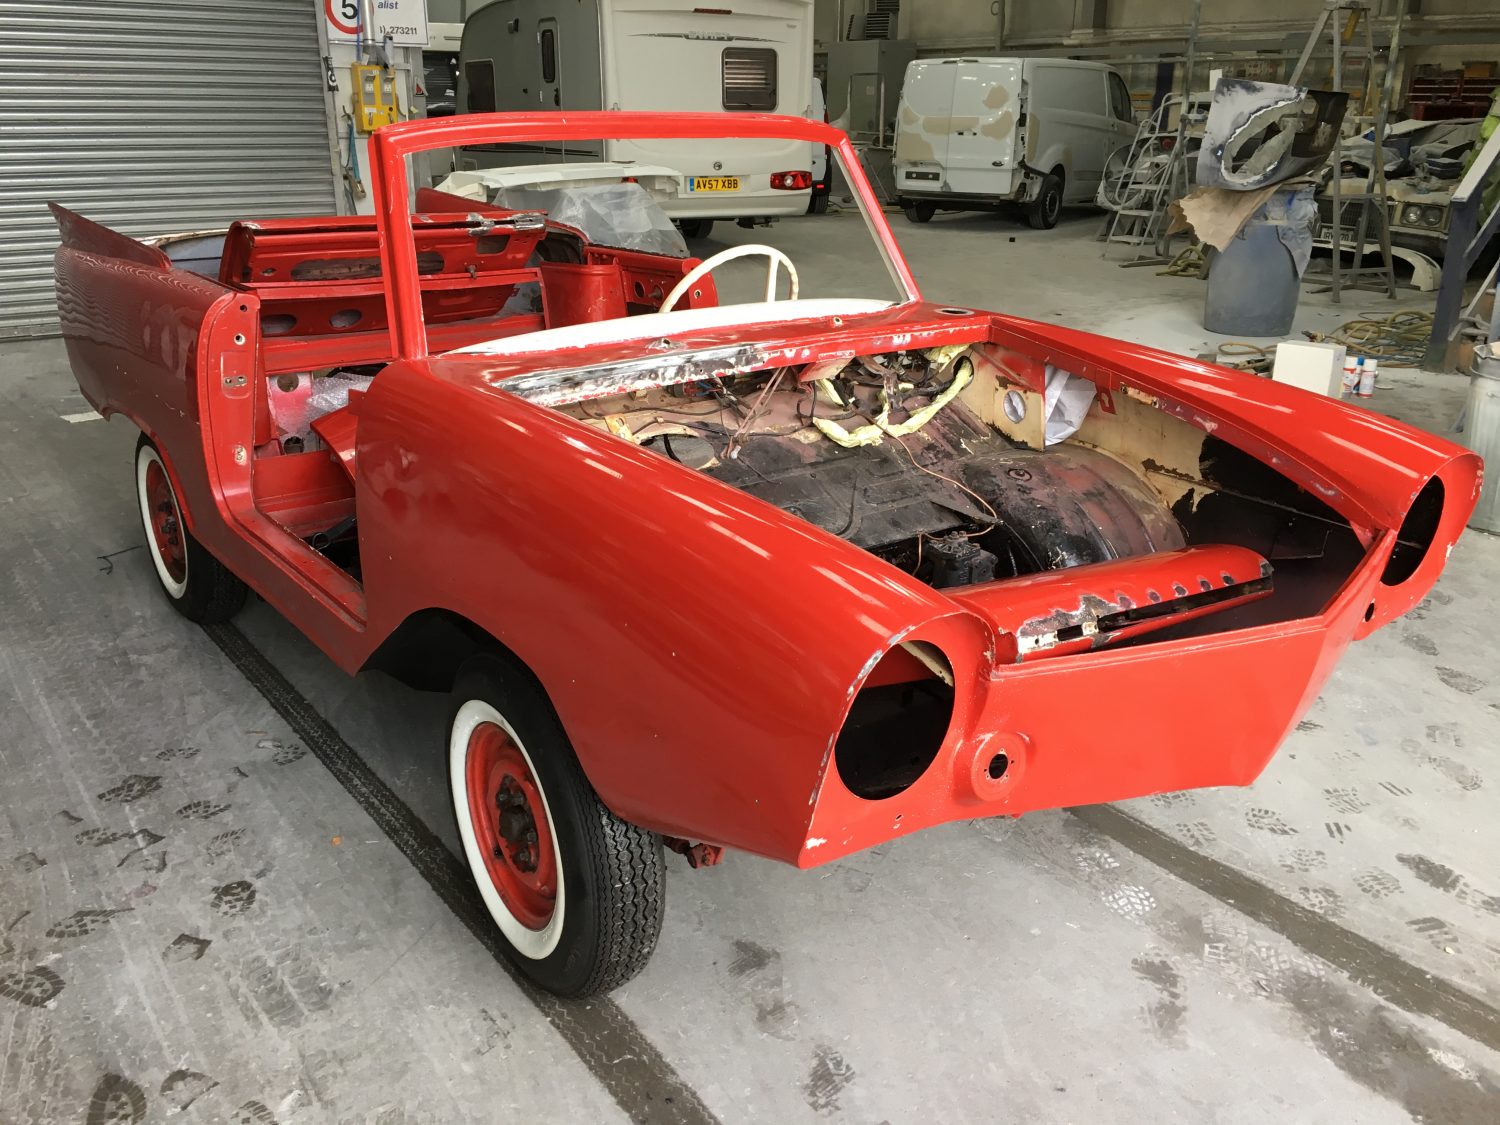
[vc_row][vc_column][vc_column_text]We are well on with the preparation of our 1965 Amphicar body ready for the full respray which we have planned for early next year.
As the entire body was built from fibre-glass from new it was never perfect to start with but we aim to make it better than the day it was new which will take a lot of time and effort but we feel will be worth it in the end.
The paint, where thick, has been removed and a very fine layer of filler has been applied in certain areas.
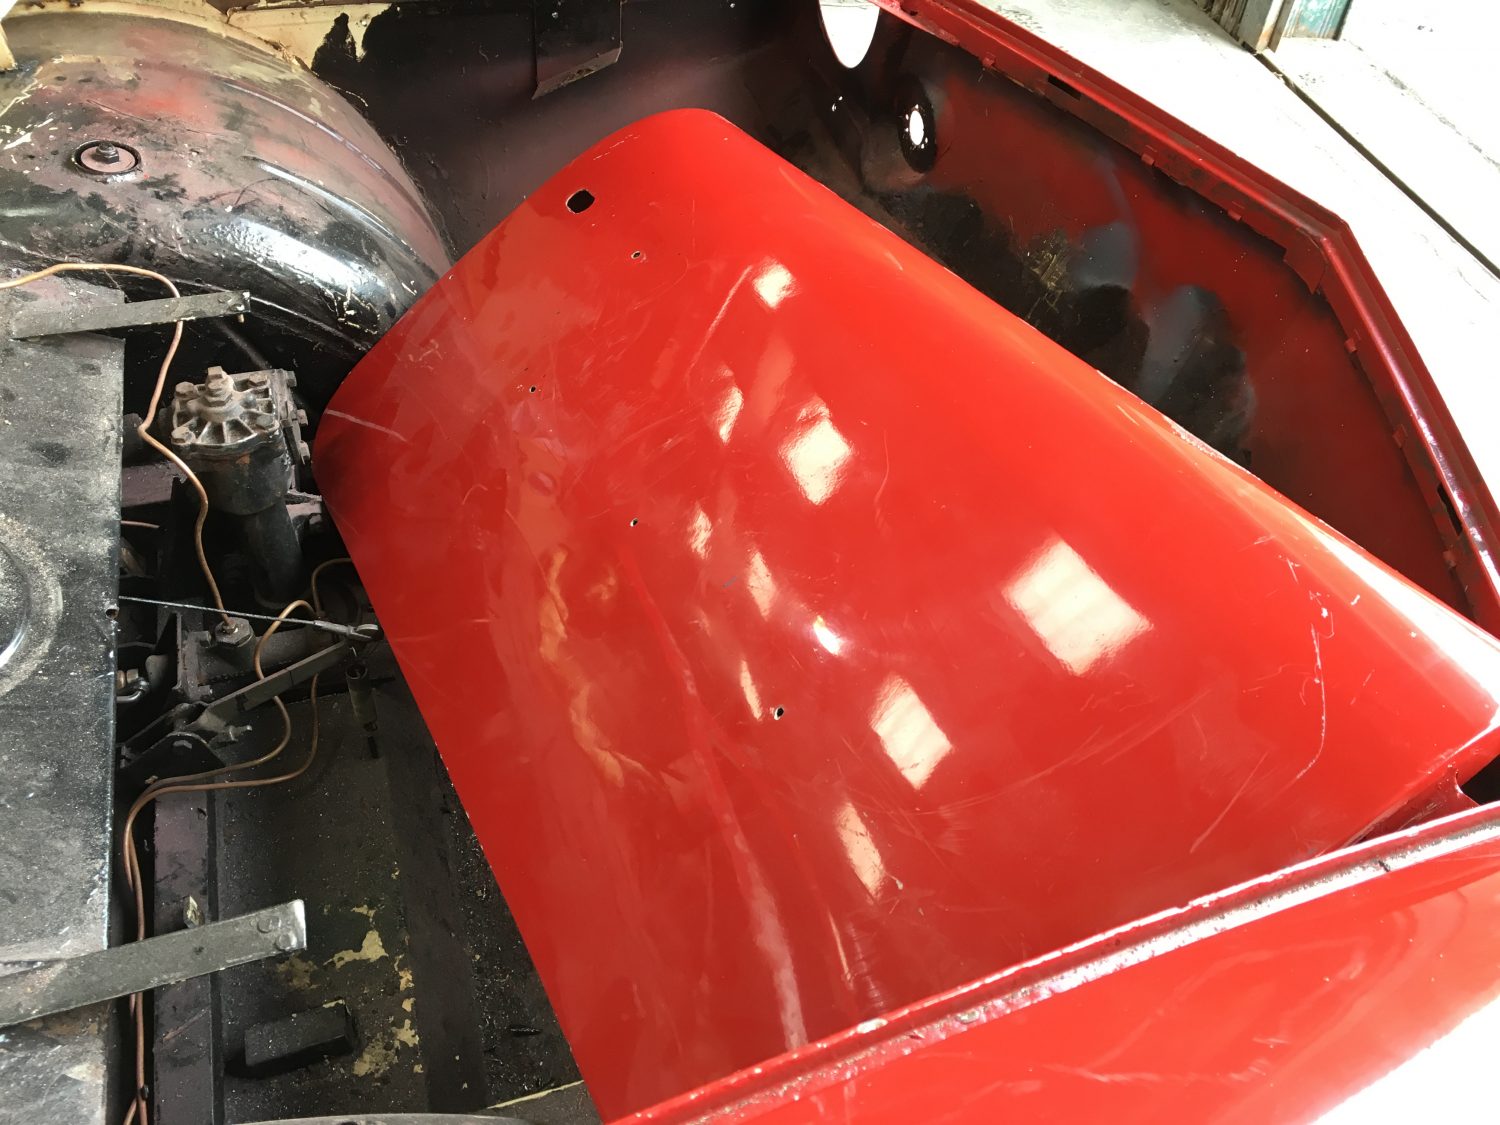
The engine bay and boot area have been stripped back ready to be re-coloured.
As the car was originally white and in it’s life has been changed to red it is our intention to bring her back to life in white.
[/vc_column_text][/vc_column][/vc_row][vc_row][vc_column][vc_gallery type=”image_grid” images=”16835,16836,16837,16838,16839,16840,16841,16842,16843,16844″][/vc_column][/vc_row]
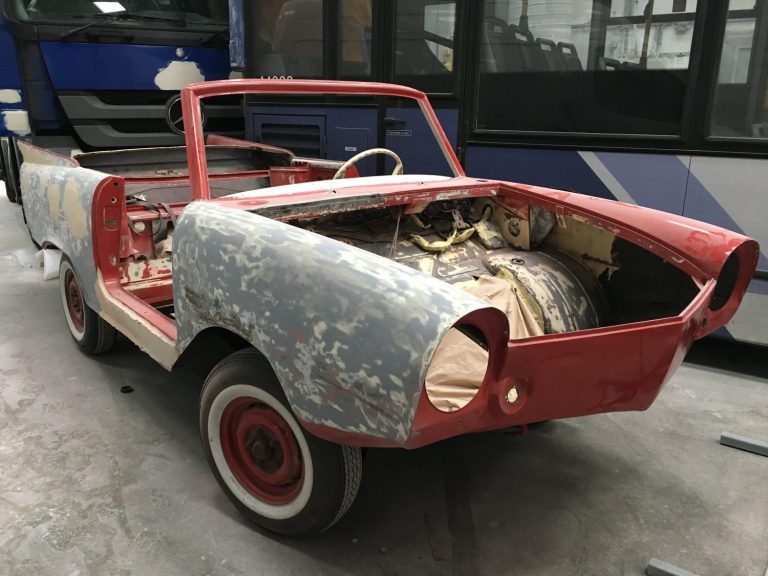
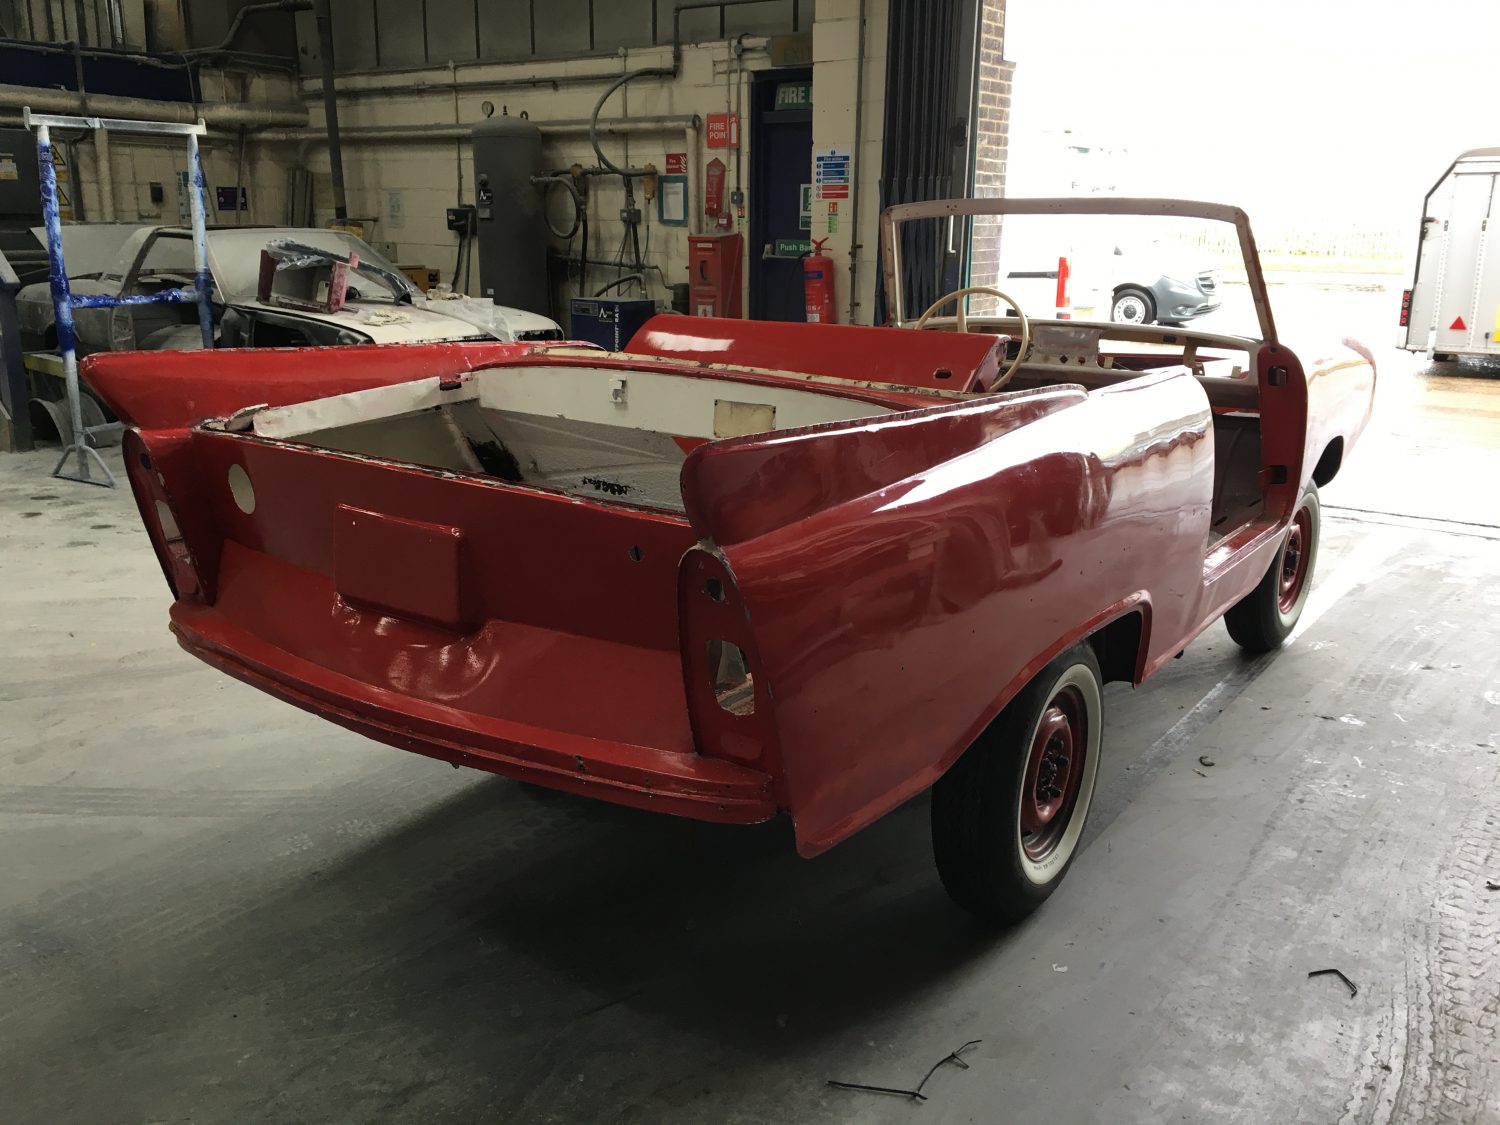
The major welding work is now complete on our 1965 Amphicar so we are off to the paint shop to have her stripped back and prepared ready for the full re-spray.
We are reverting back to the original white exterior and losing any traces of the red.

It is our intentions to repaint the blue and red decals that you can see on the above images so try and get her back to as close as she was when she first left the factory back in 1965.
Here are some of the last pictures you’ll see of her finished in red.


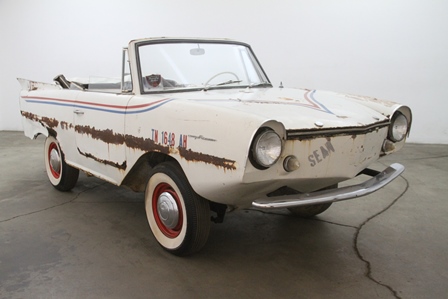
[vc_row][vc_column][vc_column_text]Found in the archives of Beverly Hills Car Club sold inventory is our 1965 Amphicar in it’s original colour combination of white with red and white interior.
The pictures were taken on 5th November 2015.
At this stage we are unsure whether the car left the US in white or whether it was re-sprayed to red before arriving in the UK. More research is needed…[/vc_column_text][/vc_column][/vc_row][vc_row][vc_column][vc_gallery type=”image_grid” images=”16380,16381,16382,16383,16384,16385,16386,16387,16388,16389,16390,16391,16392,16393,16394,16395,16396,16397,16398,16399,16400,16401,16402,16403,16404,16405,16406,16407,16408,16409,16410,16411,16412,16413,16414,16415,16416,16417,16418,16419,16420,16421,16422,16423,16424,16425,16426,16427,16428,16429″][/vc_column][/vc_row]
[vc_row][vc_column][vc_column_text]We are taking lots and lots of images whilst stripping down our 1965 Amphicar.
It is critical on all restoration projects to take as many pictures as you can as these may come in very useful when rebuilding the car.
[/vc_column_text][/vc_column][/vc_row][vc_row][vc_column][vc_gallery type=”image_grid” images=”16453,16454,16455,16456,16457,16458,16459,16460,16461,16462,16463,16464,16465,16466,16467,16468,16469″][/vc_column][/vc_row]
[vc_row][vc_column][vc_column_text]With the engine now out of the car Dave can concentrate on removing the final remaining pieces ready for the body shop to take over.[/vc_column_text][/vc_column][/vc_row][vc_row][vc_column][vc_gallery type=”image_grid” images=”16236,16237,16238,16239,16240,16241,16242,16243,16244,16245,16246,16247,16248,16249,16250,16251,16252,16253,16254,16256,16257,16259,16260″][/vc_column][/vc_row]
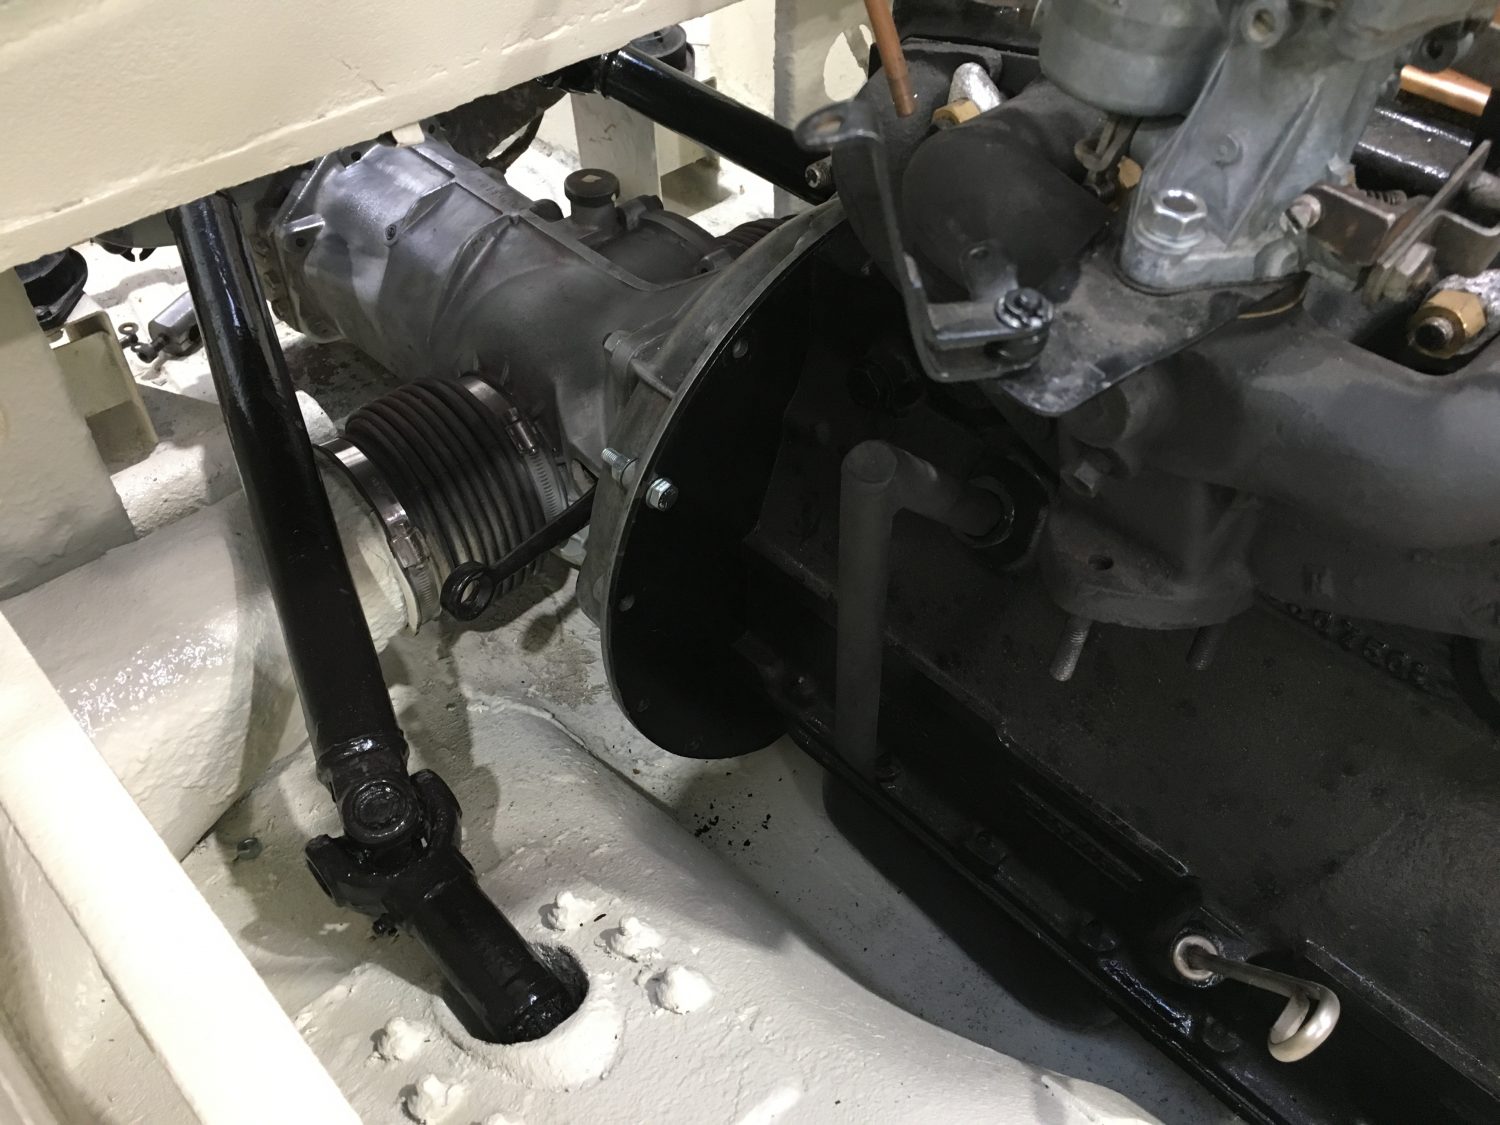
[vc_row][vc_column][vc_column_text]After years in storage we are now underway with the restoration of our 1965 Amphicar. Today we are running up and testing our the engine and propeller system to ensure it functions as it should.[/vc_column_text][/vc_column][/vc_row][vc_row][vc_column][vc_video link=”https://www.youtube.com/watch?v=u0Bb2a6J4Wo”][/vc_column][/vc_row][vc_row][vc_column][vc_video link=”https://www.youtube.com/watch?v=QOdTWQZIl64″][/vc_column][/vc_row]
[vc_row][vc_column][vc_column_text]Dave is now well on with stripping back our 1965 Amphicar ready for paint. We have since discovered that the original colour was white and not red as we first thought so we will be reverting back to the original specification in the paint shop.
We are taking lots of images as we progress with the re-build to ensure we have a good selection to reference if we need to.
[/vc_column_text][/vc_column][/vc_row][vc_row][vc_column][vc_gallery type=”image_grid” images=”16129,16130,16131,16132,16133,16134,16135,16136,16137,16138,16139,16141,16142,16143,16144,16145,16146,16147,16148,16149,16150,16151,16152,16153,16154,16155,16156,16157,16158,16159,16160,16161″][/vc_column][/vc_row]
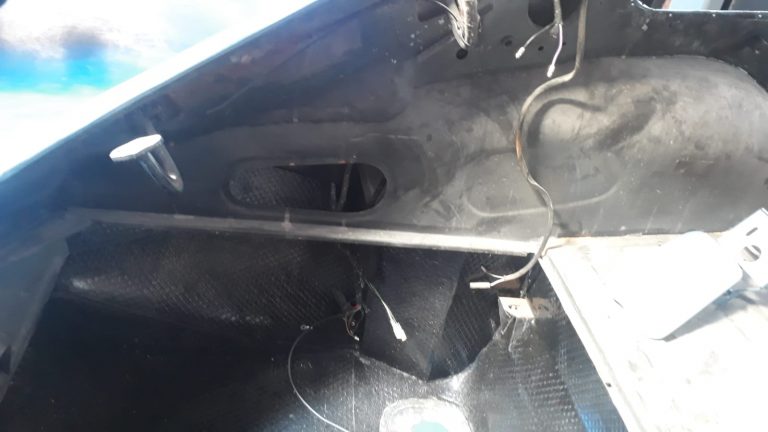
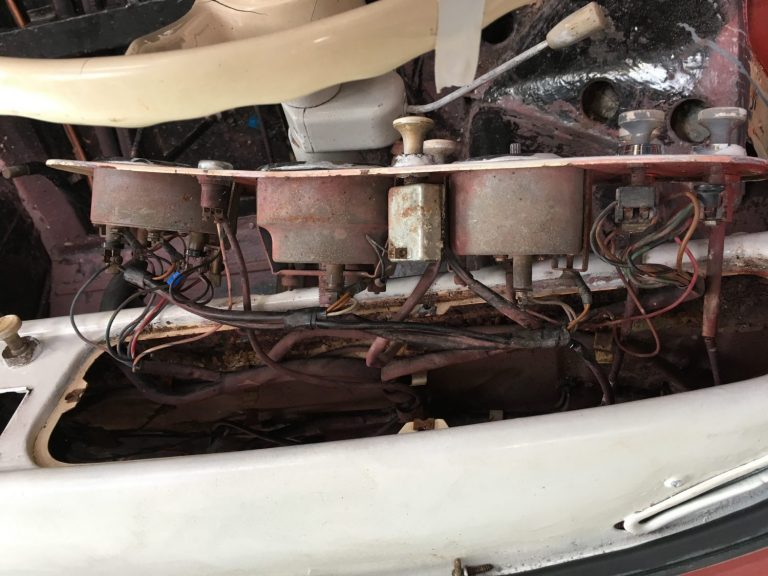
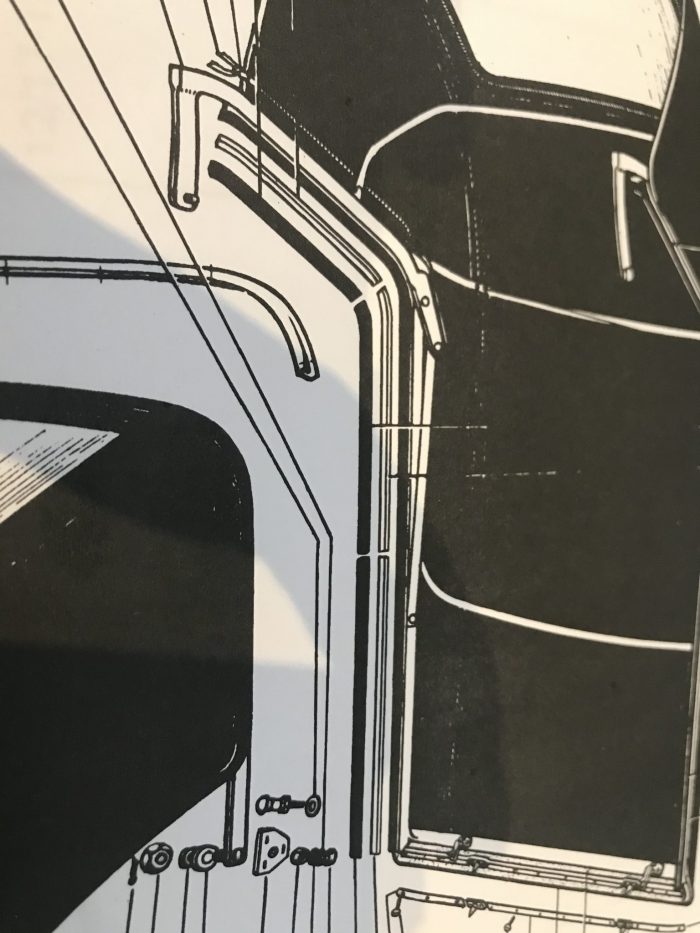
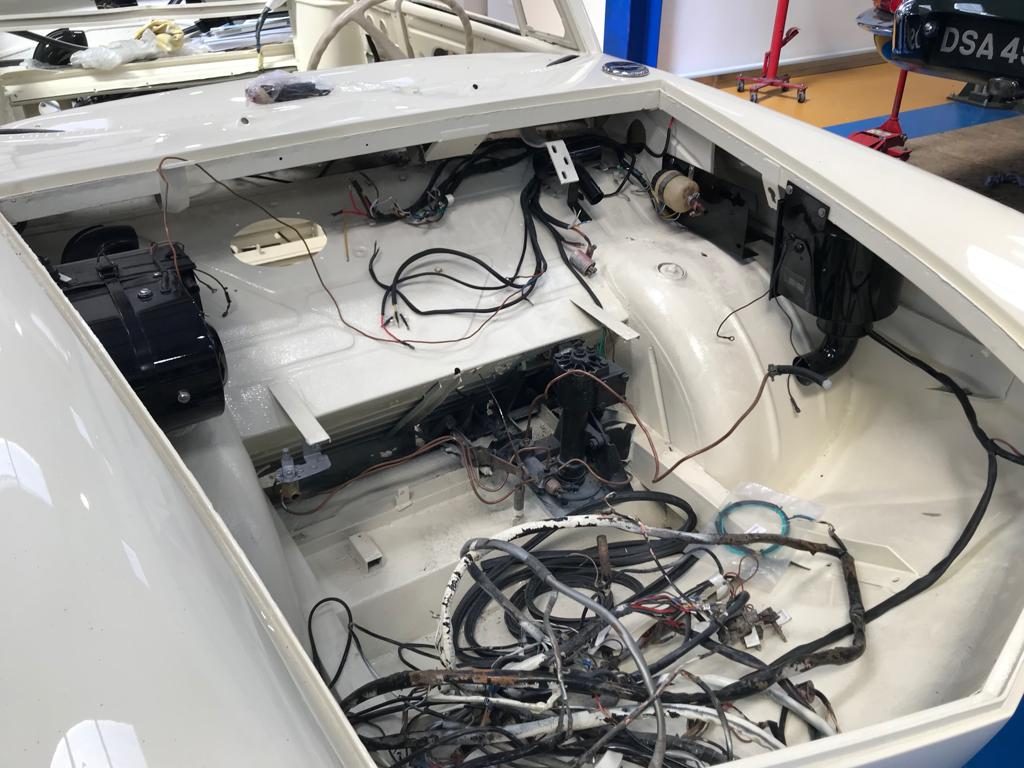
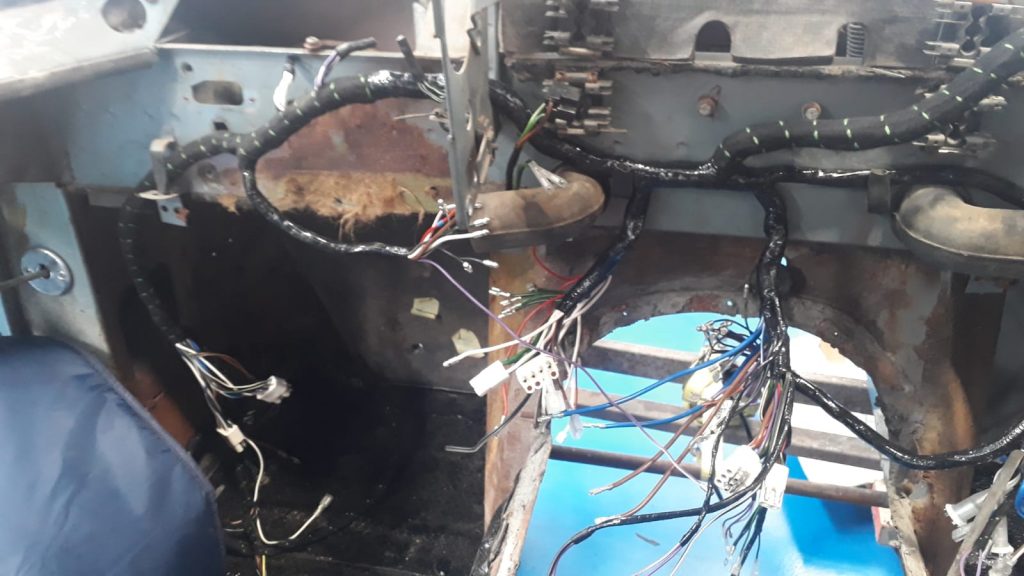
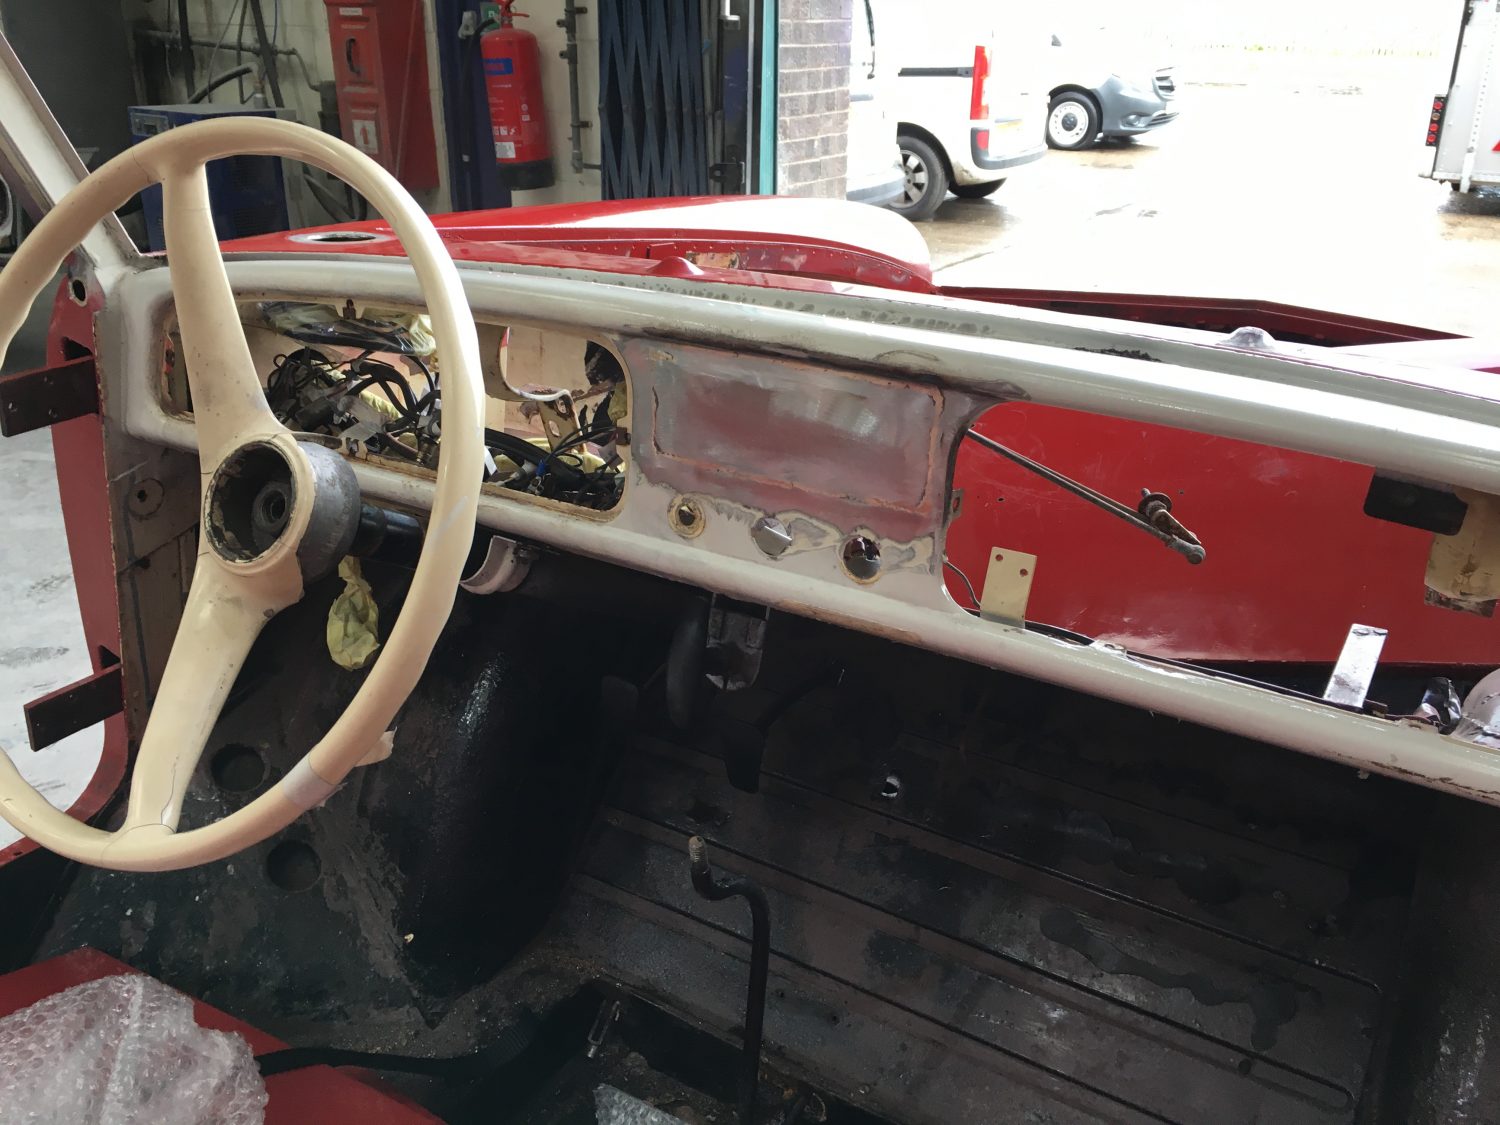
[vc_row][vc_column][vc_column_text]As we always say, it is very important to take lots of pictures when carrying out a restoration. Angles you don’t think are important and areas you think may be easy to refit can sometimes come back to bite you.
If you find yourself scratching your head because you can’t quite remember what went where then having ‘too many’ pictures might be your saviour.
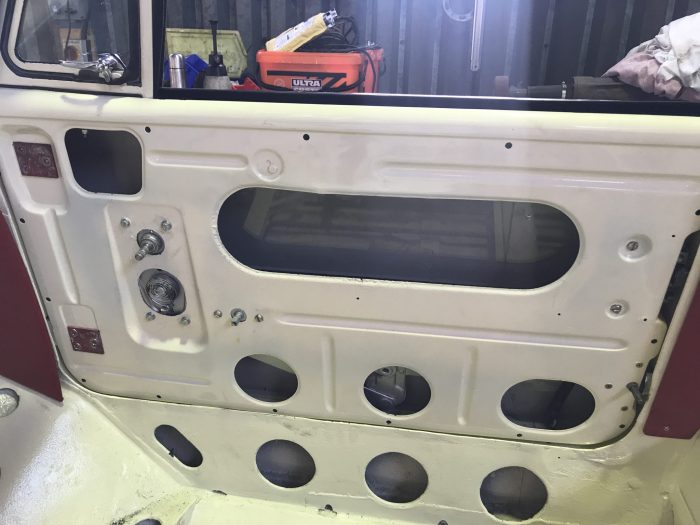
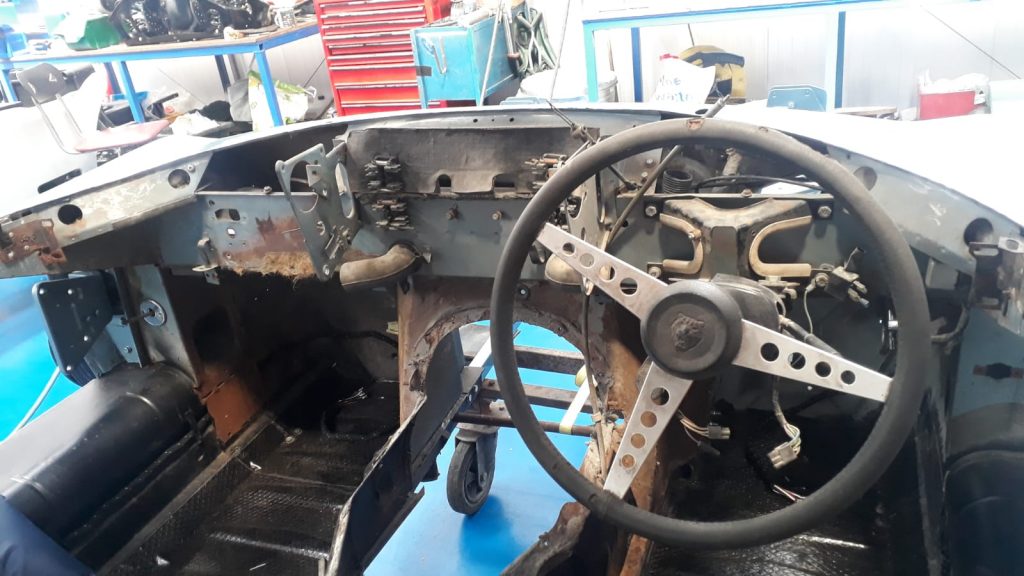
We are now looking to remove and/or tidy the dash wiring on our 1965 Amphicar. As you can see, it is a bit of a mess behind there as things stand.[/vc_column_text][/vc_column][/vc_row][vc_row][vc_column][vc_gallery type=”image_grid” images=”16219,16220,16221,16222,16223,16224,16225″][/vc_column][/vc_row]
