
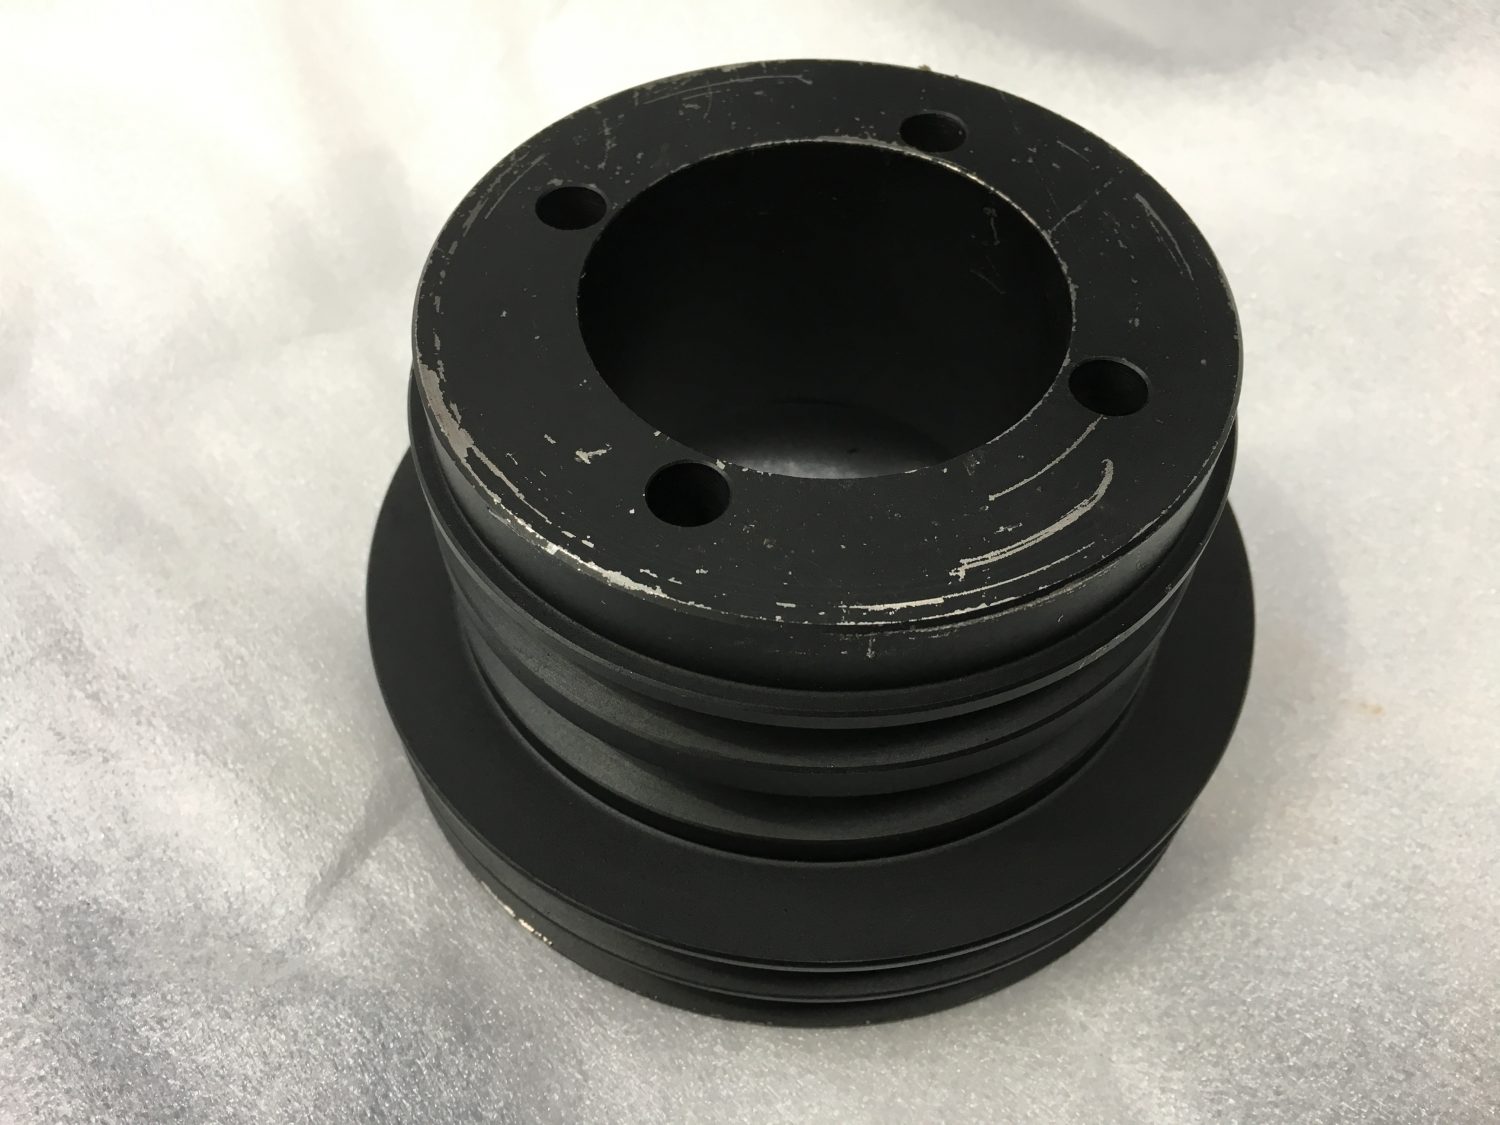
Our Jaguar E-Type V12 pulley has arrived
After months of searching and now having commissioned a small batch of pulley’s to be made especially for us we have managed to source a


After months of searching and now having commissioned a small batch of pulley’s to be made especially for us we have managed to source a

The moment we’ve been waiting for…the first piece of the stunning interior starts to be fitted up inside our 1971 Jaguar E-Type V12 roadster. The
It is one of those stories that couldn’t be written. For many months we have been on the hunt for a Jaguar E-Type V12 pulley.

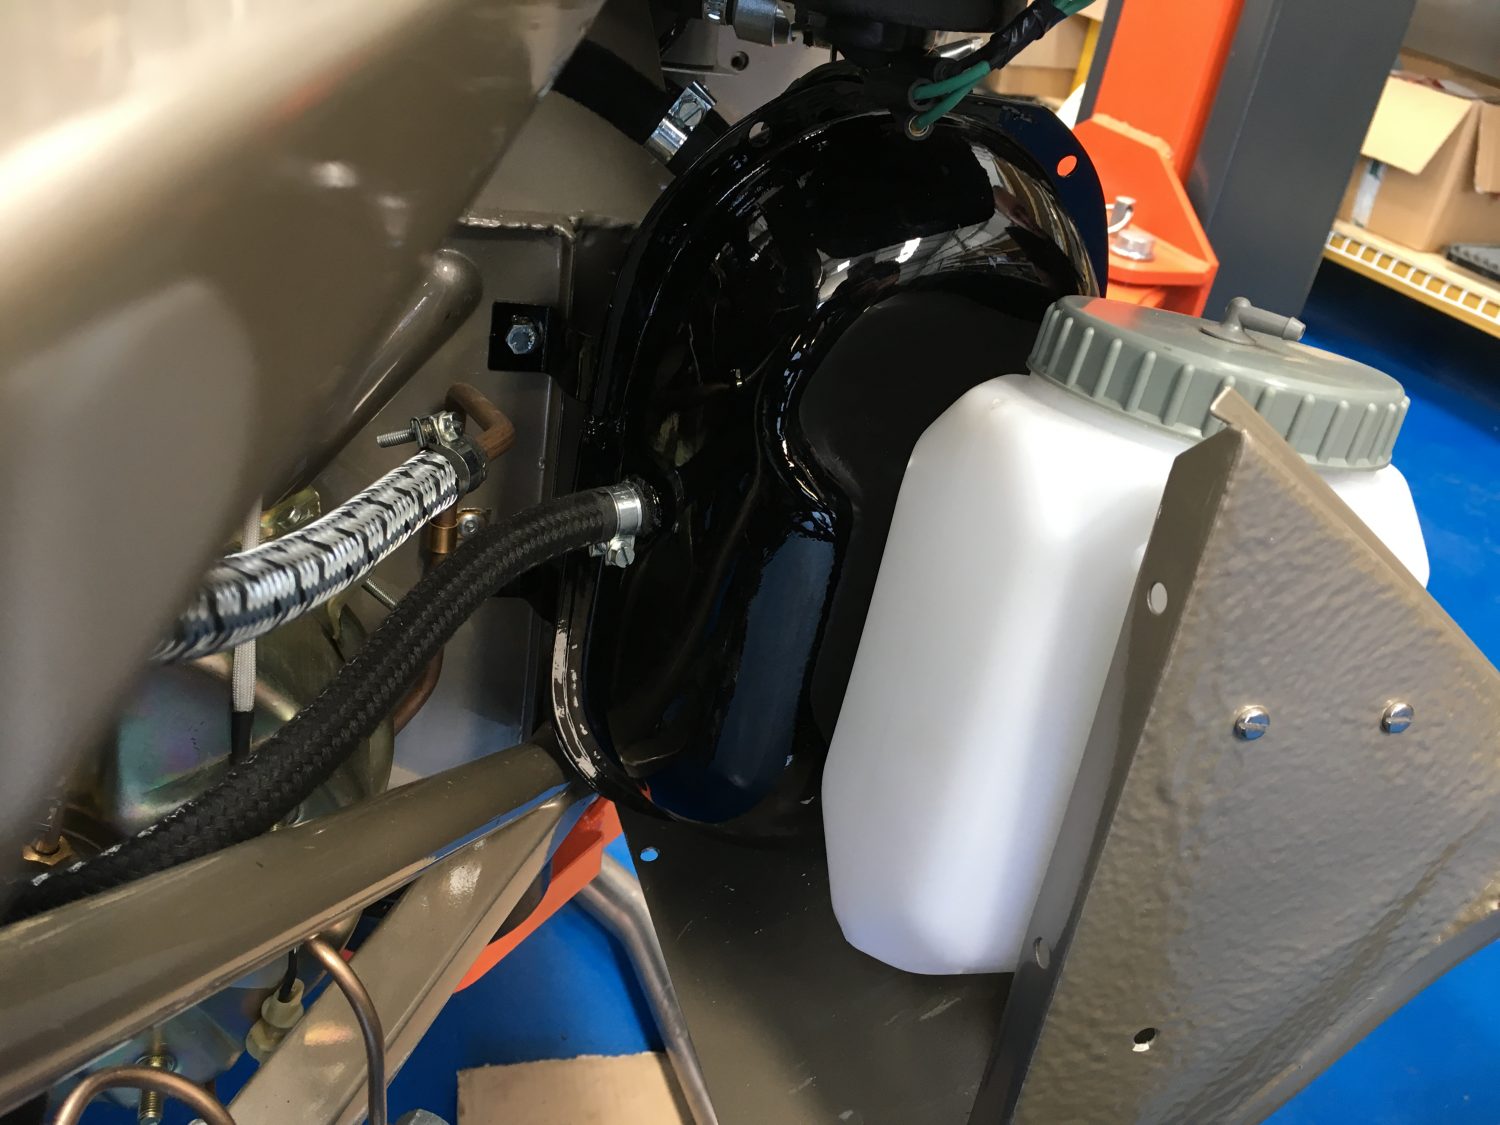
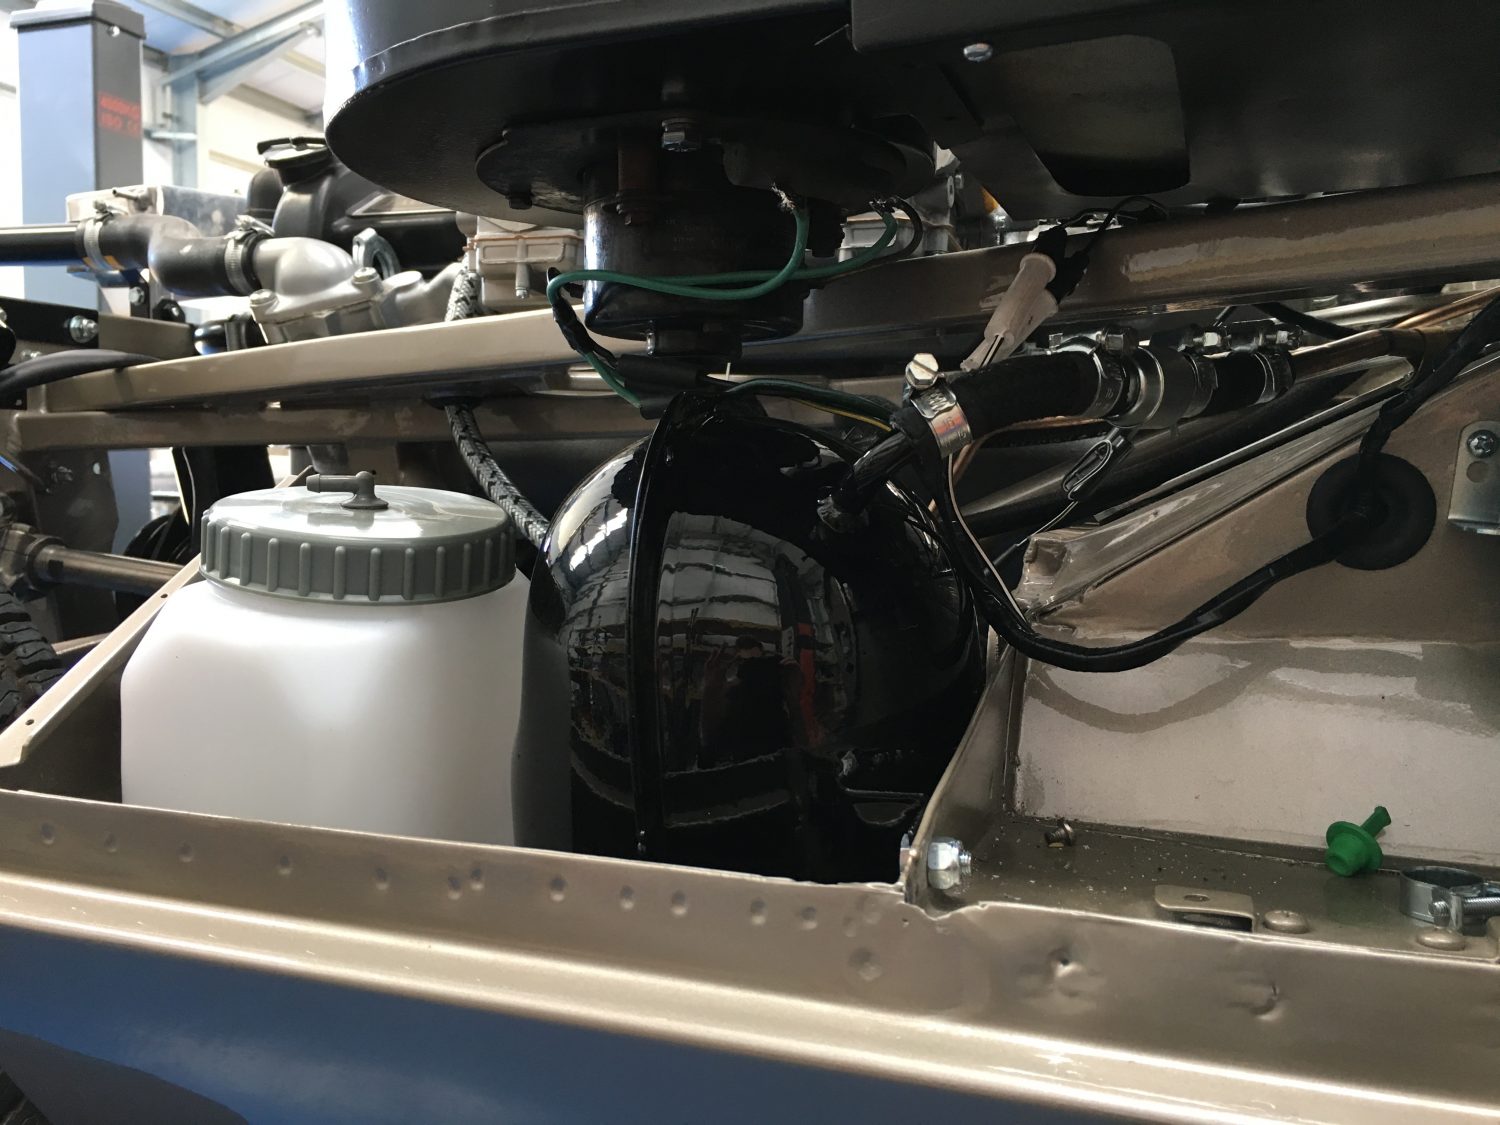
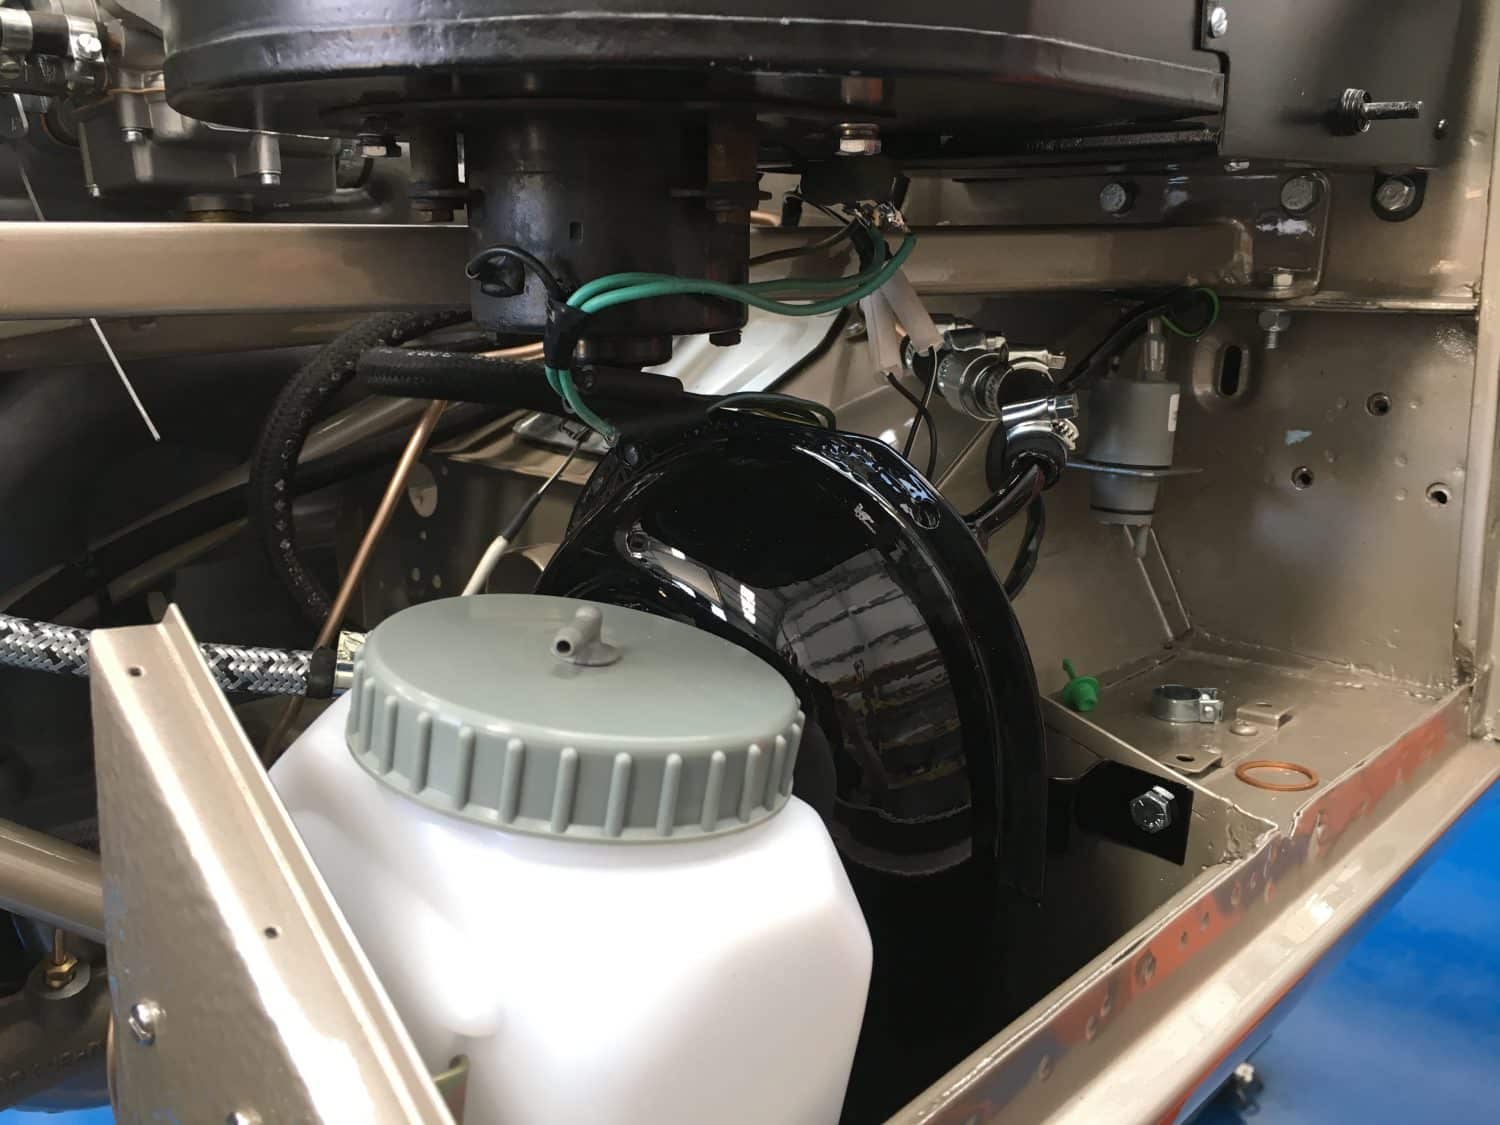
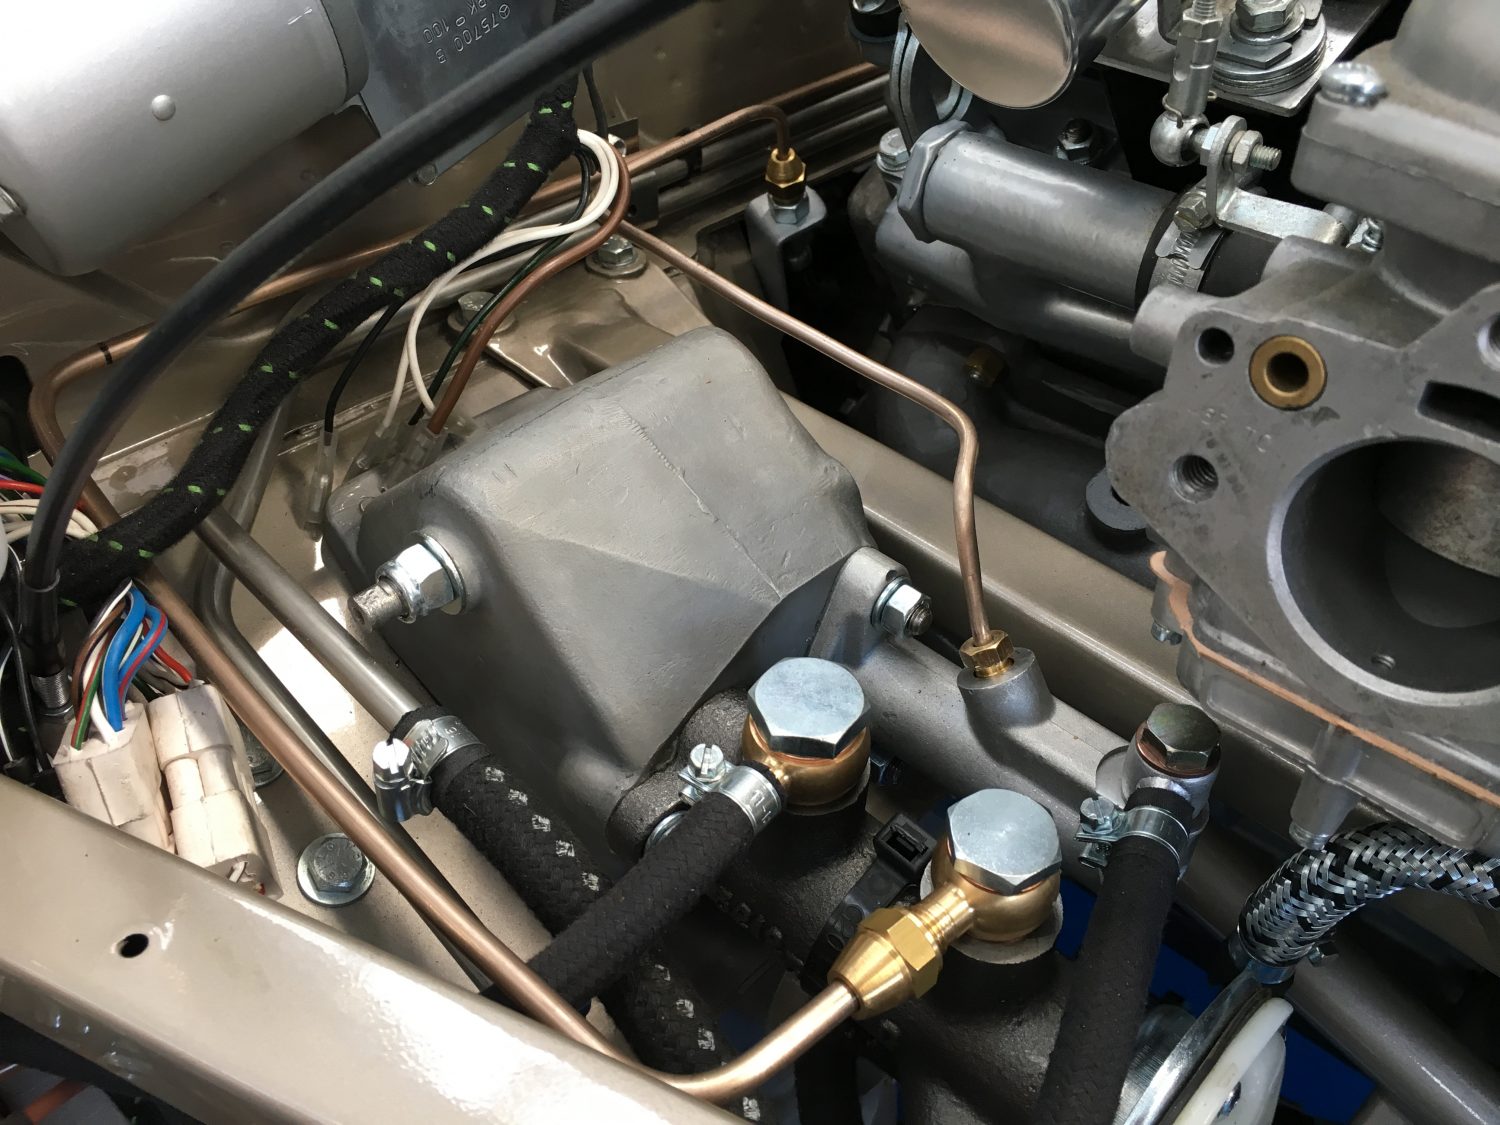
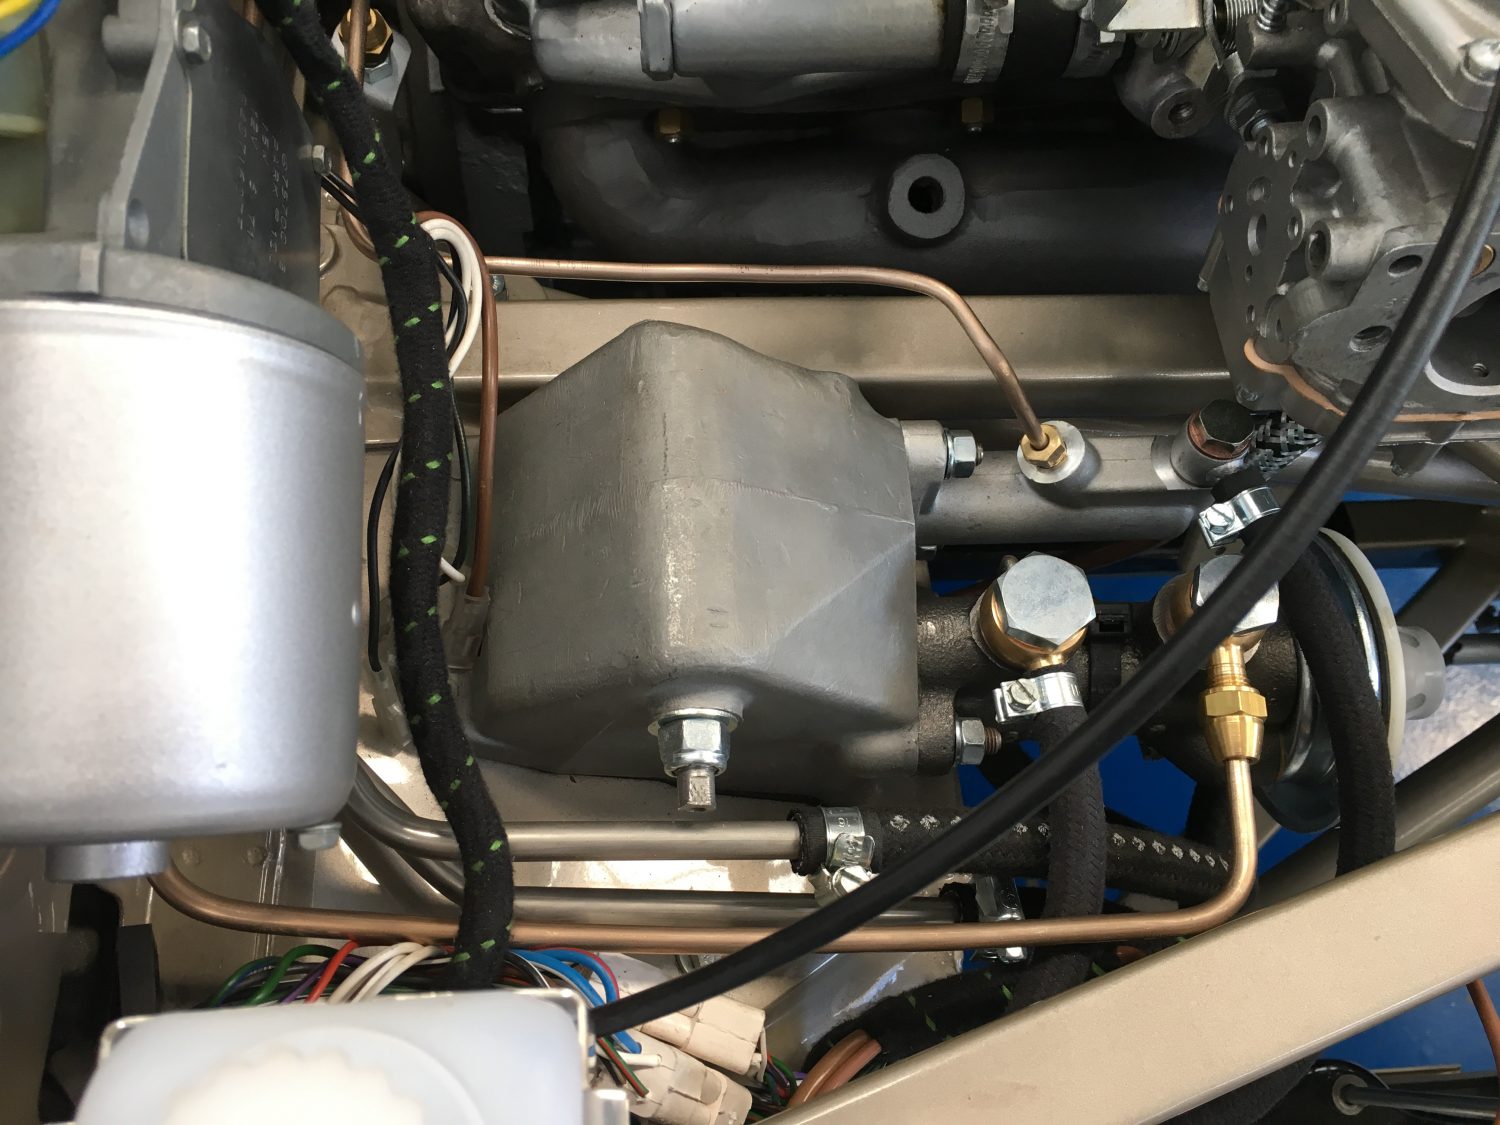
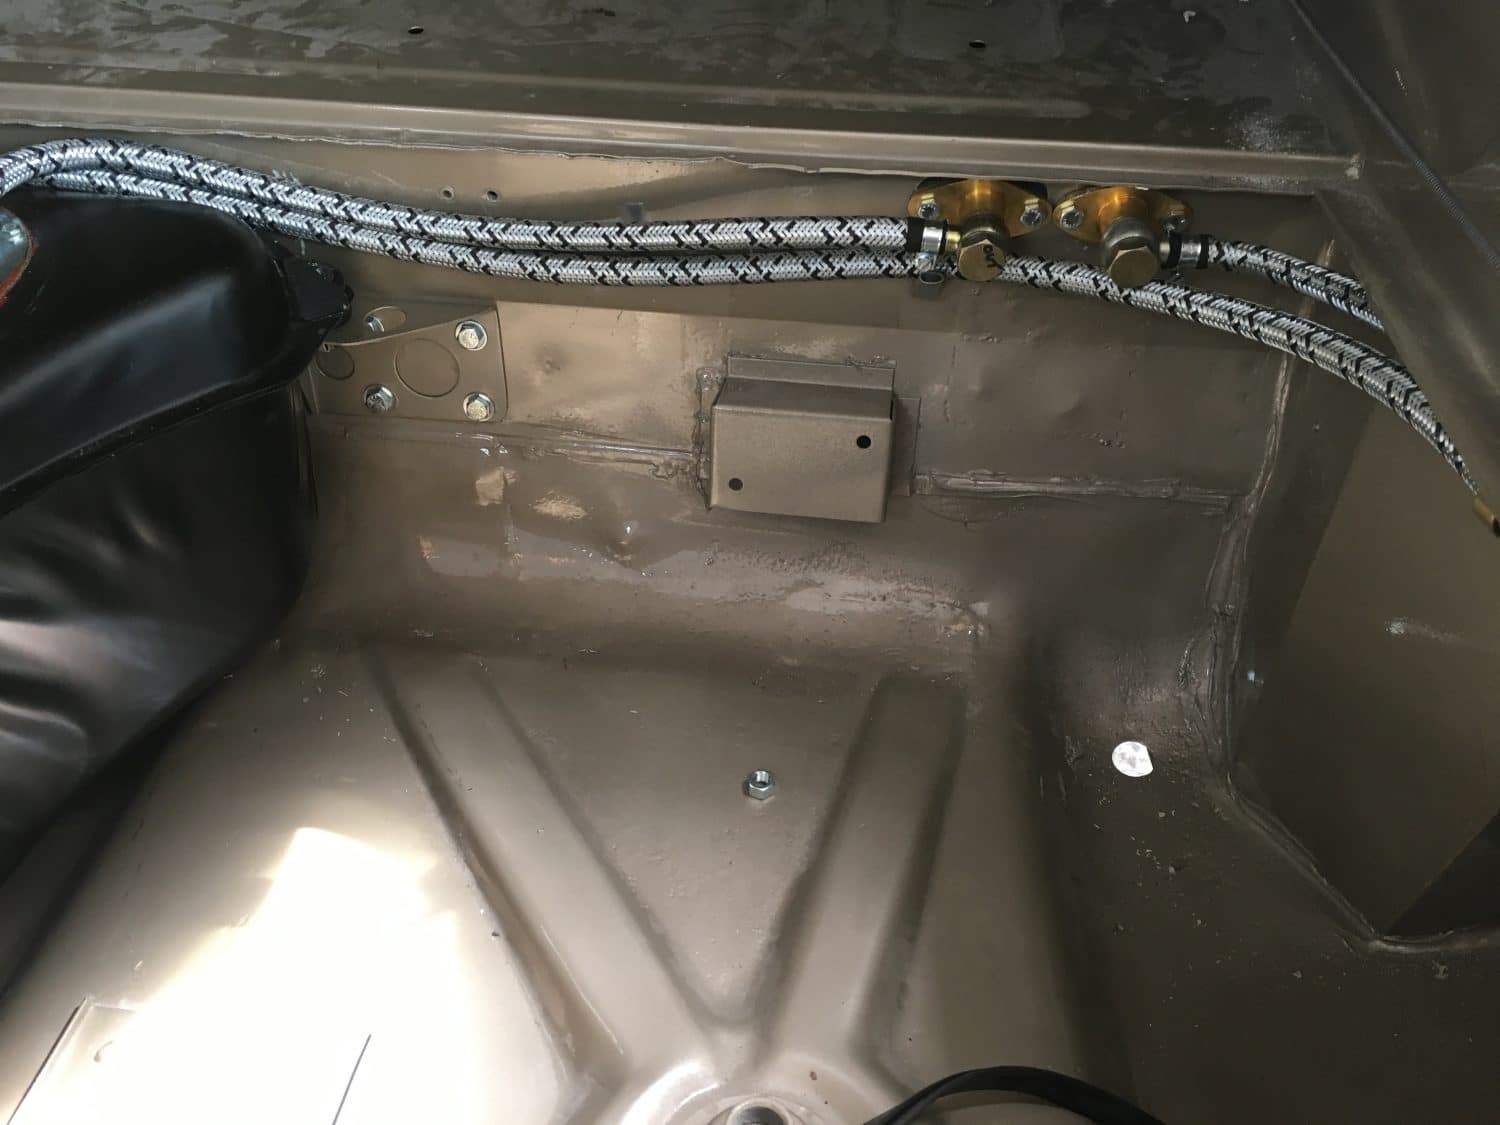
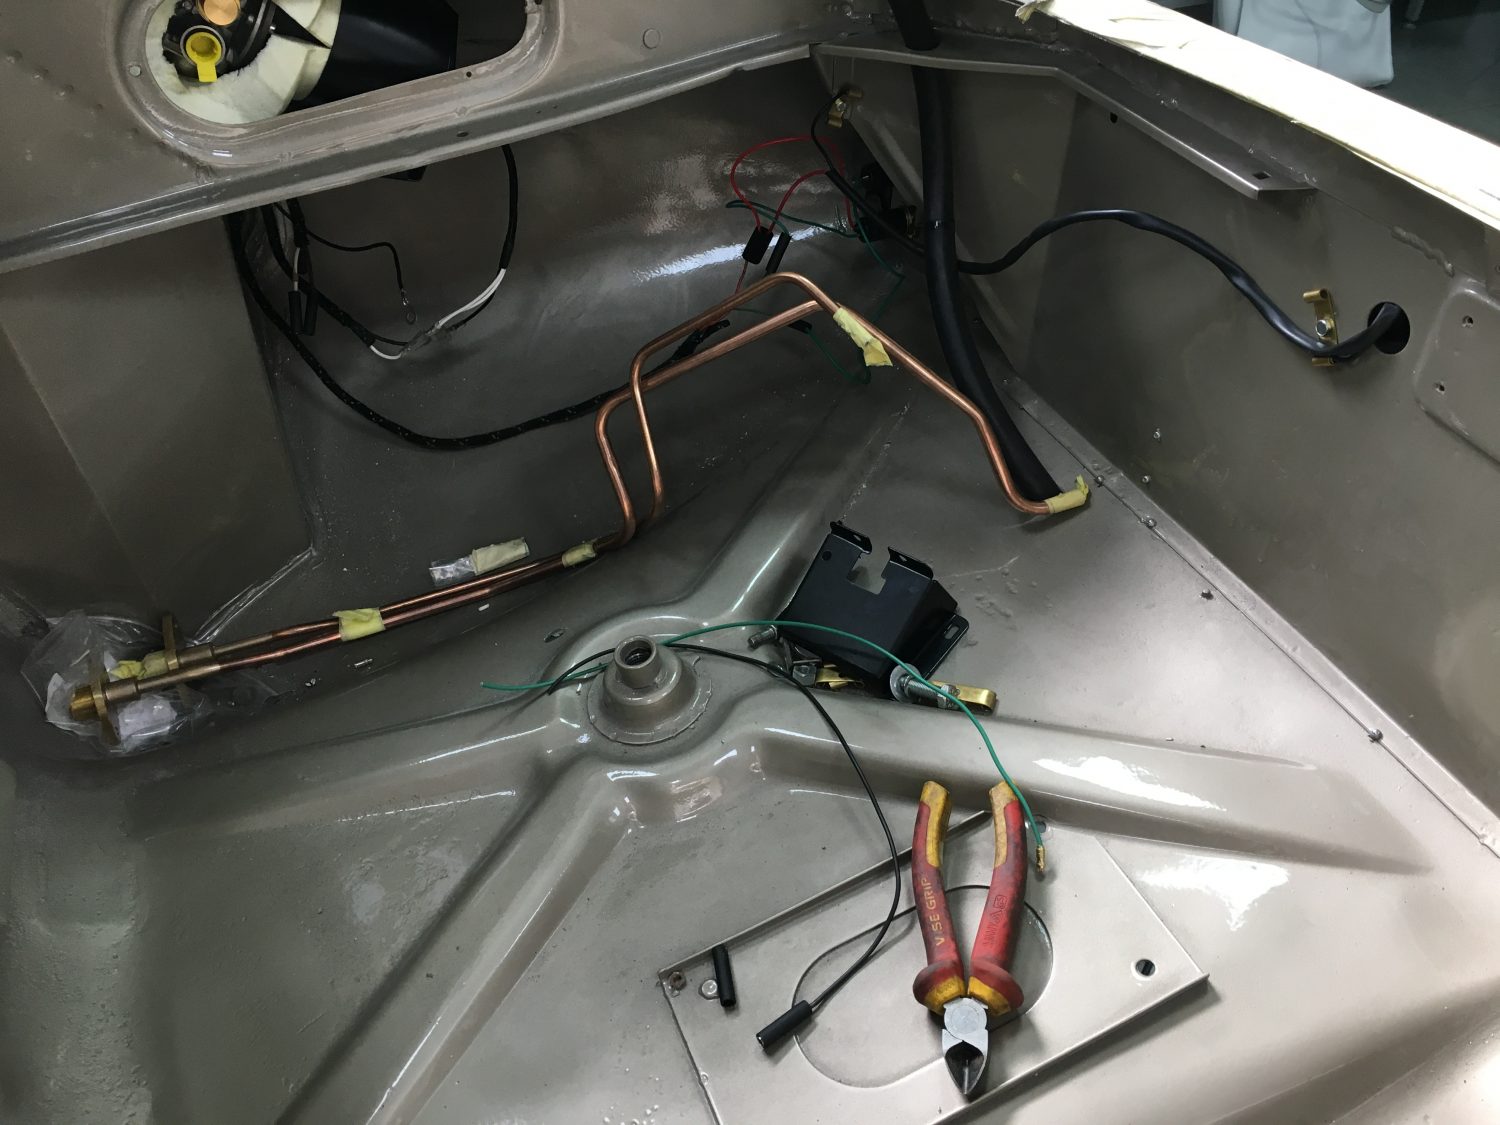
We are now making the final few touches to our 1971 Jaguar E-Type brake and clutch system. Next week we aim to run her up
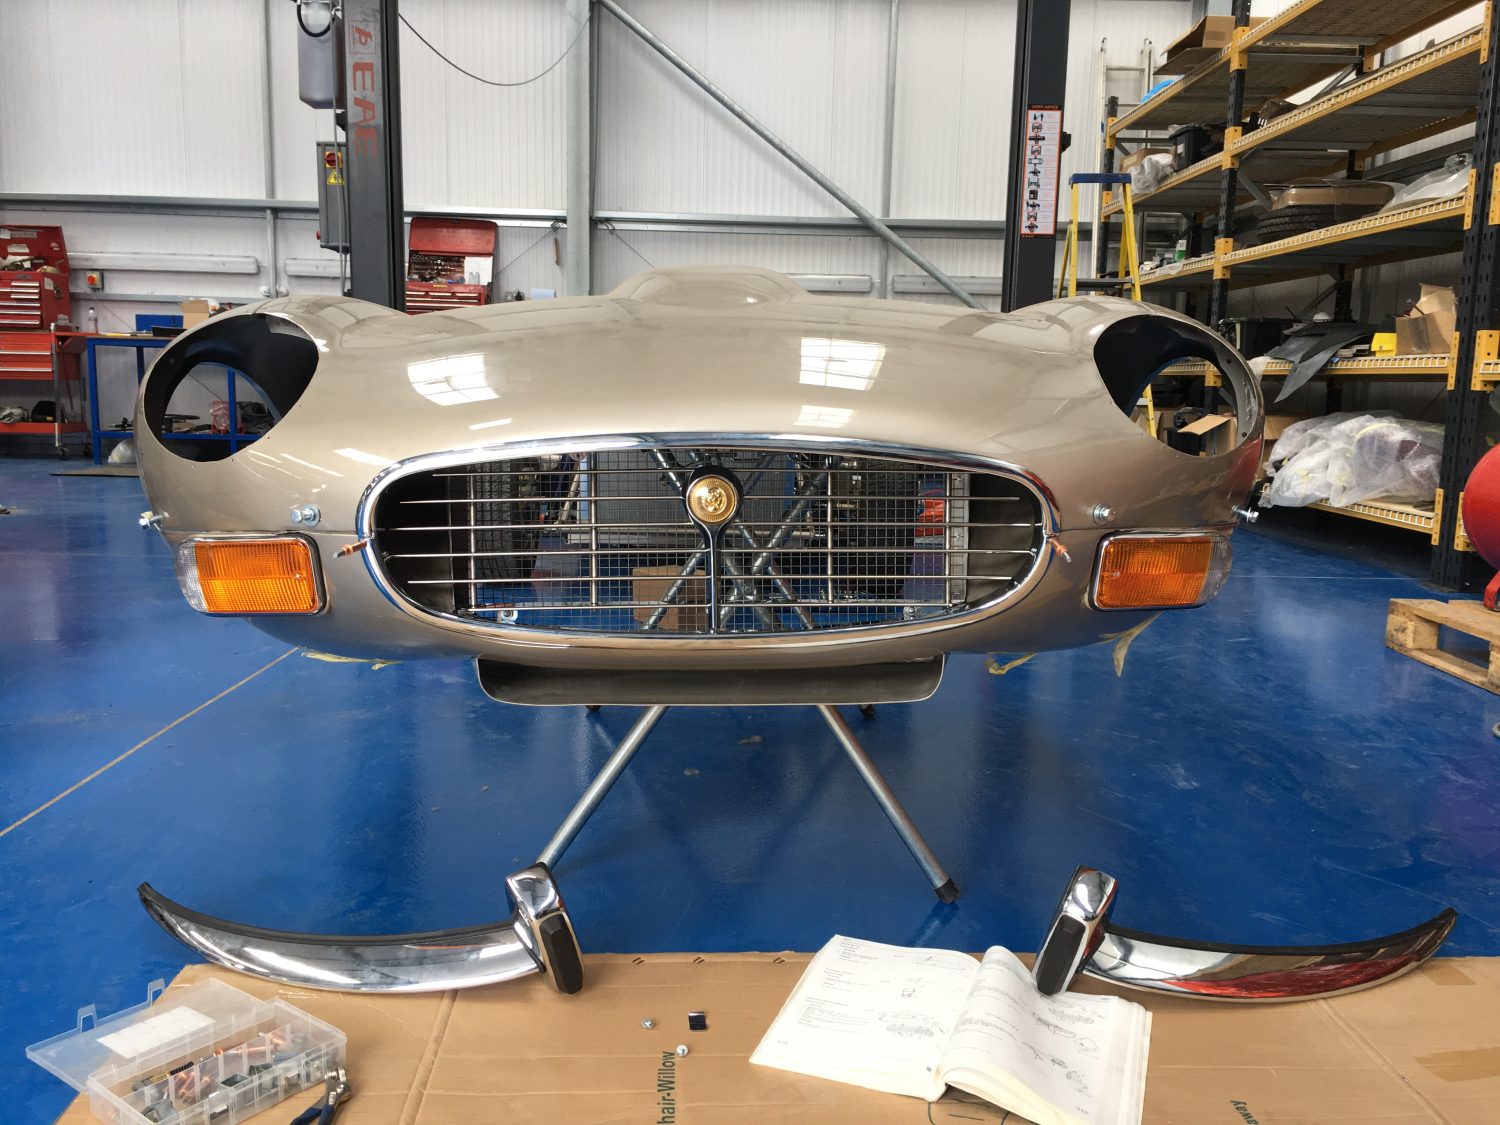
The front end of our E-type is almost complete with the lights and surround now in position. The front grill surround just requires tightening and
The nose cone, grille and badge is now in position and looking amazing. The front headlamp assembly and bumpers will follow very soon.
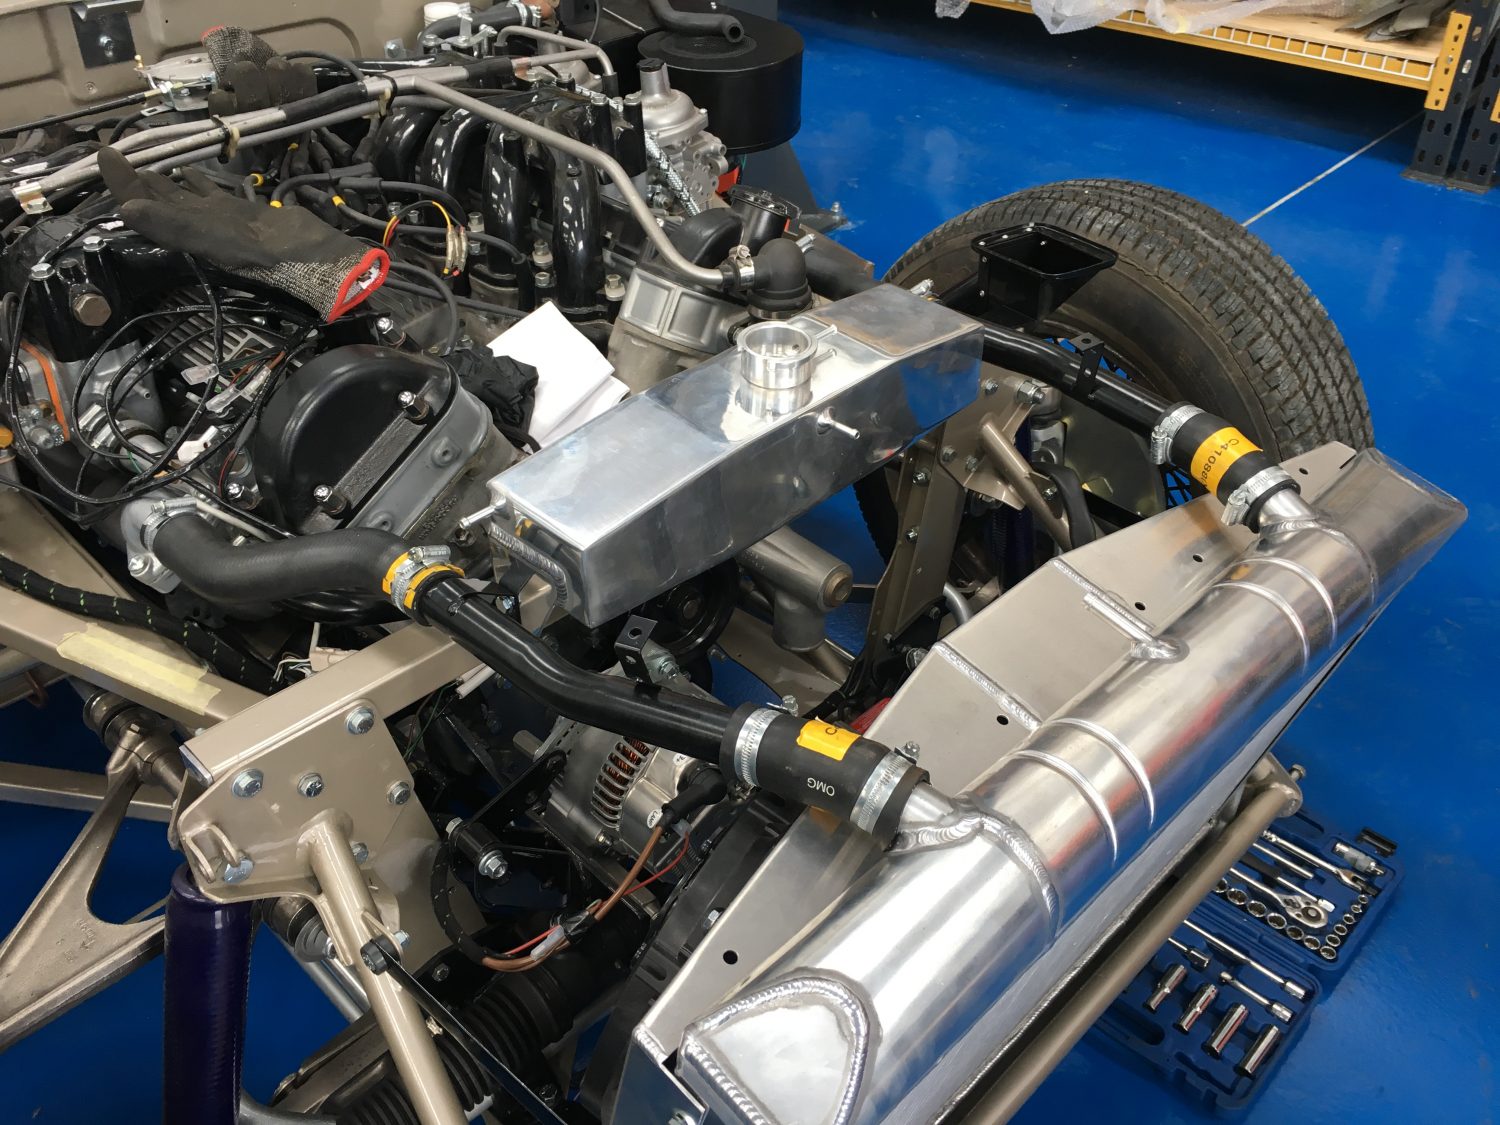
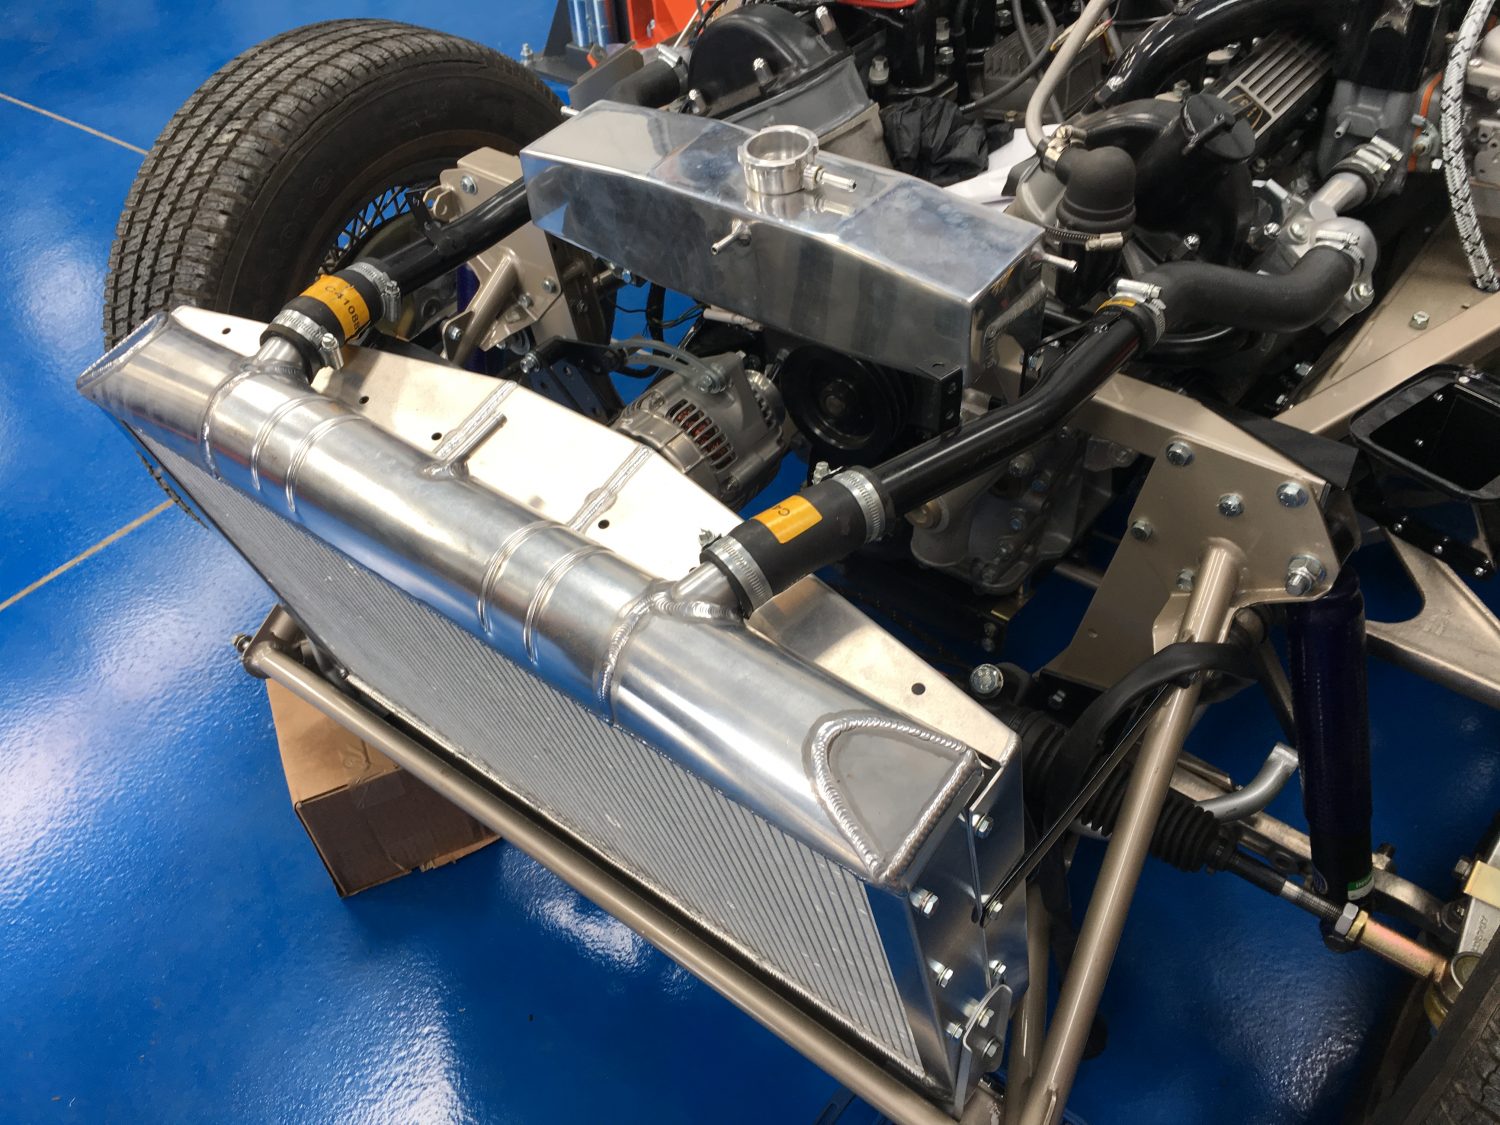
The pipework is now fitted to the brand new aluminium radiator which means the radiator can be positioned and fixed securely.

Week 1 in our new Pettistree workshops and no slowing down for us as we continue to make good progress on our current projects. Dave
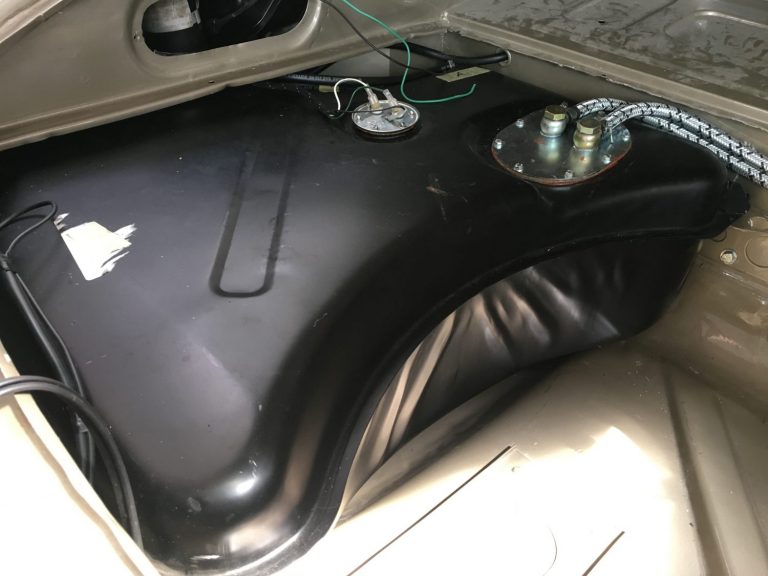
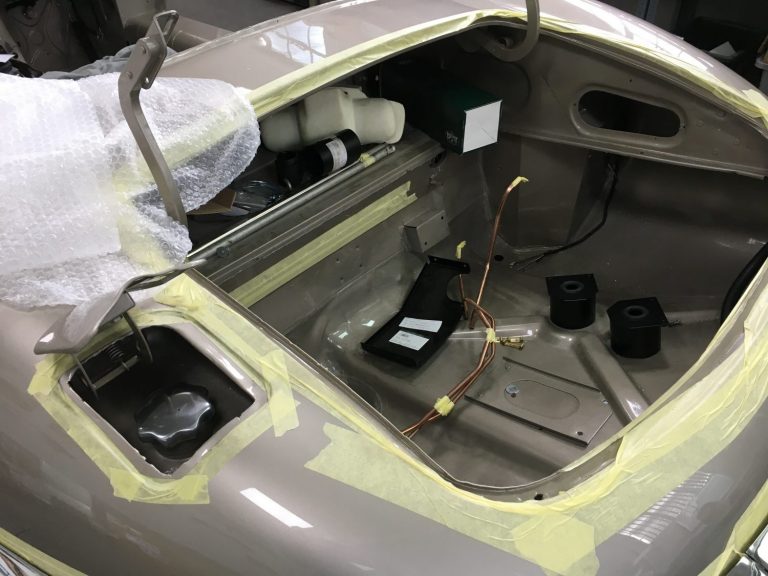
Not as simple as it looks, the fuel tank is now successfully fitted and the pipework in position.
One day in to the fit up of the brand new V12 wiring loom from Autosparks and it’s been a really successful day. The majority of
This afternoon, we’ve tested the fit of our hood frame once again. The frame came with the car when it arrived to us from California
The refurbished expansion tank is now installed. Work is now underway on installing the full wiring loom. Once the rear section of wiring is complete
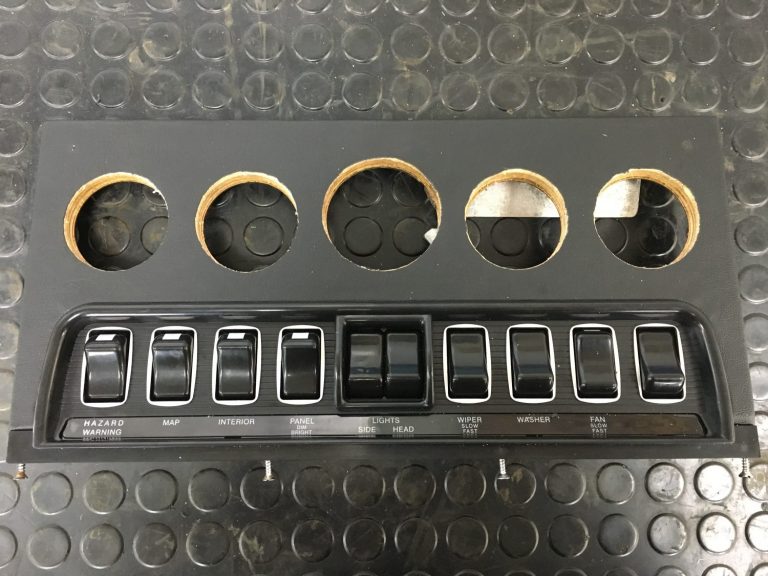
The Jaguar E-Type panel is now built and ready for the dials to be fitted up.
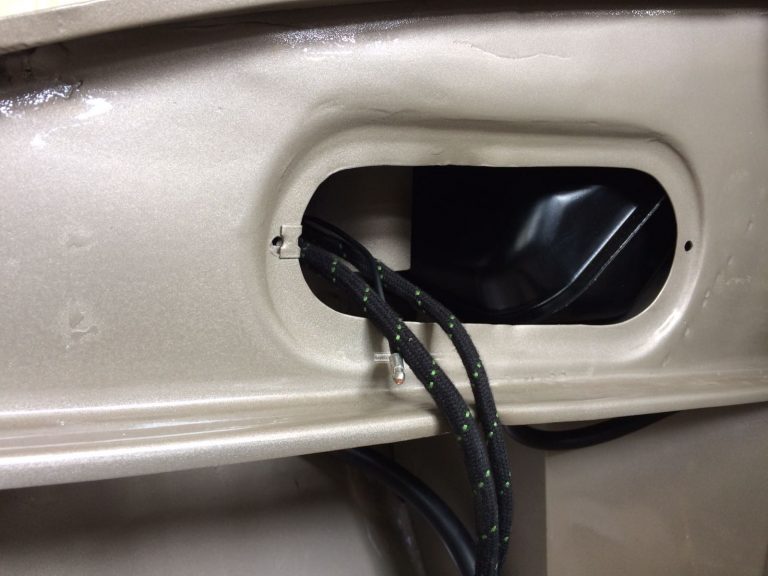
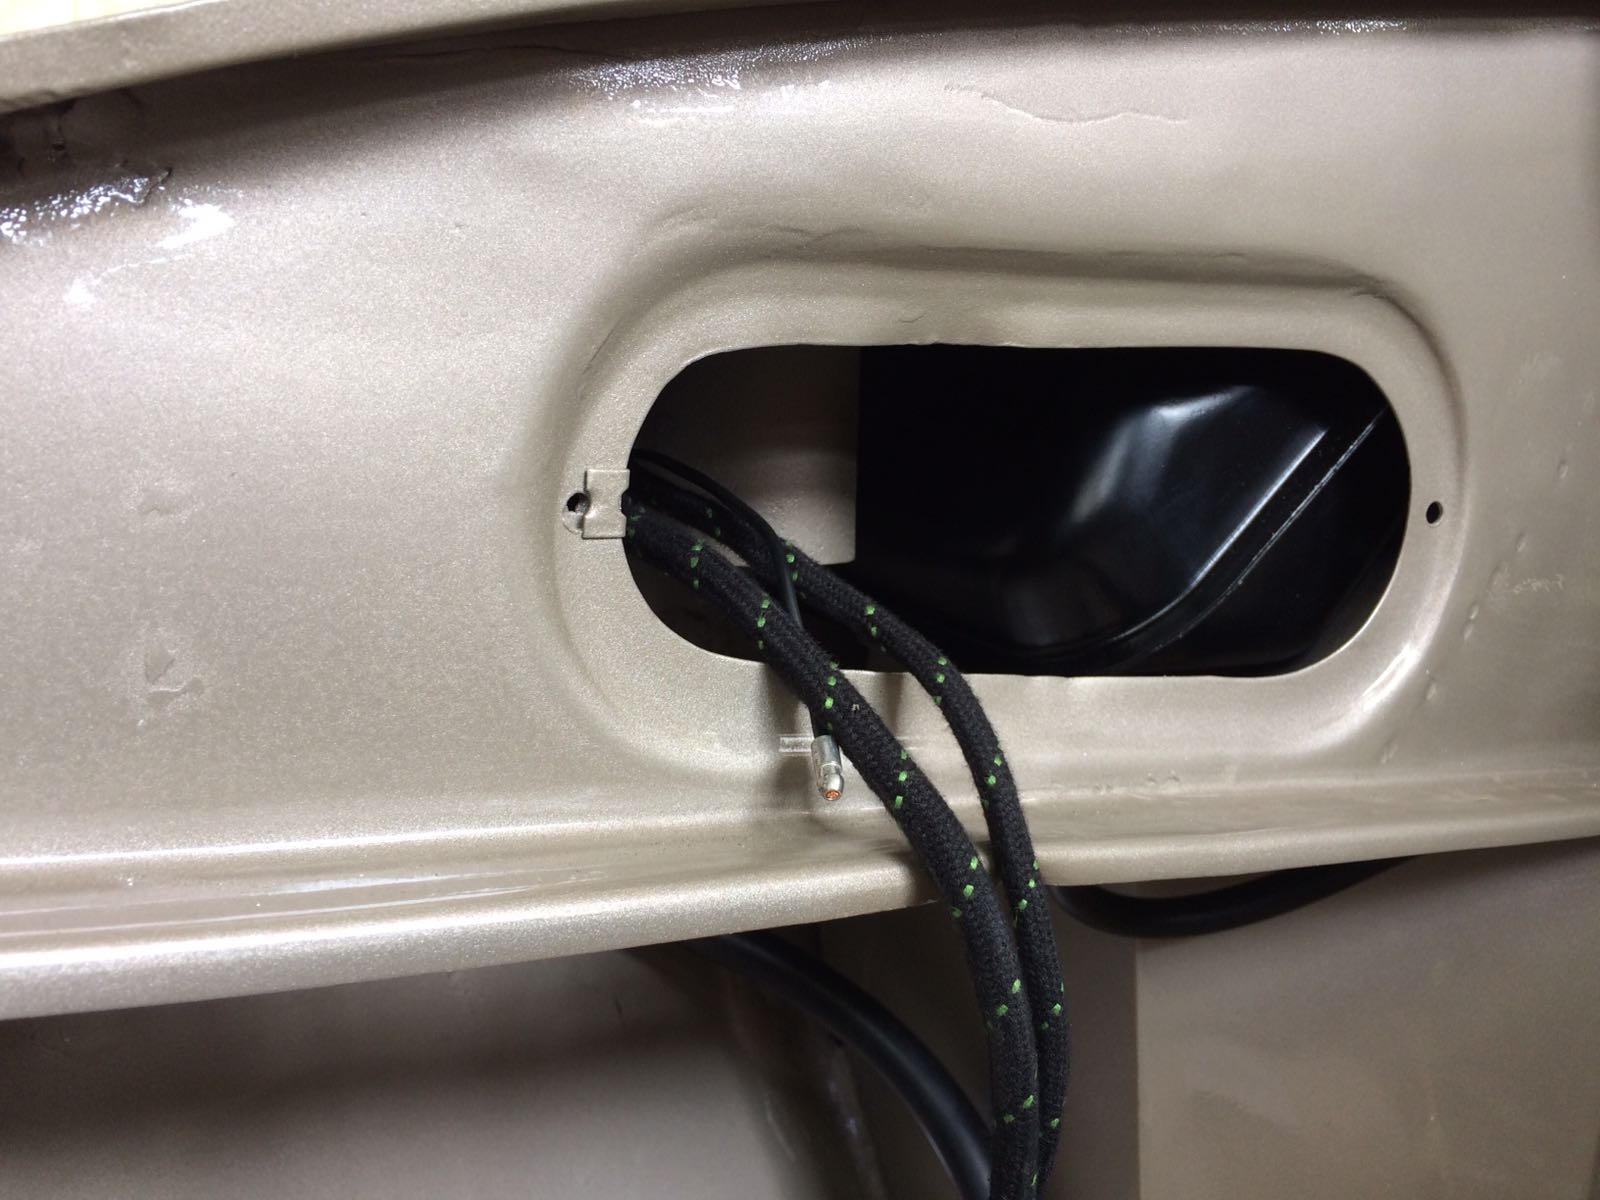
Dave’s been busy working on the rear end of our E-Type getting ready for the fuel tank to be fitted into position. The fuel filler

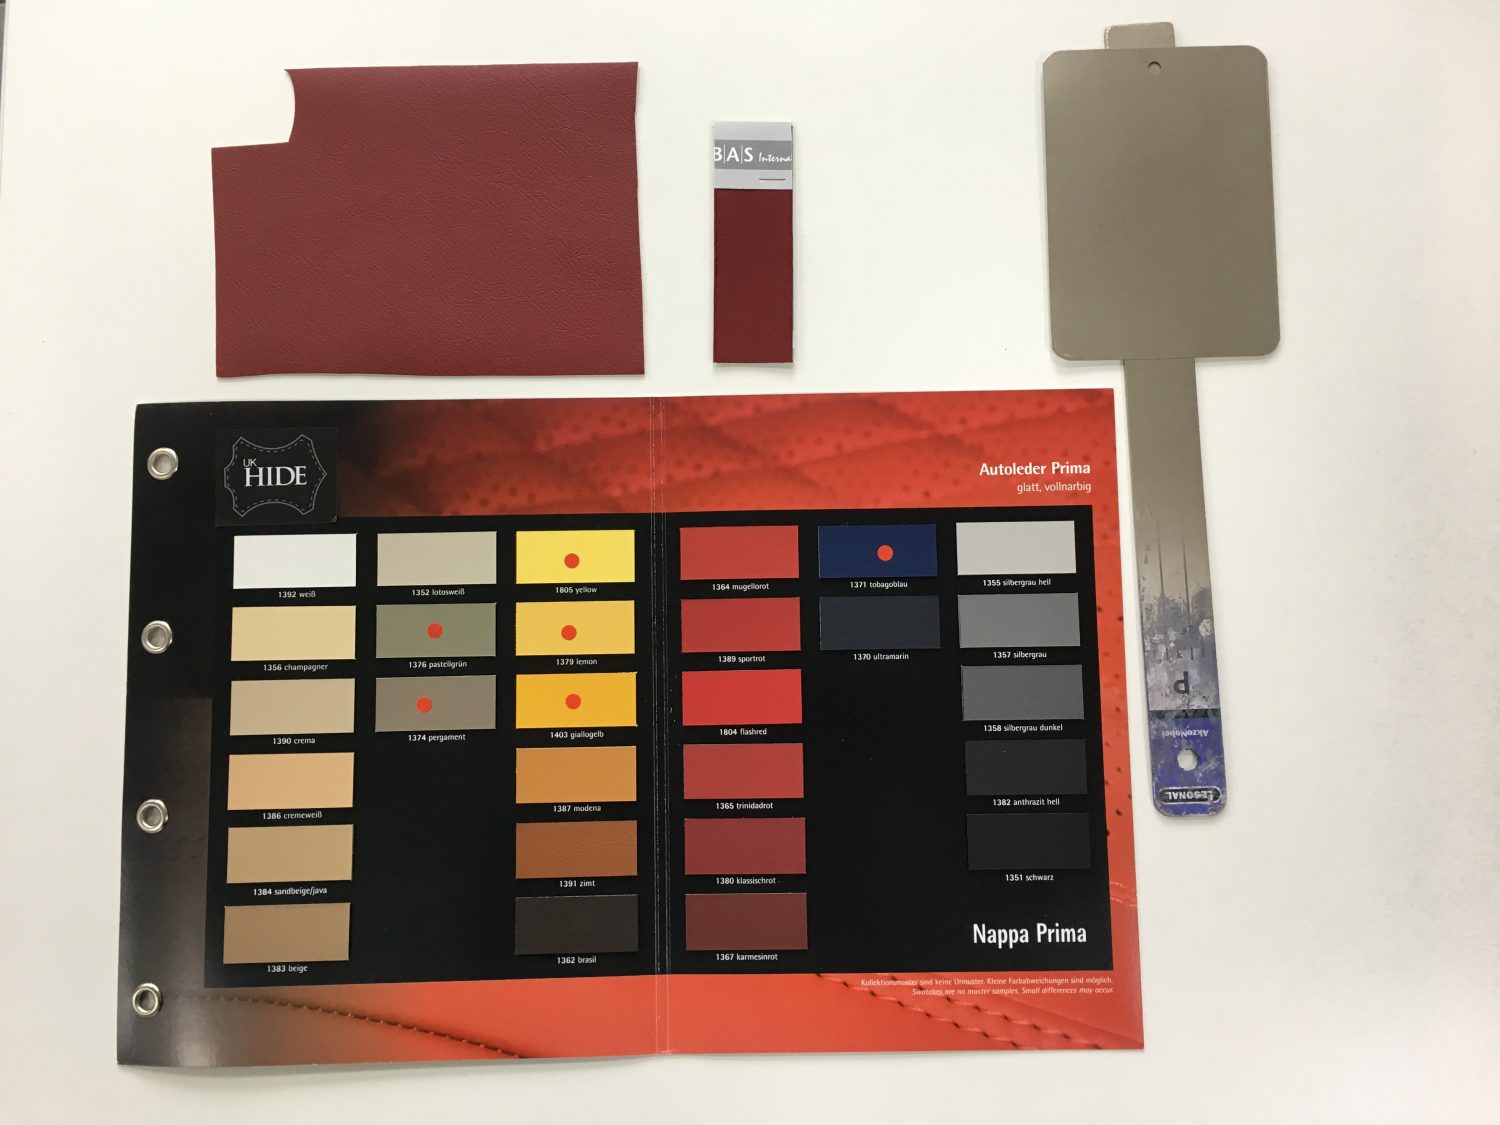
Off to China our samples go as we work alongside our 1971 Jaguar E-Type Roadster’s customer in decided the final colours for the hood, leather
The majority of our chroming work has already been carried out by Tony and the guys at Wyatt Polishing in Thetford but having found a couple
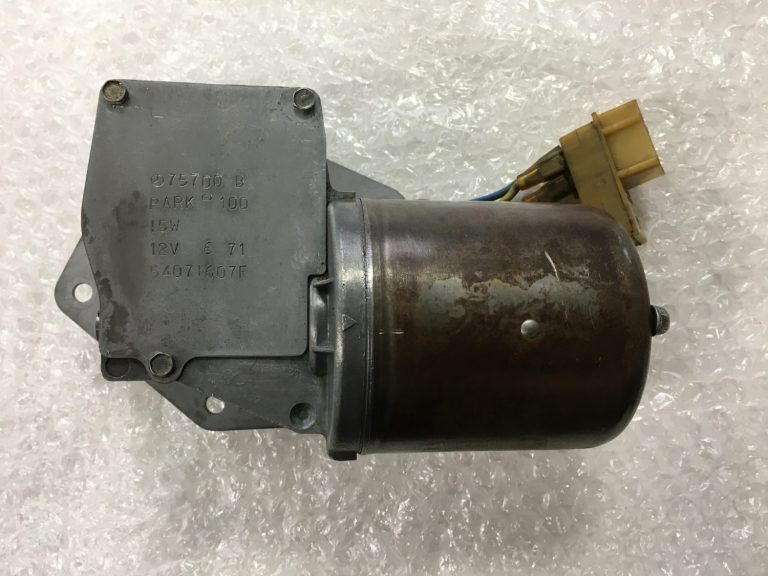
To convert the wiper motor from left hand drive to right hand drive we’ve called in the assistance of our good friends and world renowned
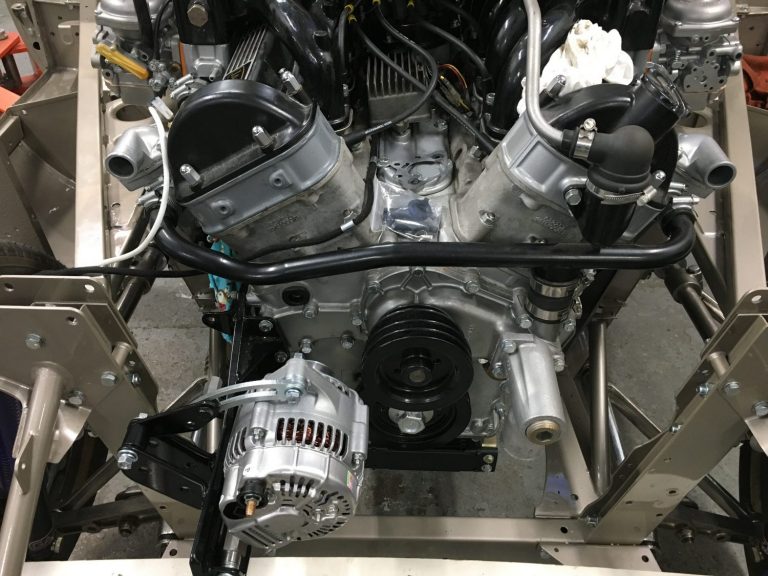
The day has come where I will no longer be seeing this beautiful piece of V12 engineering out side my office window but will soon
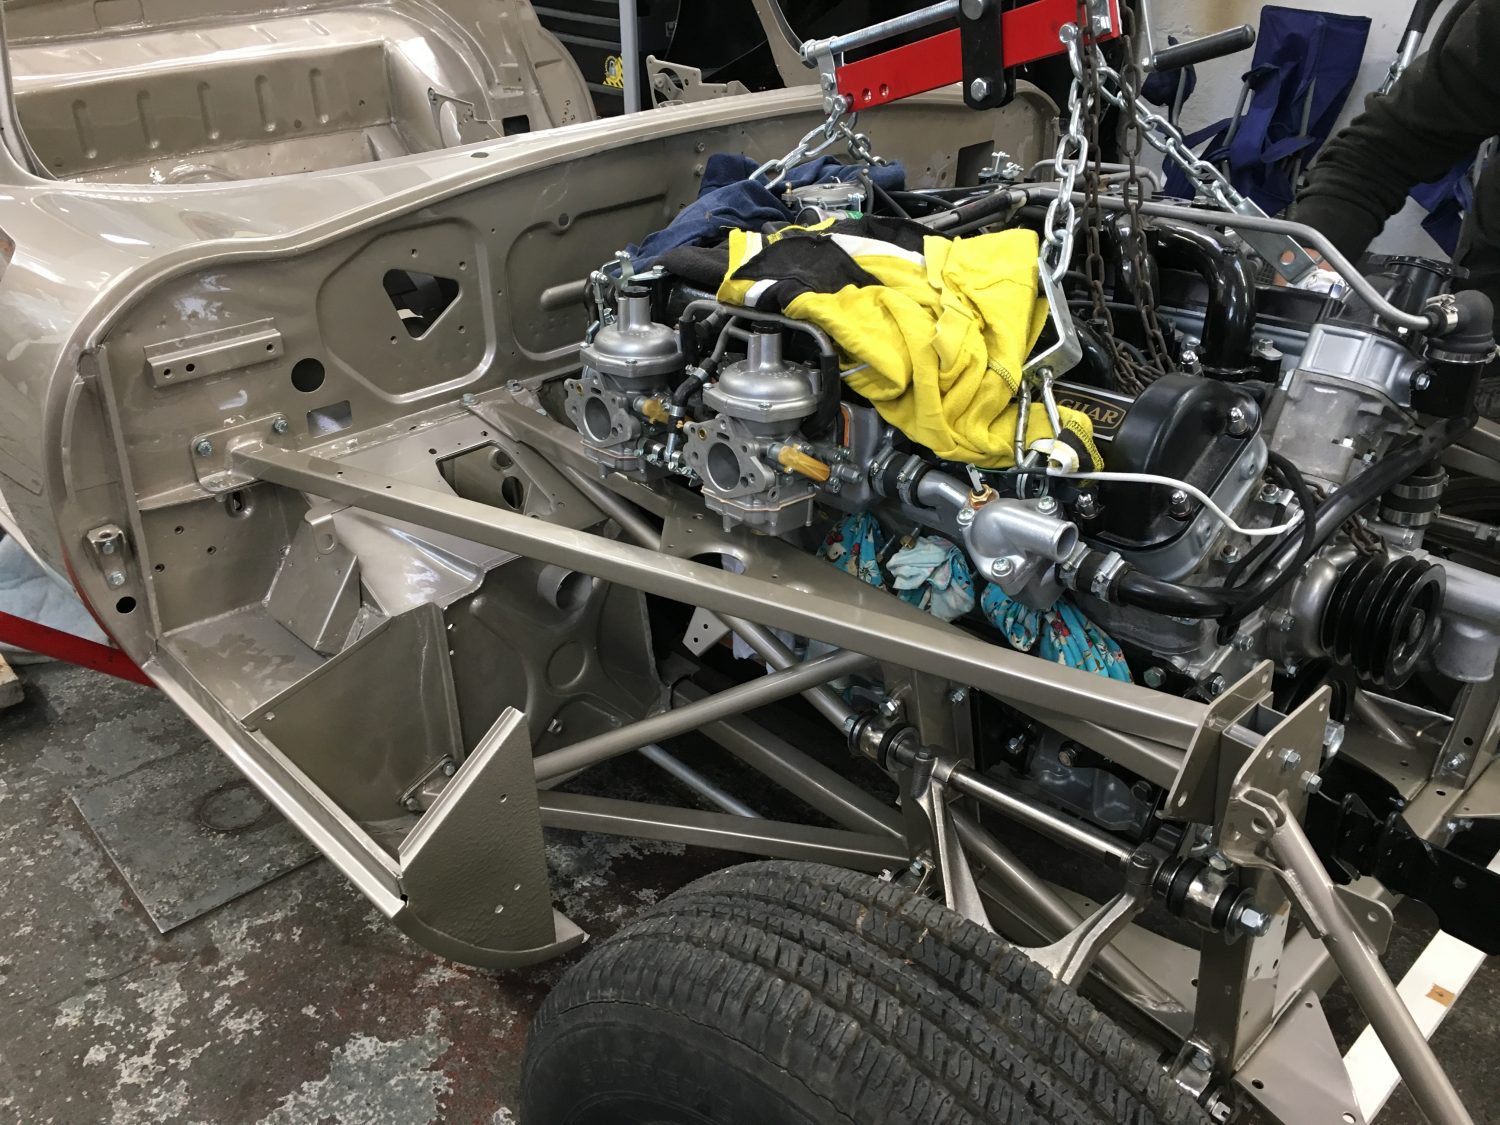
[vc_row][vc_column][vc_column_text]We are now days away from being able to marry up our V12 engine to our 1971 Jaguar E-Type so with Dave busy rebuilding the
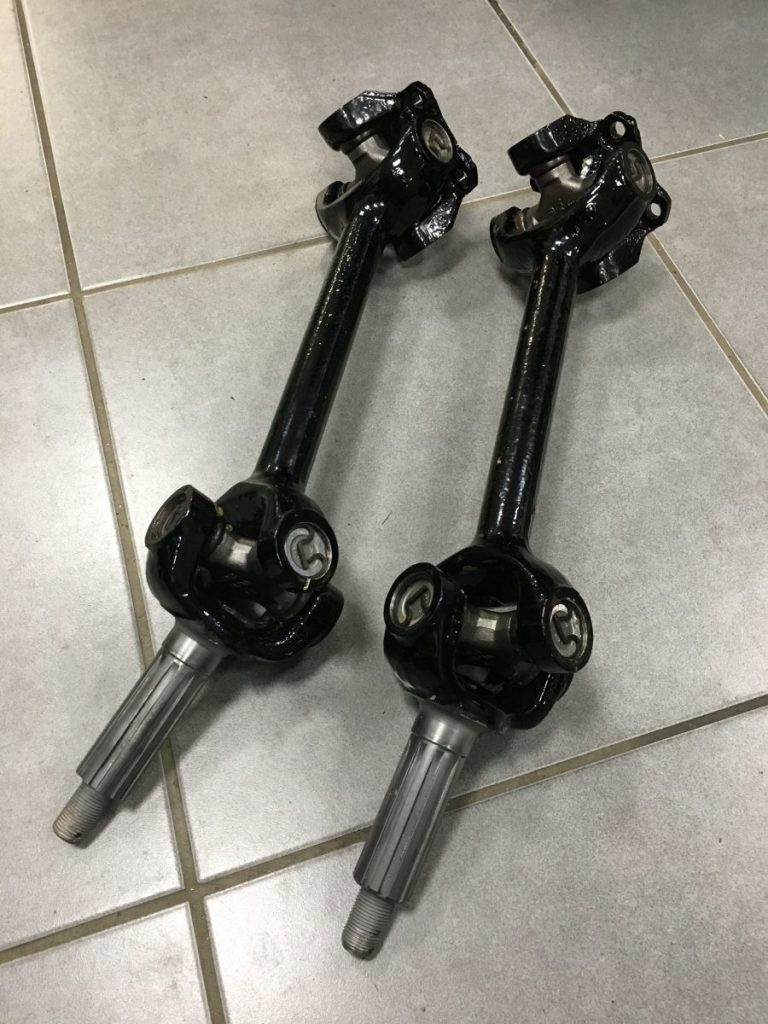
We are now into the rebuild stage of our 1971 Jaguar E-Type V12. The half-shafts have been built up ready to be fitted back up
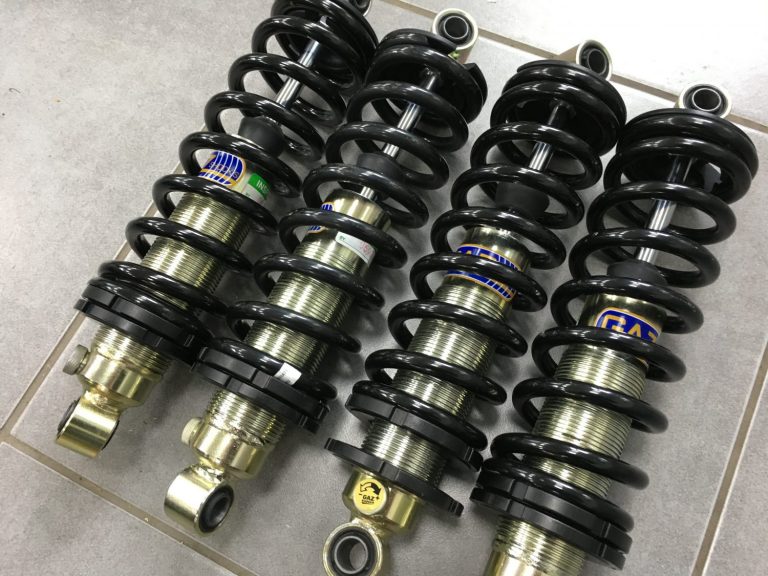
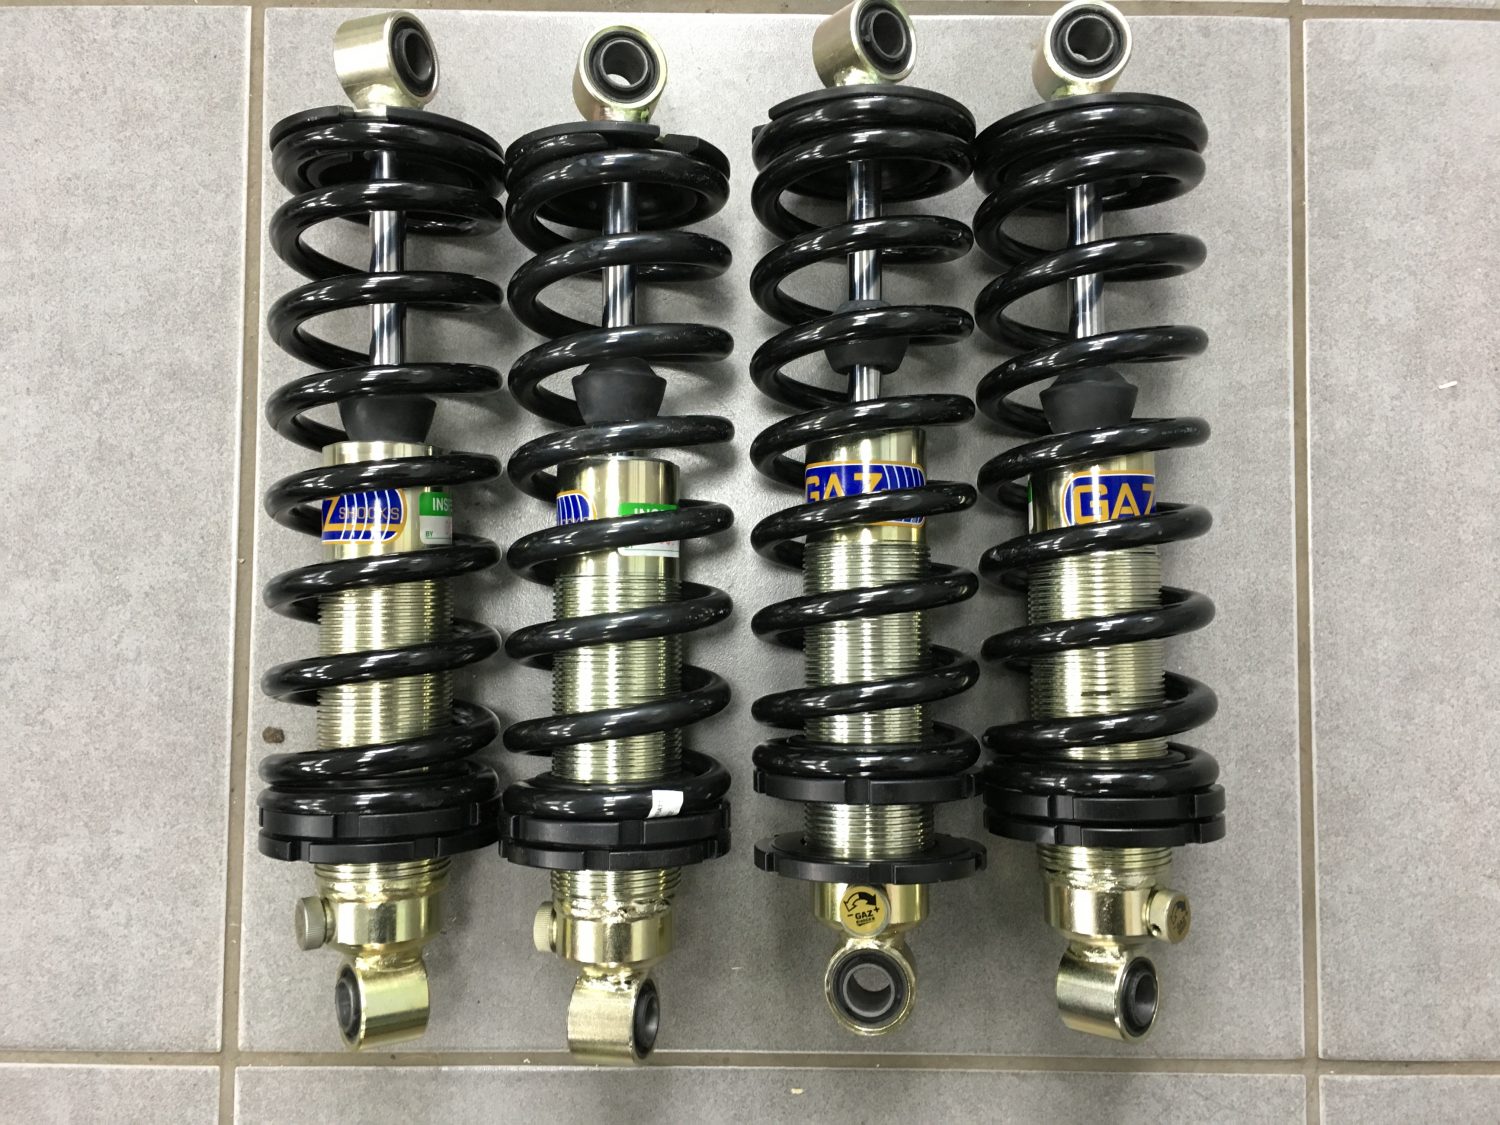
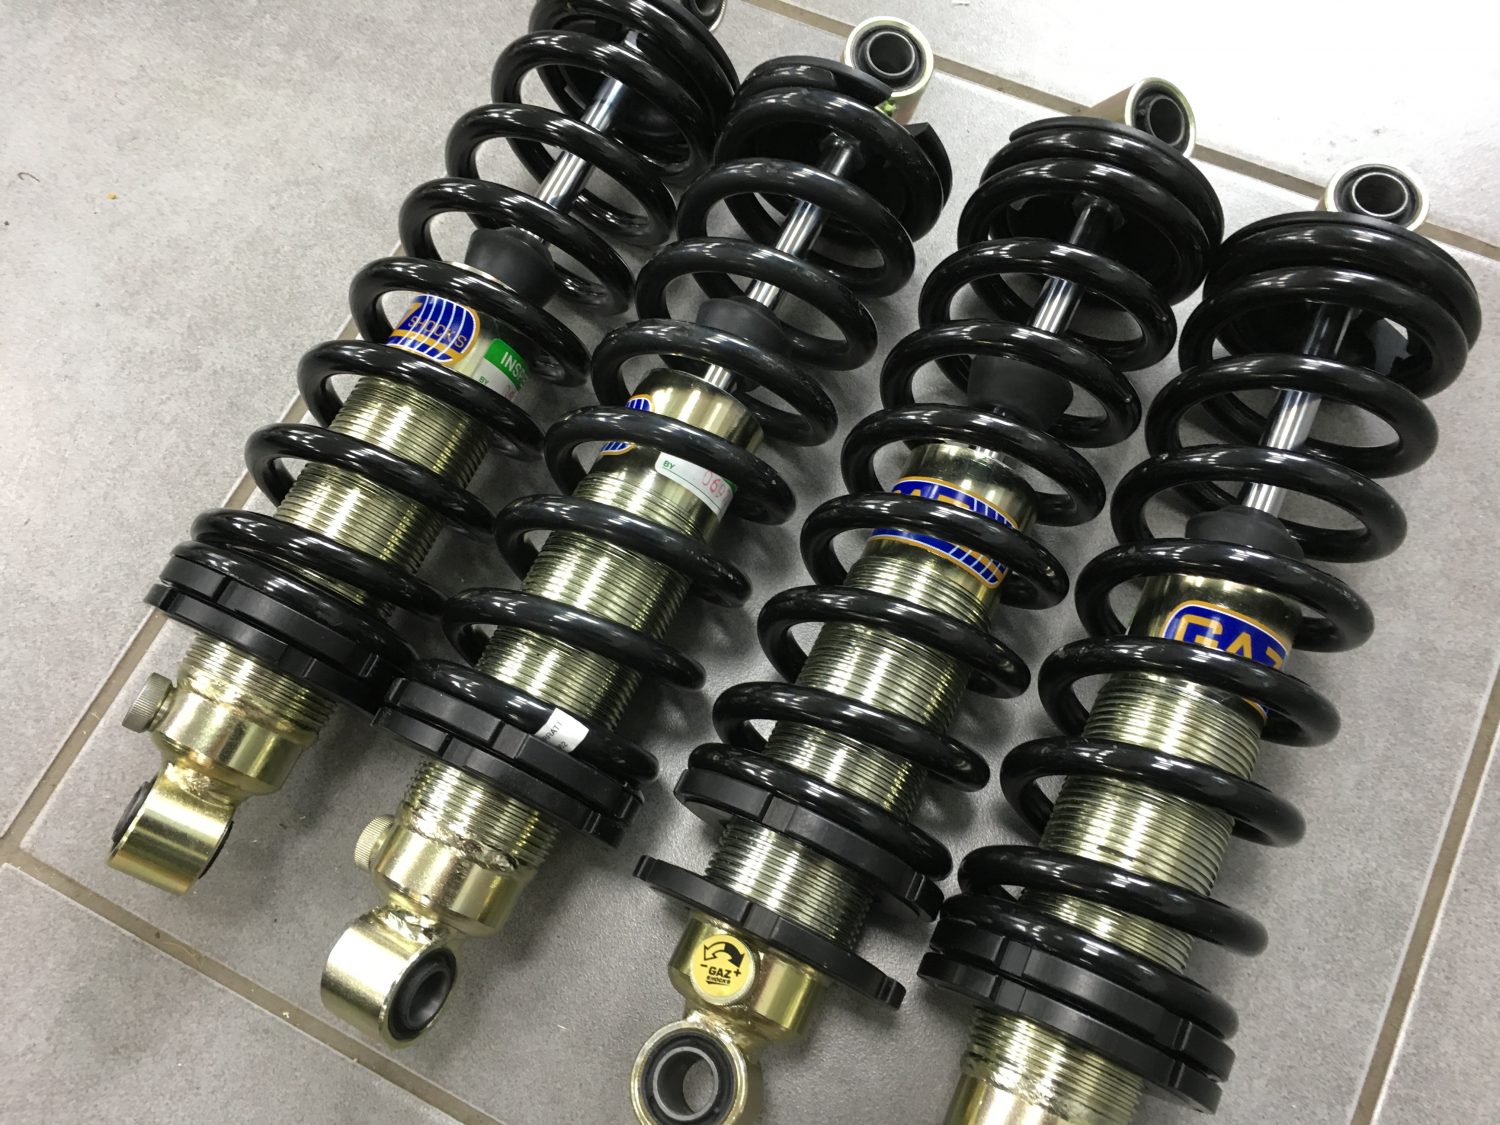
John has spent the afternoon building up the Jaguar E-Type roadster’s upgraded shocks ready for the refit to begin.
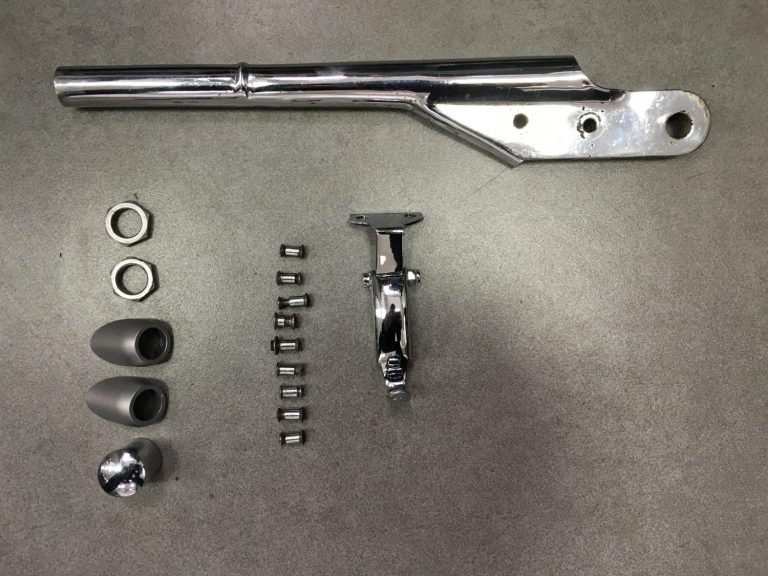
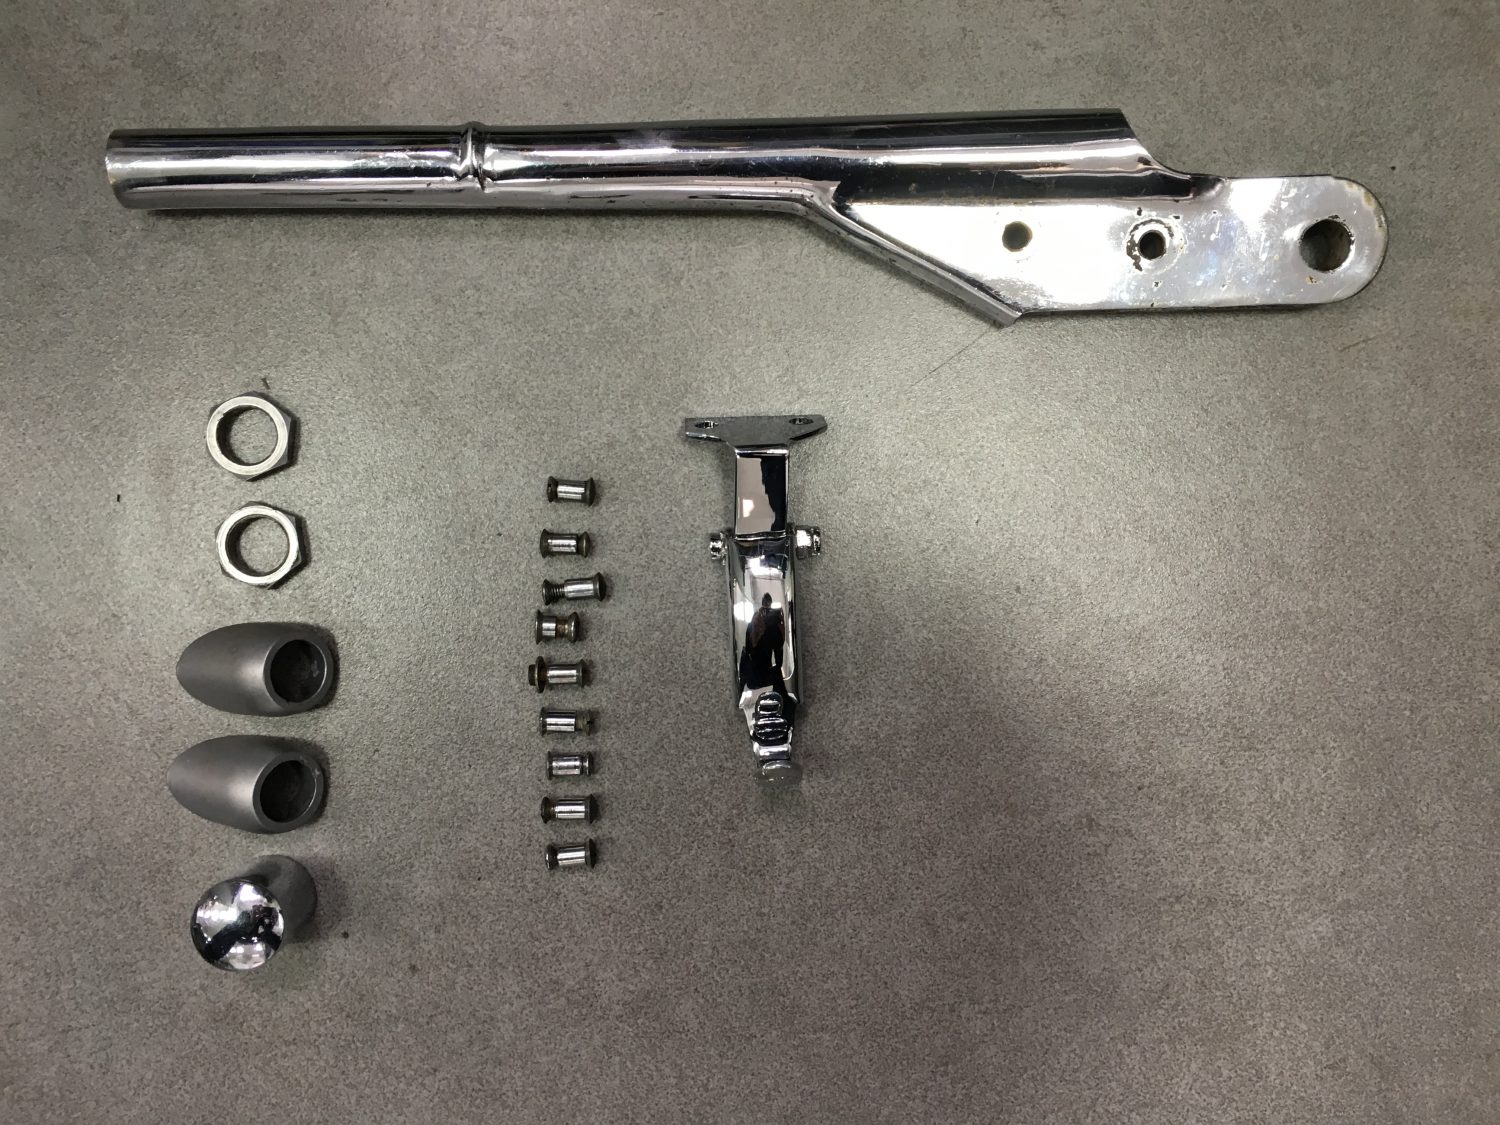
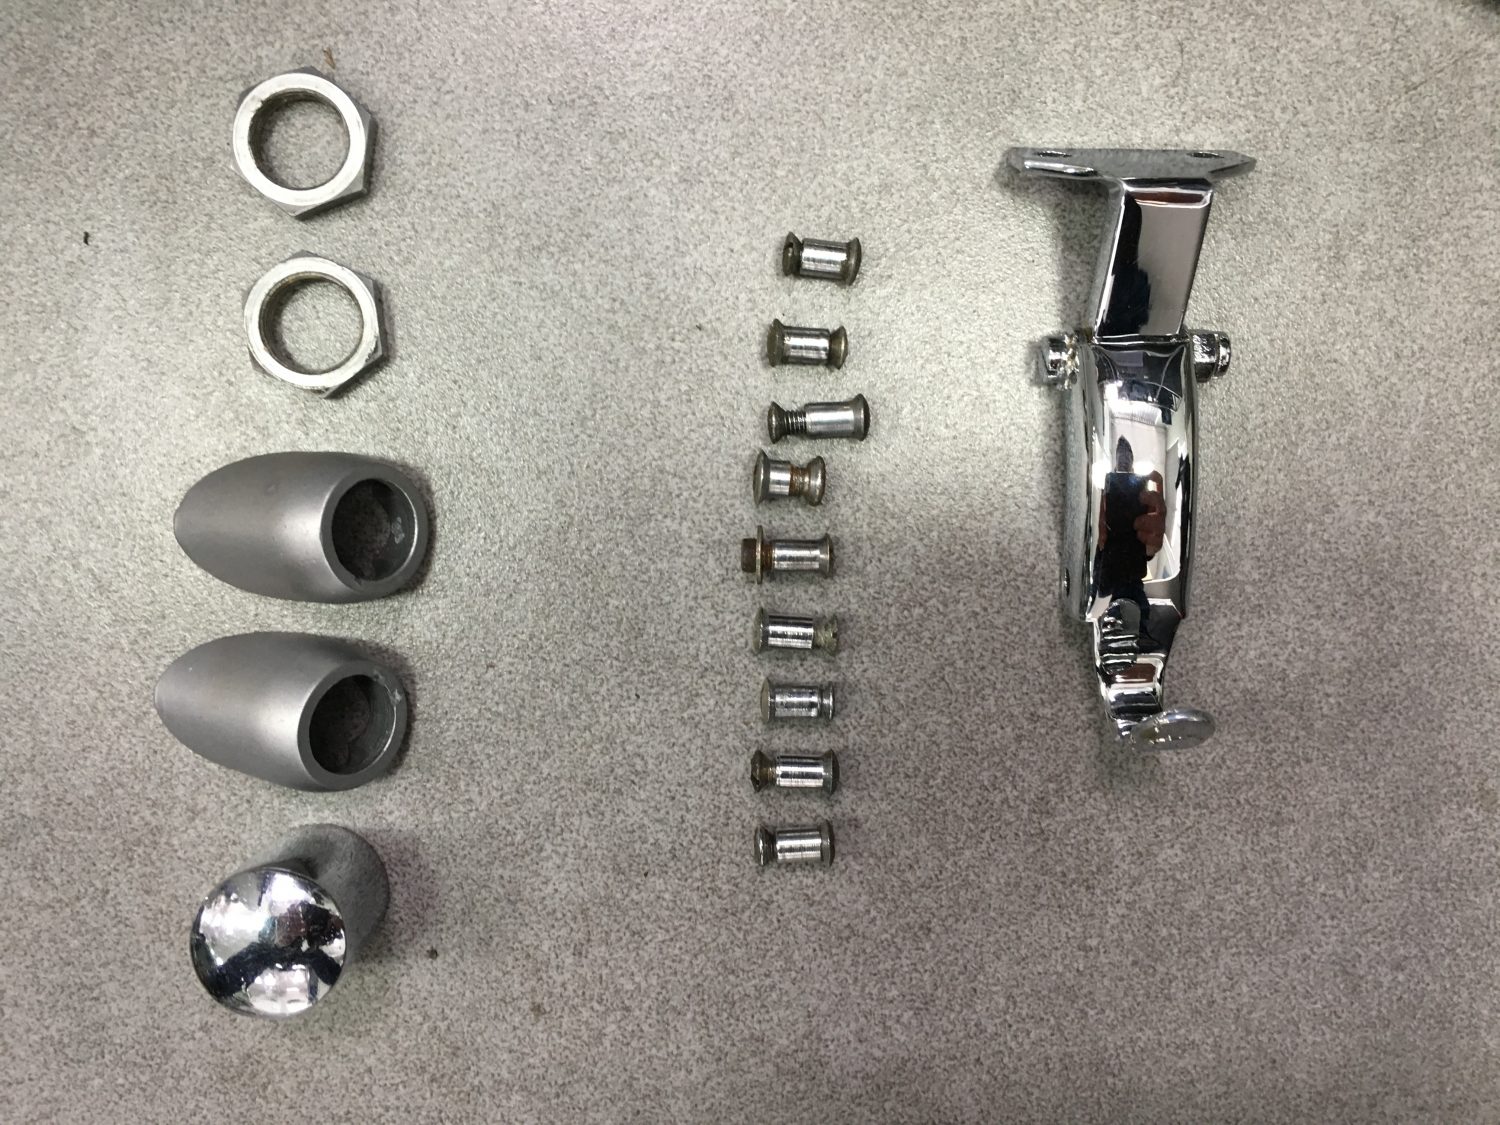
[vc_row][vc_column][vc_column_text]The handbrake levers are now in the safe hands of Tony at Wyatt Polishing ready to be zinc plated. I’ve managed to find a fantastic explanation
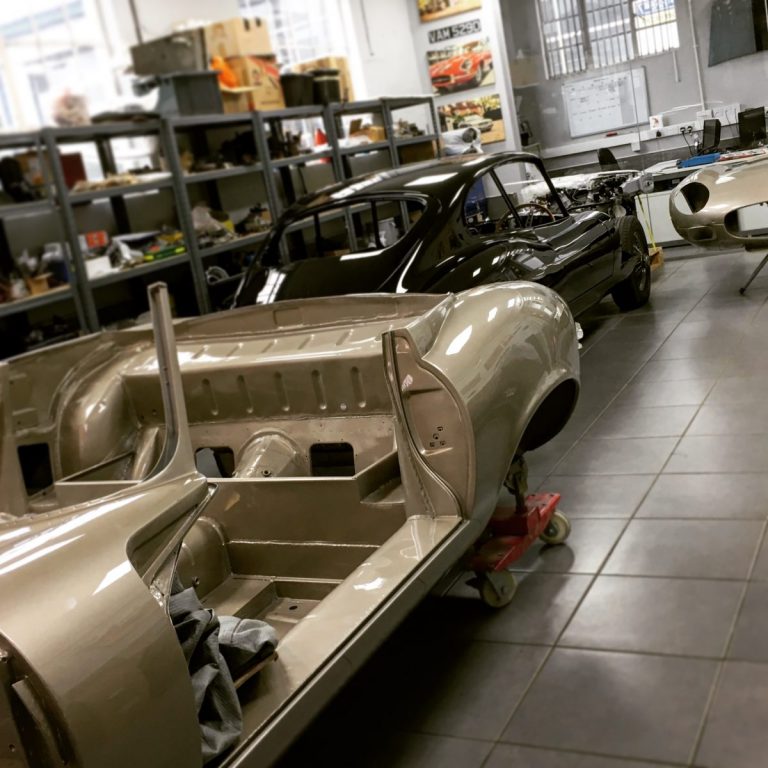
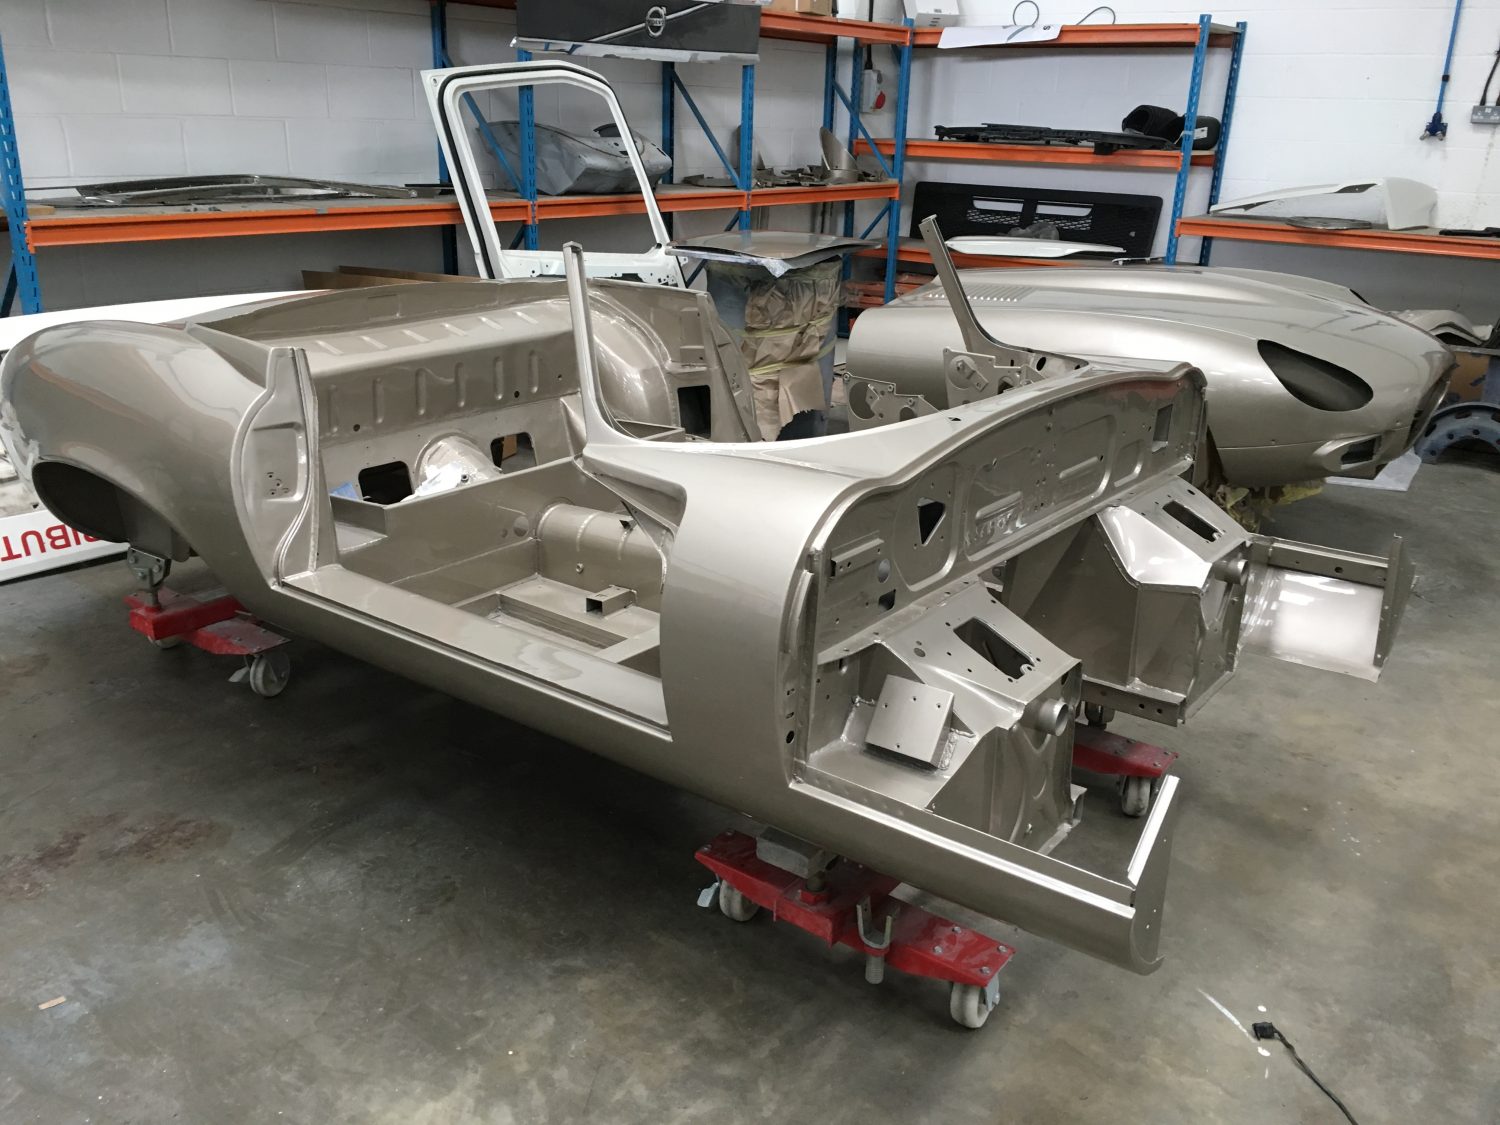
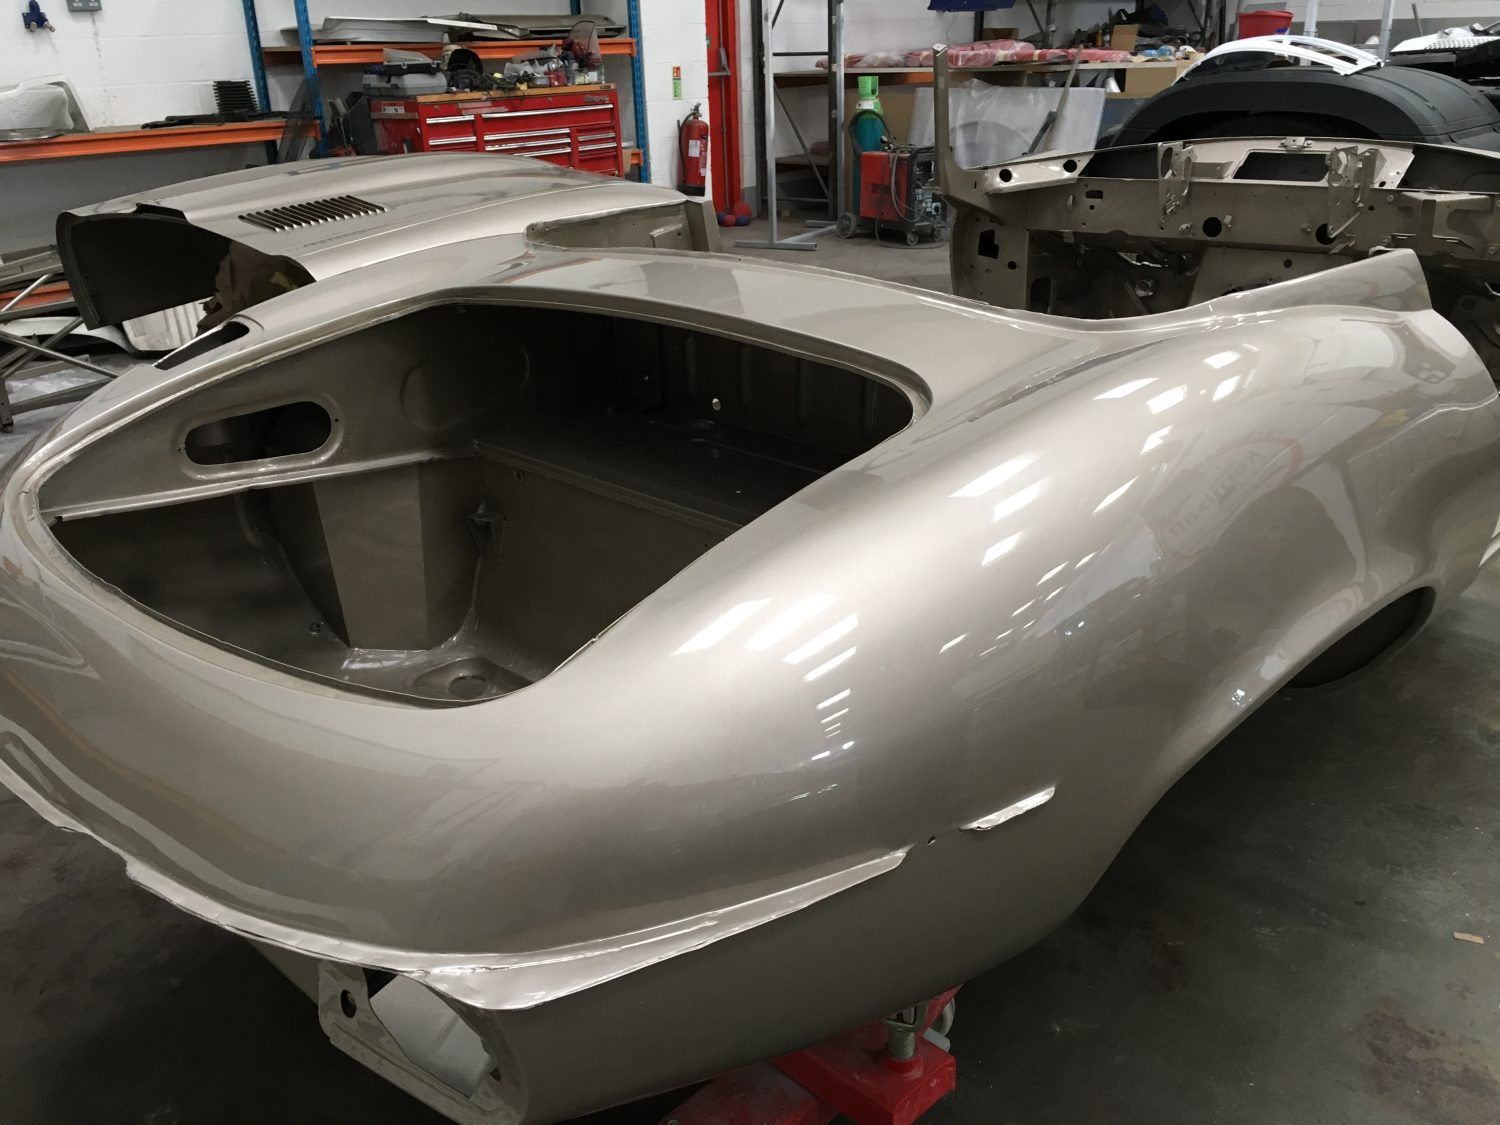
[vc_row][vc_column][vc_column_text]Welcome back to the Bridge Classic Cars workshops our Jaguar E-Type V12 Roadster. Now finished in Jaguar Golden Sands sitting proudly next to our 1967
Today’s the day our Jaguar E-Type V12 roadster rejoins the Bridge Classic Cars collection in our Deben Road workshops… …now in her new Golden Sands finish. She’ll
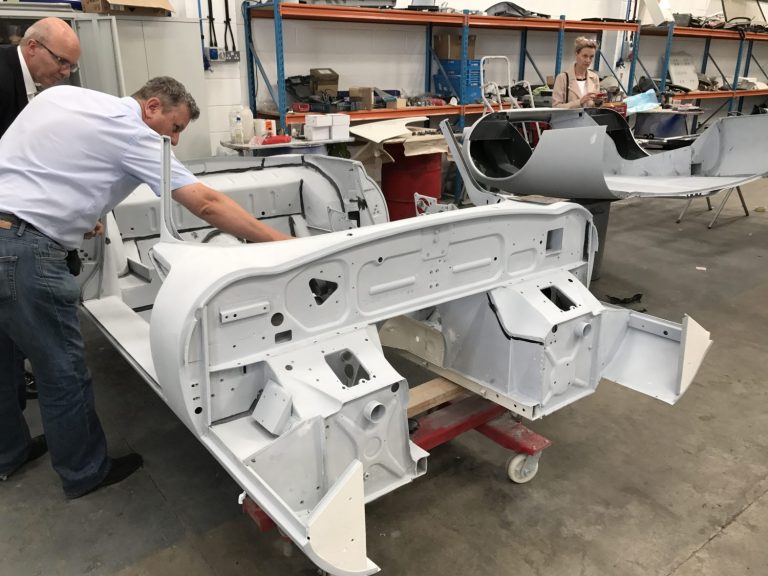
[vc_row][vc_column][vc_column_text]Today we had a visit from Brian Classic Assessments and the owners to look at the progress of our Jaguar E-Type V12 Roadster. Unfortunately they were
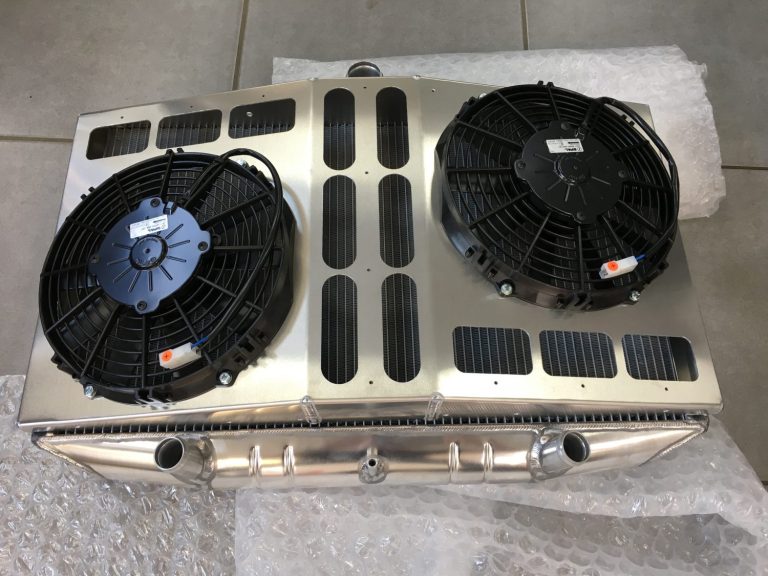
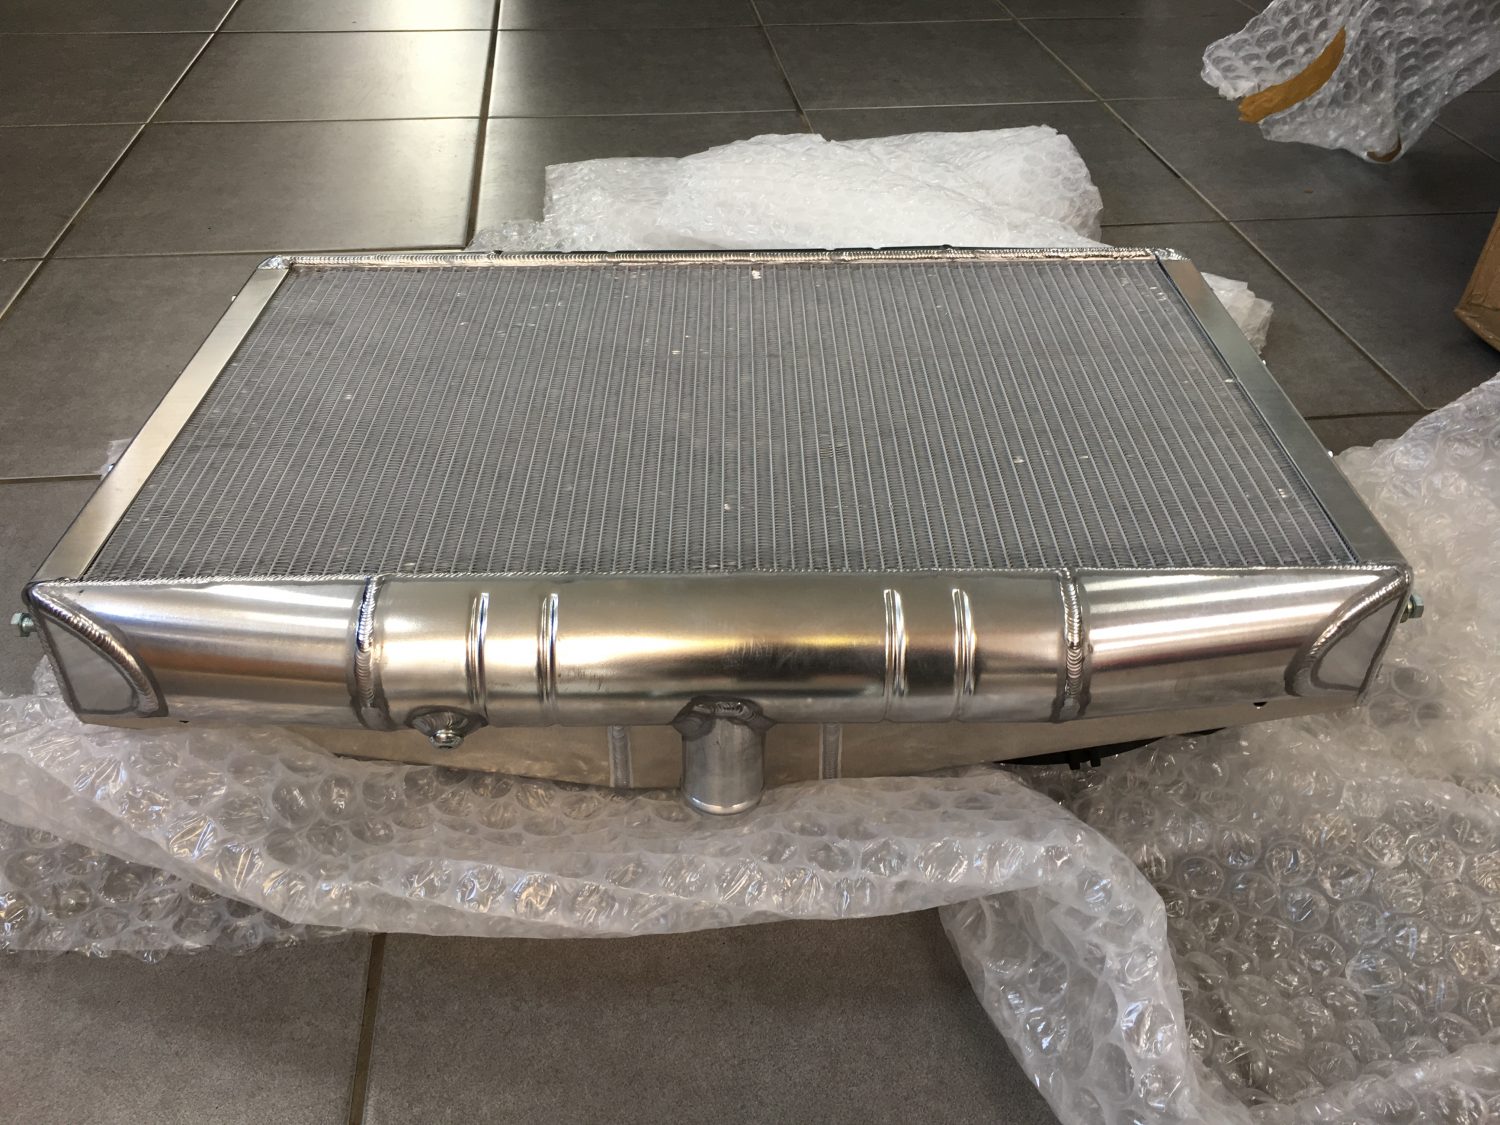
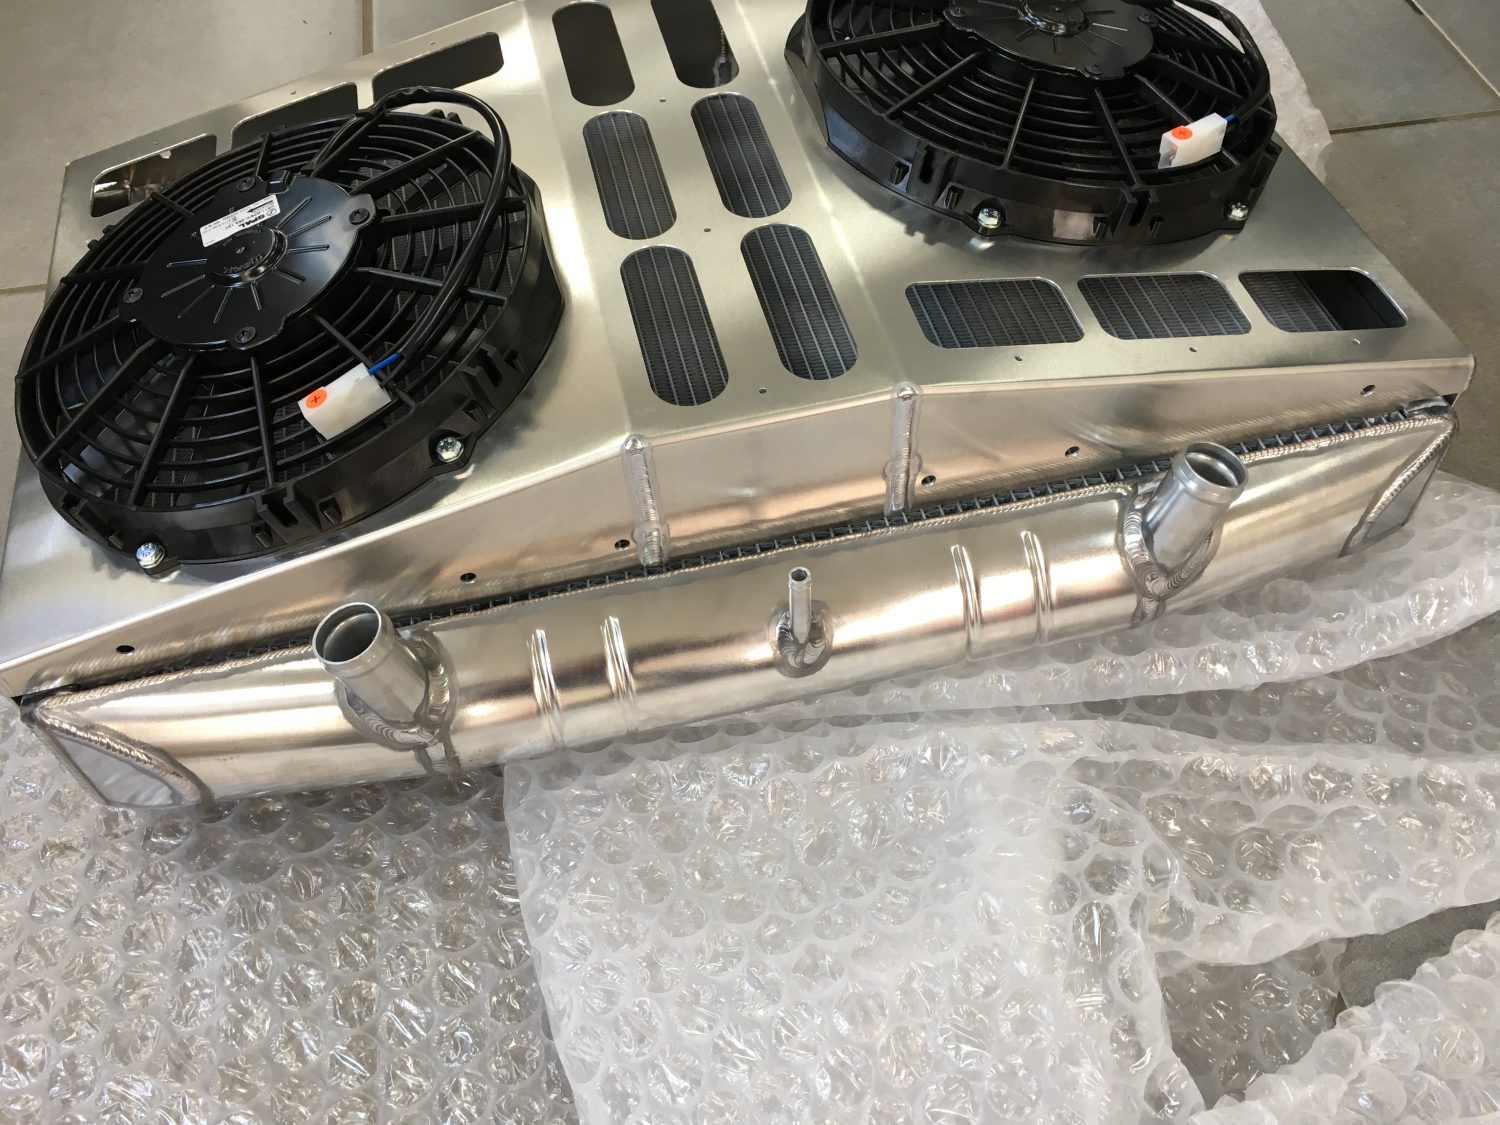
We’ve just taken delivery of our brand new aluminium Jaguar V12 radiator with cowls and fans, including header tank. Alicool produce Intercoolers, radiators, oil coolers,

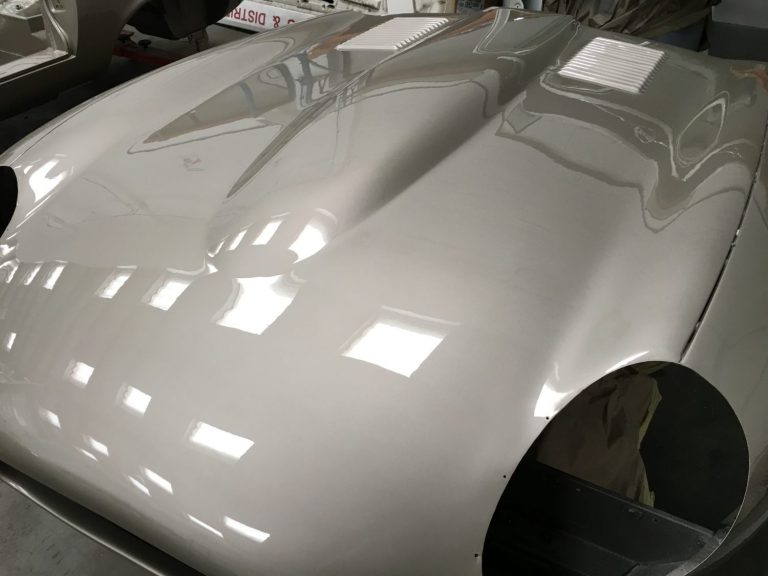
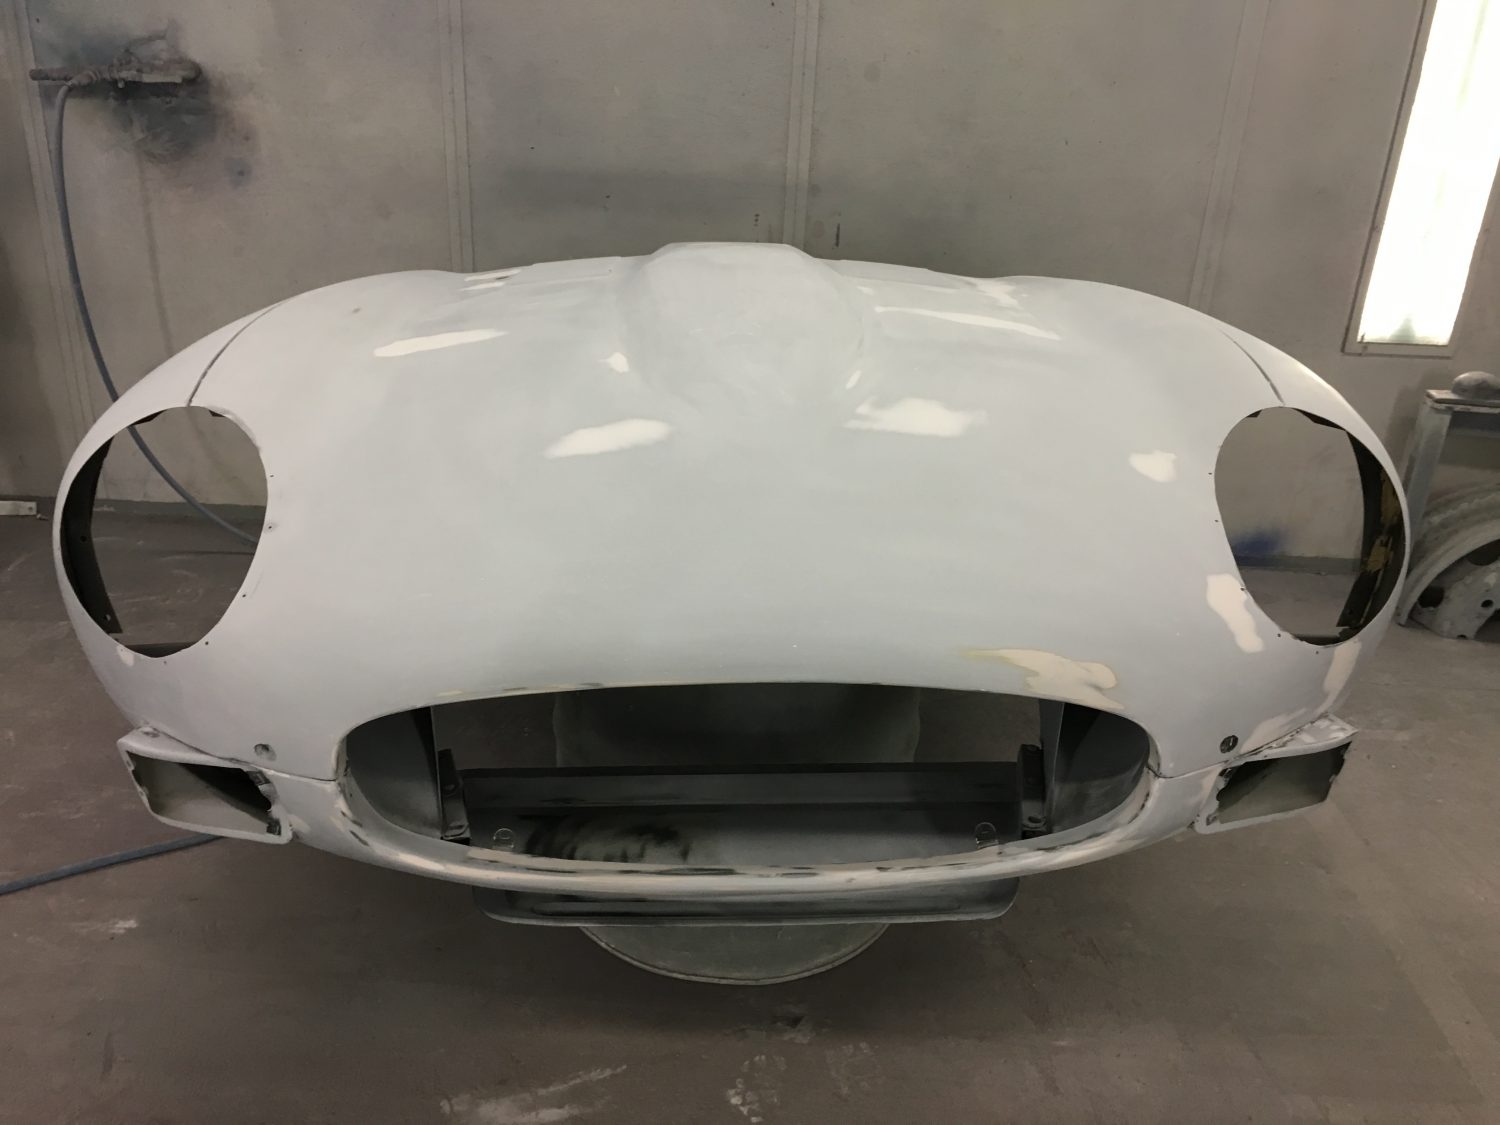
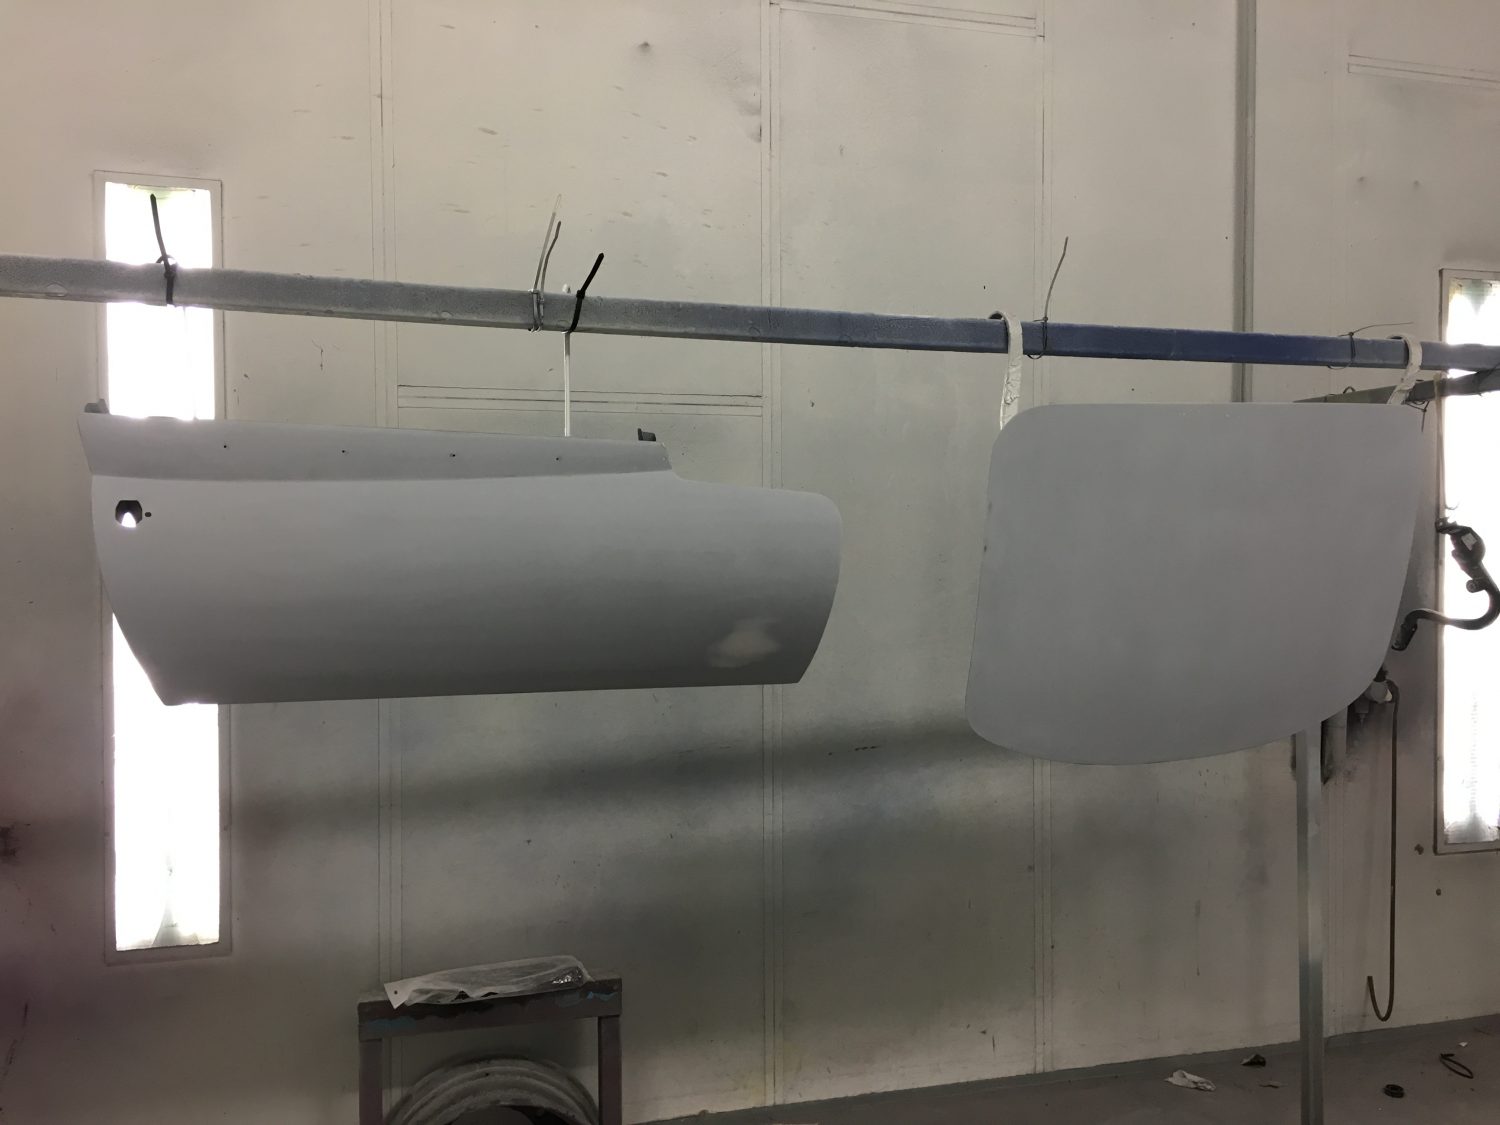
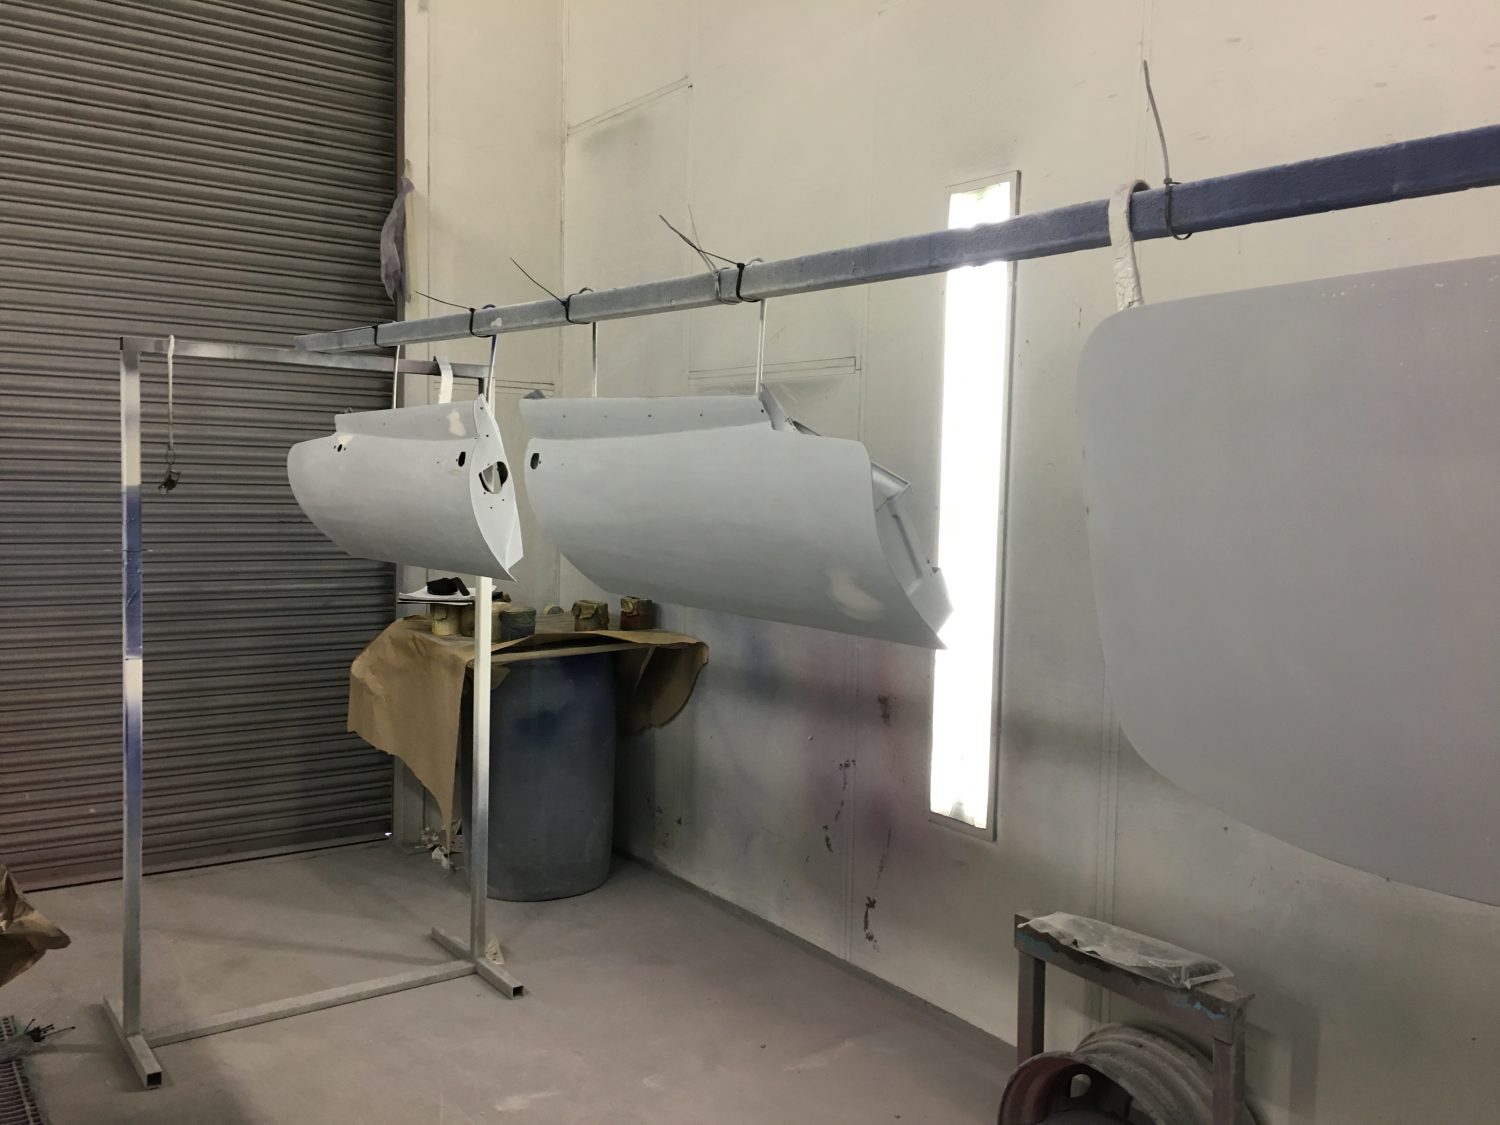
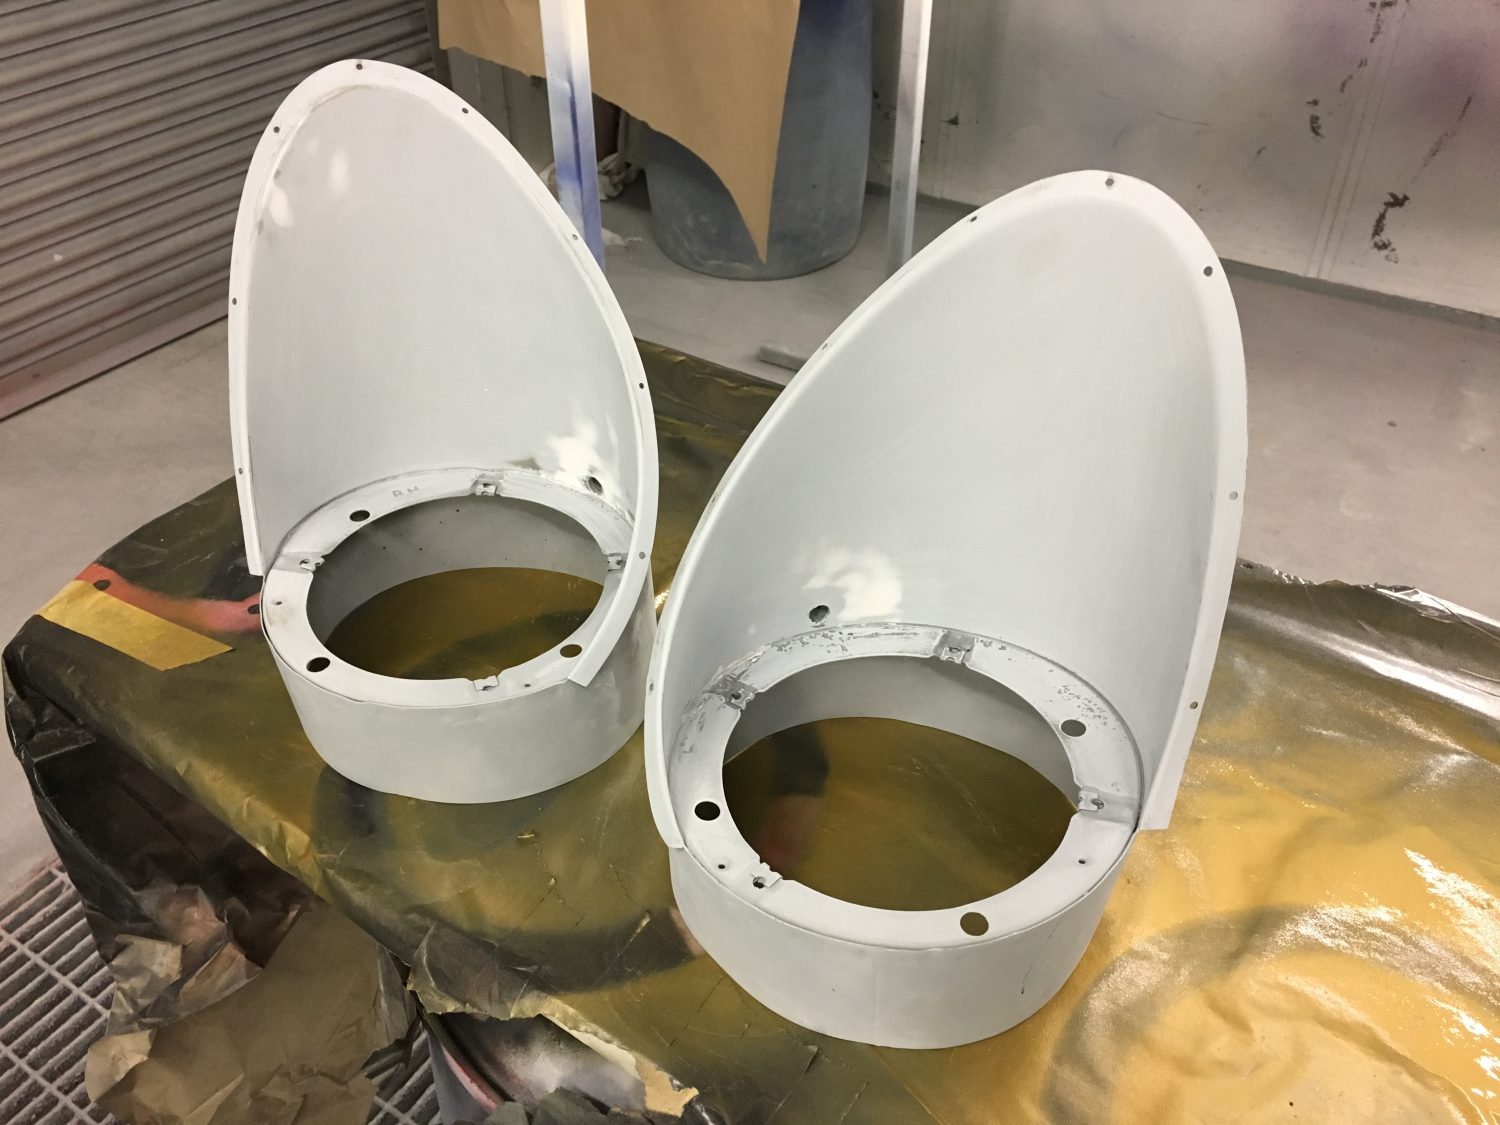
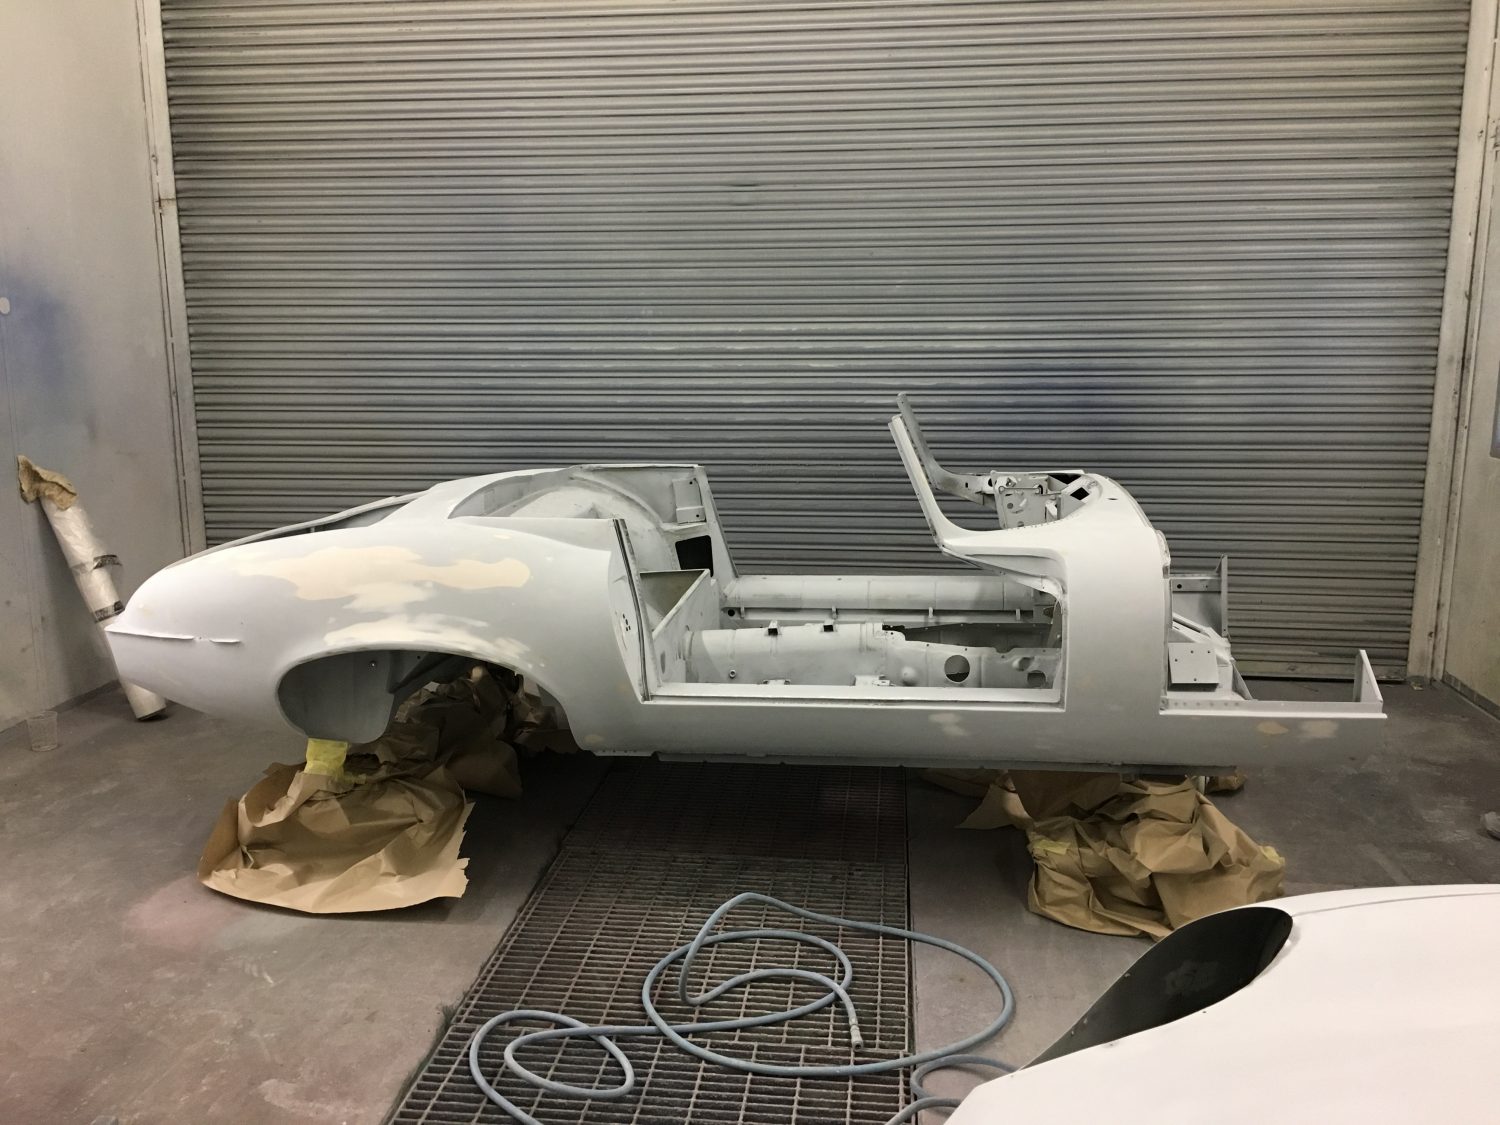
Our Jaguar E-Type Roadster is due to be painted tomorrow, here she in after her second stage of primer. The blowers are on and we

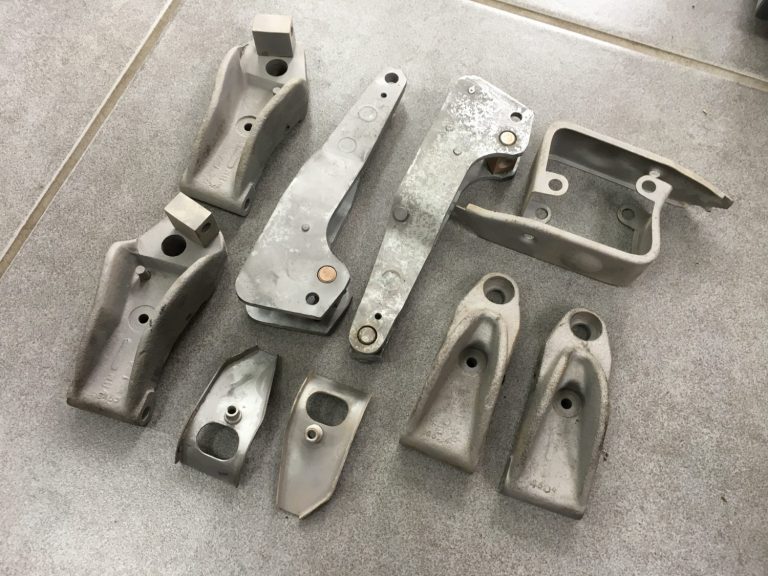
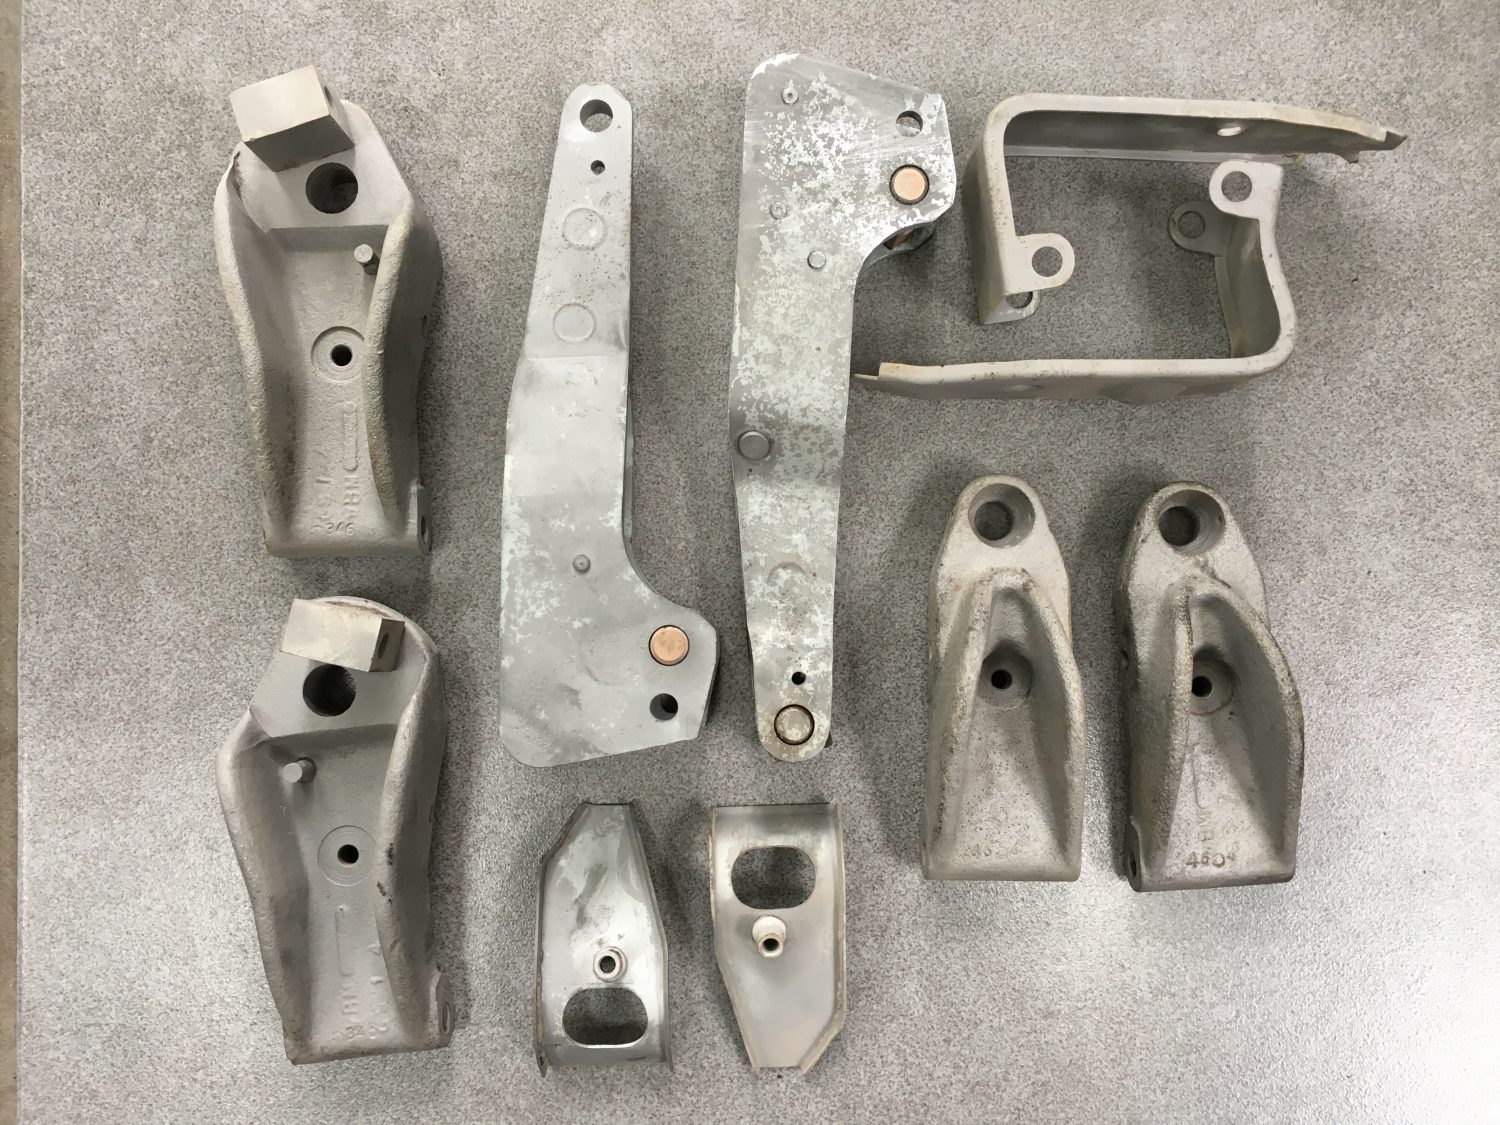
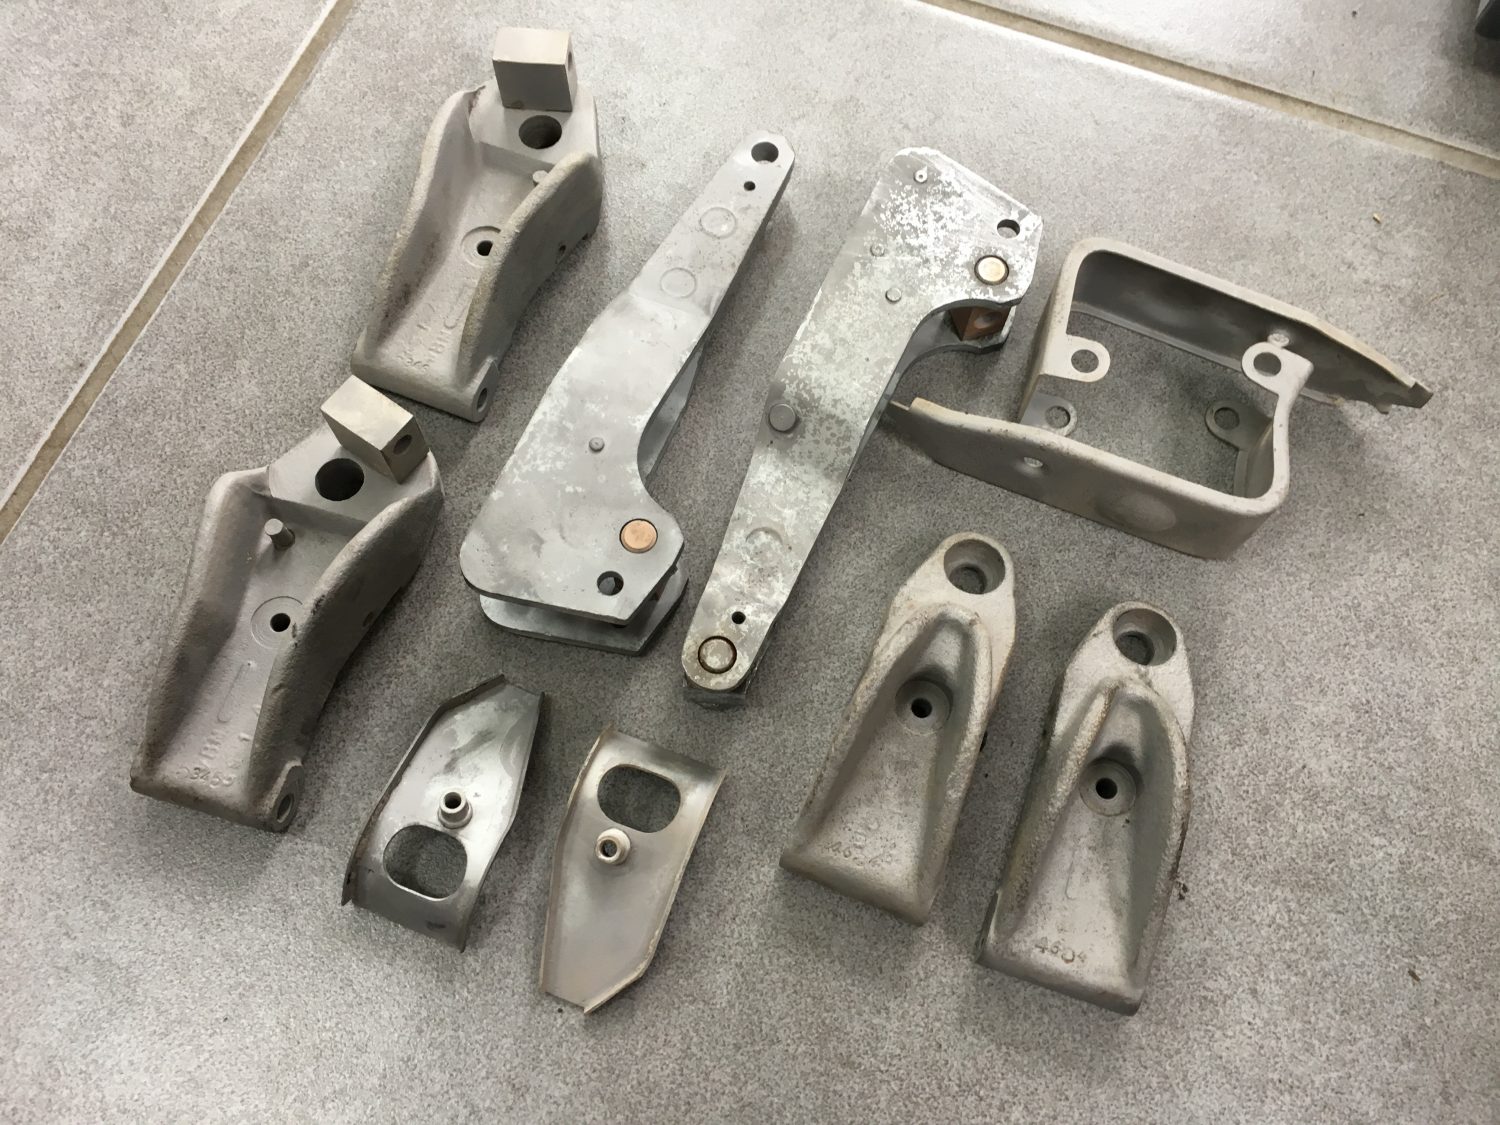
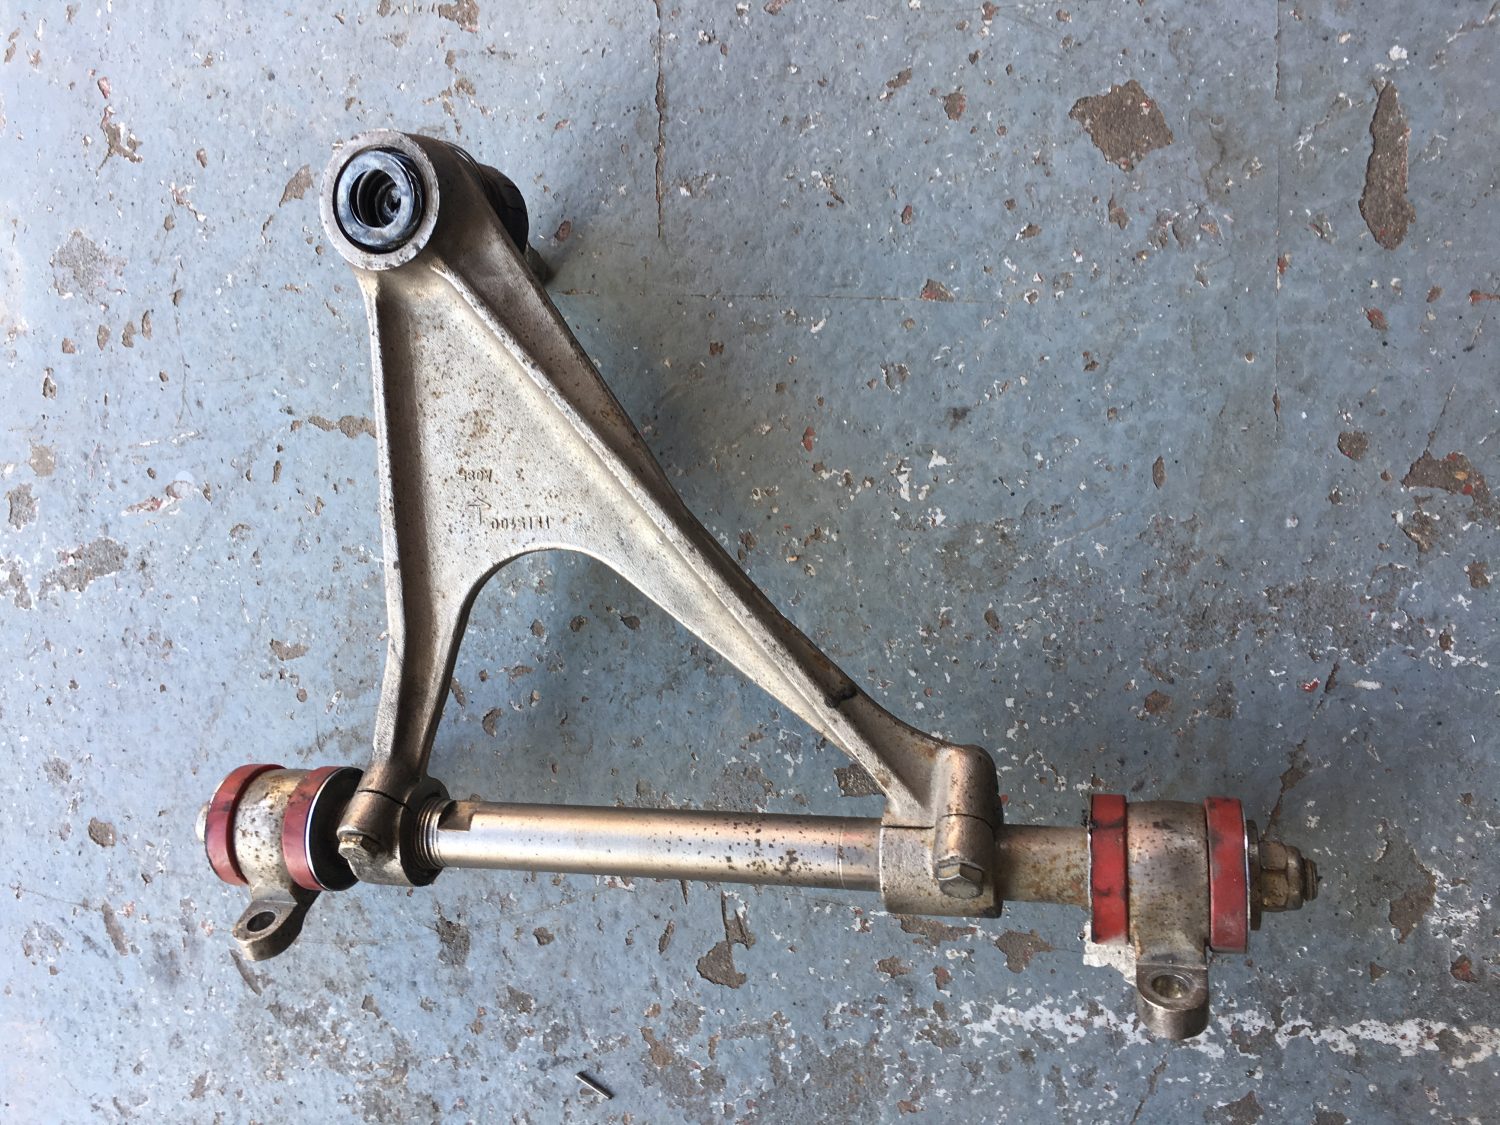
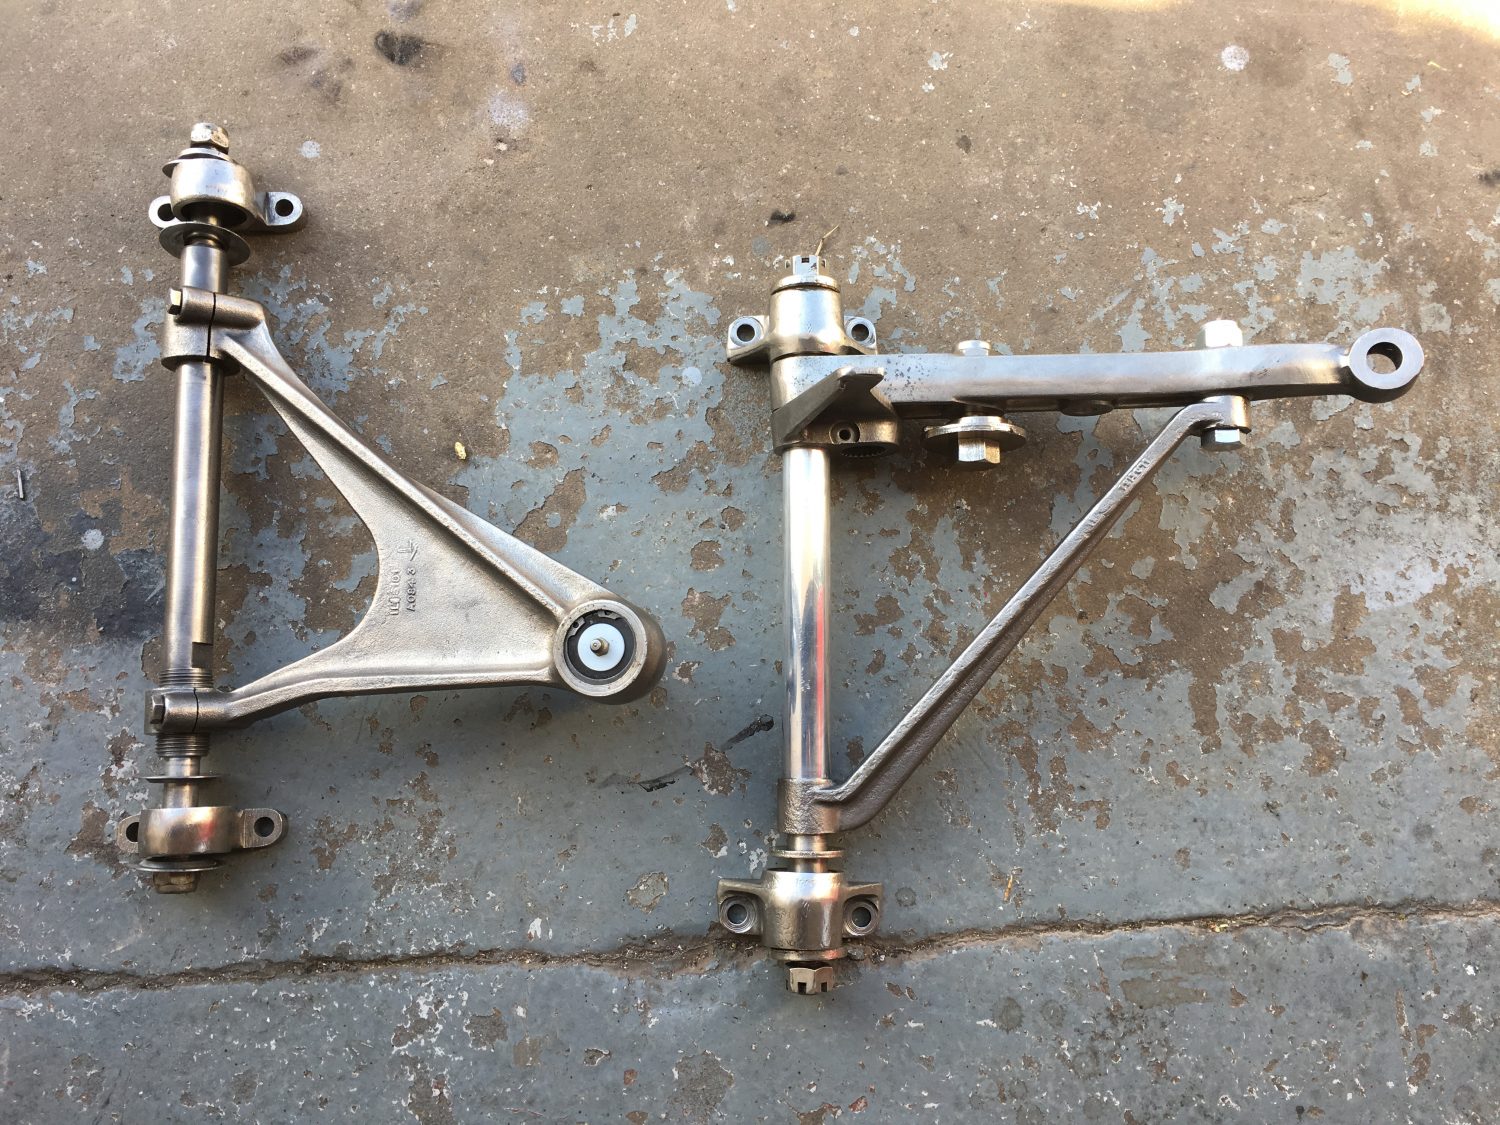
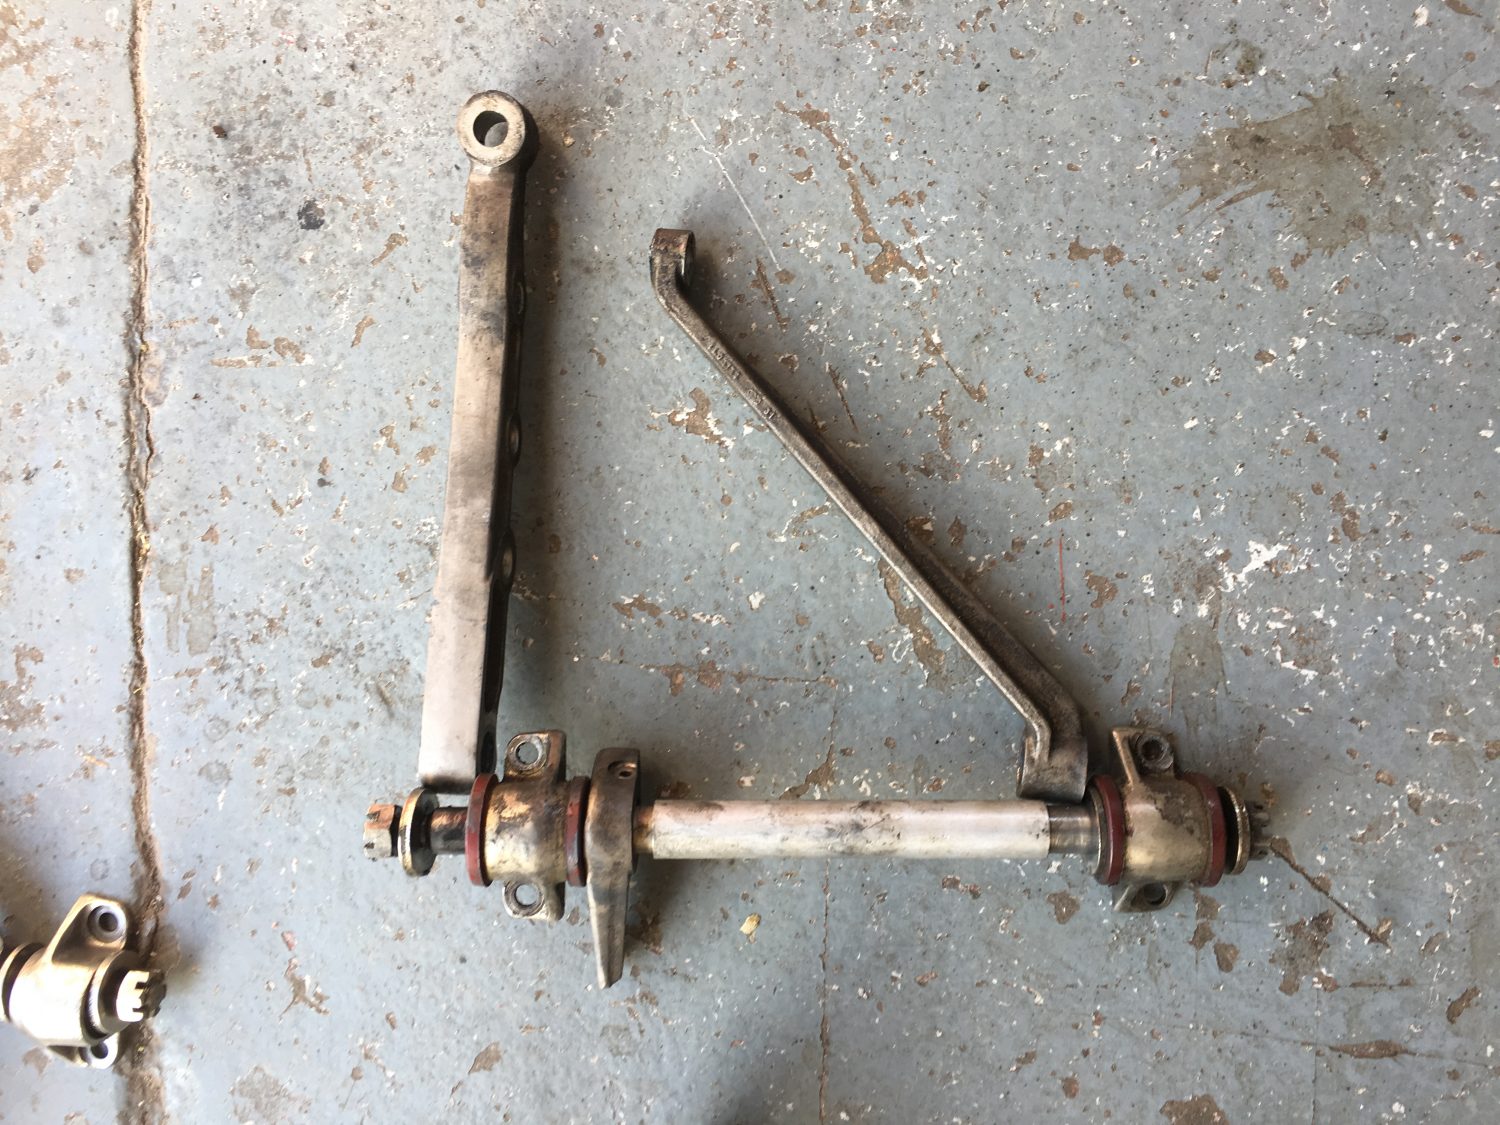
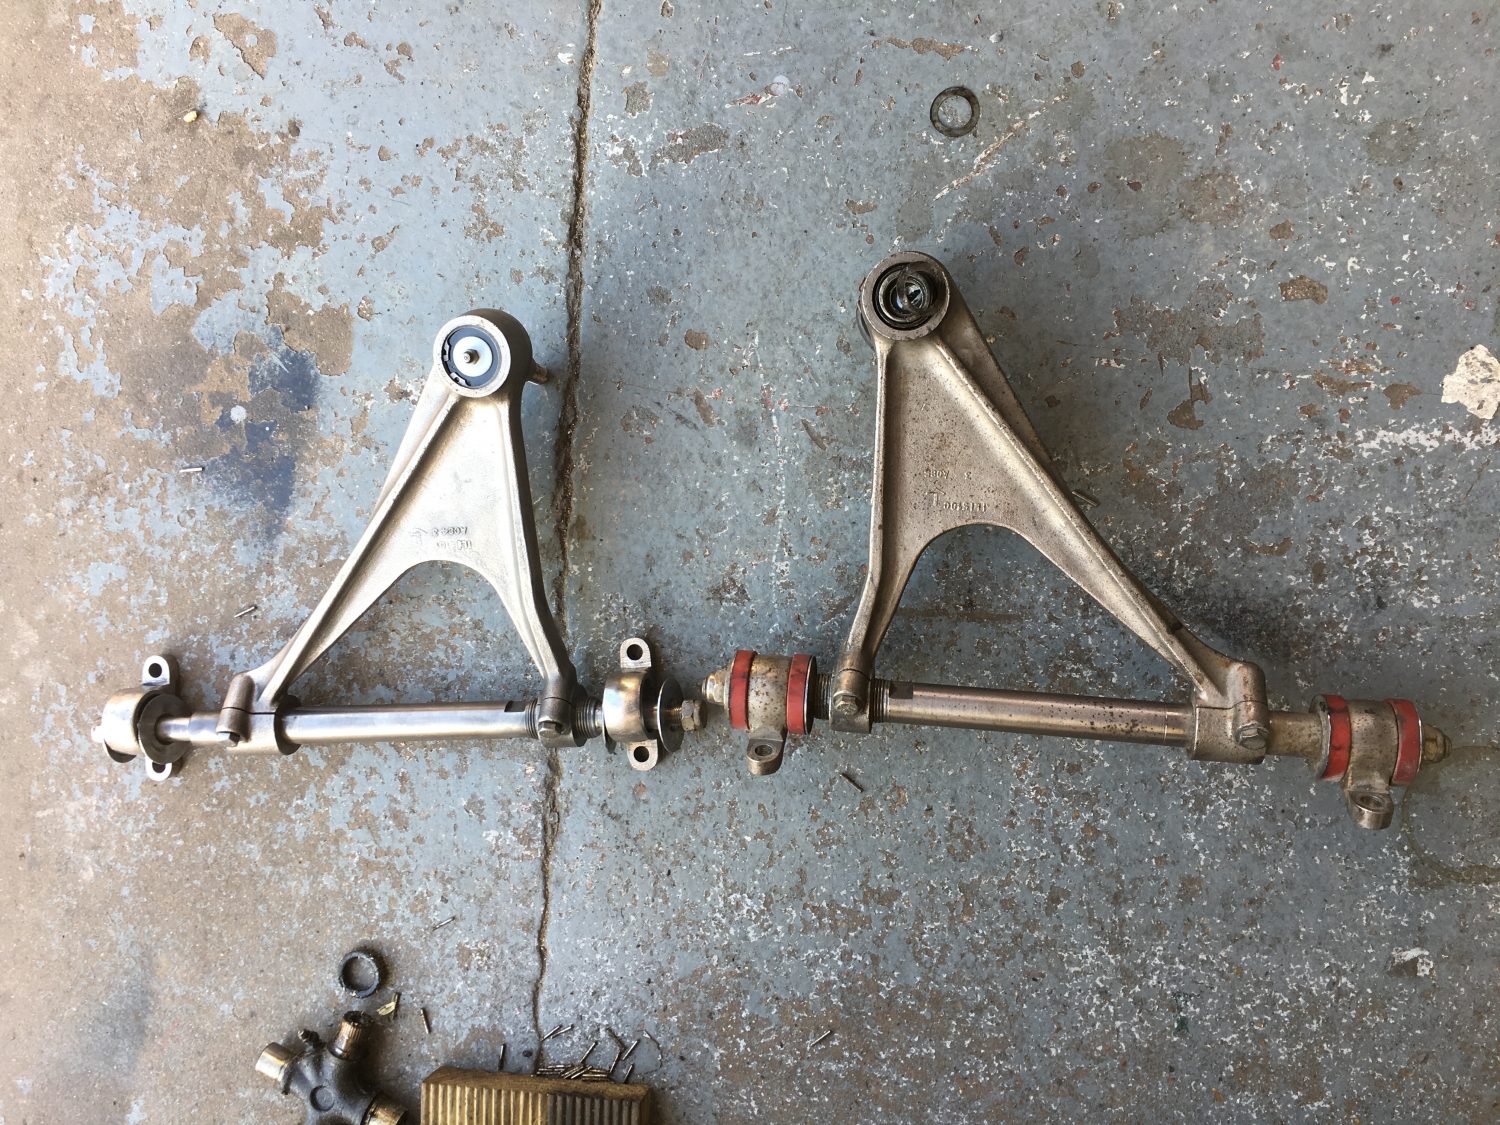
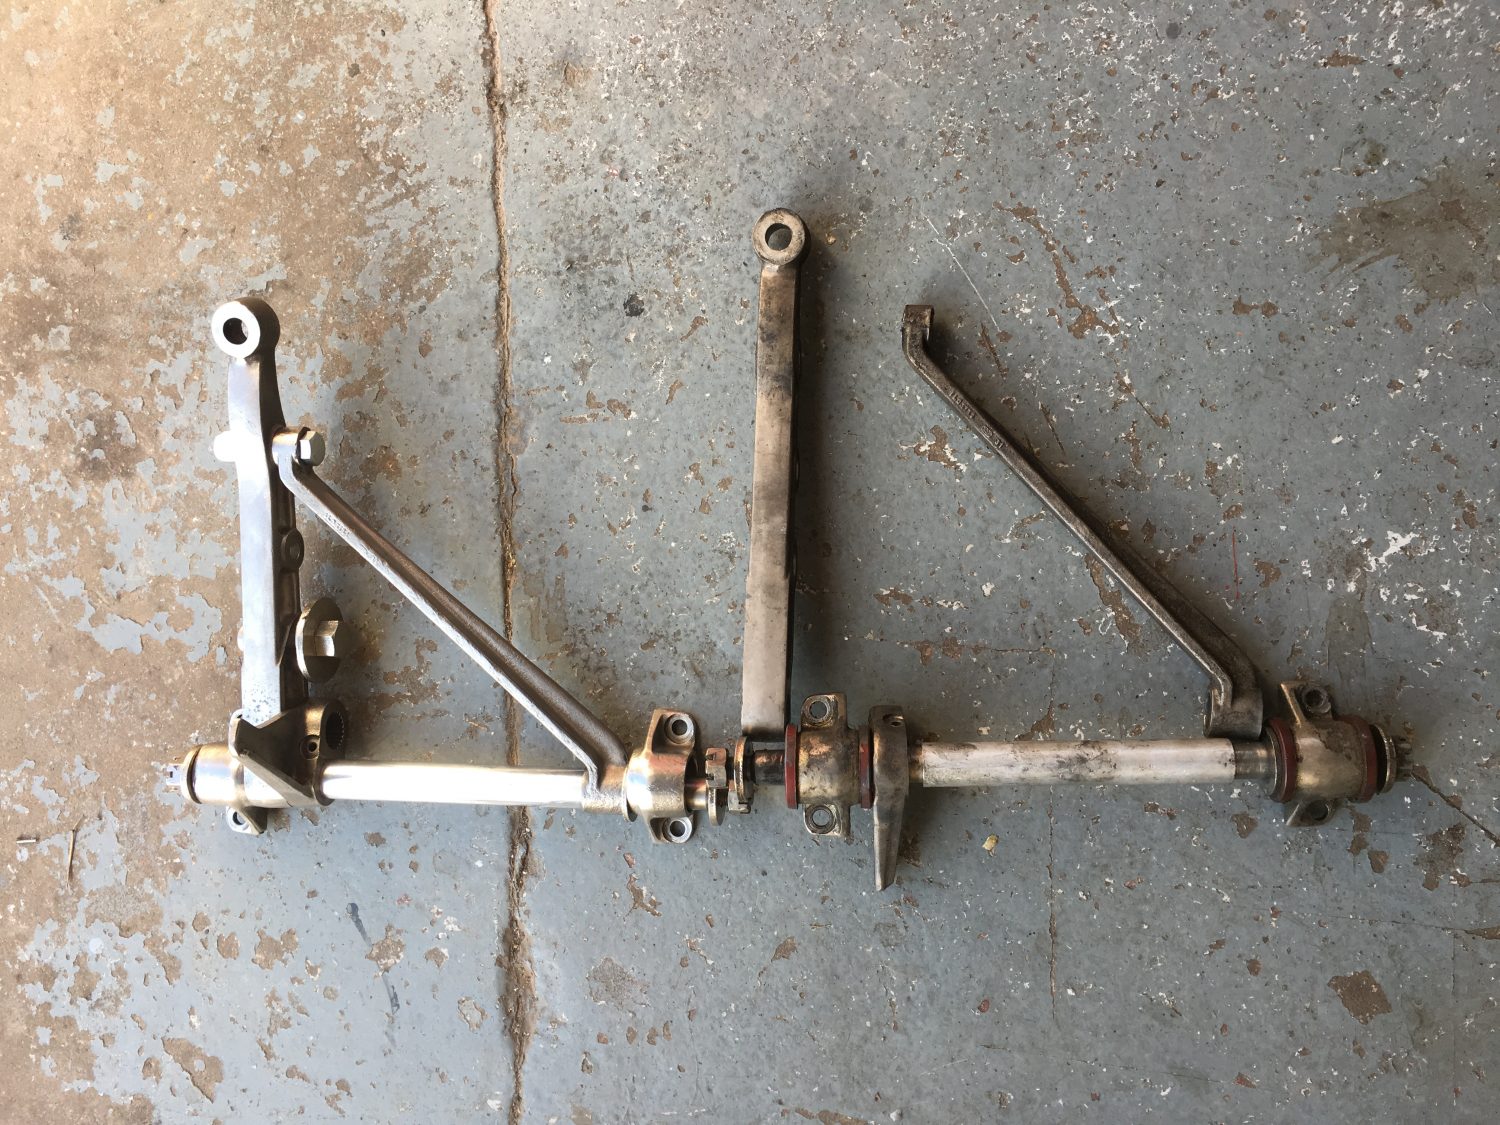
Tommy has been hard at work today blasting and refurbishing our 1973 Jaguar E-Type V12 Roadster top and bottom wishbones.
[vc_row][vc_column][vc_column_text]The first of two coats of primer have now been applied to our Jaguar E-Type V12 roadster. We are now only days away from the
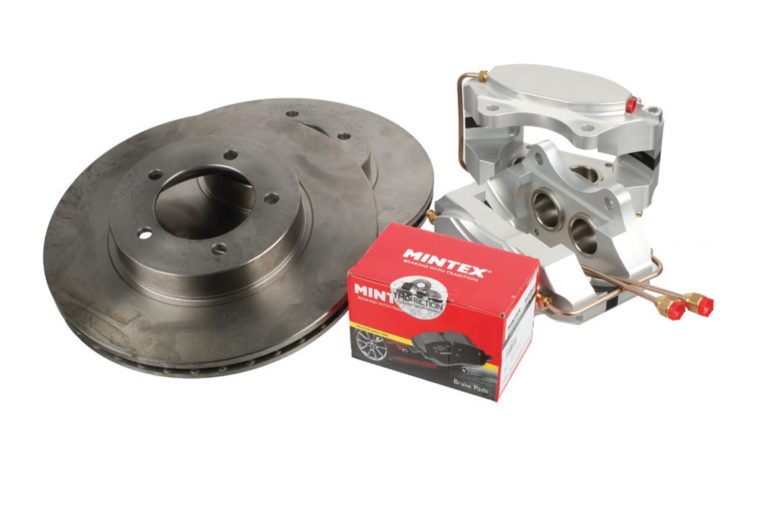
Jaguar E-Type Front Brake Caliper Conversion Upgrades from SNG Barratt These four pot front brake caliper conversion kits are manufactured in England using Ductile Cast
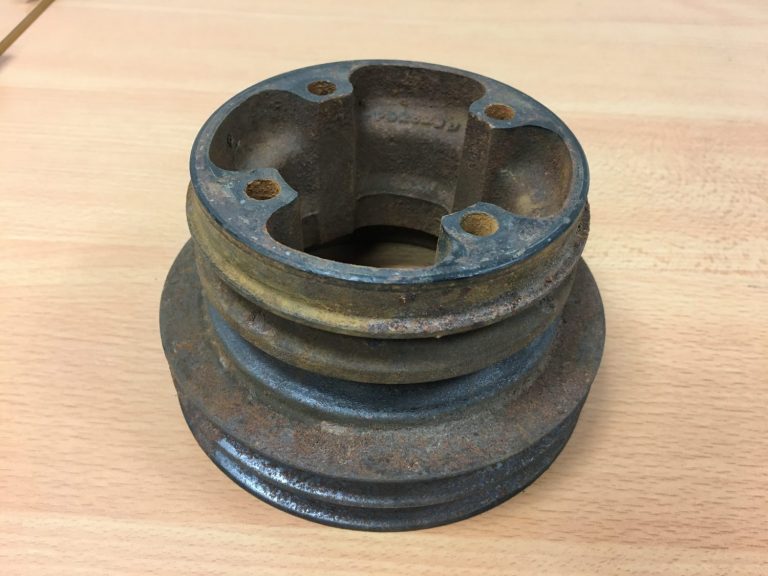
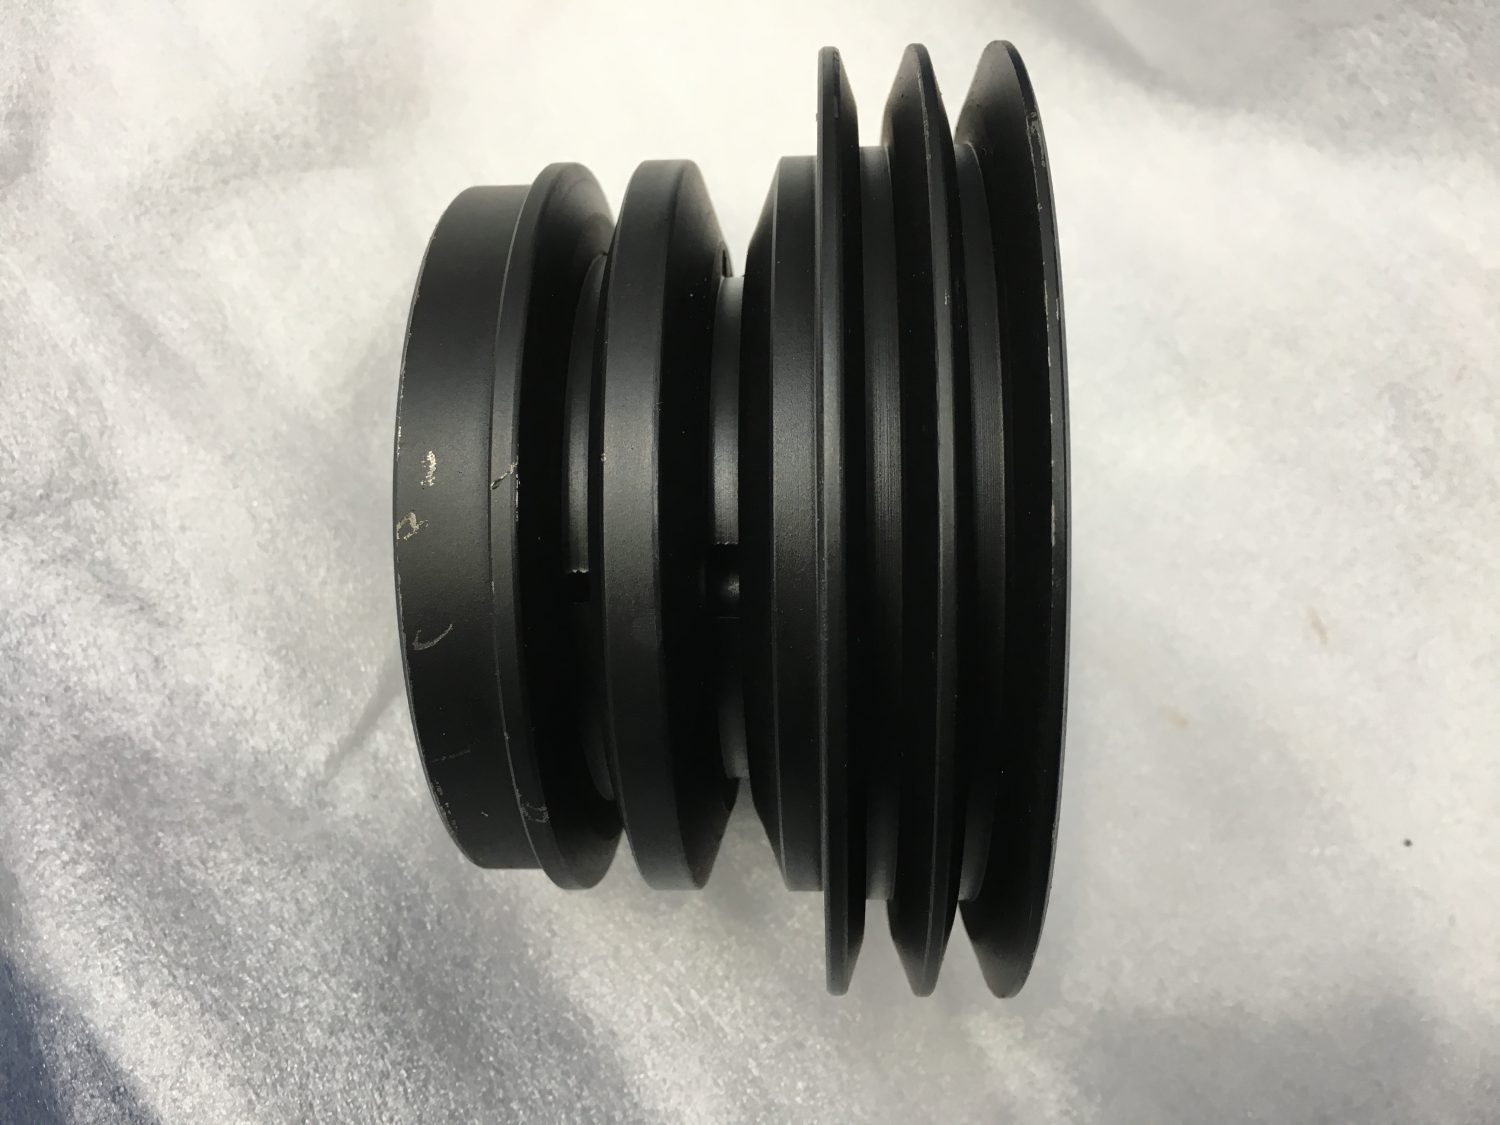
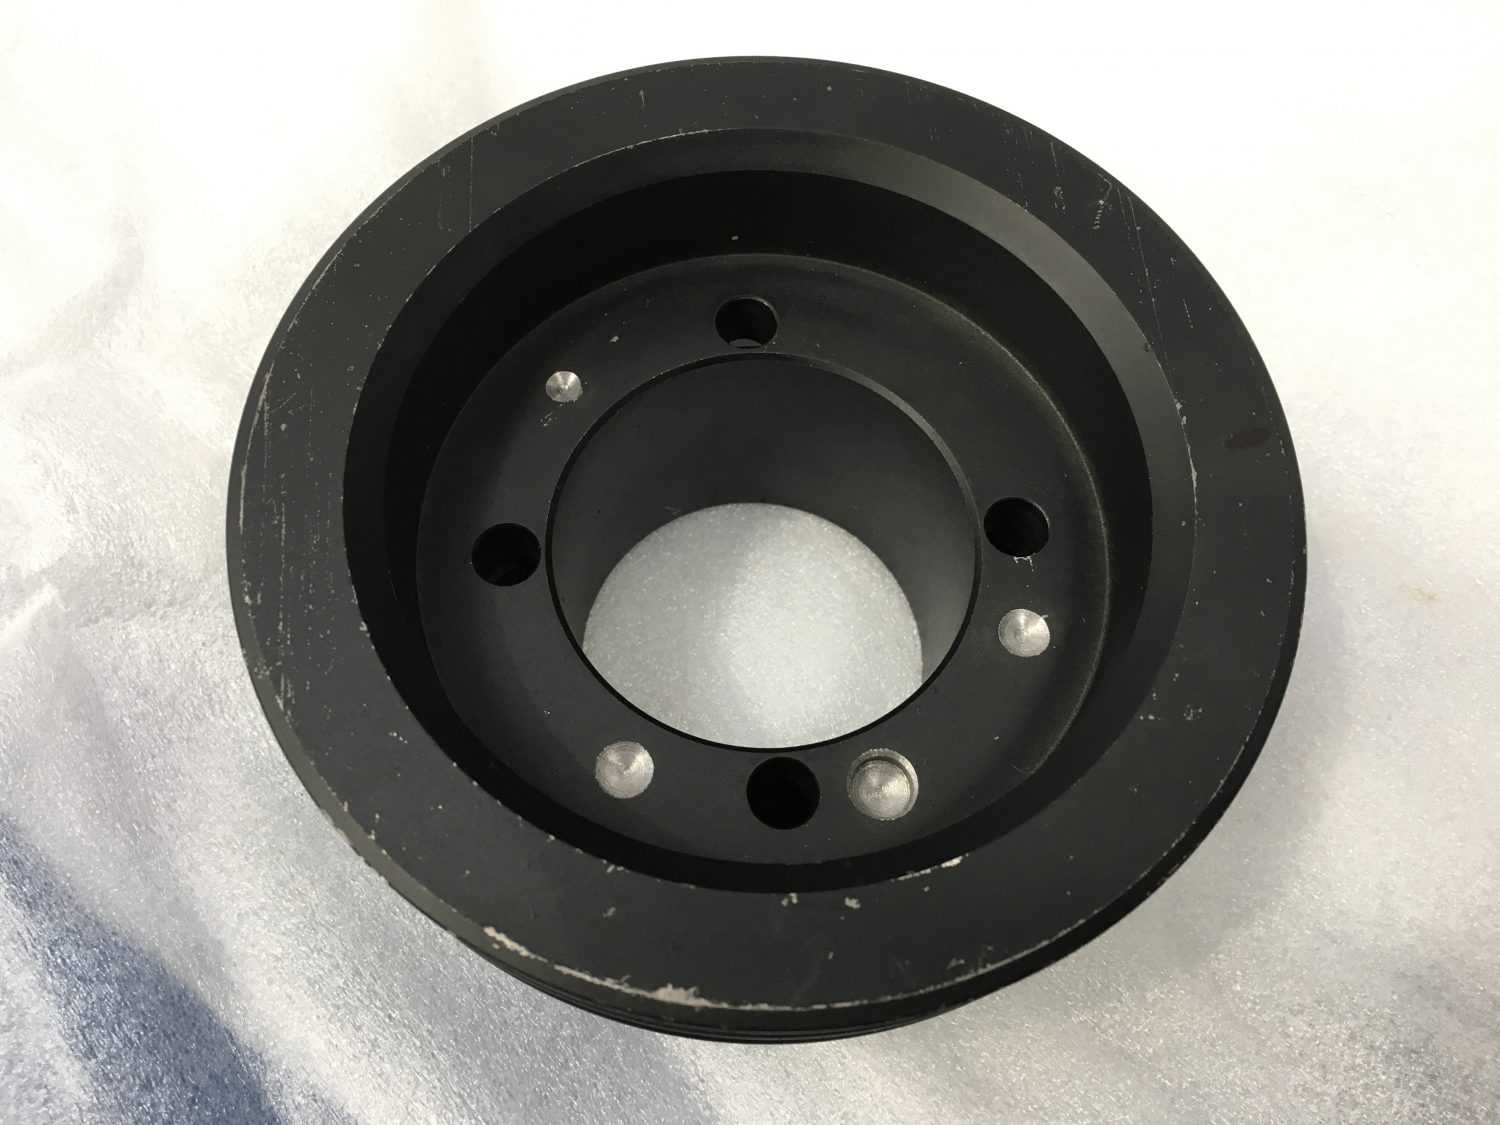
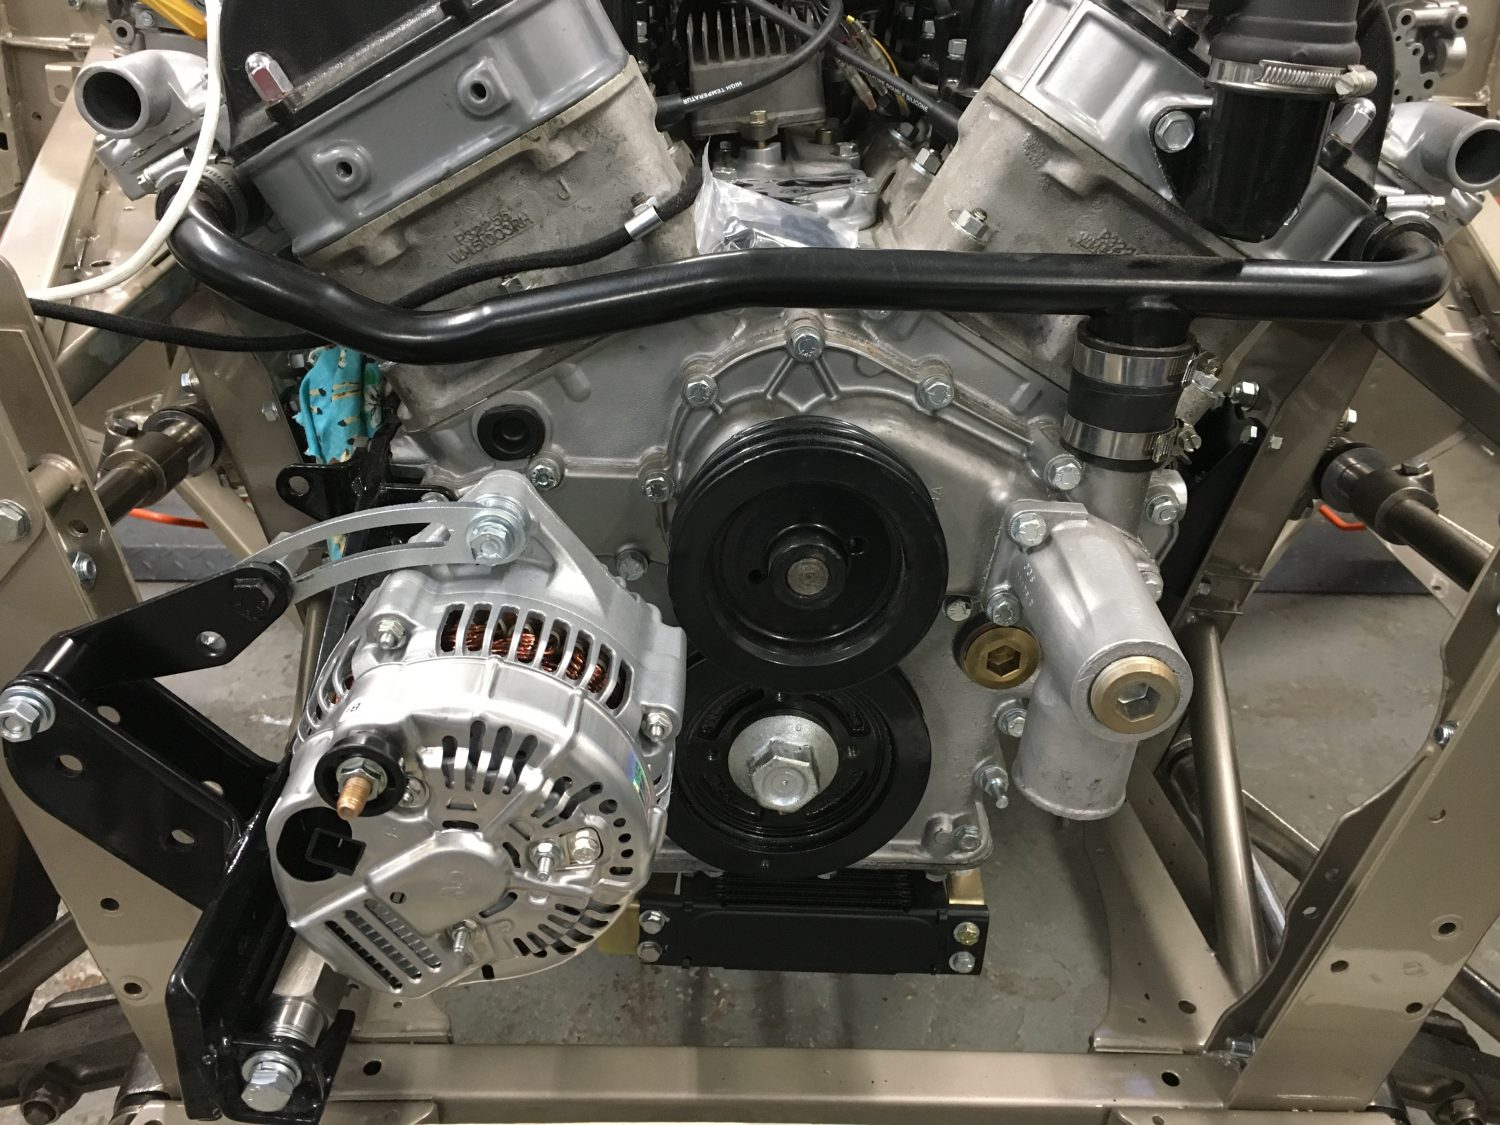
After months of searching and now having commissioned a small batch of pulley’s to be made especially for us we have managed to source a brand new V12 pulley from elsewhere.
The great news is that we can now fit up and finish off under the bonnet and still have some spare pulleys on the shelf for if and when we might need them.
The pulley has been fully balanced up and is ready to be fitted.
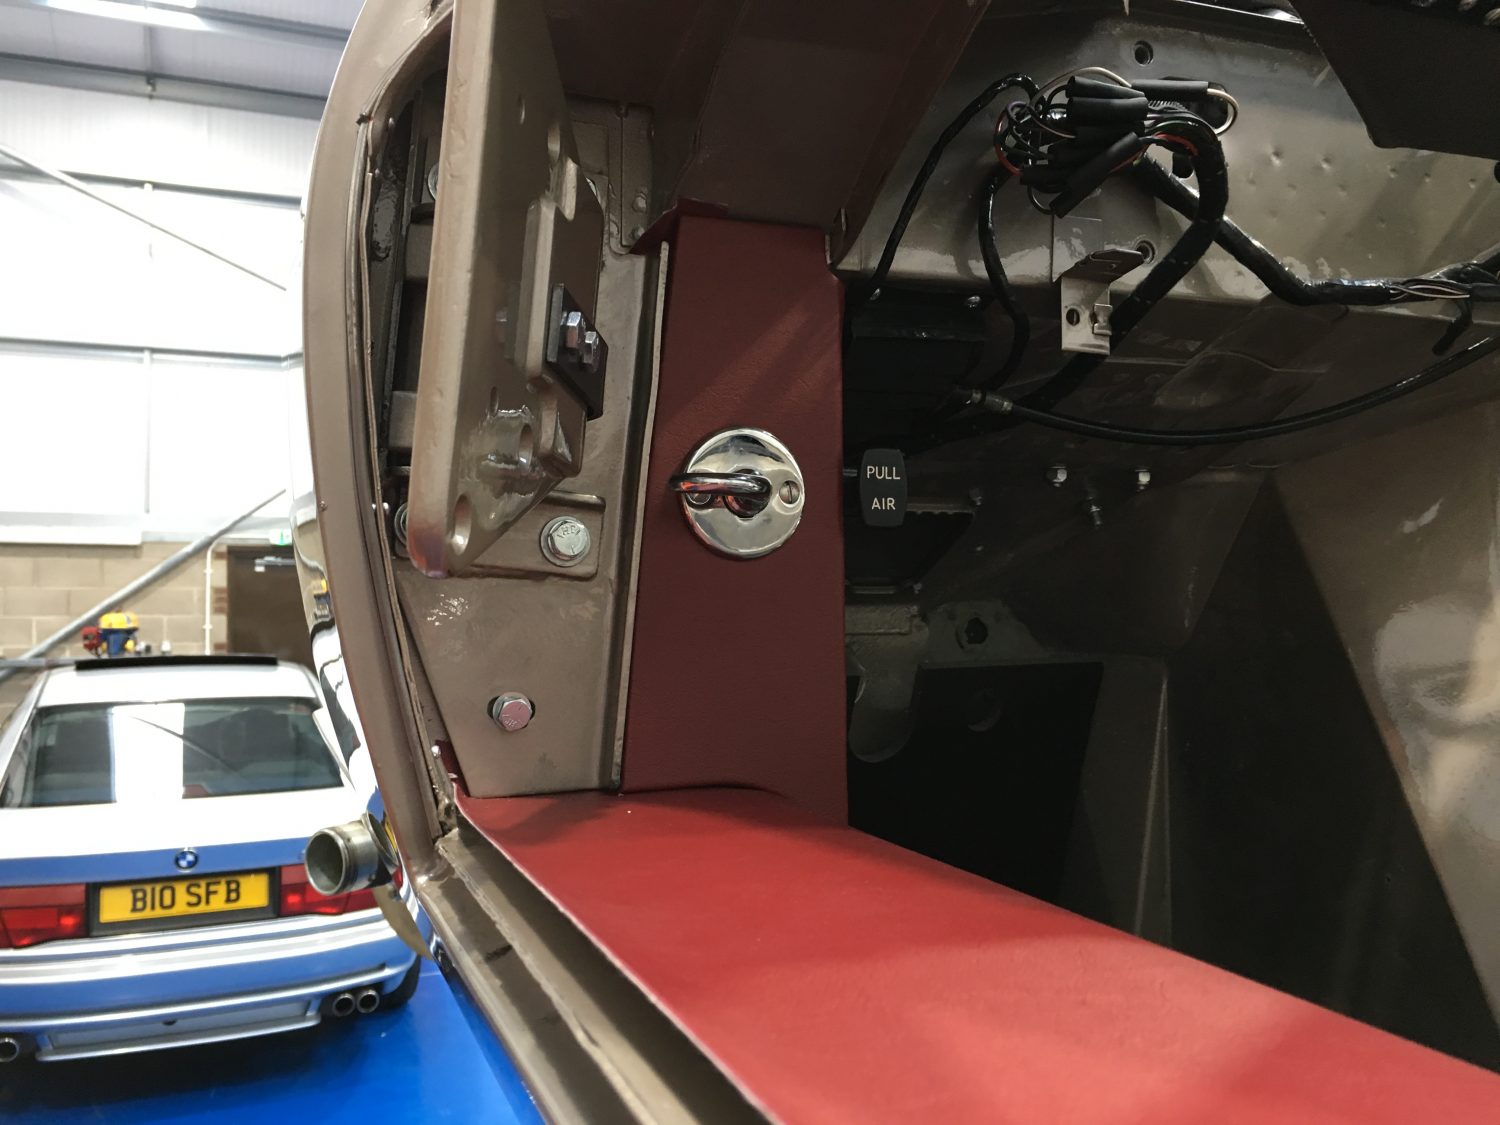
The moment we’ve been waiting for…the first piece of the stunning interior starts to be fitted up inside our 1971 Jaguar E-Type V12 roadster.
The bespoke choice of Golden Sands mixed with the maroon/burgundy interior, matching hood and mats all work perfectly together.
We are also looking into some special features within the car, stay tuned to find out more…


It is one of those stories that couldn’t be written.
For many months we have been on the hunt for a Jaguar E-Type V12 pulley. Some examples have come and gone. We’ve tried plan A, B and C and have gotten nowhere.
Having called pretty everyone who knows anything about Jaguars in the hope of finding one on their shelves we were close to running out of options so we decided to design the pulley ourselves and have it re-manufactured using the latest machining technologies.
Yesterday Dave had completed the drawing and found himself standing in front of our precision engineers in Claydon, Suffolk to explain exactly what needed to be done.
One of the machinists then came out with one of the most inspiring sentences we’ve ever heard…’my neighbour has an E-Type V12.’
So off we went and sure enough here is the very V12 pulley we require, taken directly from his fully functioning V12 E-Type.
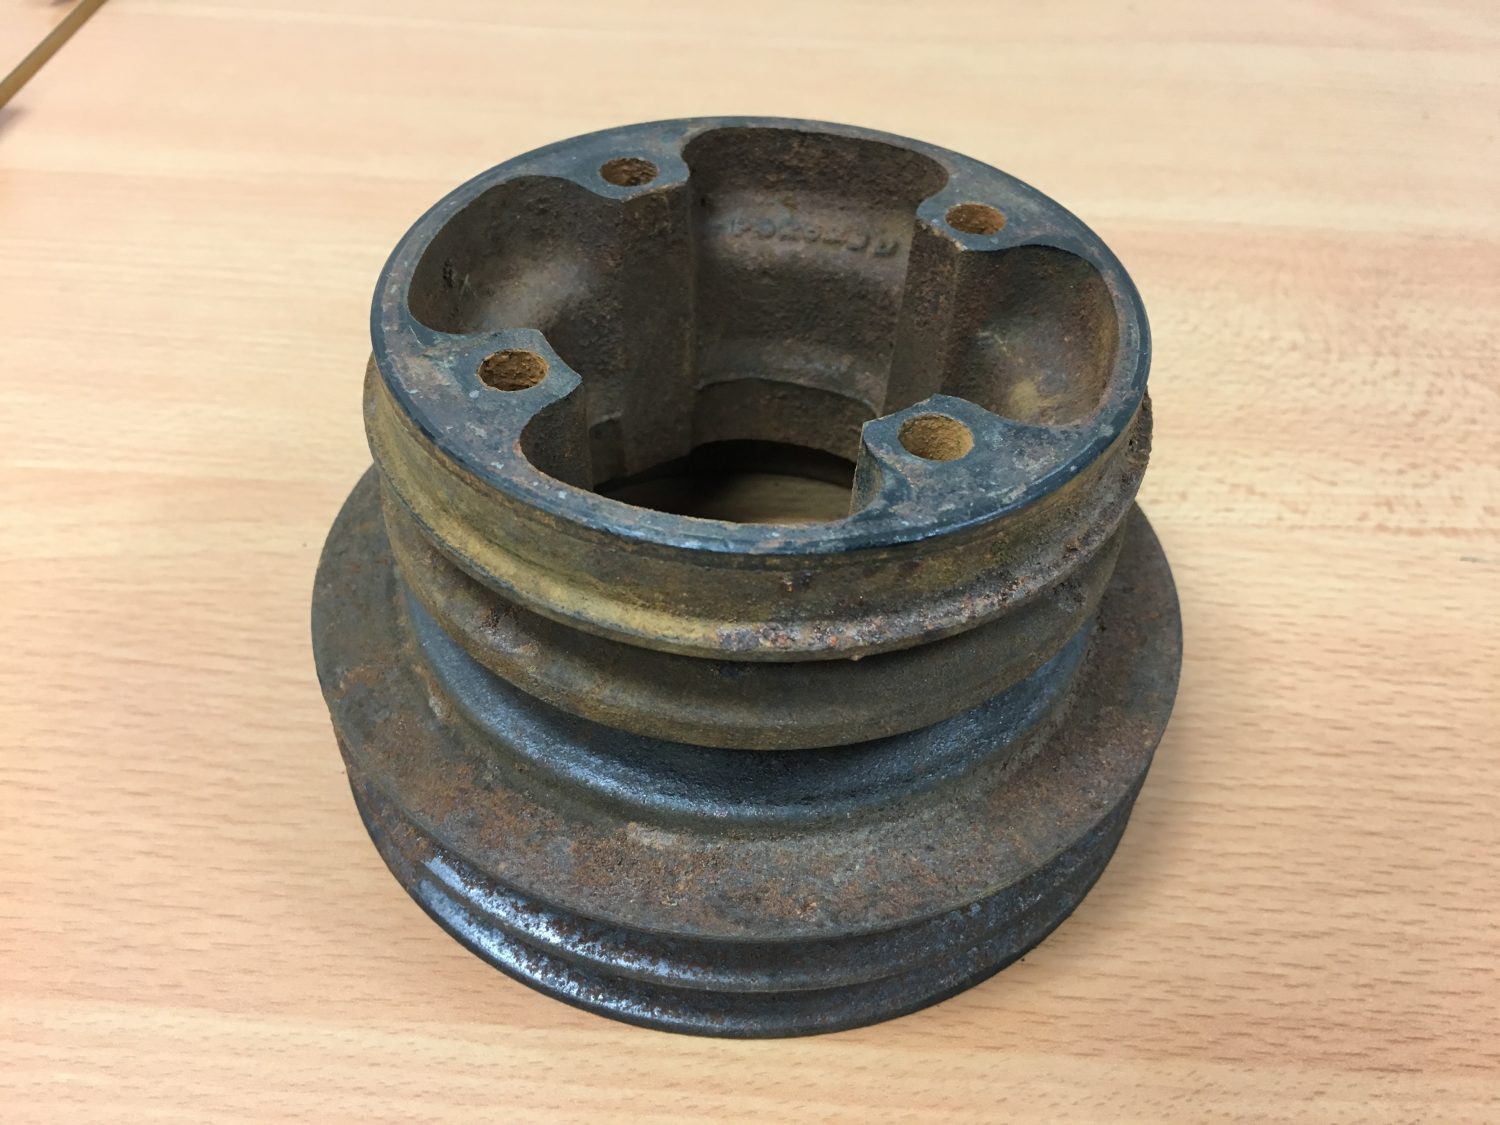


Just like Cinderella’s slipper it fits so now a trip back to Claydon. With the latest CNC technologies we will be able to reproduce a batch of the pulley’s just in case, one day, we get a call from a restoration company desperately in need of a Jaguar E-Type V12 pulley.
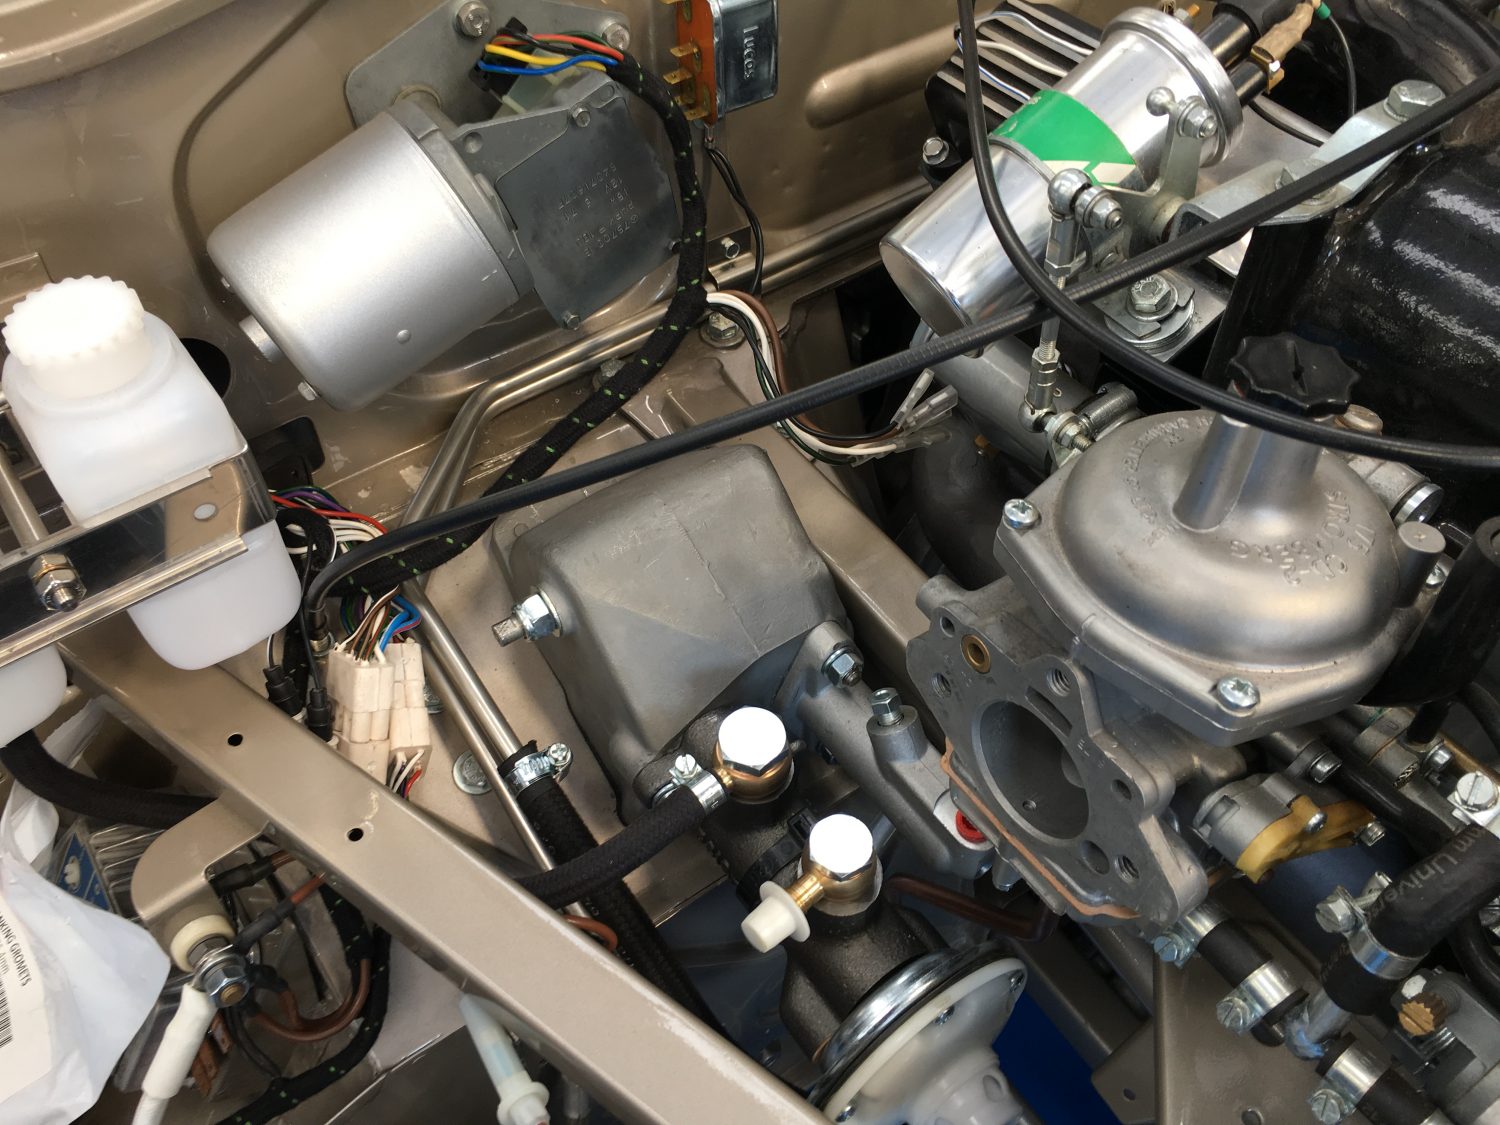
We are now making the final few touches to our 1971 Jaguar E-Type brake and clutch system. Next week we aim to run her up for the first time in situ to see how we get on and what tweaks may be needed.
We should be expecting the final part of the interior back any day now which means we can then concentrate our efforts on fitting up.
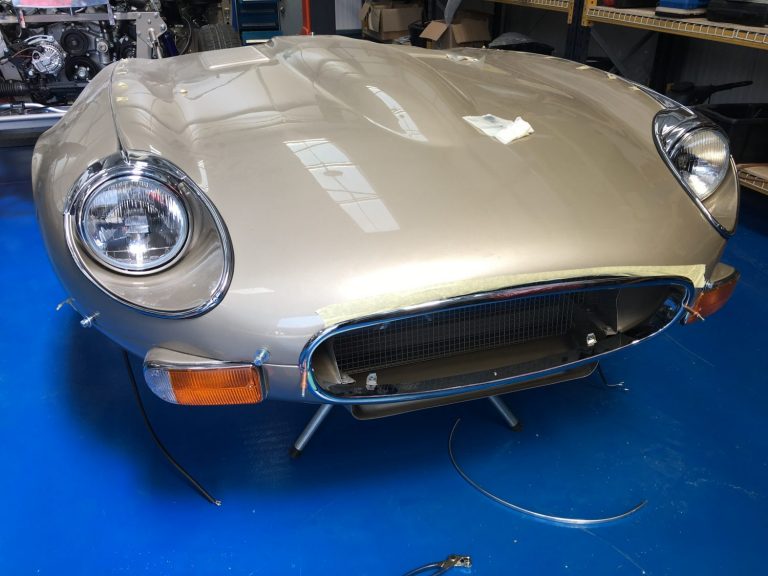
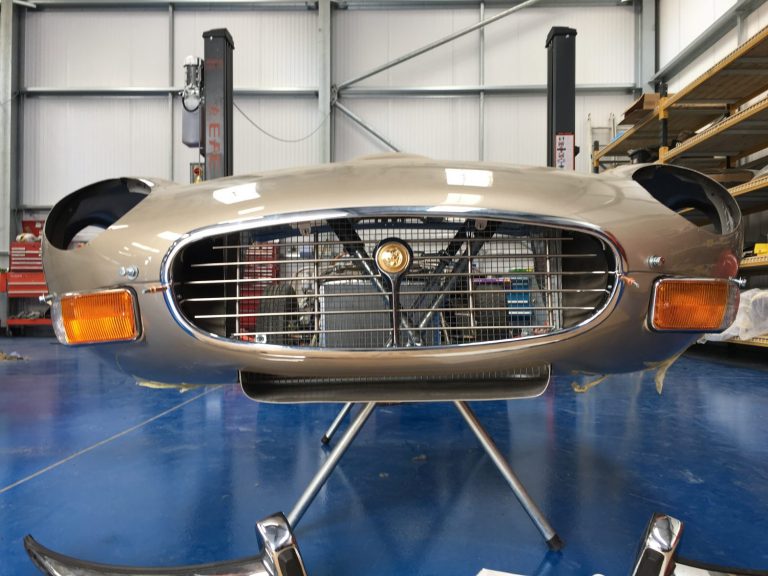
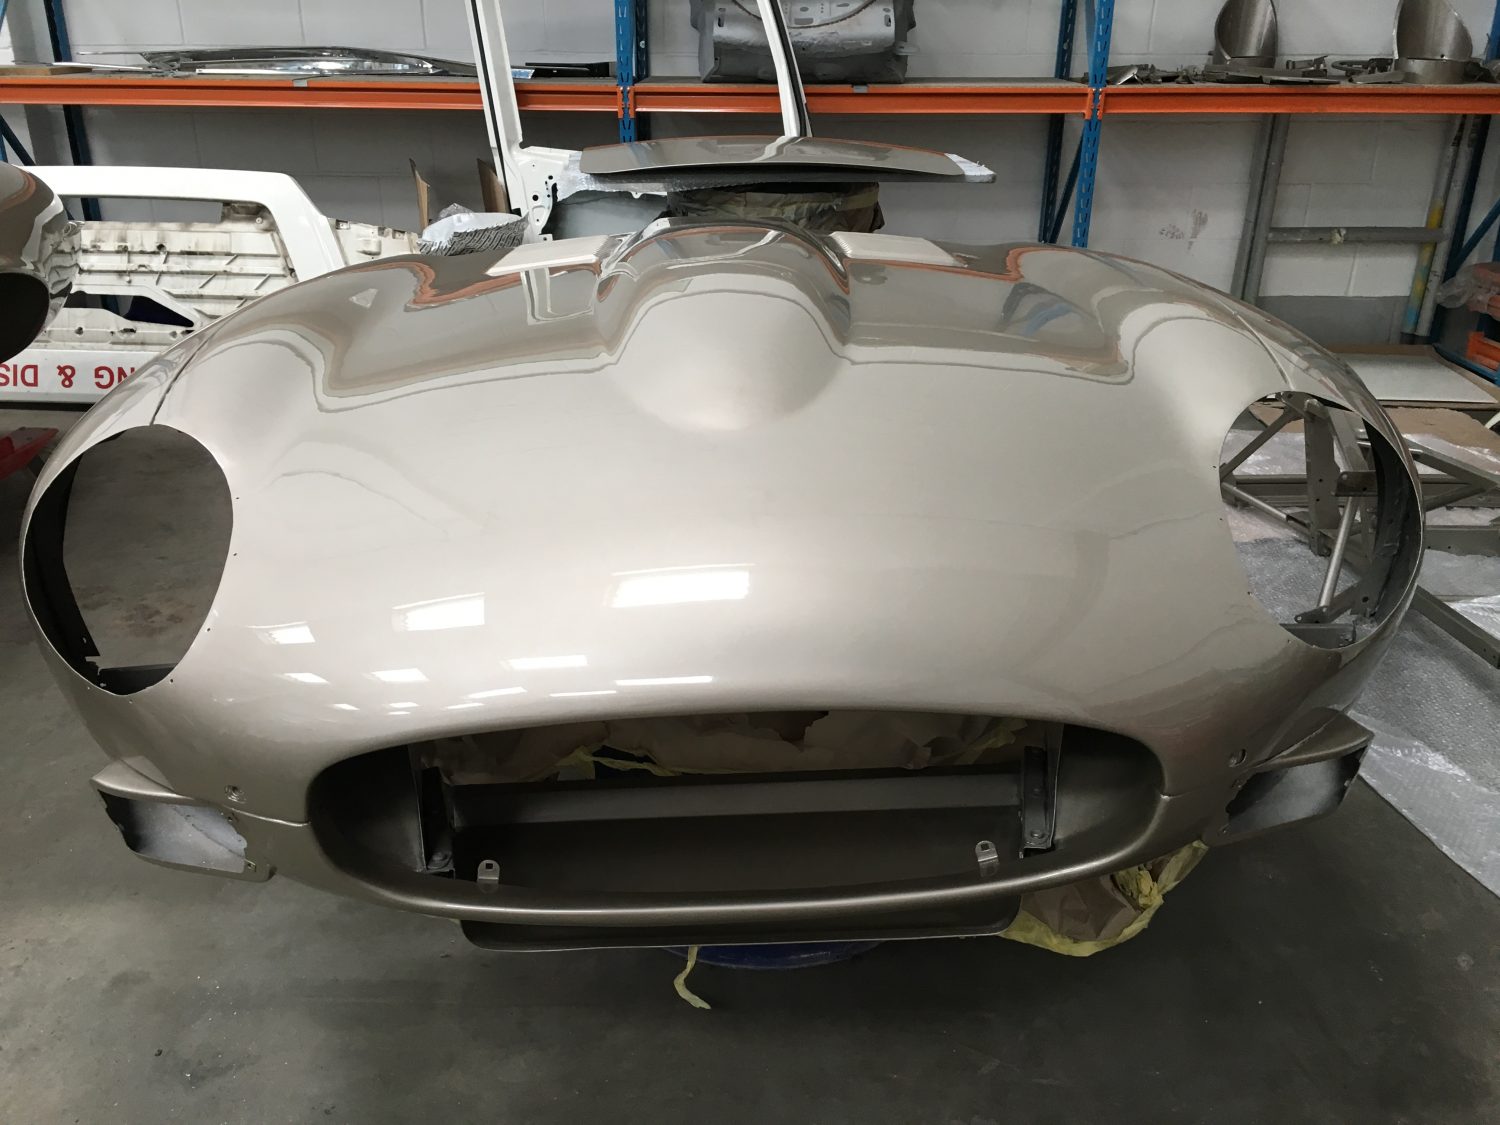
The front end of our E-type is almost complete with the lights and surround now in position. The front grill surround just requires tightening and it’ll be ready to be fitted.
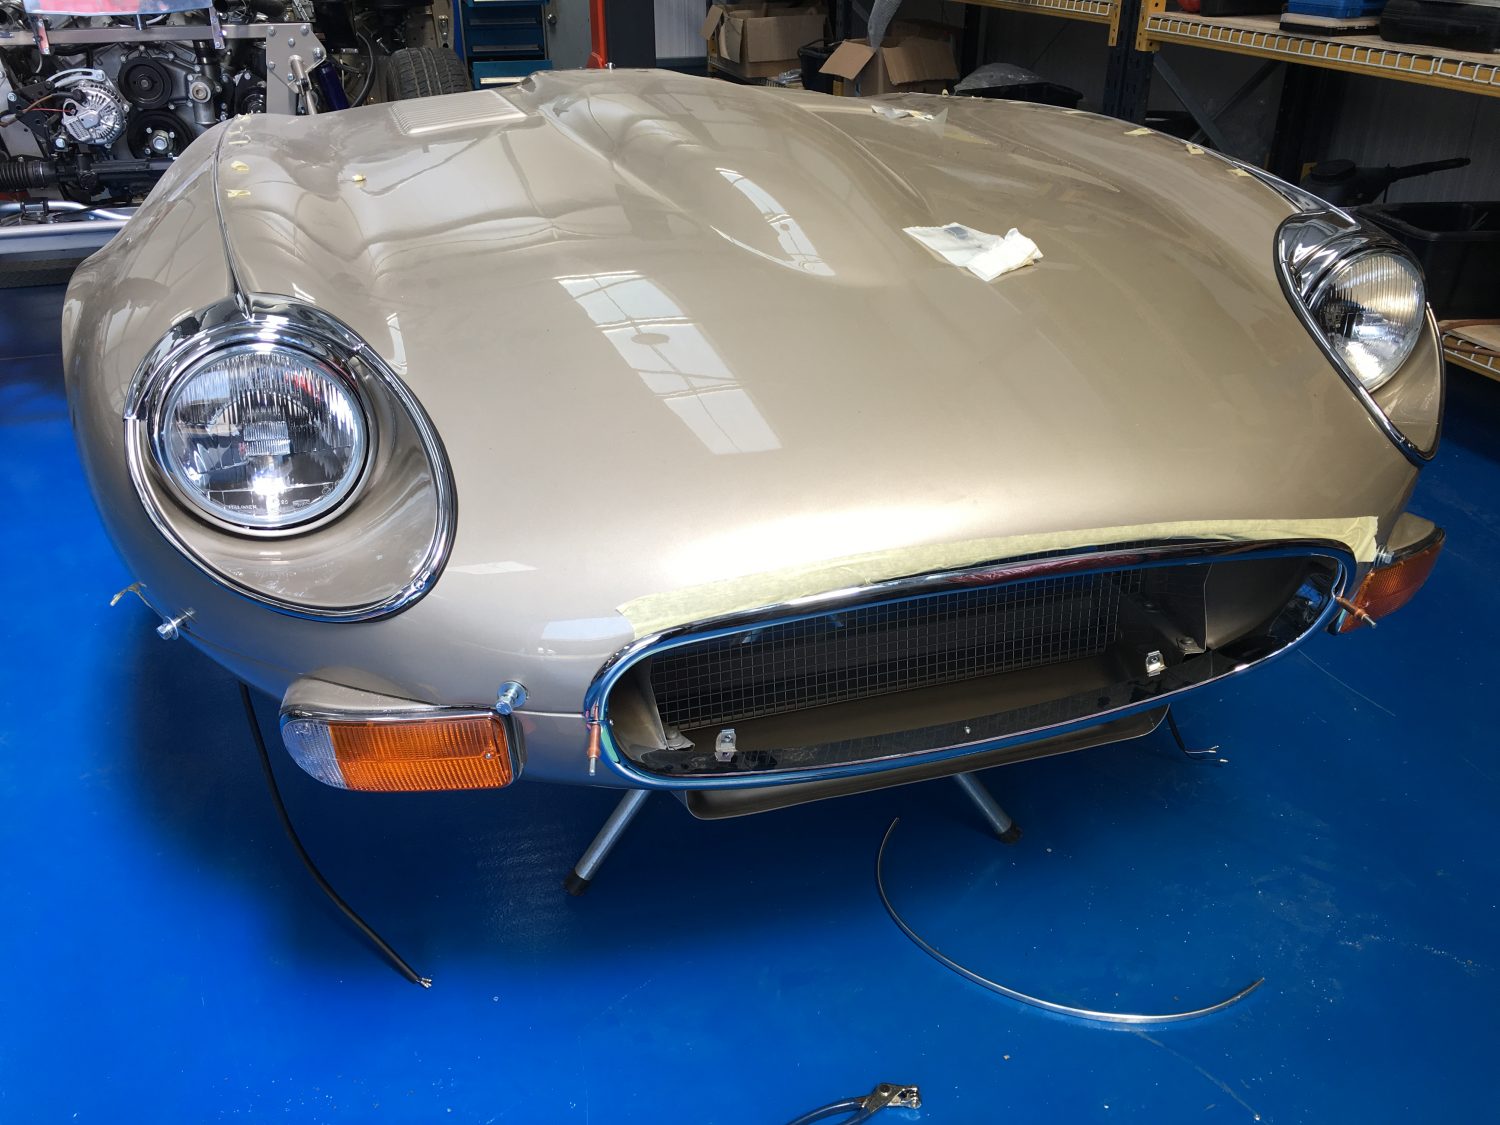
The nose cone, grille and badge is now in position and looking amazing. The front headlamp assembly and bumpers will follow very soon.

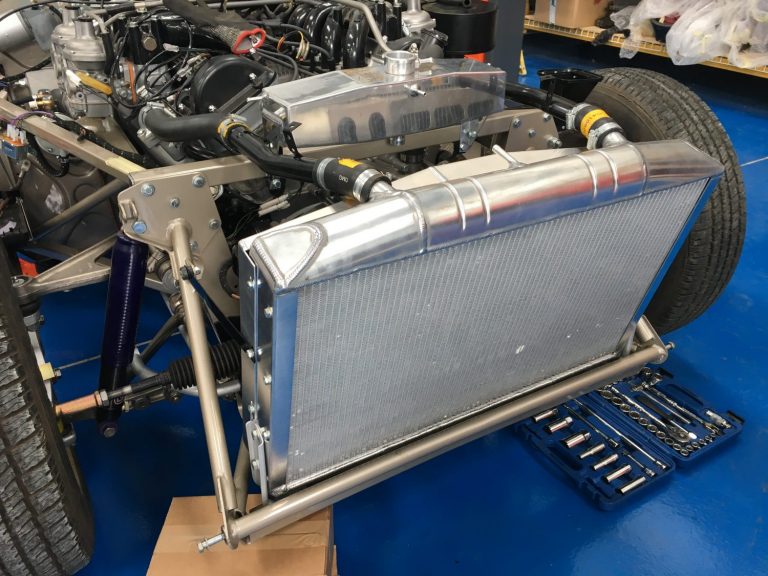
The pipework is now fitted to the brand new aluminium radiator which means the radiator can be positioned and fixed securely.

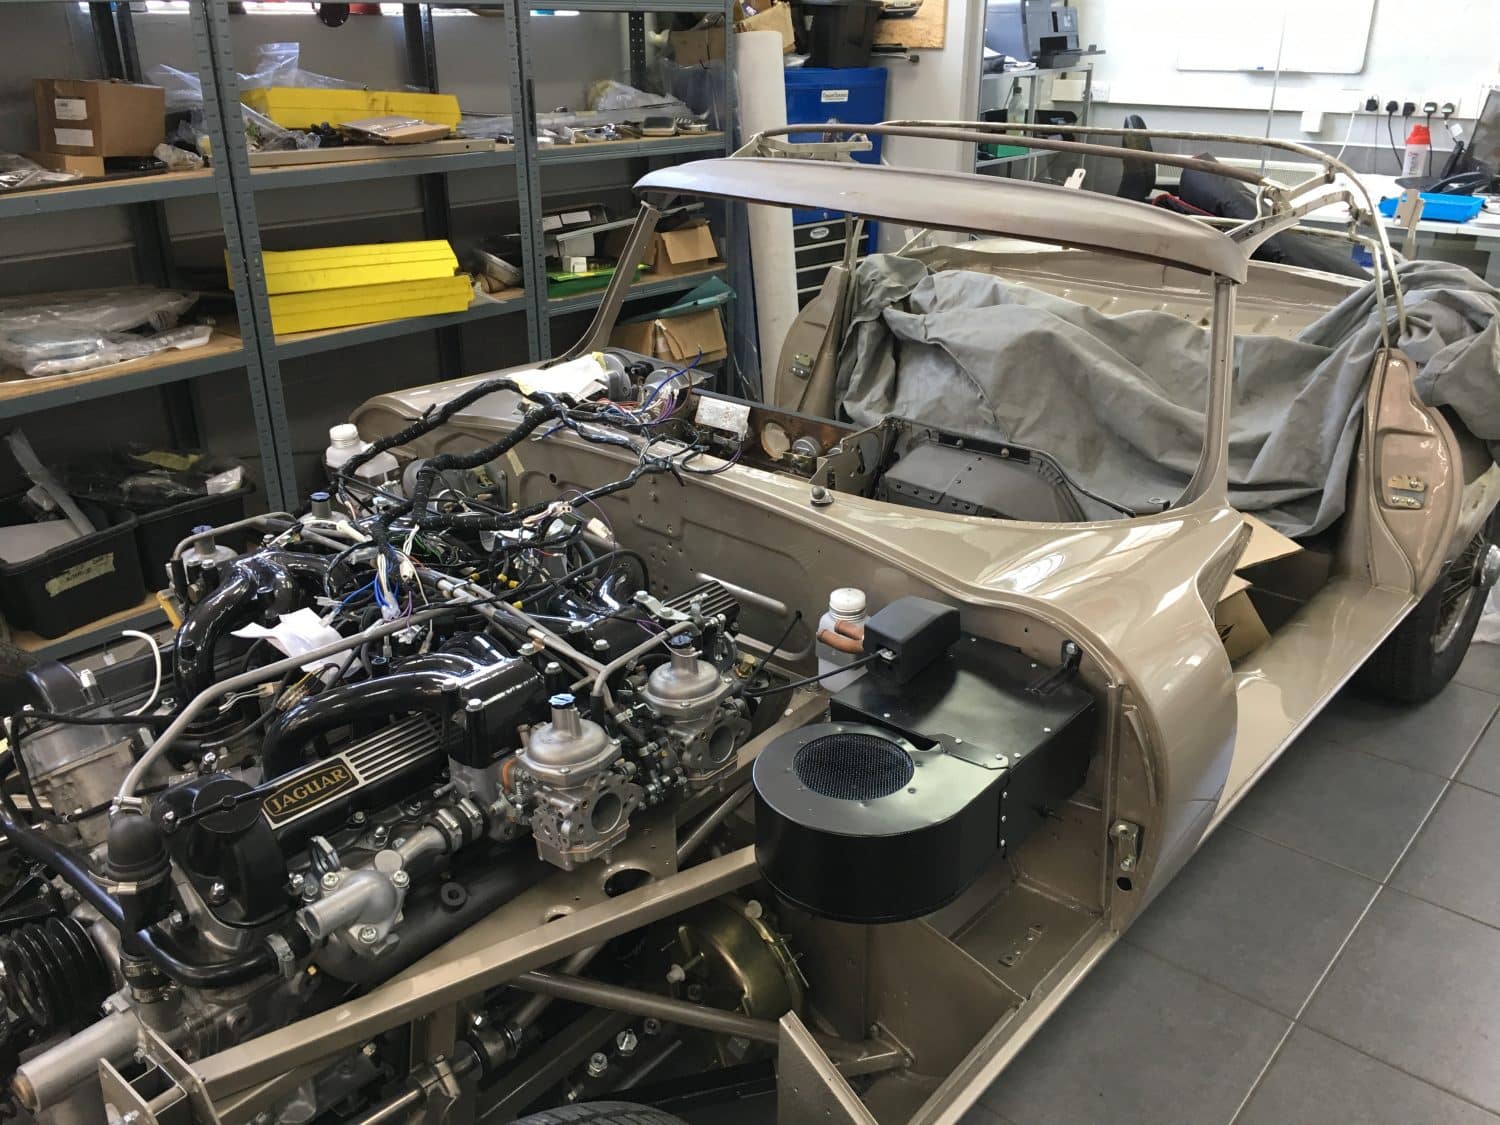
Week 1 in our new Pettistree workshops and no slowing down for us as we continue to make good progress on our current projects.
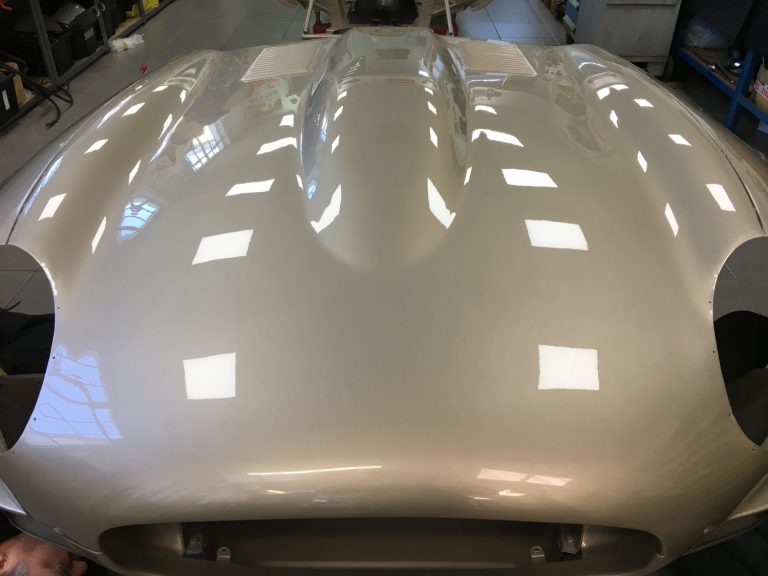
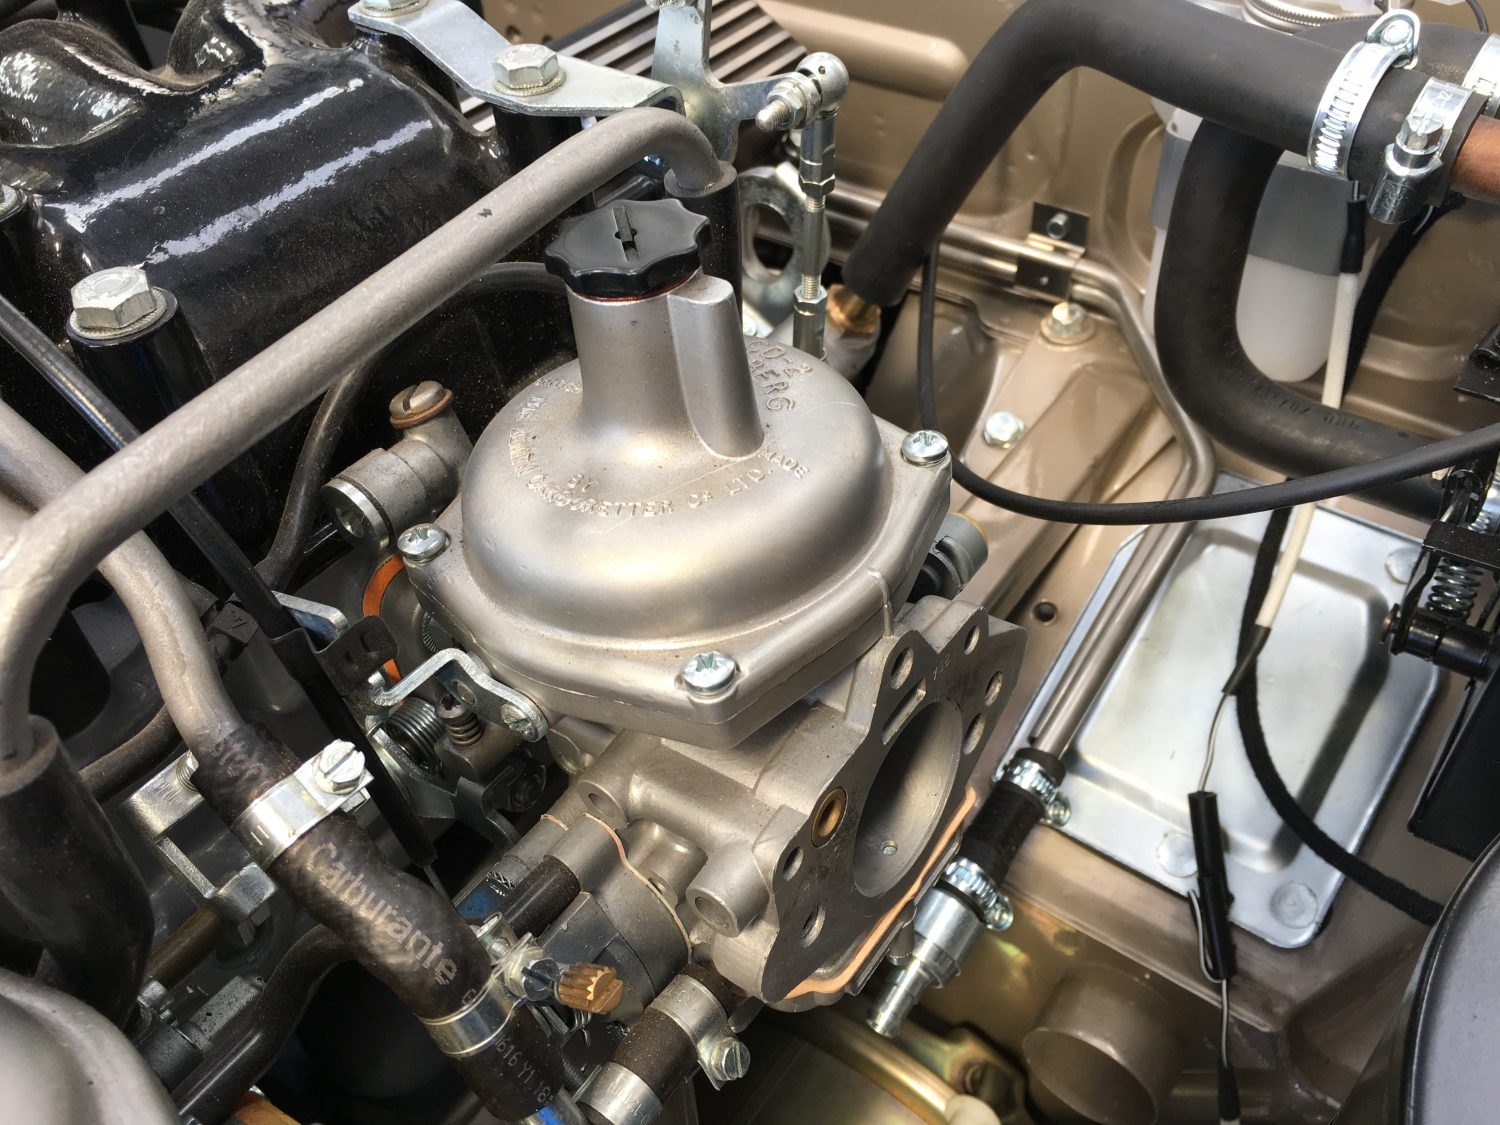
Dave has been busy fitting up the new pipework and hoses to the engine bay of our 1971 Jaguar E-Type as we look to finish off the engine ready for the bonnet to be refitted.
With the bonnet taking up almost half of the entire car, when fitted, this will completely transform the look of the car and is always a sign of just how close we are to completion.

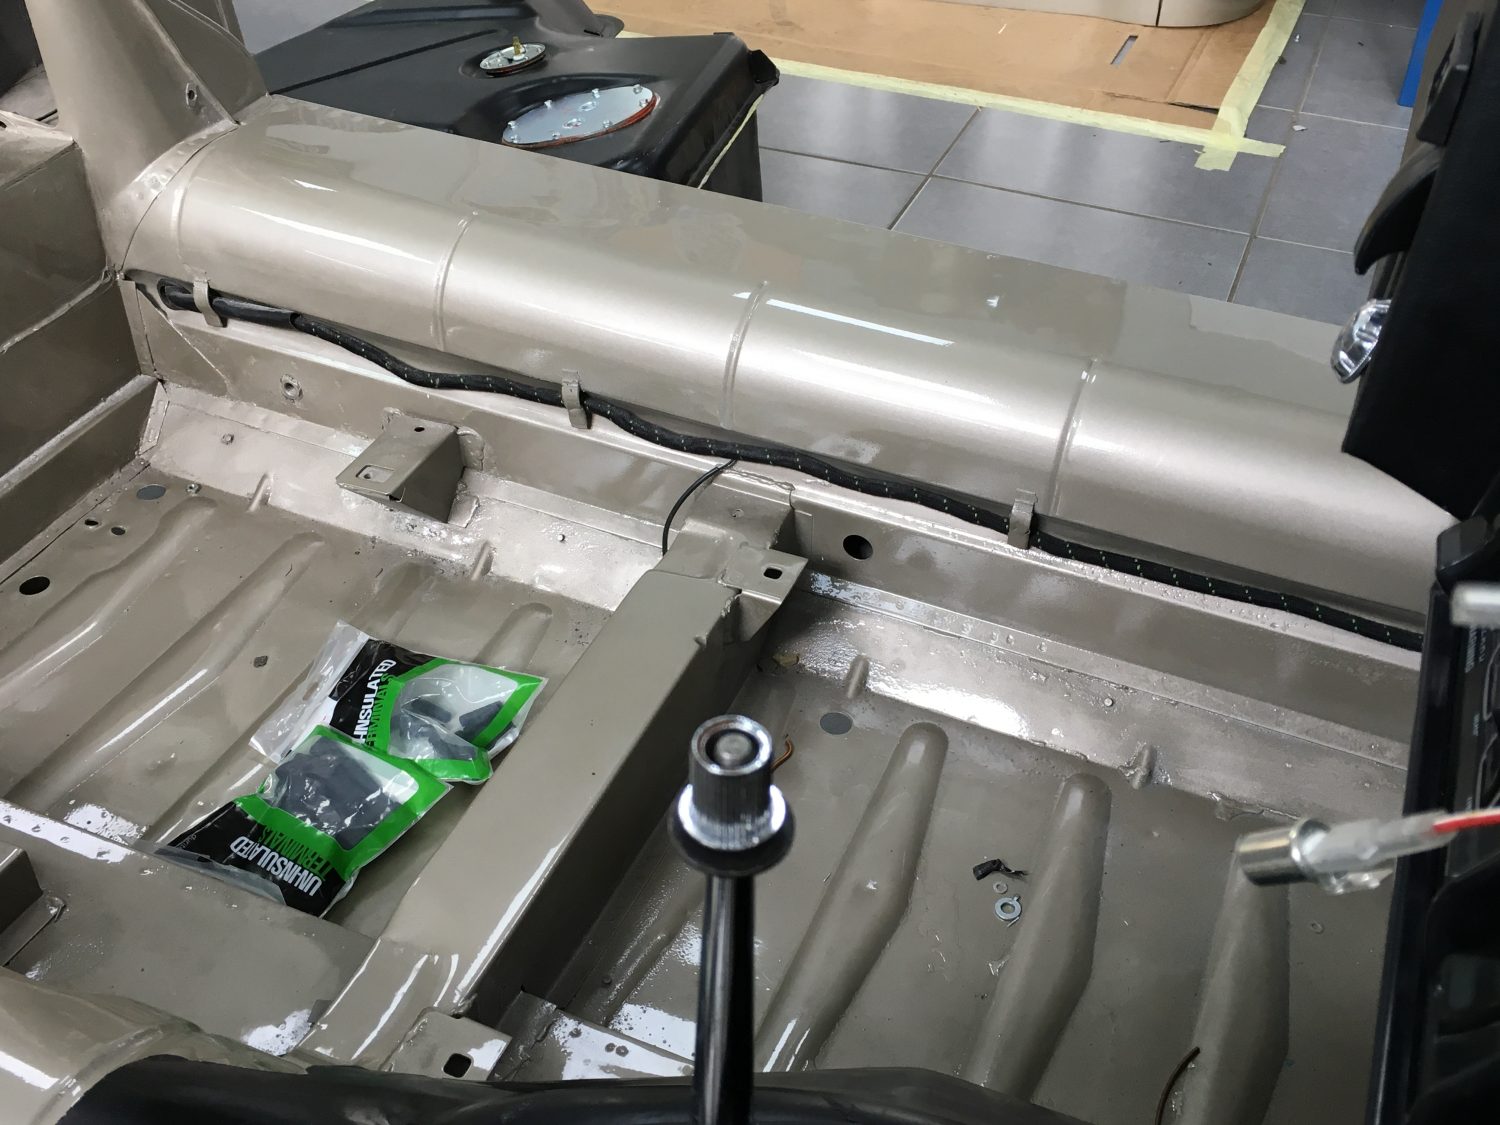
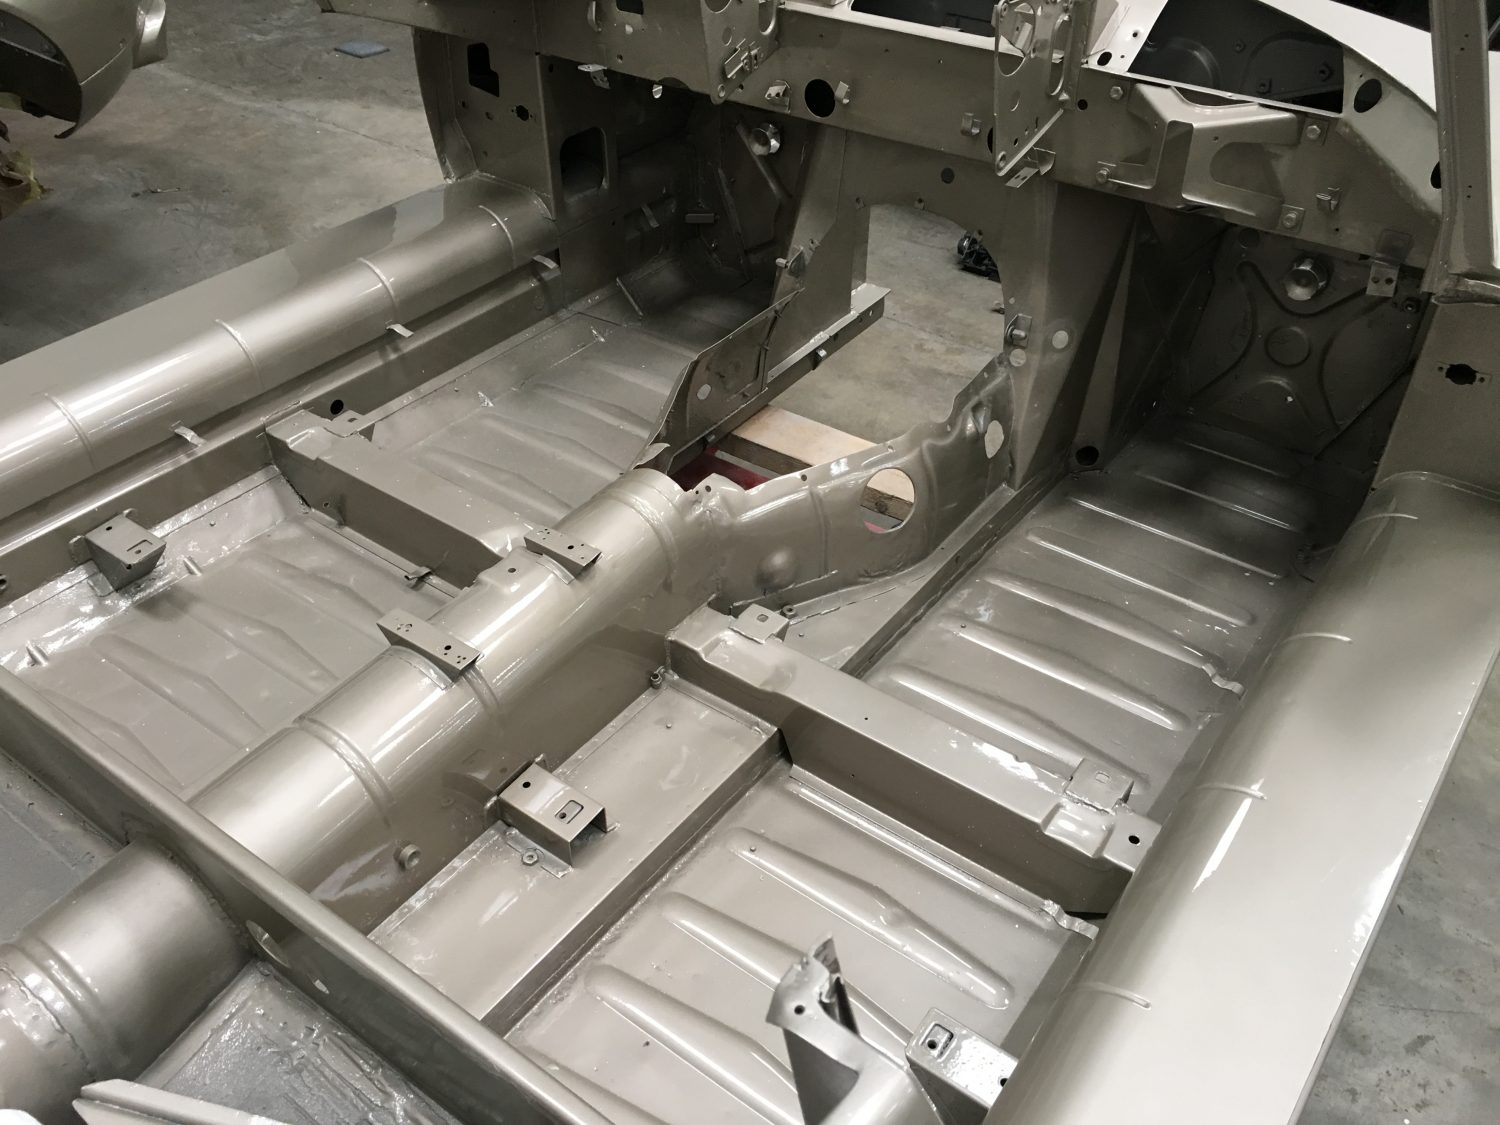
Not as simple as it looks, the fuel tank is now successfully fitted and the pipework in position.

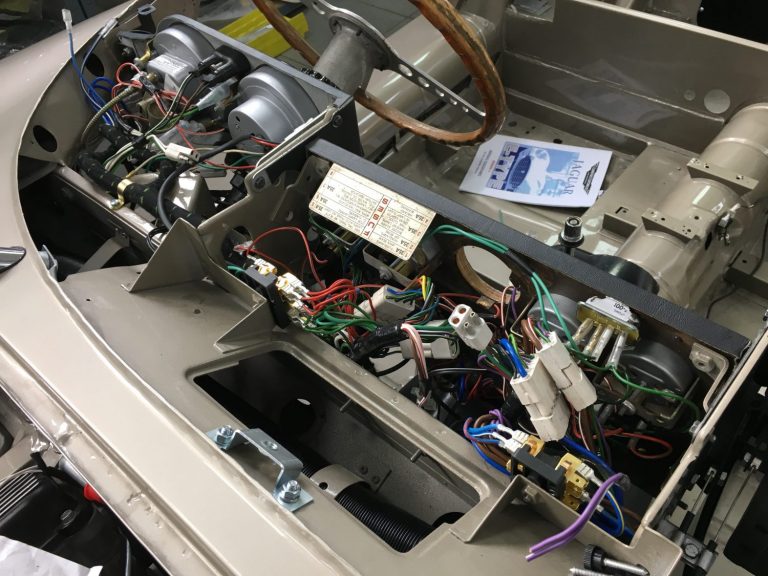
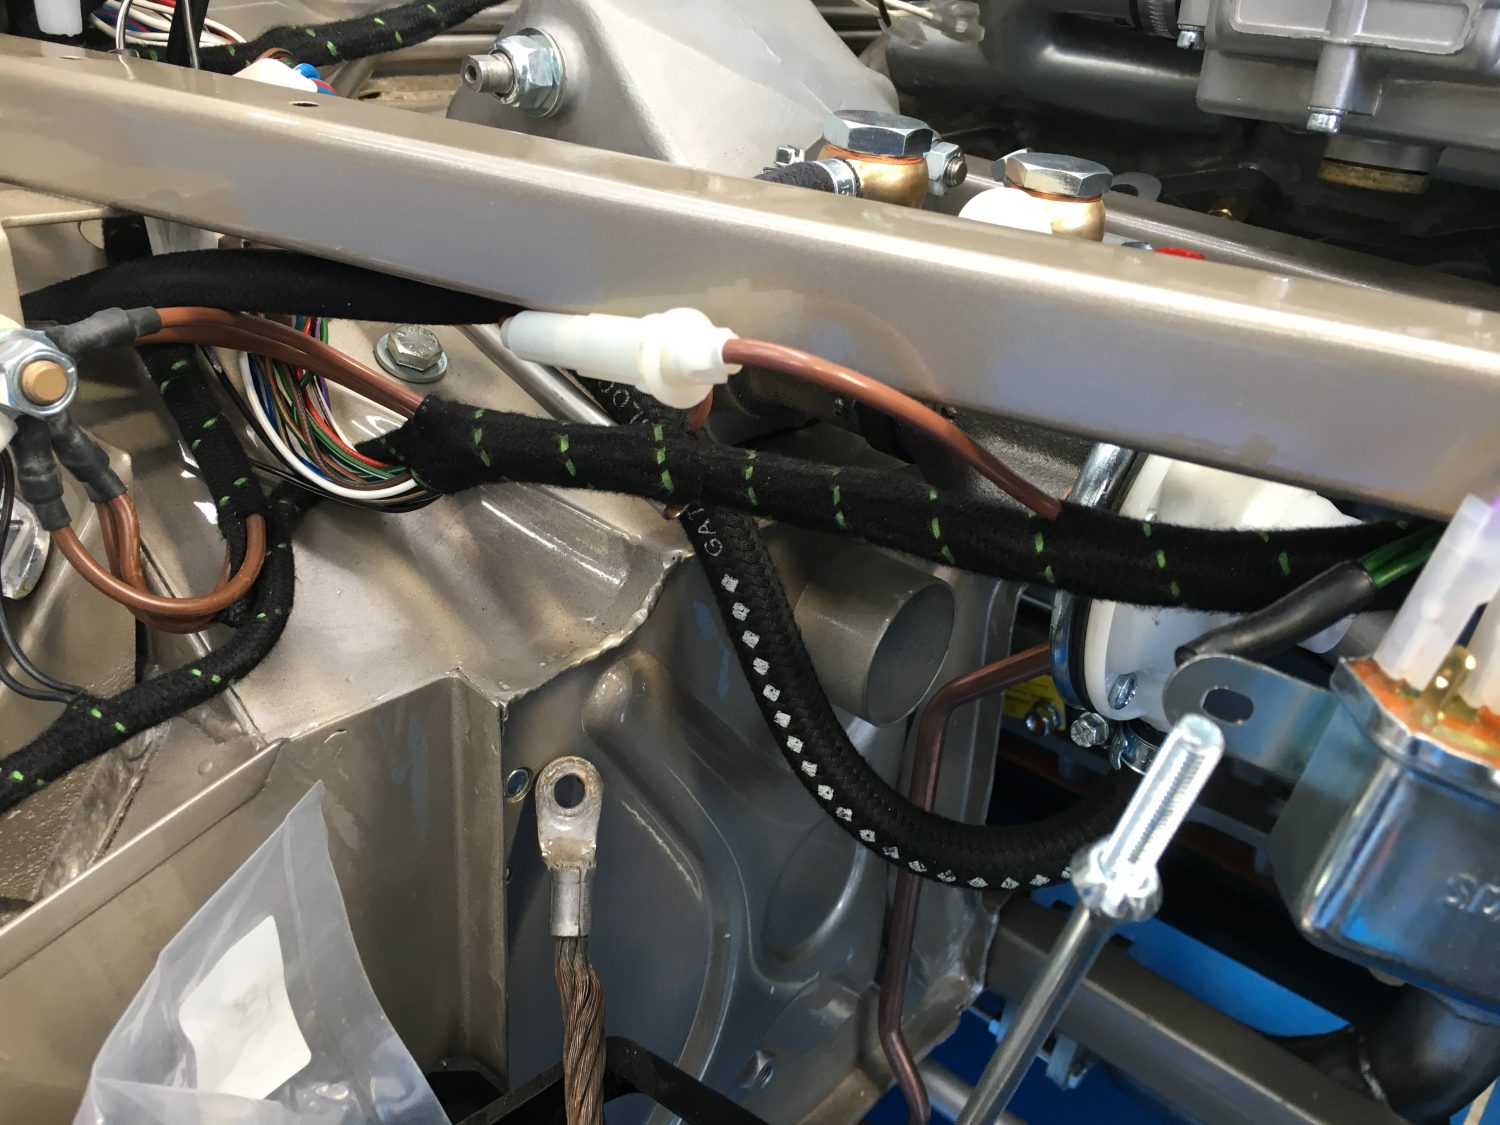
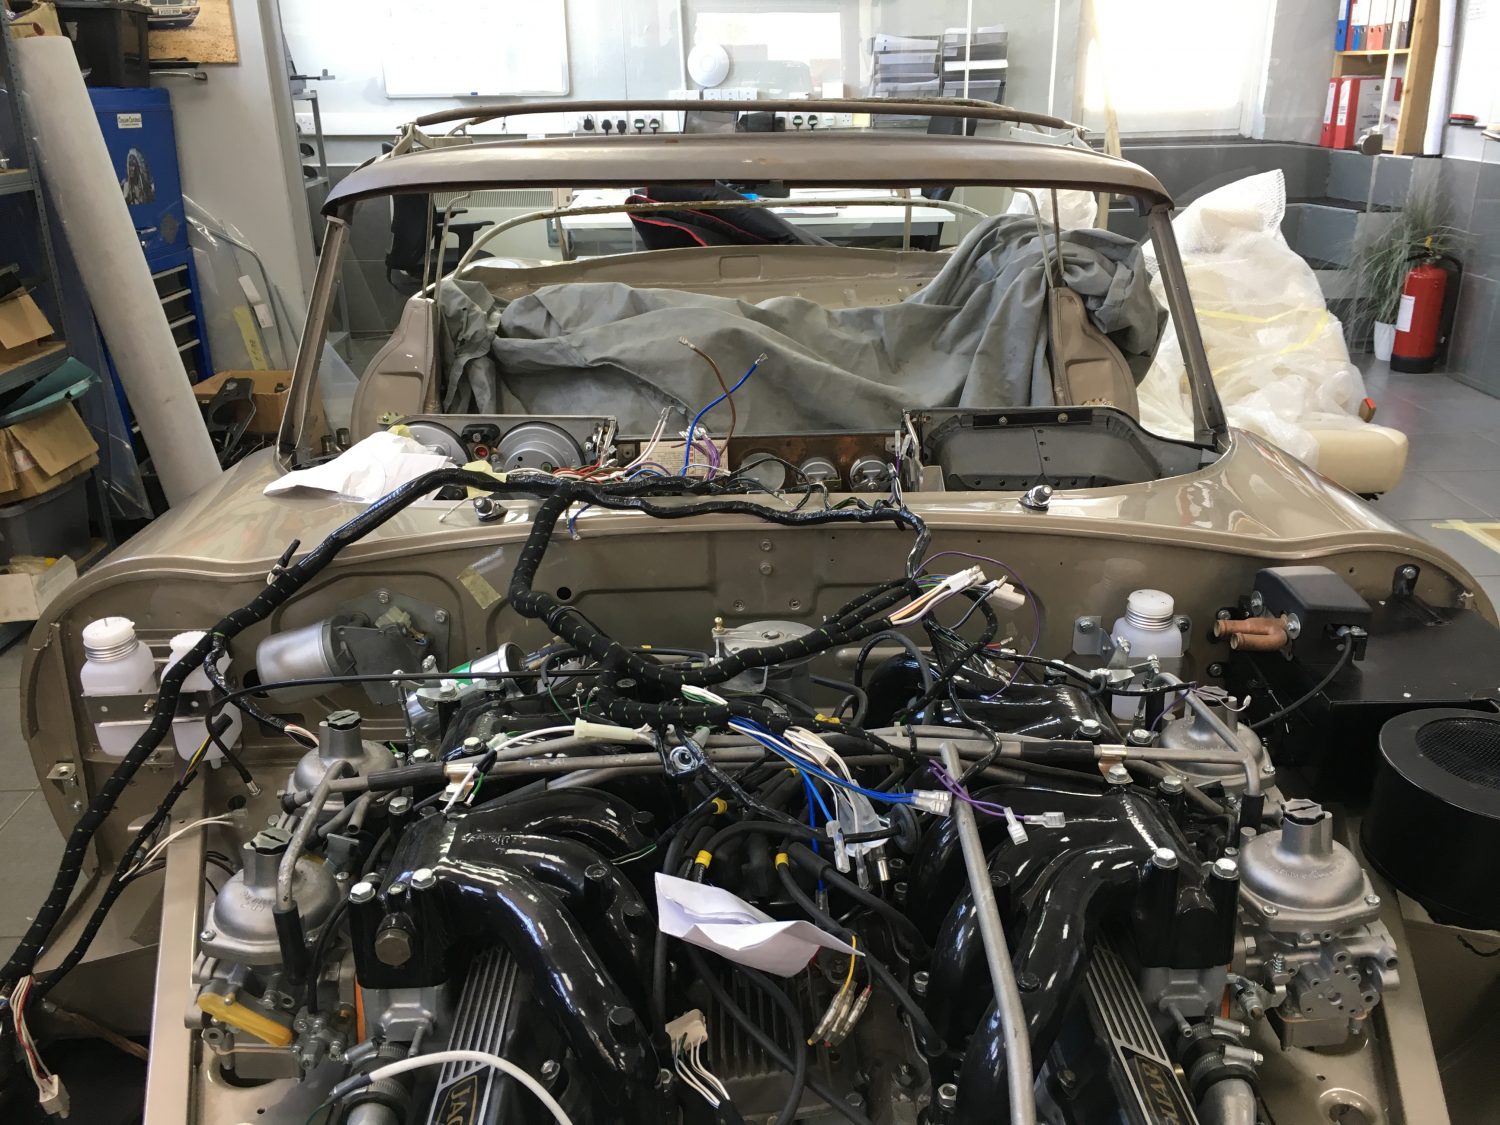
One day in to the fit up of the brand new V12 wiring loom from Autosparks and it’s been a really successful day. The majority of the loom is now in. The boot area and centre are complete and the engine wiring is in position but just need finishing.
We are a couple of looms short but these have been ordered and have been shipped next day.
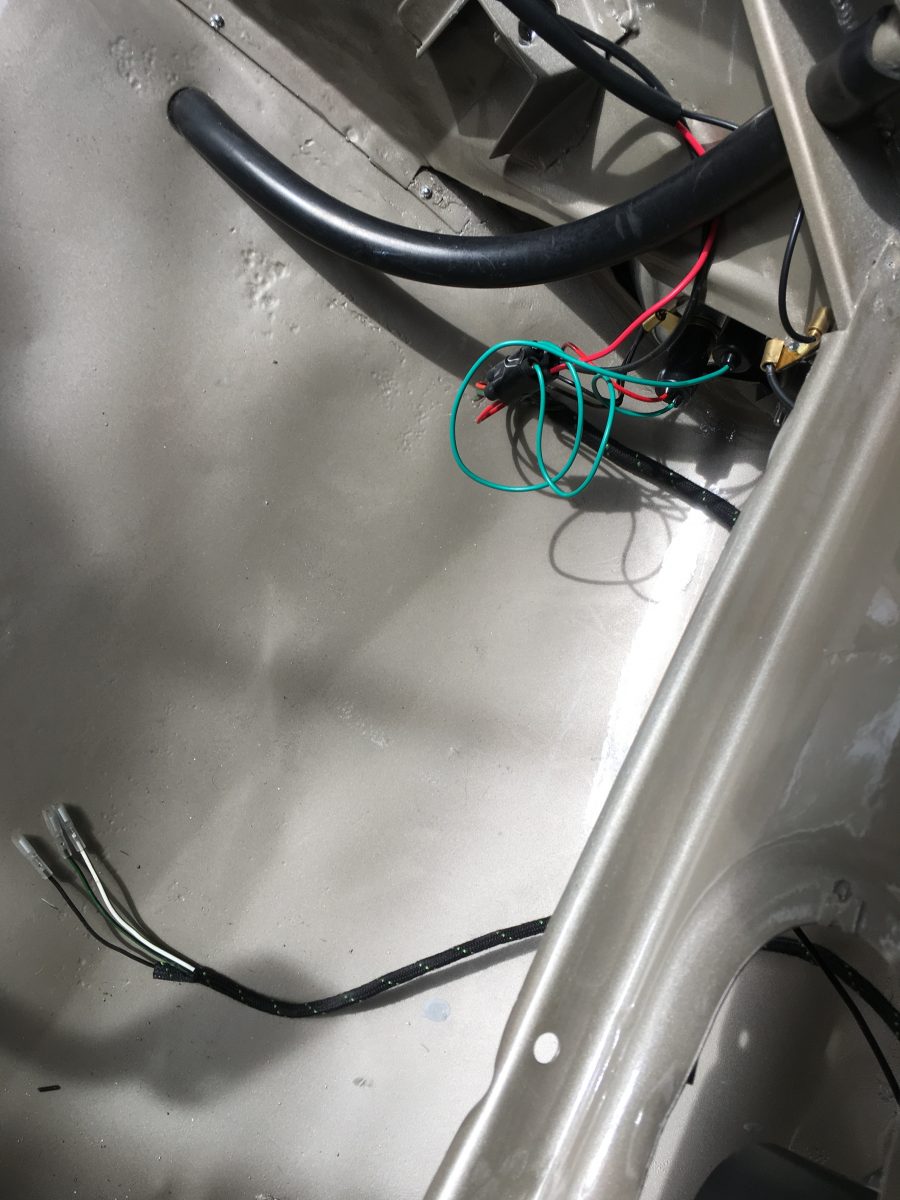
The centre section and dashboard are complete.


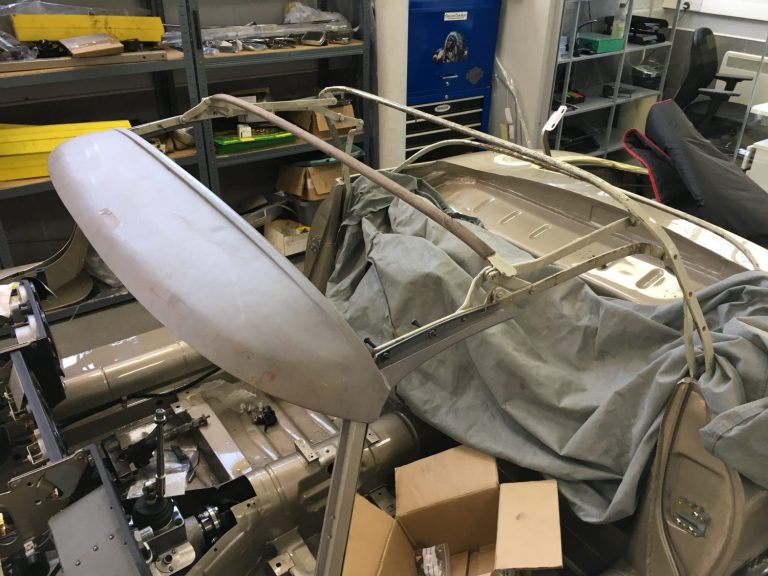
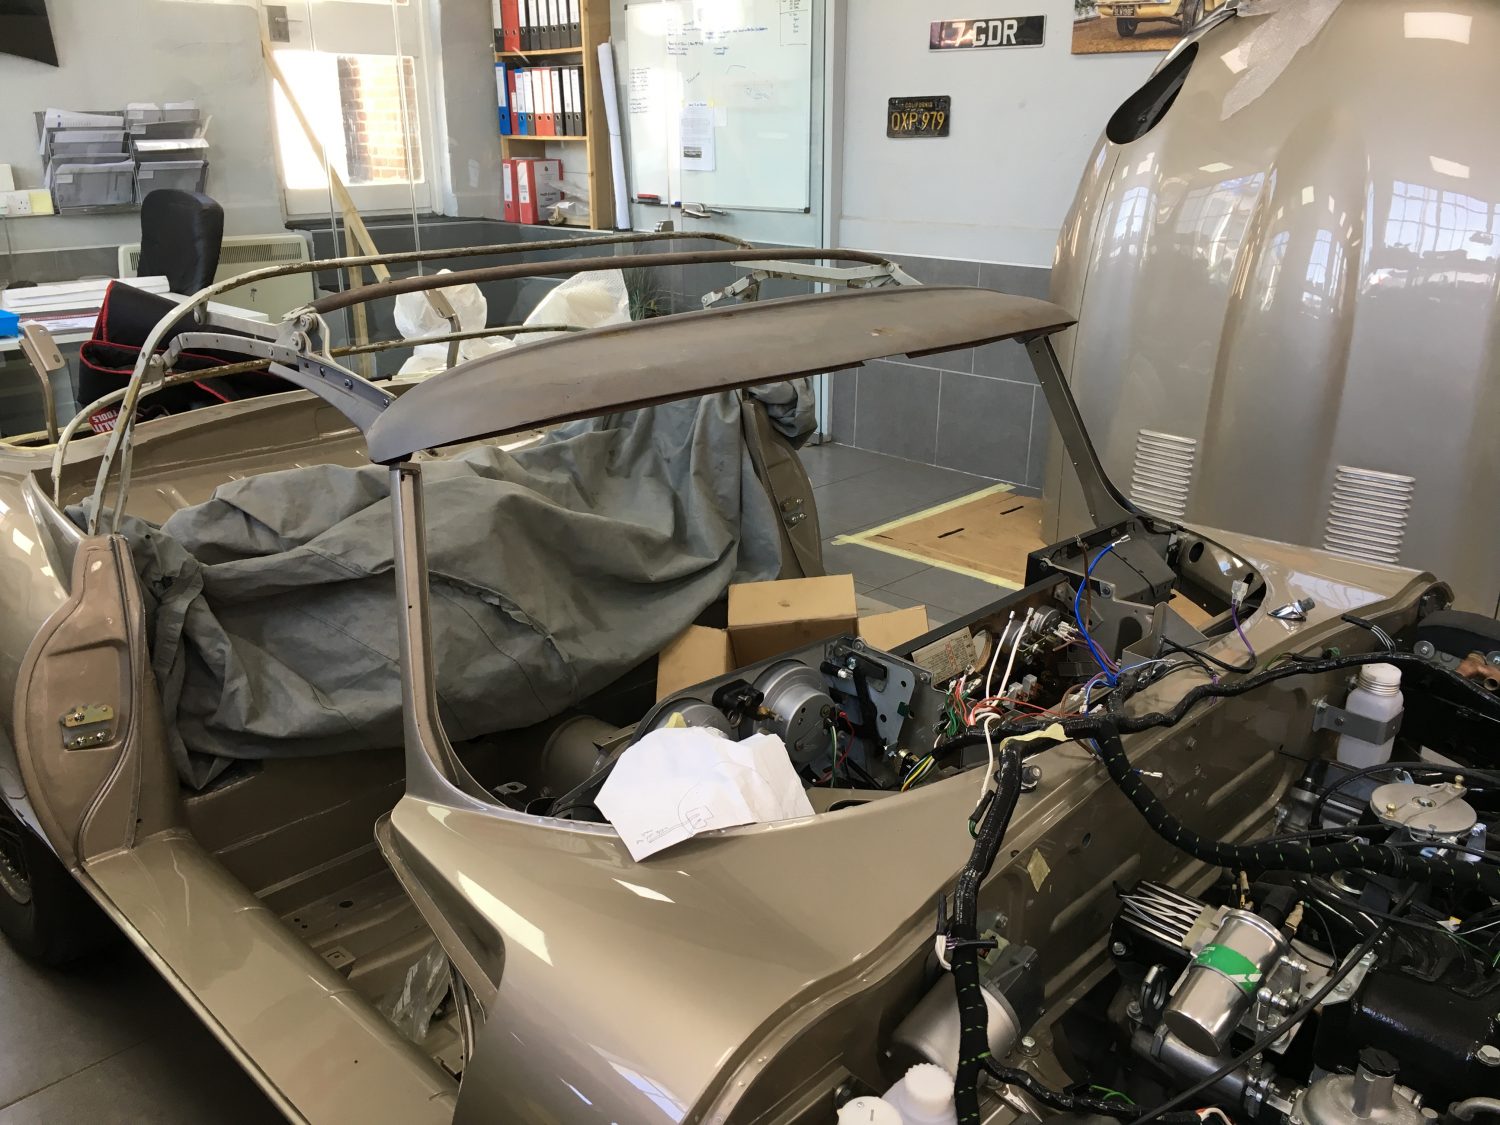
This afternoon, we’ve tested the fit of our hood frame once again.
The frame came with the car when it arrived to us from California but it was not fitted. We carried out a dry fit during the strip out process and it fitted nicely which reassured us to continue with the work. Now that we are a little further along with the build we have refitted the frame to ensure the lines are still as they should be. We have also added a new hood frame canopy to the existing frame.
Now that we are confident with our findings we can remove the frame and get to work on the preparation and paint.


The refurbished expansion tank is now installed.
Work is now underway on installing the full wiring loom. Once the rear section of wiring is complete the fuel tank can be fitted into position which will draw to a close the work on the rear section of the build.
The Jaguar E-Type panel is now built and ready for the dials to be fitted up.

Dave’s been busy working on the rear end of our E-Type getting ready for the fuel tank to be fitted into position.
The fuel filler cover has also been re-attached too!

Off to China our samples go as we work alongside our 1971 Jaguar E-Type Roadster’s customer in decided the final colours for the hood, leather and vinyl.
The majority of our chroming work has already been carried out by Tony and the guys at Wyatt Polishing in Thetford but having found a couple of extras on both the Jensen 541S and Jaguar V12 E-Type it’s another trip over to get these started.
To convert the wiper motor from left hand drive to right hand drive we’ve called in the assistance of our good friends and world renowned Jaguar specialists SNG Barratt. They’ll look to refurbishj the unit as well as carrying out the conversion.


The day has come where I will no longer be seeing this beautiful piece of V12 engineering out side my office window but will soon have to view her further down our workshops sitting proudly inside the car.
Today’s the day we re-fit the newly rebuilt V12 engine back where she belongs, sitting within our Jaguar E-Type roadster shell.
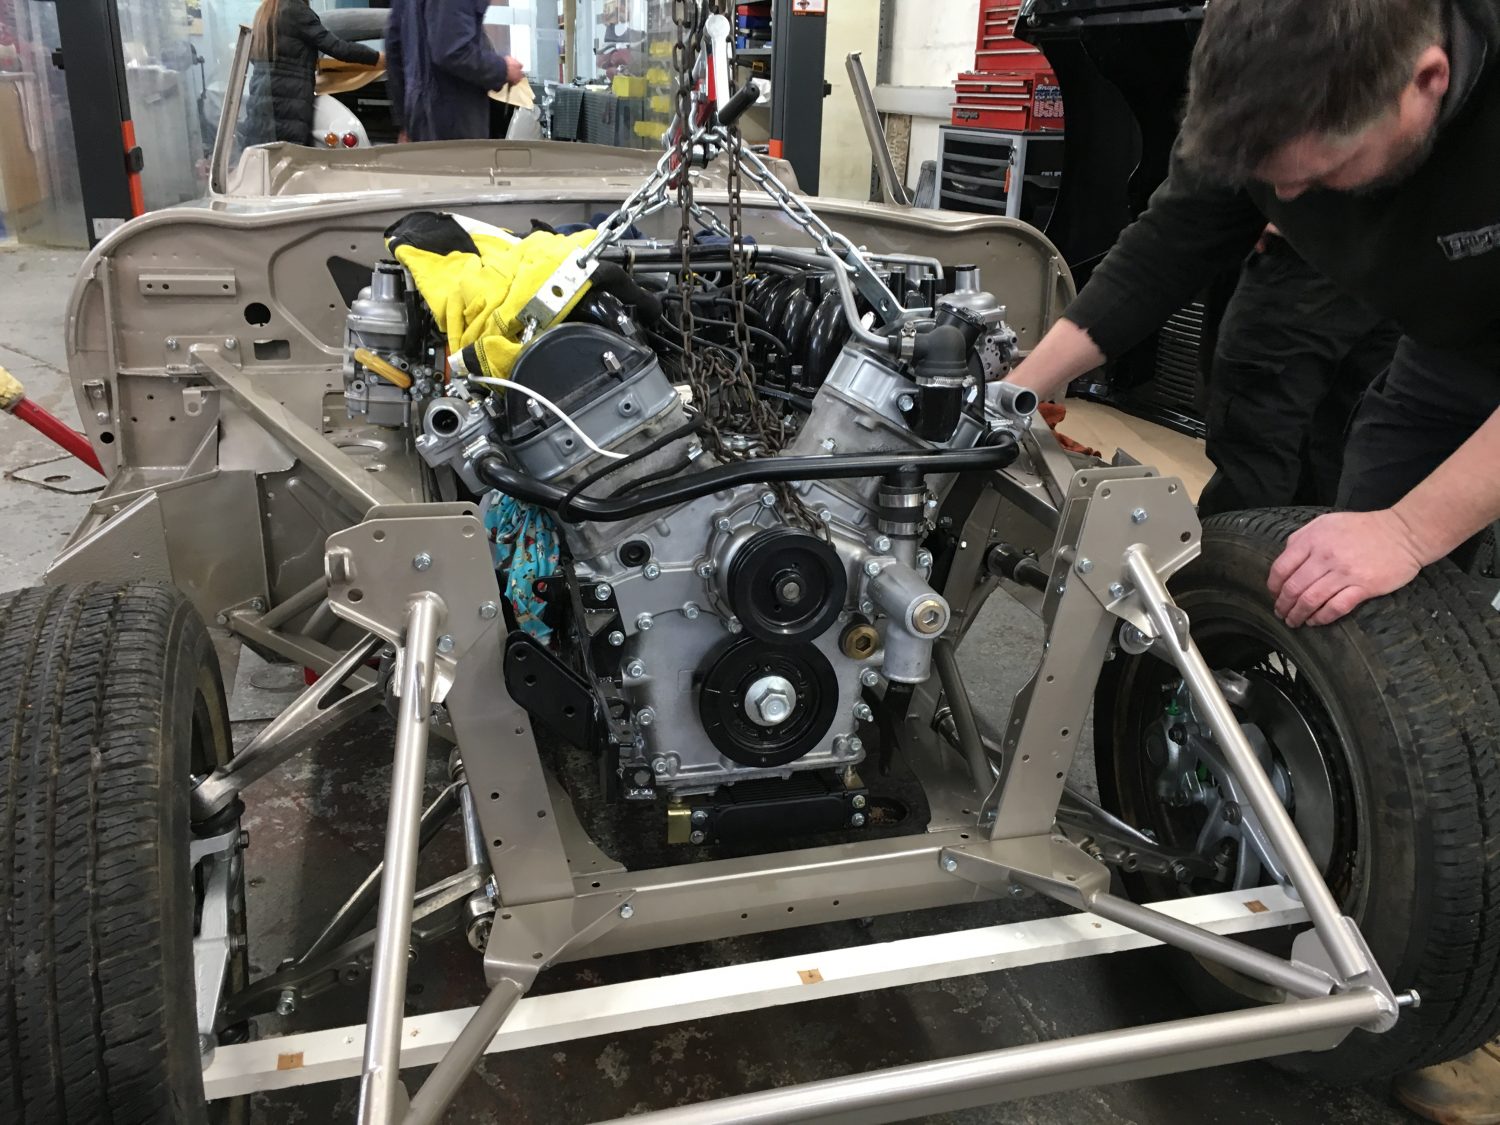
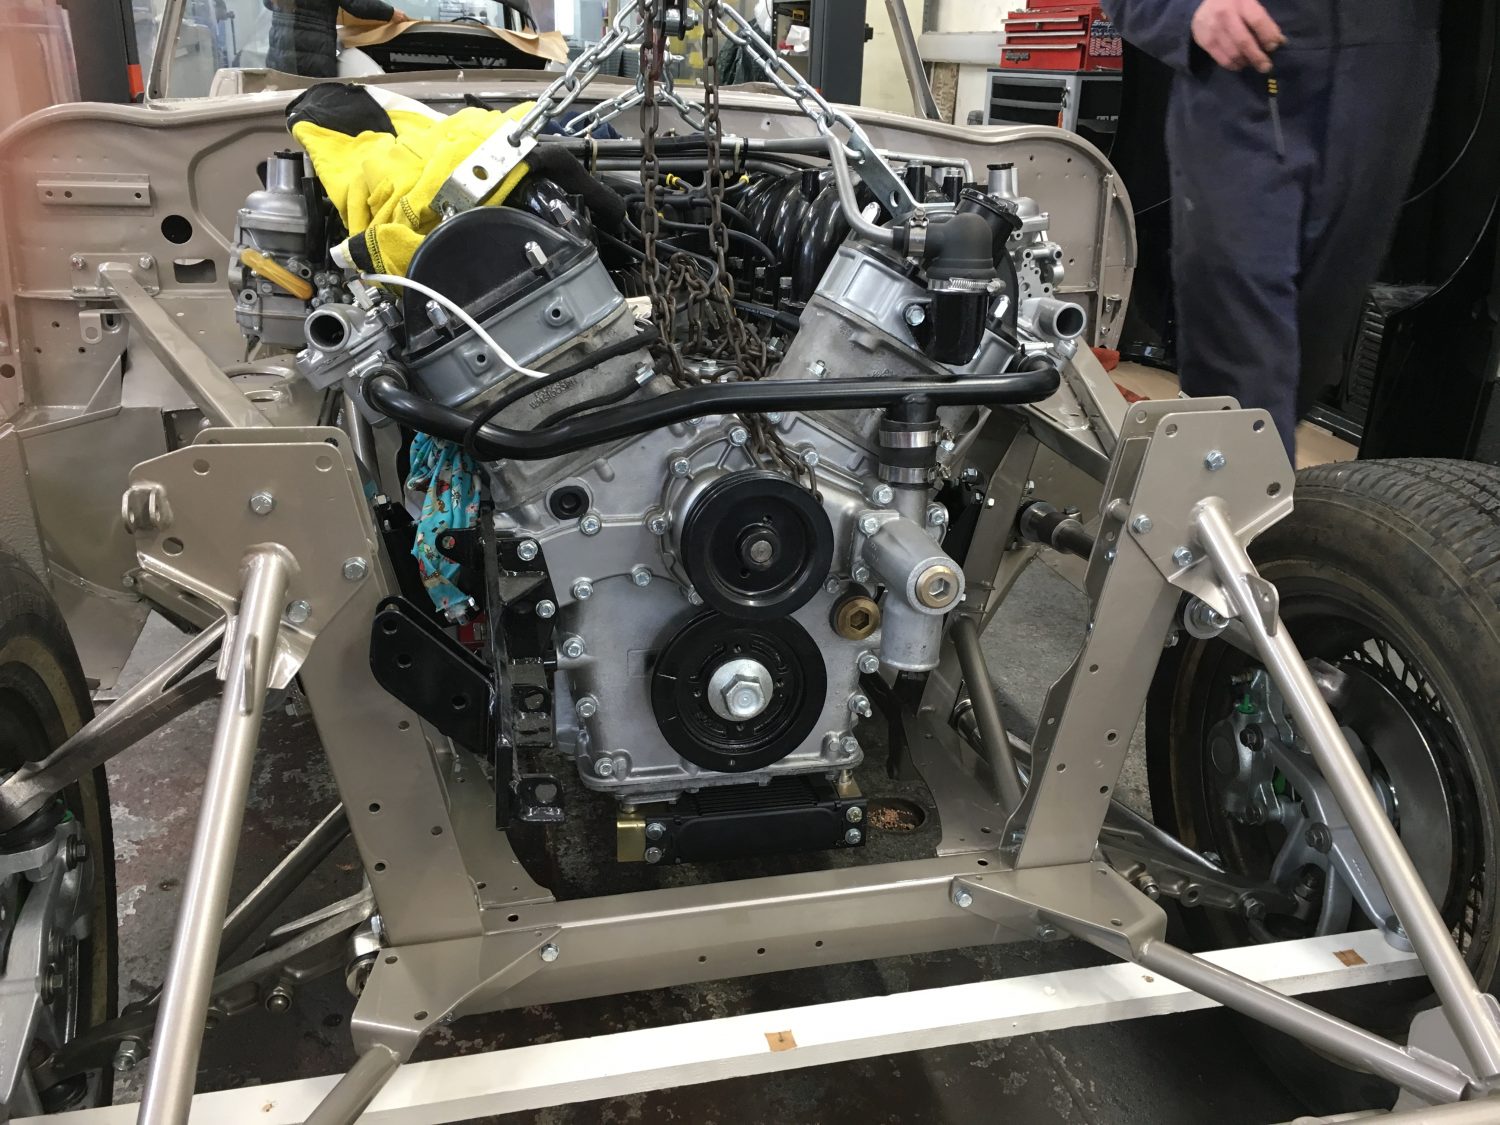
…and the operation was a huge success with the engine now safely inside the car ready to be built back up.
[vc_row][vc_column][vc_column_text]We are now days away from being able to marry up our V12 engine to our 1971 Jaguar E-Type so with Dave busy rebuilding the suspension components Tommy and John are refitting the front frame and bonnet to ensure everything fits as expected.
And it does…
[/vc_column_text][/vc_column][/vc_row][vc_row][vc_column][vc_gallery type=”image_grid” images=”17415,17416,17417,17418,17419,17420,17421,17422,17423,17424,17425,17426,17427,17428,17429″][/vc_column][/vc_row]
We are now into the rebuild stage of our 1971 Jaguar E-Type V12.
The half-shafts have been built up ready to be fitted back up and part of the full front end re-assembly.


John has spent the afternoon building up the Jaguar E-Type roadster’s upgraded shocks ready for the refit to begin.

[vc_row][vc_column][vc_column_text]The handbrake levers are now in the safe hands of Tony at Wyatt Polishing ready to be zinc plated.
I’ve managed to find a fantastic explanation from SPC, The Surface Plating Experts on the process of Zinc plating.
[/vc_column_text][/vc_column][/vc_row][vc_row][vc_column][vc_text_separator title=”The Step-by-Step Zinc Plating Process”][/vc_column][/vc_row][vc_row][vc_column][vc_column_text]Zinc plating is a relatively complex process that requires a high level of expertise. Specialised equipment and machinery is also required, including a rectifier, plating station, ancillary tank for proper dissolution of the zinc anode and a reservoir. Here’s an overview of how a typical zinc plating process works:
[/vc_column_text][/vc_column][/vc_row][vc_row][vc_column][vc_separator][/vc_column][/vc_row][vc_row][vc_column][vc_column_text]To read the full article from SPC click here[/vc_column_text][/vc_column][/vc_row]
[vc_row][vc_column][vc_column_text]Welcome back to the Bridge Classic Cars workshops our Jaguar E-Type V12 Roadster. Now finished in Jaguar Golden Sands sitting proudly next to our 1967 Jaguar E-Type 2+2 both ready for rebuild.
Huge progress will be made next week as the team return from their holidays.[/vc_column_text][/vc_column][/vc_row][vc_row][vc_column][vc_gallery type=”image_grid” images=”14216,14217,14218,14219,14220,14221,14222,14223,14224,14225,14226,14227,14228,14229,14230,14231,14232,14233,14234,14235,14236,14237″][/vc_column][/vc_row]
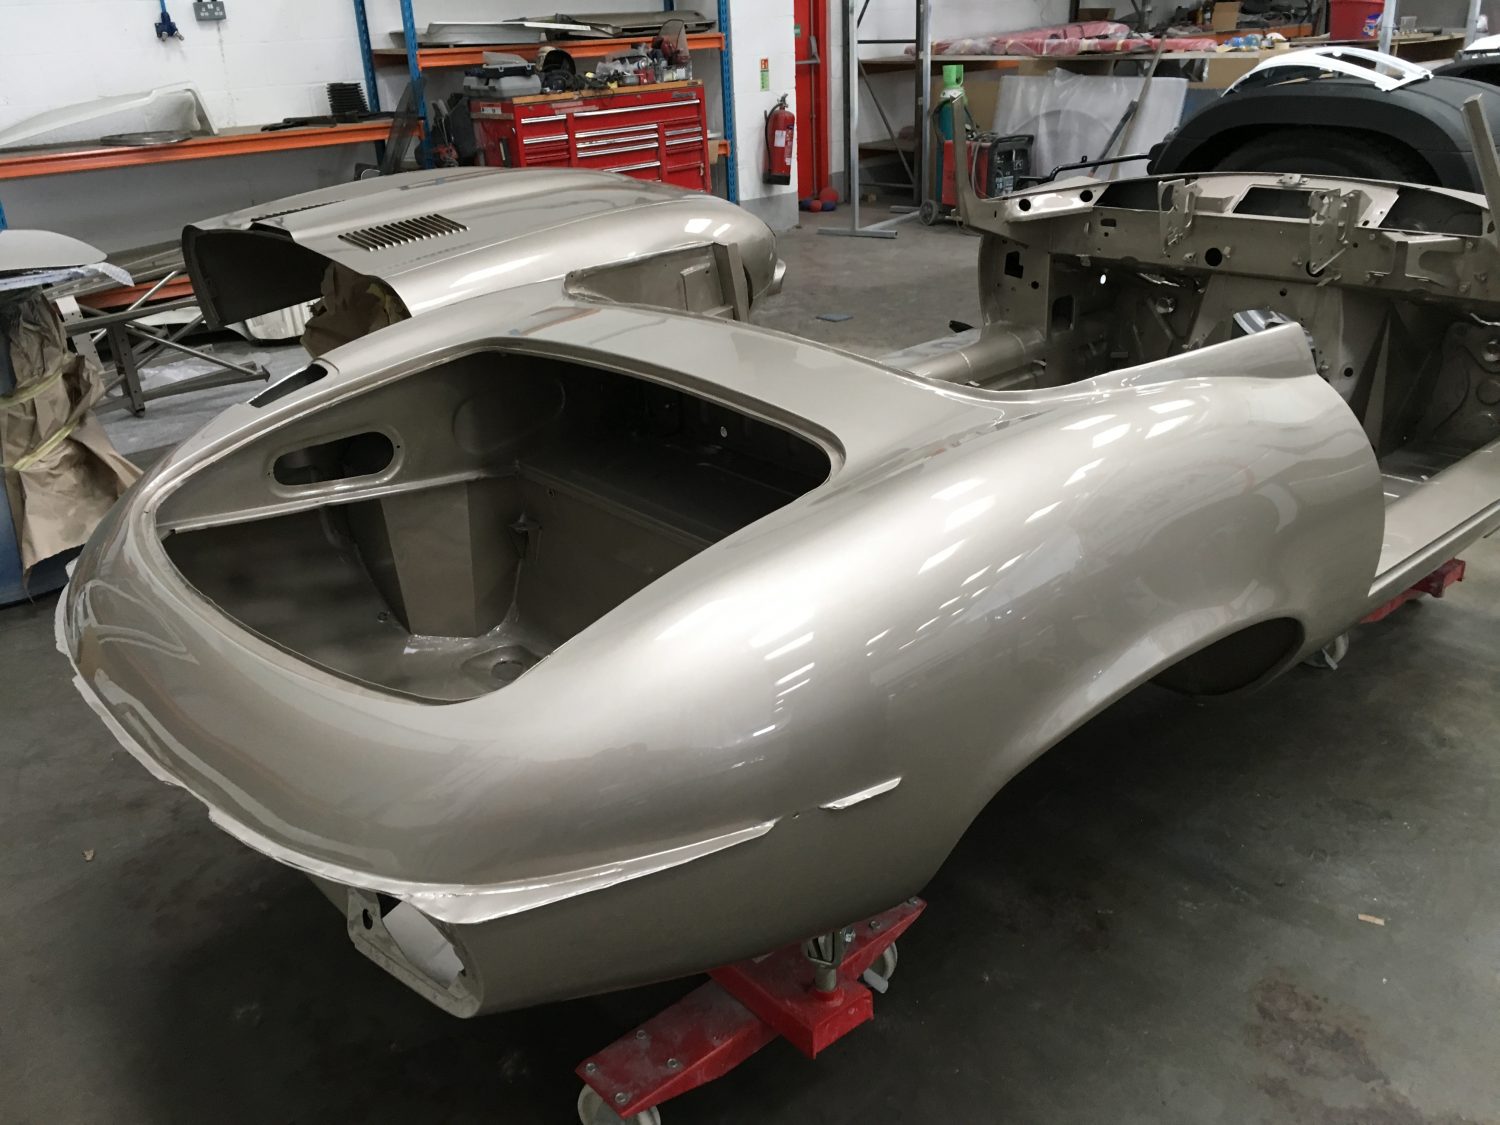
Today’s the day our Jaguar E-Type V12 roadster rejoins the Bridge Classic Cars collection in our Deben Road workshops…

…now in her new Golden Sands finish.
She’ll now come back to us for the full rebuild to commence.

[vc_row][vc_column][vc_column_text]Today we had a visit from Brian Classic Assessments and the owners to look at the progress of our Jaguar E-Type V12 Roadster. Unfortunately they were a few days too early from seeing her in the new Golden Sands finish but none-the-less they were very happy with seeing the second stage primer.
Now we have the big decision to make on what interior finish.
[/vc_column_text][/vc_column][/vc_row][vc_row][vc_column][vc_gallery type=”image_grid” images=”14115,14116,14117,14118,14119,14120,14121,14122,14123,14124,14125,14126″][/vc_column][/vc_row]
We’ve just taken delivery of our brand new aluminium Jaguar V12 radiator with cowls and fans, including header tank.
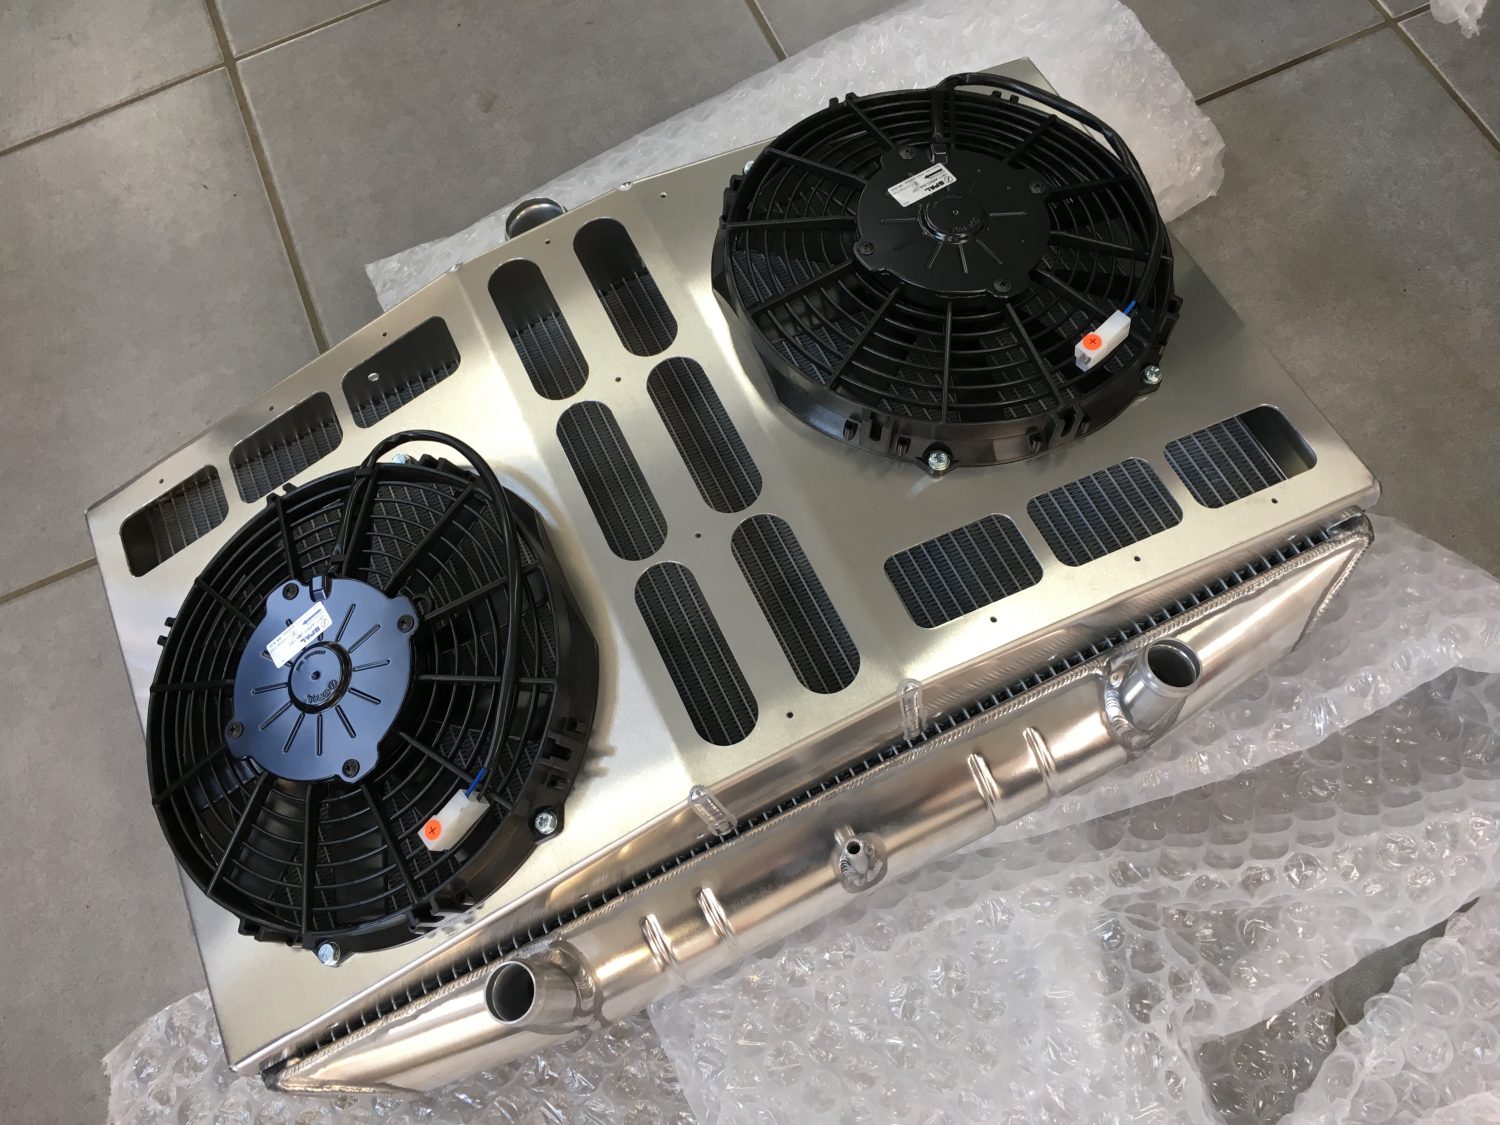
Alicool produce Intercoolers, radiators, oil coolers, fuel tanks and aluminium fabrication work. The company was set up thanks to the coming together of industry leading professionals. Their design and drawing team have 25 years’ experience in aluminium cooling products and have worked on projects from super car cooling packages in air, water and oil to radiator design for cooling in the vintage and fast road market place.
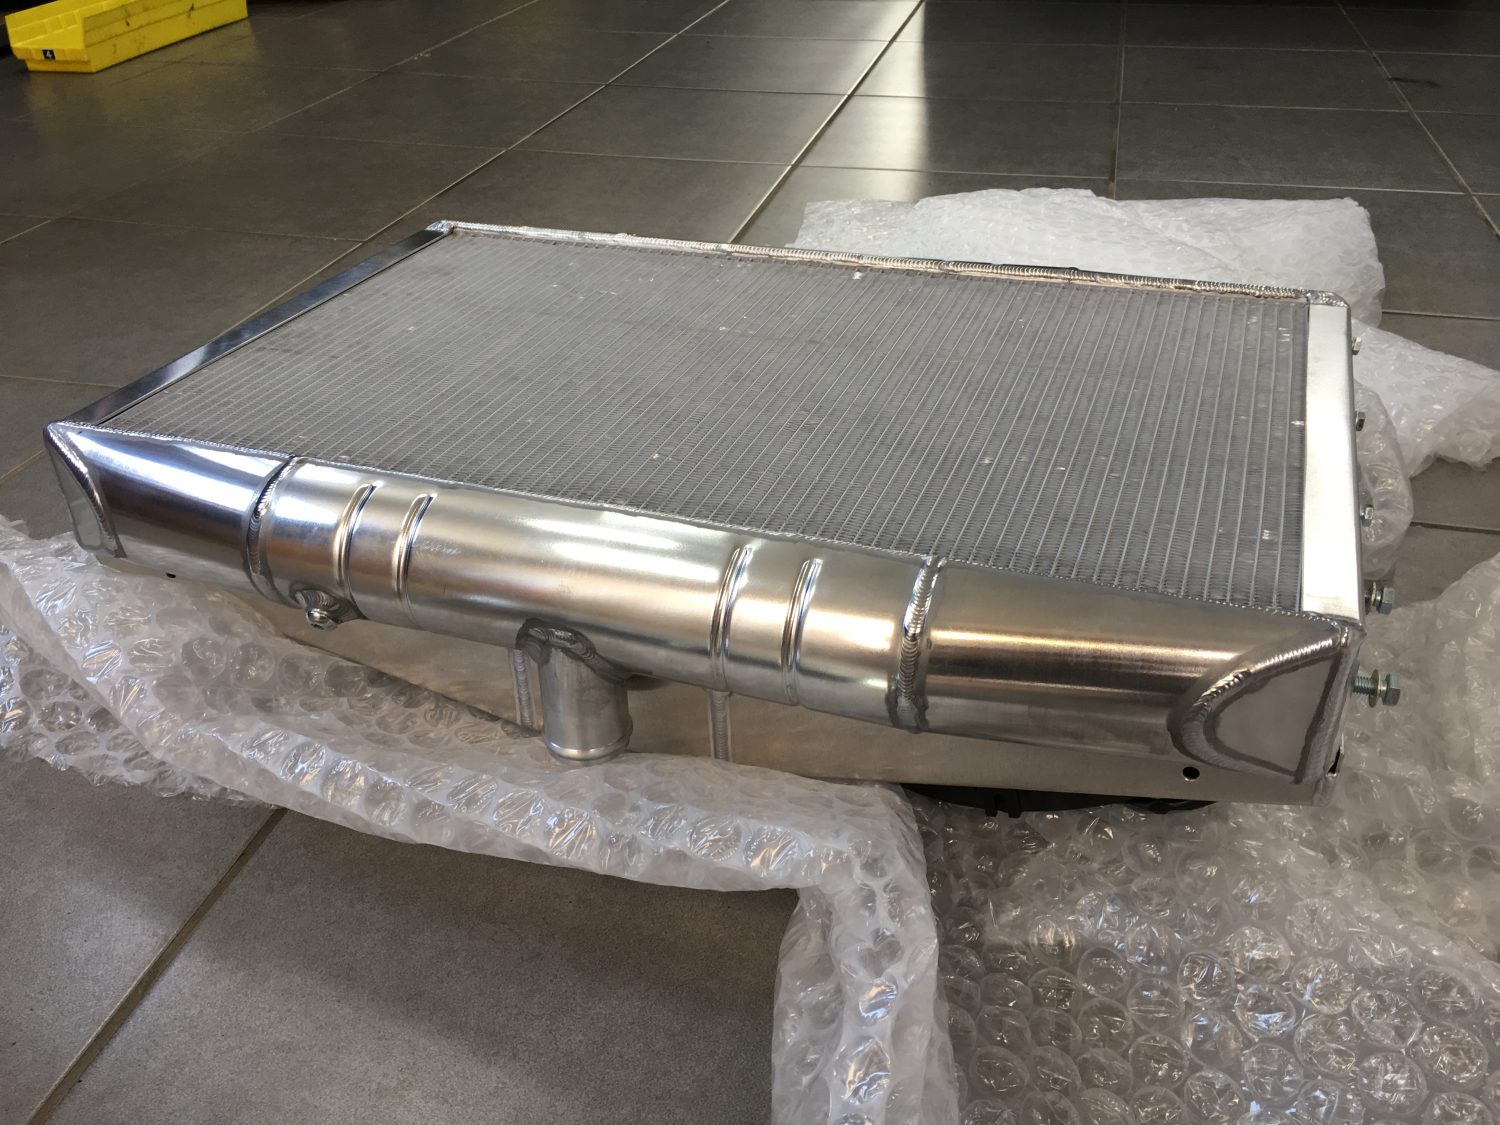
Lightweight 66mm high performance alloy core, over 45% more efficient than the original copper and brass radiator. This radiator will keep race or road cars perfectly cool even in high ambient conditions. Alicool water cores are vacuum braised in a controlled atmosphere to comply with IS09001 quality assurance standards. Available with oil cooler for automatic models. please contact us with your preference.


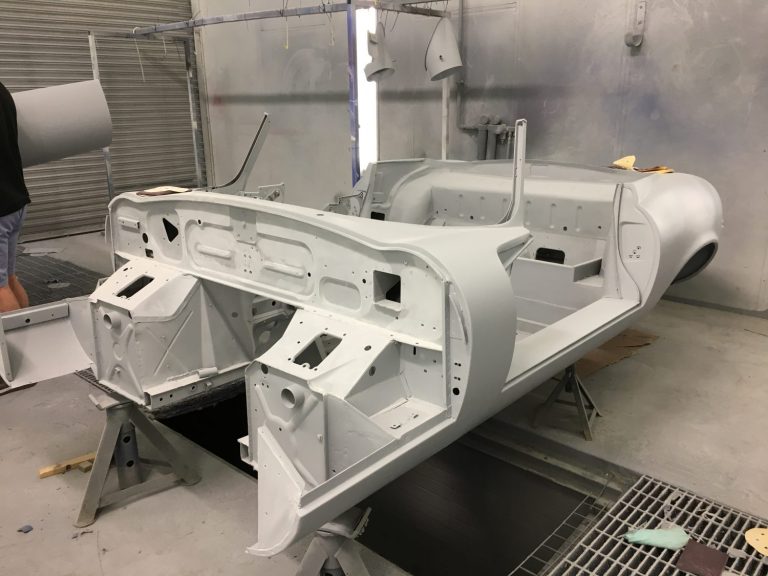
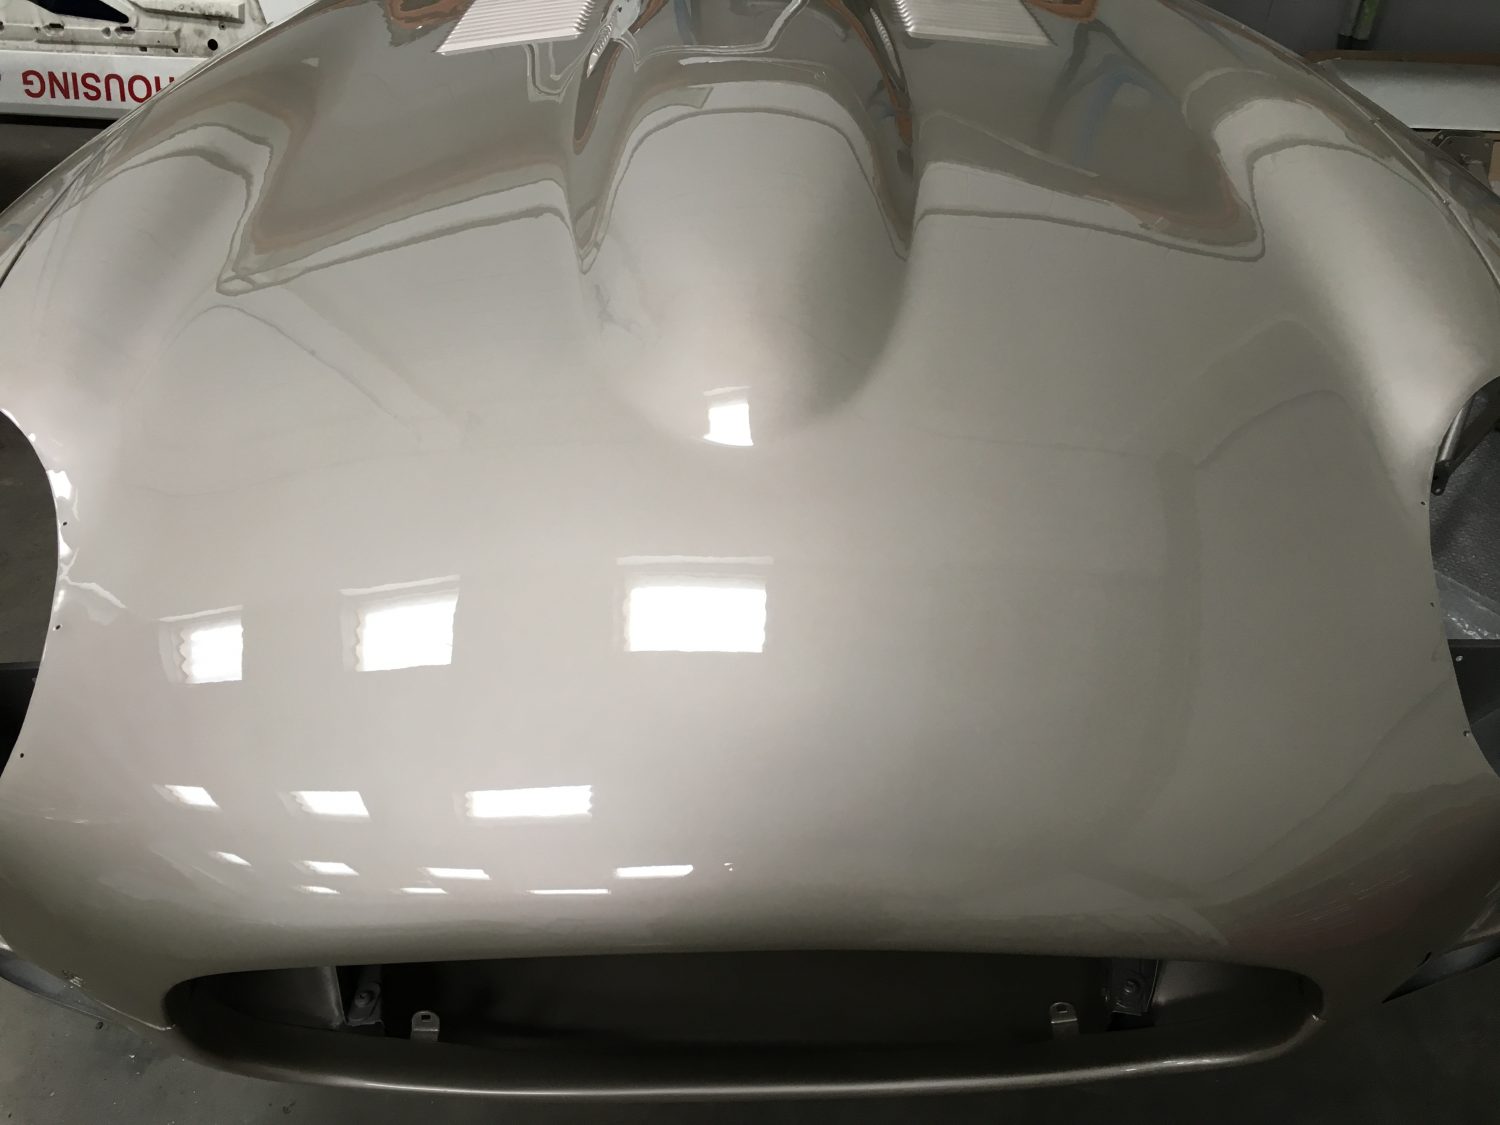
Our Jaguar E-Type Roadster is due to be painted tomorrow, here she in after her second stage of primer.
The blowers are on and we are just waiting for her to toughen up before moving into the paint booth ready for paint.

Tommy has been hard at work today blasting and refurbishing our 1973 Jaguar E-Type V12 Roadster top and bottom wishbones.


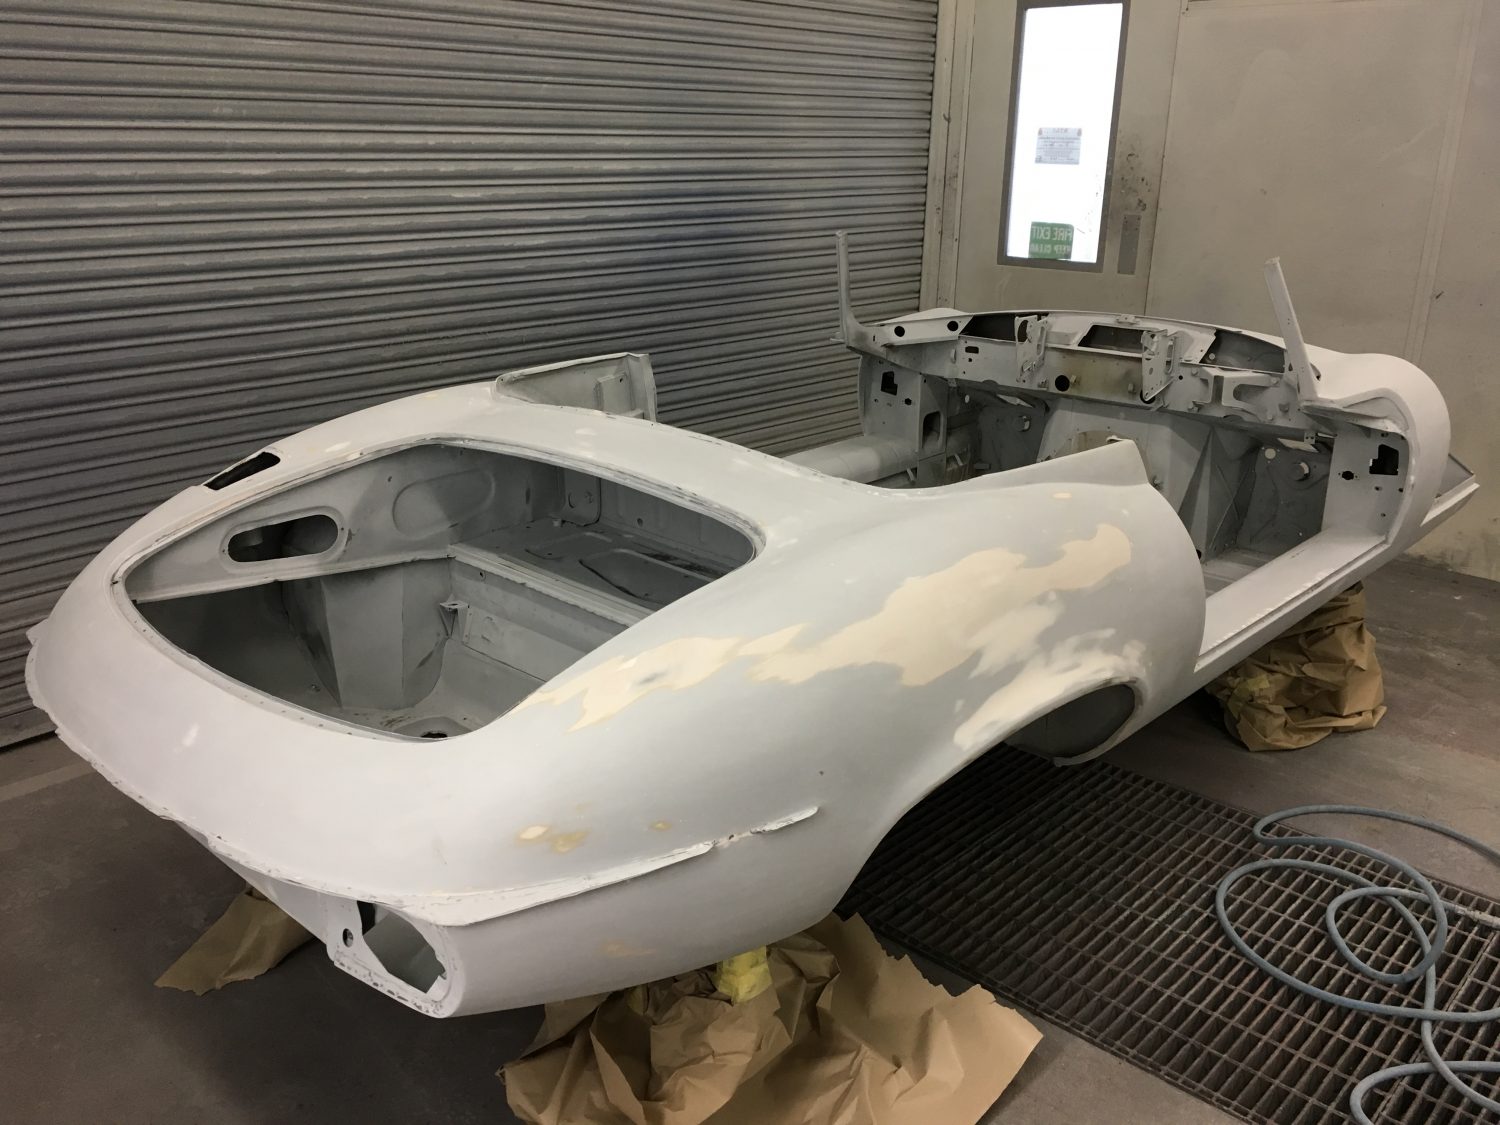
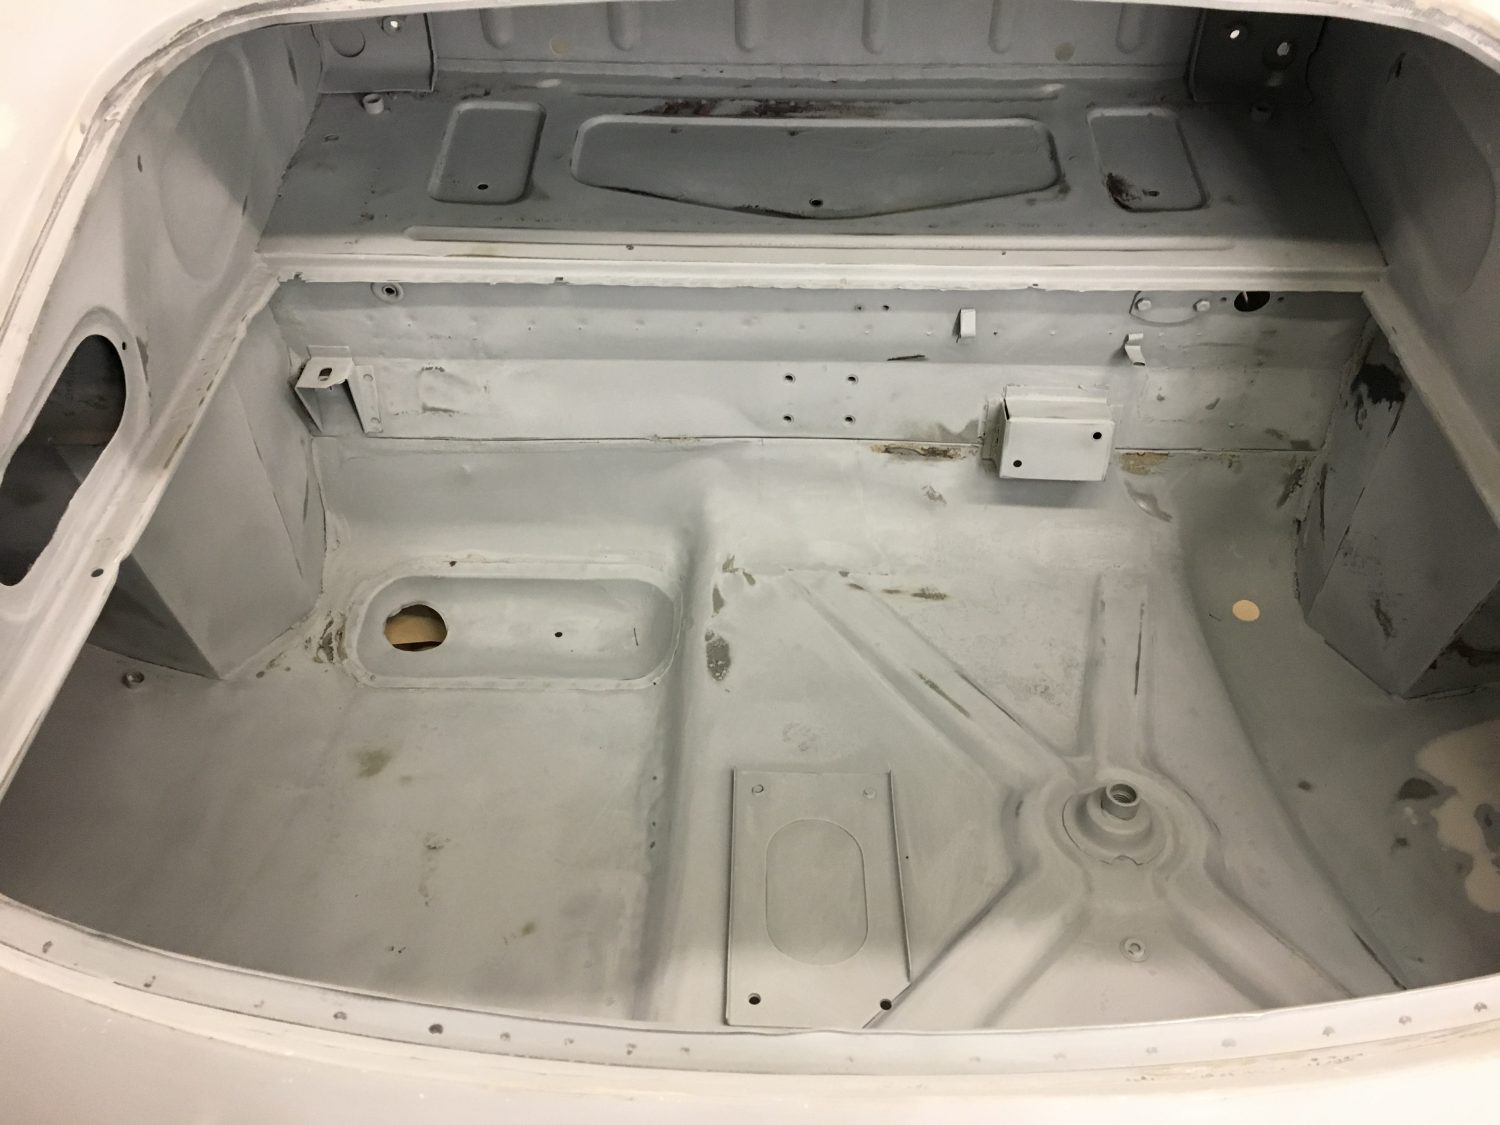
[vc_row][vc_column][vc_column_text]The first of two coats of primer have now been applied to our Jaguar E-Type V12 roadster.
We are now only days away from the stone chip areas to be drawn out and the brand new Jaguar Golden Sands colour to be applied. The car will be totally transformed by this time next week and we can’t wait!
[/vc_column_text][/vc_column][/vc_row][vc_row][vc_column][vc_gallery type=”image_grid” images=”13642,13643,13644,13645,13646,13647,13648,13649,13650,13651,13652,13653,13654,13655,13656,13657,13658,13659,13660,13661,13662″][/vc_column][/vc_row]
Jaguar E-Type Front Brake Caliper Conversion Upgrades from SNG Barratt
These four pot front brake caliper conversion kits are manufactured in England using Ductile Cast Iron or Aerospace grade 7075 aluminium. They are all fitted with OE quality modern British seals and 303 grade stainless steel pistons and pins. The kits fit straight onto the original suspension uprights without any modification and utilise the original brake discs and hoses. All are supplied complete with Mintex brake pads.
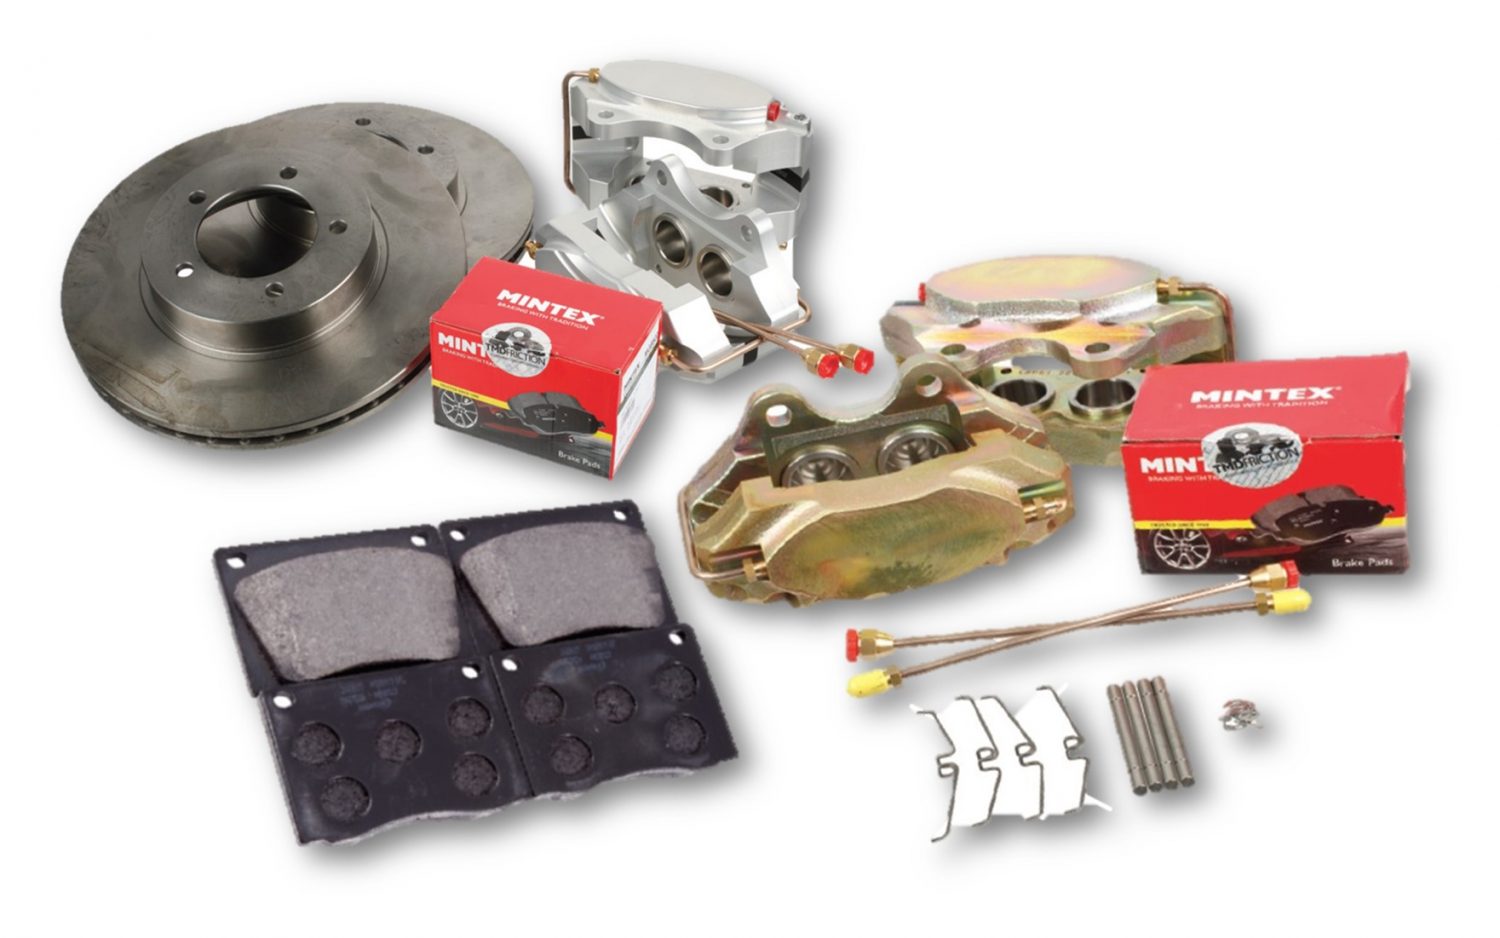 Supplied Without Brake Discs
SBS9086/1 – Iron – S1 3.8 & 4.2
SBS9086A/1 Aluminium Silver – S1 3.8 & 4.2
SBS9086AB/1 Aluminium Black – S1 3.8 & 4.2
SBS9293A/1 Aluminium Black S2 4.2
Supplied With Vented Brake Discs
Vented brake discs offer increased heat dissipation over standard solid discs, making them ideal in situations requiring frequent and/or heavy braking, such as competition
and racing.
SBS9093AB/1 – Aluminium Black – S1 3.8 & 4.2
SBS9293A – Aluminium Silver – S2 4.2
Brake Pads Sold Separately
JLM9515 – All E-Type
Click here to download and save the information on the Front Brake Caliper Conversion Upgrades or for more information contact SNG Barratt.
