
Pictures from New York
[vc_row][vc_column][vc_column_text]We’ve just had confirmation from Schumacher Cargo Logistics that our 1973 Jaguar E-Type V12 has arrived safely into New York docks. Here’s the latest pictures from the


[vc_row][vc_column][vc_column_text]We’ve just had confirmation from Schumacher Cargo Logistics that our 1973 Jaguar E-Type V12 has arrived safely into New York docks. Here’s the latest pictures from the
[vc_row][vc_column][vc_column_text]Here are some more pictures of our 1967 Jaguar E-Type 2+2 Series 1.[/vc_column_text][/vc_column][/vc_row][vc_row][vc_column][vc_gallery type=”image_grid” images=”8441,8440,8439,8438,8437,8436,8435,8434,8433,8432,8431,8430,8429″][/vc_column][/vc_row]

With the MGBGT back from the paint shop Lauren has been busy fitting the new sound deadening matting. Sound Deadener plays a vital role and
[vc_row][vc_column][vc_column_text]Having built one of the very best Jensen 541S’s in the world back in 2015 Asa and the team at Bridge Classic Cars have a
[vc_row][vc_column][vc_column_text] Our good friends at Moss Europe have selected a few gift ideas that would make any classic car enthusiast happy this Christmas. Visit the Moss
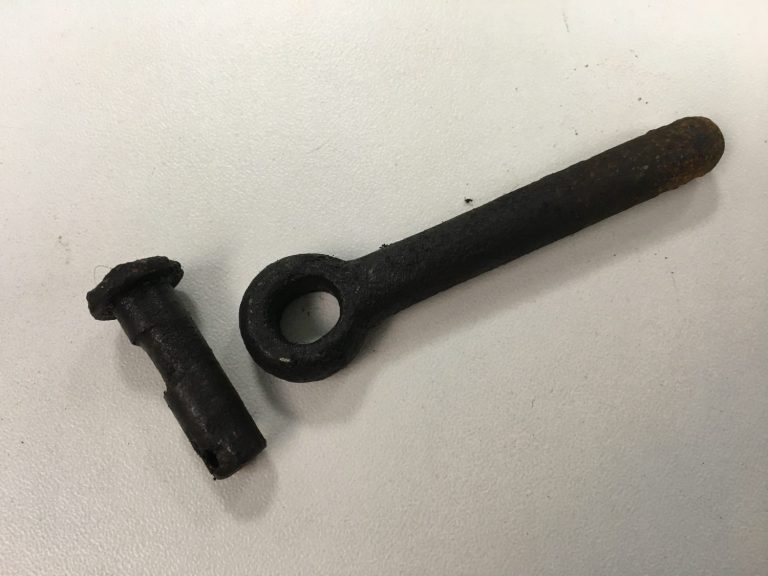
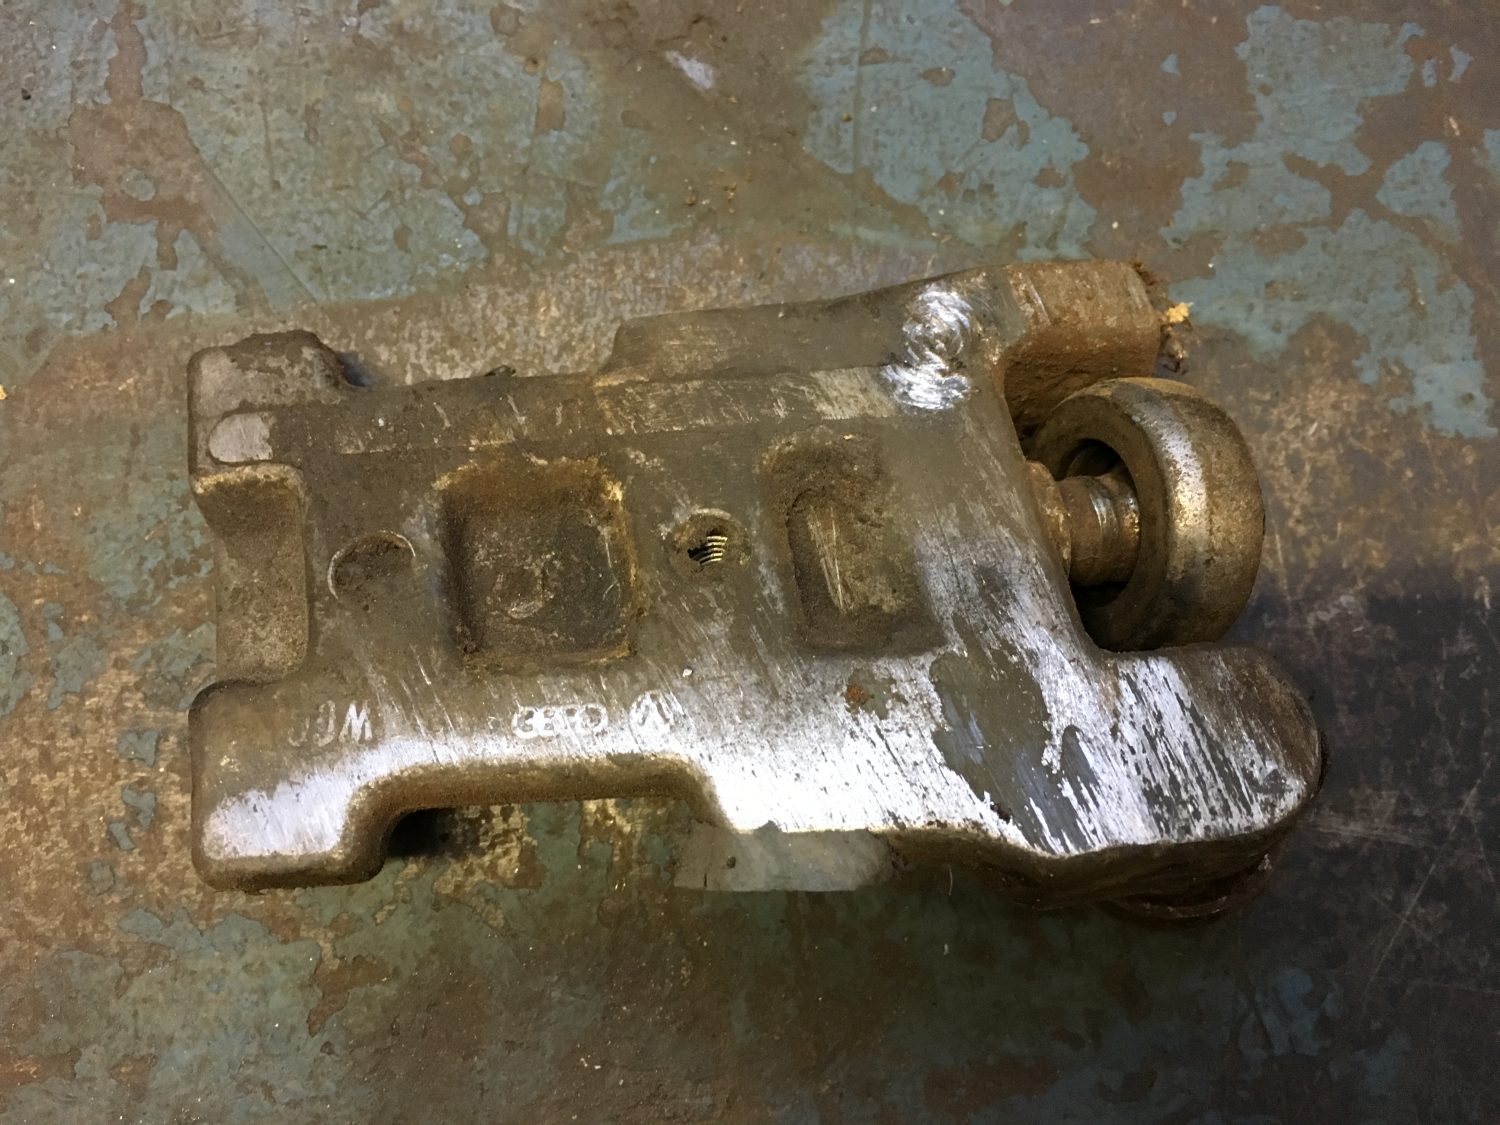
Years of wear on the clutch slave pin has resulted in a hole that is no longer circular and a pin that is no longer
Now that our 1949 MG YT has been transported to our Ipswich paint shop it’s time to start the preparation work ready for the new

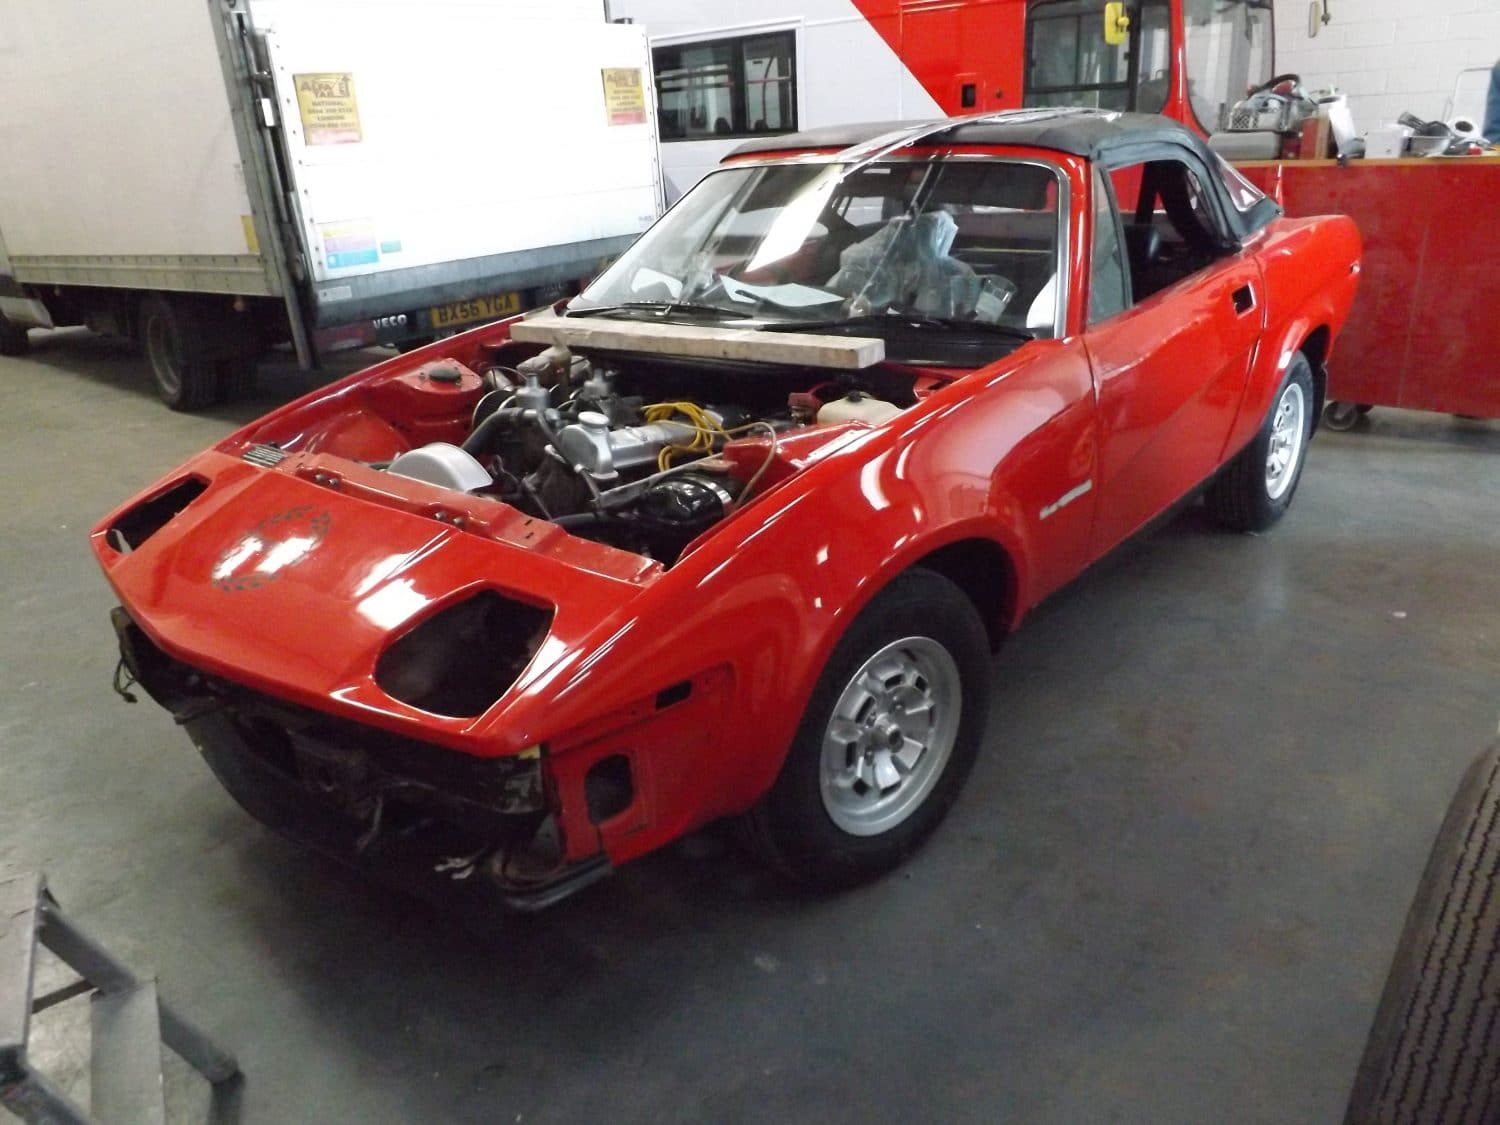
Our 1982 Triumph TR7 is now in the preparation stages, the entire car must now be stripped of it’s components ready to undergo a full
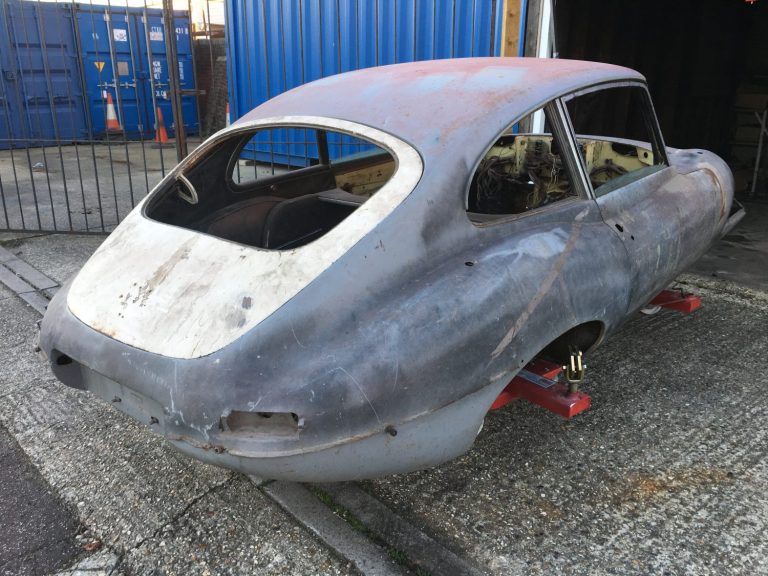
[vc_row][vc_column][vc_column_text]We have just accepted delivery of our 1967 Jaguar E-Type 2+2 Series 1. This is now available for sale as a future restoration project, for more
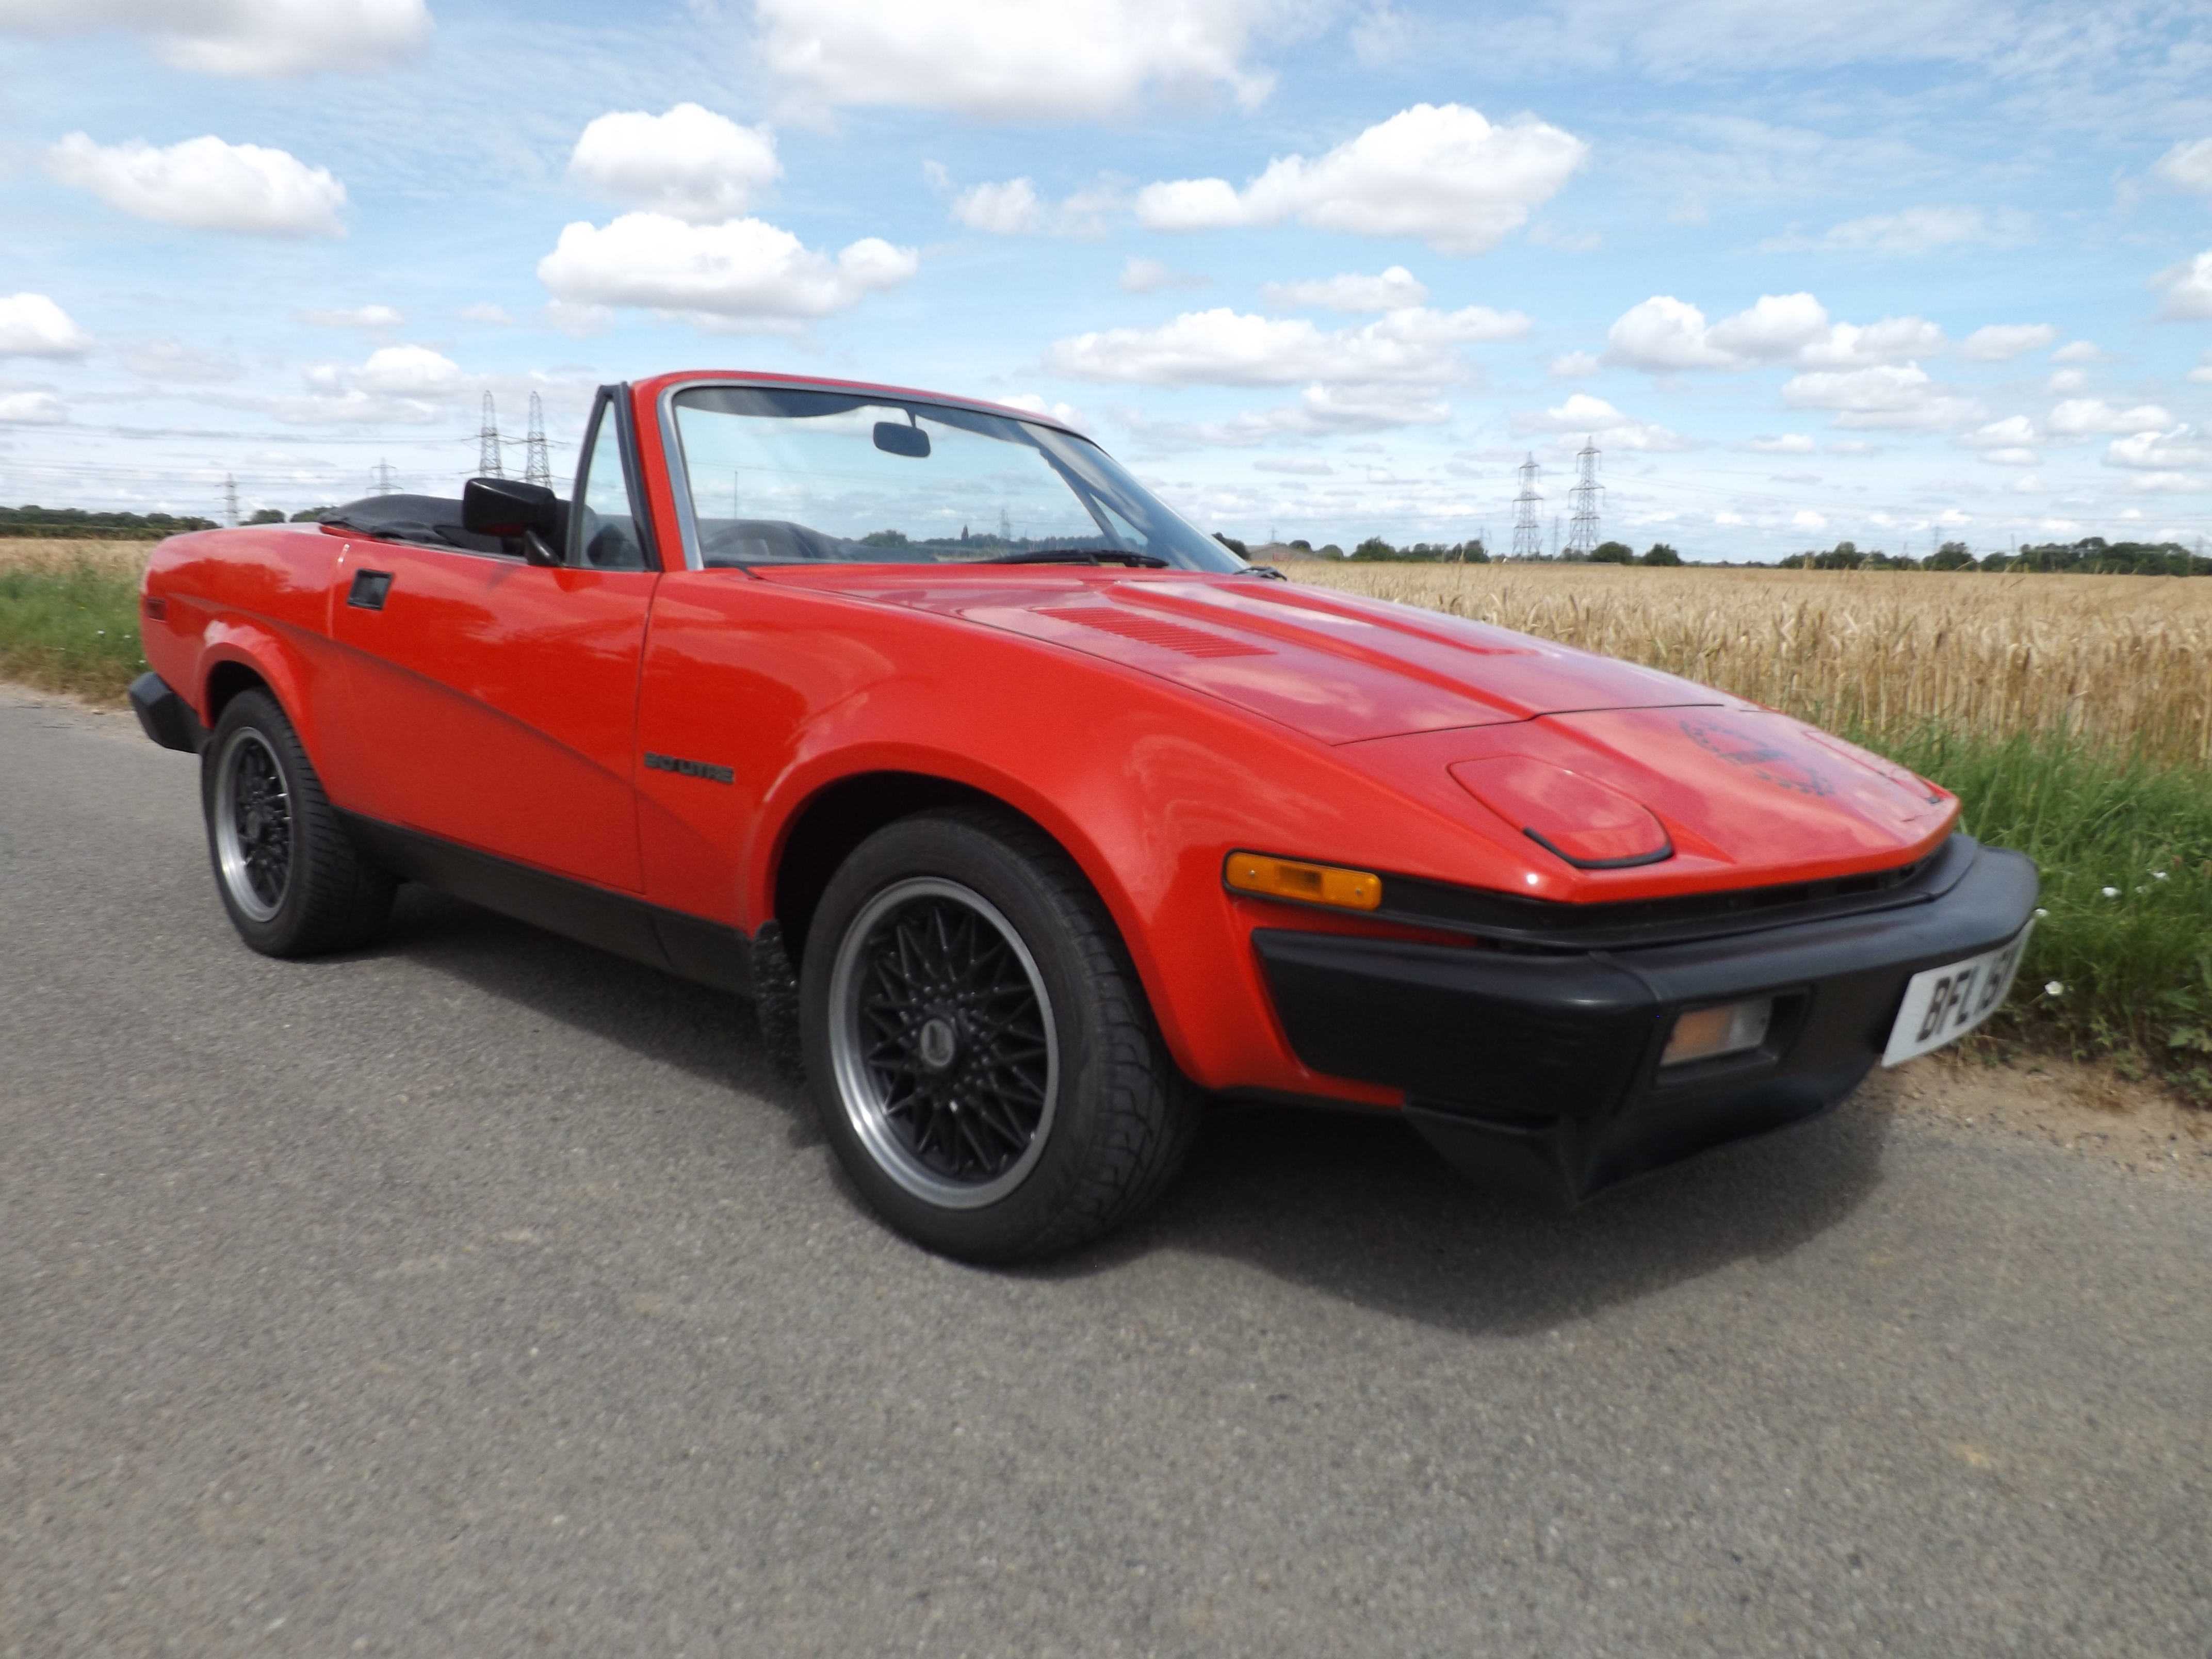
On Friday we made the decision NOT to colour code our Triumph TR7. We had discussed our plans with various people and had received mixed
A small delay on the restoration due to a couple of imperfections that we found in the paintwork. Nothing too major but worth addressing so
[vc_row][vc_column][vc_column_text]The bright-work has now been delivered to Wyatt Polishing in Thetford ready for Tony and the team to carry out a full refurbishment of them. Every
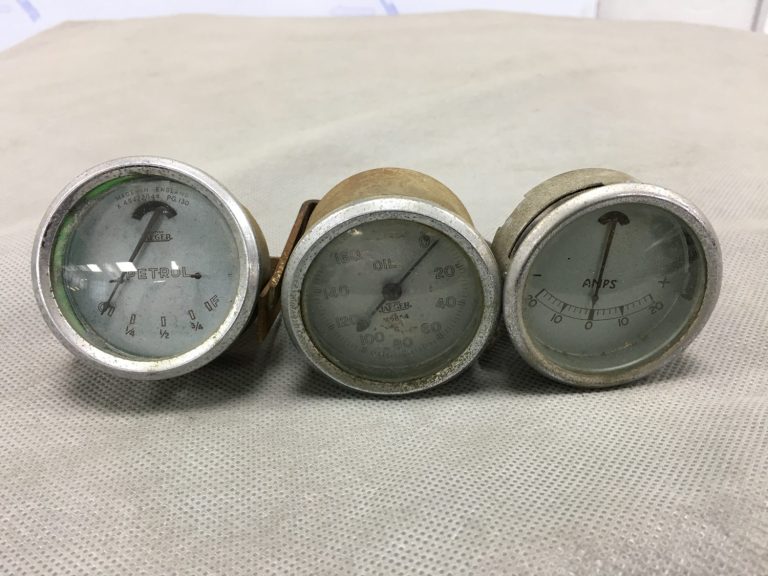
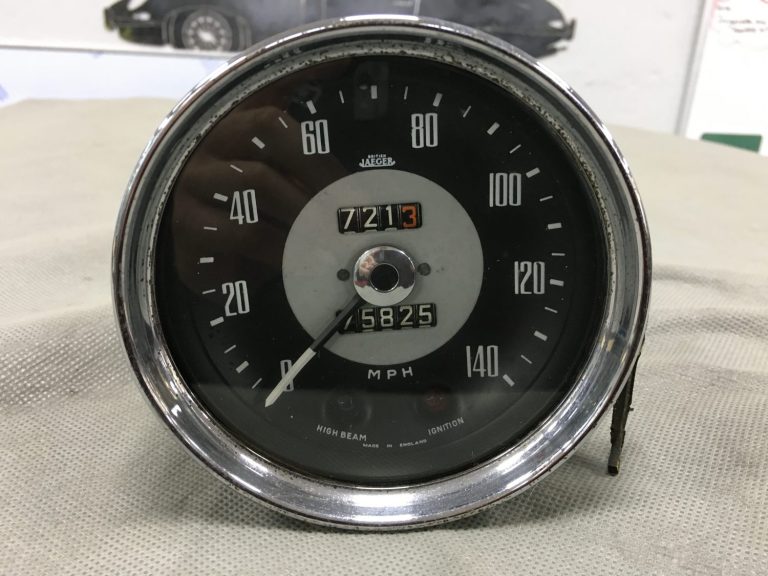
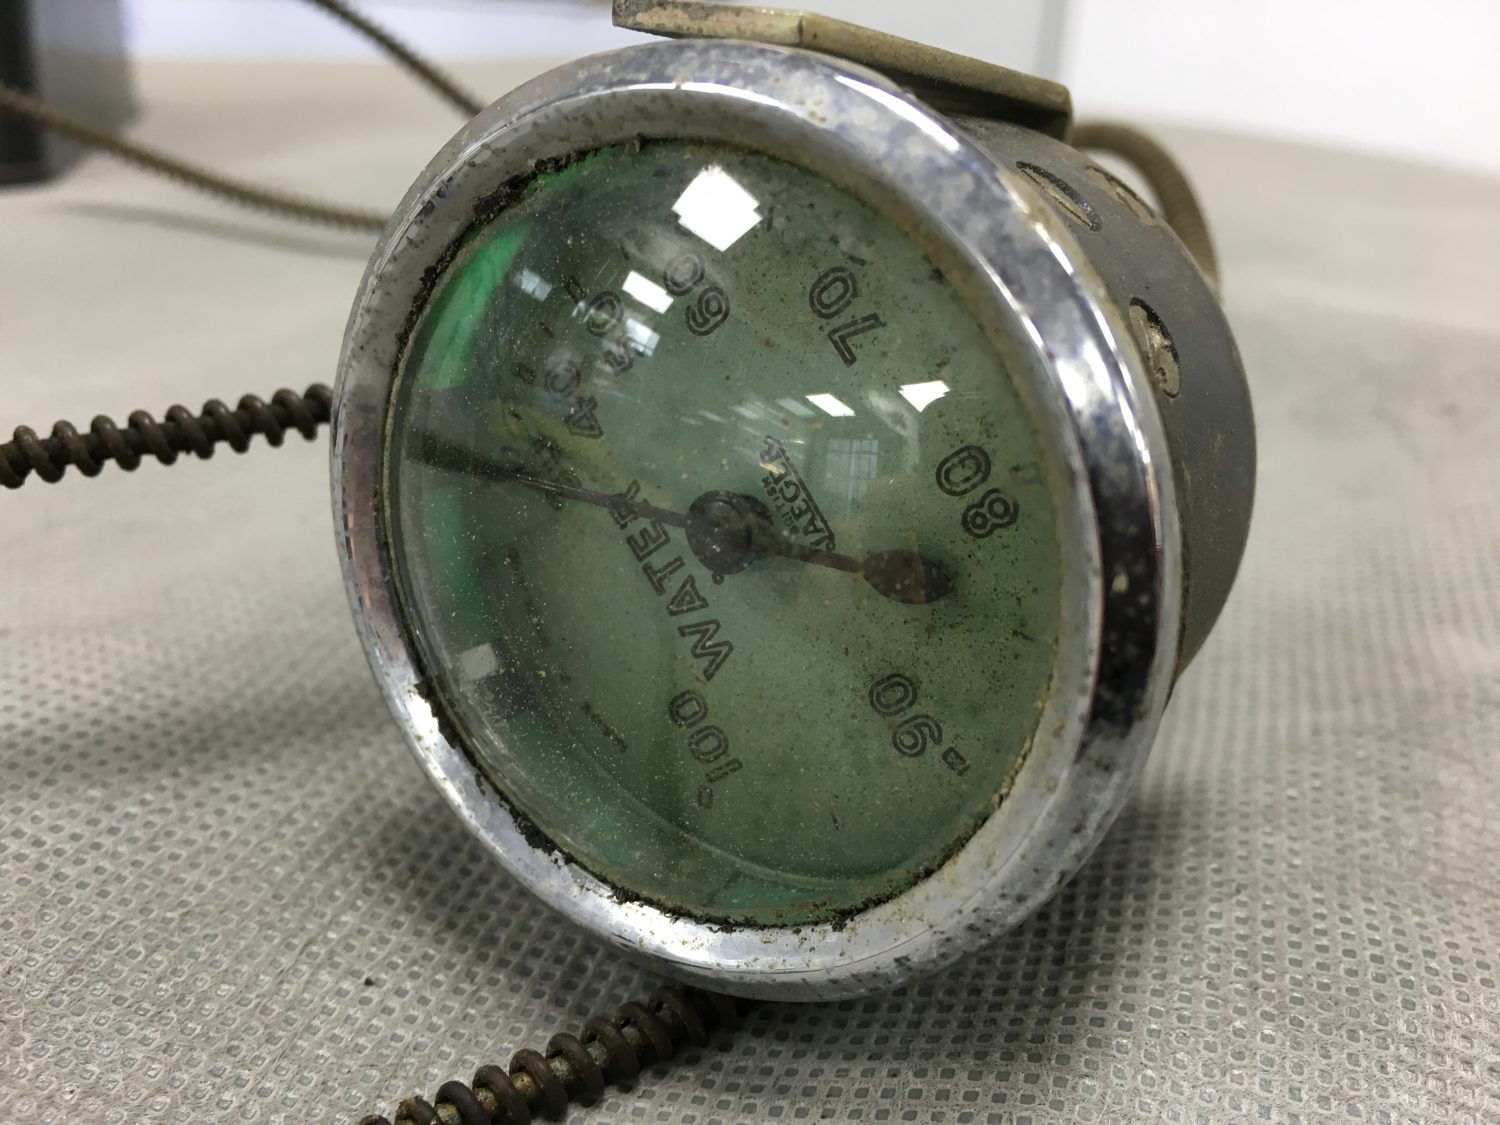
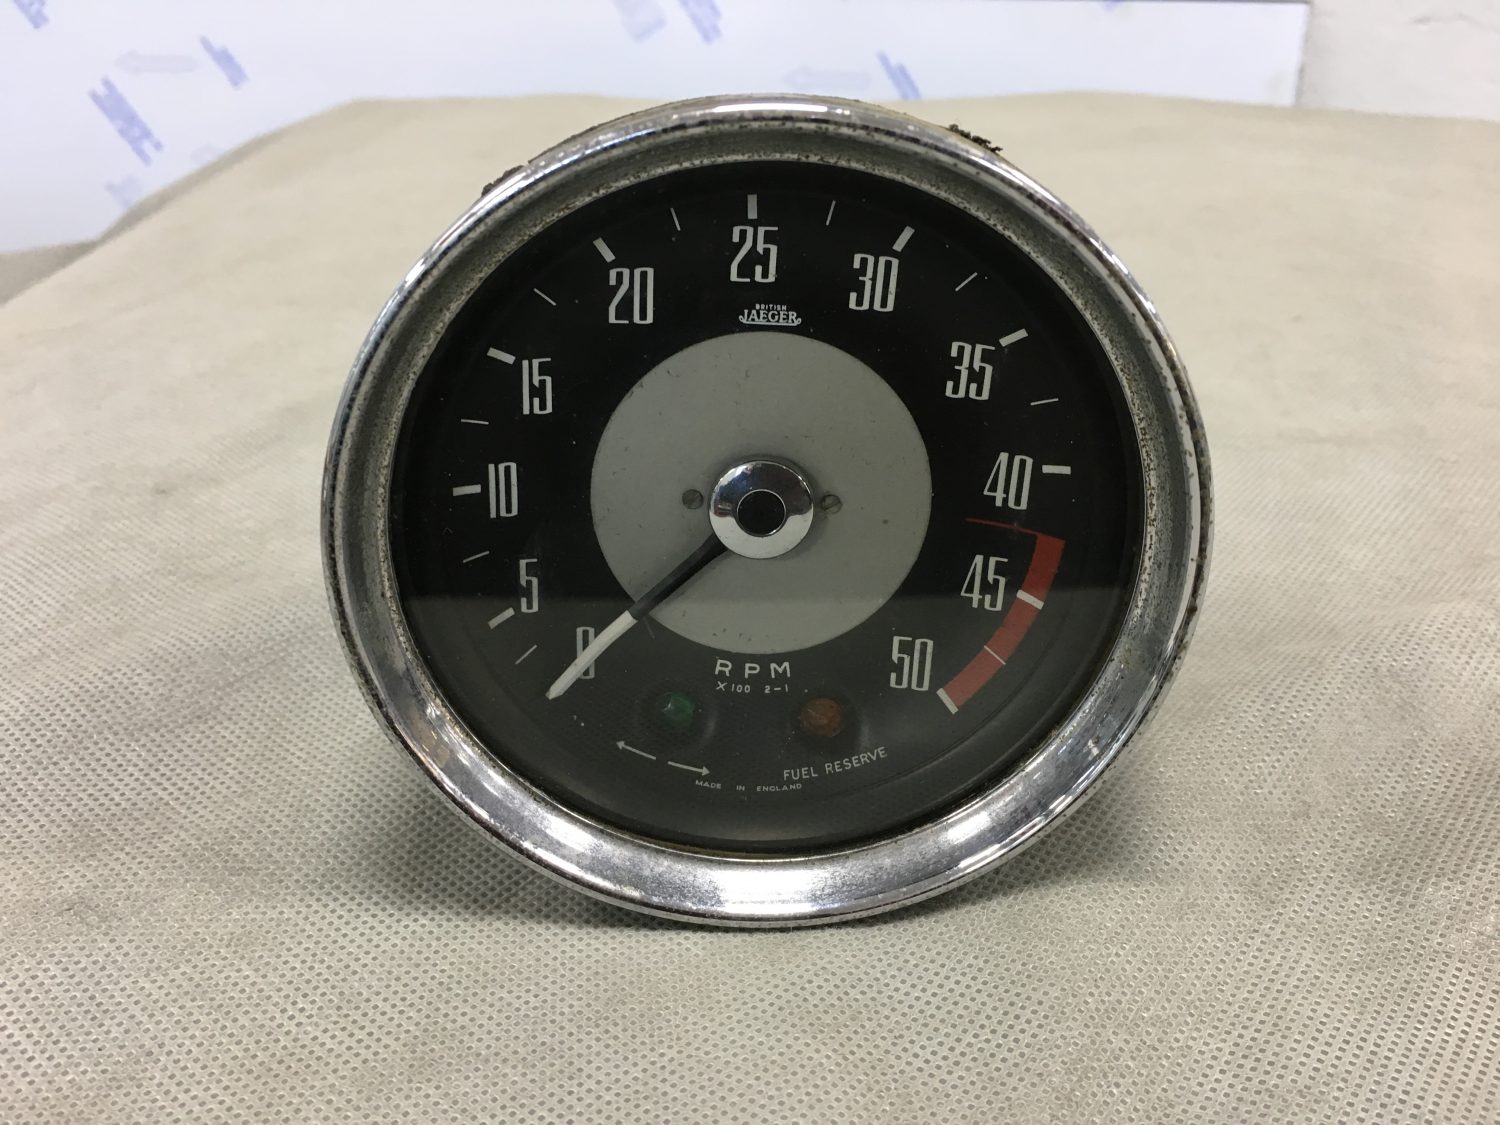
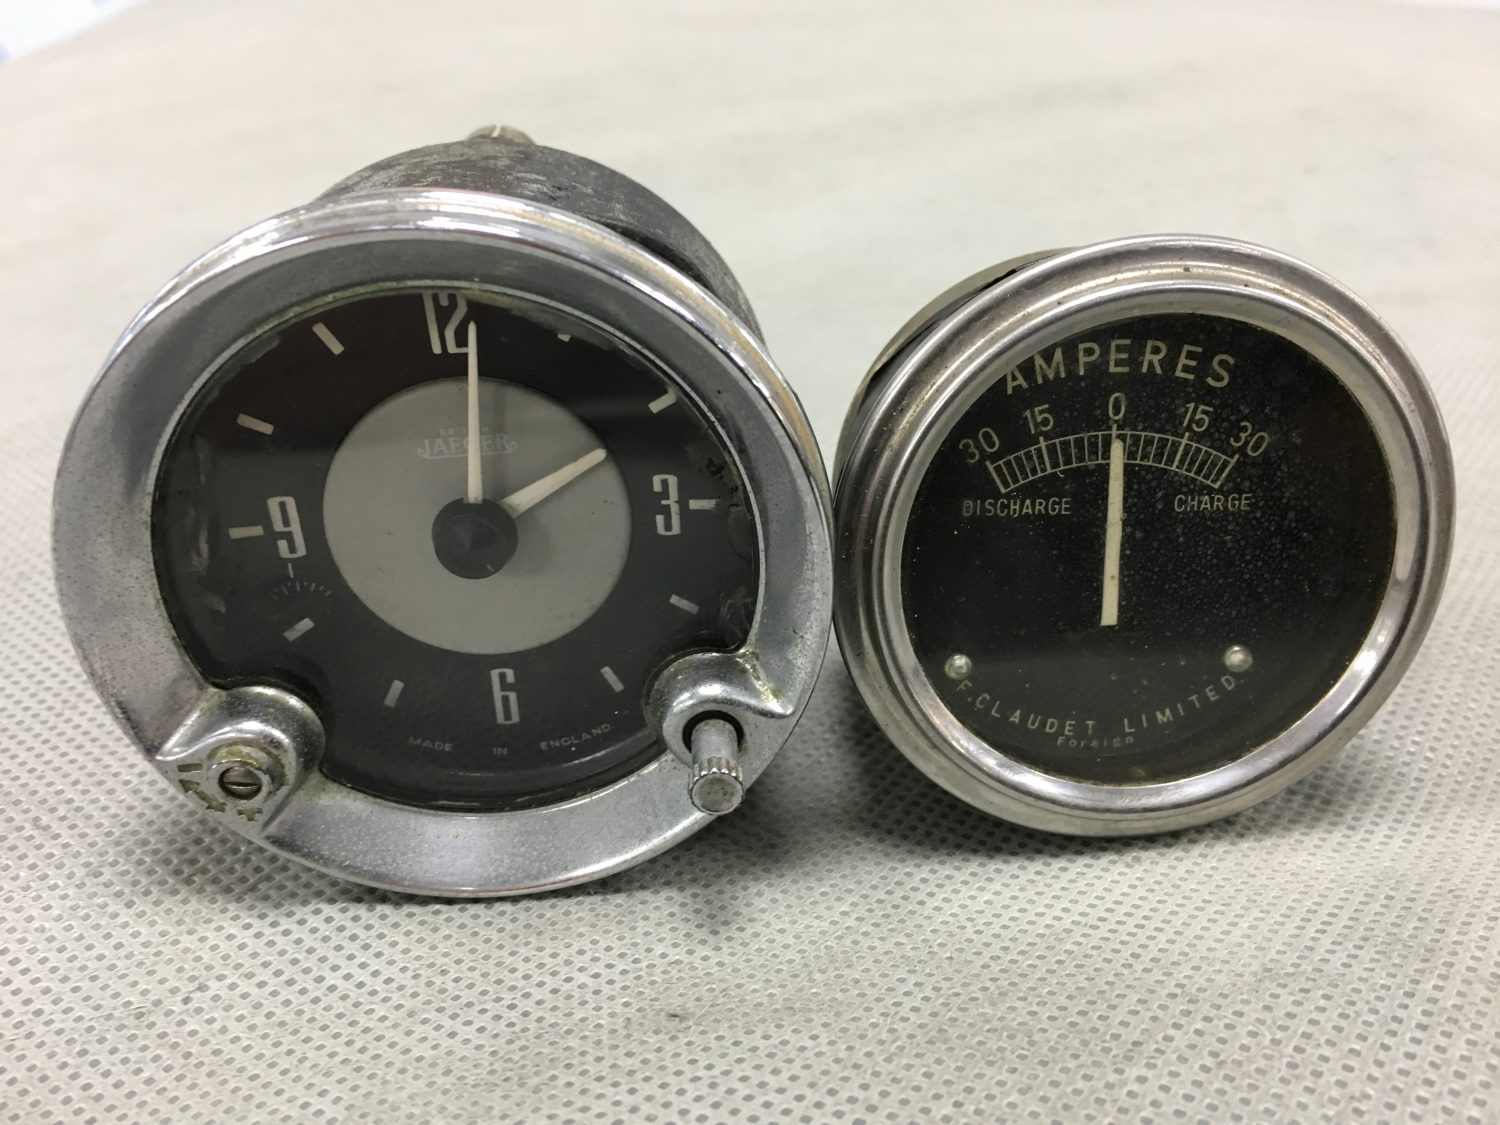
[vc_row][vc_column][vc_column_text]The MG YT dials have been packaged up and sent for refurbishing by world renowned restorers Speedograph Richfield Ltd. Within a couple days we’ll touch base with
The Jensen dials have been packaged up and sent for refurbishing by world renowned restorers Speedograph Richfield Ltd. Within a couple days we’ll touch base with
Our 1971 Volvo P1800 featured in Classic Car Buyer, released on the 23rd November 2016, issue 358. For those who love classic cars – owning, buying,
[vc_row][vc_column][vc_column_text]With the engine now out Asa and John are concentrating their efforts on removing the dashboard this afternoon. Before any work is carried out we

[vc_row][vc_column][vc_column_text]Today’s the day we are removing the engine ready for our engine rebuilder Don Warman to work his magic on her. Initially the engine was

When we were stripping and cleaning the inside of the camper we noticed that the side door was not running as smoothly as it should
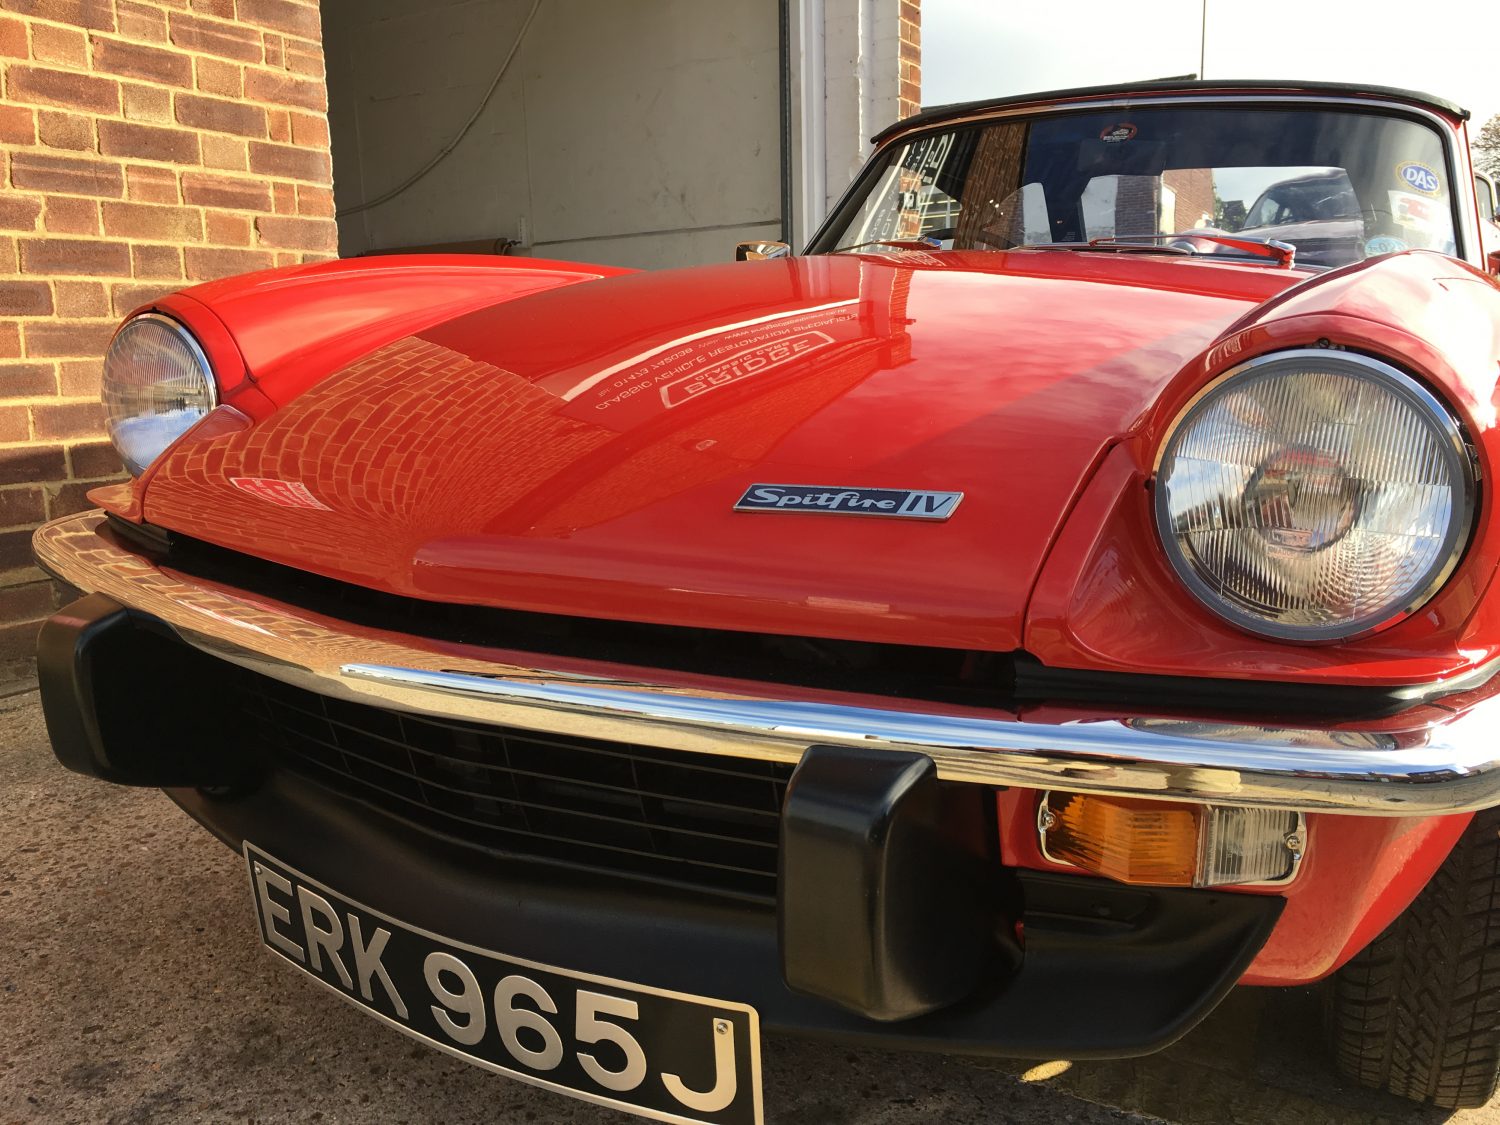
[vc_row][vc_column][vc_column_text]Having recently completed the restoration of our 1971 Triumph Spitfire, this week we had her back in our workshops for a general check over. We
[vc_row][vc_column][vc_column_text]The 541S was manufactured between 1960 and 1963 by the Jensen Motor Company and with only 127 produced, available parts, as you can imagine, are
In preparation for the body shell to be completely removed from our 1960 Jensen 541S, the engine needs to be removed. In order to carry

This system was designed and is manufactured by hawk Cars and Hoyle Suspension Ltd. MGB Coil Over Front Suspension This new double wishbone, coil over
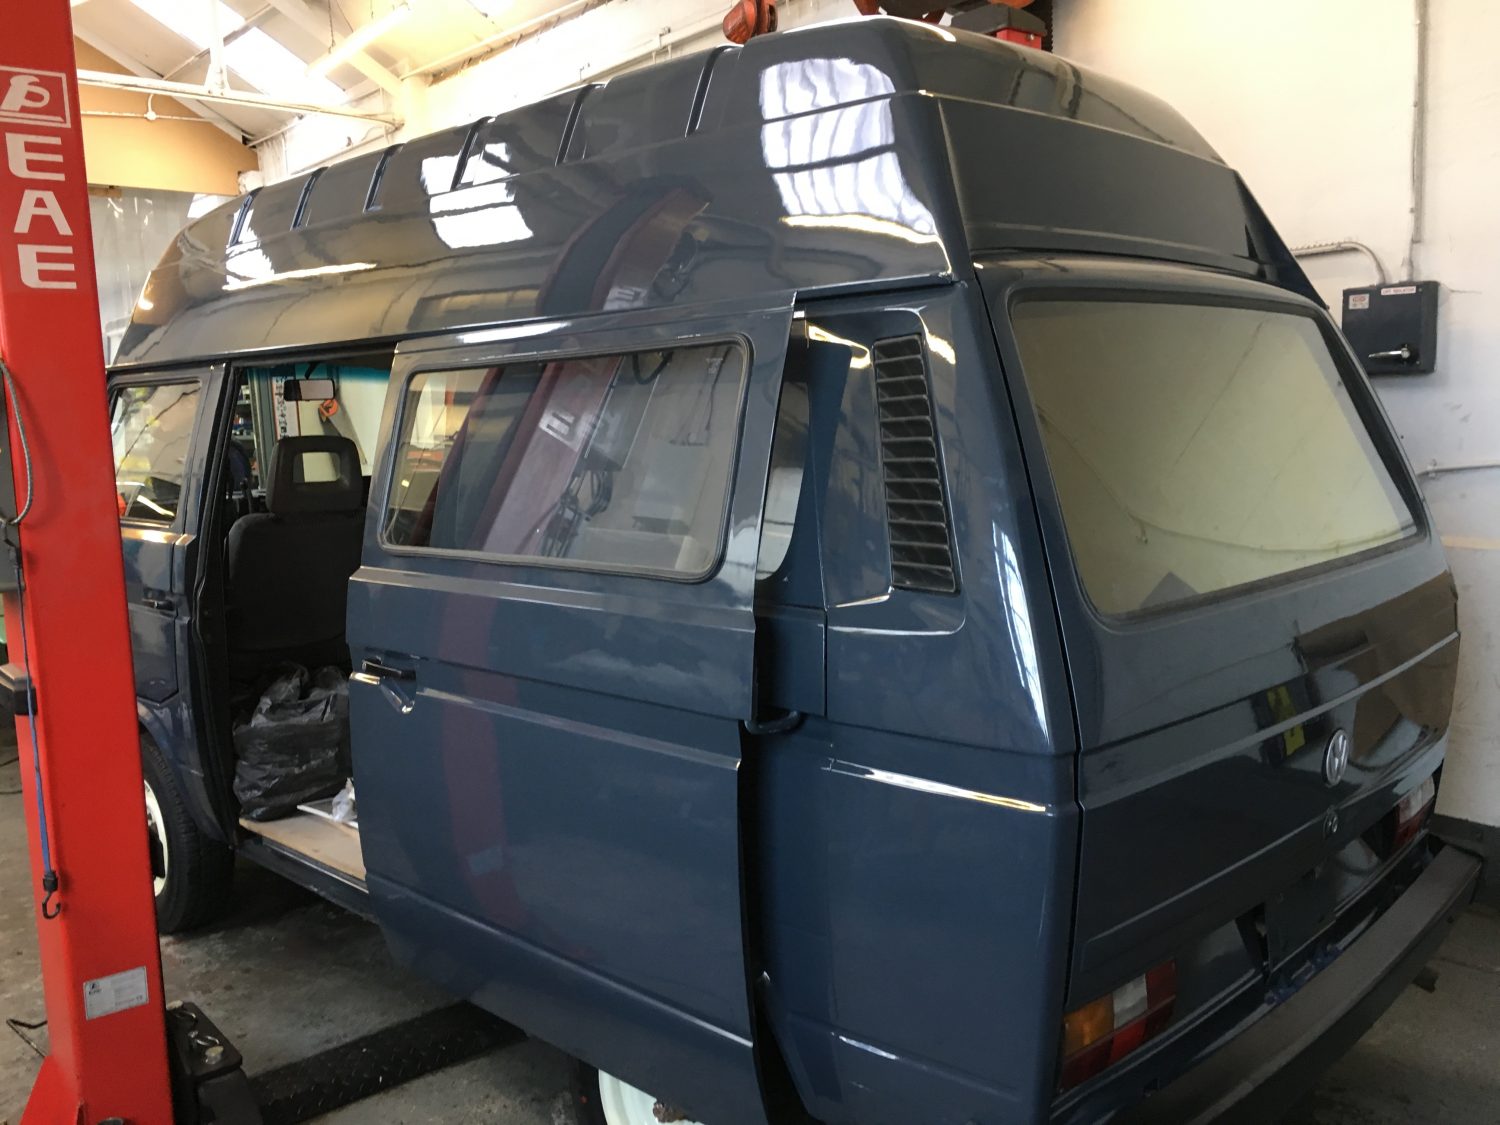
[vc_row][vc_column][vc_column_text]We now enter the final stages of our 1989 Volkswagen Camper T25, the interior design. With the exterior near on complete it is now time to
With the decals now fully fitted, the exterior of our 1989 Volkswagen Camper T25 is almost complete. A few final adjustments to be made. The
[vc_row][vc_column][vc_column_text] Emirates SkyCargo, the freight division of Emirates airline, has launched Emirates SkyWheels – a specialised transportation product for high value automobiles. Through its latest
[vc_row][vc_column][vc_column_text]Now that the car is in the paint shop it gives us a bit of time to assess the chrome. Unlike a lot of classic
[vc_row][vc_column][vc_column_text]Lauren has been busy sorting through the MG BGT chrome work. MG’s are a brilliant vehicle to work on as parts are so readily available.
Having been with it’s current family for many years ,our 1989 Ford Granada initially came in for some welding work to be carried out on
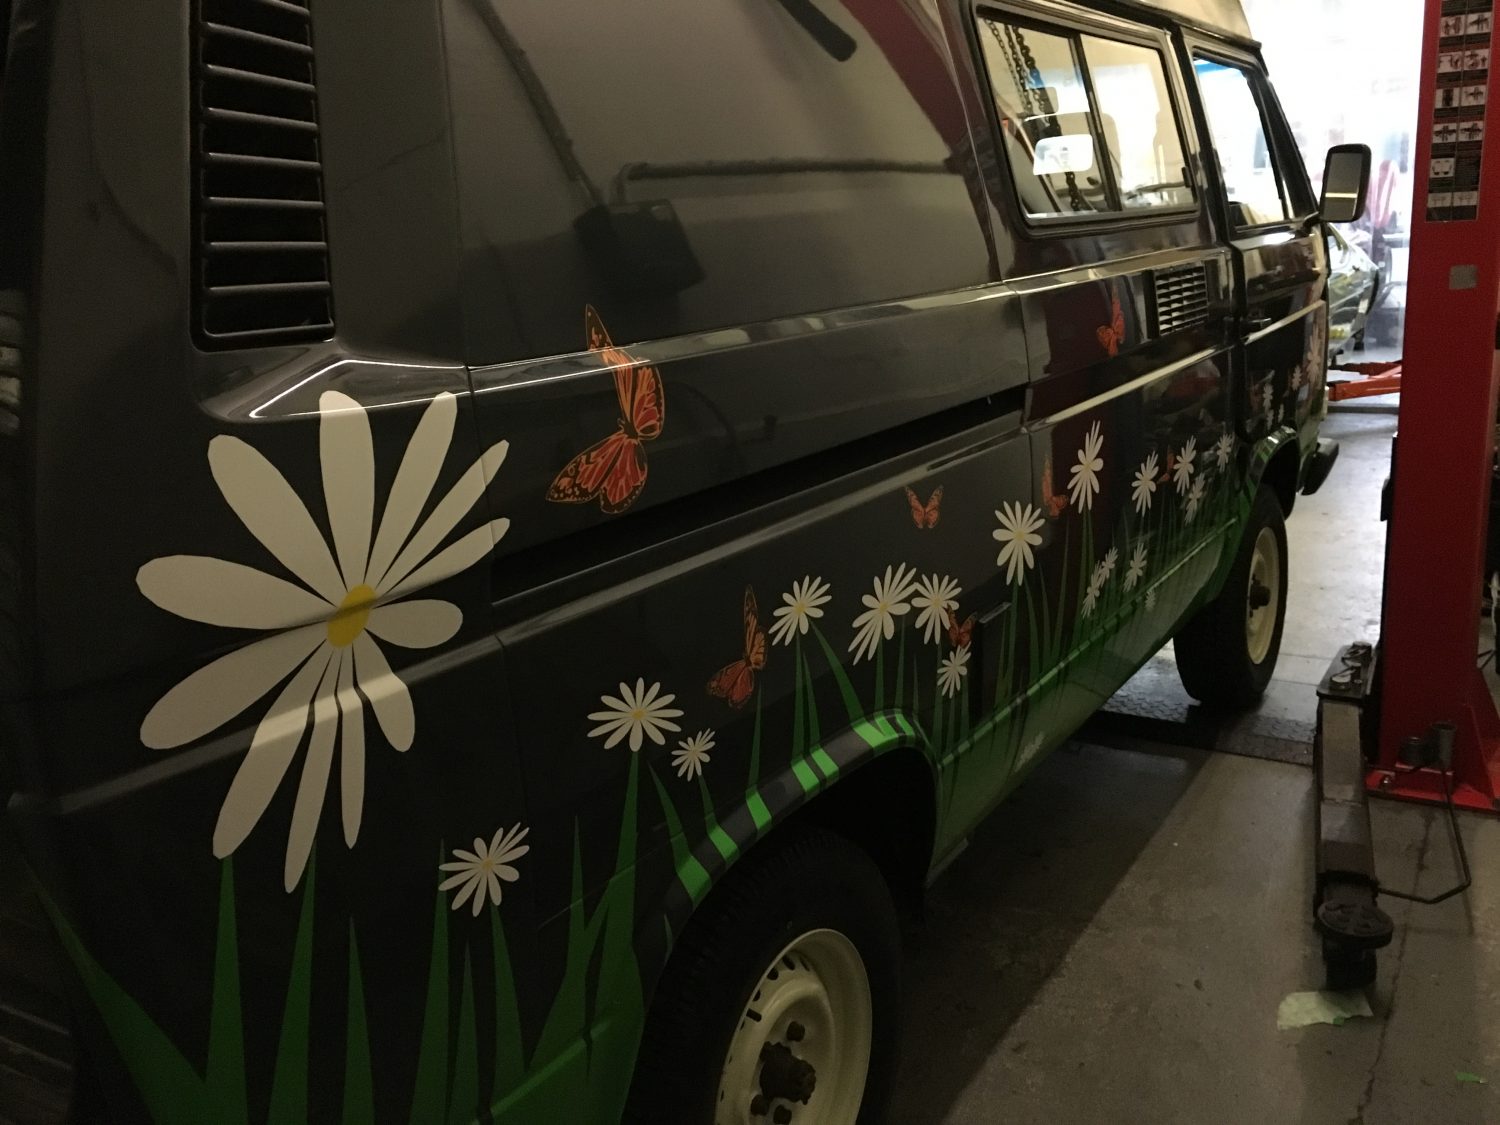
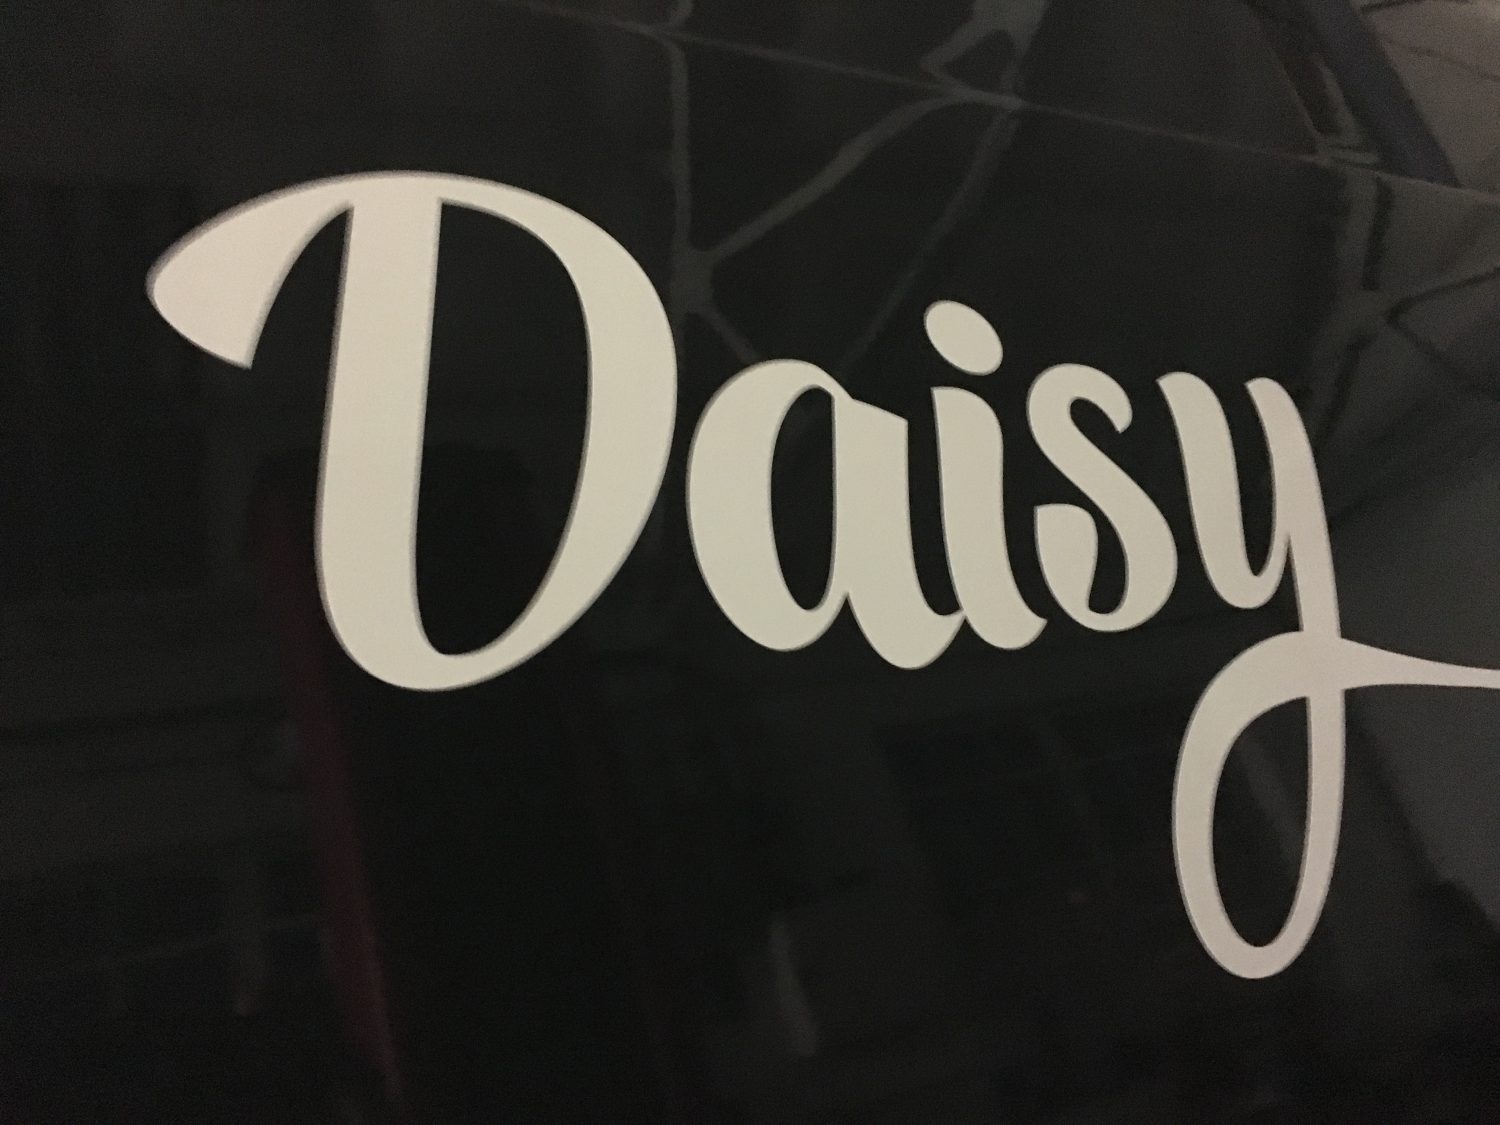
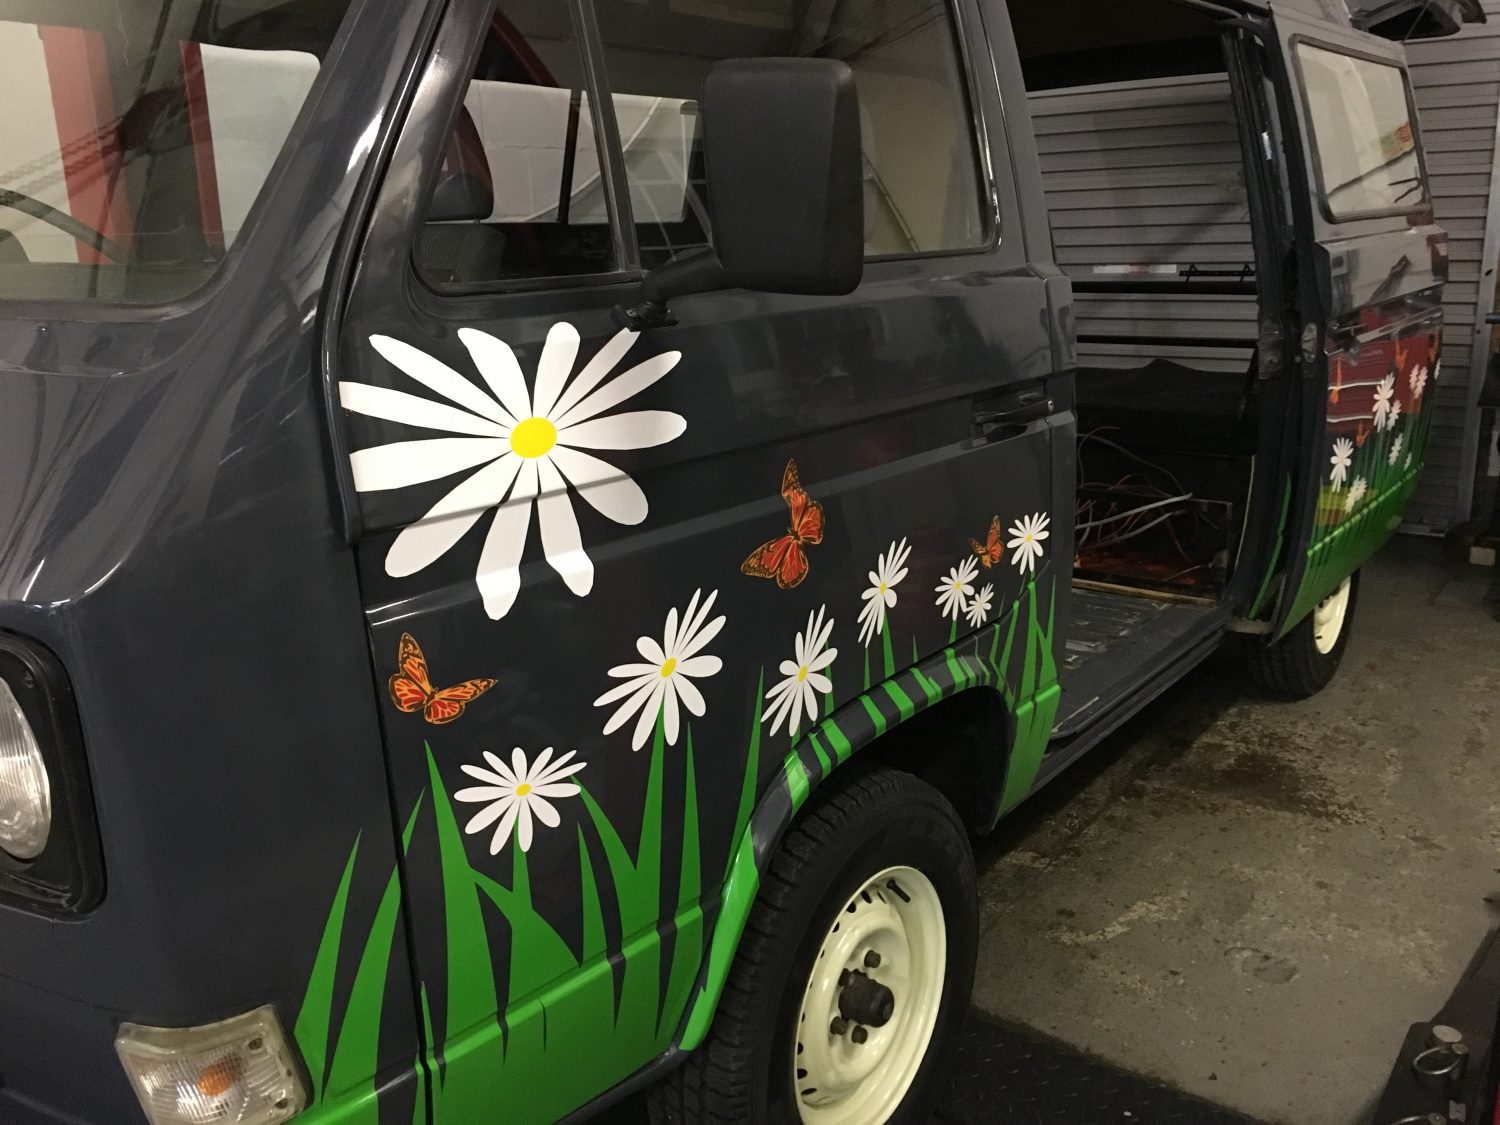
Today’s the day that our 1989 VW camper ‘Daisy’ gets her wacky decals fitted. Lauren has done a grand job getting her nice and clean
[vc_row][vc_column][vc_column_text]Earlier in the year we carried out some remedial work on our 1965 Jaguar E-Type Series 1 to get her ready for the trip to
[vc_row][vc_column][vc_column_text]We’ve just had confirmation from Schumacher Cargo Logistics that our 1973 Jaguar E-Type V12 has arrived safely into New York docks.
Here’s the latest pictures from the journey to Suffolk.[/vc_column_text][/vc_column][/vc_row][vc_row][vc_column][vc_gallery type=”image_grid” images=”8448,8449,8450,8451,8452,8453,8454,8455,8456,8457,8458,8459,8460,8461,8462,8463,8464,8465,8466″][/vc_column][/vc_row]
[vc_row][vc_column][vc_column_text]Here are some more pictures of our 1967 Jaguar E-Type 2+2 Series 1.[/vc_column_text][/vc_column][/vc_row][vc_row][vc_column][vc_gallery type=”image_grid” images=”8441,8440,8439,8438,8437,8436,8435,8434,8433,8432,8431,8430,8429″][/vc_column][/vc_row]
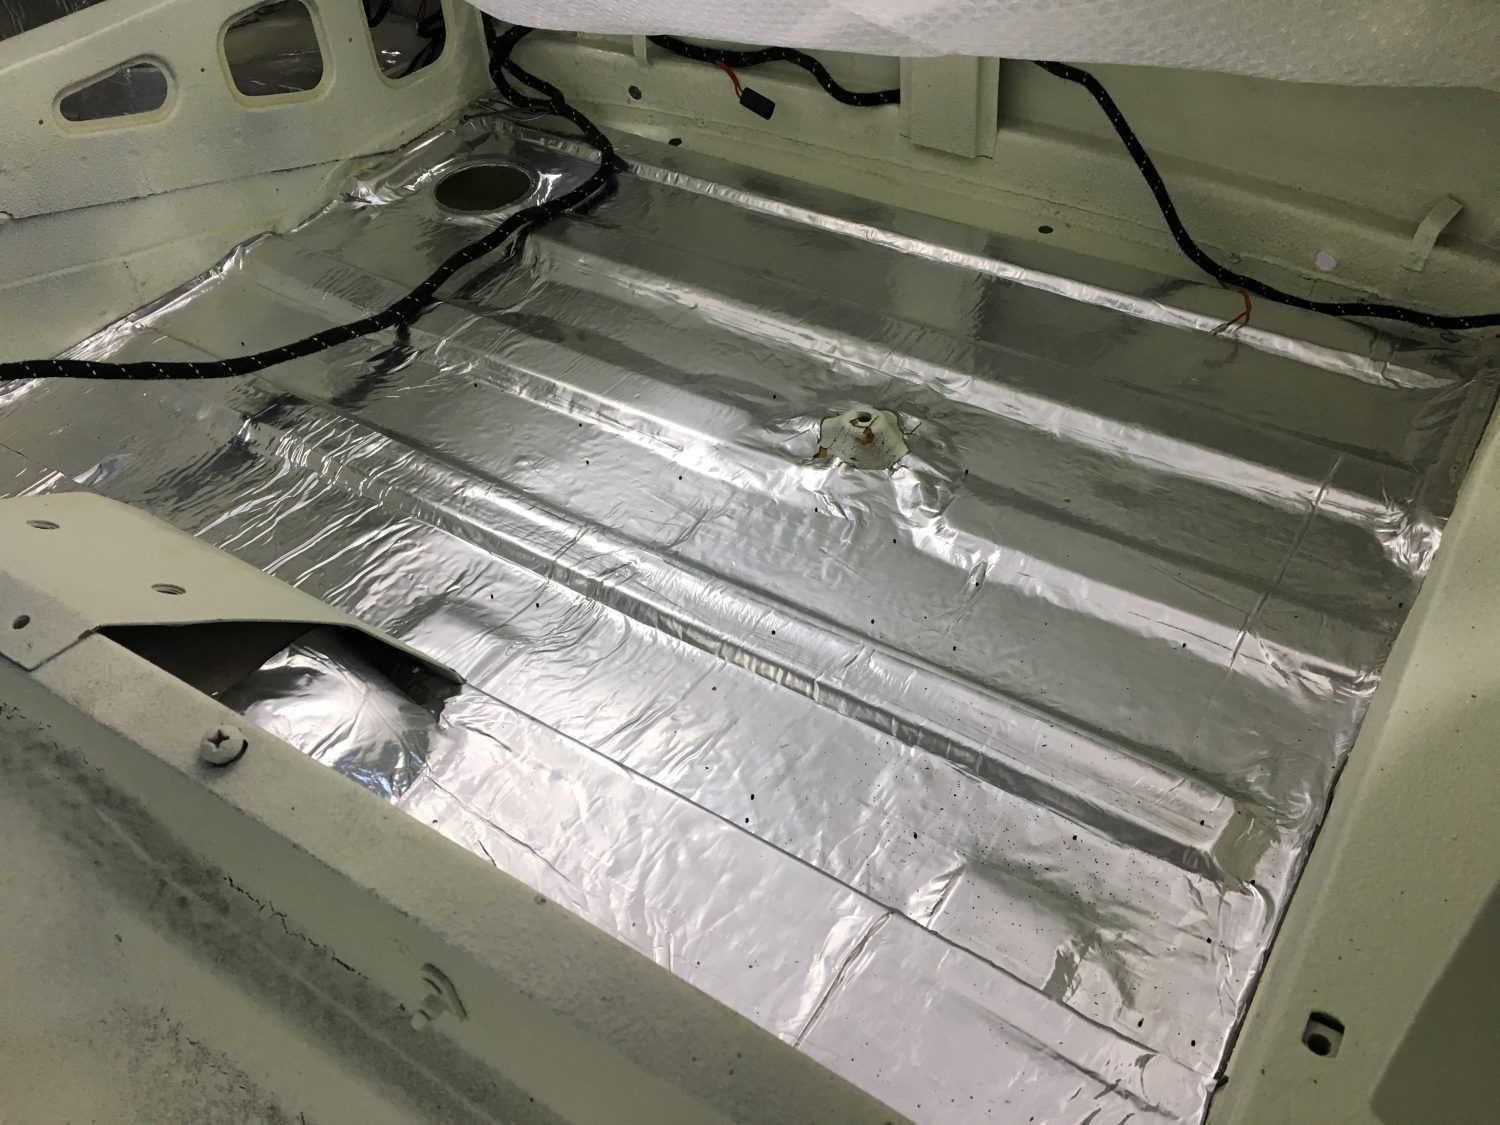
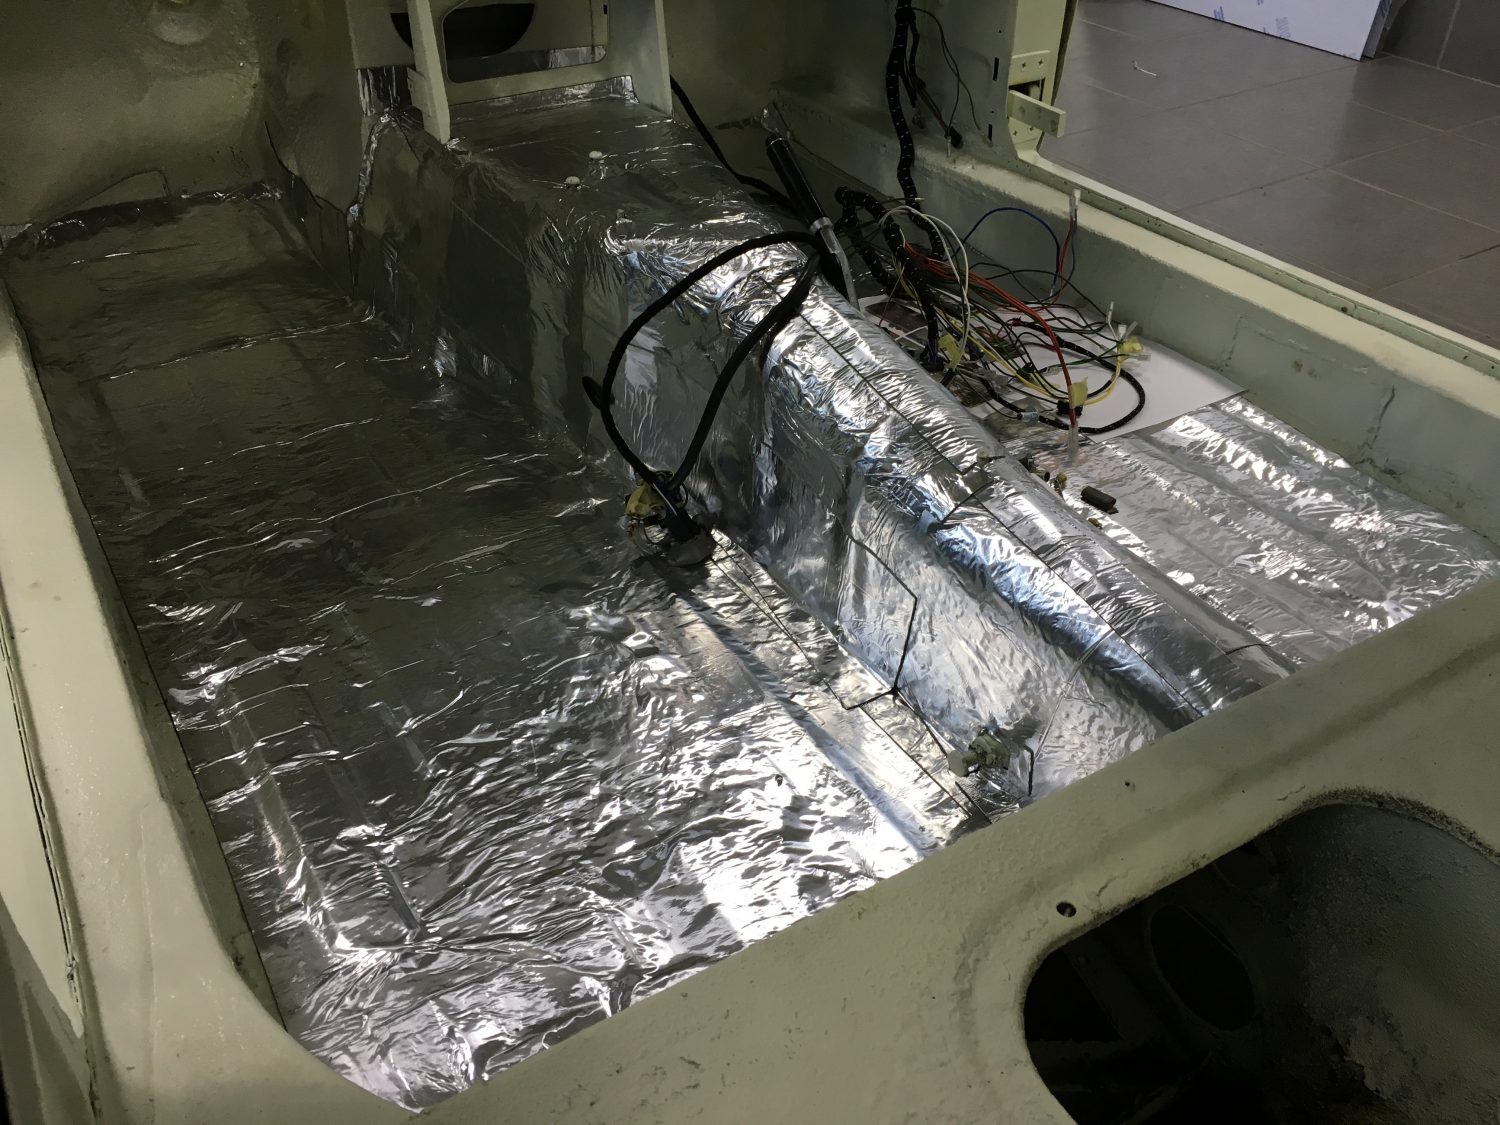
With the MGBGT back from the paint shop Lauren has been busy fitting the new sound deadening matting.
Sound Deadener plays a vital role and is one of the most crucial enhancements you can make to your vehicle!
FatMat extreme will Stop Nasty Rattles, Vibrations, Road Noise as well as increase your Car Audio’s Sound & Bass, and they guarantee it or your money back! The key ingredients to any vehicle are the way they perform, the way they drive, the way they look and of course the way they sound.


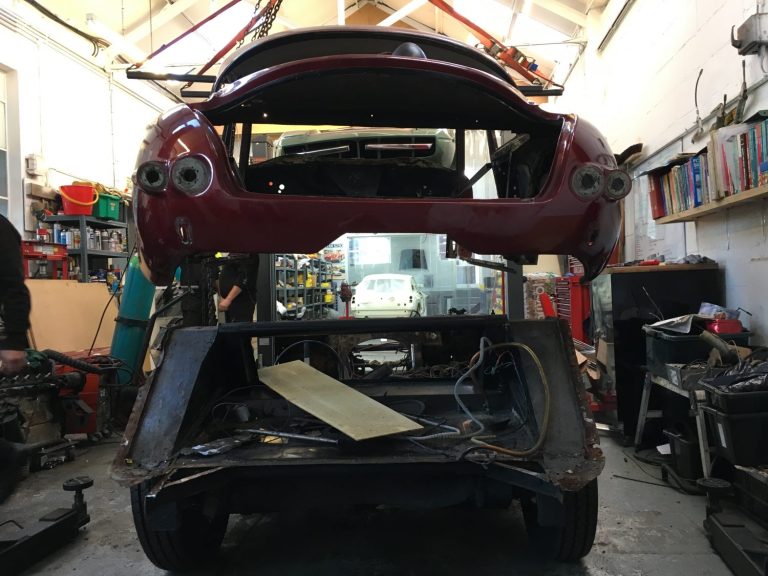
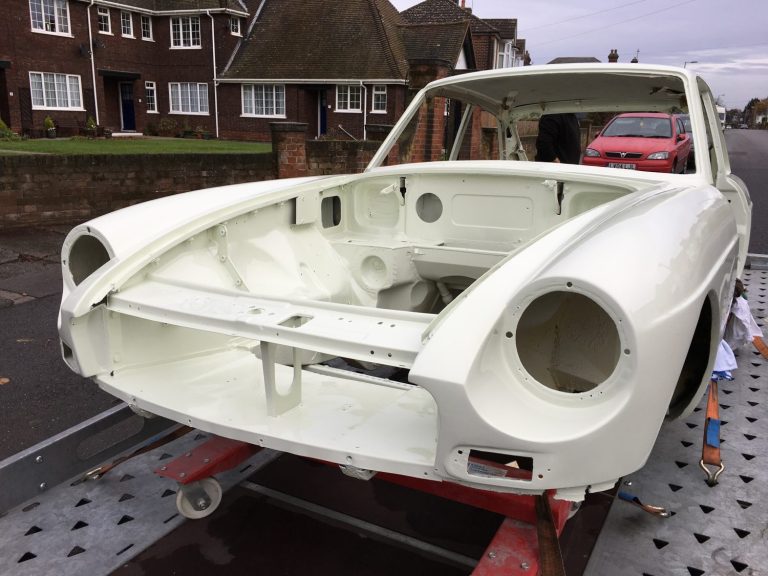
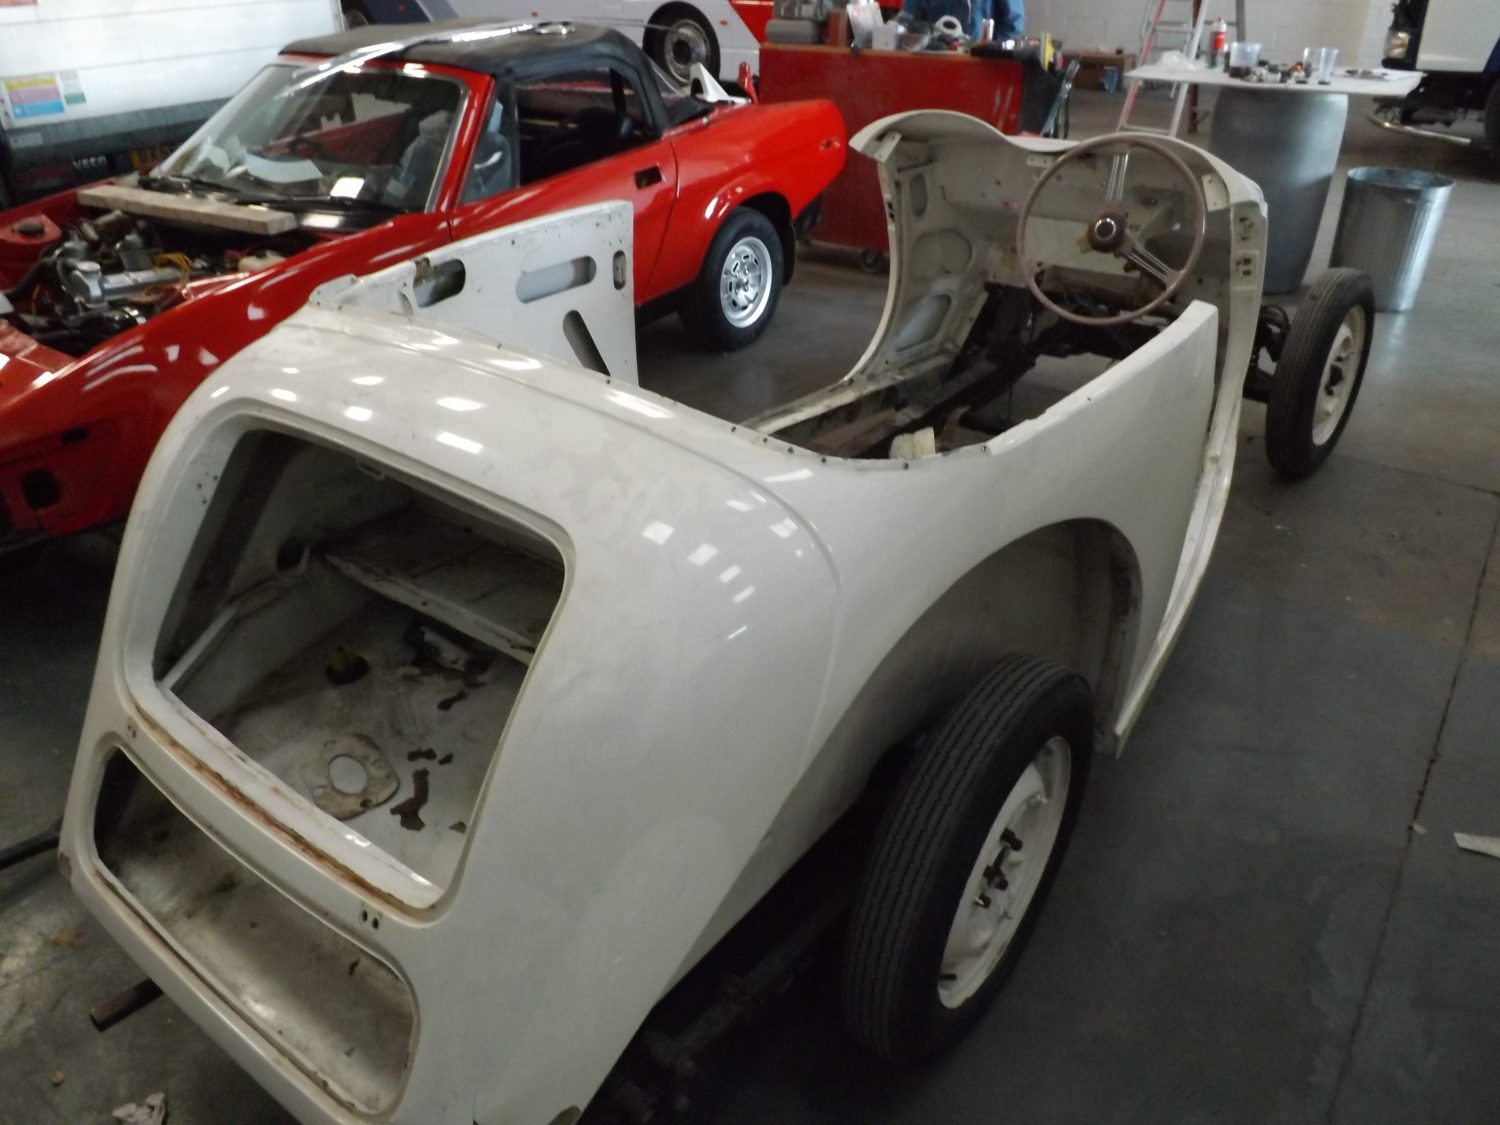
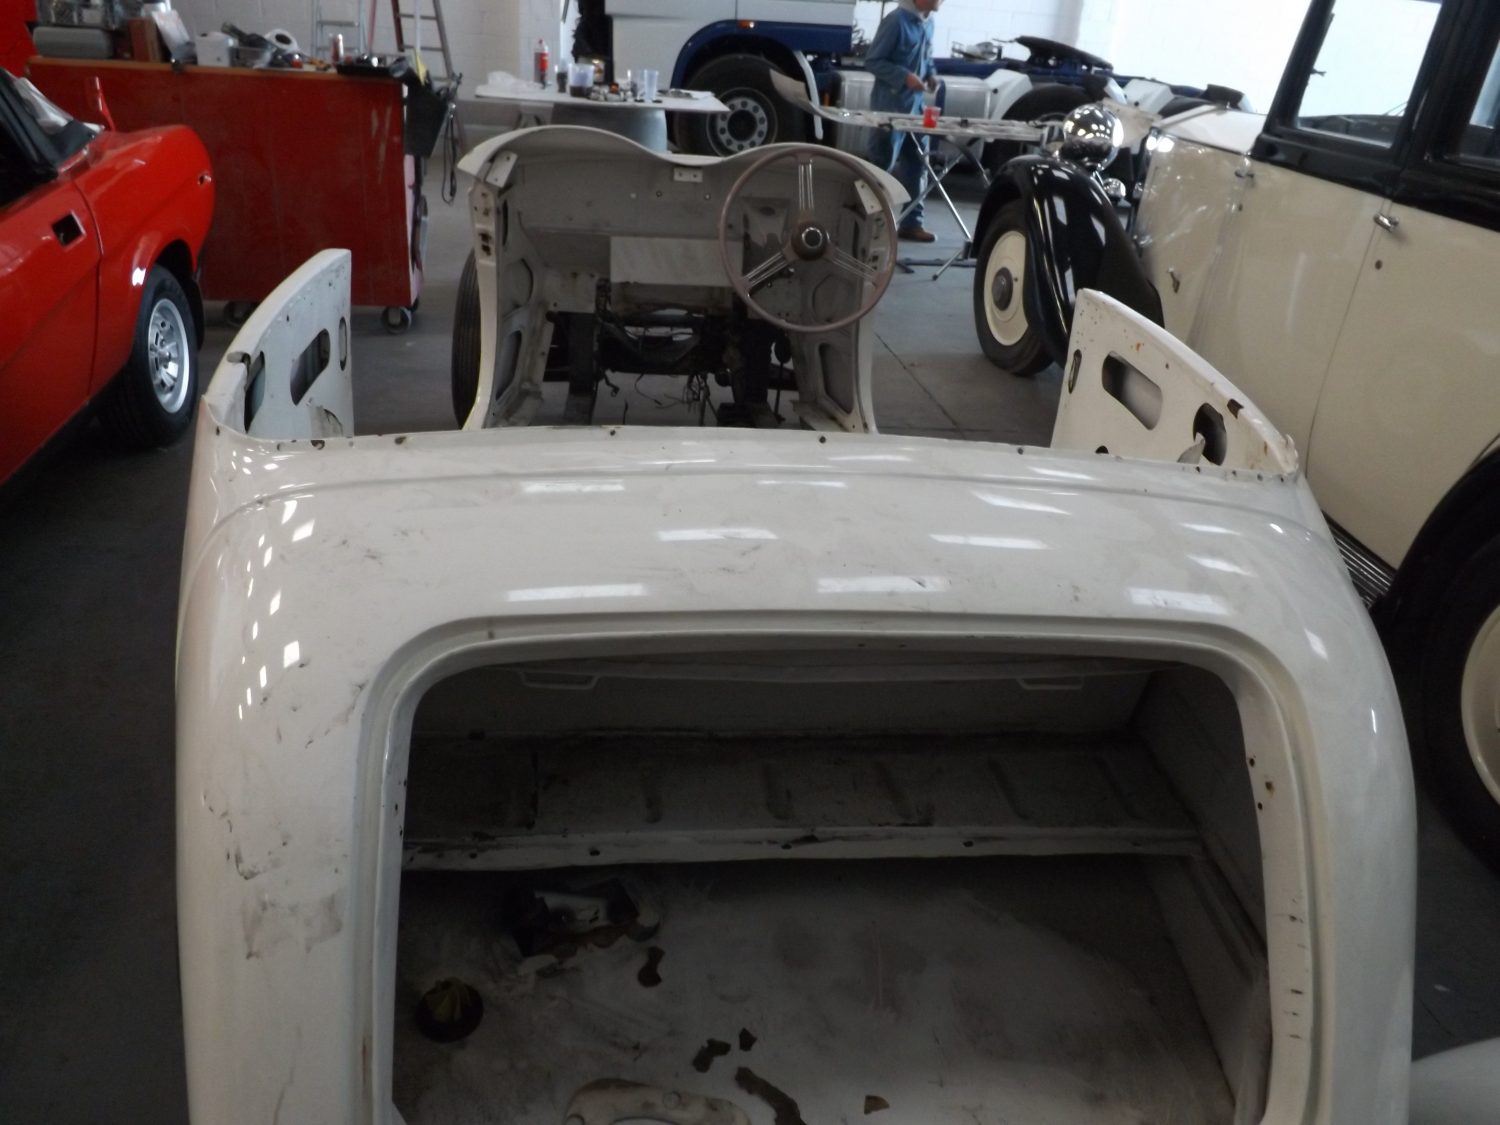
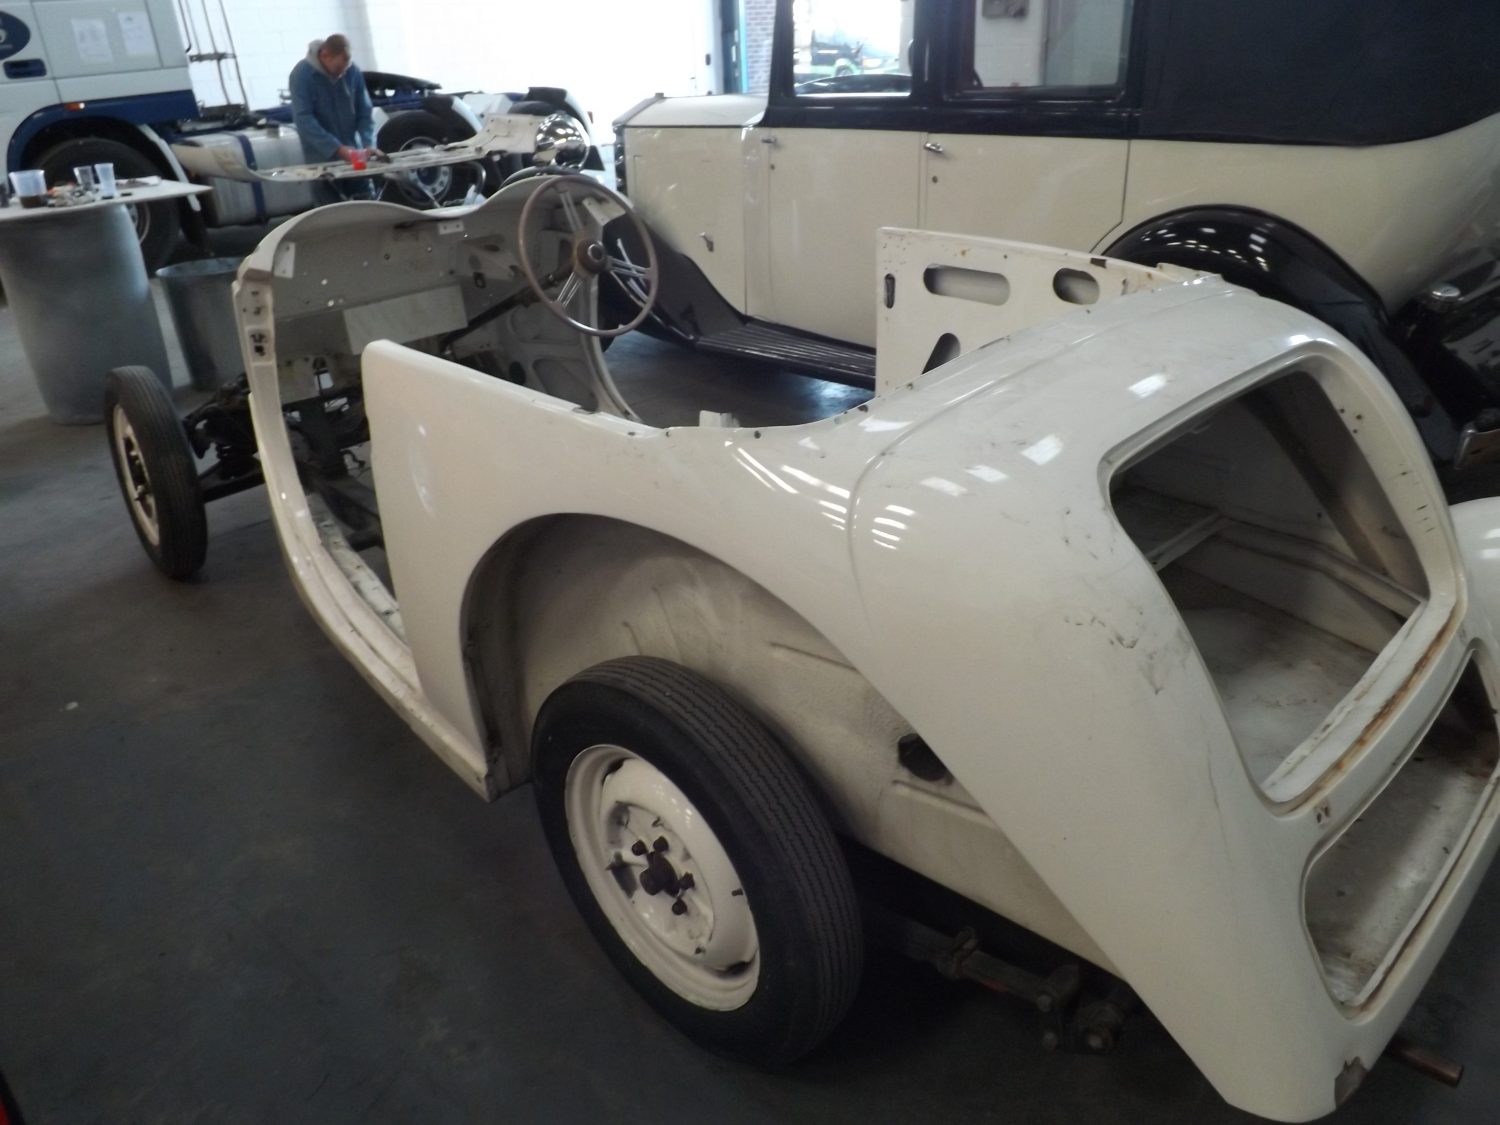
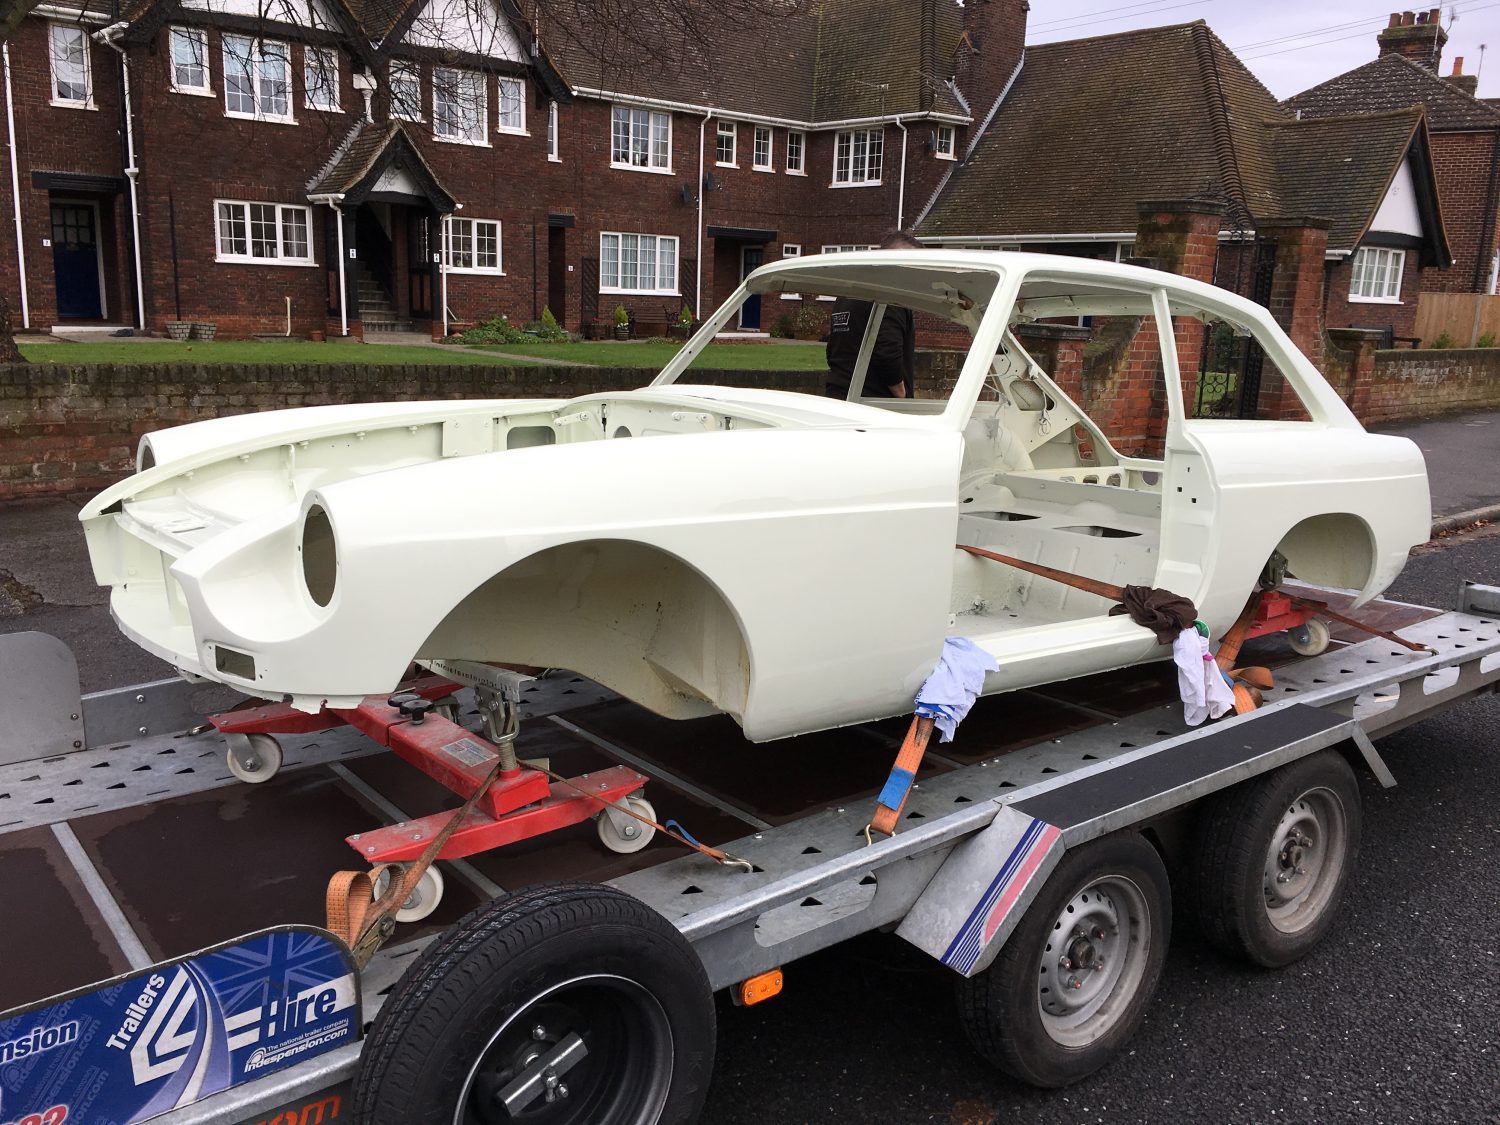
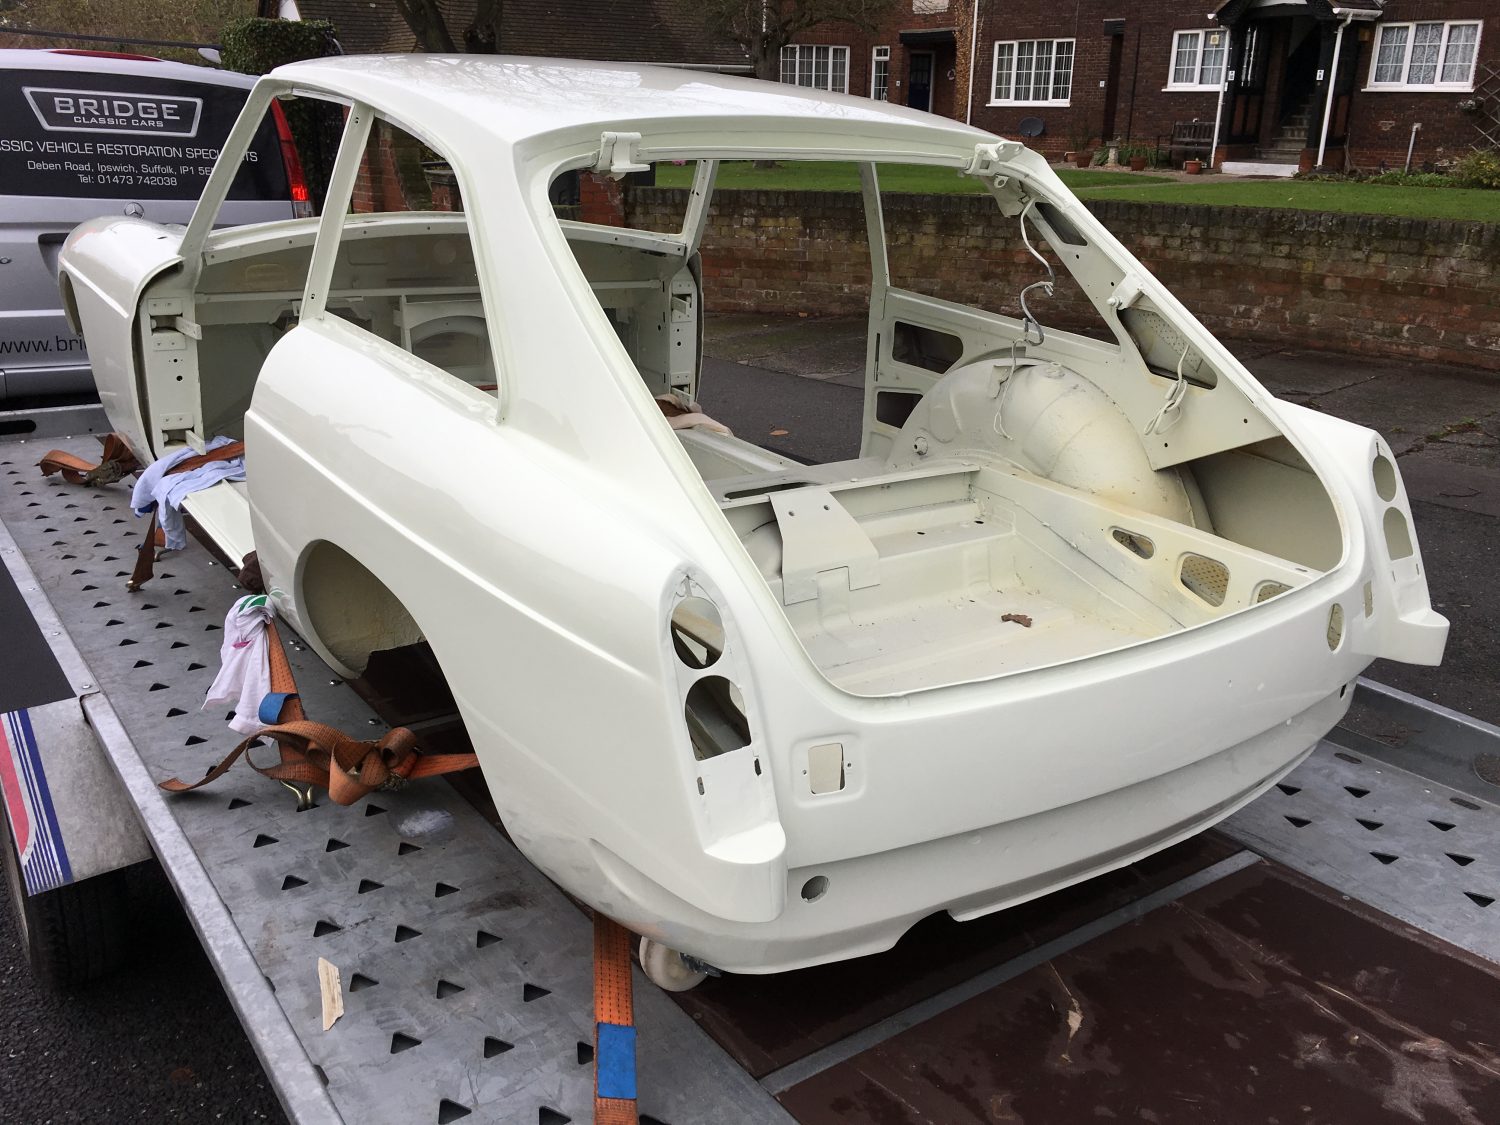
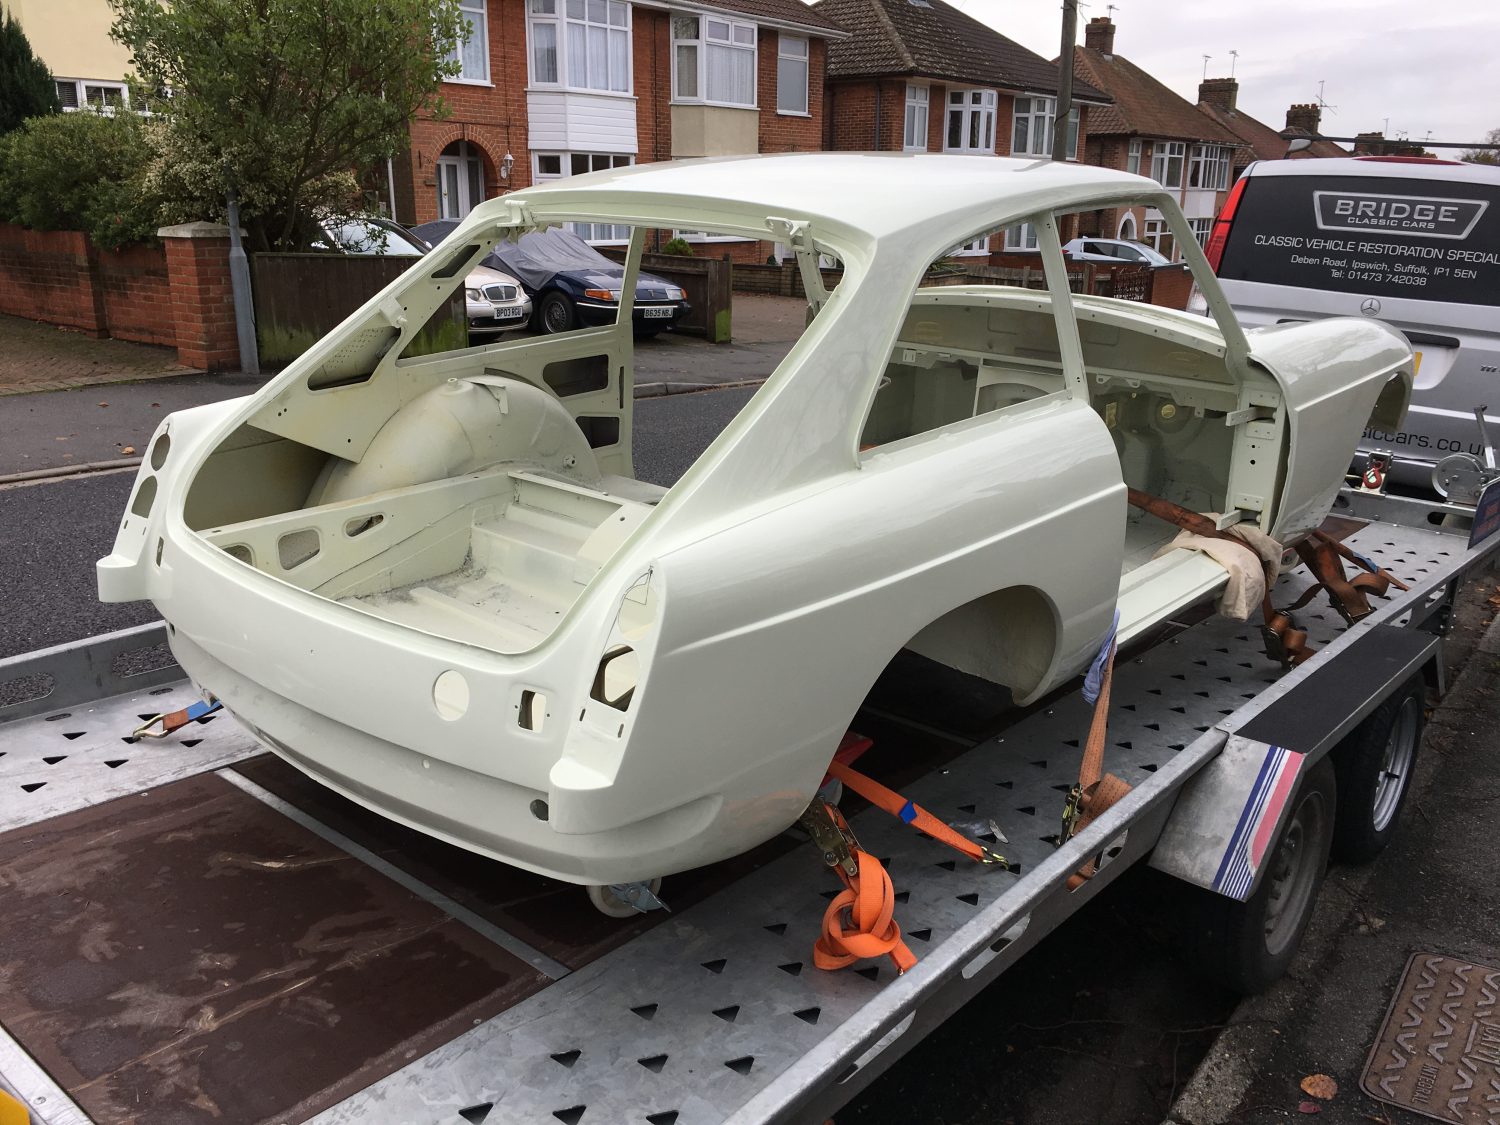
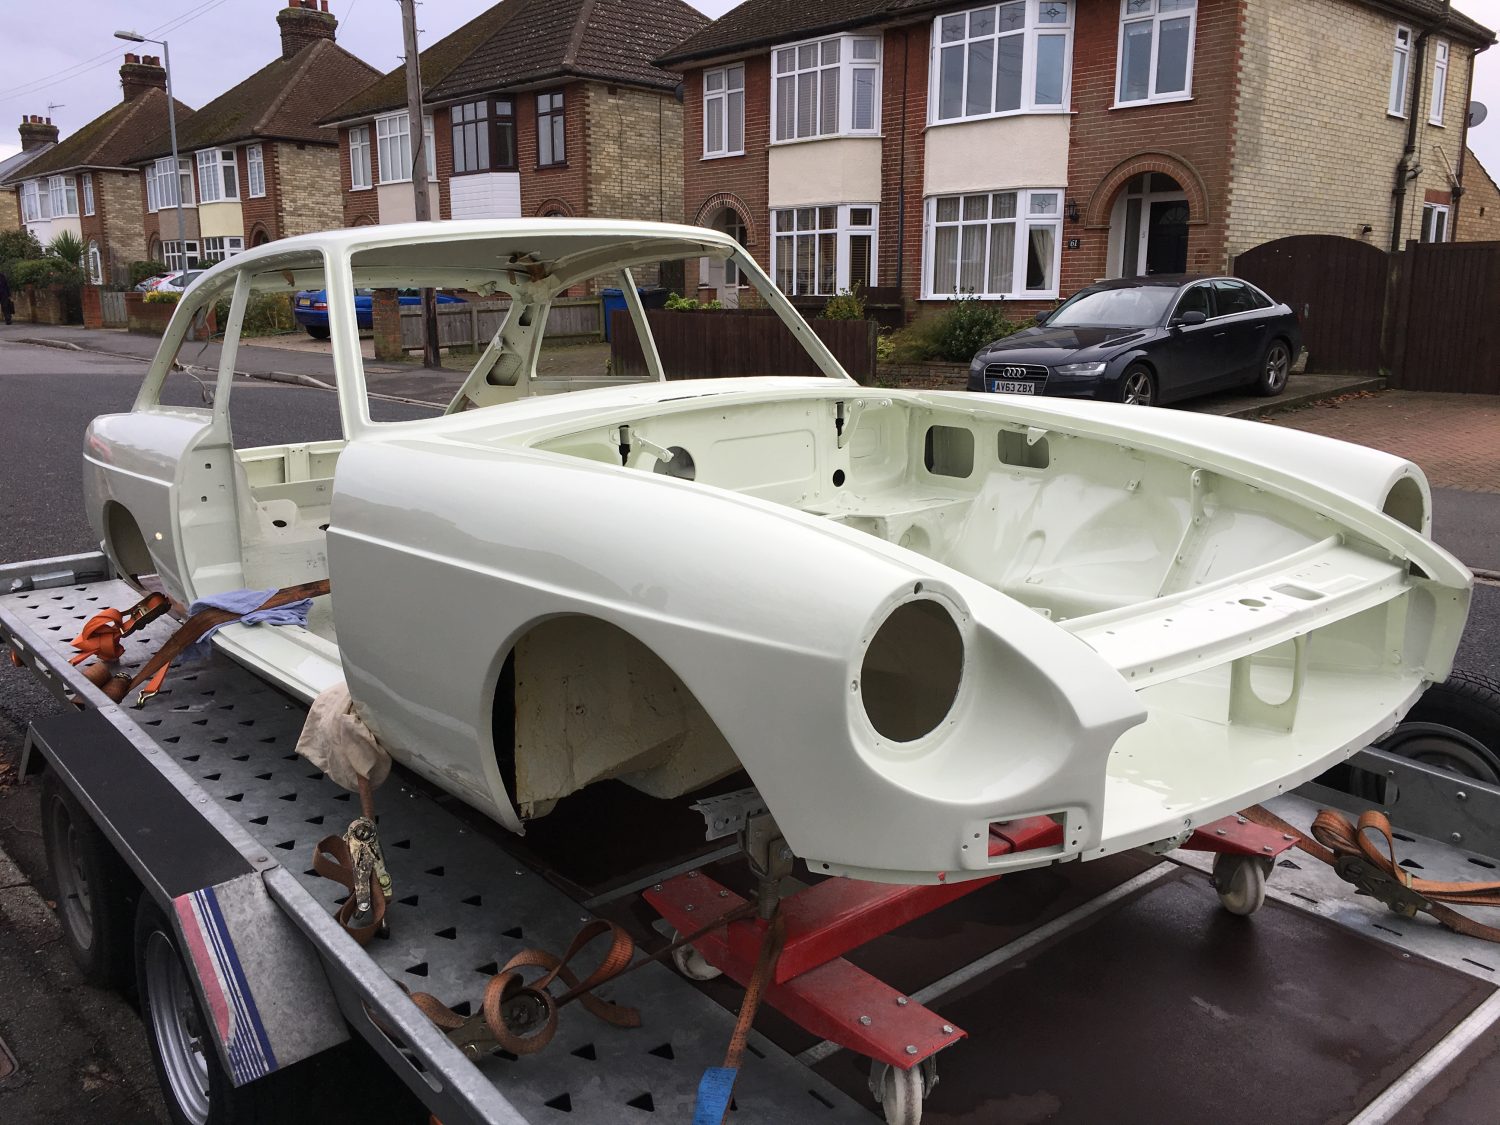
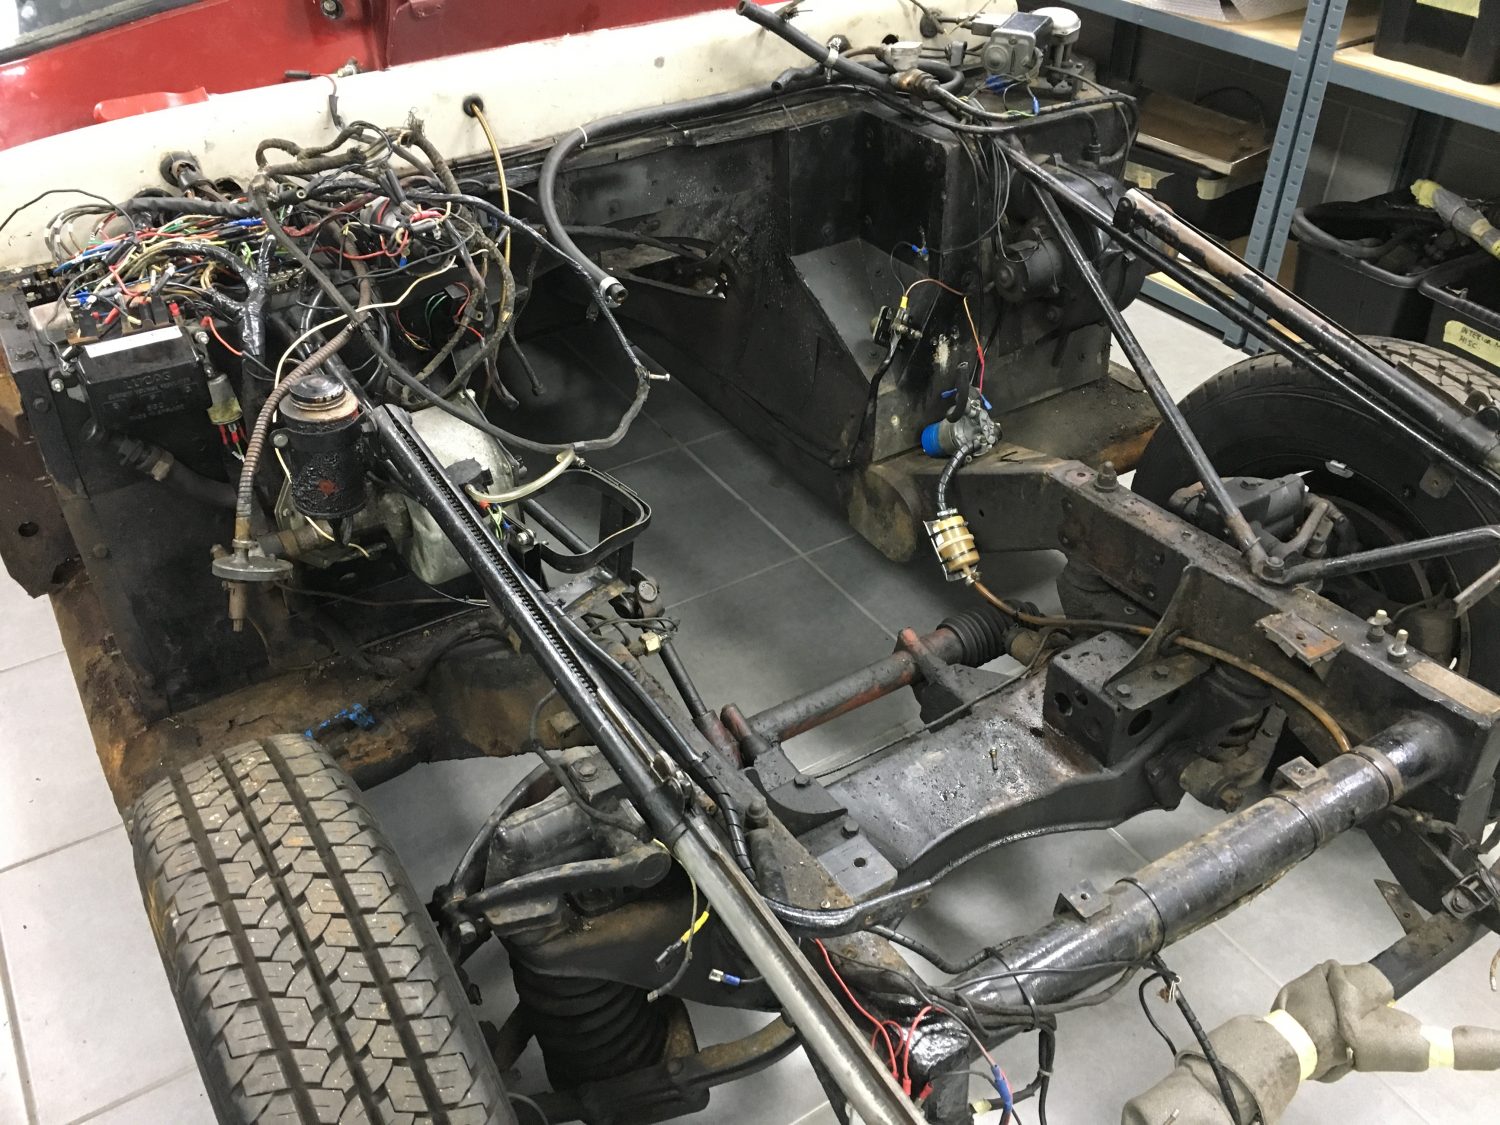
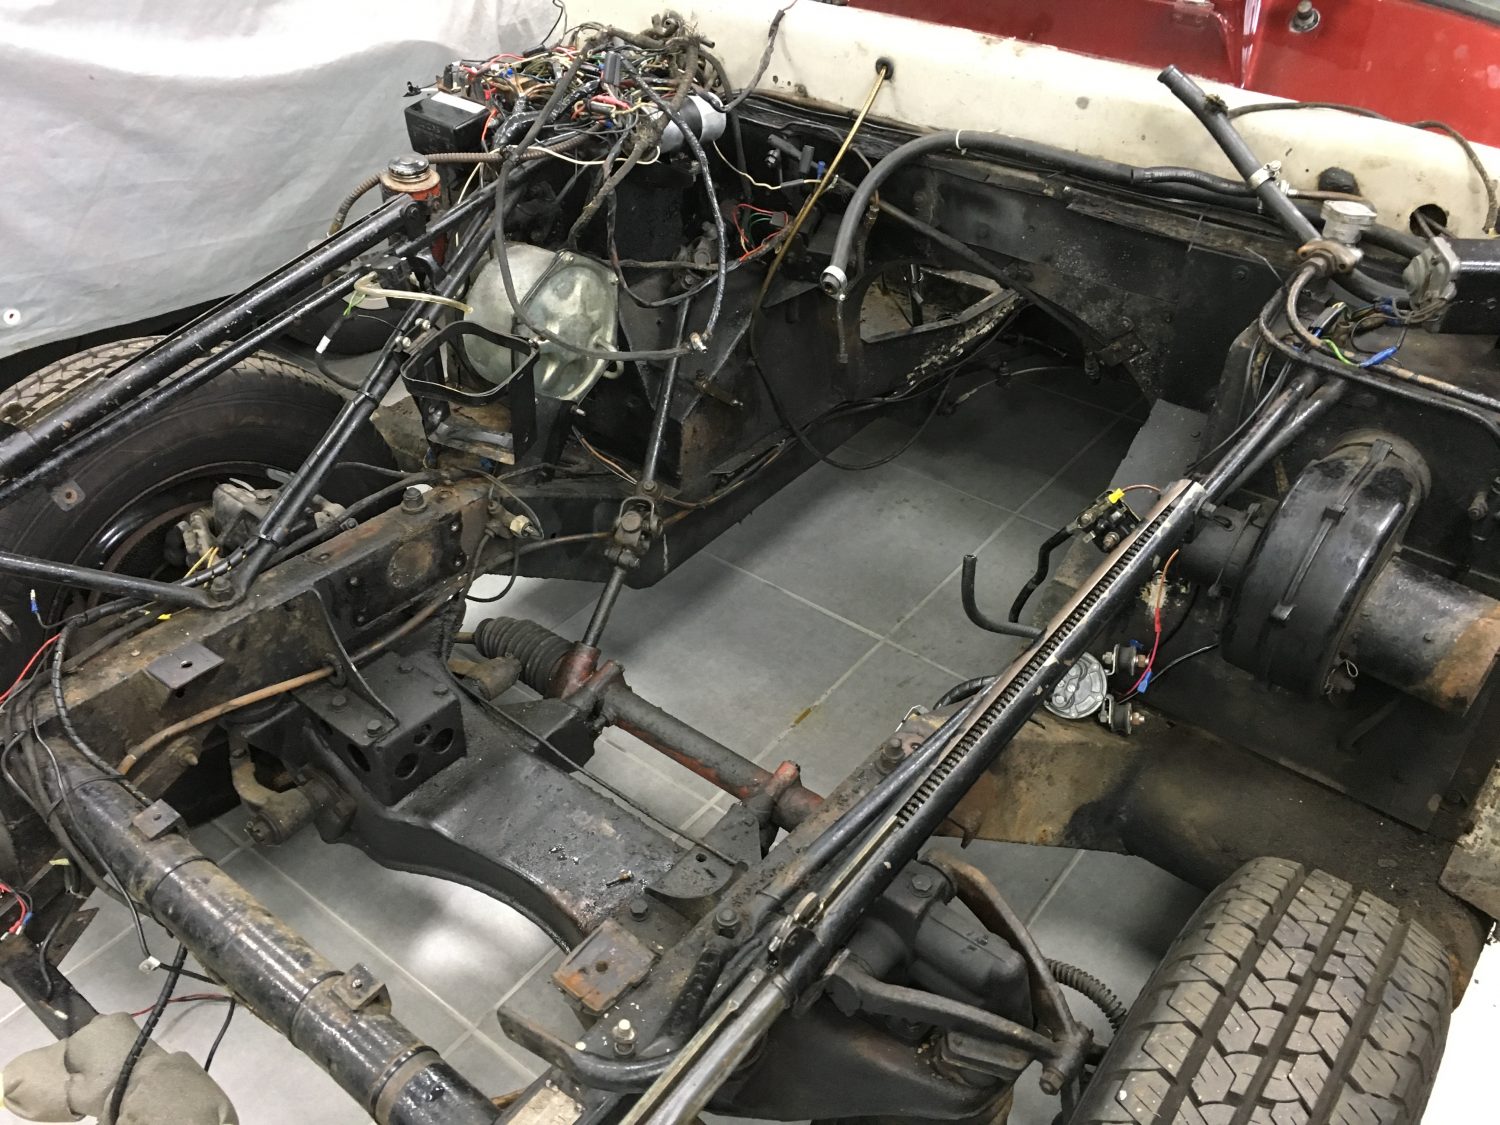
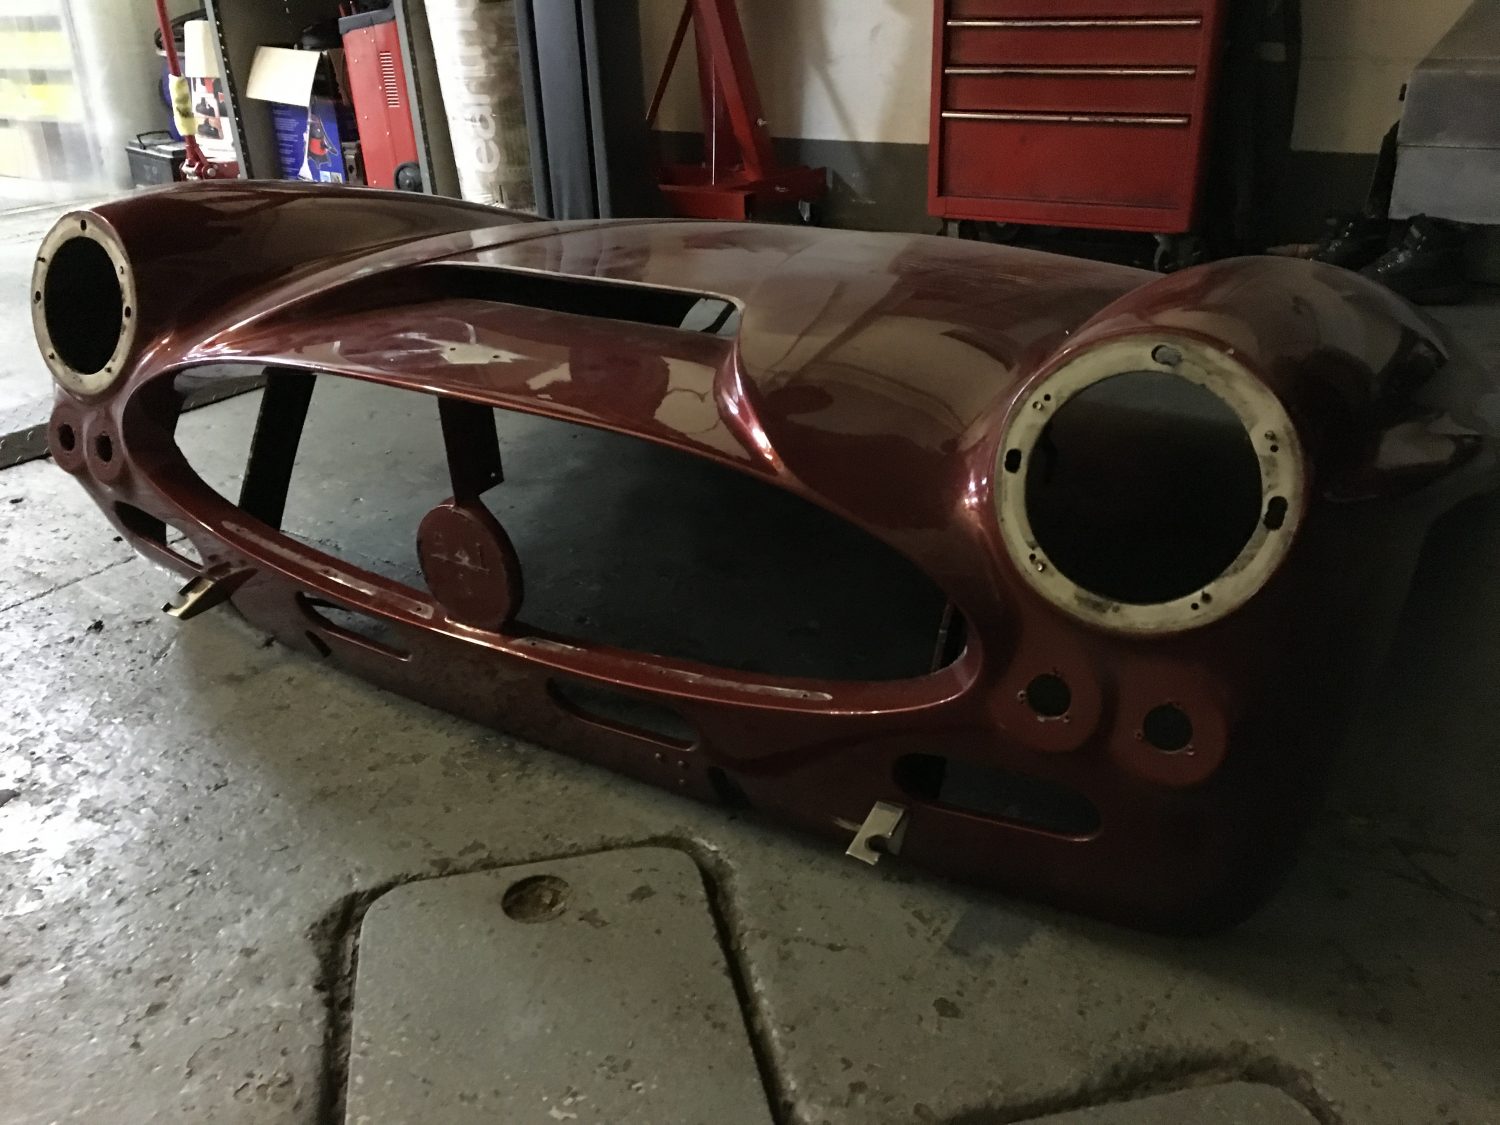
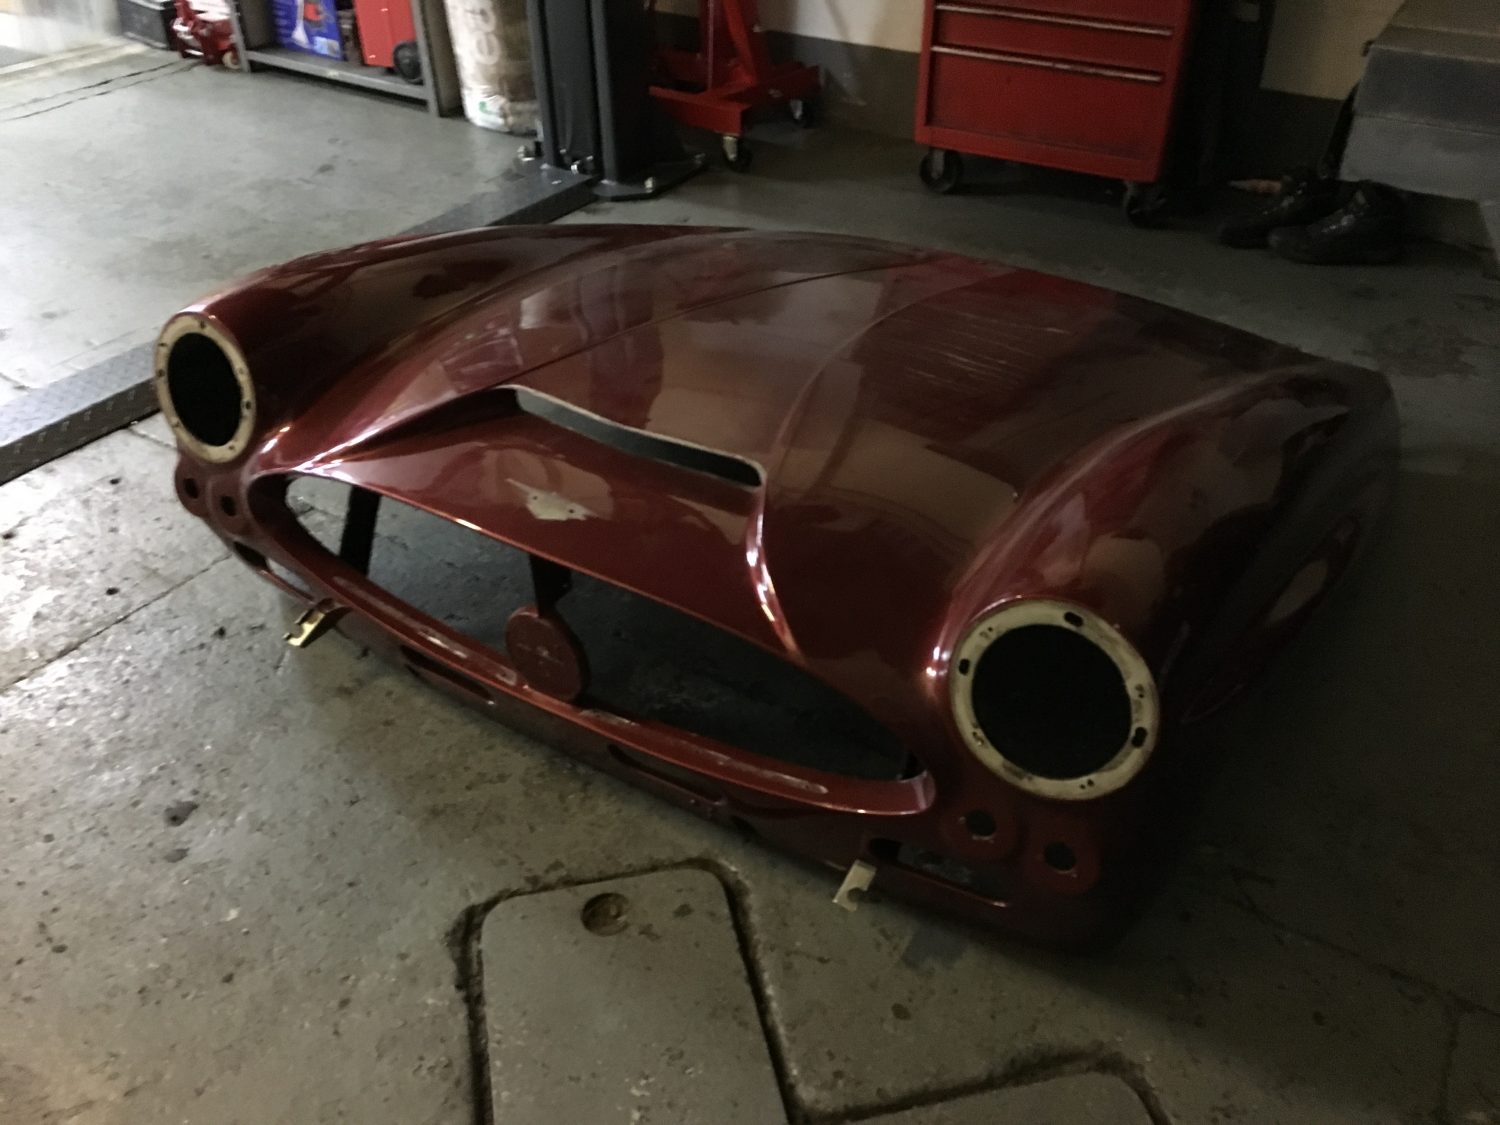
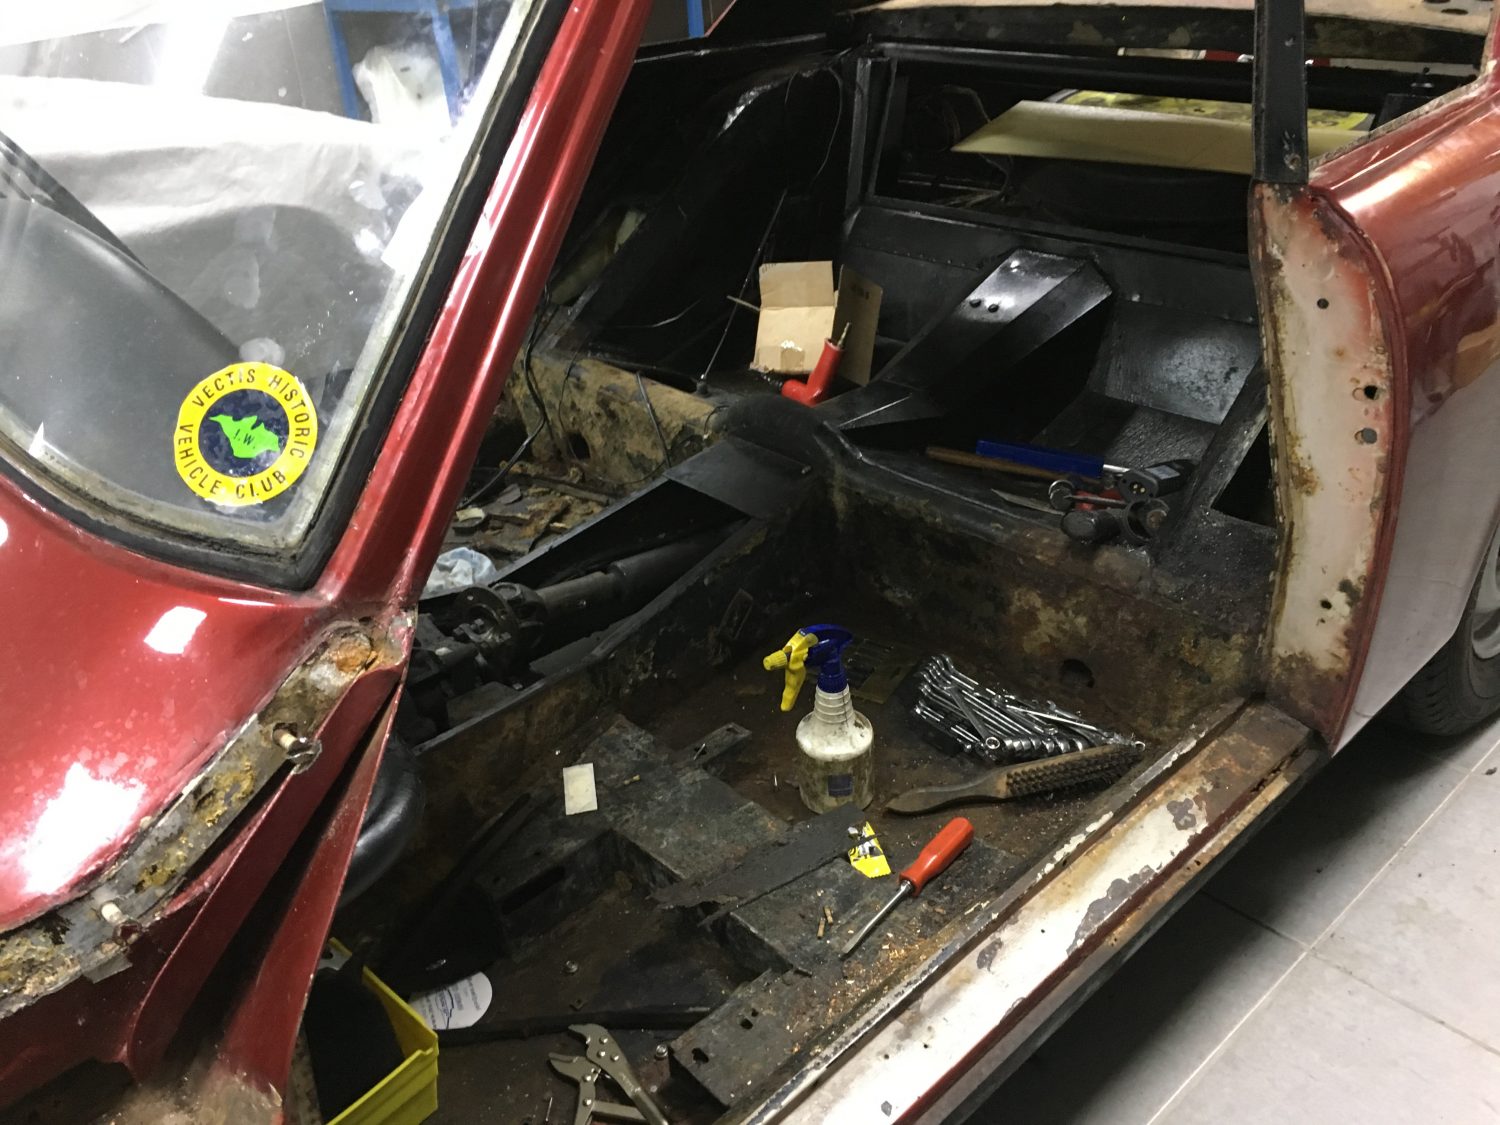
[vc_row][vc_column][vc_column_text]Having built one of the very best Jensen 541S’s in the world back in 2015 Asa and the team at Bridge Classic Cars have a very good knowledge and understanding of this beautiful vehicle.
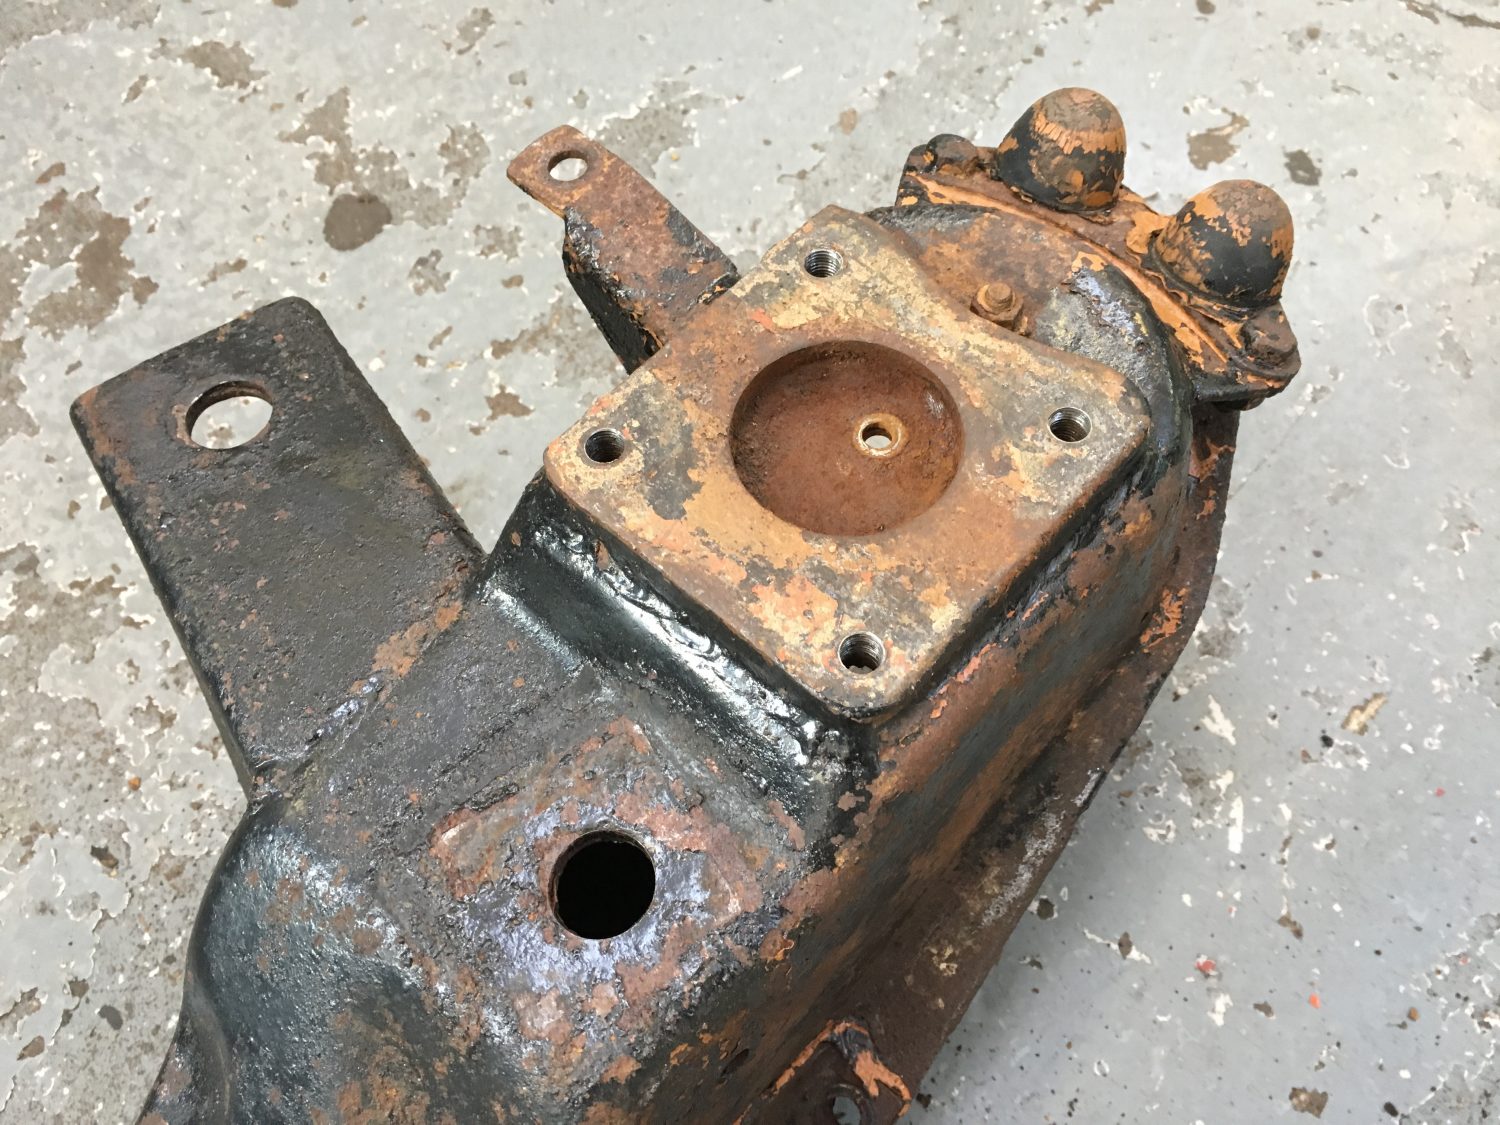
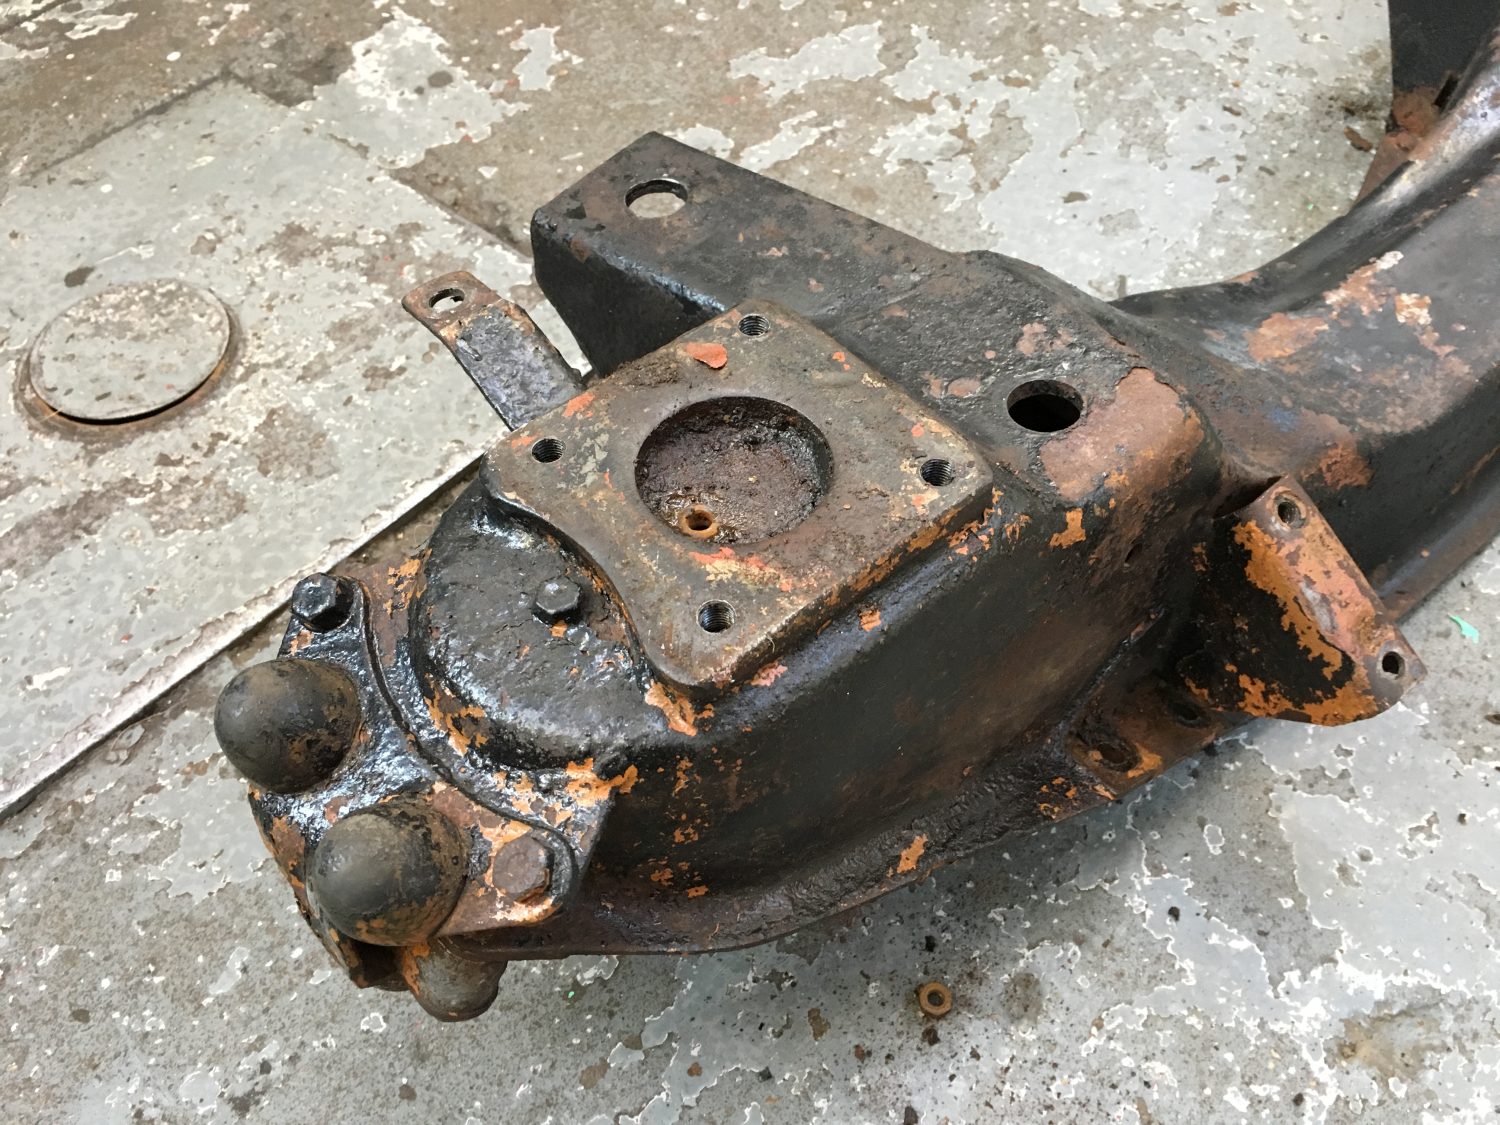
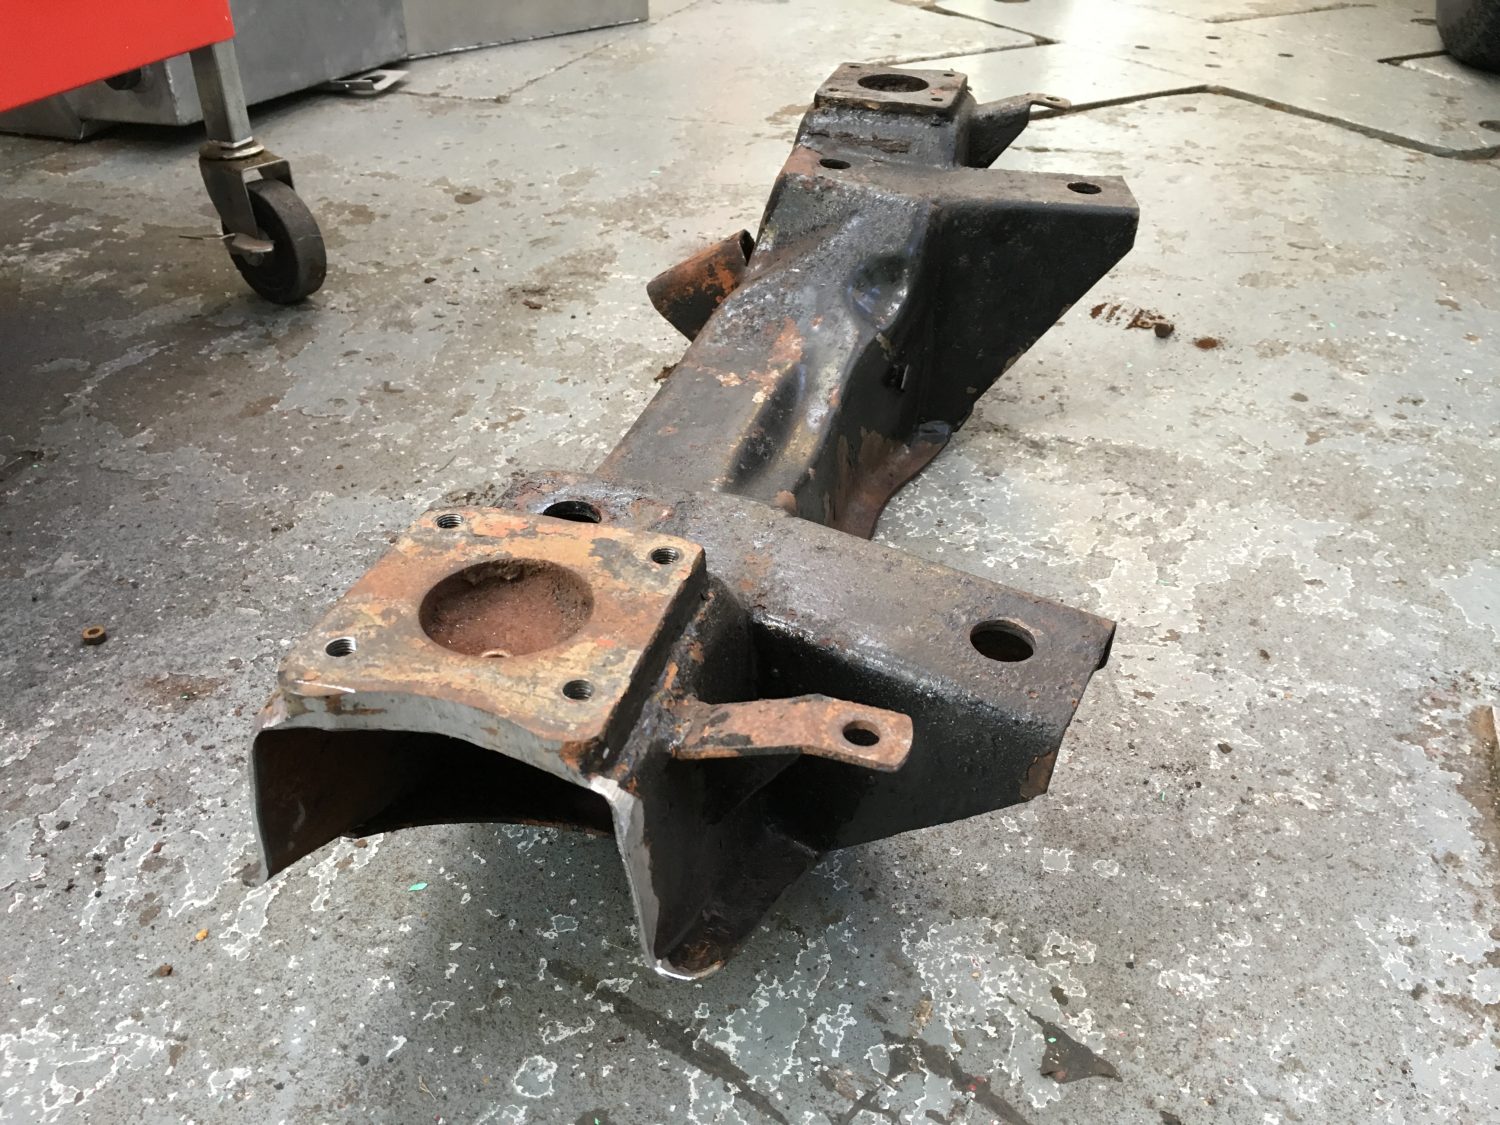
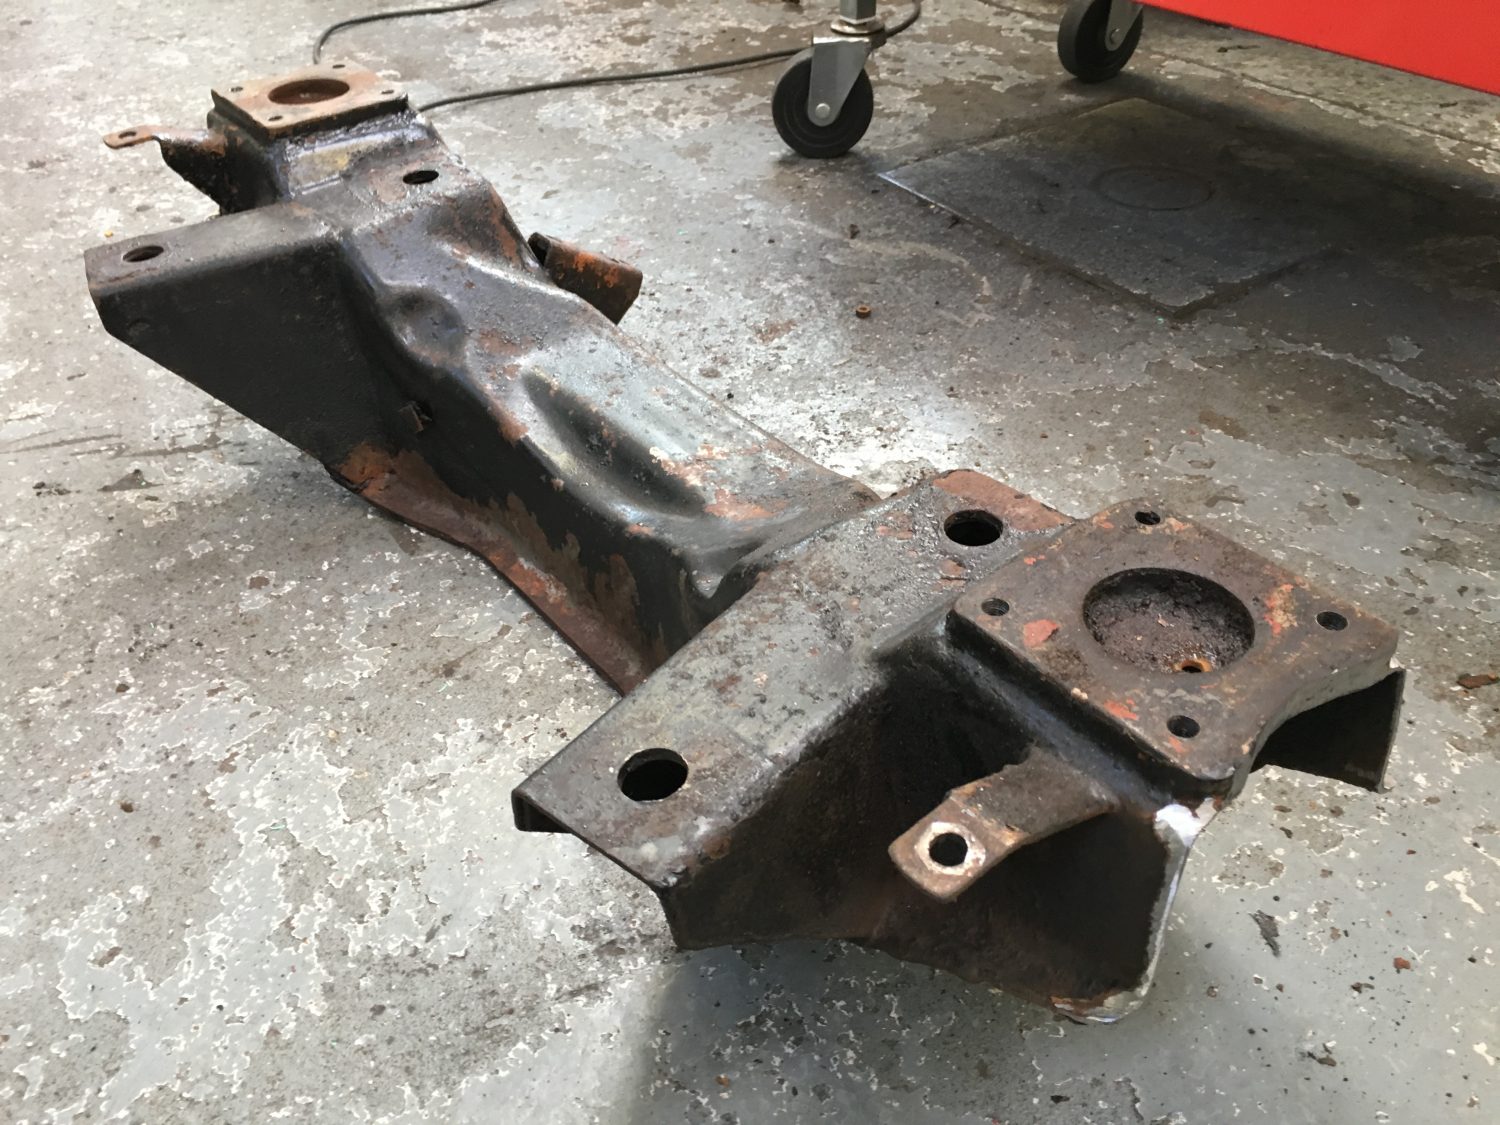
Having said that, we were very fortunate with our previous Jensen that the chassis had already been worked on prior to us finding it so that was a huge proportion of the hard work already complete. We knew with this new project that eventually we would have to delve into the unknown, we knew we needed to remove the delicate fibreglass bodyshell.
After carrying out a lot of research and finding very little information from anyone who had carried out this task previously, the day has come where the bodyshell would need to be lifted free of the chassis.
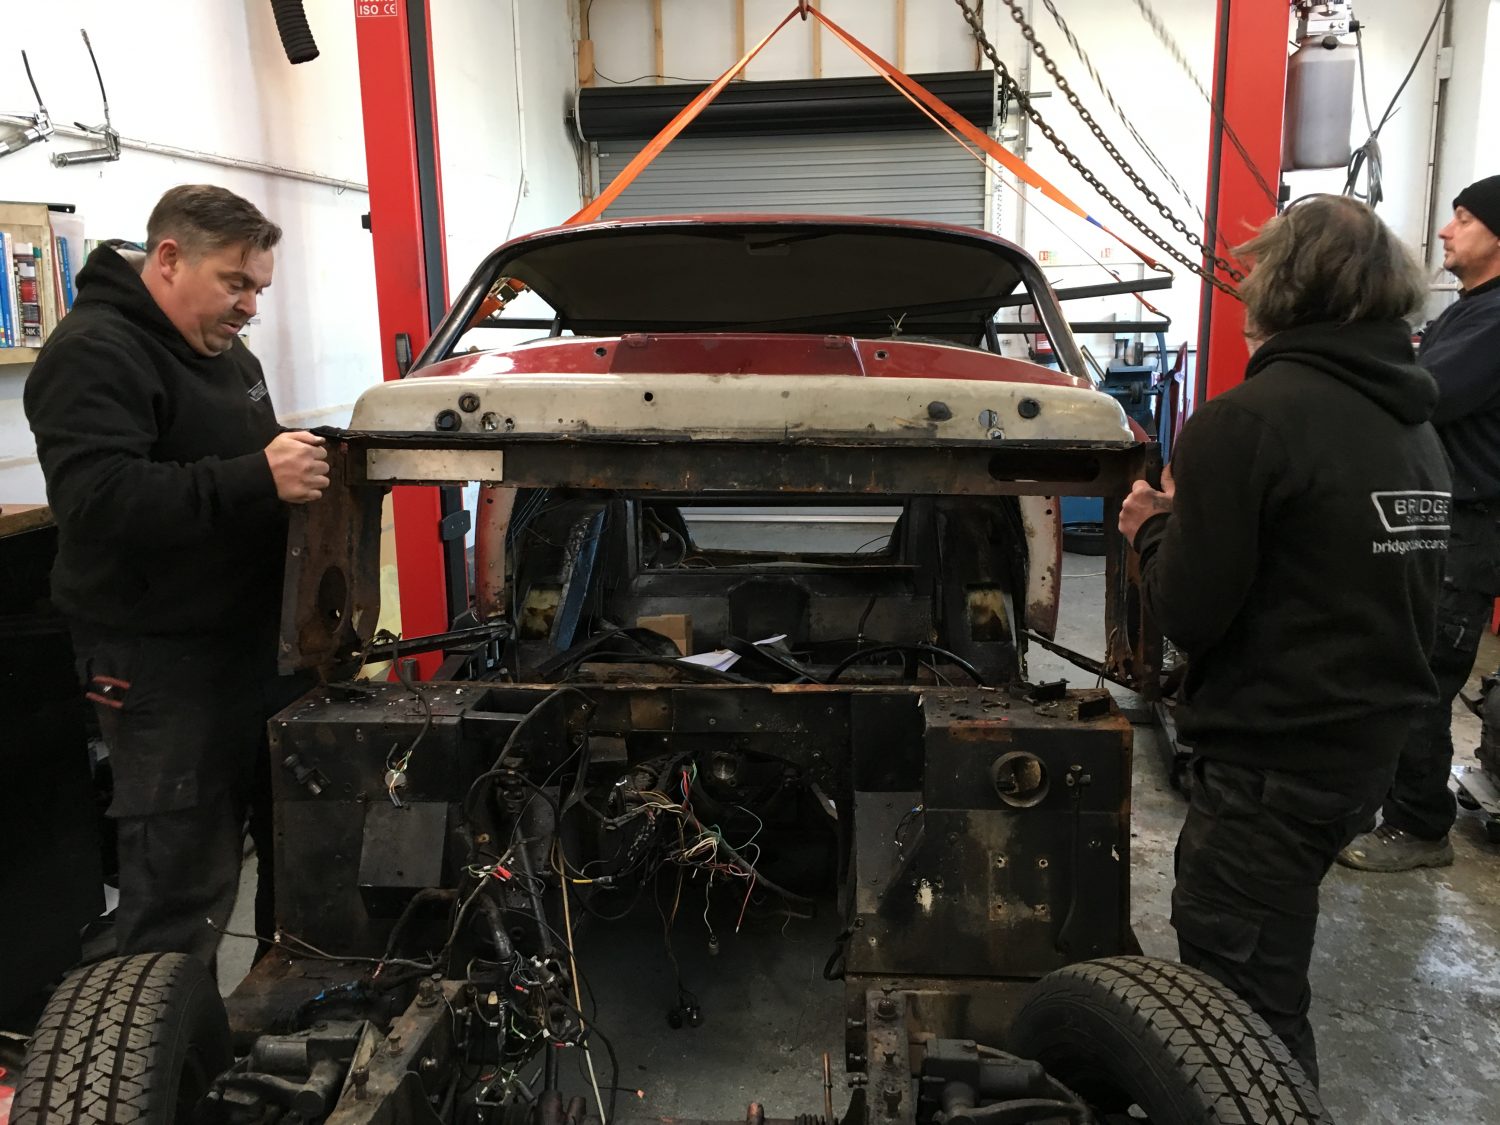
It was a time consuming task but the end result was successful. The body is now completely away from the rolling chassis.
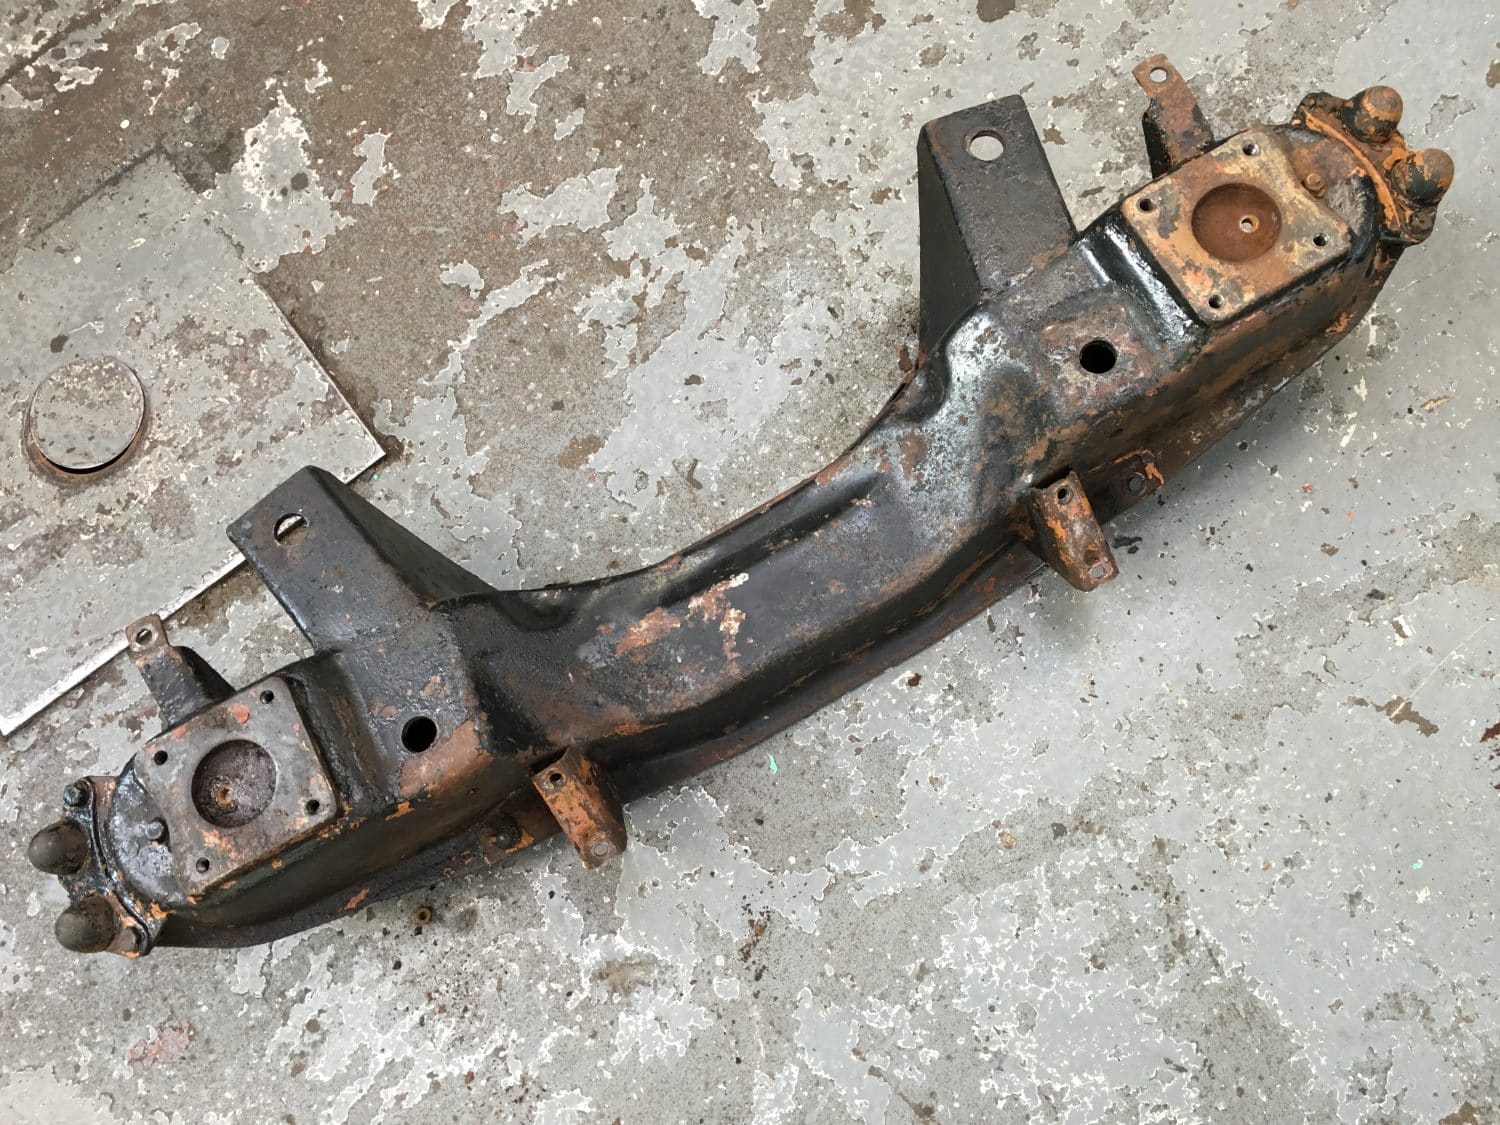
[/vc_column_text][/vc_column][/vc_row][vc_row][vc_column][vc_gallery type=”image_grid” images=”8417,8416,8415,8414,8413,8412,8411,8410,8409,8408,8407,8406,8405,8404,8403,8402,8401,8400,8399,8398,8397,8396″][/vc_column][/vc_row][vc_row][vc_column][vc_column_text]Now that the body shell has been removed the next stage is to repair the chassis ready for the shell to be refitted.[/vc_column_text][/vc_column][/vc_row]
[vc_row][vc_column][vc_column_text]
Our good friends at Moss Europe have selected a few gift ideas that would make any classic car enthusiast happy this Christmas. Visit the Moss Europe website for more ideas.
Monday 21st November to Friday 16th December.[/vc_column_text][/vc_column][/vc_row][vc_row][vc_column][vc_text_separator title=”MG, Triumph, Classic Mini, Austin Healey, Jaguar, Mazda MX-5, Morris Minor”][/vc_column][/vc_row]

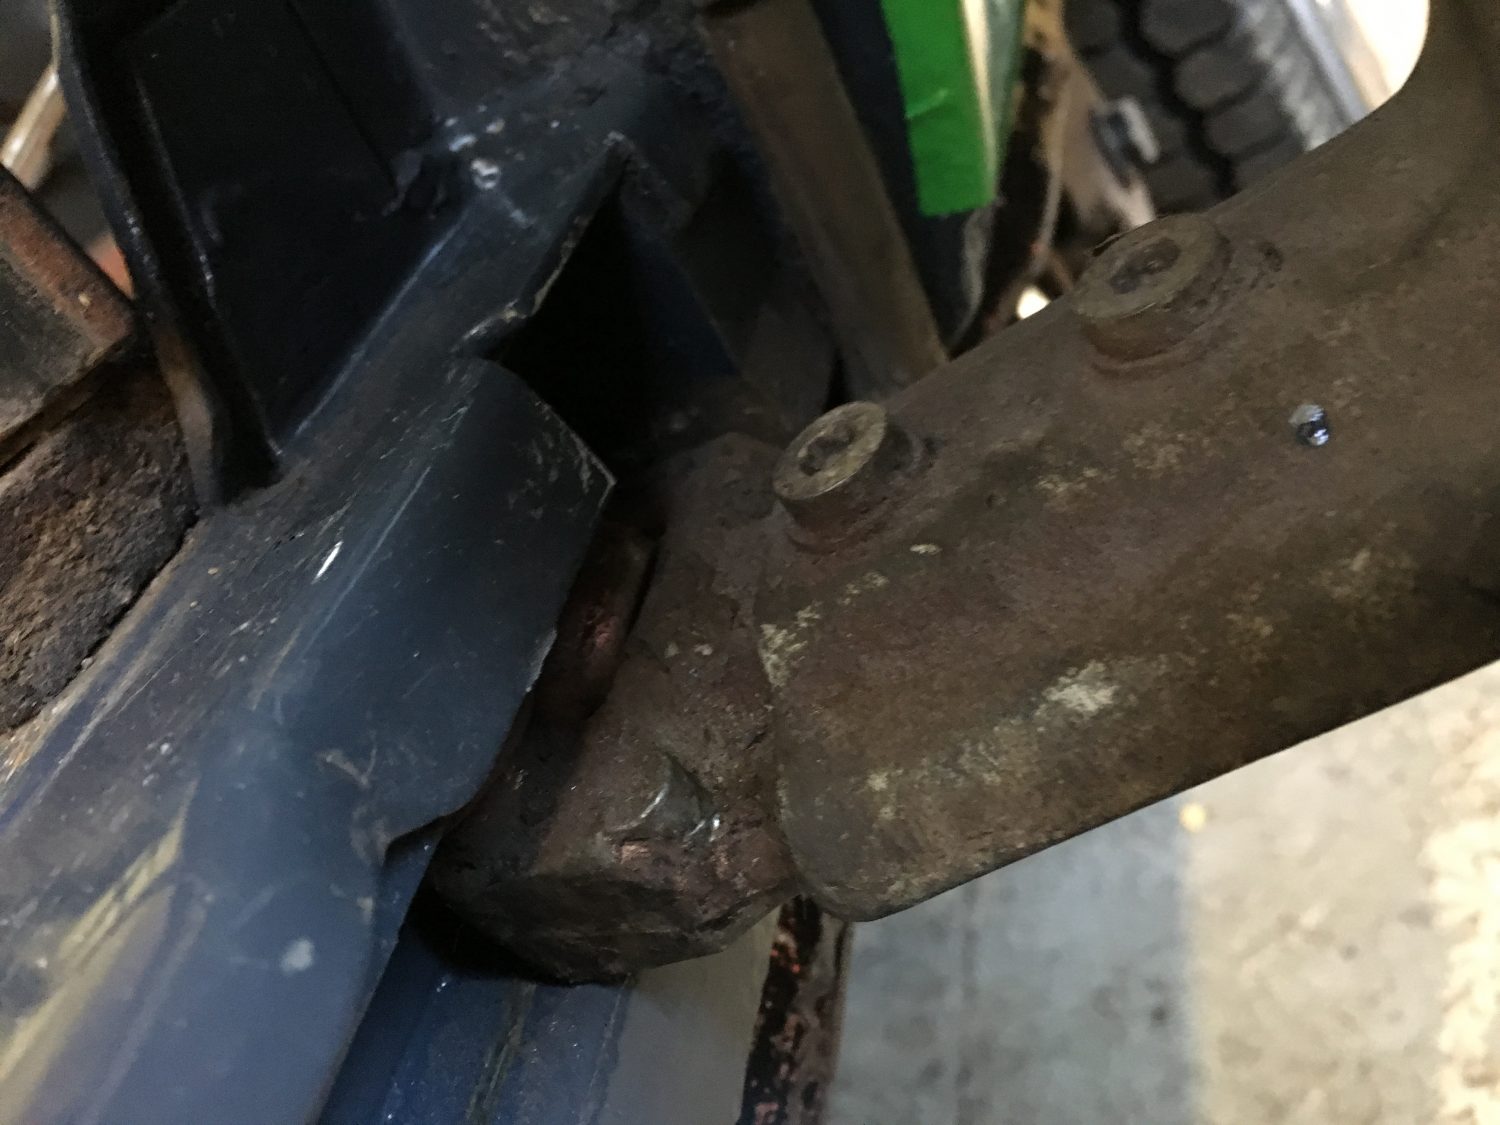
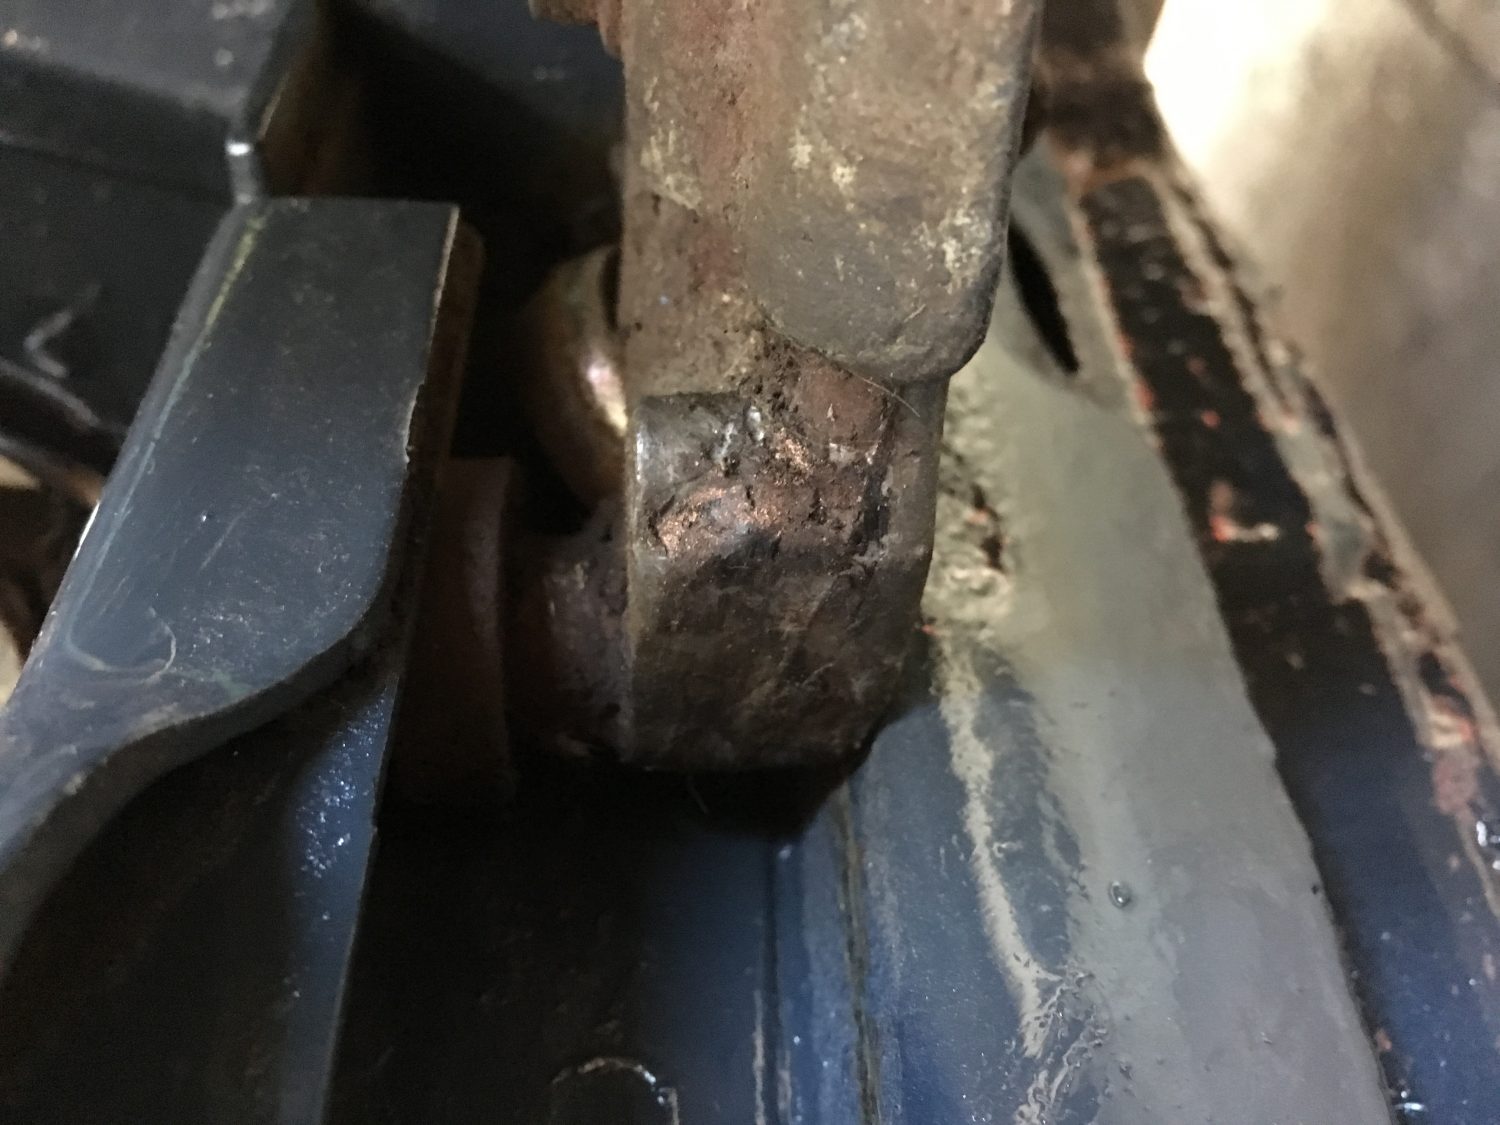
Years of wear on the clutch slave pin has resulted in a hole that is no longer circular and a pin that is no longer ‘wear’ free!
Lucky we caught it when we did but fortunately it is a part that is easily obtainable so this will be fitted, brand new, once it arrives from Moss Europe.
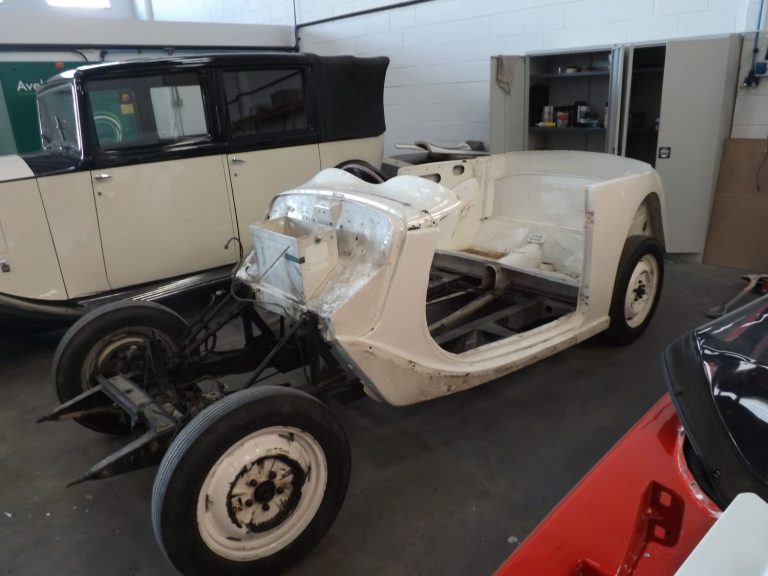
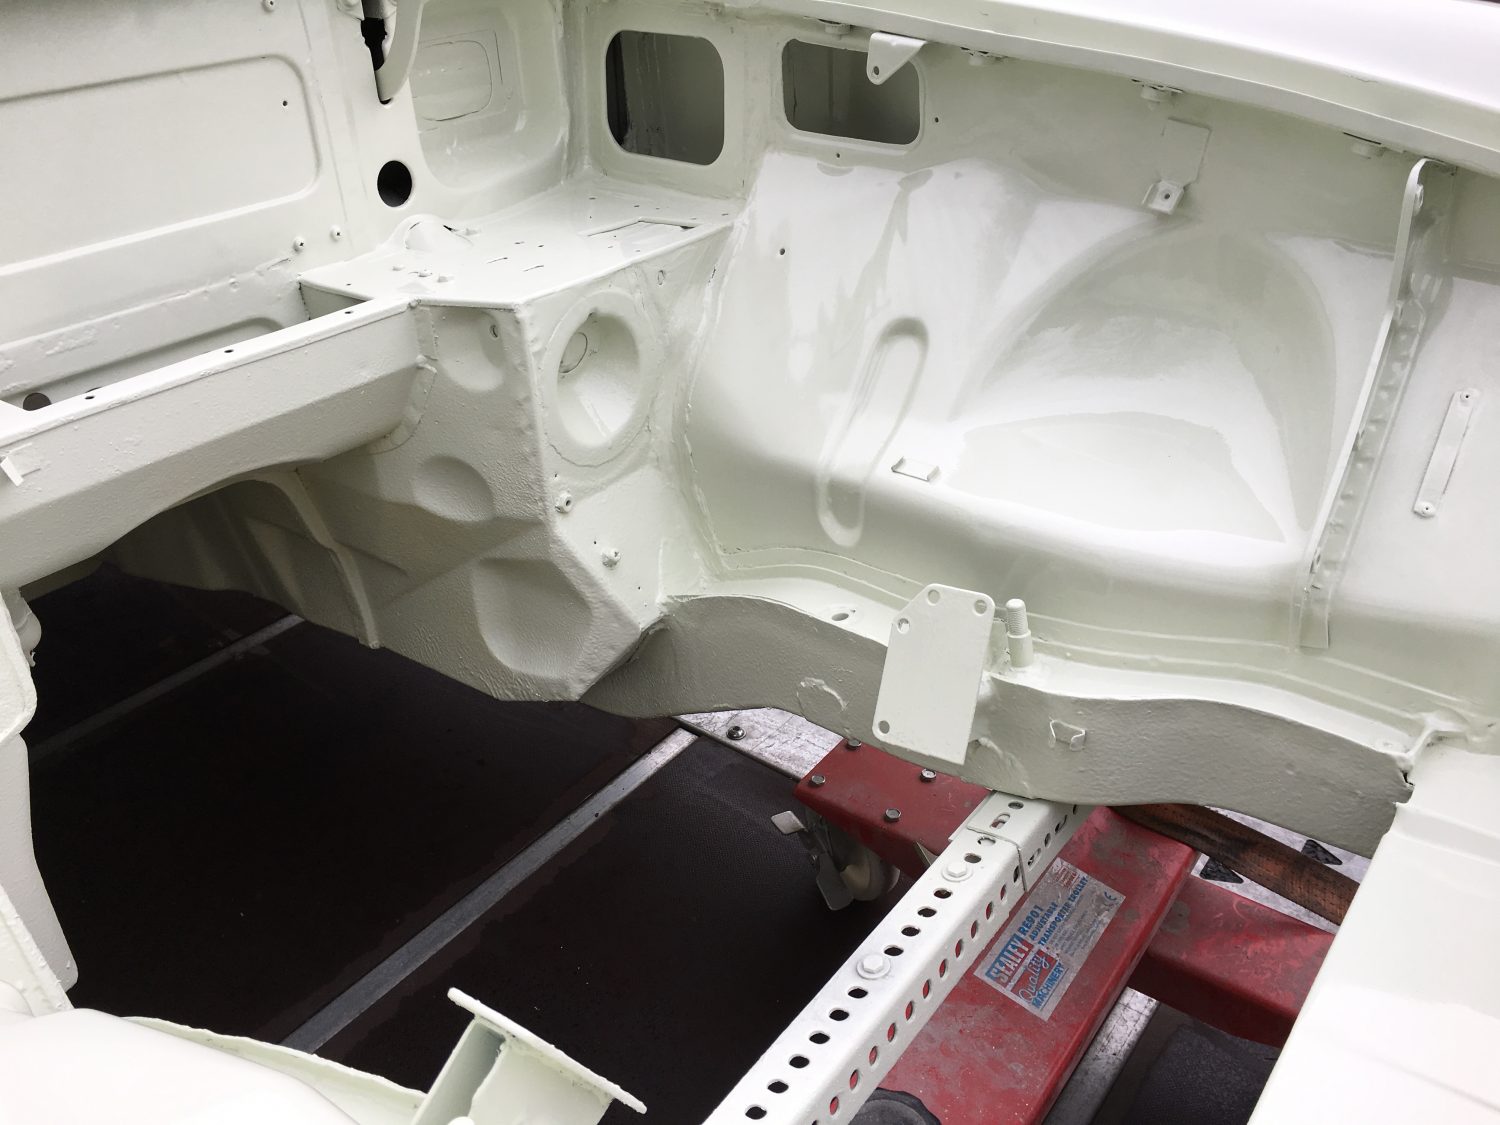
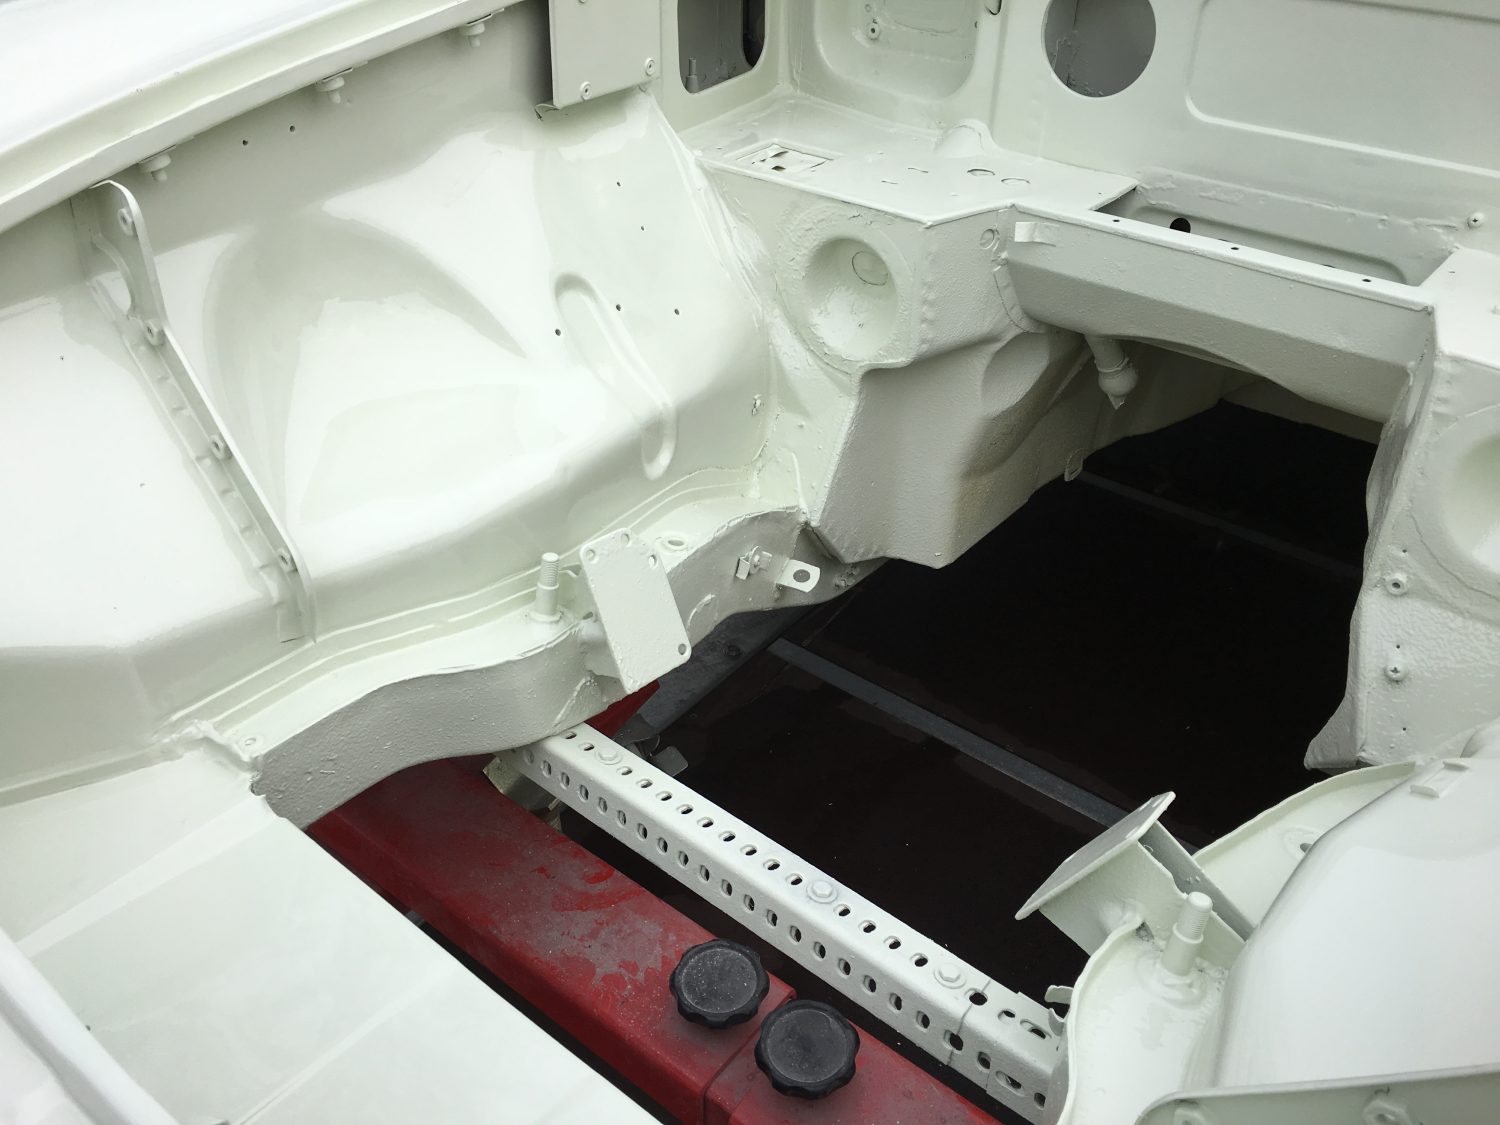
Now that our 1949 MG YT has been transported to our Ipswich paint shop it’s time to start the preparation work ready for the new Clipper Blue finish. The arches have been removed as they require a bit of remedial work where it has had a dink in it’s time. Nothing too scary to repair.
As the car was originally finished in Clipper Blue this is a complete respray which means every single inch of this body (everything that is currently white) will be changed back to blue. This is not just ‘what you see’, it is everything!


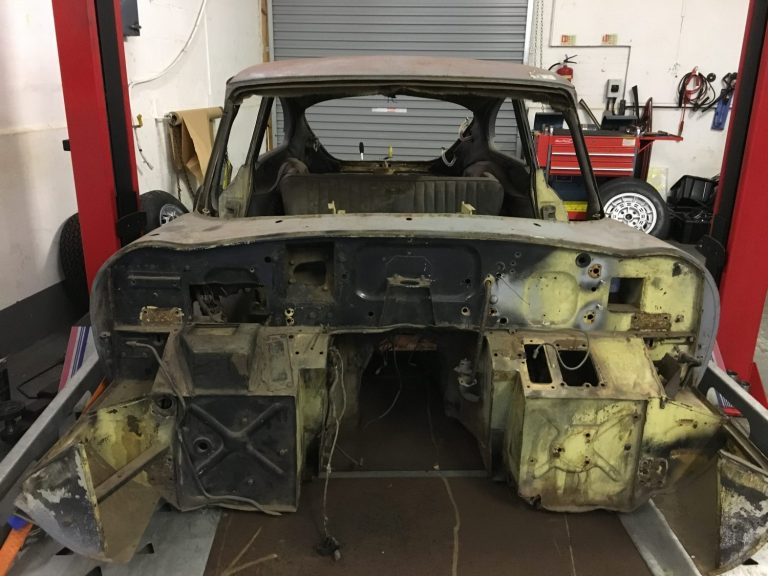
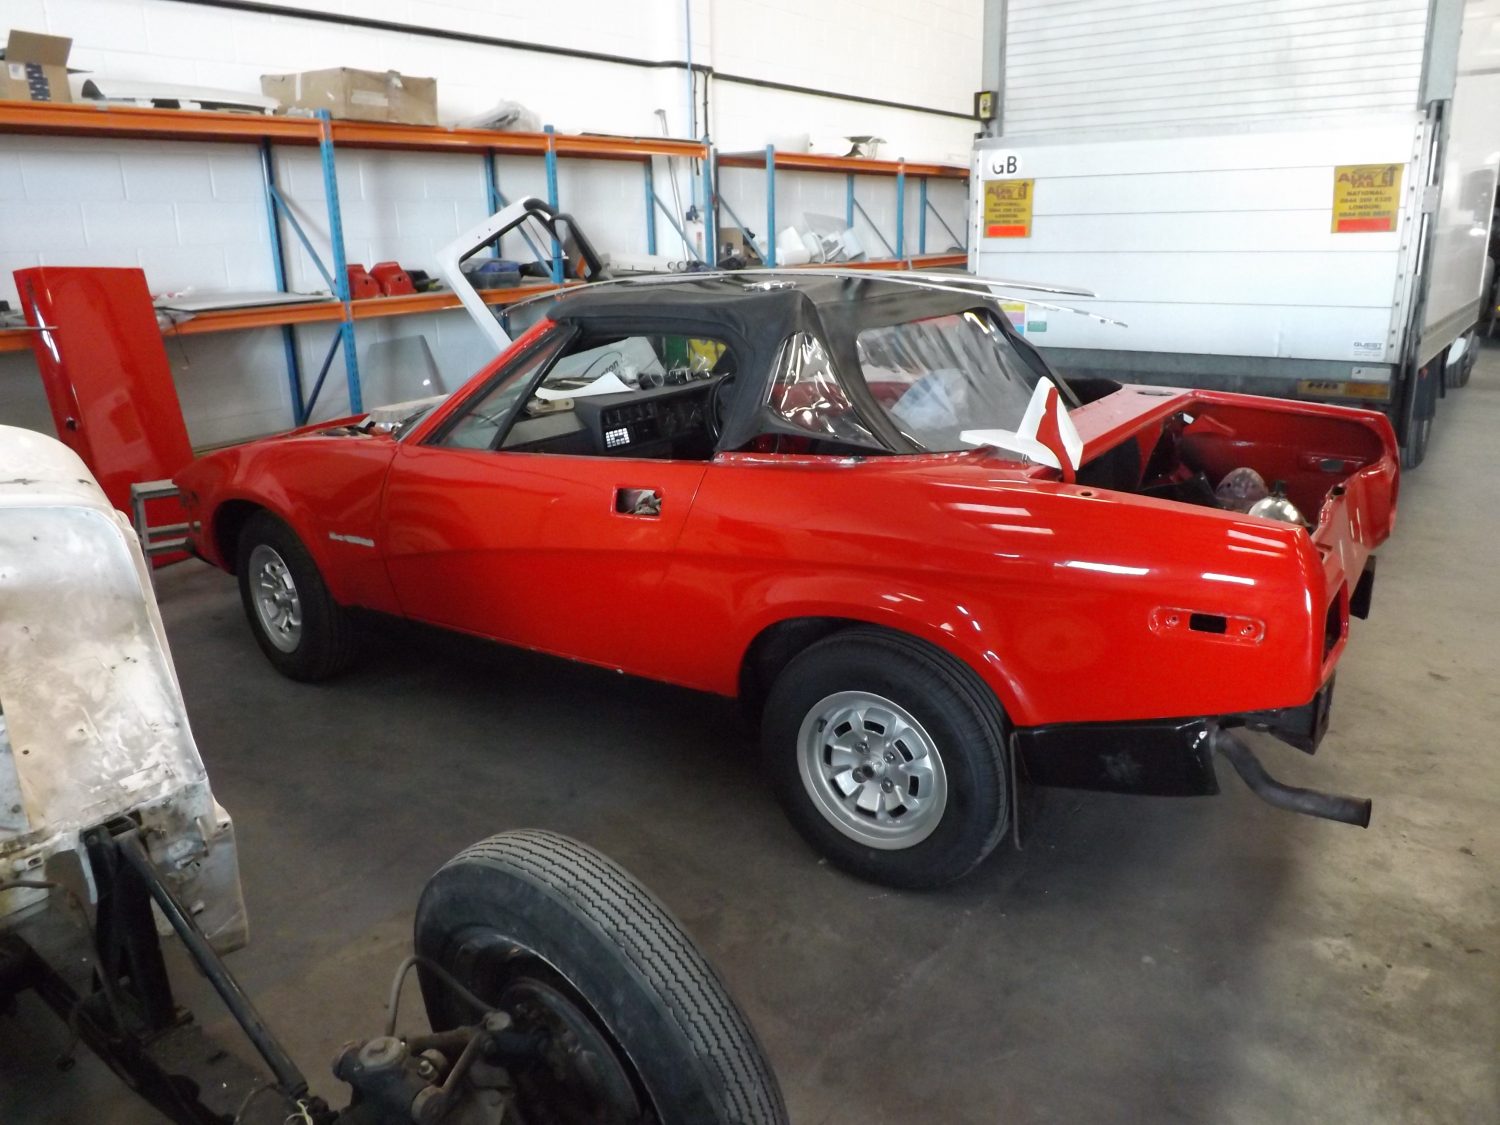
Our 1982 Triumph TR7 is now in the preparation stages, the entire car must now be stripped of it’s components ready to undergo a full respray.
Unfortunately, this task was only carried out not too long ago on by a company in Scotland acting on behalf of the previous customer. Due to a lack of preparation or perhaps a good knowledge and understanding of the correct procedure, the paint had started to micro-blister which does not look very appealing.
This means that all of the hard work that was originally carried out is to now be undone so that the paint can be prepared and applied correctly, resulting in a finish that will not longer micro-blister.

[vc_row][vc_column][vc_column_text]We have just accepted delivery of our 1967 Jaguar E-Type 2+2 Series 1.
This is now available for sale as a future restoration project, for more information email us or call the office on 01473 742038.[/vc_column_text][/vc_column][/vc_row][vc_row][vc_column][vc_gallery type=”image_grid” images=”8327,8326,8325,8324,8323,8322,8321,8320,8319,8318″][/vc_column][/vc_row]
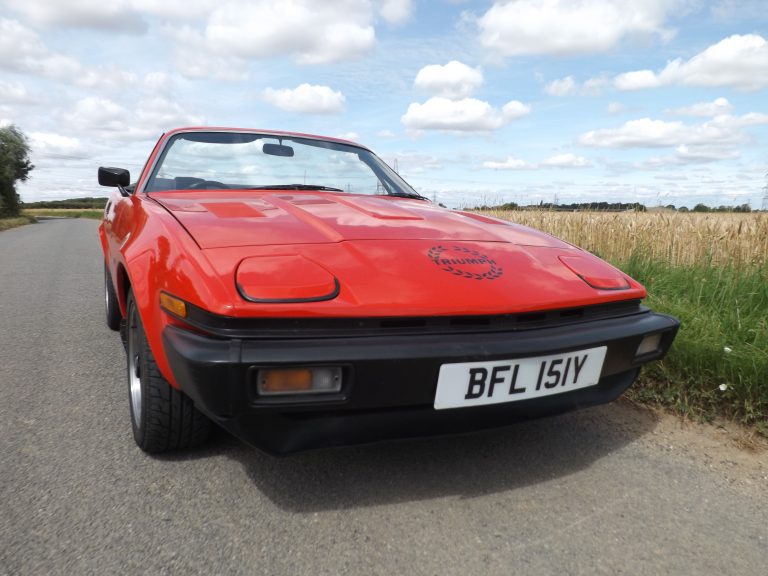
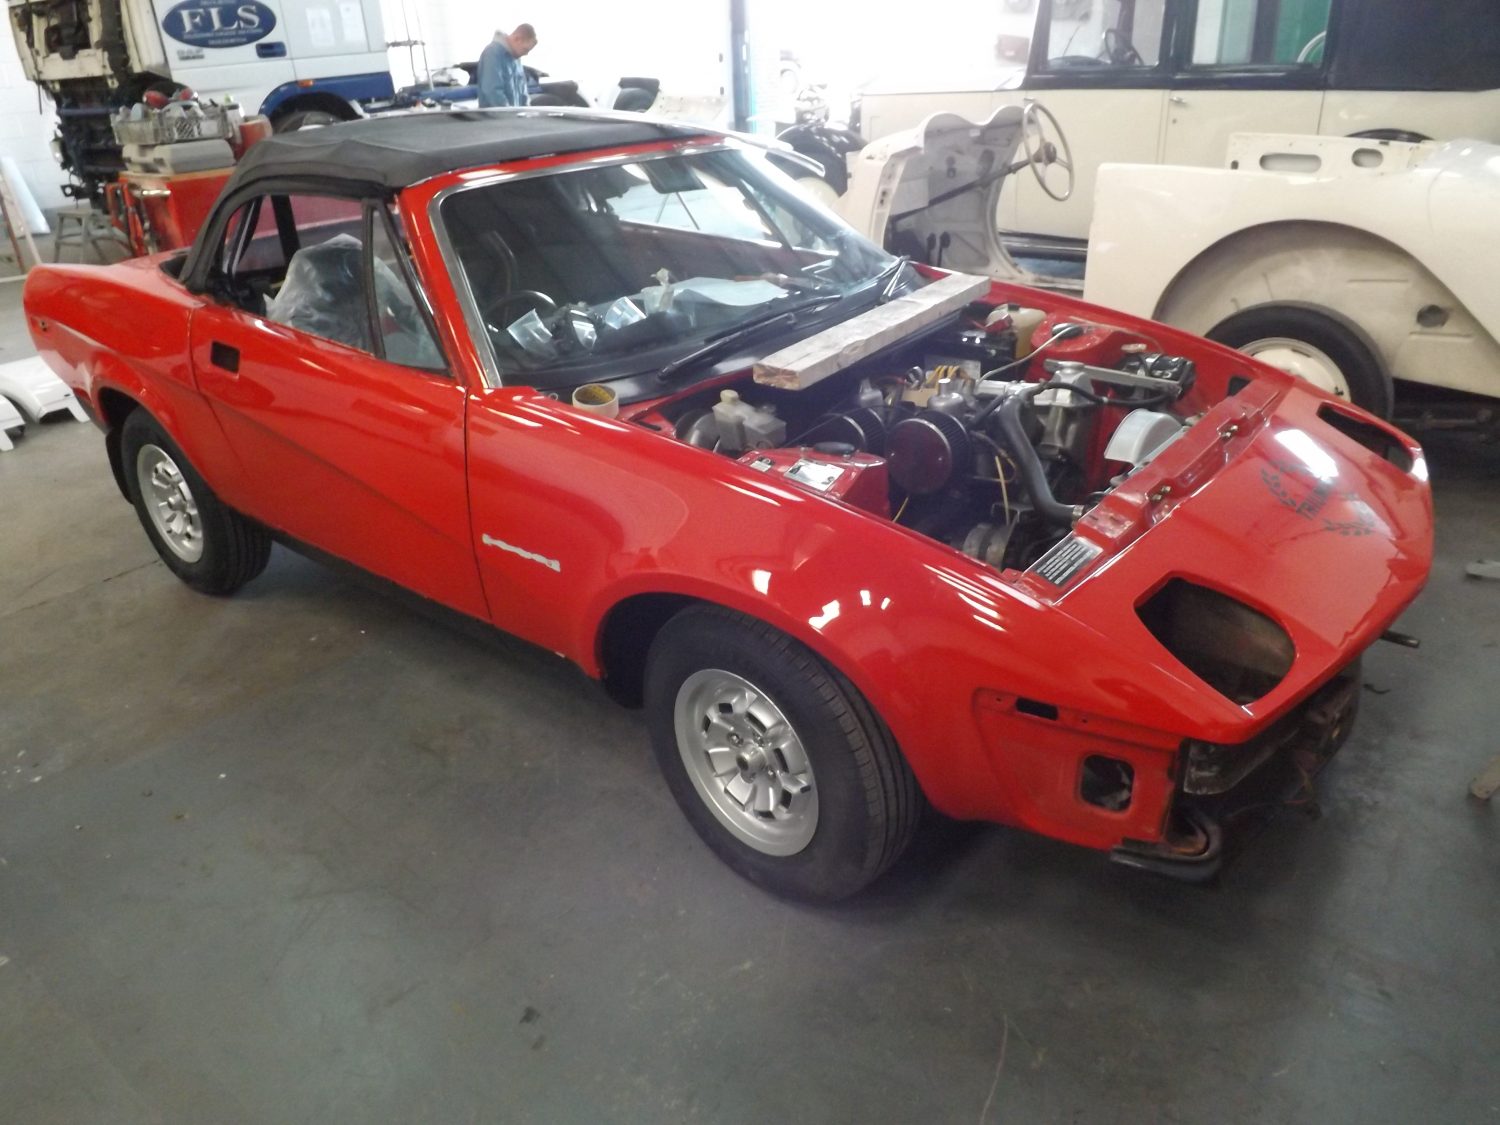
On Friday we made the decision NOT to colour code our Triumph TR7.
We had discussed our plans with various people and had received mixed reviews, some people thought it was best to stick to the originality where as other felt a face lift would be a great asset to this iconic classic.
Having thought about it long and hard we decided that the previous owner had done such a superb job of restoring her that we would continue with his original vision. It’s just unfortunately that the preparation in the paintwork was not previously carried out properly which resulted in the vehicle micro-blistering. She is now in our workshops being stripped and prepared ready for a full respray.
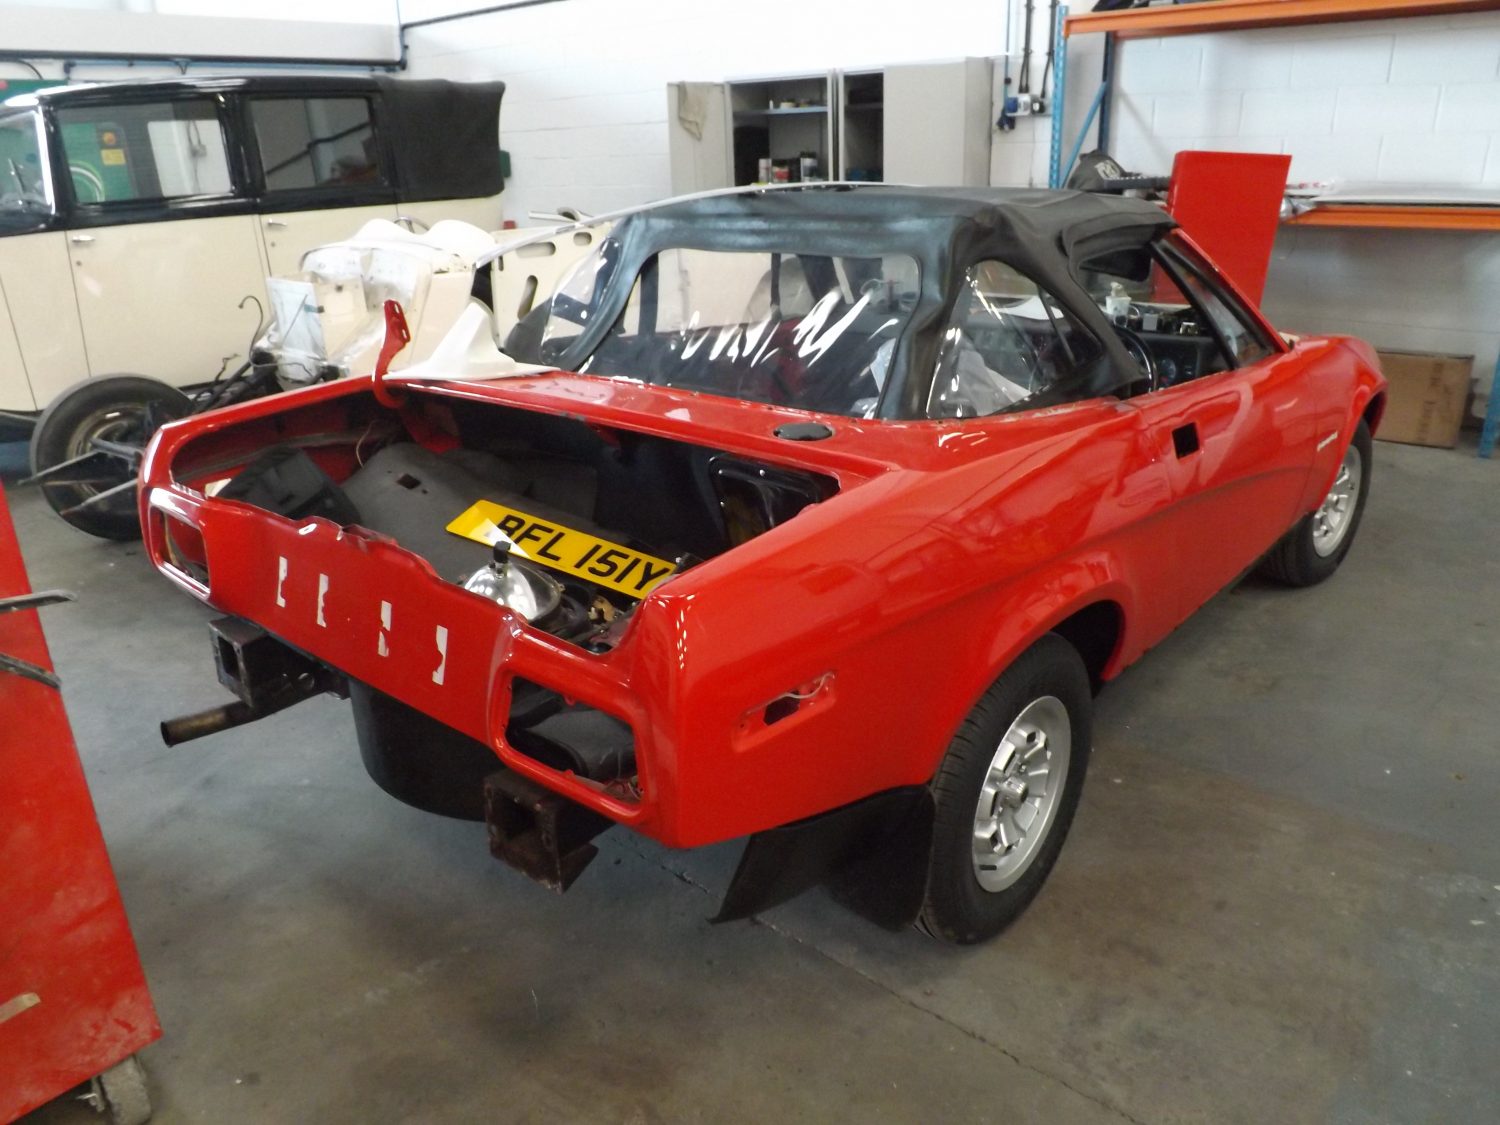
A small delay on the restoration due to a couple of imperfections that we found in the paintwork.
Nothing too major but worth addressing so we’ve had it back in the paint shop for a couple of weeks to rectify the issues.
We now have it back in our workshops, all done and looking fantastic so time for John to get back on with rebuilding. First job is to get it back onto it’s wheels.

[vc_row][vc_column][vc_column_text]The bright-work has now been delivered to Wyatt Polishing in Thetford ready for Tony and the team to carry out a full refurbishment of them.
Every inch of chrome work on this vehicle will be worked on.
It is a very delicate task to undertake as not only are these parts small and intricate but they are also very rare so one false move could be disastrous.
Tony at Wyatt Polishing is one of the best in the business so we have every confidence that the end result will be outstanding.[/vc_column_text][/vc_column][/vc_row][vc_row][vc_column][vc_gallery type=”image_grid” images=”8342,8343,8344,8345,8346,8347,8348,8349″][/vc_column][/vc_row]
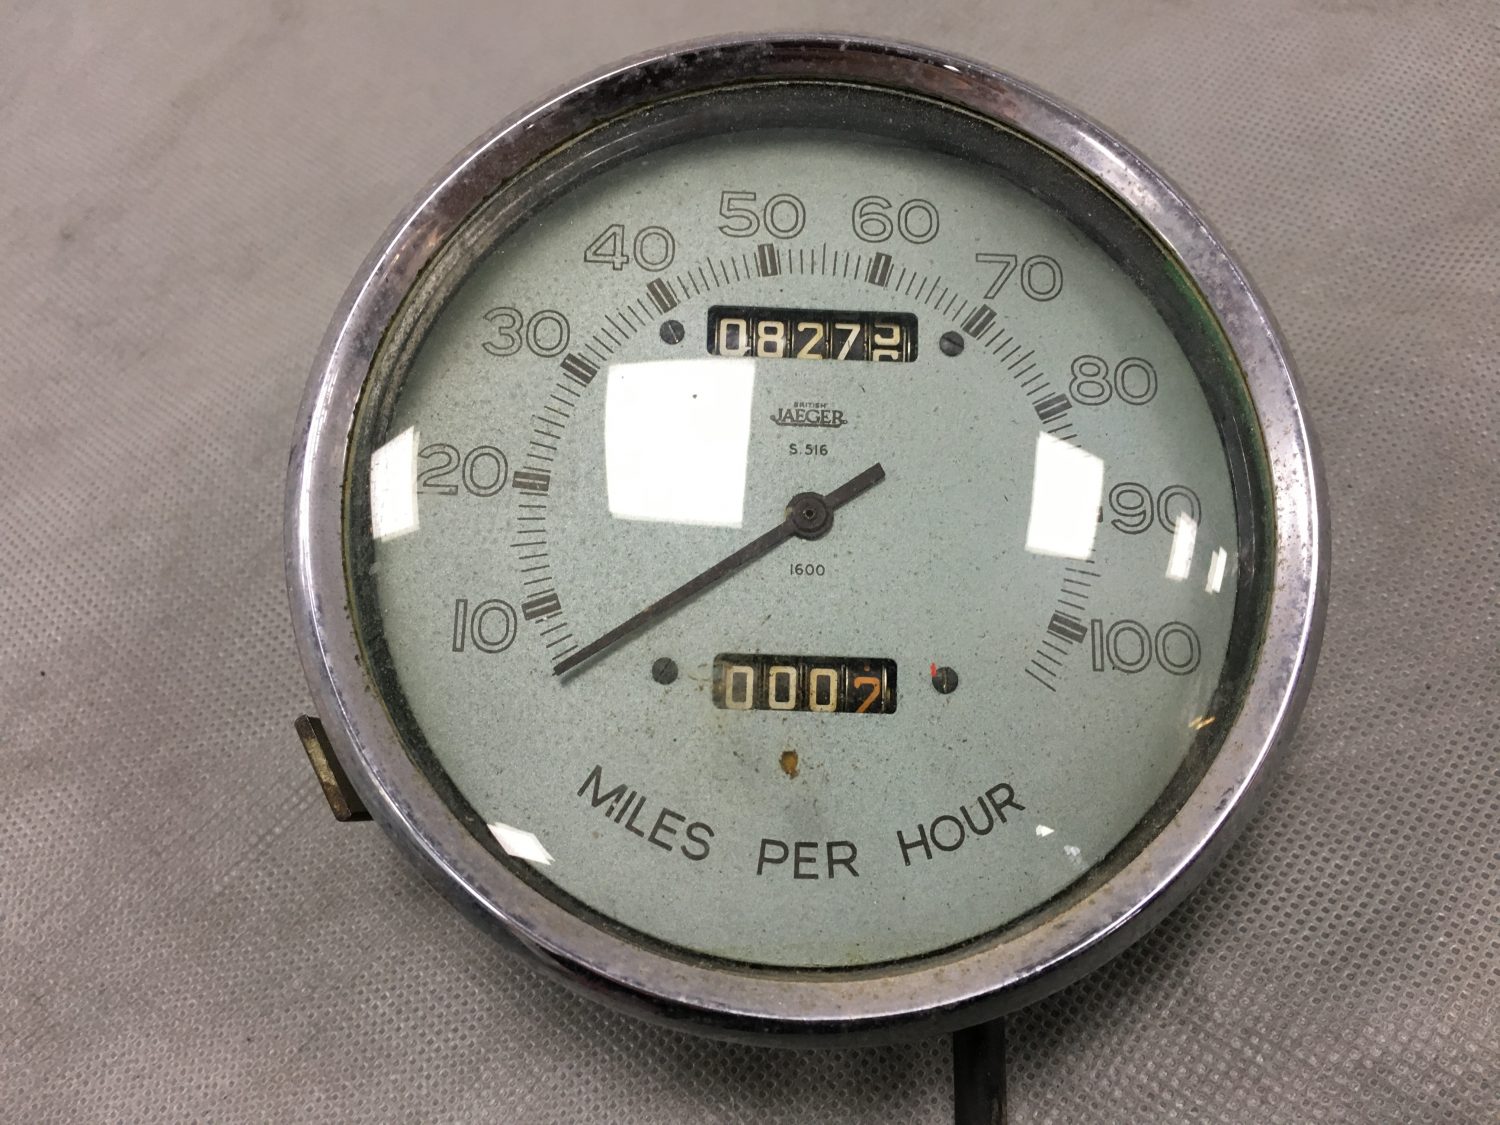
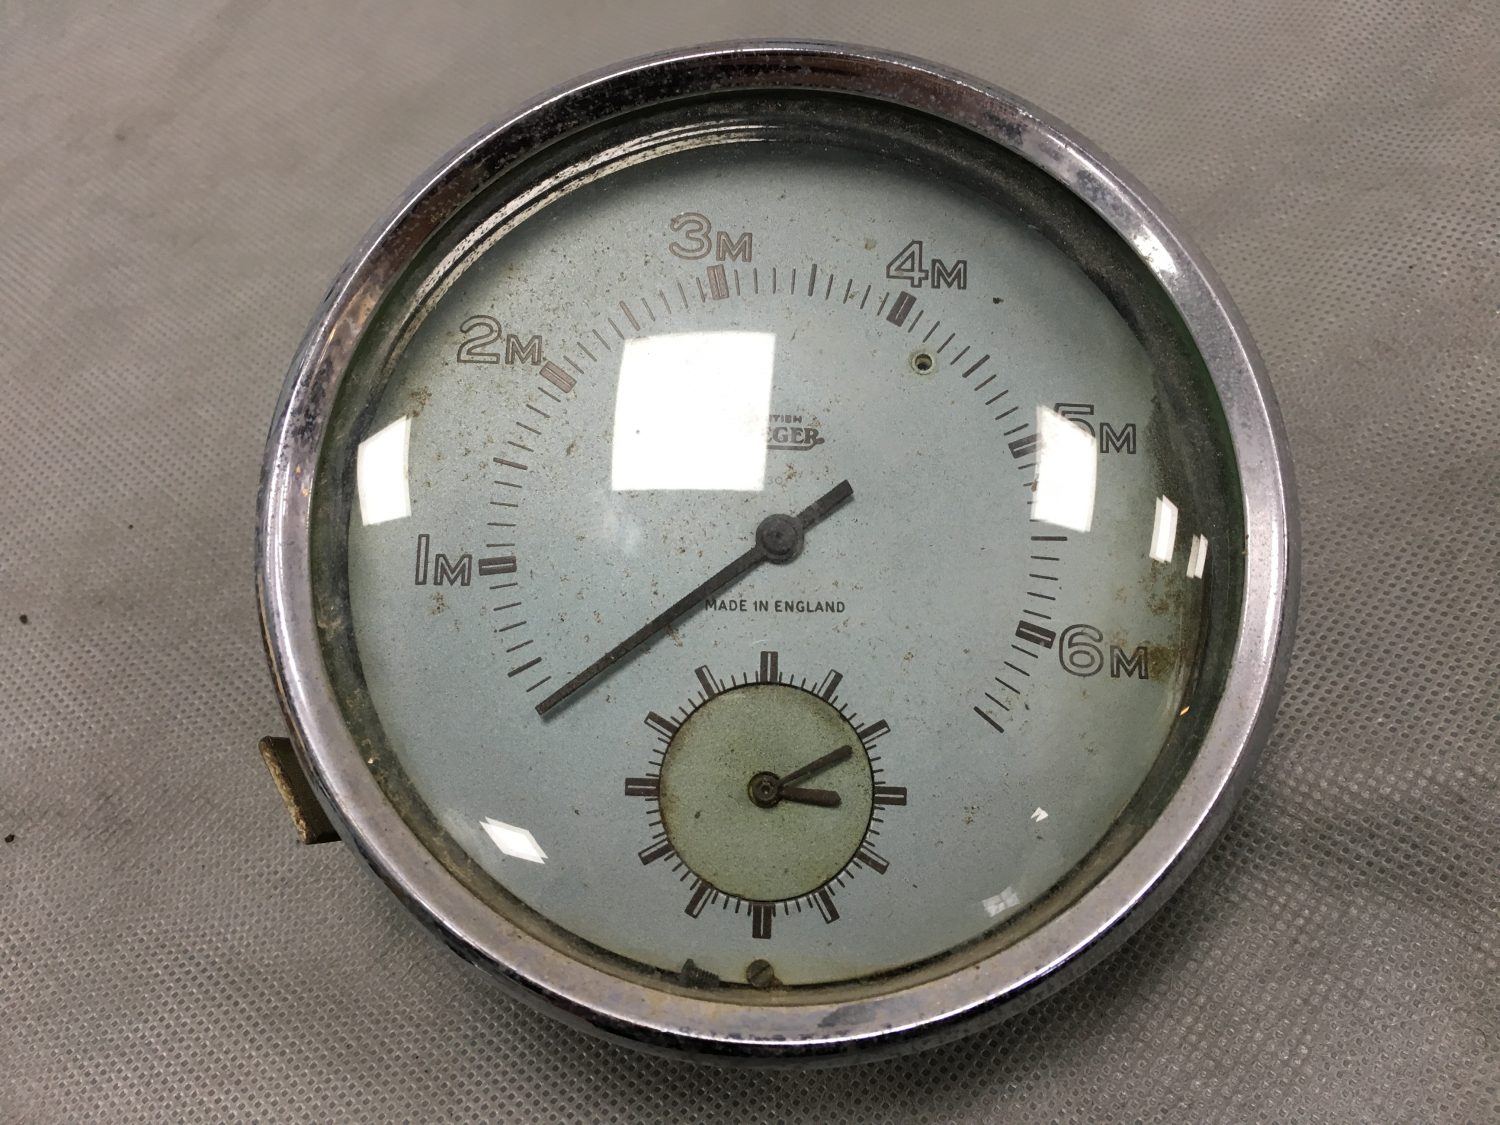
[vc_row][vc_column][vc_column_text]The MG YT dials have been packaged up and sent for refurbishing by world renowned restorers Speedograph Richfield Ltd.
Within a couple days we’ll touch base with them, by which time they would have fully assessed the extent of work that will need to be carried out.
They are the experts in this field, we have trusted Speedograph Richfield Ltd with the majority of our major dial restorations for some time.
It is truly amazing how they can bring these dials back to life.

 [/vc_column_text][/vc_column][/vc_row][vc_row][vc_column][vc_text_separator title=”UPDATE”][/vc_column][/vc_row][vc_row][vc_column][vc_column_text]We have now received a call from Speedograph, the dials have arrived and the promising news is that they are happy to carry out a full restoration on almost all of the dials. A full restoration involves the following:
[/vc_column_text][/vc_column][/vc_row]
The Jensen dials have been packaged up and sent for refurbishing by world renowned restorers Speedograph Richfield Ltd.
Within a couple days we’ll touch base with them, by which time they would have fully assessed the extent of work that will need to be carried out.
They are the experts in this field, we have trusted Speedograph Richfield Ltd with the majority of our major dial restorations for some time.
It is truly amazing how they can bring these dials back to life.


Our 1971 Volvo P1800 featured in Classic Car Buyer, released on the 23rd November 2016, issue 358.
For those who love classic cars – owning, buying, driving, restoring – Classic Car Buyer is the most informative read there is. Published every Wednesday it keeps readers up-to-date with the very latest classic car and club news, follows the important issues affecting this popular market and has pages and pages of buying, owning and practical features.
If it’s happening in the classic car world, it’s happening in Classic Car Buyer – every week.
In this edition they were reviewing and featuring the highlights of Anglia Car Auction’s November sale.
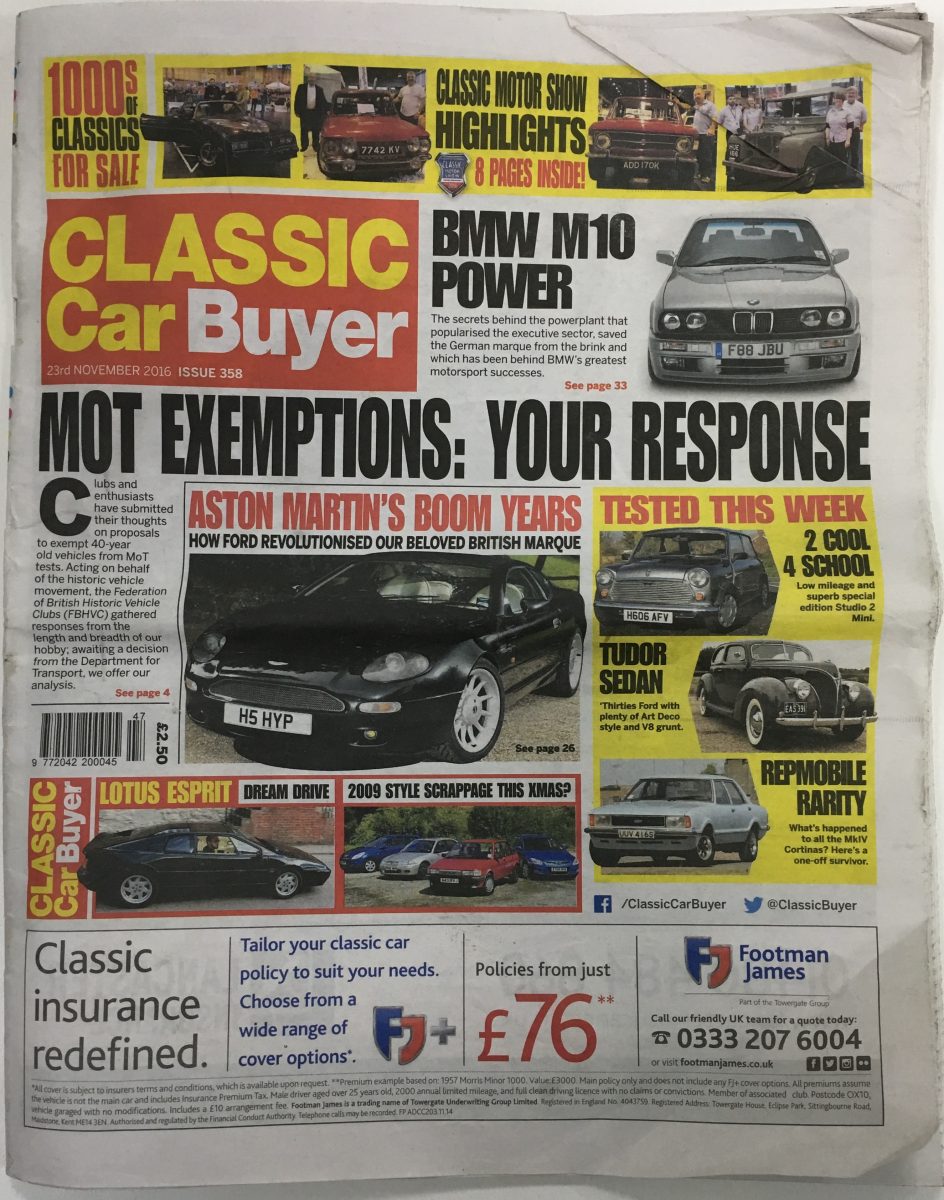
“Forever handsome, thanks to styling that does not date, Volvo P1800s were popular with ACA entrants and buyers alike, with all four selling out. With lots of history and MOTs to check out during its 91,507 displayed miles, this 2011 restored 1971 P1800 coupe achieved £15,120, which was top estimate money.”


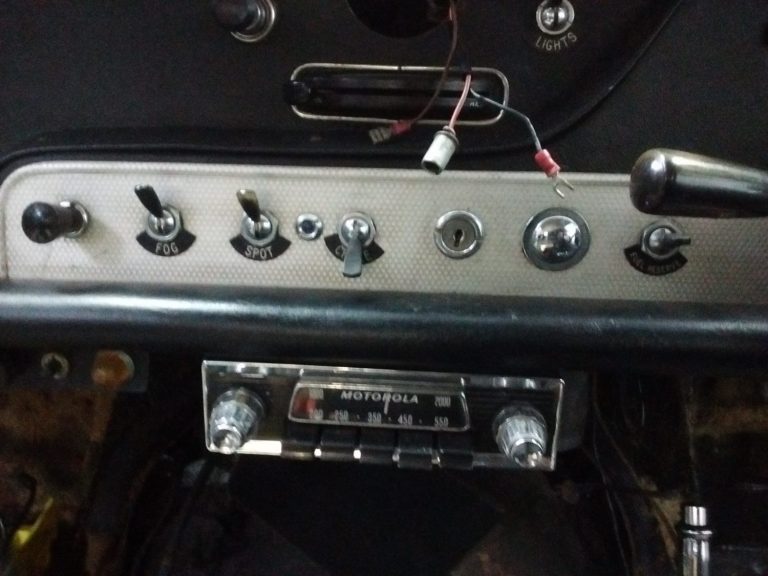
[vc_row][vc_column][vc_column_text]With the engine now out Asa and John are concentrating their efforts on removing the dashboard this afternoon.
Before any work is carried out we have taken a number of pictures which we can use to cross reference when we look to refit it later on in the build process.
[/vc_column_text][/vc_column][/vc_row][vc_row][vc_column][vc_gallery type=”image_grid” images=”8279,8280,8281,8282,8283,8284″][/vc_column][/vc_row]
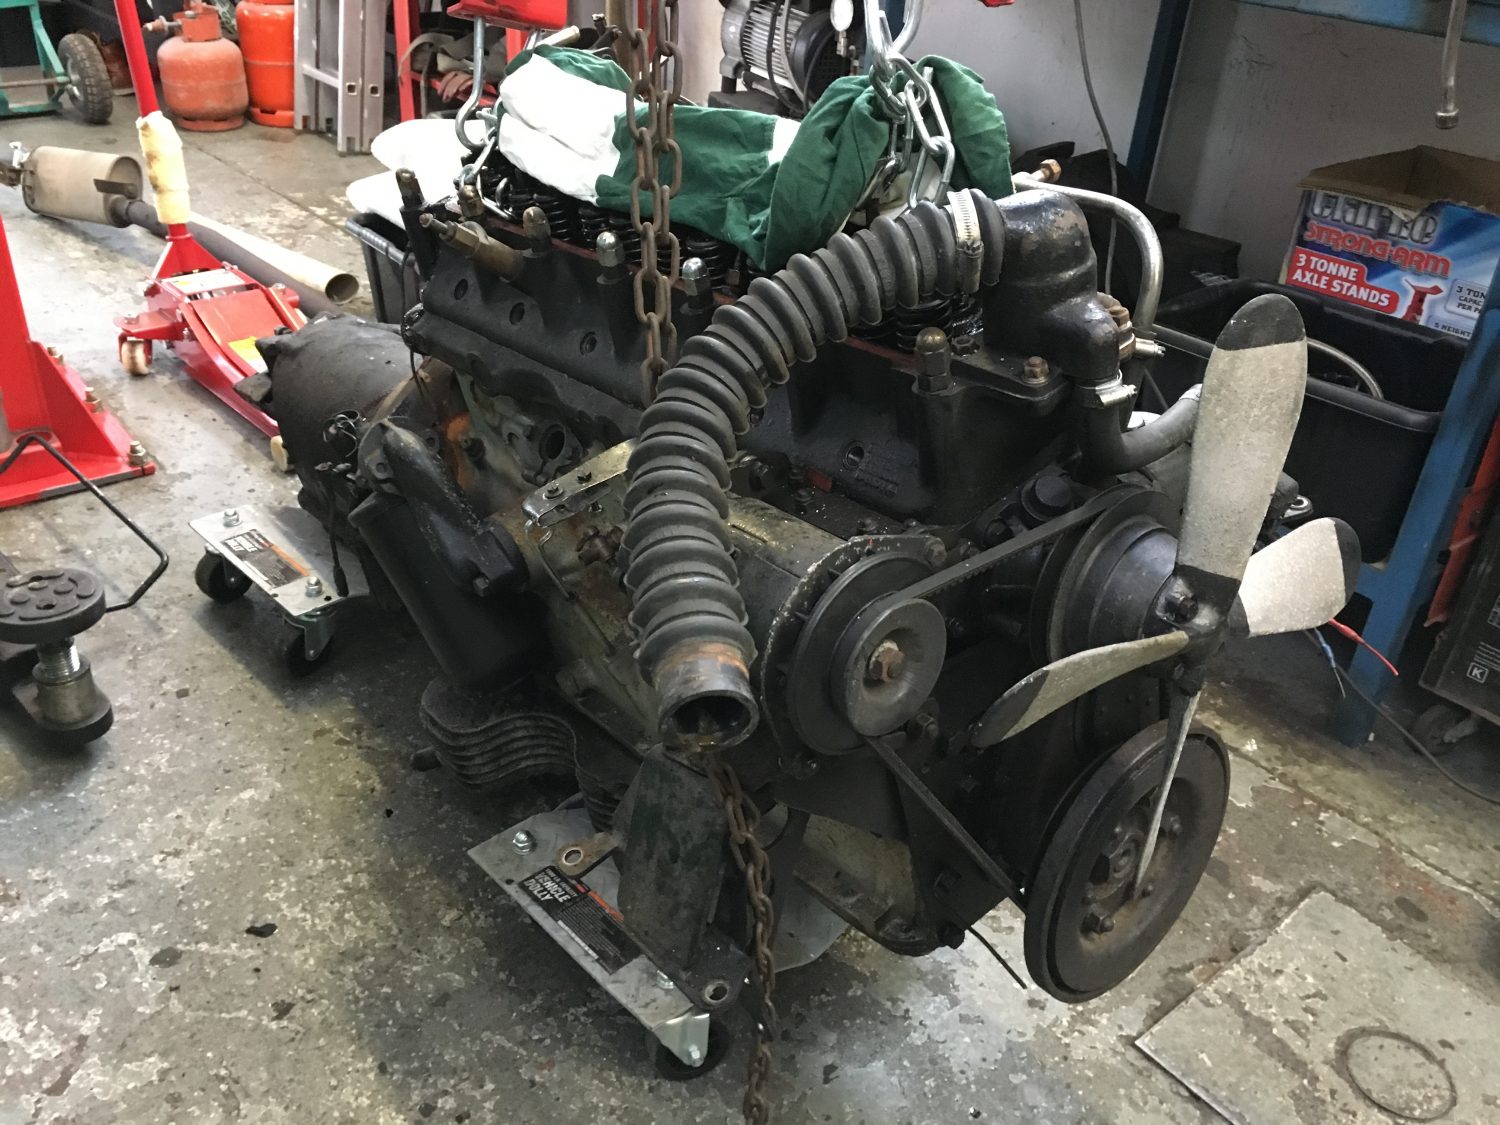
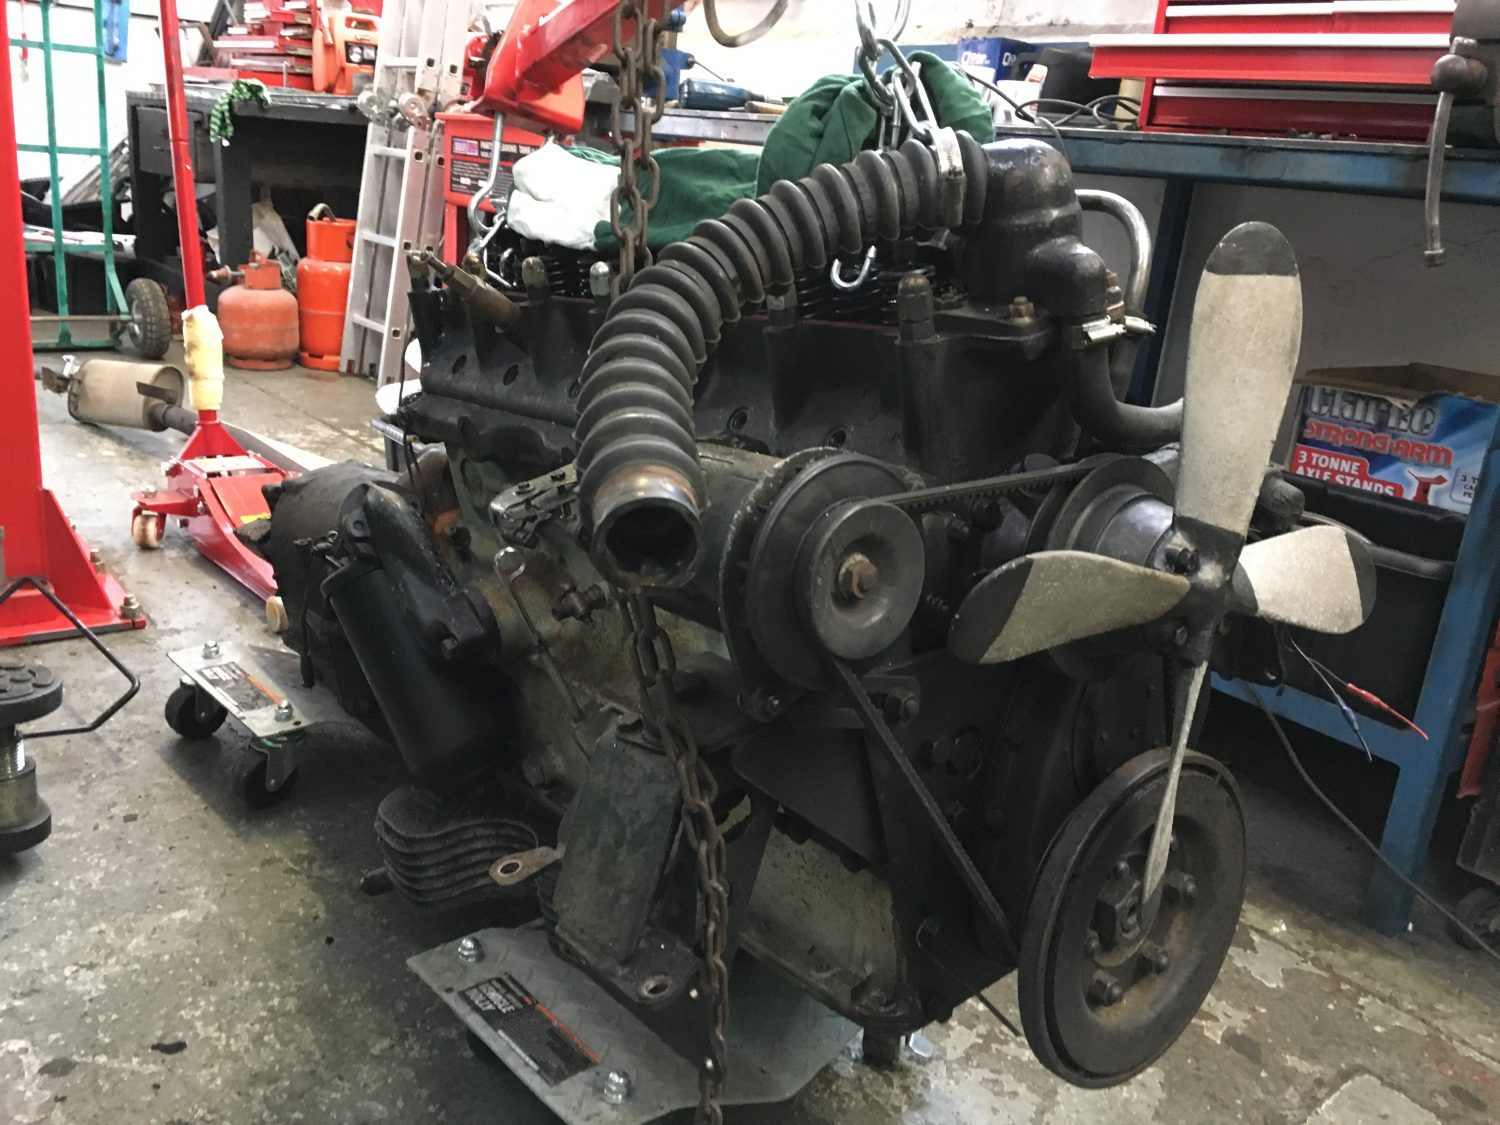
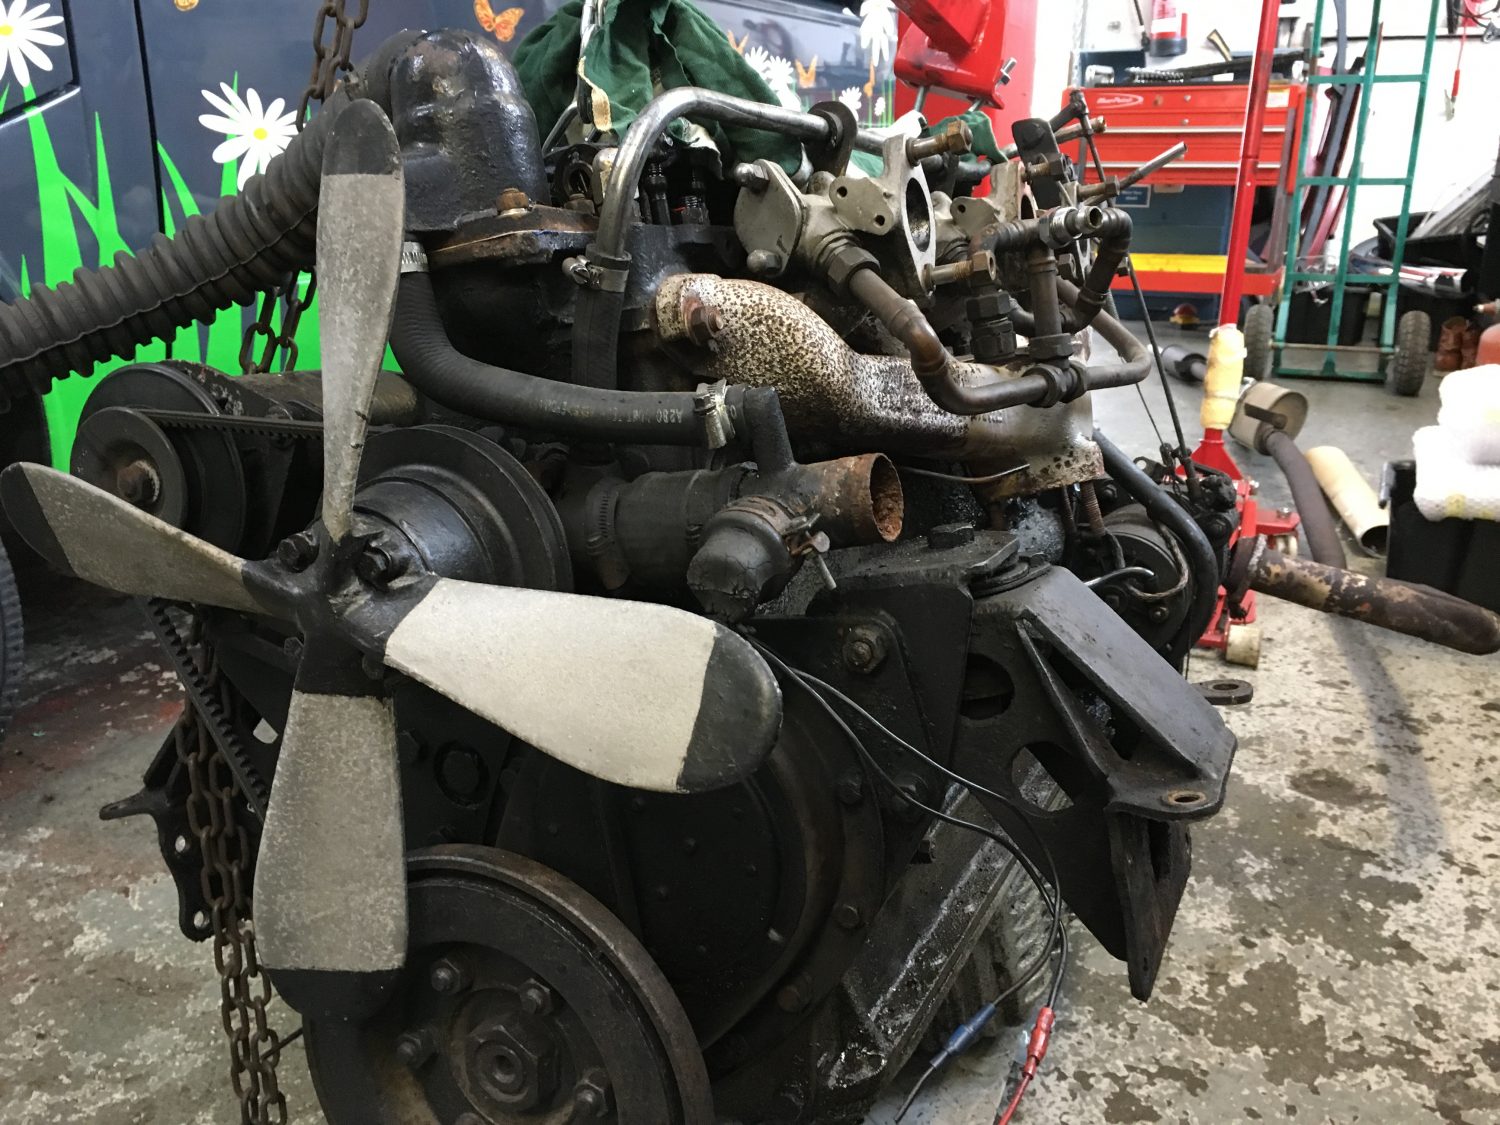
[vc_row][vc_column][vc_column_text]Today’s the day we are removing the engine ready for our engine rebuilder Don Warman to work his magic on her.
Initially the engine was going to stay in the car until the carbs had been rebuilt so that Don could run her in situ but he has since decided that it needs to come out.
Over the coming months the entire engine and gearbox will be rebuilt so before we on this huge task, first, we need to take a number of pictures as reference for when it returns in a number of months.
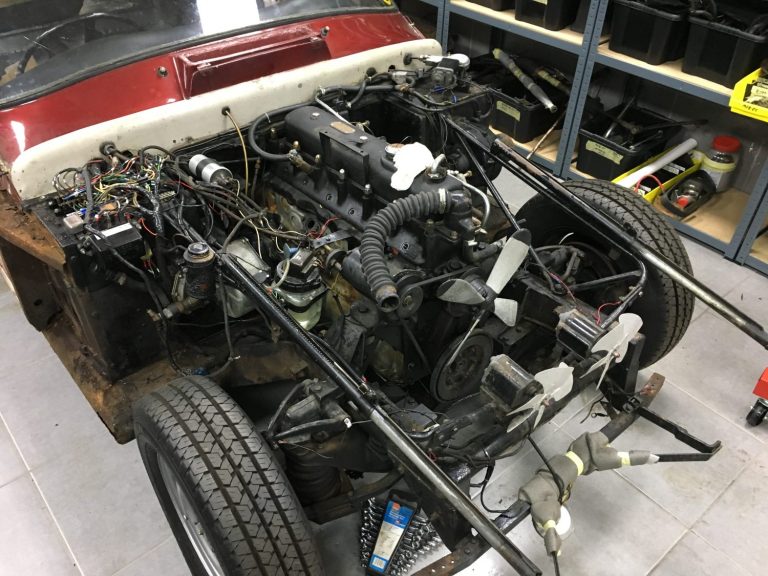
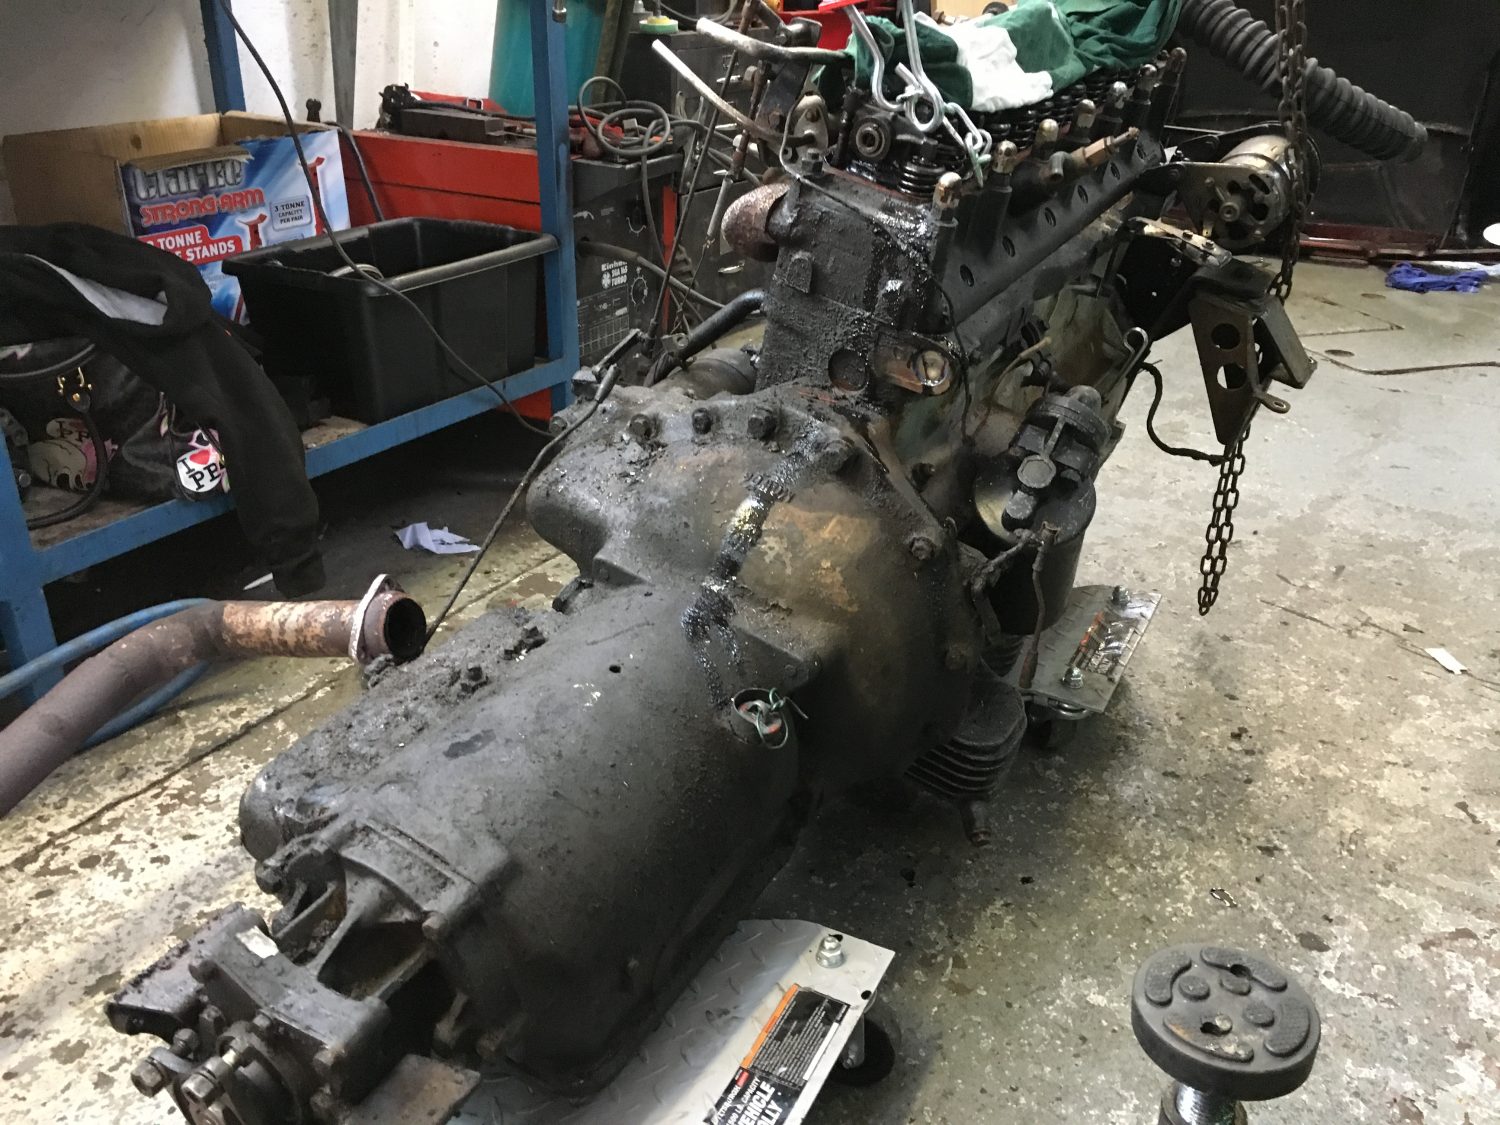
As we mentioned before, when restoring a car or taking on any project it is vital to take lots of pictures as you go along. You may never need them but if, one day, you’re questioning the position of something you know you have images to fall back on.[/vc_column_text][/vc_column][/vc_row][vc_row][vc_column][vc_gallery type=”image_grid” images=”8207,8208,8209,8210,8211,8212,8213,8214,8215,8216,8217,8218,8219,8220,8221,8222,8223,8224,8225,8226,8227,8249,8250,8251,8252,8253,8254,8255,8256,8257,8258,8259,8261″][/vc_column][/vc_row][vc_row][vc_column][vc_column_text]A successful morning in our Ipswich workshops and Asa and John, together, managed to lift the Jensen 541S engine and gearbox out of the car.

 [/vc_column_text][/vc_column][/vc_row][vc_row][vc_column][vc_column_text]Here we have the huge Jensen 541S engine and gearbox. Now fully removed from the vehicle she’s ready for Don to inspect and guide us one what his next stage will be.
 [/vc_column_text][/vc_column][/vc_row]
When we were stripping and cleaning the inside of the camper we noticed that the side door was not running as smoothly as it should be. Upon closer inspection we noticed that the lower guide assembly (252843405A) was showing signs of wear.
We managed to secure a new one on an overnight carriage and it was an easy fix.
As you can see the wheels that help guide the door into position have a lot of play which they shouldn’t be able to do. This was enough to prevent the door from sliding smoothly.
A new 252843405A Volkswagen Camper T25 Lower Guide Assembly replaces the entire running guide and the door is now running how it should be.

[vc_row][vc_column][vc_column_text]Having recently completed the restoration of our 1971 Triumph Spitfire, this week we had her back in our workshops for a general check over. We offer this service on all of our major projects to make sure the nuts and bolts are still tight and to iron out any imperfections that may have been found.
Here at Bridge Classic Cars, we don’t just finish a car and send it on it’s way never to see it again.
Our Customers and our Projects are very important to us so our after sales care is just as key to any other part of our business.
When you see your restoration project complete for the very first time it’s very exciting, your mind is more geared up to seeing the bigger picture and getting in it for a drive. It’s not until you really settle in to the drive do you discover things that you most probably have missed on collection day.
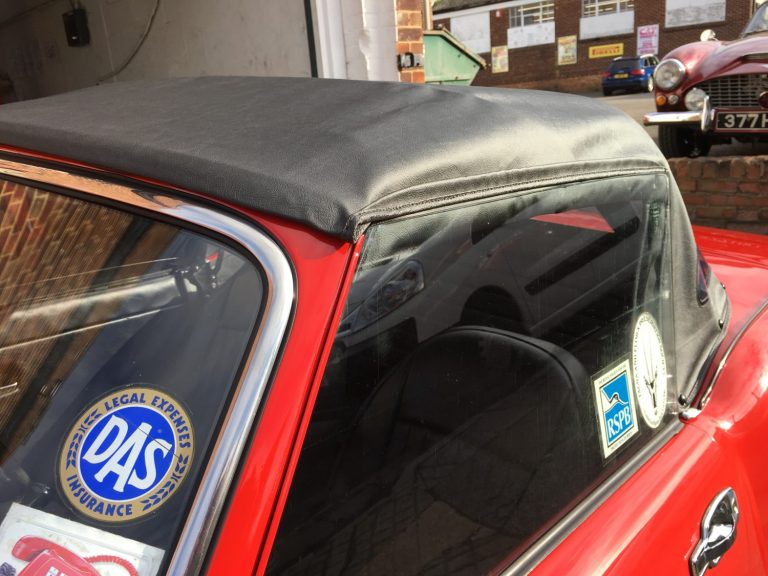
One of the concerns that Mr and Mrs King had on their 1971 Triumph Spitfire after taking her home was that they felt the hood was a little stiff.
Although we used the original hood frame, it was removed and completely refurbished before being fitted with a brand new hood. As components are new, they take a little time to settle and that’s exactly the case with the hood,
Here is a step by step guide, beautifully demonstrated by Asa and John of how we feel it is best to lower a Triumph Spitfire hood.[/vc_column_text][/vc_column][/vc_row][vc_row][vc_column][vc_video link=”https://www.youtube.com/watch?v=breXMSRJi-M”][/vc_column][/vc_row]
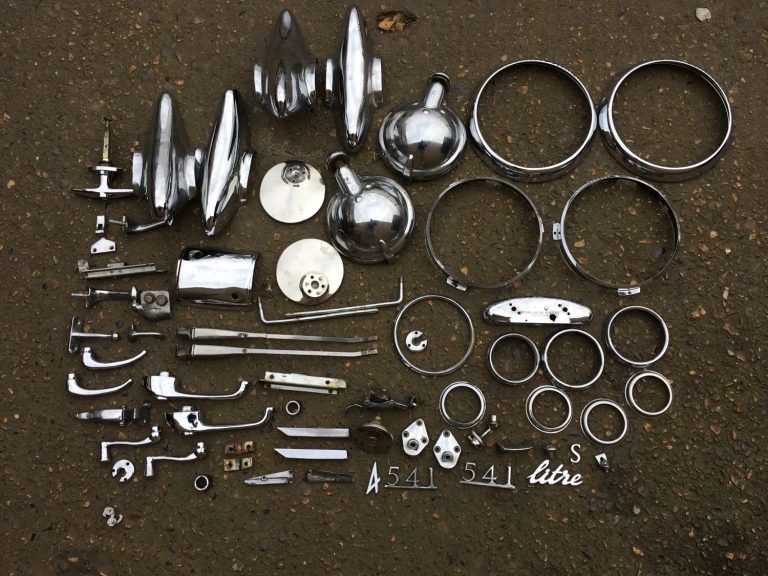
[vc_row][vc_column][vc_column_text]The 541S was manufactured between 1960 and 1963 by the Jensen Motor Company and with only 127 produced, available parts, as you can imagine, are very few and far between.
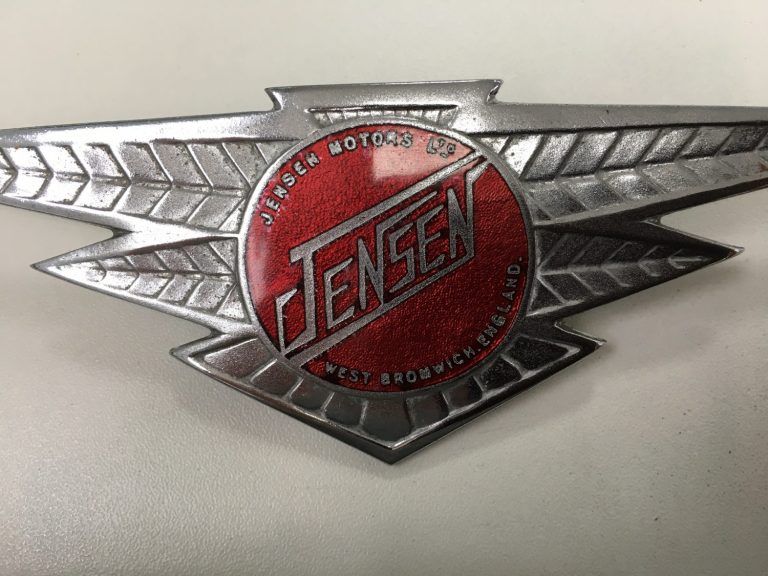
With our 541S almost stripped, the chrome work is now ready to be re-chromed and polished.[/vc_column_text][/vc_column][/vc_row][vc_row][vc_column][vc_gallery type=”image_grid” images=”8128,8129,8130,8131,8132″][/vc_column][/vc_row][vc_row][vc_column][vc_column_text]The winged badges are in reasonably good condition however the shields are in need of refurbishment.
Our previous Jensen 541S restoration required the full set of badges to be refurbished.
This time round we have managed to secure a brand new set of original badges which is very exciting for us. Finding original parts are always exciting…[/vc_column_text][/vc_column][/vc_row][vc_row][vc_column][vc_gallery type=”image_grid” images=”8133,8137,8136,8135,8134″][/vc_column][/vc_row]
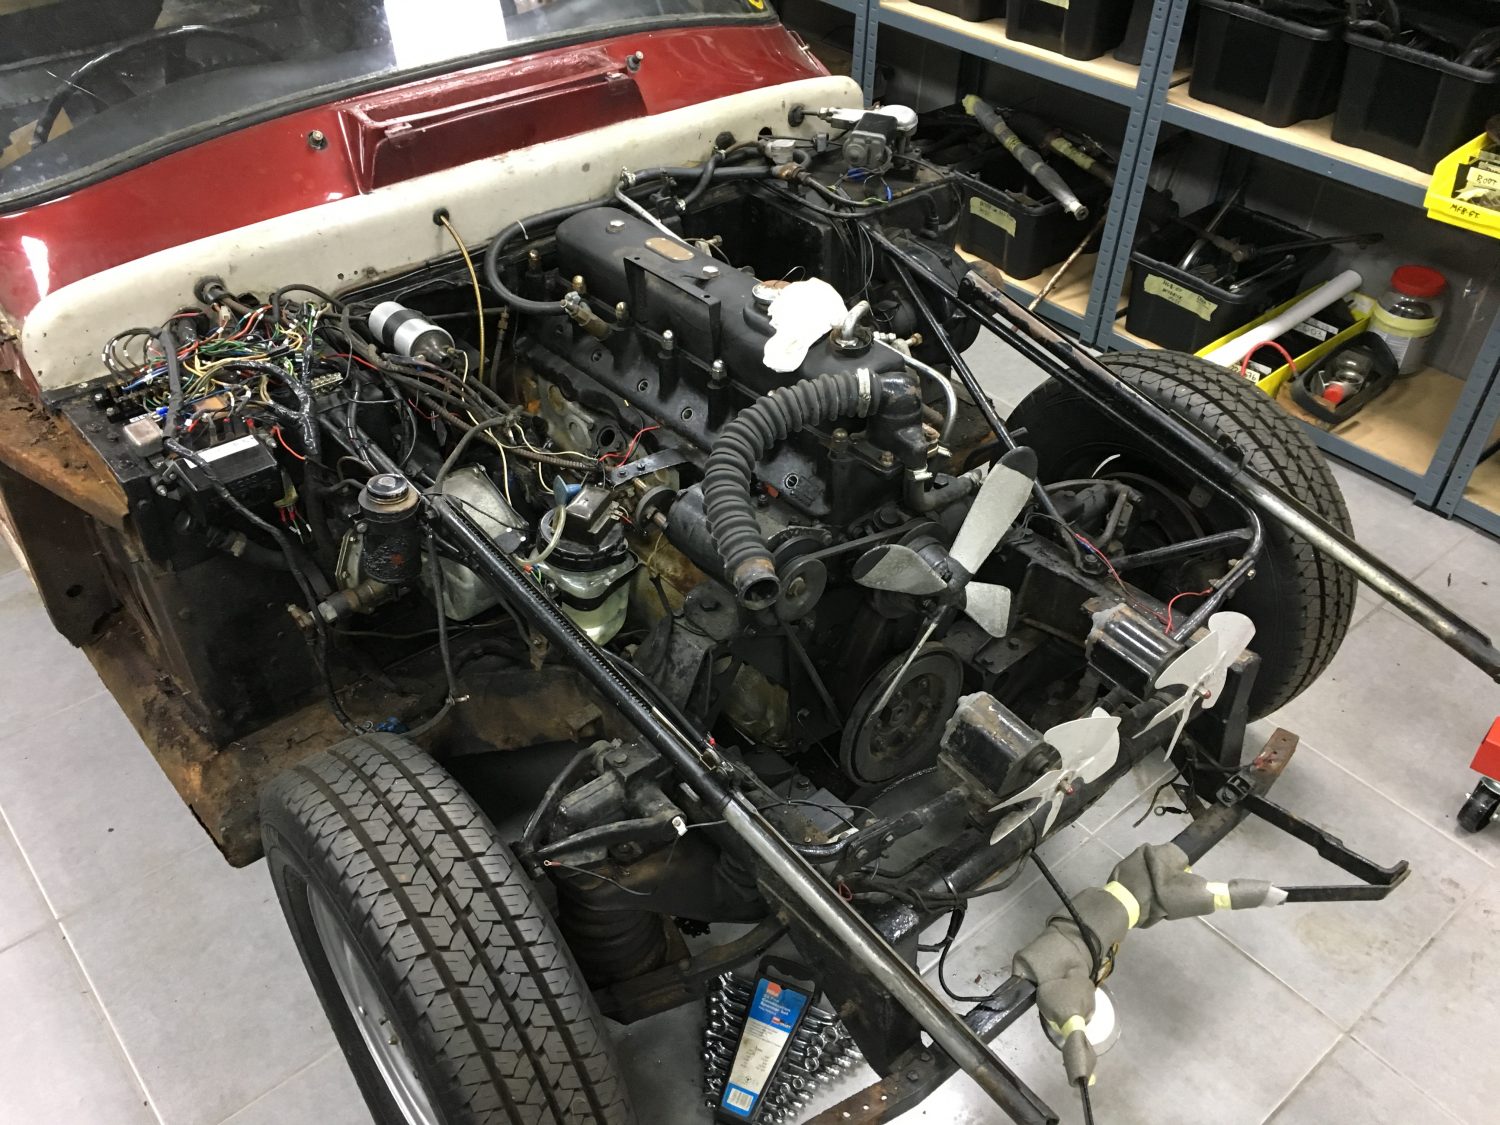
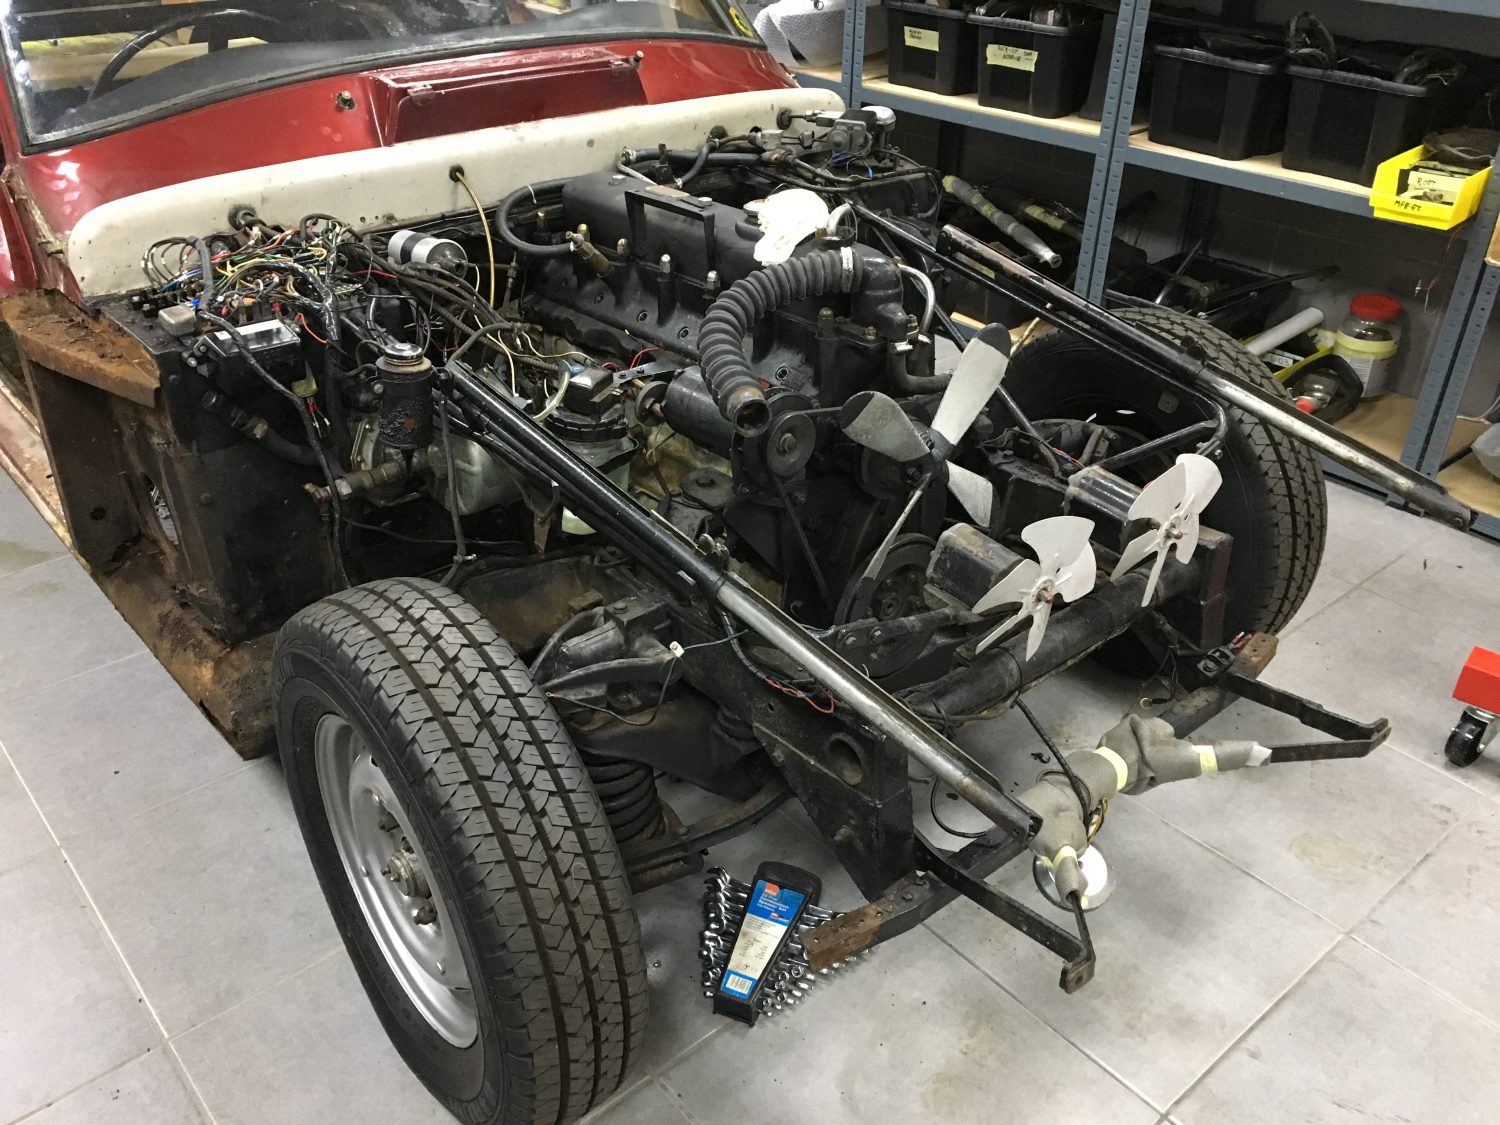
In preparation for the body shell to be completely removed from our 1960 Jensen 541S, the engine needs to be removed. In order to carry out this huge task we have removed the bonnet and at the same time have taken off the side doors.
These can now be prepared ready for paint.
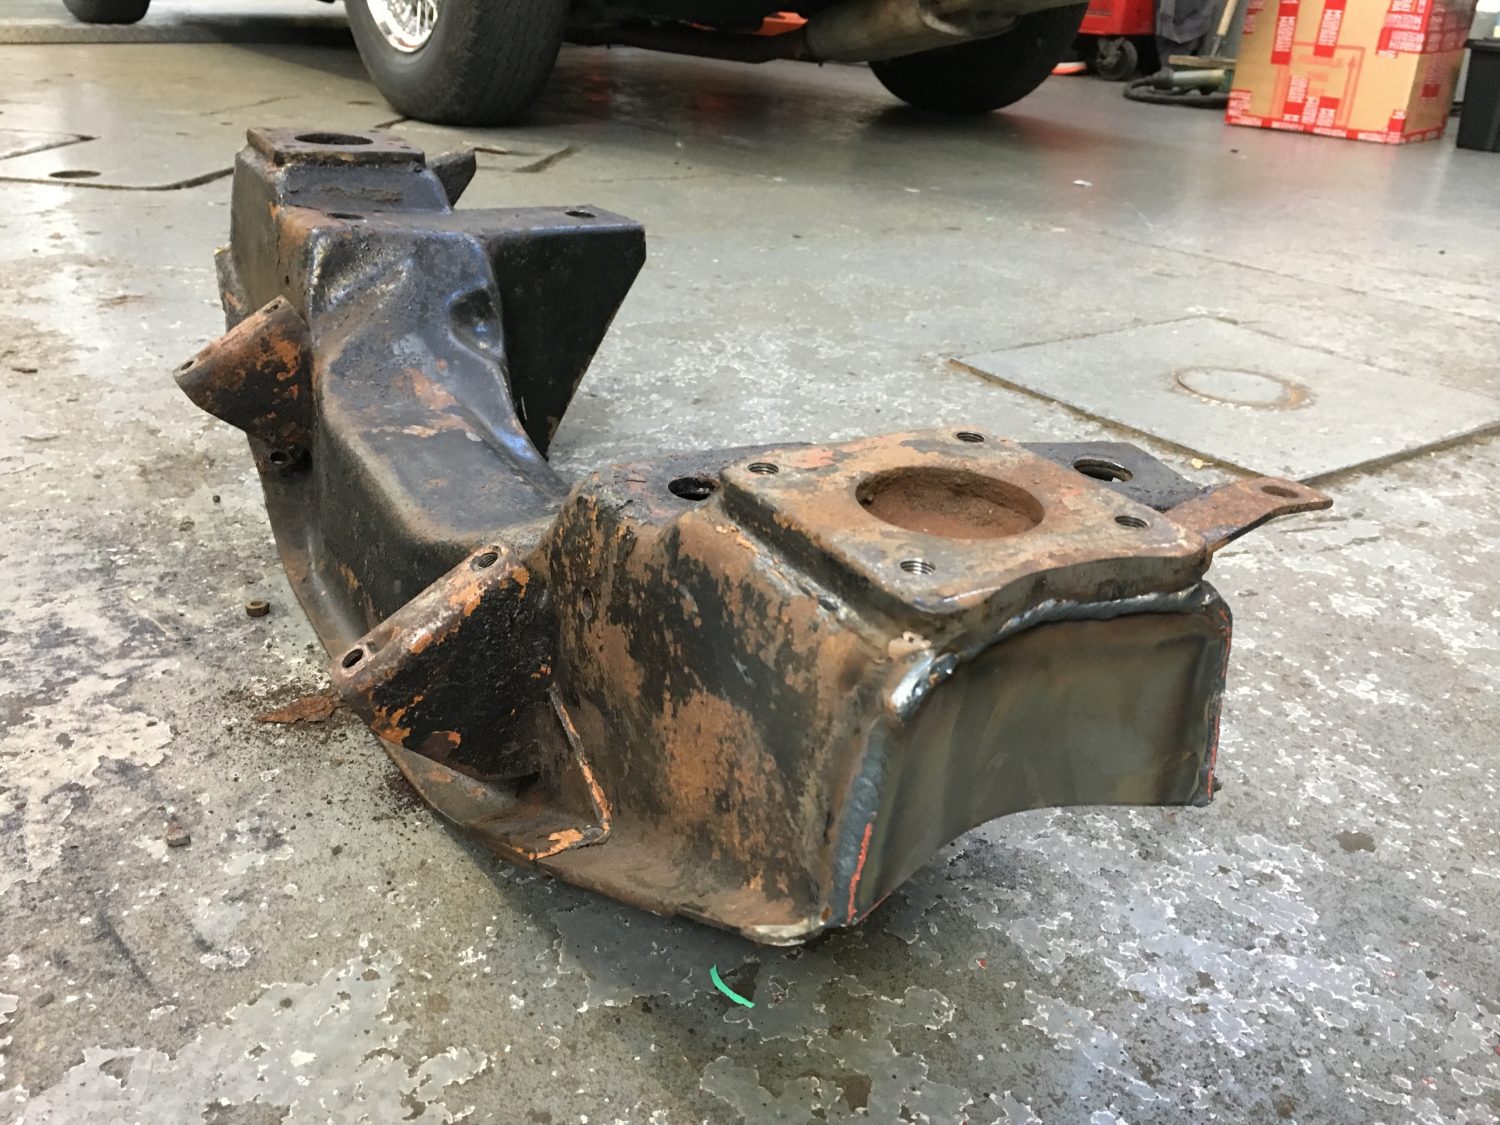
This new double wishbone, coil over front suspension system has been specially designed to overcome some of the criticism of the original or other alternative options.
The kit replaces some of the components normally fitted, there are:
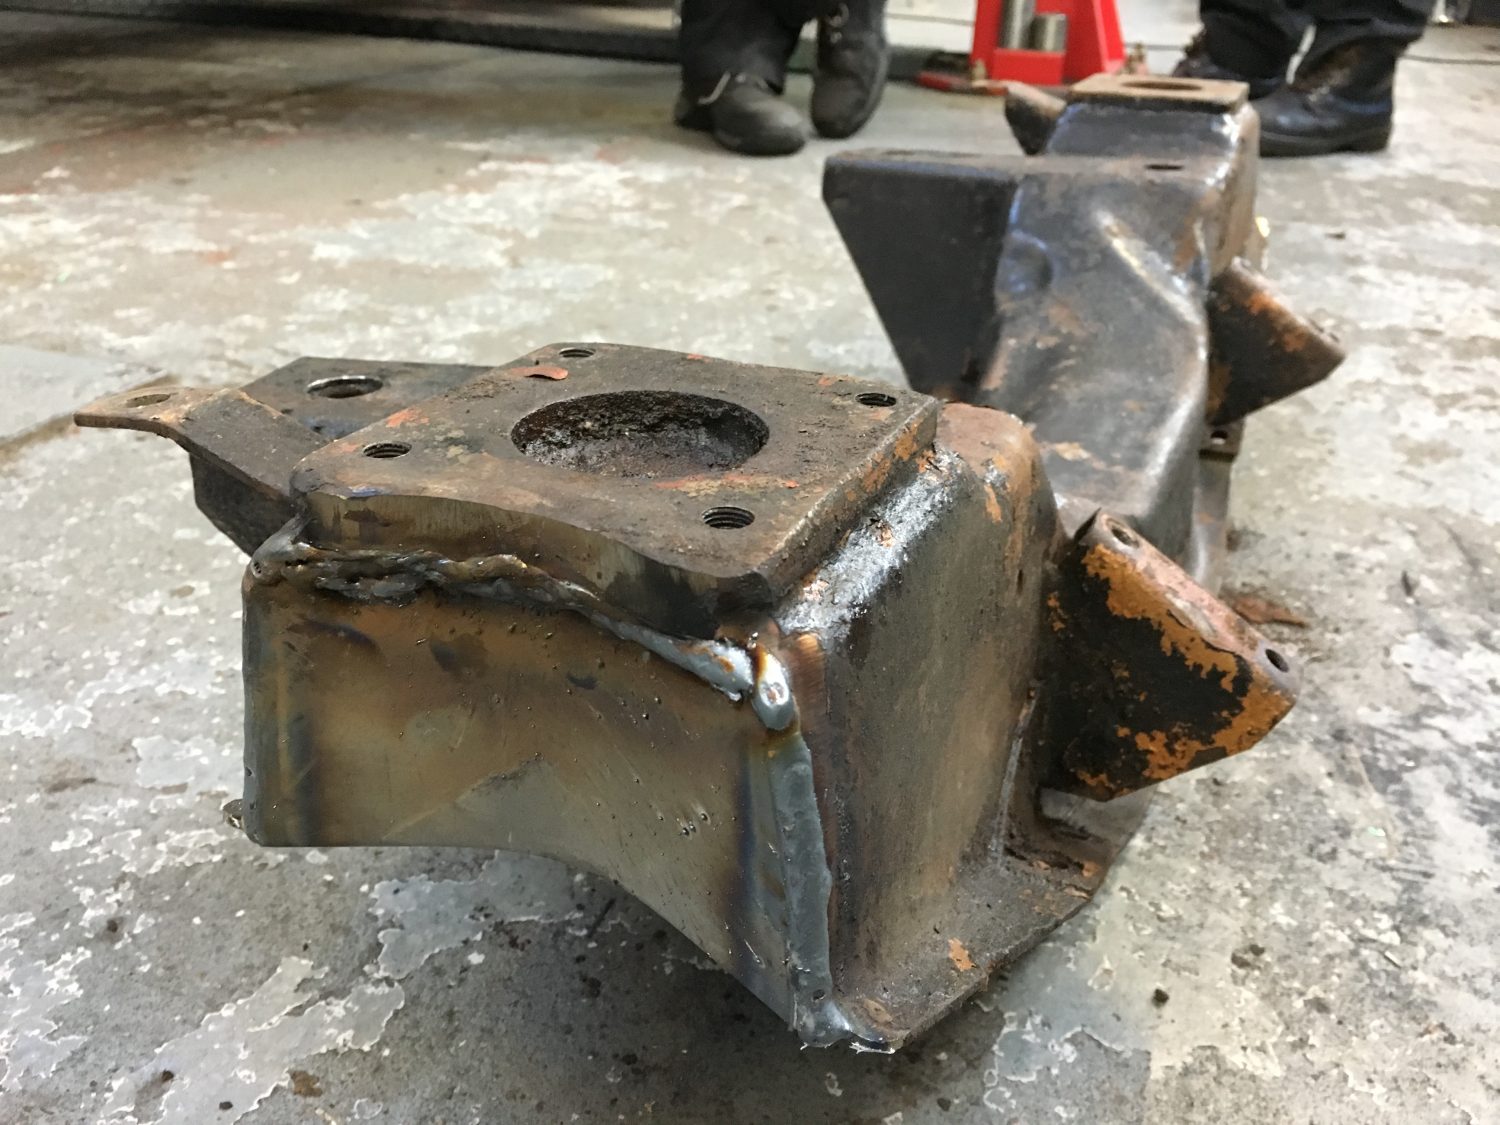
The coil over shocks are specially made ‘click’ adjustable, rebuildable units with adjustable spring seats to enable to change the ride height of your car. The springs supplied are a standard 2 1/4″ ID which are used on a variety of special and race cars. These can be obtained in a wide variety of poundages and lengths. In order to be able to fit a full size spring shocker of this type it is necessary to modify the front crossmember in order to give clearance. We can do this for you by supplying a ready modified unit on exchange. If you wish to carry out the modification yourself it its necessary to cut a curved section from each end of your crossmember and weld in a gusset, this is supplied in the kit. The advantage of using your original crossmember is that it can be modified in situ.
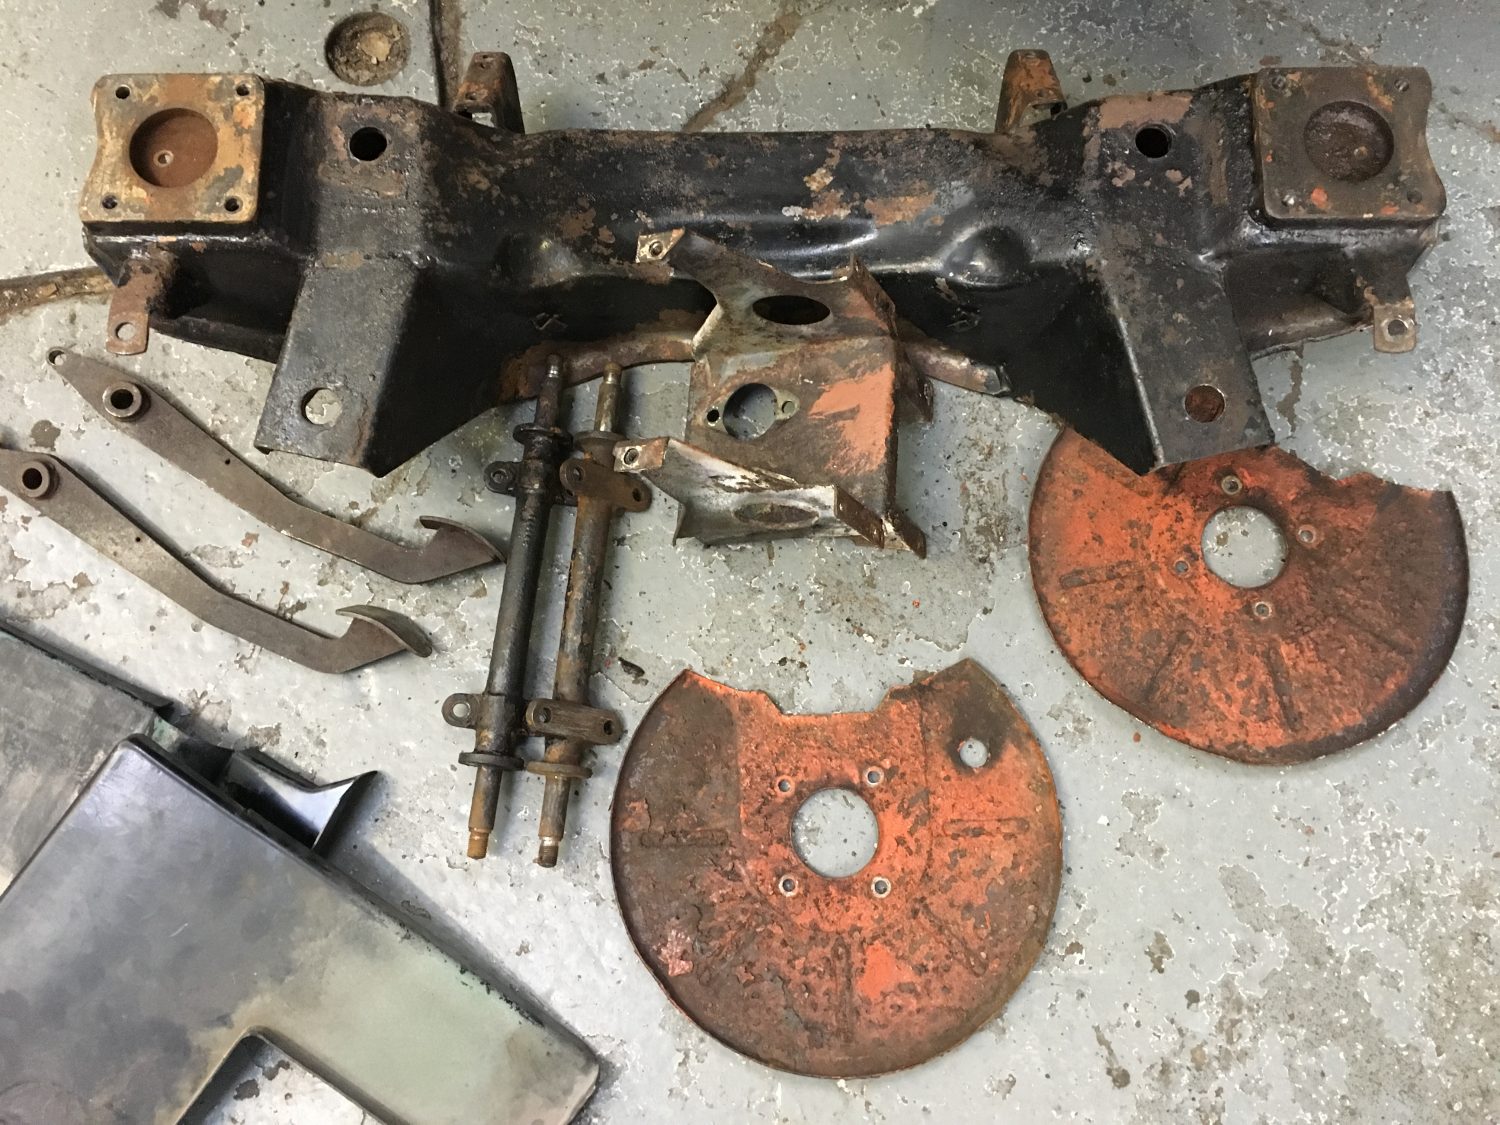
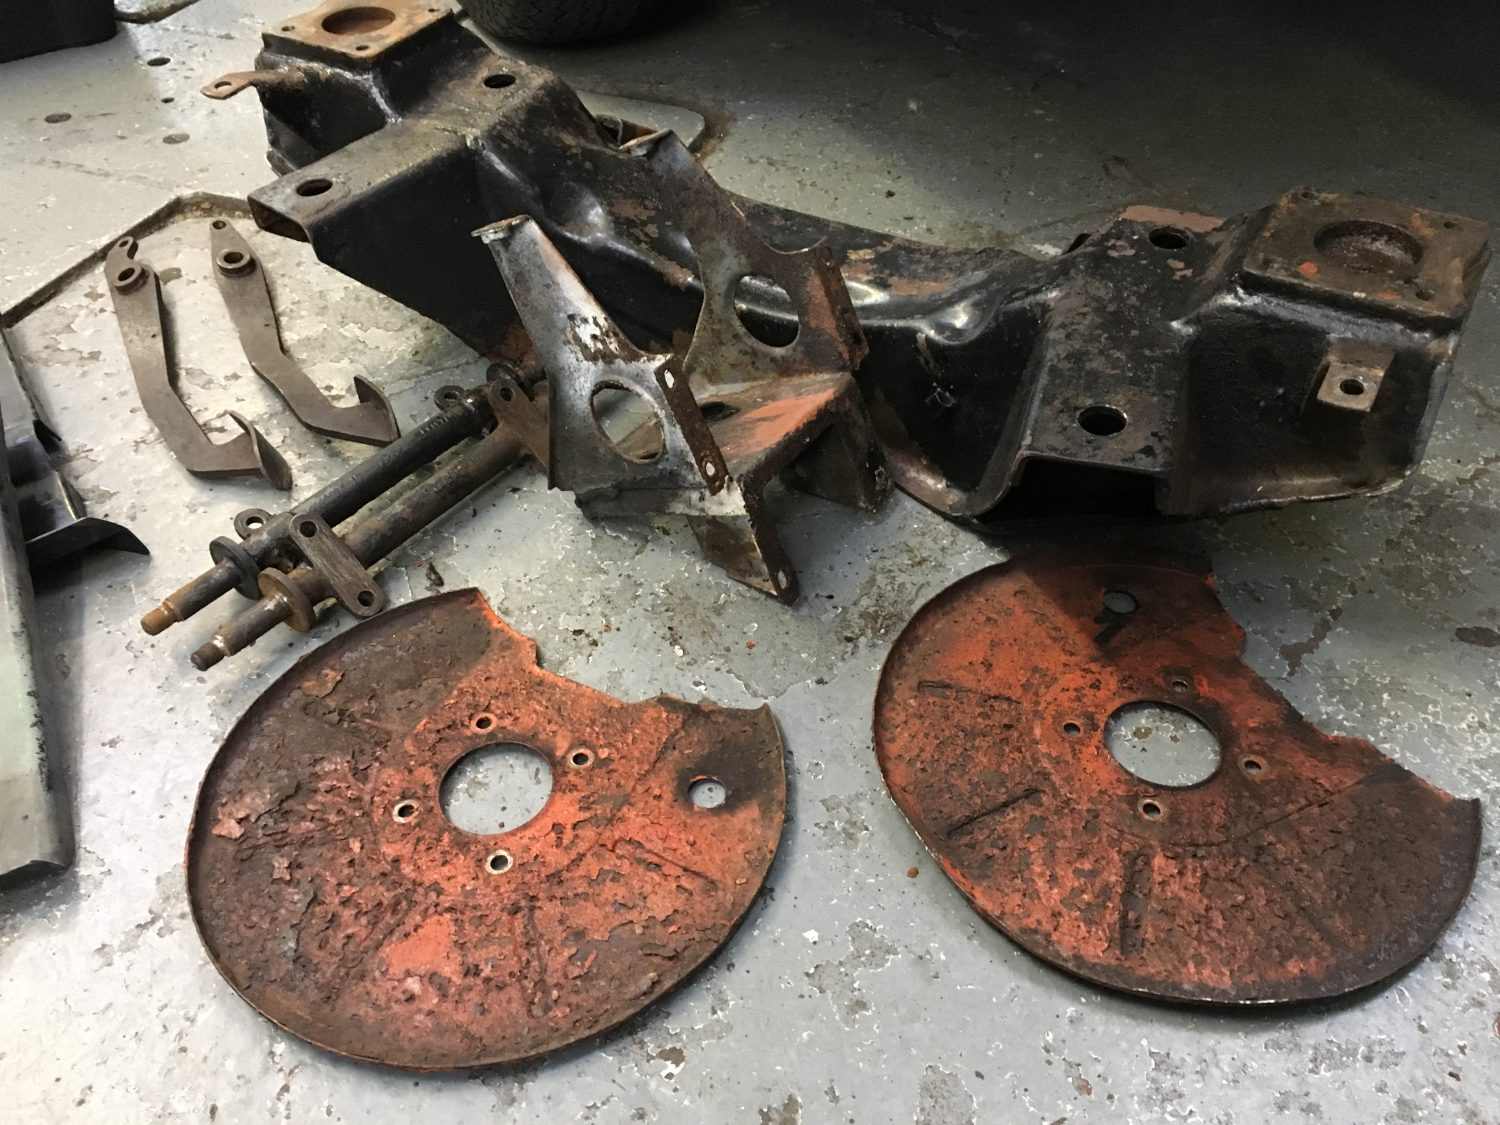
The special mounting brackets supplied have to be fitted to the crossmember in place of the original lever arm shock absorber.
It is essential to make sure that the threads in your crossmember are in sound condition. The brackets are secured using special high tensile allen bolts torqued to the correct setting as in the owners manual. We recommend you use ‘loctite’ for these.
The original lower wishbone pivots are retained, make sure that these are straight and in good condition.
The lower wishbones (straight ones) attach to the wishbone pivots using either MGB V8 rubber bushes or if you prefer we can supply special polyurethane bushes (which are of a special high grade material). Notice that two of the wishbone arms have threaded bosses to accept the anti-roll bar link arms, these go to the front of the car.
Note: the bushes on the inner ends of the wishbones will last longer if their retaining buts are tightened when the vehicle is at ride height.
Assemble the springs onto the shock absorber after first unscreing the adjustable seat (to its lowest positon). We always recommend the use of a coil spring compressor when handling these components. It is a good idea to put ‘copperslip’ on the threads and collars.
The spring shockers are assembled to the suspension with the adjuster facing the engine and using the special 12mm bolts and spacers supplied.
We suggest that you start with the springs wound fairly high to start with and if you wish to lower the car then make sure you don’t go too low and have problems with ‘sleeping policemen’ etc. the upper wishbones are curved and these are attached to the special mounting brackets in the same way as the lower wishbones and use the wishbone bushes. You will therefore need a total of eight new wishbone bushes altogether.
A new bolt is supplied for the top wishbone to stub axle the standard tapered bushes (or polyurethane) are used here. Please note that two special shim washers rebuked each side these bushes at the top, these are to enable the castor angle to be adjusted should you wish. There is also a special spacer that is fitted slightly inboard of this which increases the rigidity of the top wishbone assembly.
The bottom stub axle retains the original seals, thrust washers and spacer tubes etc, but a special bolt replaces the original item. The special high tensile bolt has a small flat machined on it which carries two snail cams, one under the bolt head and one under the nut. This enables the camber angle to be adjusted simply by slackening the nut and then rotating the bolt with an allen key. When you have set the desired chamber you must tighten the nut securely without letting the bolt rotate. Make sure that your bottom link parts are in good condition and kept well greased. If in doubt replace them – refer to owners manual if you need guidance on these parts.
The anti-roll bar link arms are replaced with our type, which are threaded to accept a special spherical joint. The spherical joints can be screwed up or down in order to set the anti-roll bar evenly and without bias. It is important to make sure that the joints are locked in place with a lock nut and that they are positioned carefully not to interfere or foul during operation. This can be checked with the shock absorber in place, with the spring removed, by checking clearance through the full suspension and steering lock travels.
To set up your suspension the car needs to have the full weight on the wheels. First adjust the ride height (easier to do if the car is jacked up and the wheel removed – yes I know we said have it on its wheels!!!) so that the bottom wishbones are horizontal (parallel to the ground), this will give you the standard height. This can be lowered if you wish, but the amount by which it is lowered will reduce the bump (upward) travel by the same amount. Secondly the chamber should be adjusted, for road use 1/2 – 1 degree negative is suggested. Finally the tracking can be set up to standard MGB spec – 1/16@ toe in. A good starting point with the shocker adjustment is ‘two clicks’ in and see how the car feels on the road. Increasing (turning knob clockwise) the number of clocks will make the shocker harder and vice versa. Keep increasing the damper setting until you feel the ride is too firm then drop it back a couple of clicks.
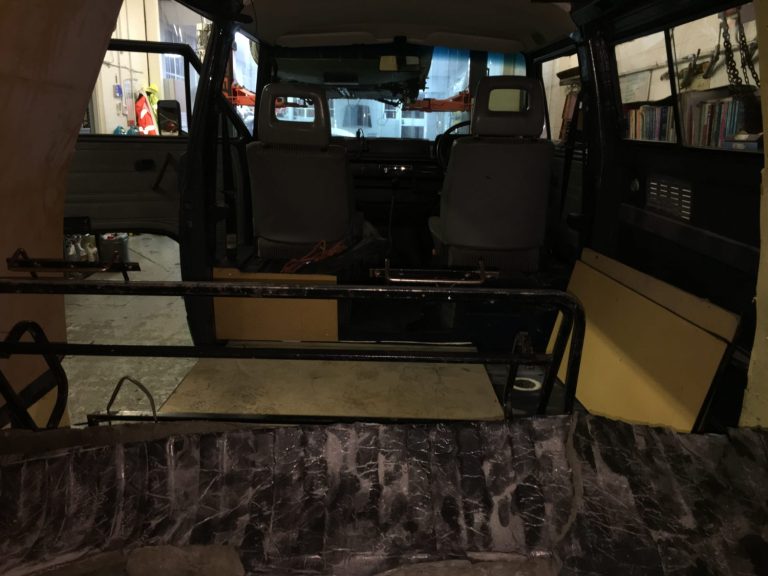
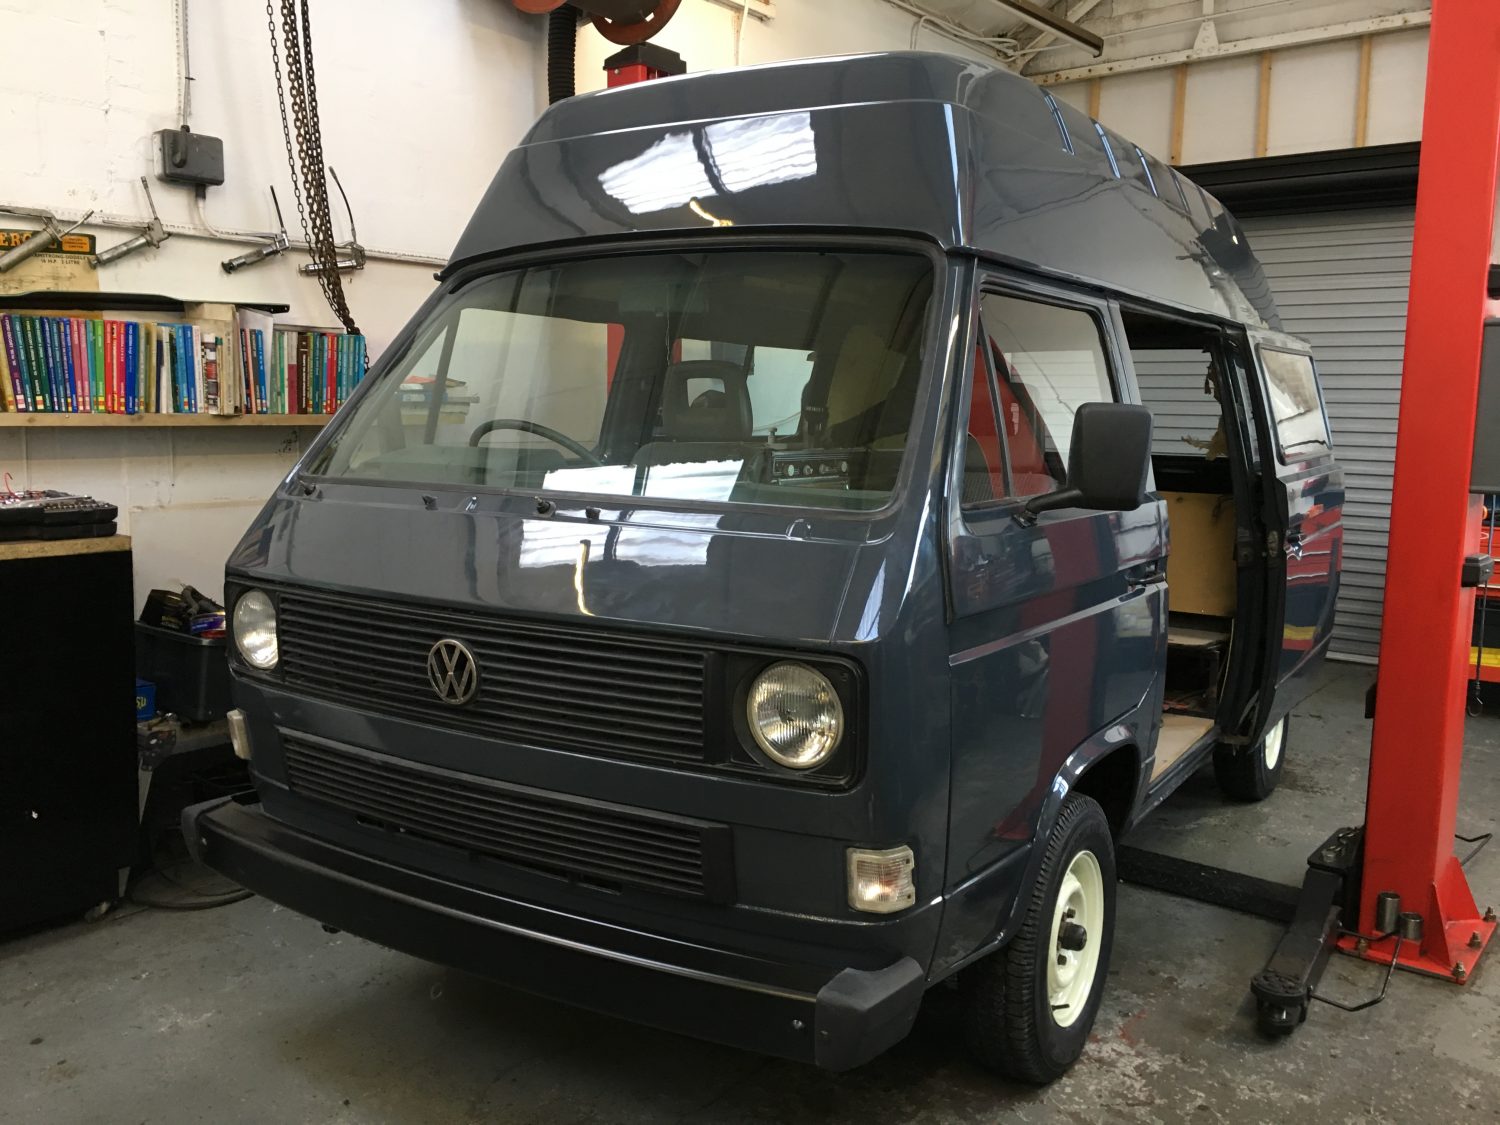
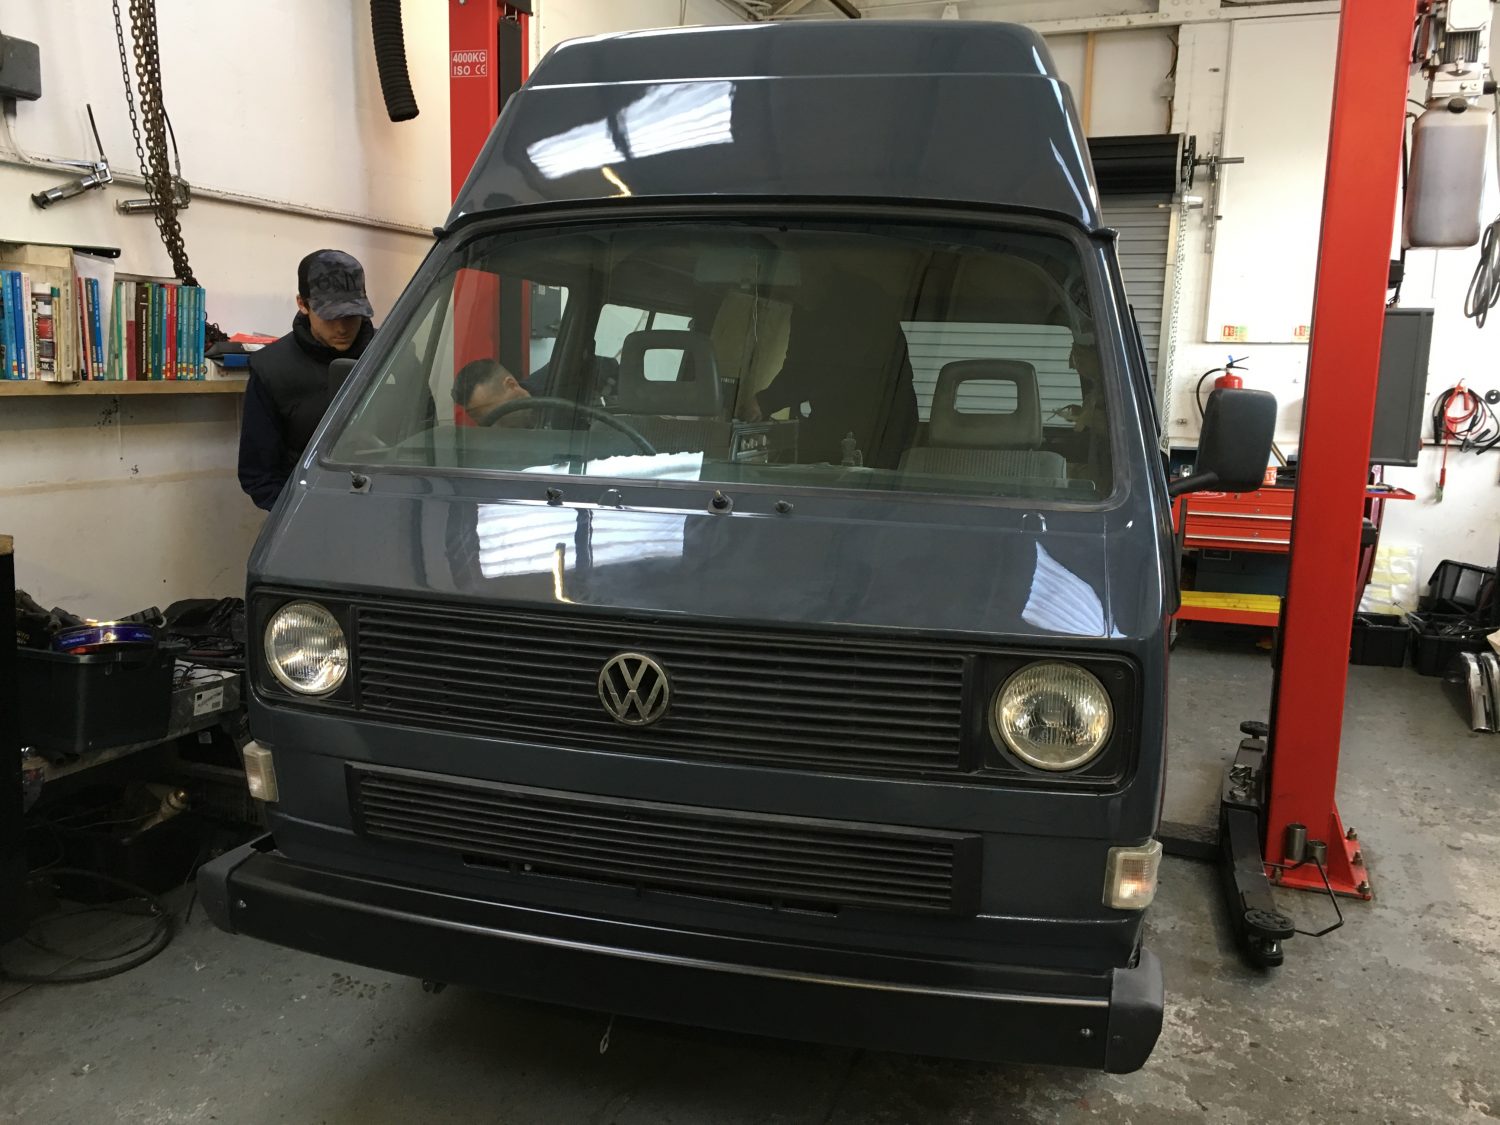
[vc_row][vc_column][vc_column_text]We now enter the final stages of our 1989 Volkswagen Camper T25, the interior design.
With the exterior near on complete it is now time to focus our efforts on designing and manufacturing the bespoke camper van interior.
So we’ve taken a detail brief so let the creative juices flow as we put together a plan for tackling the inside. Of course, it’ll have to reflect the personality of exterior![/vc_column_text][/vc_column][/vc_row][vc_row][vc_column][vc_gallery type=”image_grid” images=”8109,8110,8111,8112,8113,8114,8115,8116,8117,8118,8119,8120,8121,8122,8123,8124,8125″][/vc_column][/vc_row]
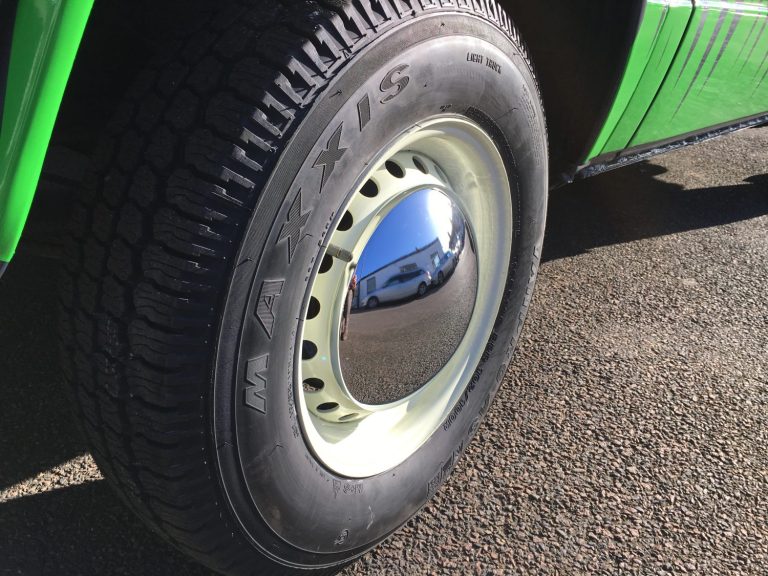
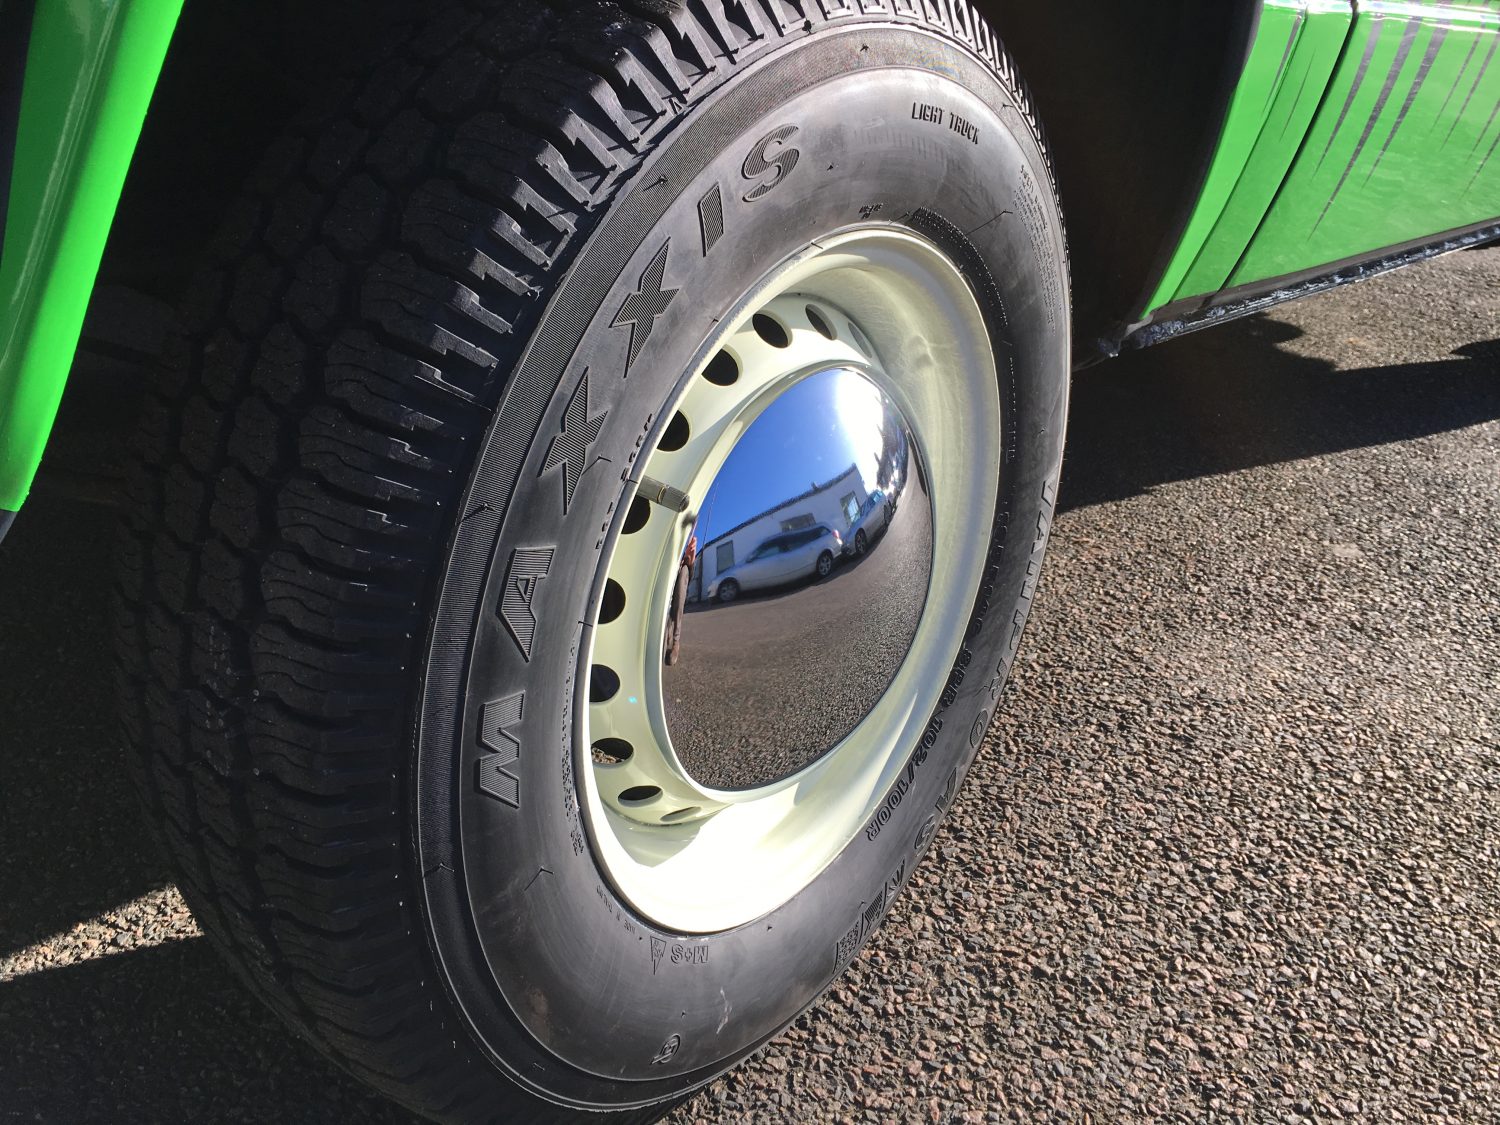
With the decals now fully fitted, the exterior of our 1989 Volkswagen Camper T25 is almost complete. A few final adjustments to be made.
The Chrome Baby Moon Hubs have arrived this morning from VW Heritage so we have fitted these up ready for her new owner who is due to arrive on Sunday to see her for the very first time.
[vc_row][vc_column][vc_column_text]
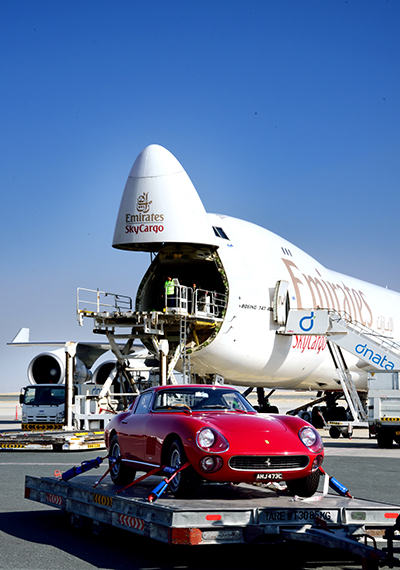
Emirates SkyCargo drives ahead with launch of Emirates SkyWheels
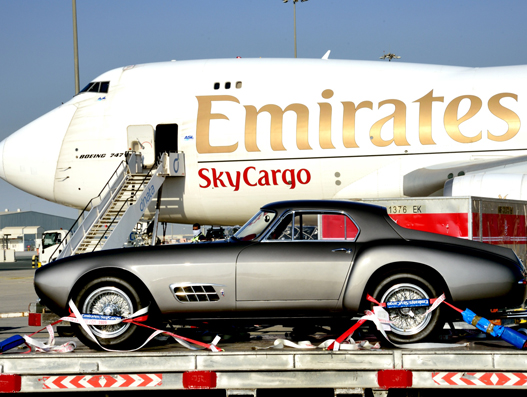
Emirates SkyCargo, the freight division of Emirates airline, has launched Emirates SkyWheels – a specialised transportation product for high value automobiles. Through its latest offering Emirates SkyCargo will provide customers a complete transportation solution for vehicles such as classic, luxury and sports cars, across its network.
Customers who would like to have their cars transported can choose between Emirates SkyWheels Premium and Emirates SkyWheels Advanced.
The customisable Premium product package covers door-to-door transportation of the vehicle from select origins and destinations. It includes collection of the vehicle from its home and delivery overseas, in addition to export and import customs clearance processes for the vehicle at both ends of the journey. Additional road and transport insurance is also available under the Premium option.
Emirates SkyWheels Advanced will offer seamless airport-to-airport transportation for automobiles. Emirates SkyCargo offers complete round trip handling of vehicles under both Premium and Advanced products.
Emirates SkyCargo drives ahead with launch of Emirates SkyWheels
Super cars fly First Class
Emirates SkyCargo is no stranger to transporting high value cars, both on its passenger flights as well as on its freighter aircraft. Emirates SkyWheels is backed by the expertise of highly qualified staff across Emirates SkyCargo’s global network of over 150 destinations in 6 continents, who are specifically trained on loading and unloading vehicles from aircraft with the utmost attention to care and safety.In addition to state of the art cargo terminals in Dubai featuring dedicated storage space for vehicles, Emirates SkyCargo also boasts a modern fleet of over 245 widebody aircraft including 15 freighters; 13 Boeing 777Fs and two B747-400ERFs.
Emirates SkyCargo also recently transported an exclusive Pagani Zonda F super car from Dubai back to the Pagani factory near Bologna, Italy for a service.
Watch an Emirates SkyCargo case study film following the journey of the car presented by automobile vlogger Mr JWW.[/vc_column_text][/vc_column][/vc_row][vc_row][vc_column][vc_video link=”https://www.youtube.com/watch?v=ij_7-YLPbSE”][/vc_column][/vc_row][vc_row][vc_column][vc_column_text]Further information on Emirates SkyWheels is available at www.skycargo.com
Partnership with Gulf Concours
Emirates SkyCargo is also a sponsor of the inaugural Gulf Concours event that will take place in Dubai on 18 and 19 November 2016. Part of the international Concours d’Elegance car competitions, the Gulf Concours is a prestigious platform that brings together a combination of rare classic cars and modern bespoke luxury and supercars, on display for the first time in the region.
Emirates SkyCargo transported a collection of rare classic Ferrari cars to Dubai for the event. One of the cars that was flown into Dubai was a classic 1962 Ferrari 250 GTO estimated to be worth over USD 40 million. The car has a successful race history (27 races and 17 podium finishes) and was also one of the handful of cars used by Scuderia Ferrari for testing. Some of the other cars transported by Emirates SkyCargo for Gulf Concours included a 1955 Ferrari 250 GT Competizione Berlinetta Sport Speciale and a rare 1965 Ferrari 275 GTB Competizione.
Cars participating in Concours d’Elegance events across the world are normally not driven on a day to day basis and are meticulously maintained by collectors to ensure a perfect appearance for display in private collections, museums or competition events. This, combined with the high value and uniqueness of the cars, meant that the Emirates SkyCargo team had to ensure that the vehicles were transported with the utmost of care, safety and security.[/vc_column_text][/vc_column][/vc_row]
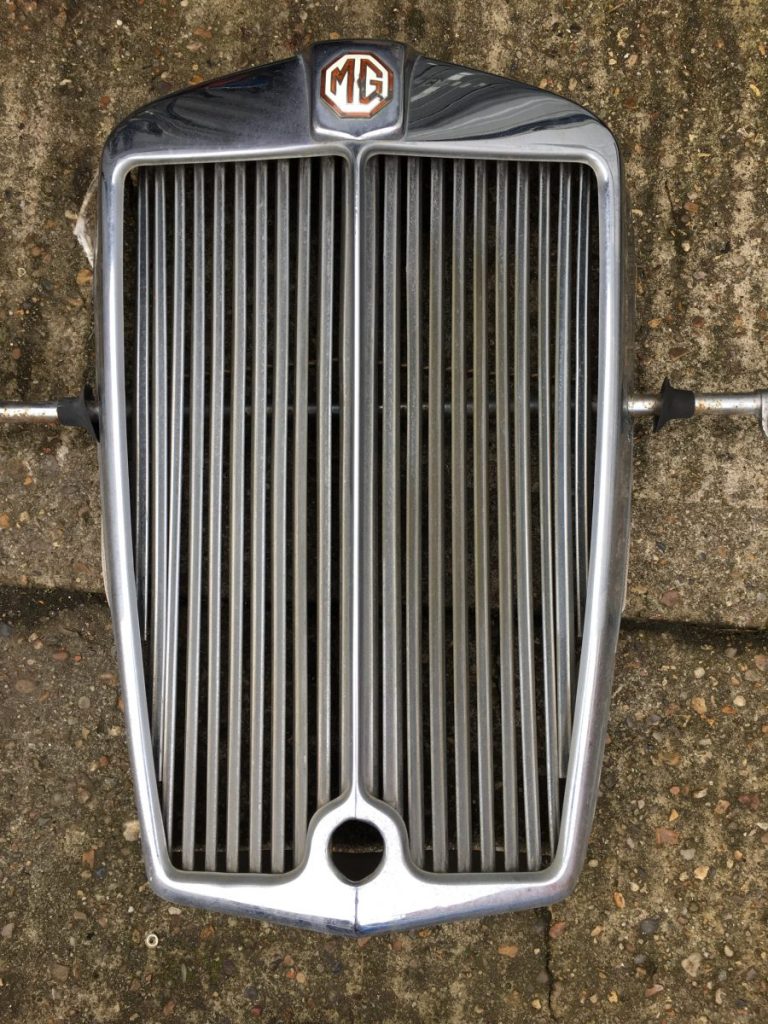
[vc_row][vc_column][vc_column_text]Now that the car is in the paint shop it gives us a bit of time to assess the chrome.
Unlike a lot of classic cars, MG parts are readily available which makes the MG’s not only an affordable classic but also a lovely classic to work on, especially if you like to do bits and pieces yourself at home.
Unfortunately for our beautiful MG YT this isn’t quite a simple. A lot of the parts on this vehicle are very rare so it is not as easy to source new.
With all of our projects we assess whether it is more cost effective to source new chrome work or re-chrome the existing.
As with everything, there are always for’s and against’s to consider; are brand new parts made with good quality materials, have they been batch produced on a tight budget, is the original tooling used to produce the parts, will they fit as well as originals? All things you need to consider before making a decision.
As a team of individuals with years of experience, between us, we’ve seen it all. We have a good idea of when to buy new and when to re chrome.[/vc_column_text][/vc_column][/vc_row][vc_row][vc_column][vc_gallery type=”image_grid” images=”8038,8039,8040,8041,8042,8043,8044,8045,8046,8047,8048,8049,8050,8051,8052,8053,8054,8055,8056,8057,8058,8059,8060,8061,8062,8063″][/vc_column][/vc_row]
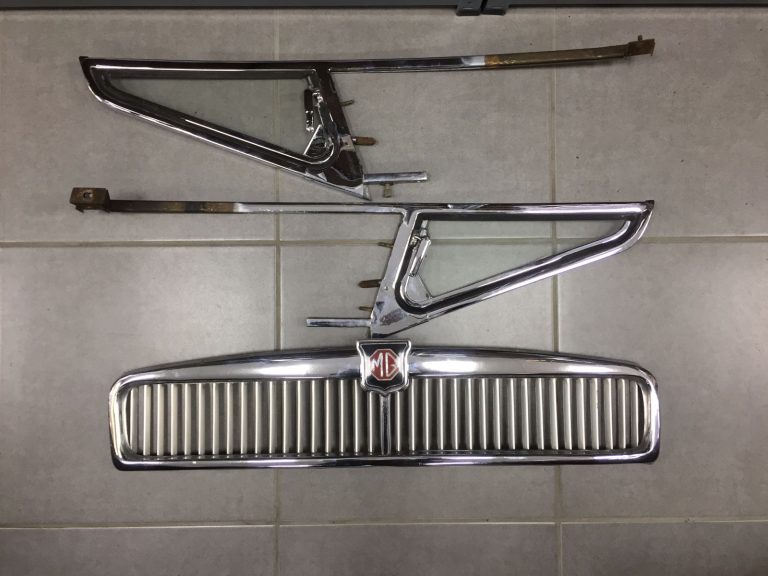
[vc_row][vc_column][vc_column_text]Lauren has been busy sorting through the MG BGT chrome work.
MG’s are a brilliant vehicle to work on as parts are so readily available. Our job now is to decide on ‘what needs to be re-chromed’ against ‘what can be purchased new’ against ‘what is good enough to be polished and reused’.
When making your decisions on this, there are a lot of factors to consider; what’s the most cost effective, are the parts you are being supplied from a reputable company, is the quality of new components as good as the originals, will your decision reflect on the overall look you are trying to achieve?
[/vc_column_text][/vc_column][/vc_row][vc_row][vc_column][vc_gallery type=”image_grid” images=”8145,8146,8147,8148,8149,8150,8151,8152,8153,8154,8155,8156,8157,8158,8159″][/vc_column][/vc_row]
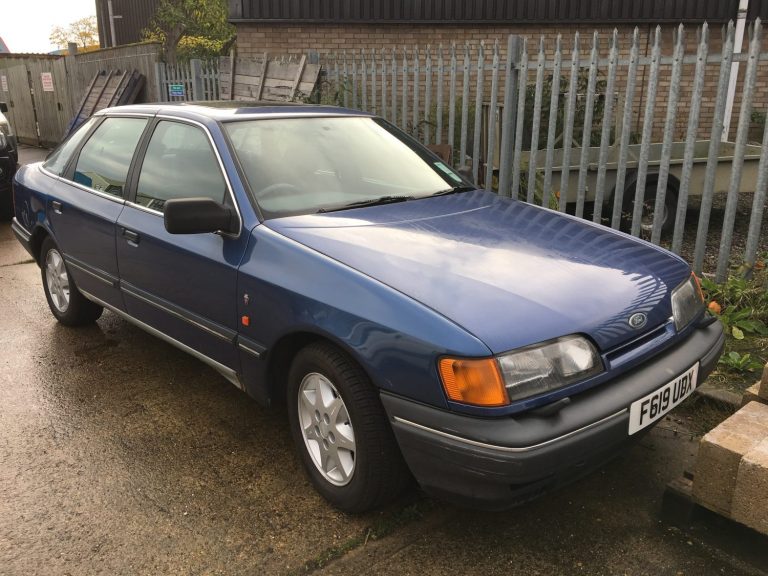
Having been with it’s current family for many years ,our 1989 Ford Granada initially came in for some welding work to be carried out on the sills, in a view to get her back on the road with a new MOT.
Unfortunately the sills were in desperate need of some attention along with some smaller task that we carried out.

Having completed the necessary work on the sills, we sat down with the owners and all made the decision that a full respray would freshen up the car’s exterior.
With the interior looking so good it would be lovely to have her back to how she should be.
Unfortunately, as with a lot of vehicles that sit still in the UK for some time each panel required attention and when every panel needs it, it’s best to do a full respray rather than trying to match up with the few good points. It’s best to make it all good again so this is what we intend to do.
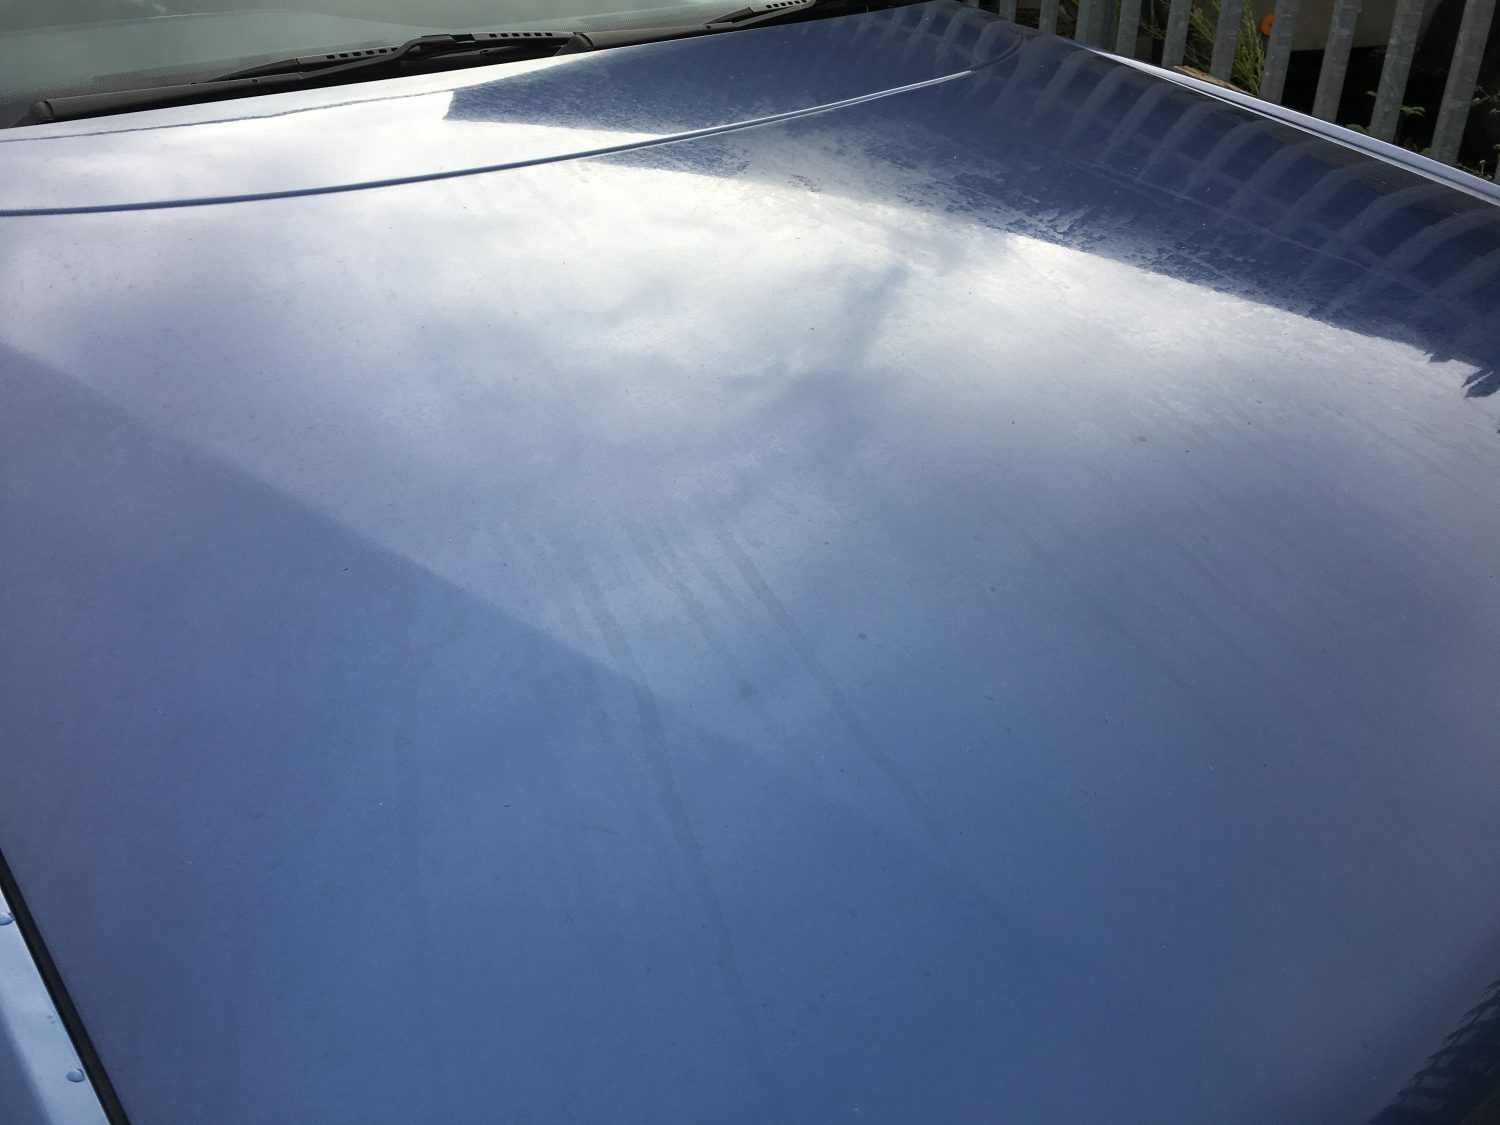


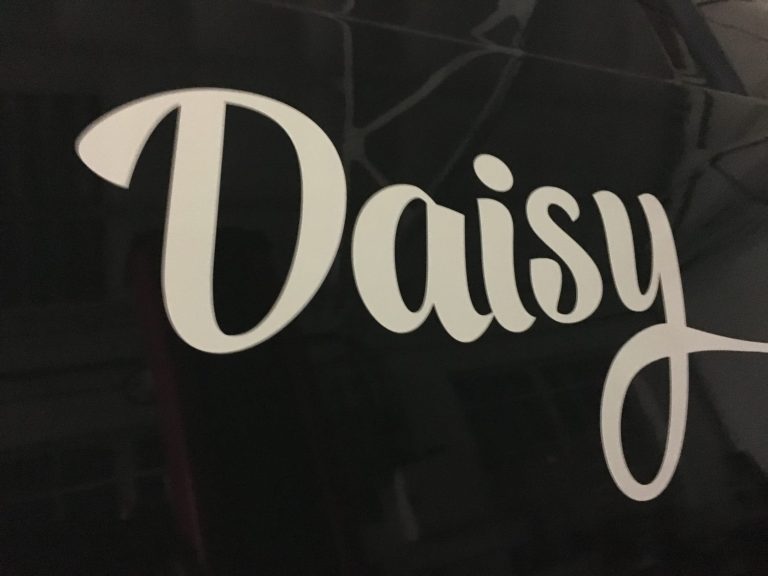
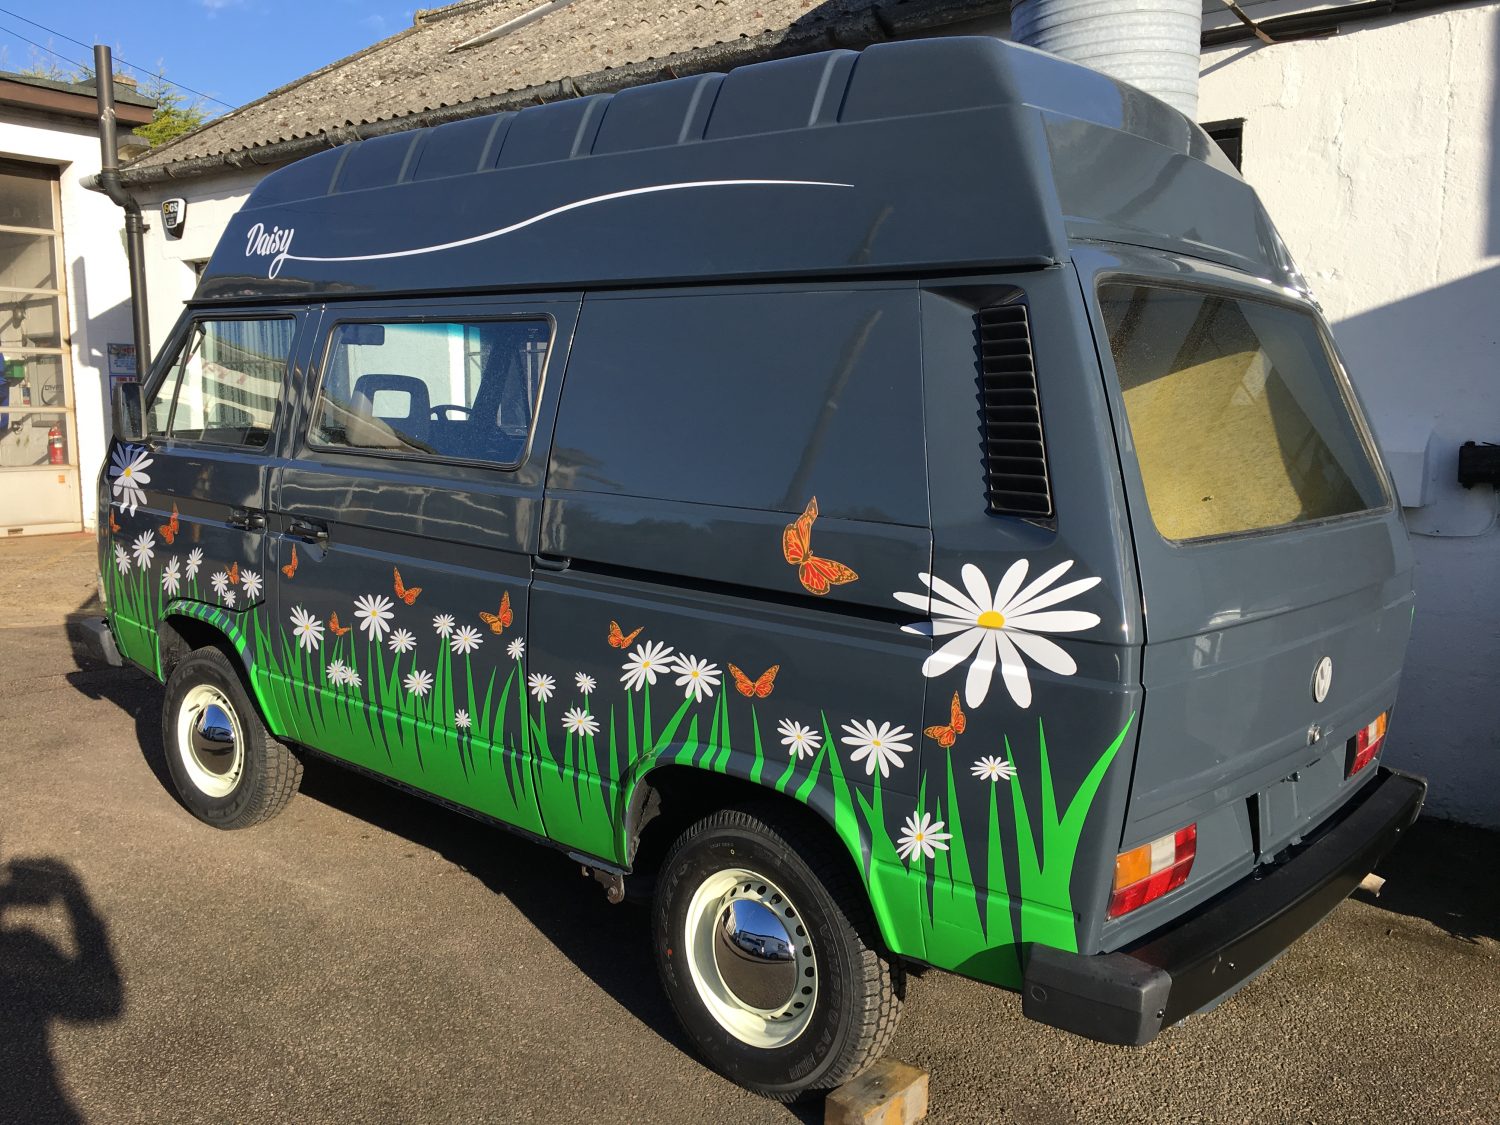
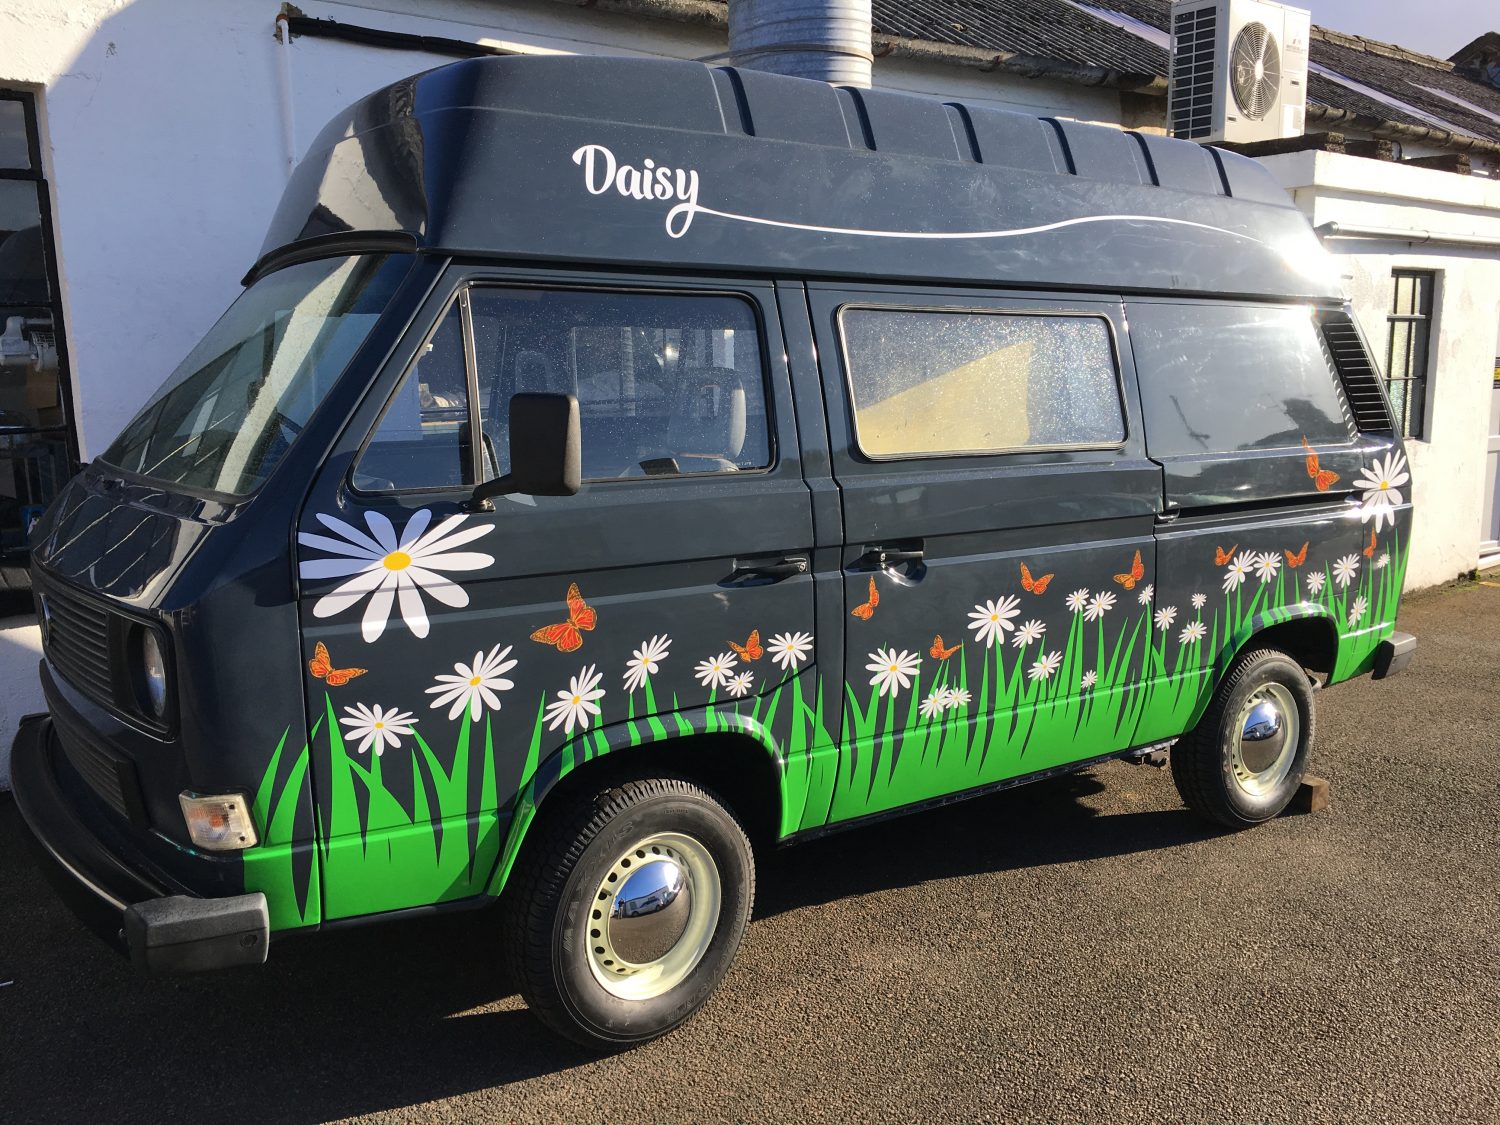
Today’s the day that our 1989 VW camper ‘Daisy’ gets her wacky decals fitted.
Lauren has done a grand job getting her nice and clean and the workshop is toasty and warm. The perfect environment for fitting exterior decals to a vehicle…and a lovely environment to work in too, being cold is horrible! Too cold and the adhesive won’t bond to the metalwork.
Another note when fitting stickers to a vehicle; it must be clean but do ensure that there is no polish or cleaning products left on the bodywork, this too will prevent the adhesive from settling.
It took Harvey from Apex Signs a good few hours to finish the design, every piece was individually printed and cut to create the layered design.


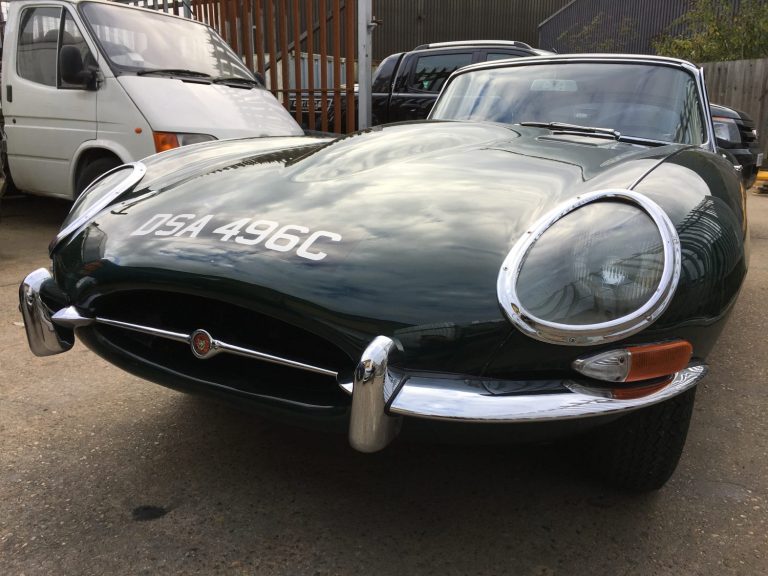
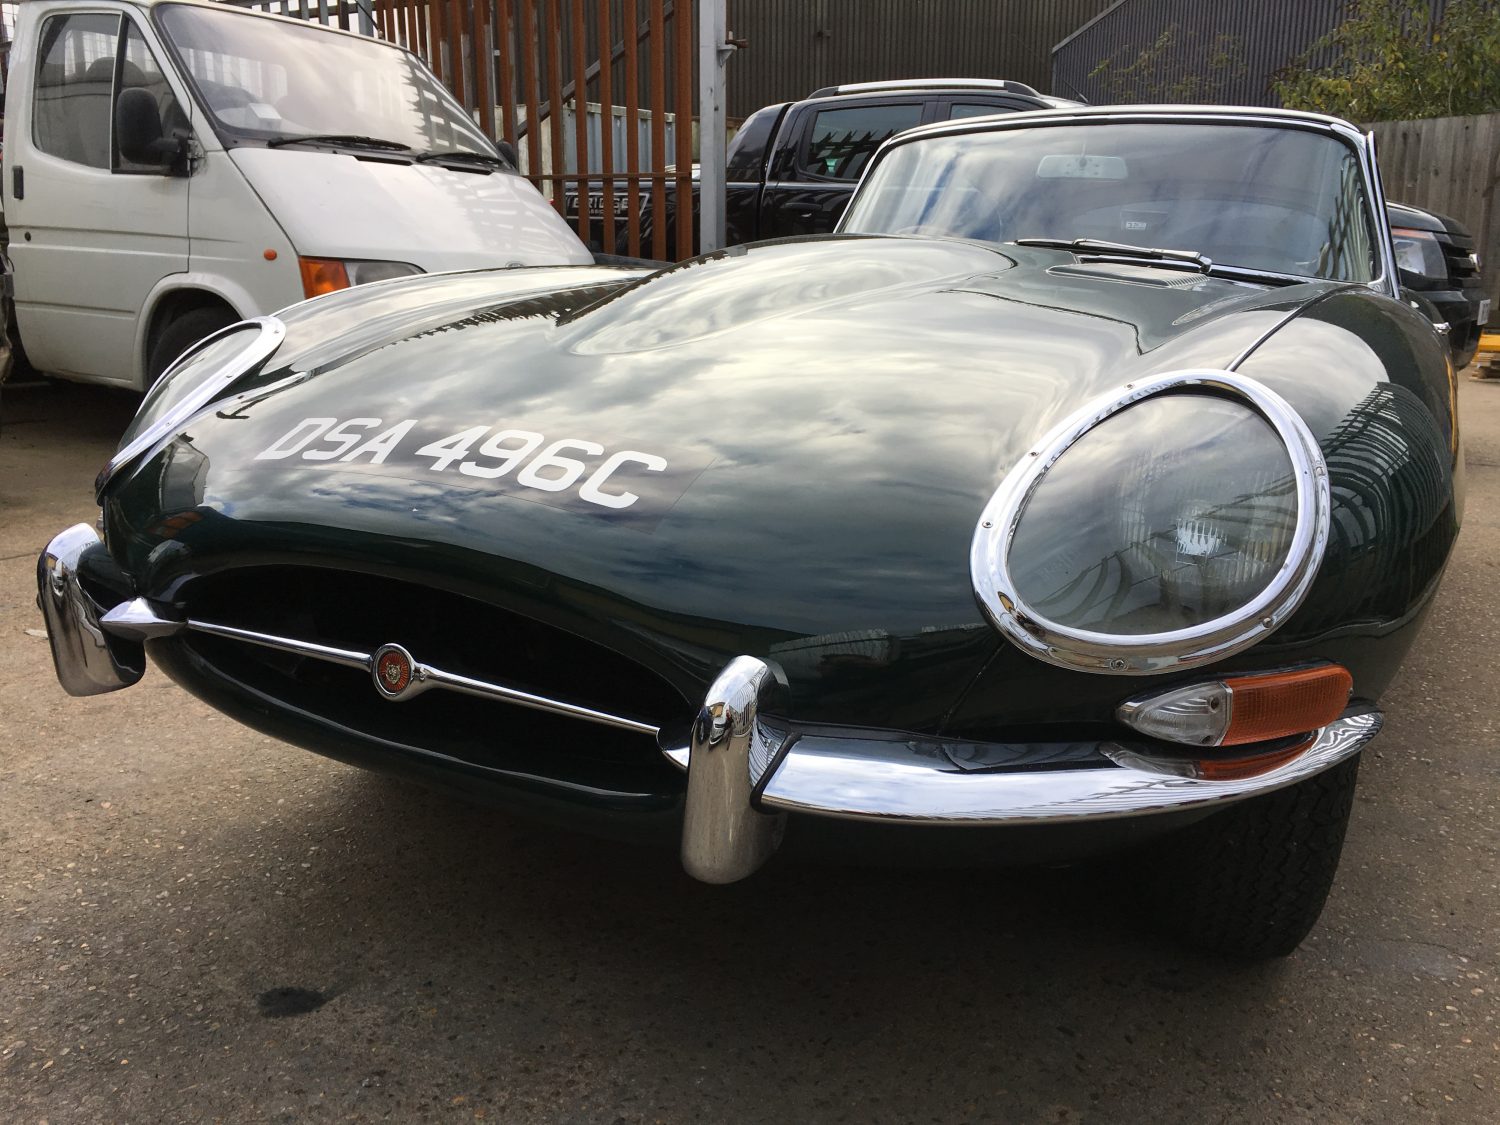
[vc_row][vc_column][vc_column_text]Earlier in the year we carried out some remedial work on our 1965 Jaguar E-Type Series 1 to get her ready for the trip to Goodwood Revival.
Now the weather is a little less appealing it’s time for her to return for a full respray.


 [/vc_column_text][/vc_column][/vc_row]
