Chassis’s and Parts ready for media blasting
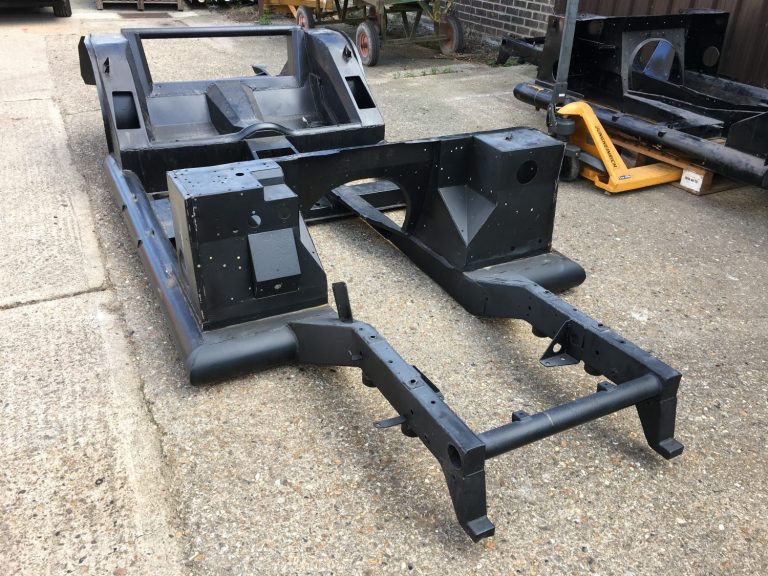
[vc_row][vc_column][vc_column_text]The chassis’ and parts are now ready to go for media blasting. We expect these only to be away for a short period of time.


[vc_row][vc_column][vc_column_text]The chassis’ and parts are now ready to go for media blasting. We expect these only to be away for a short period of time.
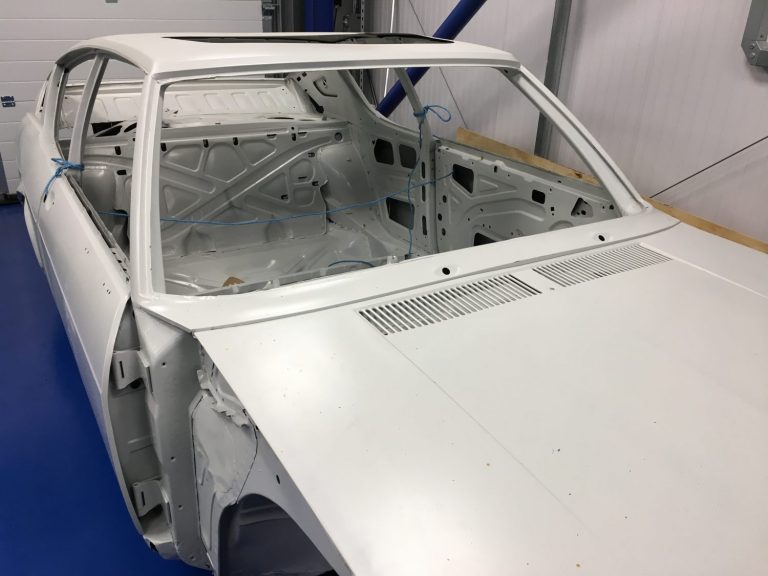
[vc_row][vc_column][vc_column_text]We’ve collected our 1974 Audi Coupe S from the guys at Prostrip who have successfully completed the chemical treatment on the body shell to remove all
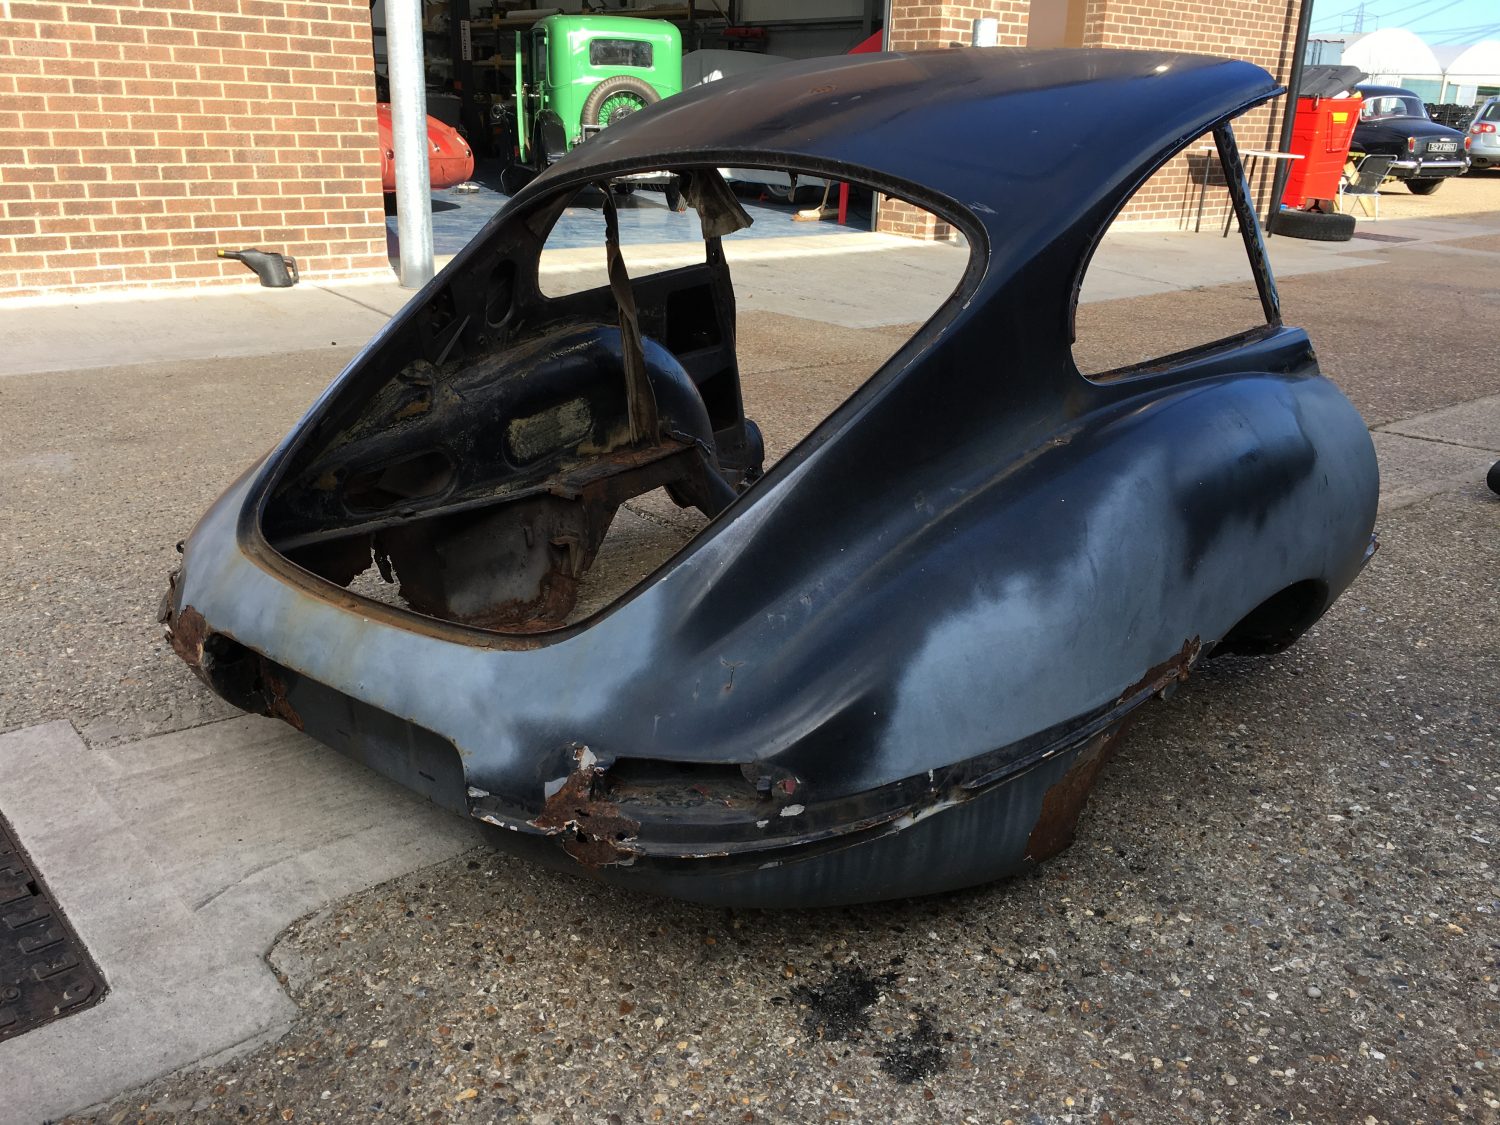
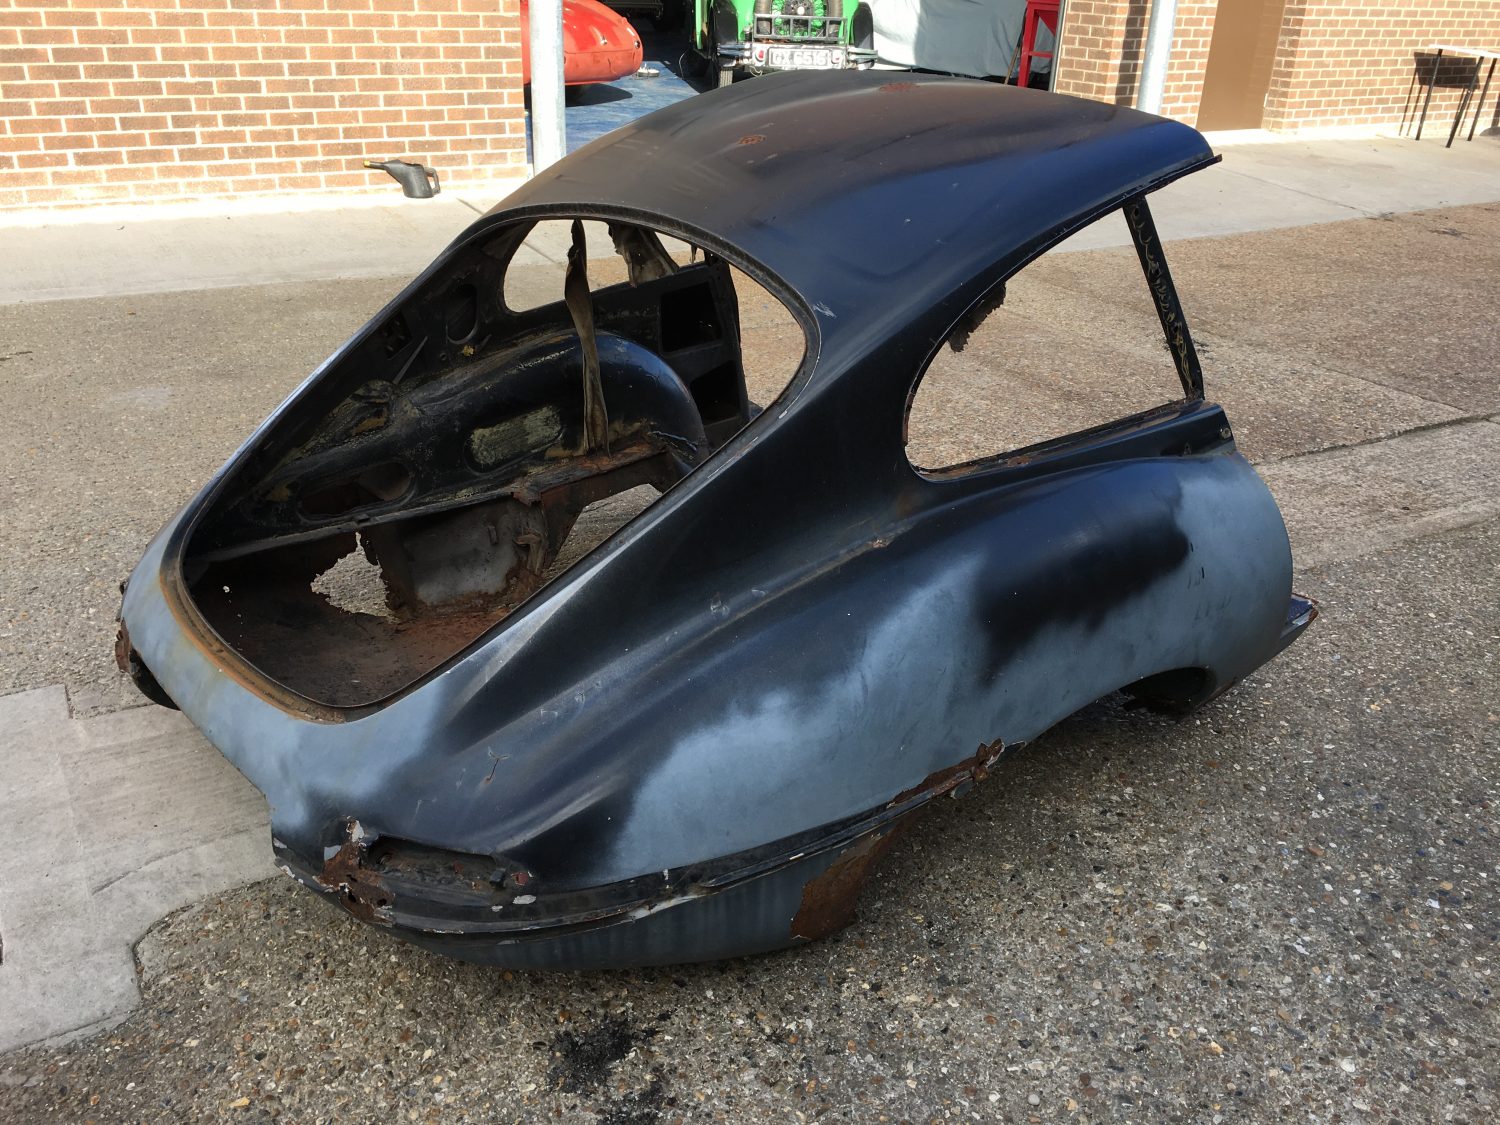
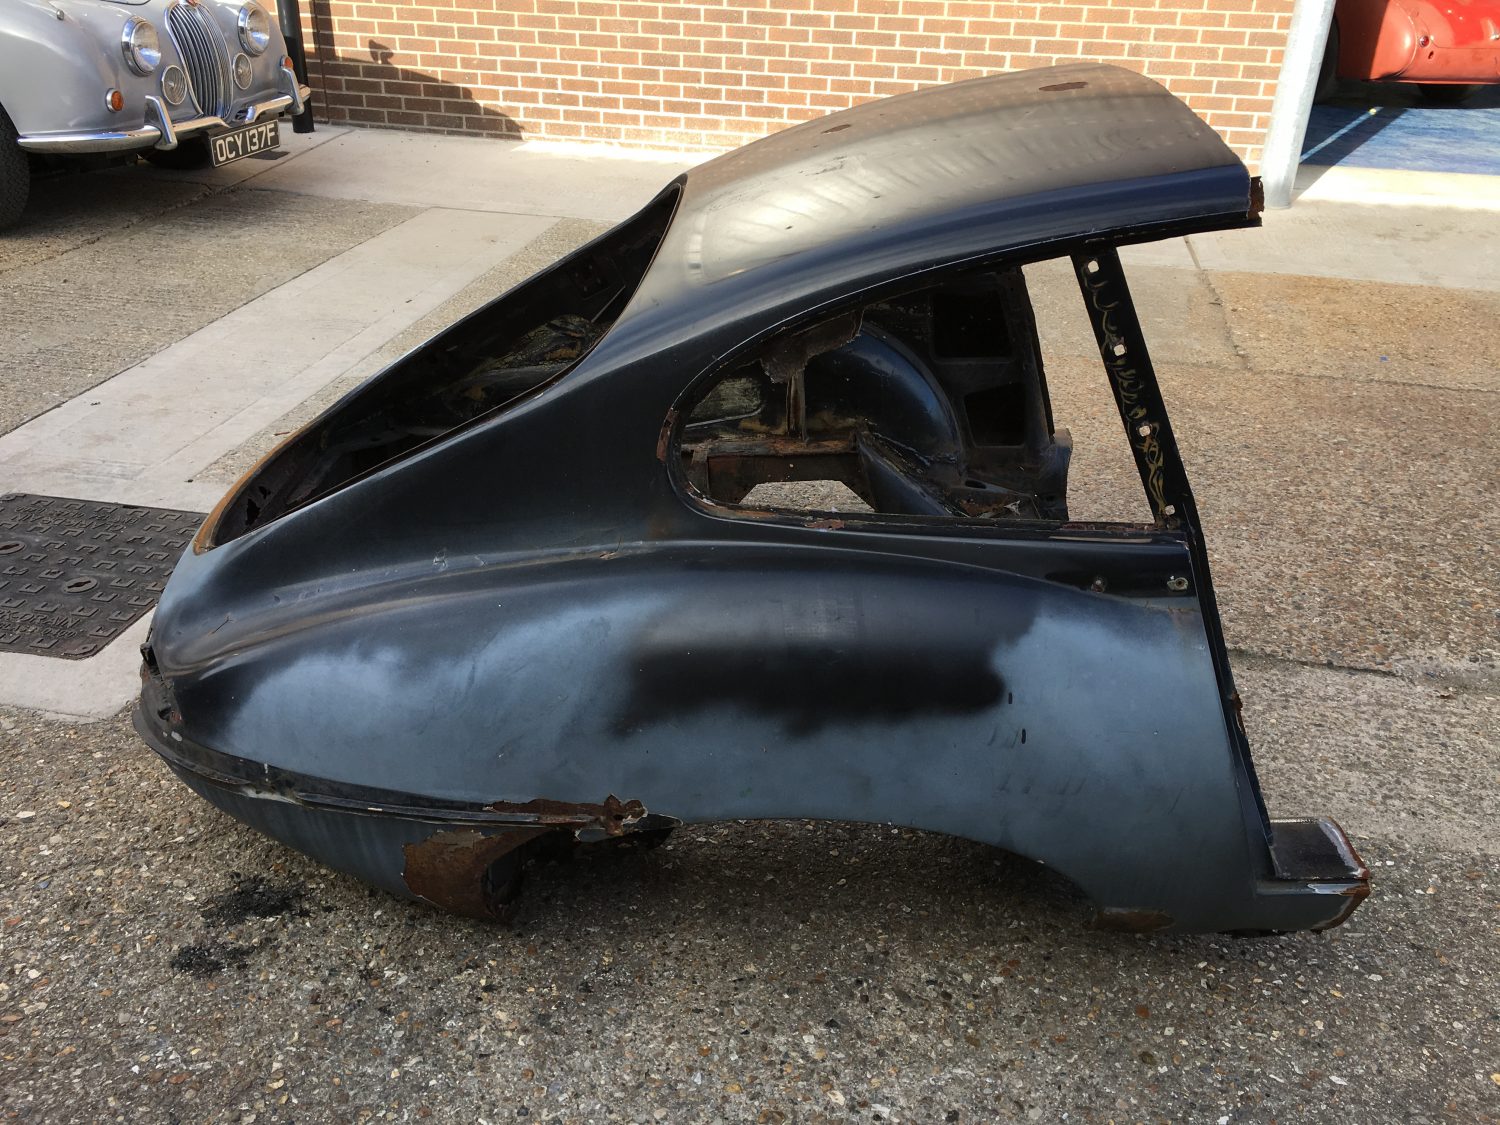
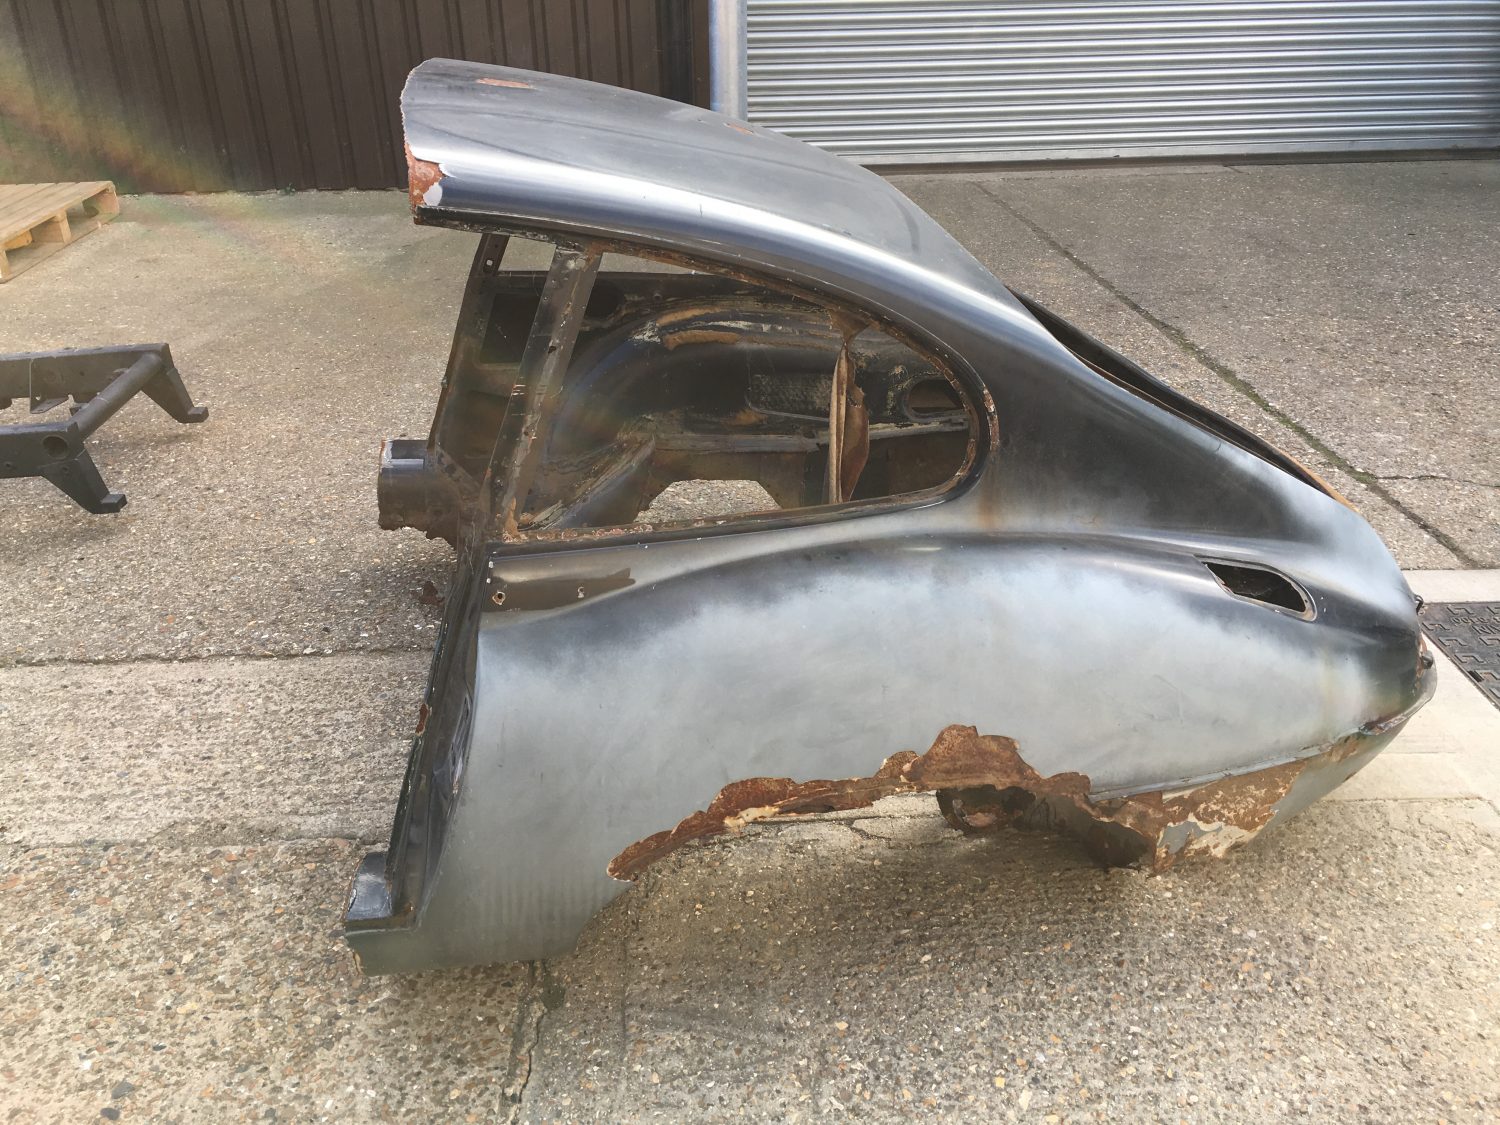
We’ve not spent much time on our Jaguar E-Type sofa of late but today we’ve pulled it out in preparation for the blasters to work
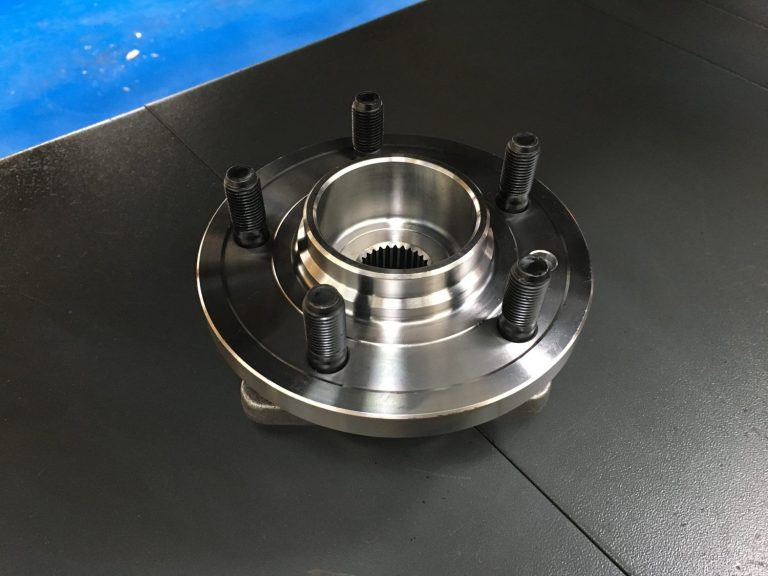
Peter is busy replacing the worn wheel bearings on our 2008 Range Rover Sport.

Our 2008 Range Rover is up on the ramp today having the existing side steps changed for new ones. We are unsure how the previous
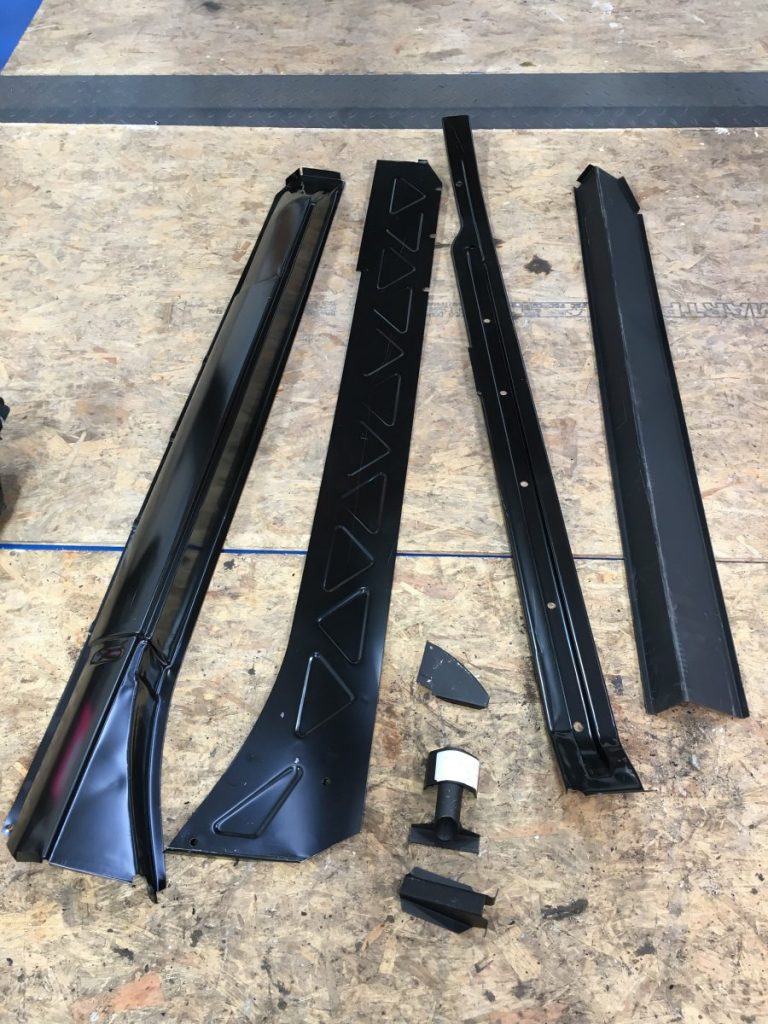
The new MG B sills have arrived this morning from Rimmer Brothers. We are not yet ready to fit them on but they are here,
[vc_row][vc_column][vc_column_text]Due to his fantastic connections in the motorcycle world our man Brian has built up some what of a reputation for himself as being the
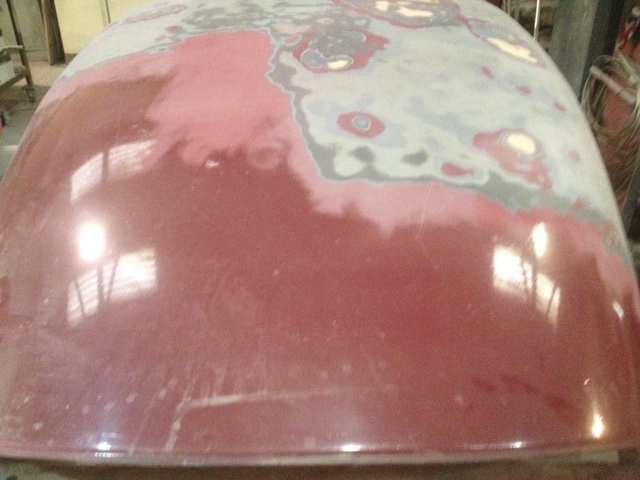
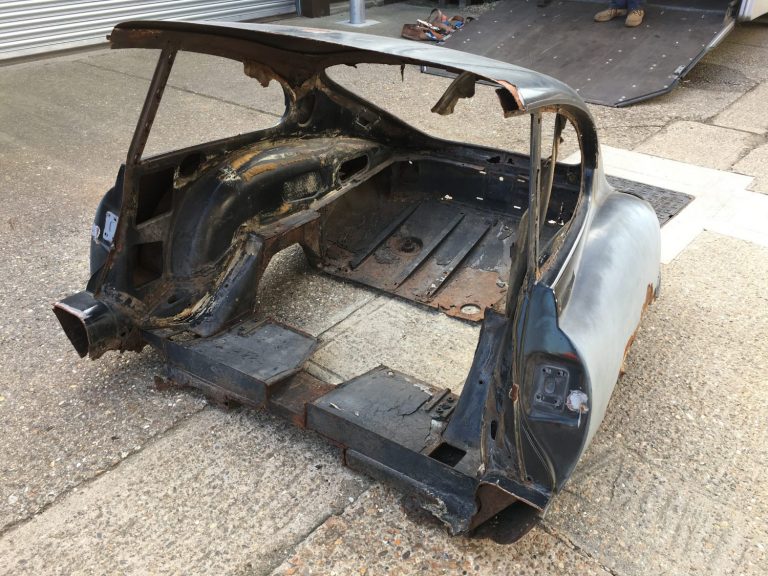
[vc_row][vc_column][vc_column_text]The preparation of our 1960 Jensen 541R body is now underway. To get the body shell into an acceptable standard to paint requires a lot
[vc_row][vc_column][vc_column_text]The chassis’ and parts are now ready to go for media blasting. We expect these only to be away for a short period of time.
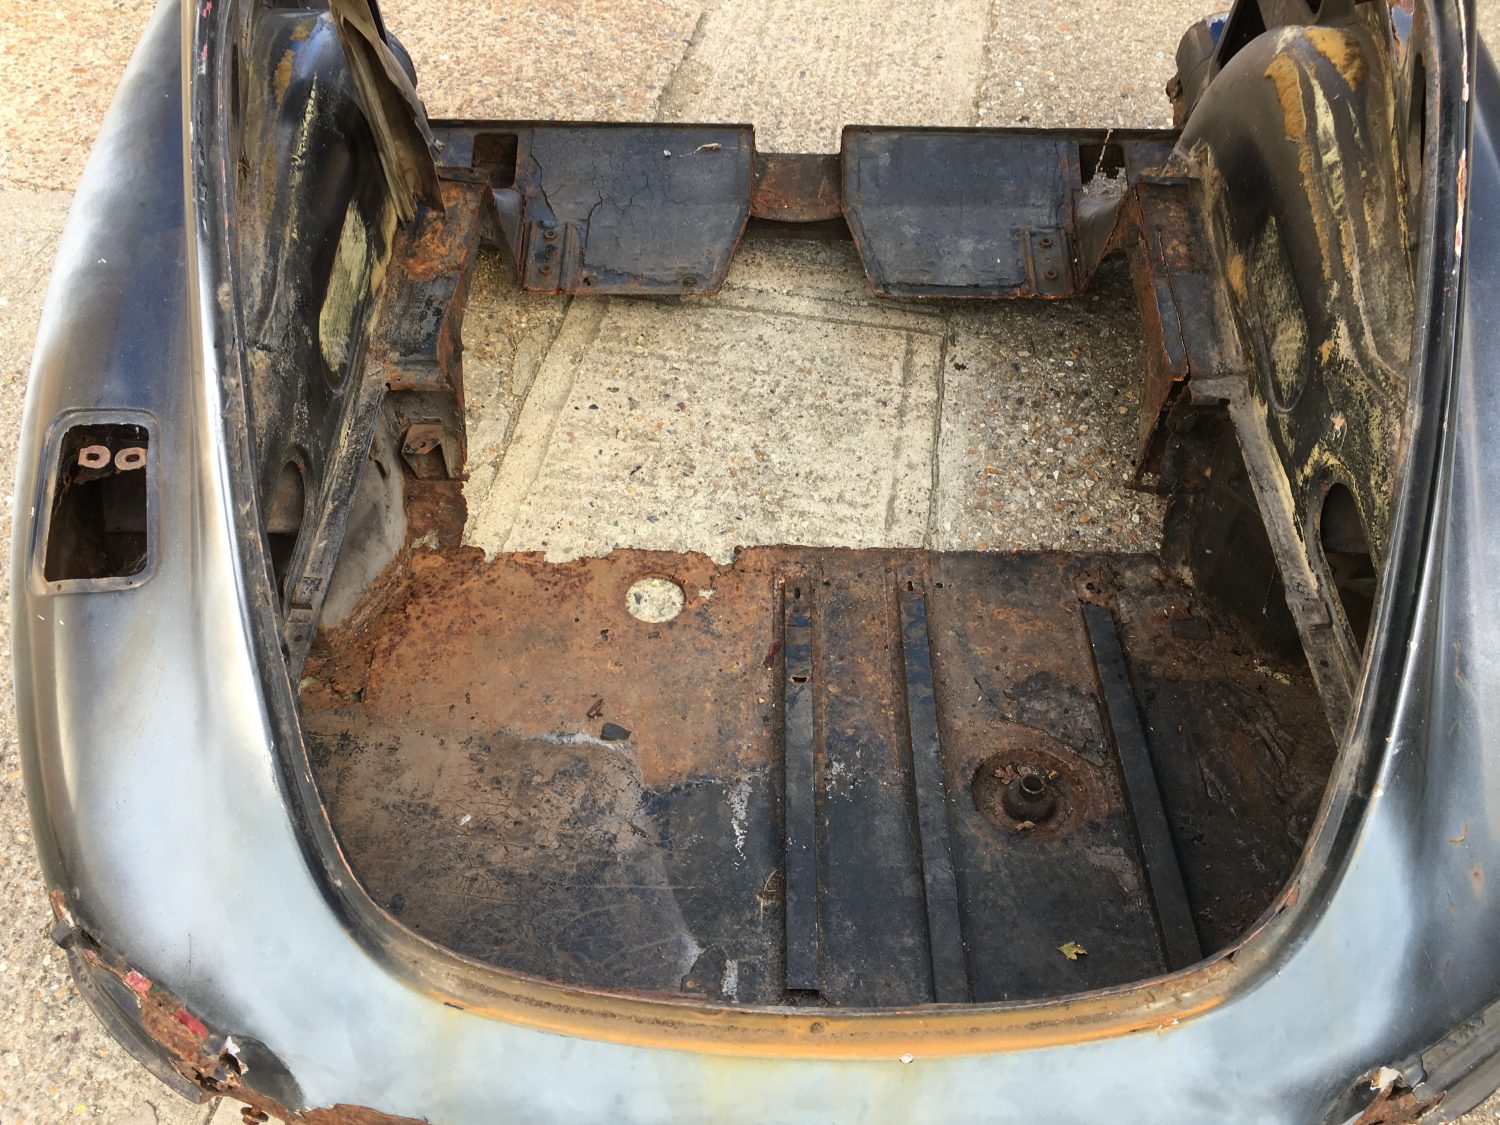
1957 Jensen 541R – chassis 328[/vc_column_text][/vc_column][/vc_row][vc_row][vc_column][vc_gallery type=”image_grid” images=”24177,24178,24179,24180,24181,24182,24183″][/vc_column][/vc_row][vc_row][vc_column][vc_column_text]It’s every restorer’s nightmare – spending £1000’s returning a classic car to its original glory, to then find it rotting from the inside out. By cleaning shells right back to bare metal, you can see exactly what condition the metalwork is in, and therefore what work needs to be done for the best restoration.
1960 Jensen 541R – chassis 493[/vc_column_text][/vc_column][/vc_row][vc_row][vc_column][vc_gallery type=”image_grid” images=”24184,24185,24186,24187,24188,24189,24190″][/vc_column][/vc_row]
[vc_row][vc_column][vc_column_text]We’ve collected our 1974 Audi Coupe S from the guys at Prostrip who have successfully completed the chemical treatment on the body shell to remove all paint, rust and filler
The shell has now been treated with a coating of primer to preserve the metalwork until welding commences very soon.
[/vc_column_text][/vc_column][/vc_row][vc_row][vc_column][vc_gallery type=”image_grid” images=”23490,23489,23488,23487,23486,23485,23484,23483,23482,23481,23480,23479,23478,23477,23476,23475,23474,23473″][/vc_column][/vc_row]
We’ve not spent much time on our Jaguar E-Type sofa of late but today we’ve pulled it out in preparation for the blasters to work their magic.
Next time we see her she’ll be primed and most probably (based on the pictures) a bit more of a challenge for us to deal with!!


Peter is busy replacing the worn wheel bearings on our 2008 Range Rover Sport.


Our 2008 Range Rover is up on the ramp today having the existing side steps changed for new ones. We are unsure how the previous ones became damaged but never-the-less, we have an exact replacement so our first task is to remove the old and replace with new. Not as easy as it sounds.
The sill covers will need to be removed, cleaned up behind. The existing brackets will need to be removed and replaced with new.
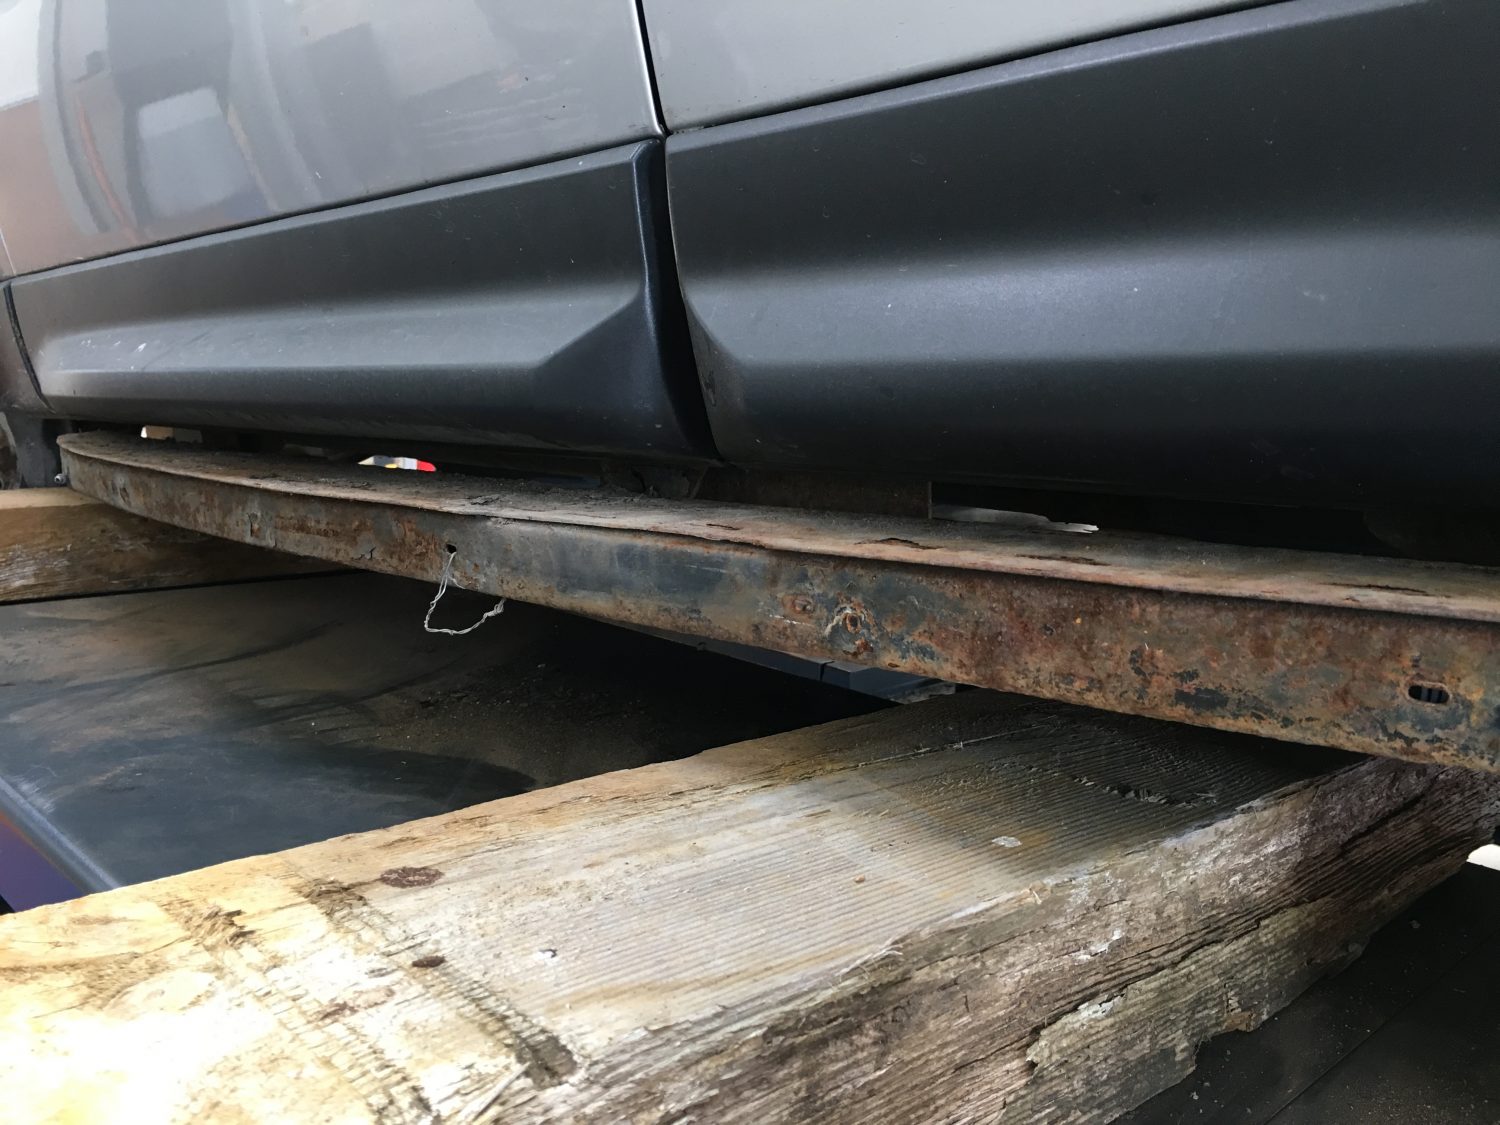
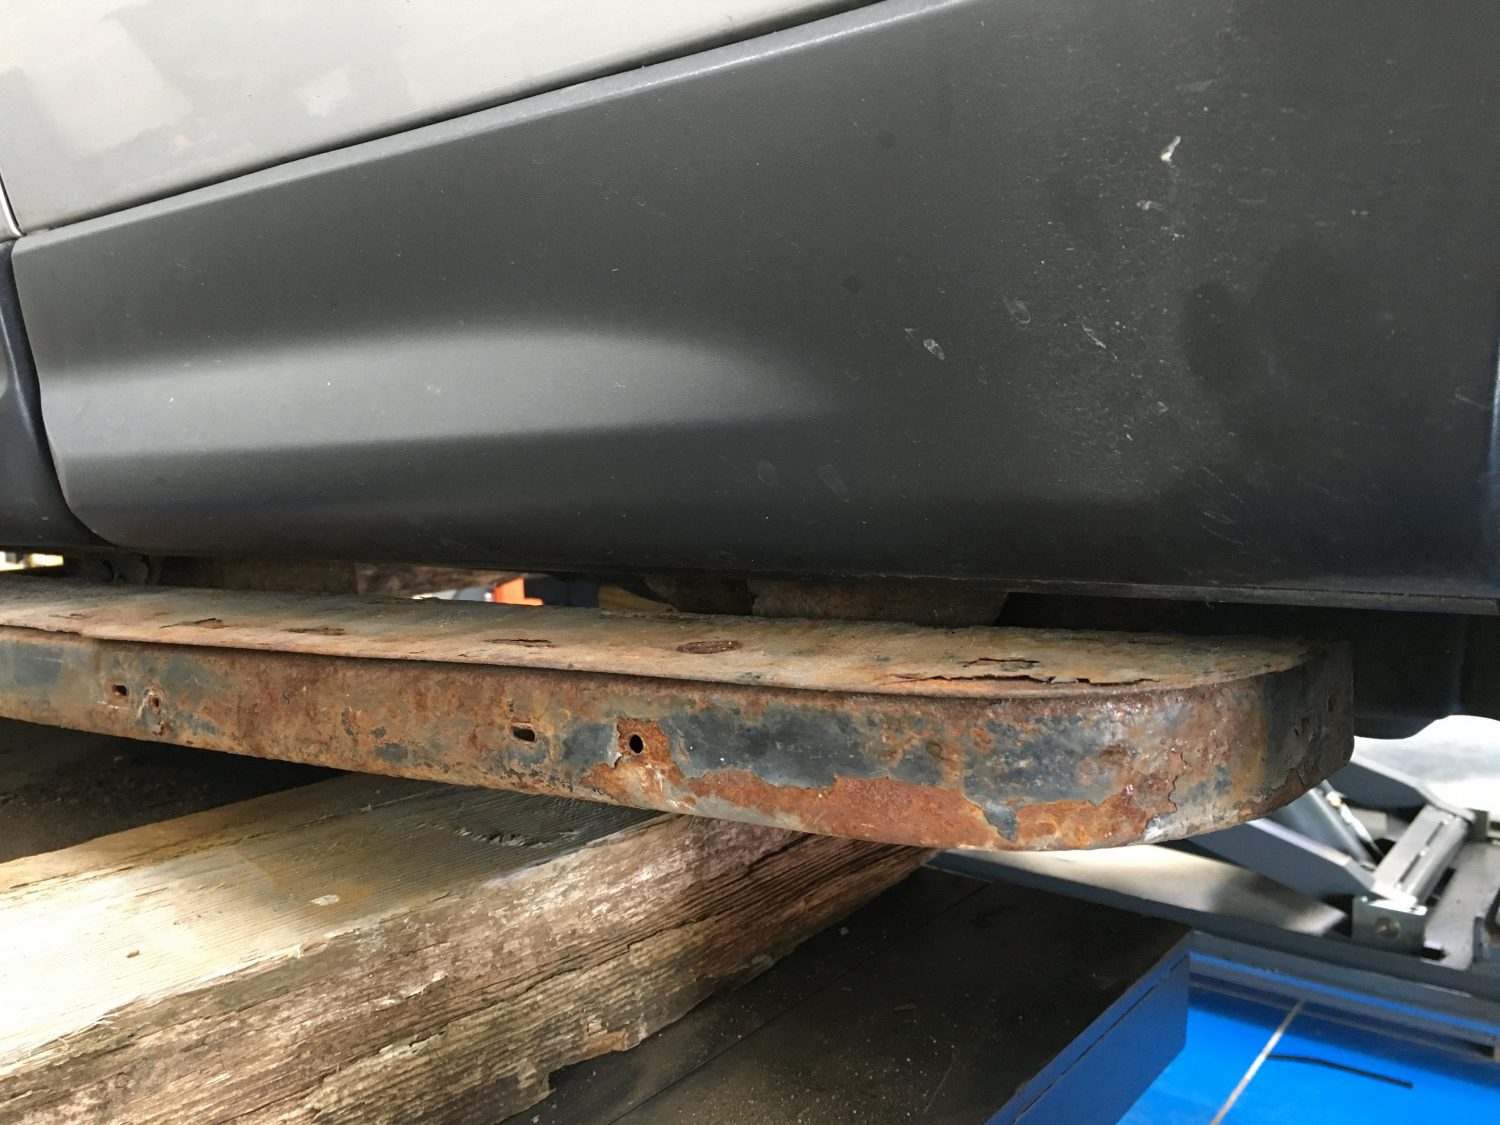

A vast improvement to the existing step which on the surface looked fantastic but underneath the plastic casing revealed a lot of surface rust.
Nothing to worry about now though as the existing set up is now fully removed and replaced with brand new. We have also stripped, cleaned and sealed the areas of the car that we manage to expose prior to fitting back up with the new steps.

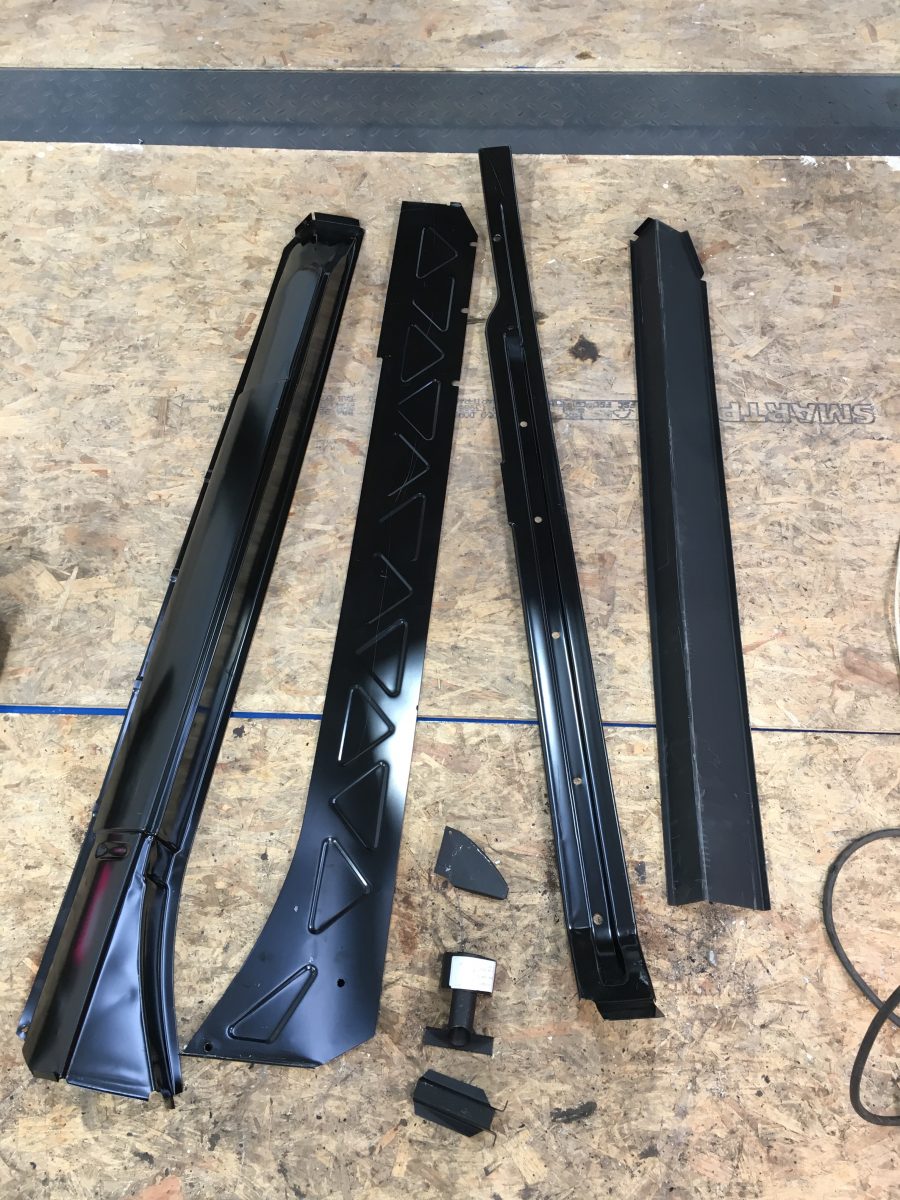
The new MG B sills have arrived this morning from Rimmer Brothers. We are not yet ready to fit them on but they are here, on the shelf, ready for the day Tommy requires them.

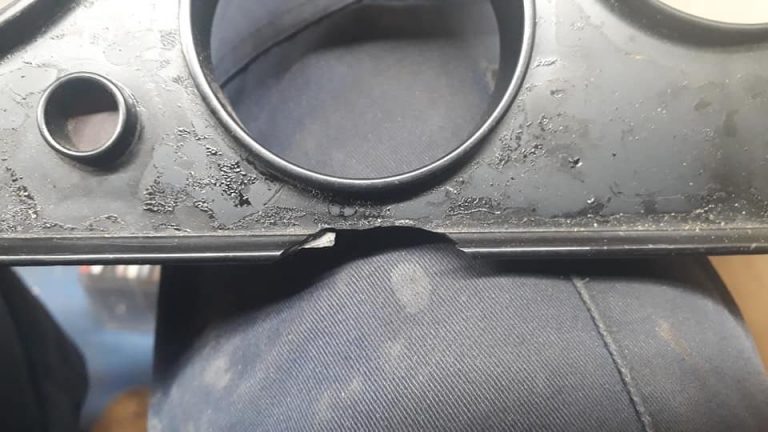
[vc_row][vc_column][vc_column_text]Due to his fantastic connections in the motorcycle world our man Brian has built up some what of a reputation for himself as being the go-to man when it comes to motorcycle repairs using the specialist skills of plastic welding.
We let Brian loose with our spare Capri dash, just to see wether he could turn his hand to more than just motorcycles.

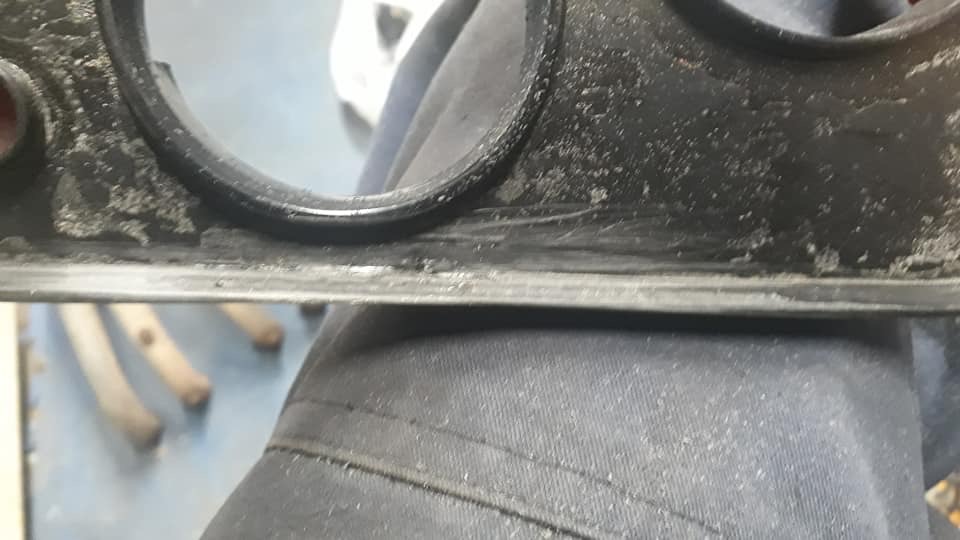
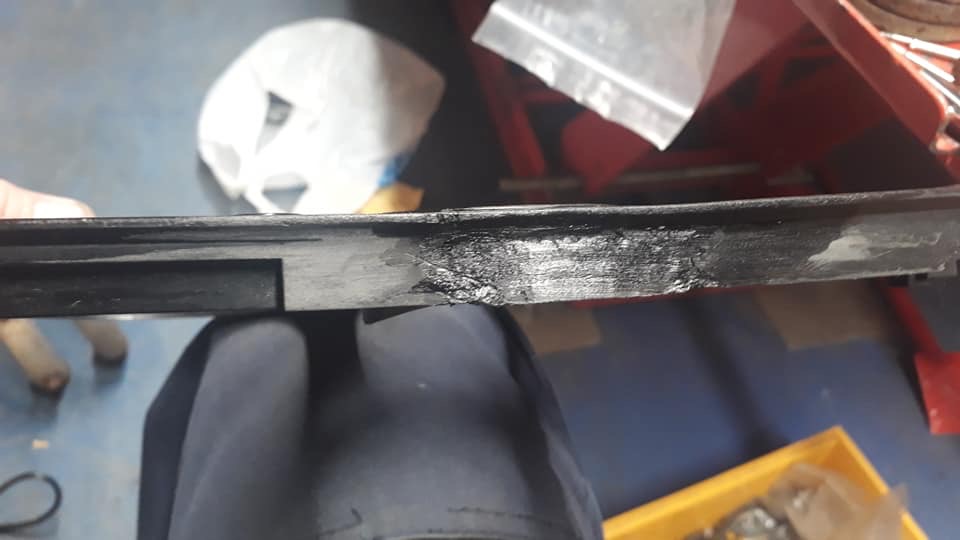
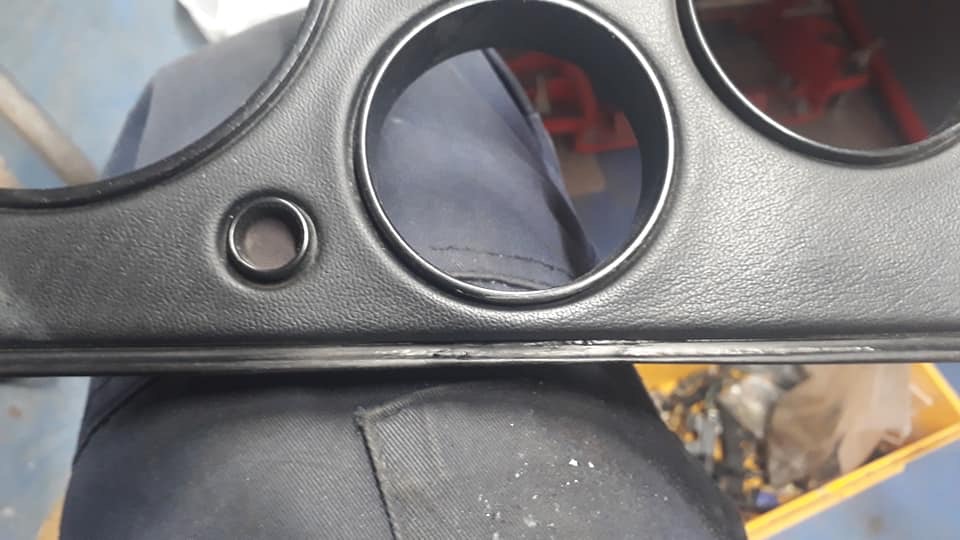
More of Brian’s amazing plastic welding work:
[/vc_column_text][/vc_column][/vc_row][vc_row][vc_column][vc_gallery type=”image_grid” images=”23785,23786,23787,23788,23789,23790,23791,23792,23793,23794,23795,23796,23797,23798,23799,23800,23801,23802,23803,23804,23805,23806,23807,23808,23809,23810,23811,23812,23813,23814,23815,23816,23817,23818,23819,23820,23821,23822,23823,23824,23825,23826,23827,23828,23829″][/vc_column][/vc_row][vc_row][vc_column][vc_column_text]Source: Plastic Welding (Wikipedia)
Plastic welding is welding for semi-finished plastic materials, and is described in ISO 472 as a process of uniting softened surfaces of materials, generally with the aid of heat (except solvent welding). Welding of thermoplastics is accomplished in three sequential stages, namely surface preparation, application of heat and pressure, and cooling.
Read more on Wikipedia[/vc_column_text][/vc_column][/vc_row]
[vc_row][vc_column][vc_column_text]The preparation of our 1960 Jensen 541R body is now underway. To get the body shell into an acceptable standard to paint requires a lot of time and effort but in the end it will end up better than the day it left the Jensen factory.[/vc_column_text][/vc_column][/vc_row][vc_row][vc_column][vc_gallery type=”image_grid” images=”24416,24417,24418,24419,24420,24421,24423,24424,24425,24426″][/vc_column][/vc_row]
