The Fastest Car On The Water
If you haven’t already, say hello to our Amphicar! Part boat, part car, this curious little vehicle can drive both on land and on water.


If you haven’t already, say hello to our Amphicar! Part boat, part car, this curious little vehicle can drive both on land and on water.
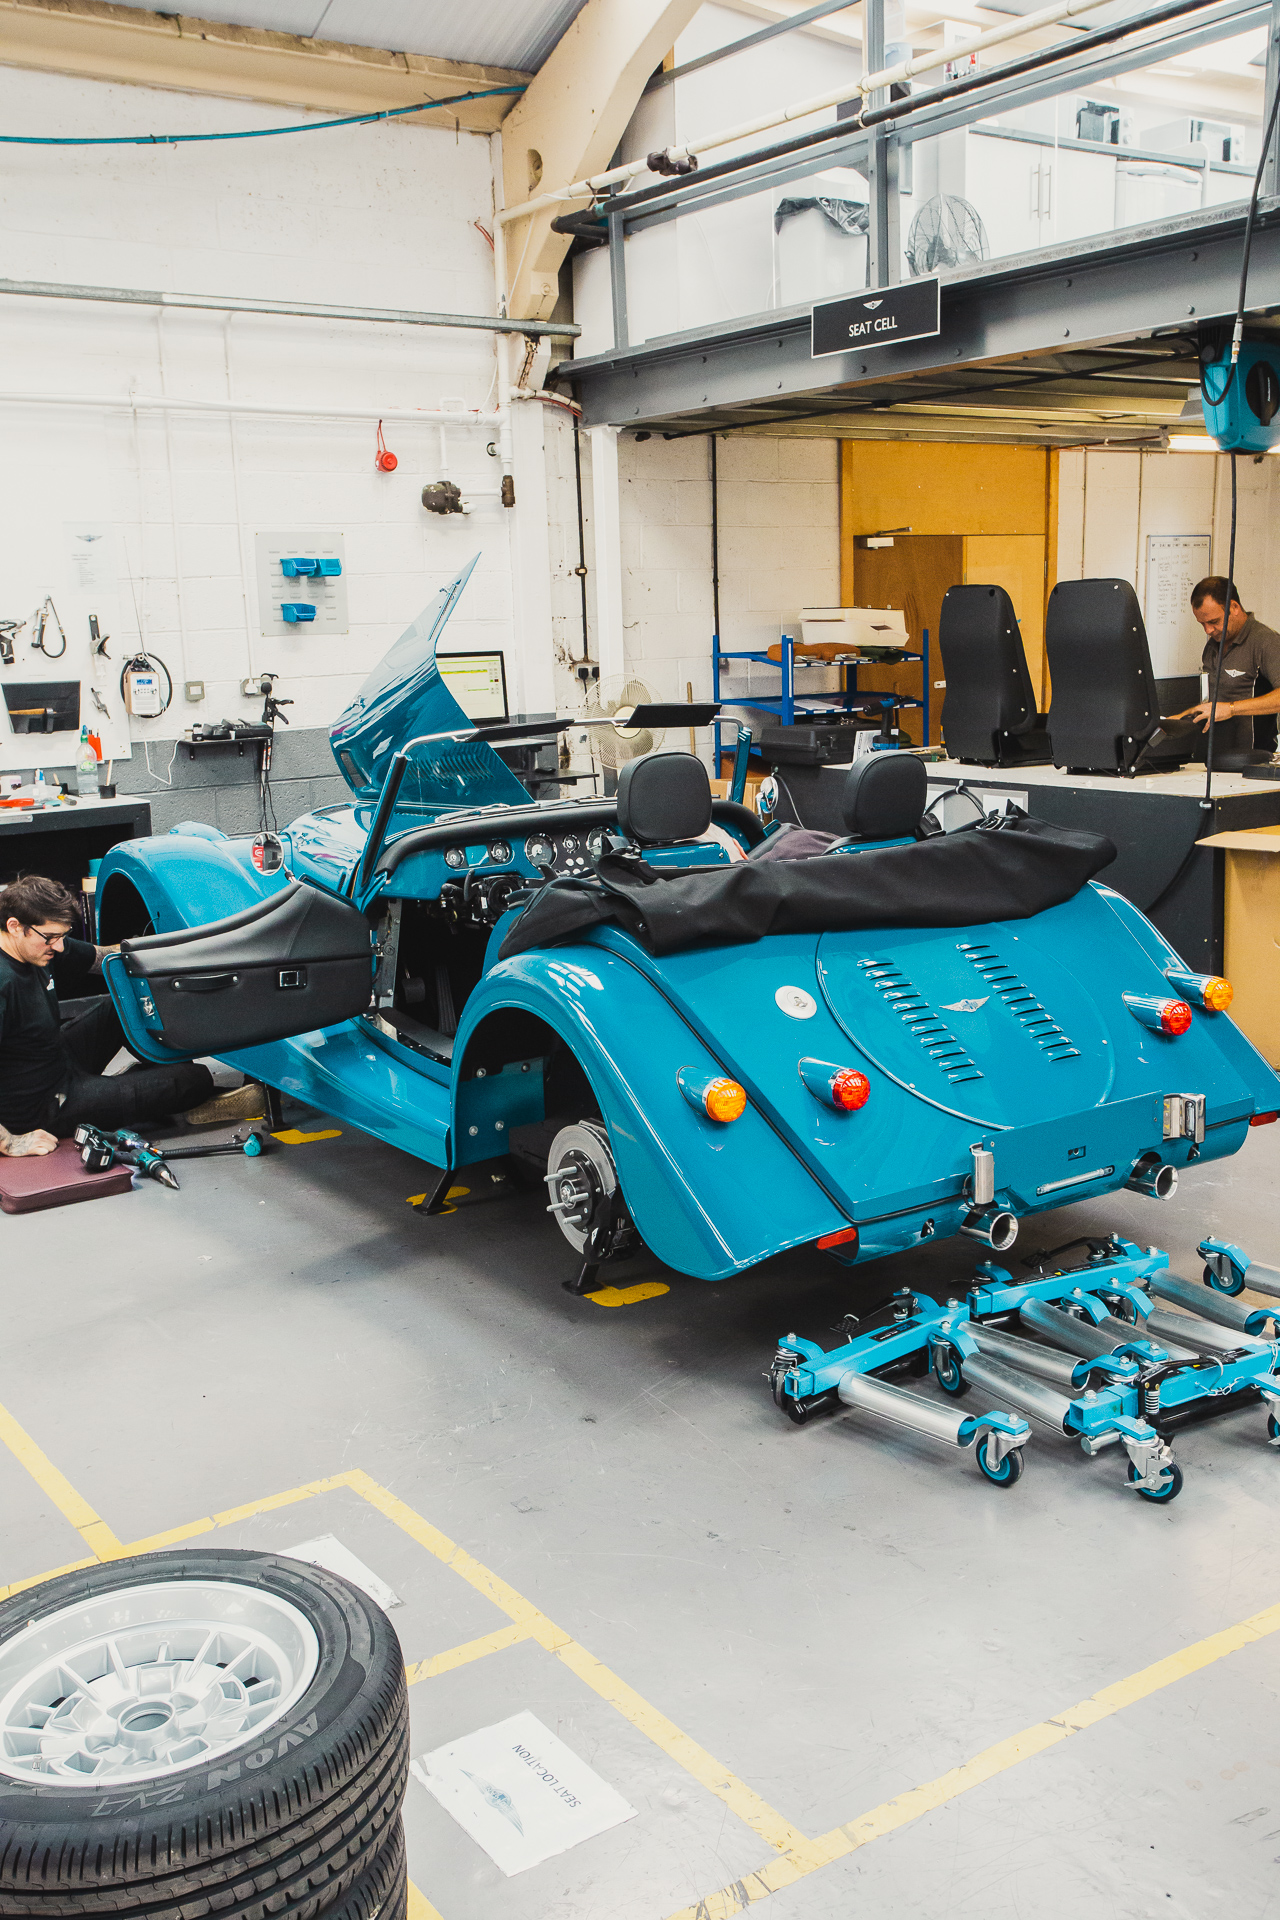
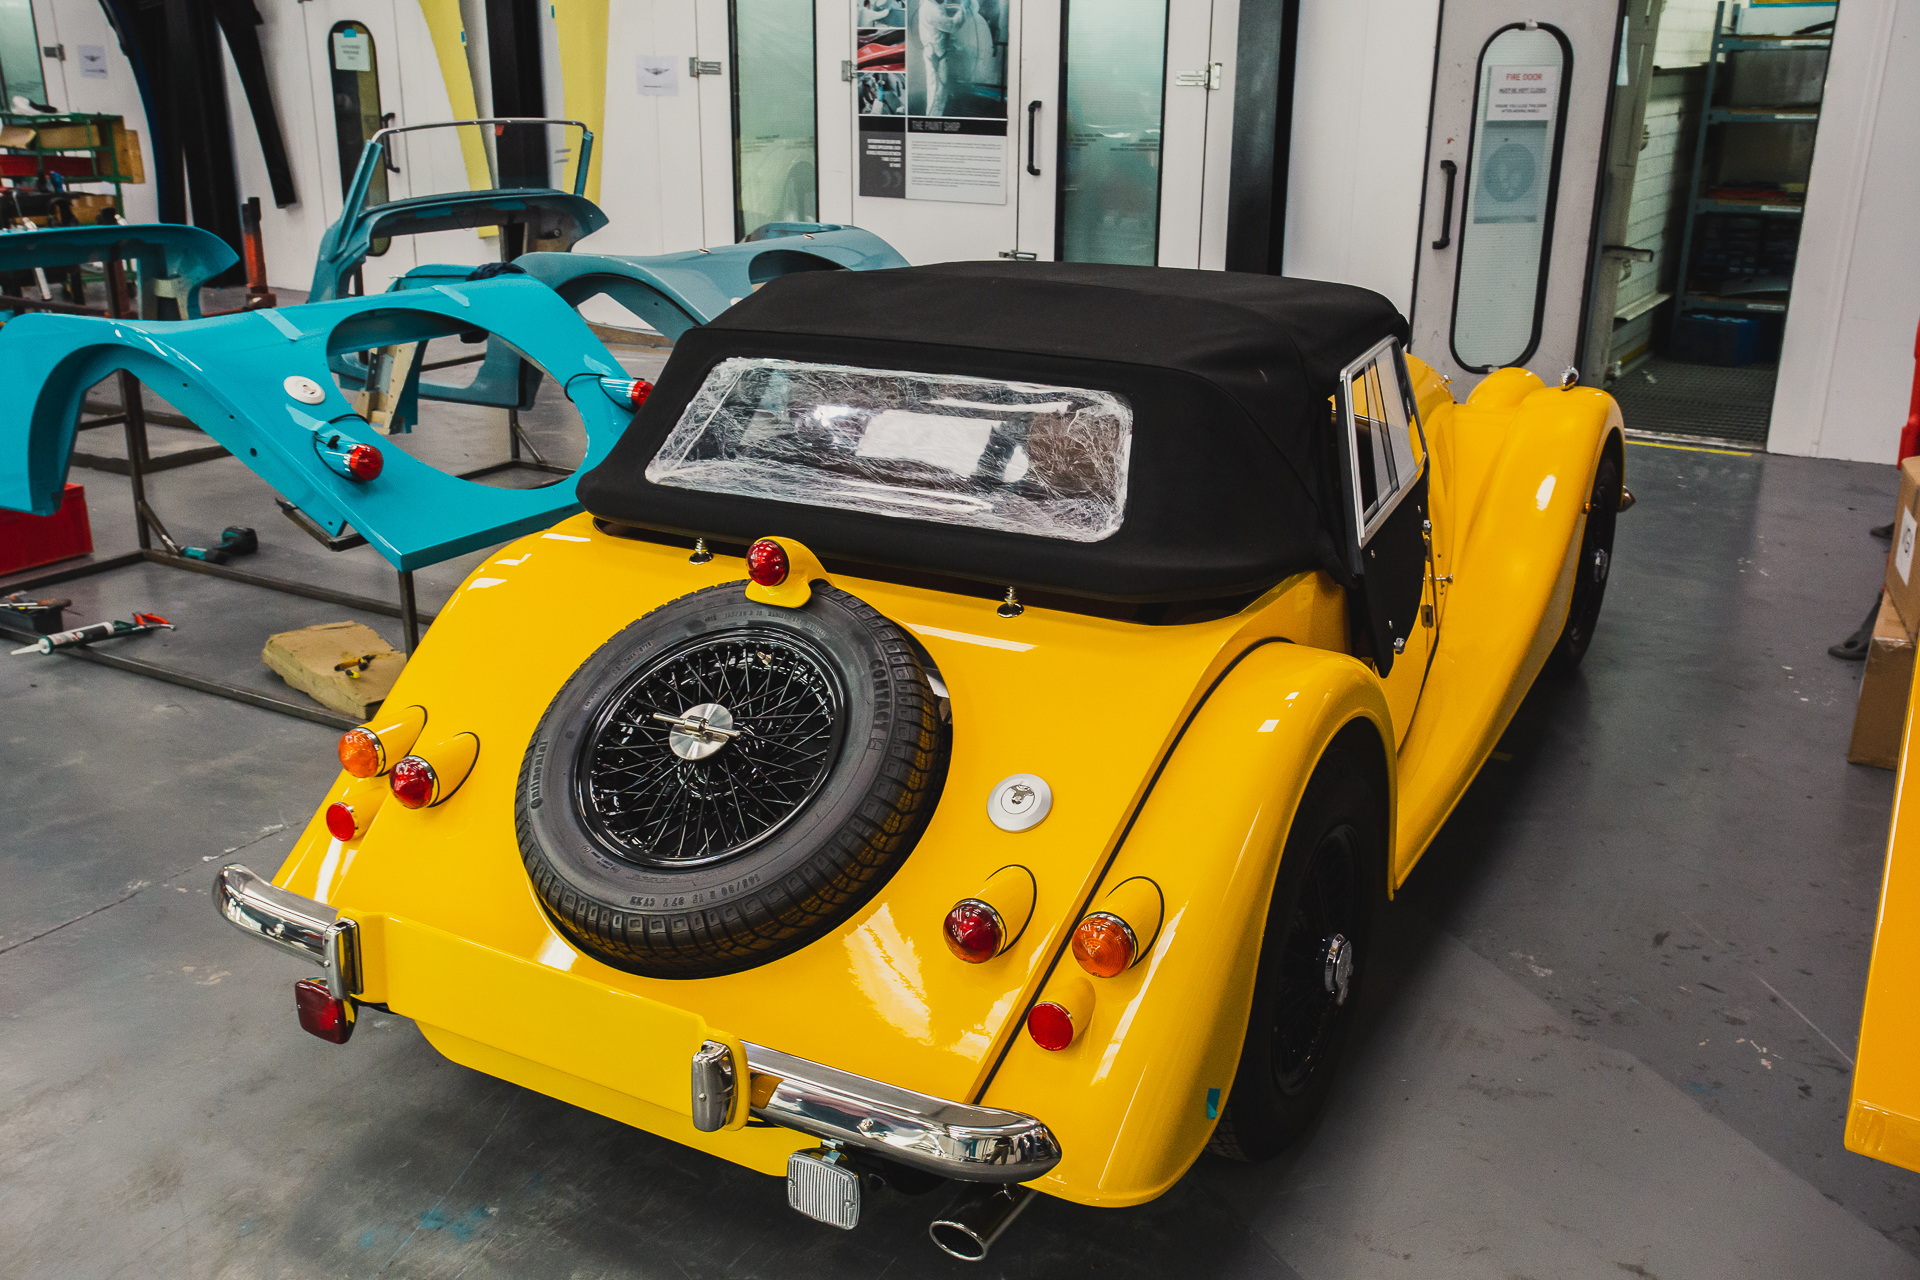
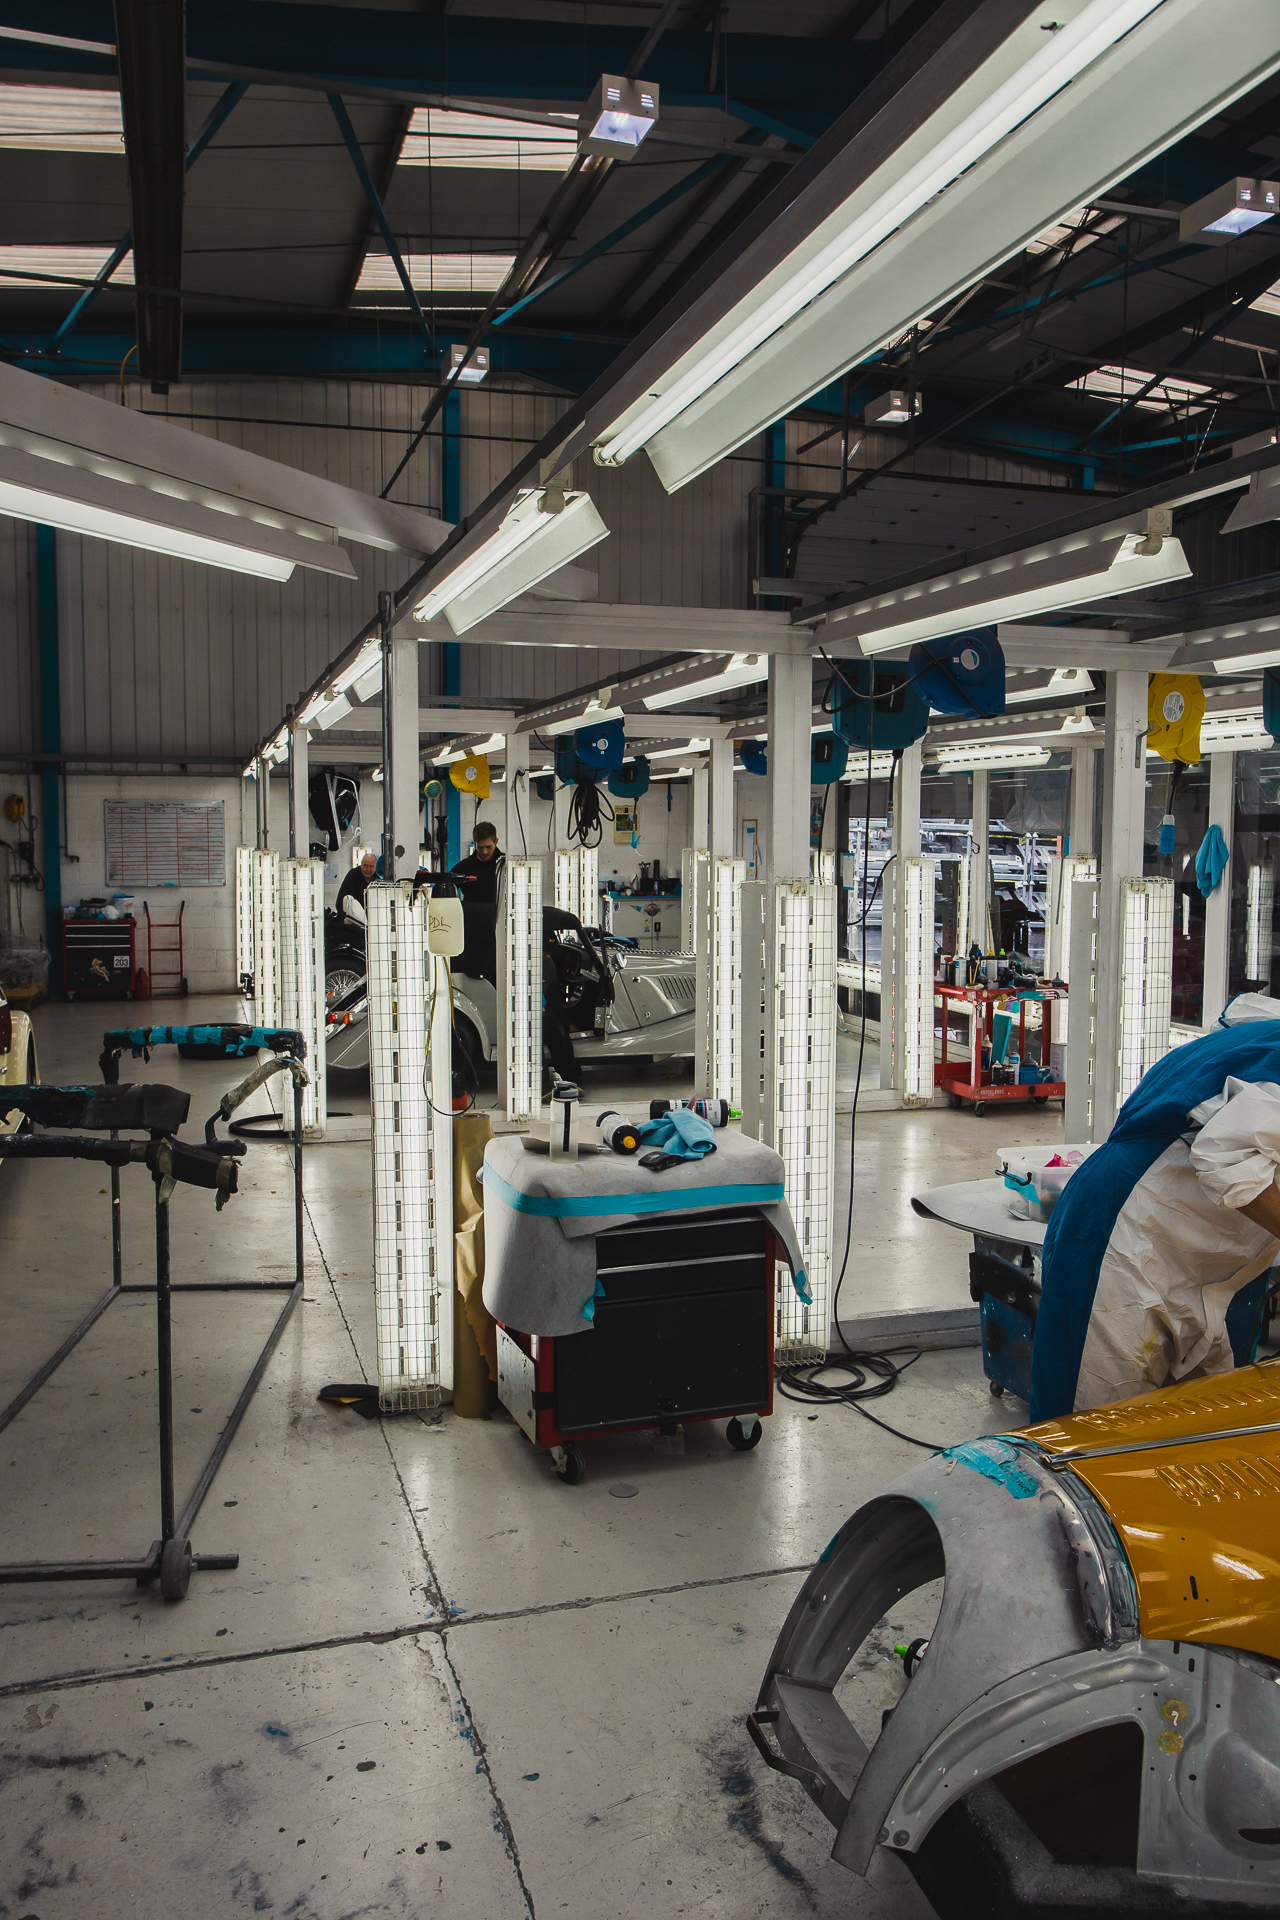
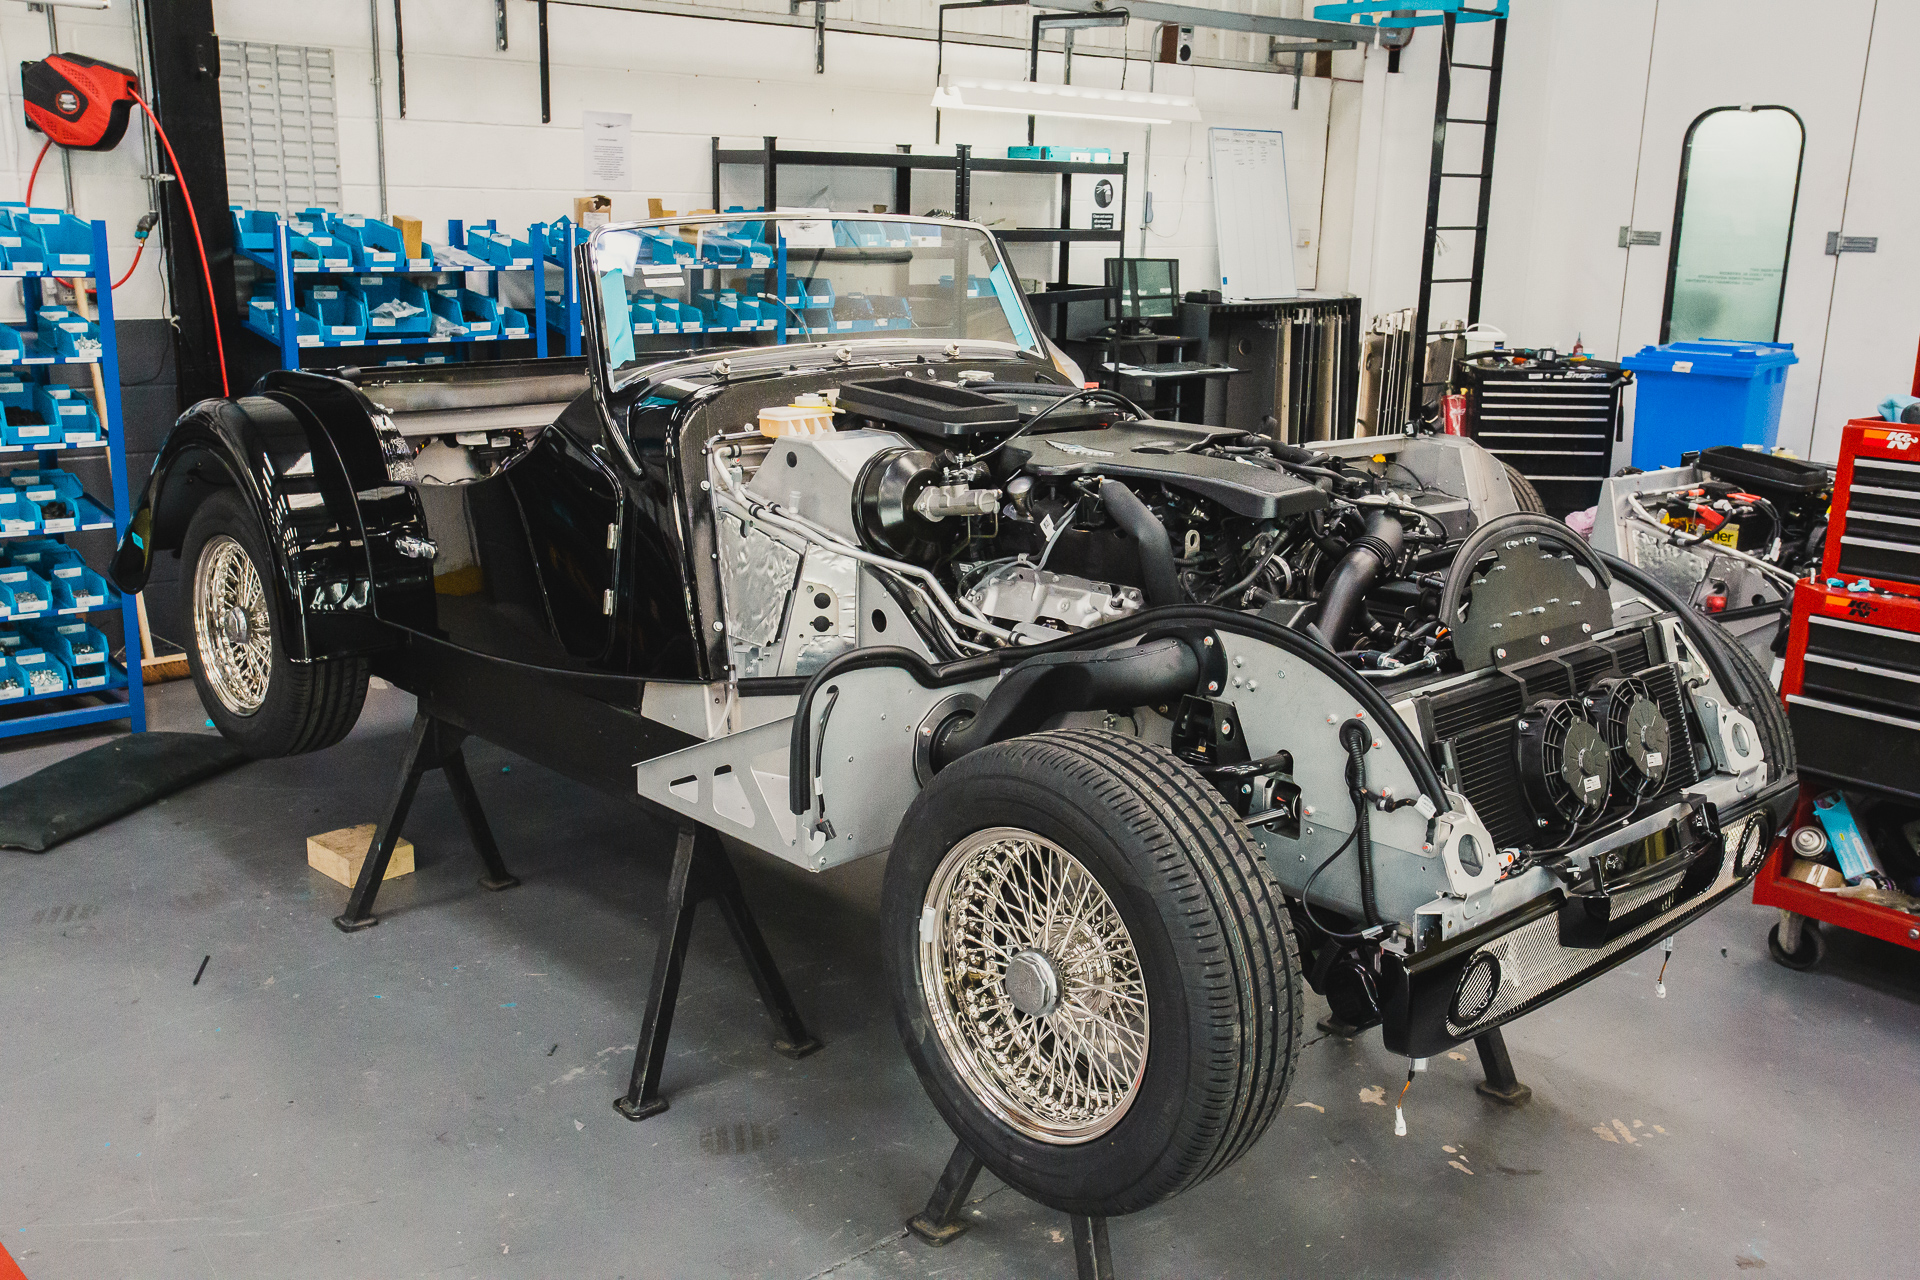
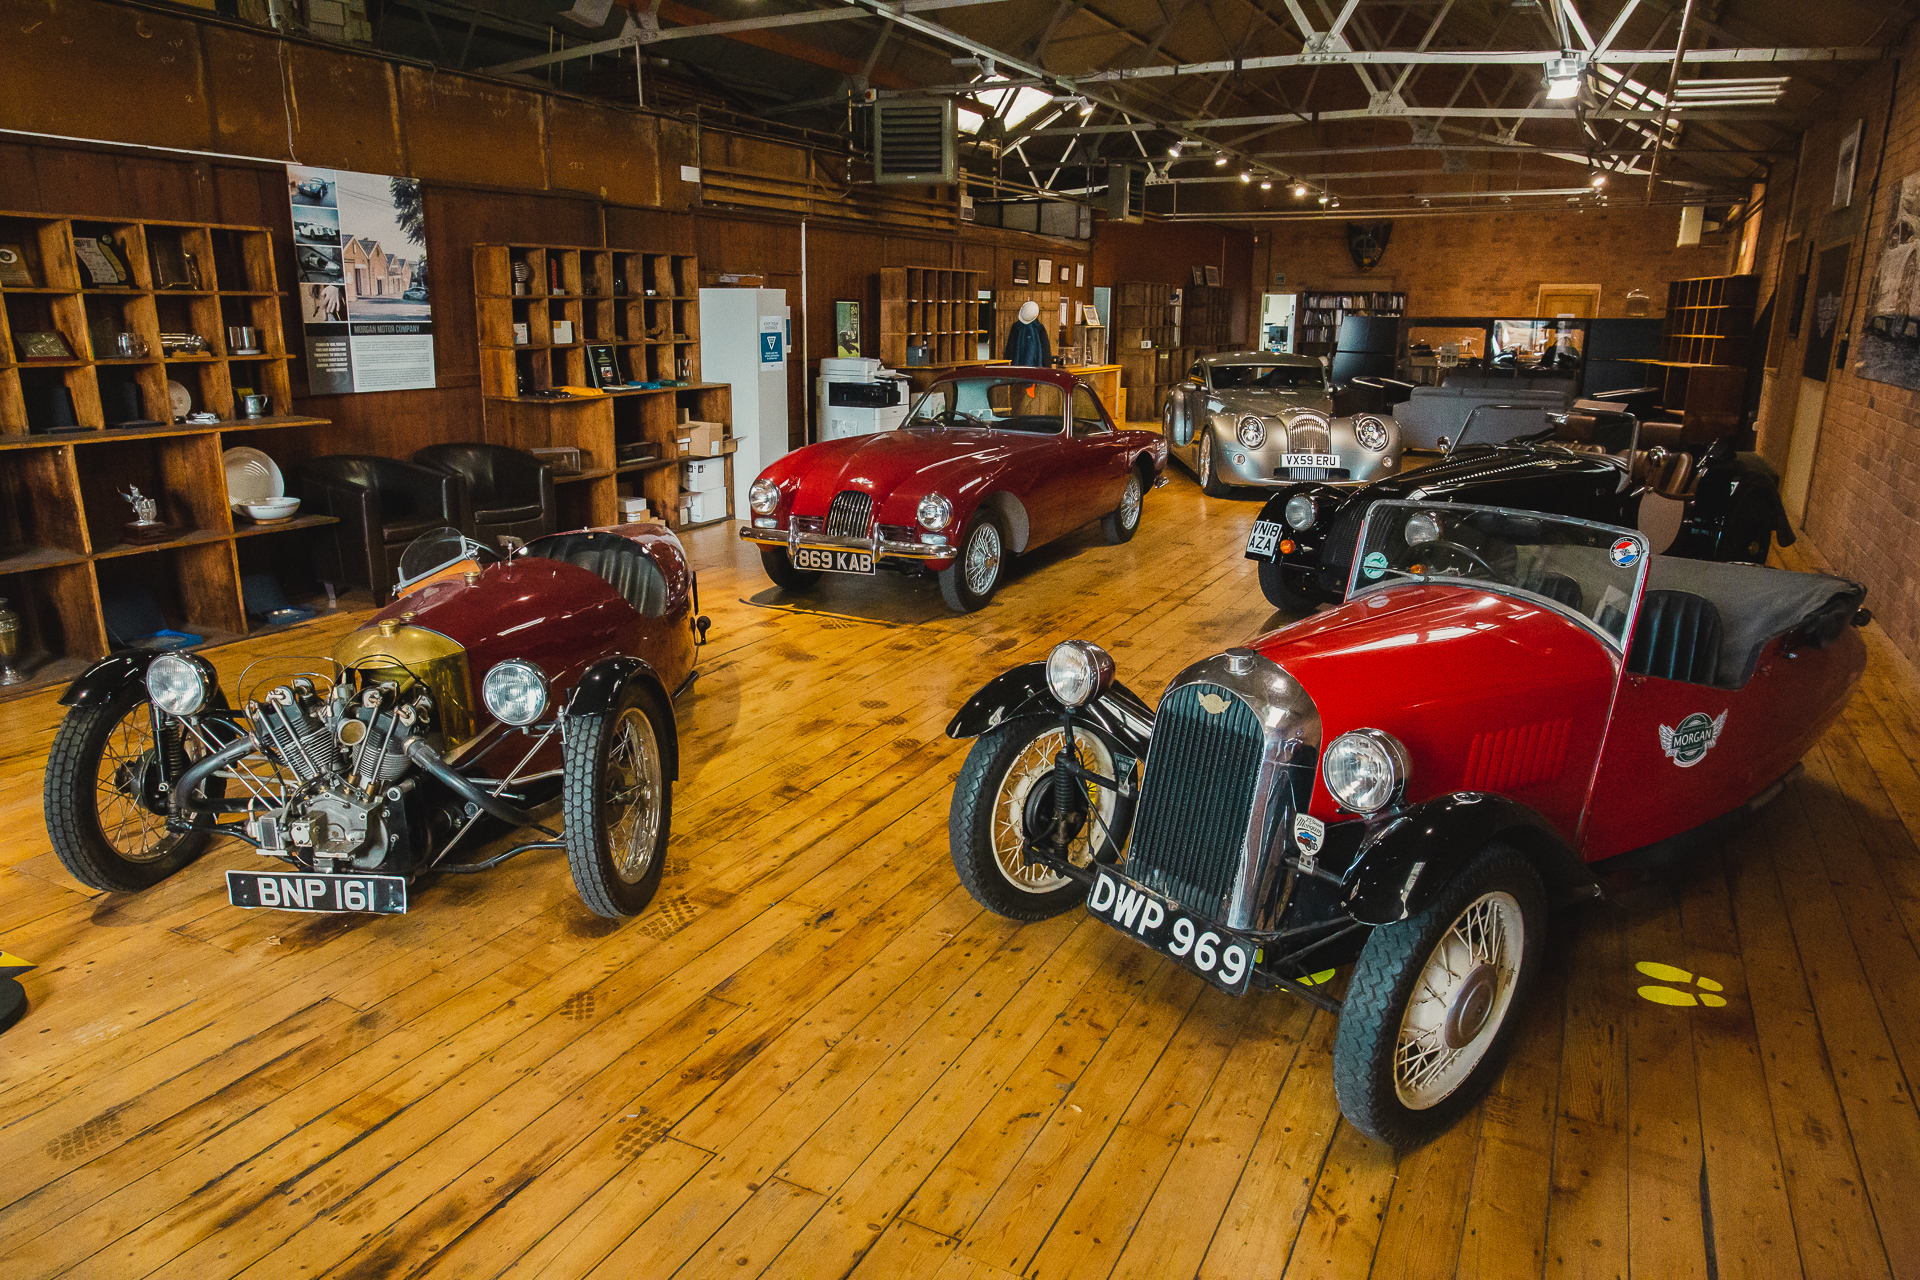
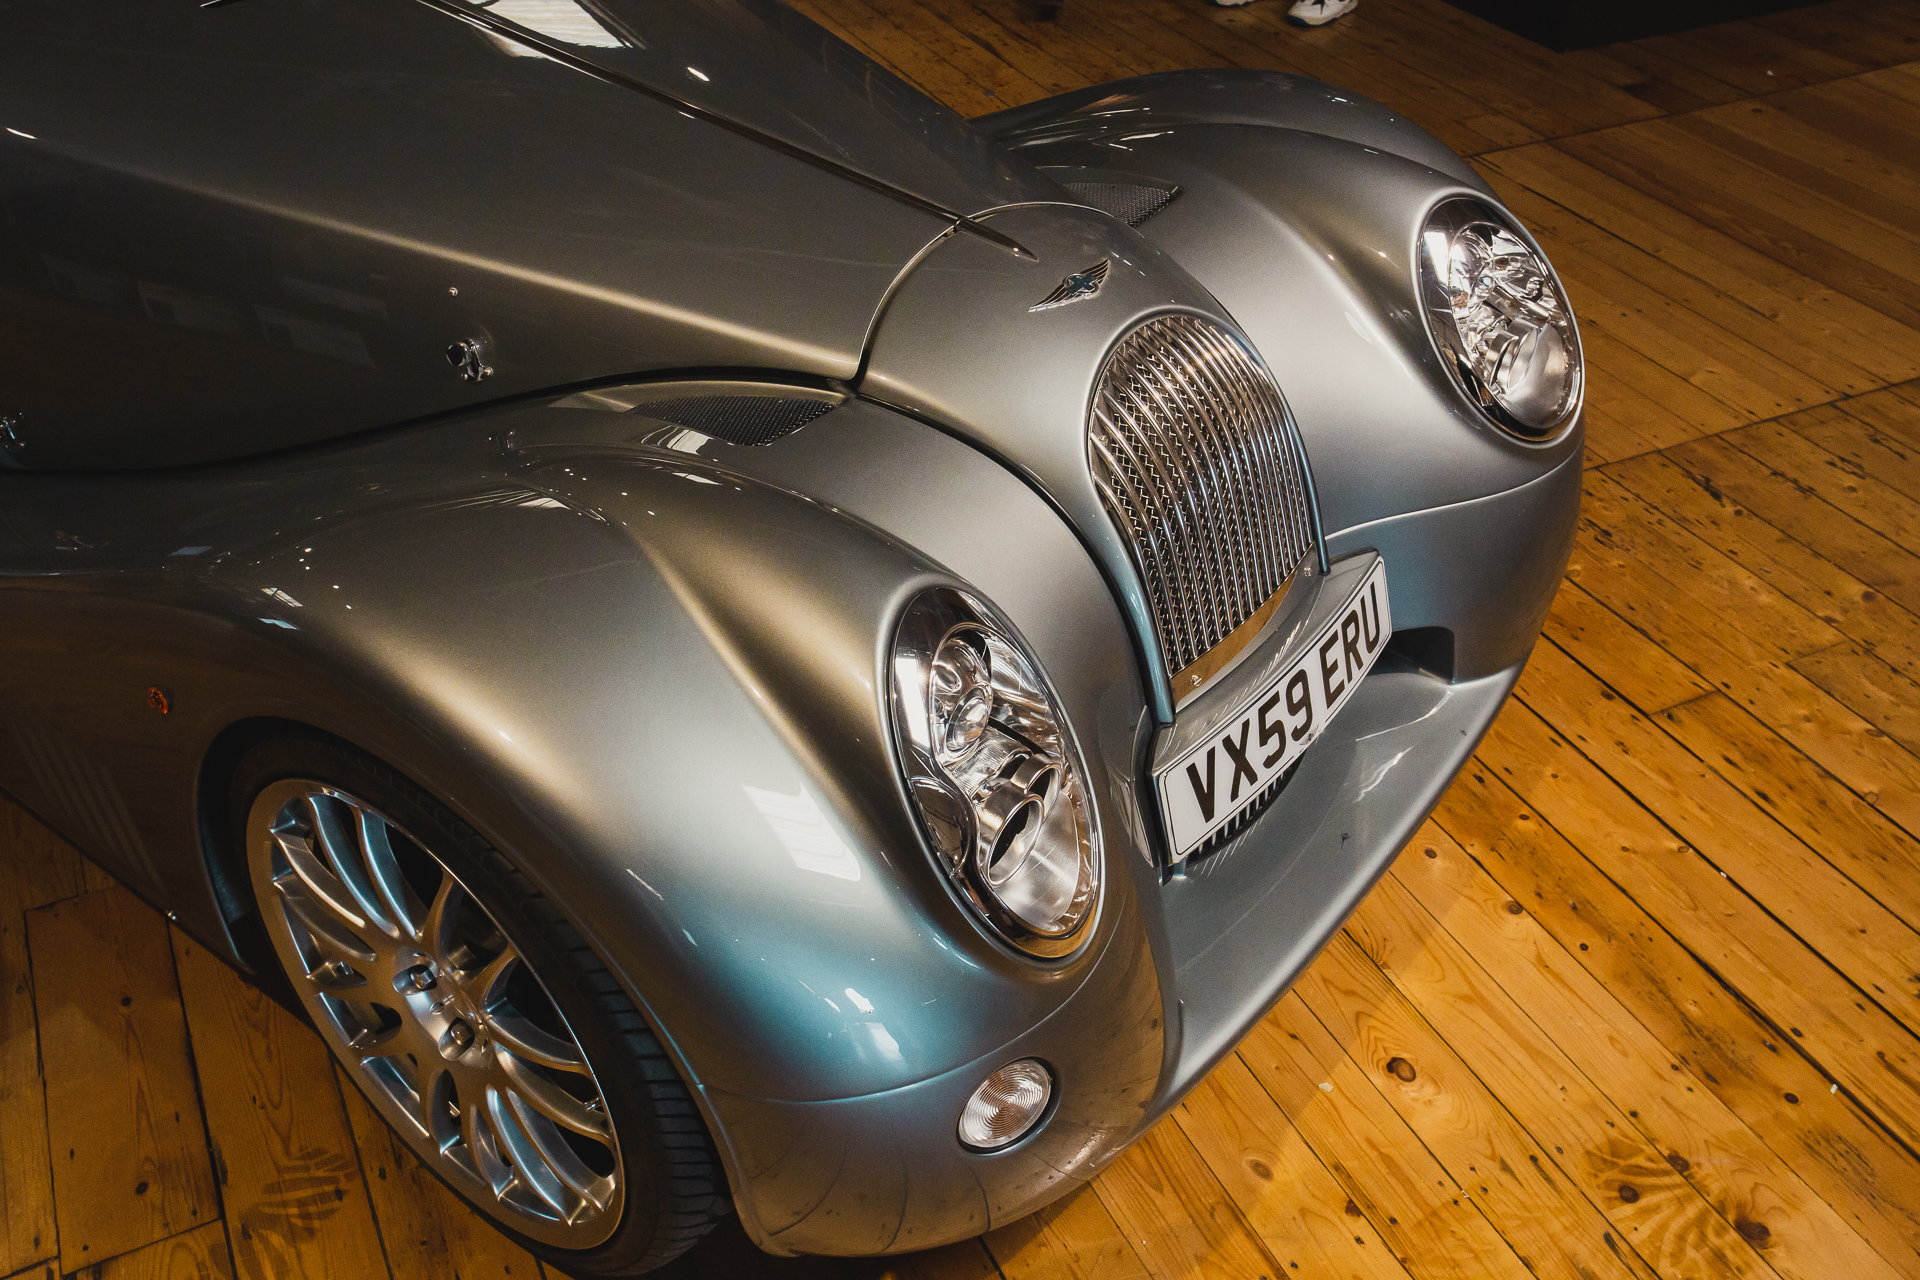
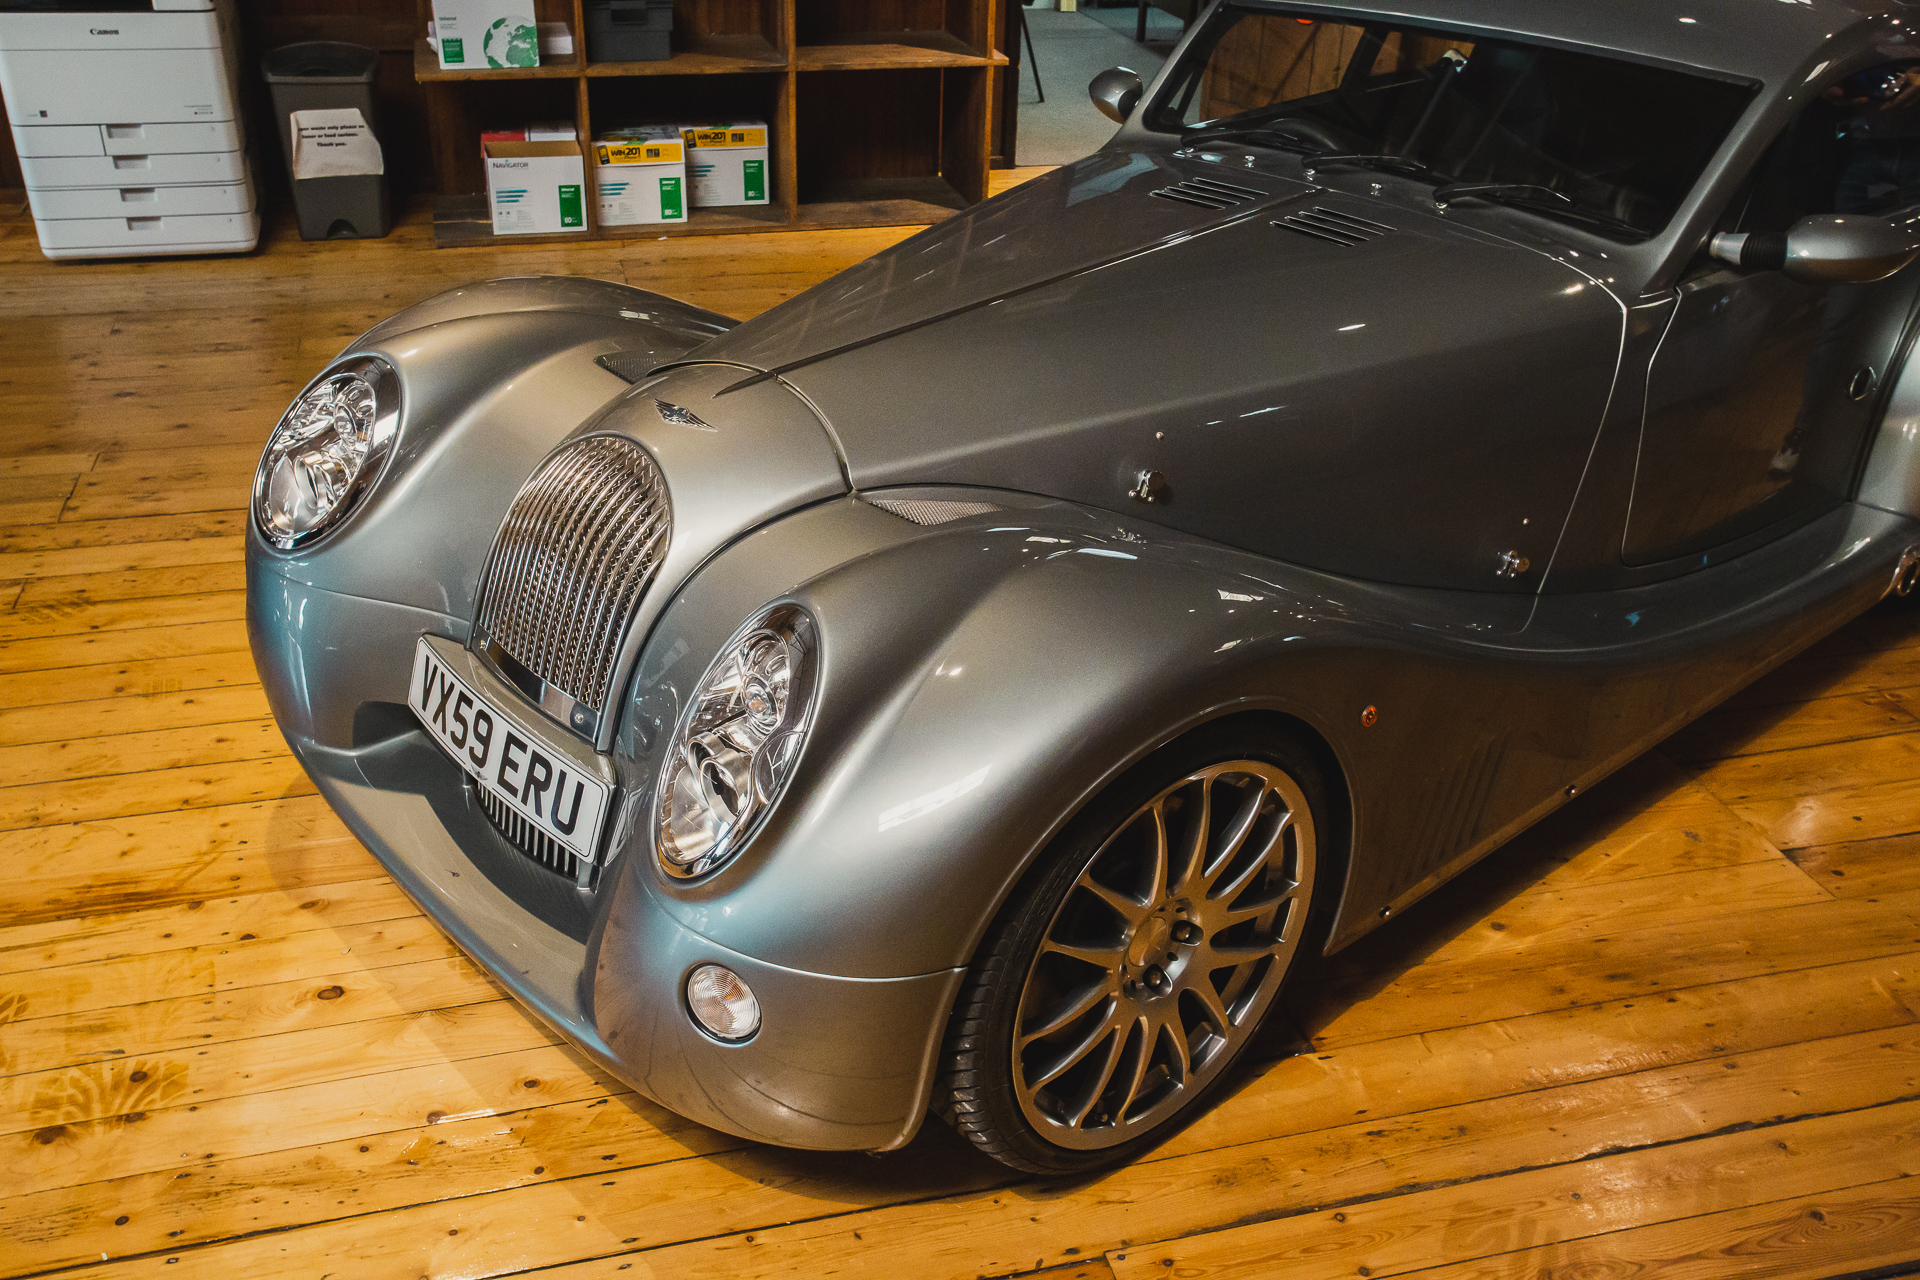
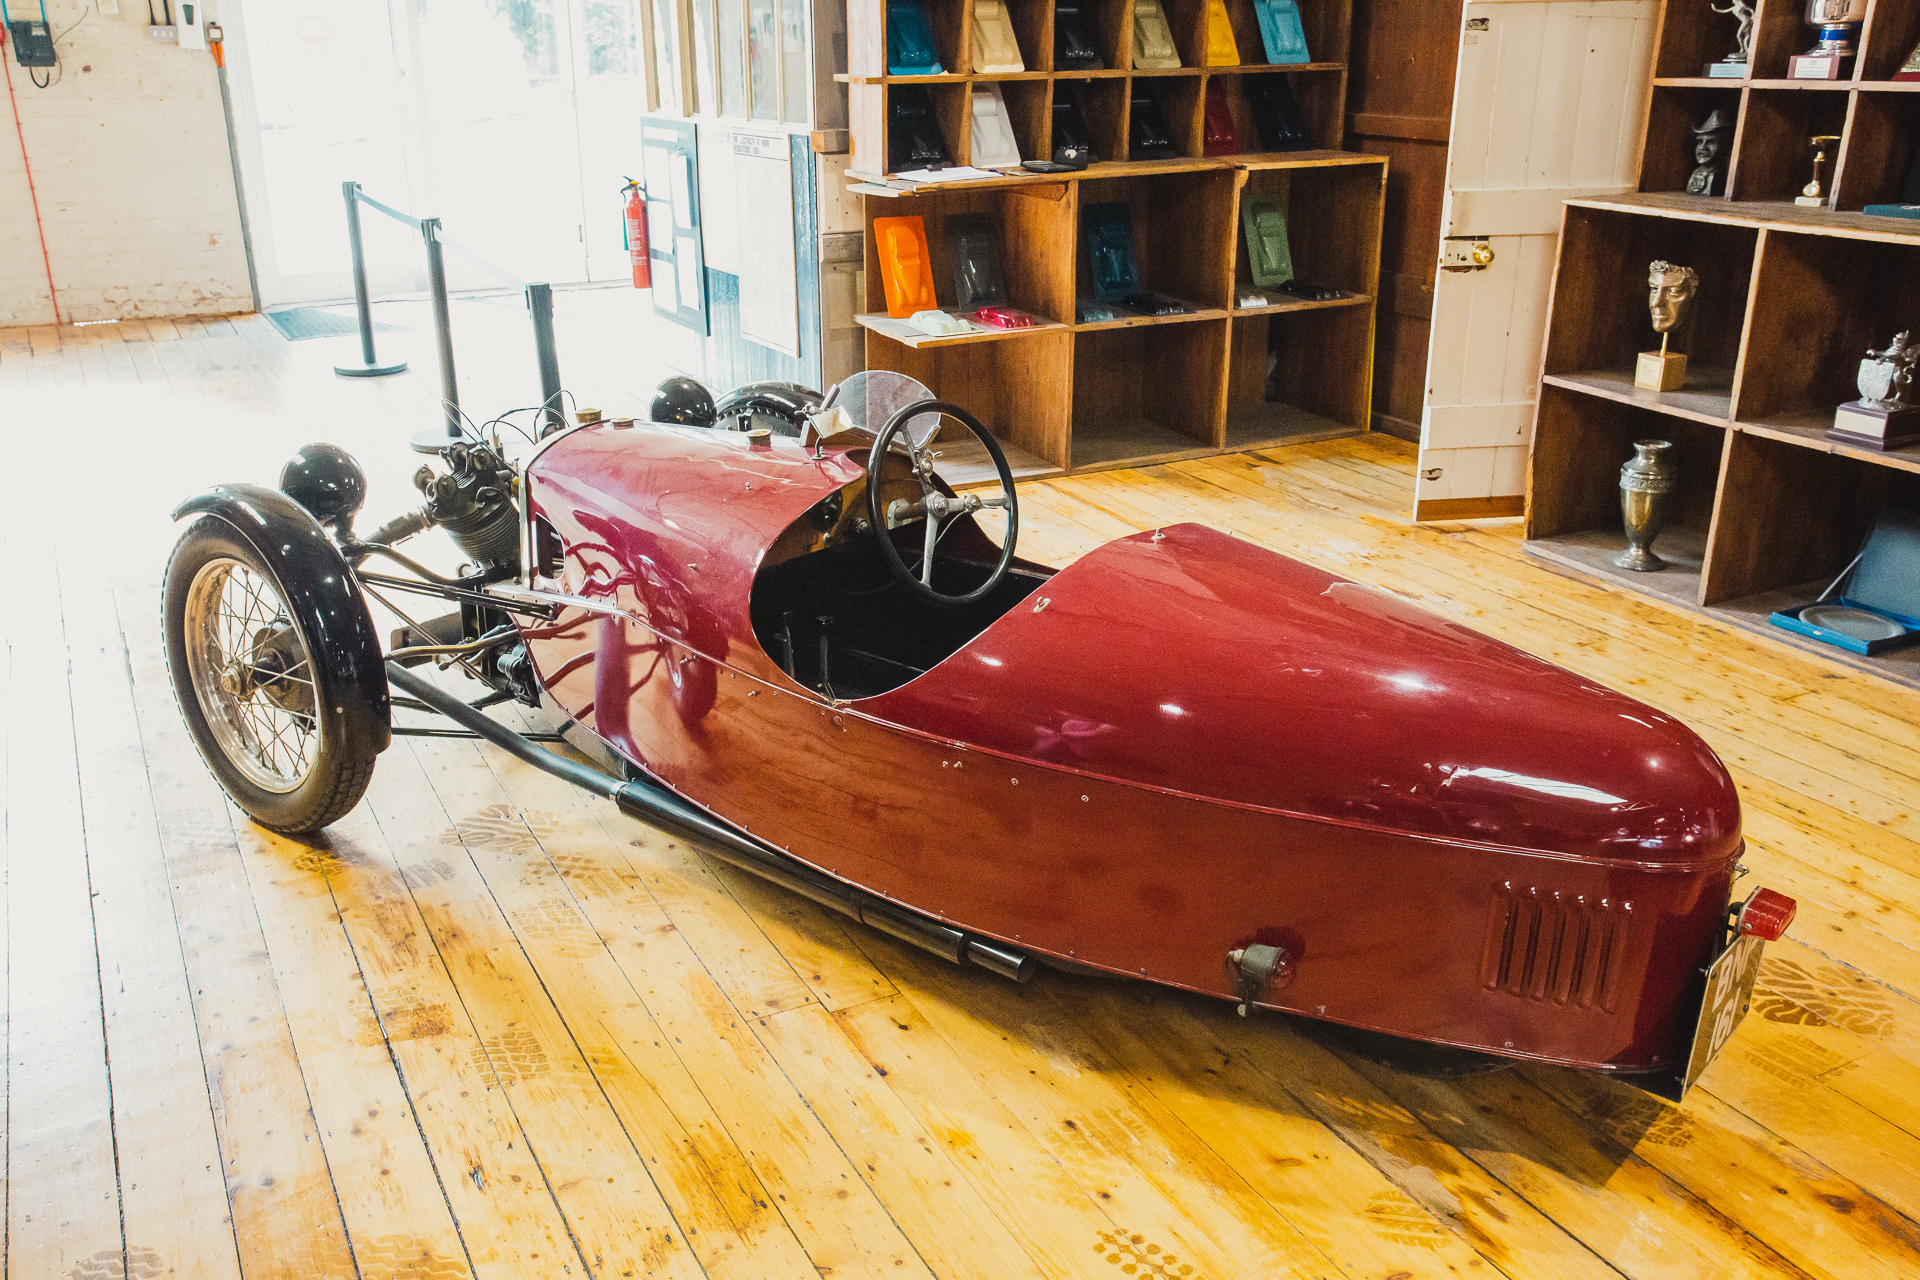
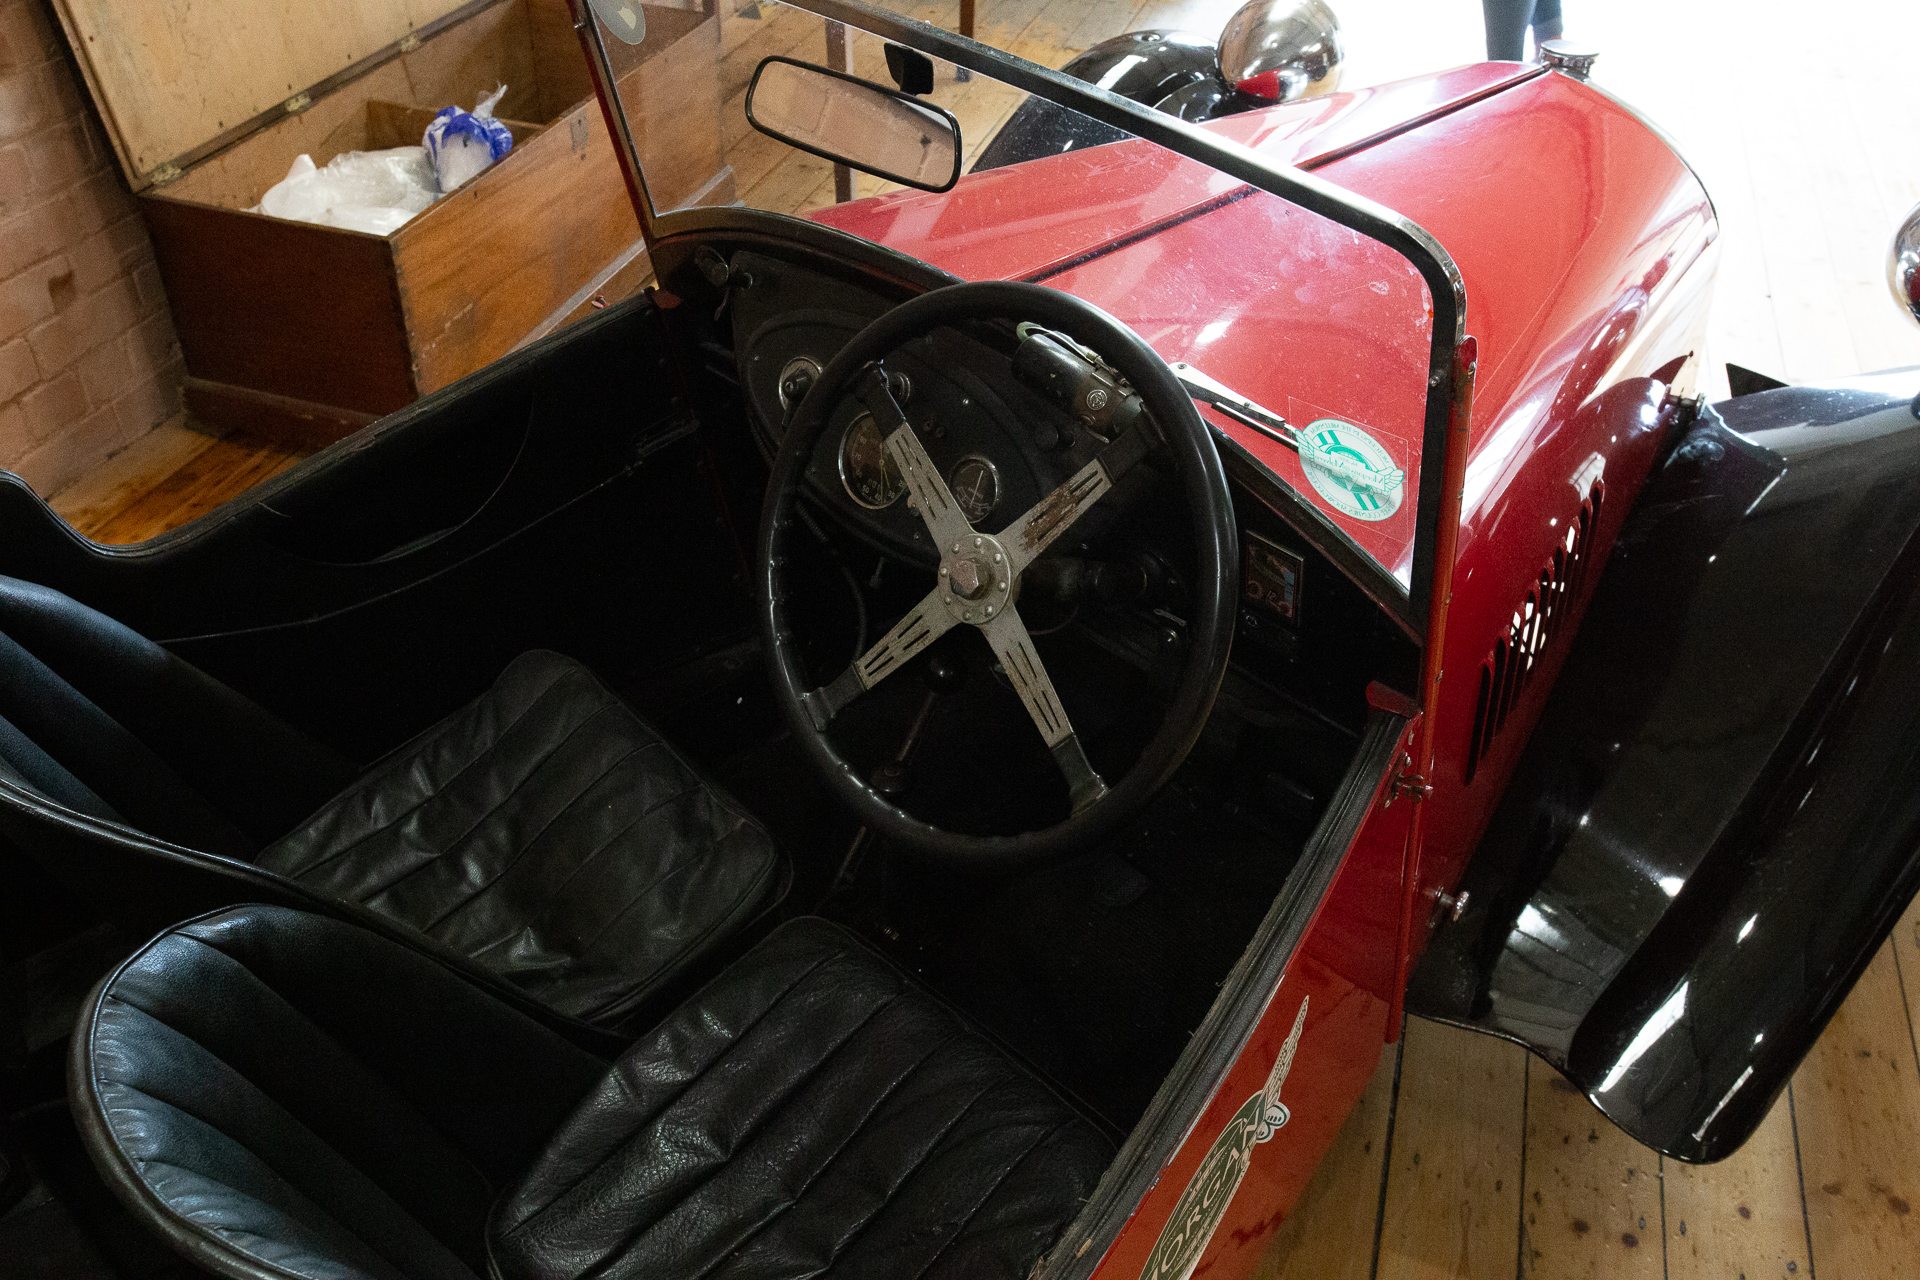
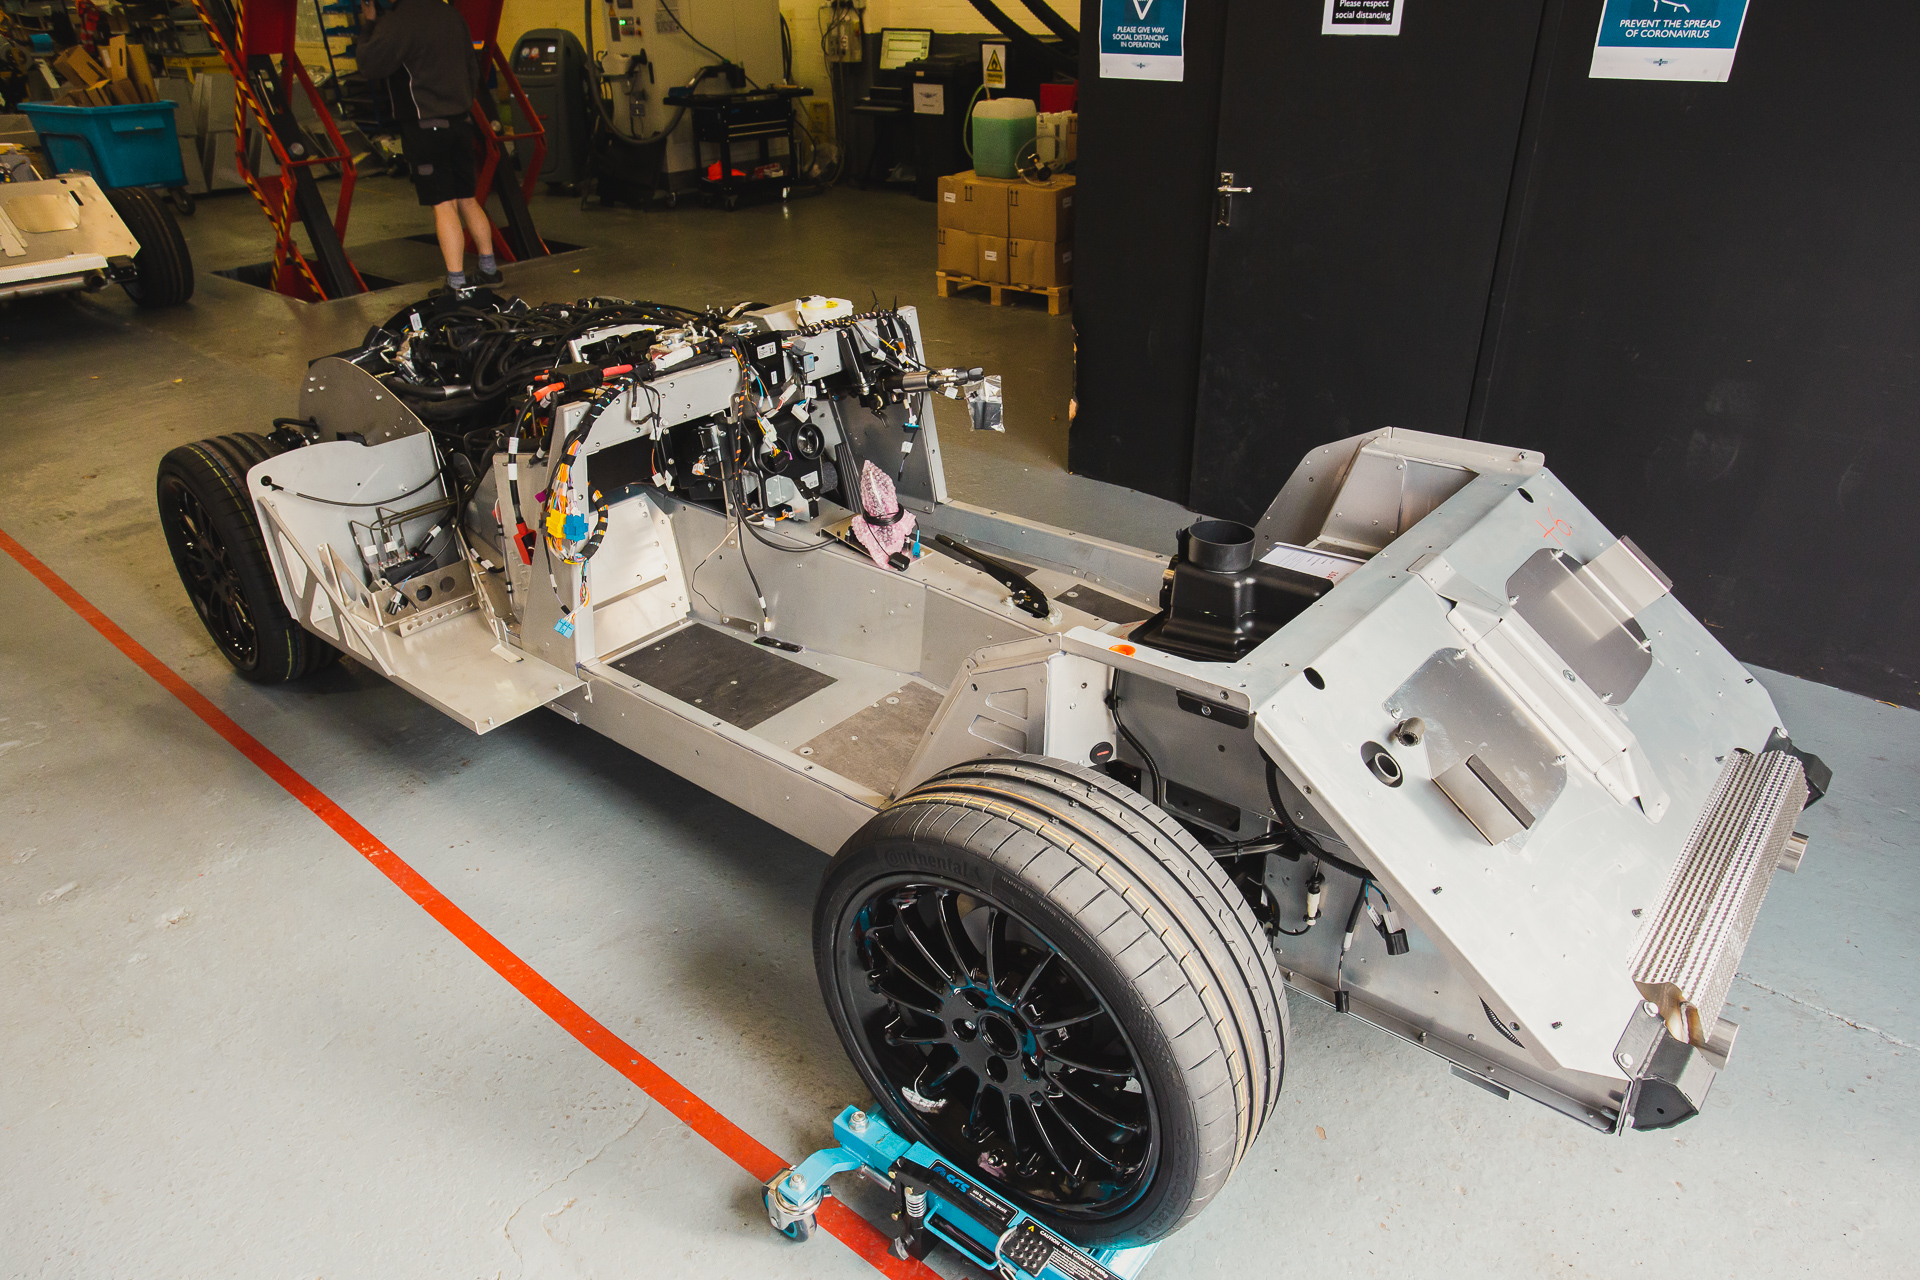
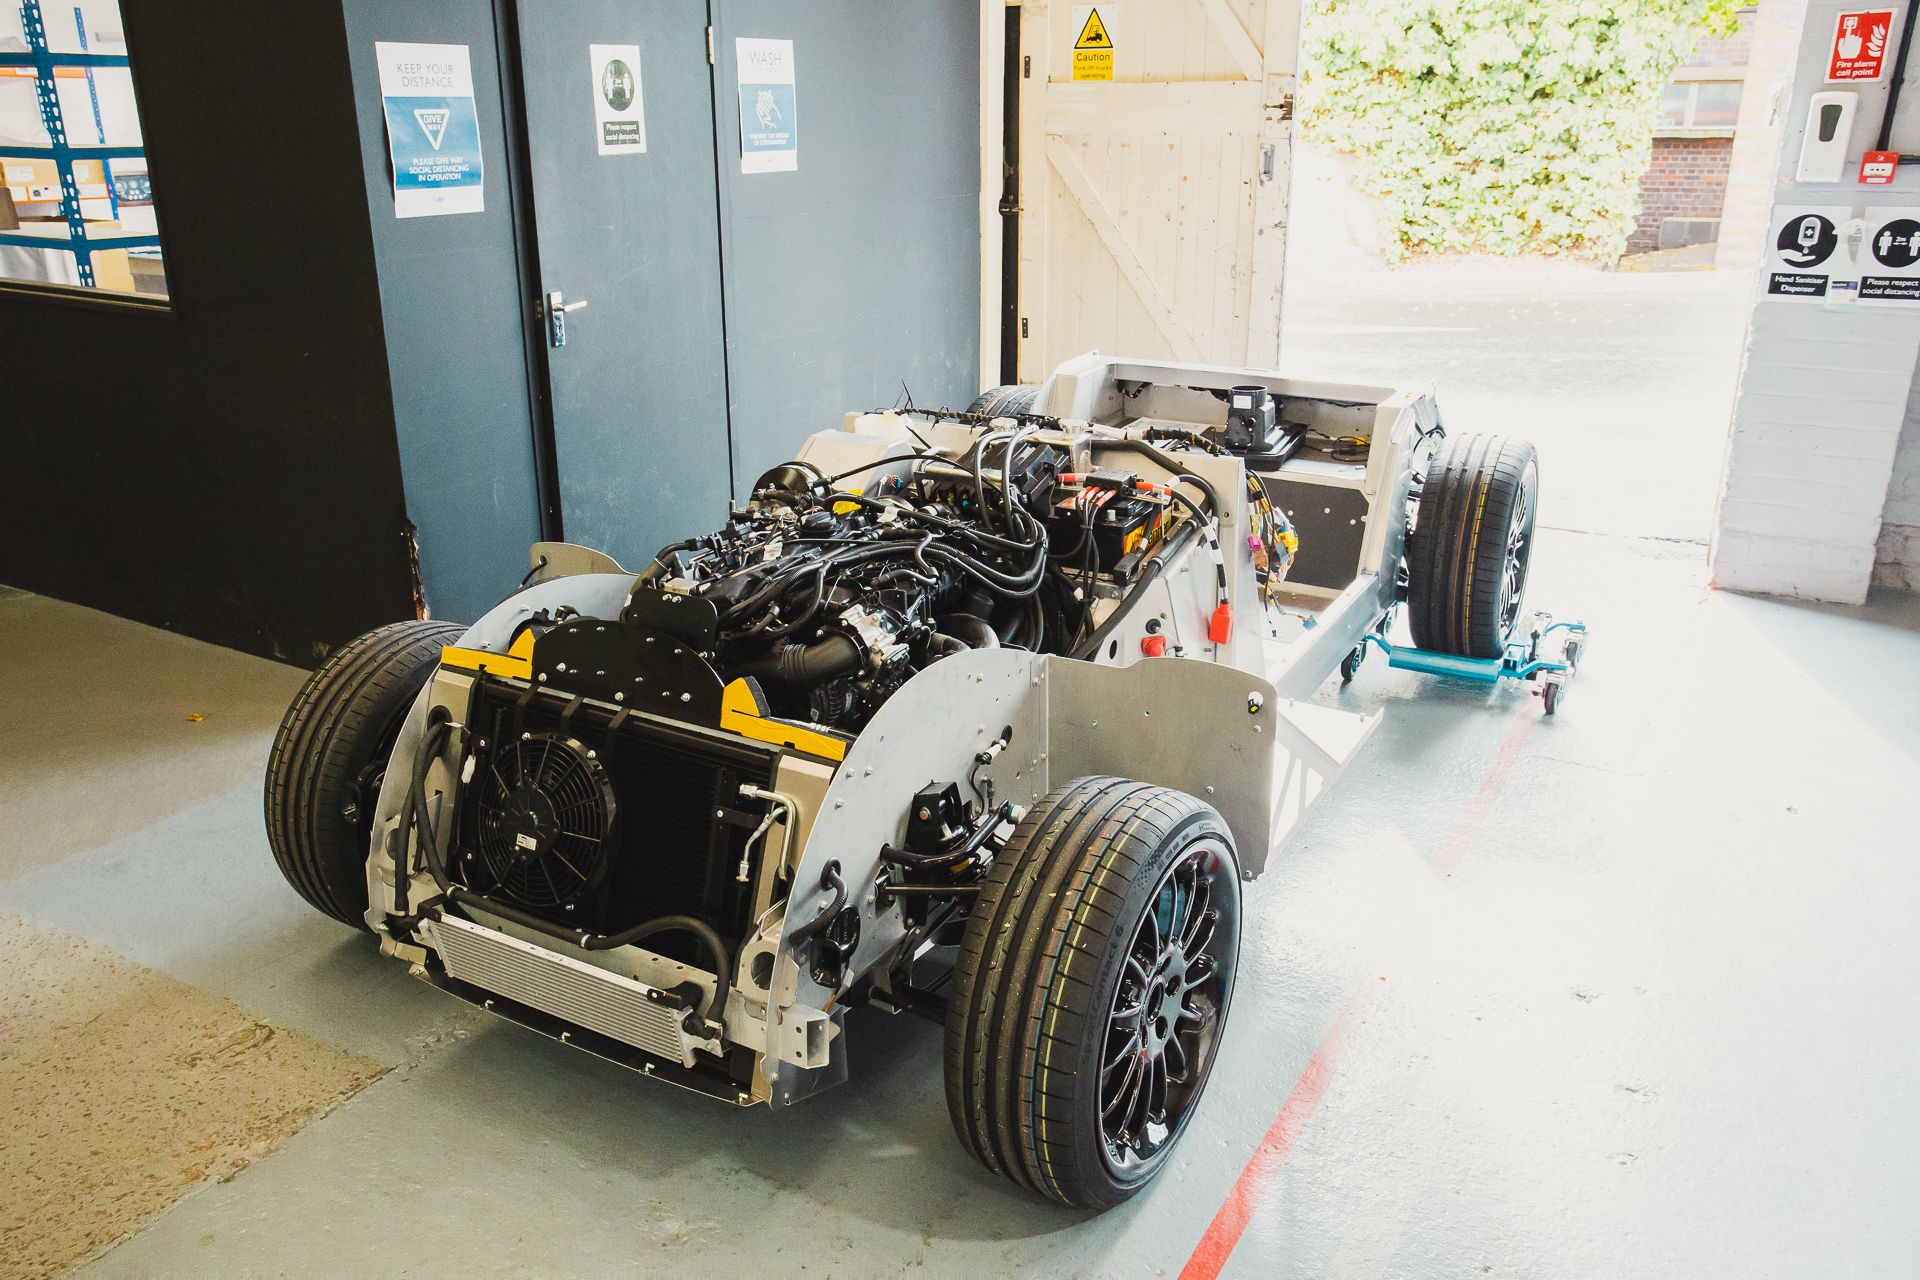
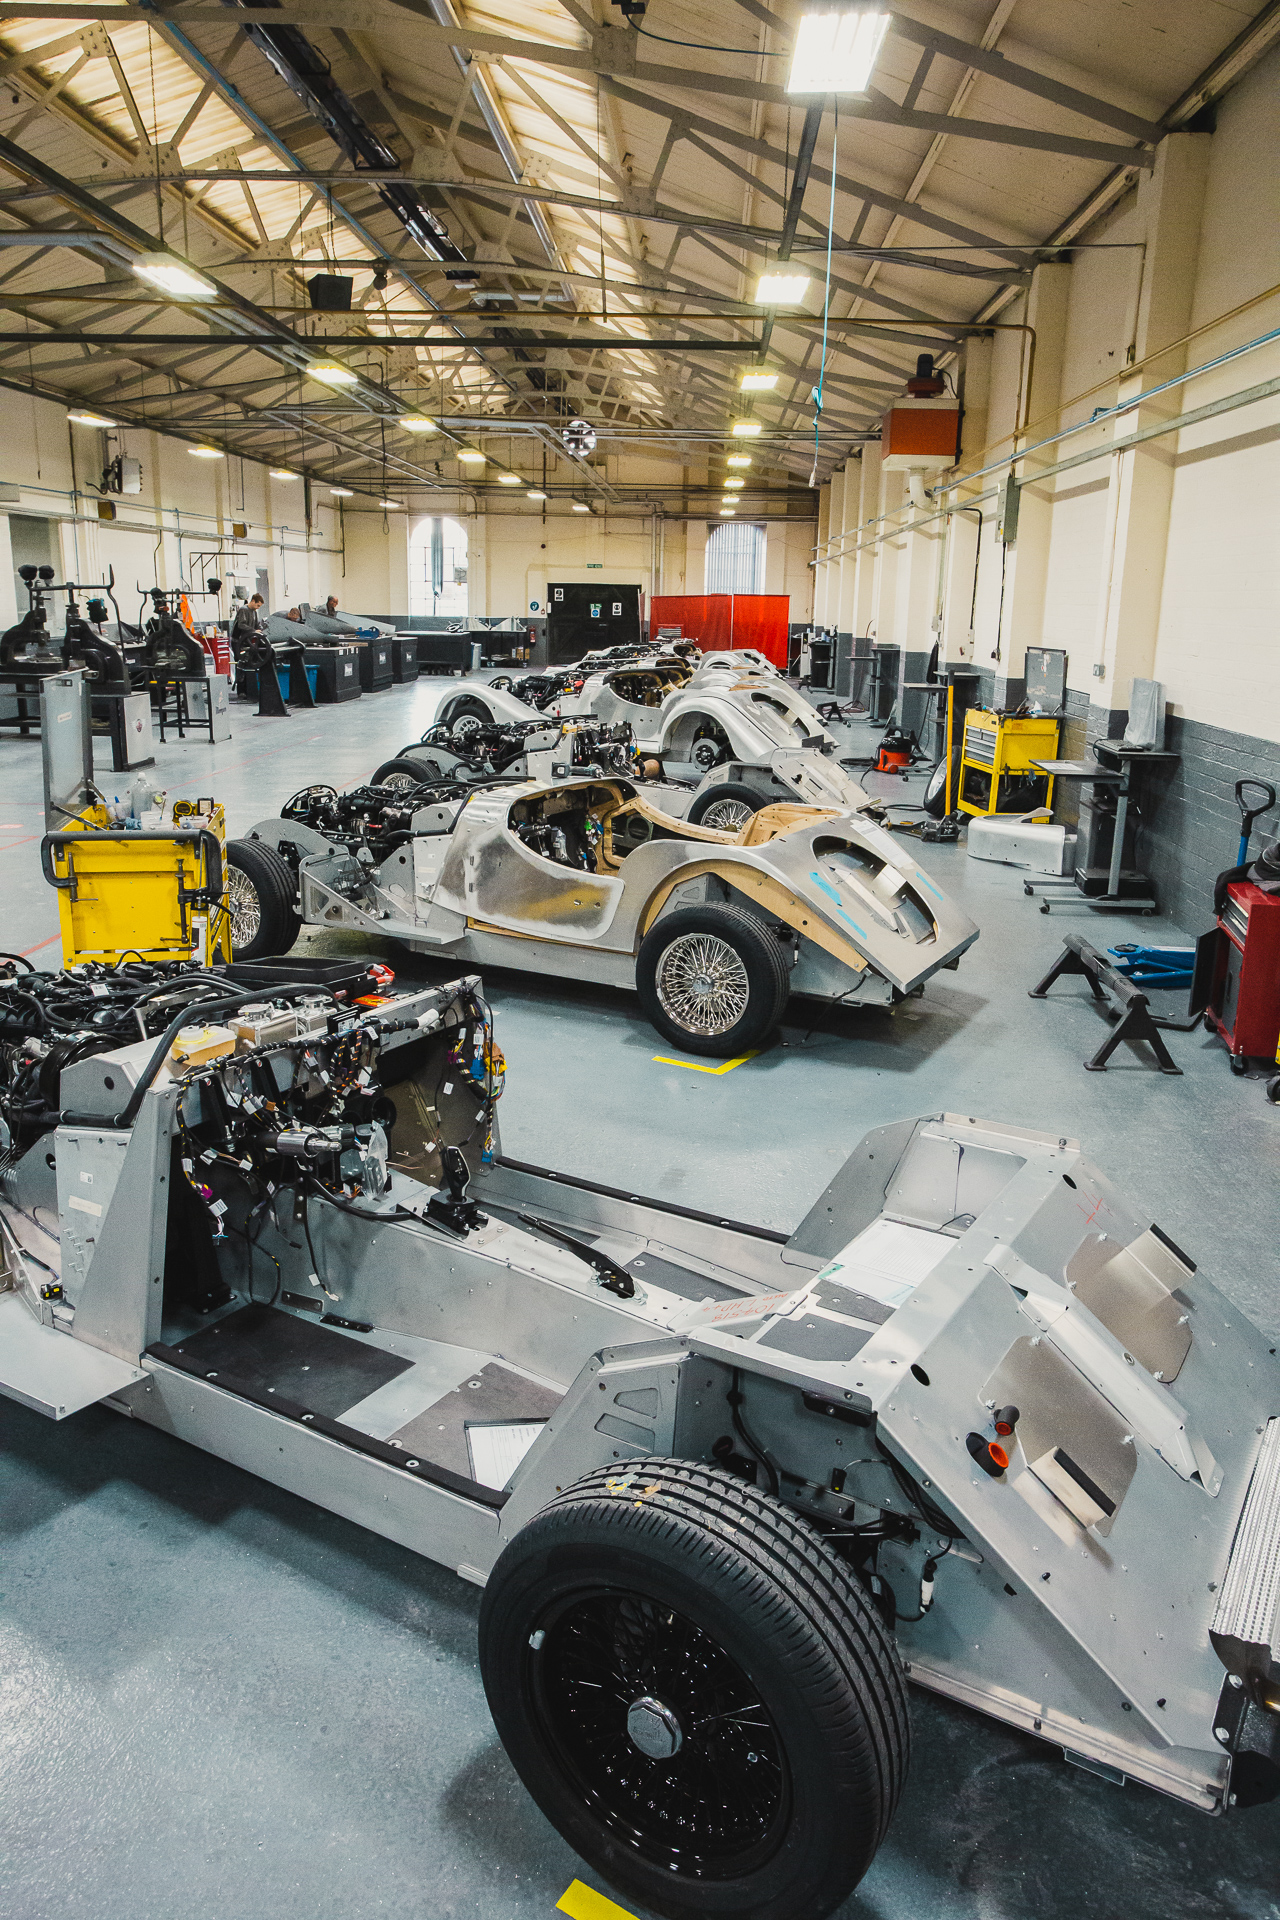
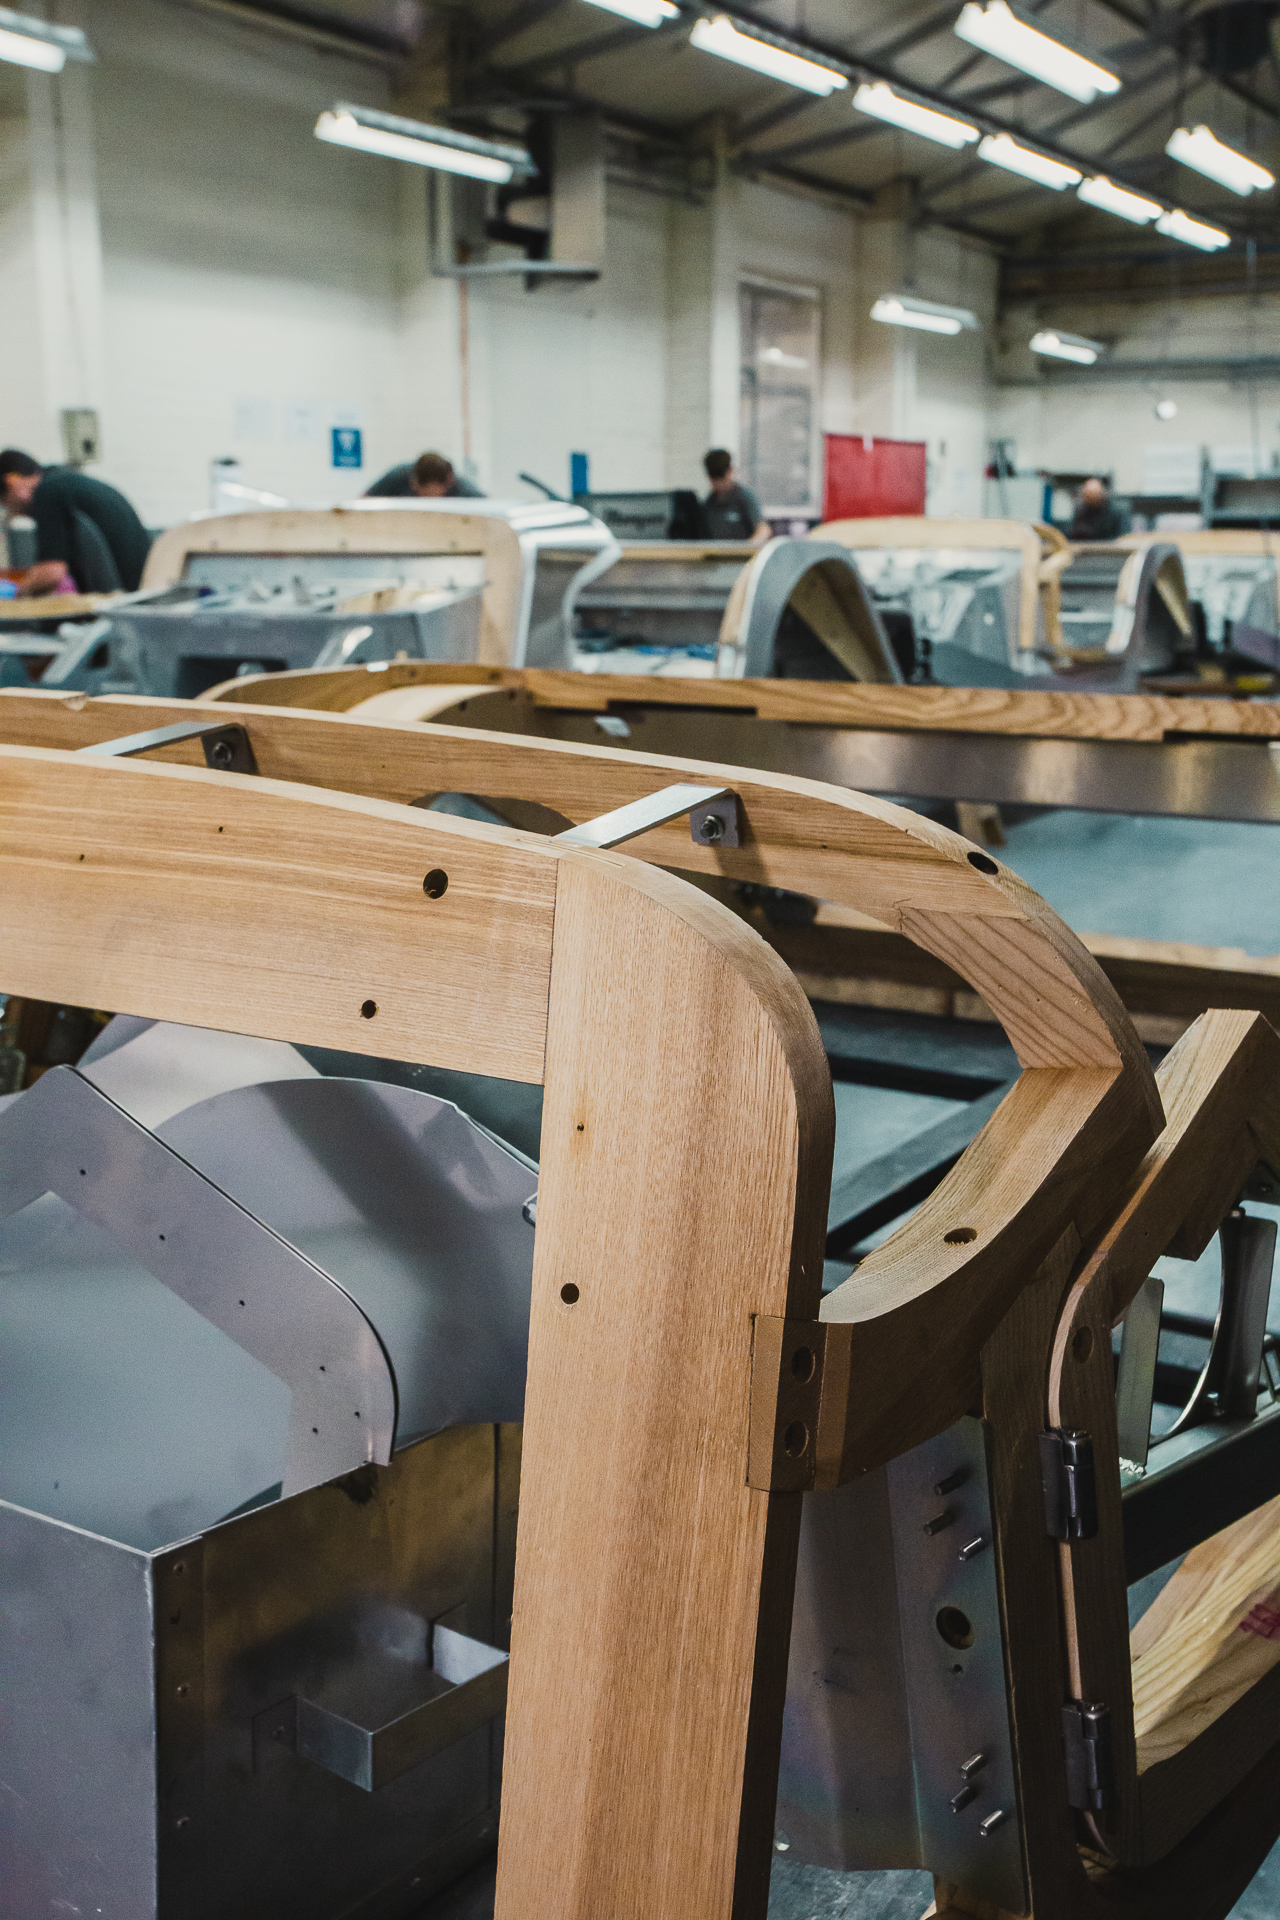
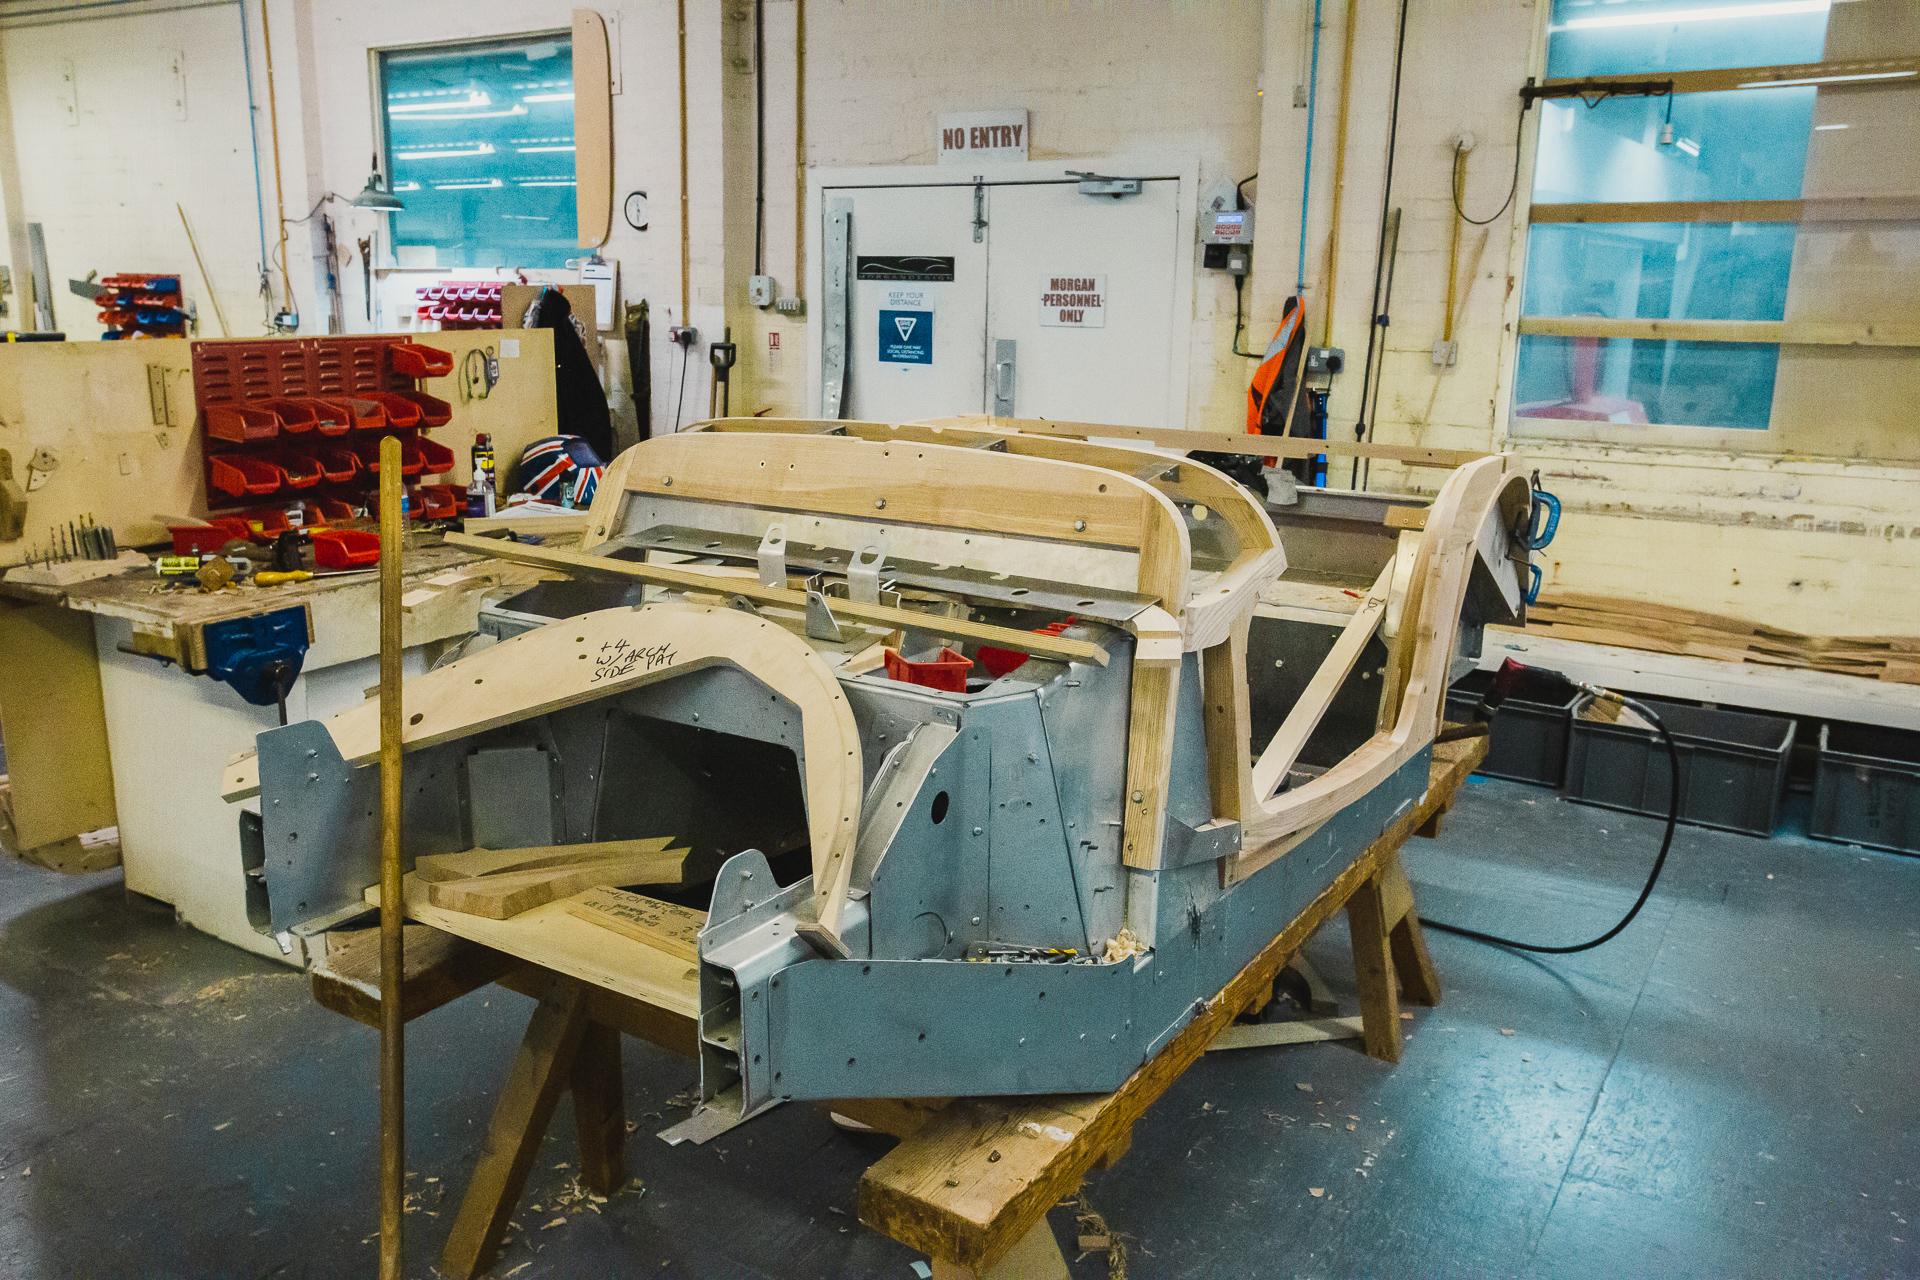
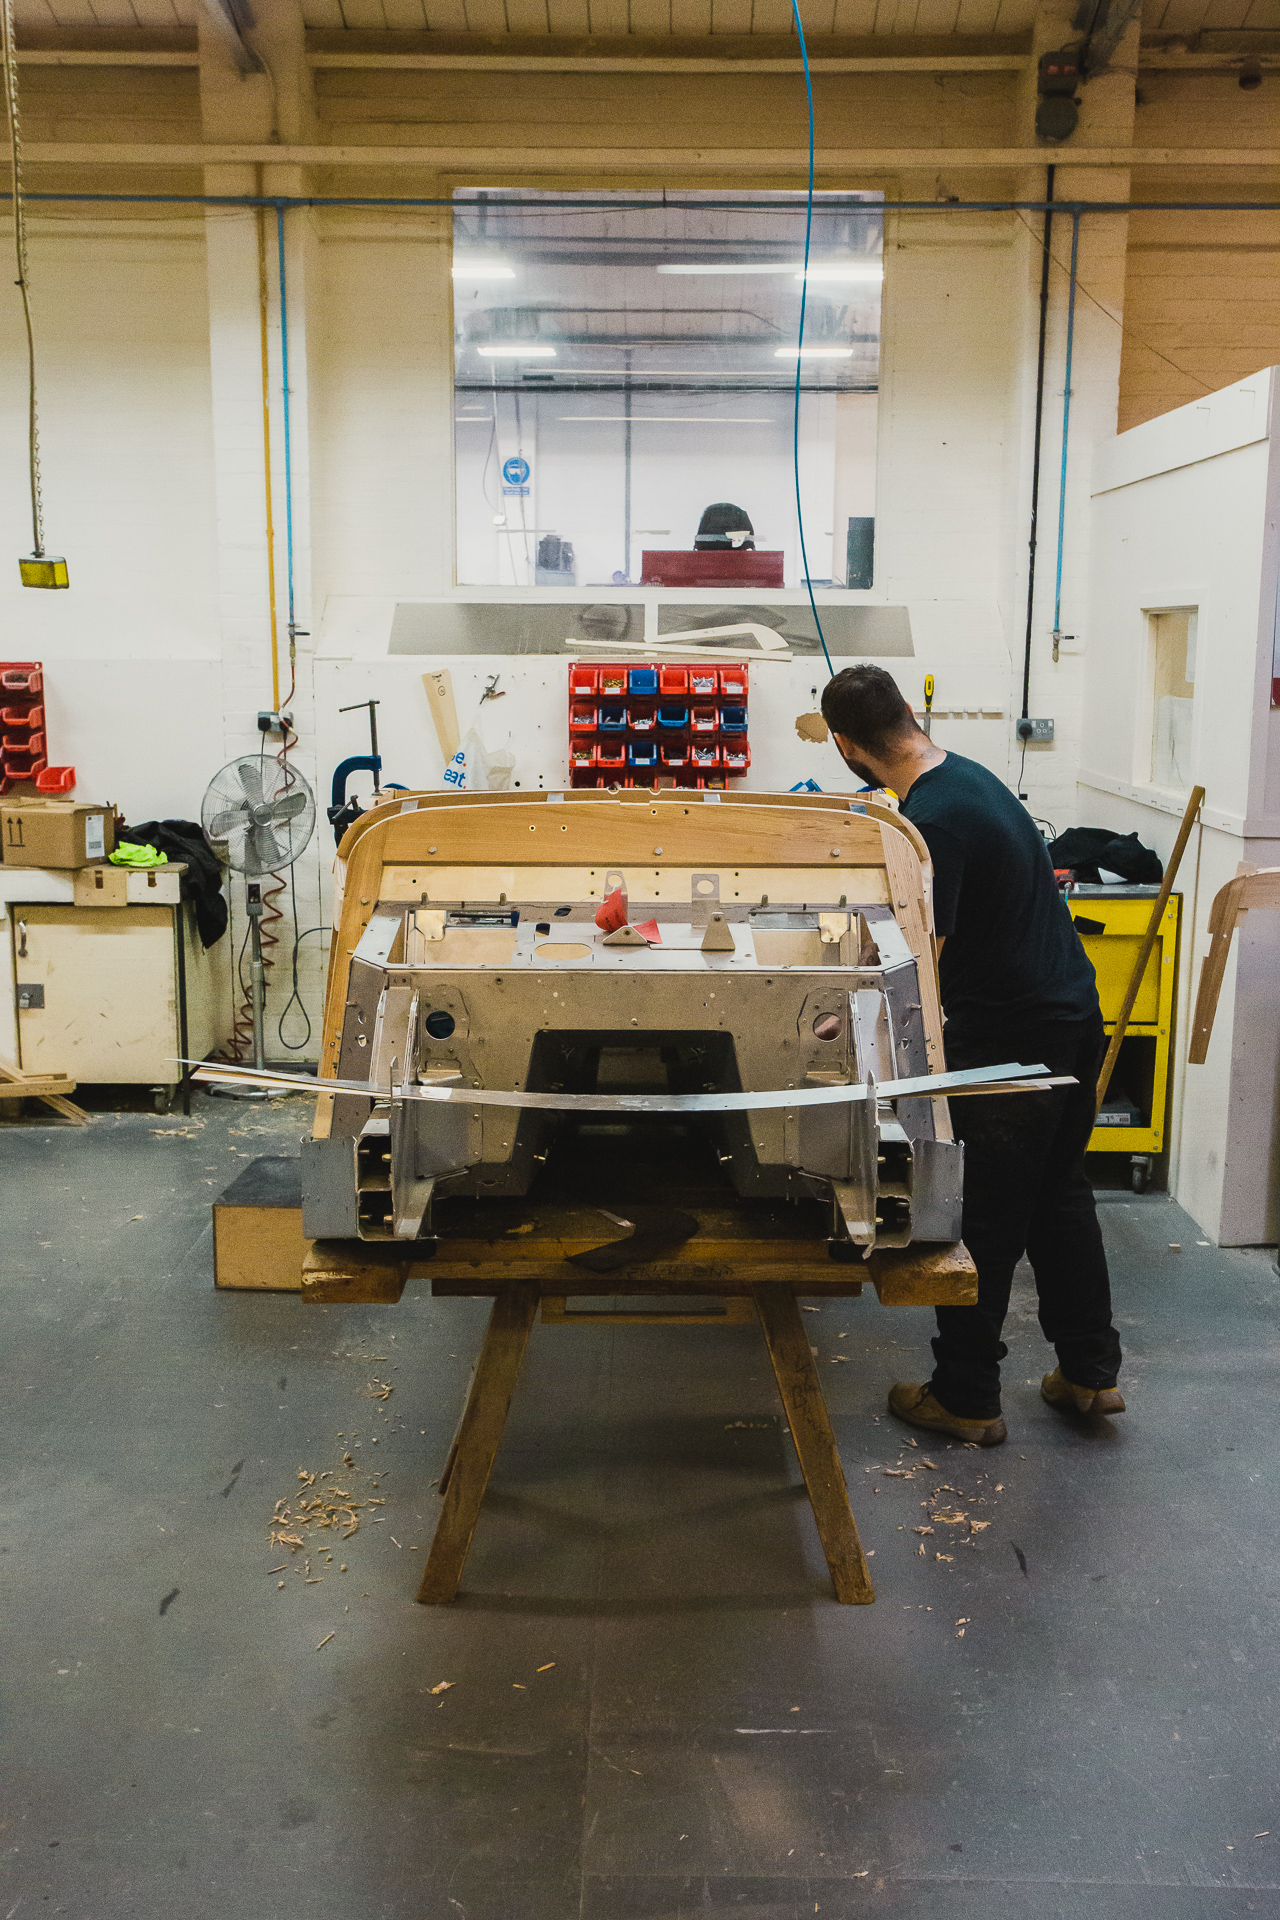
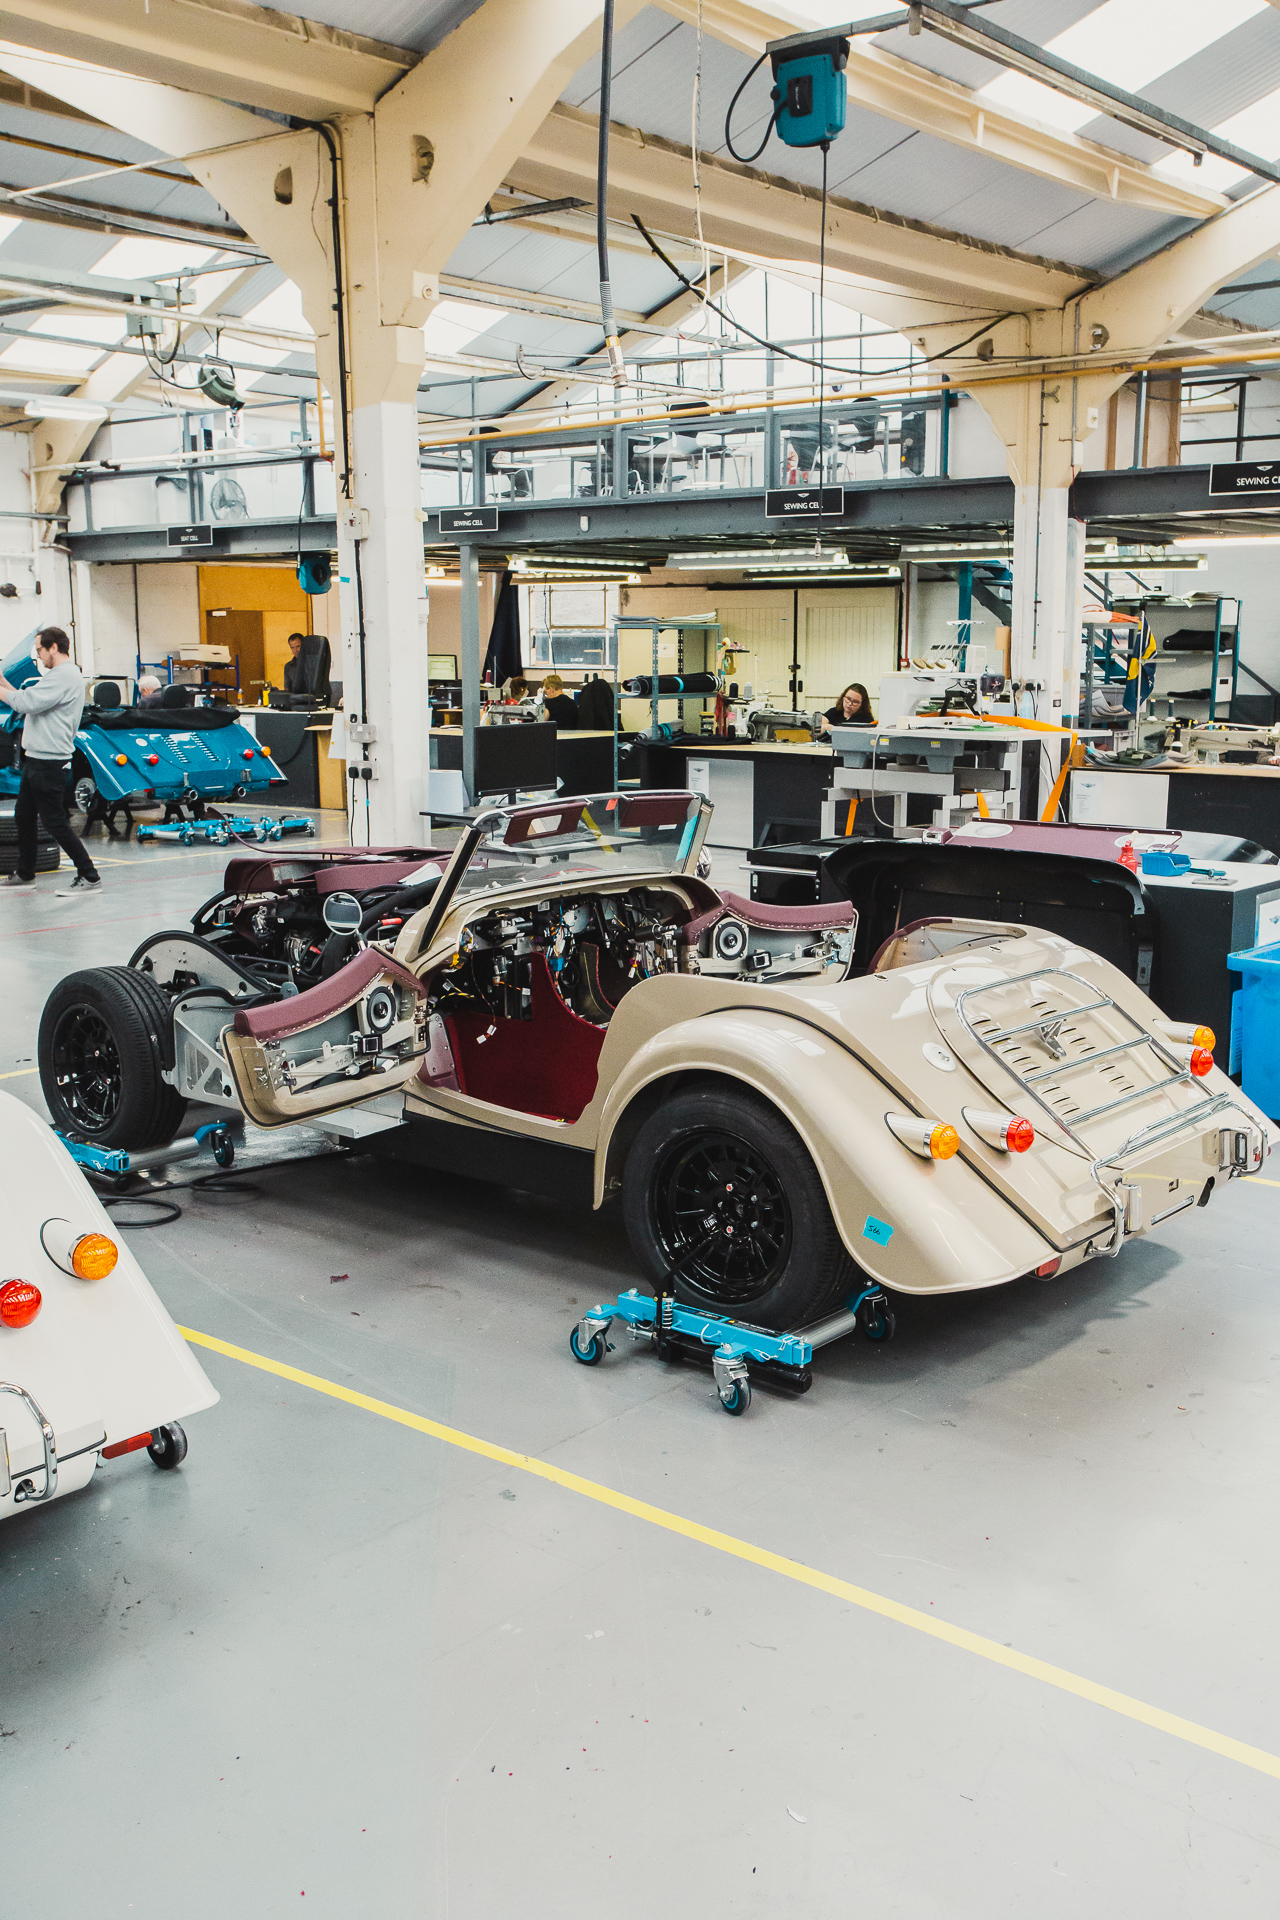
At the foot of the Malvern hills lies one of the worlds longest running motorcar production factories, Morgan Motor Company. A practice close to our
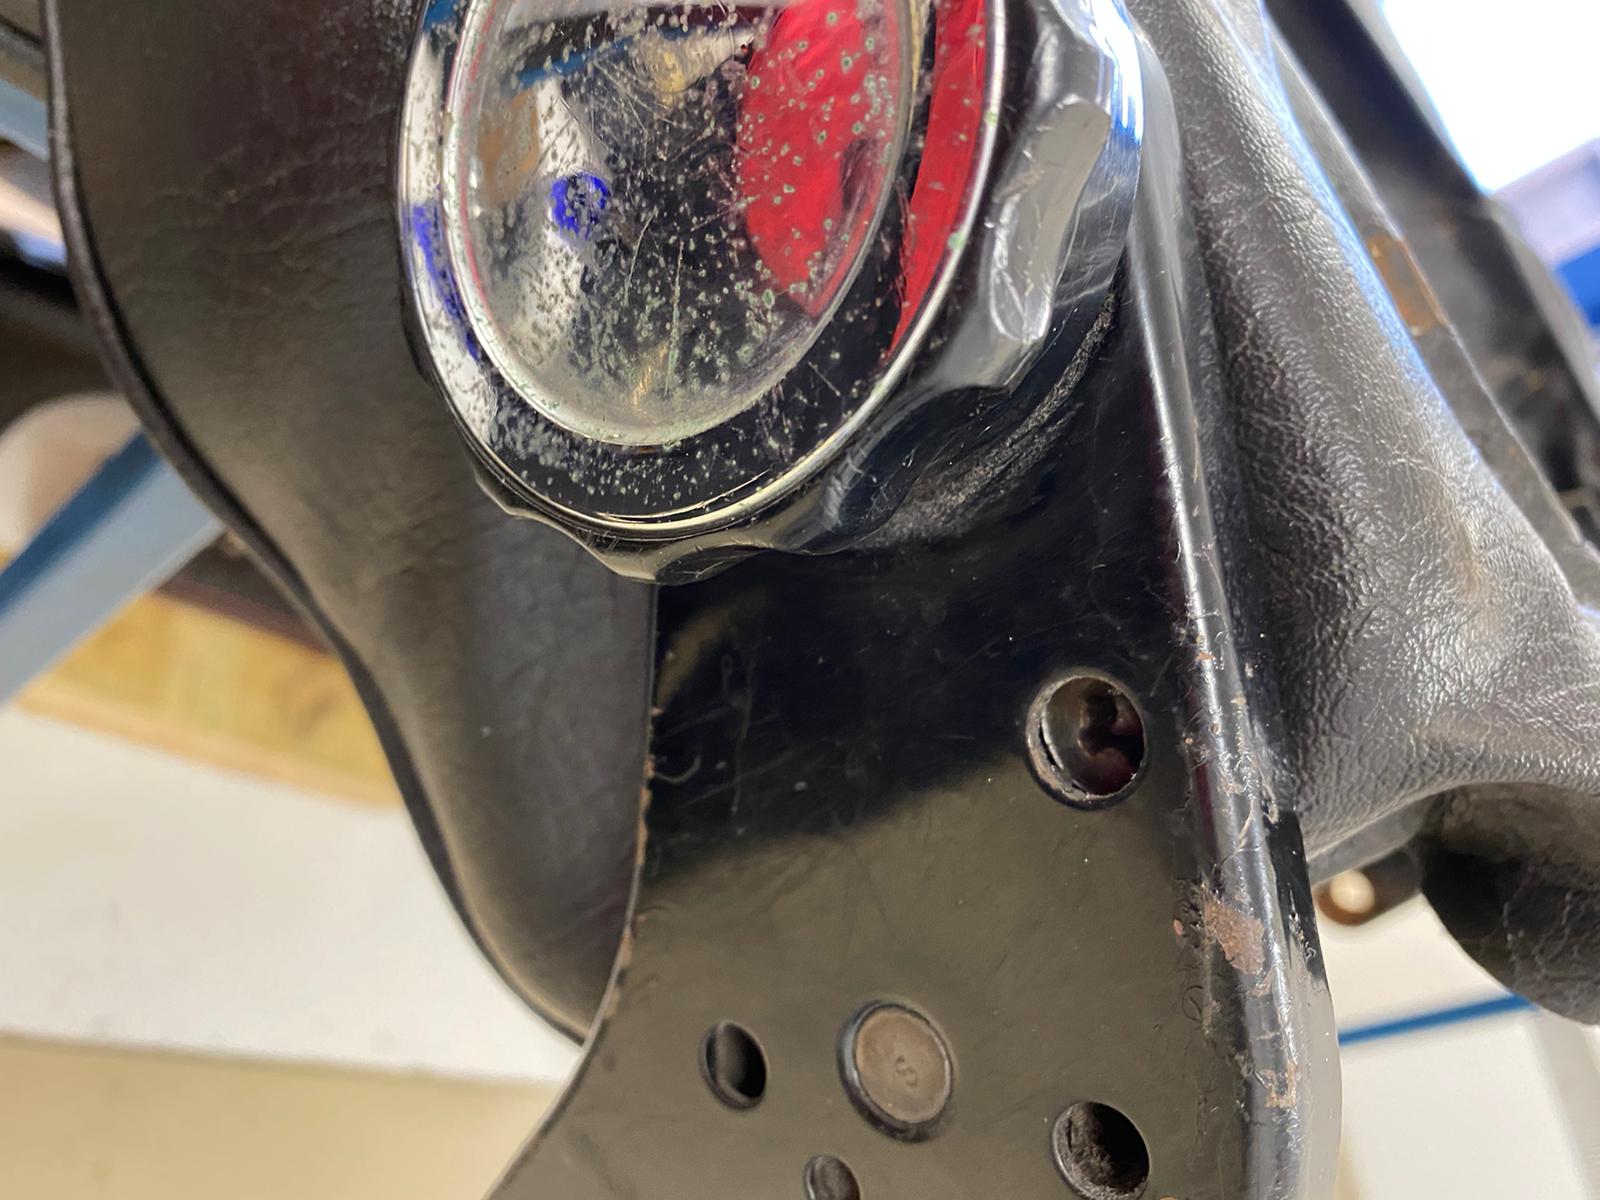
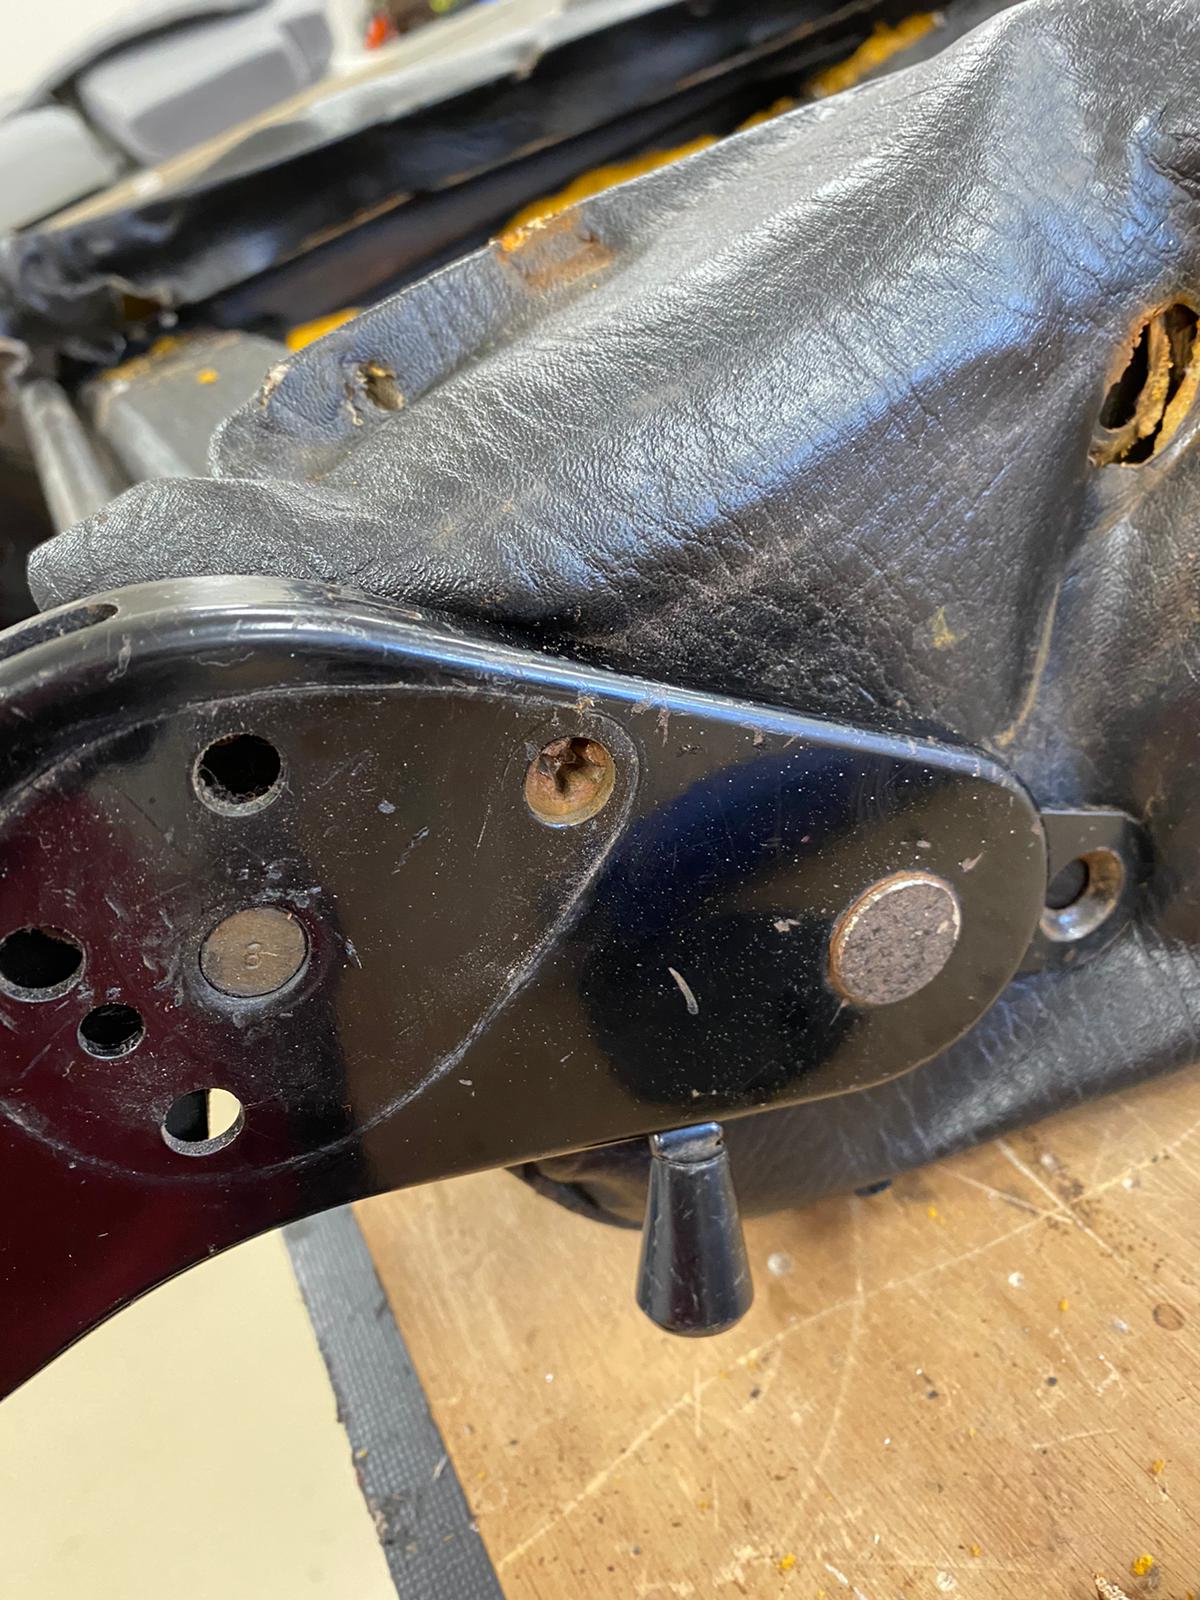
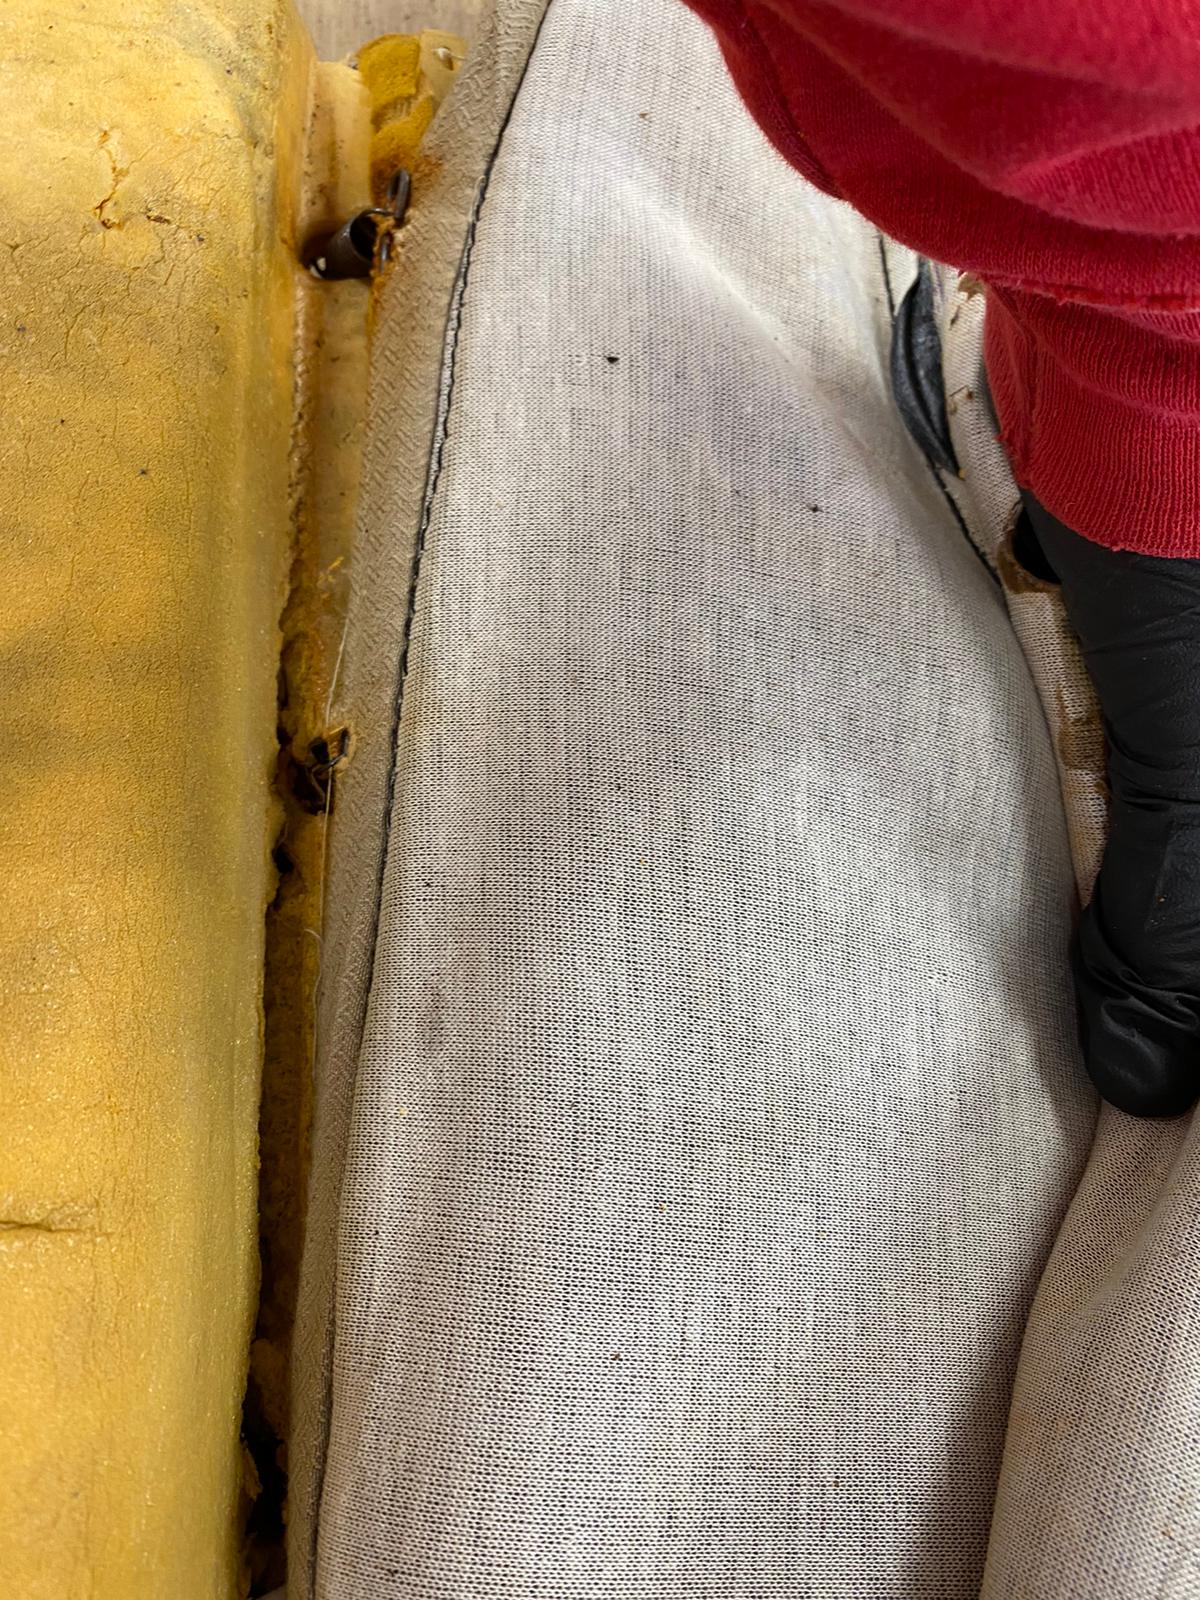
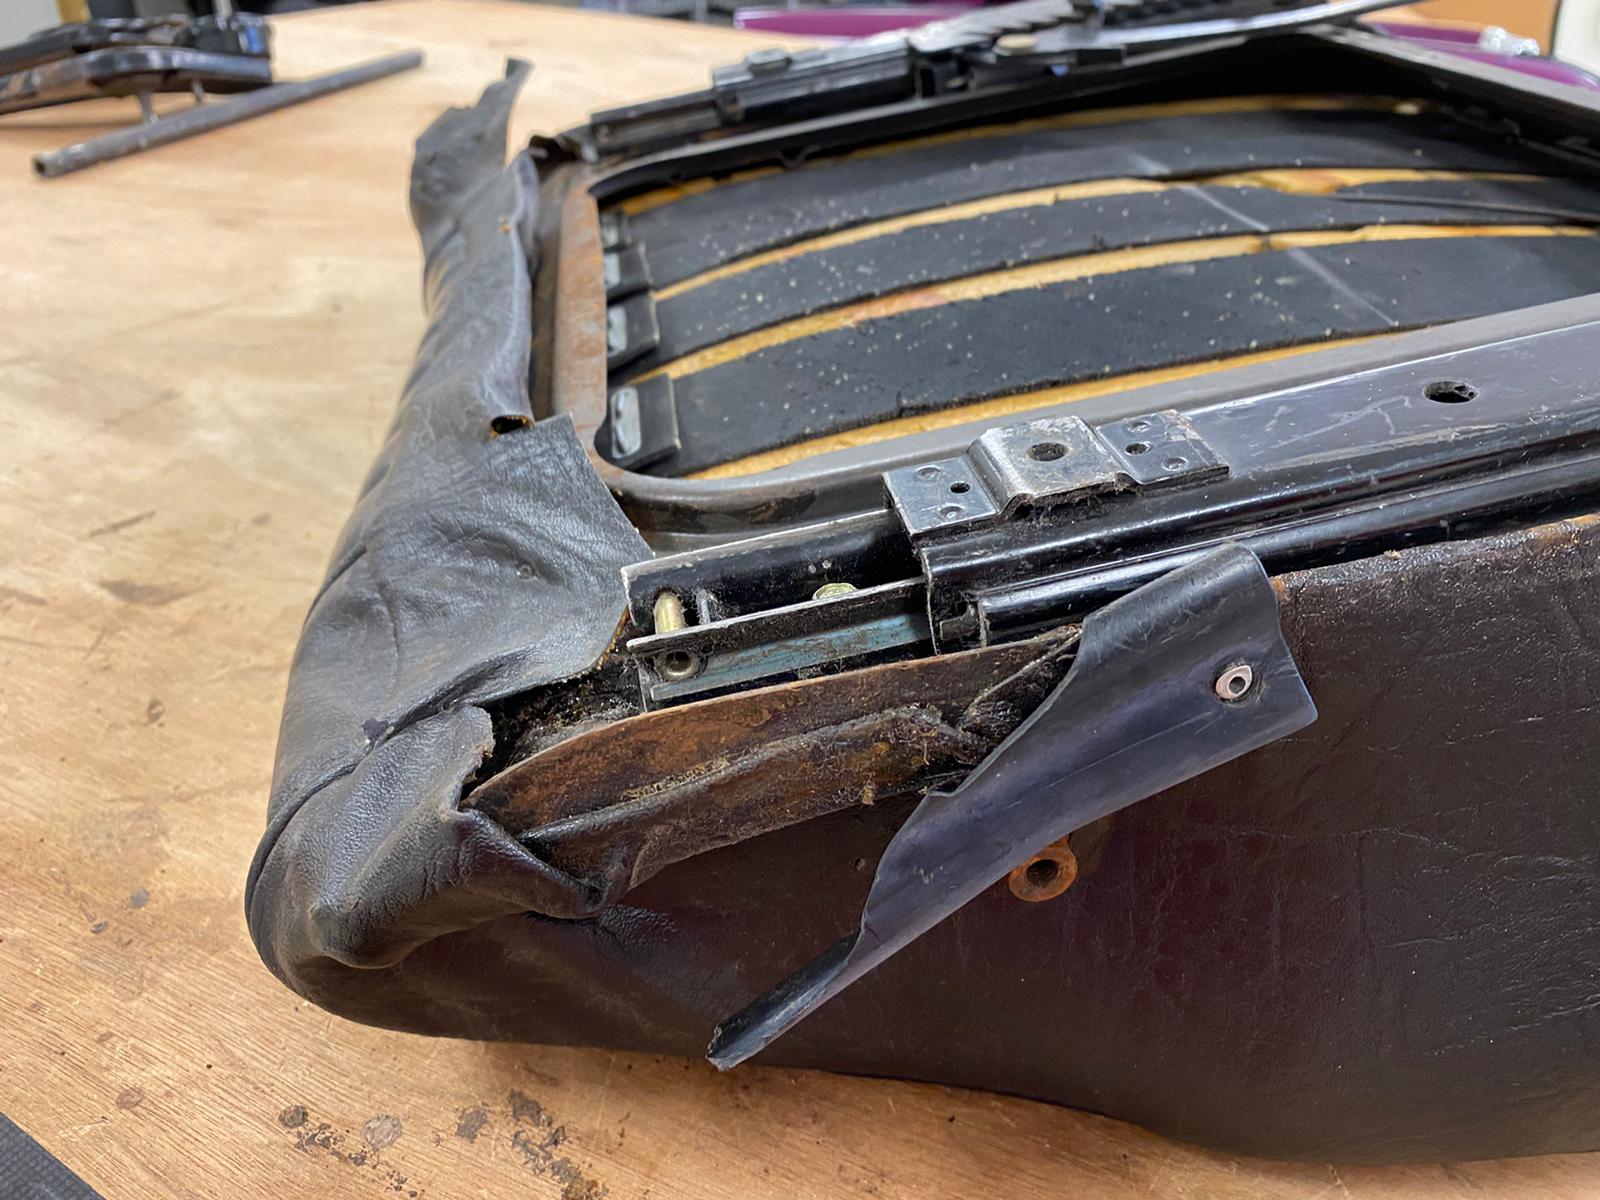
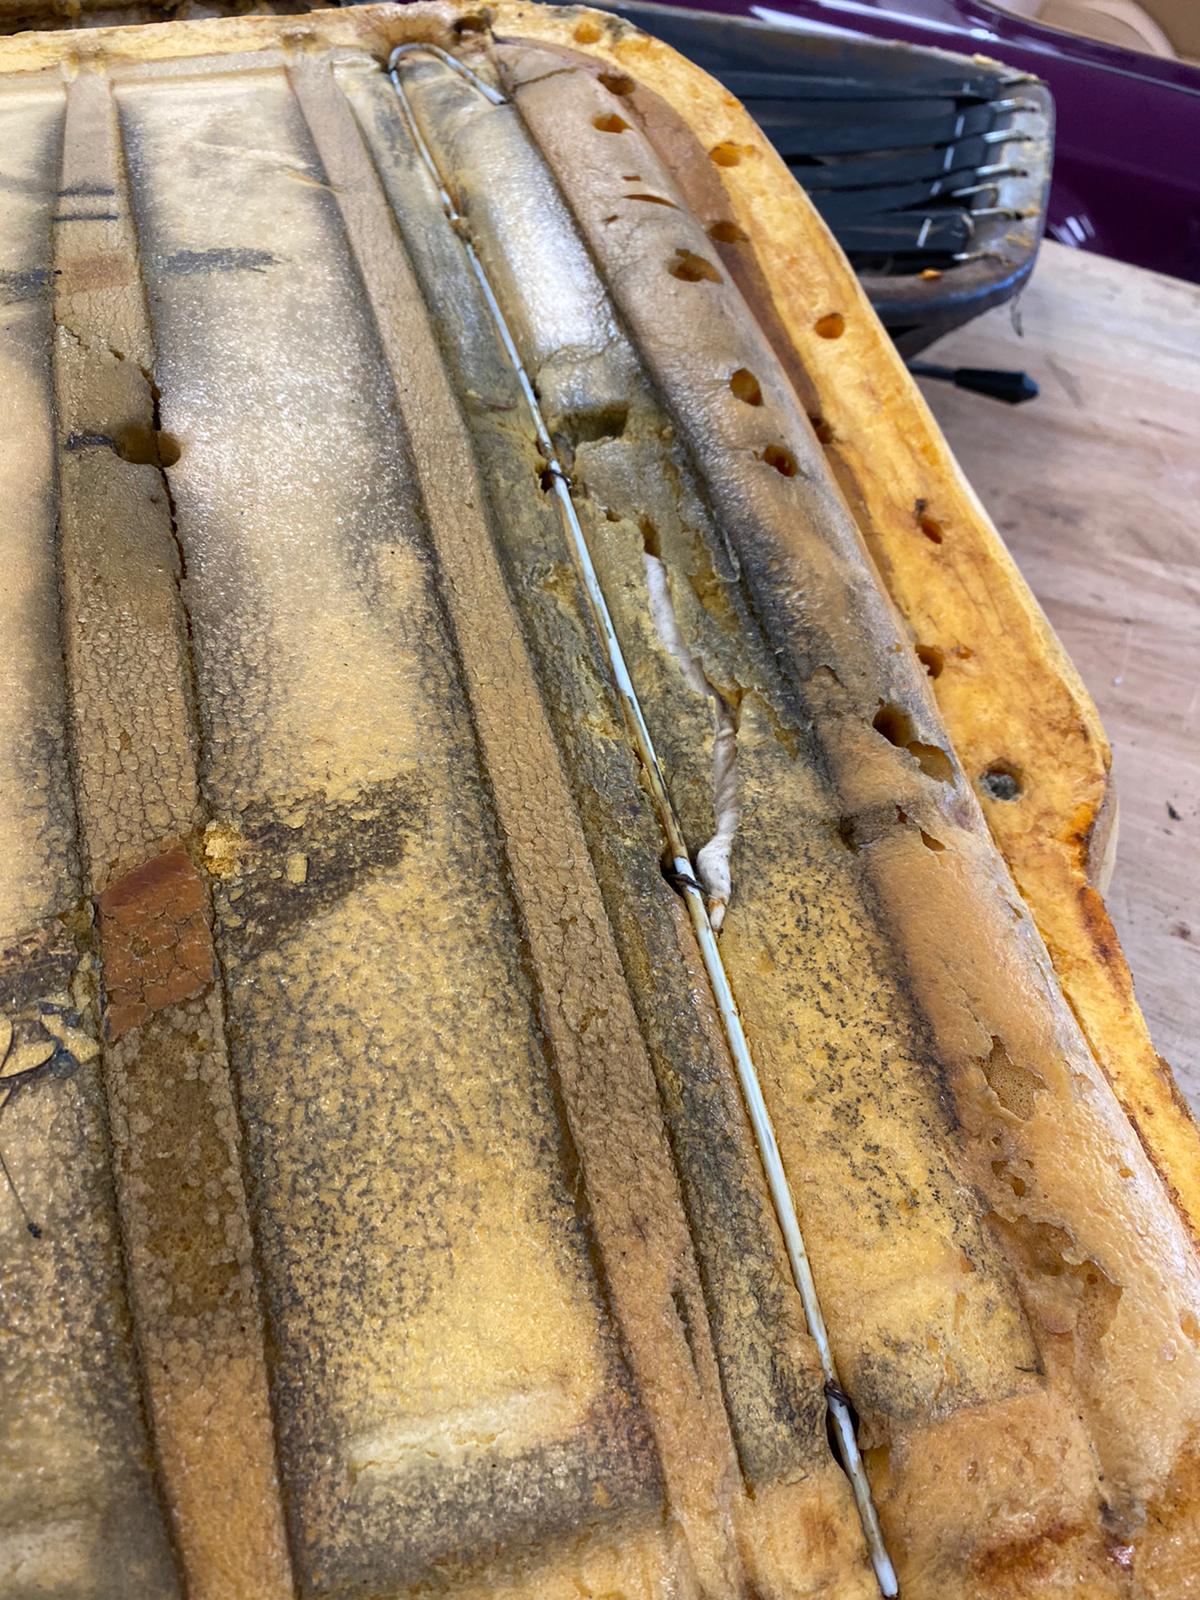
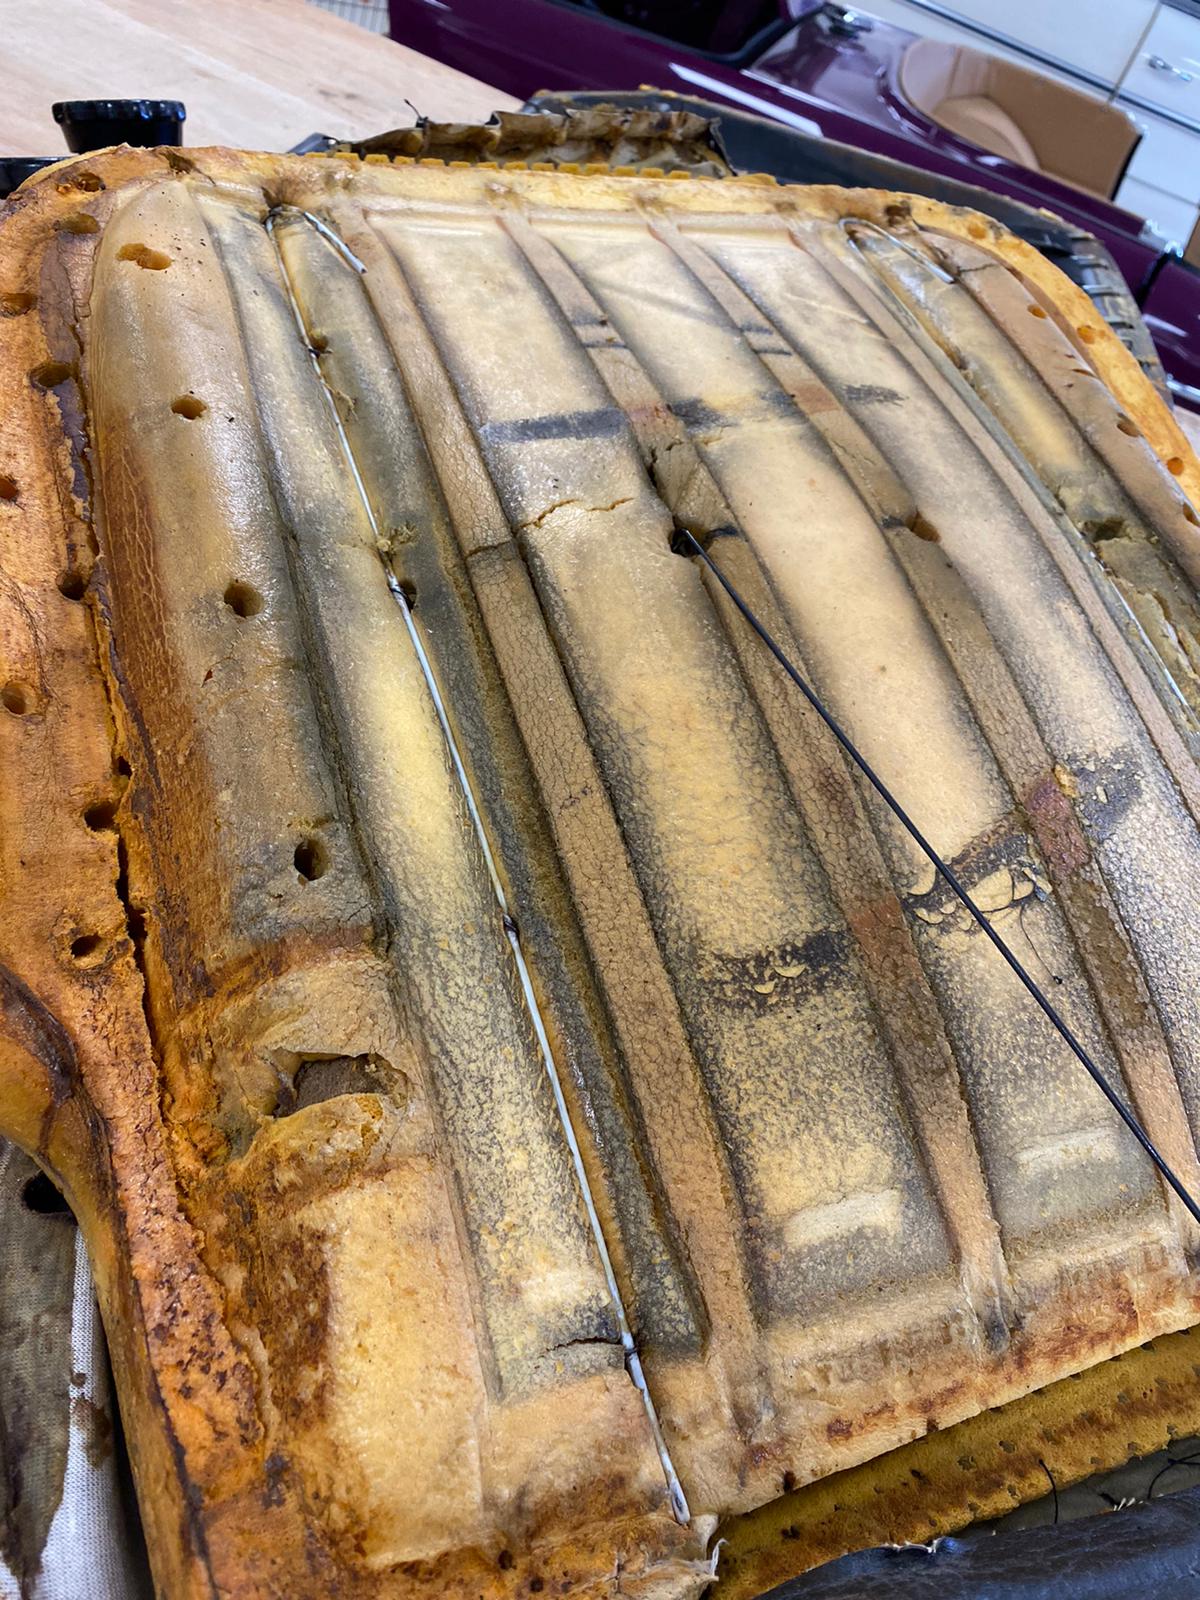
The exciting restoration project continues on our 1958 Jaguar XK150. This week the interior has been with our expert trim shop who have been working
This exciting 1995 BMW 840 arrived at the workshop this week, ready to start an extensive restoration. The outer body certainly needs some attention. Our
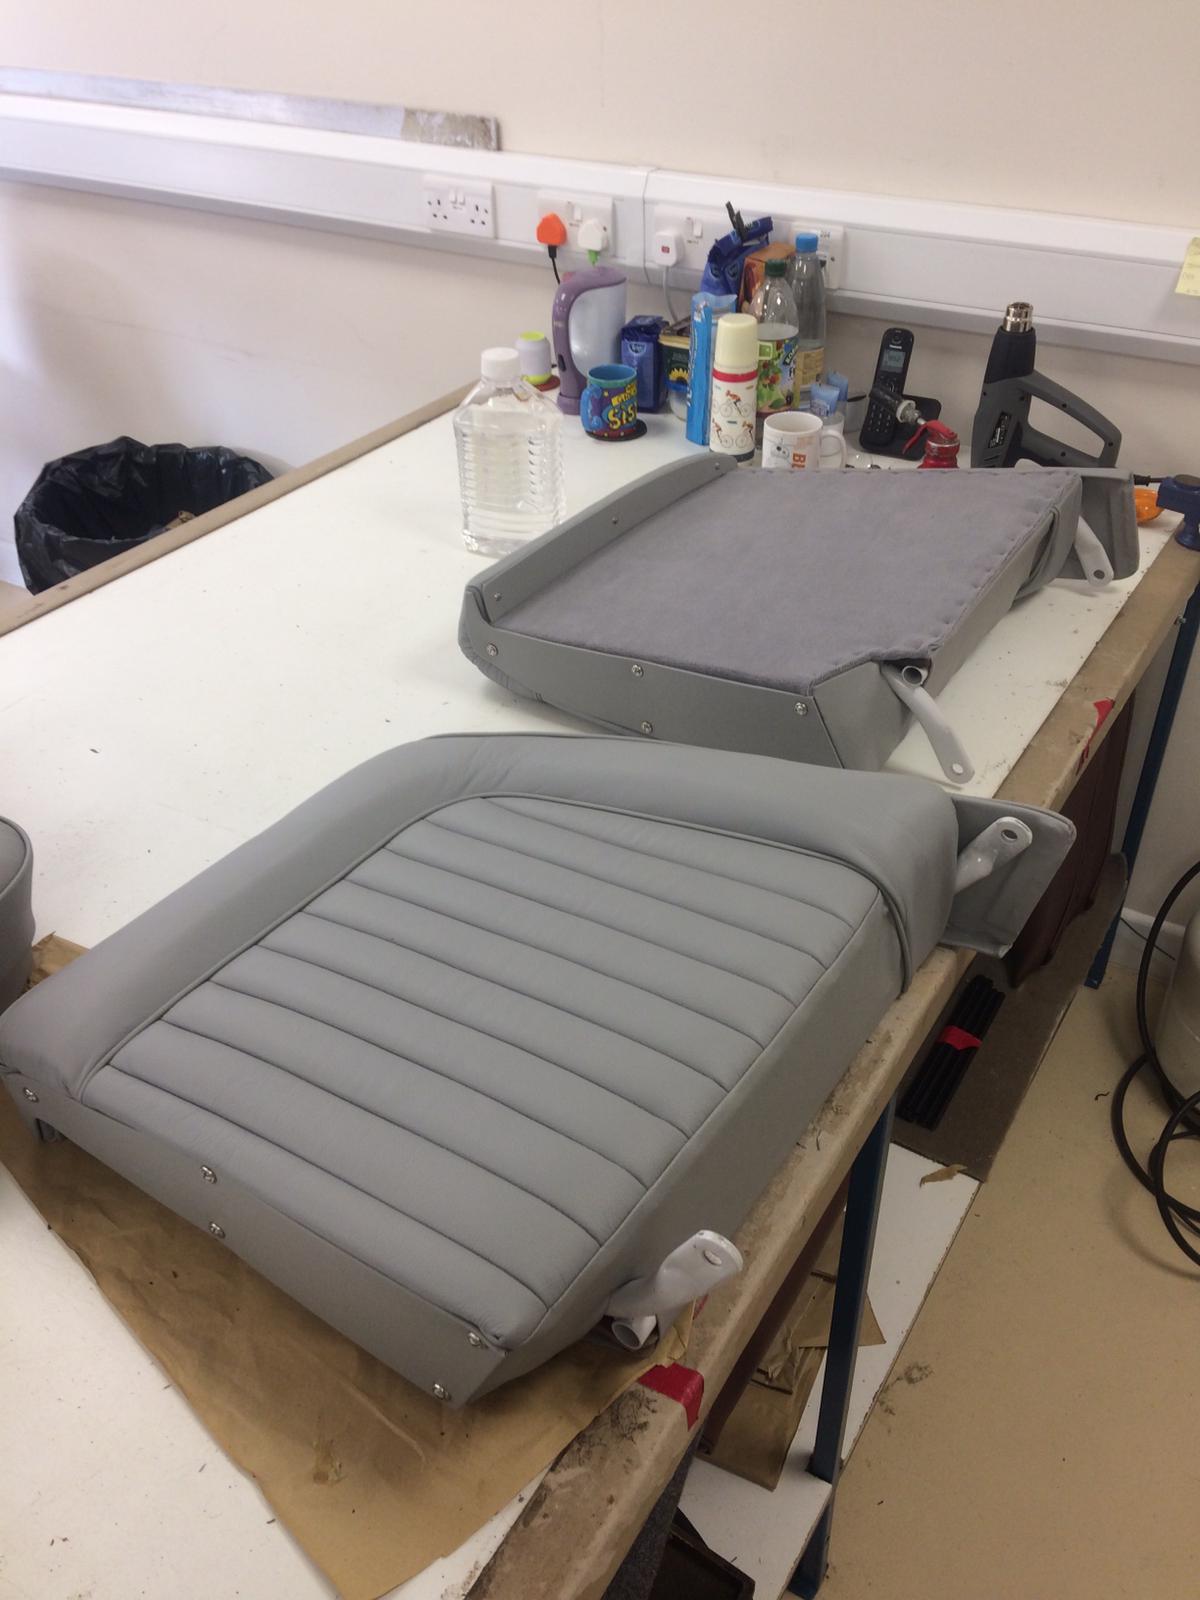
Kath and Brian in our in-house trim shop have been busy with our 1972 Peugeot 504 seats. They’re in to be fully reupholstered, so Kath
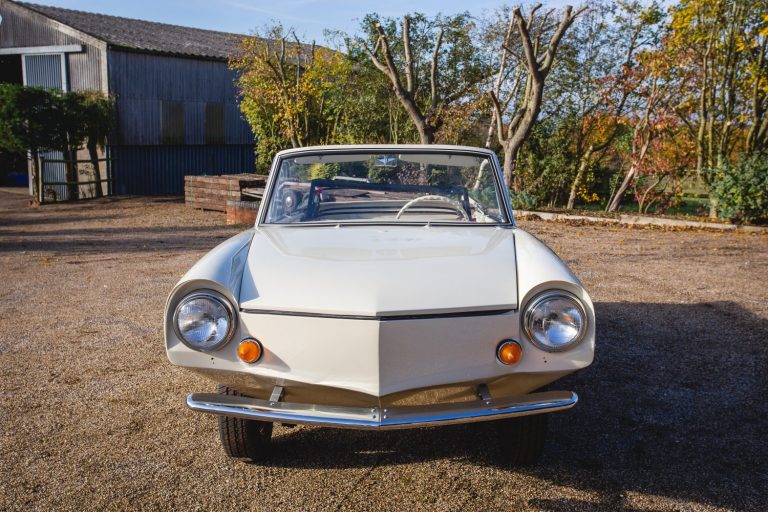
If you haven’t already, say hello to our Amphicar! Part boat, part car, this curious little vehicle can drive both on land and on water. Jovially referred to as ‘the fastest car on the water’.
The Amphicar was only in production from 1961 to 1968, so our 1965 model is an incredibly rare find. We’re so lucky to have the opportunity to be doing a full restoration on this intriguing little car (or is it a boat!?)
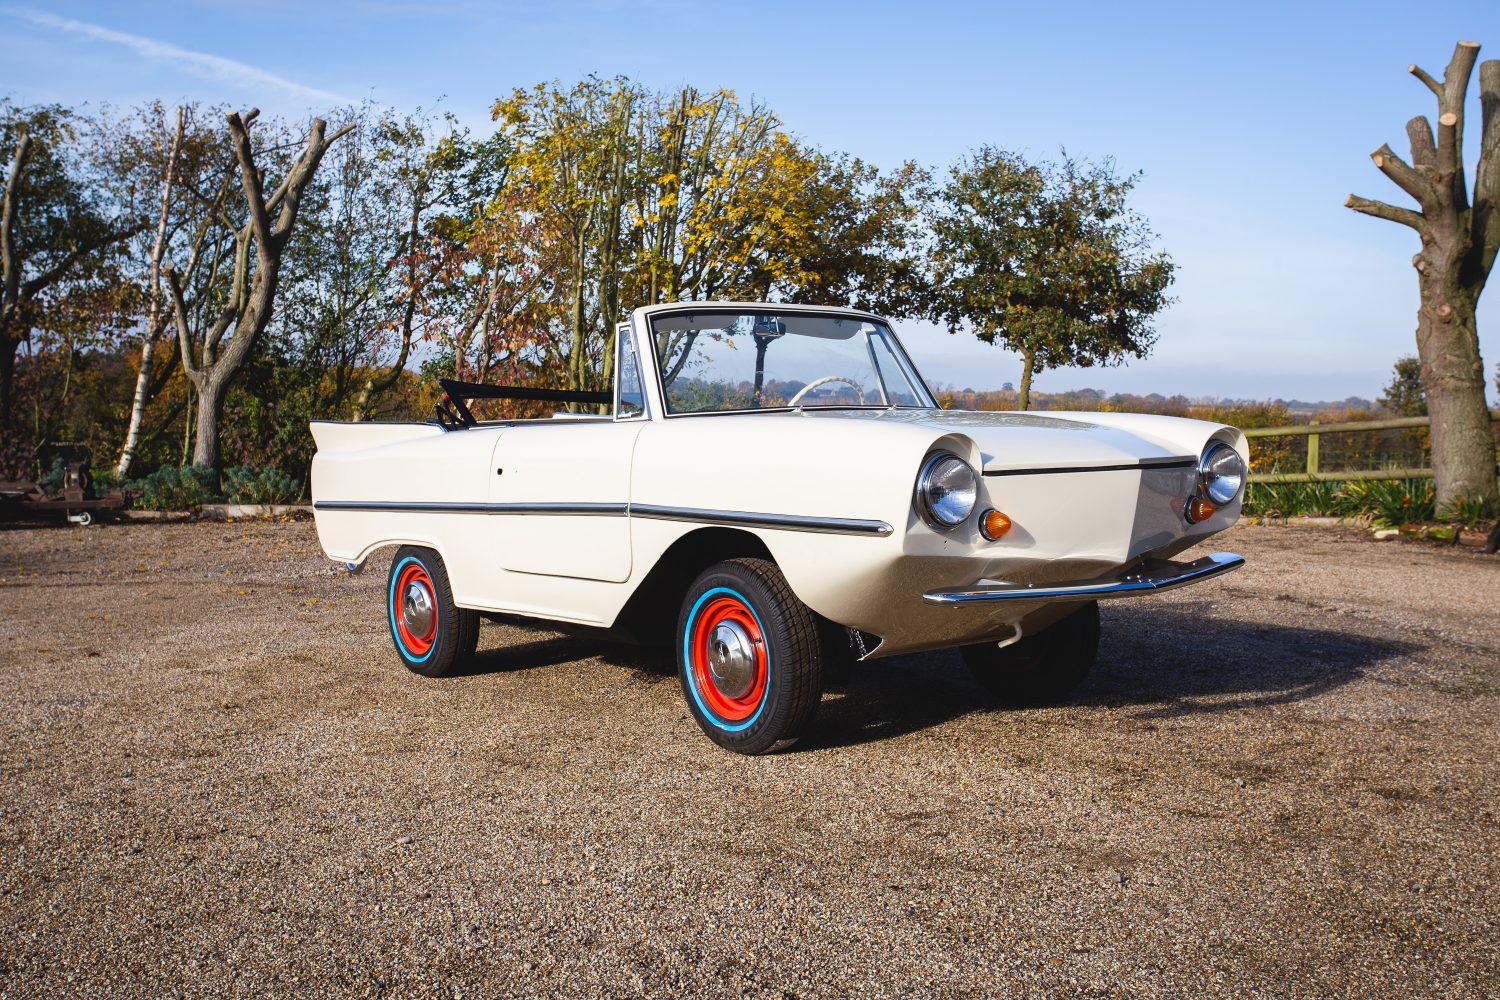
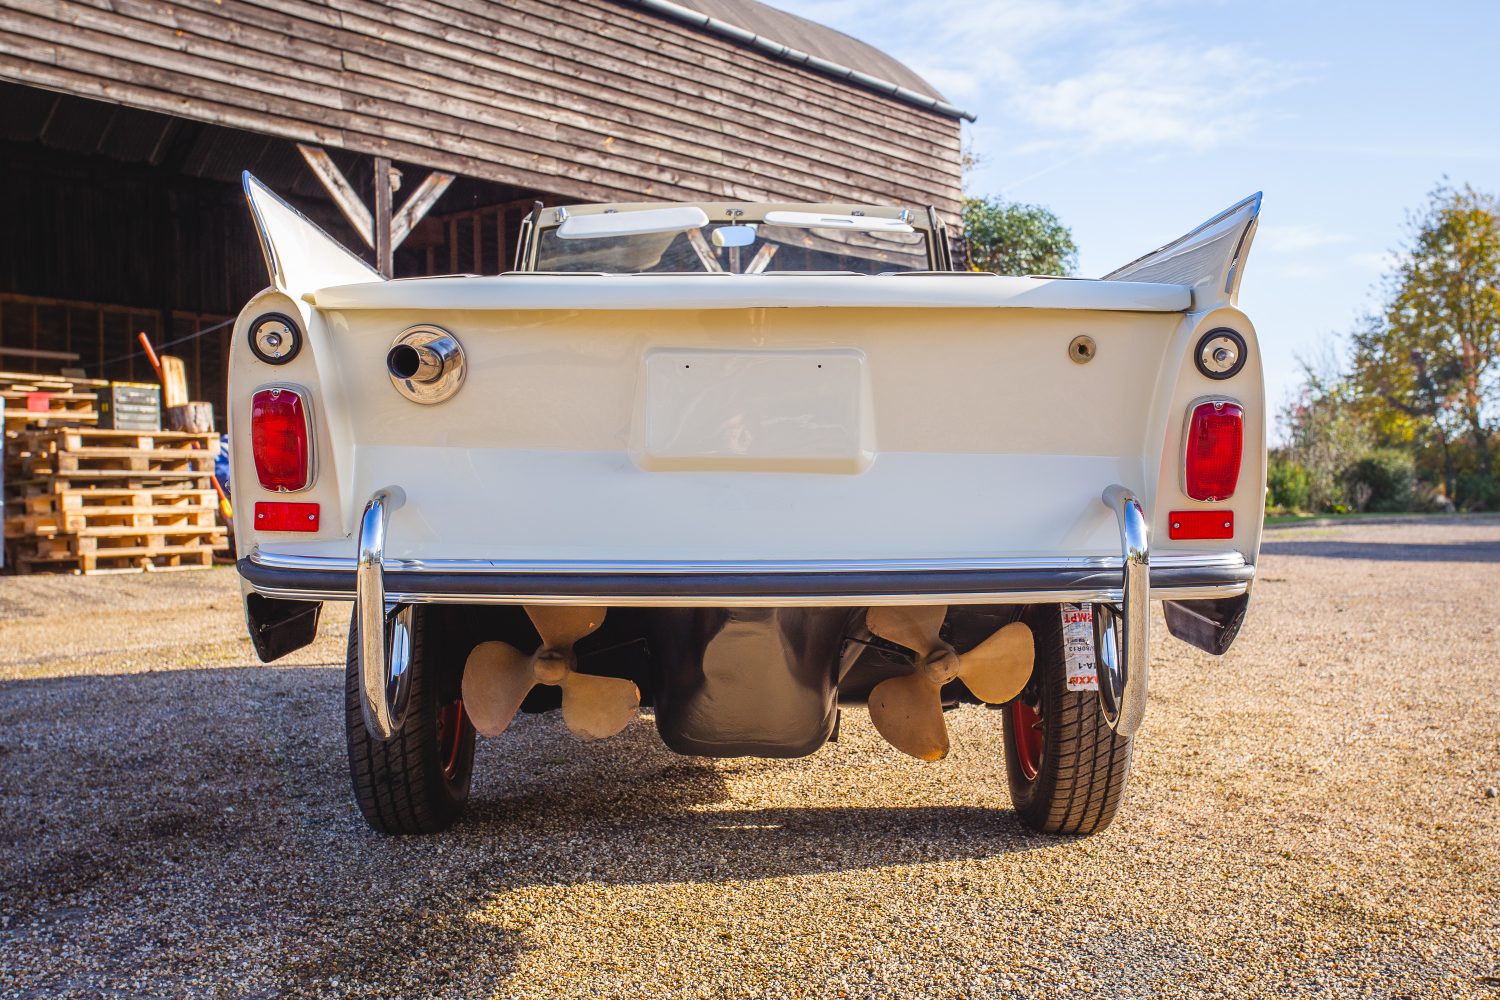
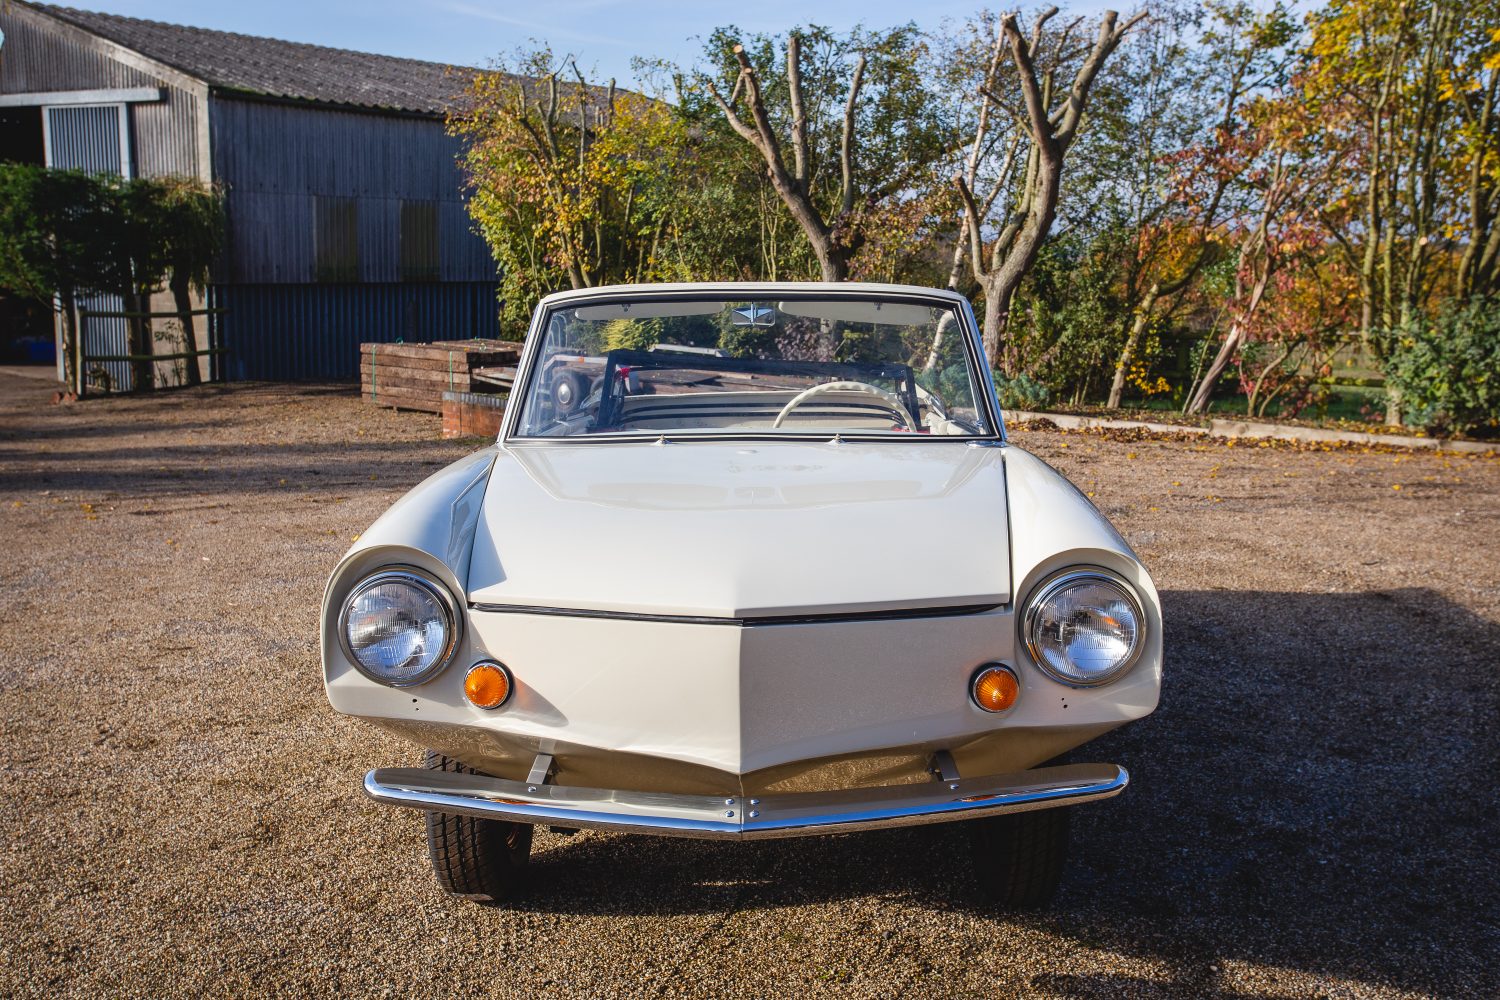
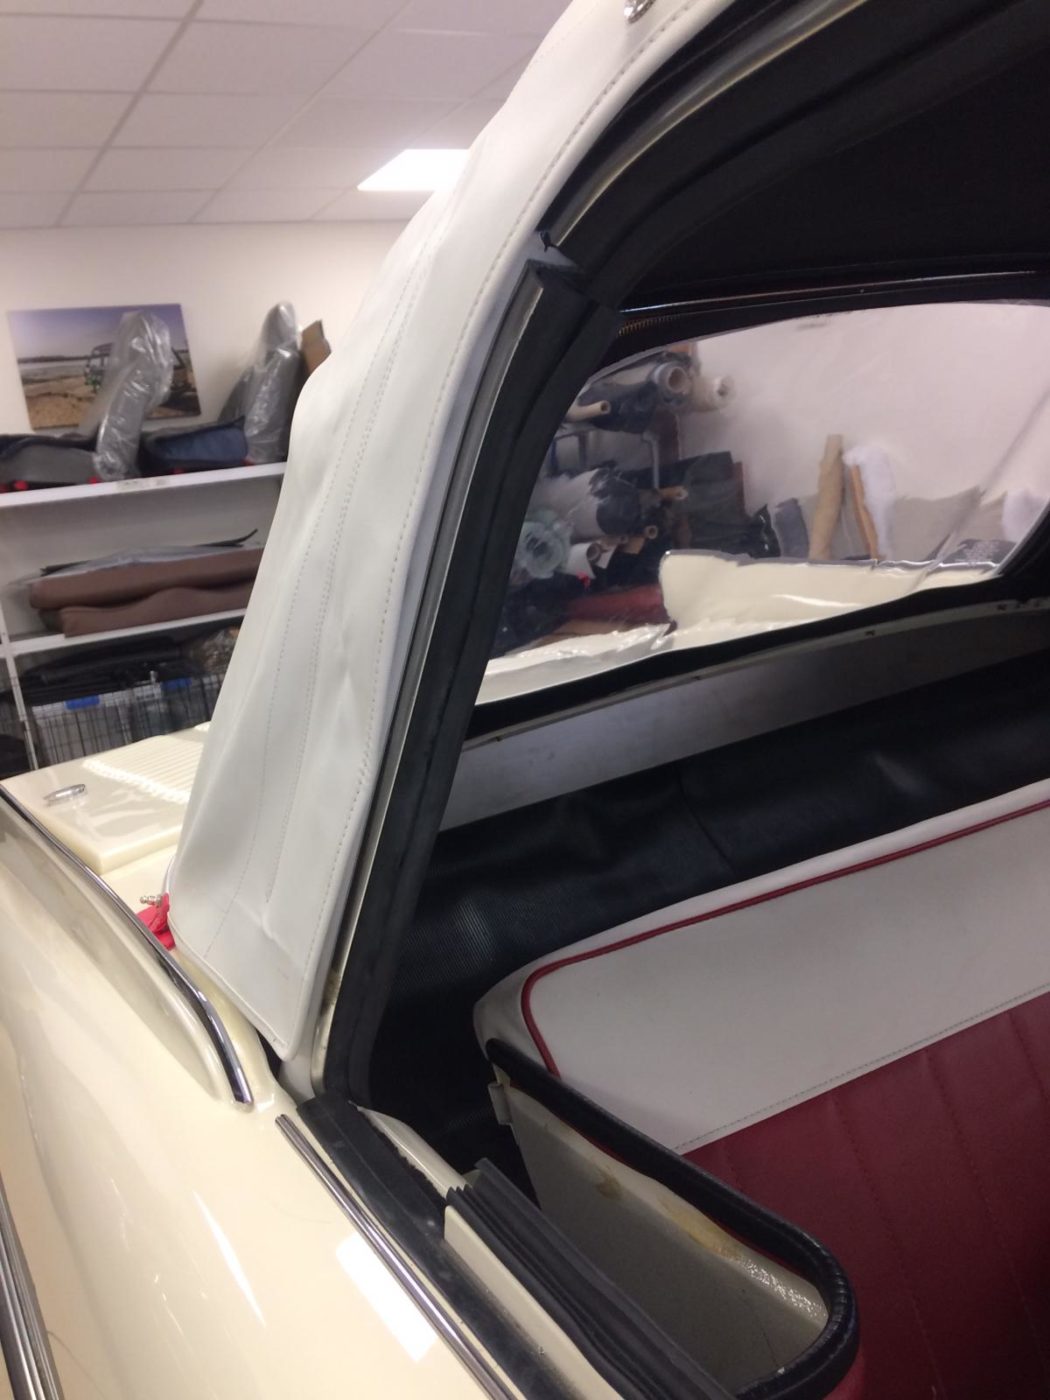
Along with returning the car to her former glory by doing a complete bodywork restoration, the team have also returned her to her original colour- ‘Beach Strand White’. We think she looks gorgeous!
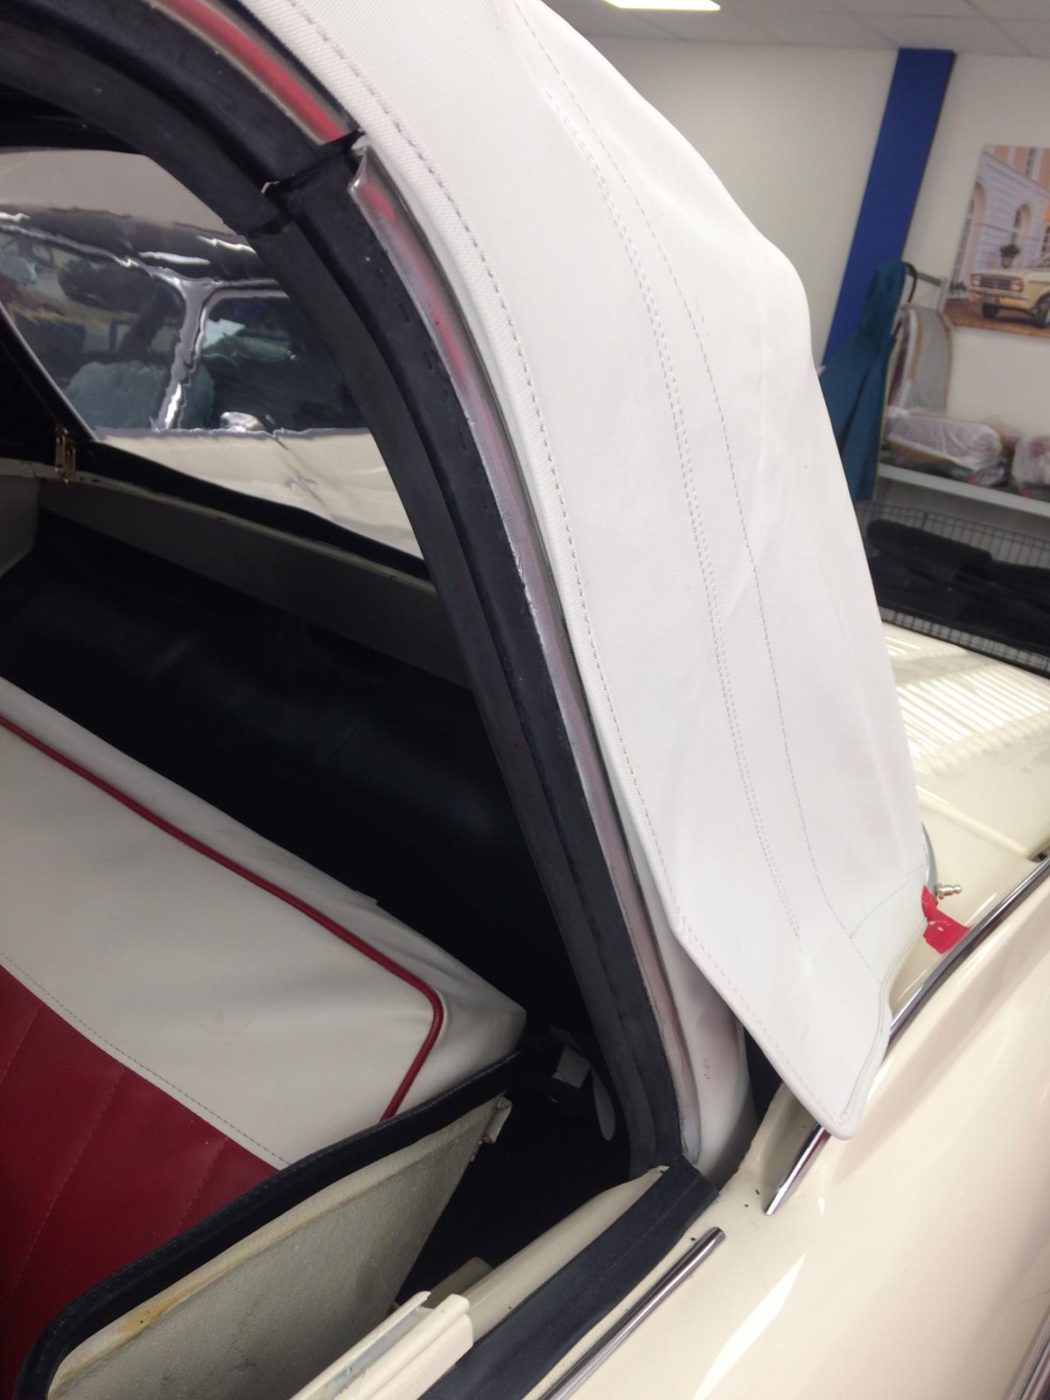
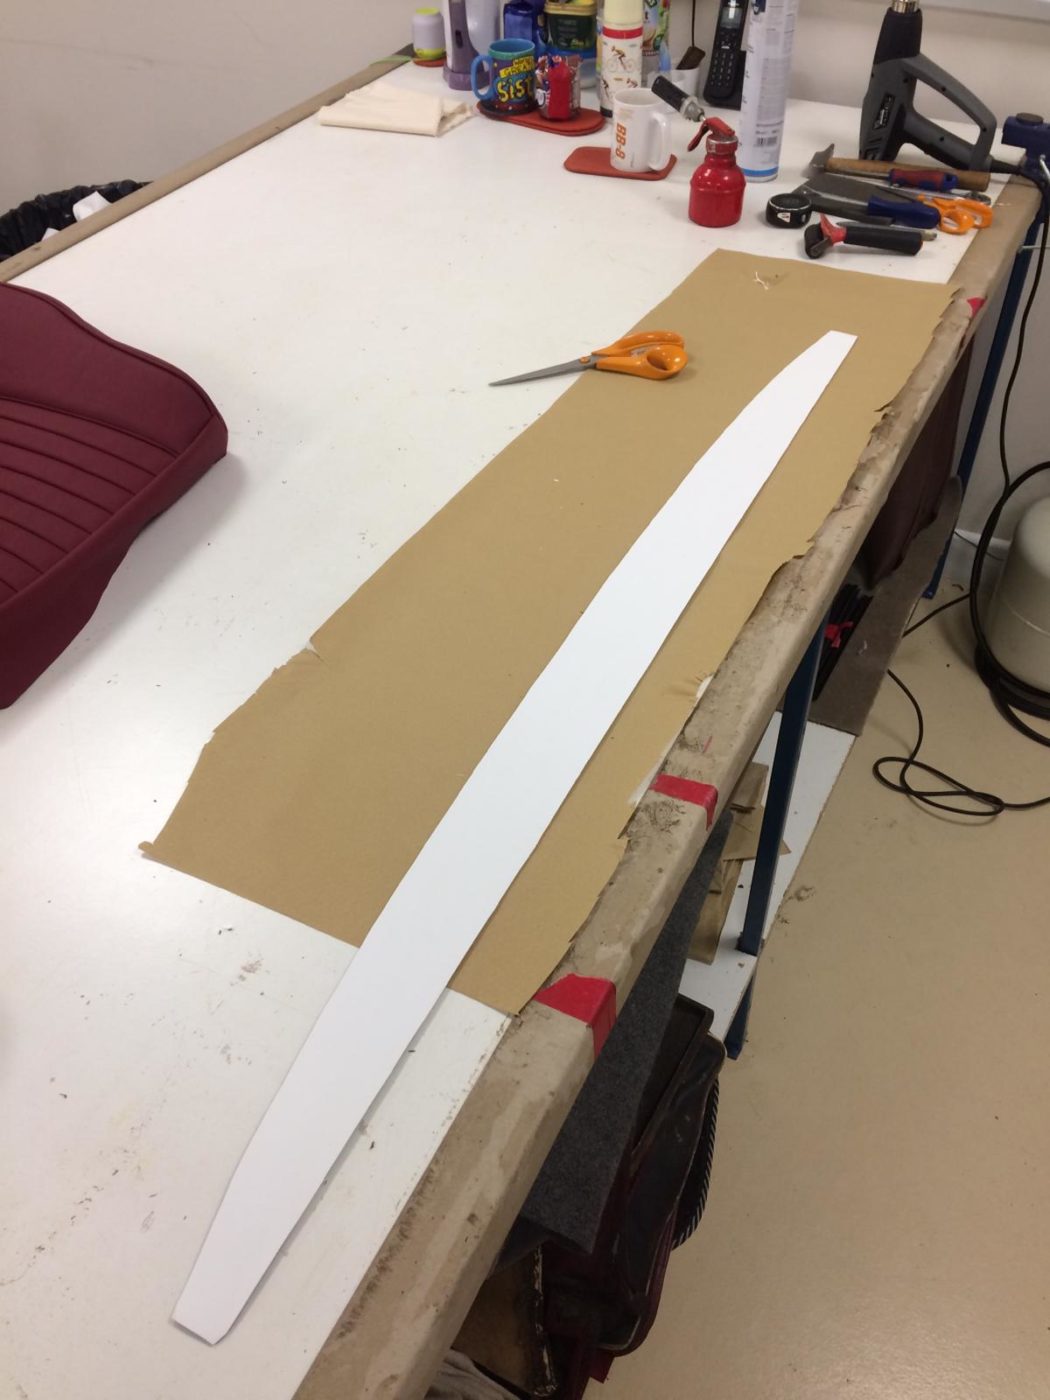
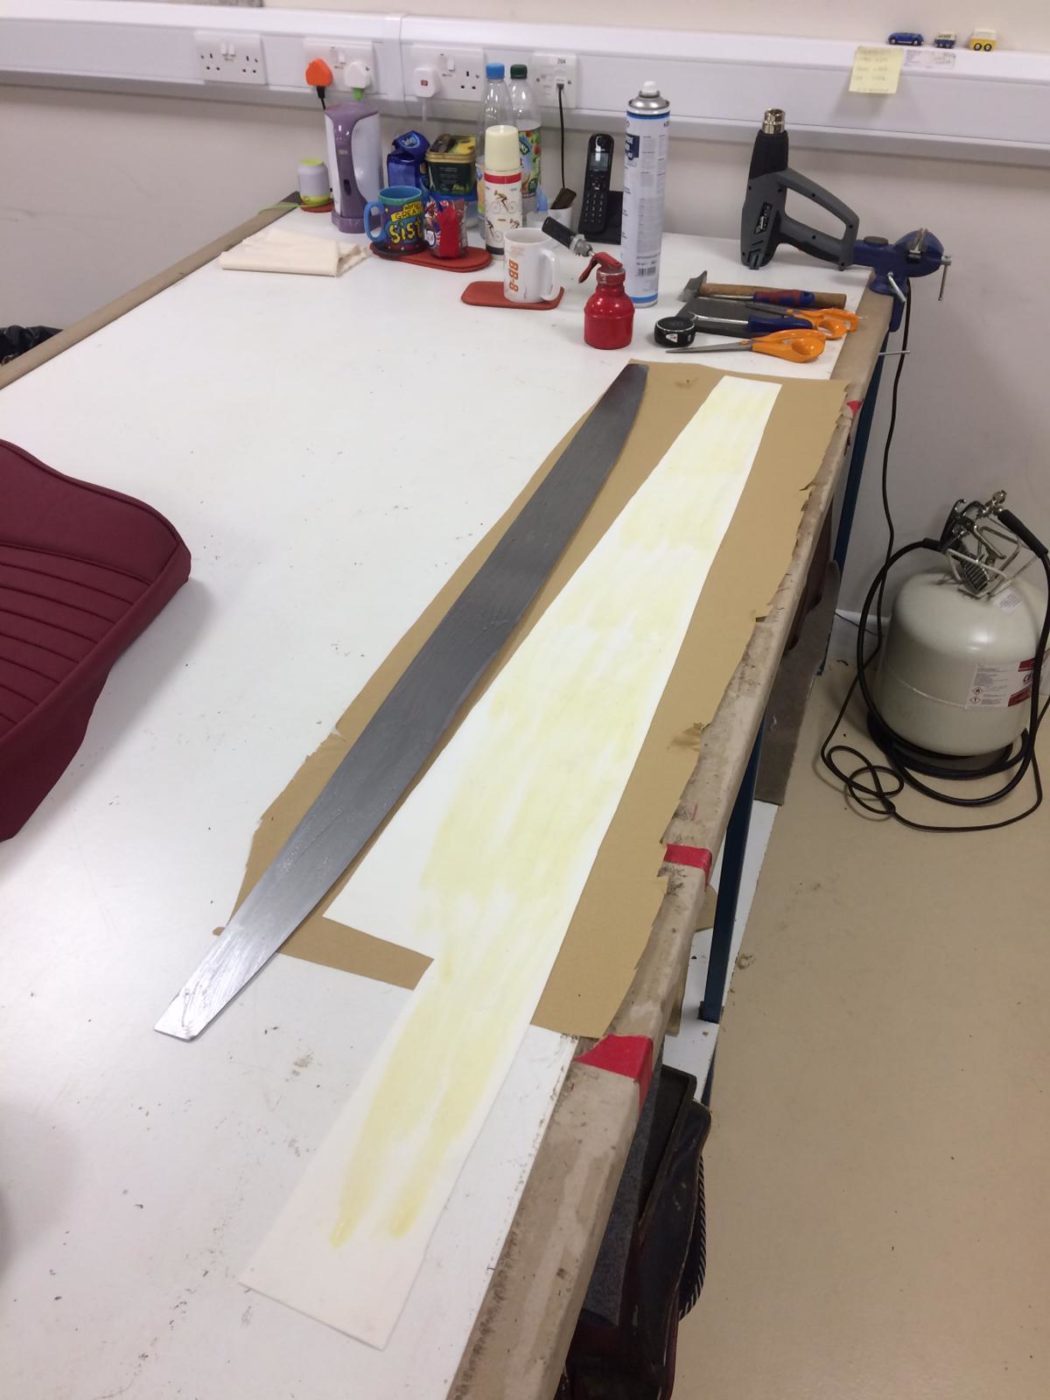
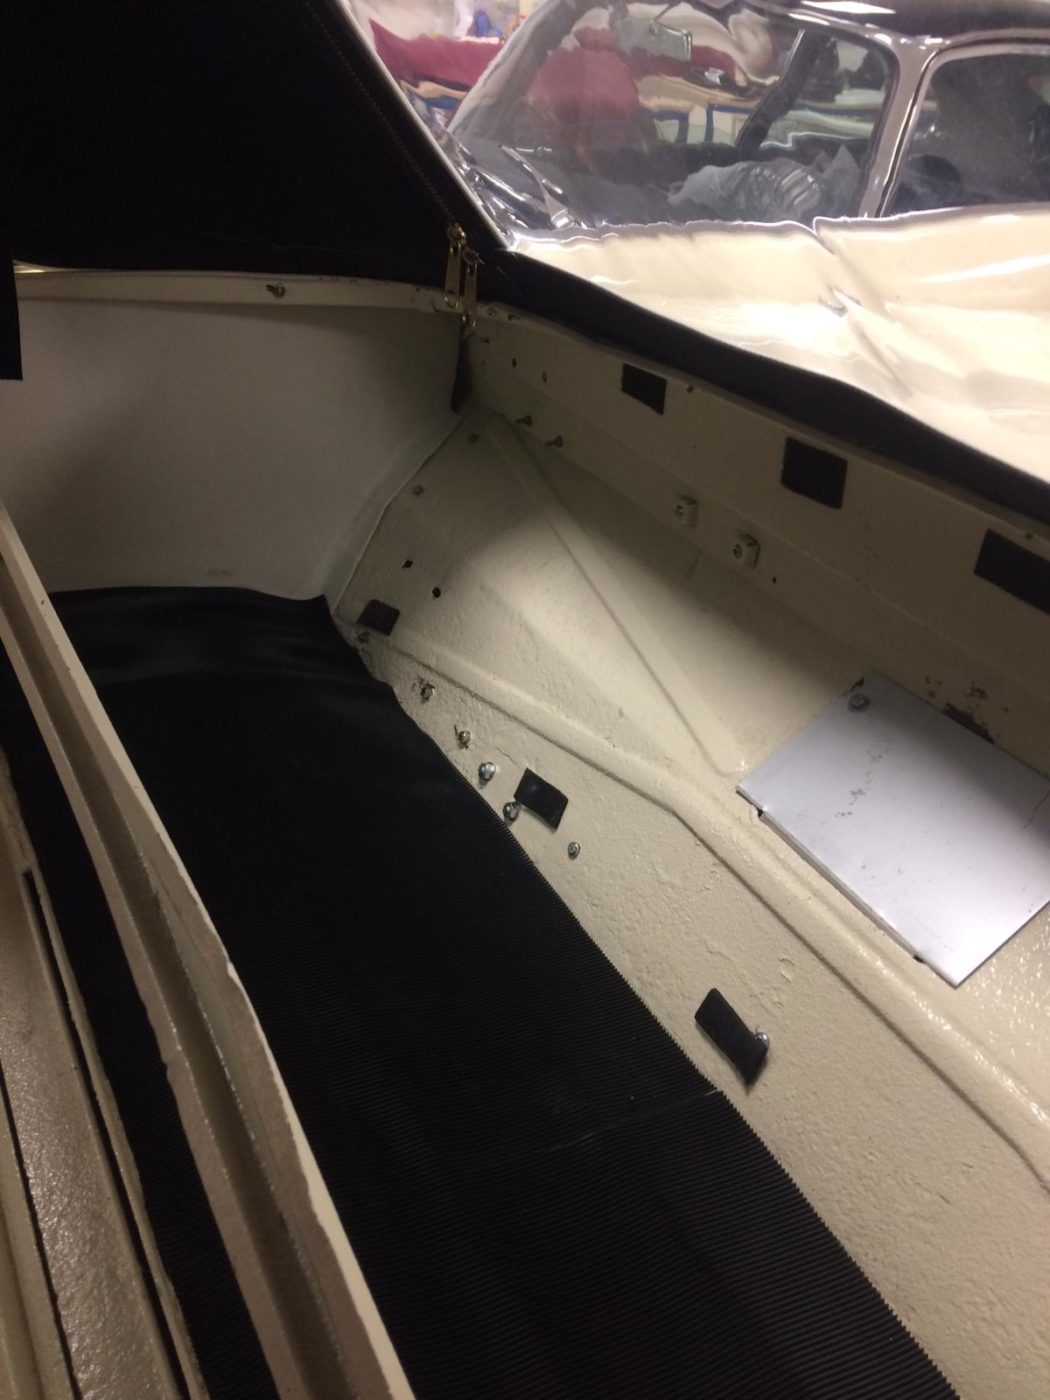
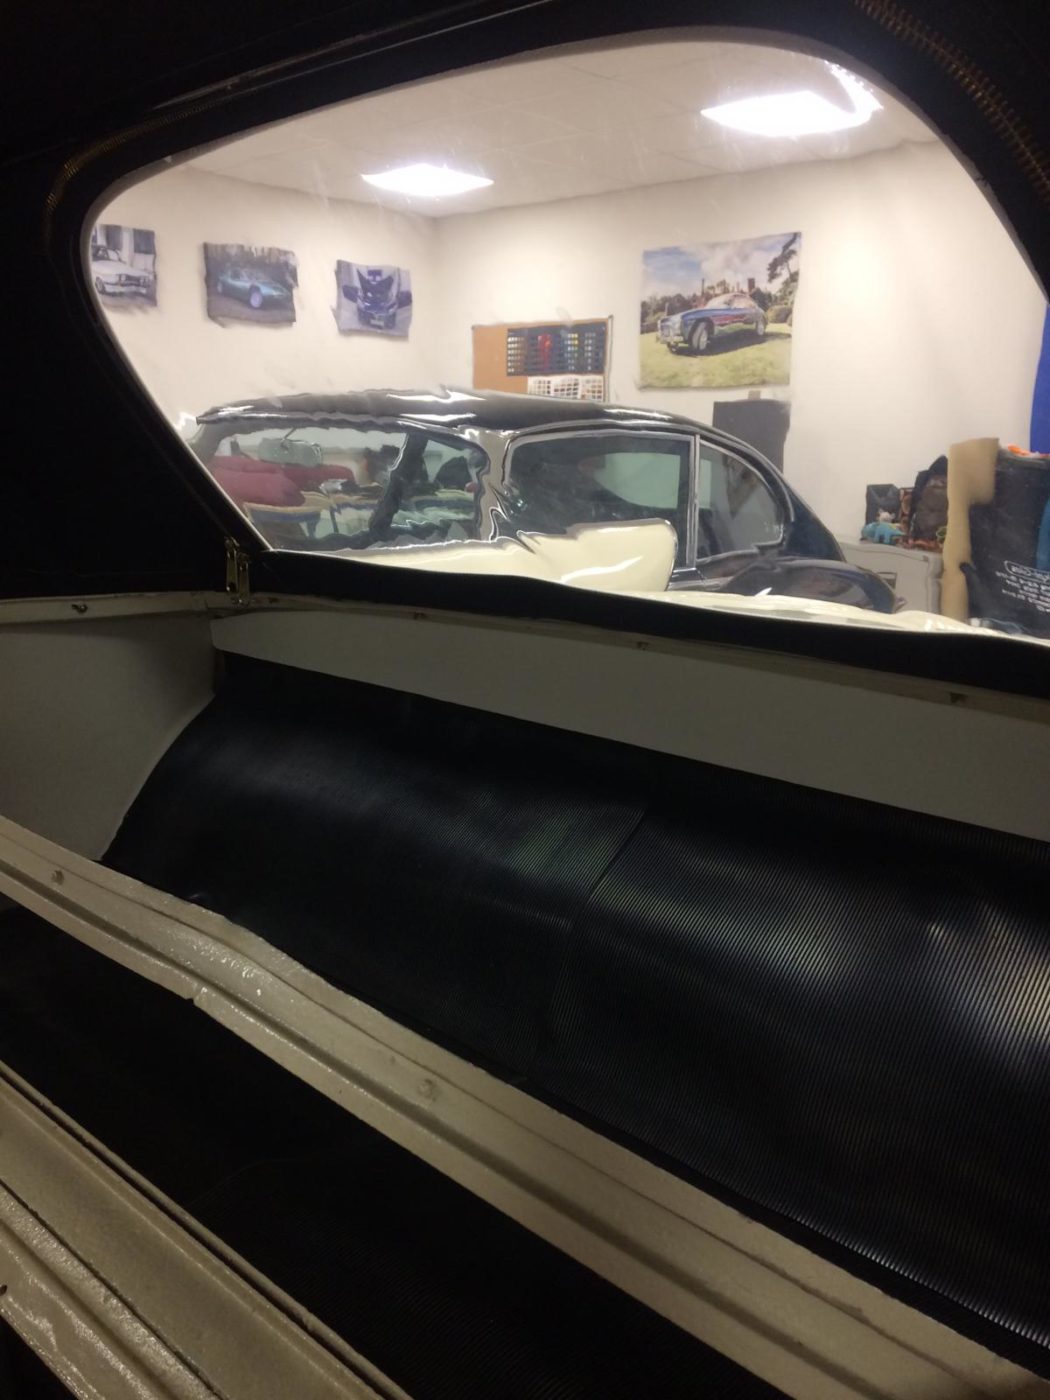
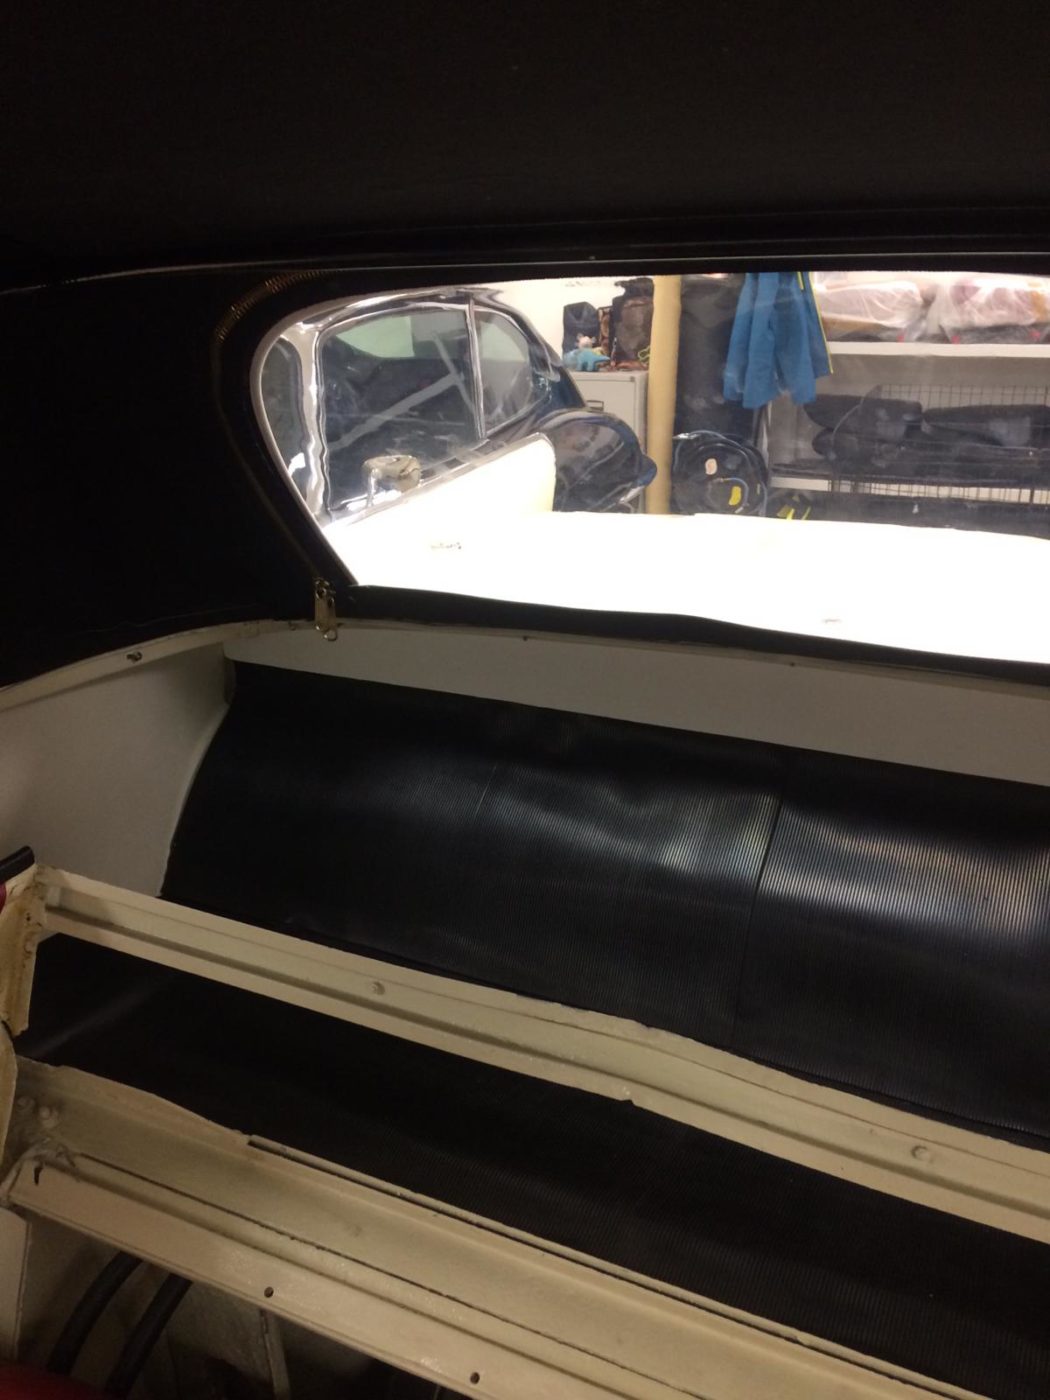
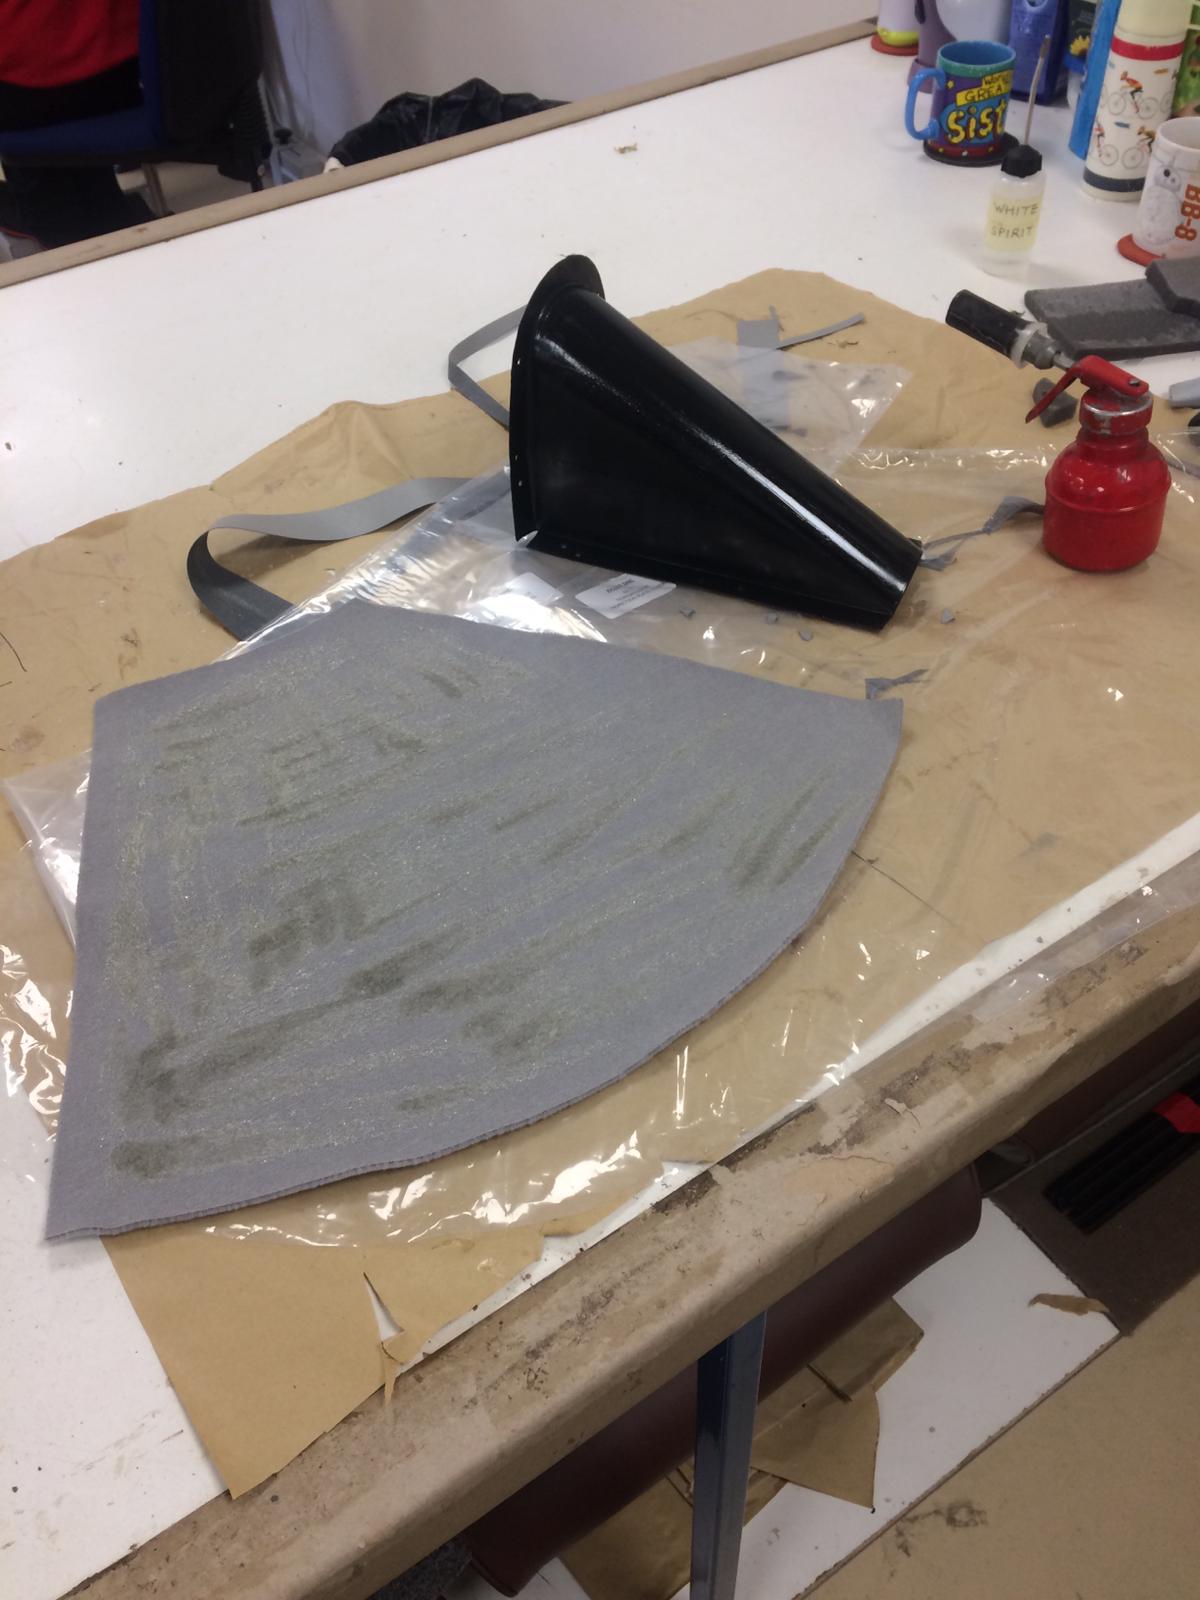
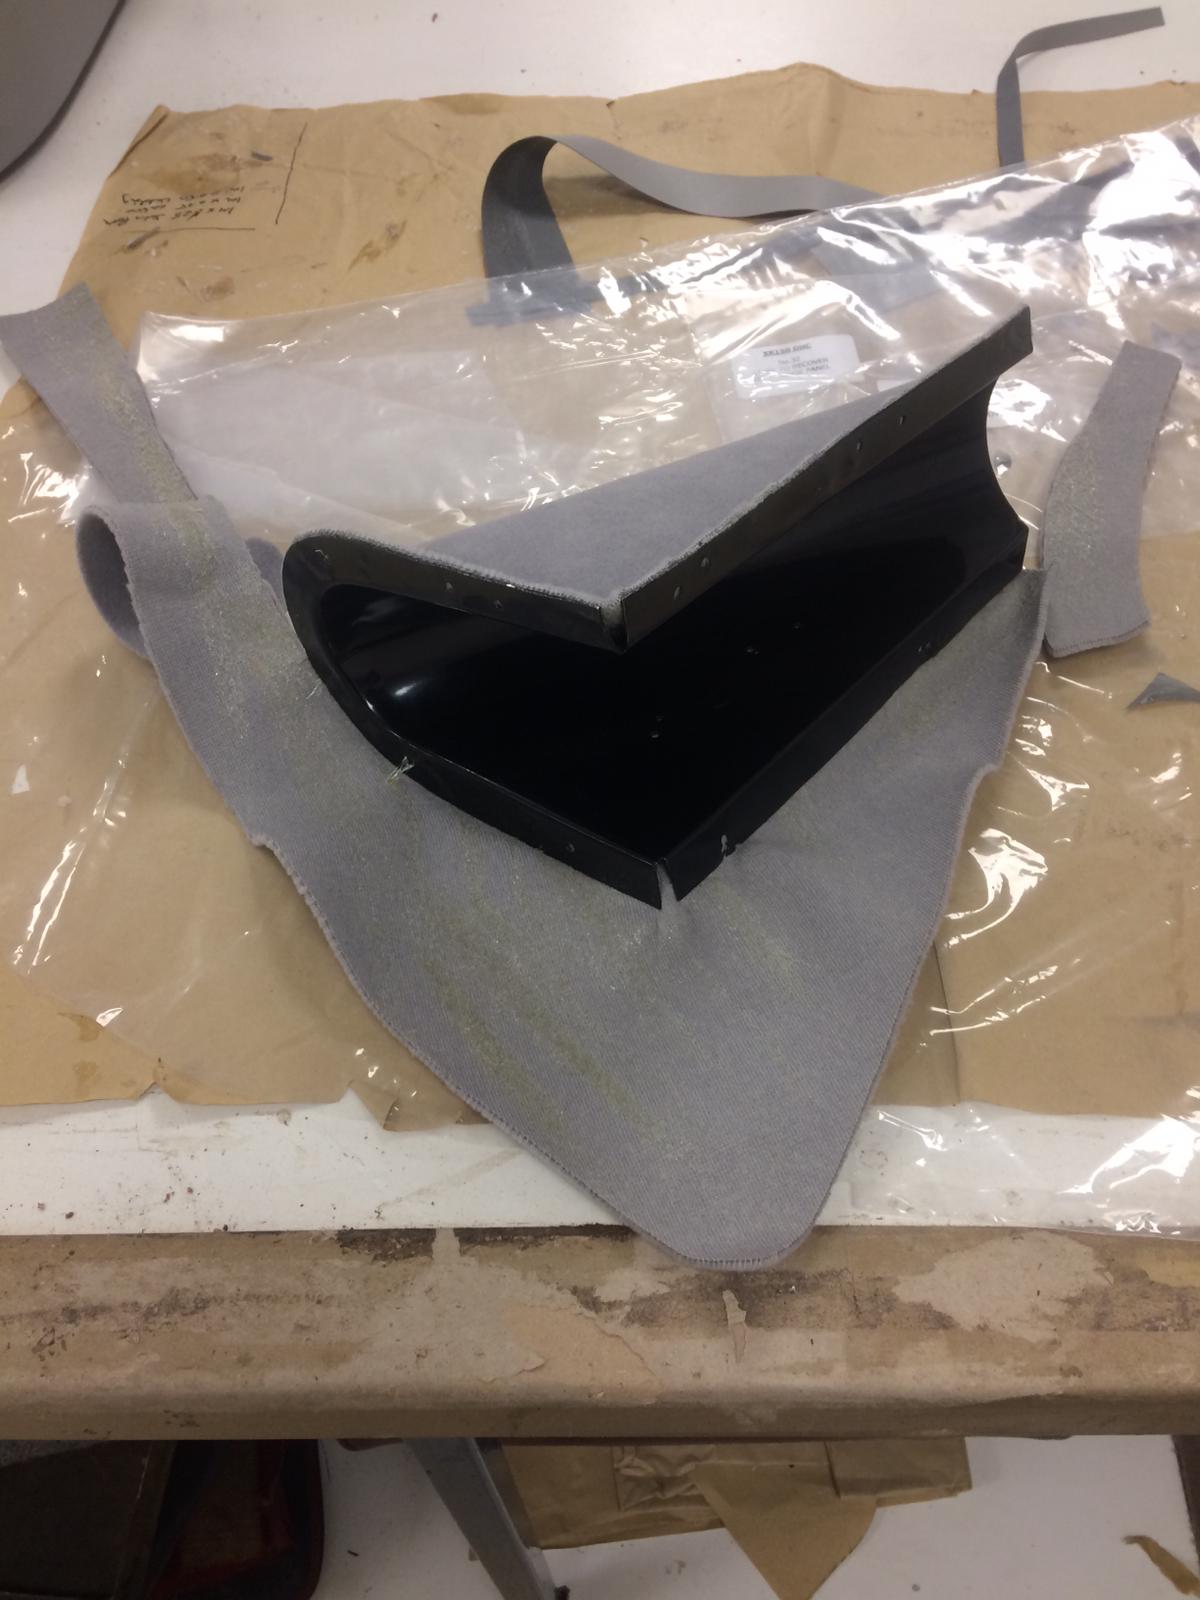
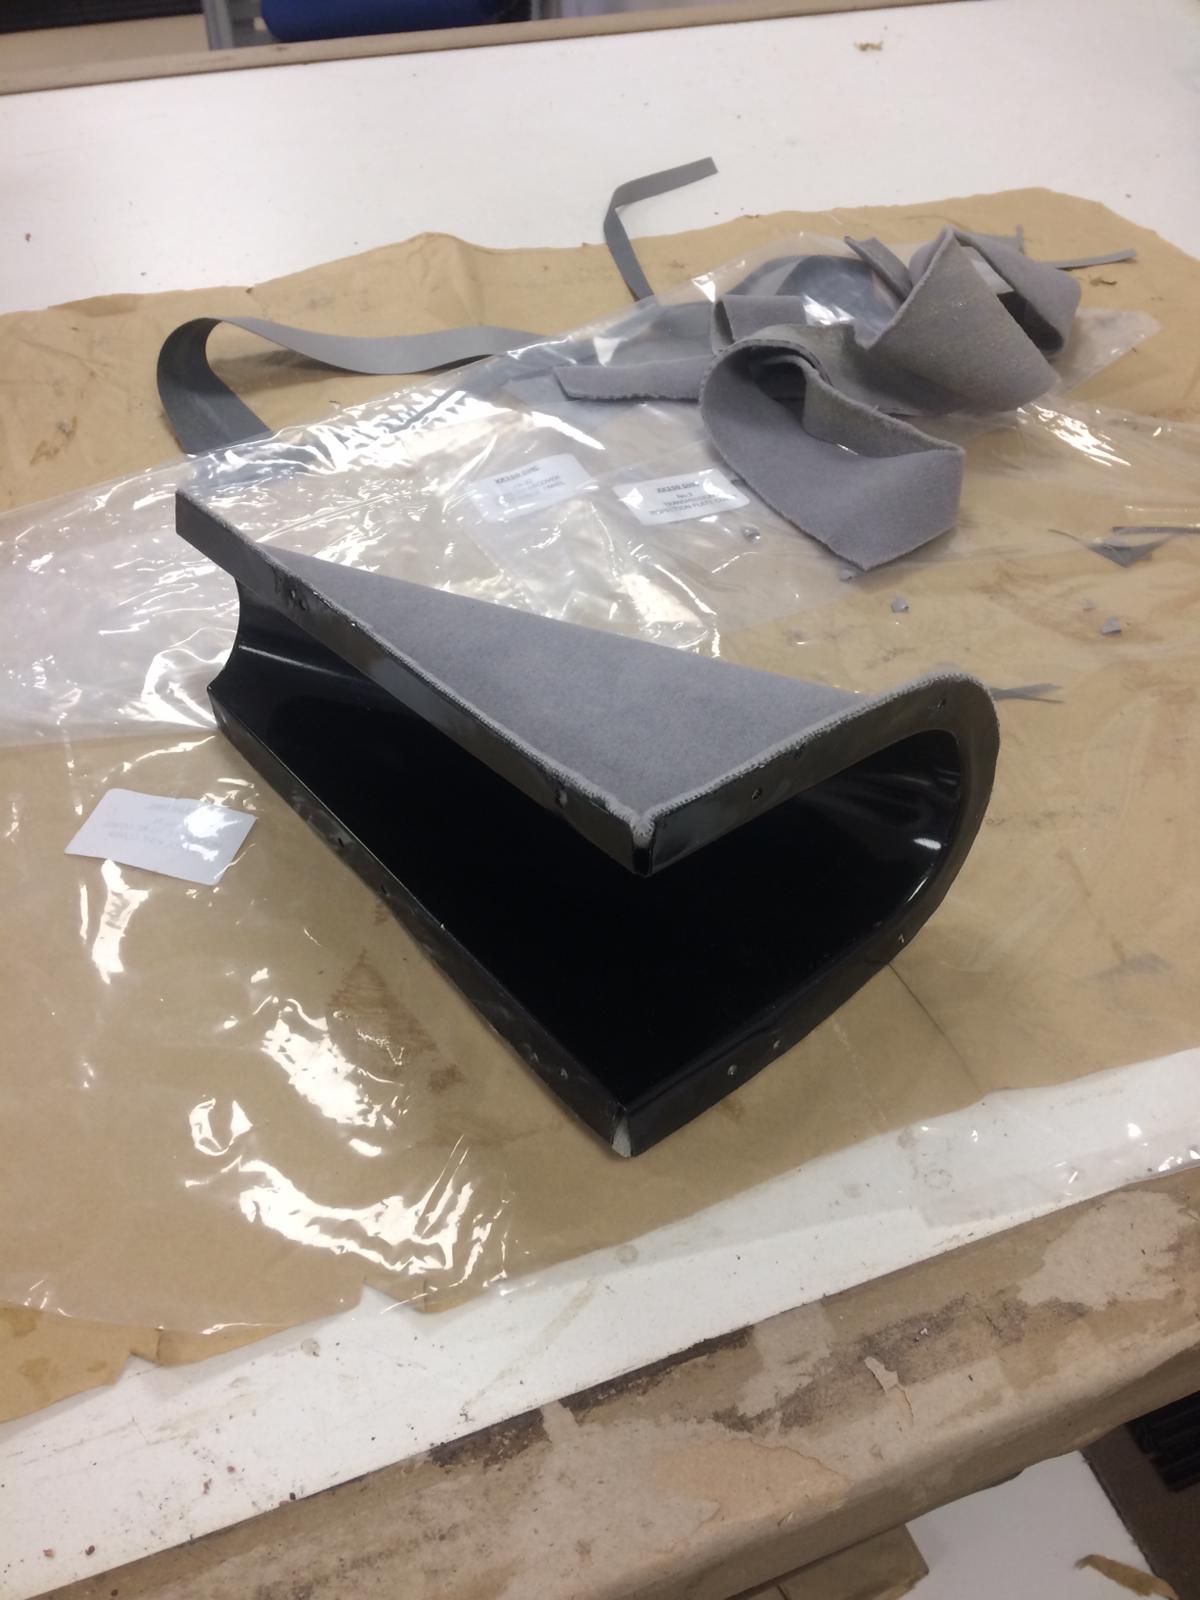
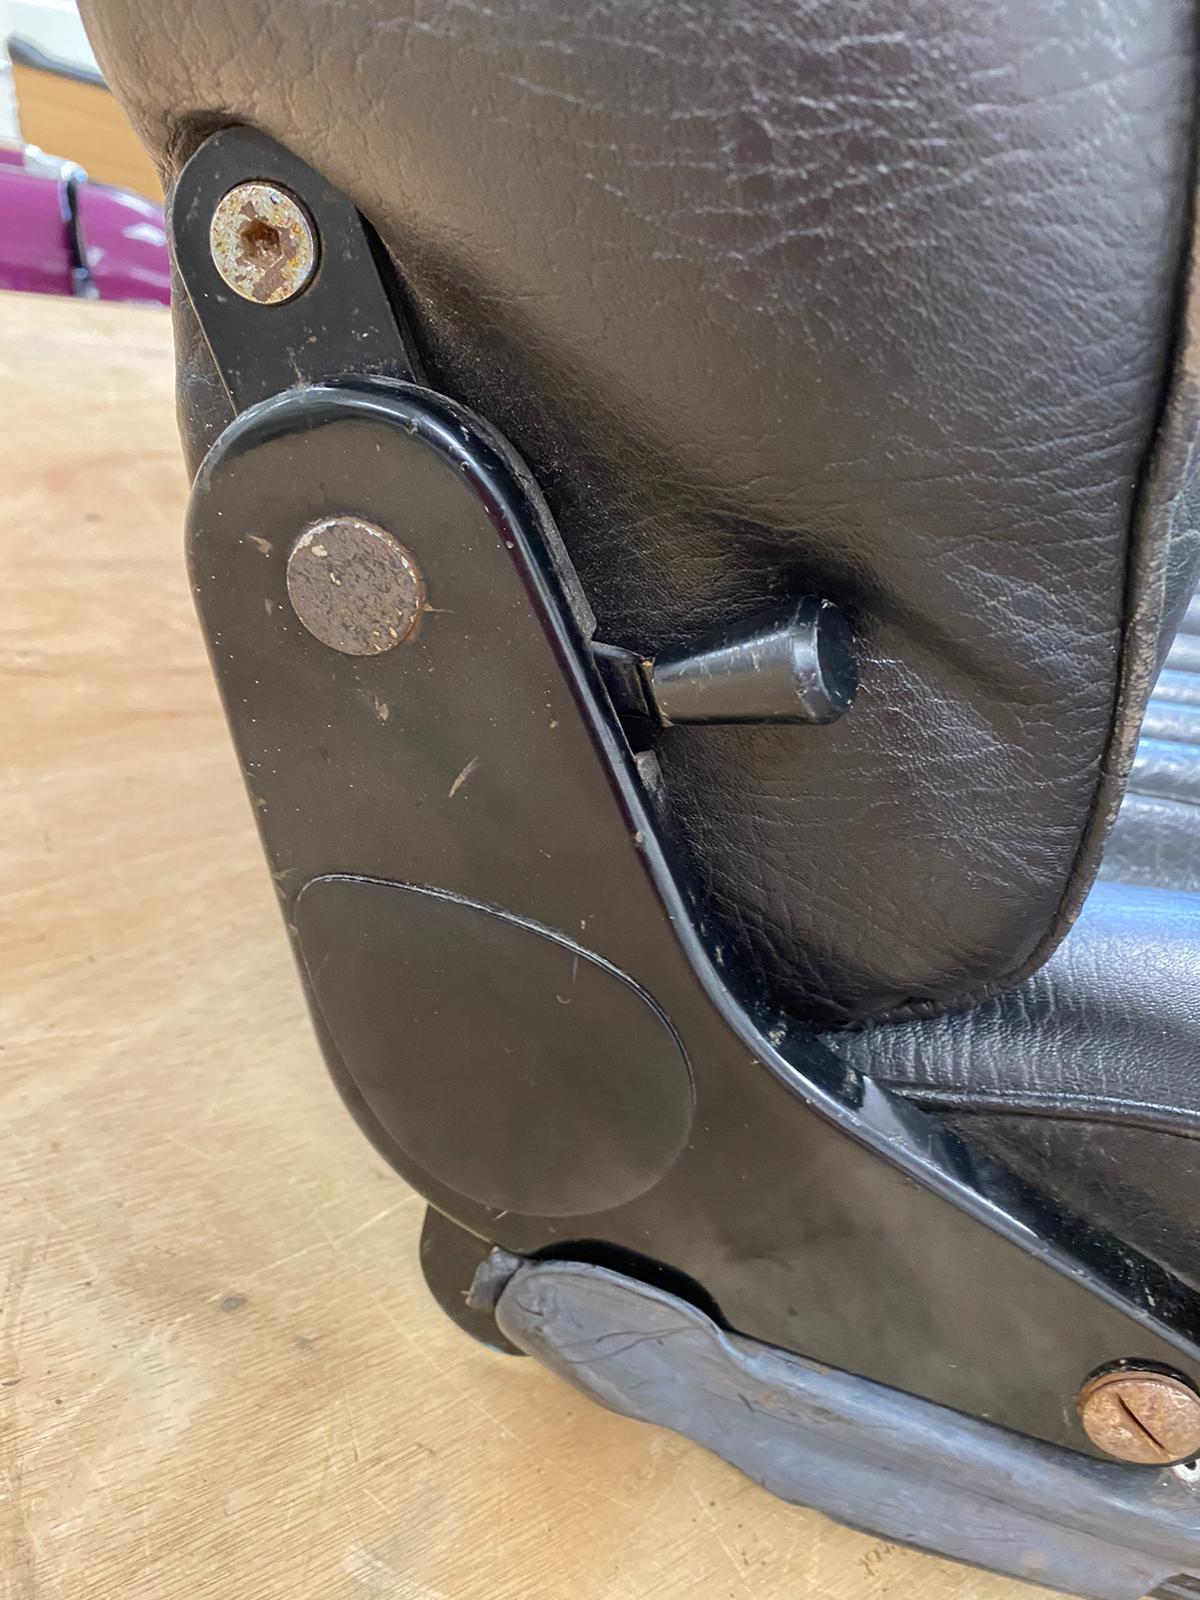
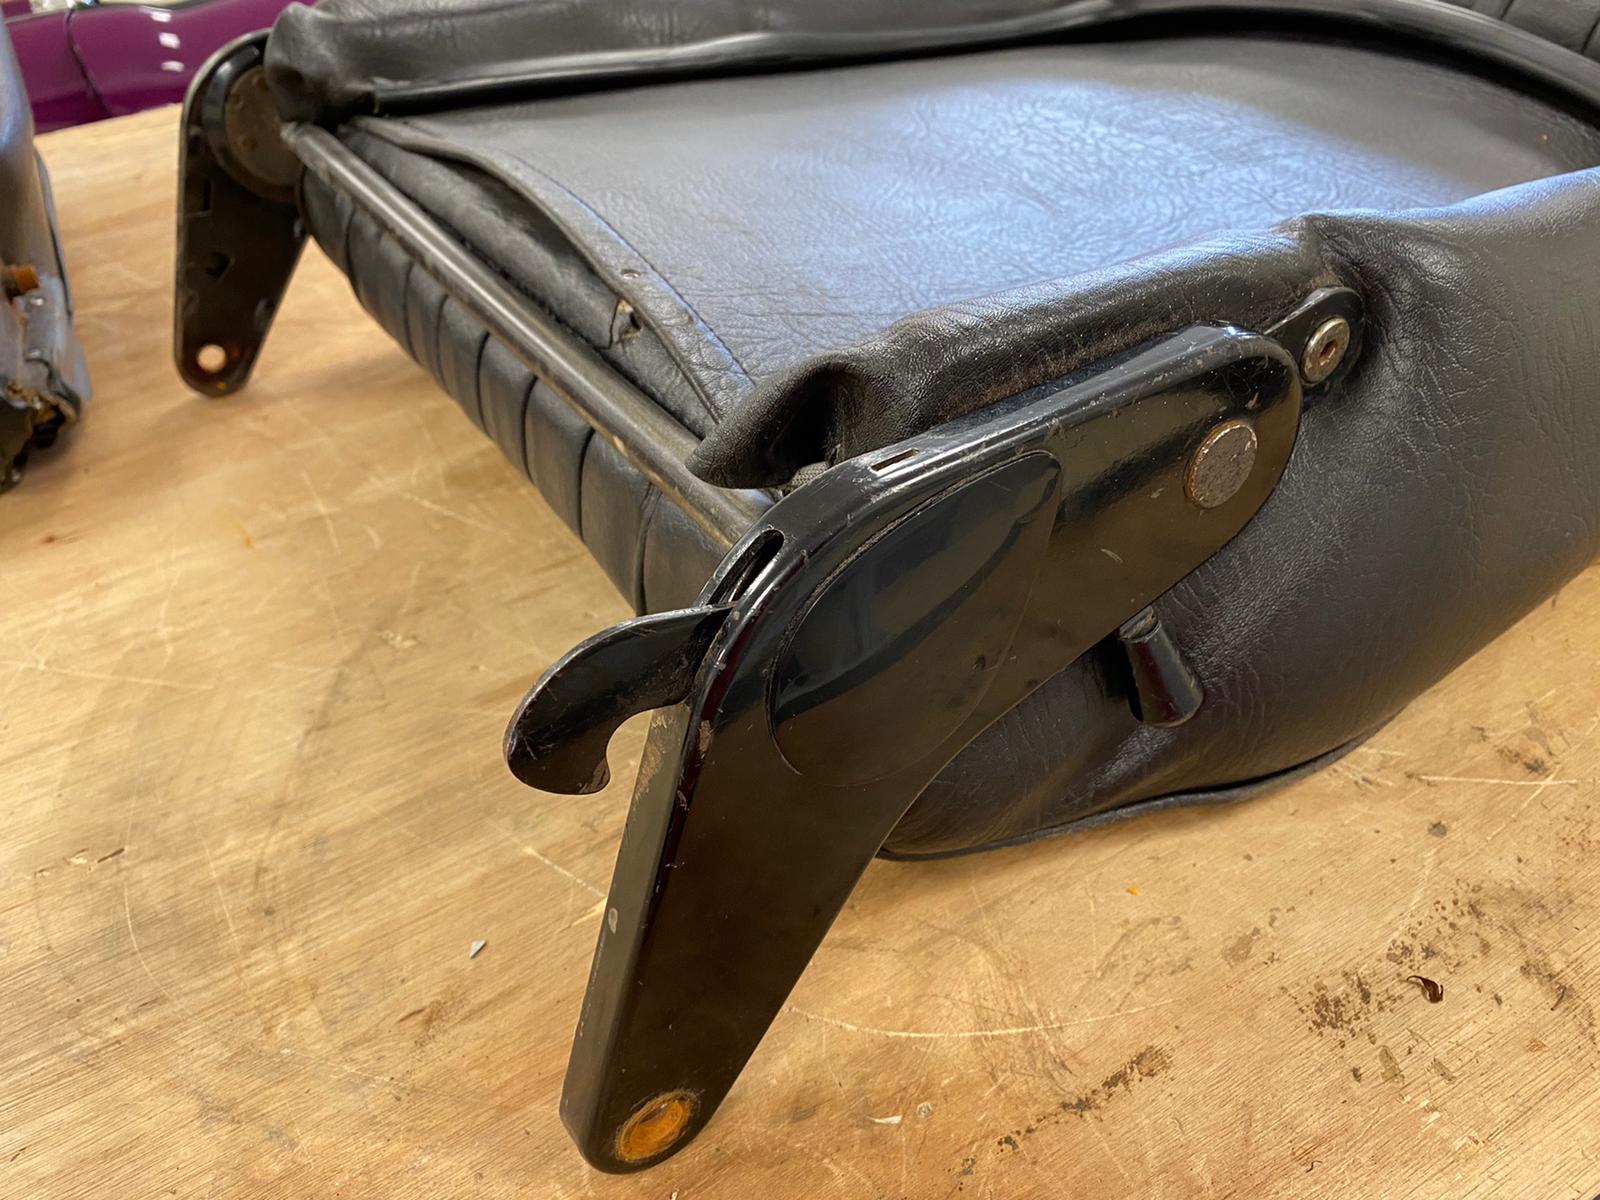
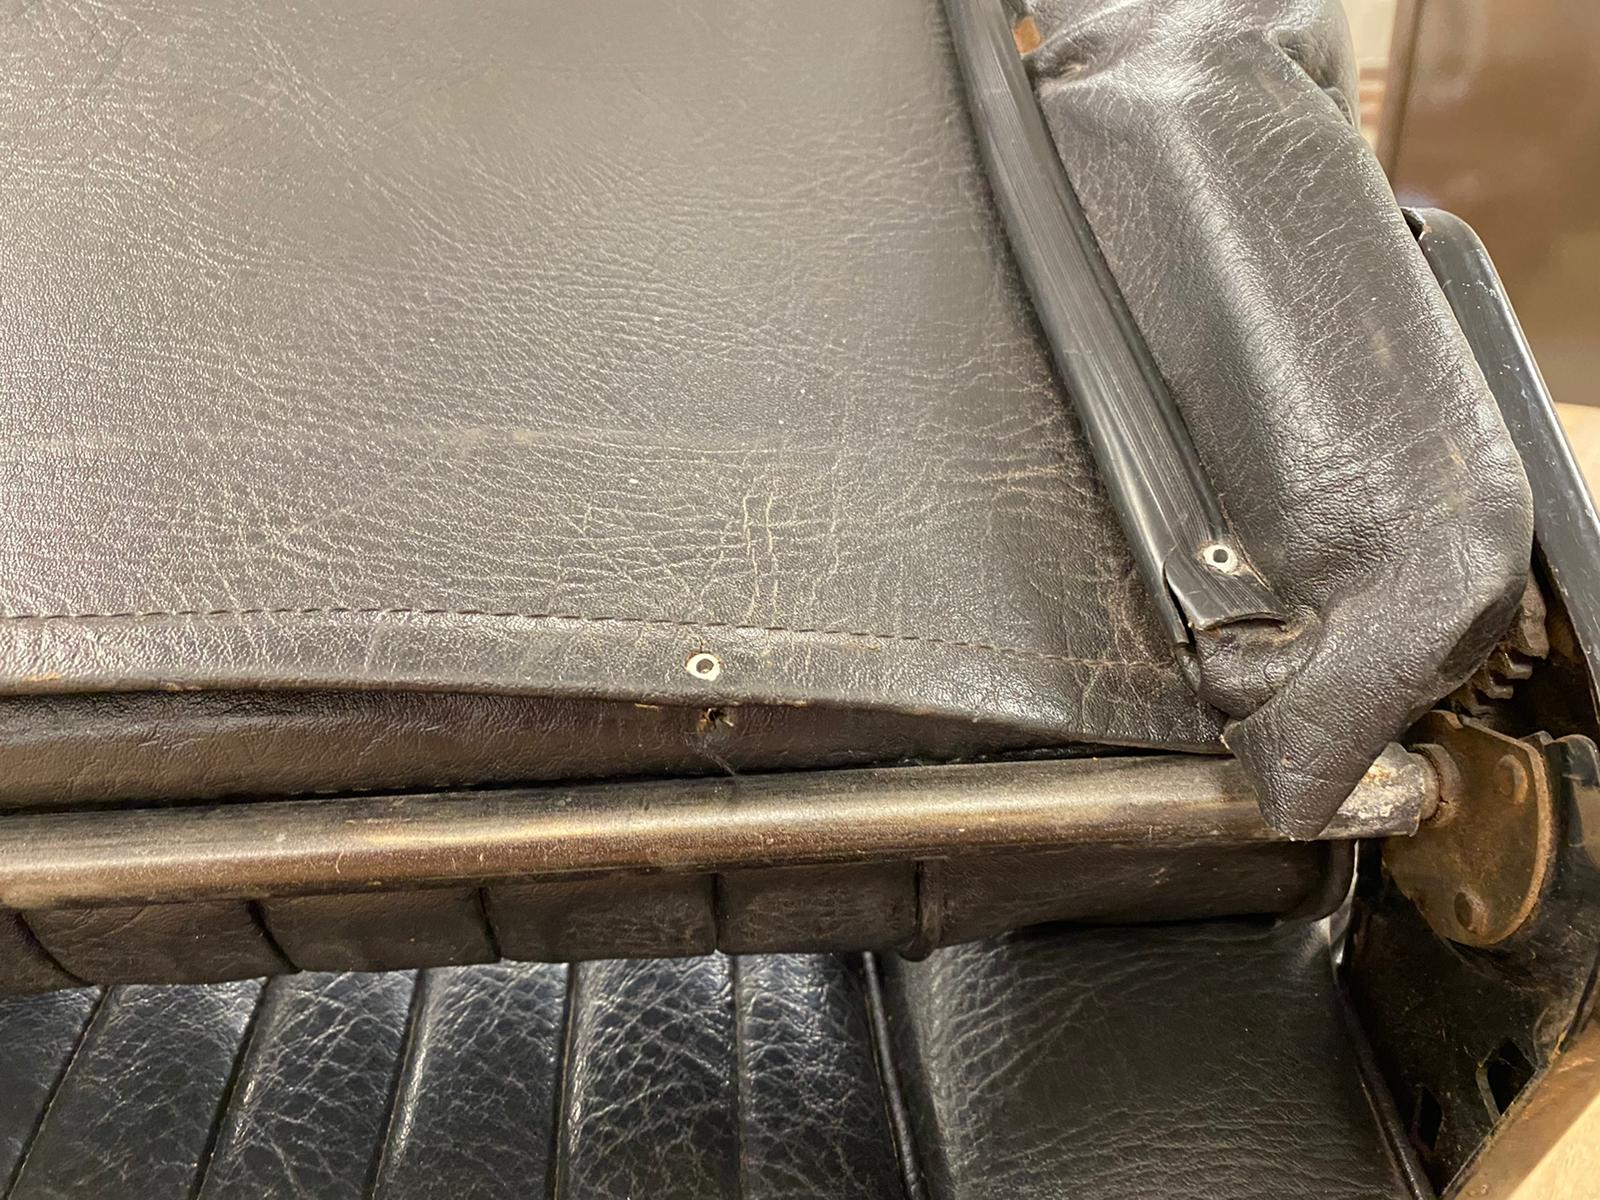
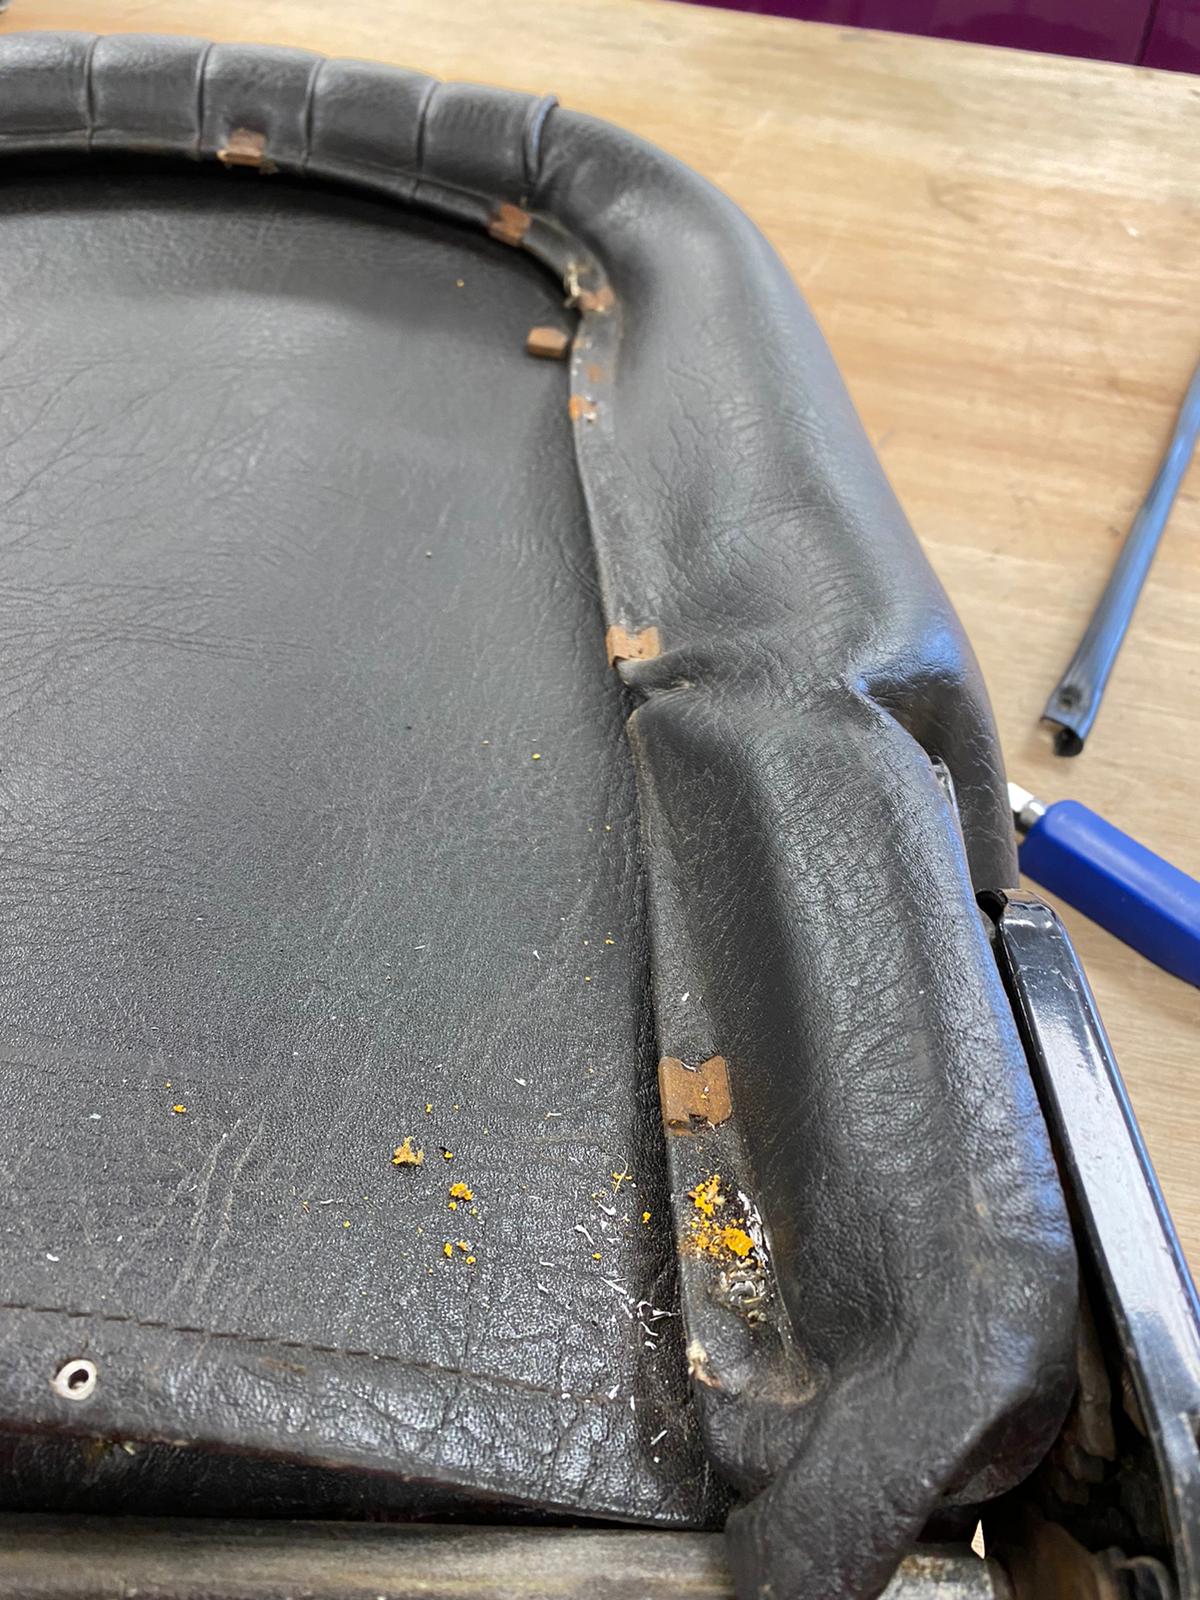
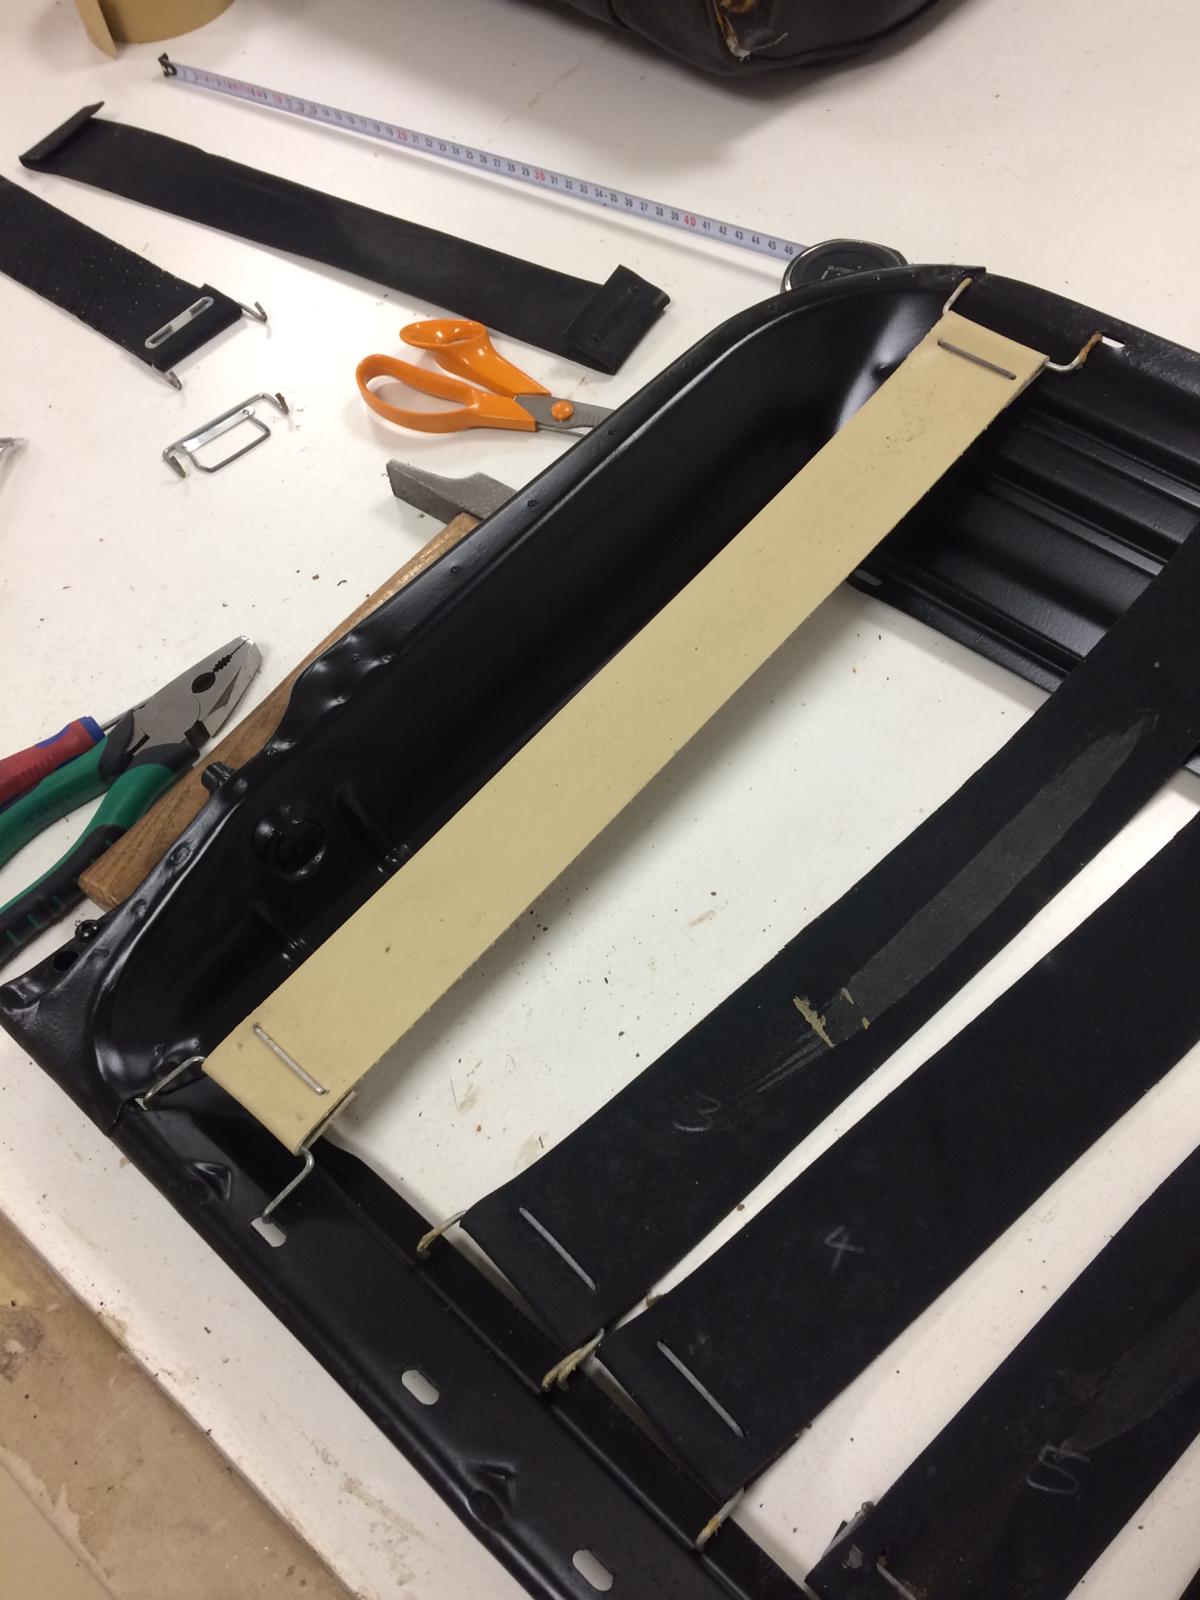
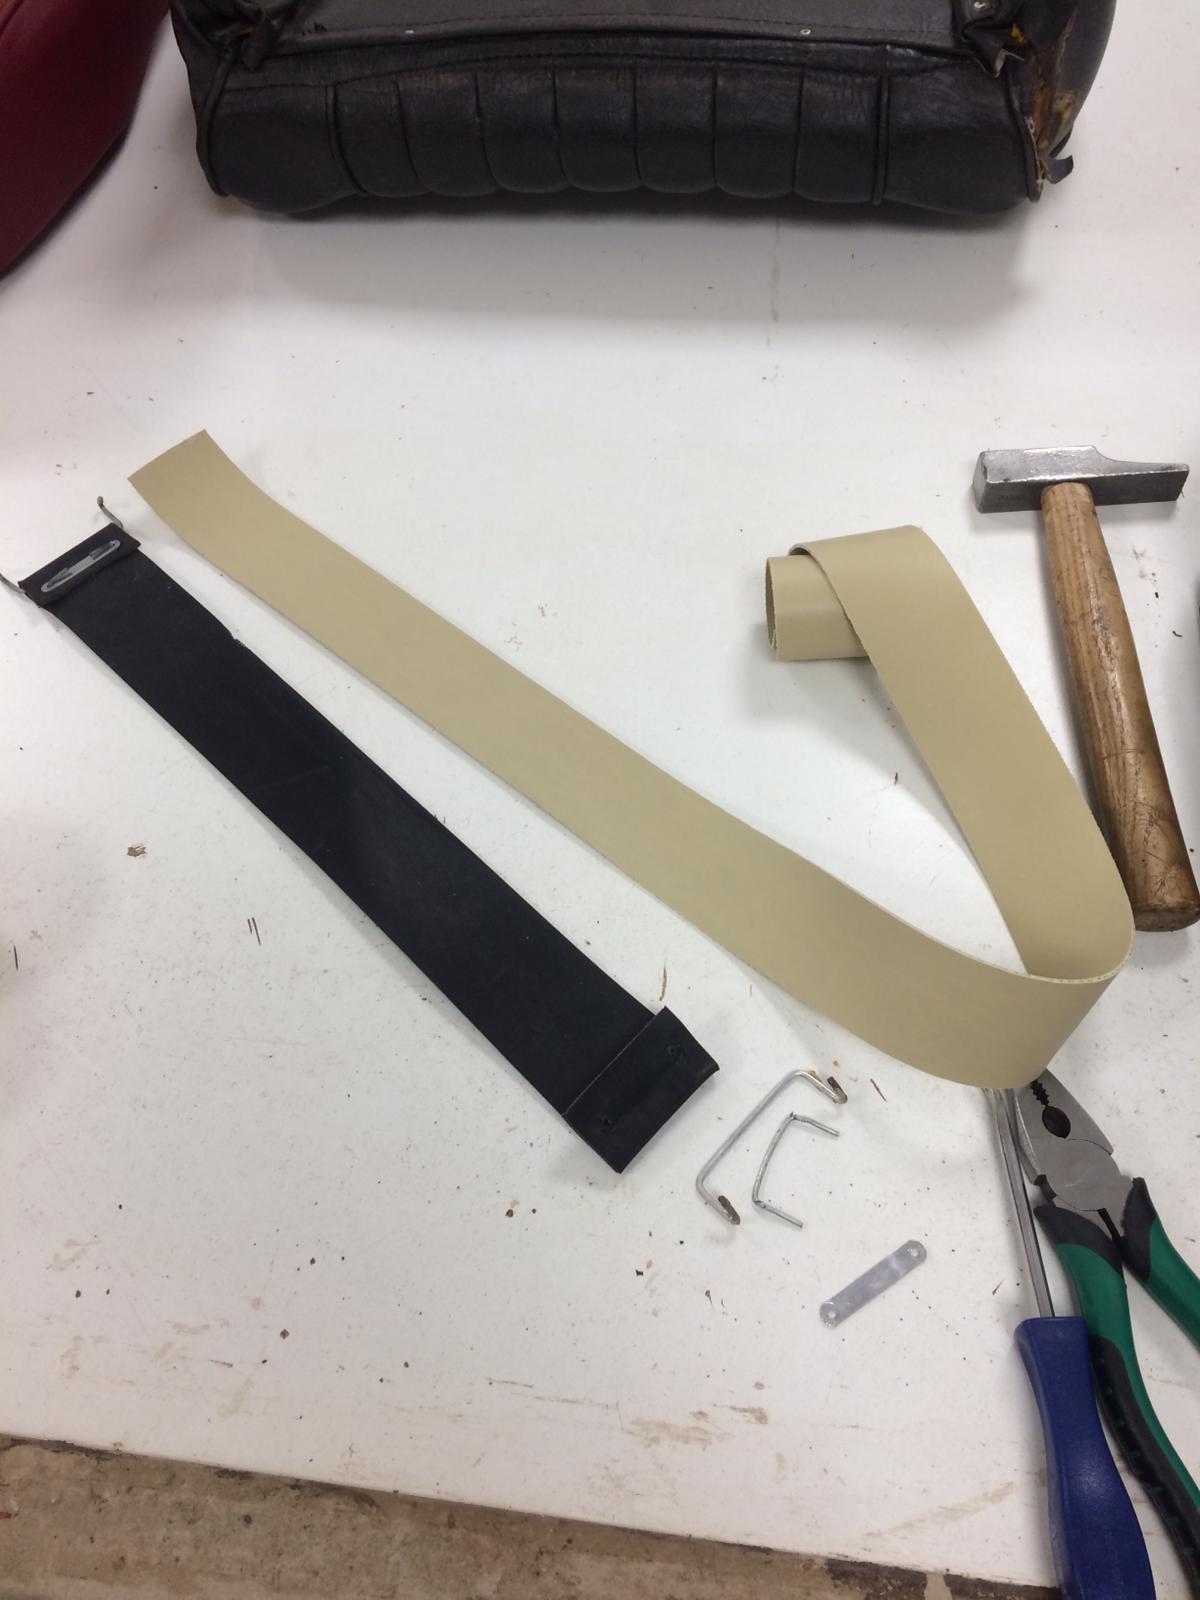
Our Amphicar has been in the trim shop this week having her new roof fitted. Brian’s been working on the task. “I’ve fitted the locating pins around the roof edge” Brian describes “then glued and turned the corners of the roofs front rail”.
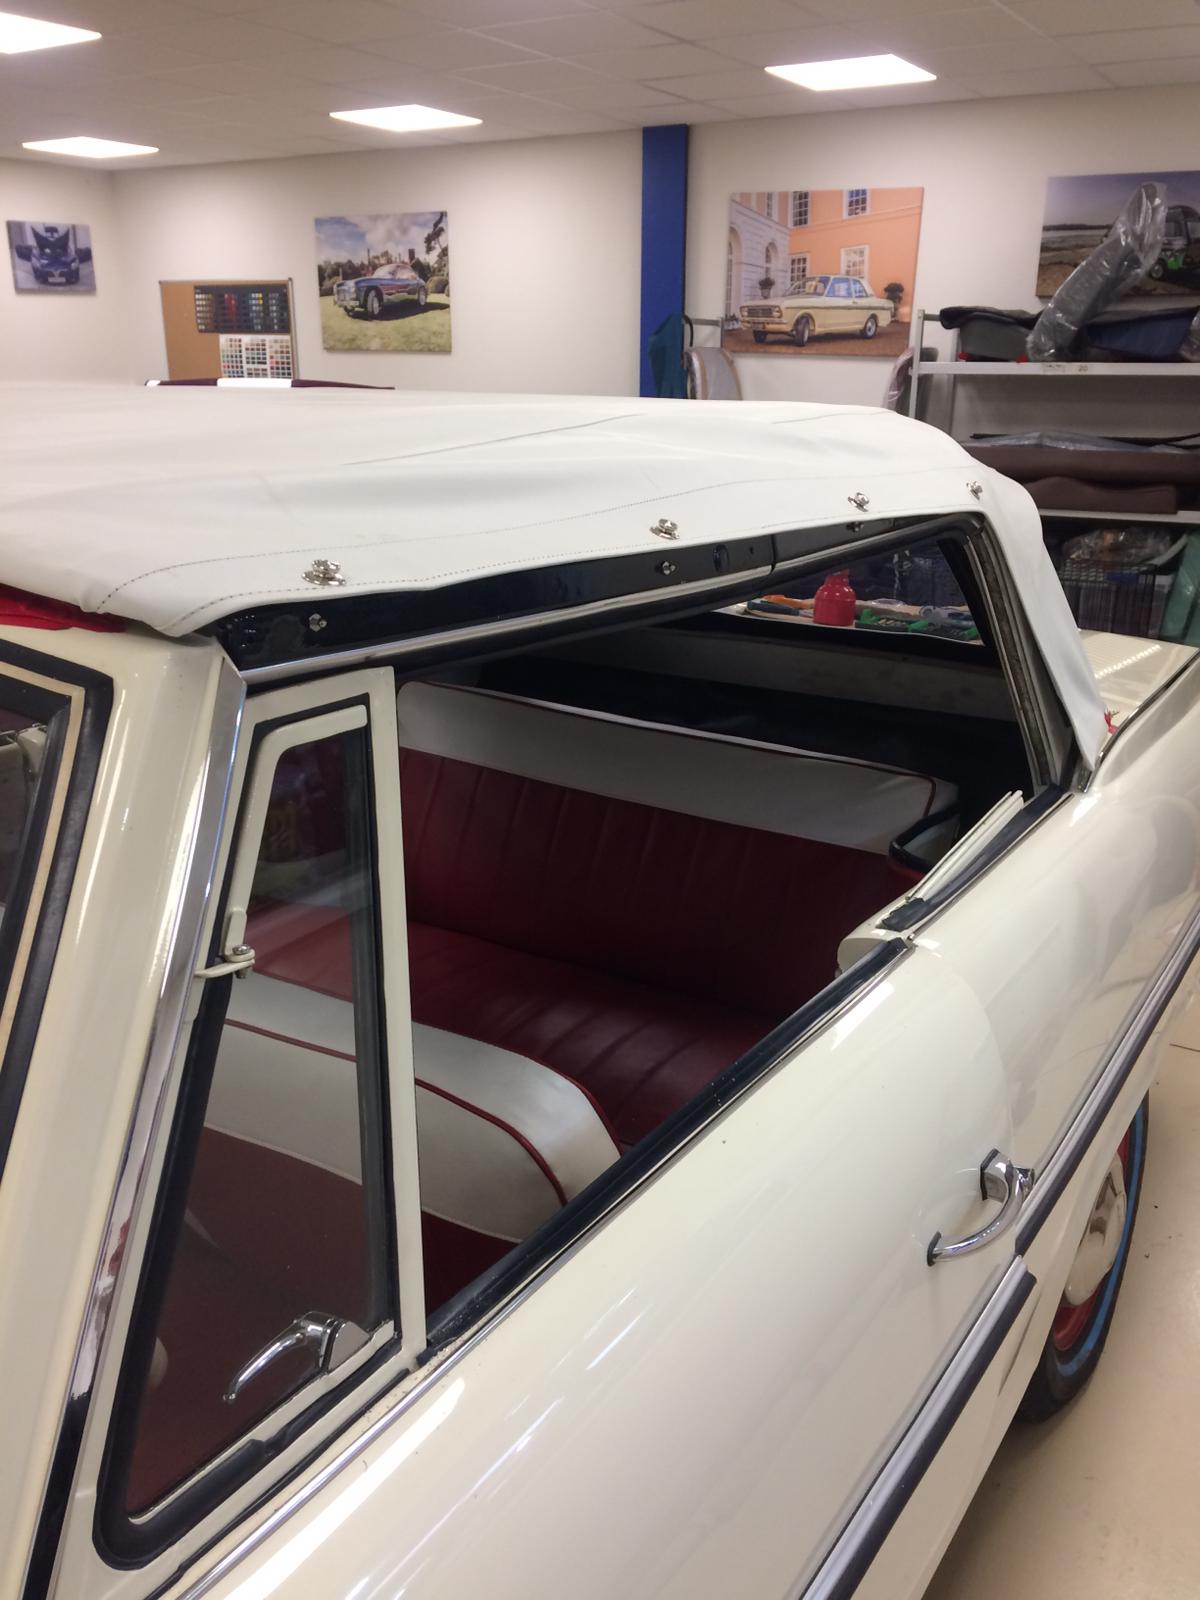
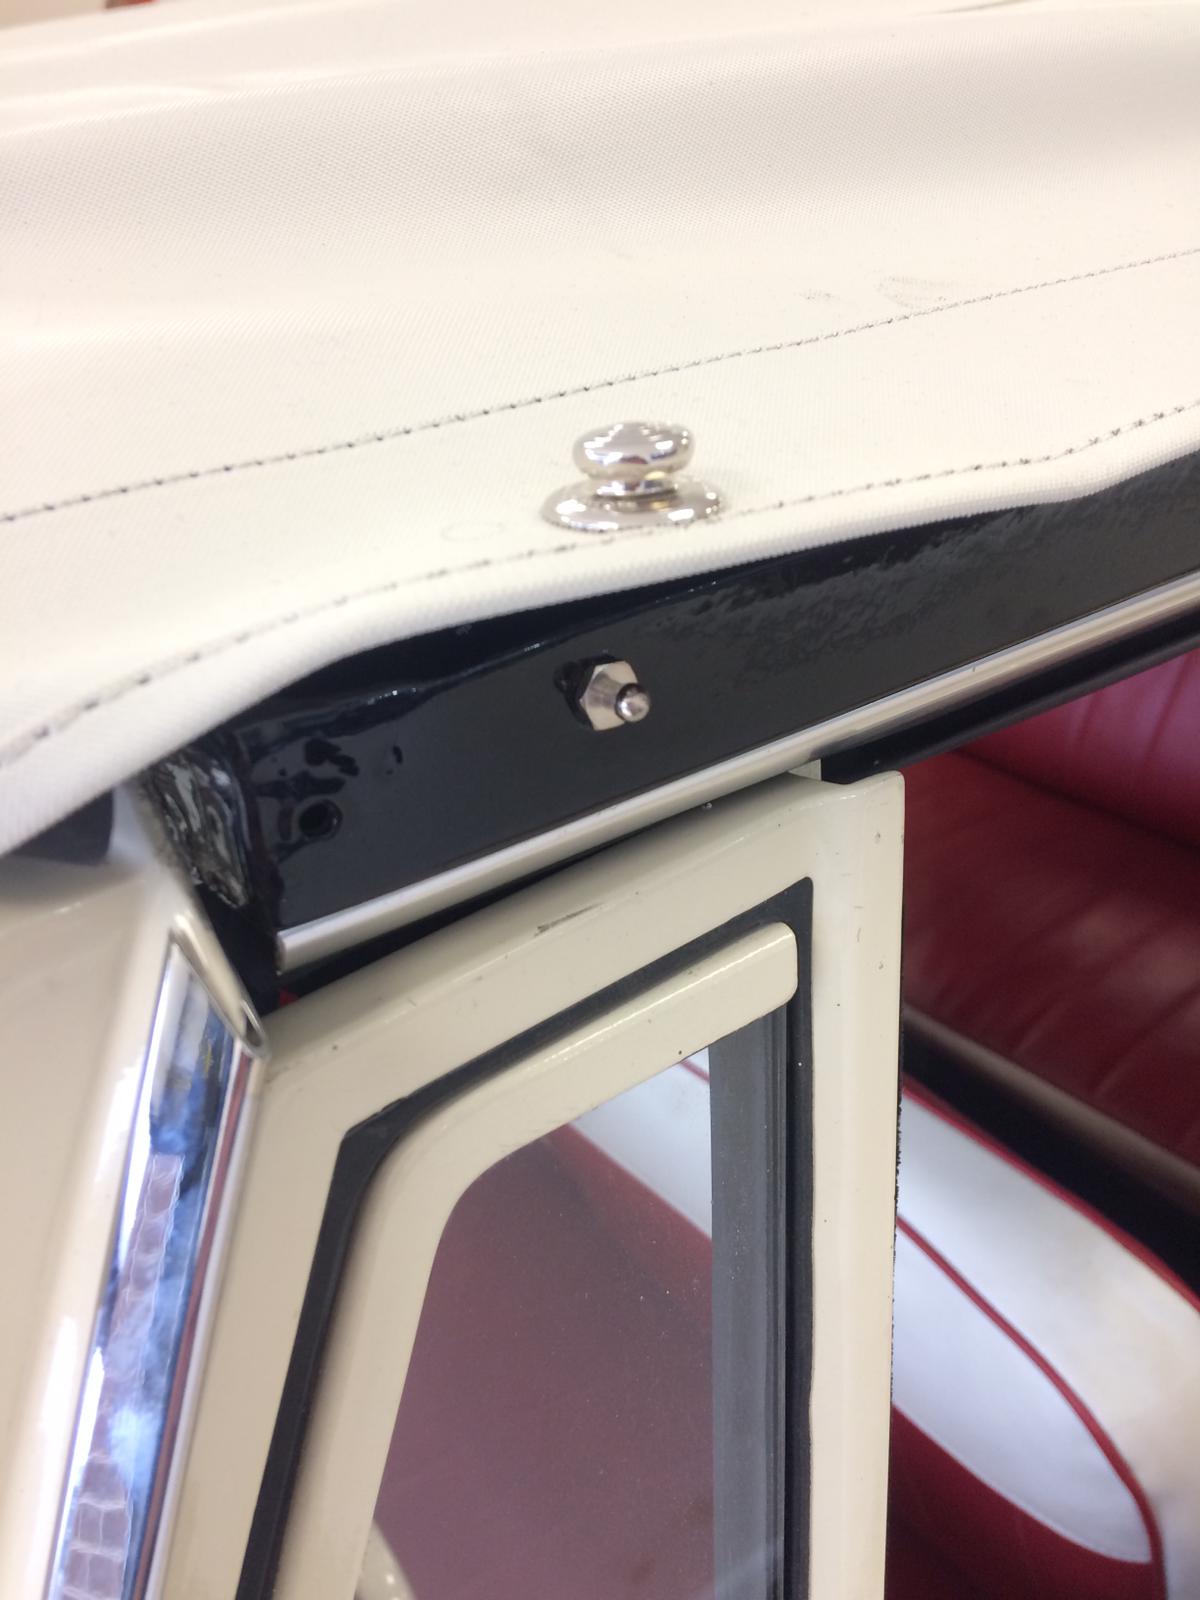


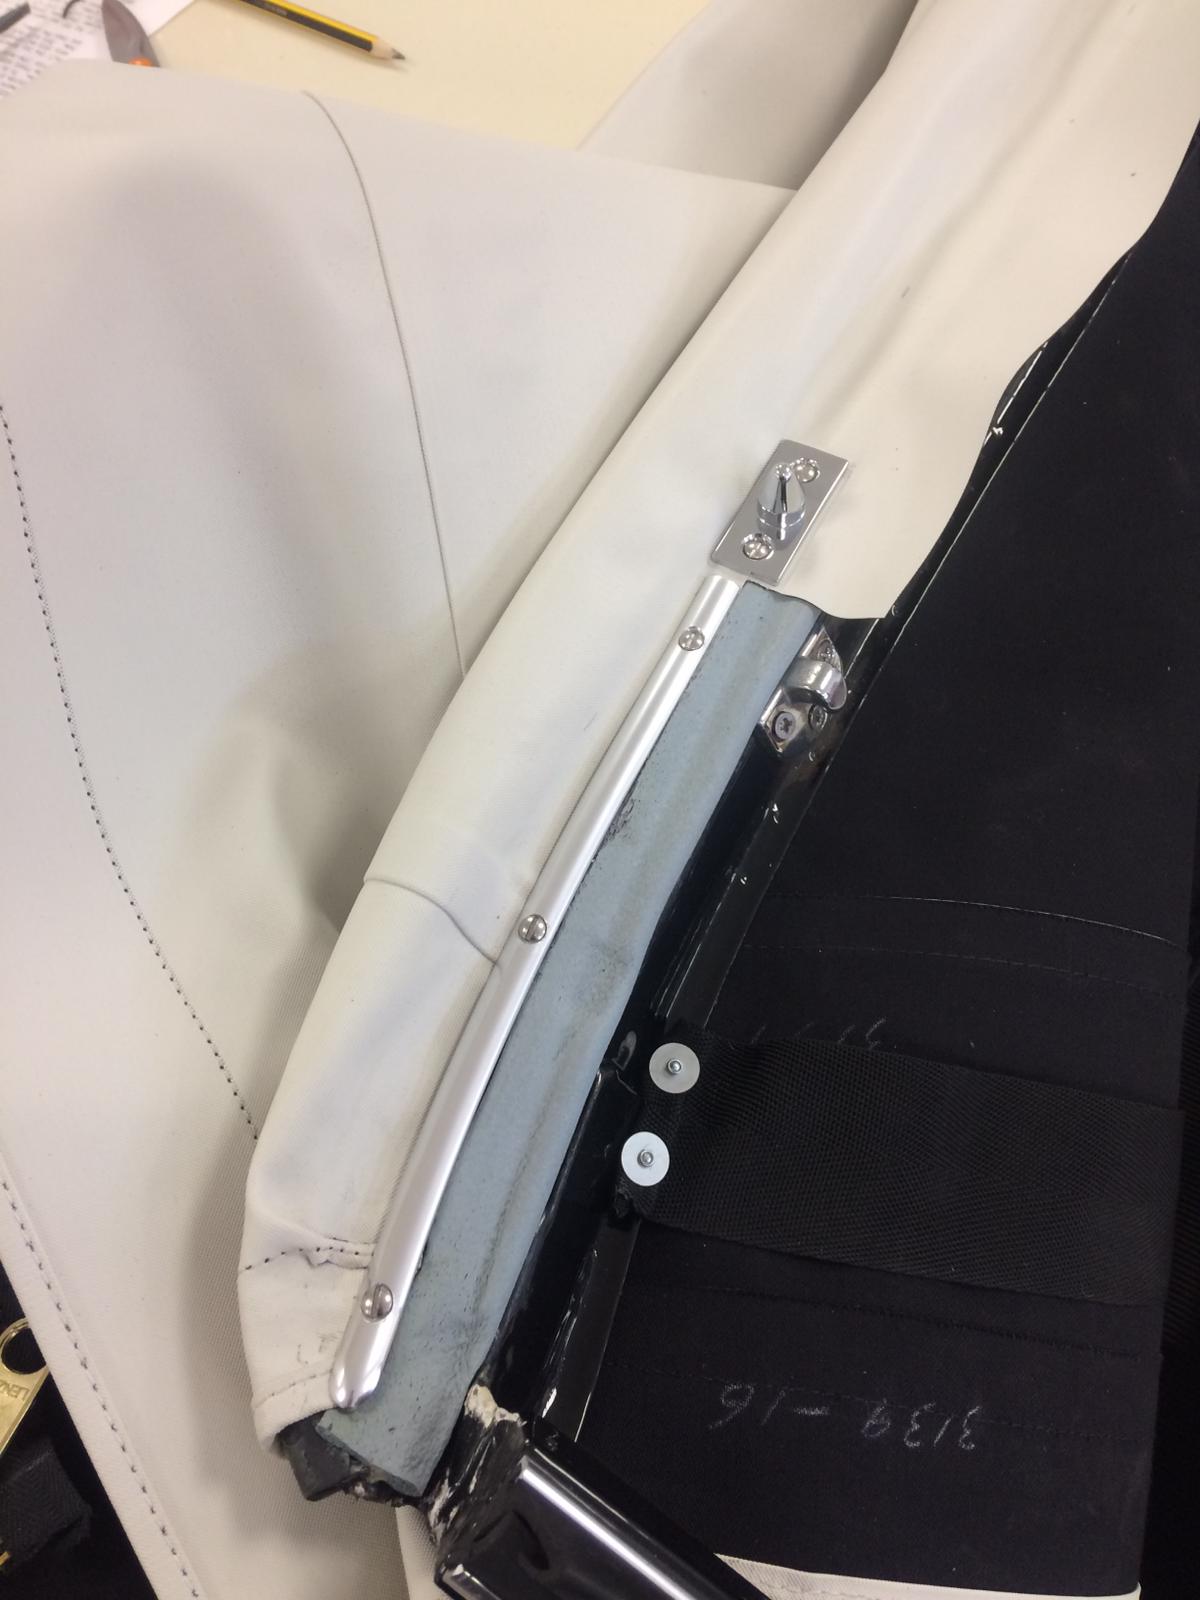
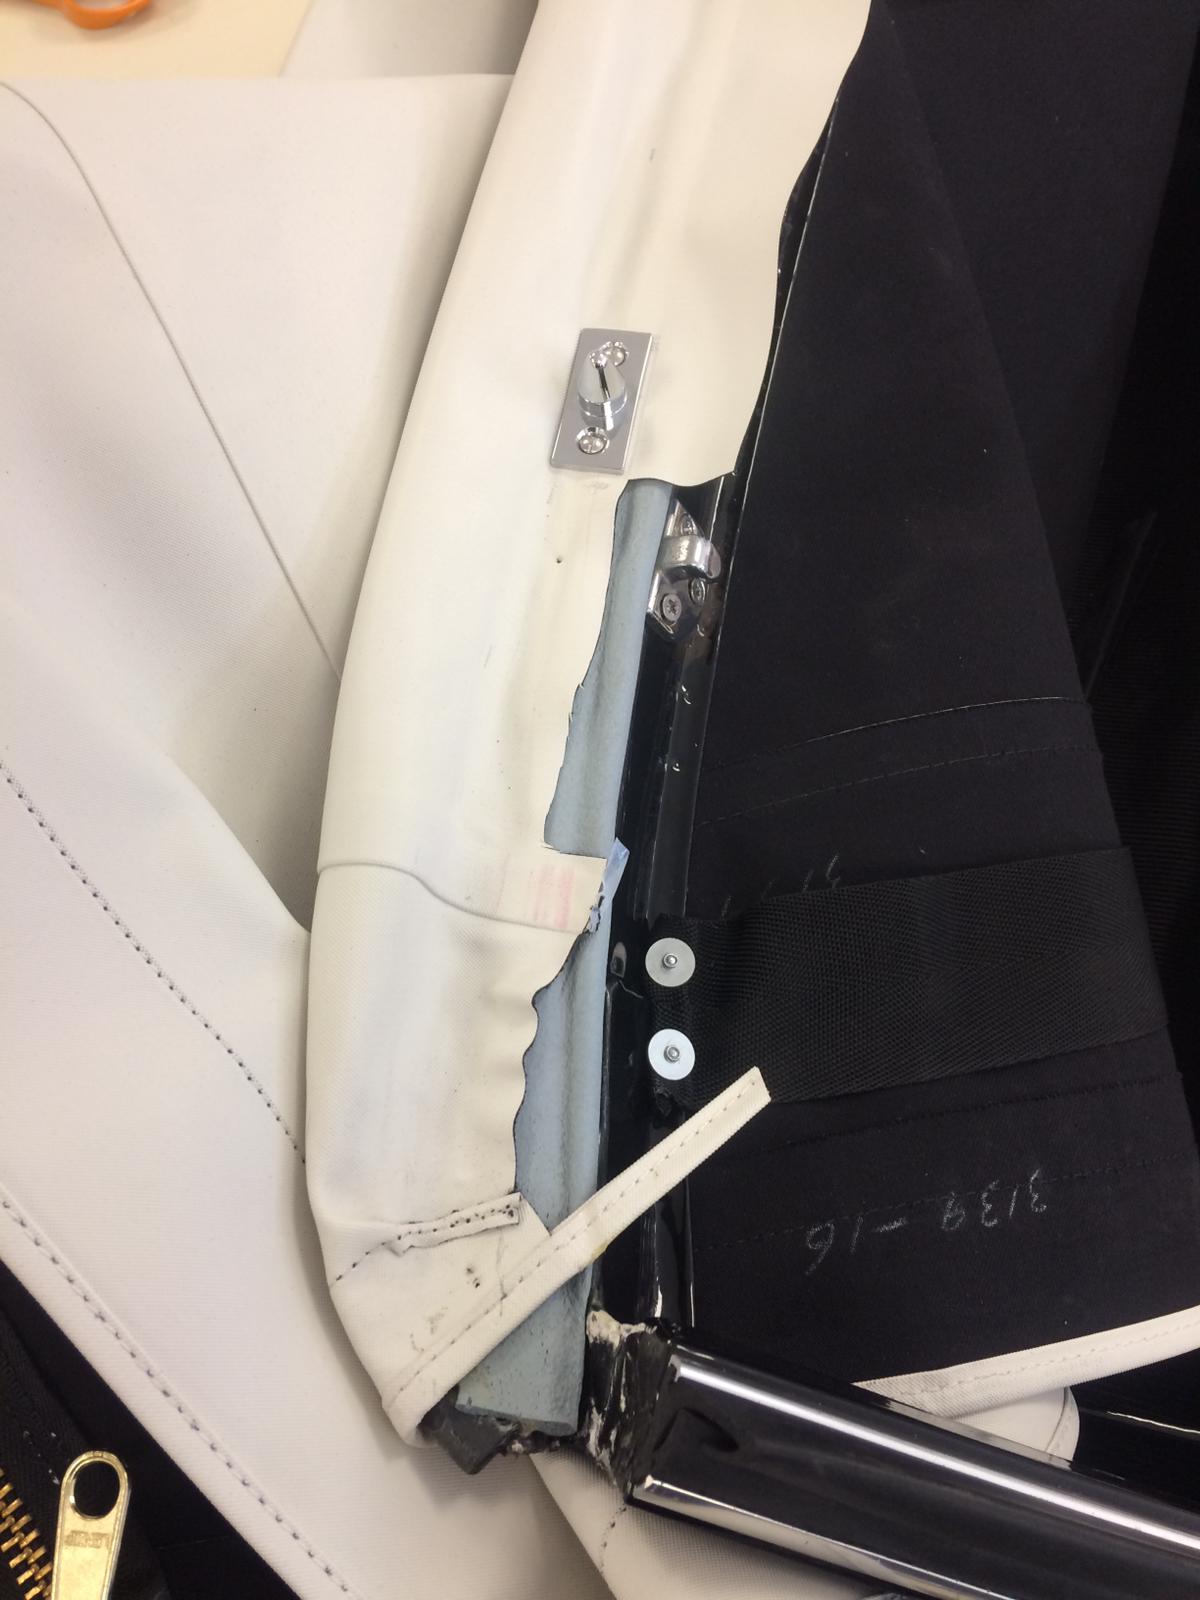
Brian’s then trimmed off any excess material and screwed the metal trim in place. The edges looking nice a neat now. “I then fitted the metal trim round the bottom of the back of the roof using Tenax fasteners” he explains.
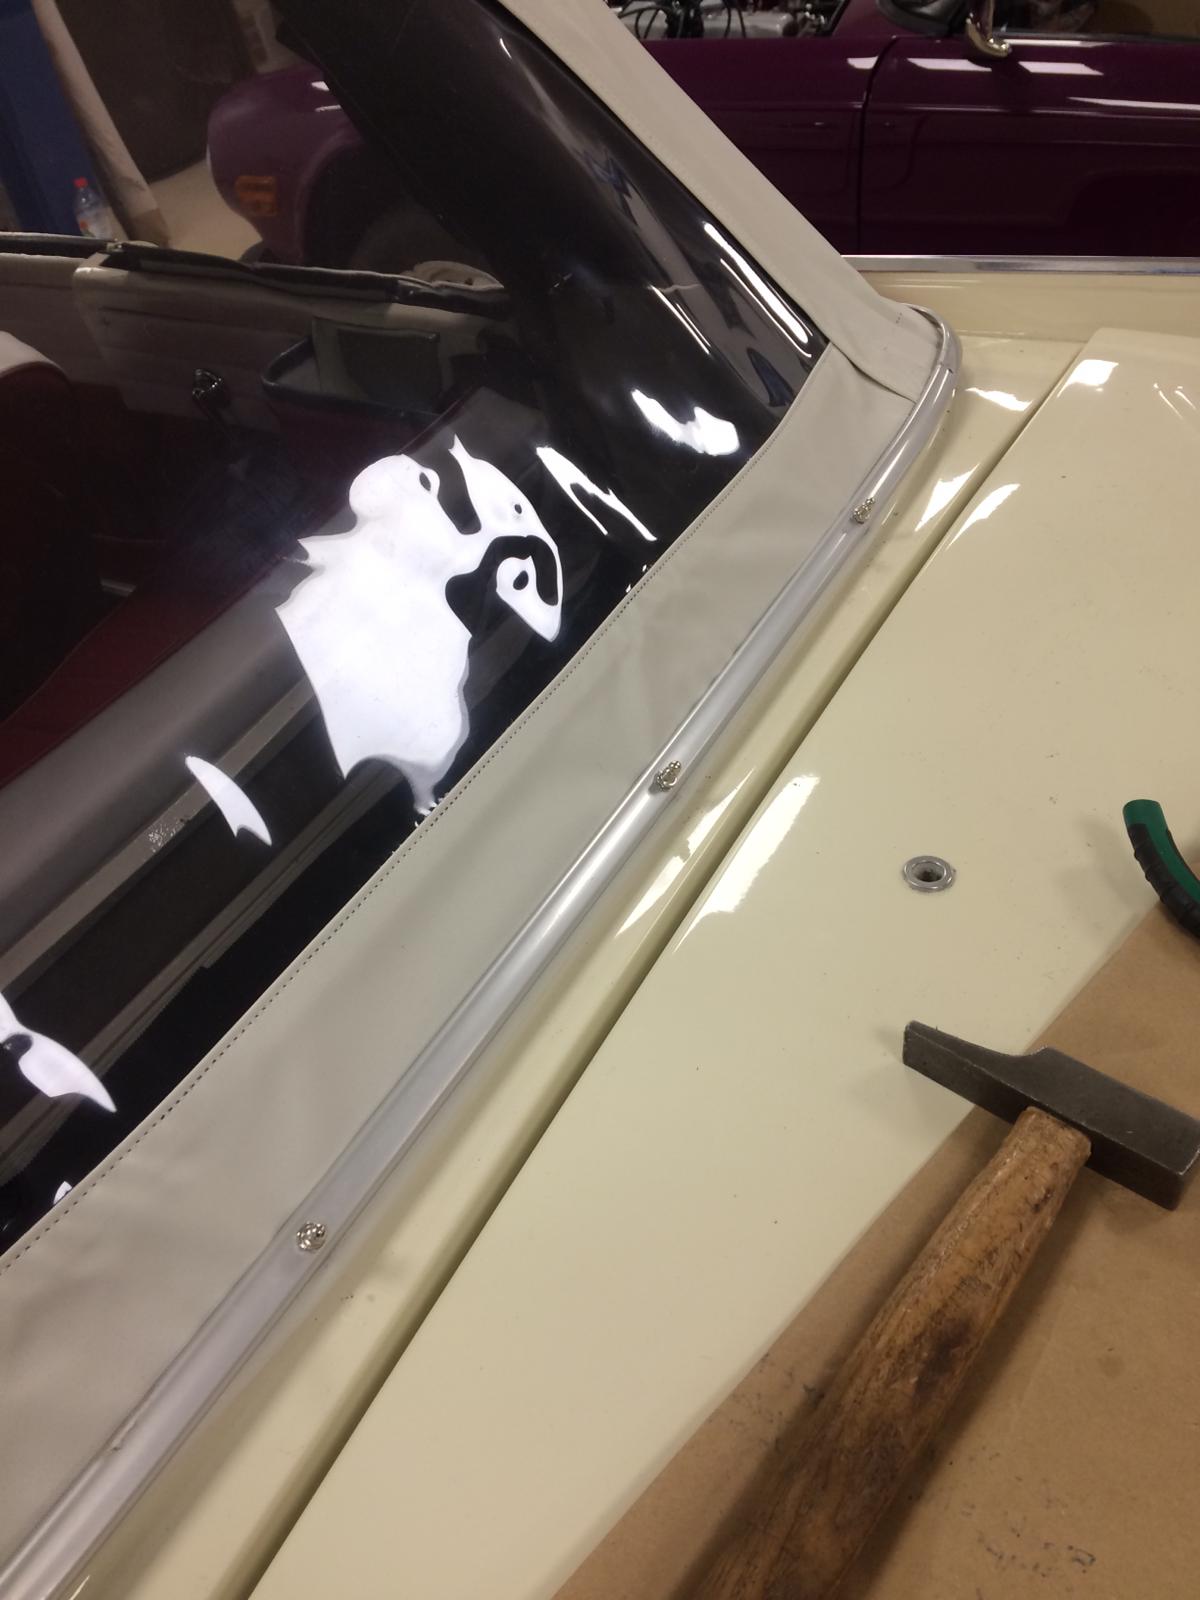

“I’ve then glued flaps around the rear window frame” Brian continues “again adding the neat metal trim to smarten up the edges and also, to hold the window rubber in”.
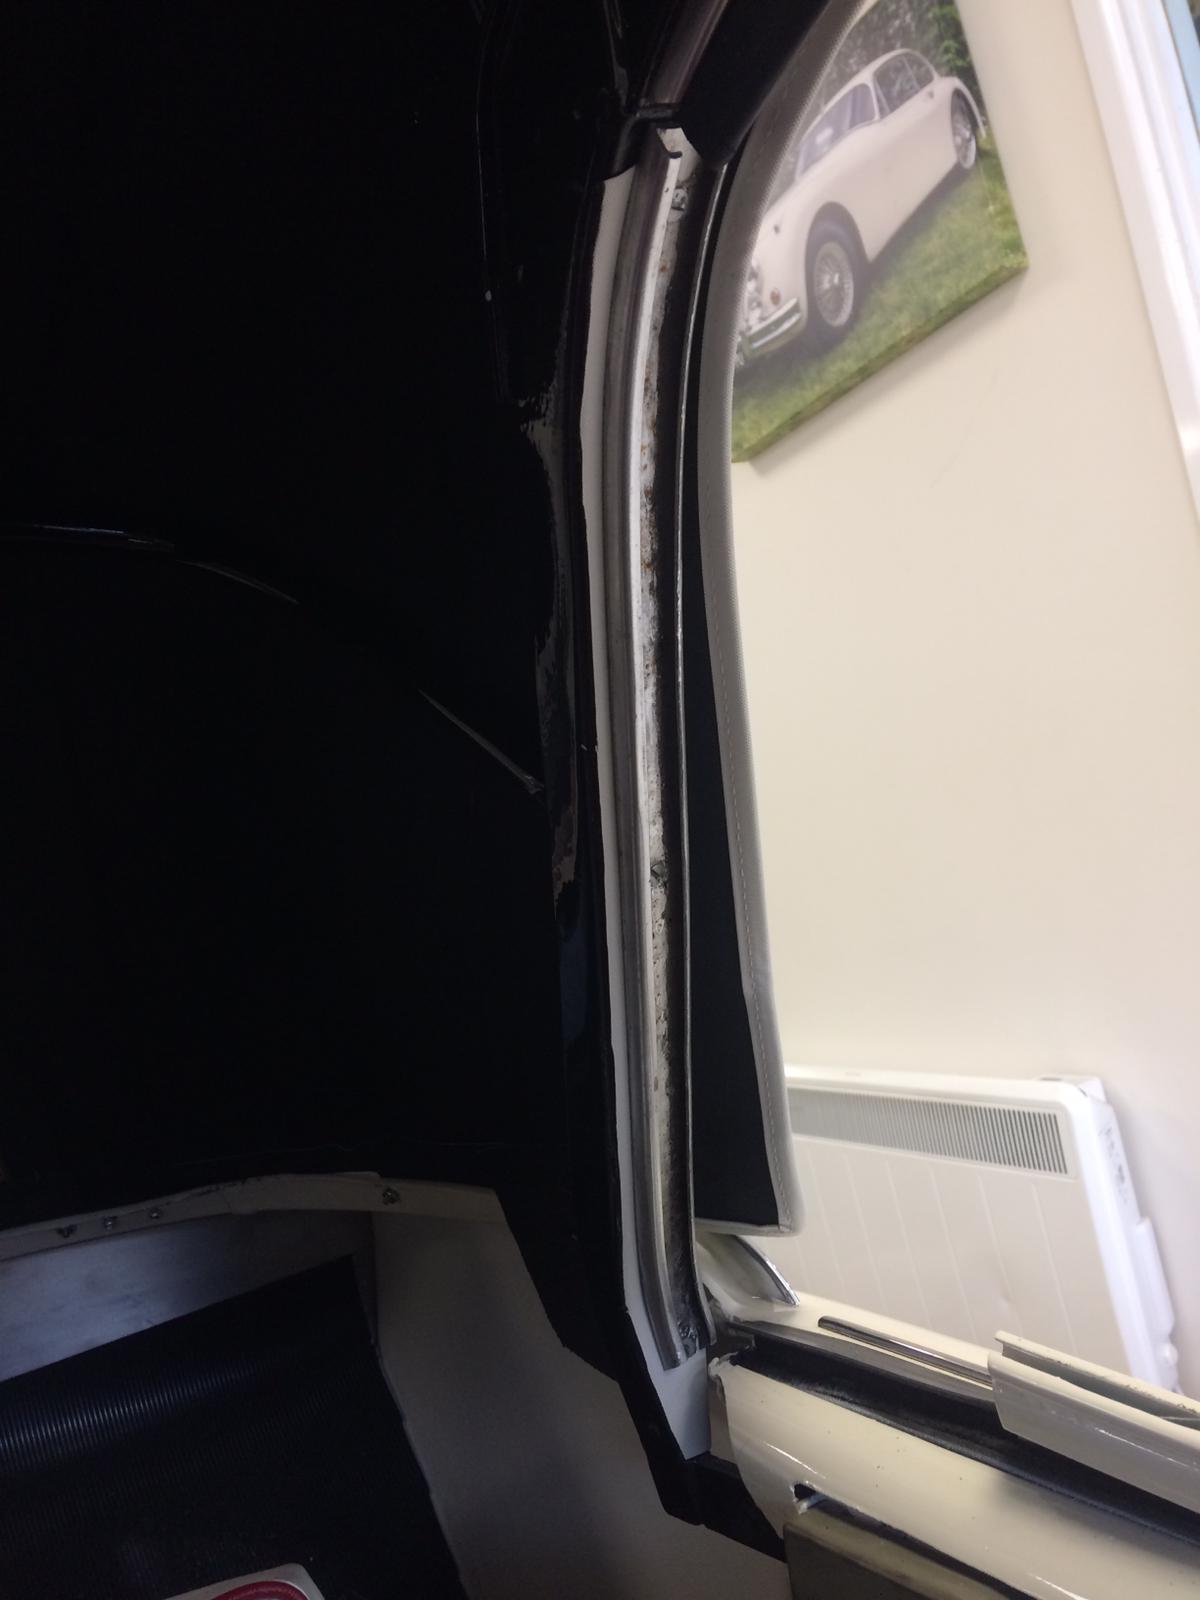
Even though the roof was a ready-made, it still had to be custom fitted and therefore provided it’s own challenges! Brian told us how tricky it was to get the roof liner to fit. “When we make our own parts we can measure against the car and use those exact patters” Brian explains. “But, when it’s ‘off the shelf’ the product arrives and we have to work with what we’re presented with.”
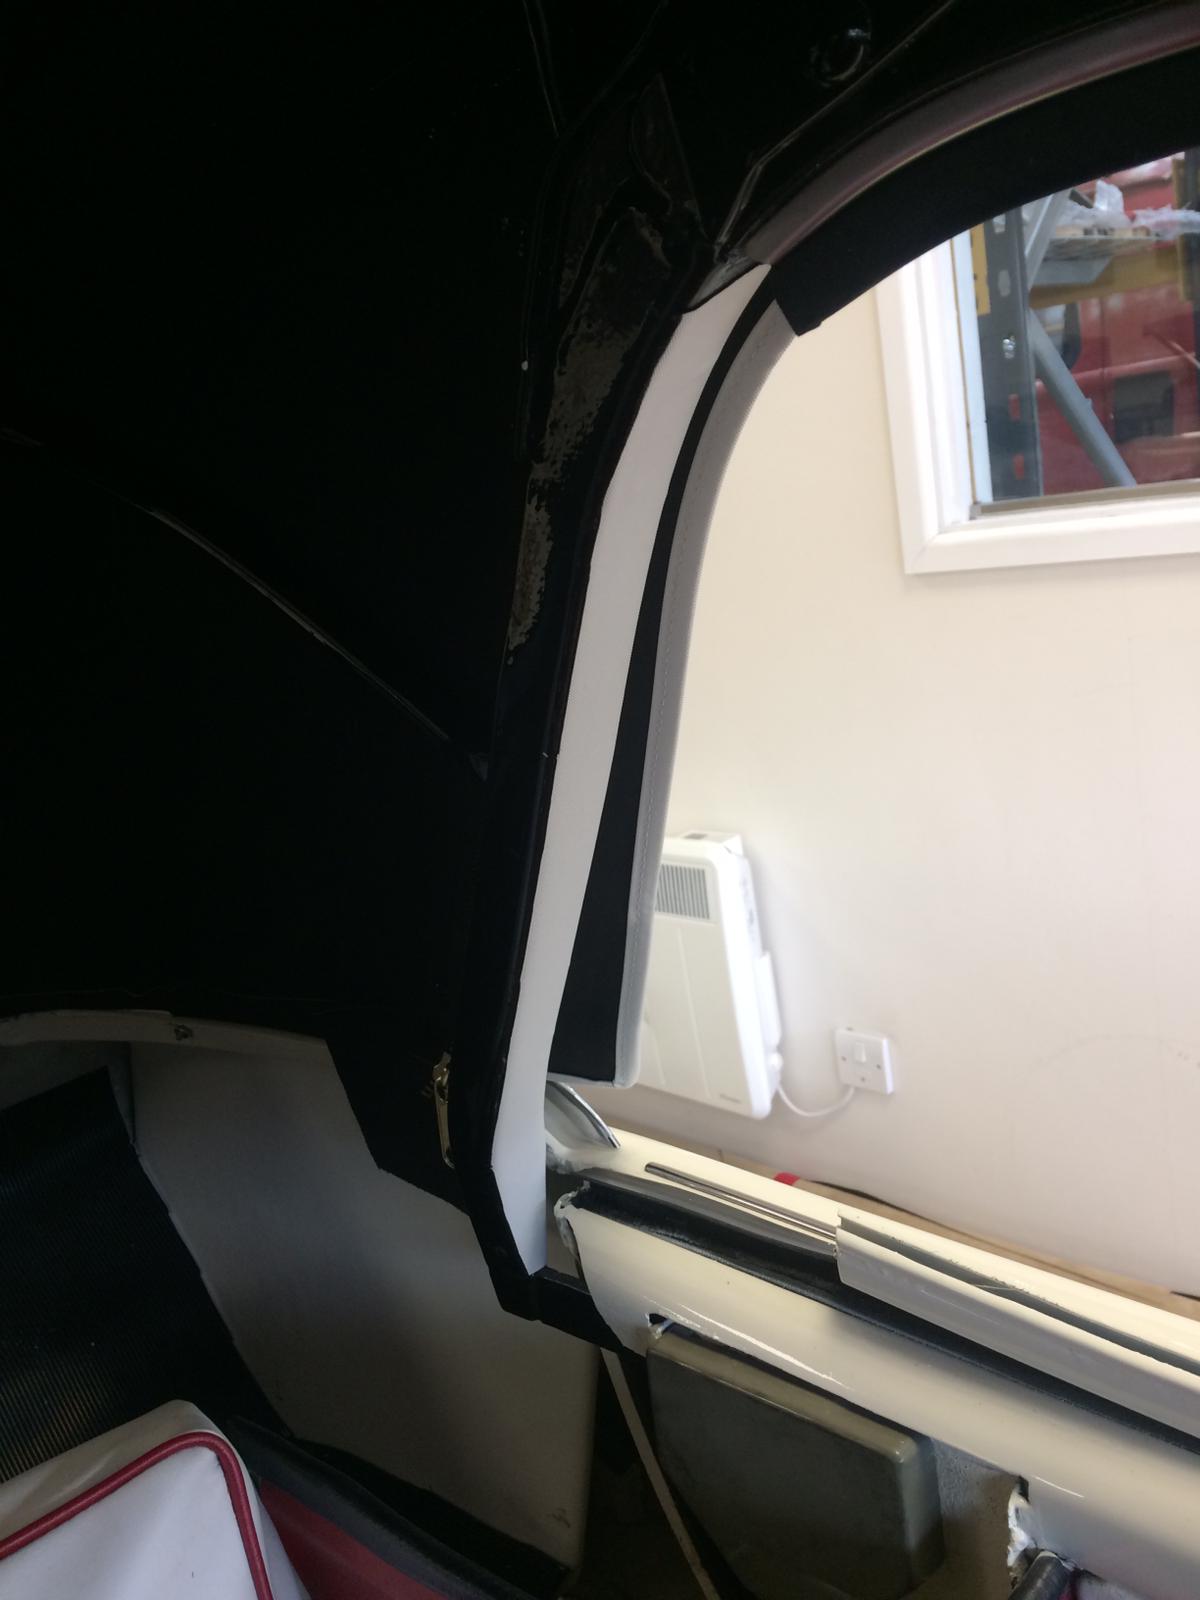
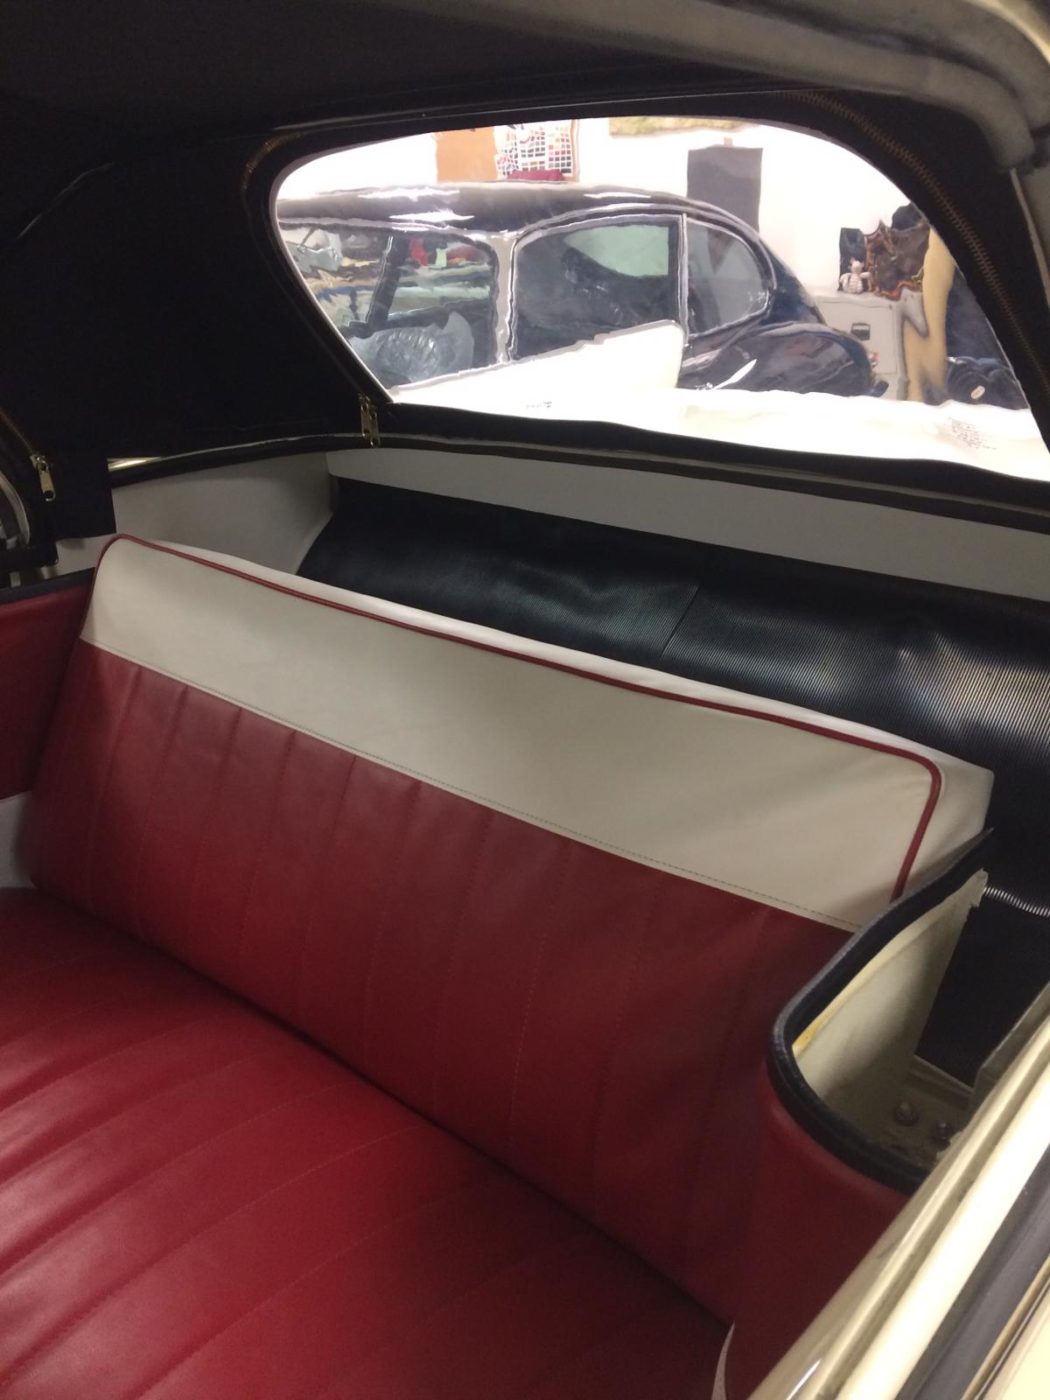
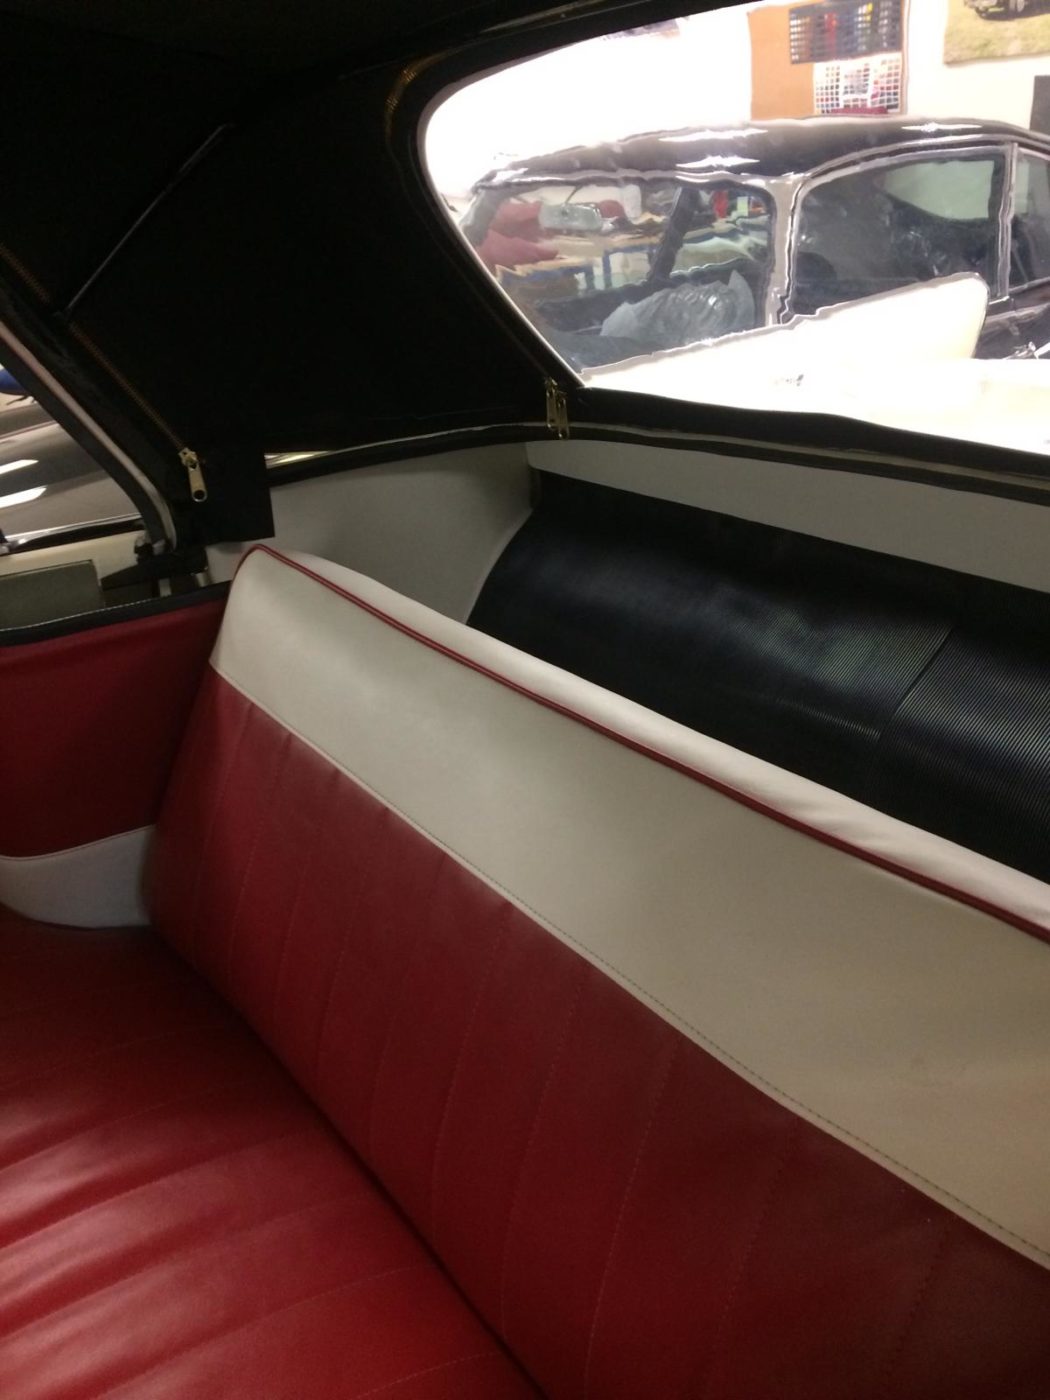
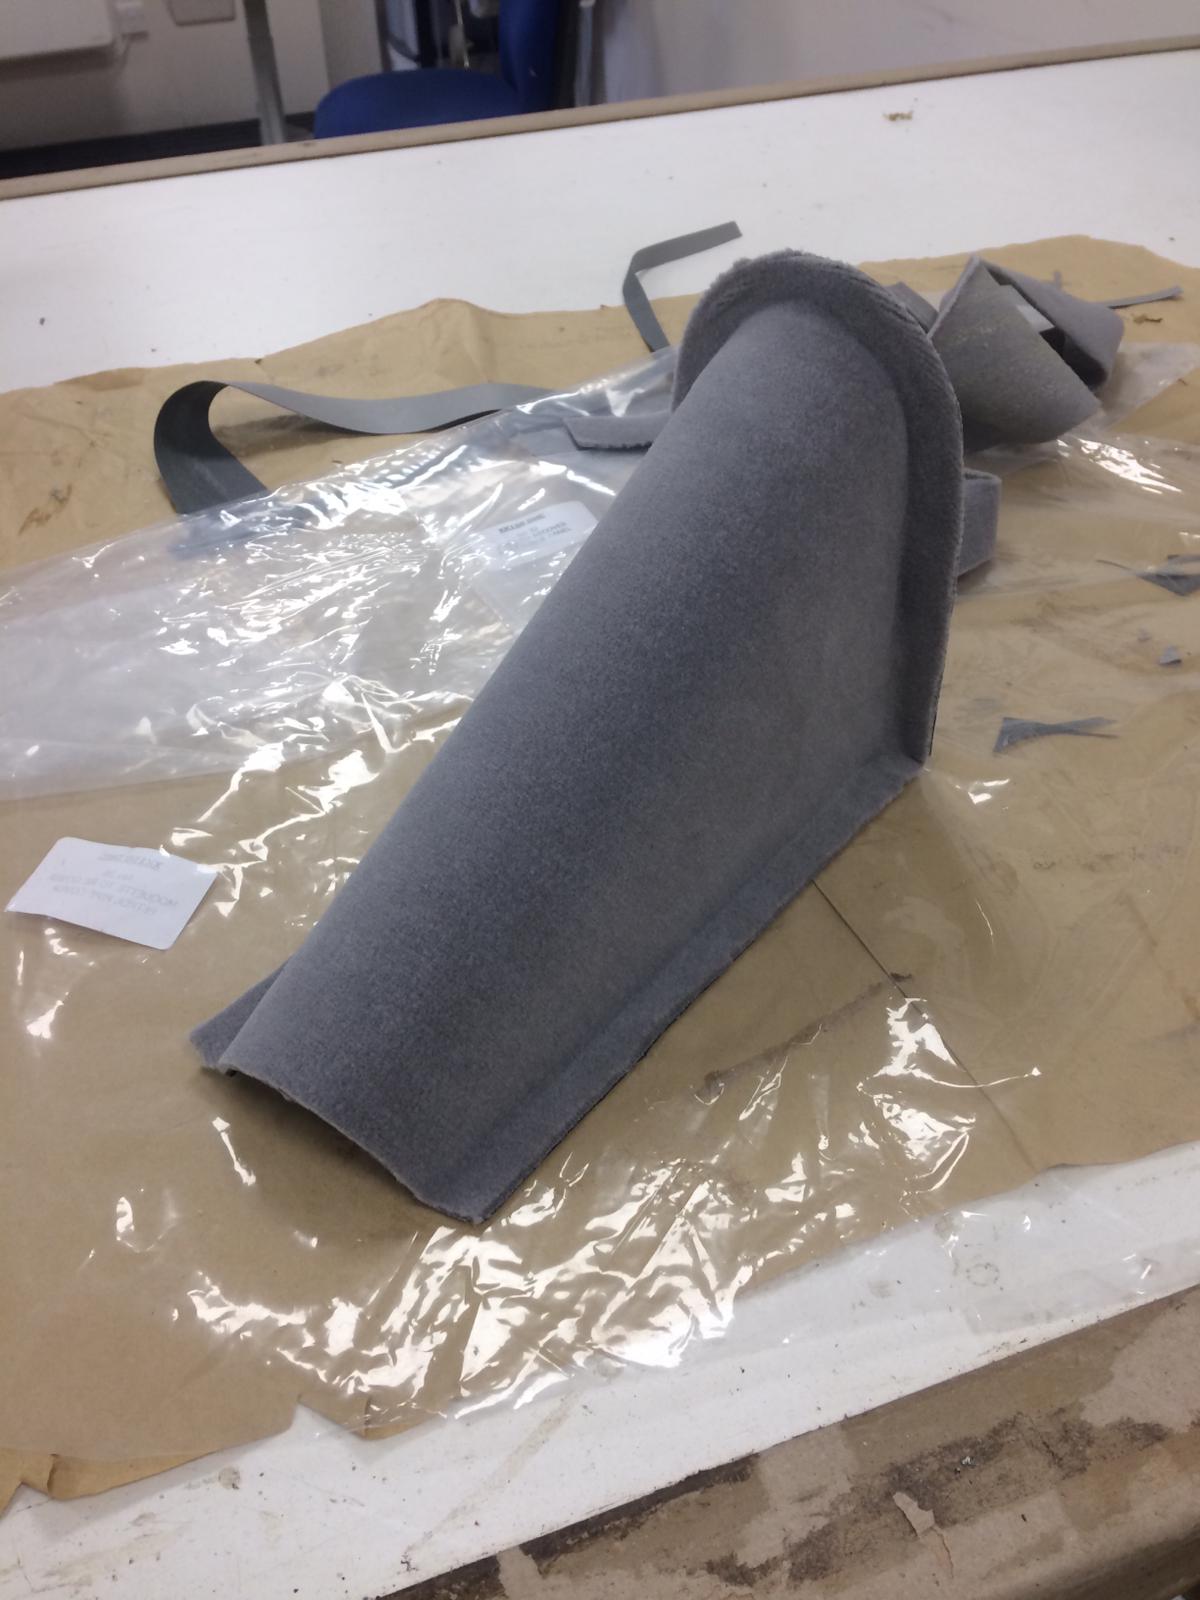
Brian’s also fitted the back seat “I glued the rubber down first” he explains “then fitted the seat Kath and I have made onto it.”

Raise your hand if you want to take this swimmingly fun car for a test-dive!?
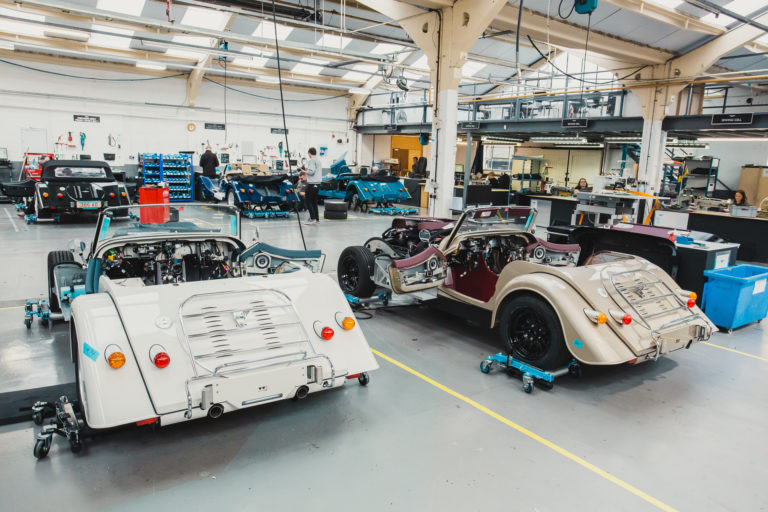
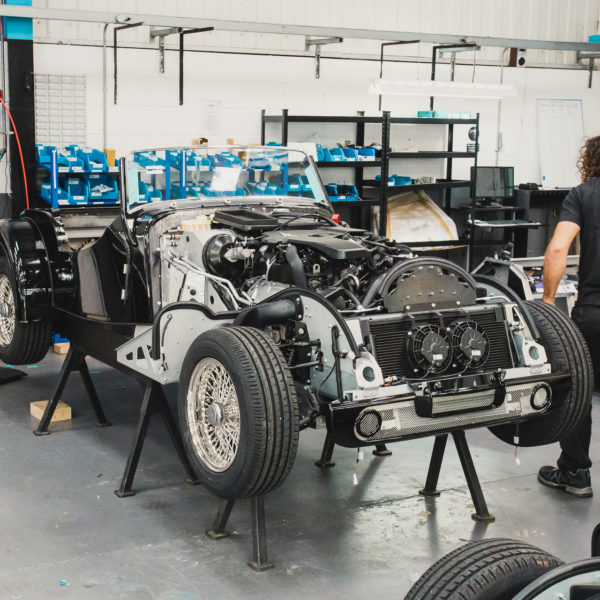
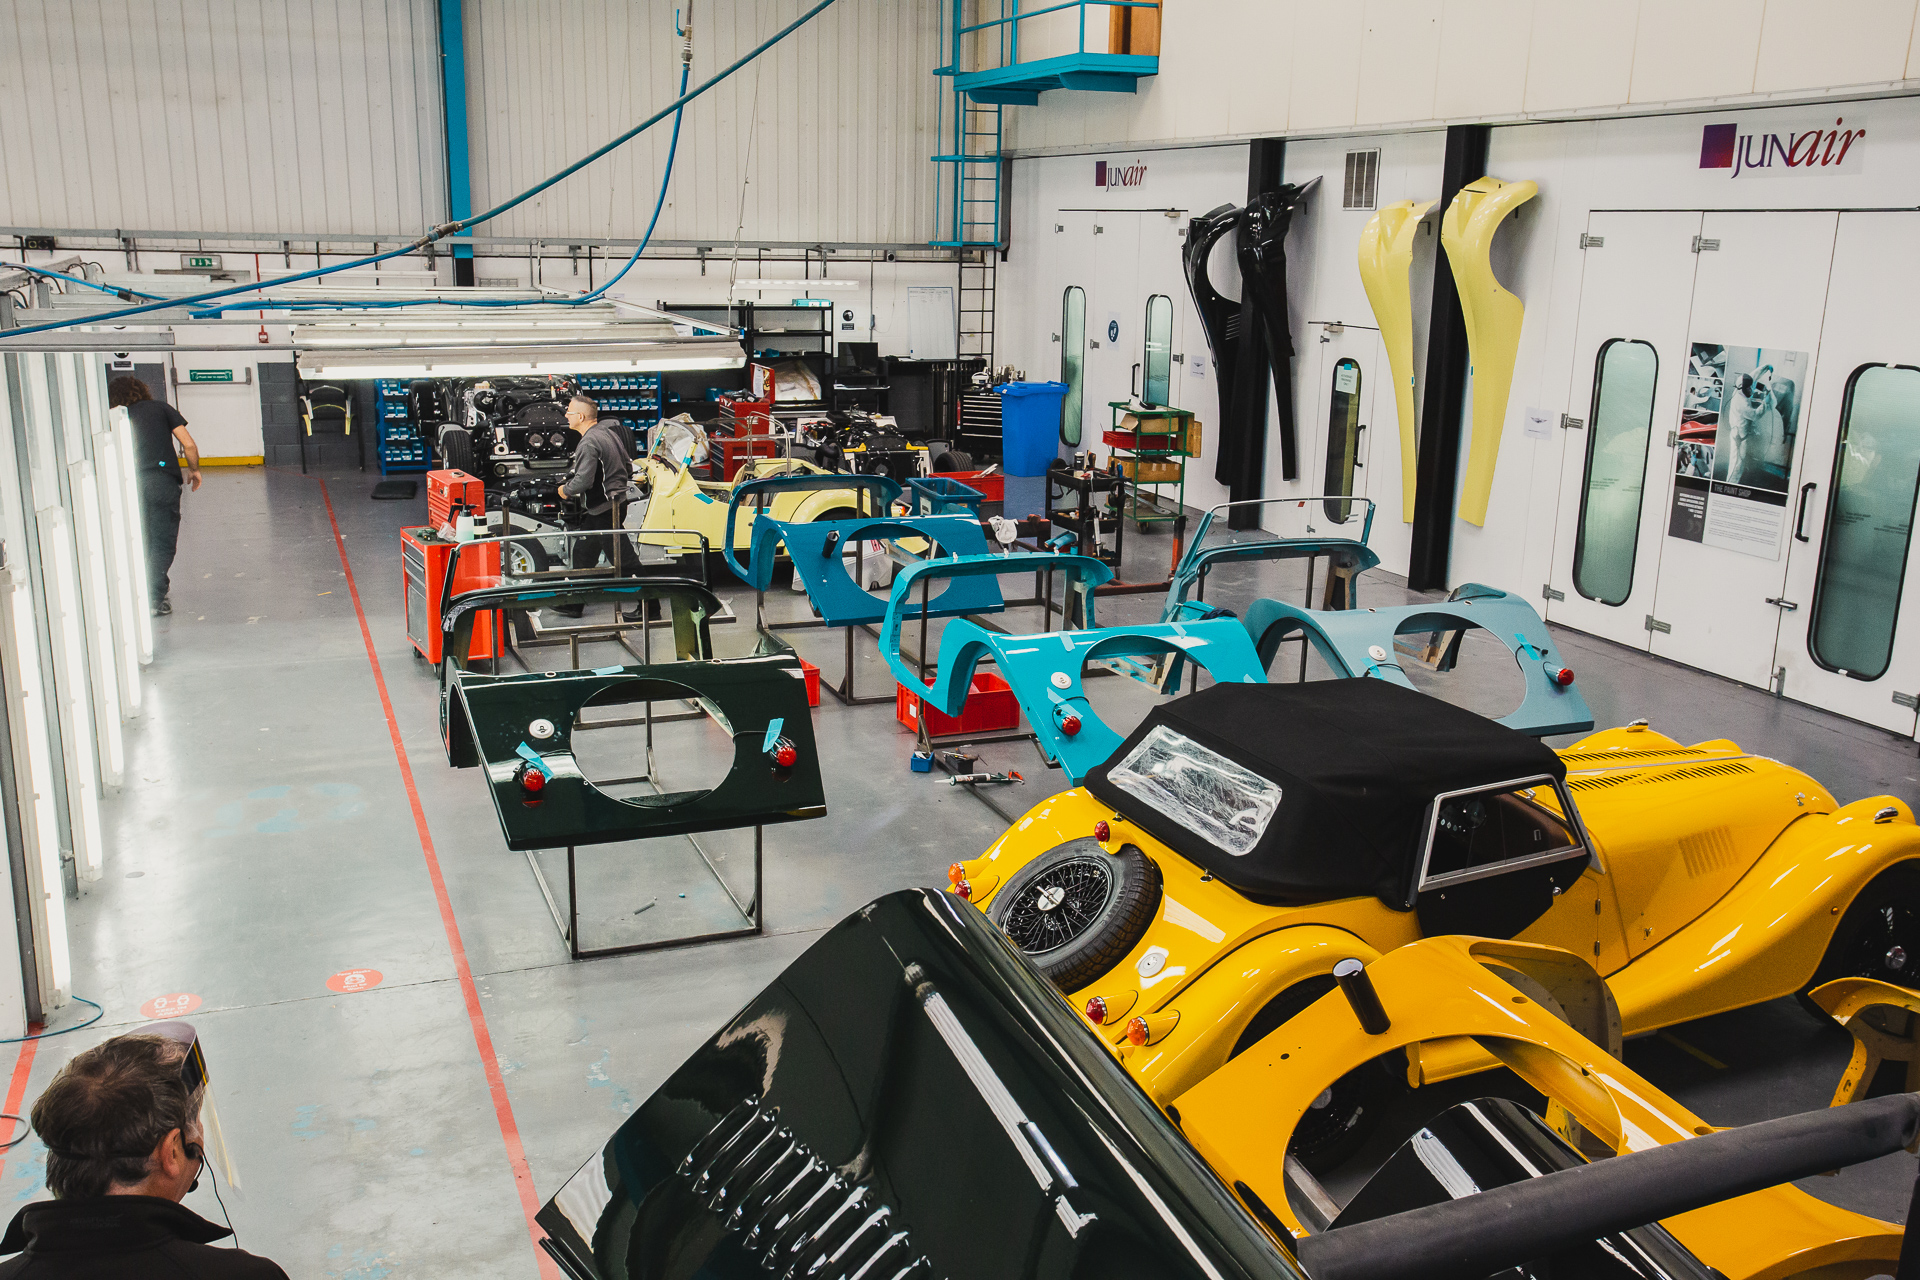
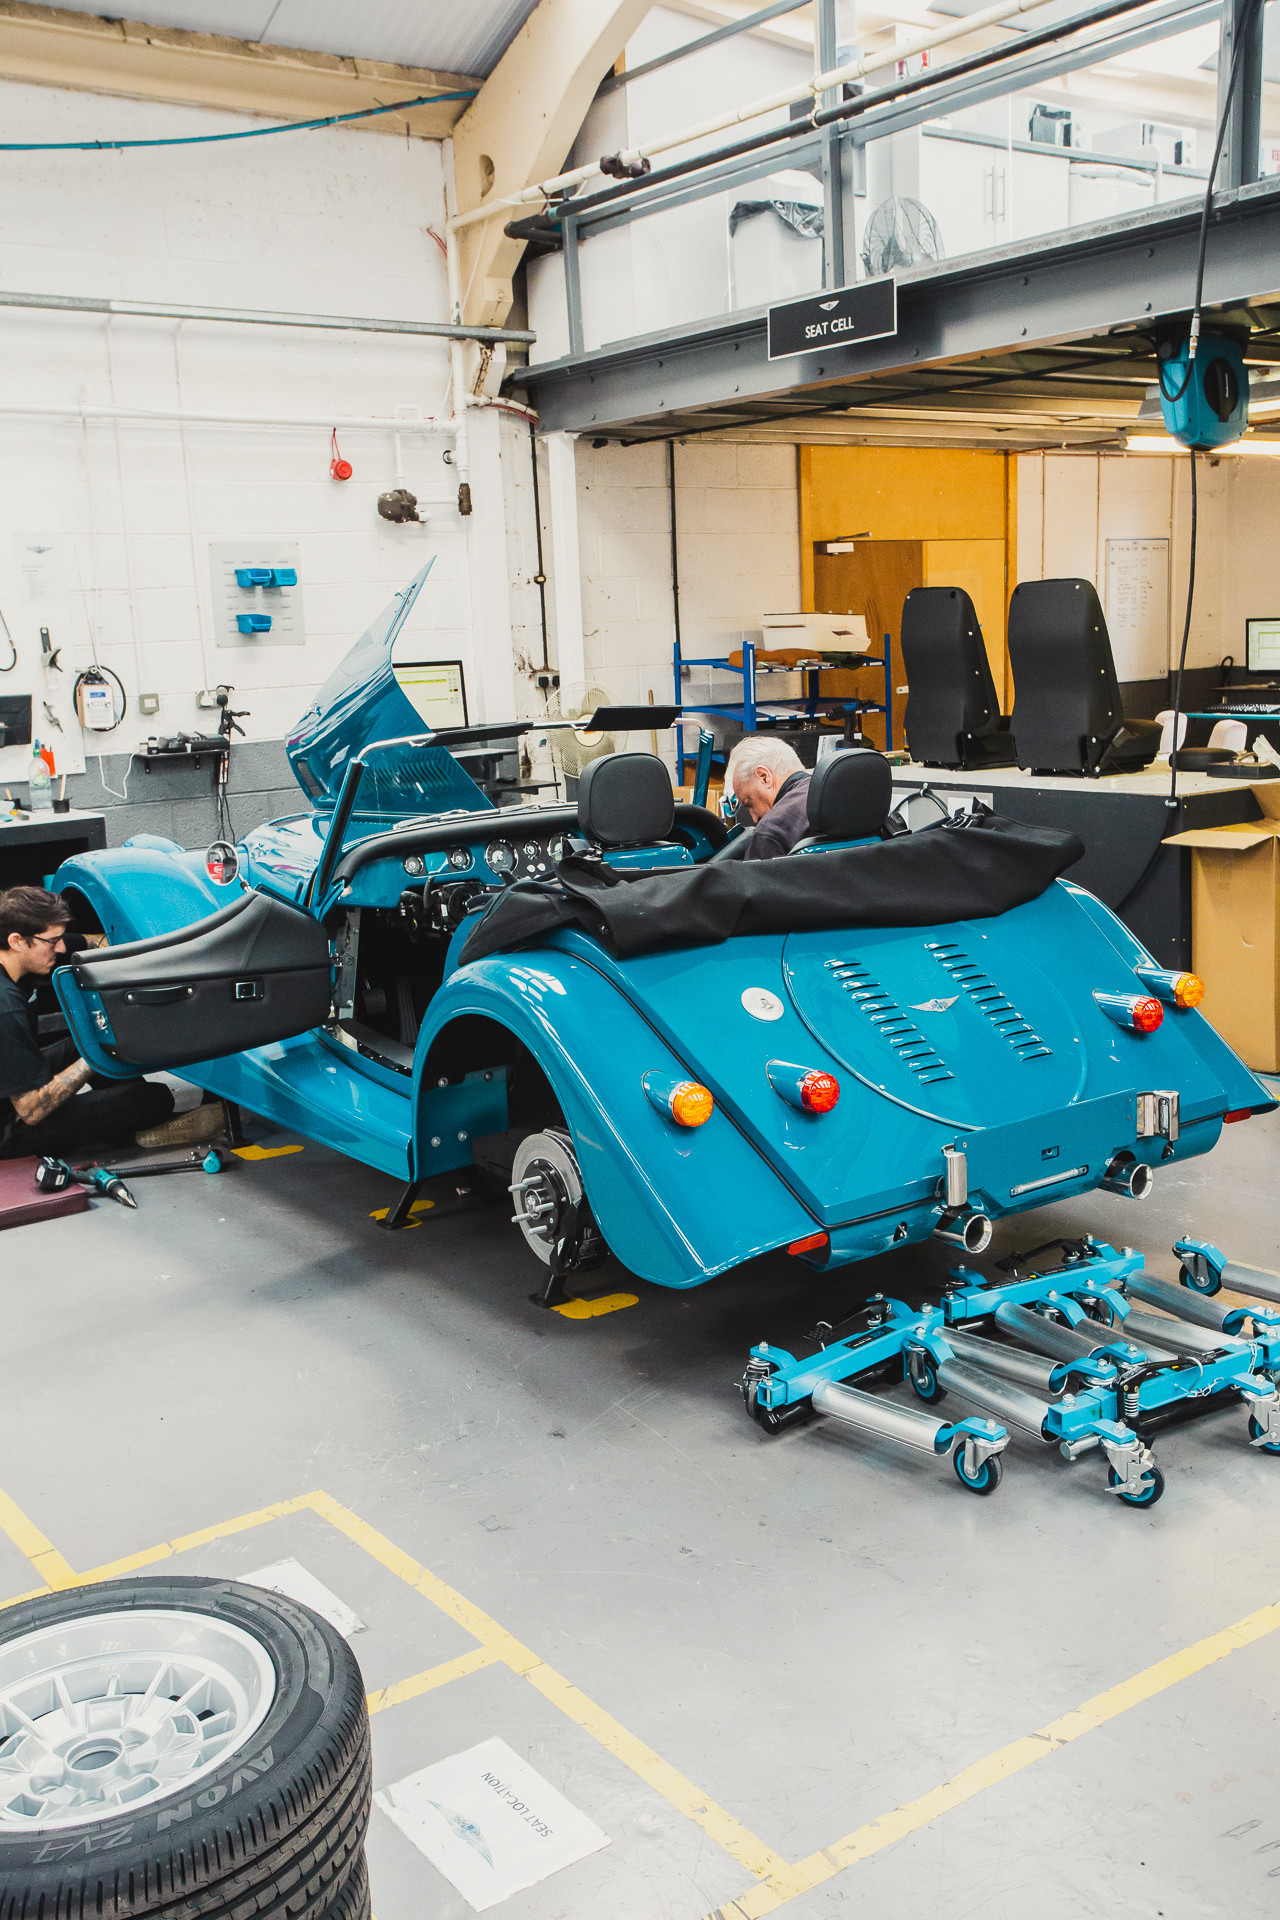
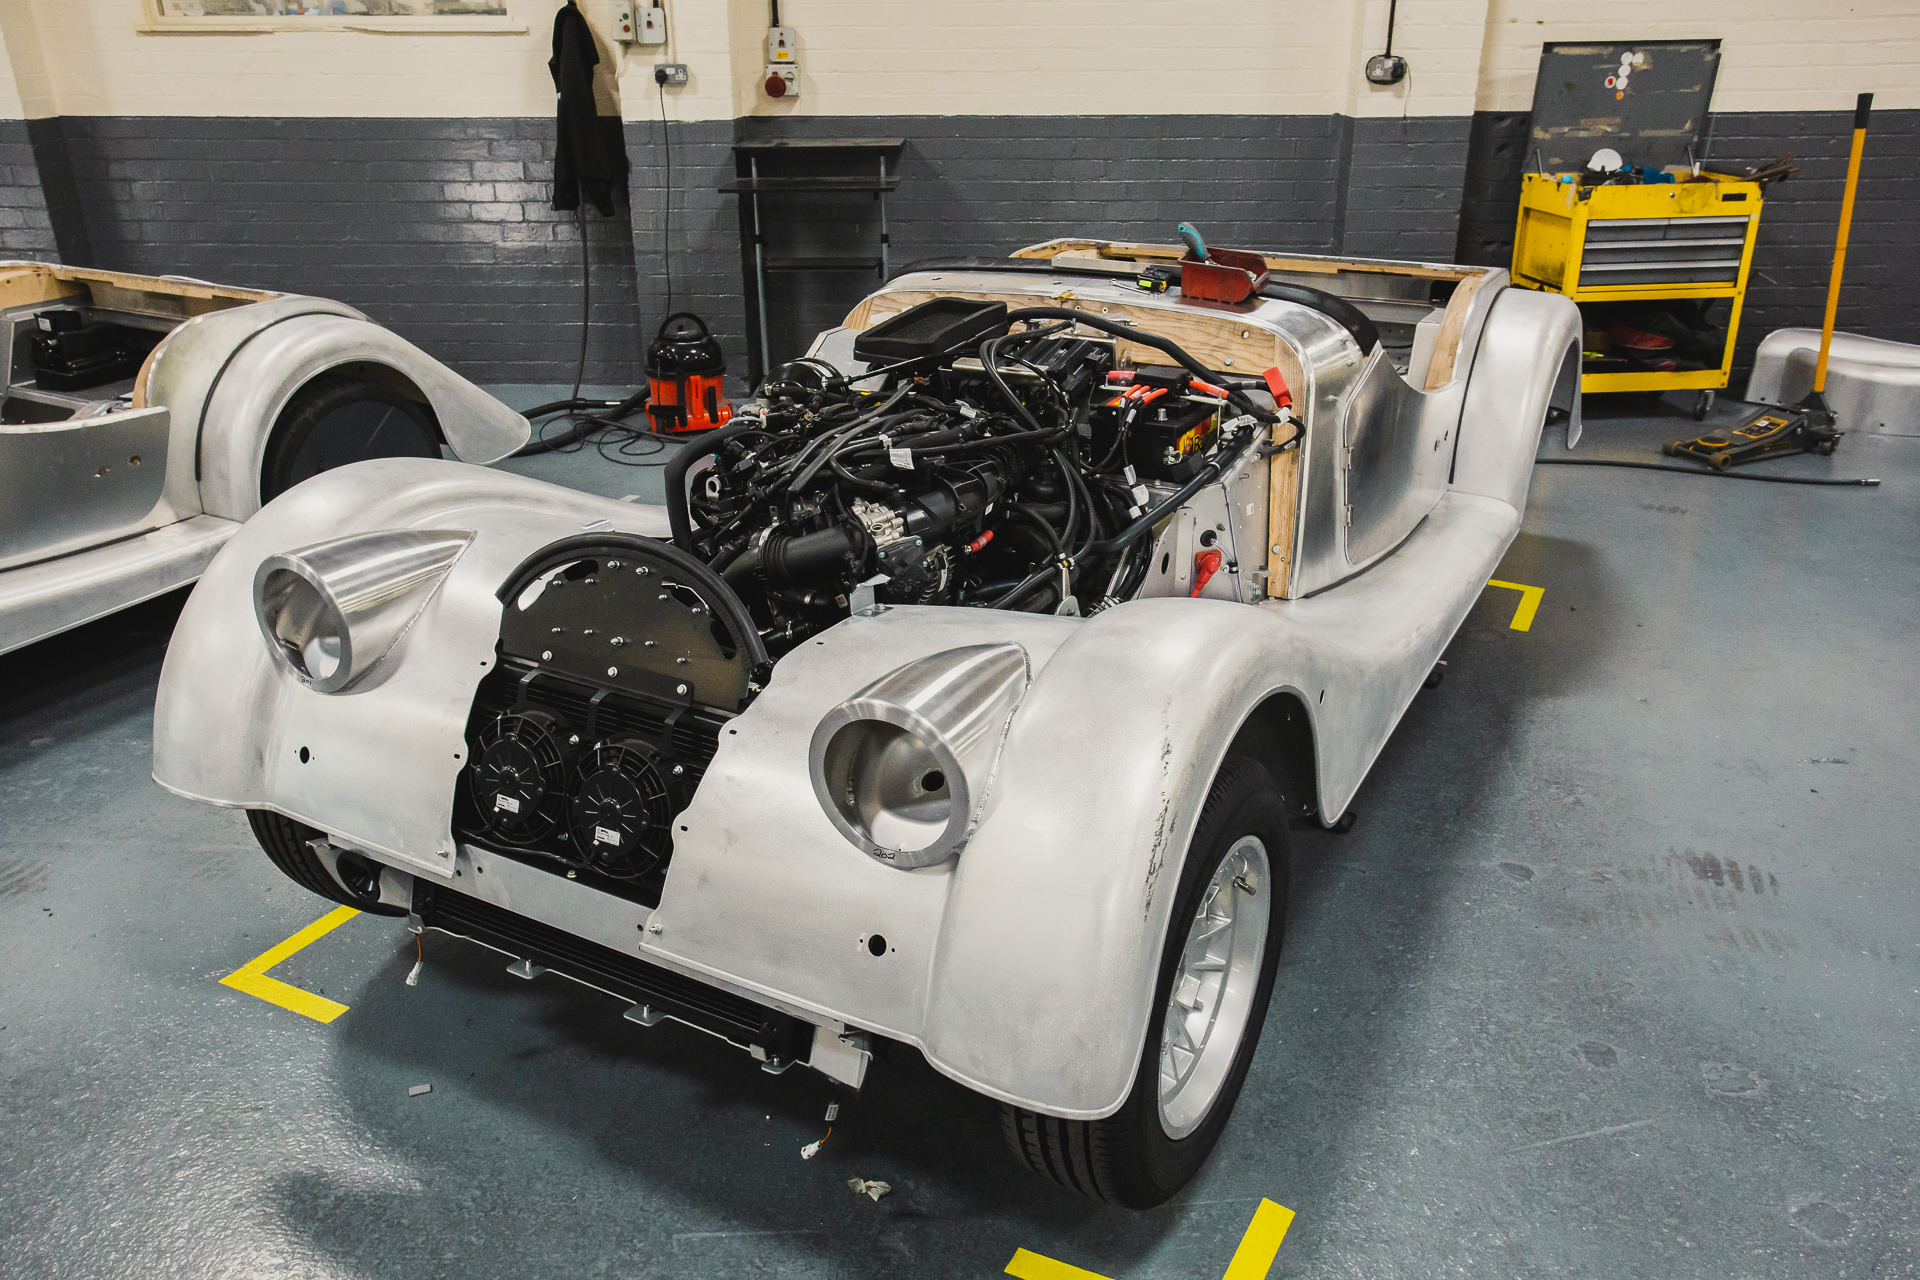
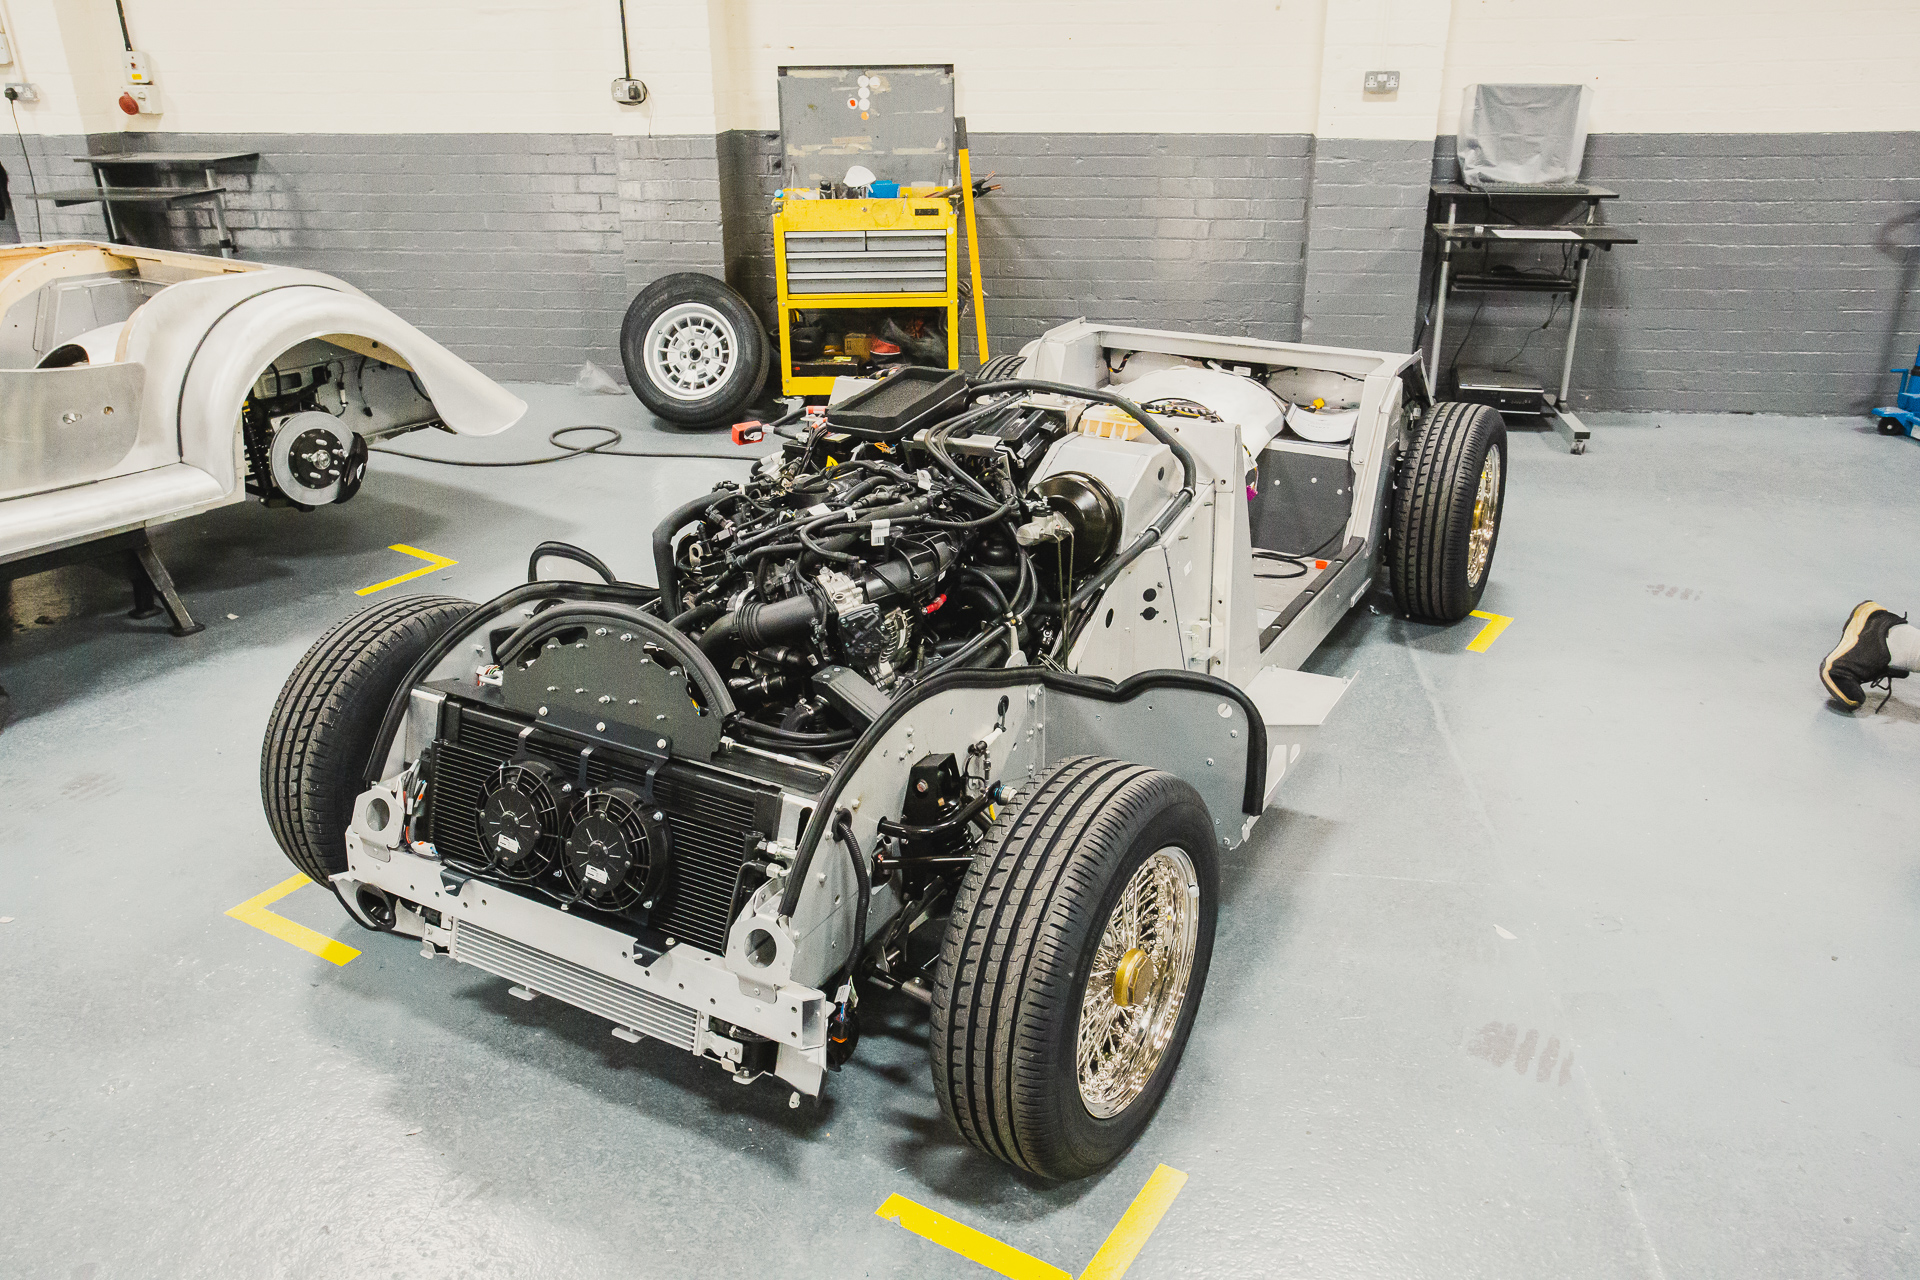
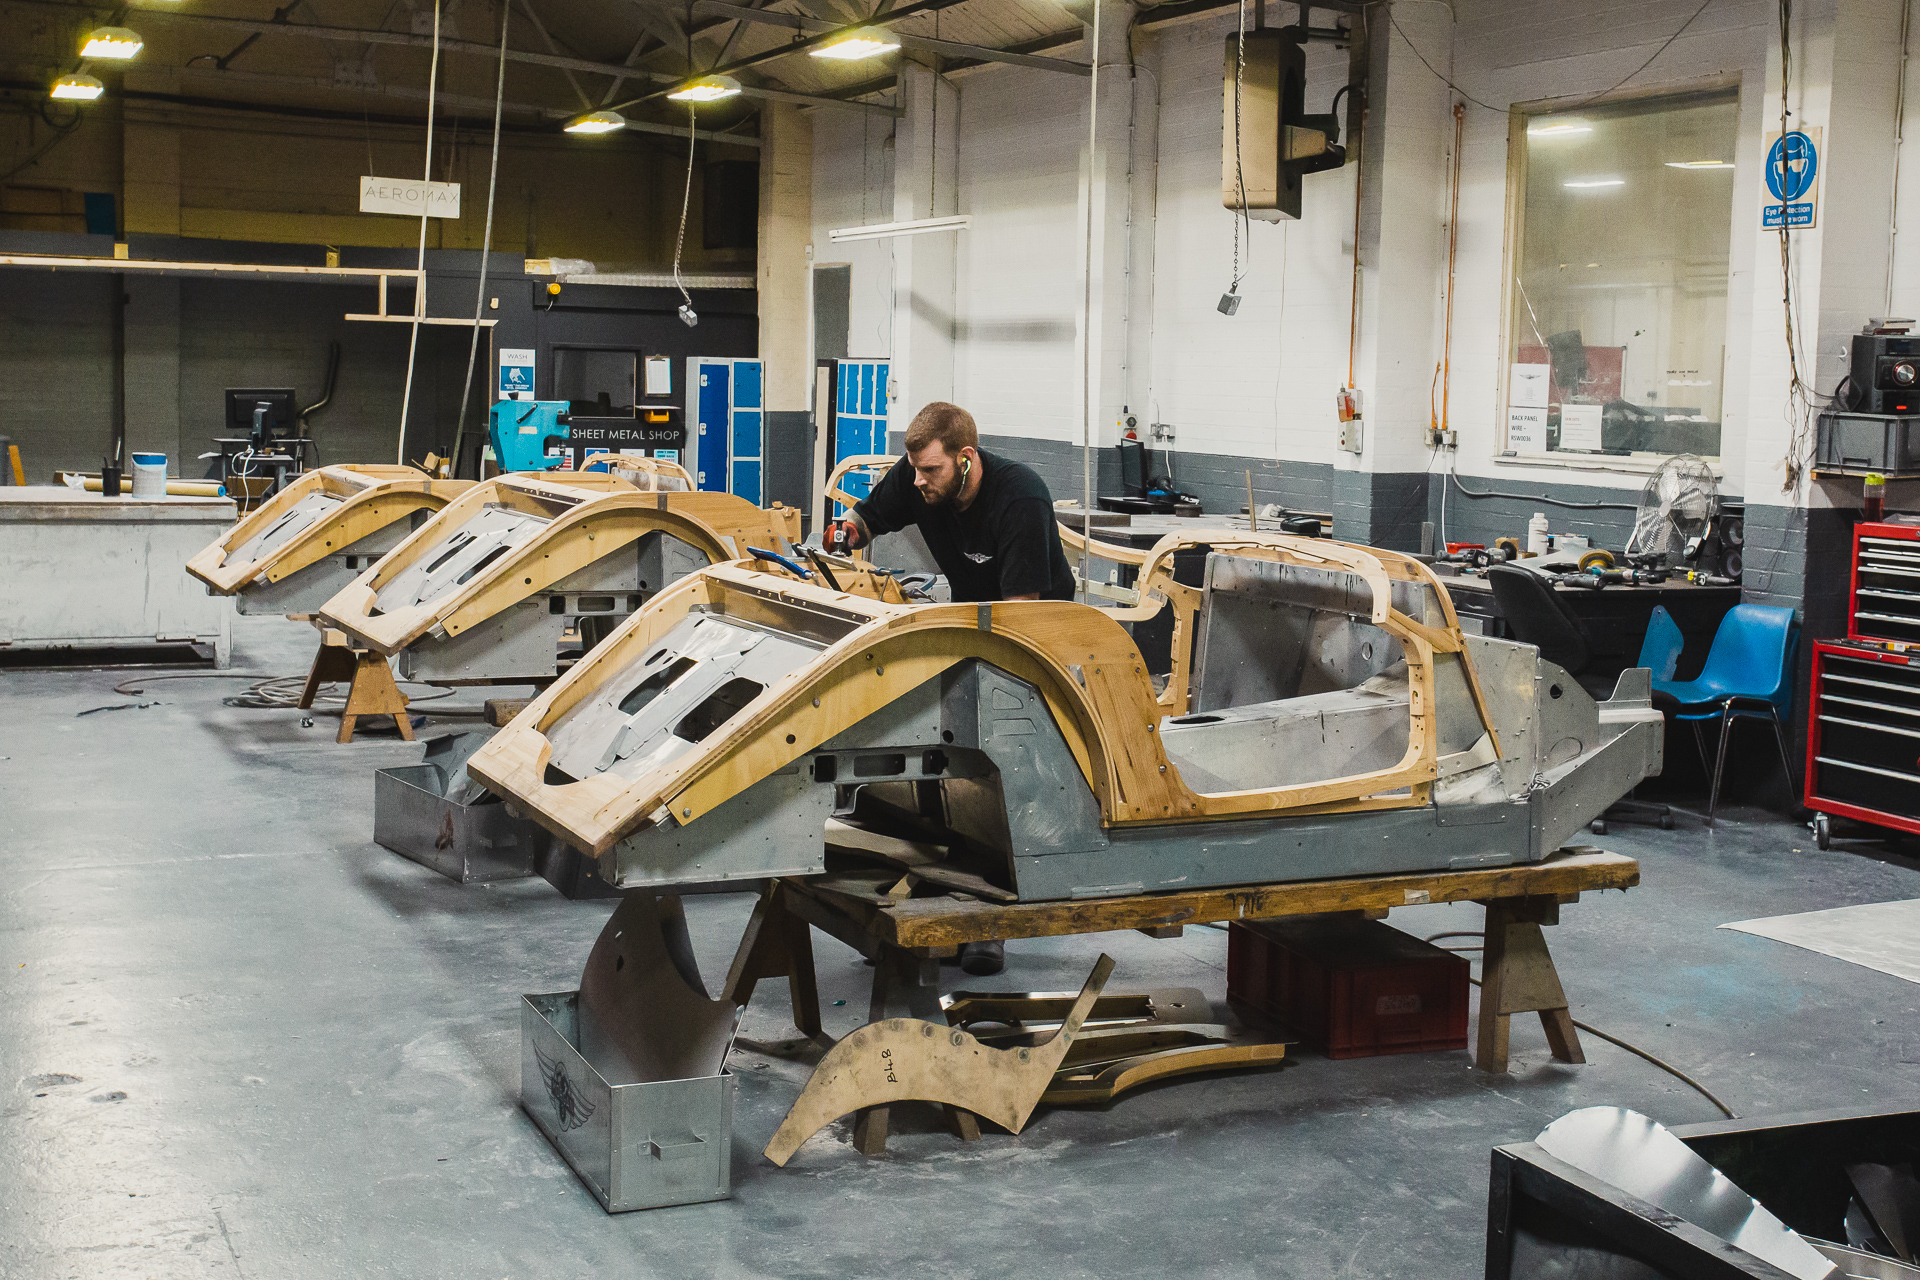
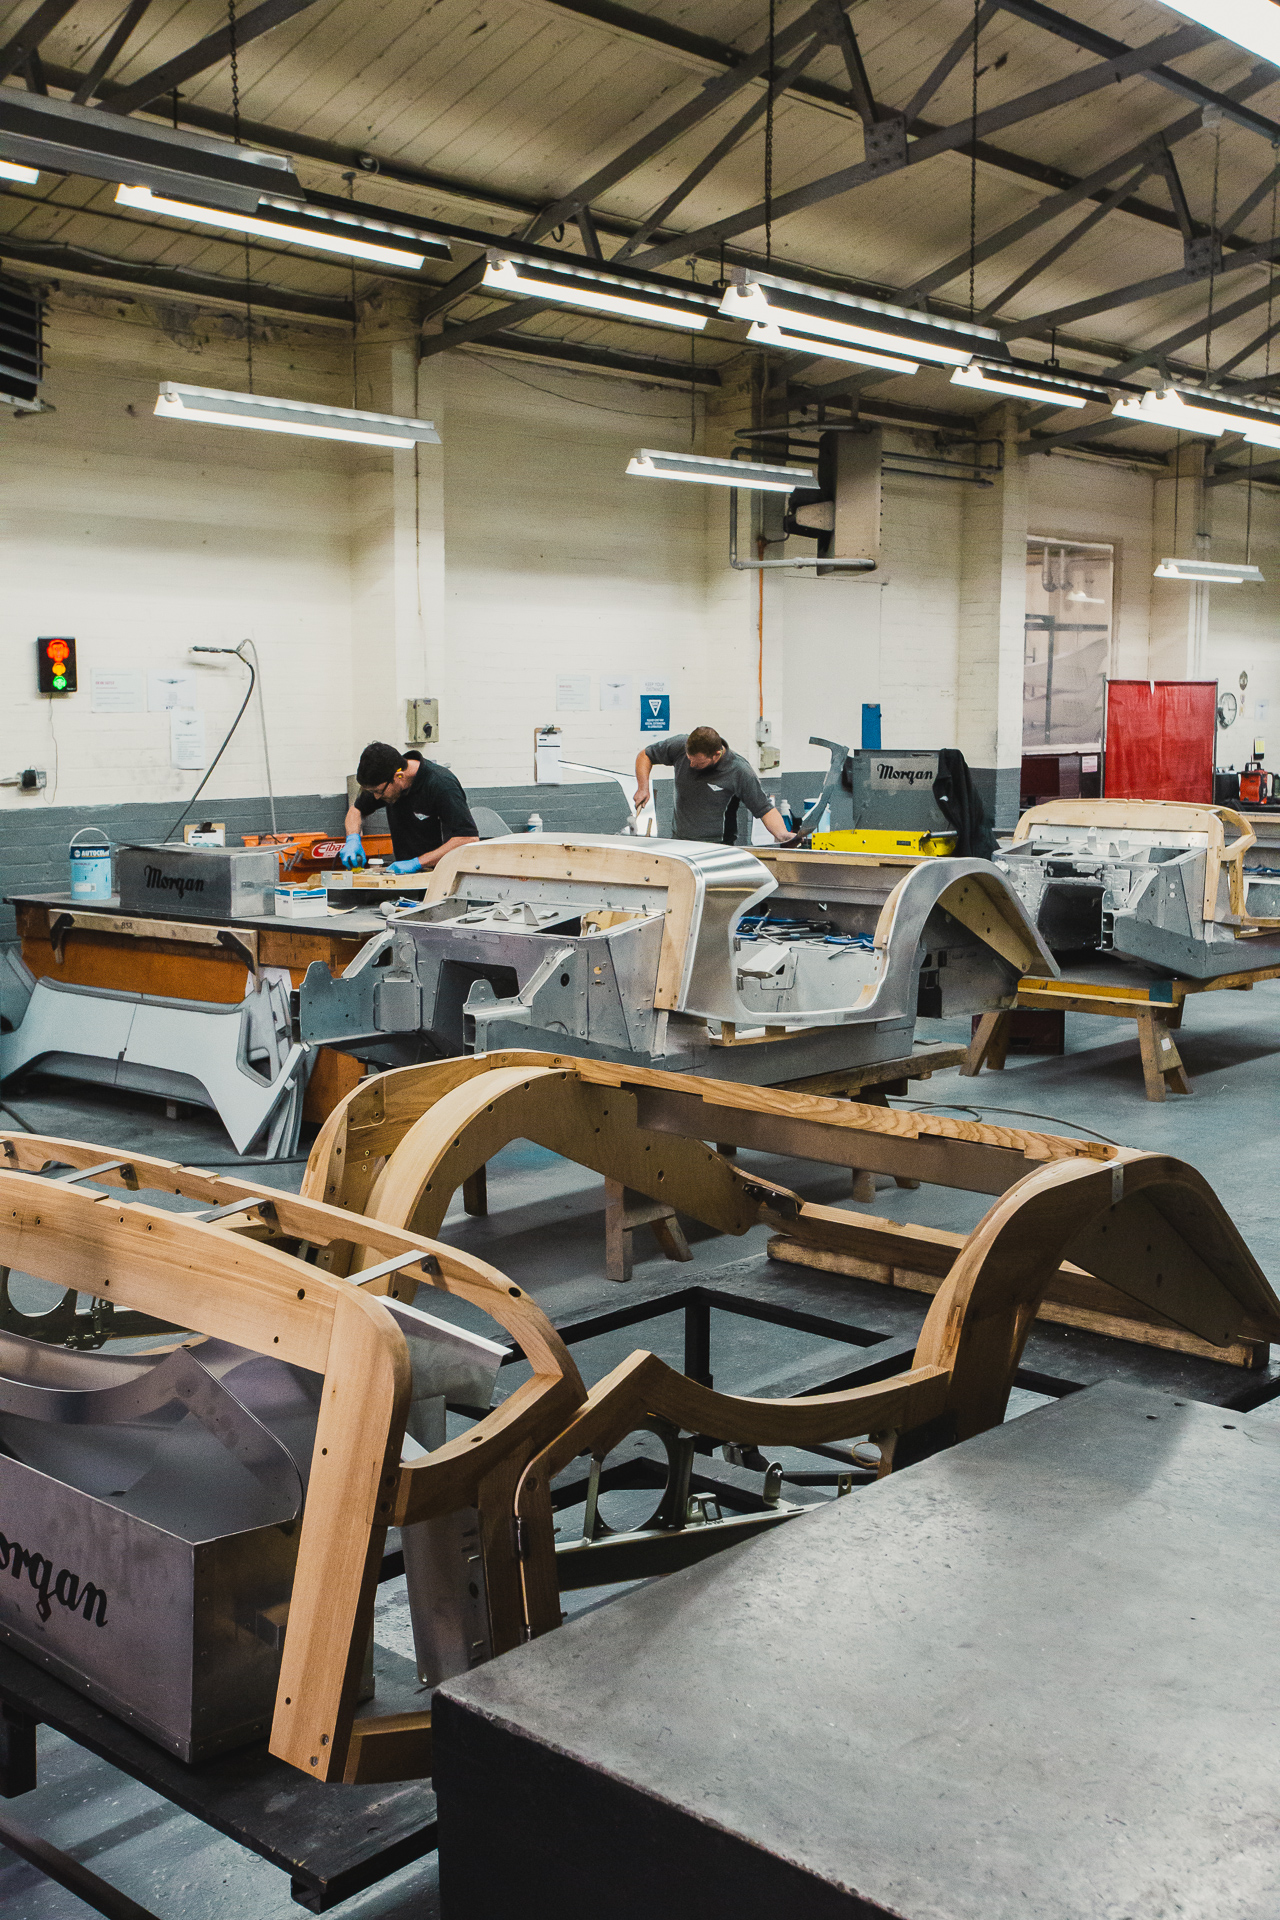
At the foot of the Malvern hills lies one of the worlds longest running motorcar production factories, Morgan Motor Company. A practice close to our hearts, Morgan values traditional craftsmanship, and still to this day hand-builds every car with not a single production line in sight.
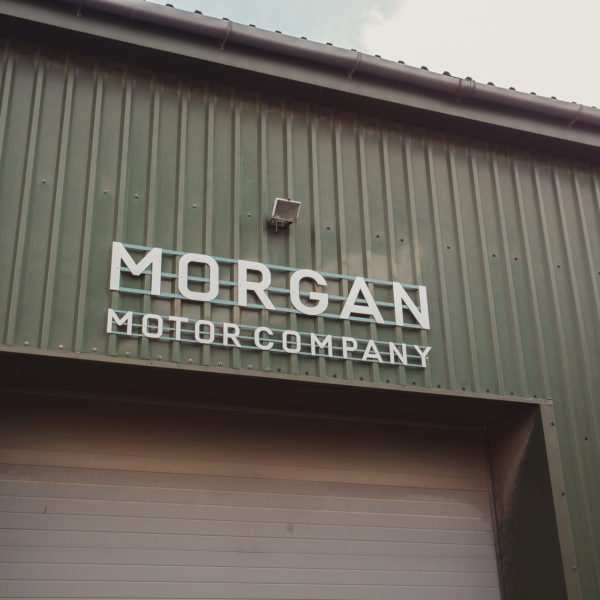
Whilst on a trip to the Cotswolds, we had to take a look around the home of one of the most iconic British automotive marques.
The company was established in 1909 by H.F.S Morgan, who begun making motor vehicles with the now iconic, Morgan three-wheeler. Contrary to popular belief, it is not the chassis of Morgans that are made from wood. The chassis are aluminium; it is the bodywork that is formed from ash. Ash was chosen for its light weight, structural strength and flexibility.
Being hand-built, no two Morgans are ever the same. Every component needs to be manipulated to perfectly fit its intended vehicle. When metal, wood and leather collide, Morgan’s team of skilled craftspeople ensure the cars are assembled to the highest standards.
If you are ever in the Malvern area, we would thoroughly recommend taking a tour of the Morgan factory. You won’t be disappointed!


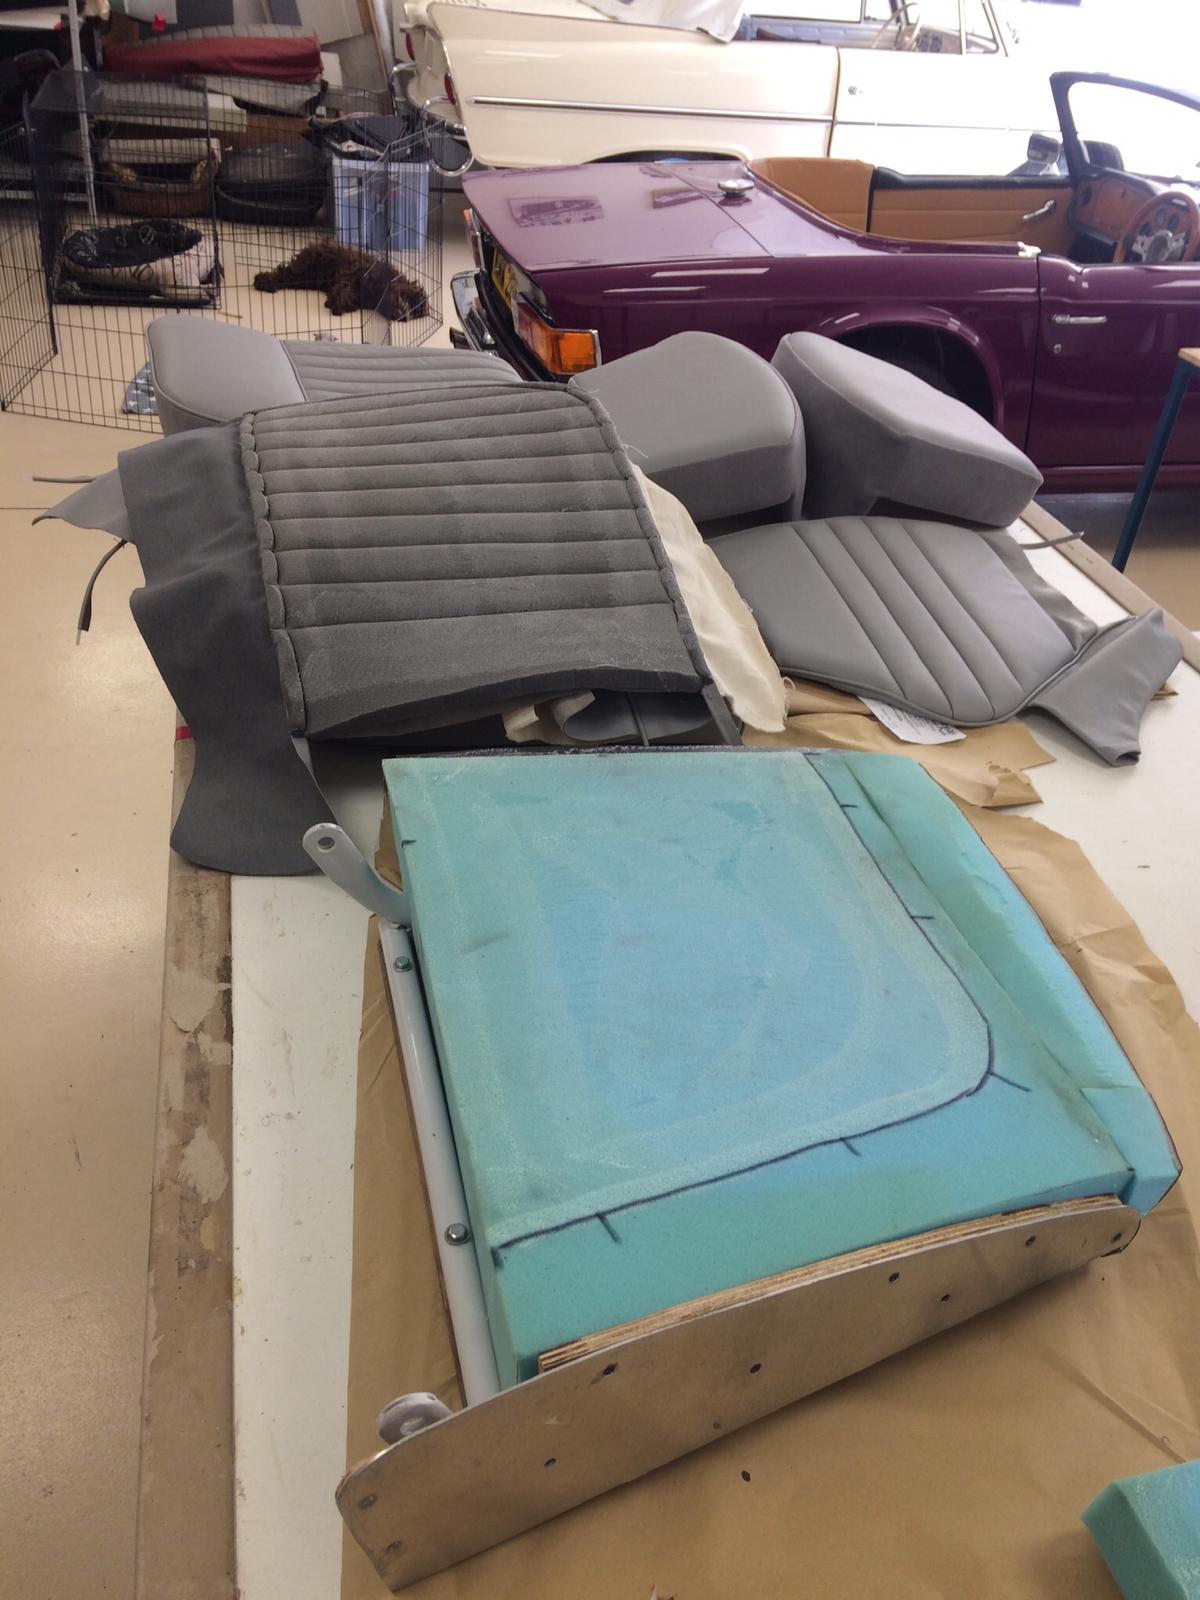
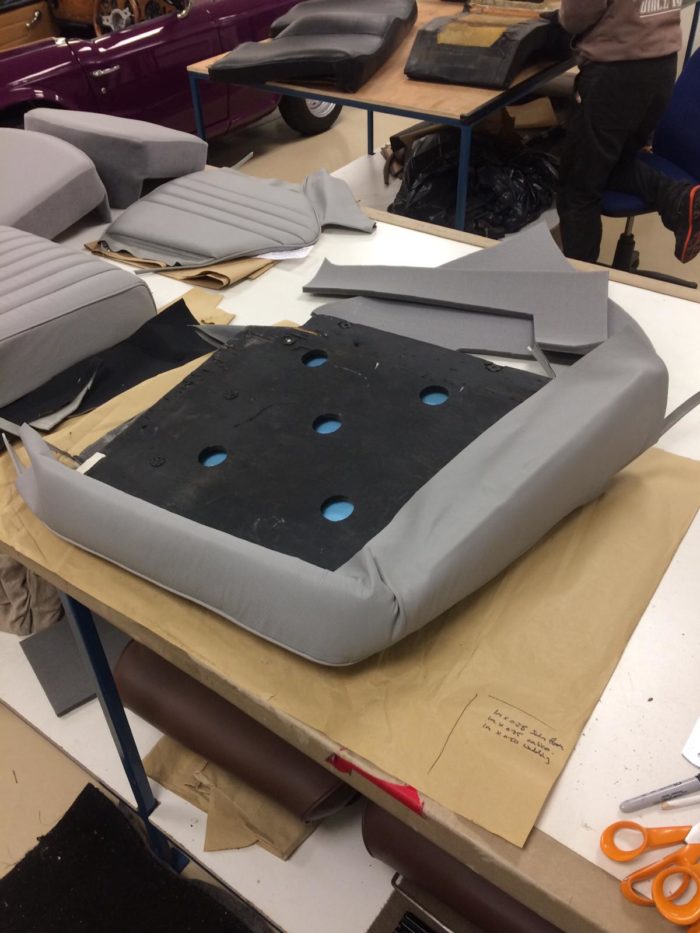
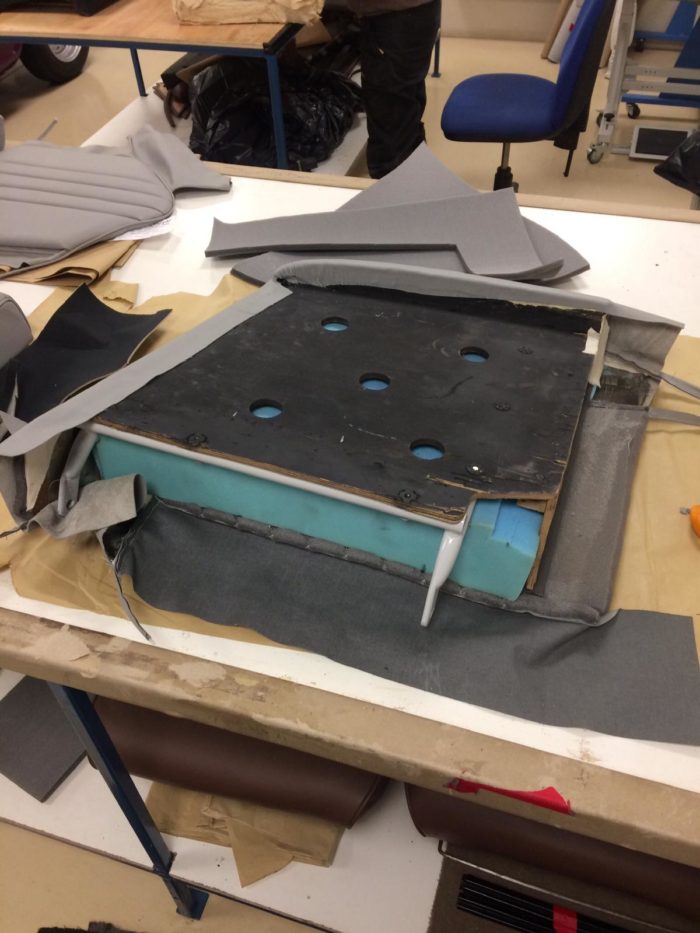
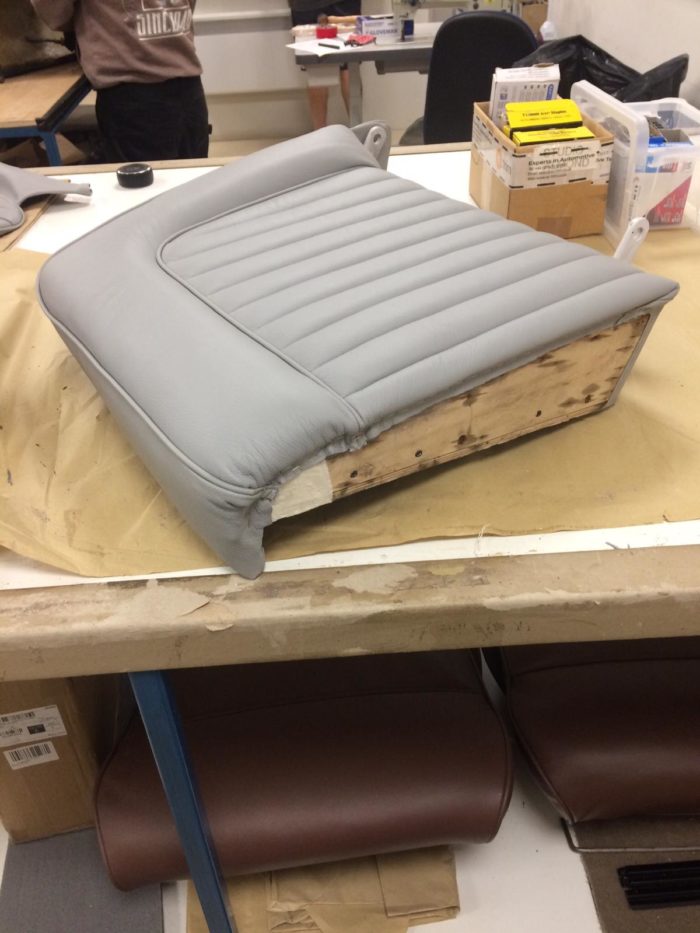
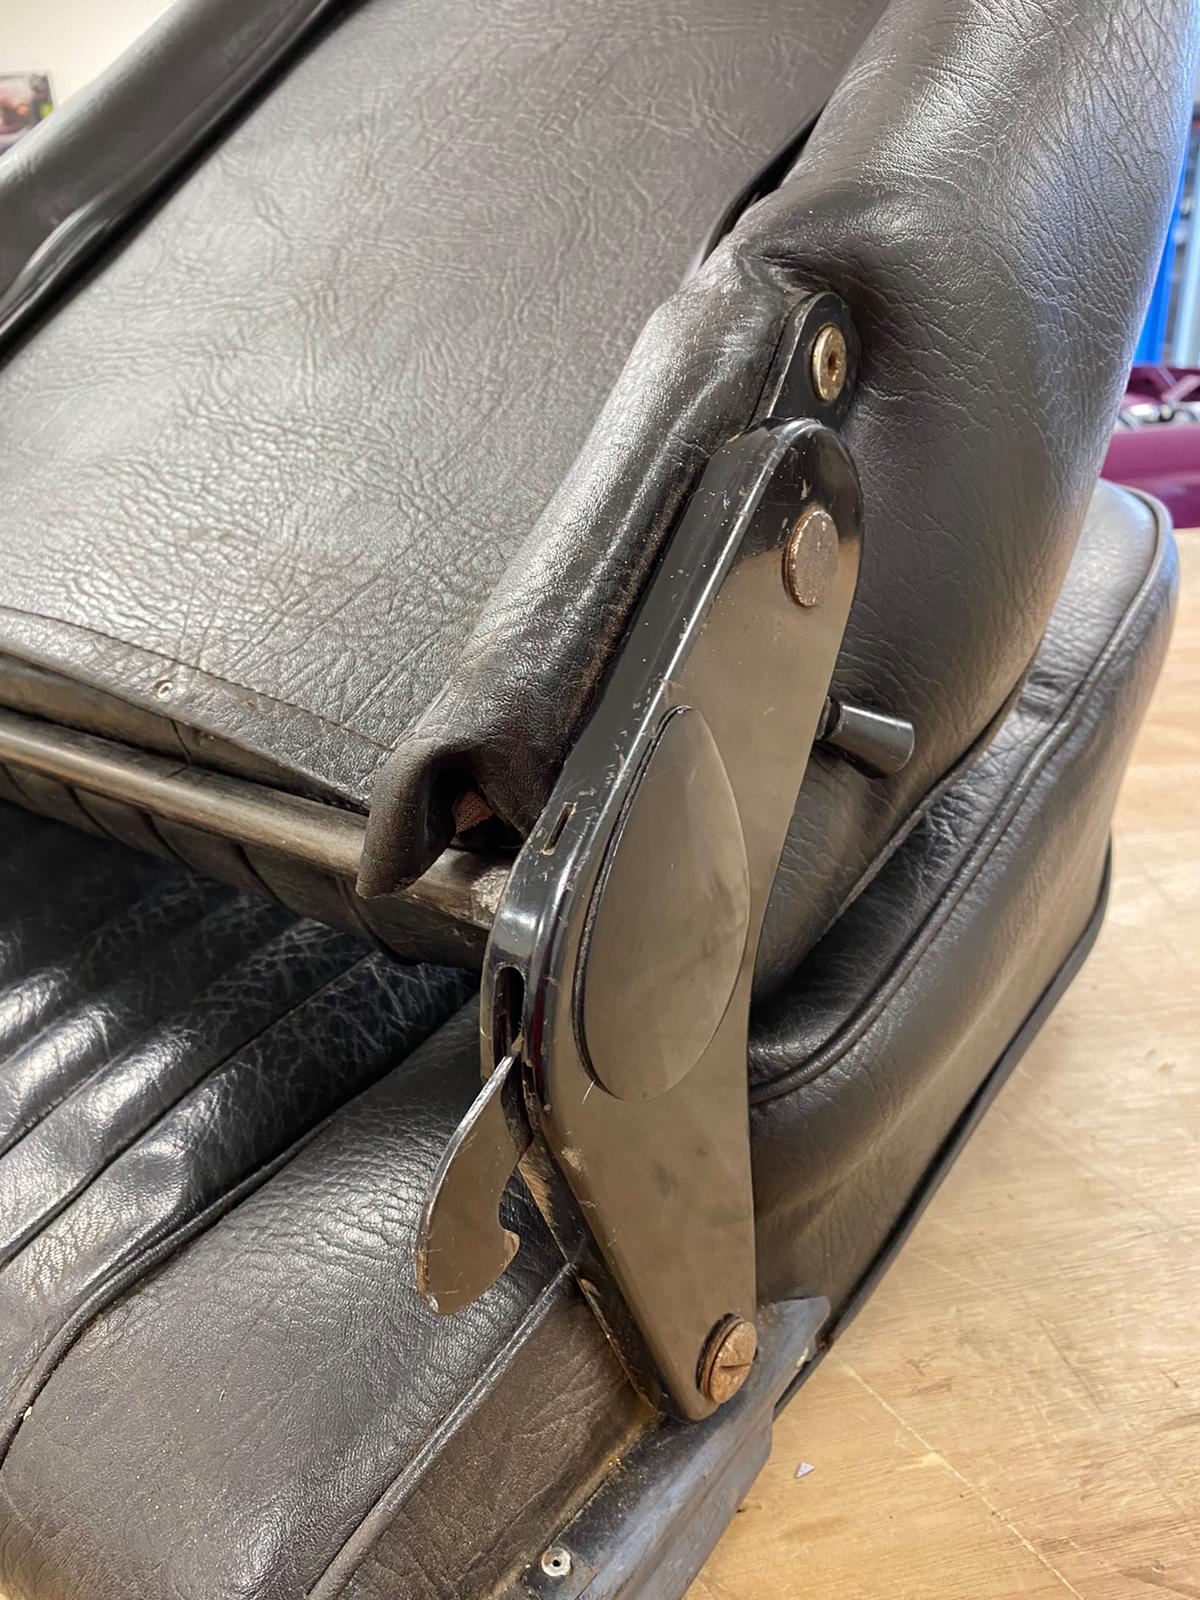
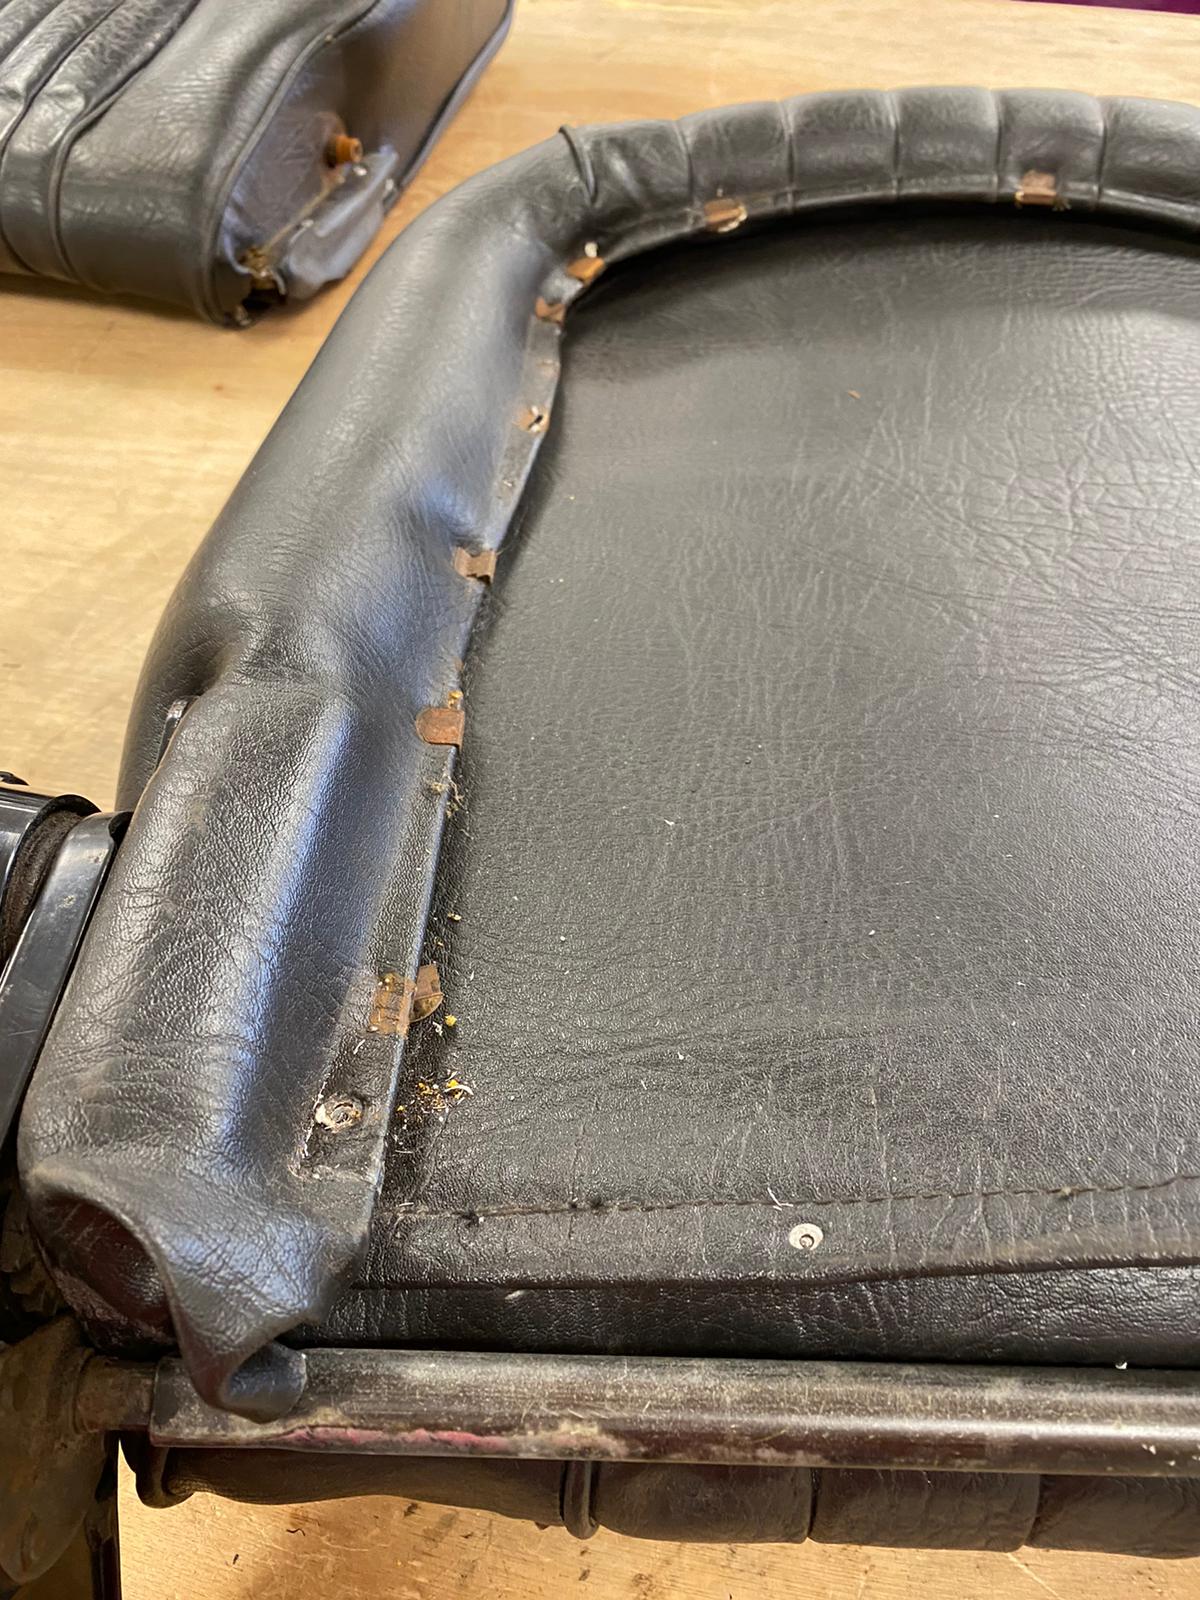
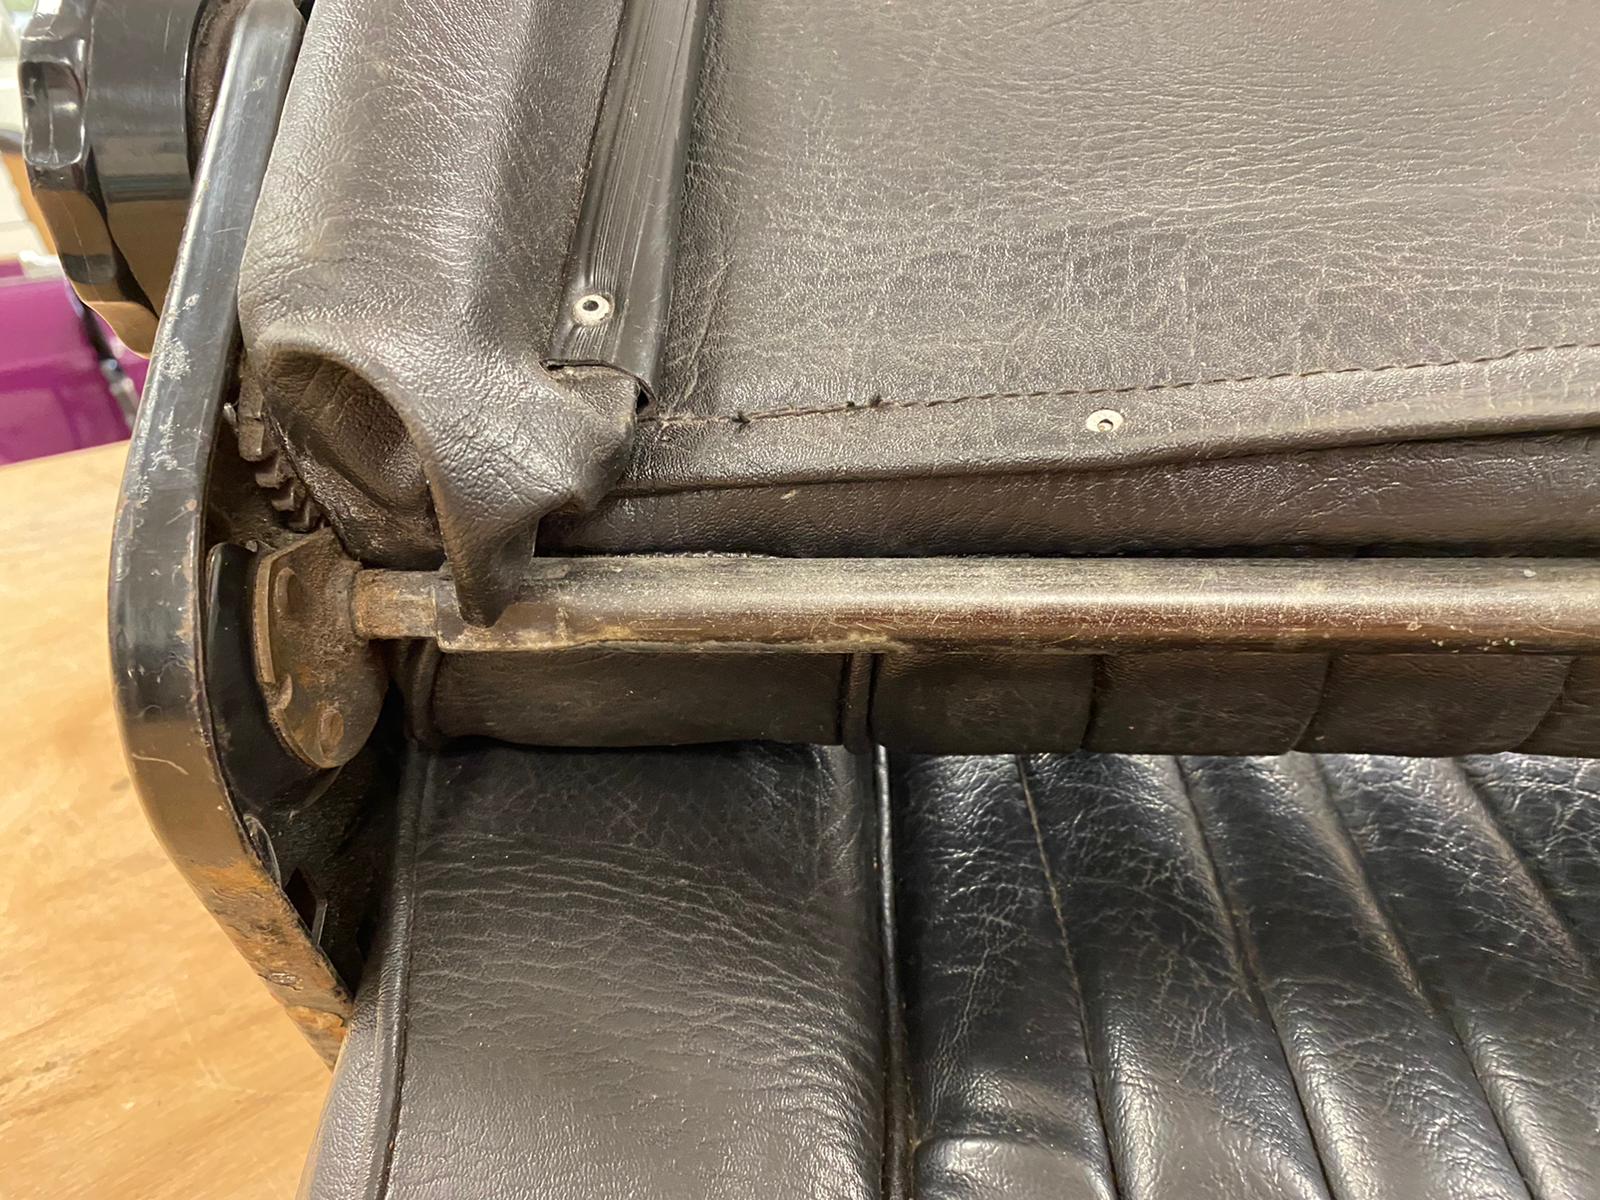
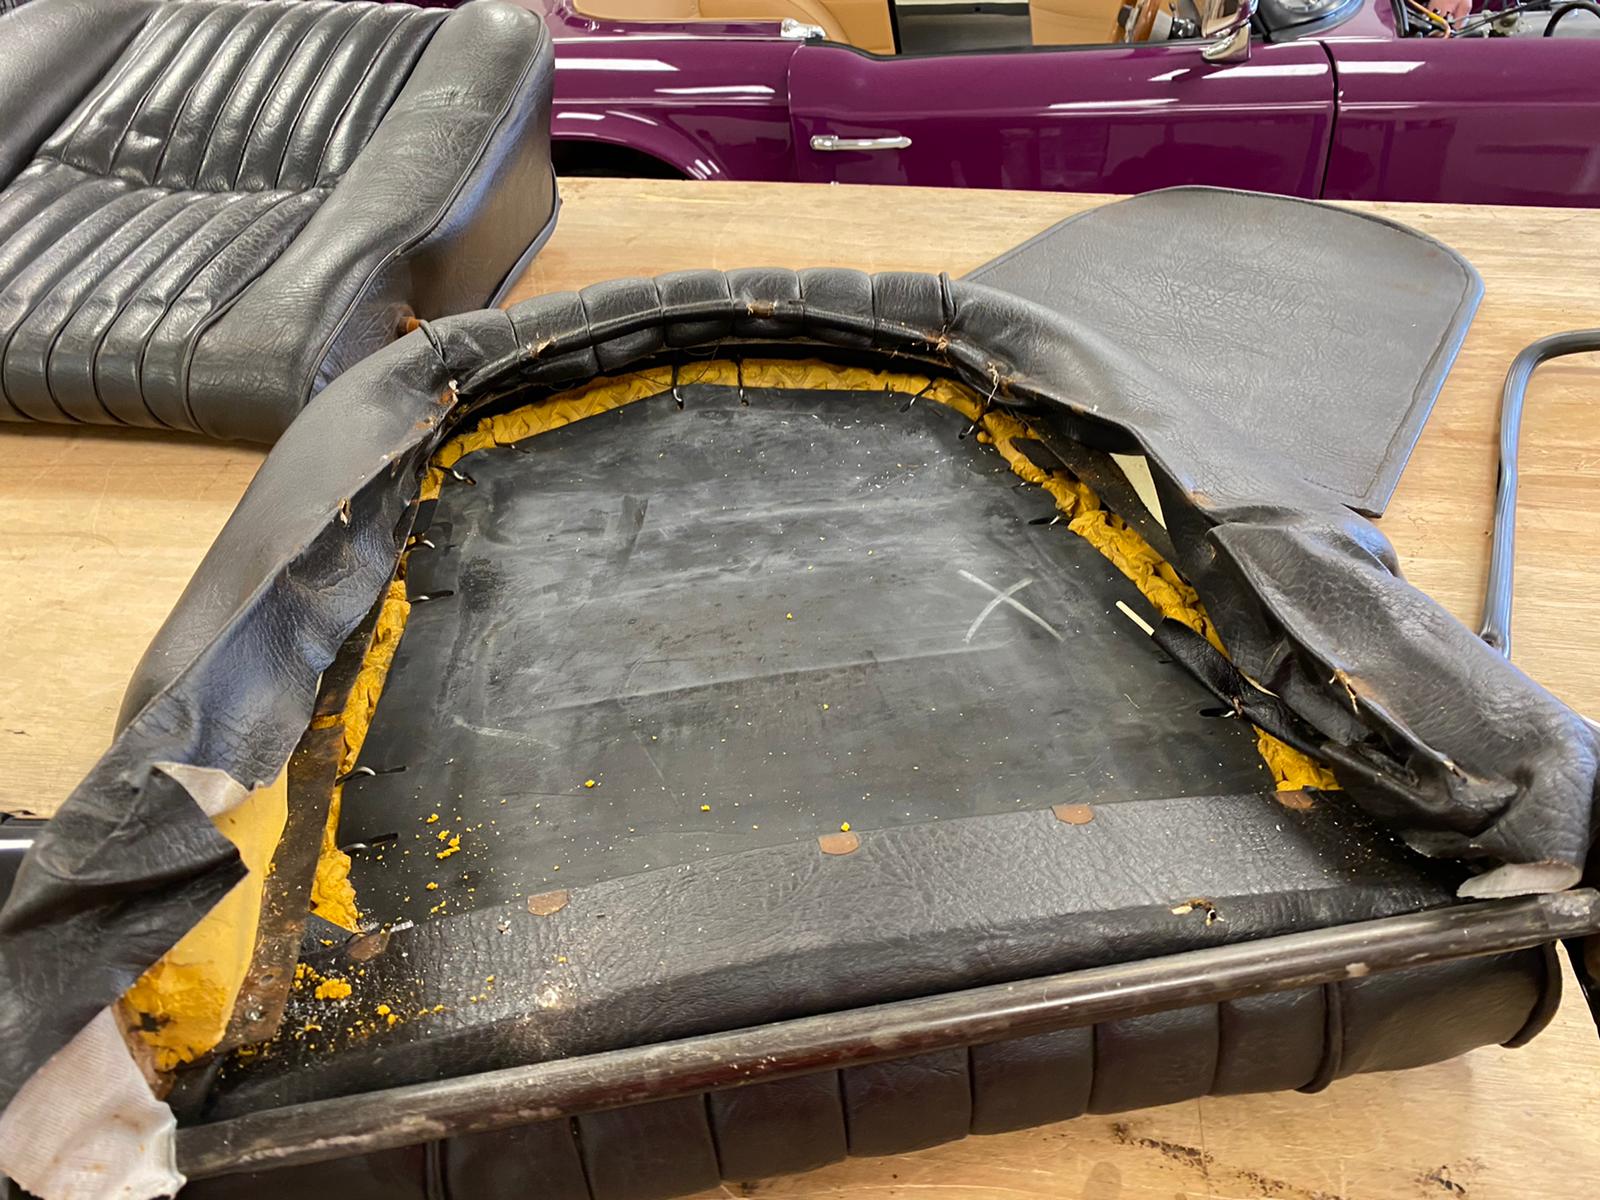
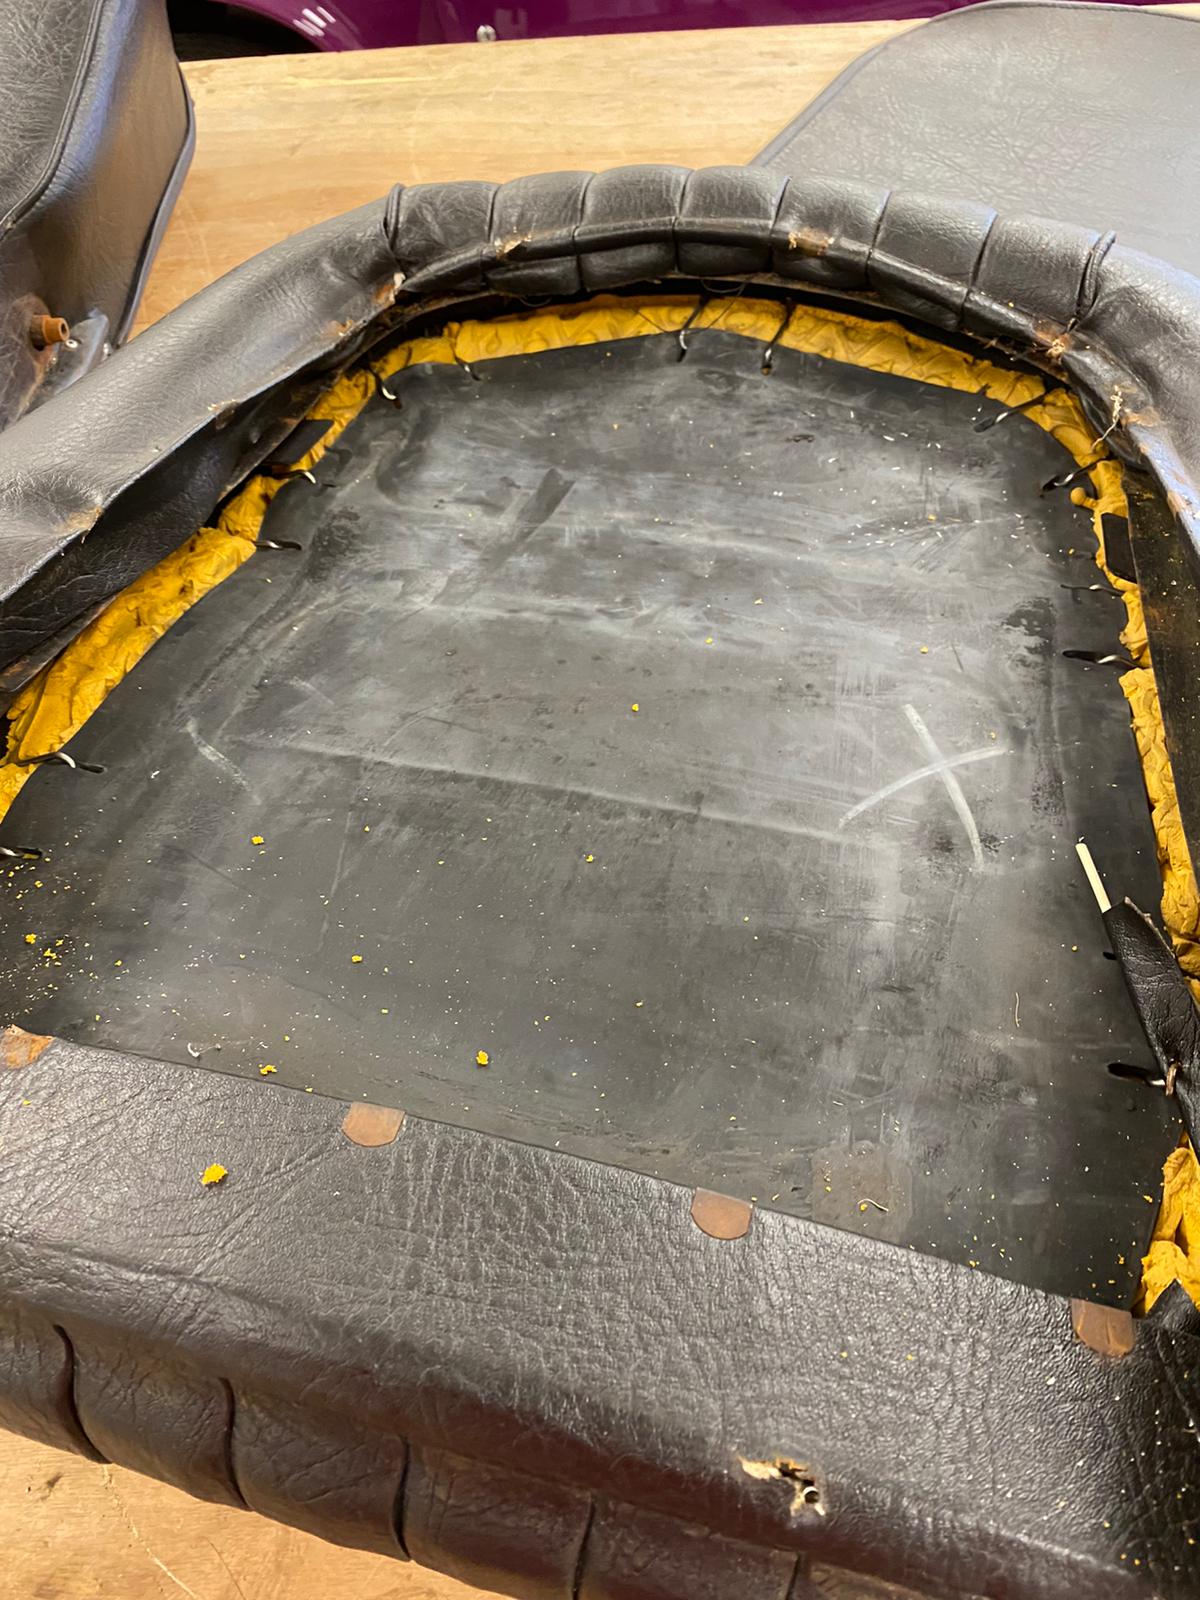
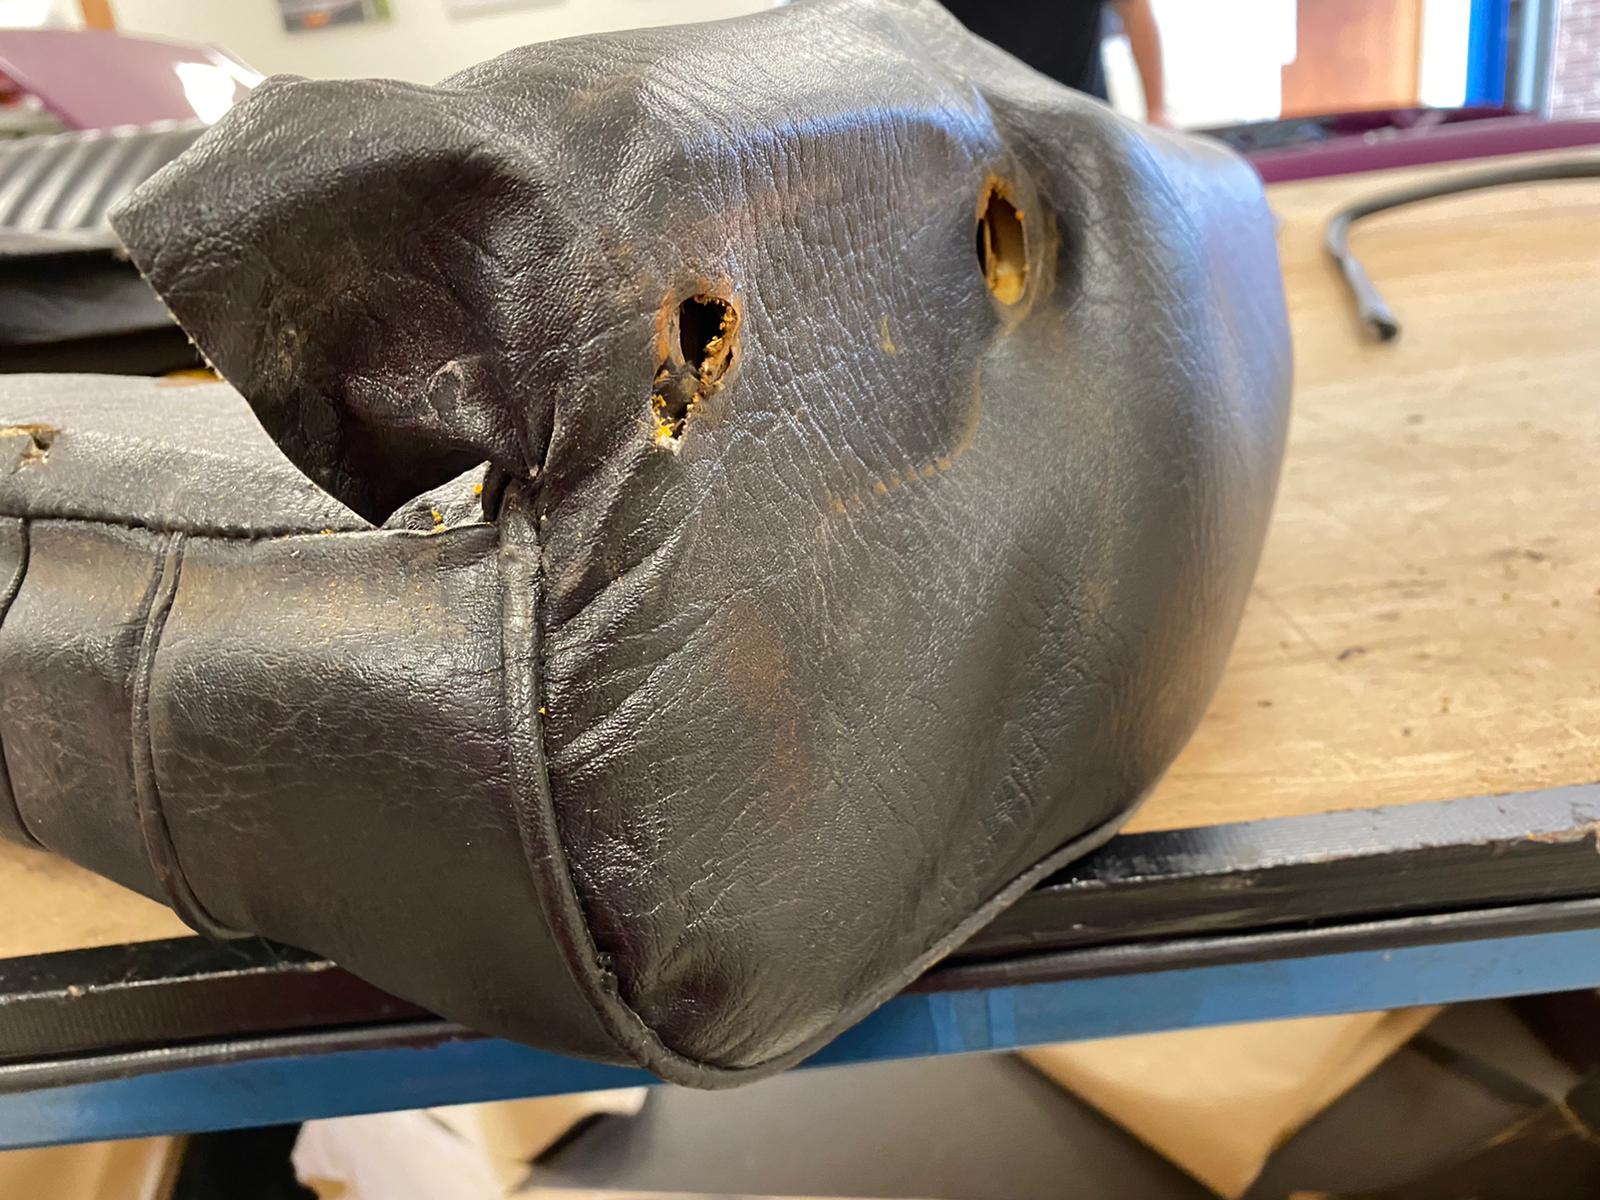
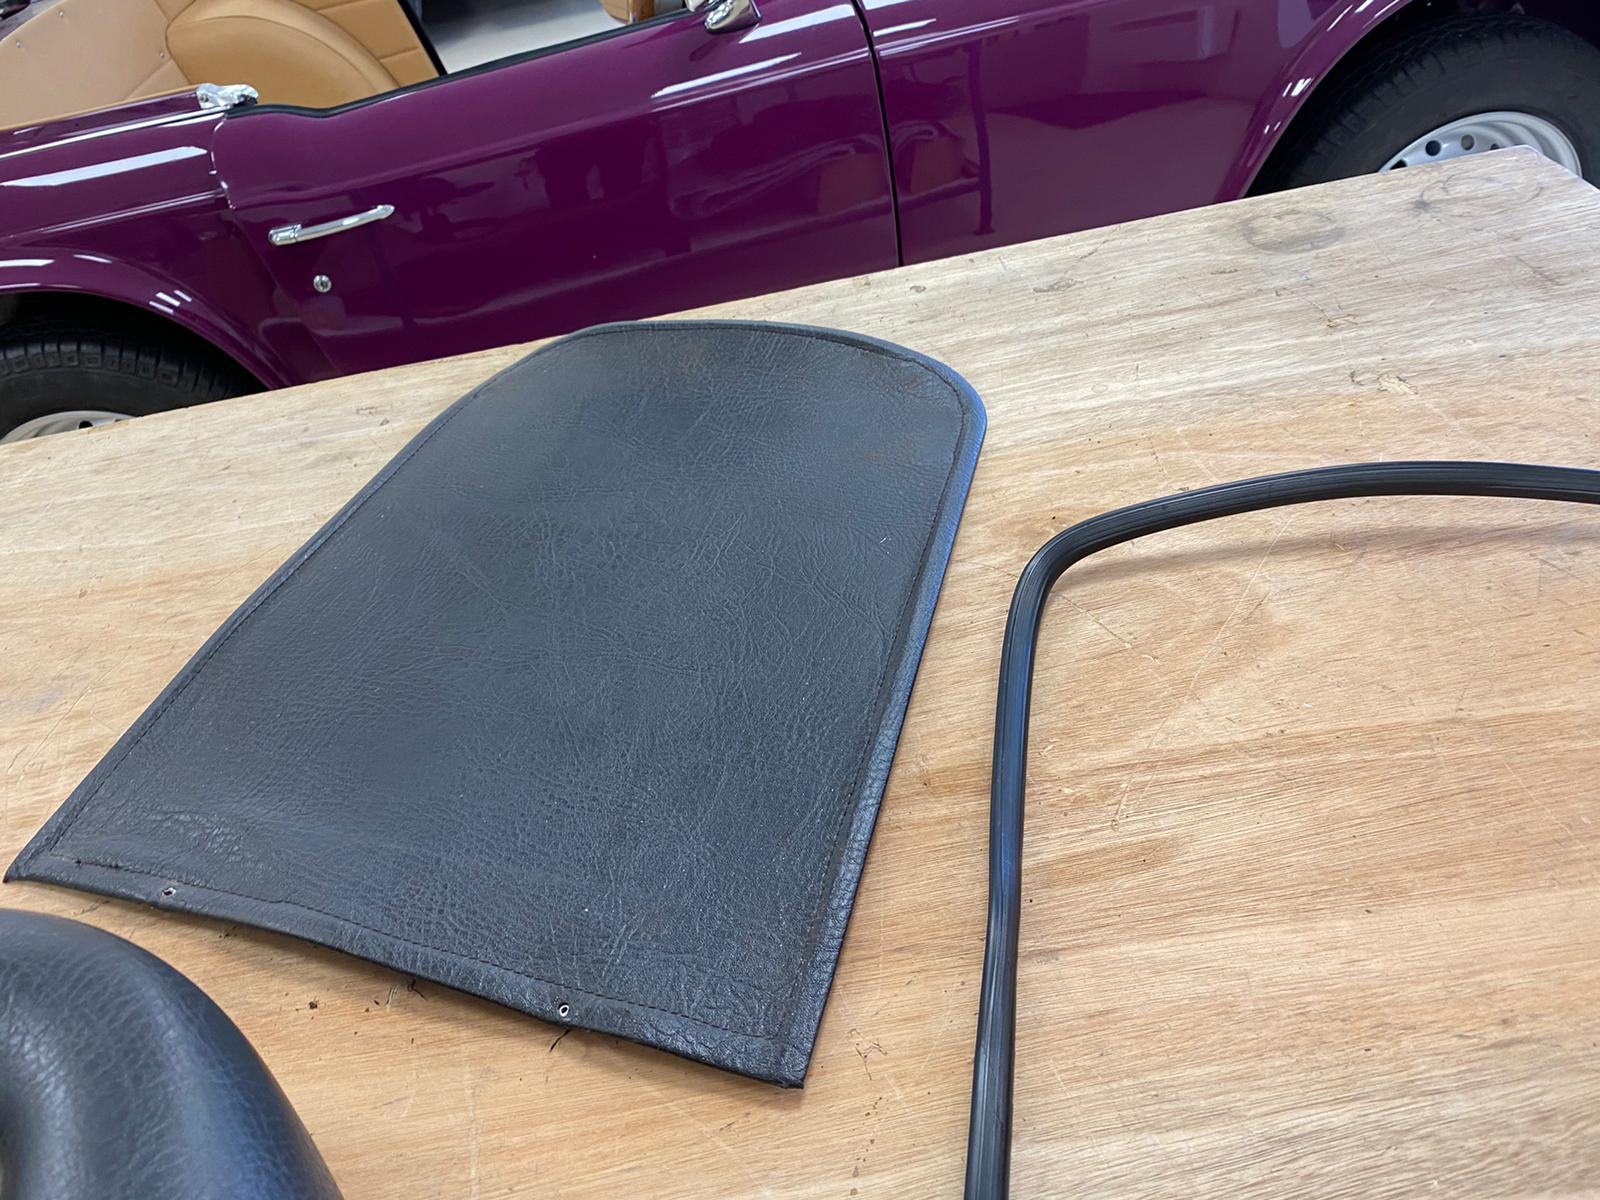
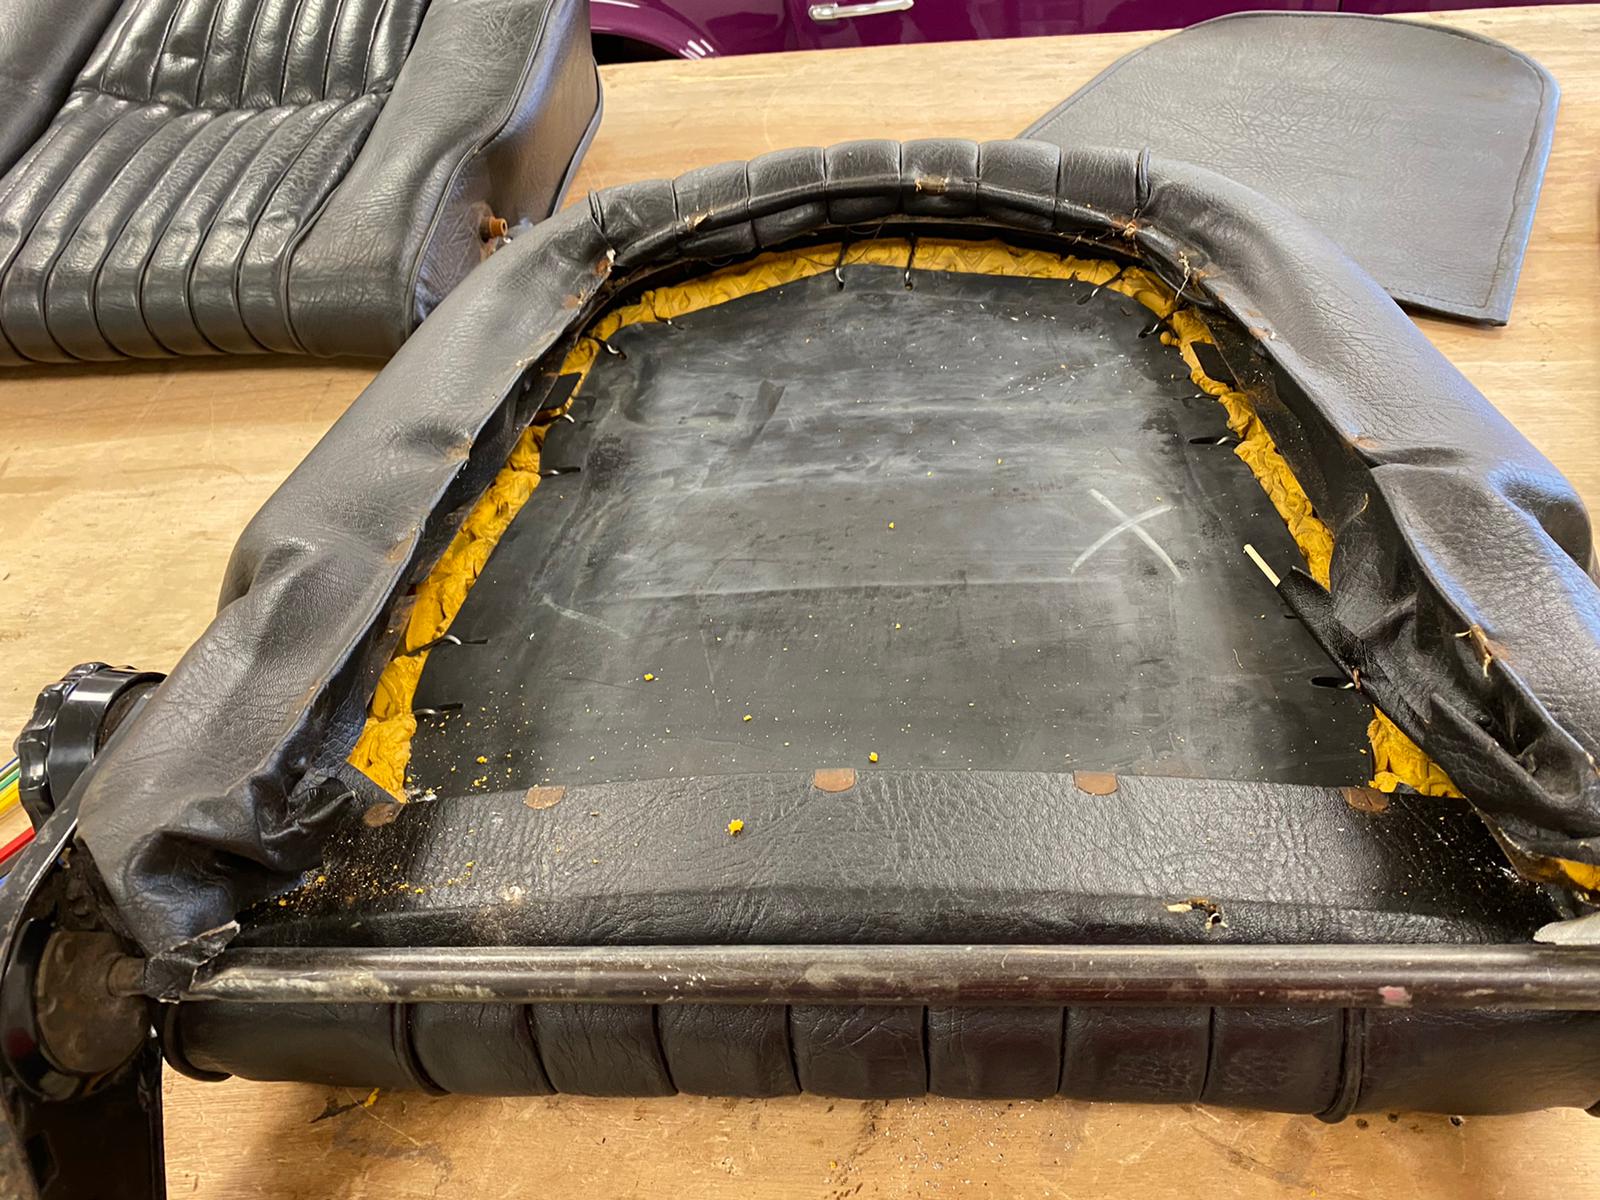
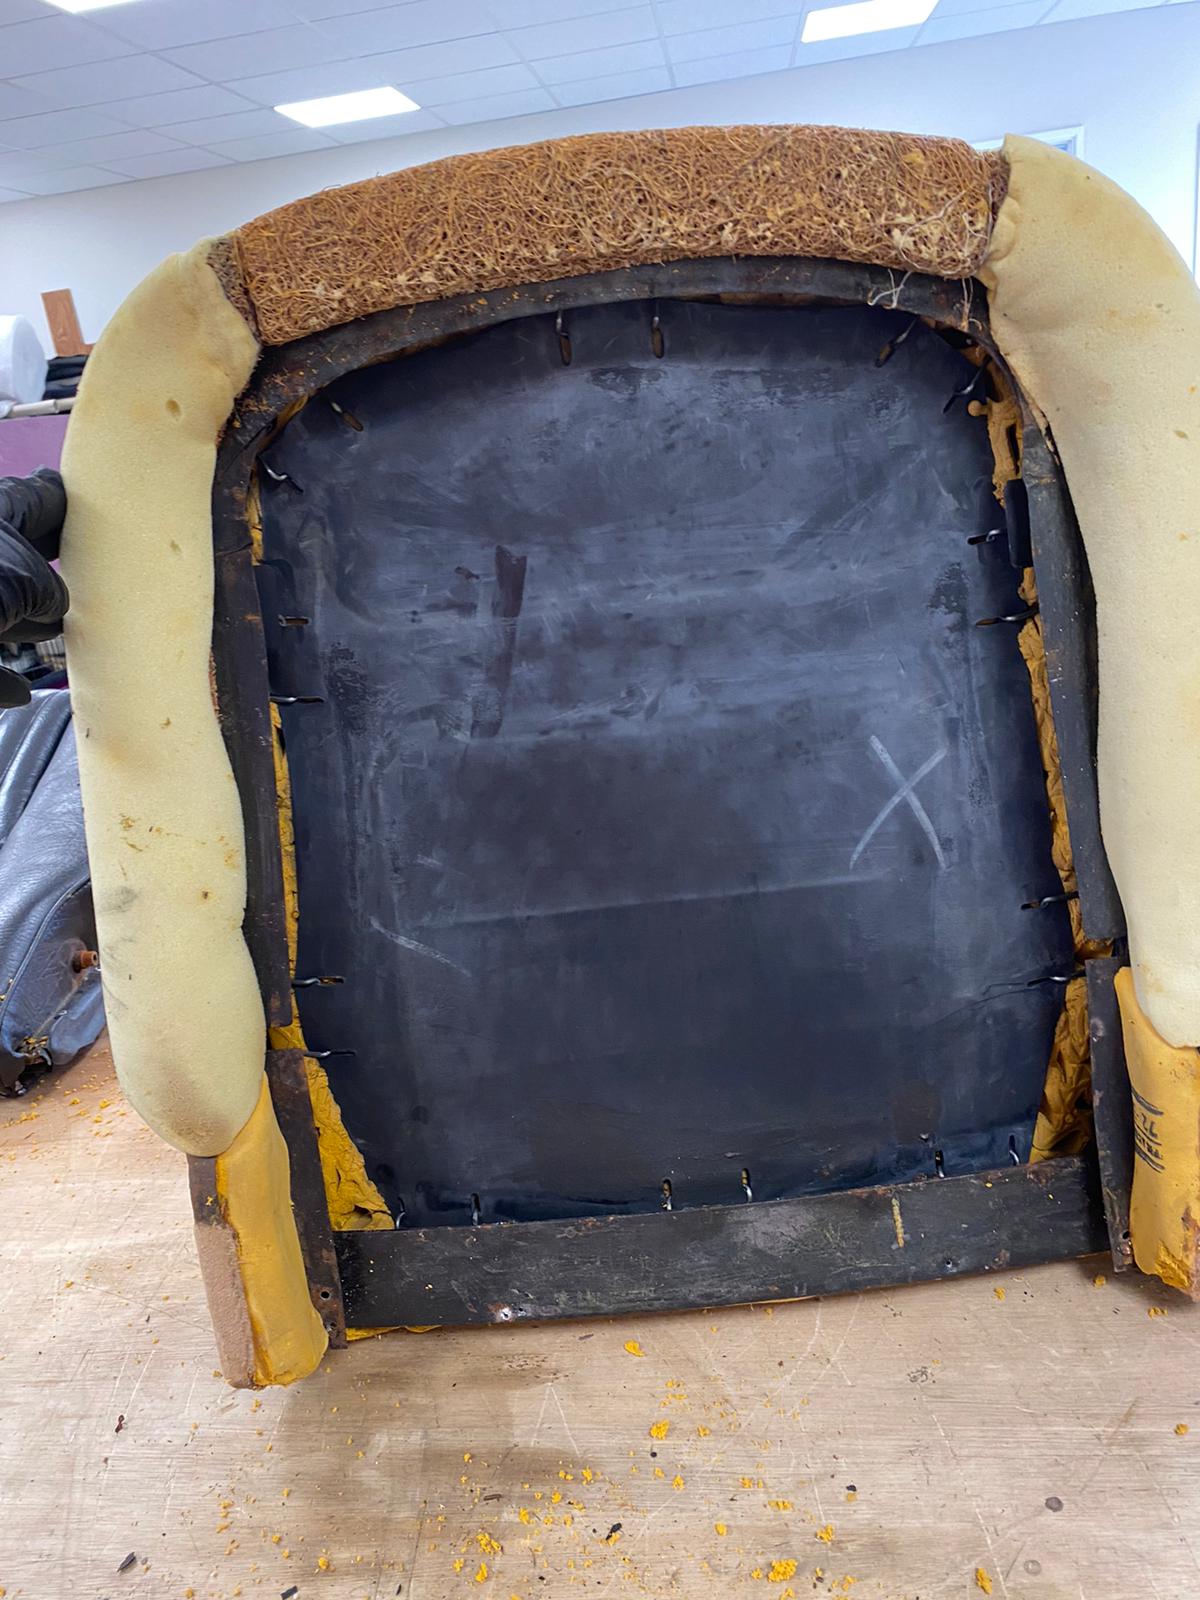
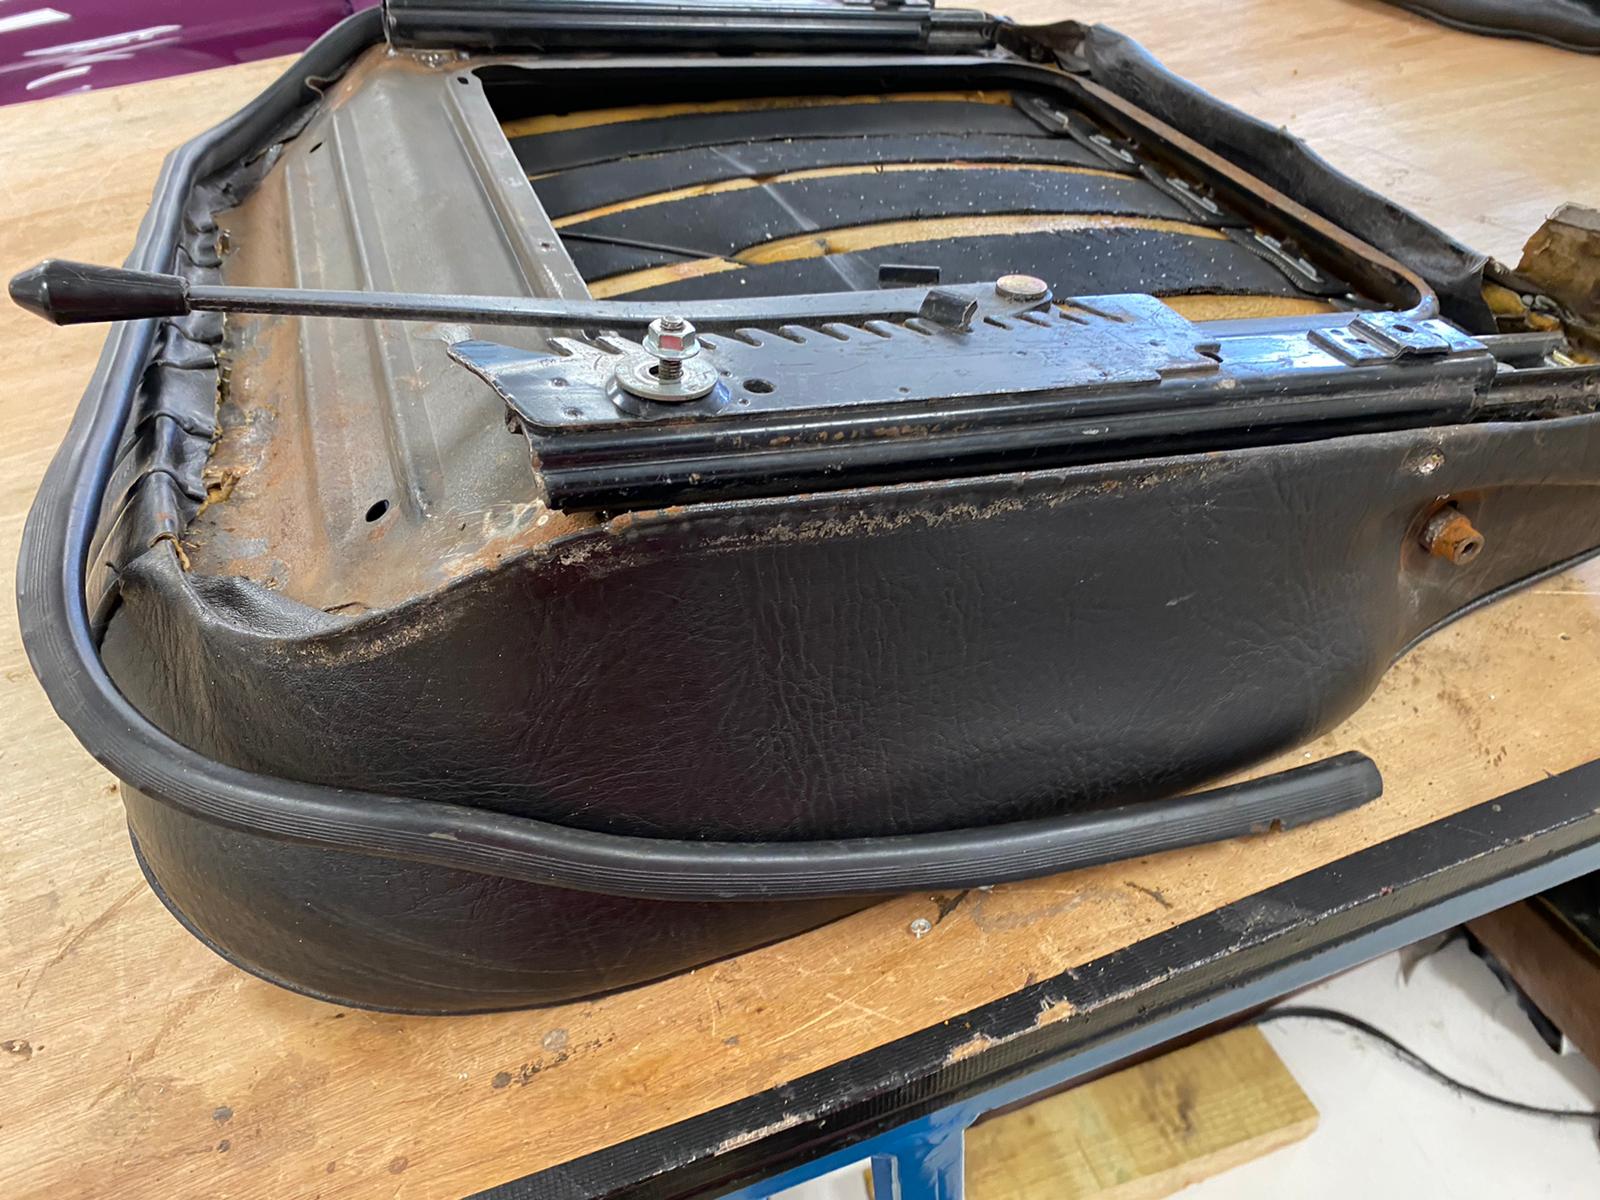
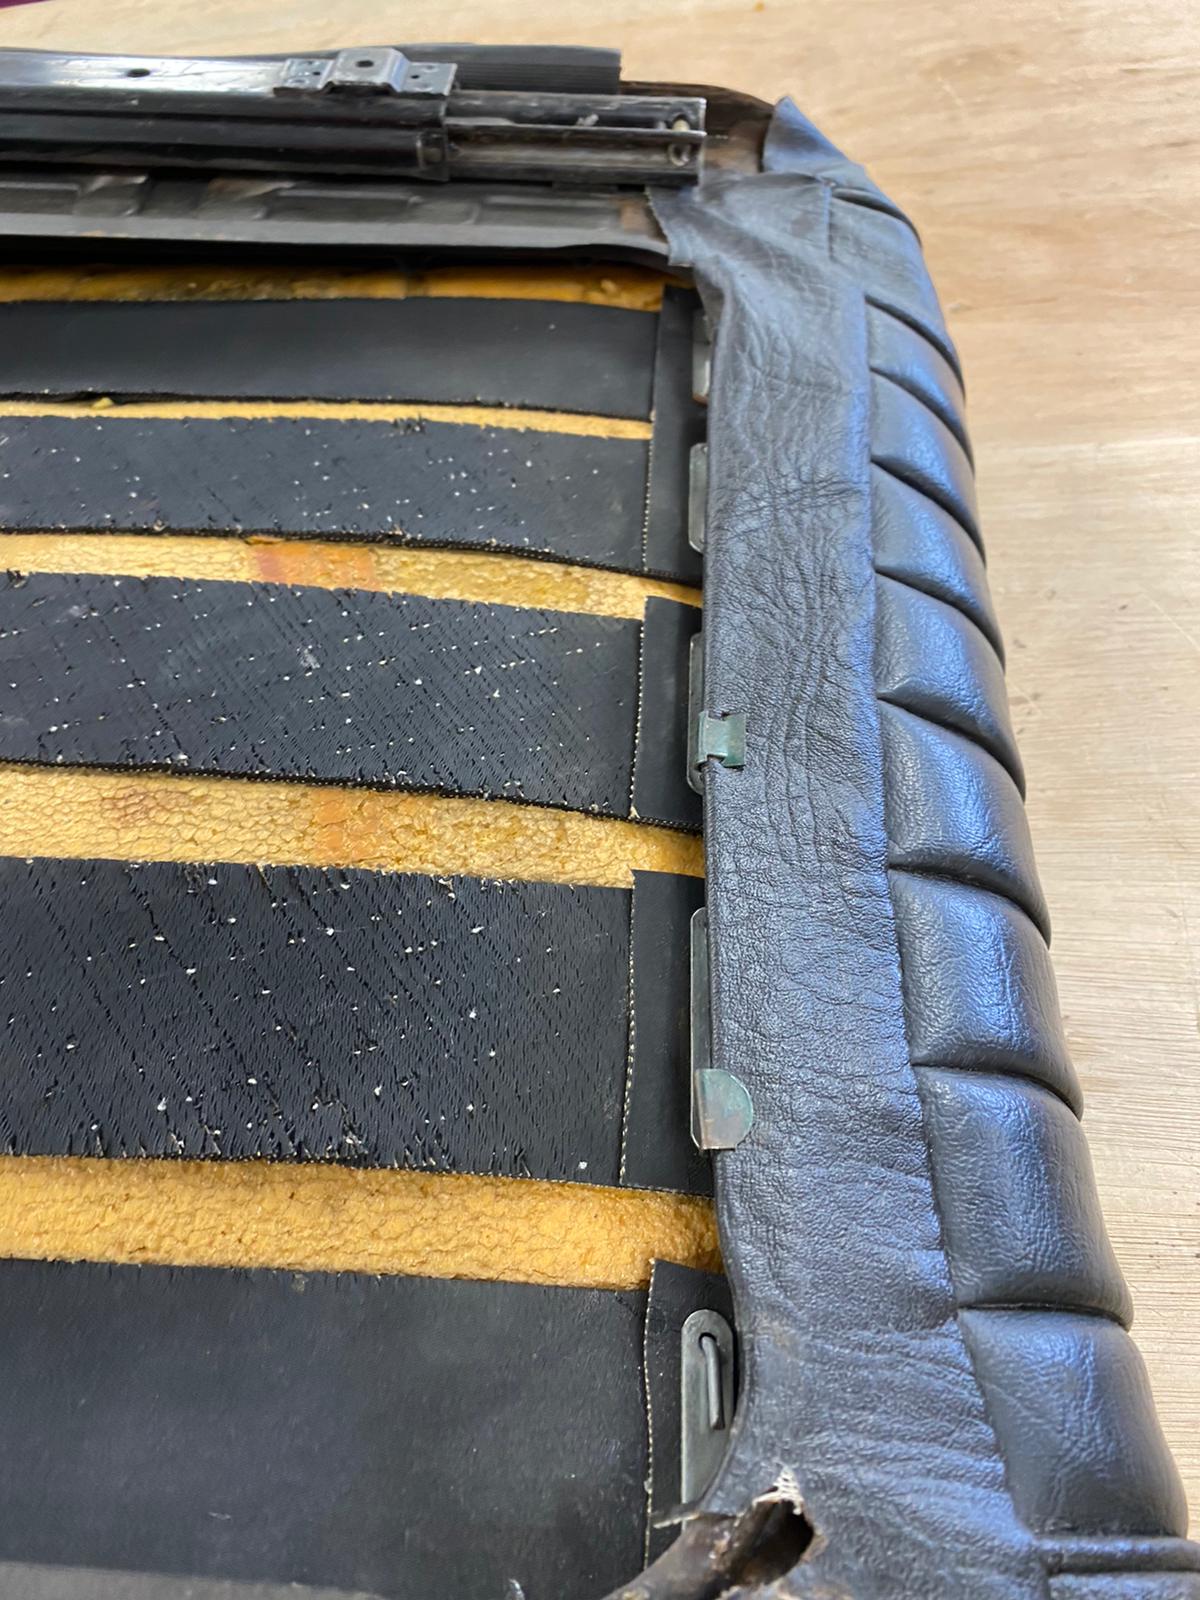
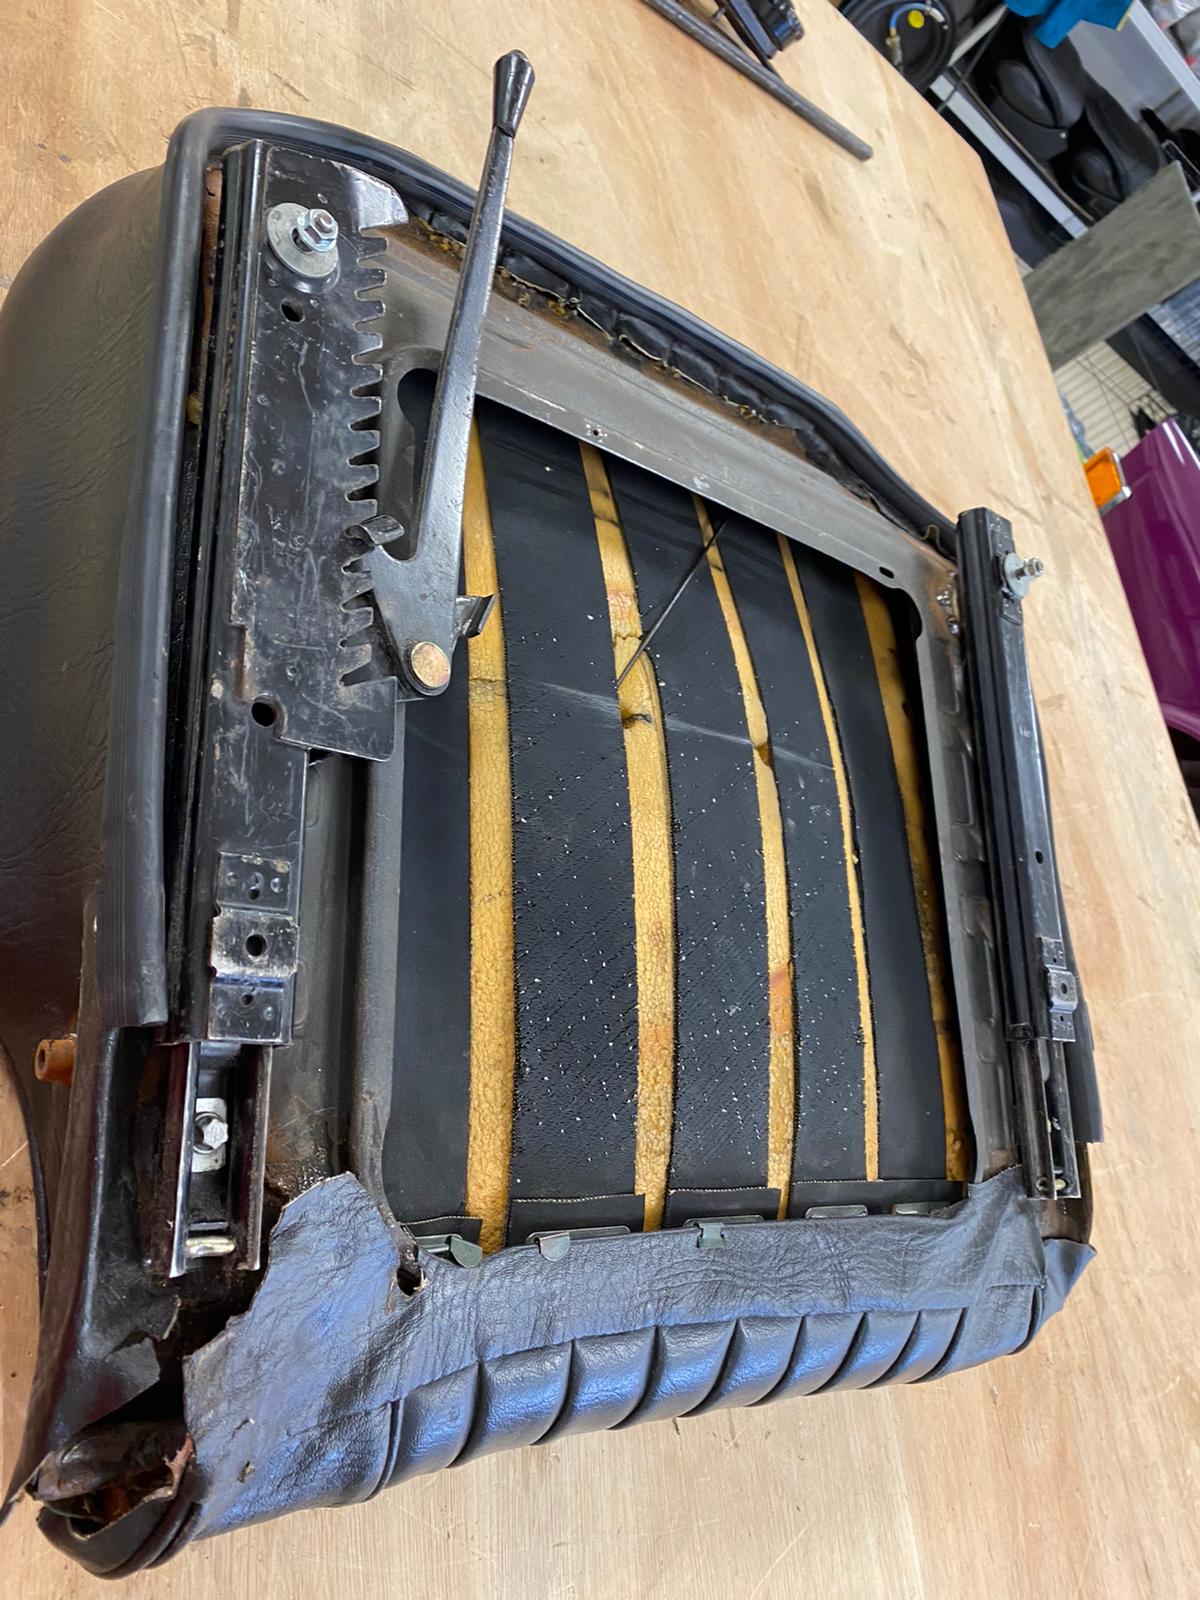
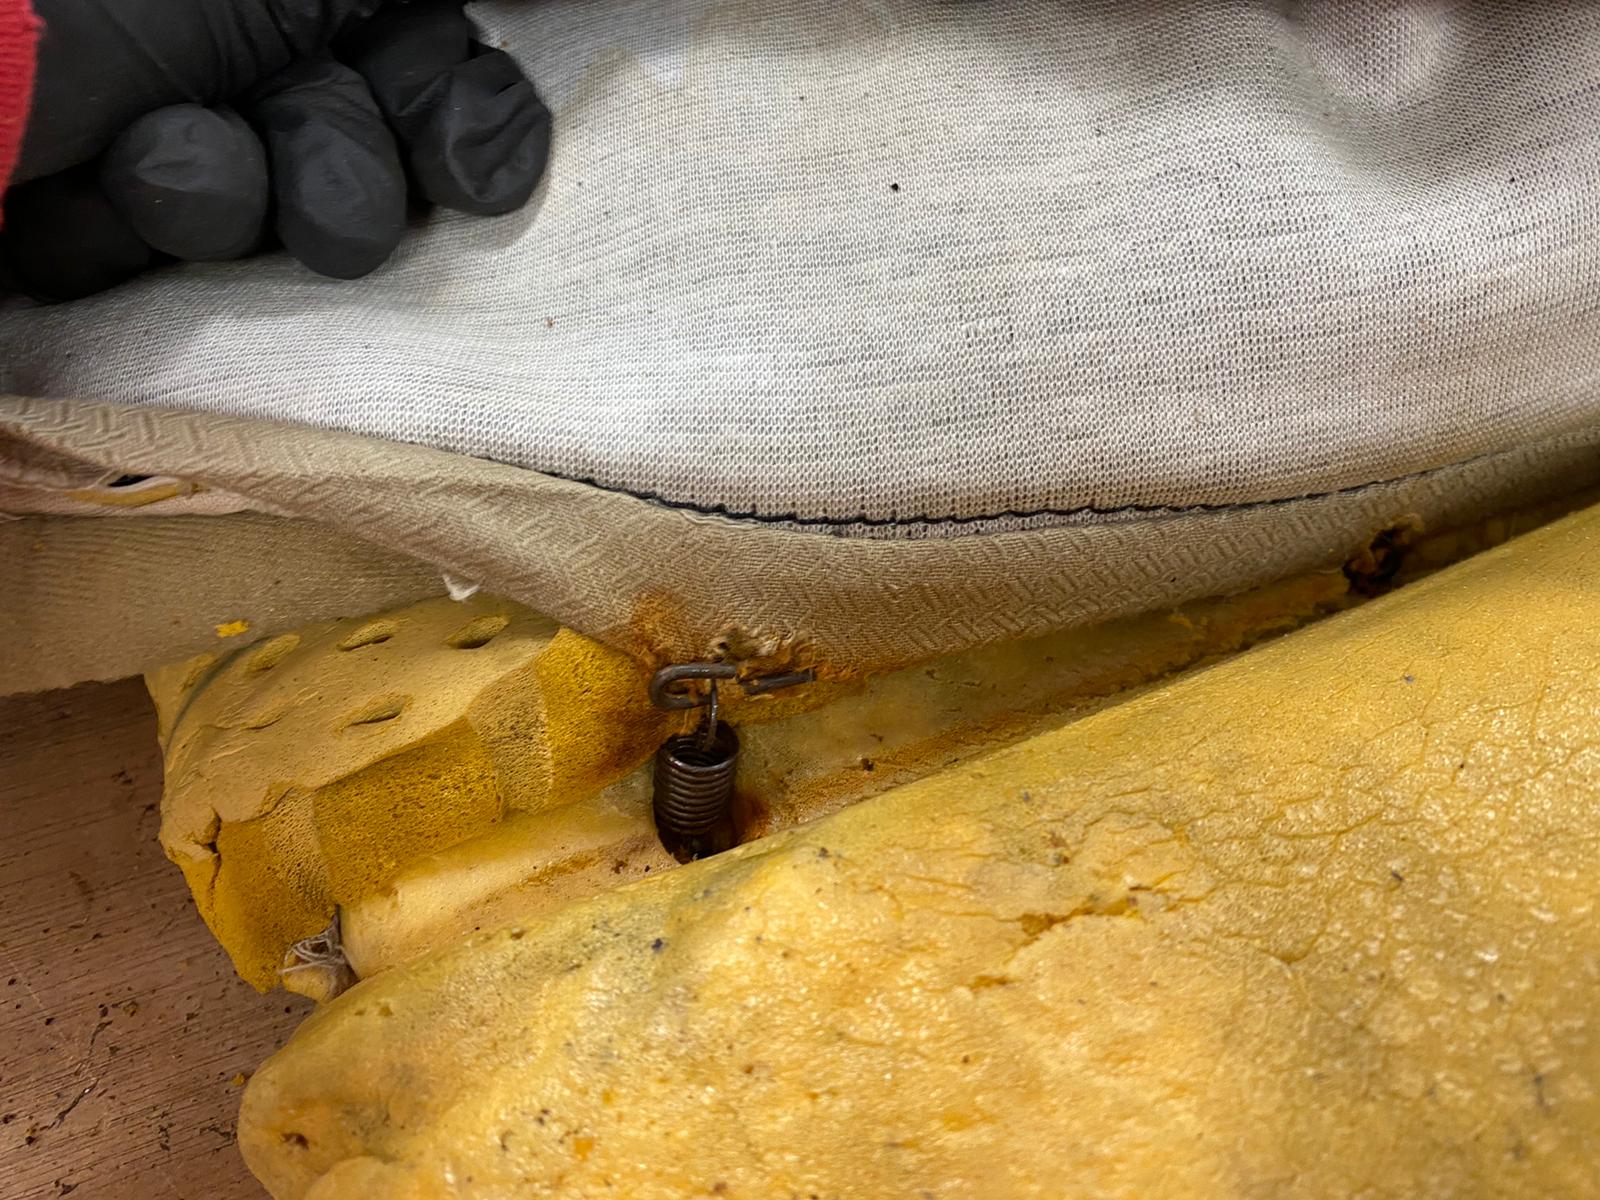
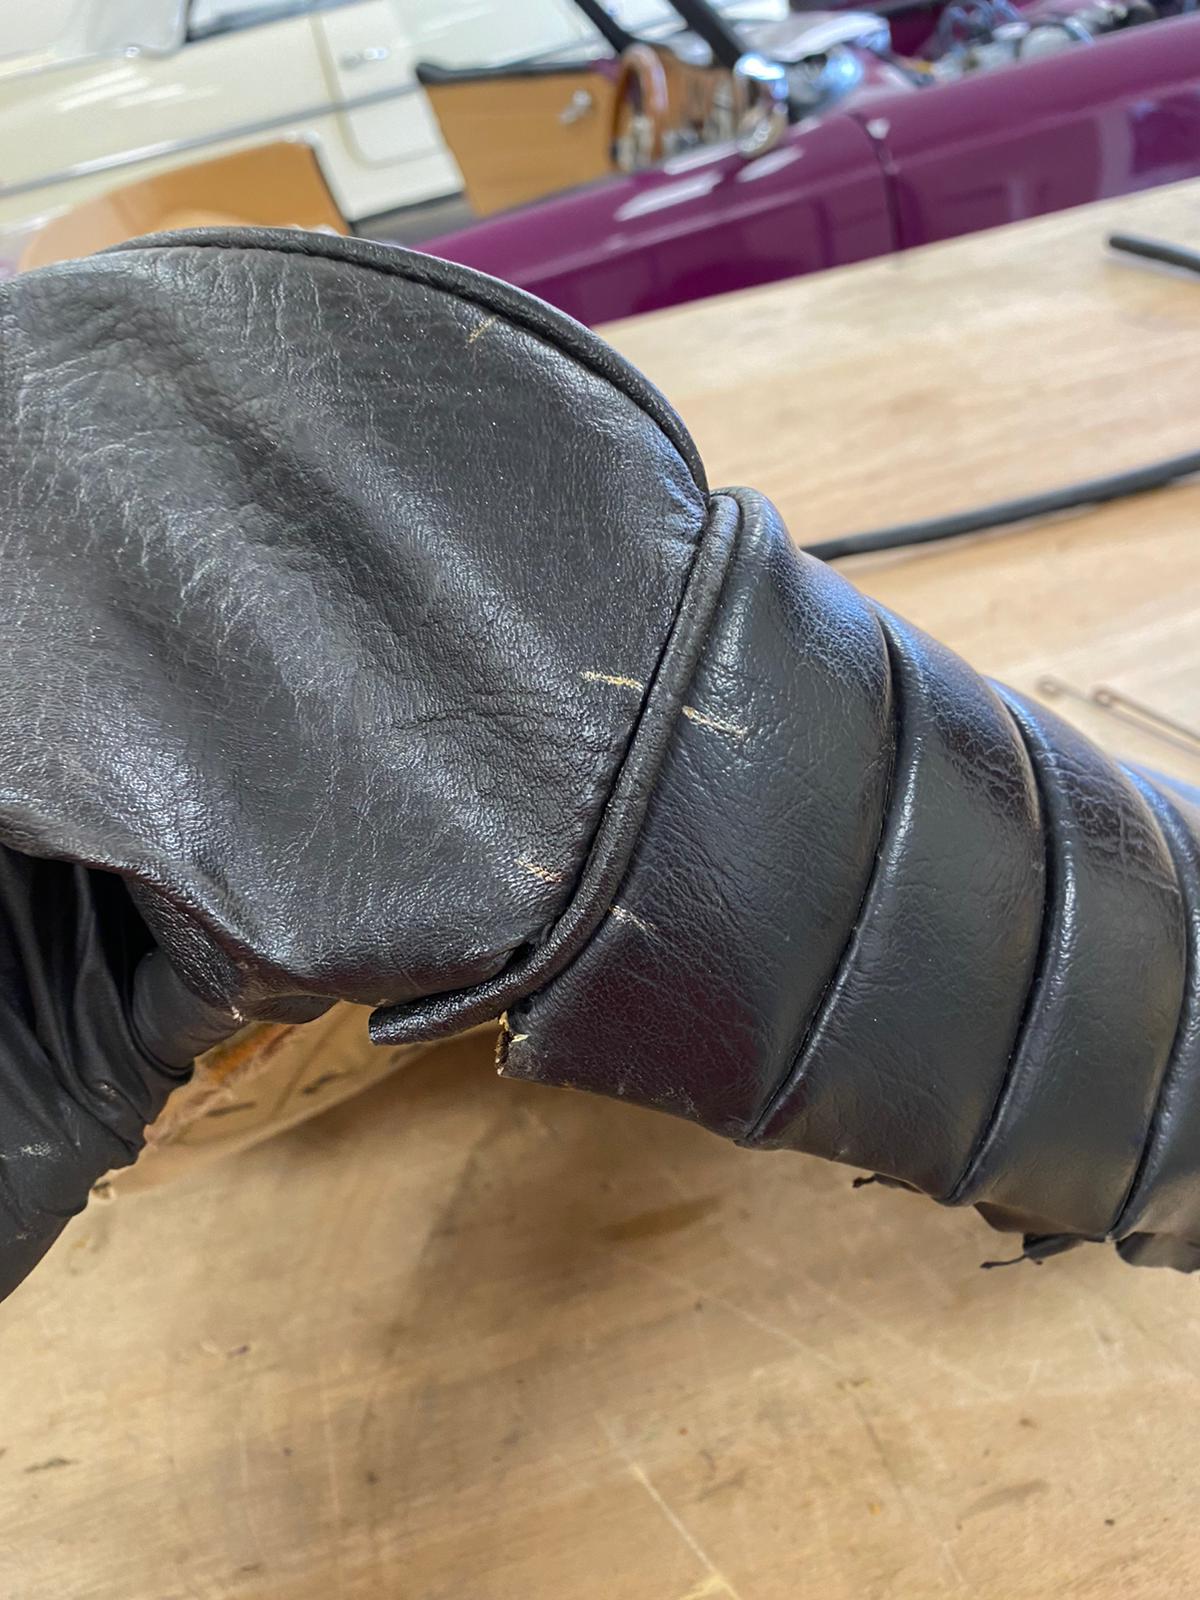
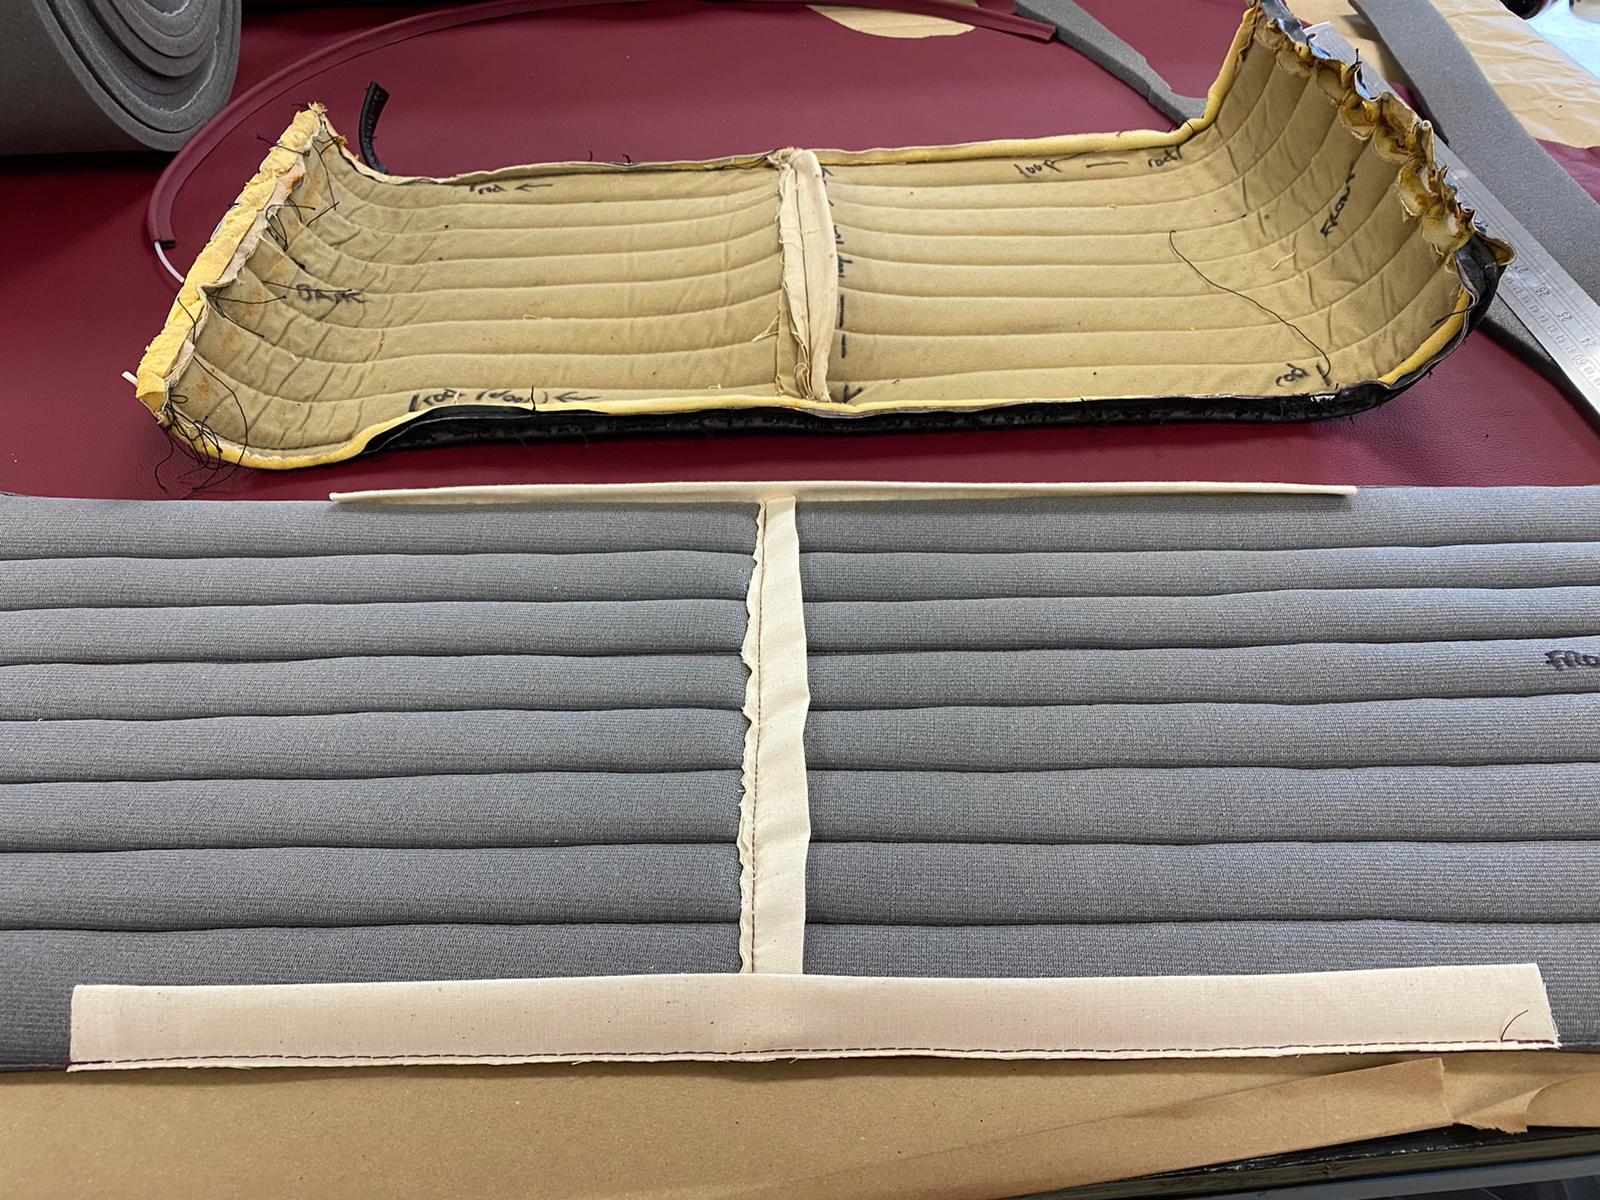
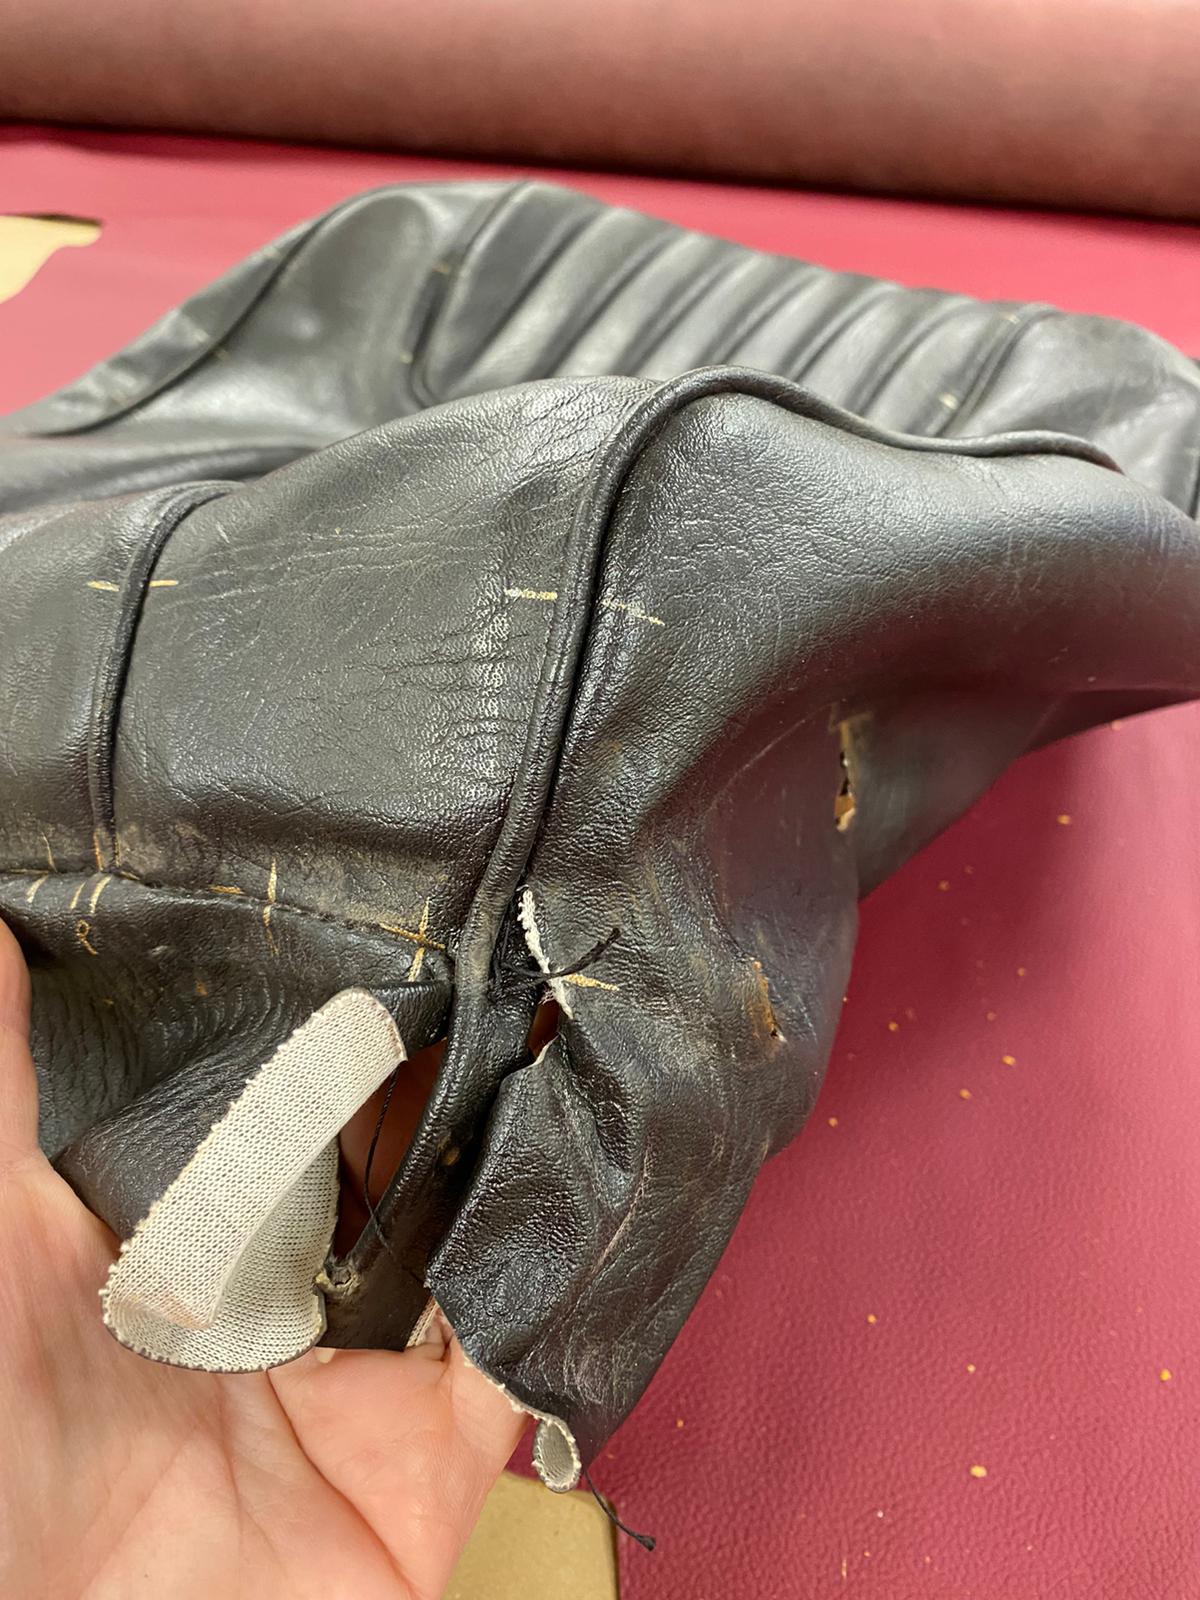
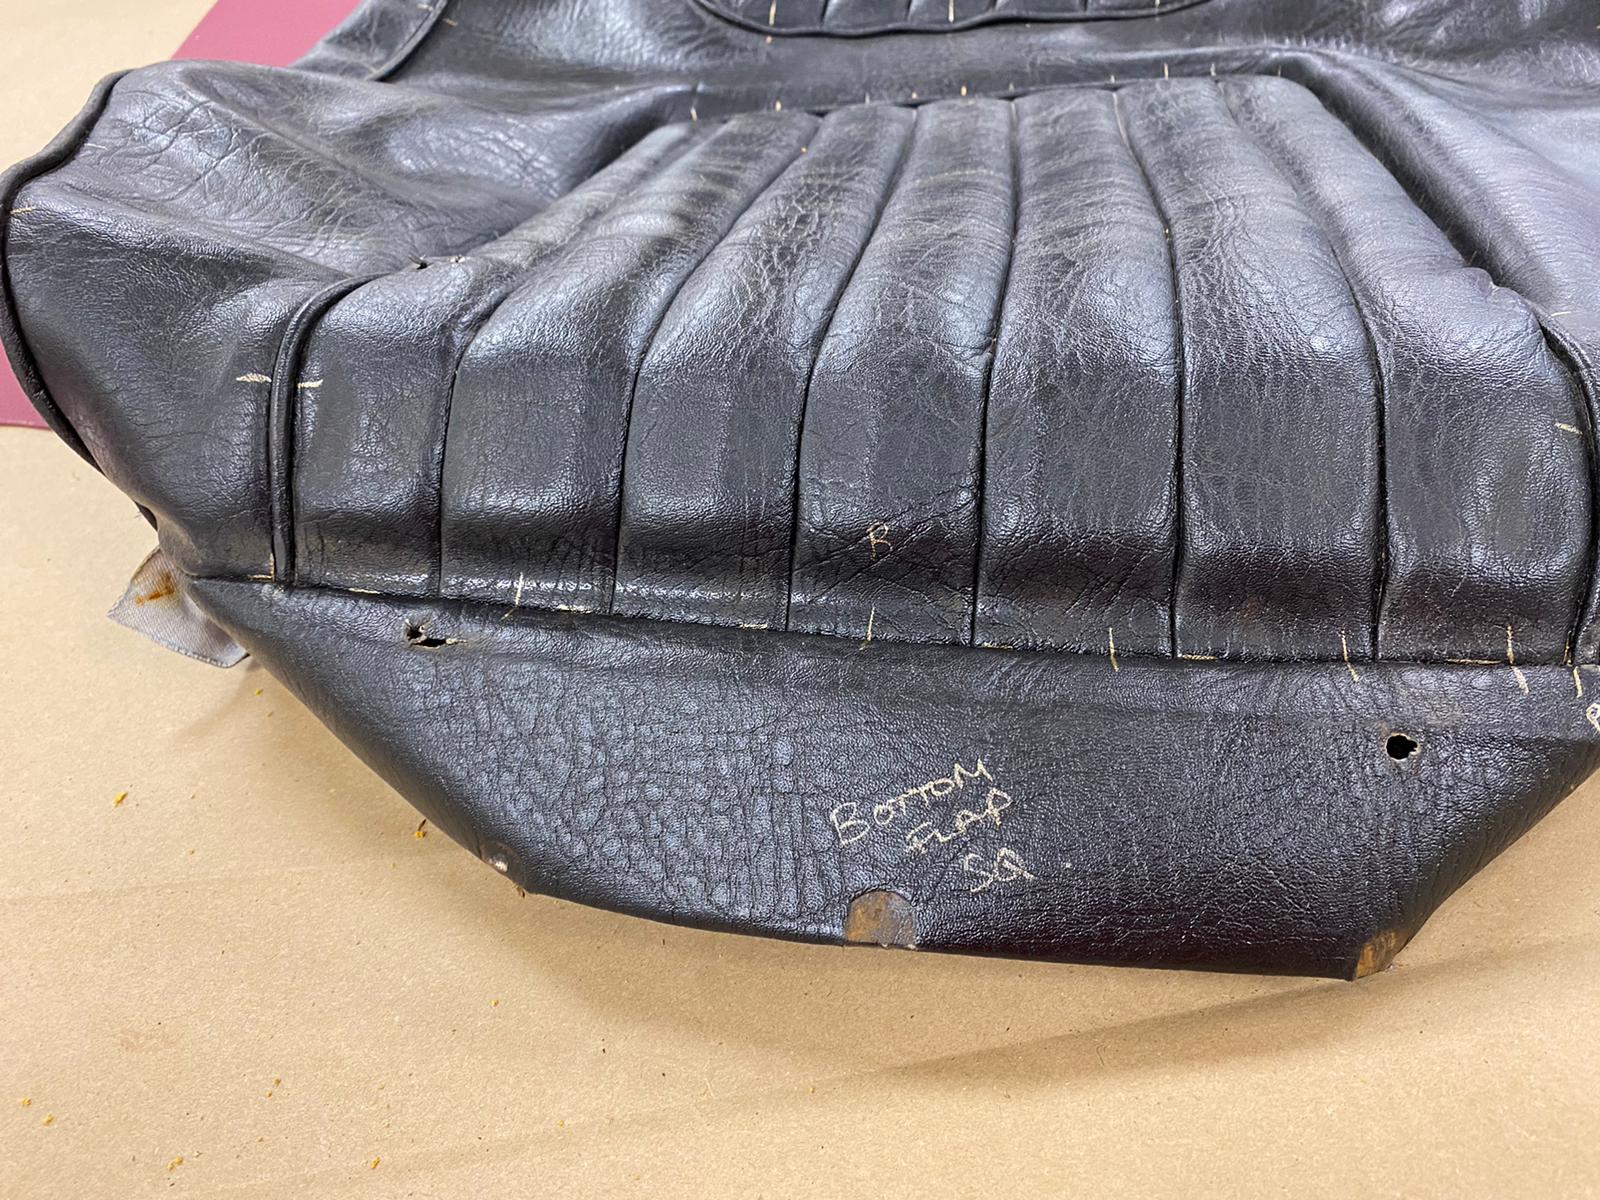
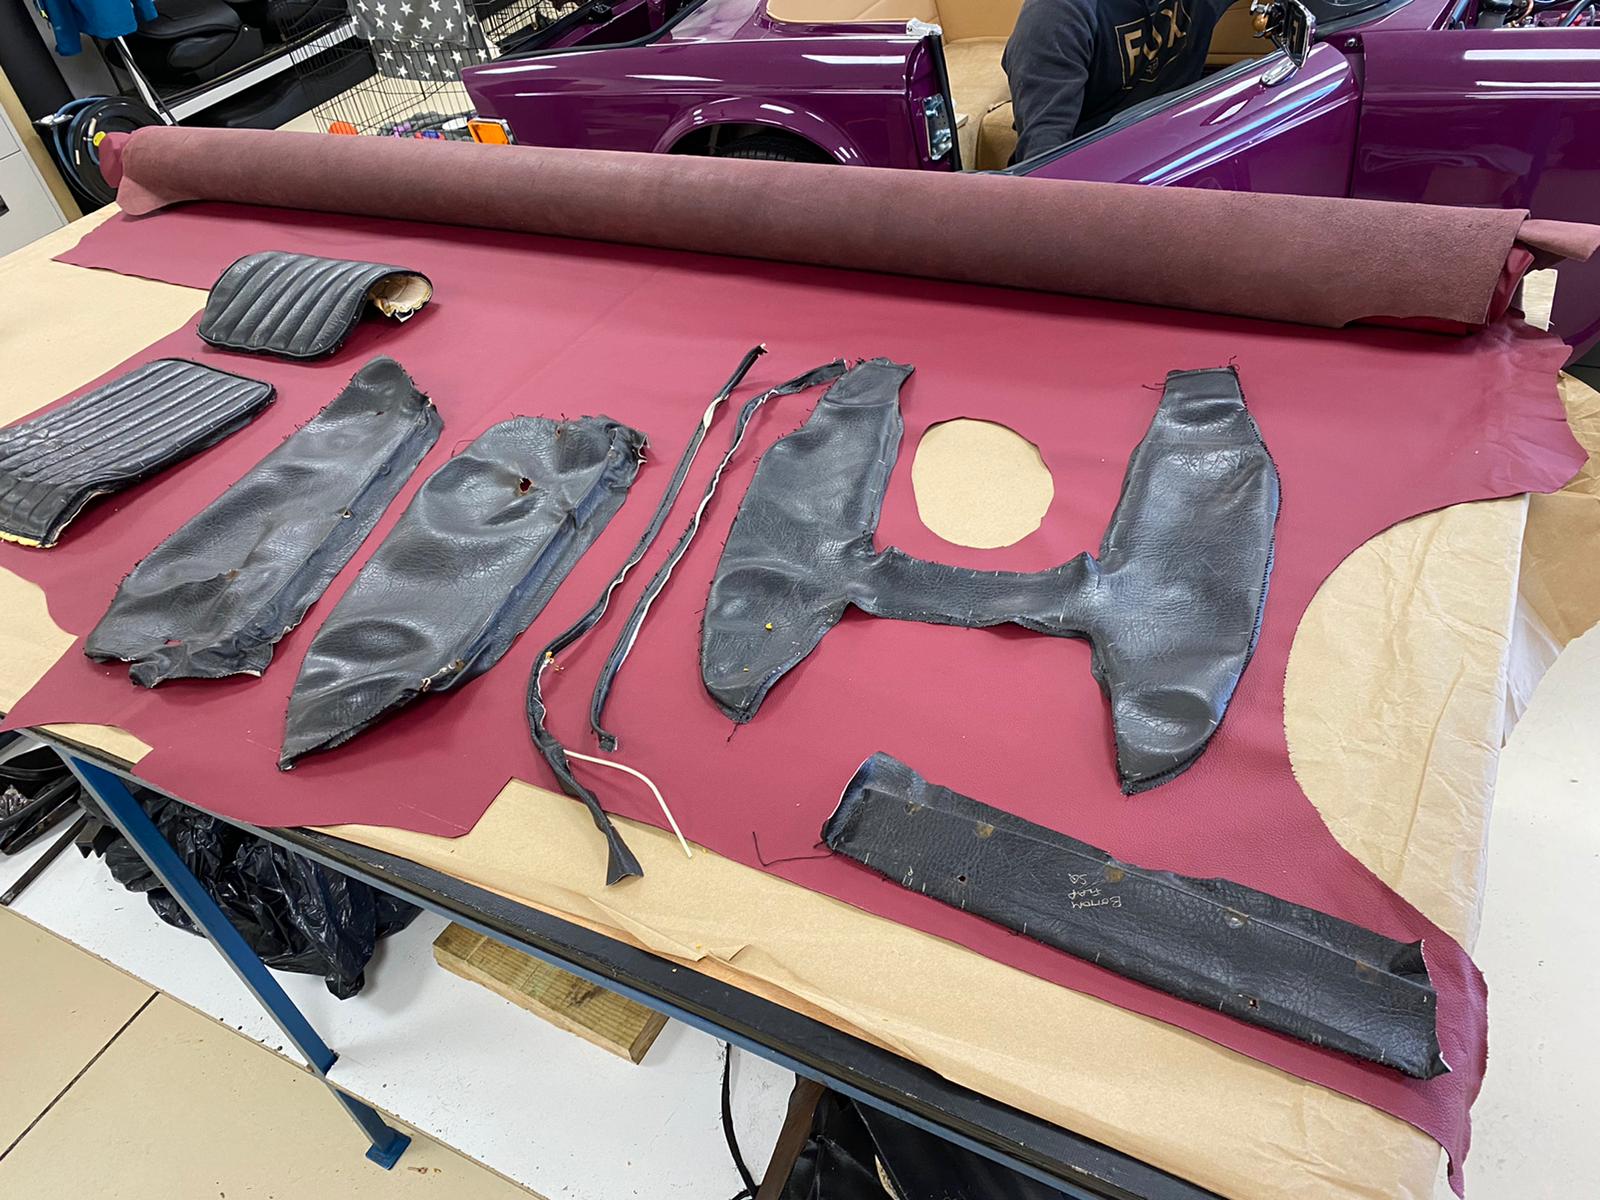
The exciting restoration project continues on our 1958 Jaguar XK150. This week the interior has been with our expert trim shop who have been working on the seats, and other interior panels.
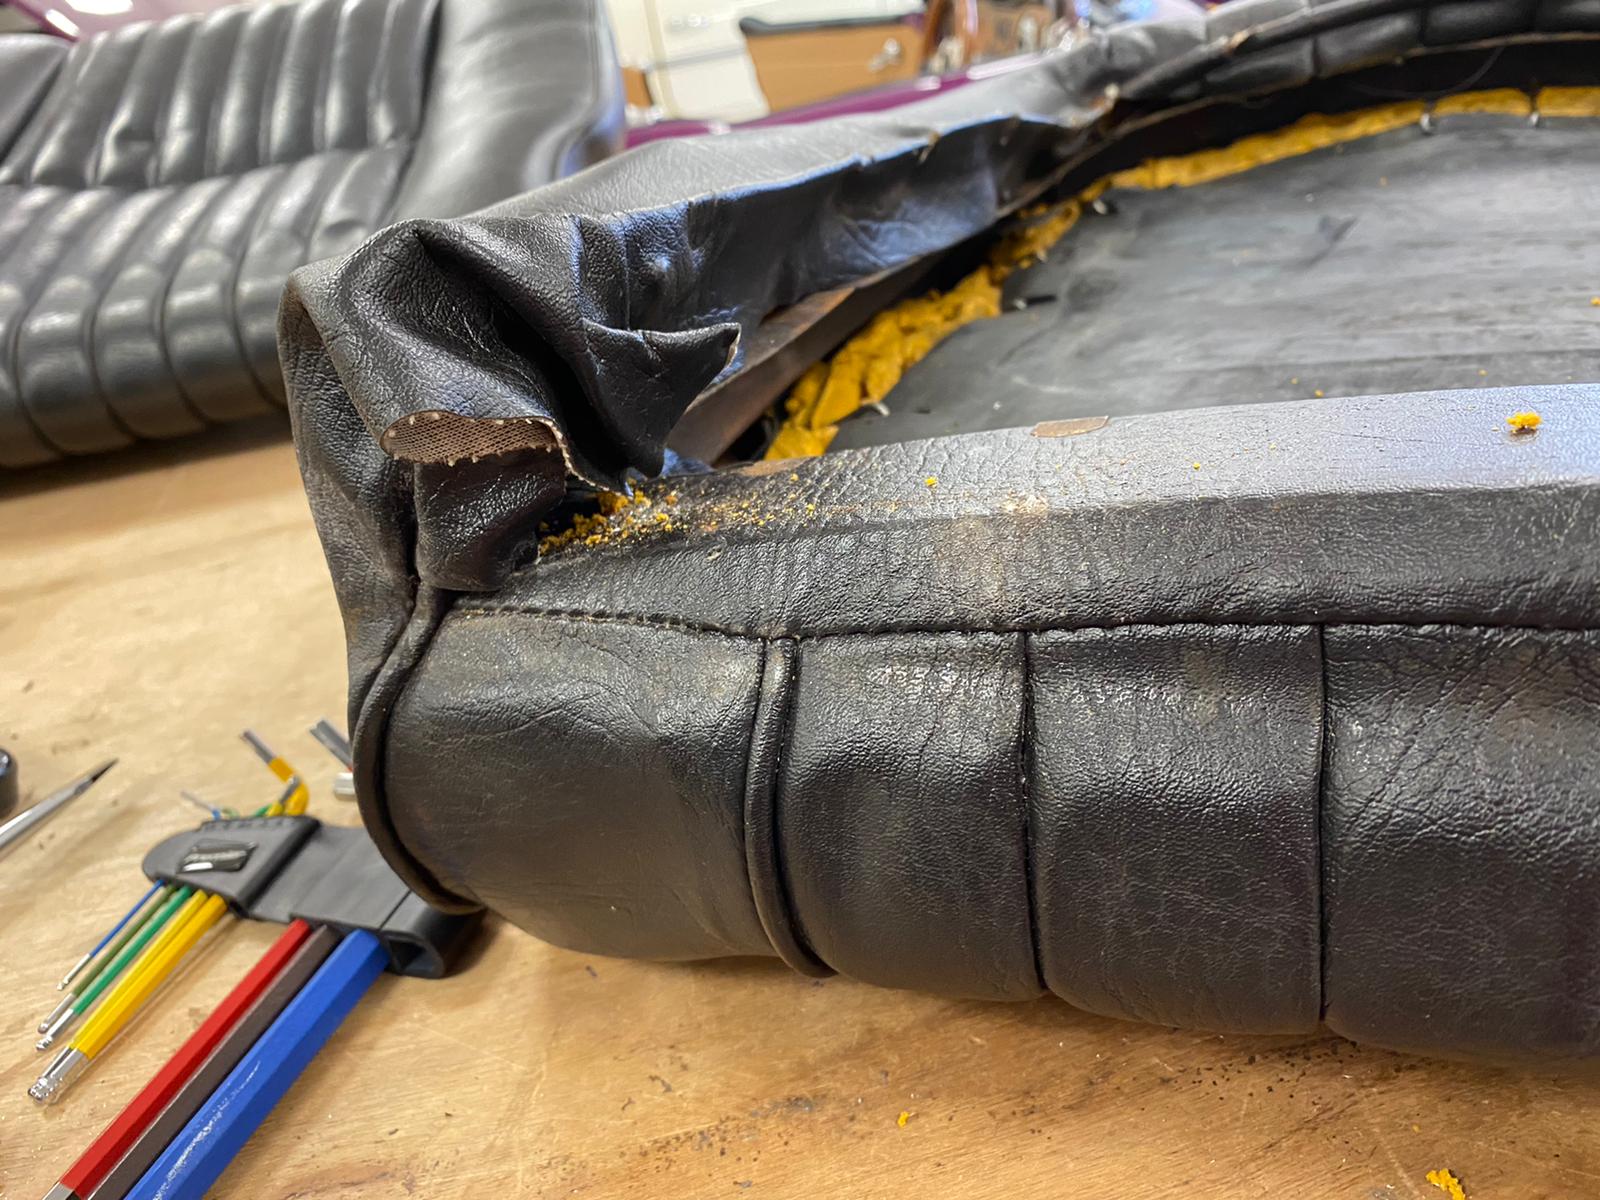
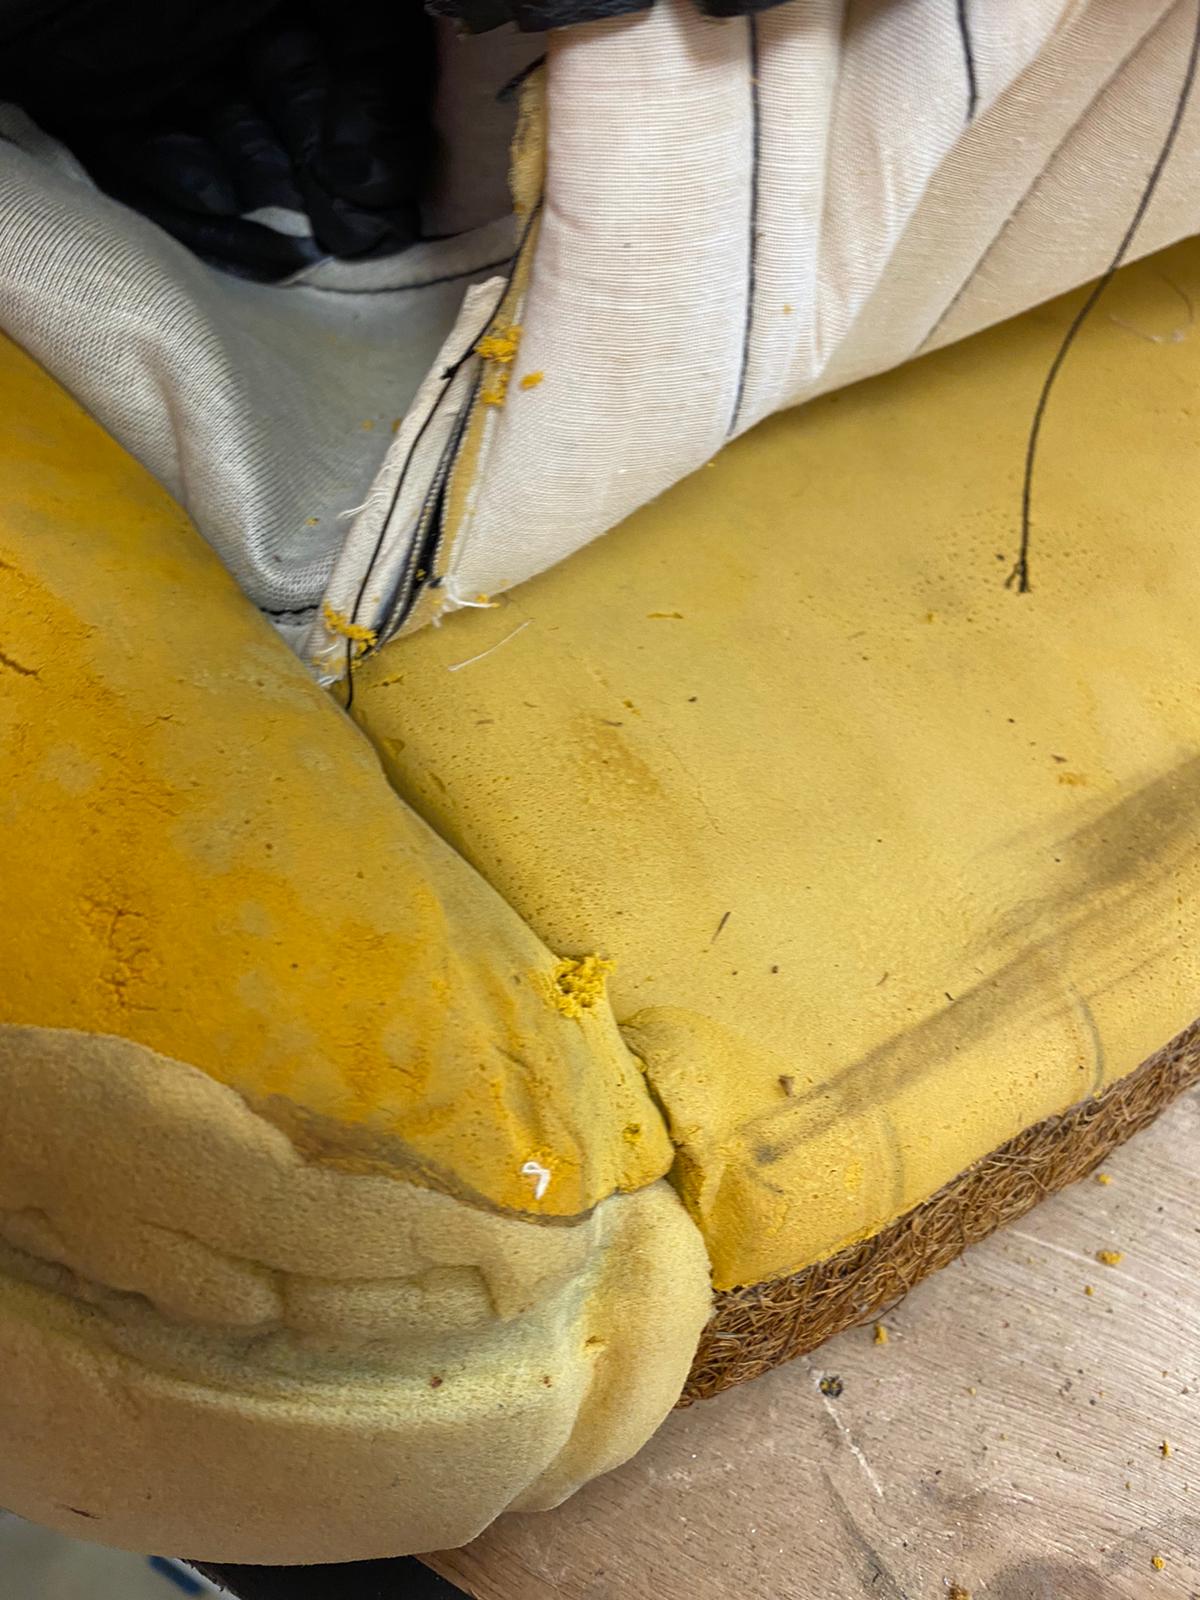
Brian starts by cutting the foam to the right size for the front seat squab frame. “I then mark where the cover needs to sit” Brian explains “gluing the cover into position, sticking the calico flap in place”.
Brian adds extra foam bolstering, to give the seat it’s comfortable shape. He then pulls the second calico flap over the frame and pulls the cover into position.

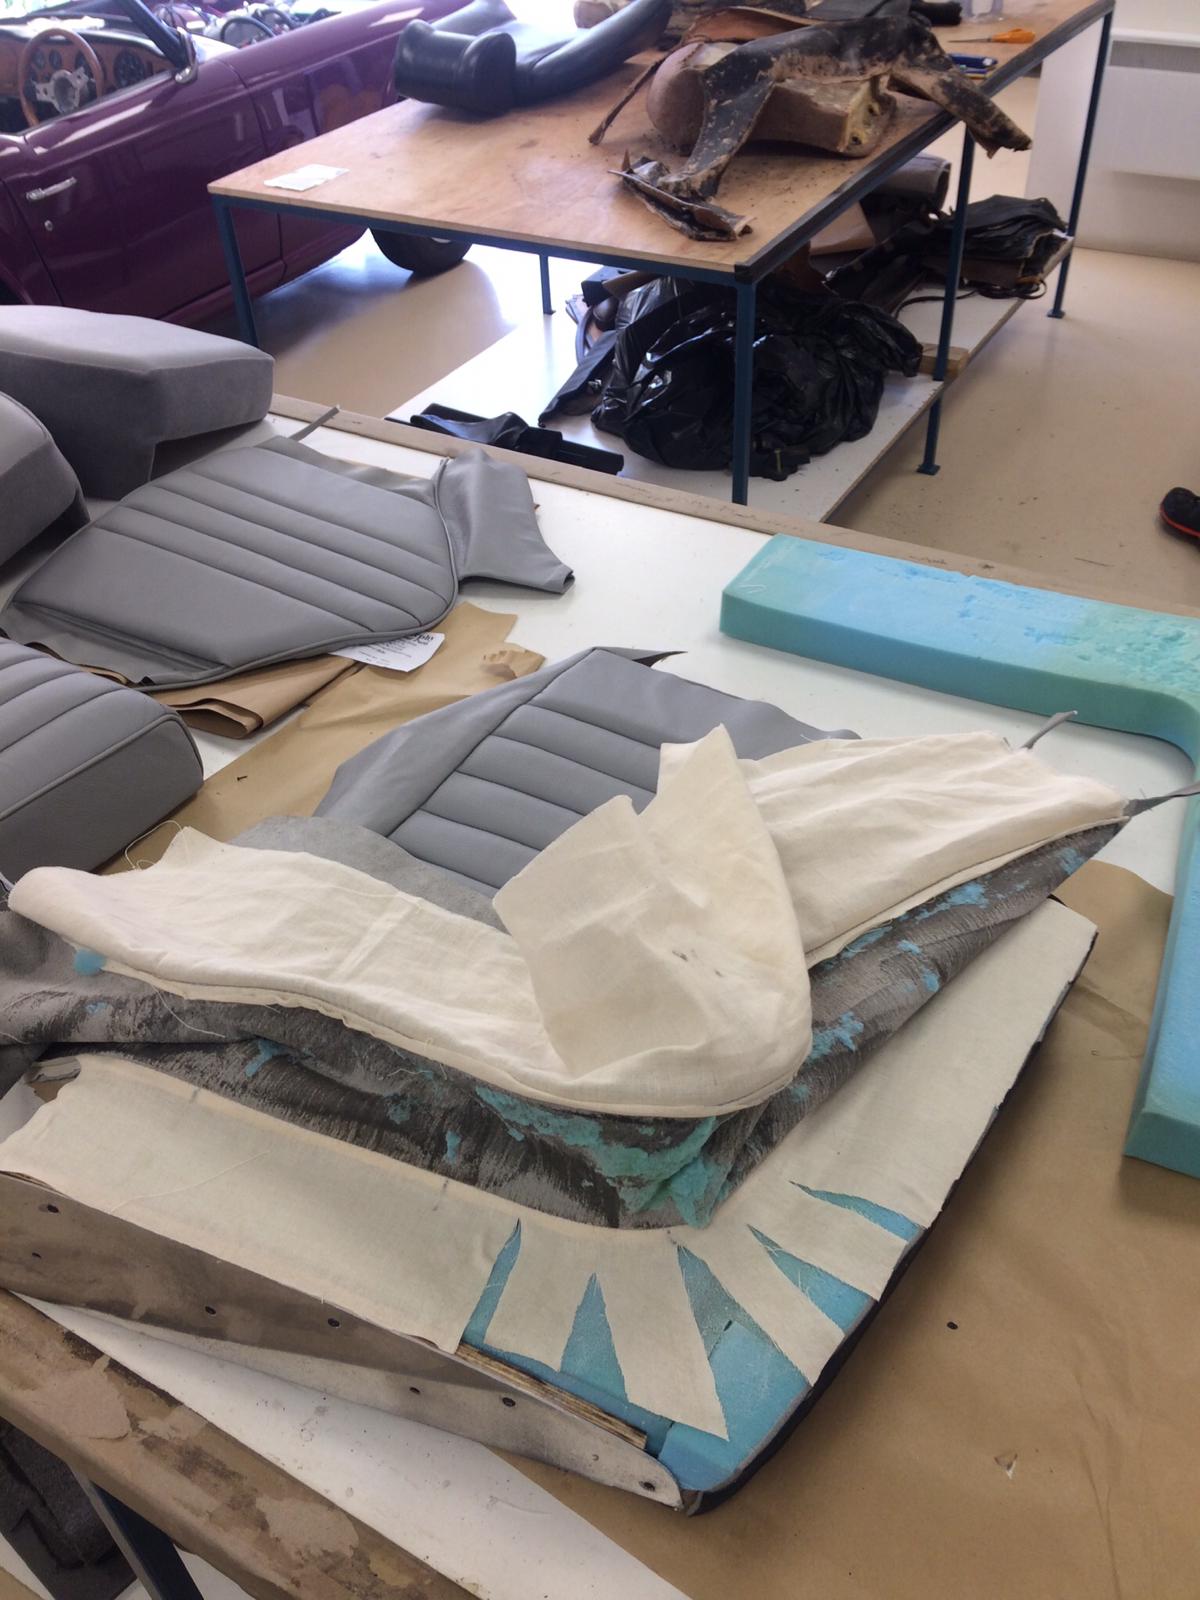
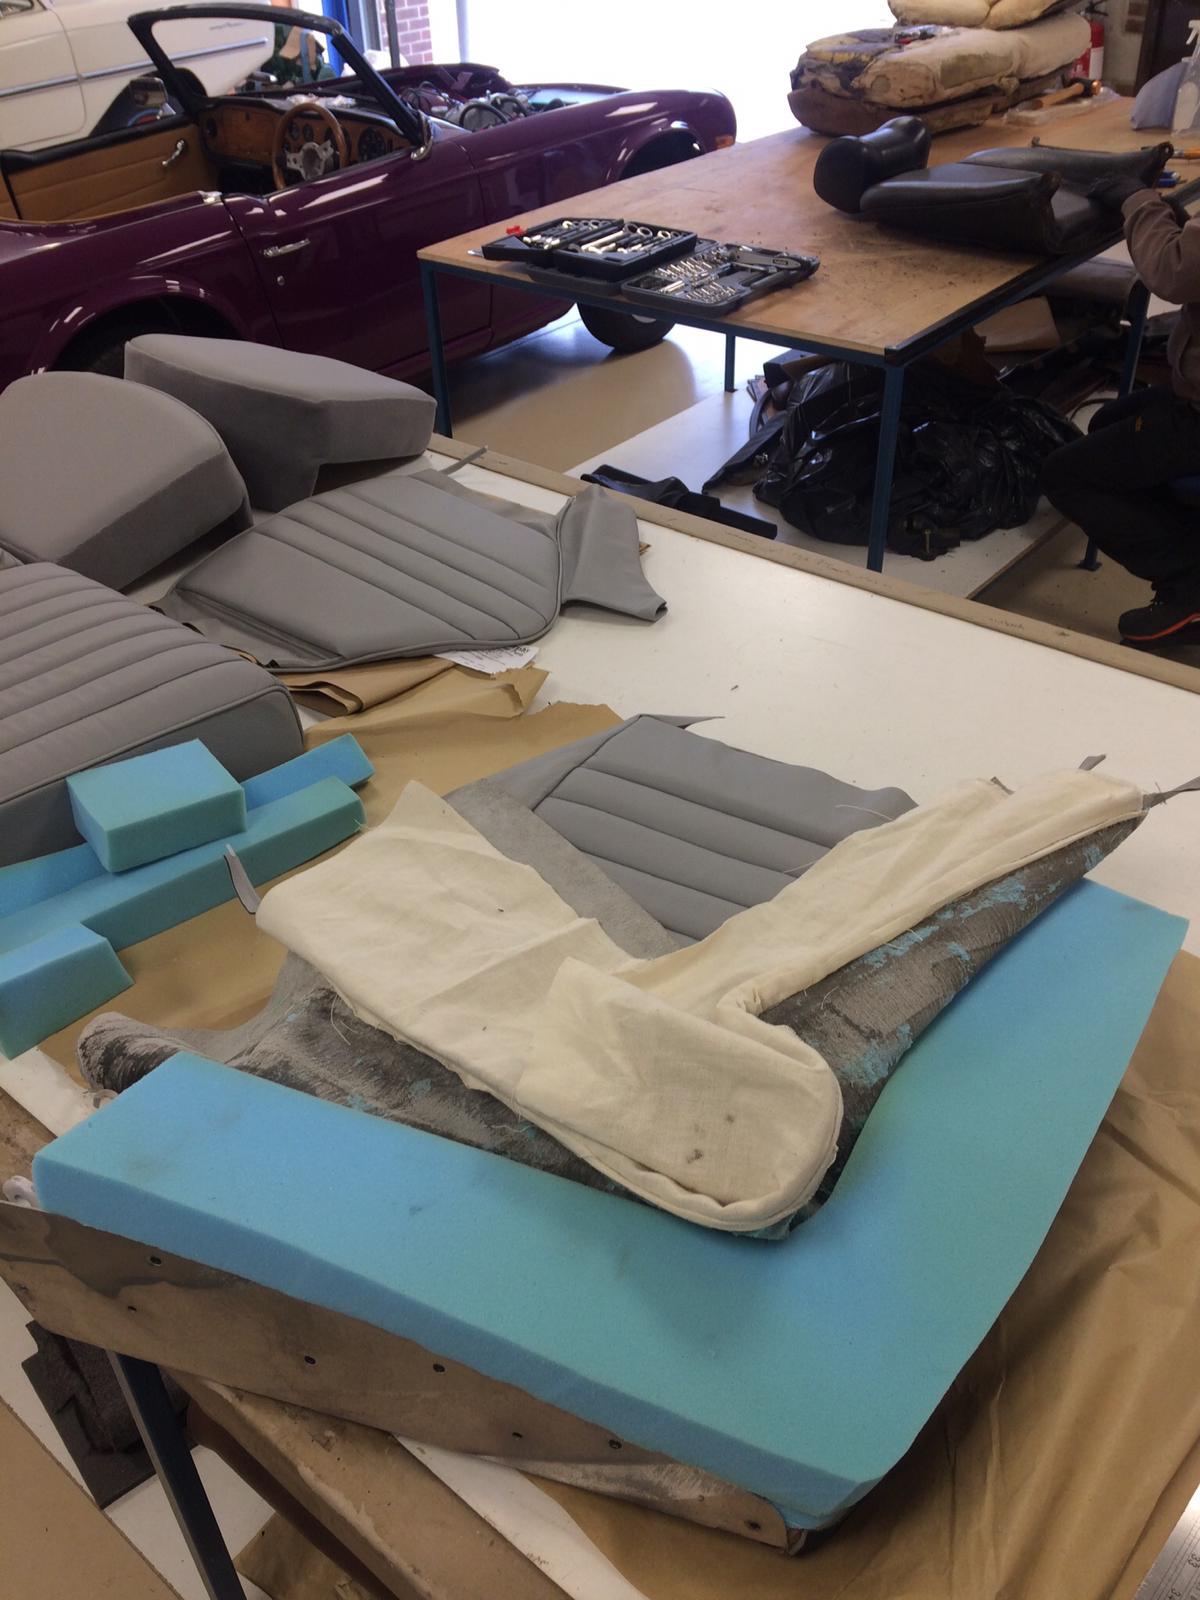
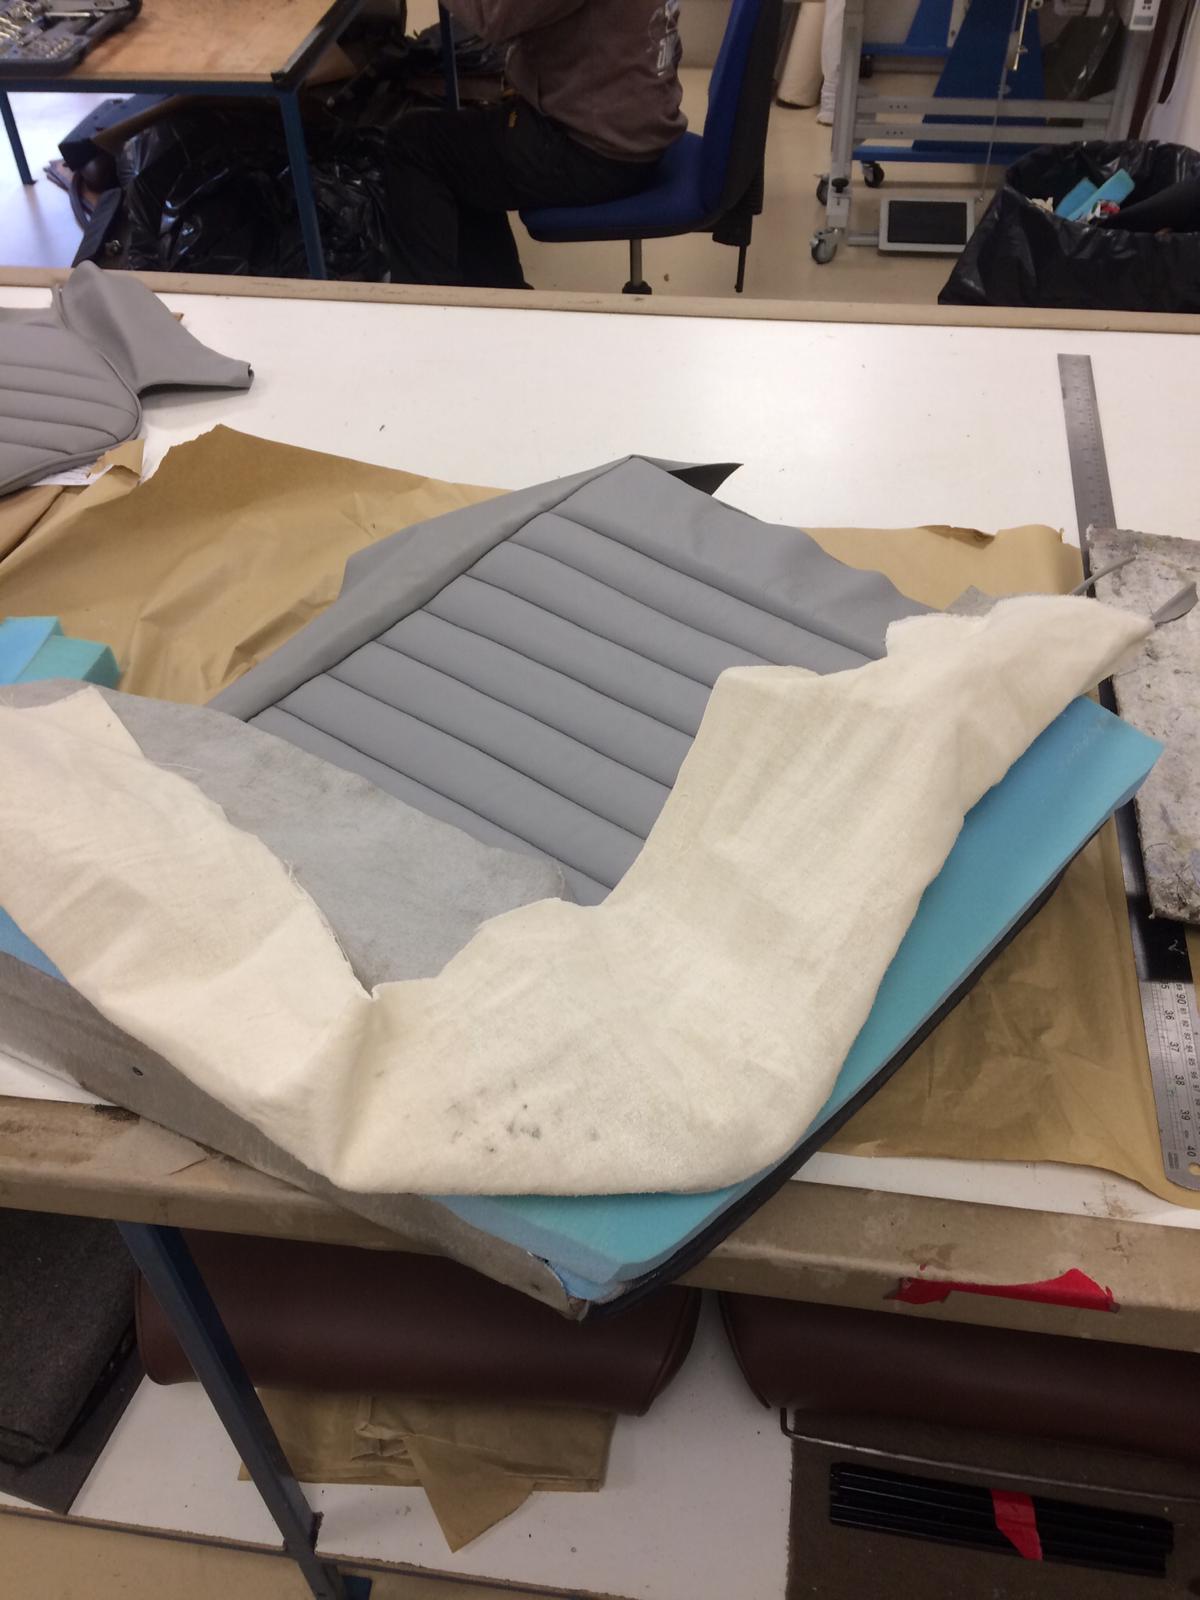
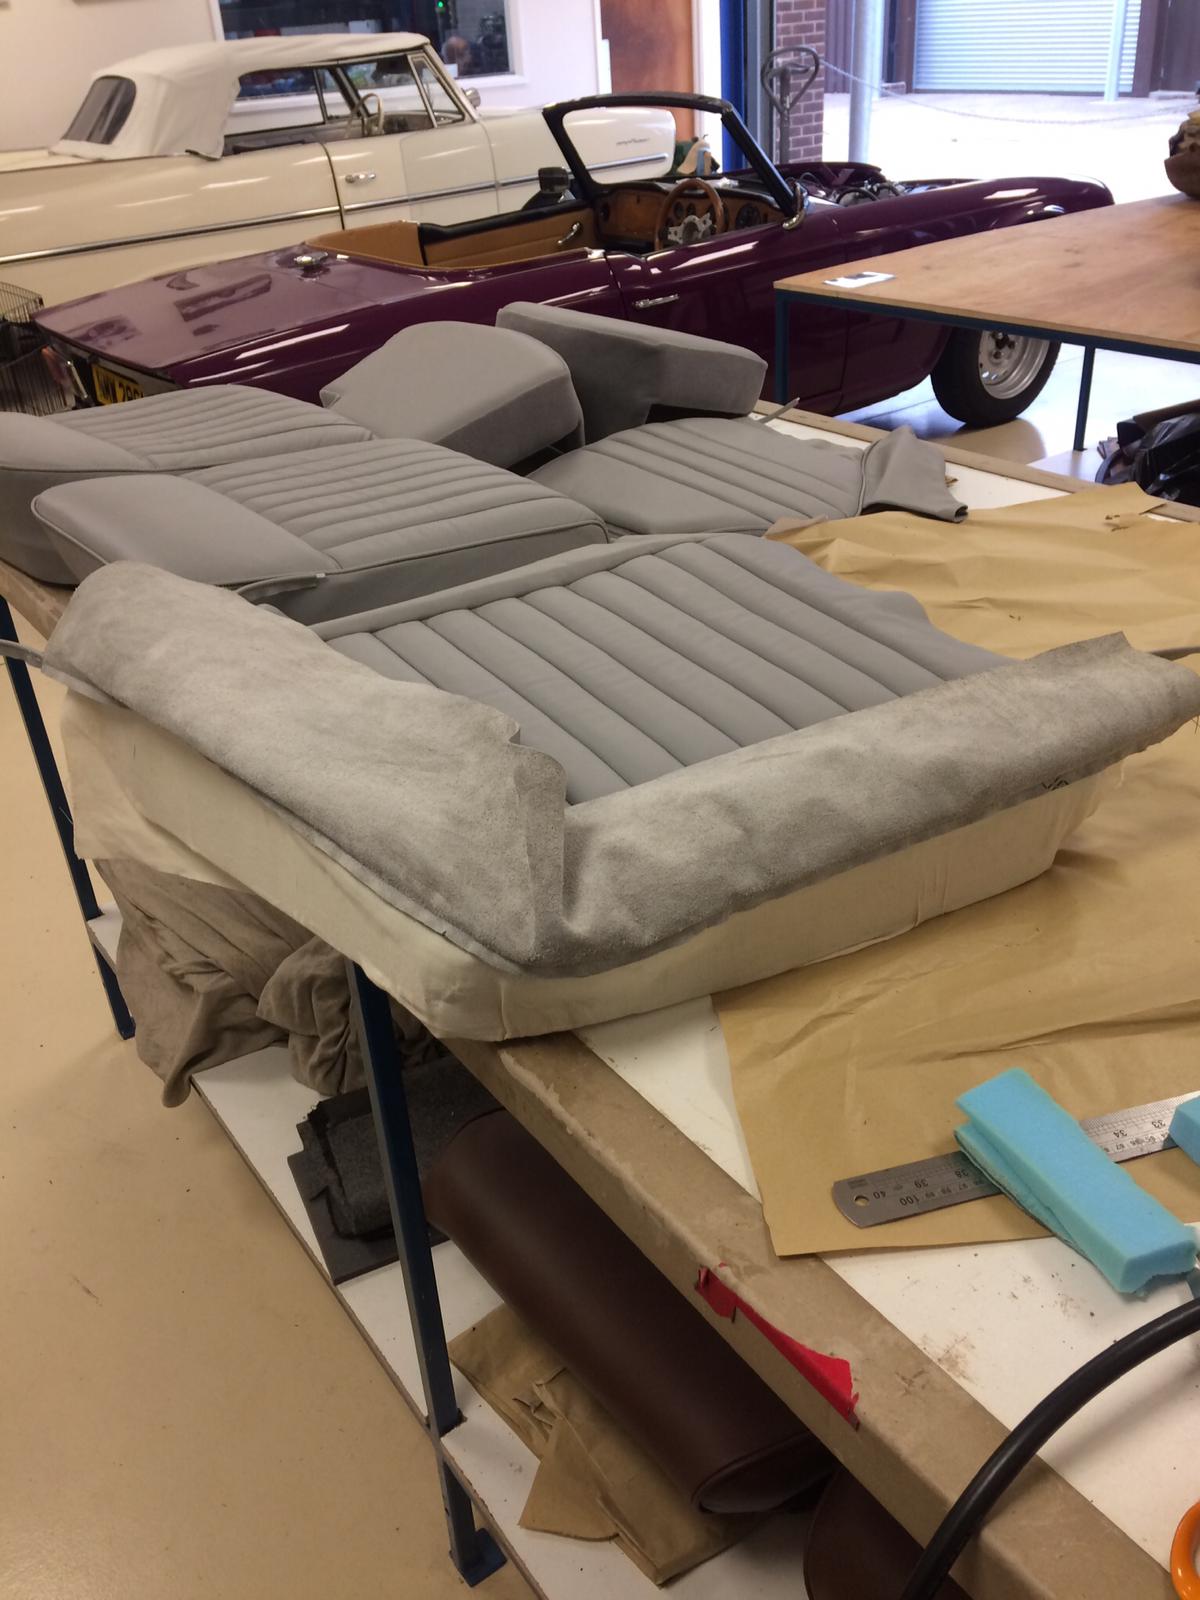
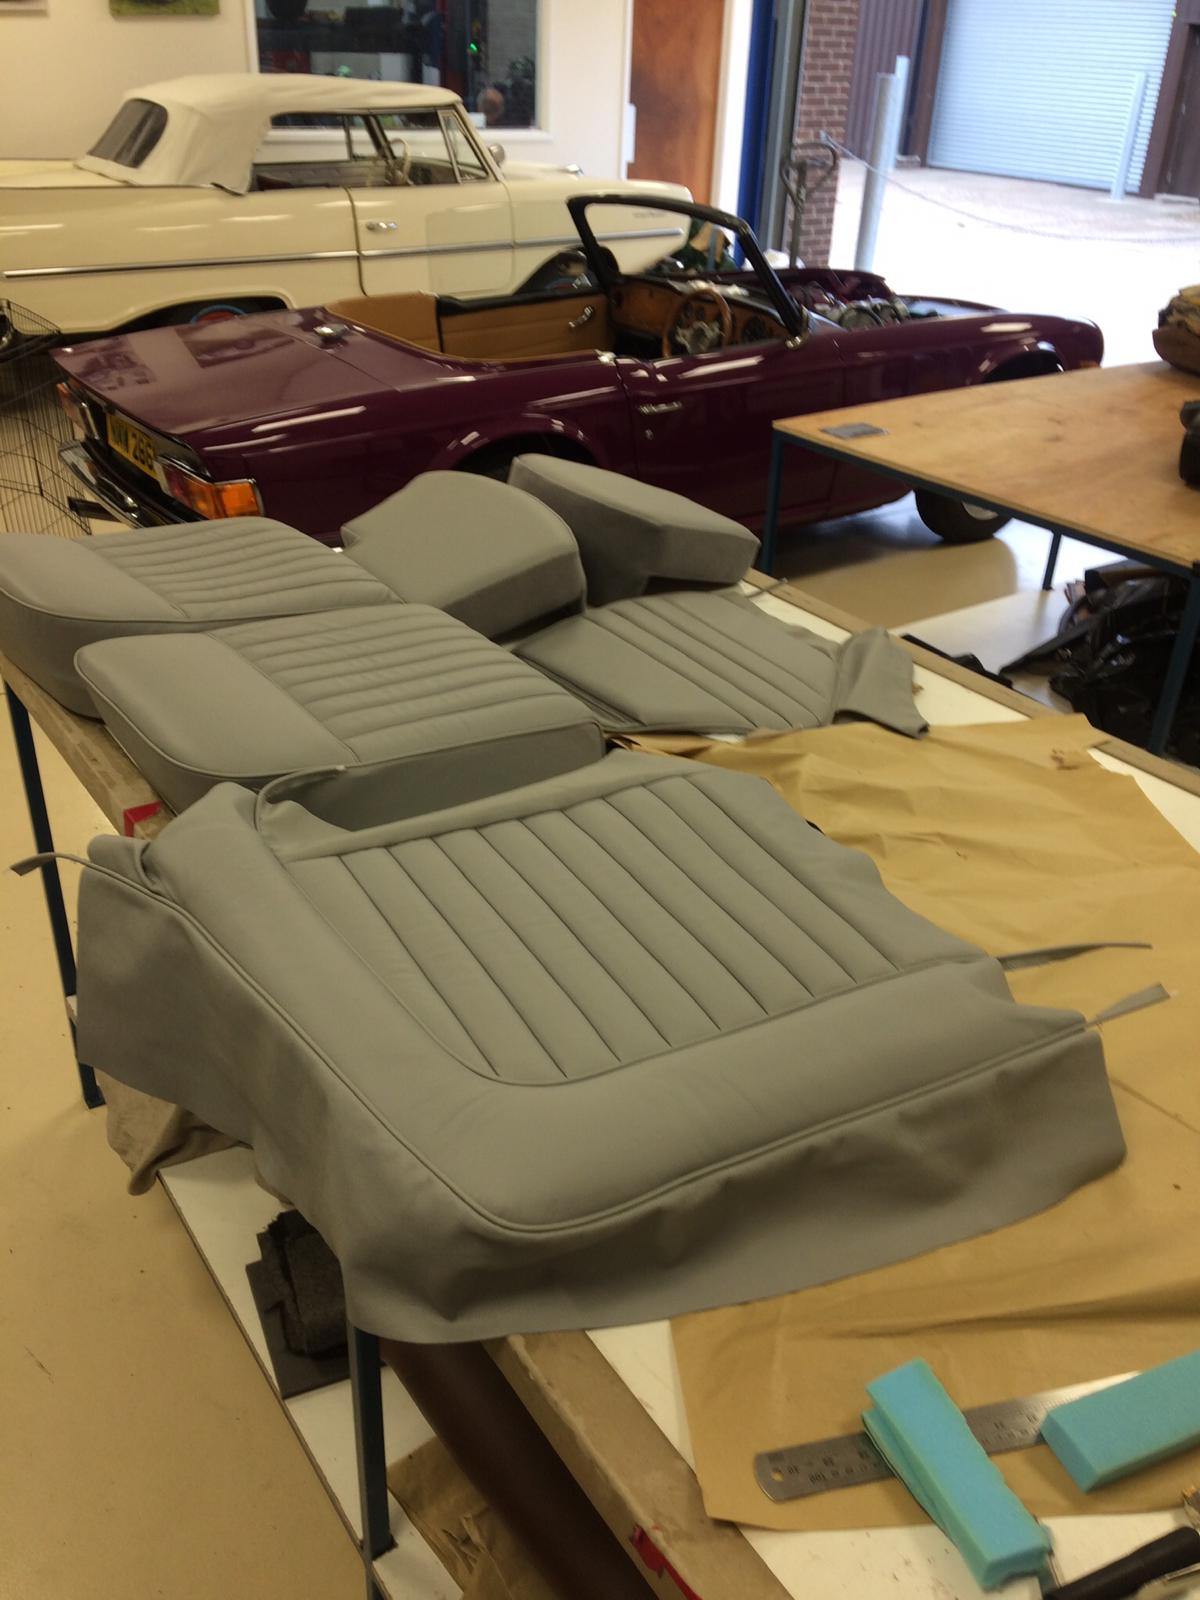
Brian then begins gluing and stapling the top and side of the cover onto the frame. “I’ve glued the bottom edge of the outer side of the frame” he explains “gluing the outer flap, then tucking in the piping and gluing the inner flap”.
Brian then staples the inner edge and bottom flap neatly into place, carefully hiding the glue and staples from view.

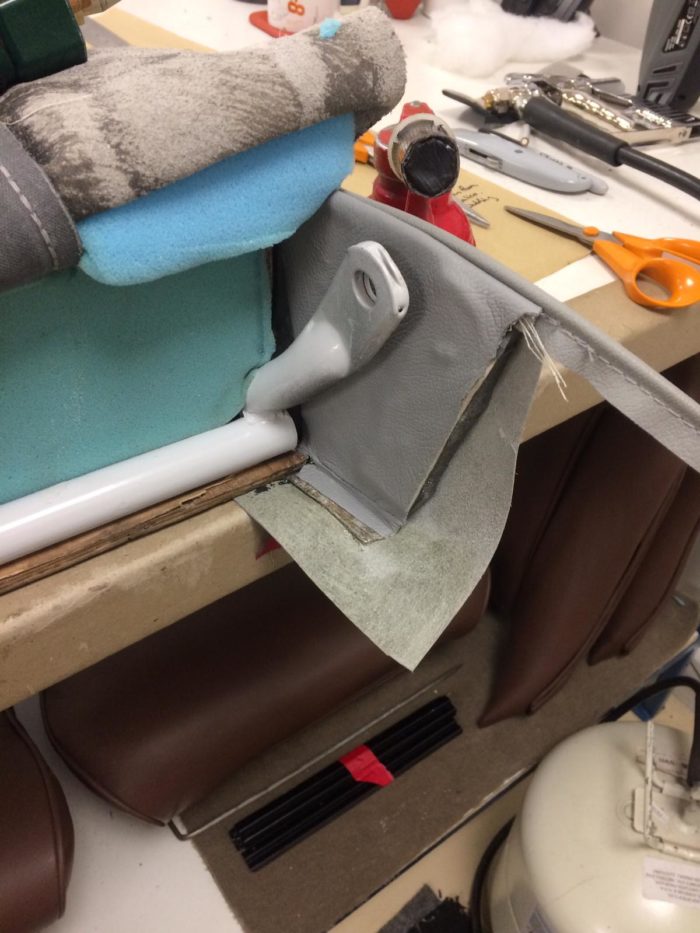
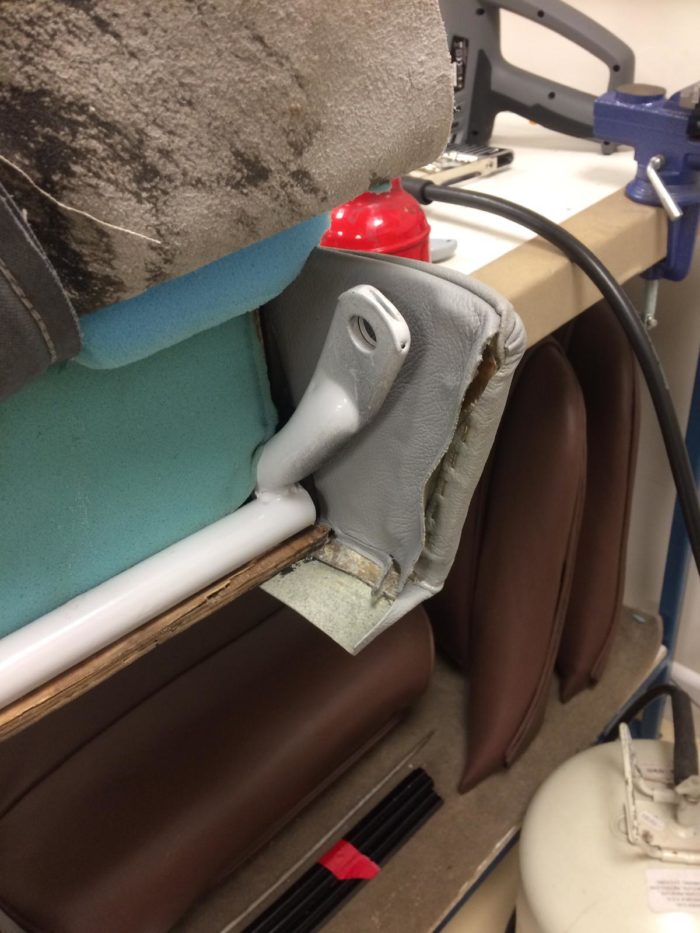
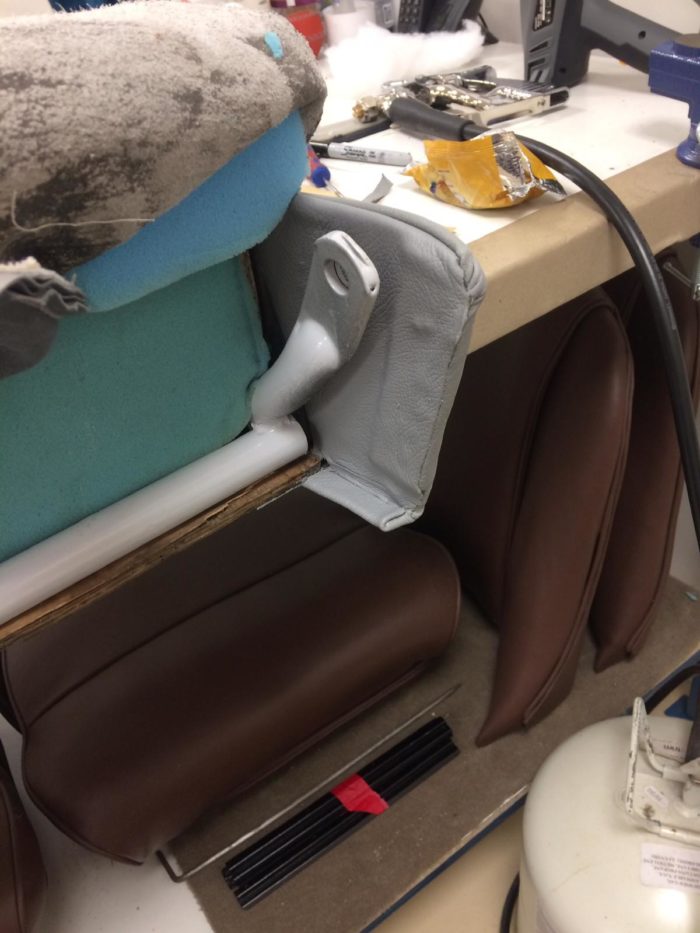

The back of the chairs is next up, where Brian tacks the fabric to the back of the frame. “I’ve made the side and top panels out of mill board” he tells us “finishing them off by covering them with vinyl”.
He then screwed the top and side panels into place.

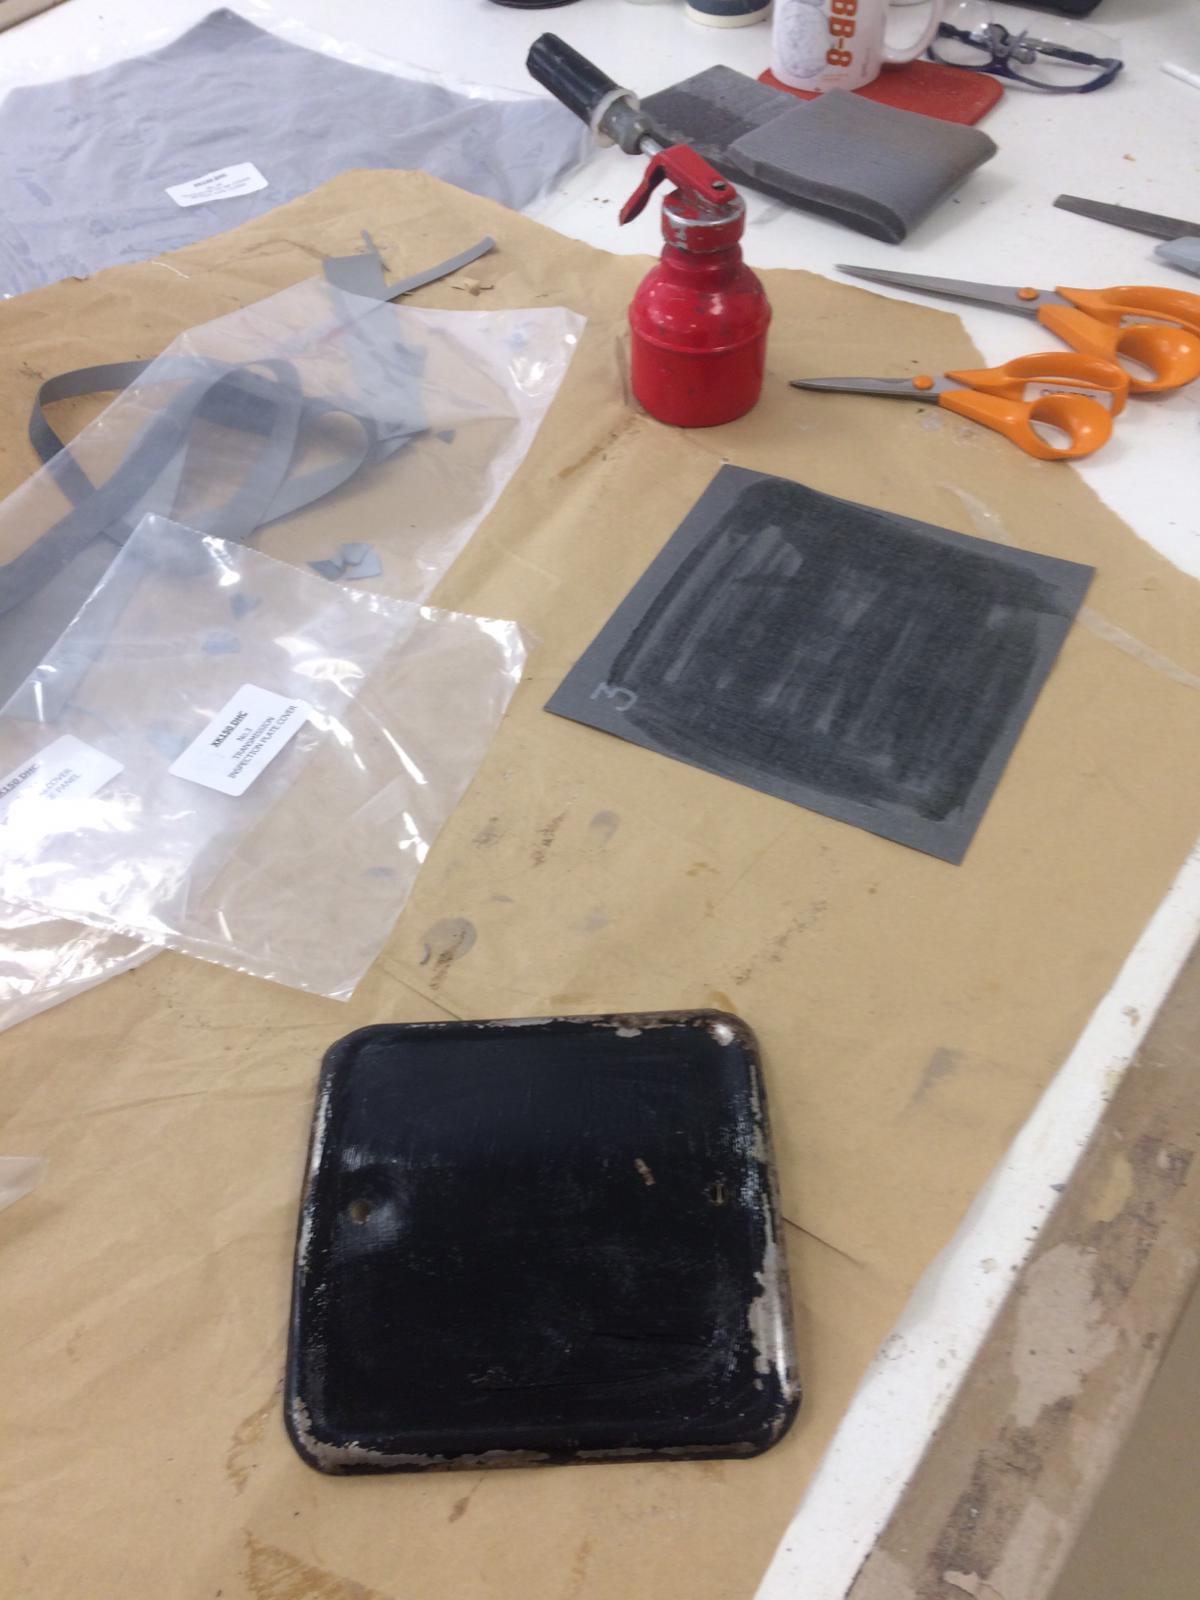
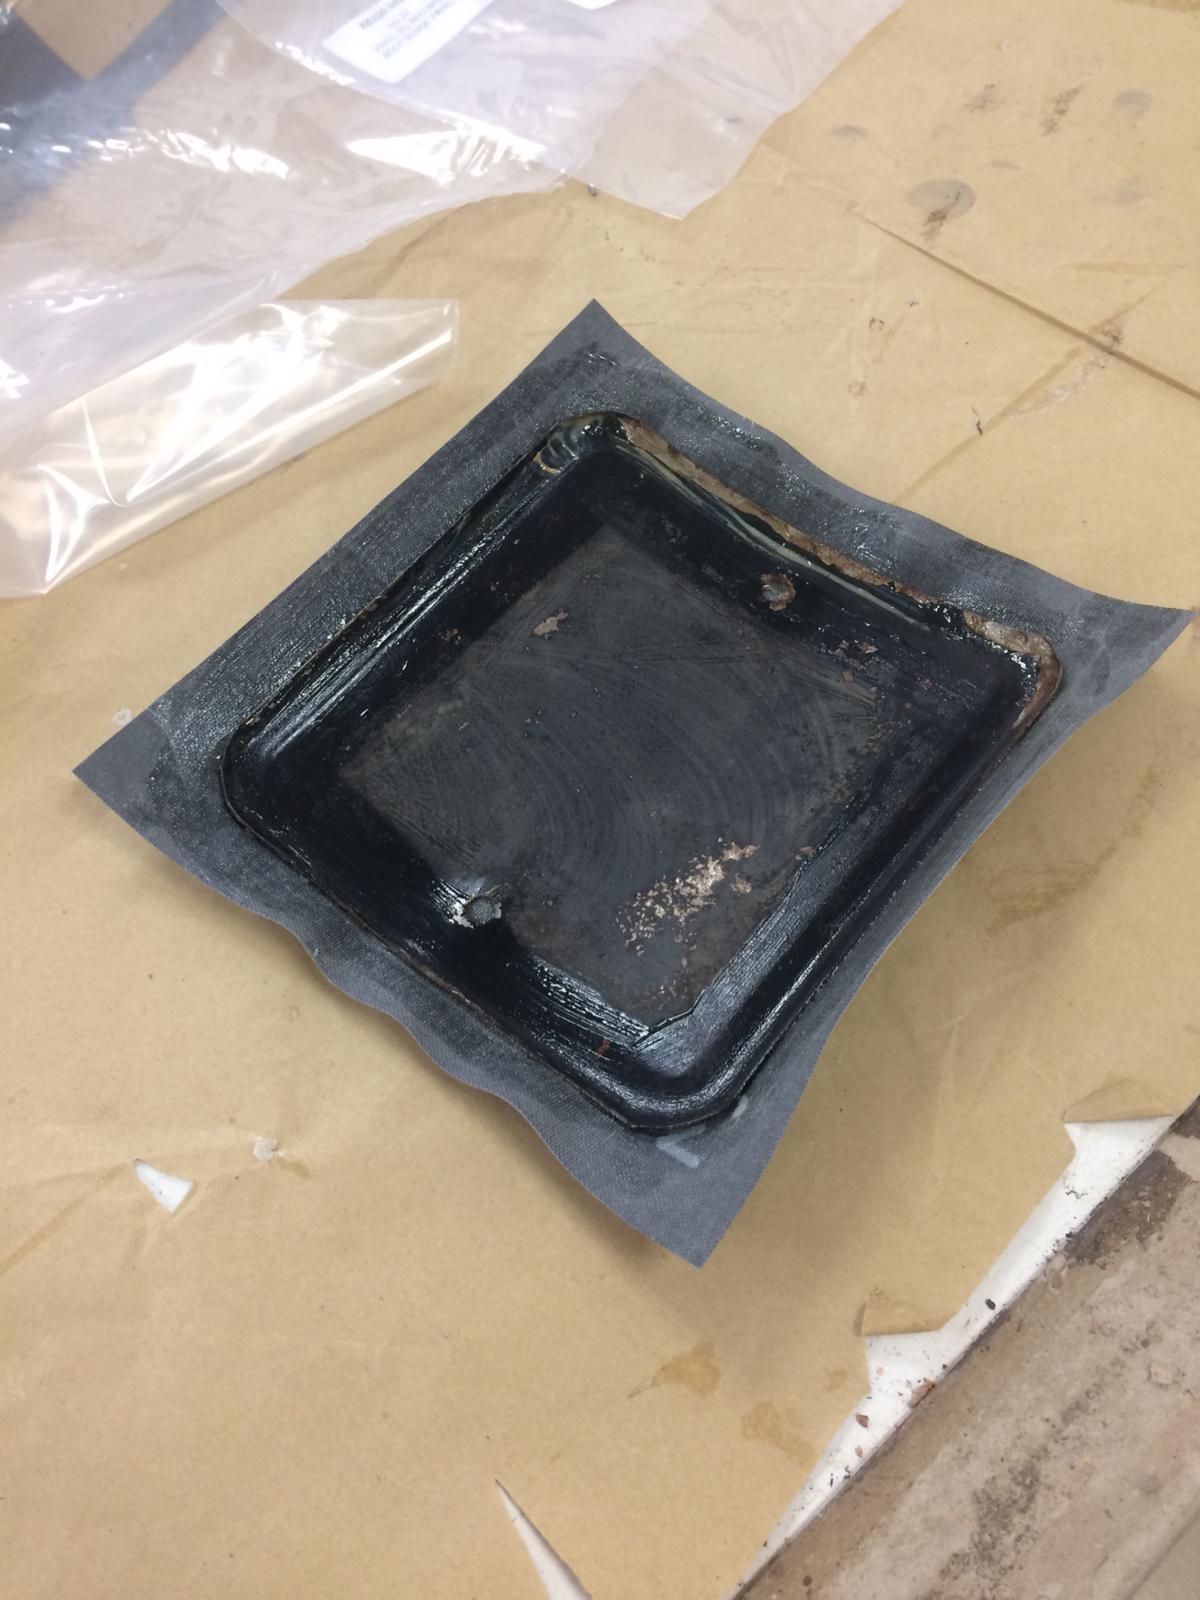
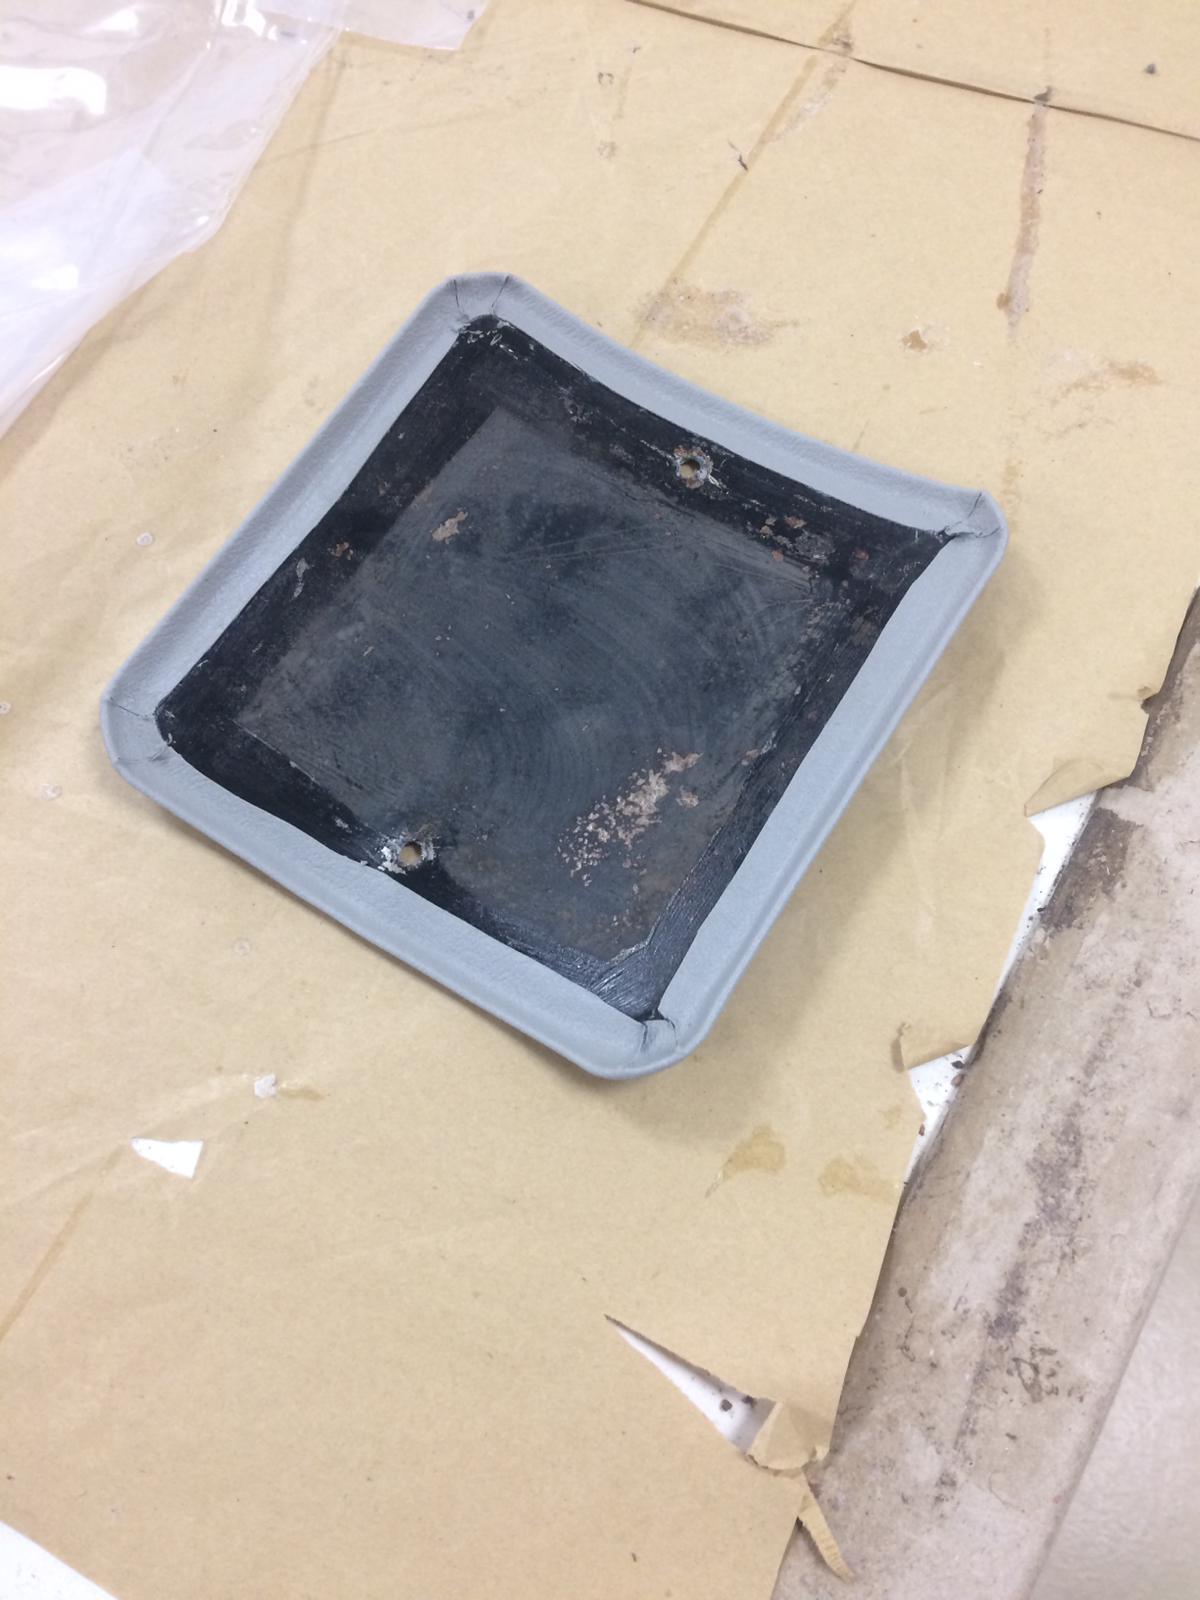
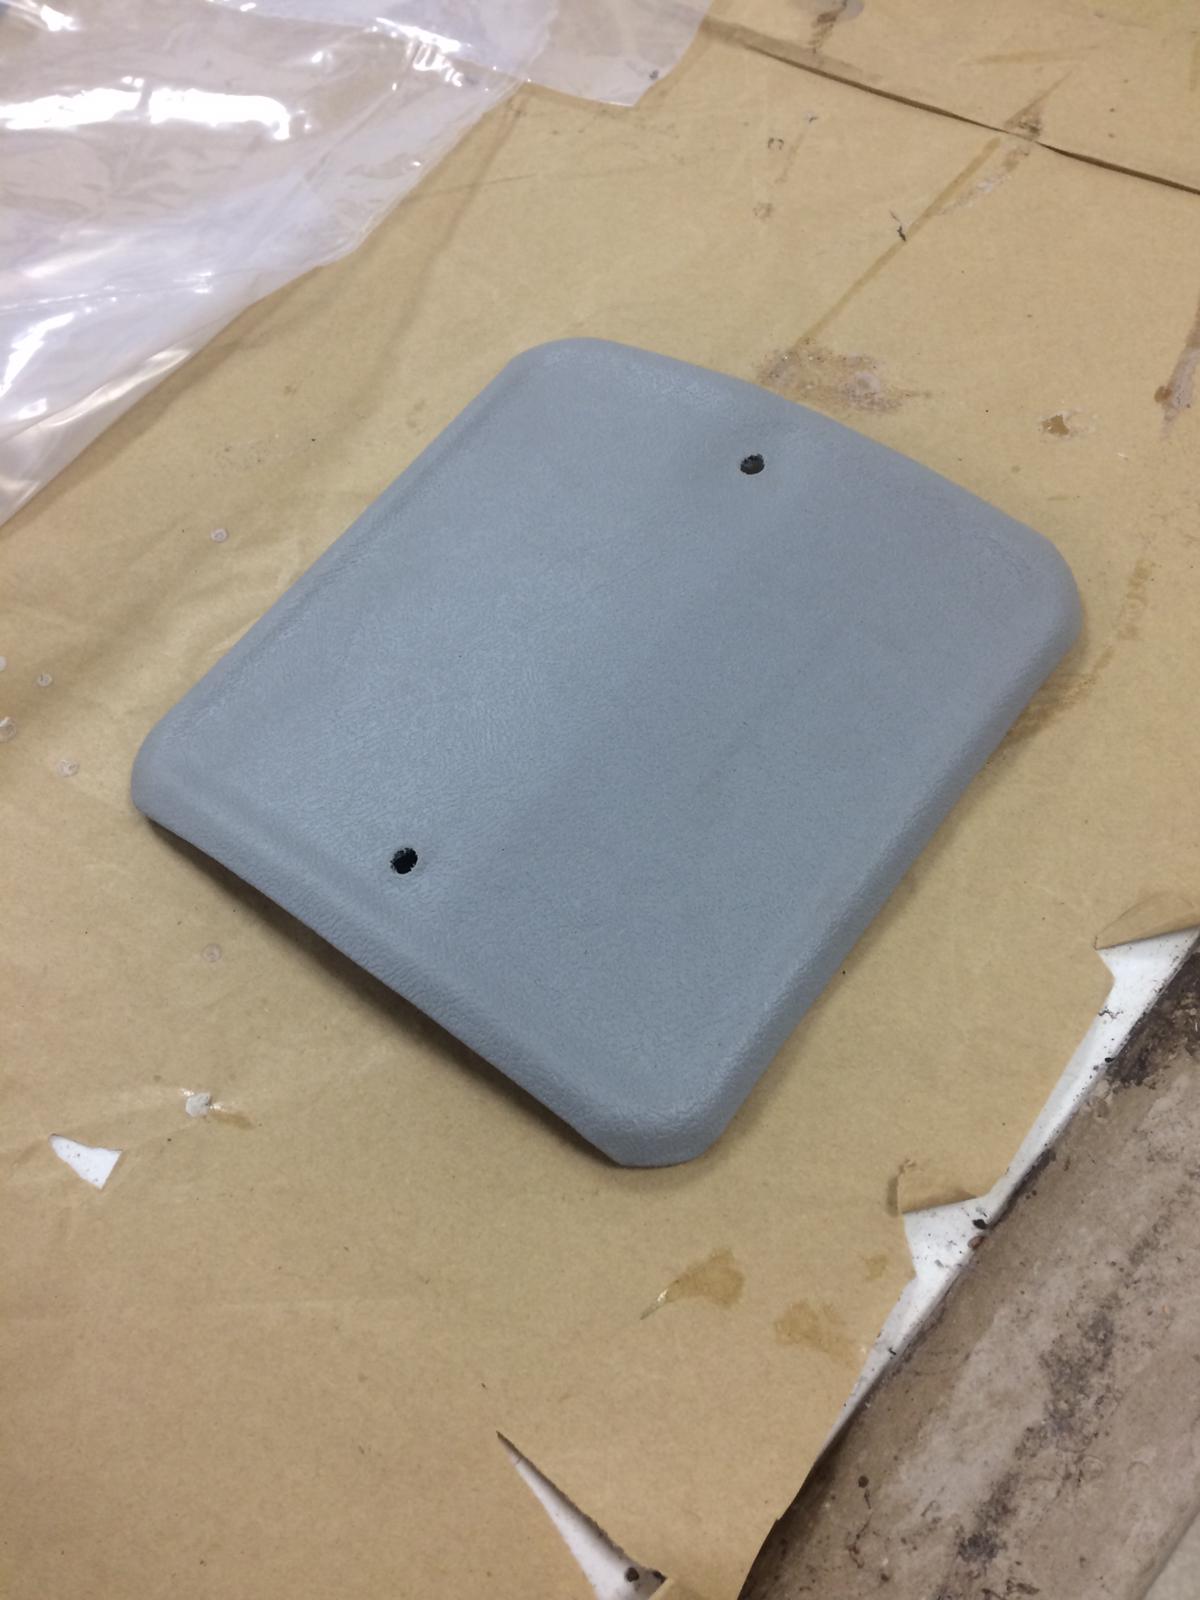
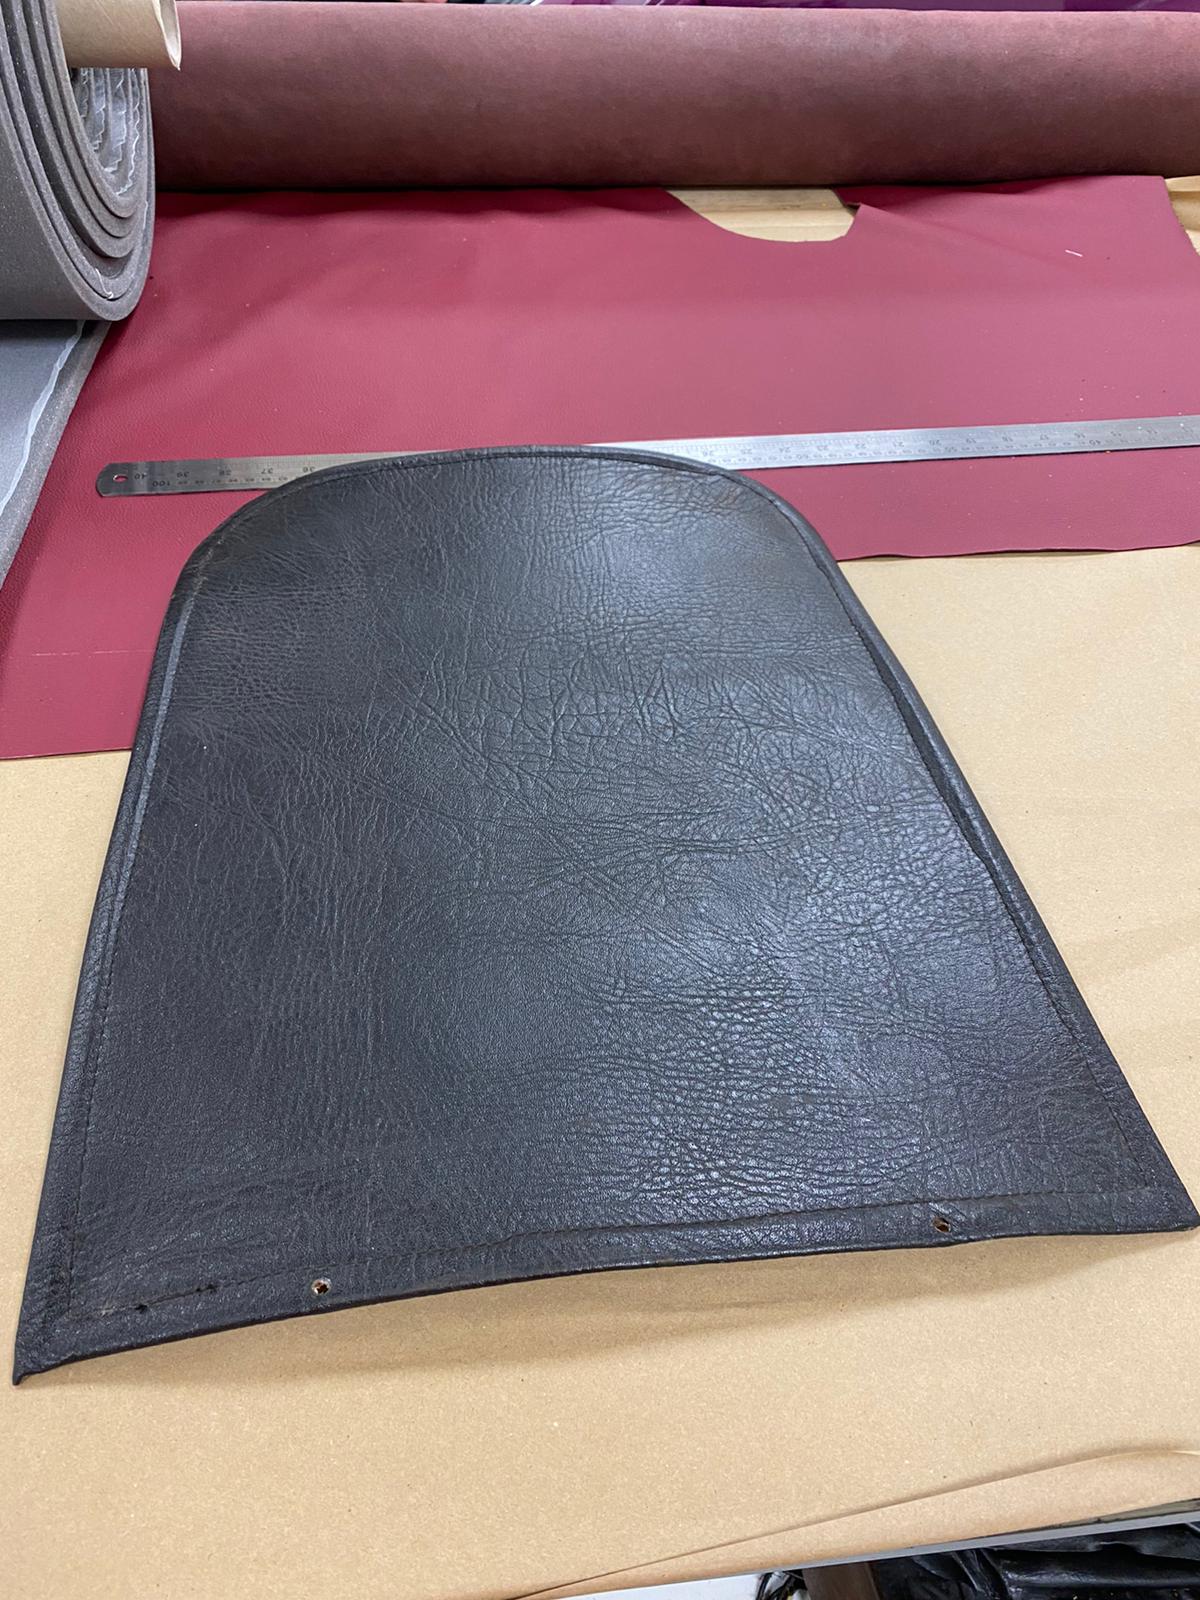
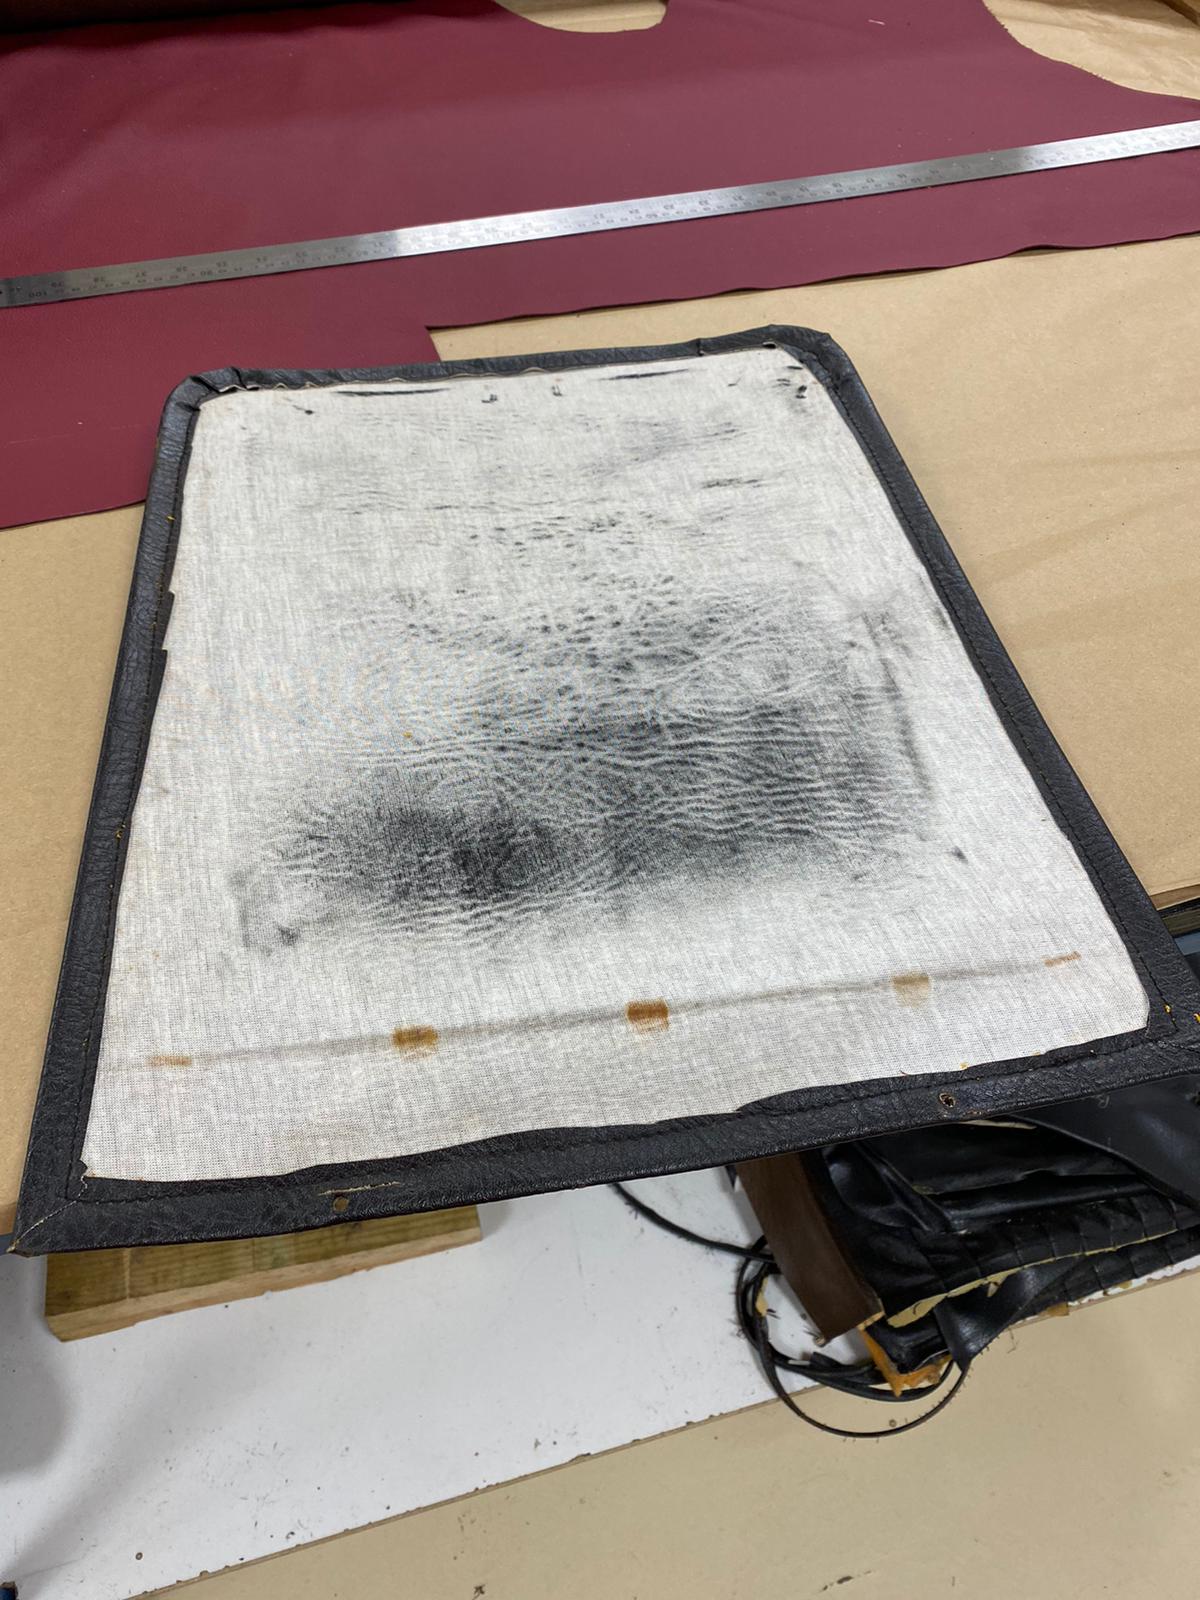
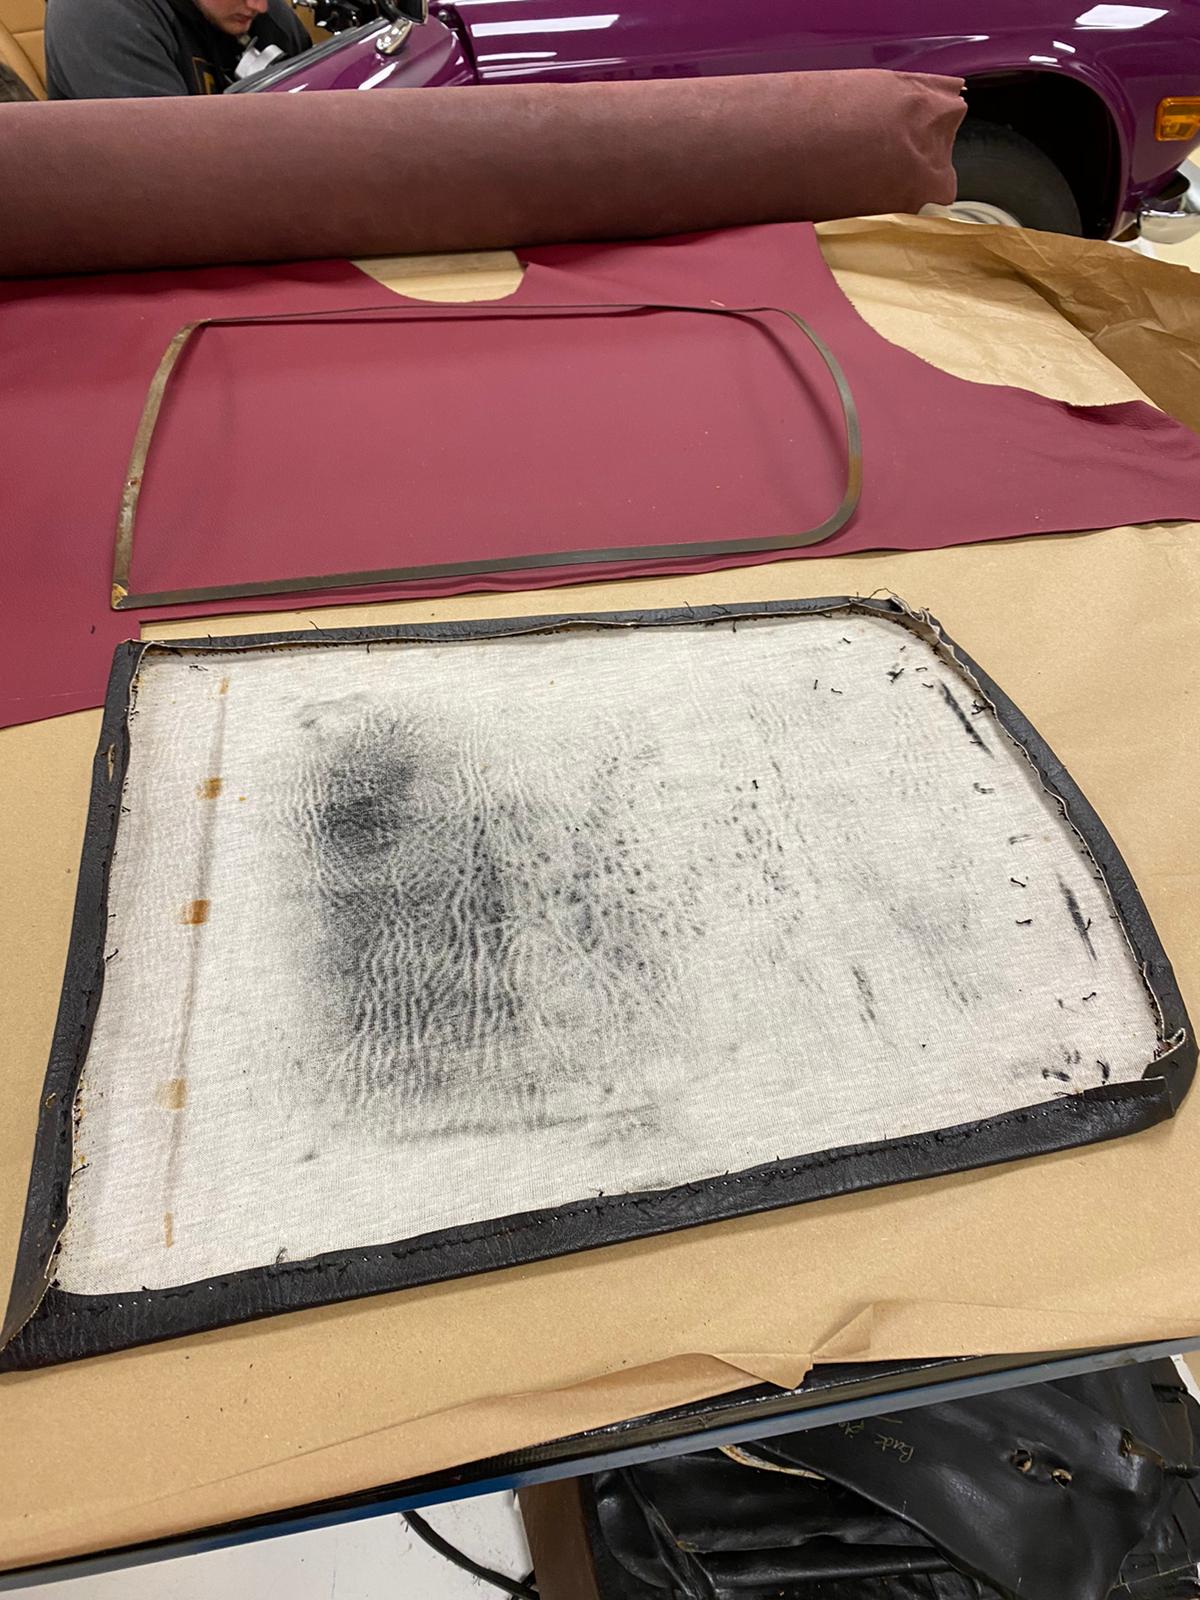
Some other interior panels have also has Brian’s magic touch. Including the boot hinge cover, the transmission inspection plate and the petrol pipe cover. All hand crafted and finished in a matching vinyl.
All these sections and the seats are now ready to be fitted back into the car. How sharp does this interior work look?
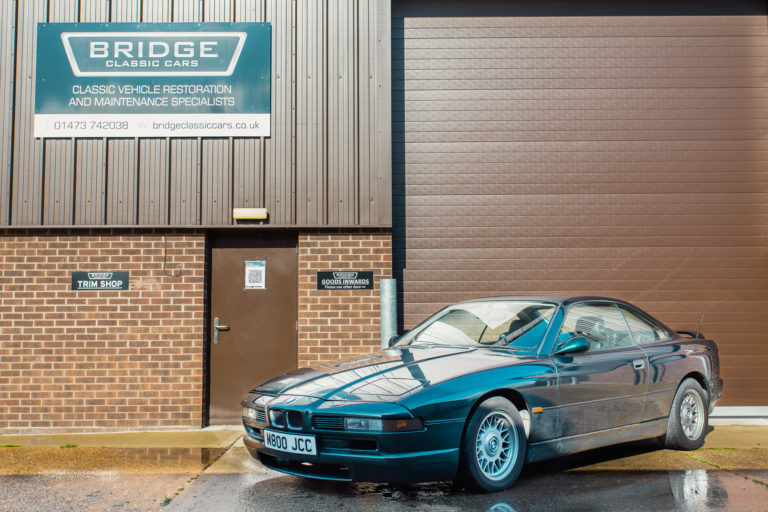
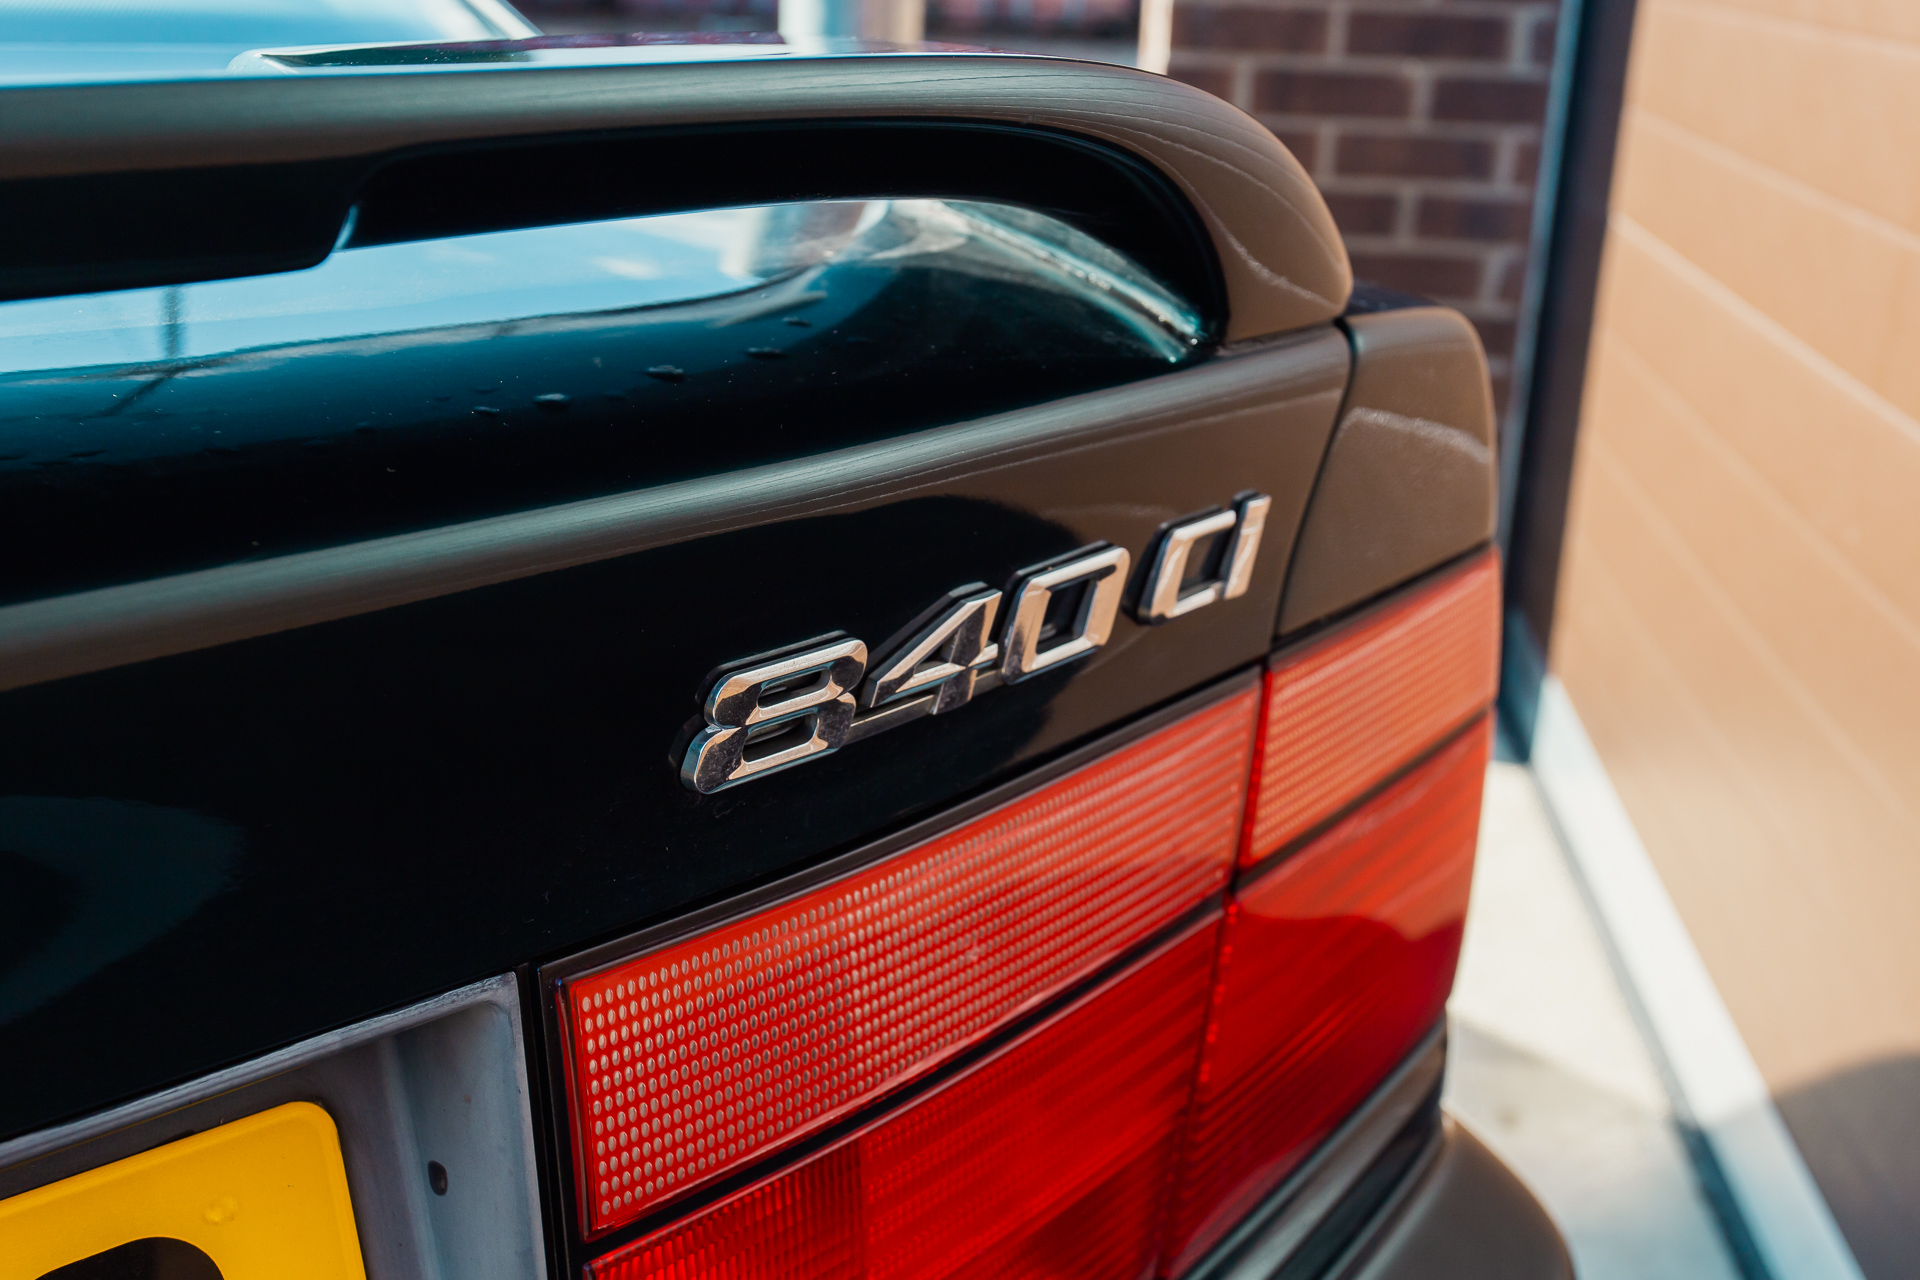
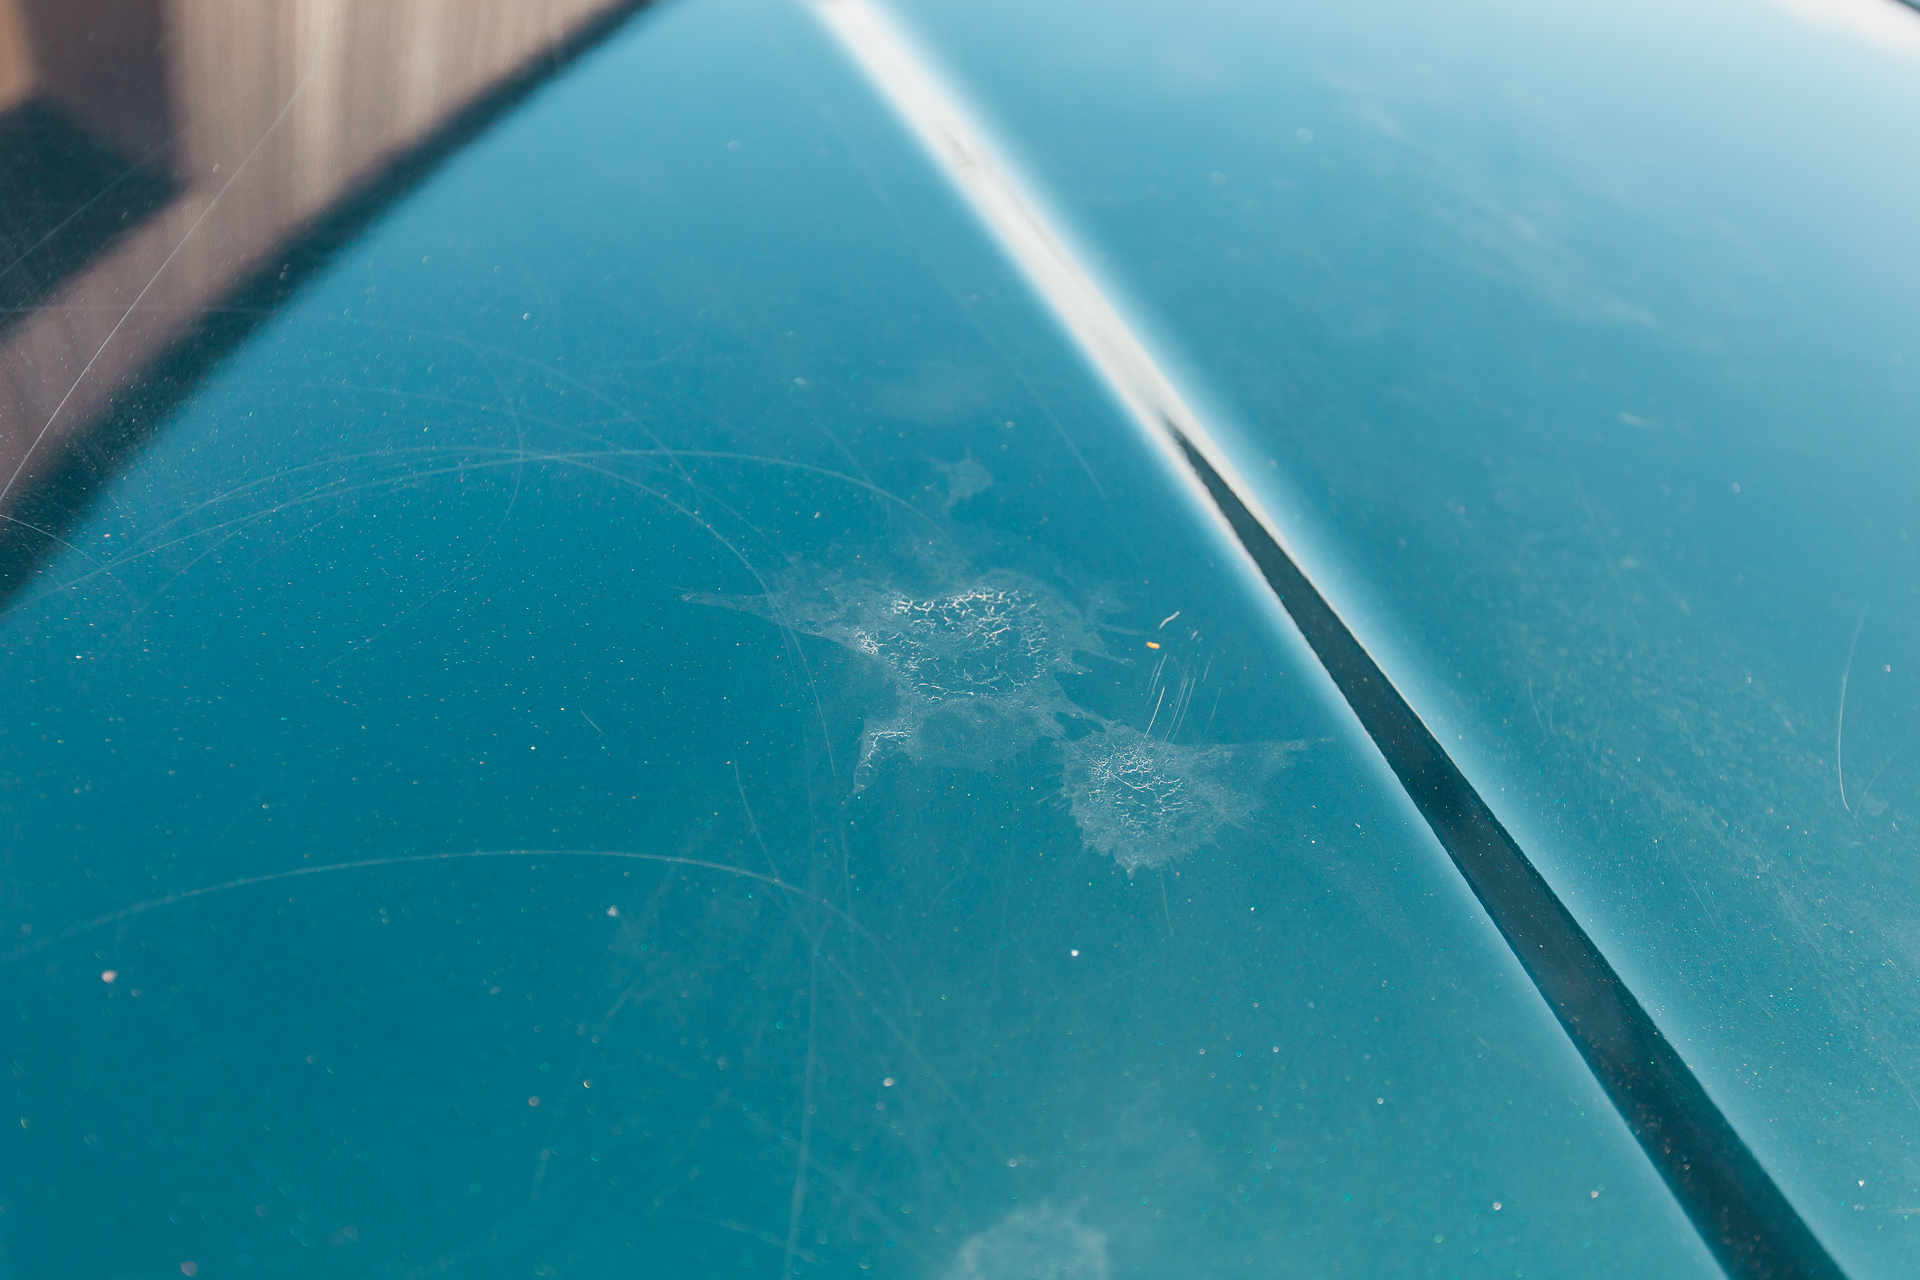
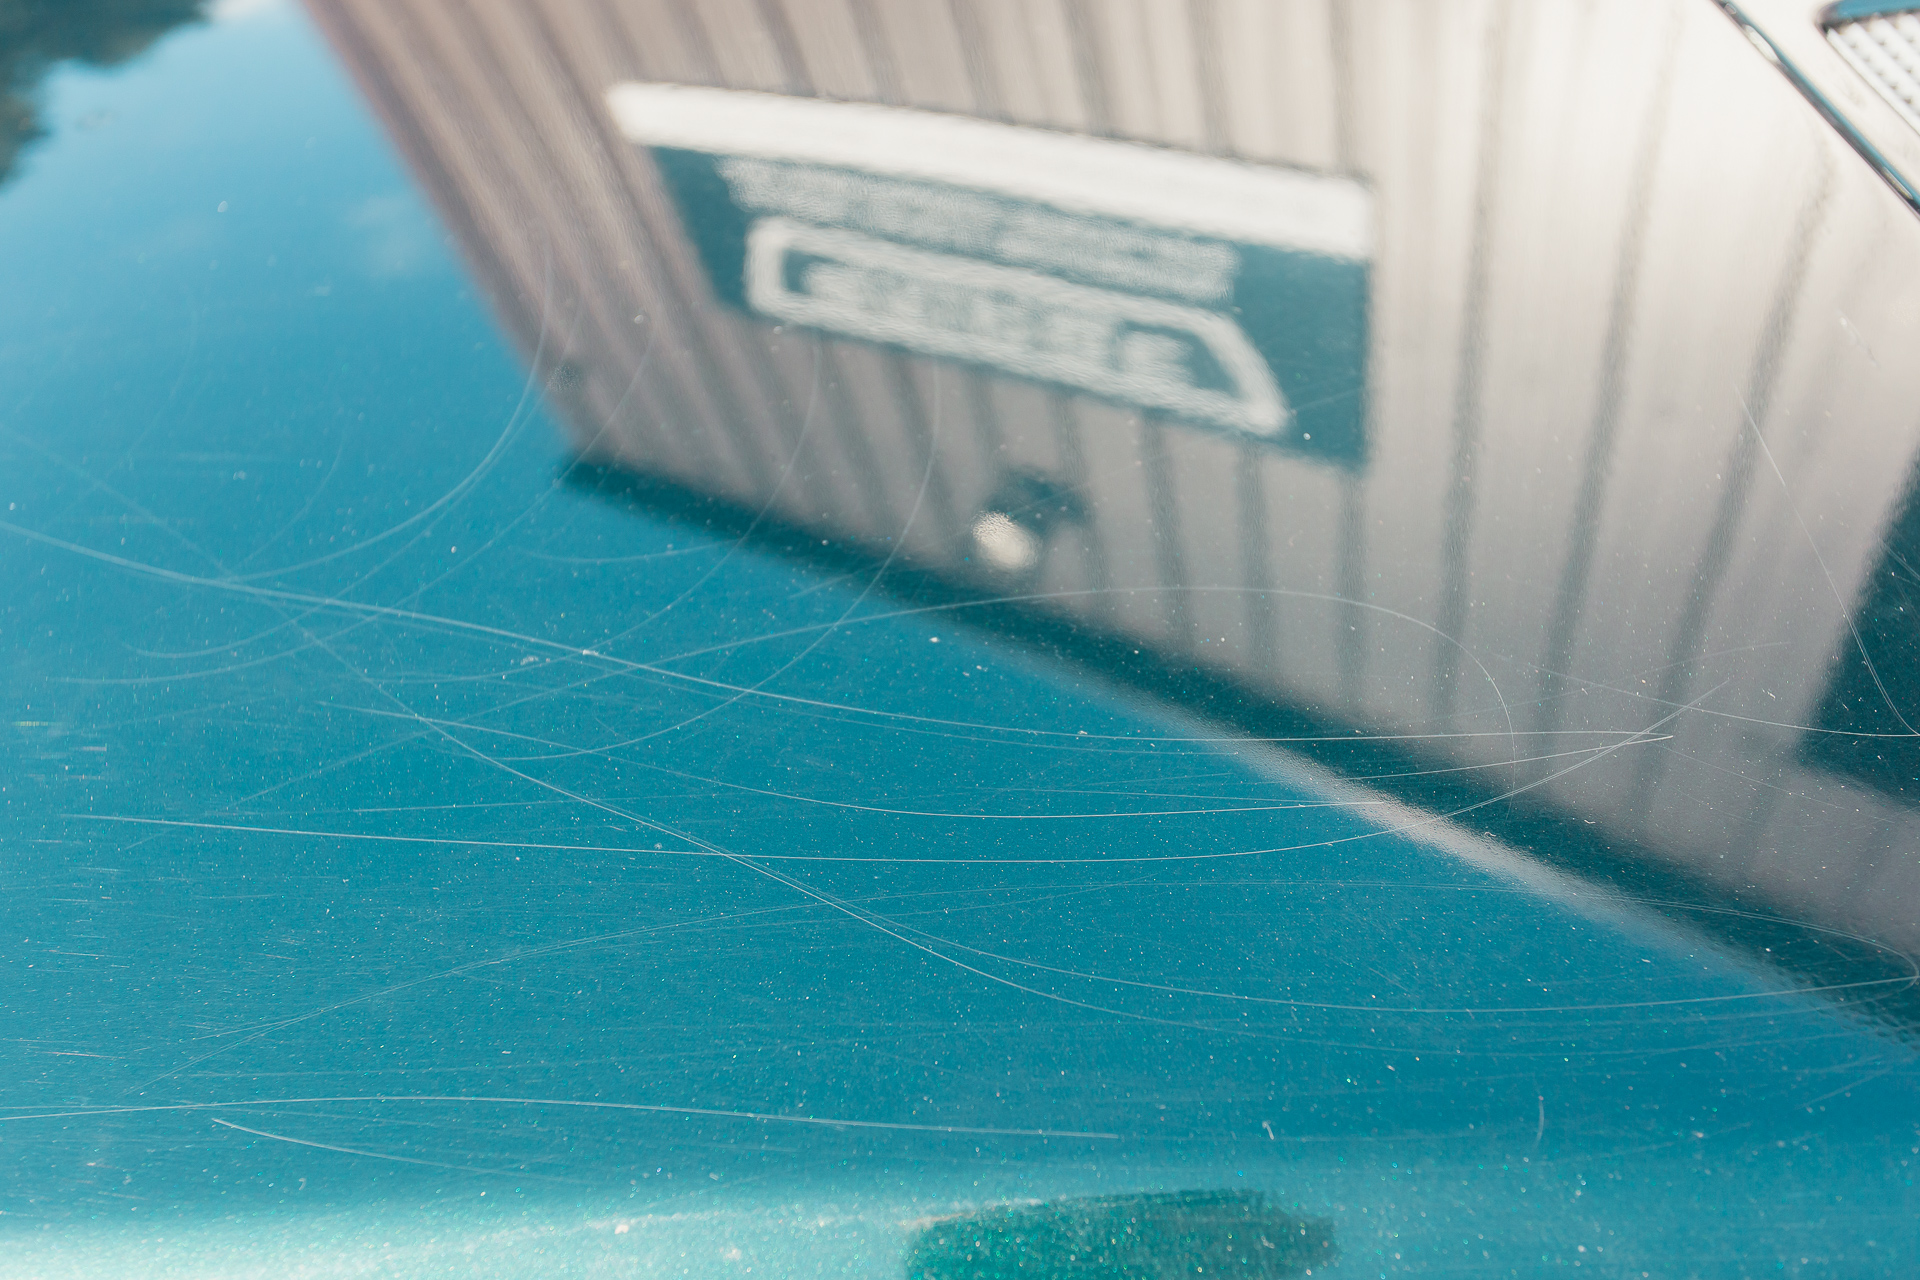
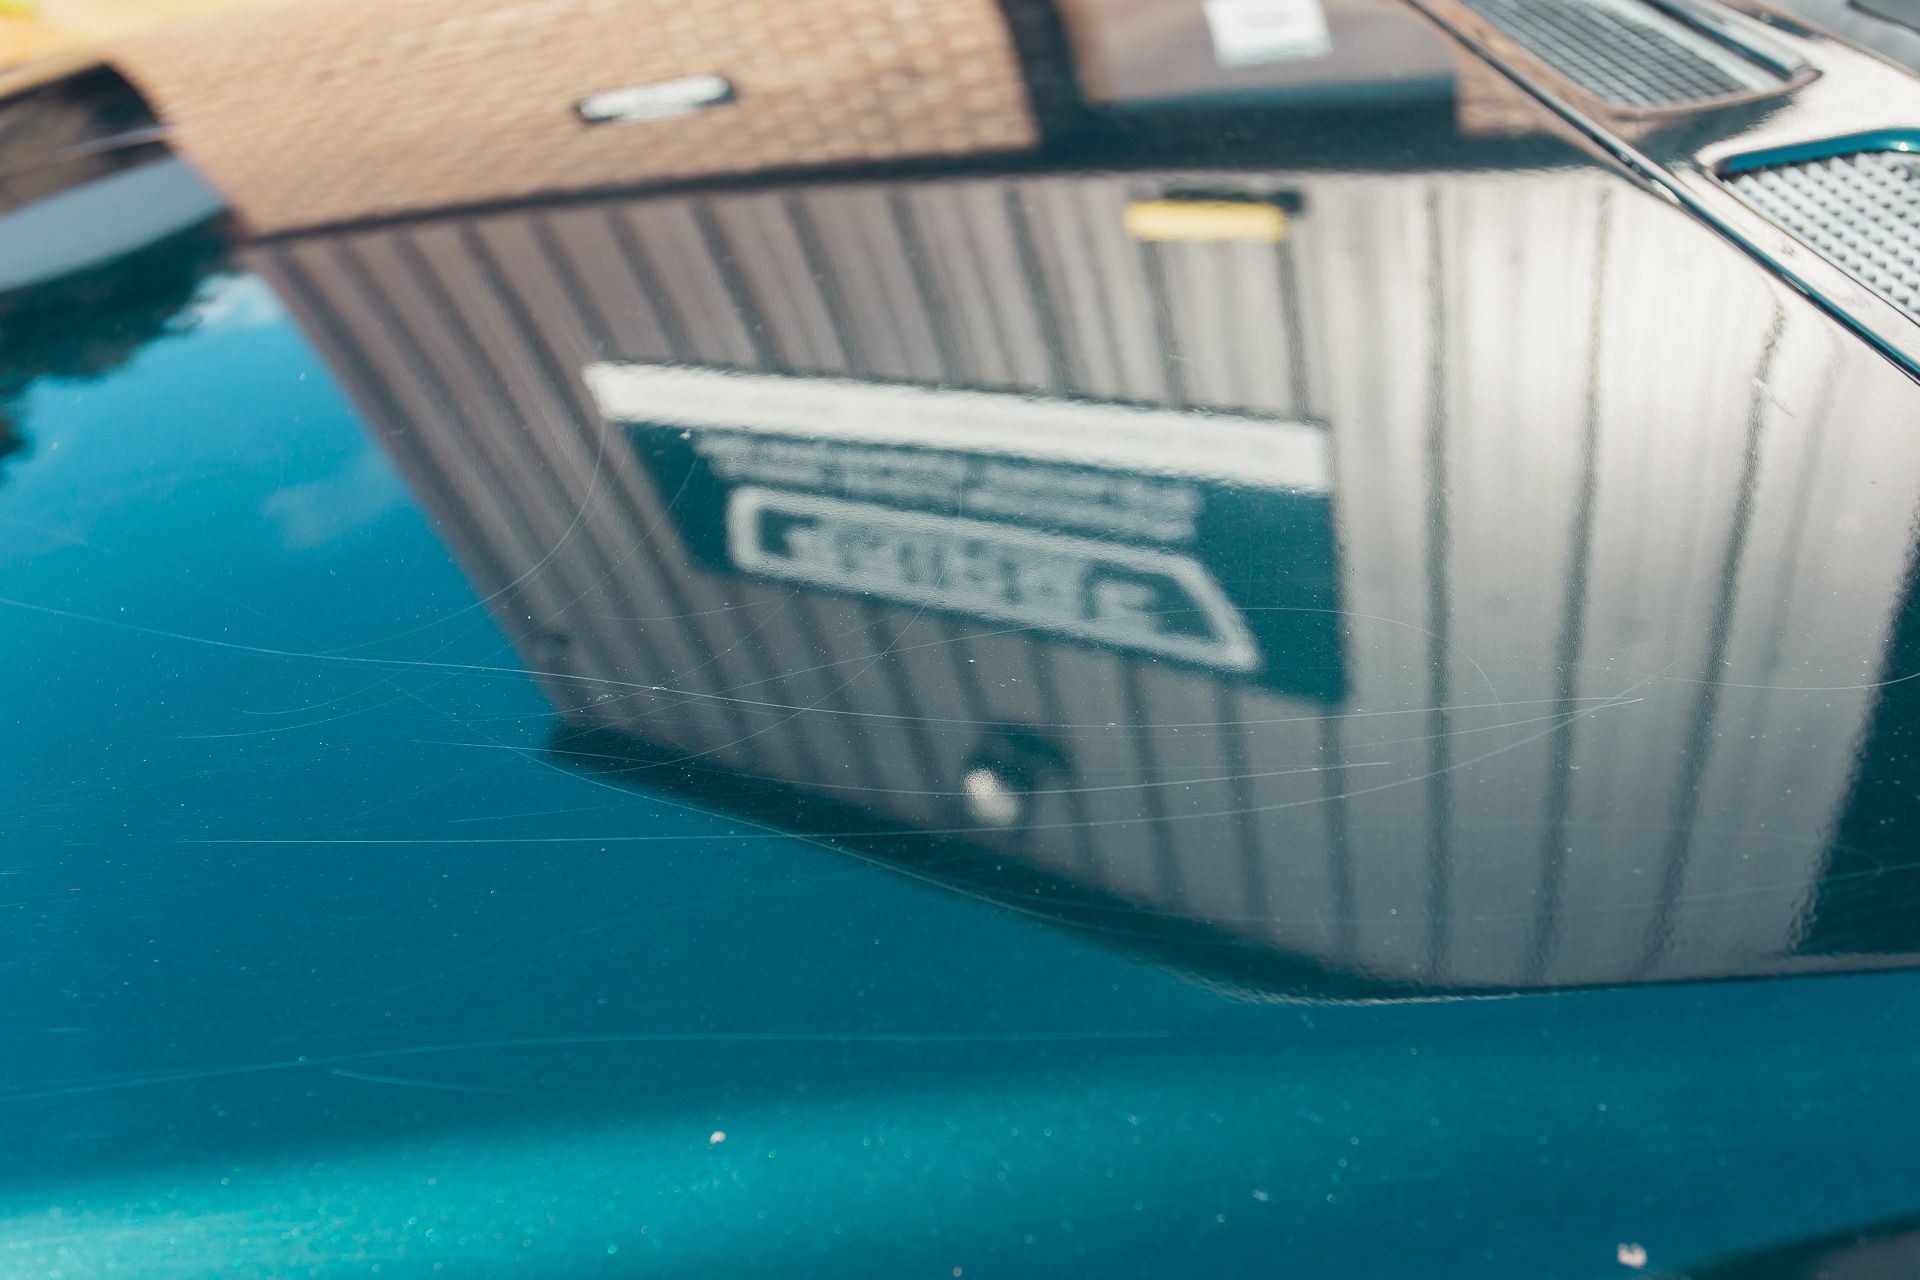
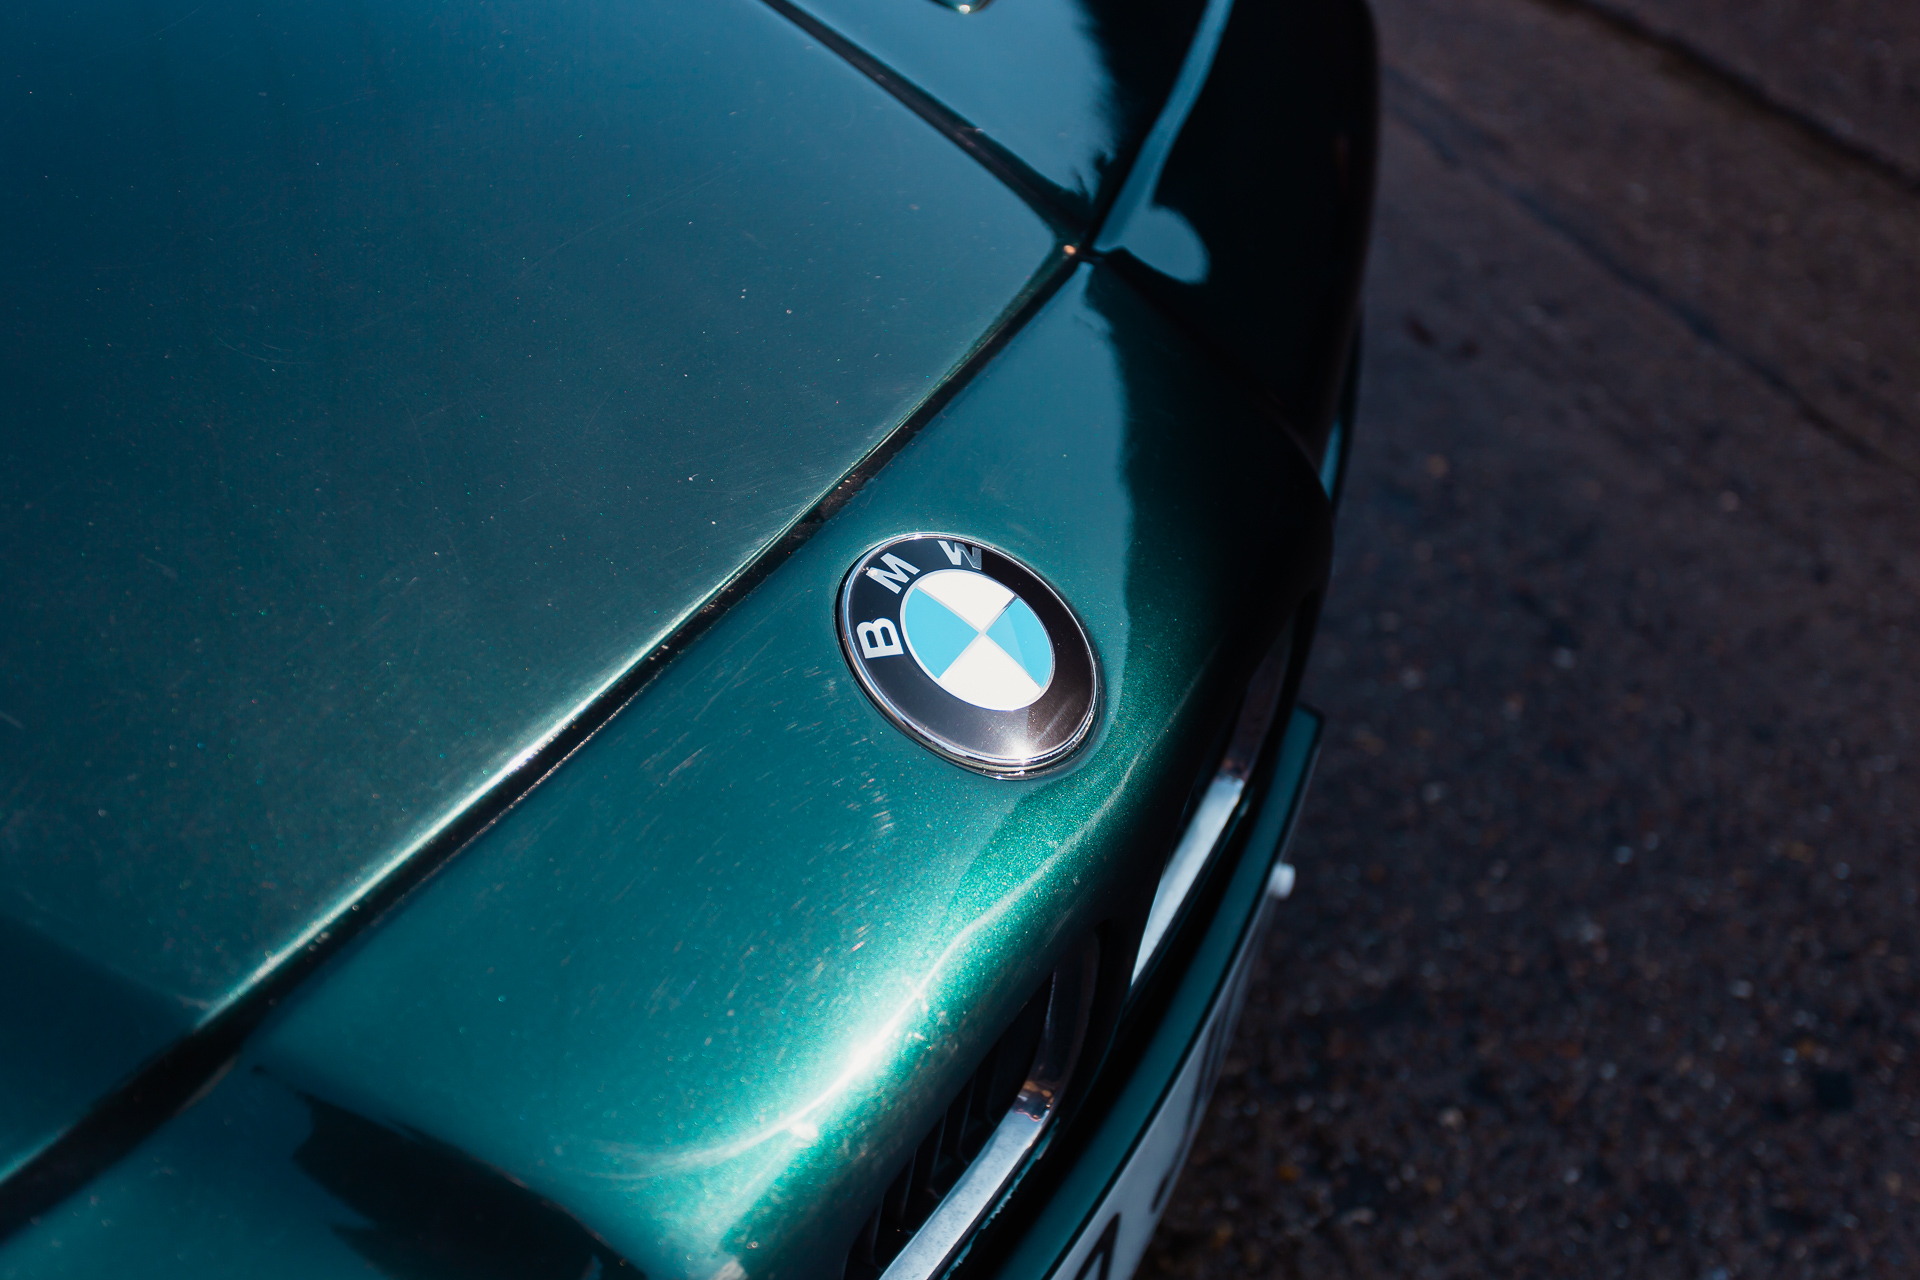
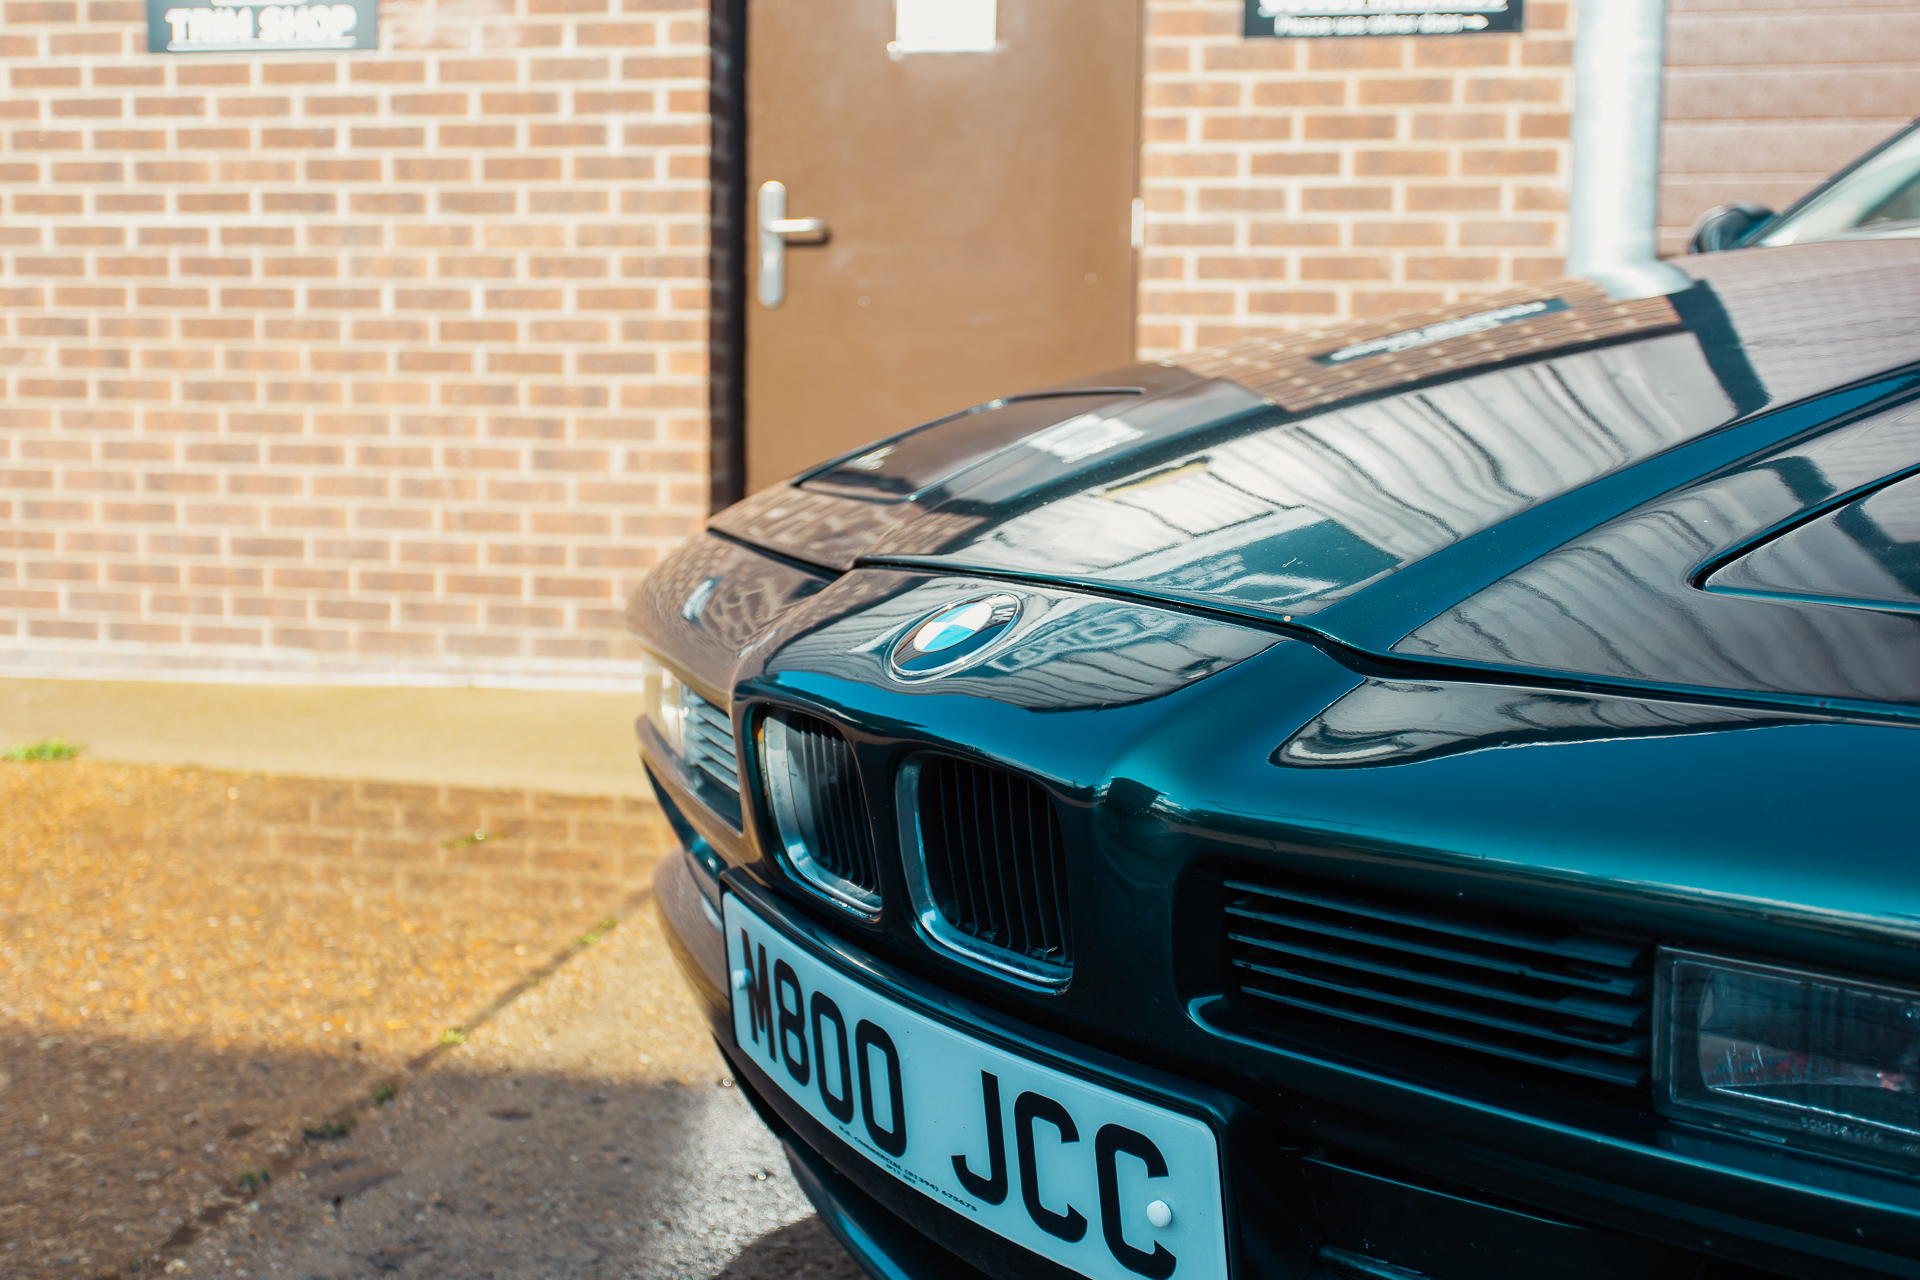
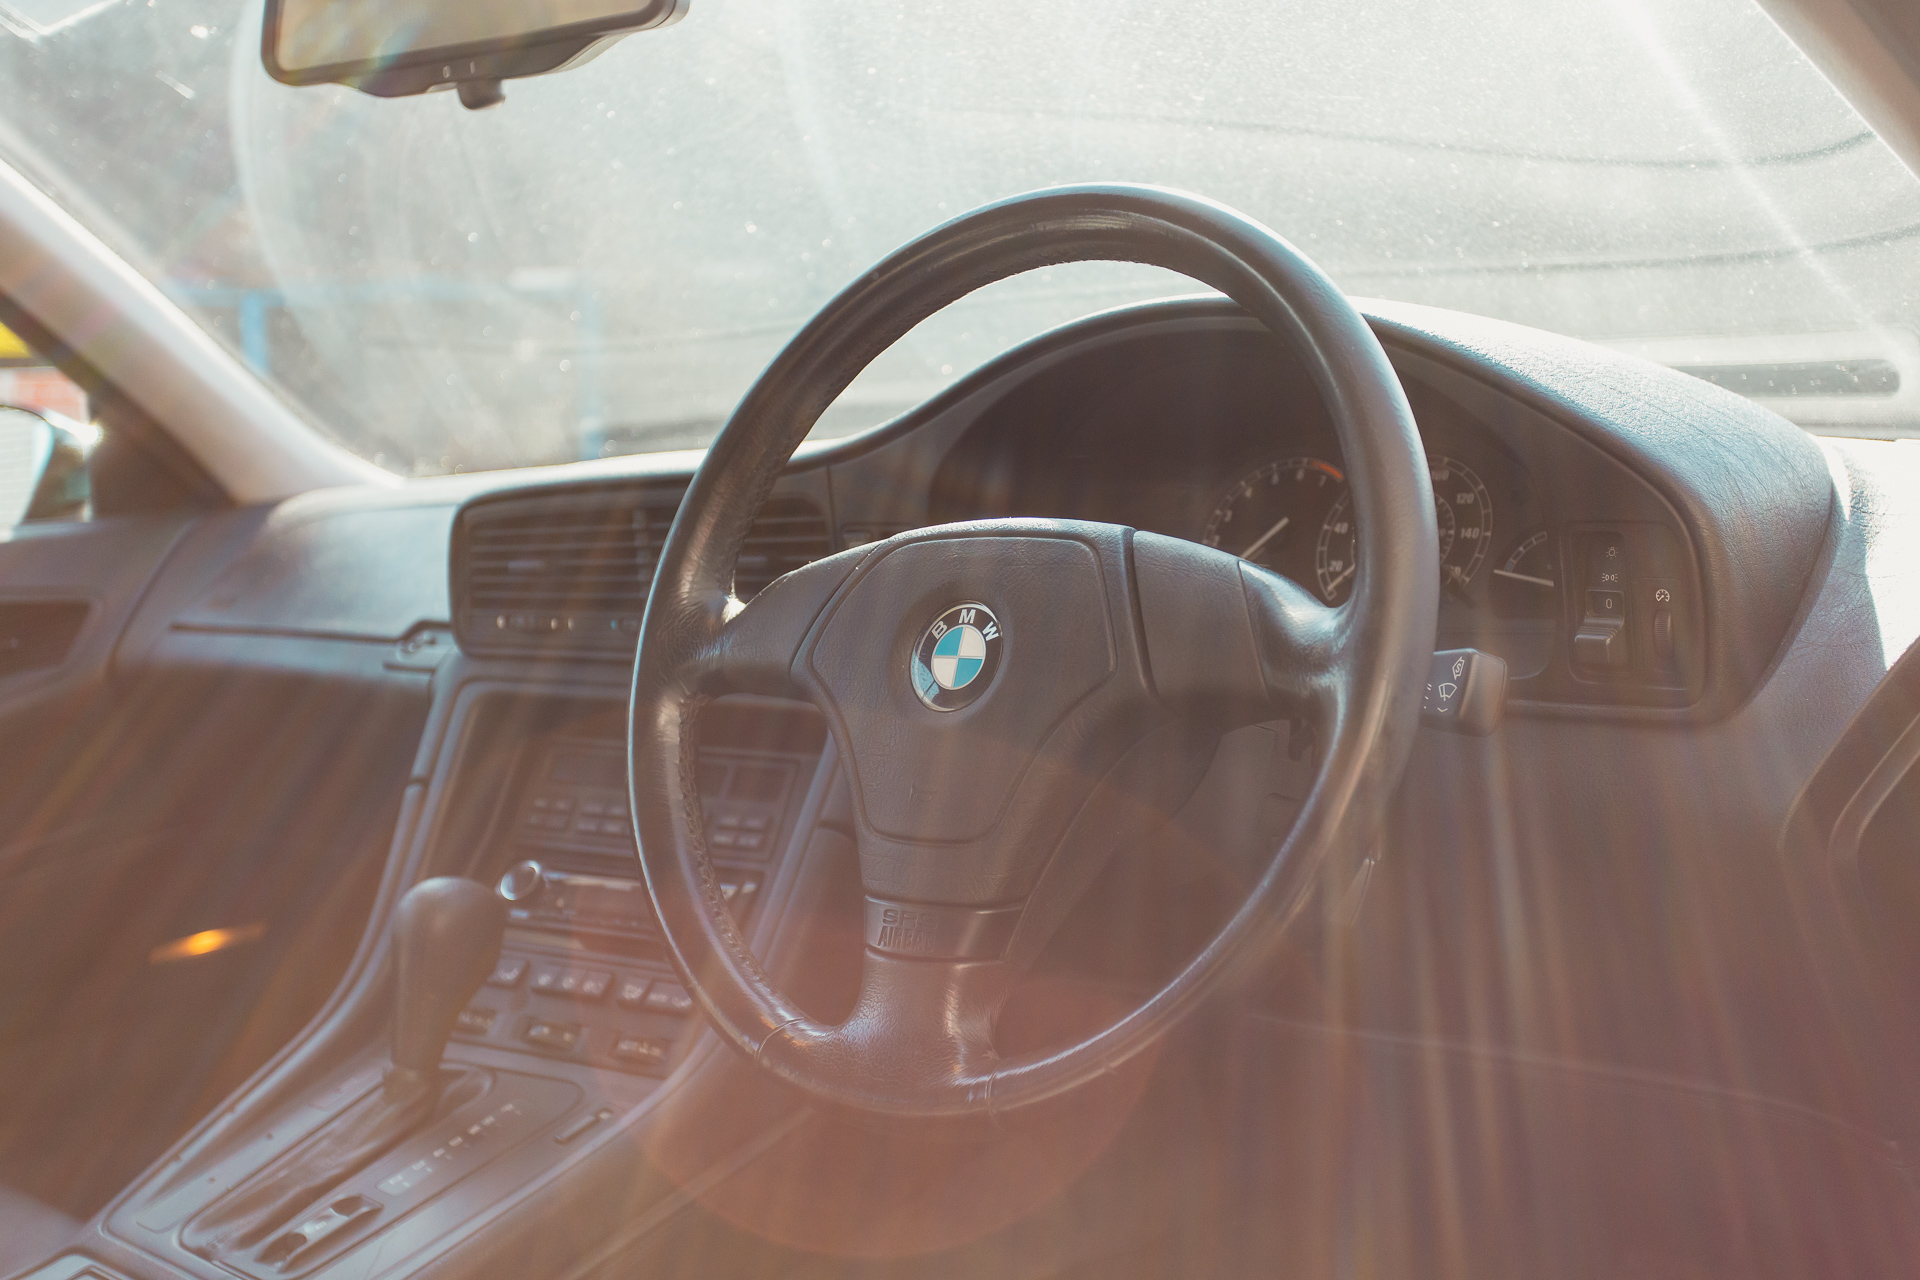
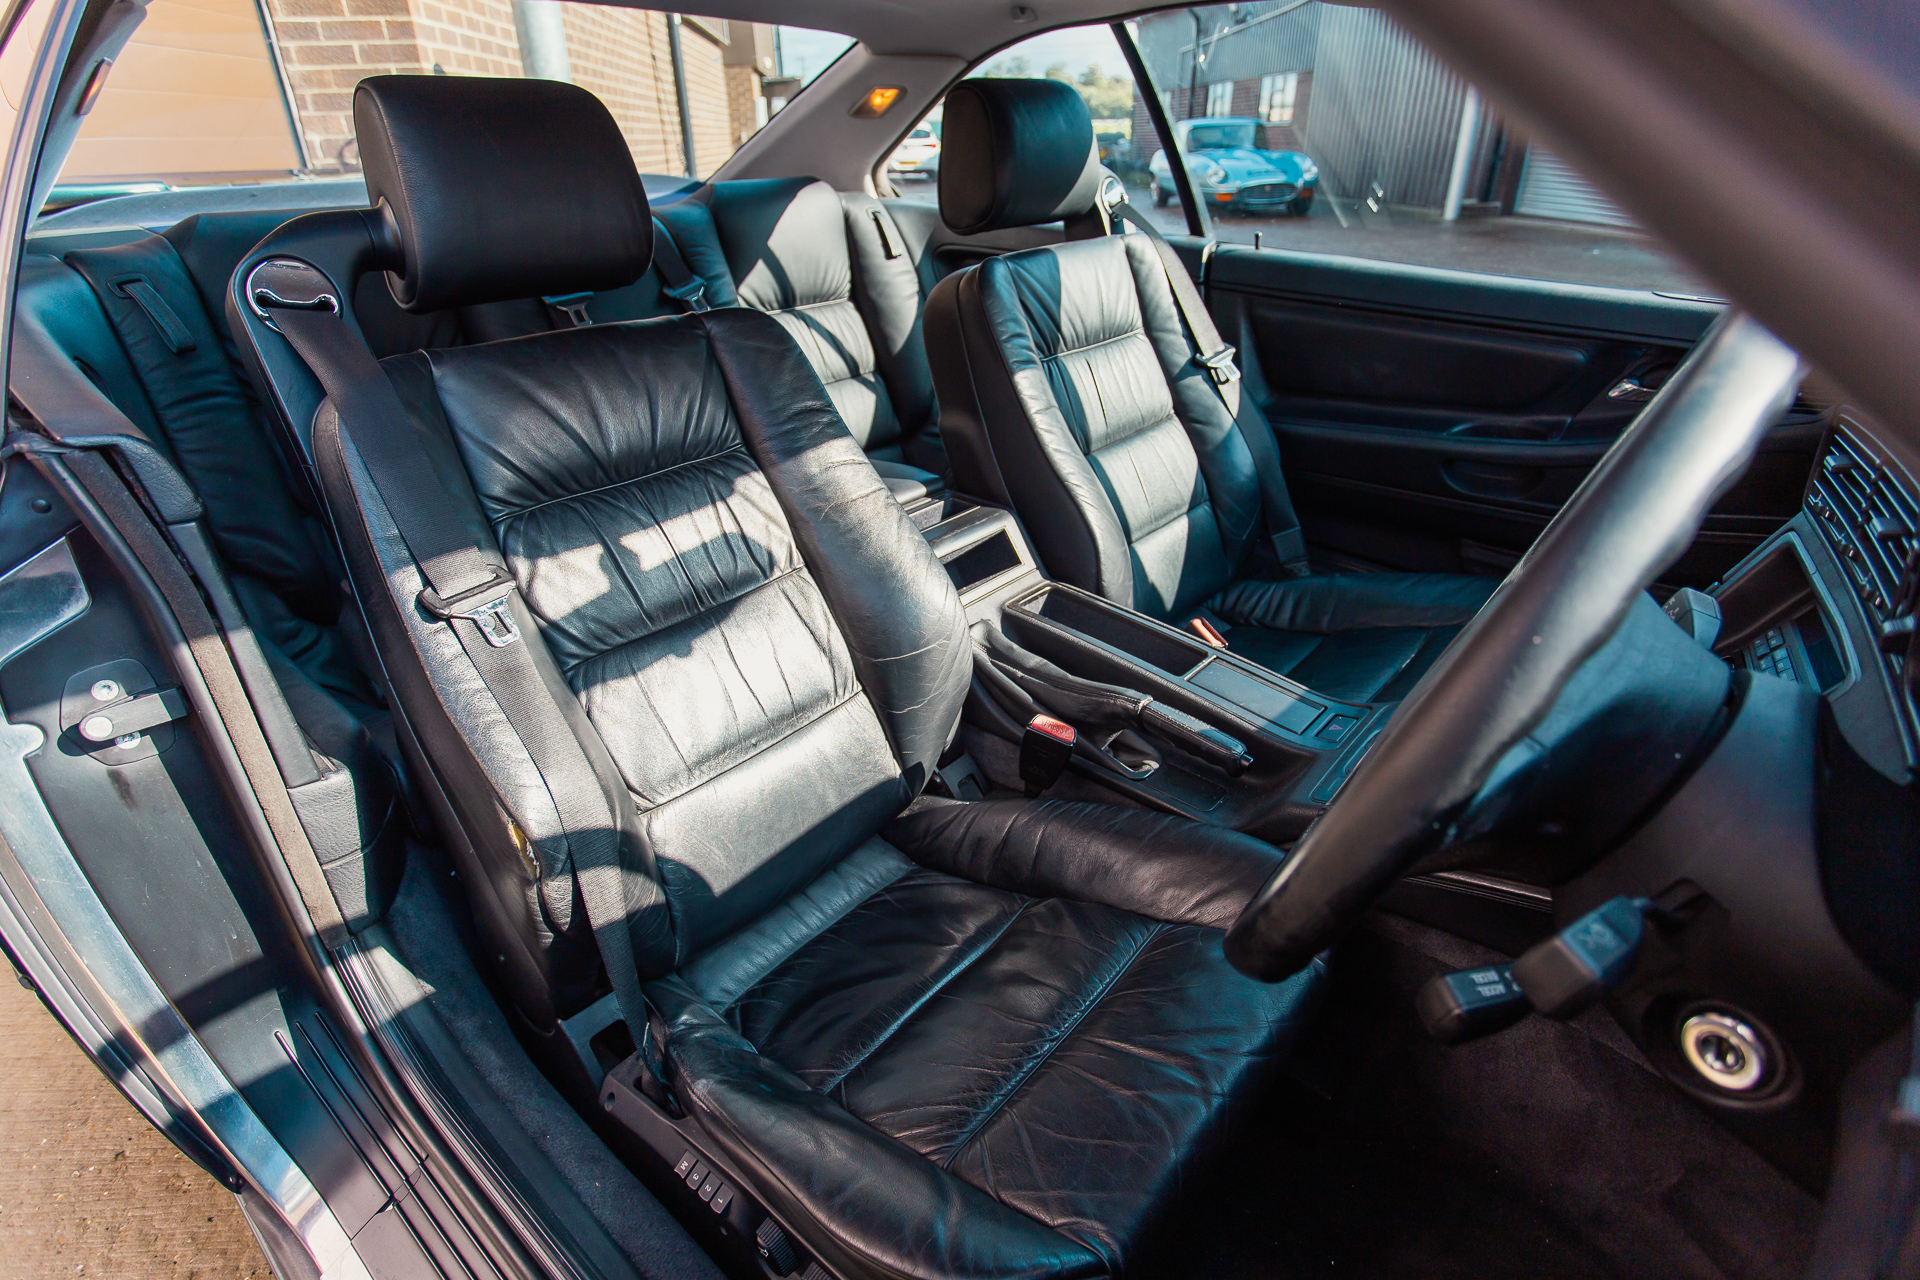
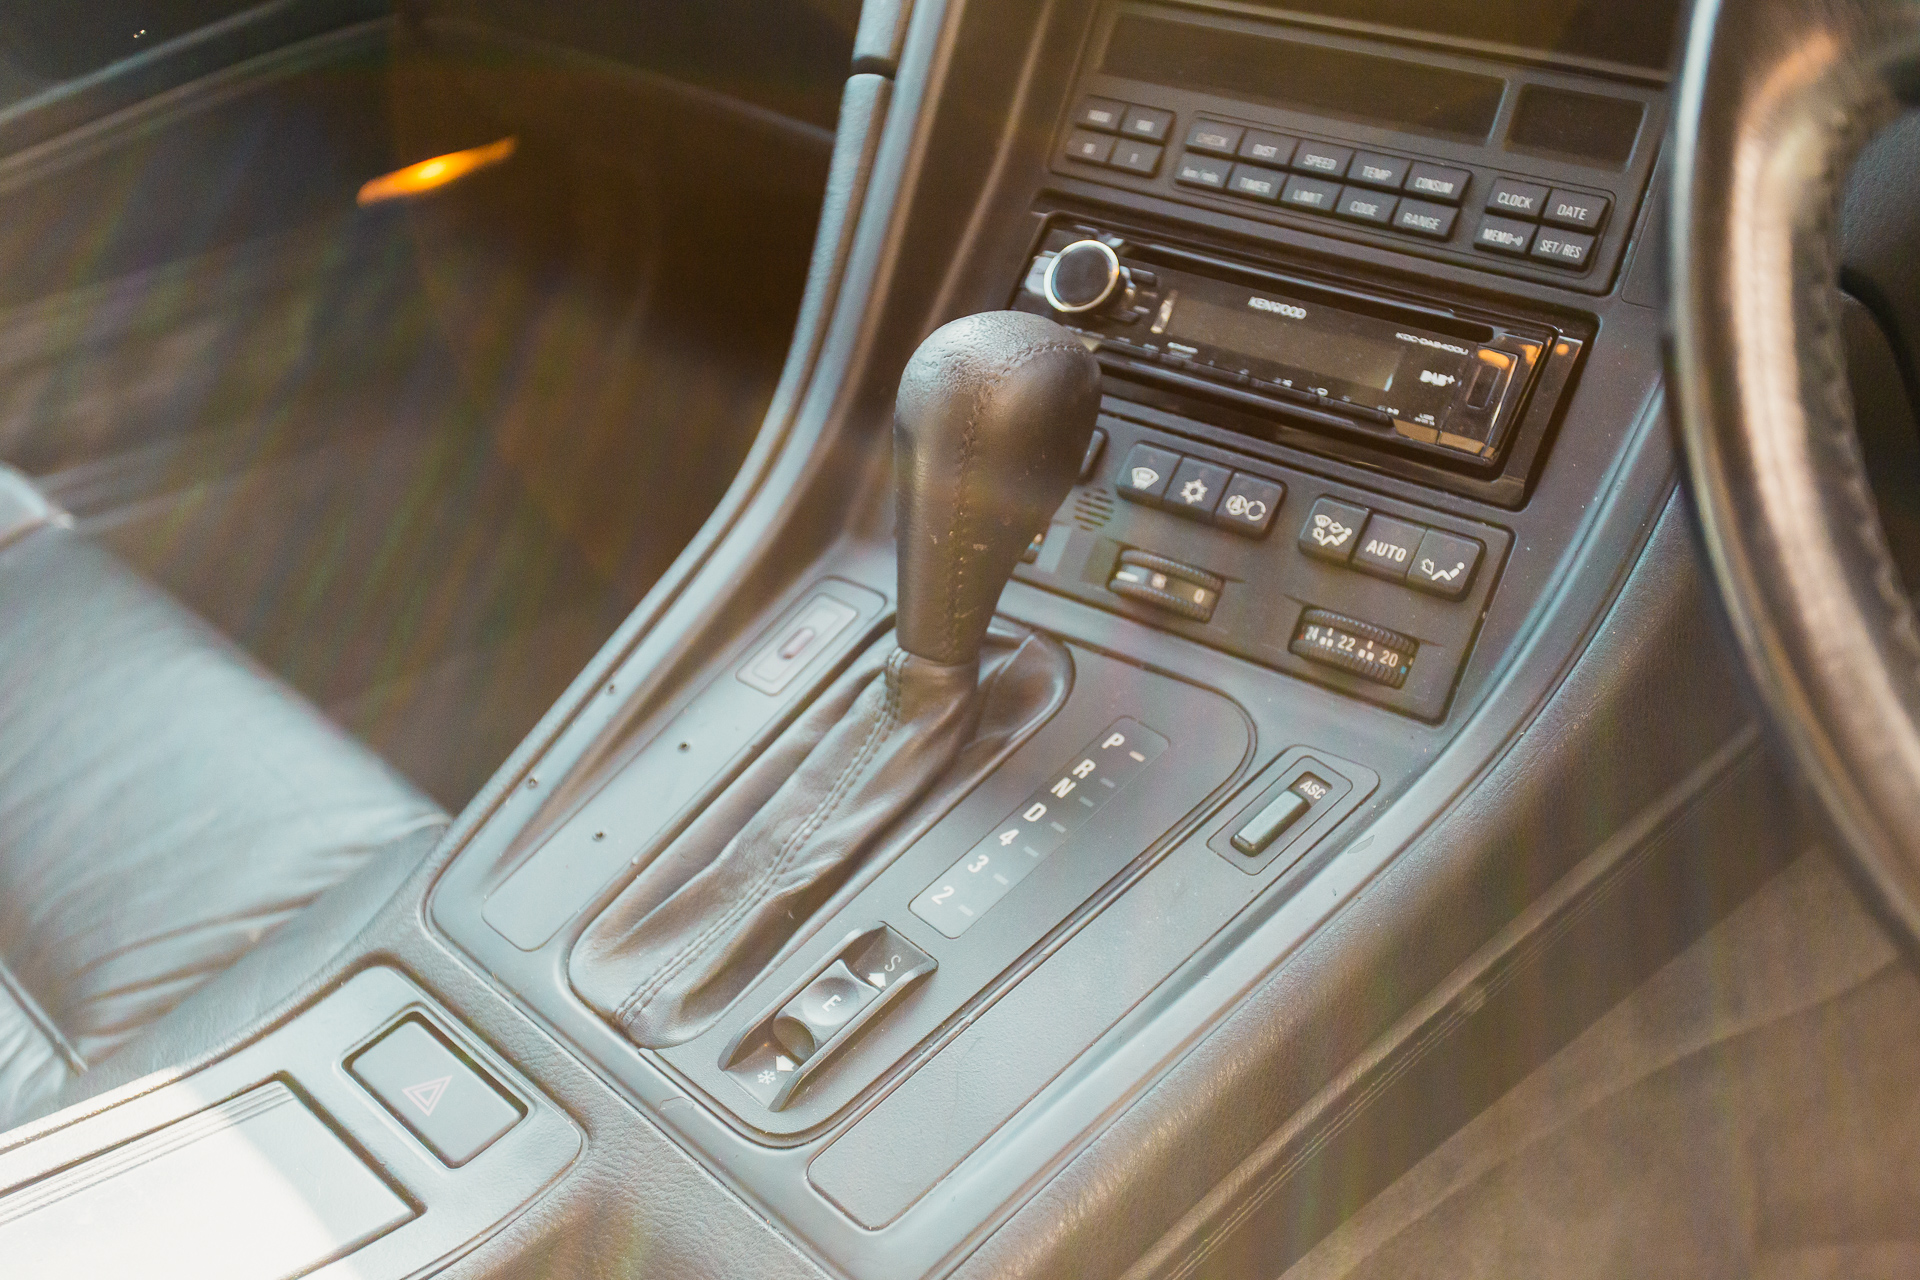
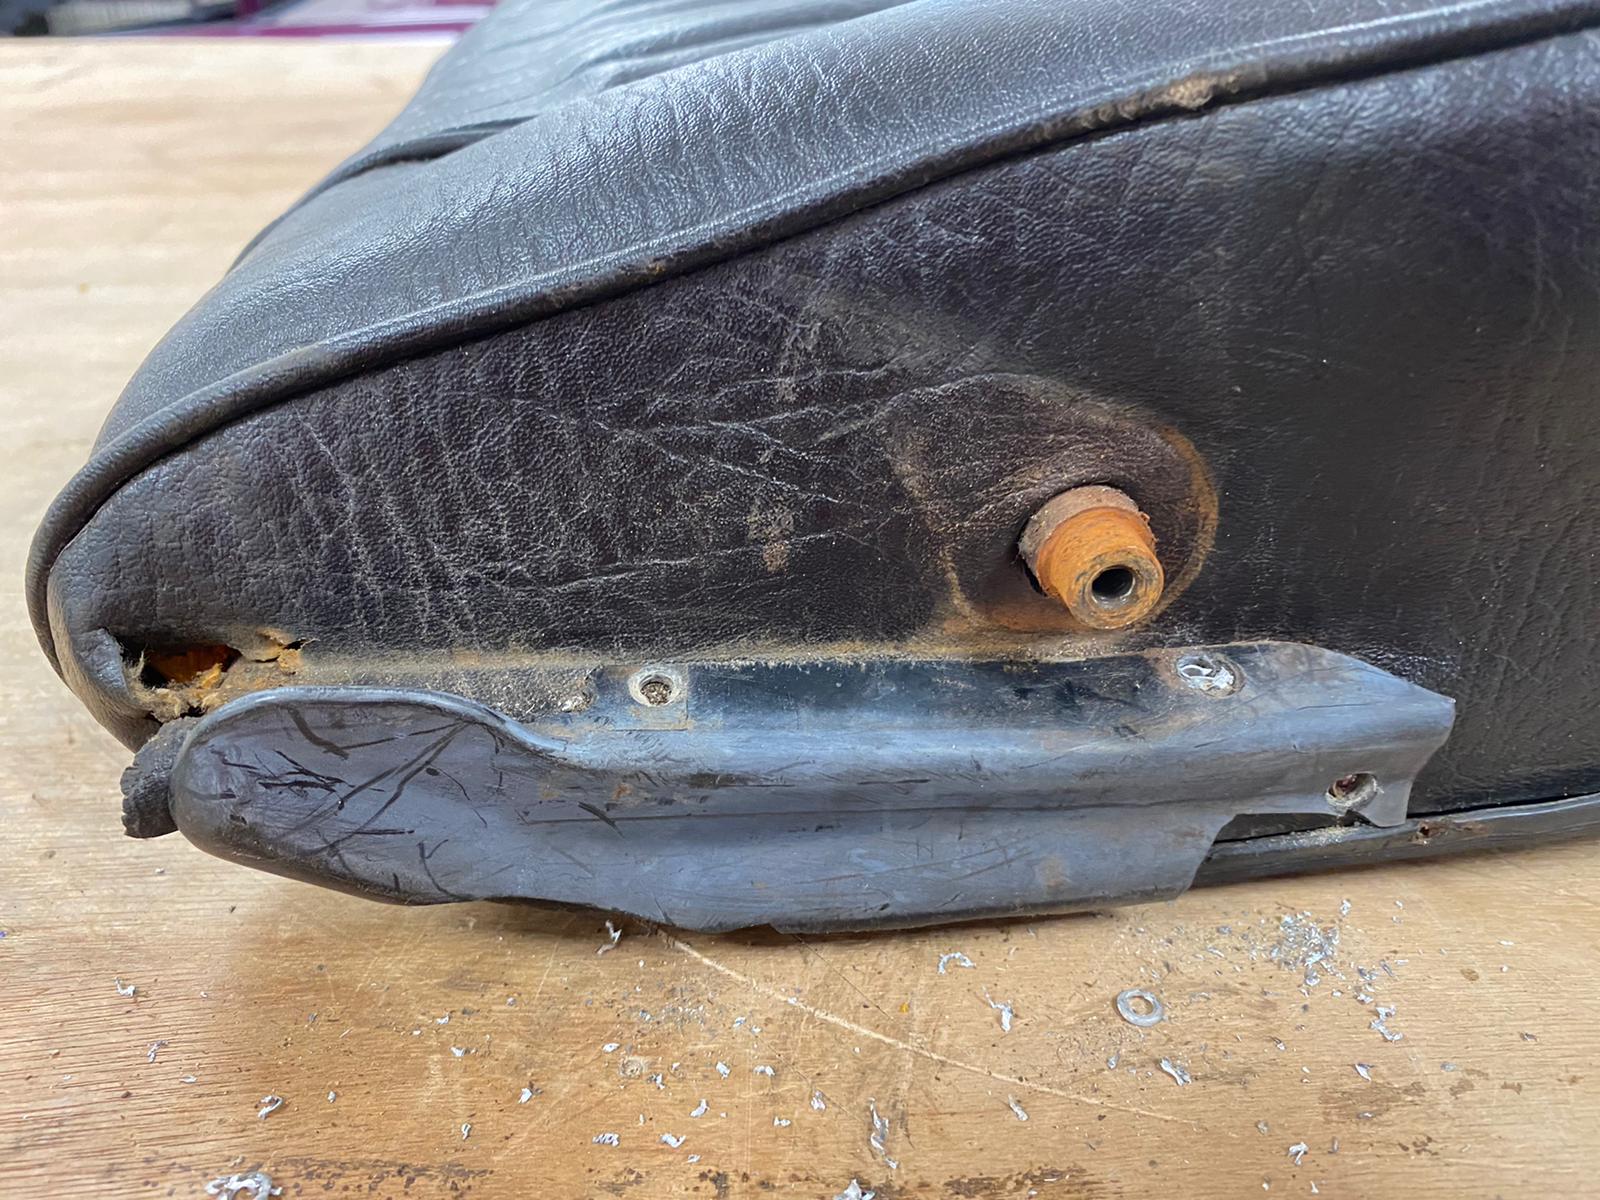
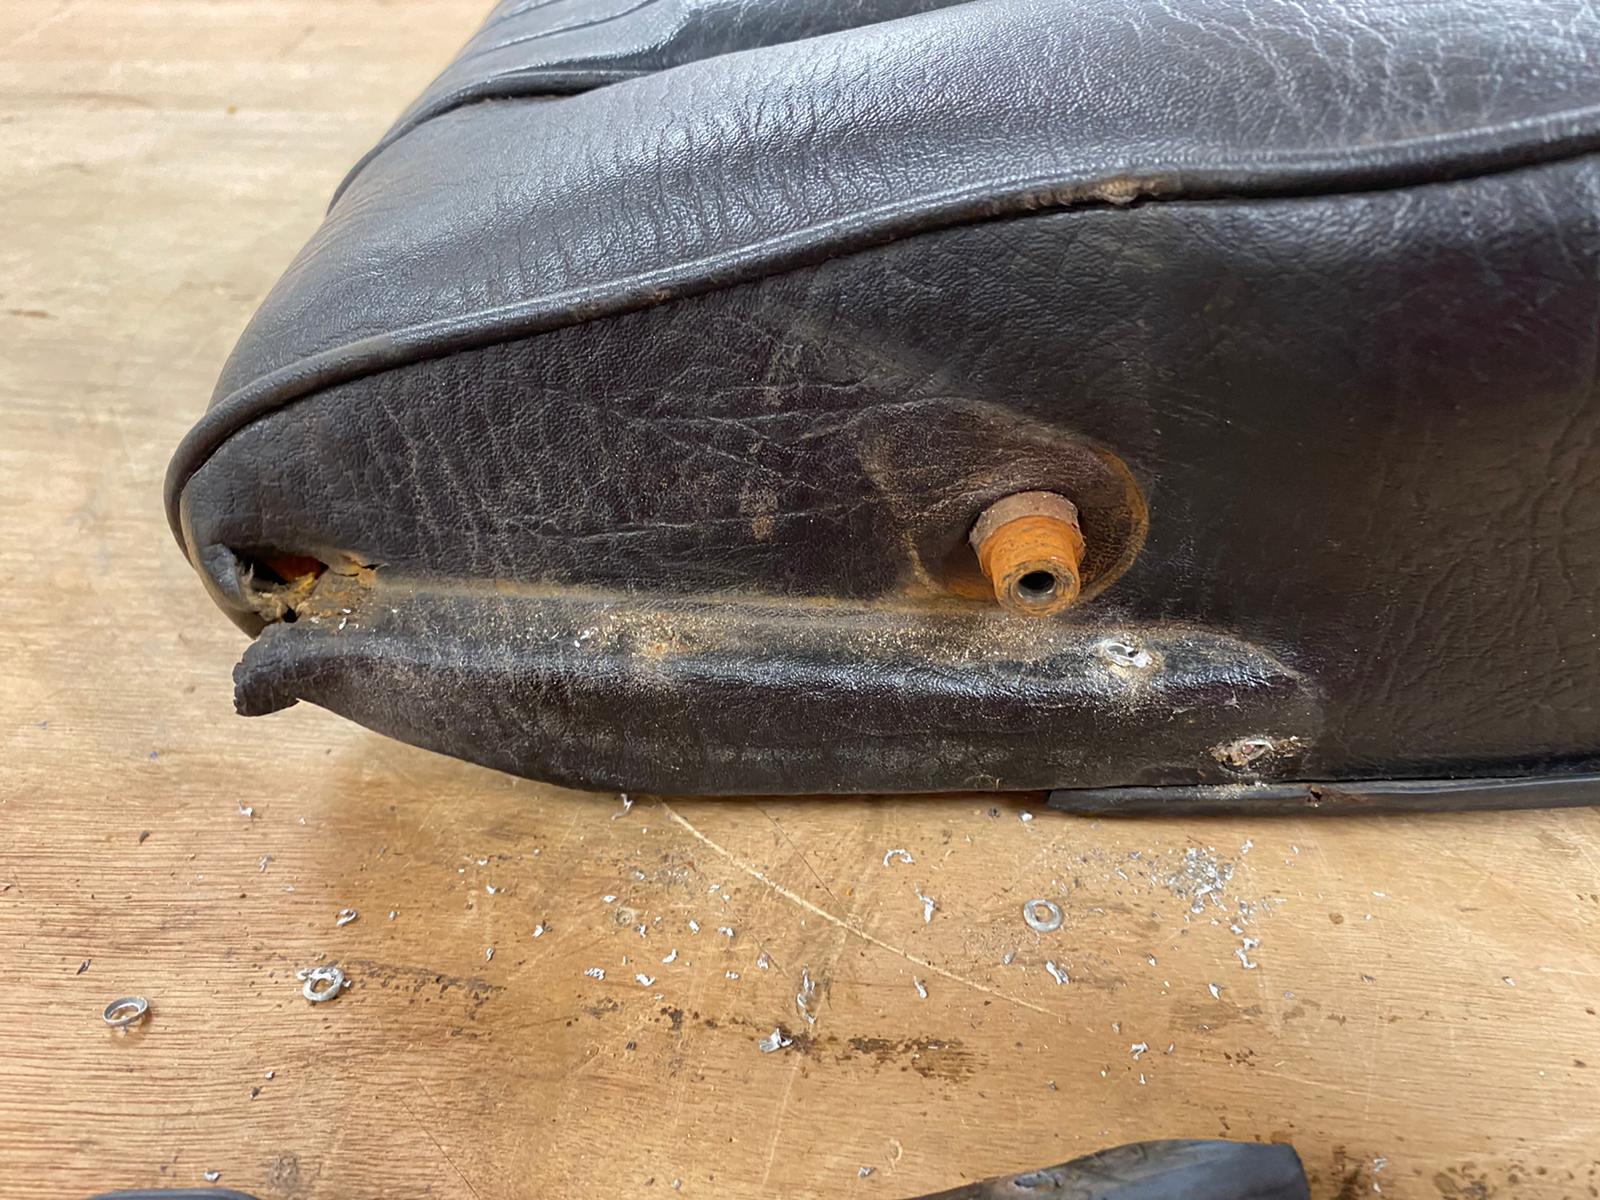
This exciting 1995 BMW 840 arrived at the workshop this week, ready to start an extensive restoration.
The outer body certainly needs some attention. Our in-house paint shop will be preparing the car for a full re-spray. This is to rectify all the scratches and marks in the paintwork. There’s also a fair amount of rust that’s been spotted. This will be sorted by our in-house body shop team before paint.

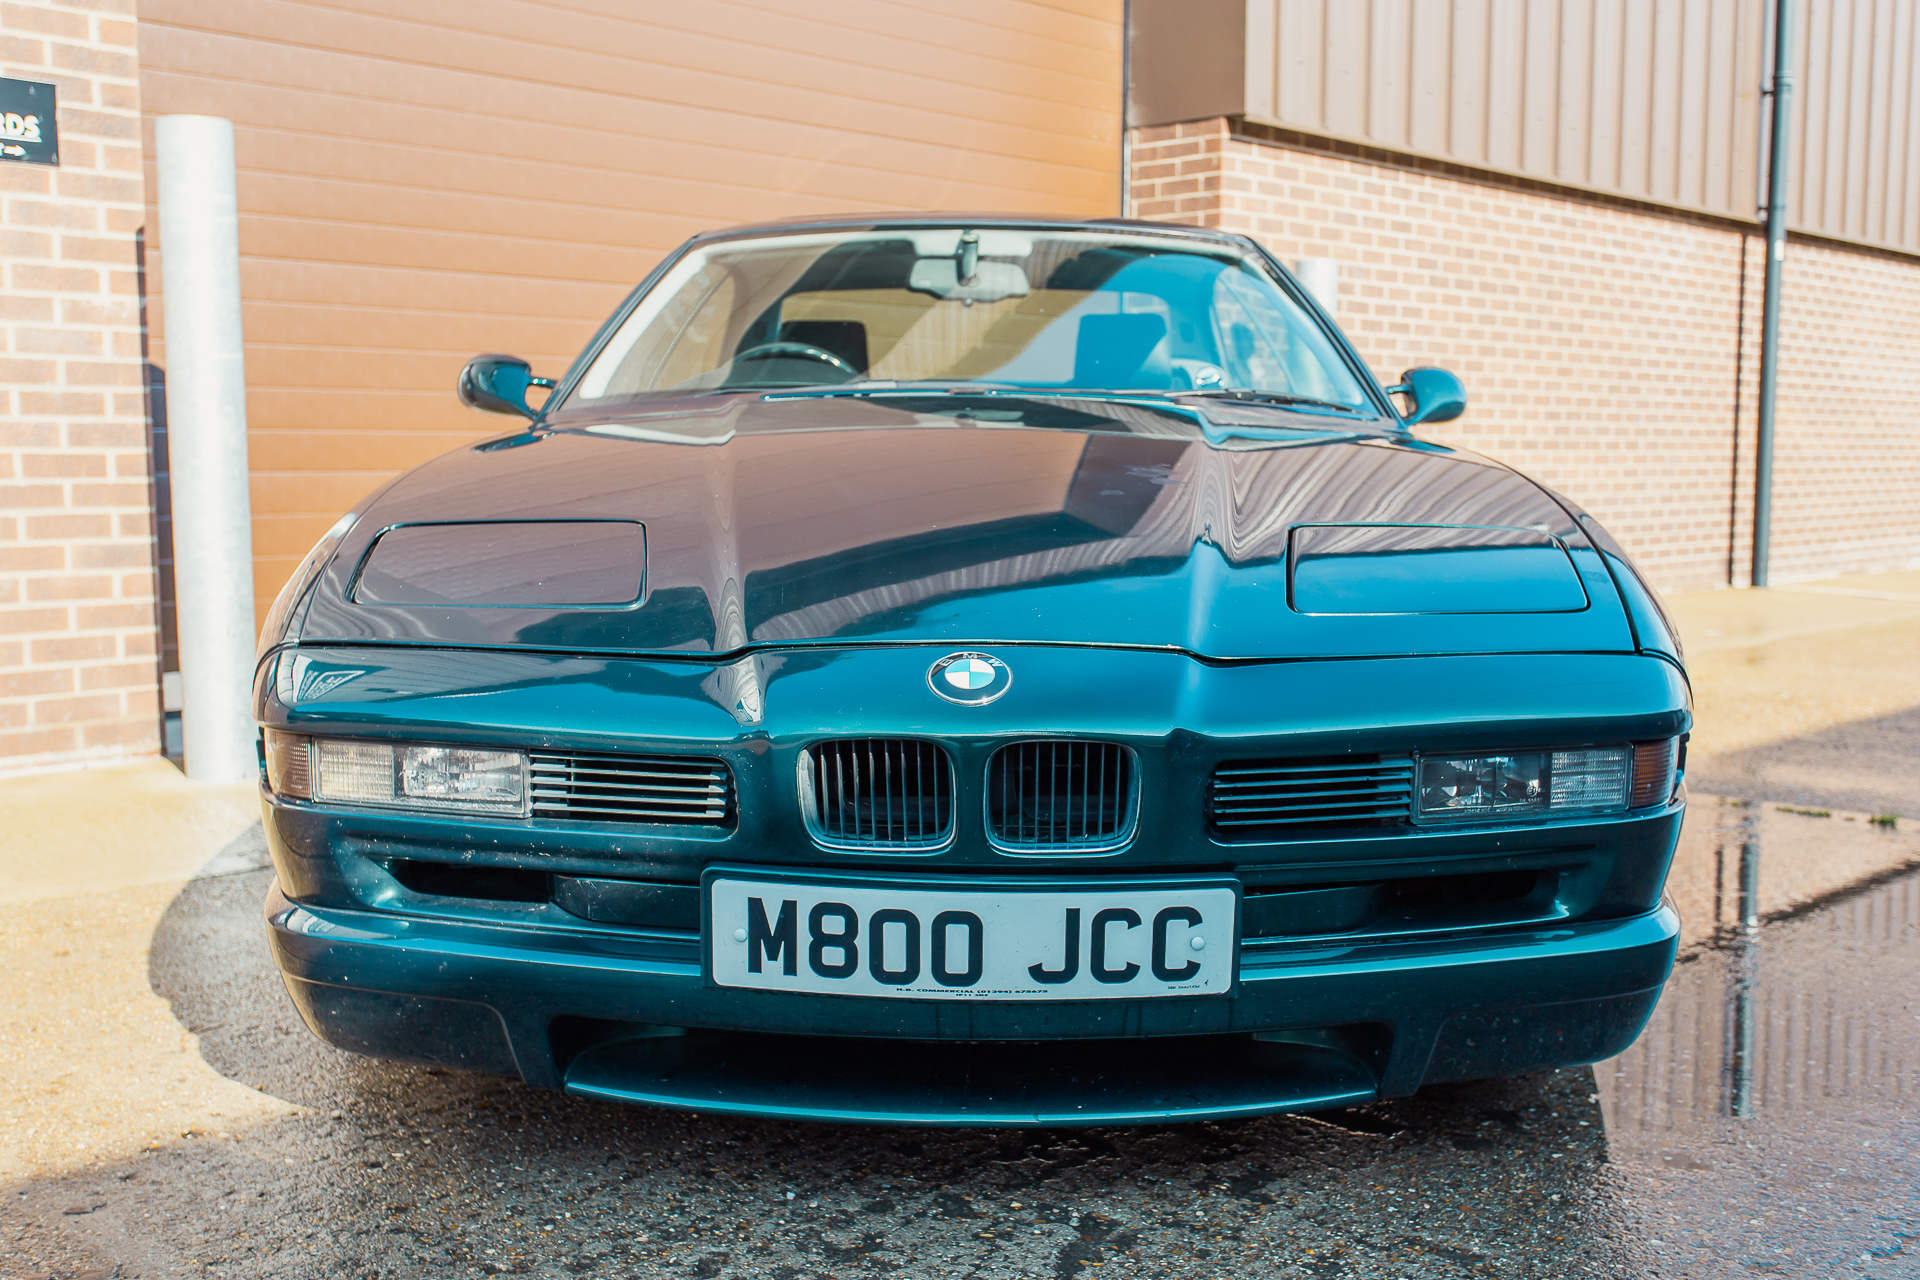
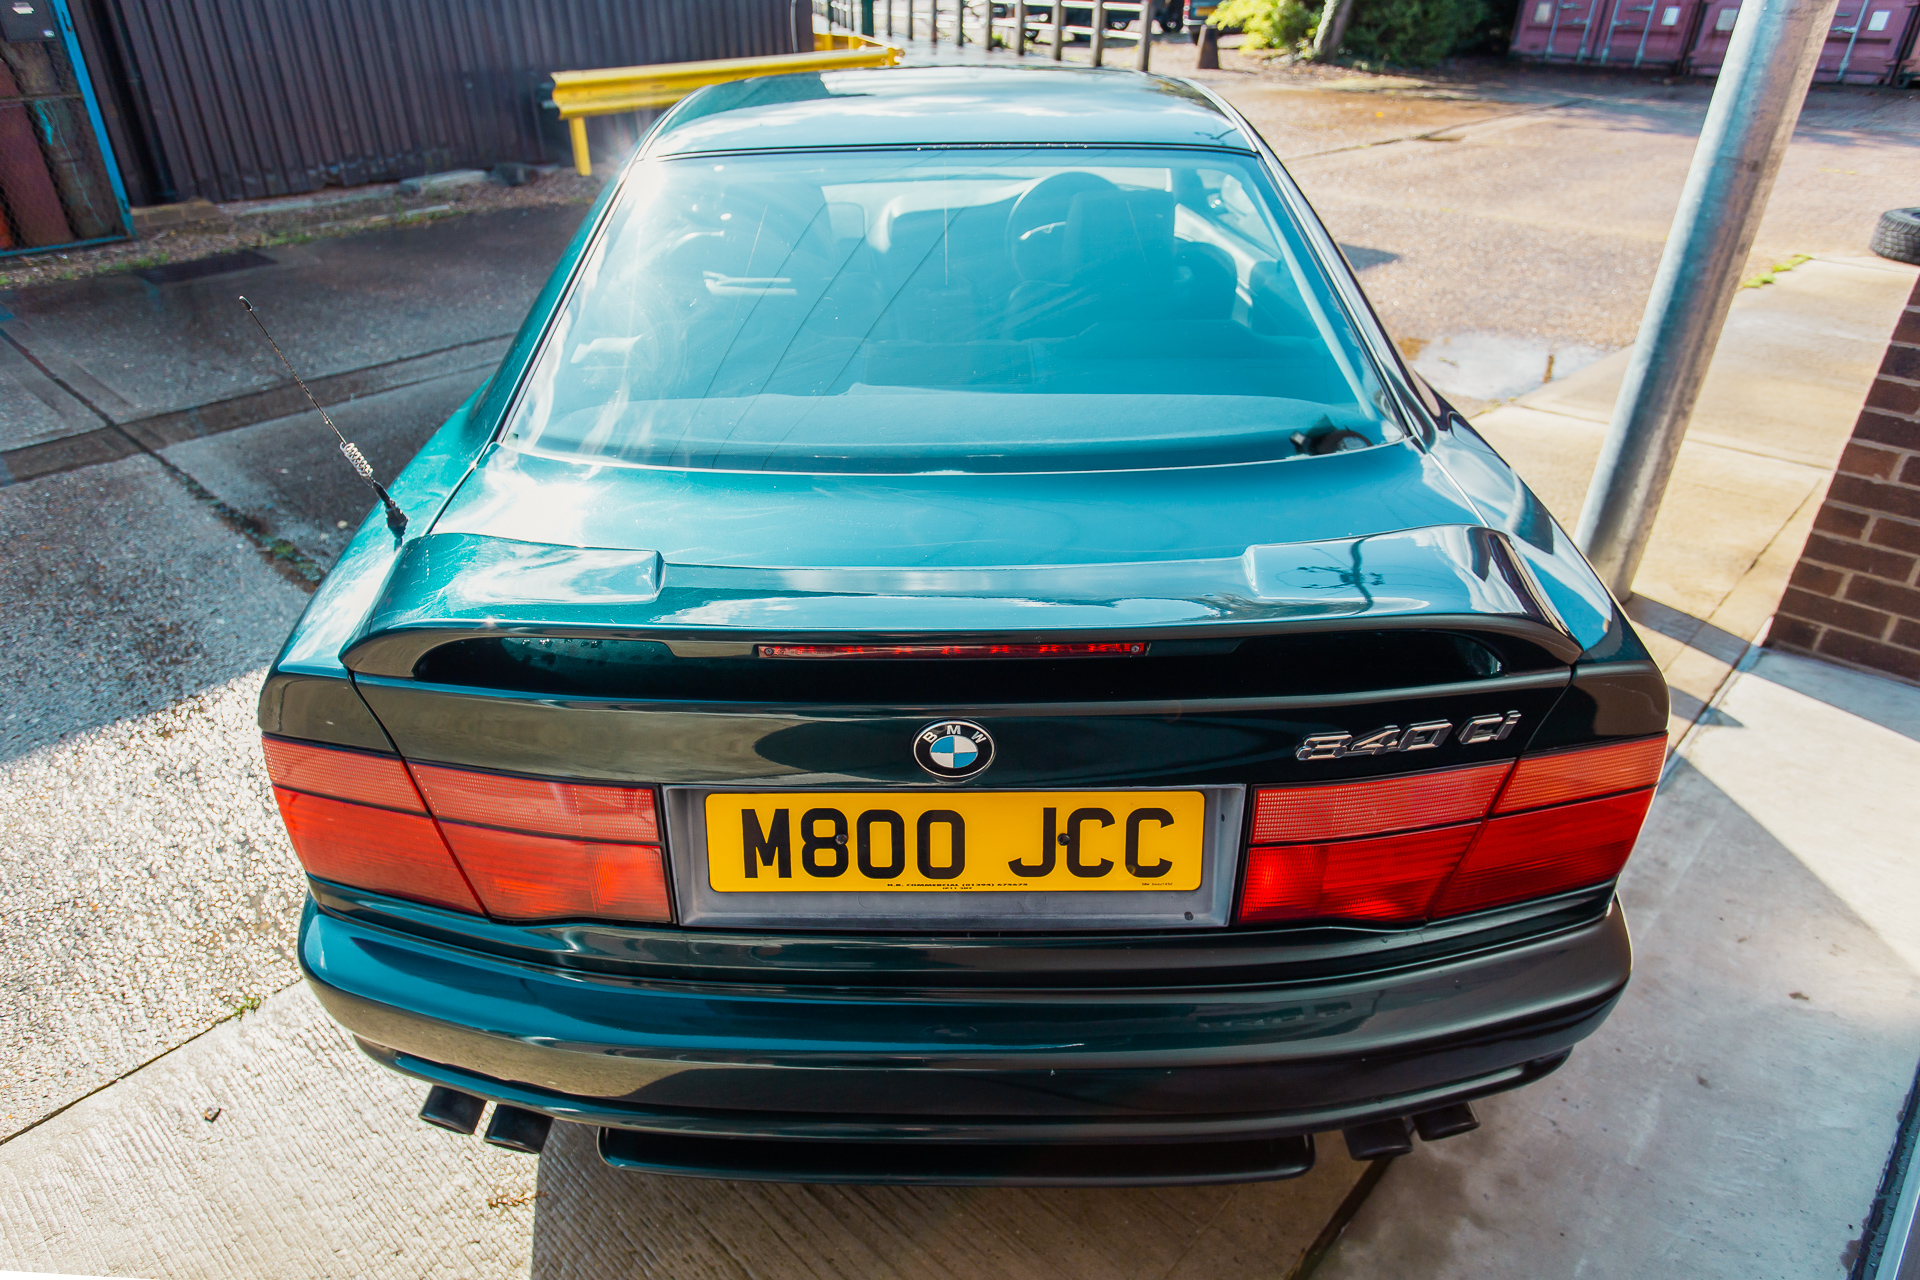
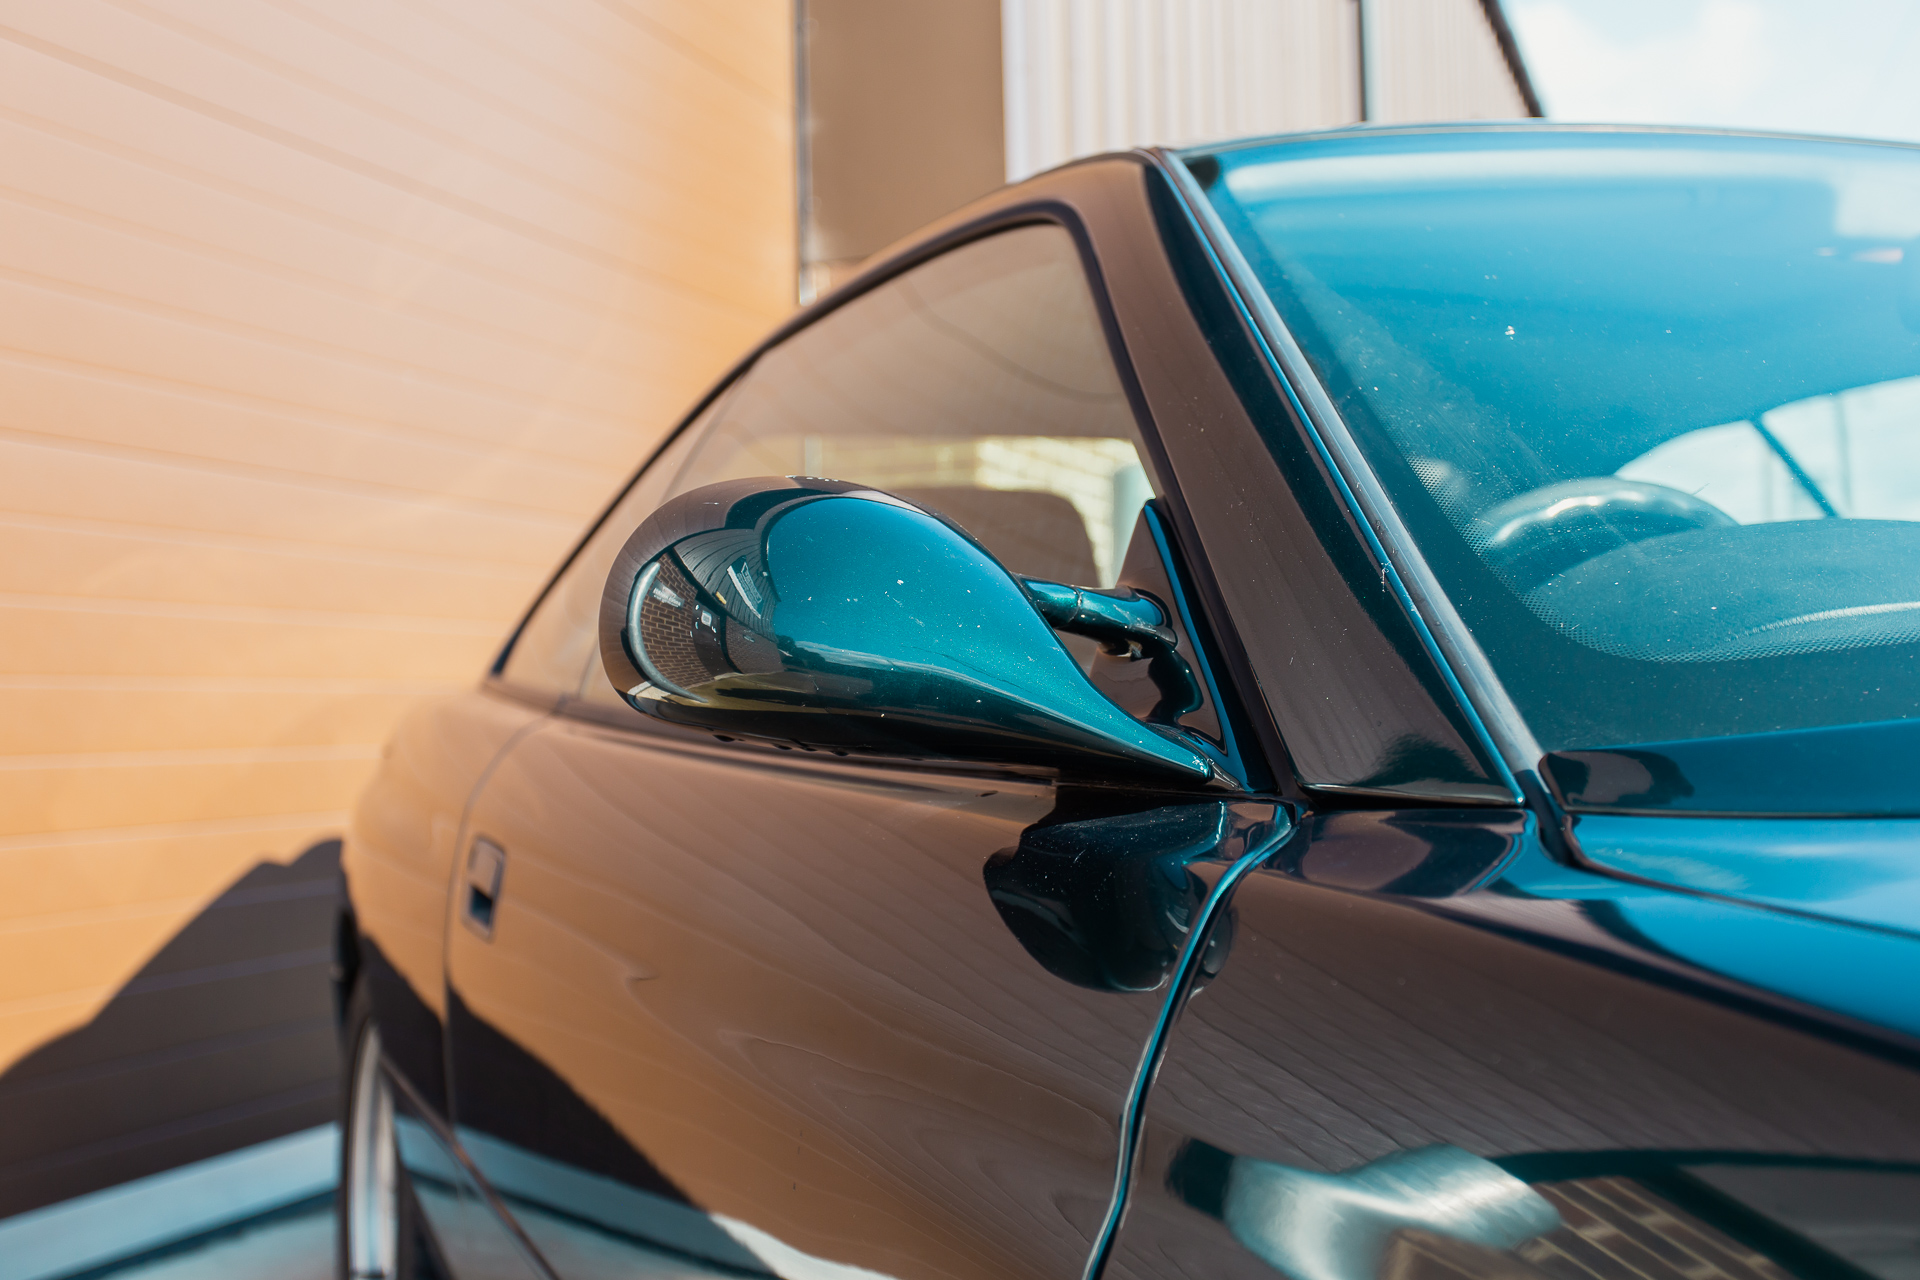
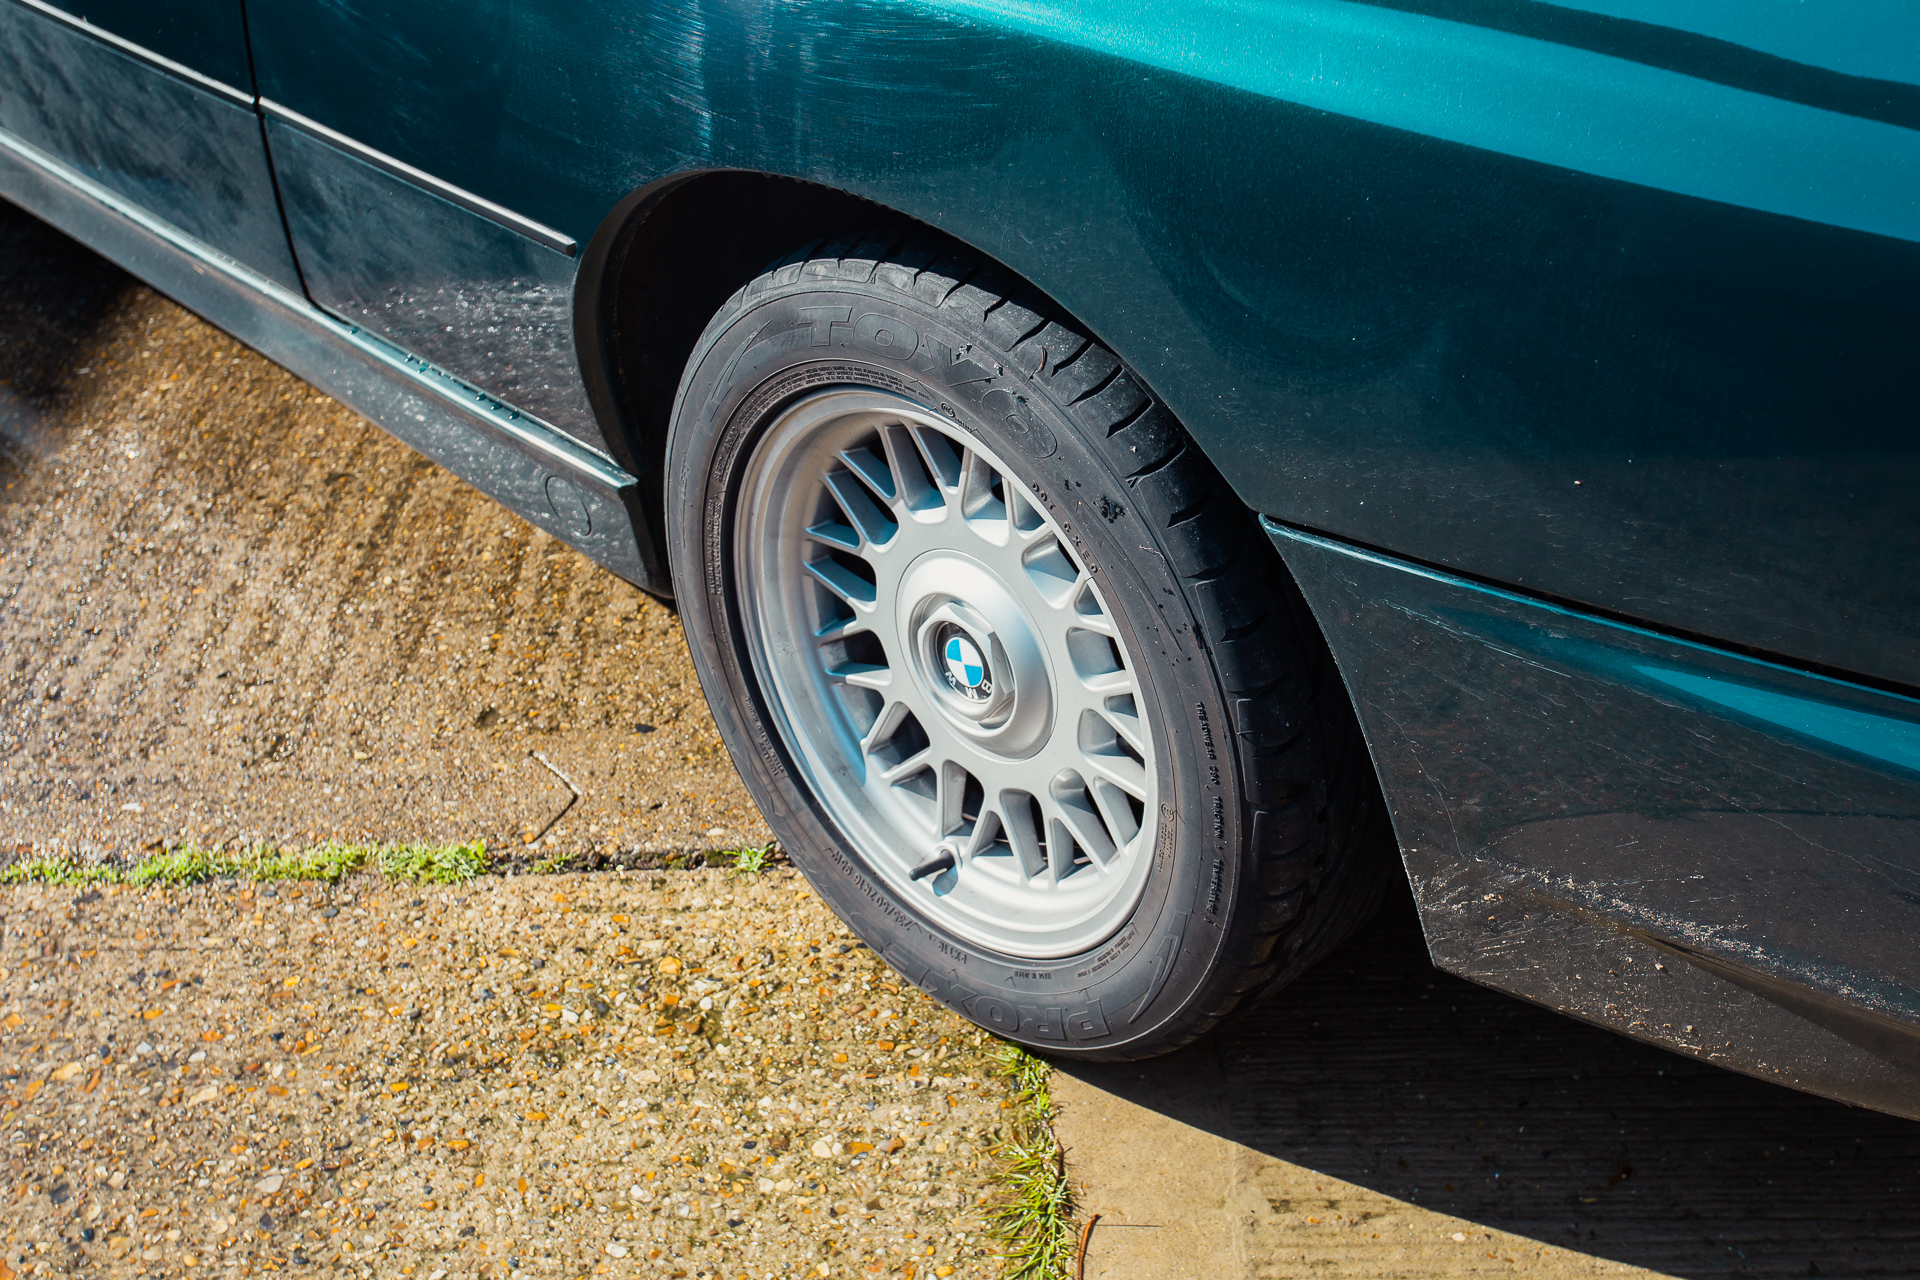
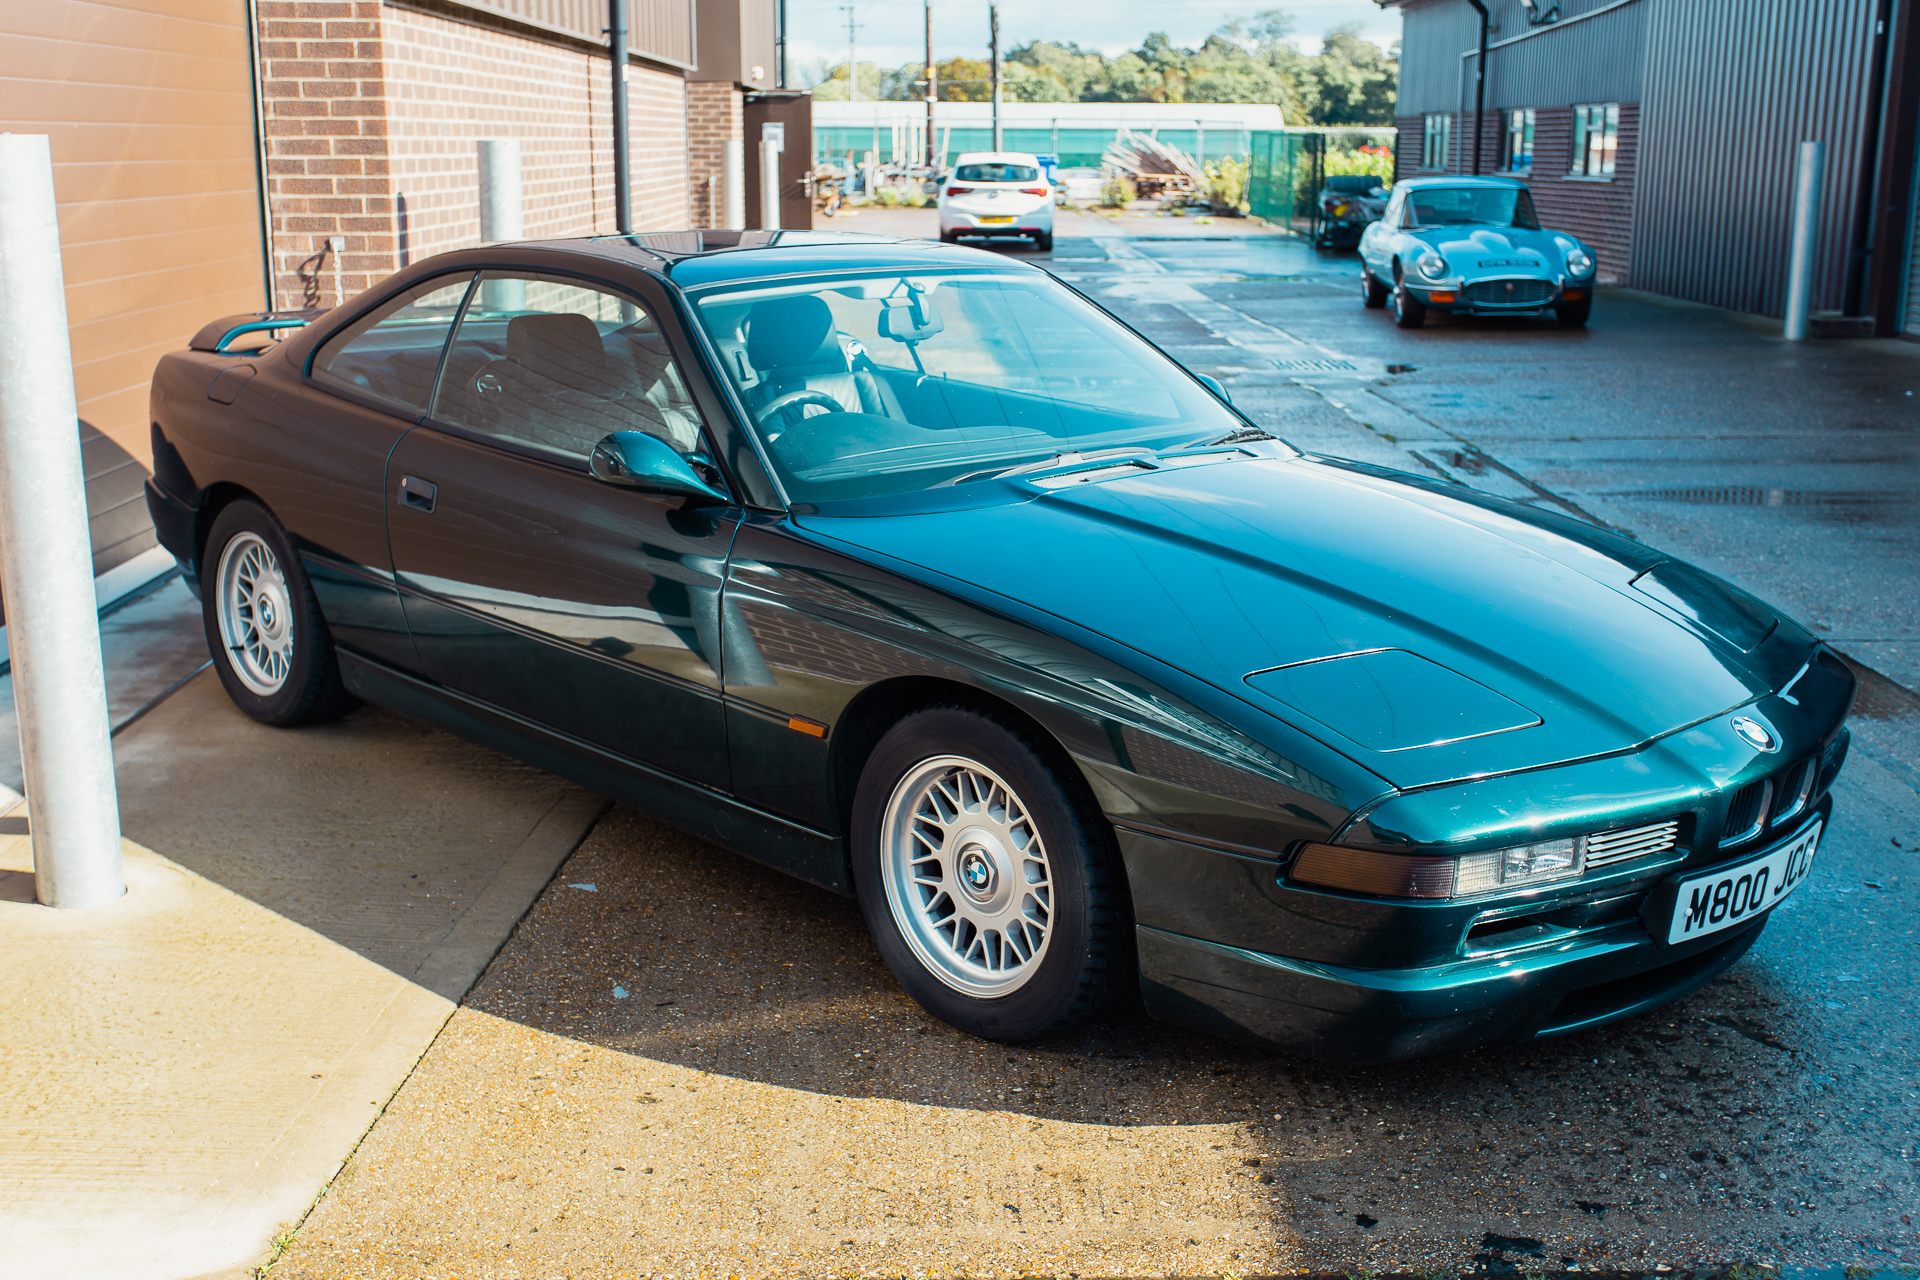
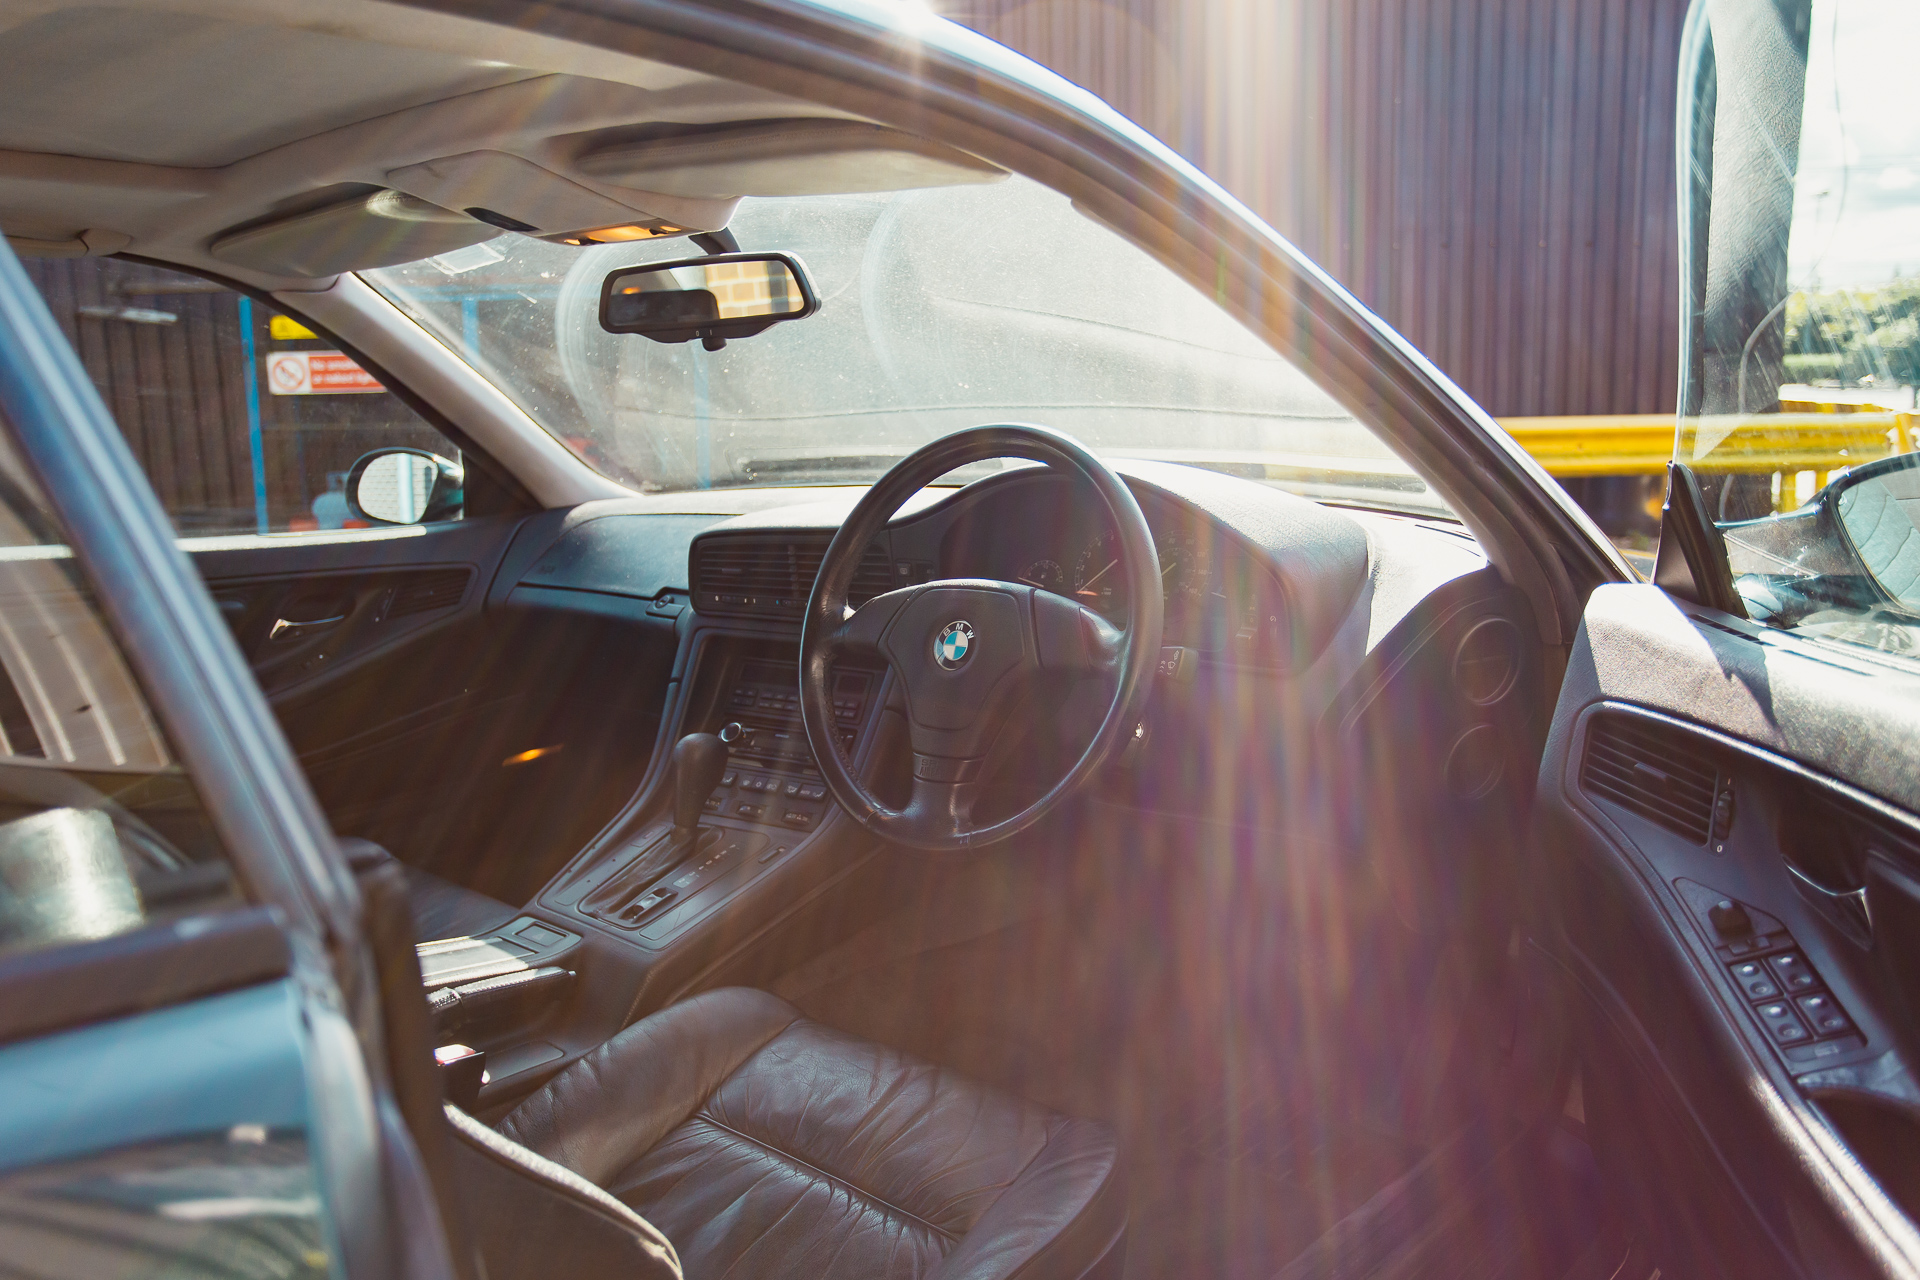
Along with external work, the interior will also be receiving some TLC from the Bridge team. The drivers seat is worn, so there are plans to visit our in-house trim shop to have this seen to. Along with a fair amount of electrical and mechanical work. The sunroof, aircon, the boot and door handles, the alarm system and the wing mirrors all needs looking at.
Until we inspect further, it’s always difficult to judge what else we may uncover. Any engine work is yet to be diagnosed. But, what we do know is that the under panel is missing from the engine.

We’ll be following this exciting restoration closely with lots of updates on our progress. Head to the Bridge Classic Cars current projects page to keep up to date.
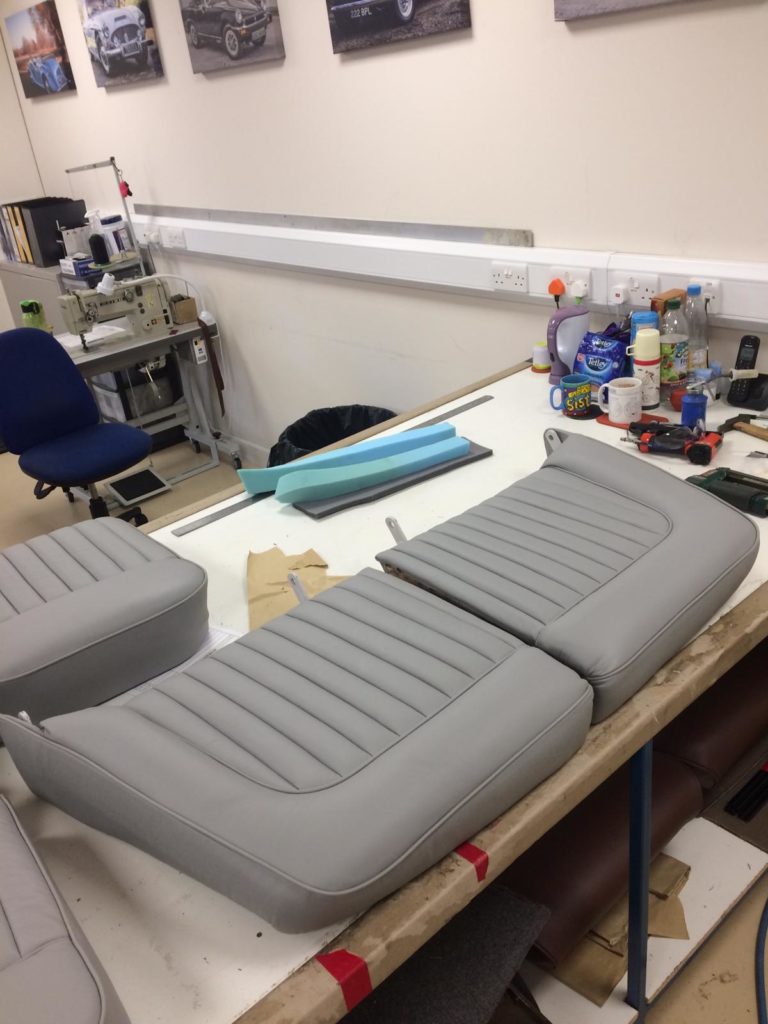
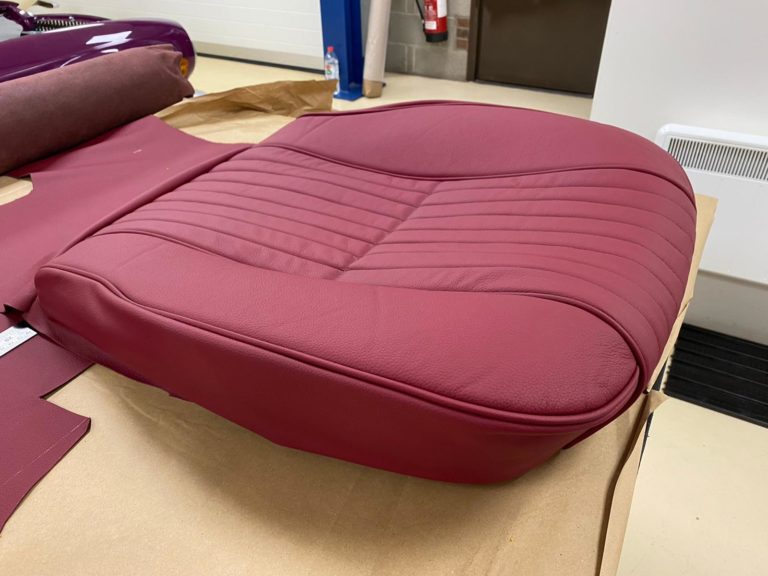
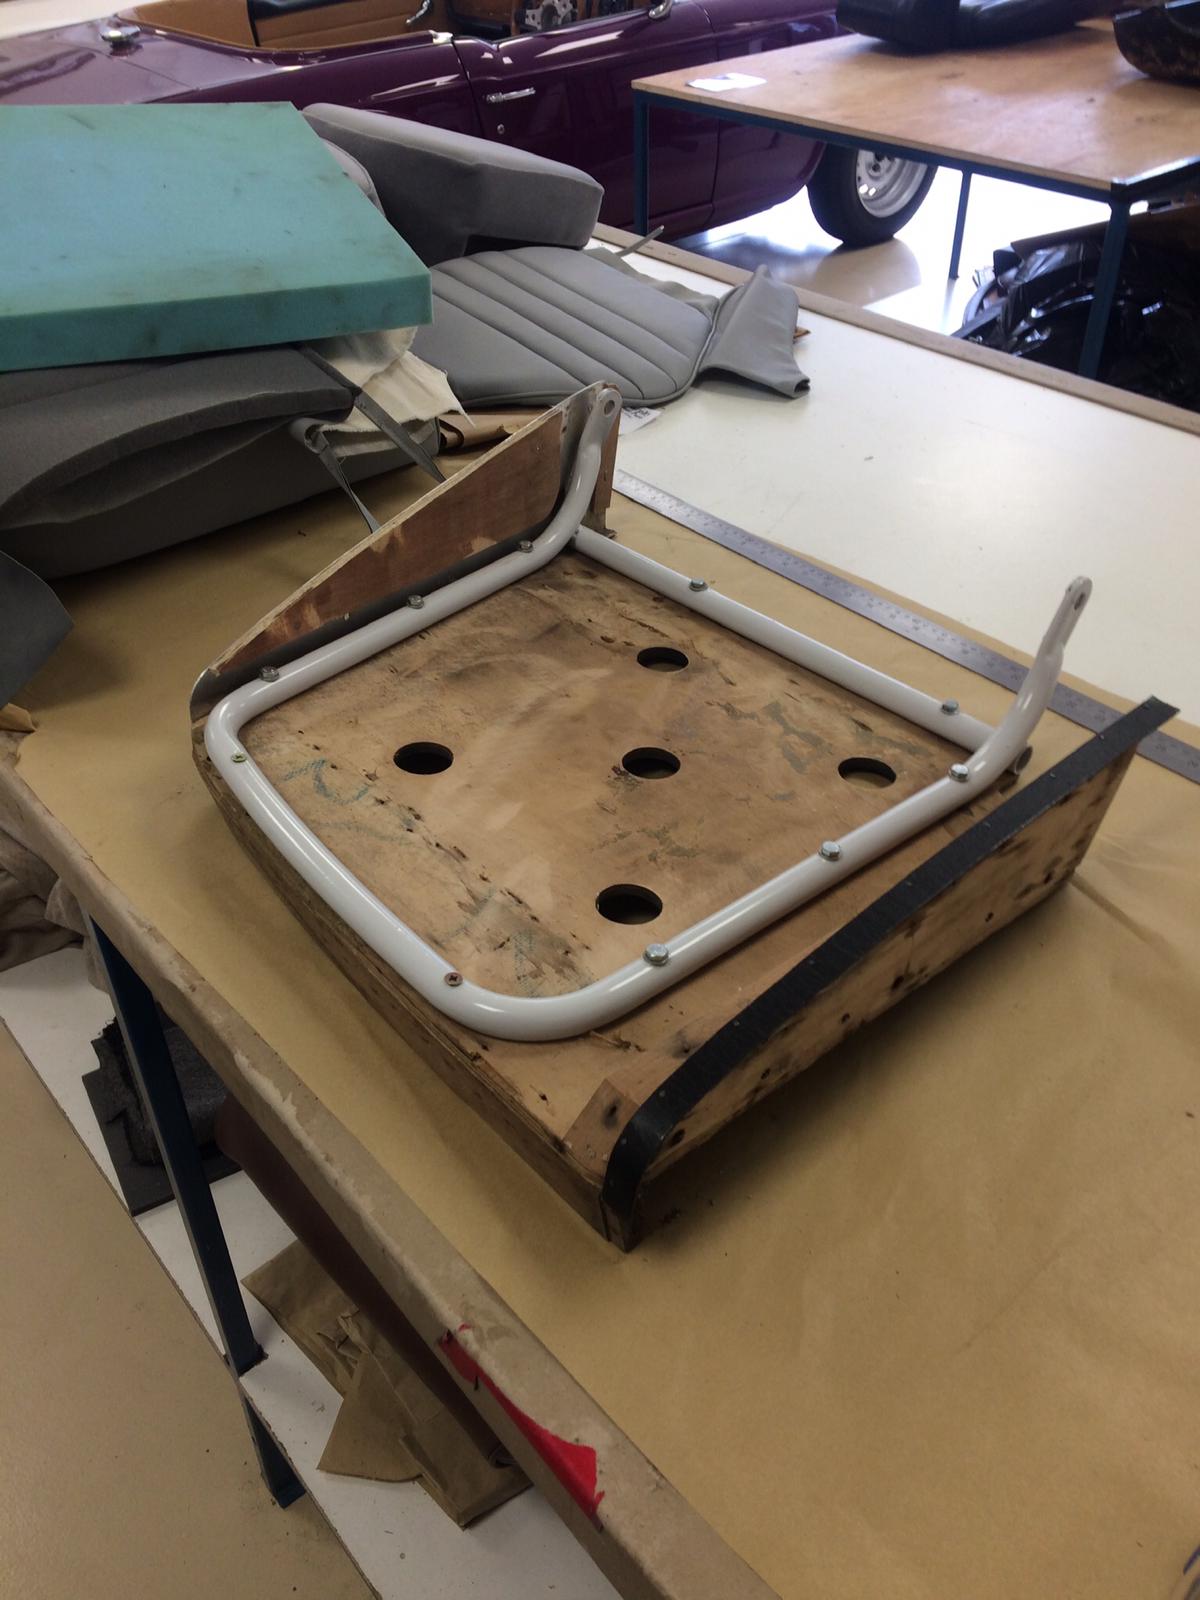
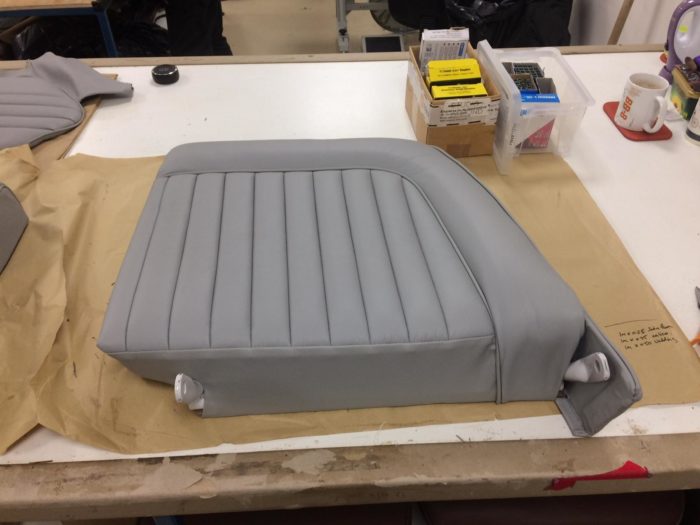
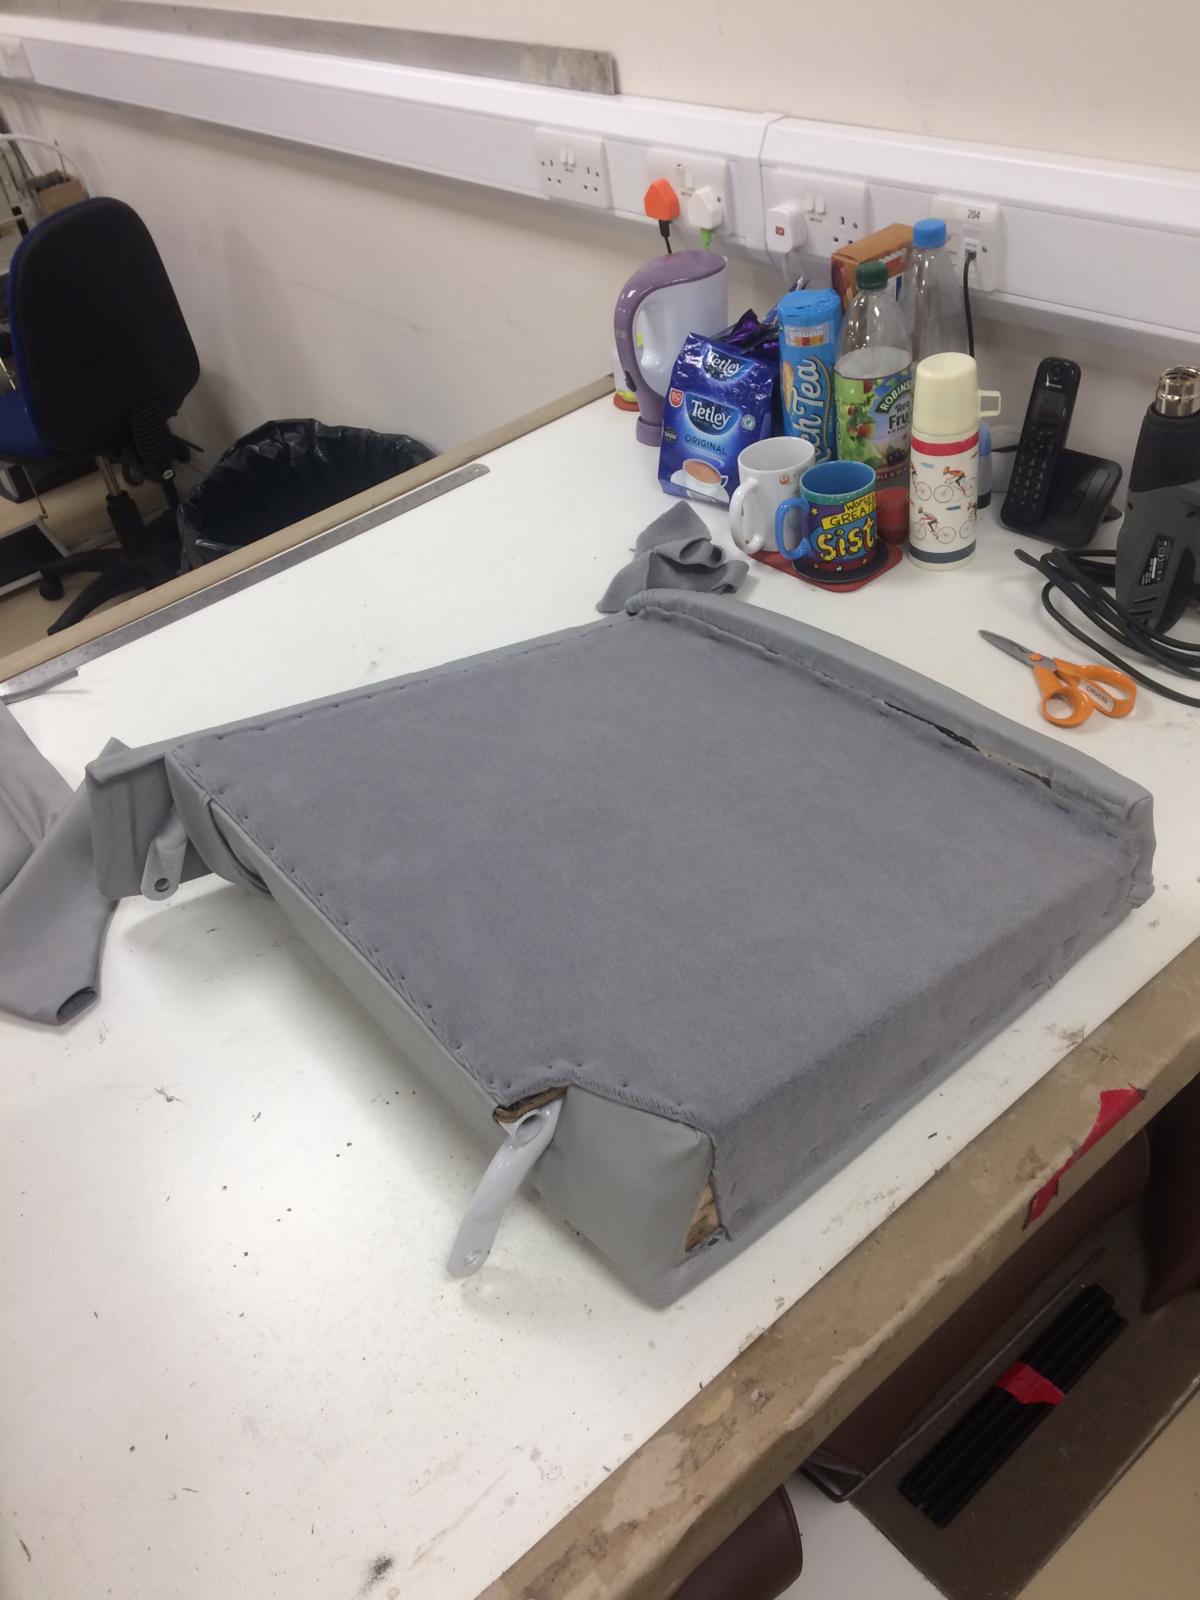
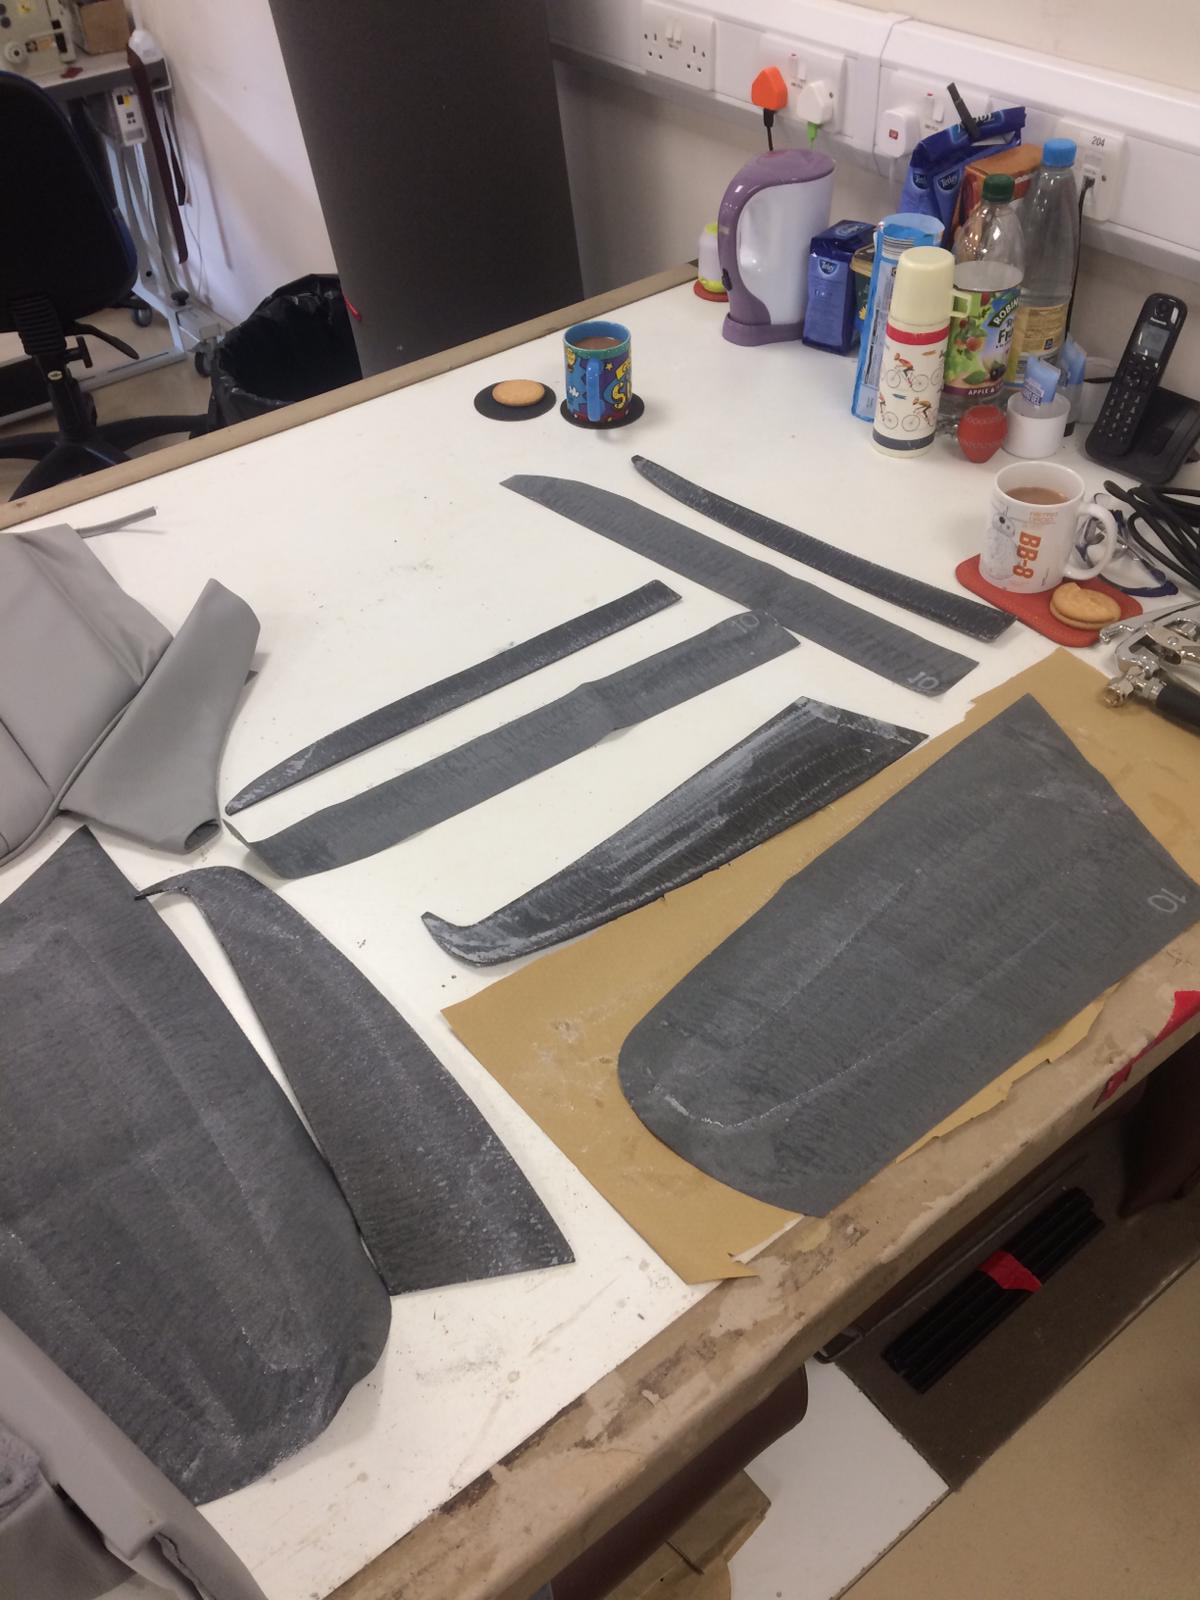
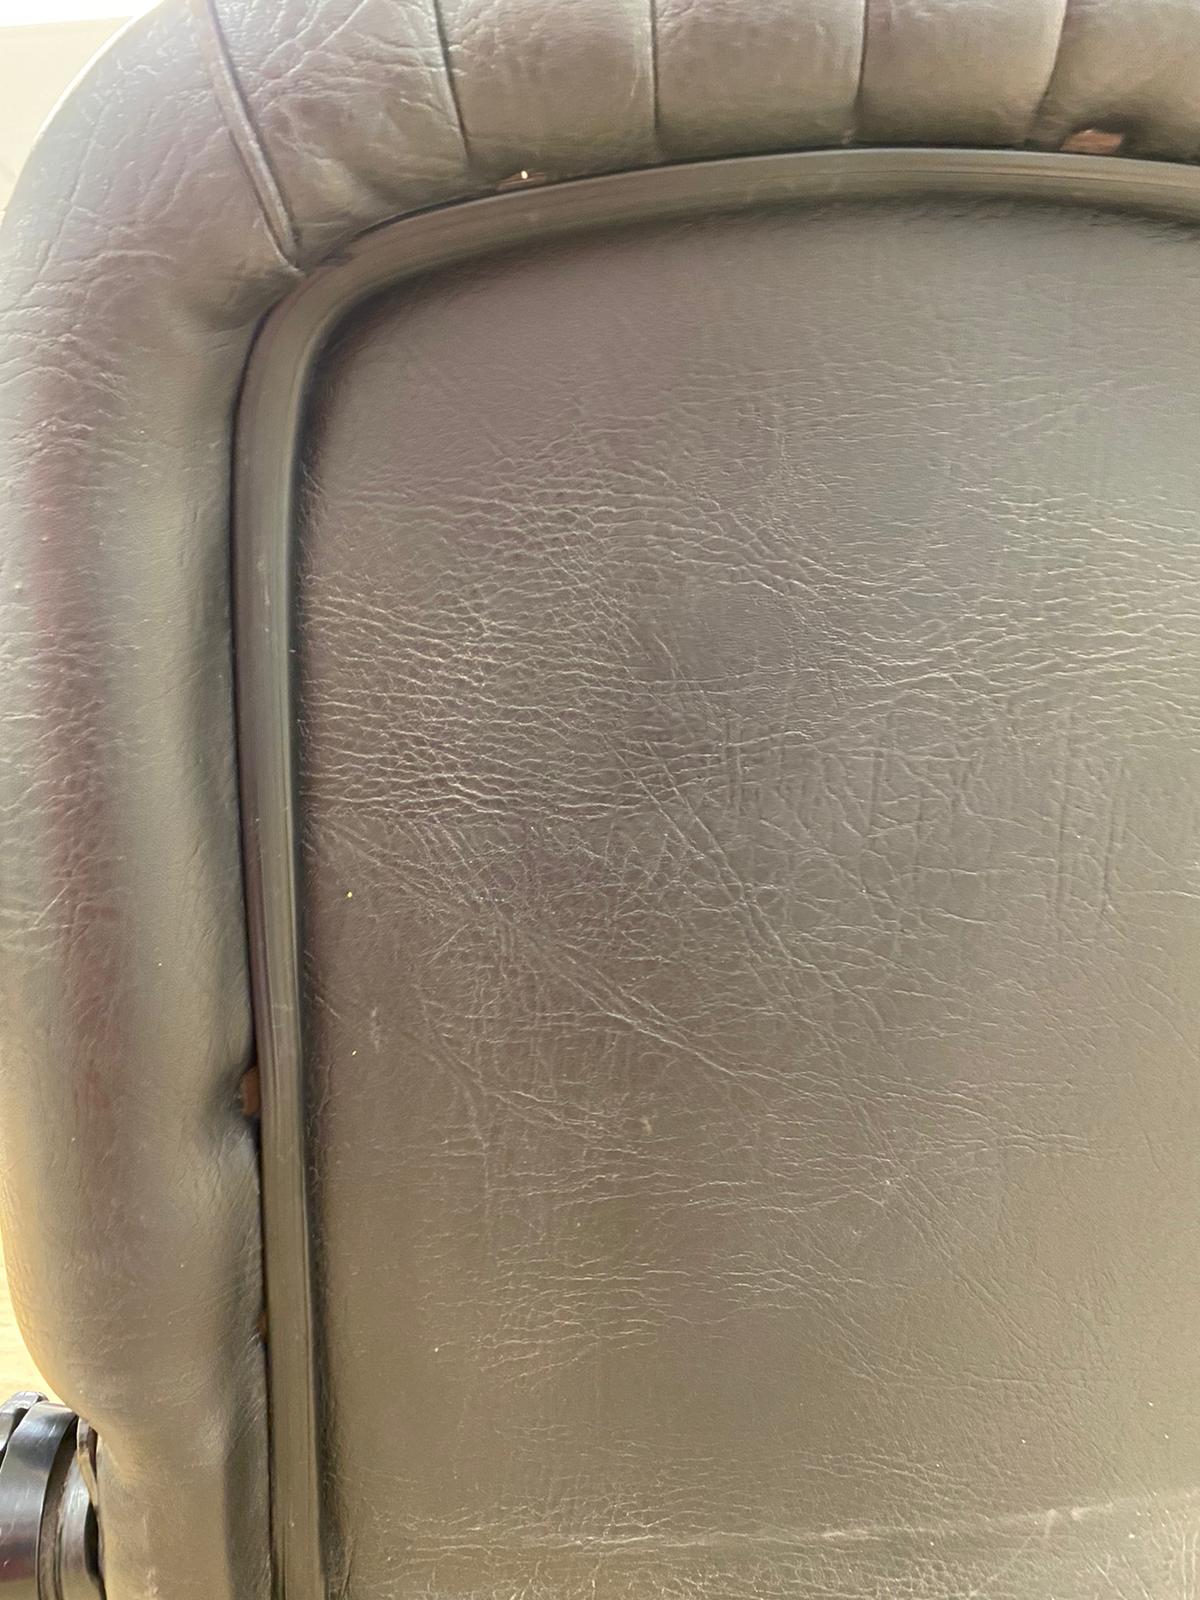
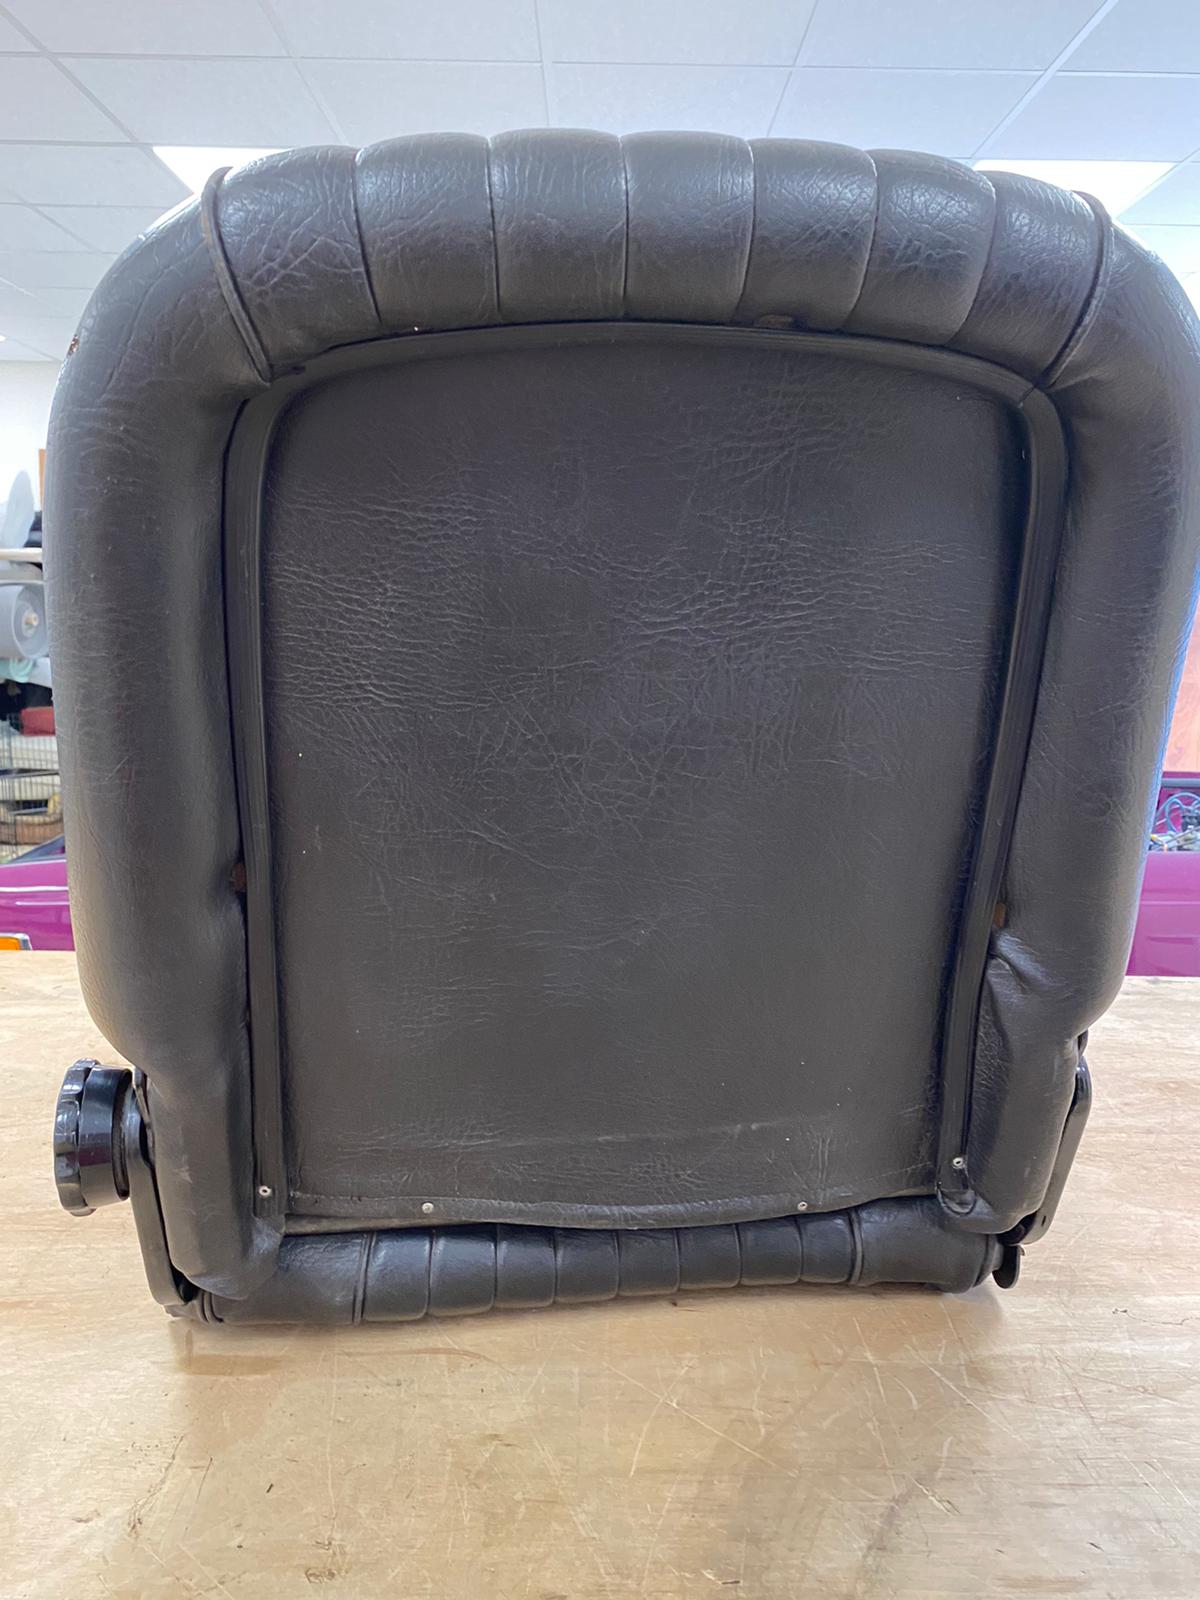
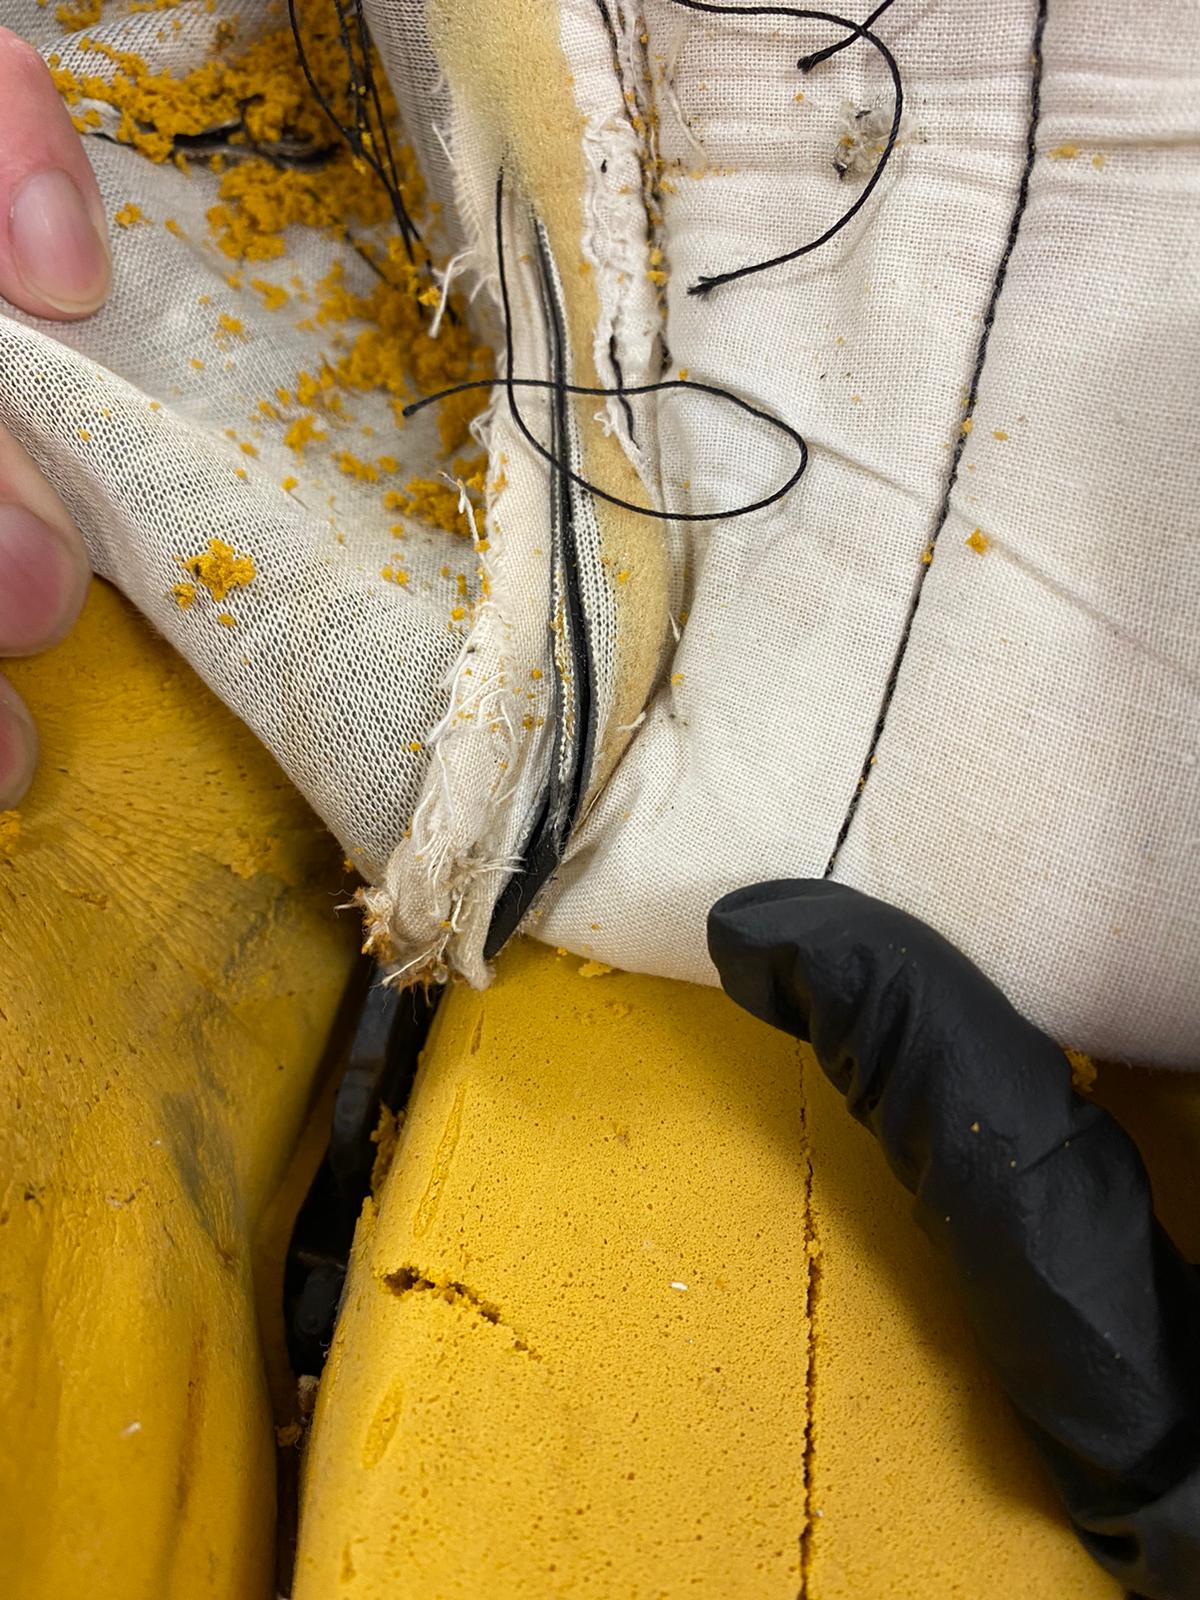
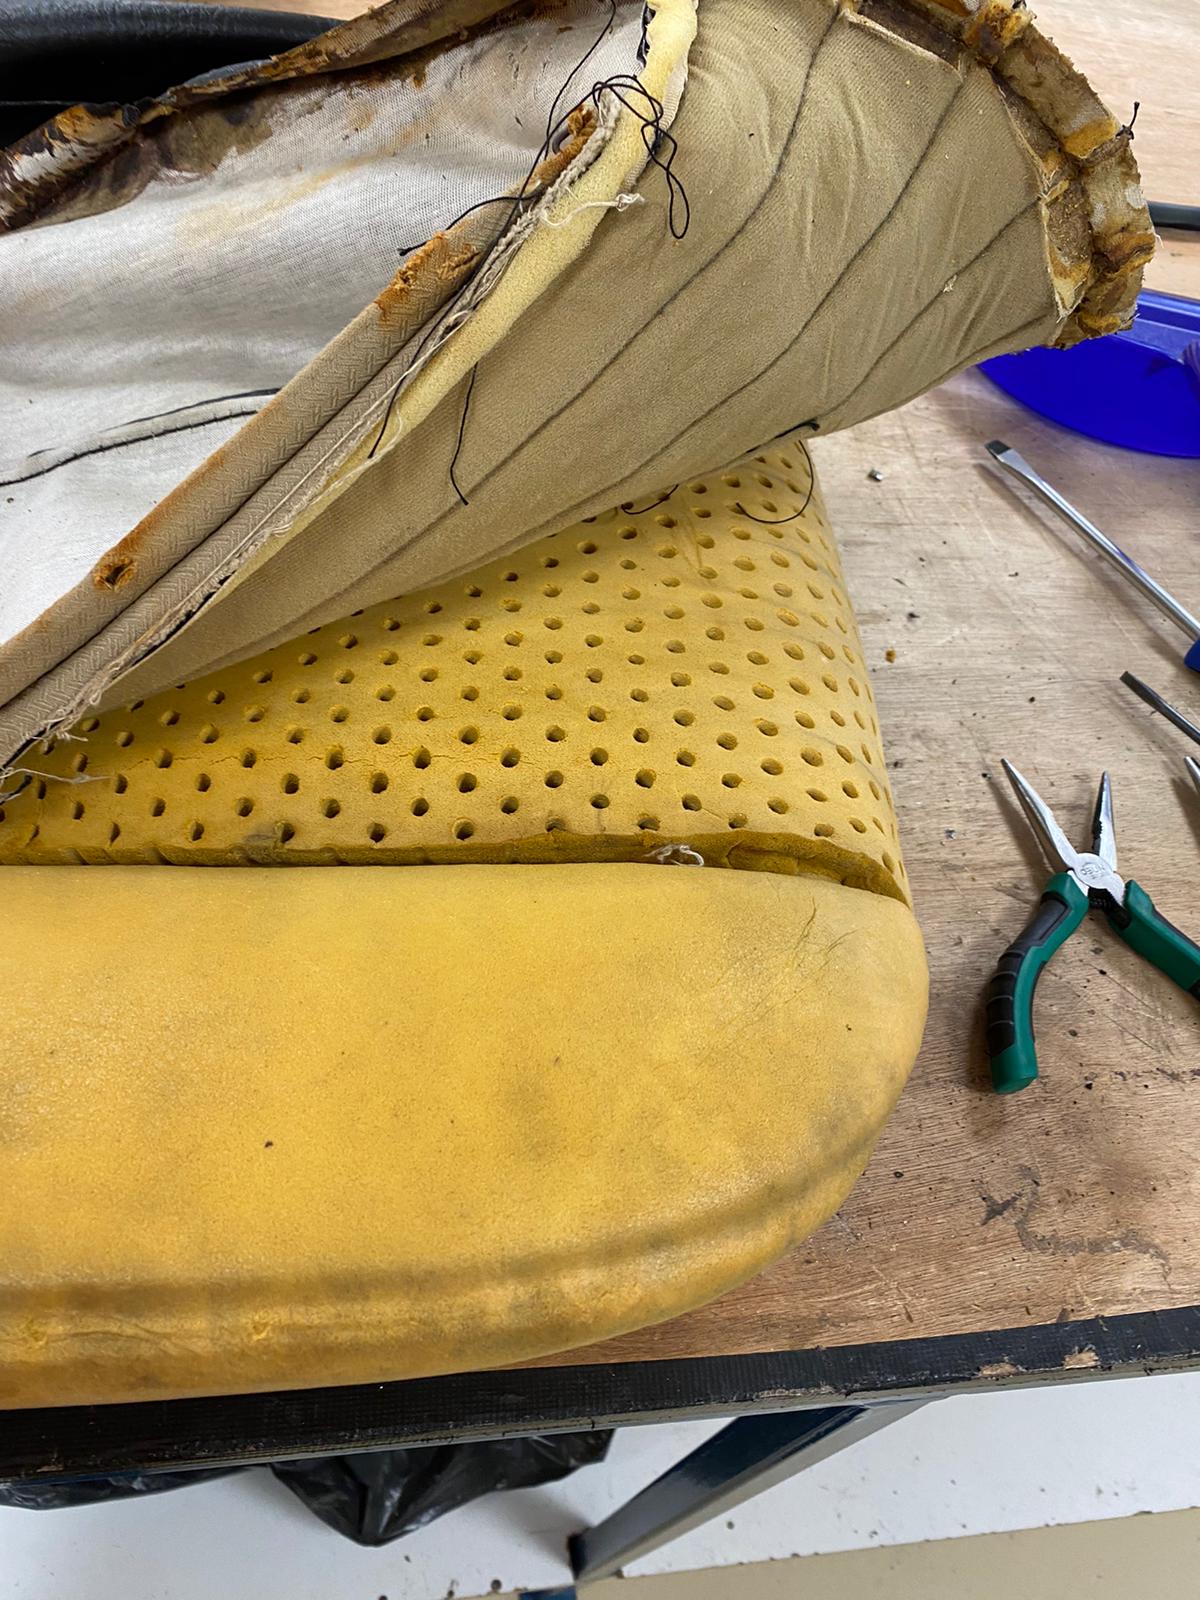
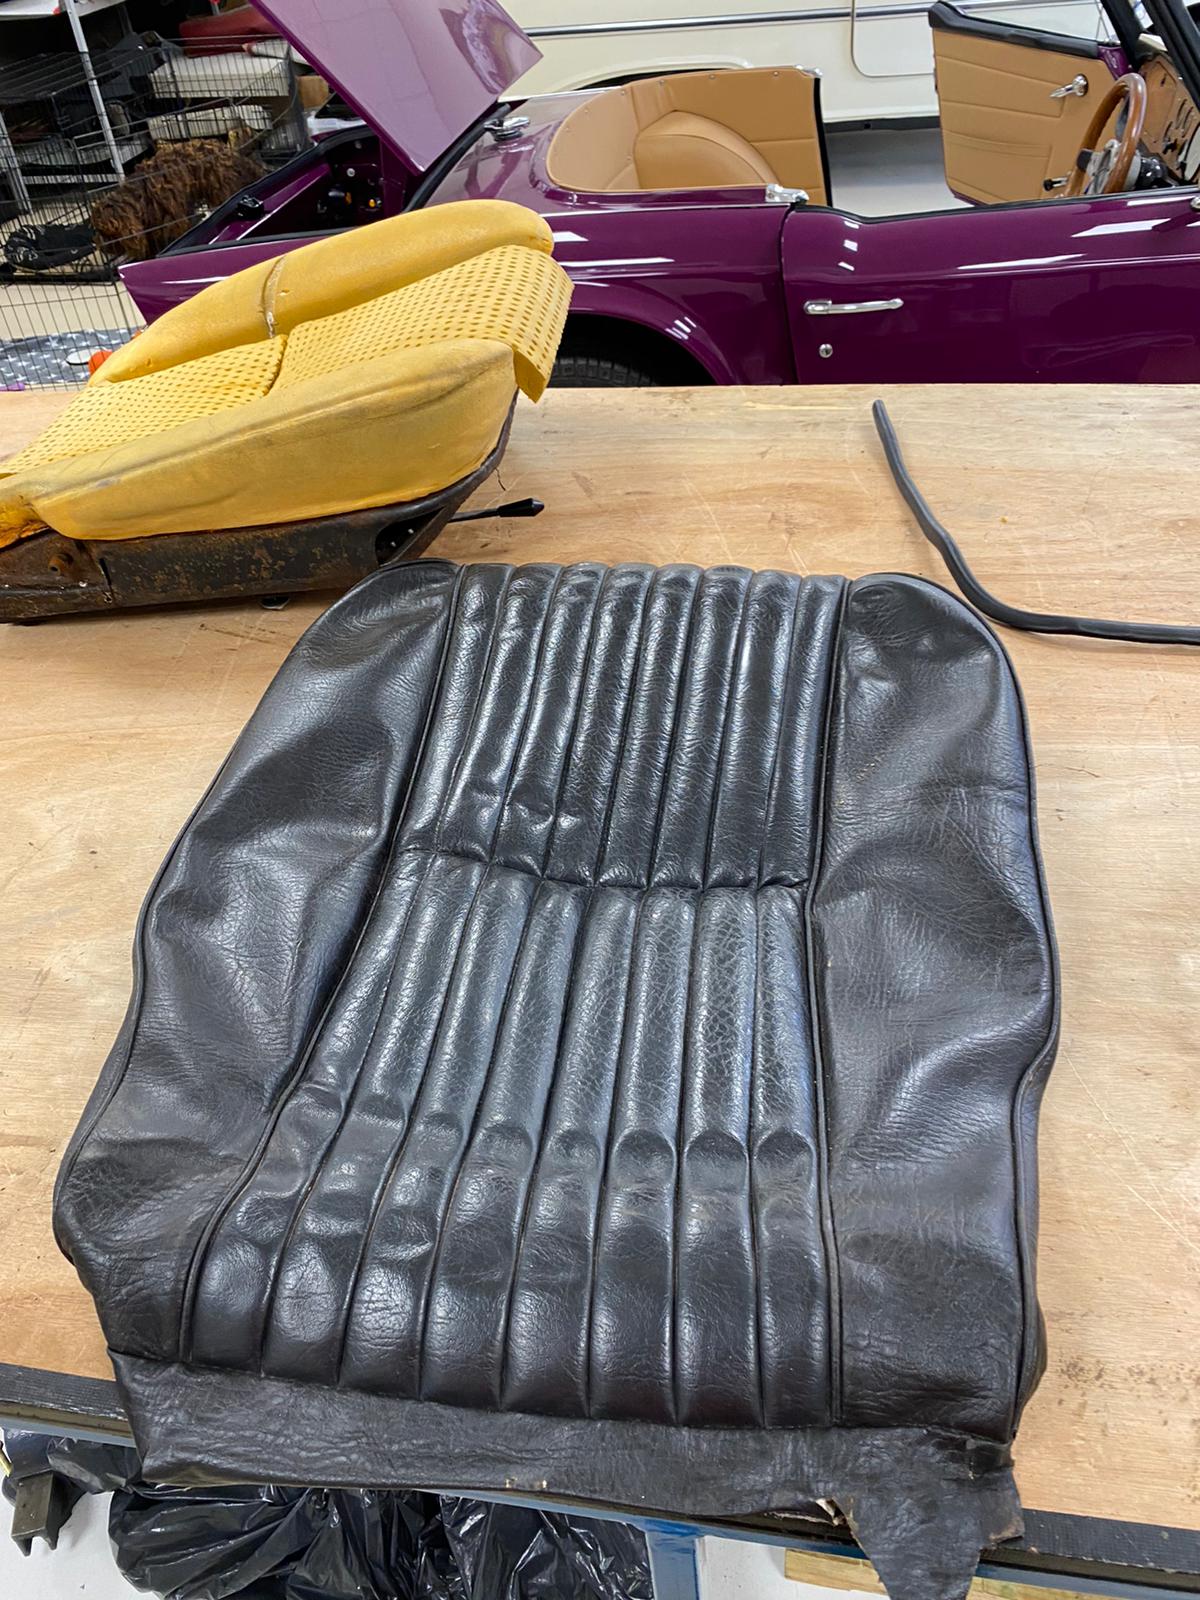
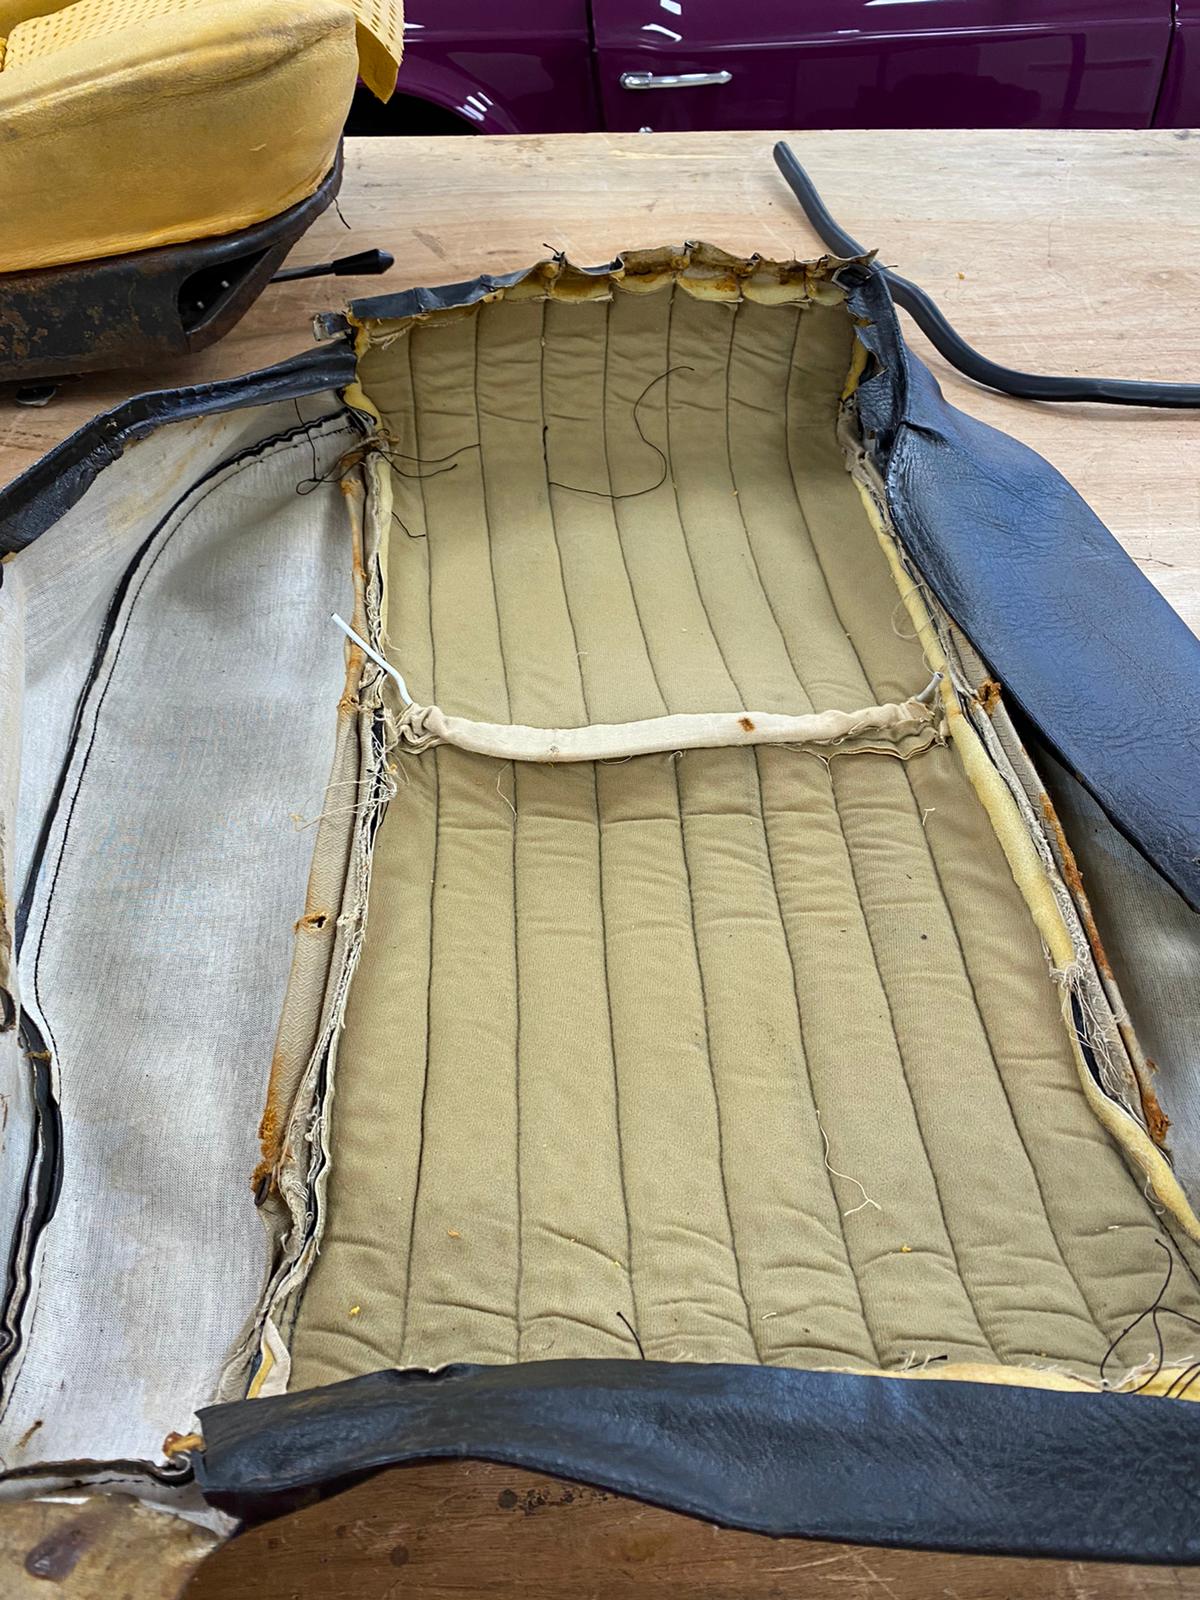
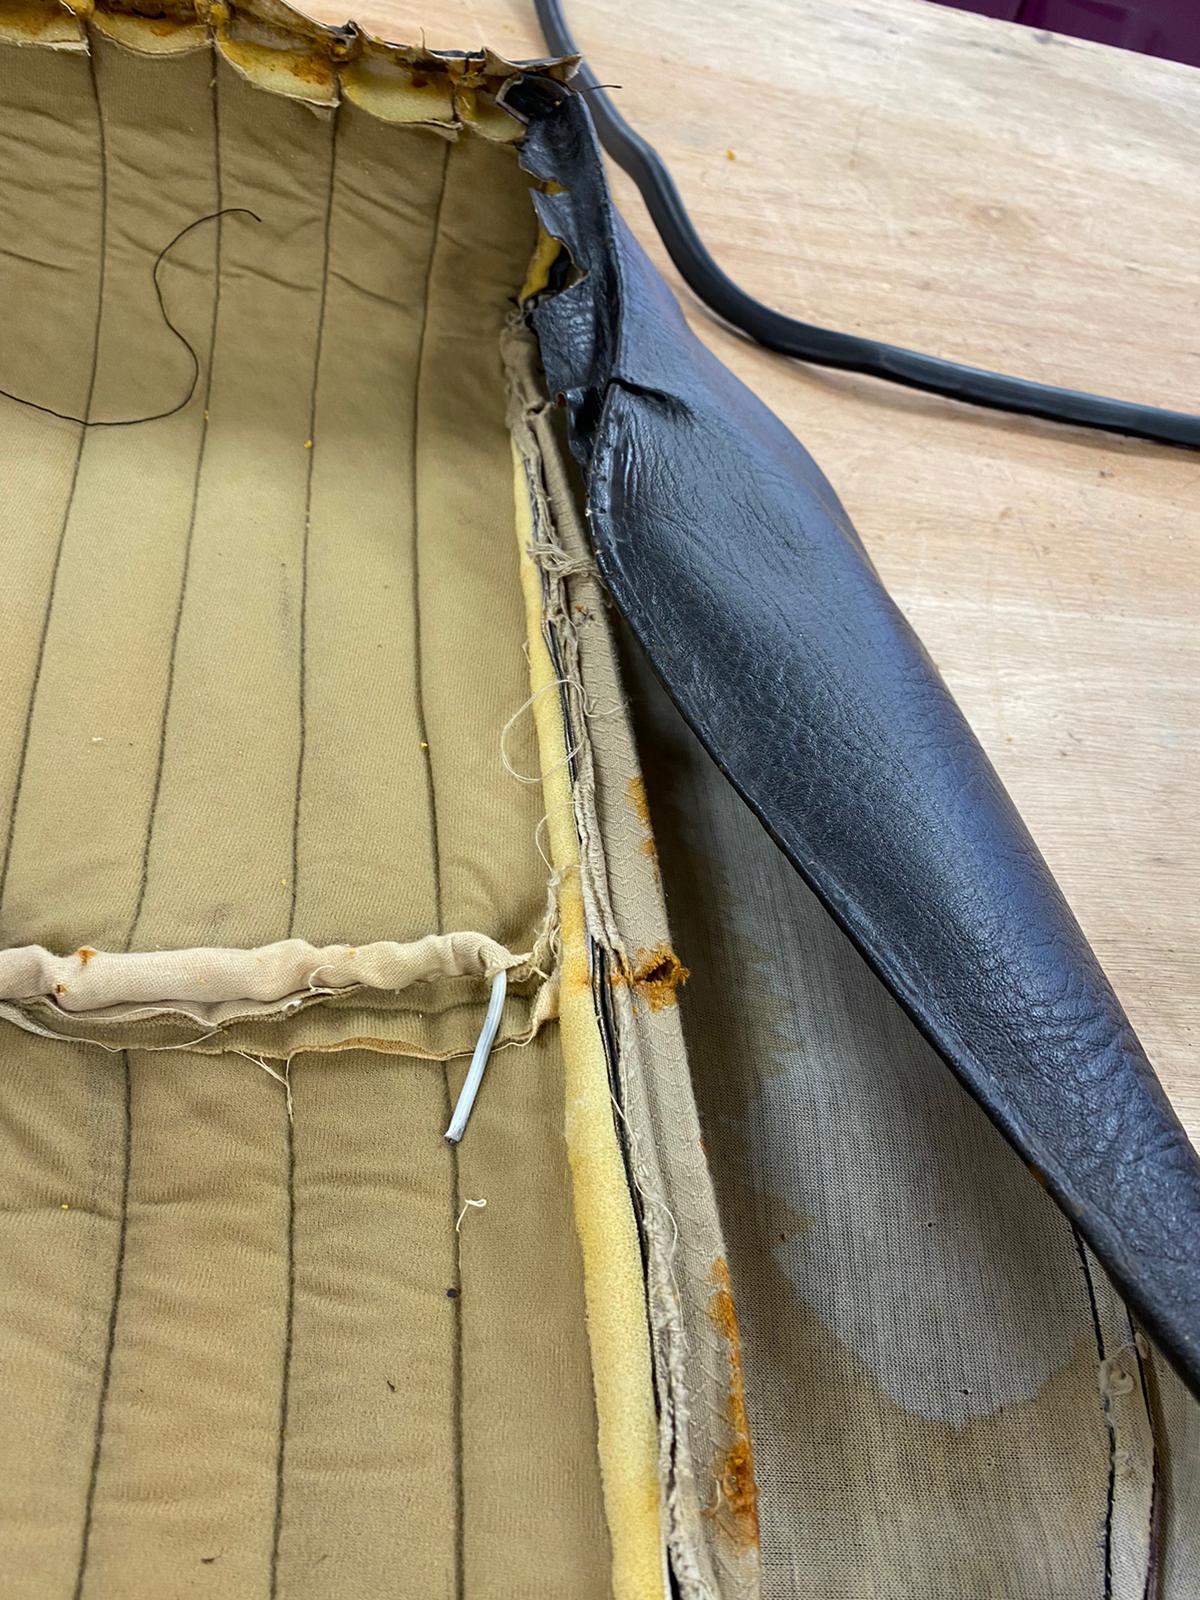
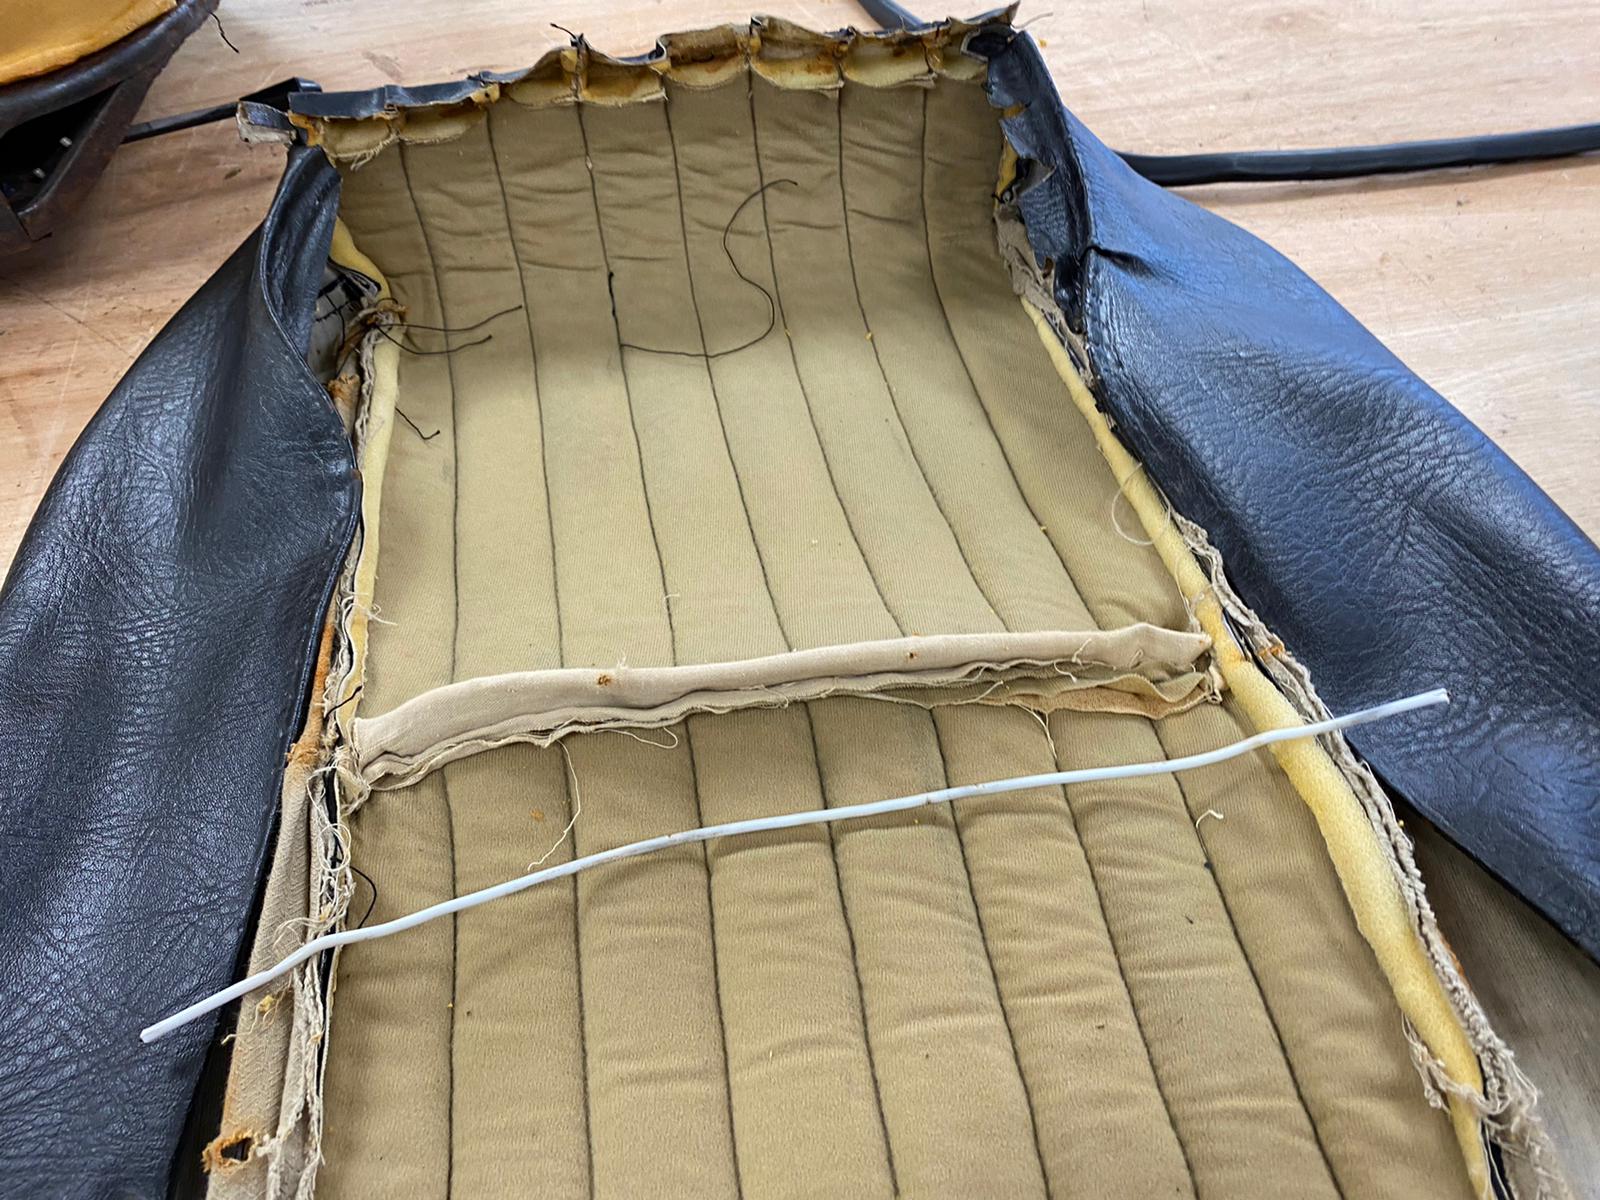
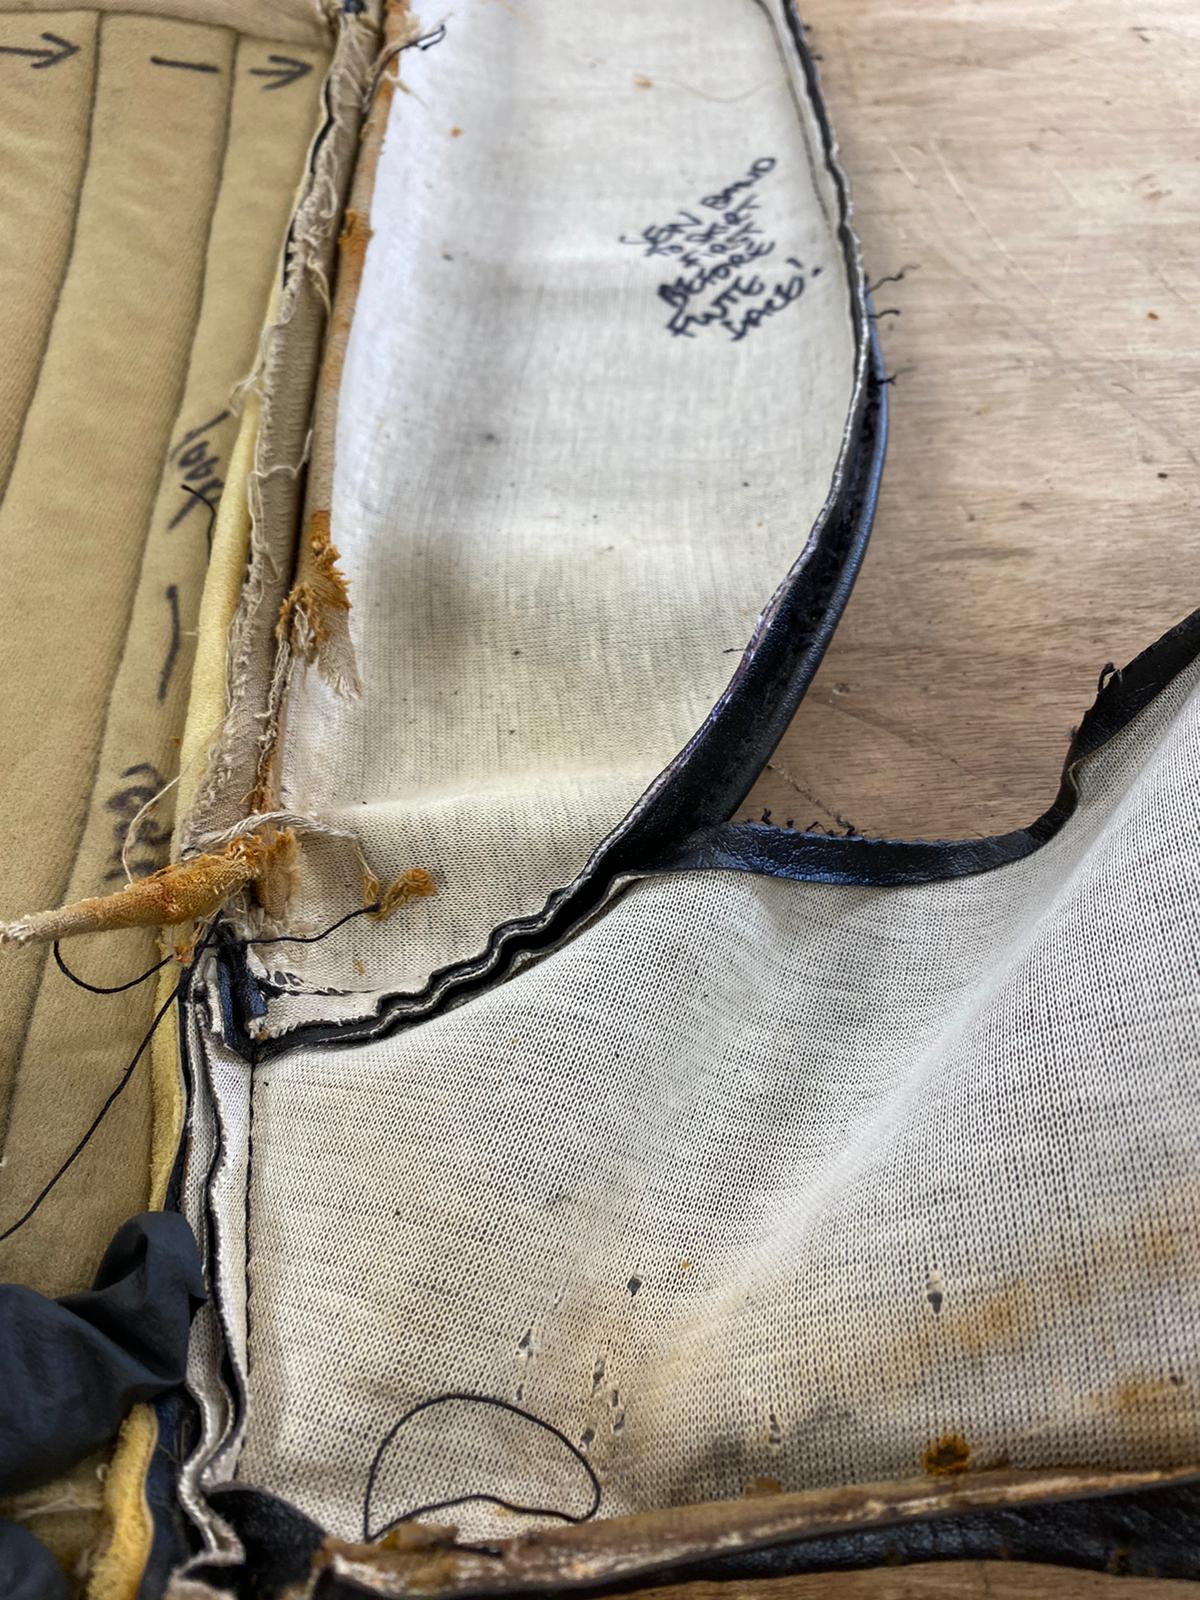
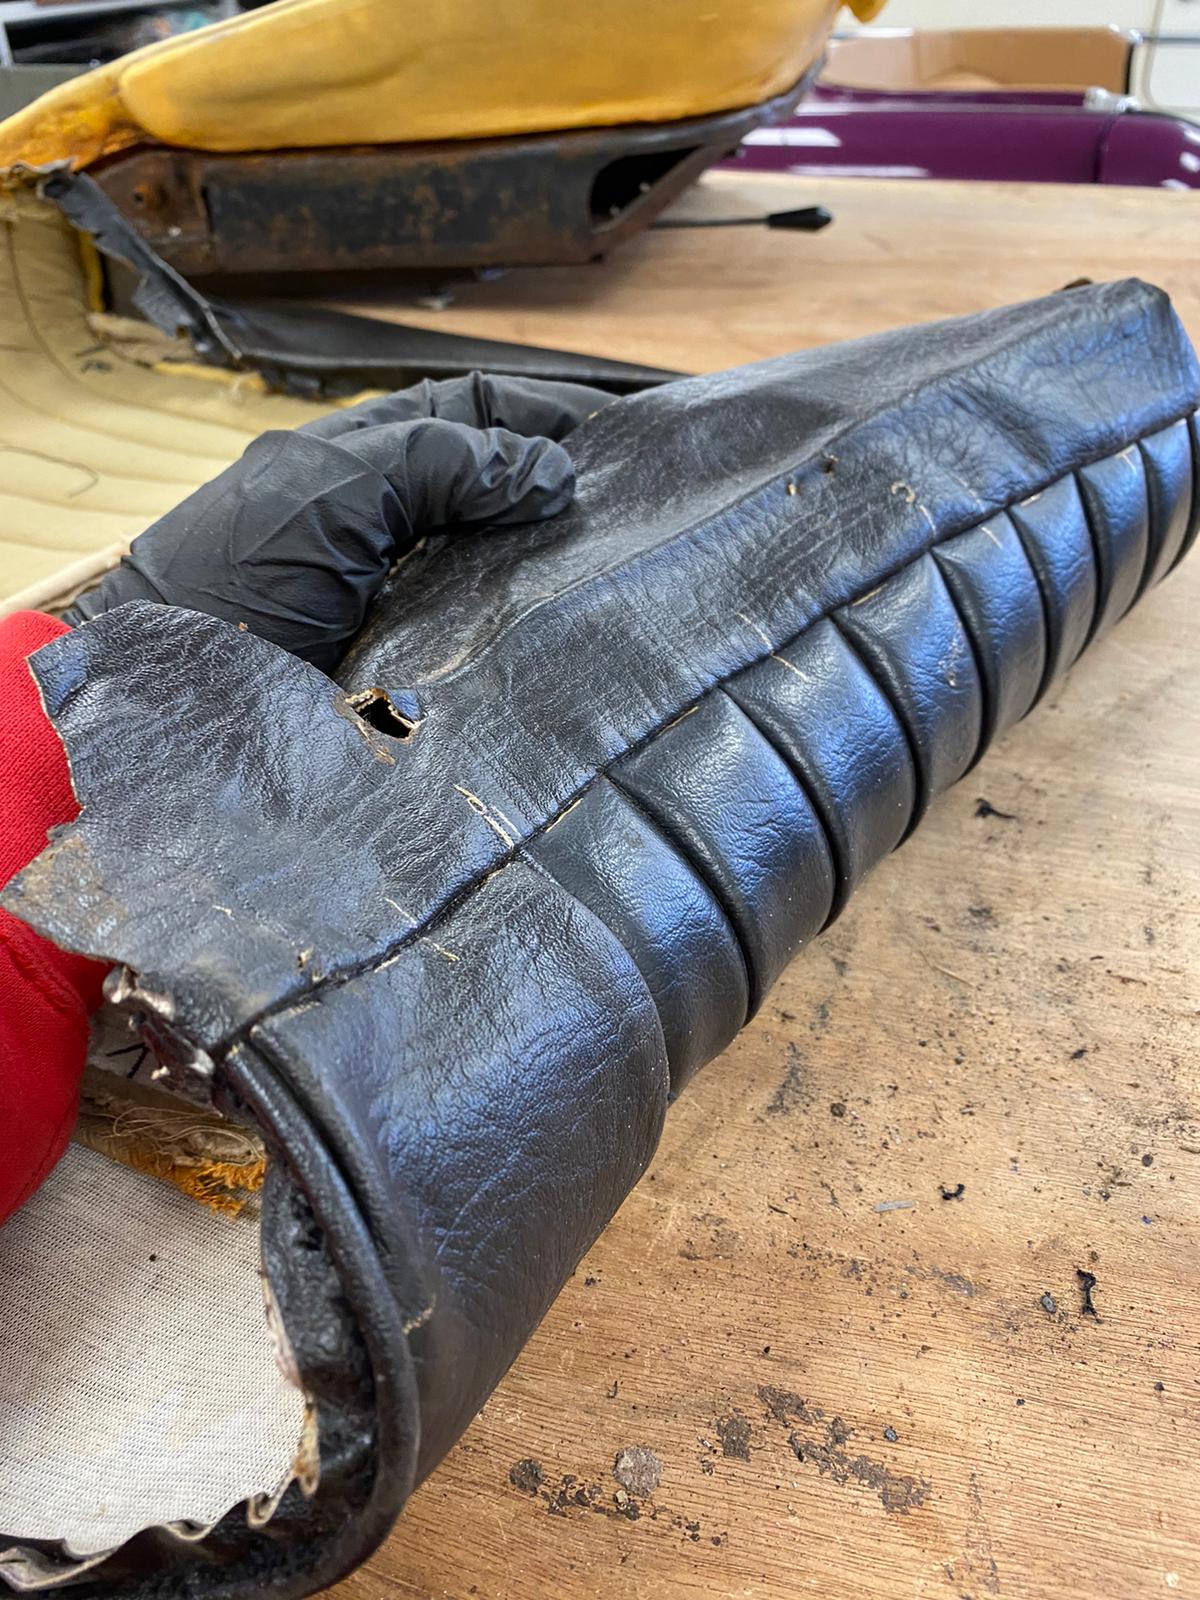
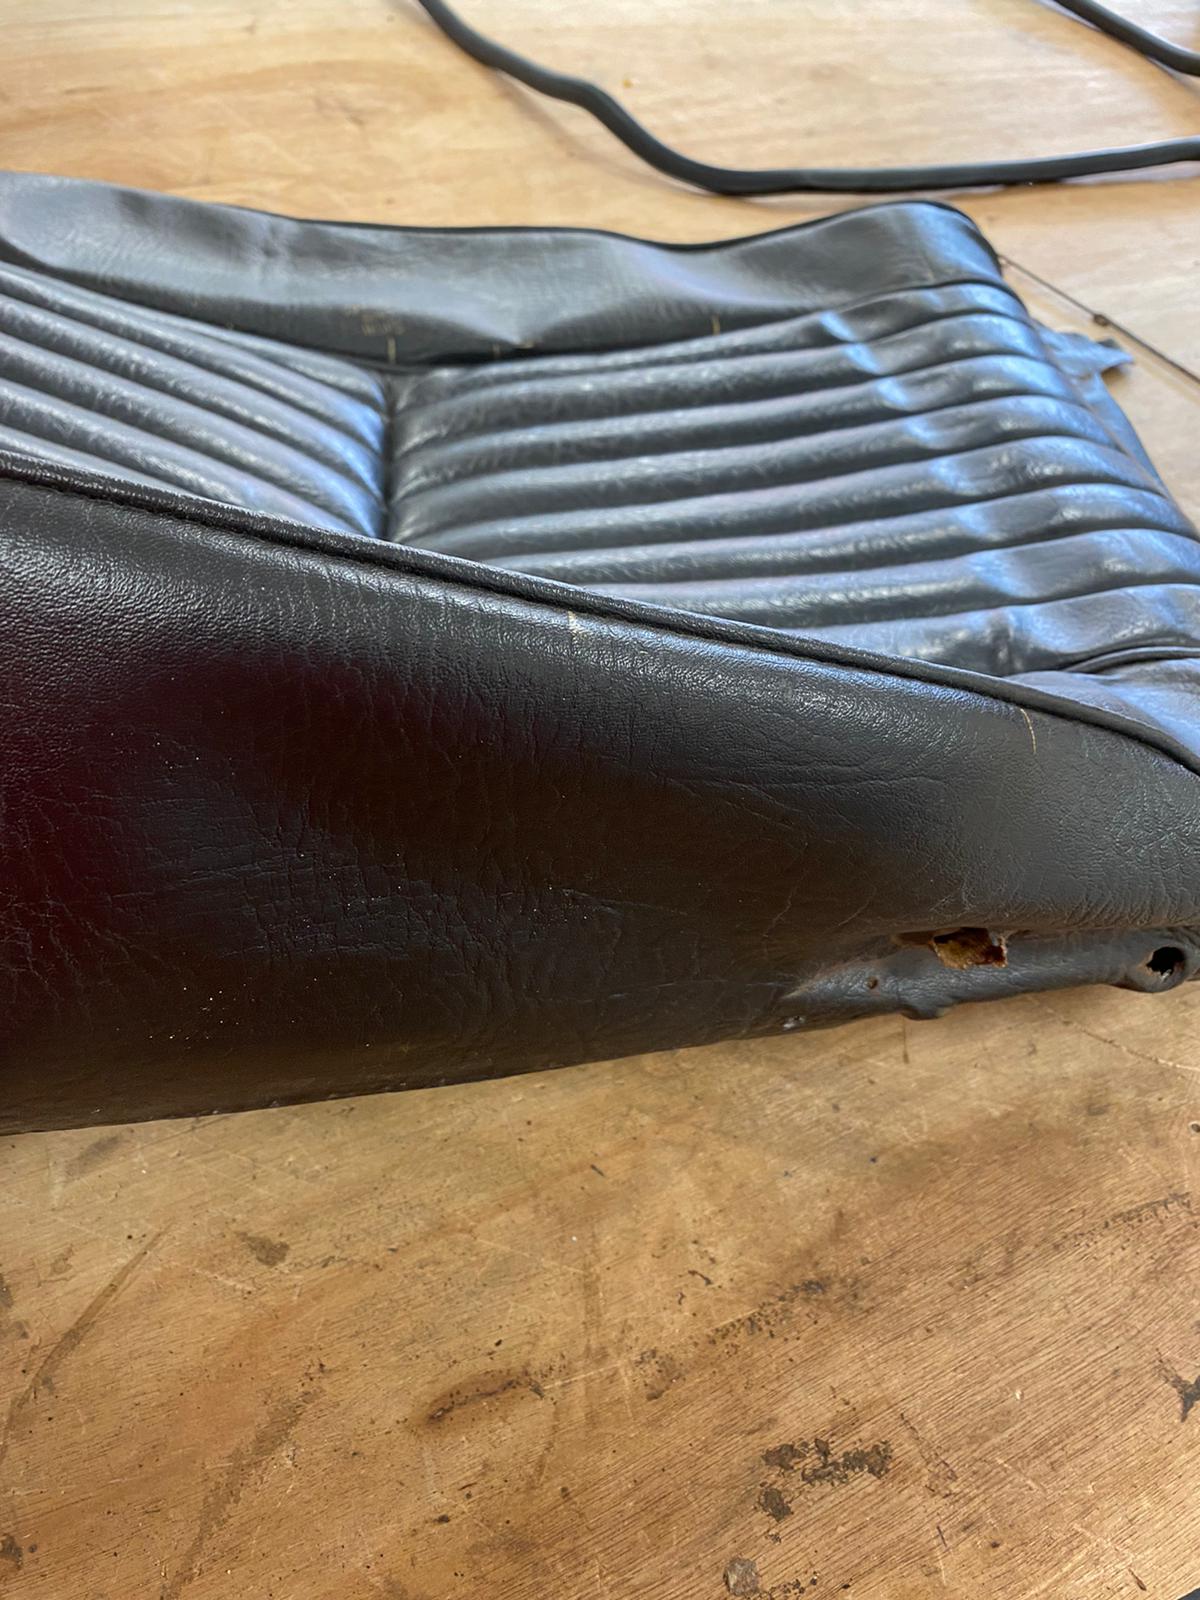
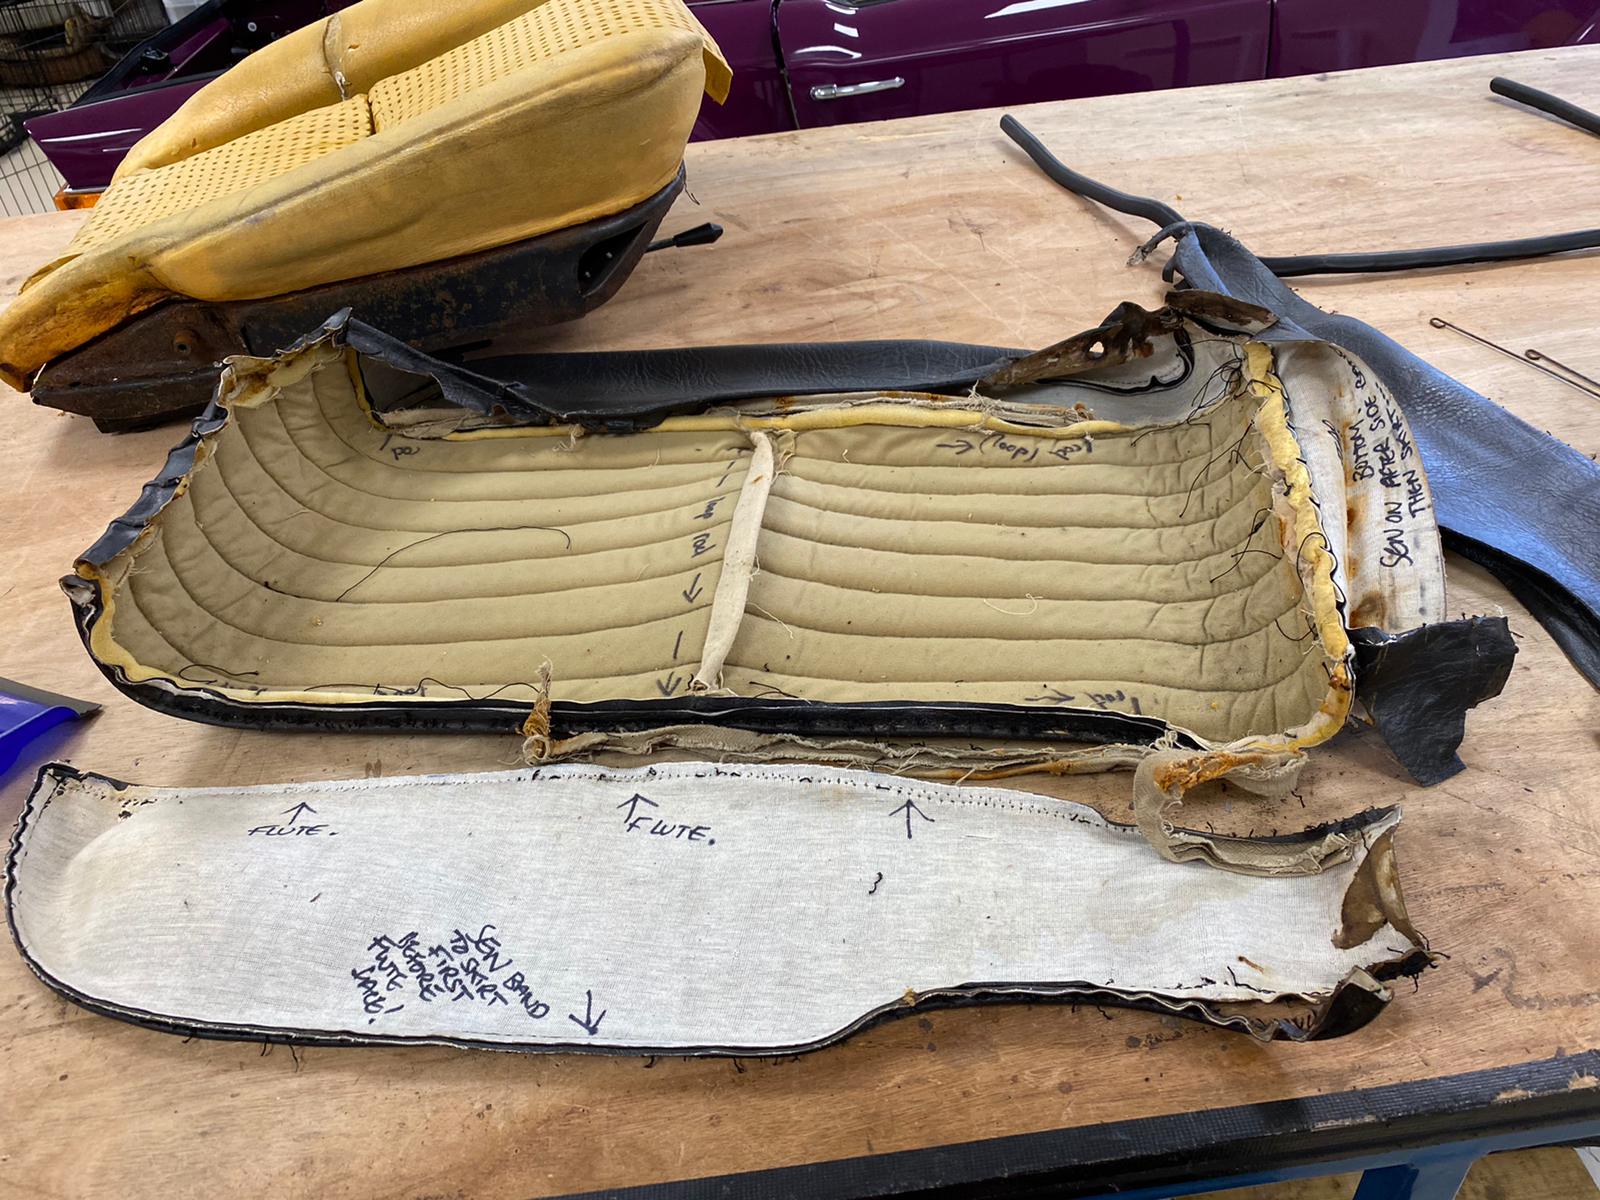
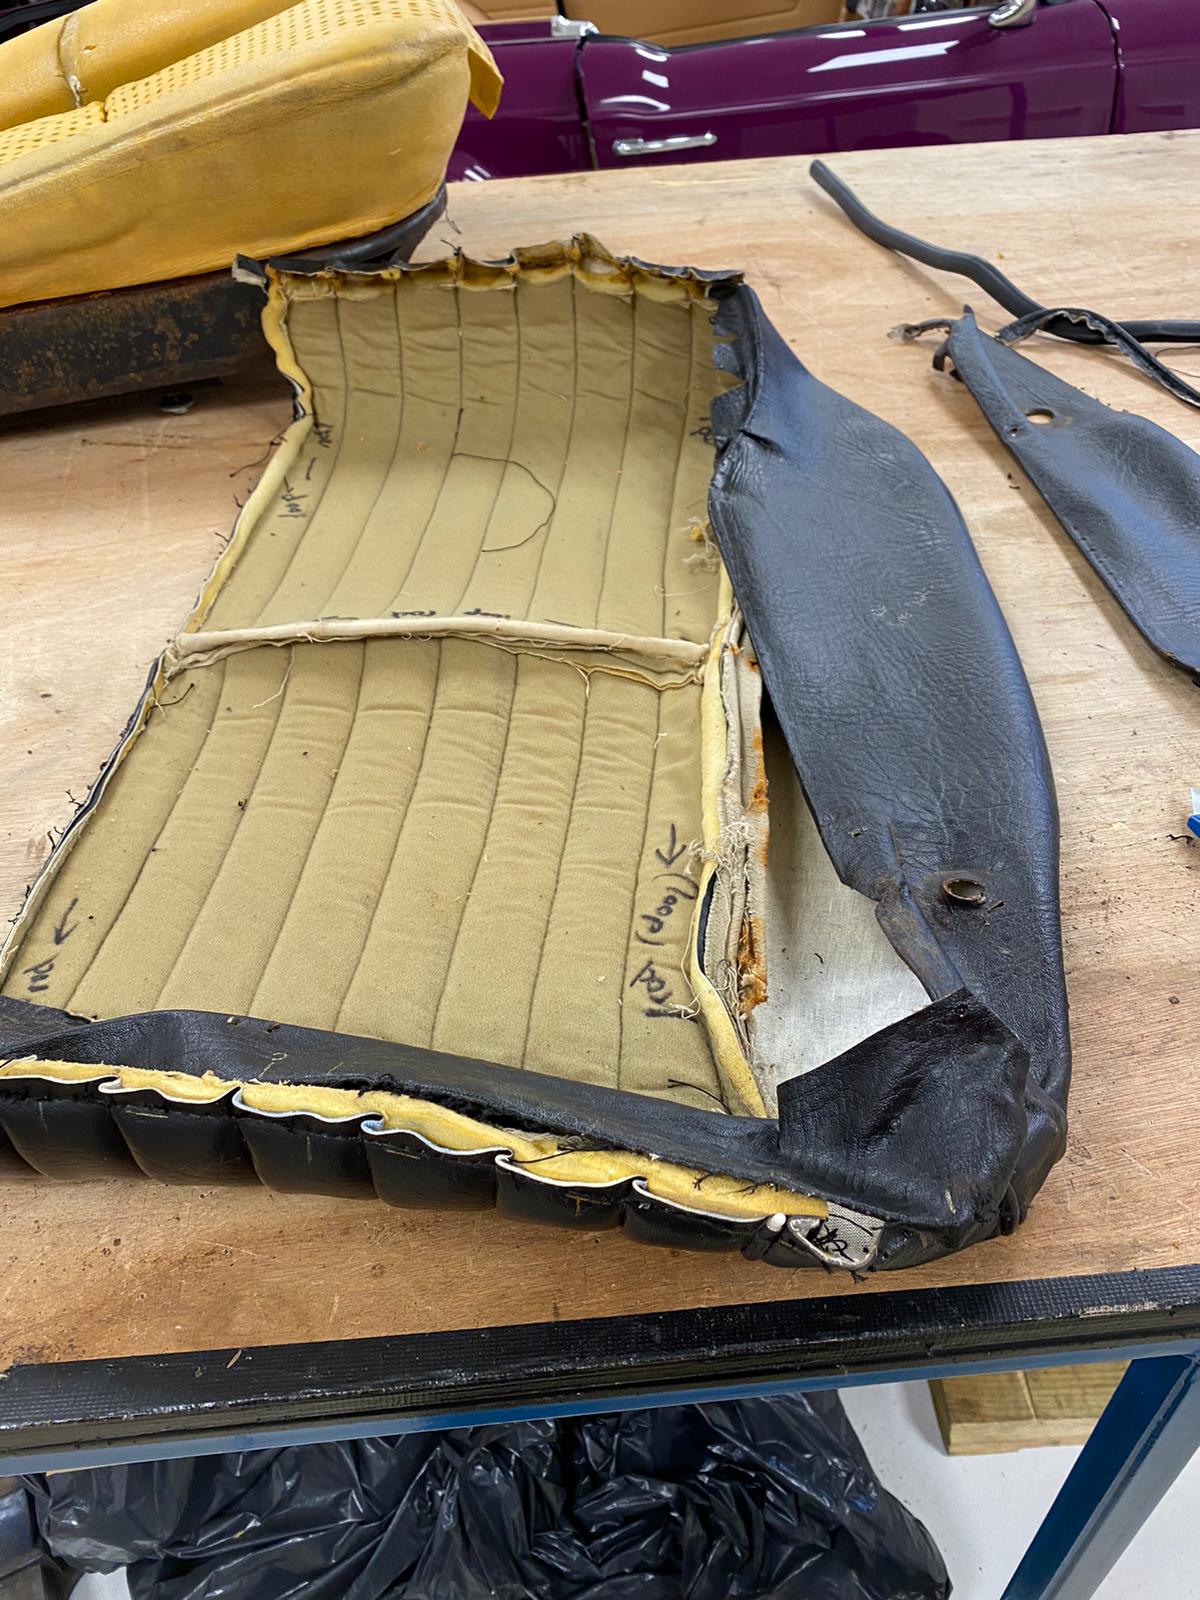
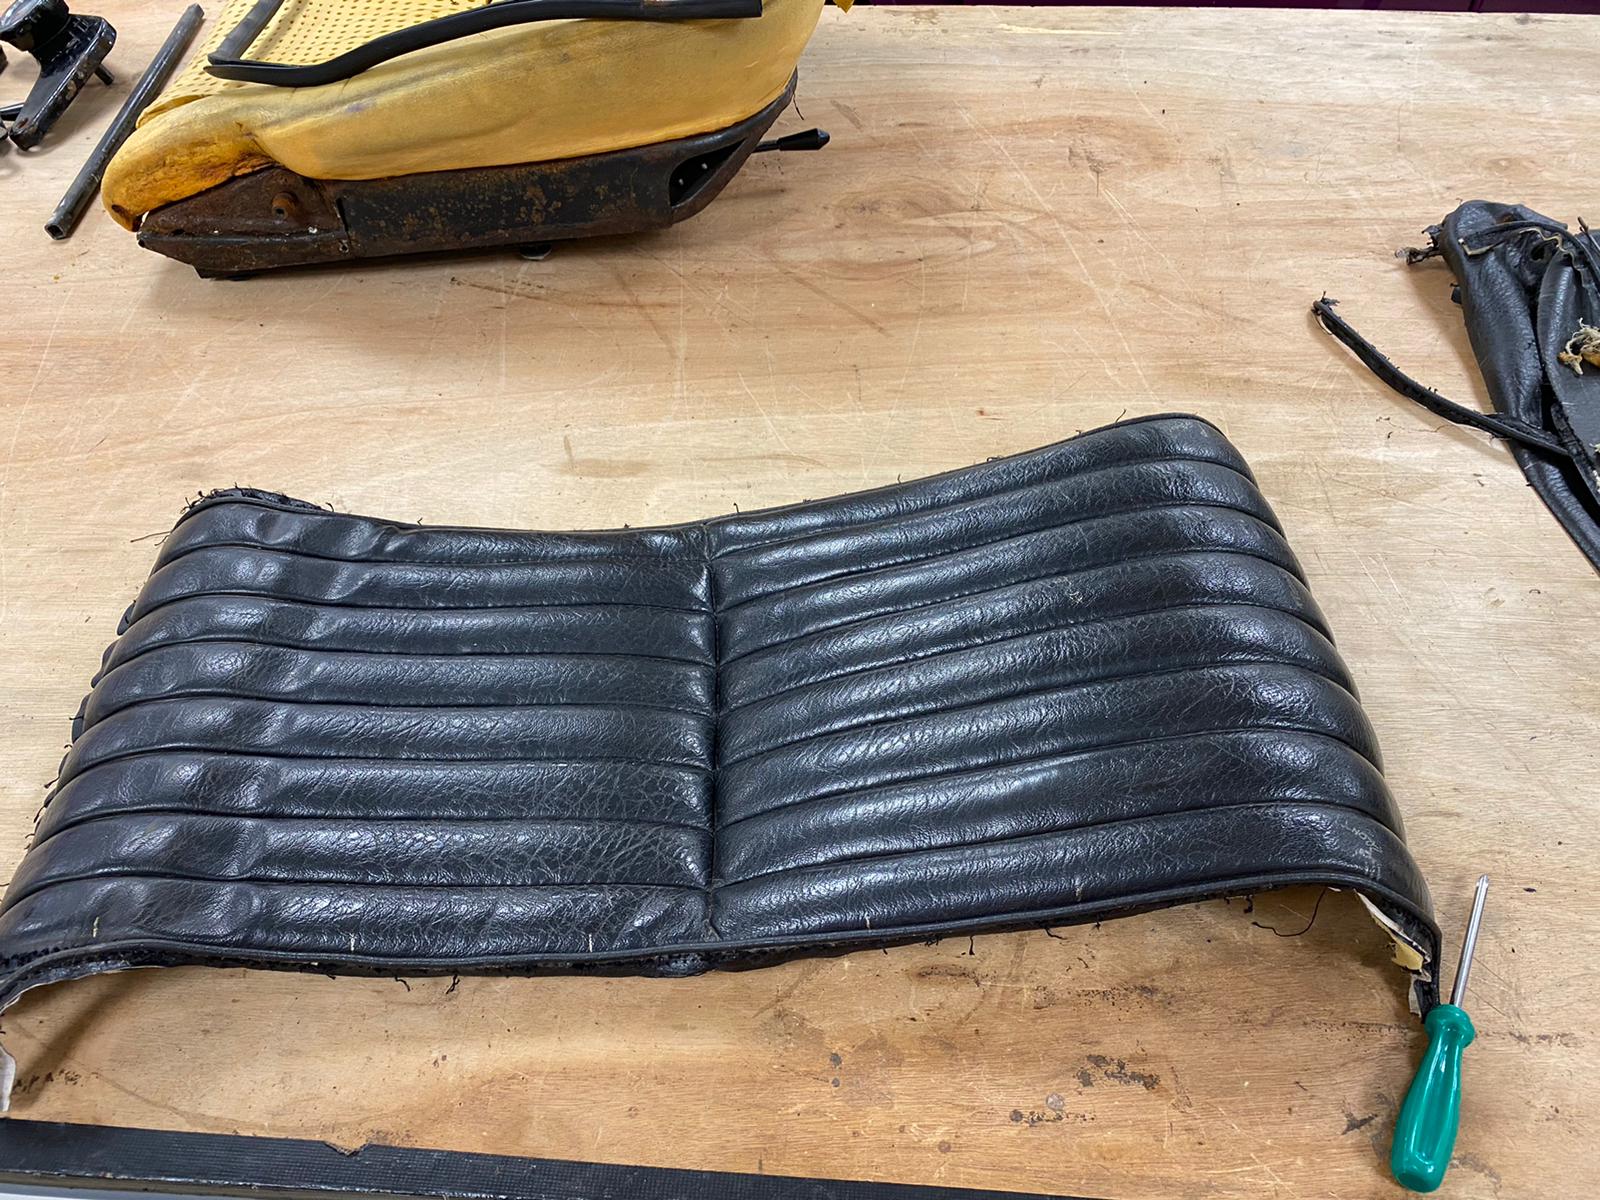
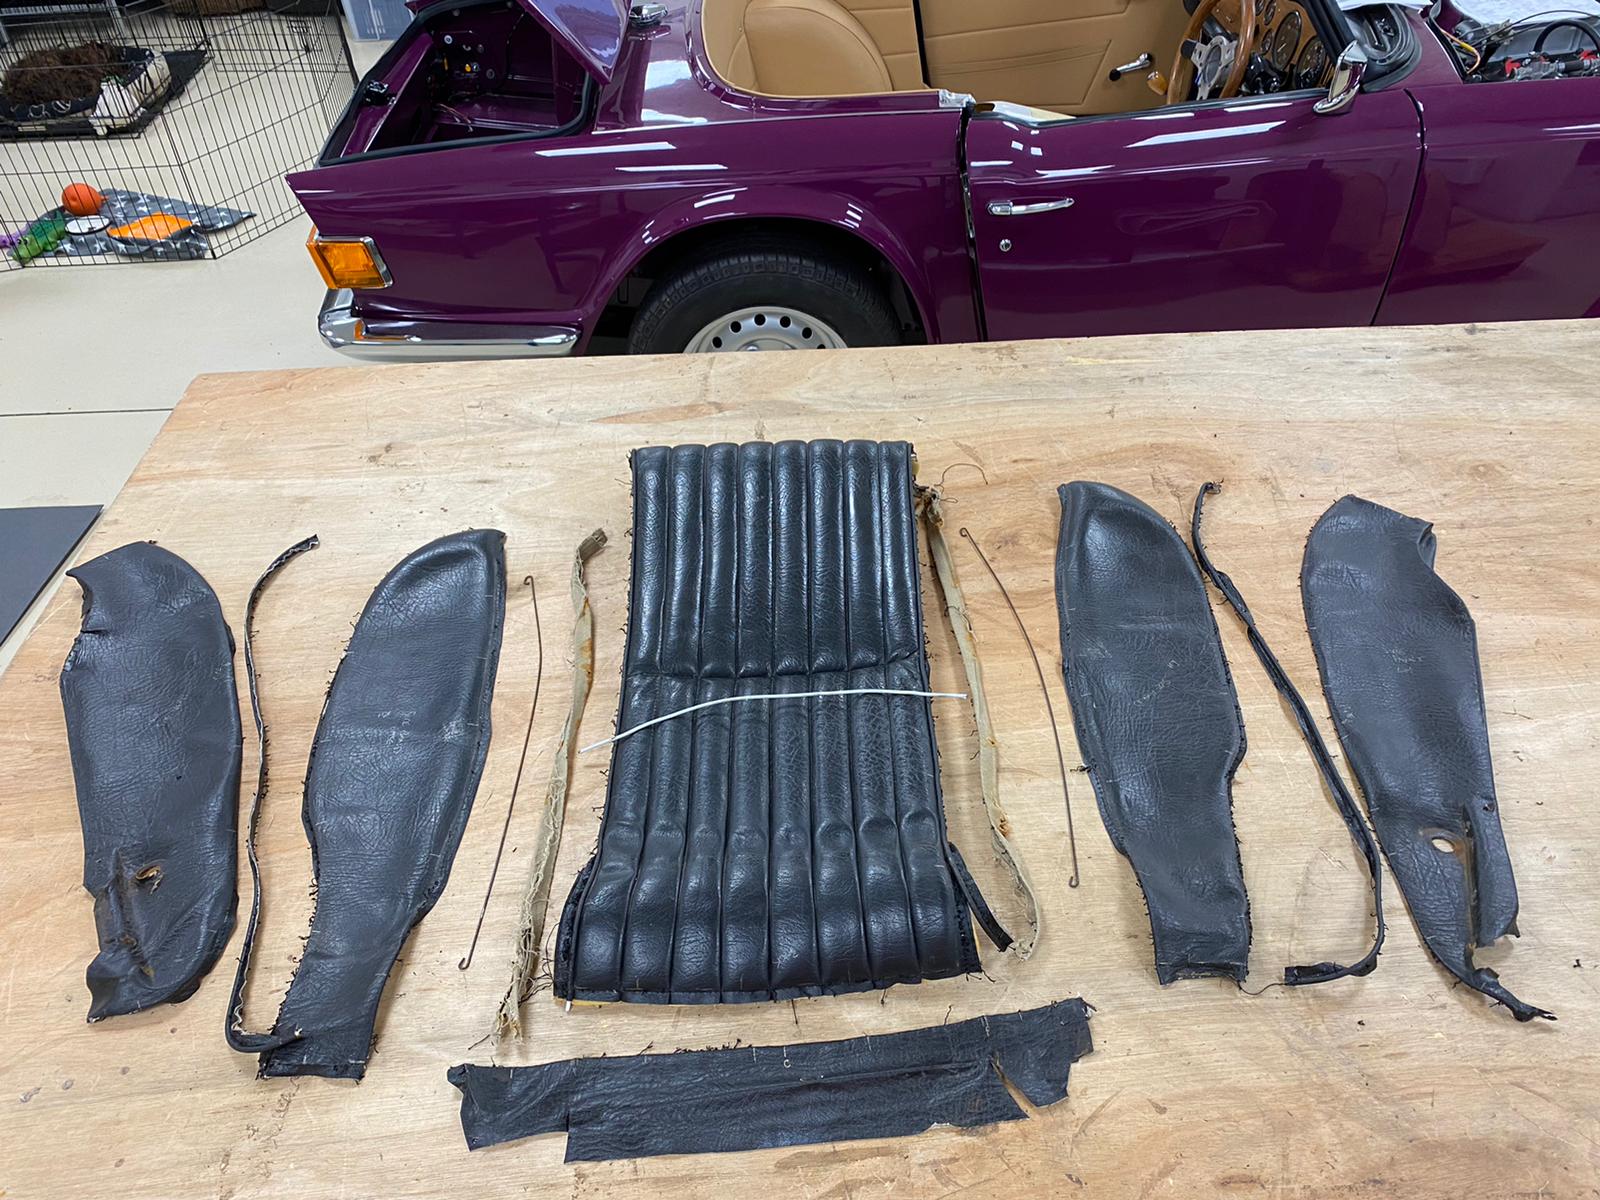
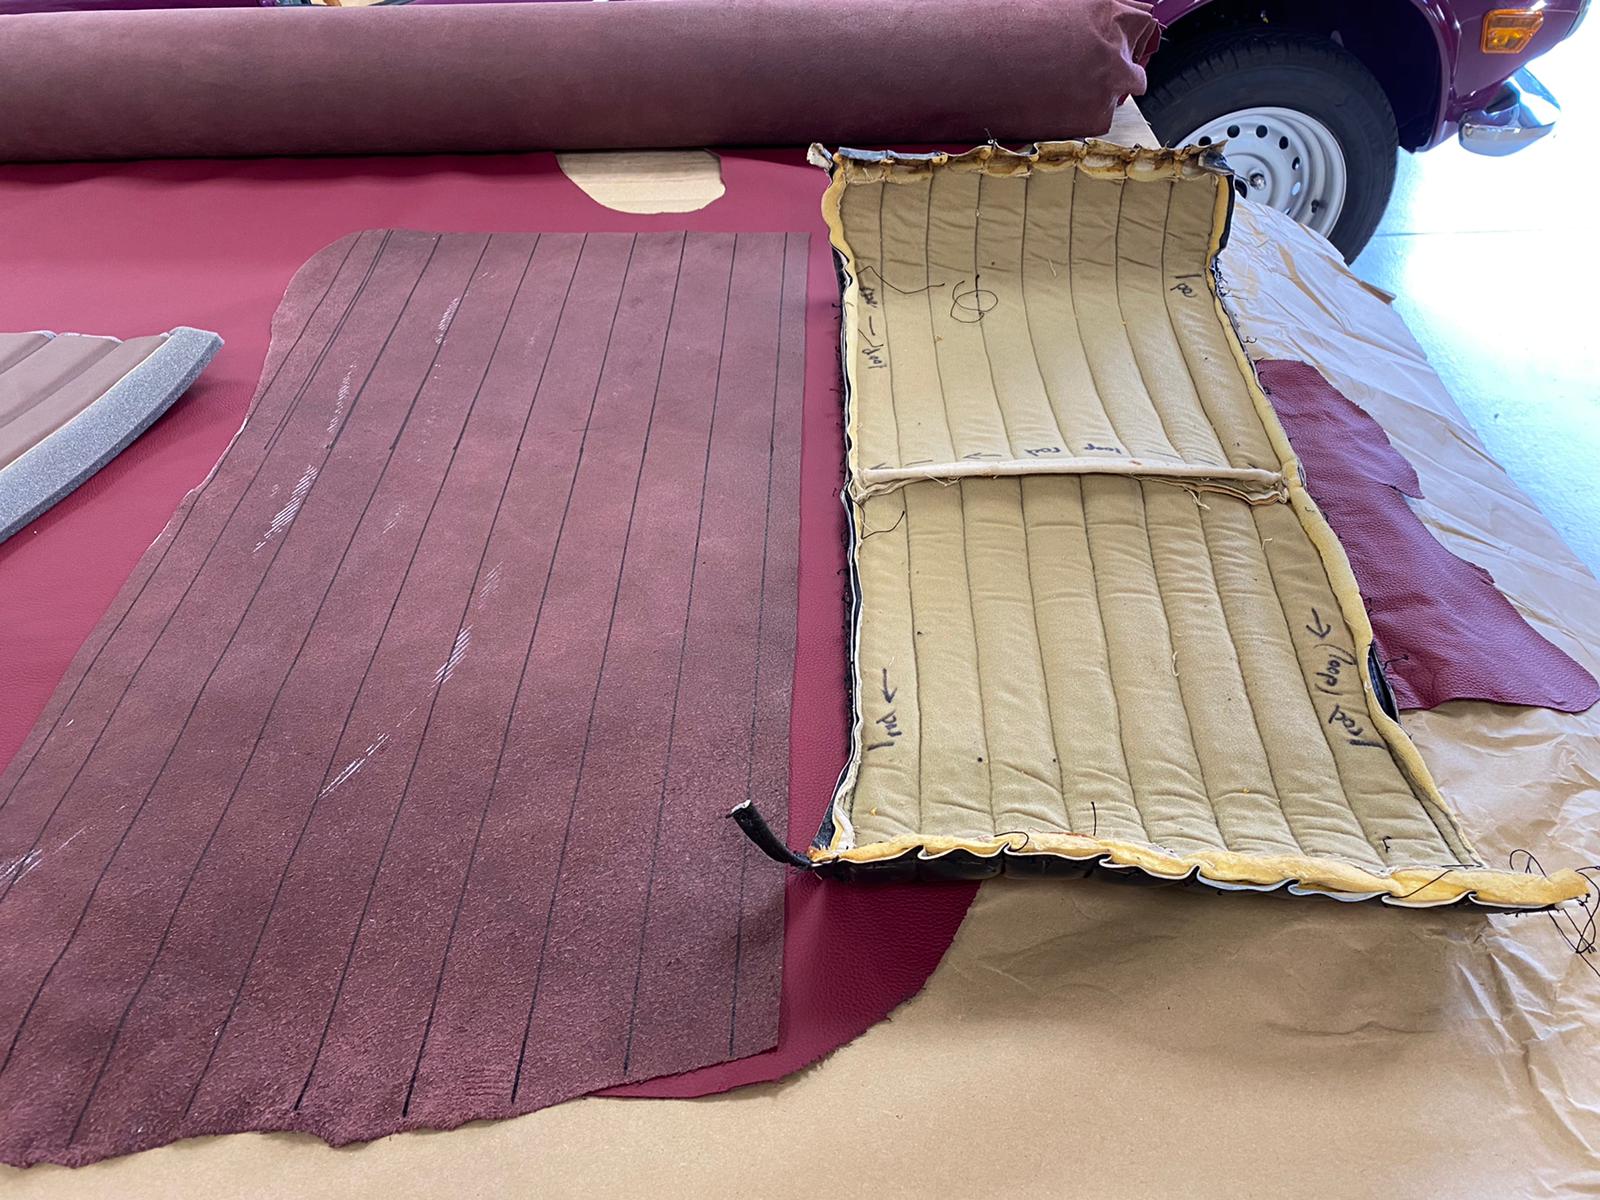
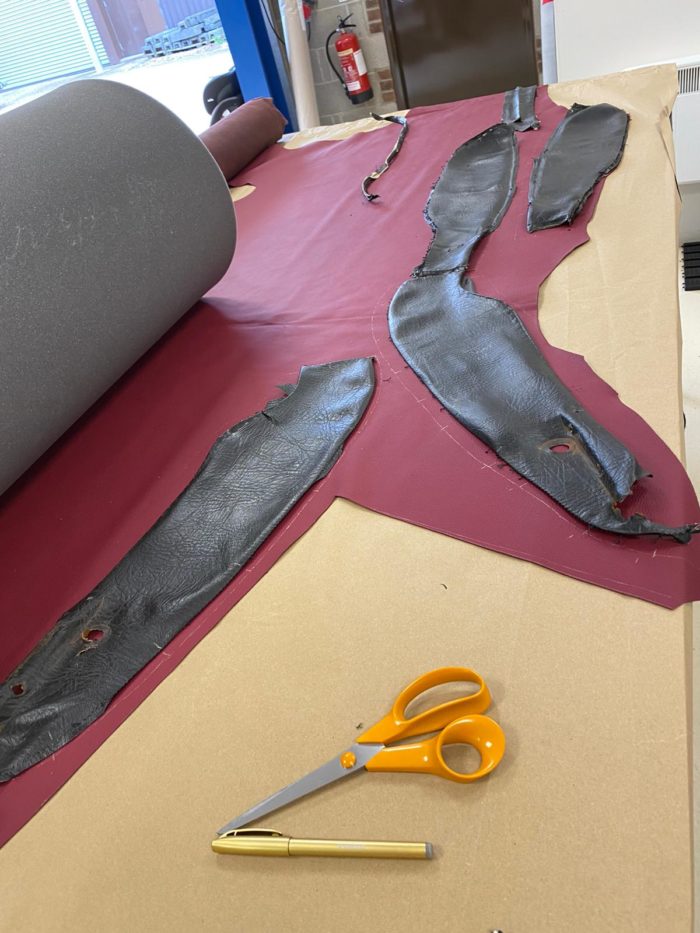
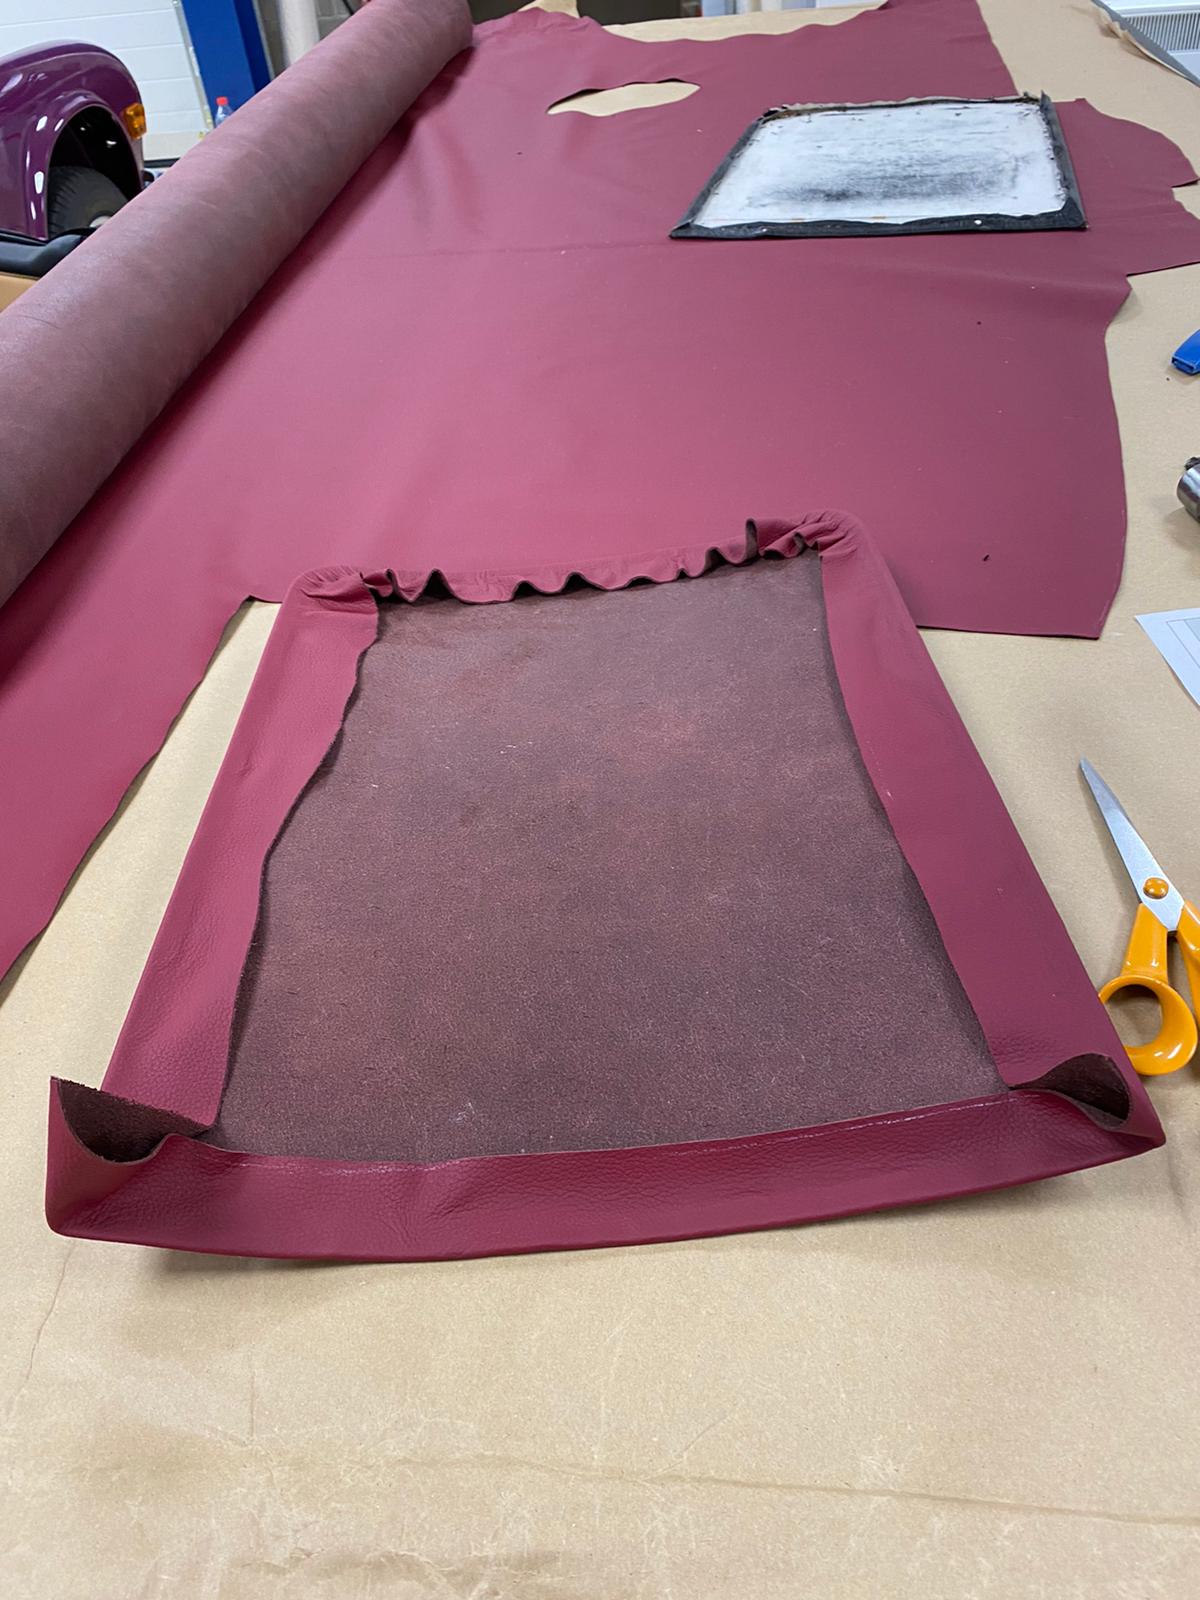
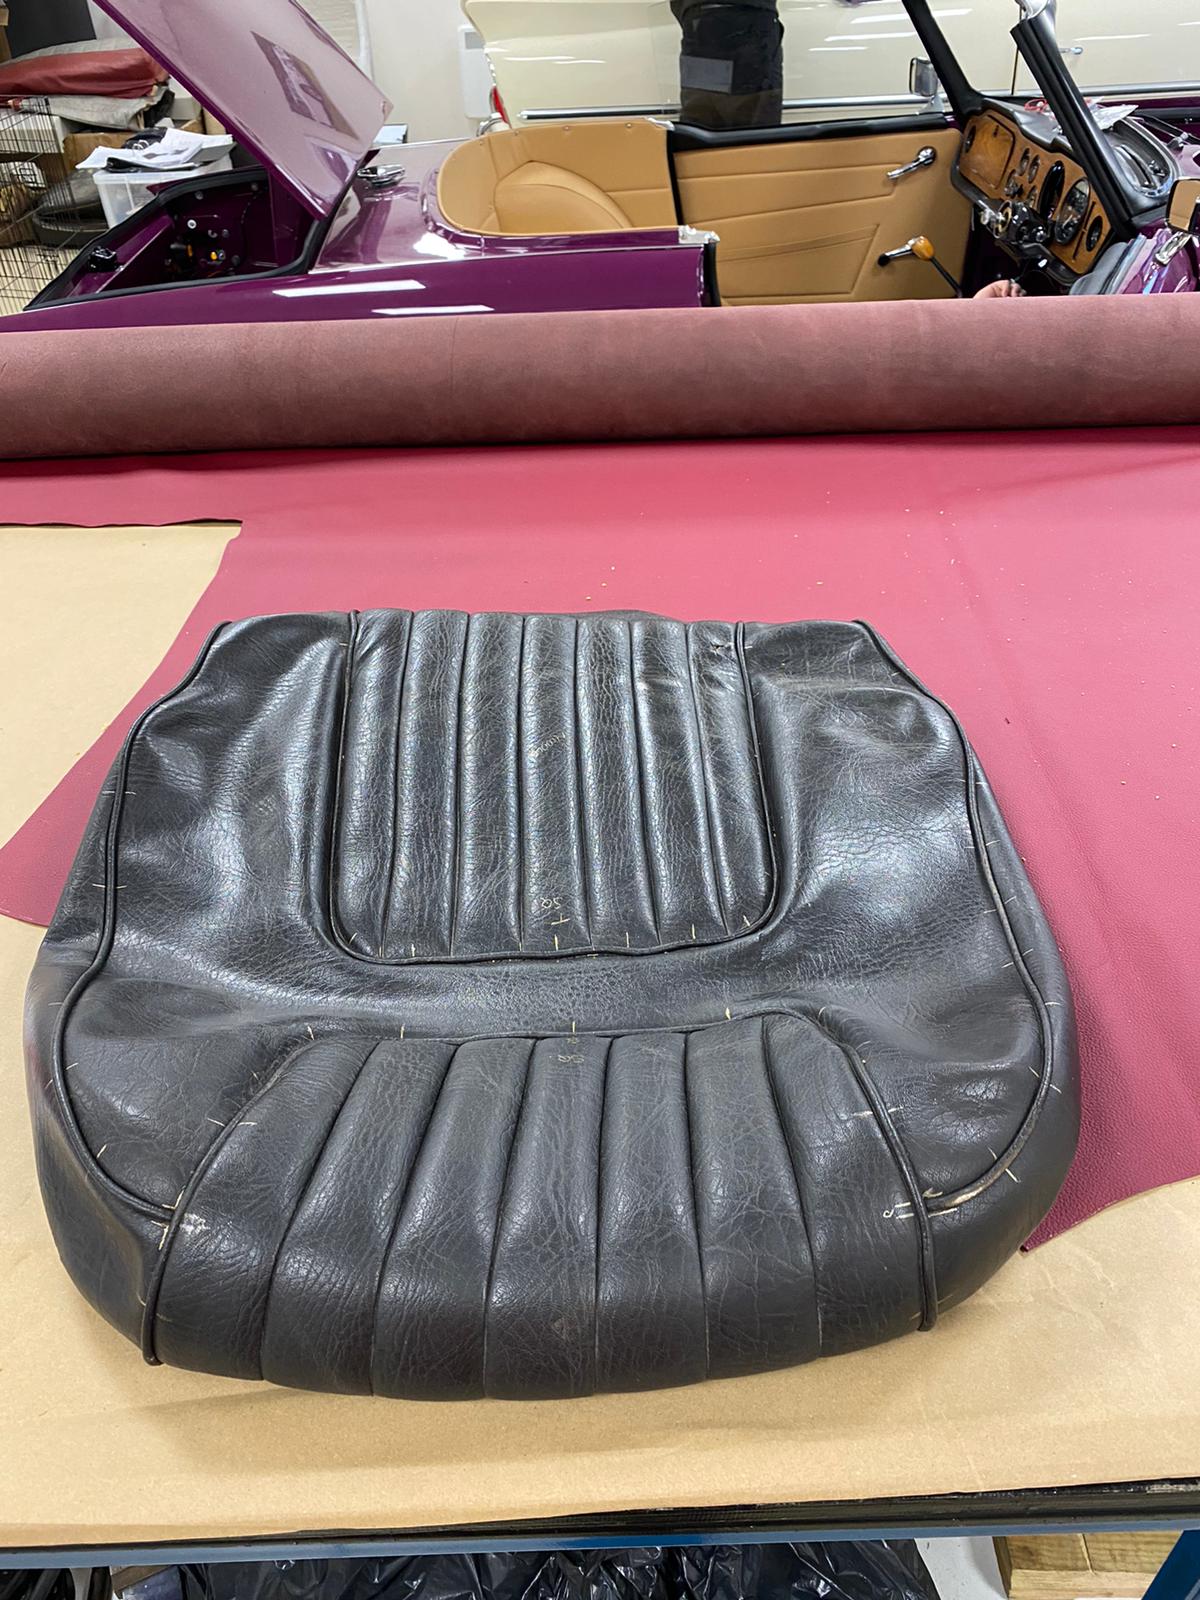
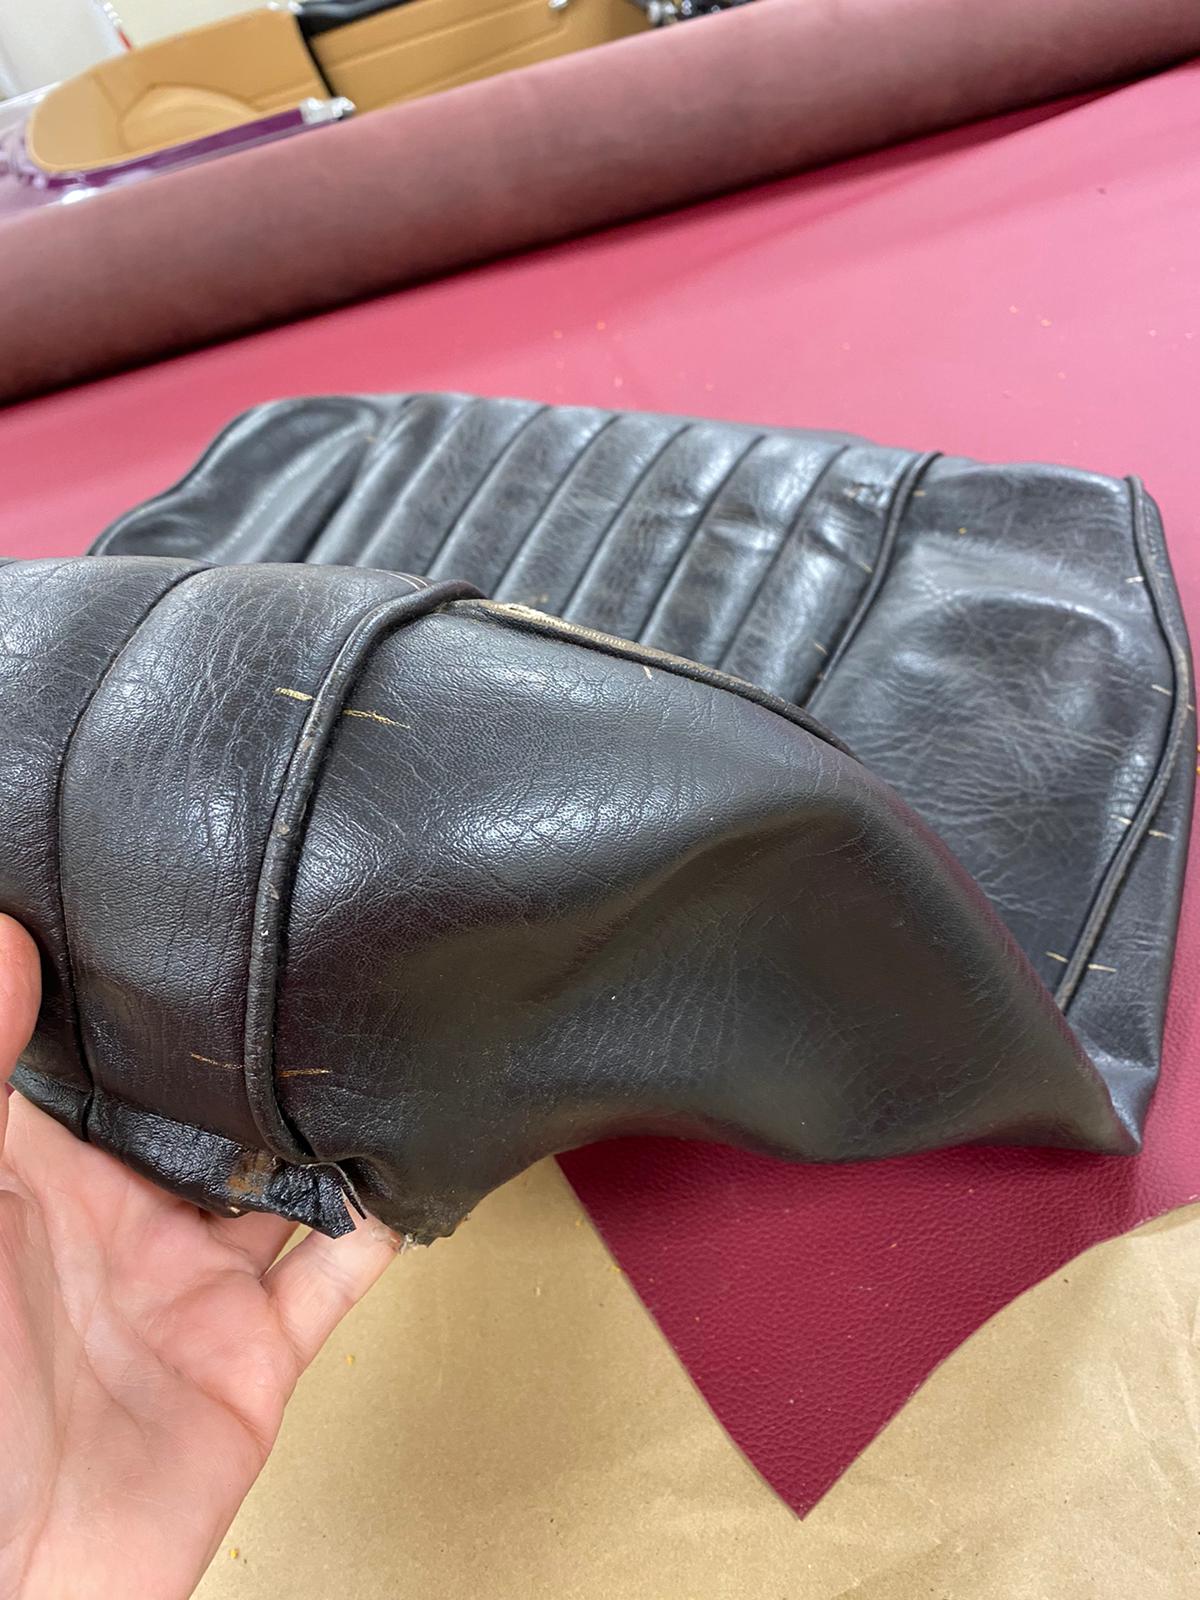
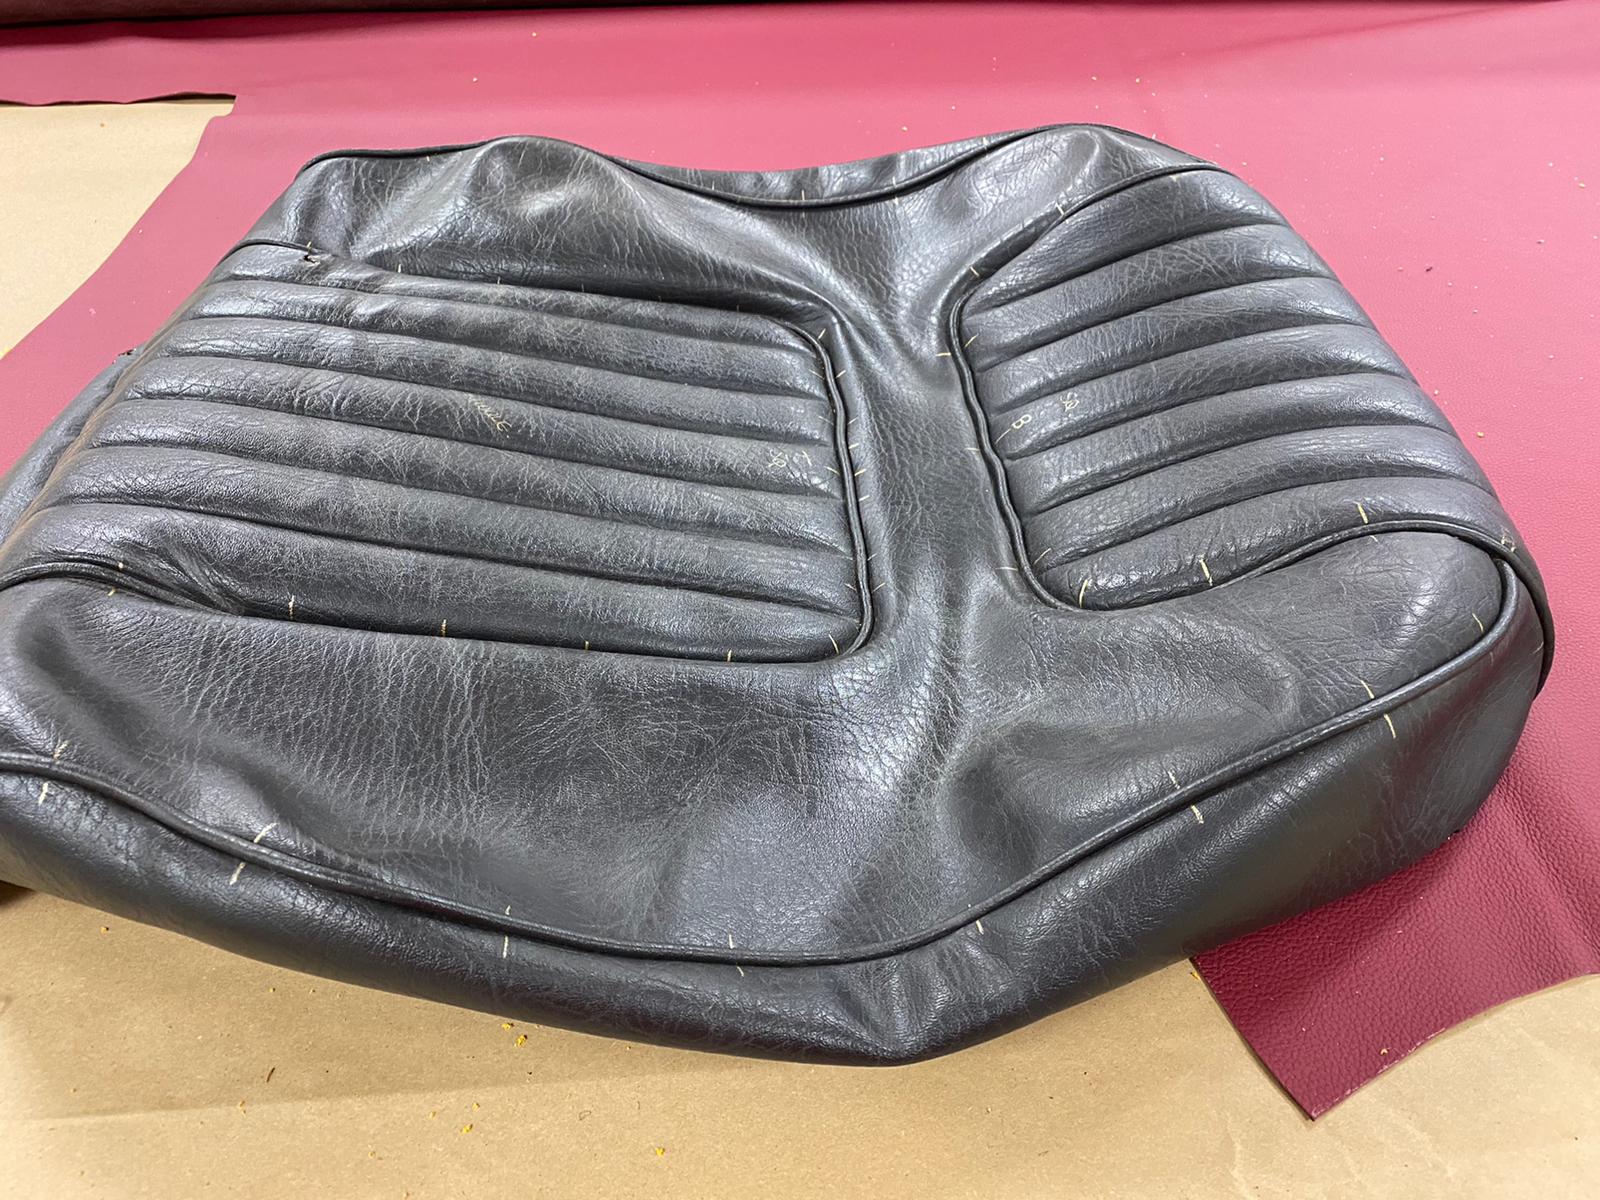
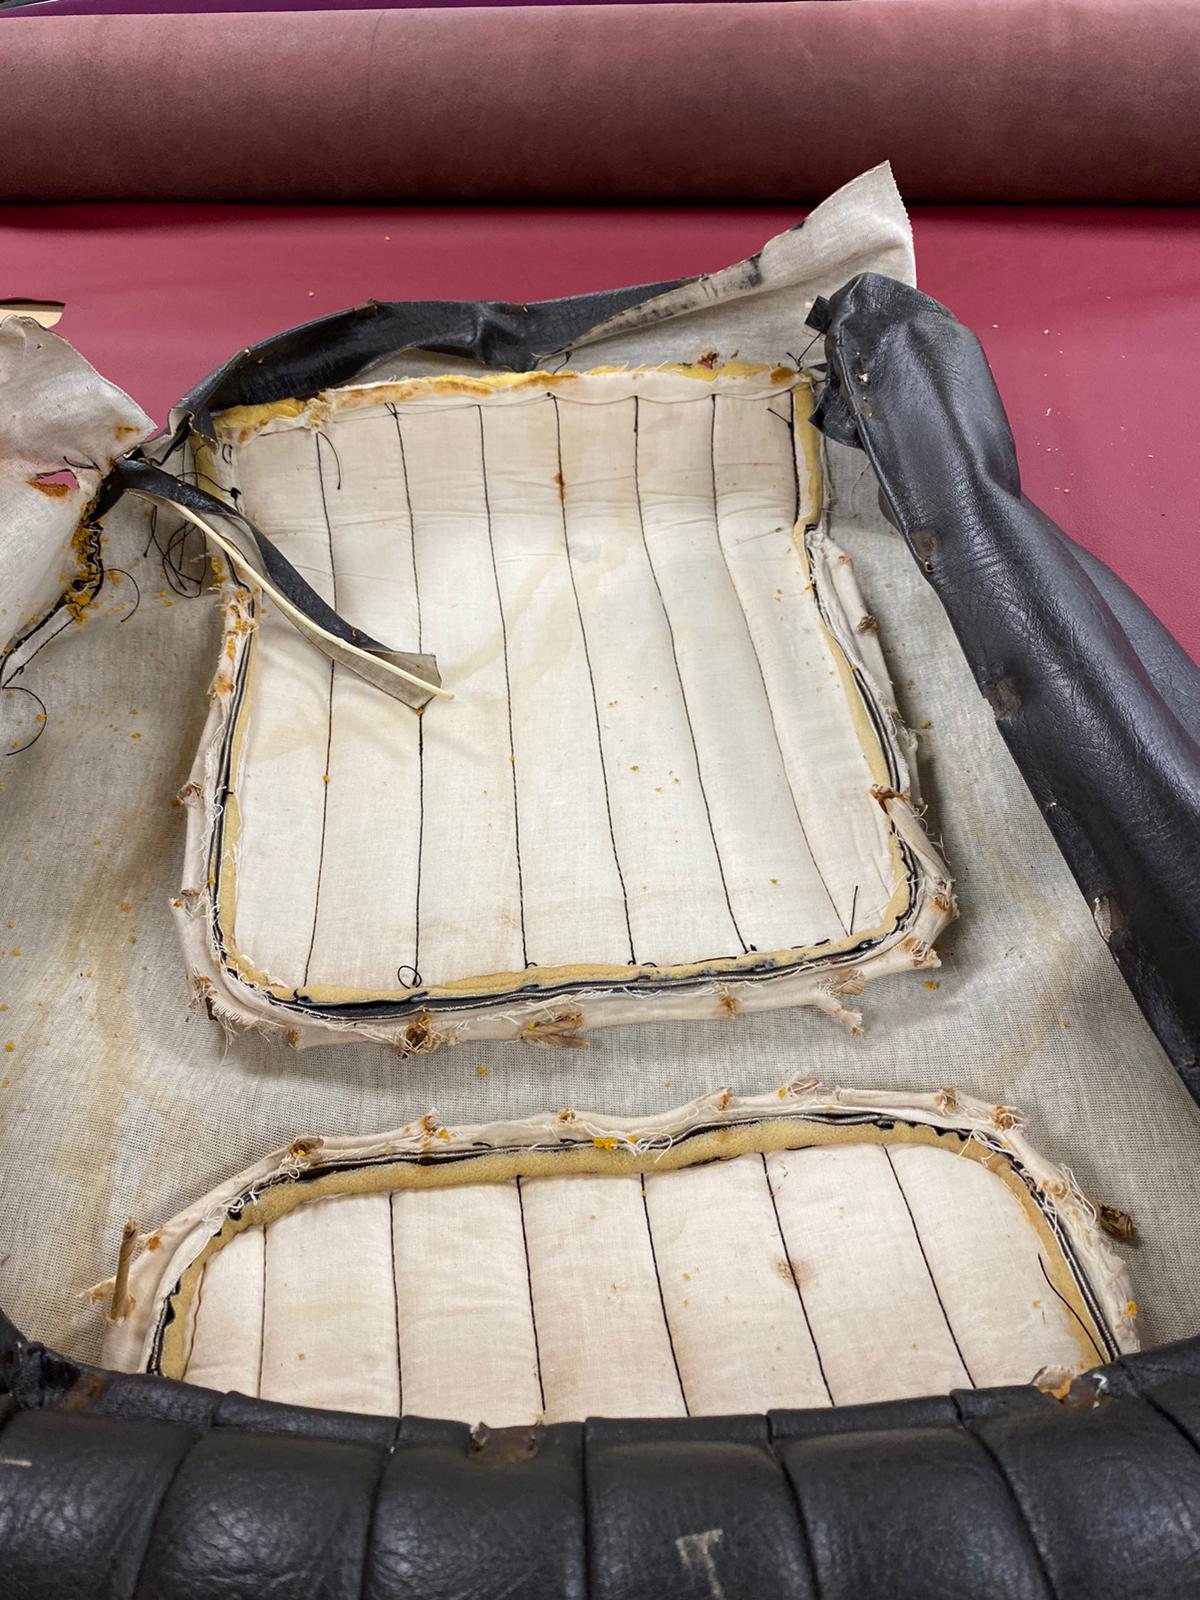
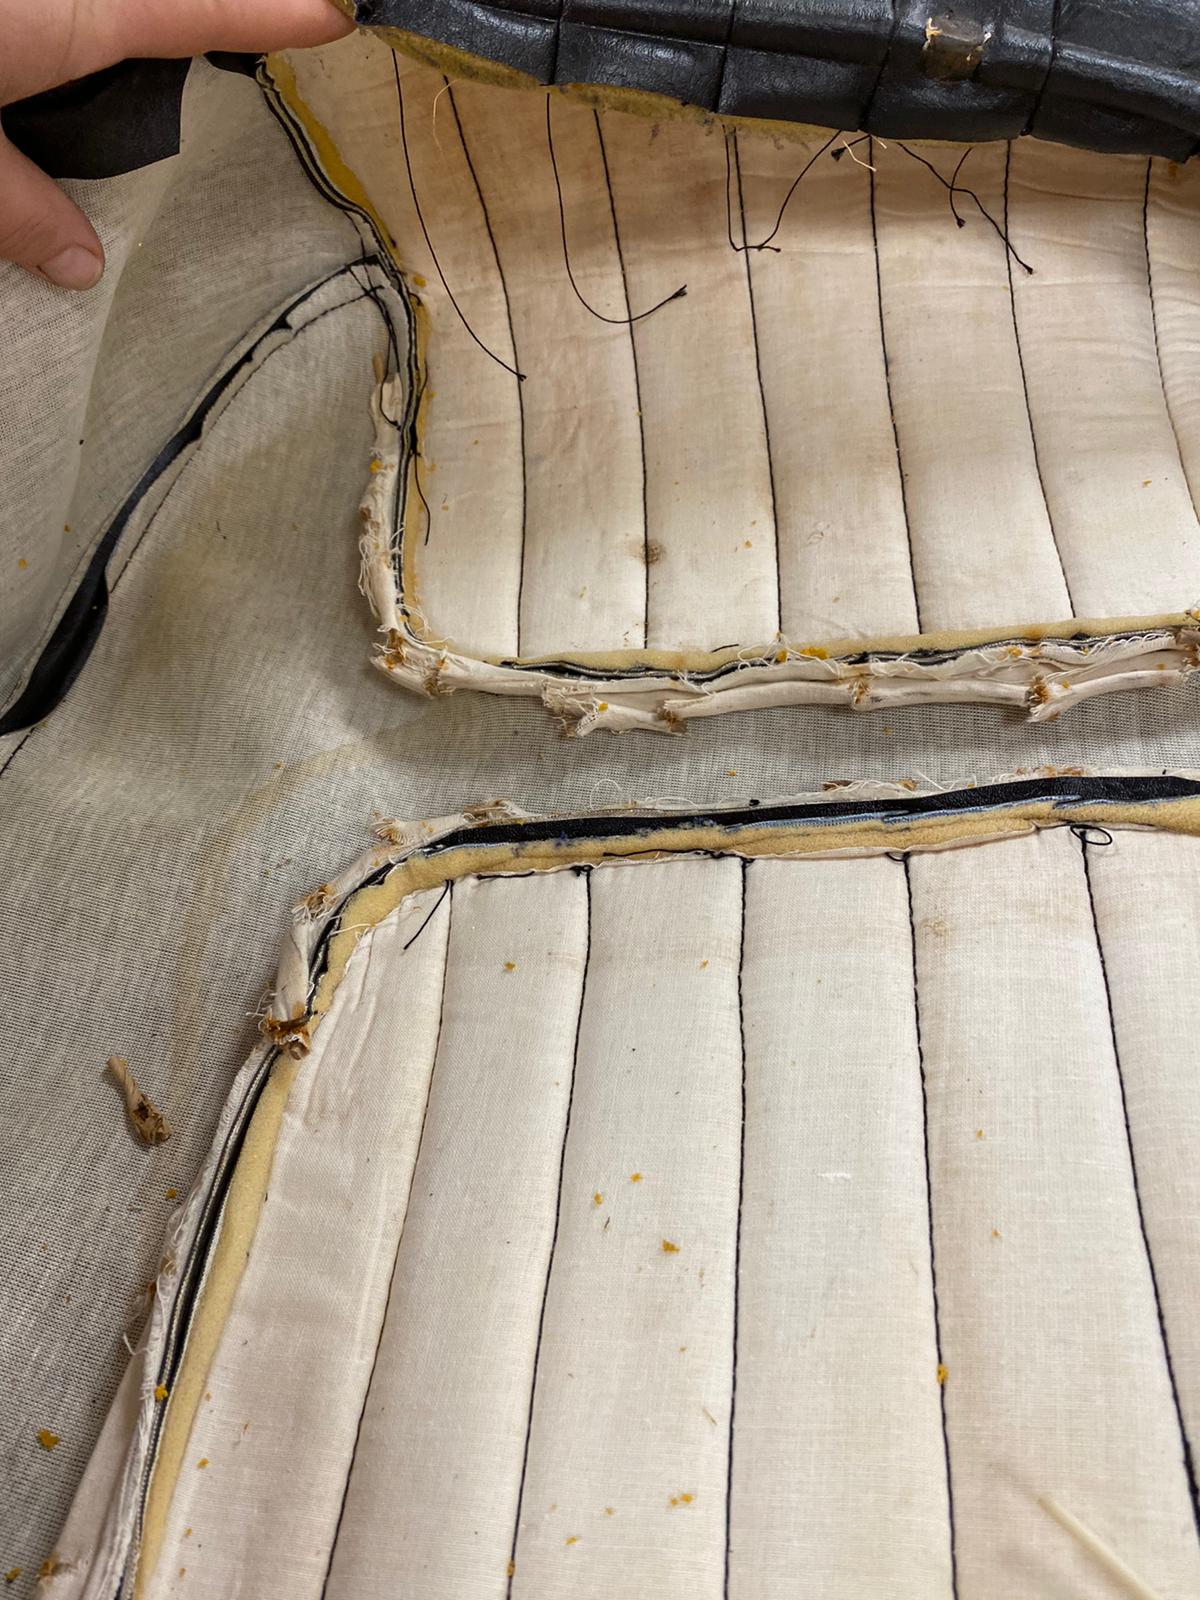
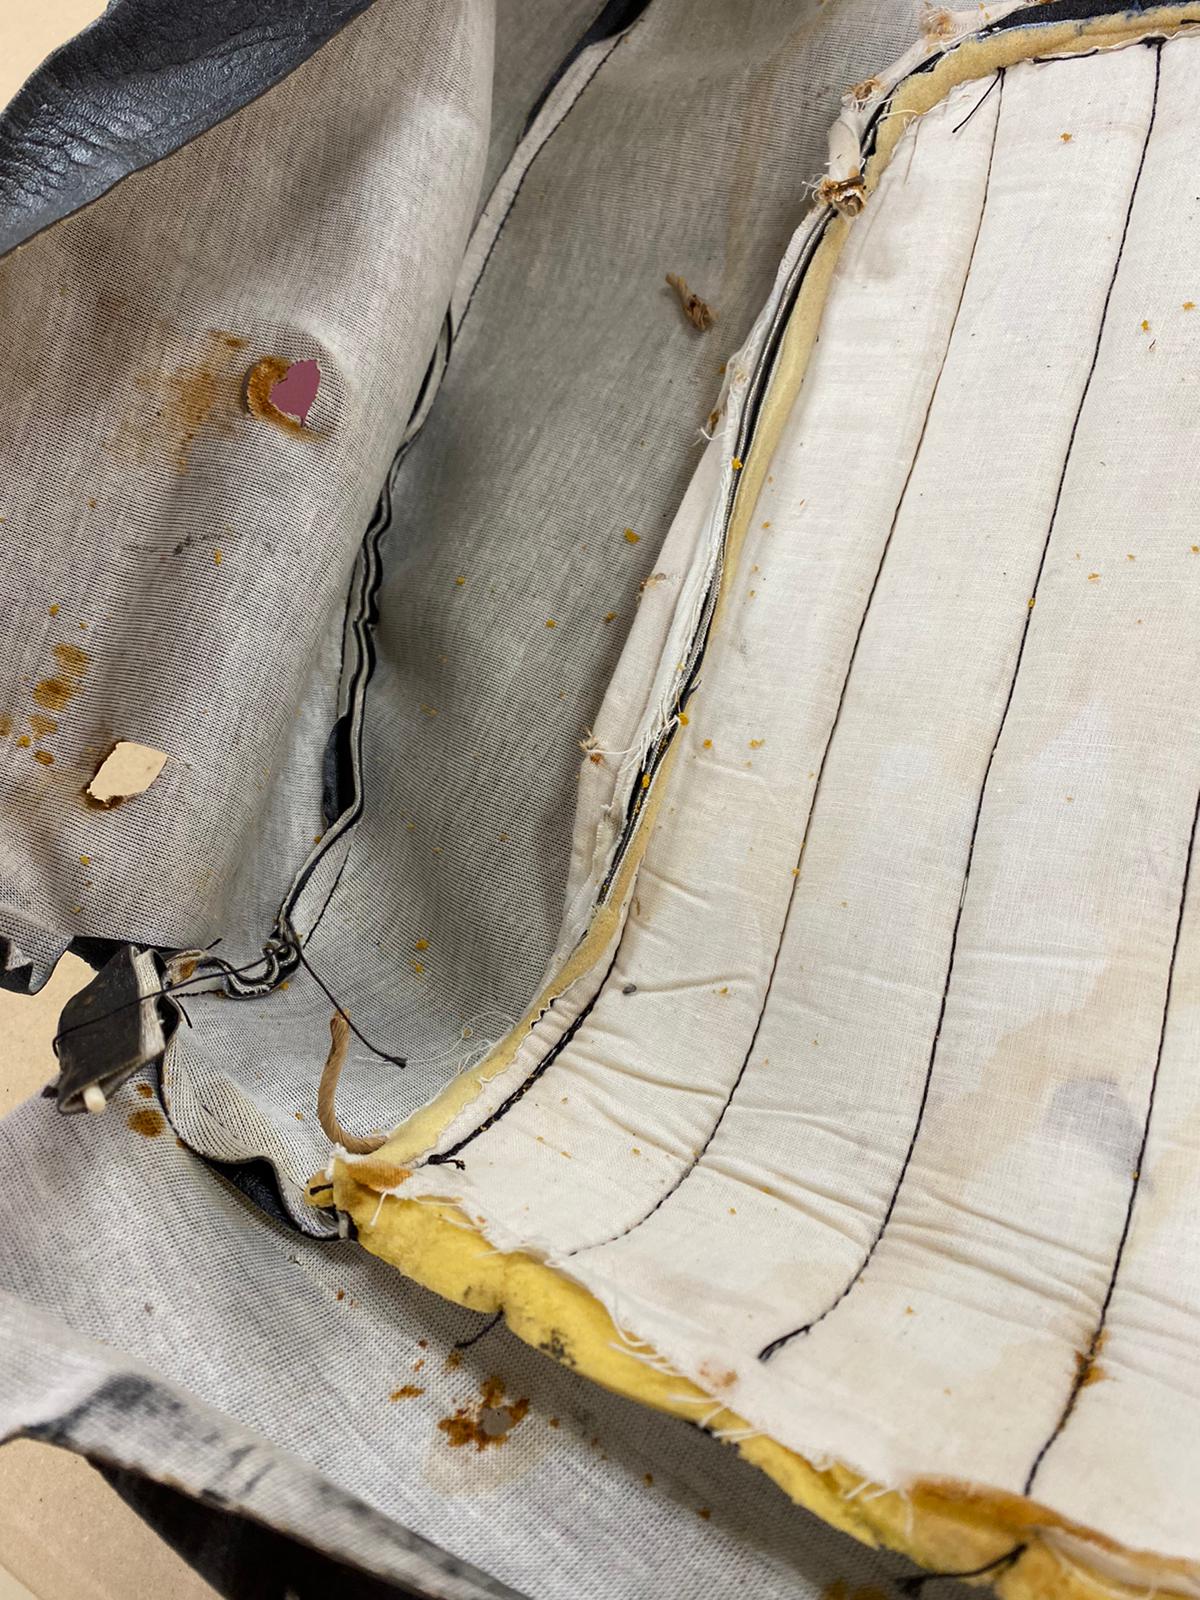
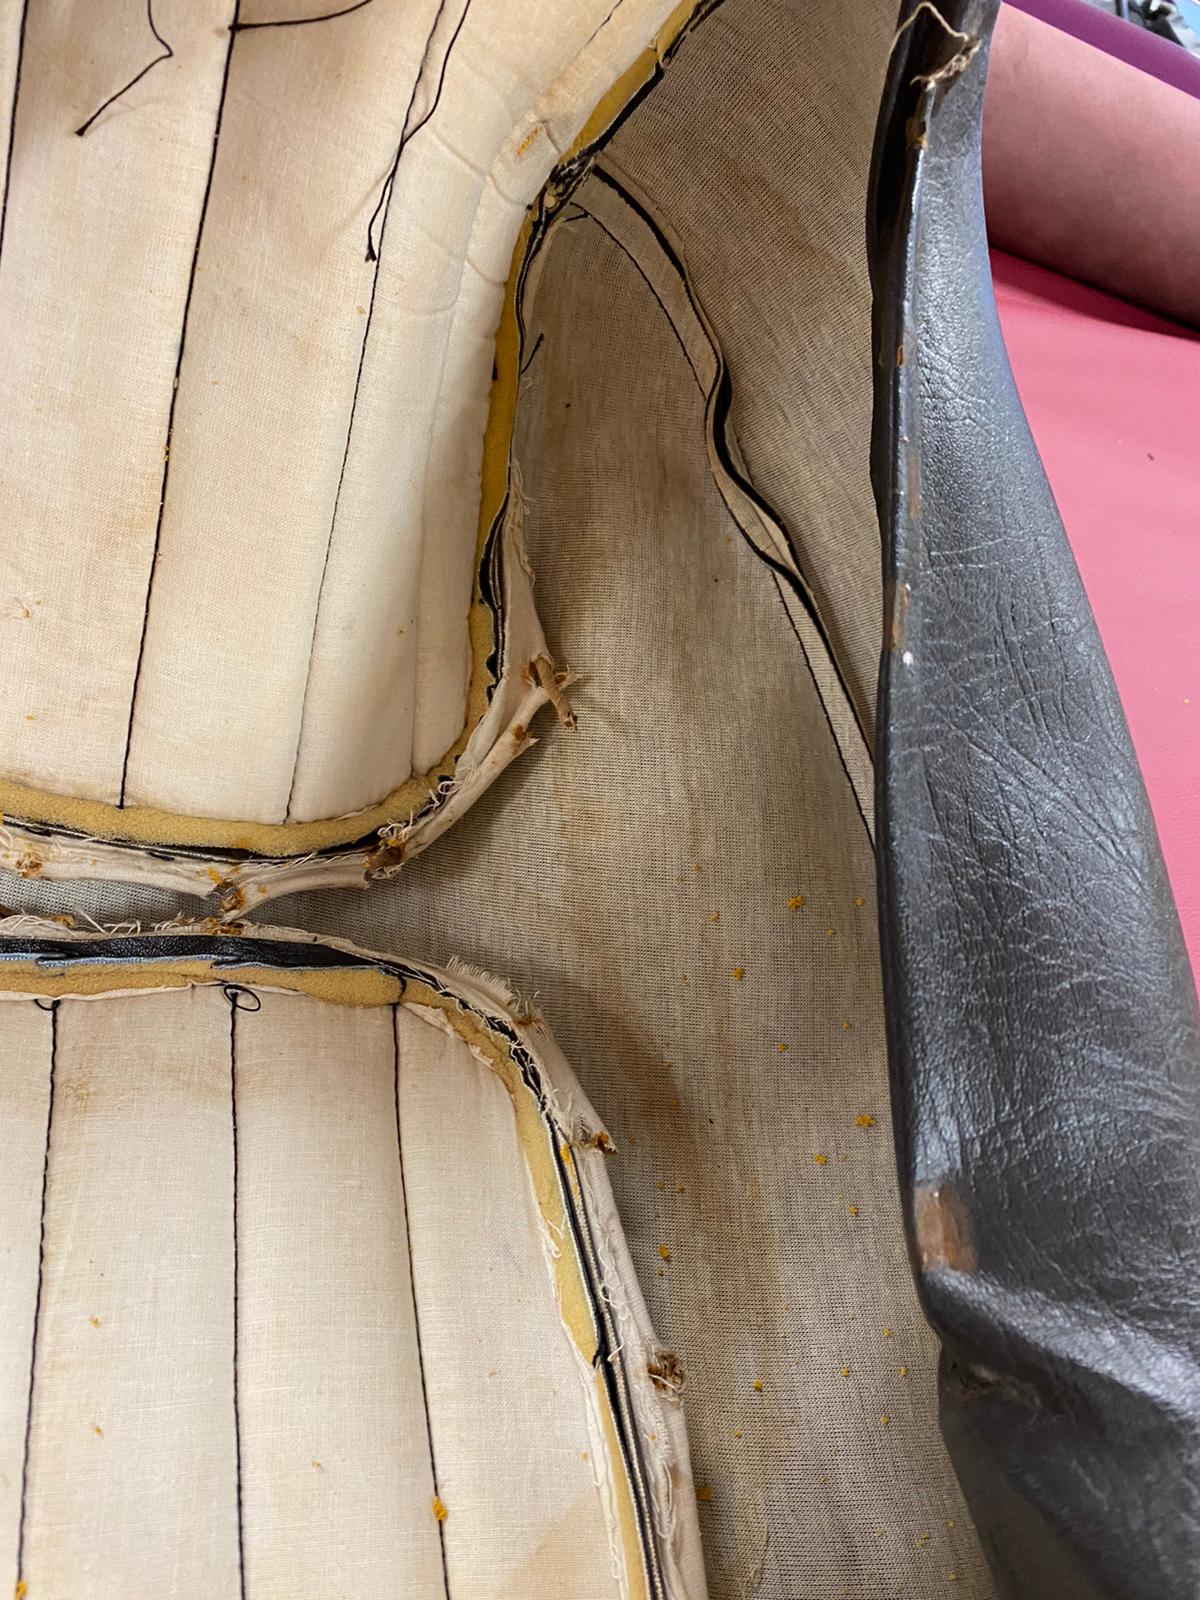
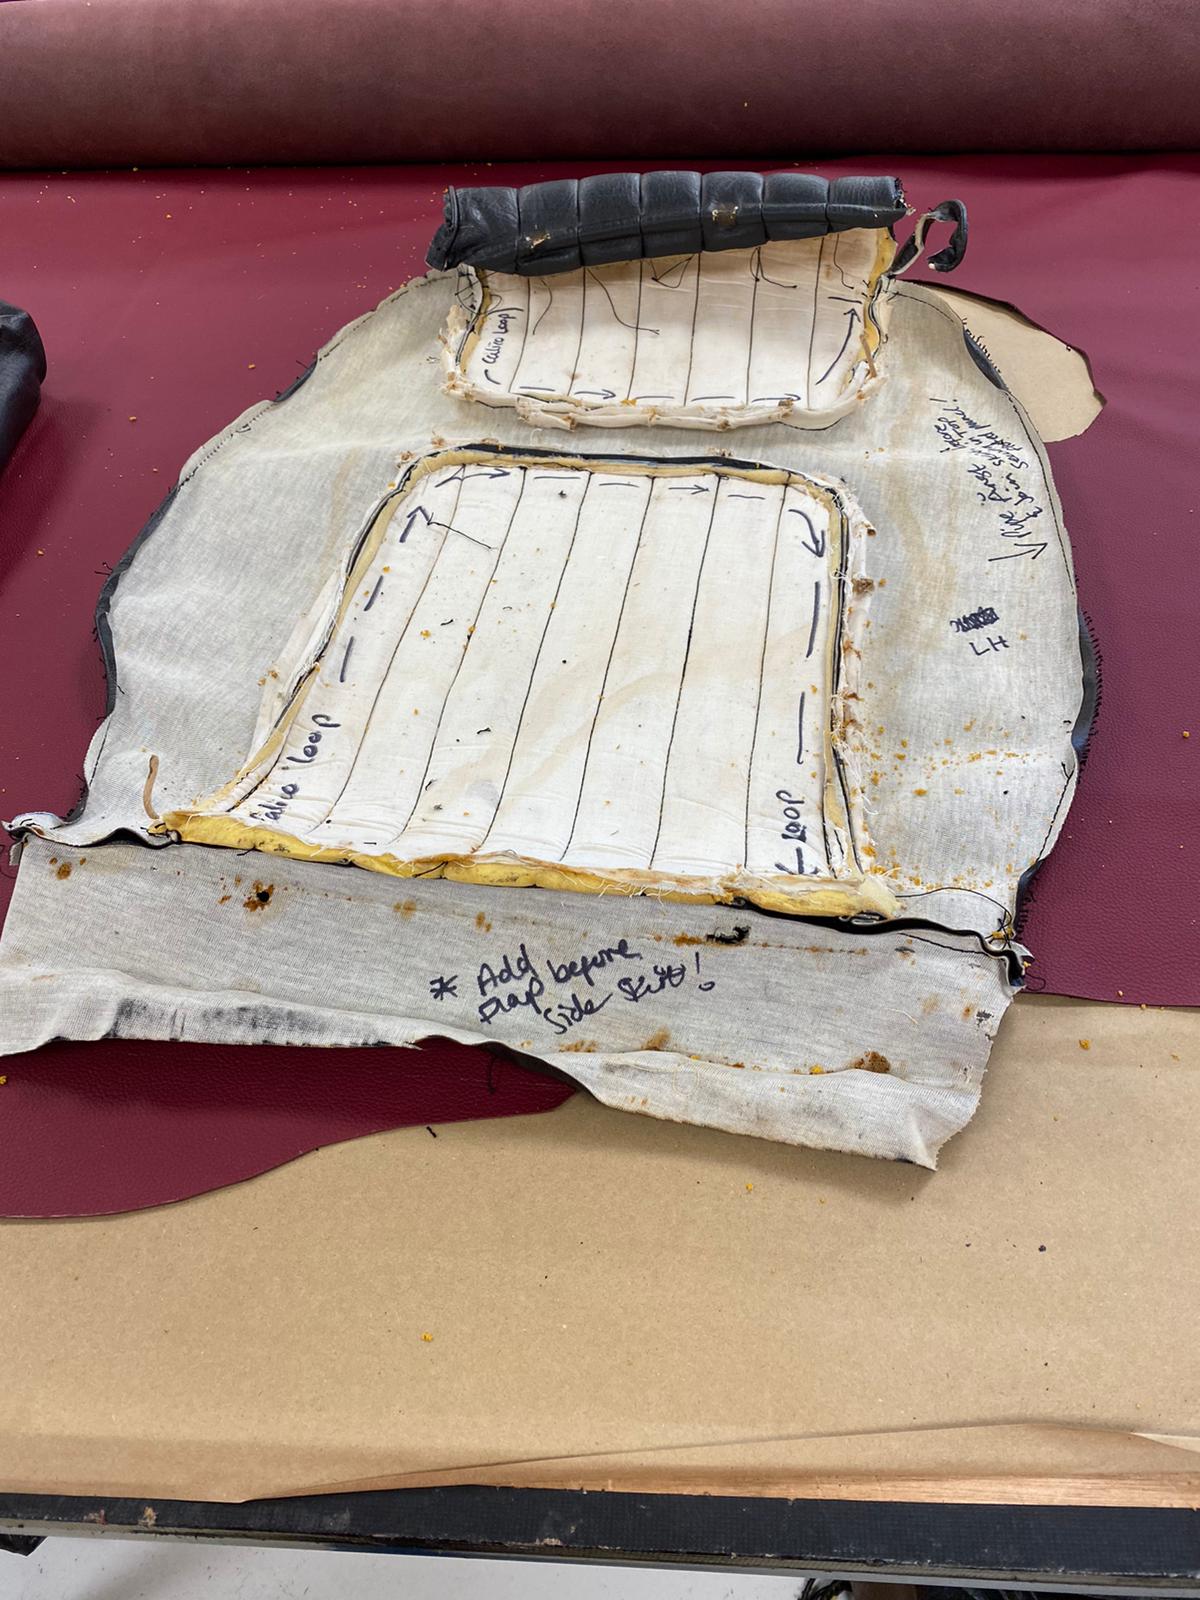
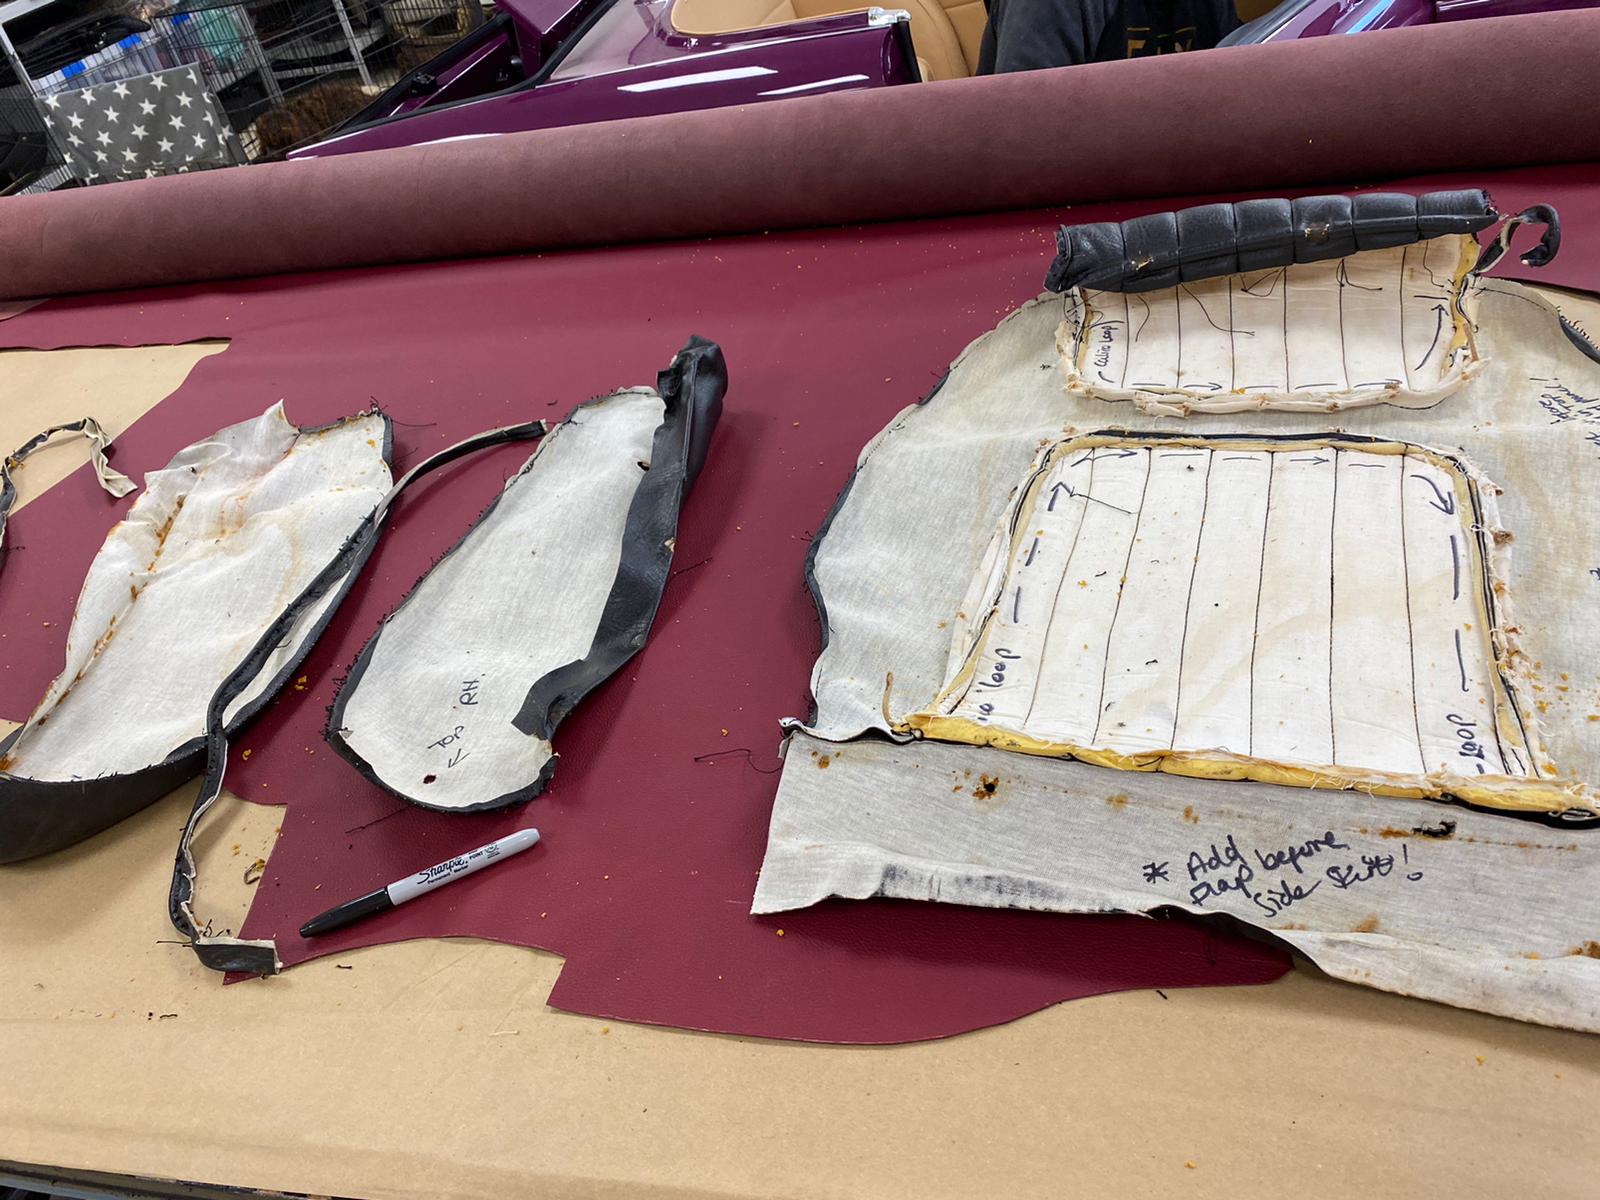
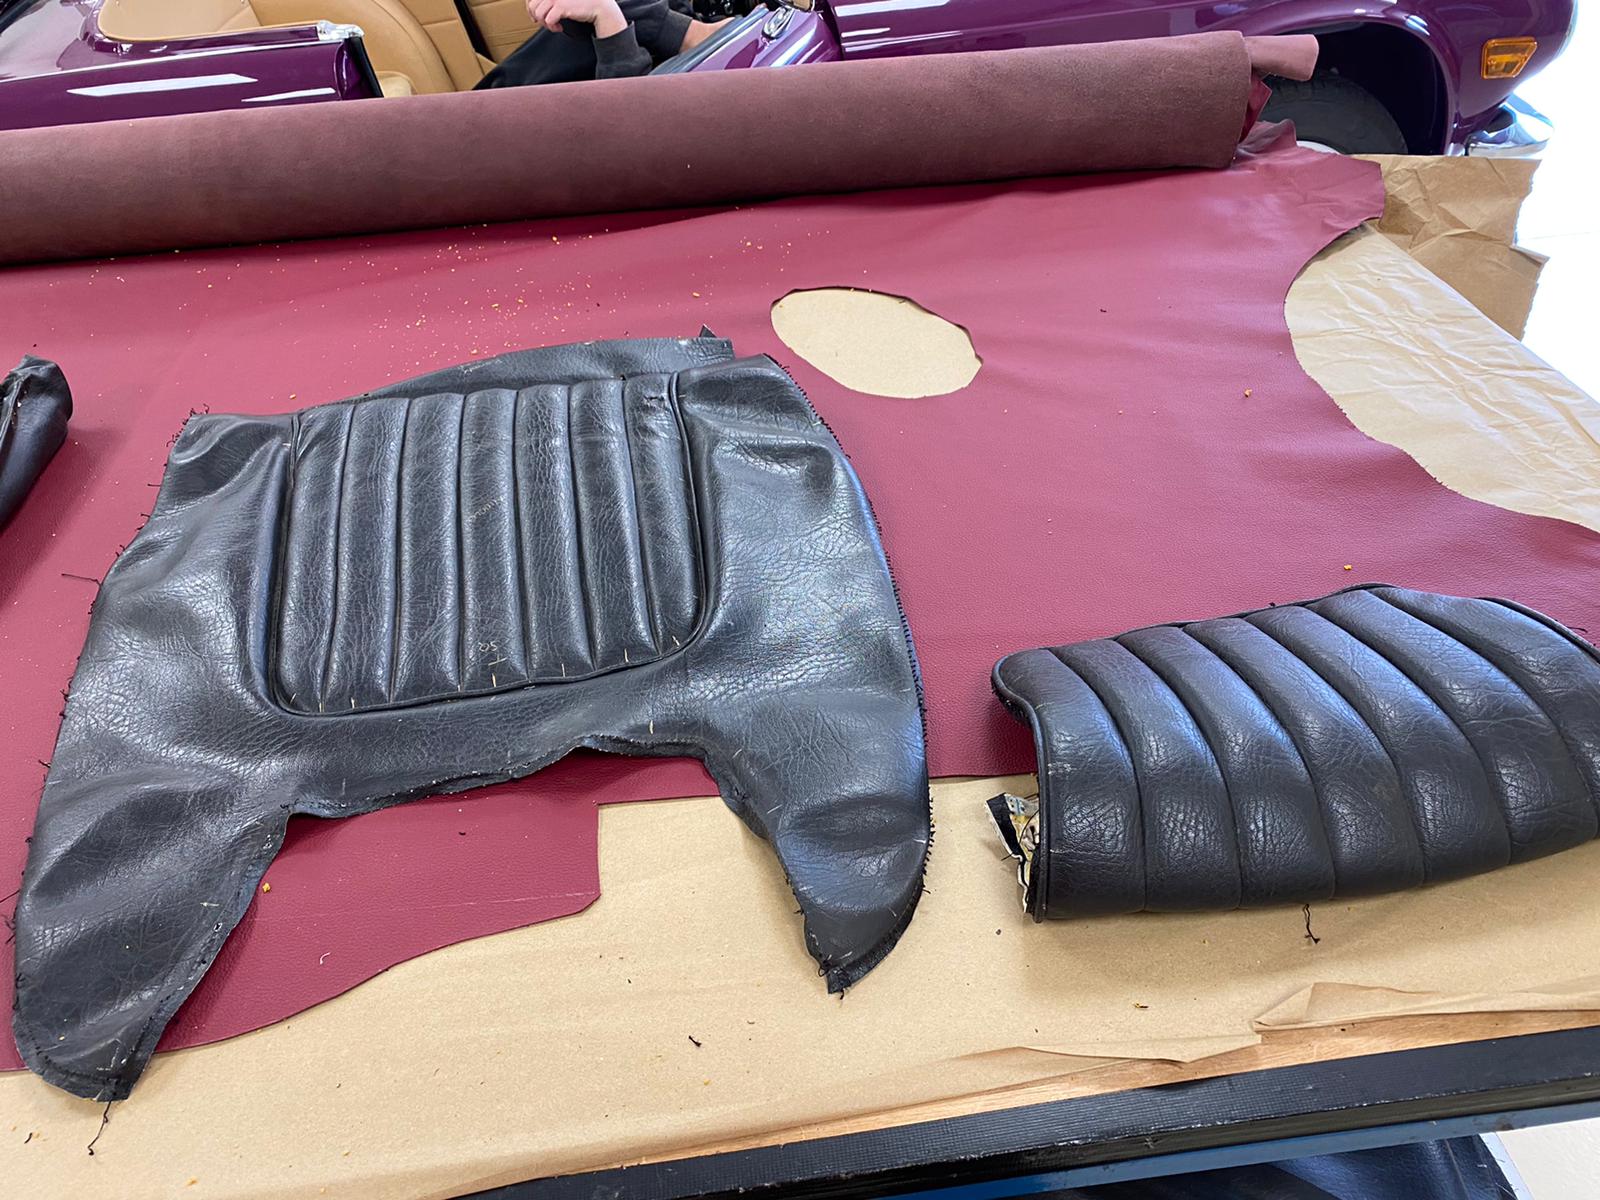
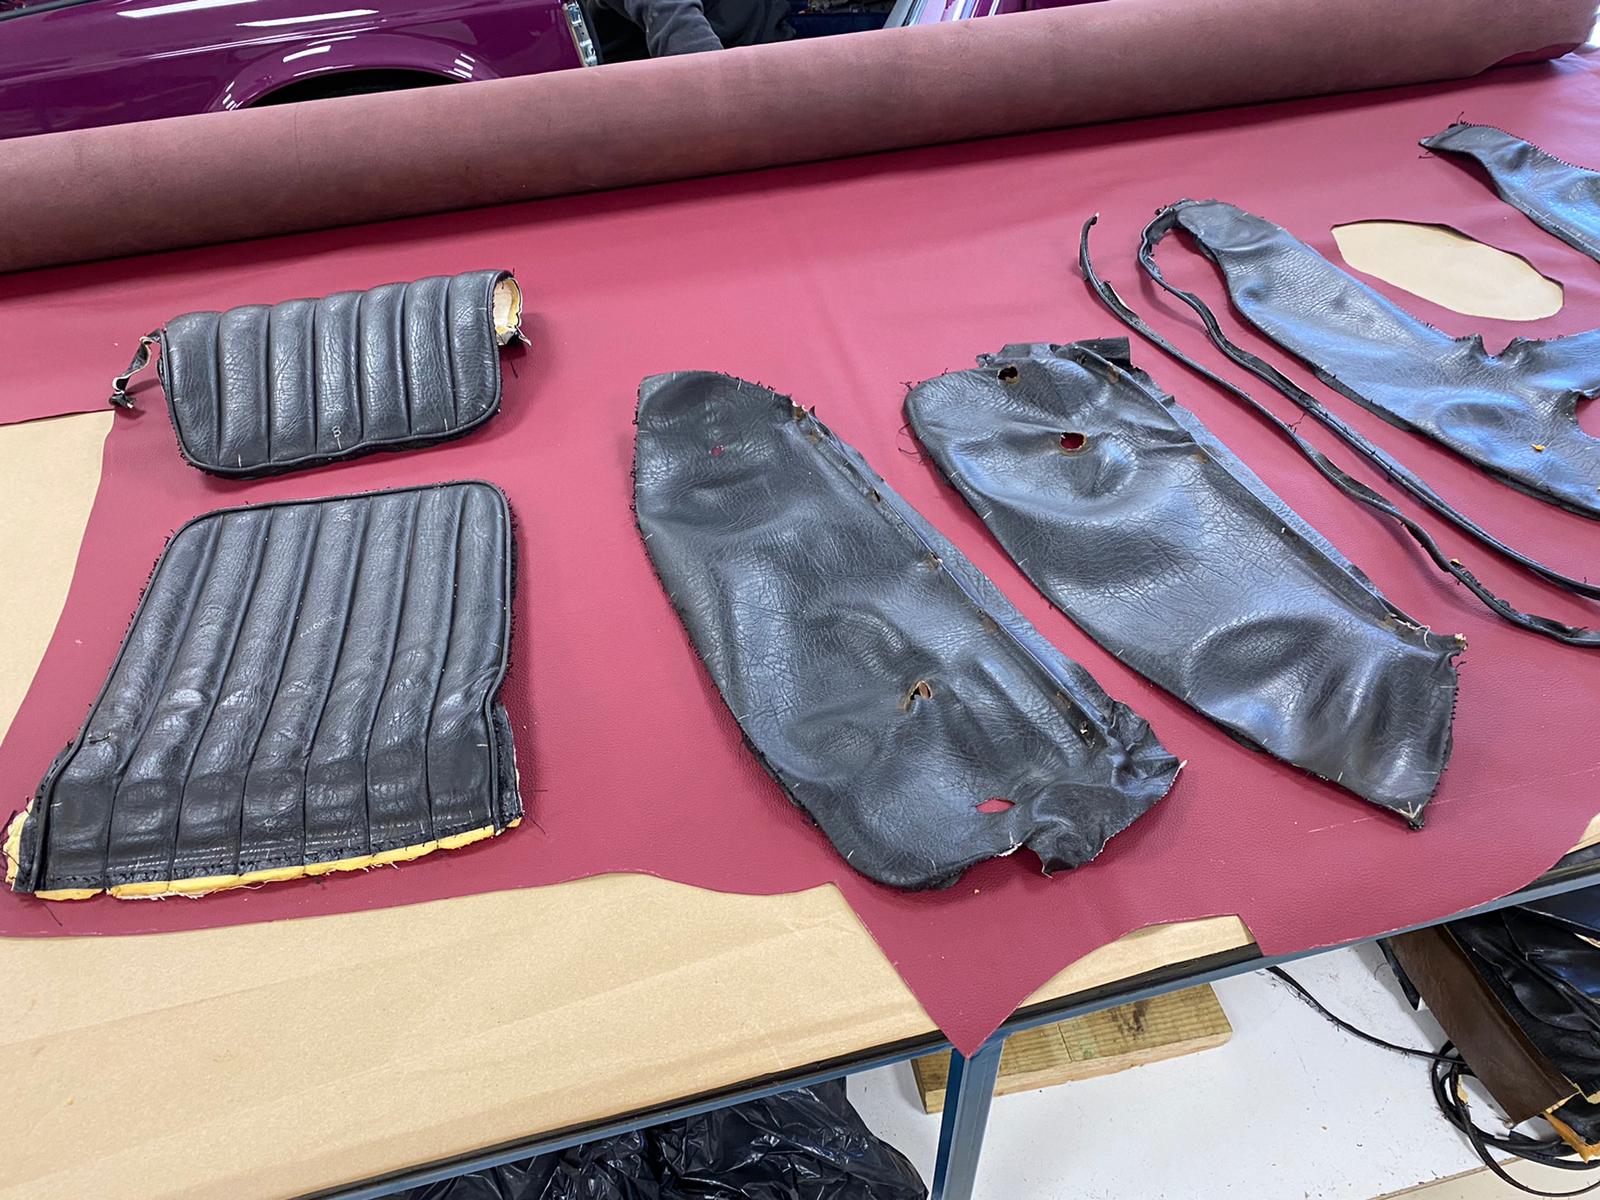
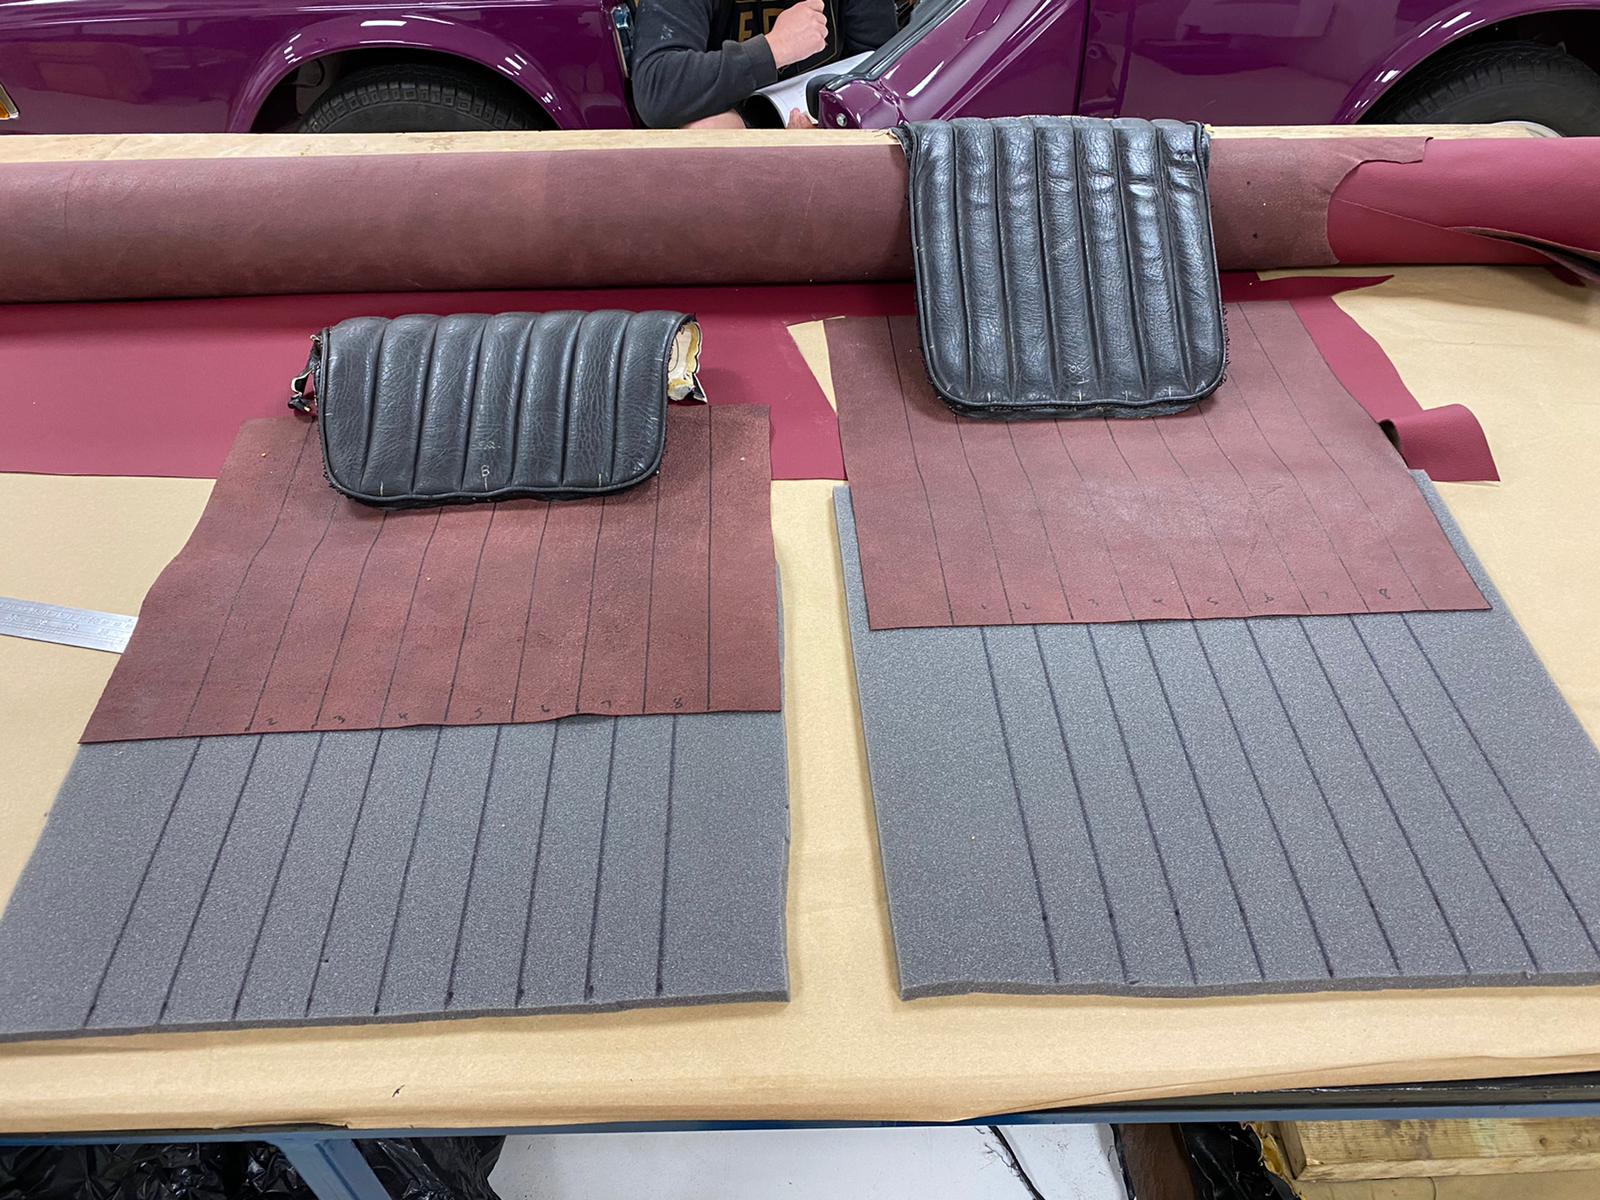
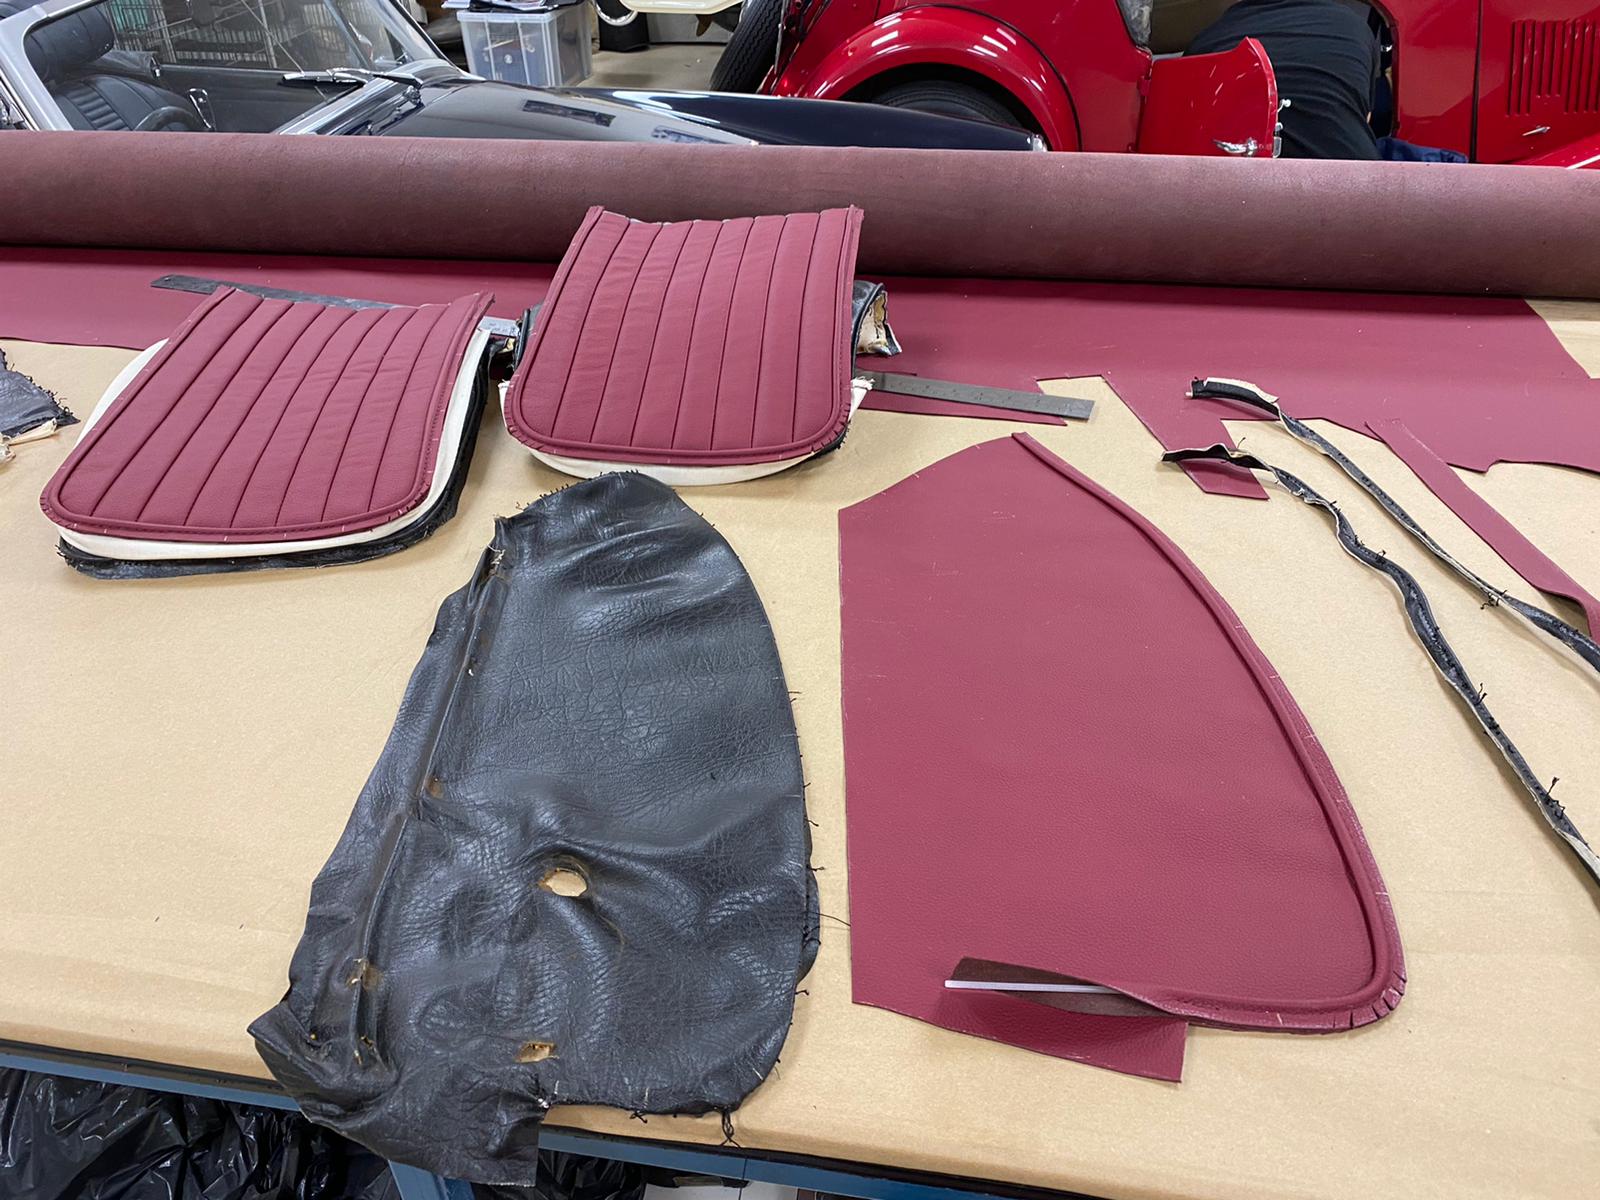
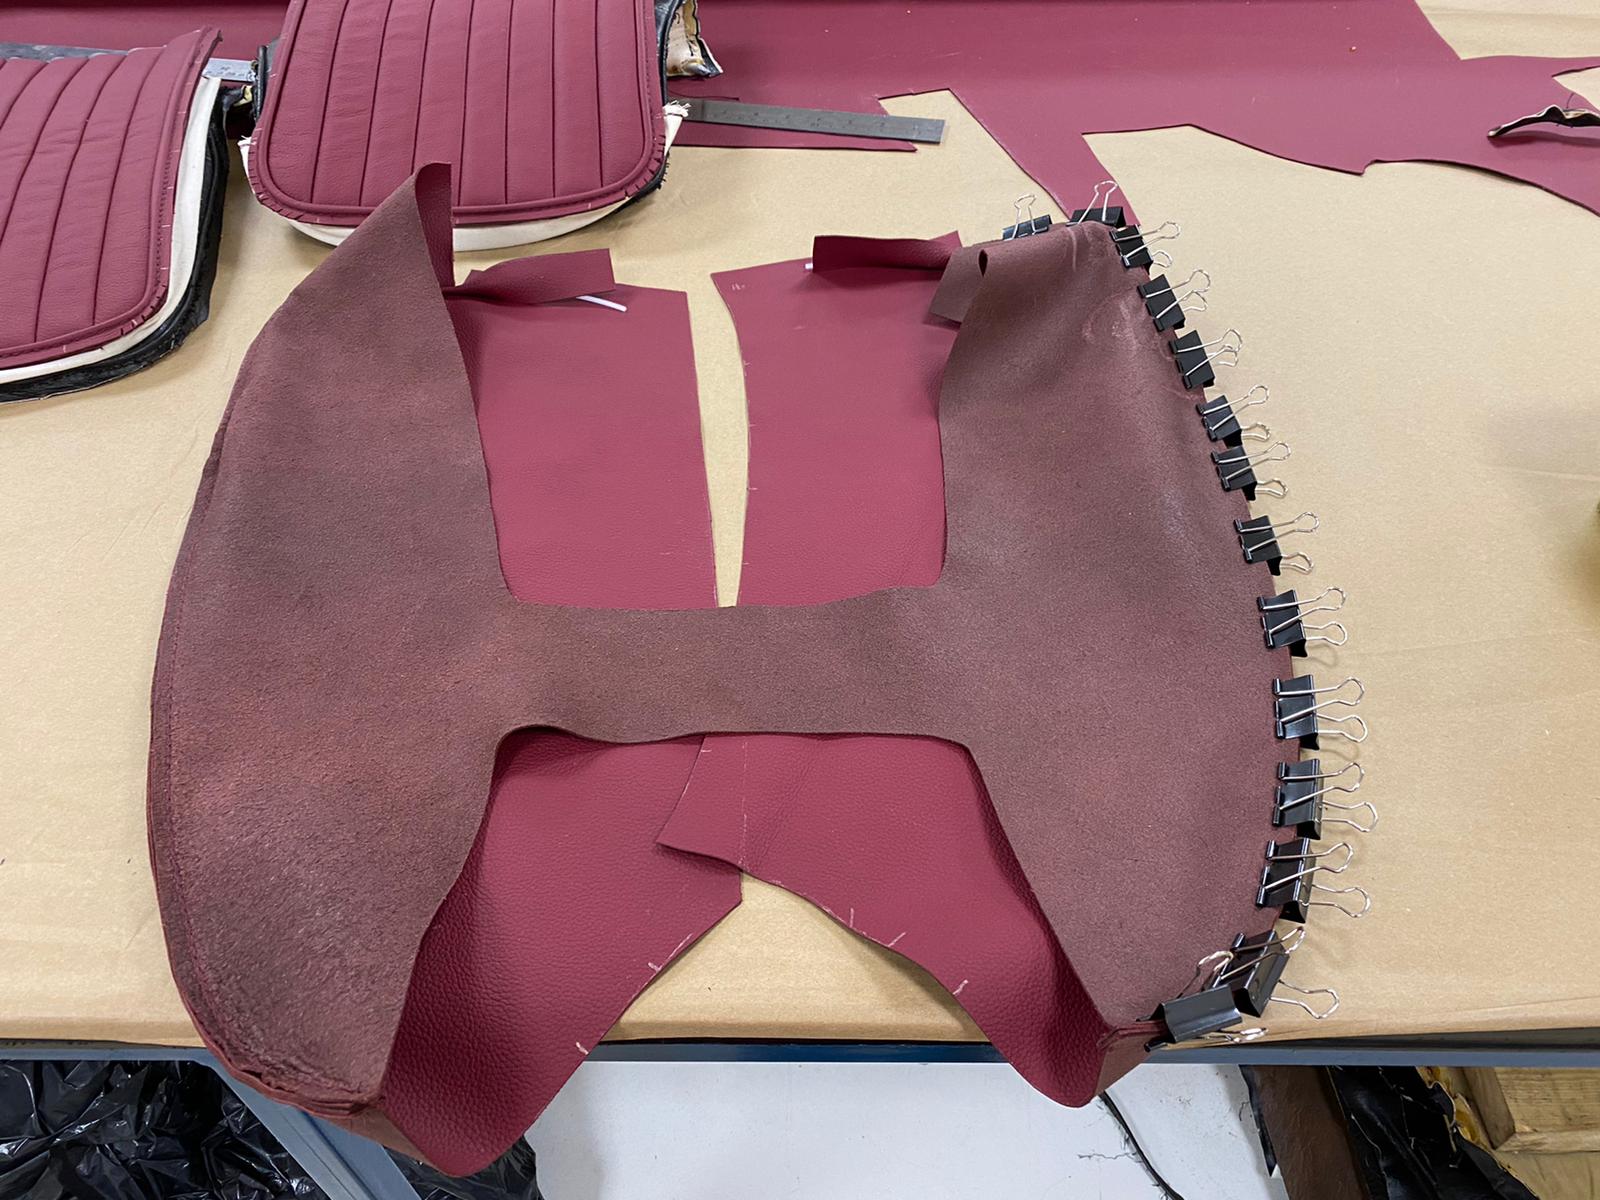
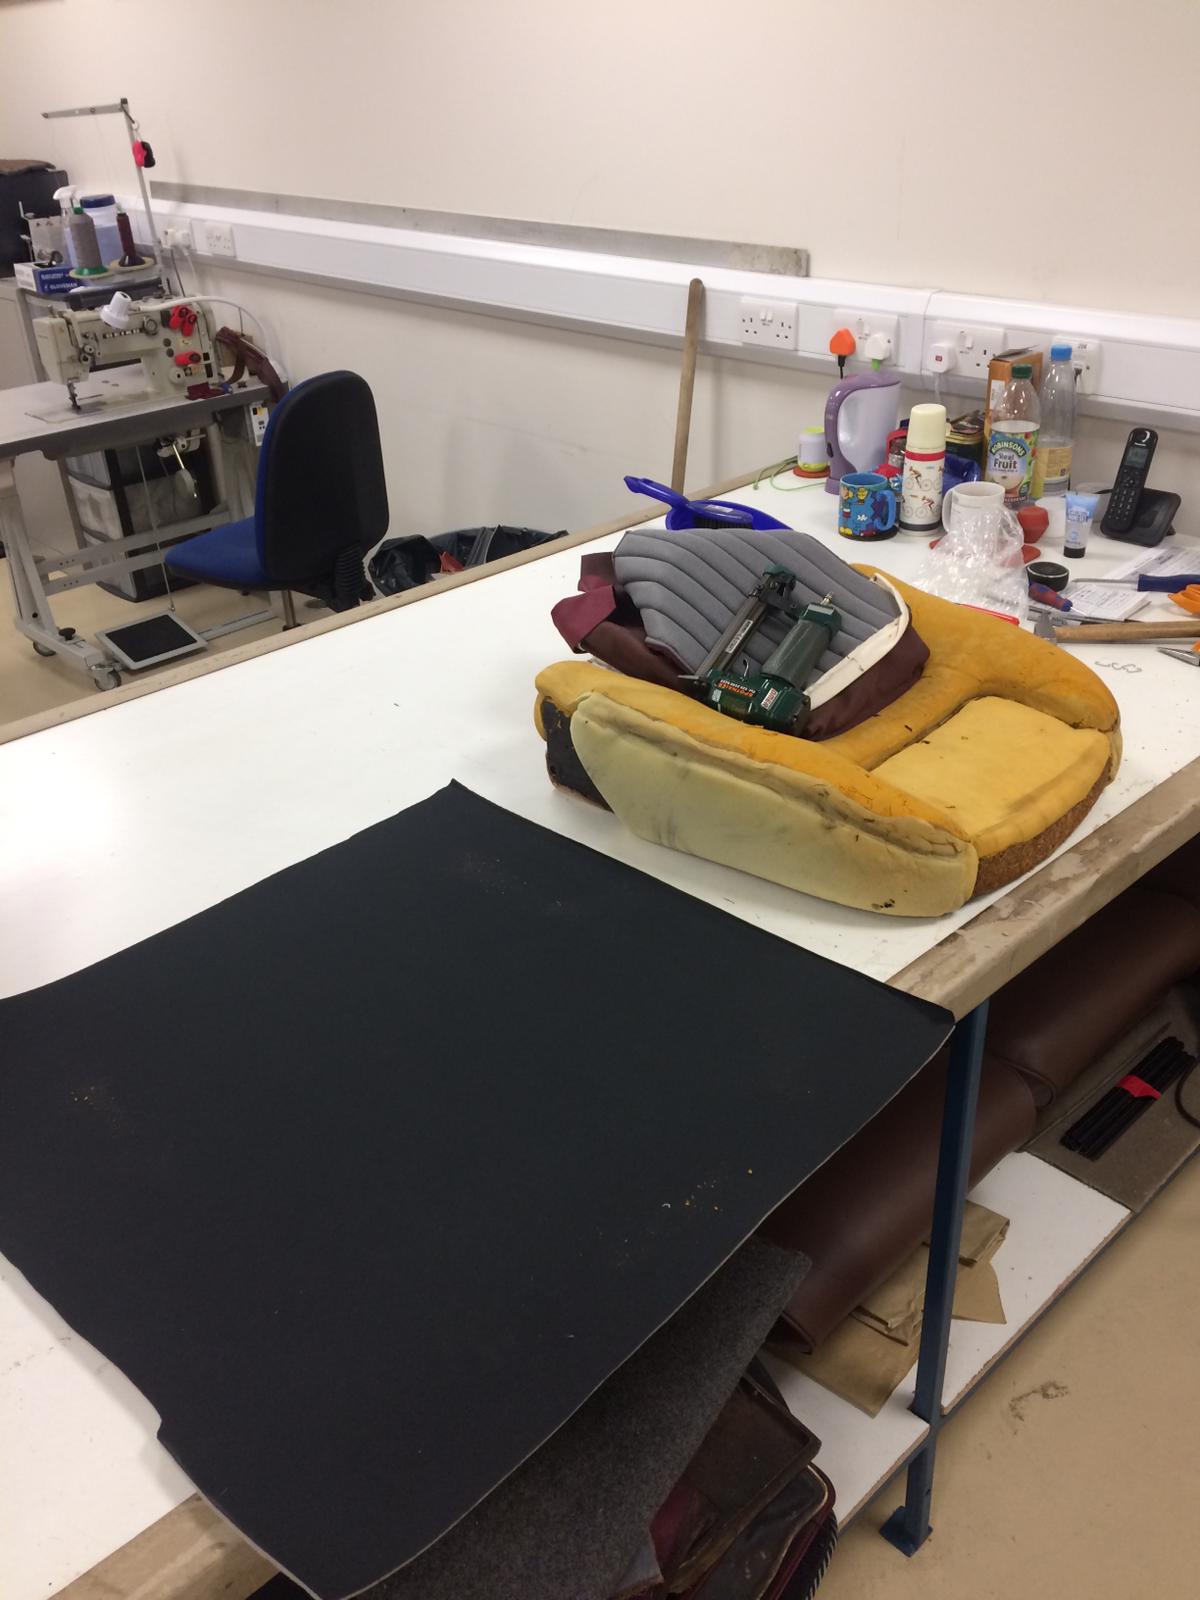
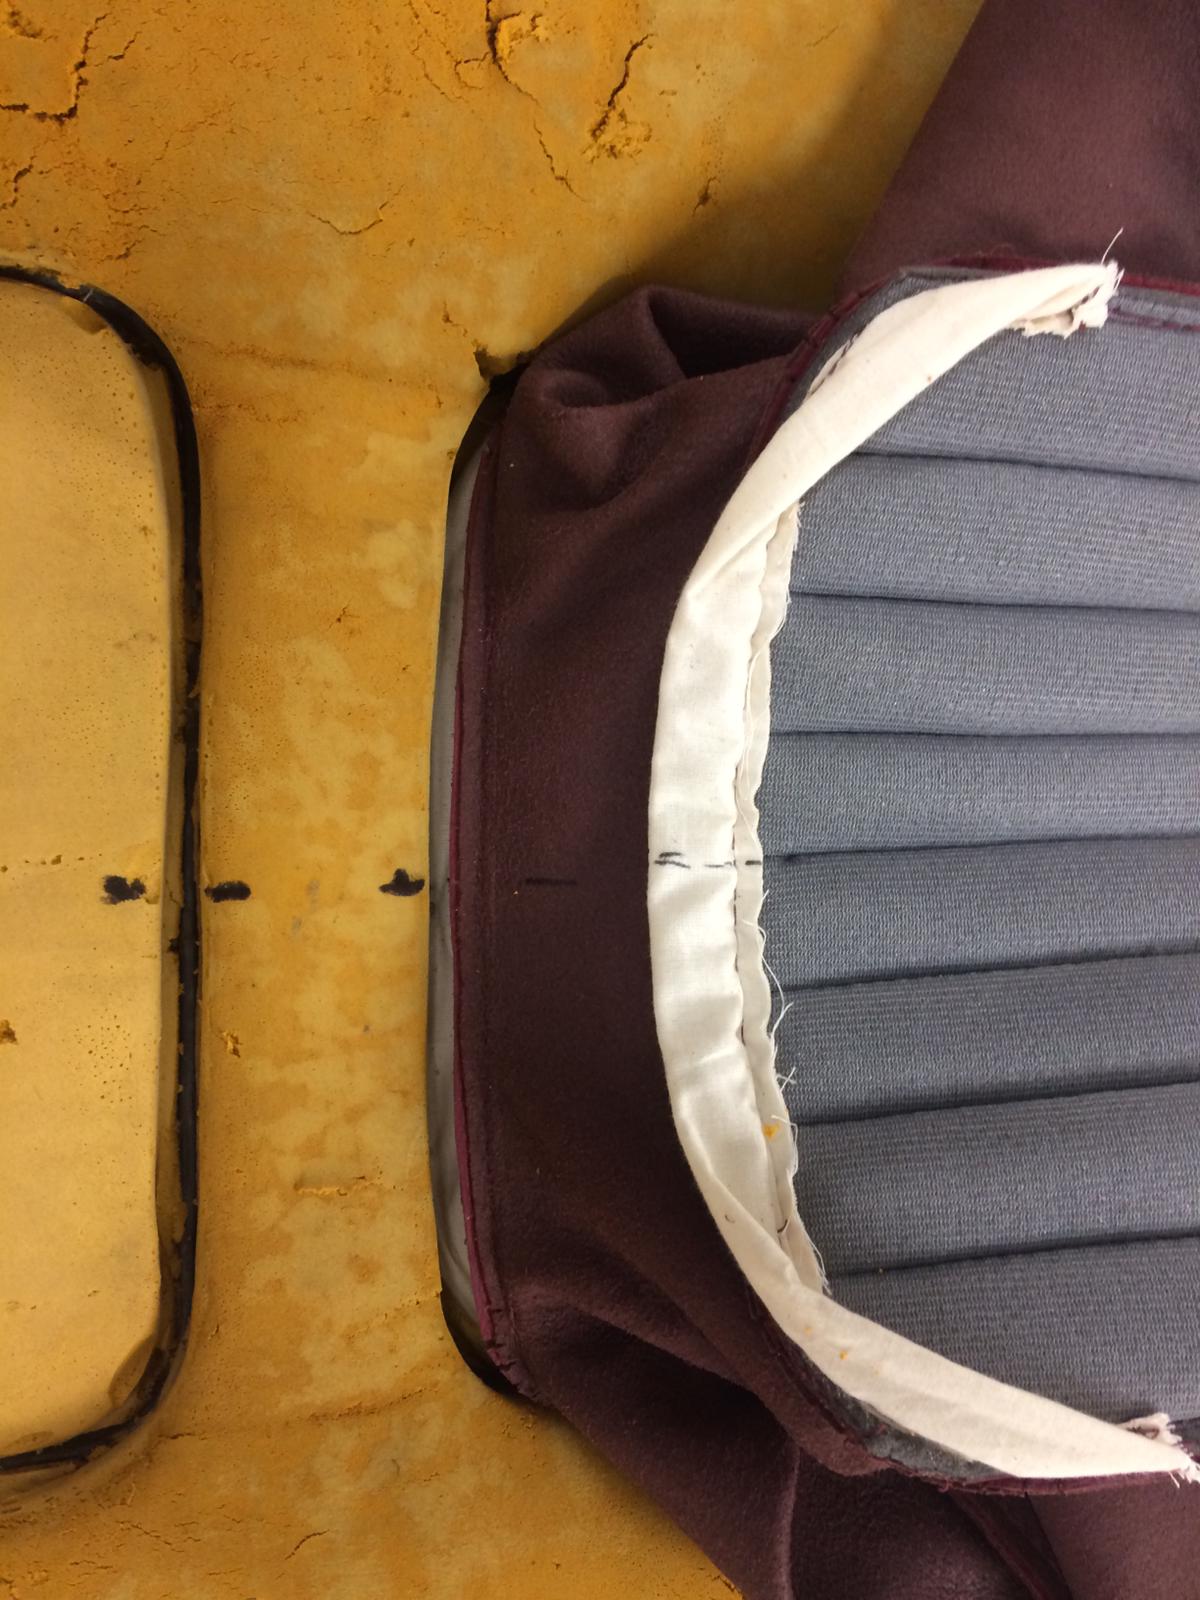
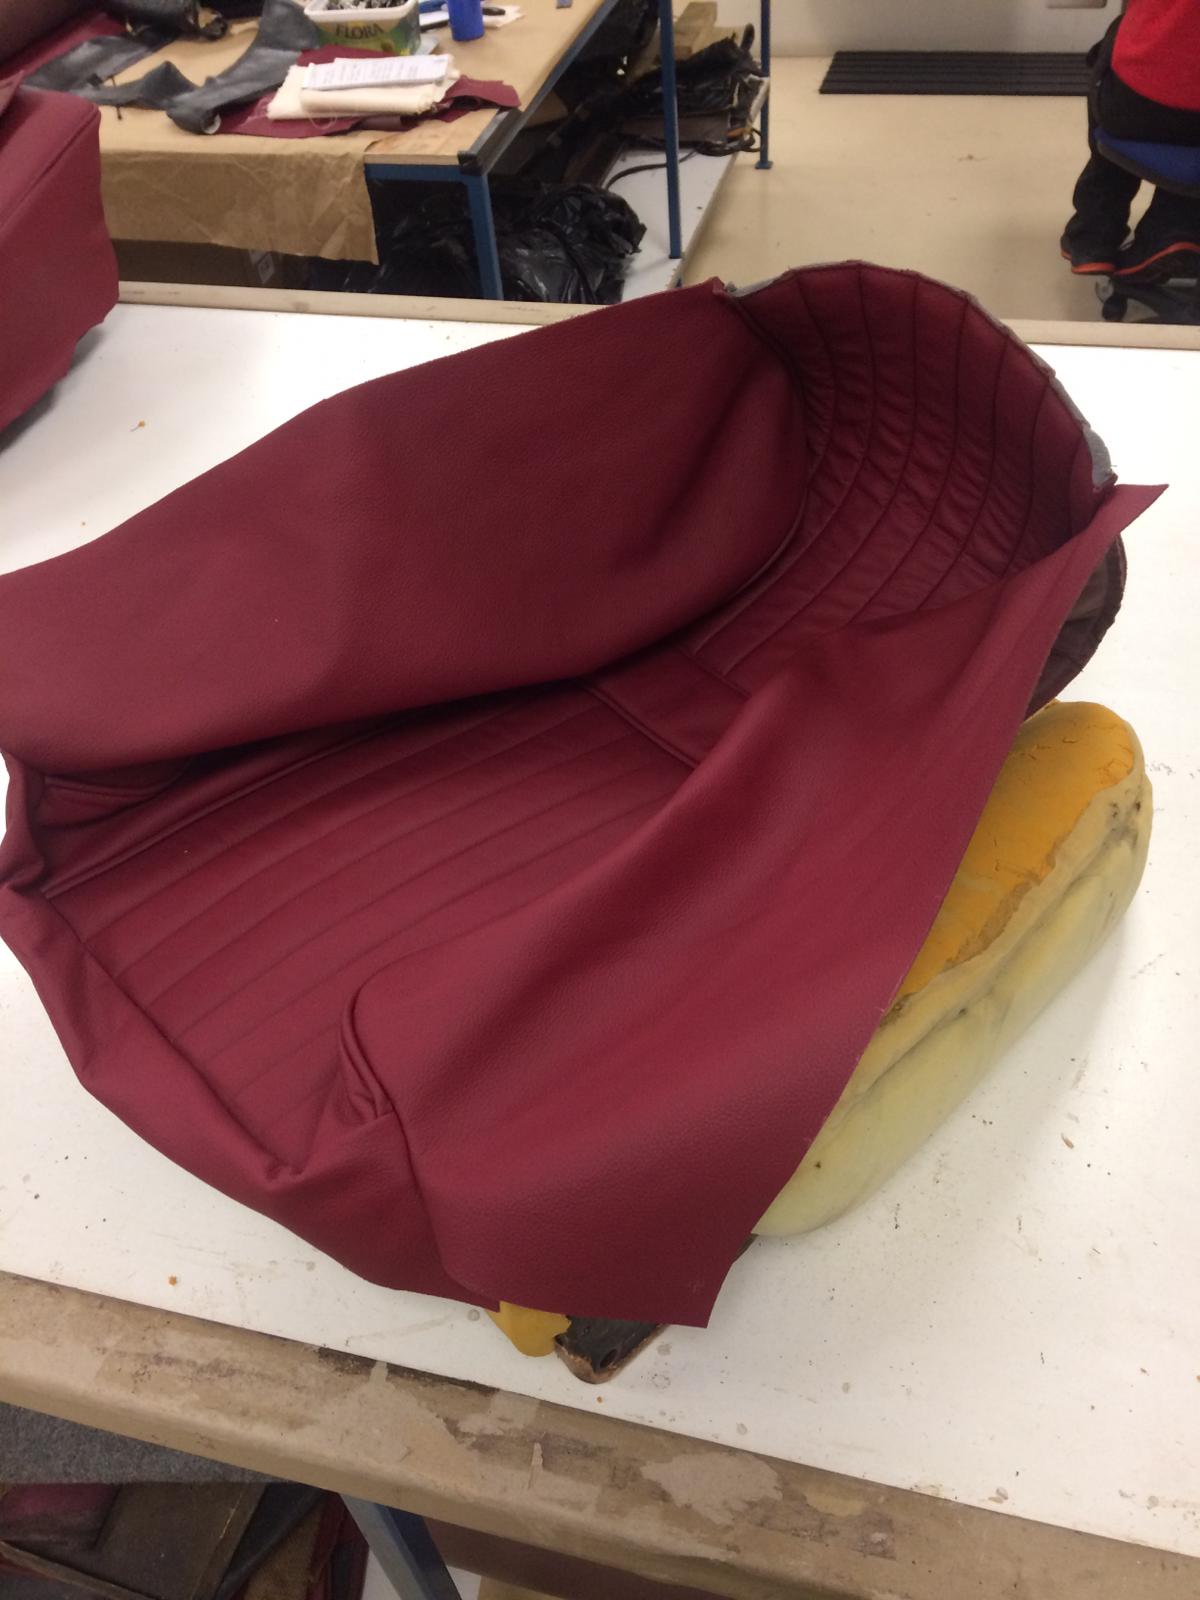
Kath and Brian in our in-house trim shop have been busy with our 1972 Peugeot 504 seats. They’re in to be fully reupholstered, so Kath first has to take the pattern from the existing seats by stripping away all the fabric ensuring she keeps it intact.
“The back panel was riveted in” describes Kath, “so in removing this I have to be careful not to rip or stretch the old fabric as I’ll be using these segments as a pattern for the new covers.”
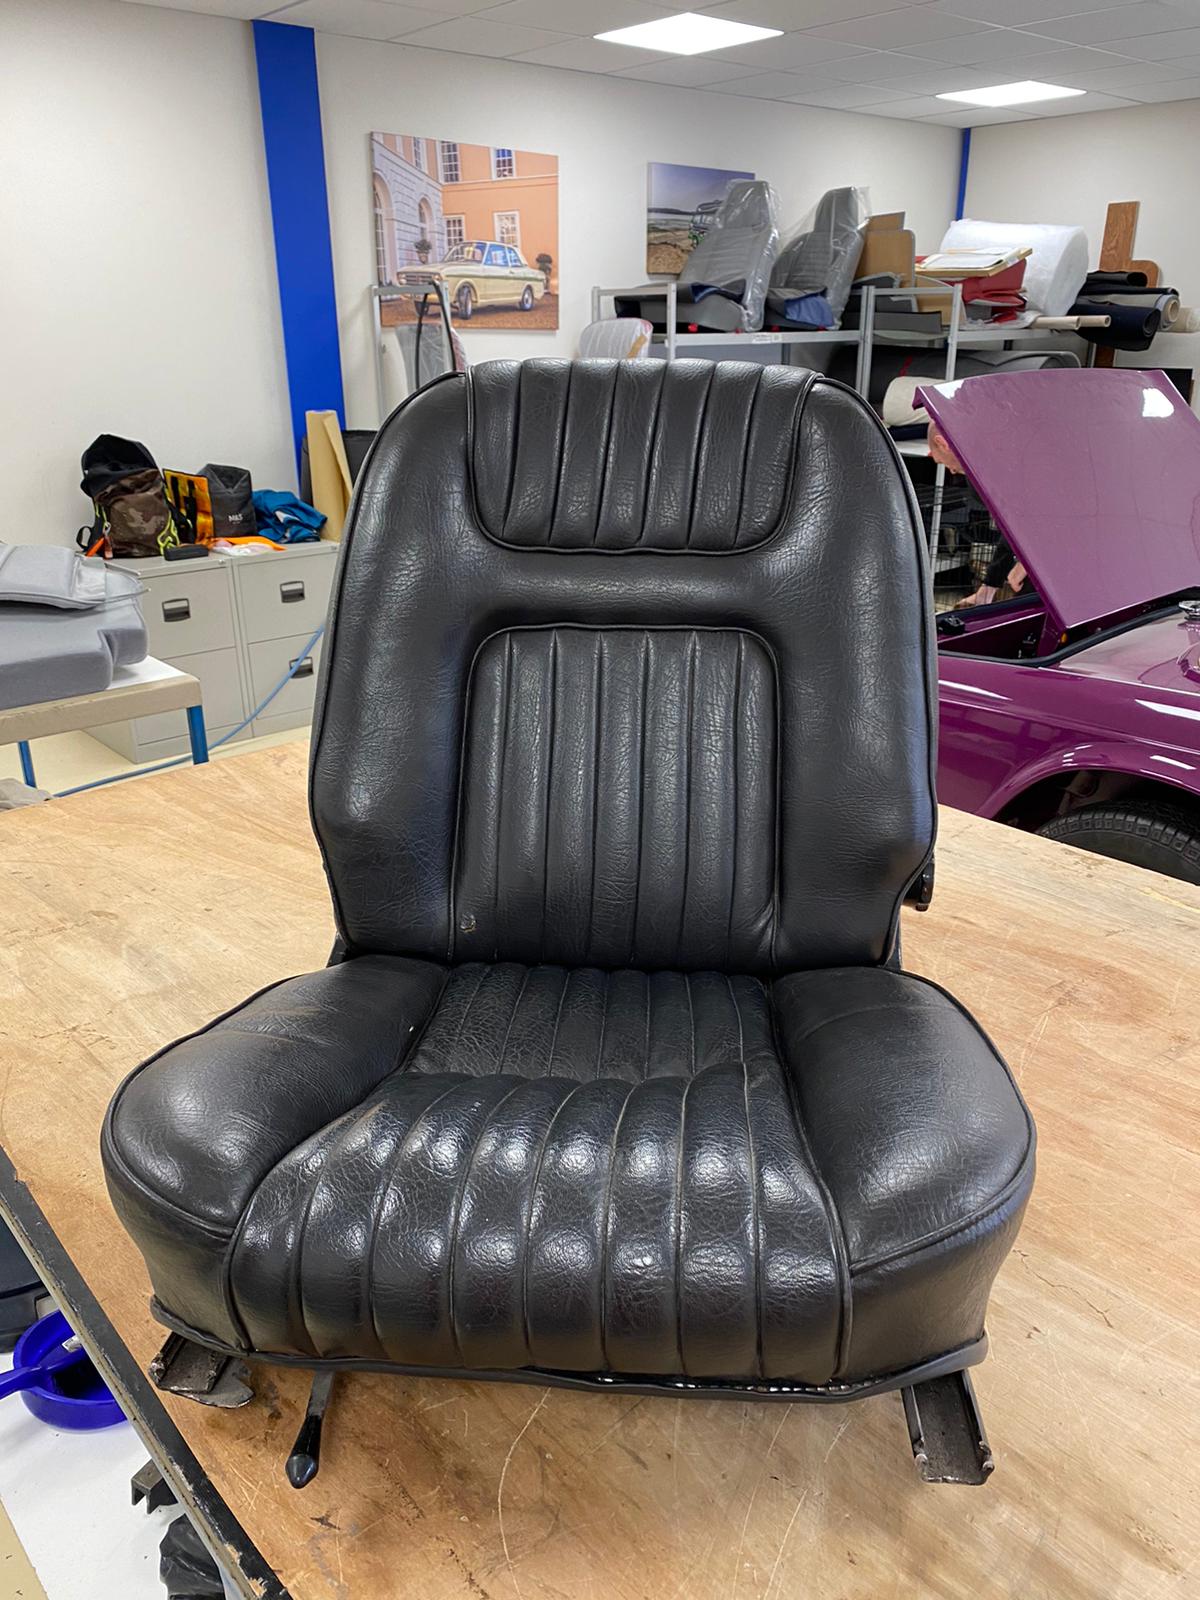
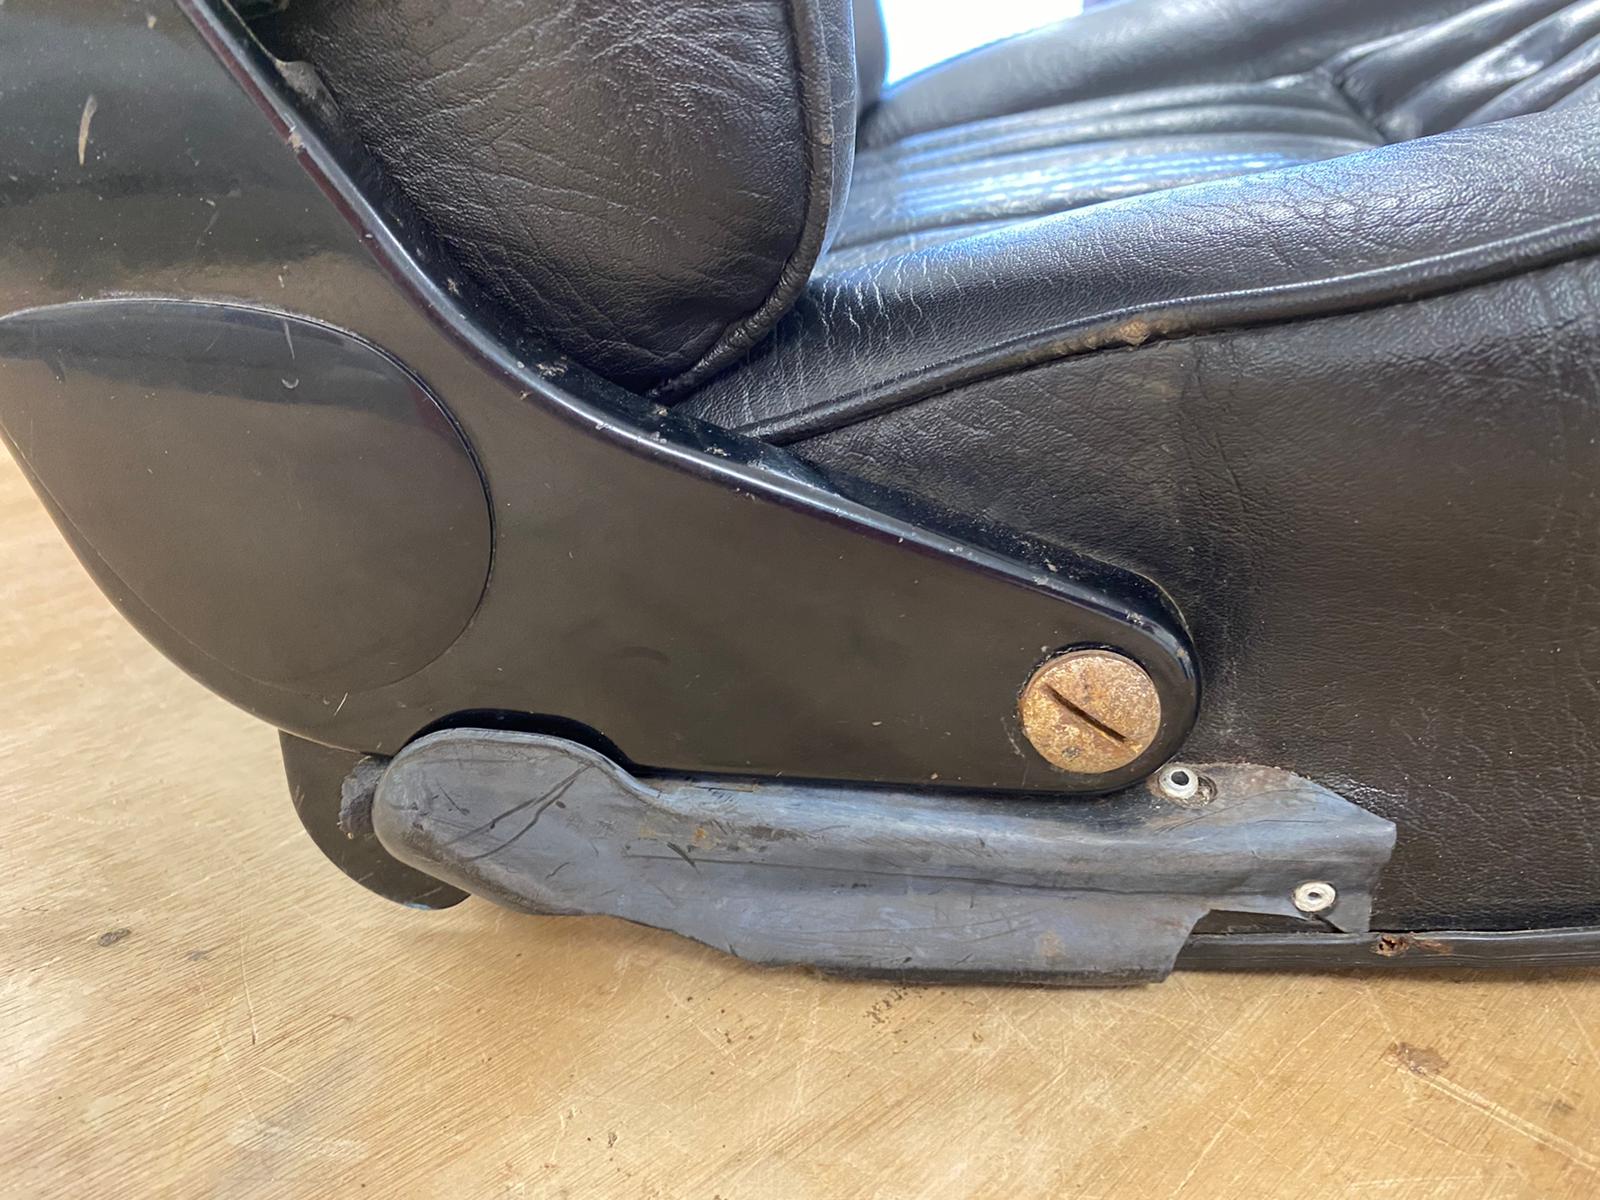
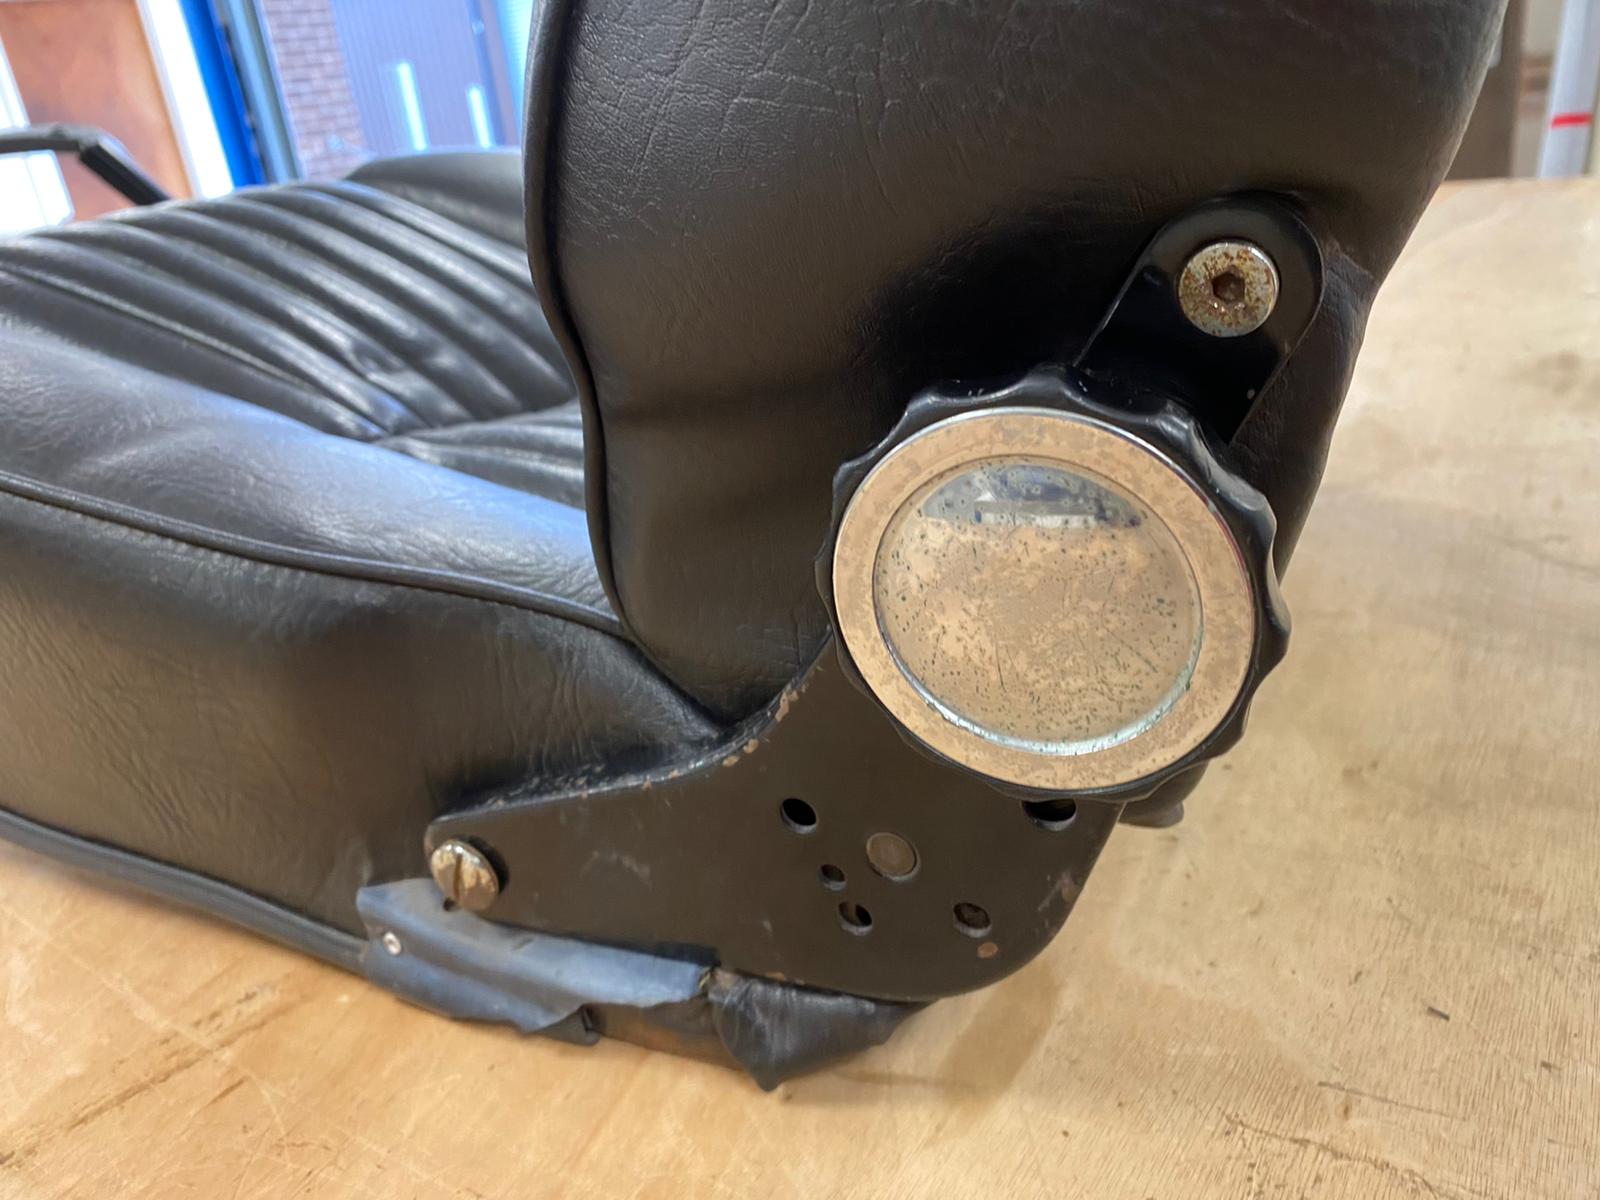


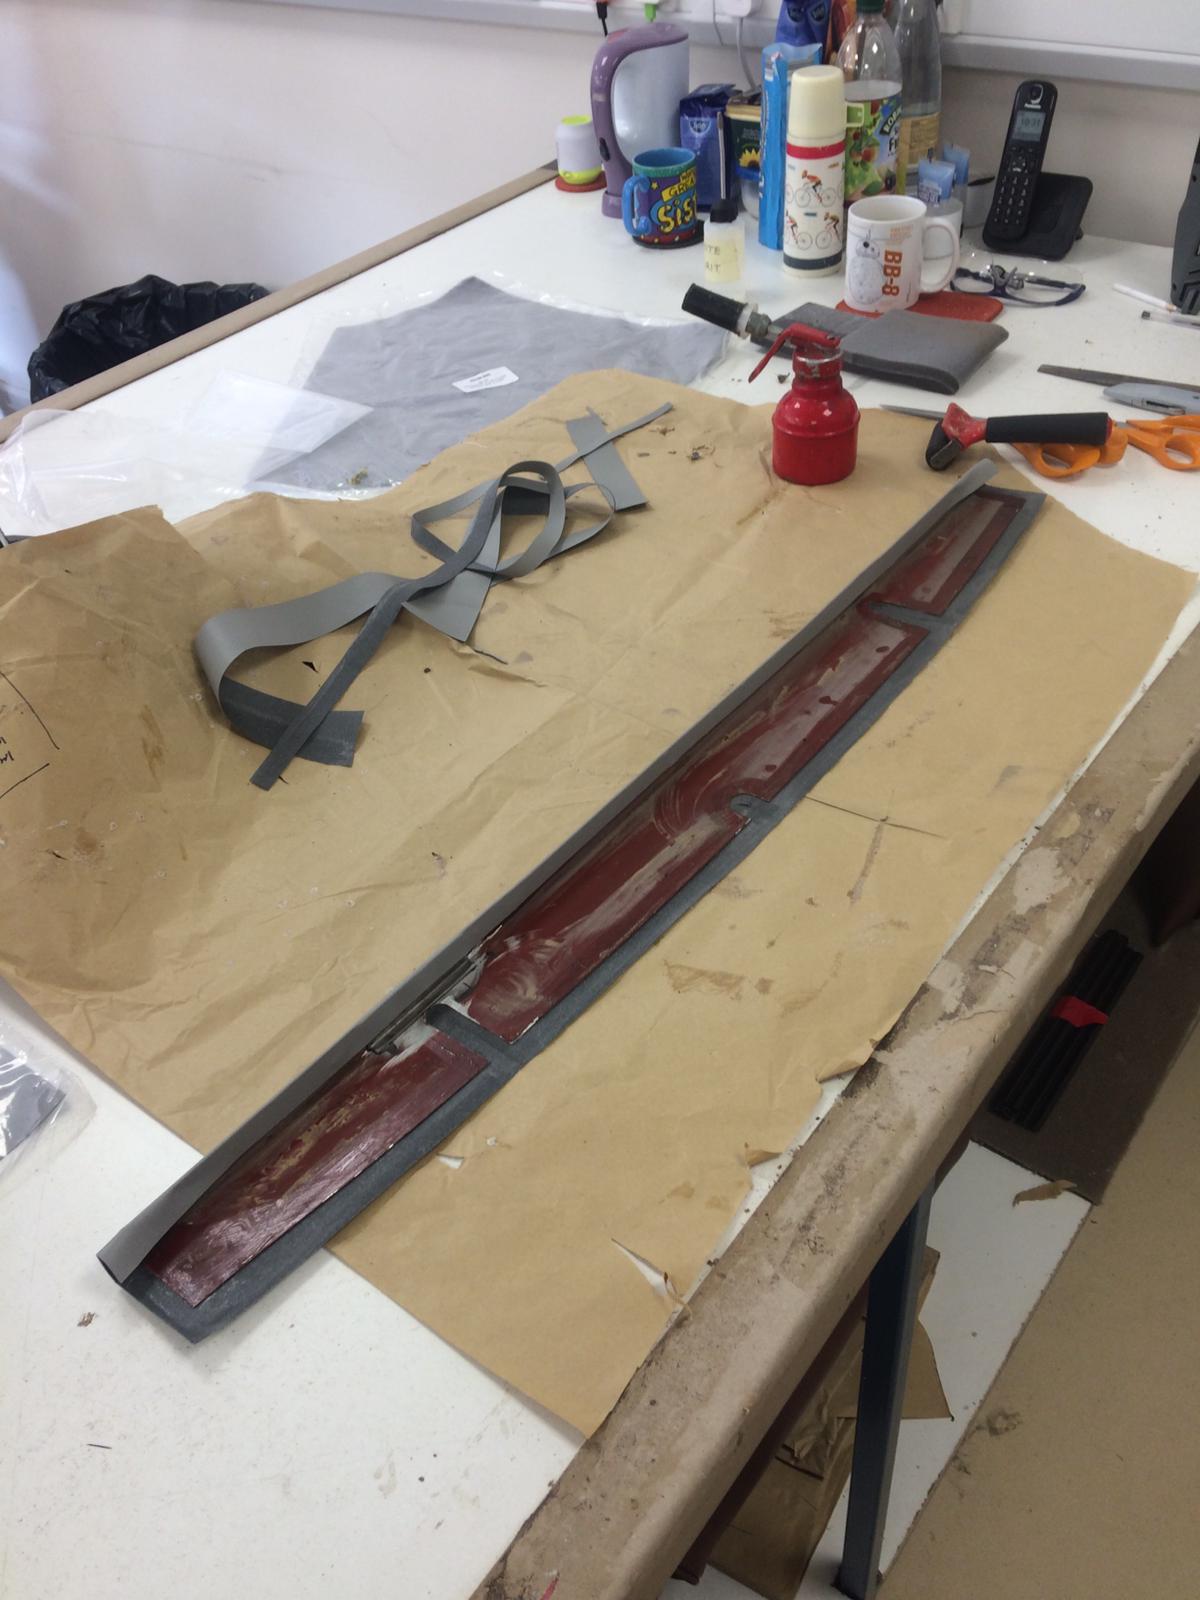
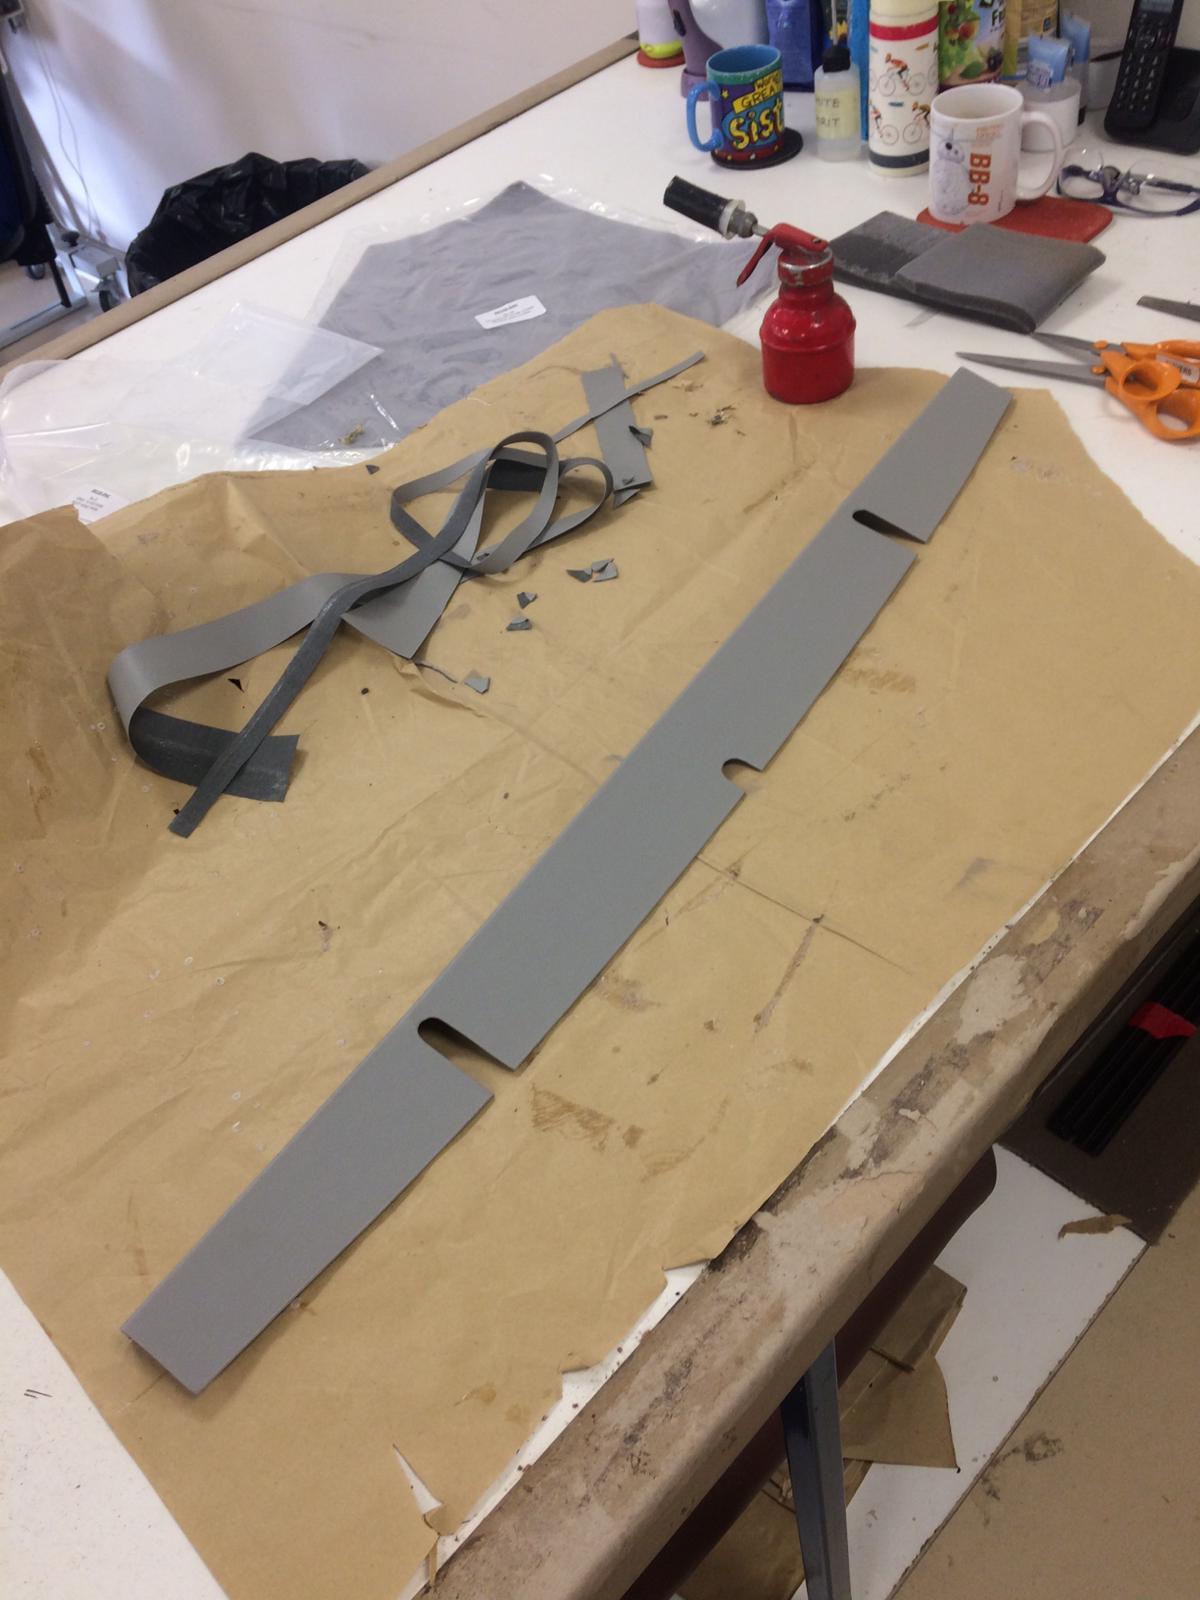
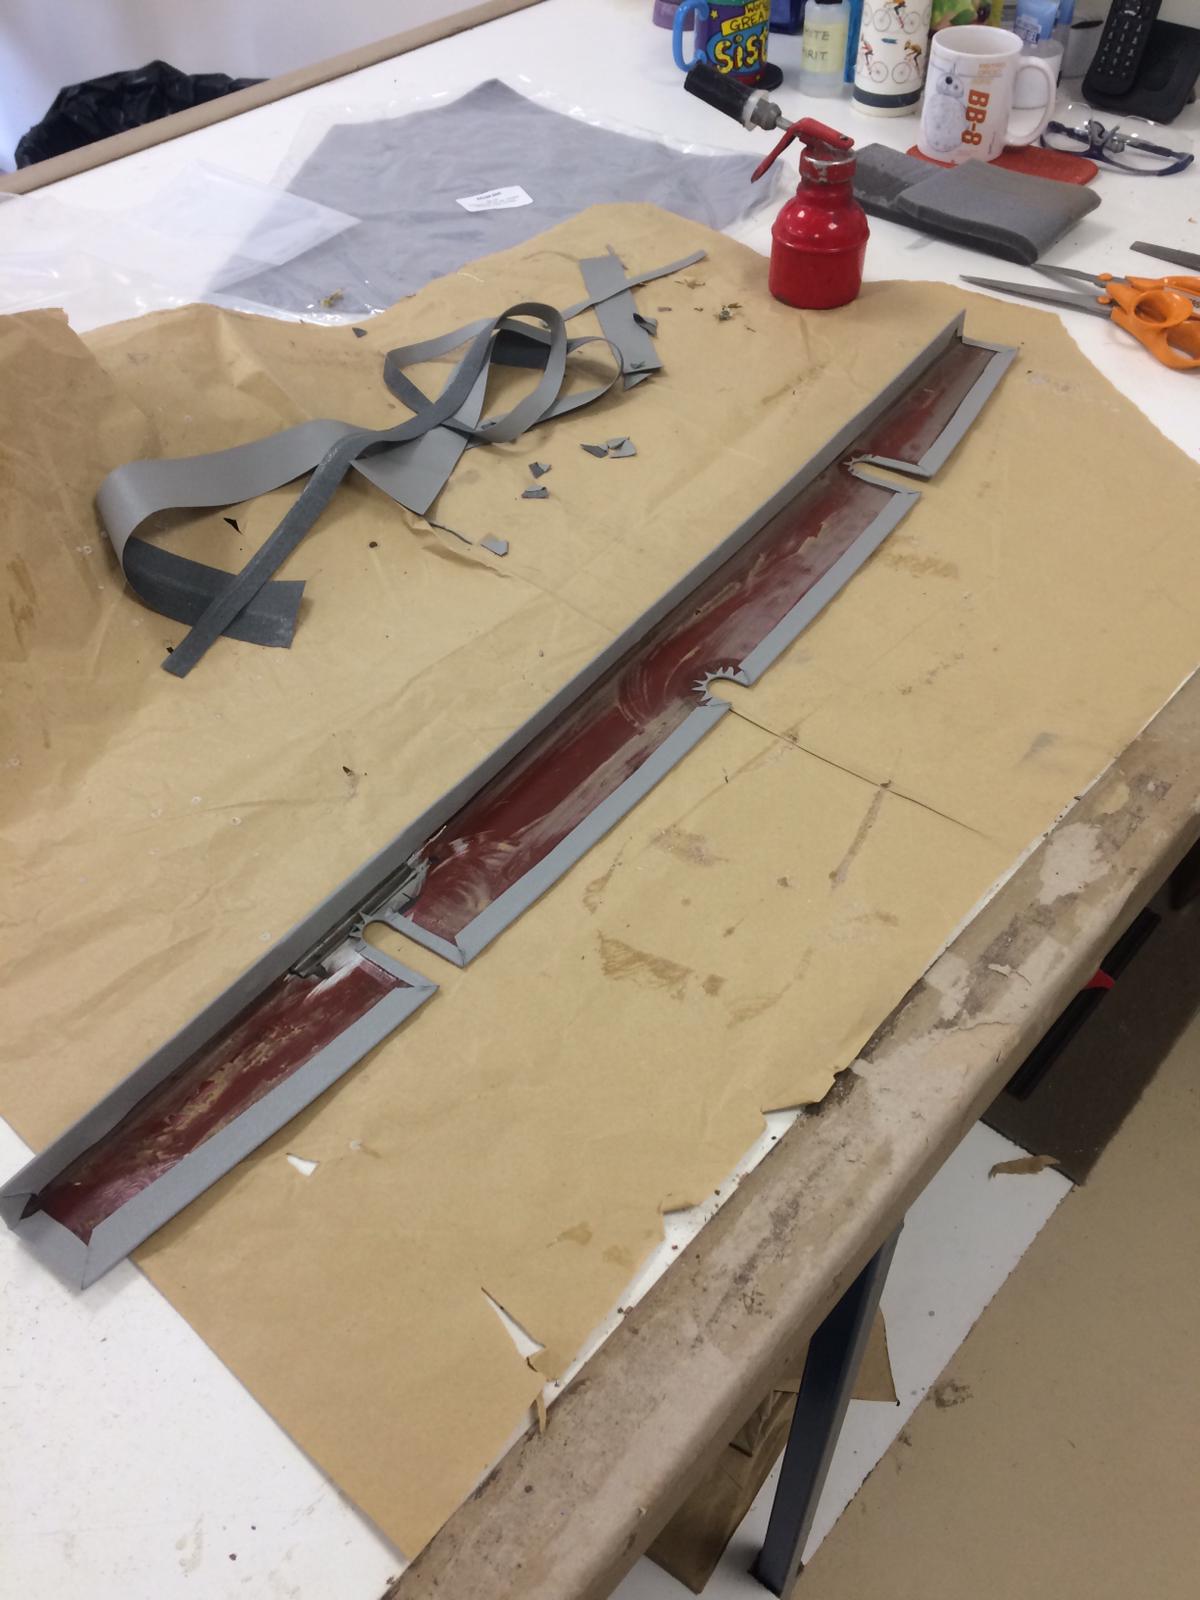
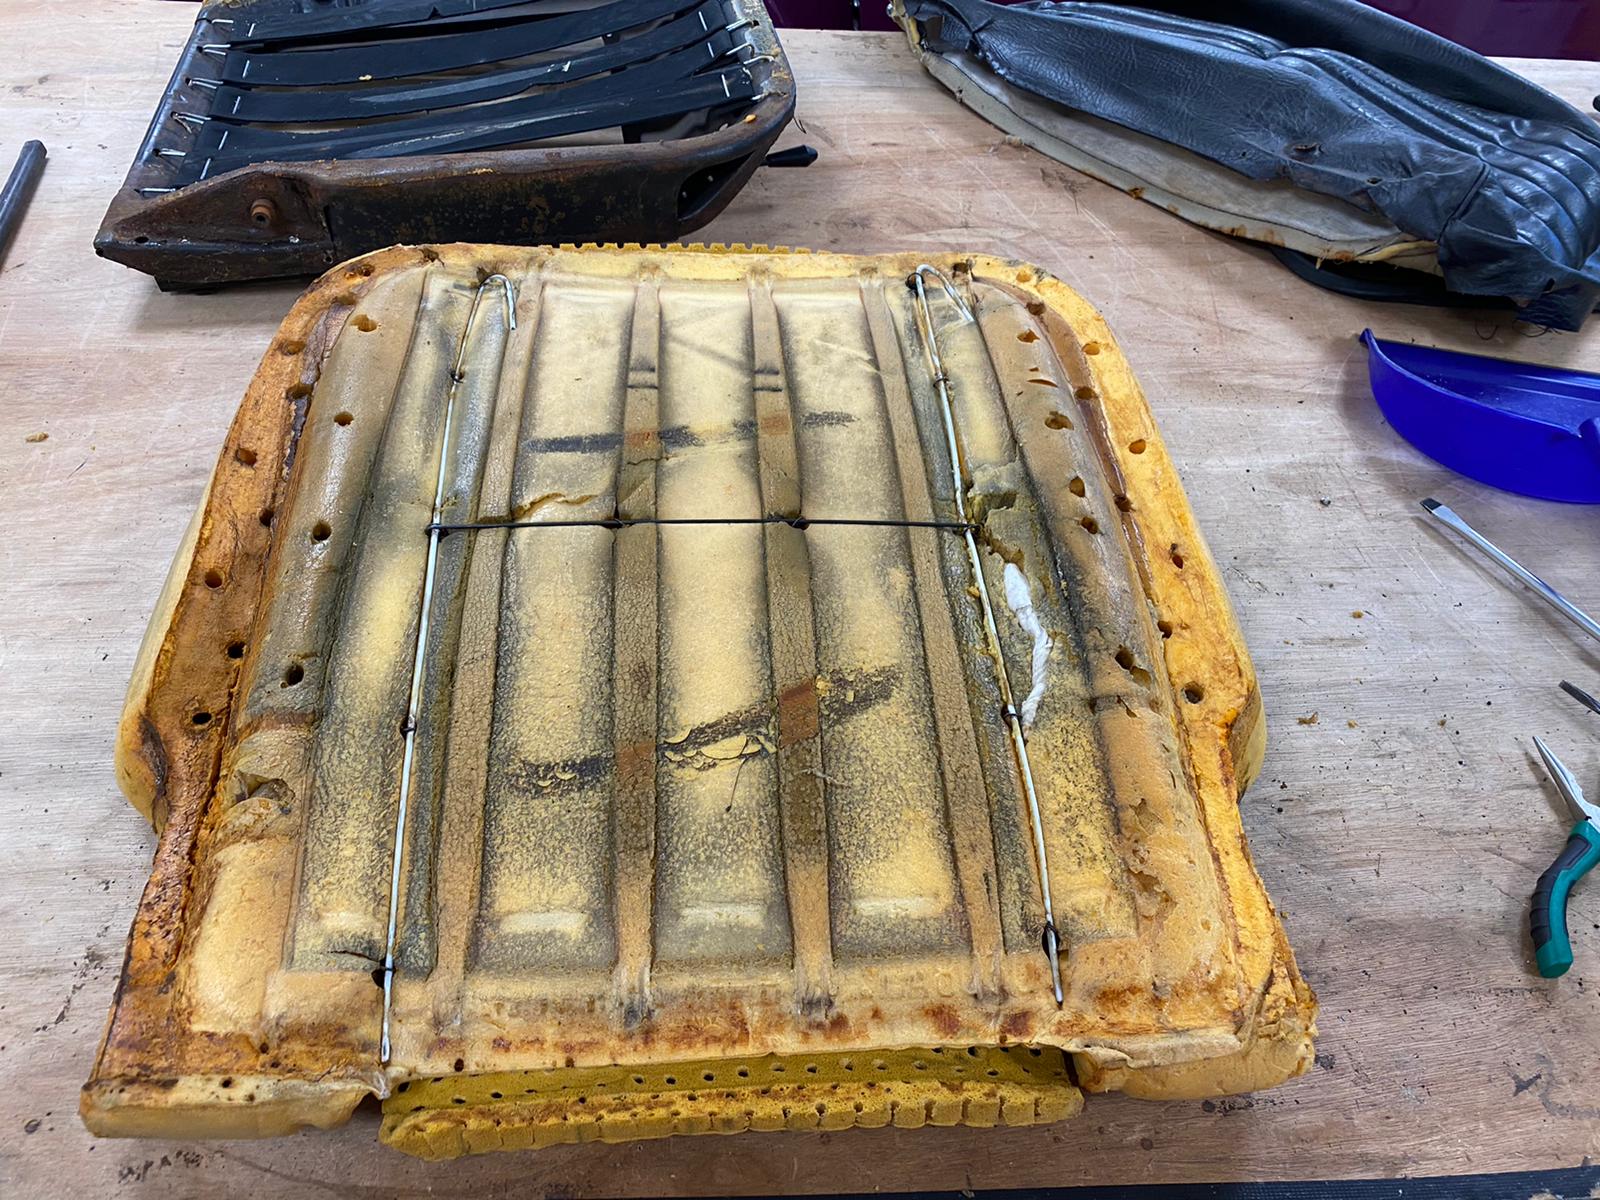
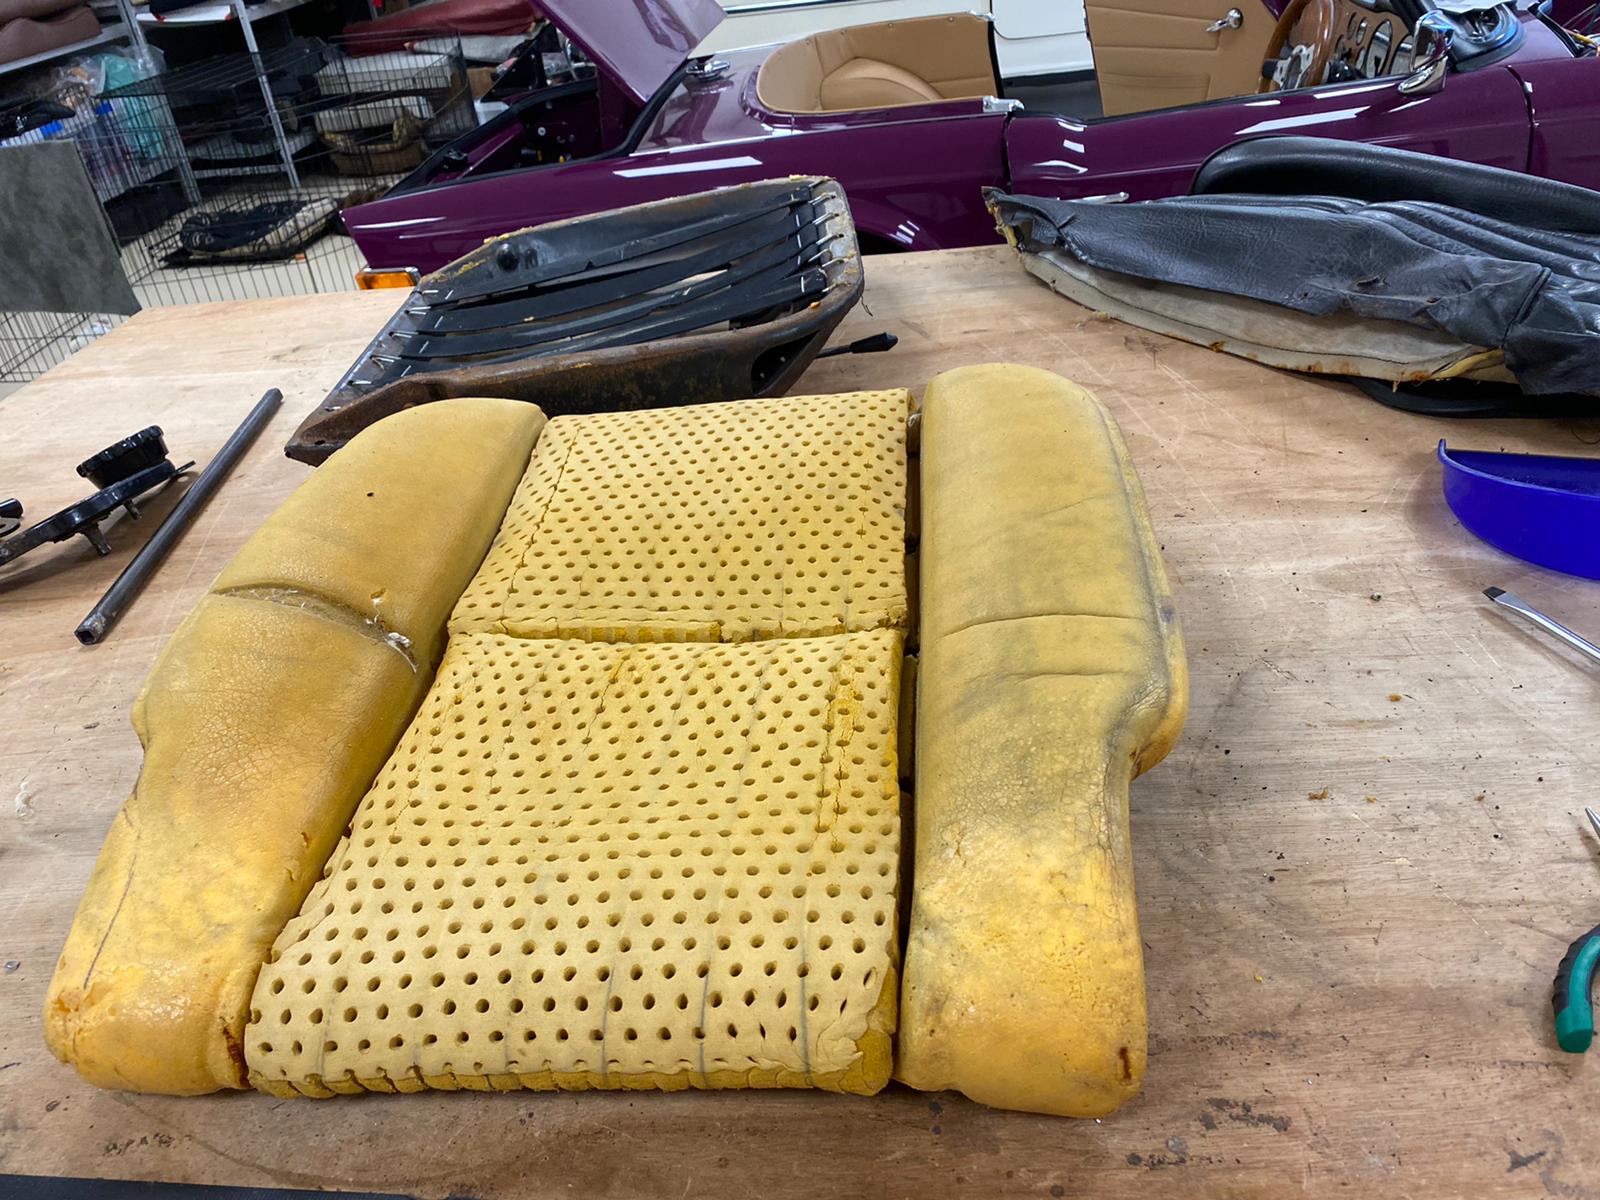
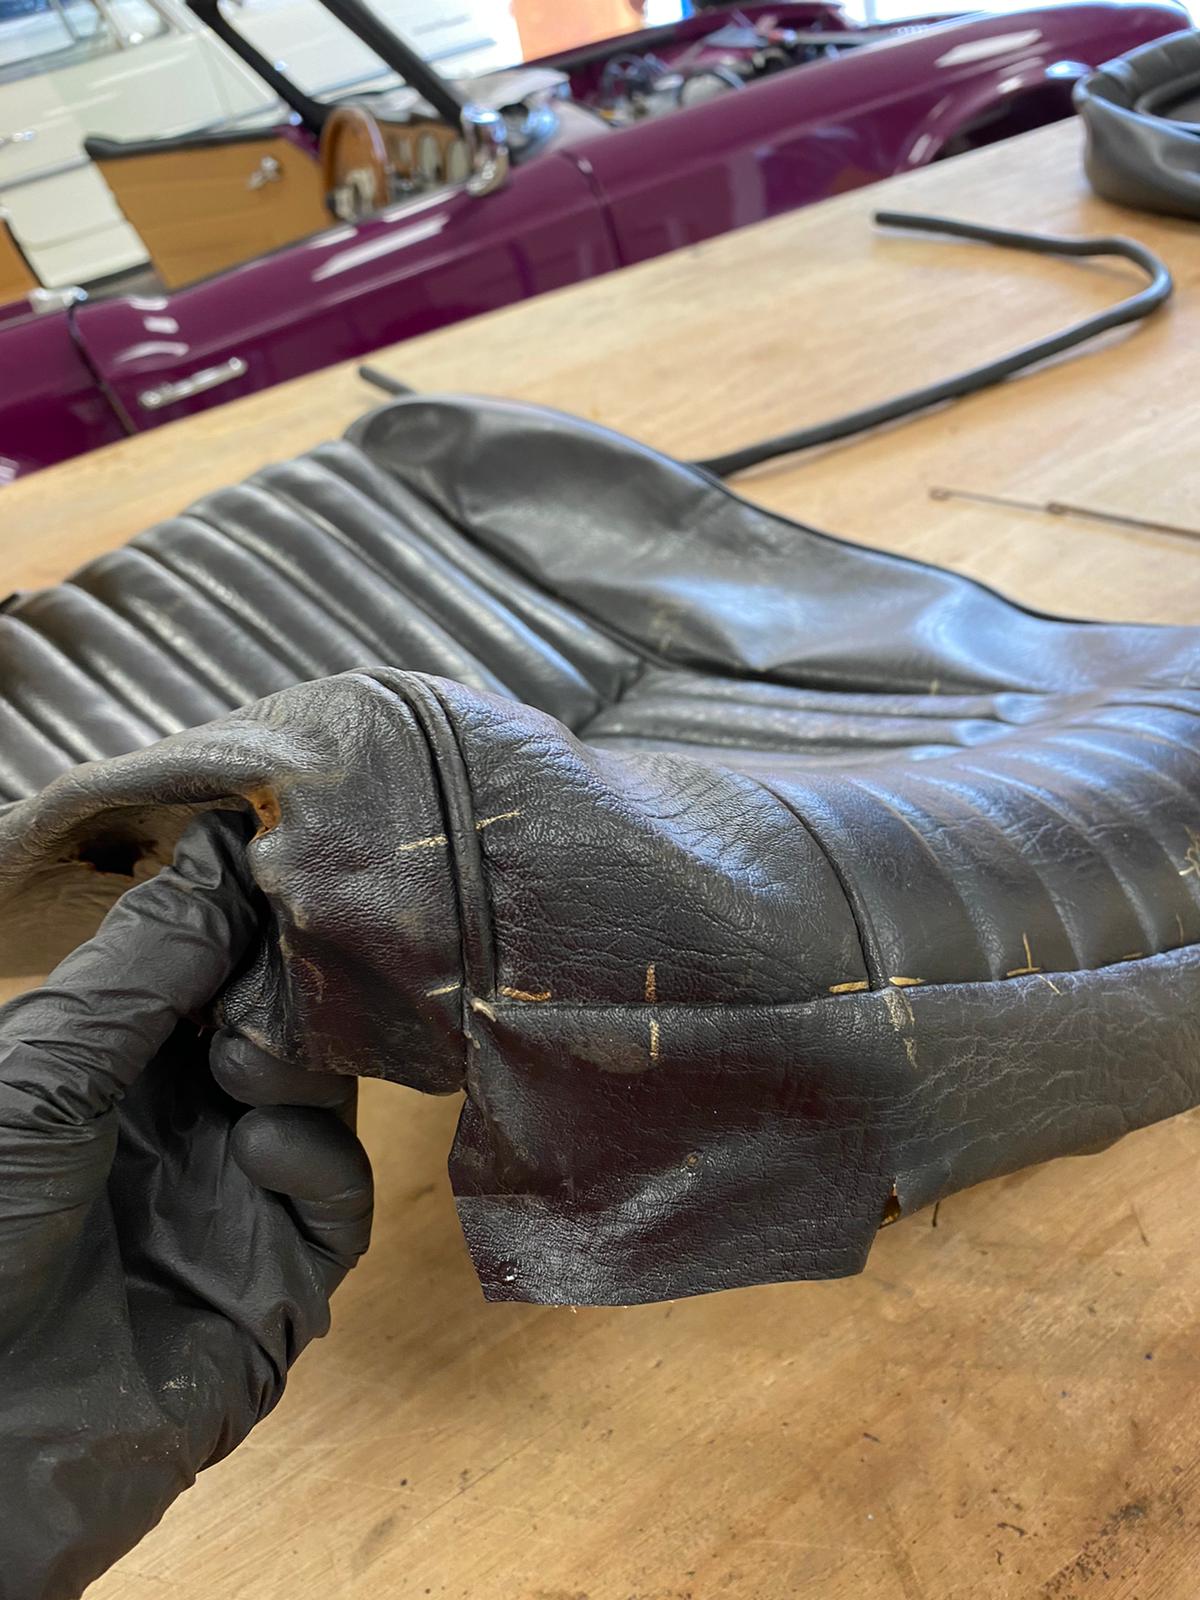
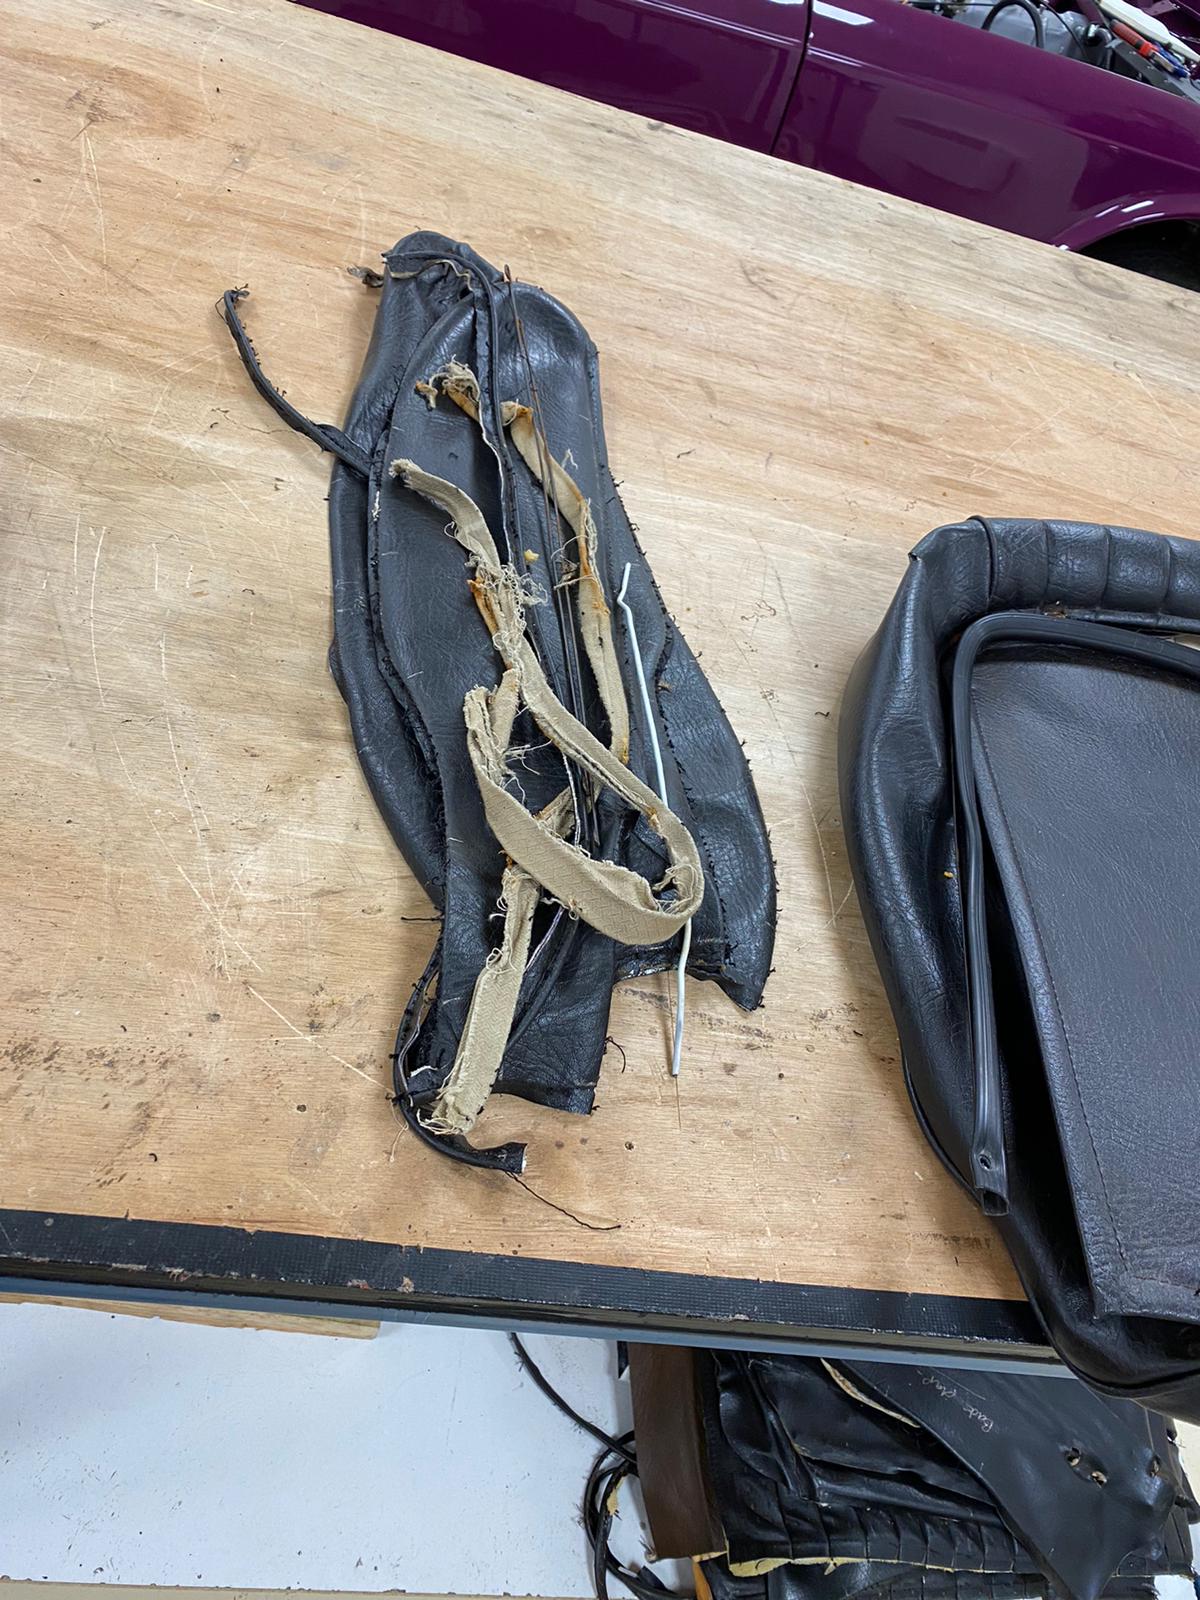
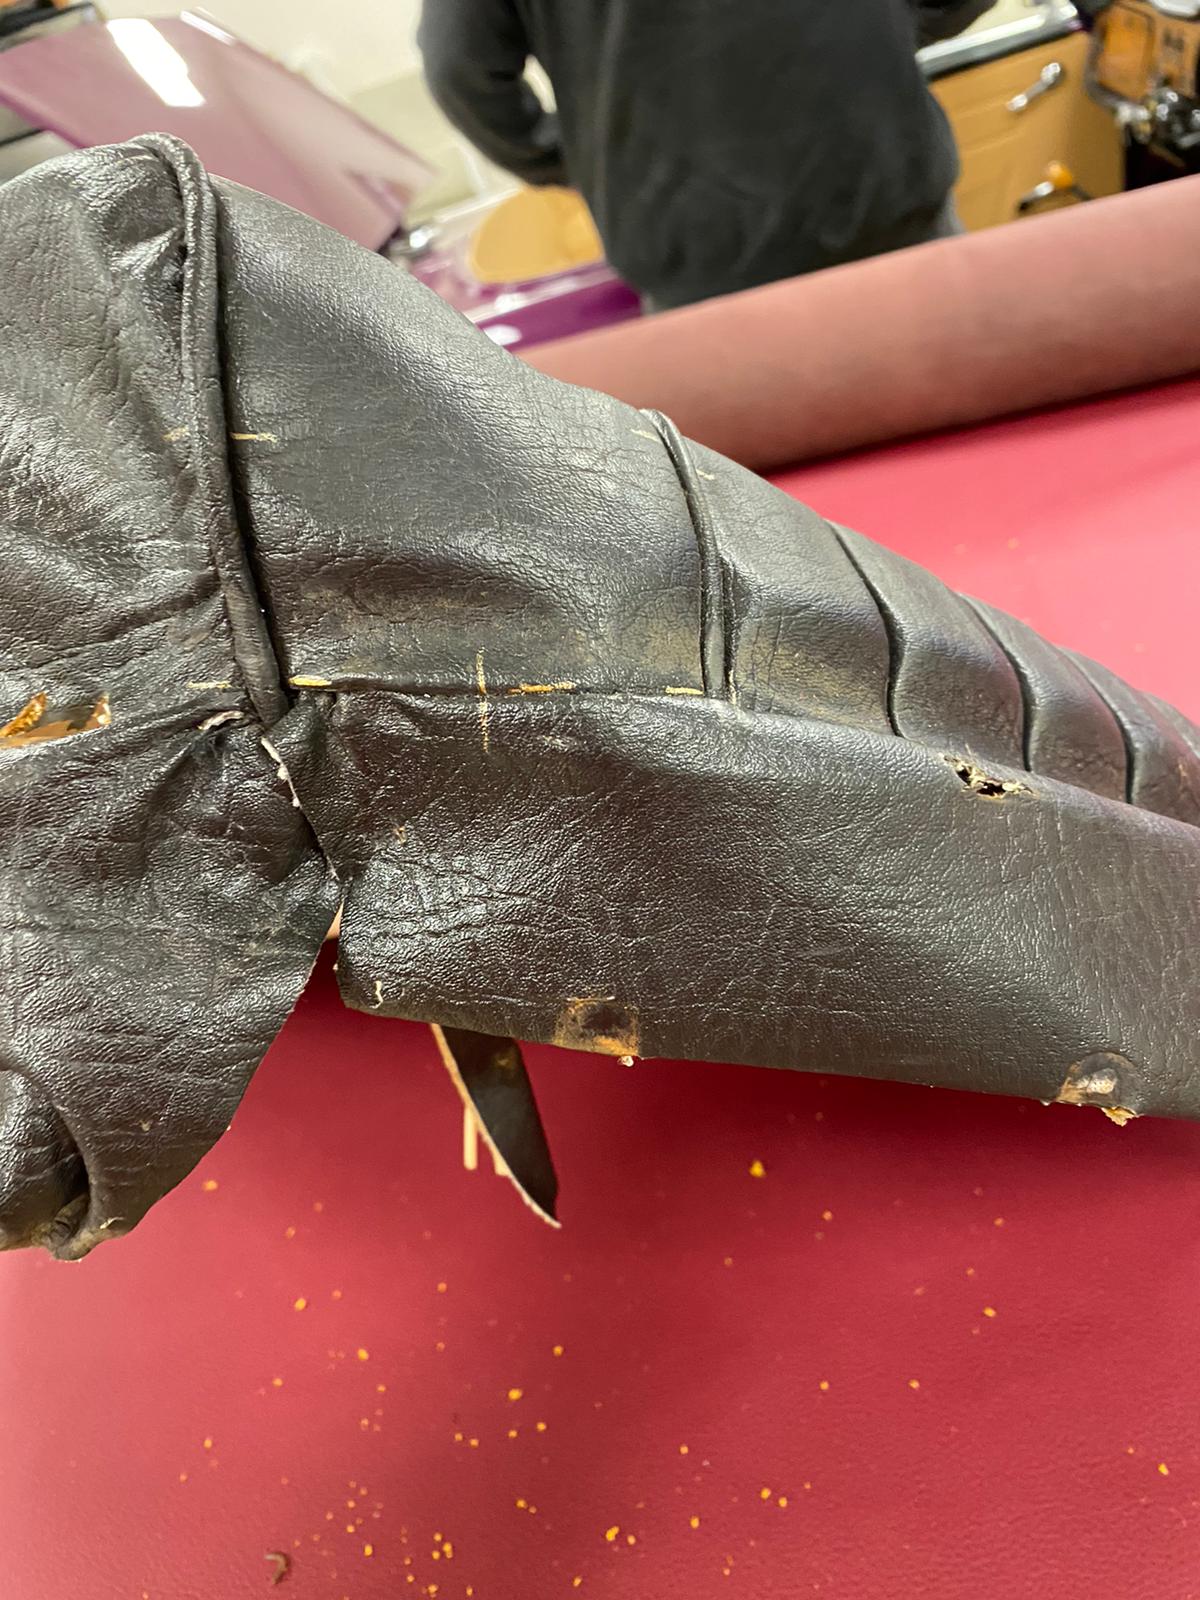
While separating all the different parts, Kath also has to remove all the hog rings she finds along the way. She’s also removed the plastic trim from around the adjustment handles and the base of the seat.
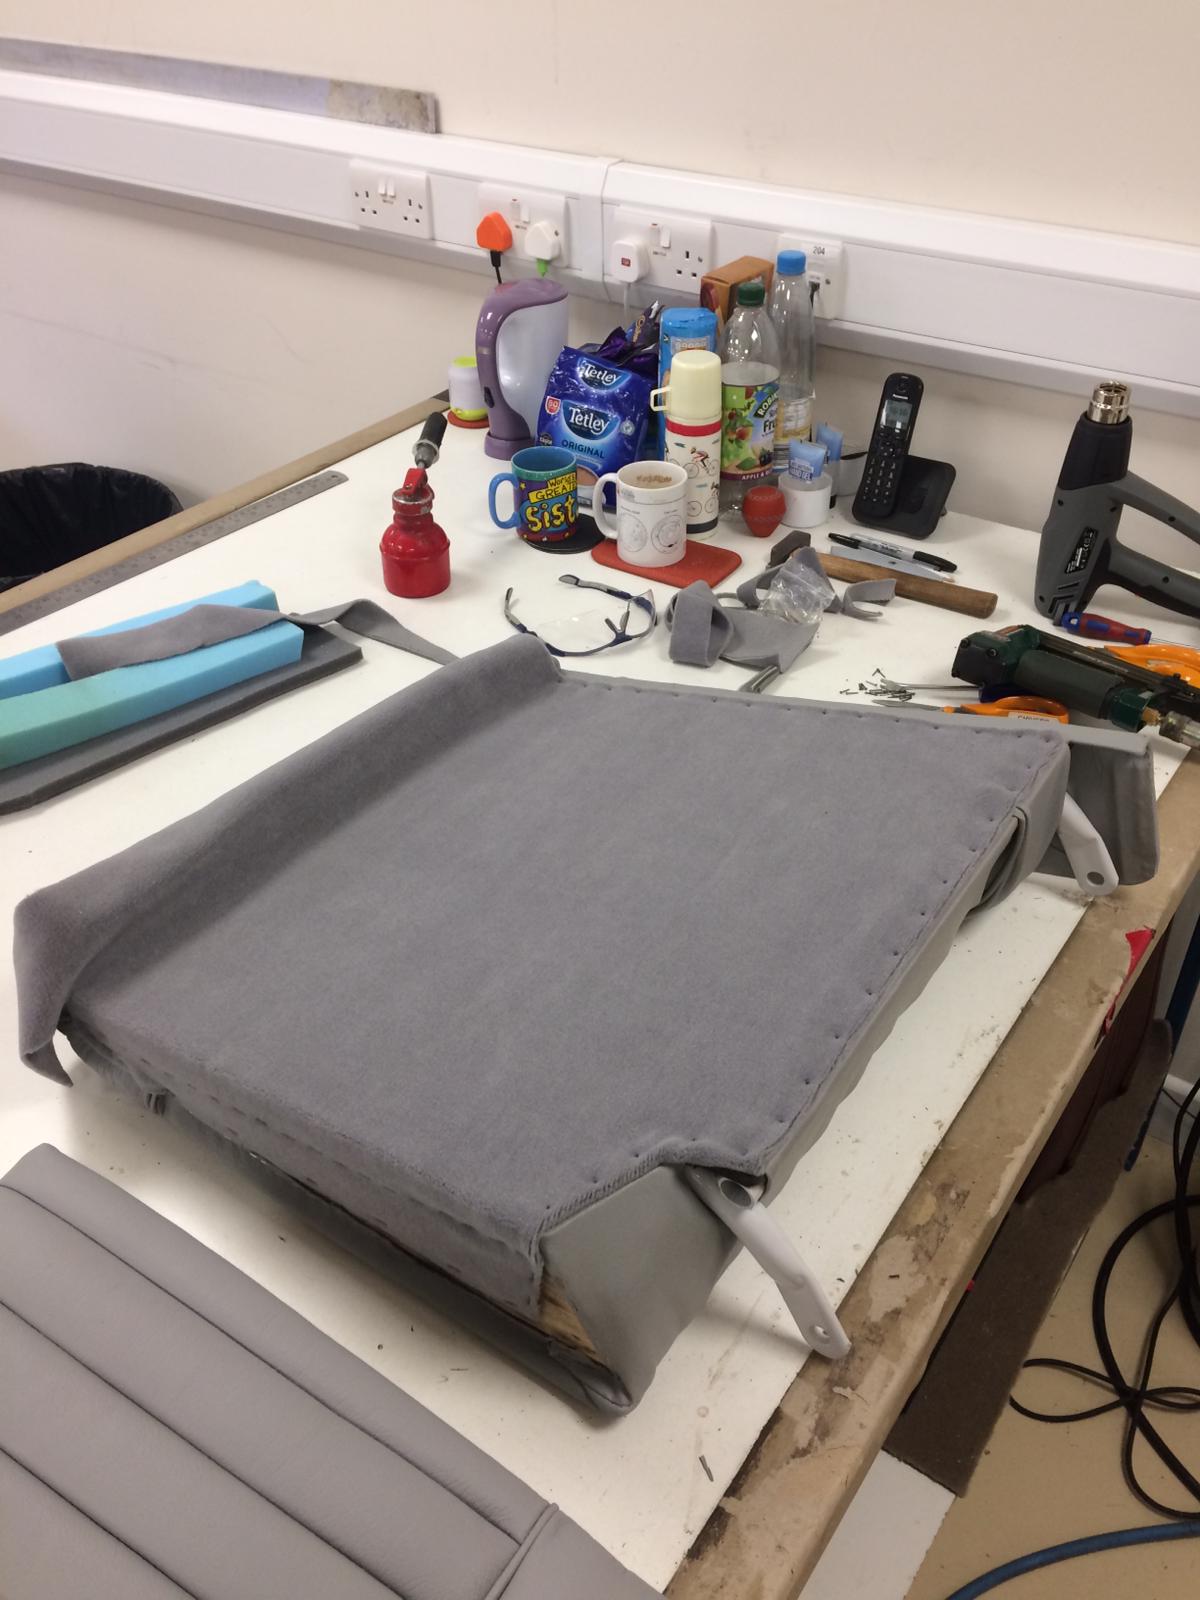
Pictures like these are incredibly useful to the team to know the shape they’re aiming for.


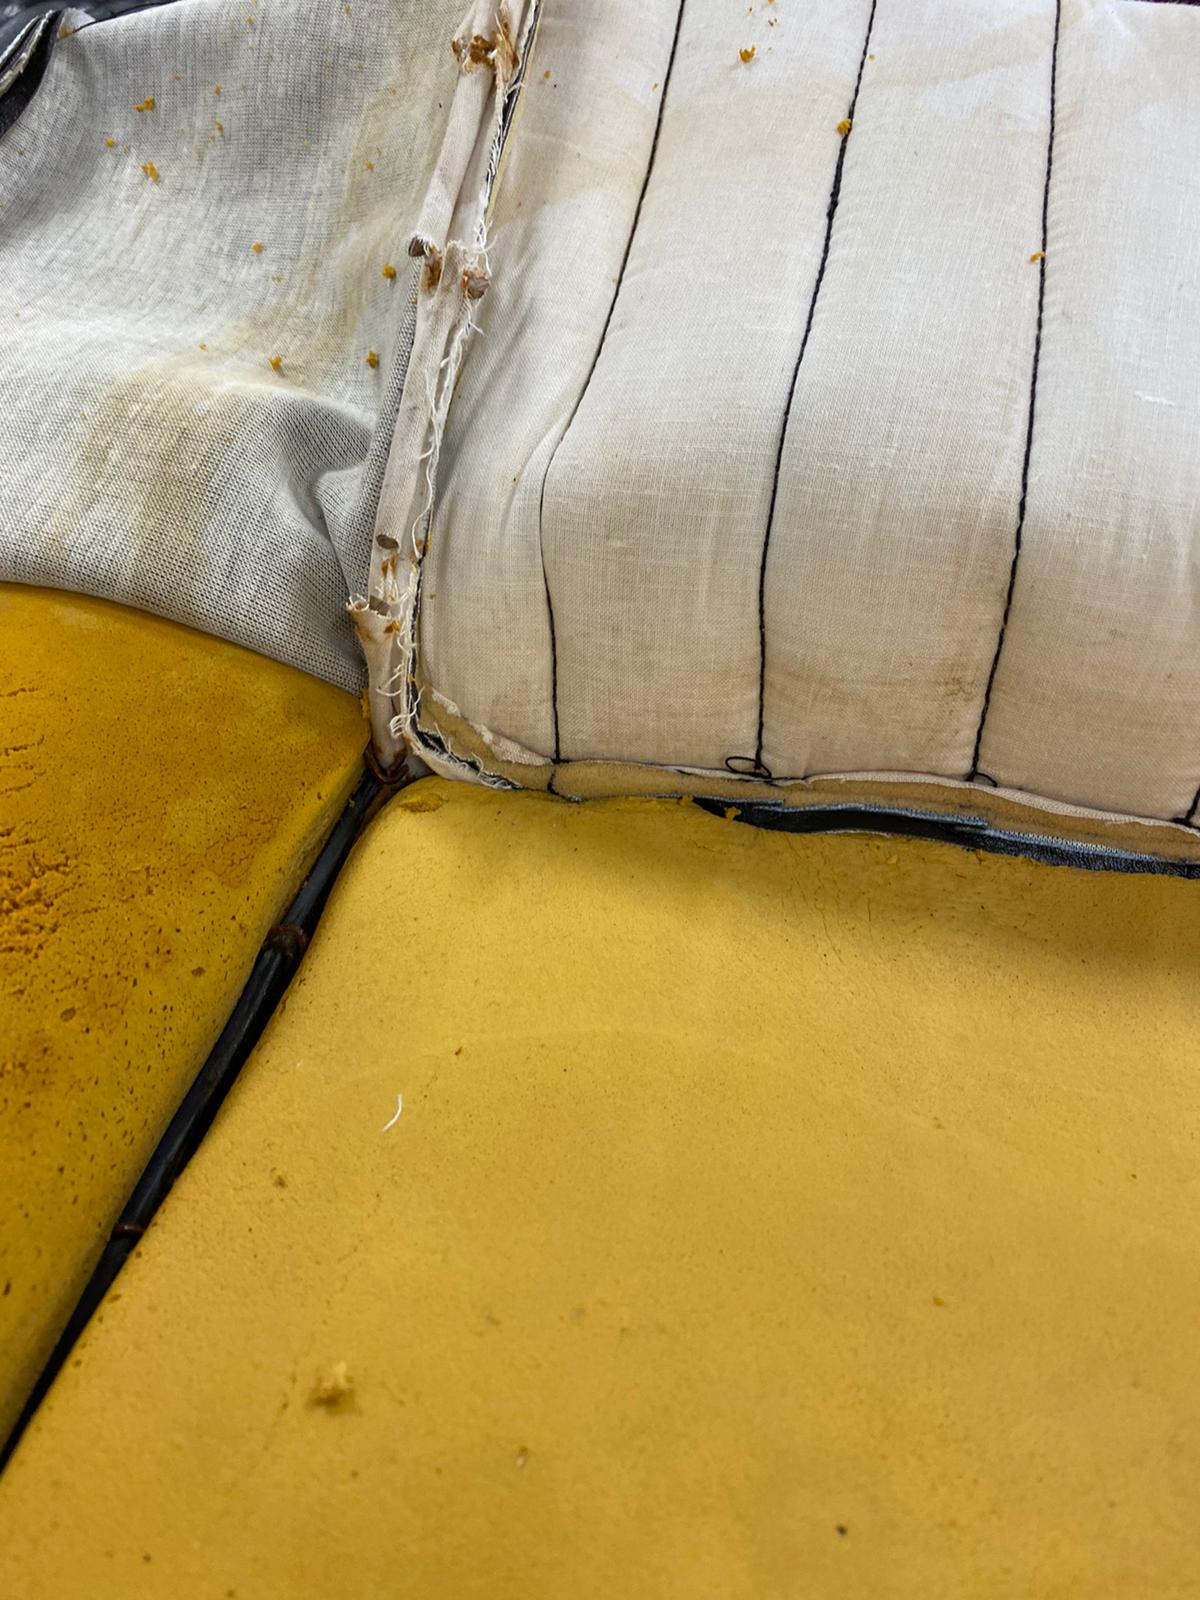

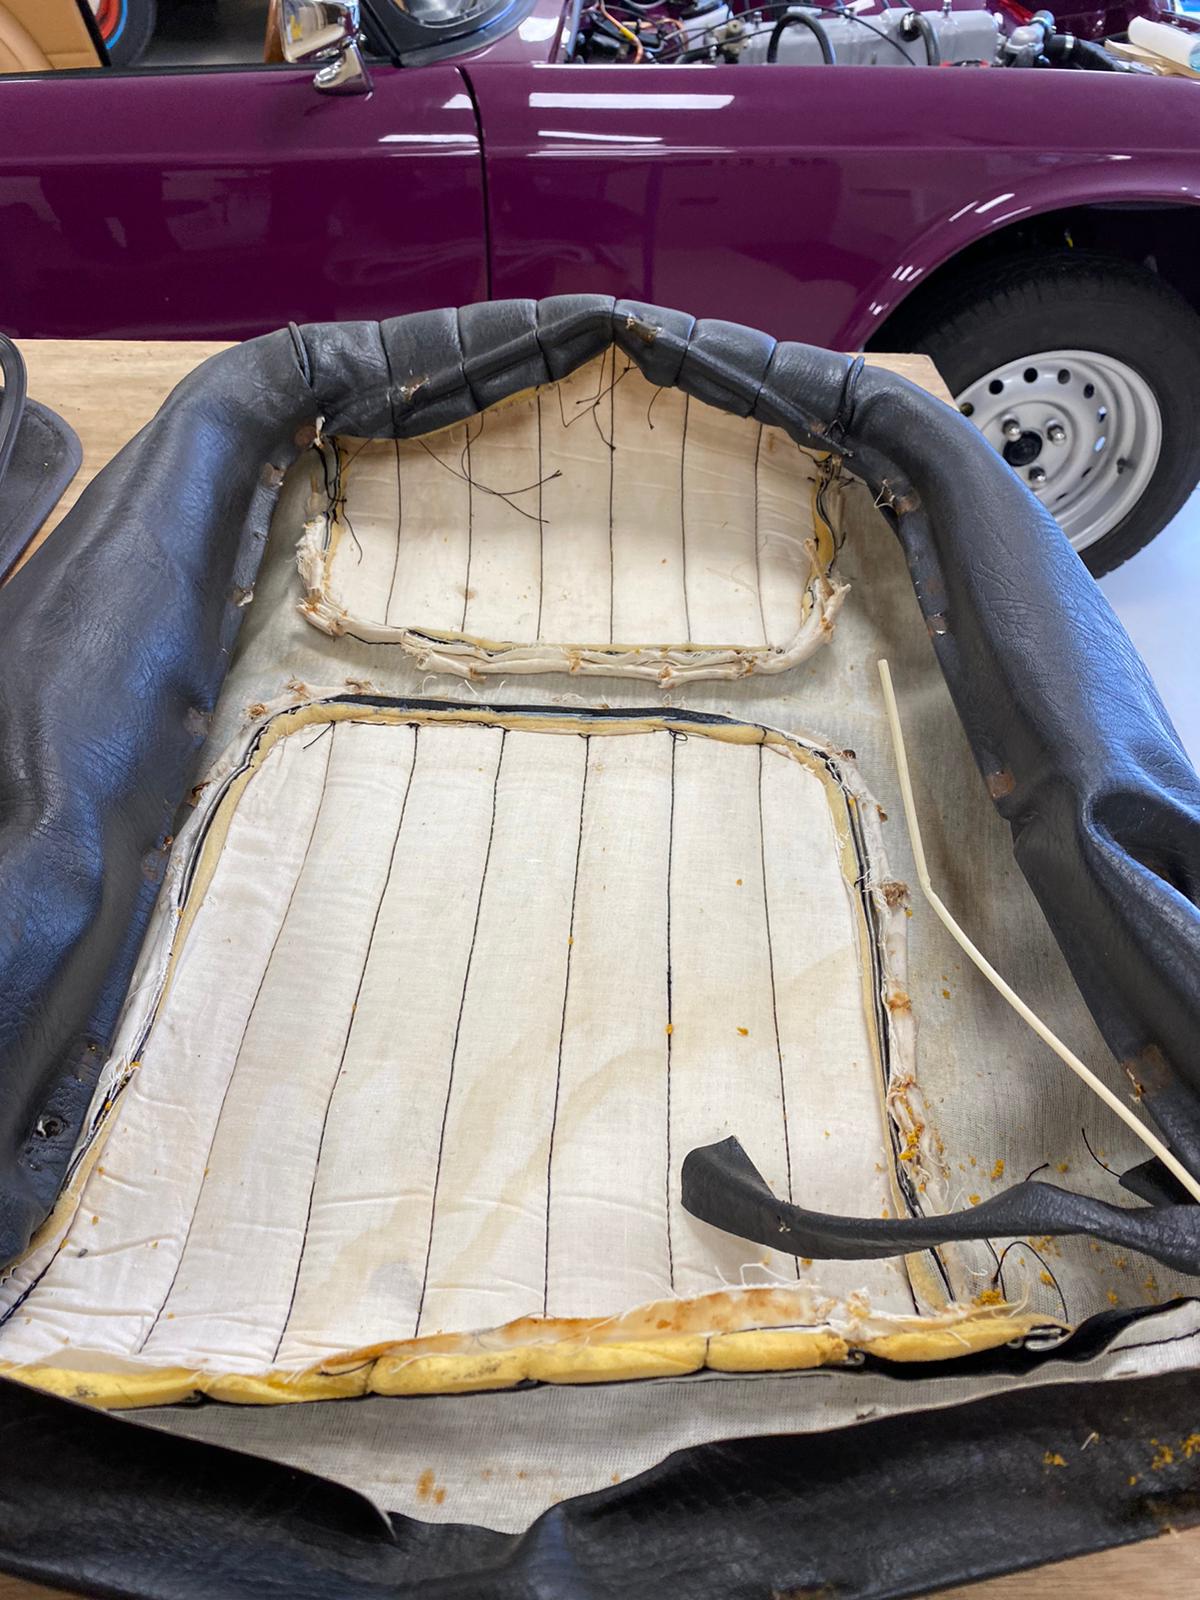
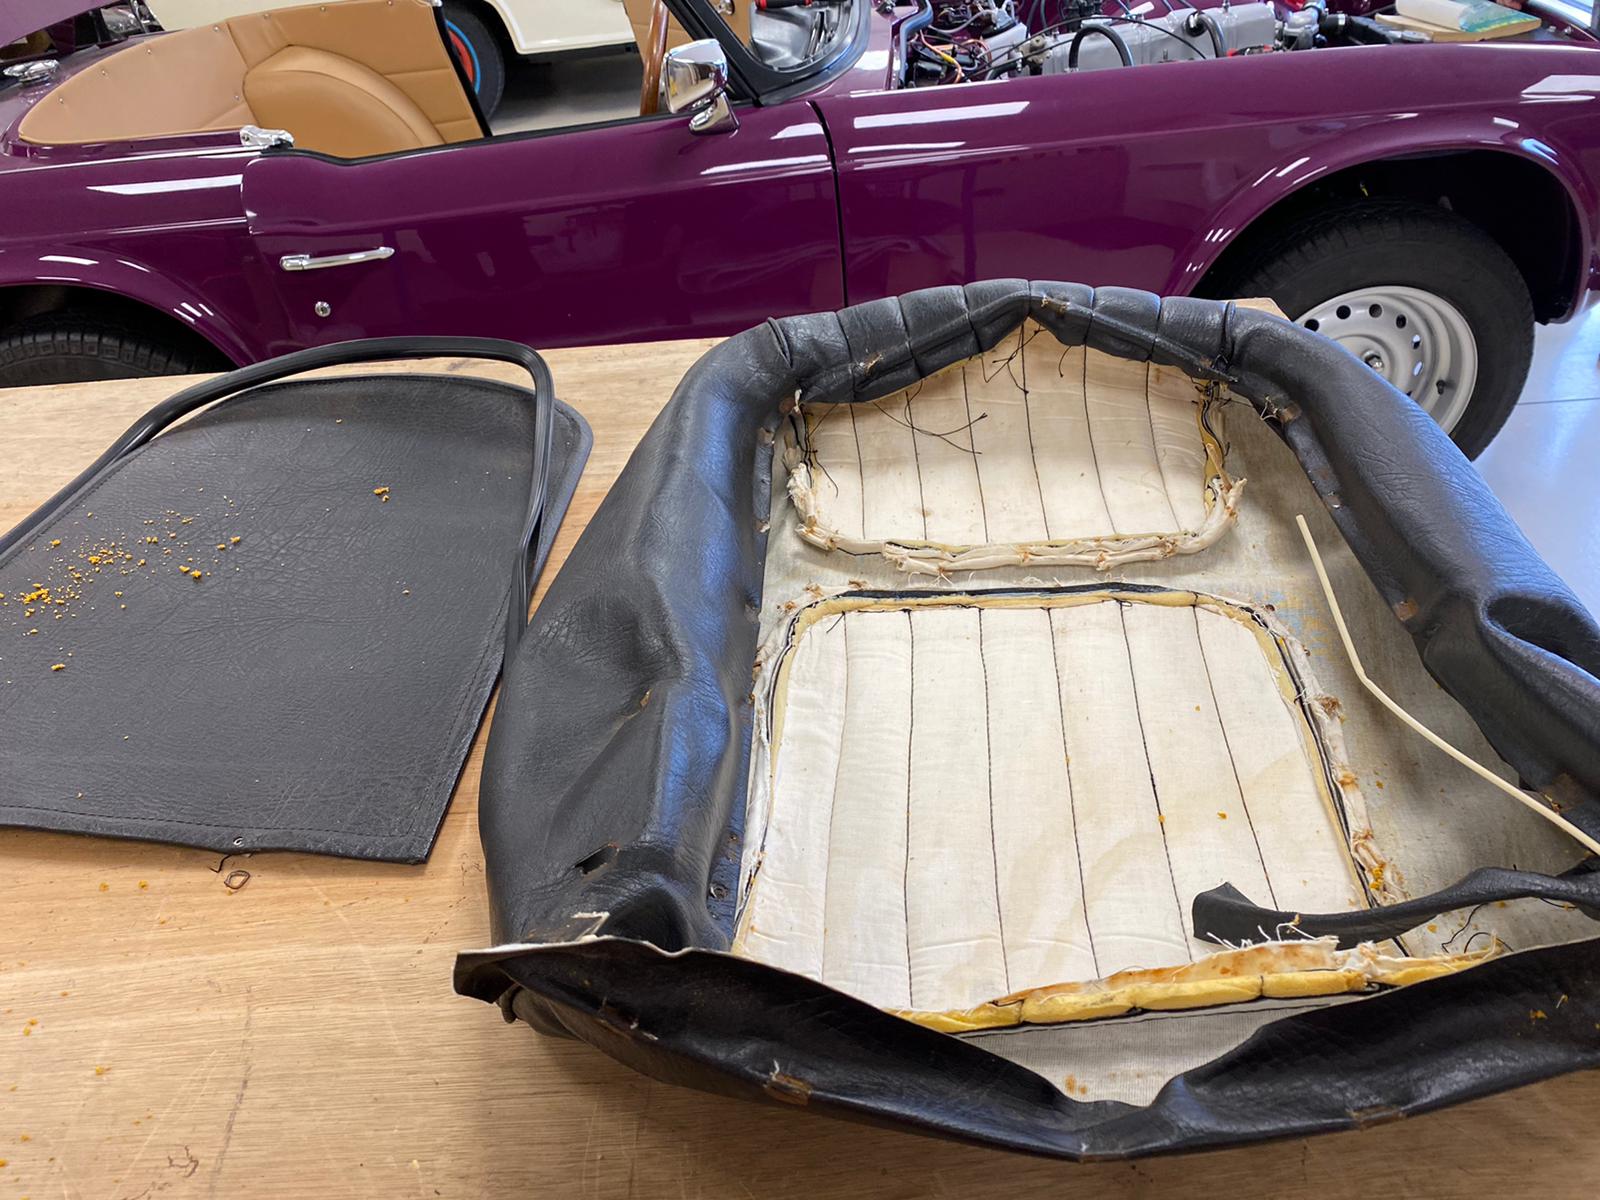
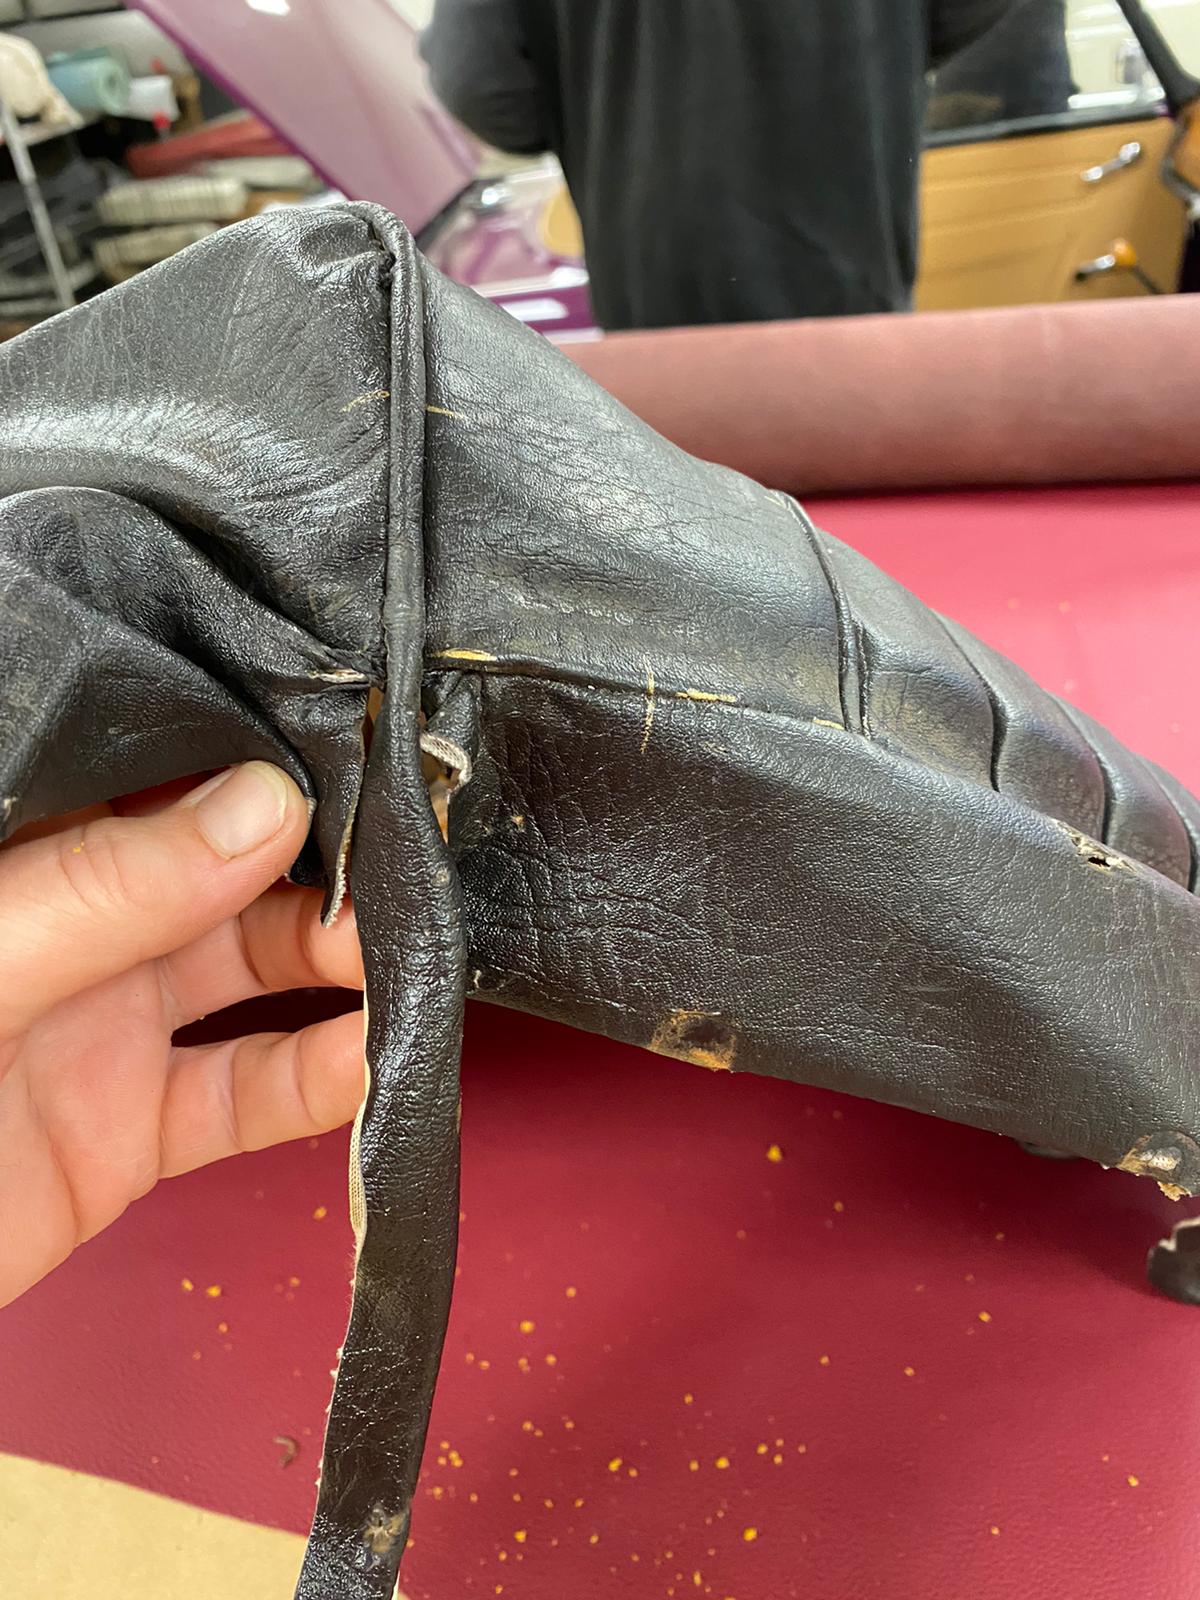
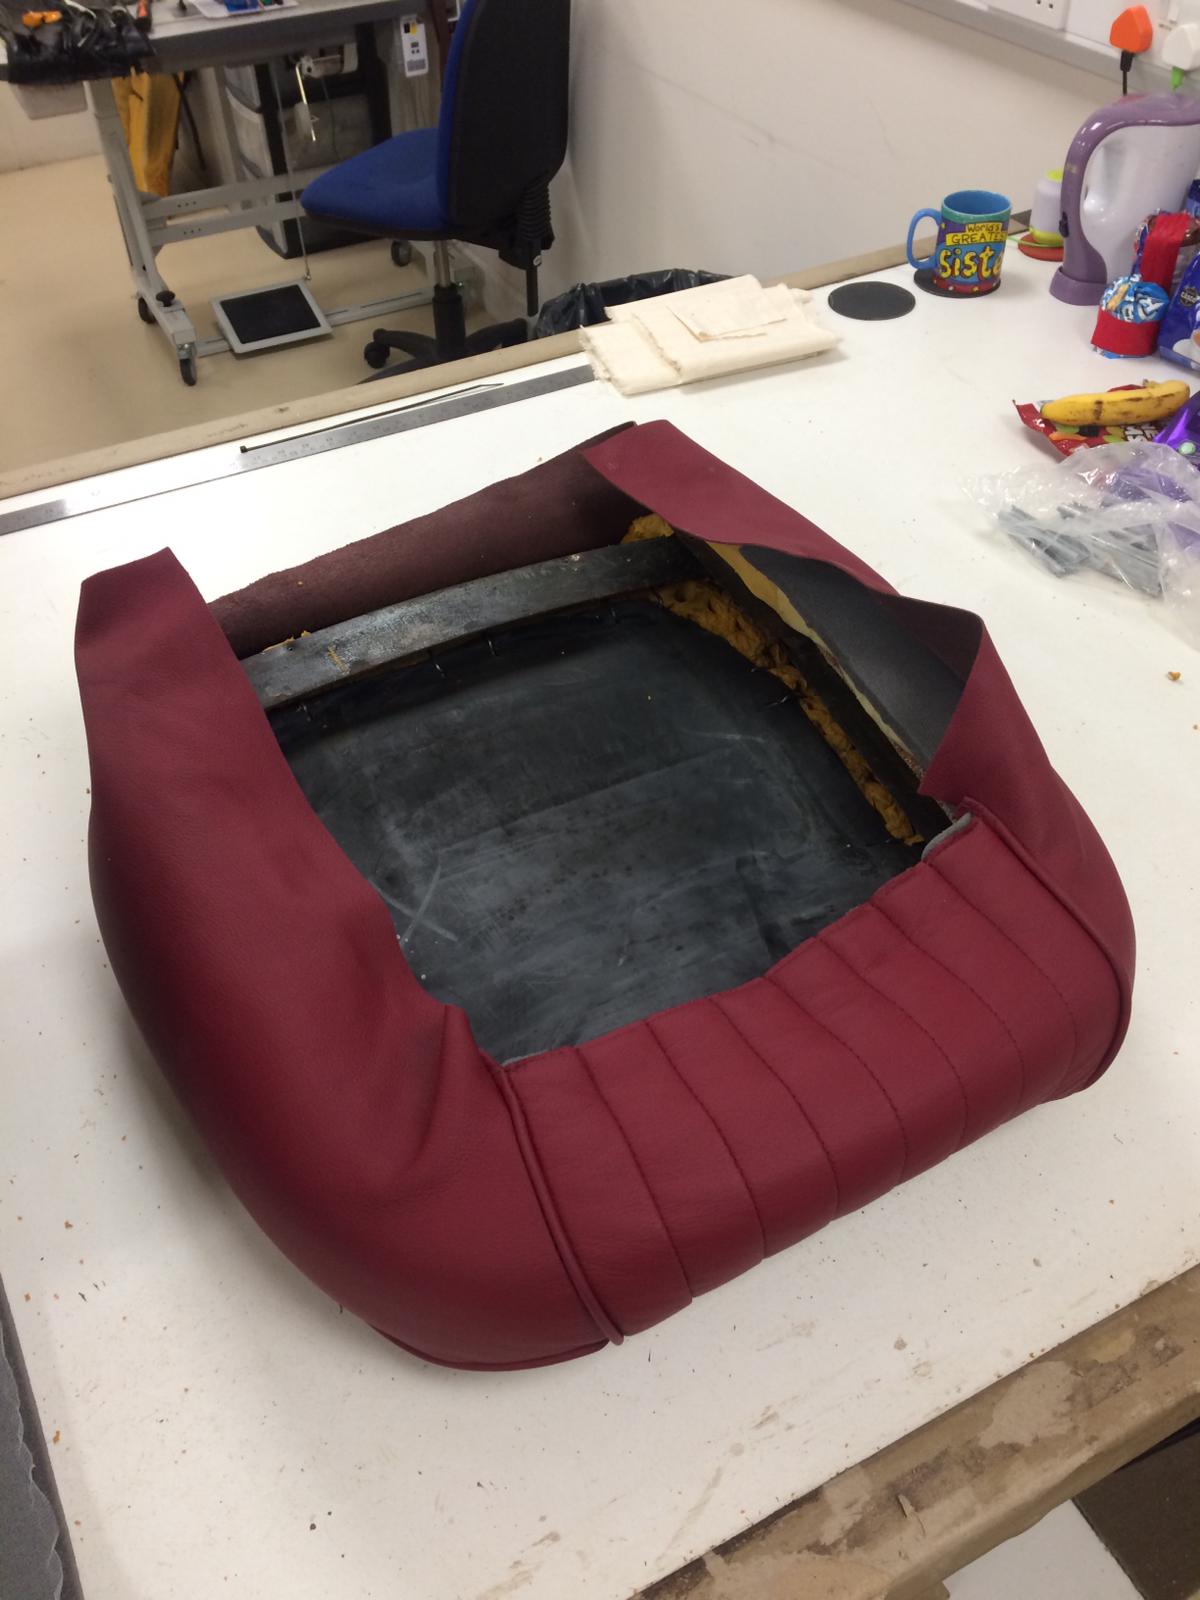
“I removed the spring clips that keep the base in place” Kath explains. “I’ve also marked out all the positions of the parts so I can easily position them back together.”
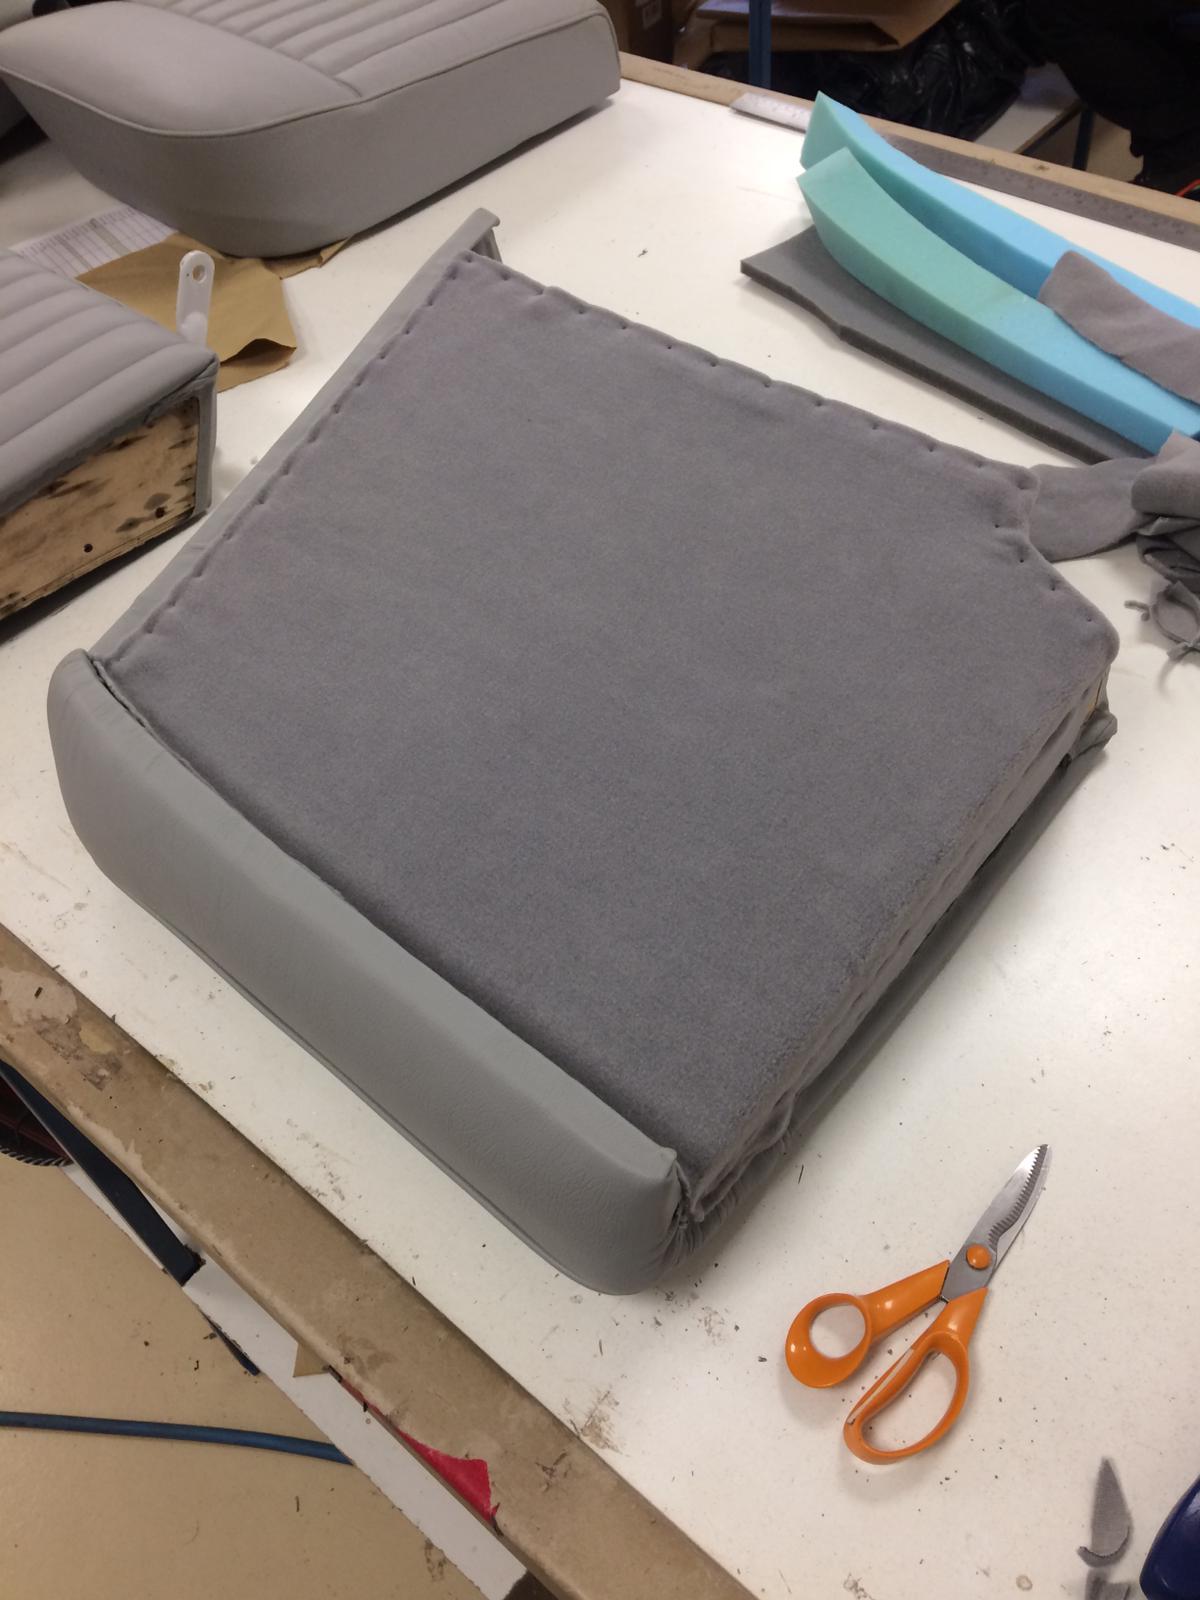
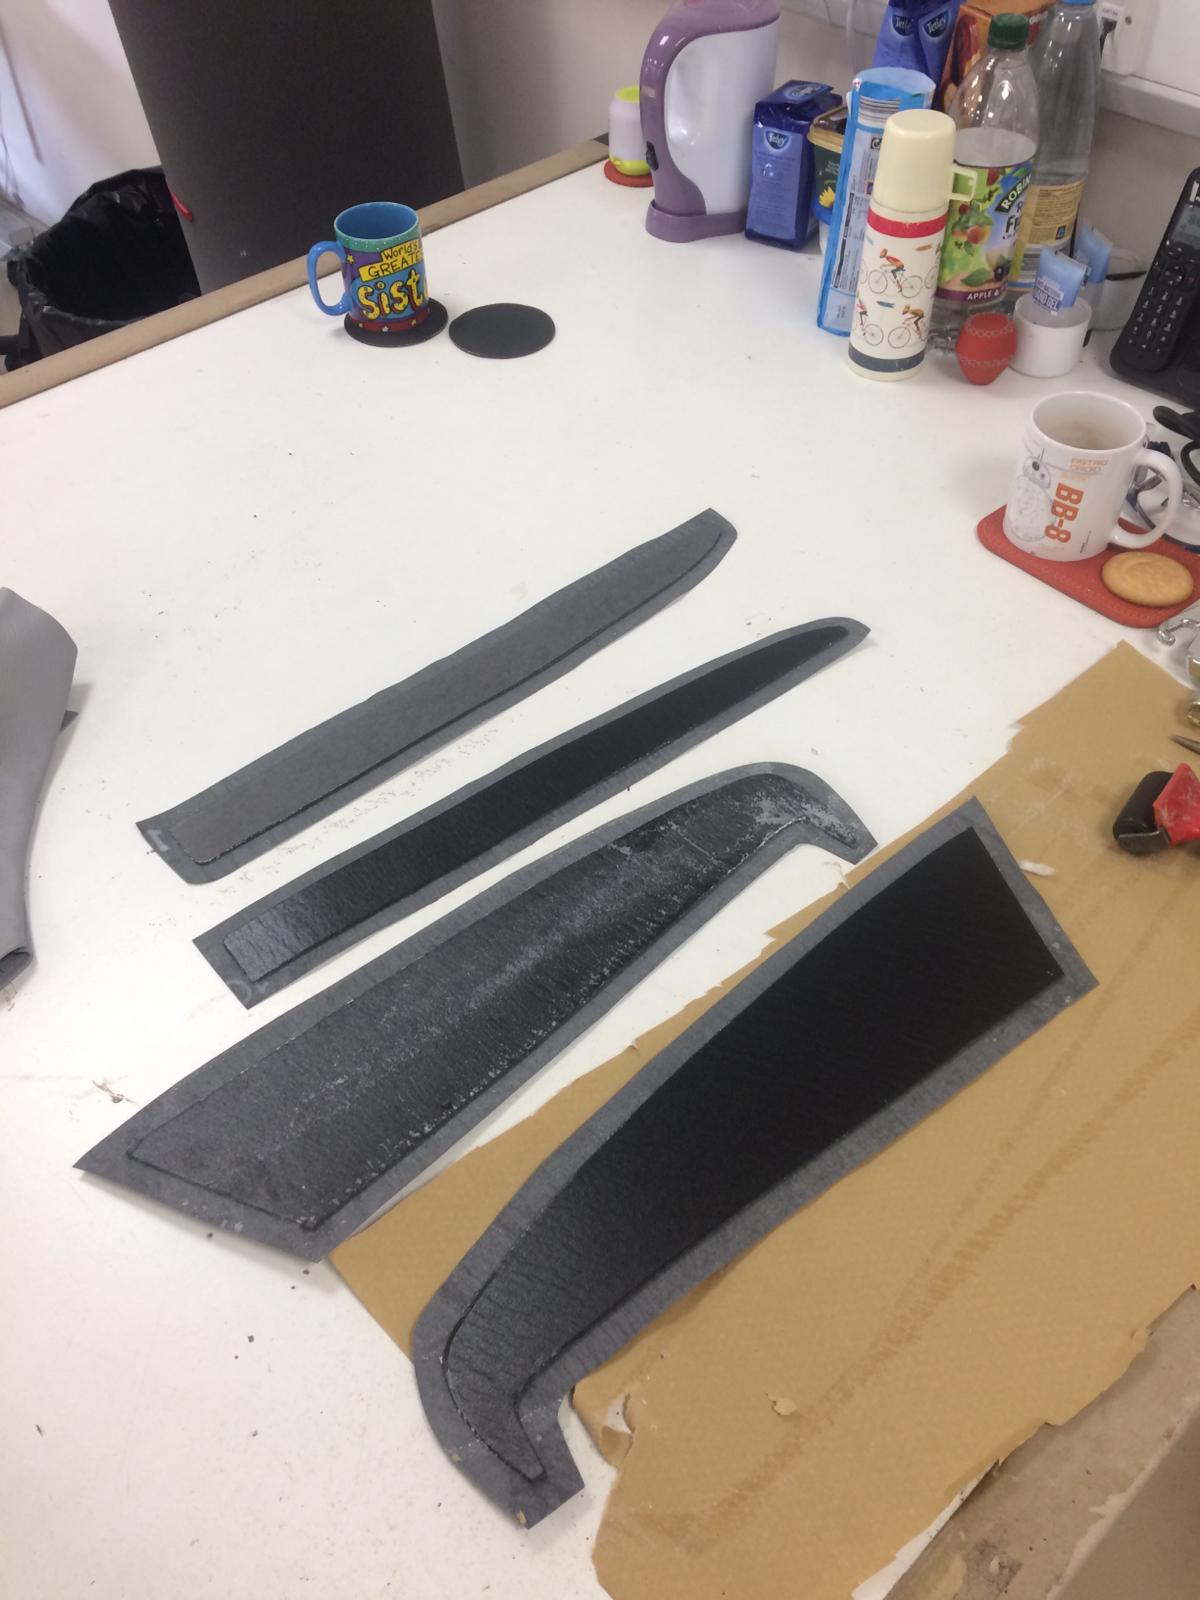
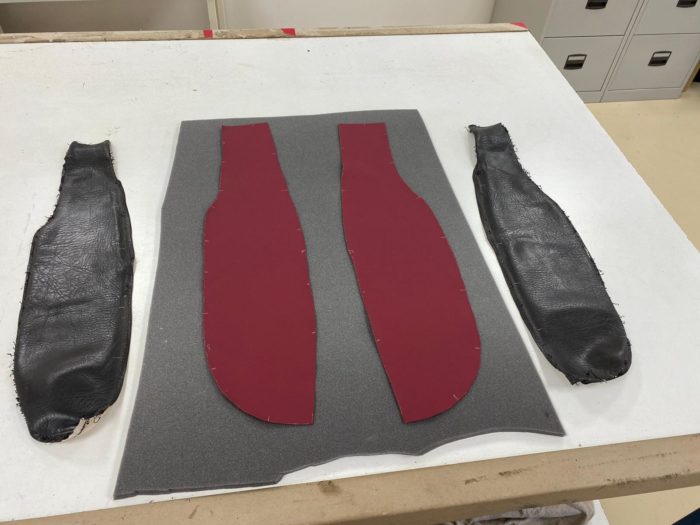
Now all the parts are marked and separated, it’s time to start matching them up to the new leather.


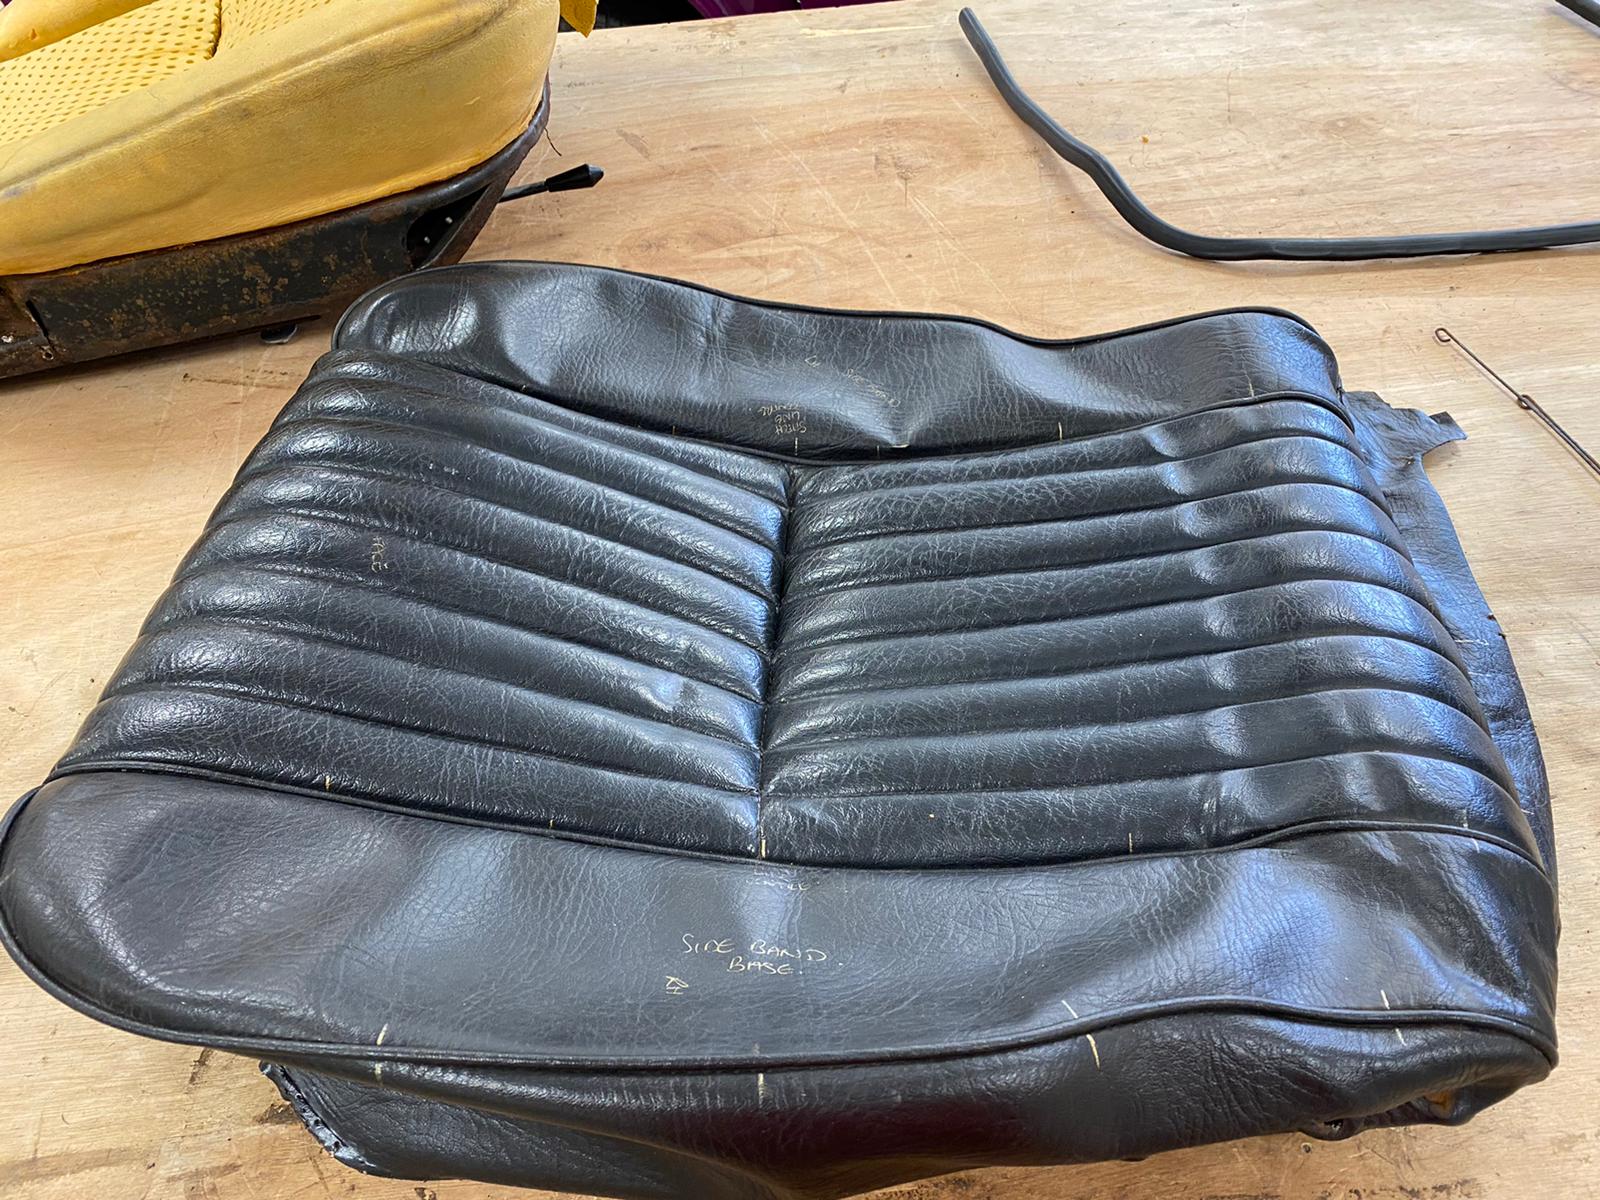
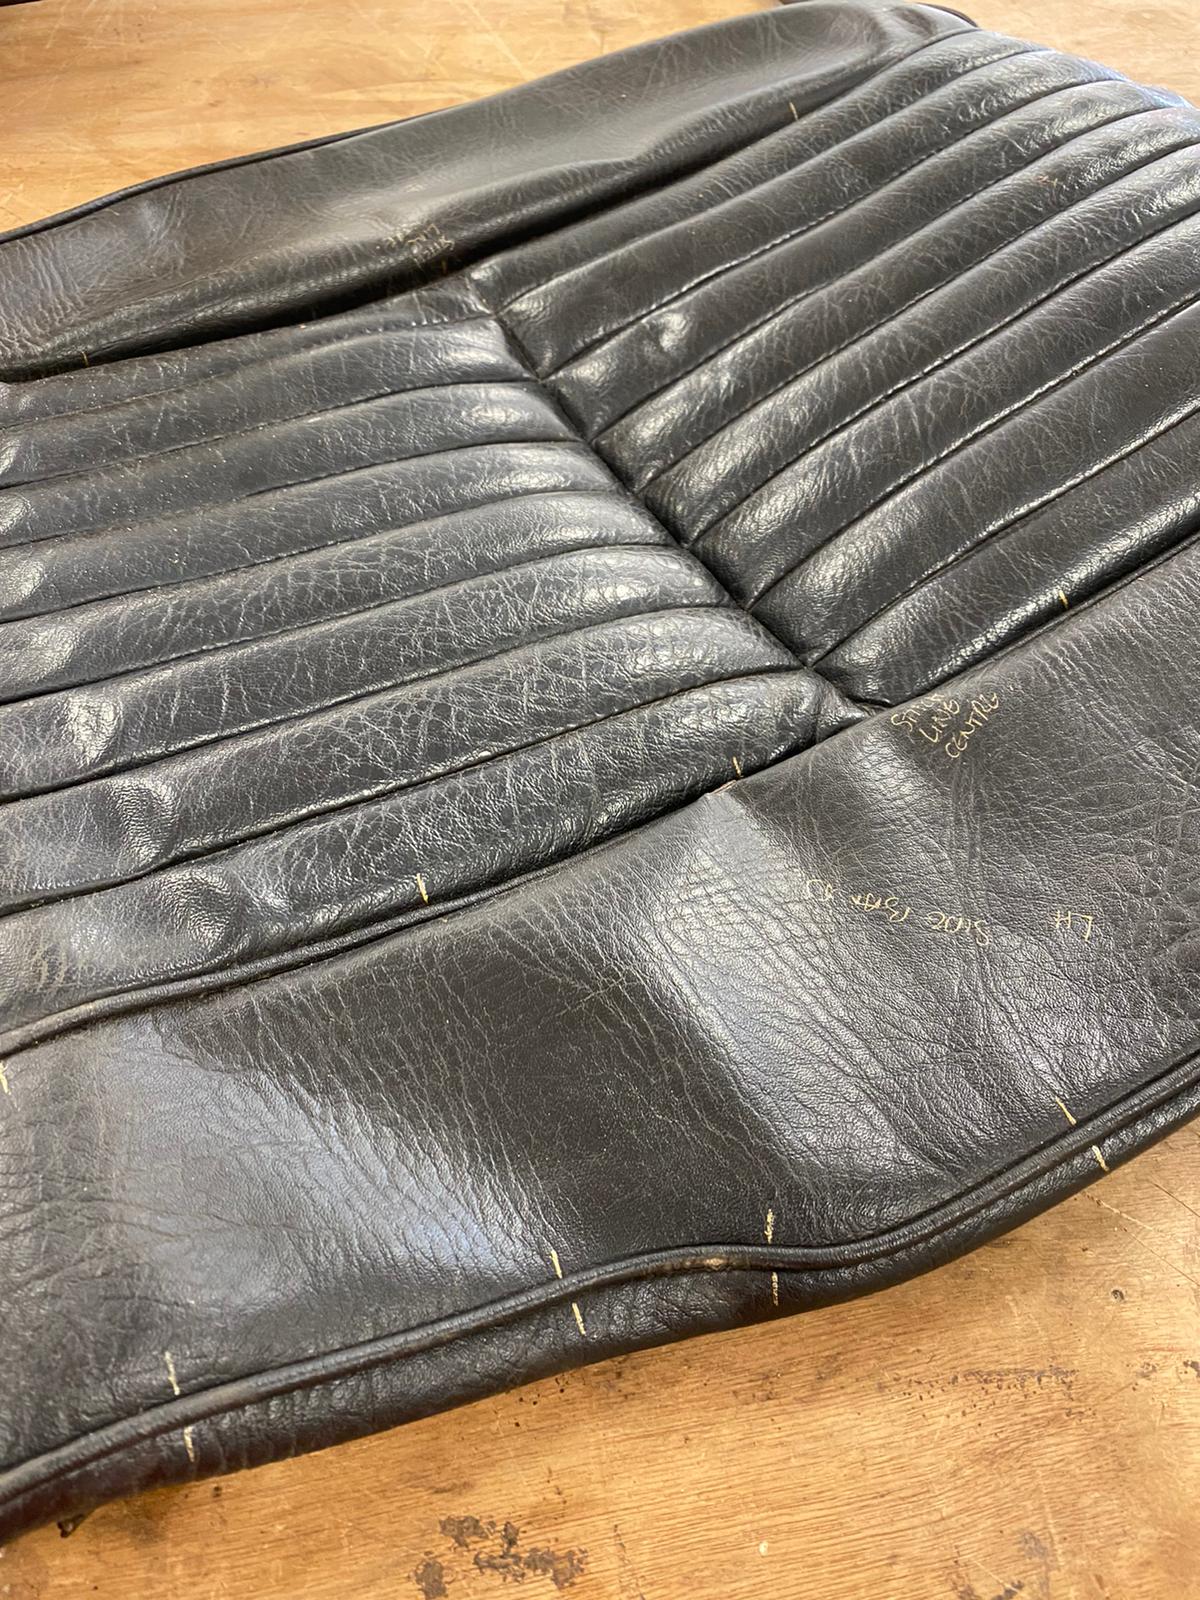
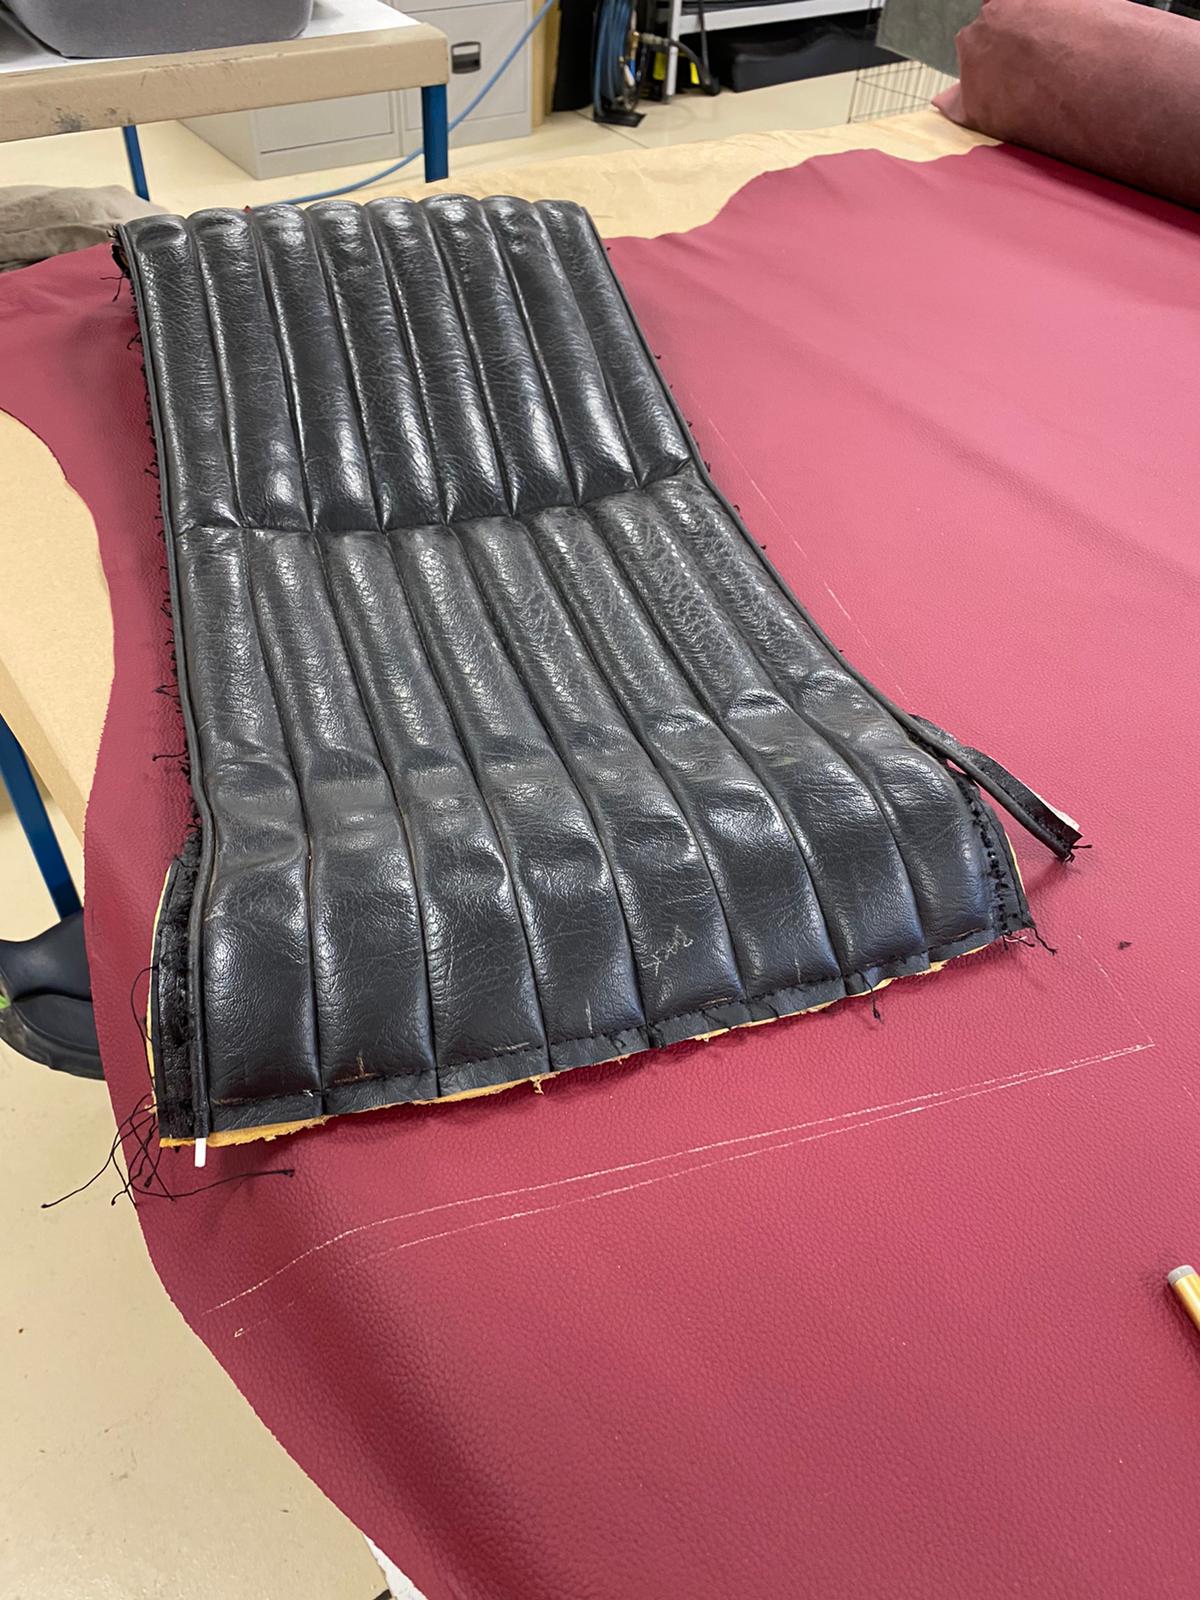
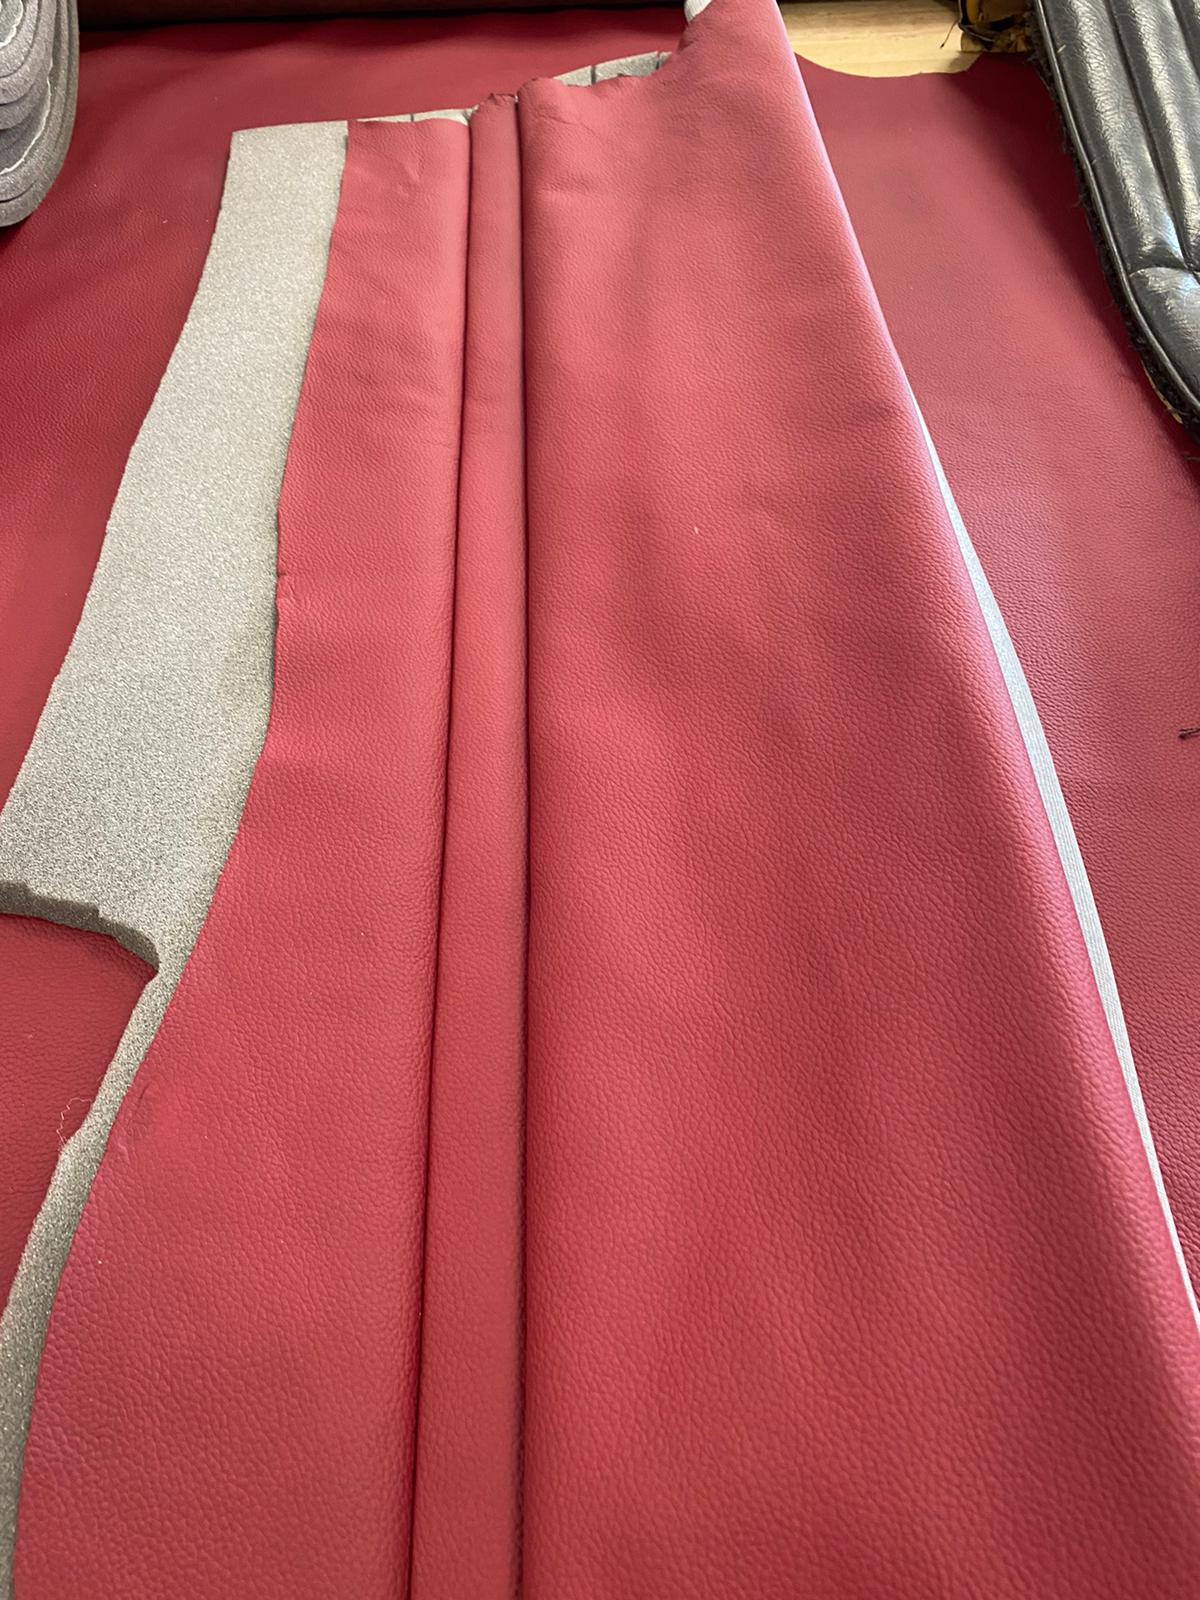
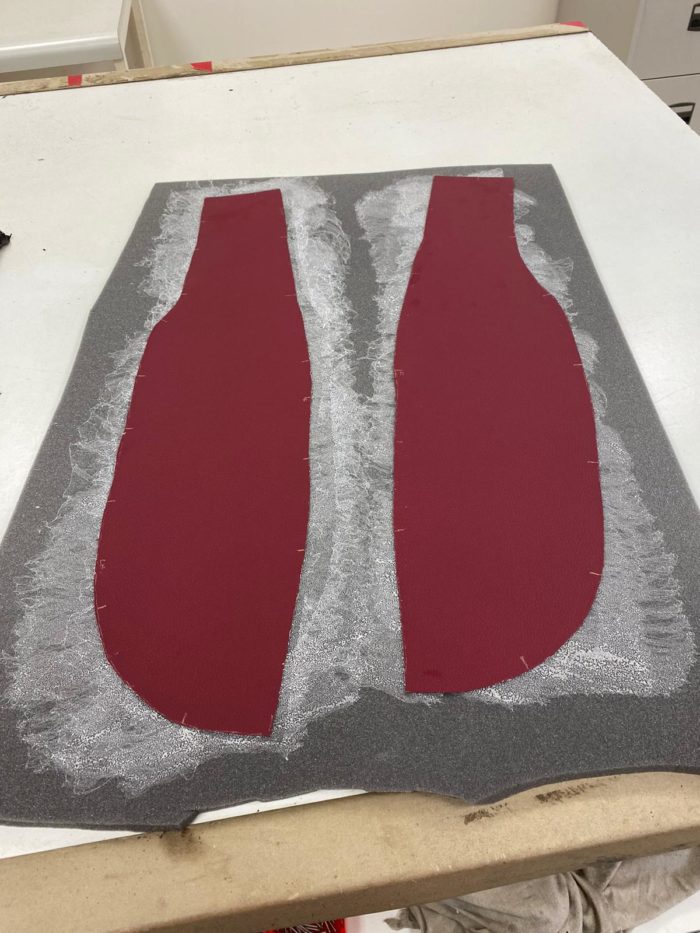
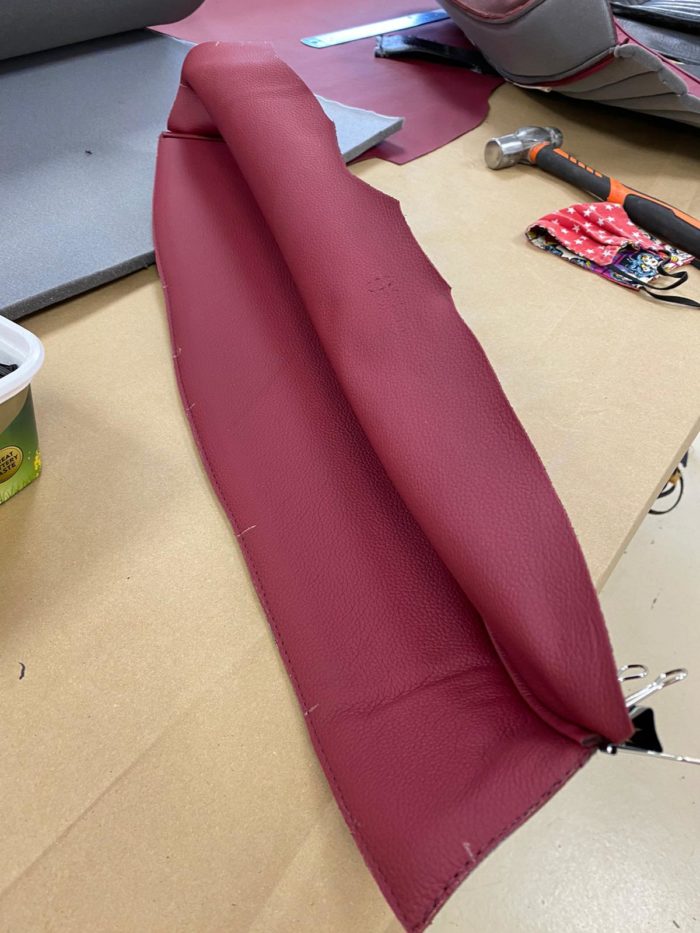
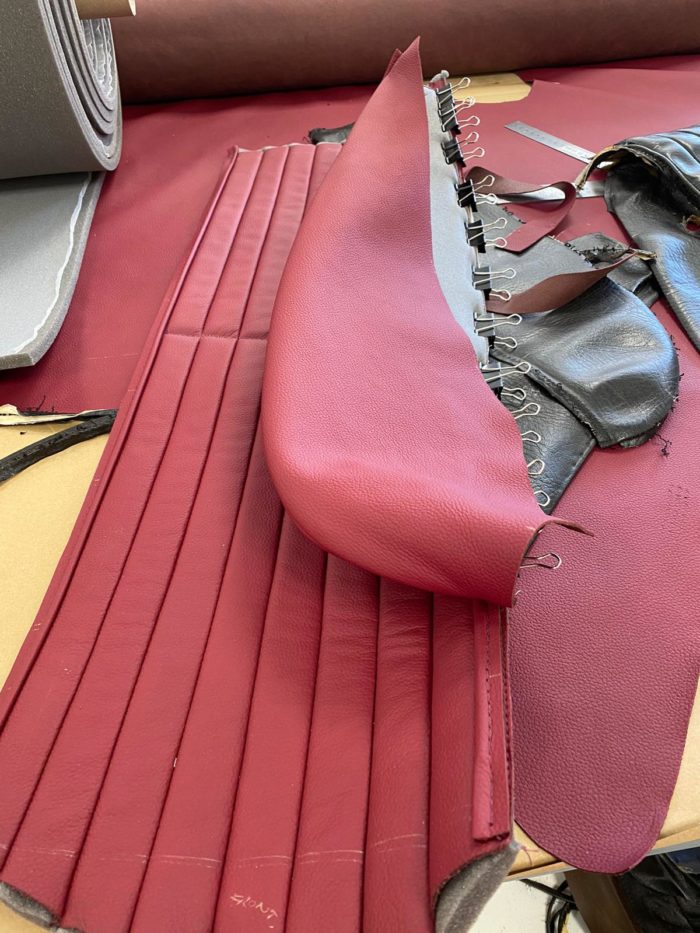
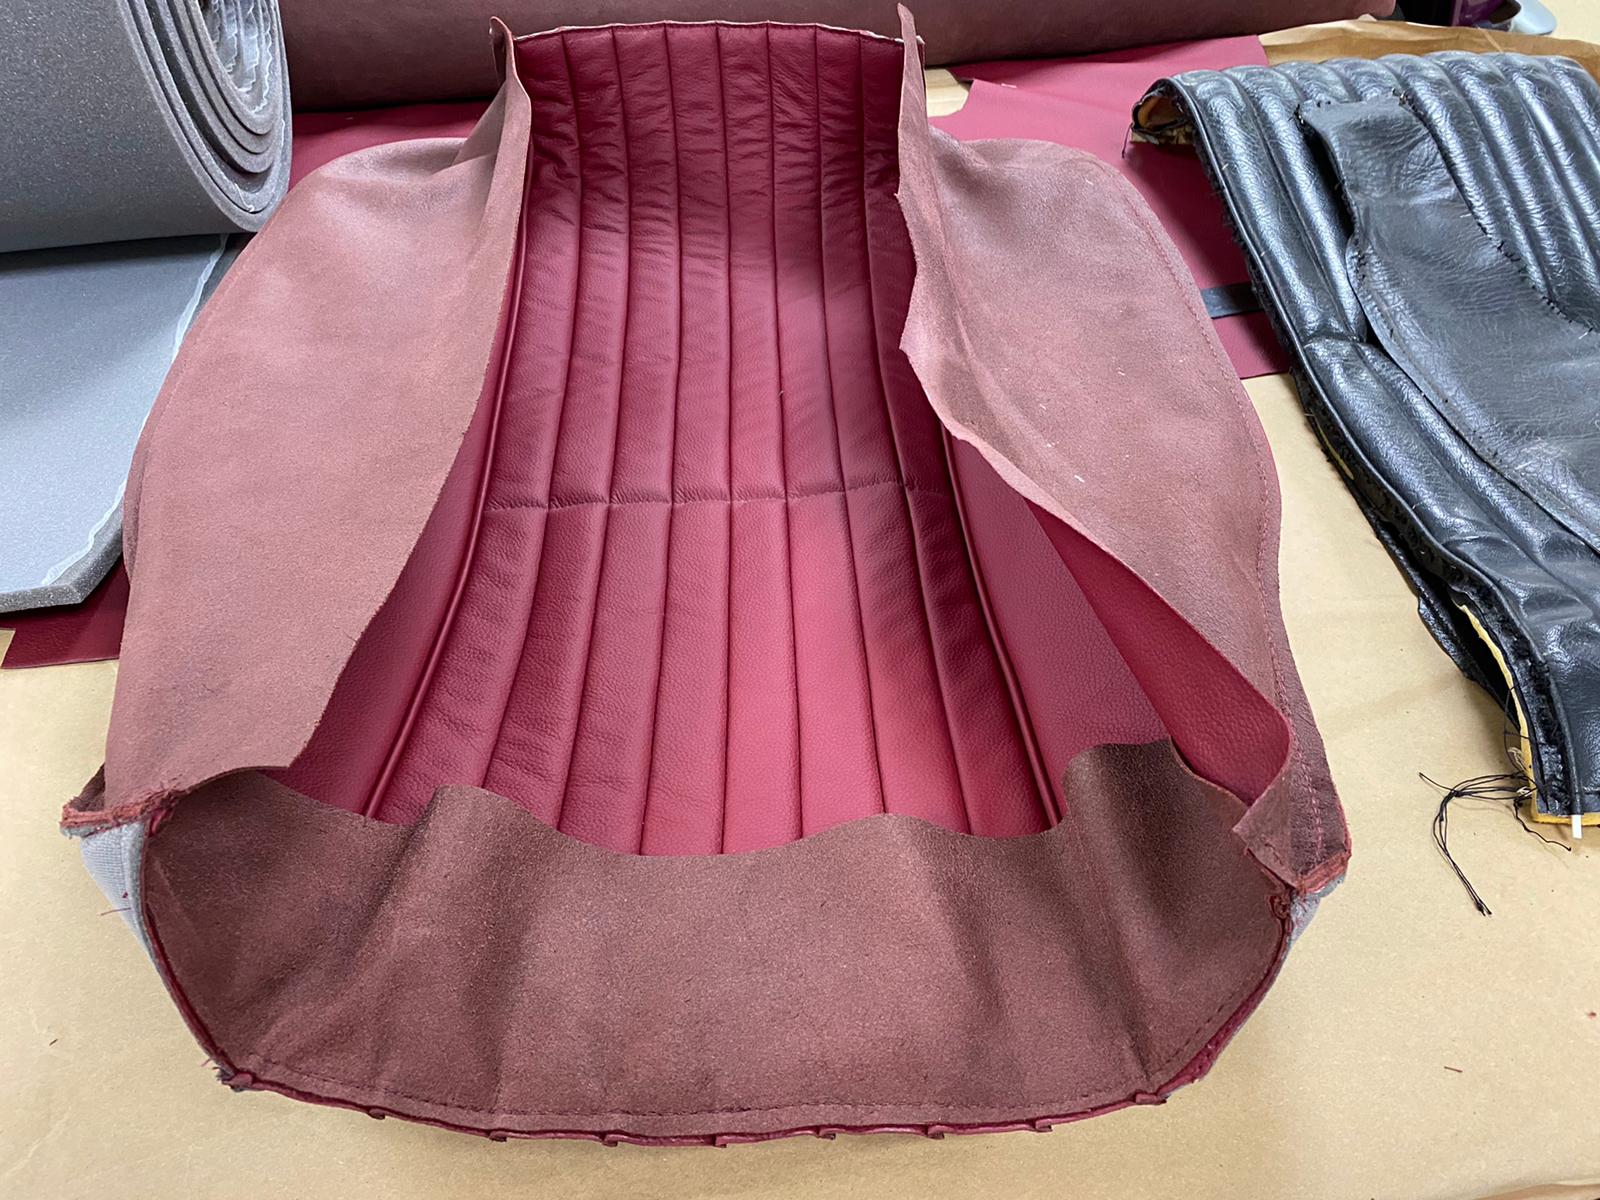
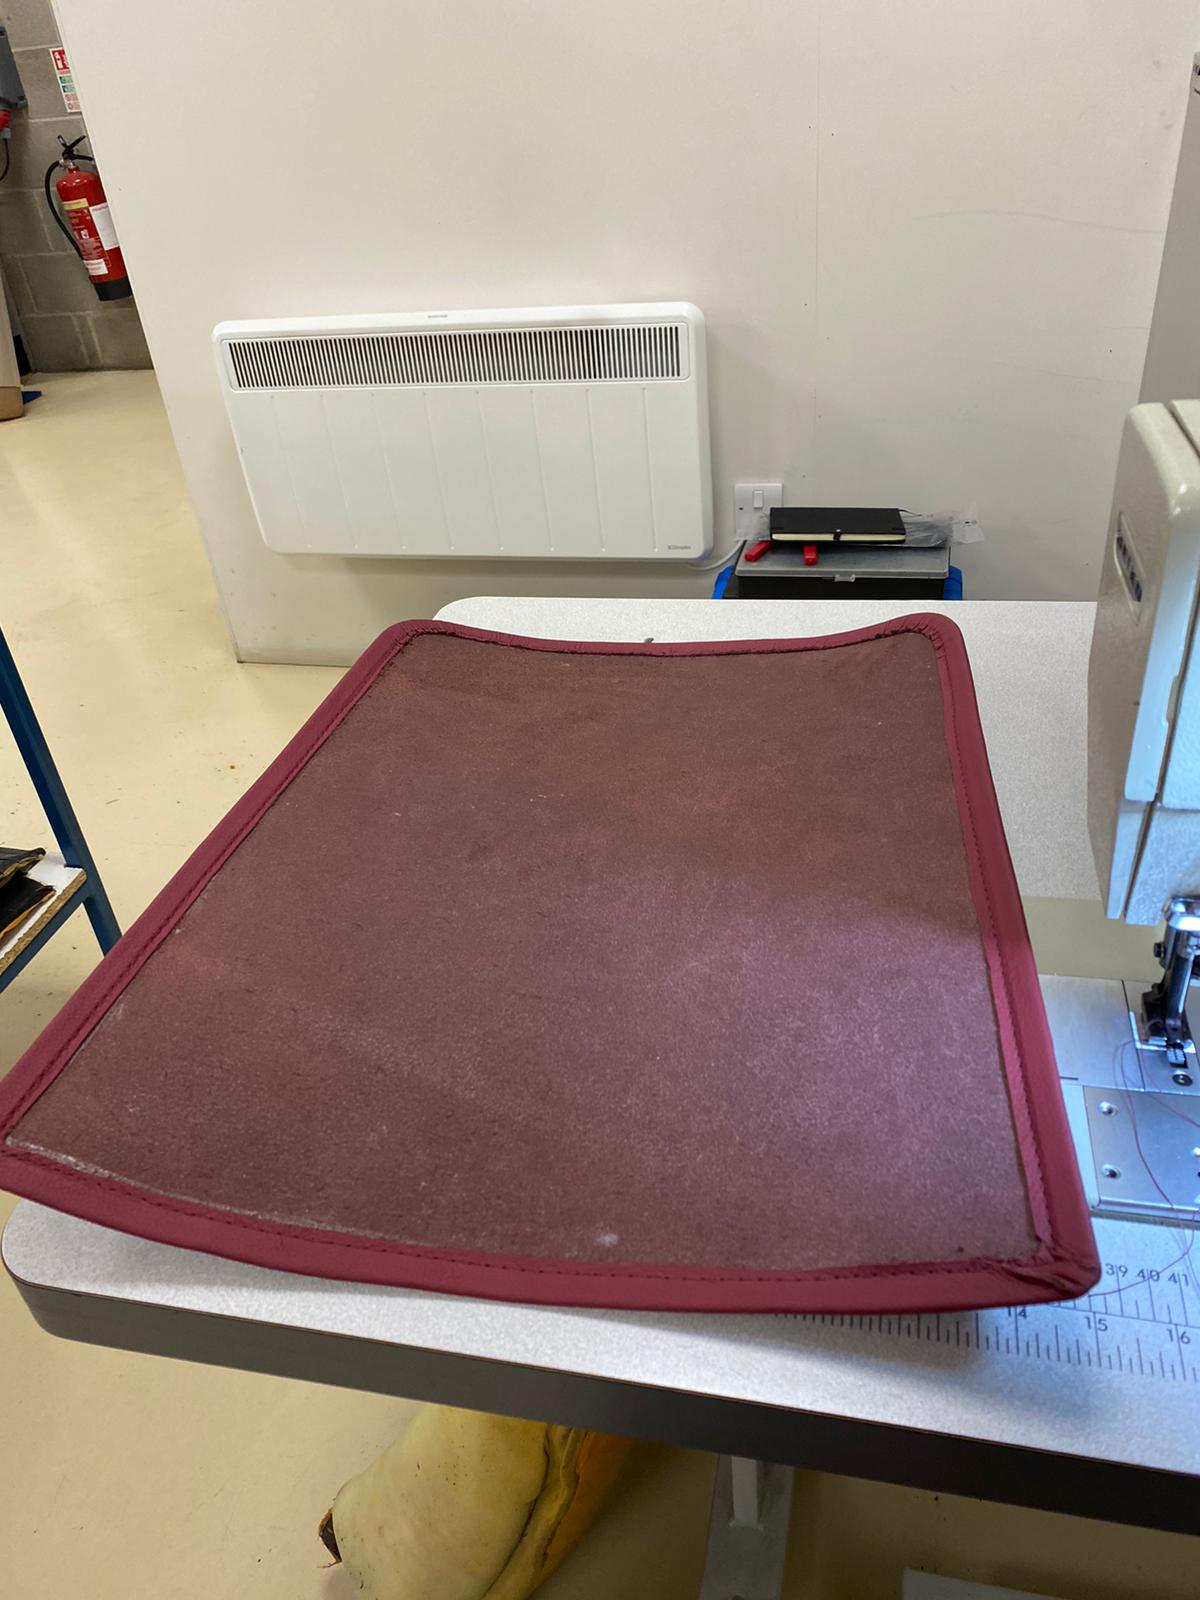
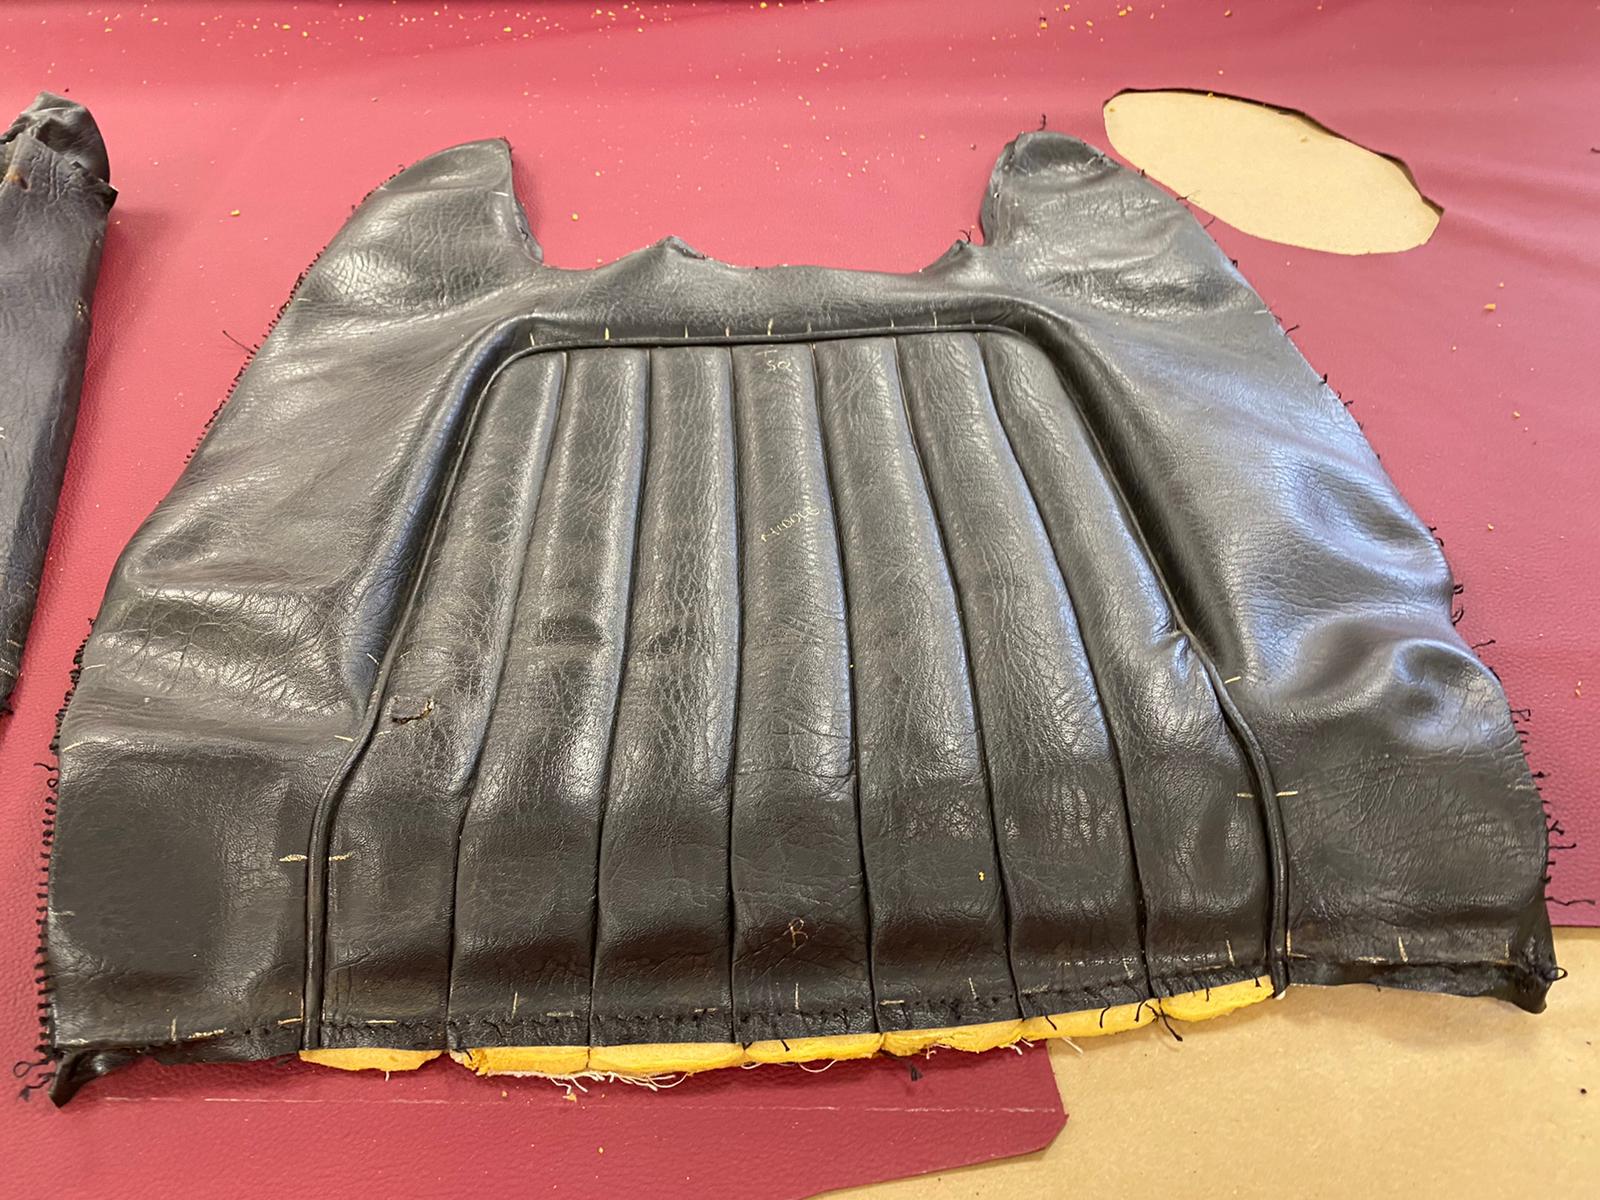
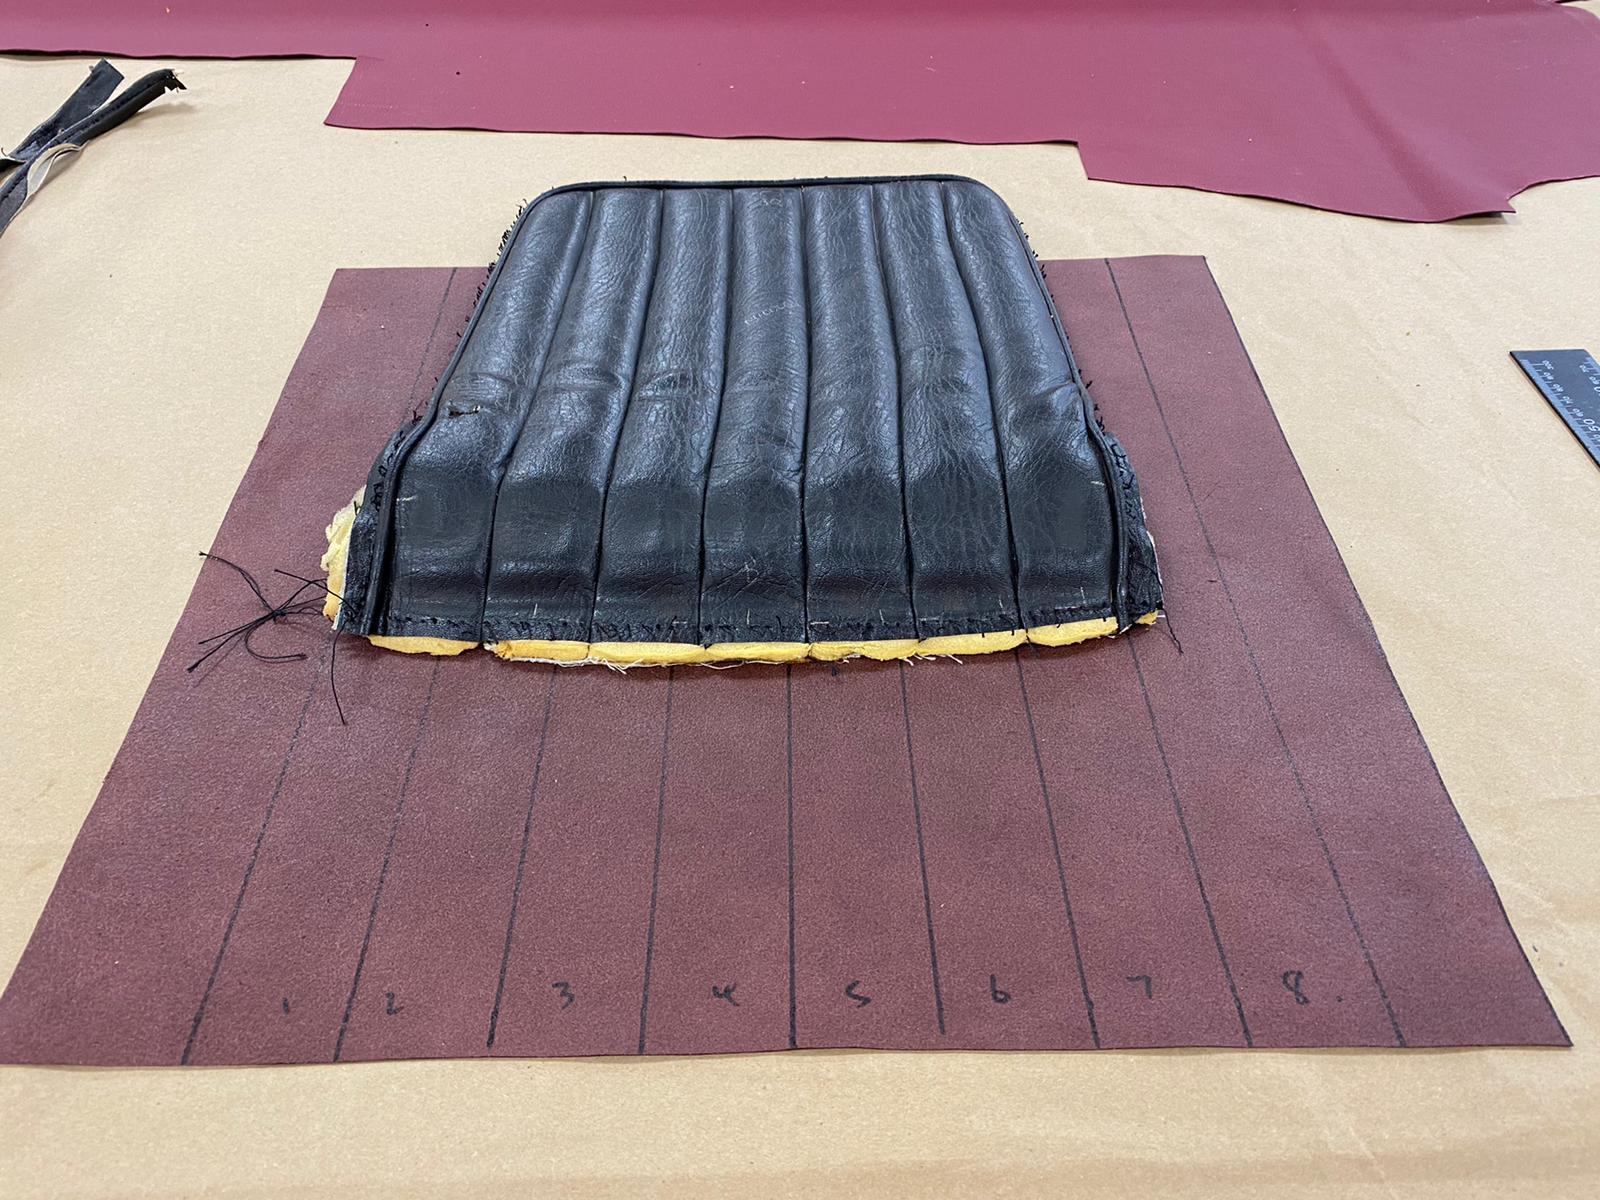
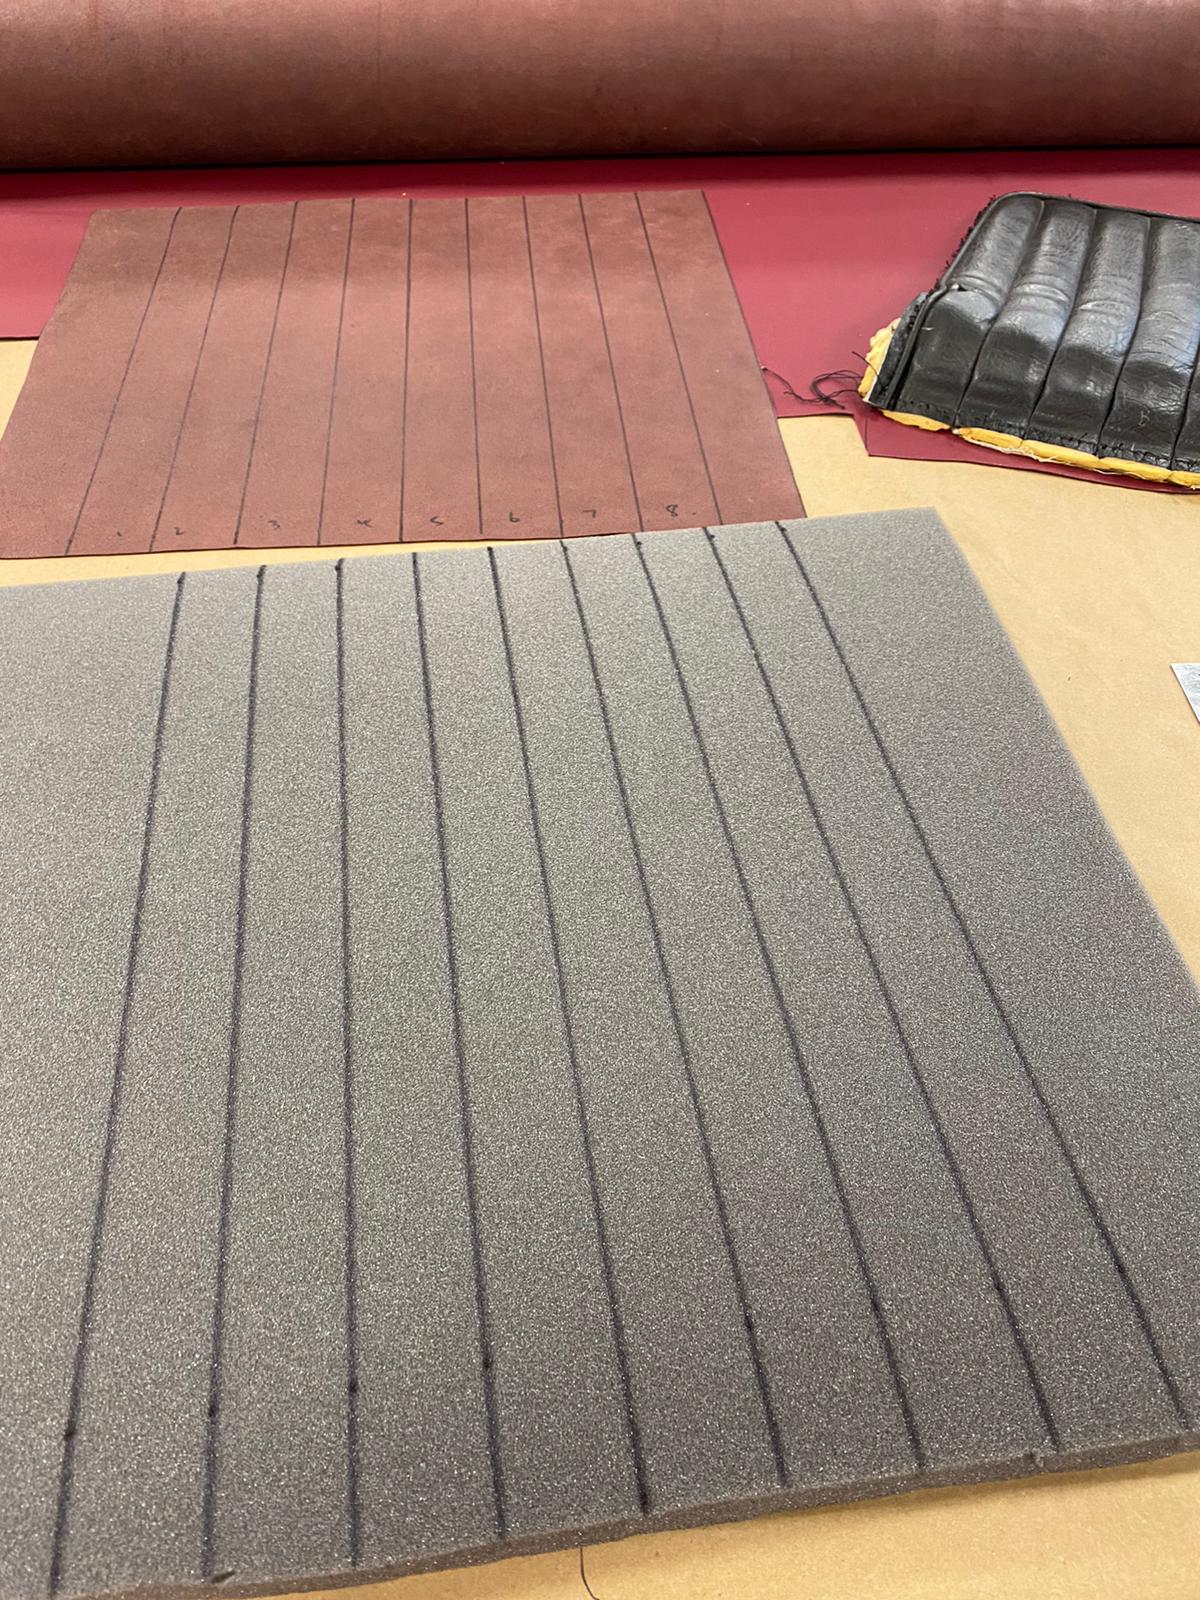
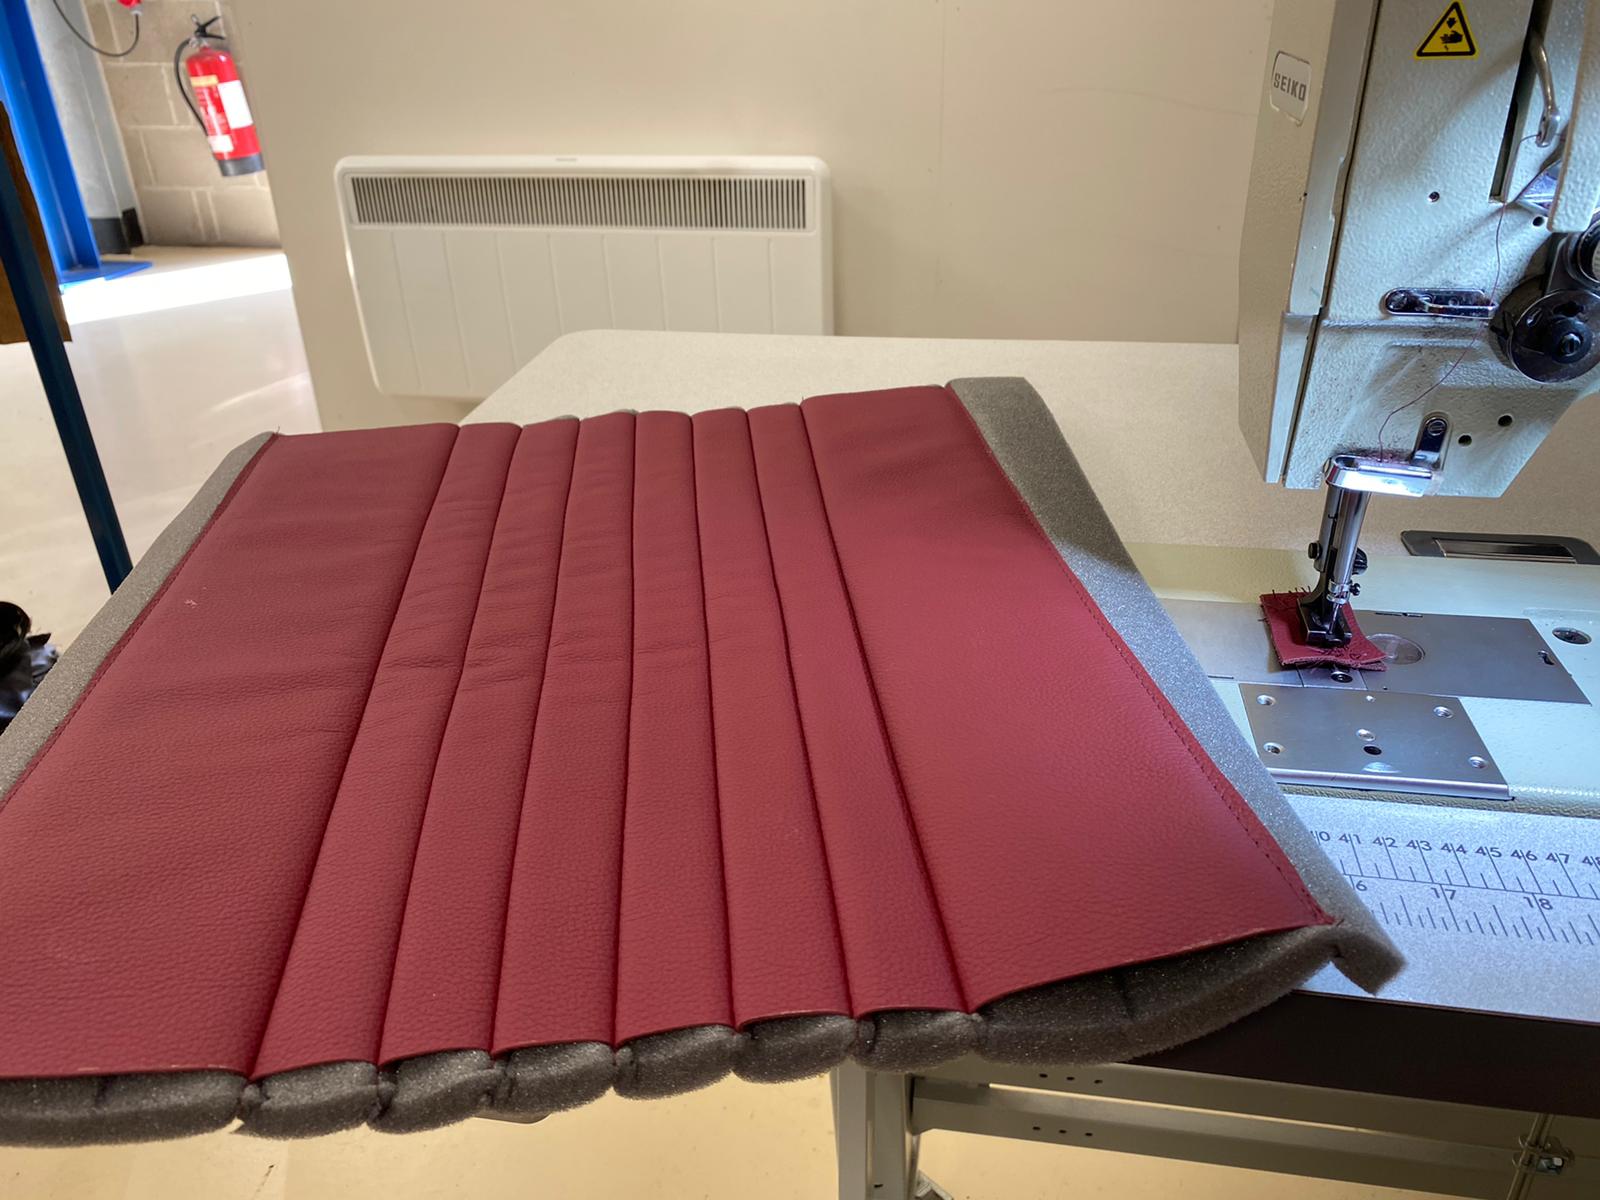
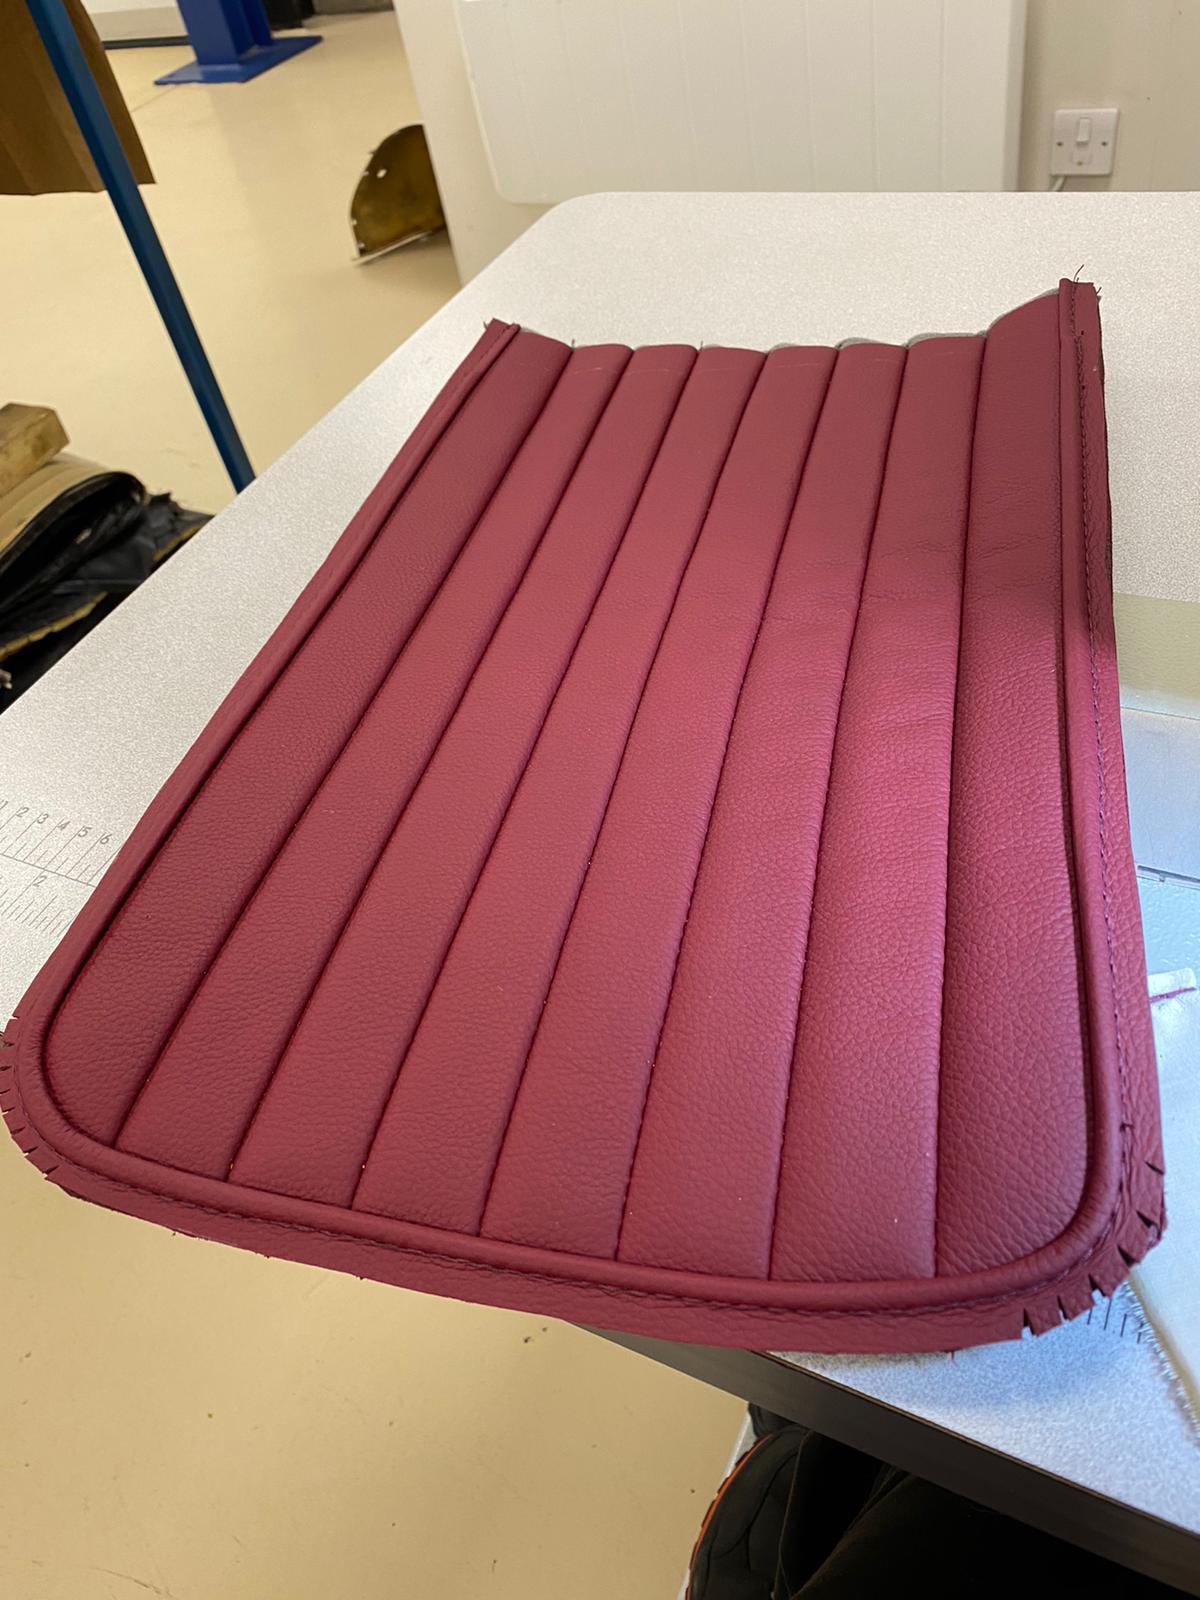
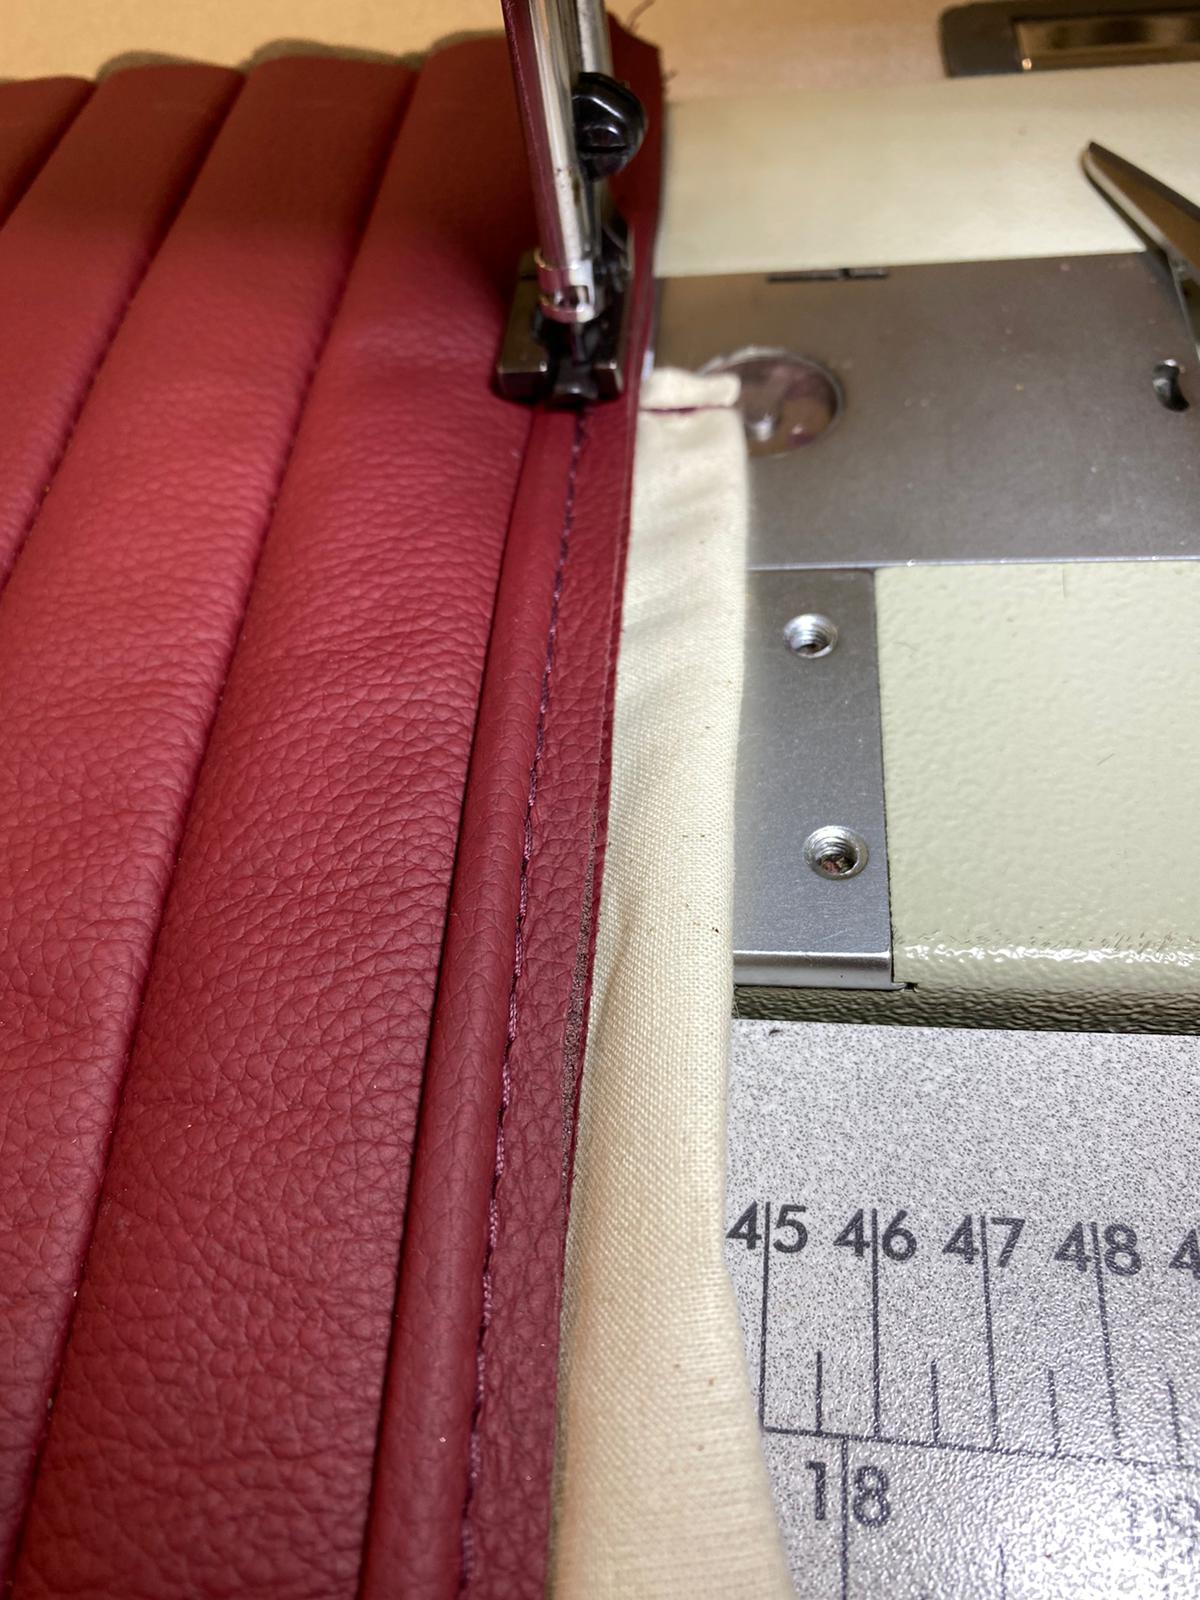
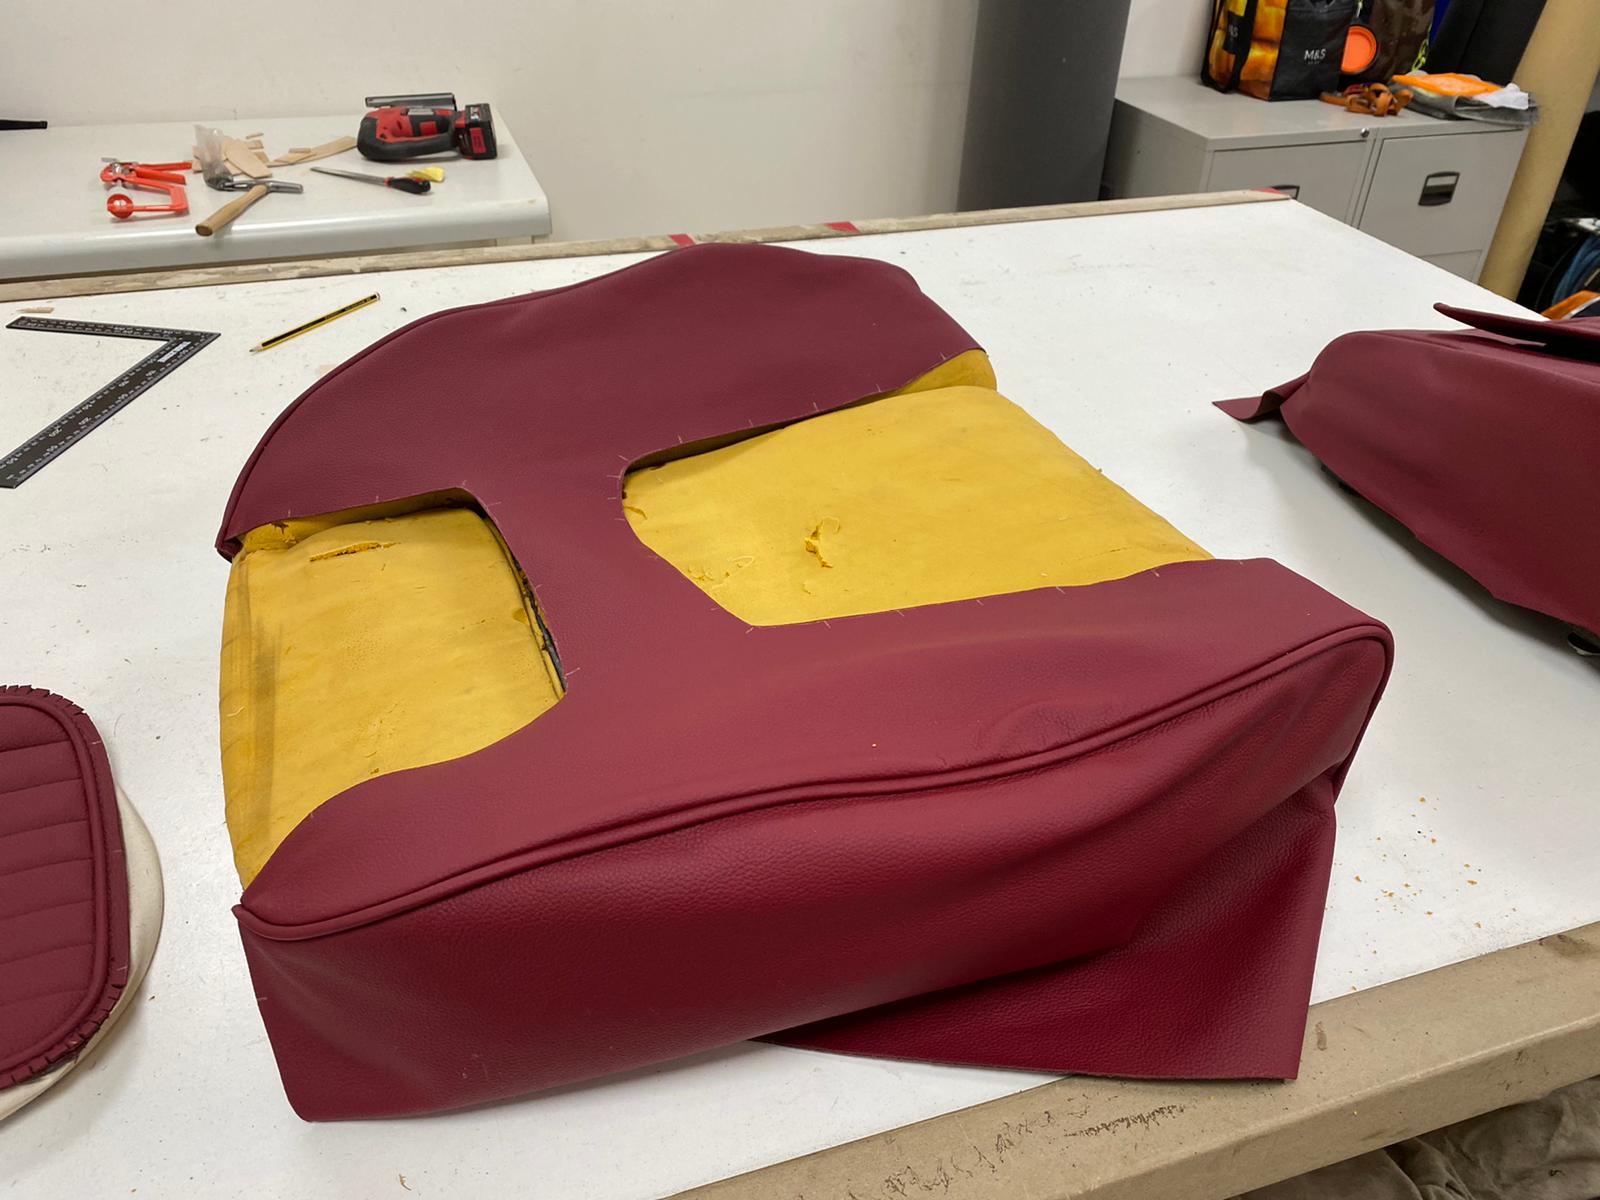
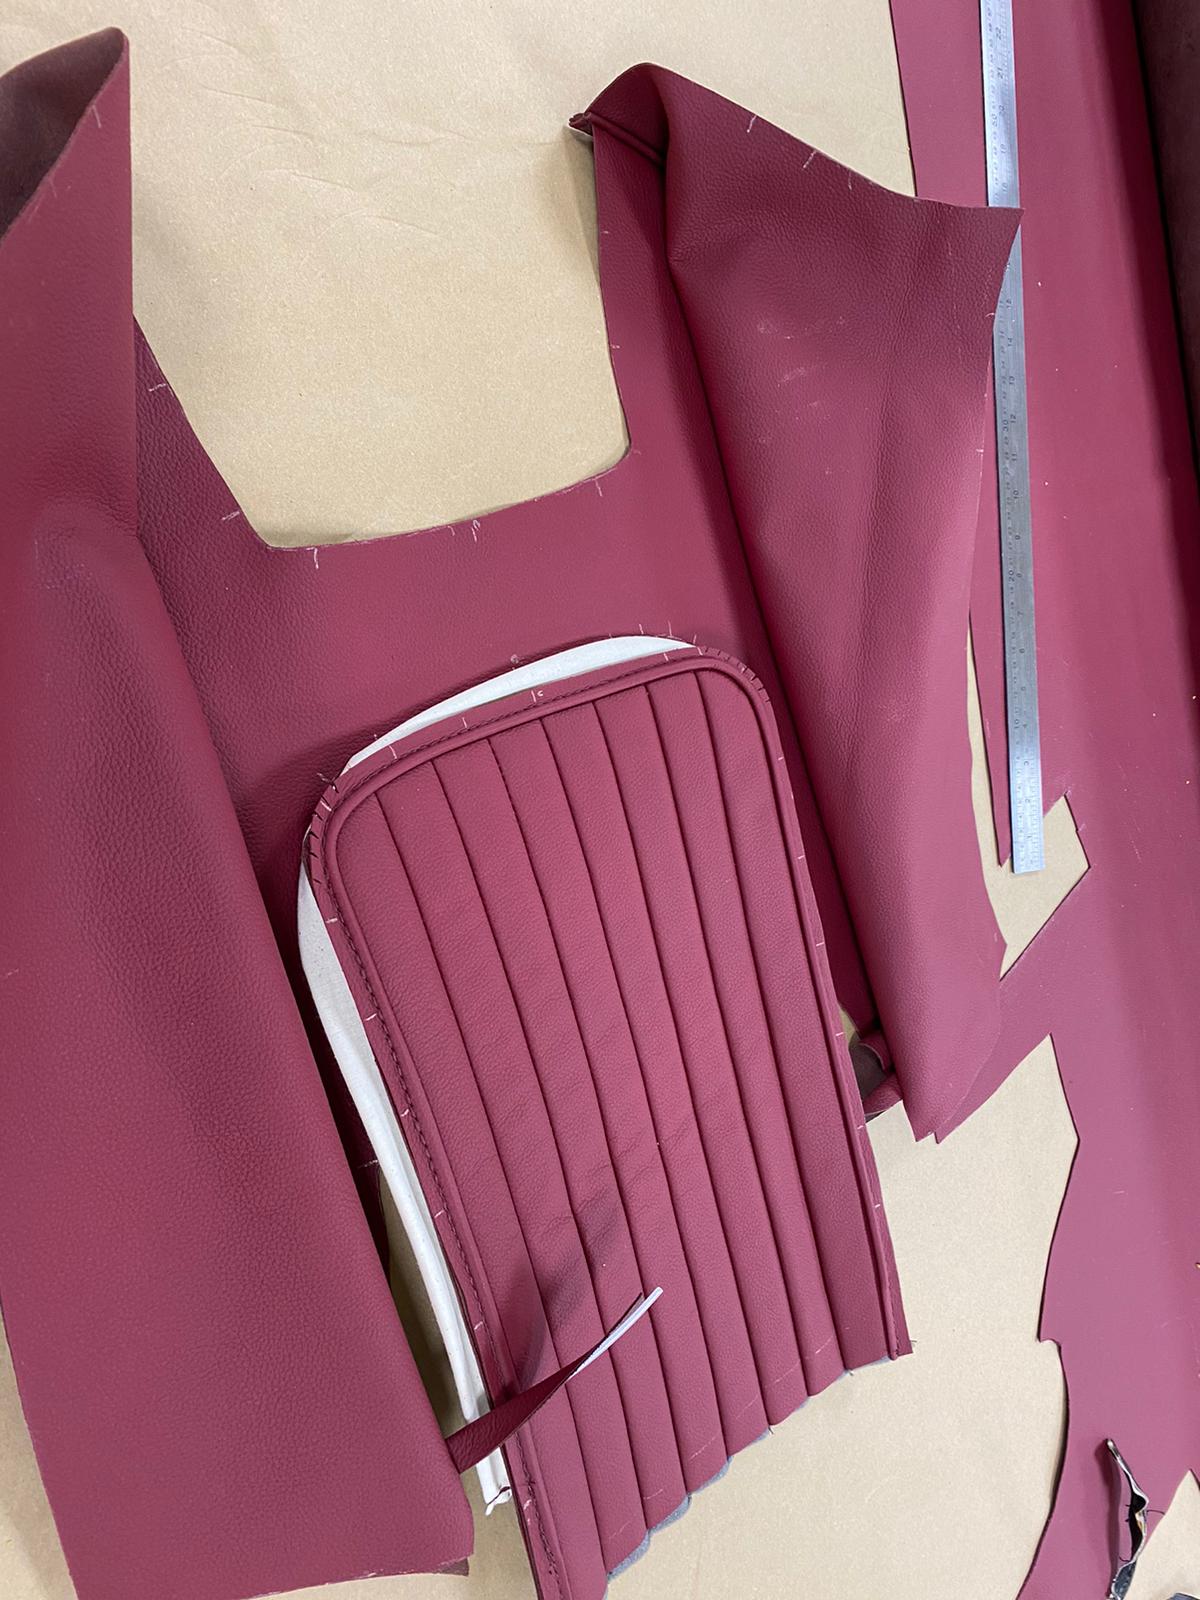
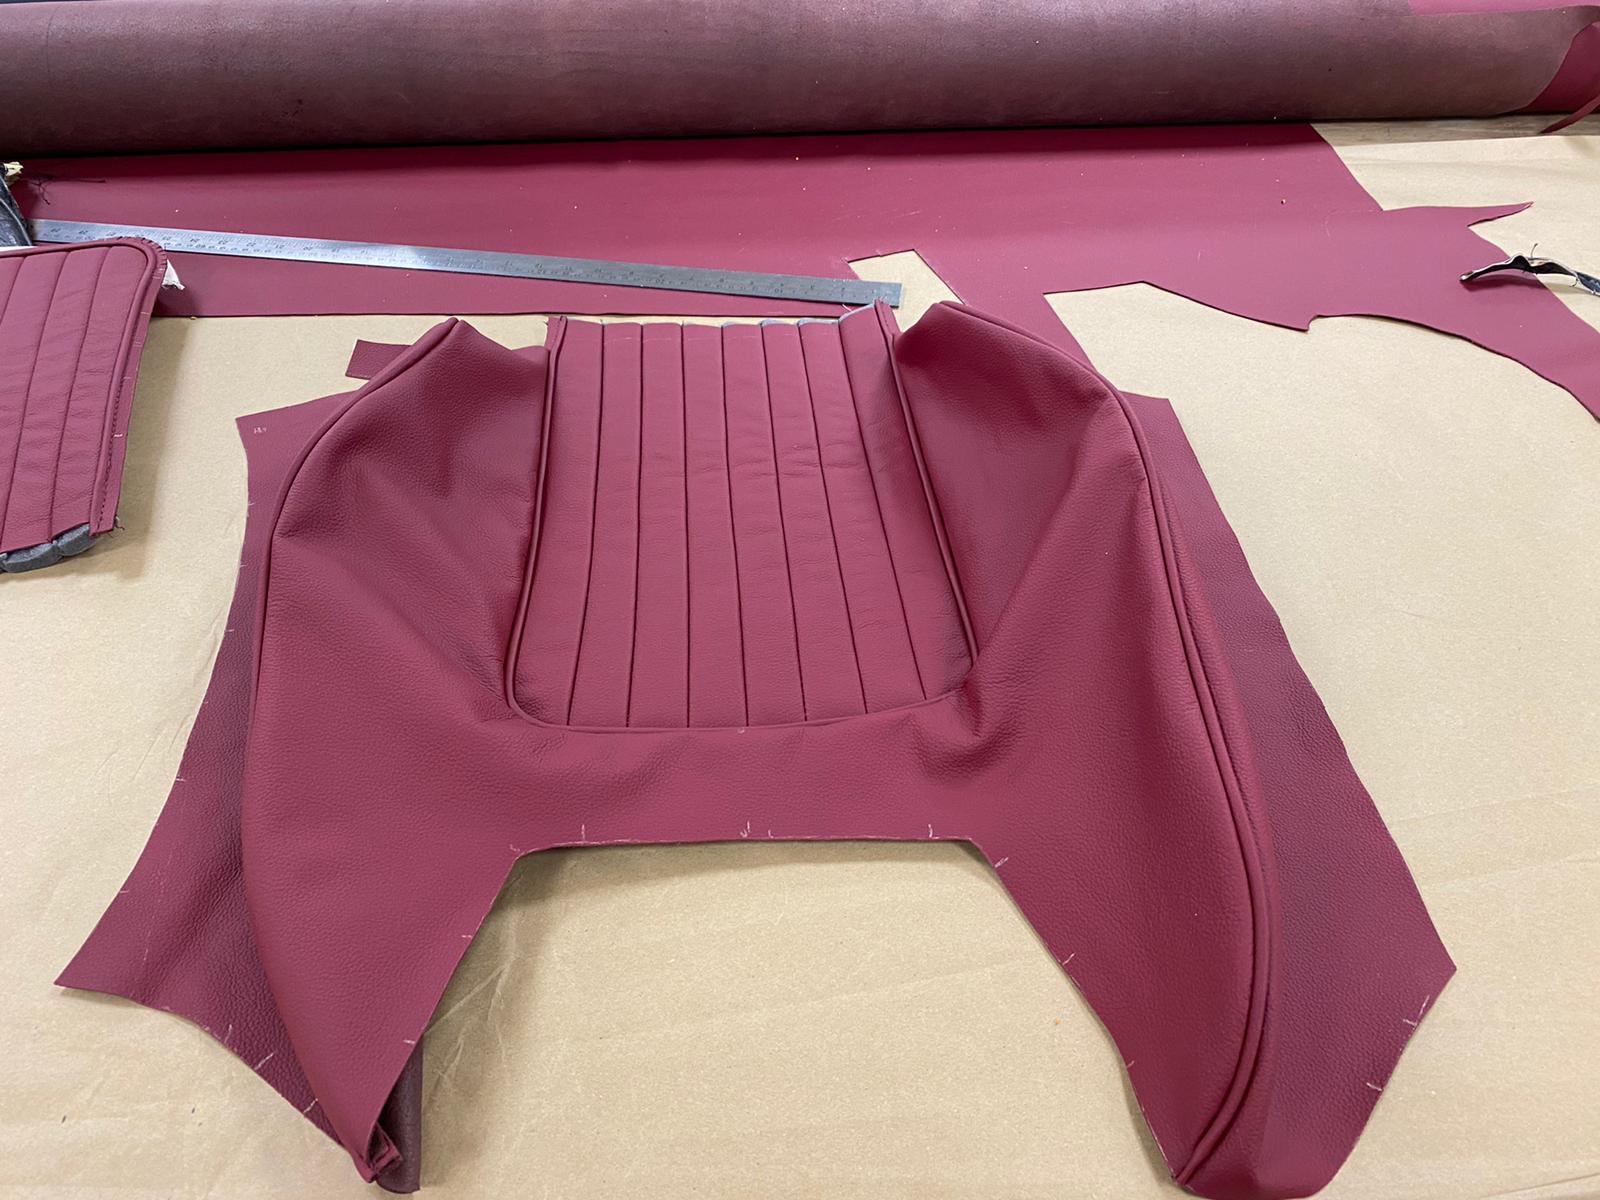
Kath’s then begun work with the new leather sections. She starts by marking out the lines in the fabric to match the existing seats. “I marked out the leather to make the fluted face” Kath explains, “then marked out the lines across the back.”
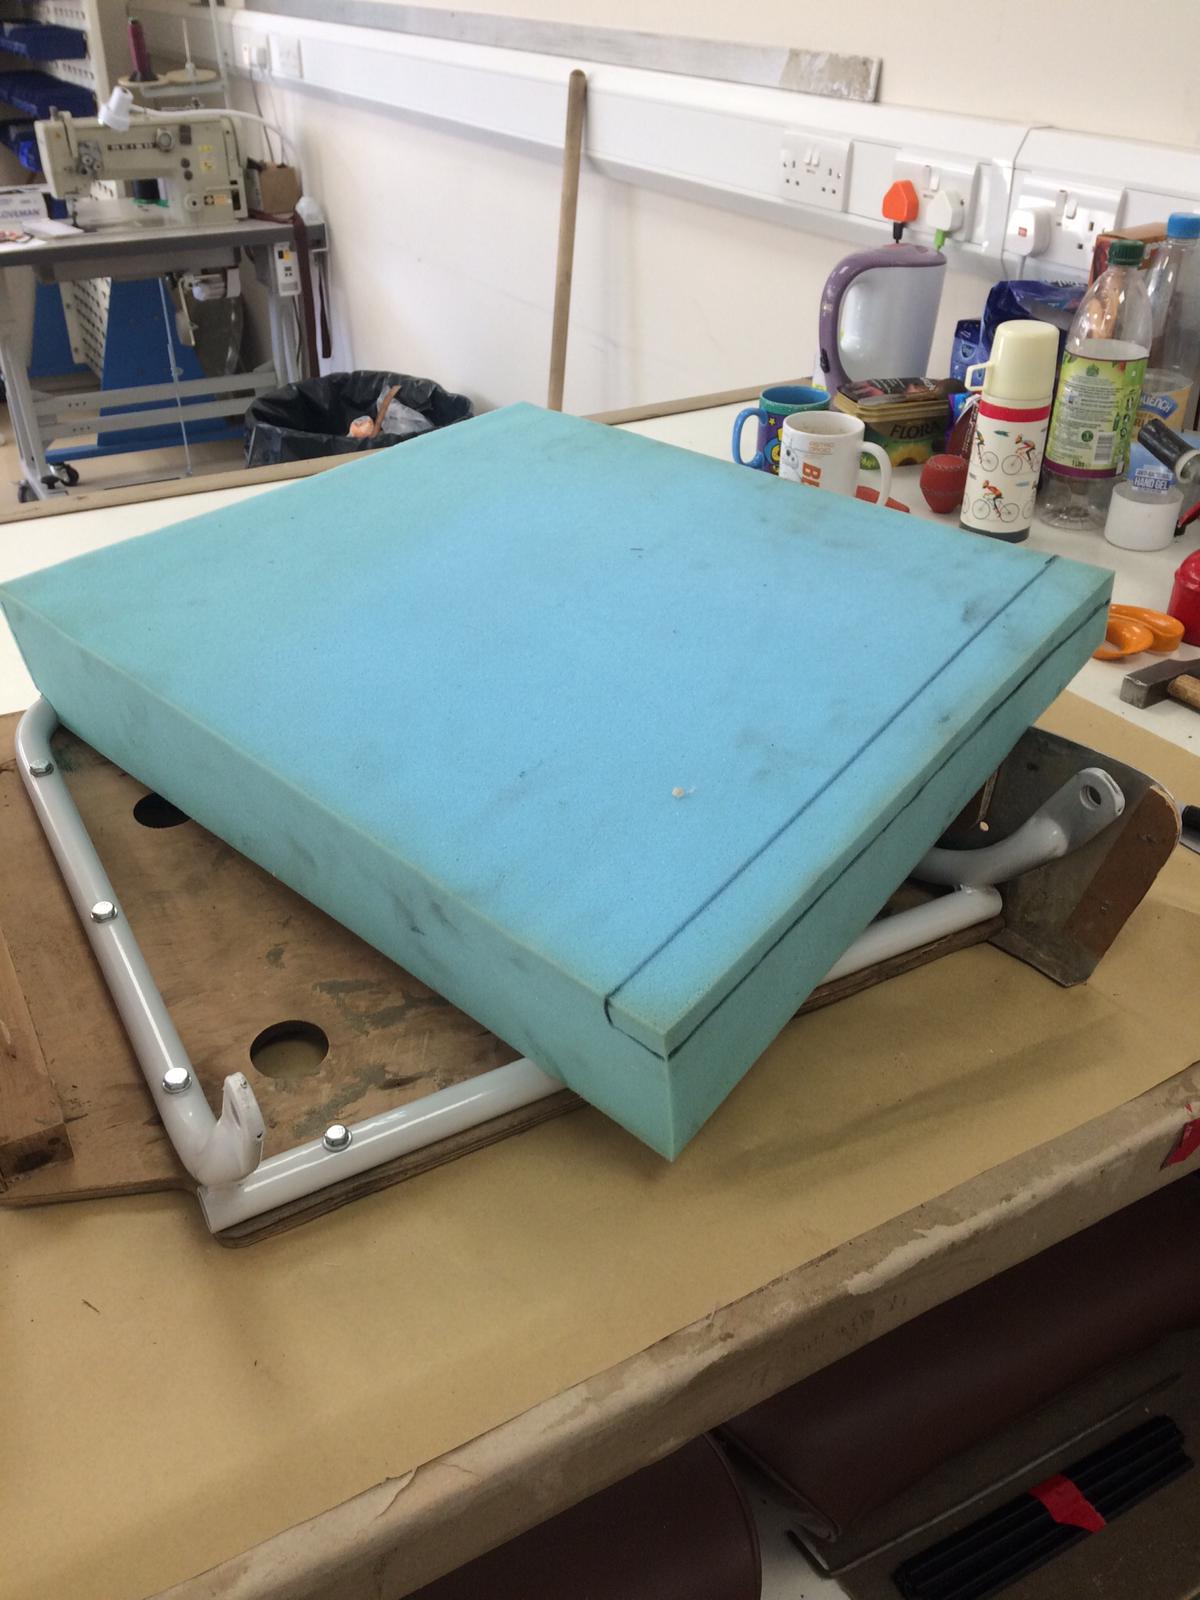
Kath then cut the foam and marked out the lines on that too. Then, it was ready to start sewing the flutes.


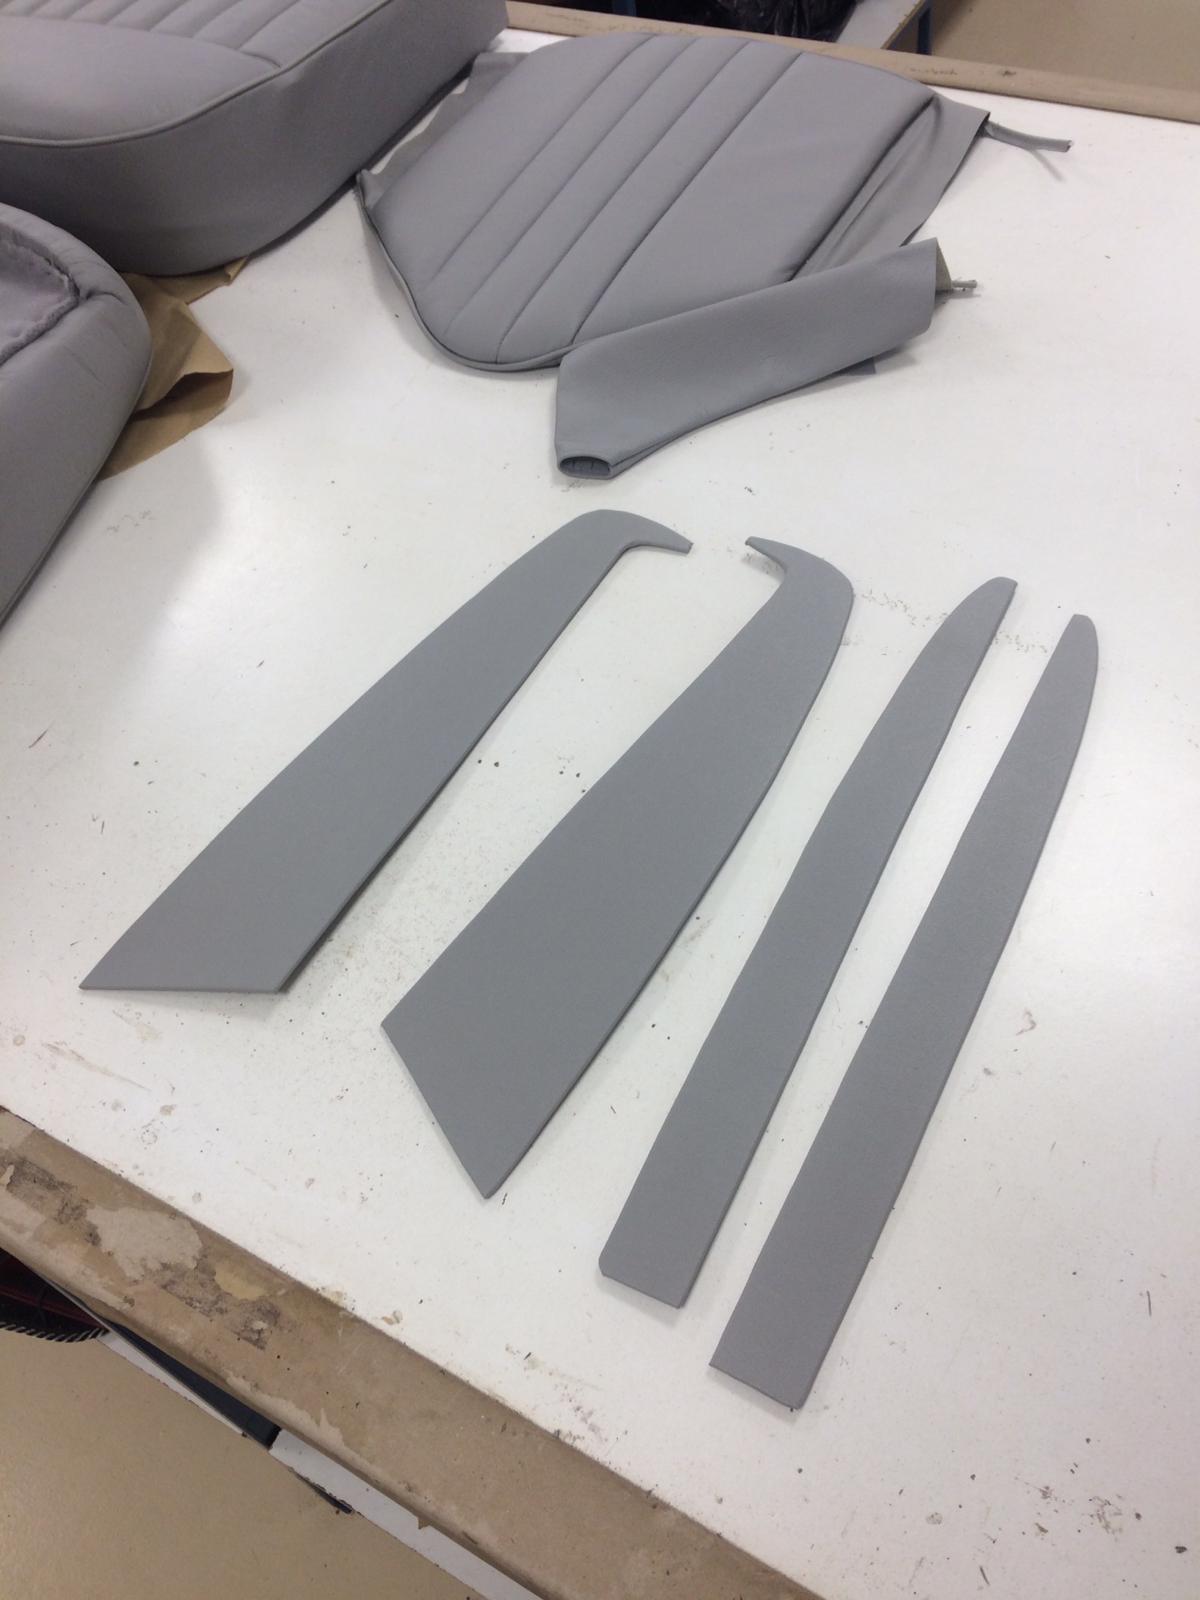
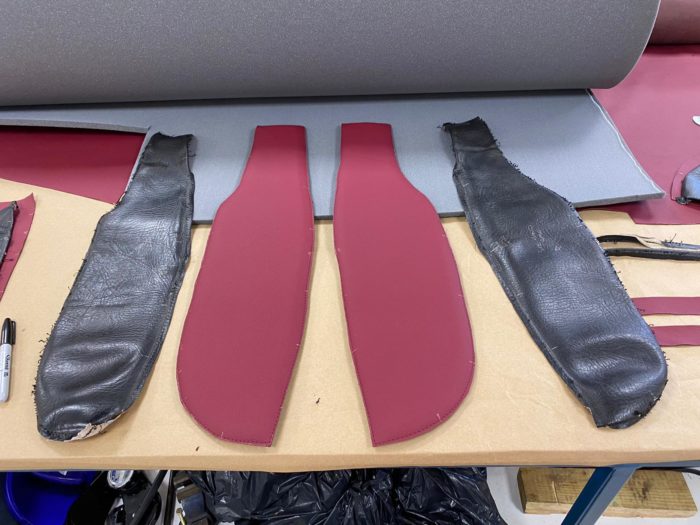
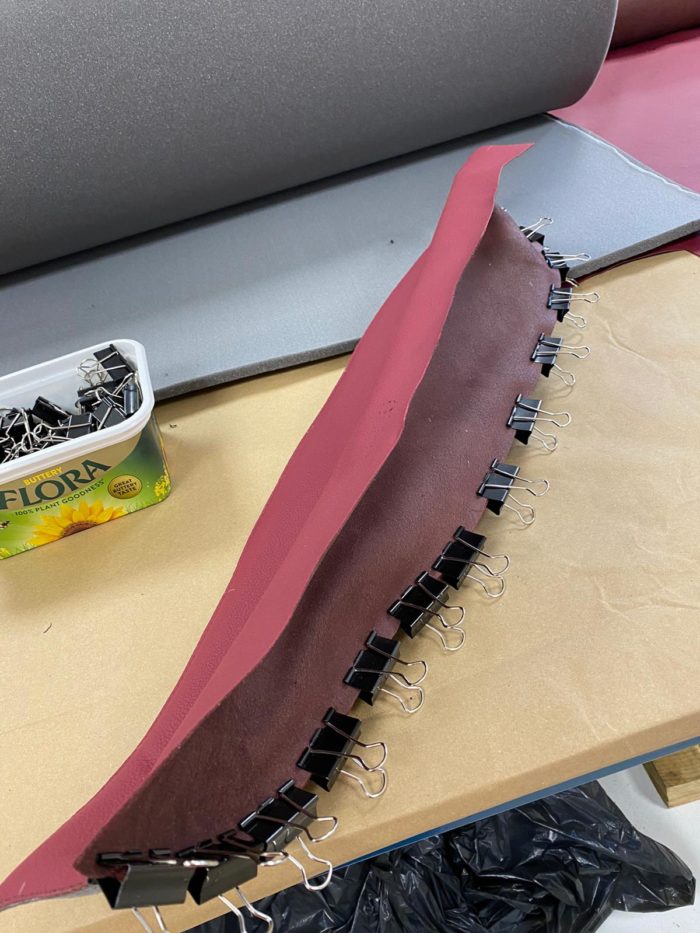
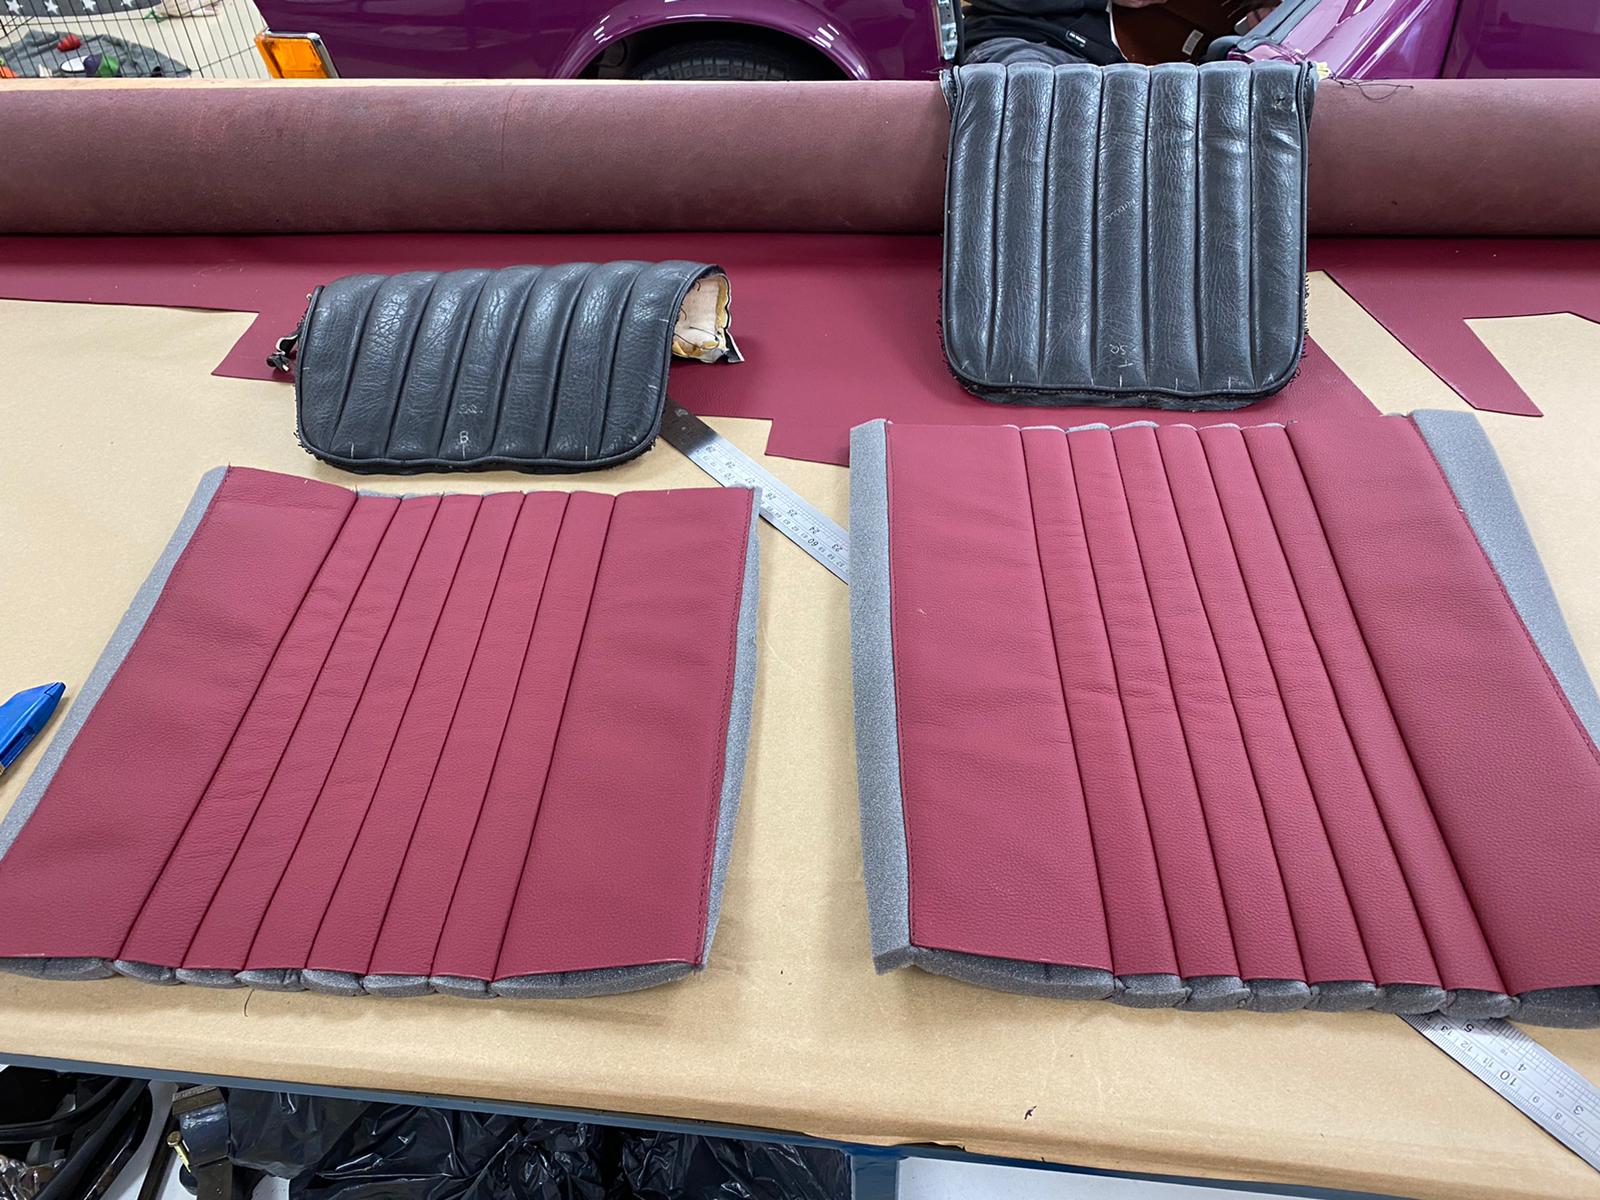
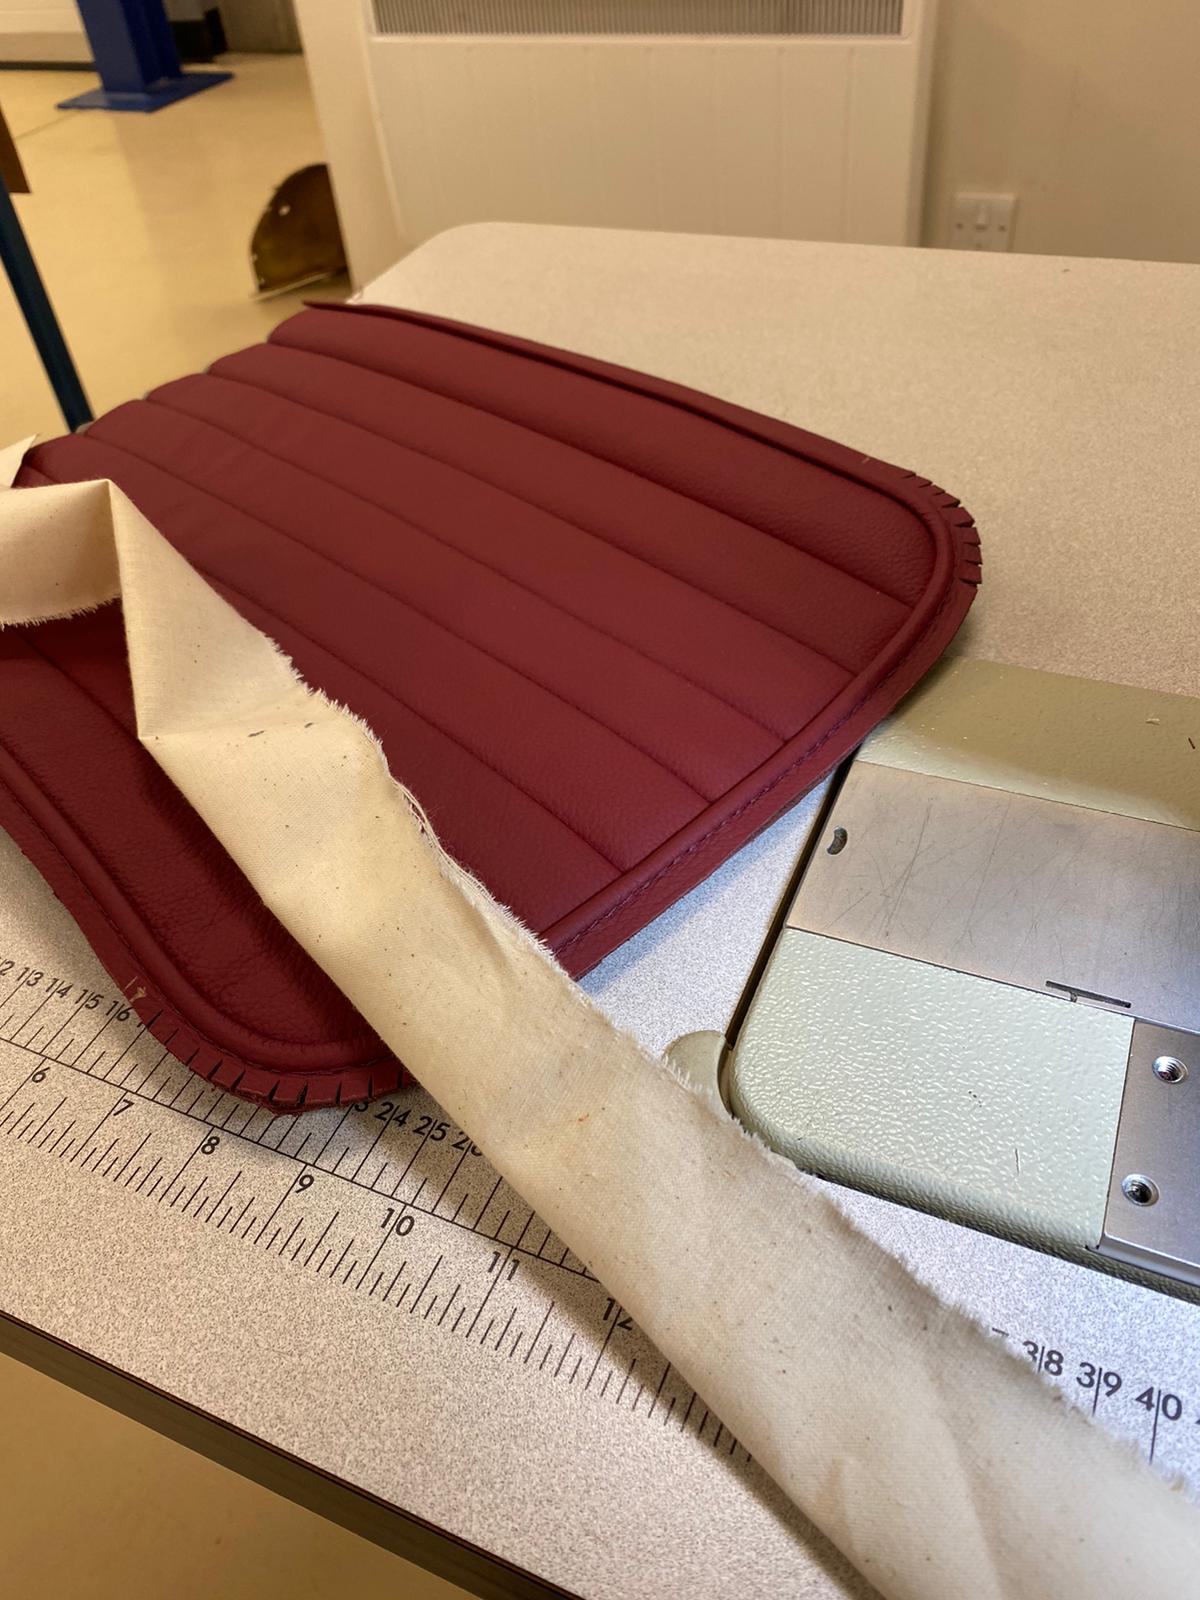
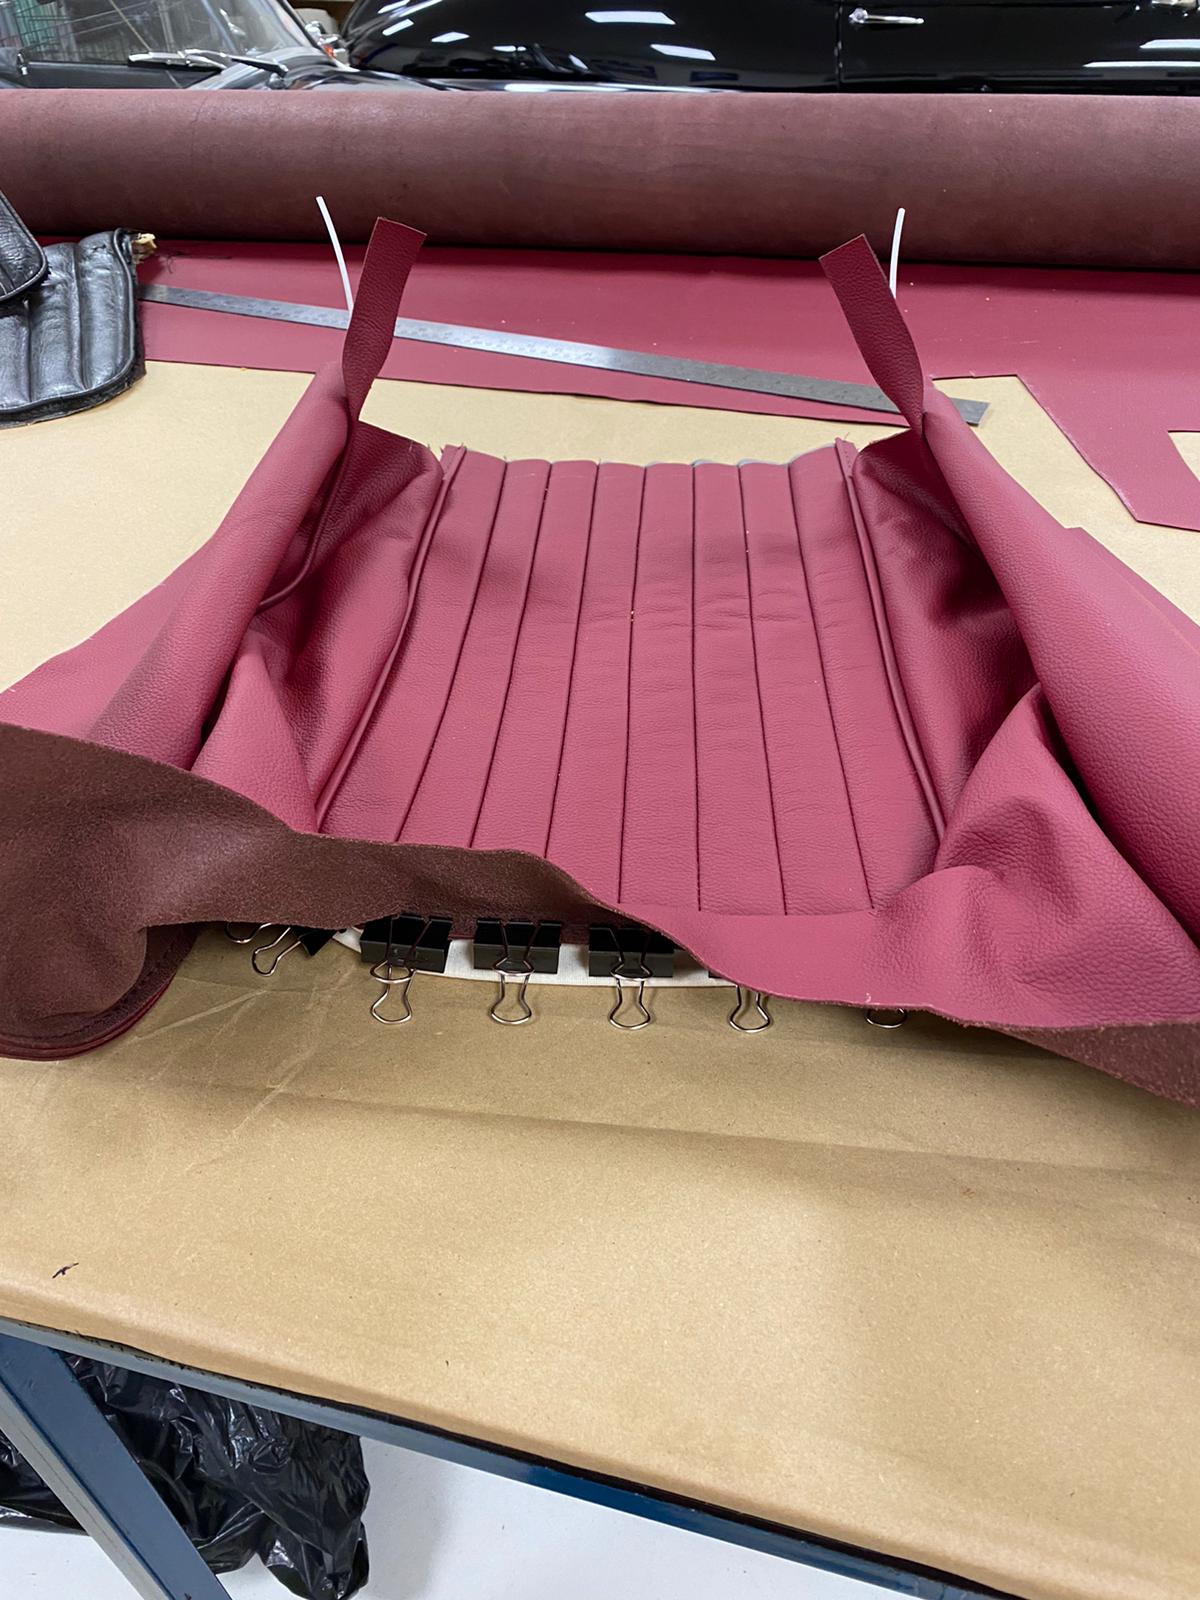
Kath then begun work on some smaller segments of the seats. “I marked out the side bands, skirt and piping” Kath describes “then mounted the side bands onto foam.”
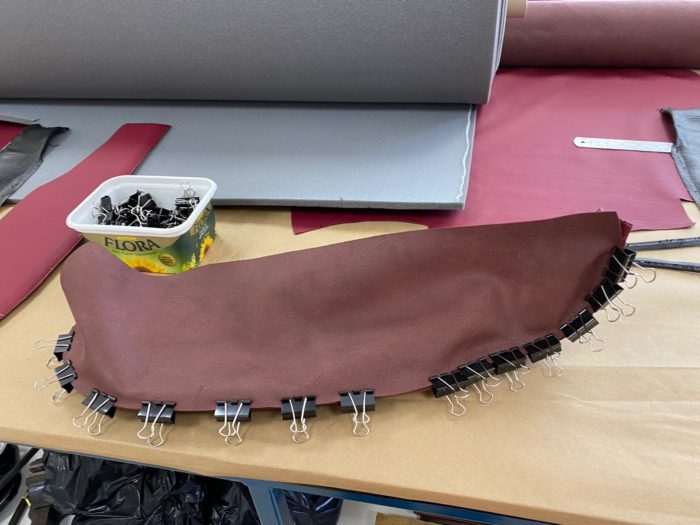
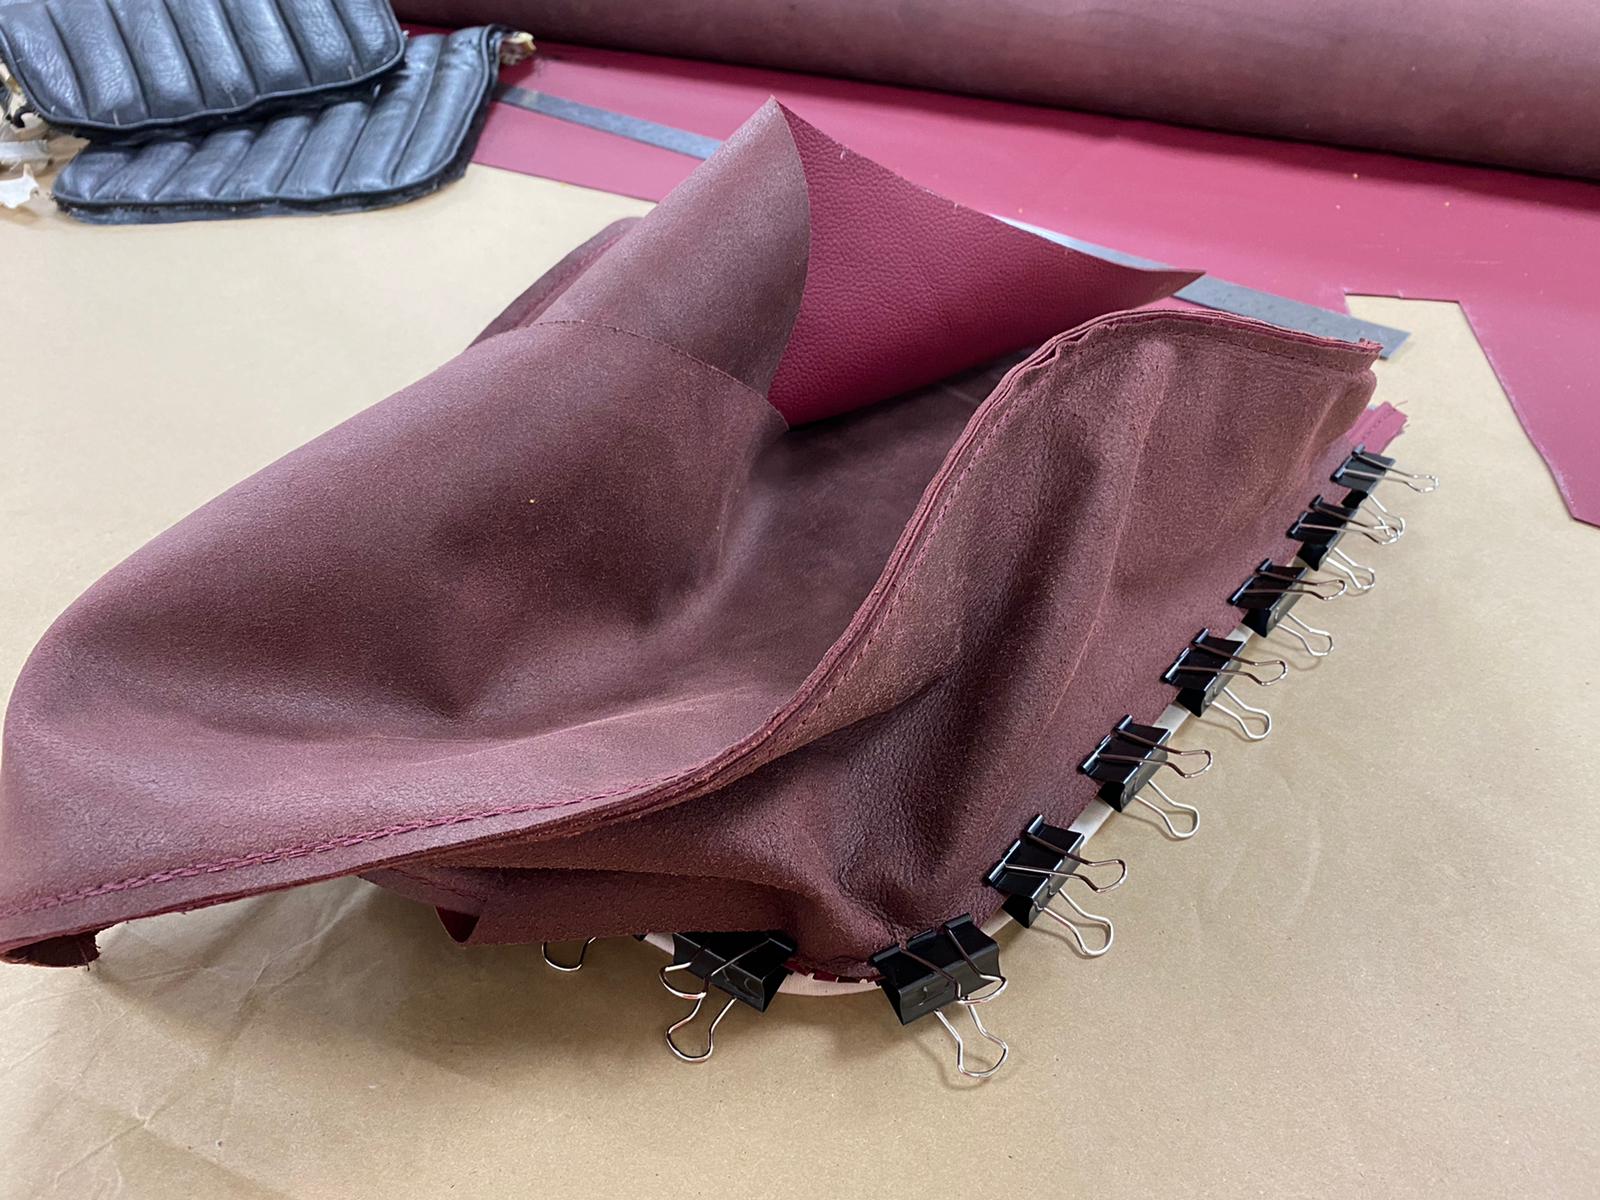
Kath then seals around the edges and trims off any excess, clipping the leather together to hold in place before it’s stitched up.
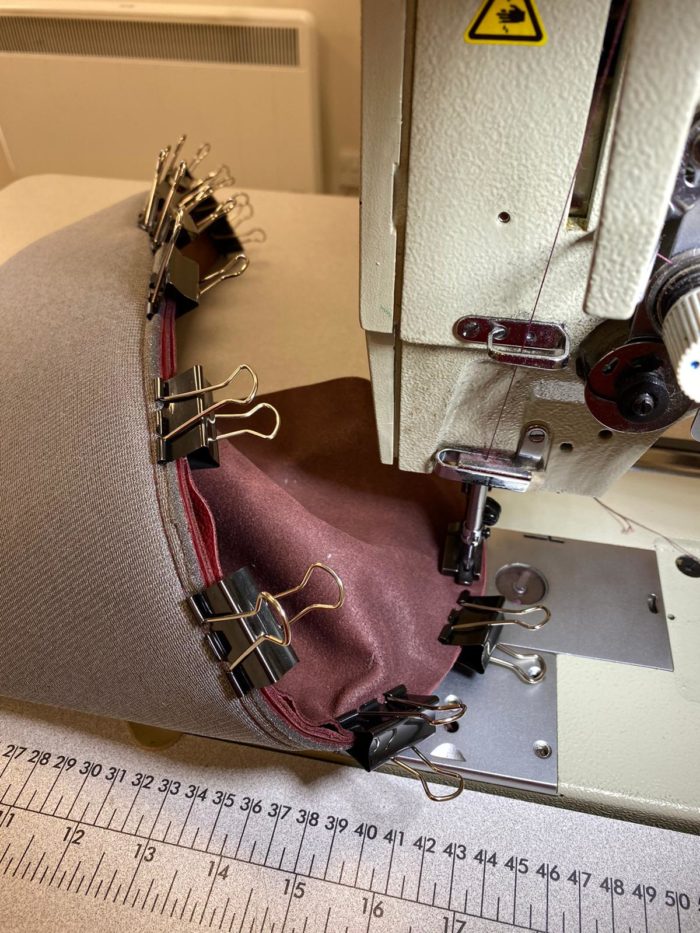
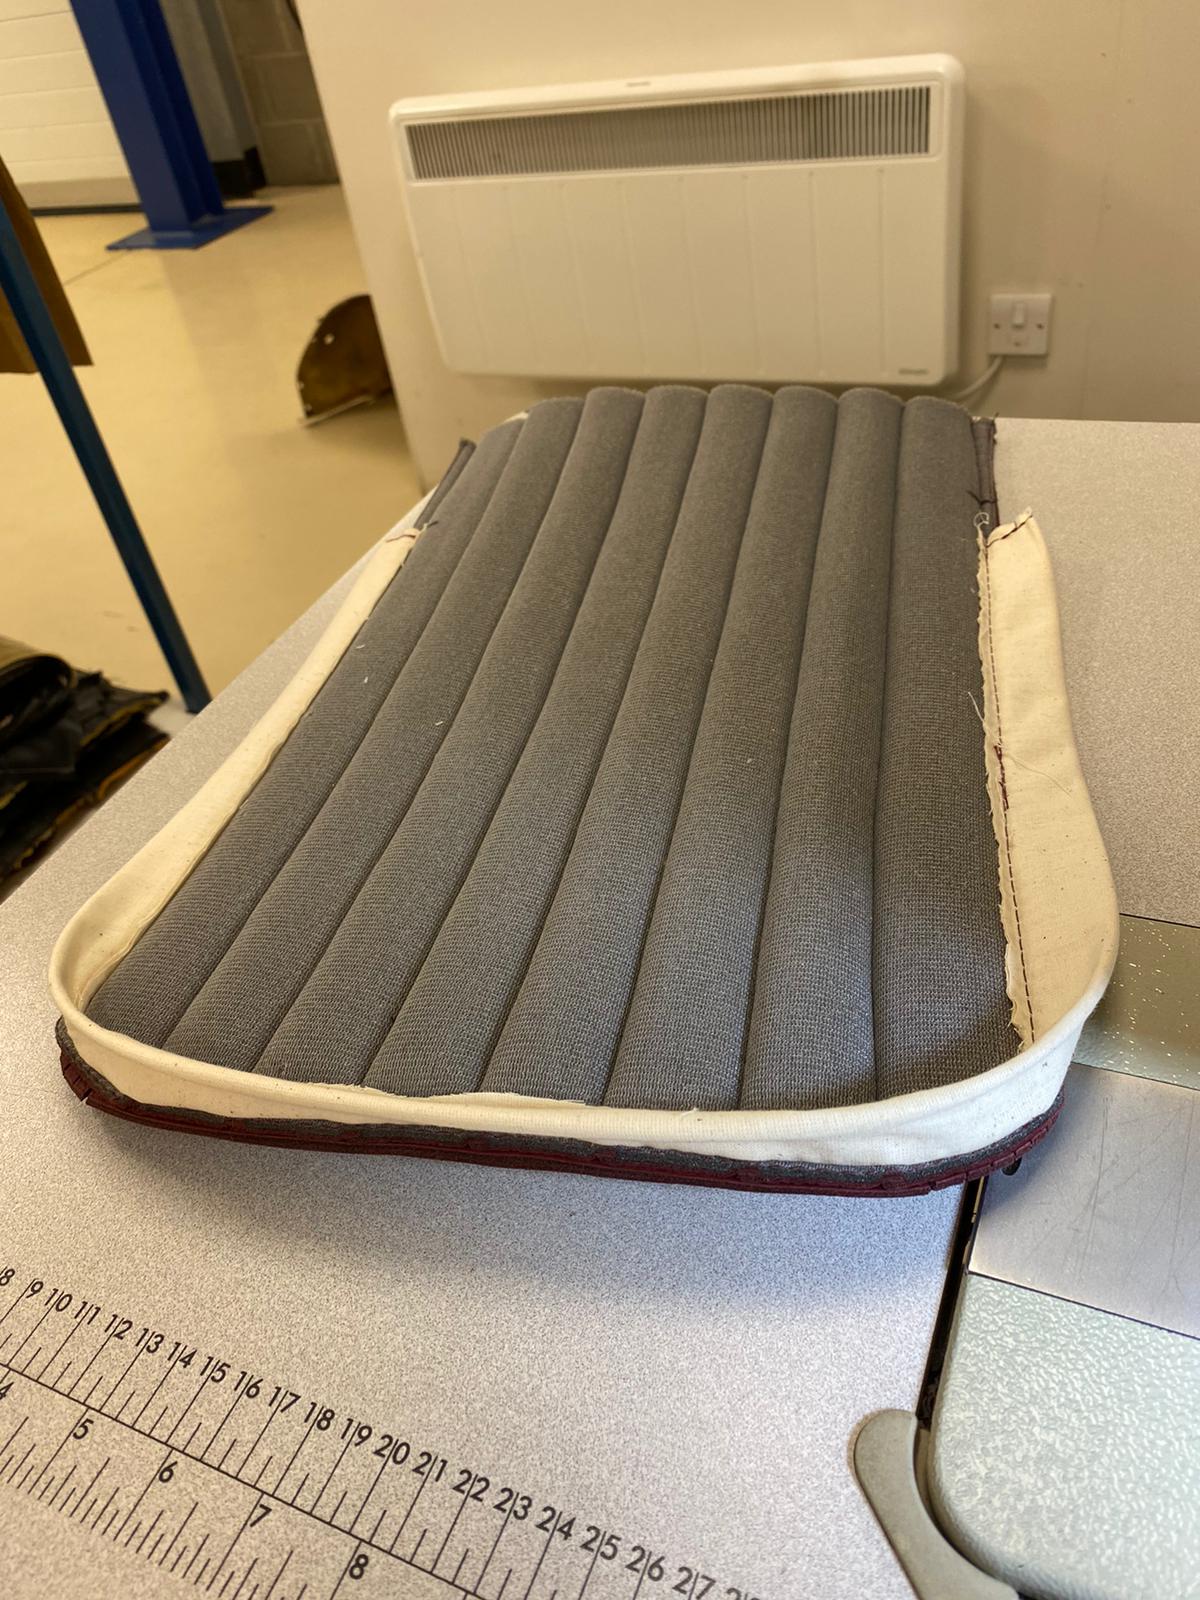
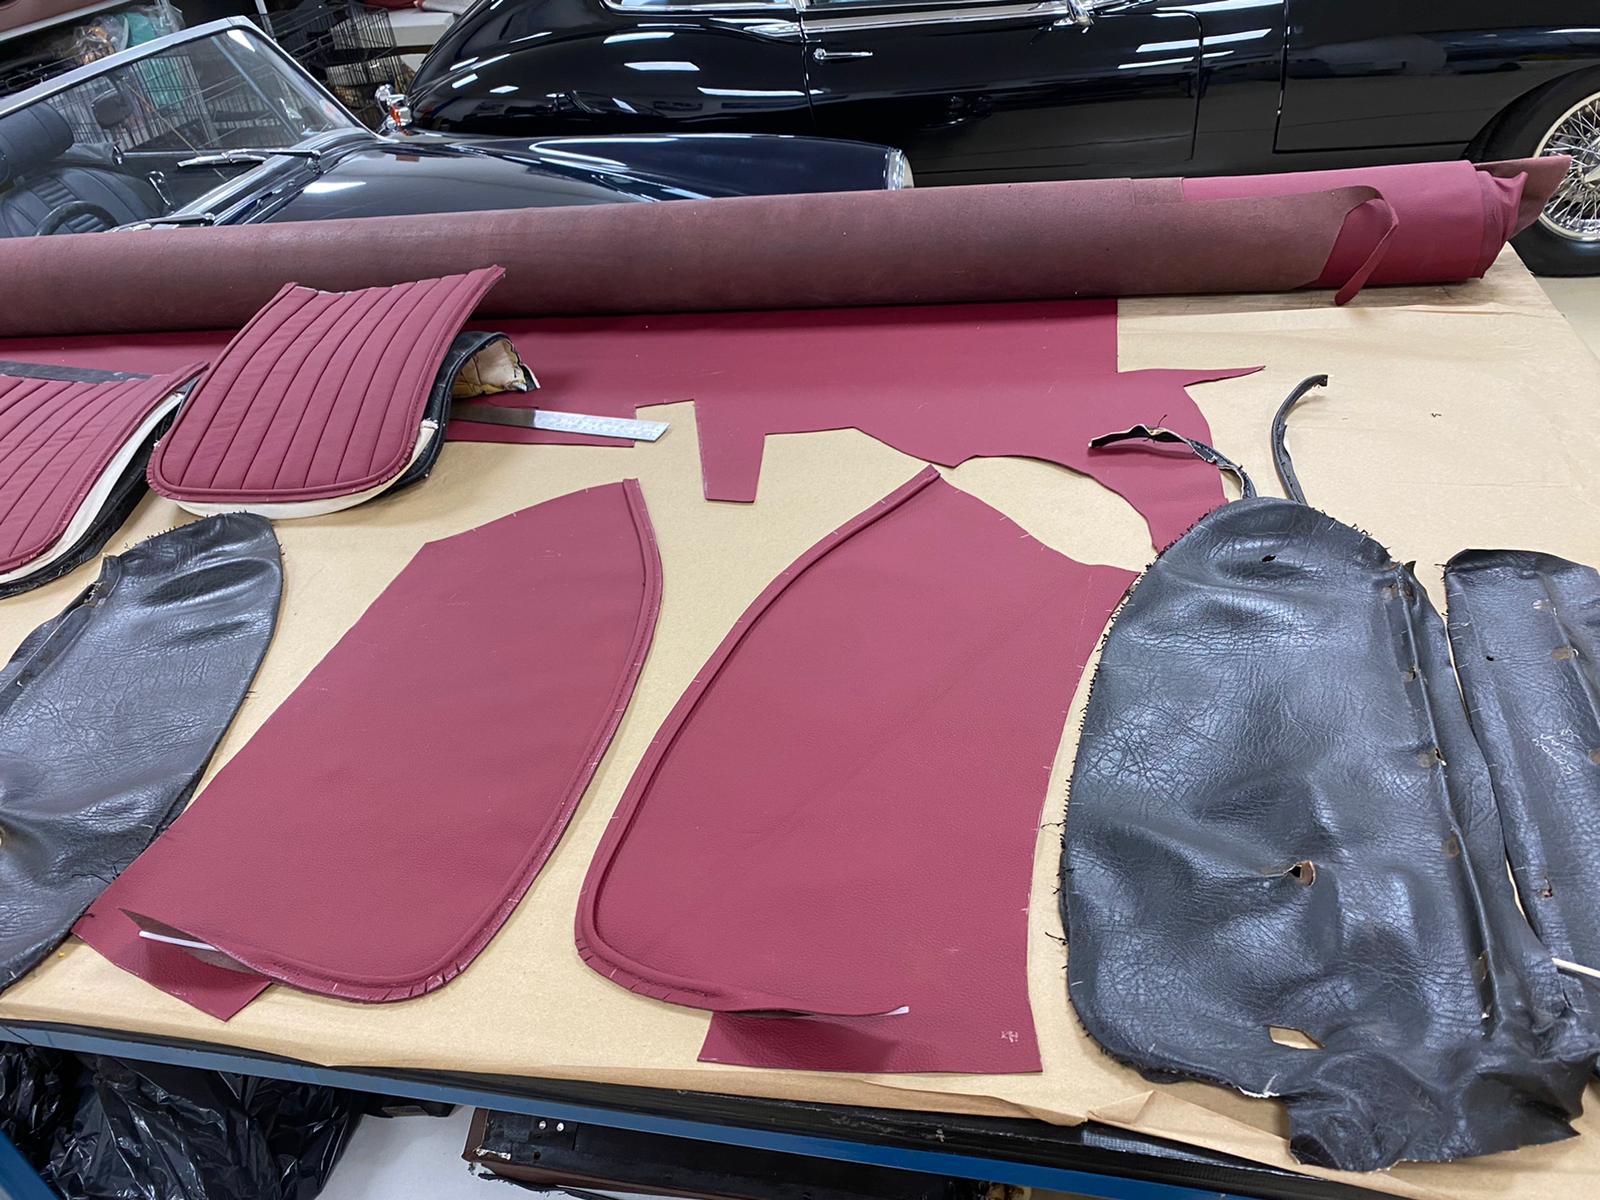
These sections are then attached to the base of the seat. Both sides are sewn on, then the back flap is also sewn in place.
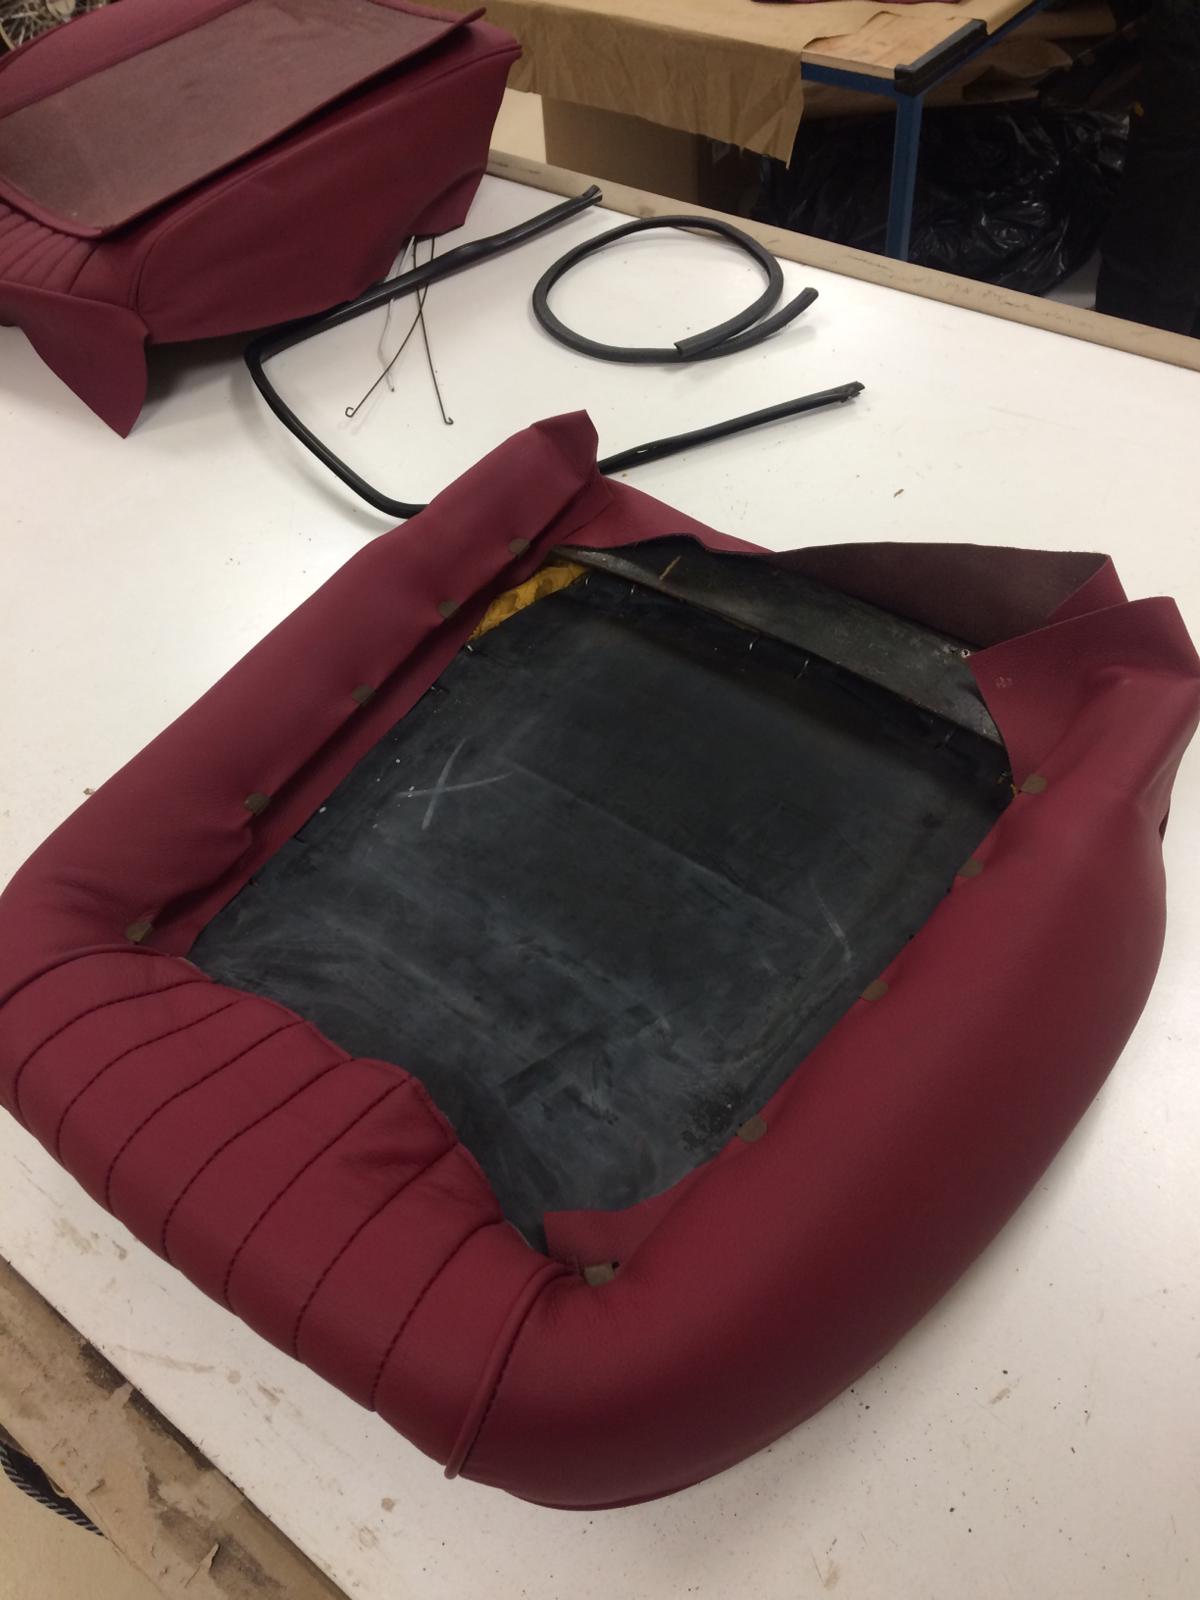
Next up, Kath is sorting out the back panel of the squab. “I unpick all the original stitching” she explains, “again to use the pattern as a guide”.
The new leather is then marked out, stuck round with its edges turned and glued. “I then sew around the edges and trimmed off the excess fabric” Kath tells us.


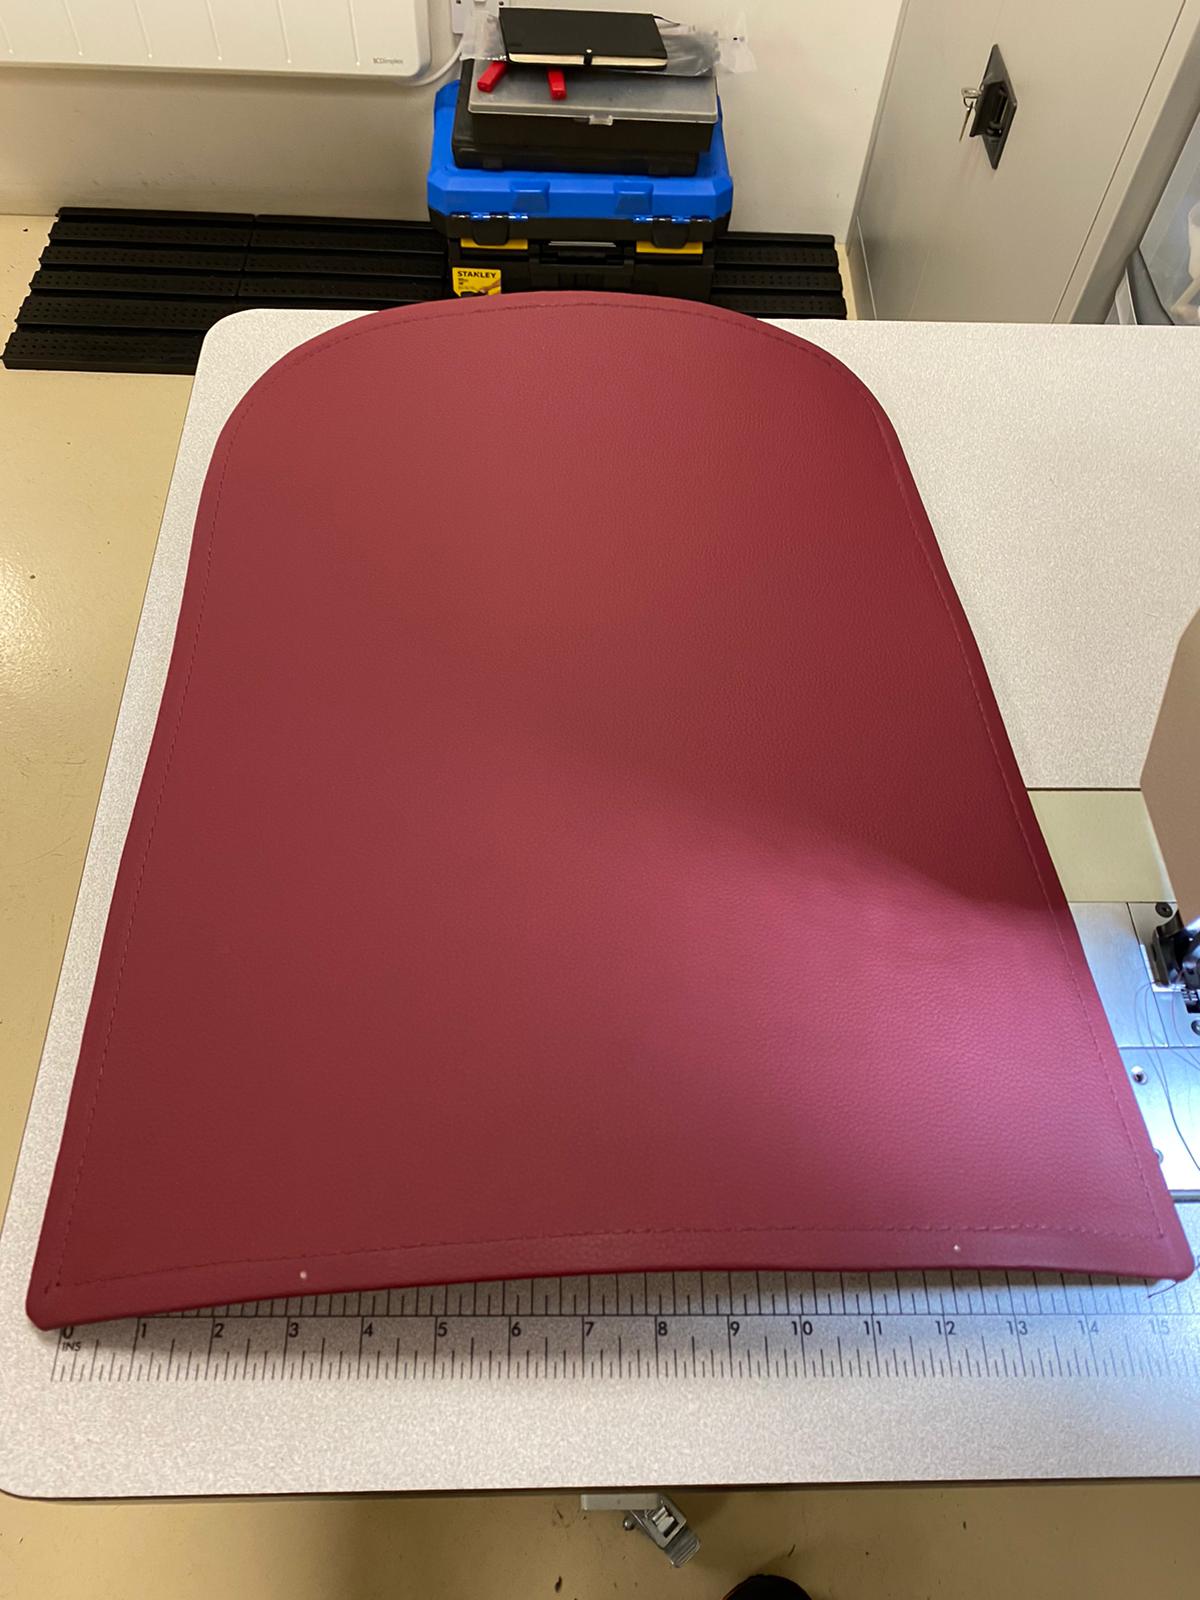

Kath then does the same for the back seat squab. Using the existing leather as a gauge for the seats pattern, marking out the segments in the new leather.
“I then unpicked the seat cover” explains Kath. All the separate parts can then be used to cut out the sections in the new leather.

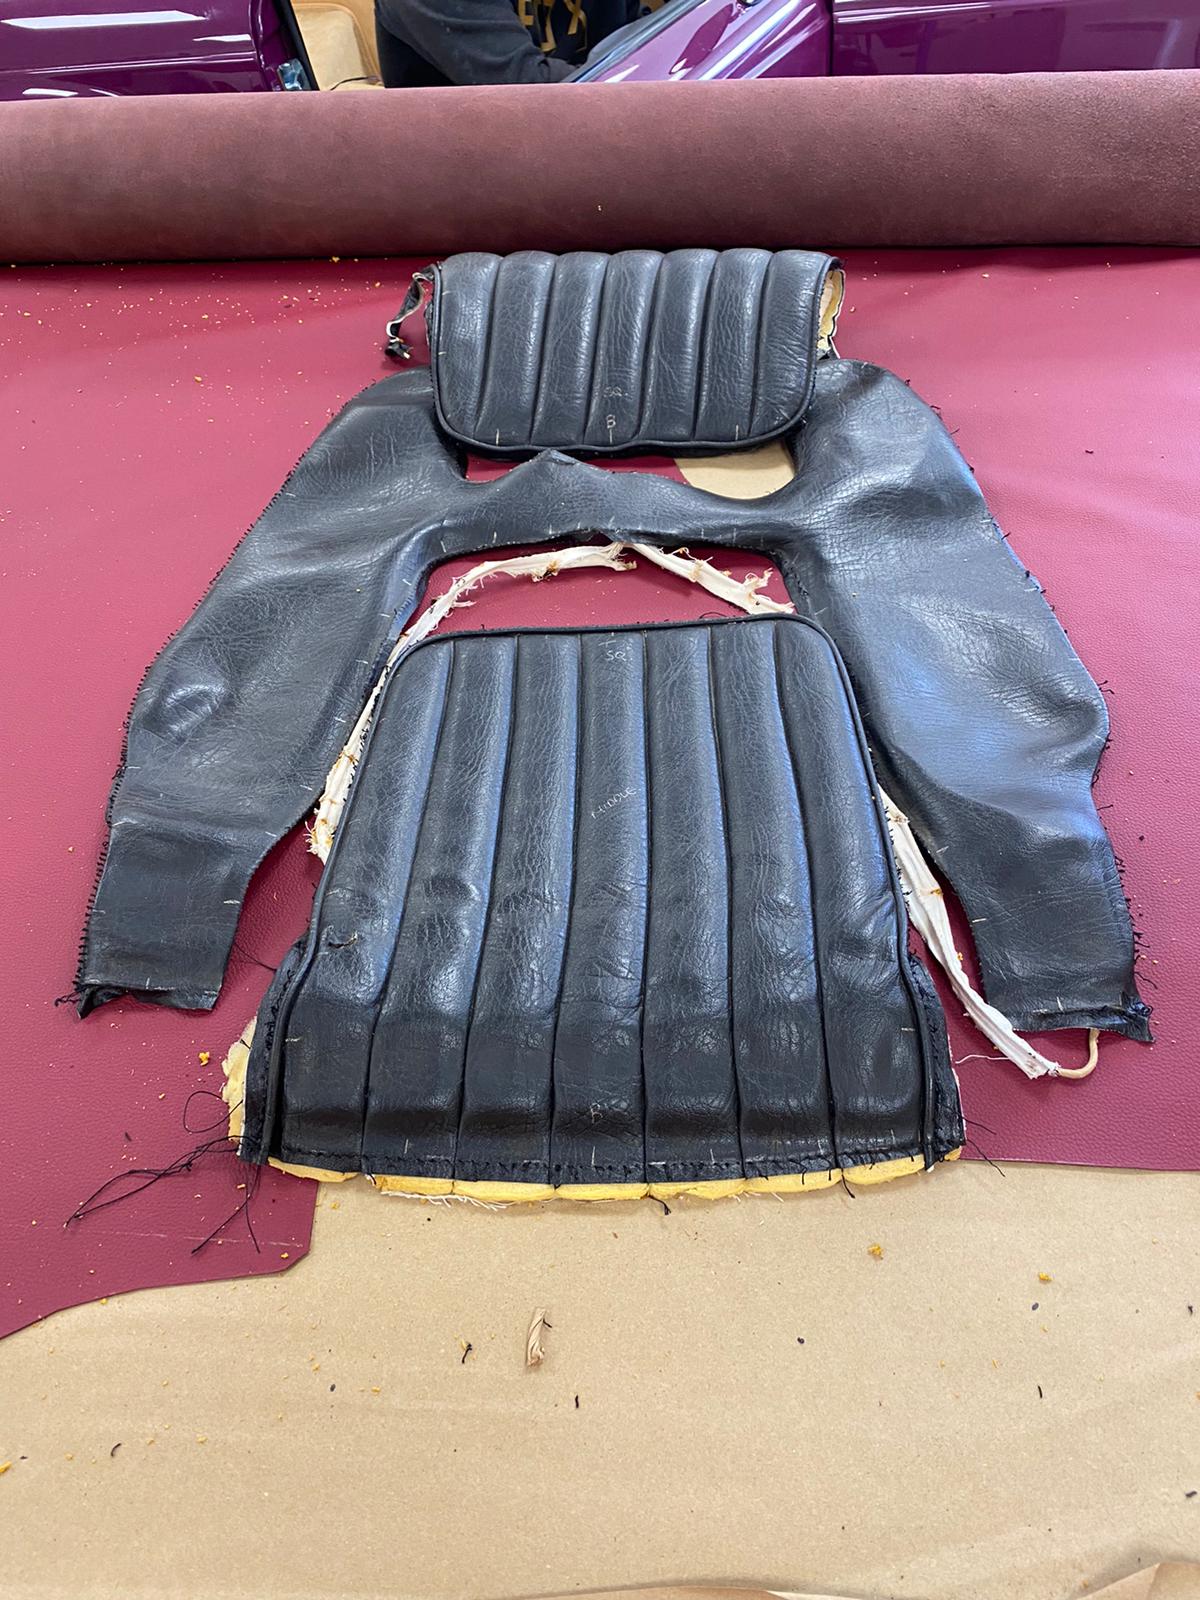
The individual parts were then cut out of the new leather with lines marked out for the seat to match the existing design.

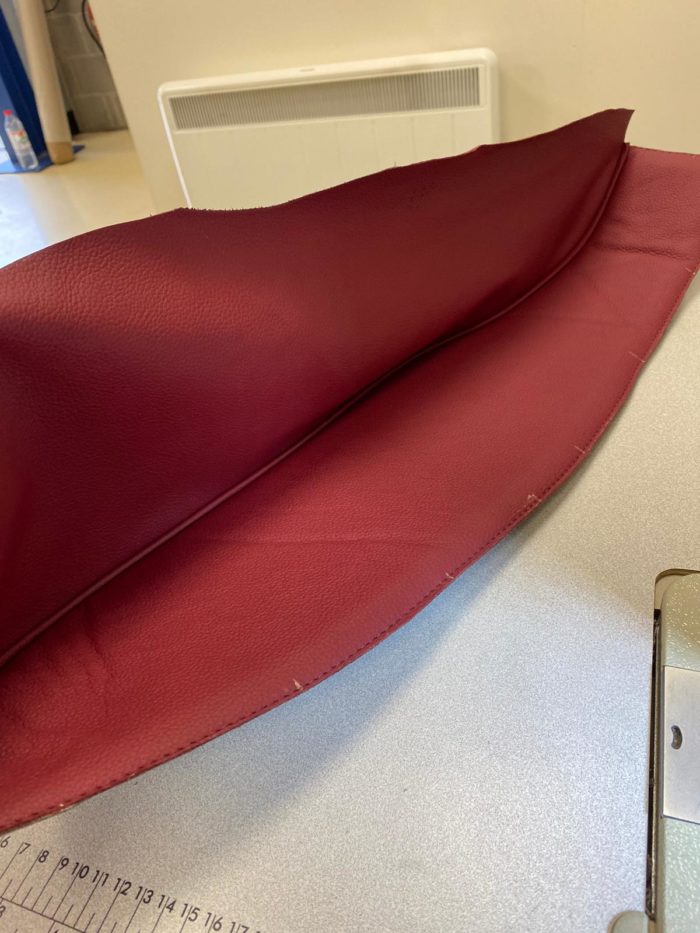
Kath then put pipe around the edges of both panels. ” I sewed a calico loop and piping around the edge” she explains “so I can attach this section to the back of the seat and keep it in place”.

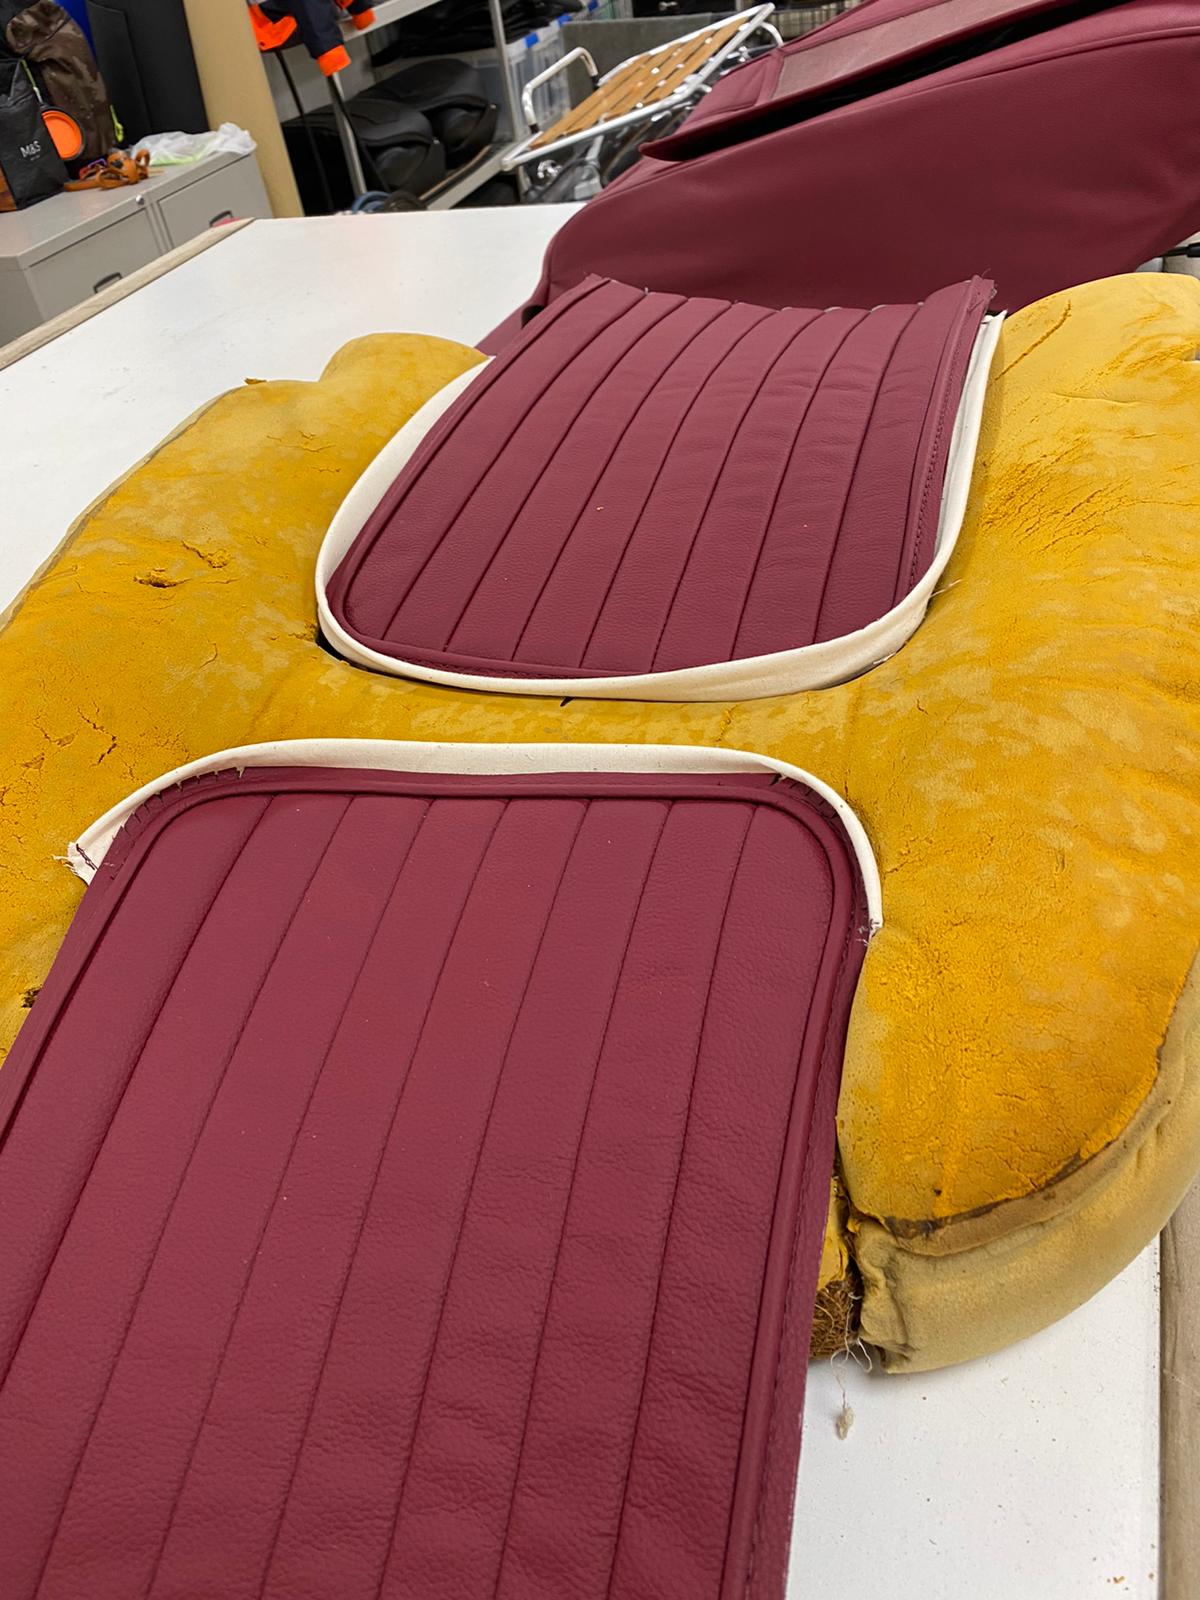
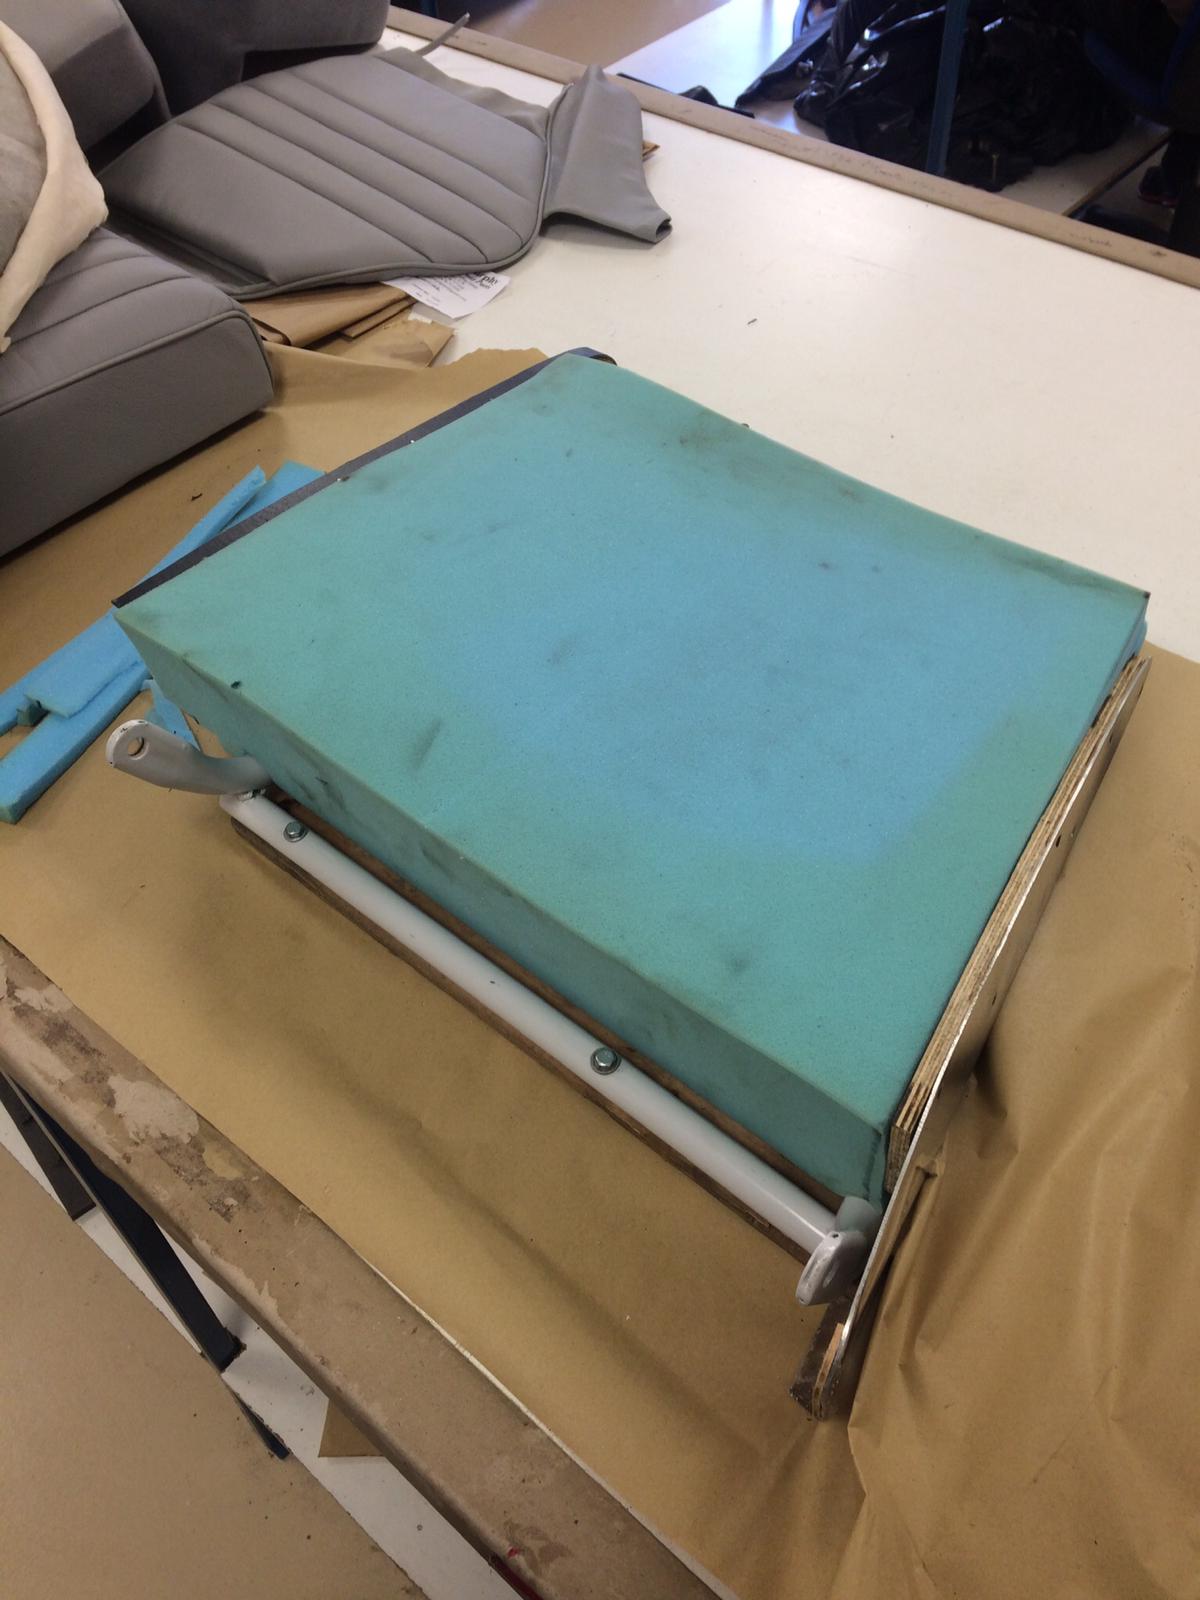
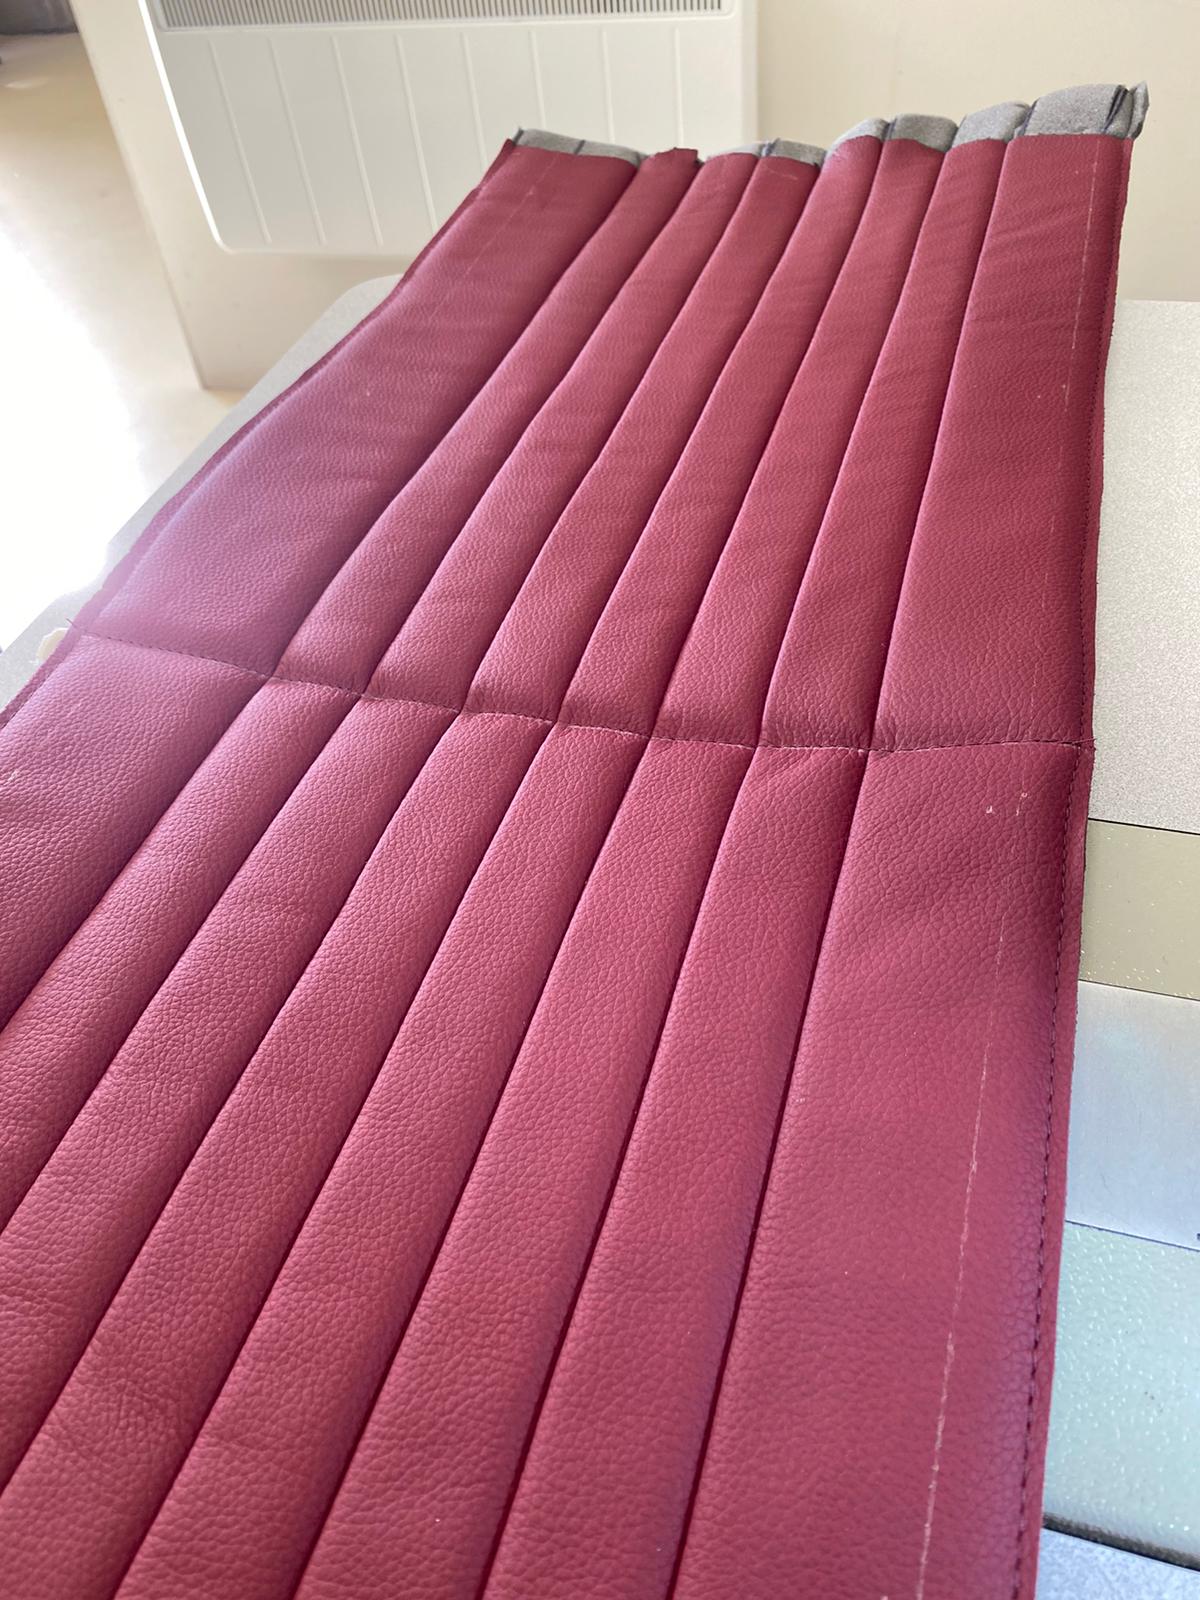
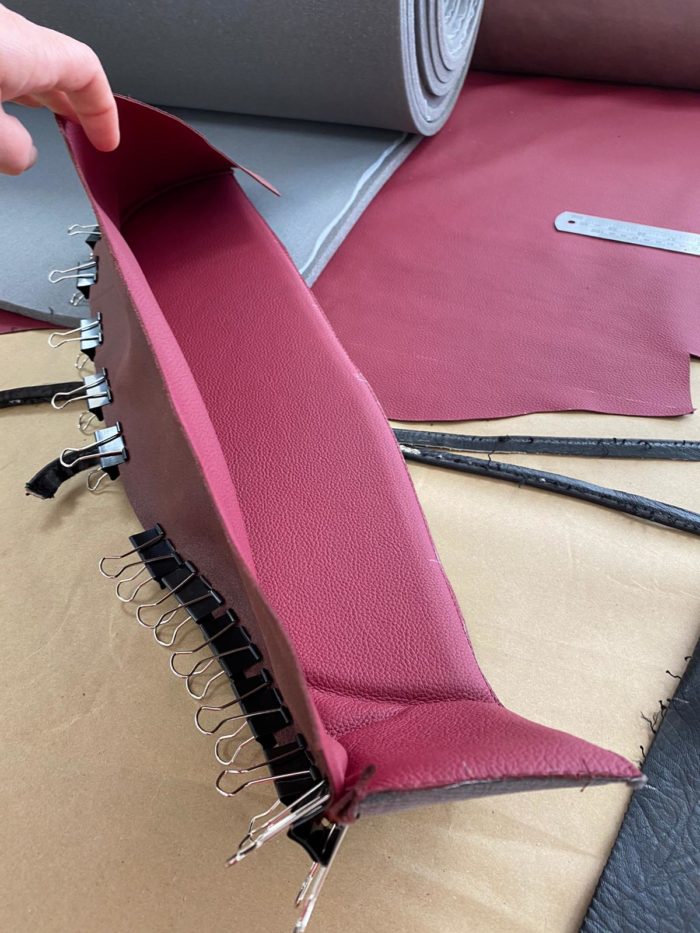
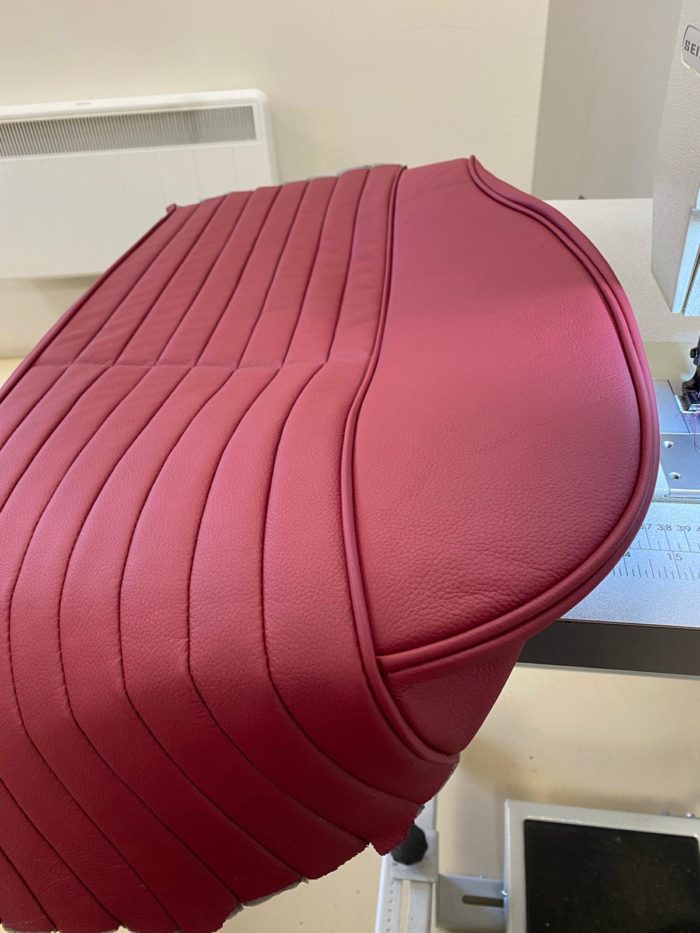
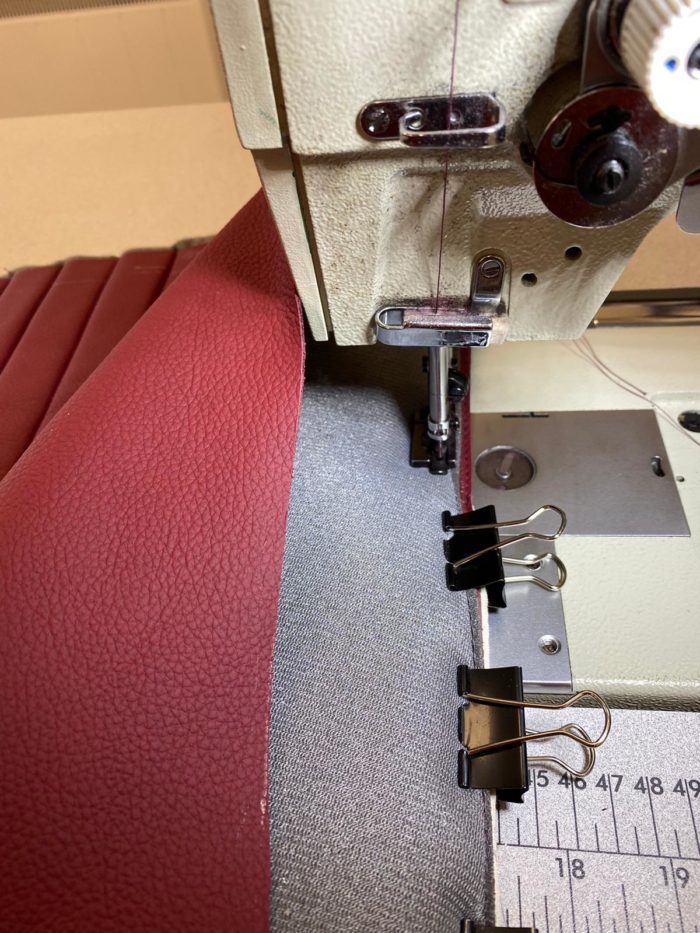
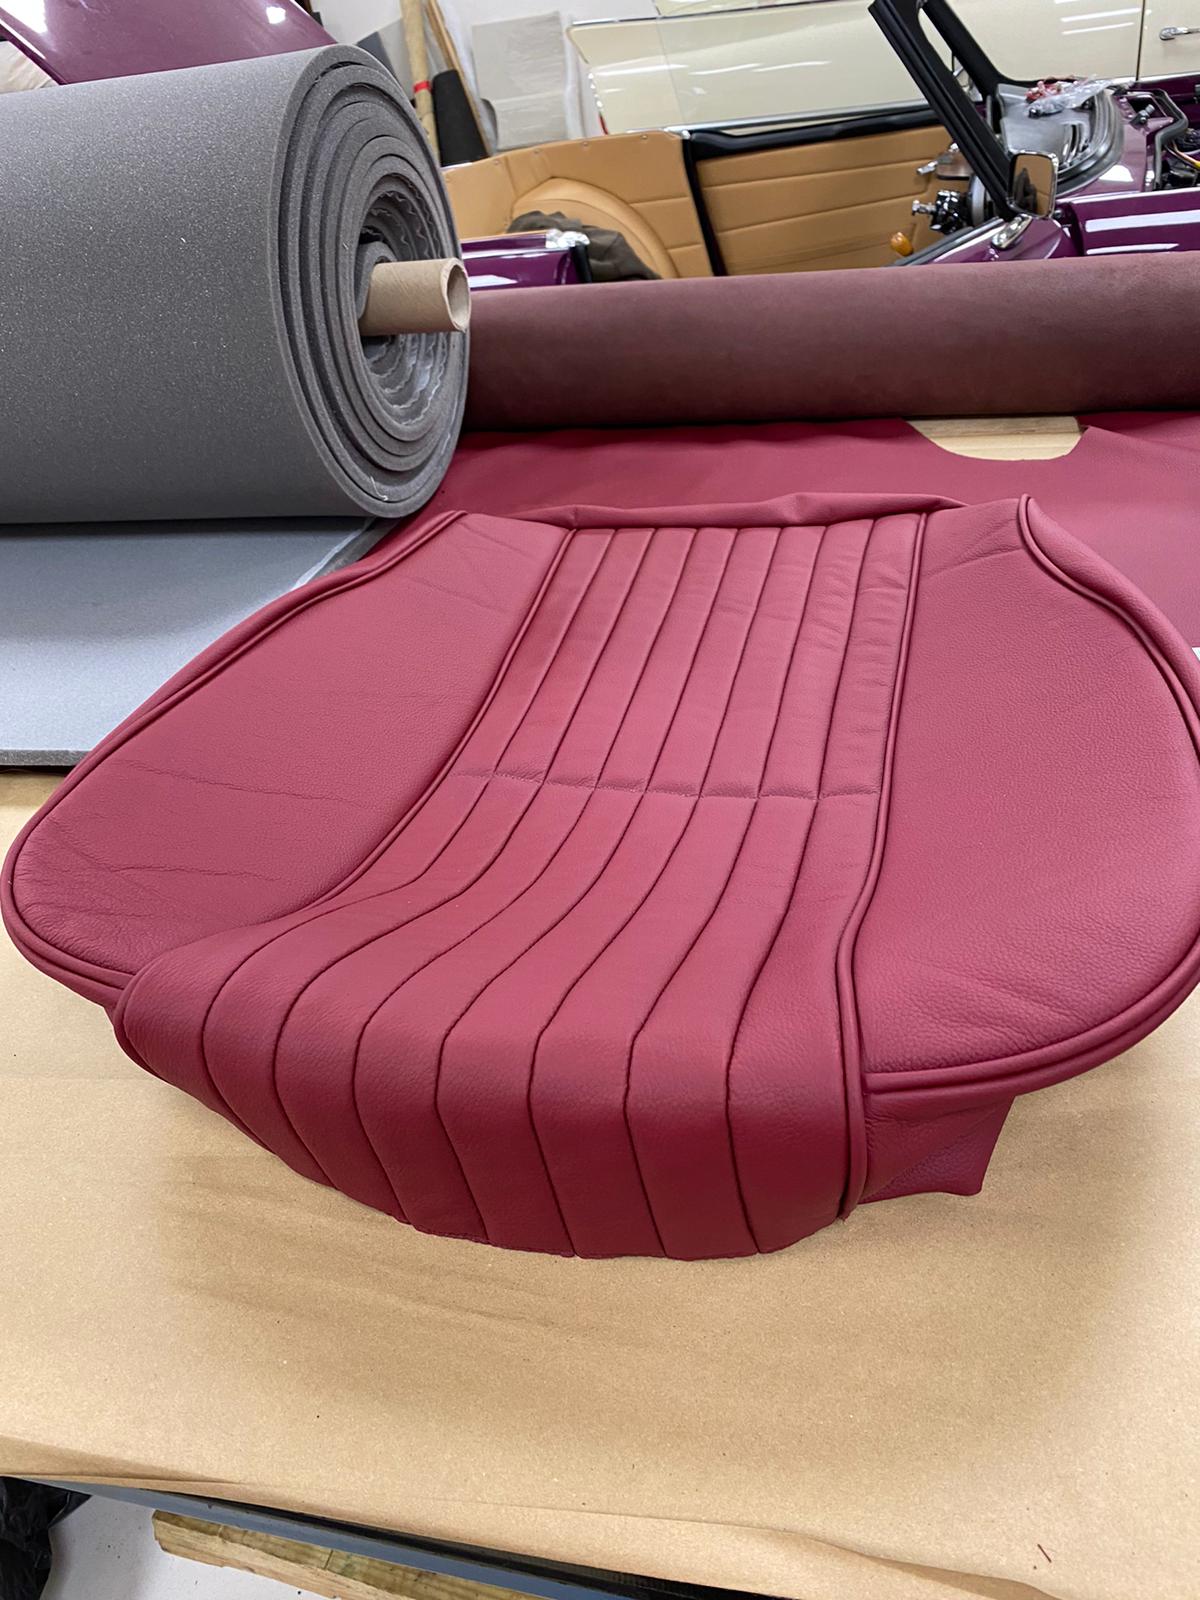
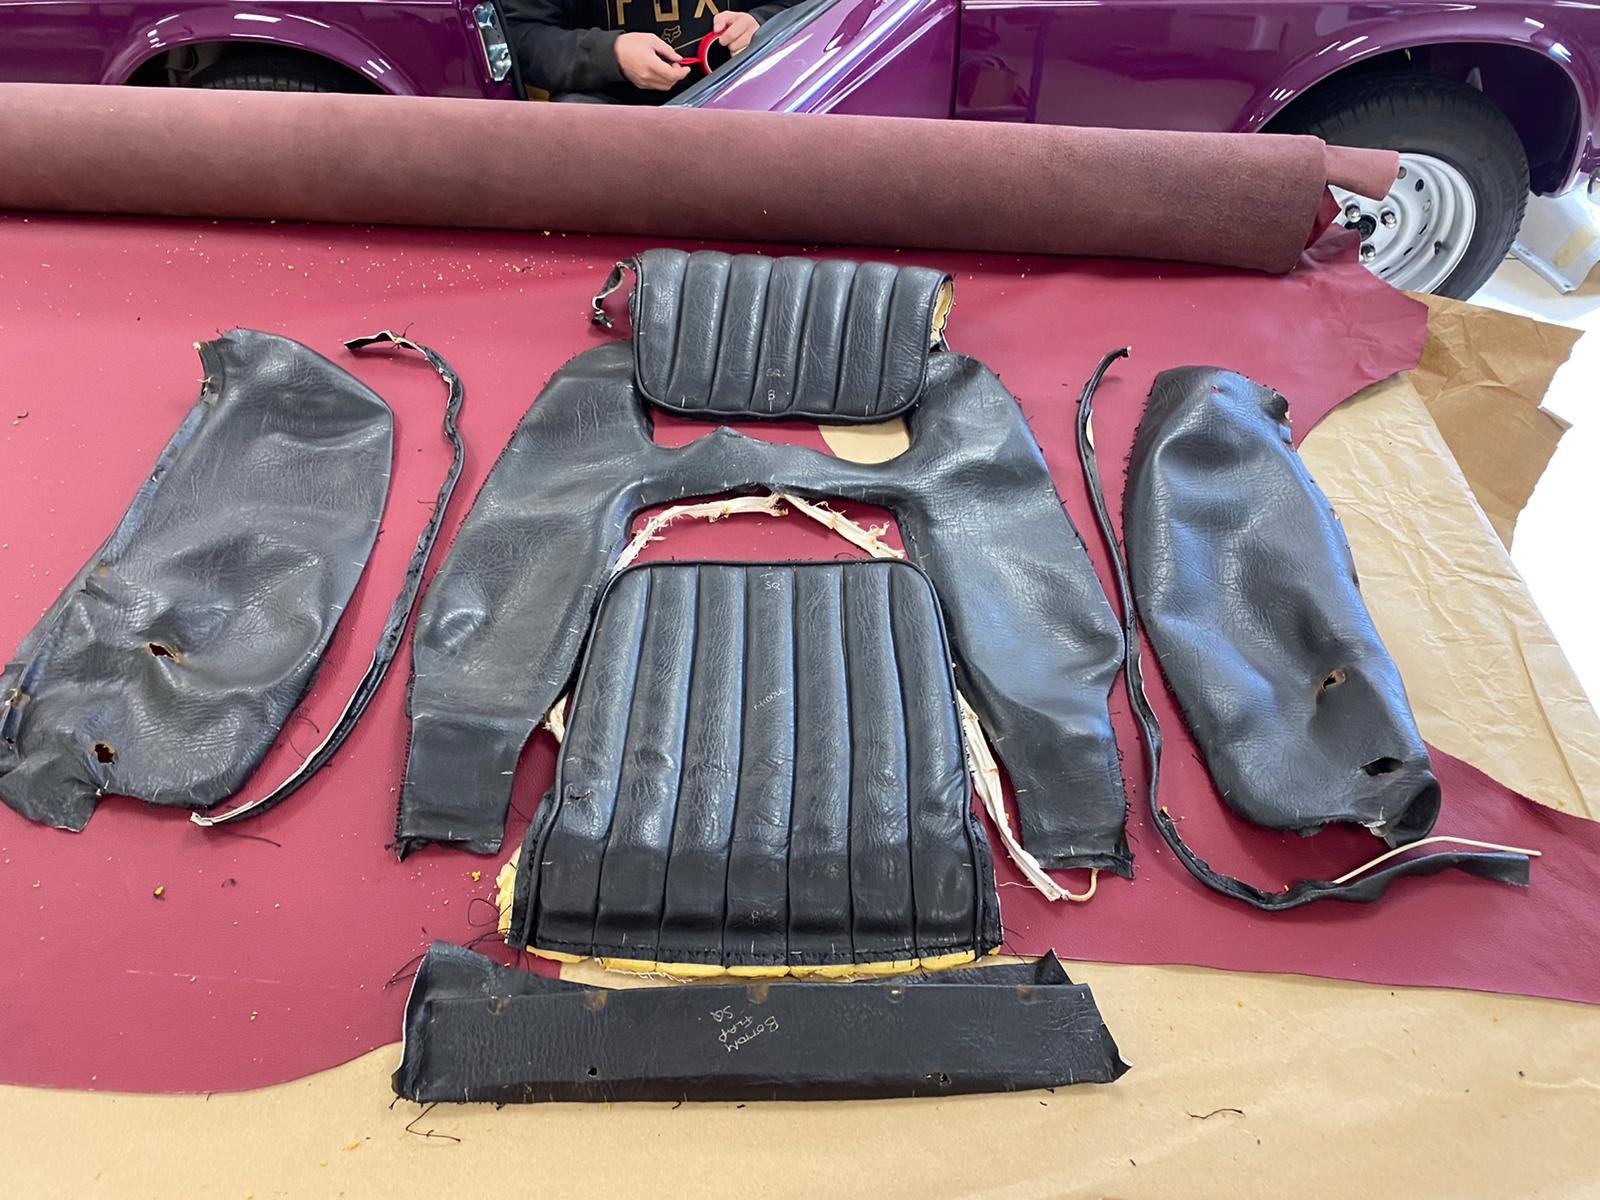
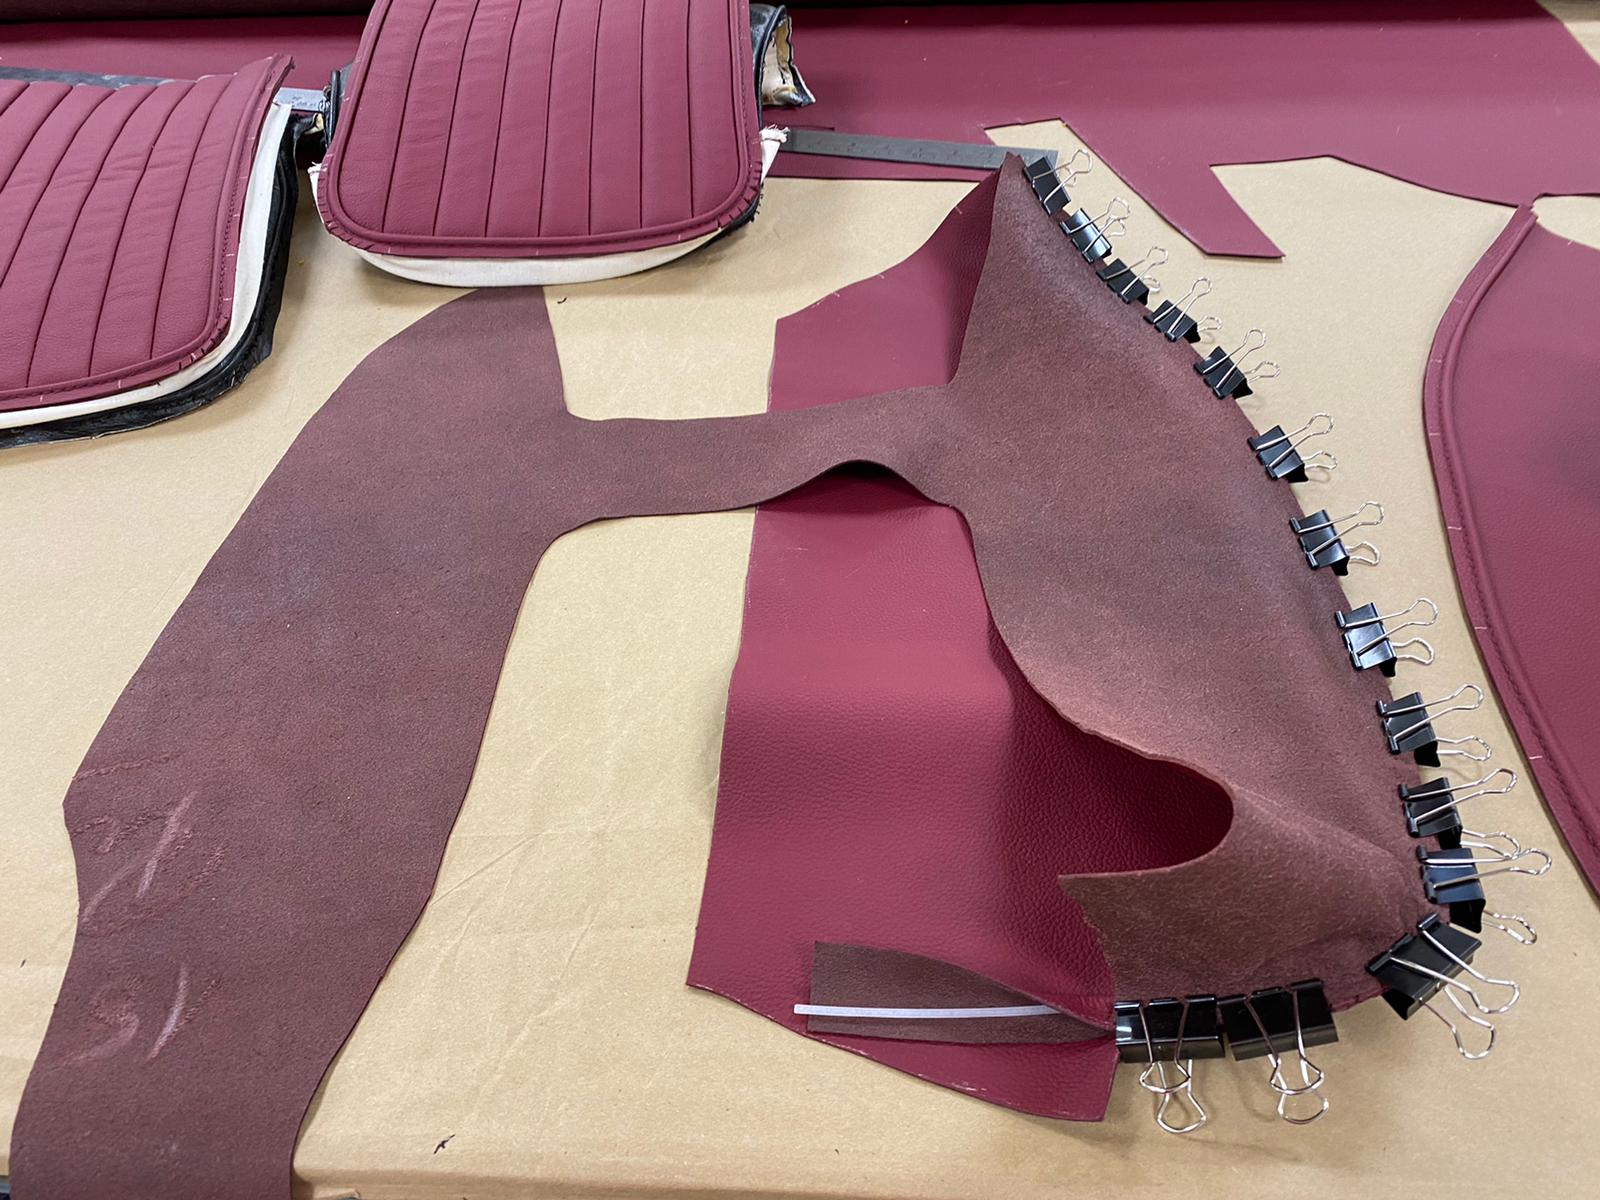
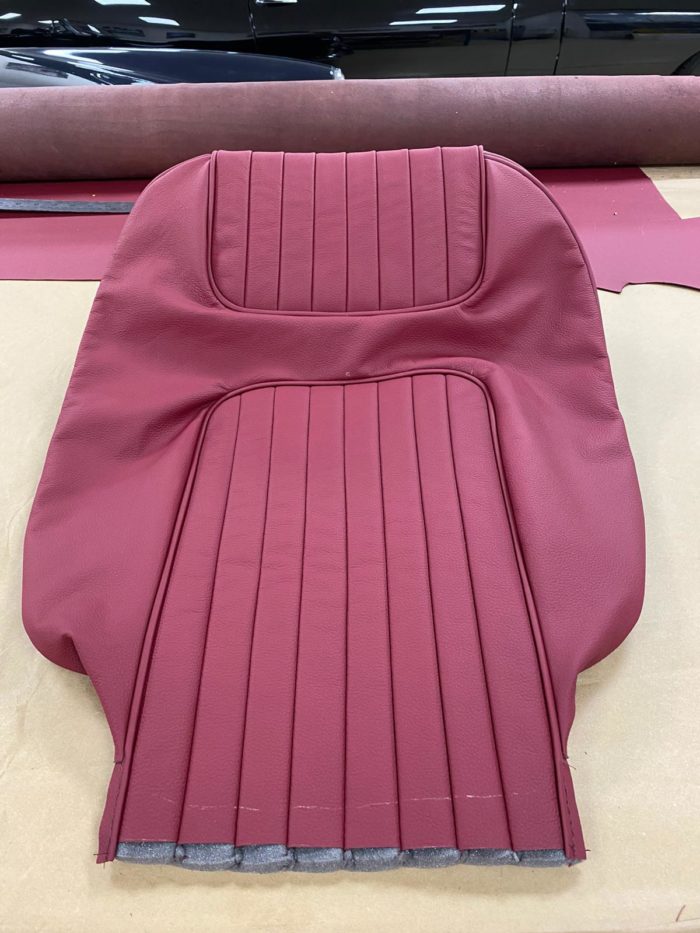
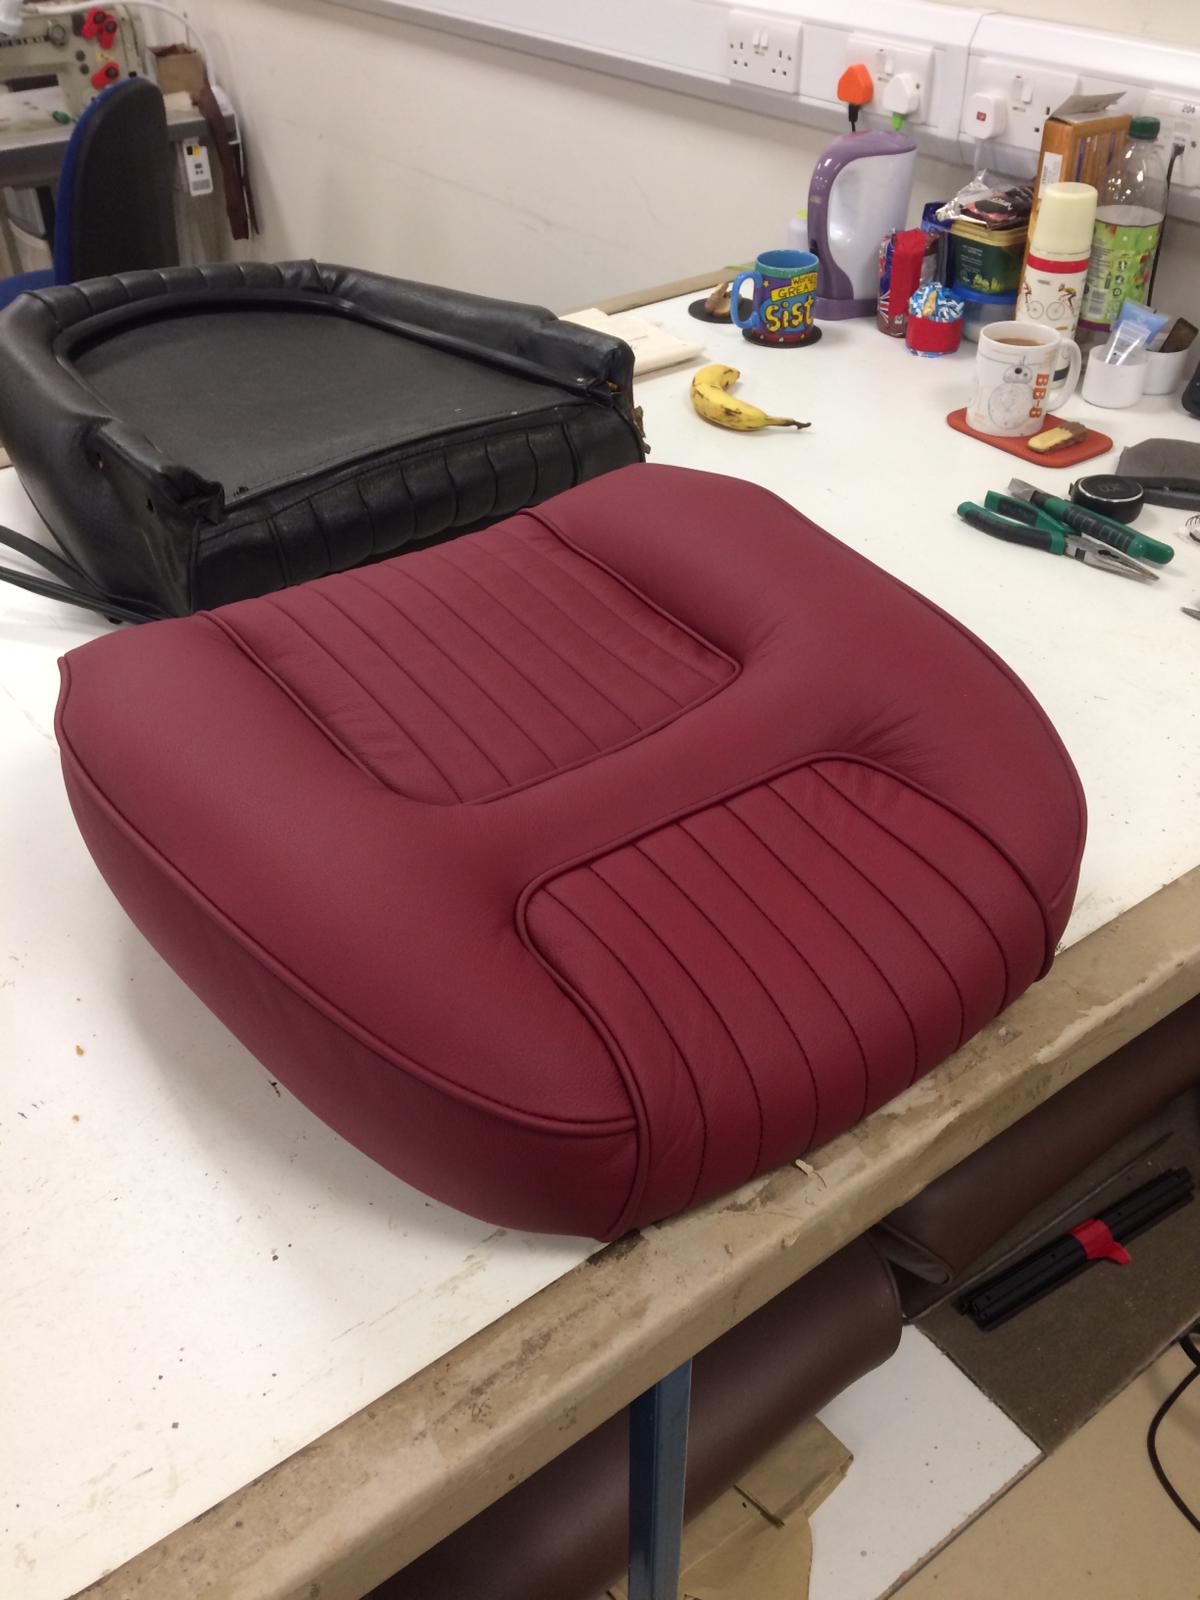
Kath then made a start on the edges of the squab, putting piping around the edge of the side skirt and clipping it to the front section. The cover was then fitted to the foam squab ready for the fluted panels.
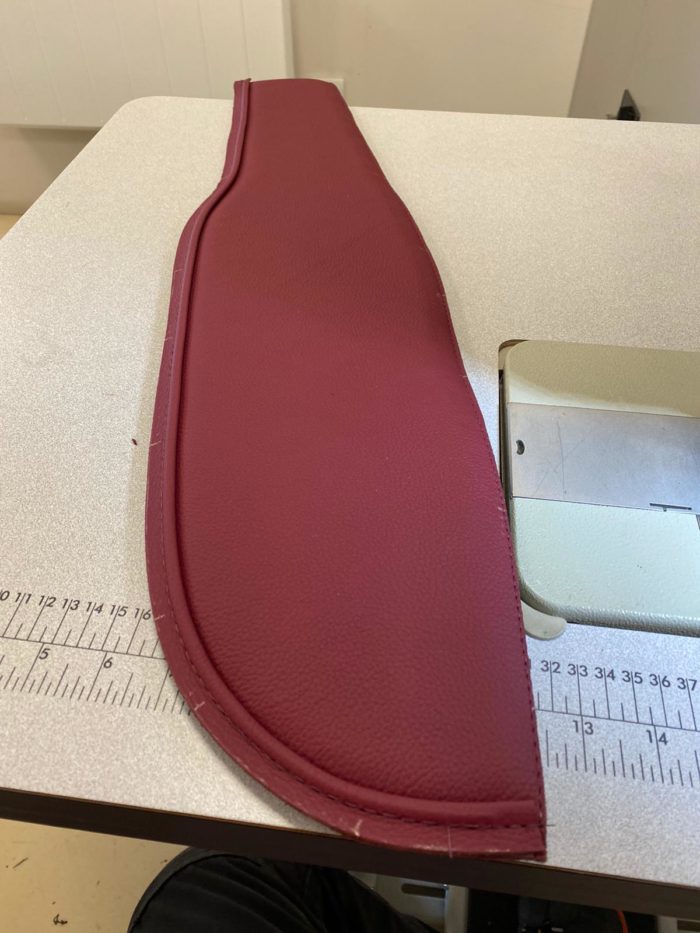
“I clipped the edges ready to be sewn together” Kath explains, “then sewed all the separate panels together and fitted it around it’s foam base”.
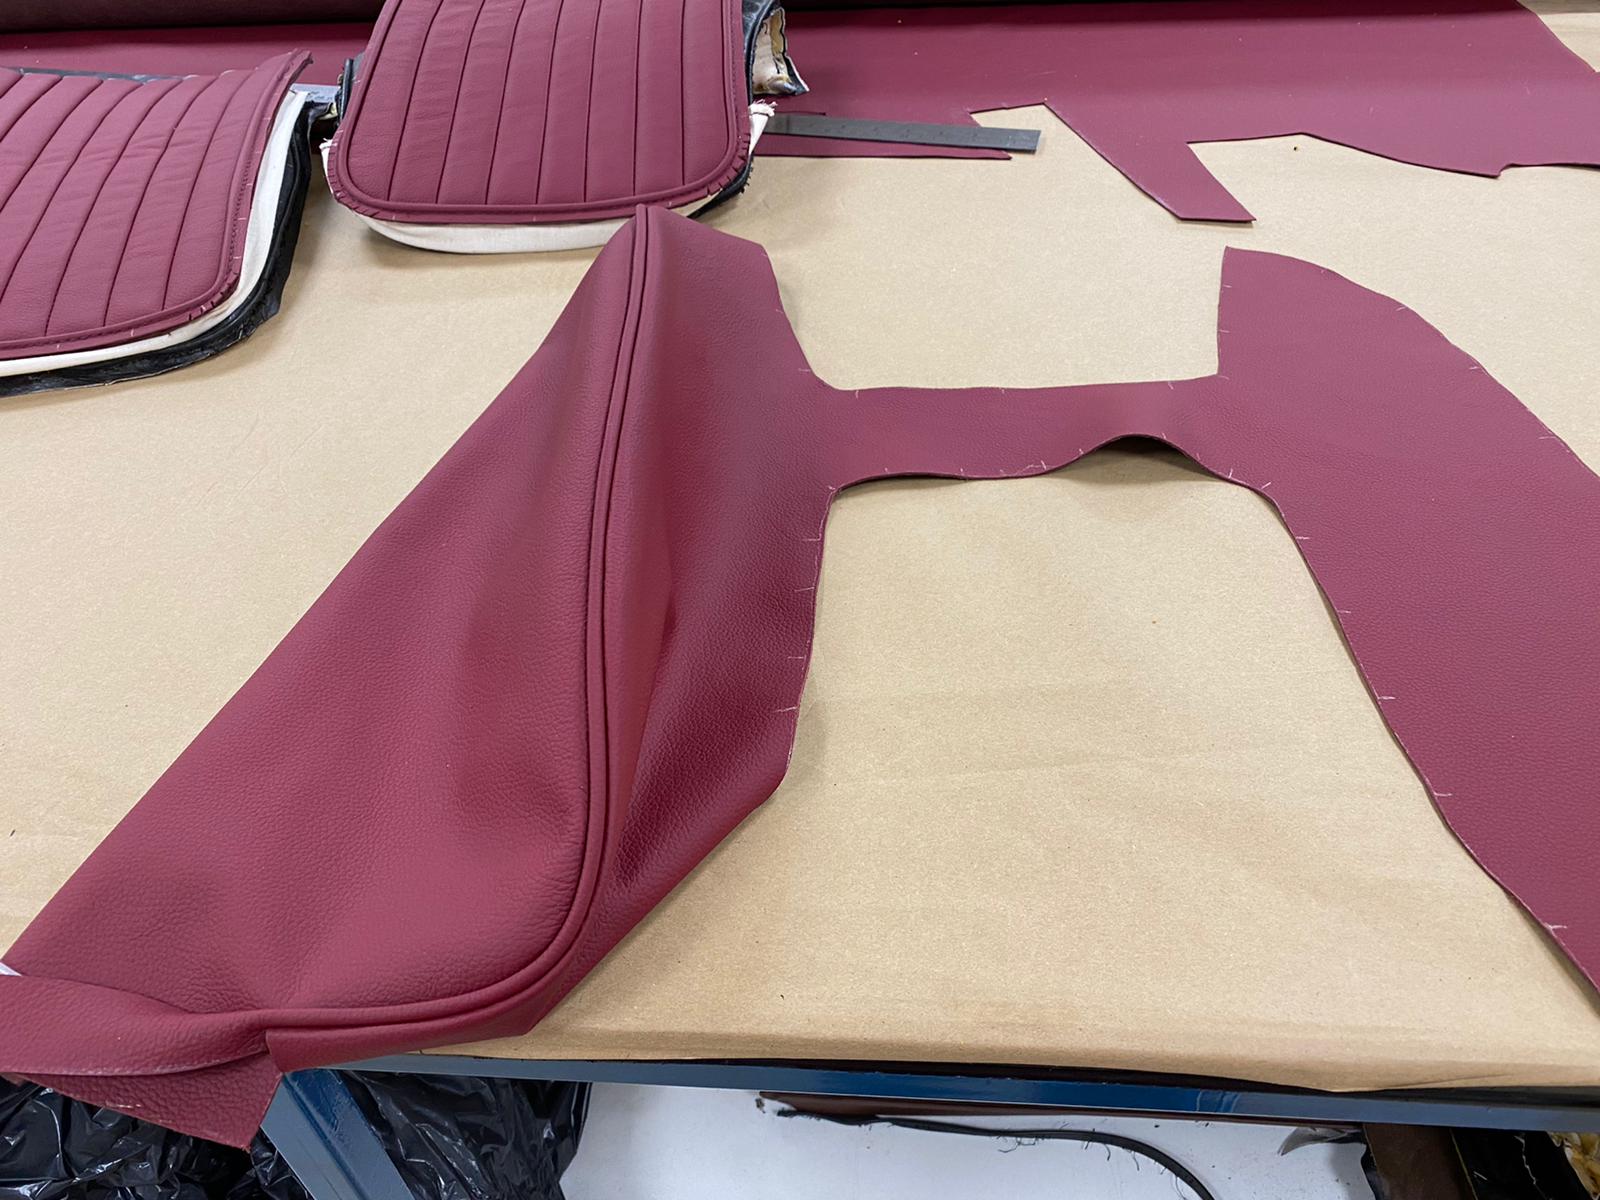
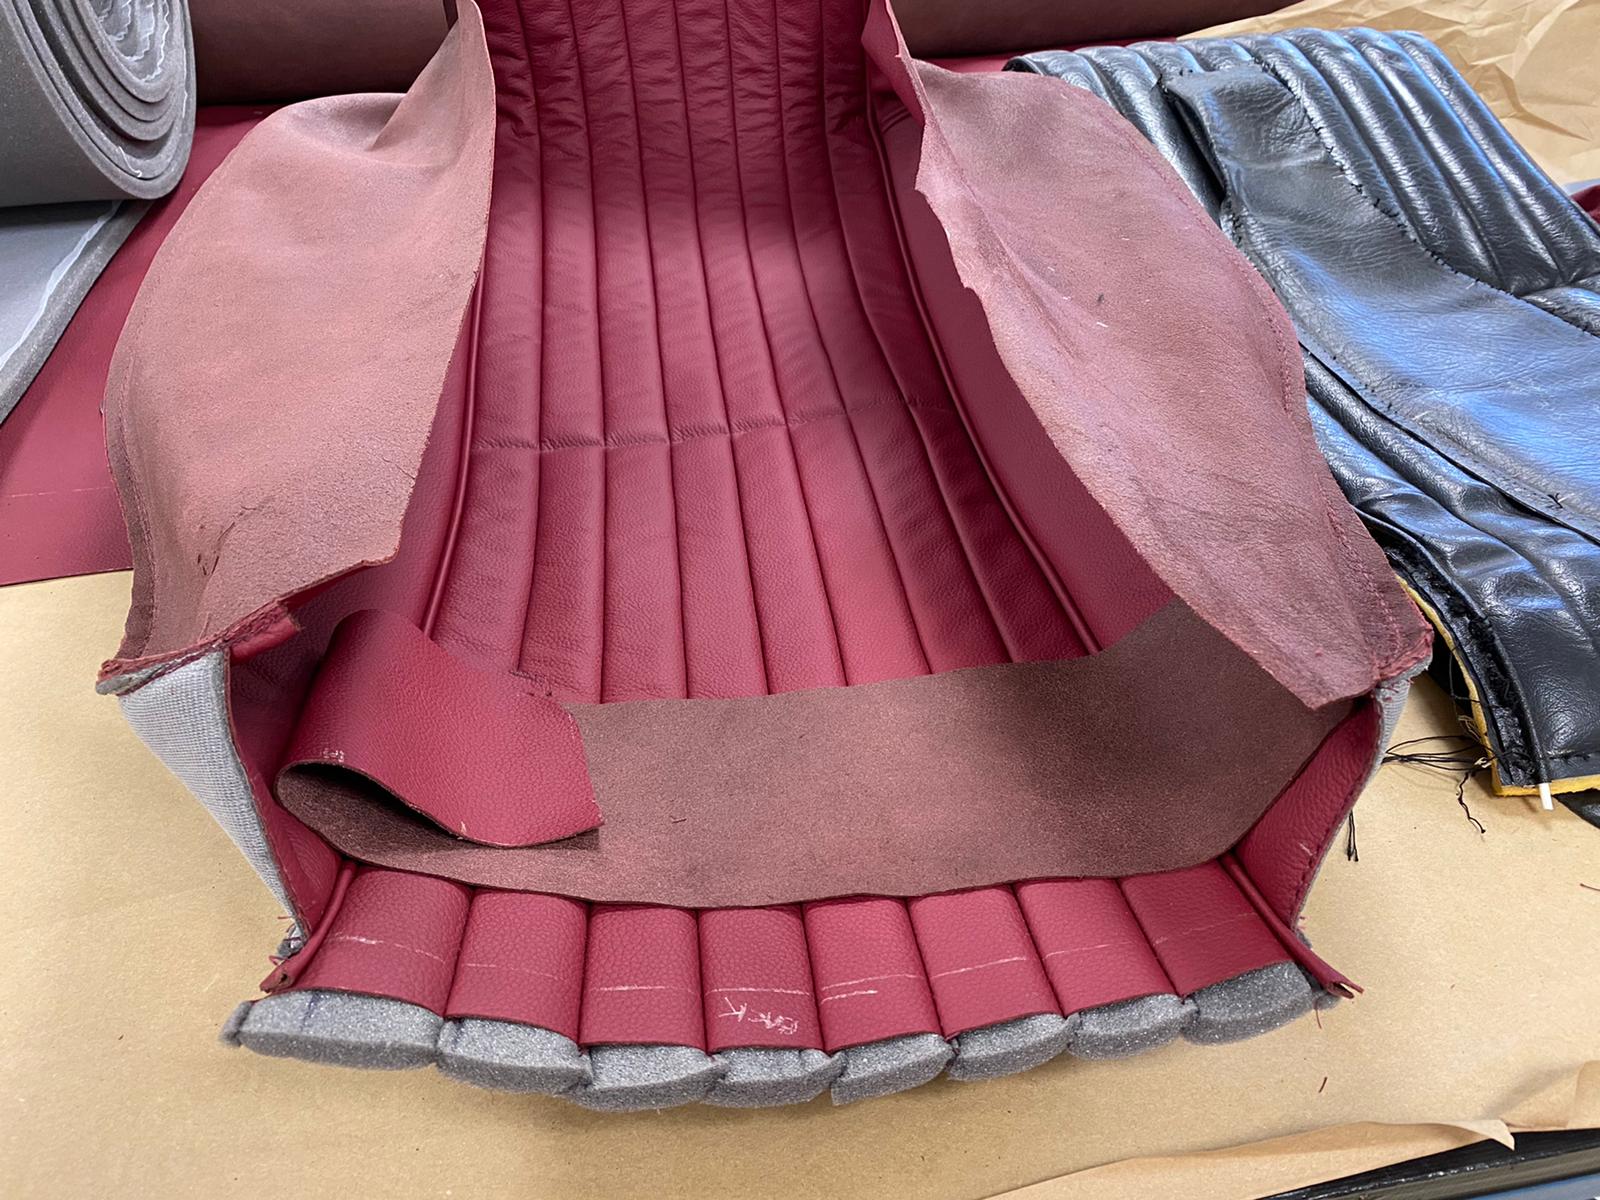
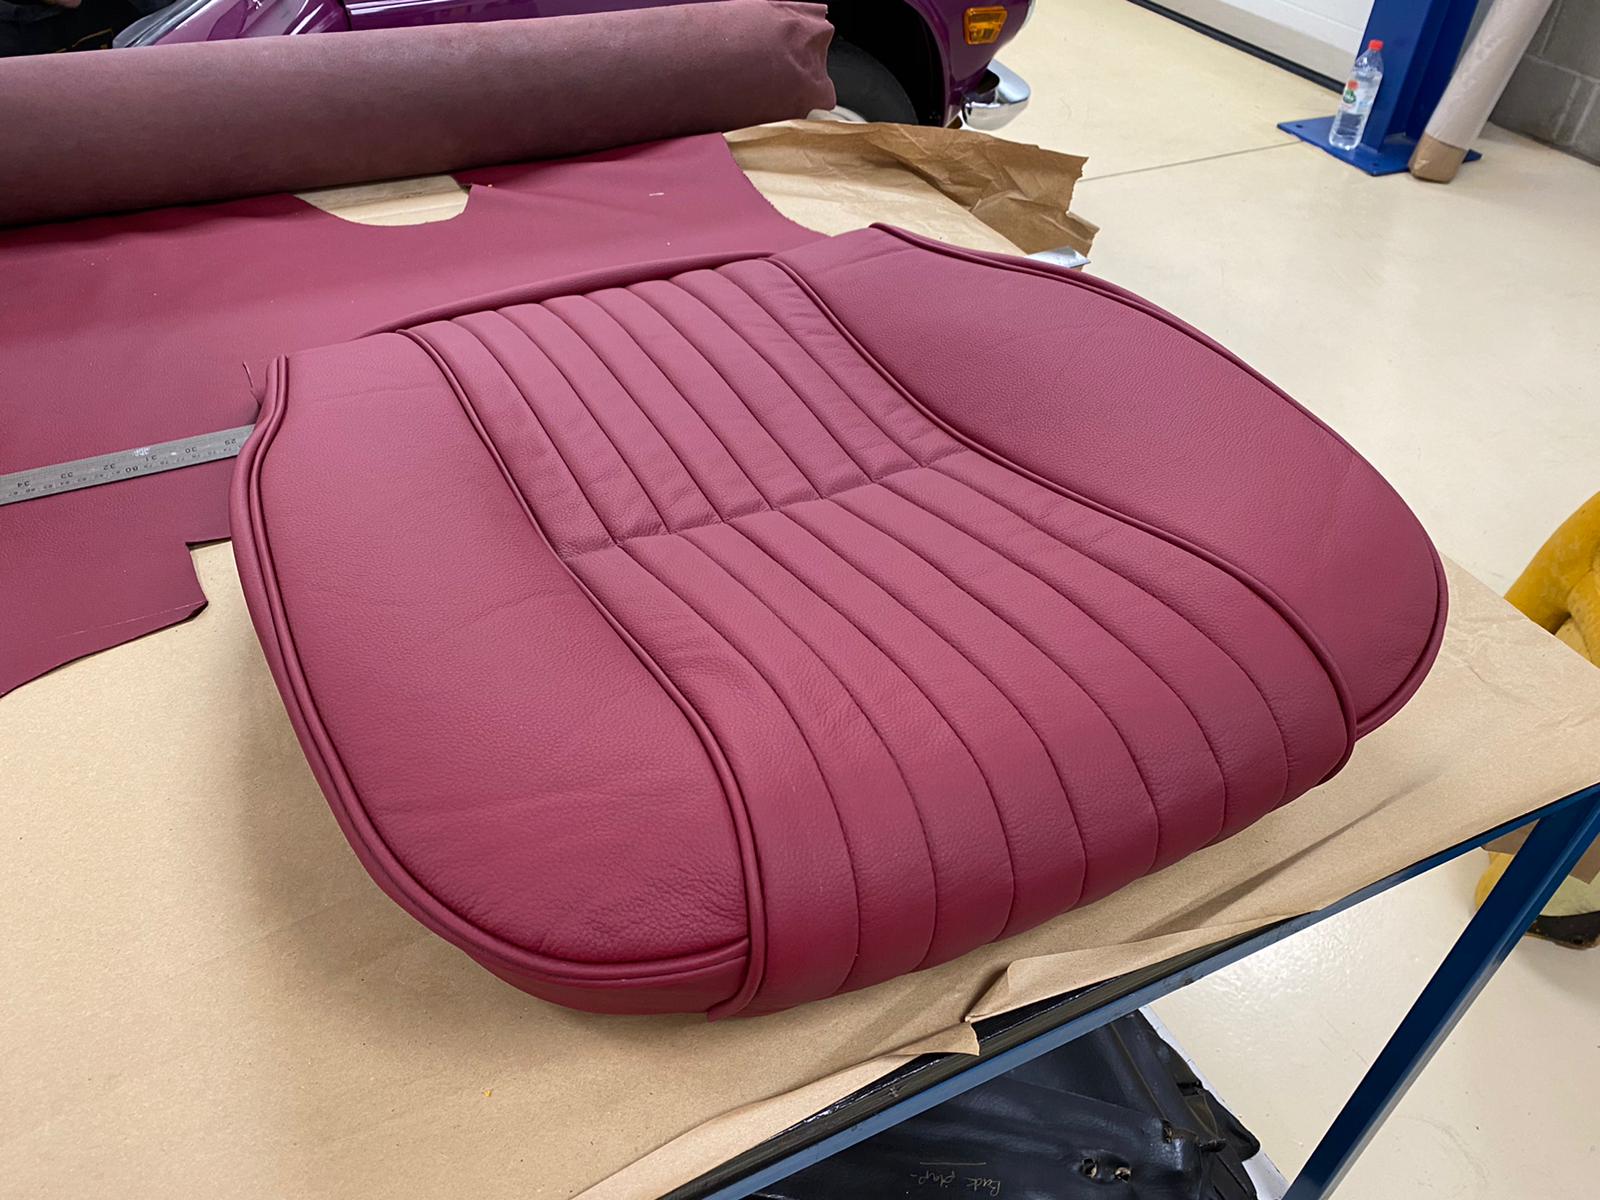
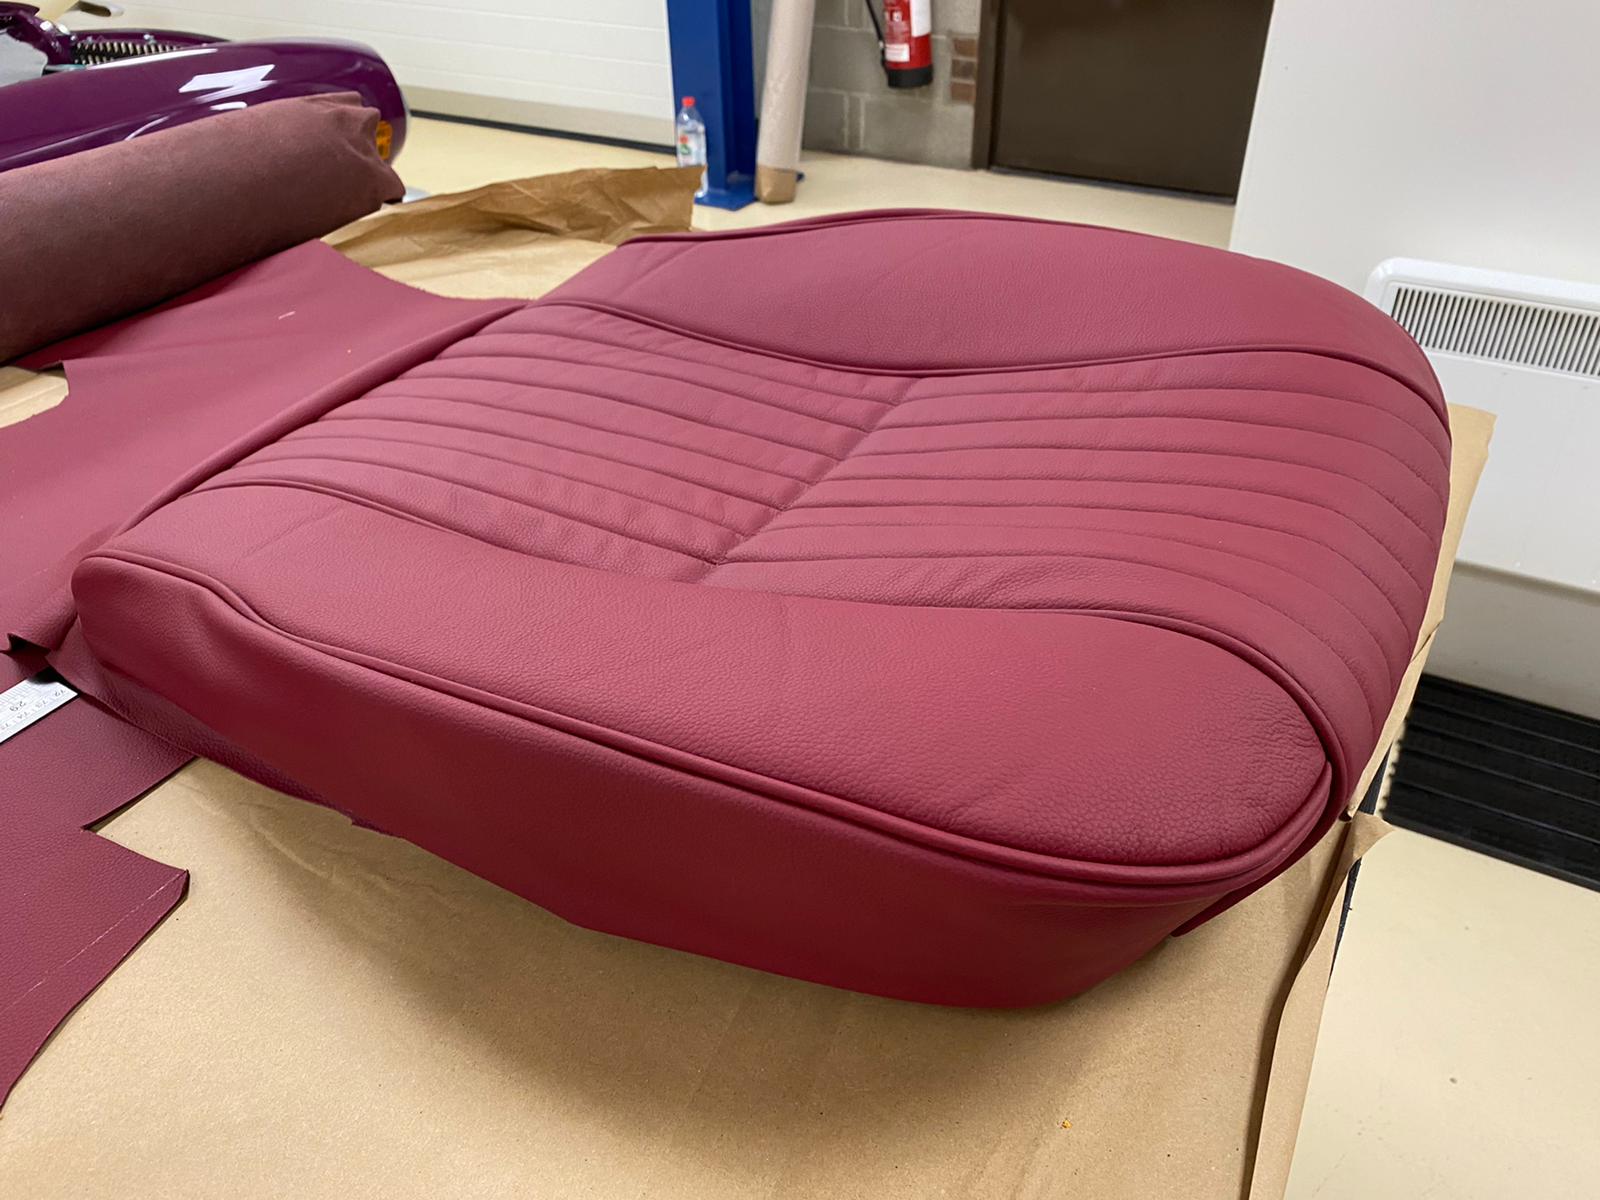
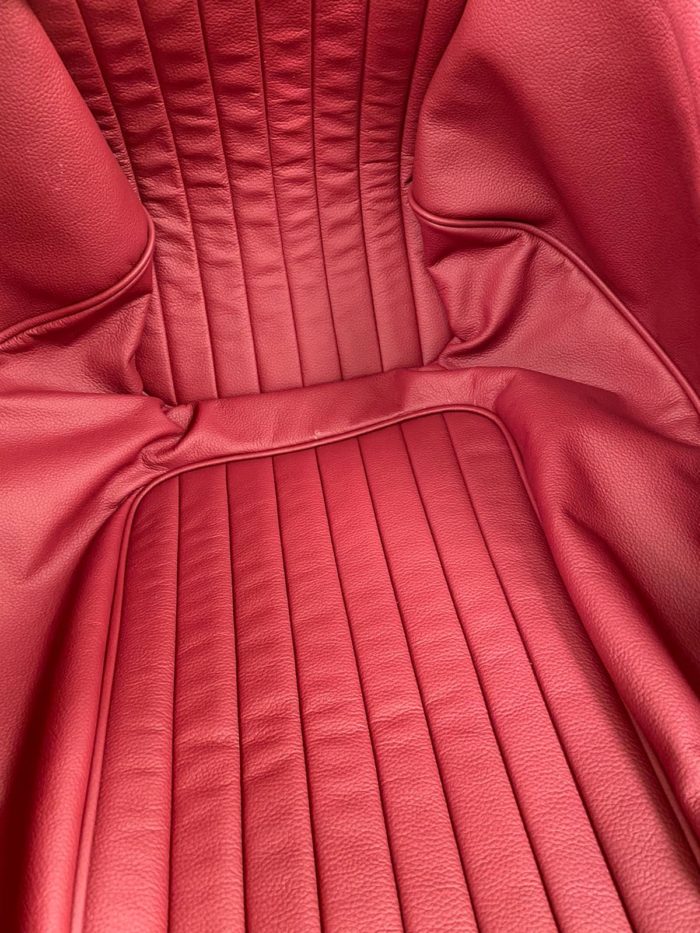
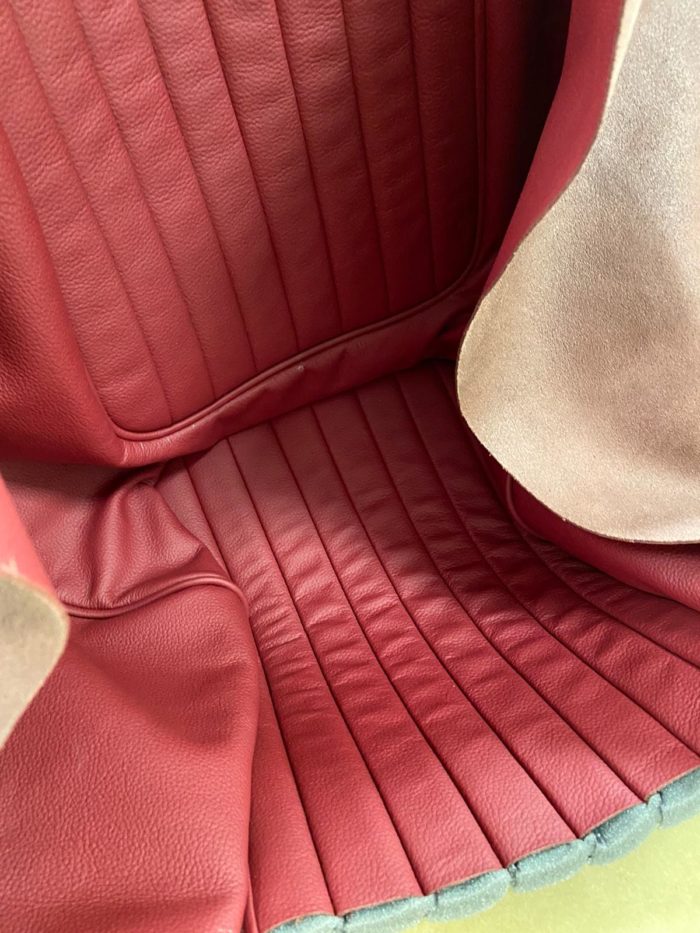
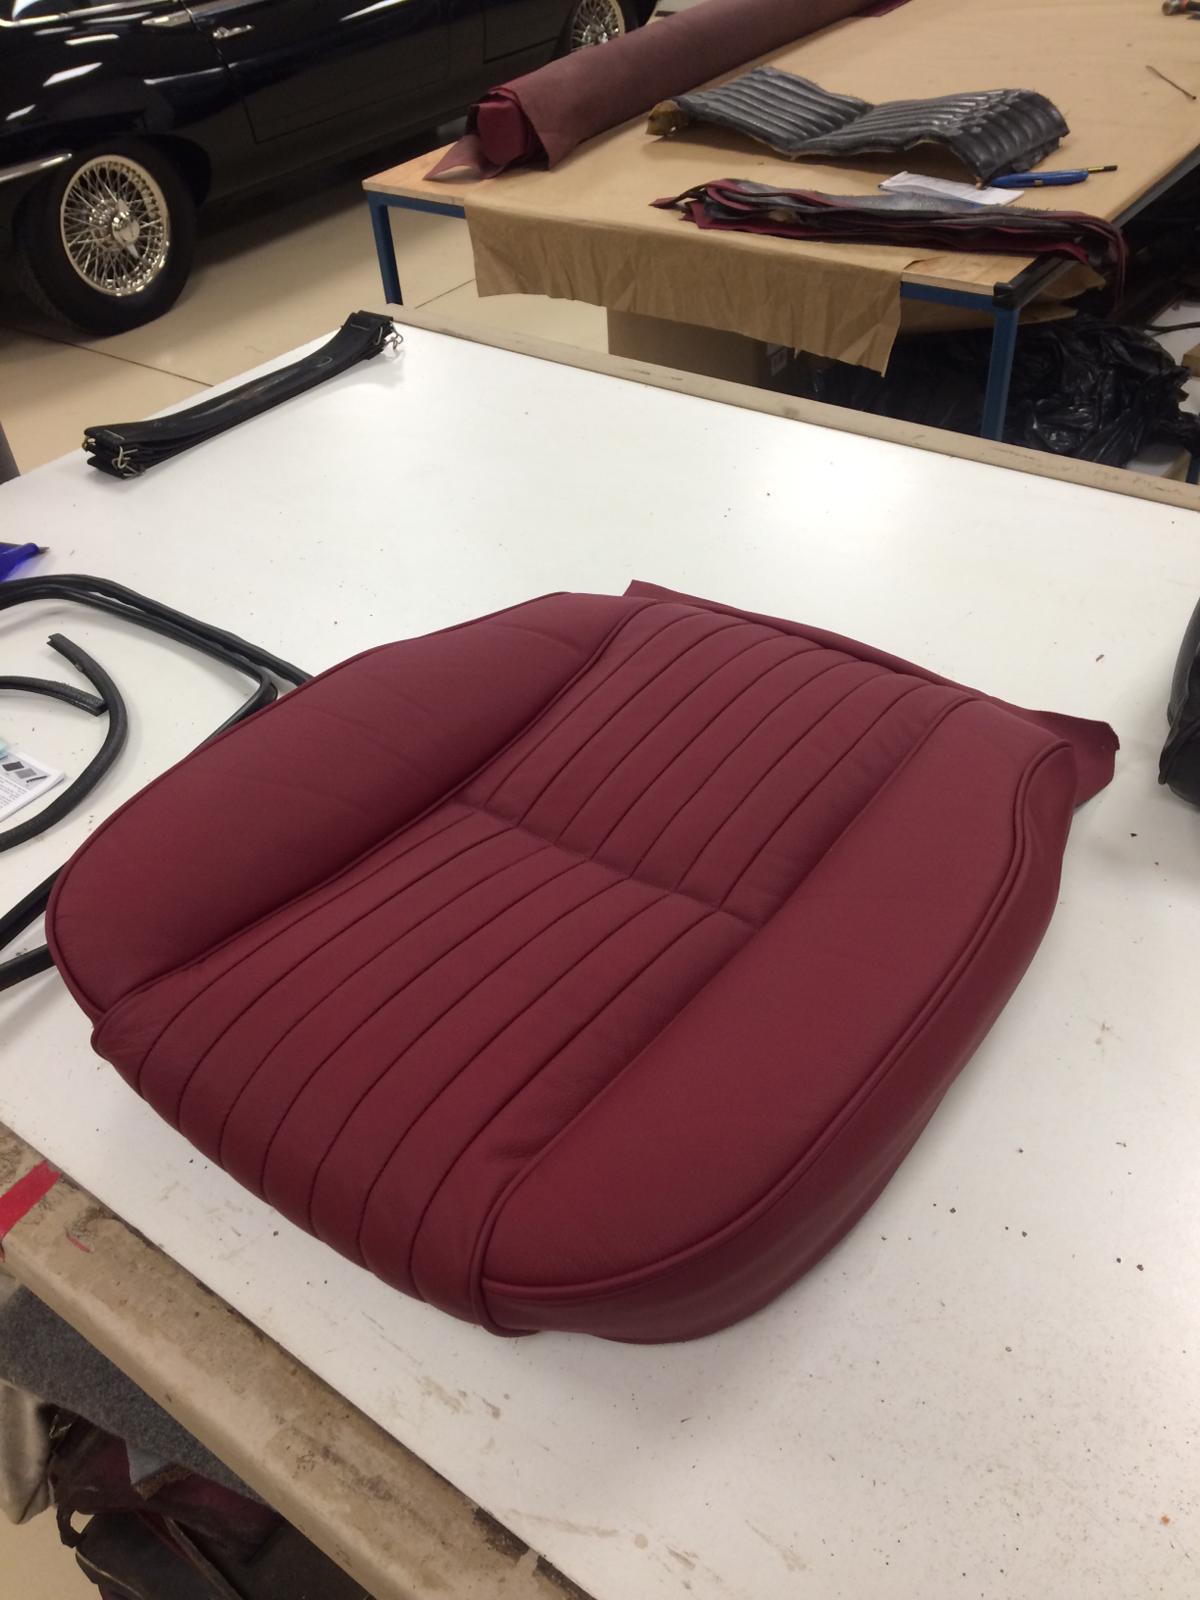
The skills of our in-house seamstress Kath never cease to amaze us! Just look how beautiful this finished red leather seats are.

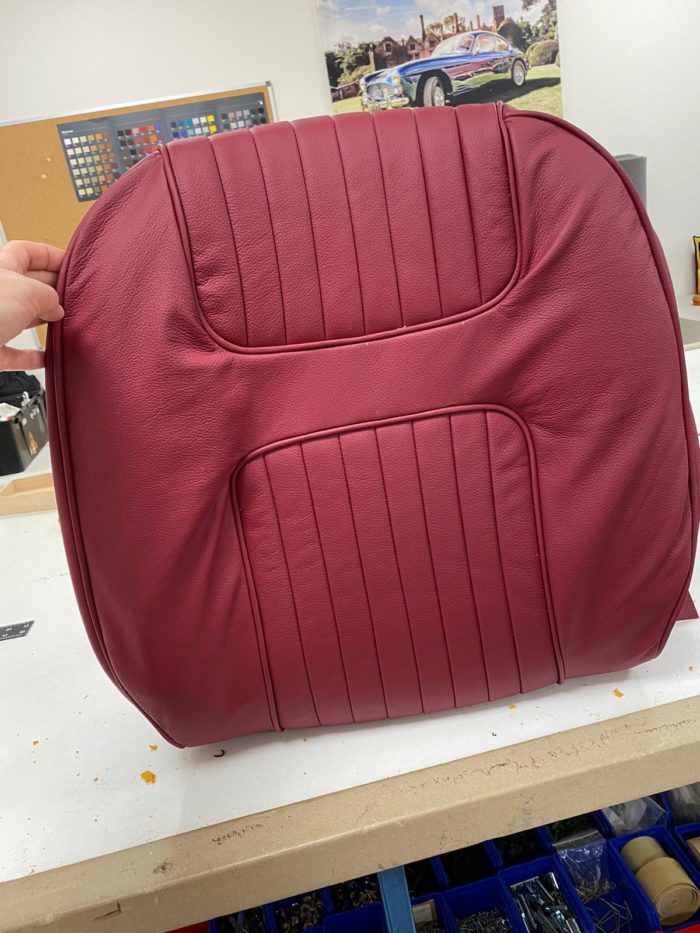
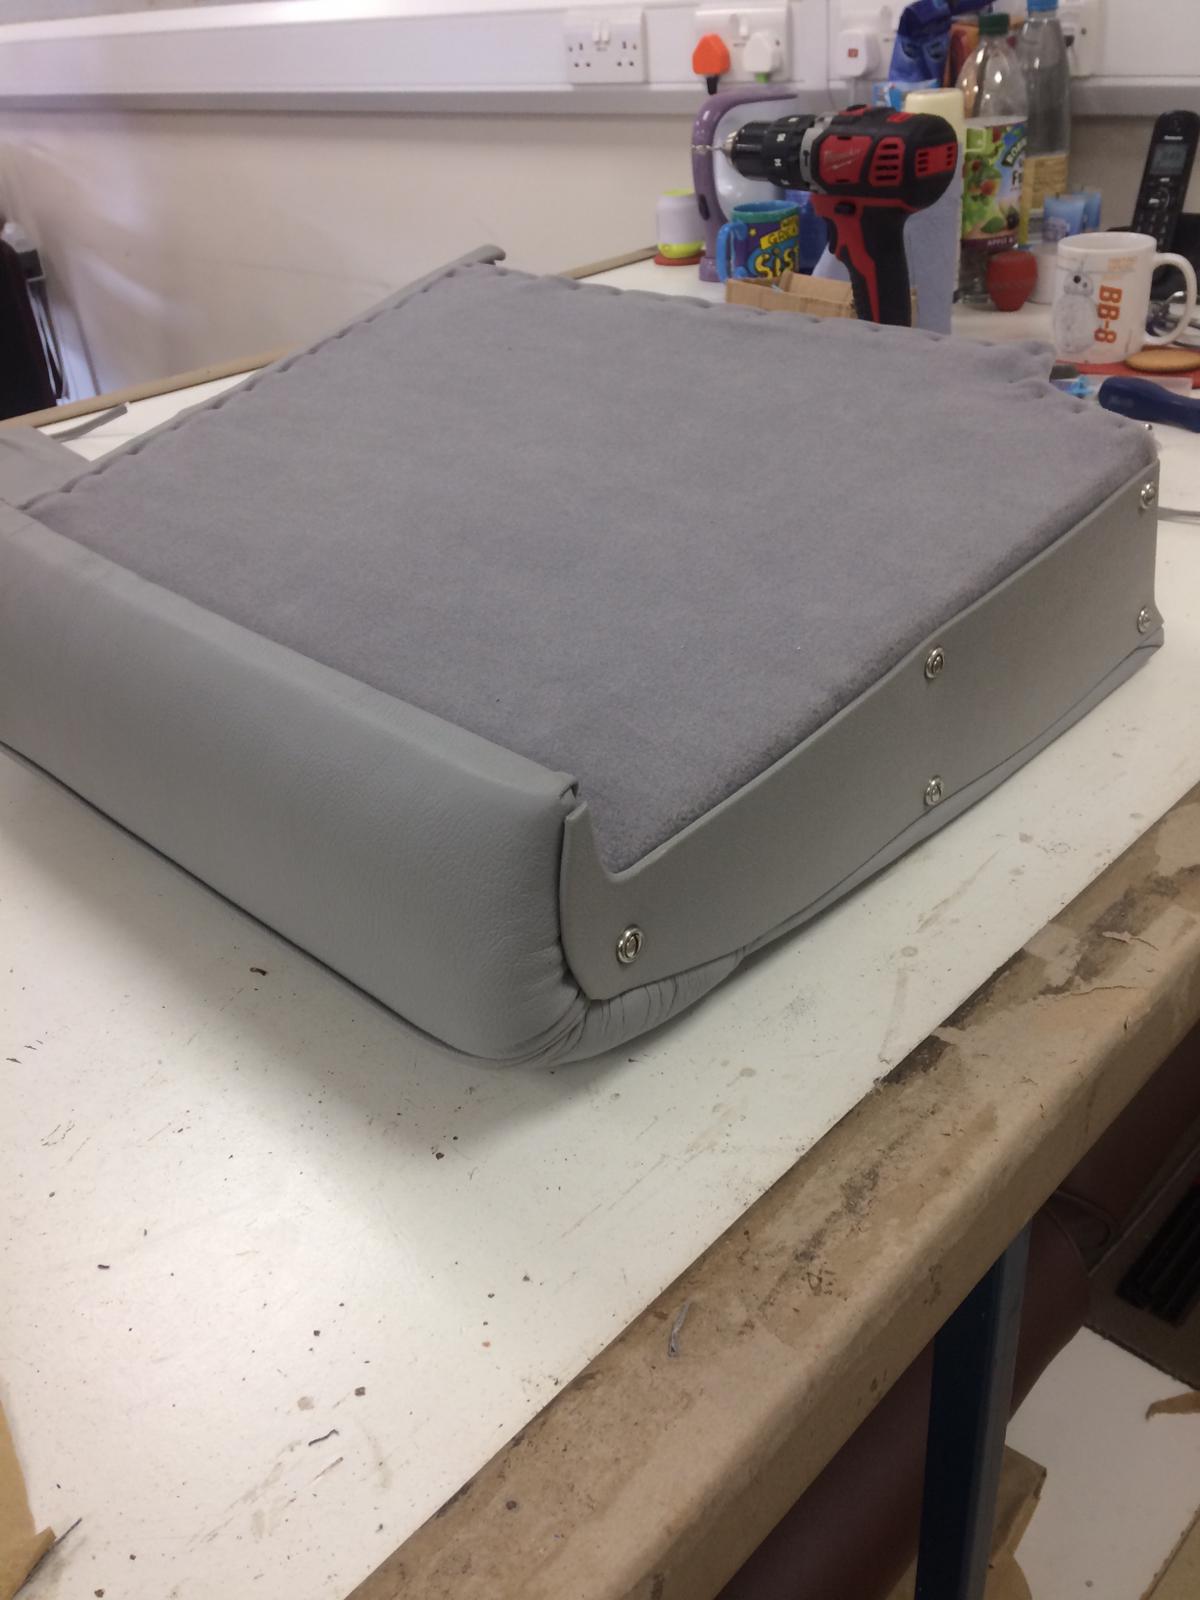
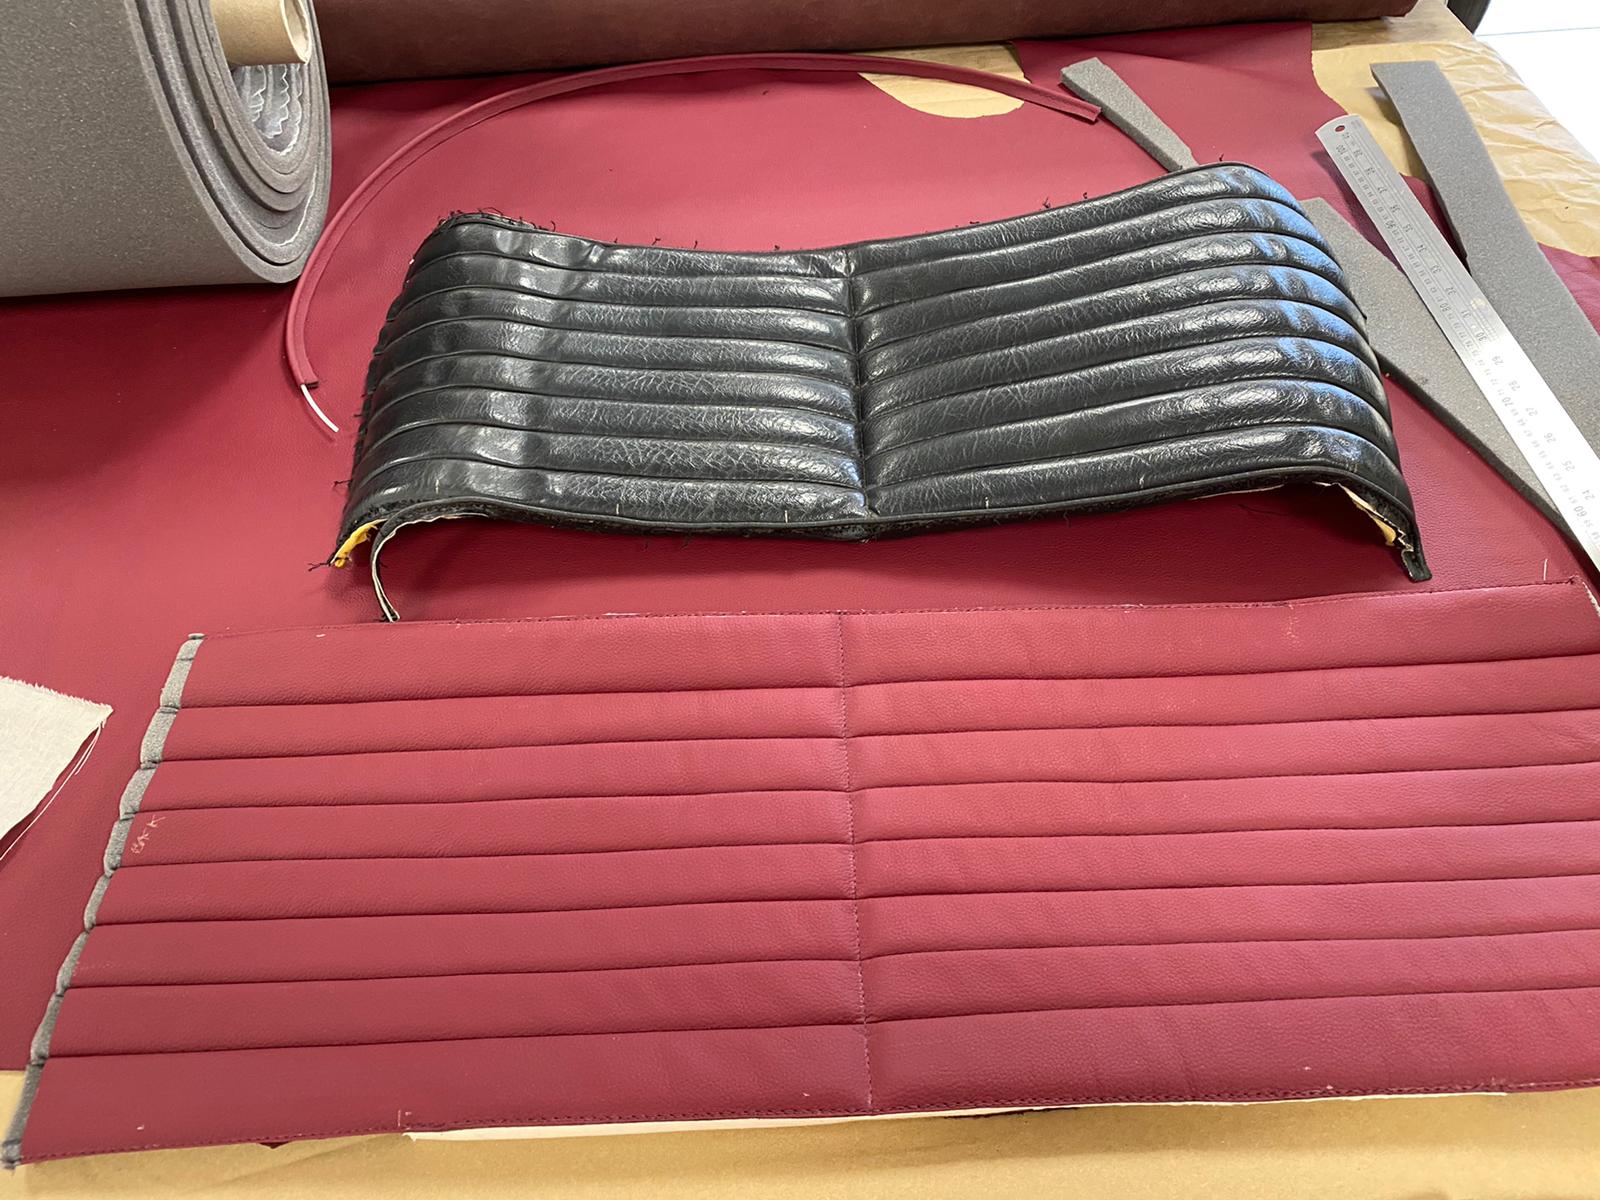
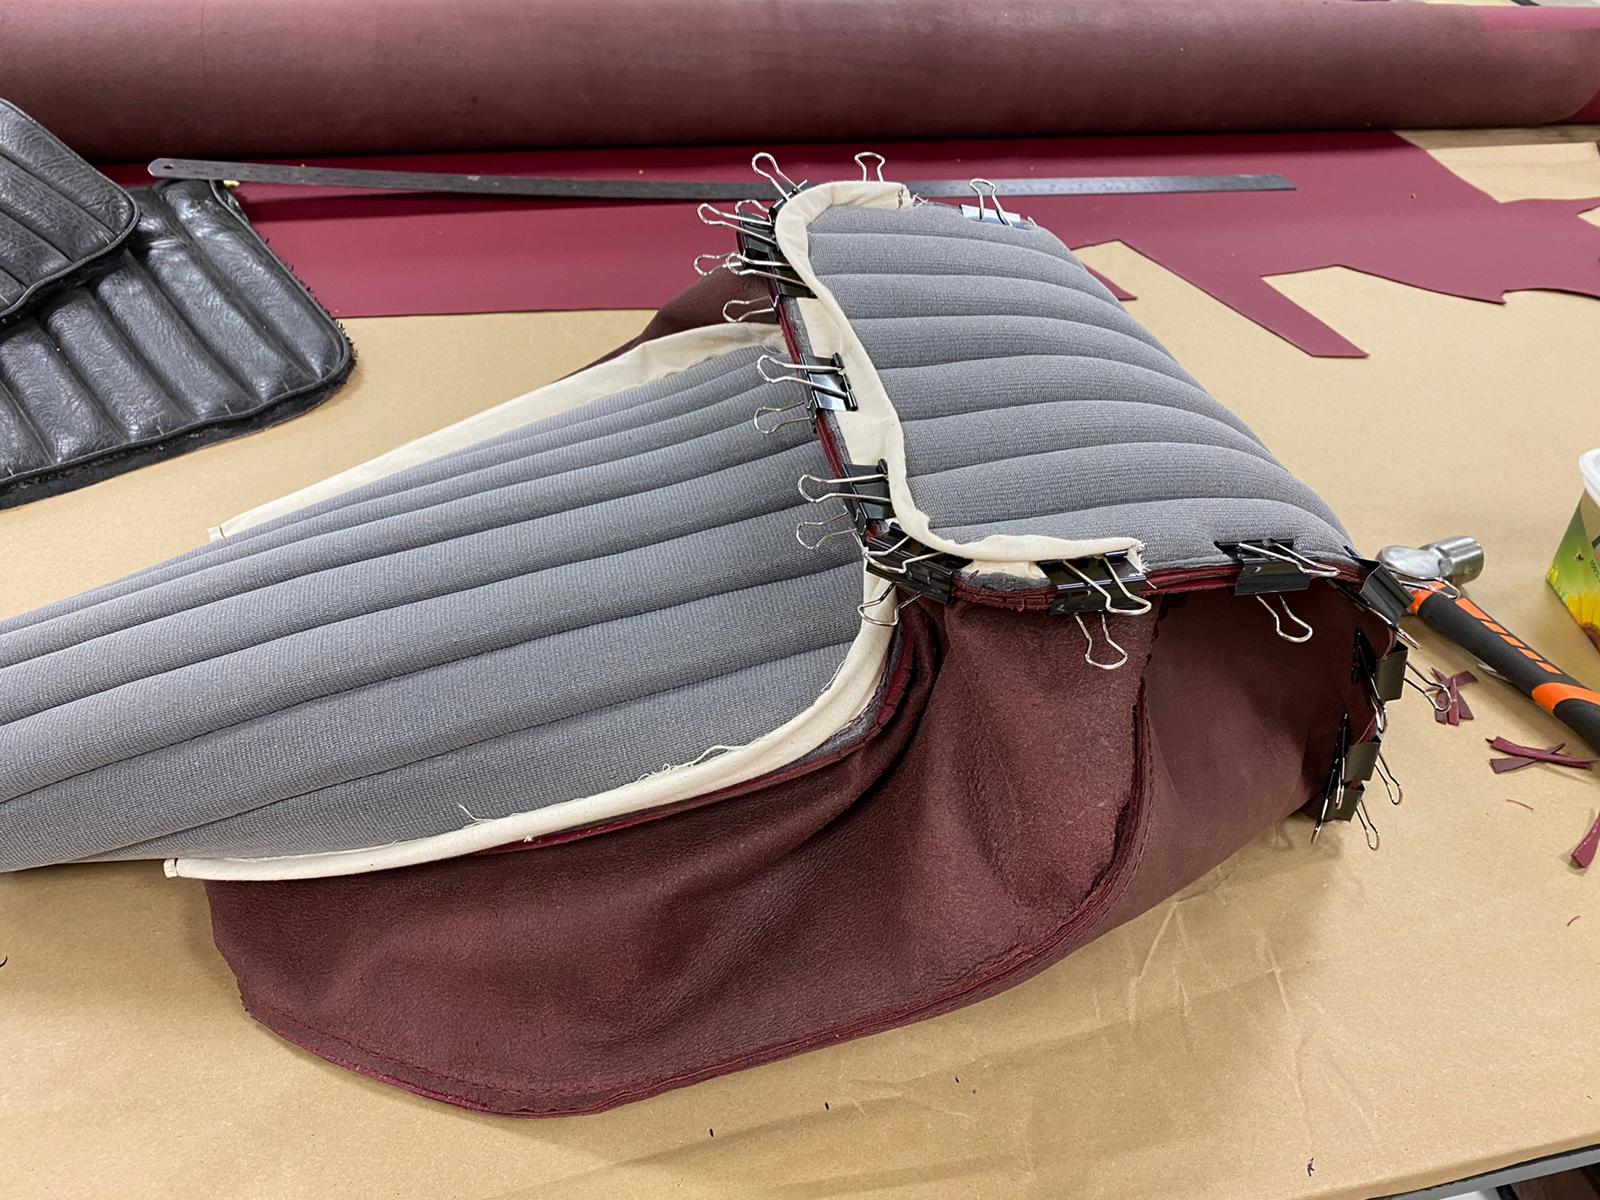
Brian then takes Kath’s seat covers and started fitting them to their new frames. “I’ve fitted the front squab to the frame” Brian tells us, “holding the fluted sections with hog rings”.
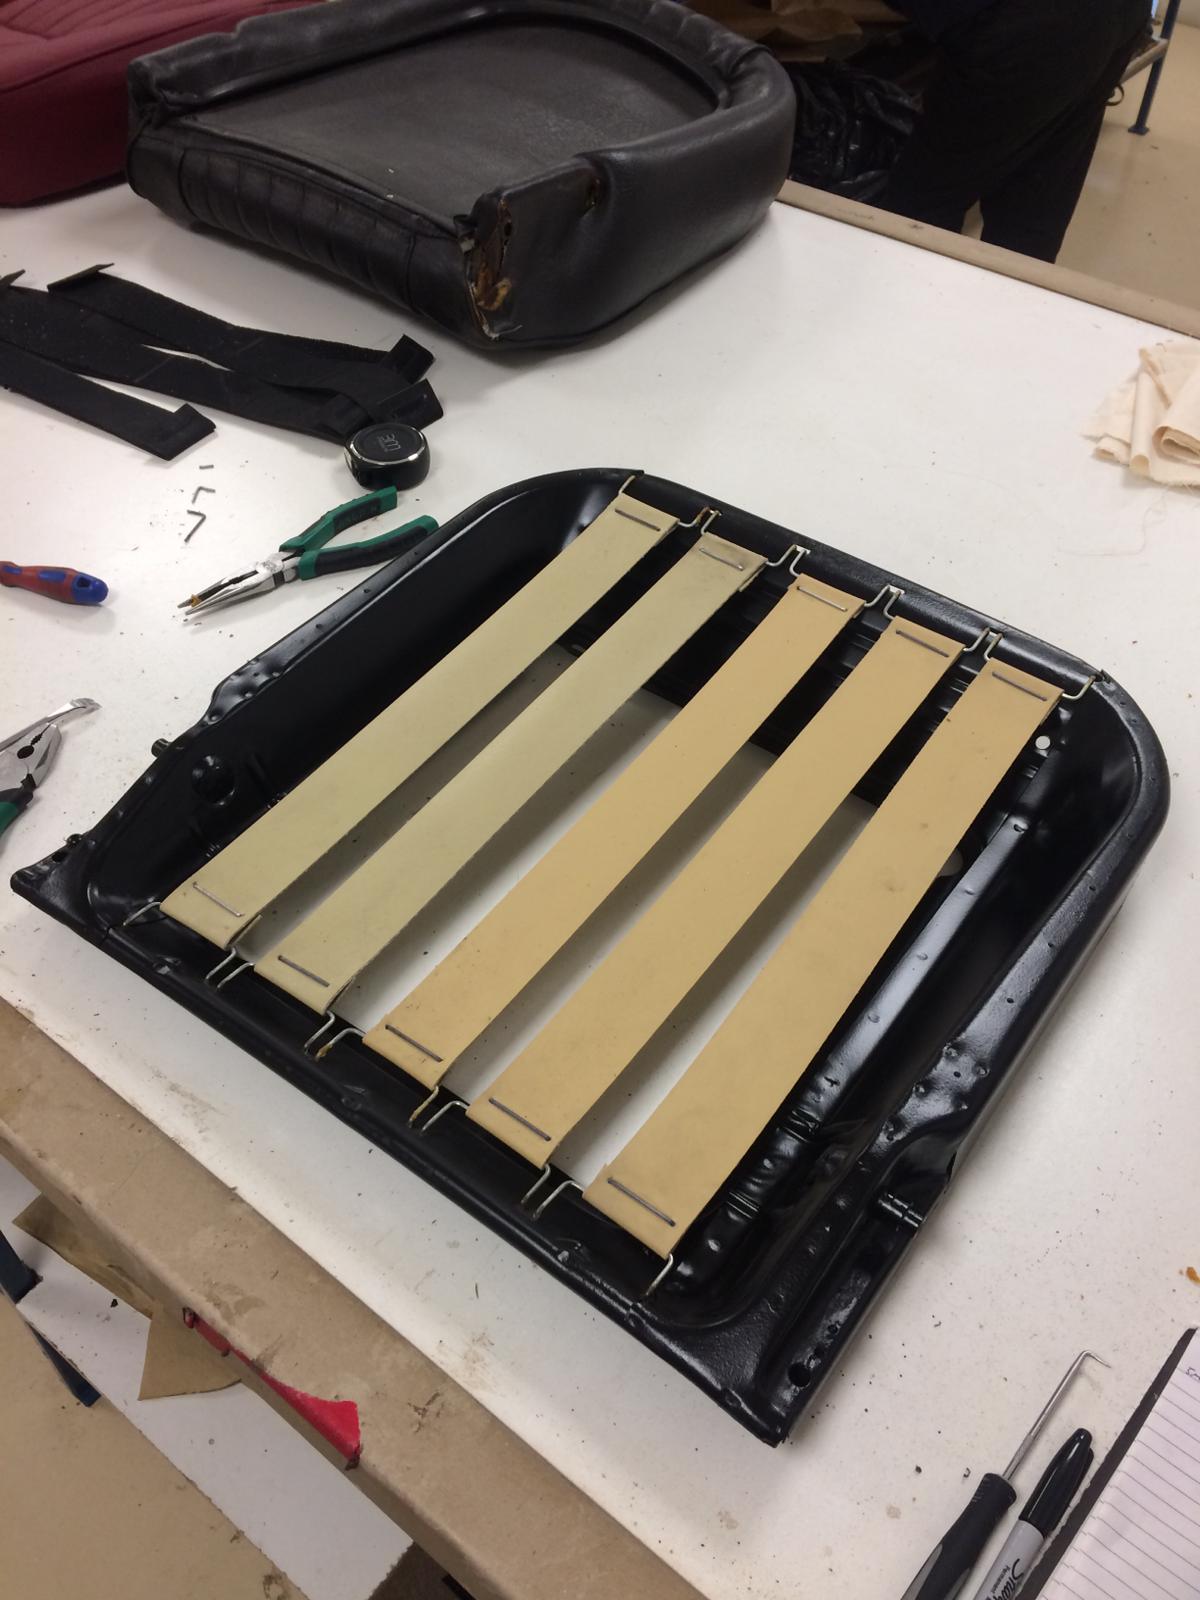
Brian’s also made new webbing straps for each seat and fitted these to their frames. He’s added extra foam to help pad them out some more too.
Brian’s then pulled the cover over tightly around the back of the seat and clipped it into position. The backboard has then been fitted into place.
We can’t wait to see them back inside the car, and give them a test ‘sit-down’!
