
TVR’s New Wardrobe
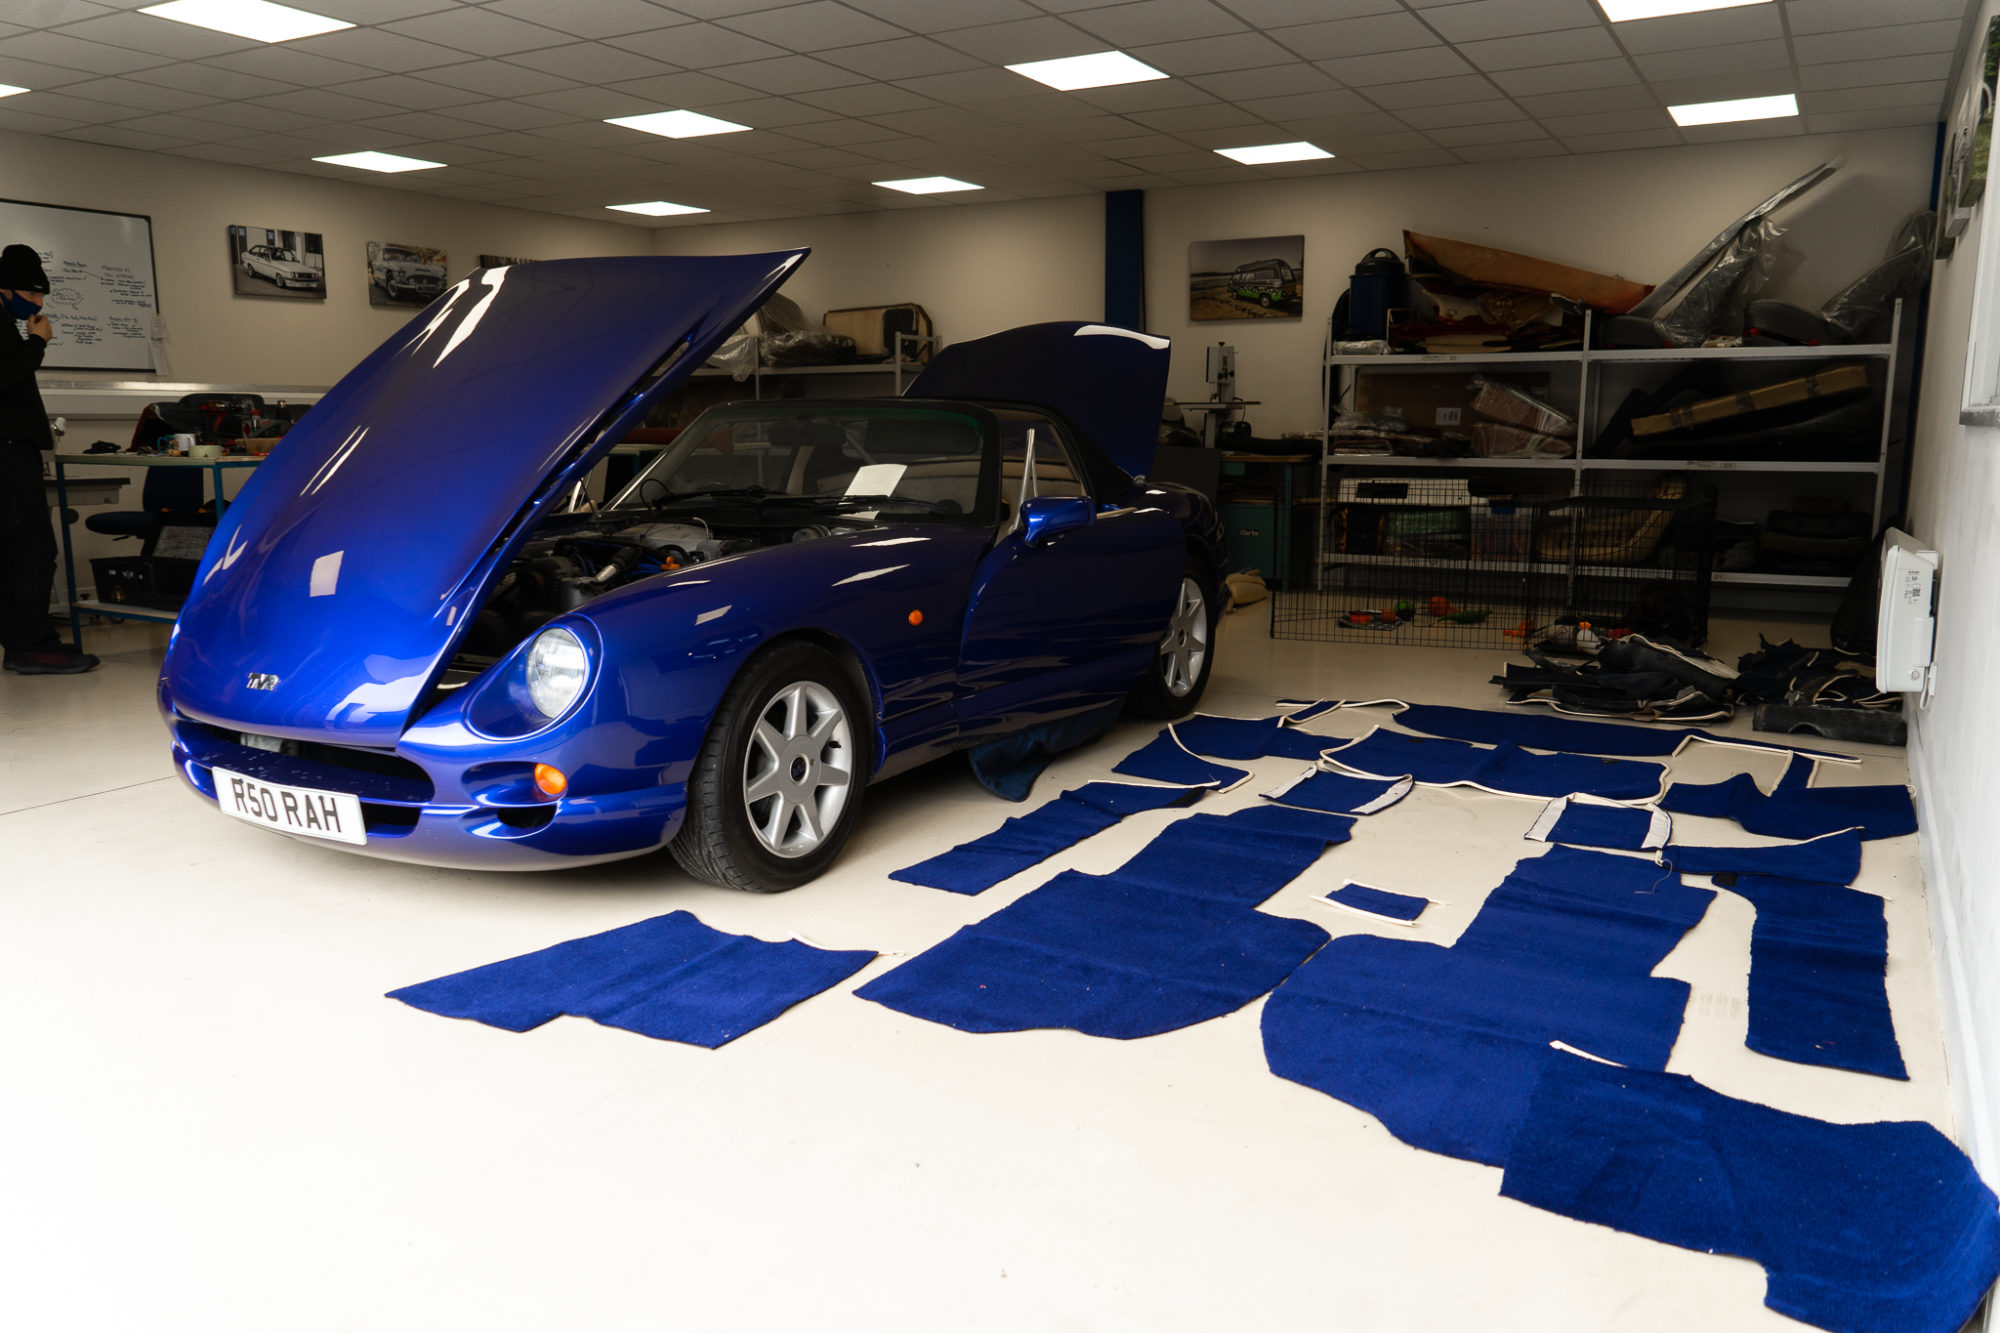
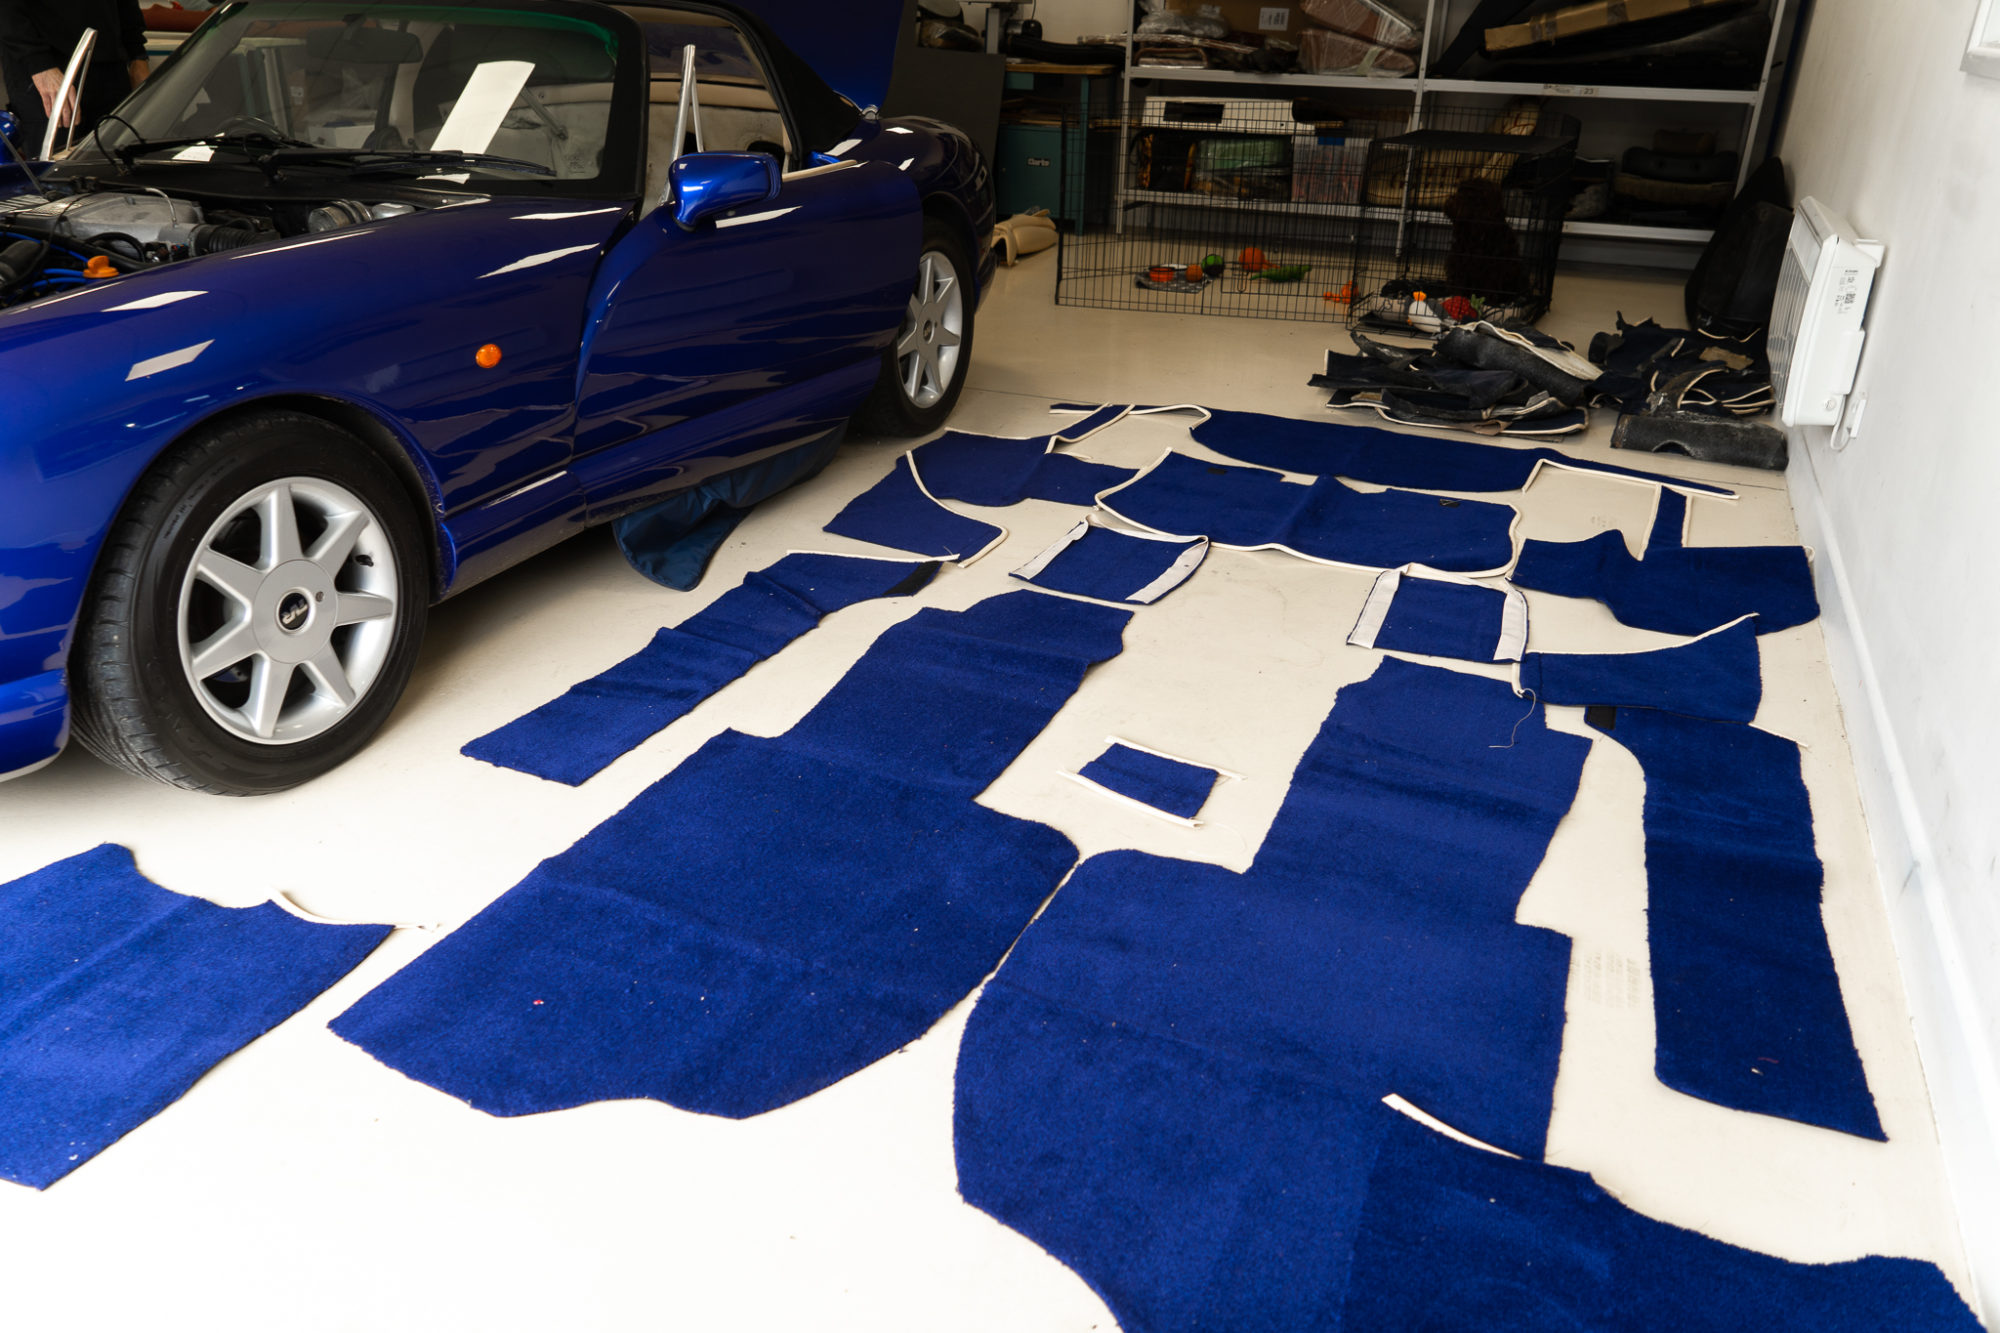
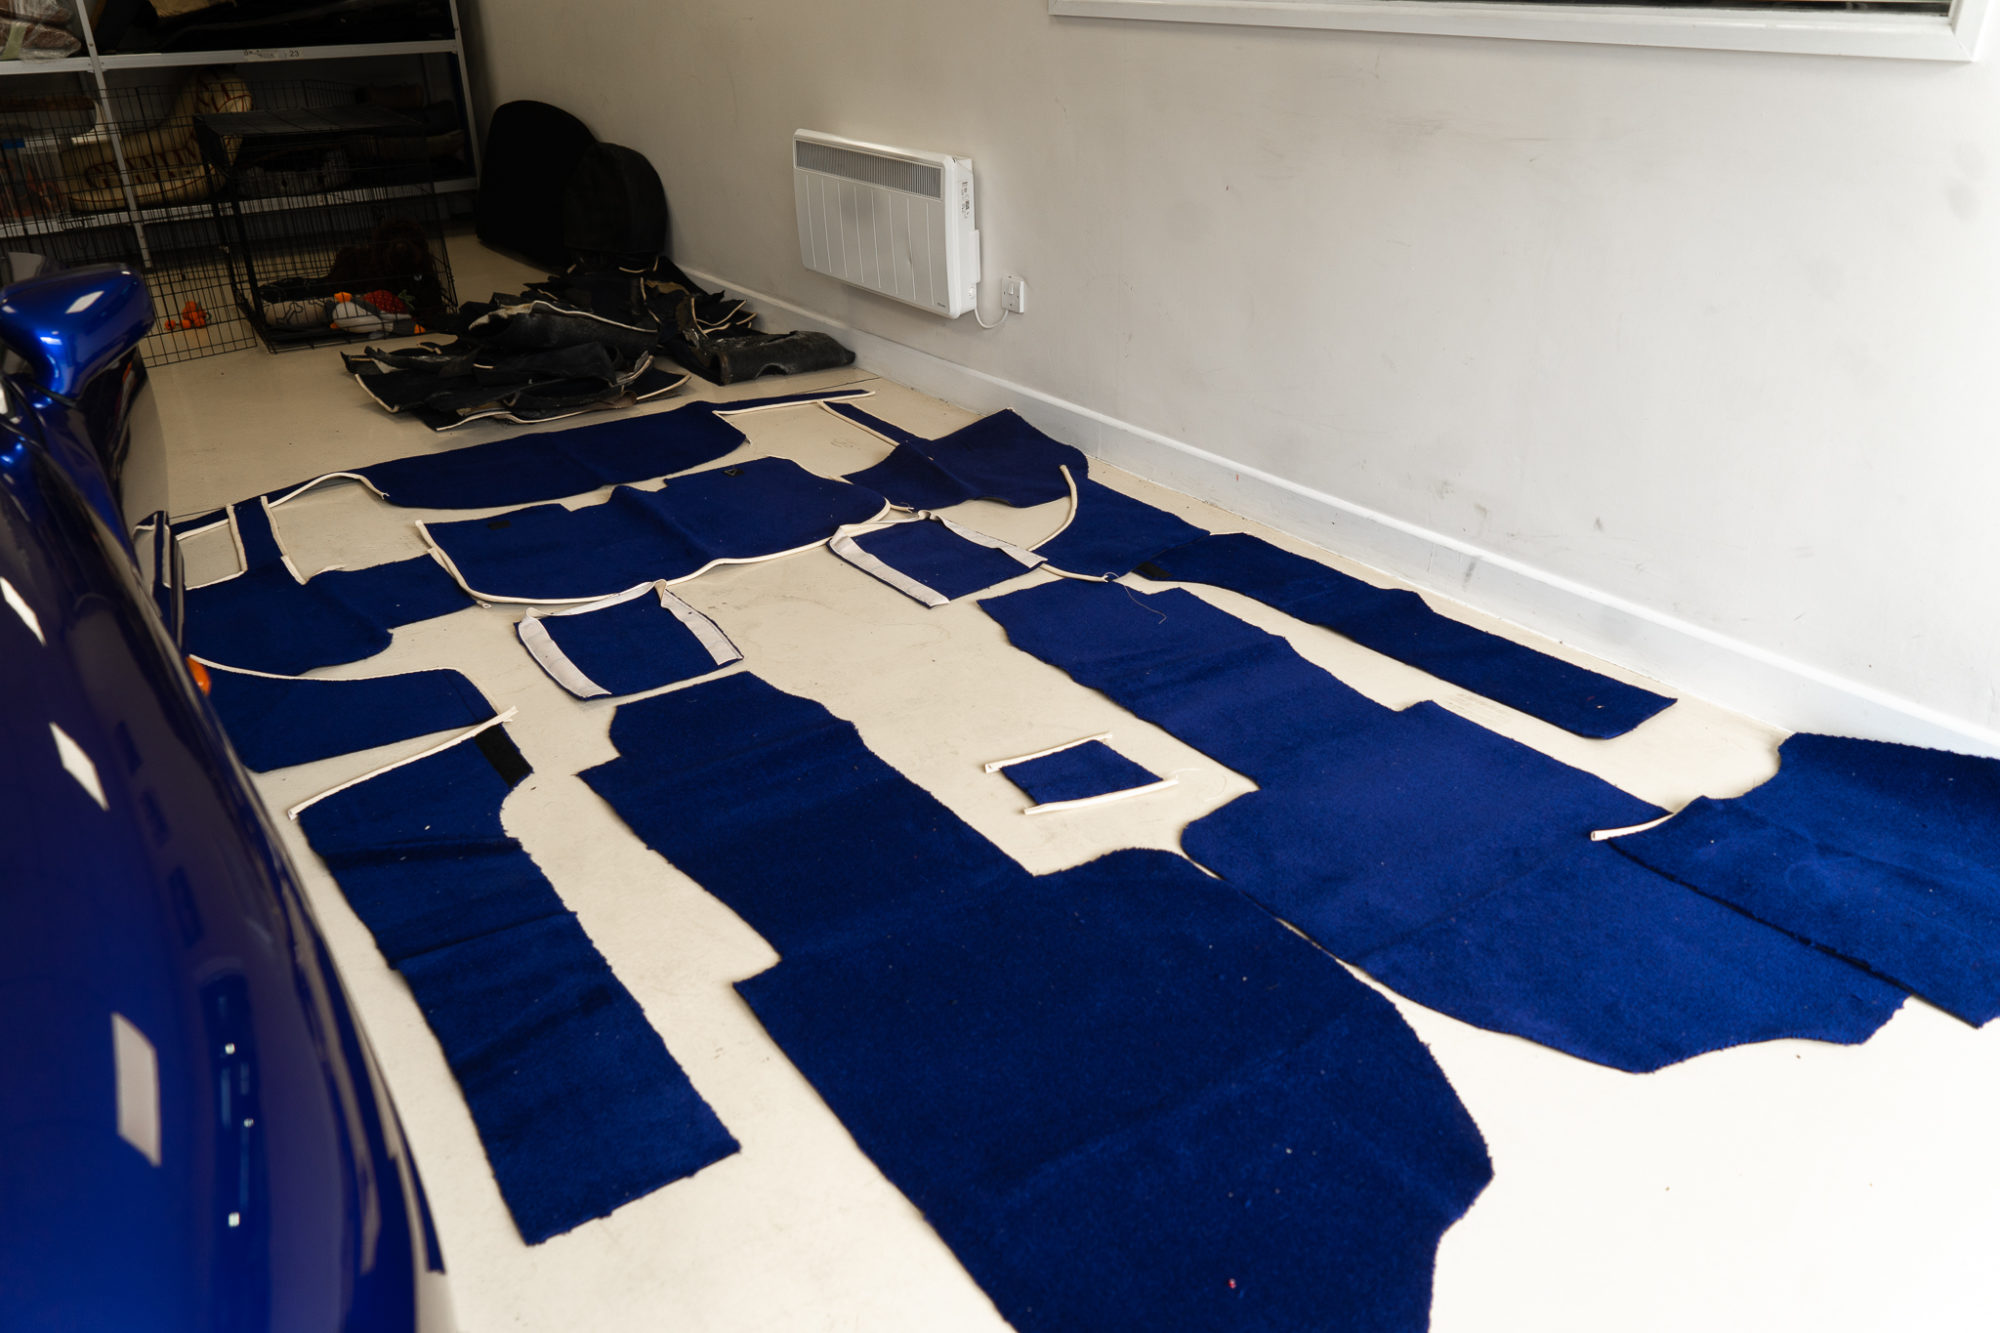
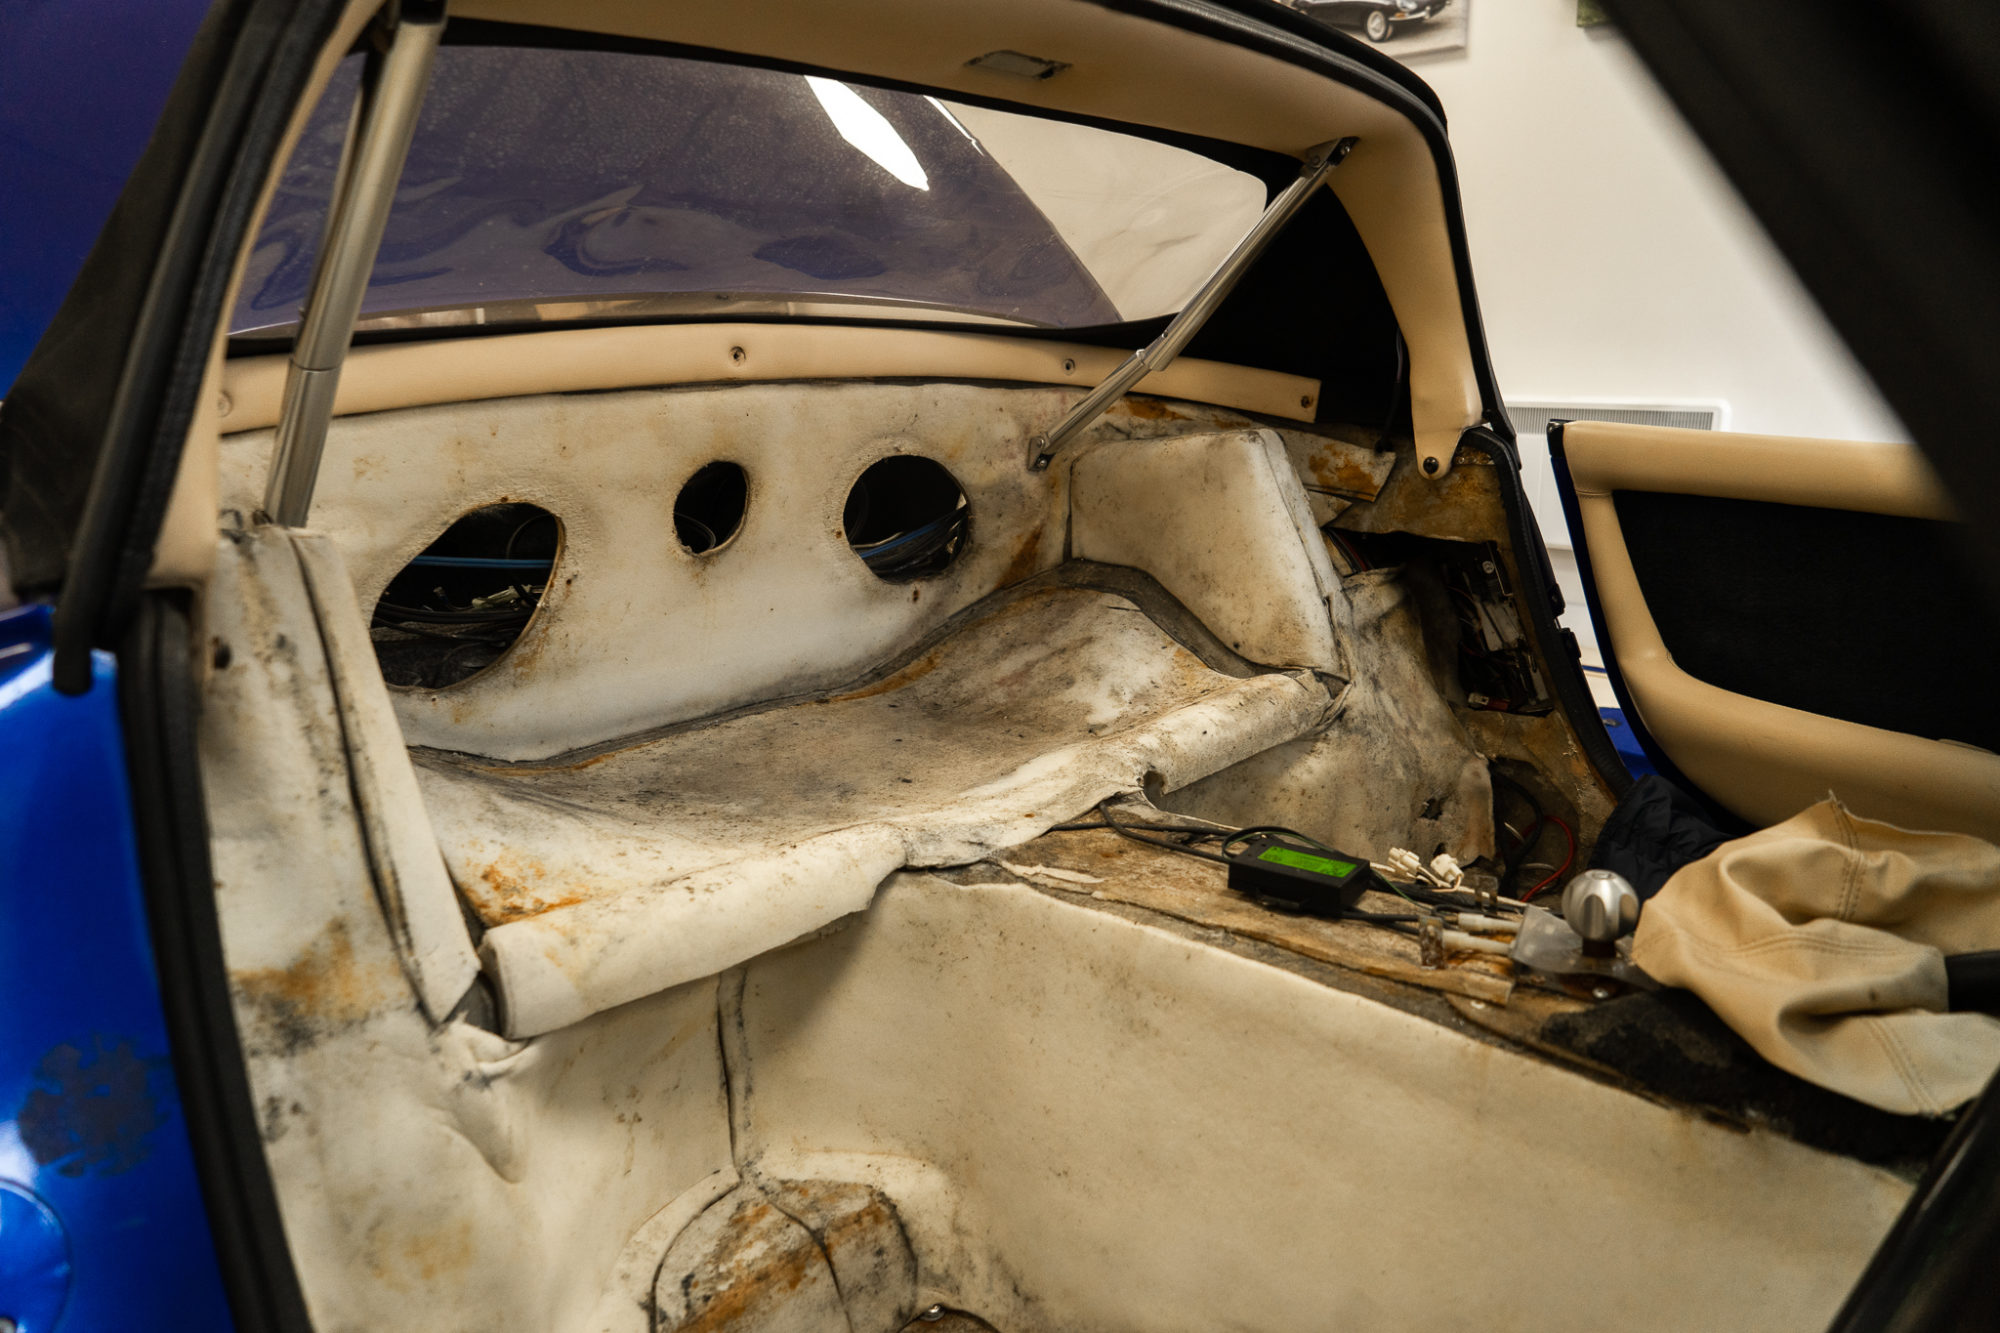
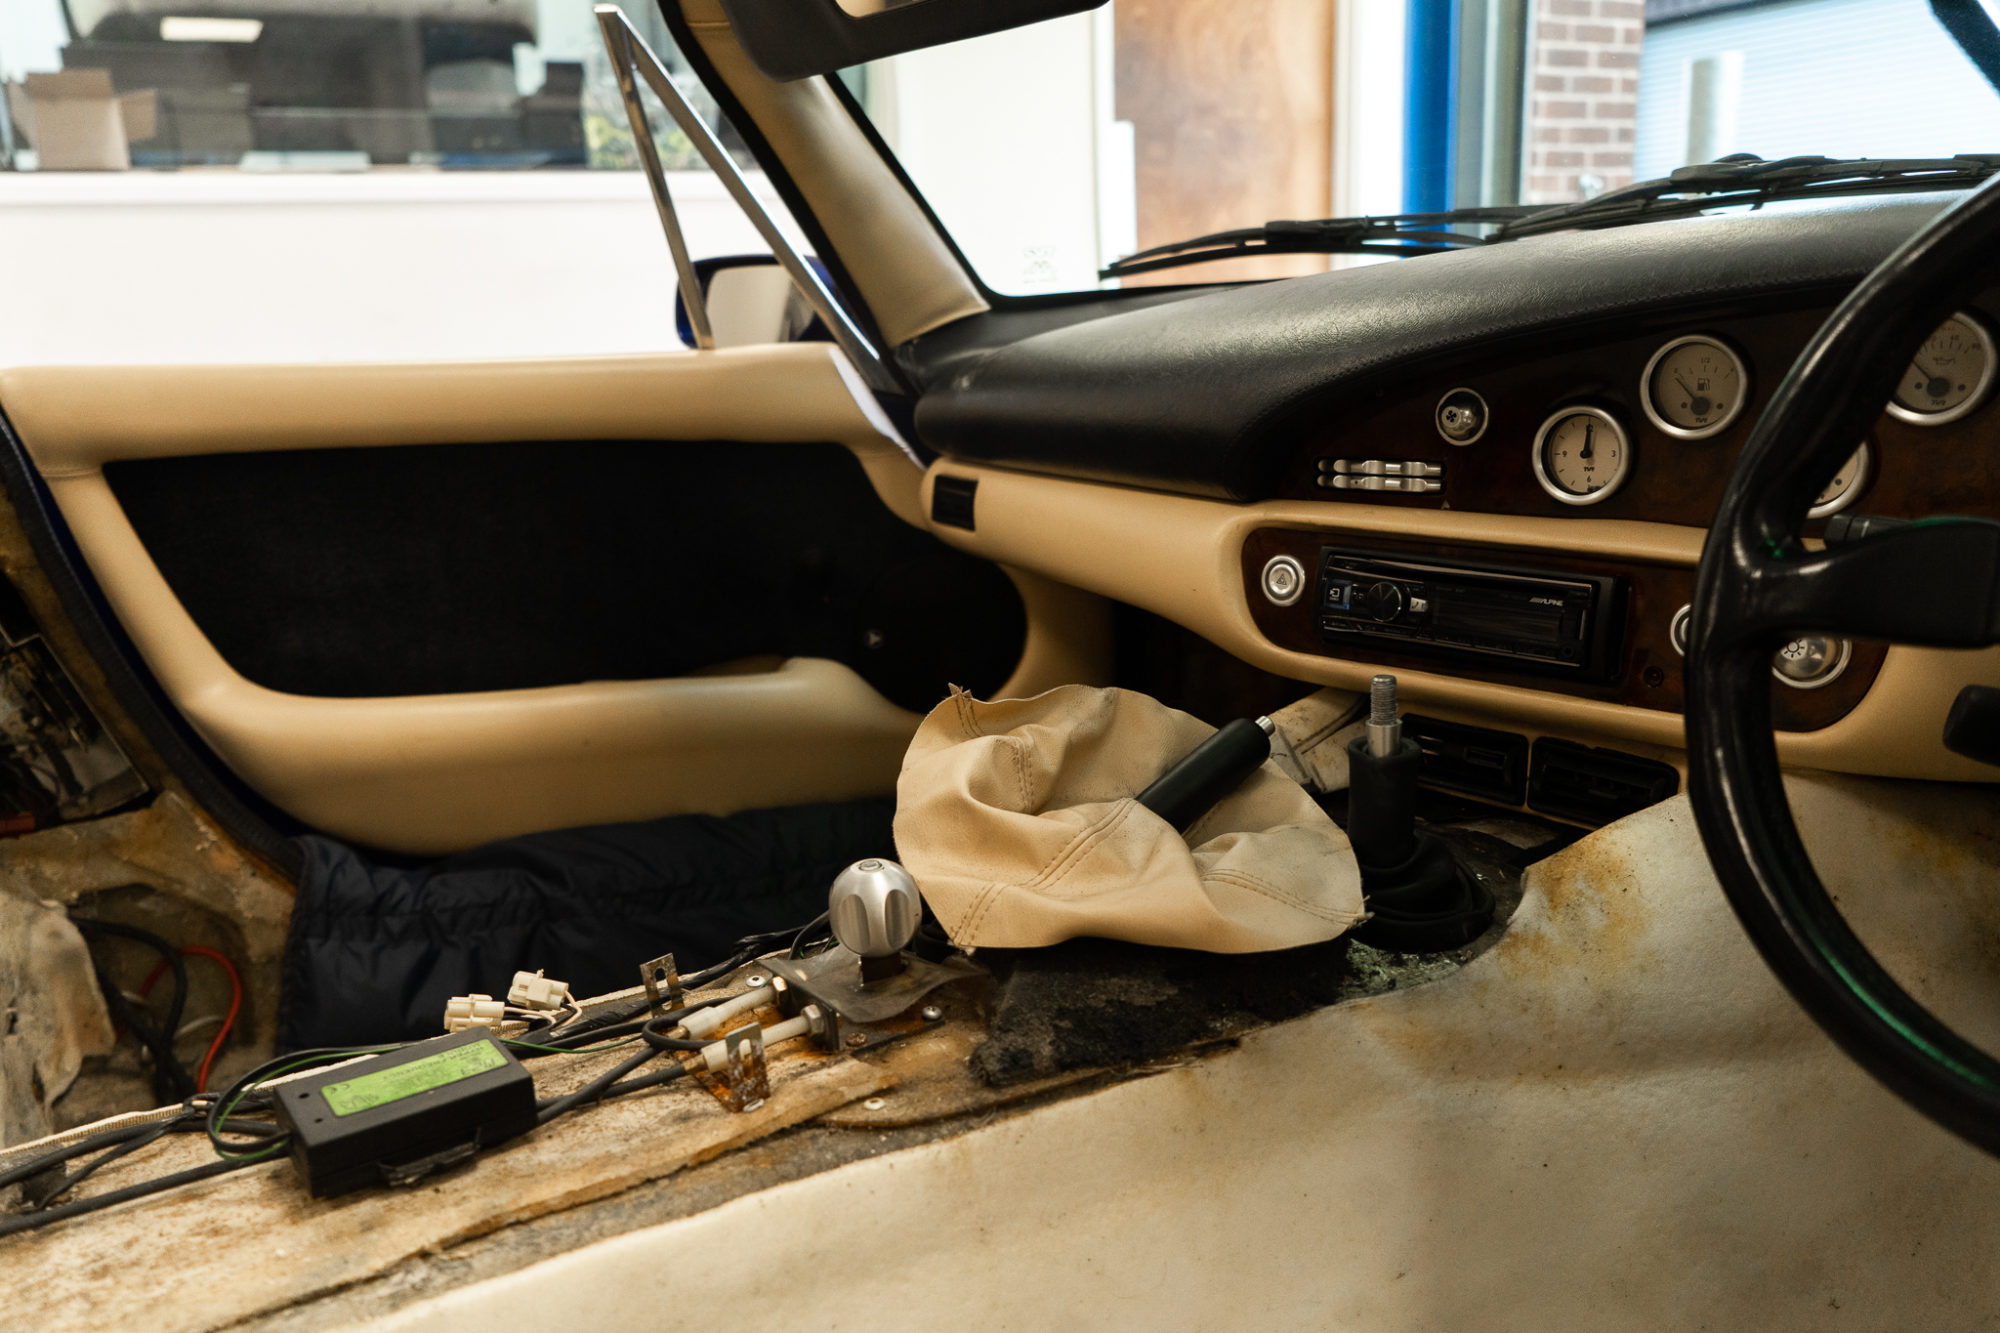
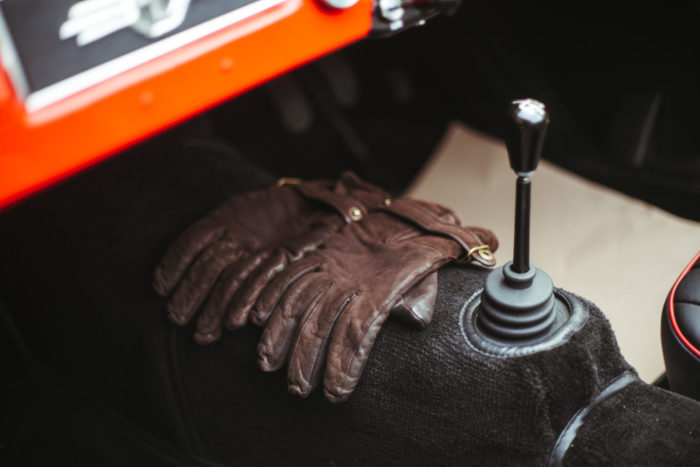
The TVR is having a new carpet fitted so our trim shop has removed everything and has begun fitting the new pieces provided to us


The TVR is having a new carpet fitted so our trim shop has removed everything and has begun fitting the new pieces provided to us

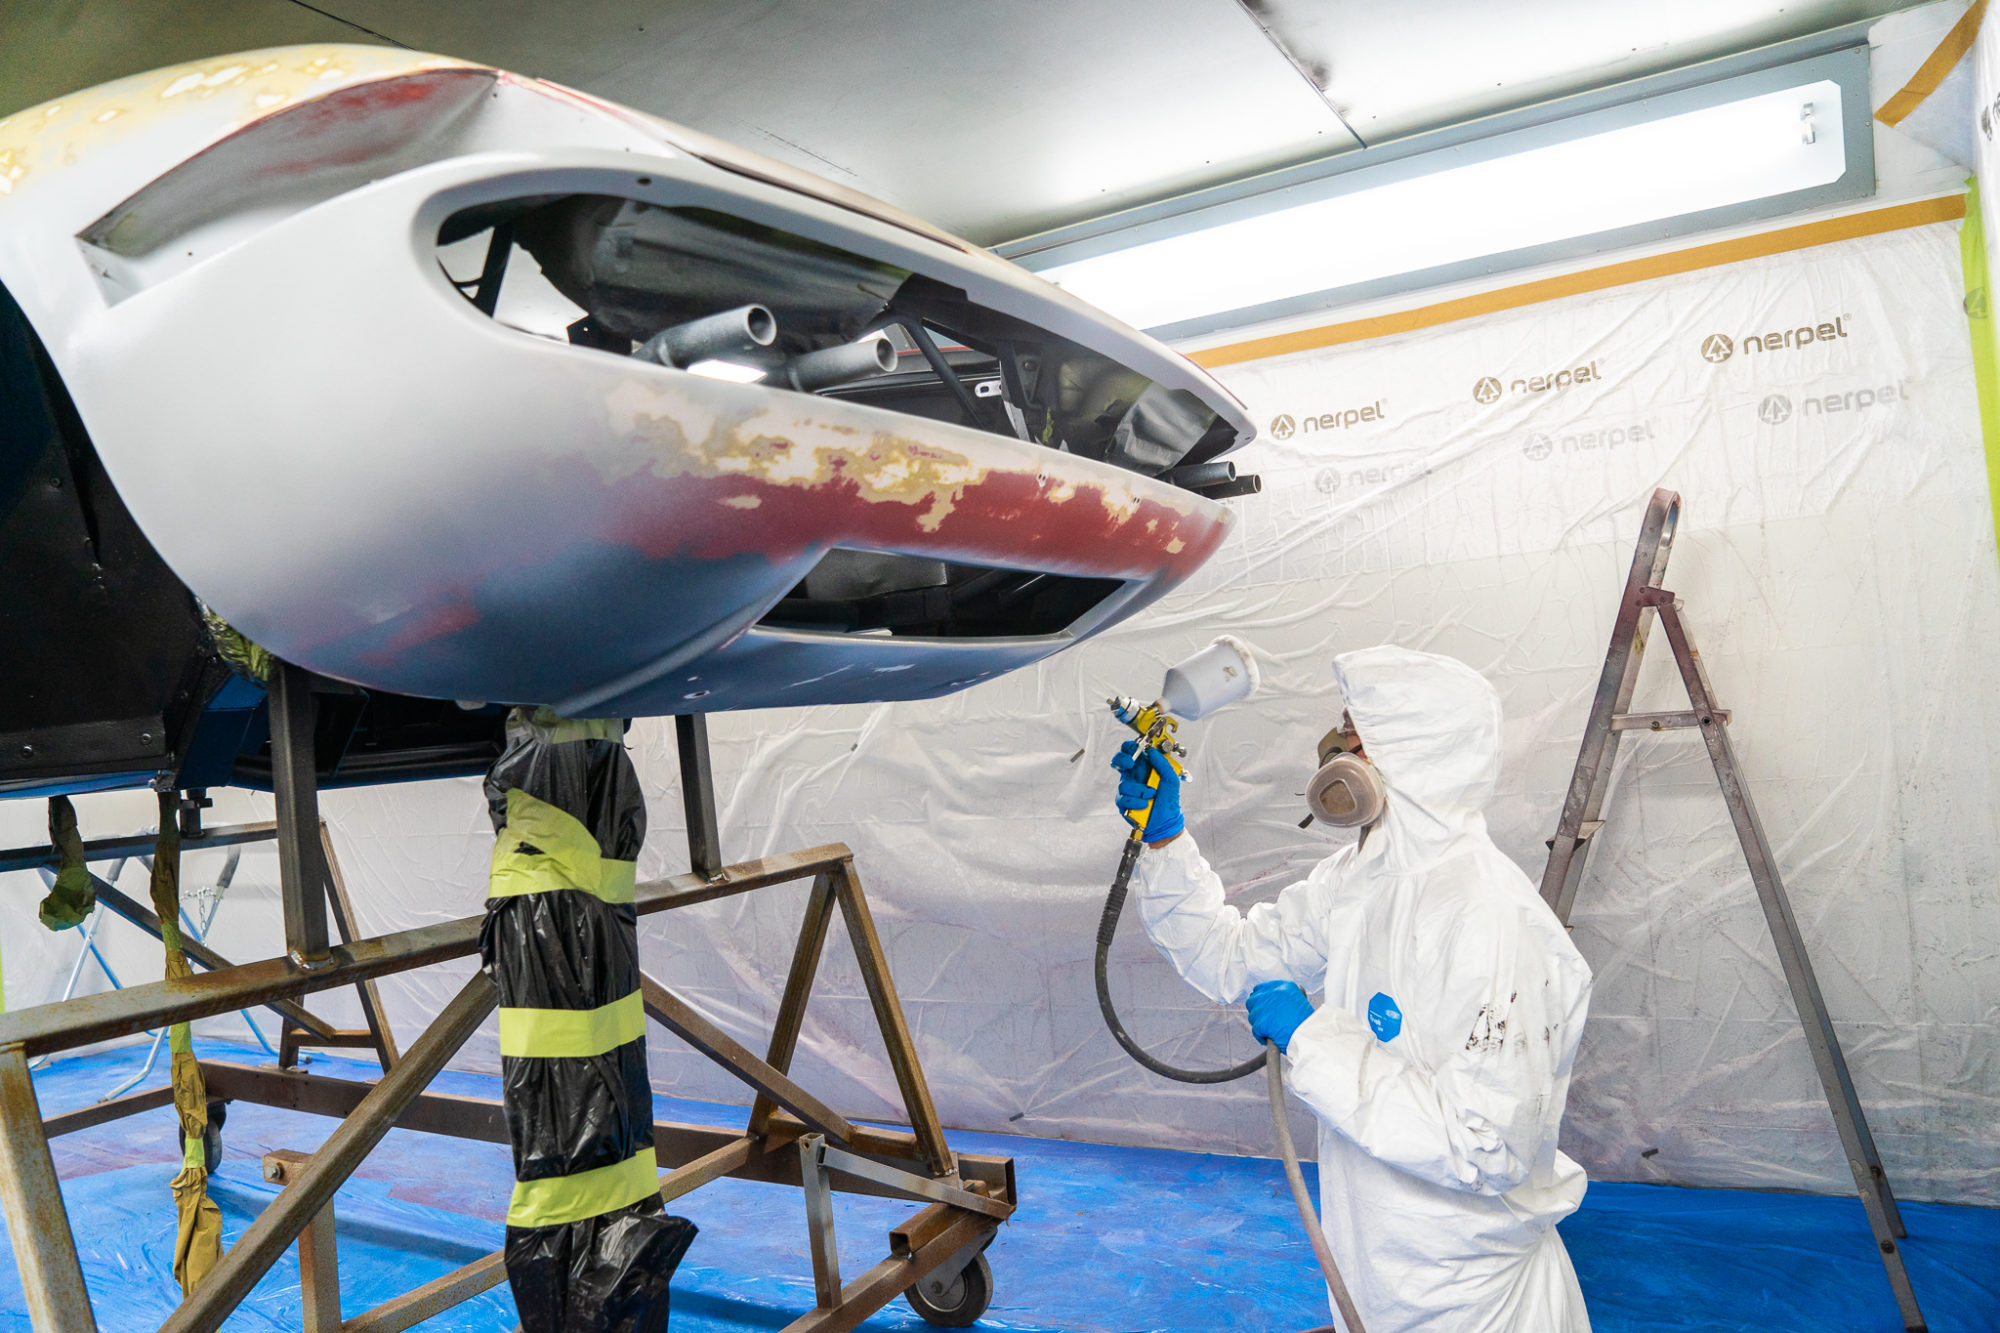
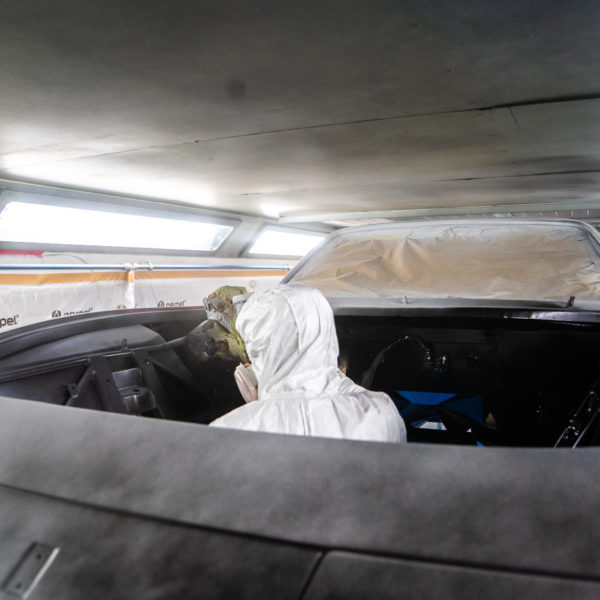
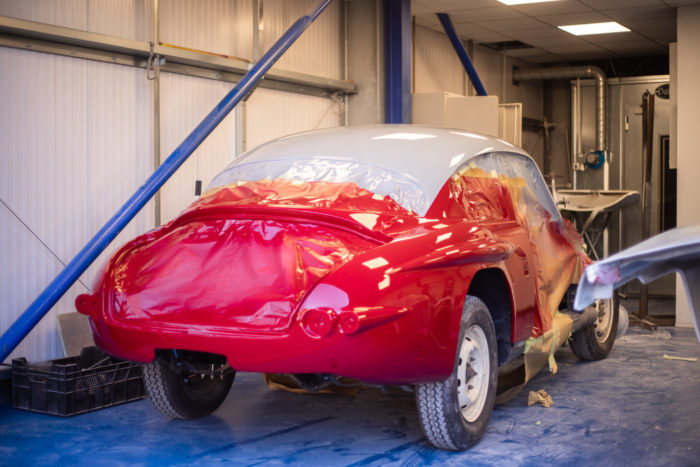
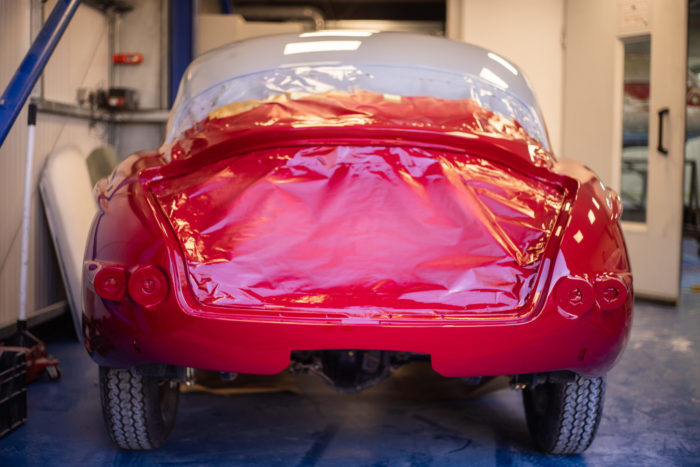
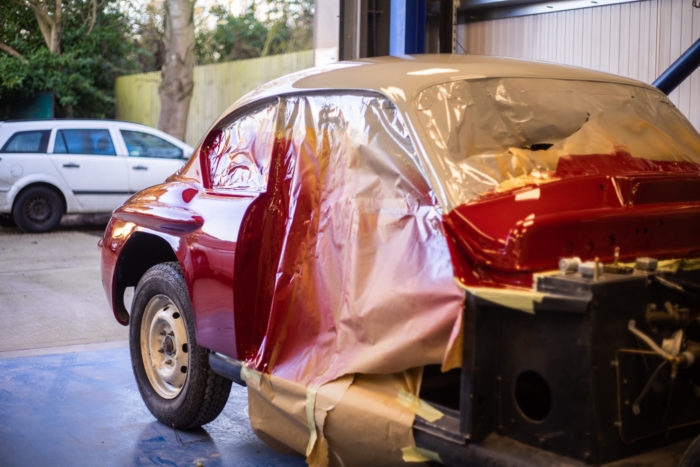
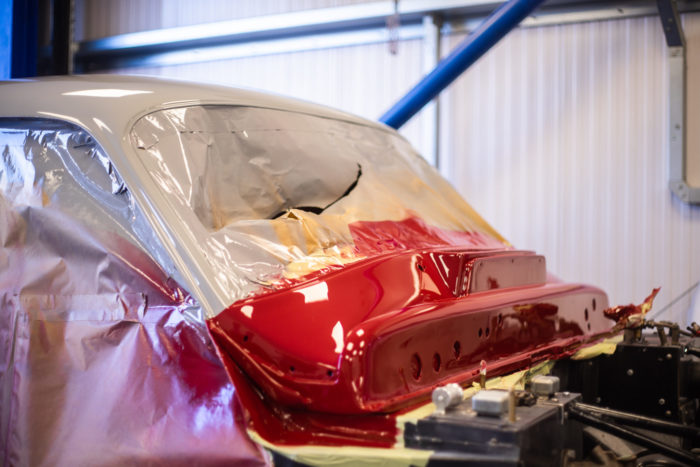
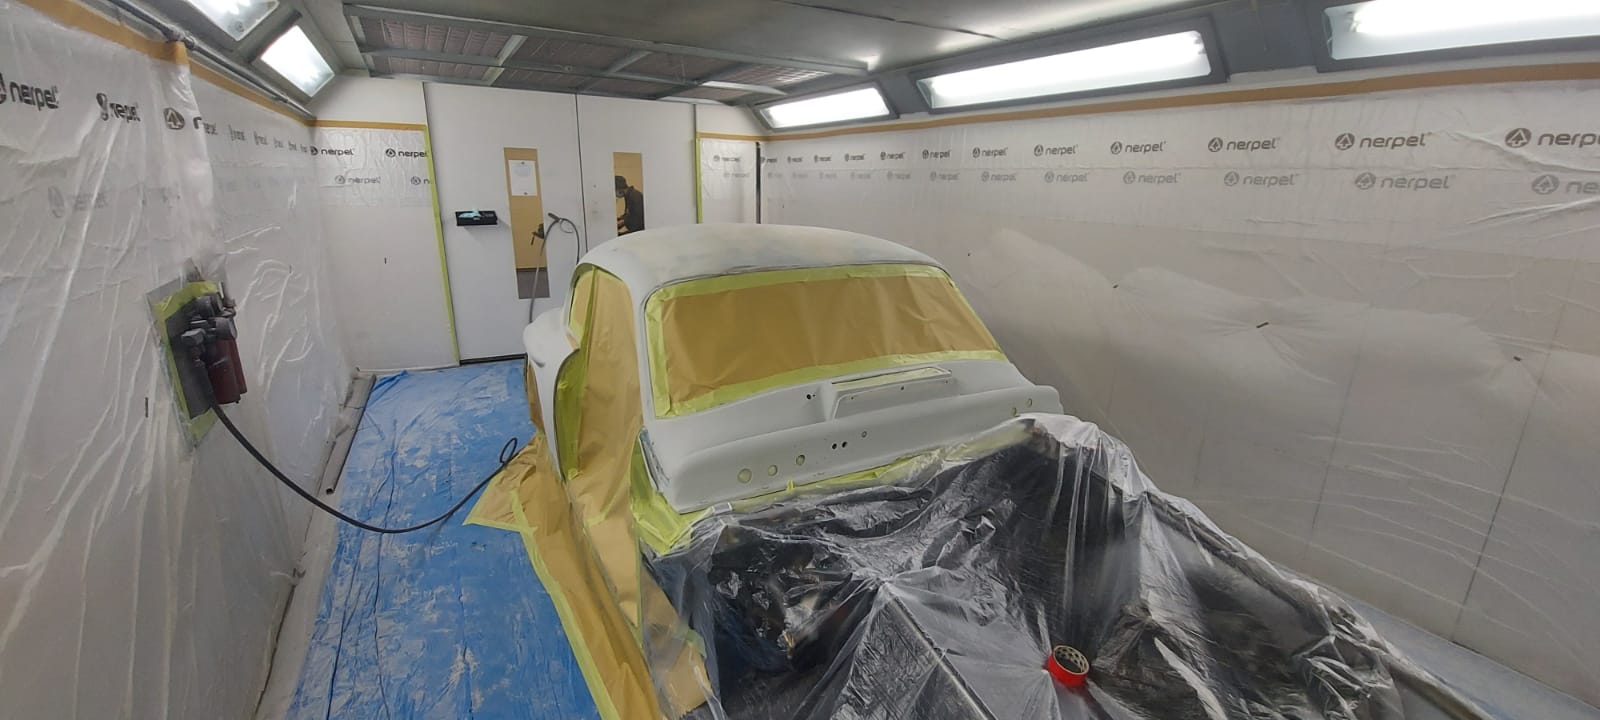
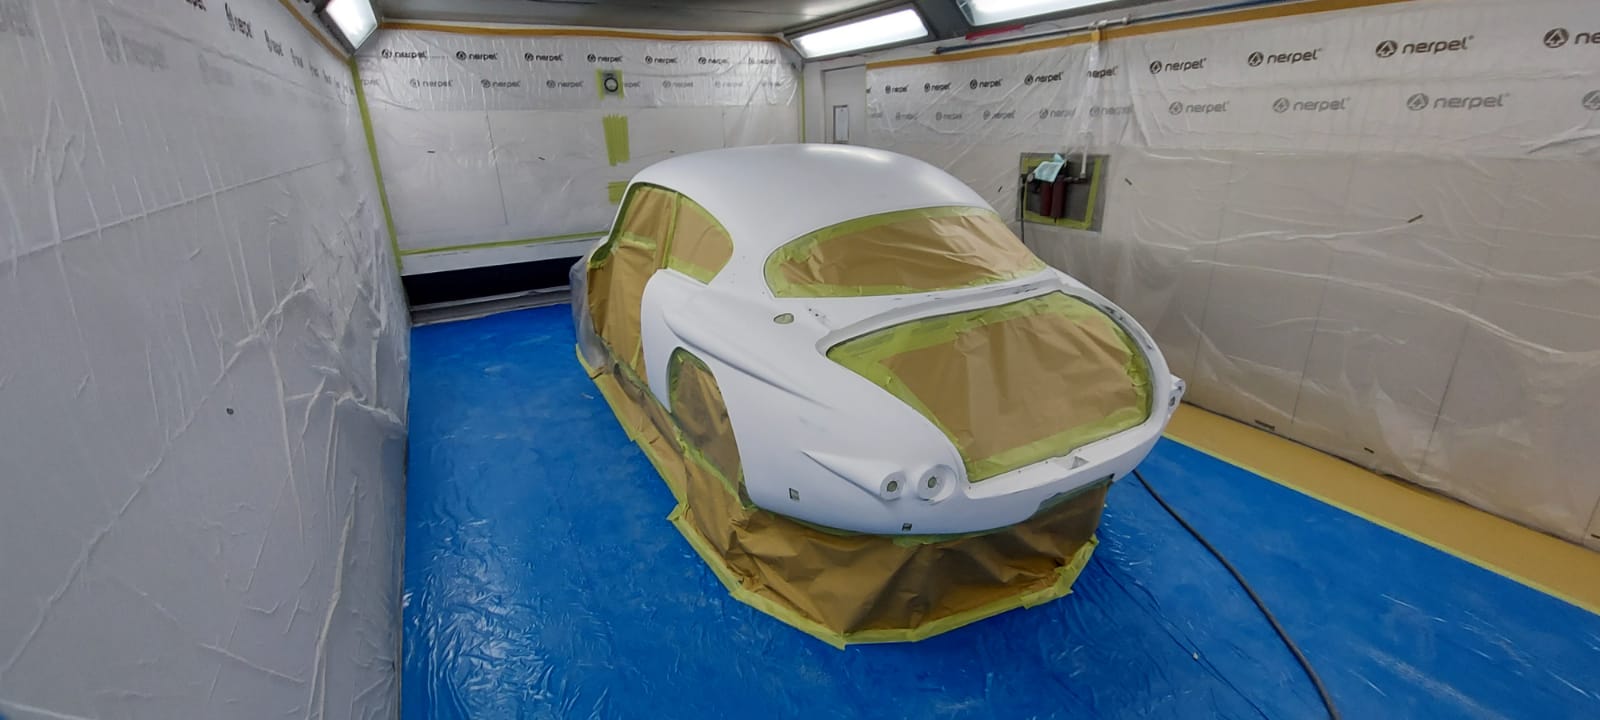
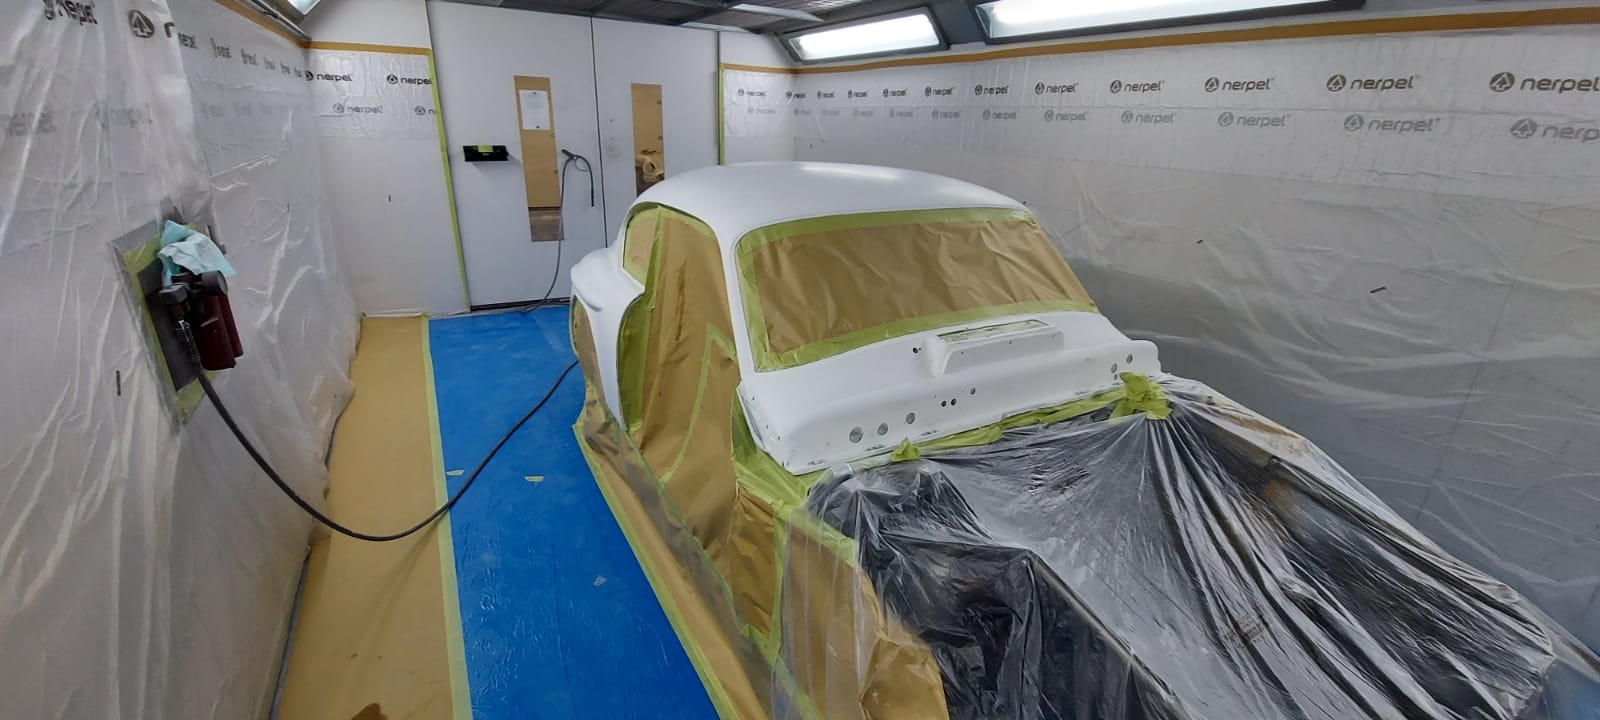
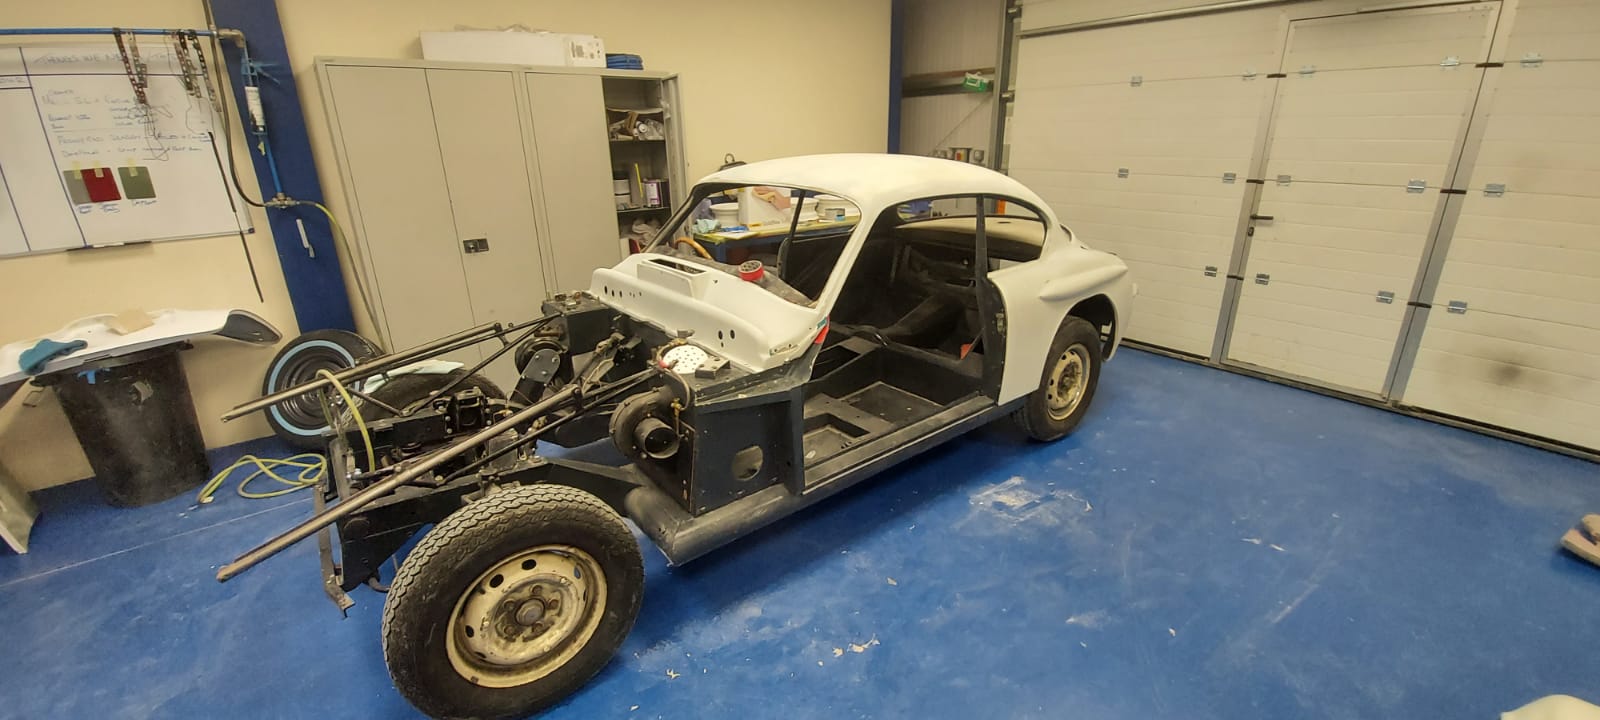
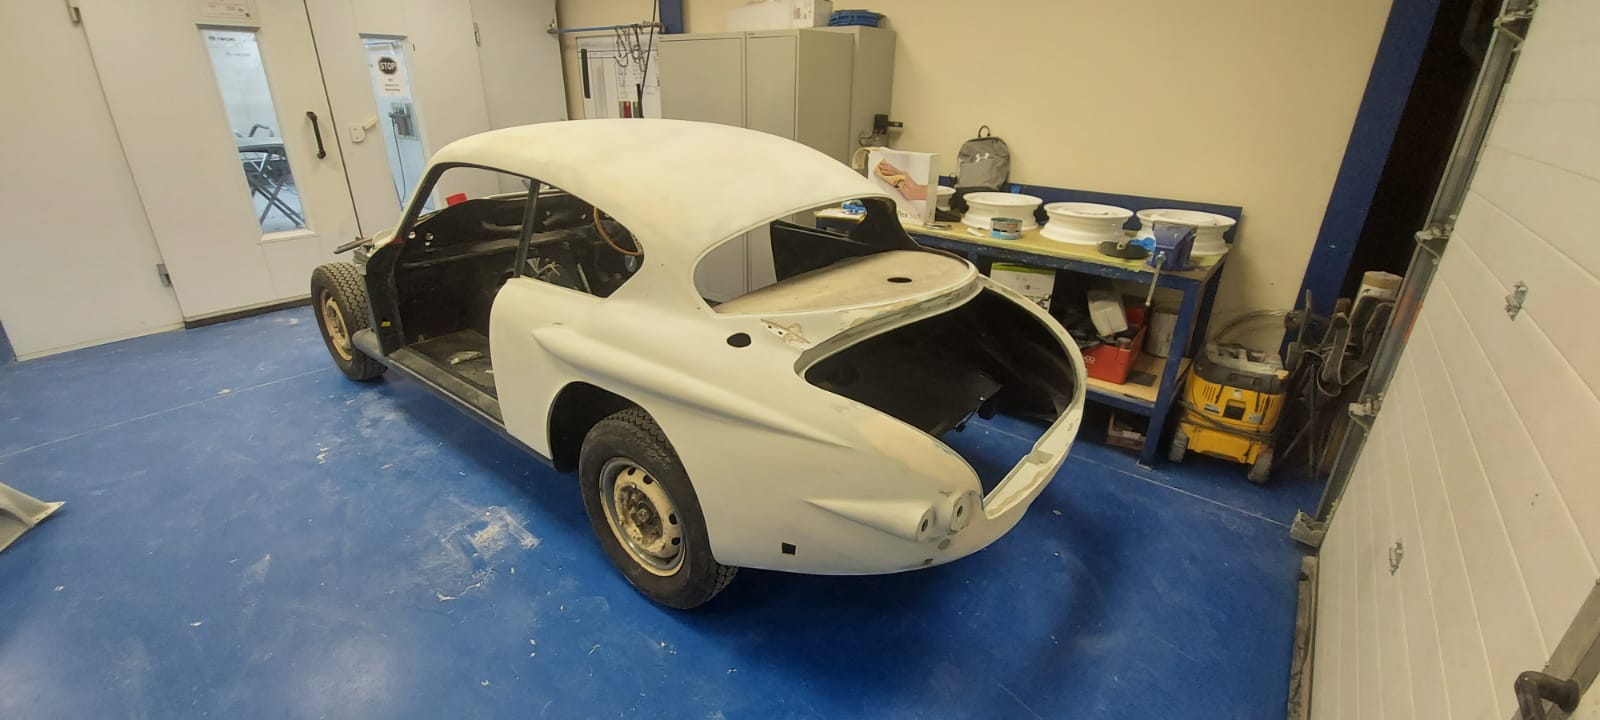
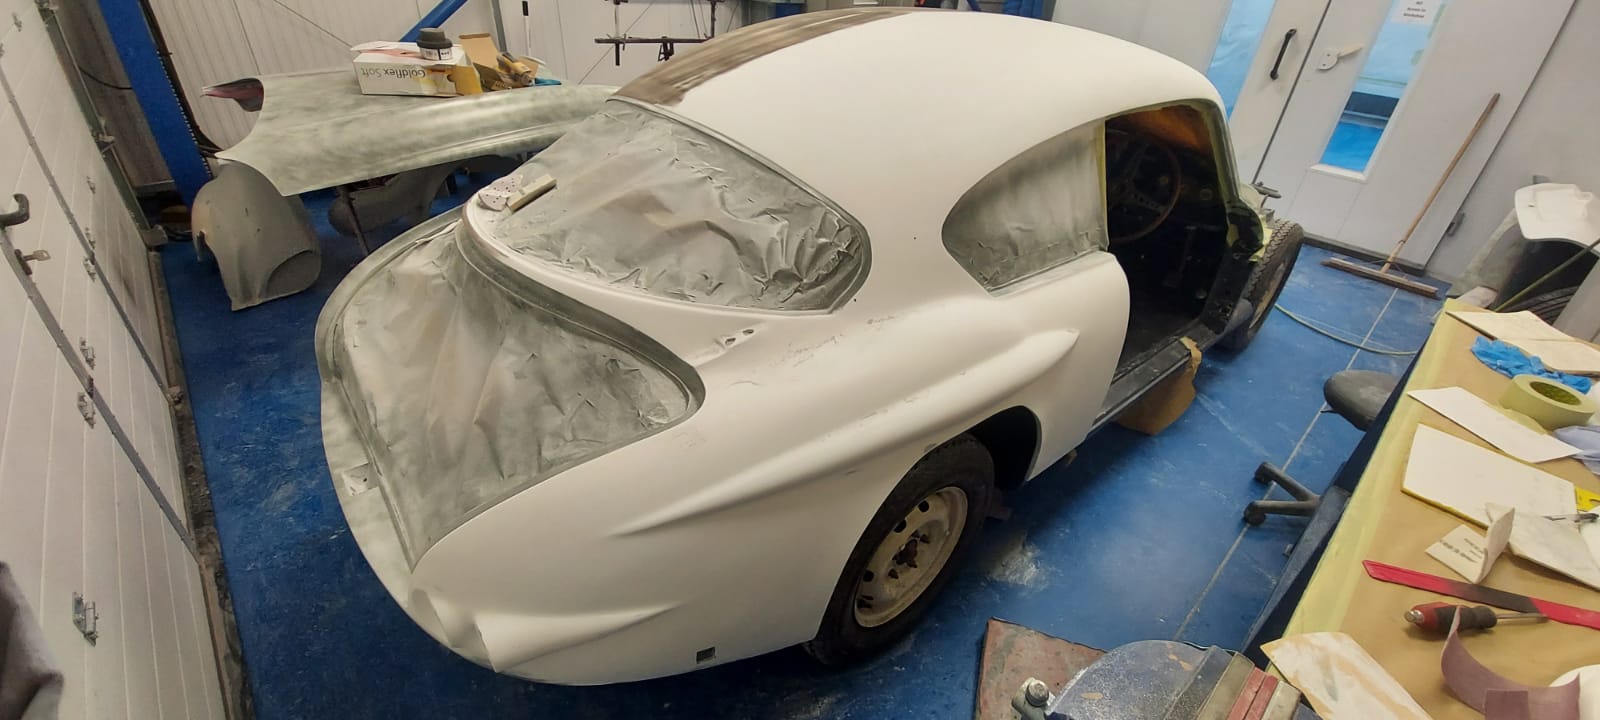
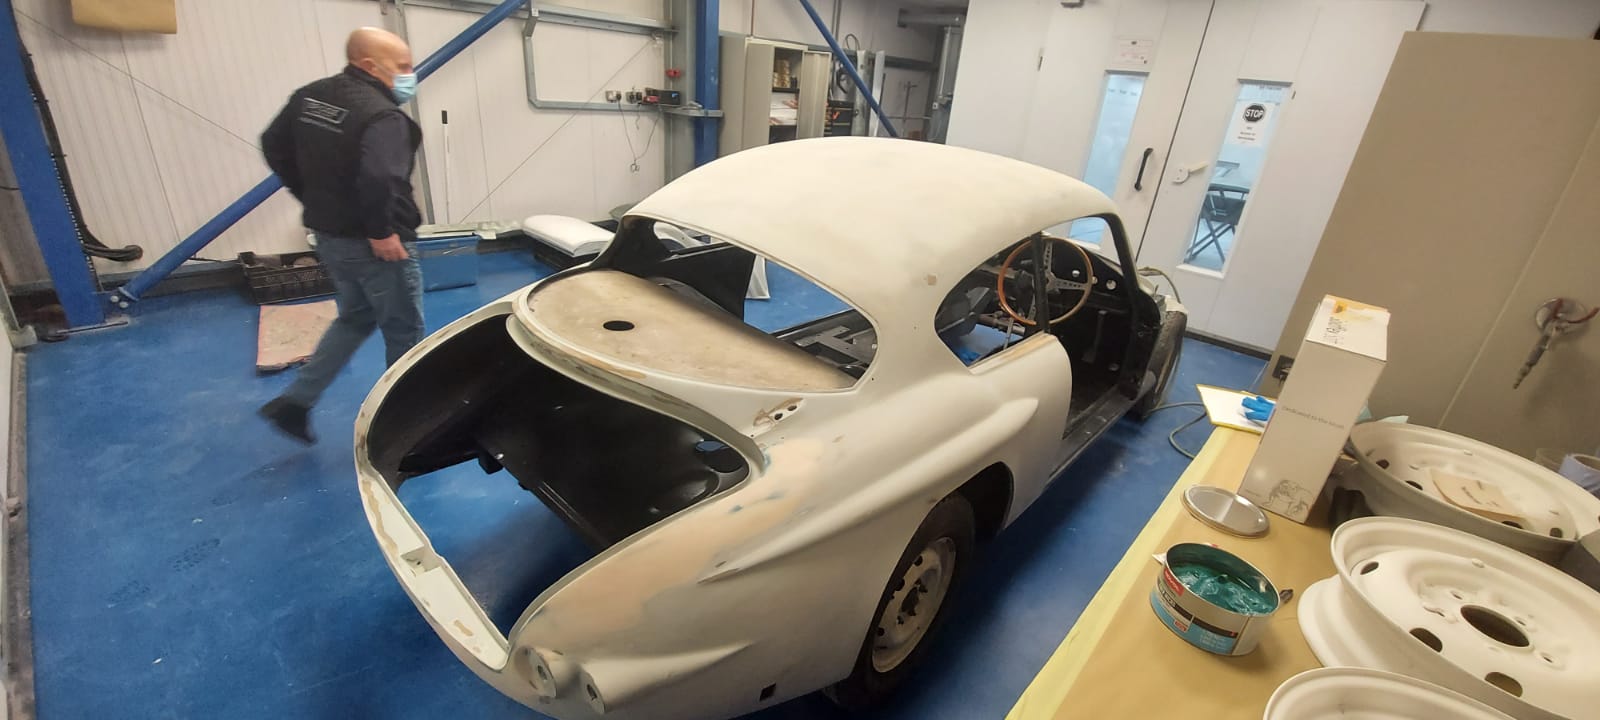
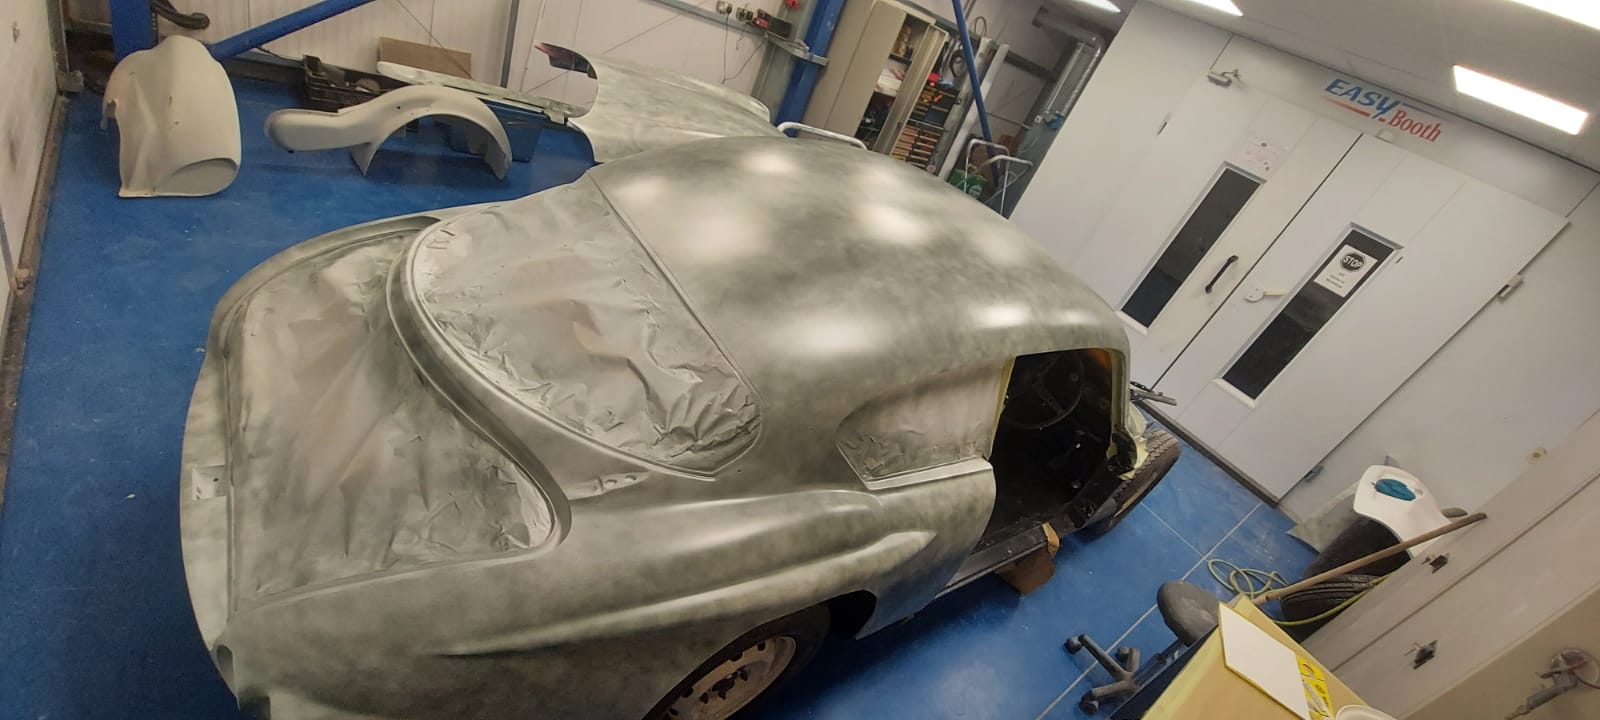
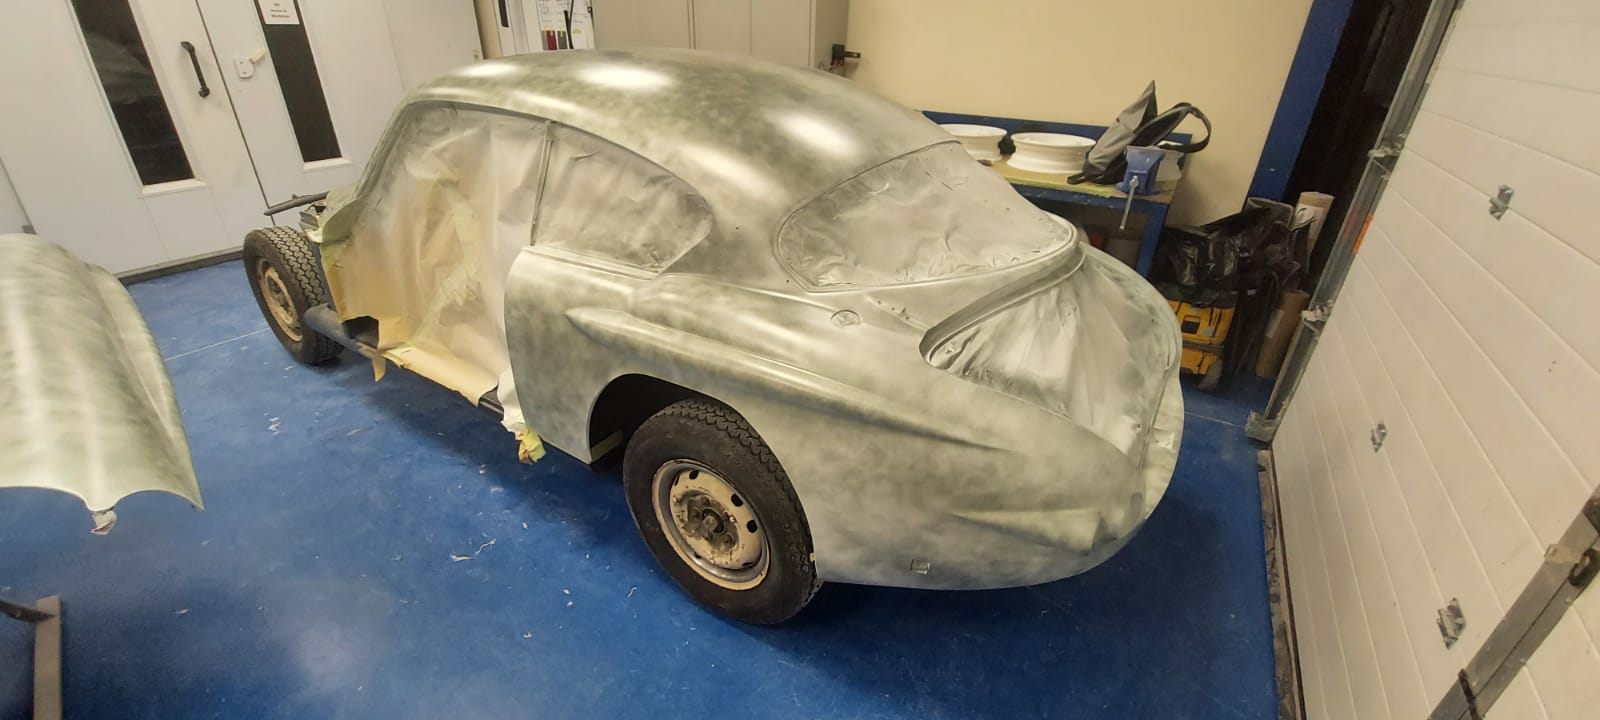
The Daytona entered the Paint Bay today under the trusted hands of Scott, one of our classic car technicians. We’re very fortunate that so many
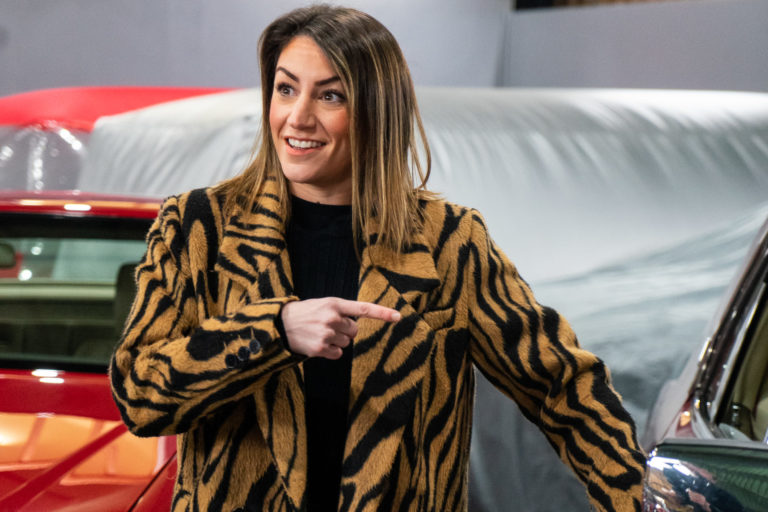
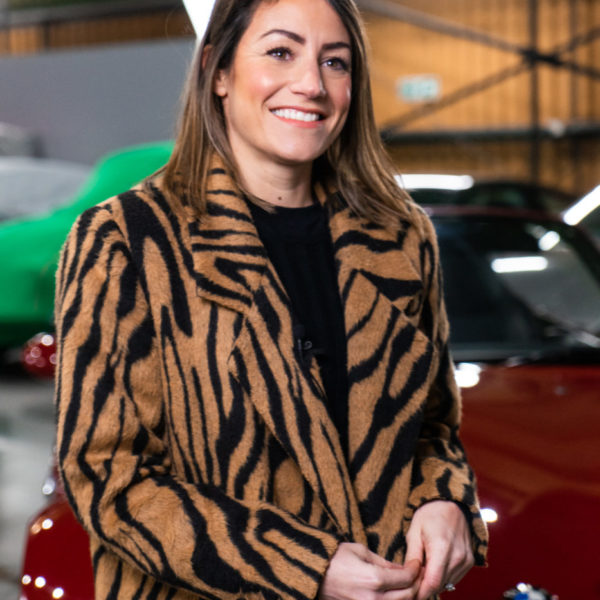
Last night we held our live draw to announce the BMW Z3M winner! As always, Charlotte joined us to take a walk through the cars
We’ve welcomed back this lovely 1960 MG A for a service. We originally restored this stunning classic and were delighted to hear how happy Mike
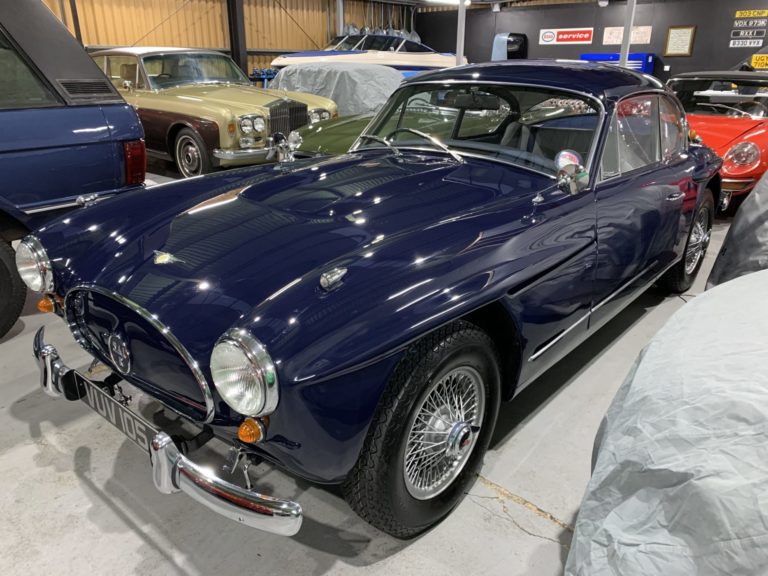
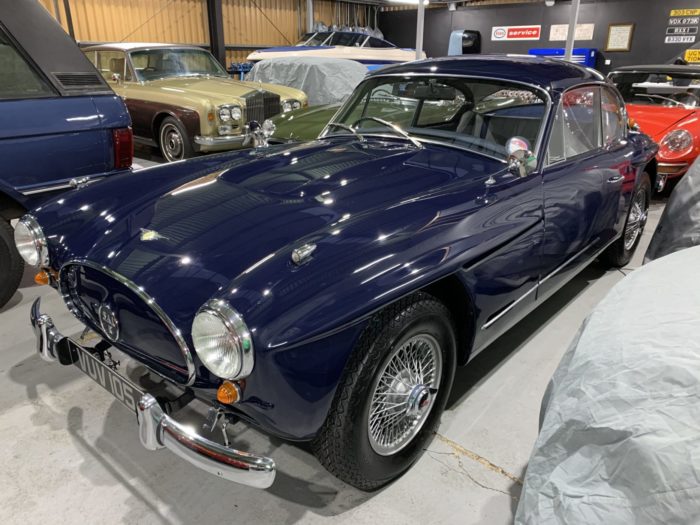
Our 1958 Jensen 541R is now complete, cleaned and ready for shoot. The car will be available for sale from our showroom very soon.
We’ve diagnosed an oil leak in the Jaguar MKVII as a result of a faulty component. Take a look at the walk through below to

Yesterday afternoon was the moment we’ve all be waiting for. The first drop of Peony Red paint has been applied to our 1960 541S Jensen.
Eye spy a little turquoise mini! A little while ago, we worked on a 1967 Austin Mini 850 for Electric Classic Cars who aimed to
The TVR is having a new carpet fitted so our trim shop has removed everything and has begun fitting the new pieces provided to us by the customer.

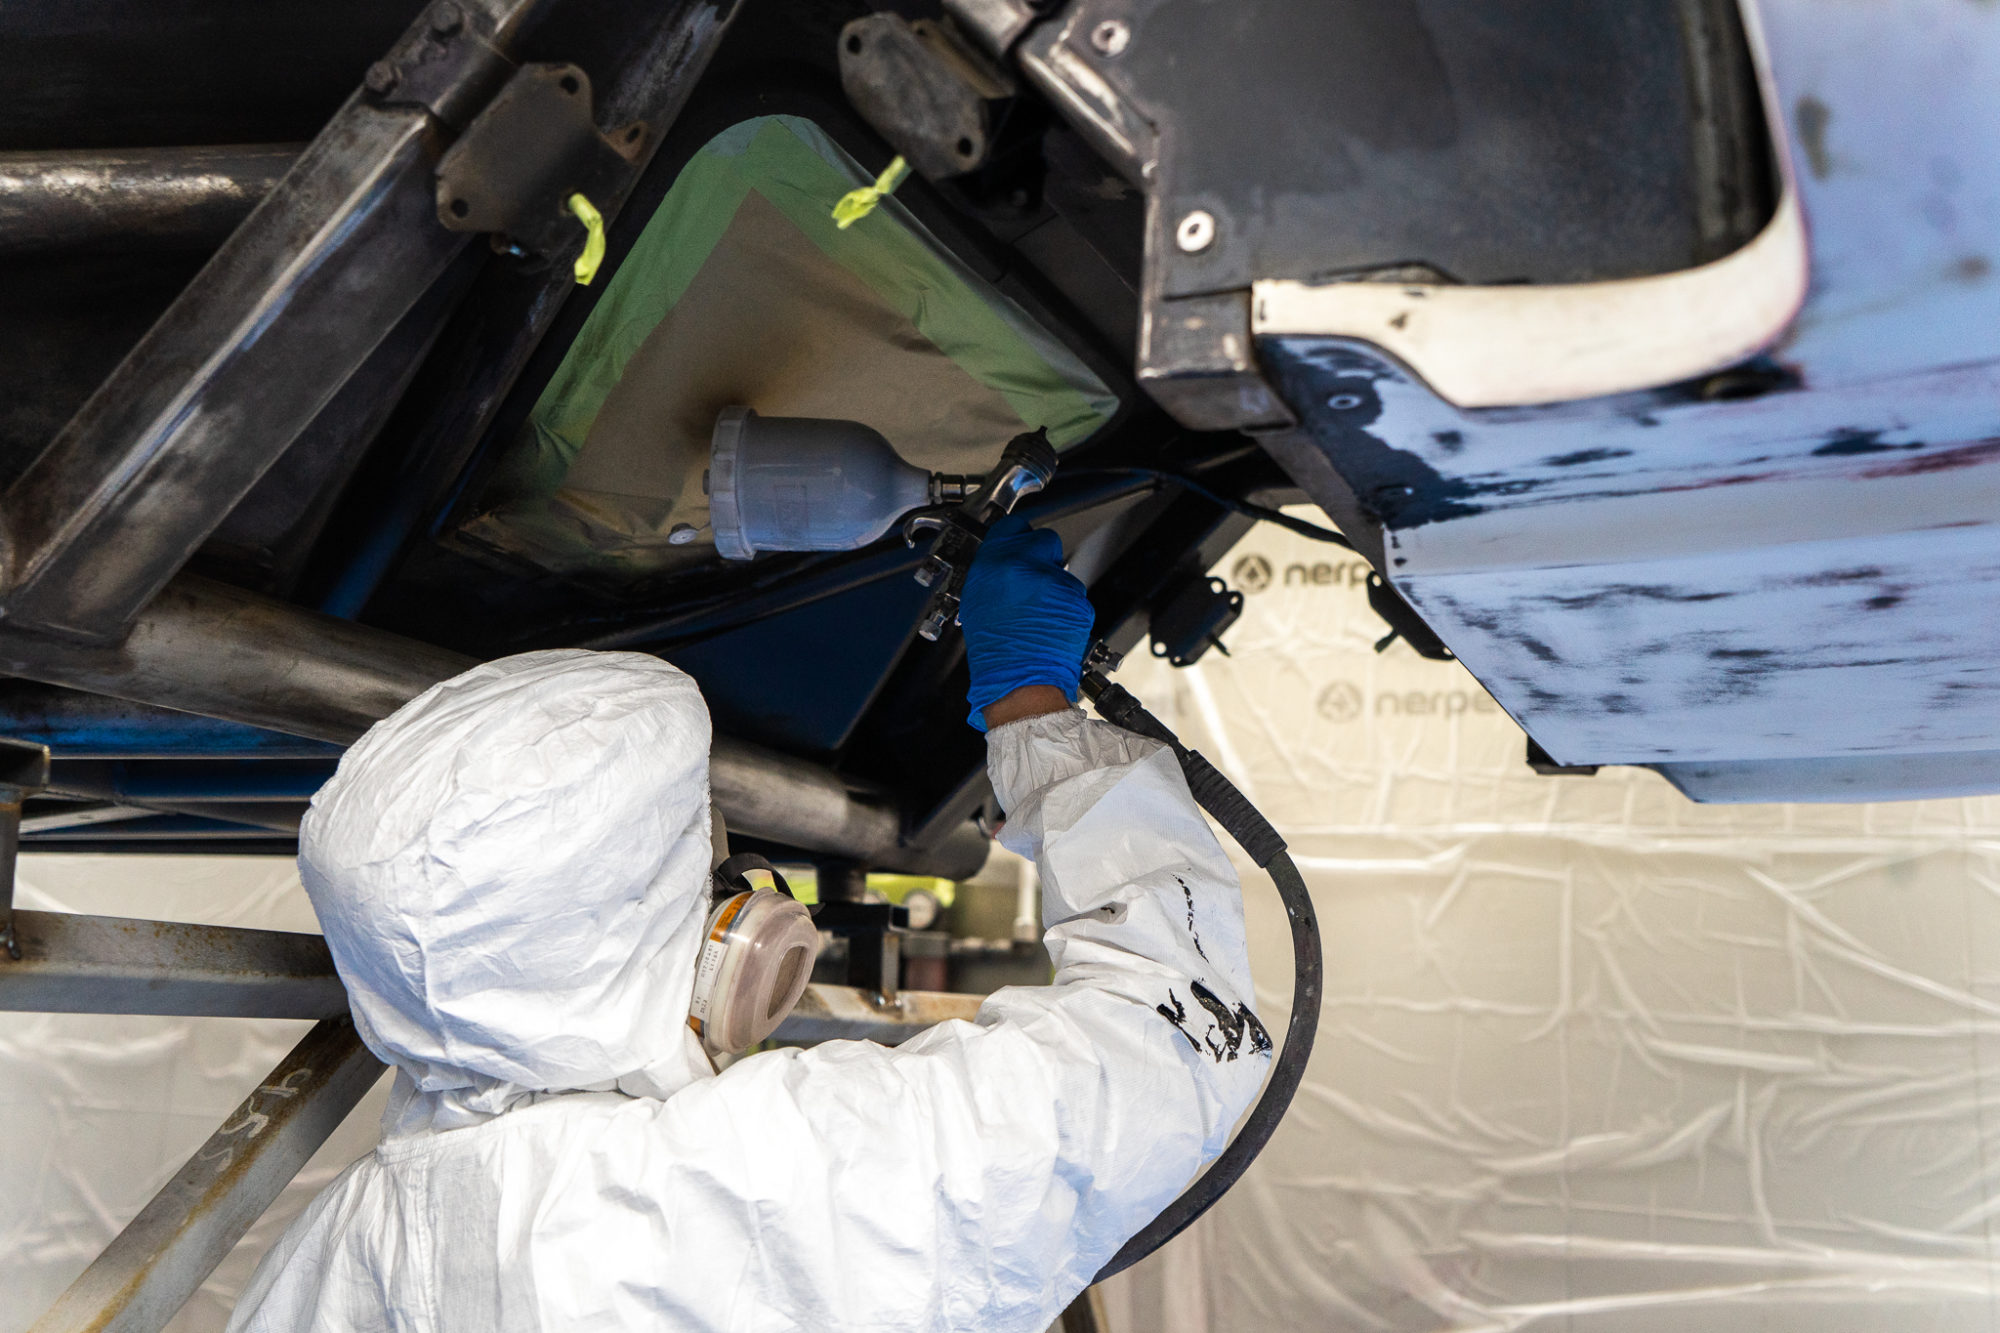
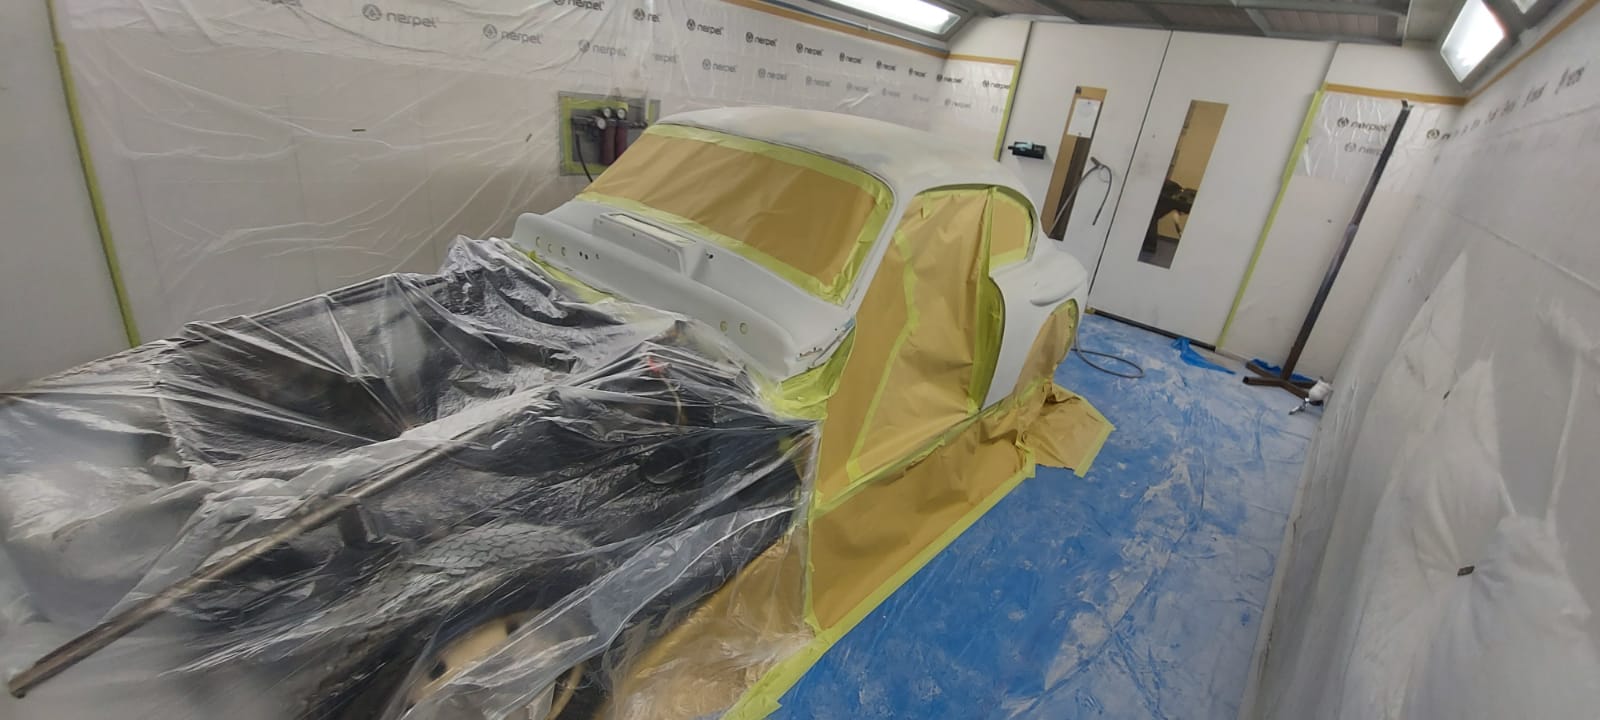
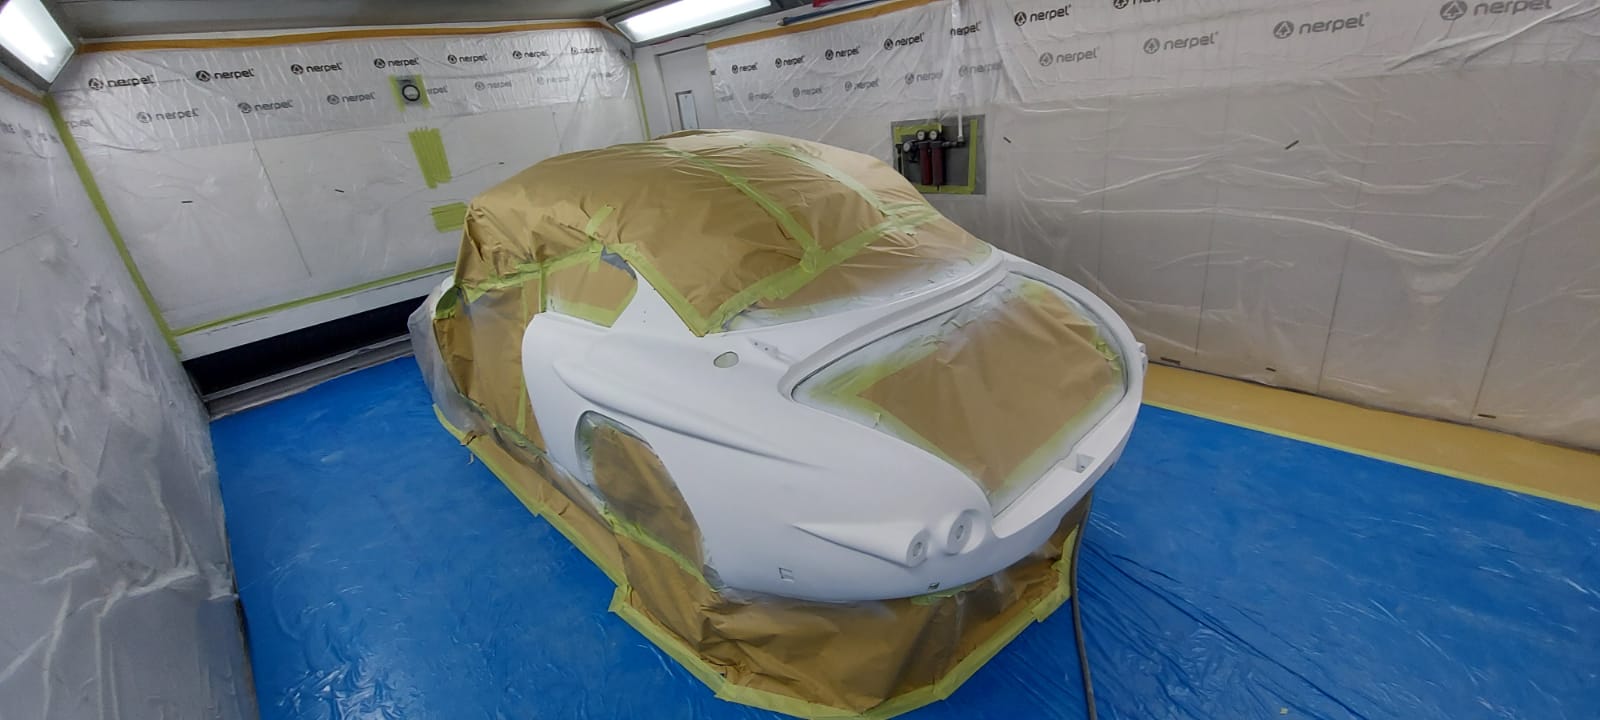
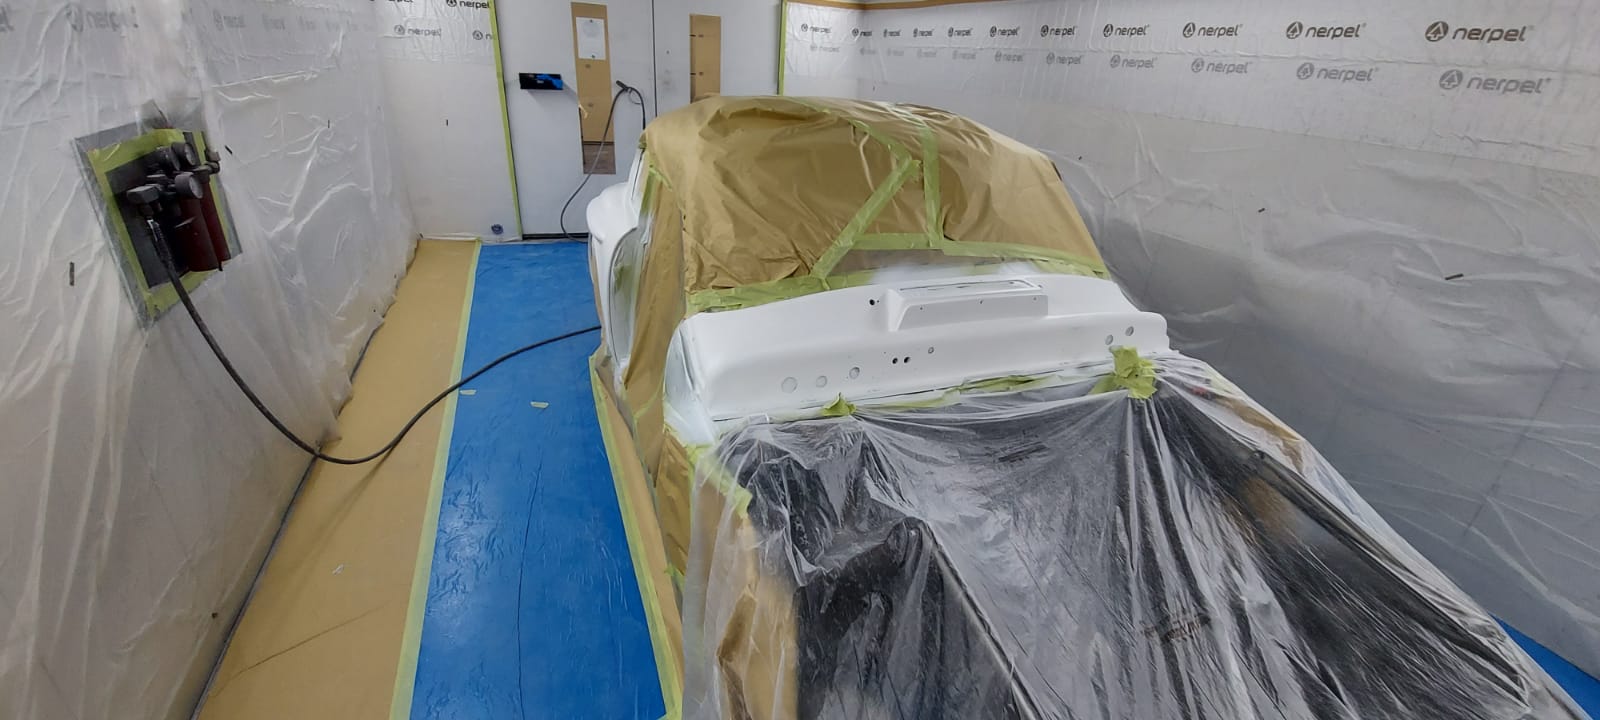
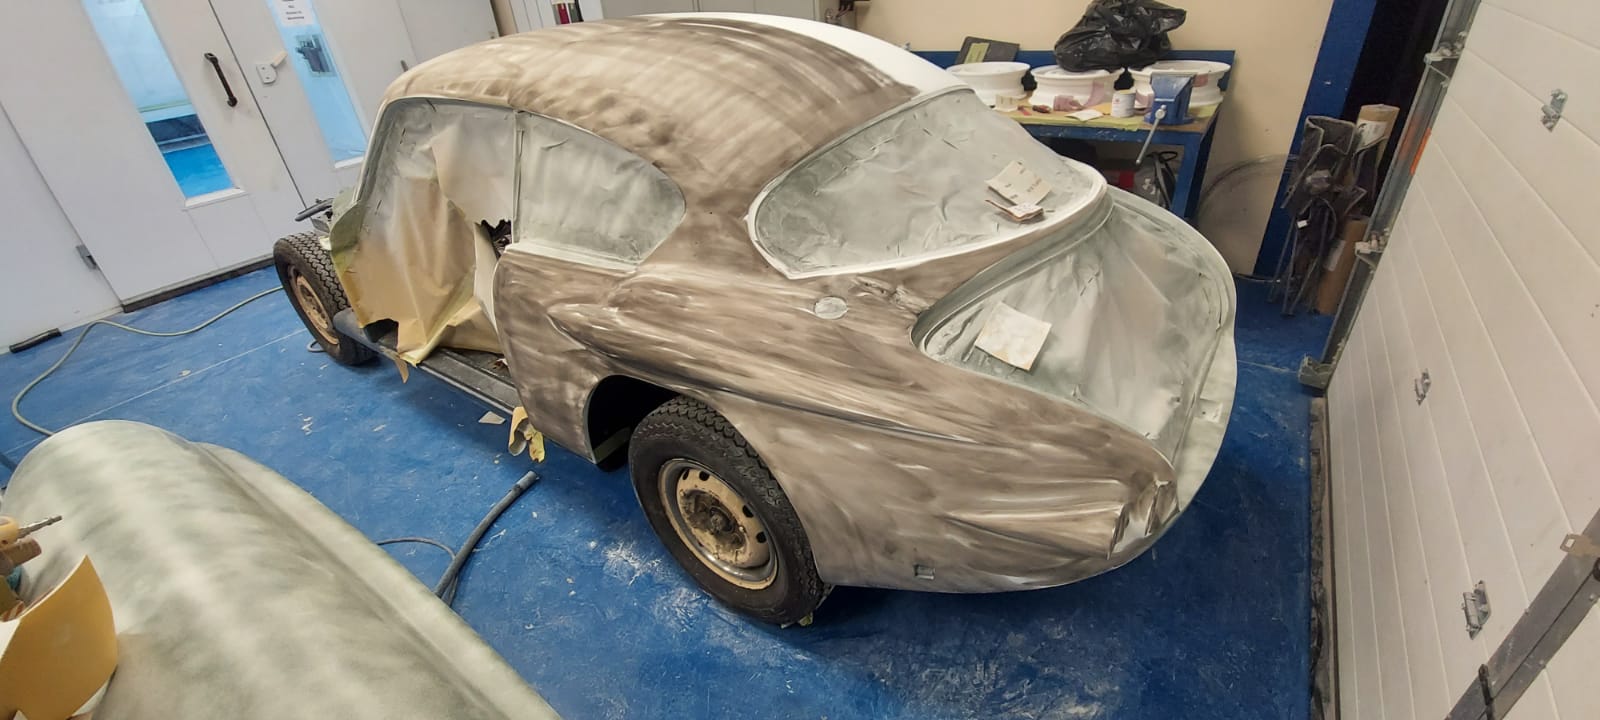
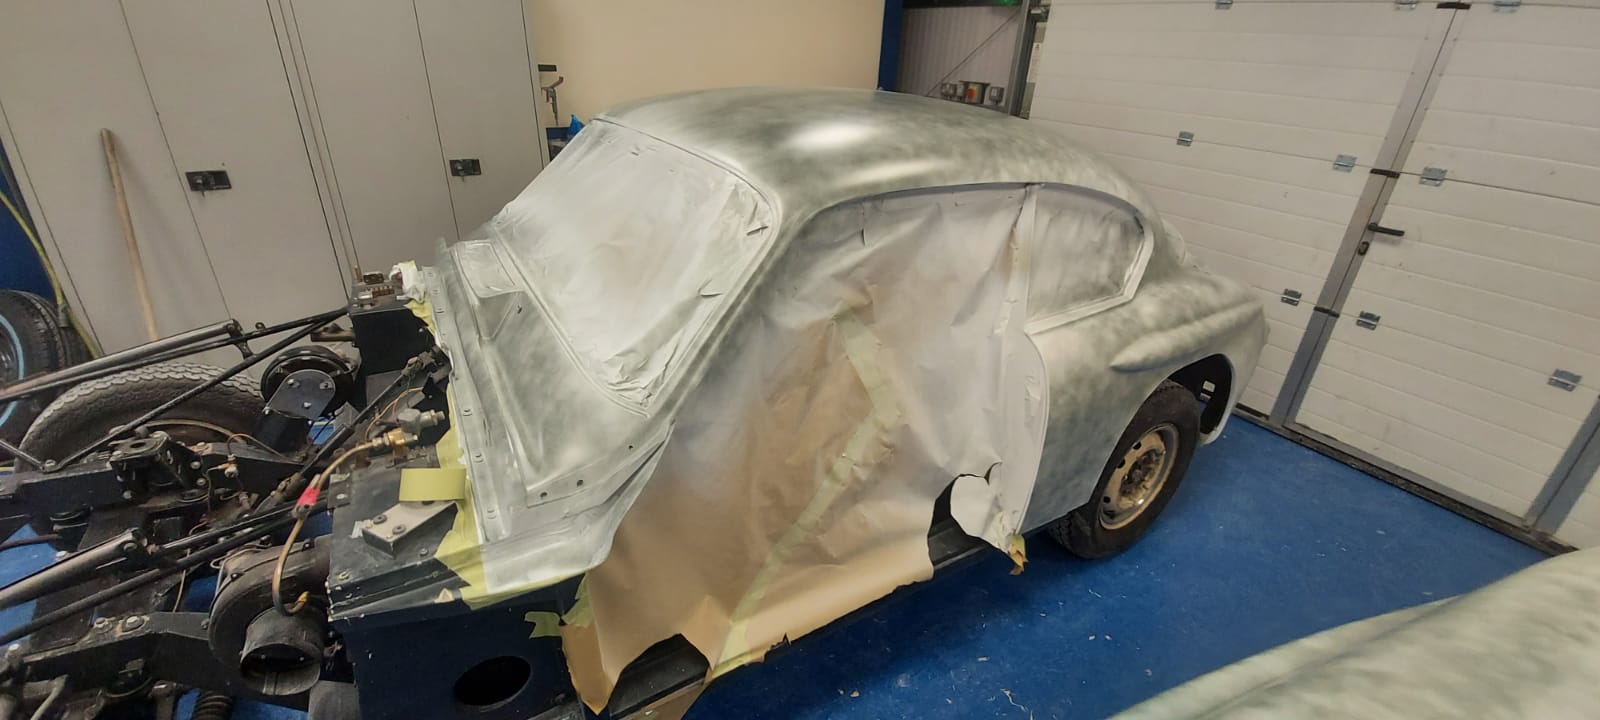
The Daytona entered the Paint Bay today under the trusted hands of Scott, one of our classic car technicians. We’re very fortunate that so many of our engineers are multifaceted in their skills, allowing us to, at times, dedicate one technician to an entire restoration. We of course get our specialists involved in these instances, but its great to see an individual technician lead a restoration from start to finish. This is what we’ve done with Scott, who’s a very experienced and talented classic car engineer. Assigning him to just one restoration means that he will see the total project from start to finish, taking on multiple disciplines. Under the supervision of our paint specialist, Scott tackled the primer stage of painting our Daytona.
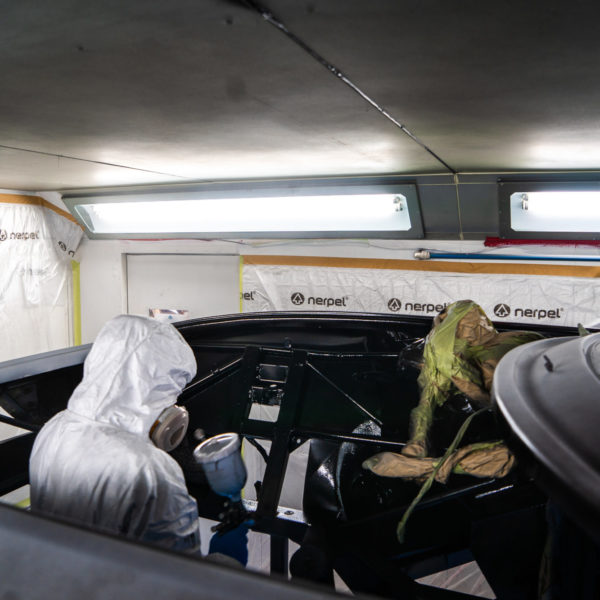
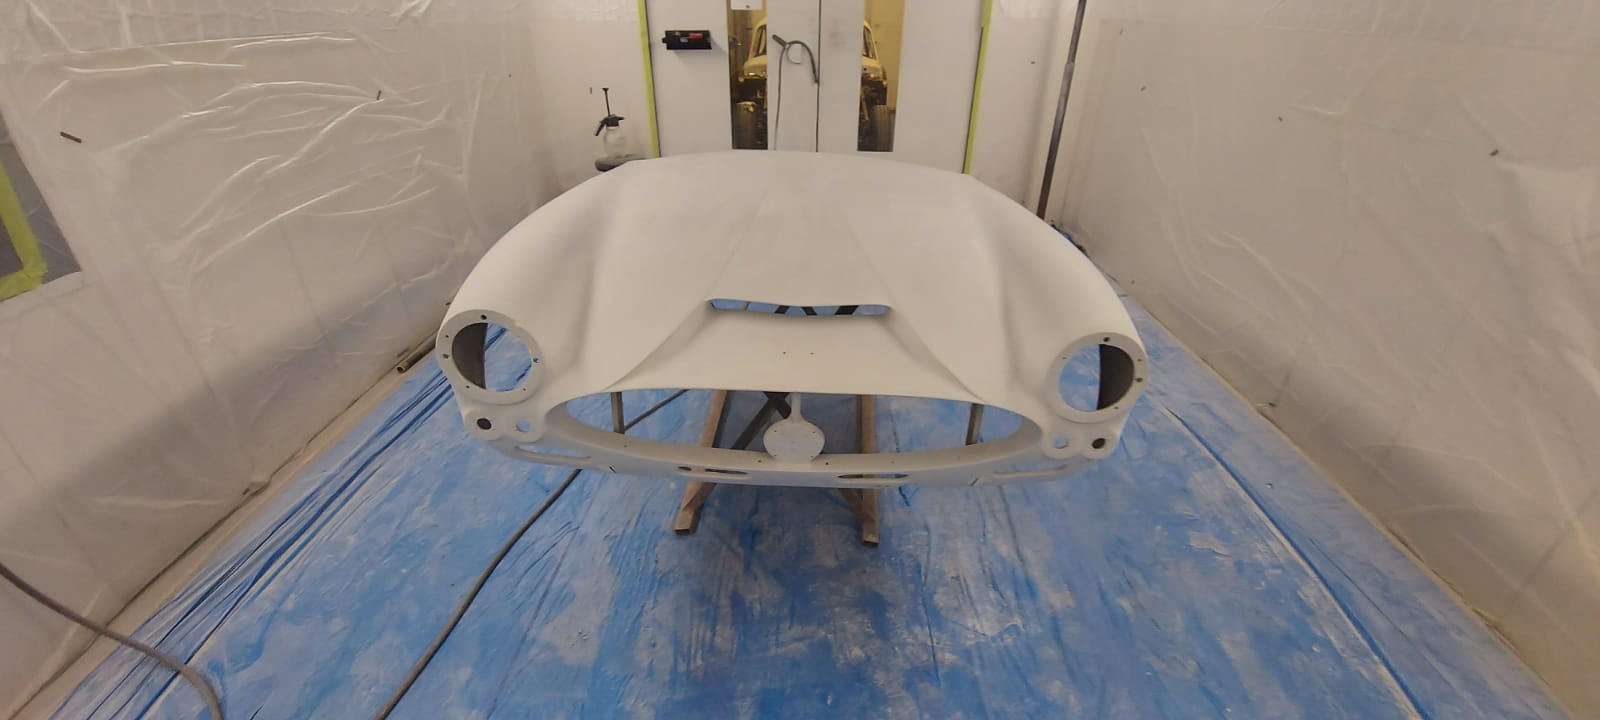
Here we see him focusing on masking up and cleaning the body of the car, wiping clean all the elements in the preparation of the primer.

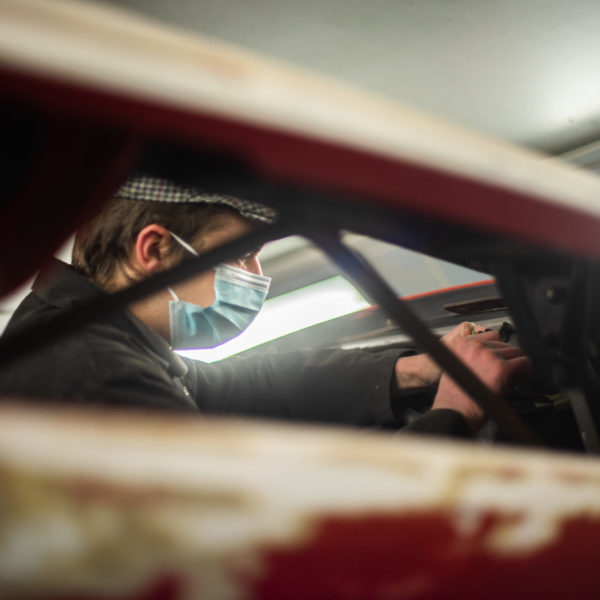
The cleaning process is an important part of the primer preparation as it removes any dust or debris that may interrupt the primer.
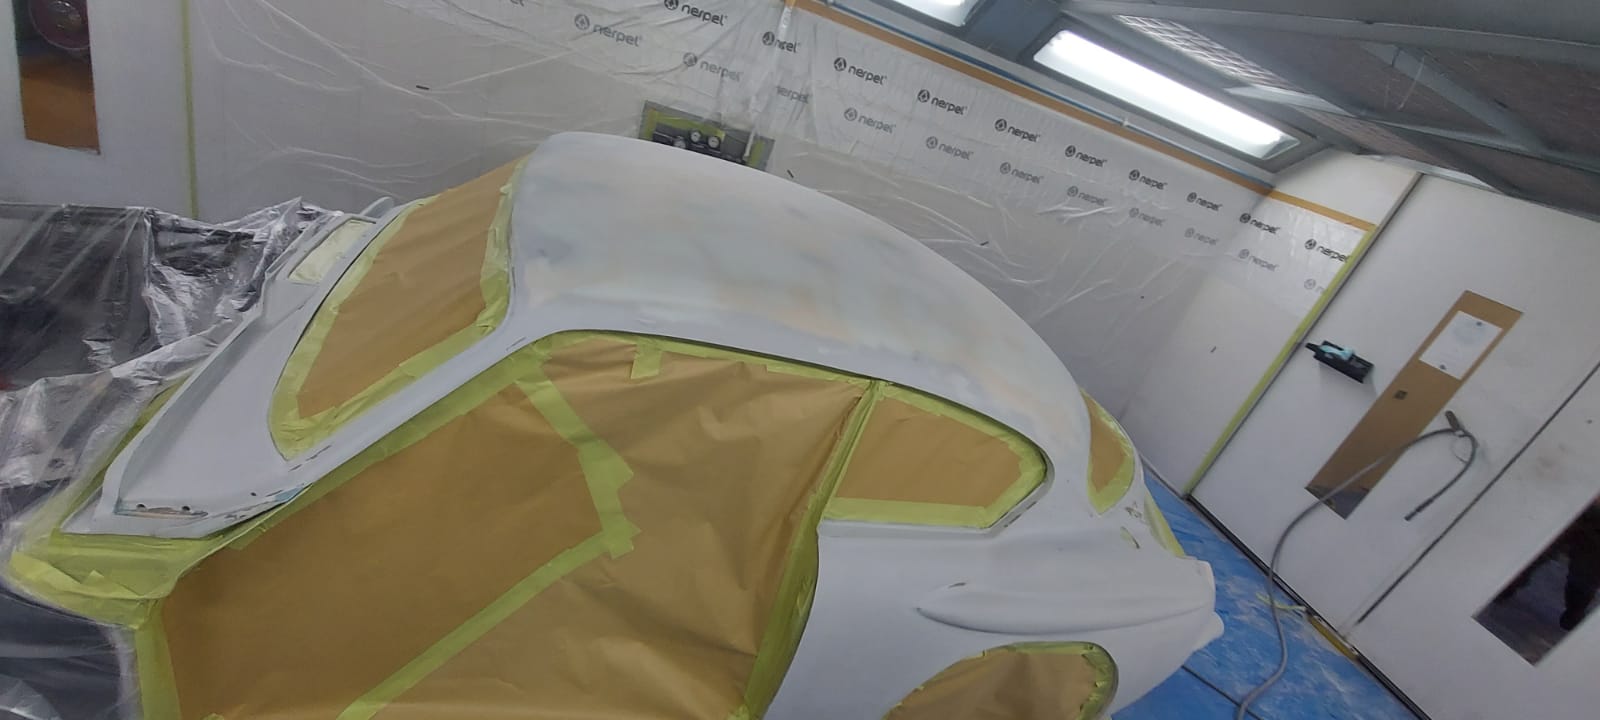
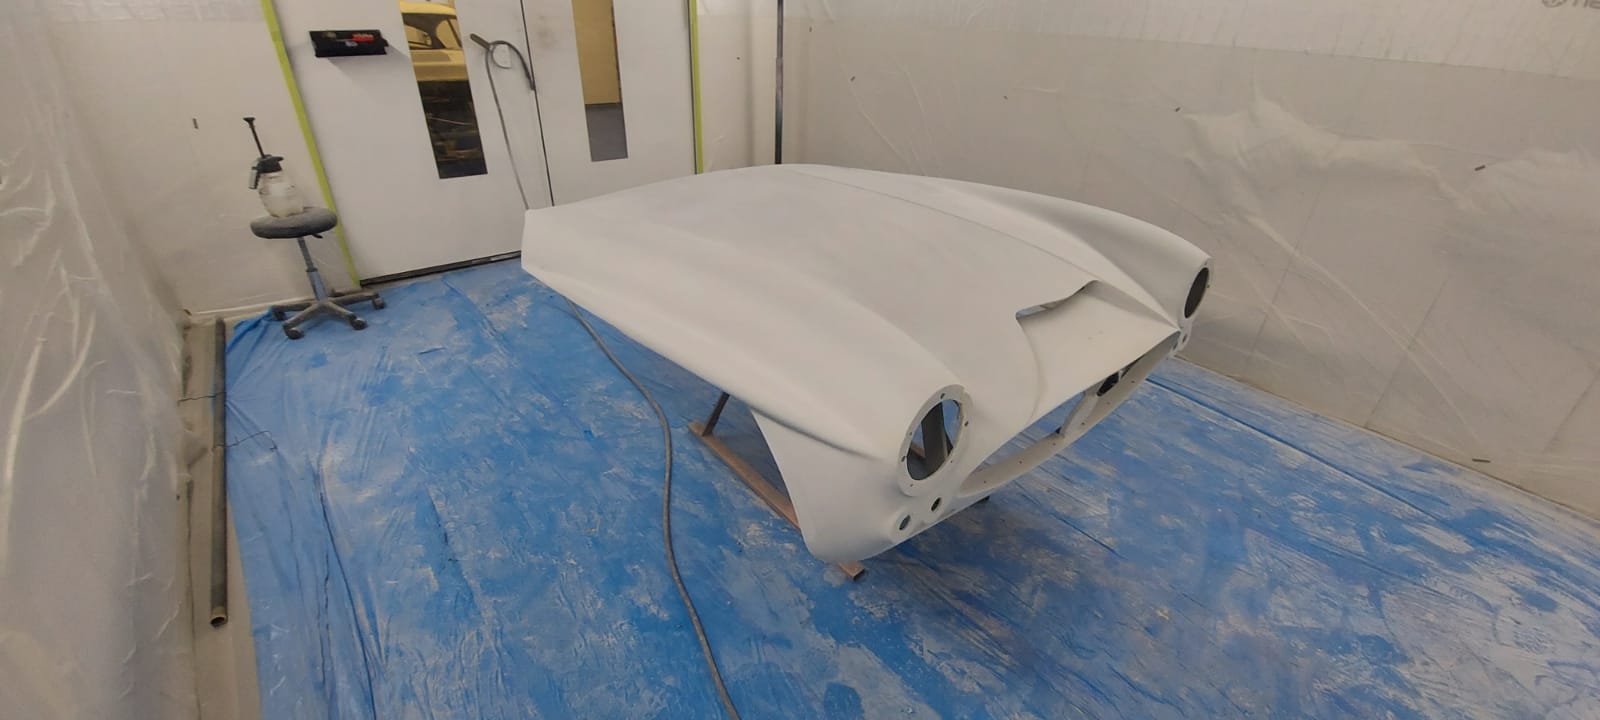
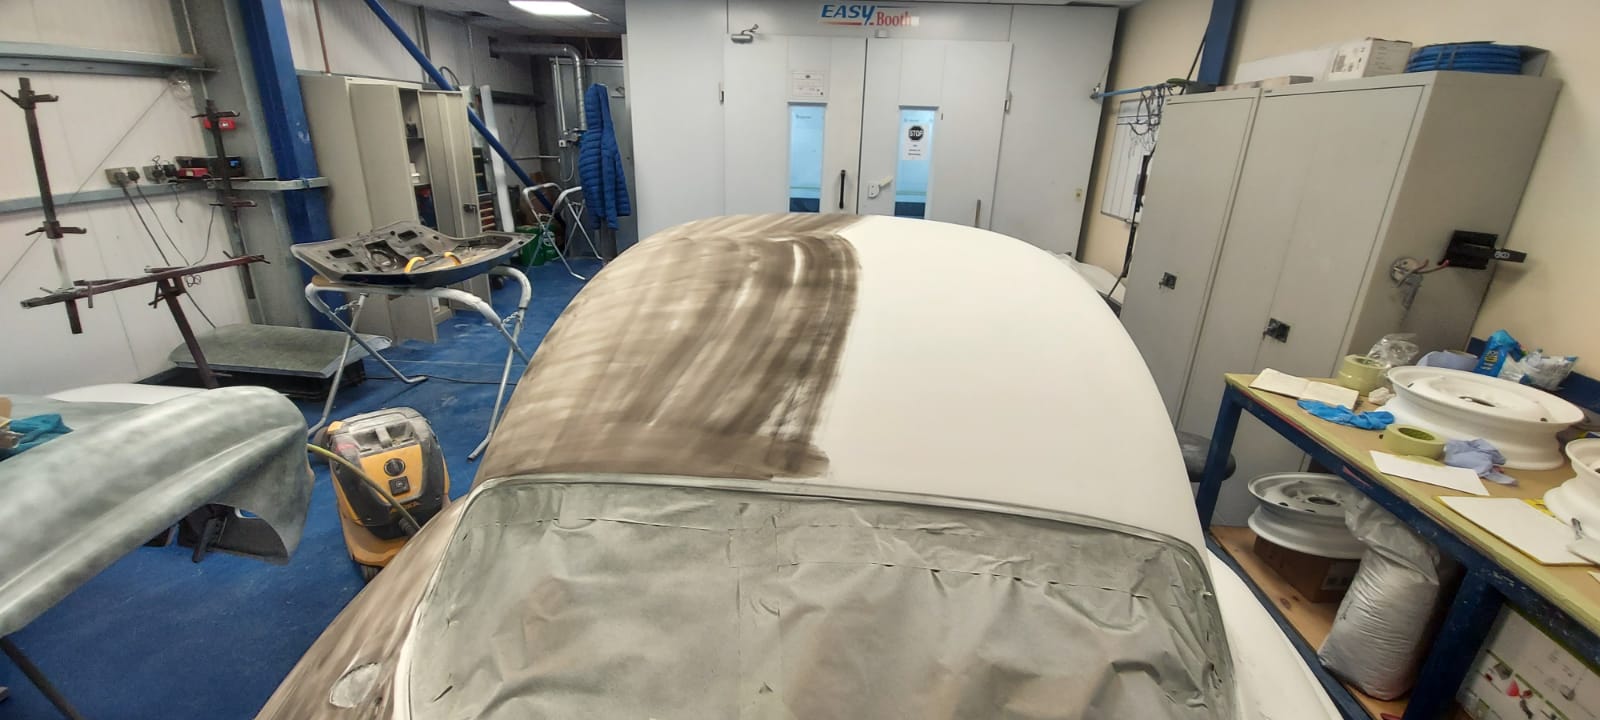
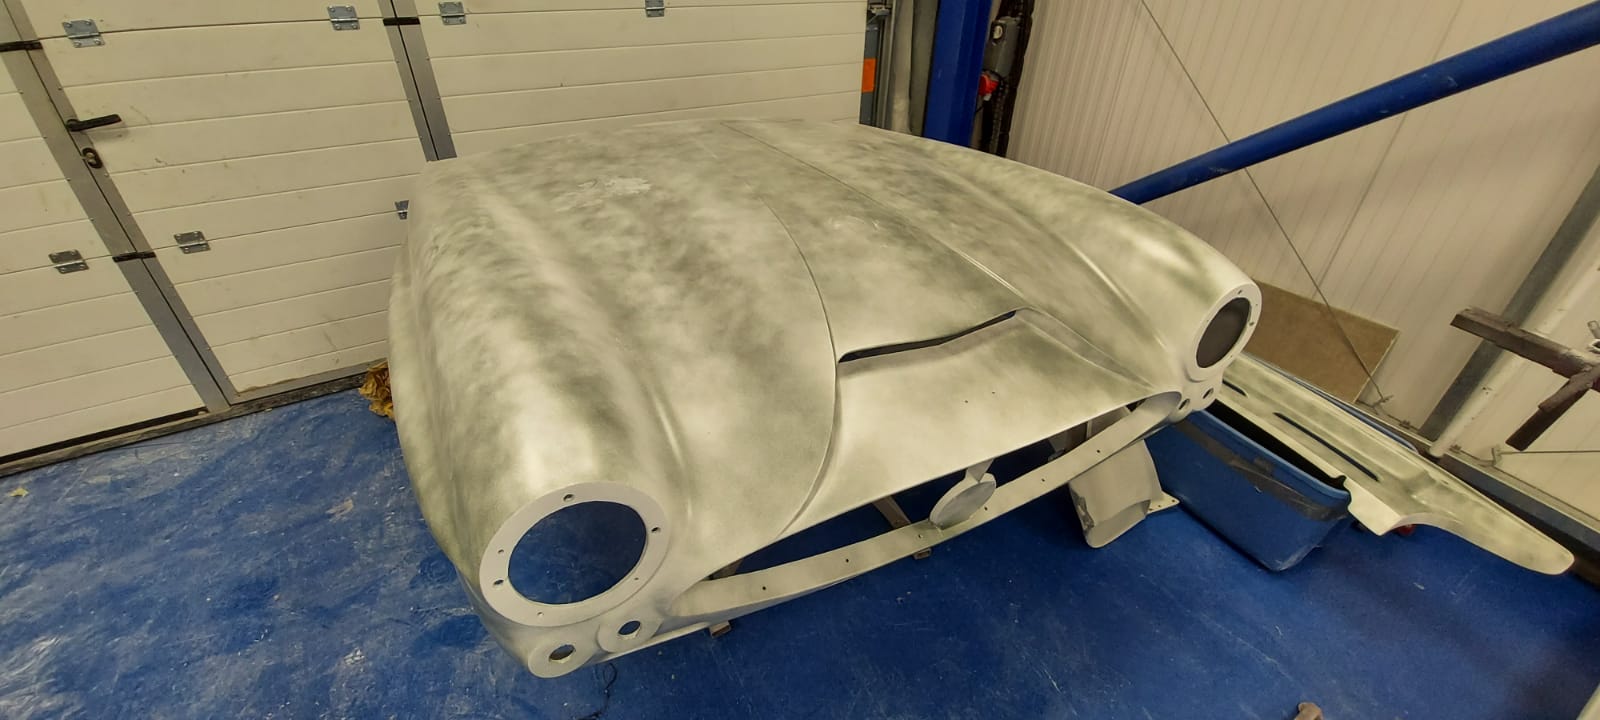
The next step was for Scott to apply the black epoxy primer on the chassis and engine bay. This black layer is a non-porous, high-bonding, anti-corrosive primer.

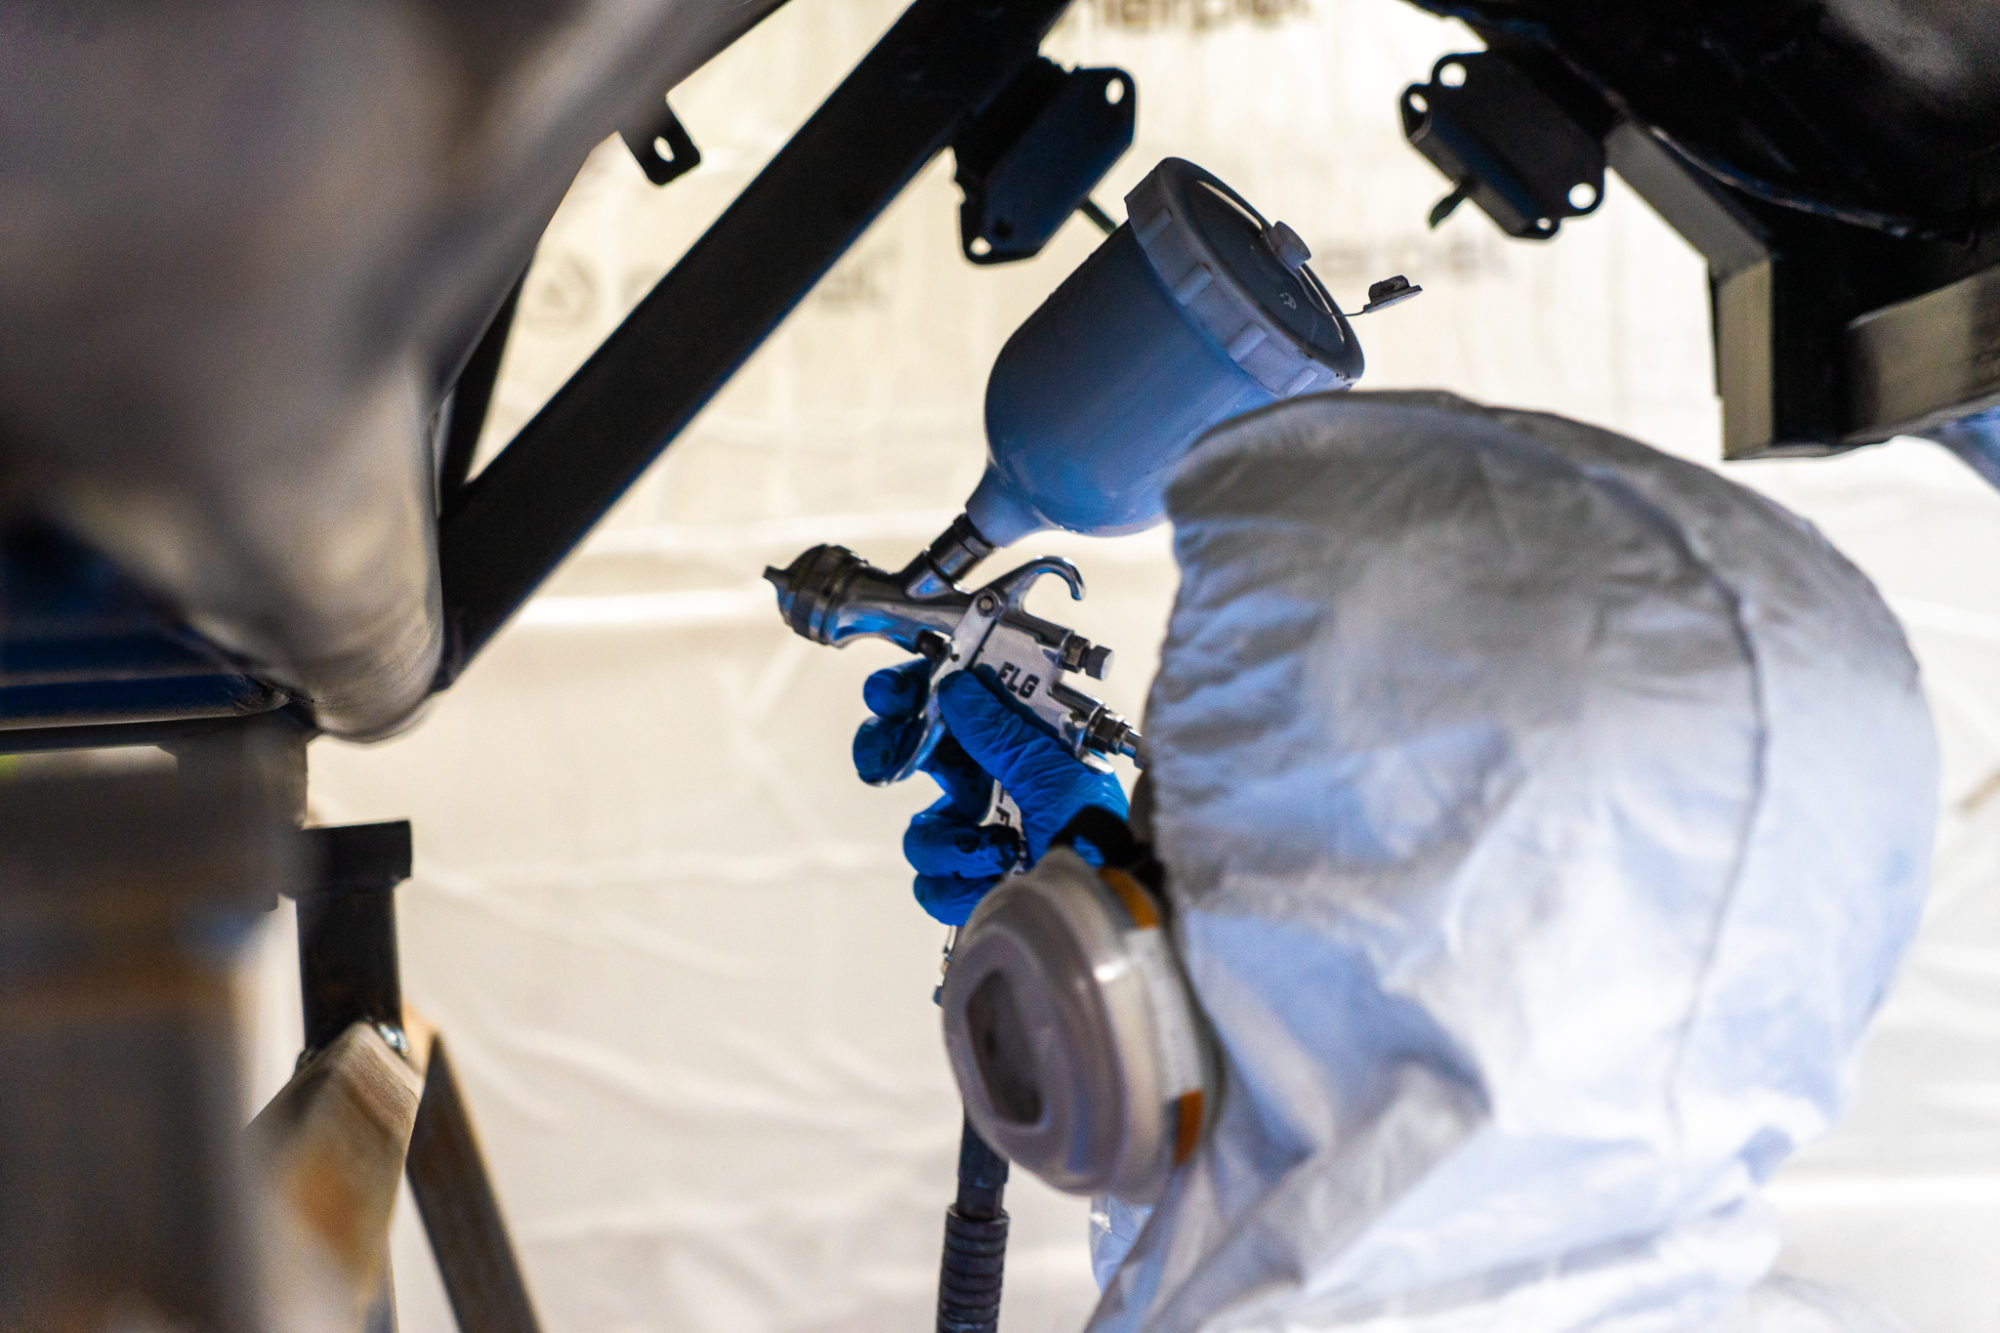


Scott’s next task was to spray on Polyfan Primer which is a polyester filler primer.


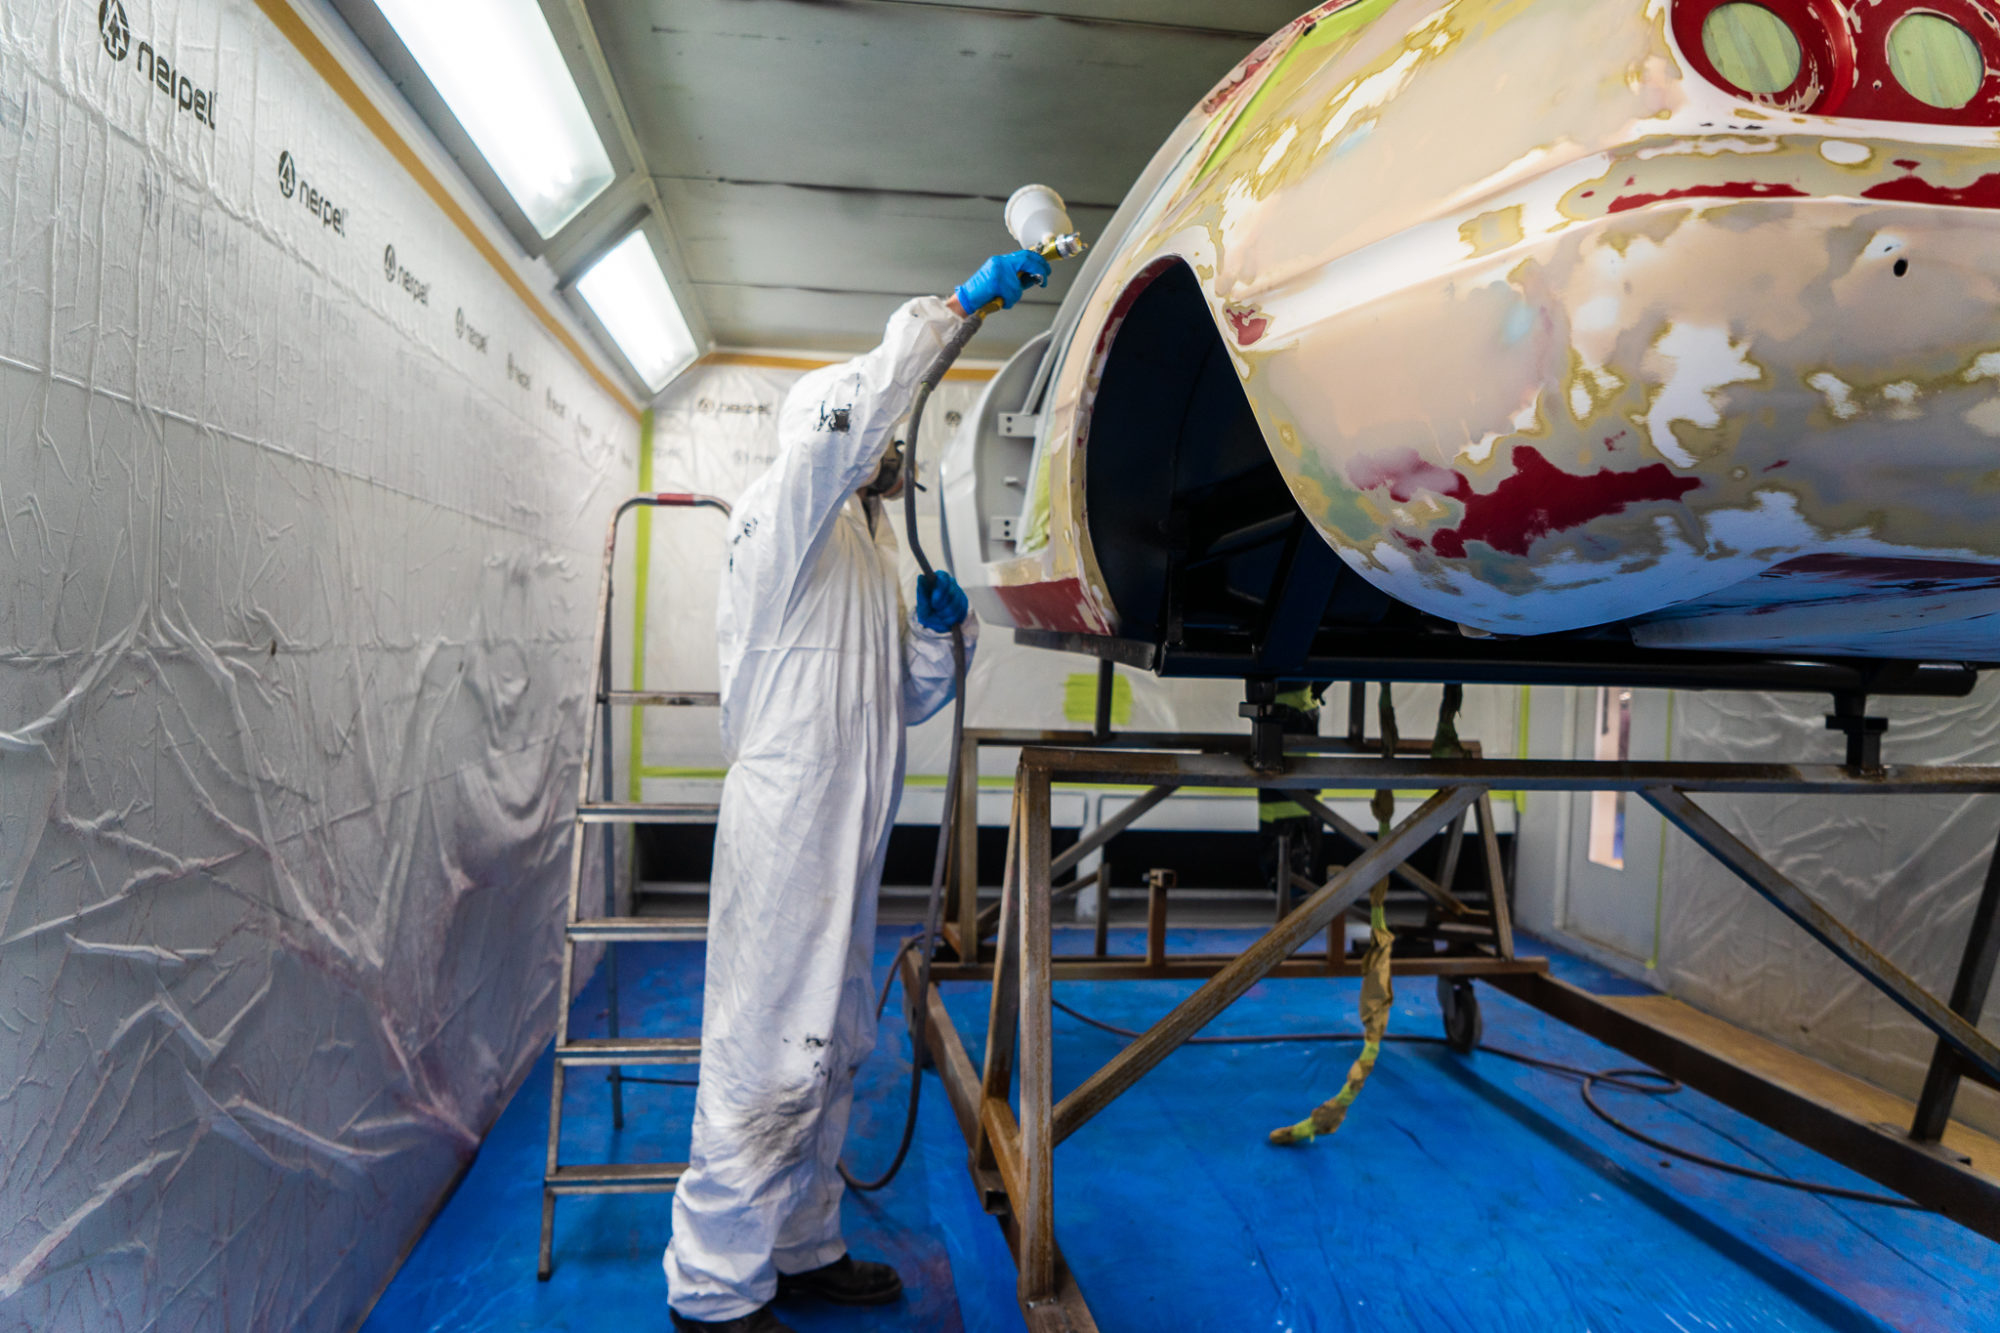
The final step was to apply an anticorrosive primer onto the underside of the Daytona. These steps can take all day as each layer must dry before applying the next. The advantage of this is that the paint booth is kept warm, making a cosy workplace during these cold winter days.
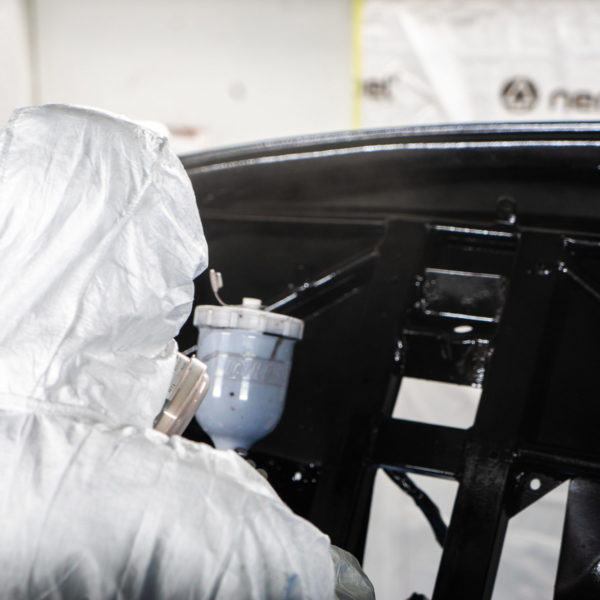
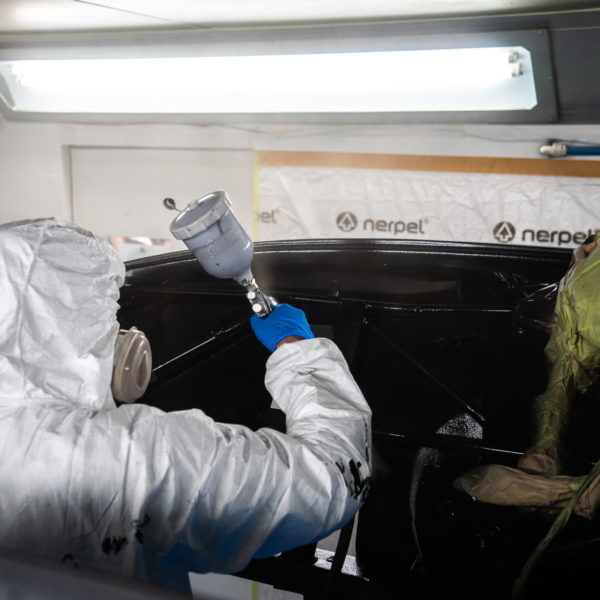
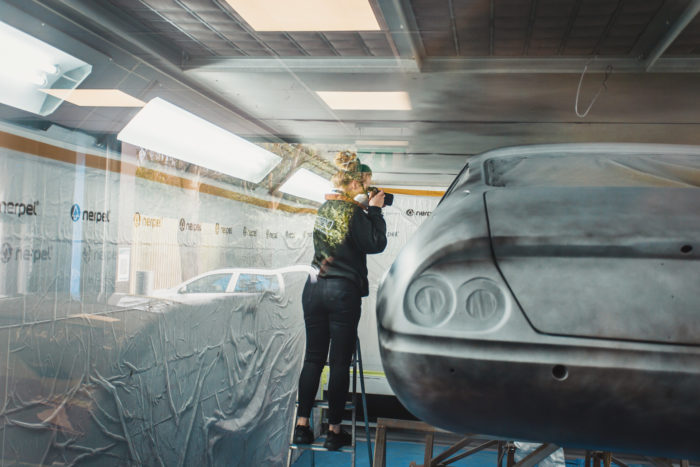
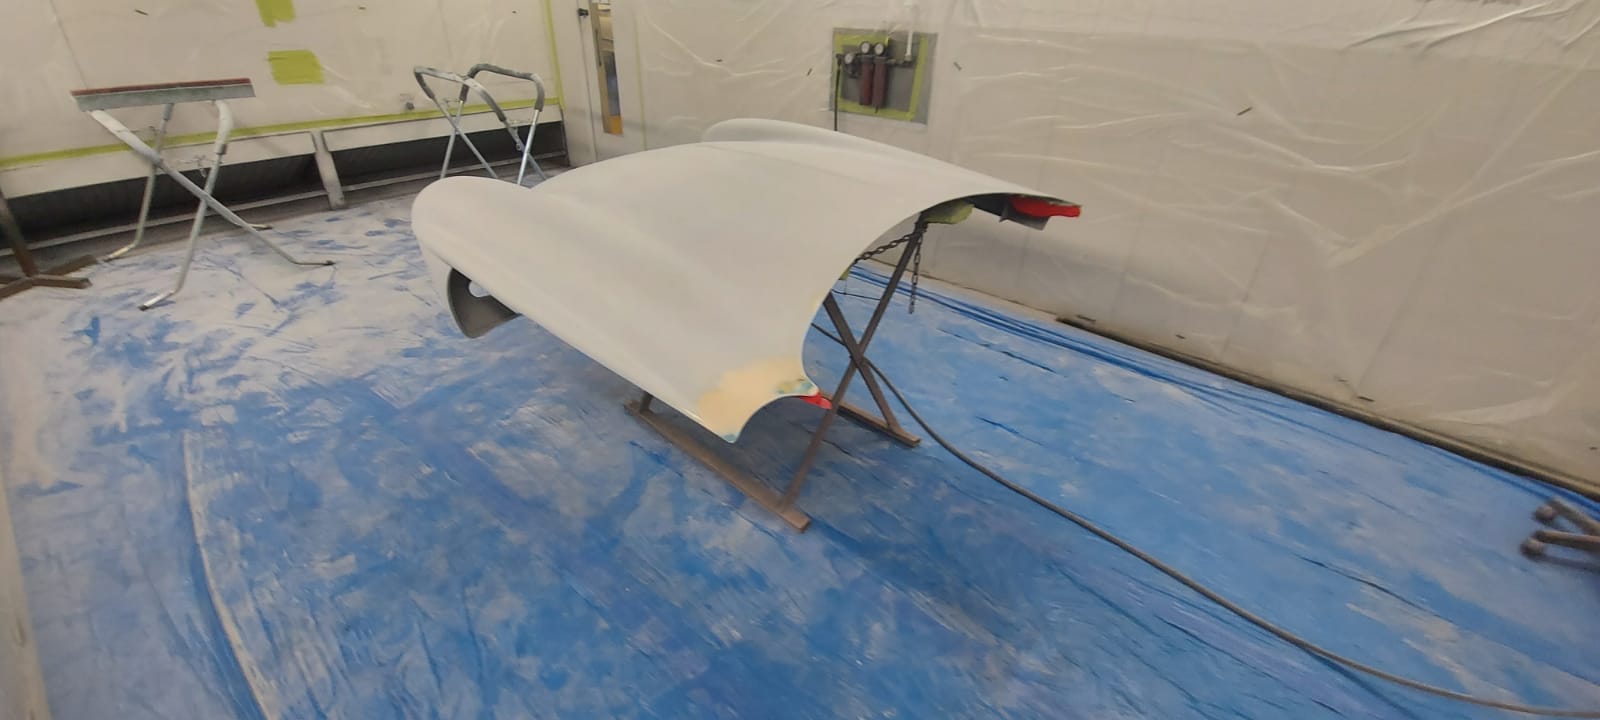
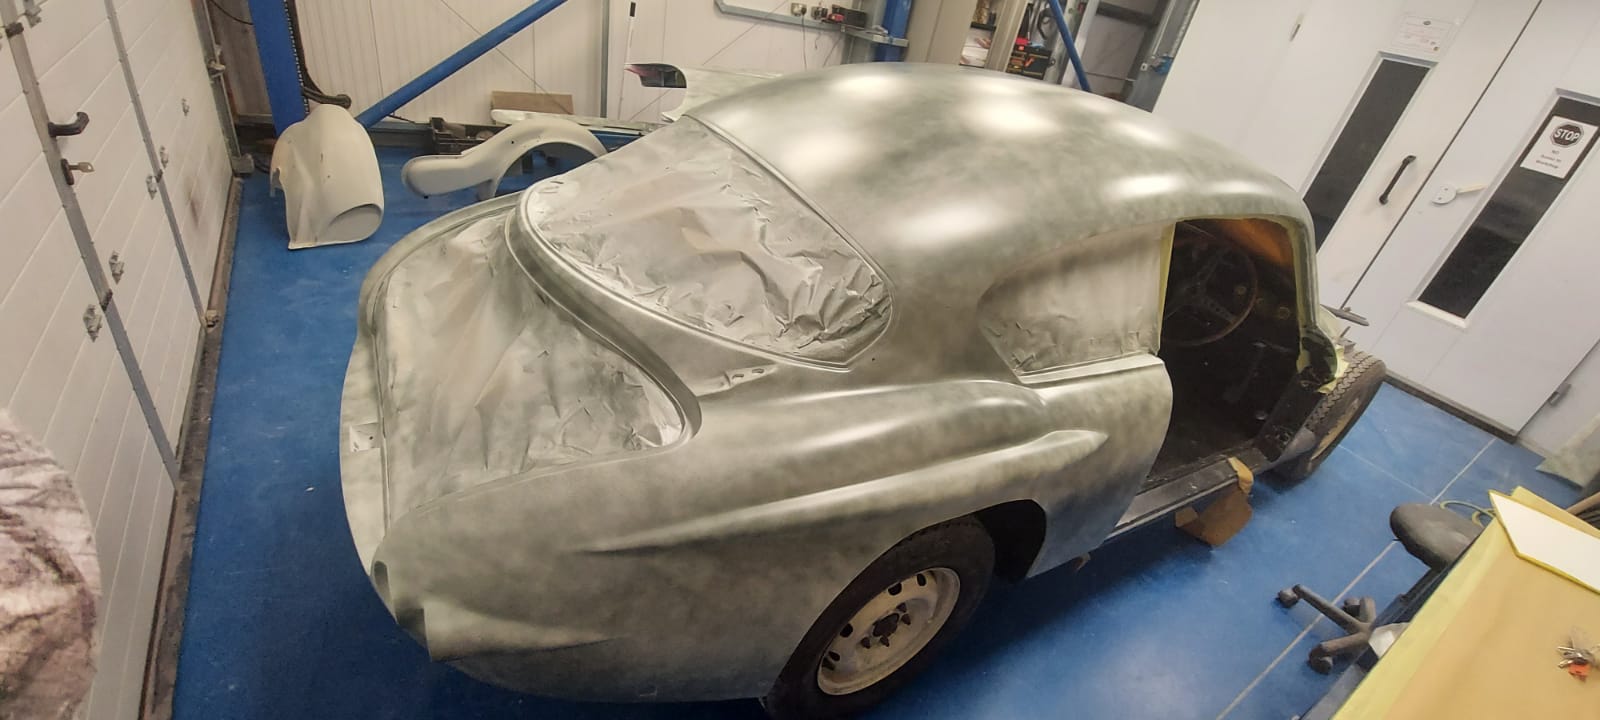
If you’ve been following us for a while, you’ll know we love getting behind the scenes shots and behind the behind the scenes shots! Here’s Ellie, our in house photographer and latest member to the marketing team, snapping Scott prepping the Daytona.
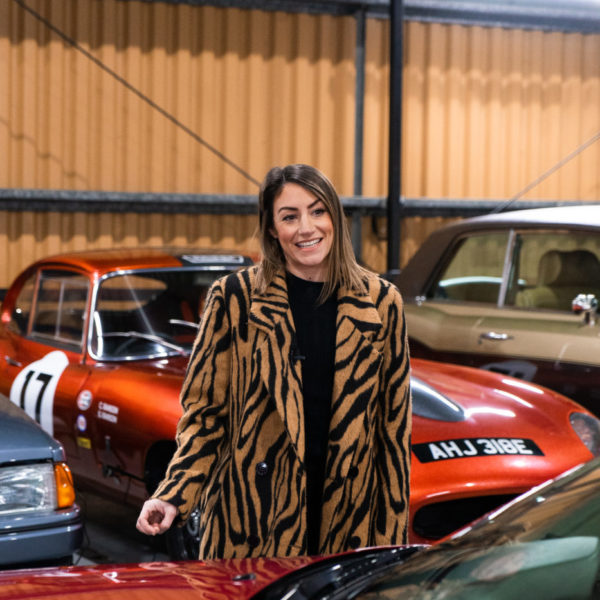
Last night we held our live draw to announce the BMW Z3M winner! As always, Charlotte joined us to take a walk through the cars in the hanger and the competition before she announced the winner.
We’re delighted to announce the winner of our BMW is Philip Hatswell with ticket number 3267. We’re yet to hear back from Philip but we’ve sent him a message to let him know he’s won, and we can’t wait to drop it off for him!
You can watch our live draw back here. We also work to capture behind the scenes shots to give you an insight into what we see!
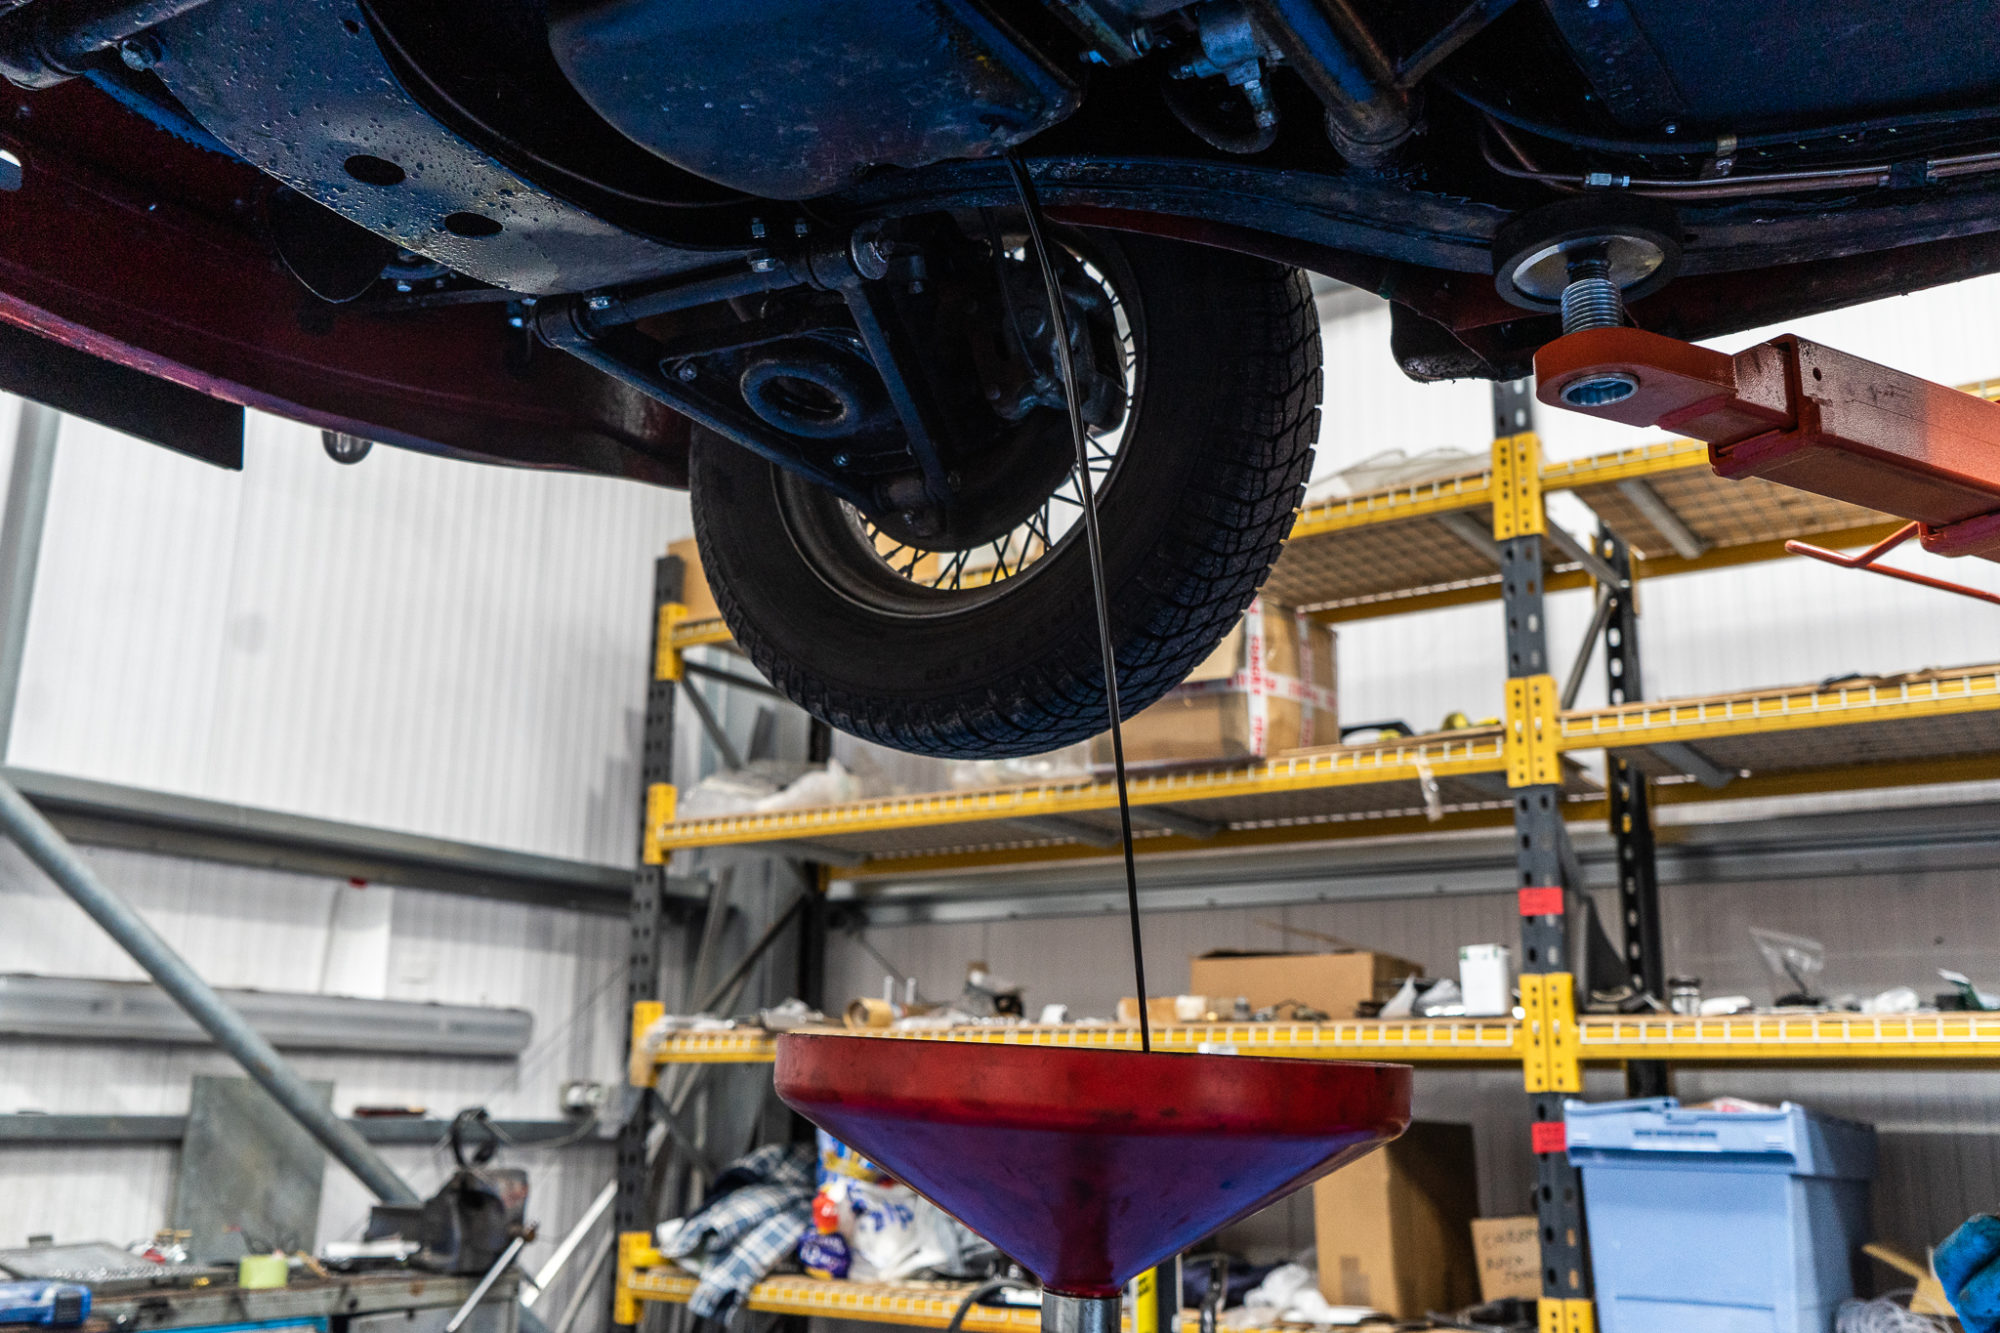
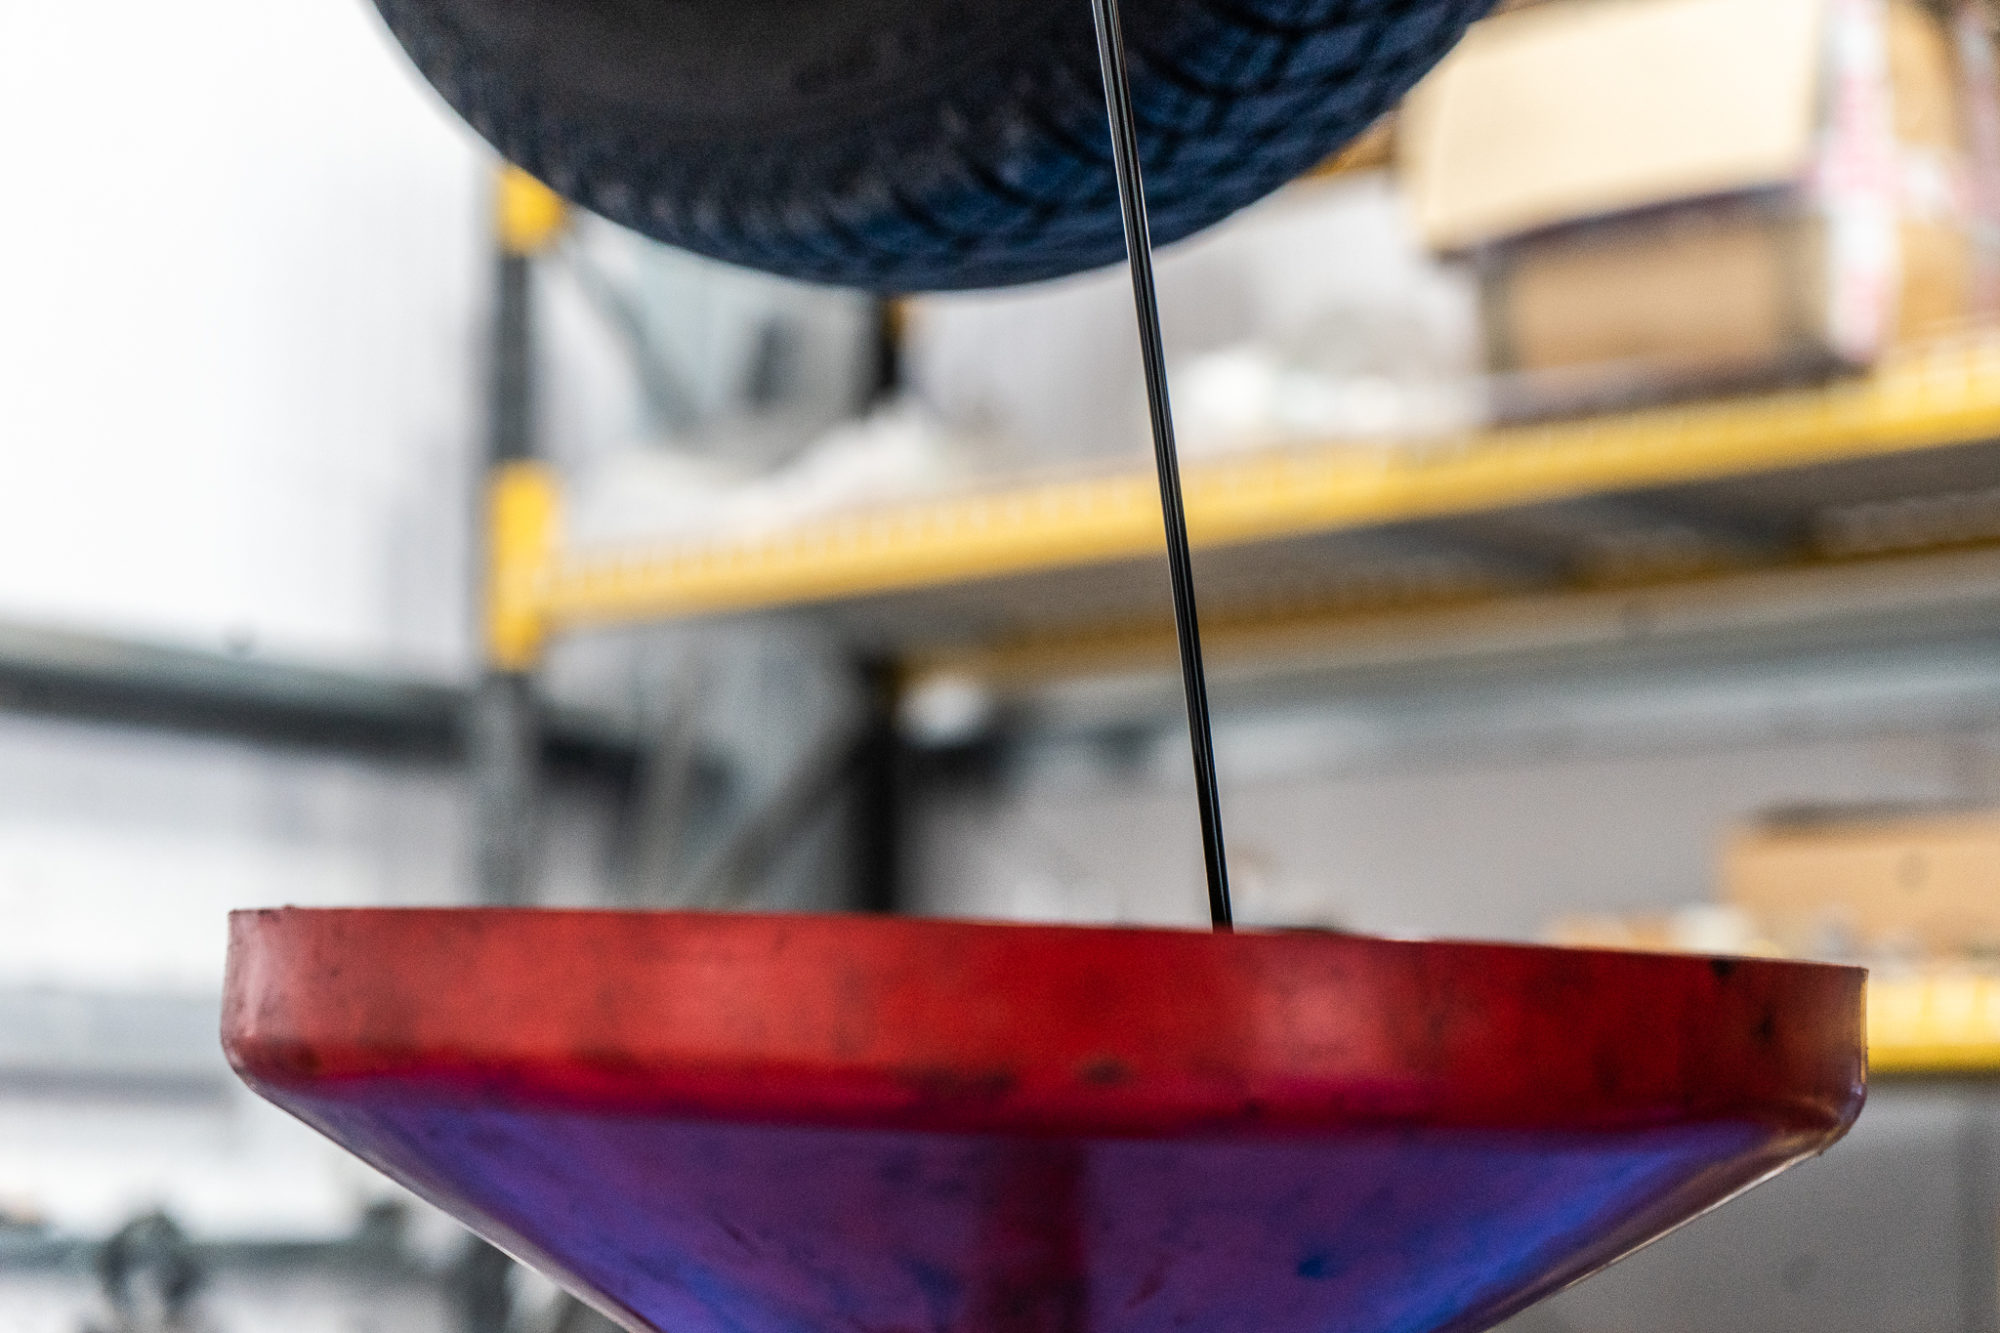
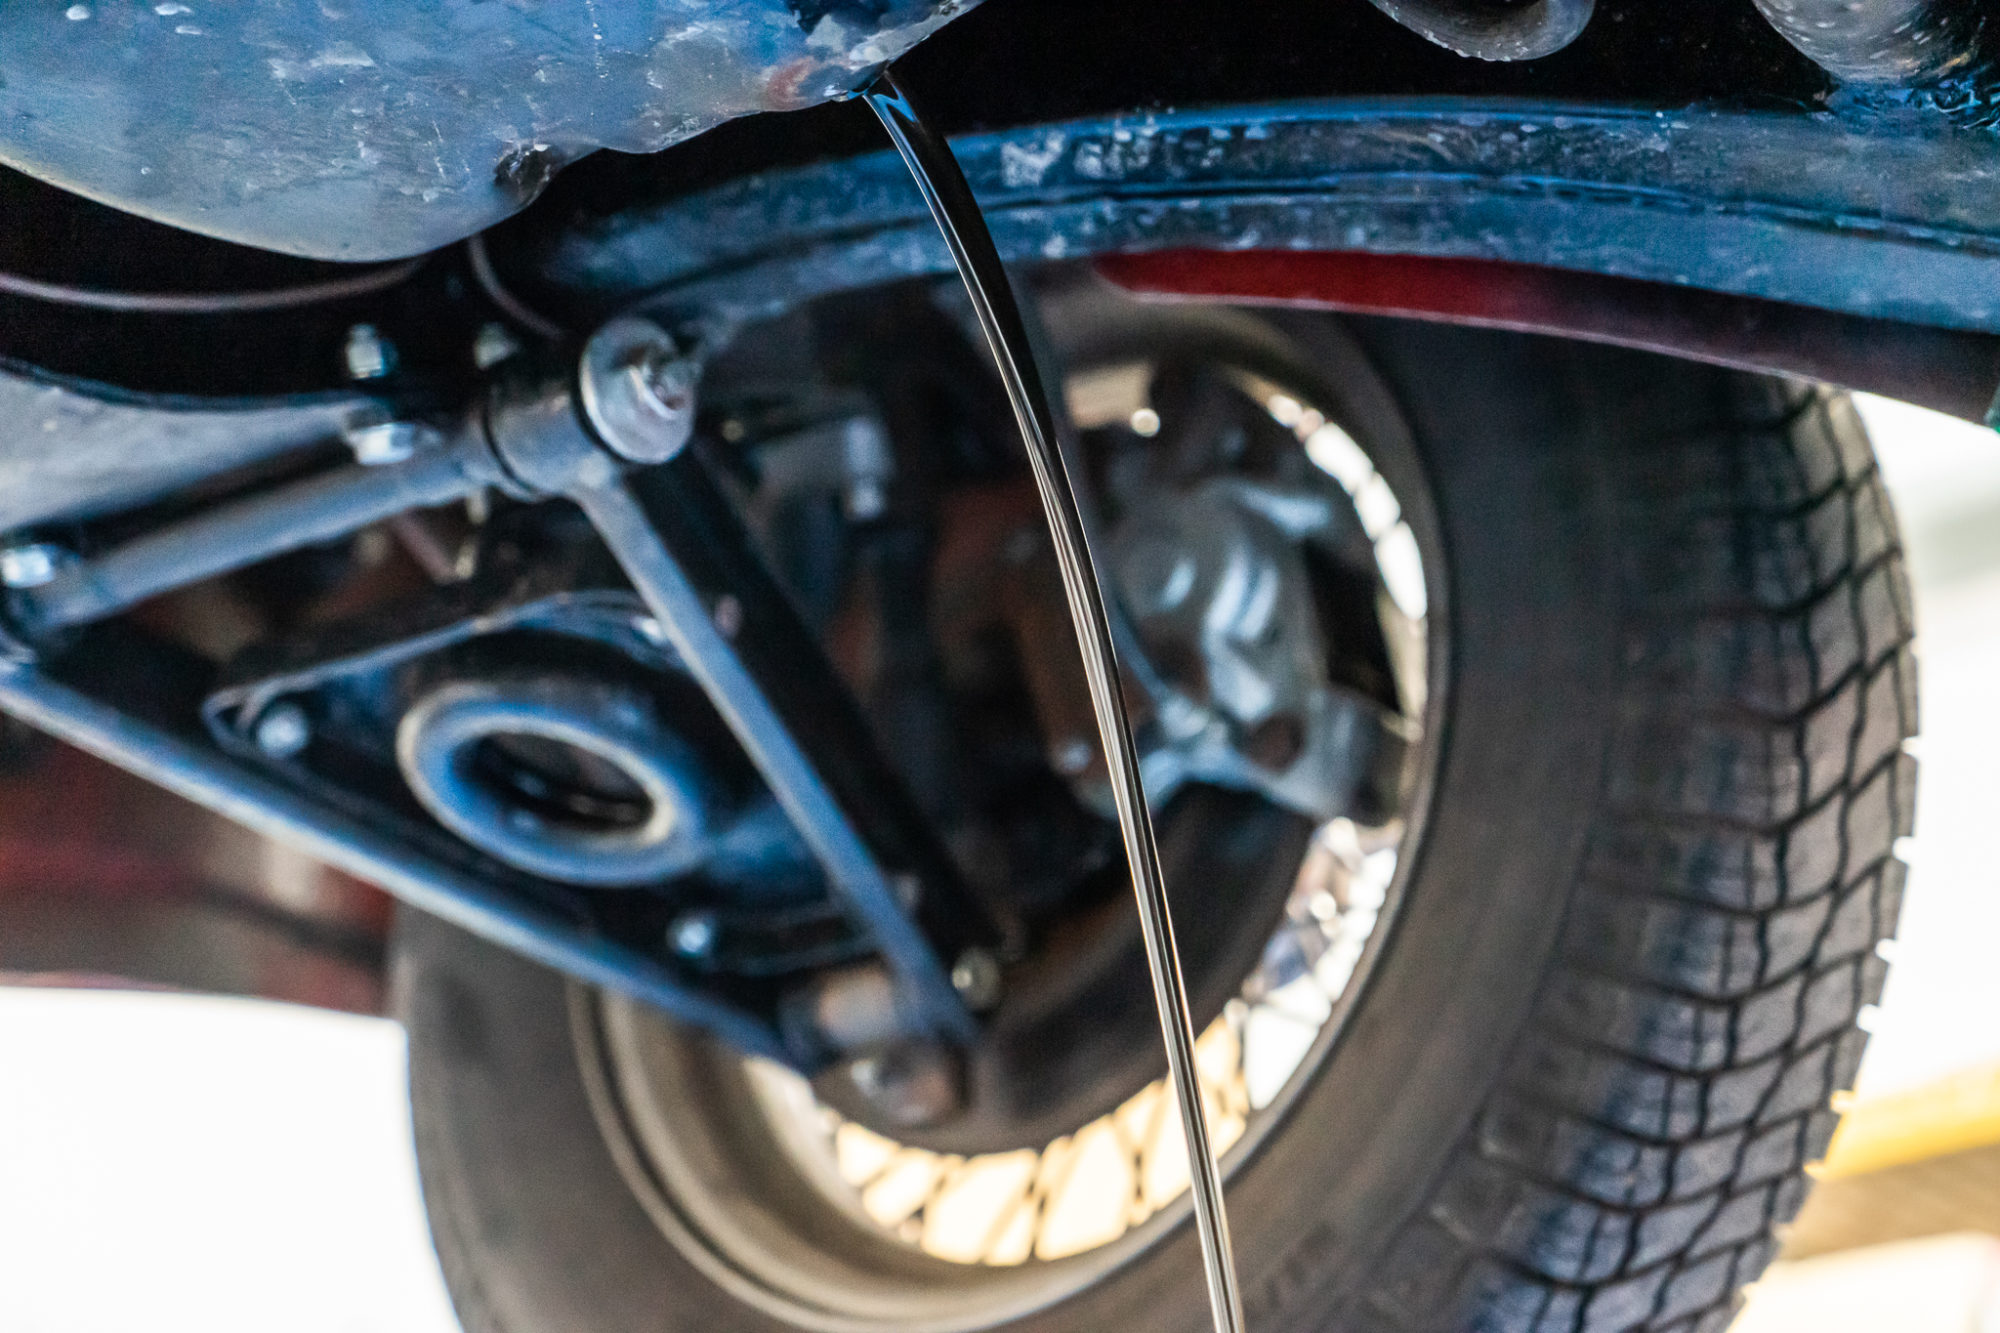
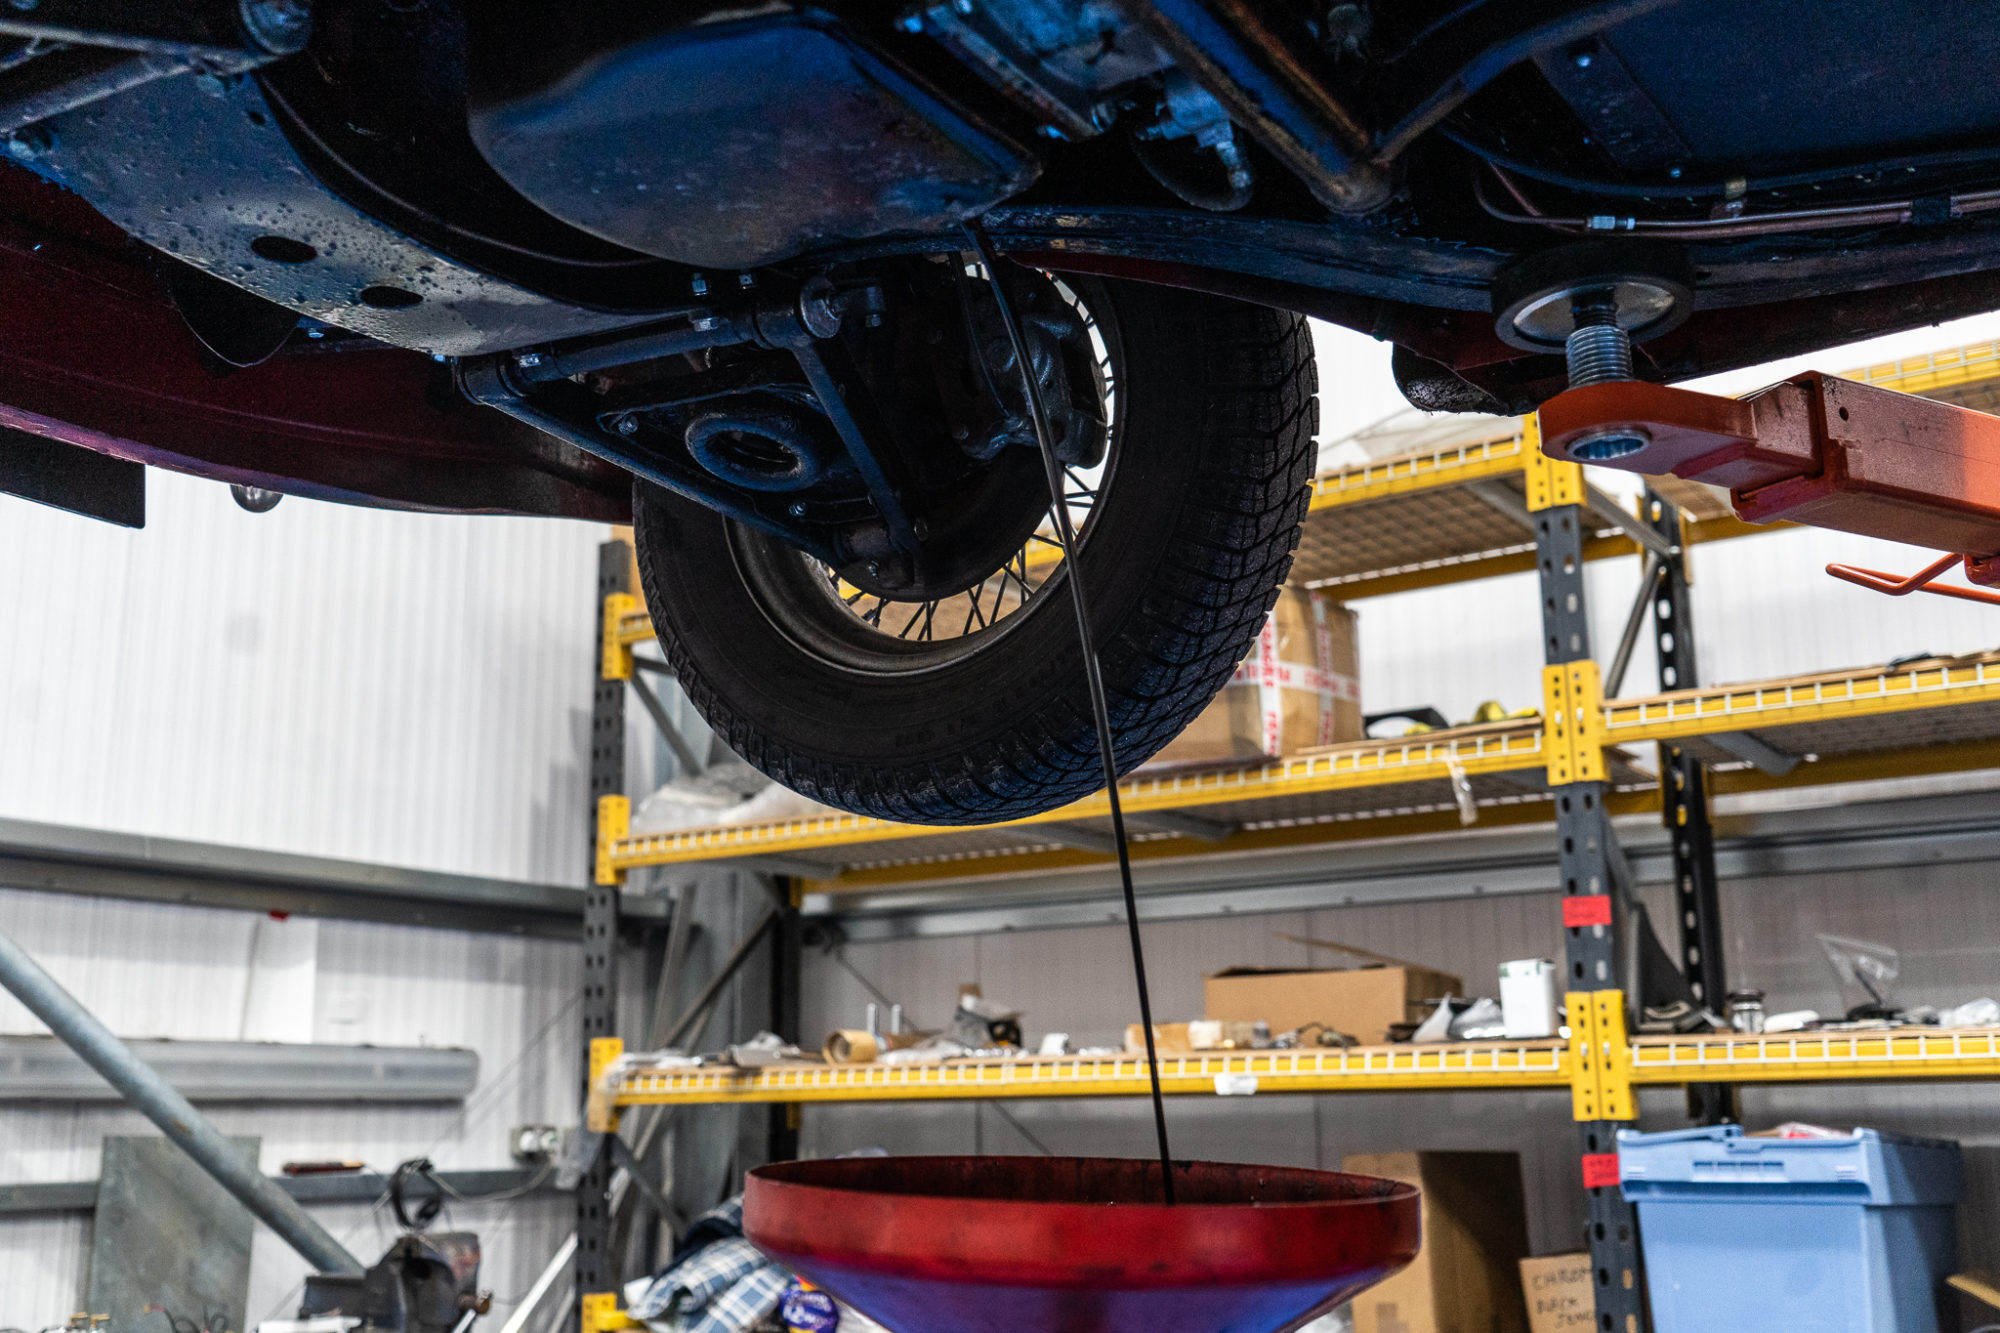
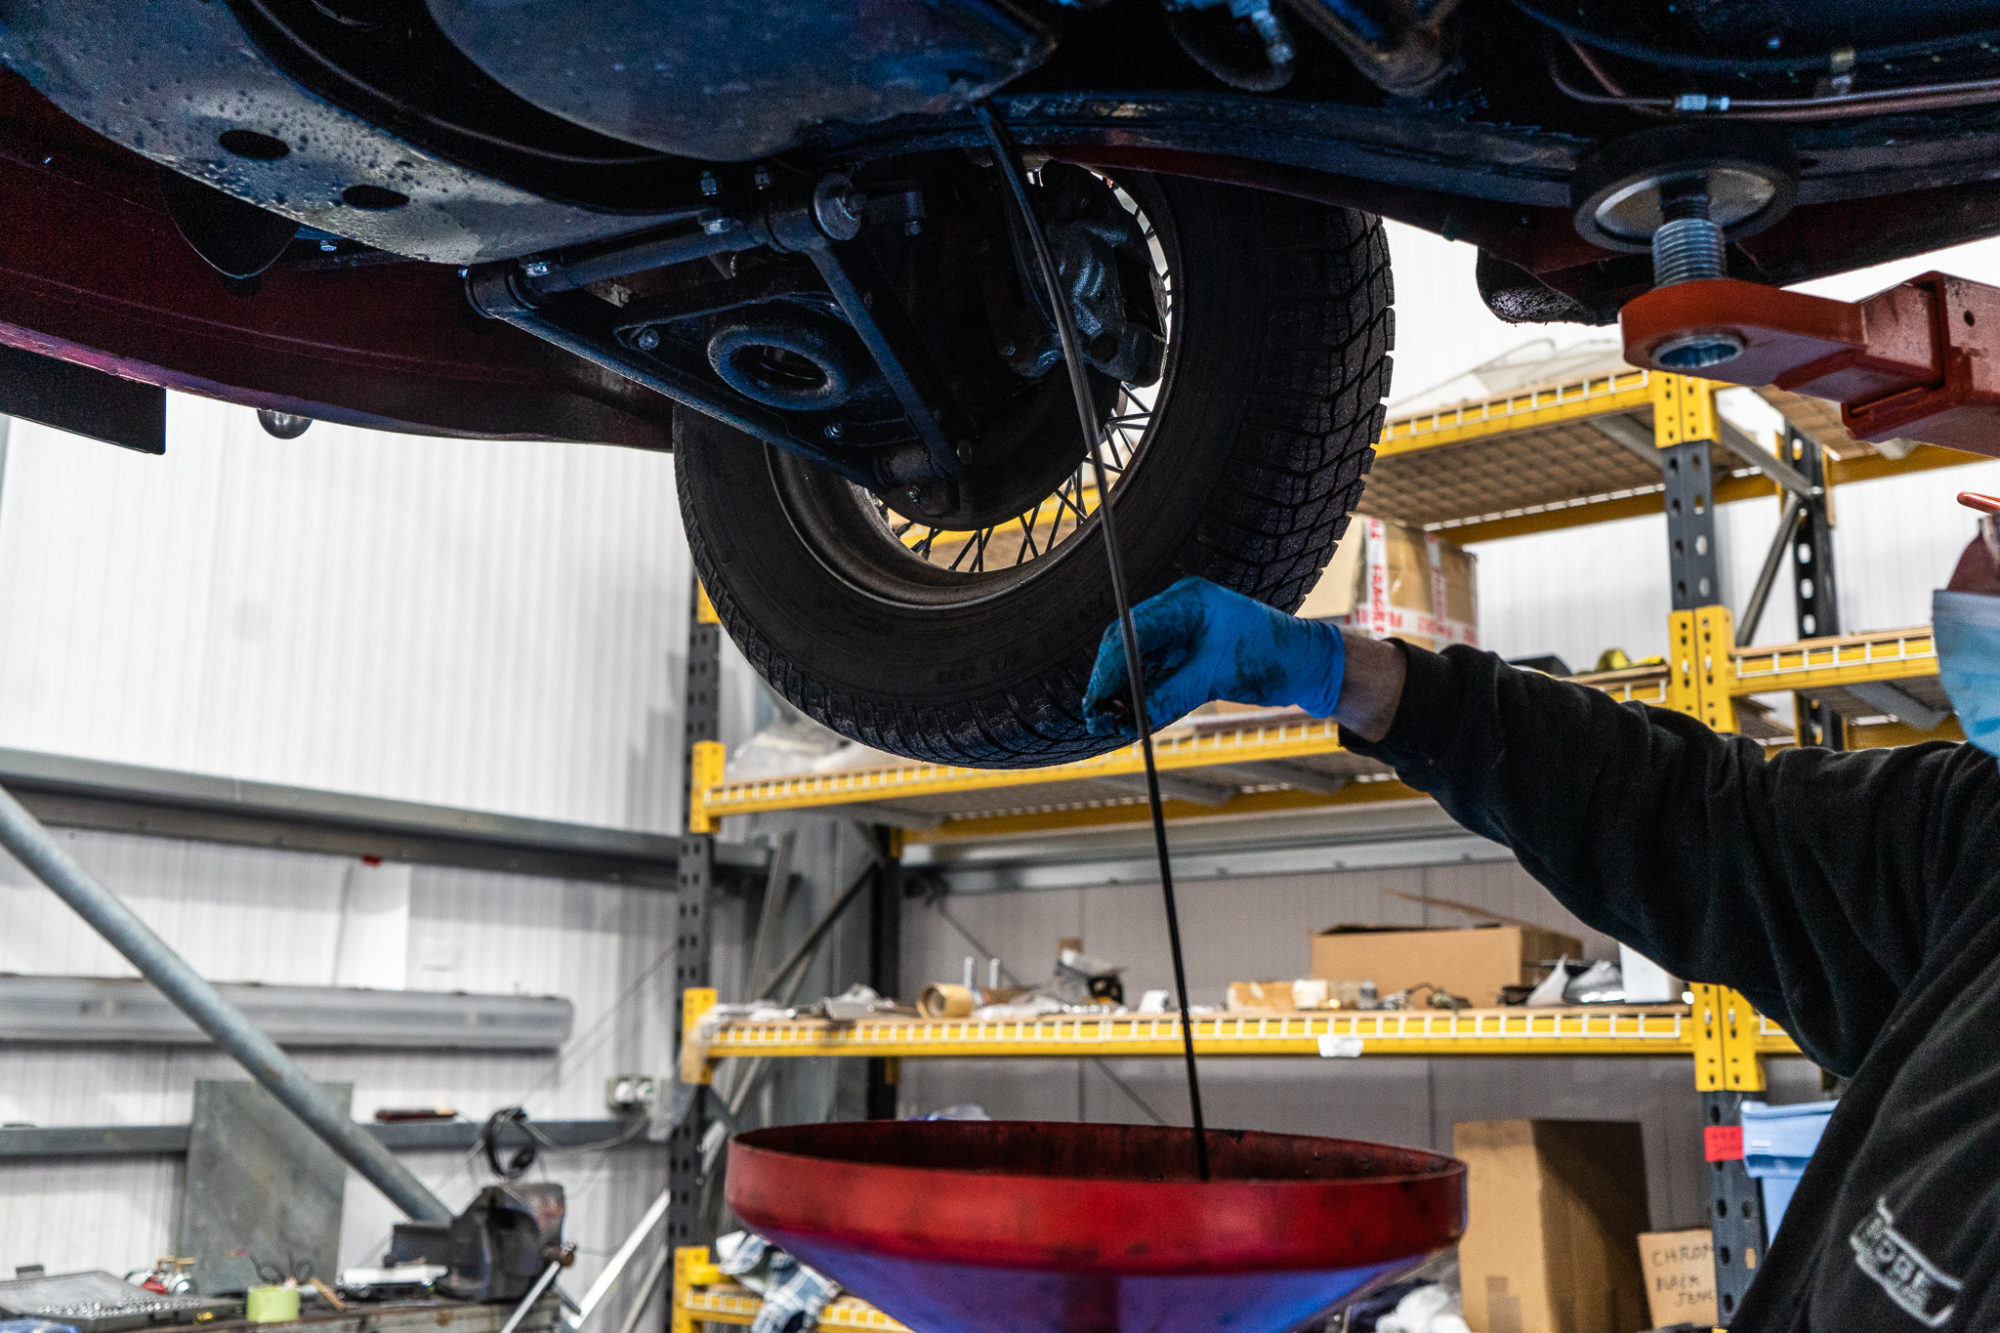
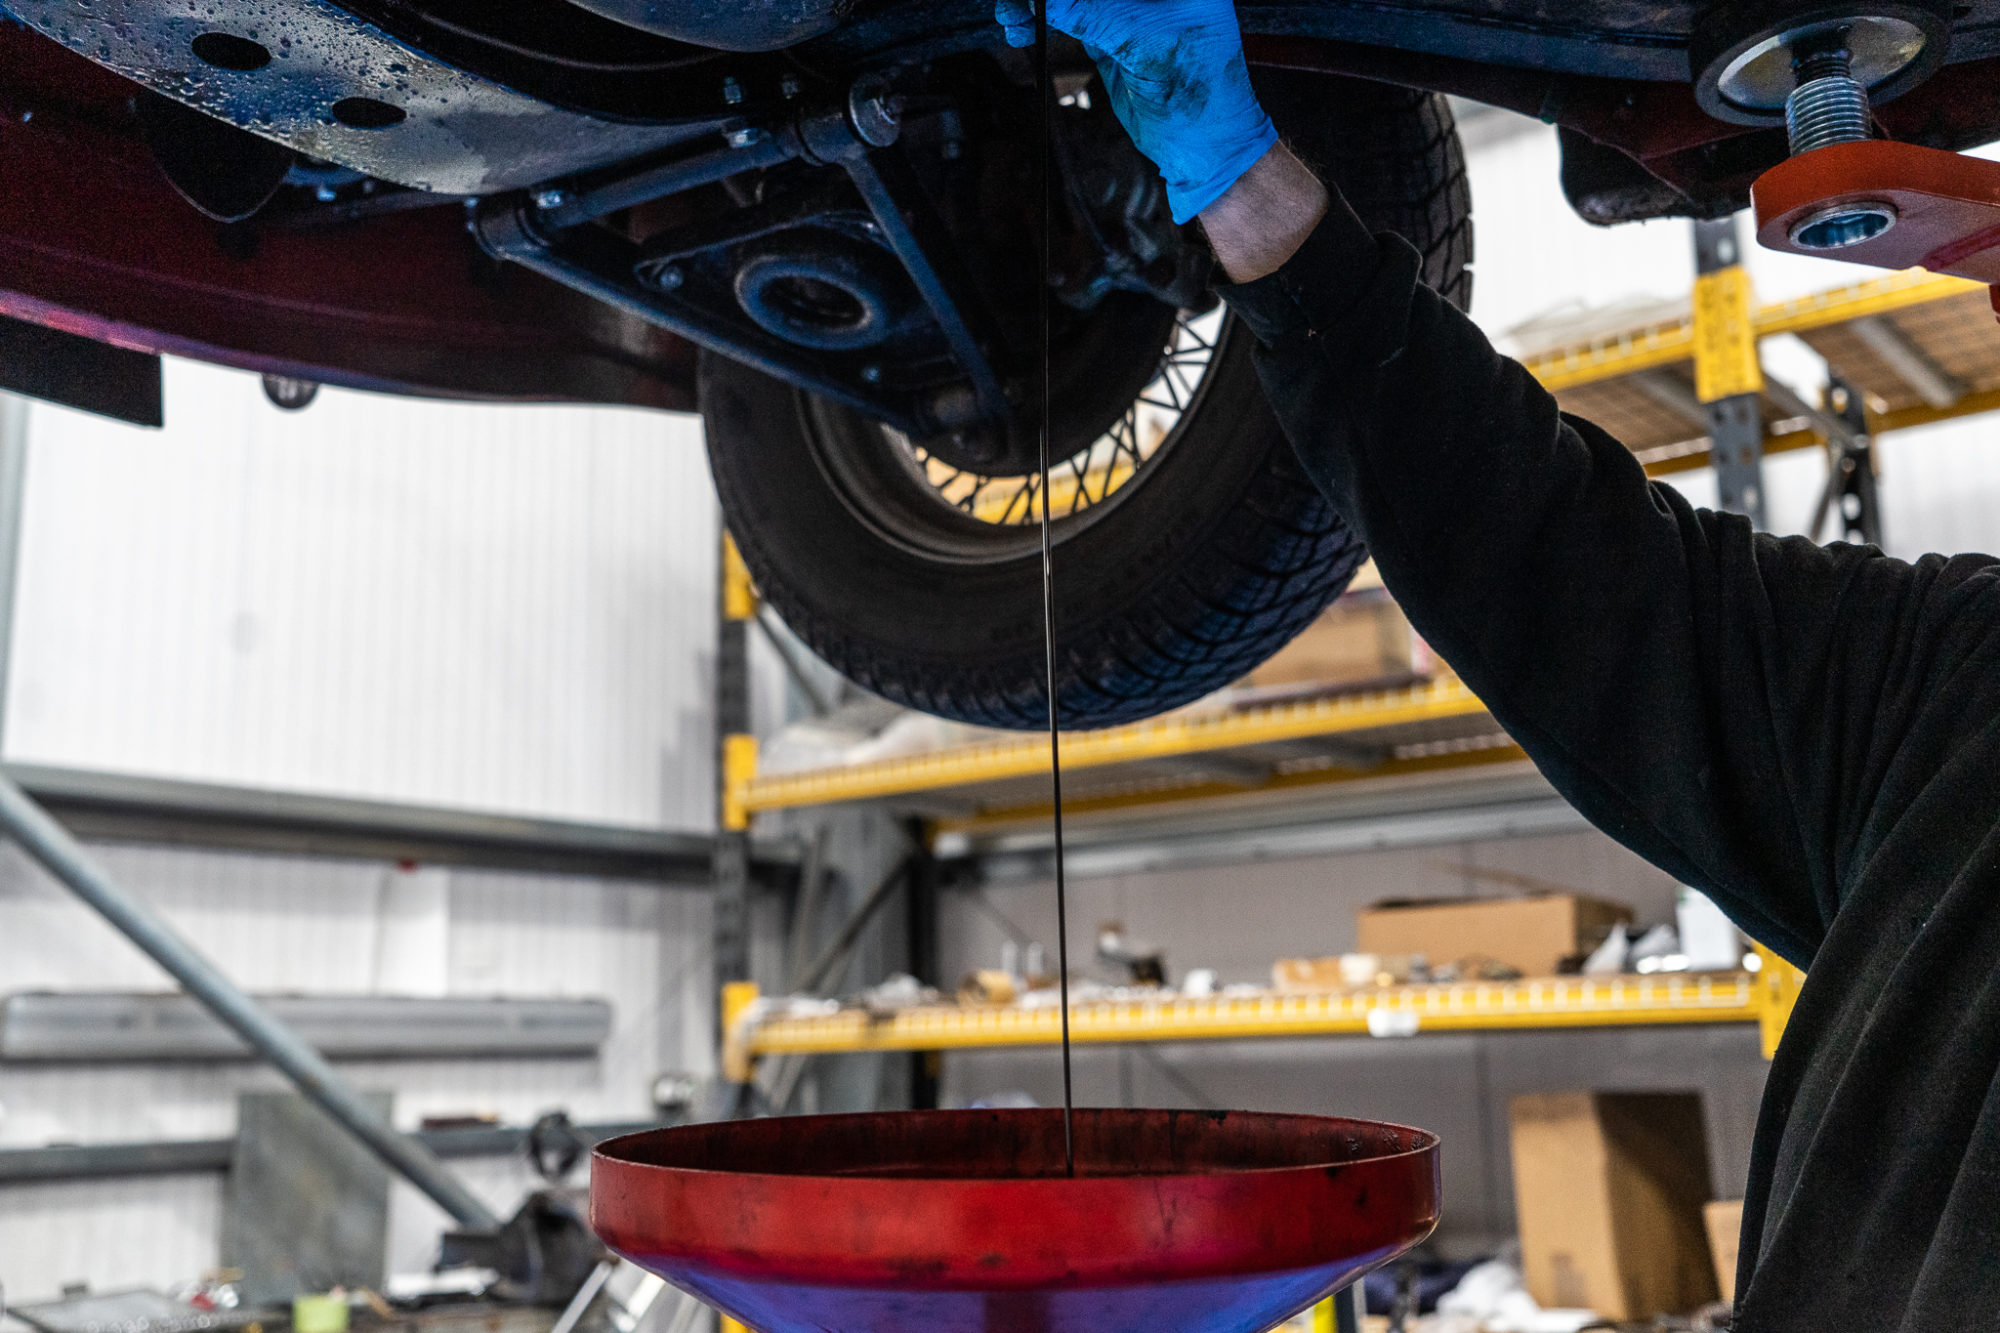
We’ve welcomed back this lovely 1960 MG A for a service. We originally restored this stunning classic and were delighted to hear how happy Mike is with his beloved motor when he dropped it off with us this morning.
We’ve begun by draining the oil out of the engine to replace it as this is advised to do either once a year or every 6000 miles. This is important to do as when the oil has circulated around the engine numerous times, it can collect metal pollutants and lose its effectiveness.
Our 1958 Jensen 541R is now complete, cleaned and ready for shoot.
The car will be available for sale from our showroom very soon.
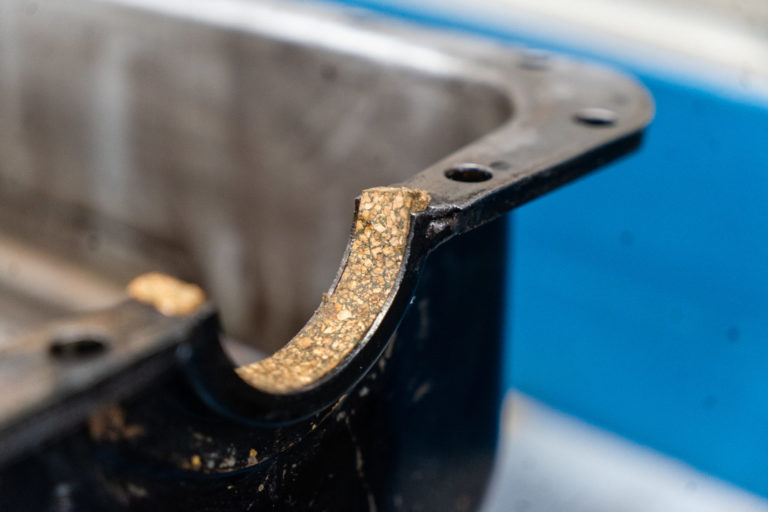
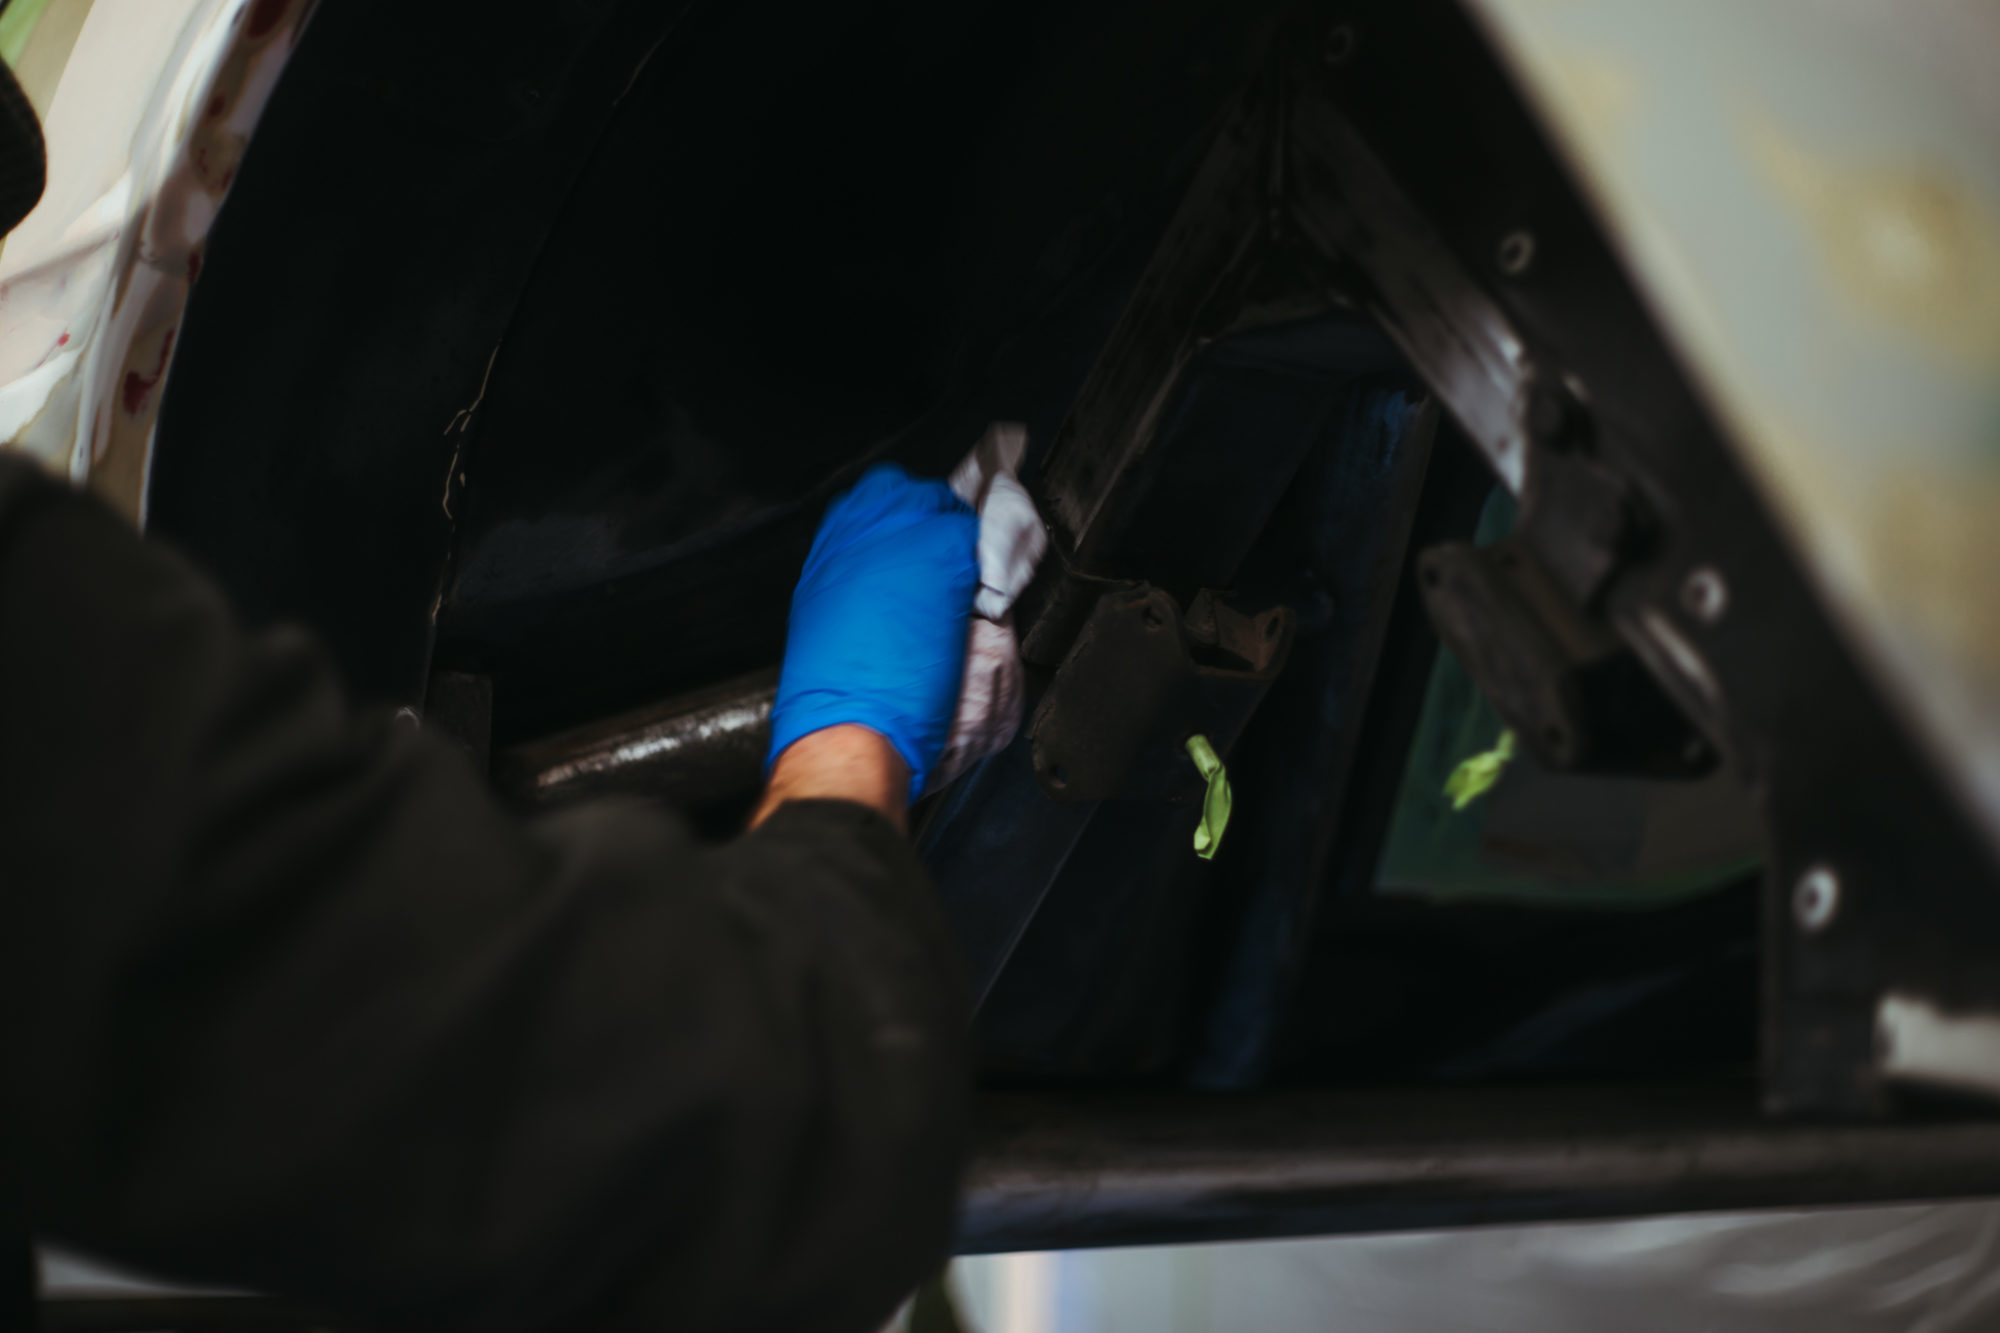
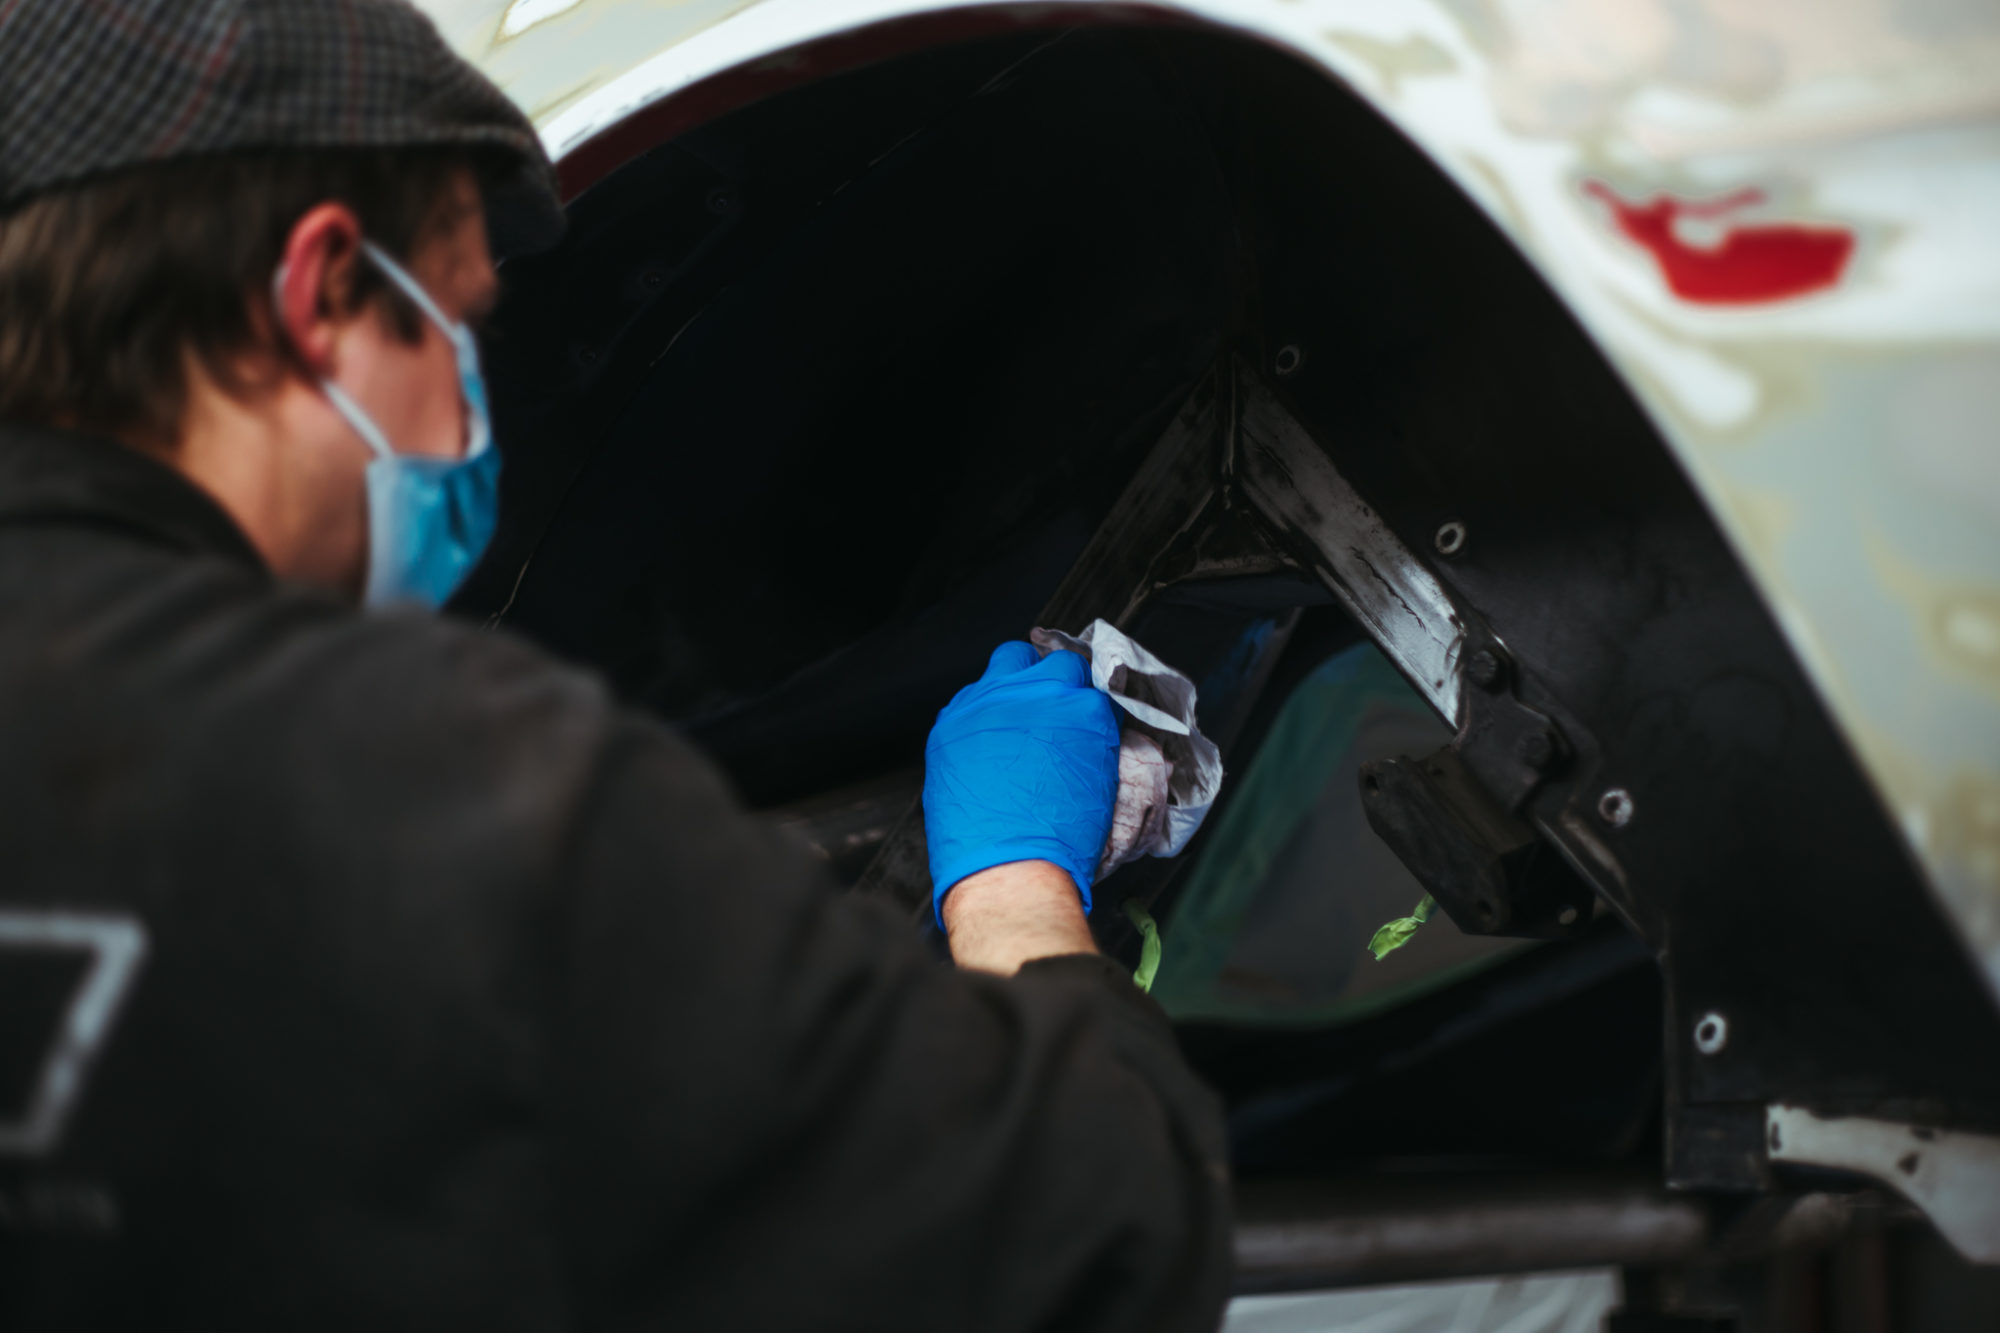
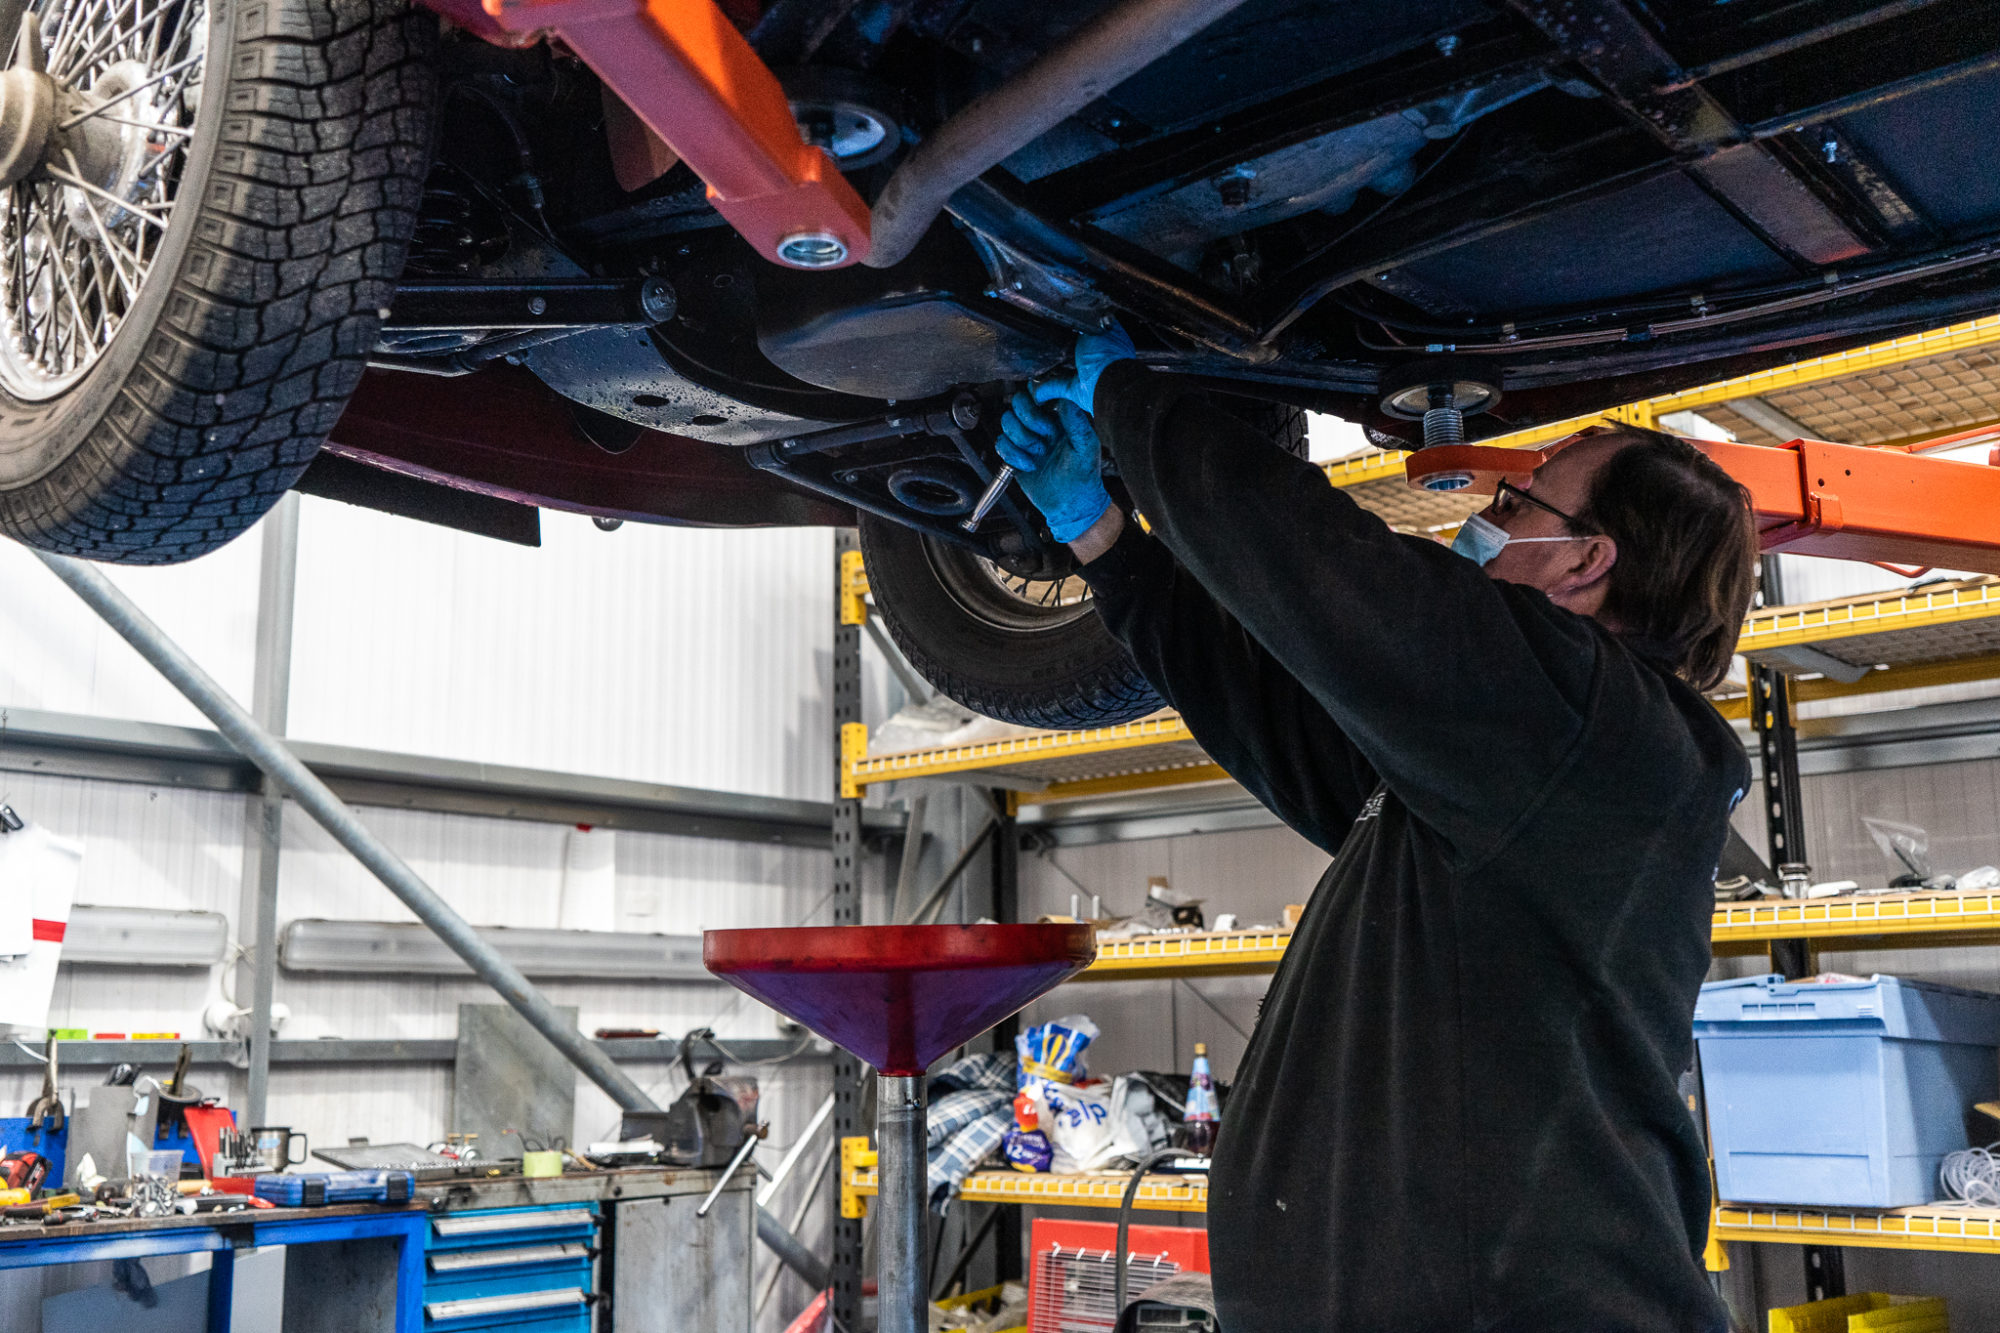
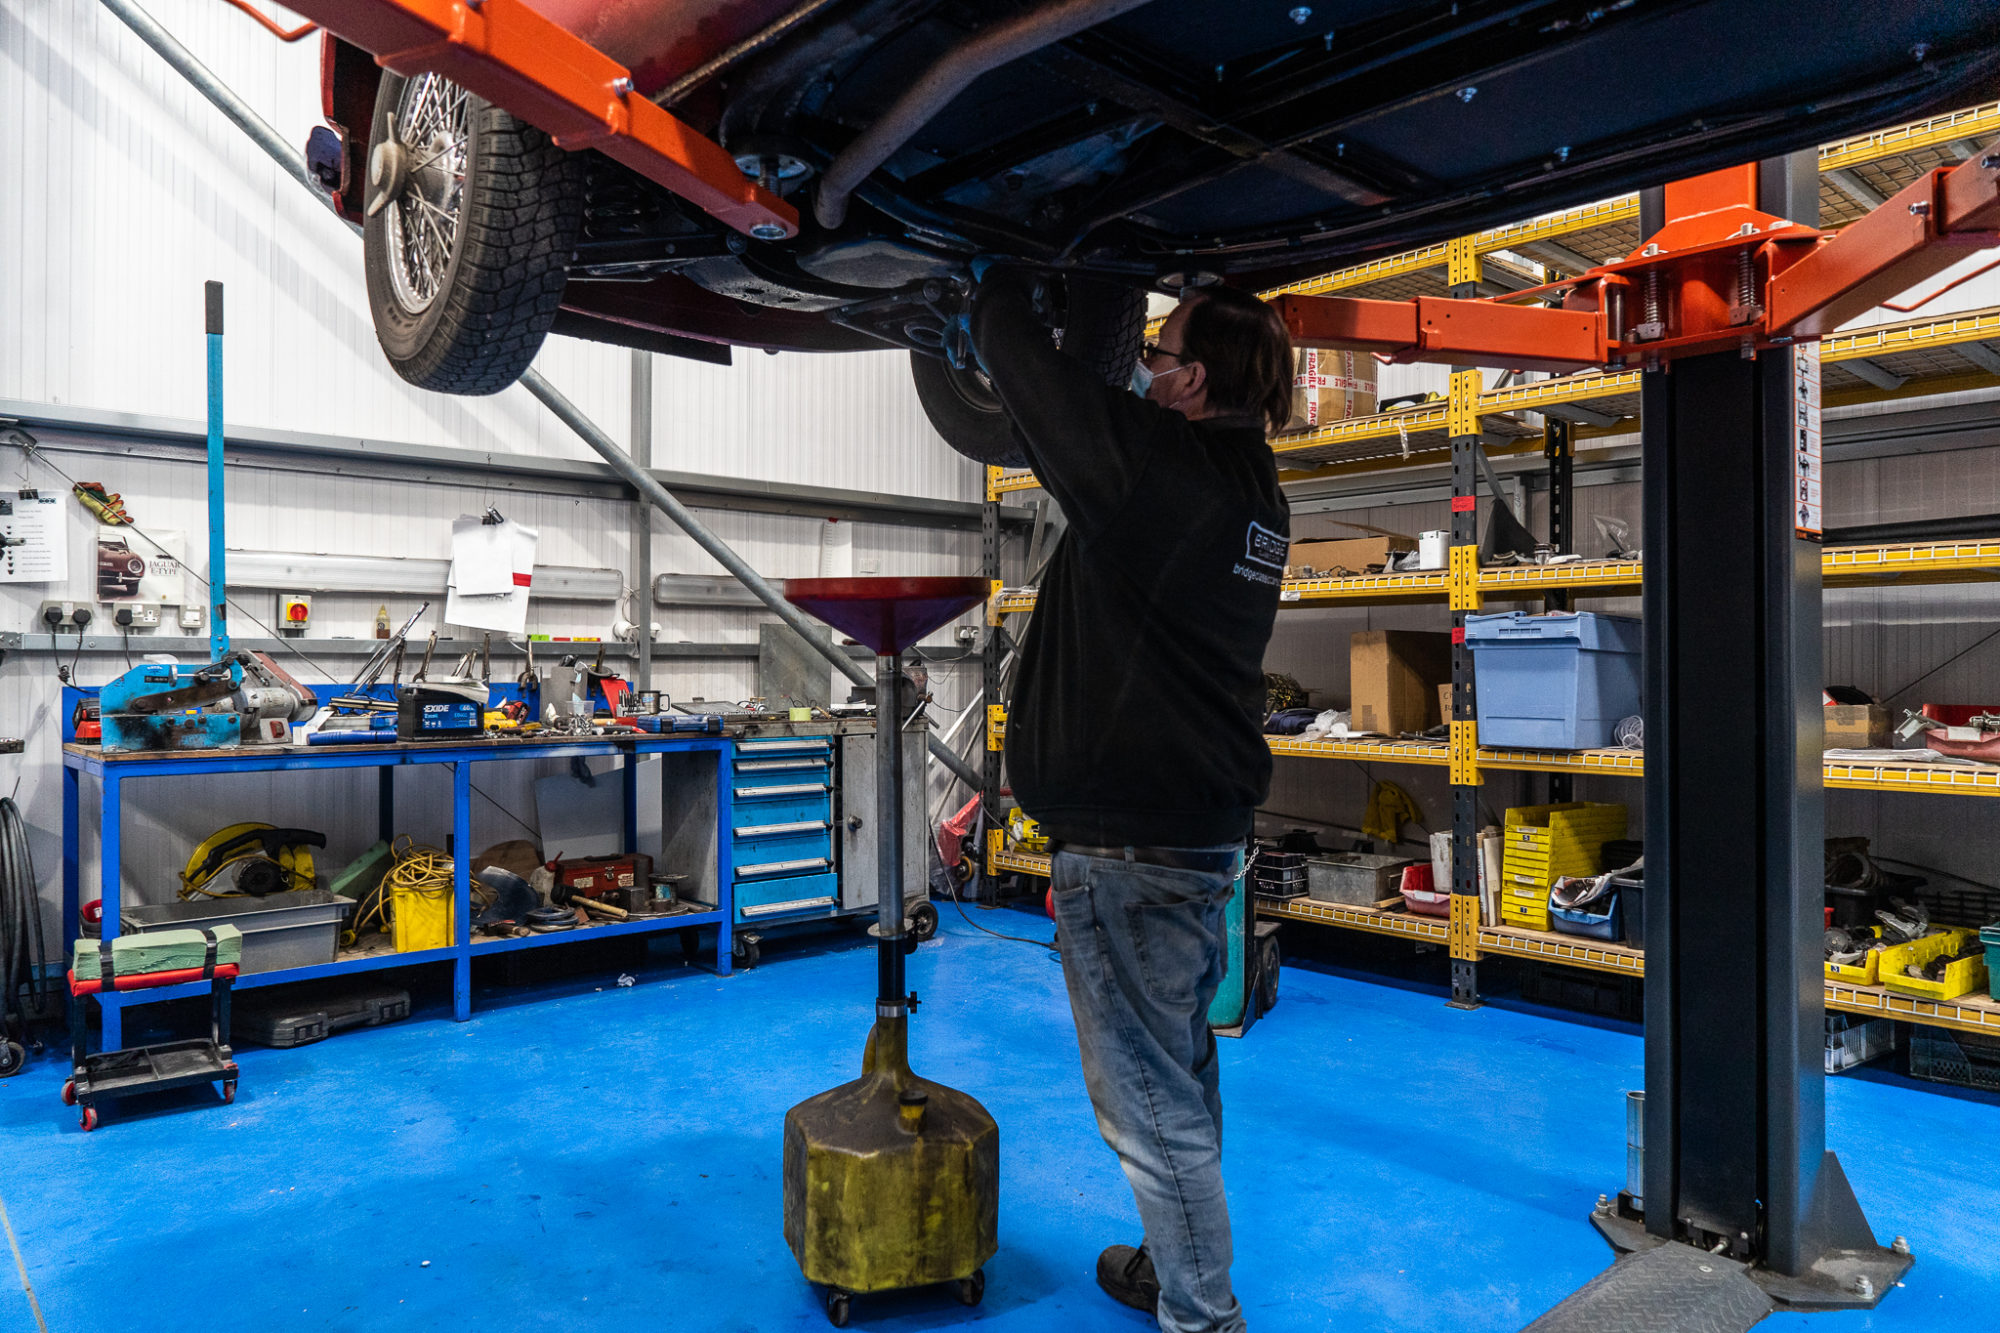
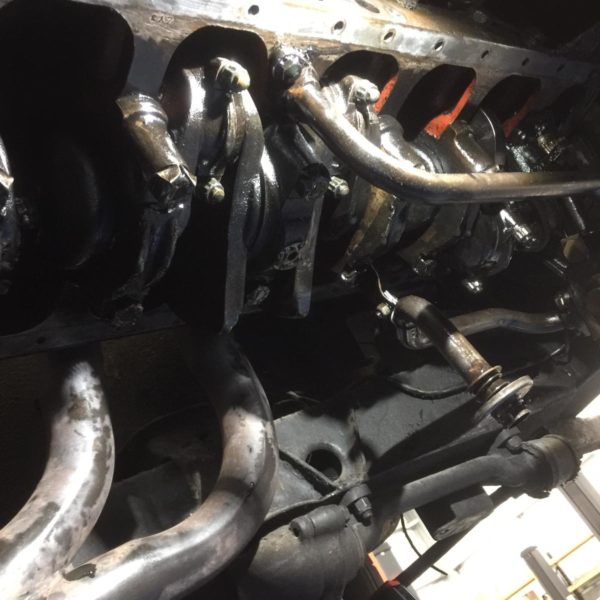
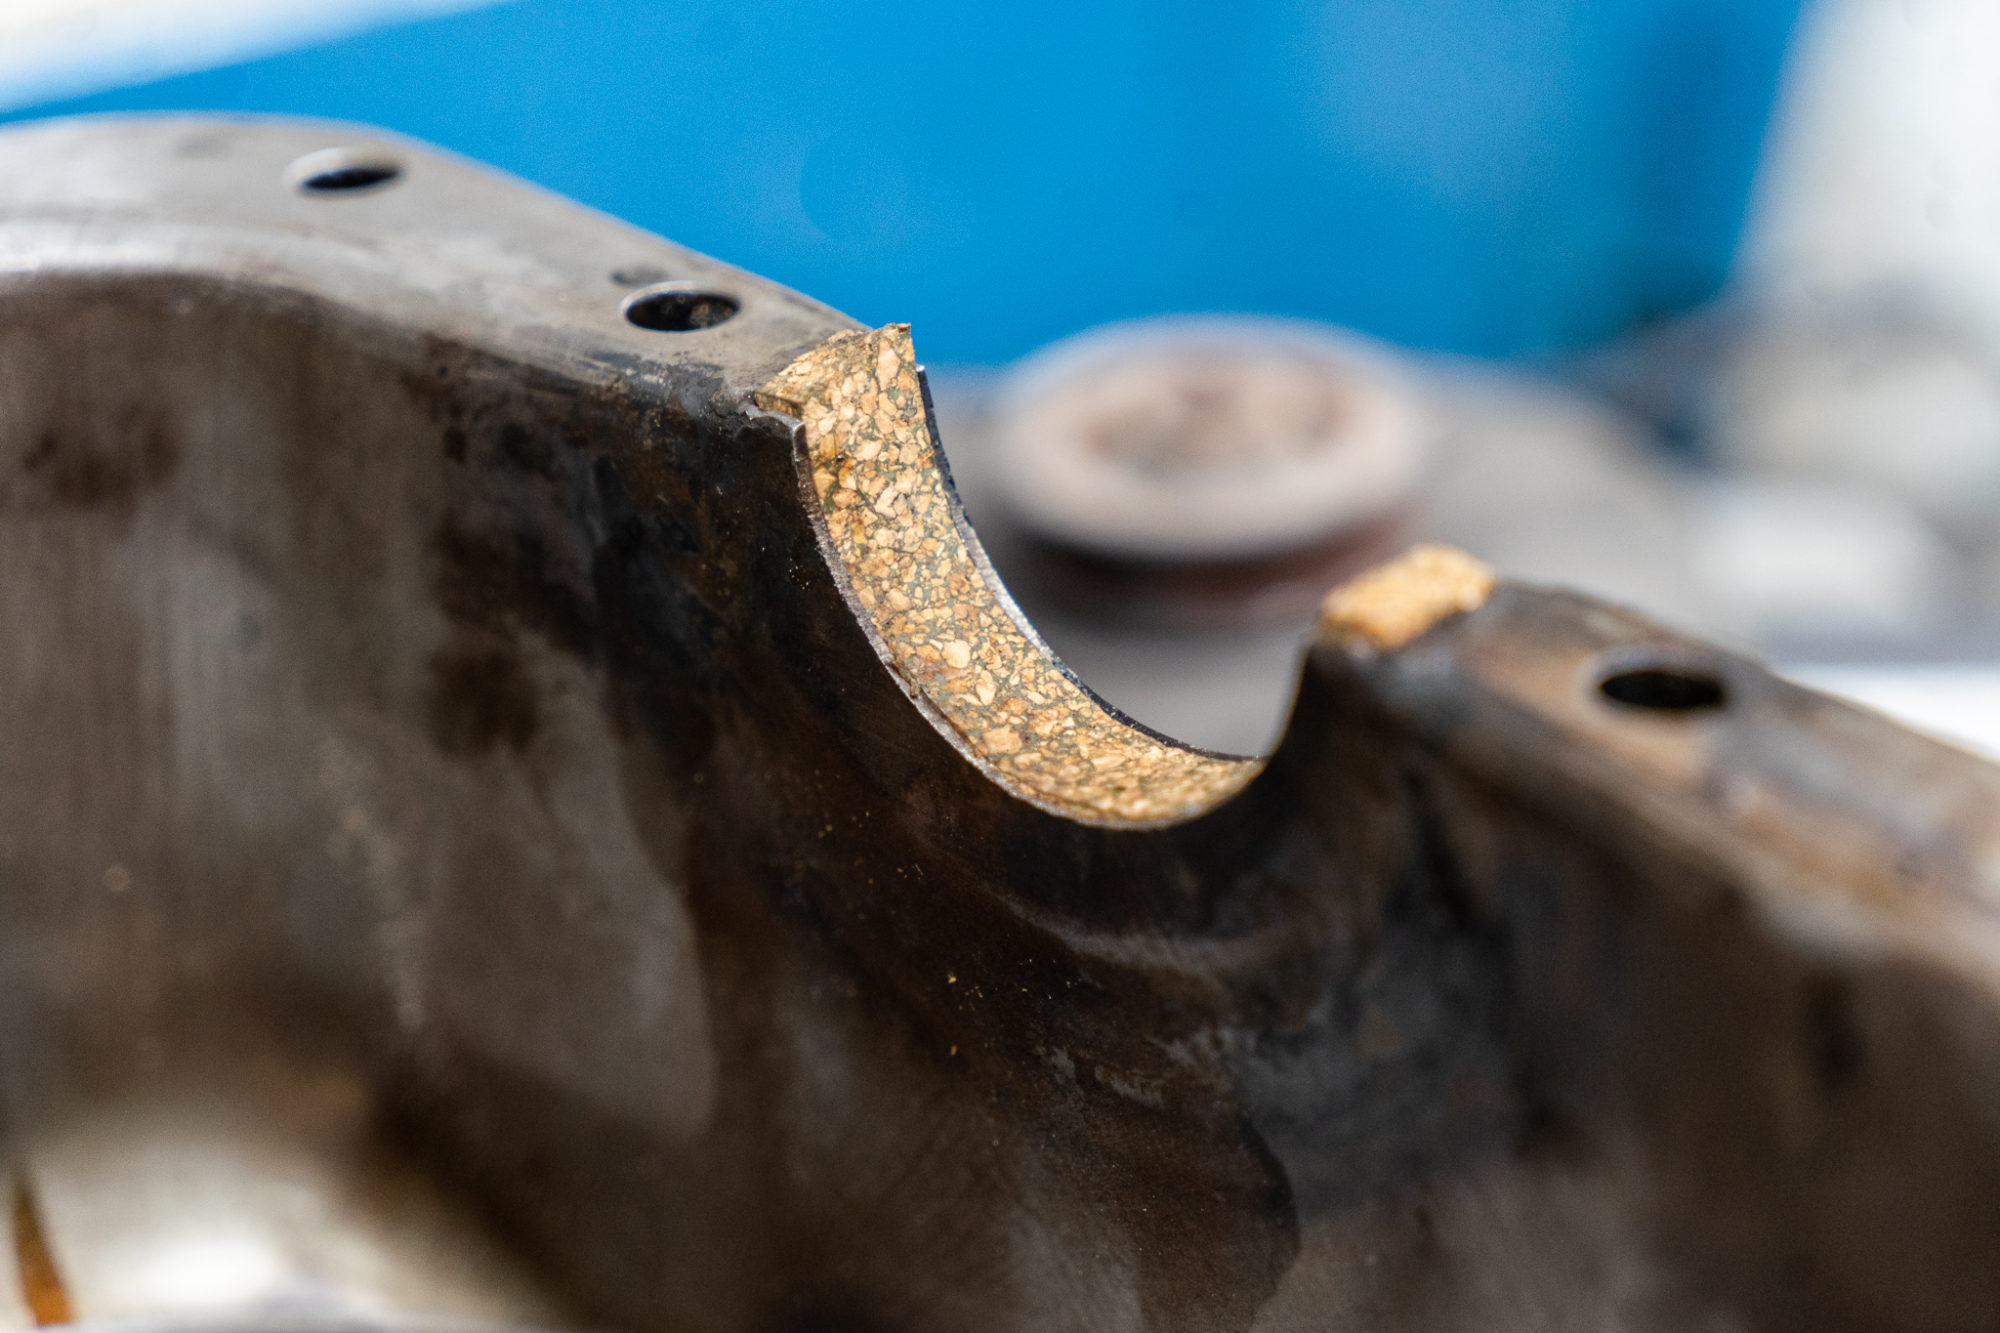
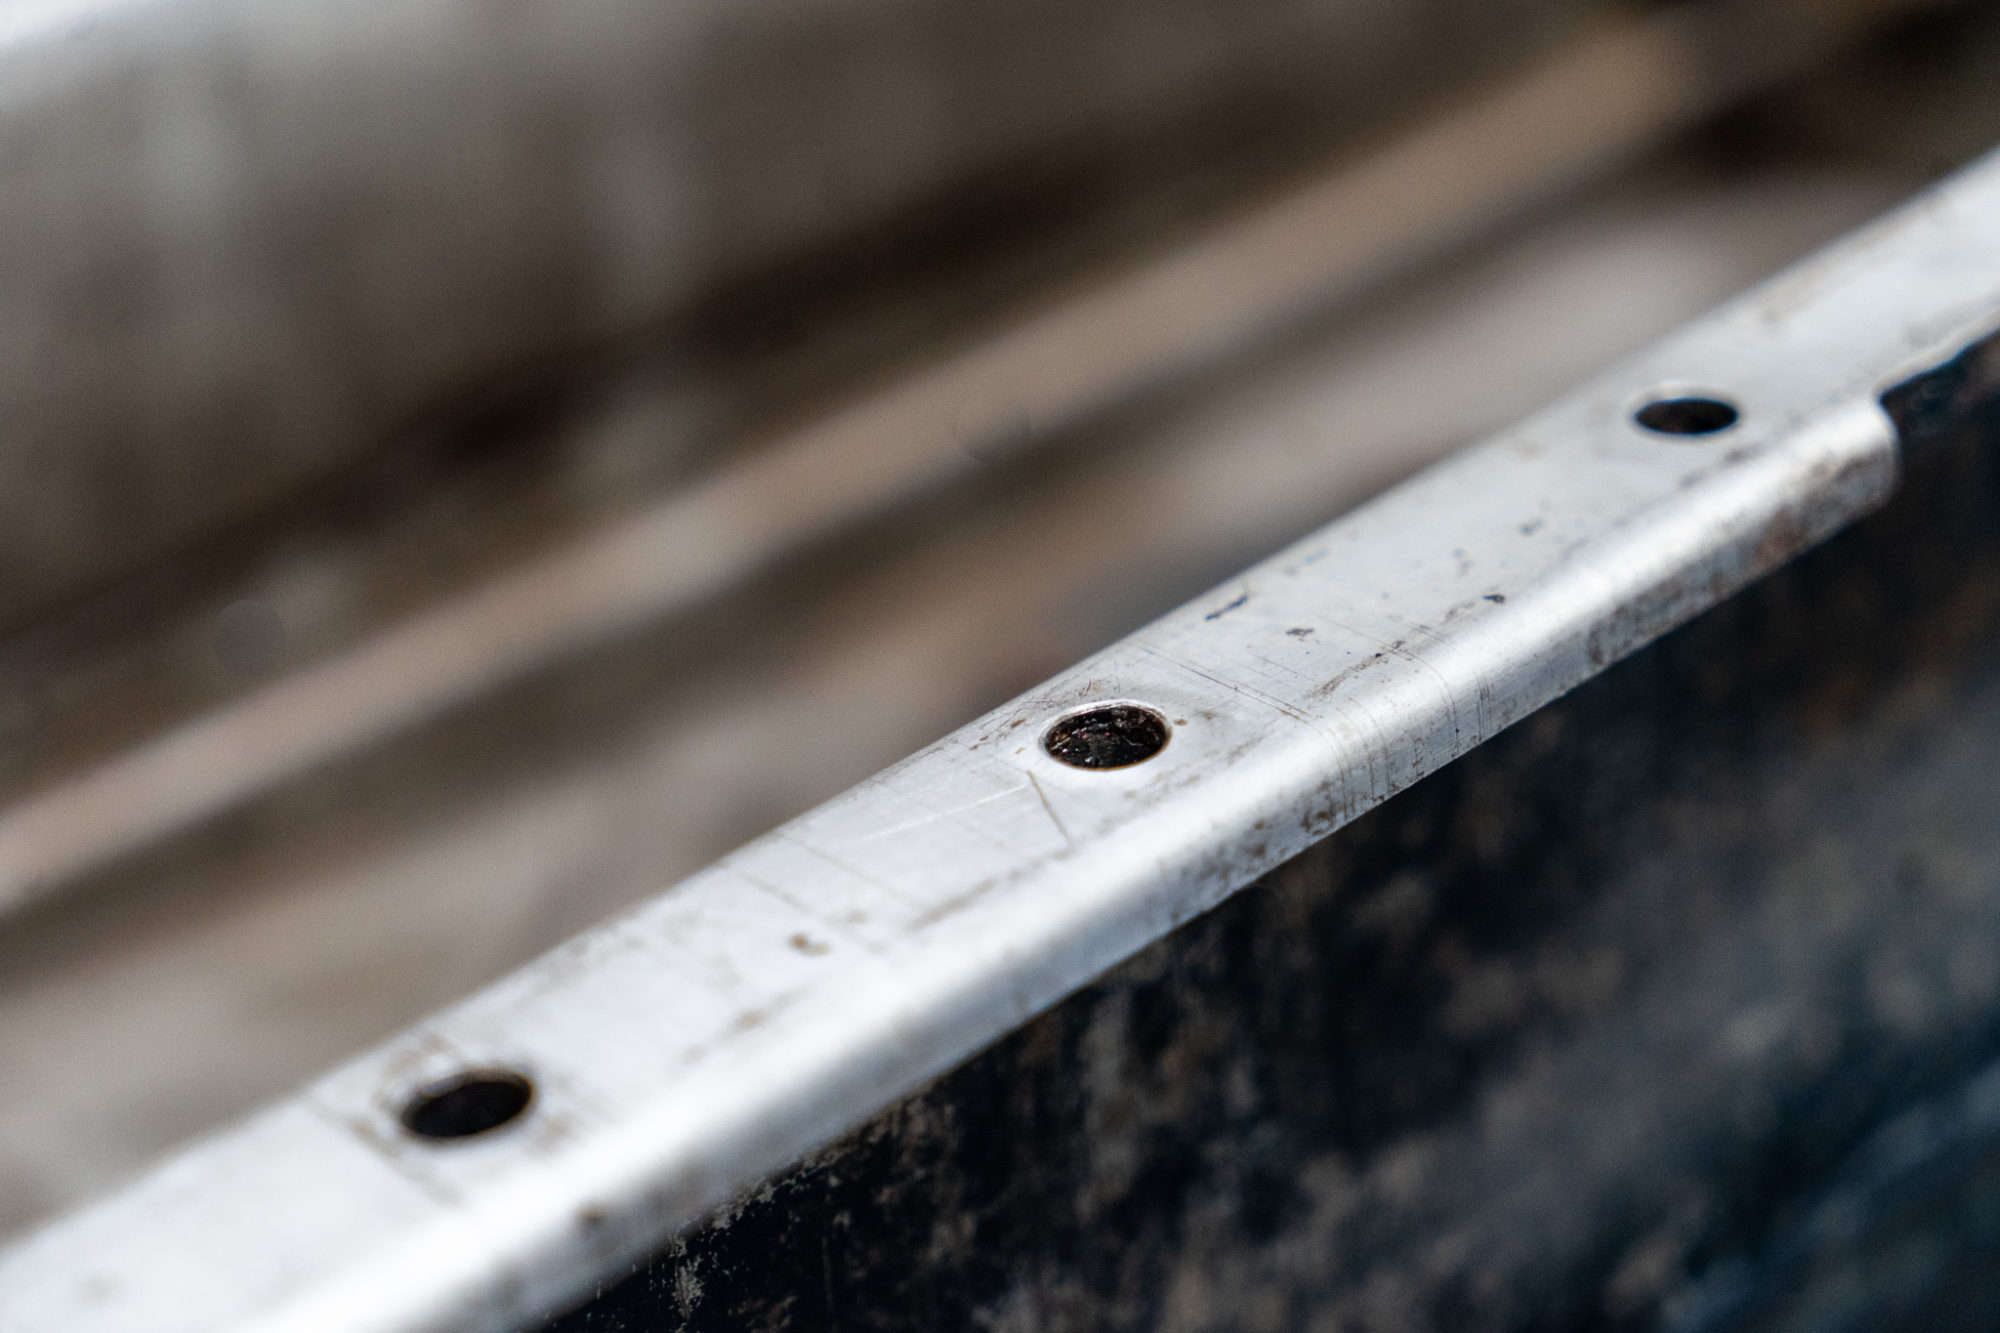
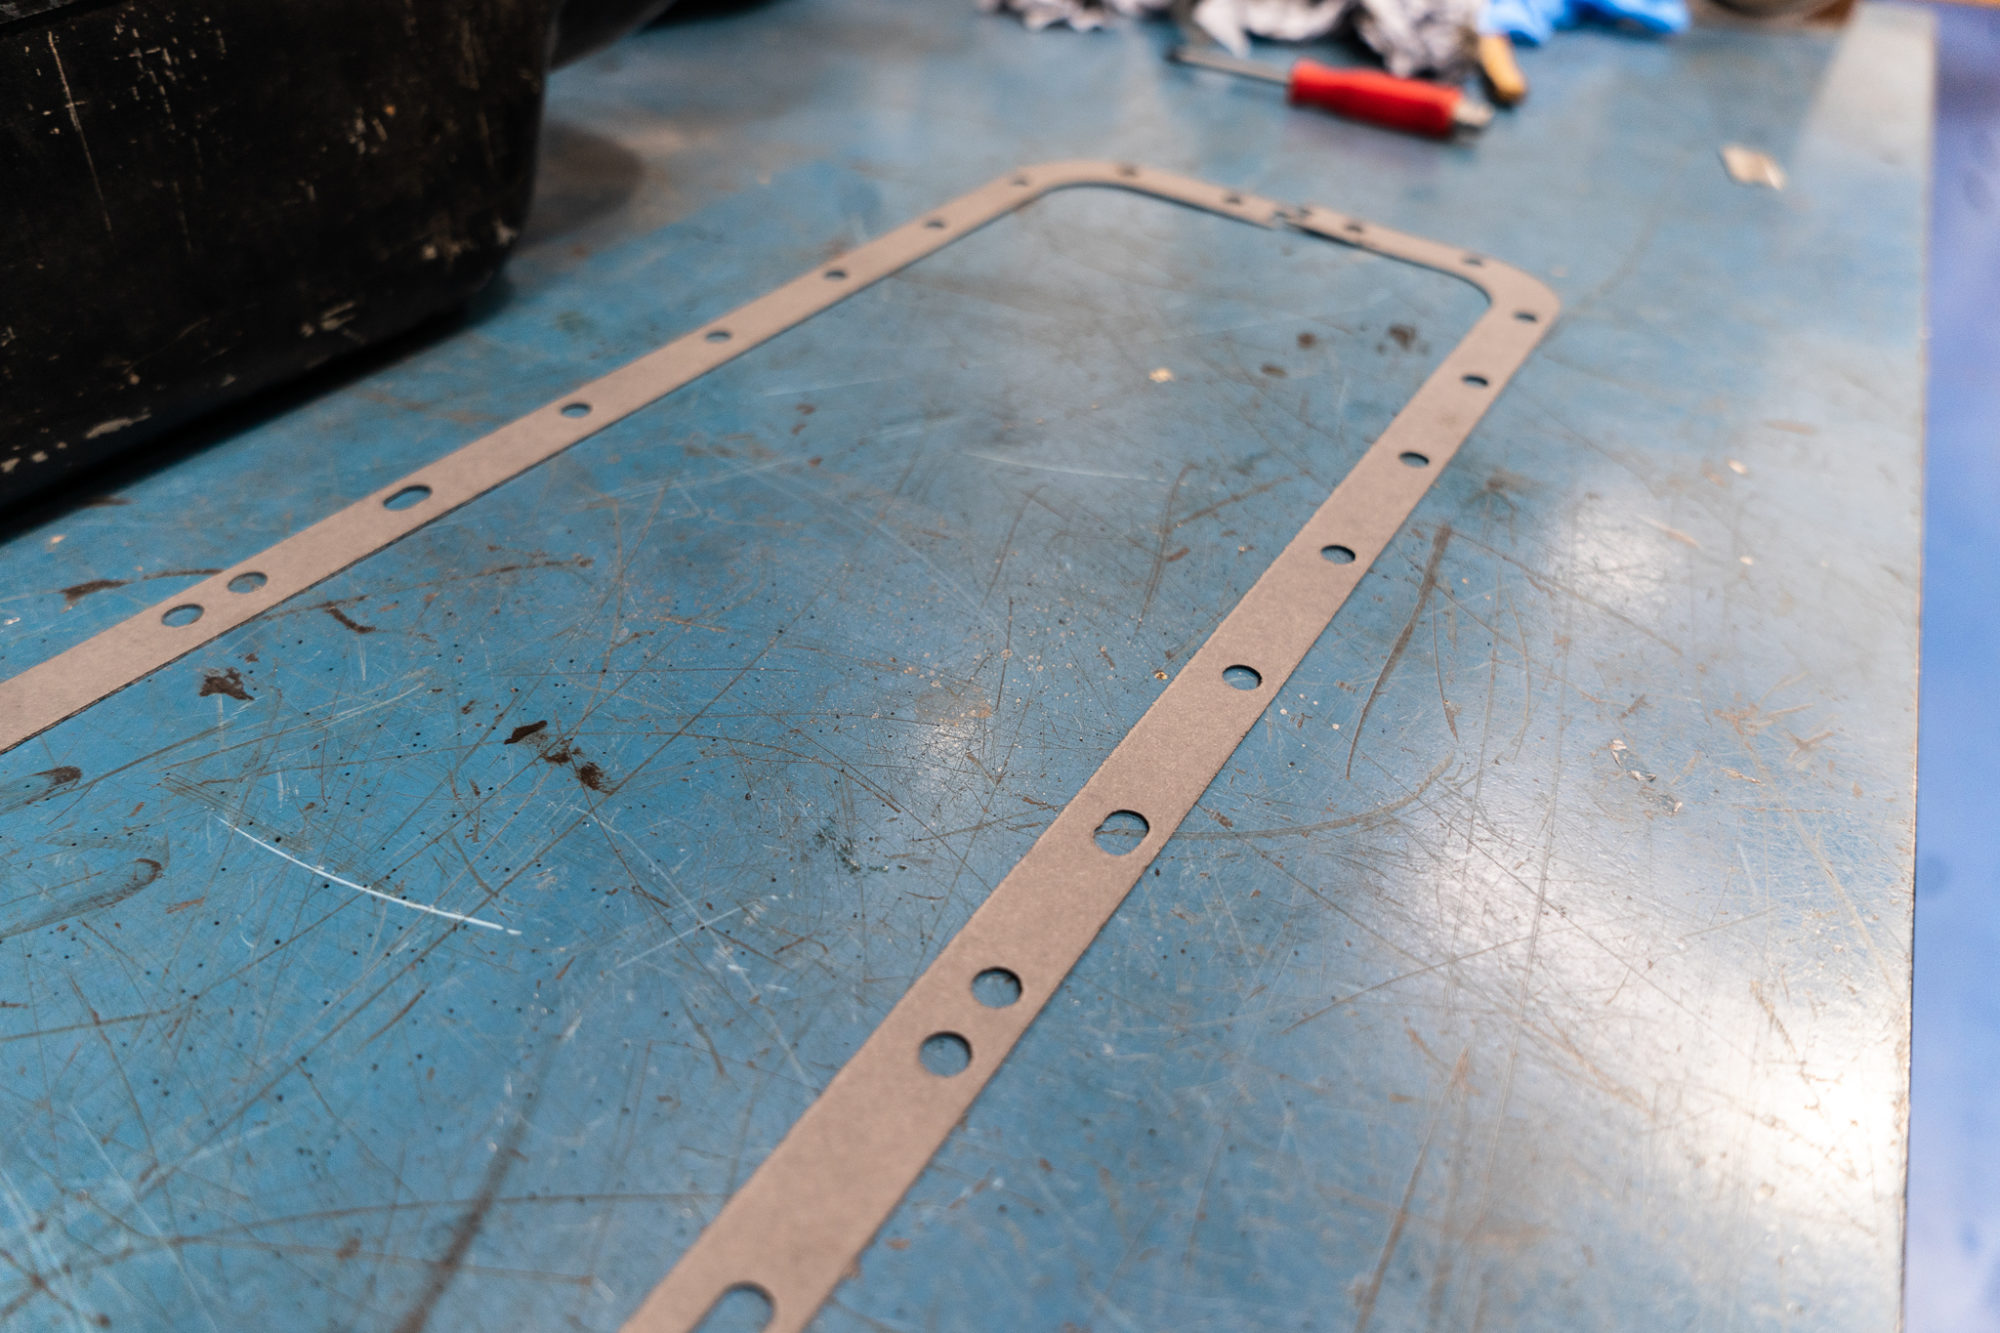
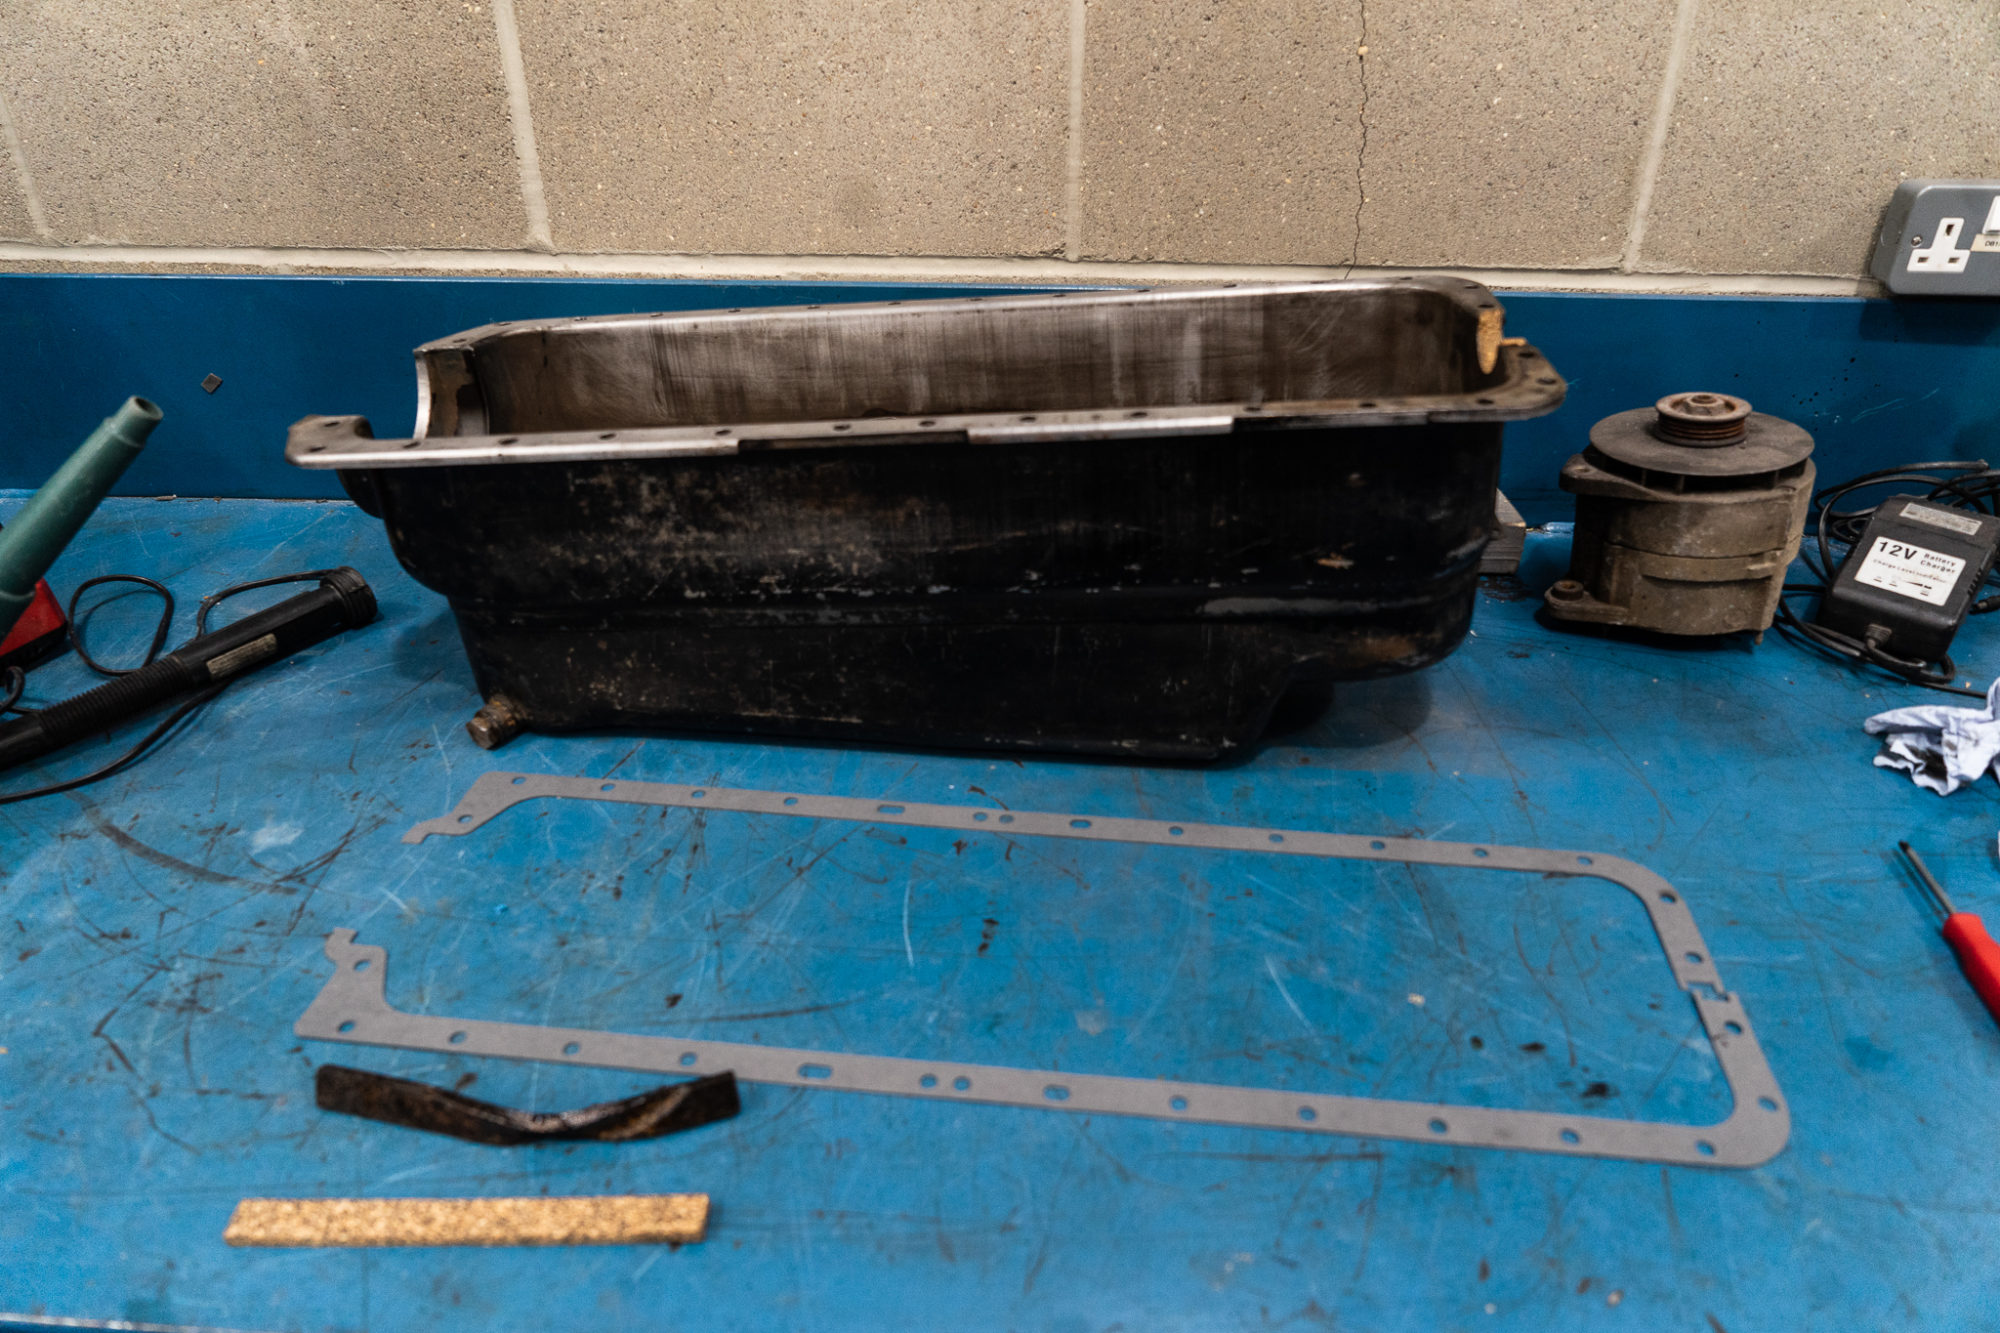
We’ve diagnosed an oil leak in the Jaguar MKVII as a result of a faulty component. Take a look at the walk through below to see what the issue was and how we resolved it…
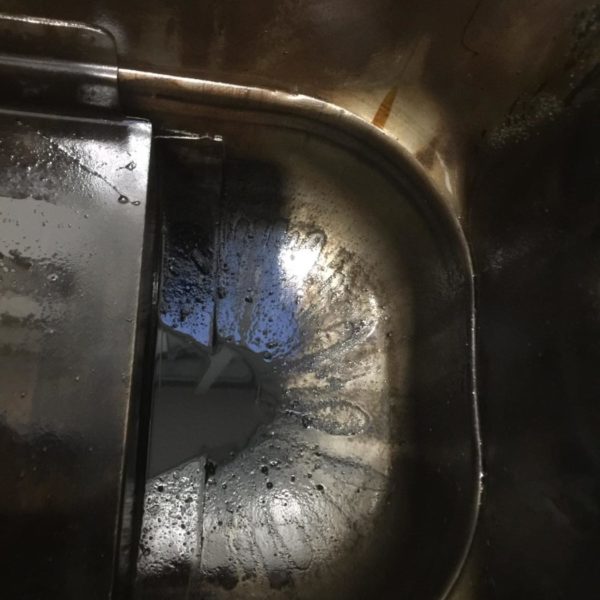
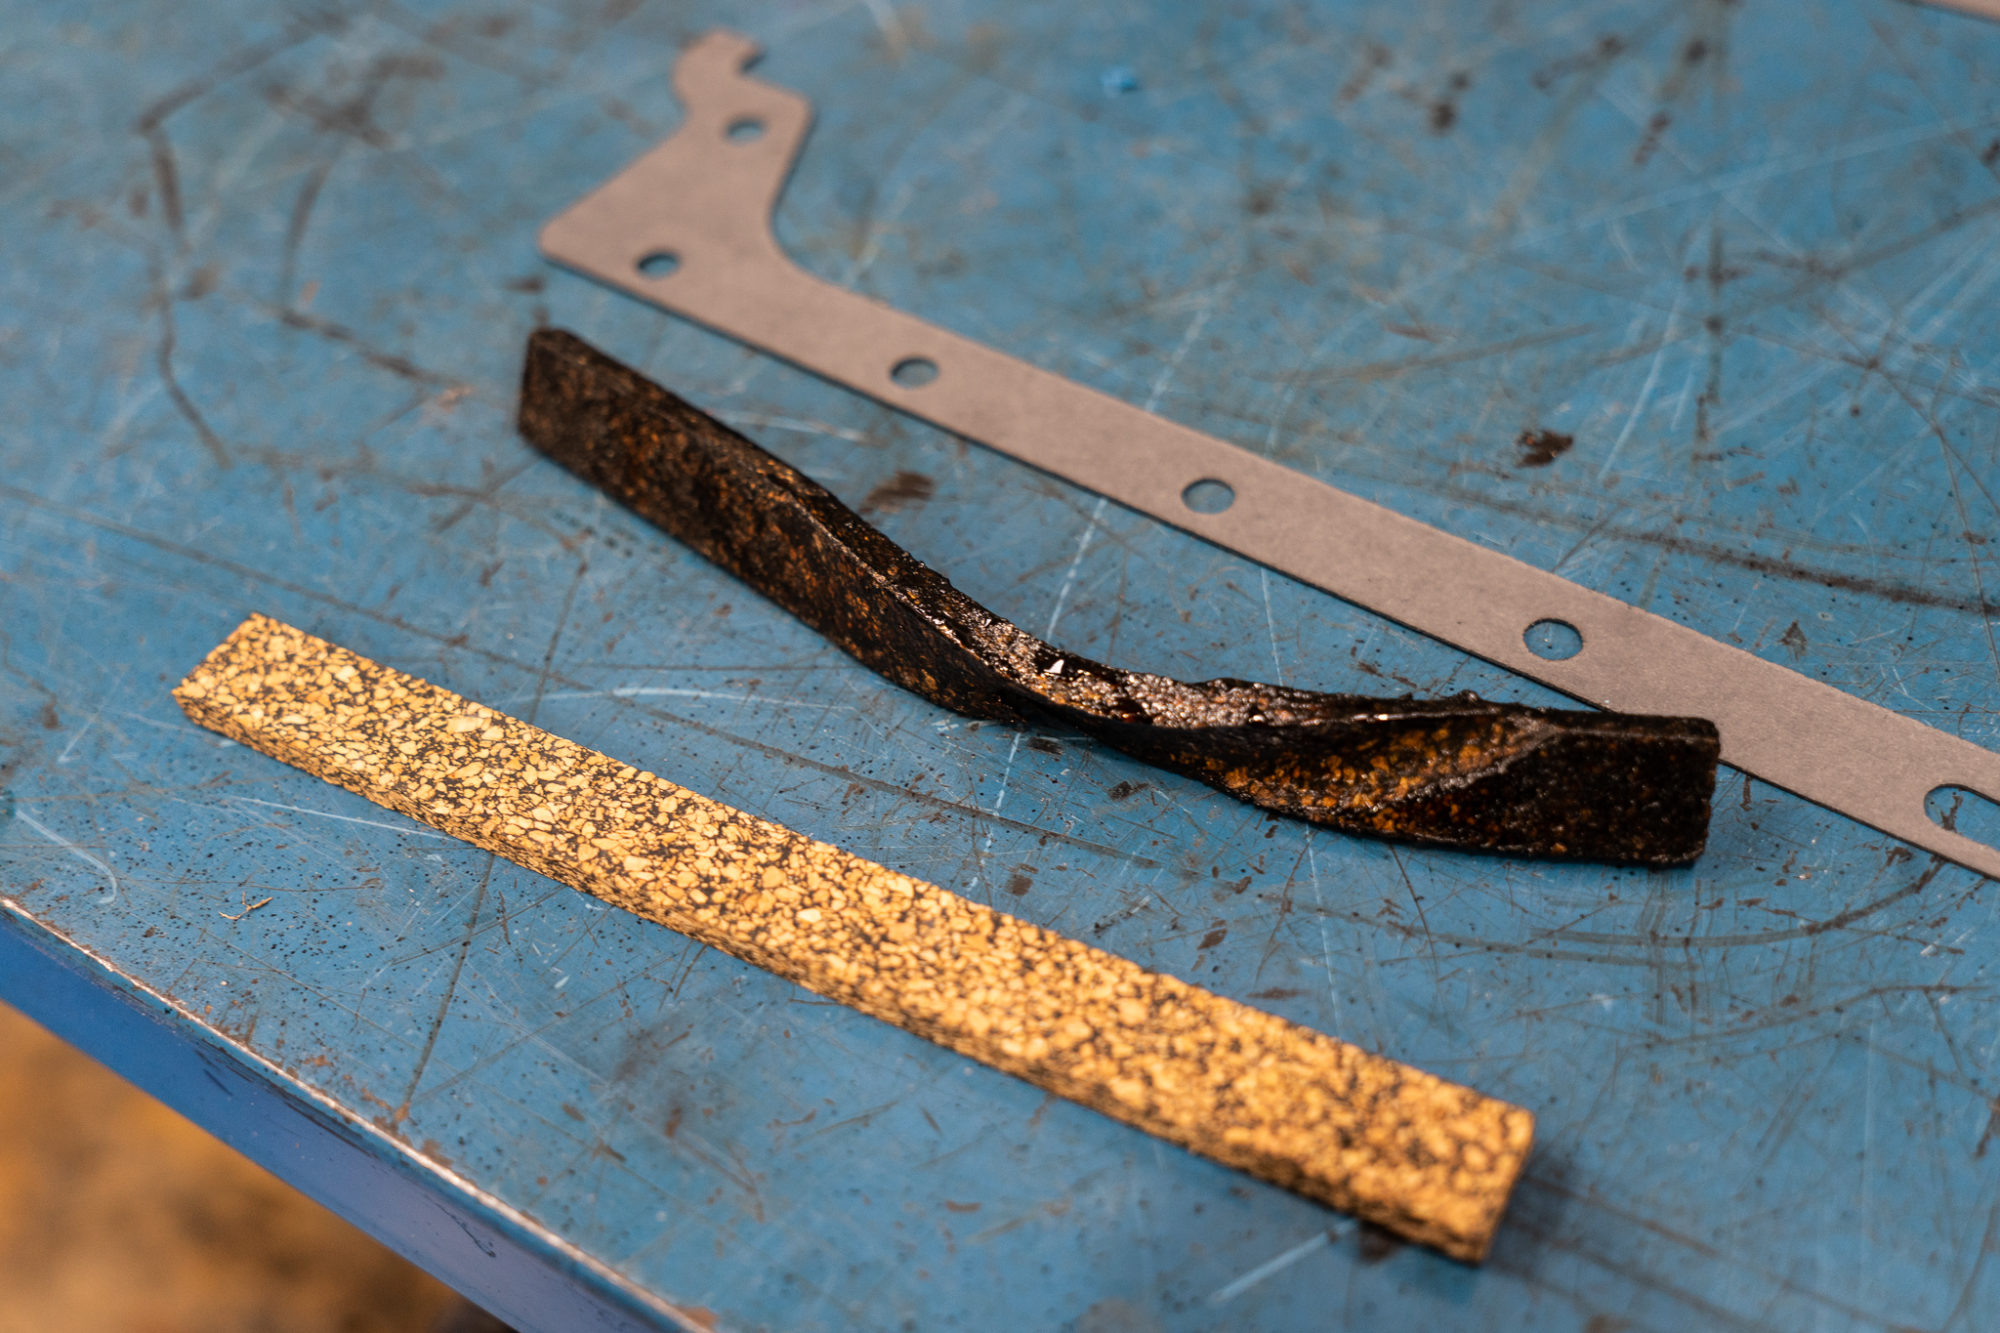
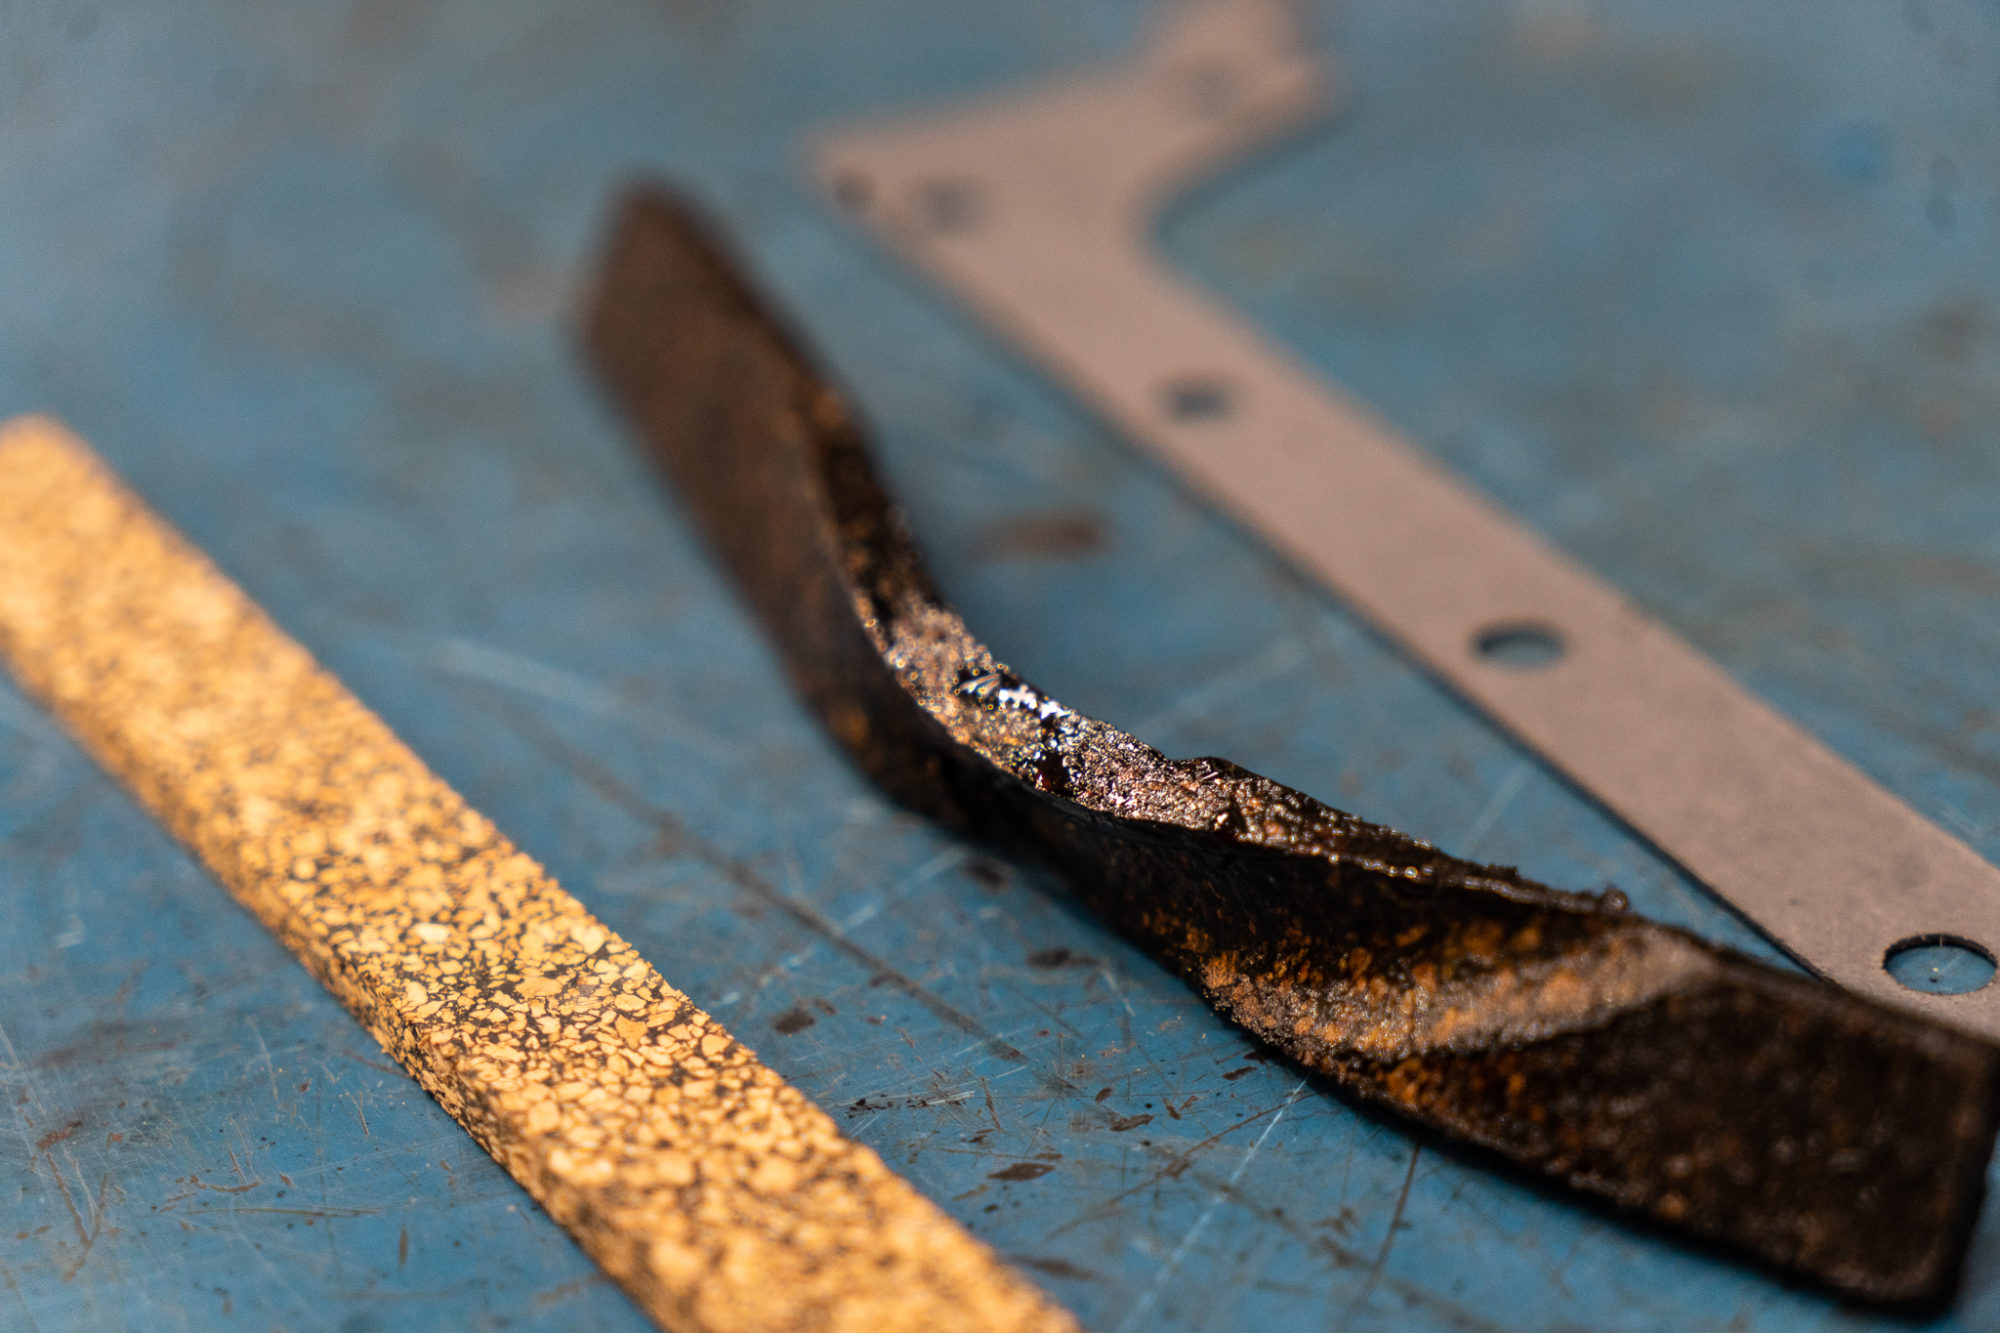
Image 1: MK7 jag engine with the sump off to allow Ady to start working his way into the engine. The sump, or the oil pan, is a metal dish that covers the bottom of the engine block and holds the engine oil when it is not circulating.
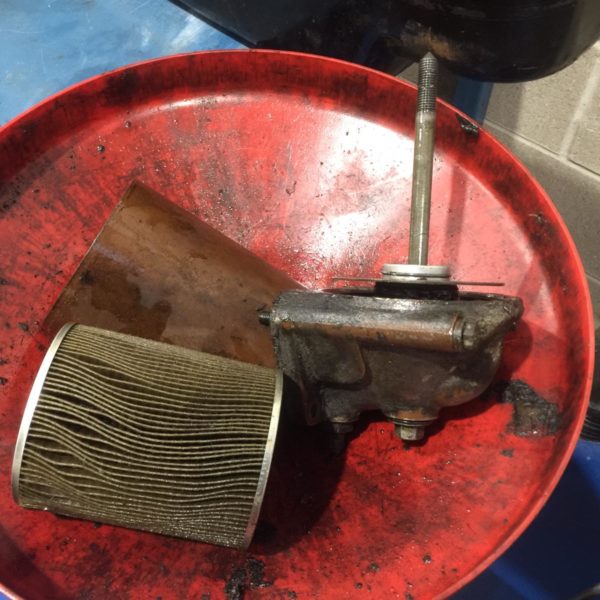
Image 2: Oil filter housing.
Image 3&4: The engine sump
Image 5&6: This is the cork seal which we discovered has been fitted incorrectly which lead to the engine leak.
So now what? We’ve identified the issue, its time to fix it!

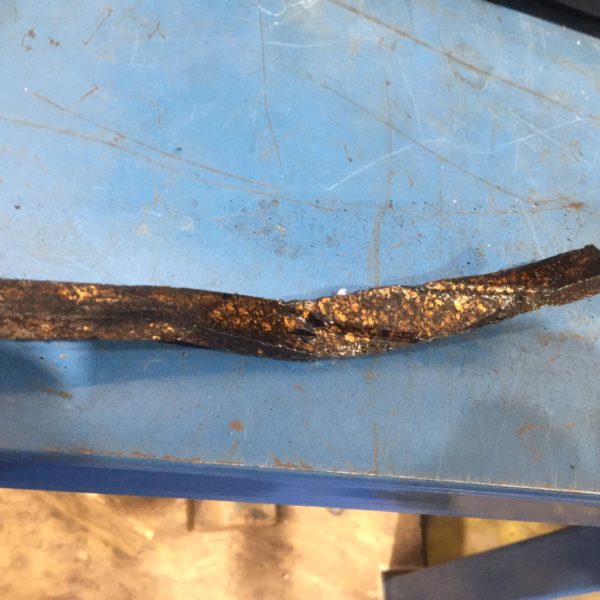
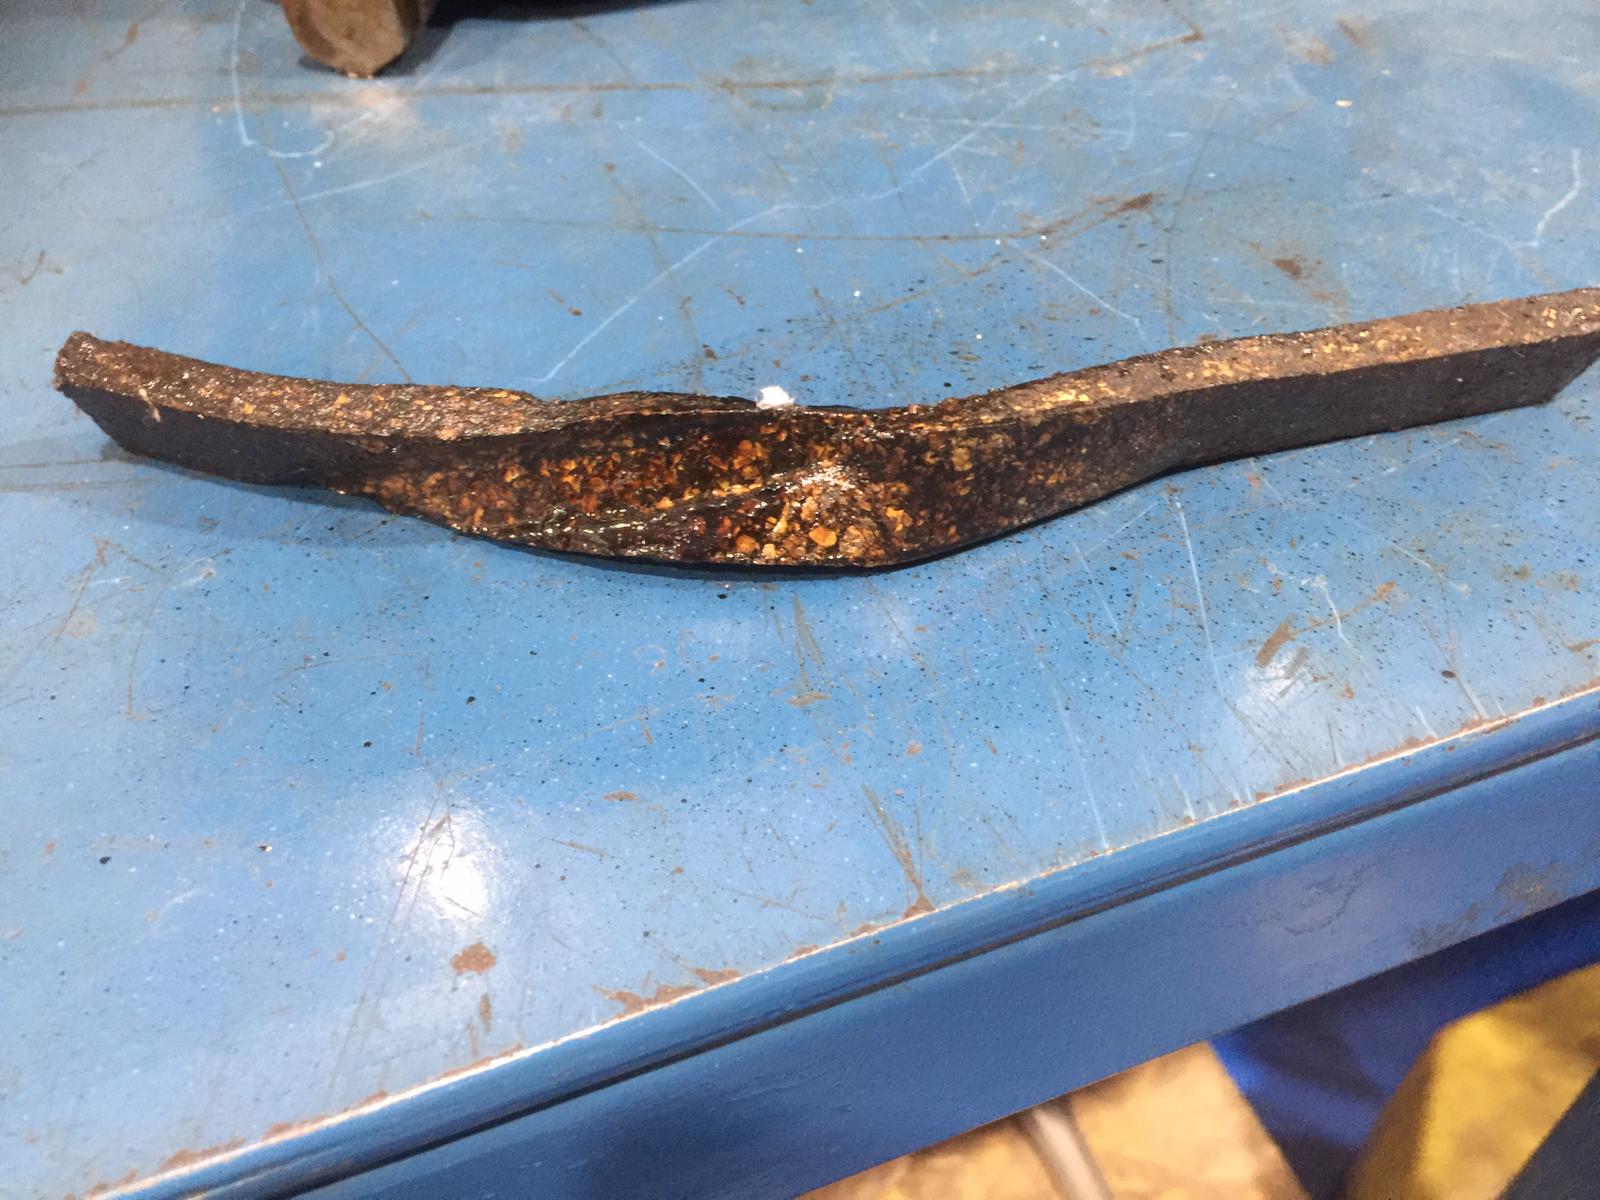
The cork sealant had been attached incorrectly, meaning it had twisted and more importantly, been let oil out. Ady, our engine specialist has got some more cork and new gaskets to fit either end of the oil sump and across the edges, meaning that the oil will stay where its meant to be.

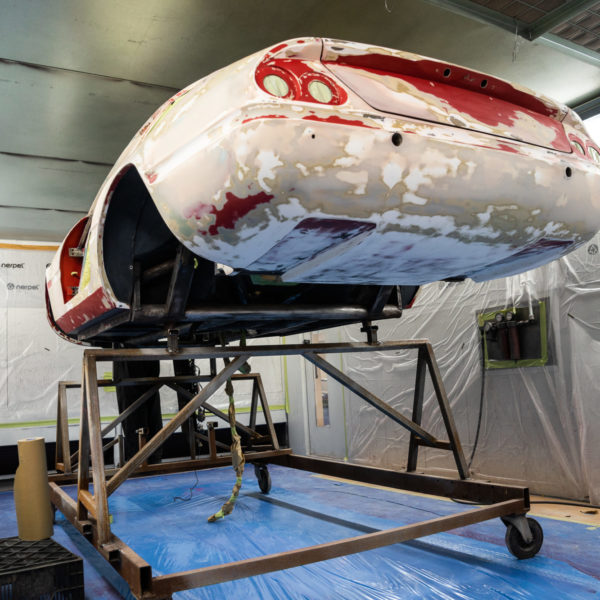
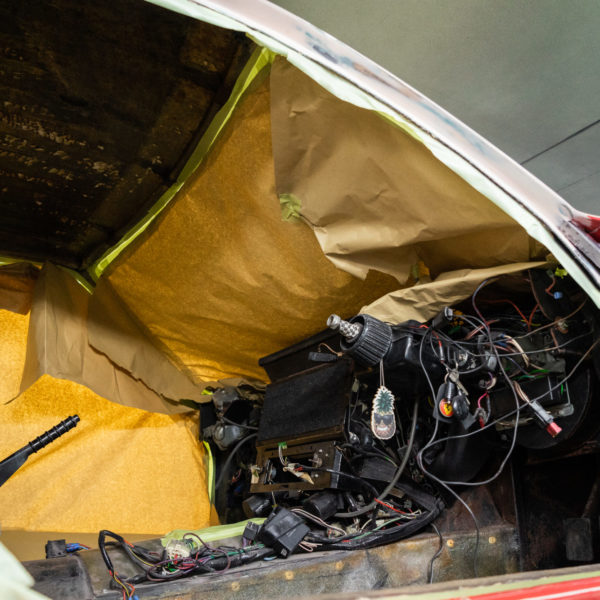
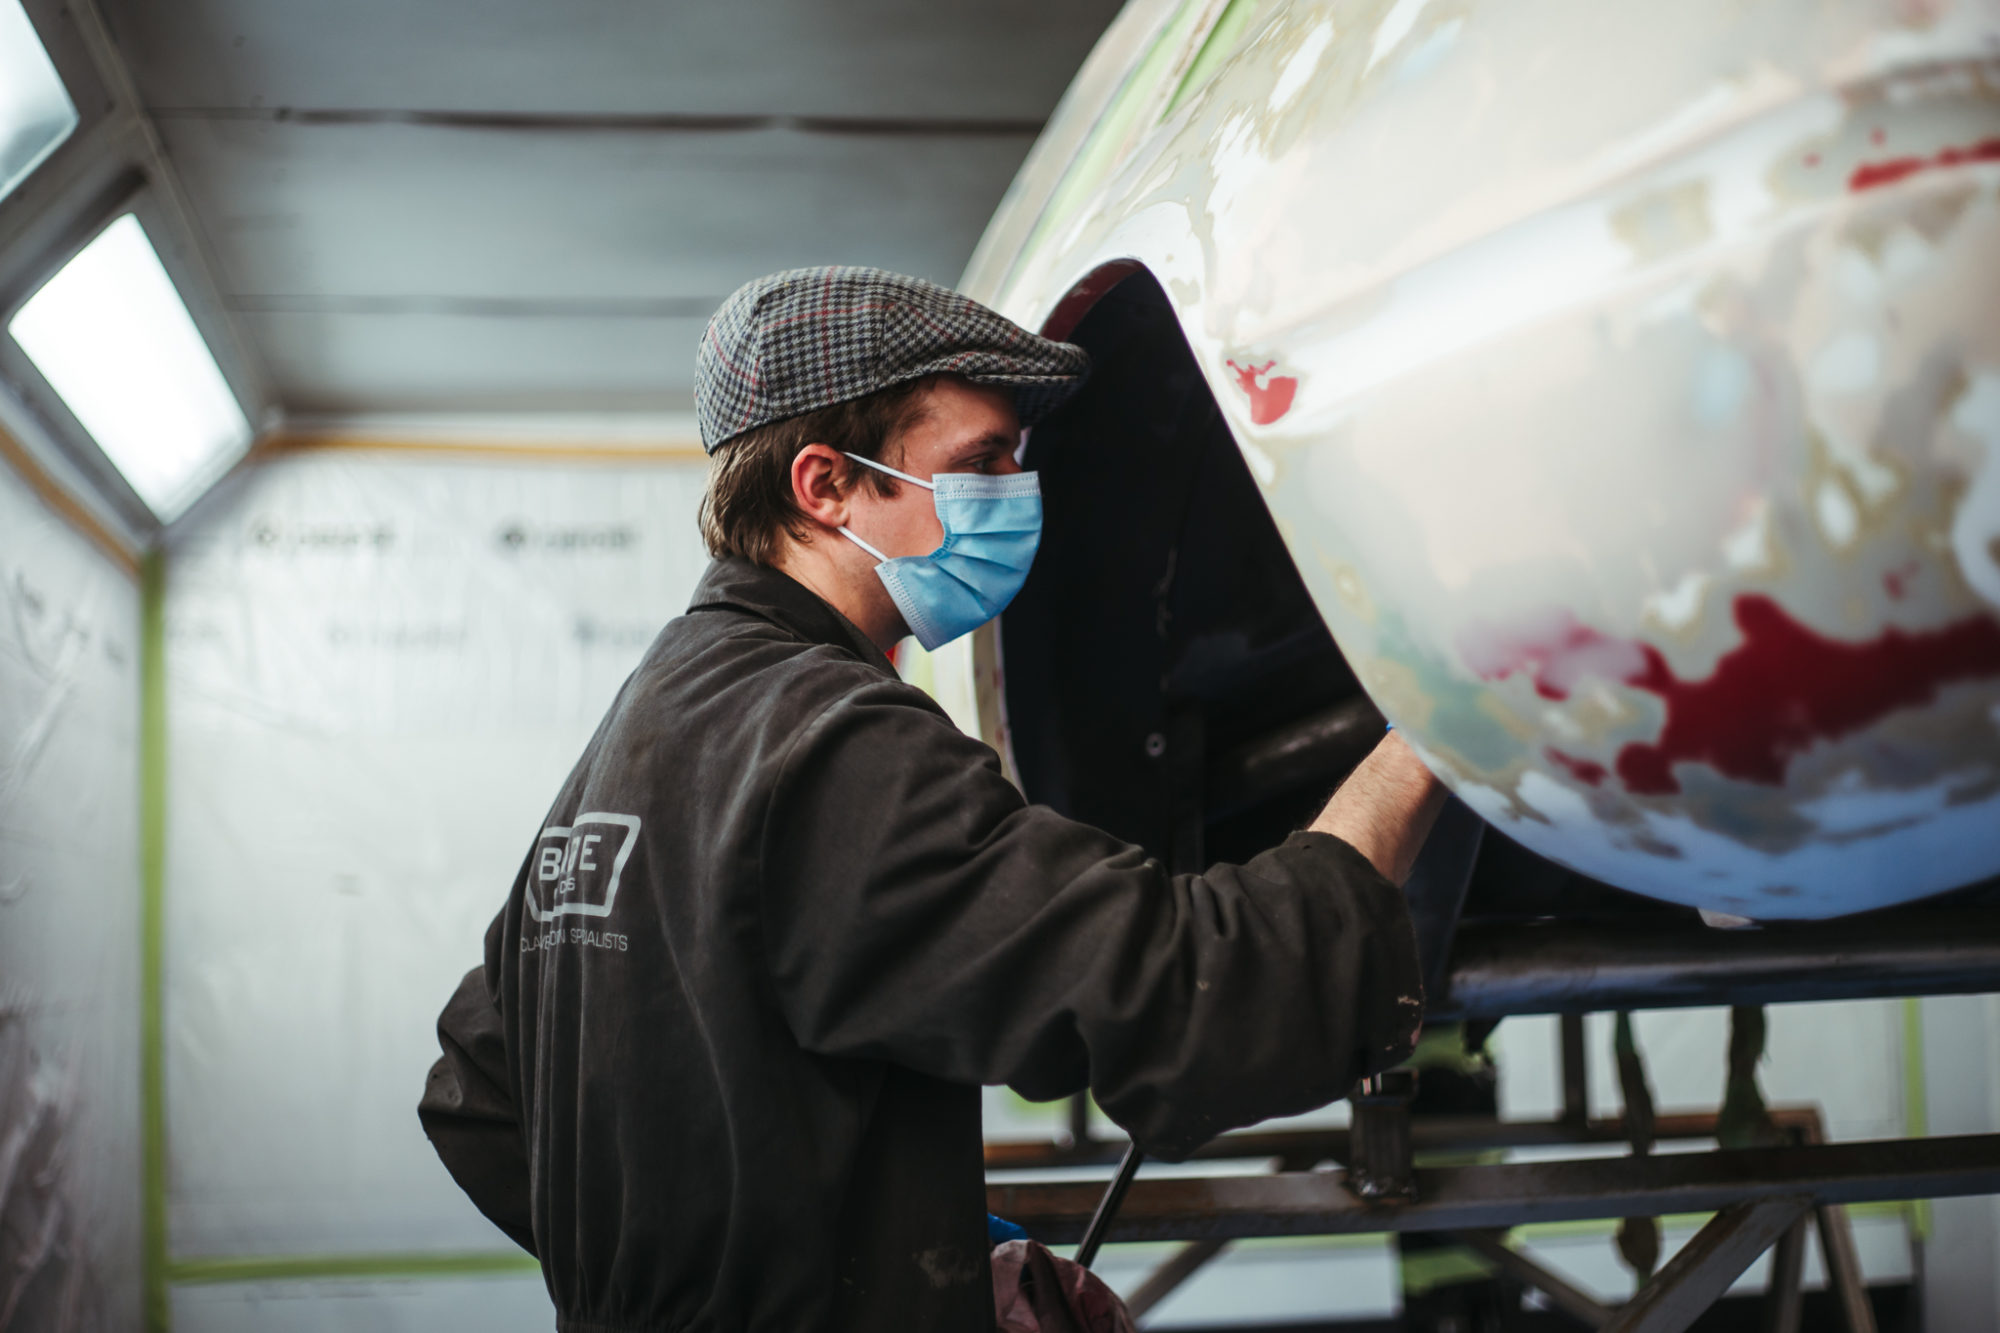
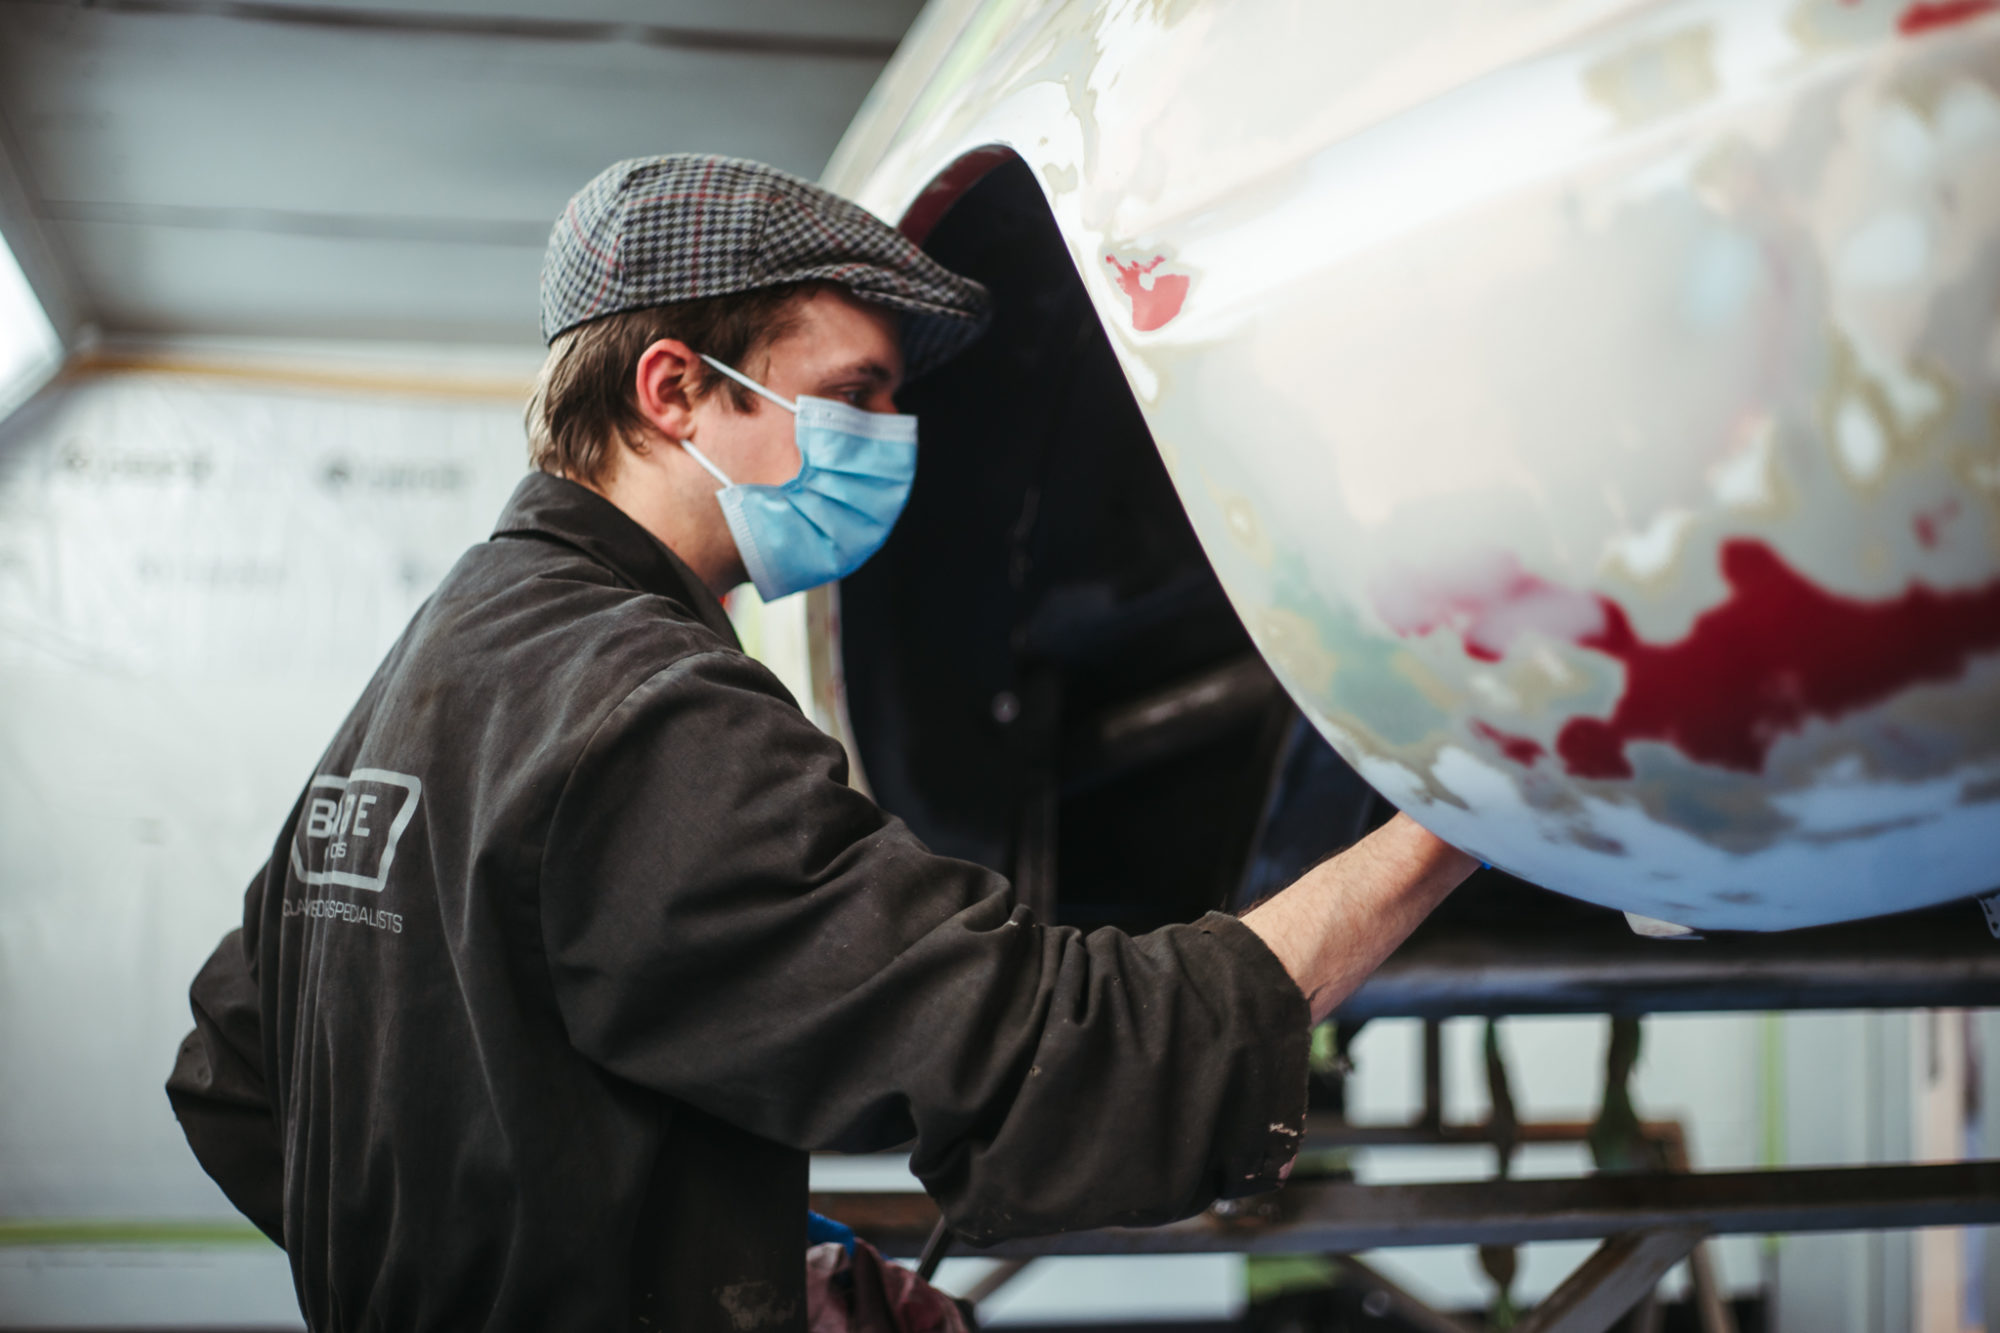
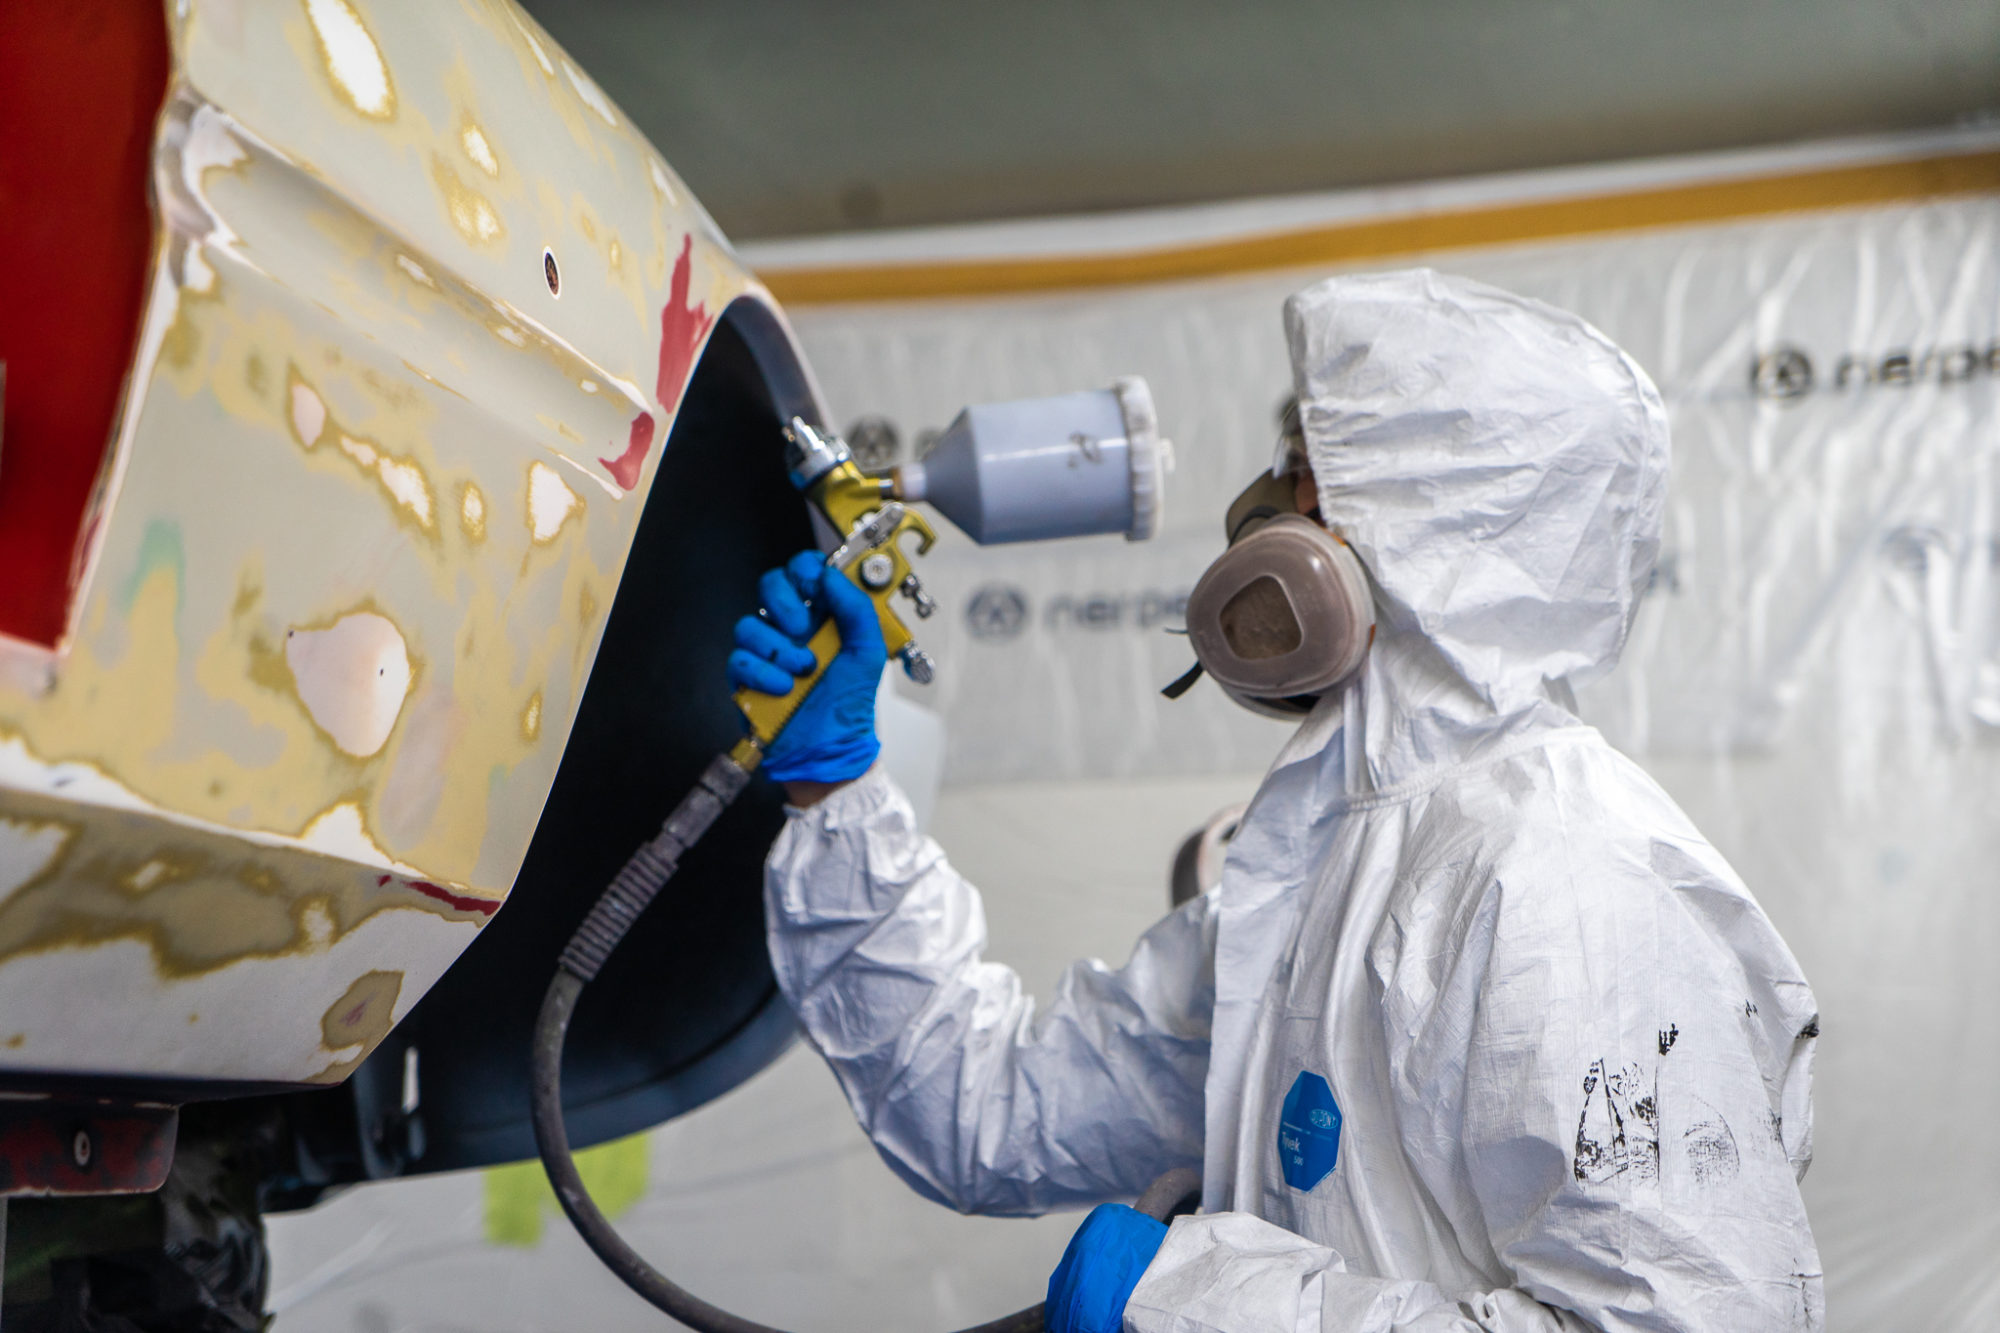
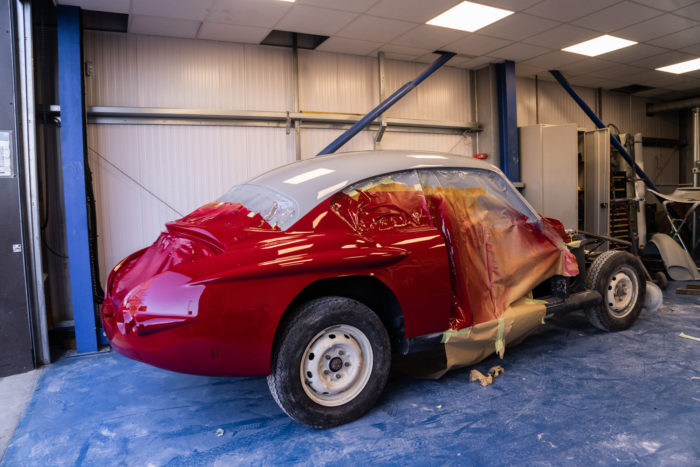
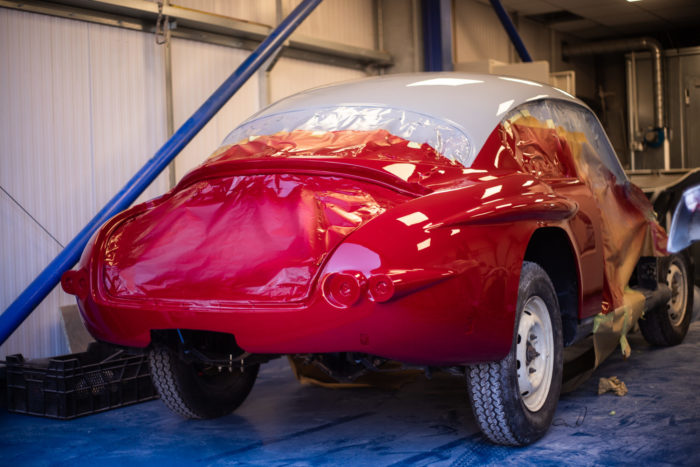
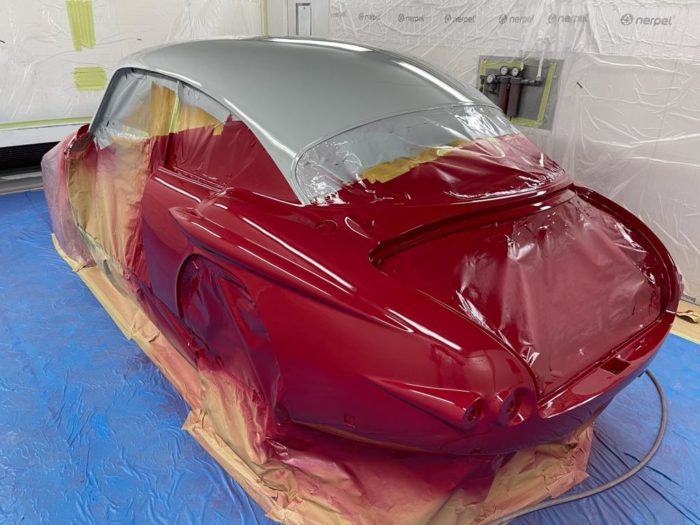
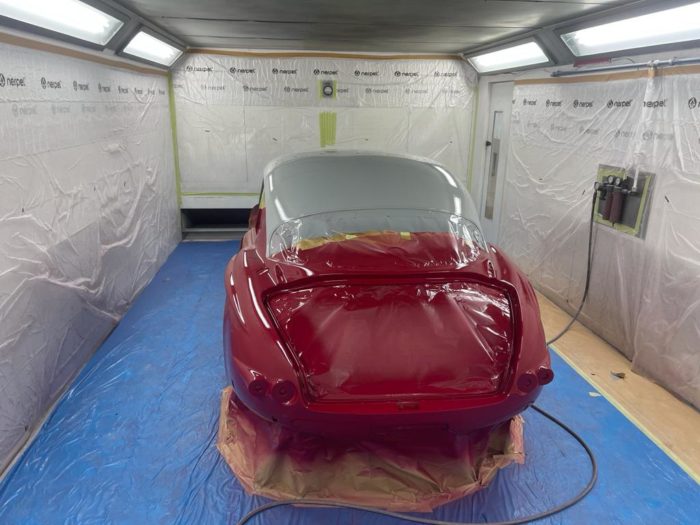
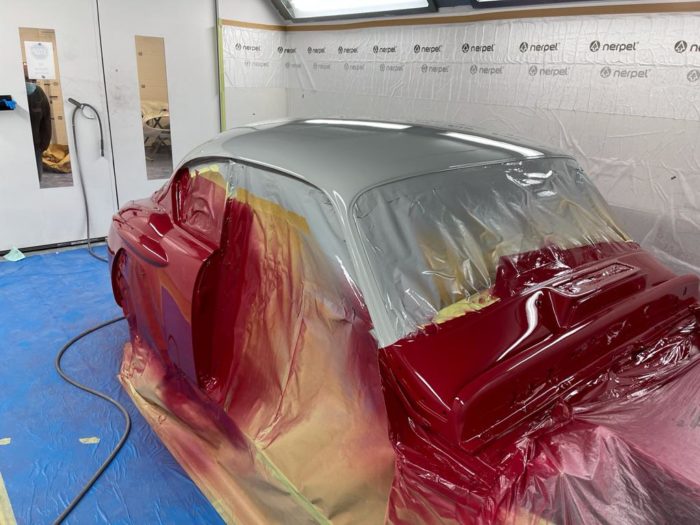
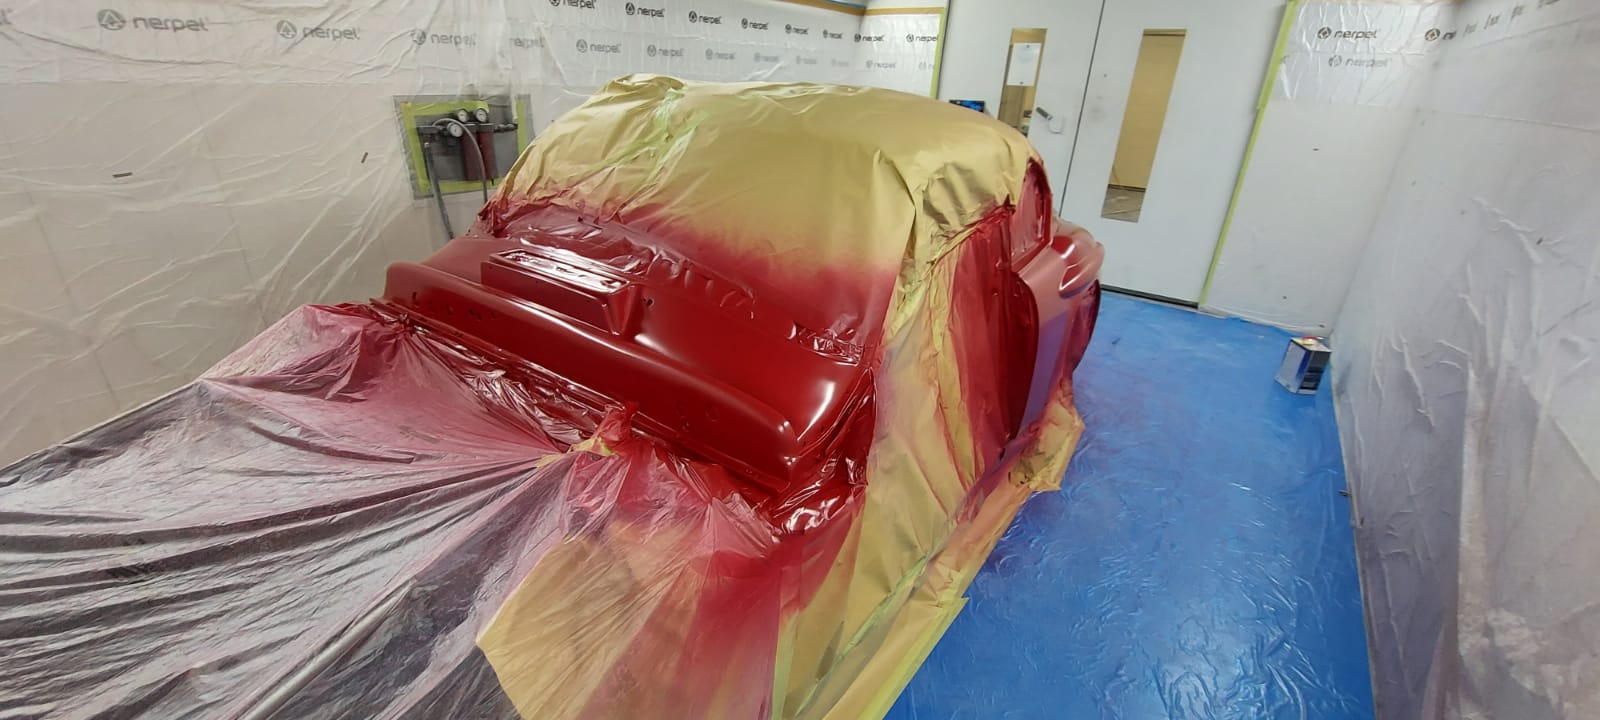
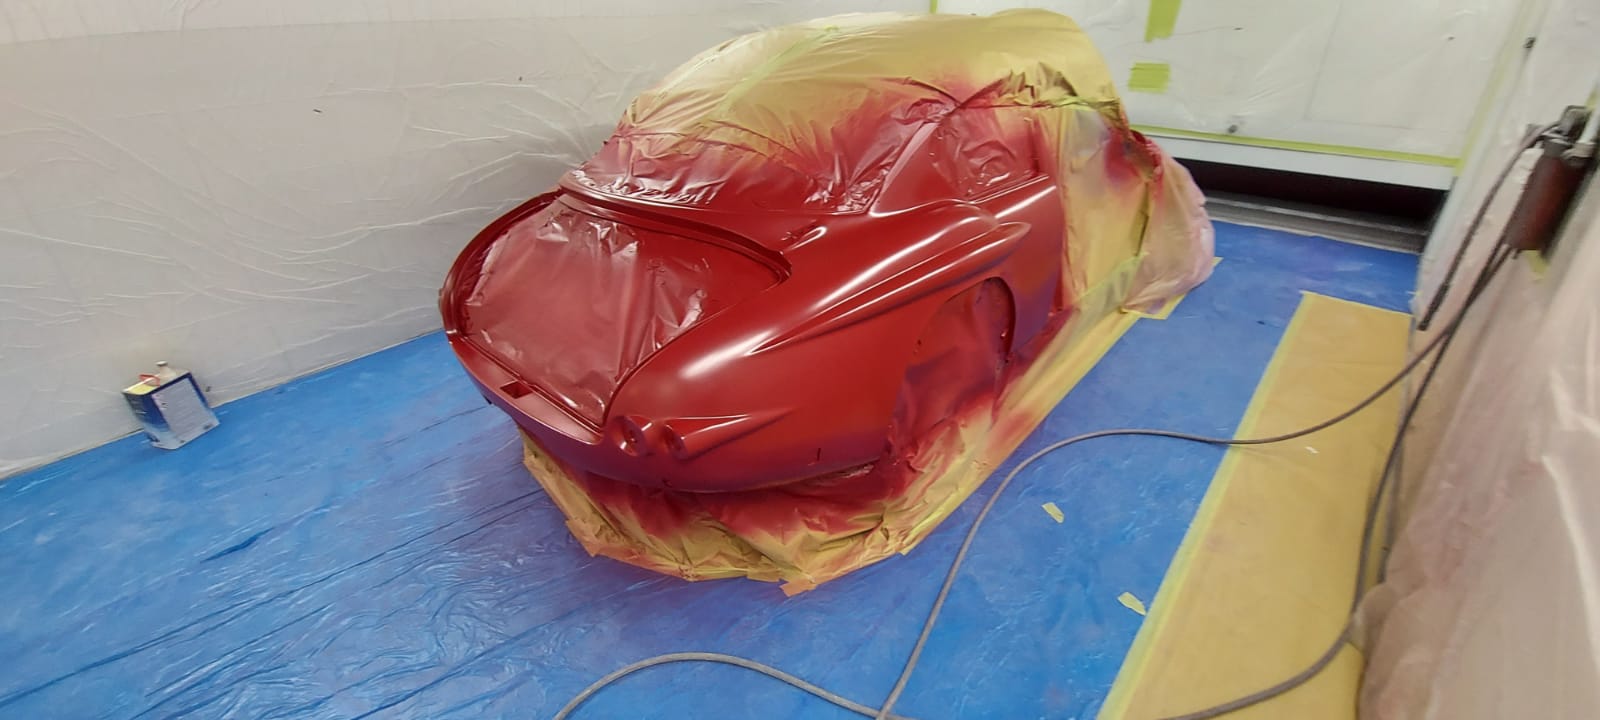
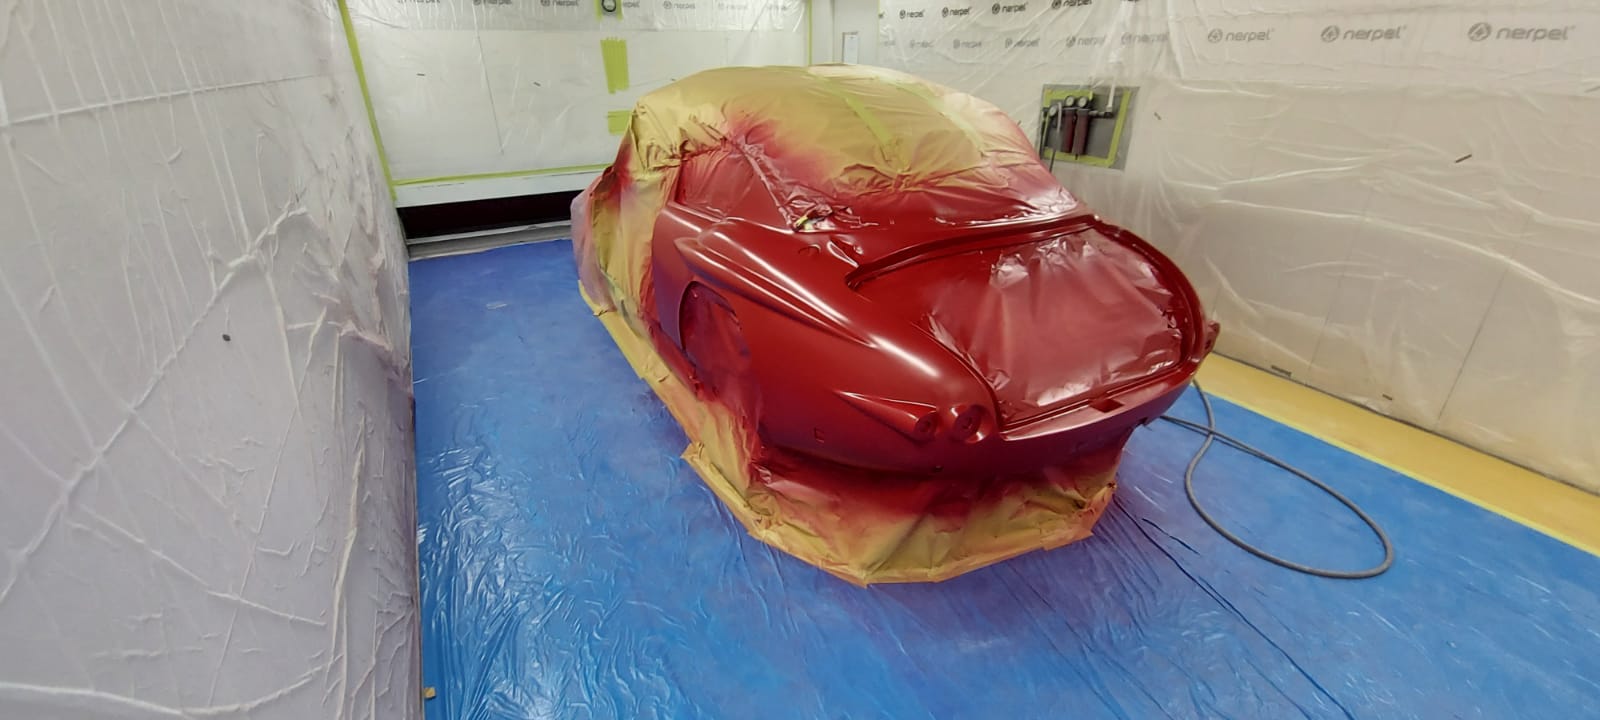
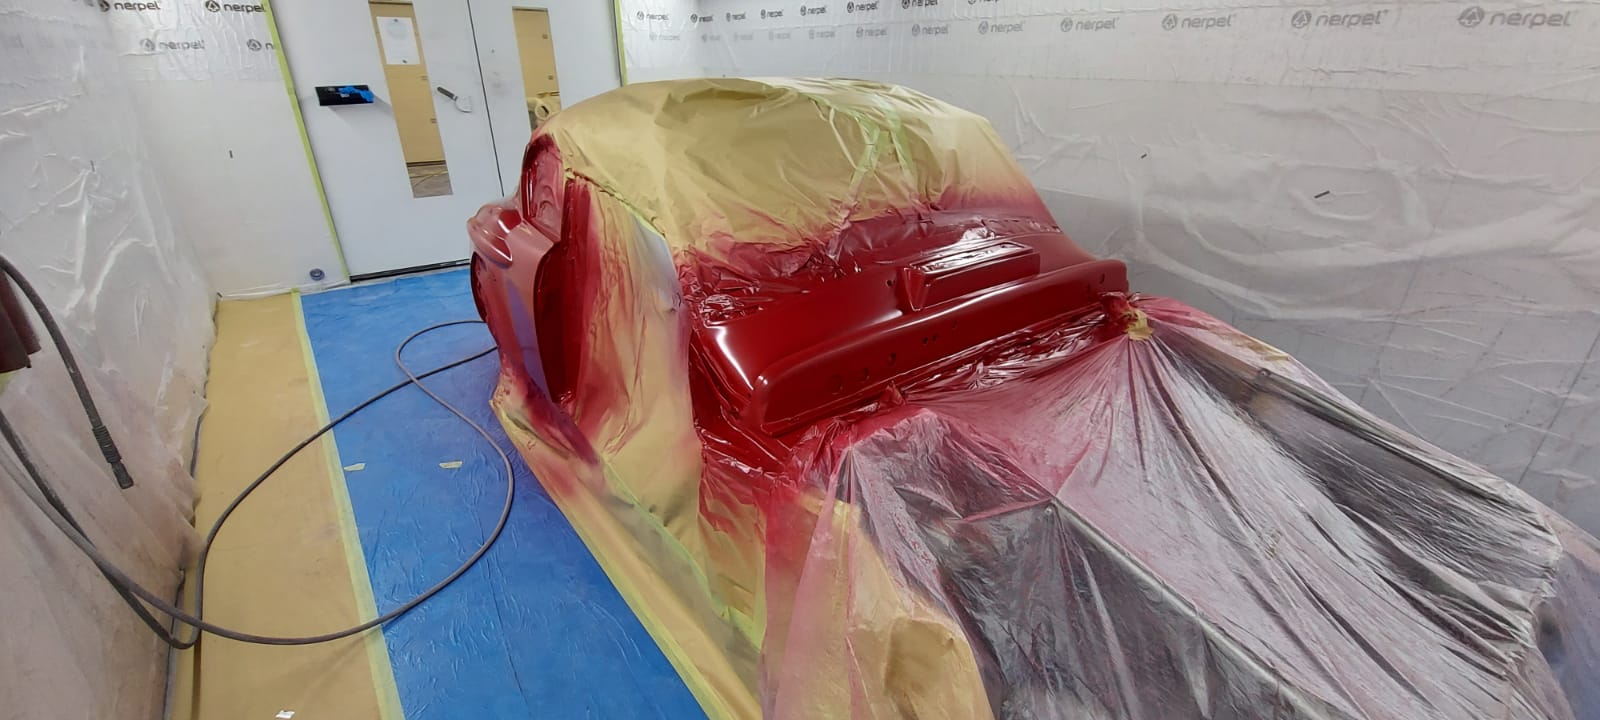
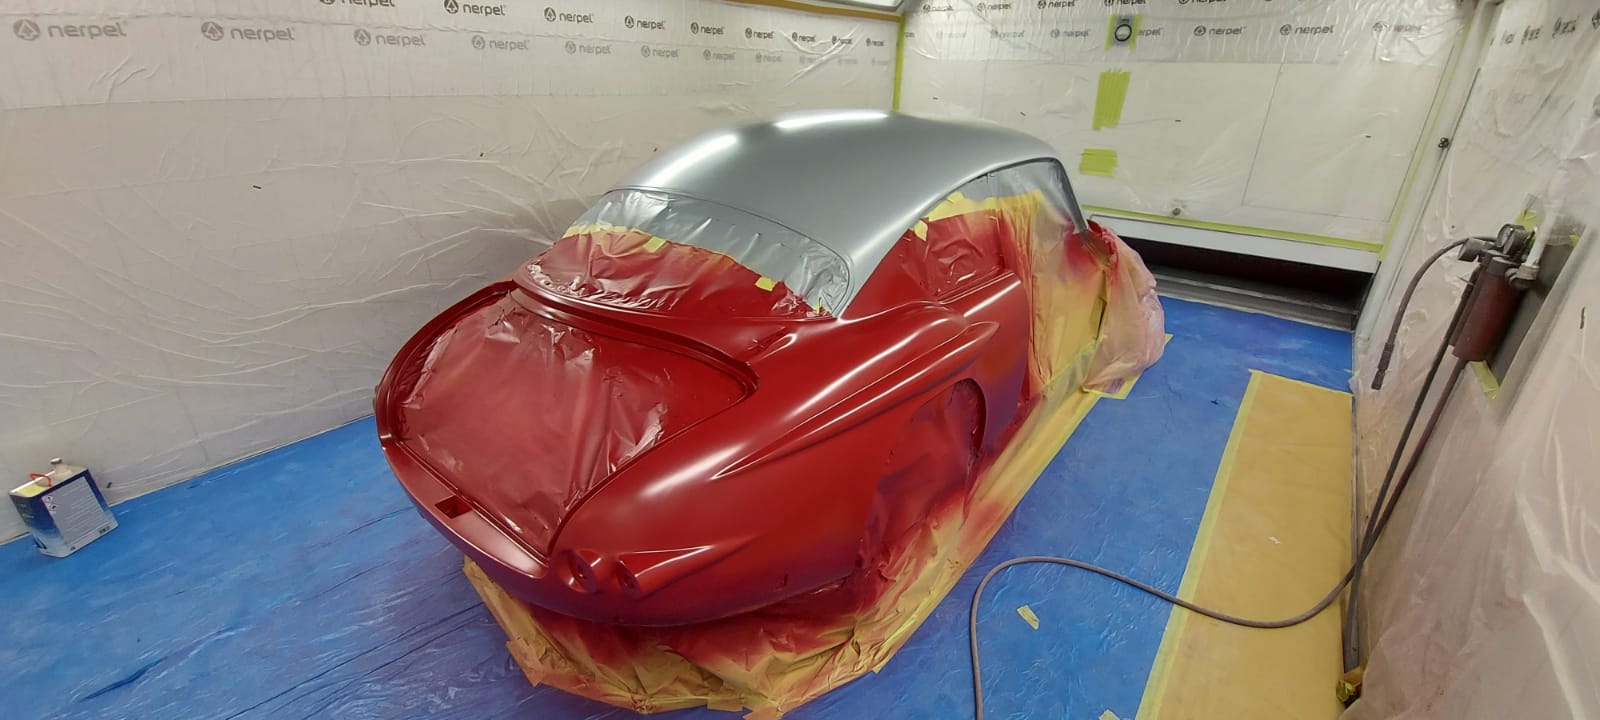
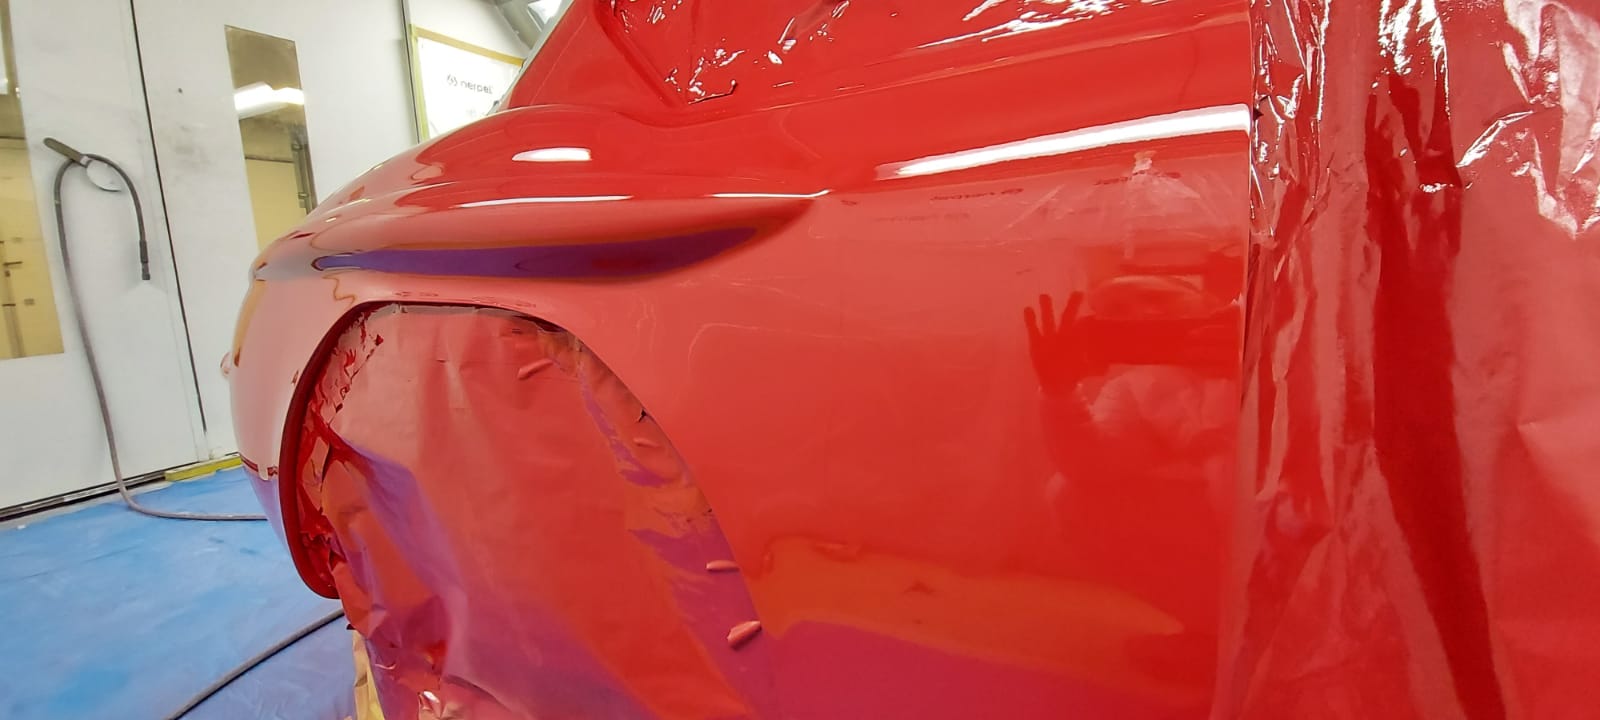
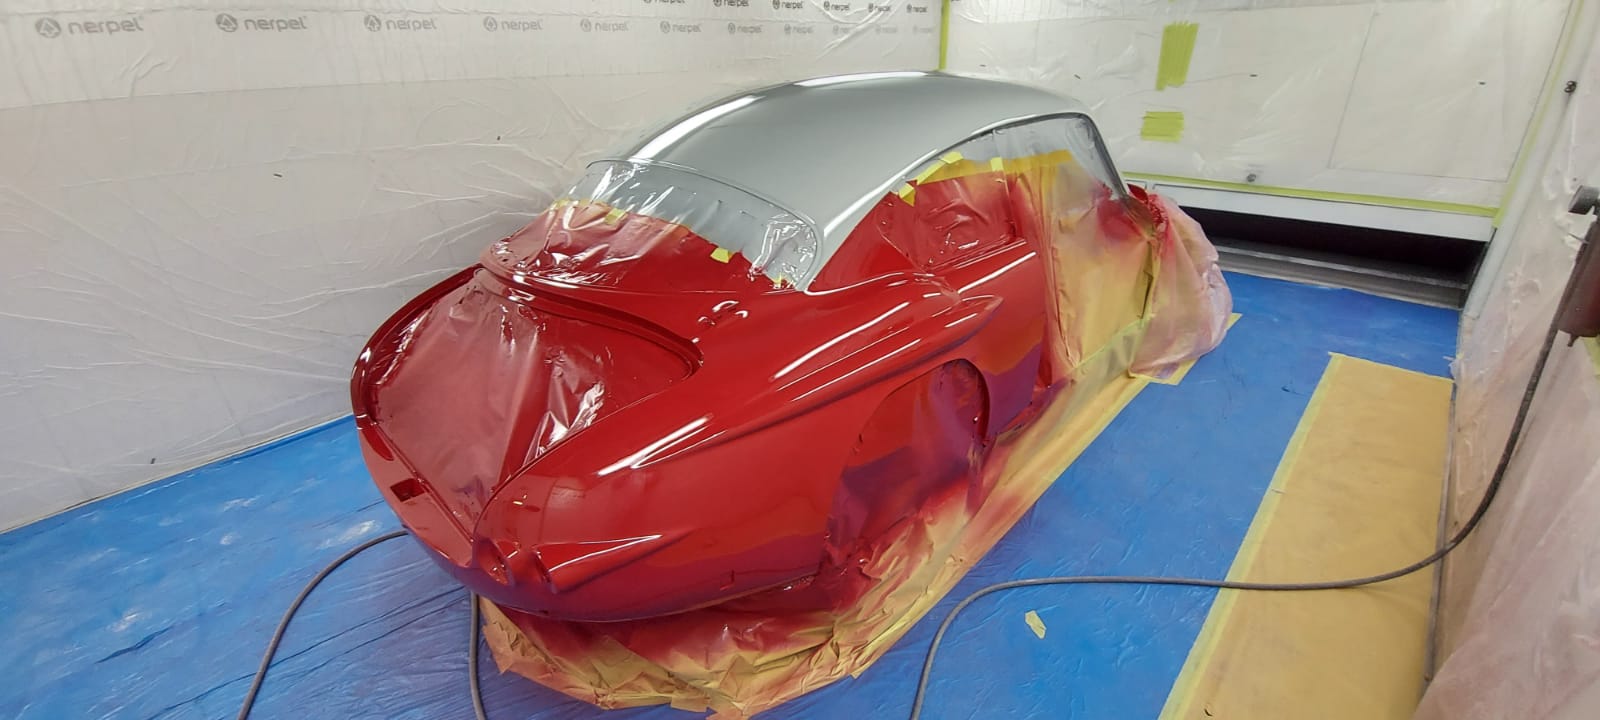
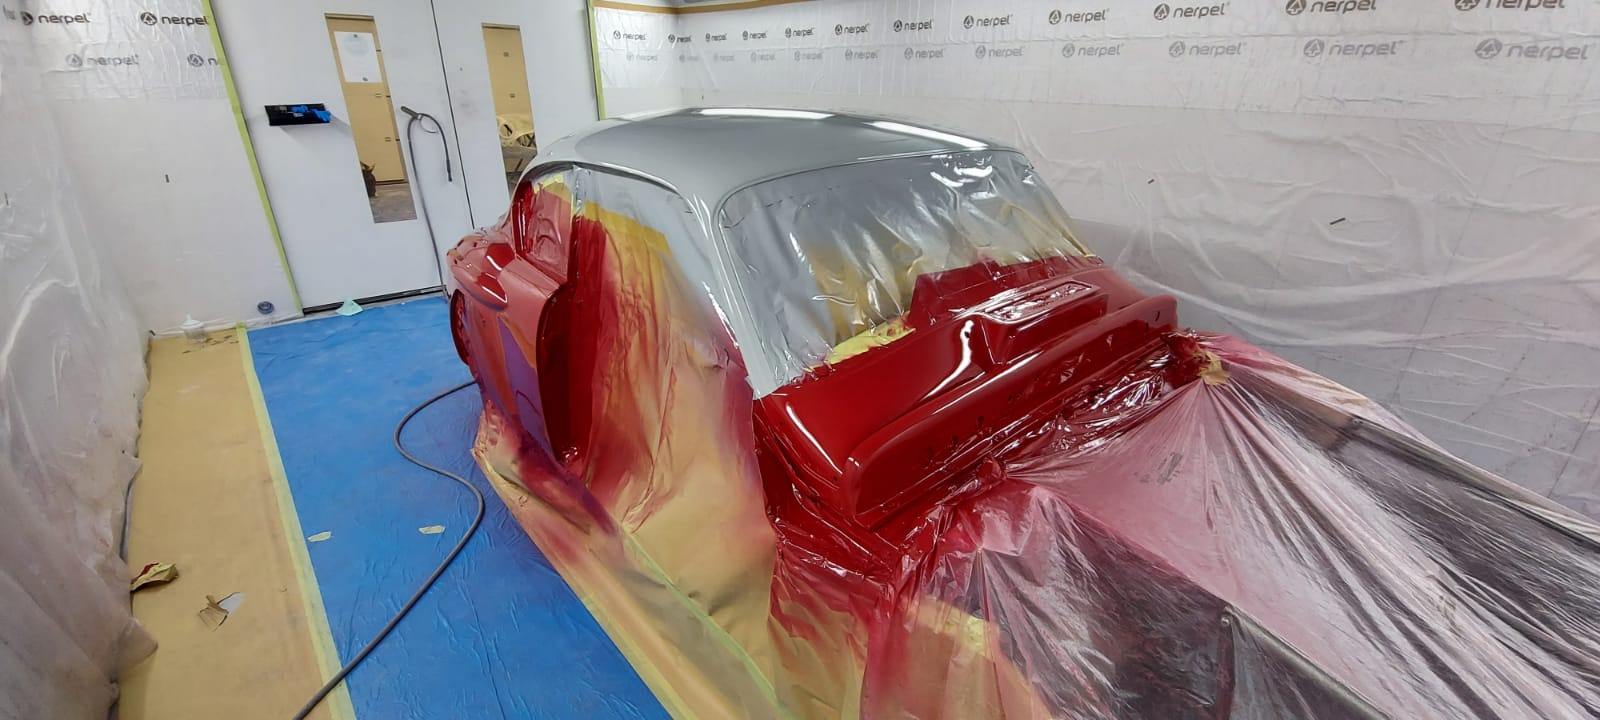
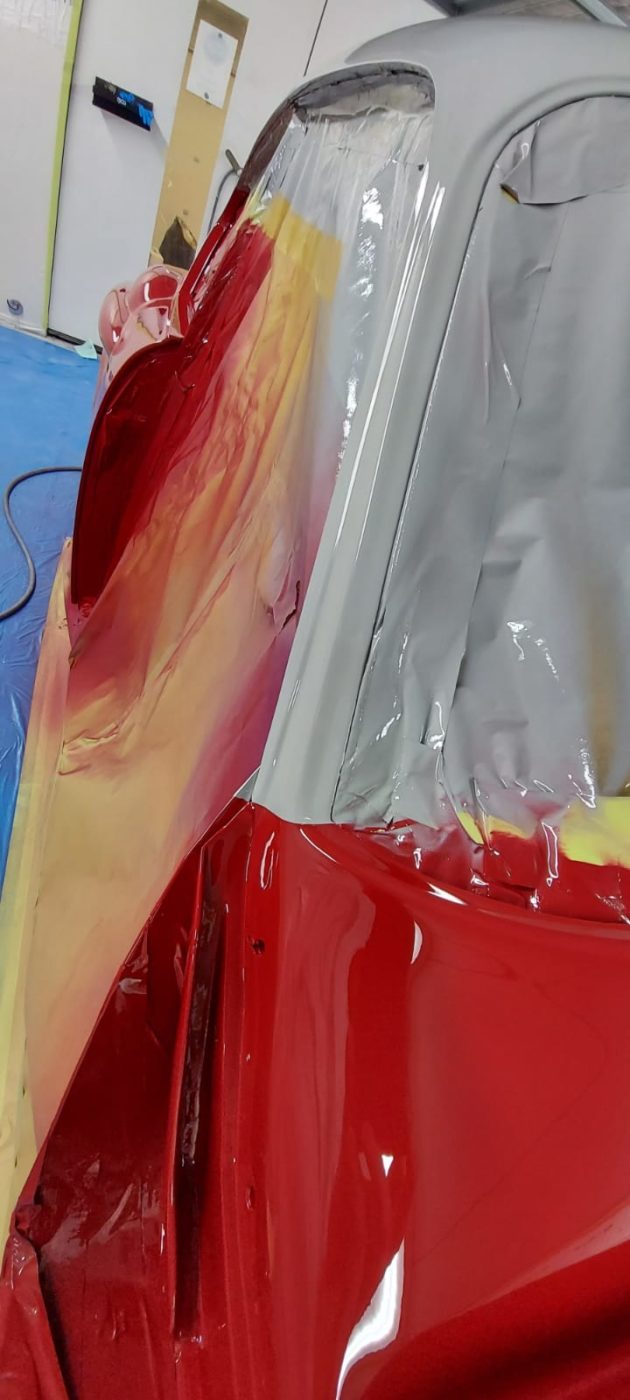
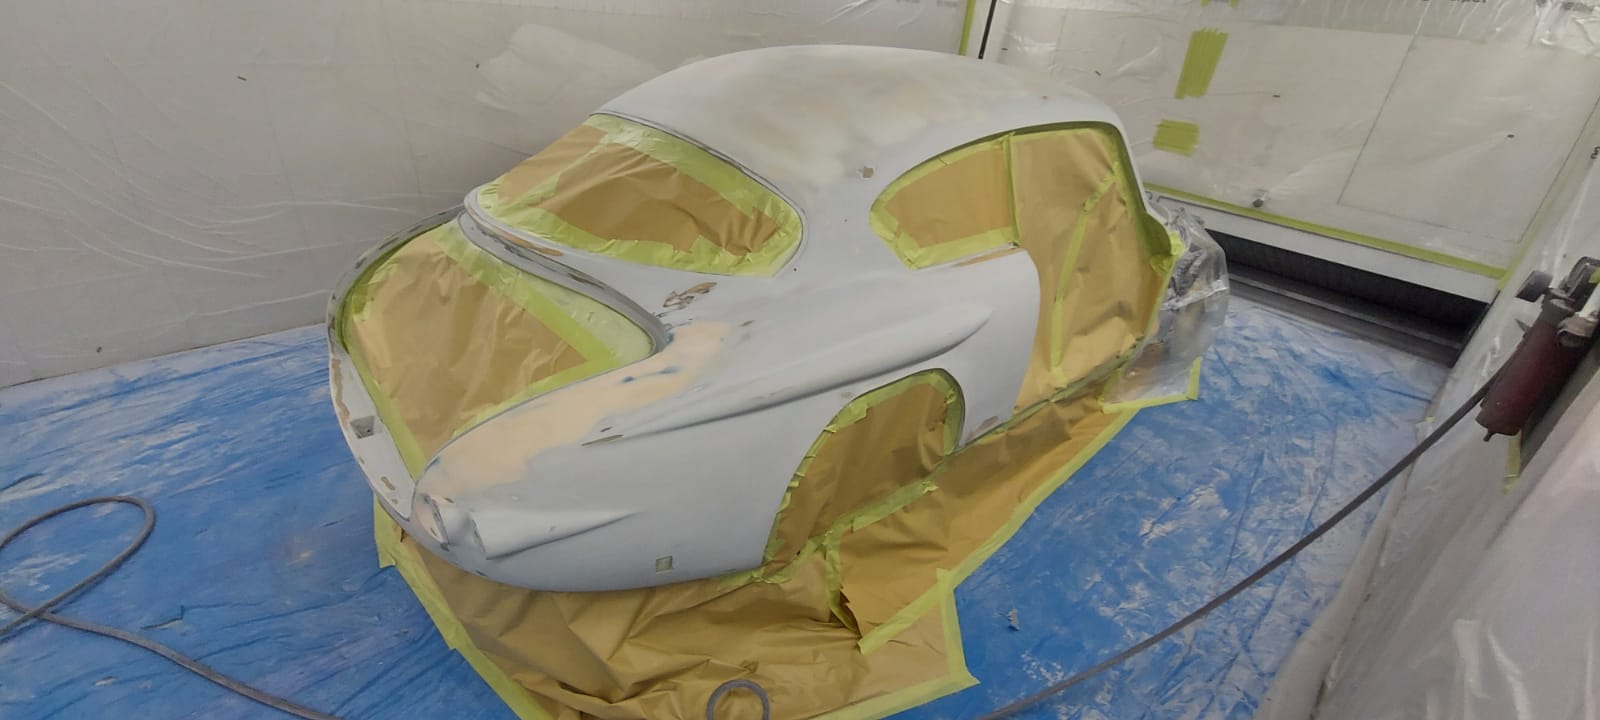
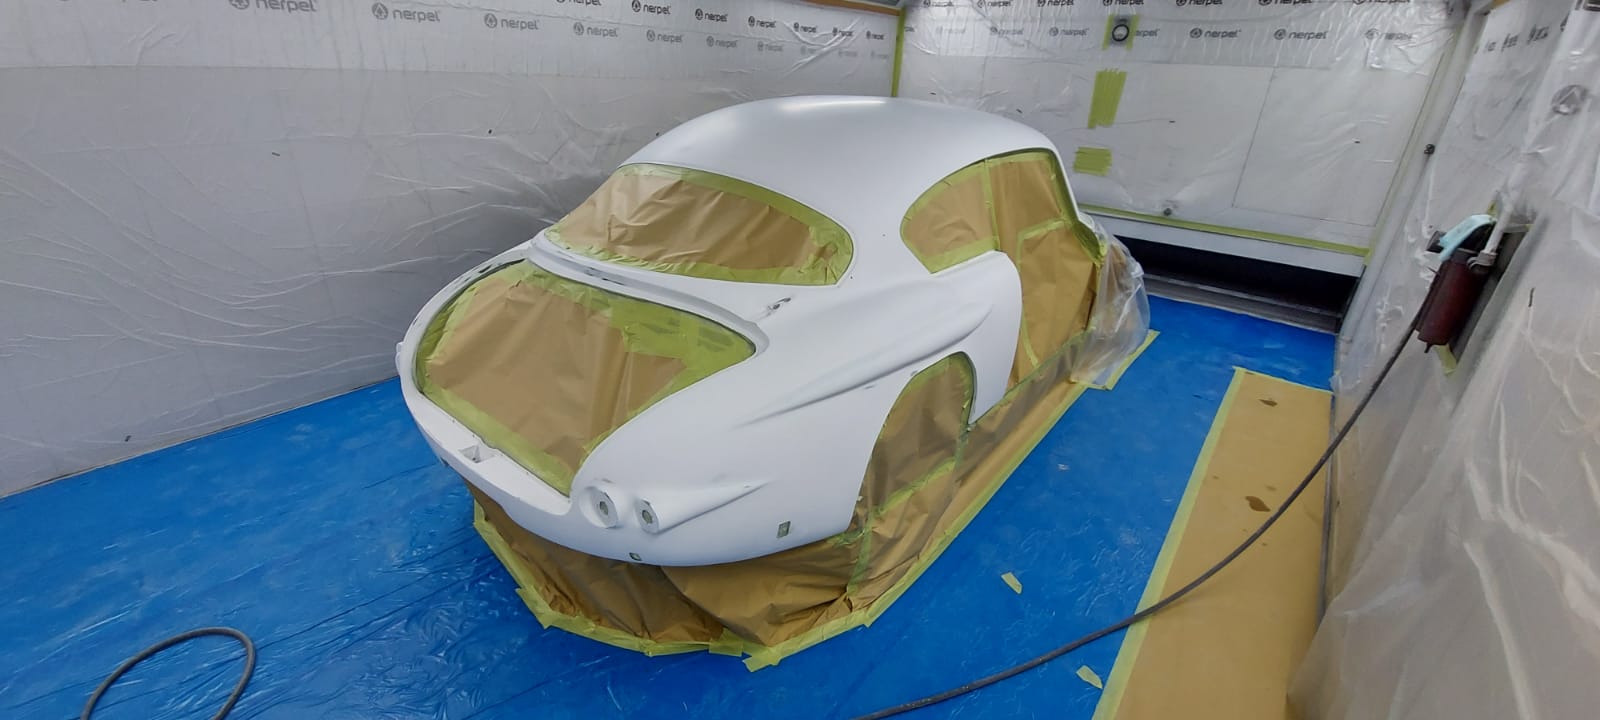
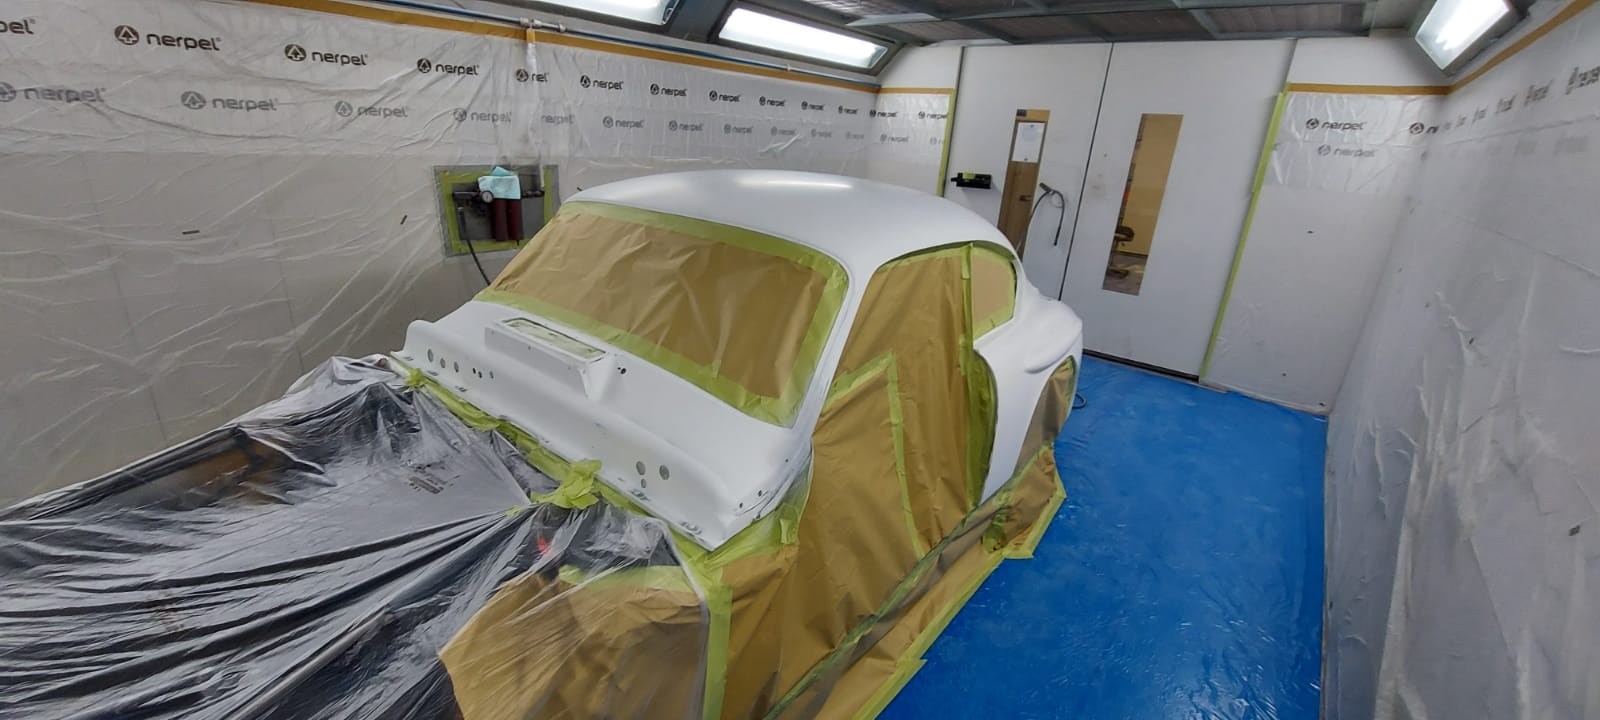
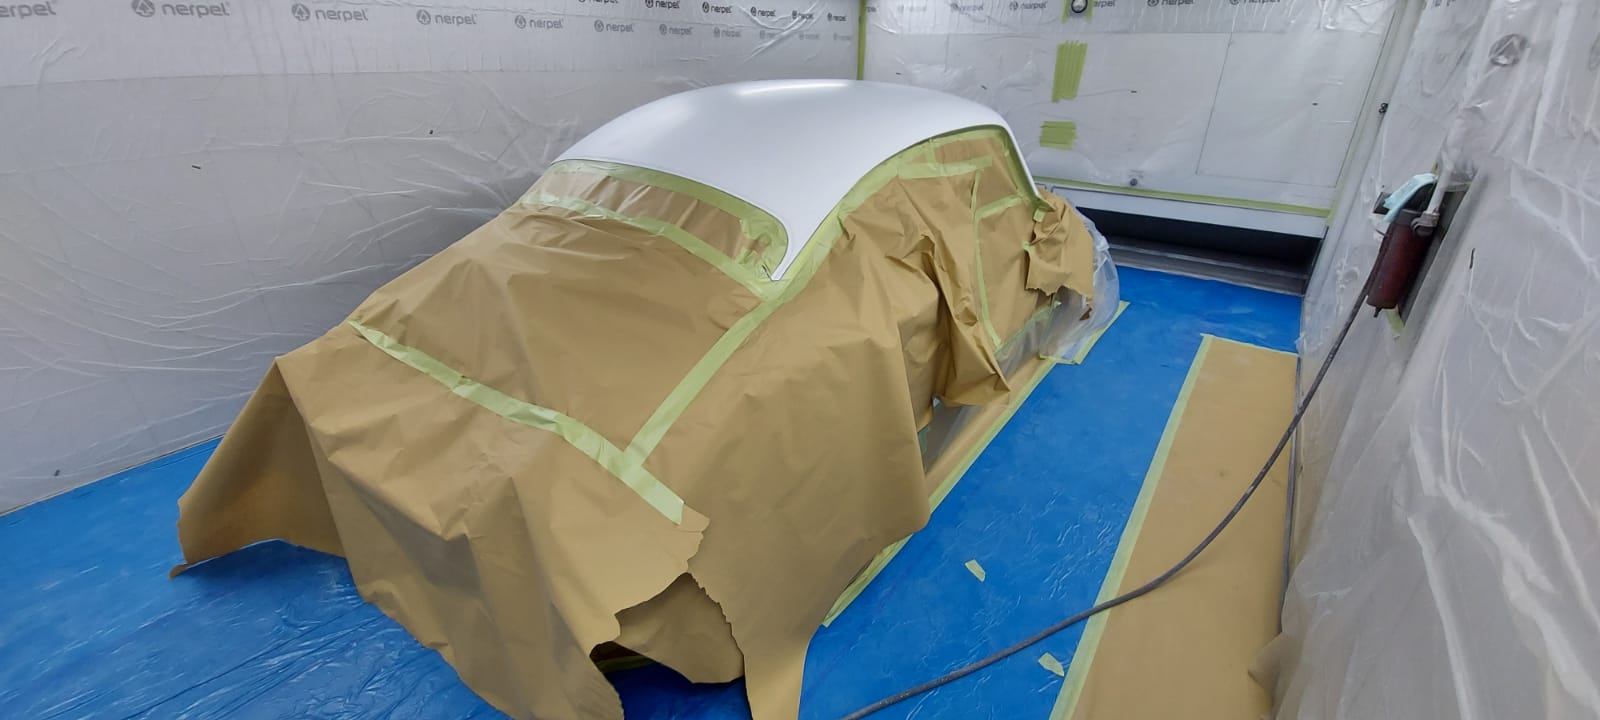
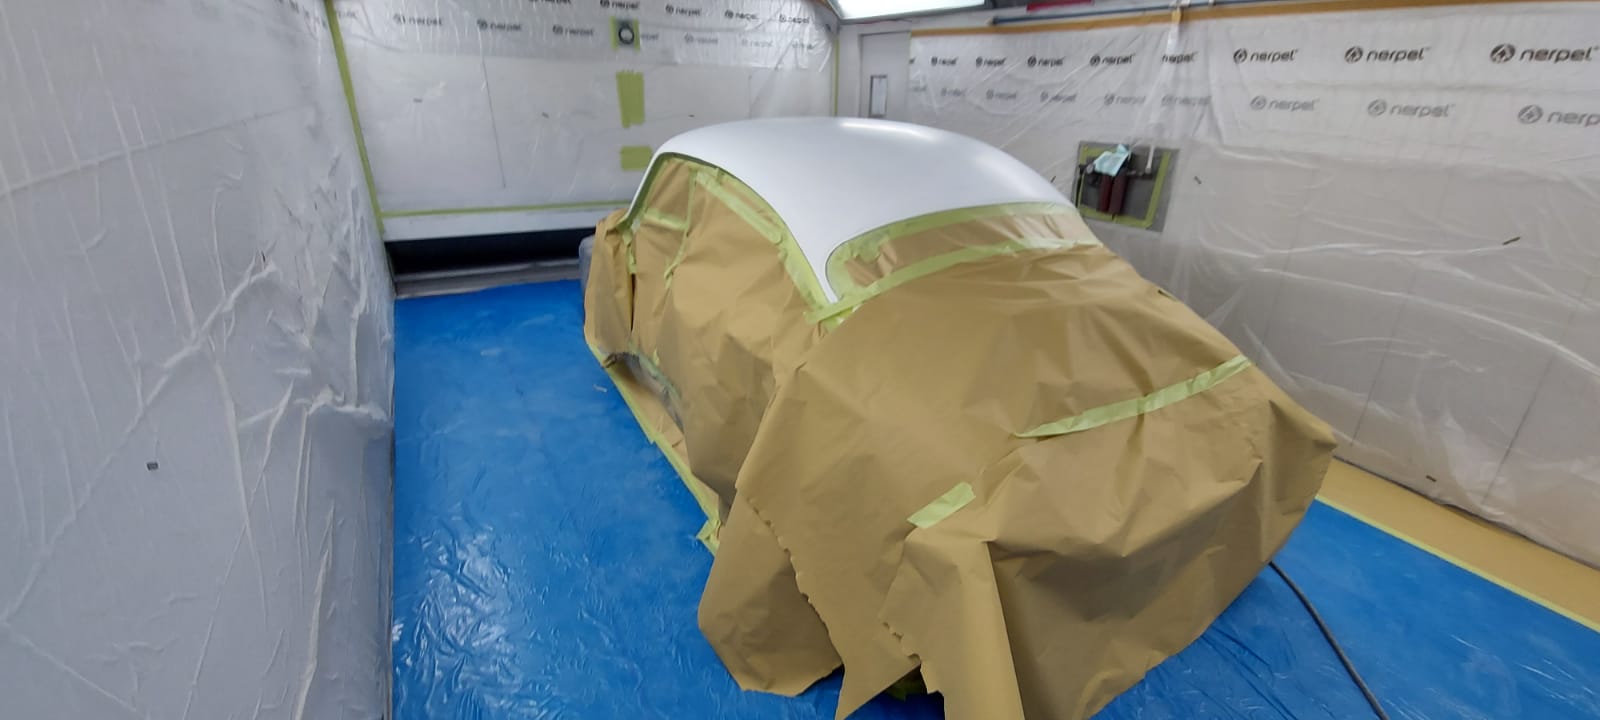
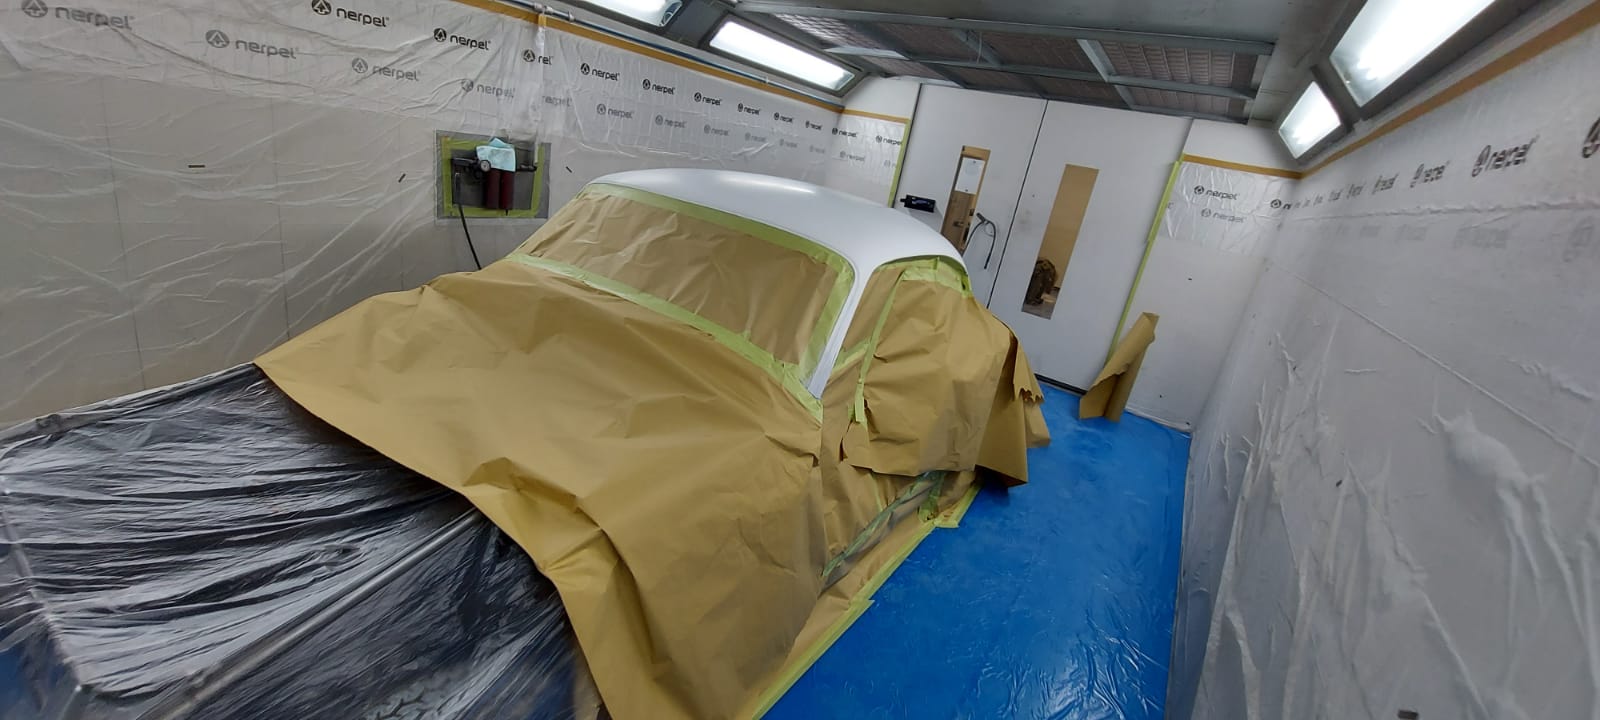
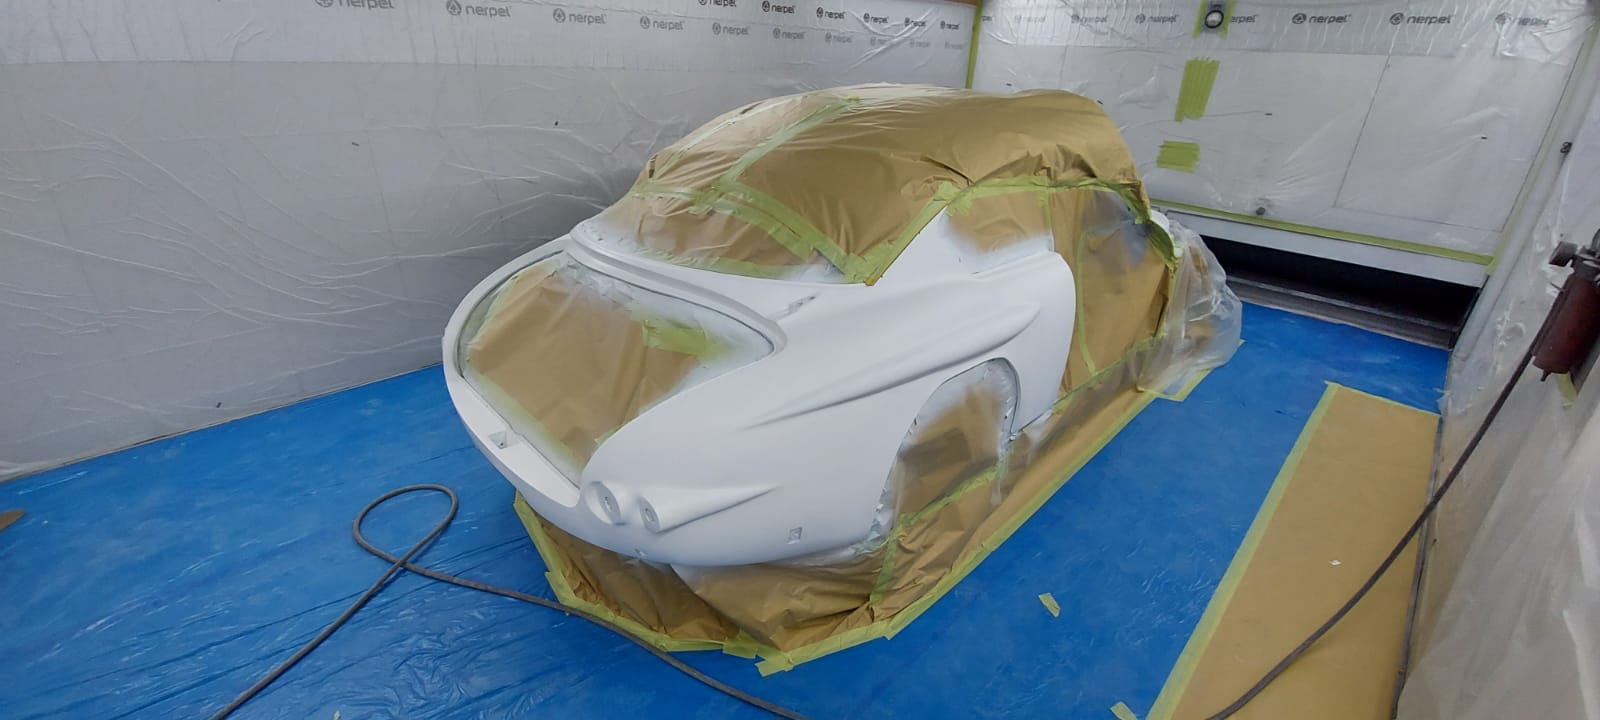
Yesterday afternoon was the moment we’ve all be waiting for. The first drop of Peony Red paint has been applied to our 1960 541S Jensen. For months we’ve been watching our skilled technicians work on rebuilding and reworking the body of this Jensen and finally its entered the paint shop.
This is a very exciting development in this restoration project as it’s now starting to resemble a classic car! With this fresh layer of paint on, our beautiful Peony Red Jensen is blossoming into the iconic classic it should be.
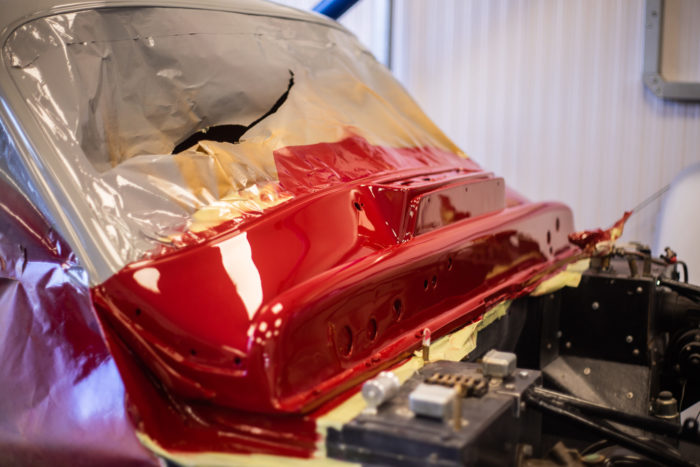
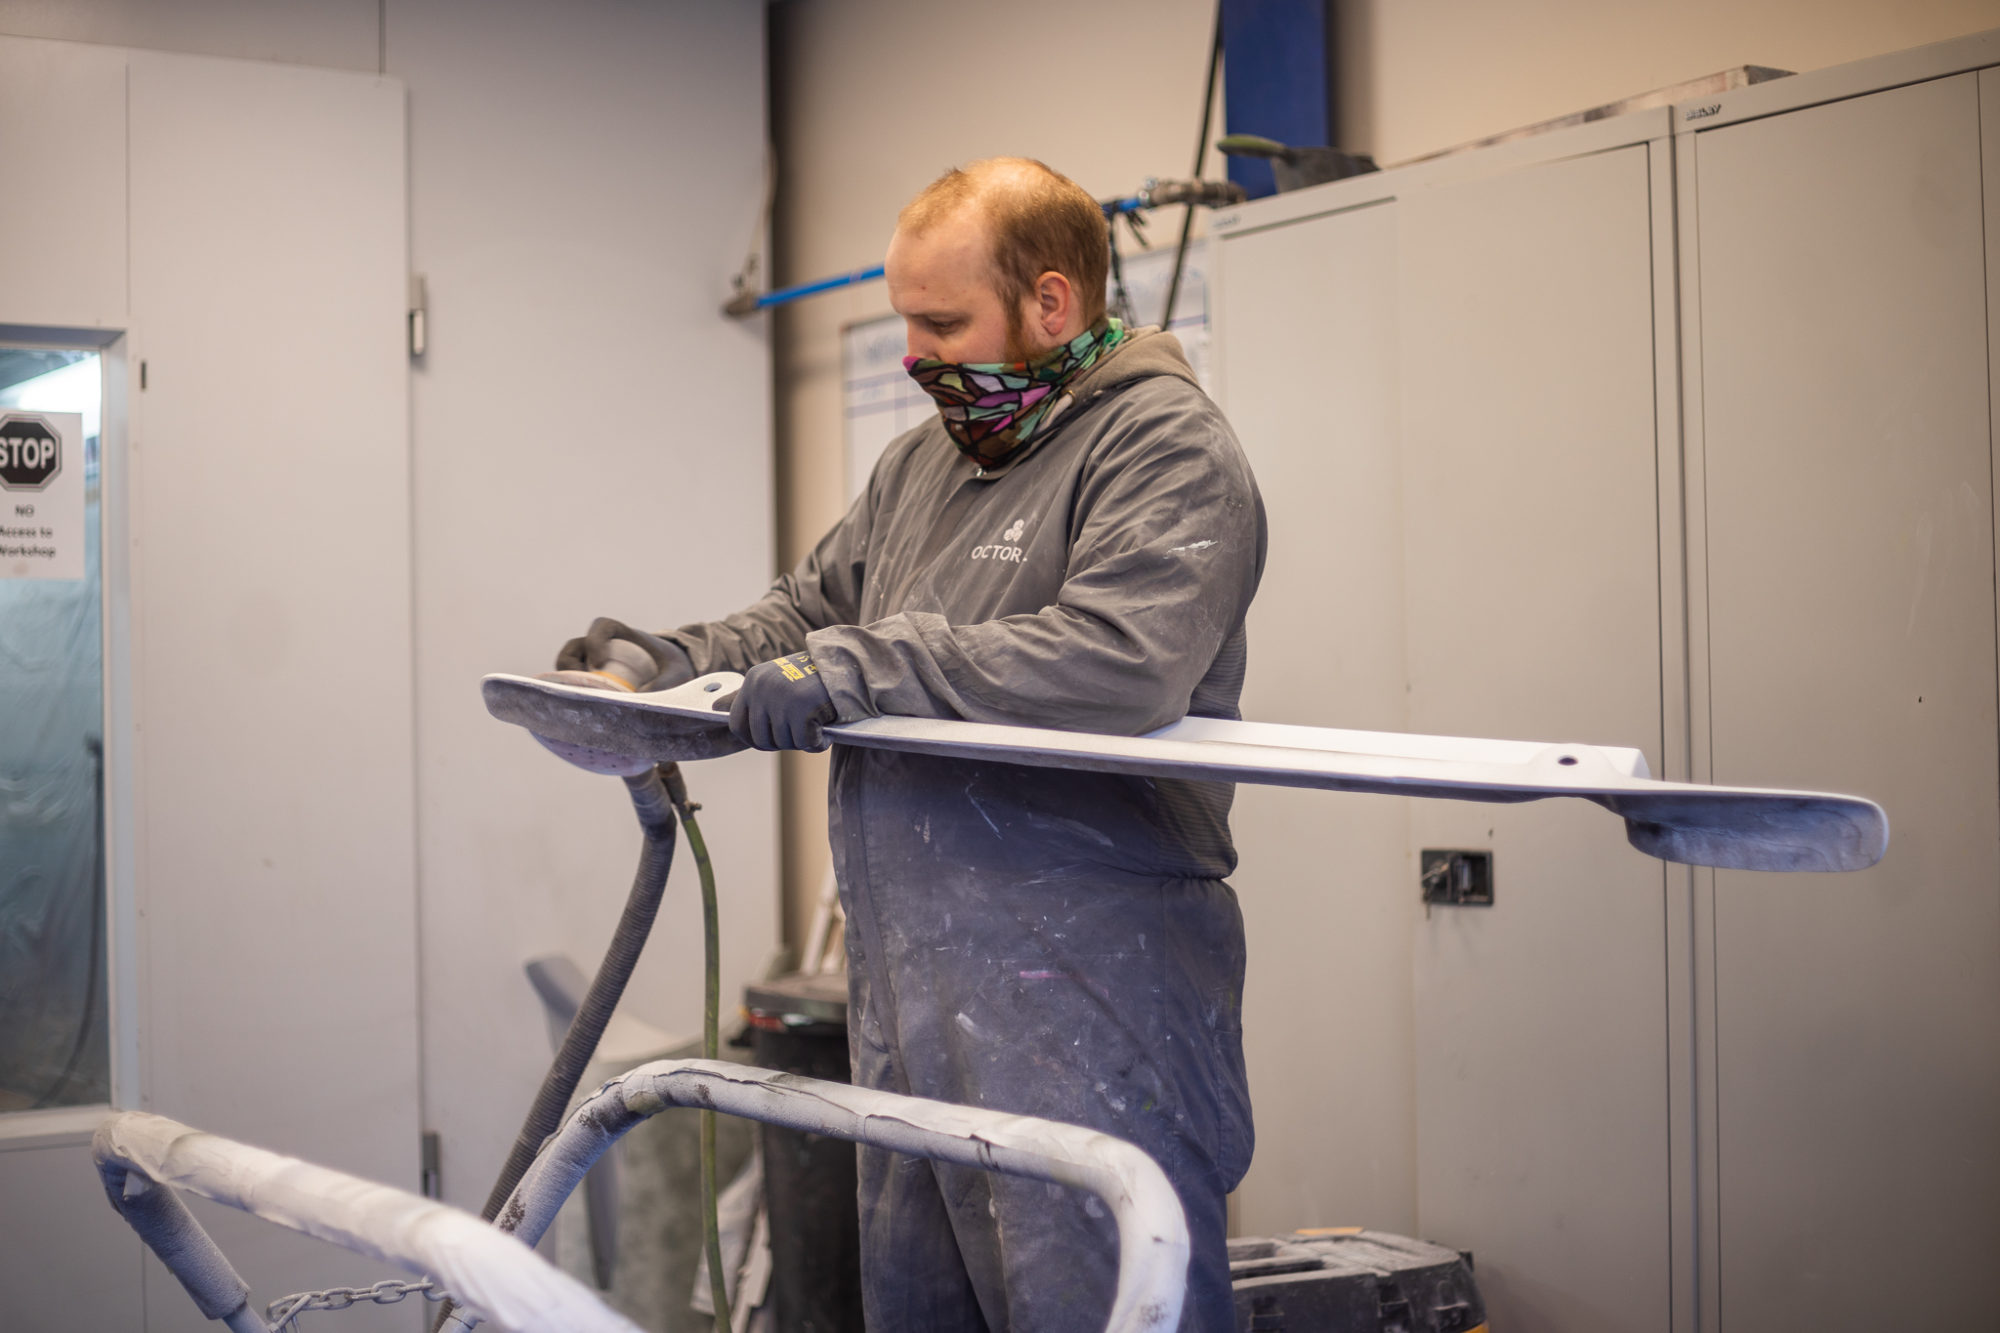
Chris has been focusing on preparing other exterior elements for paint. Here Chris is working on a front bumper shield.
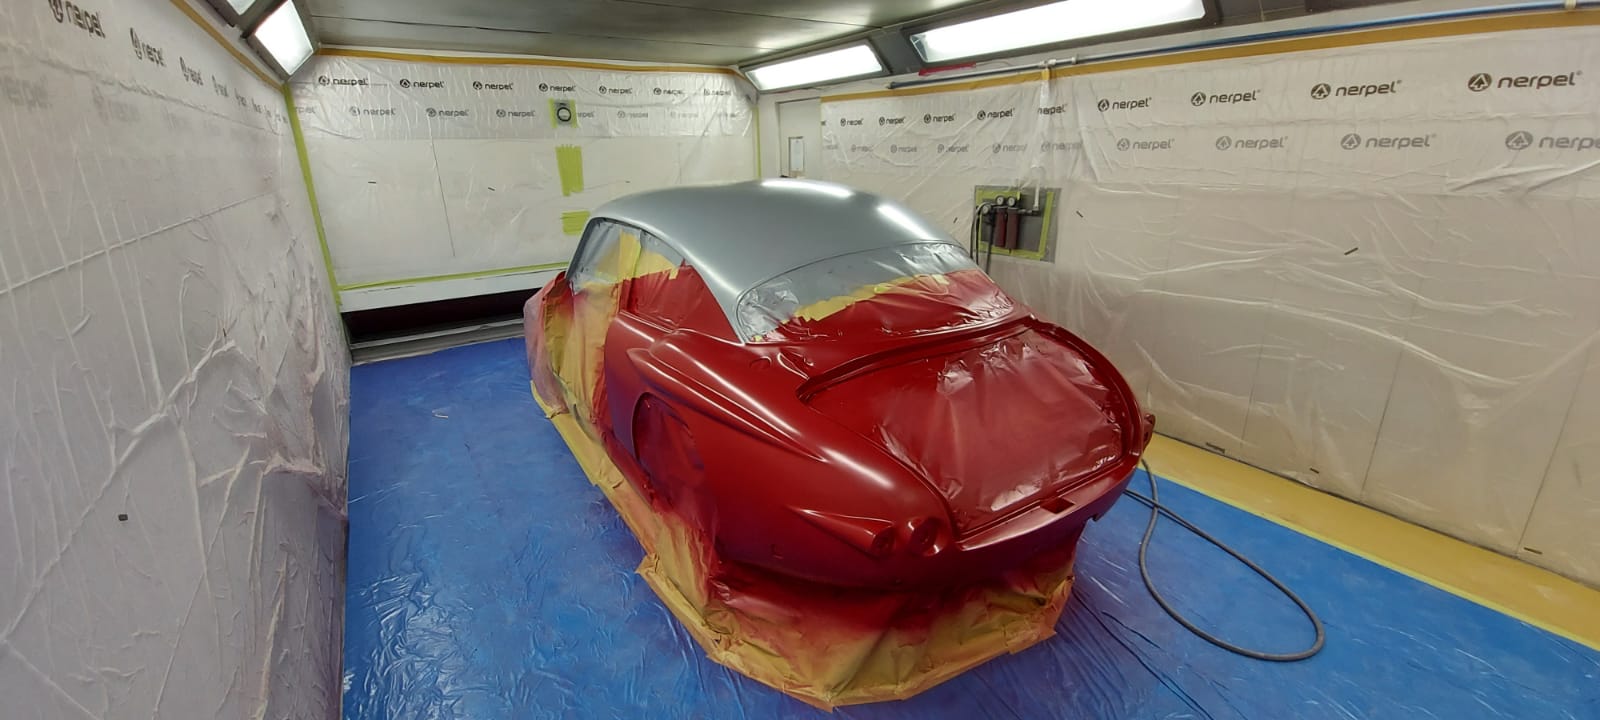
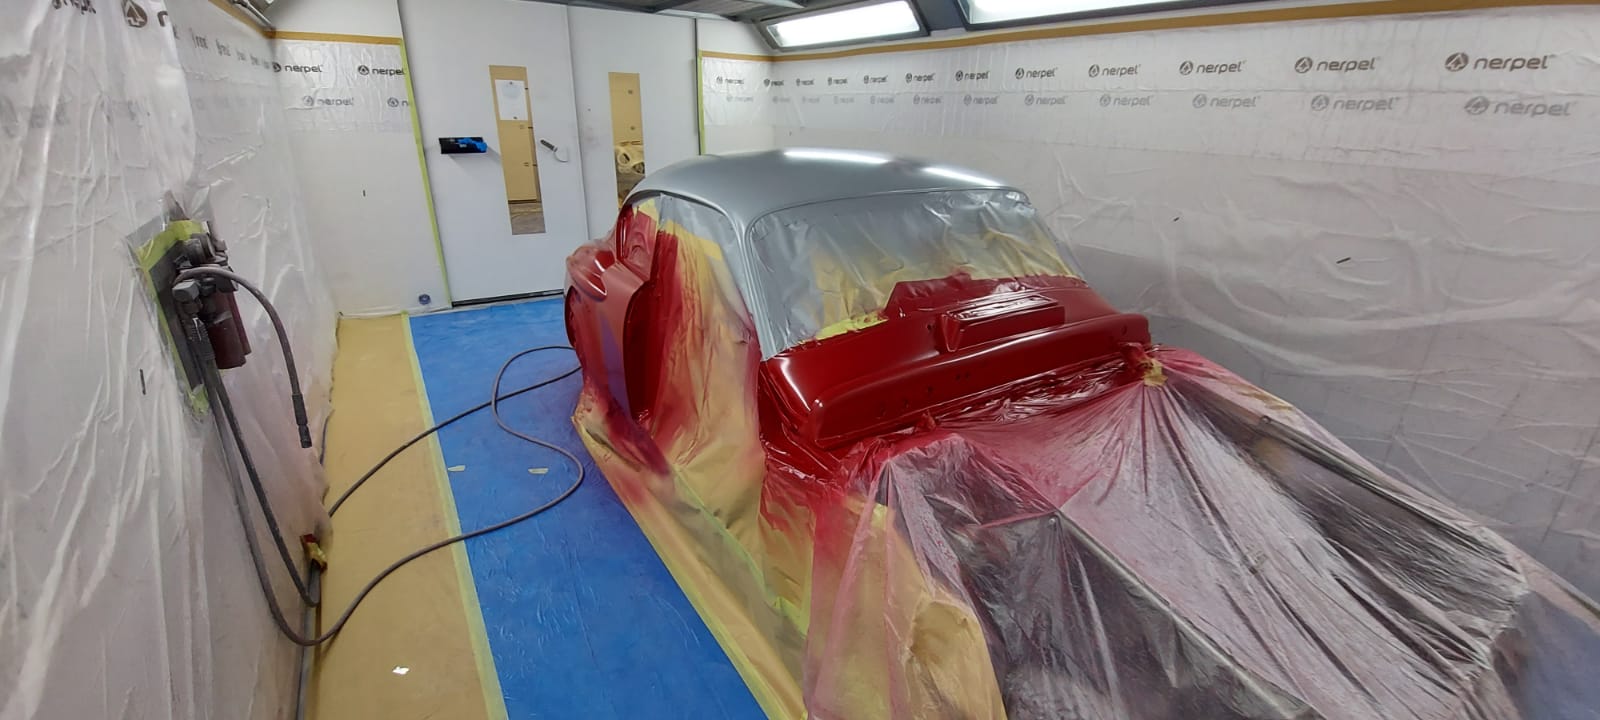
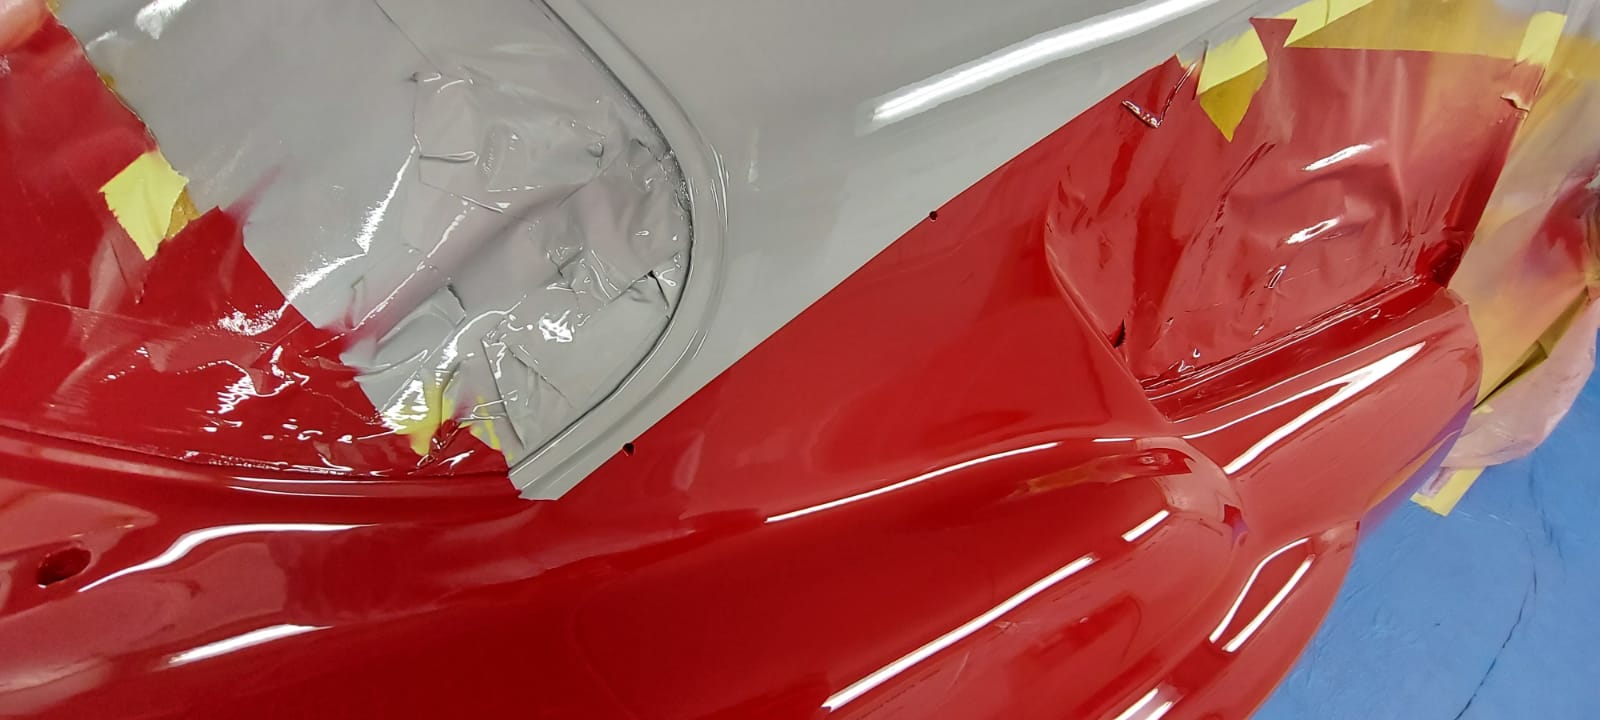
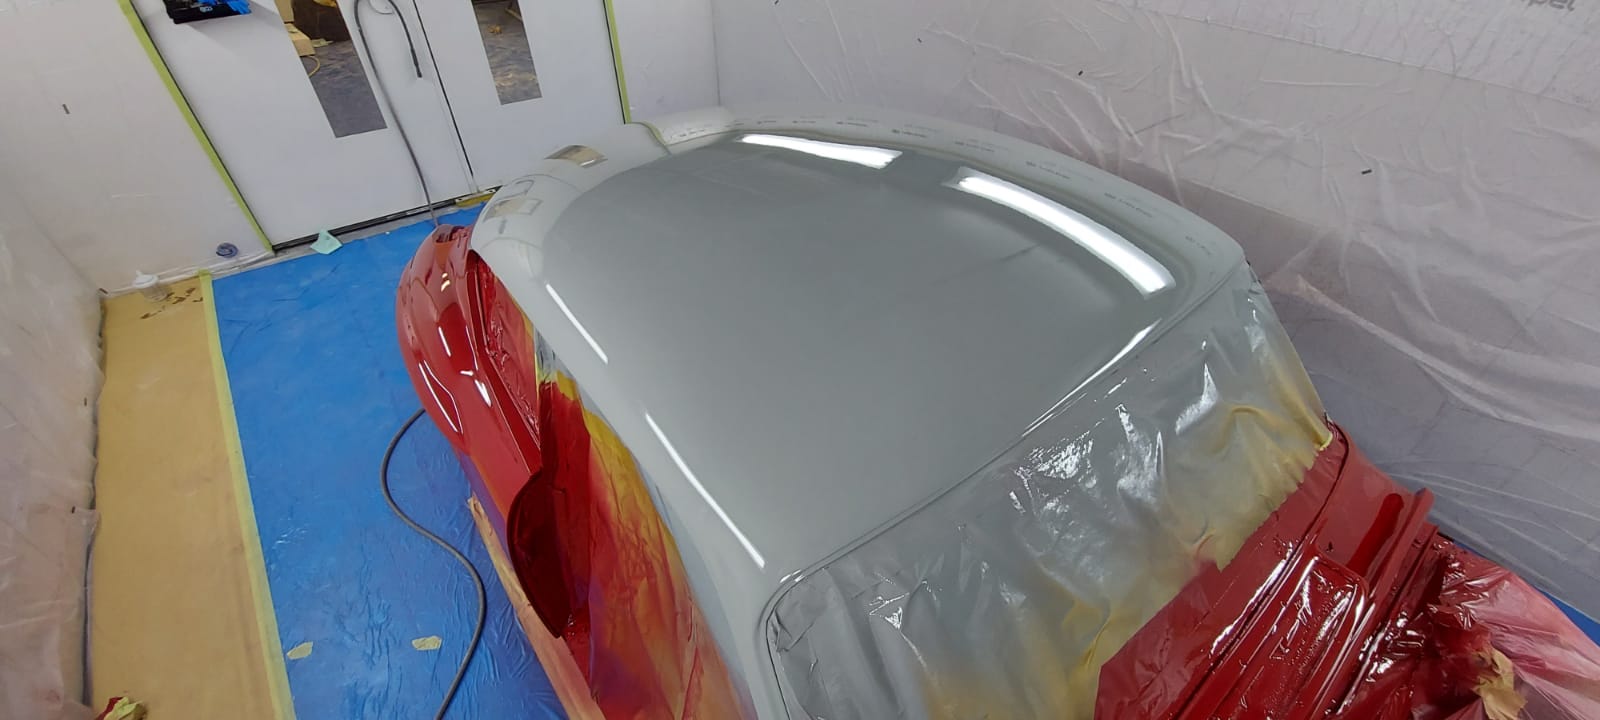
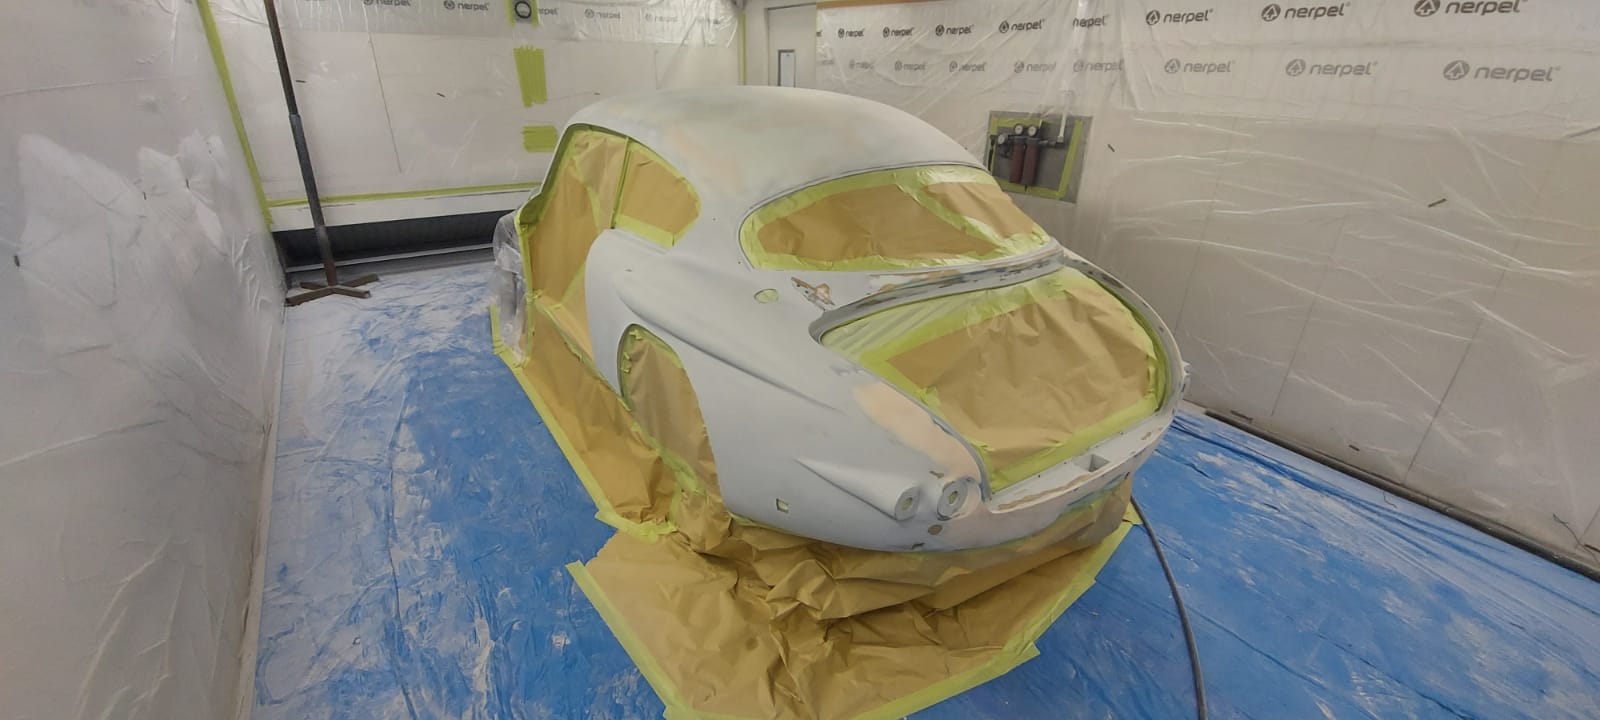
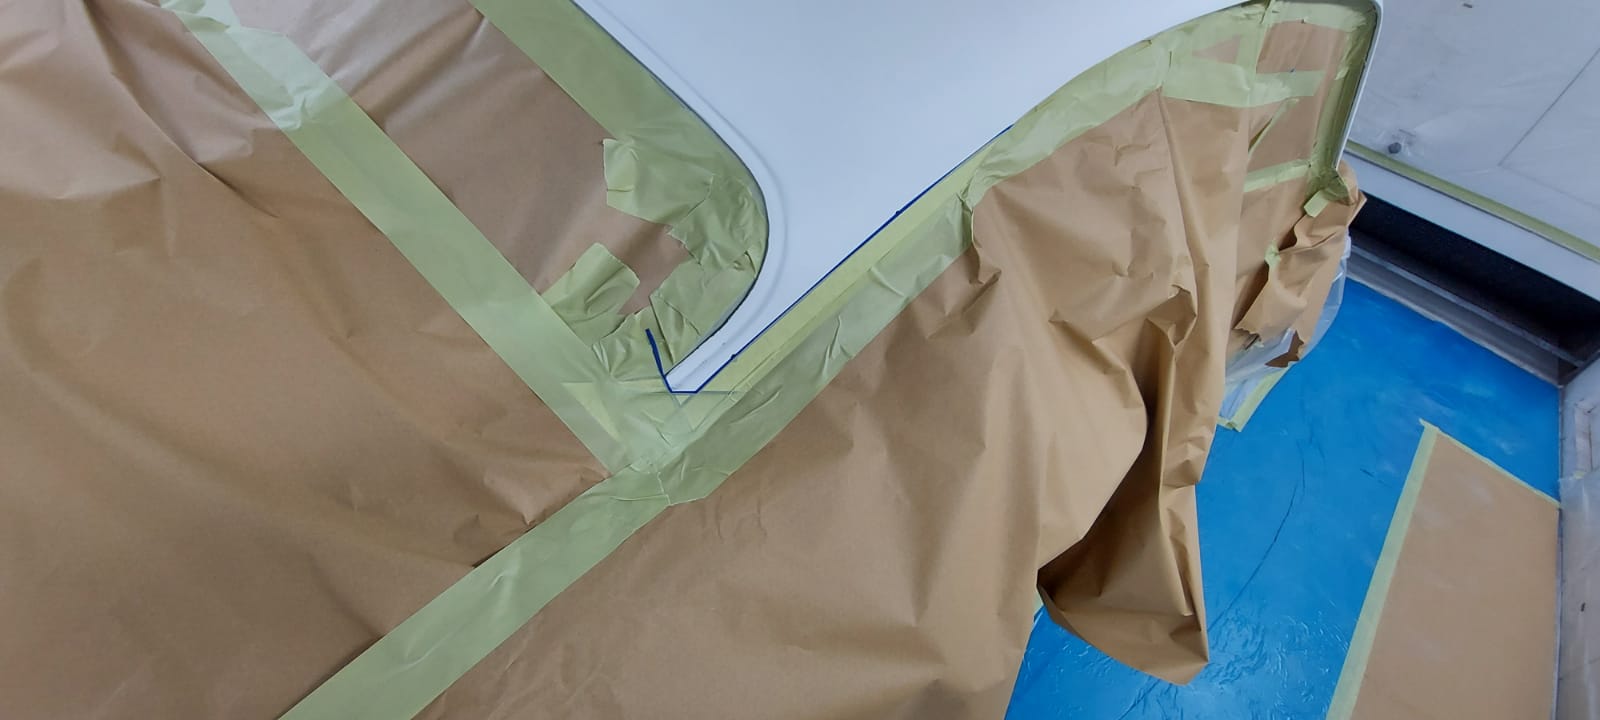
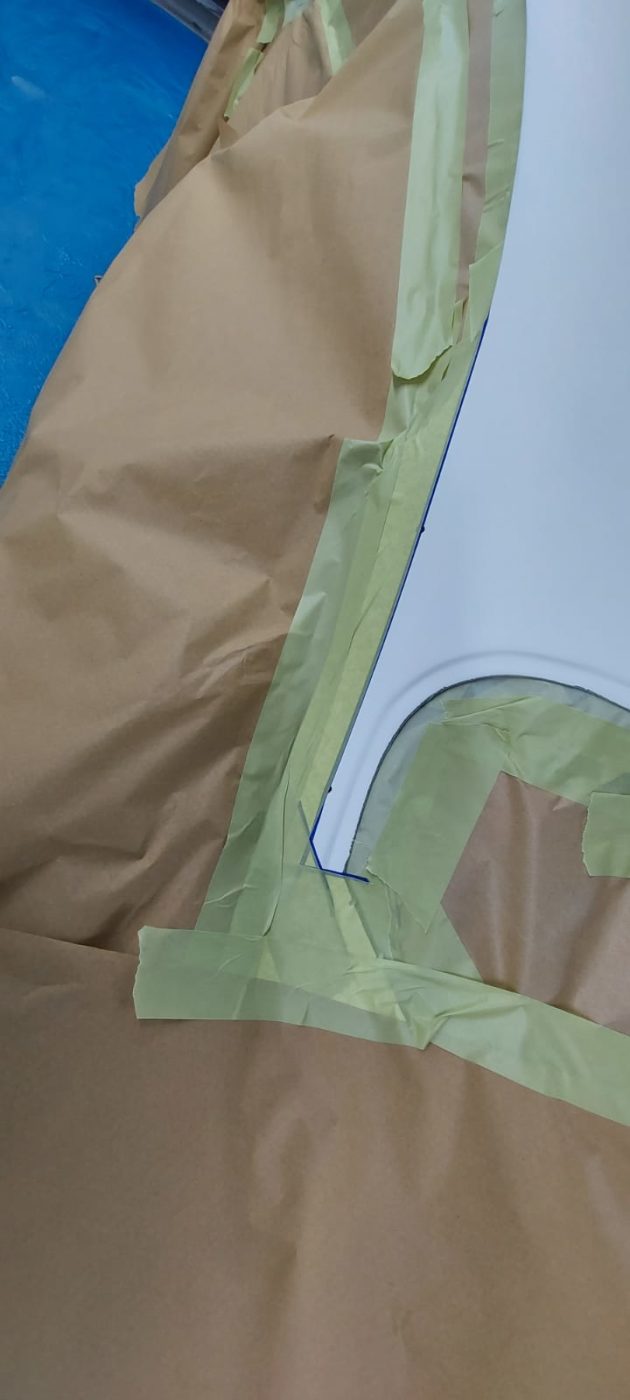
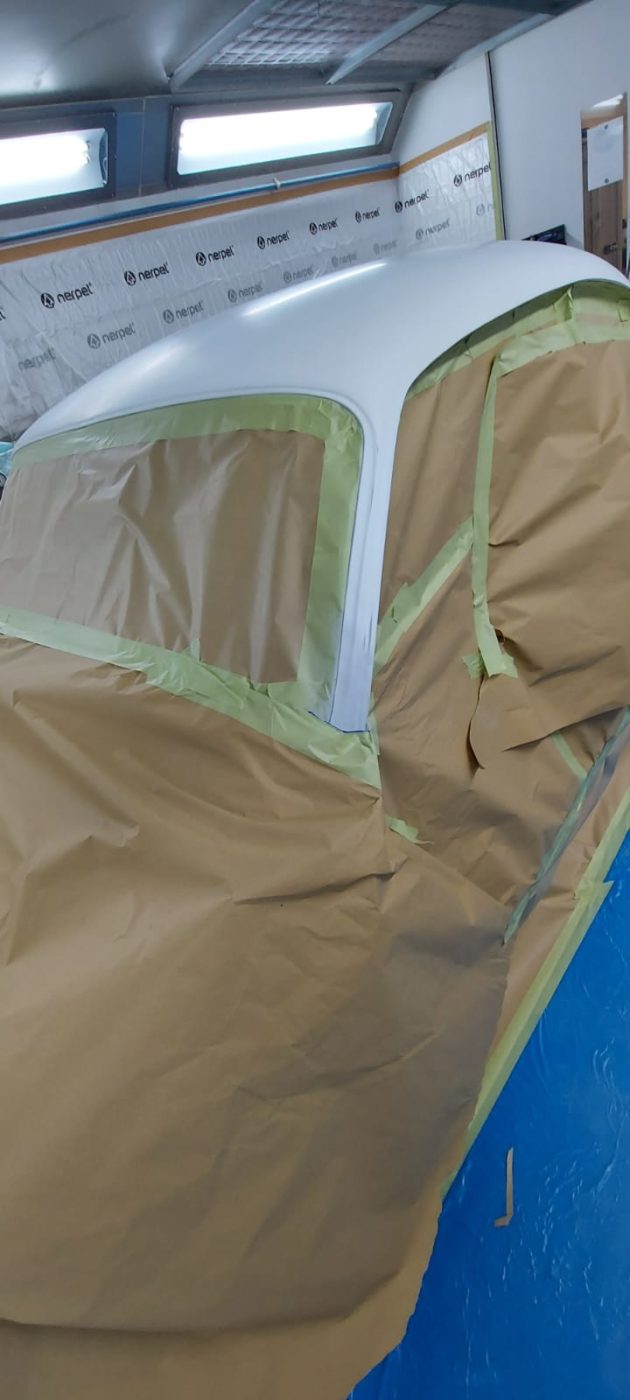
Our specialist paint technician, Chris, has been dedicated to preparing, masking and painting our beloved Peony Red Jensen. He began by applying primer and guide coat to the bonnet, panels and body. He then rubbed the car down with 320 and 500 sandpaper grit ready for paint. Once the car was masked up, it was ready for paint. Car masked up for a ‘Verkehrsgrau’ grey roof and red bottom. Once the two tones had been applied, Chris could paint on the clear preservative coat.

Eye spy a little turquoise mini! A little while ago, we worked on a 1967 Austin Mini 850 for Electric Classic Cars who aimed to turn it into a 300hp electric-powered classic.
Bridge Classic Cars worked on restoring this charming mini and handed it over Electric Classics to finish. Our final touch was the bodywork preparation and paintwork. Our Paint Shop finished the vehicle in a dazzling ‘Surf Blue’.
We love following its progress and can’t wait to see the finished product!
