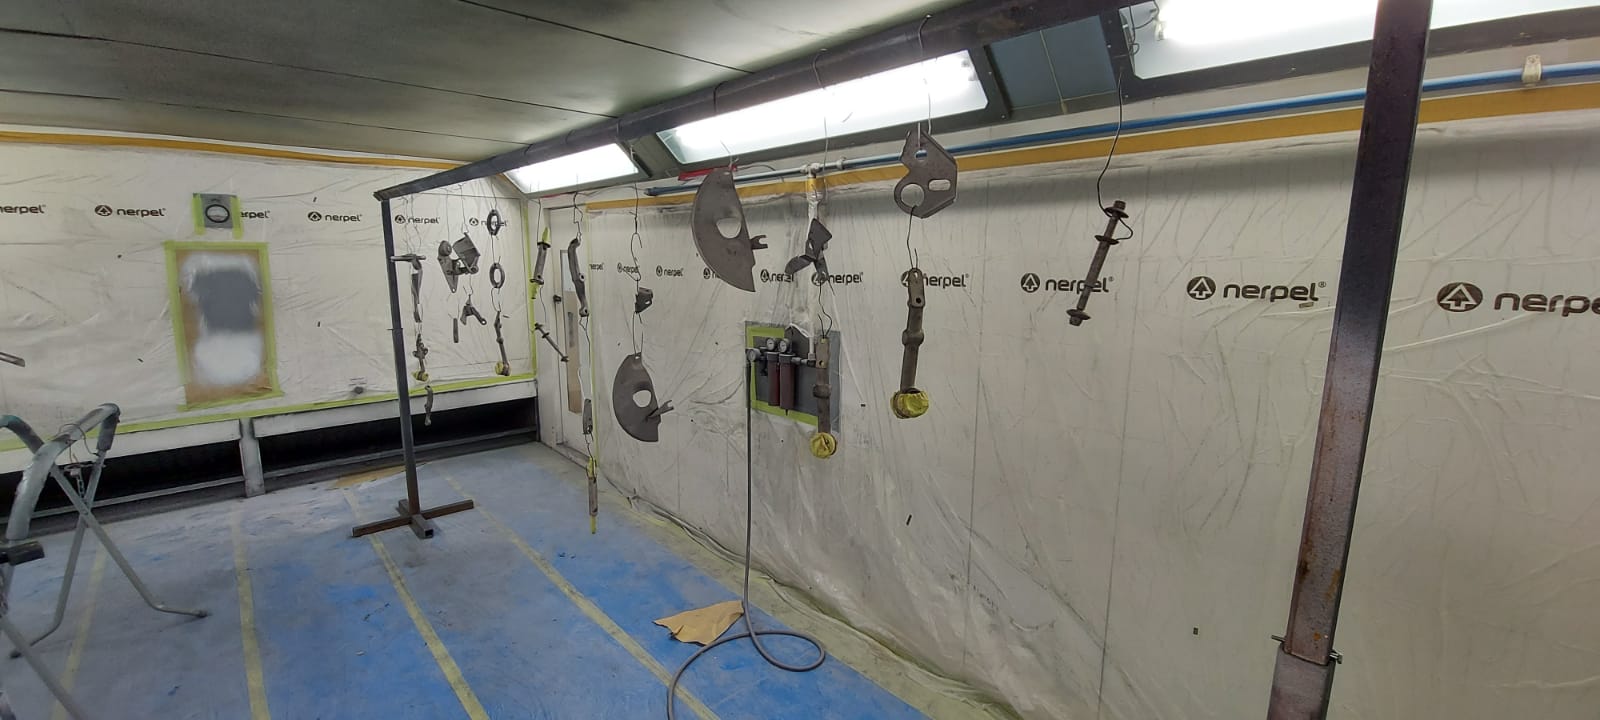
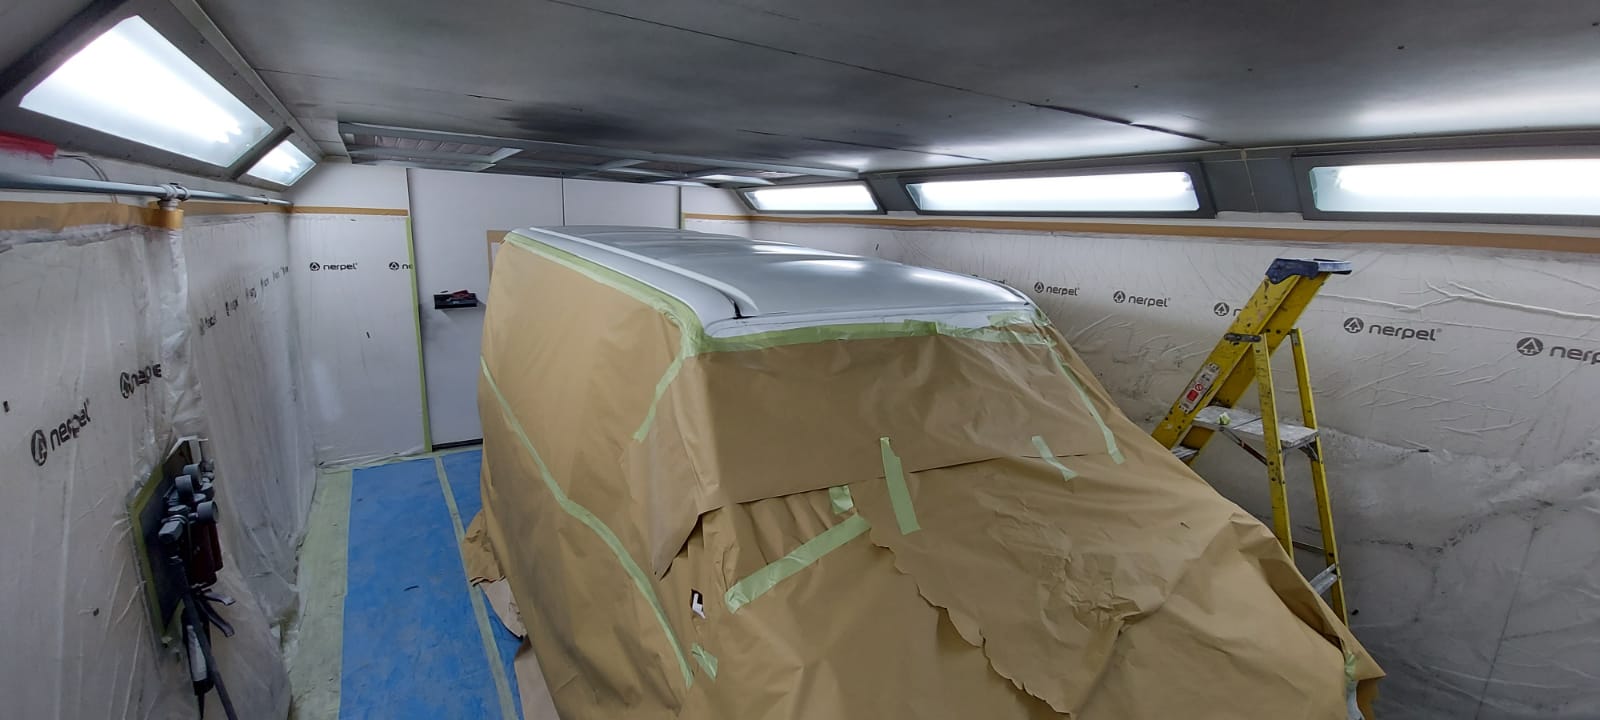
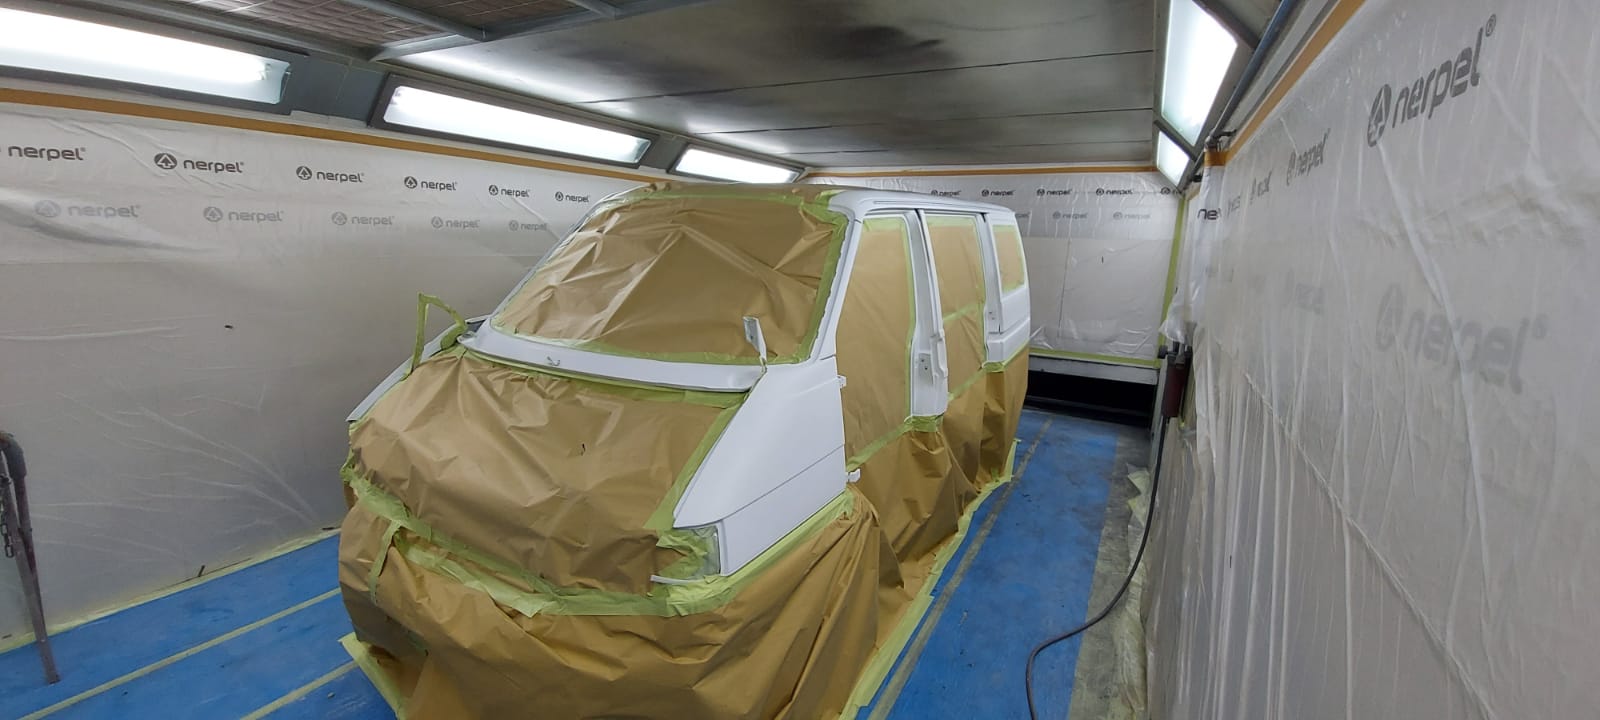
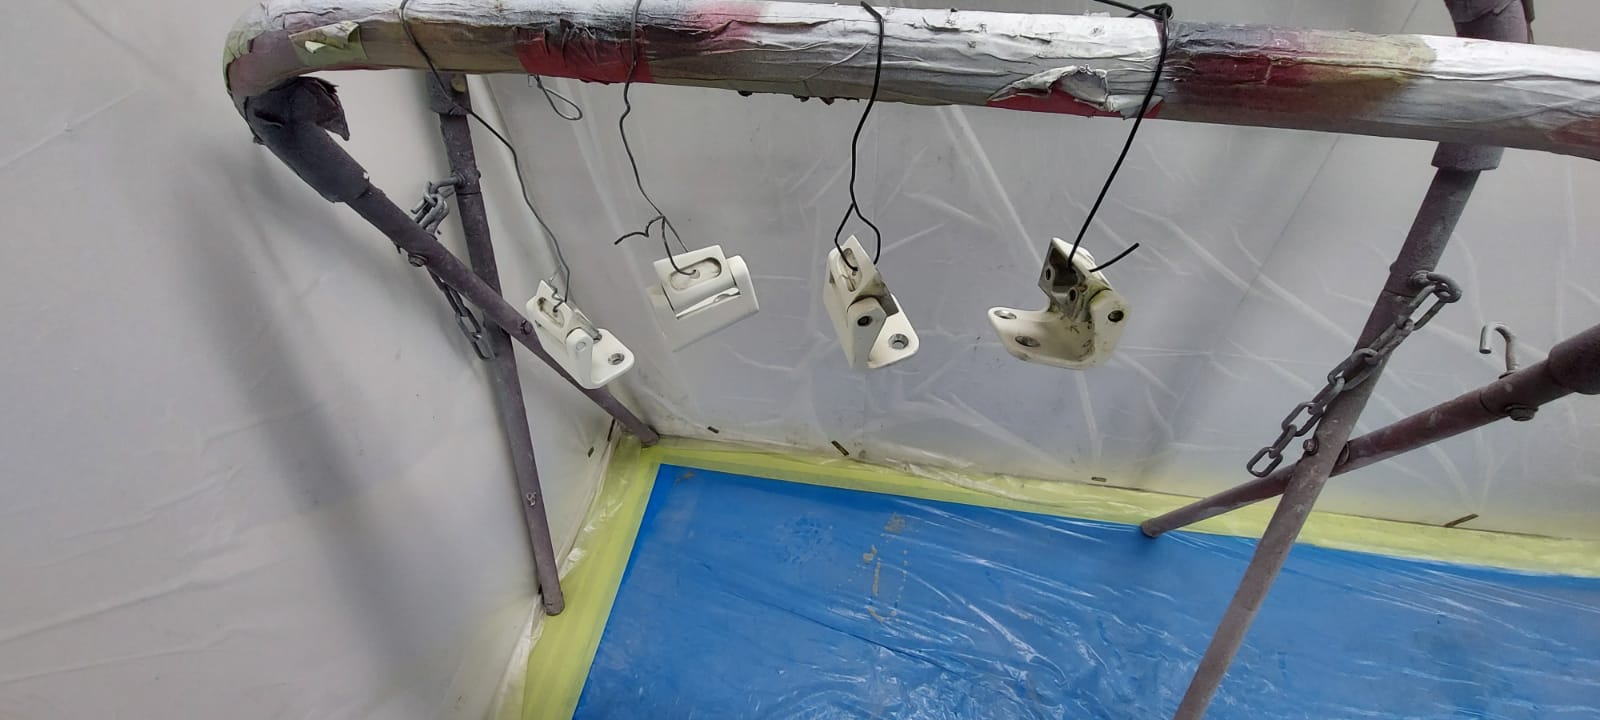
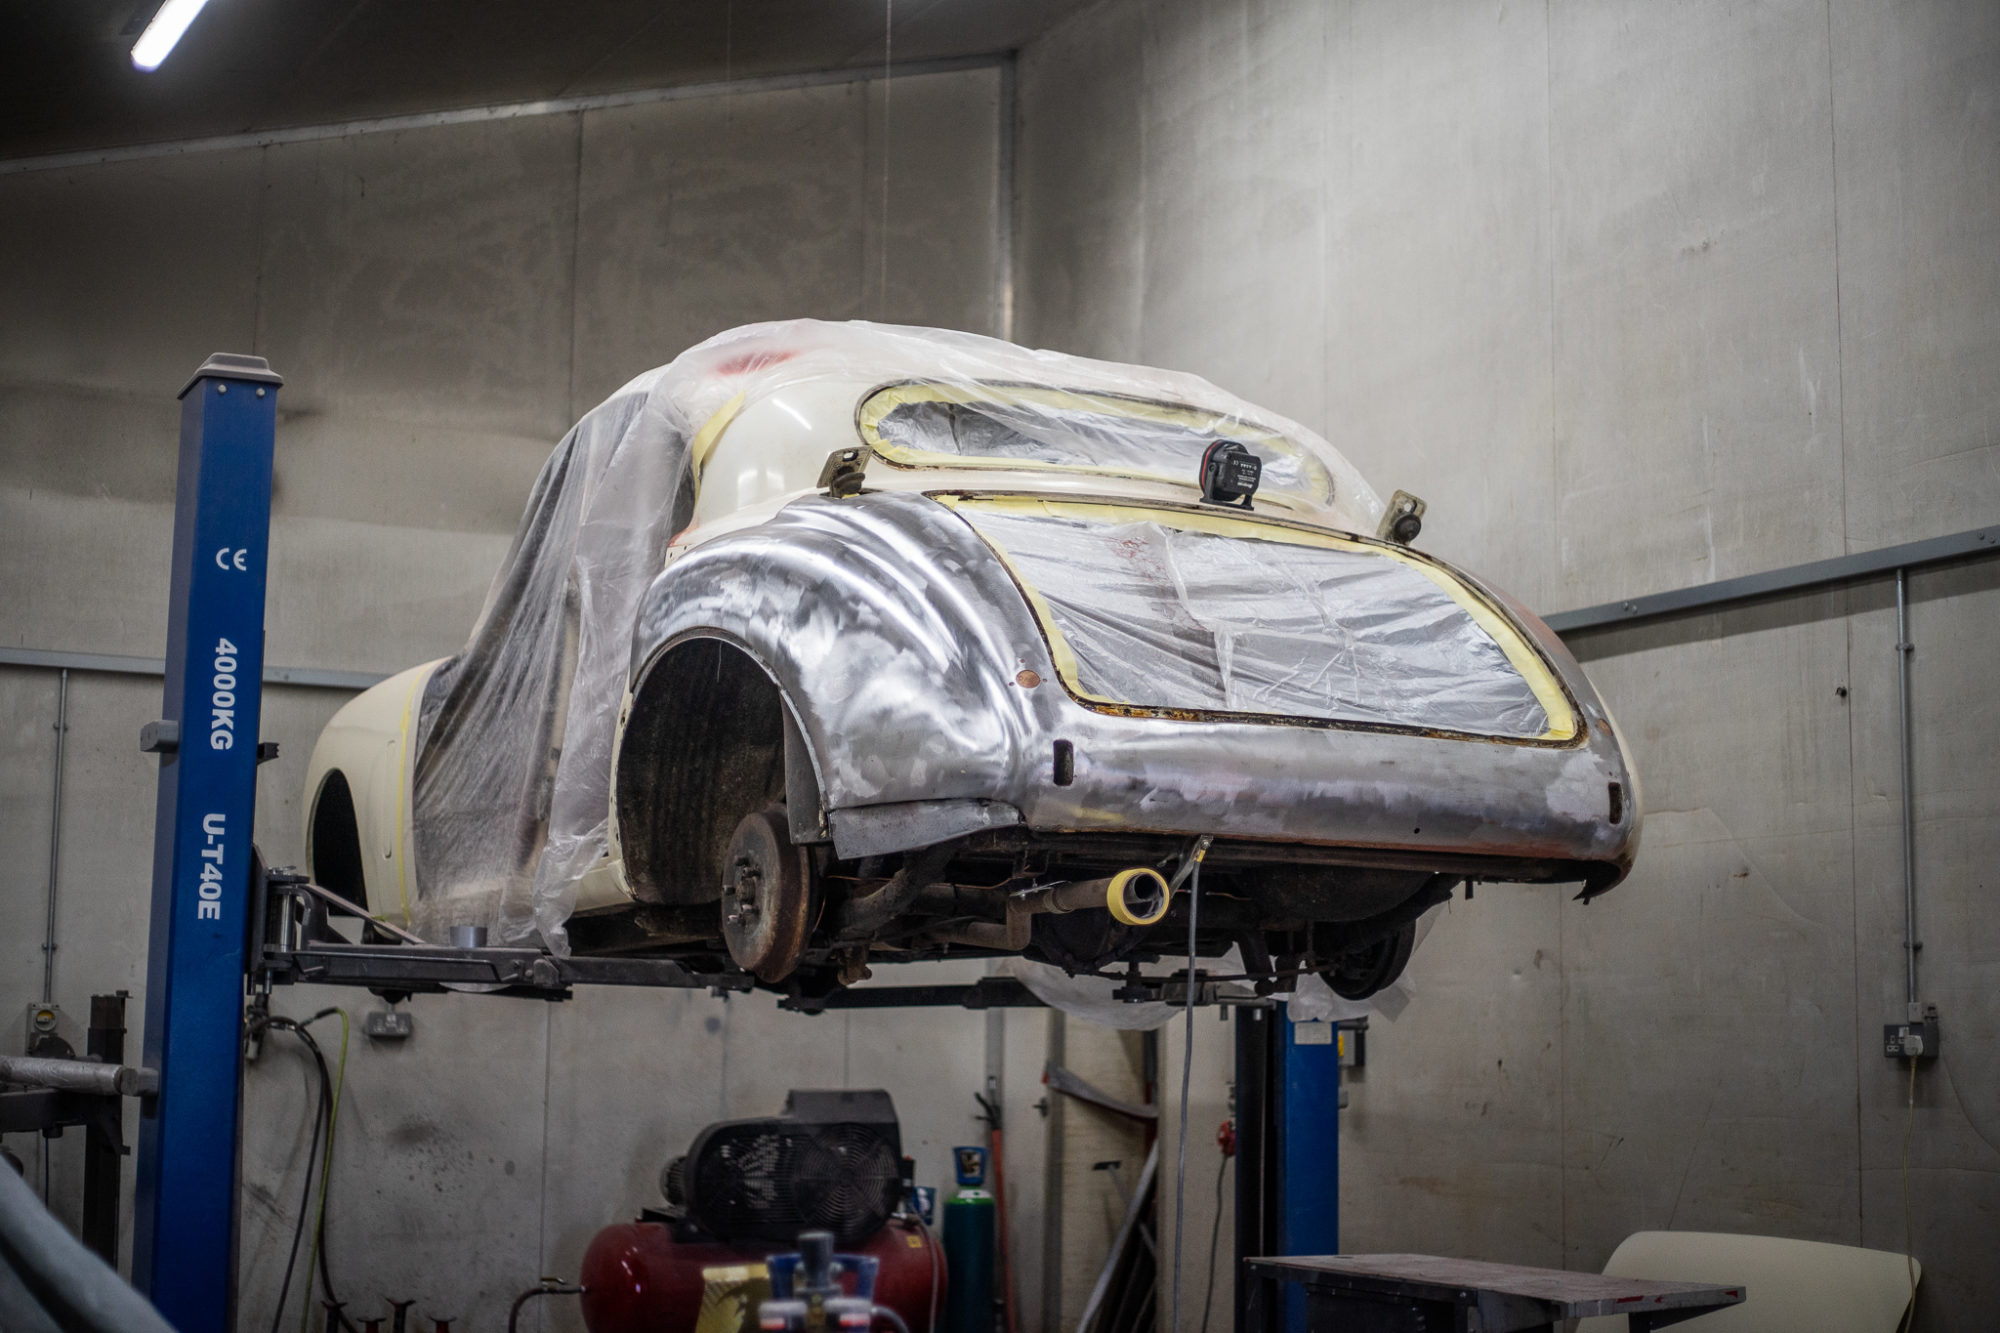
VW Paint complete
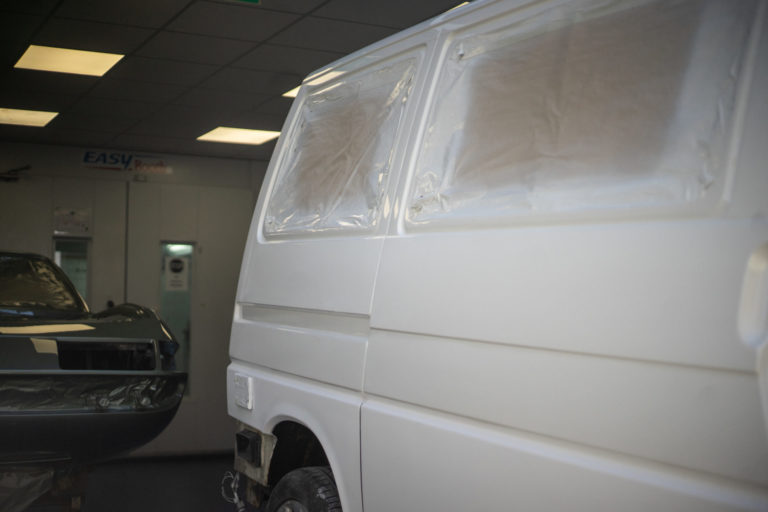
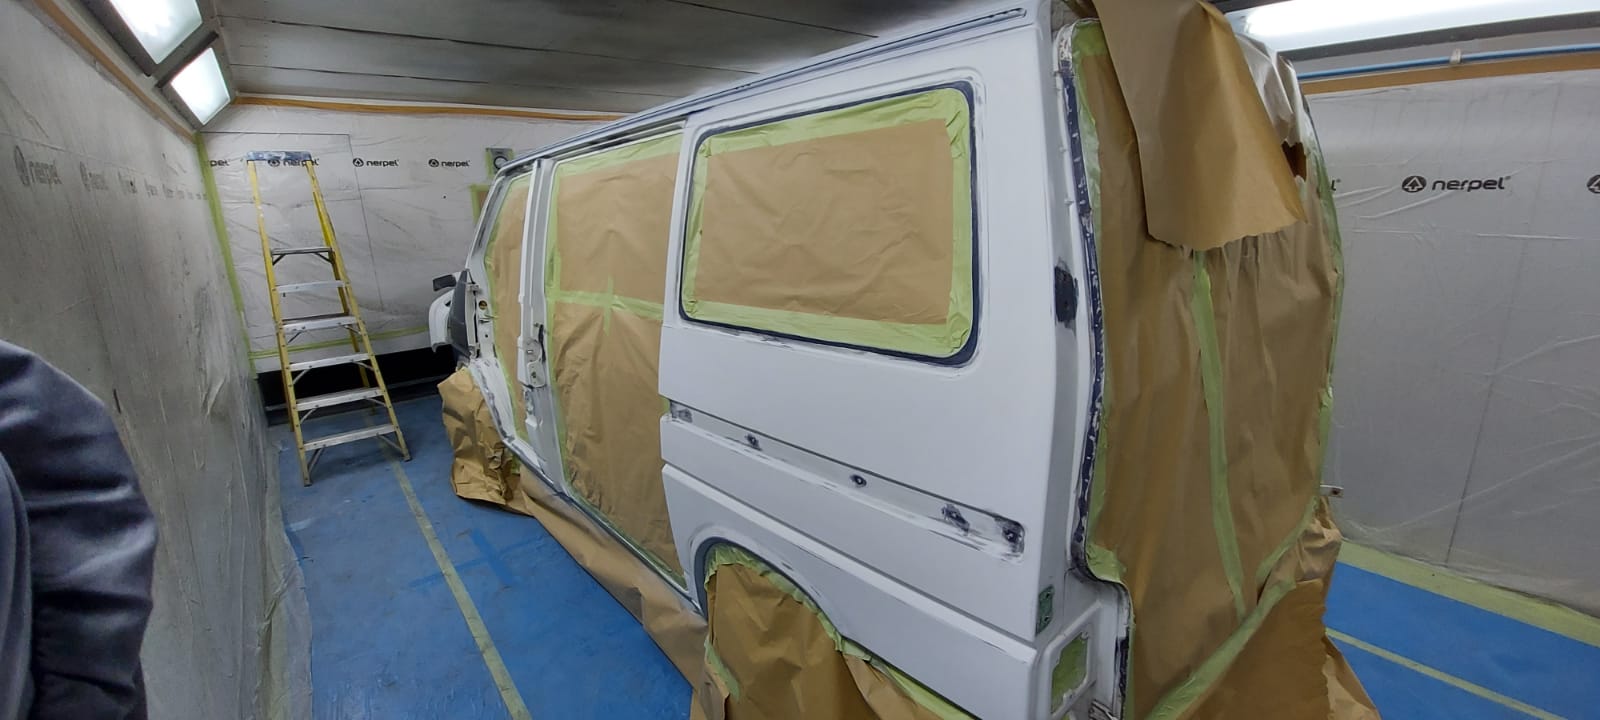
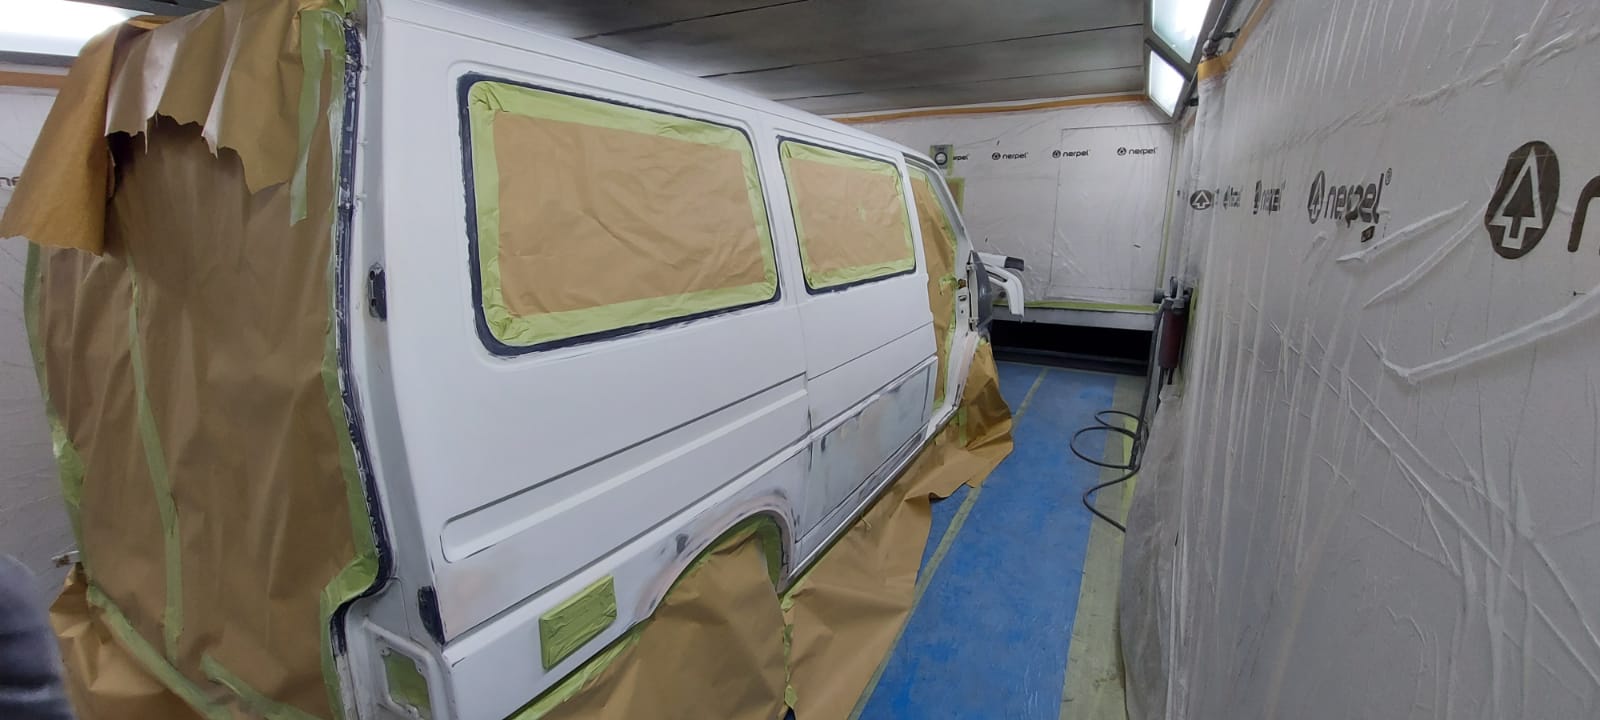
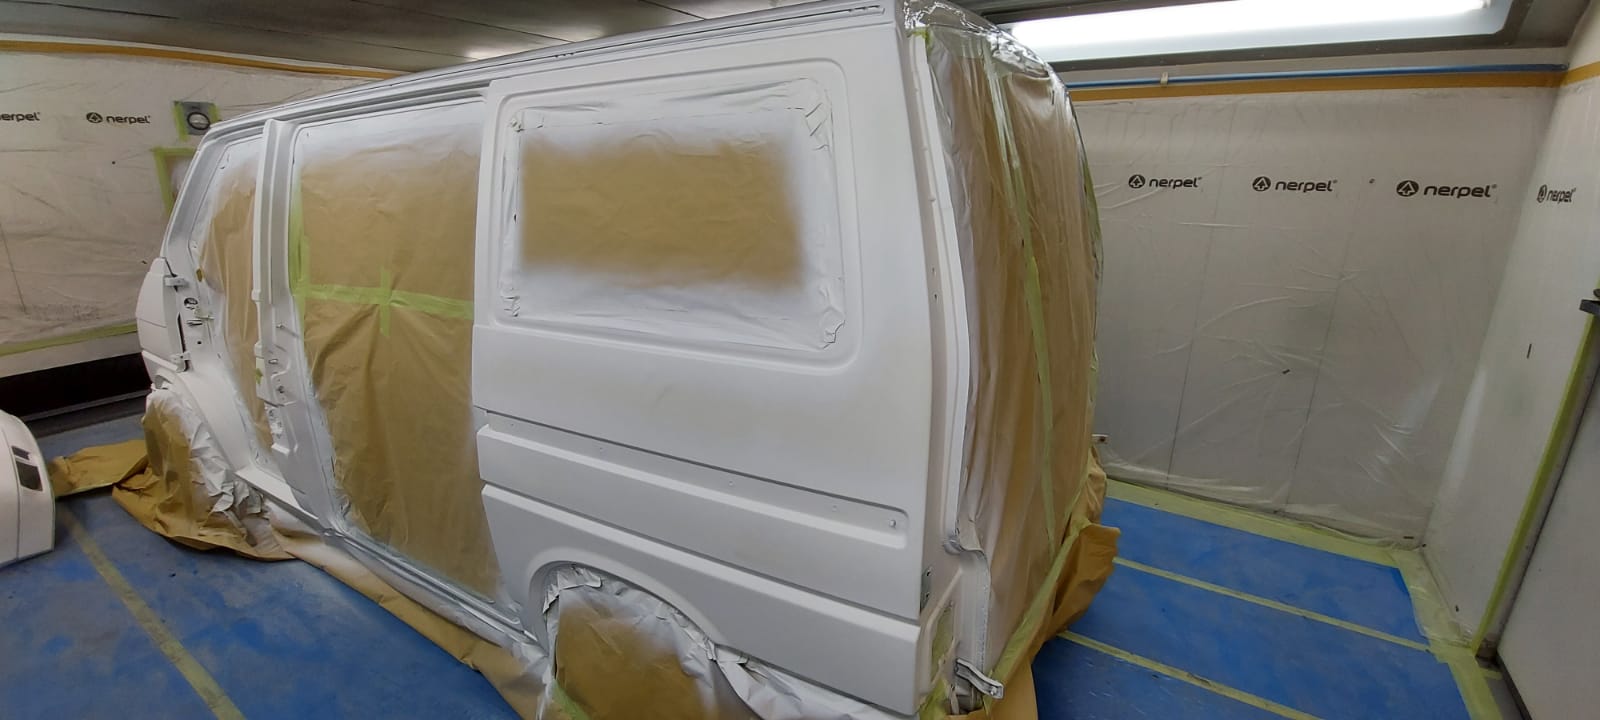
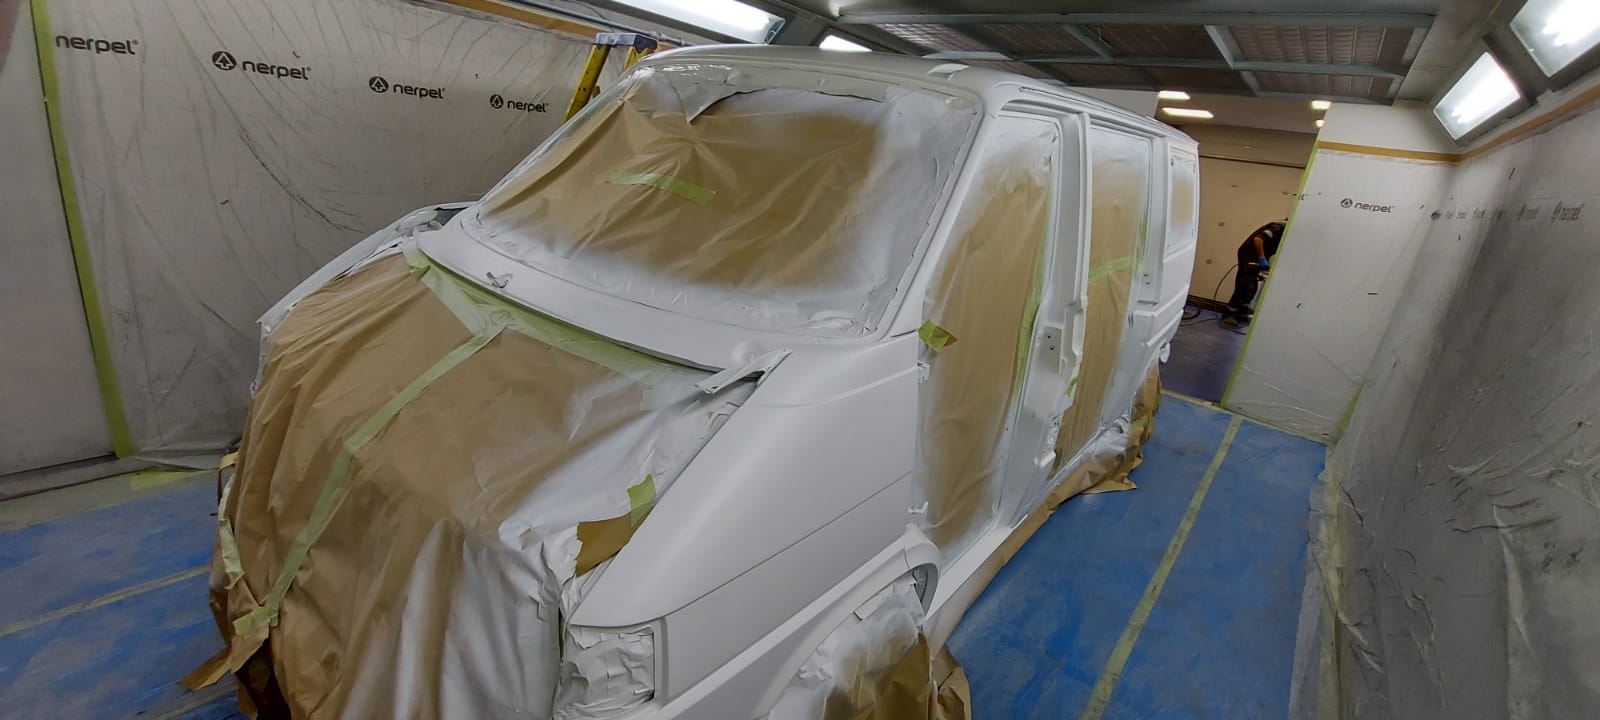
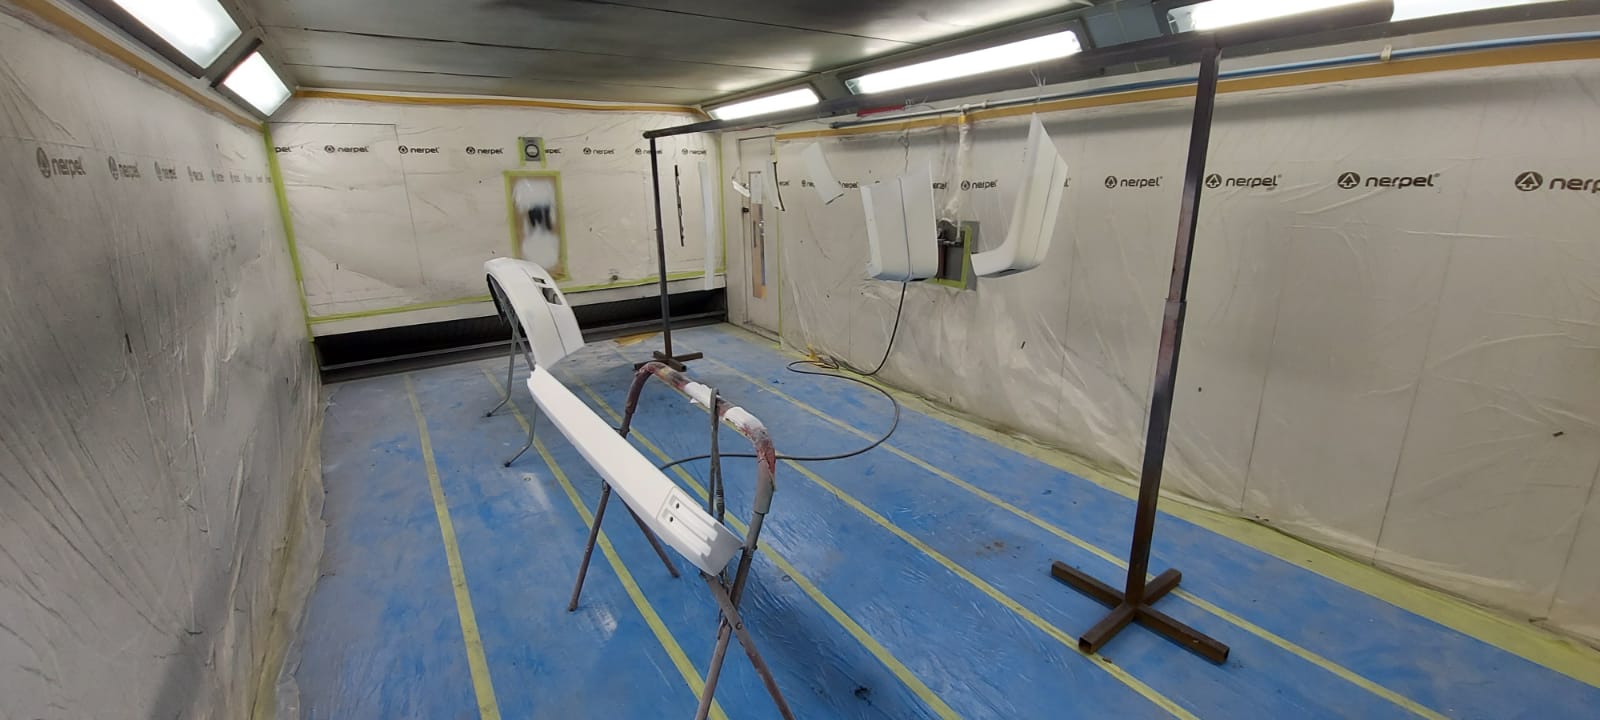
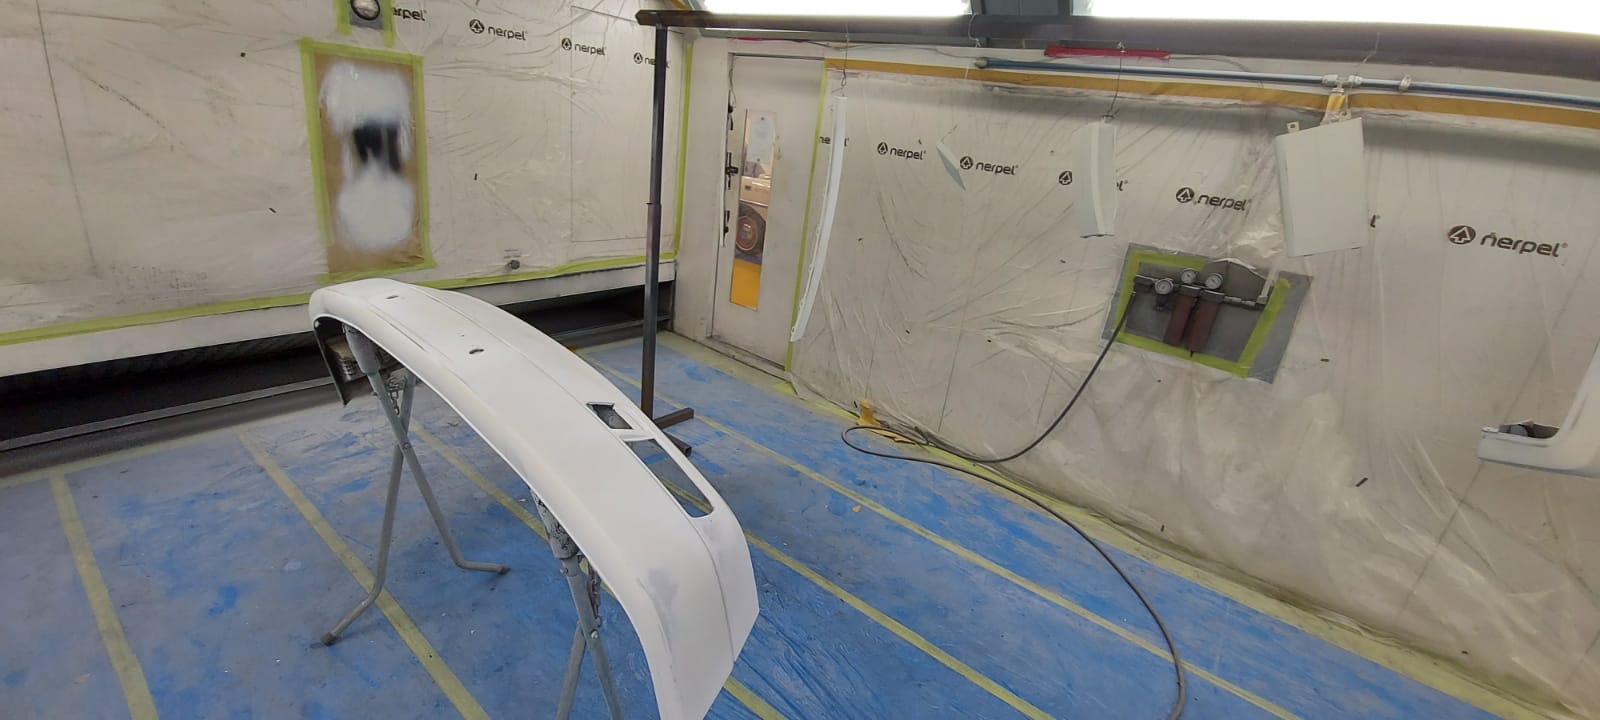
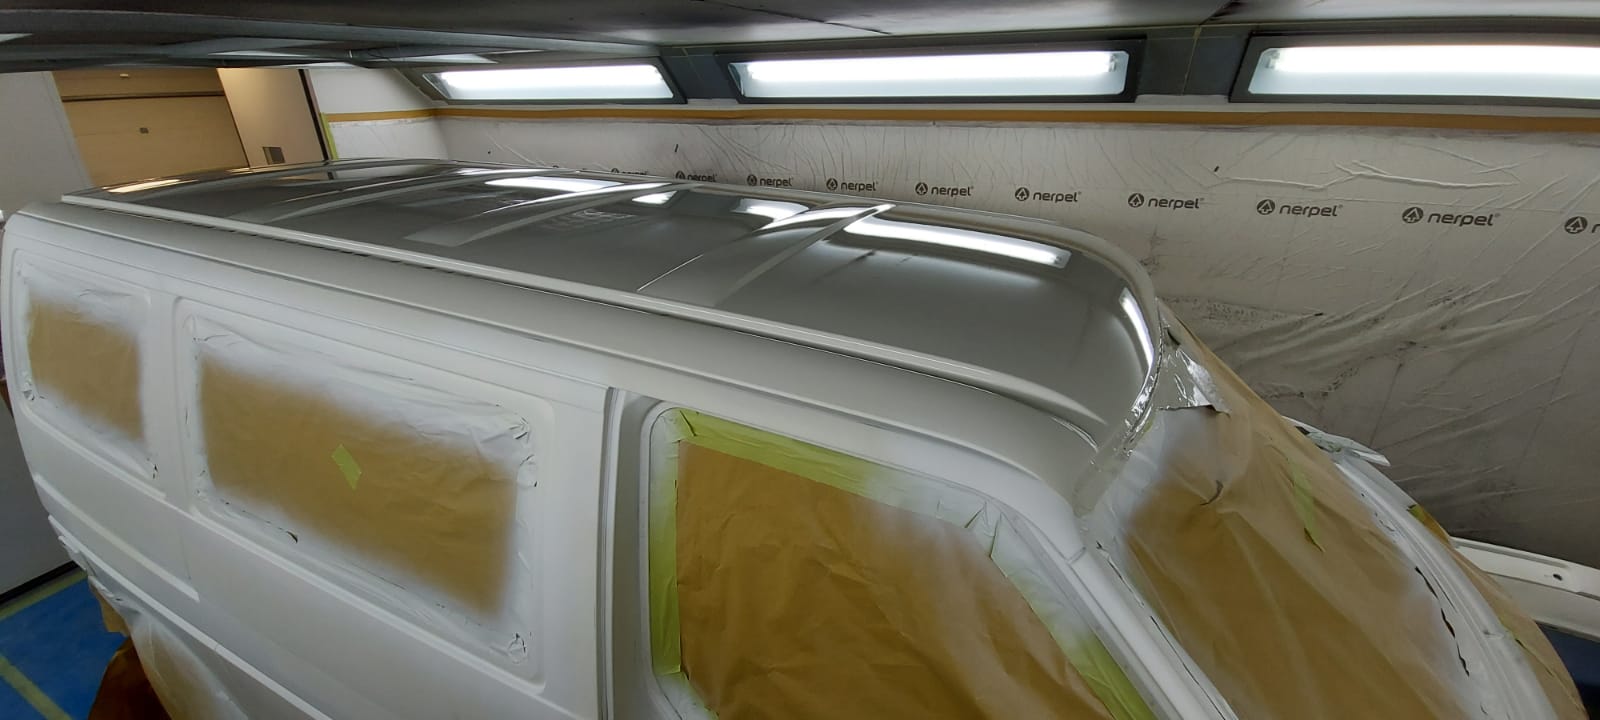
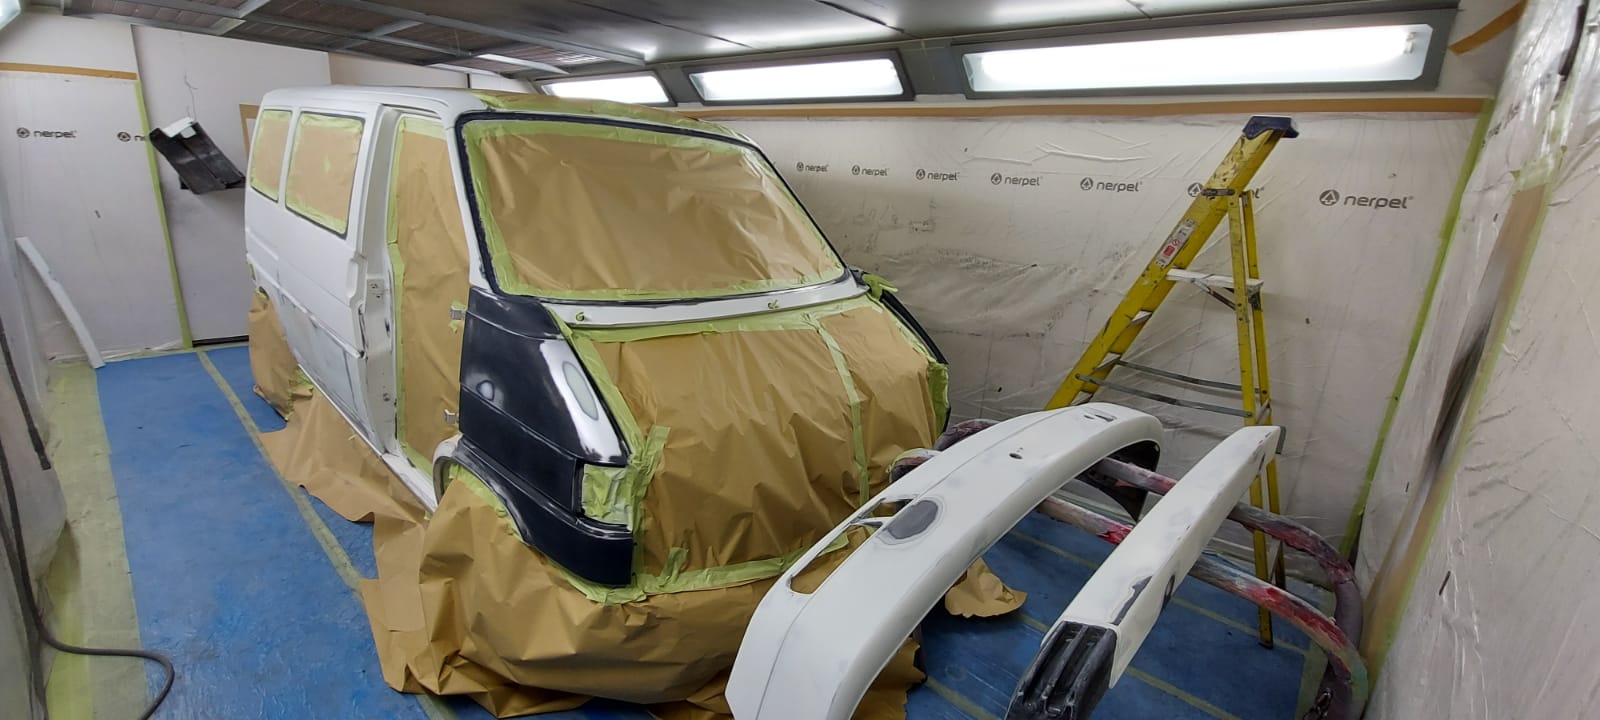
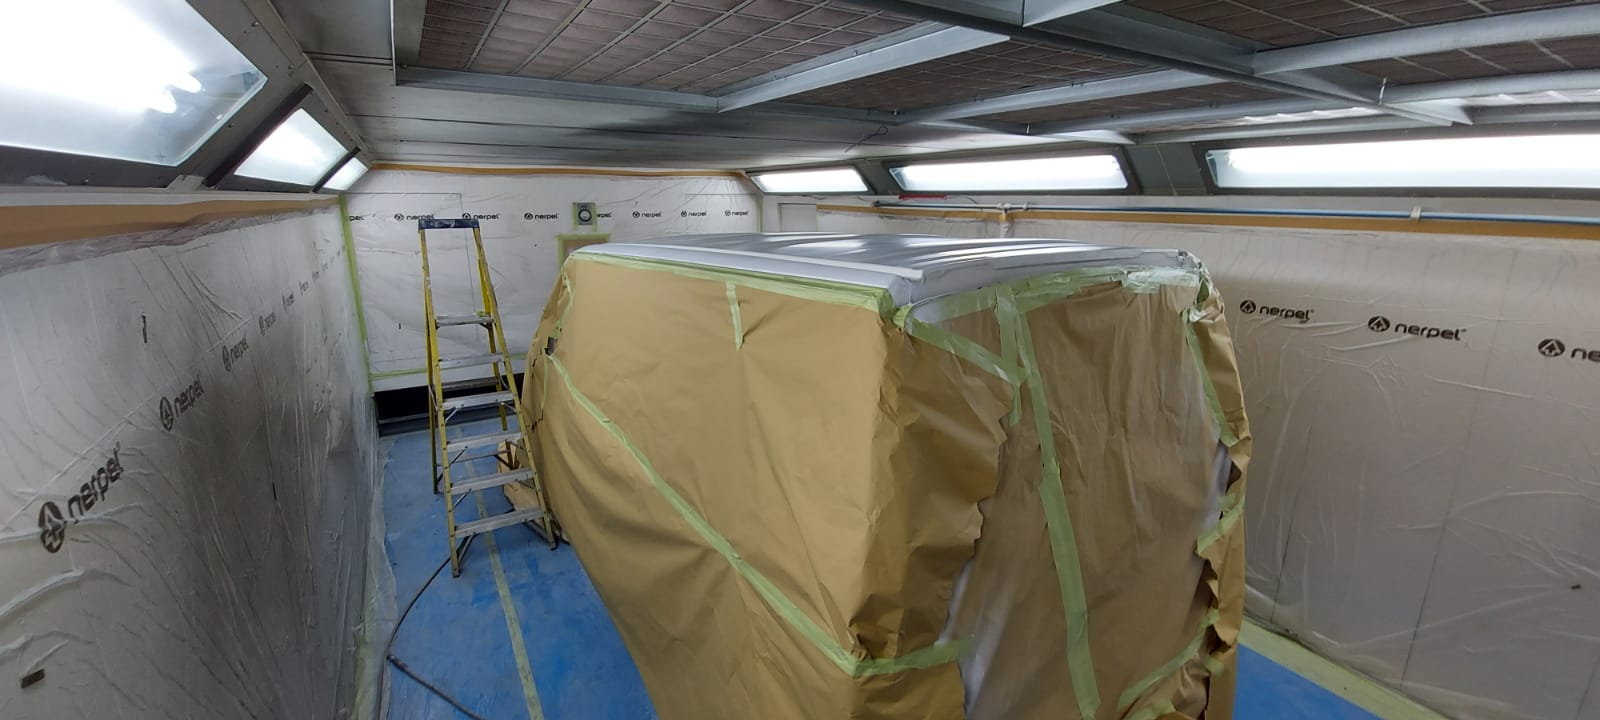
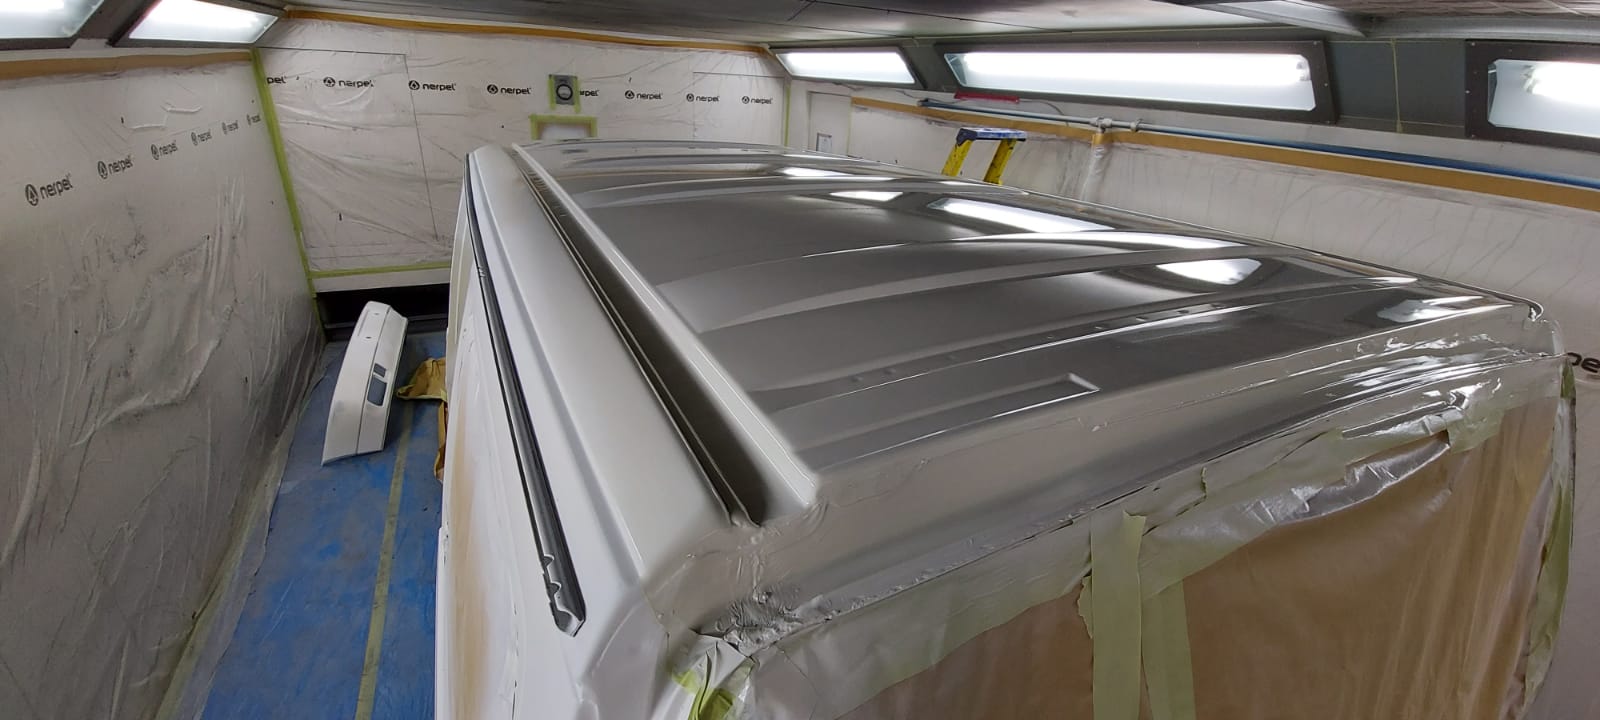
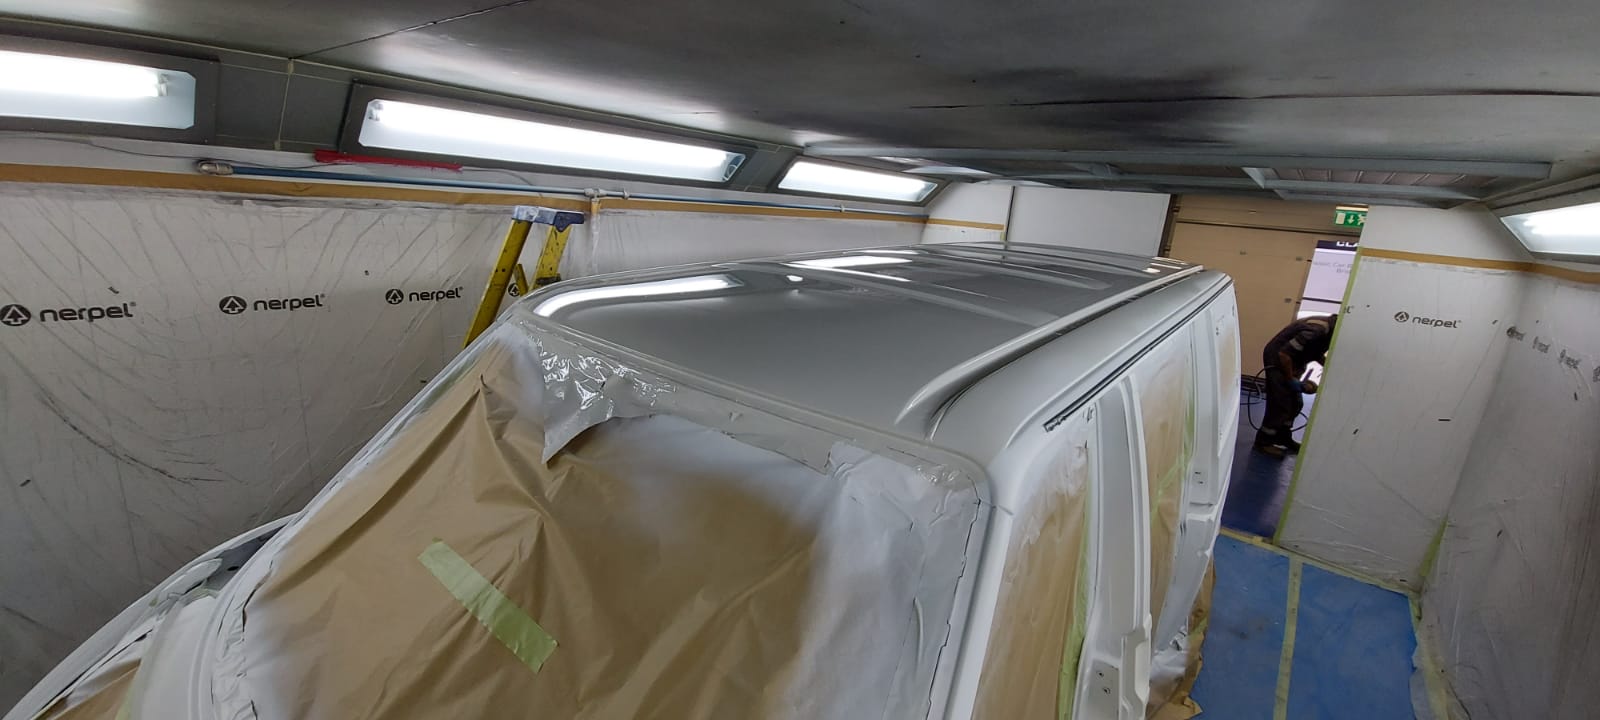
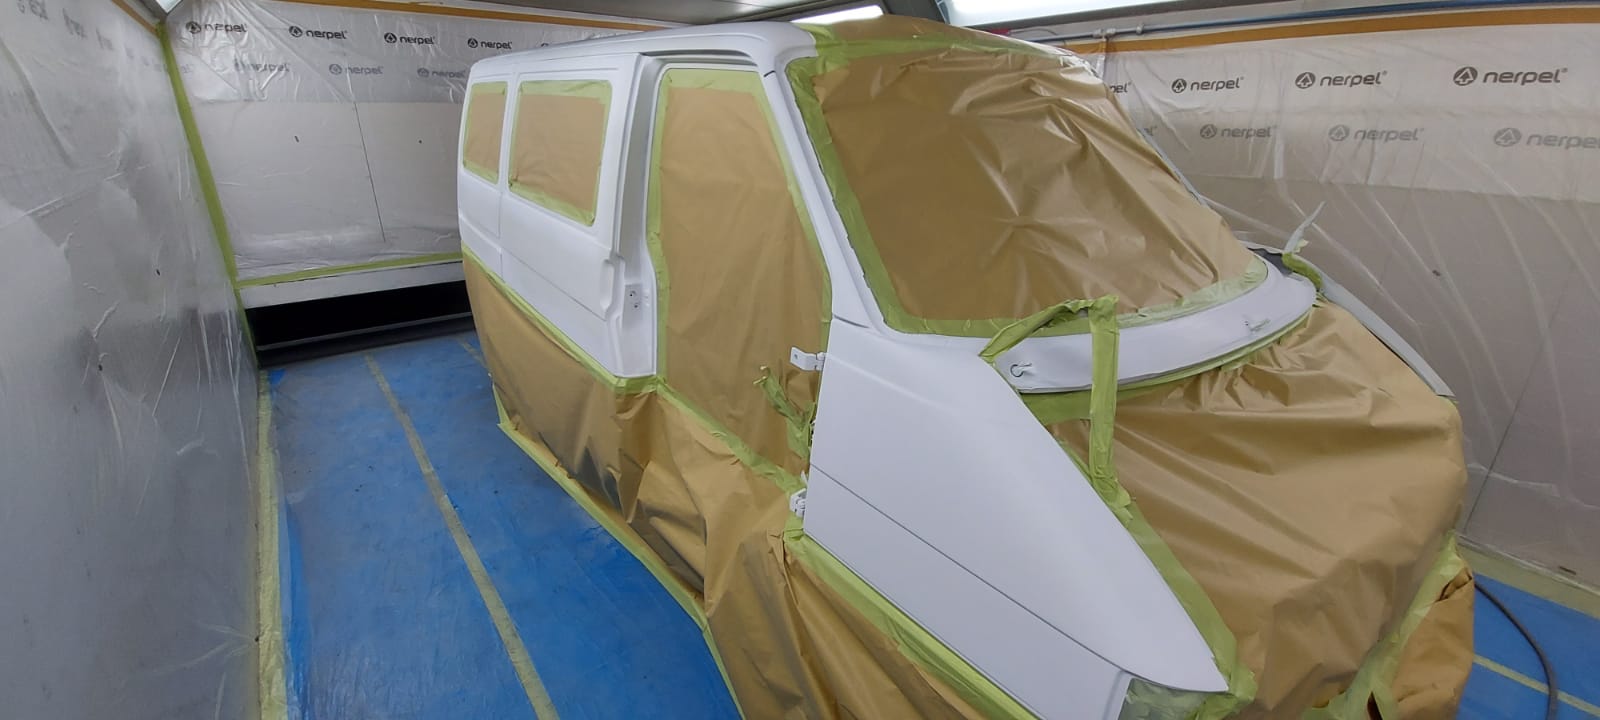
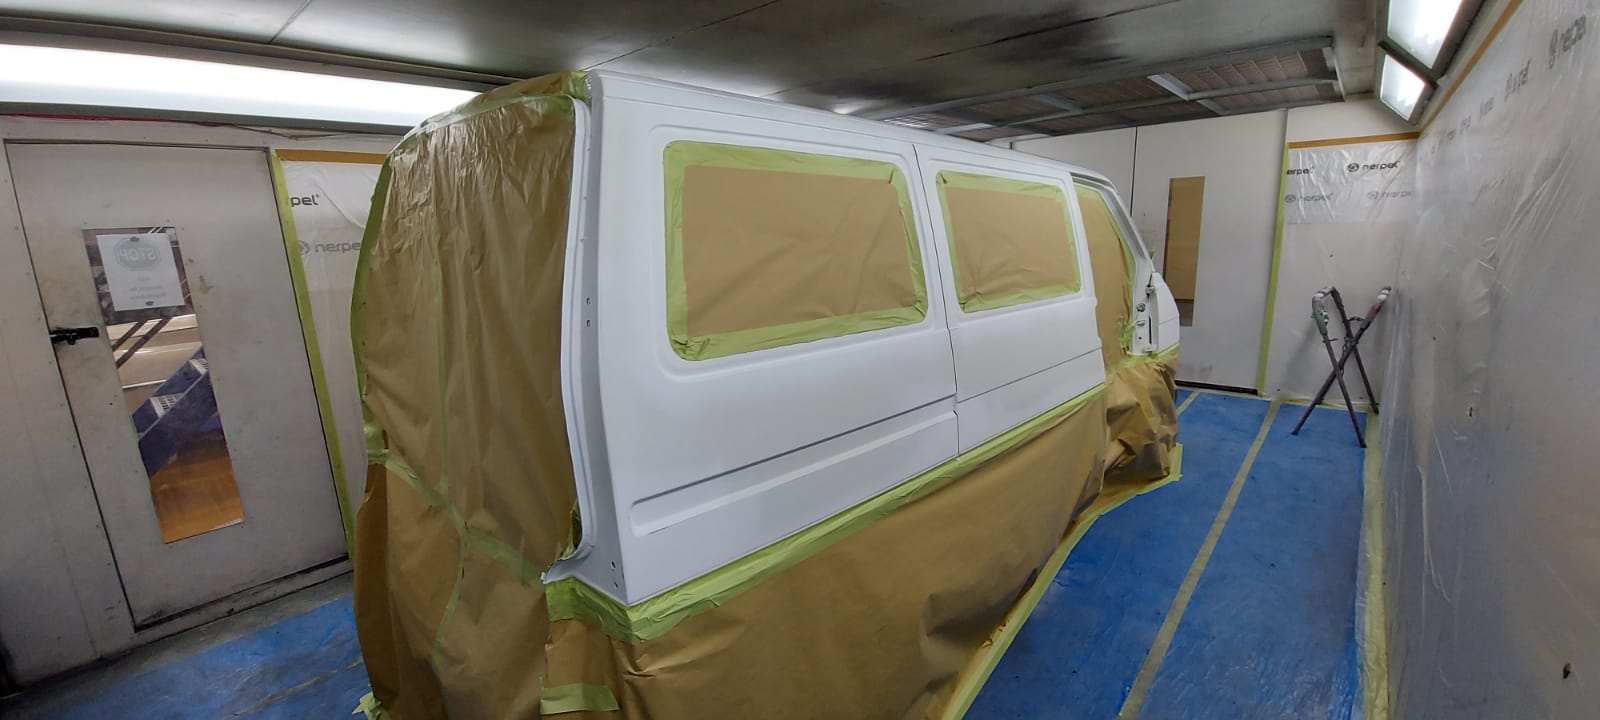
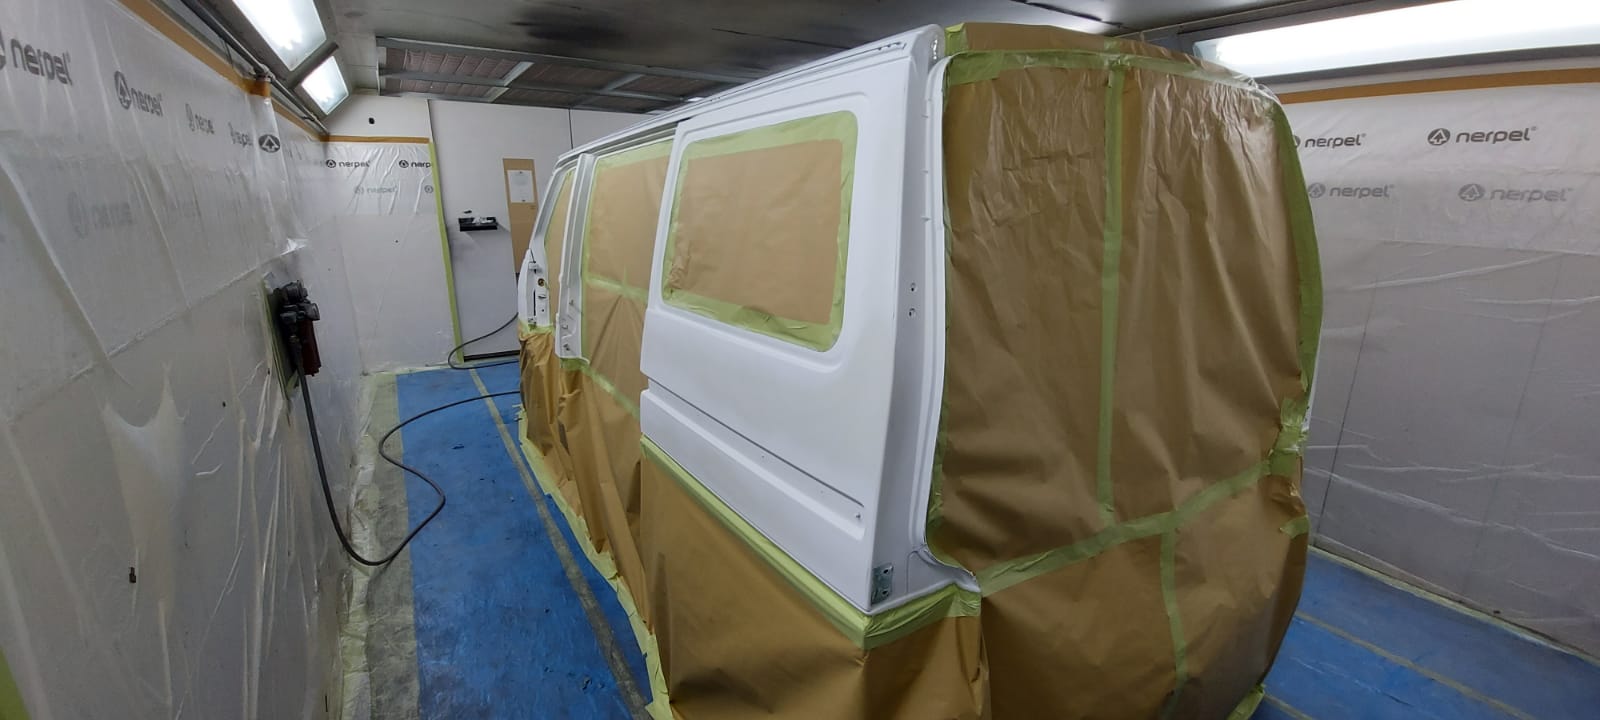
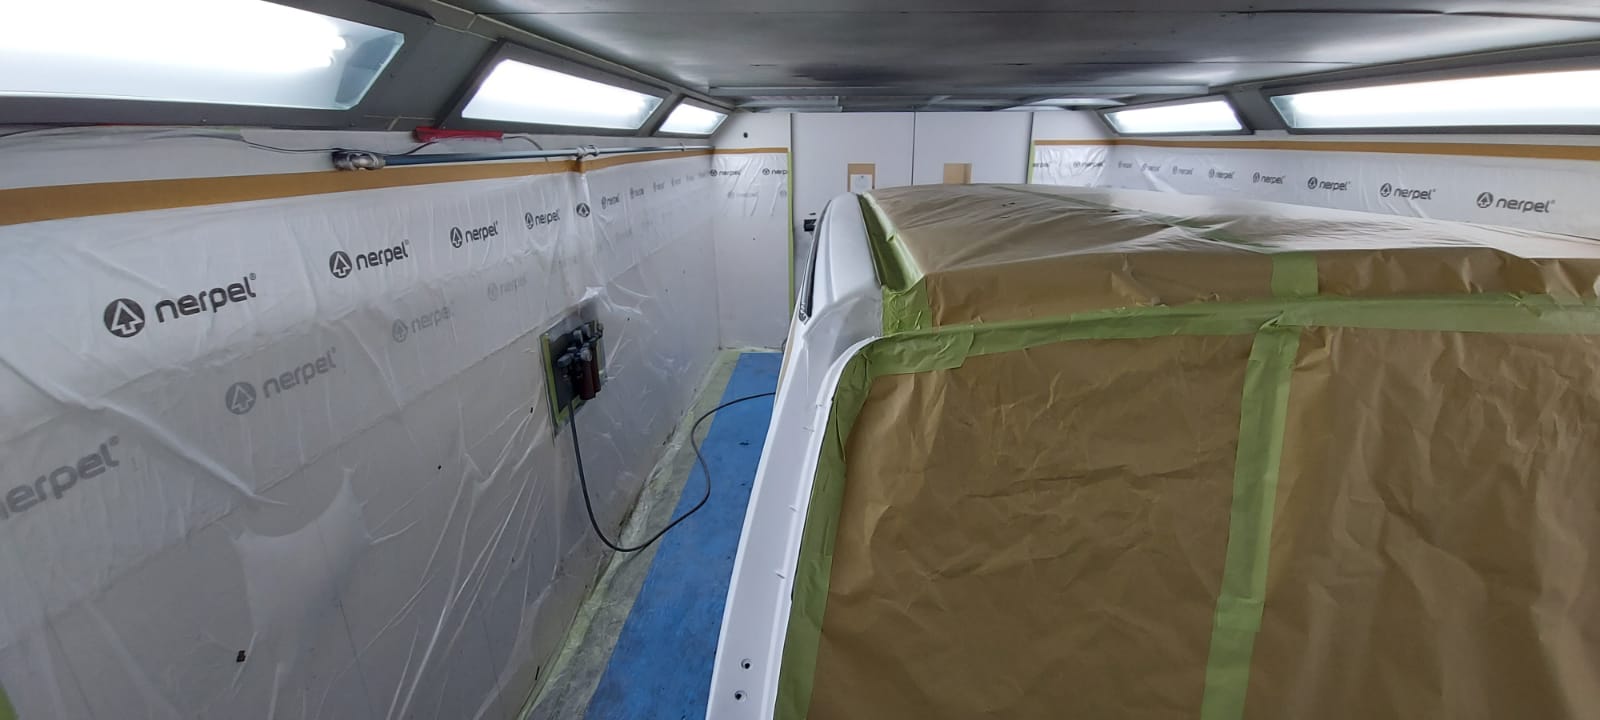
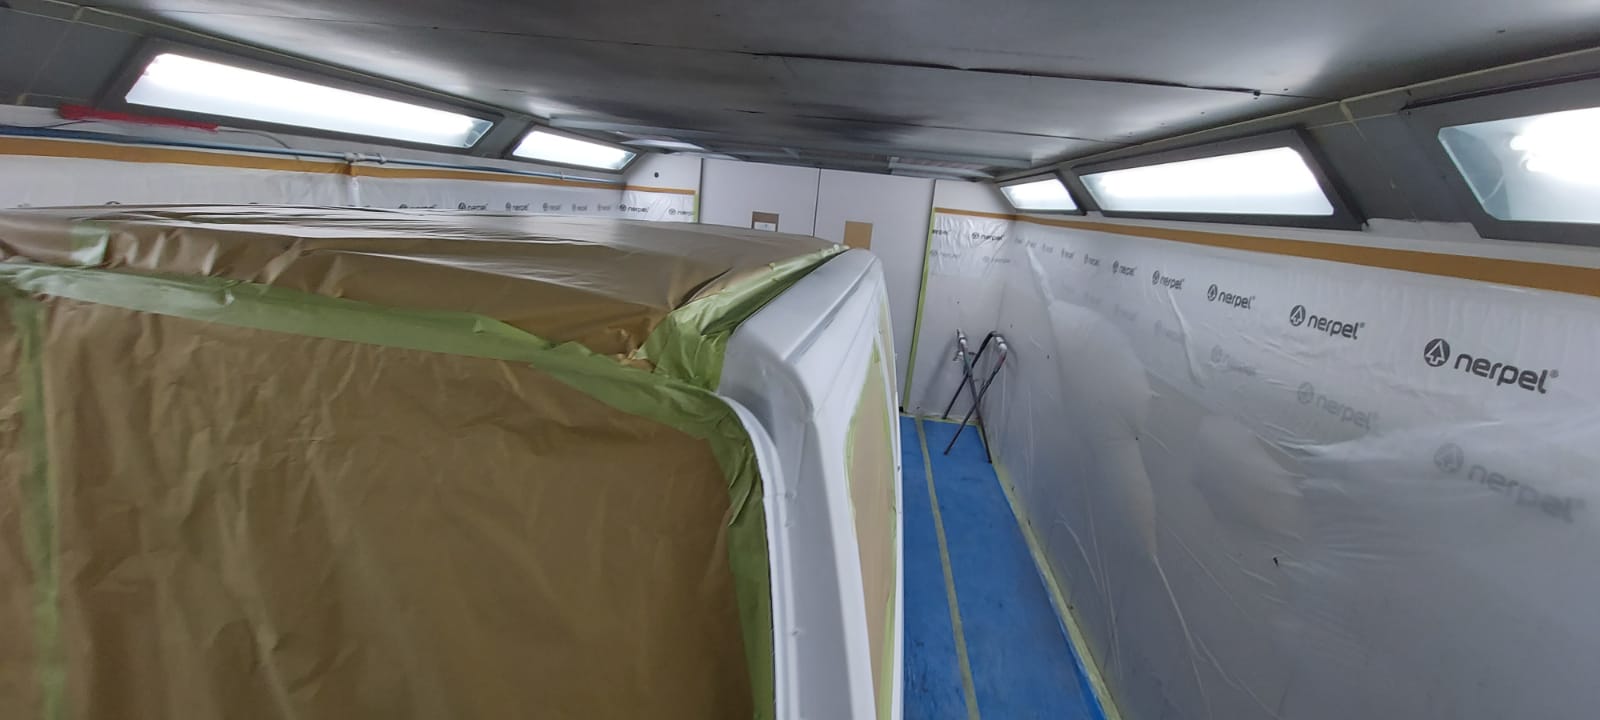
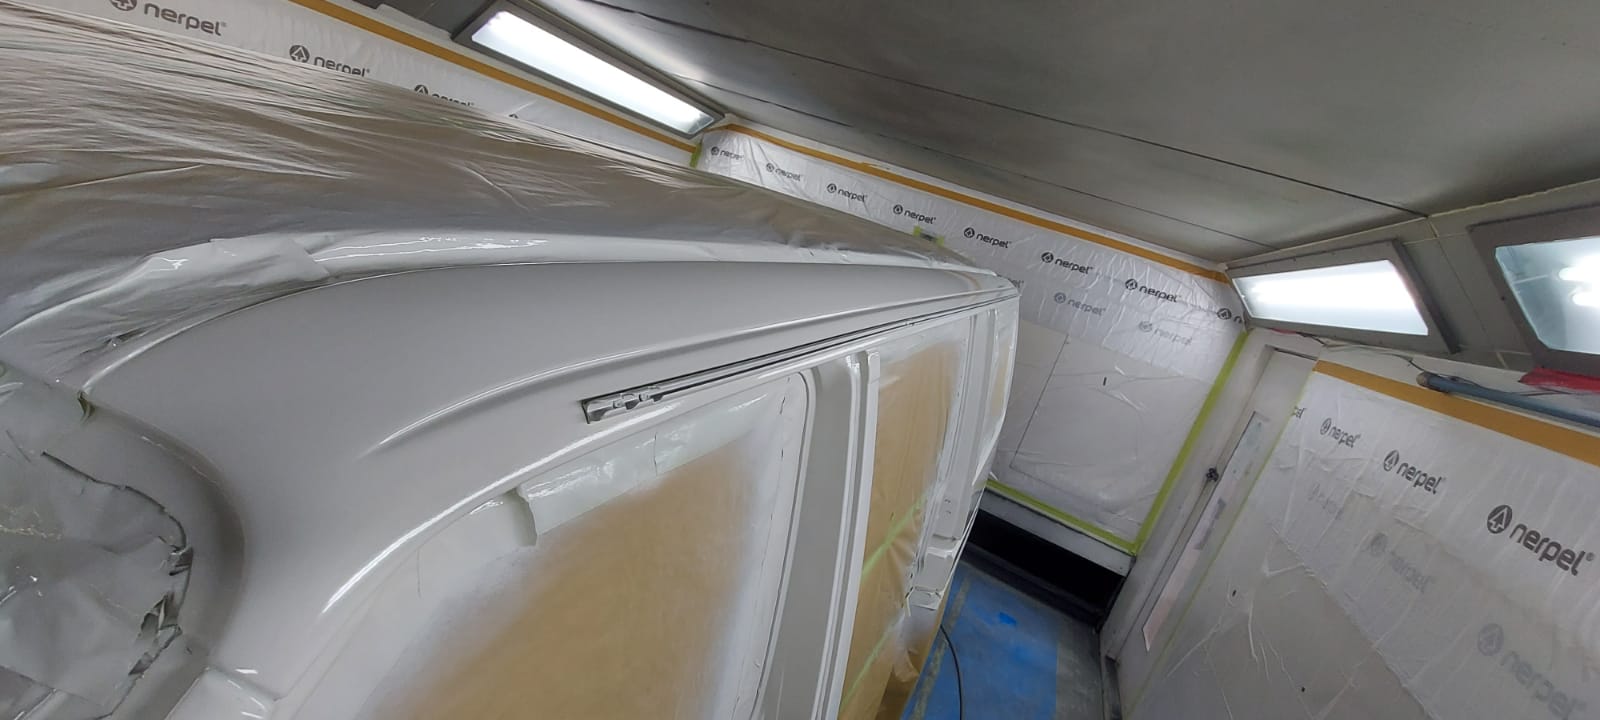
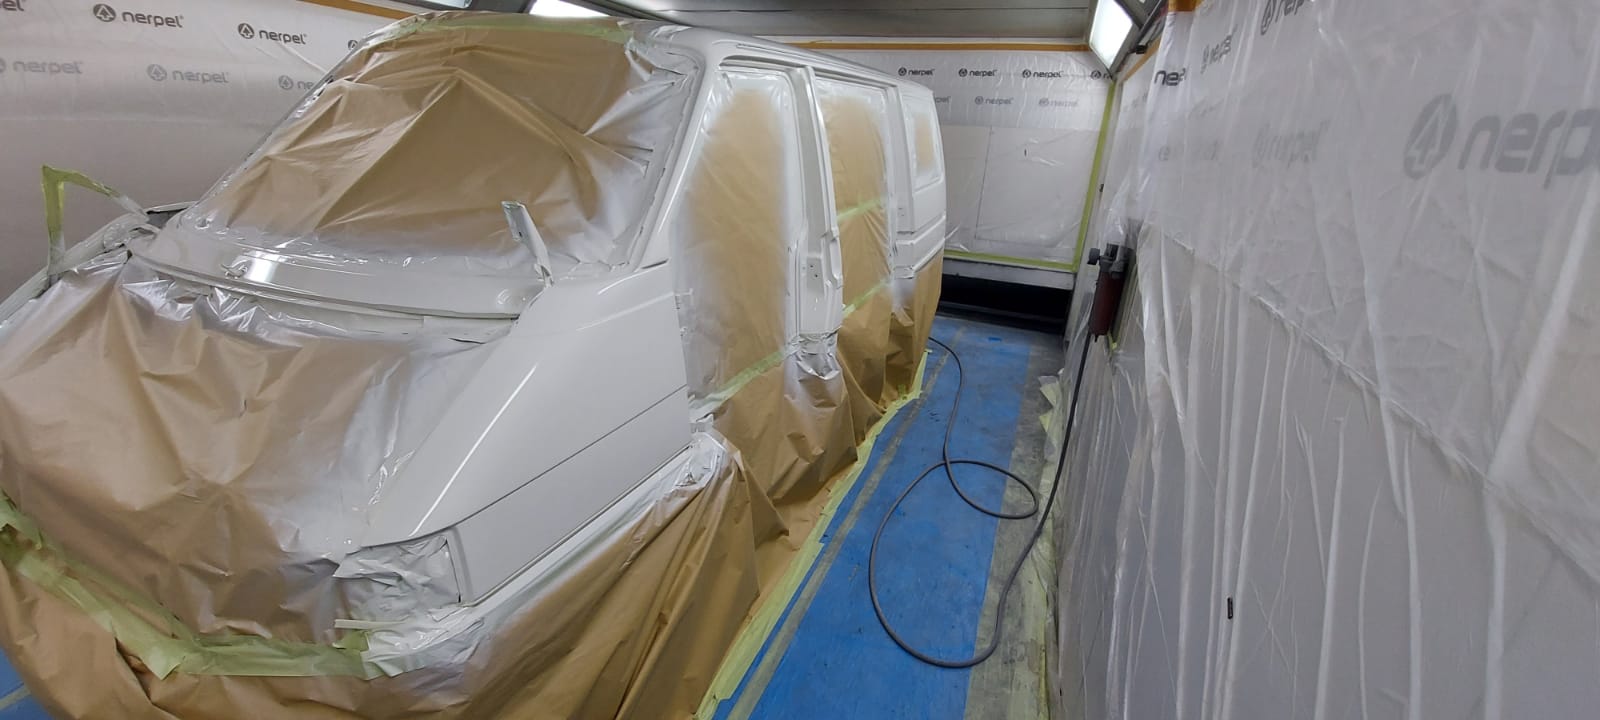
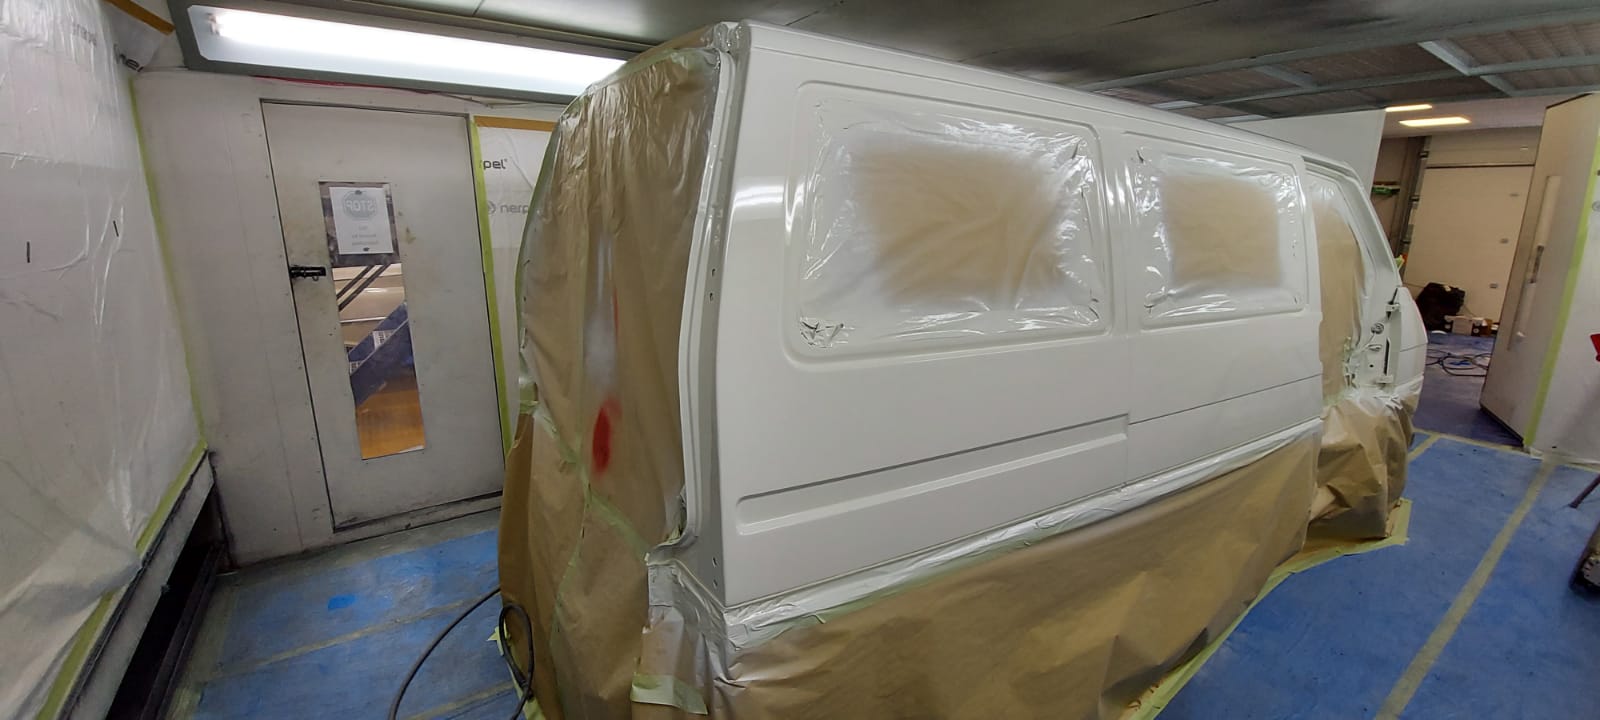
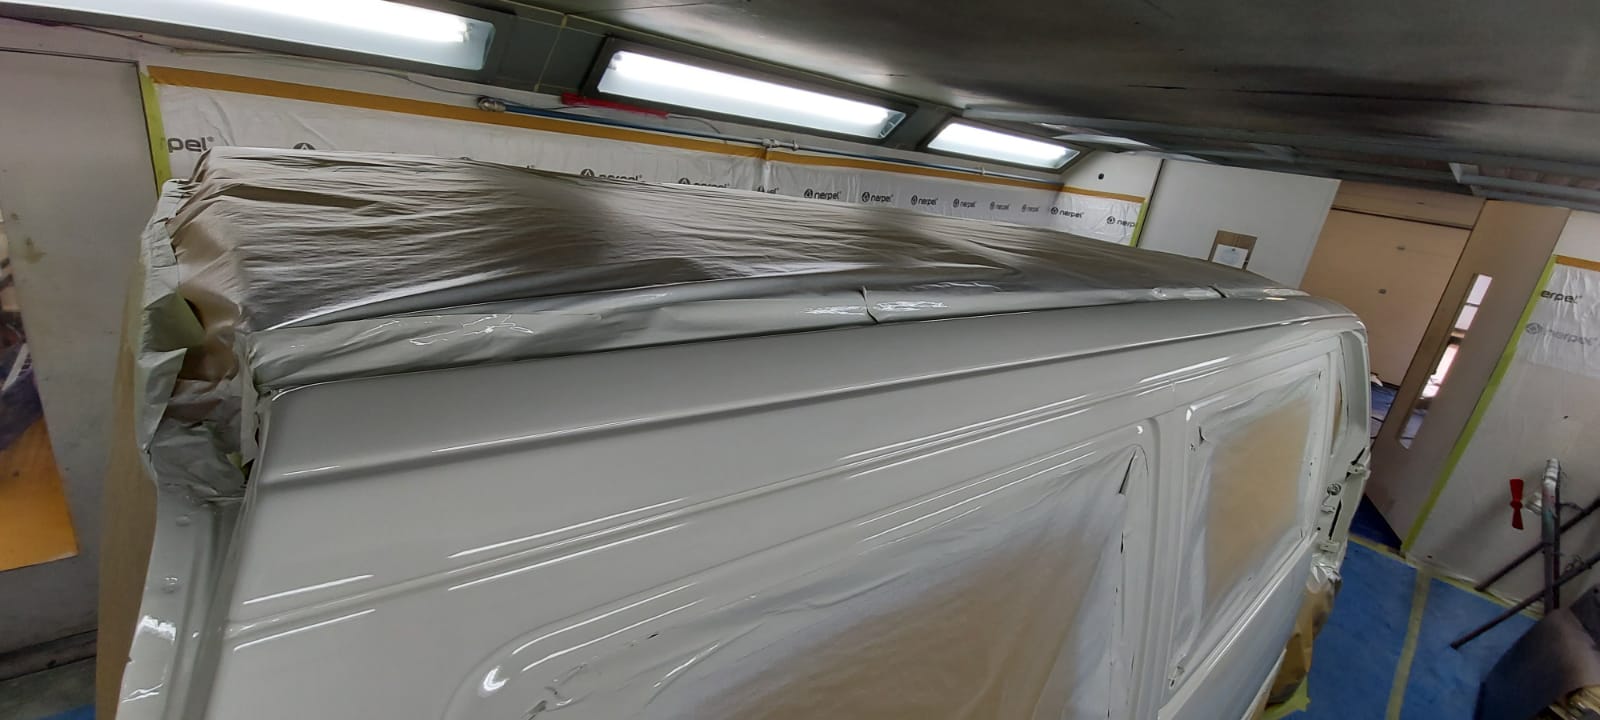
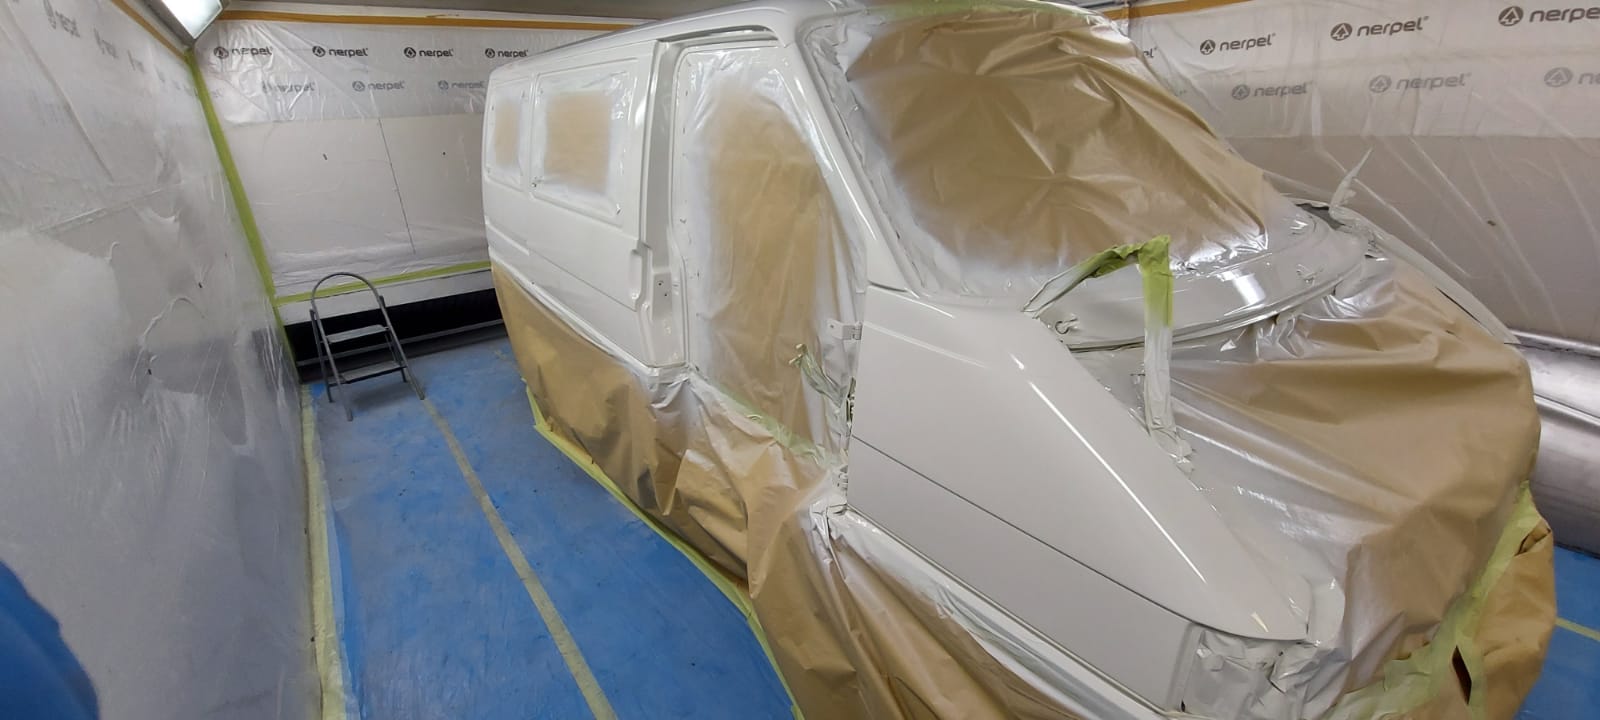
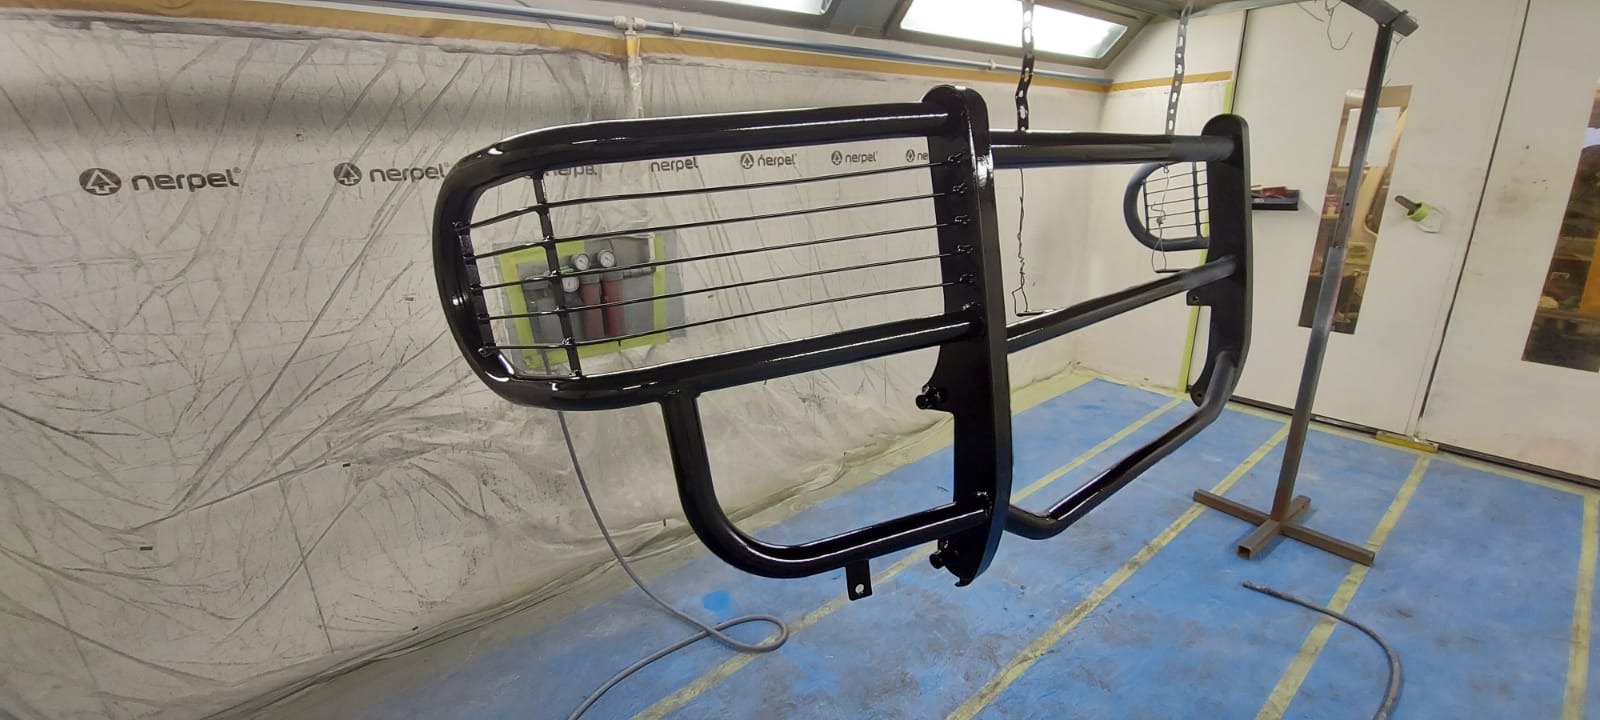
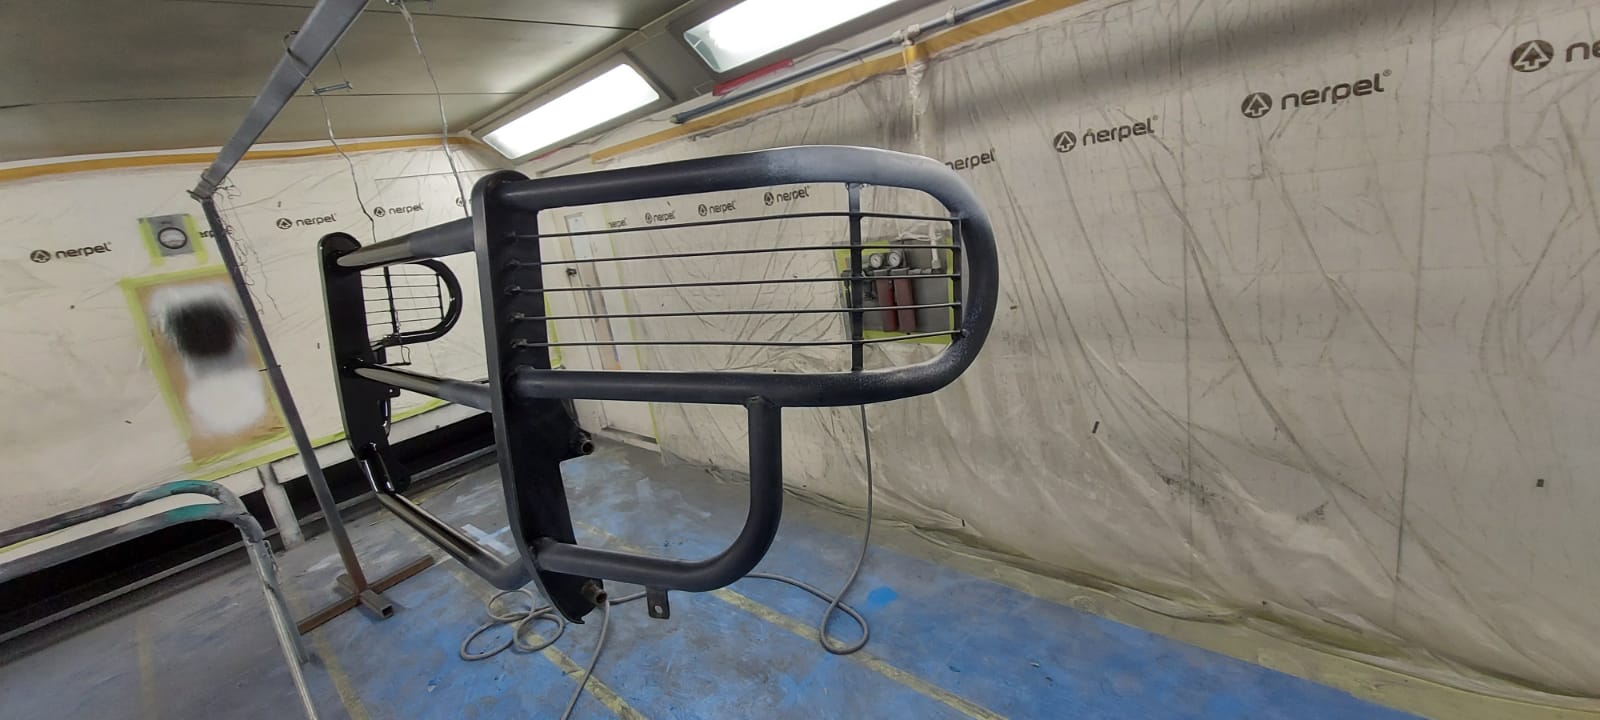
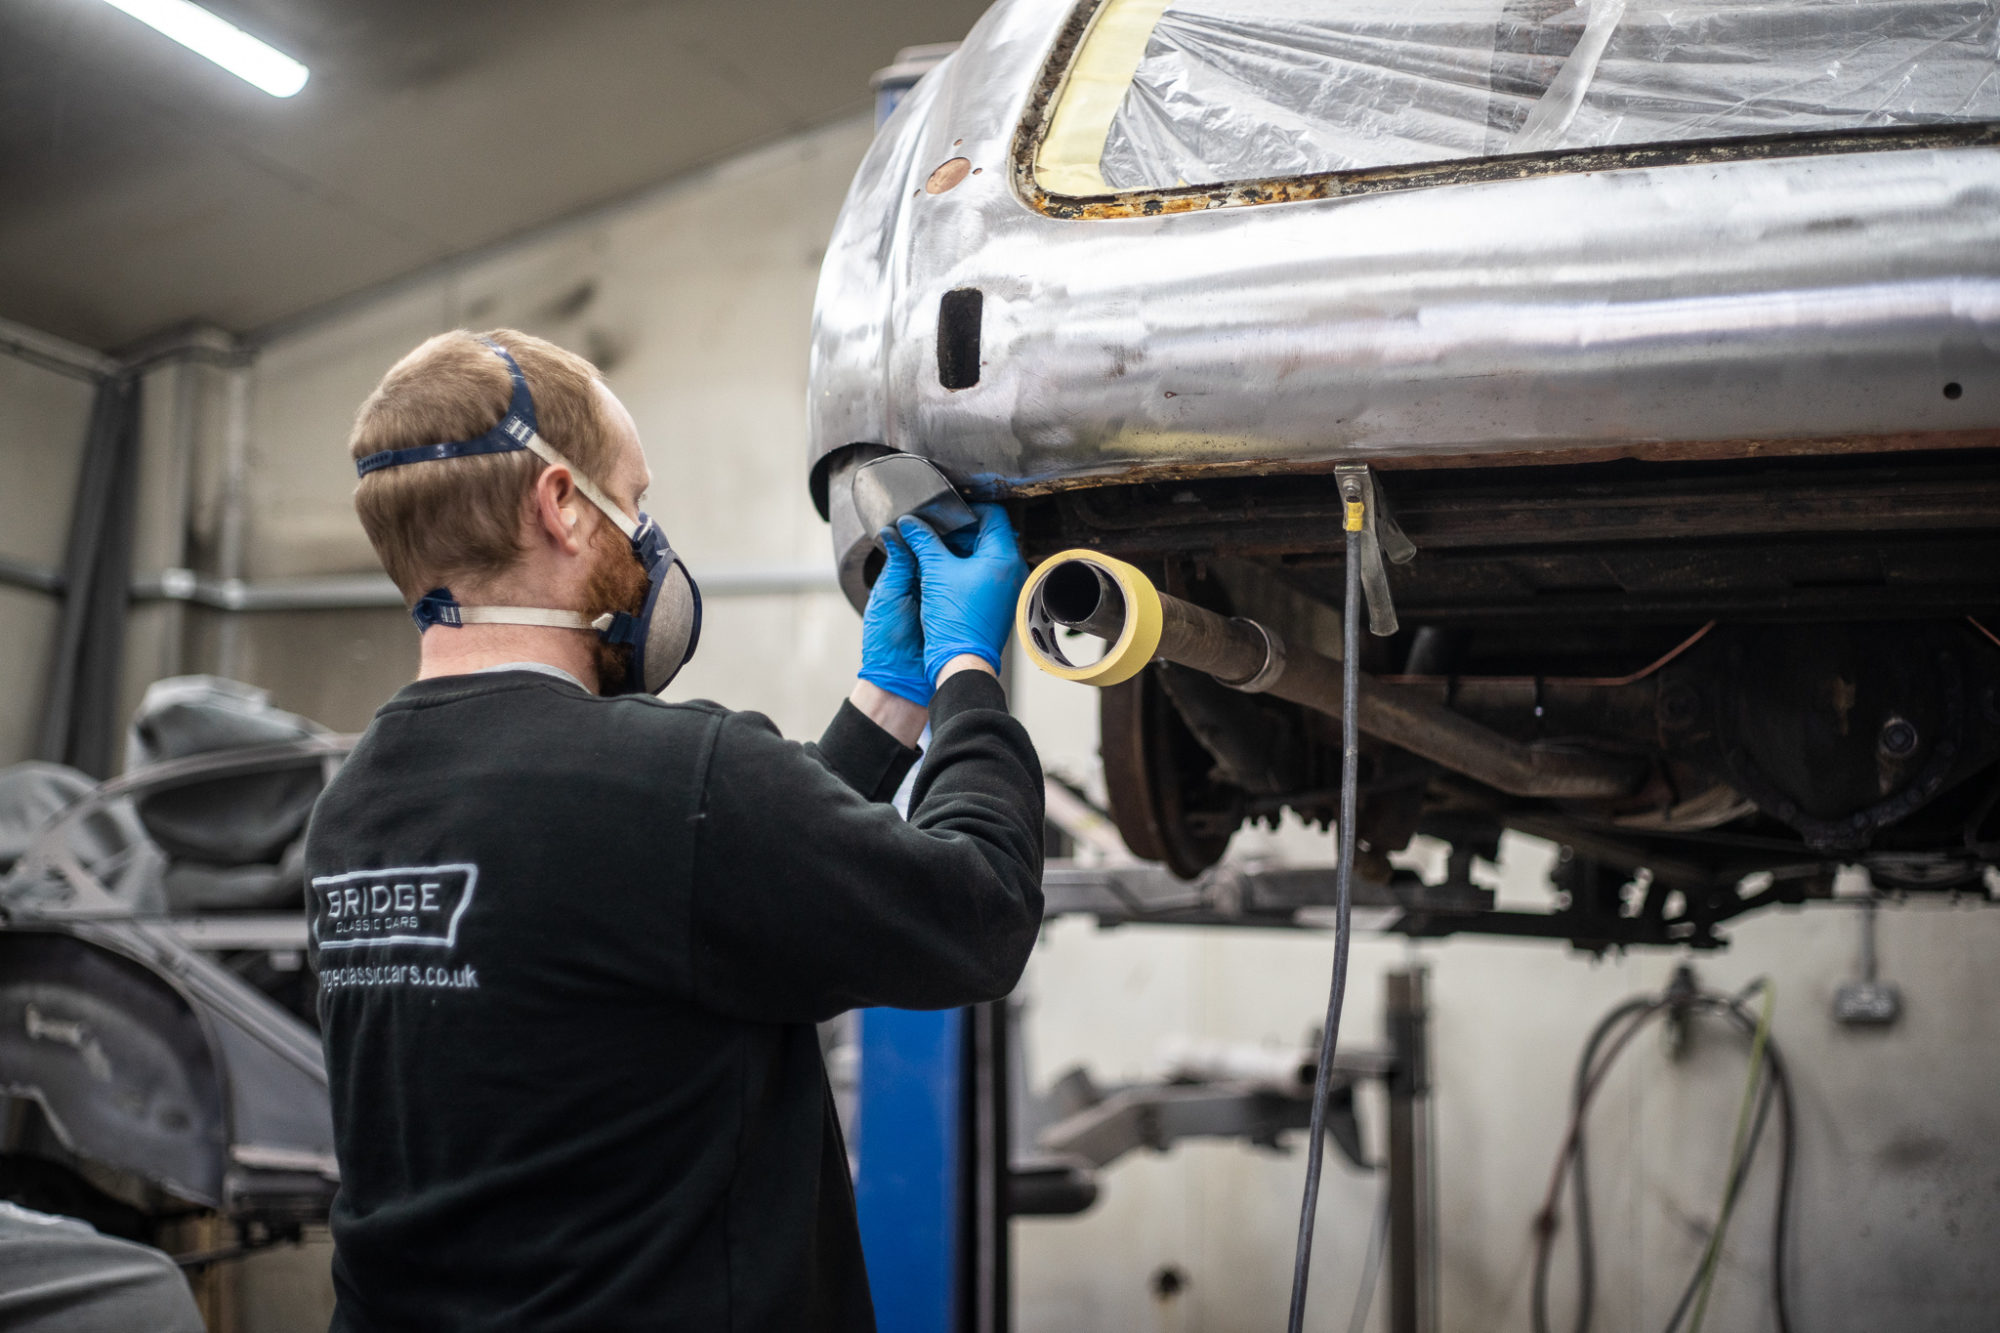
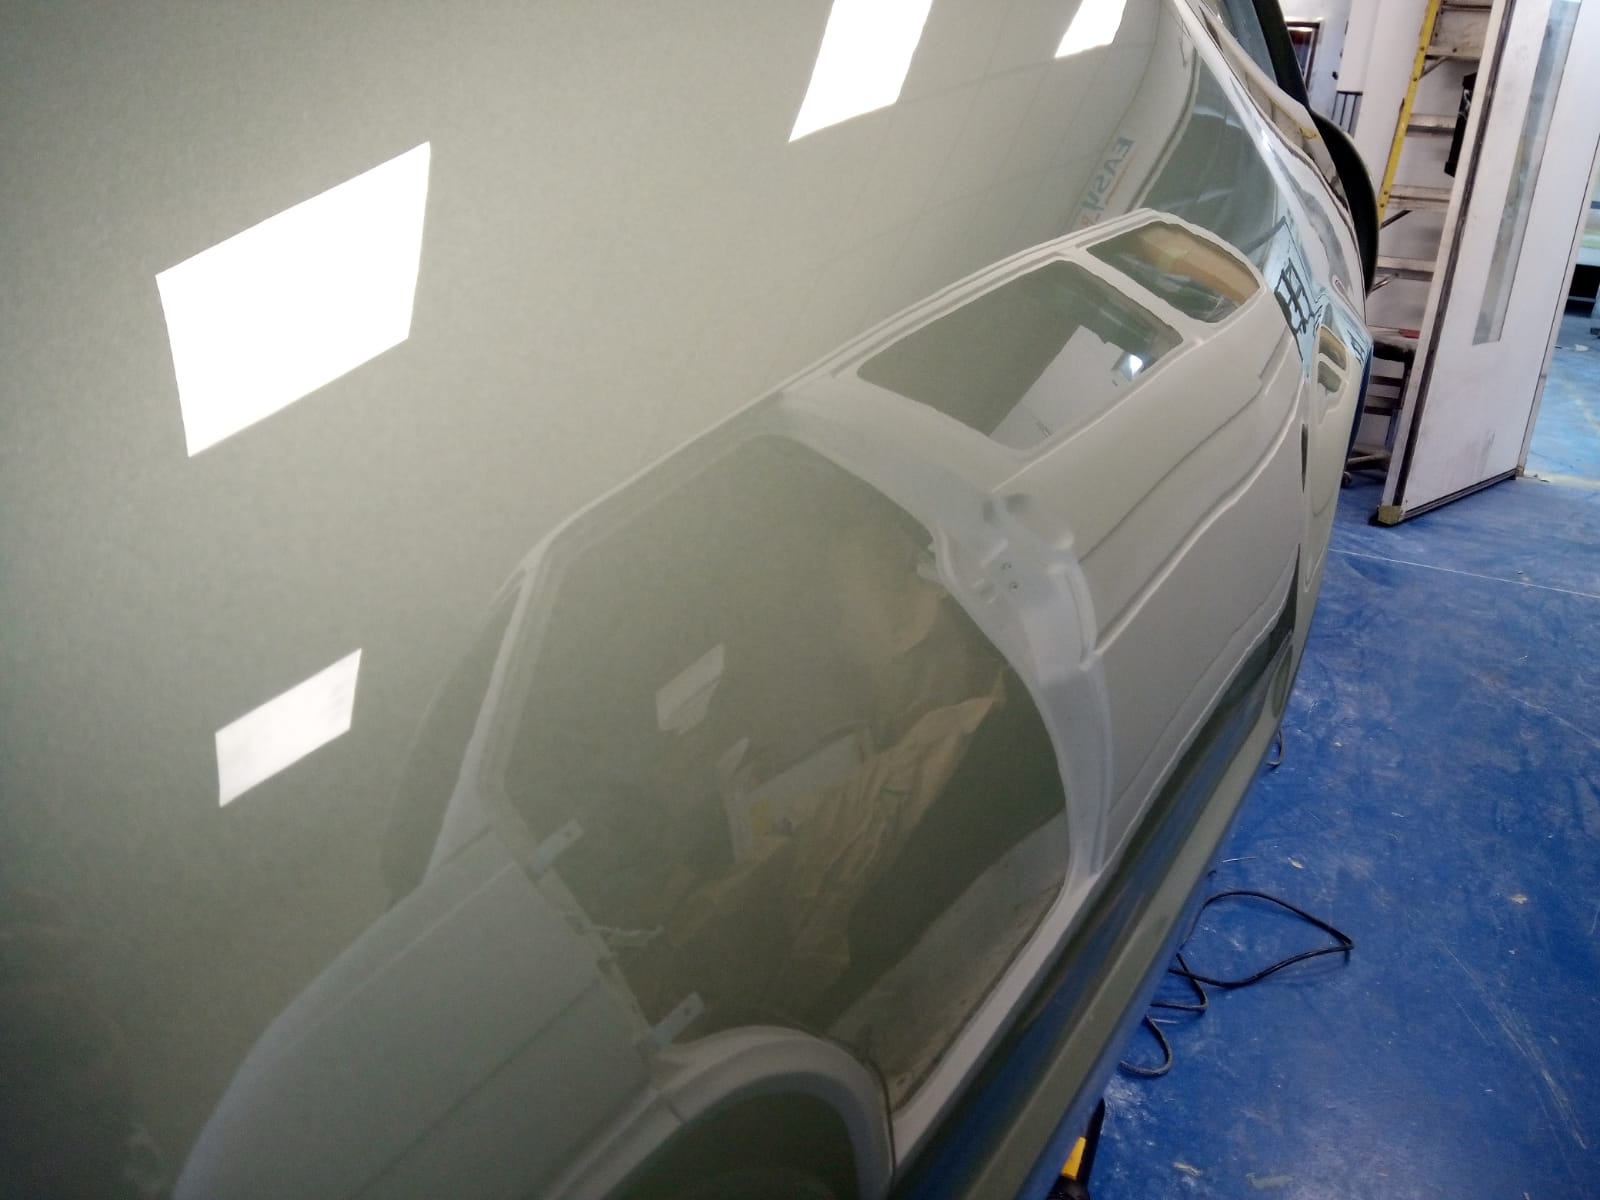
The first stage of our 1991 VW T4 Campervan paint has been completed. With the entire body masked and painted in a solid white, the


The first stage of our 1991 VW T4 Campervan paint has been completed. With the entire body masked and painted in a solid white, the

James and James have been working on shrinking and re-shaping the panels for our 1954 Jaguar MKVII however they’ve taken to doing it the traditional
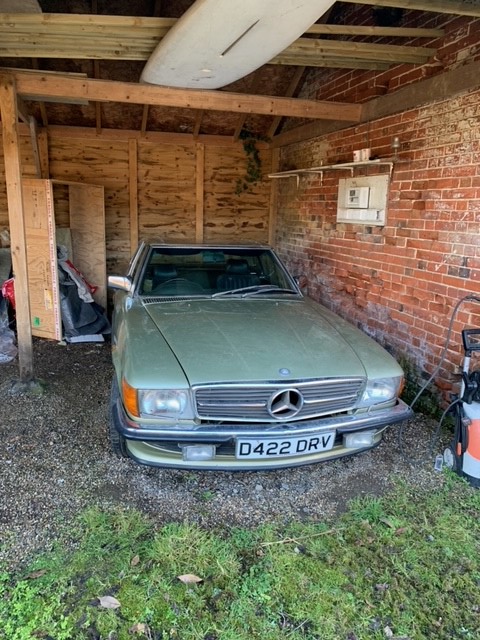
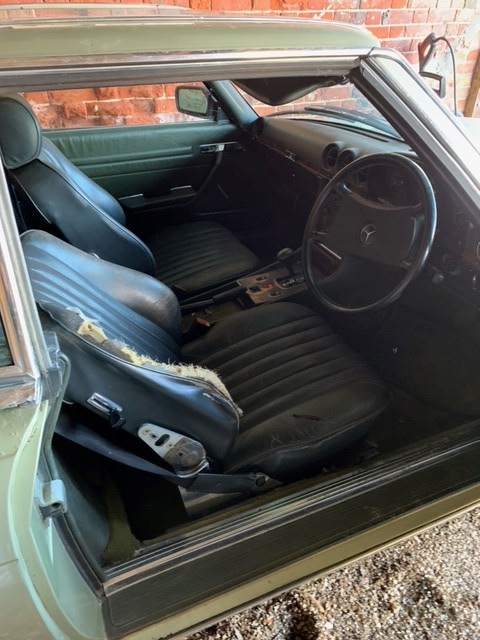
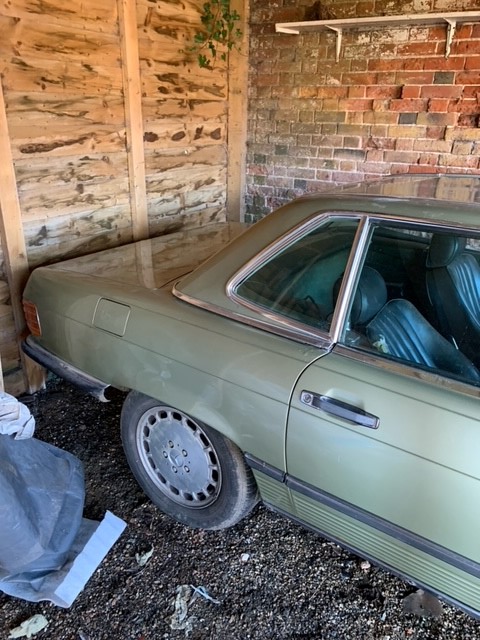
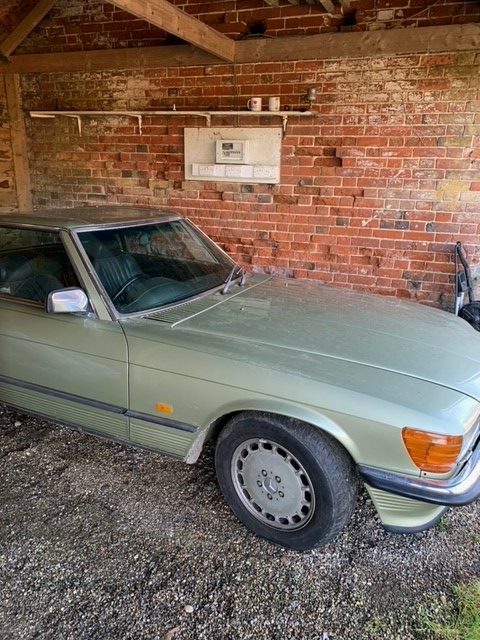
This metallic green classic 1986 Mercedes 420SL is coming in soon to be re-commissioned and assessed to see how much needs doing to it. We
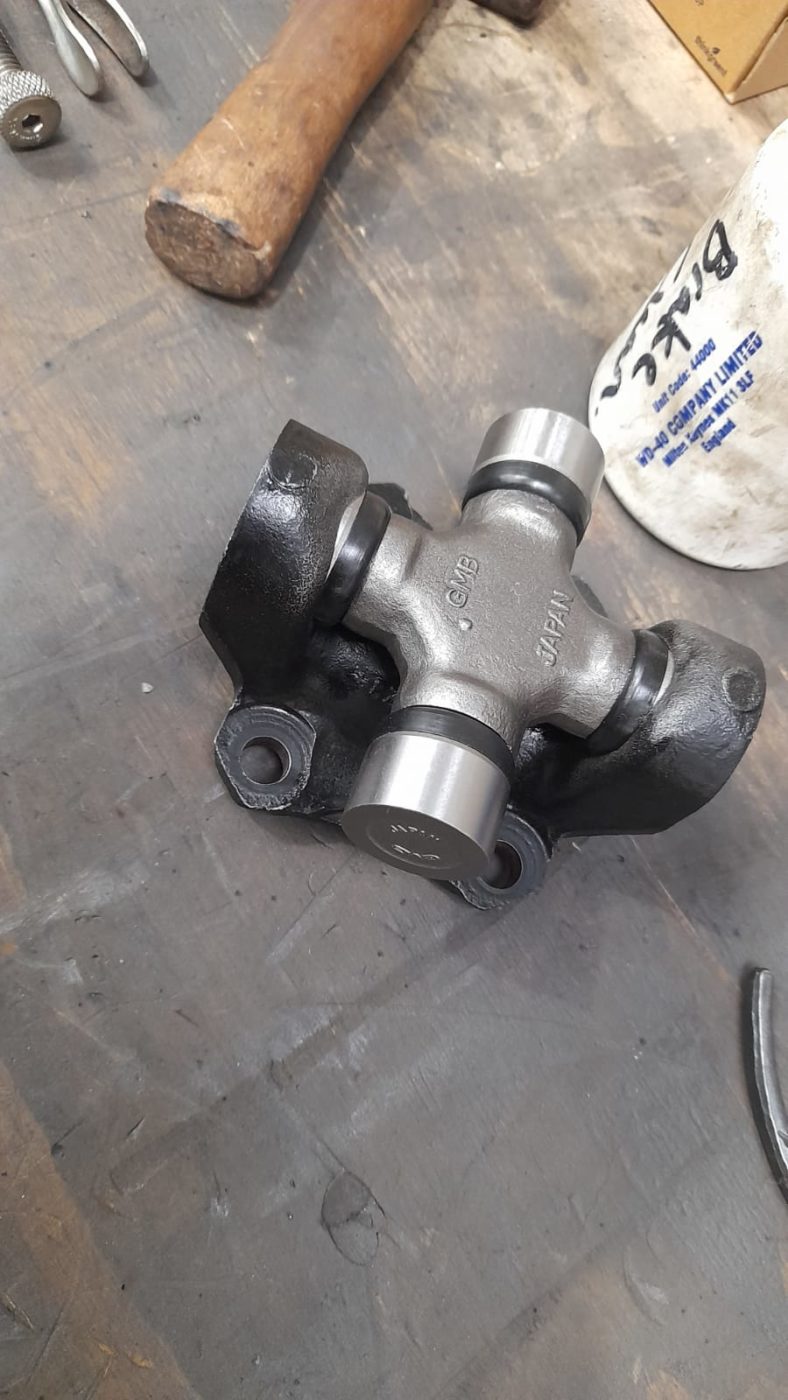
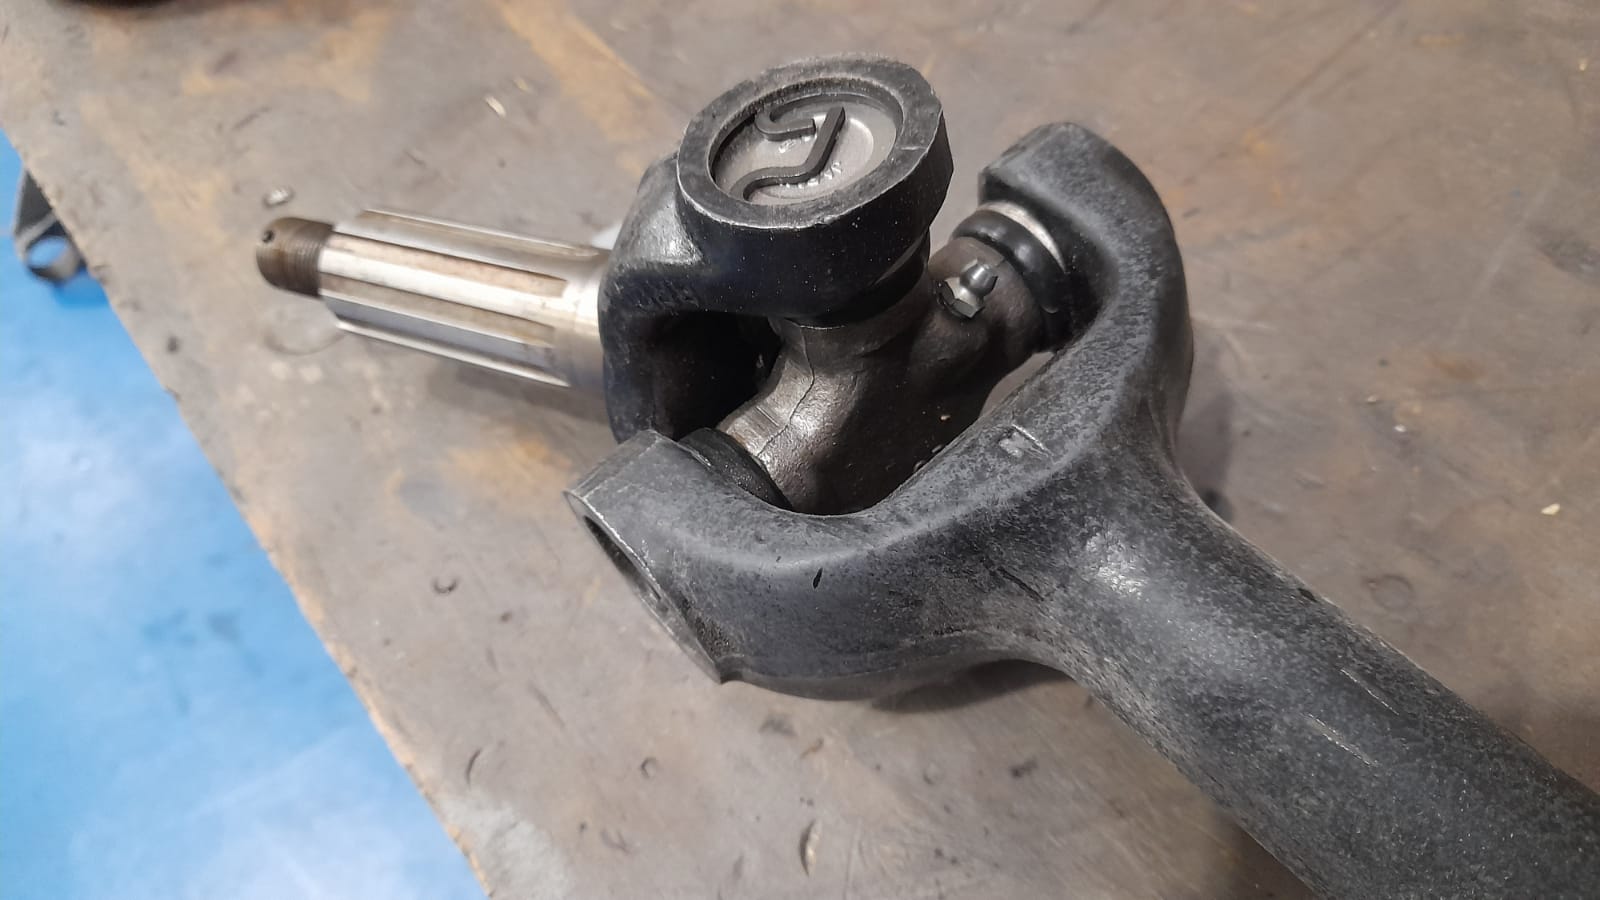
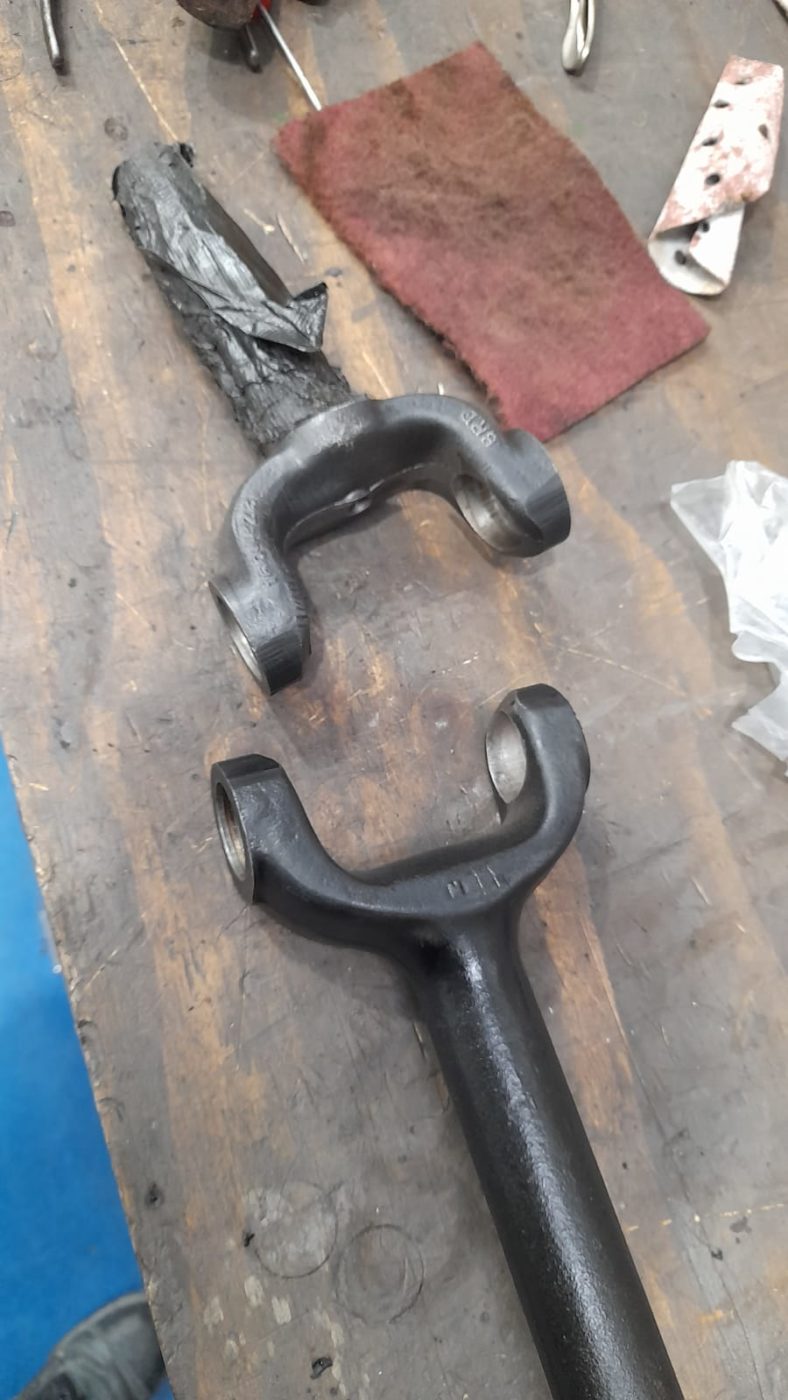
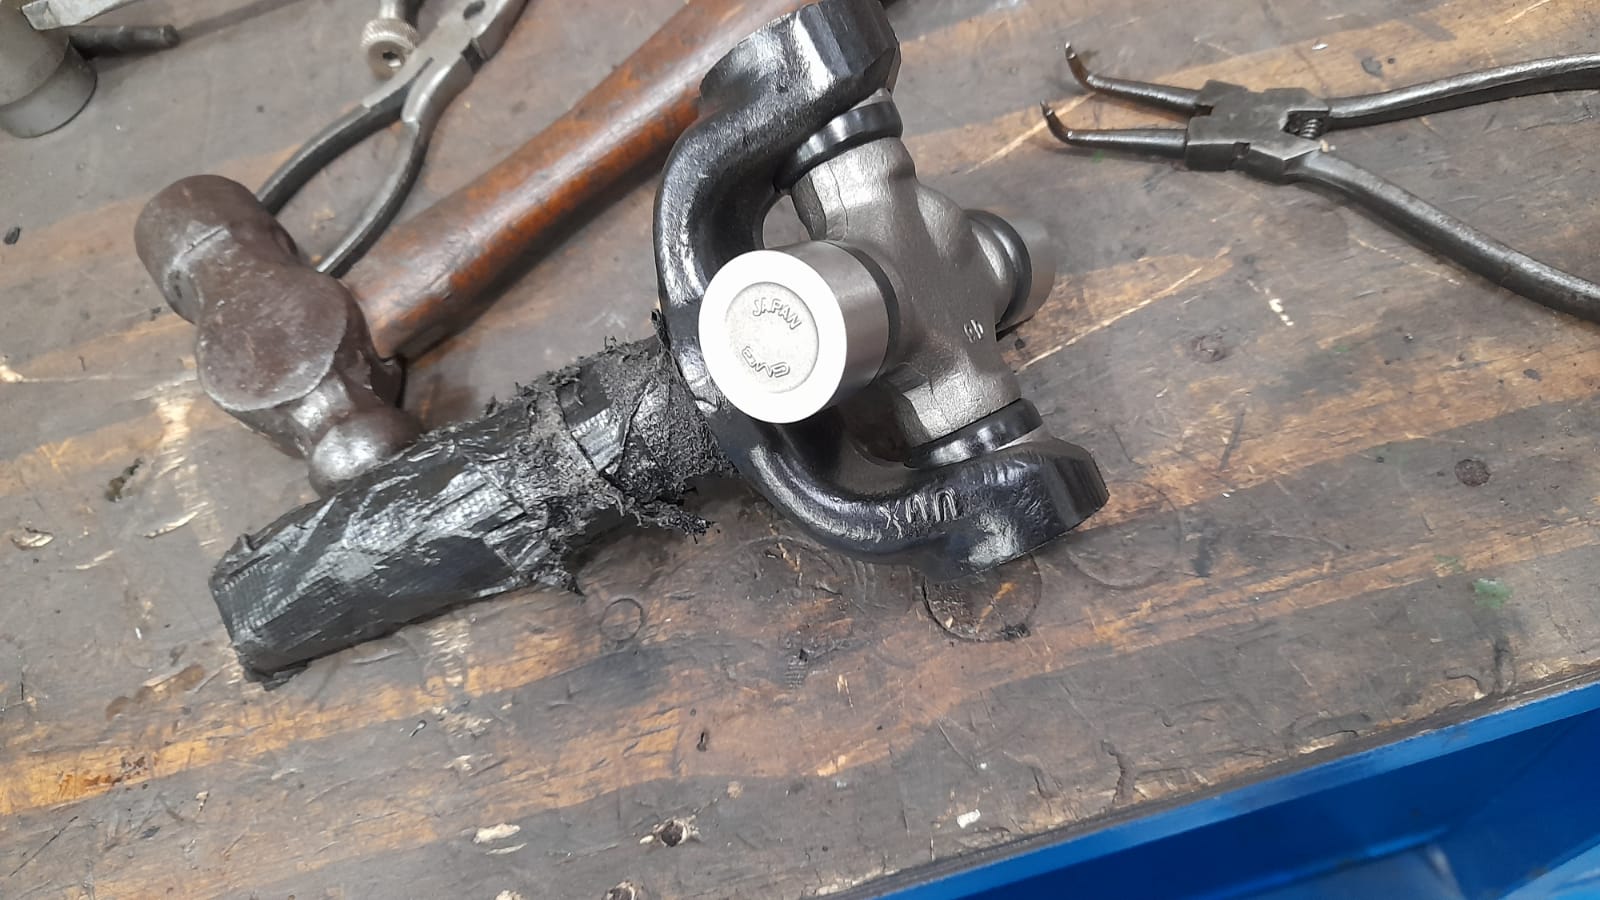
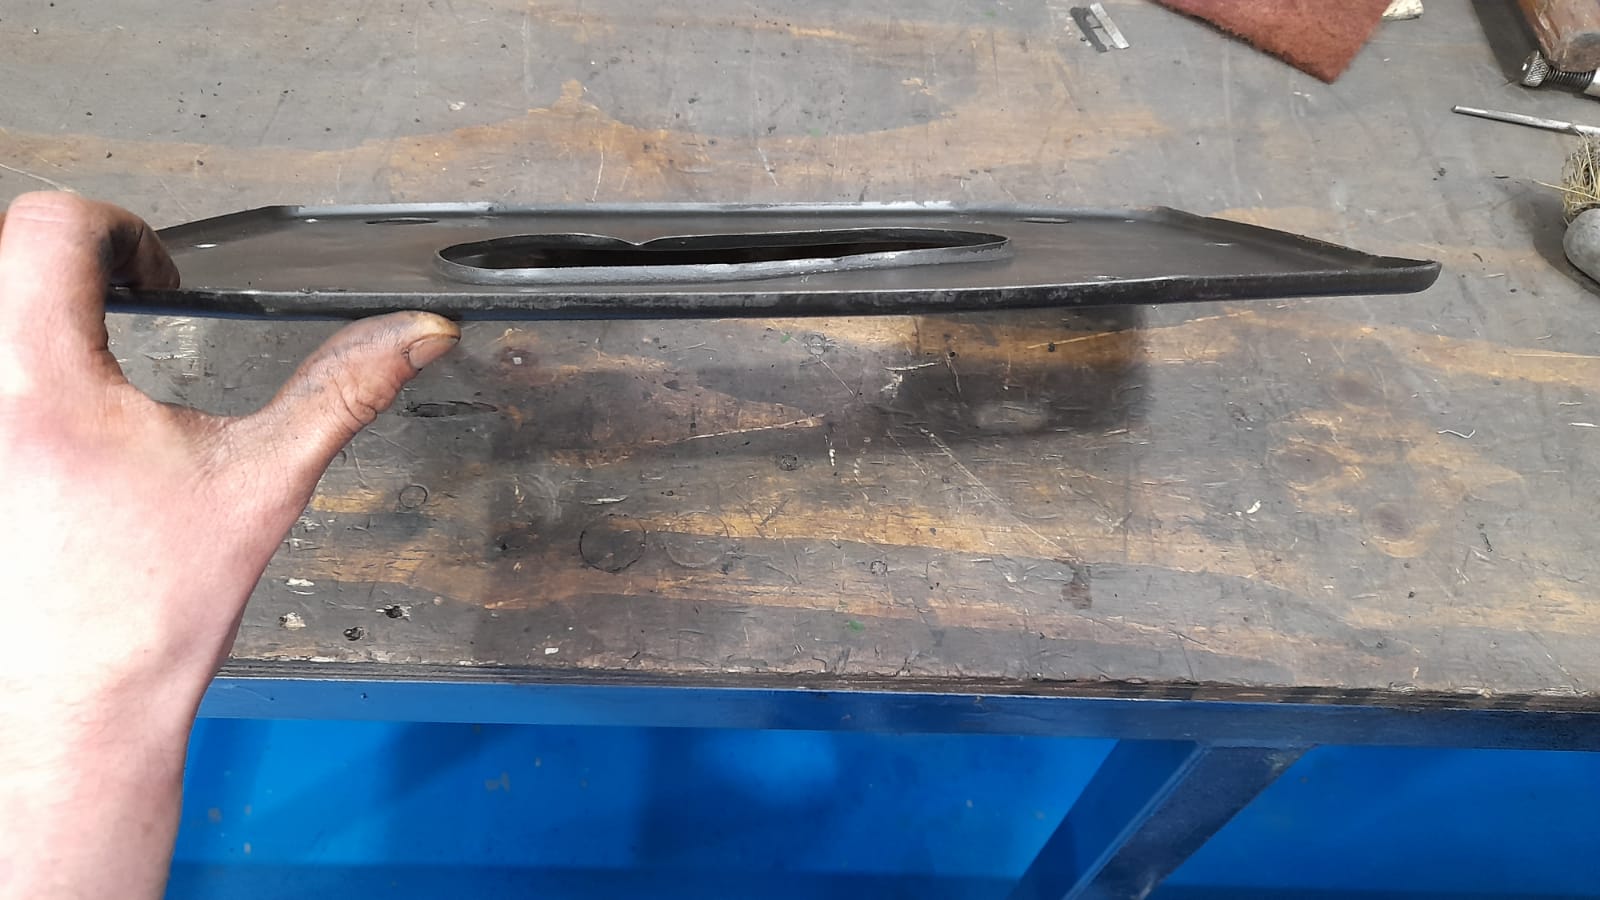
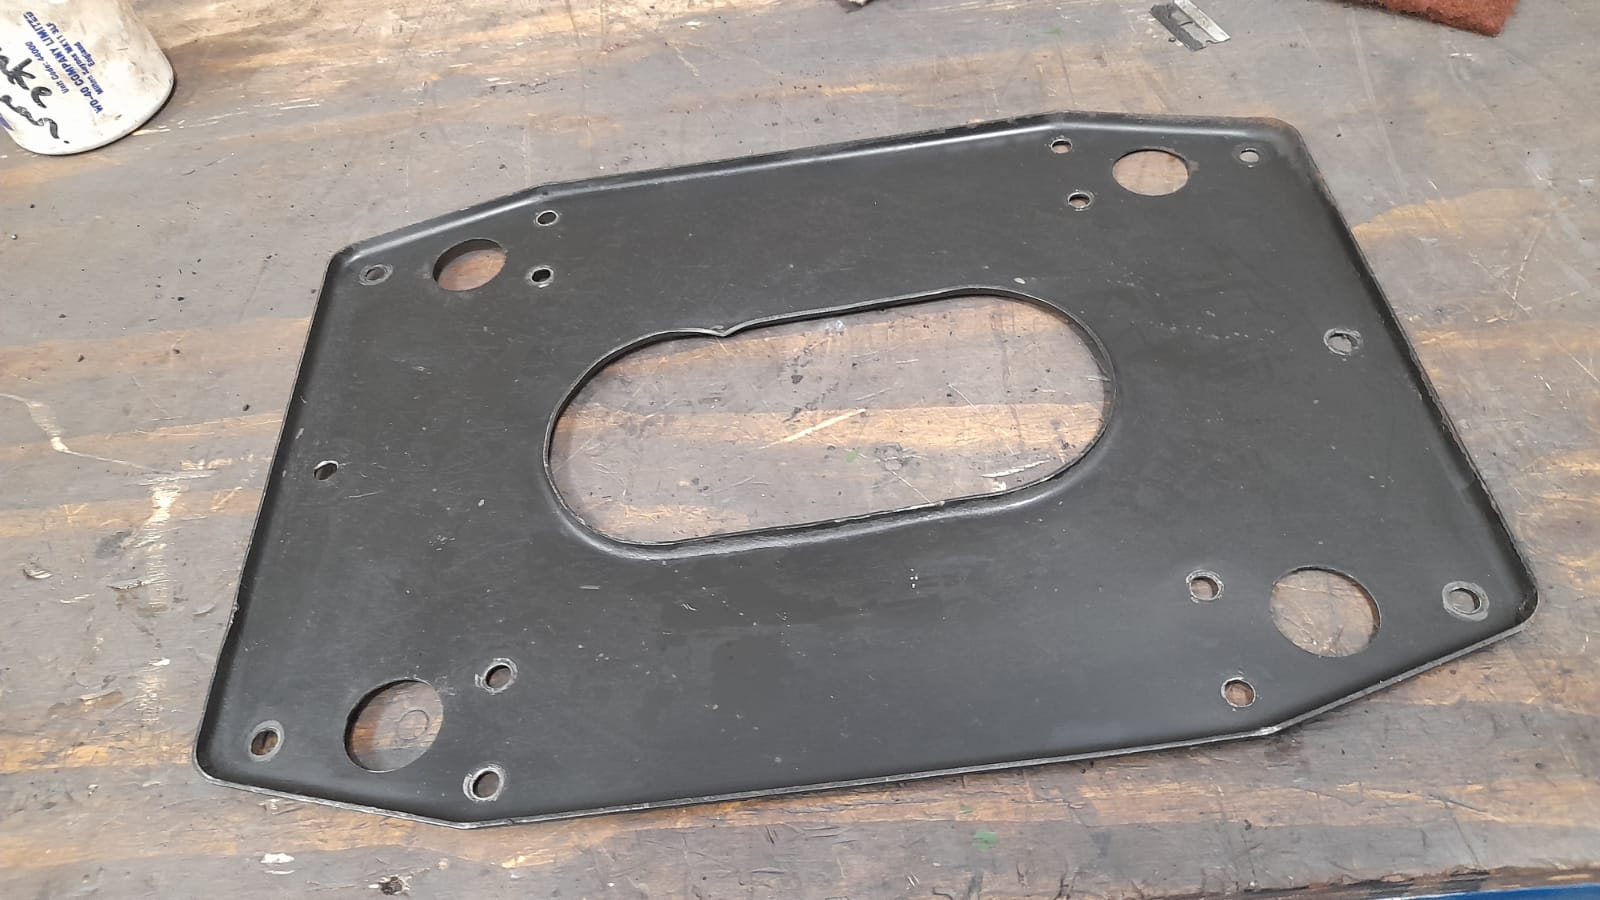
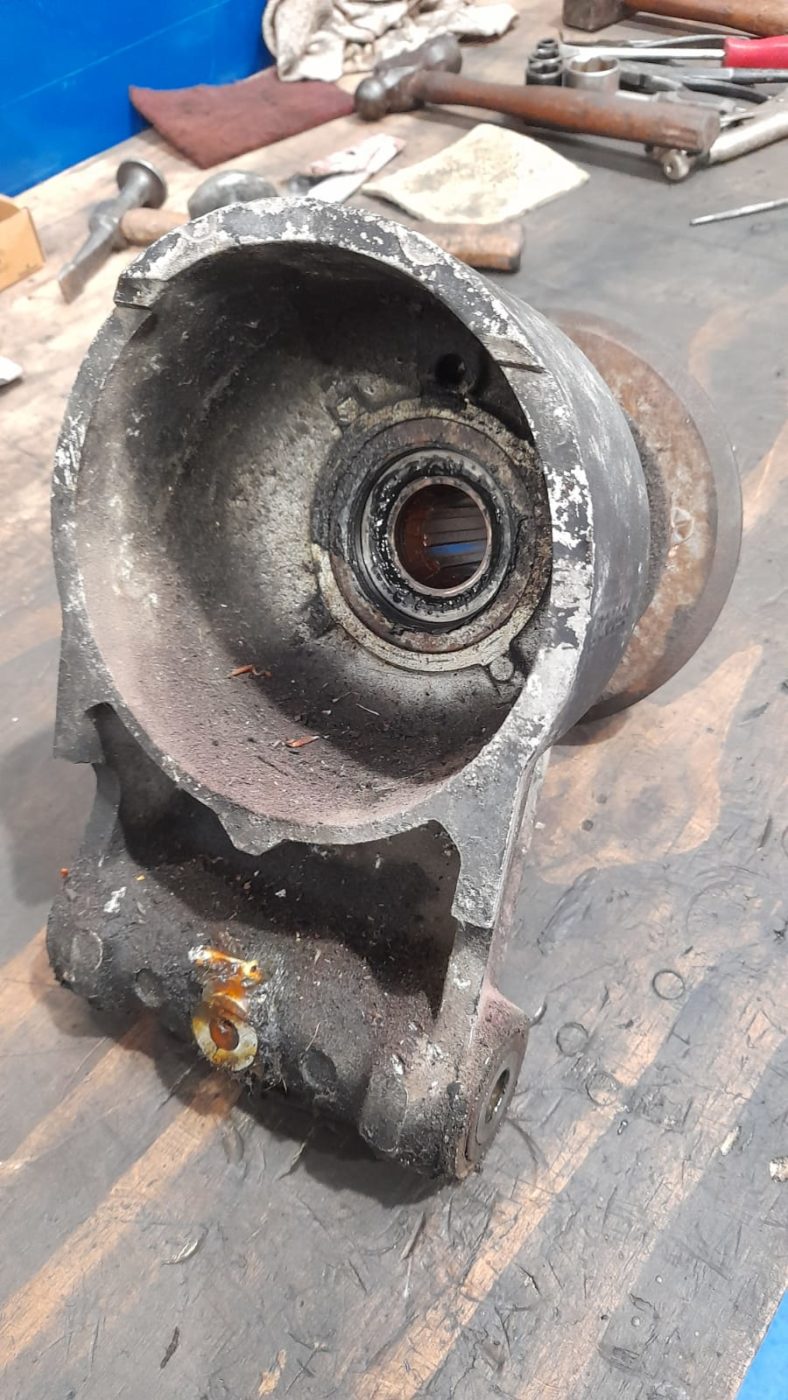
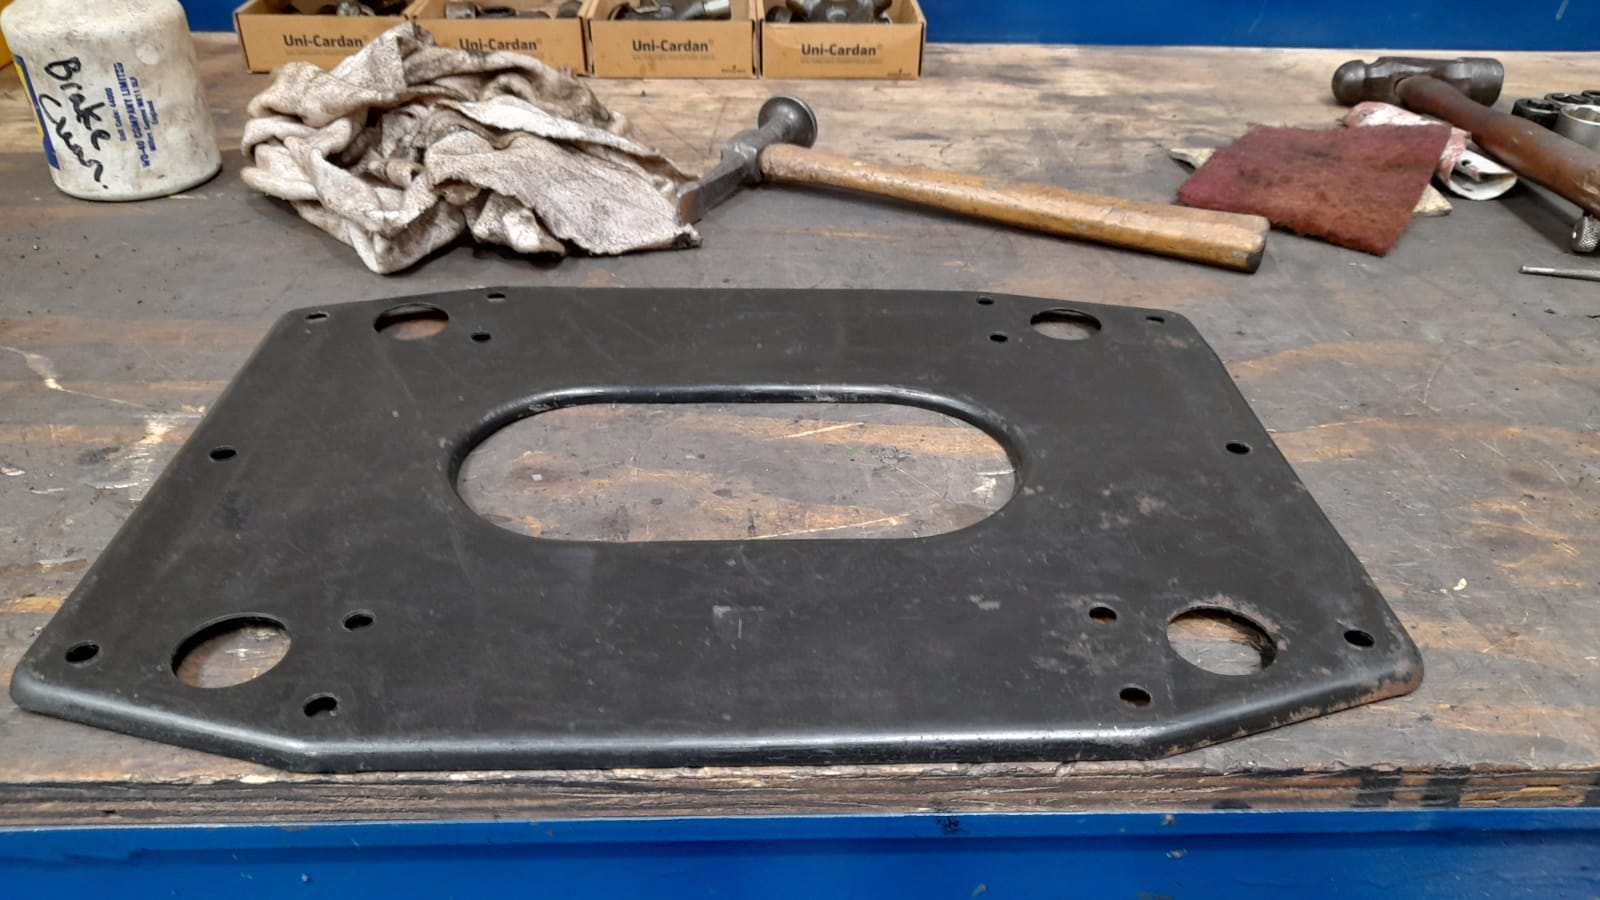
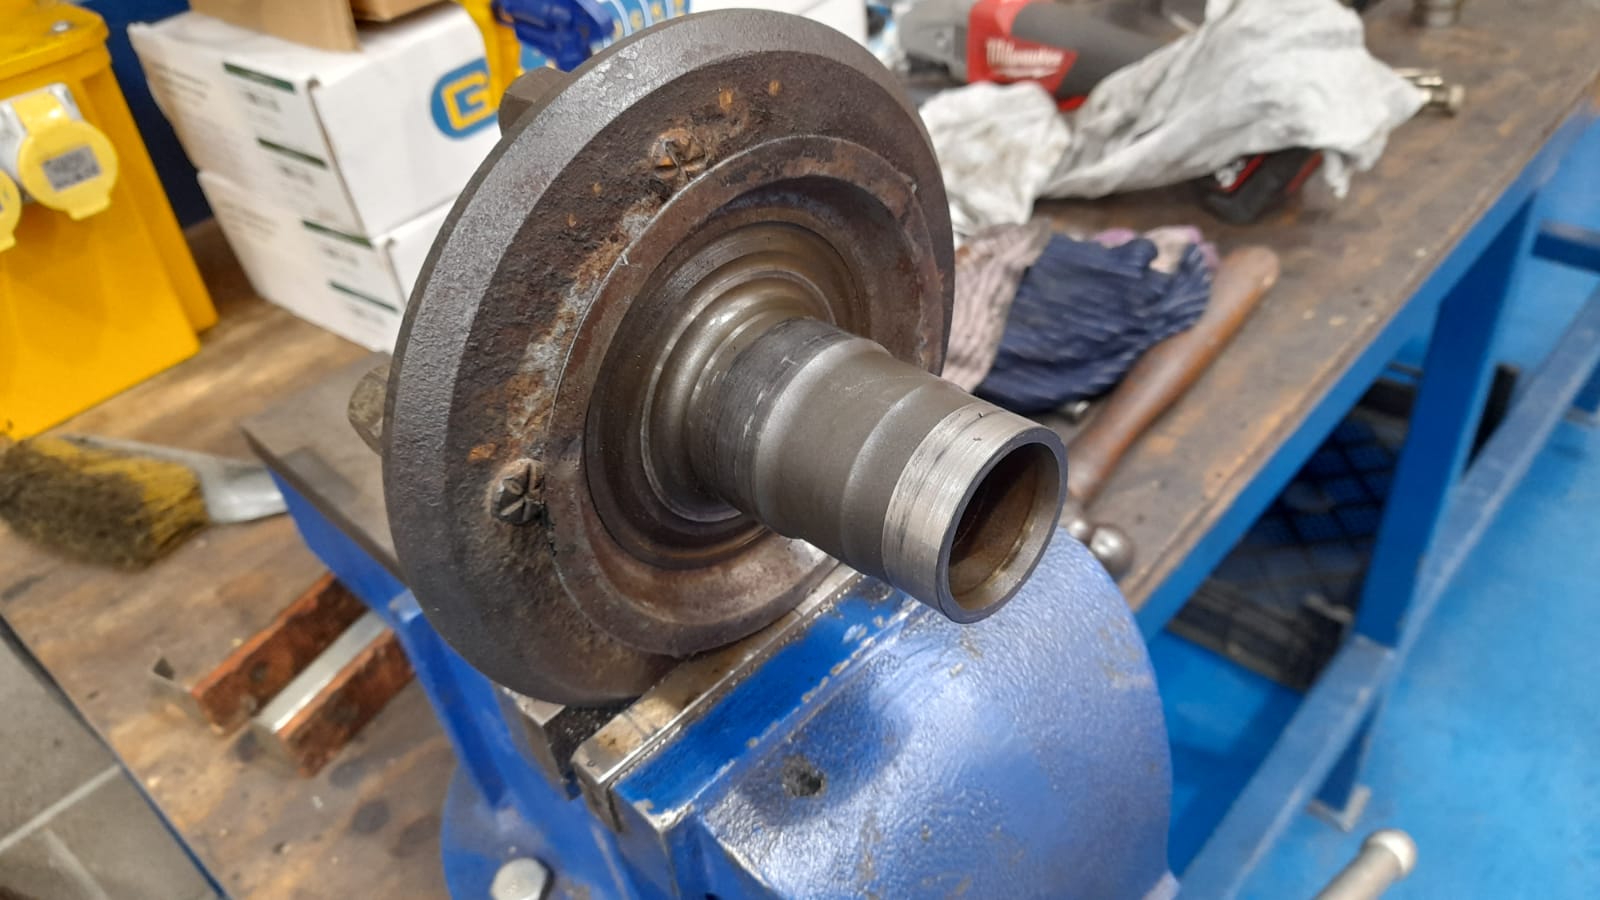
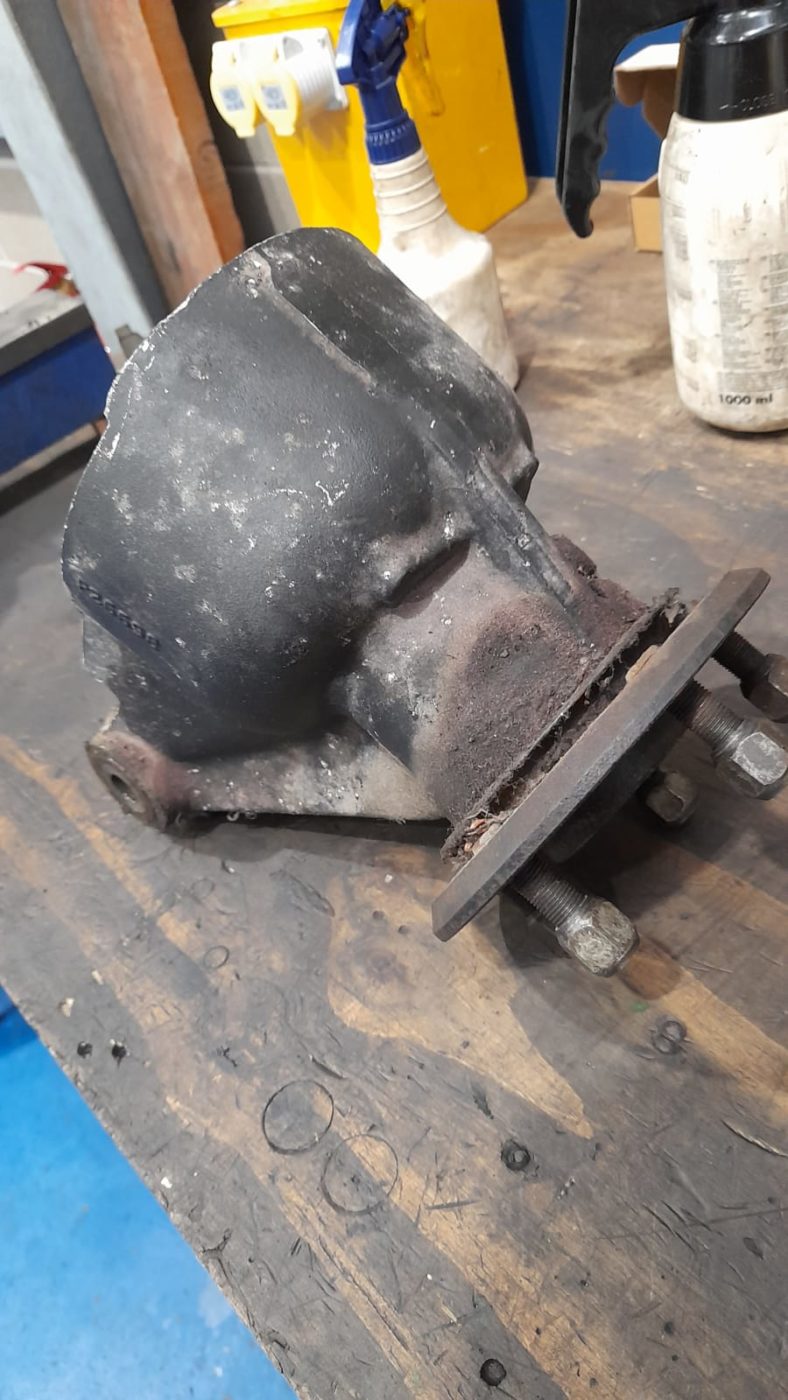
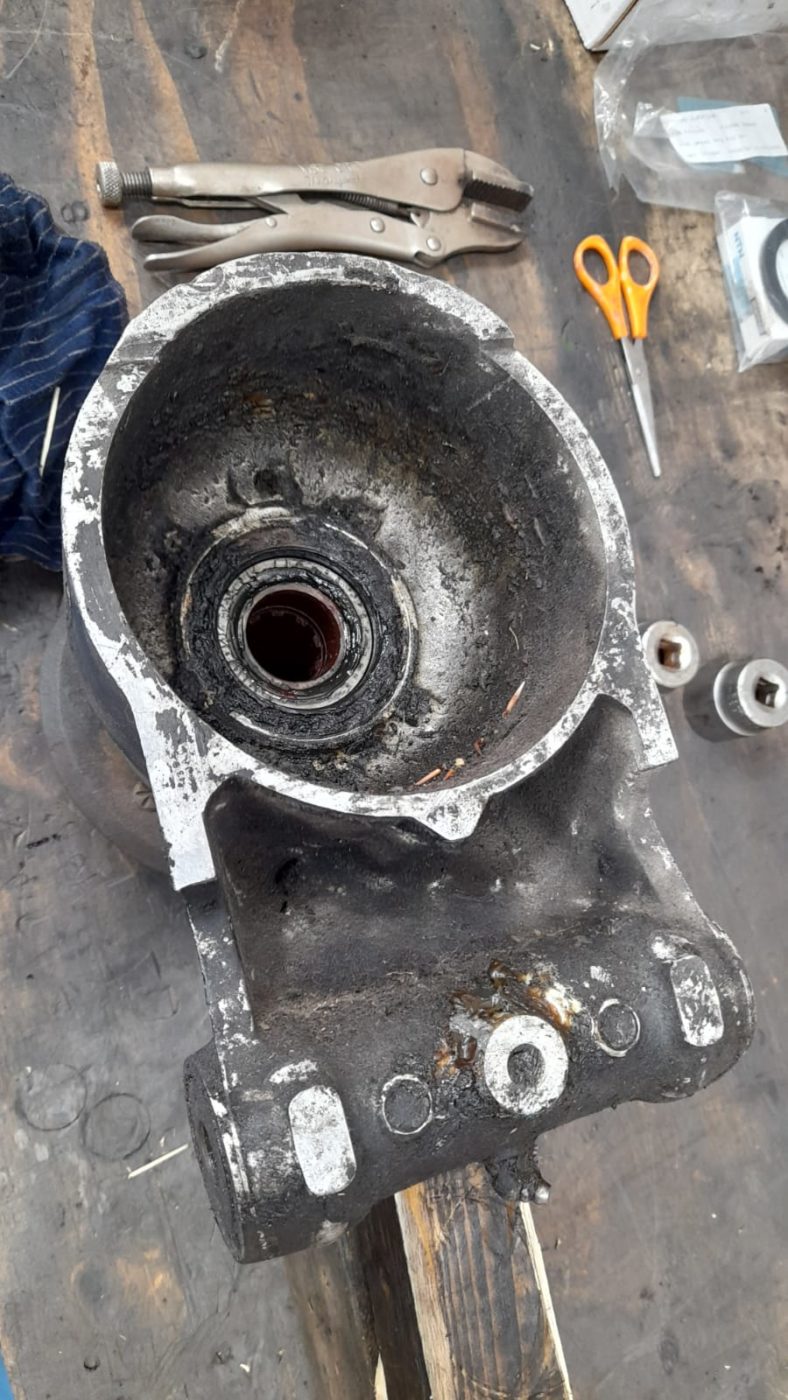
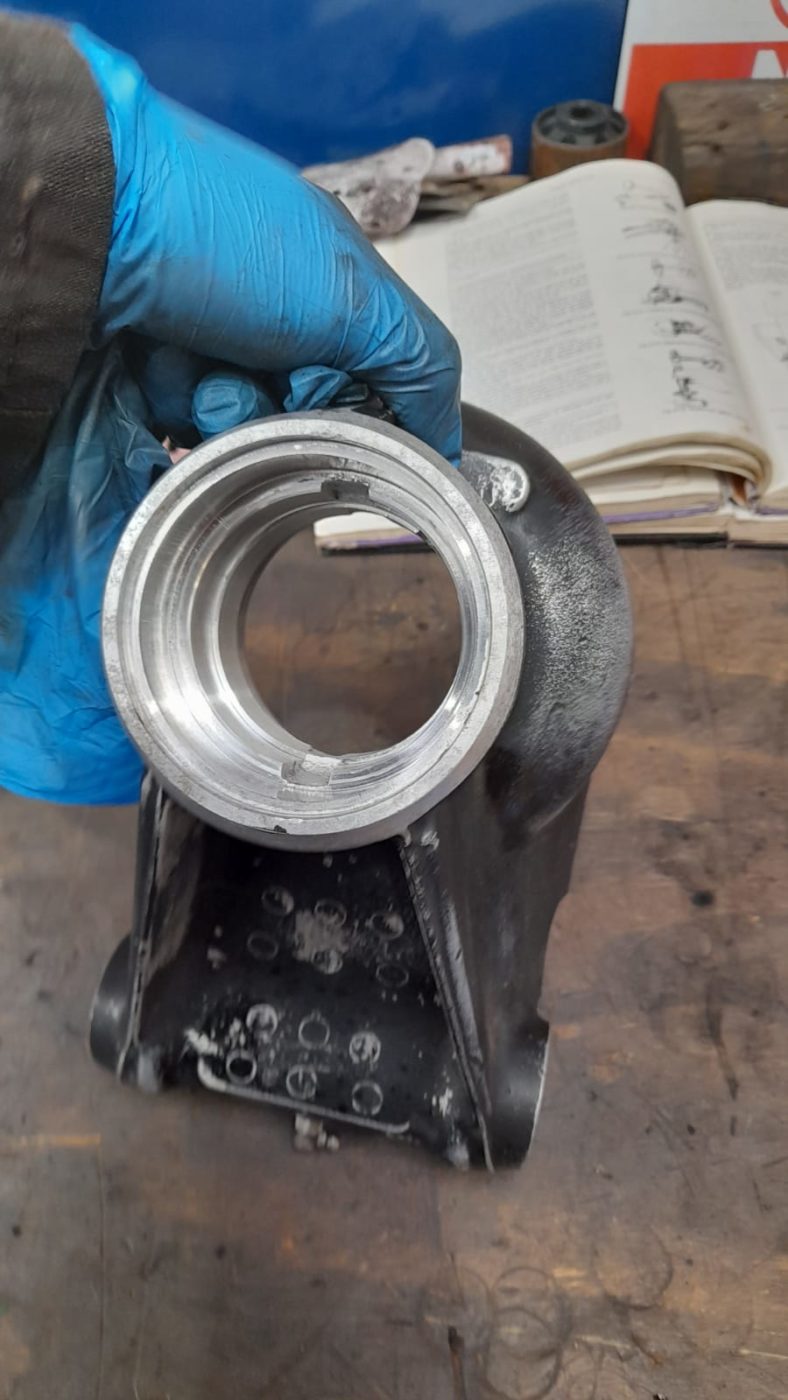
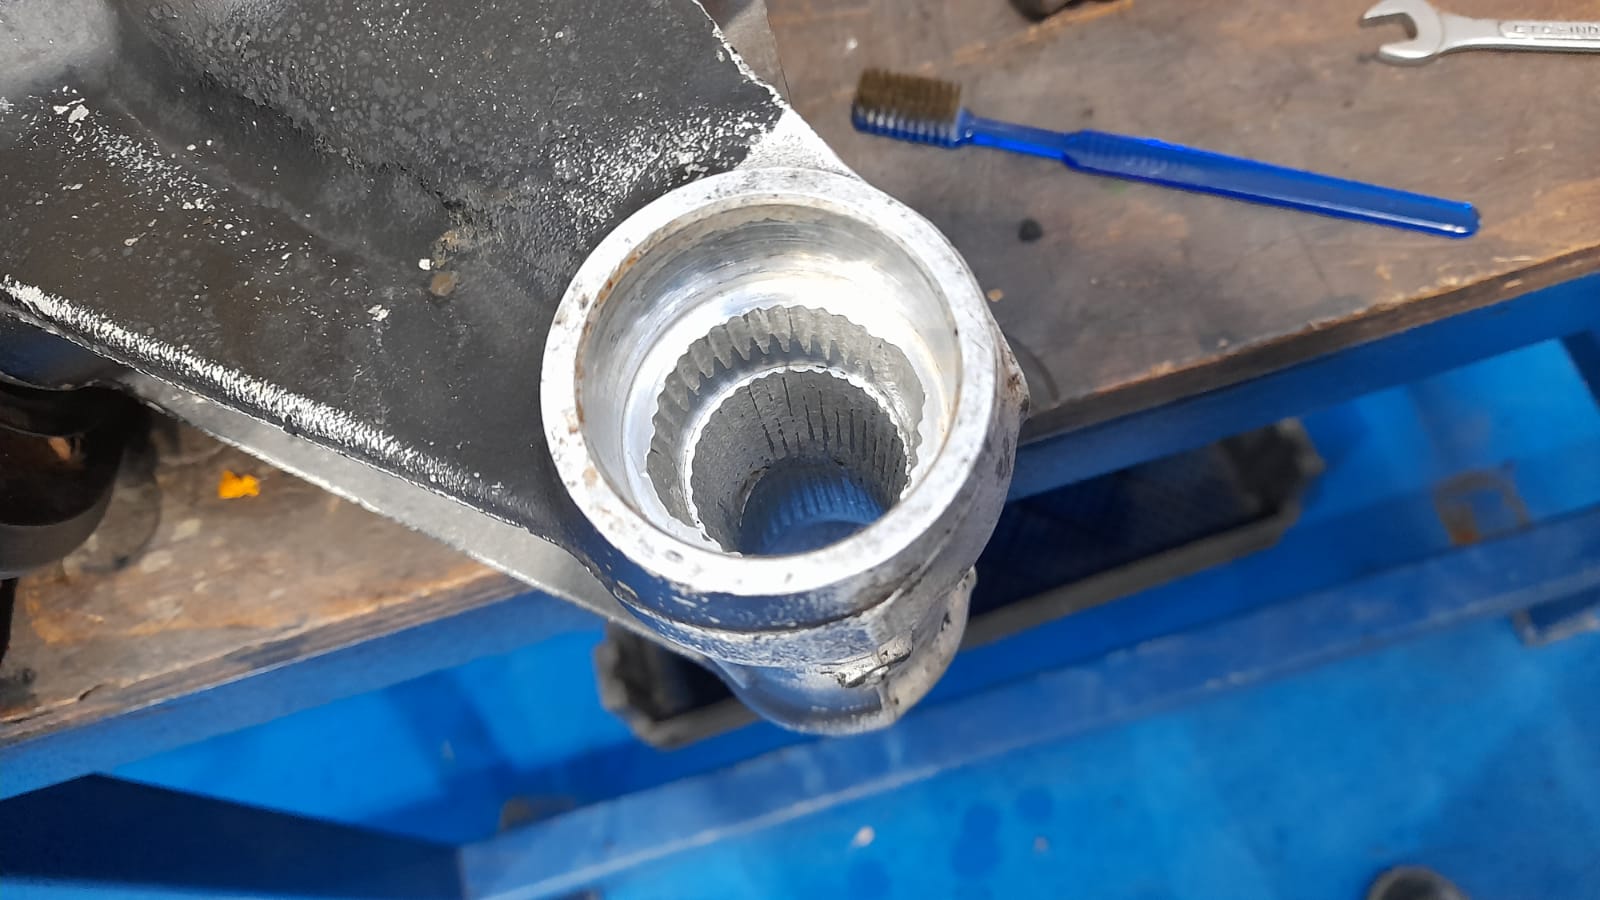
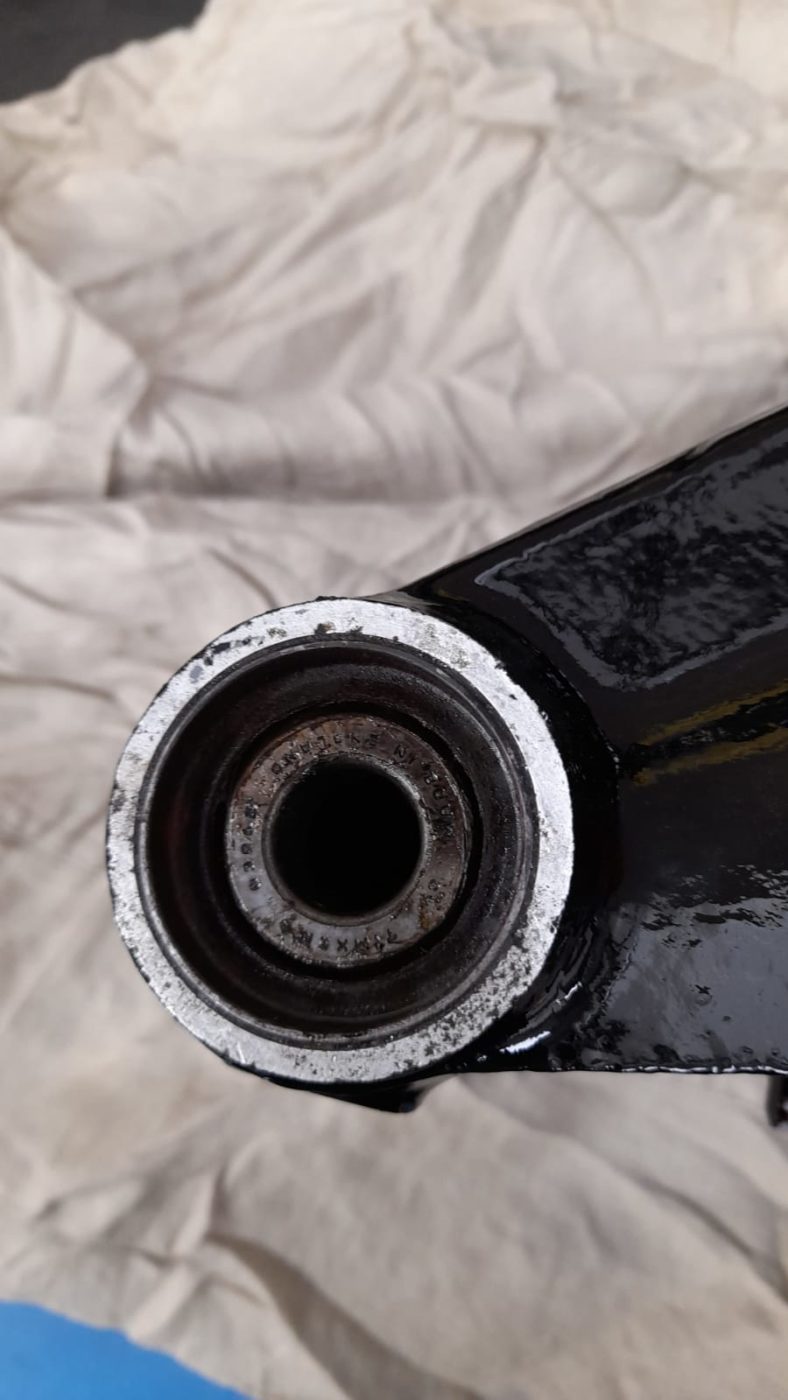
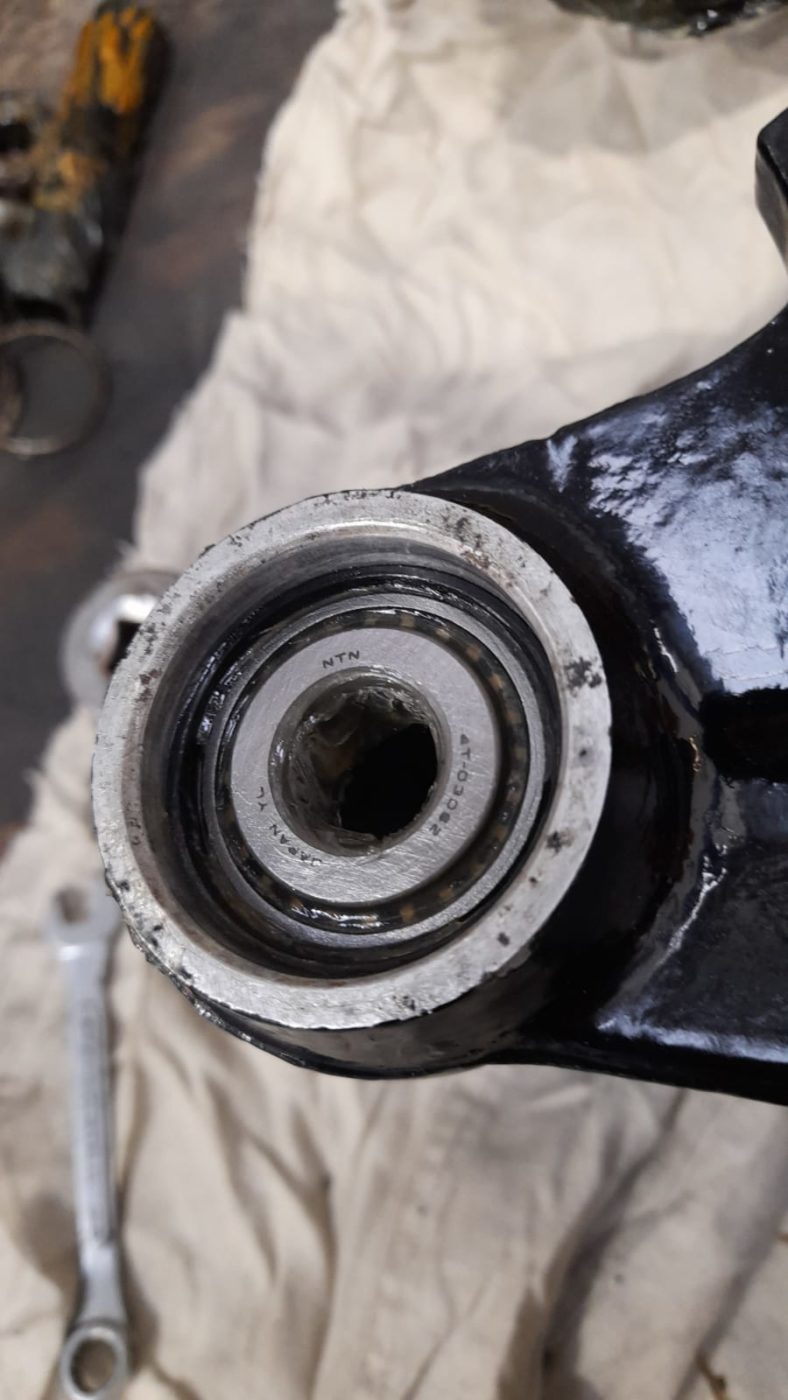
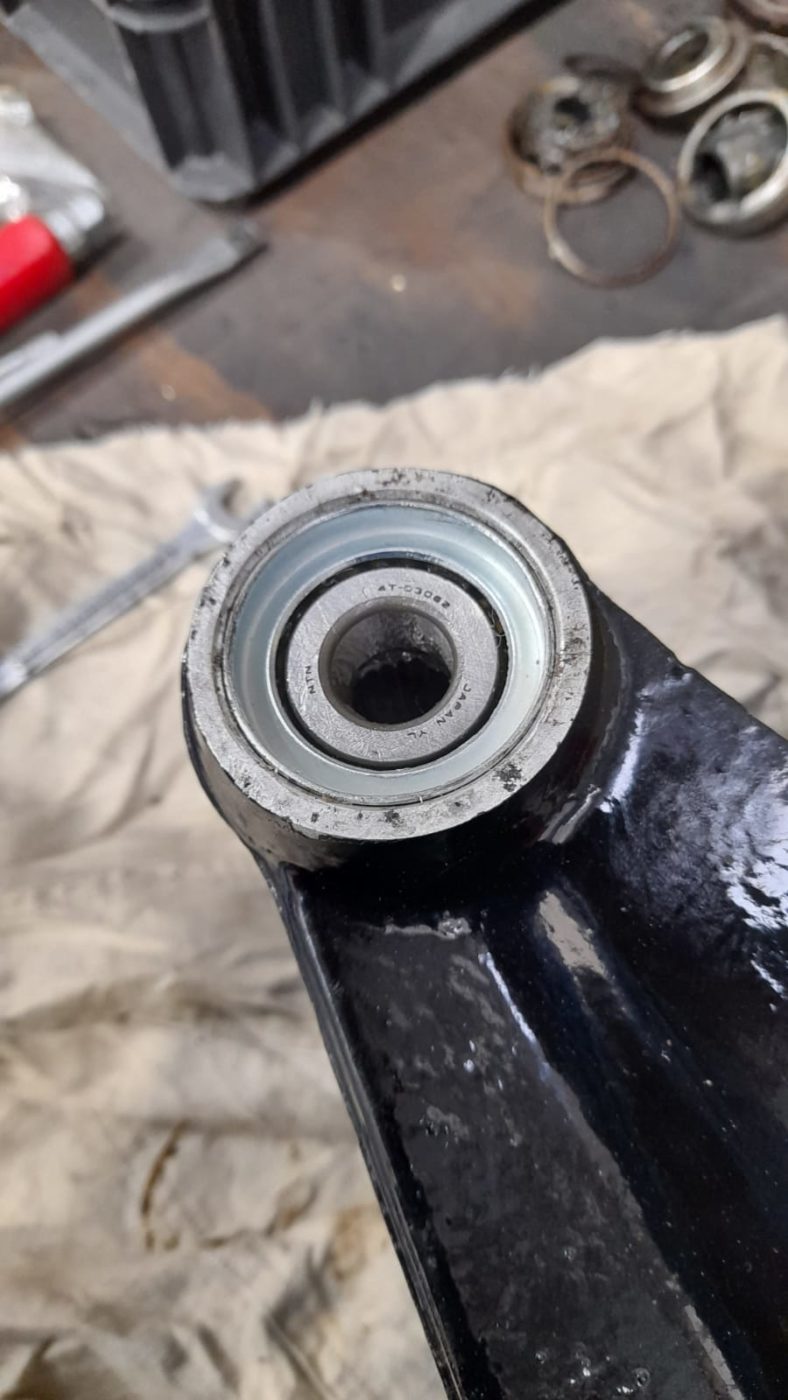
Scott has been working on the suspension for our Ferarri Daytona. He’s replaced all the UJs, bearings and bushes on the front and rear suspension.

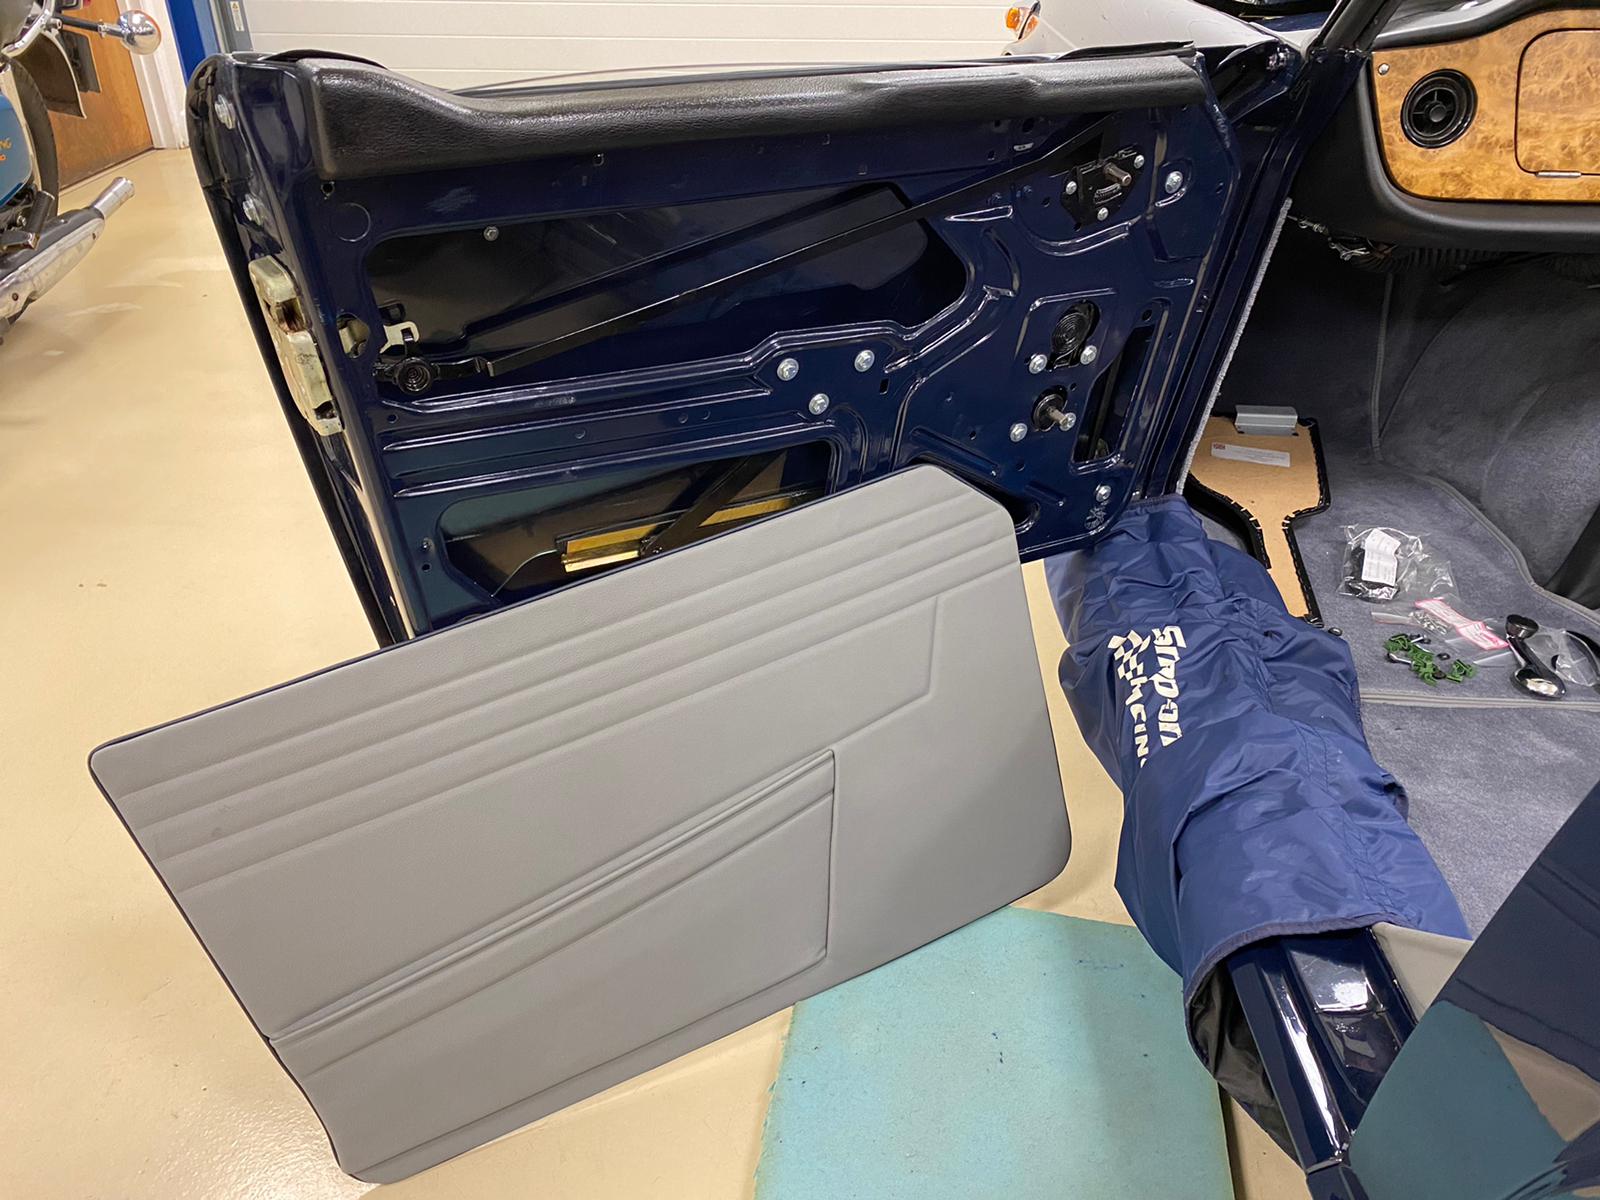
Kath and Brian have both been working on our 1968 Triumph TR5 recently. Kath has fitted the door cards which could be placed in now
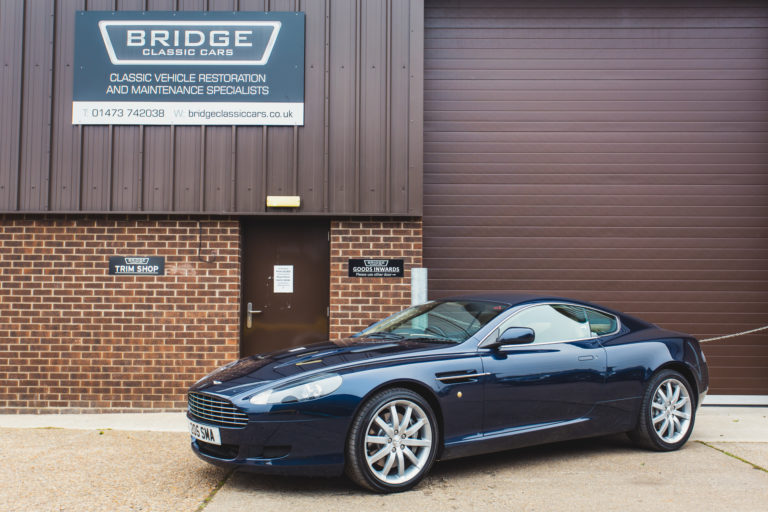
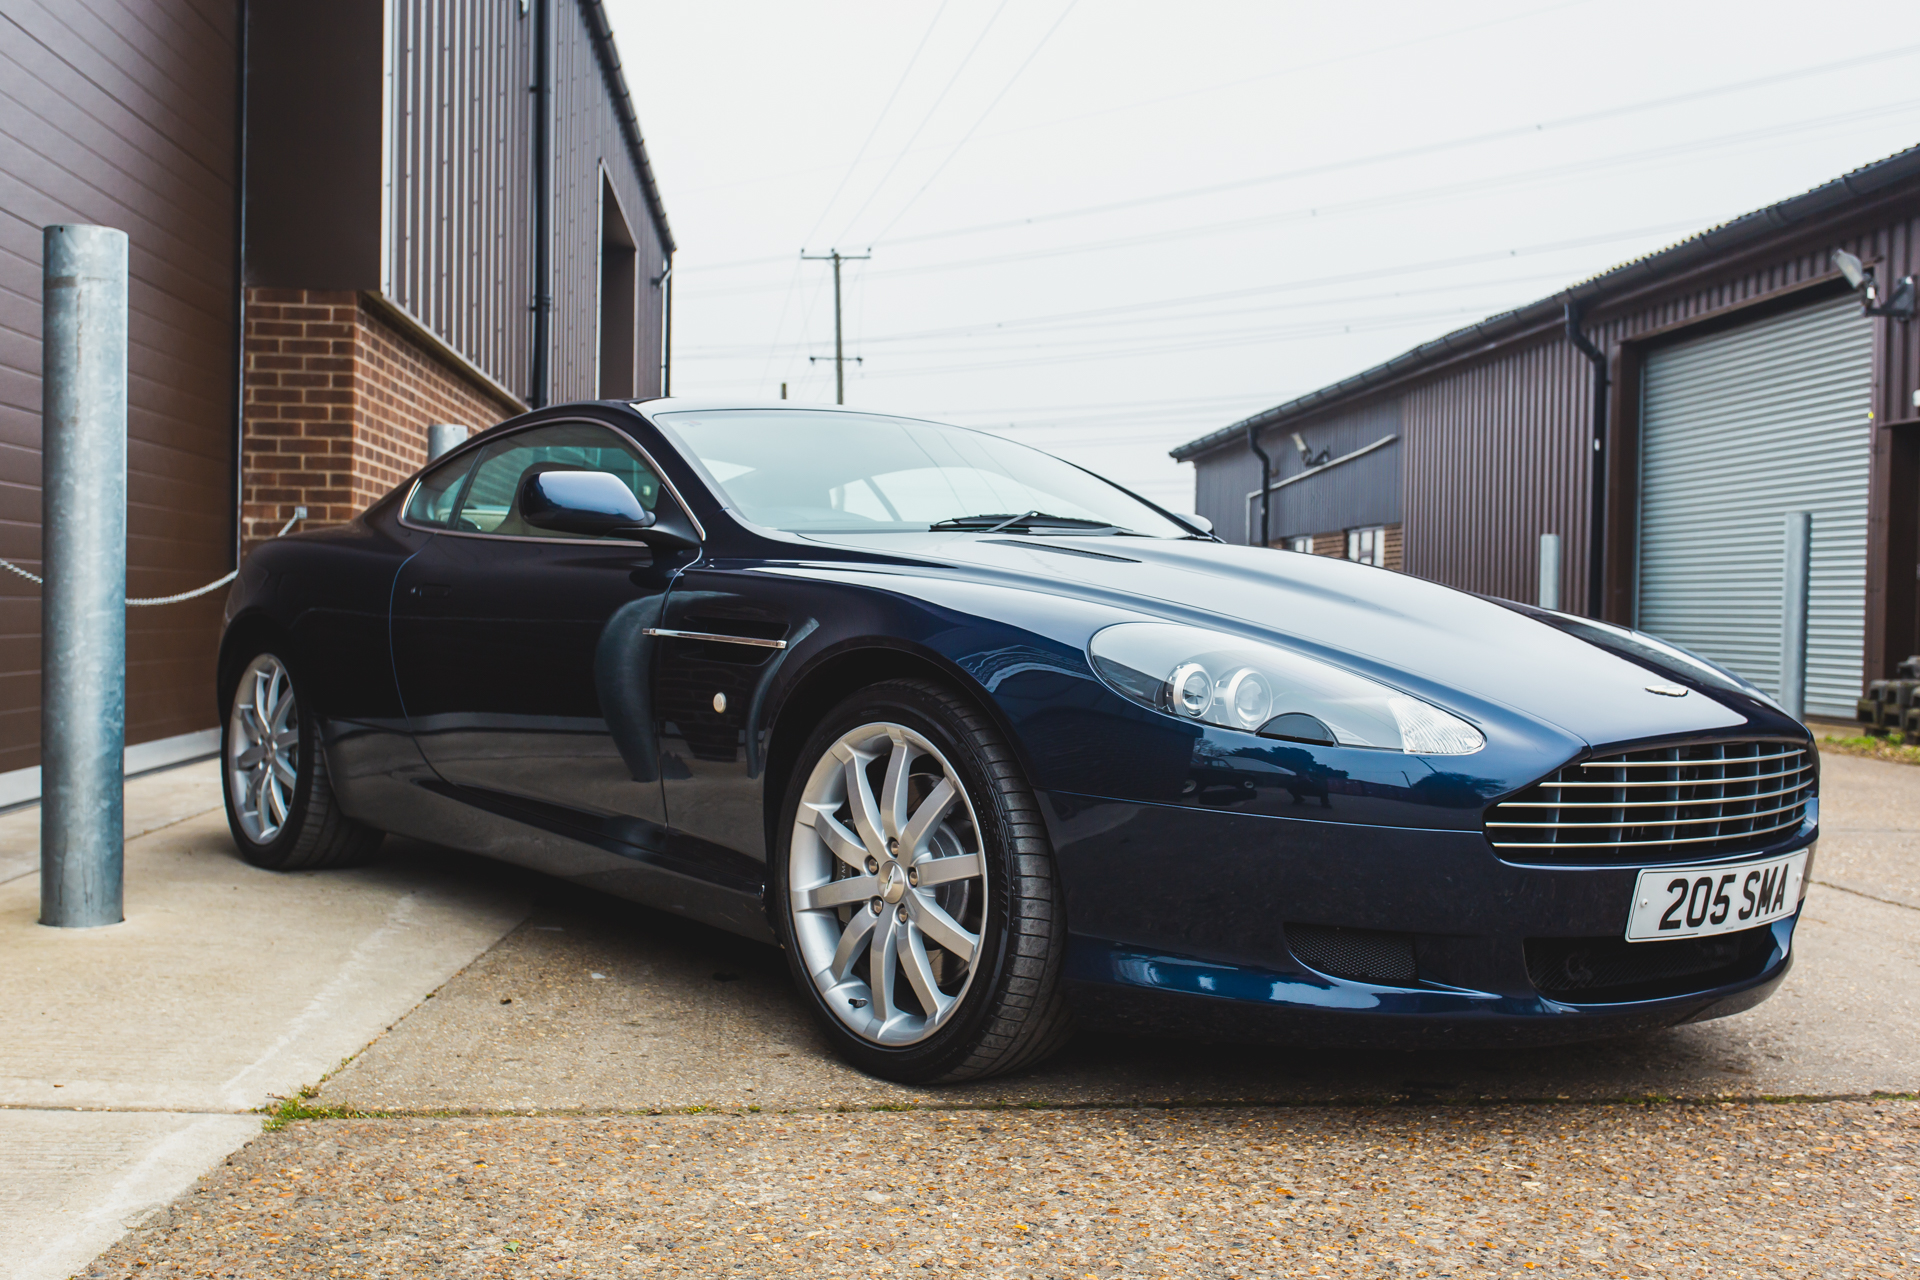
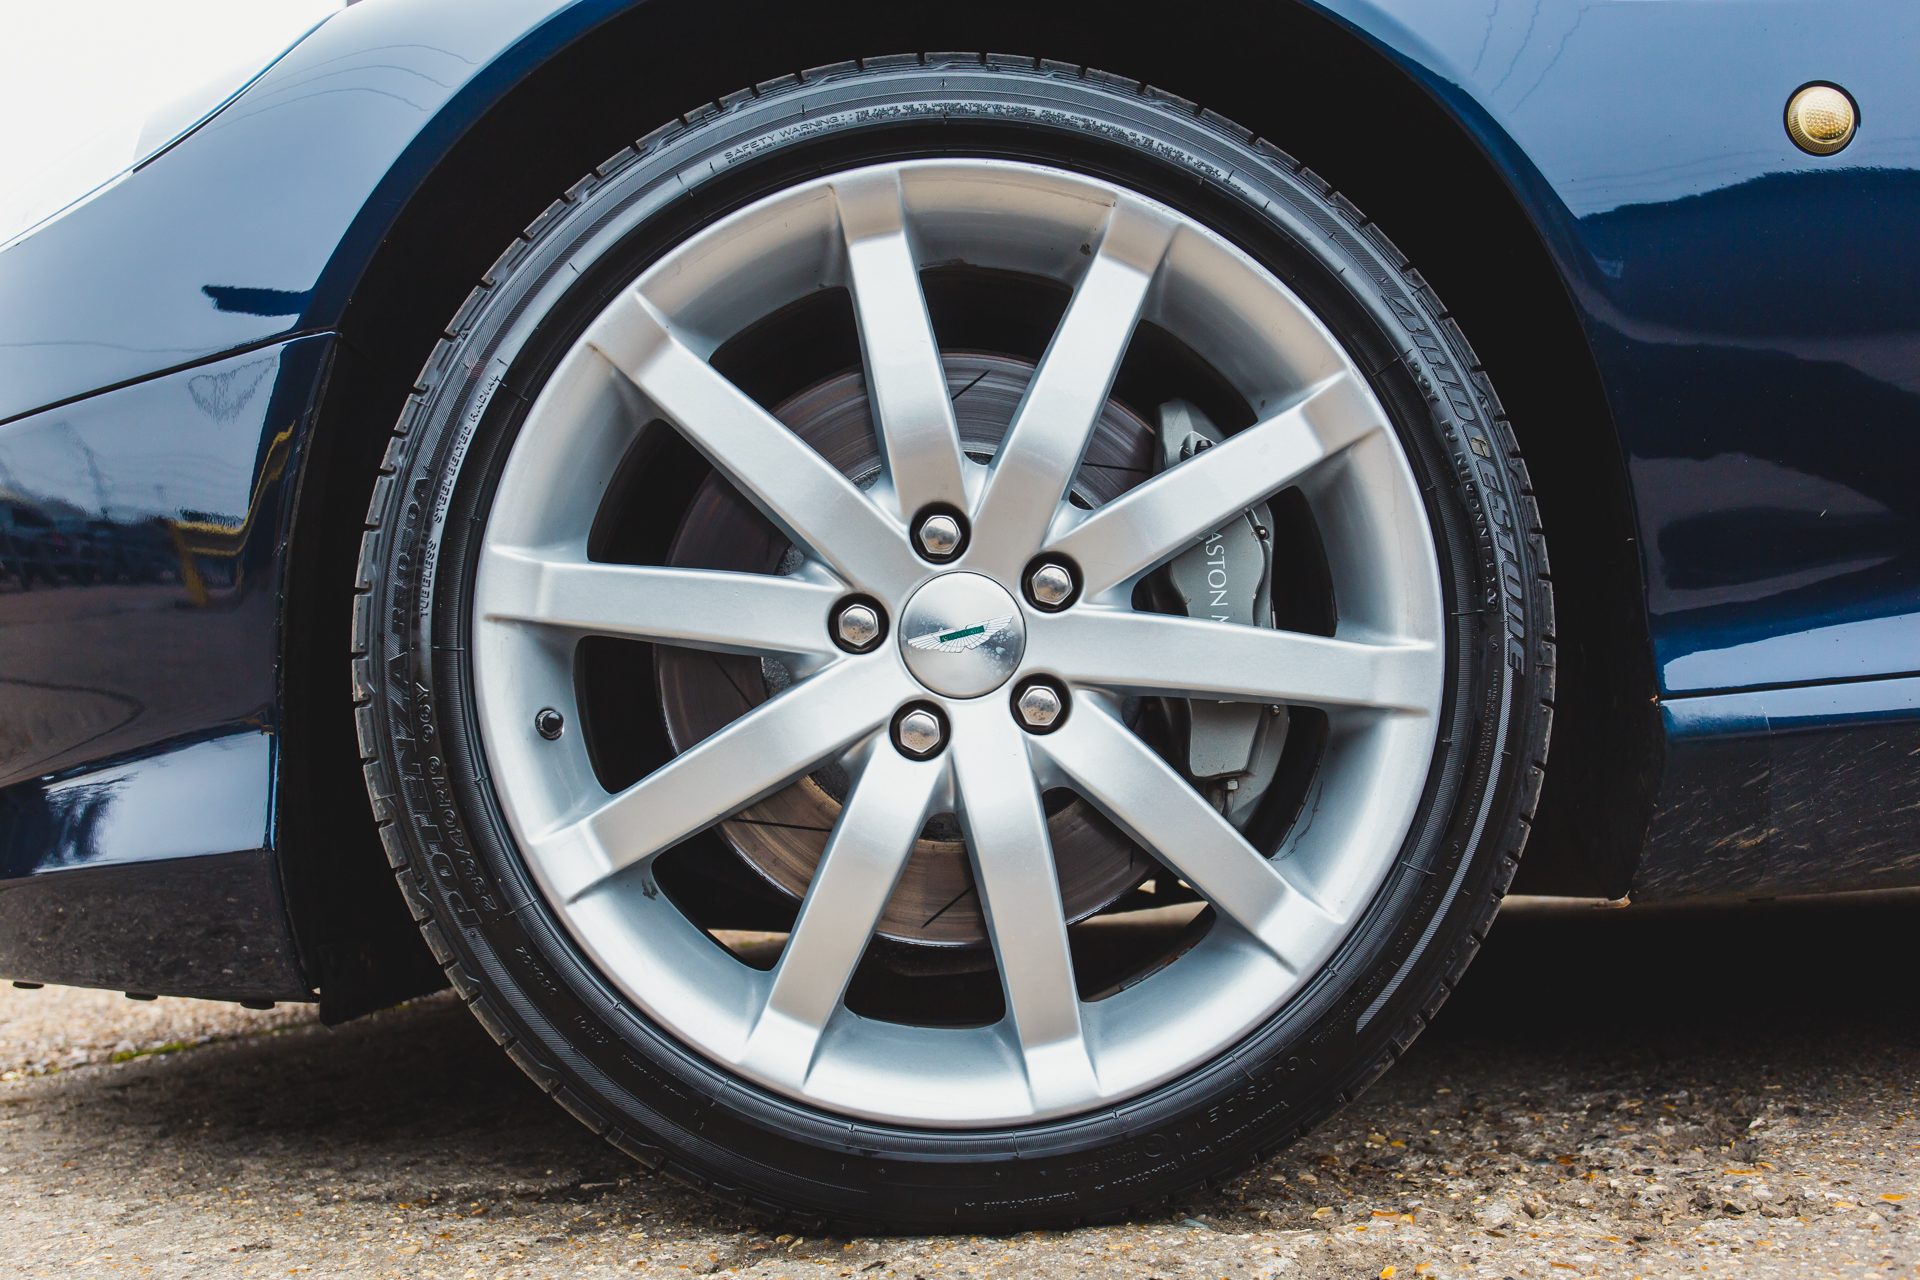
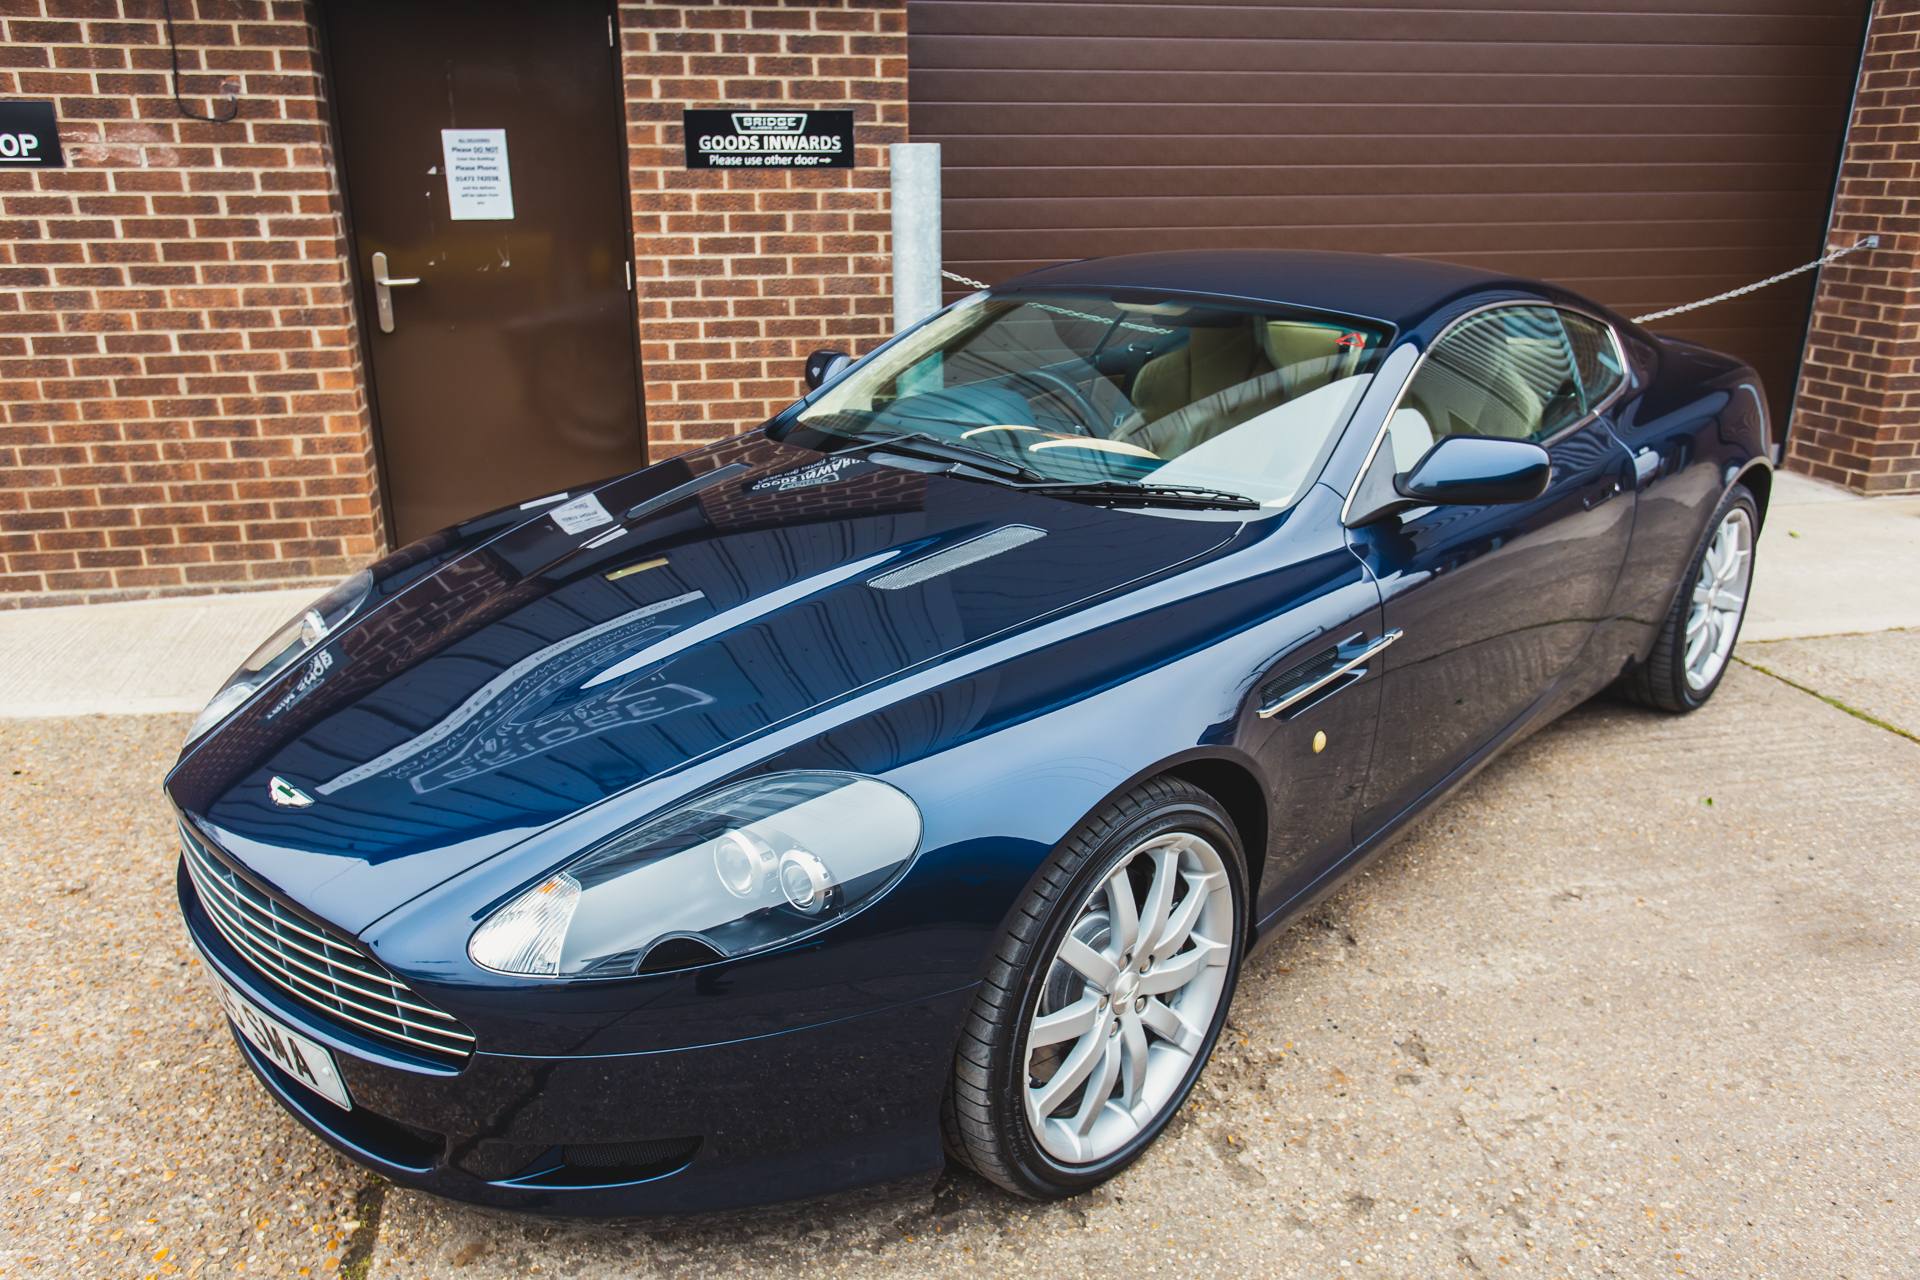
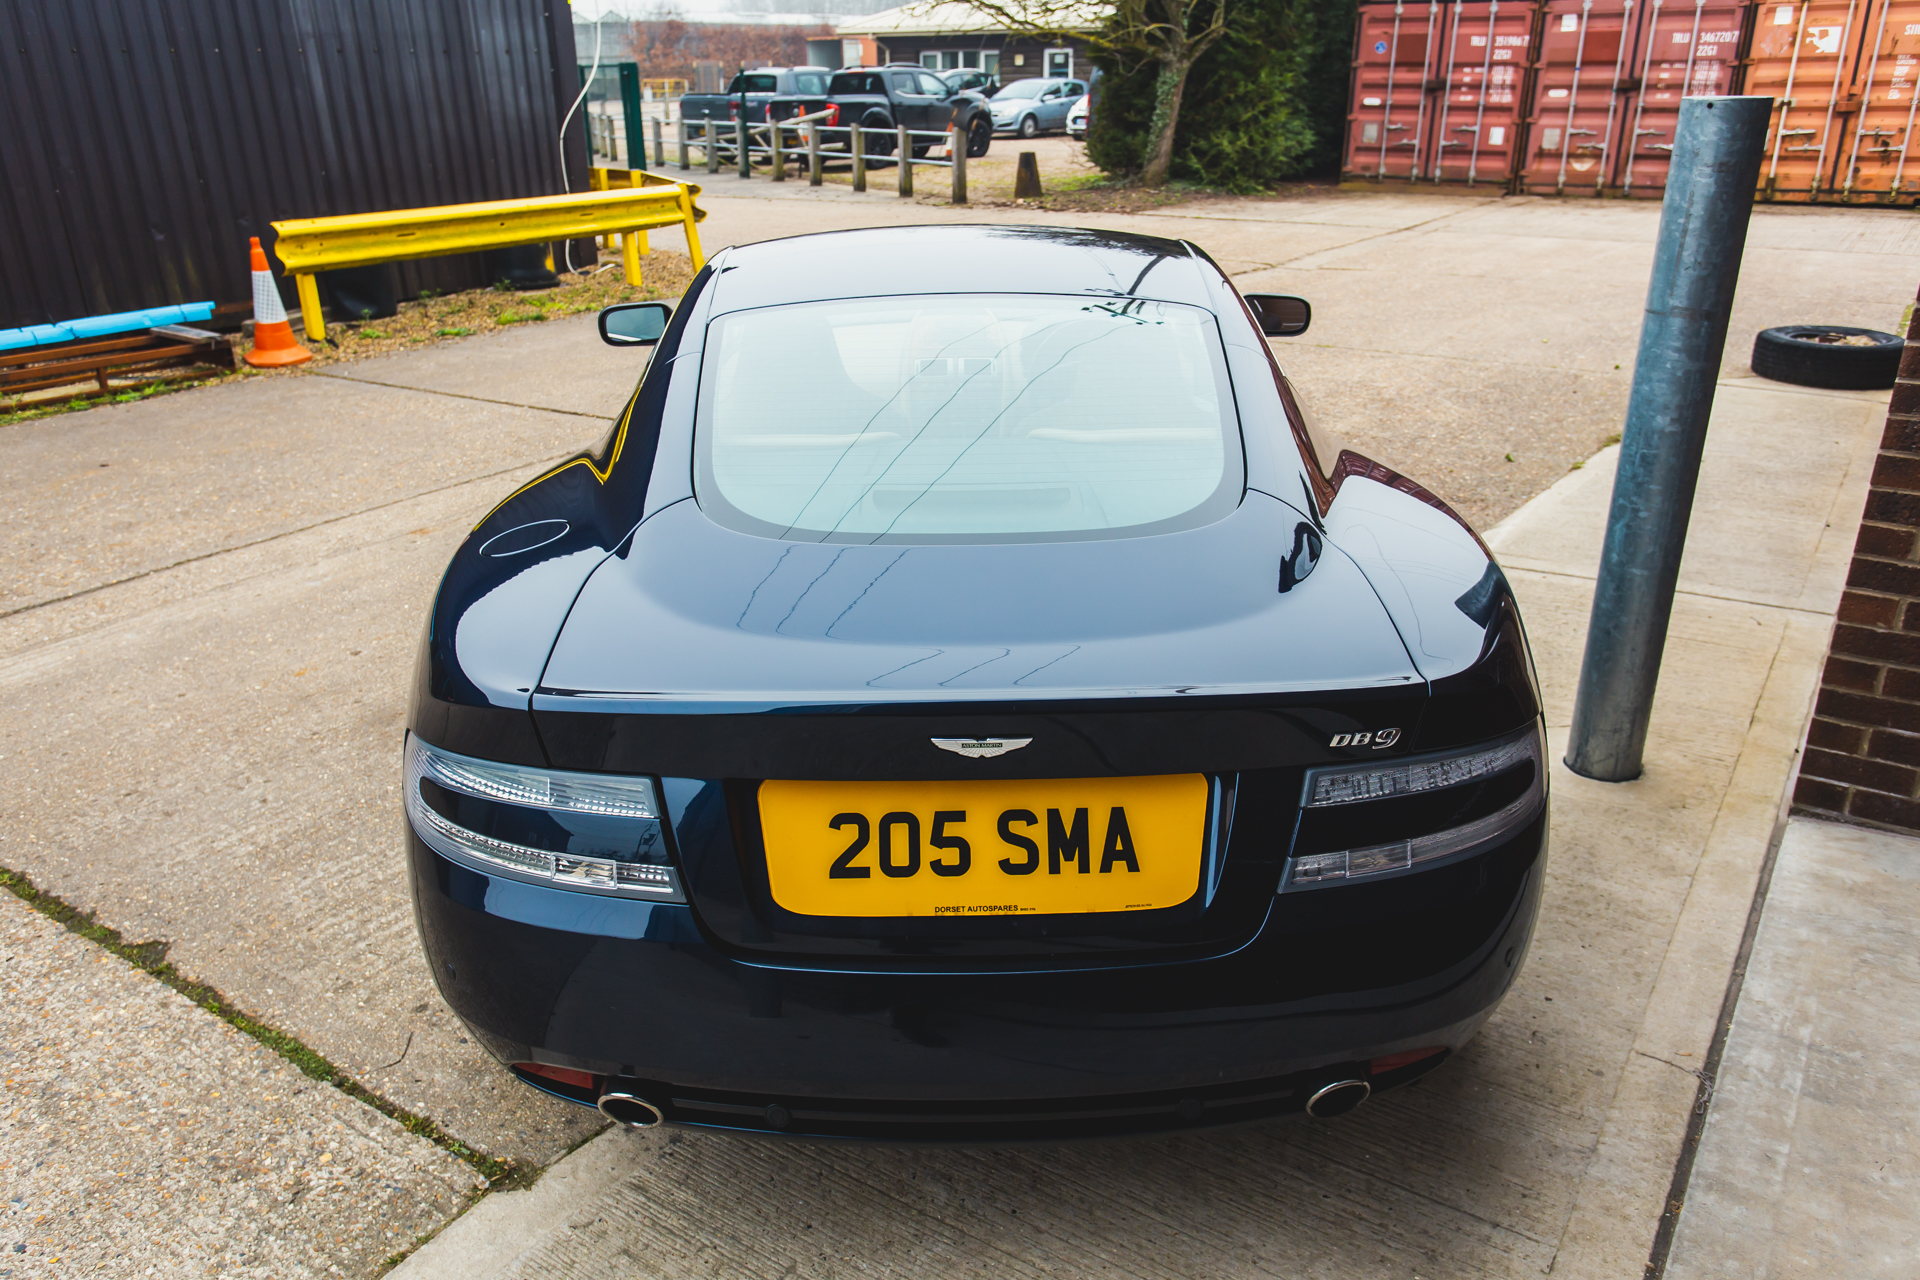
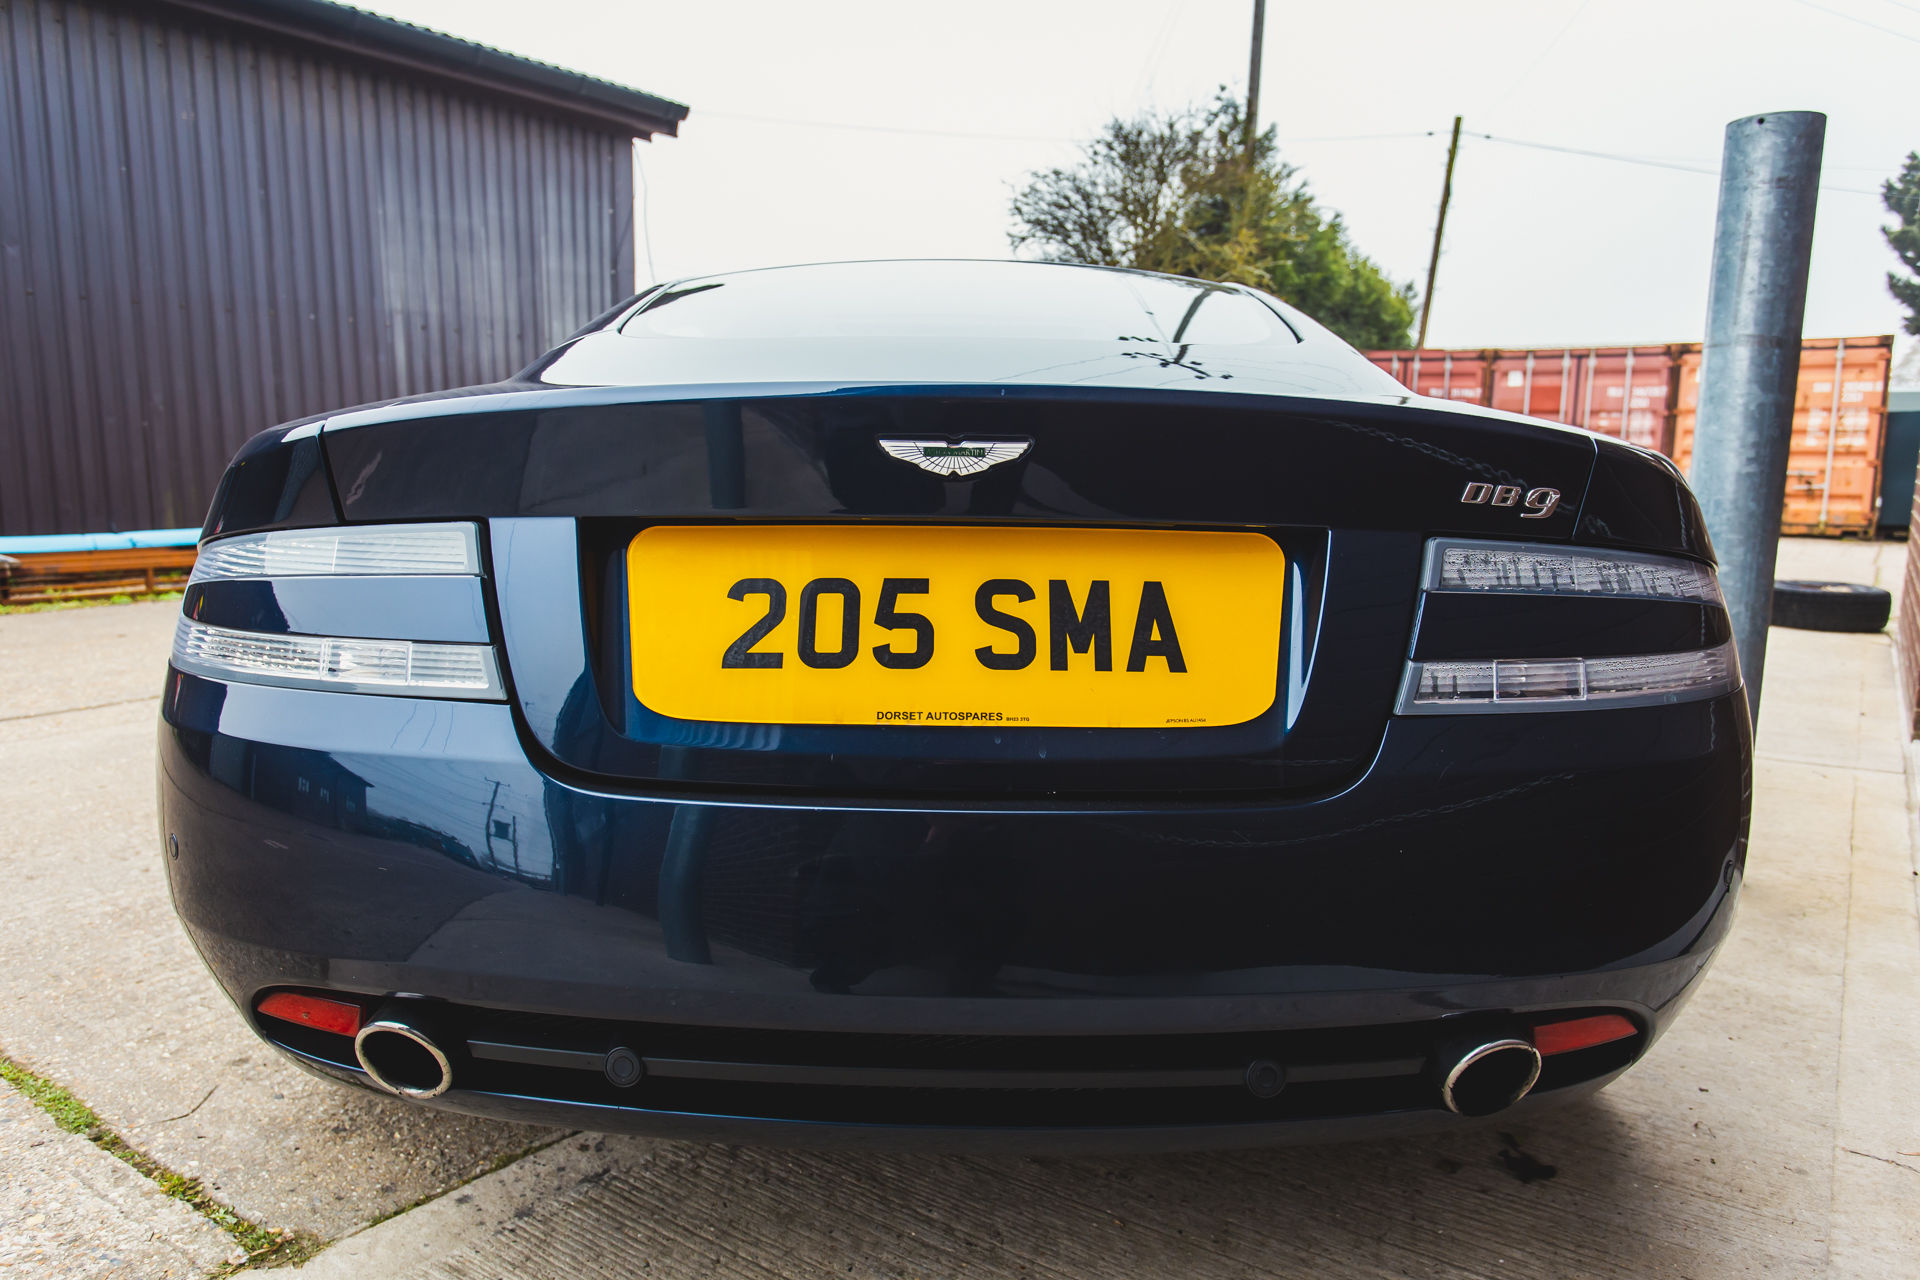
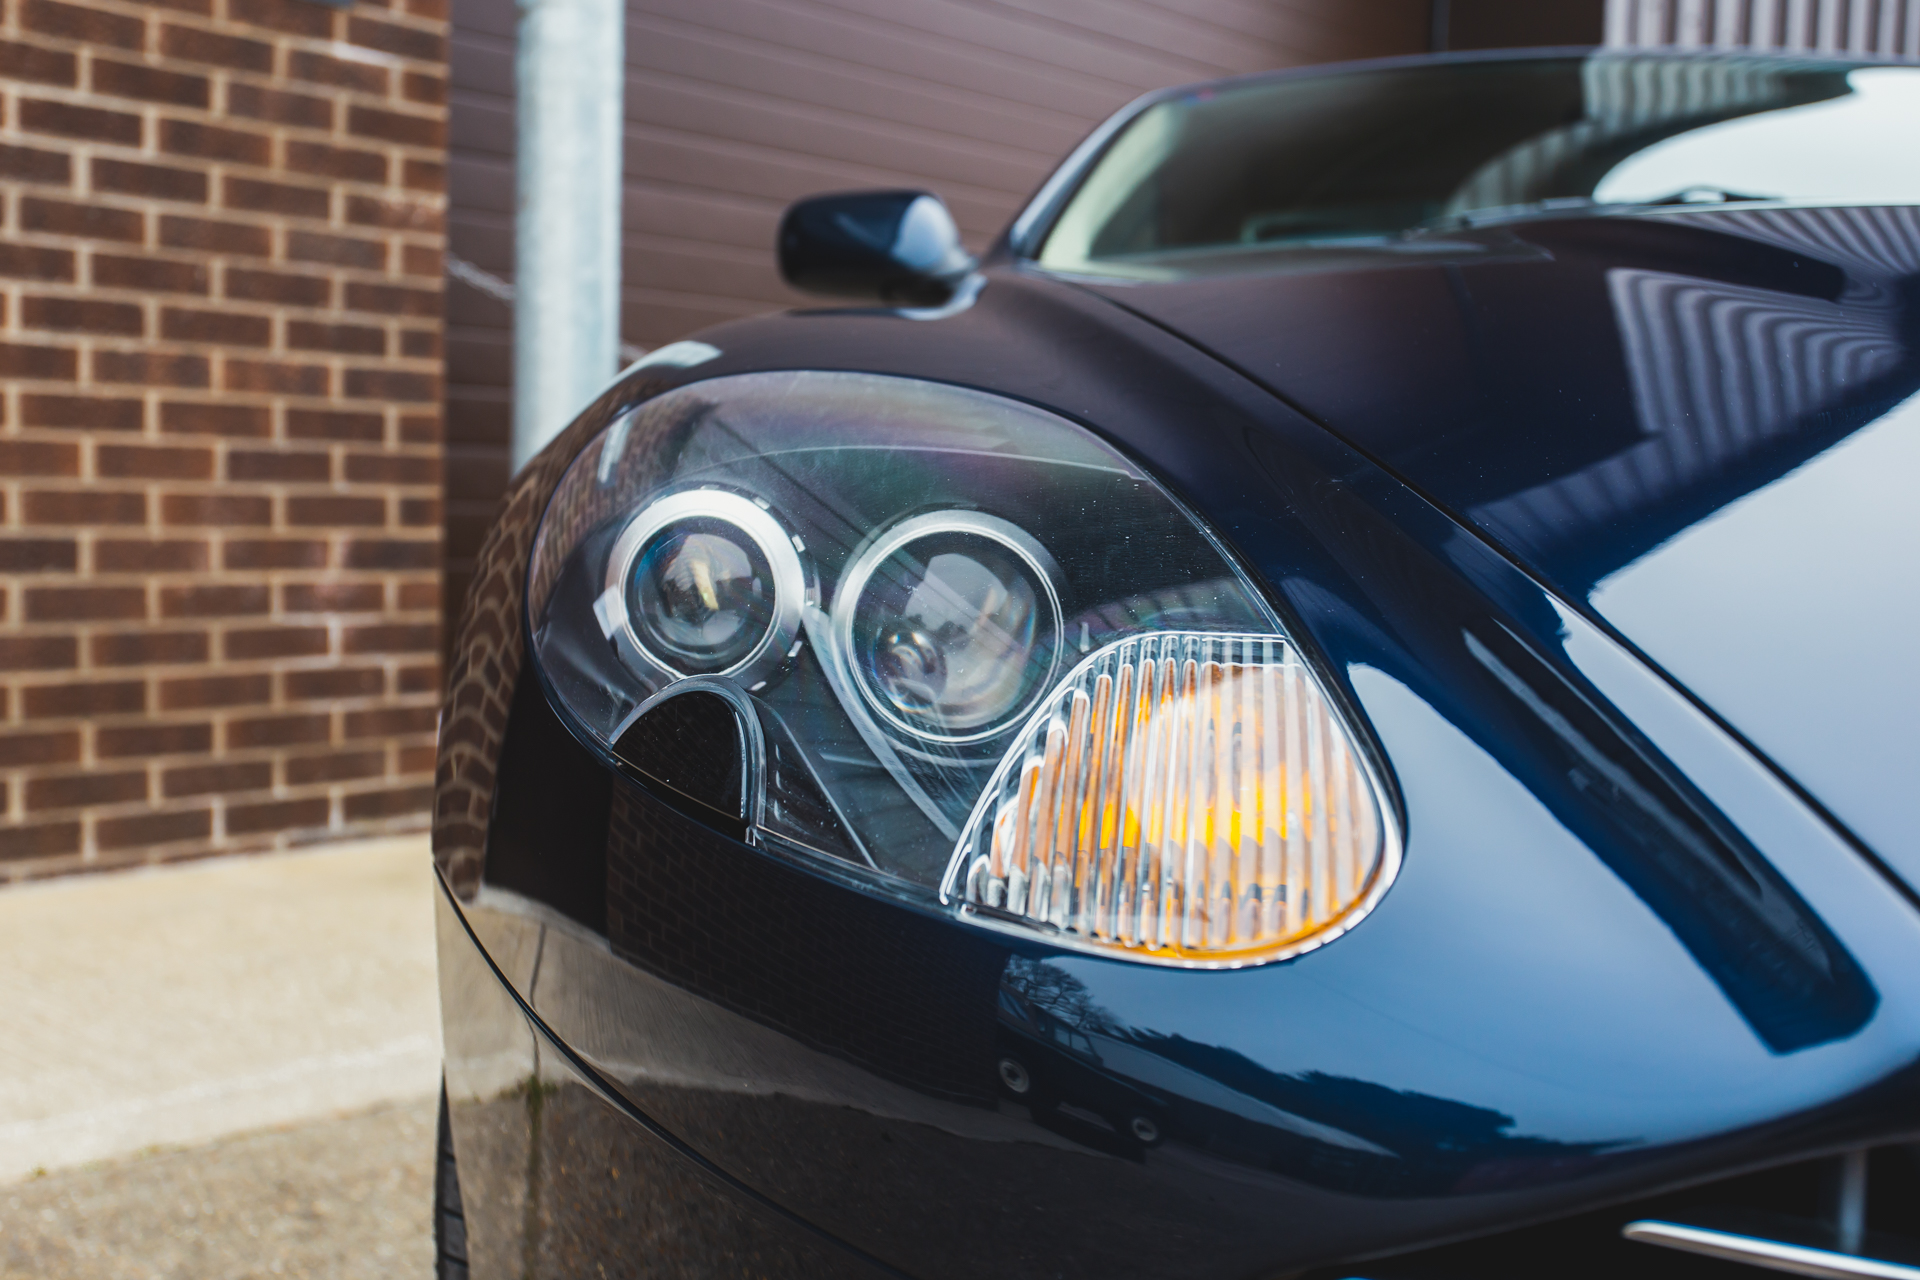
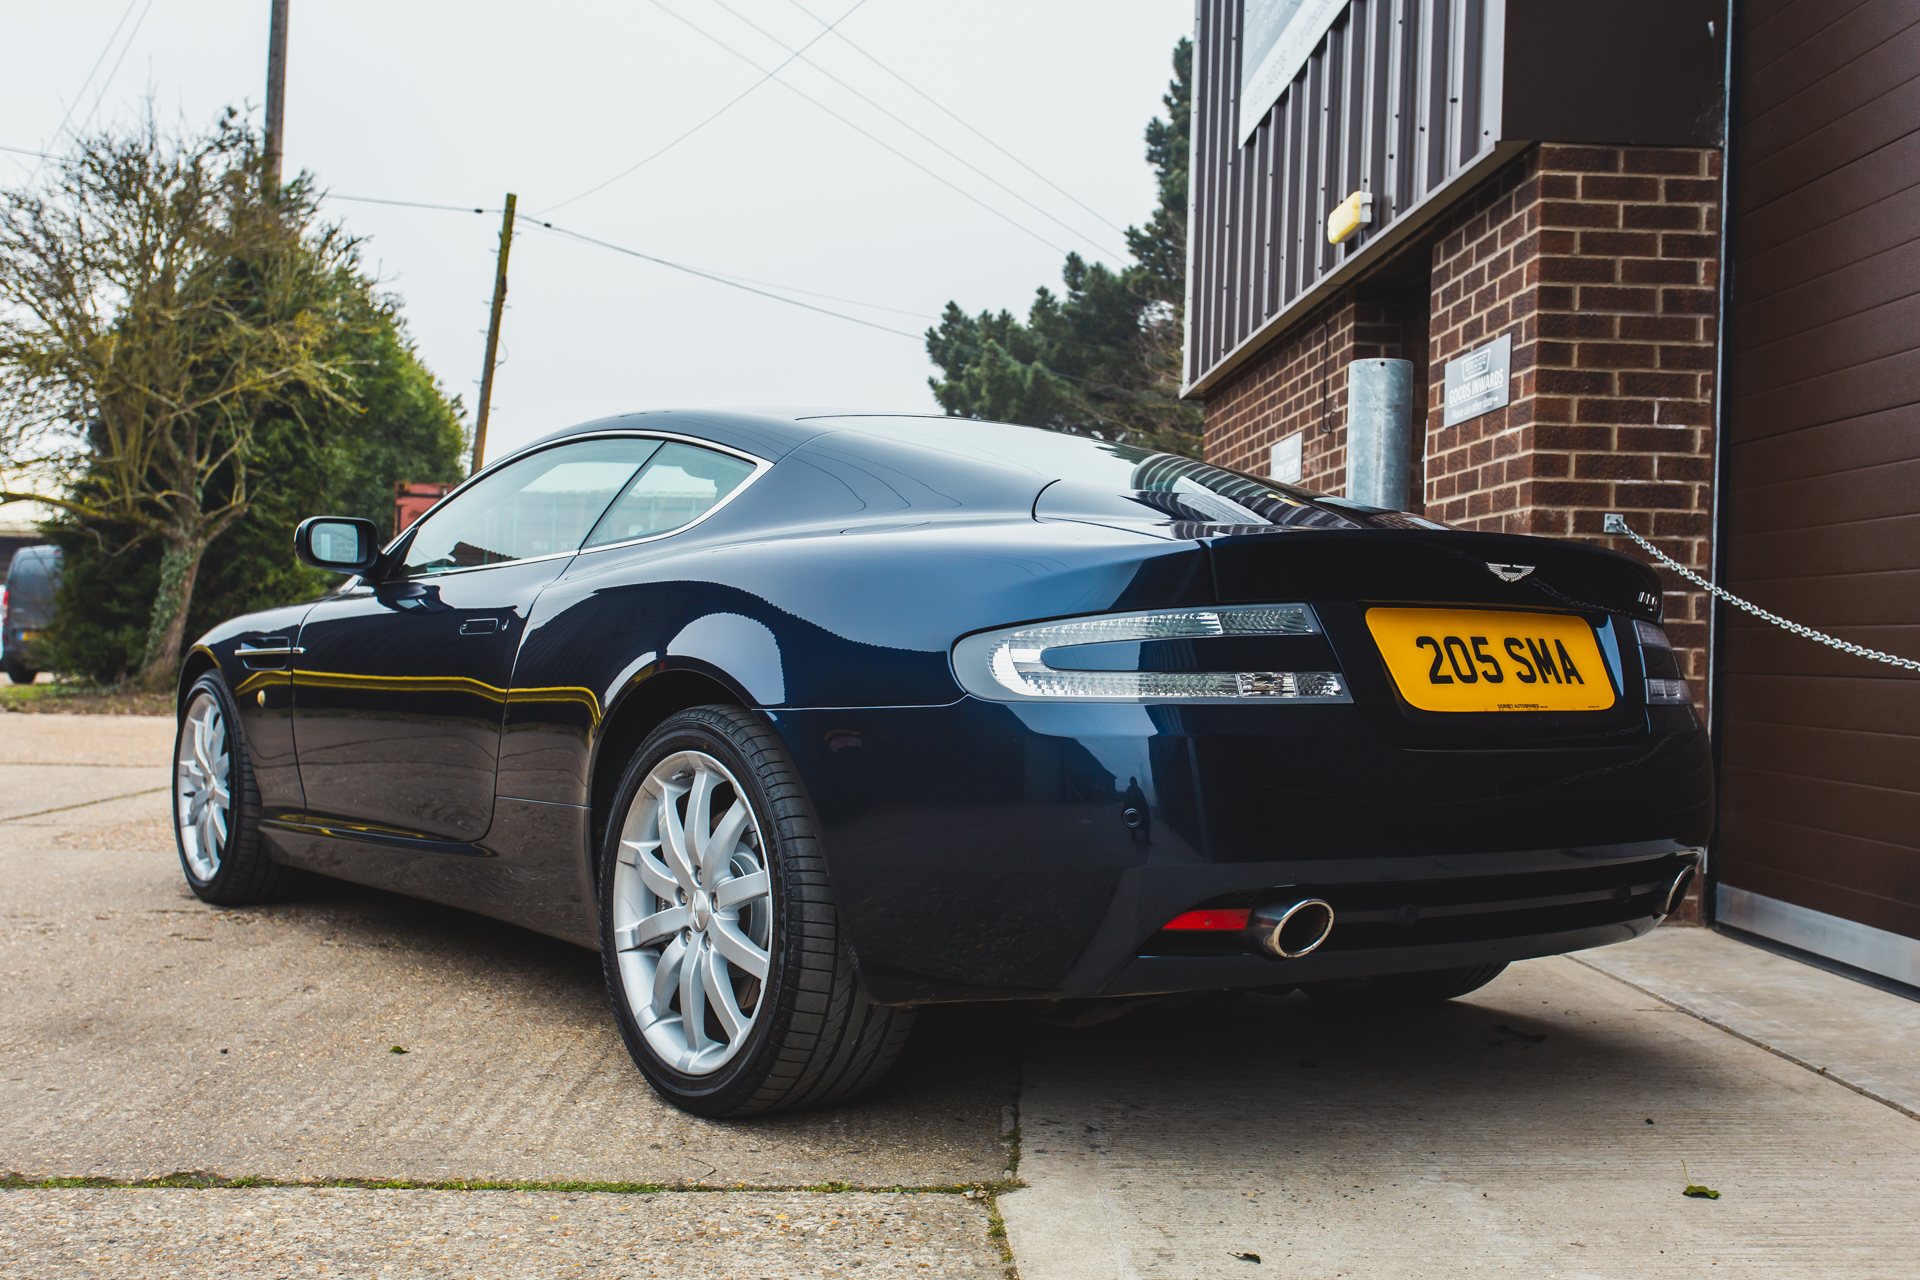
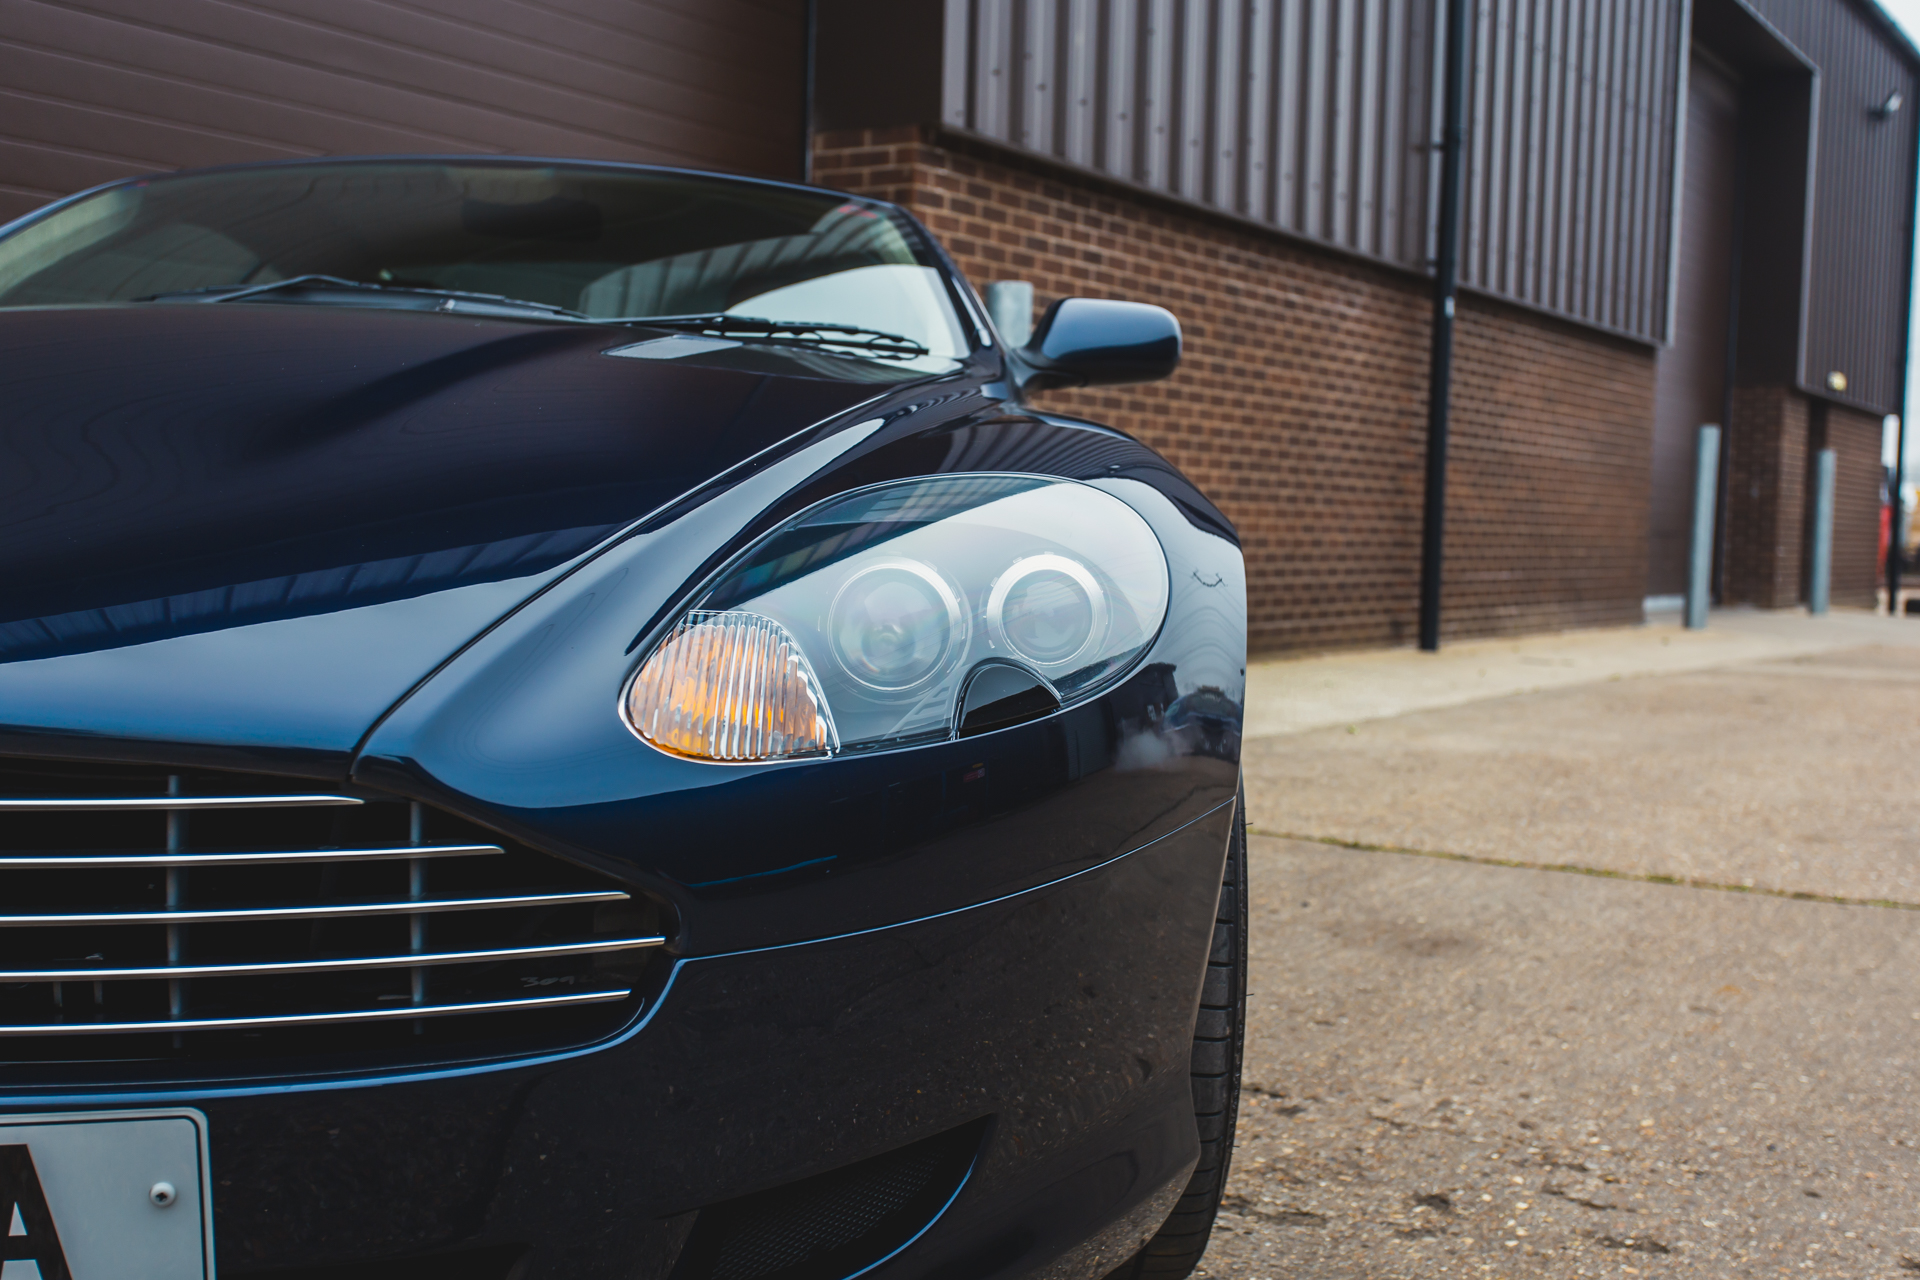
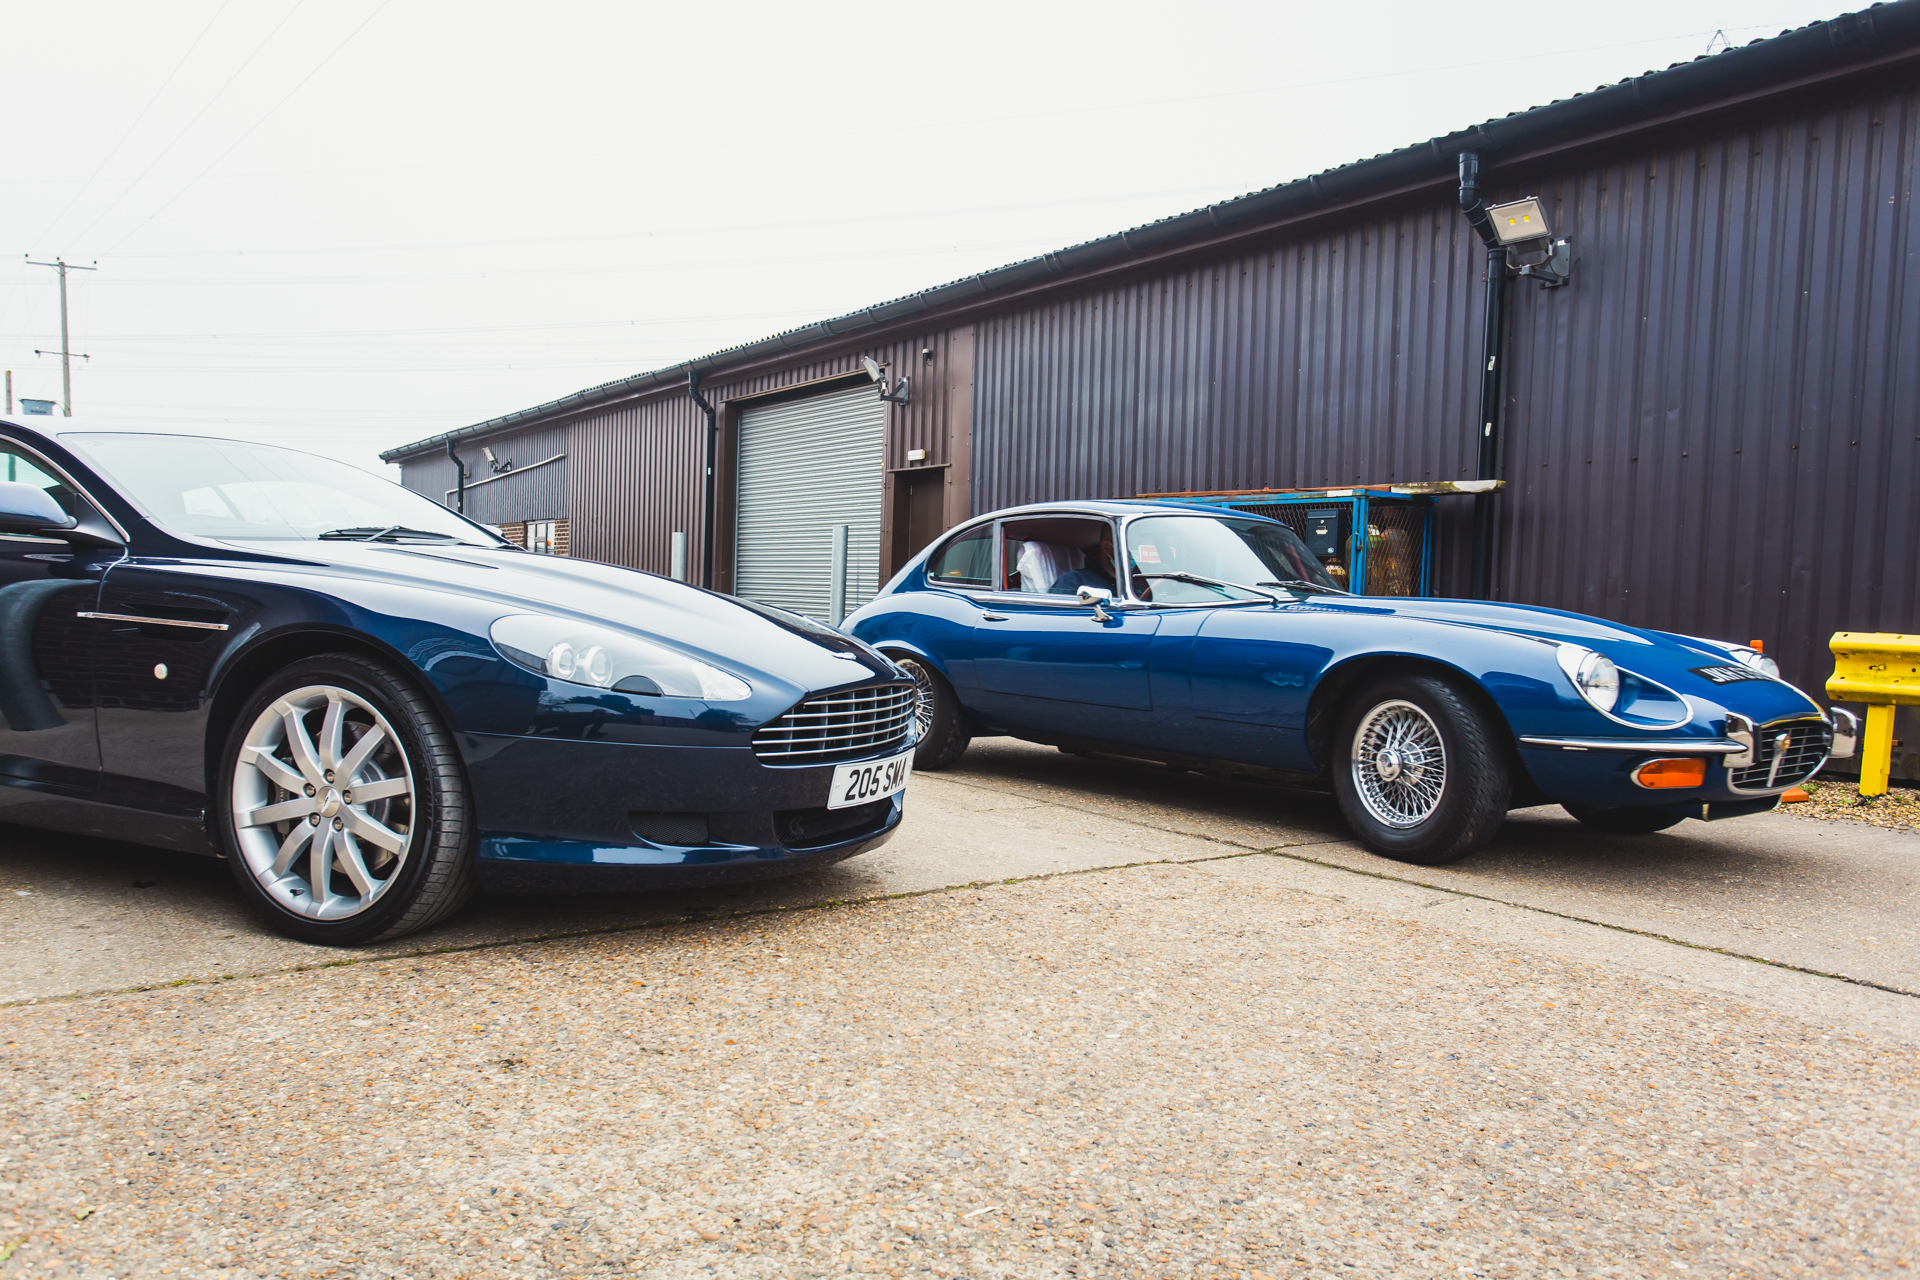
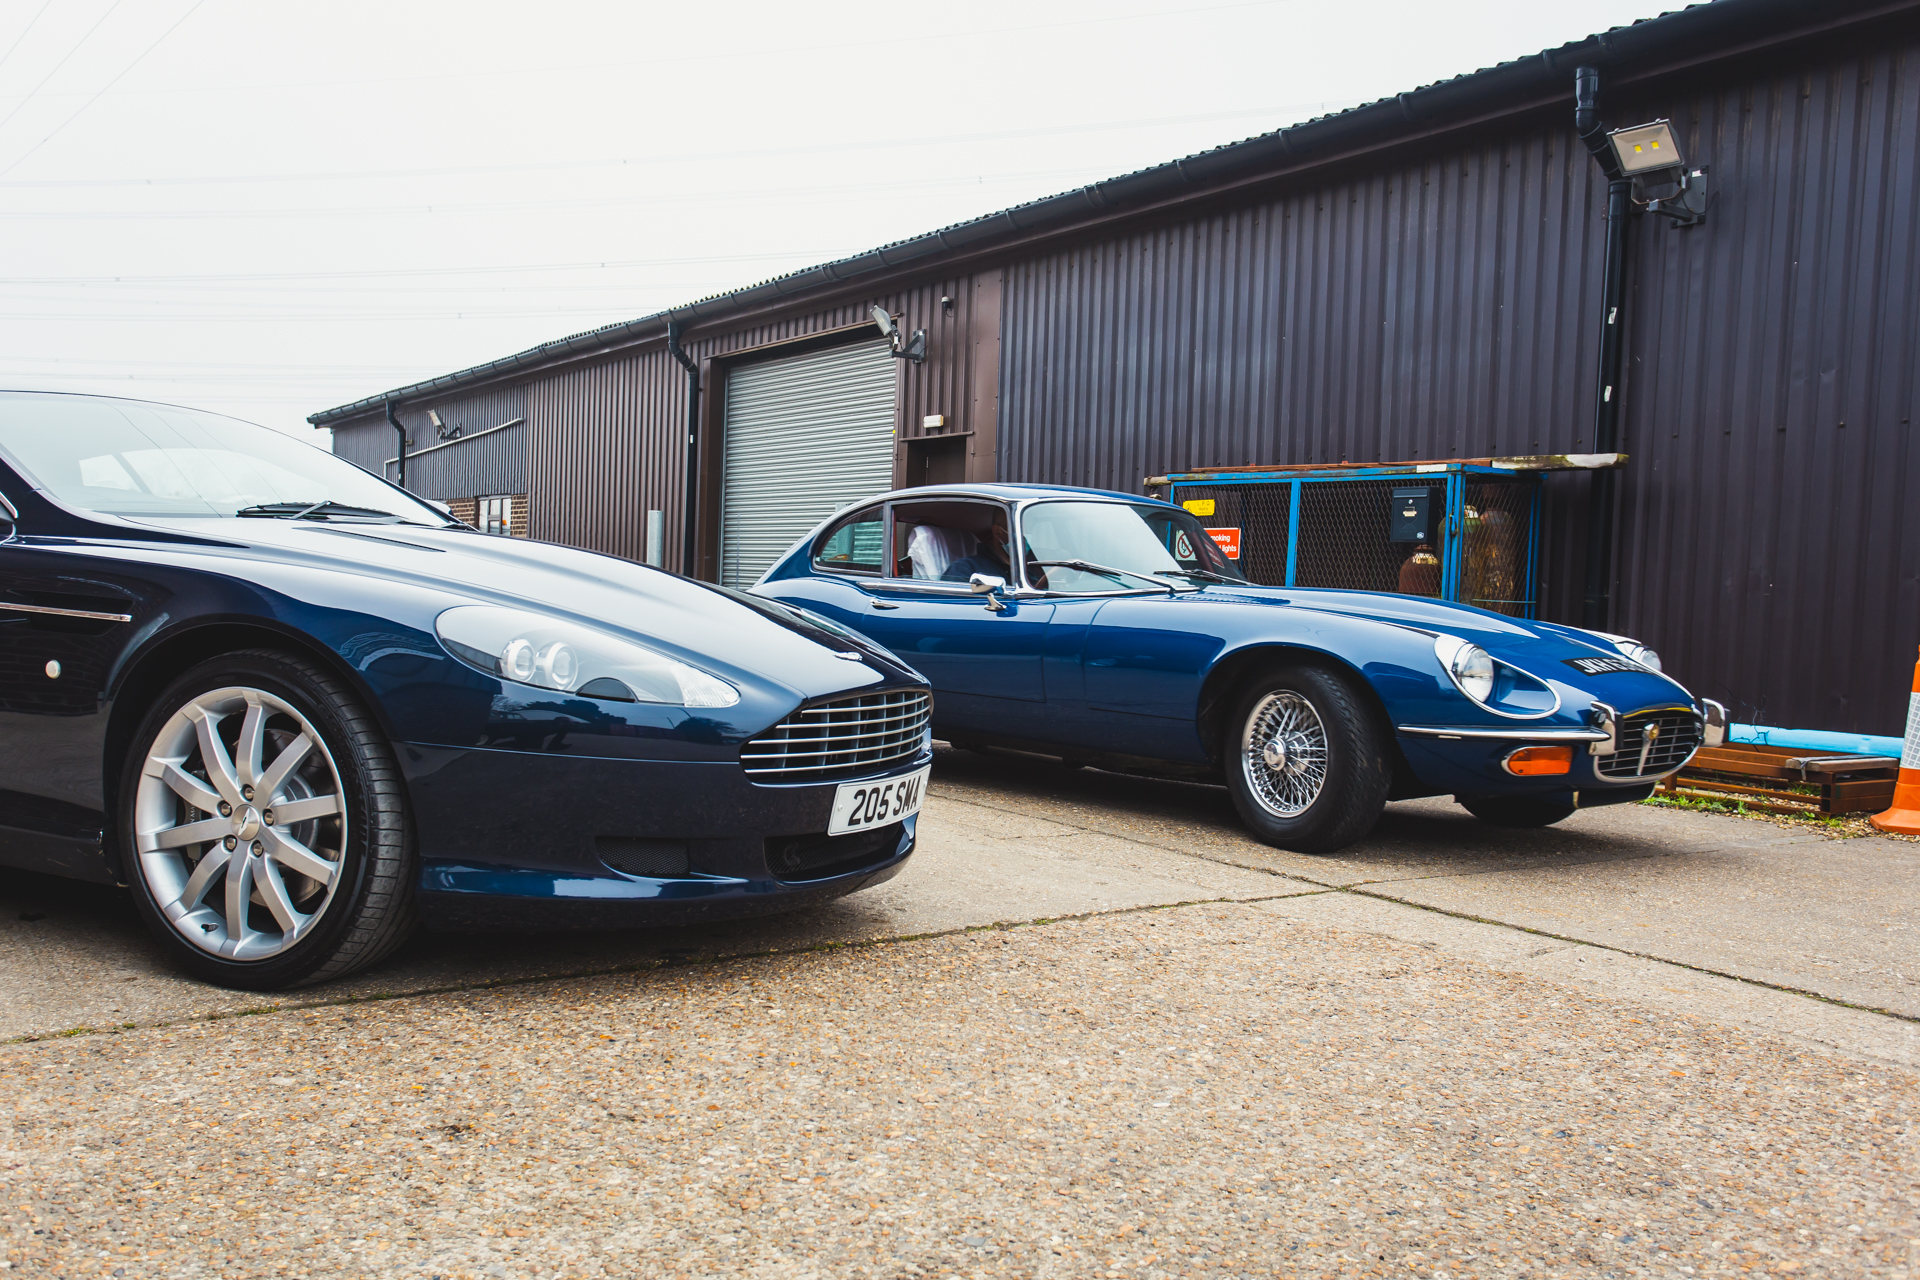
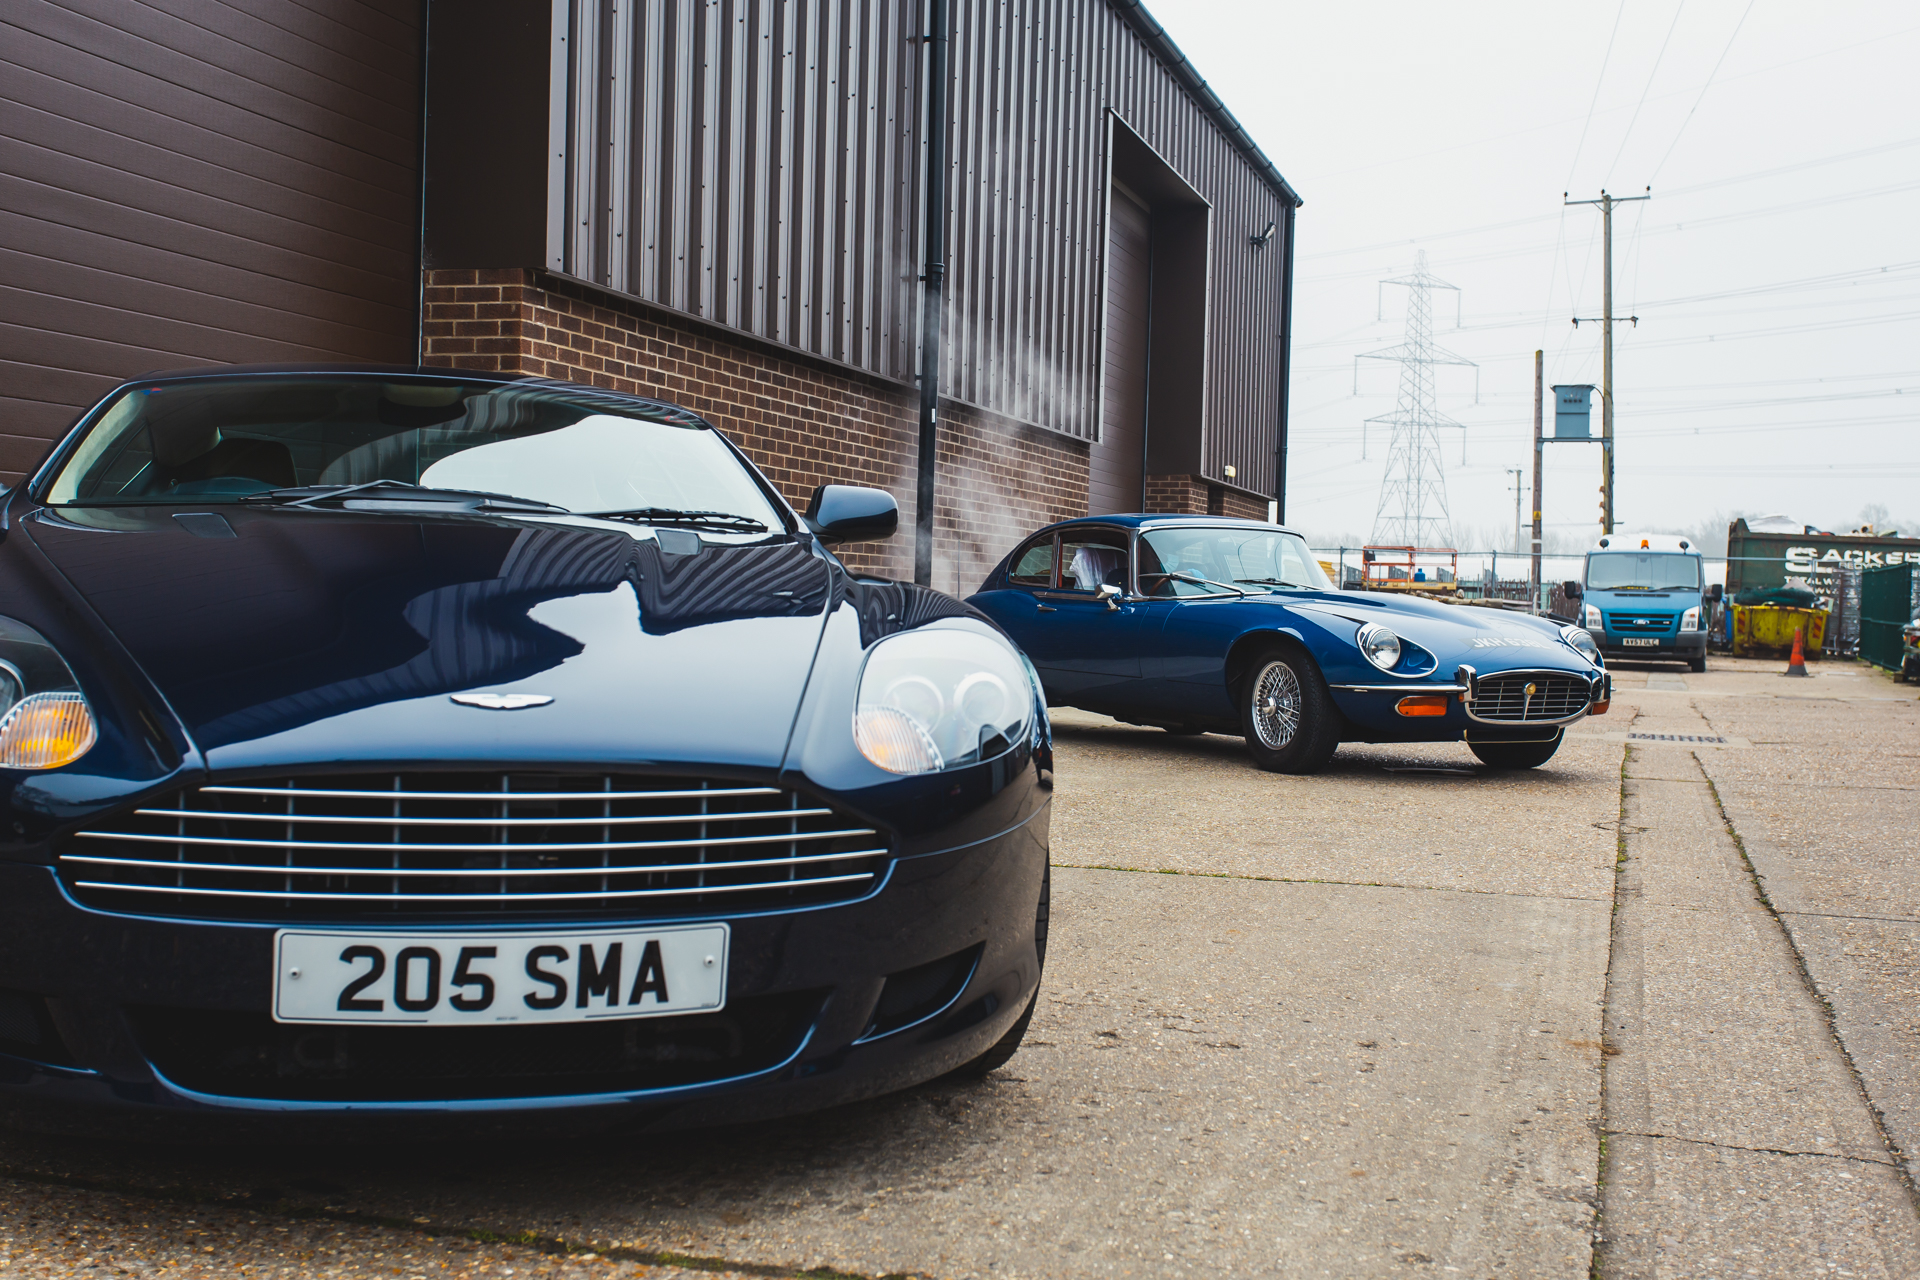
Craig, Director here at Bridge Classic Cars, has recently purchased this gorgeous V12 Aston Martin DB9. In need of a service and keen to preserve
The first stage of our 1991 VW T4 Campervan paint has been completed. With the entire body masked and painted in a solid white, the paint shop can then move on to paint the lower half a steel grey.


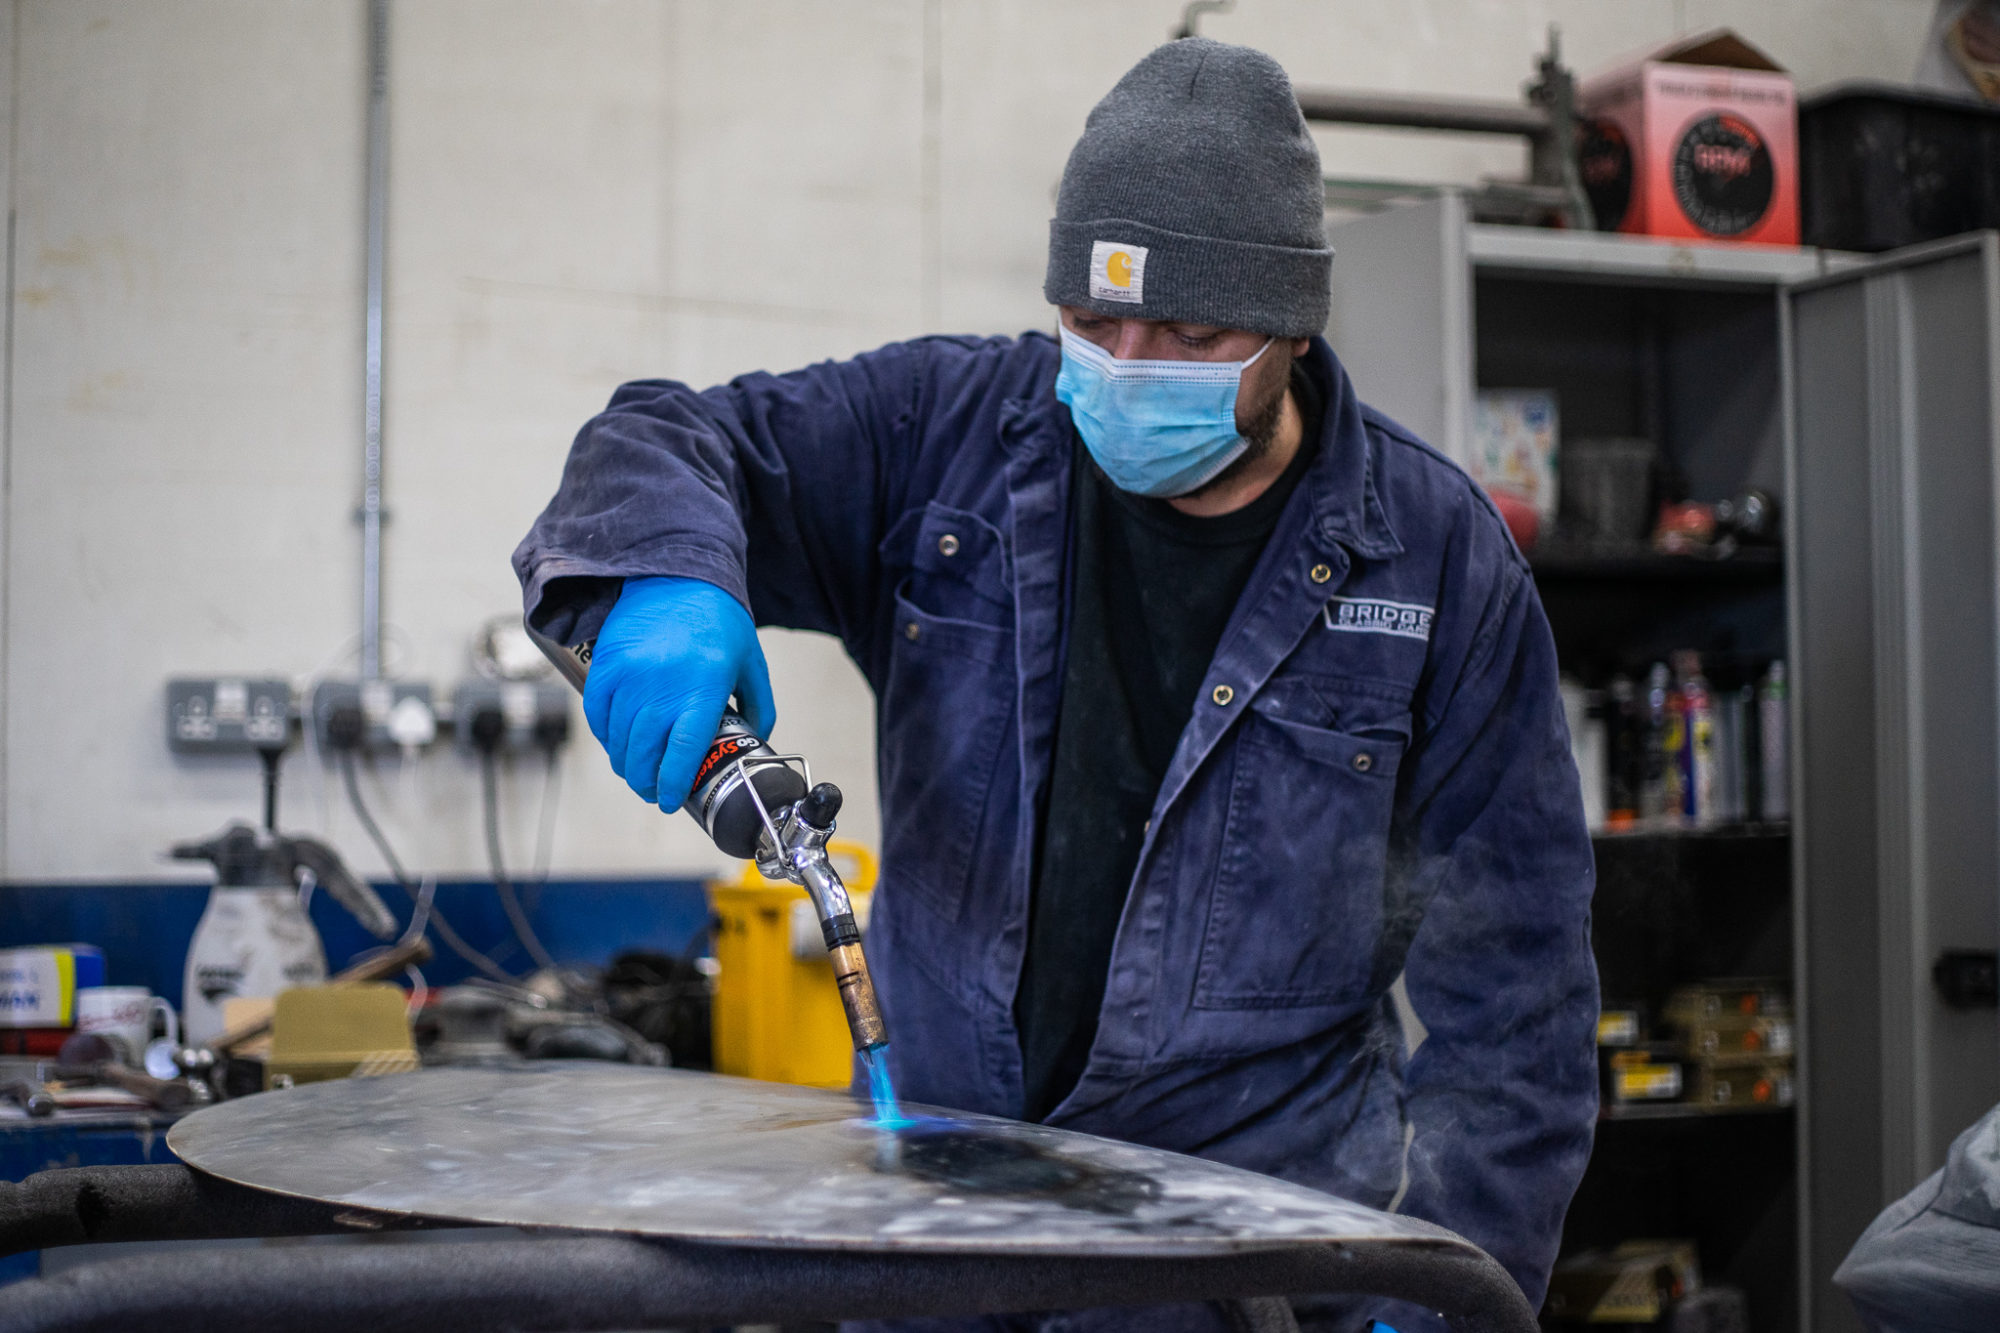
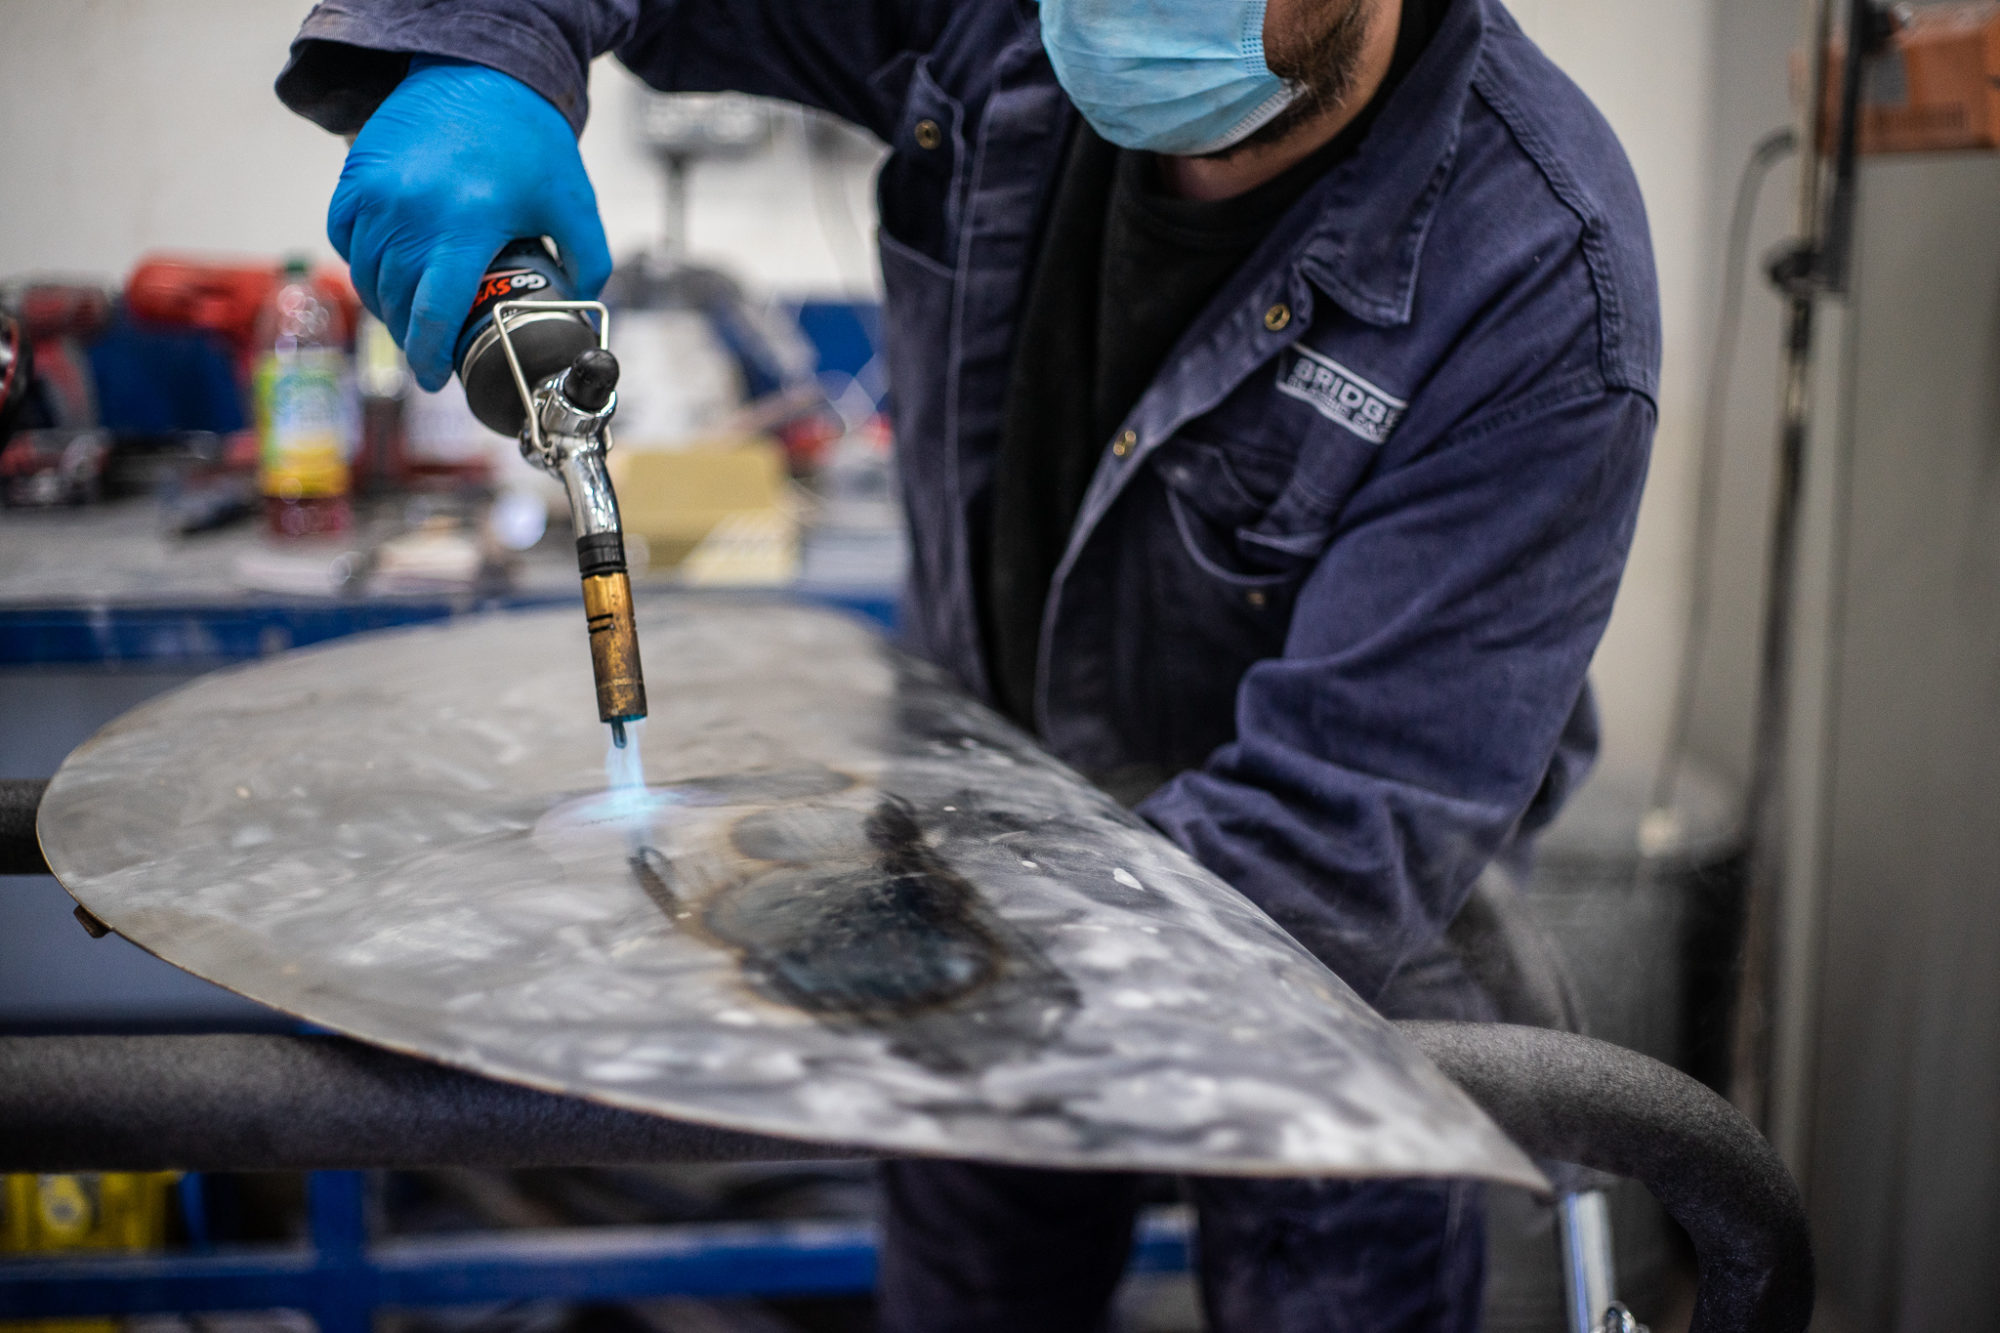
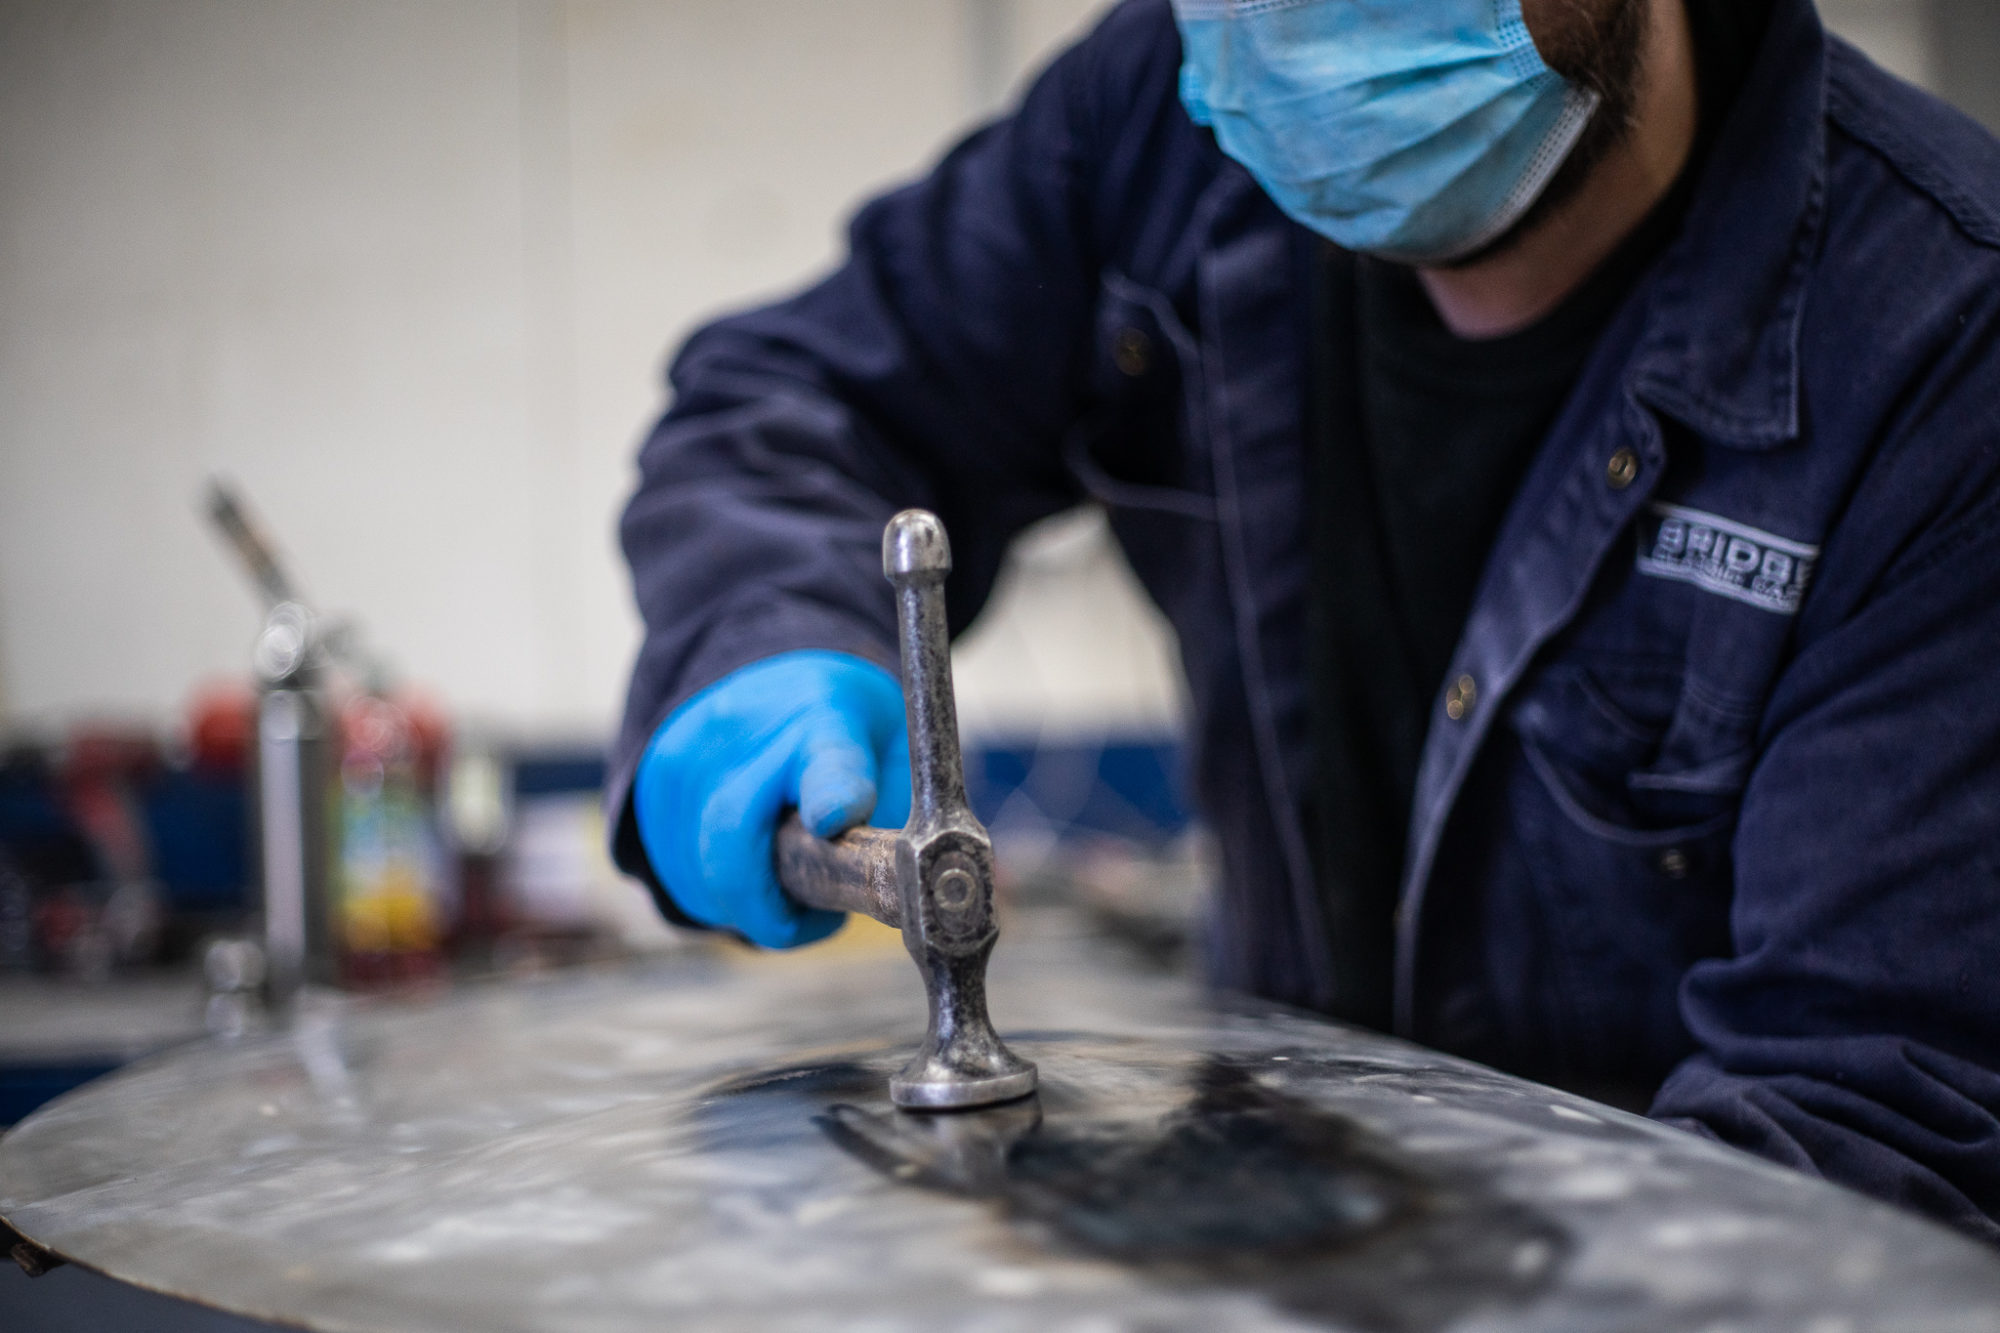
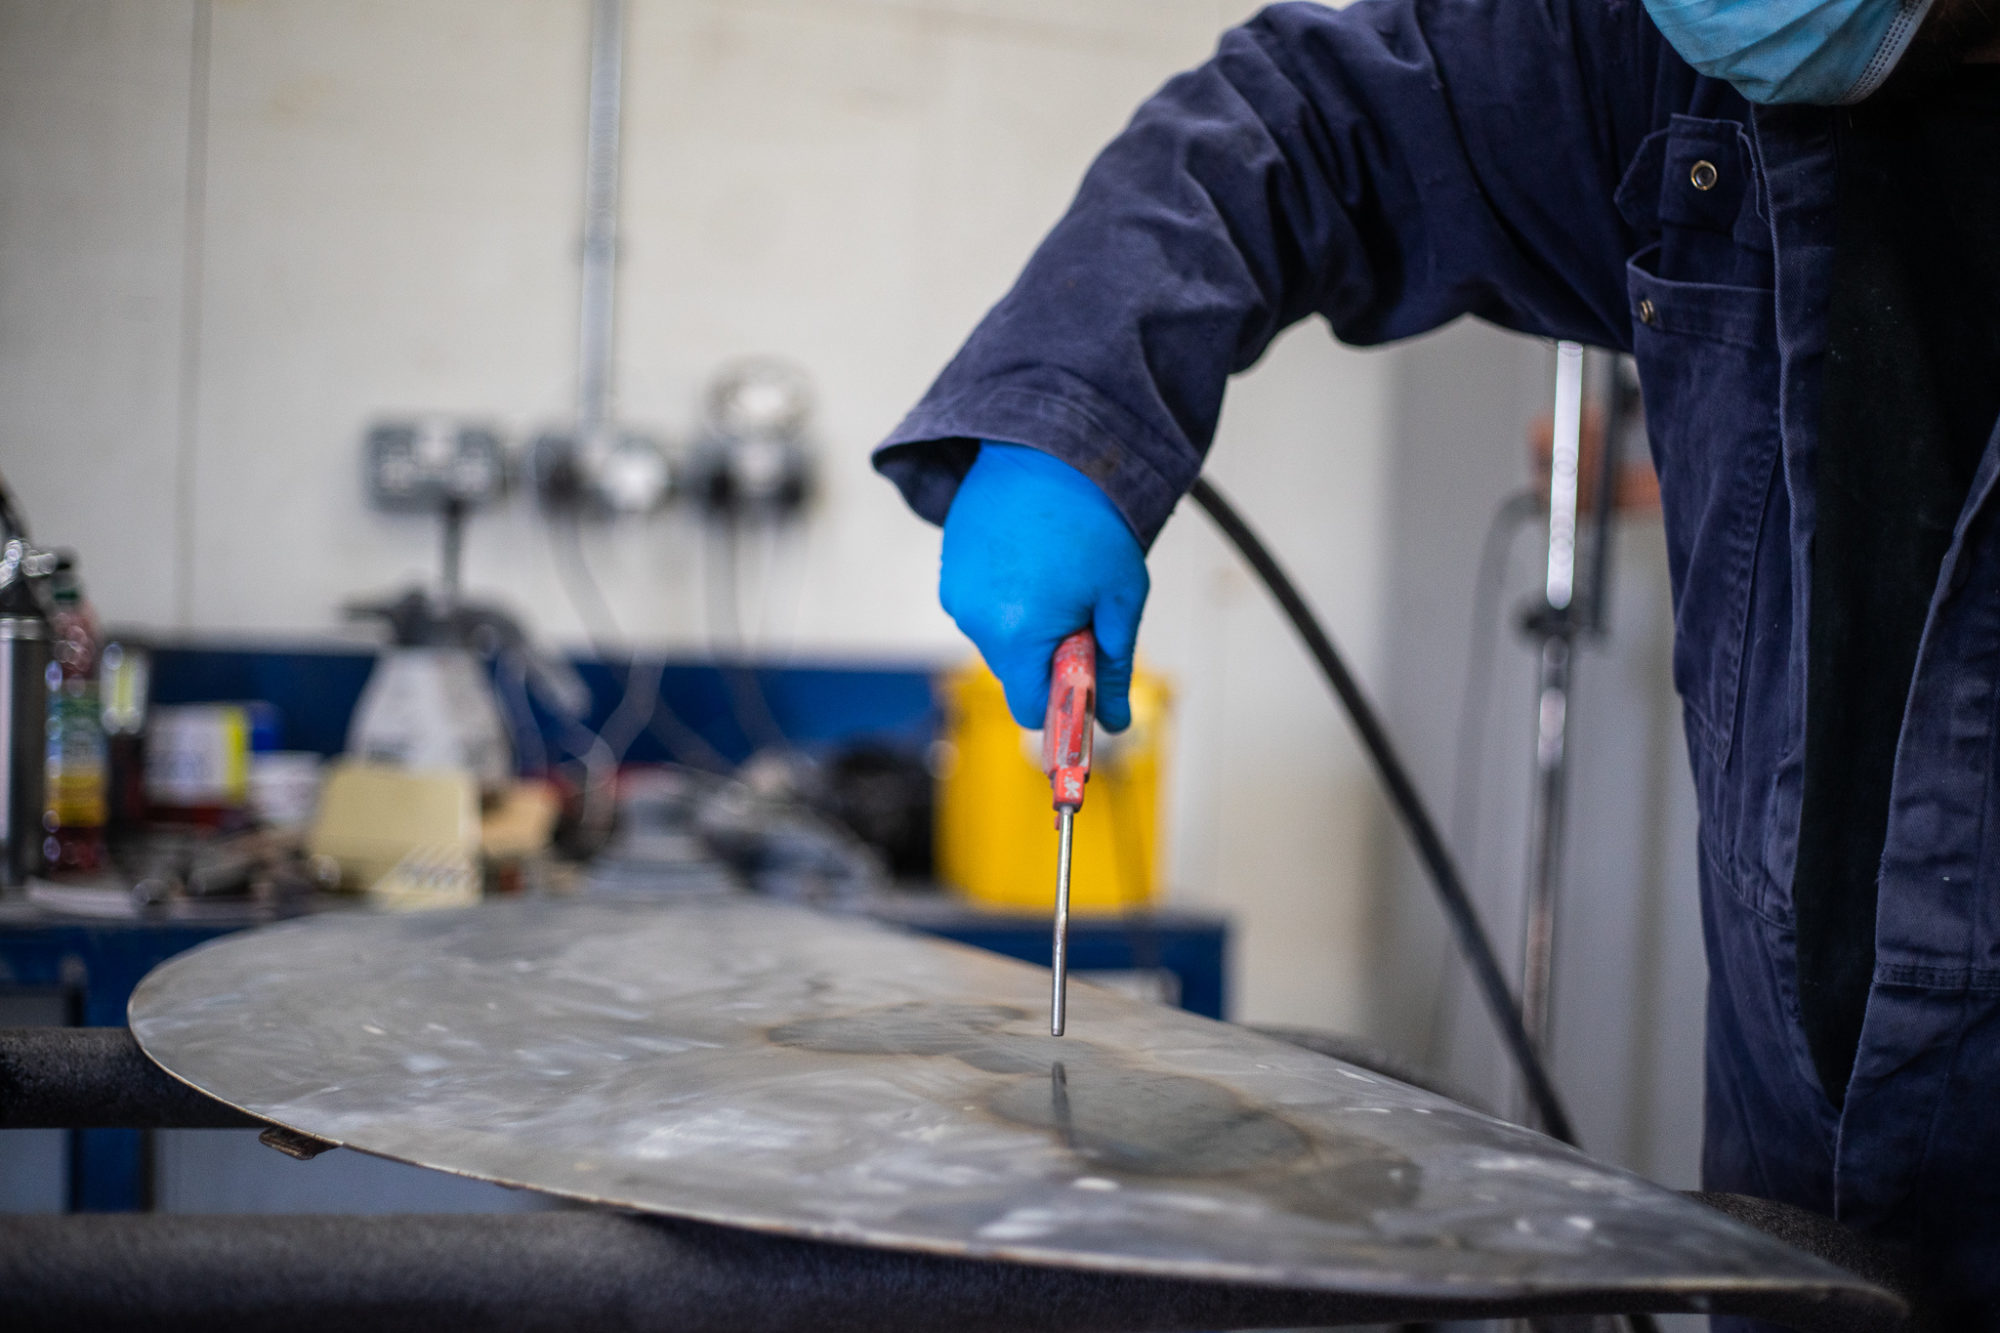
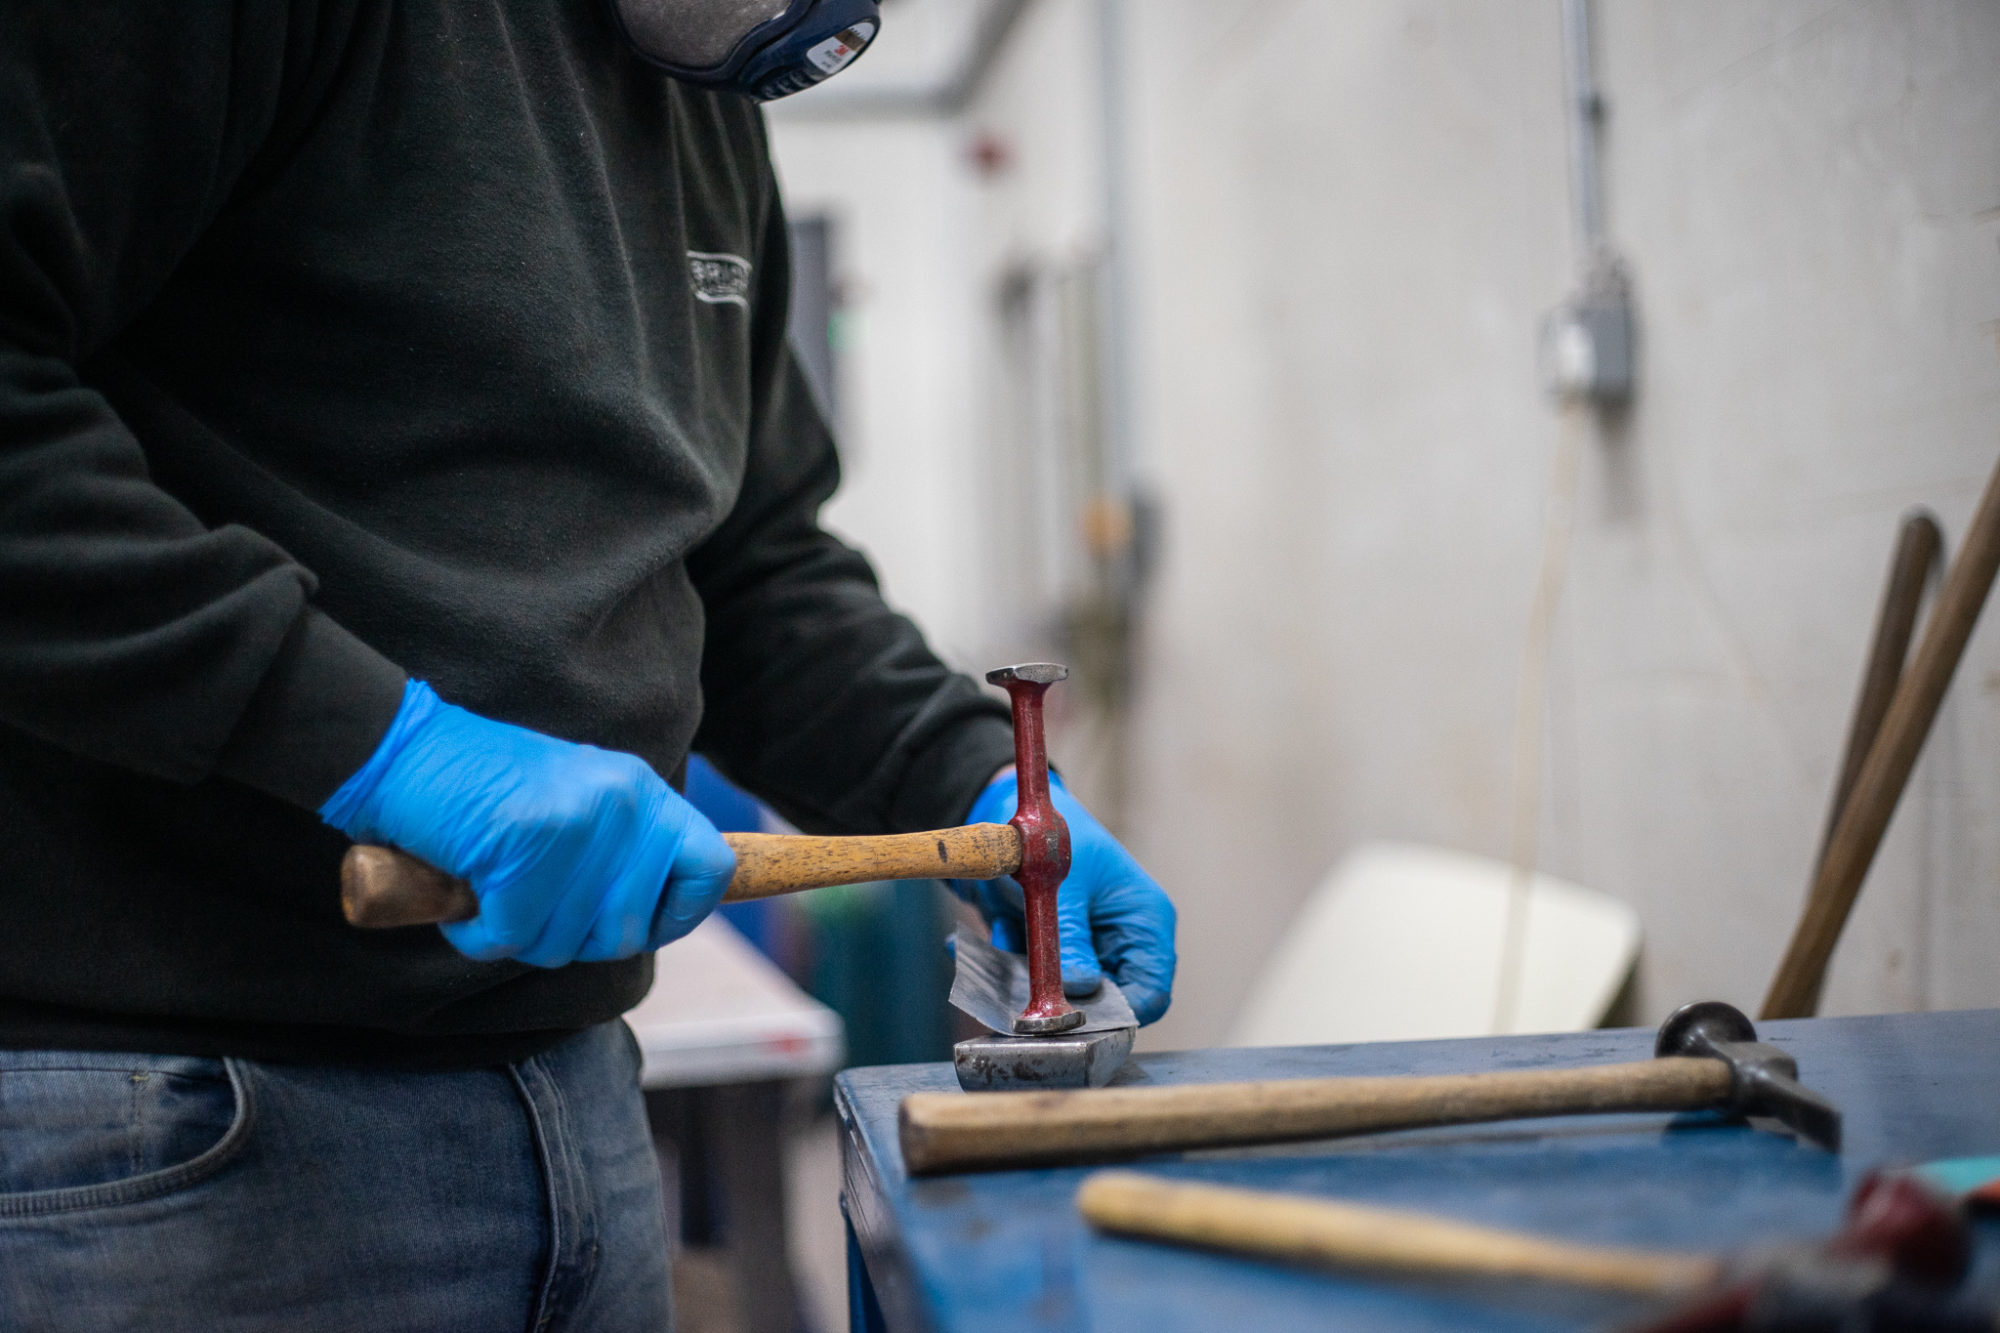
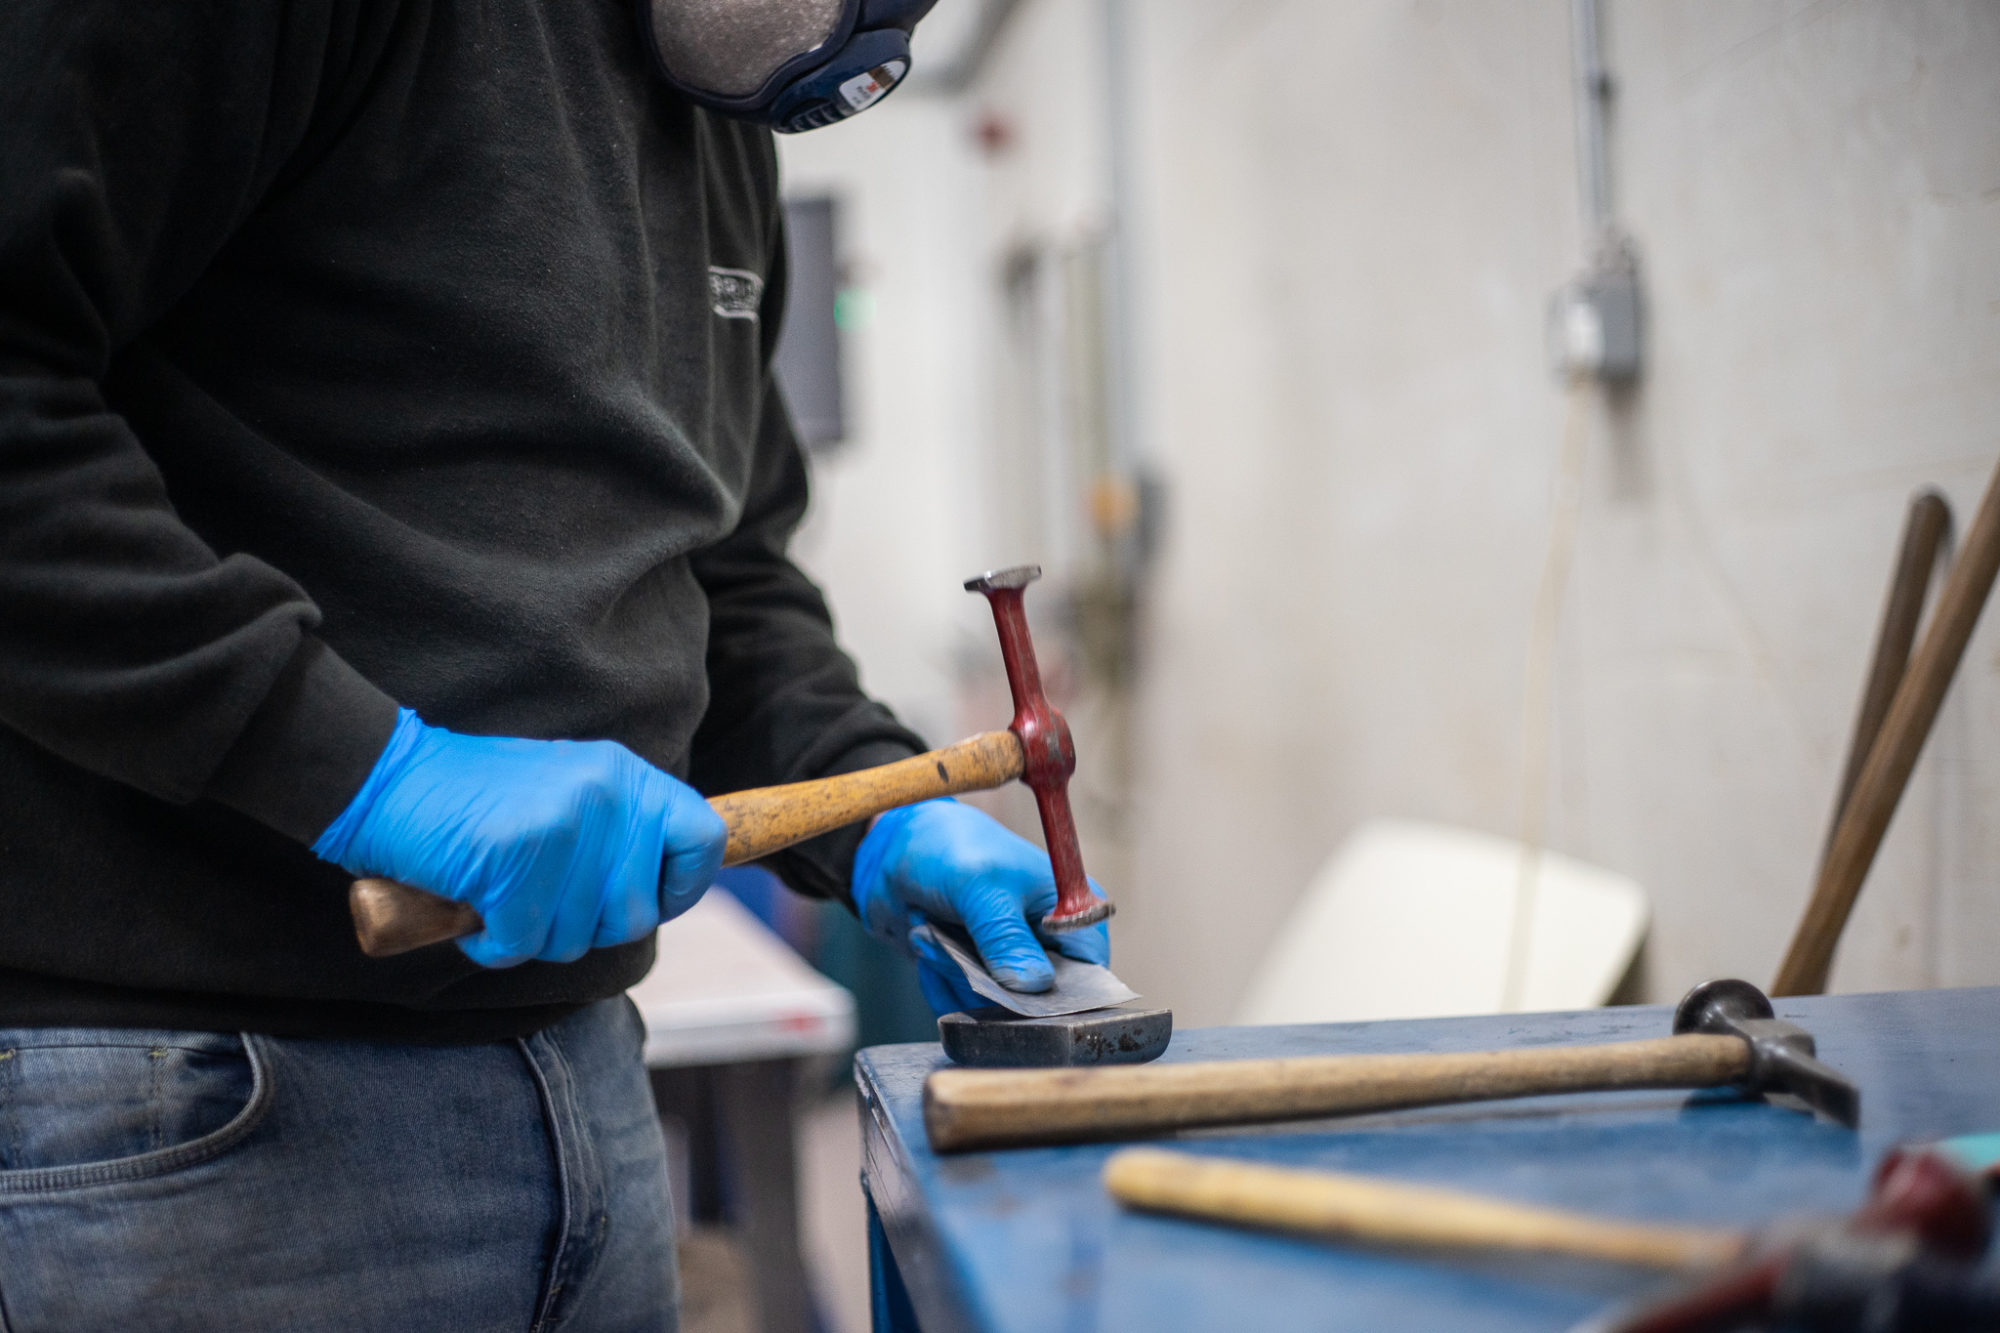
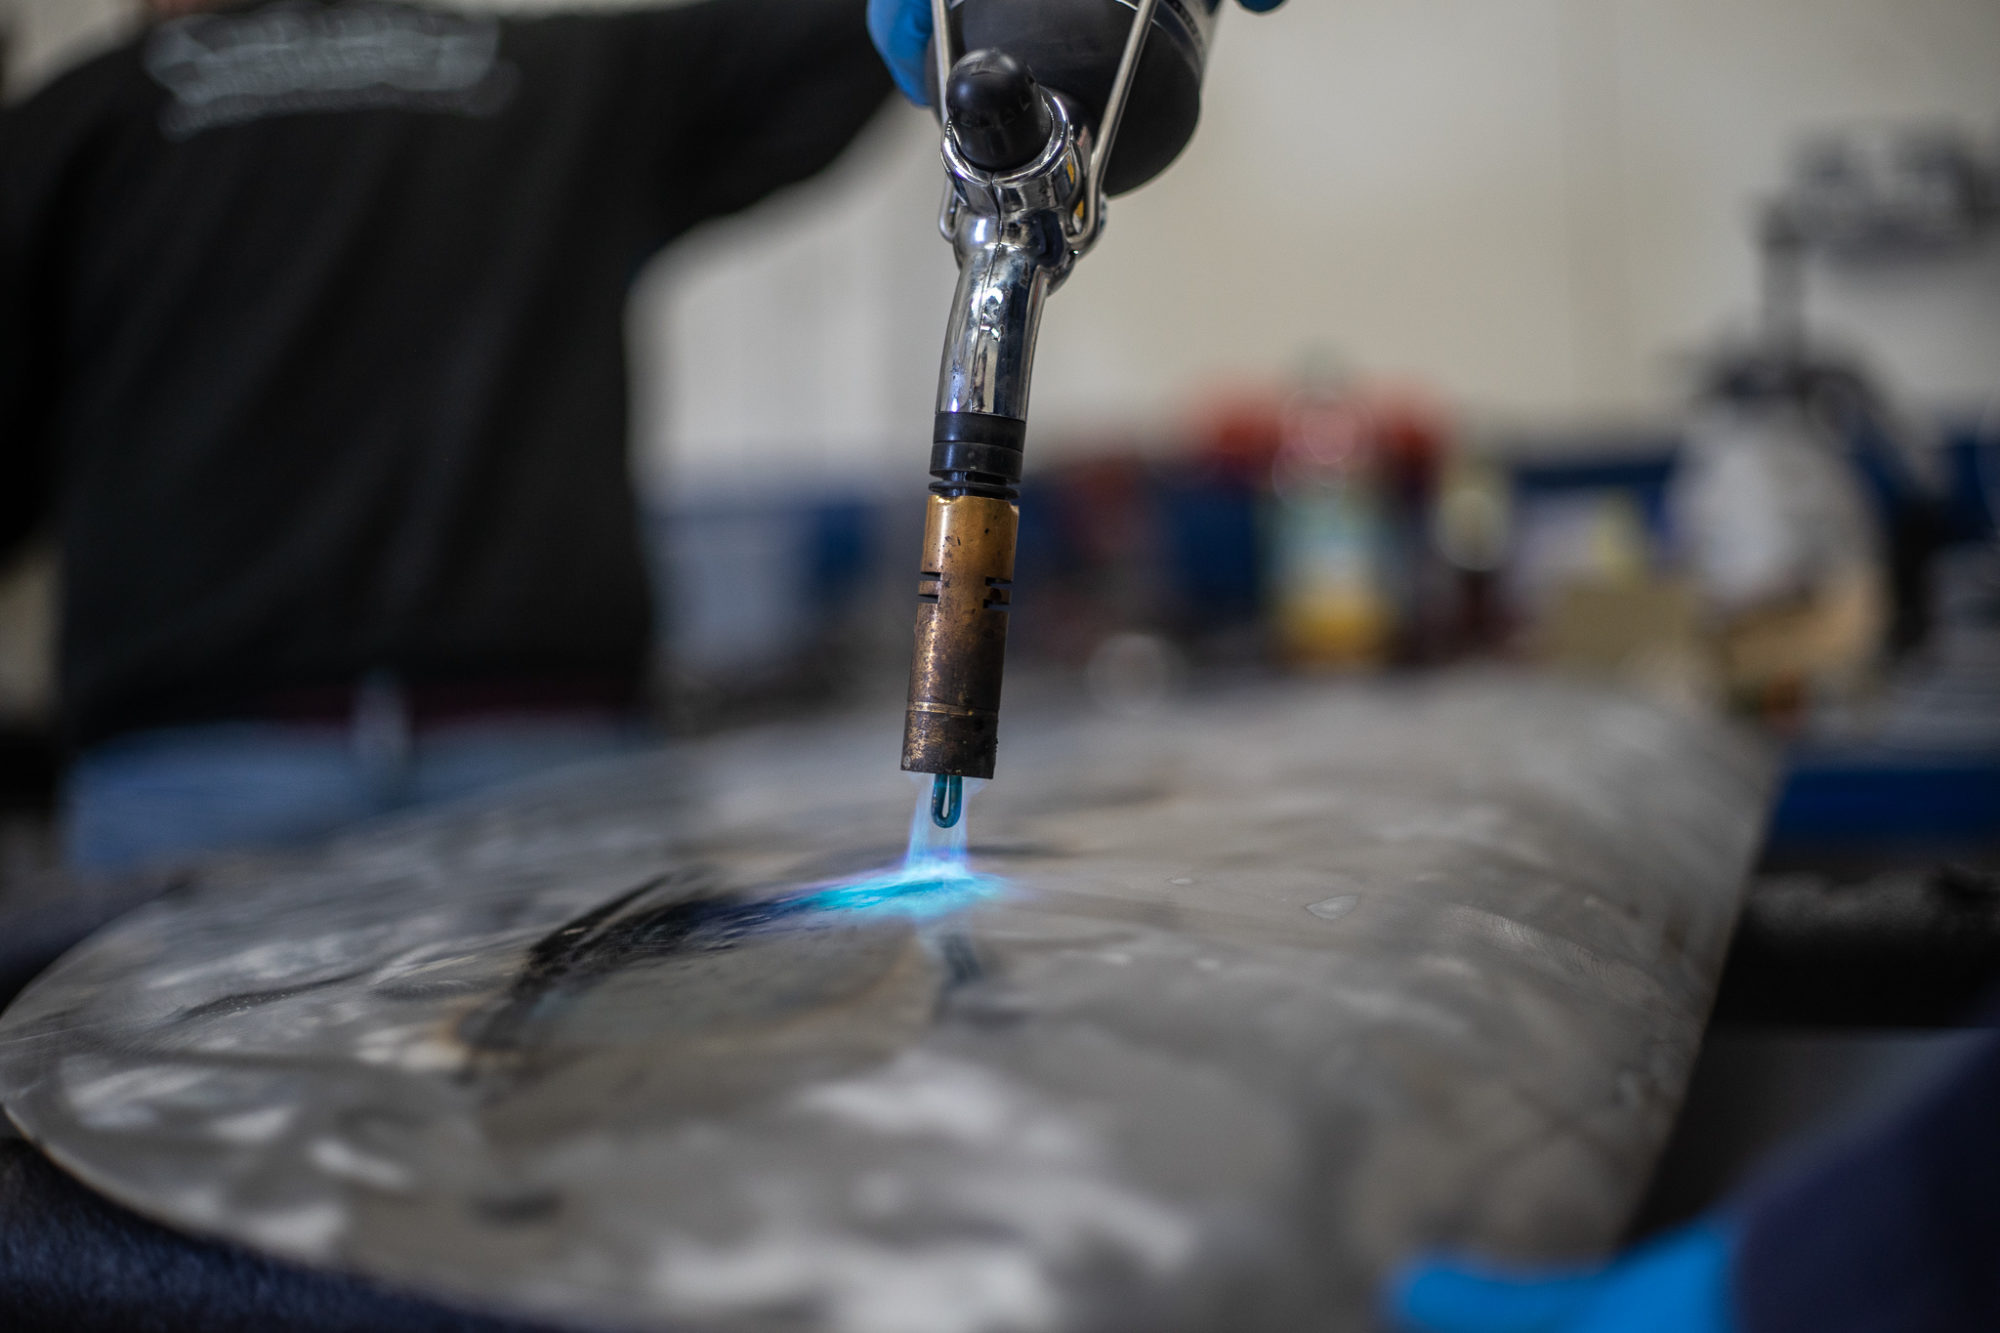
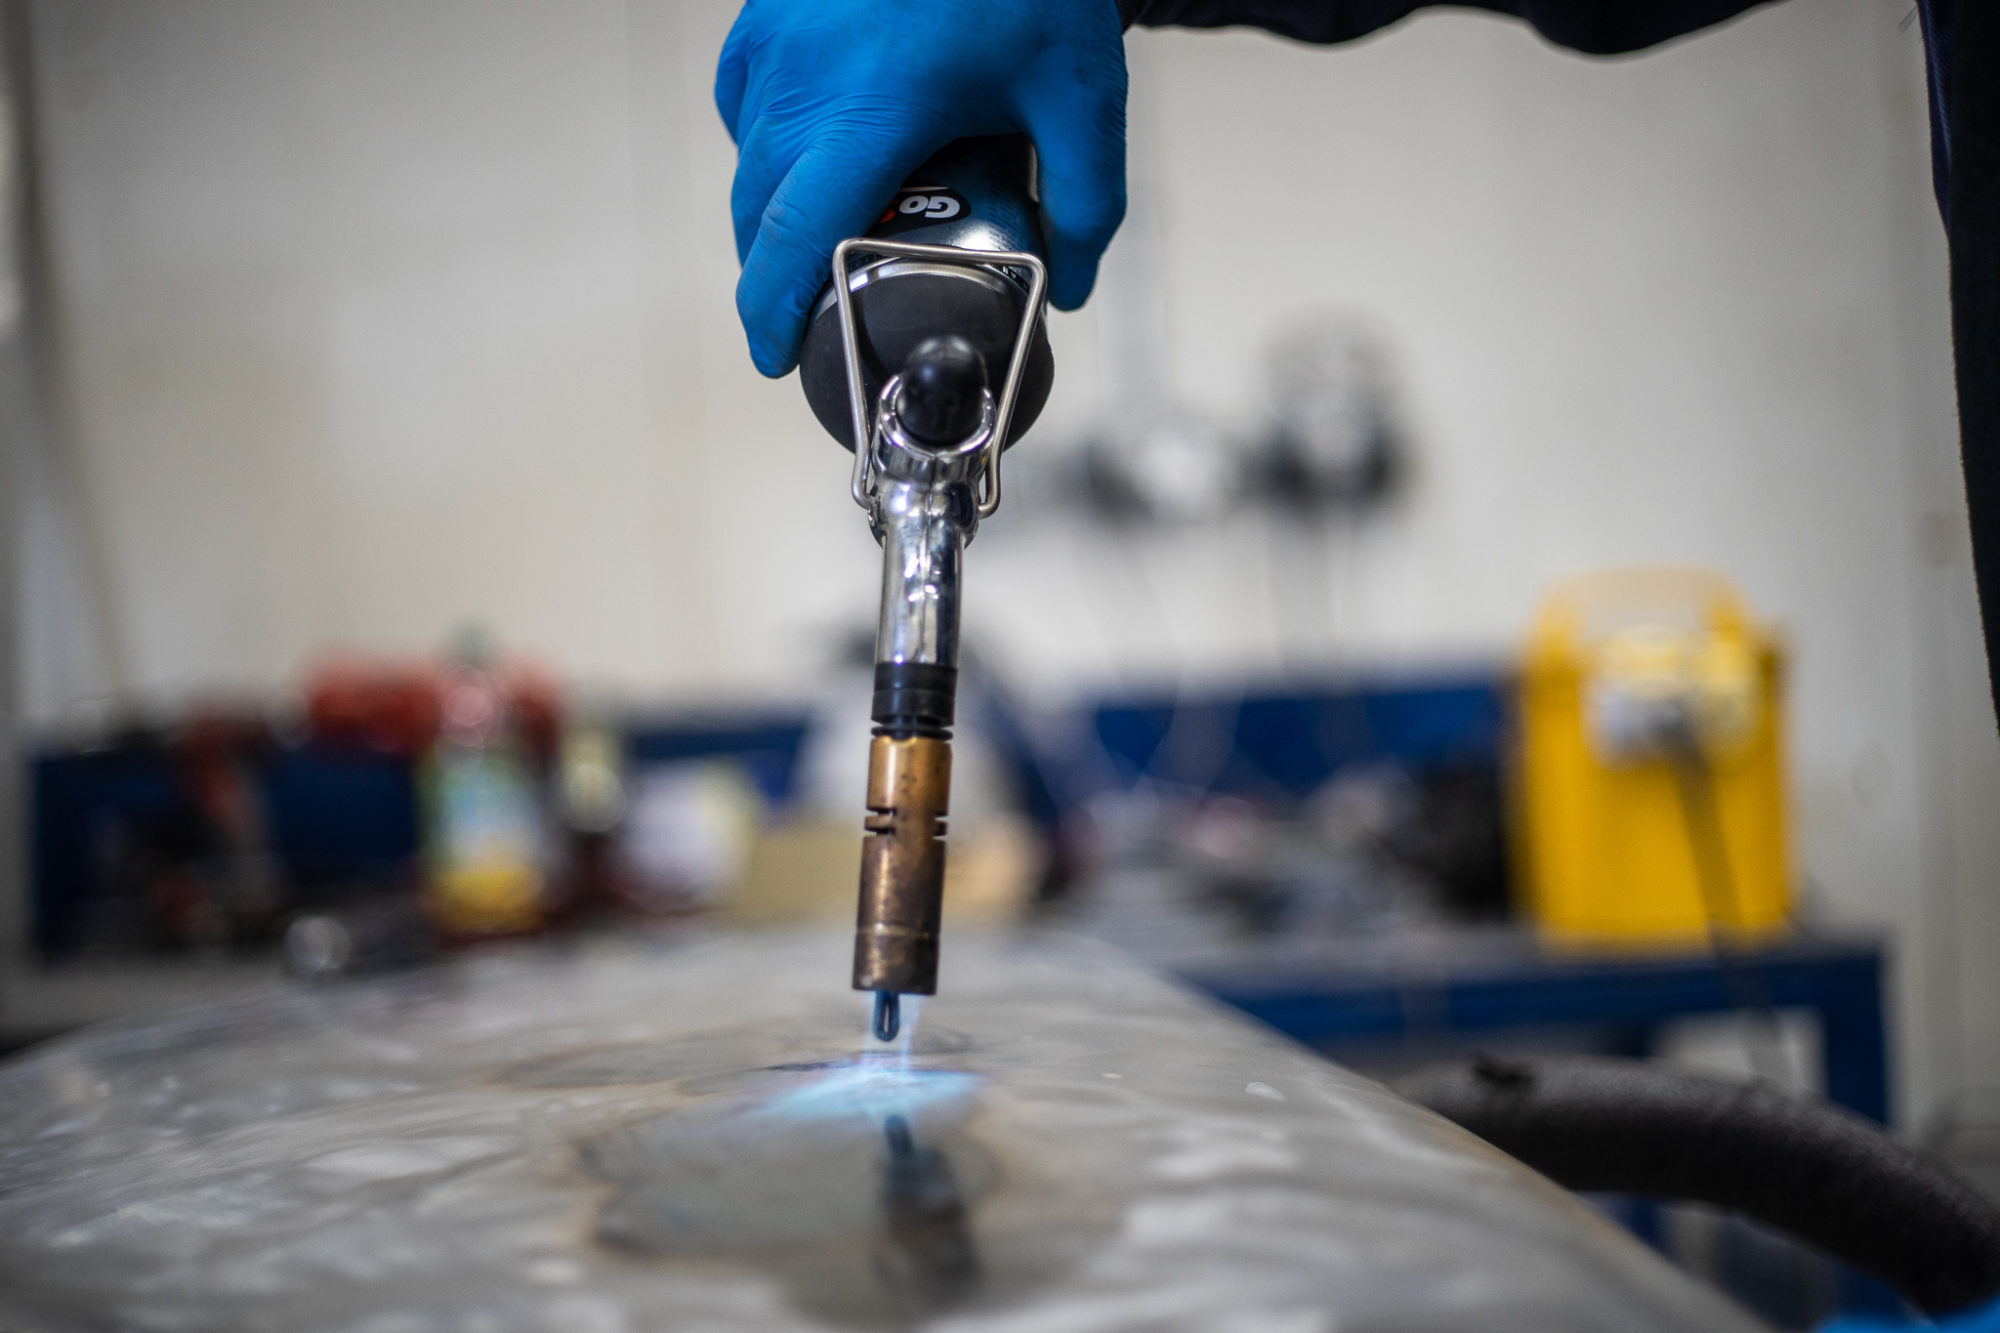
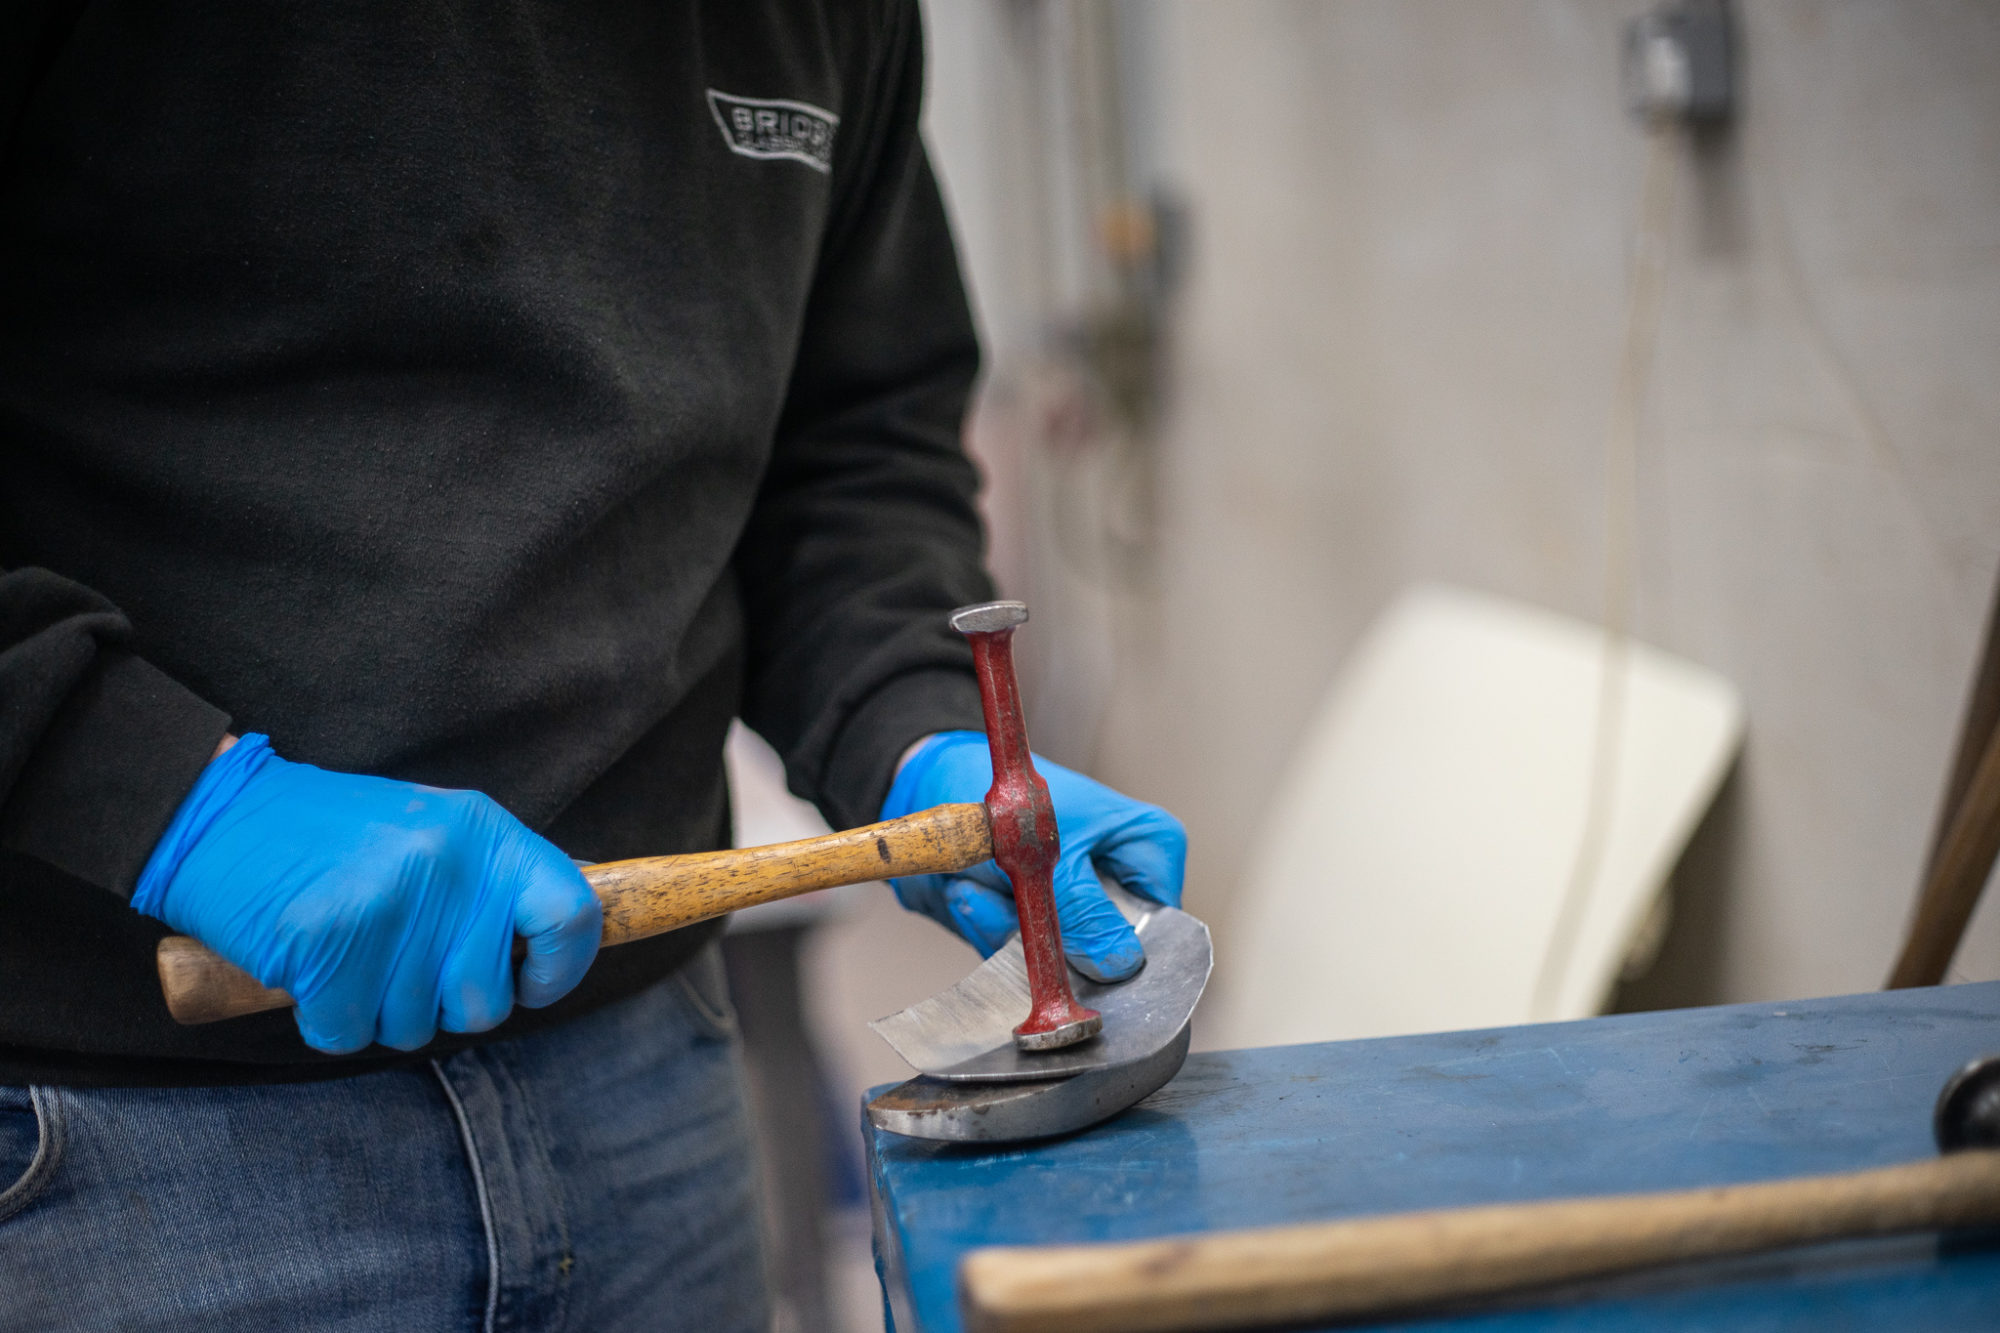
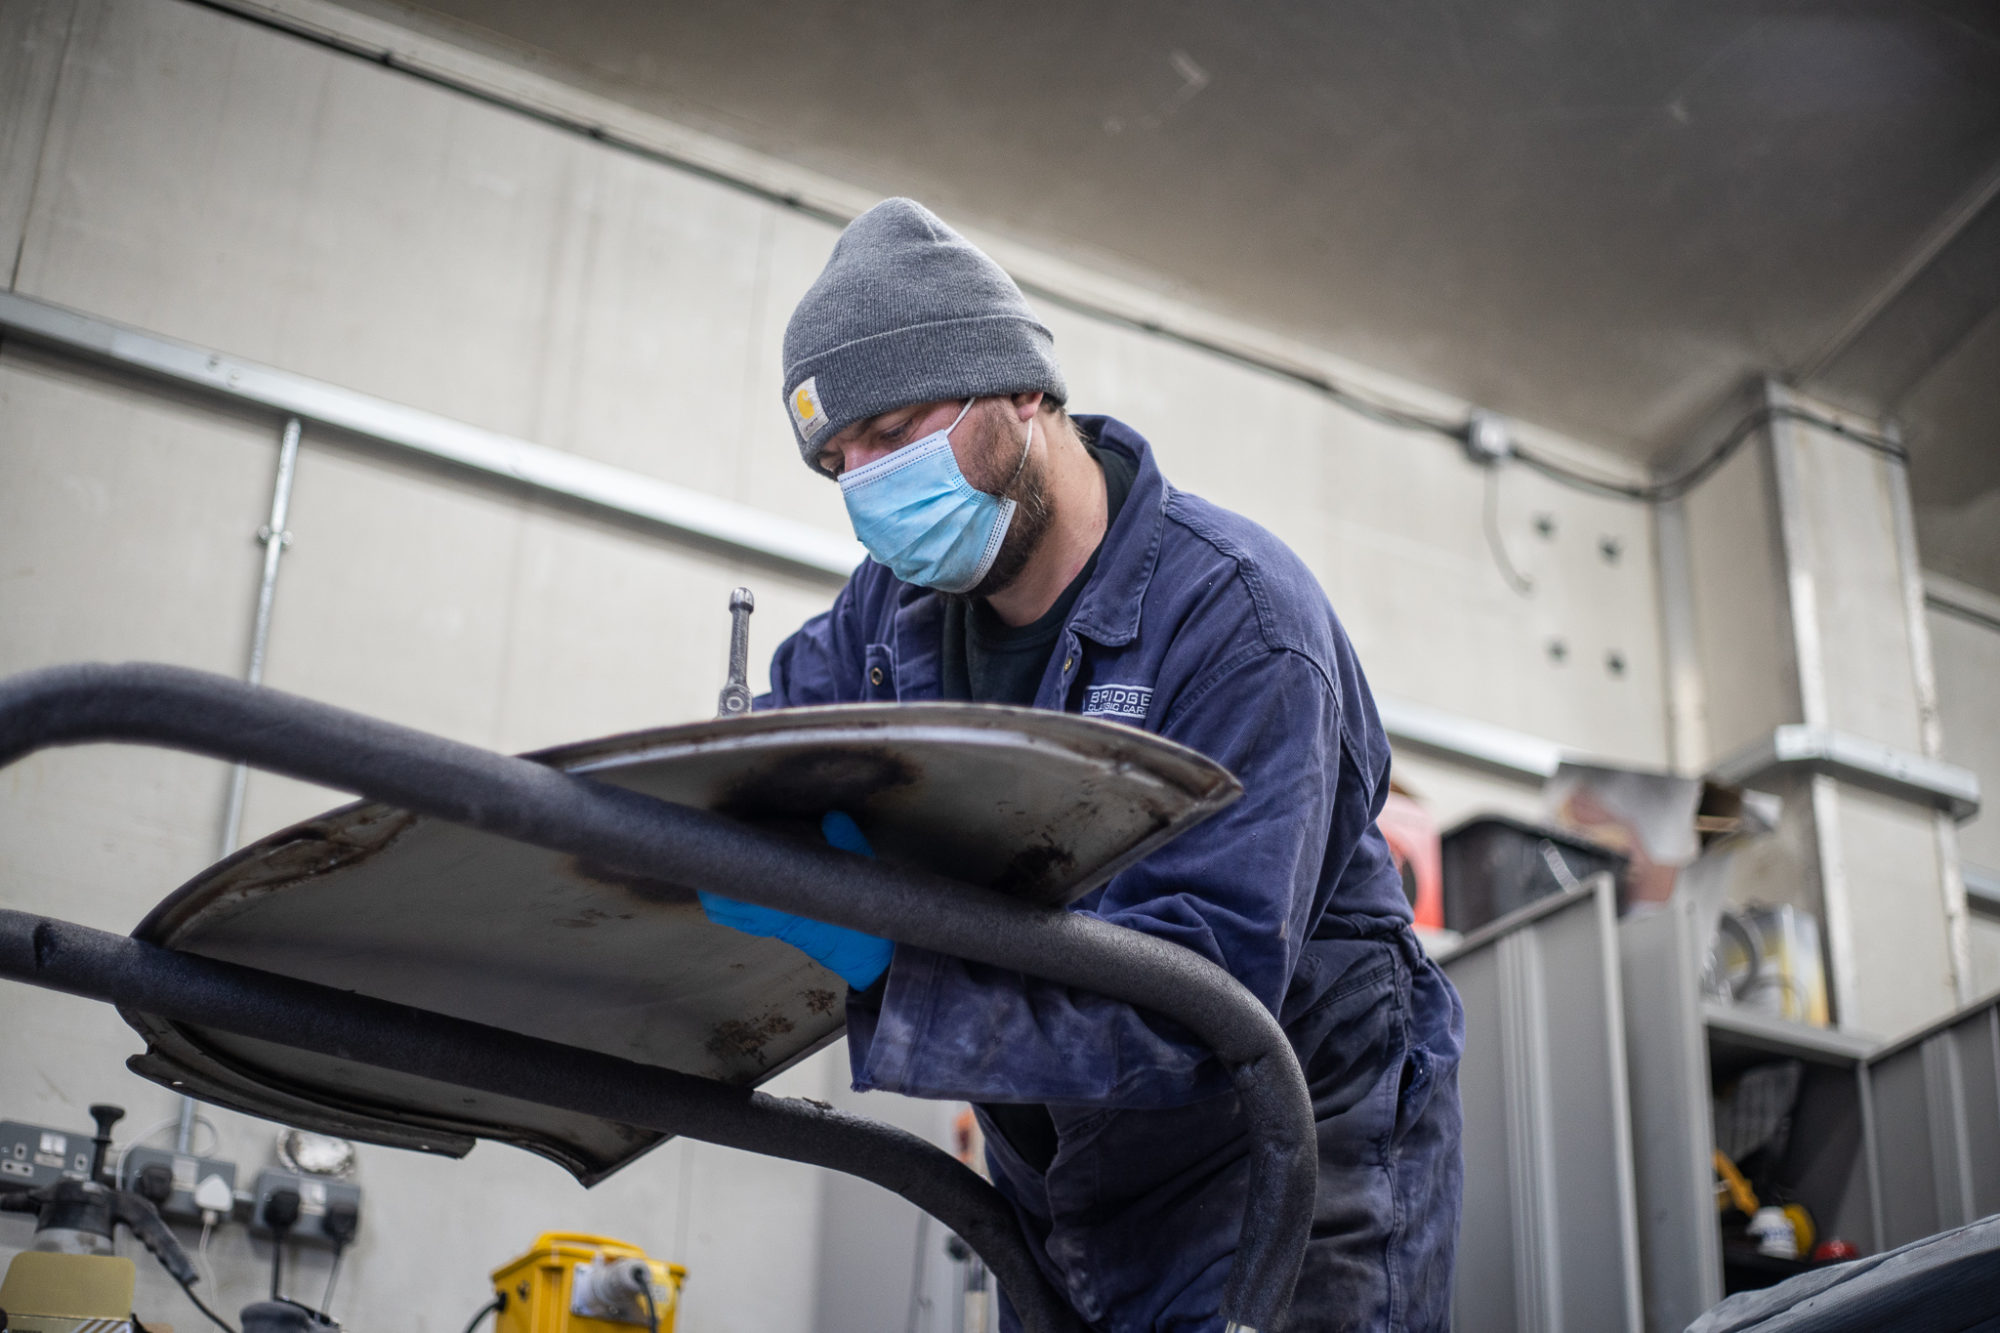
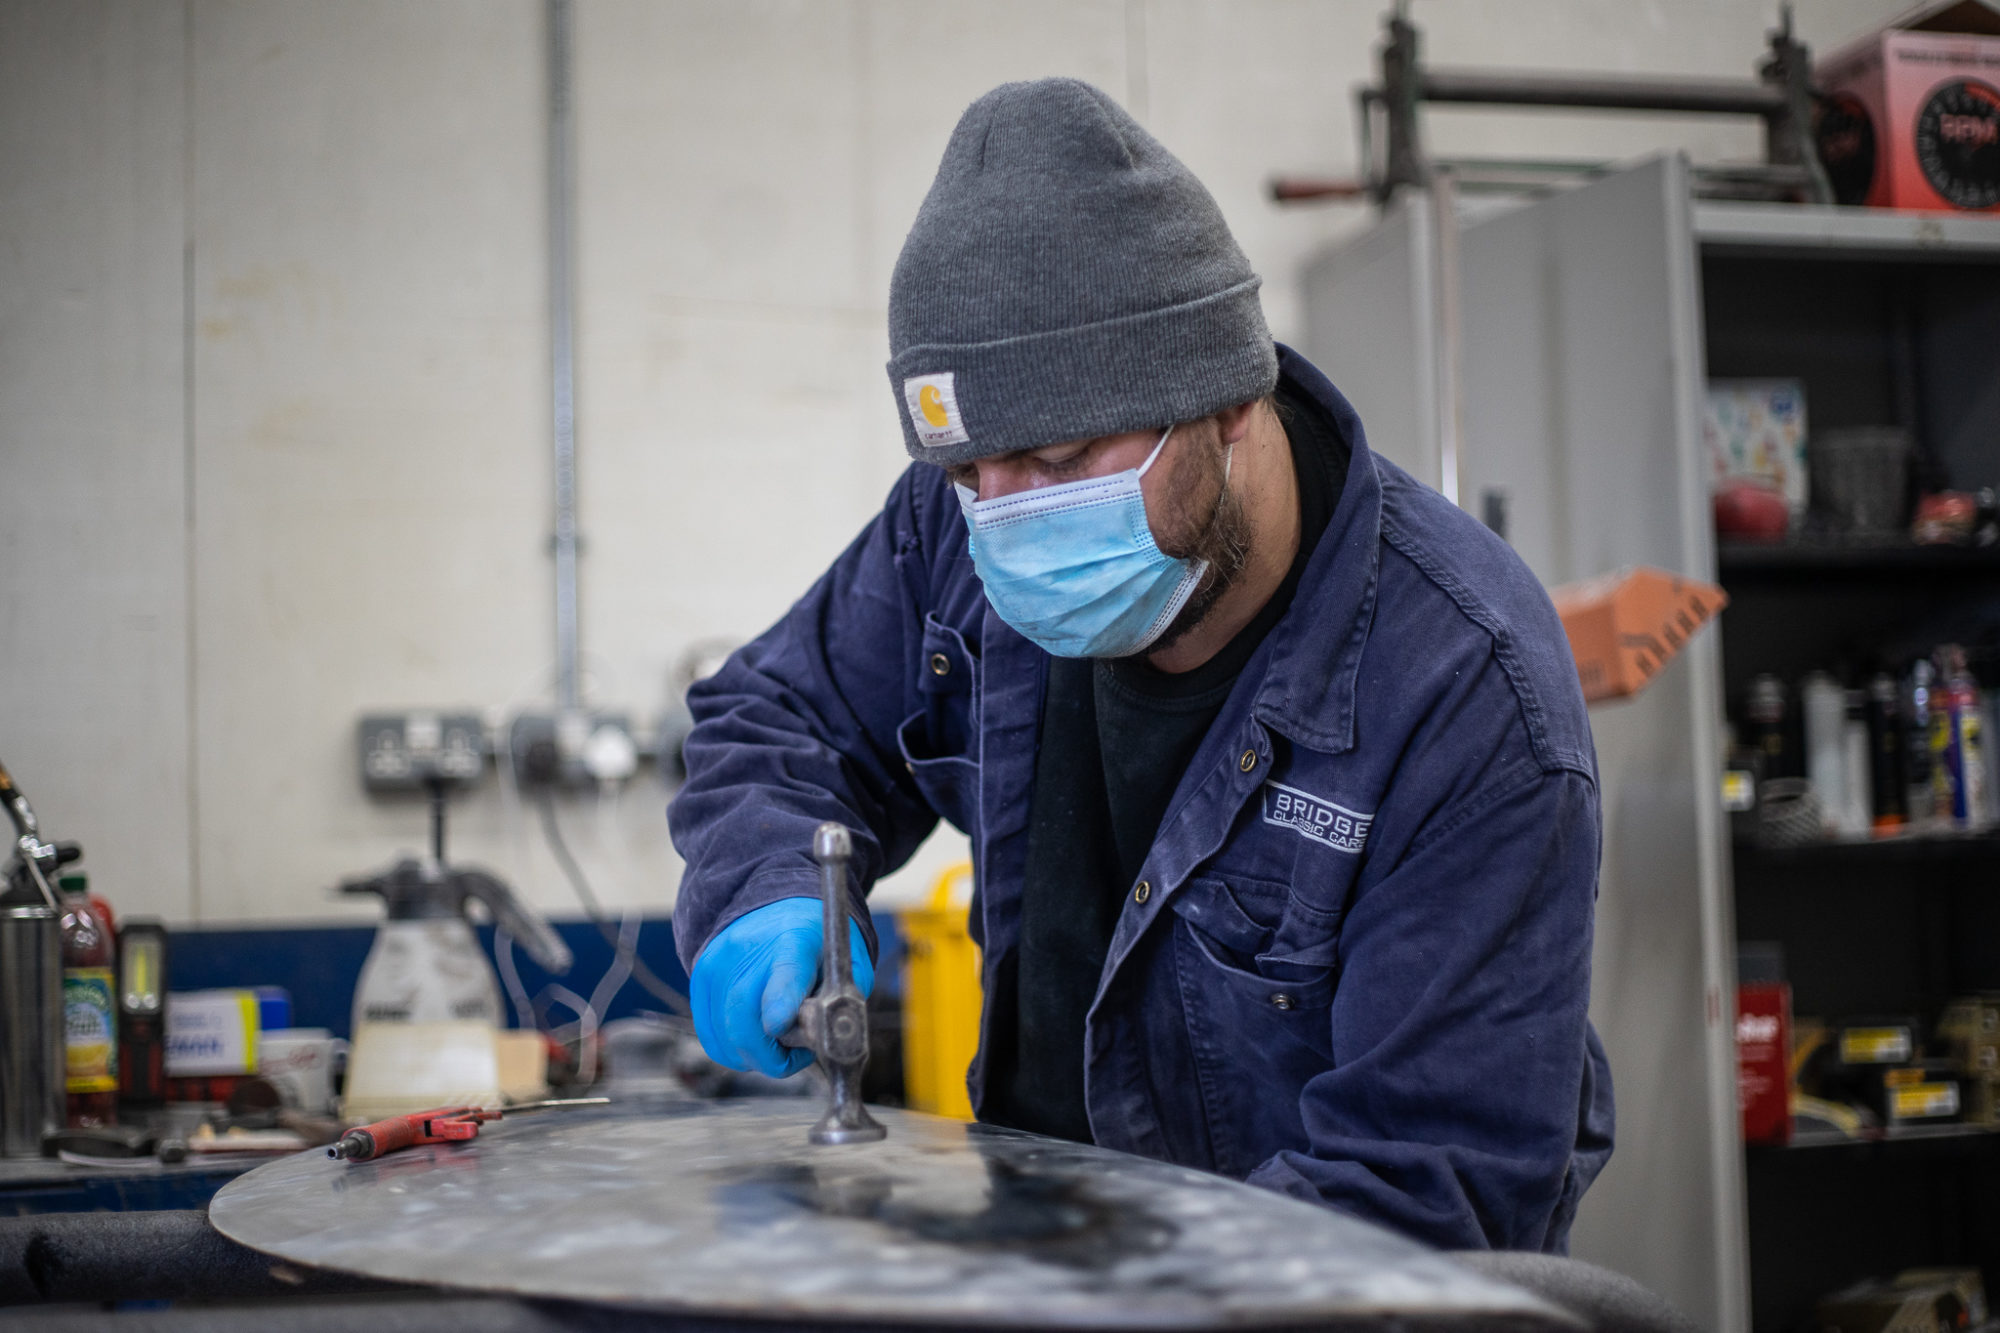
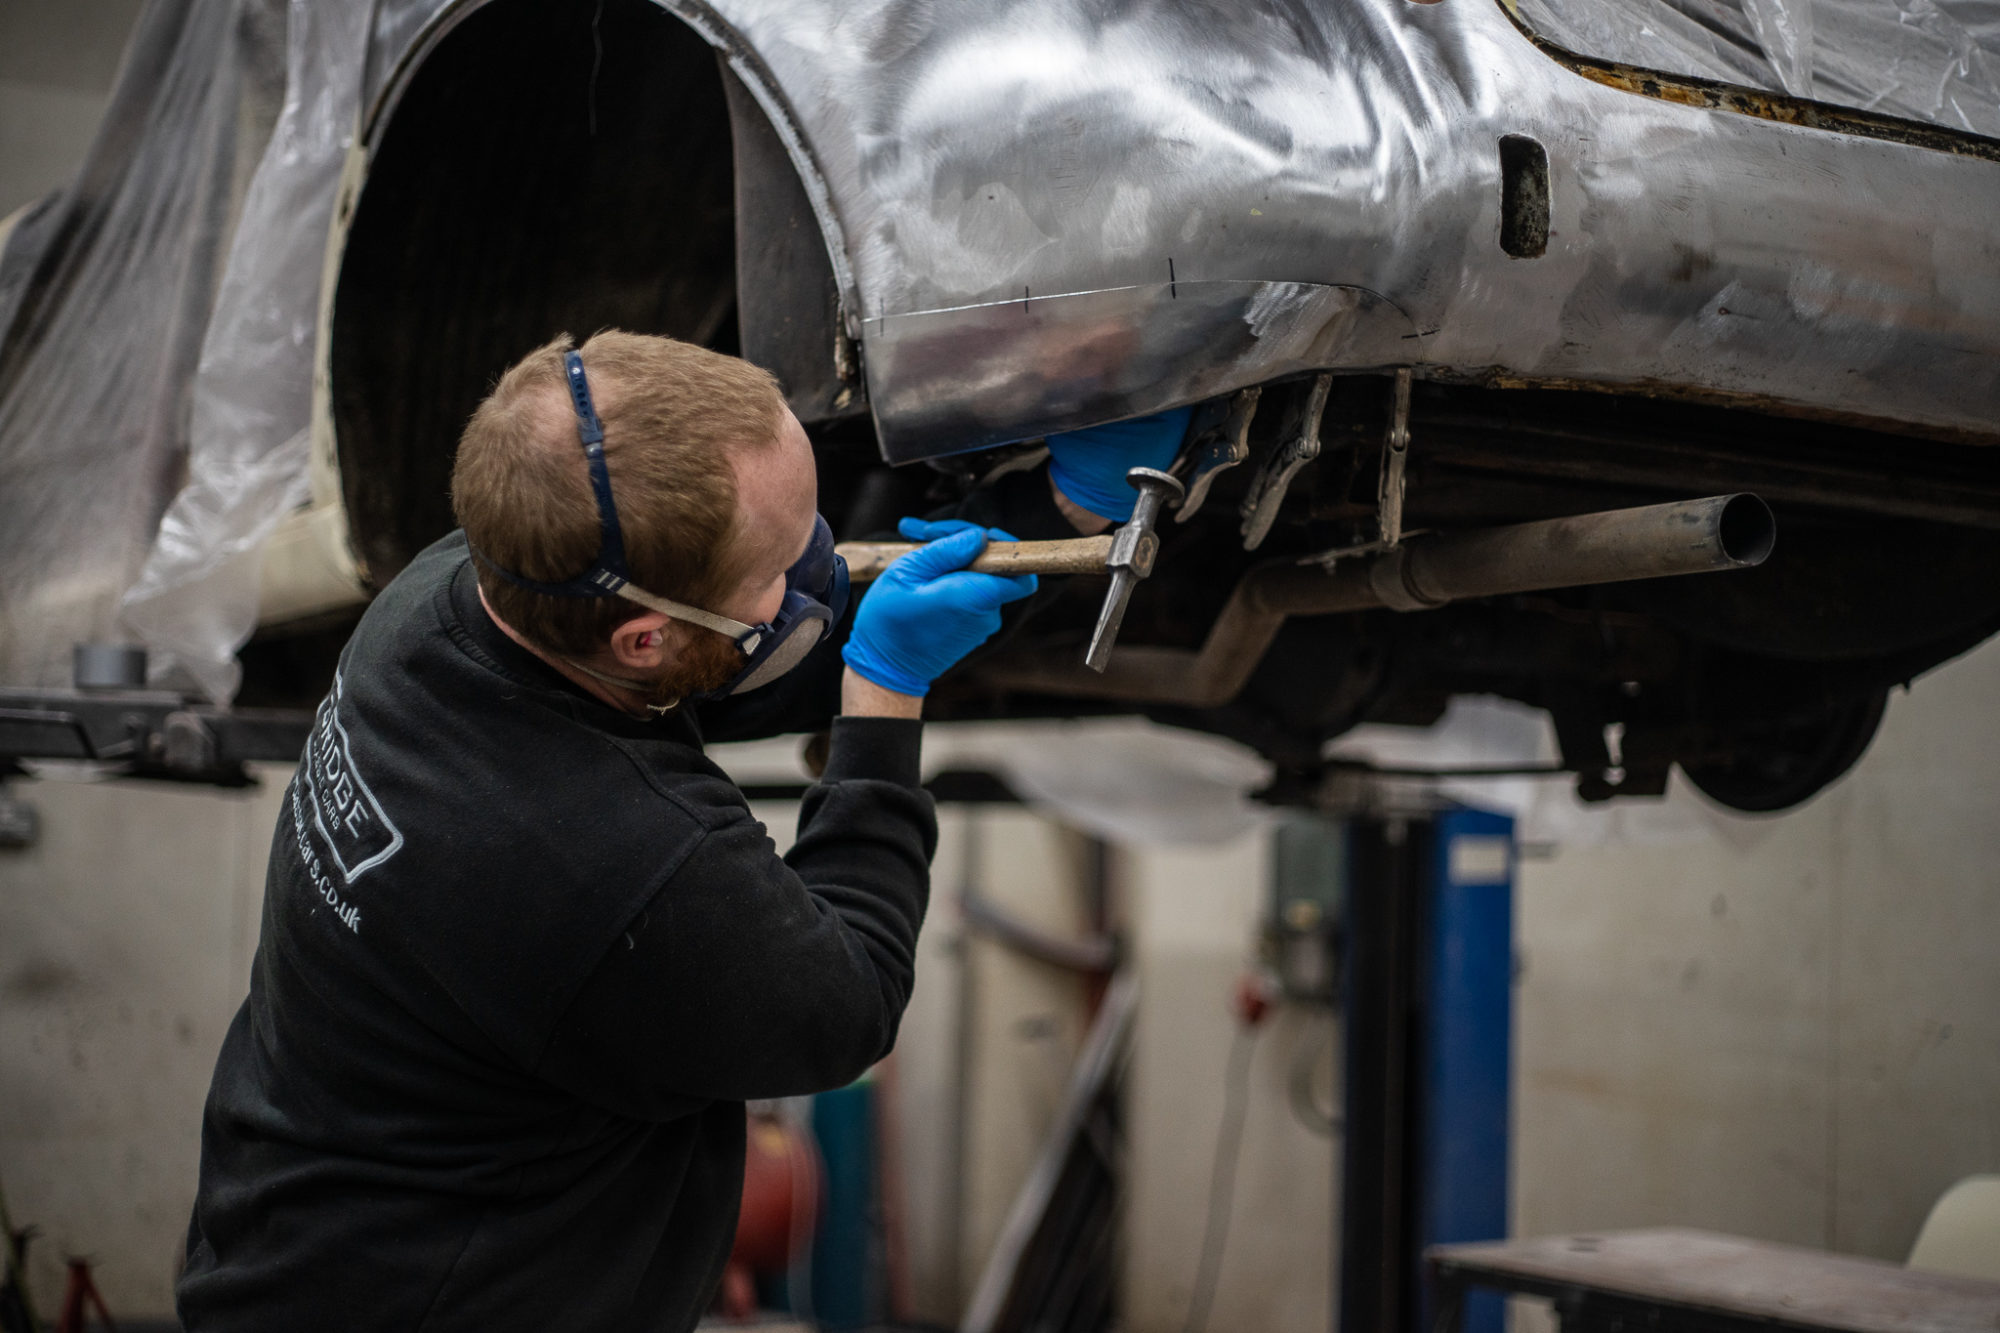
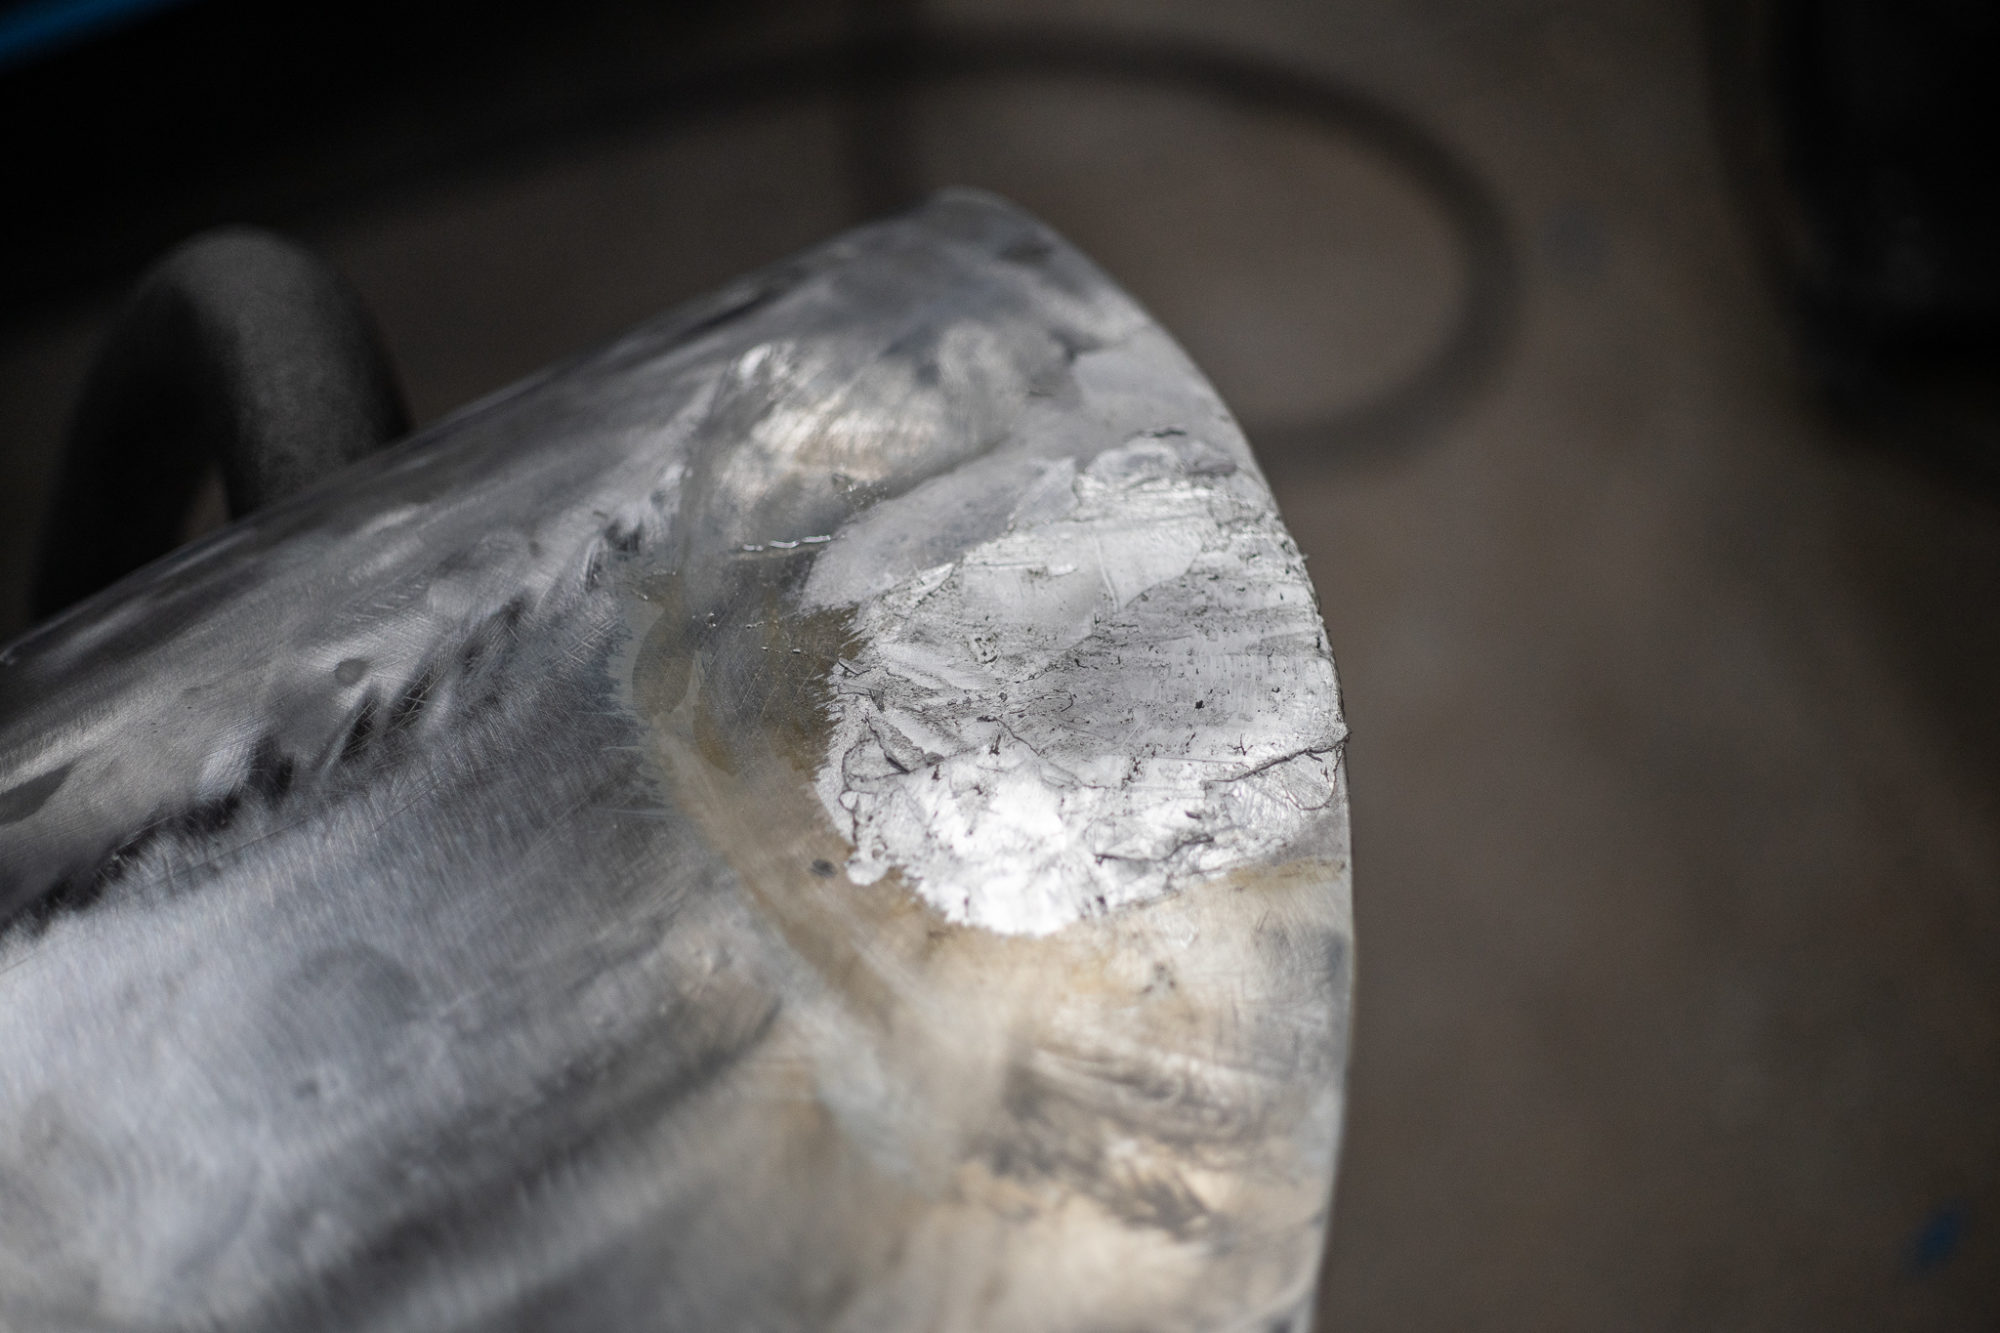
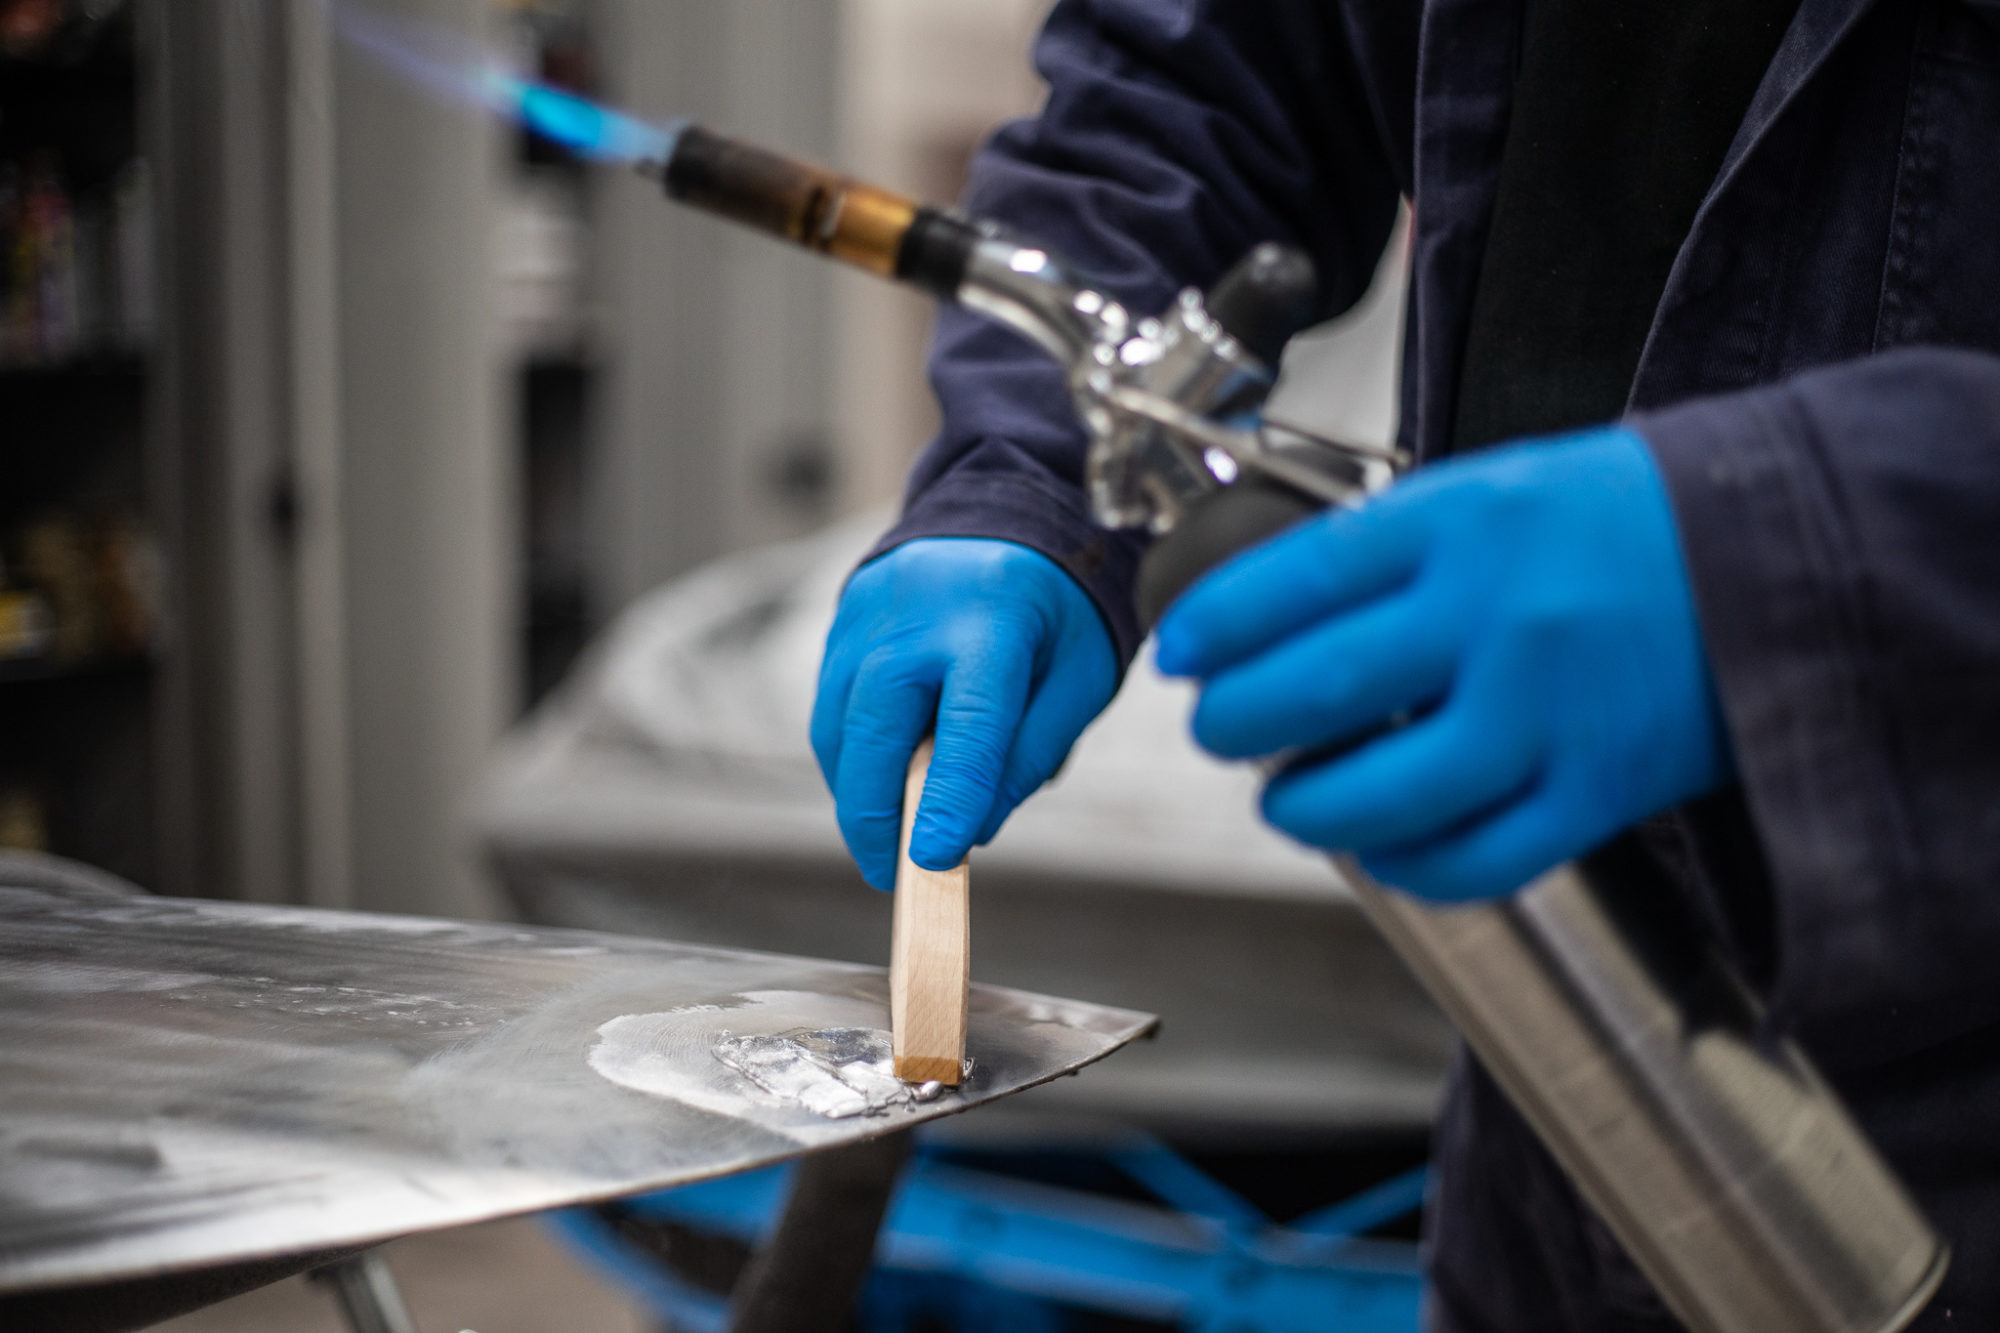
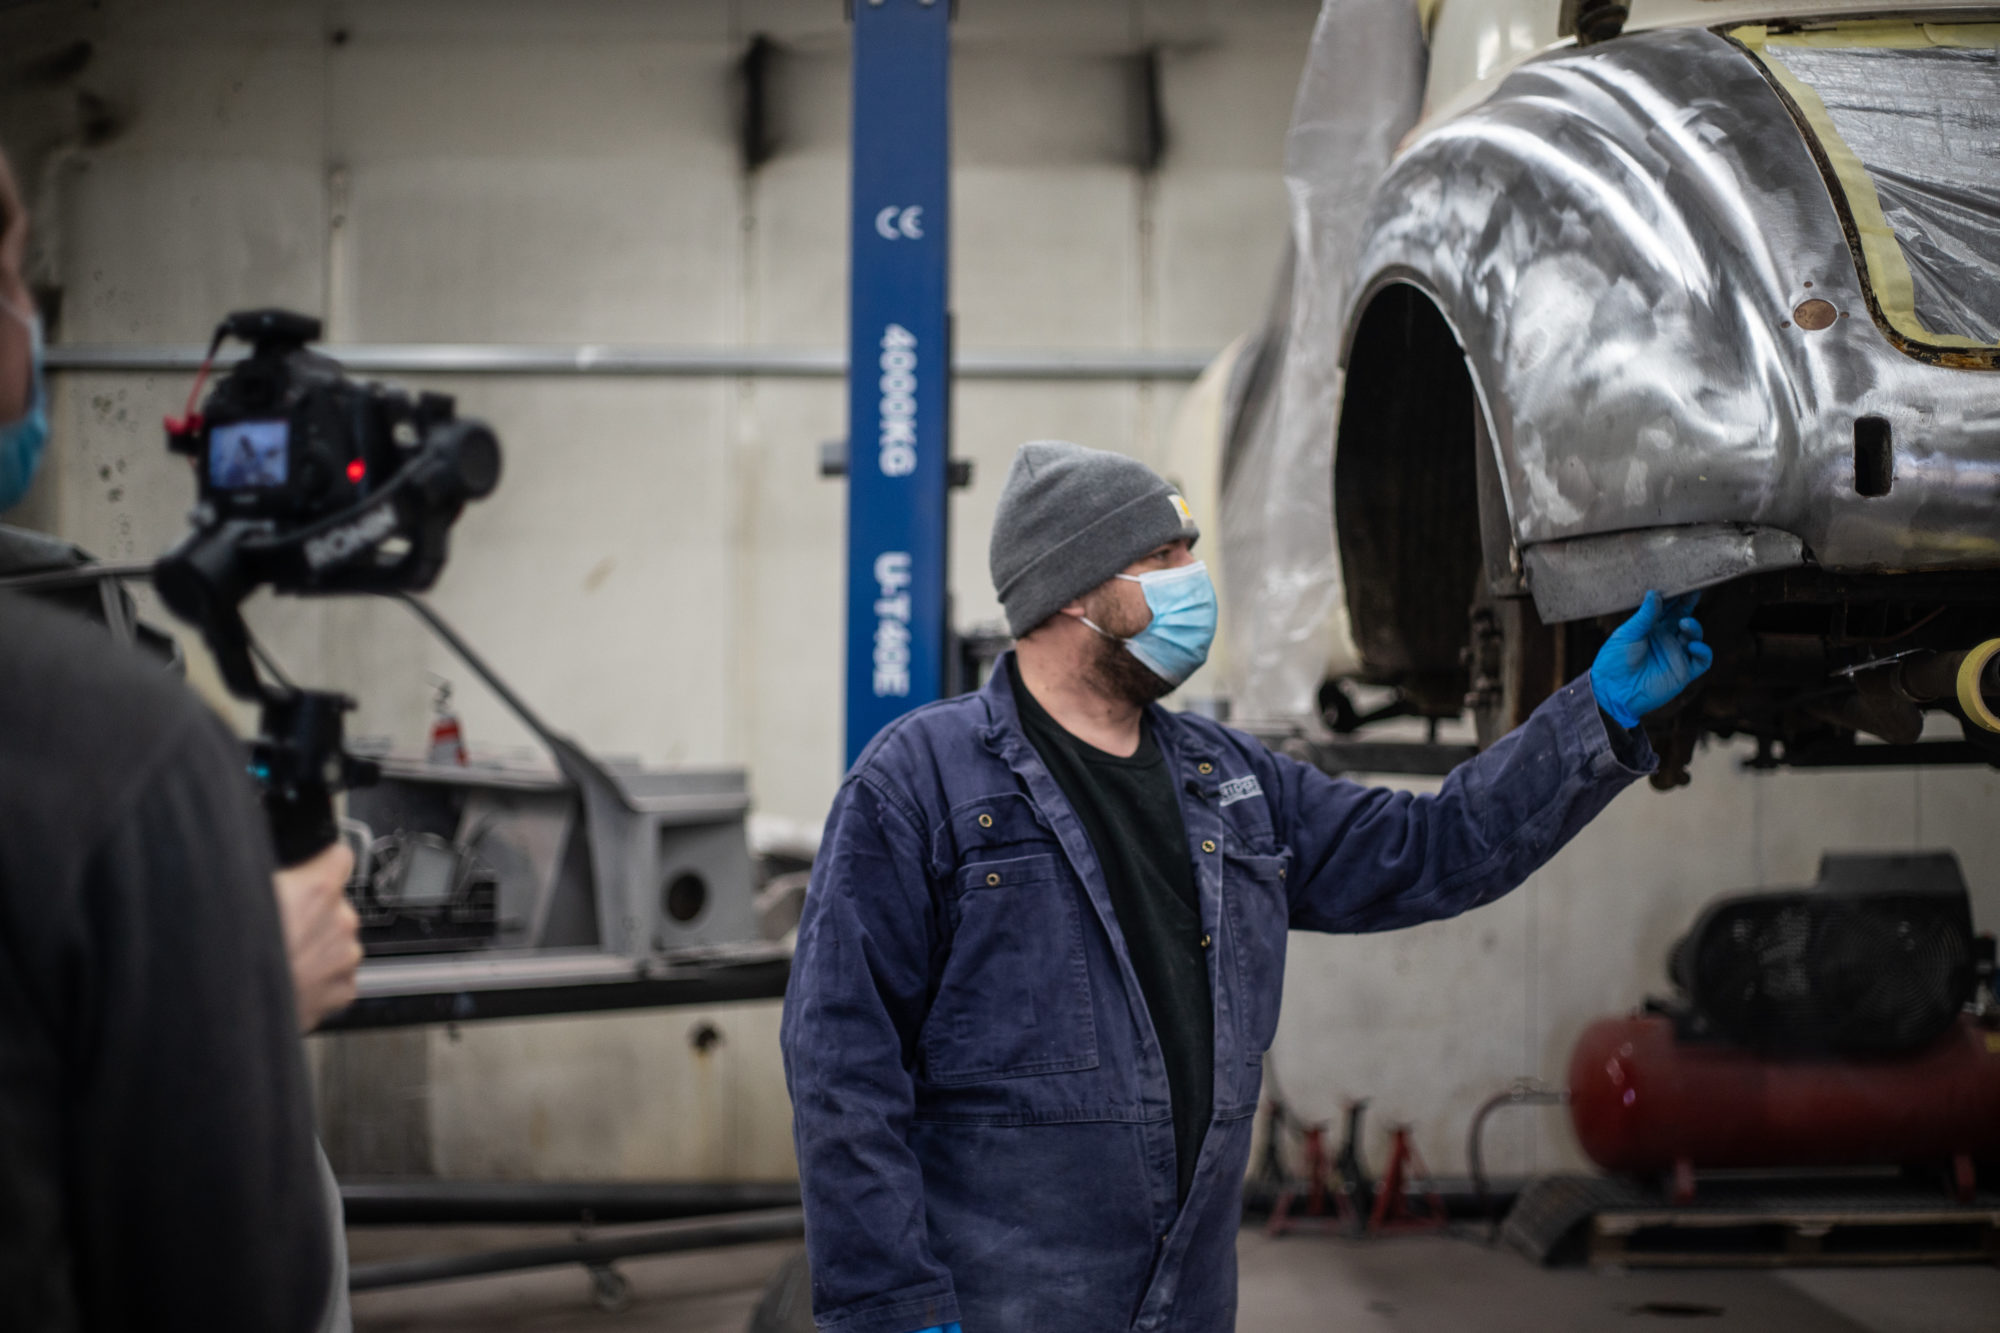
James and James have been working on shrinking and re-shaping the panels for our 1954 Jaguar MKVII however they’ve taken to doing it the traditional way. Using heat, a hammer and cool air, they can effectively reshape anything they need to in a precise and neat manner. By heating up the metal, it balloons and softens the surface, allowing James to hammer it into shape and then use cool air to set it.
James is focusing on making the outside layer of the rear quarter panel, which is made by hand and hammered into place.
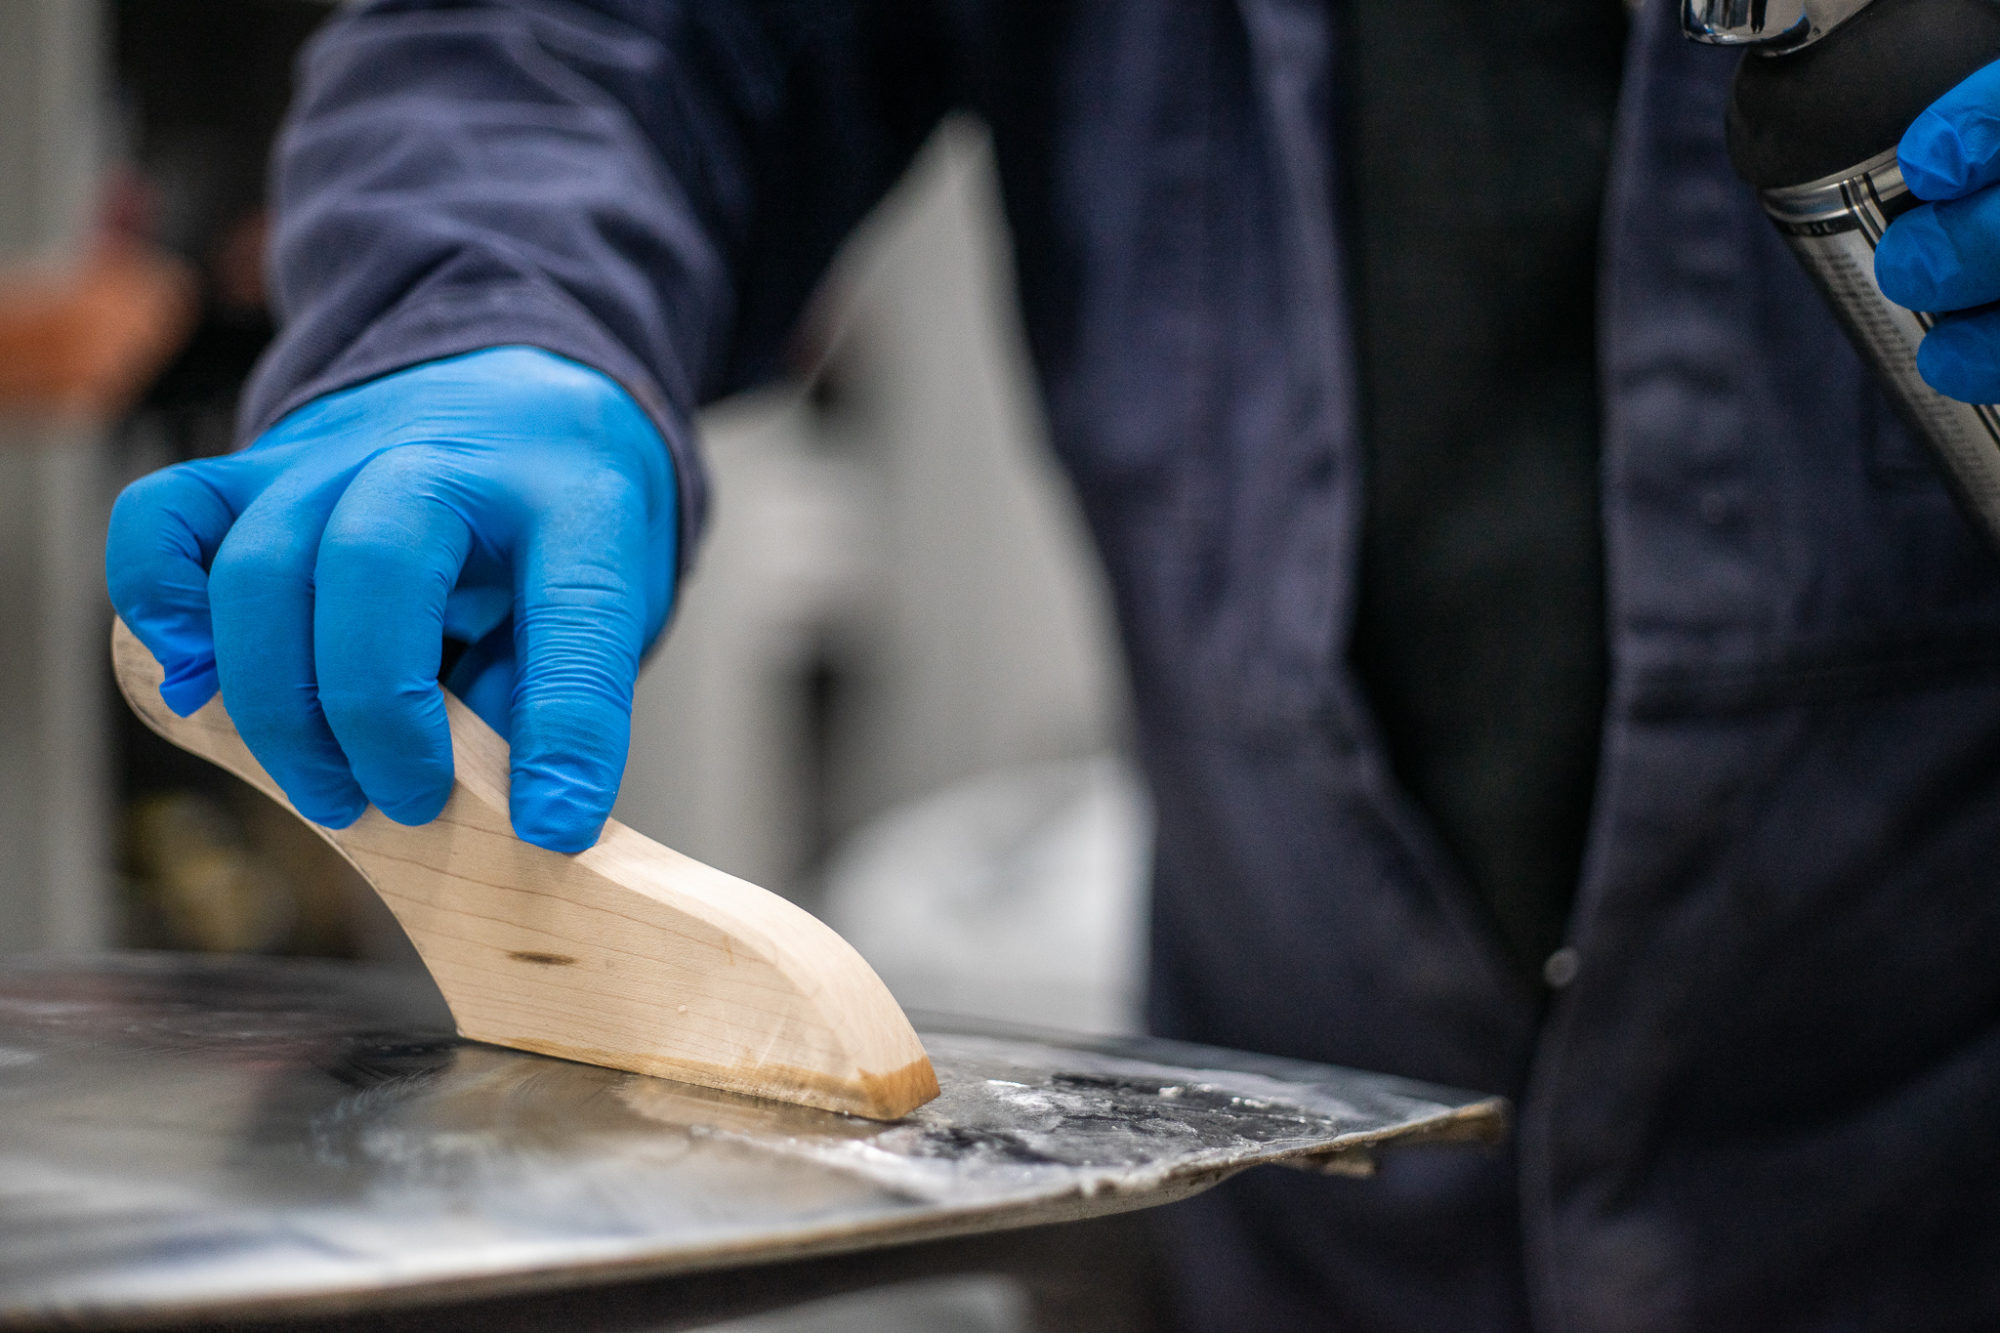
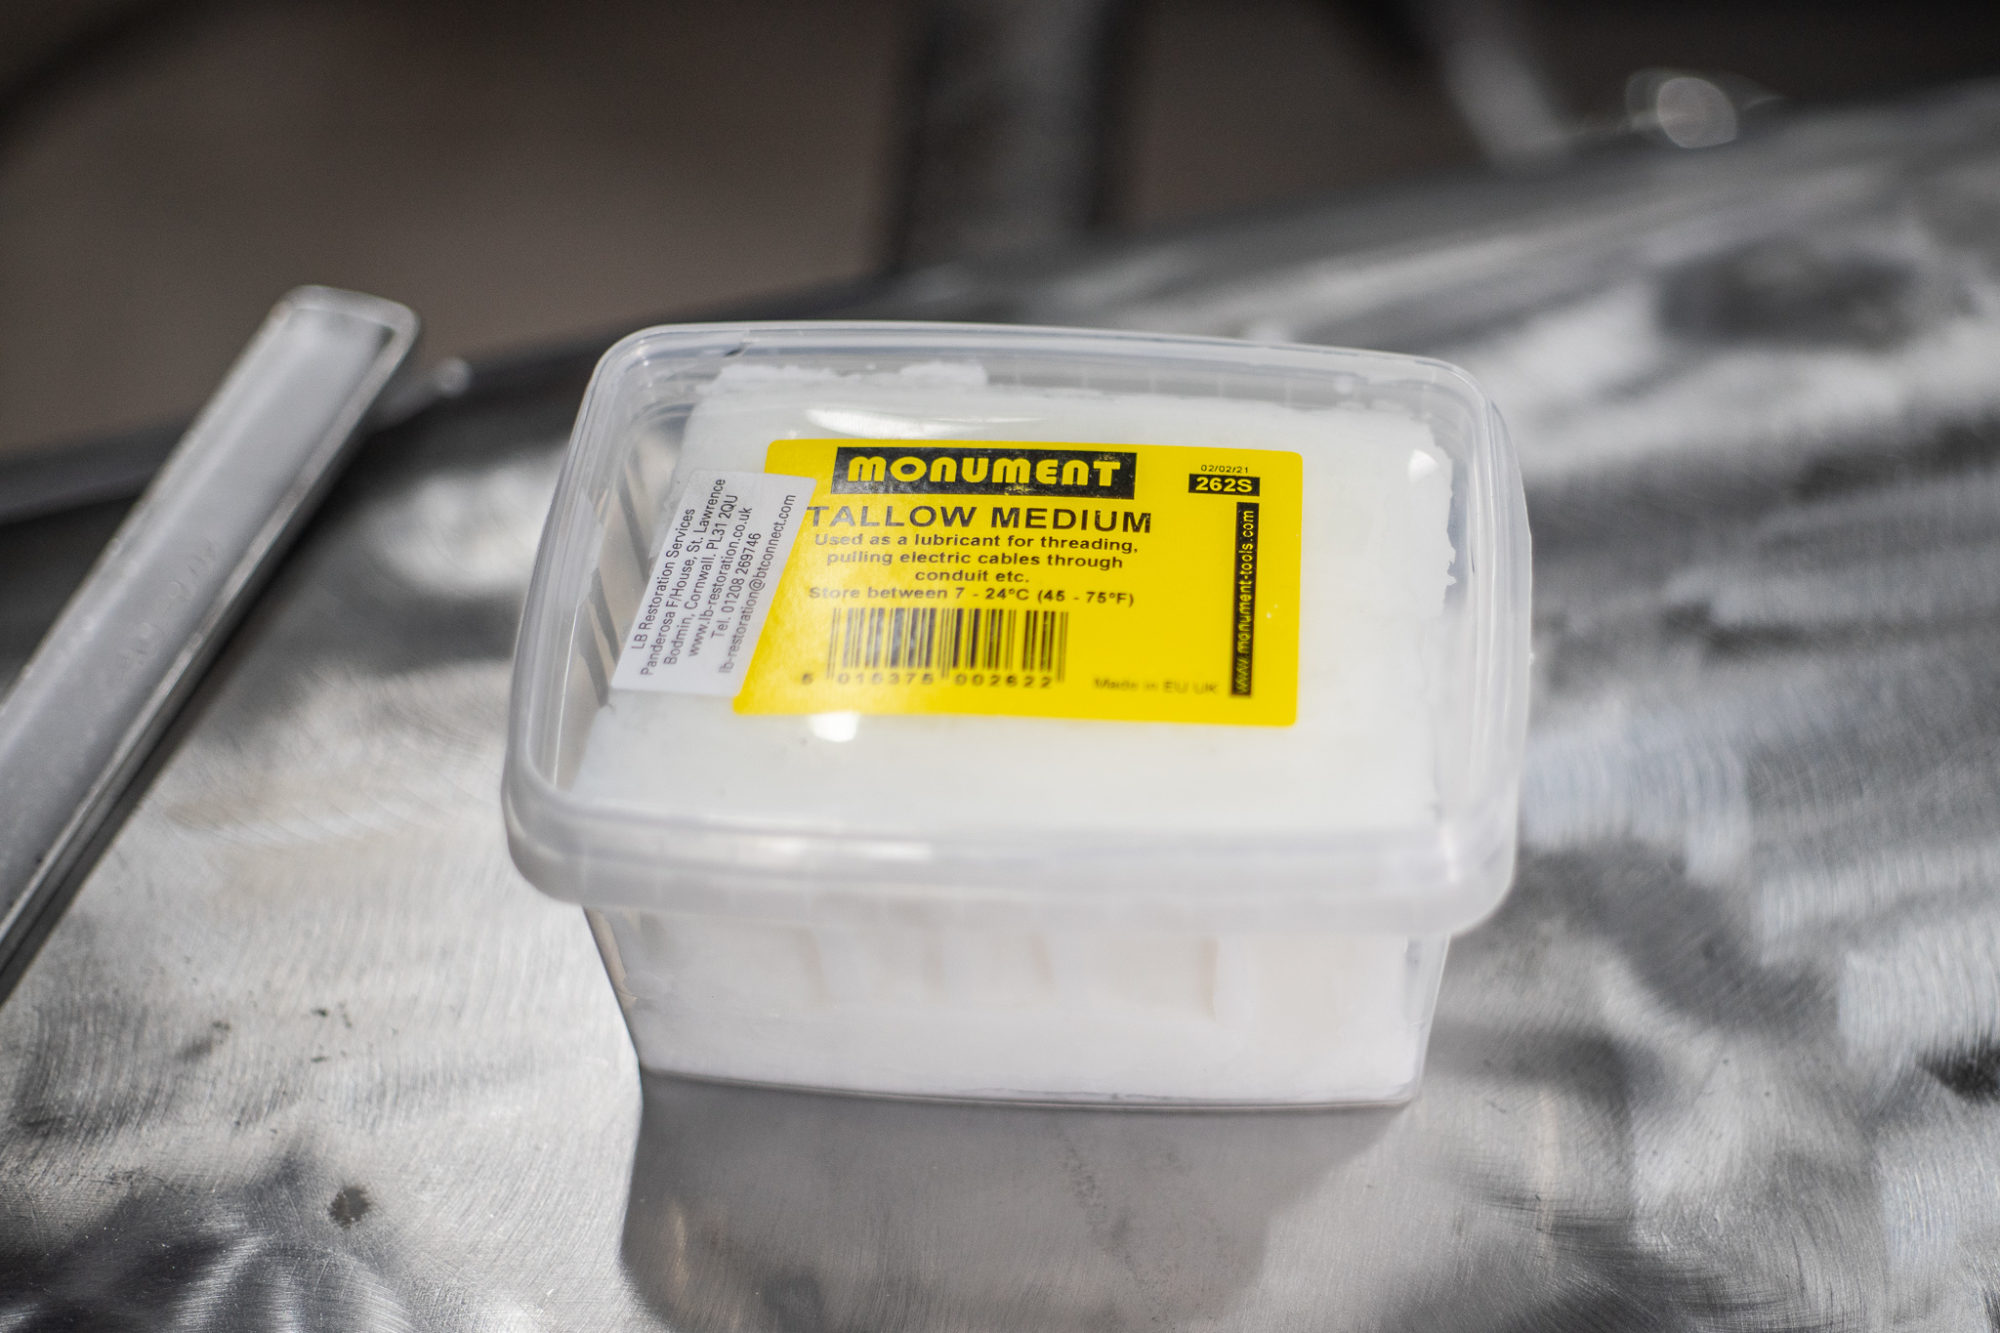
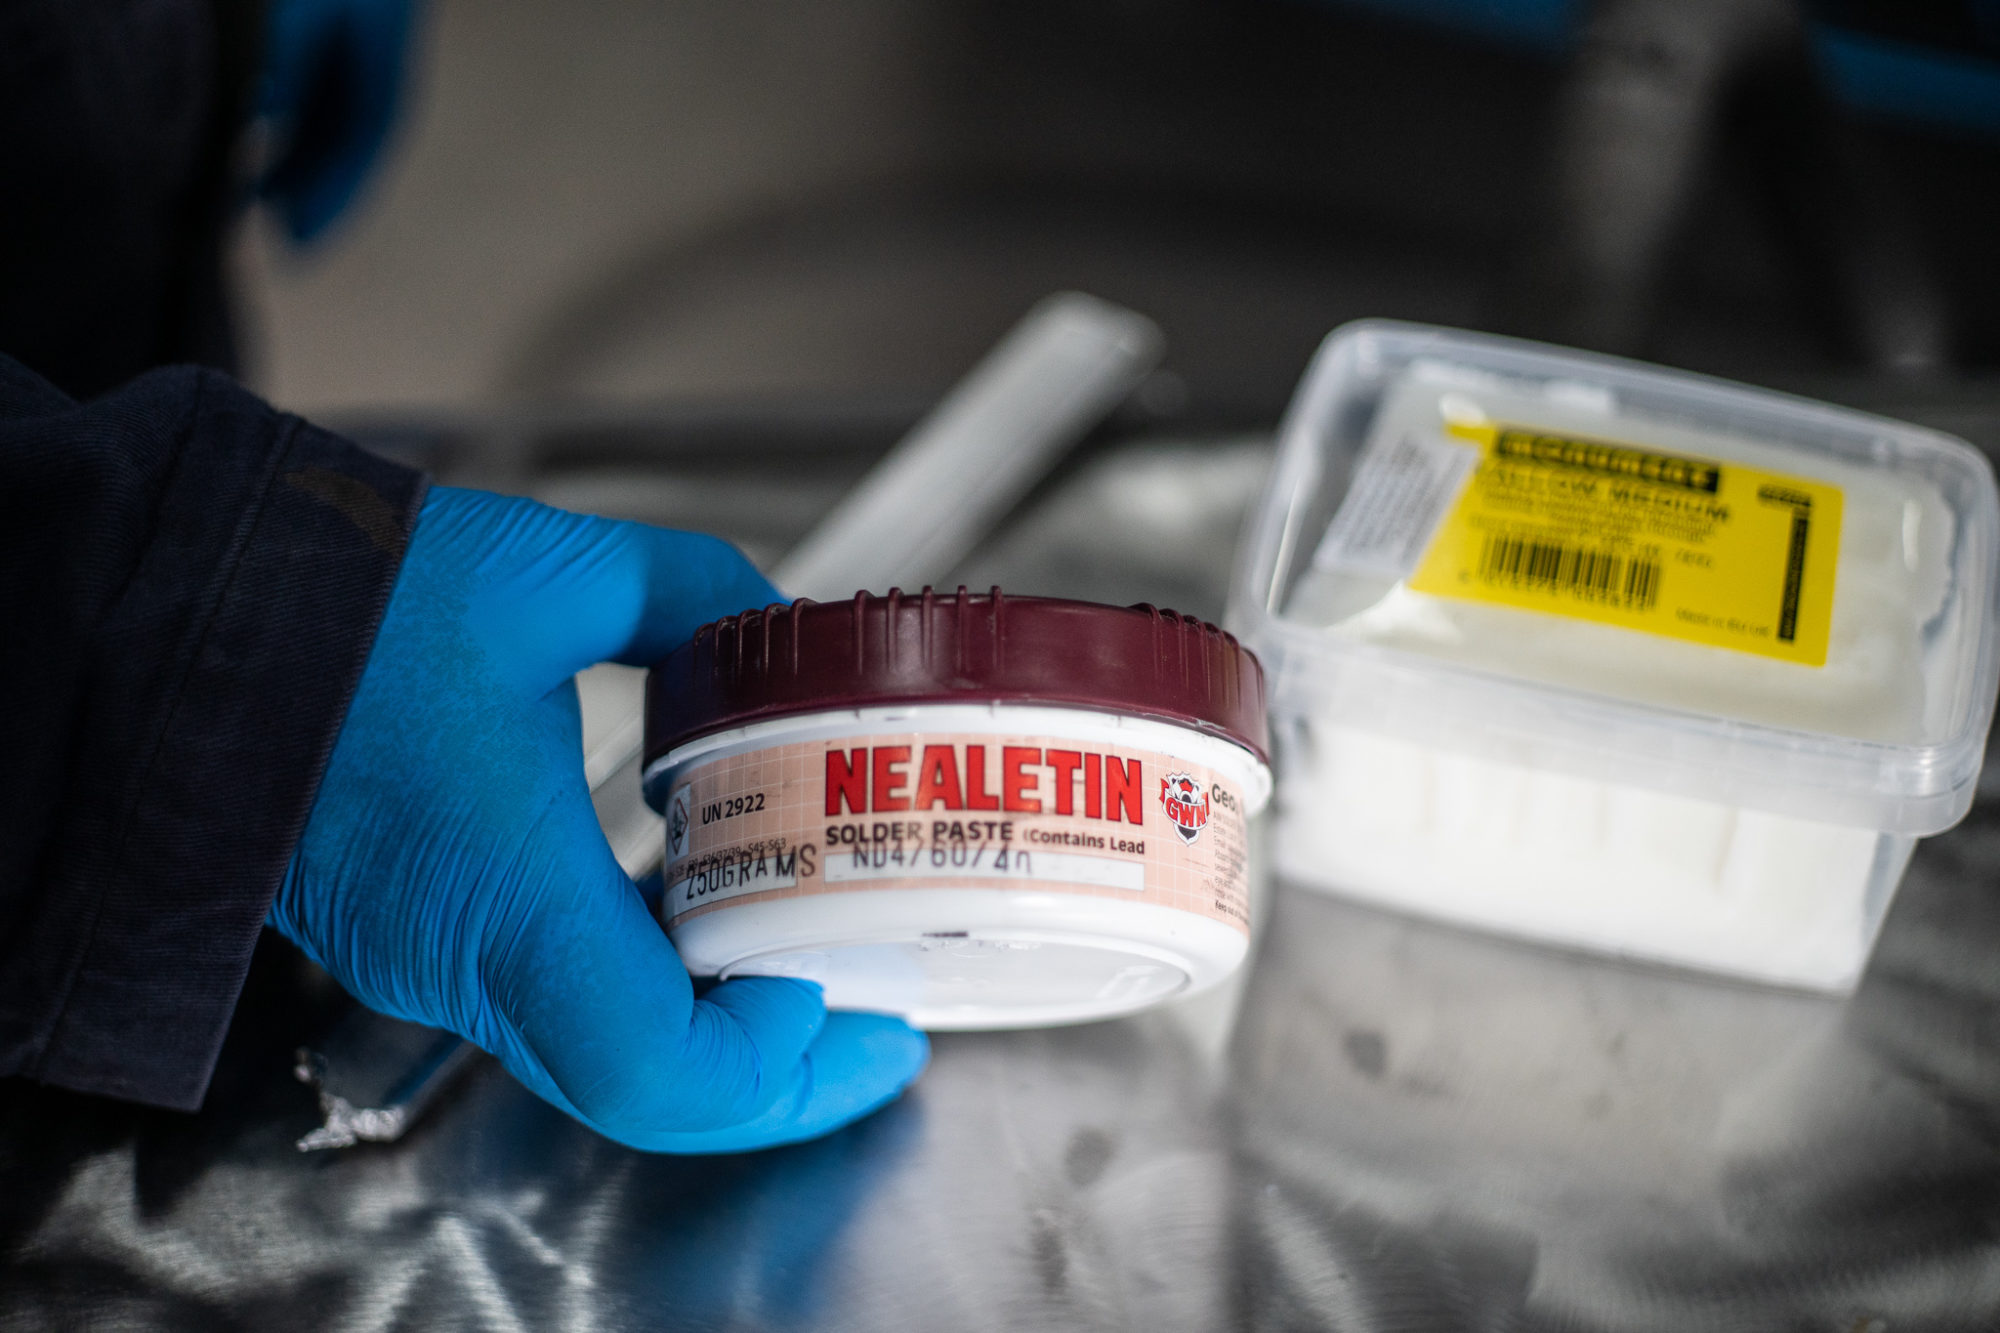
After finishing the re-shaping, James could then start with applying the lead primer and then the Tallow Medium and Nealetin, all of which are applied using heat. The tallow medium, traditionally made from goose fat, is heated up and melted so it resembles a spreadable ‘goo’ that can then be worked into shape to provide a flat finish.
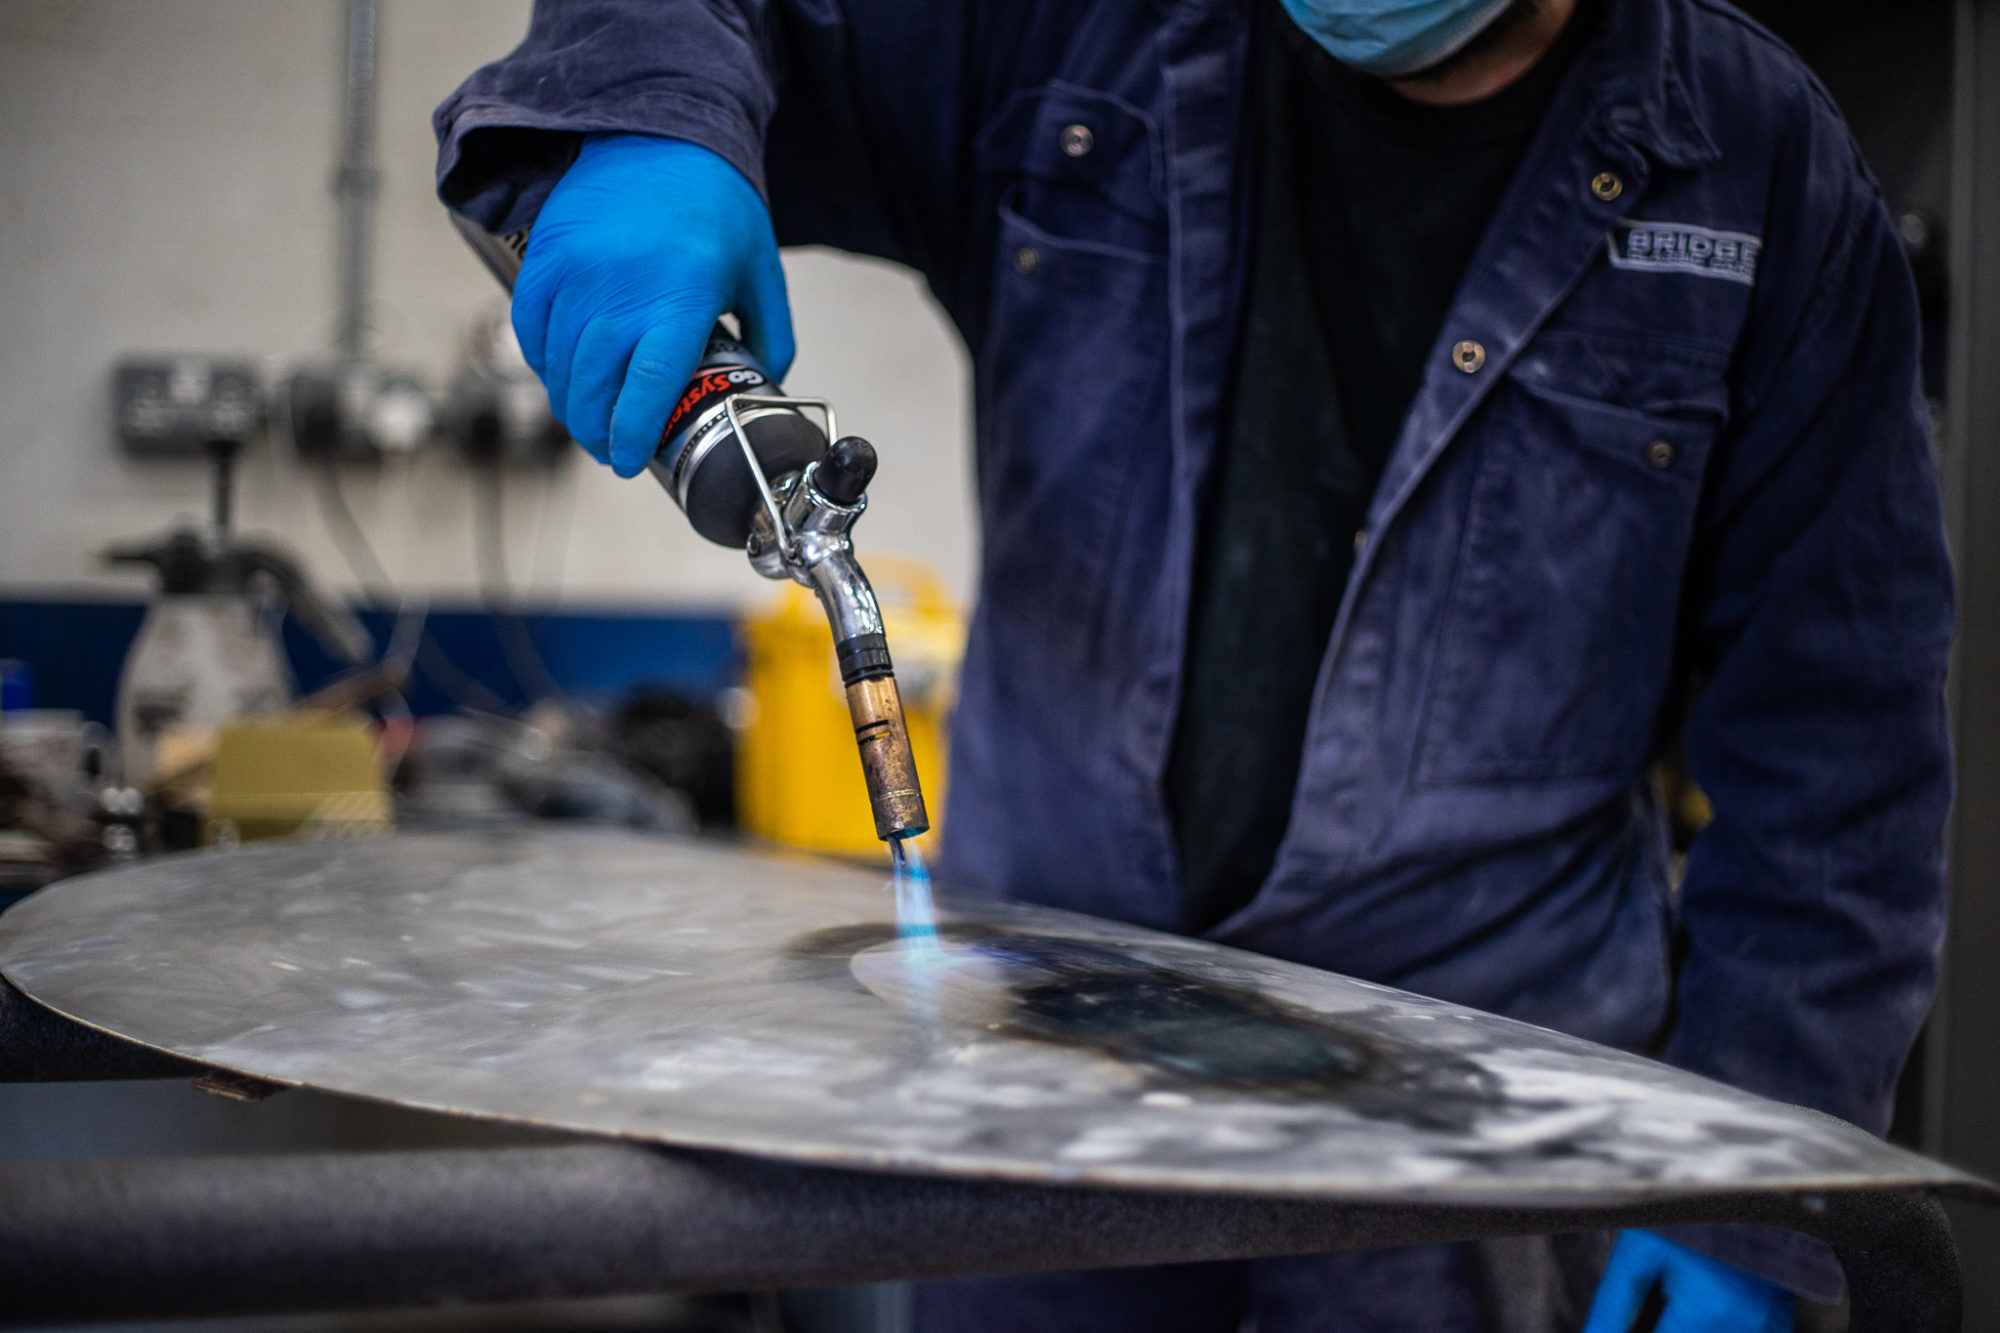
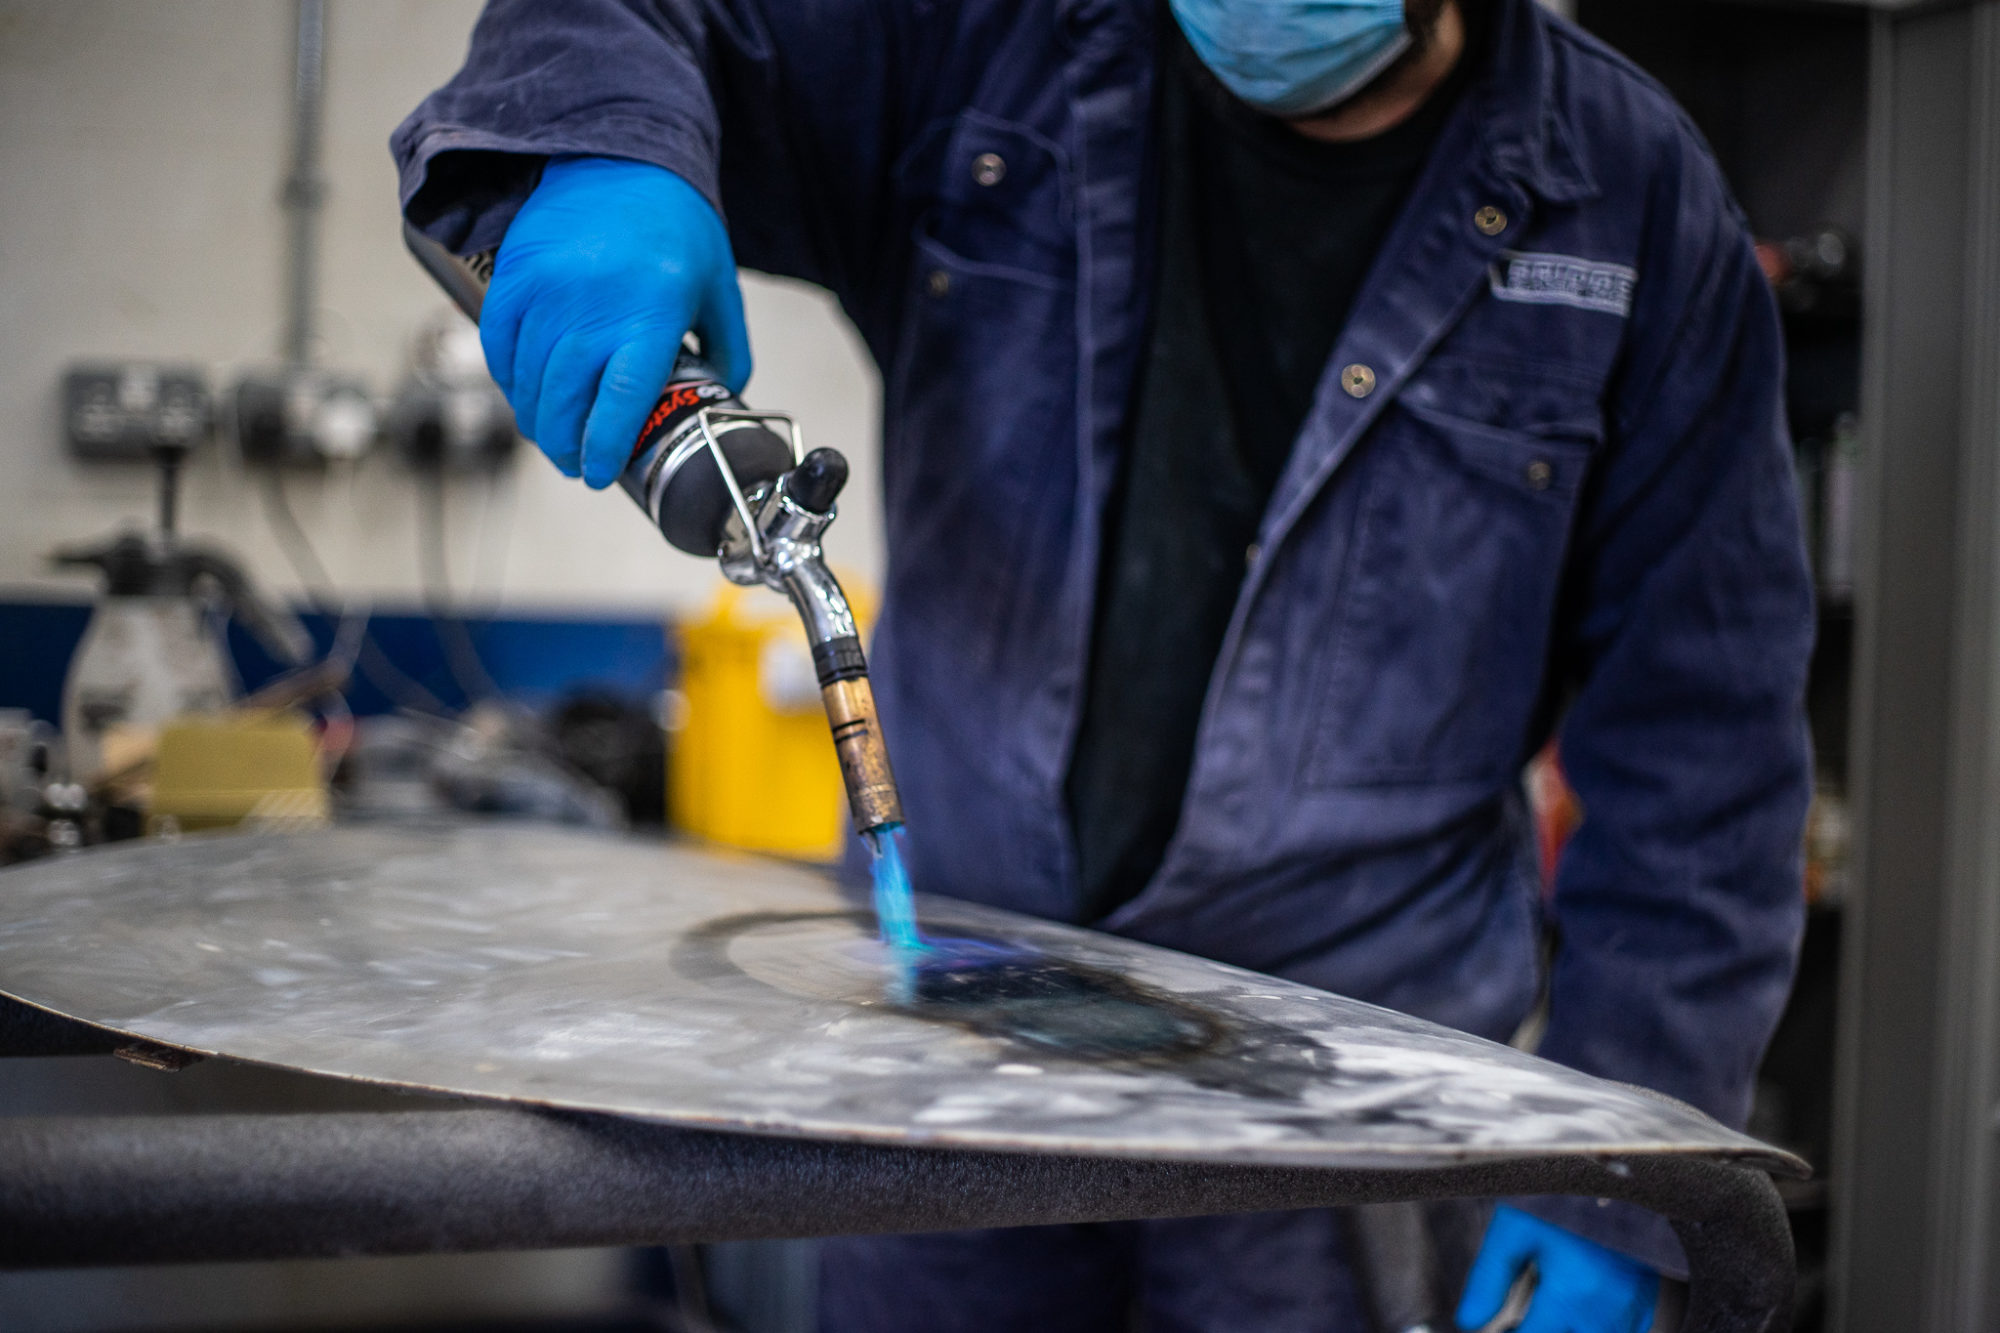

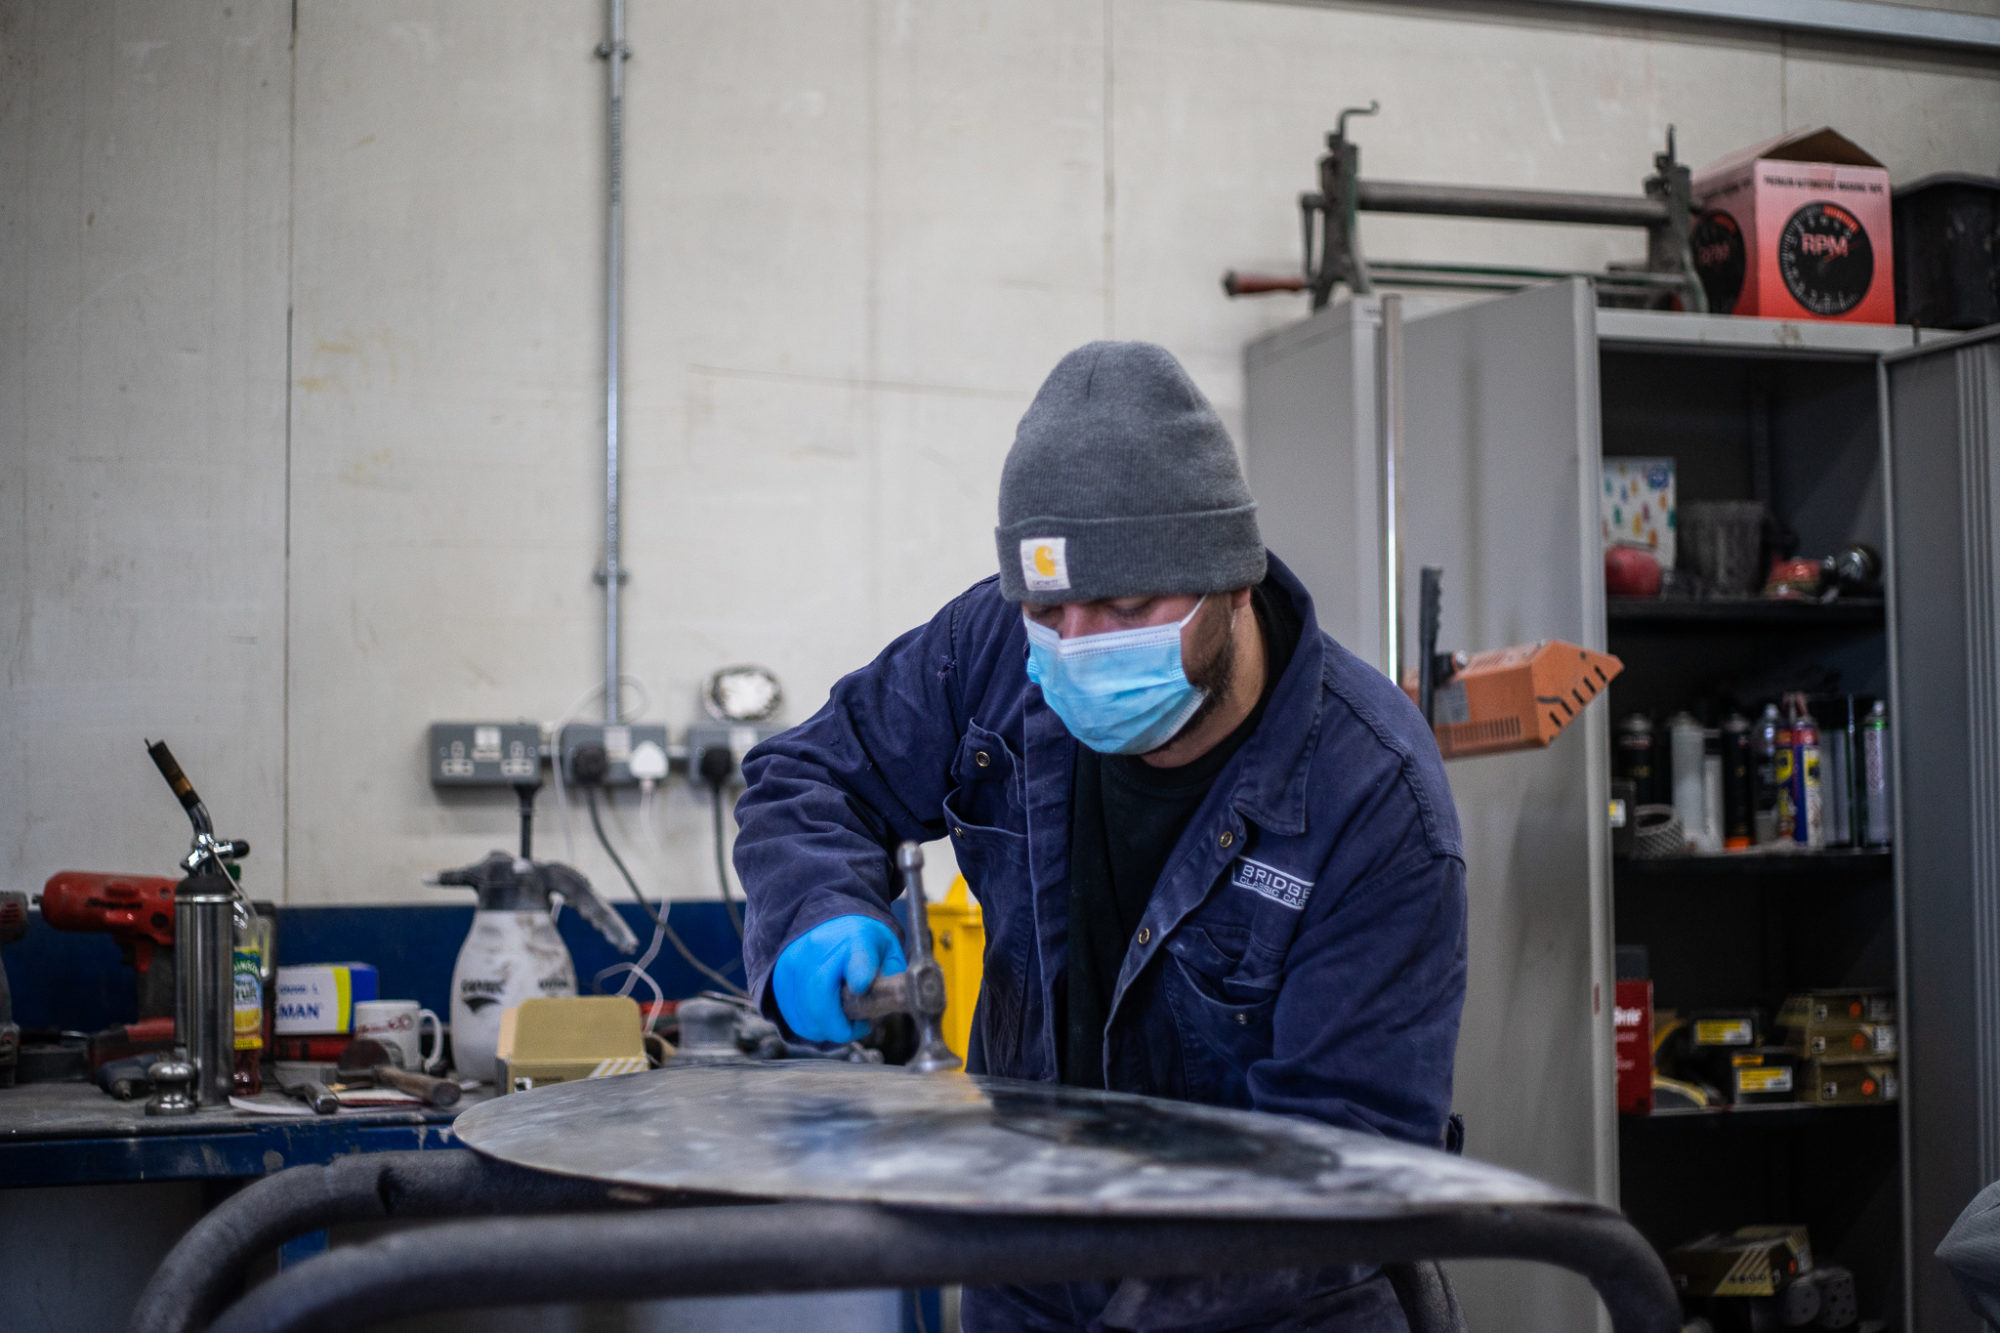


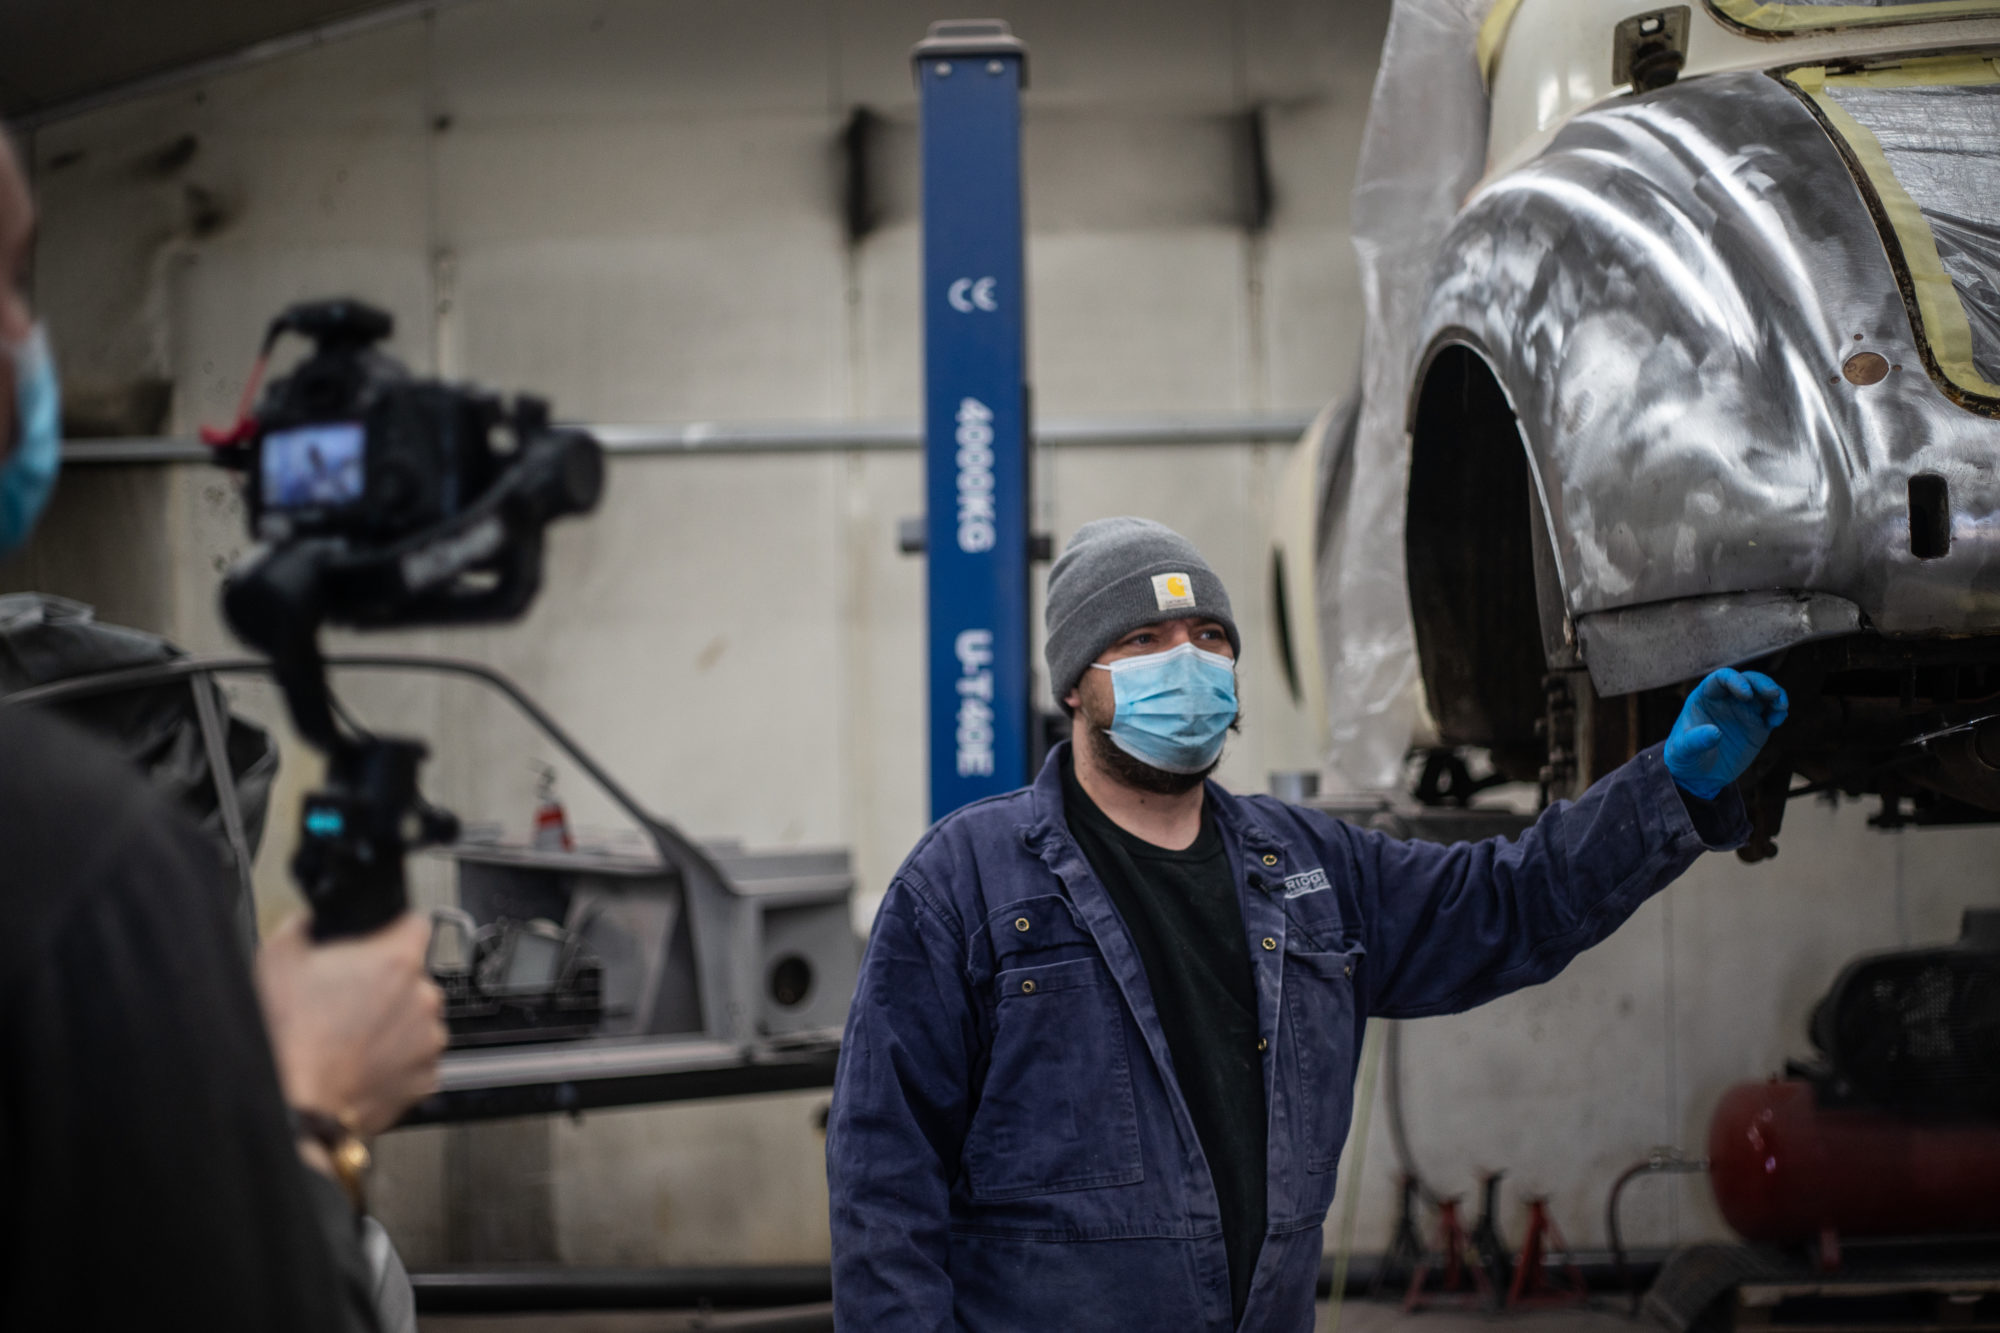
We did some filming with James in the workshop where he explained to us what’s going on with the Jaguar in the fabrication bay. Here’s some behind the scenes.
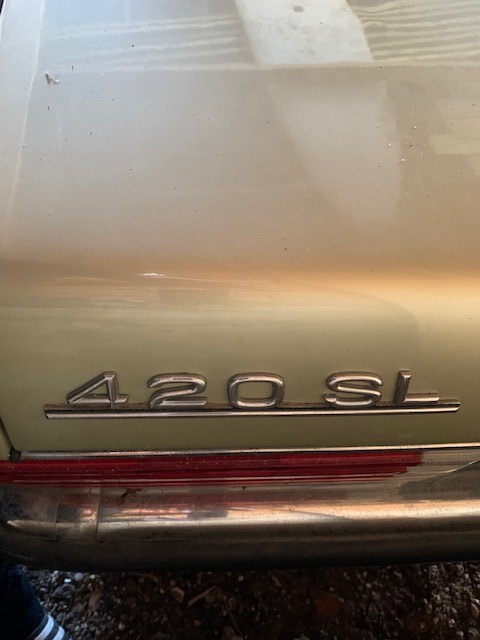
This metallic green classic 1986 Mercedes 420SL is coming in soon to be re-commissioned and assessed to see how much needs doing to it. We can’t wait to get started!
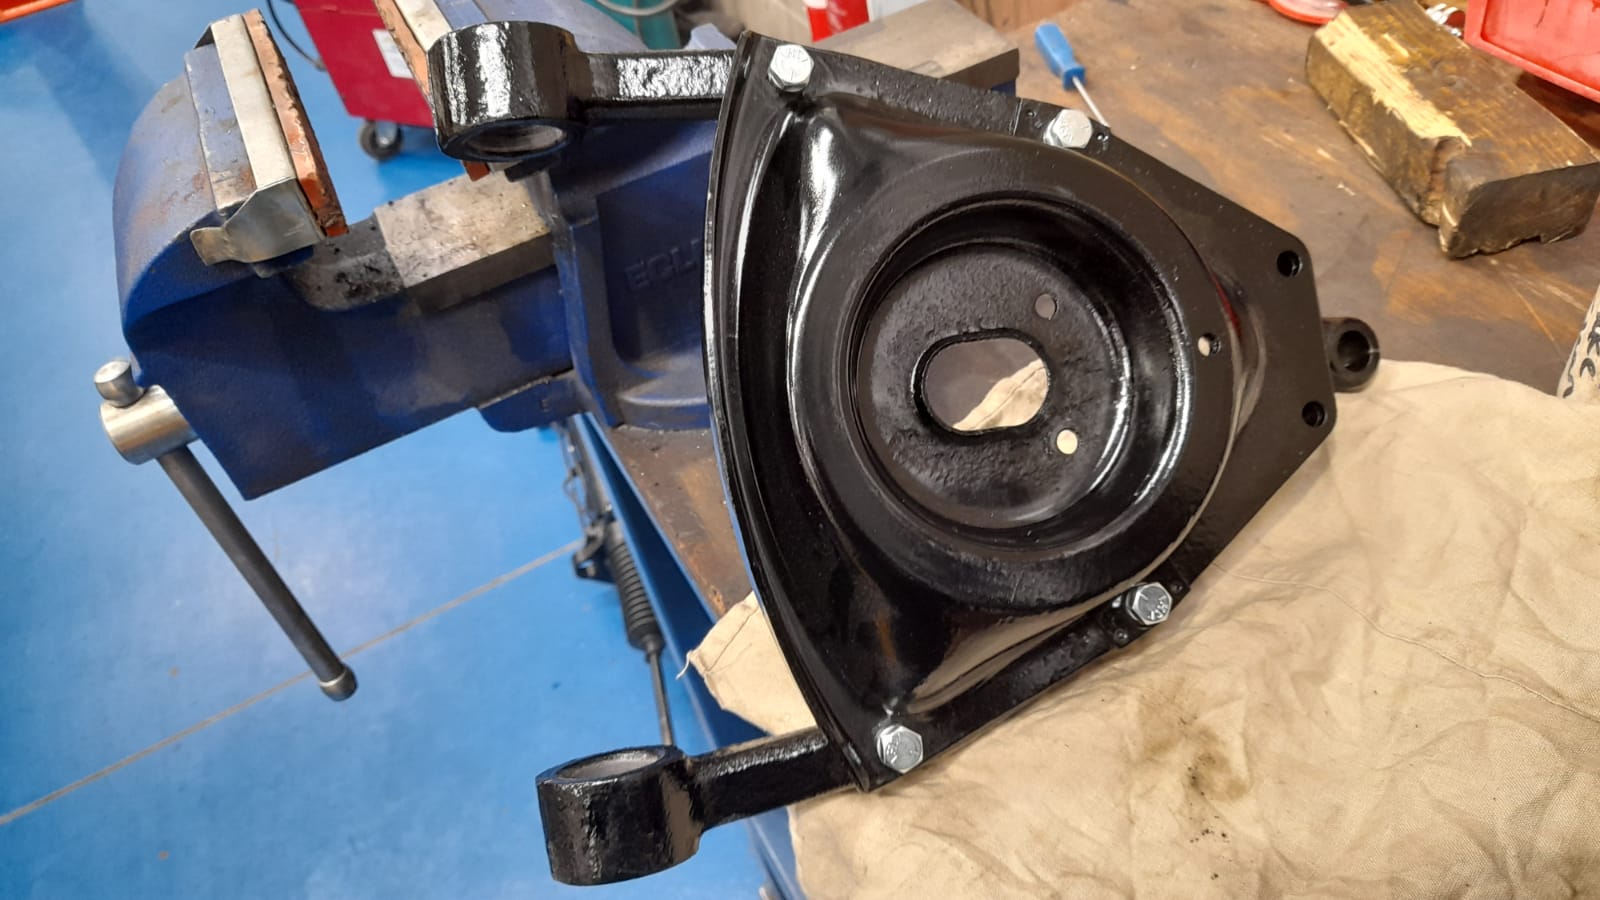
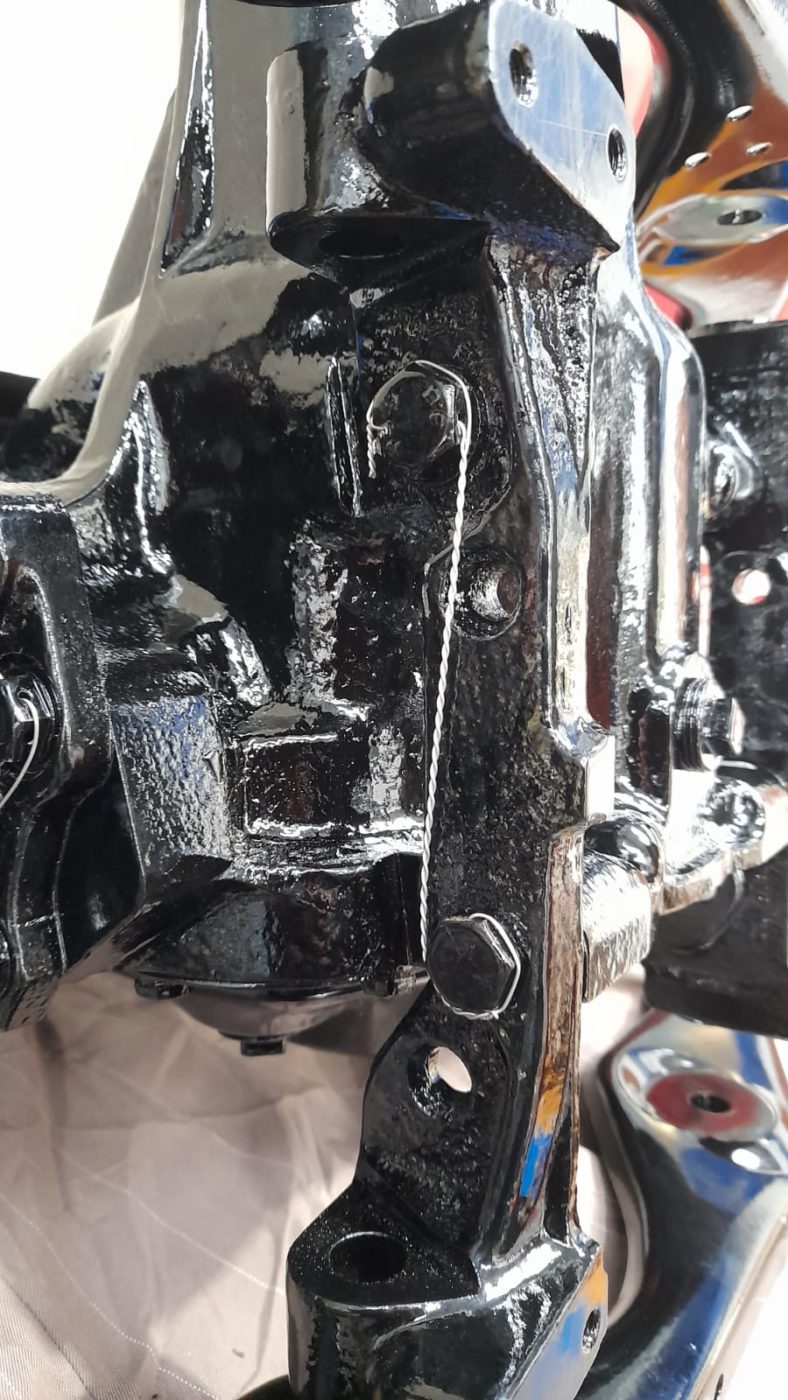
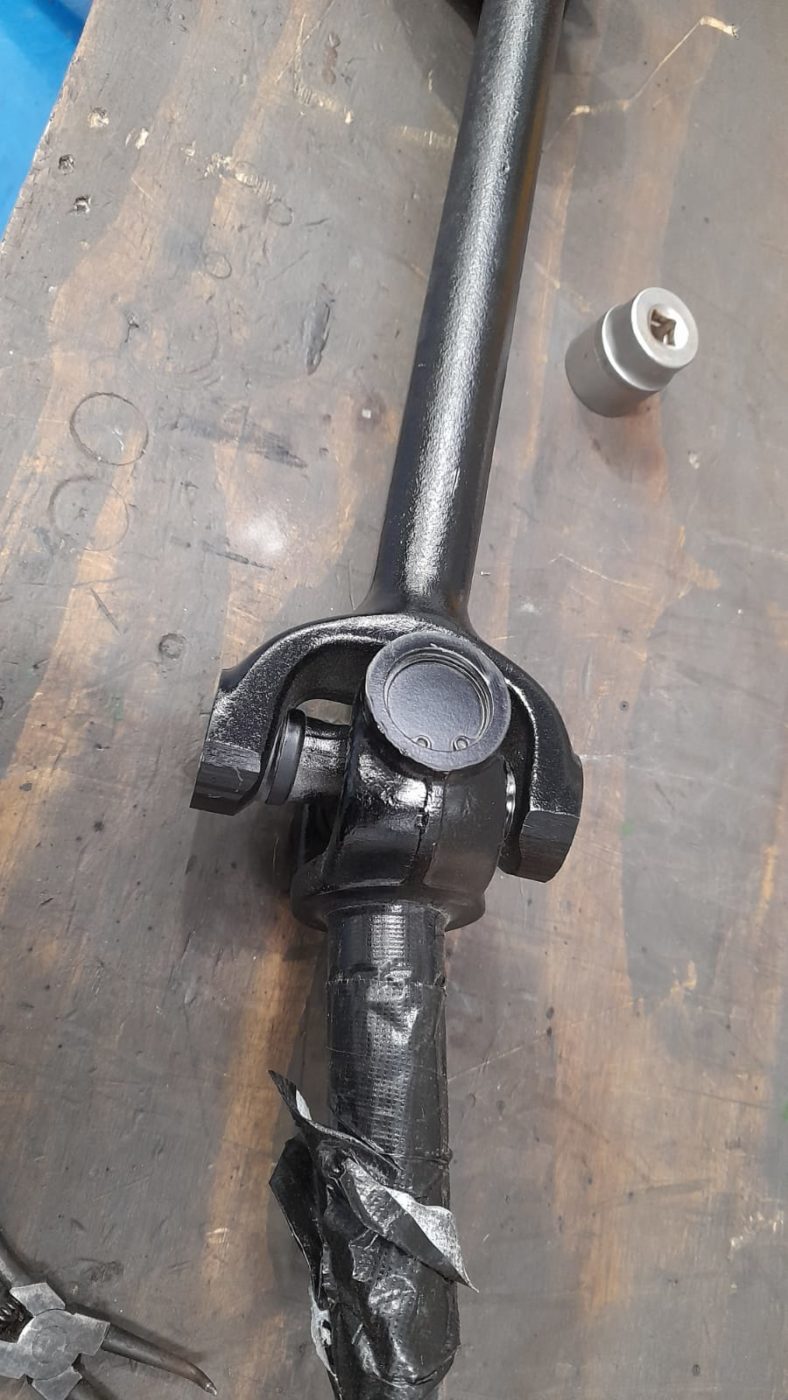
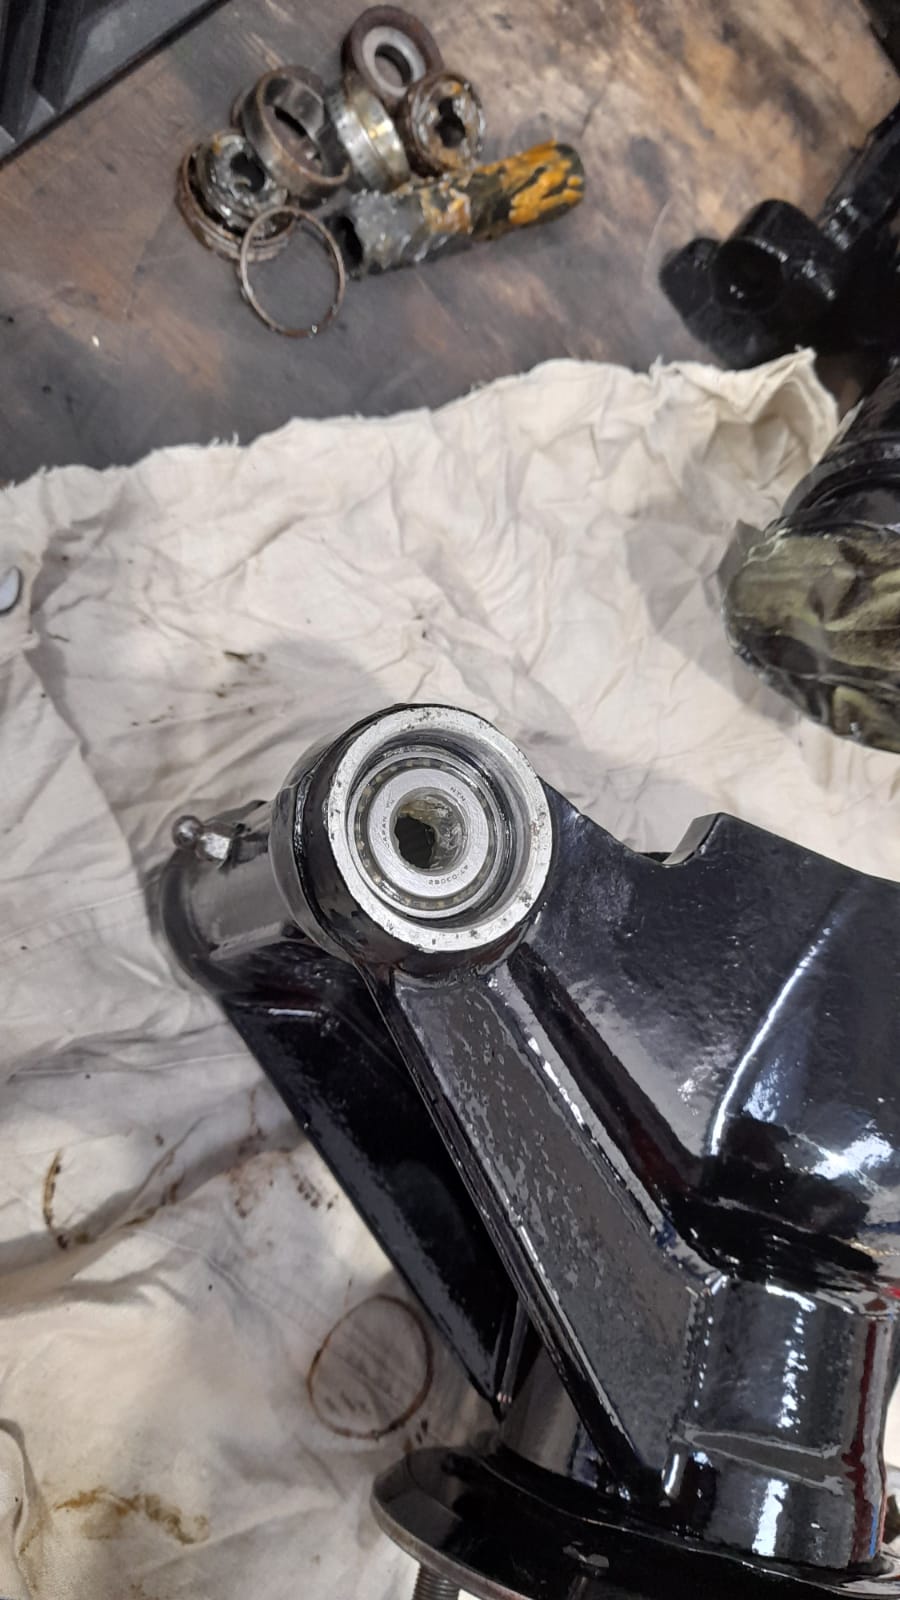
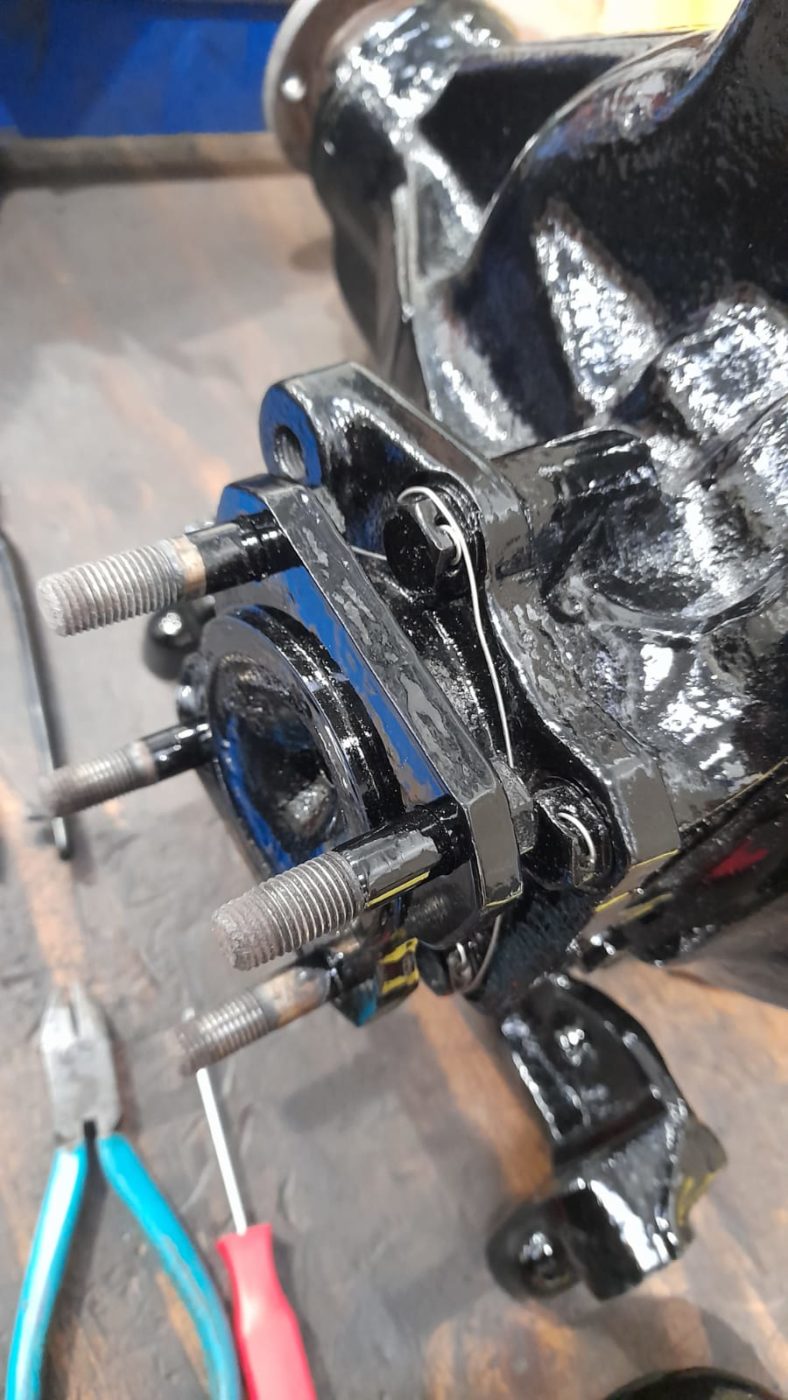
Scott has been working on the suspension for our Ferarri Daytona. He’s replaced all the UJs, bearings and bushes on the front and rear suspension. He’s also started to reassemble the front and rear axles.


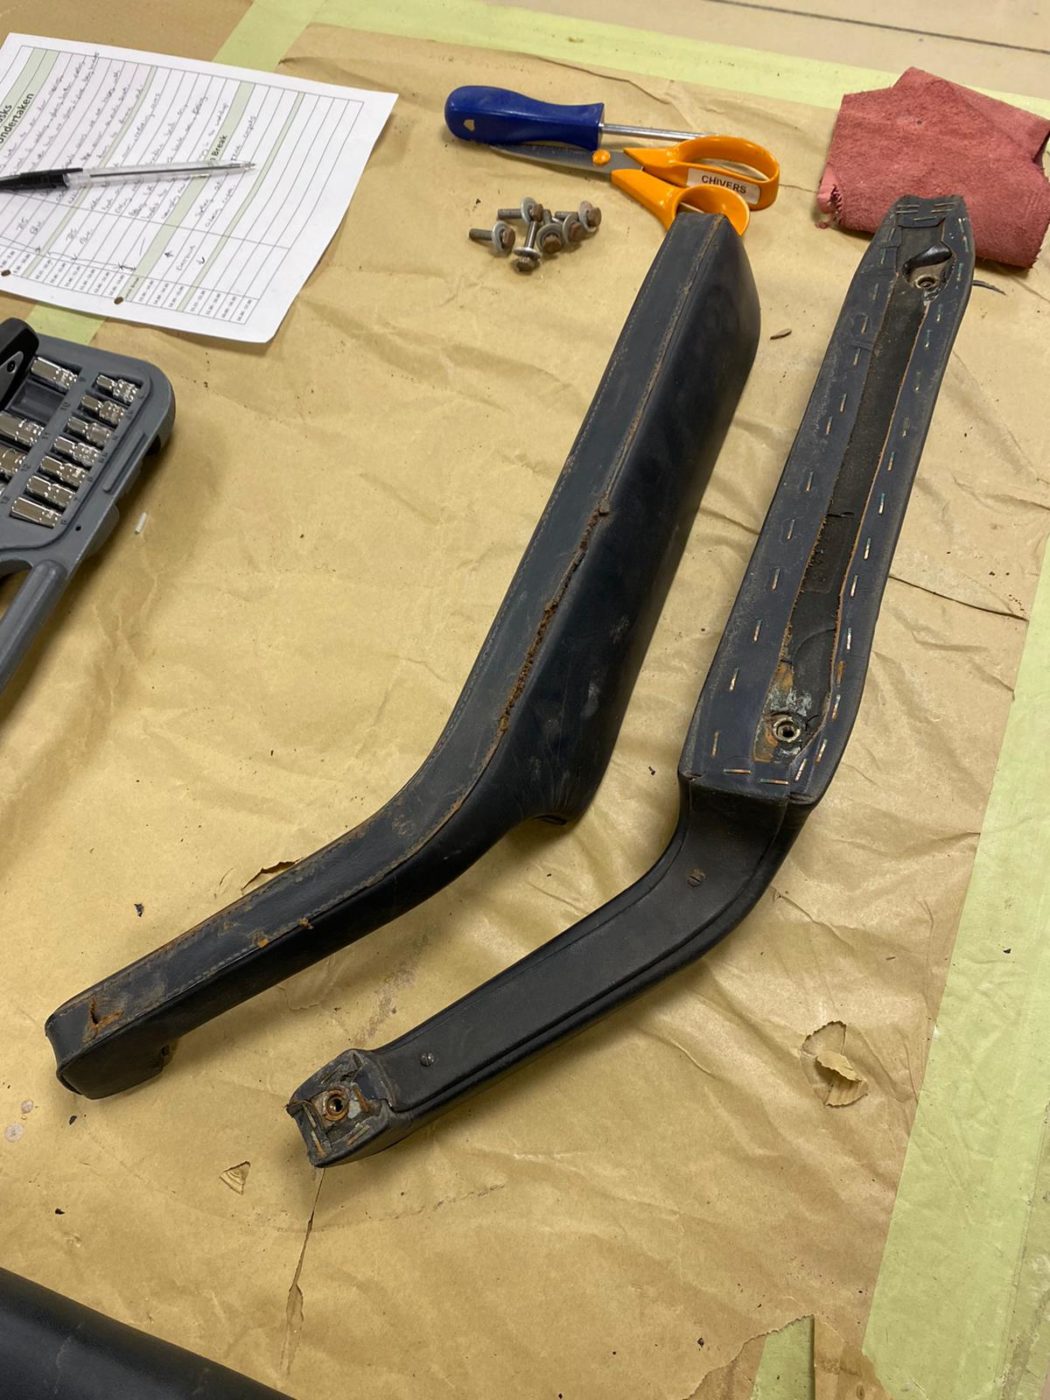
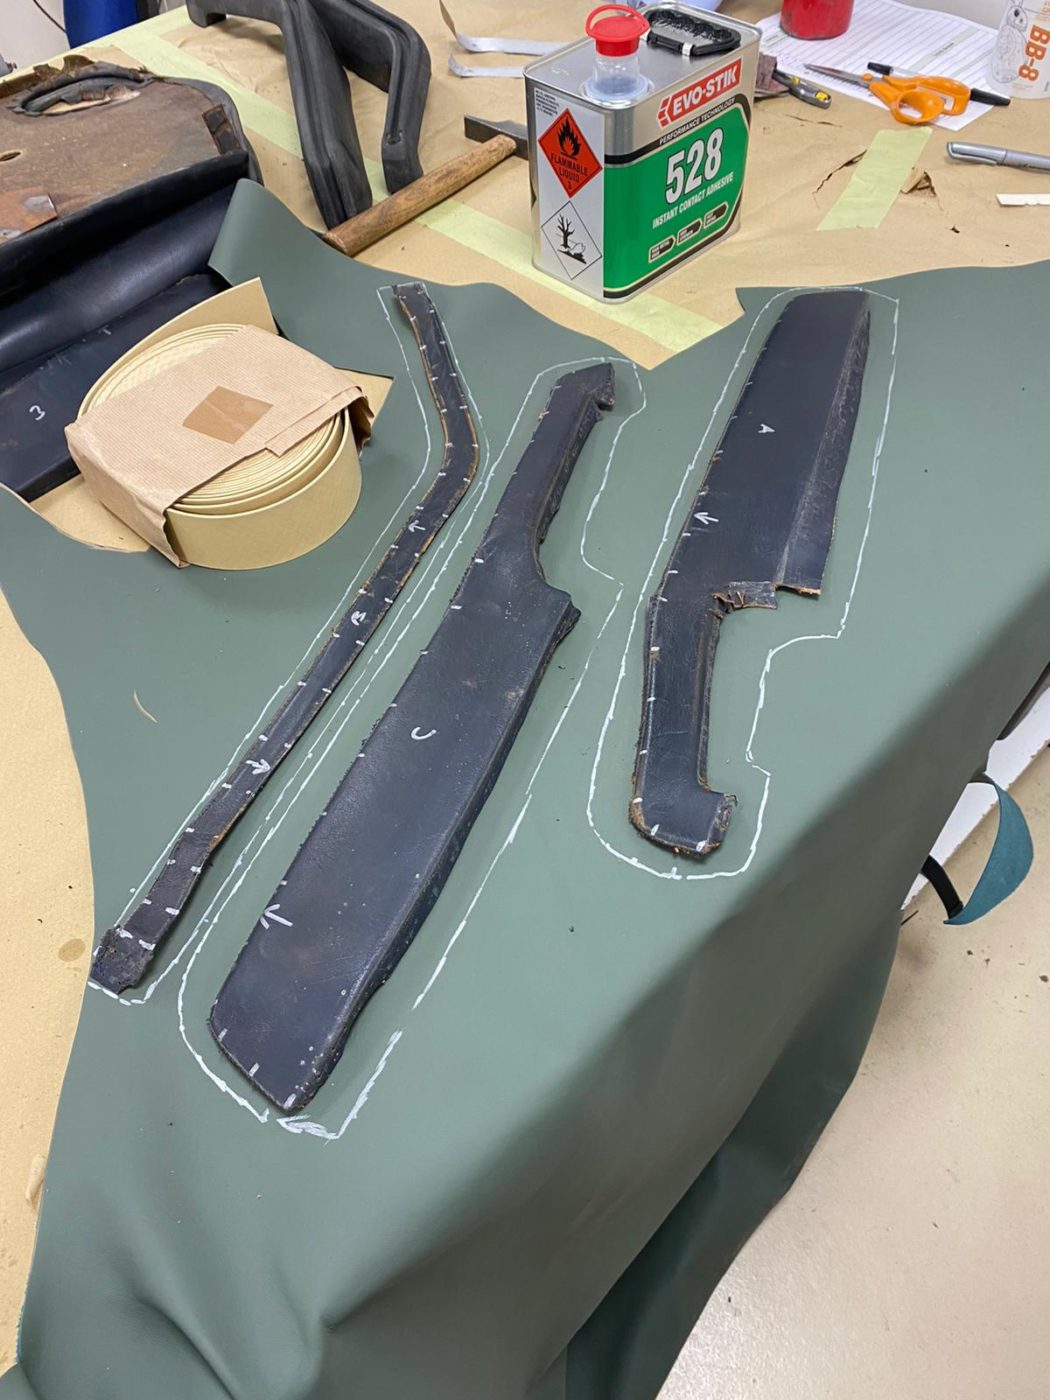
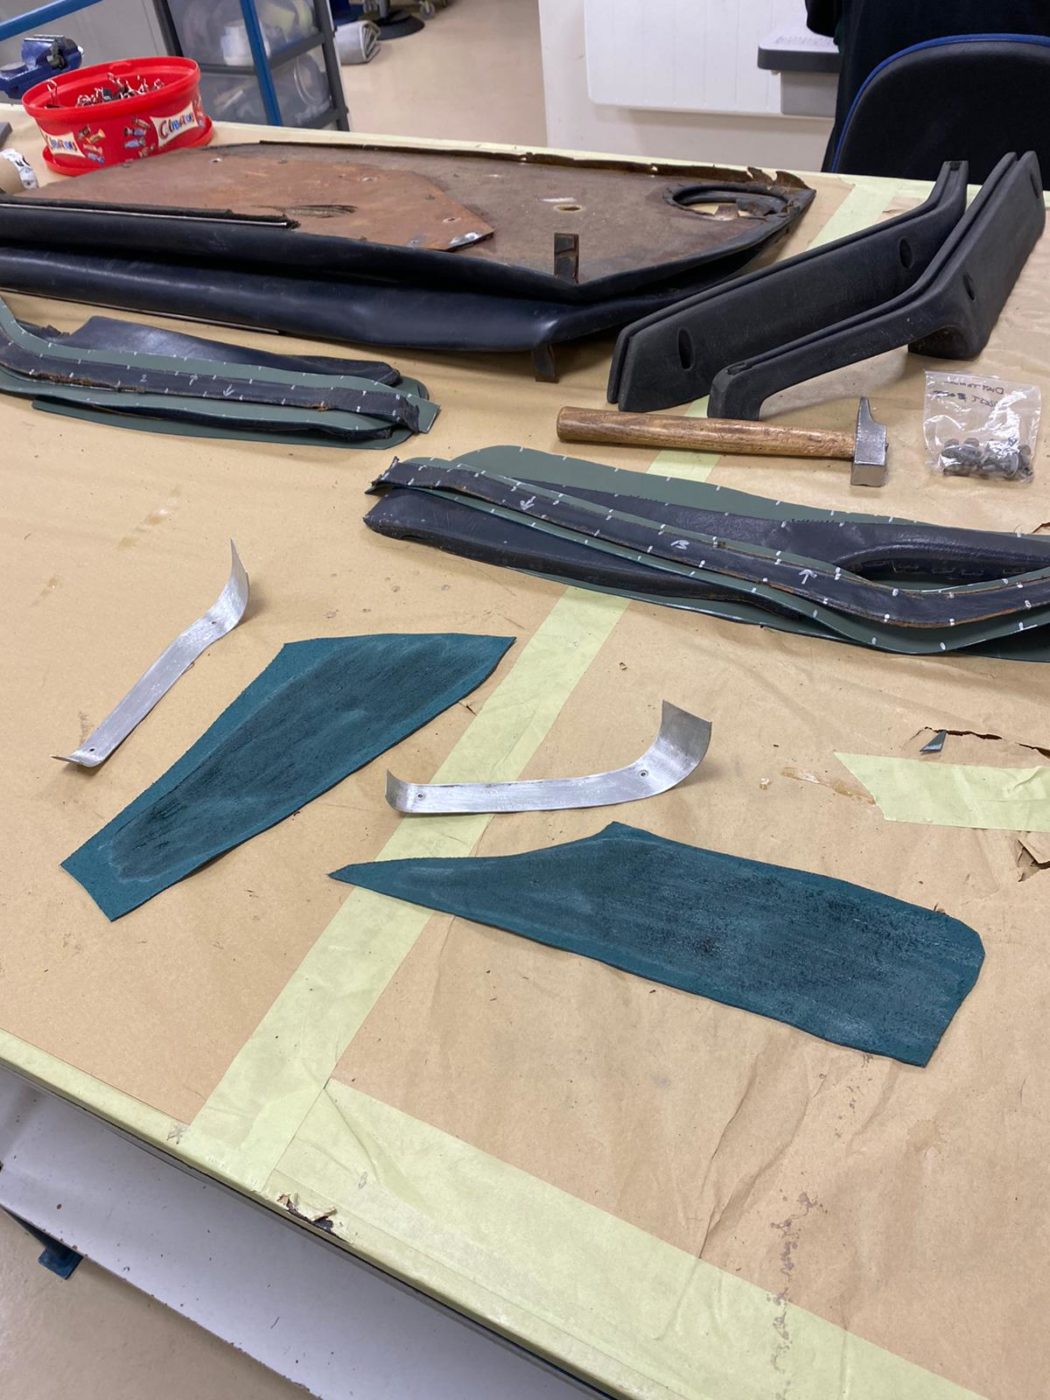
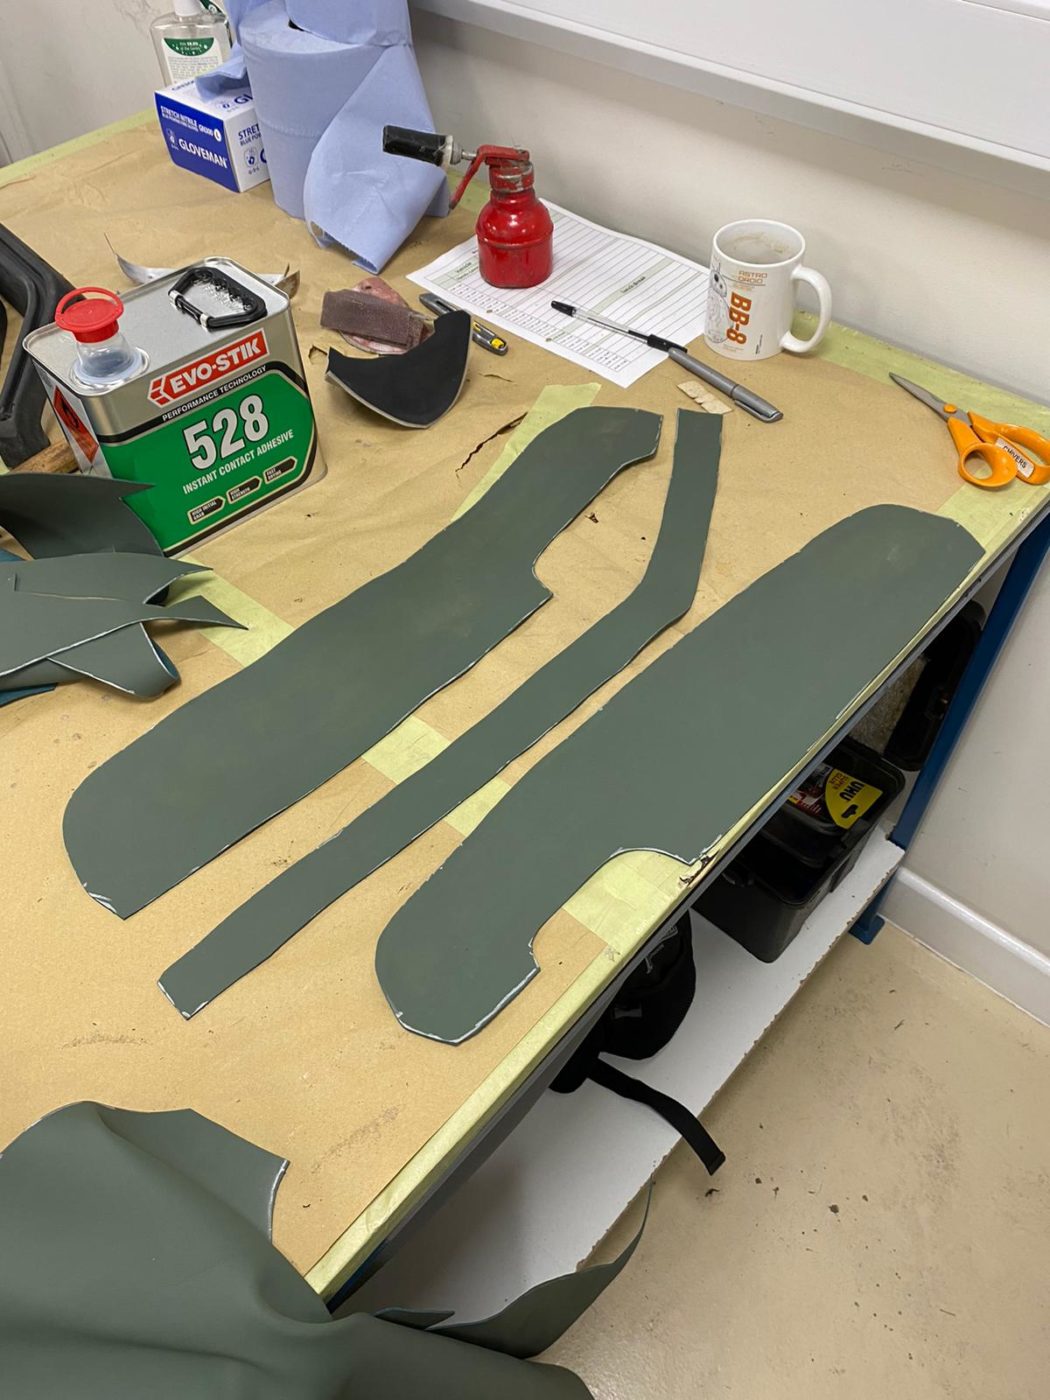
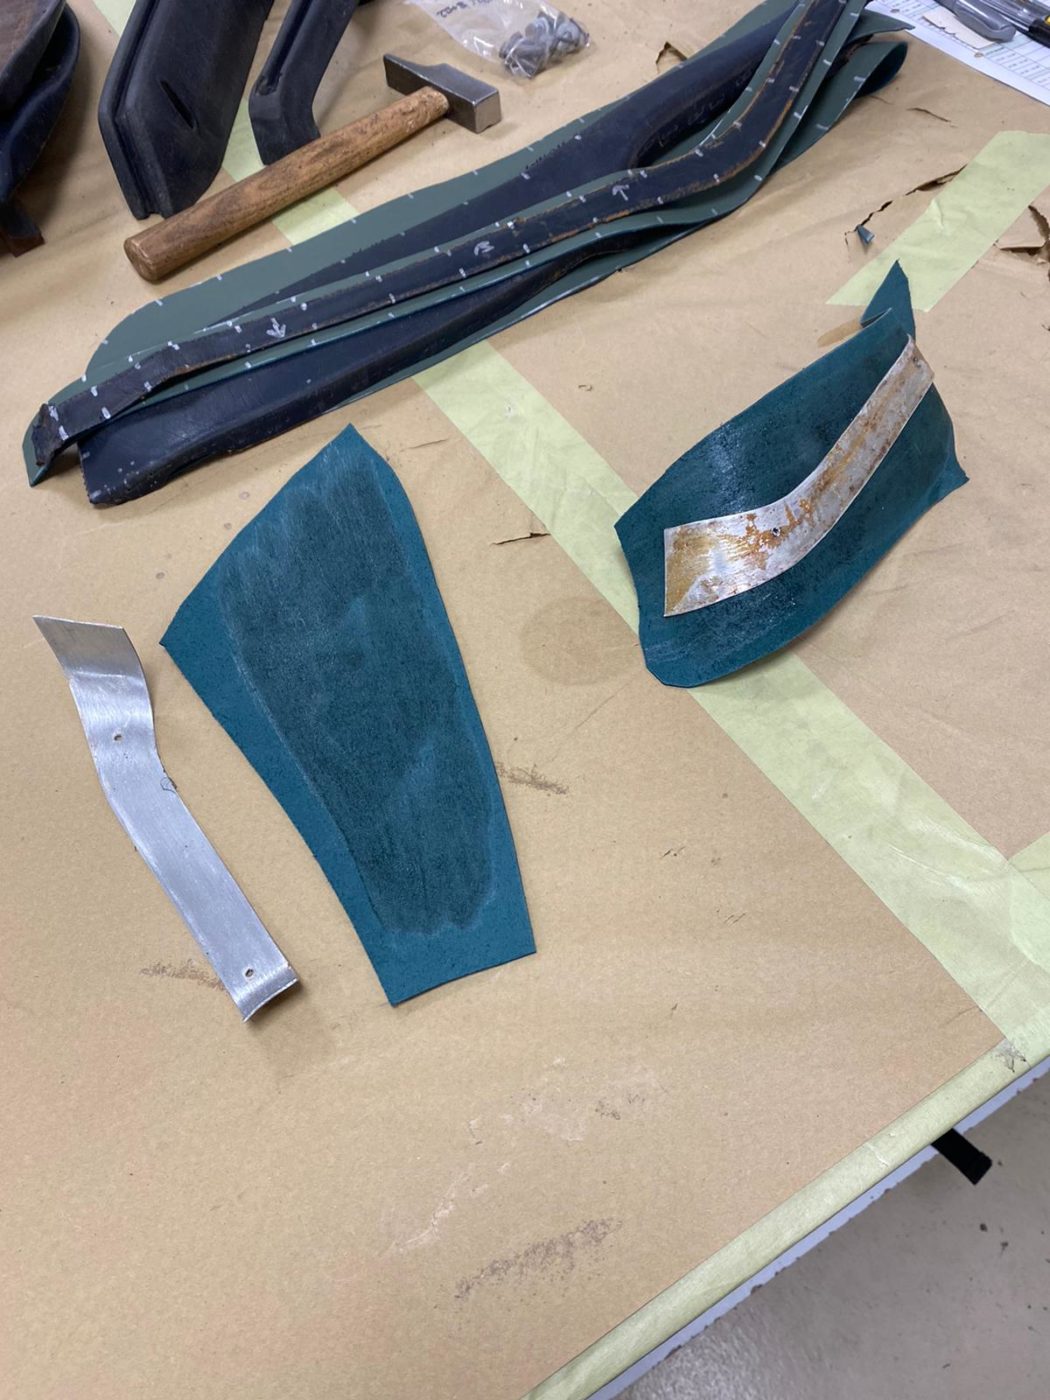
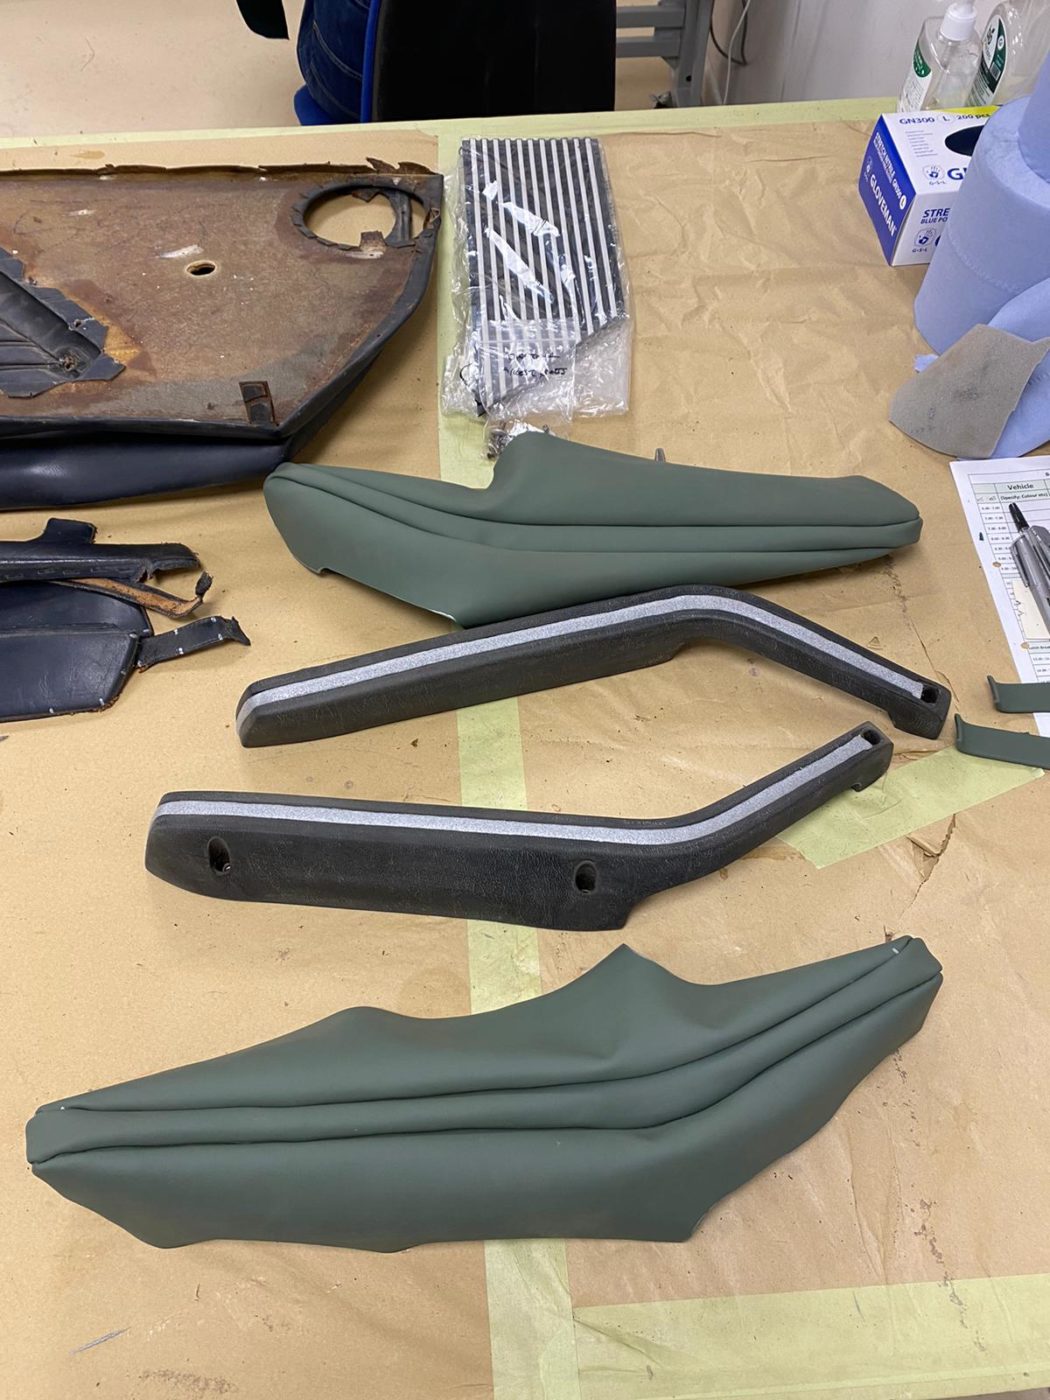
Brian has been marking up the old armrest covers ready to make new covers. He used the old pattern as a template to cut out the new leather, glued in the new metal trim for inside the handles, added the foam and glued up the edge of the arm rest. By pulling the arm rest tight and stapling it down, Brian can get a neat finish.
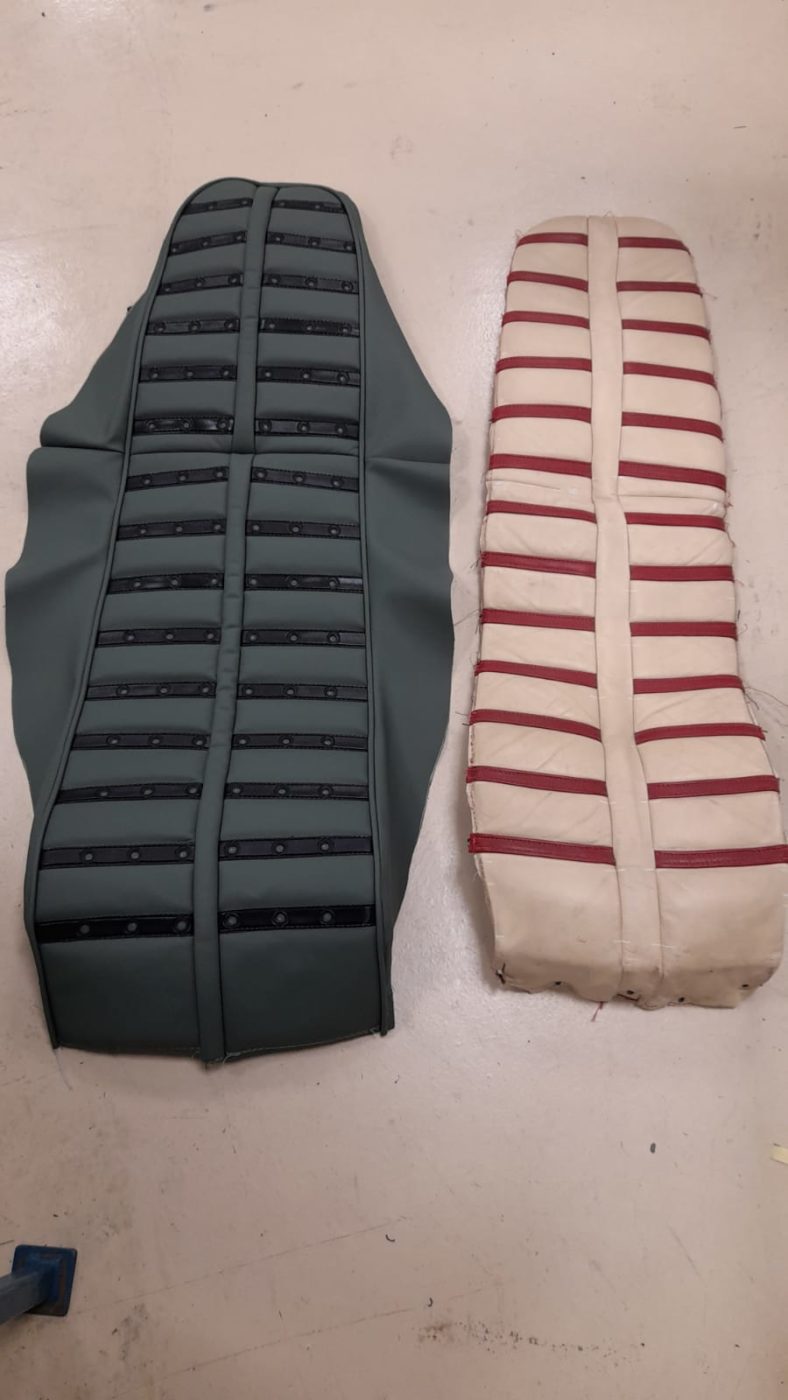
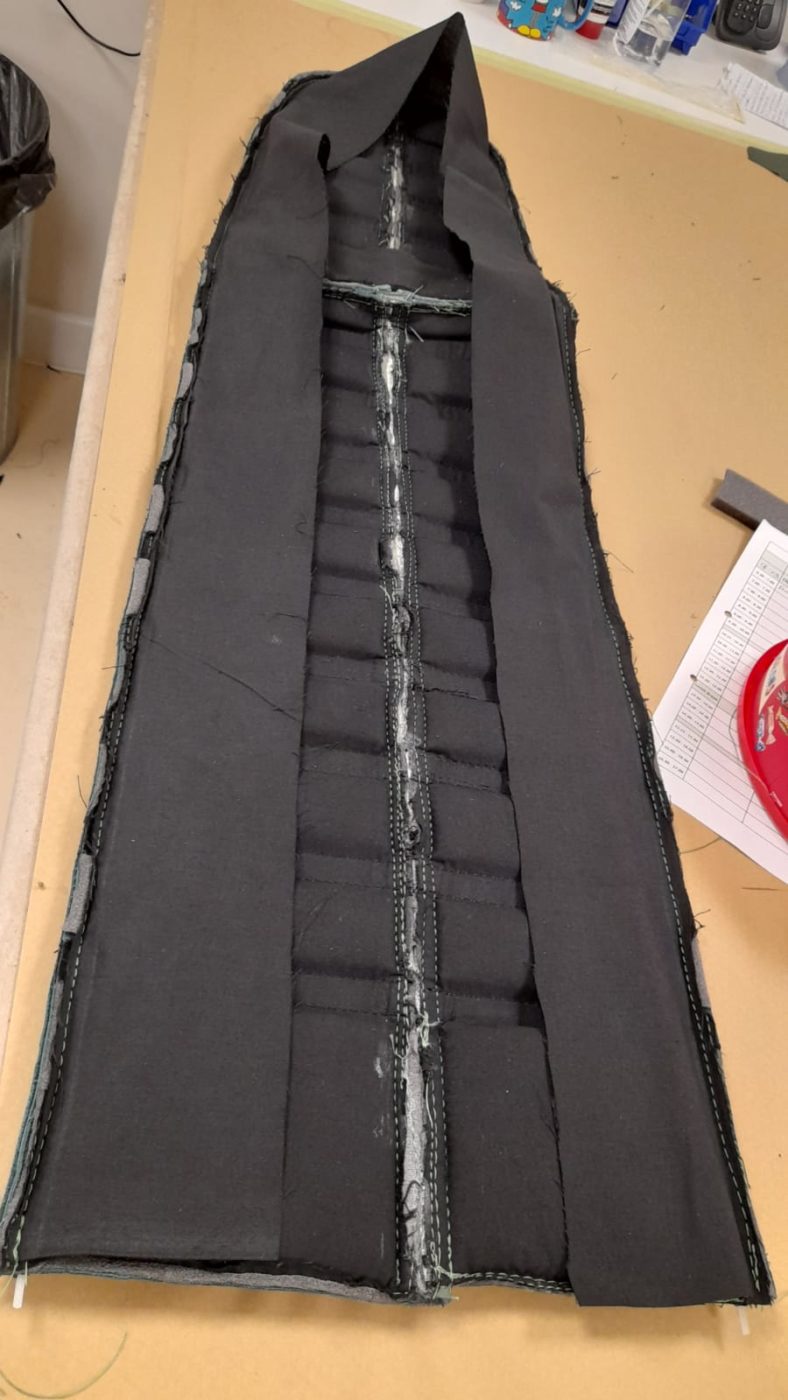
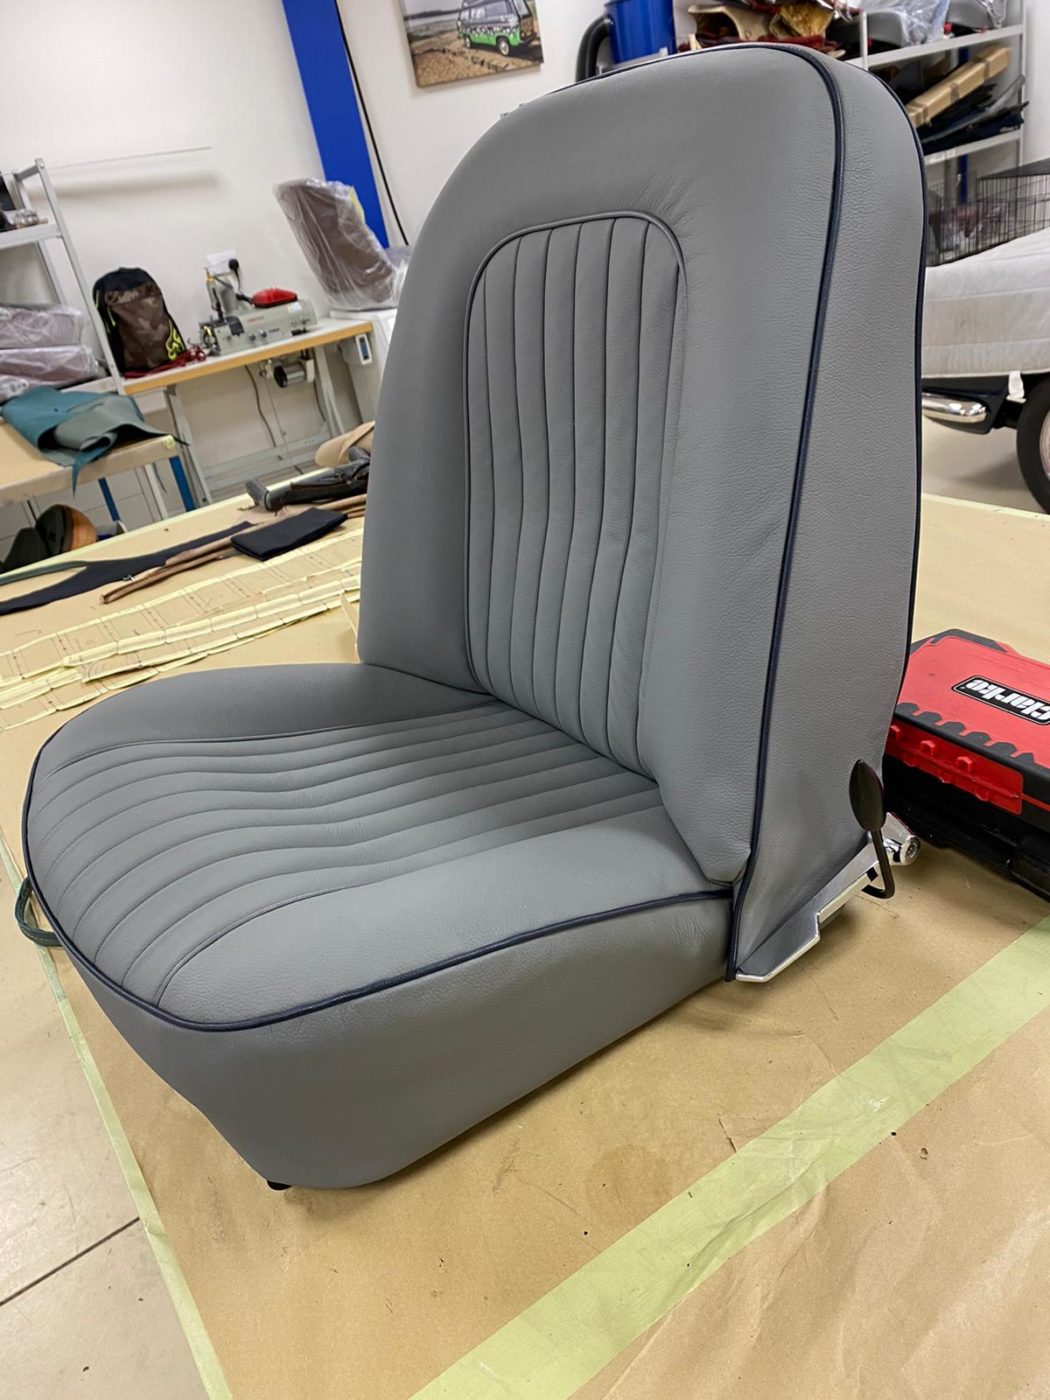
Lydia has been working on putting together the seat covers by adding pipping around the outside, adding calico underneath which gets pulled over the bars in the frame to keep it tight. Lydia then marks out the new back and skirt on fresh leather. Lydia sews on the hem to the skirt and adds the pieces back together.
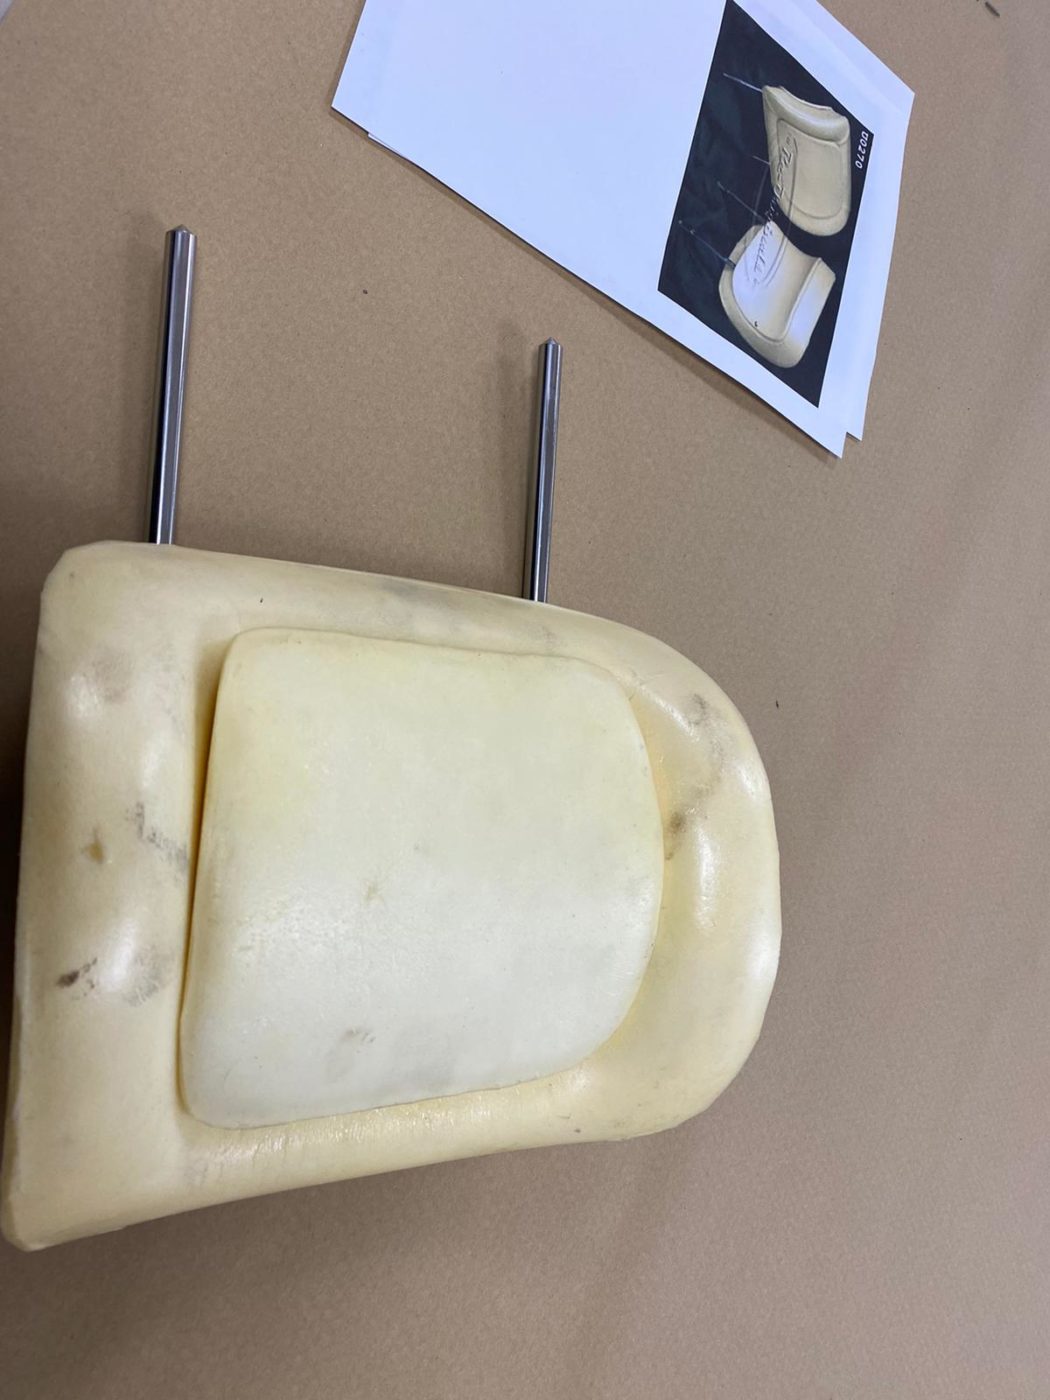
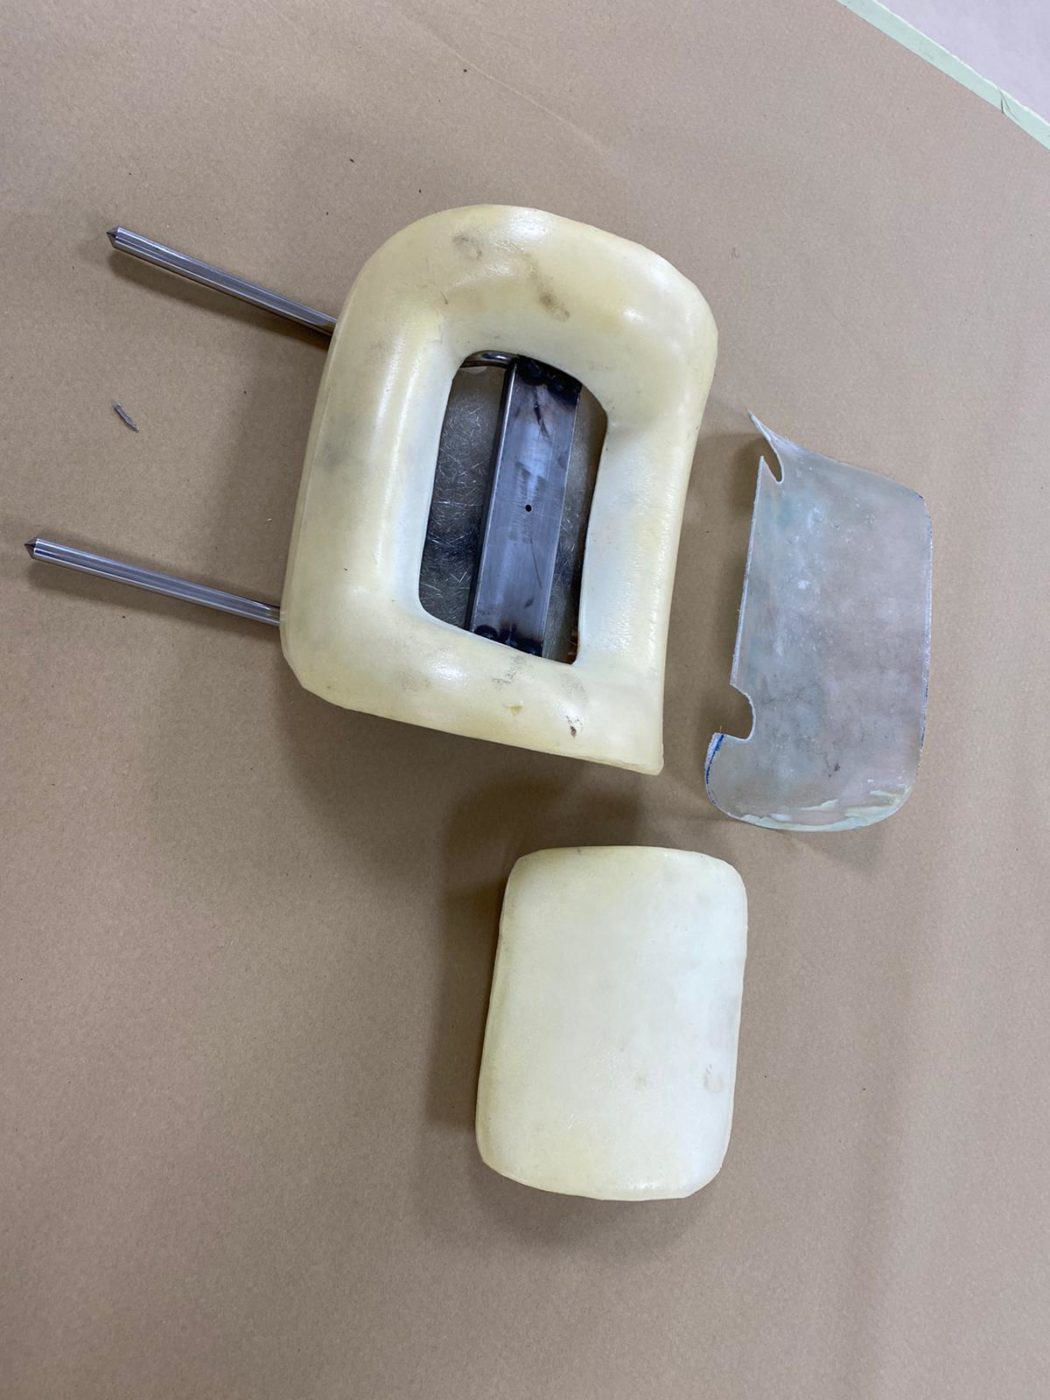
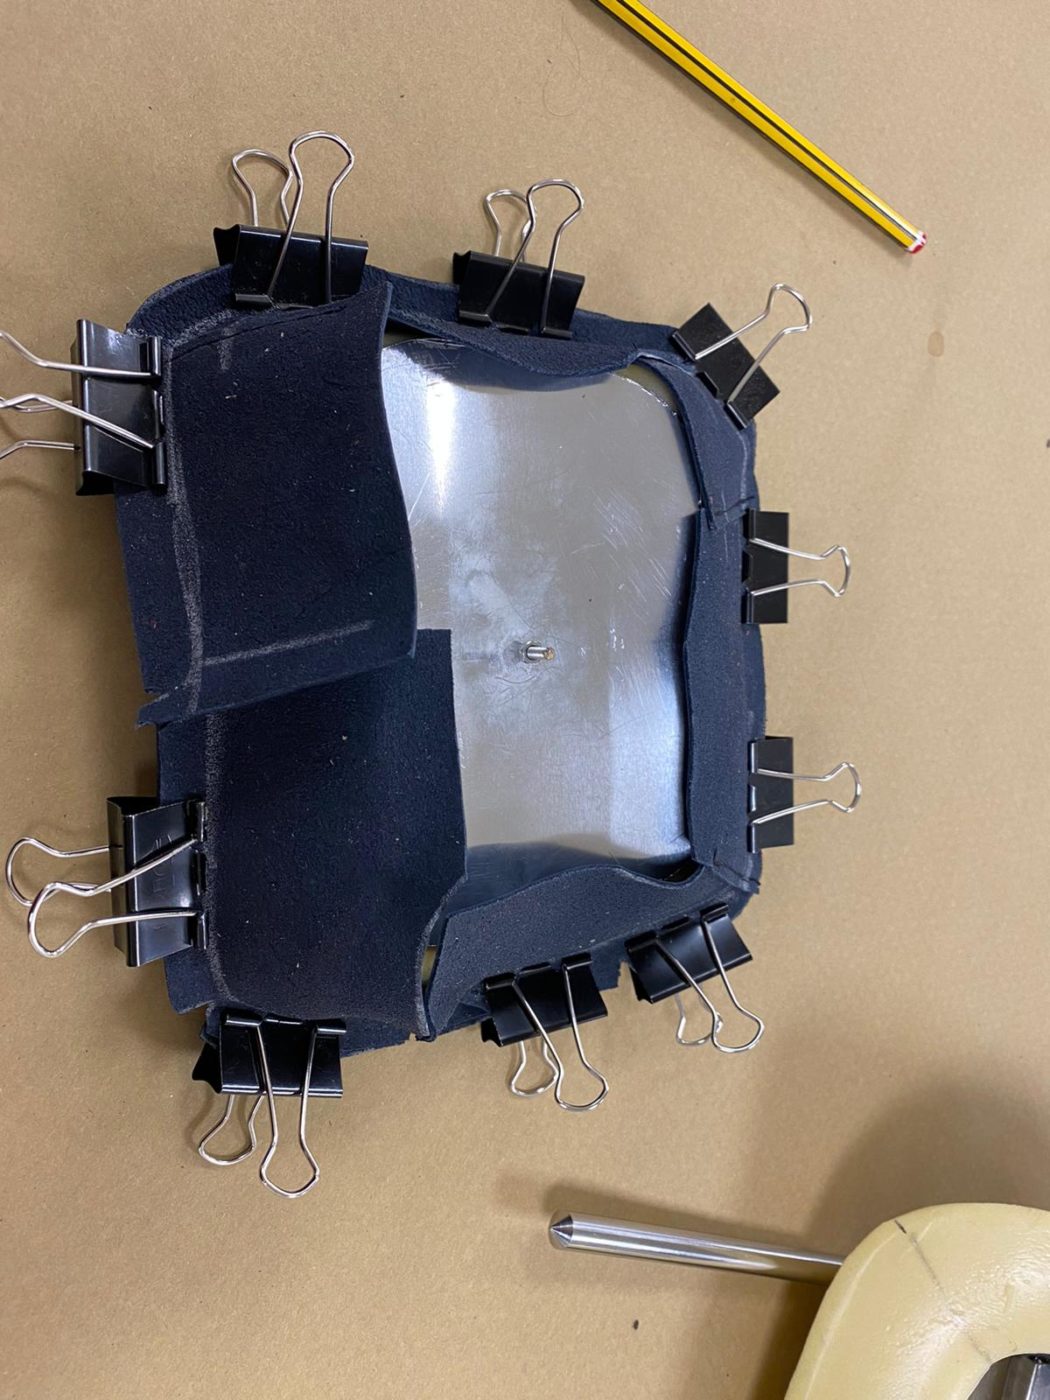
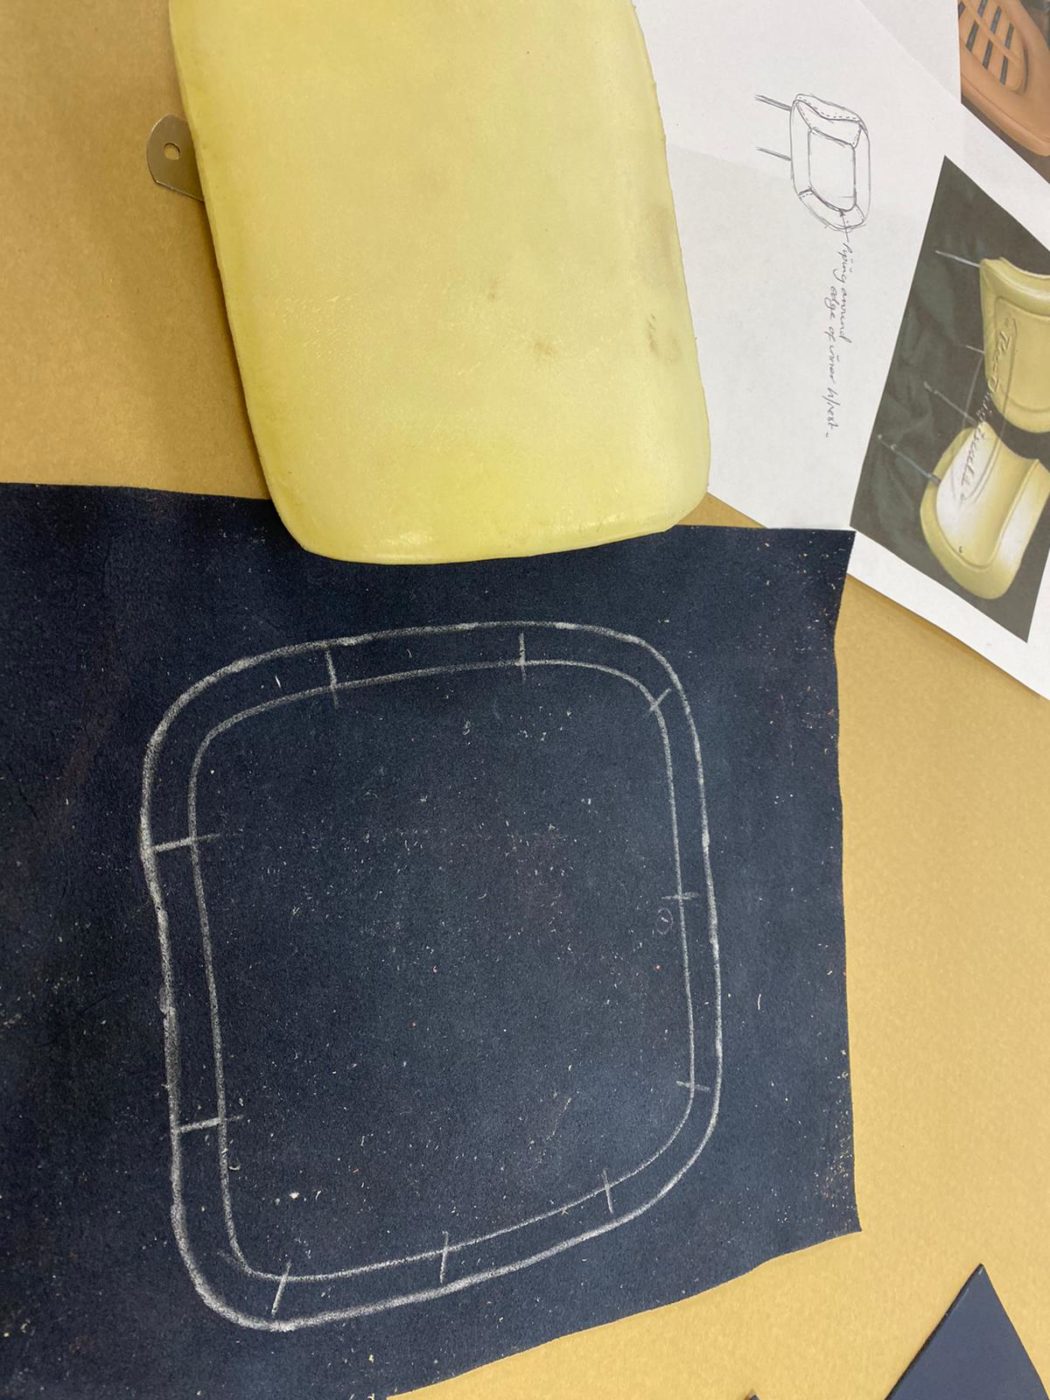
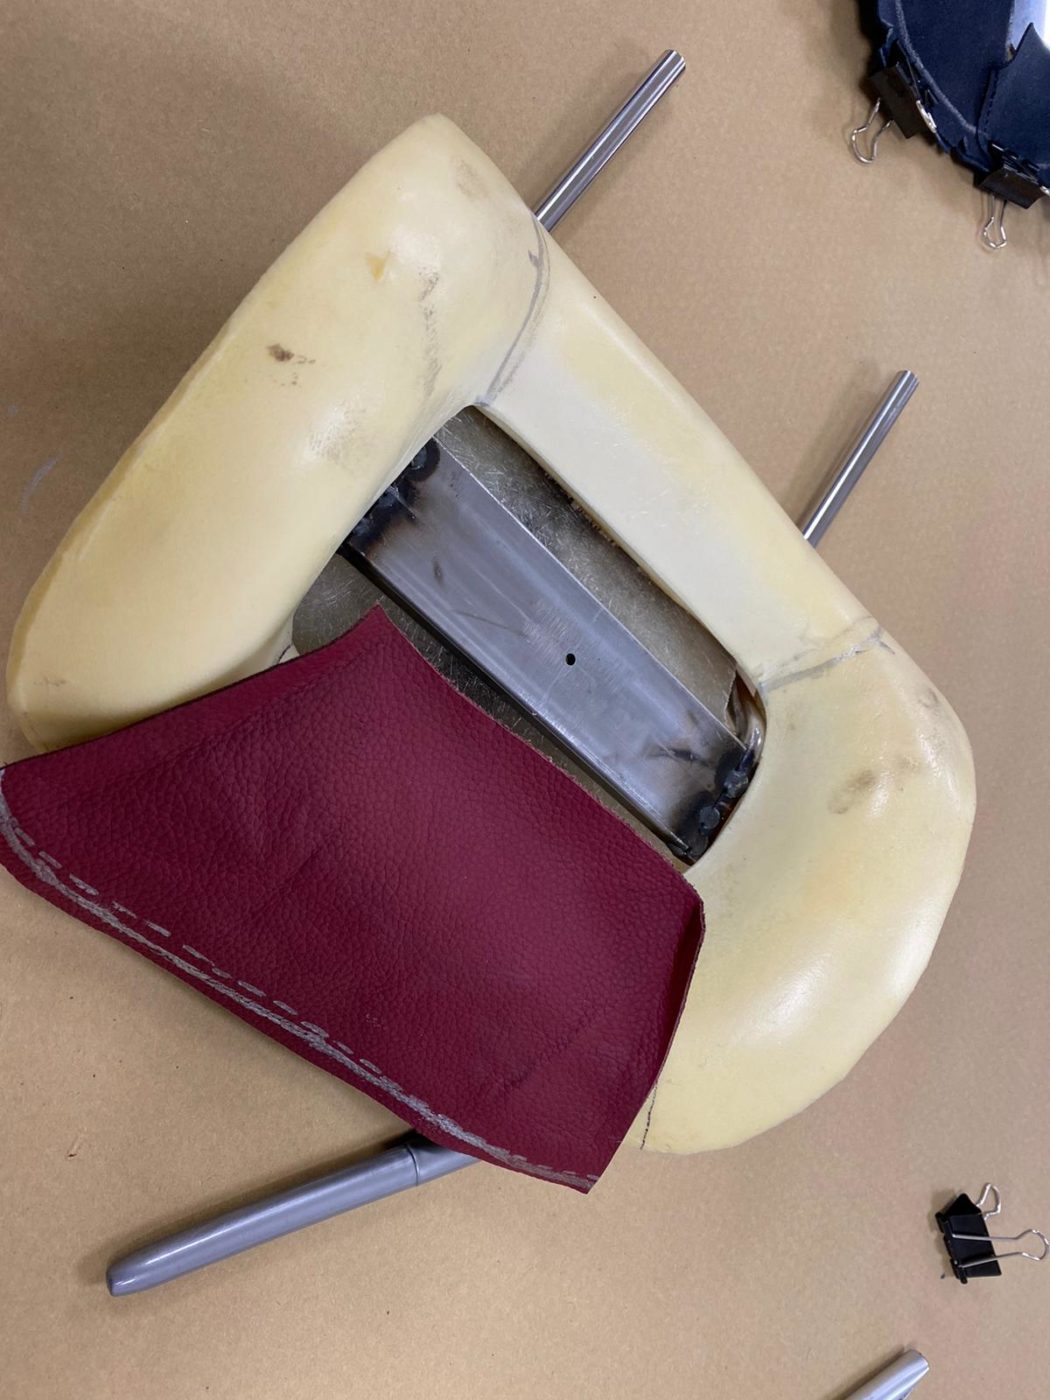
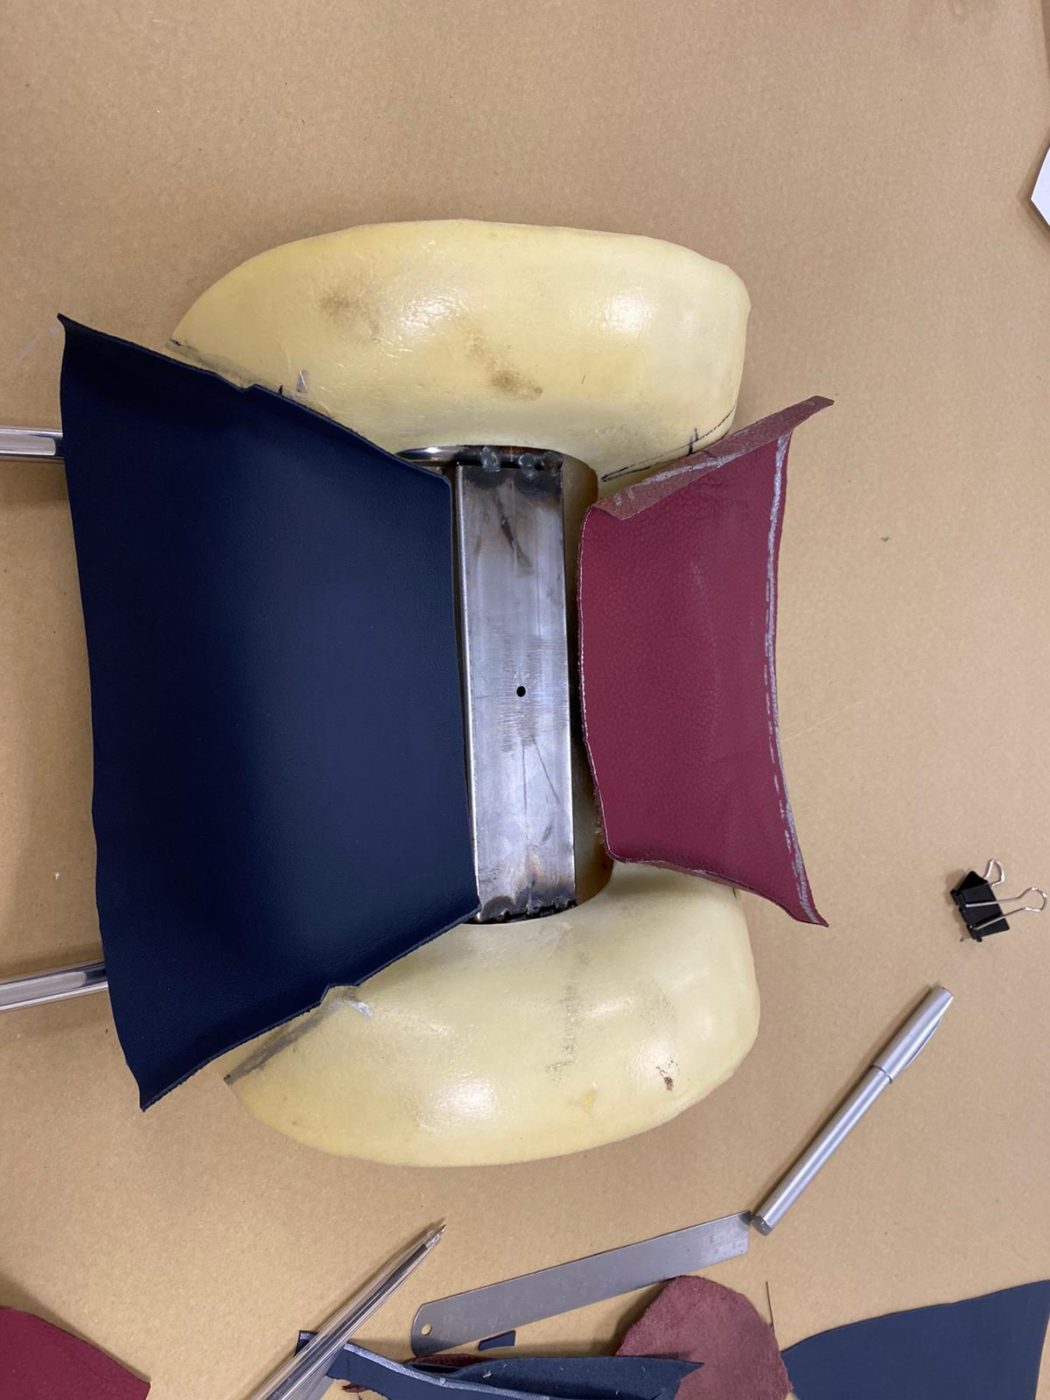
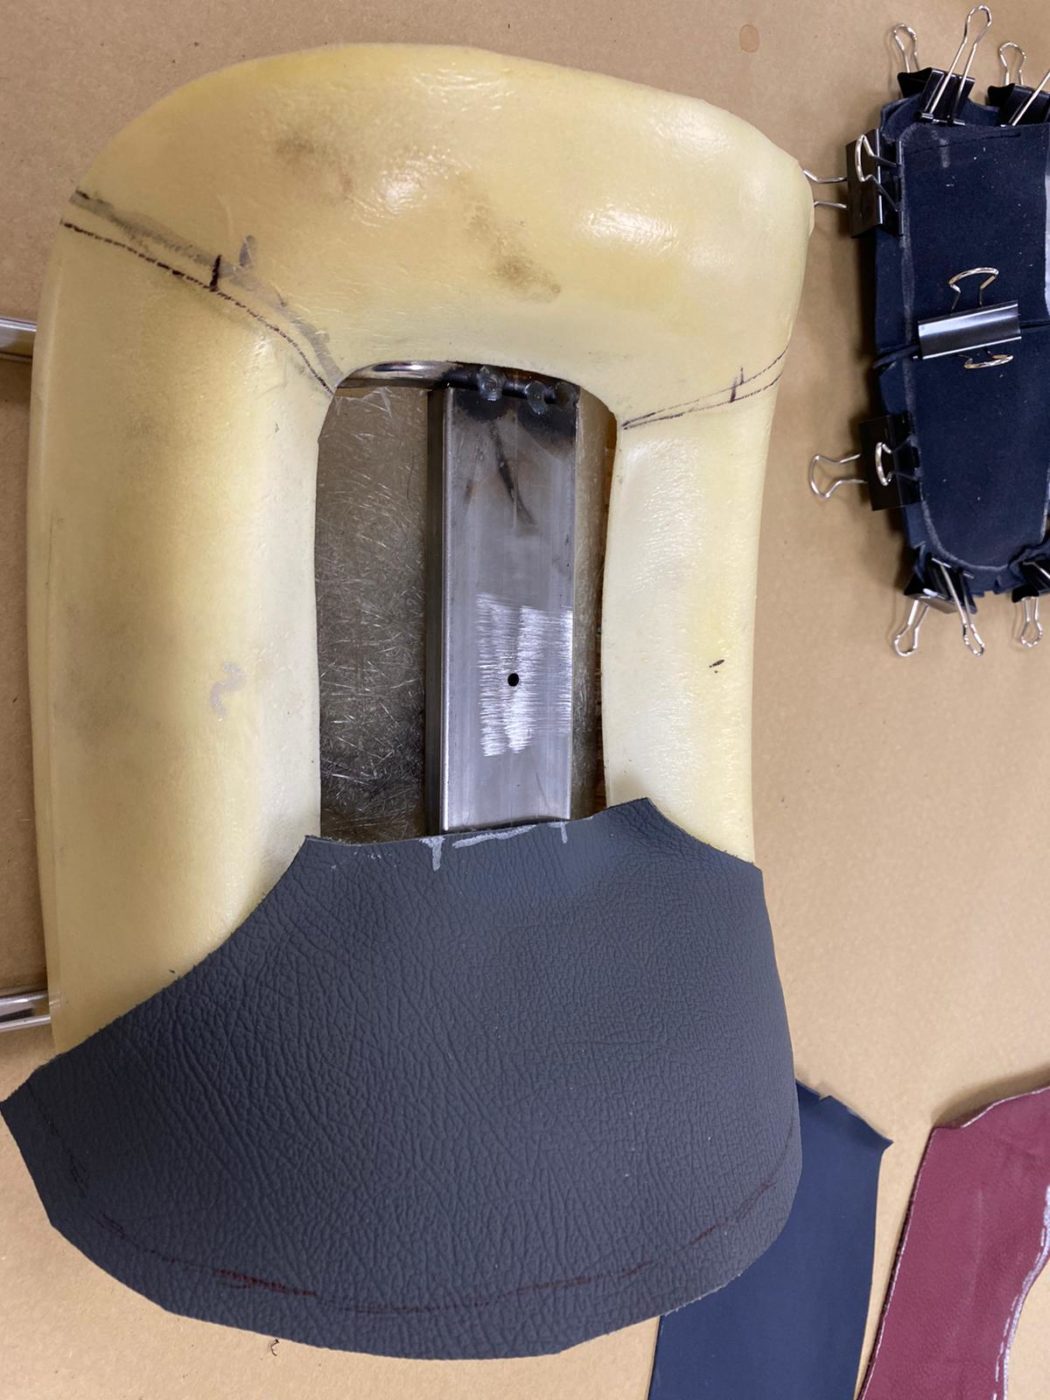
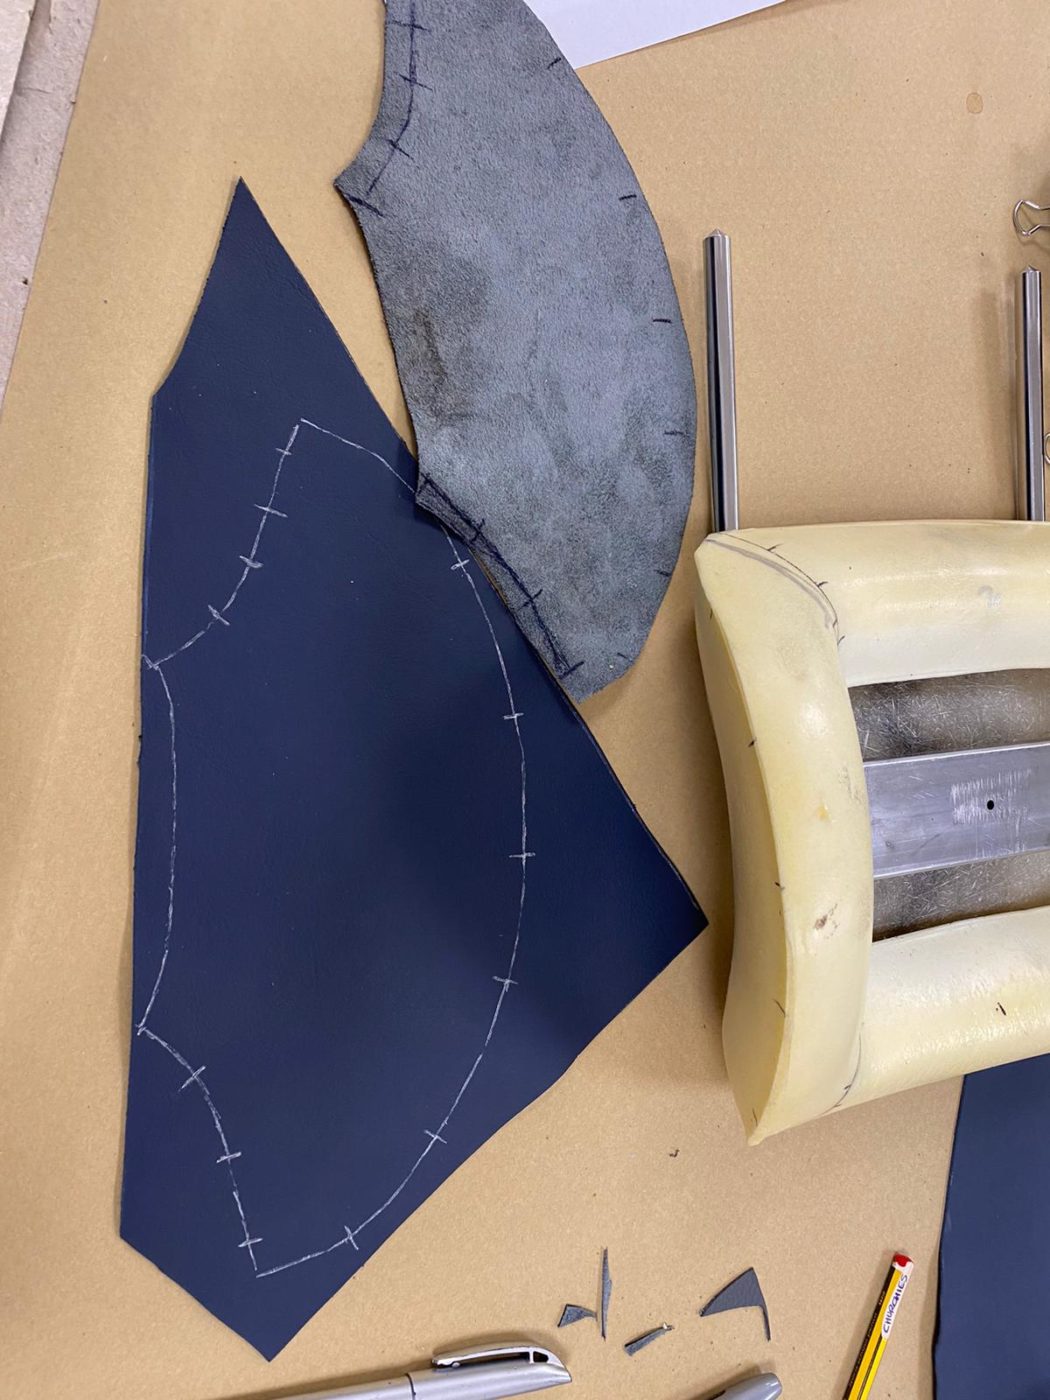
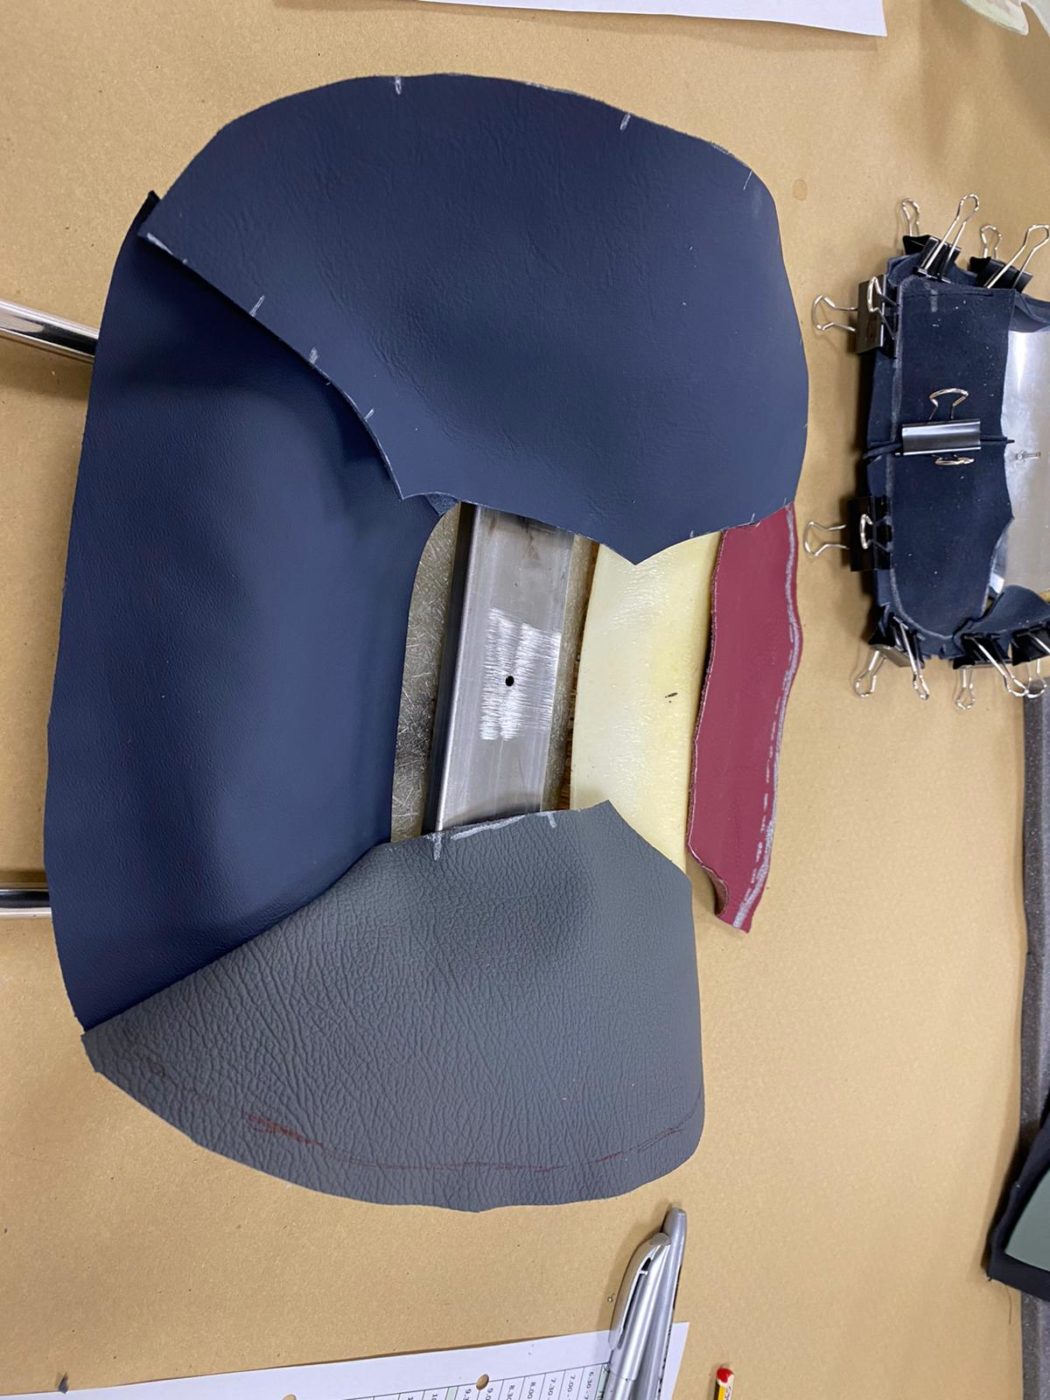
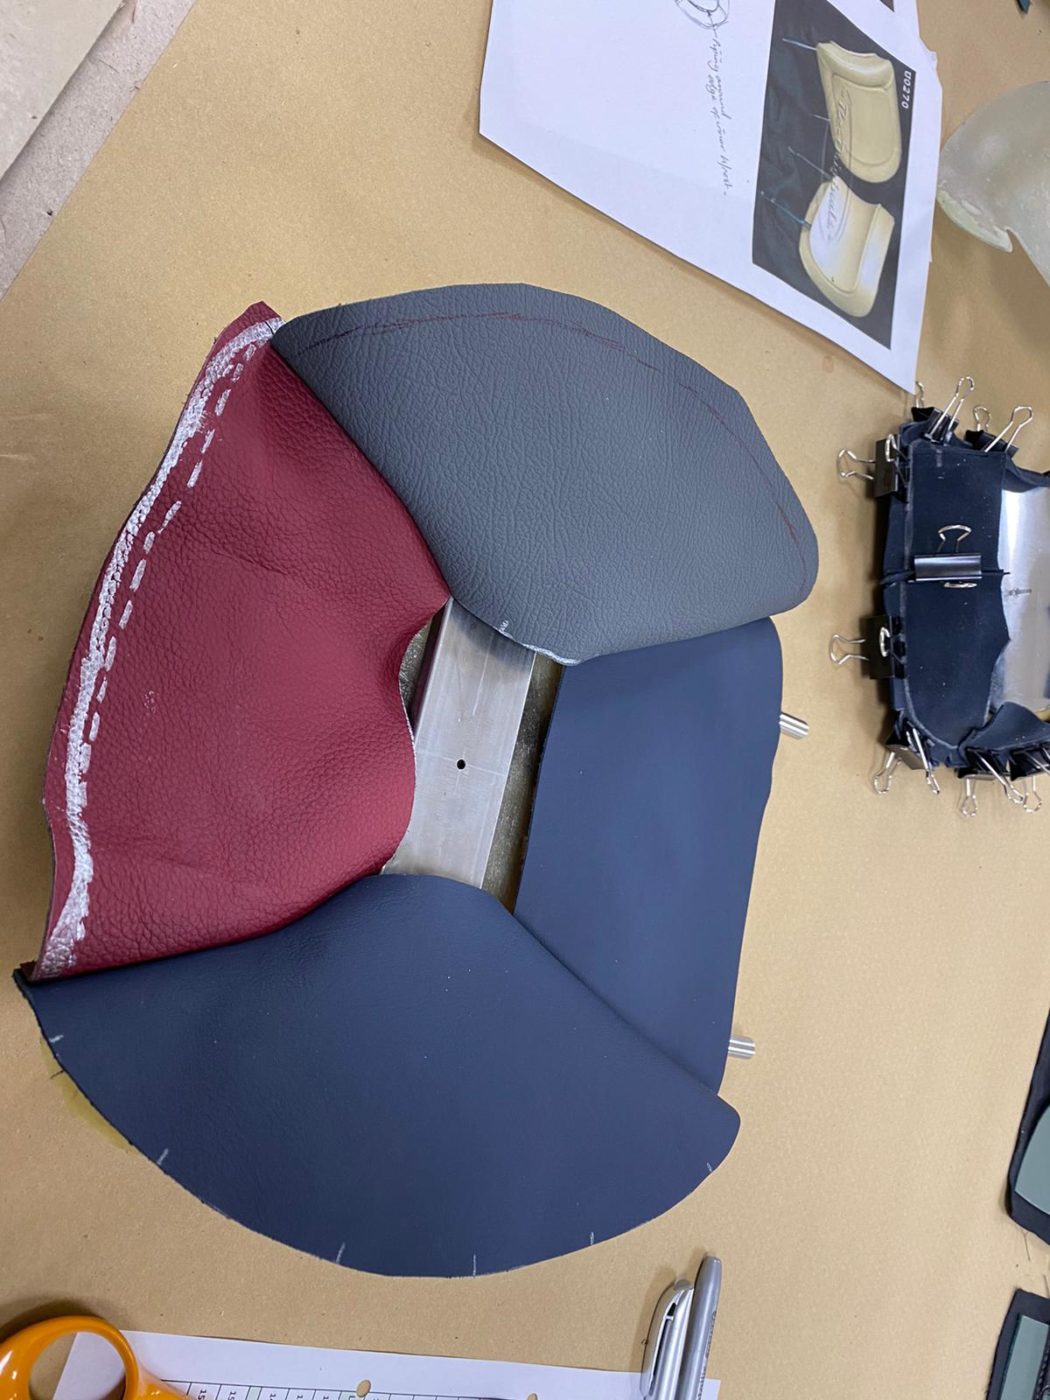
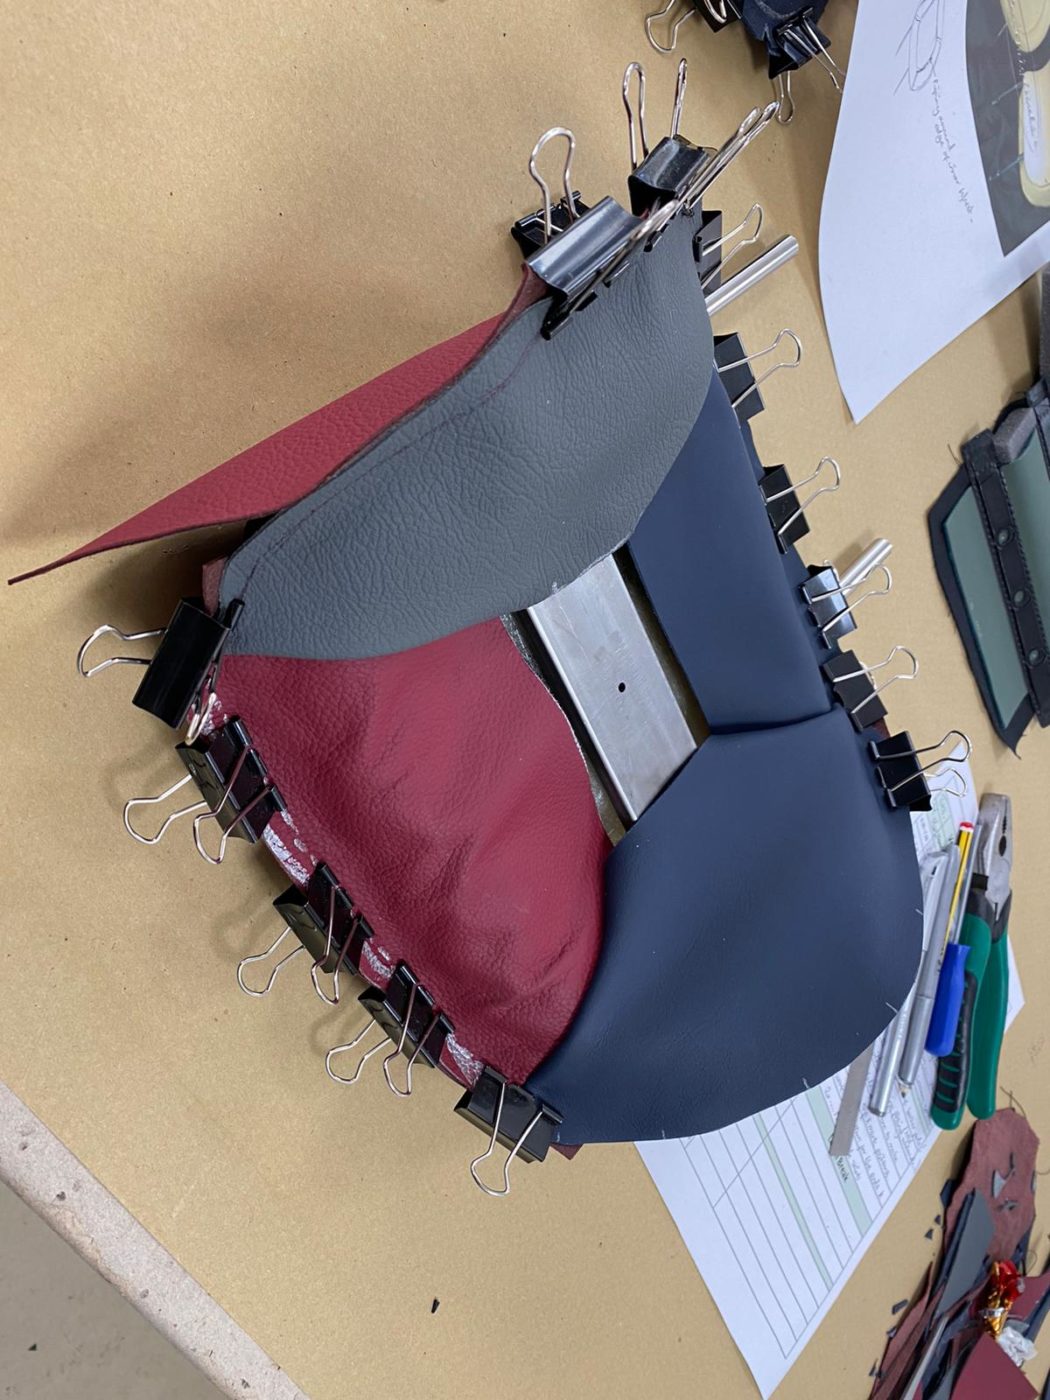
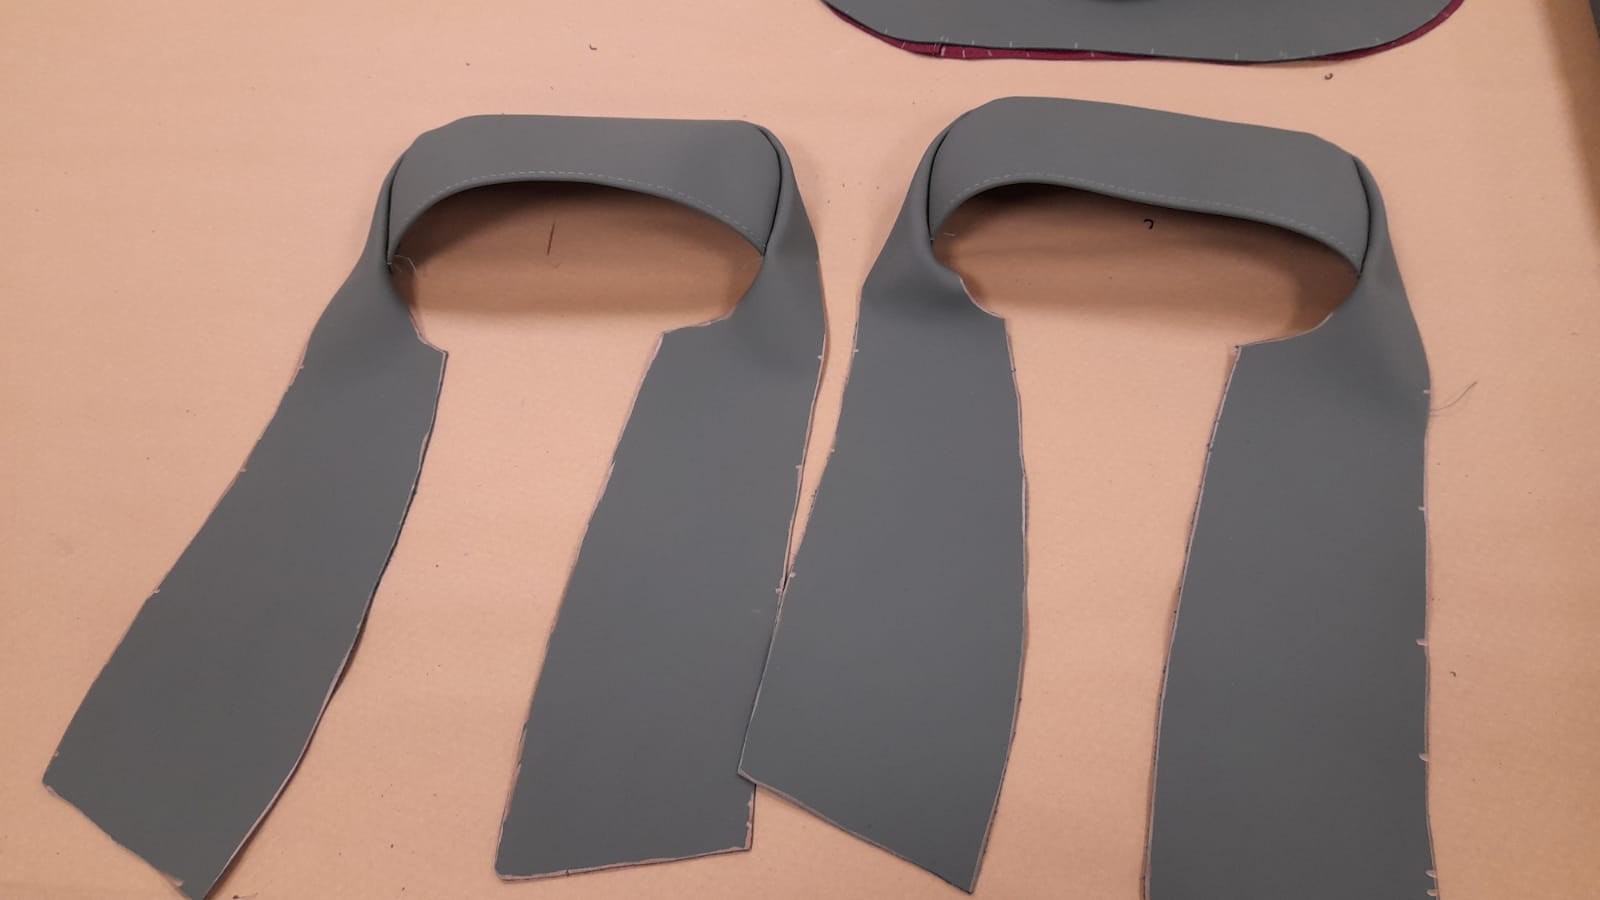
Kath has been working on making the test run for the head rests. She starts by drawing around the inner section and adding the seam allowance. She then makes up the skirt, clips it together and sews it in place. Kath then makes the pattern for each part of the head rest, marks out the positions on the leather and foam and sews it all together. Once all the parts and skirts as sewed up, she fits it onto the foam head rest and adjusts it to fit. Once she’d modified it to fit perfectly, Kath can then sew round the inner section and fit that. Once that the pattern is made, Kath finds she needed to unpick the stitching and mark out the parts in he sage green leather.


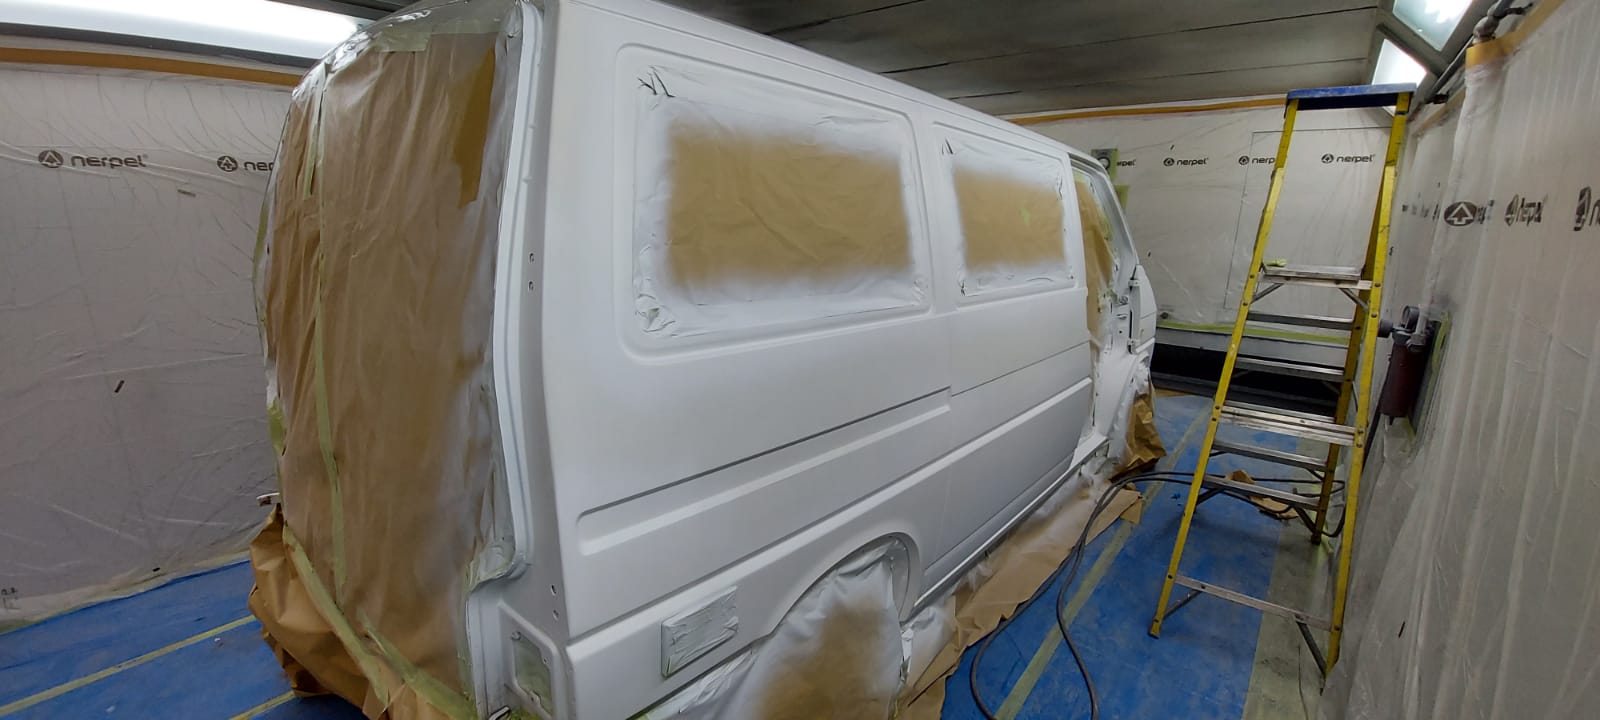
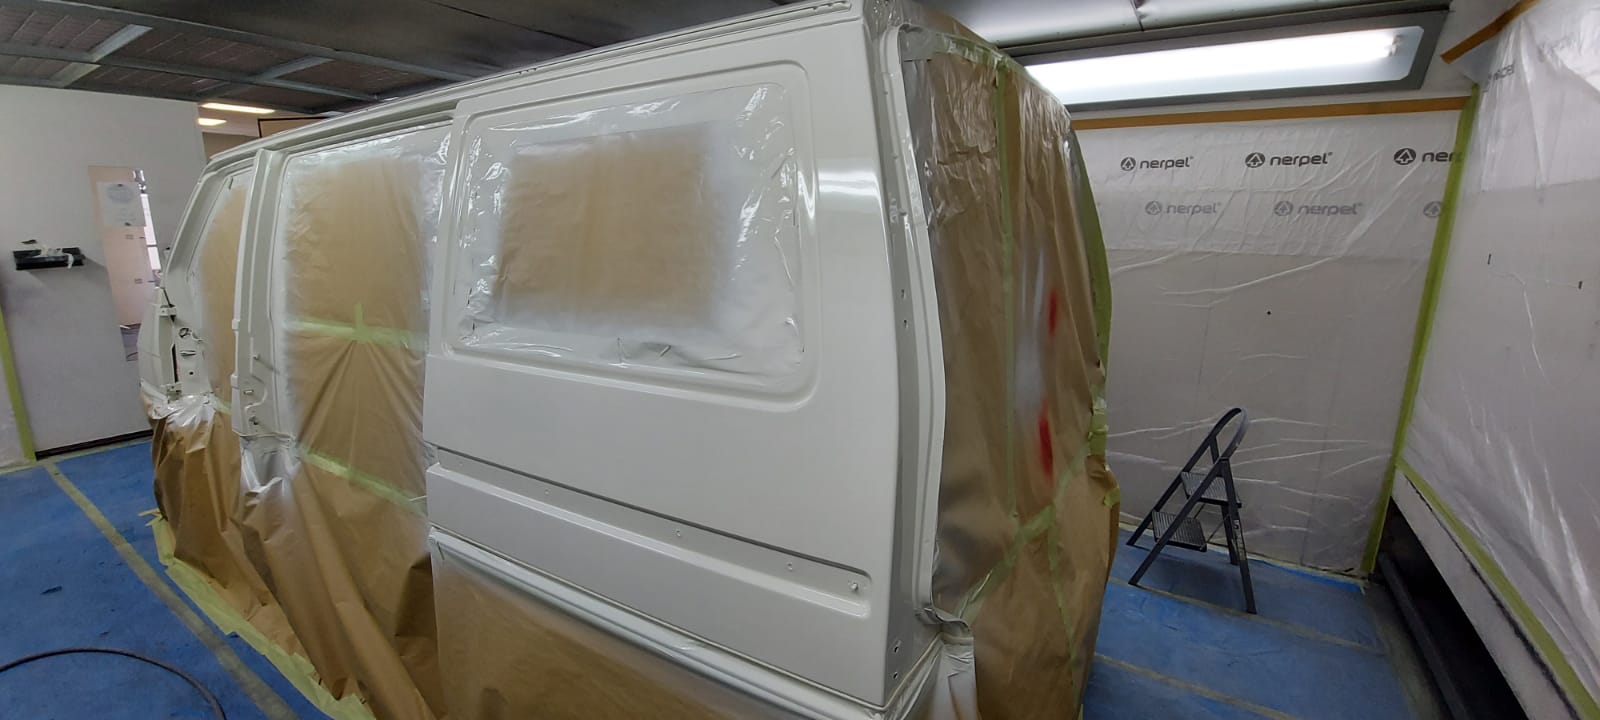
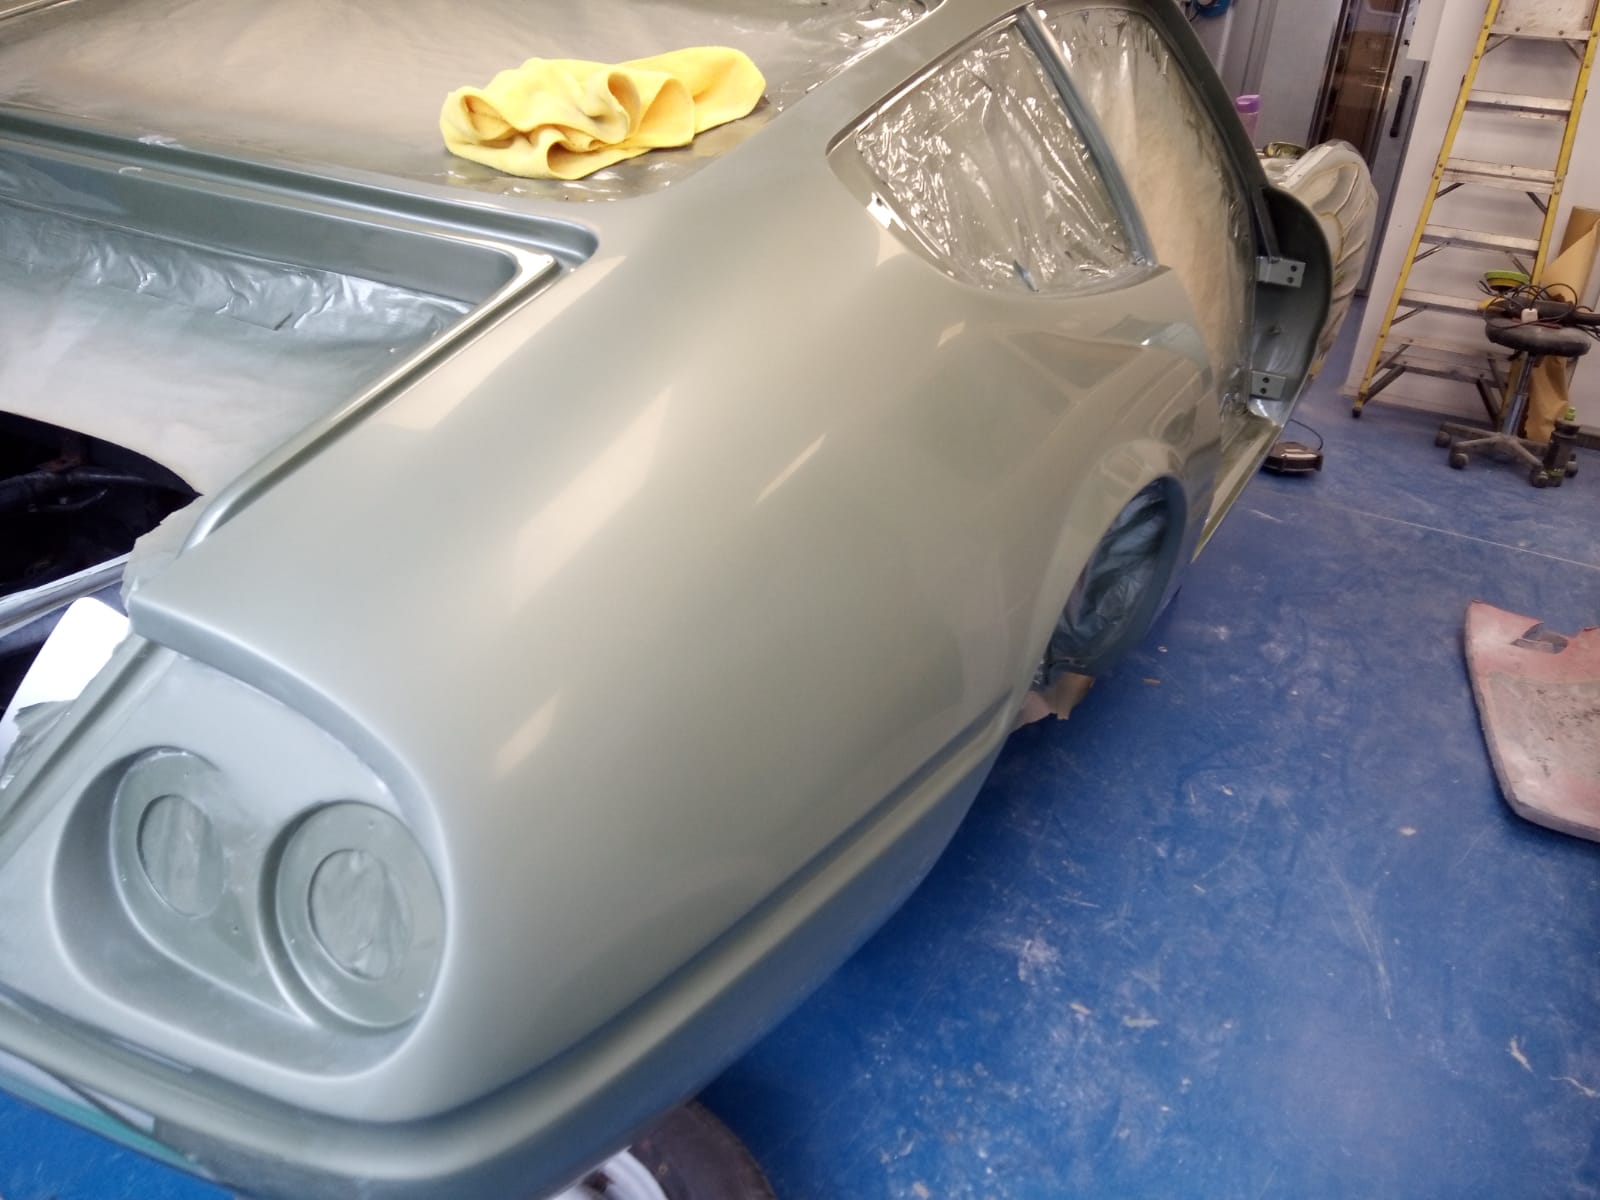
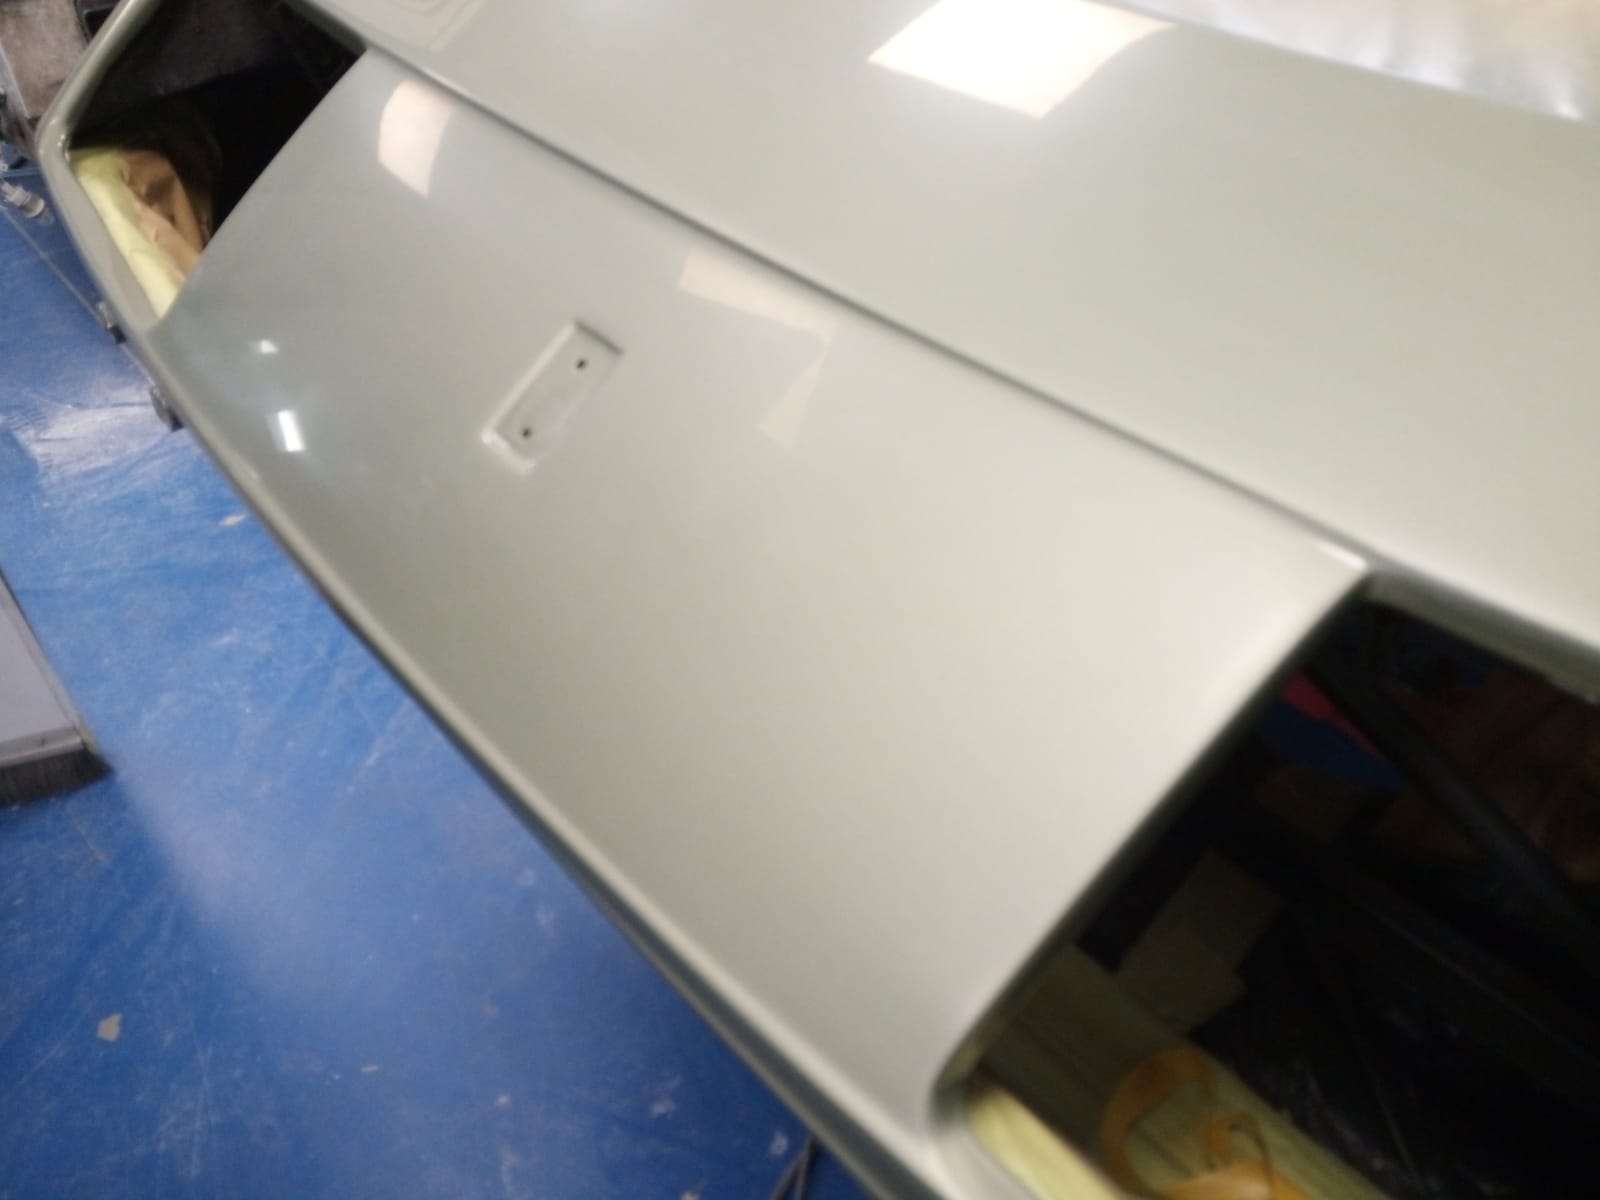
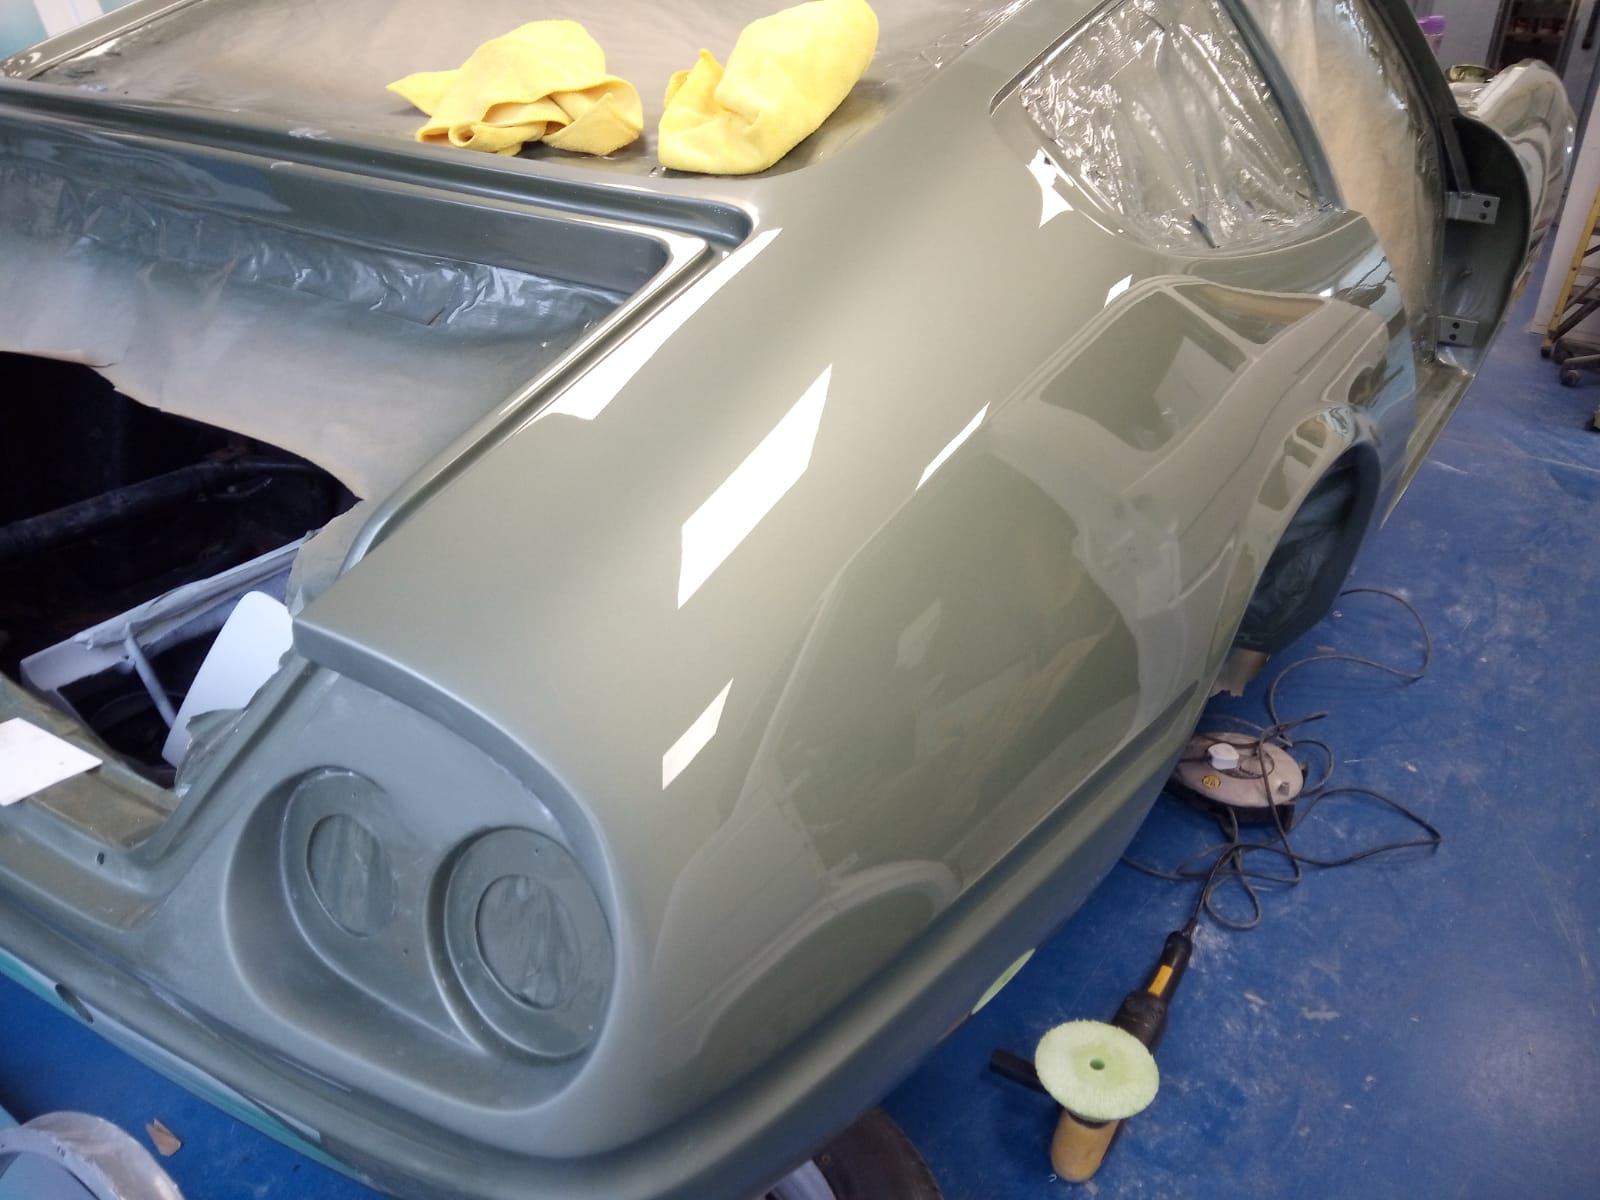
Matt and Chris in the paint shop have smoothed and flattened the paint so its looking really shiny and even. Once the doors and panels have been painted, it can all be fitted together.


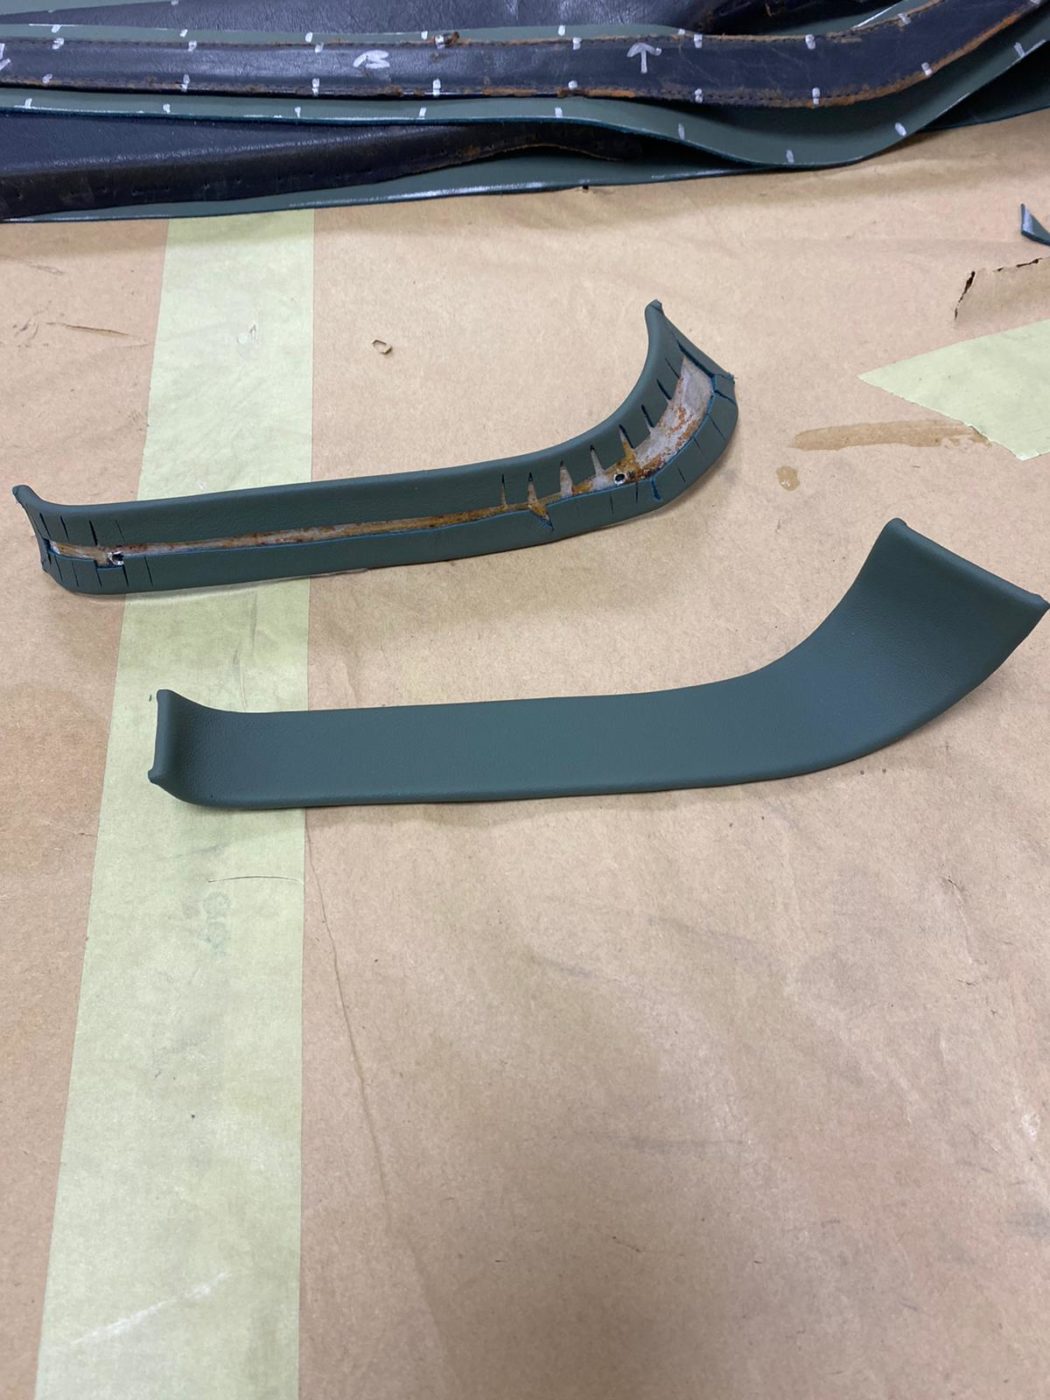
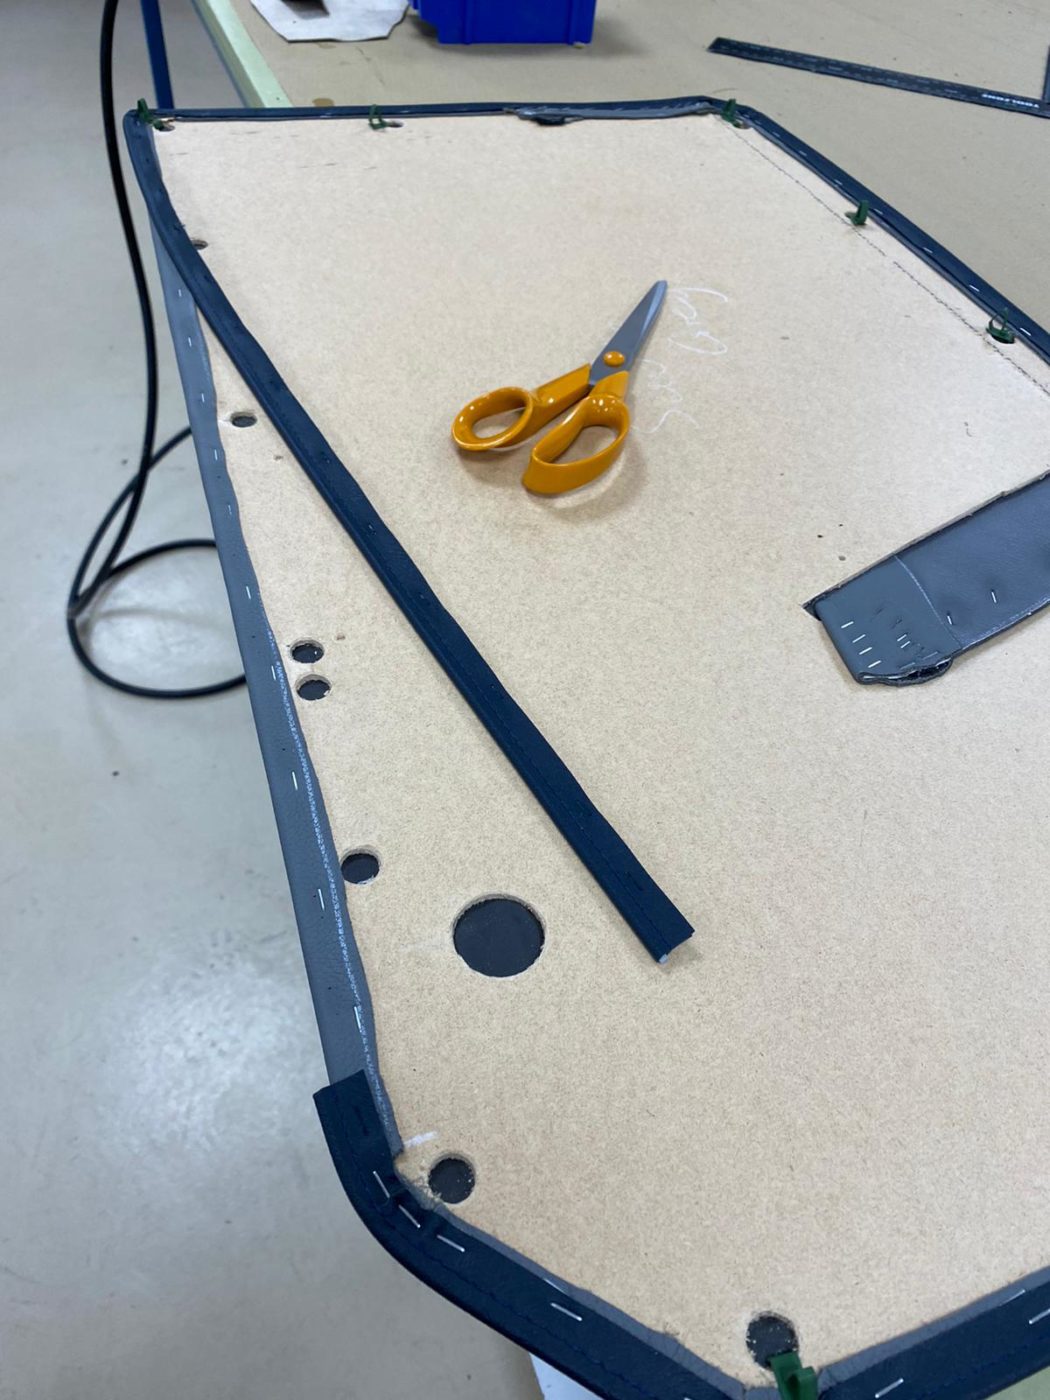
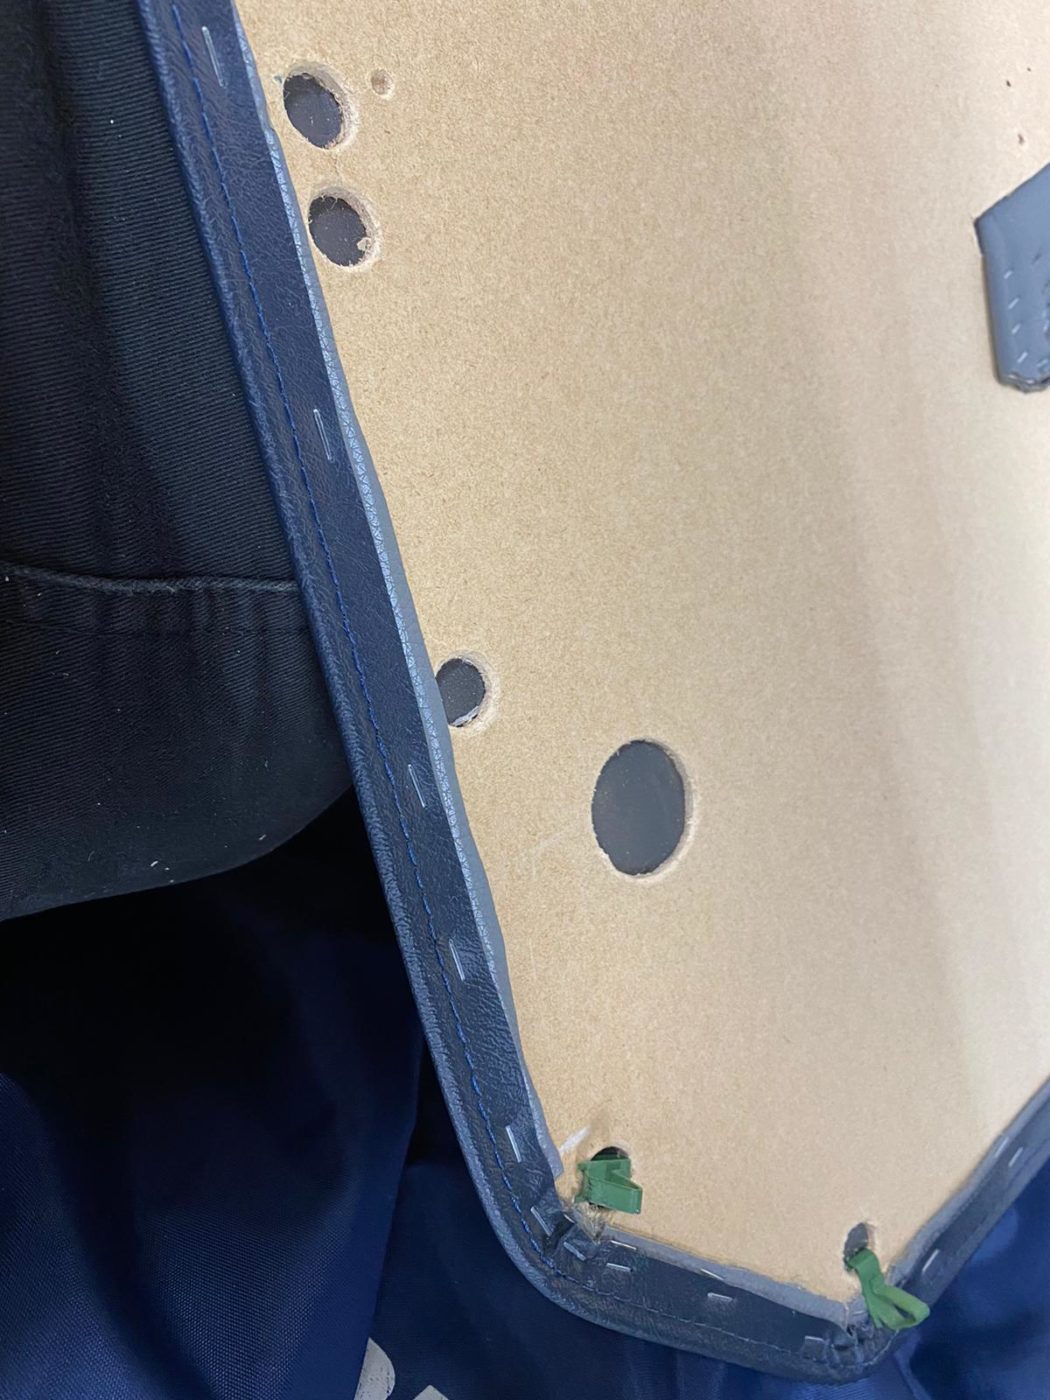
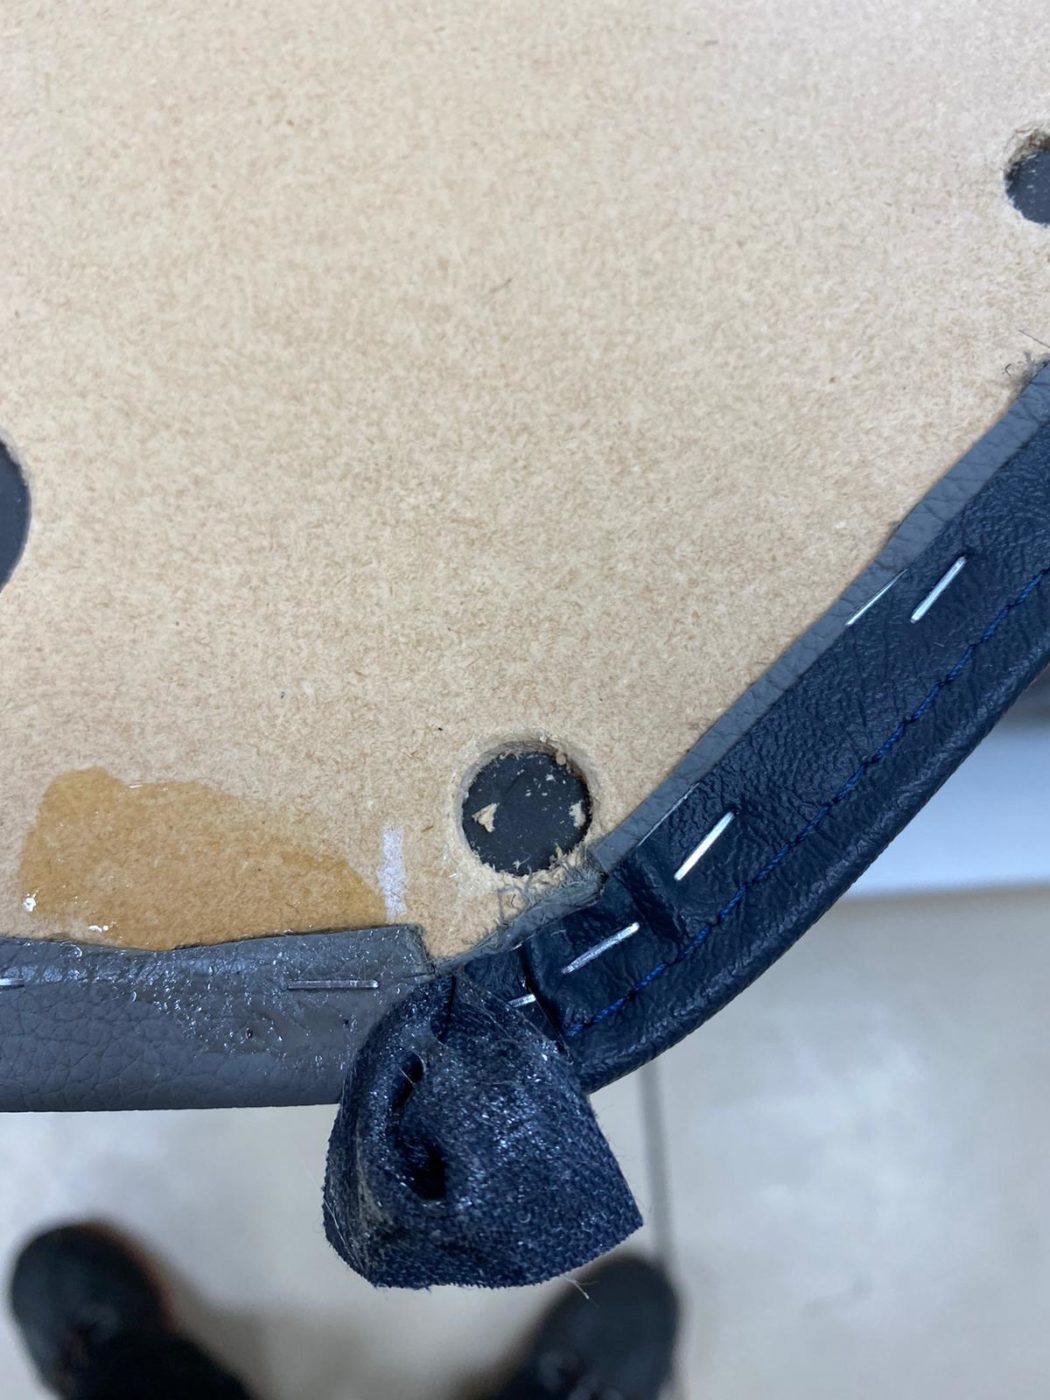
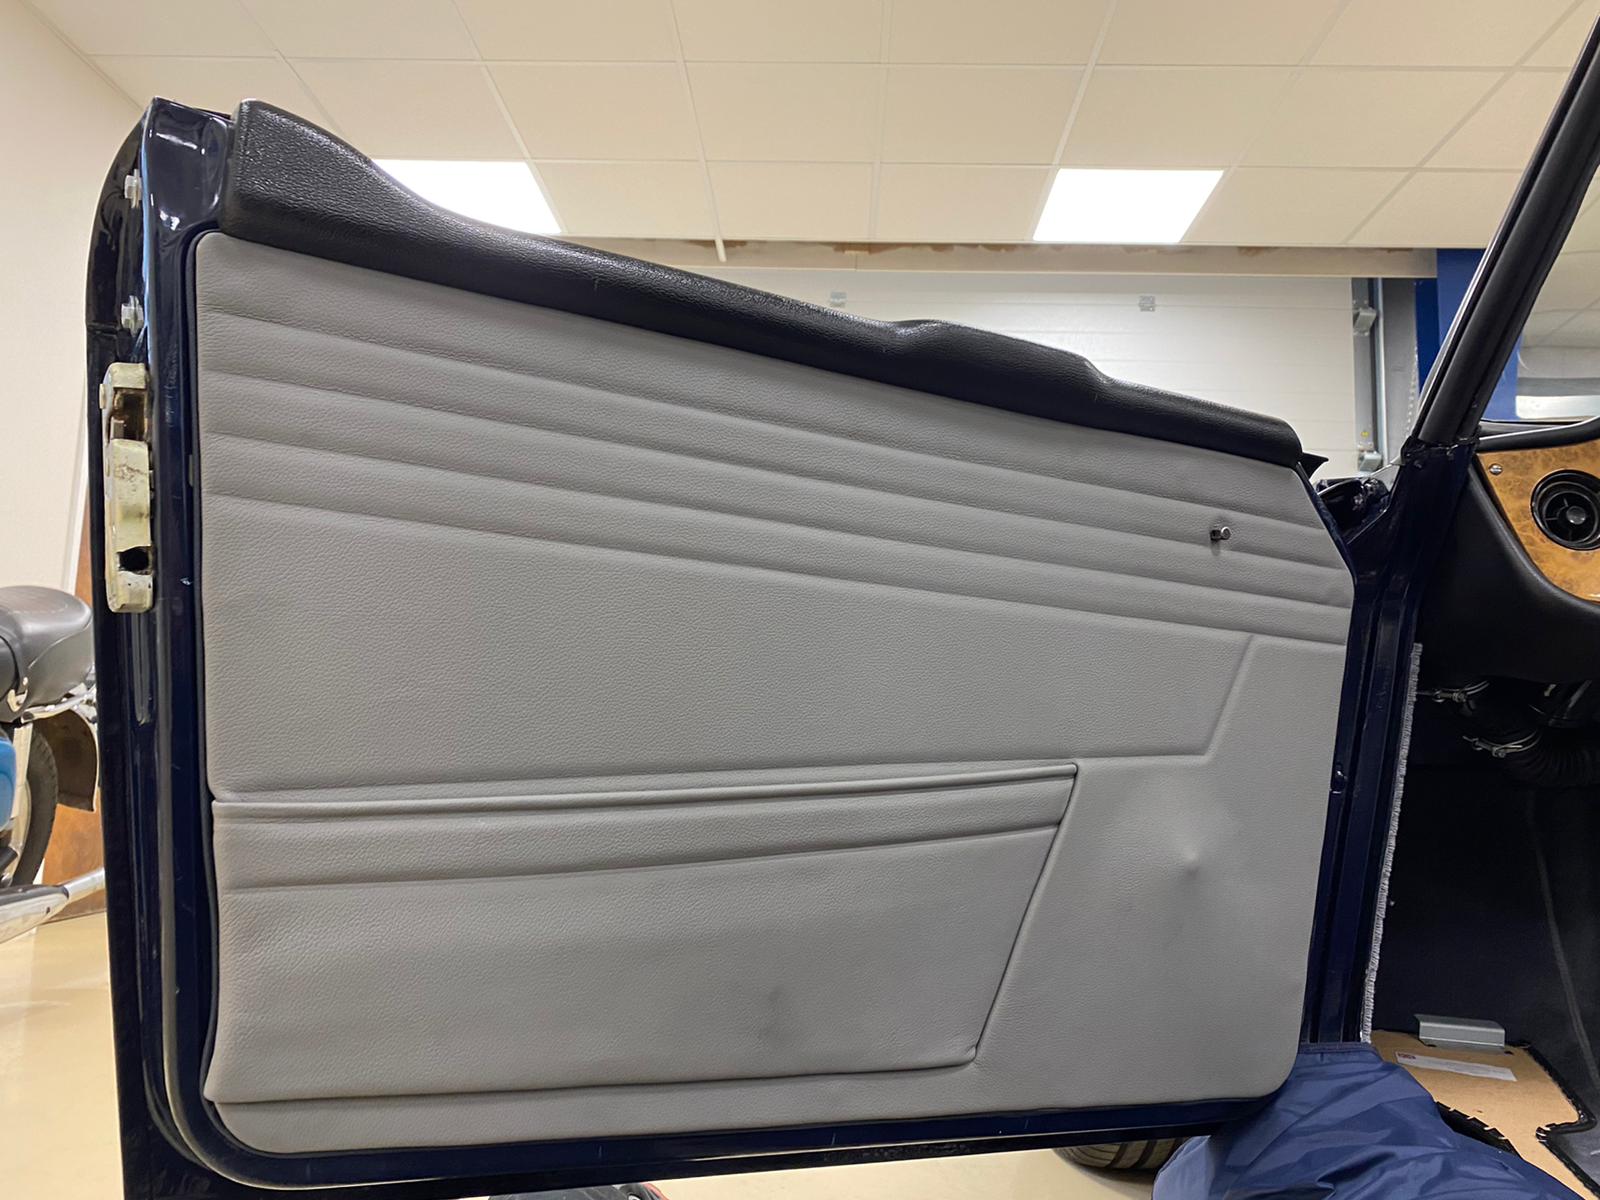
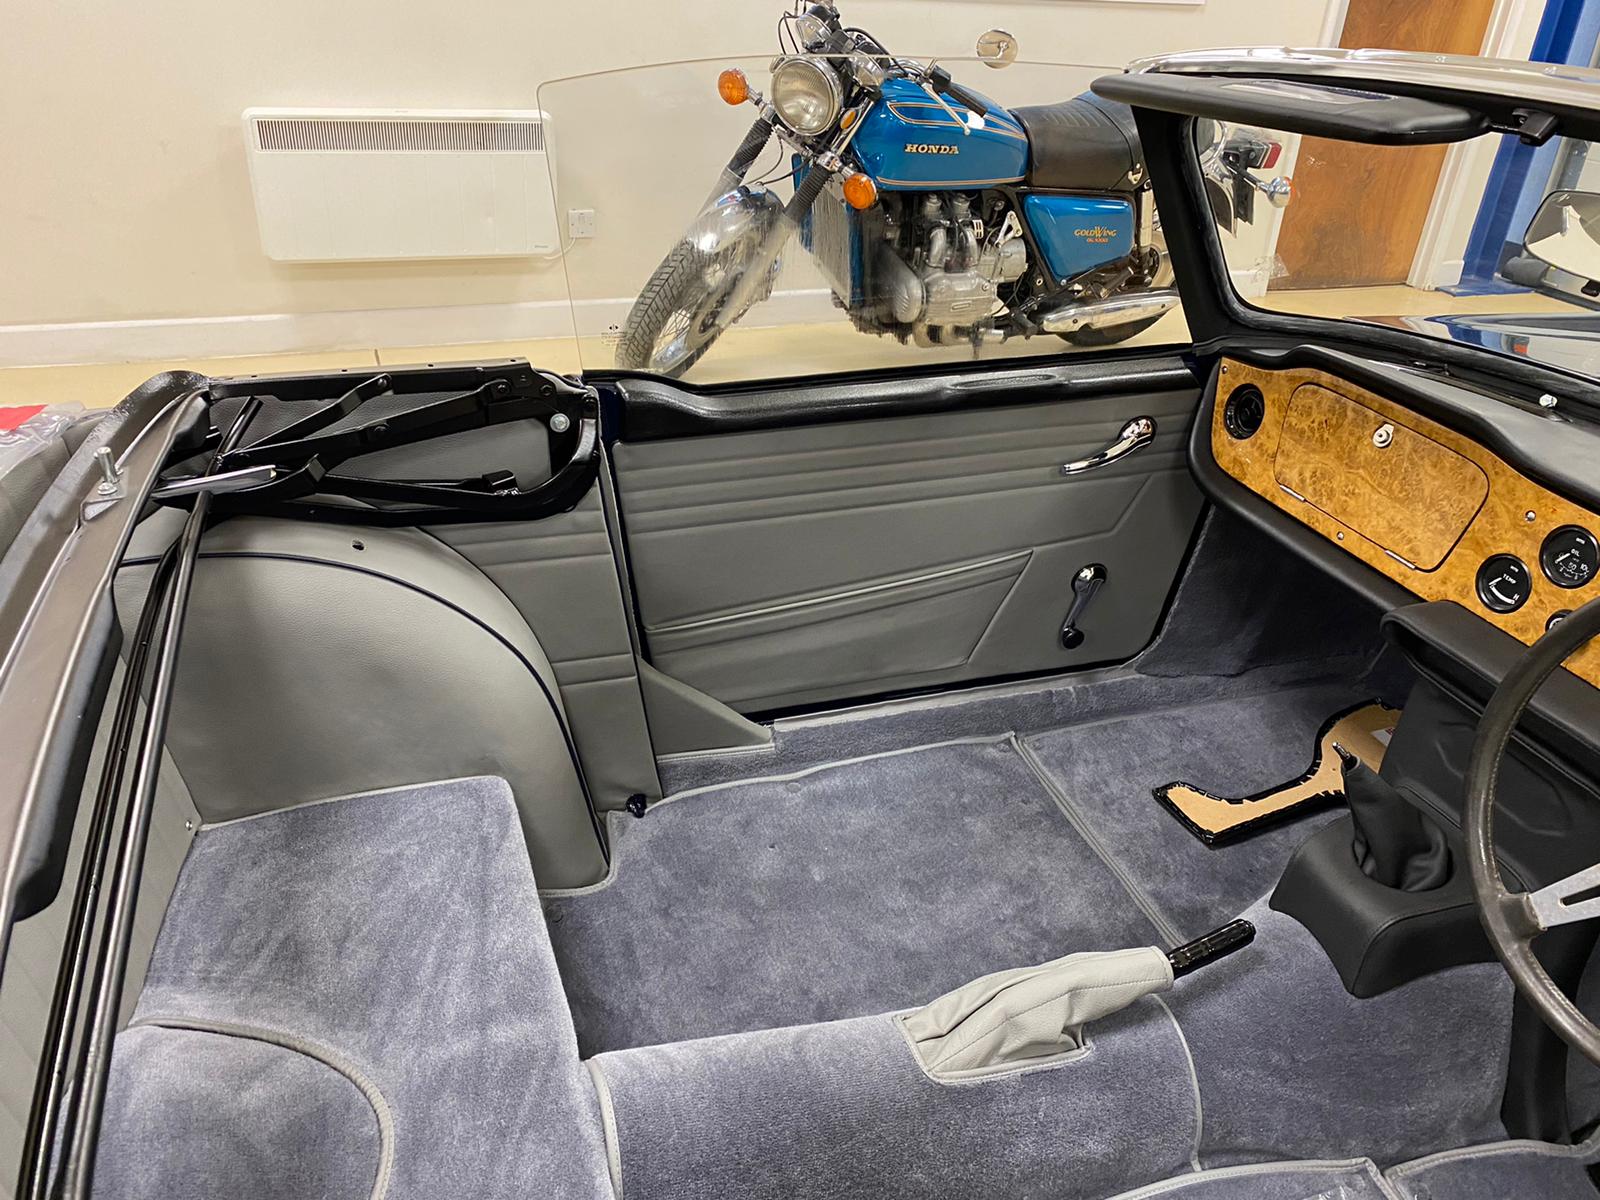
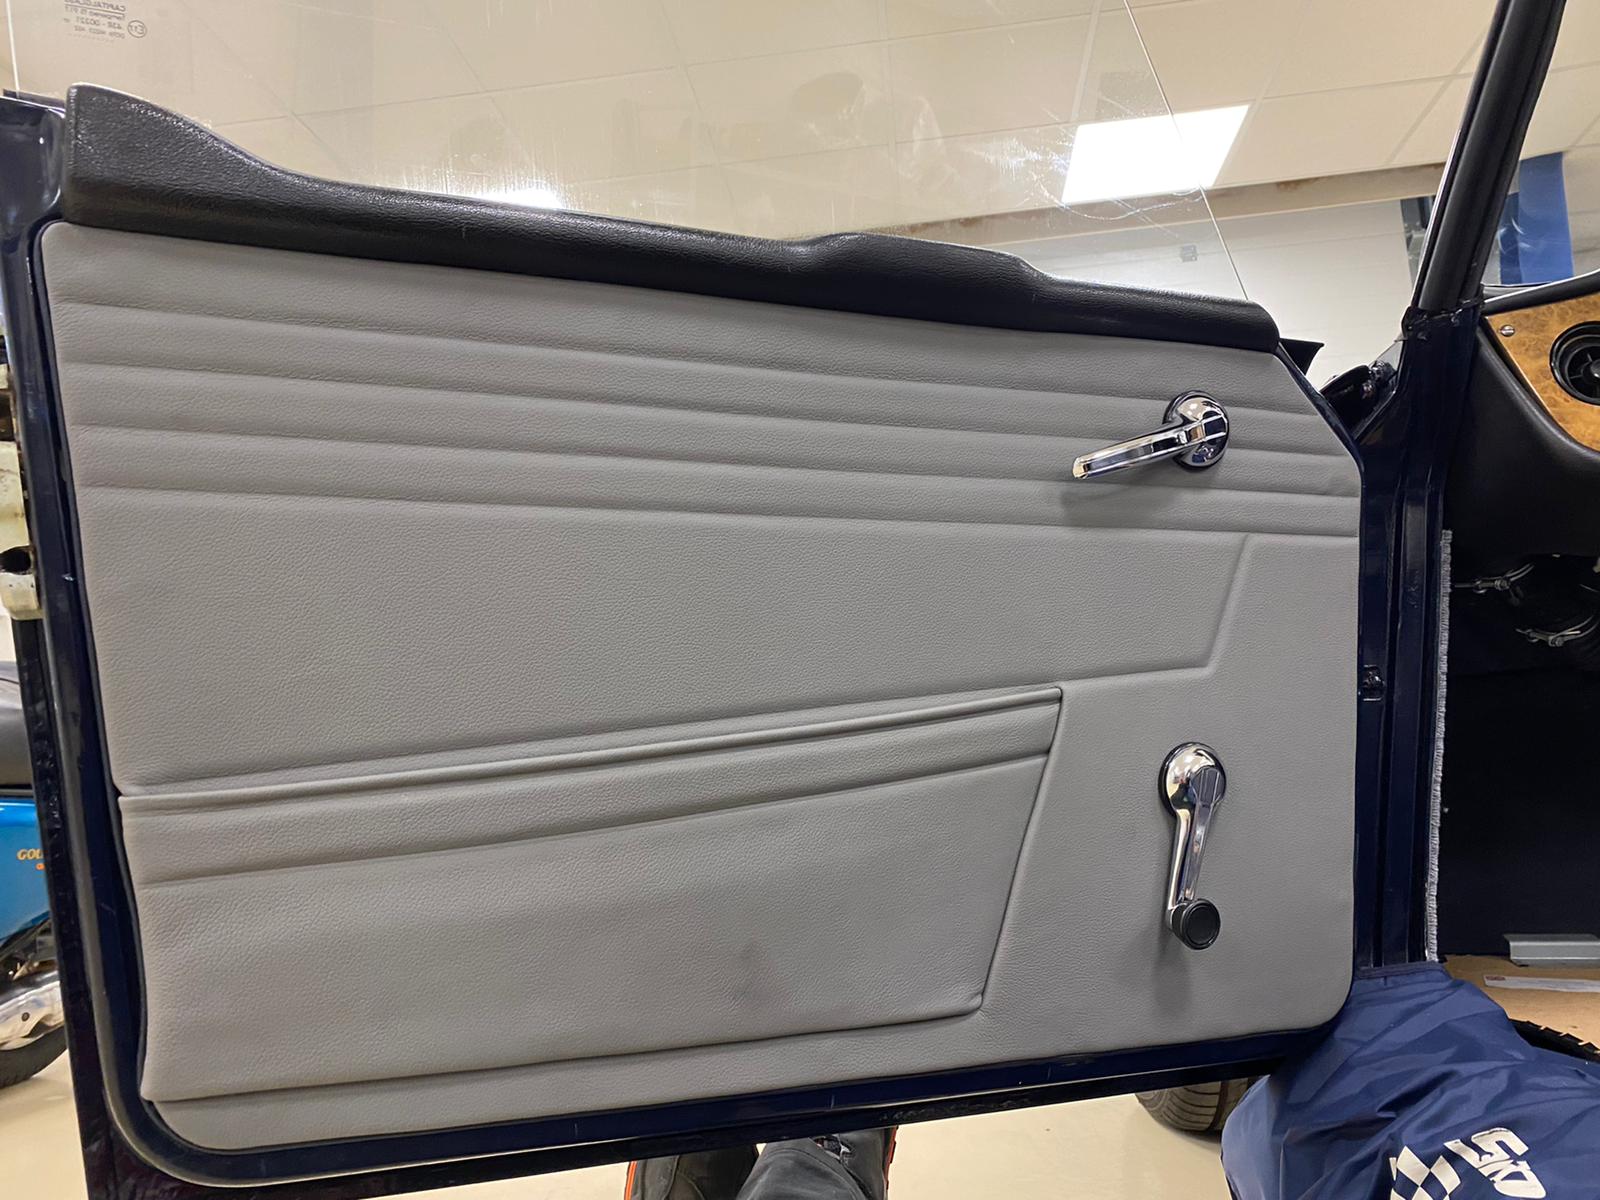
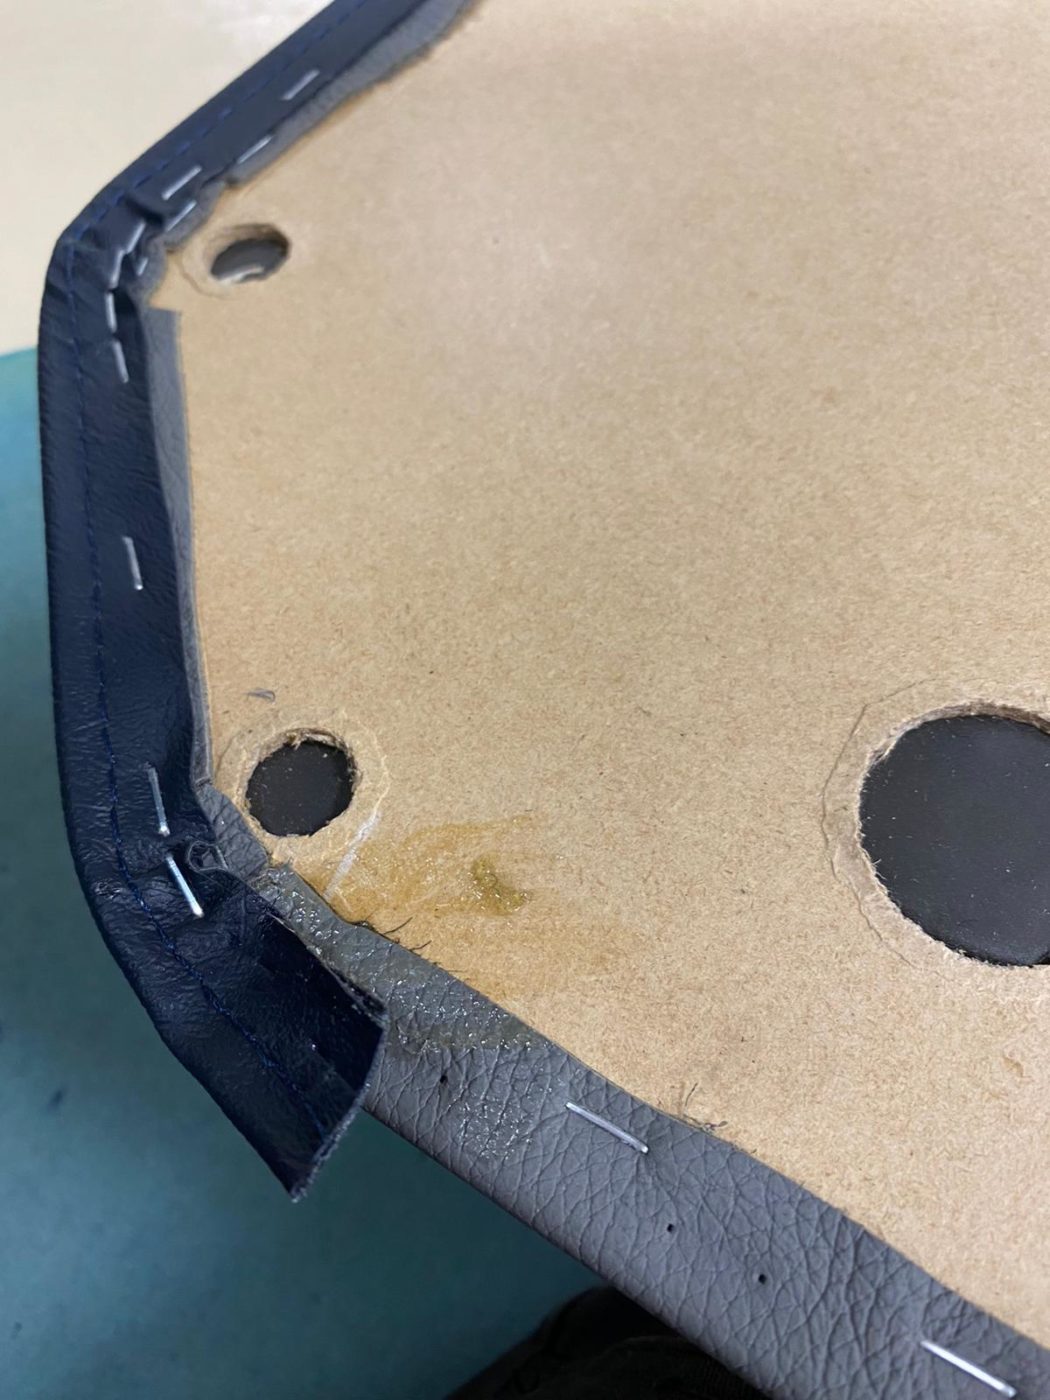
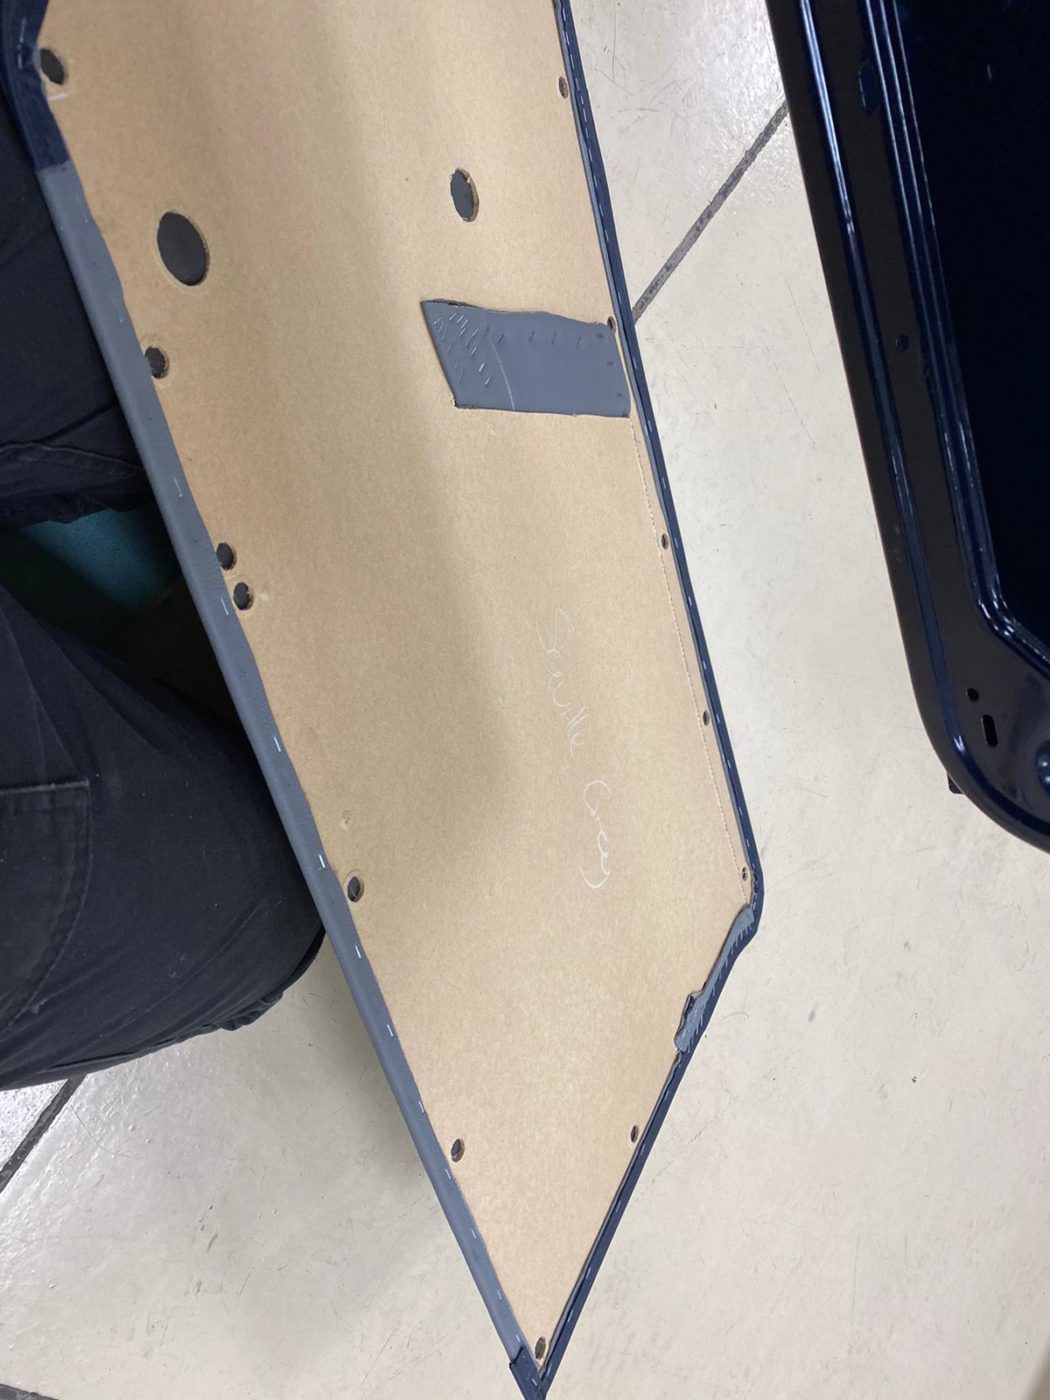
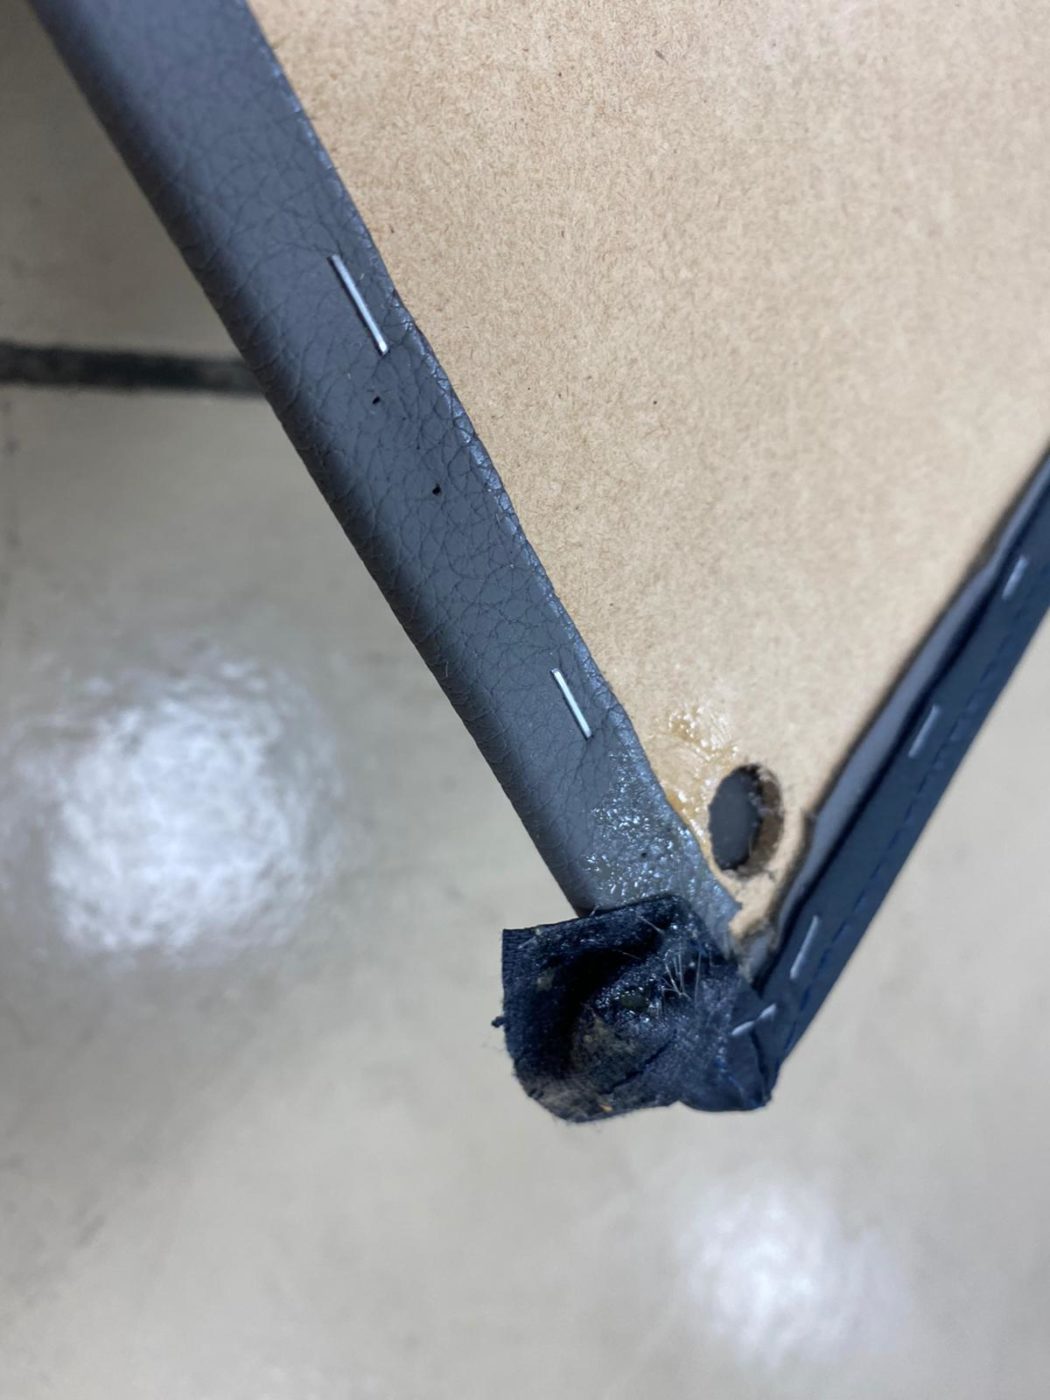
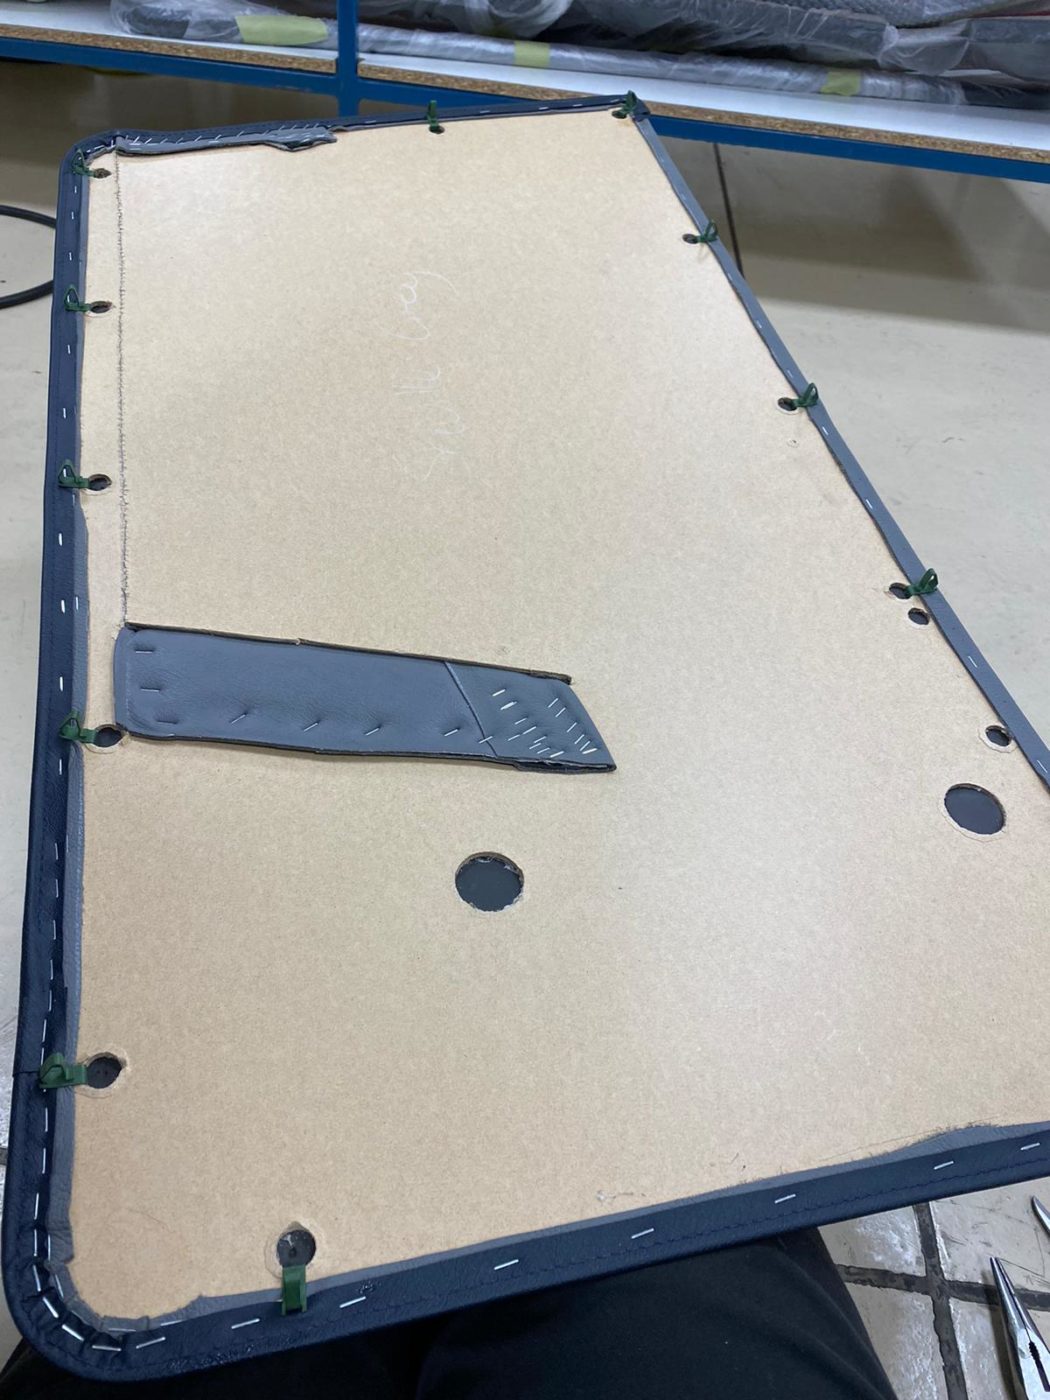
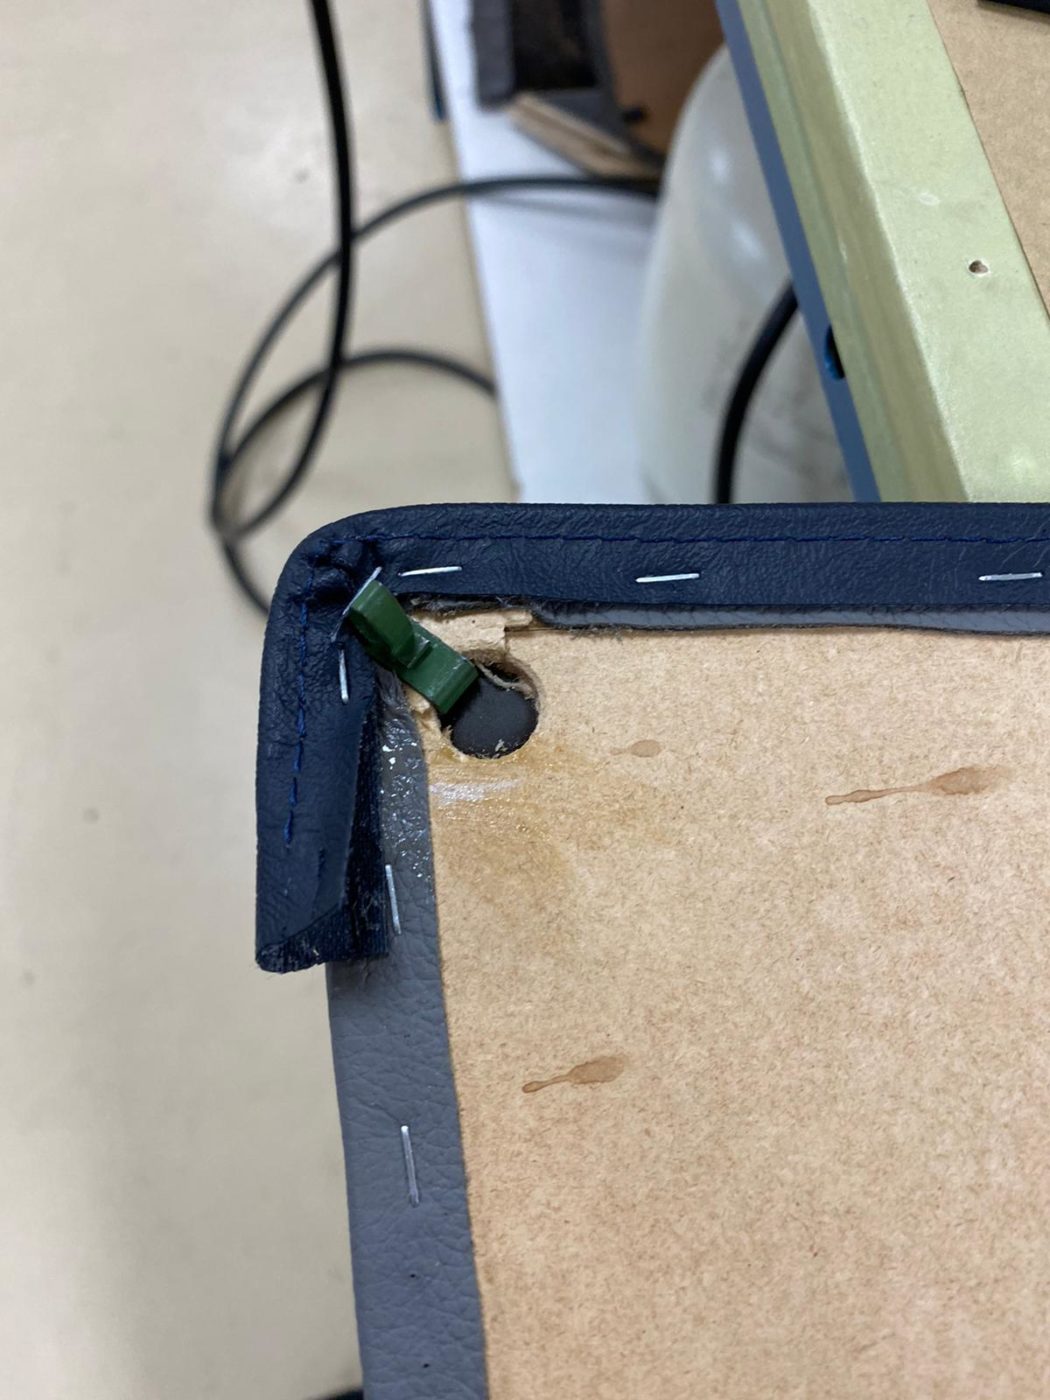
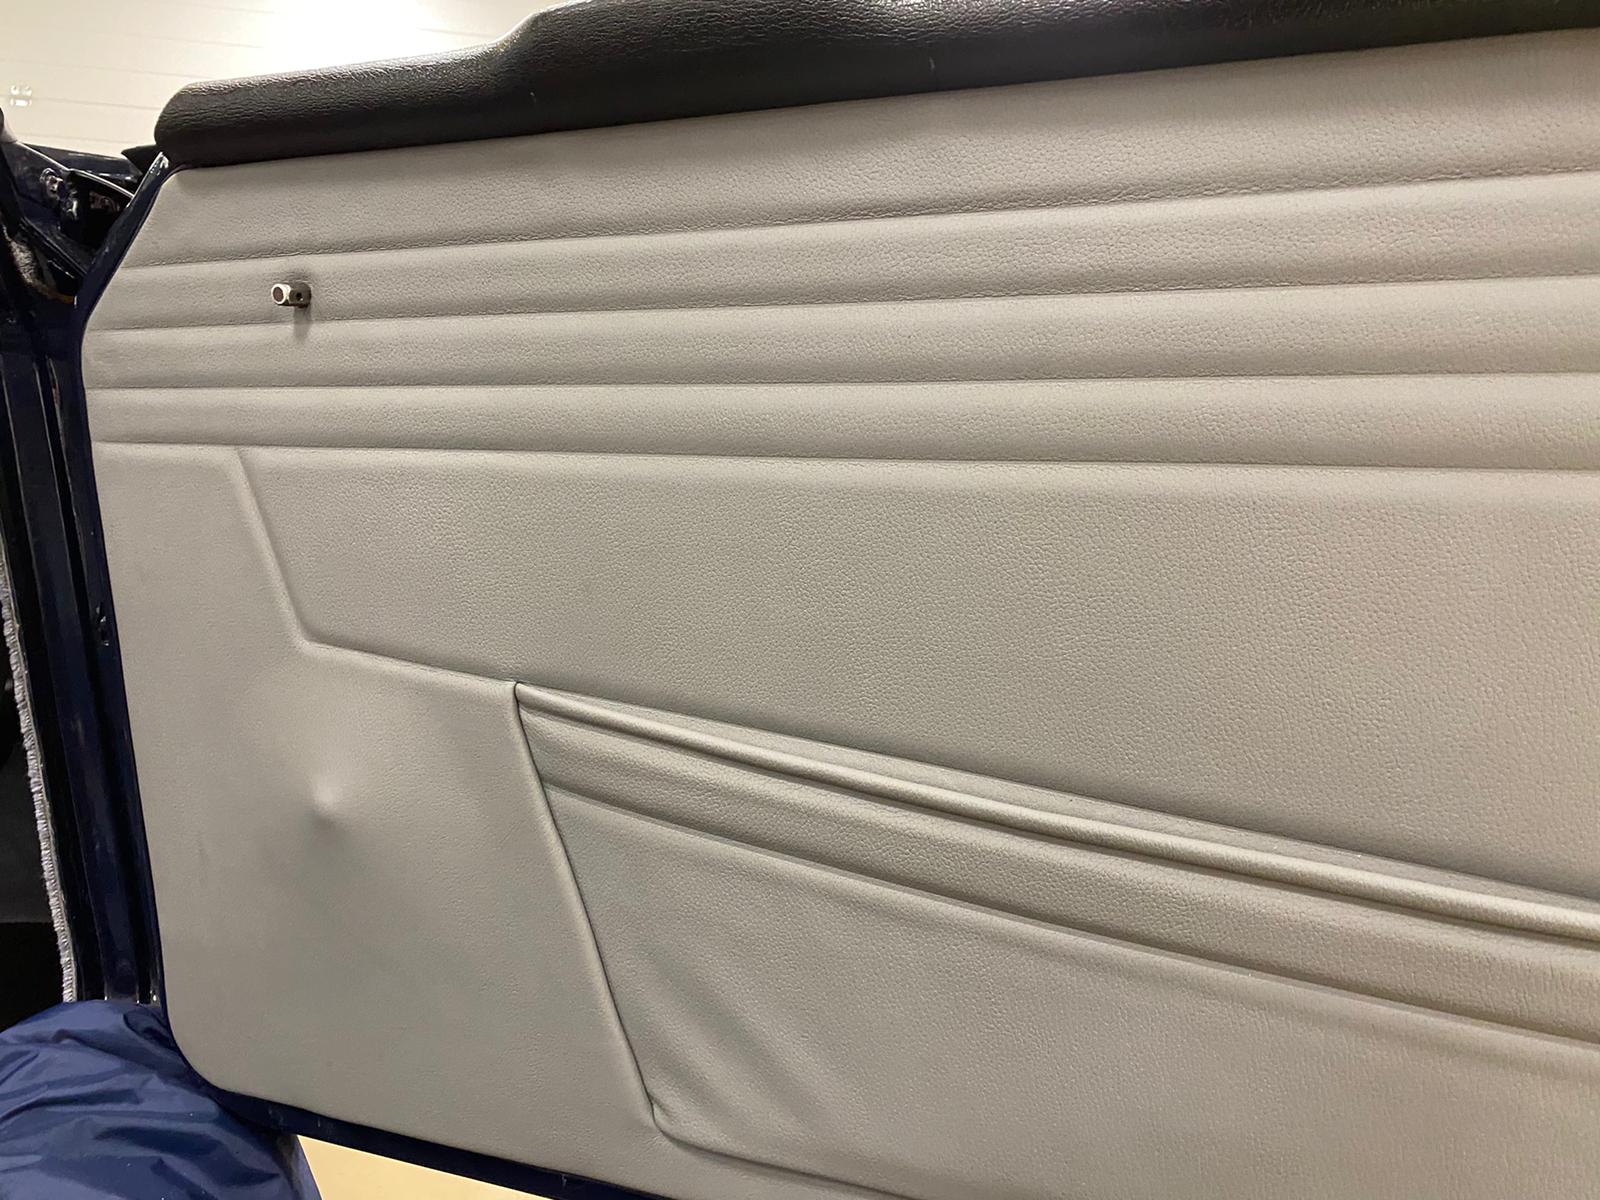
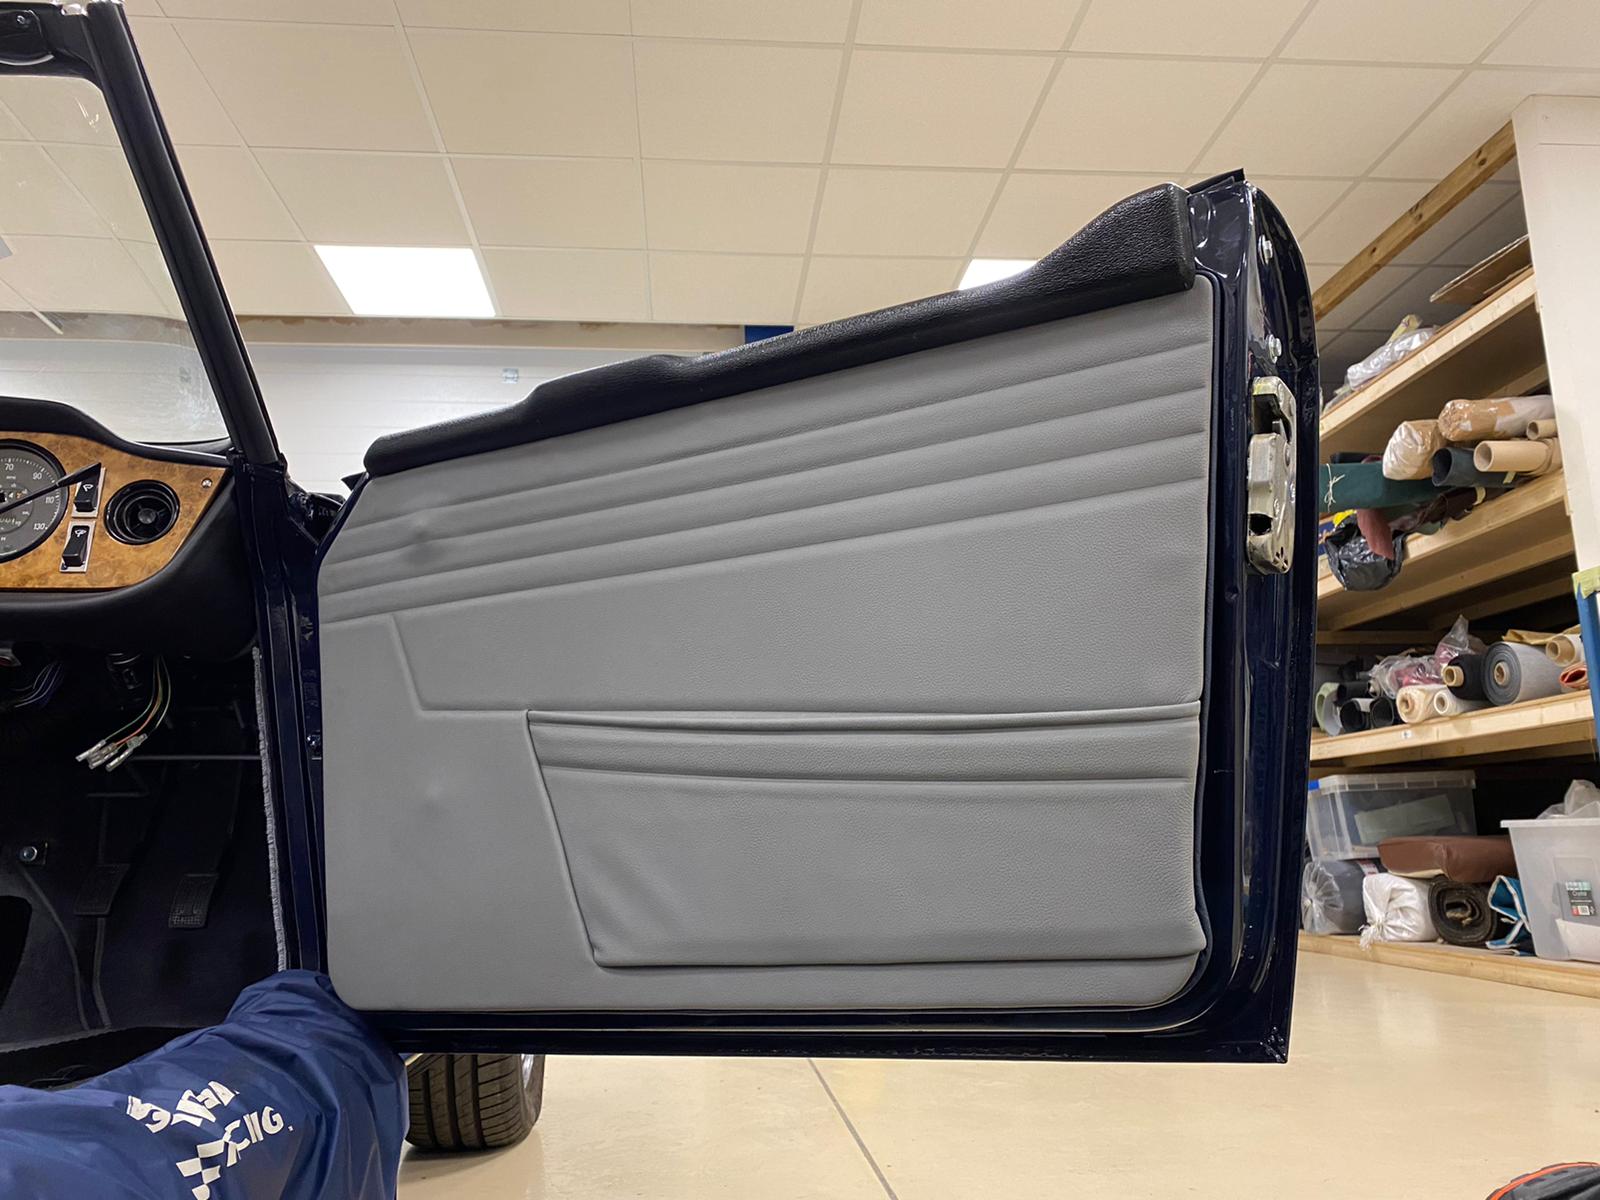
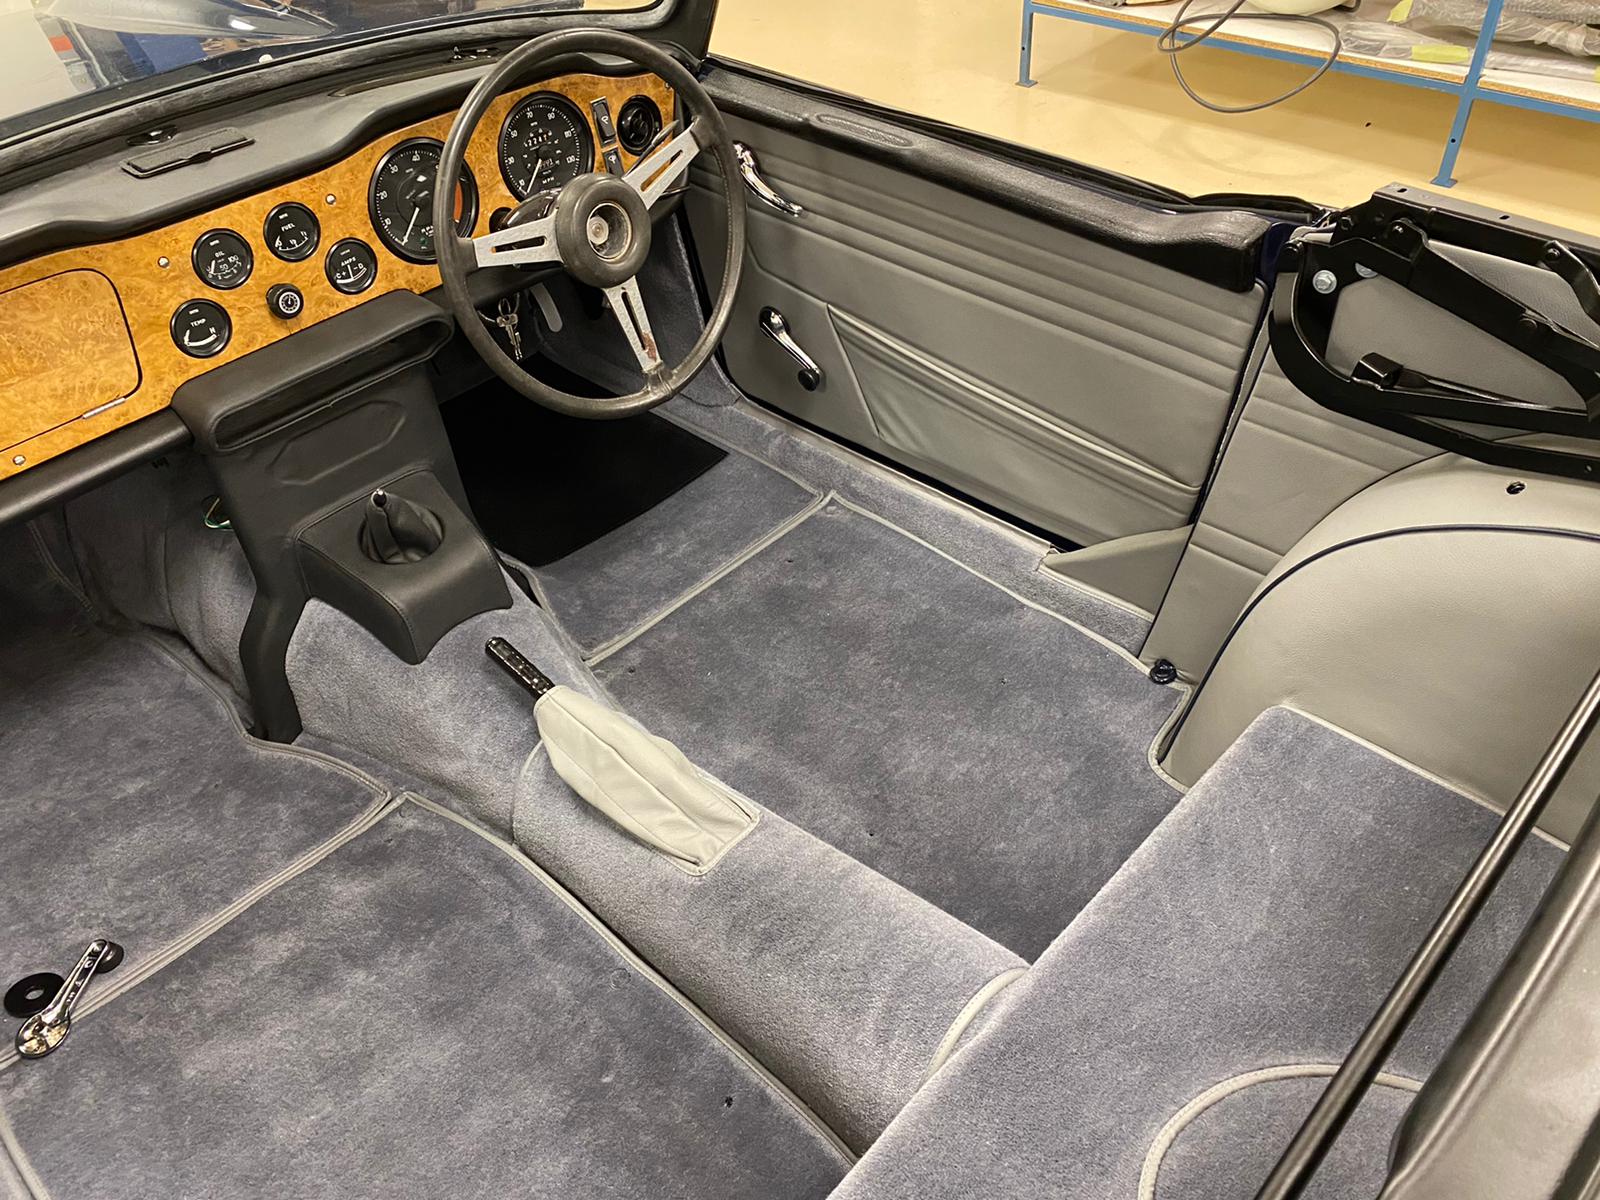
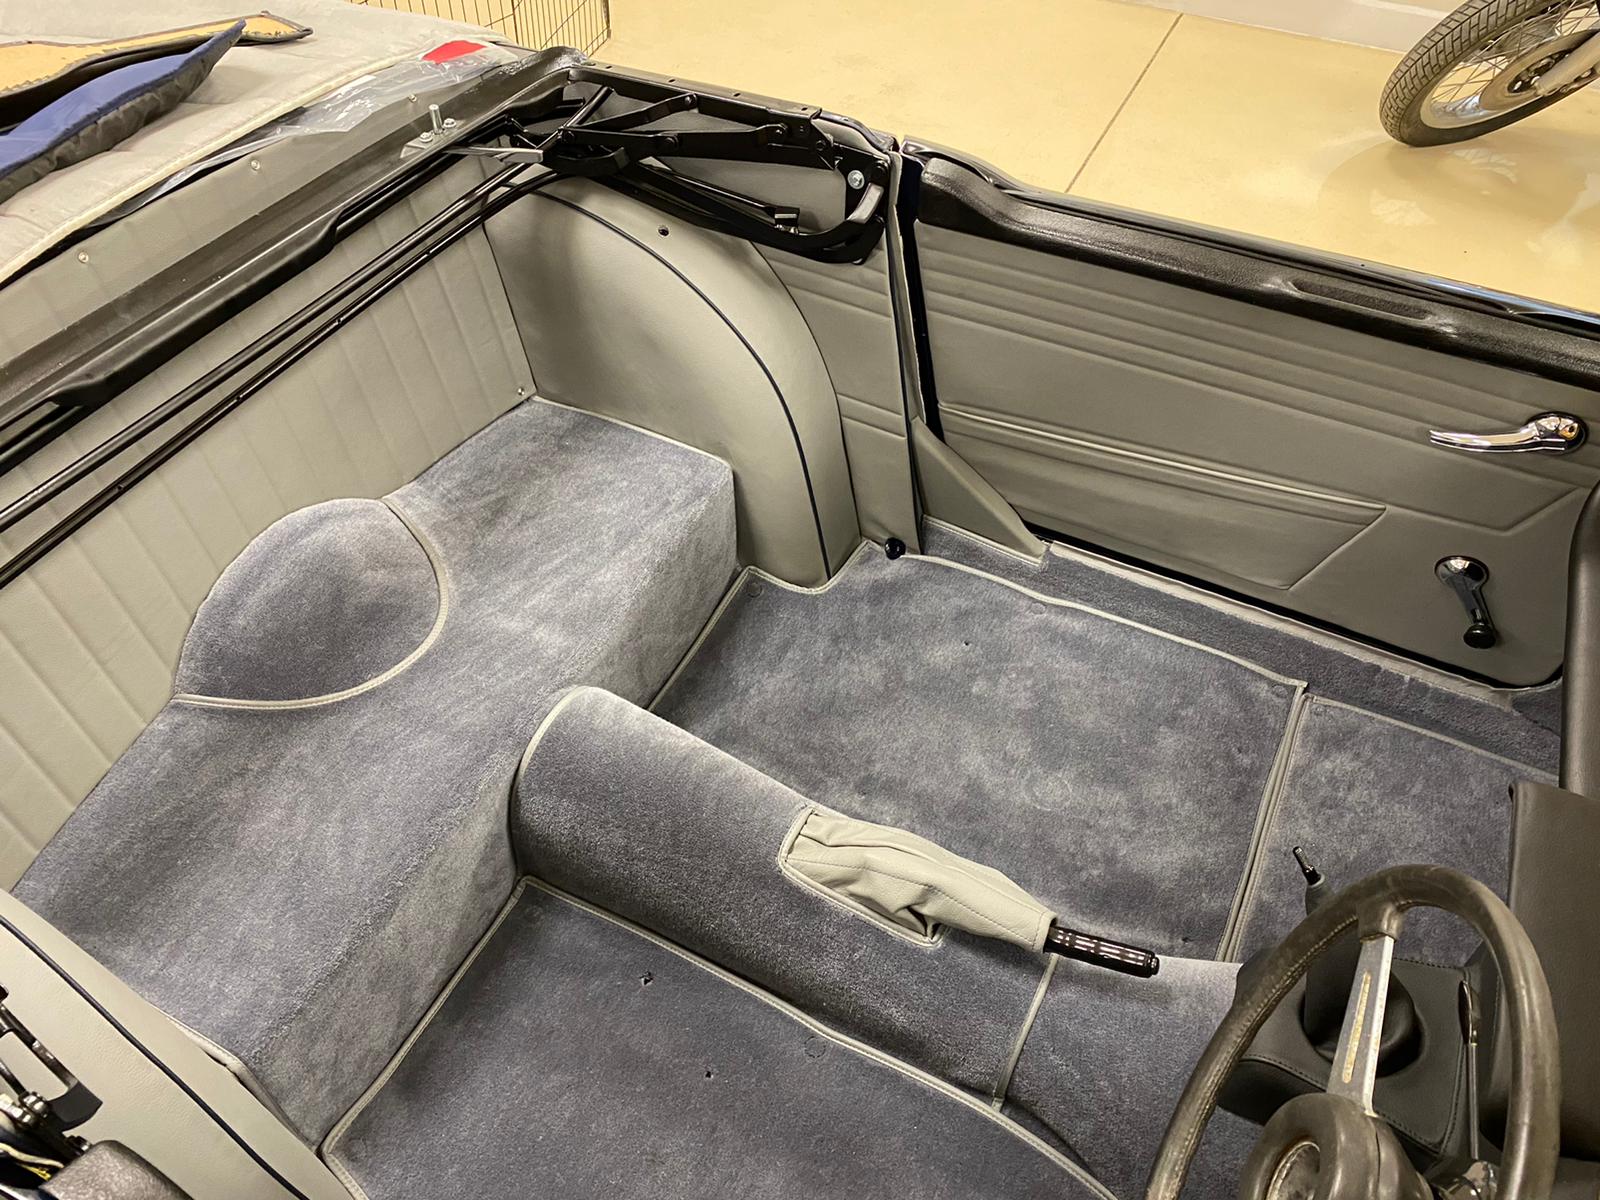
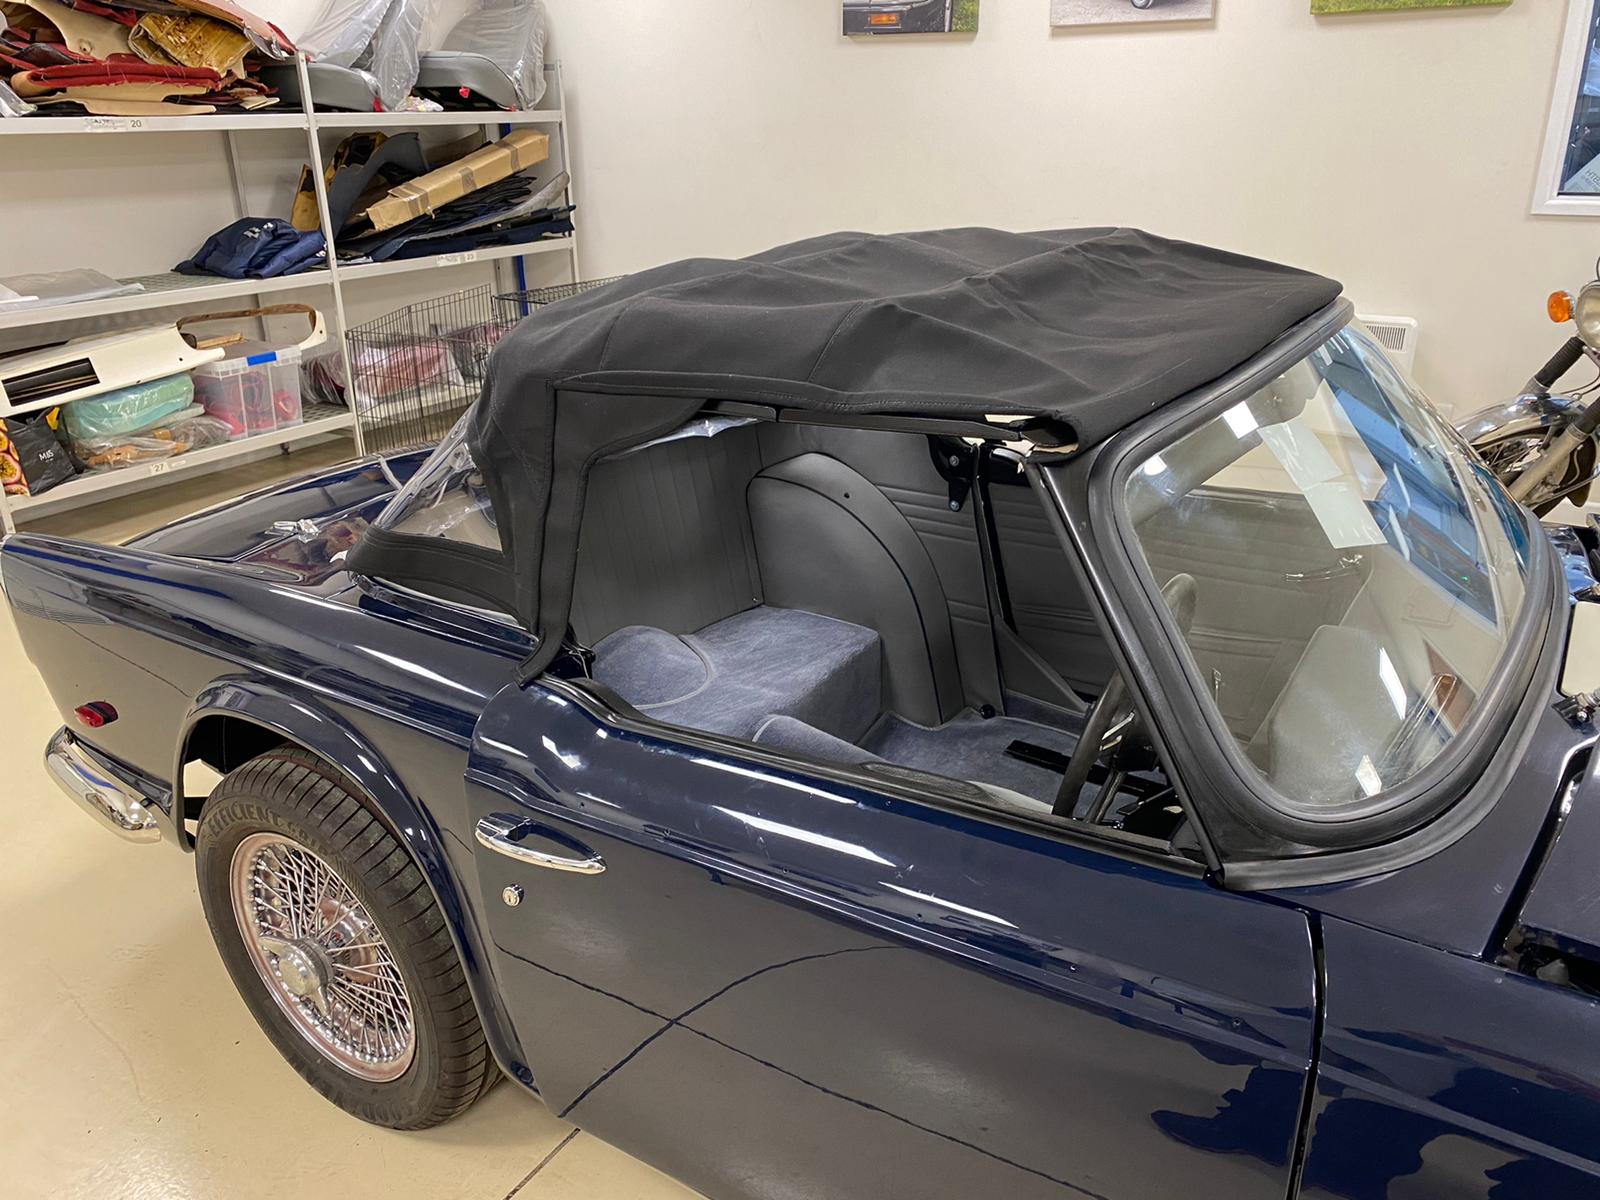
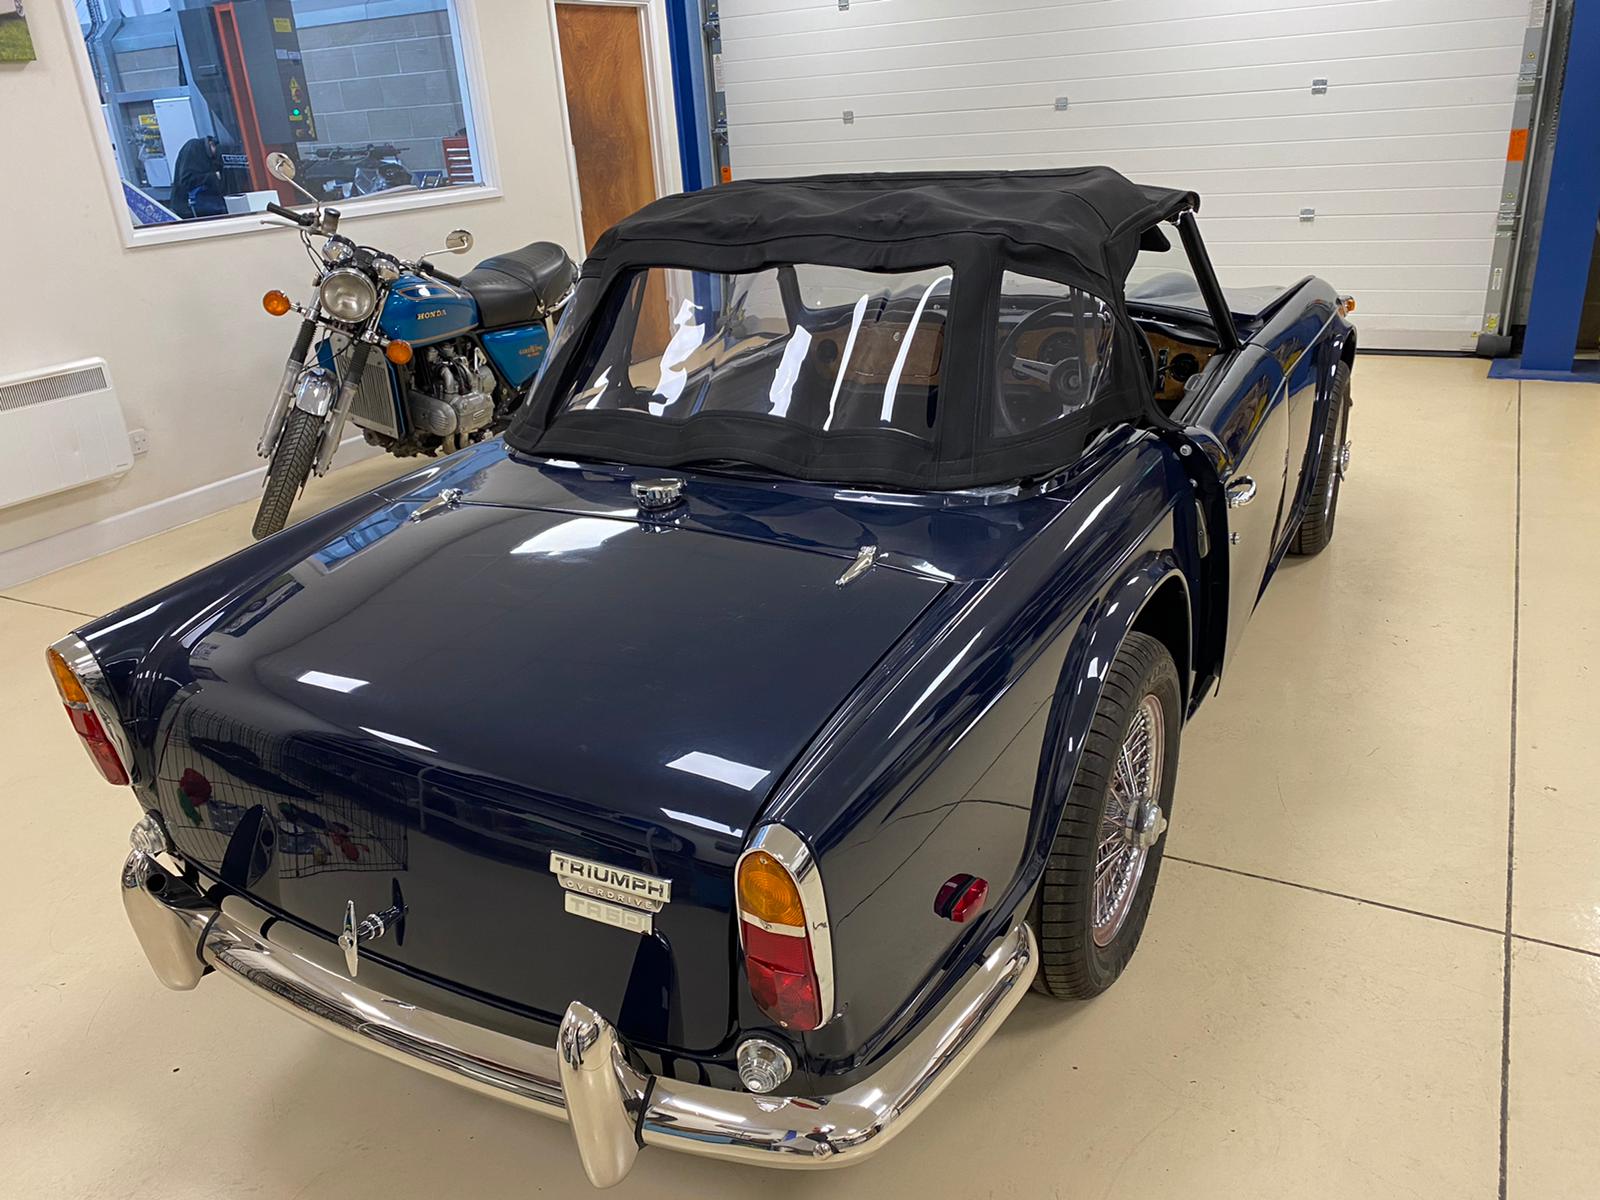
Kath and Brian have both been working on our 1968 Triumph TR5 recently. Kath has fitted the door cards which could be placed in now that the door capping’s have been fit. Kath began by pushing in the panel clips into the back of the panel and aligning the clip with the hole in the door to push it into place. At first Kath noted that it wasn’t sitting straight forward so she had to adjust the panel by cutting off the piping from the top.
Once Kath had the clips in at the top, she could then go round the rest of the panel clips, cut out the holes for the window winder and door handle, fit the handles and move on to the other side to do the same thing again.
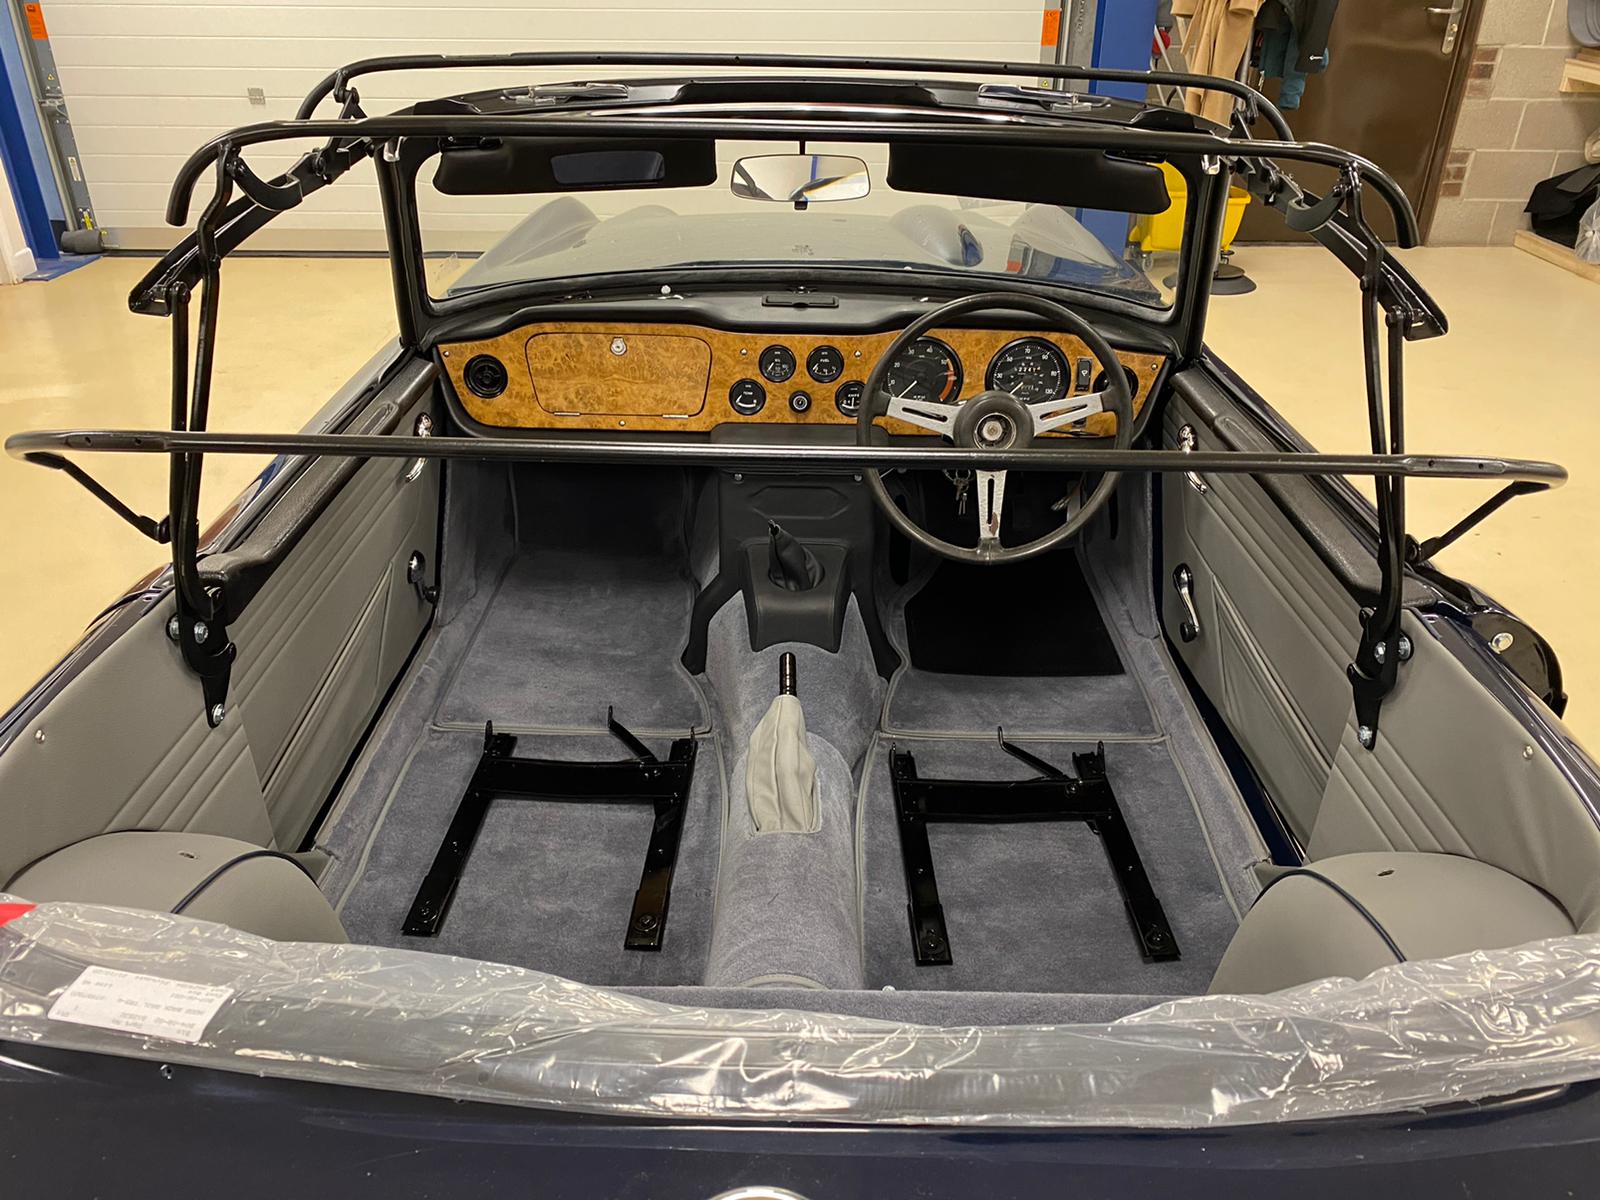
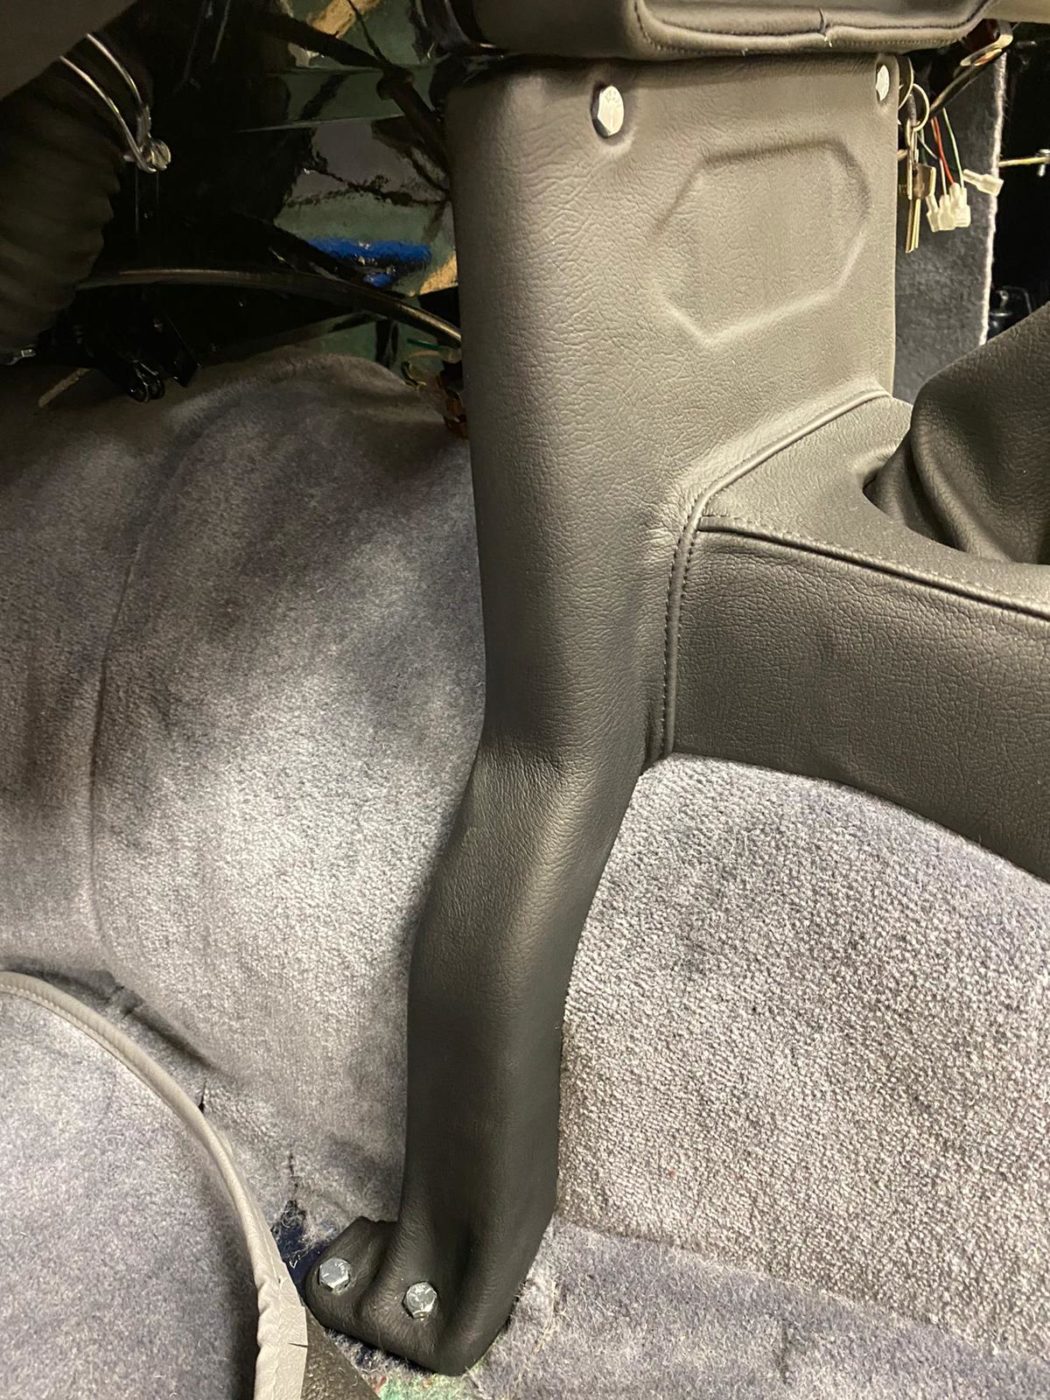
Kath also bolted the seat runners onto the floor and bolted in the centre console. This included fixing two bolts into the floor pan each side of tunnel section and one each side at the top.
The hood has also been fitted to check that the measurements align well. Kath laid the hood over the car ready to fit it later whilst she was waiting for the rubbers and header rail parts to arrive. By placing it over the frame, Kath could see if anything needed to be modified.
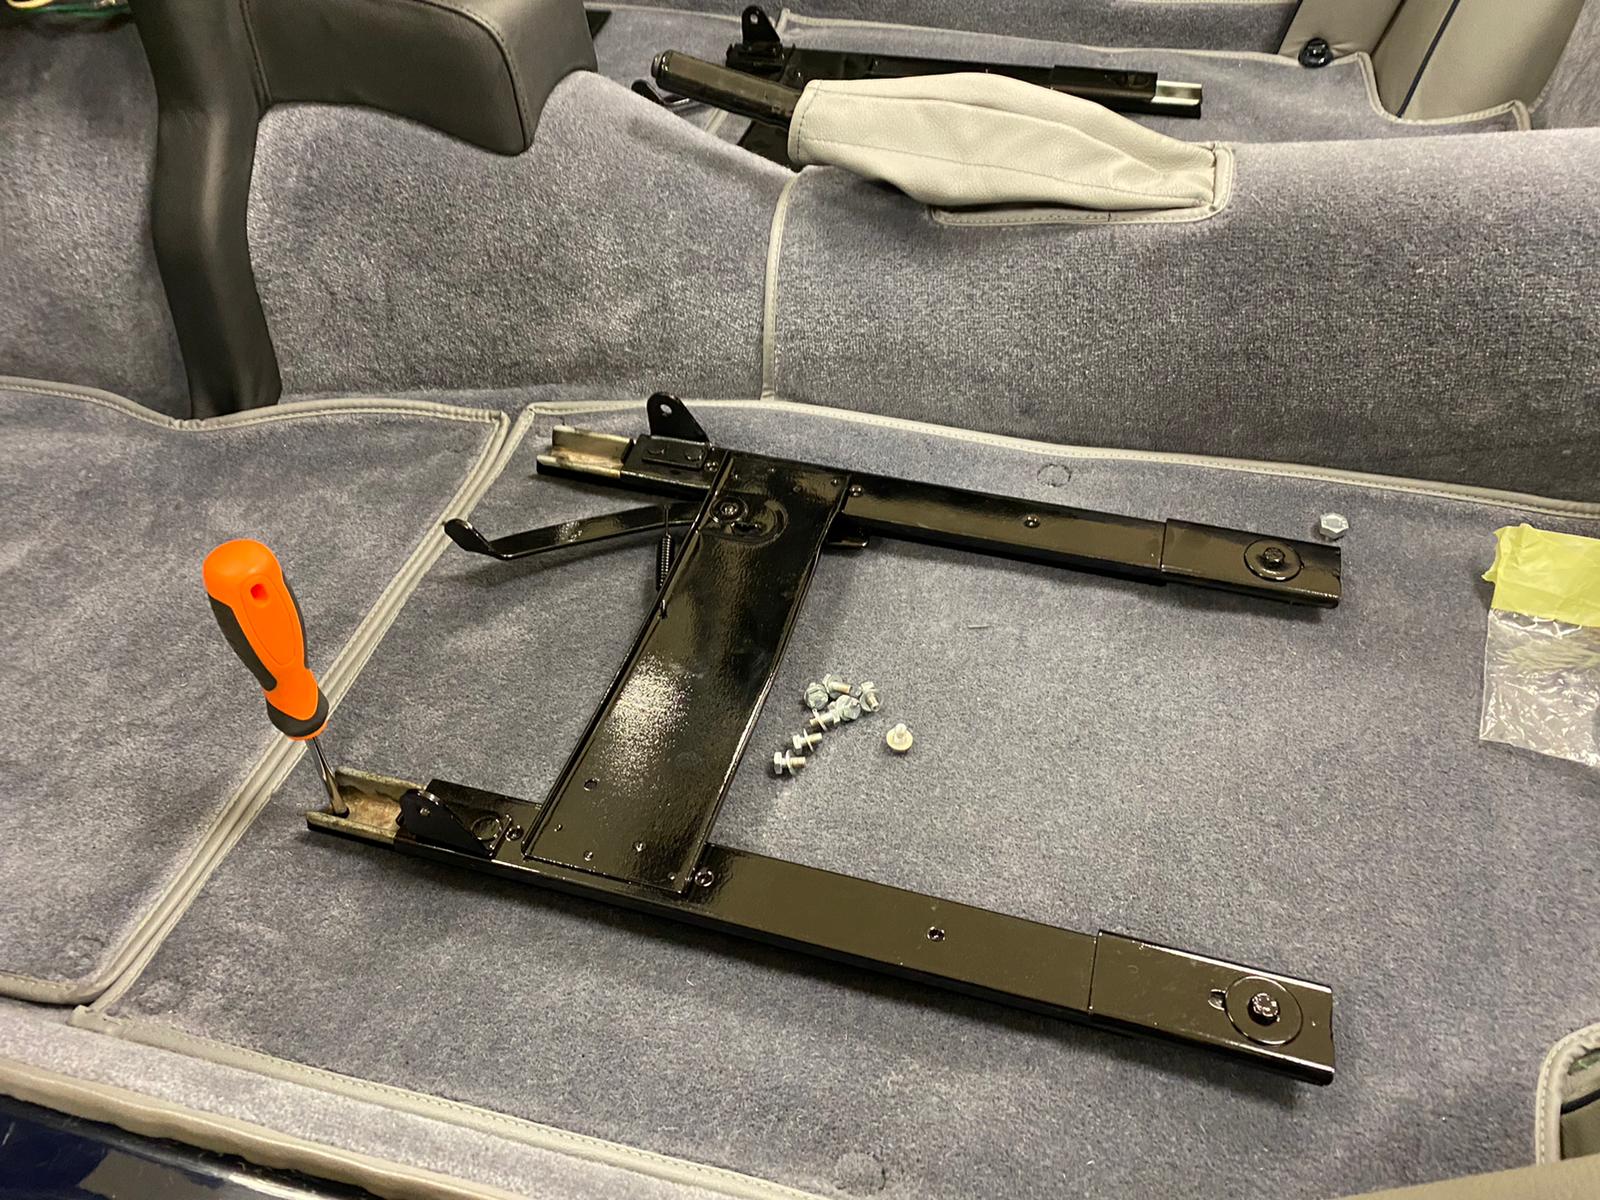
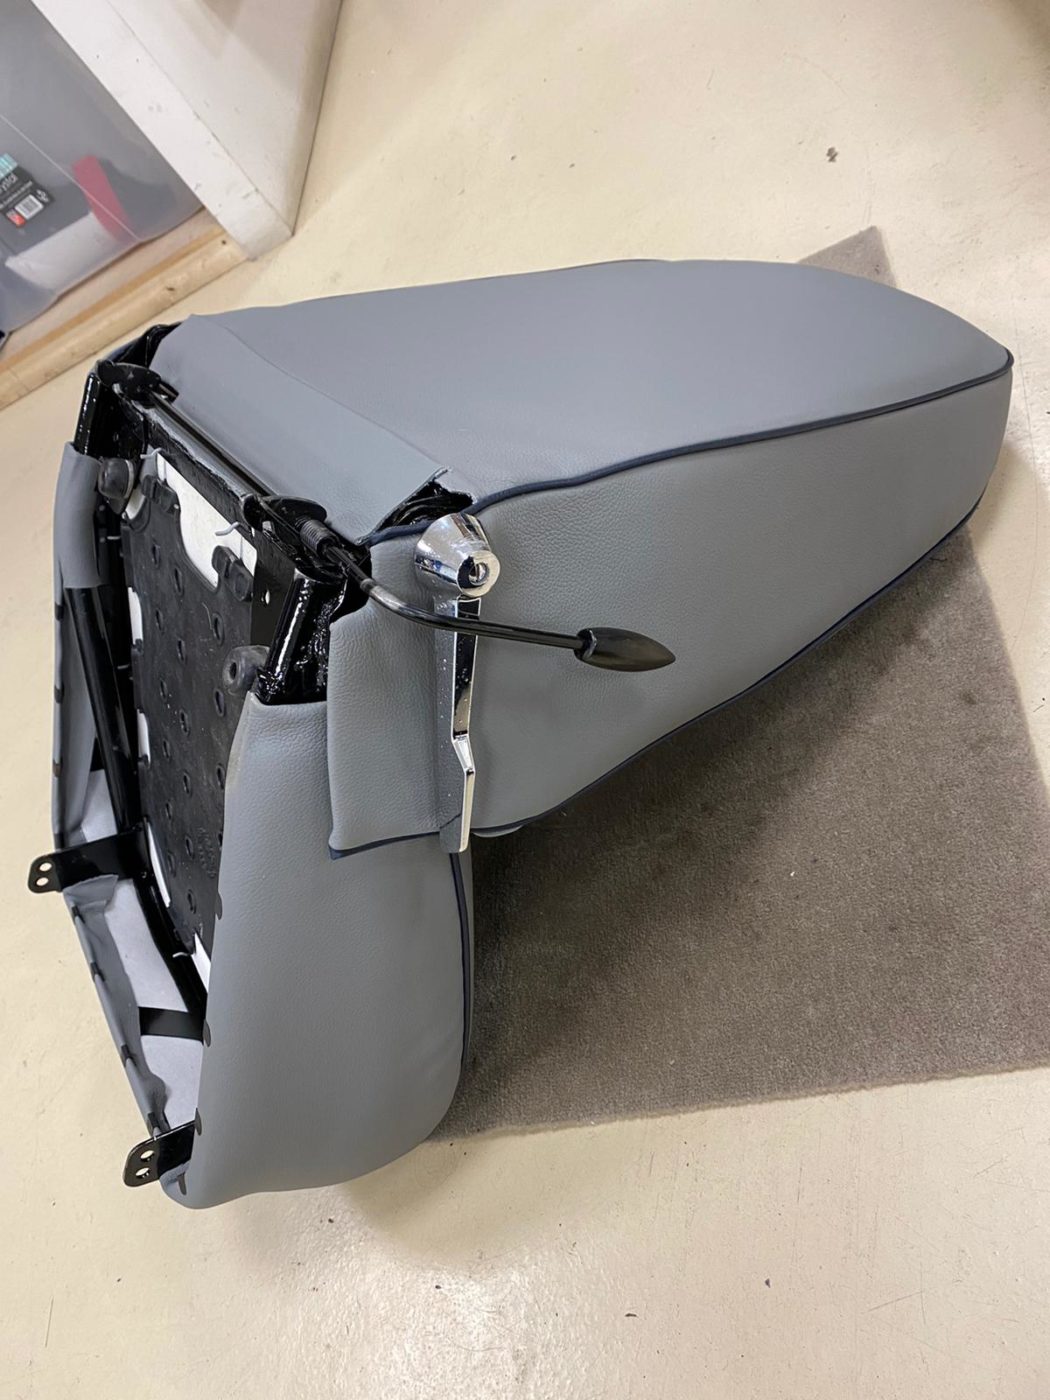
Brian has been fitting the chrome handle and lift up bar mechanism to the seats that allow the seat to move forward or back on the runners or from its hinges.

Craig, Director here at Bridge Classic Cars, has recently purchased this gorgeous V12 Aston Martin DB9. In need of a service and keen to preserve it’s full main dealer history, we sent our DB9 over to Nick and Kevin at Stratstone Motor Company of Long Stratton.
The customer service received was a breath of fresh air. Knowledgeable, friendly and efficient, it’s a pleasure to have delft with both Nick, (Service Executive) and Kevin, (General Sales Manager). They were familiar with Bridge Classic Cars as a brand and have been keeping tabs on our Classic Car Competitions.
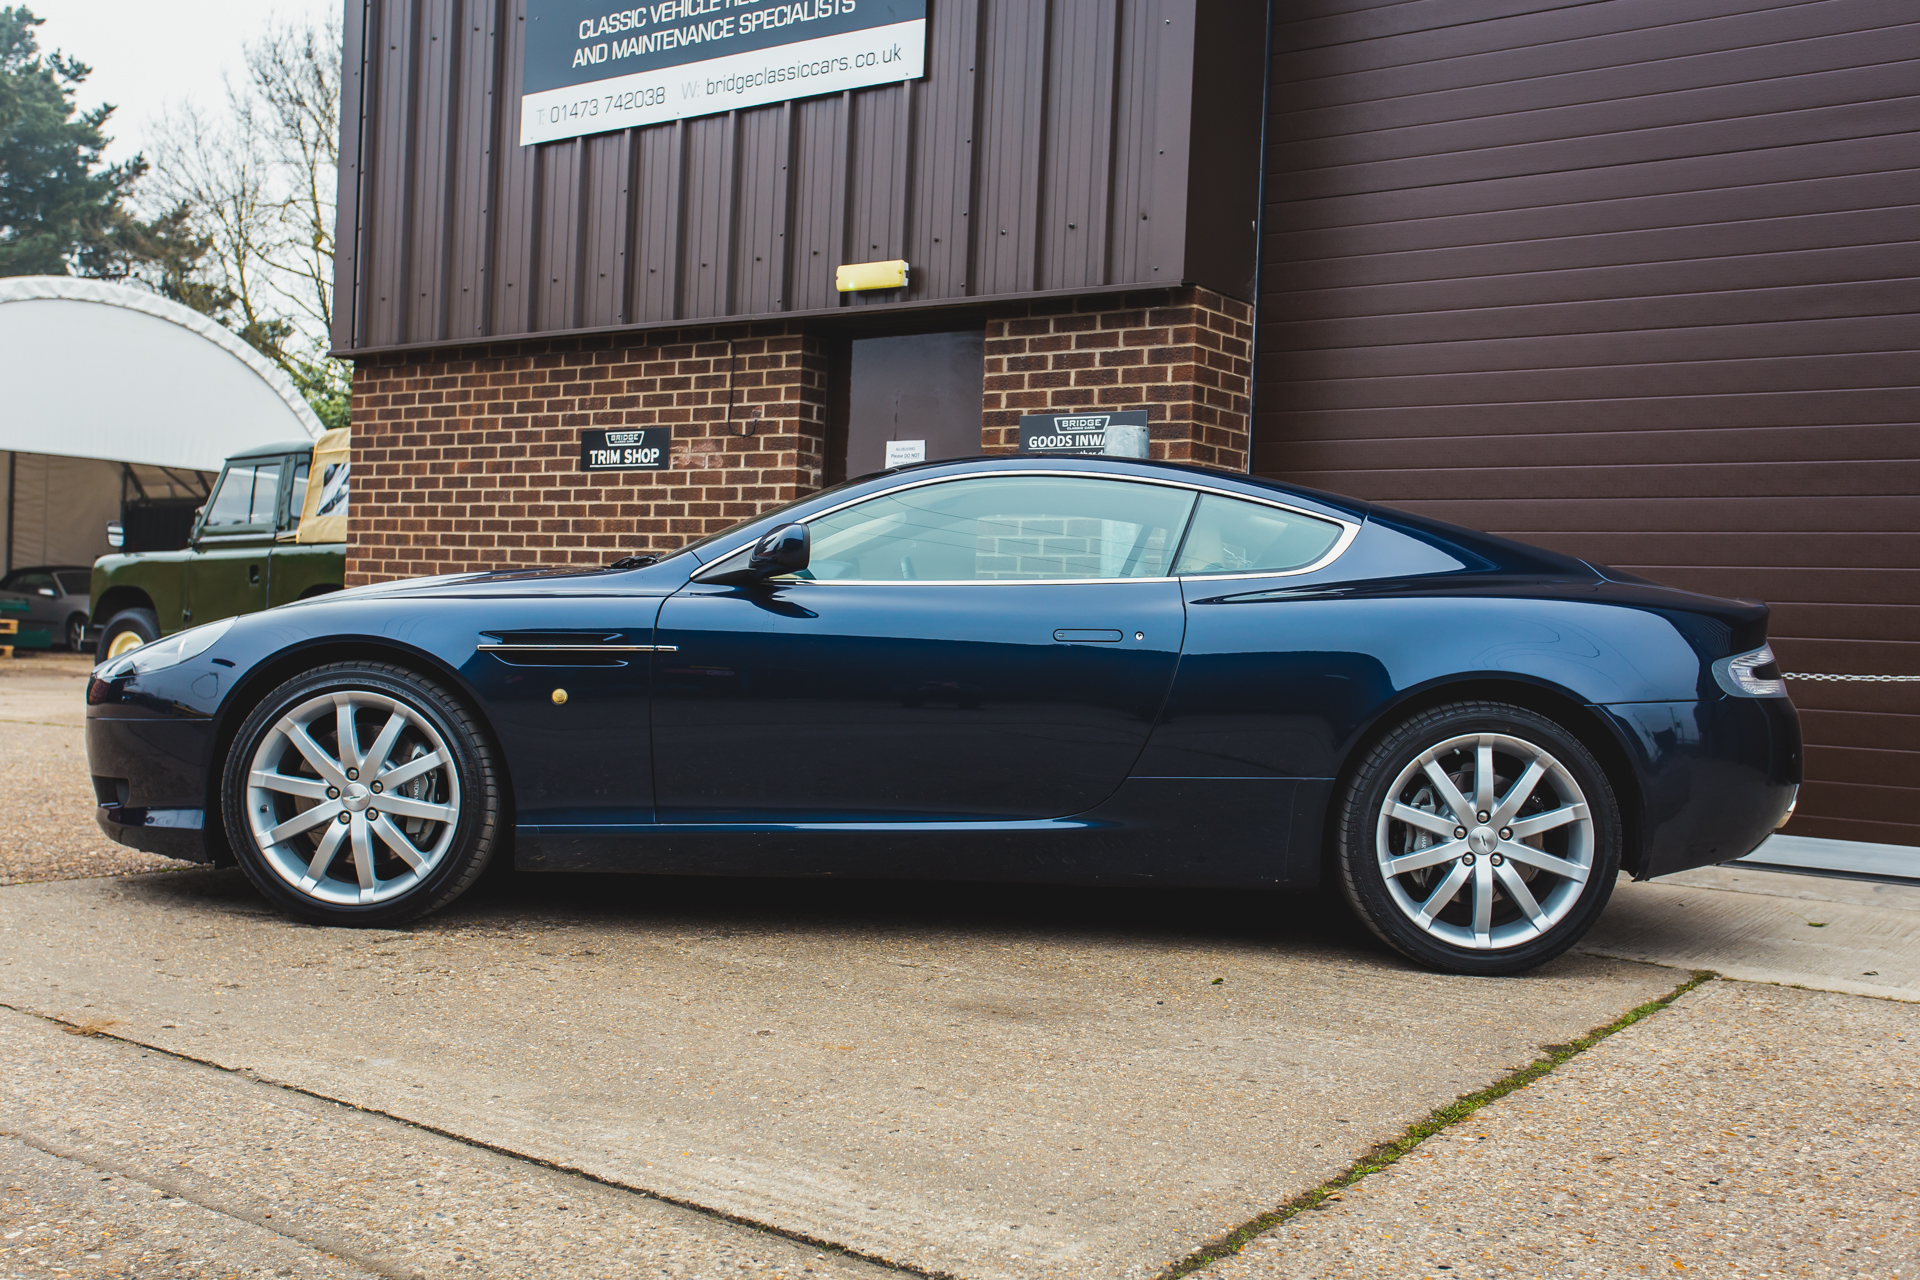
We wouldn’t hesitate to recommend Stratton Motor Company to any of our clients for Lotus’ or Aston Martin’s.
