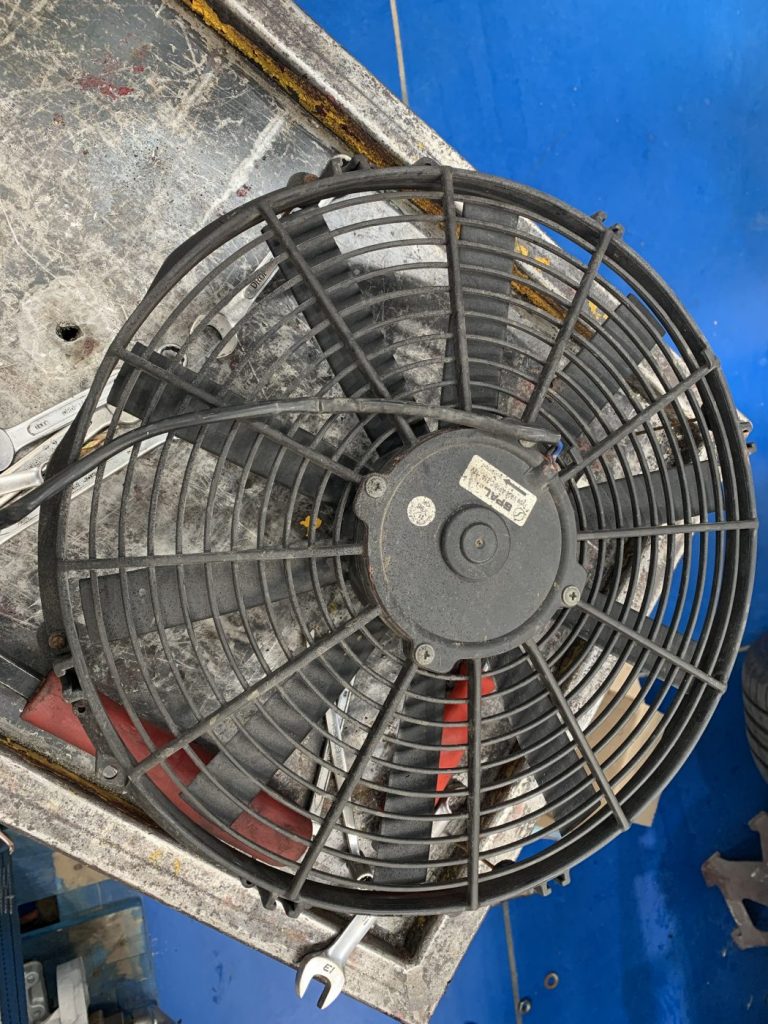
HMC Fan Exchange
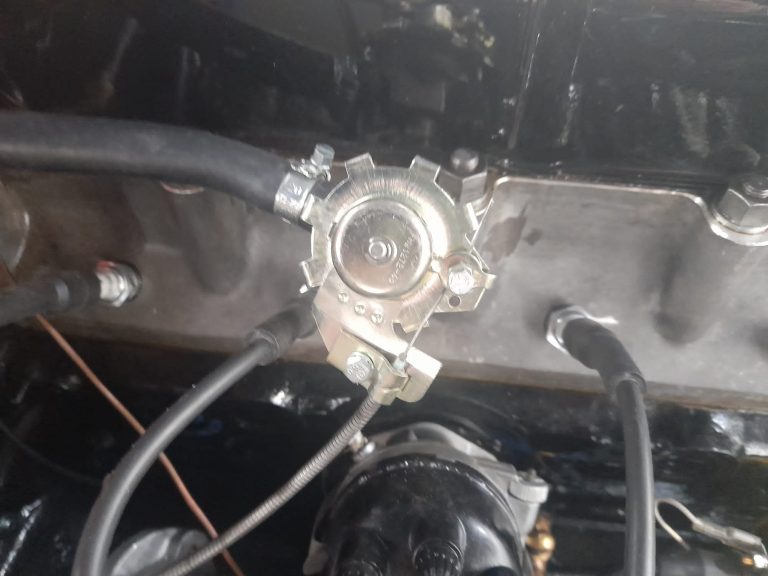
Slight play in the cooling fan of our HMC requires attention. A consideration could be to pack it out with a washer but this wouldn’t


Slight play in the cooling fan of our HMC requires attention. A consideration could be to pack it out with a washer but this wouldn’t
Ady has been continuing his investigation into the engine of the 1971 Lotus Elan. He’s replaced the points condenser and coil and put fresh oil
We’re welcoming this 1971 Lotus Elan into the workshop! It’s in here because it doesn’t run, so the engine needs checking over to see where
Ady has started investigating this Lotus Elan’s engine after the owner bought it into us because of it not running quite right. He’s found that
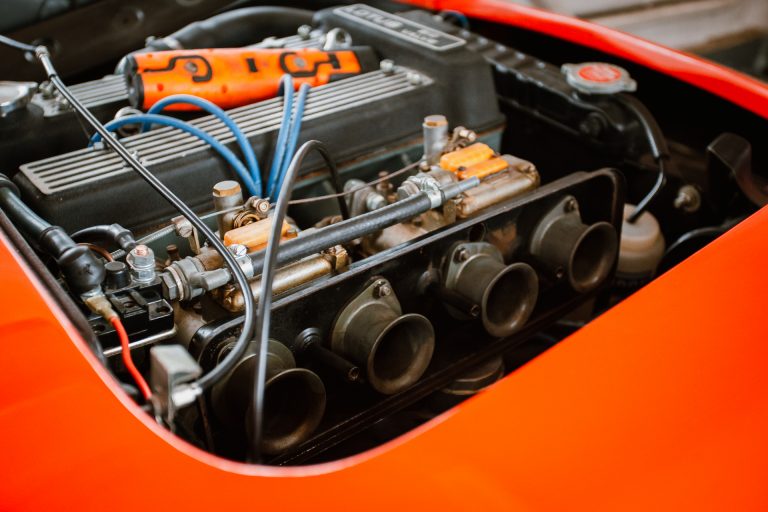
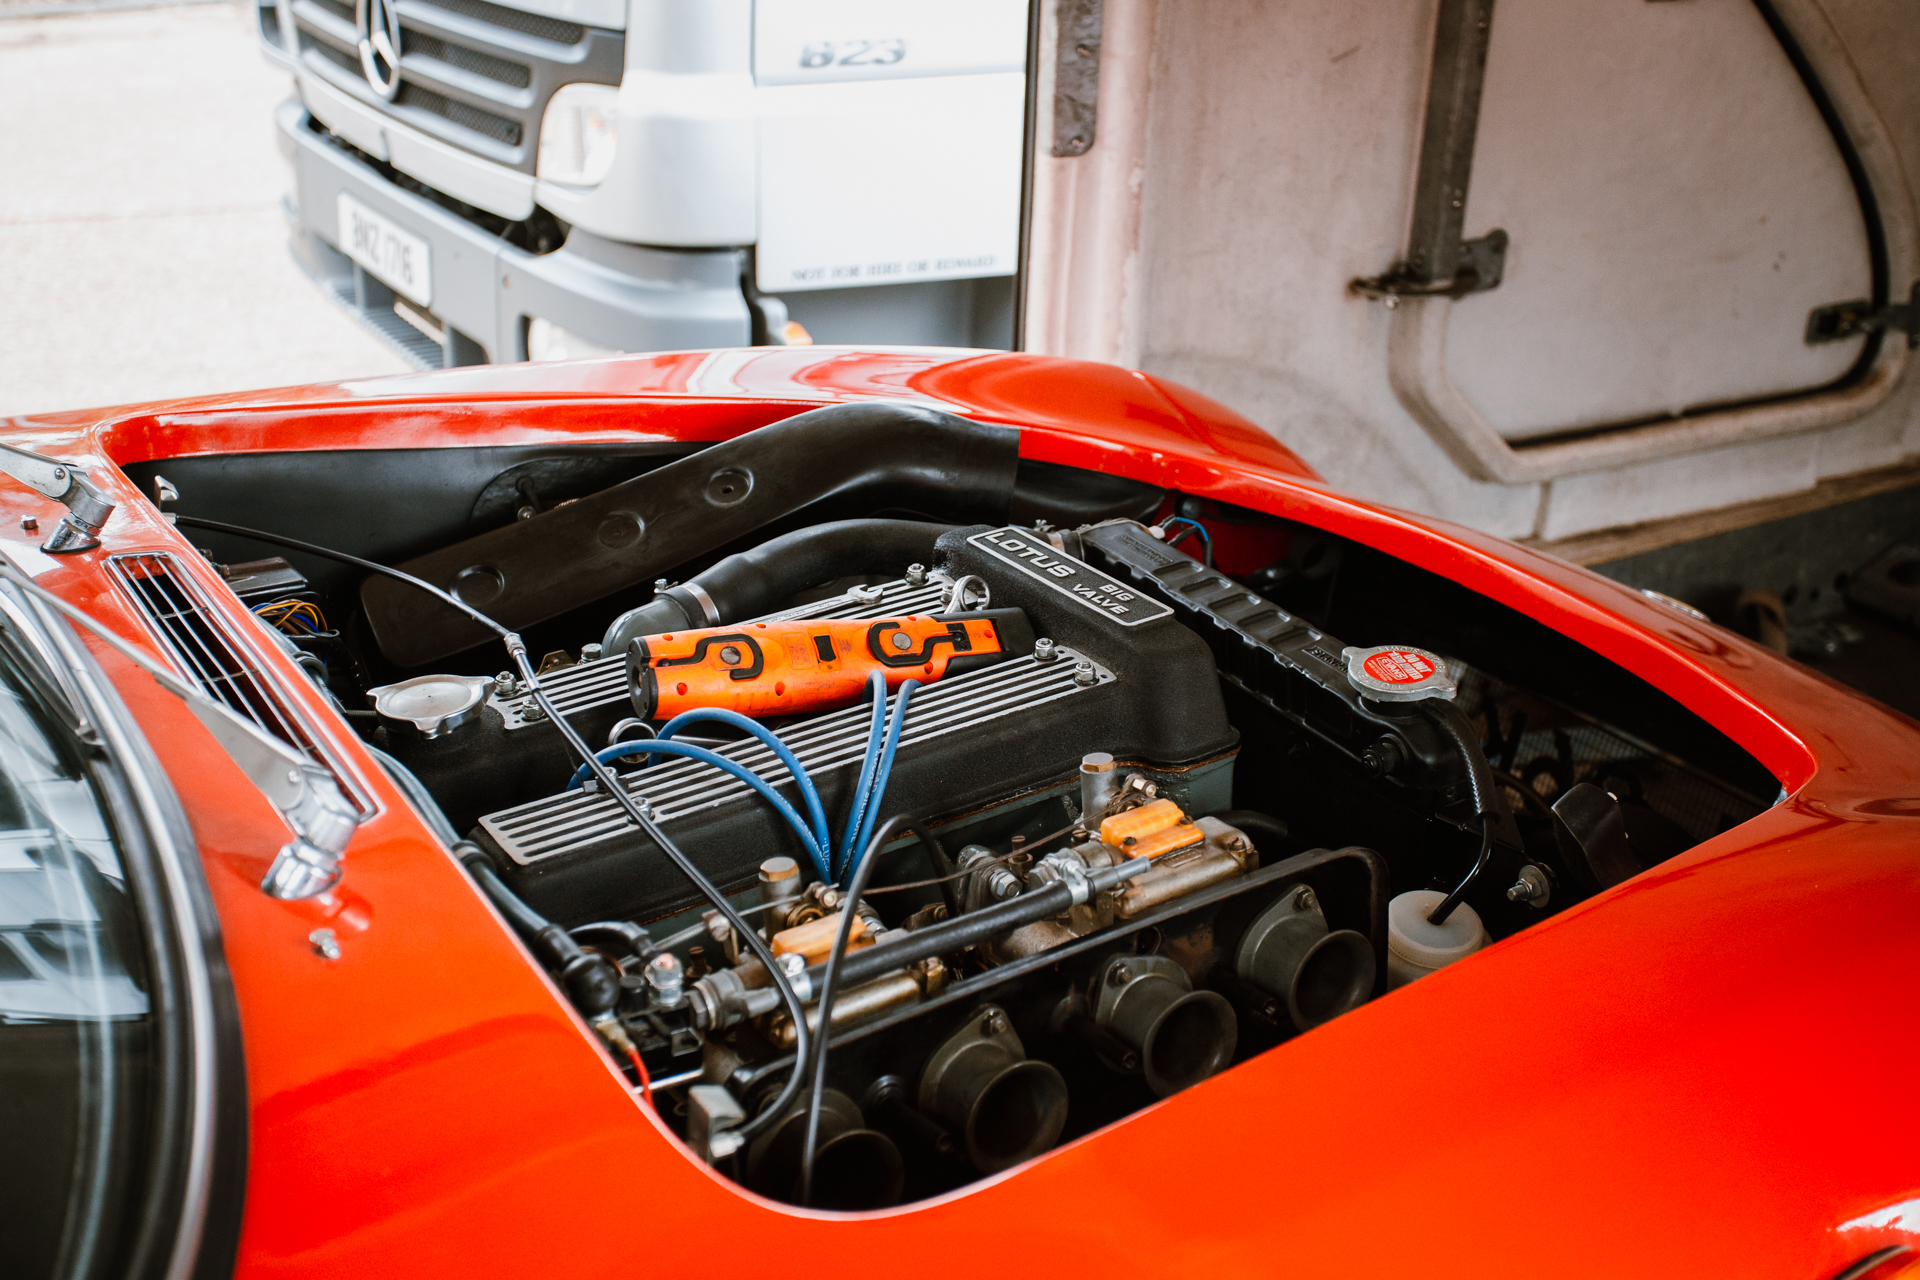
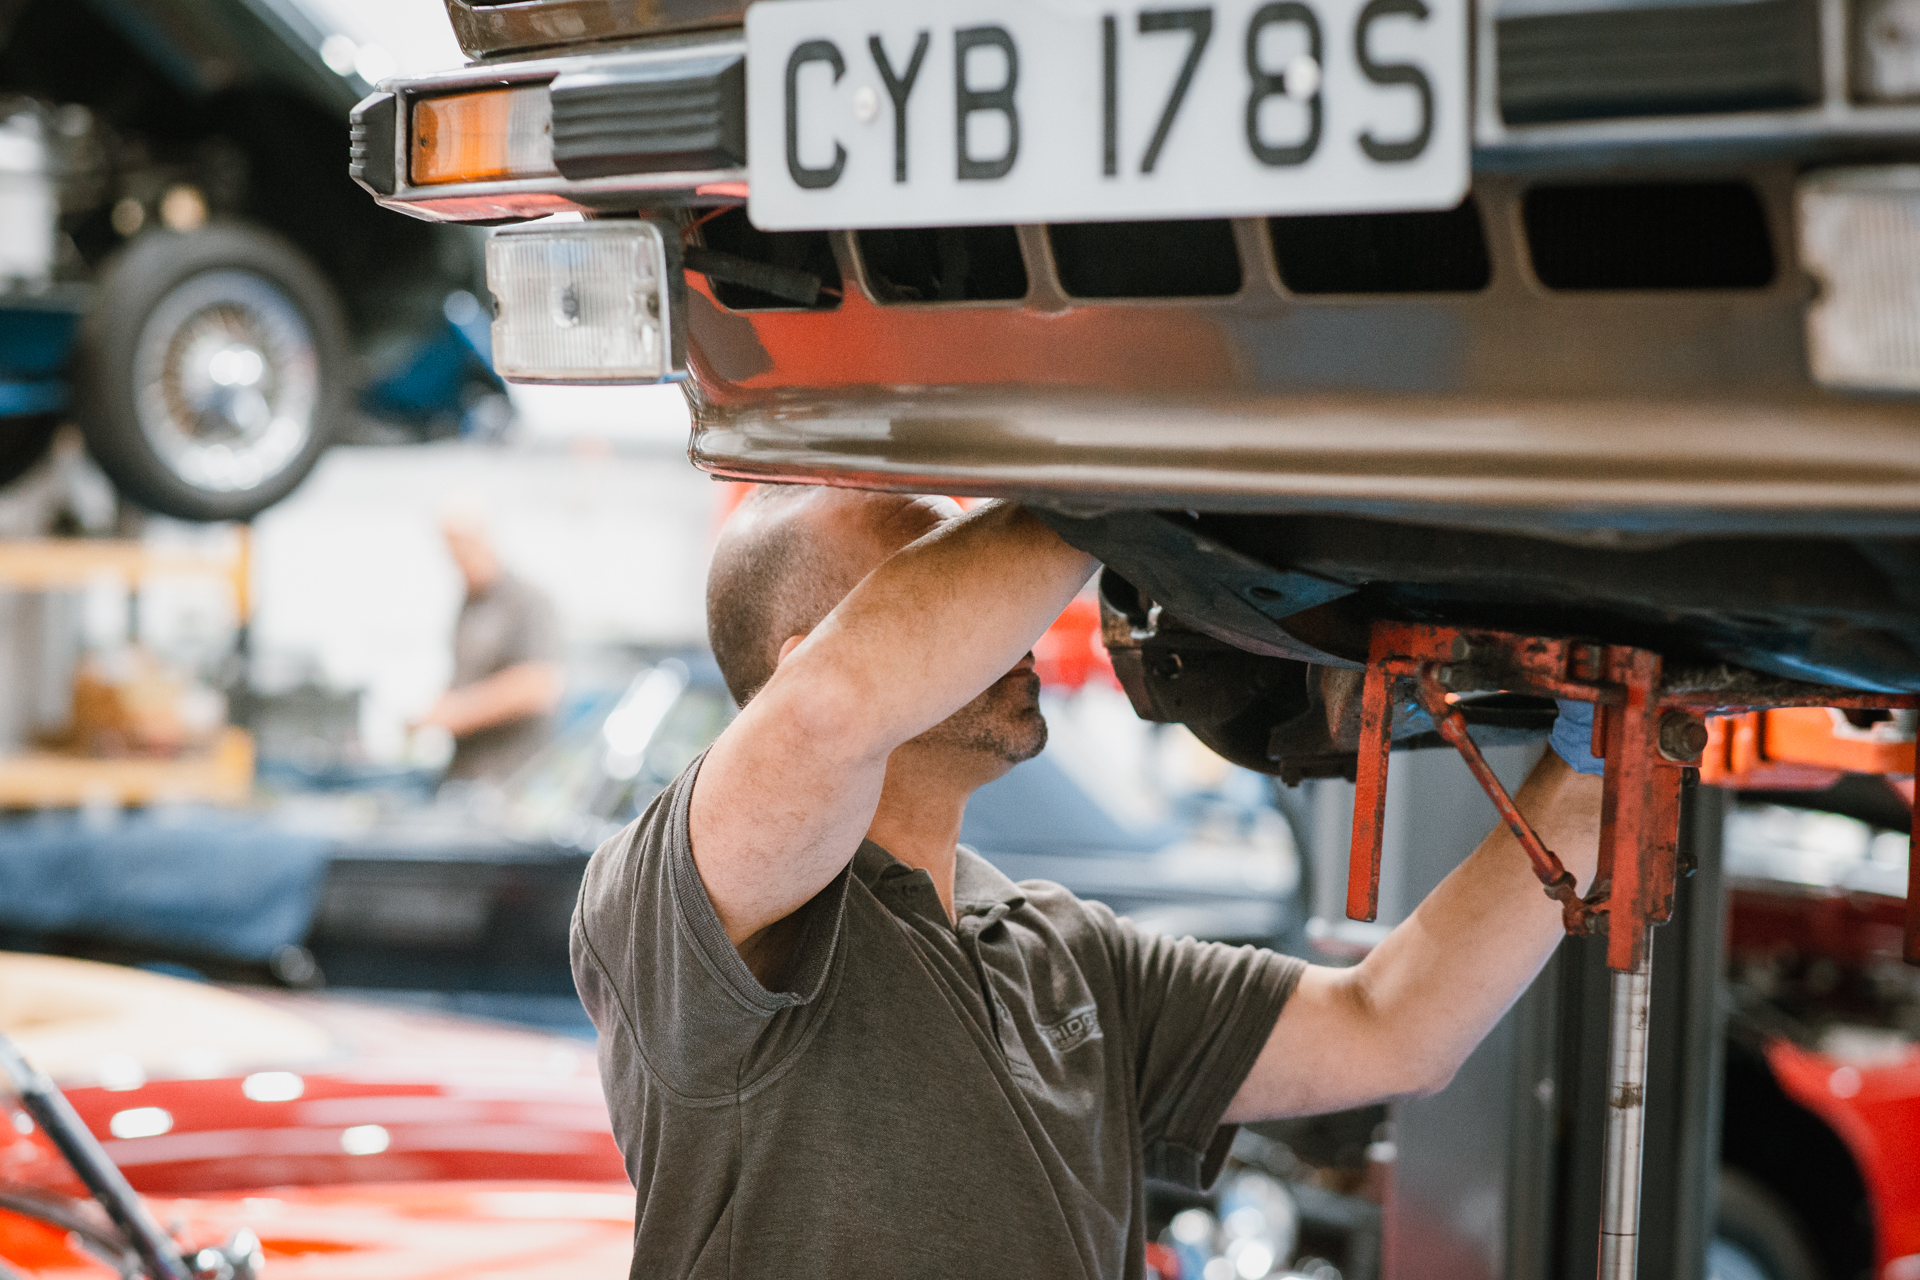
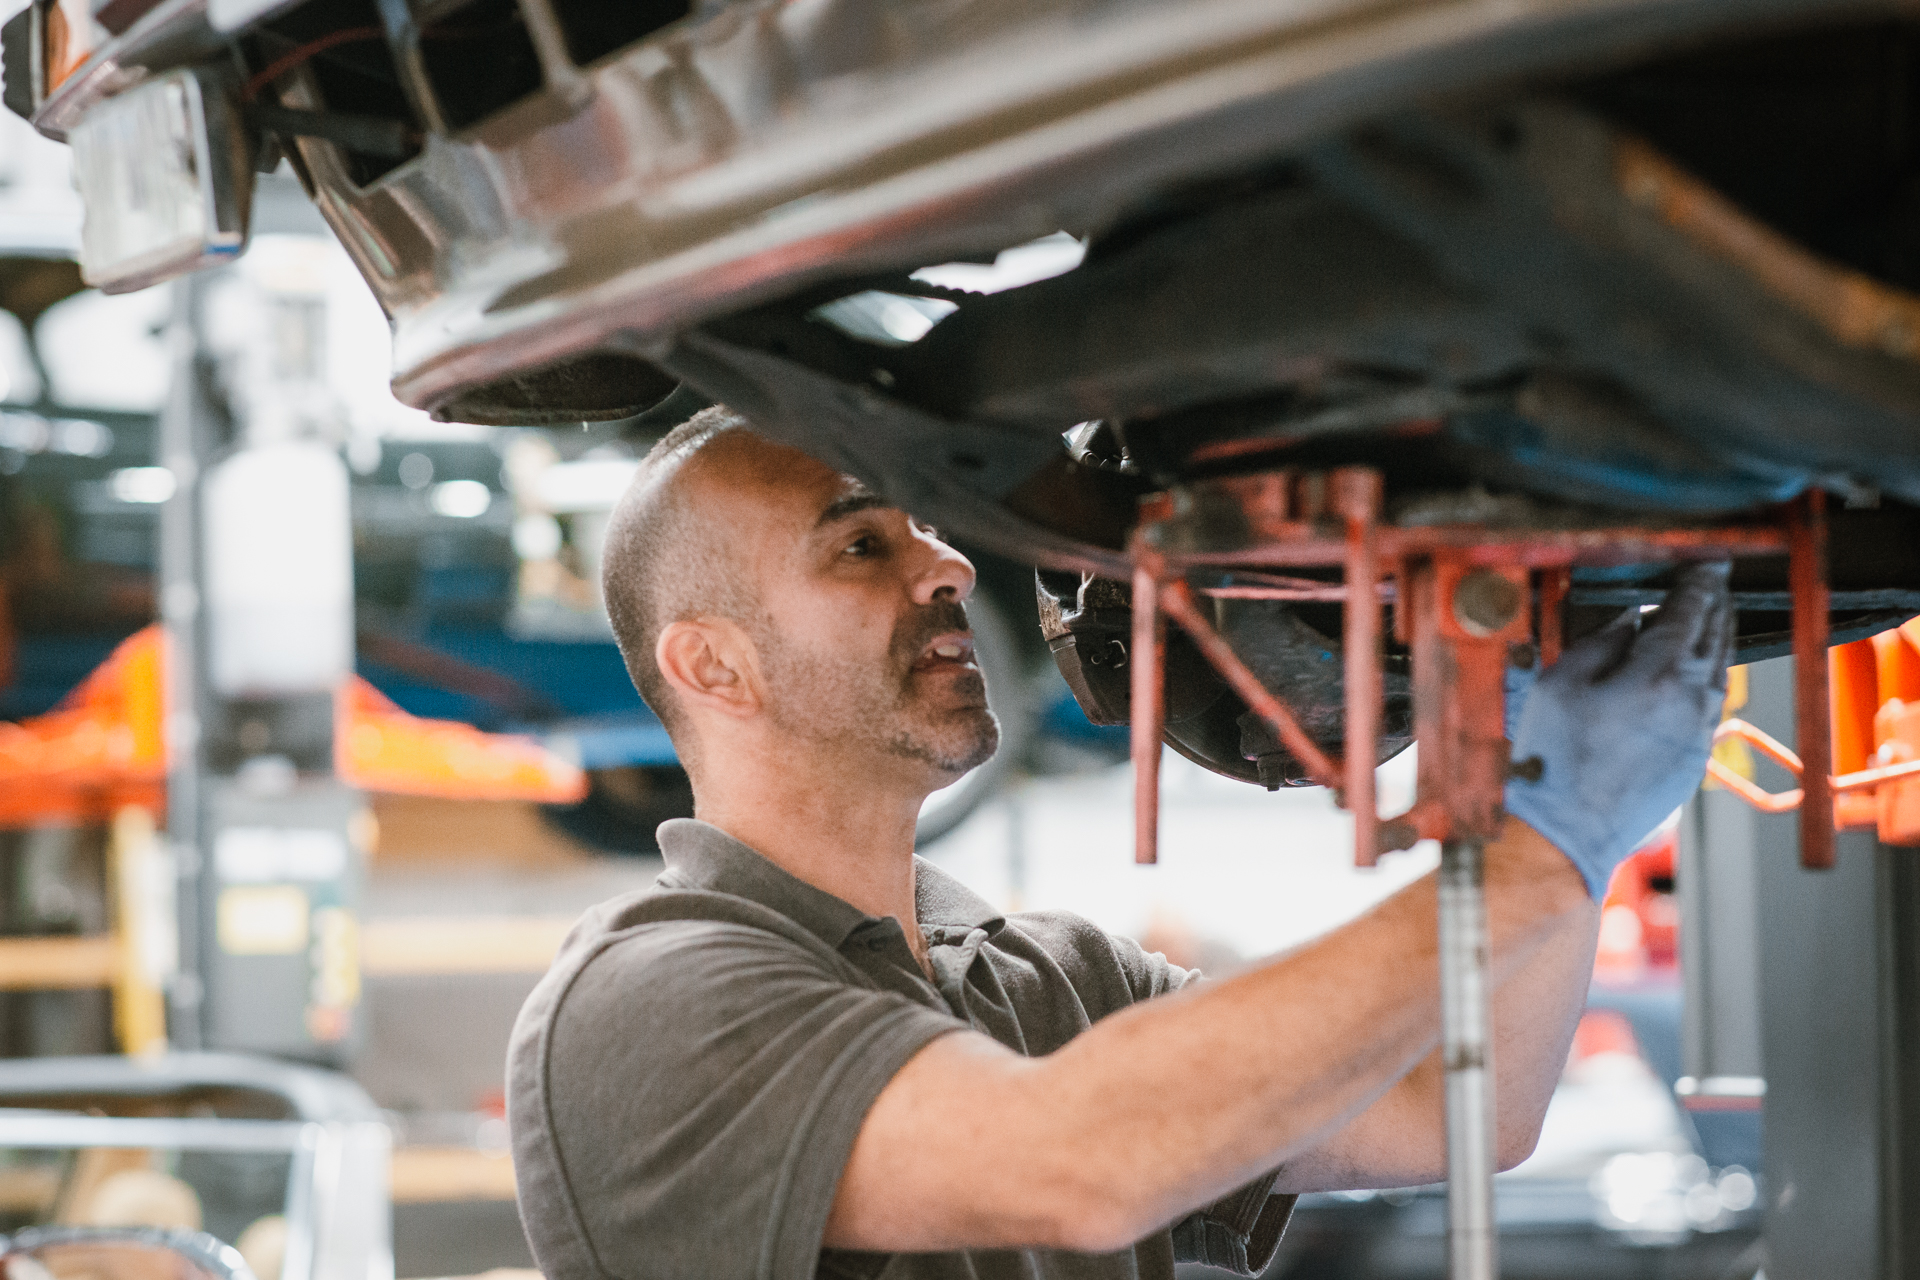
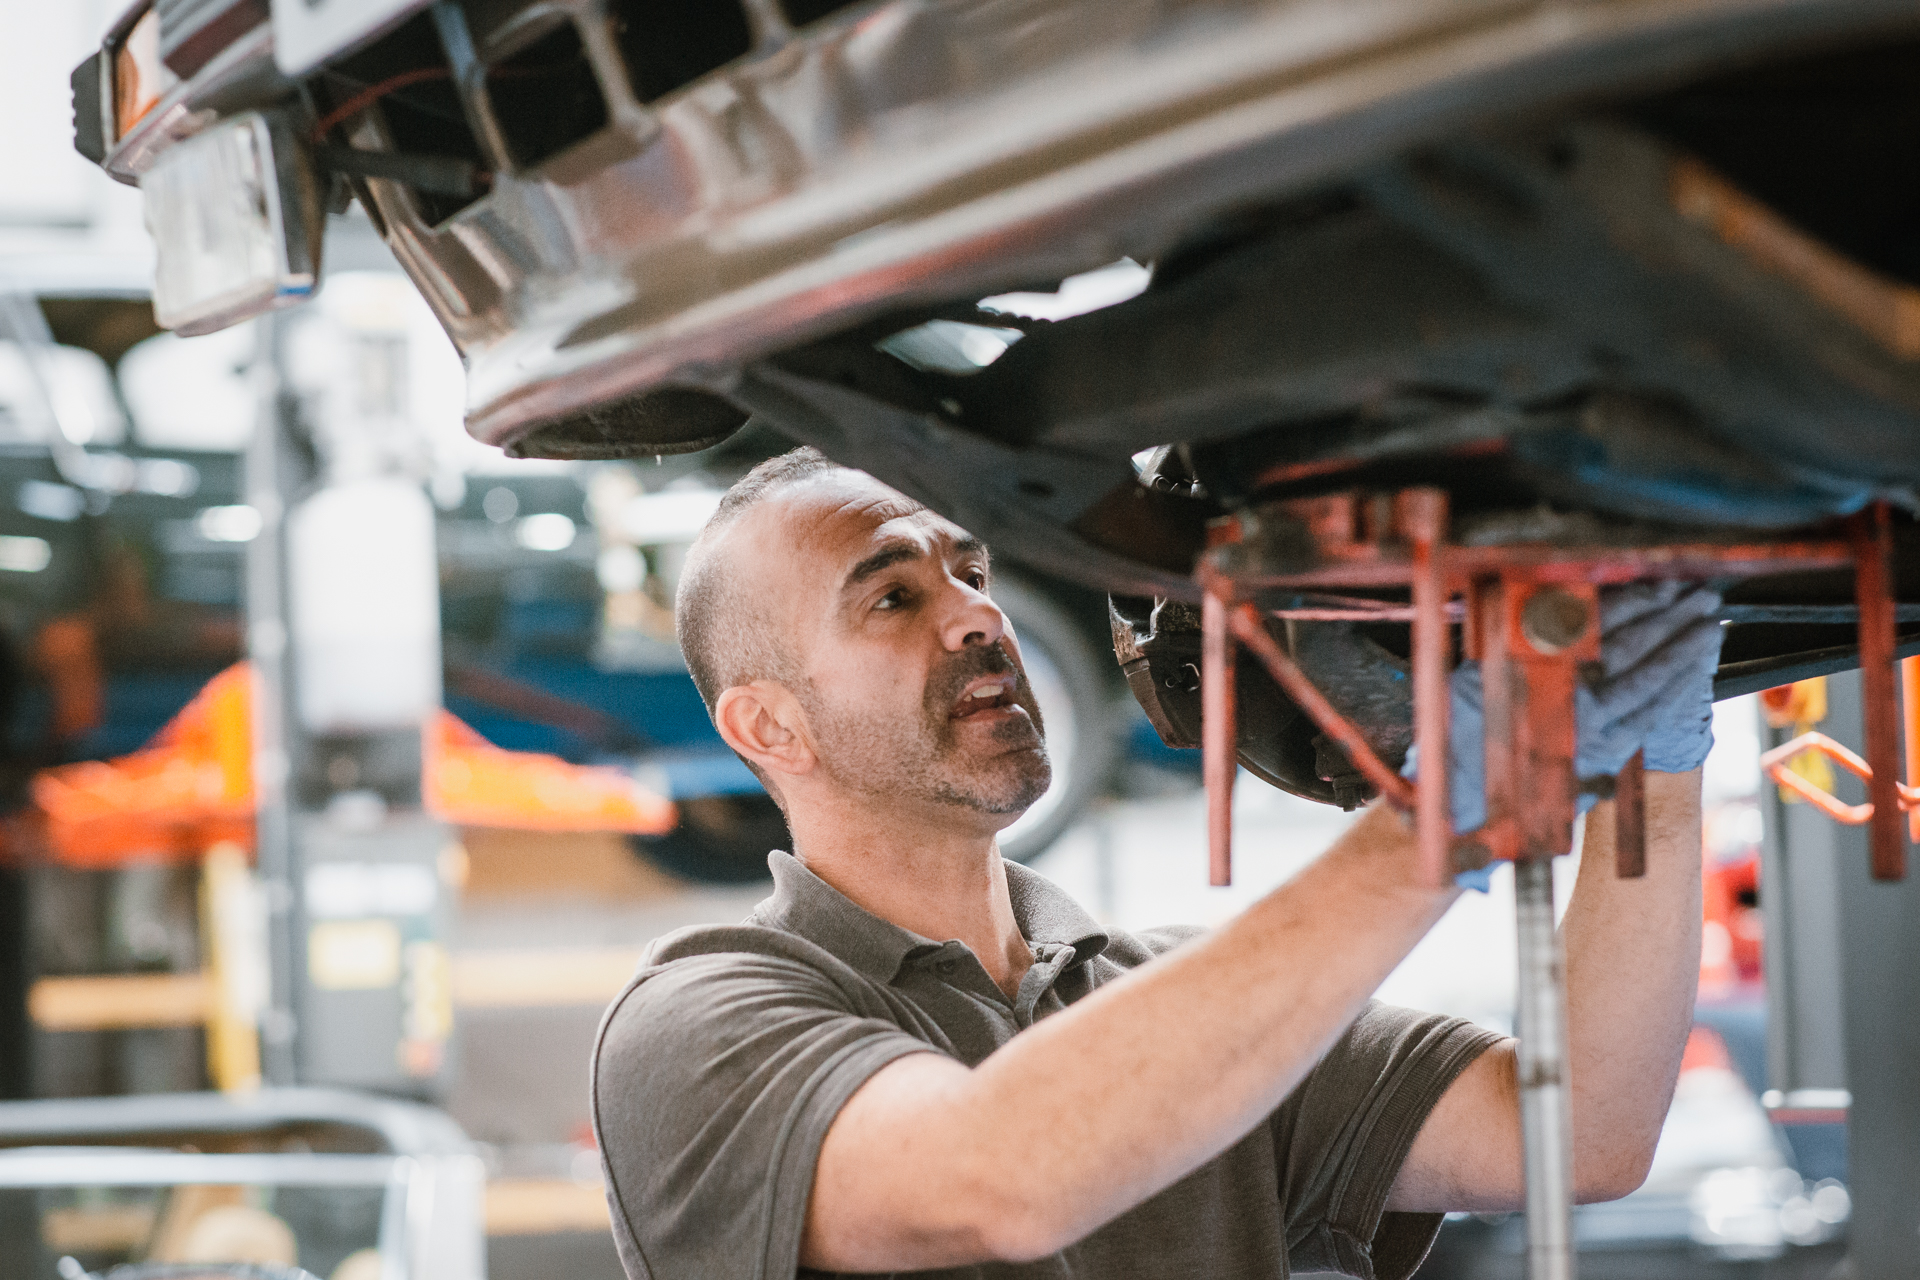
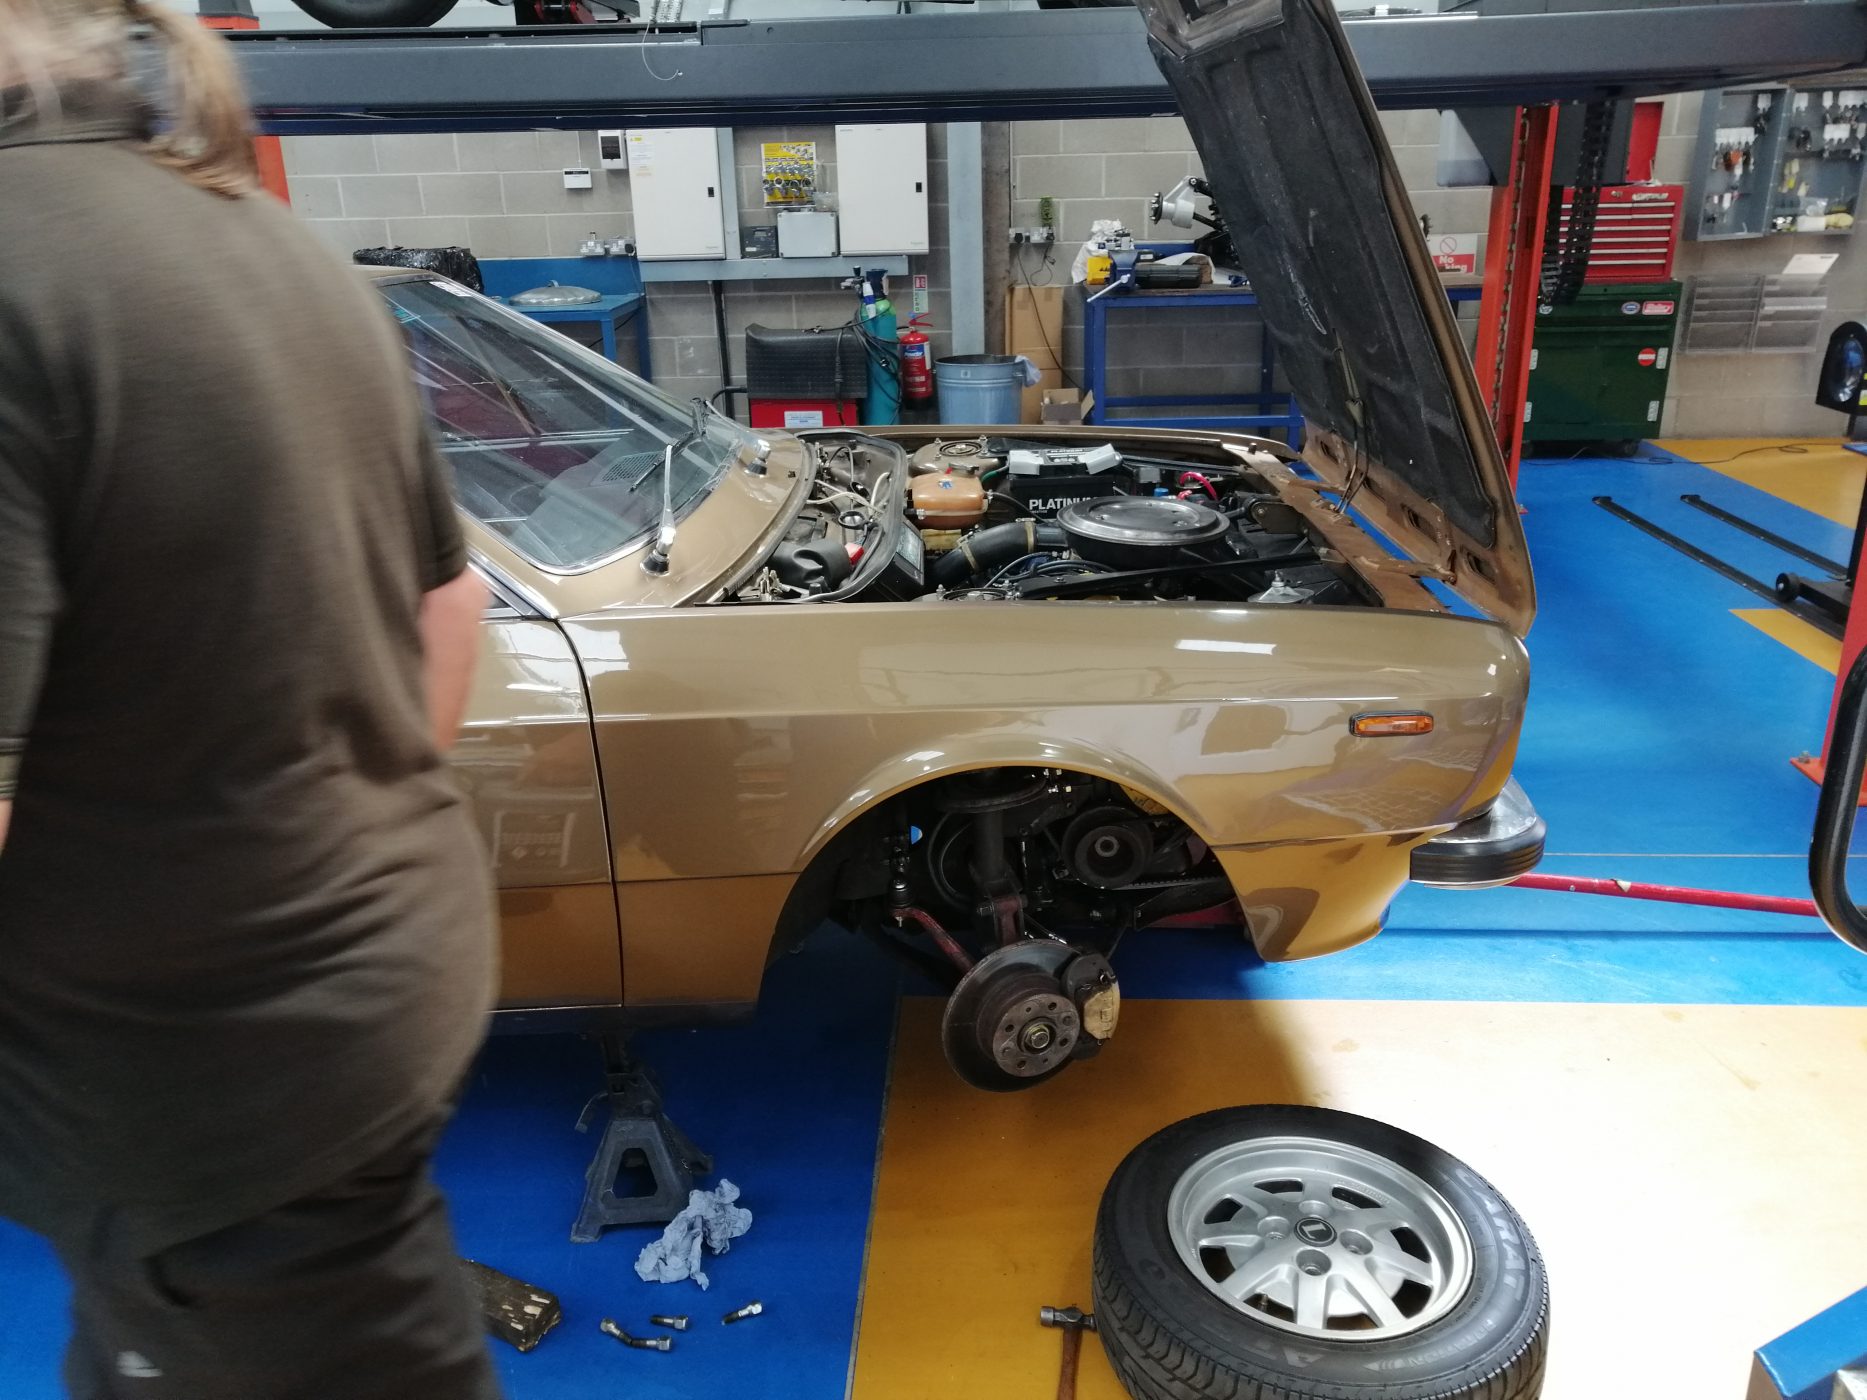
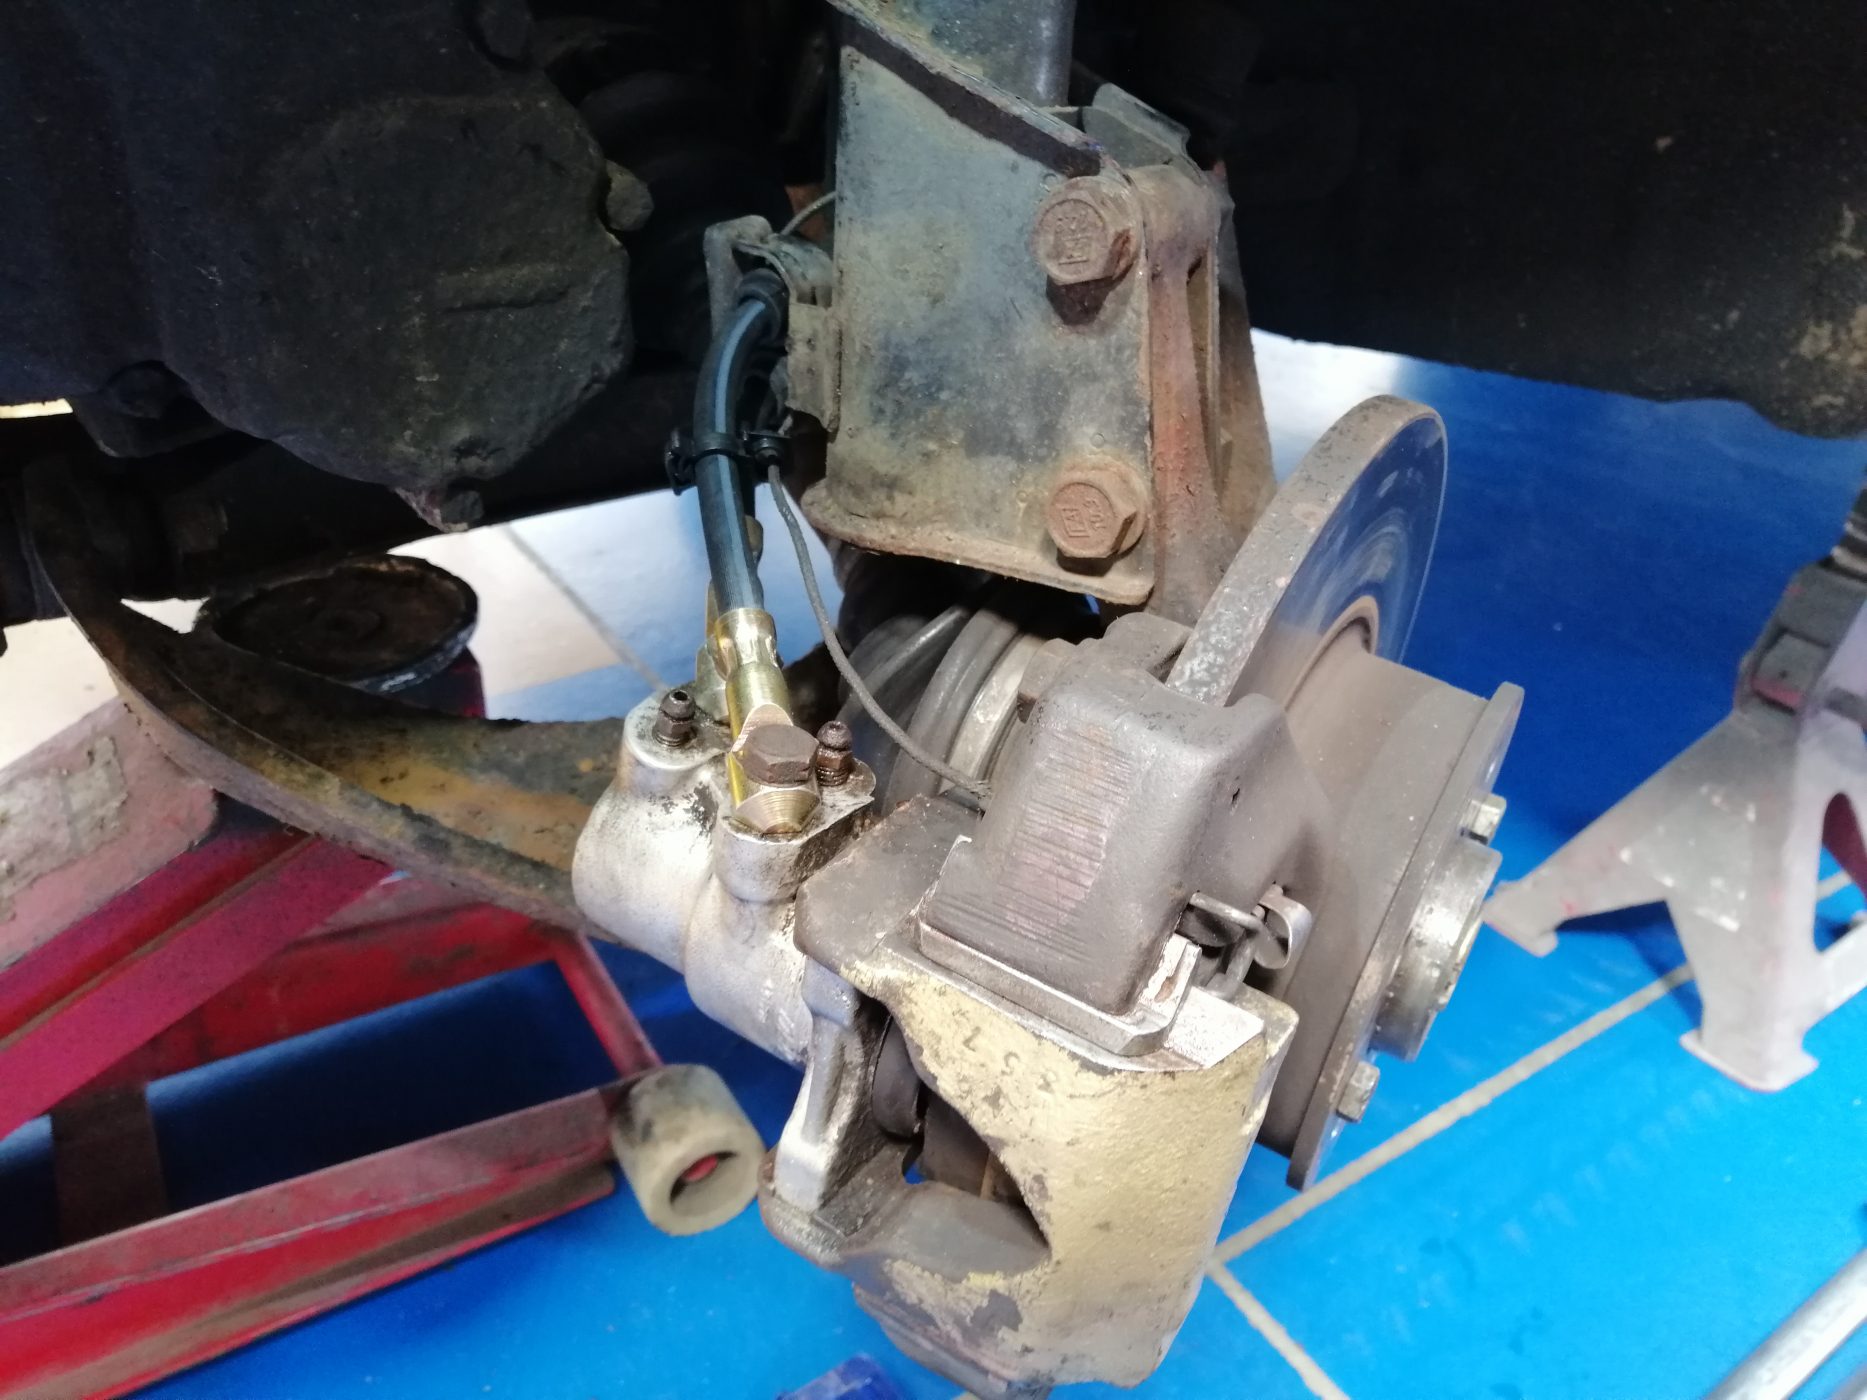
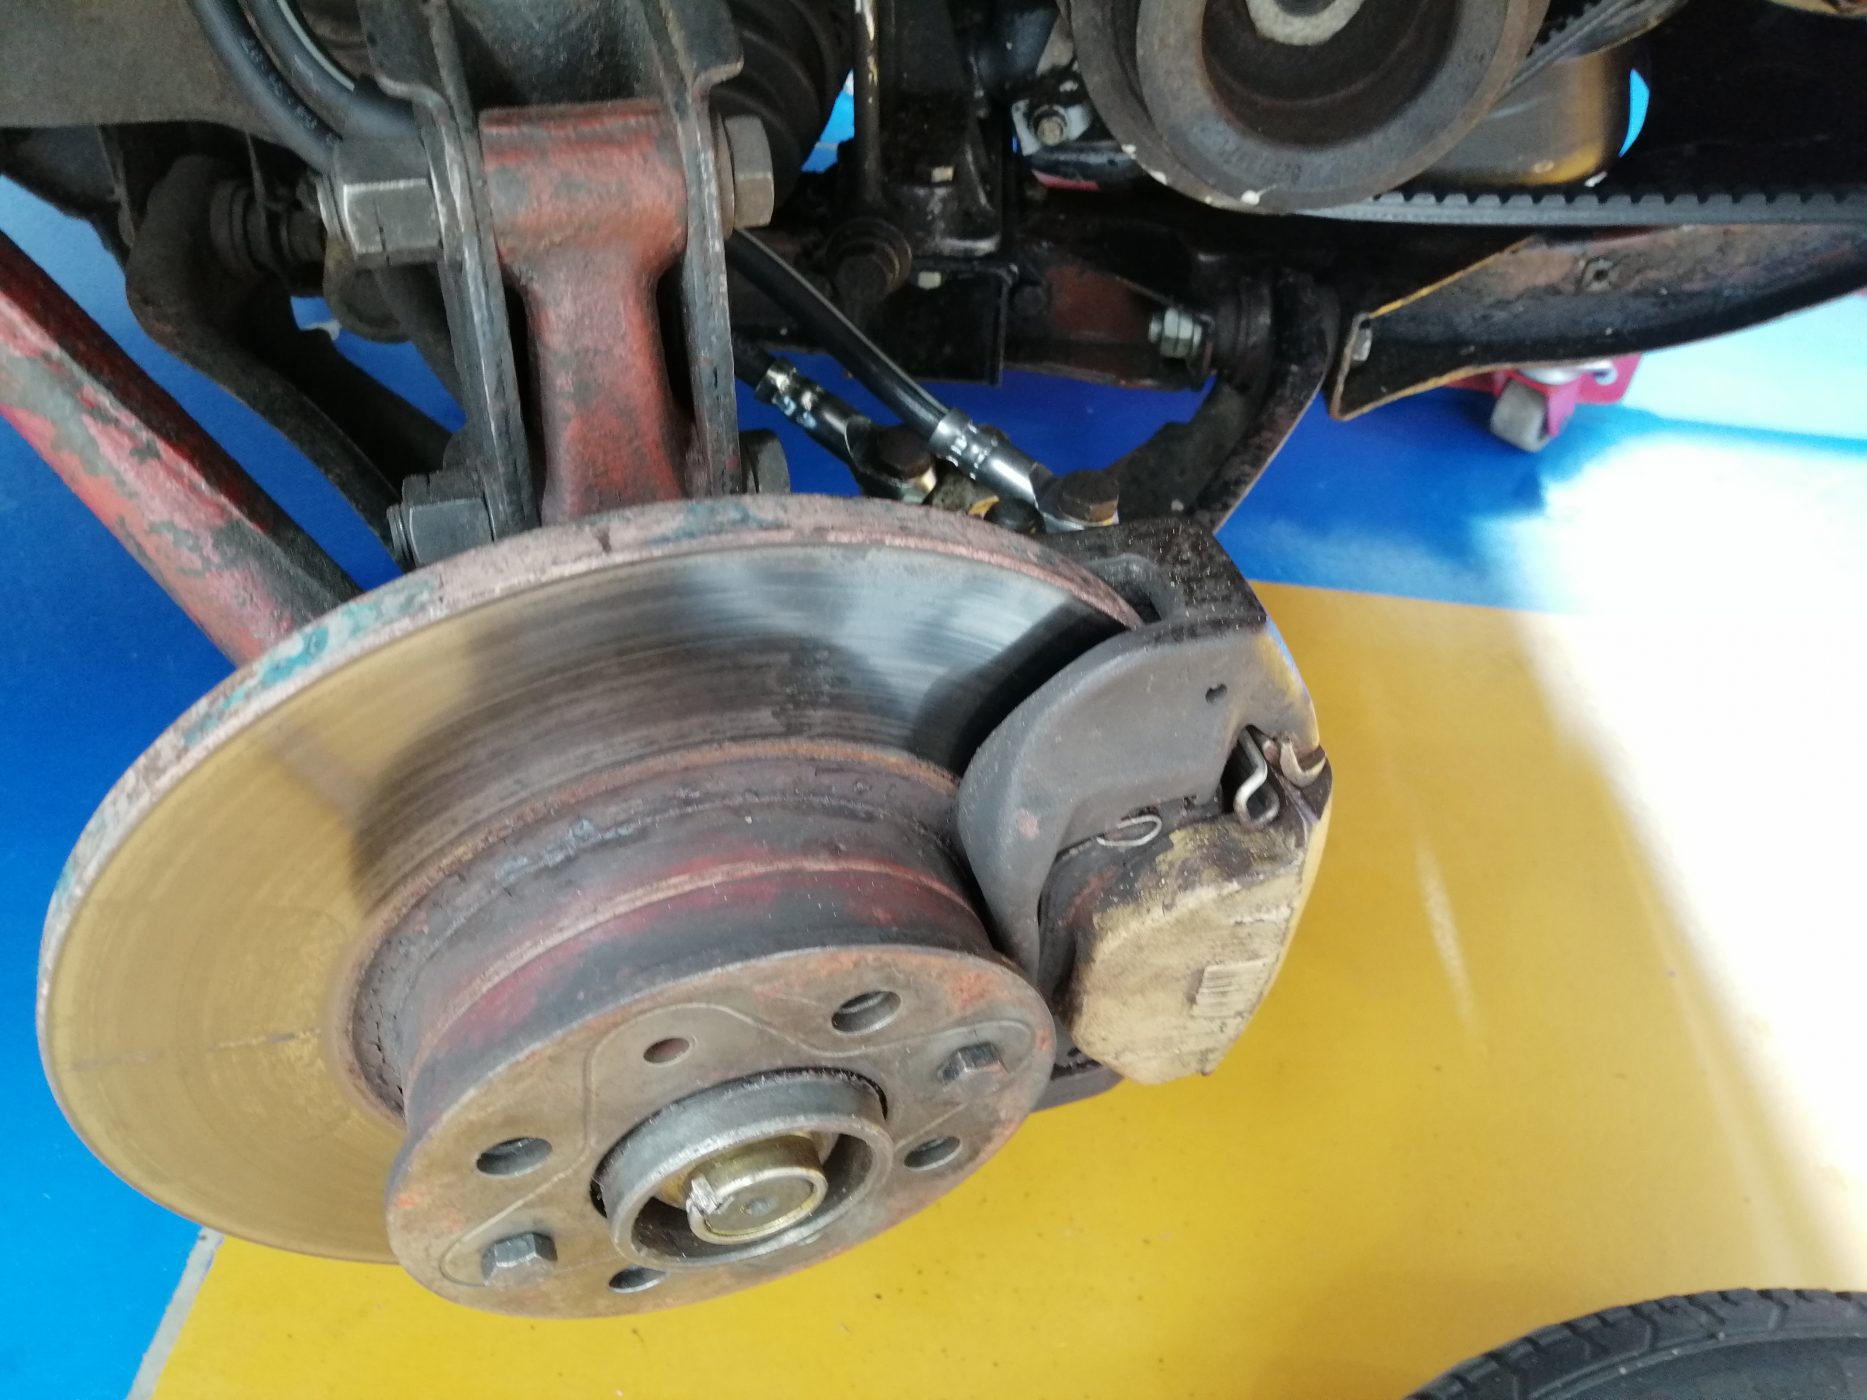
Scott has been getting up to speed on the front axle of the 1979 Arrow Ferrari Daytona. The only tasks left to do on it
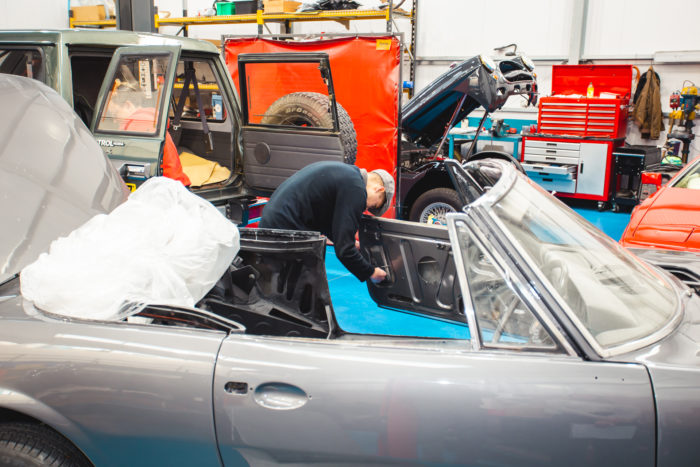
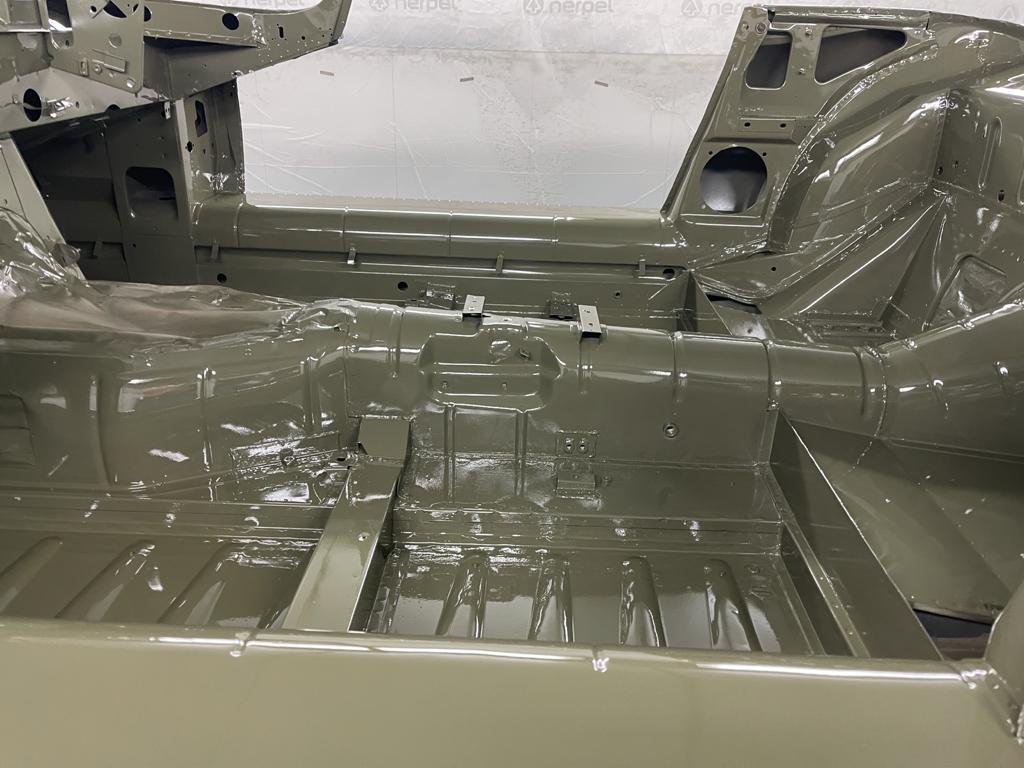
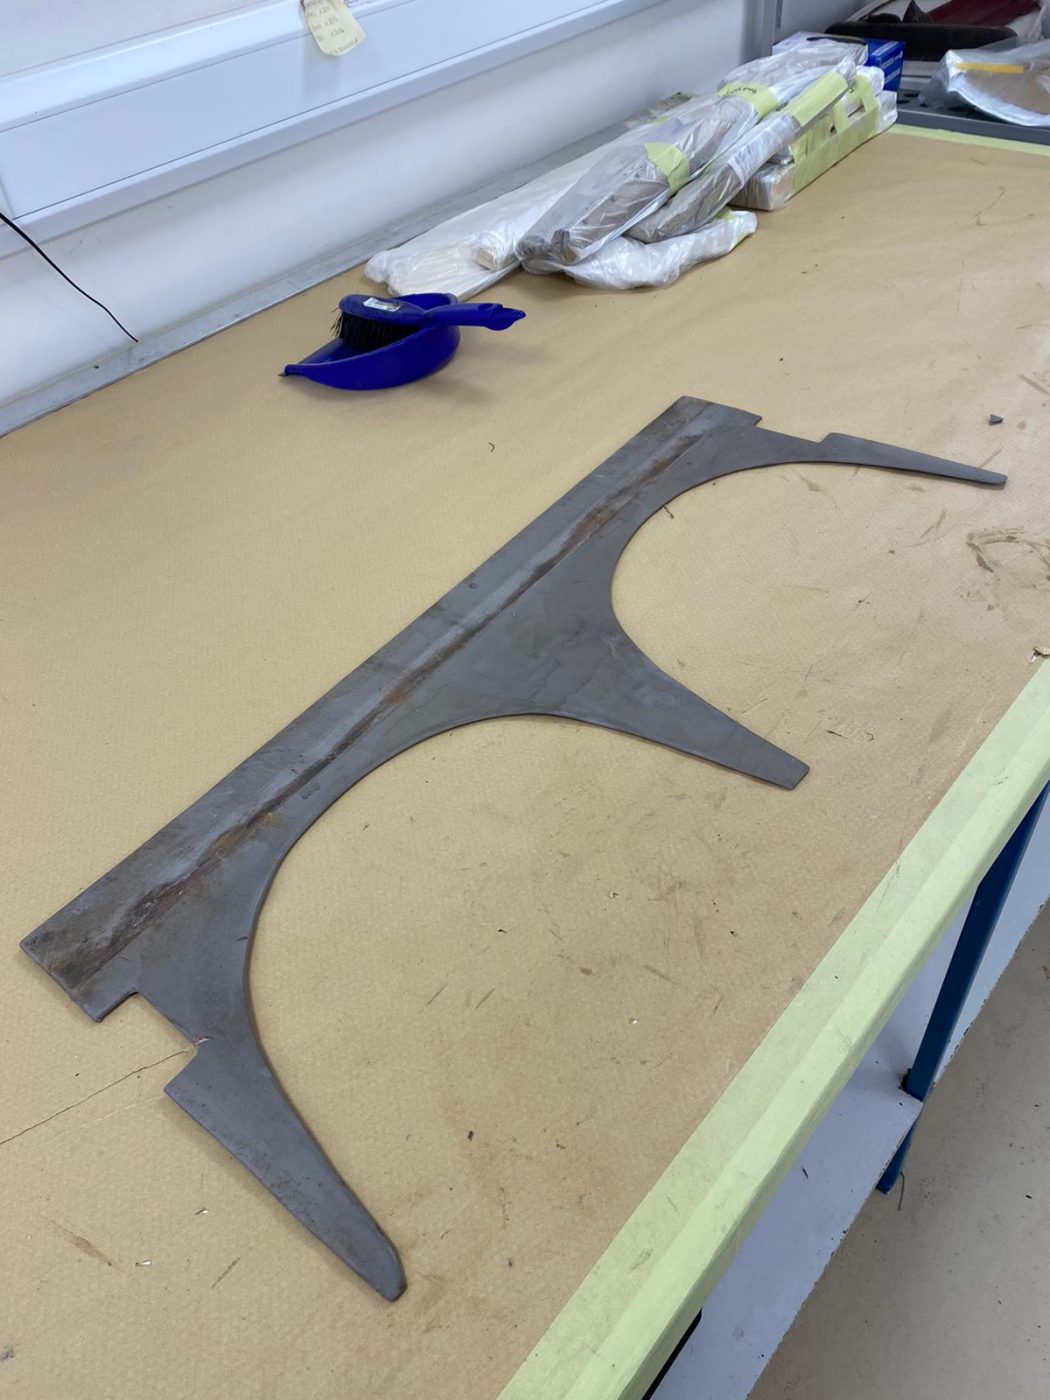
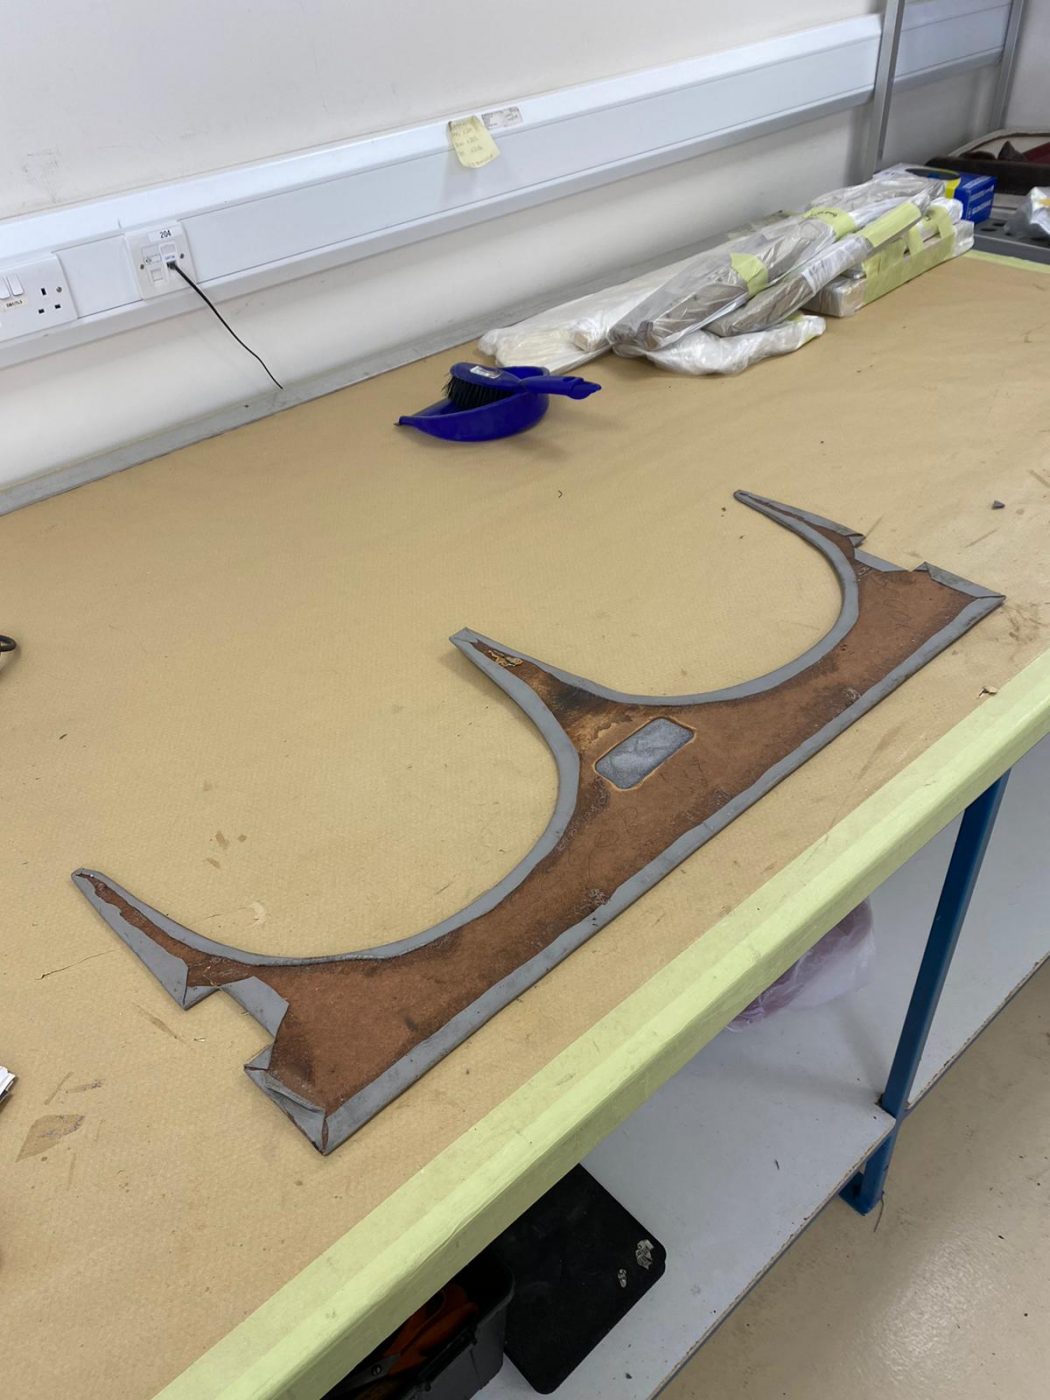
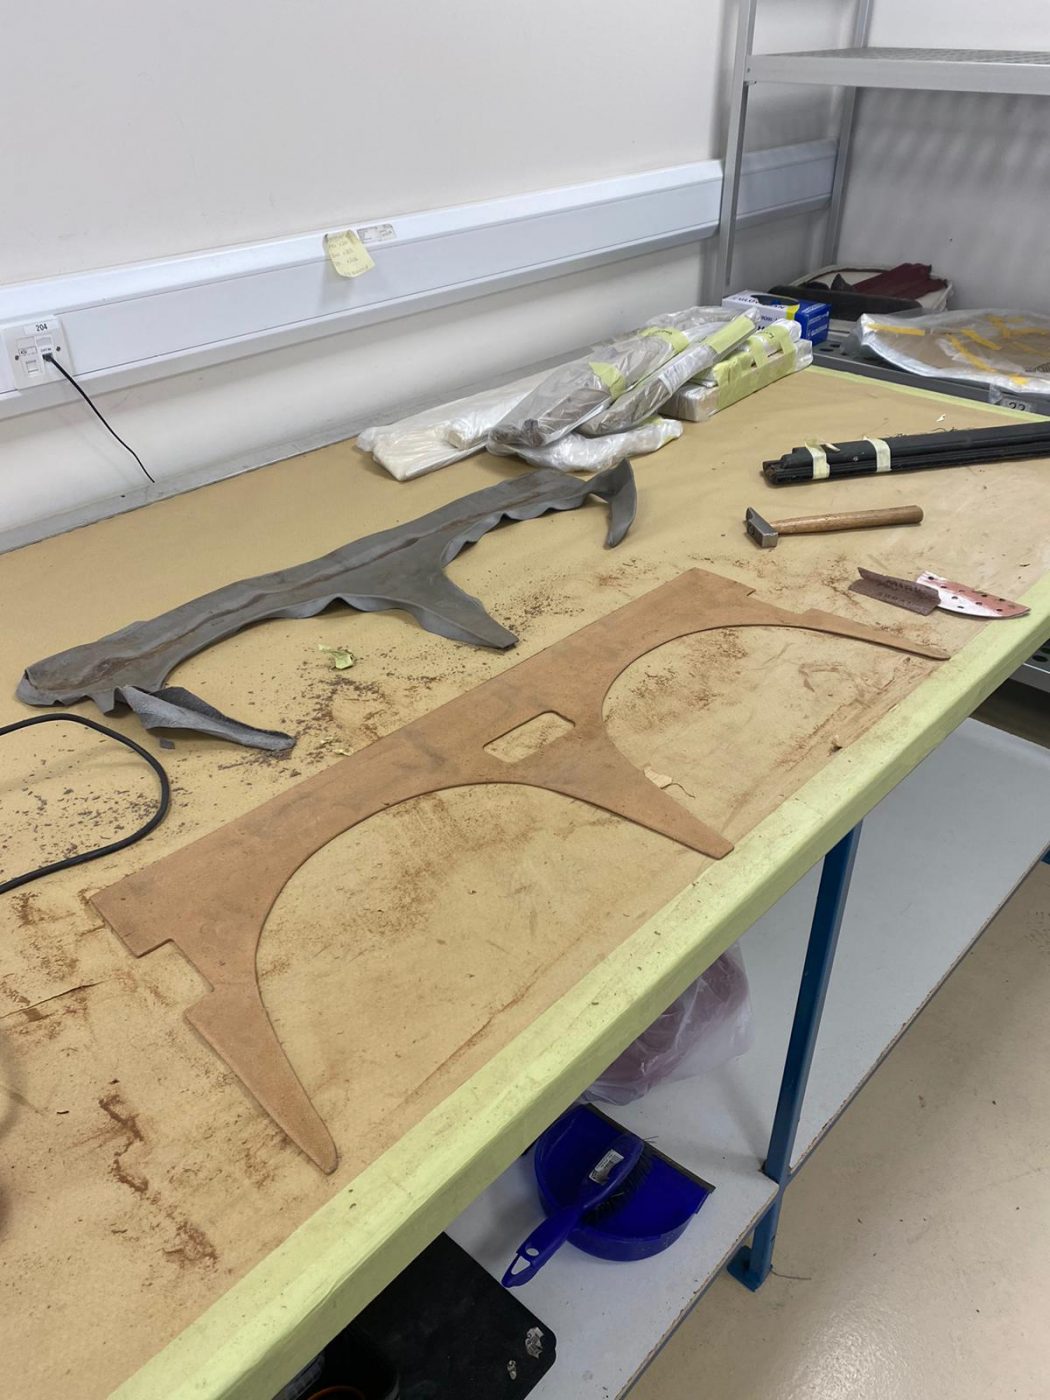
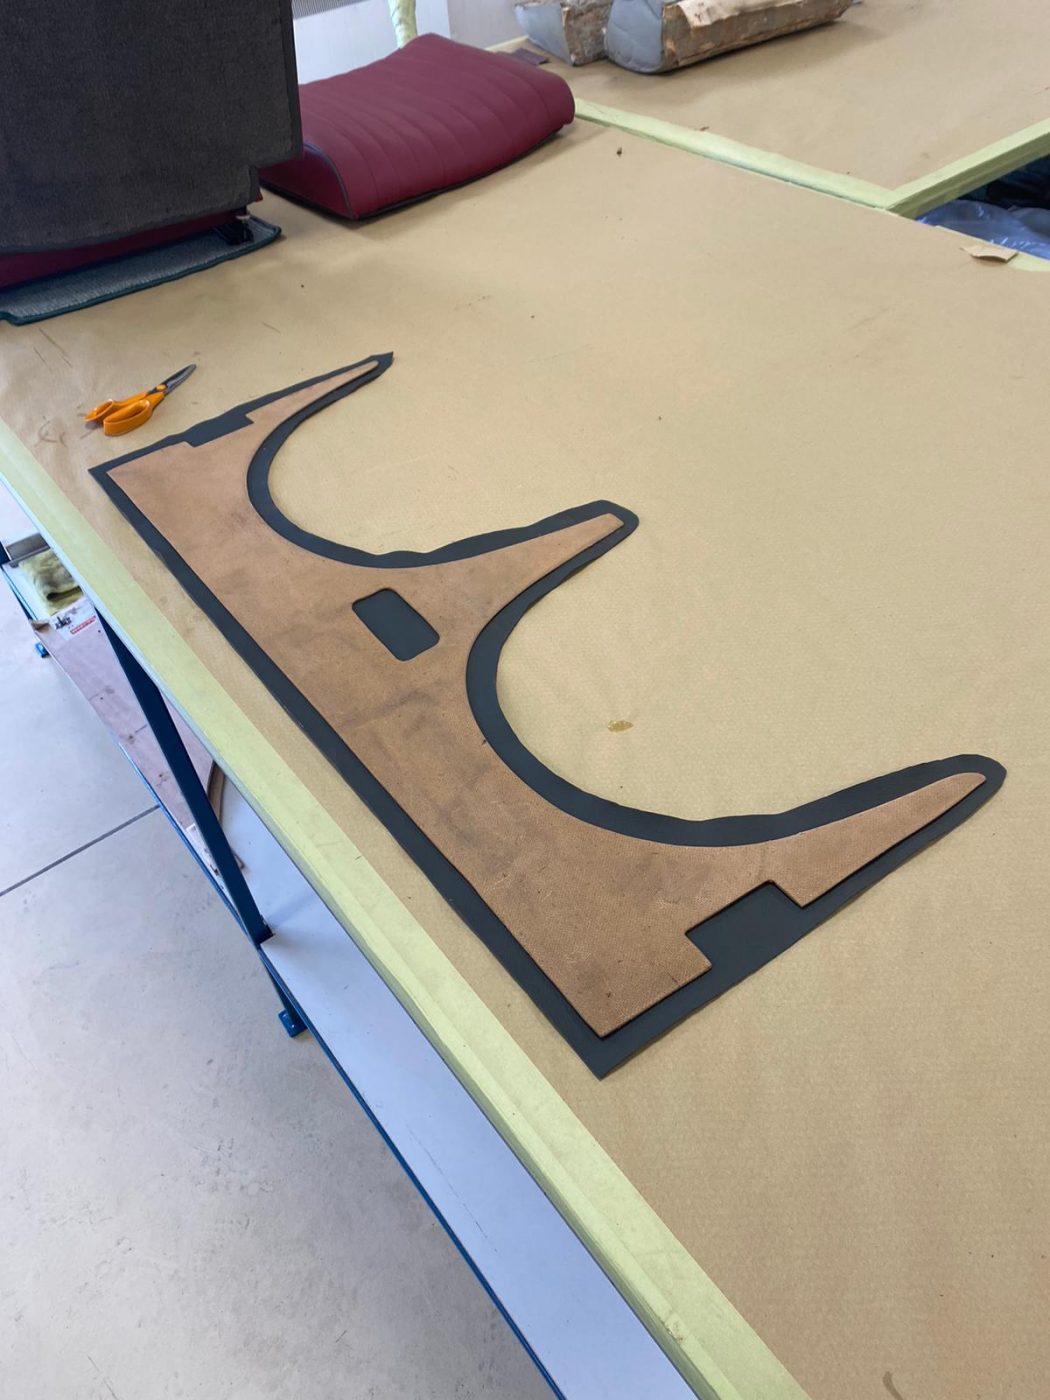
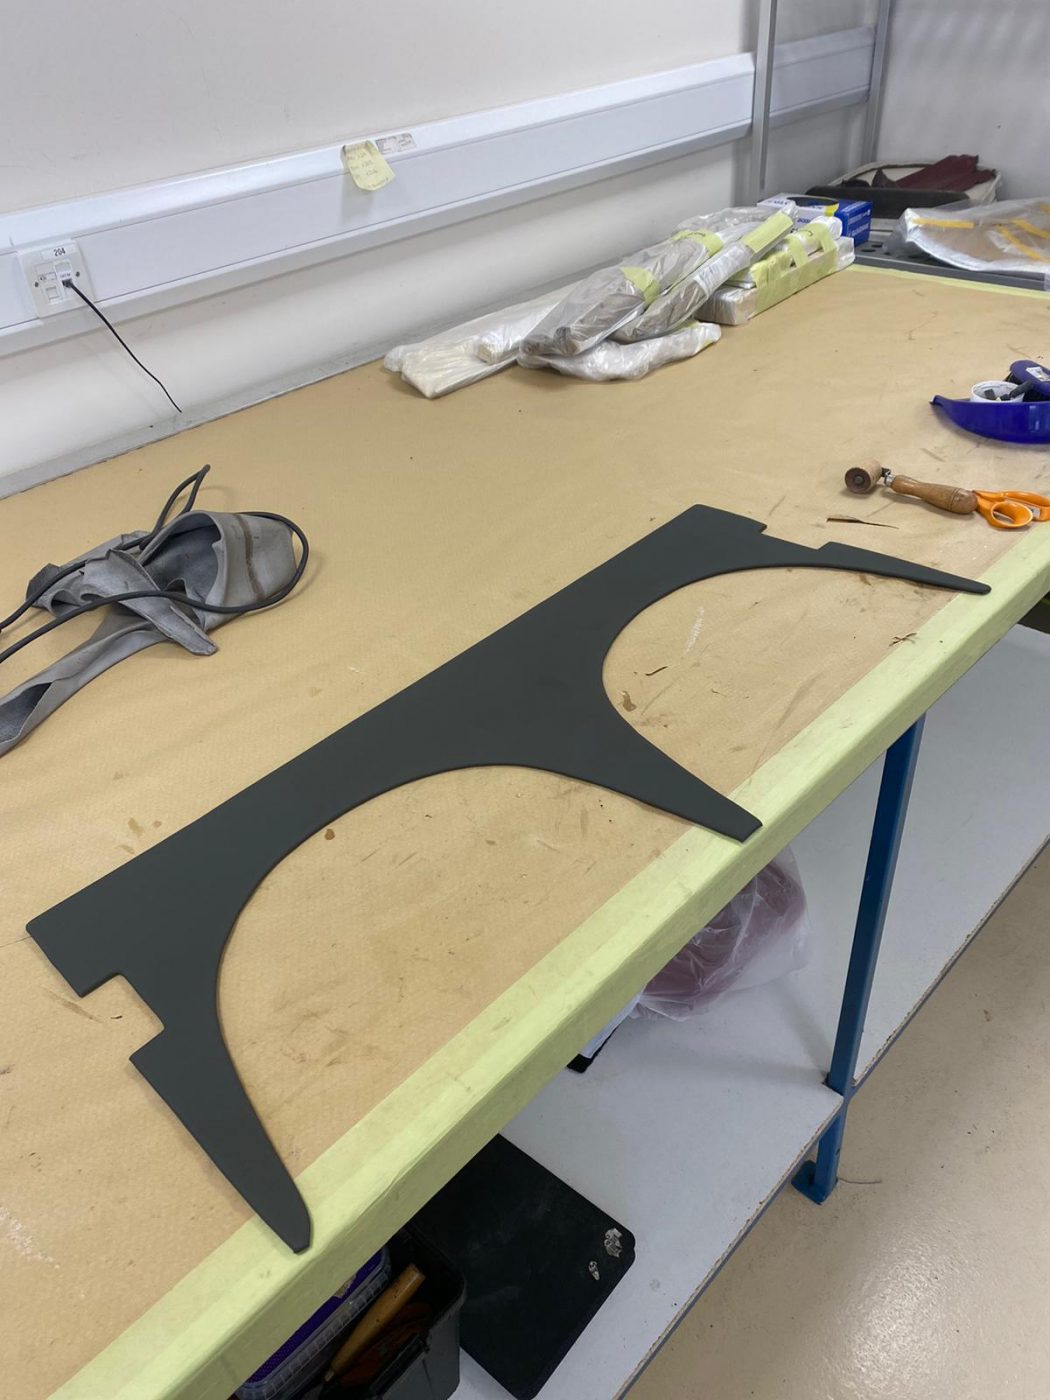
Lydia has continued sanding down the primer on various parts for the 1973 Jaguar E-Type Roadster Series 3. This time it was the gearbox cover,

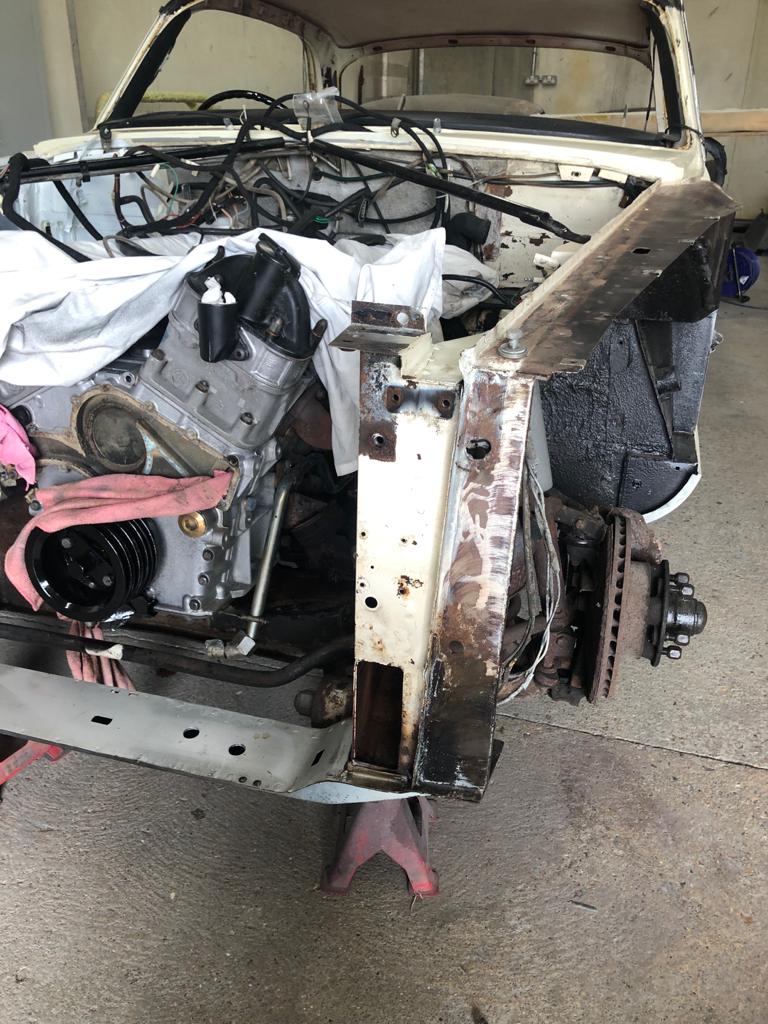
After thinking the 1977 Daimler Double Six would only be in and out rather quickly, James has unfortunately discovered layers of more corrosion than expected

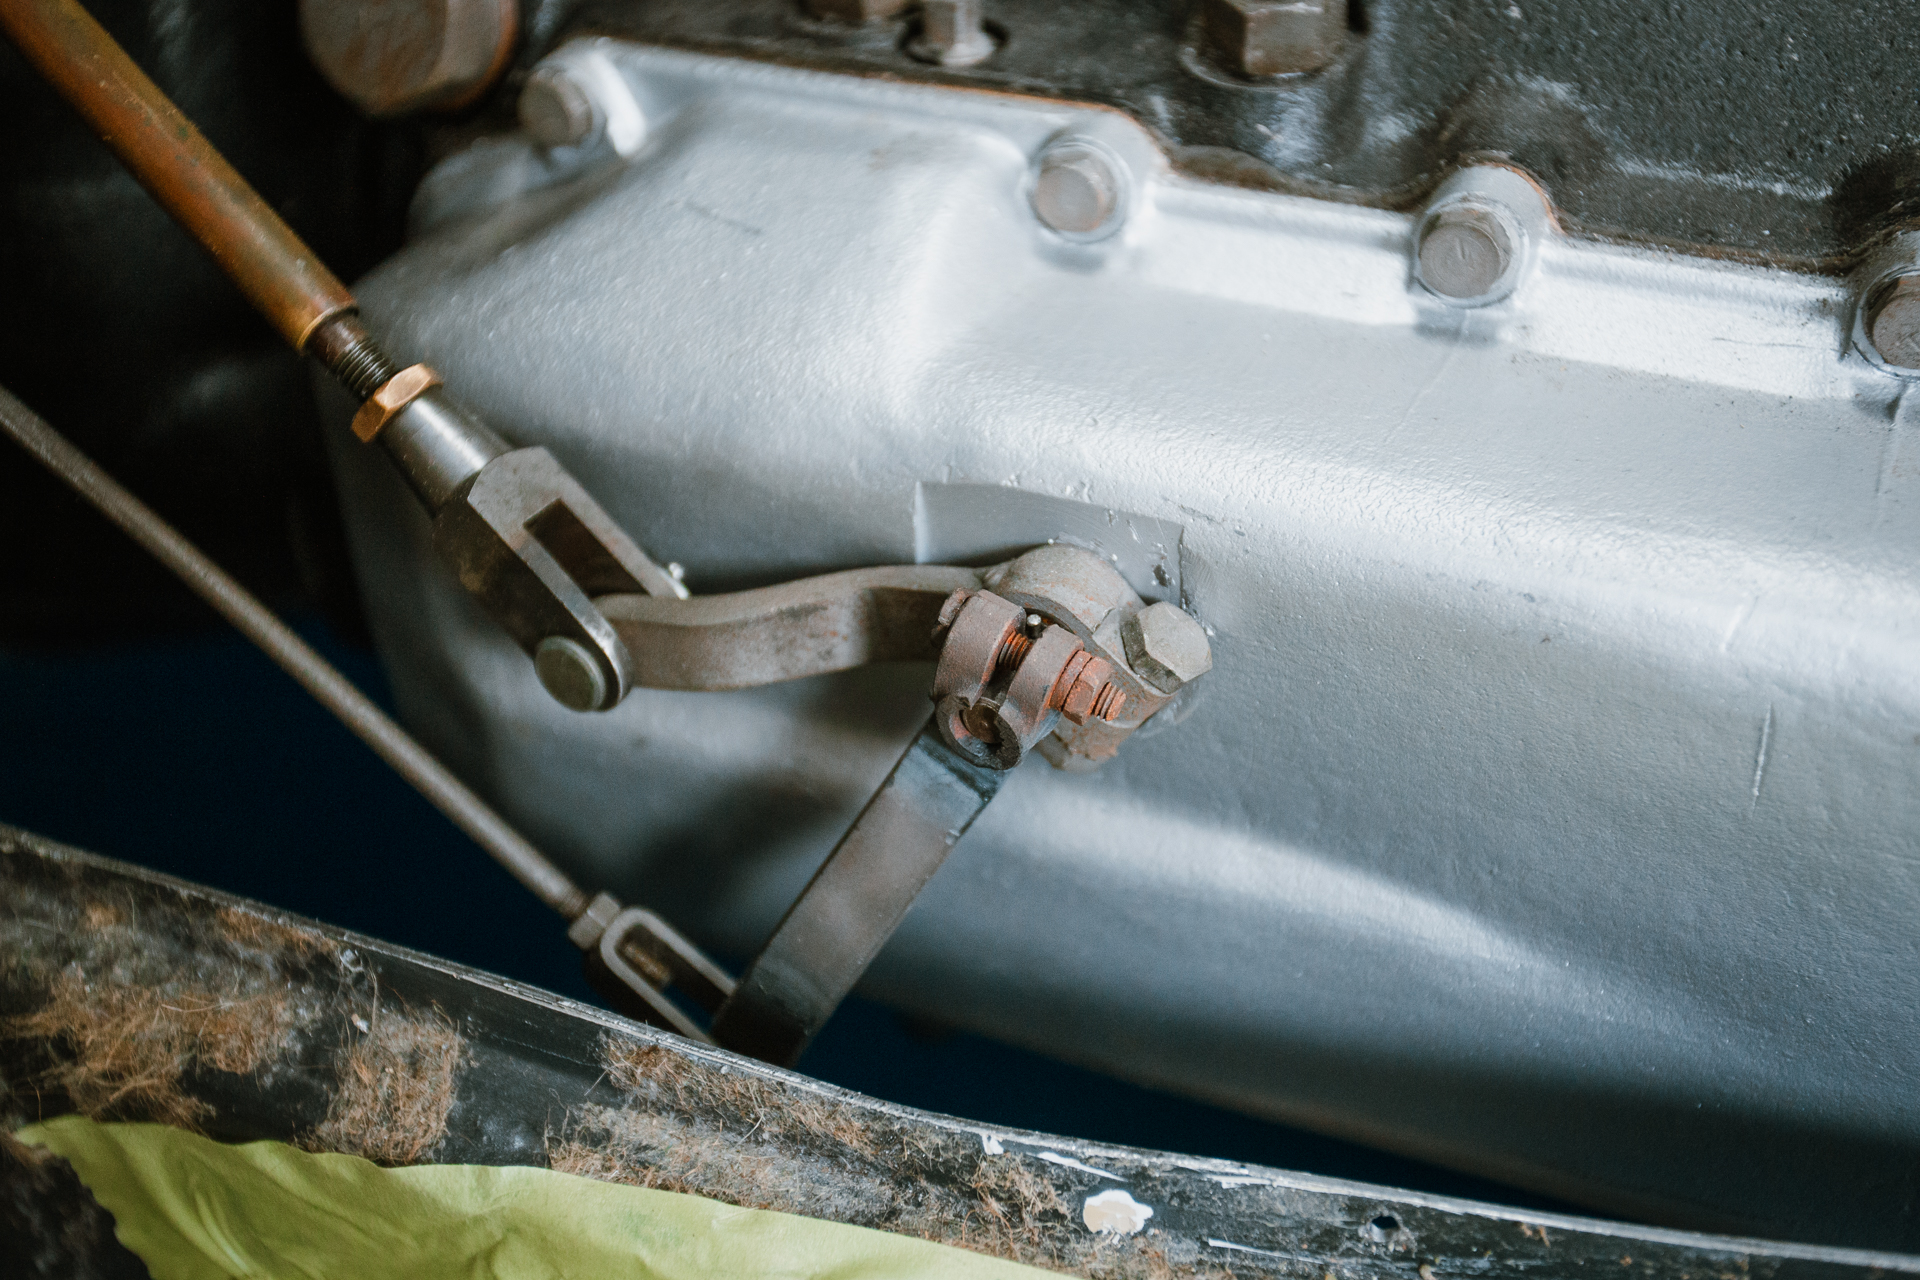
Dave has been working on the 1960 peony red Jensen 541S. He’s adjusted the cover for the gearbox so it can come apart for an
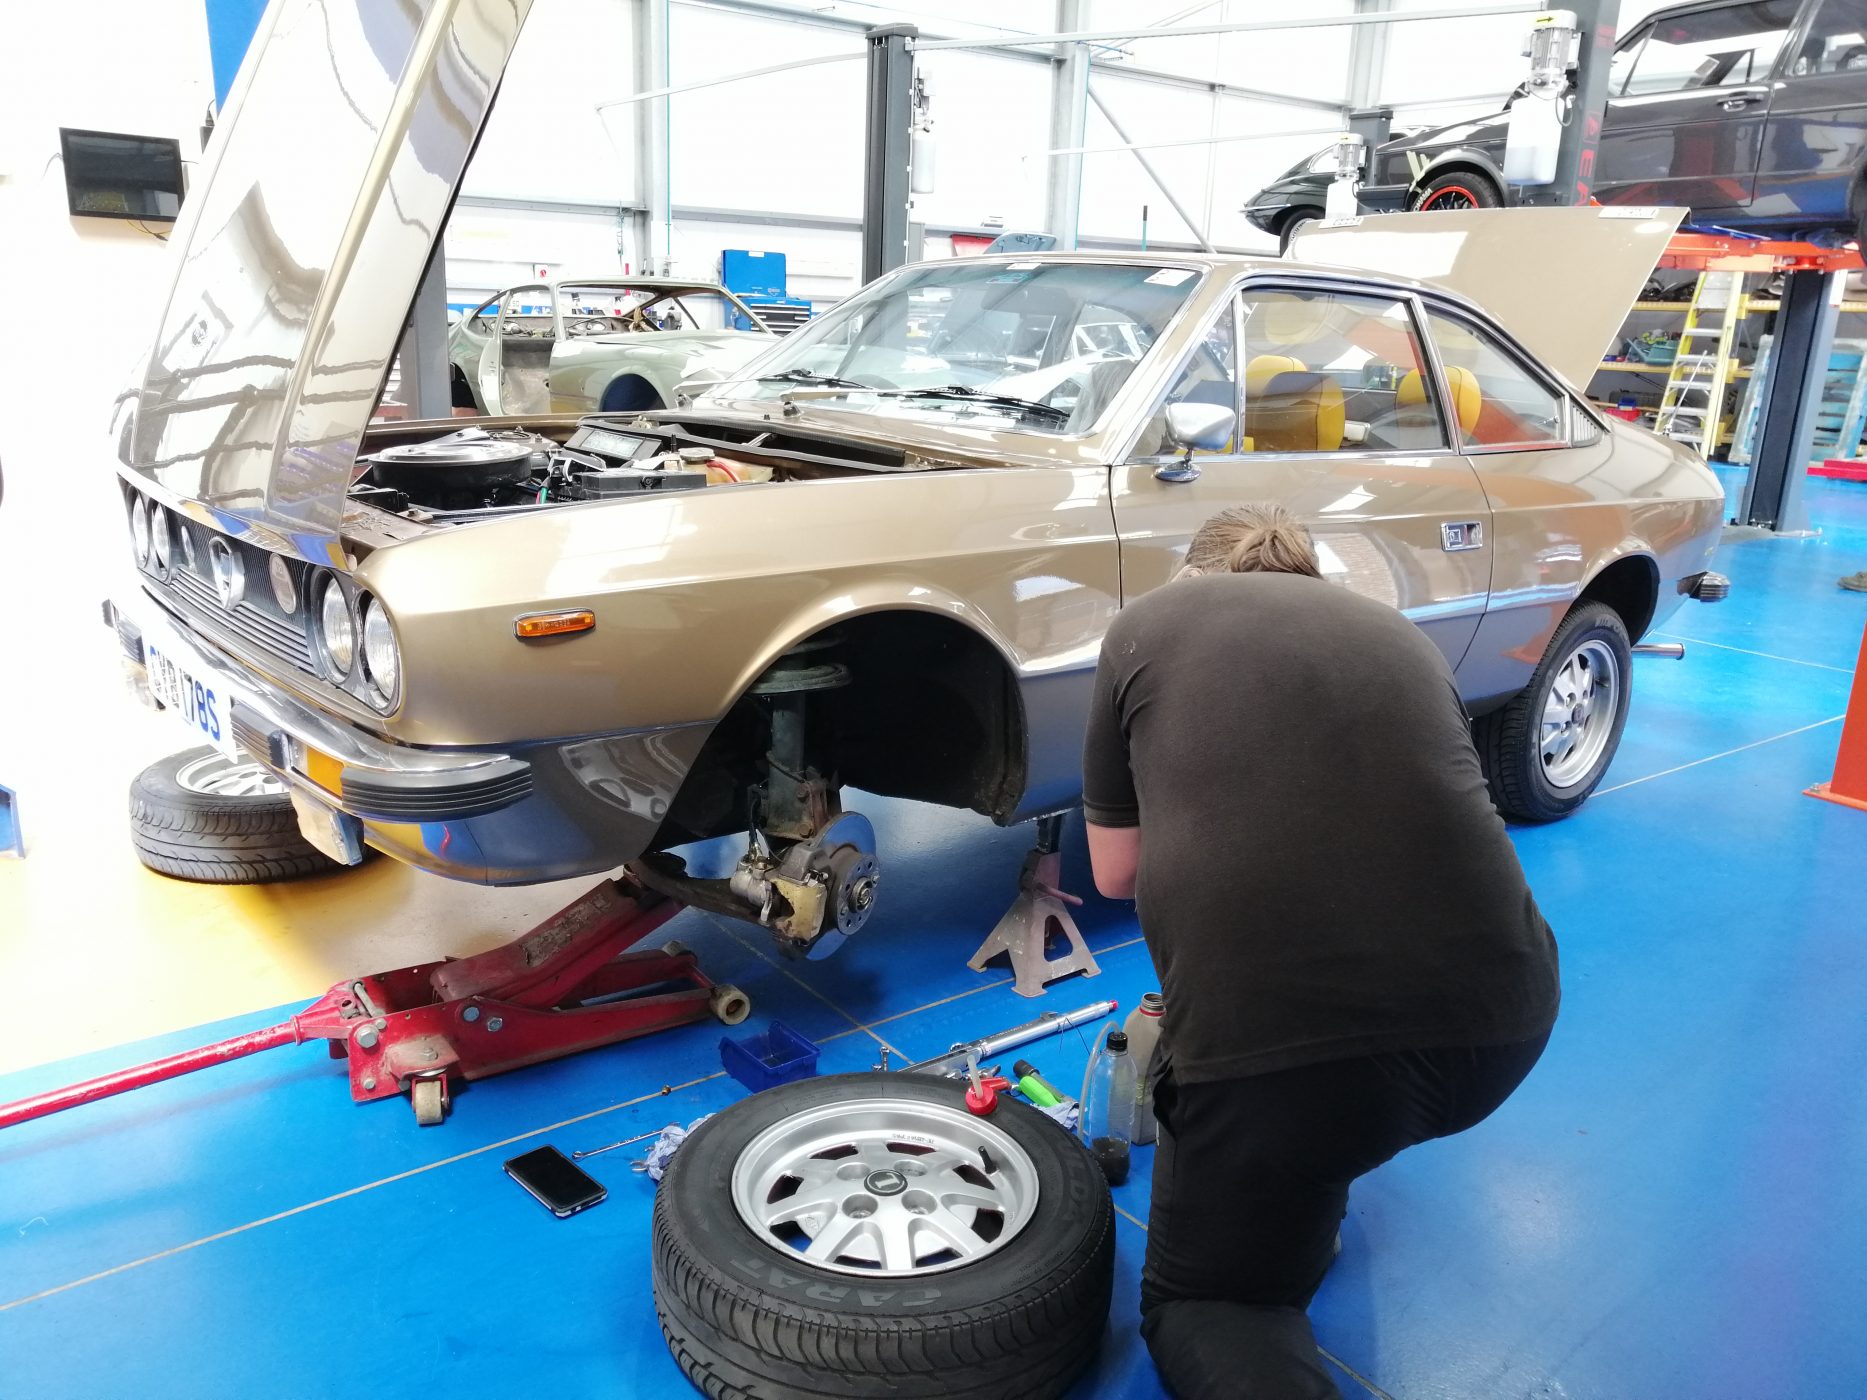
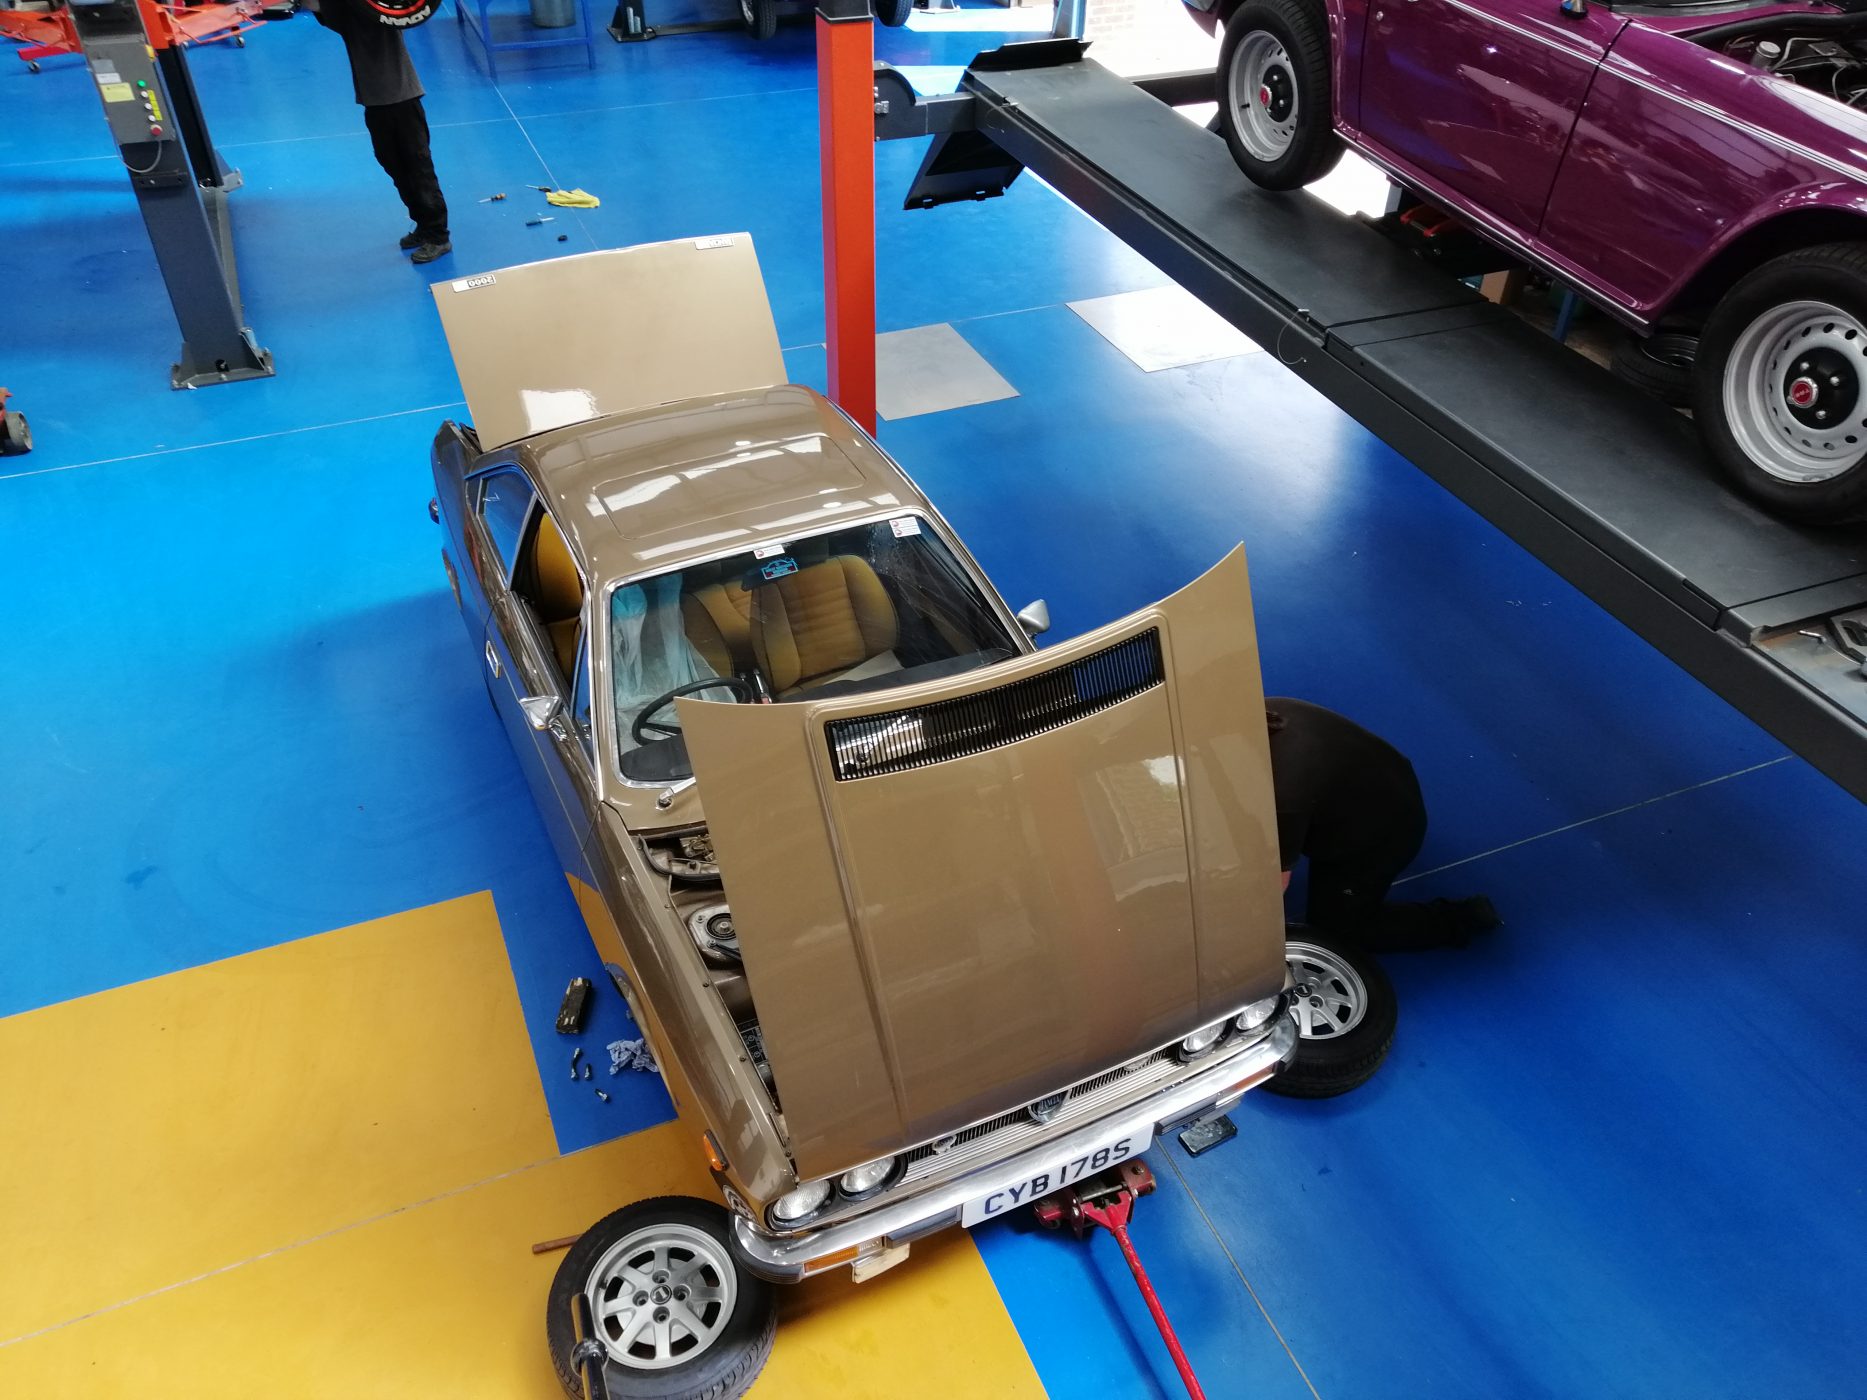
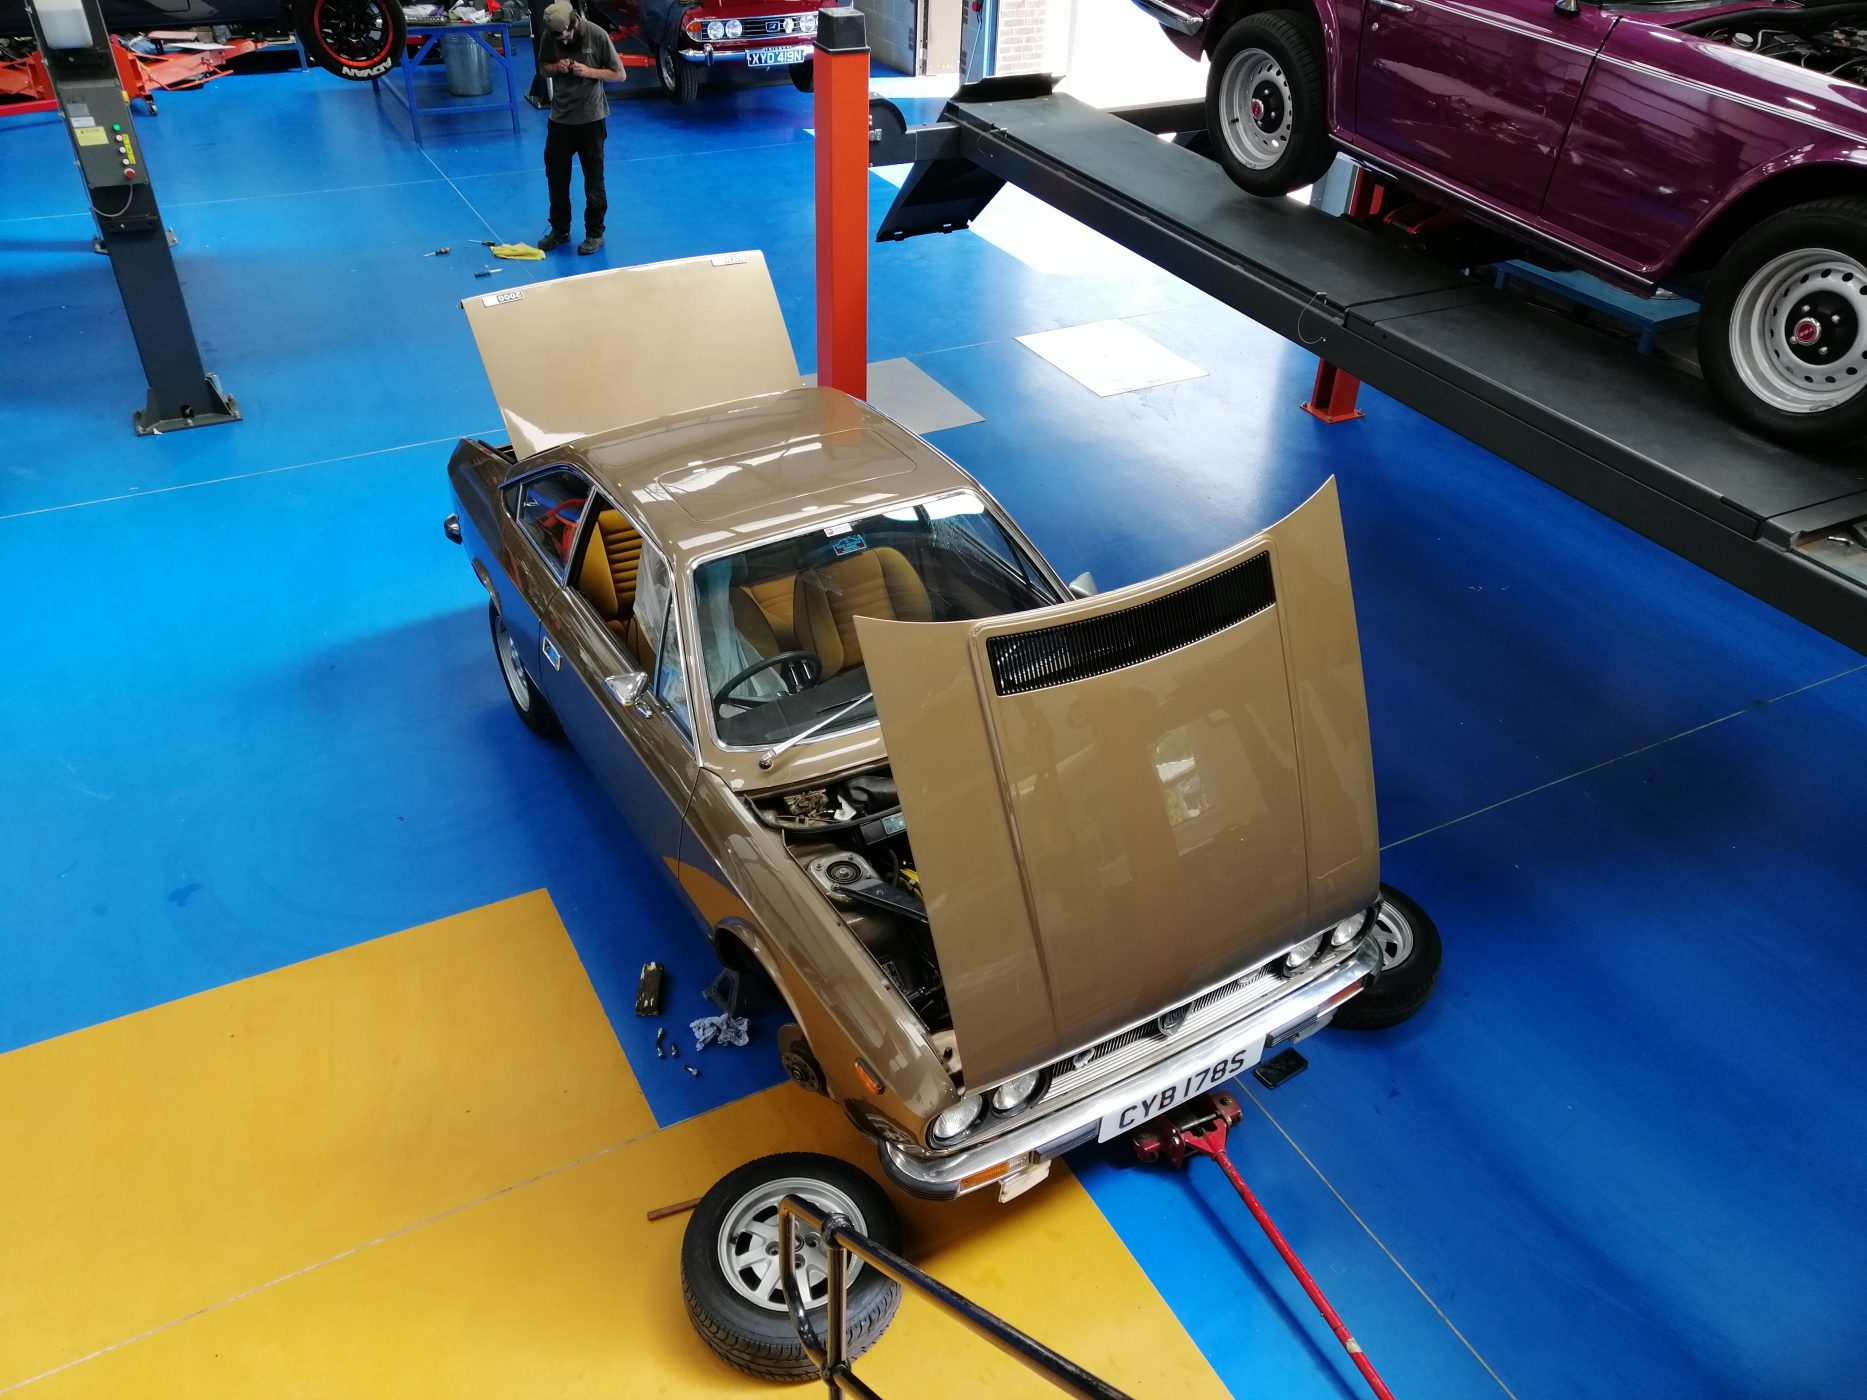
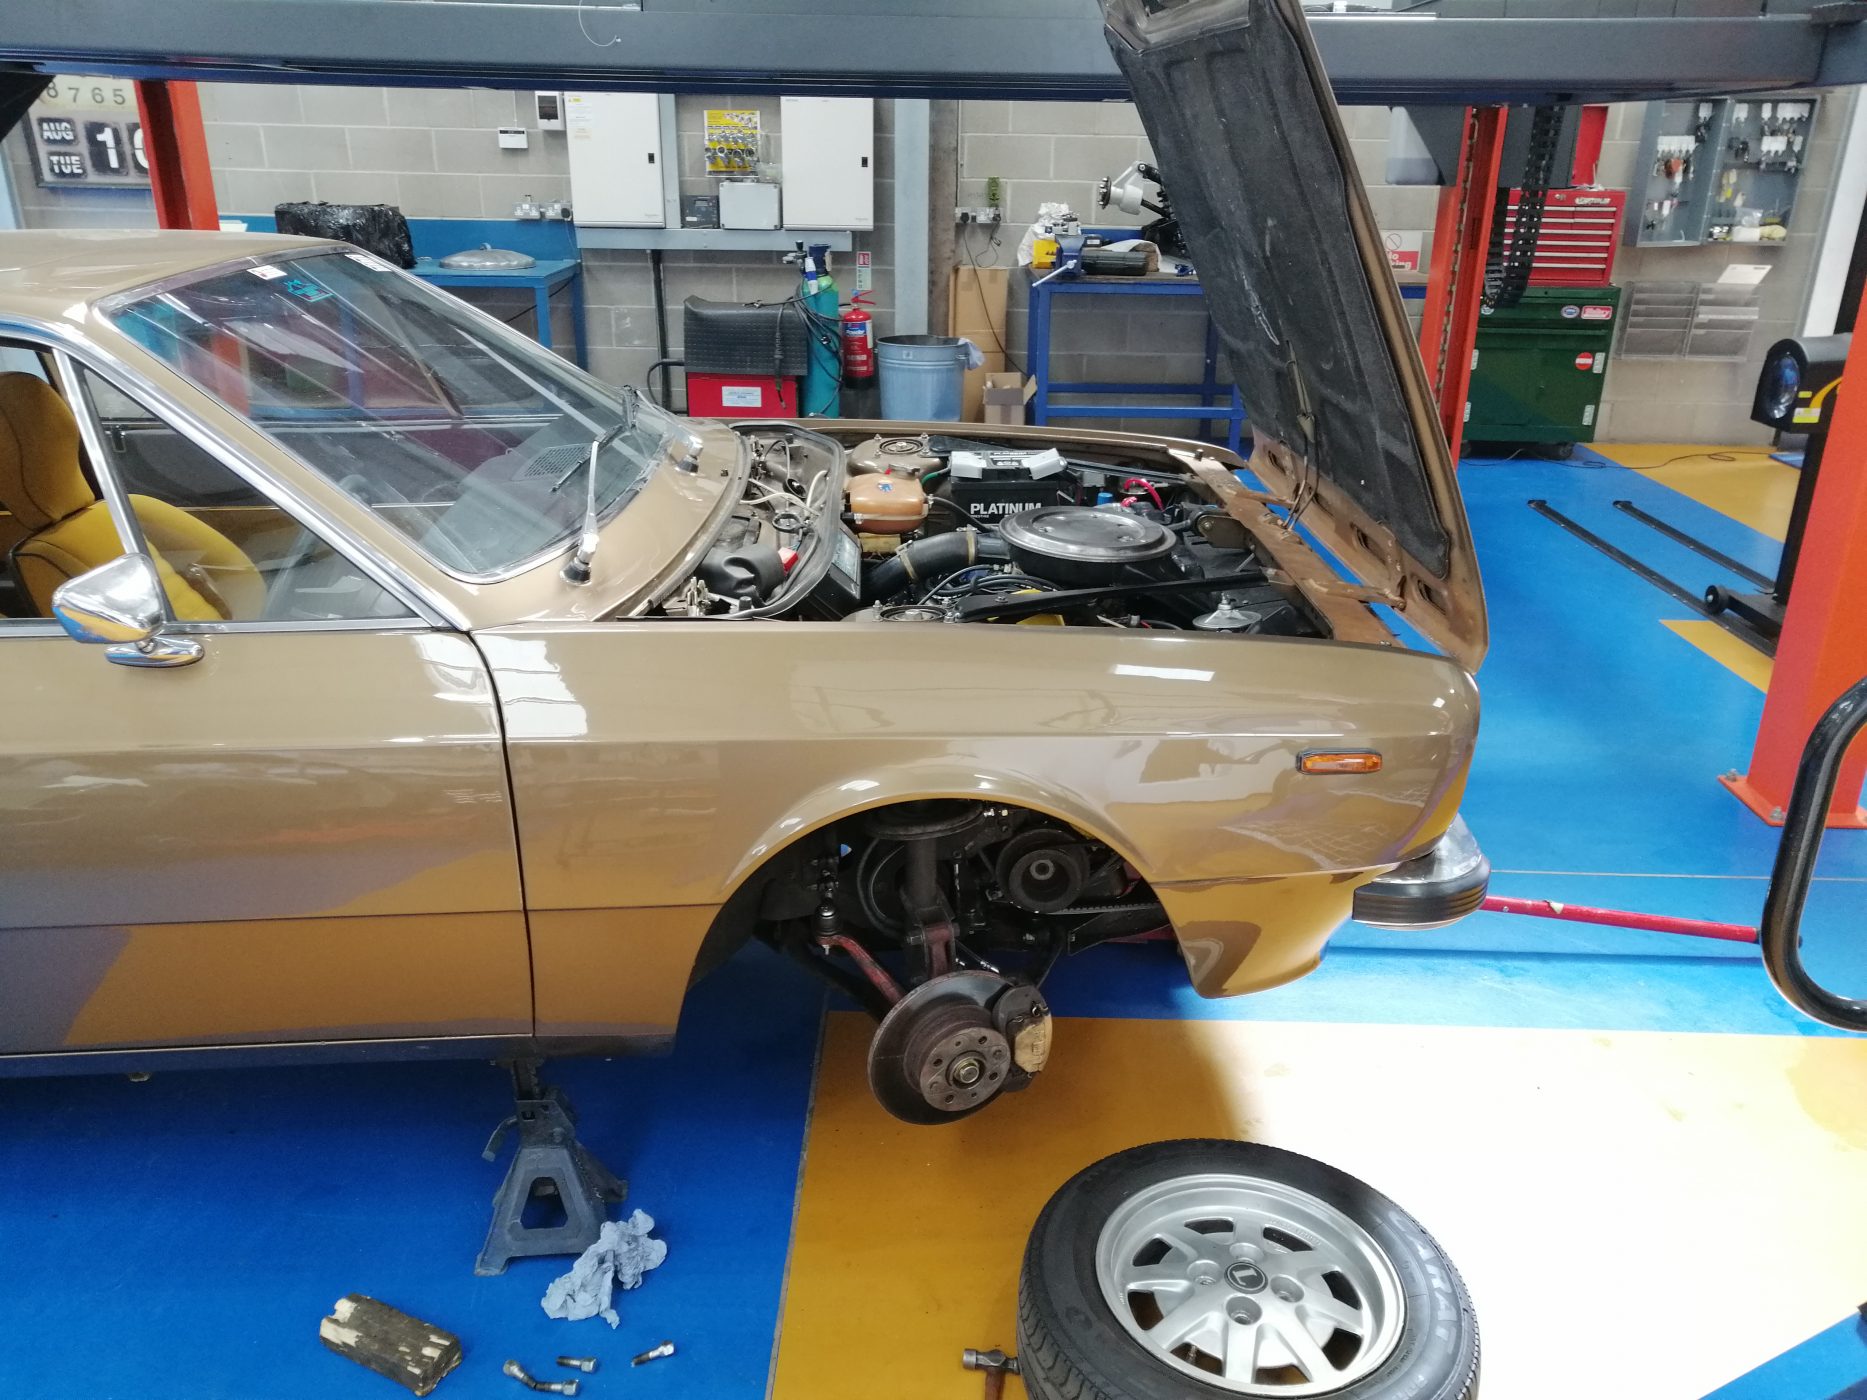
Our 1978 bronze Lancia has recently been getting some TLC. This car is an upcoming competition car and is being serviced just like all the
Source: Classic Cars and Campers Fantastic article from our friends at Classic Cars and Campers; ‘Can E-Fuel Rescue Classic Cars?’ Many classic car owners are
We’ve added a splash of colour to our Beverly Hills 1973 Jaguar E-Type roadster. Having arrived over from the US in an Old English White
Love it or hate it, it’s clear to see the electric car is here to stay. Guy Martin, a renowned lover of petrol-guzzling engines, is

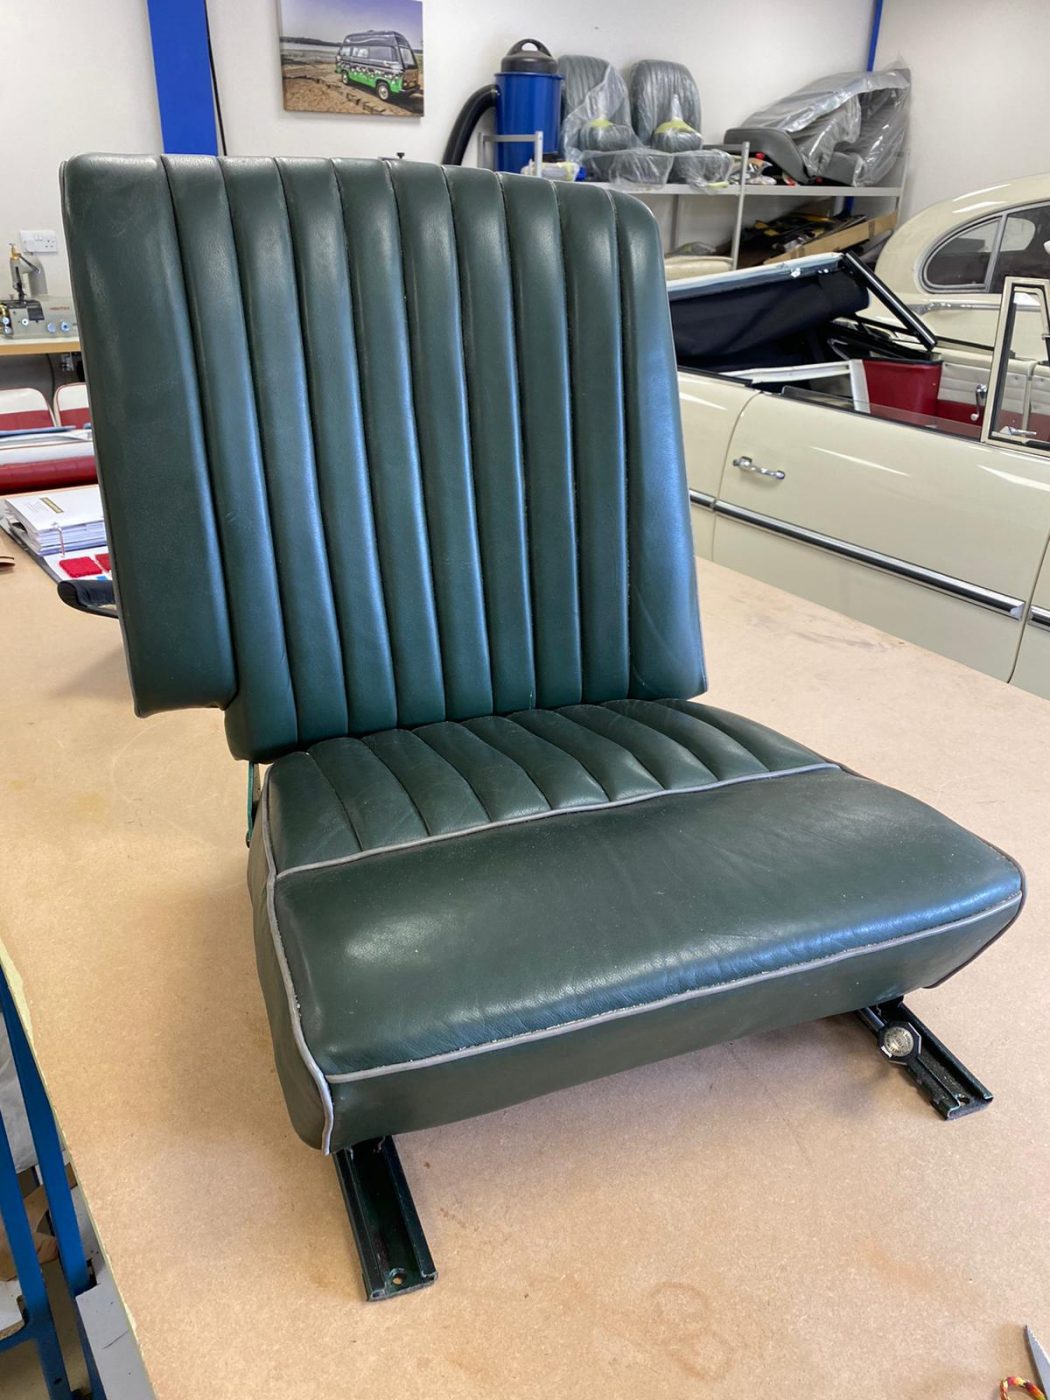
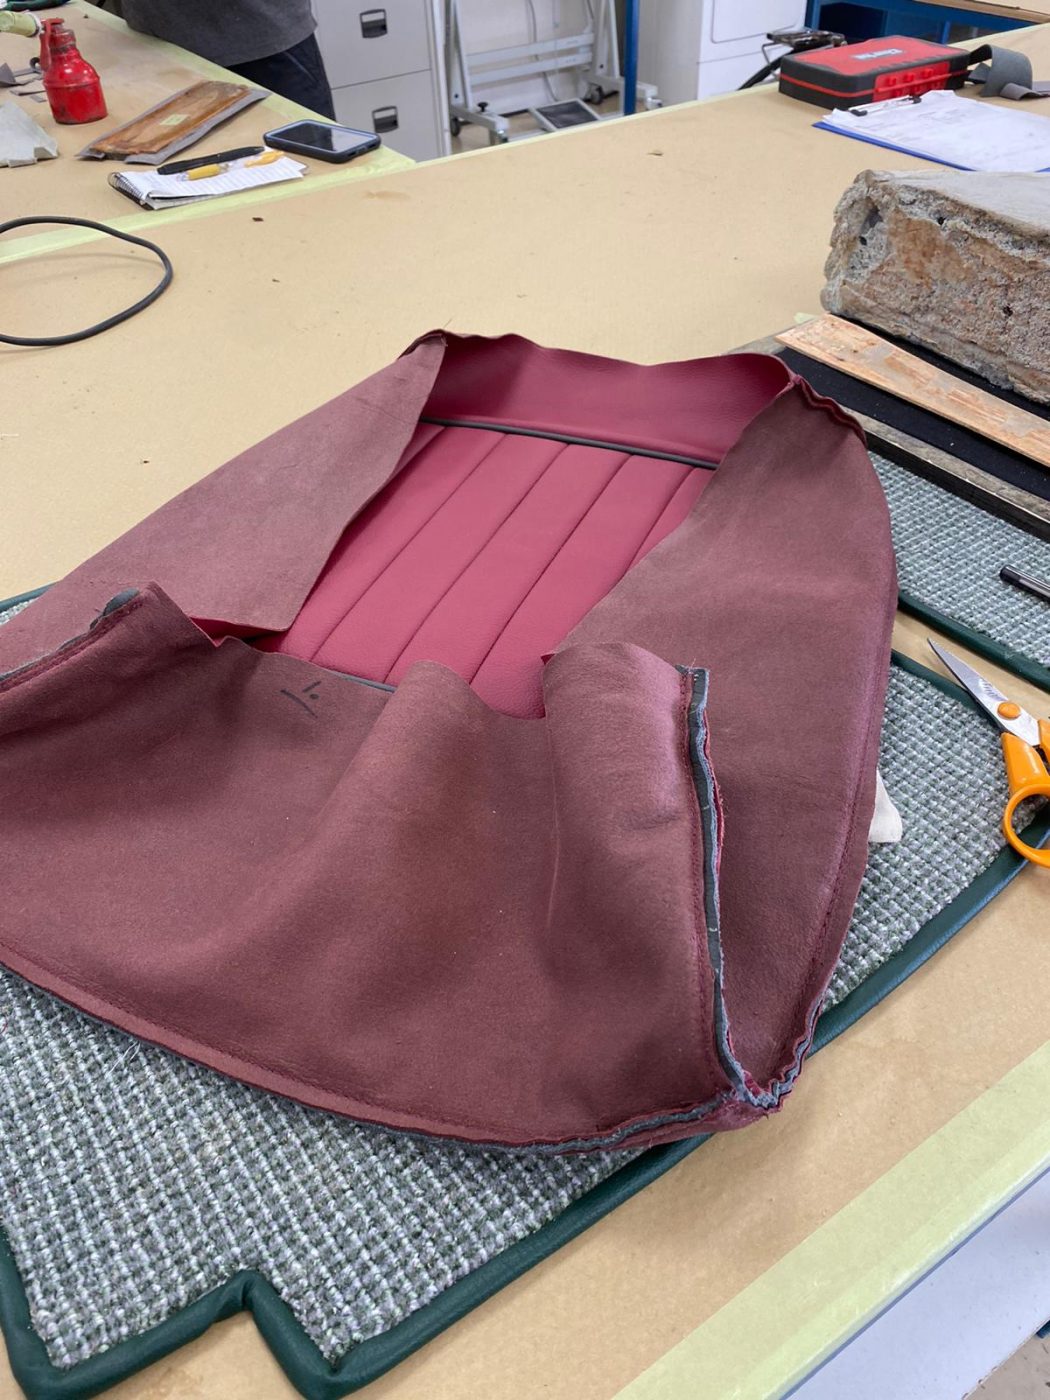
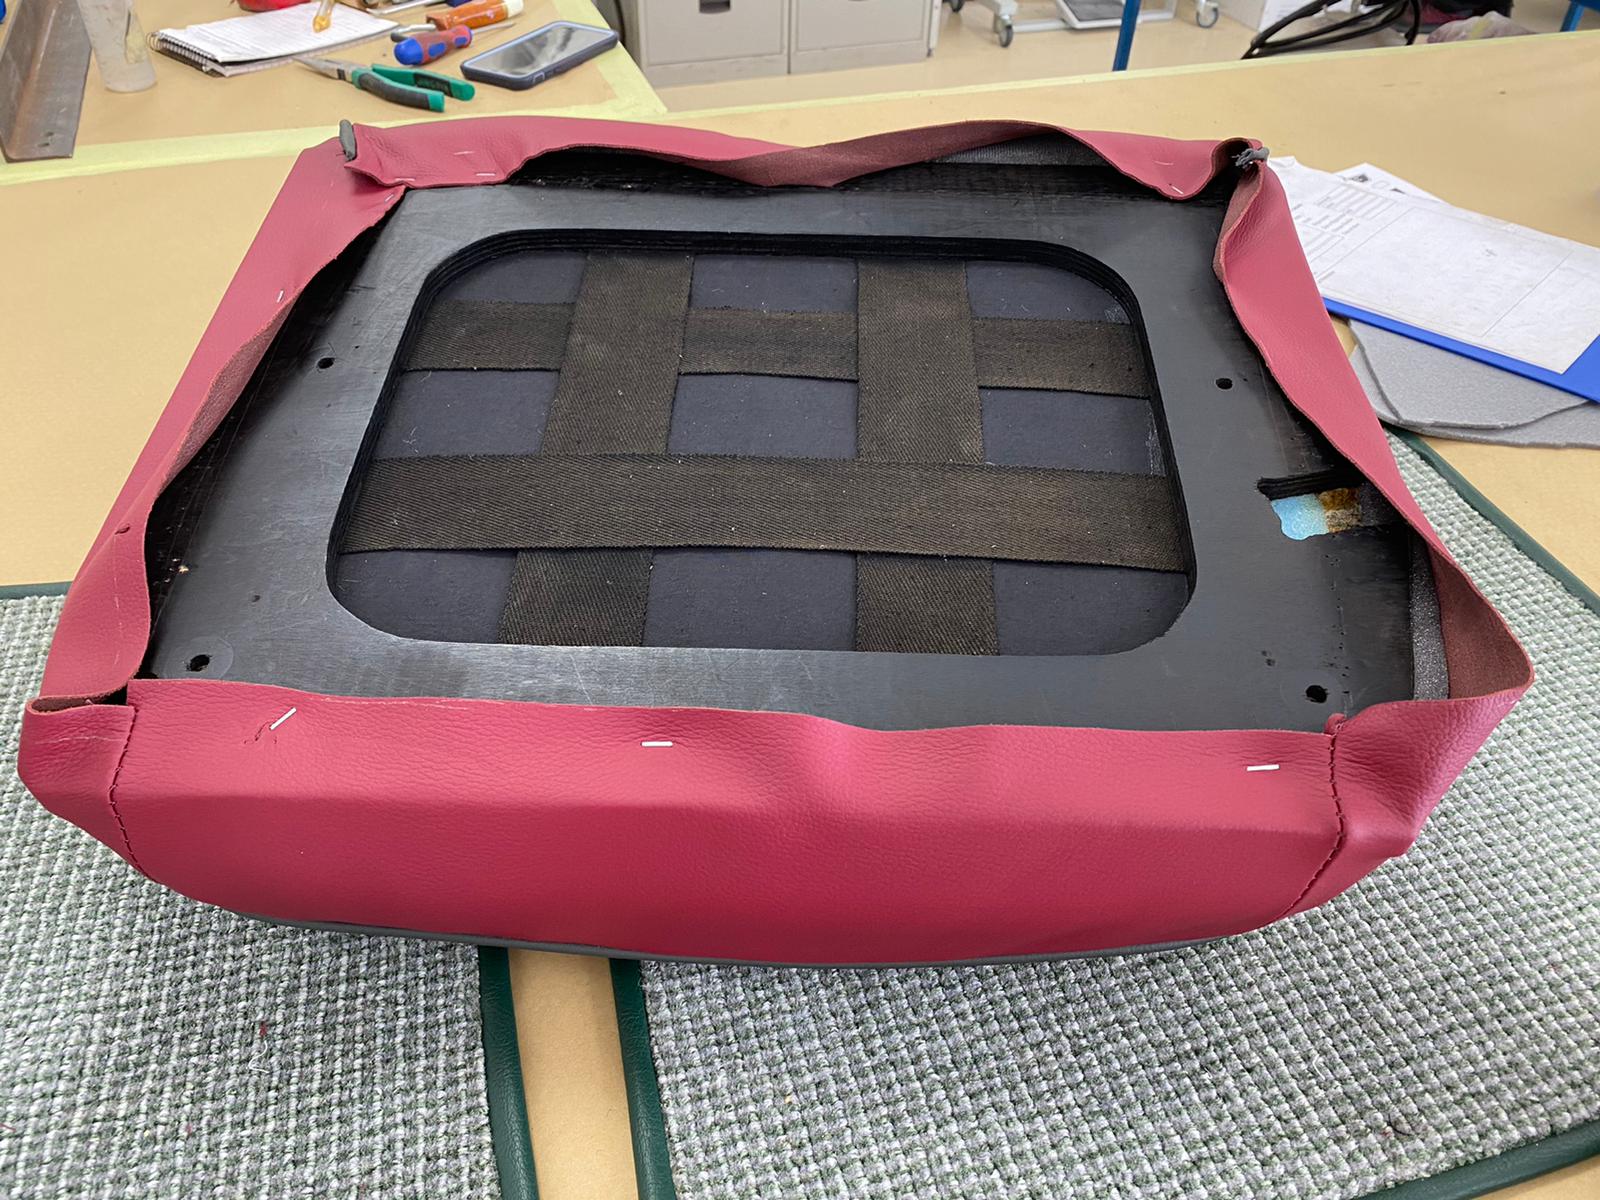
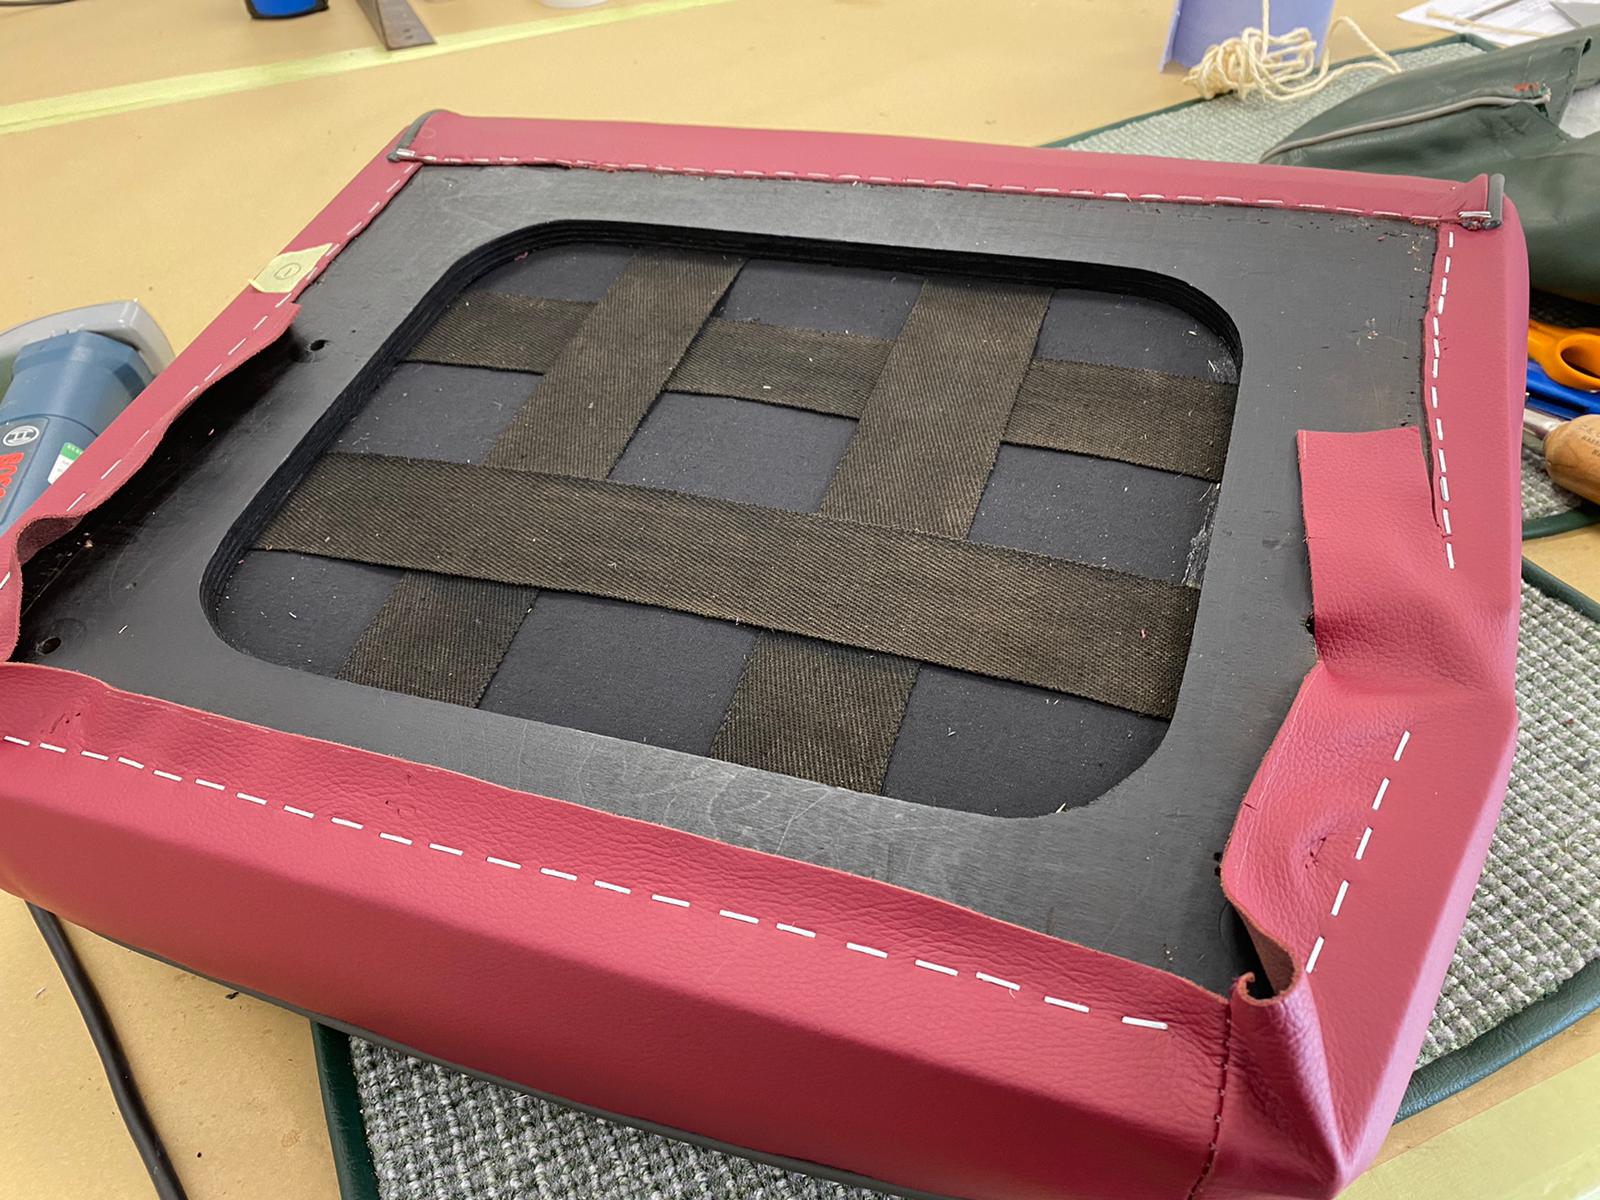
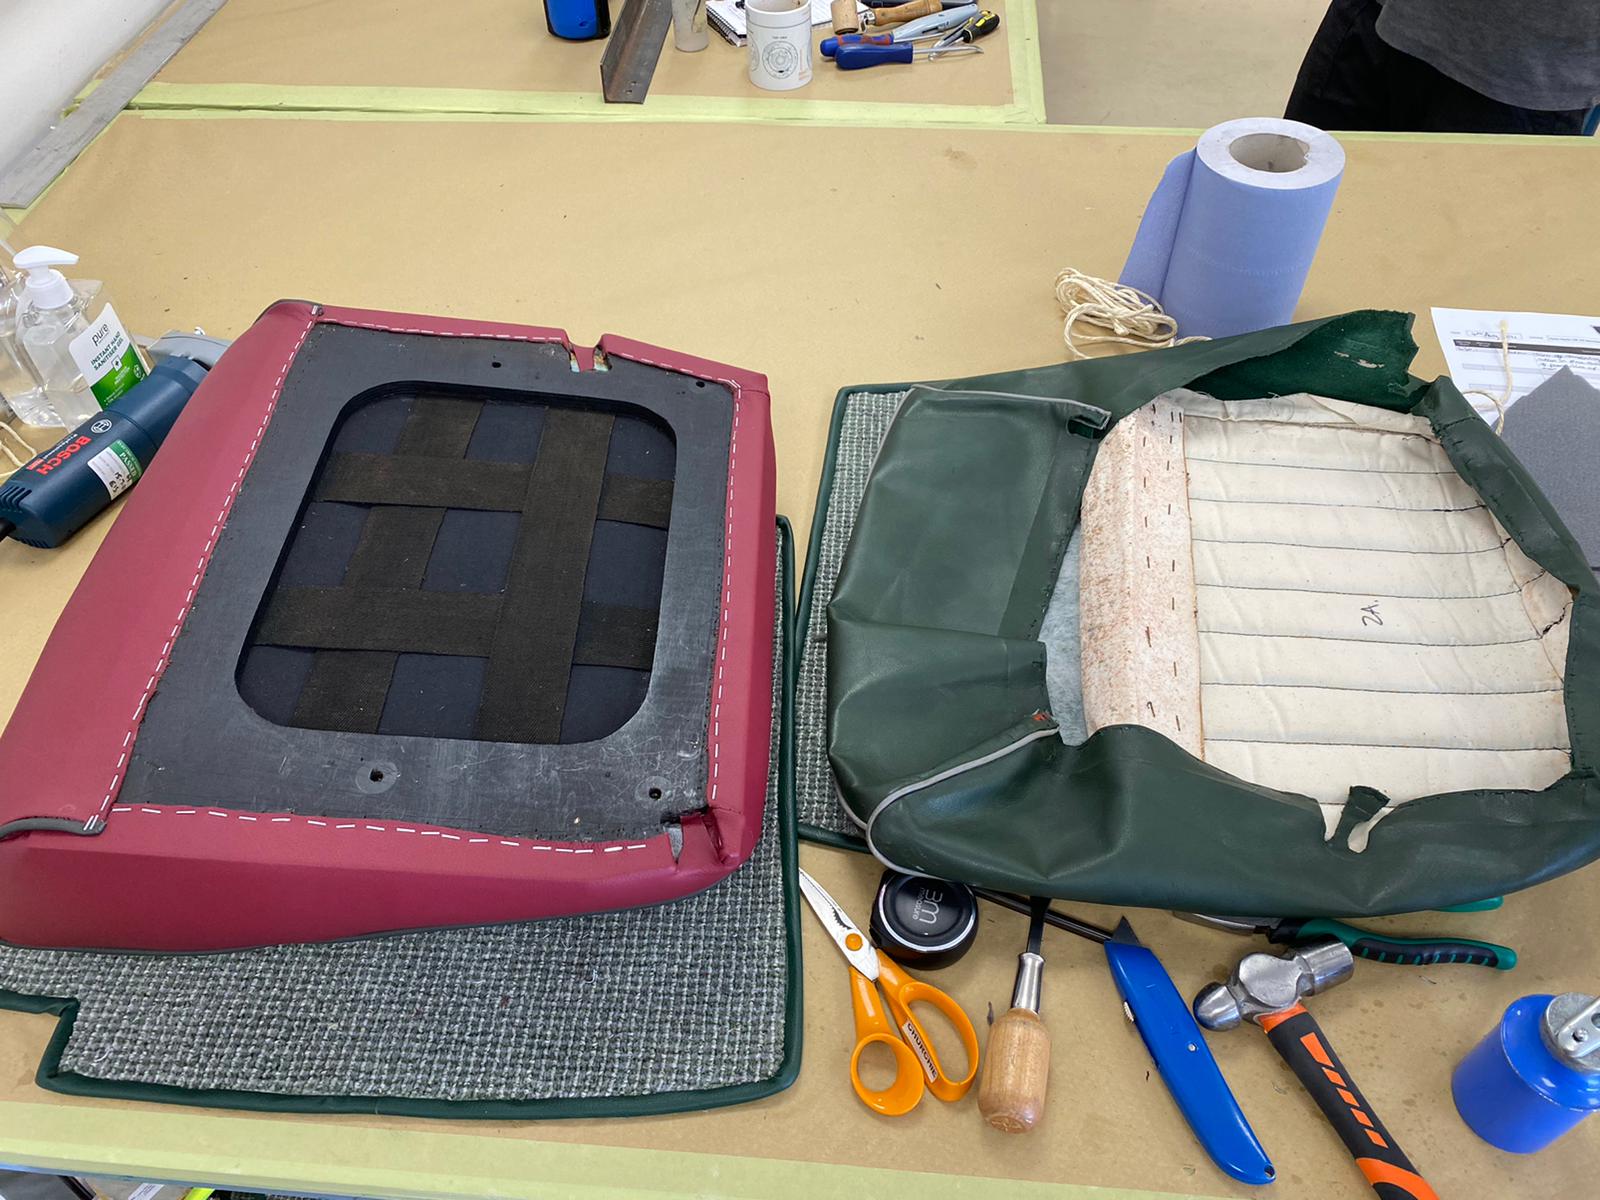
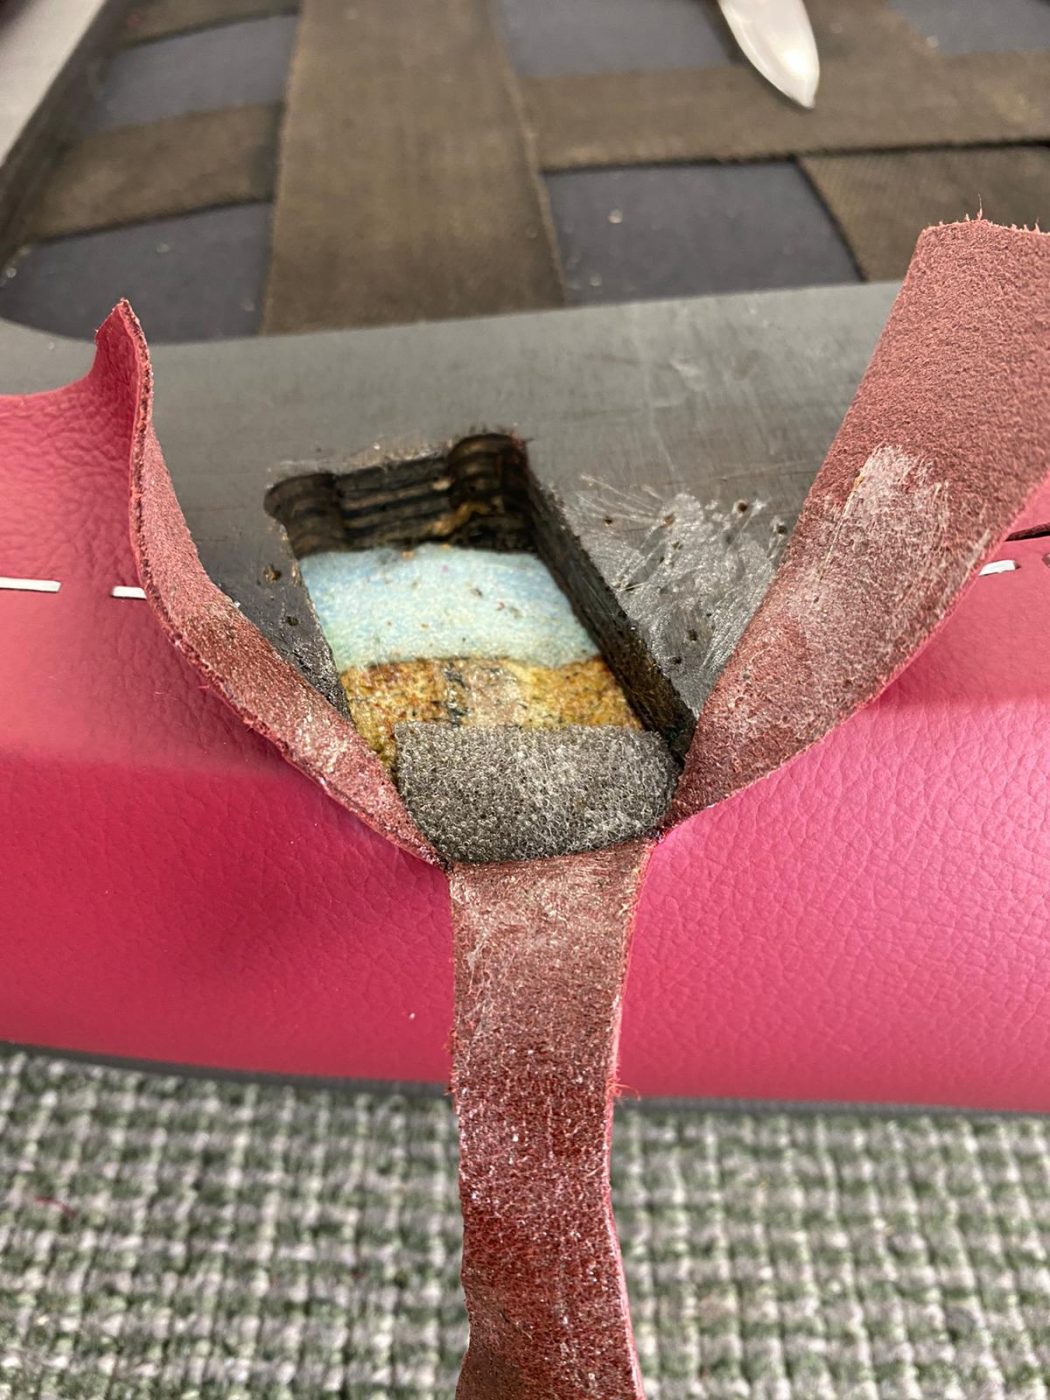
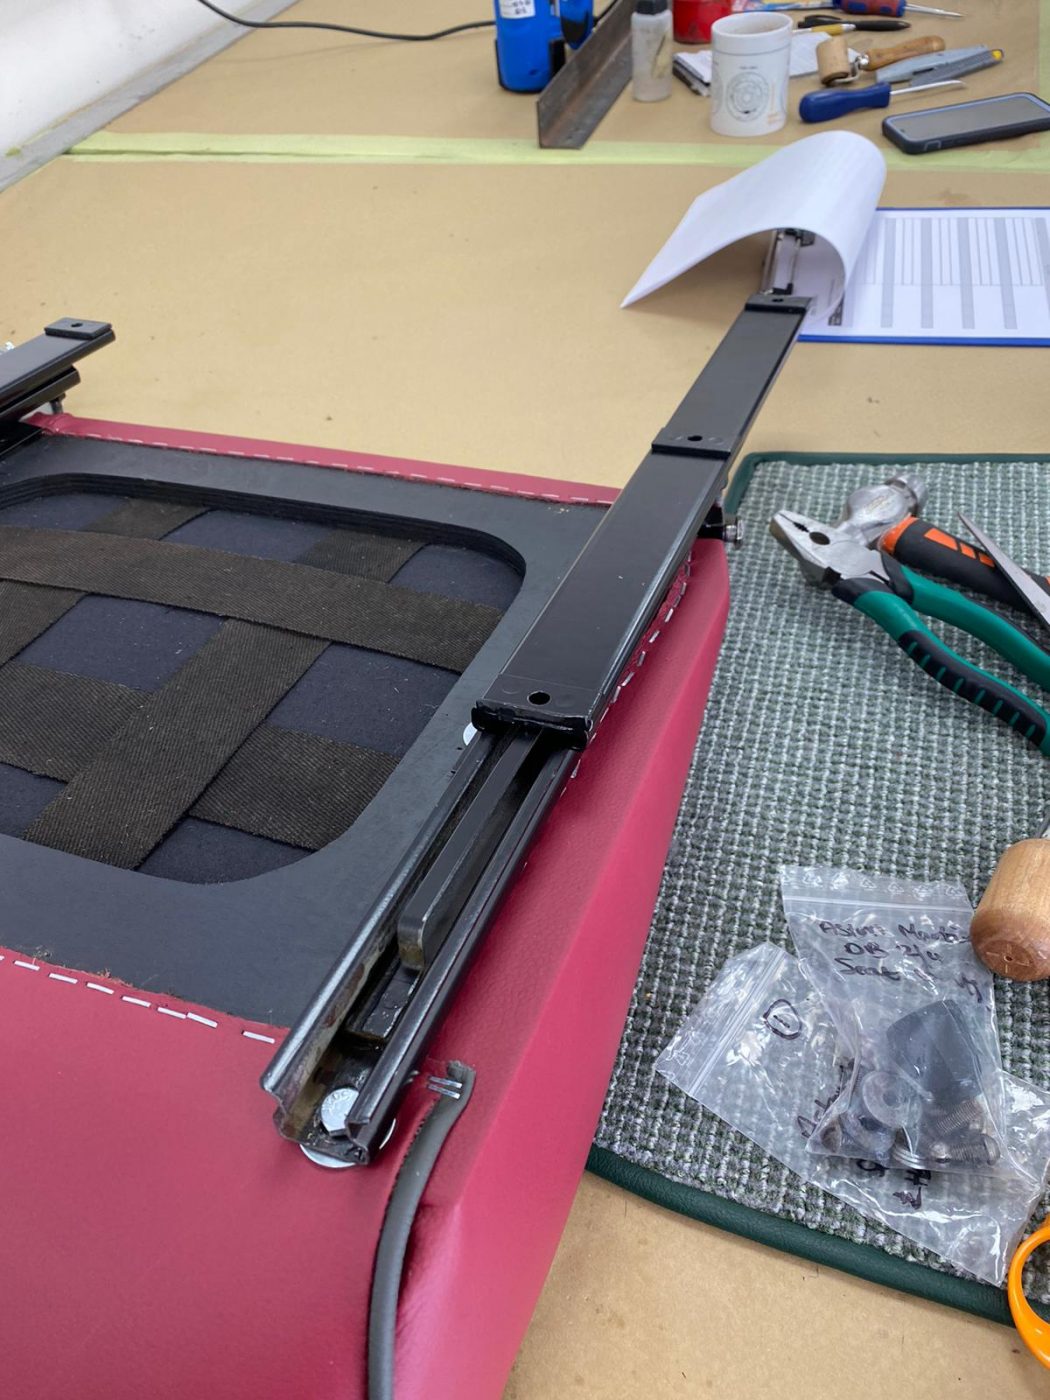
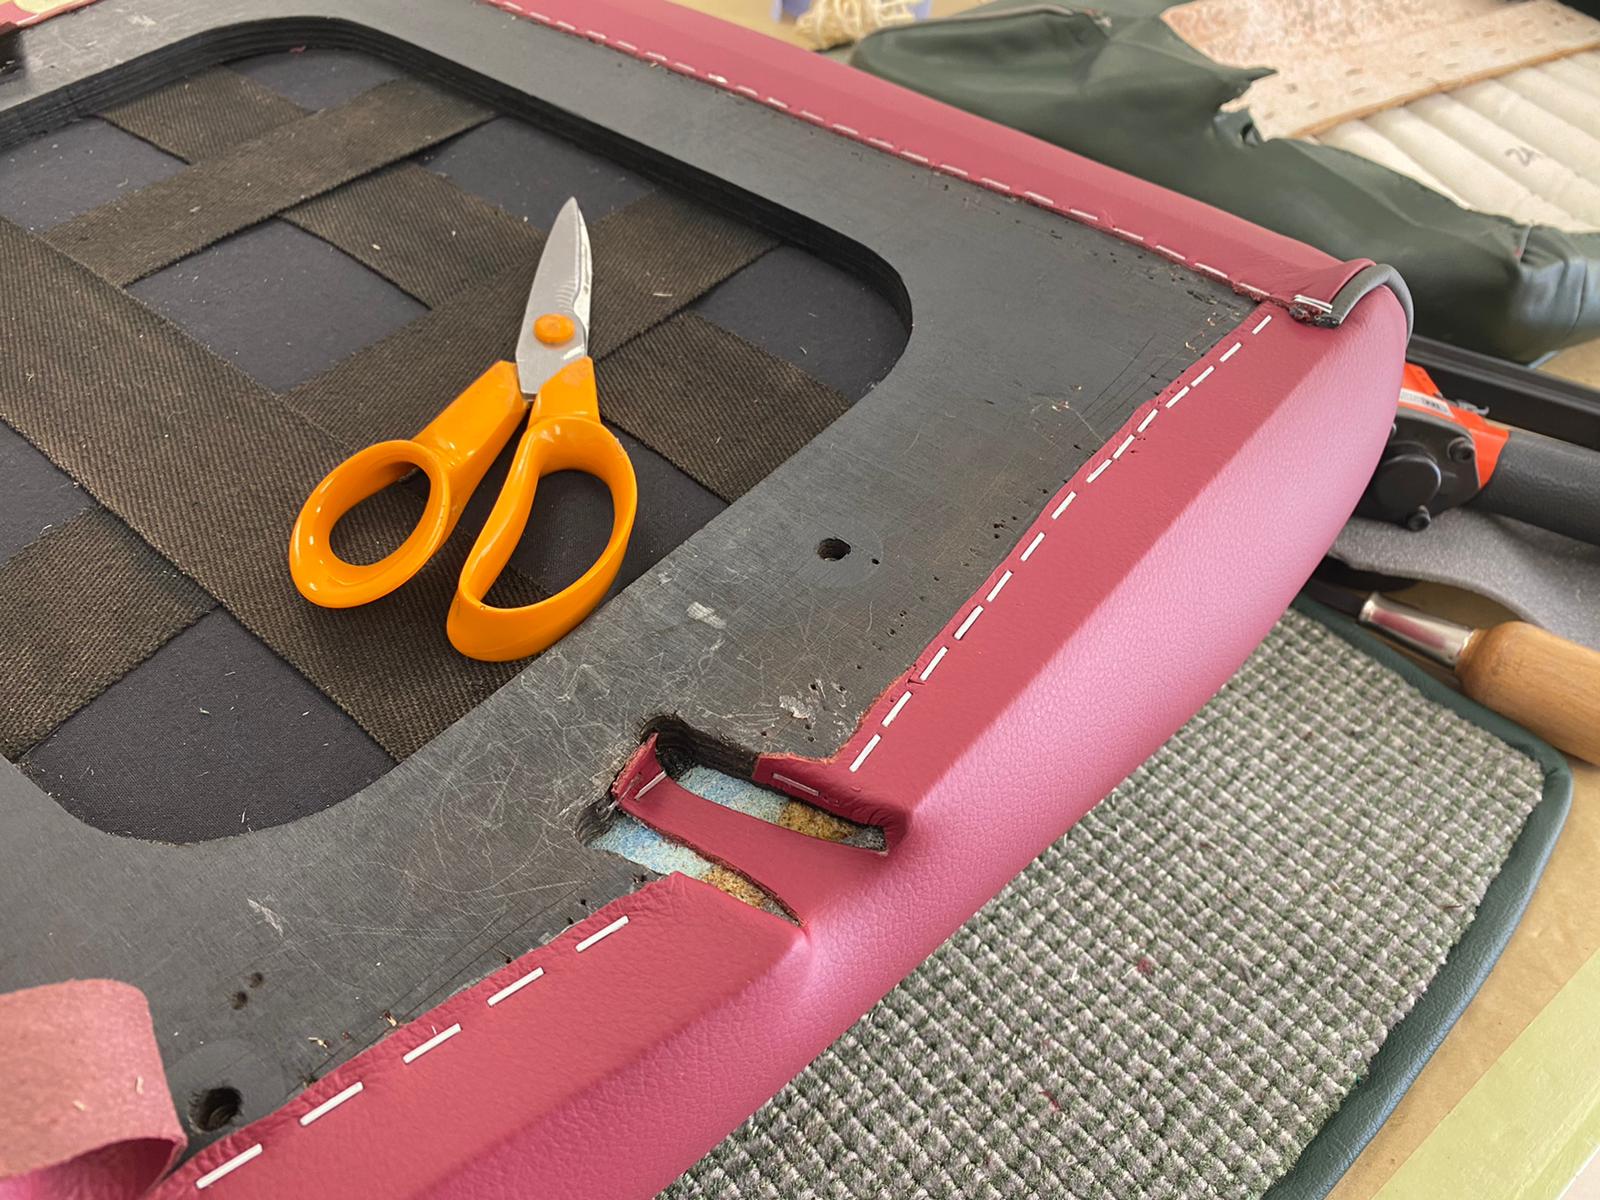
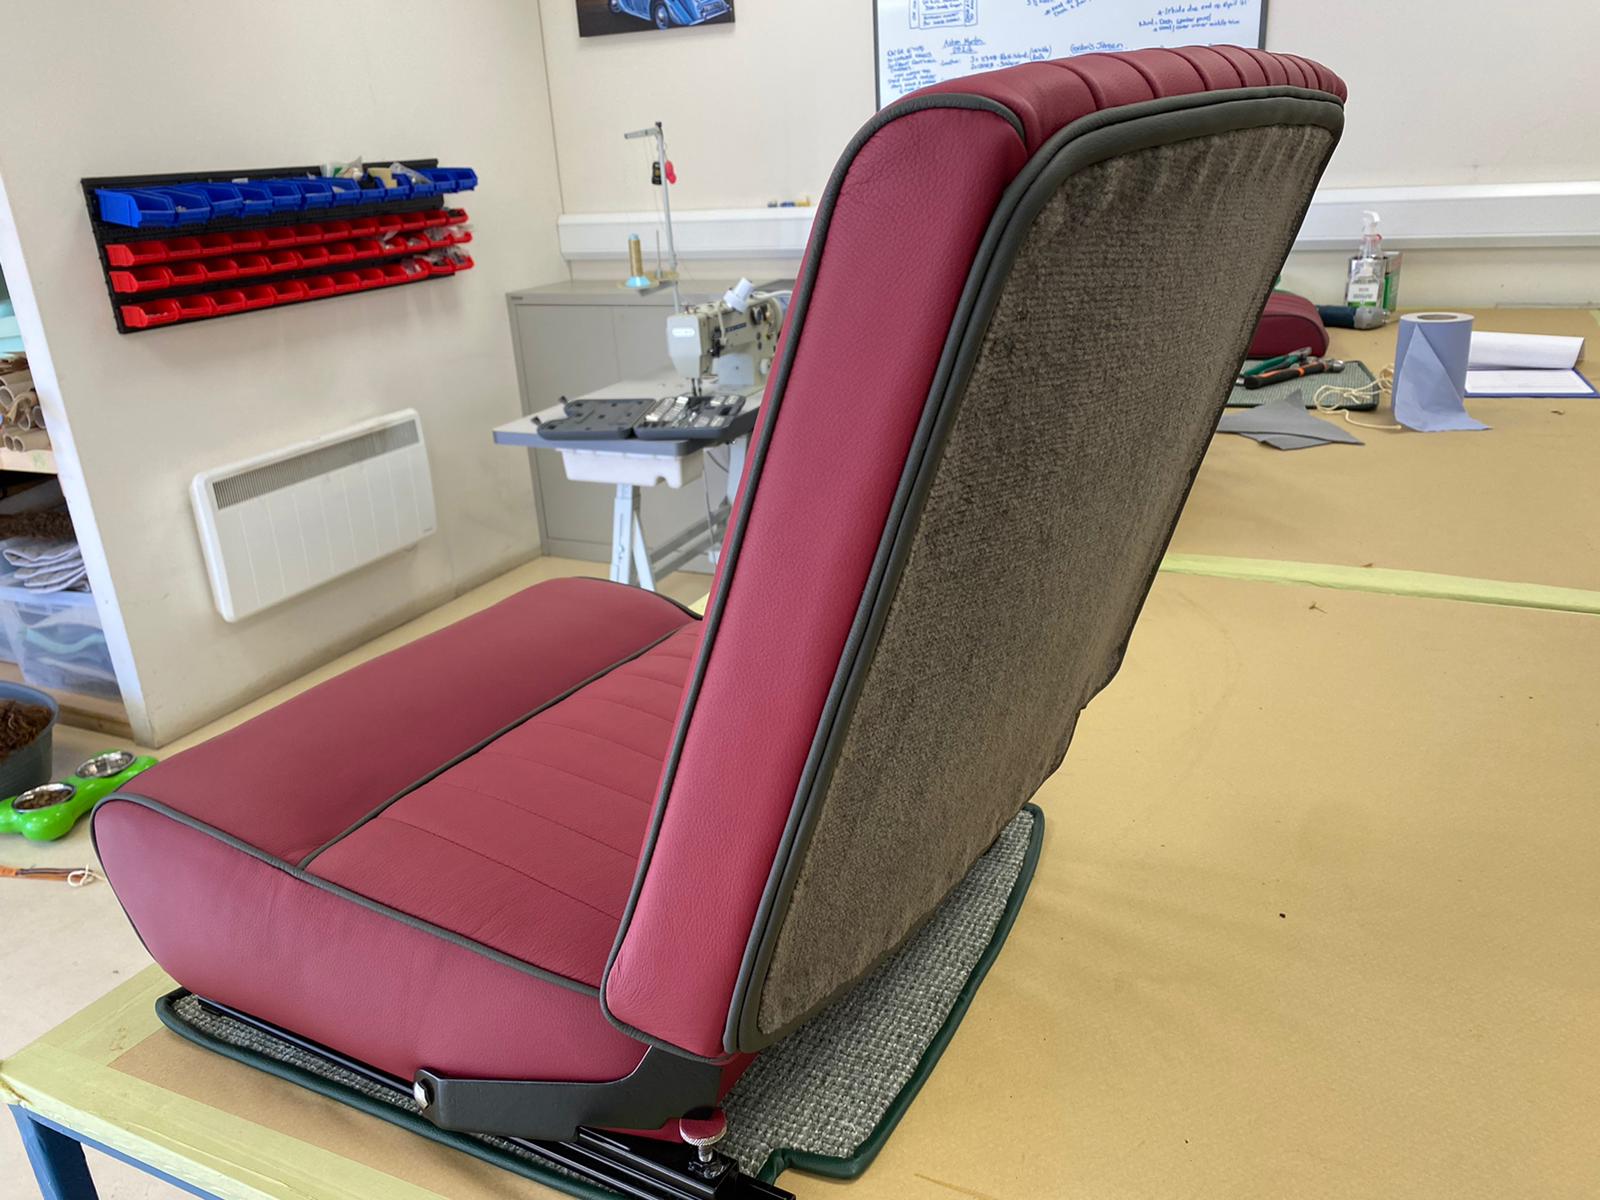
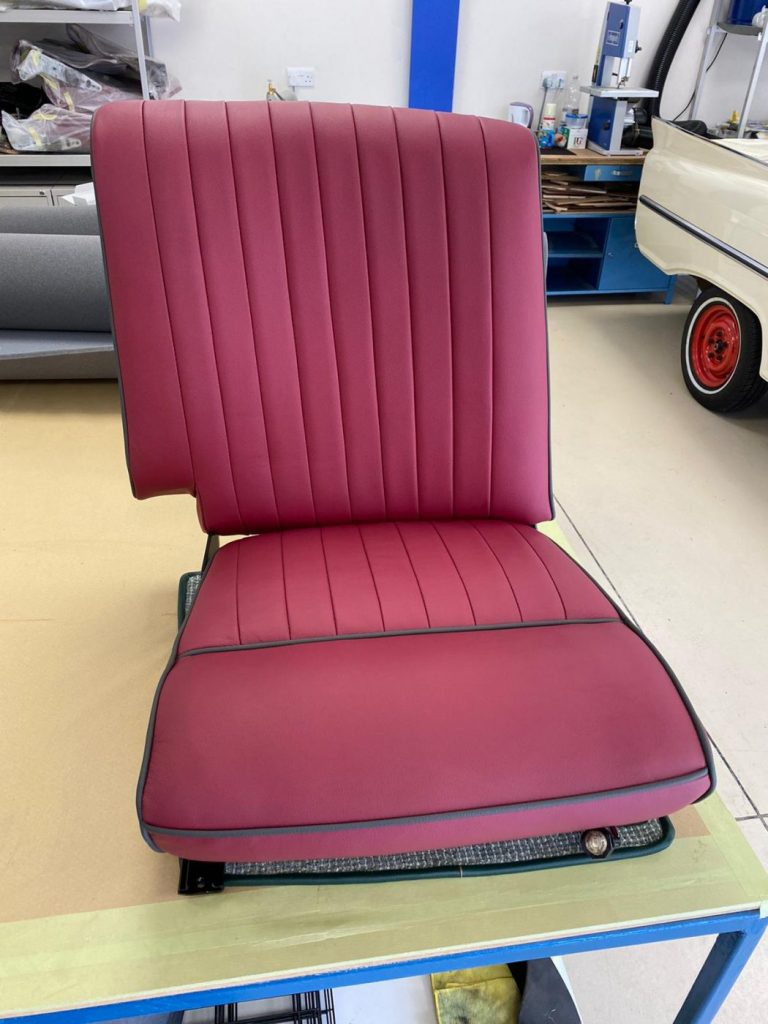
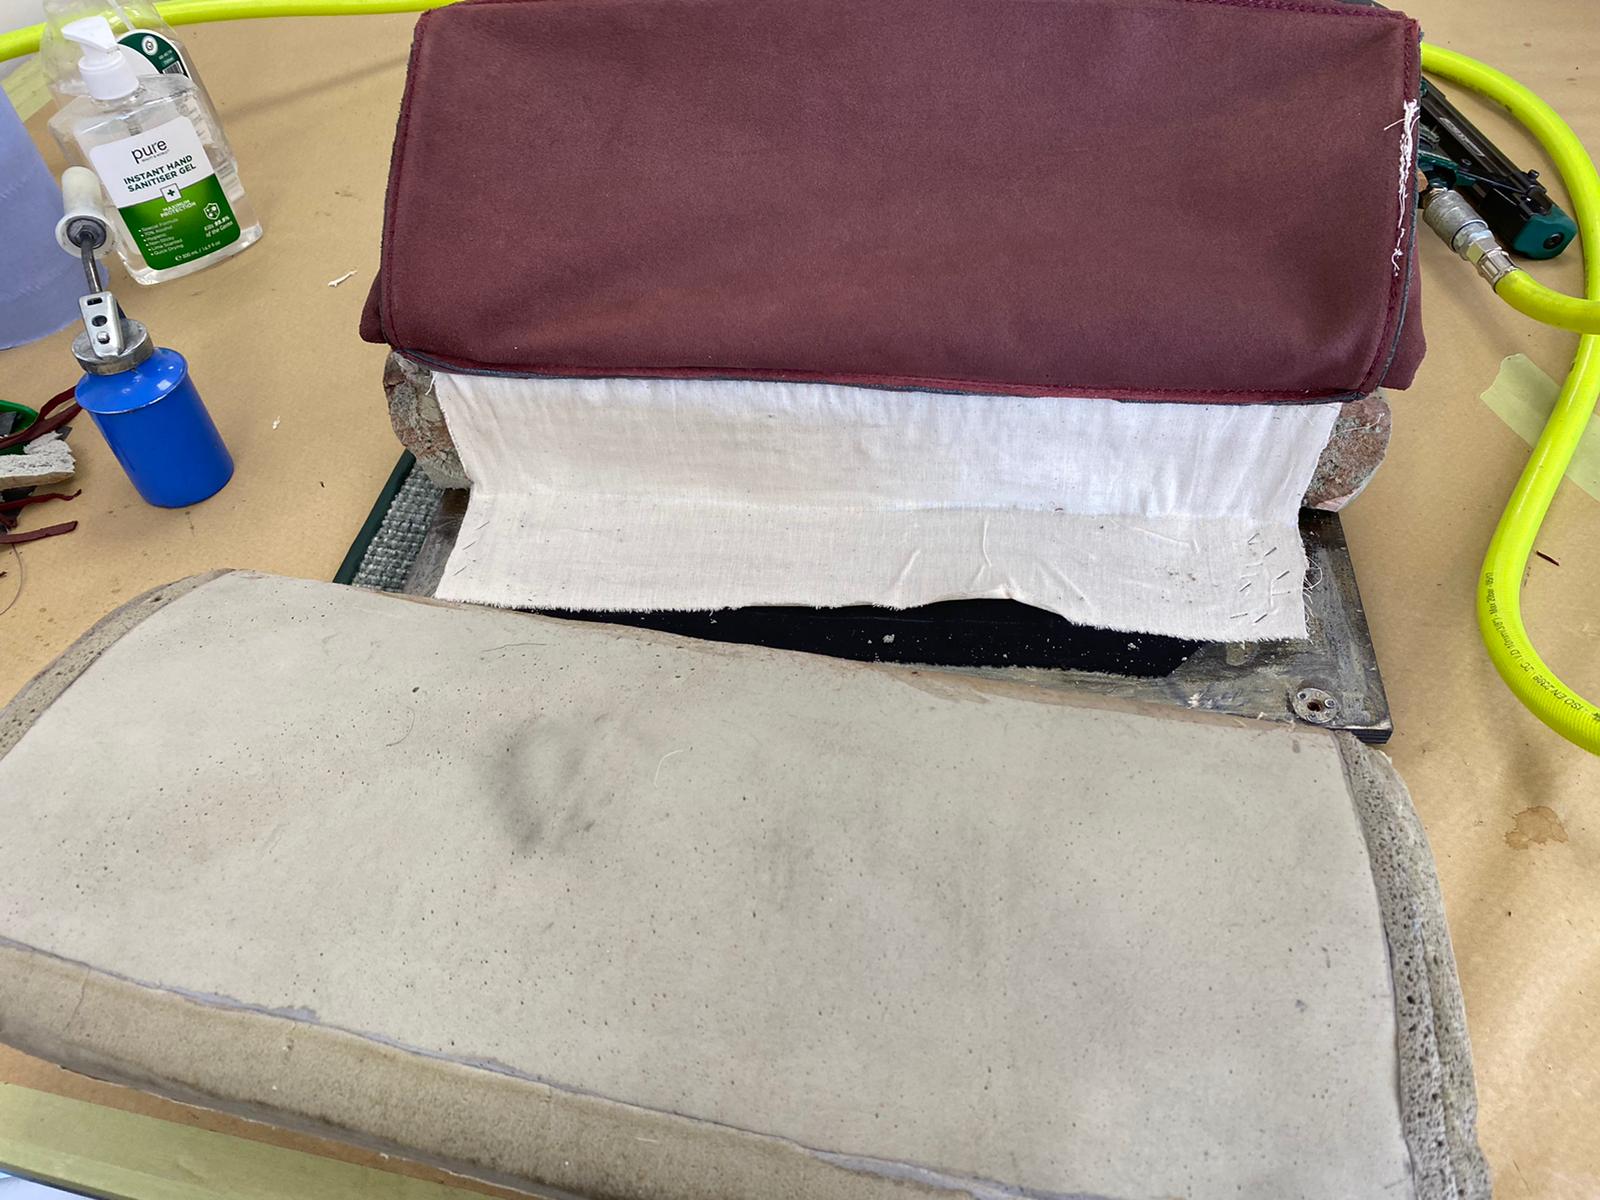
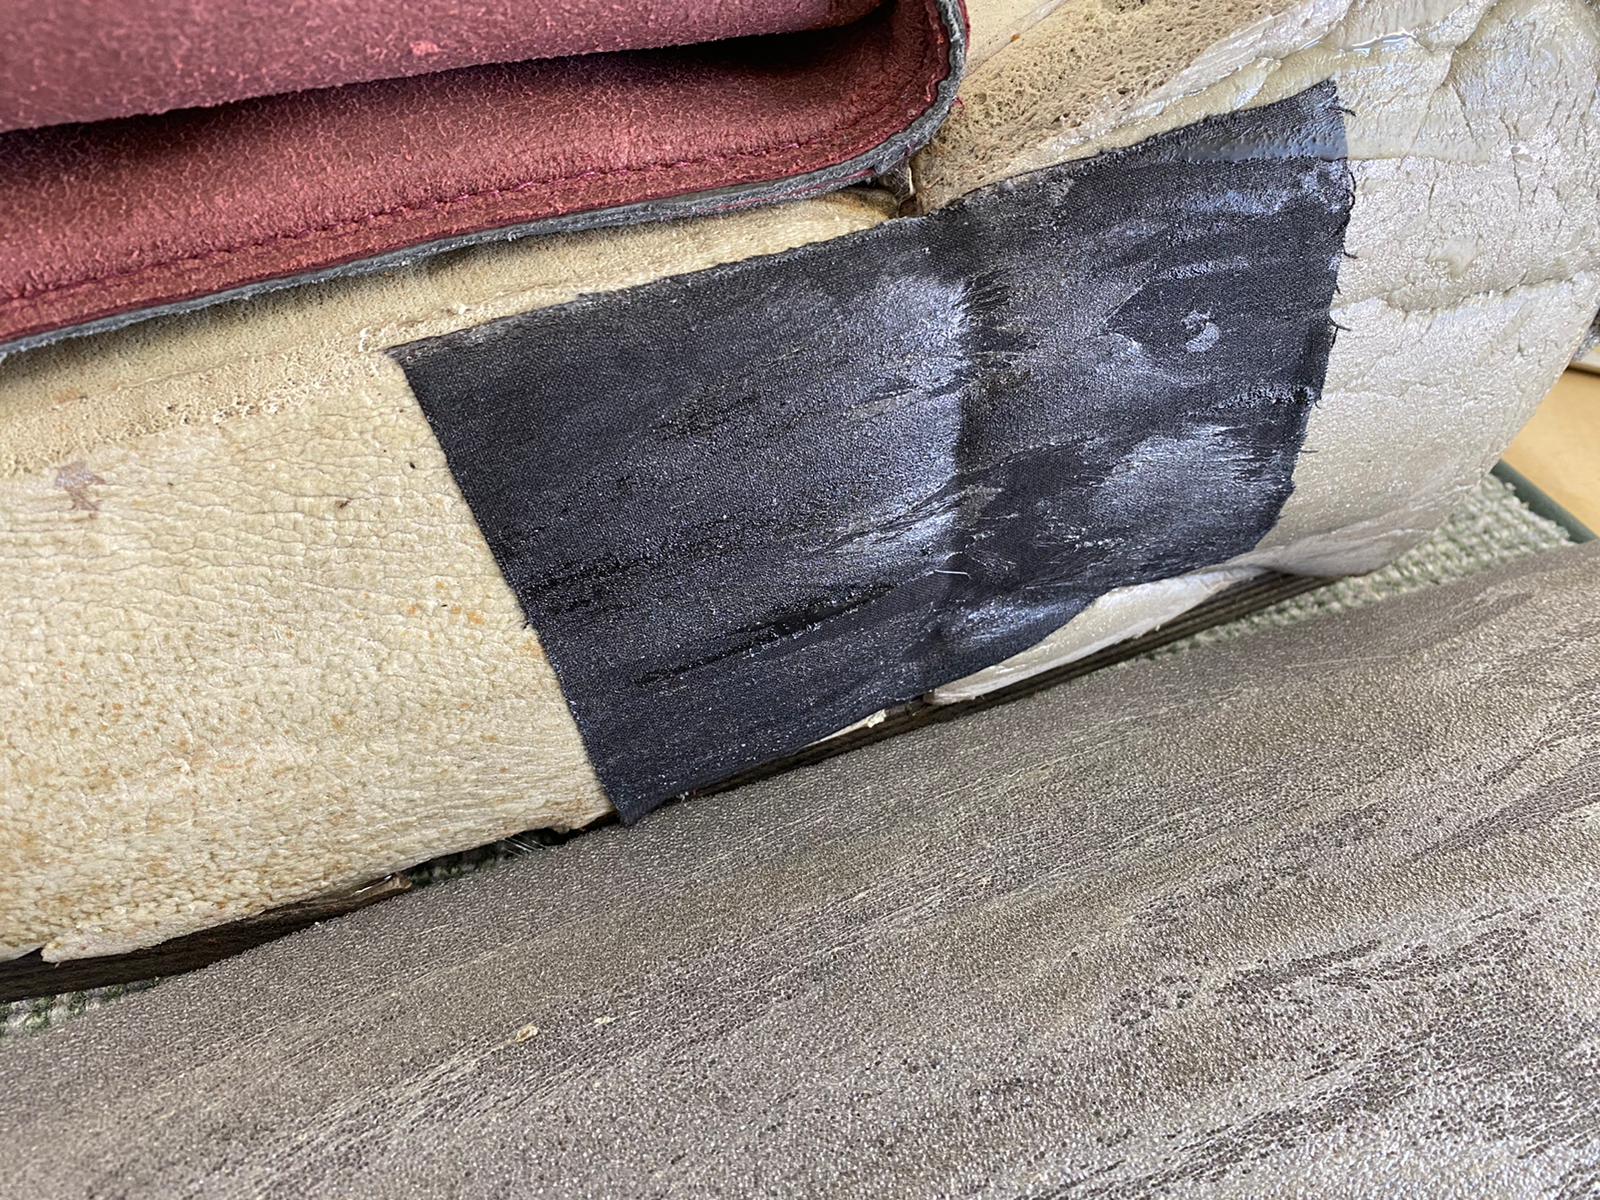
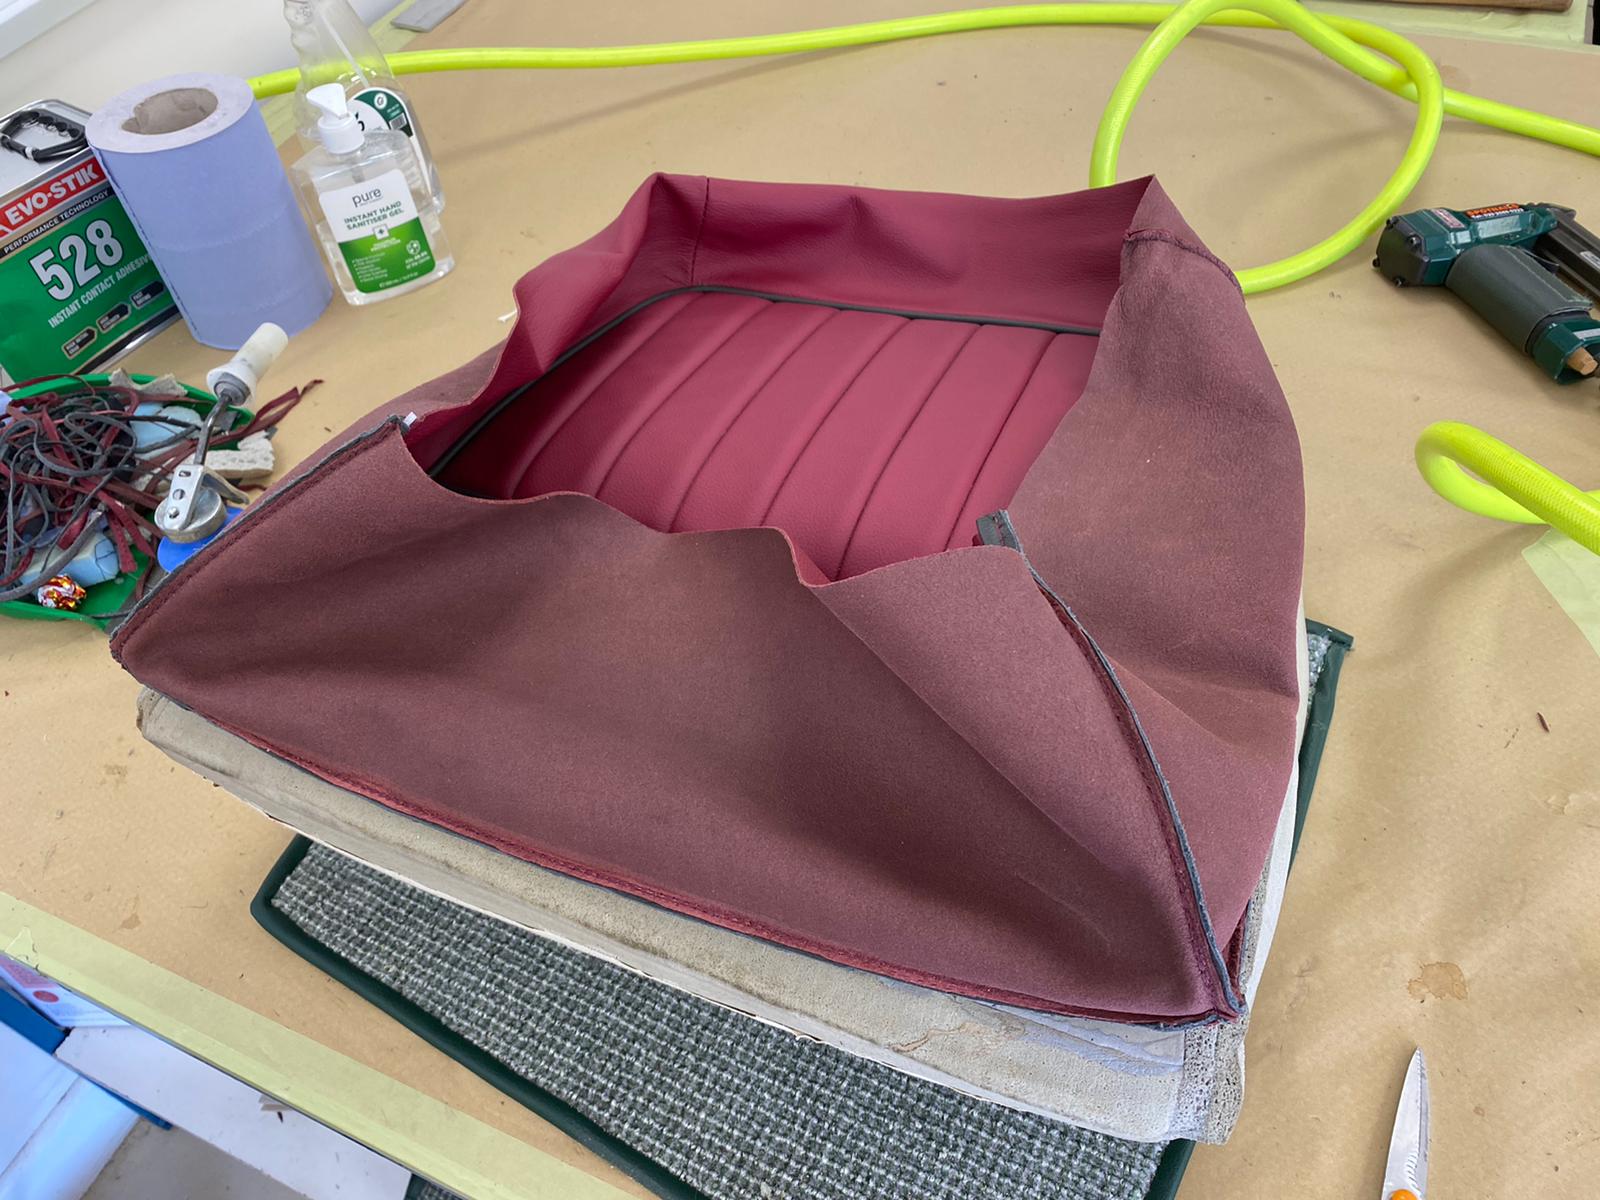
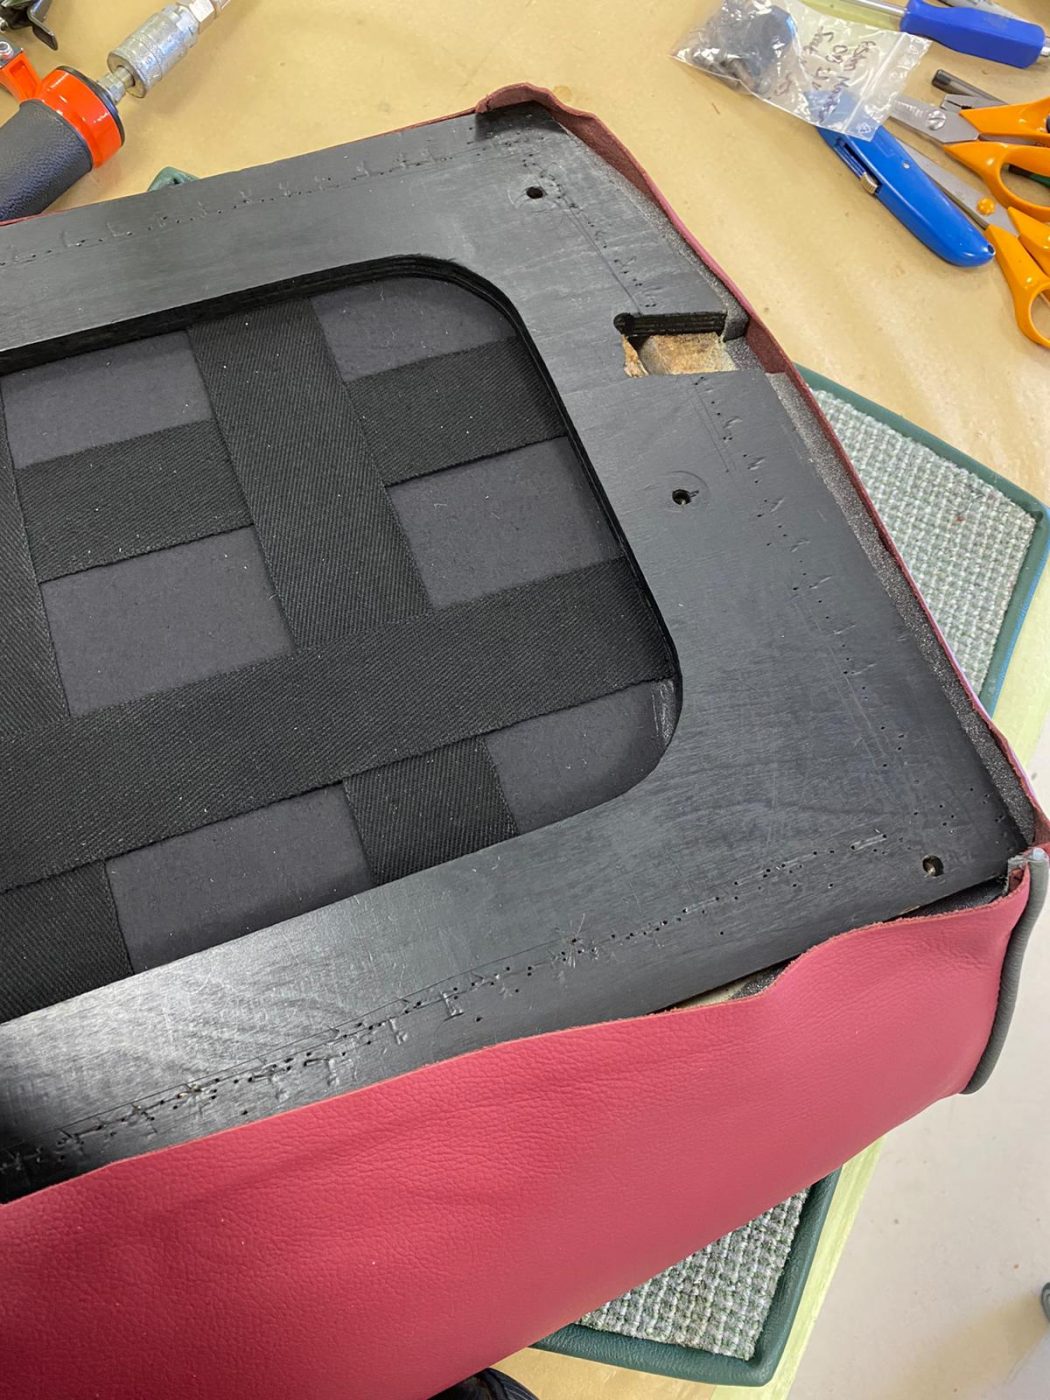
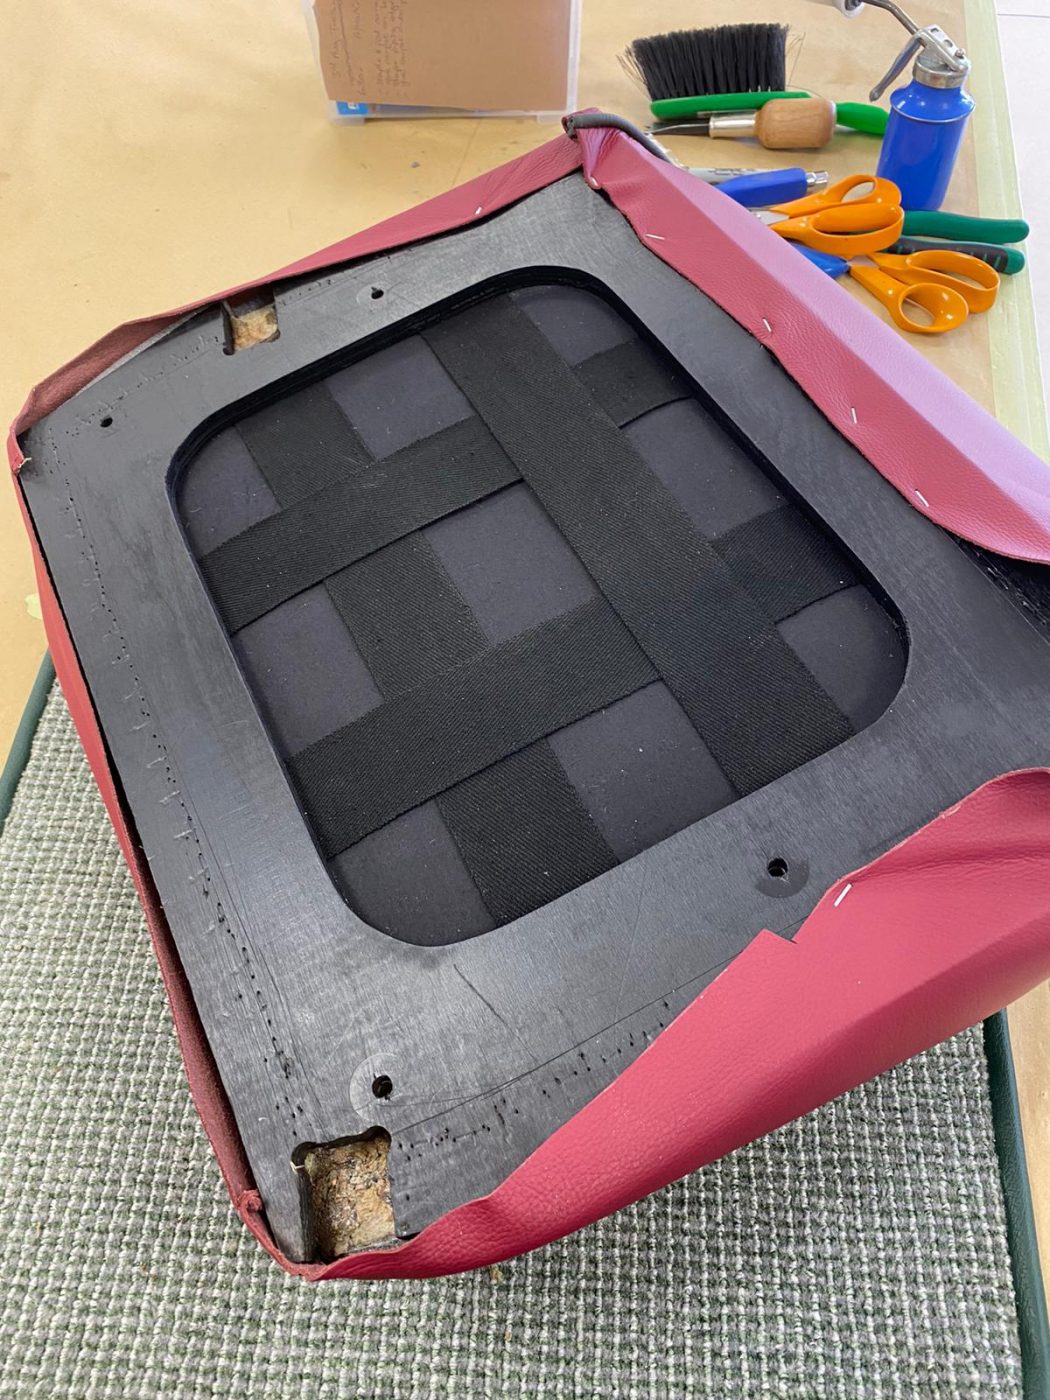
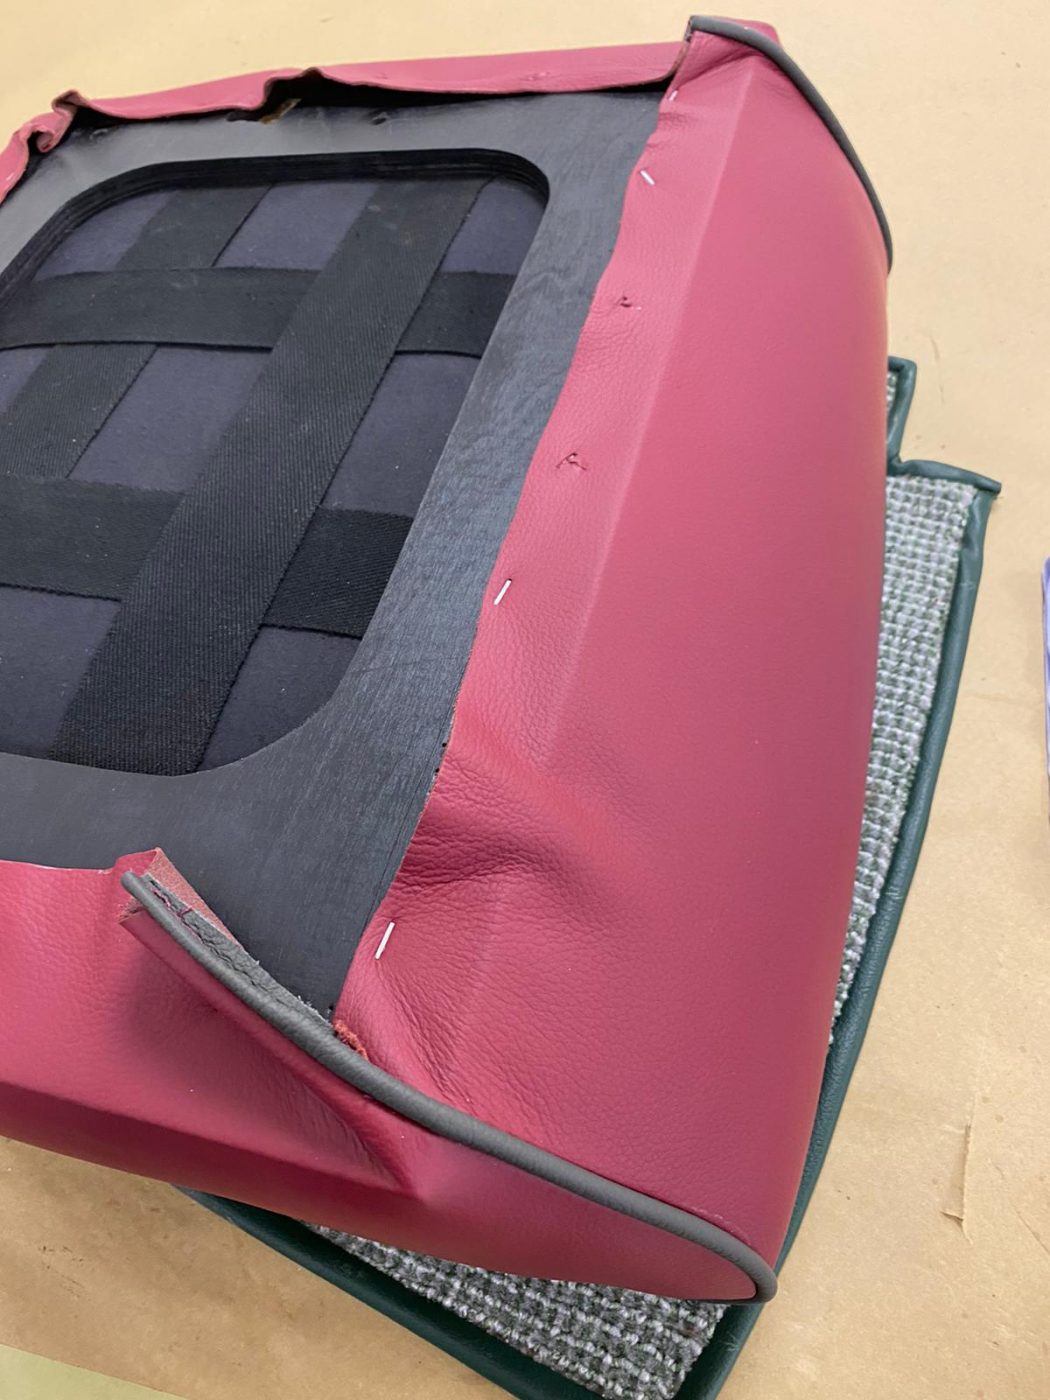
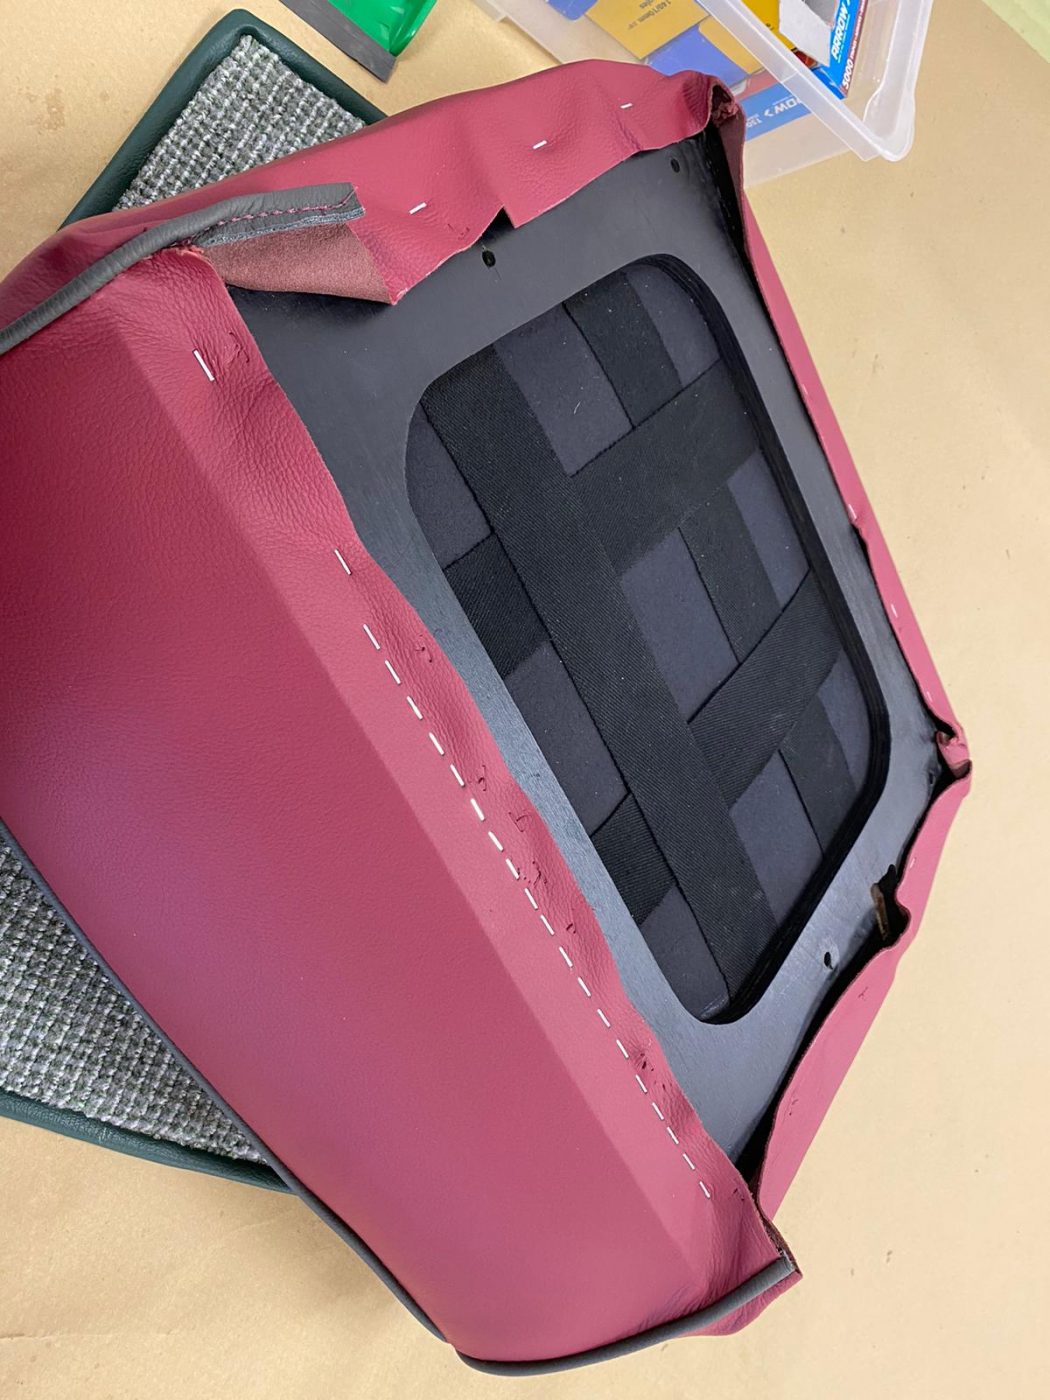
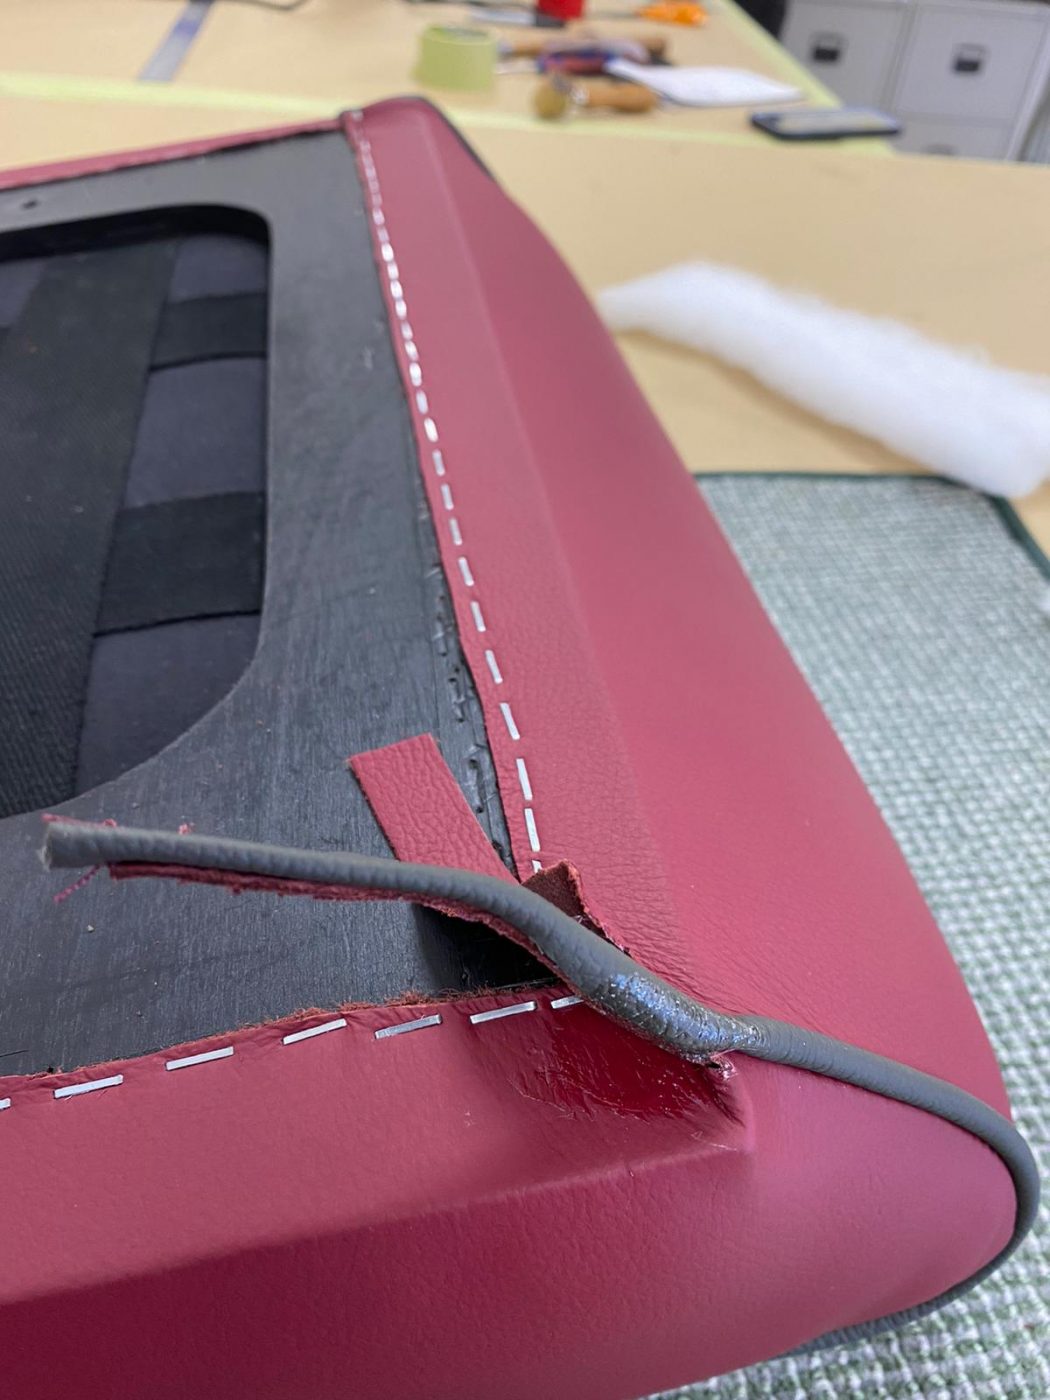
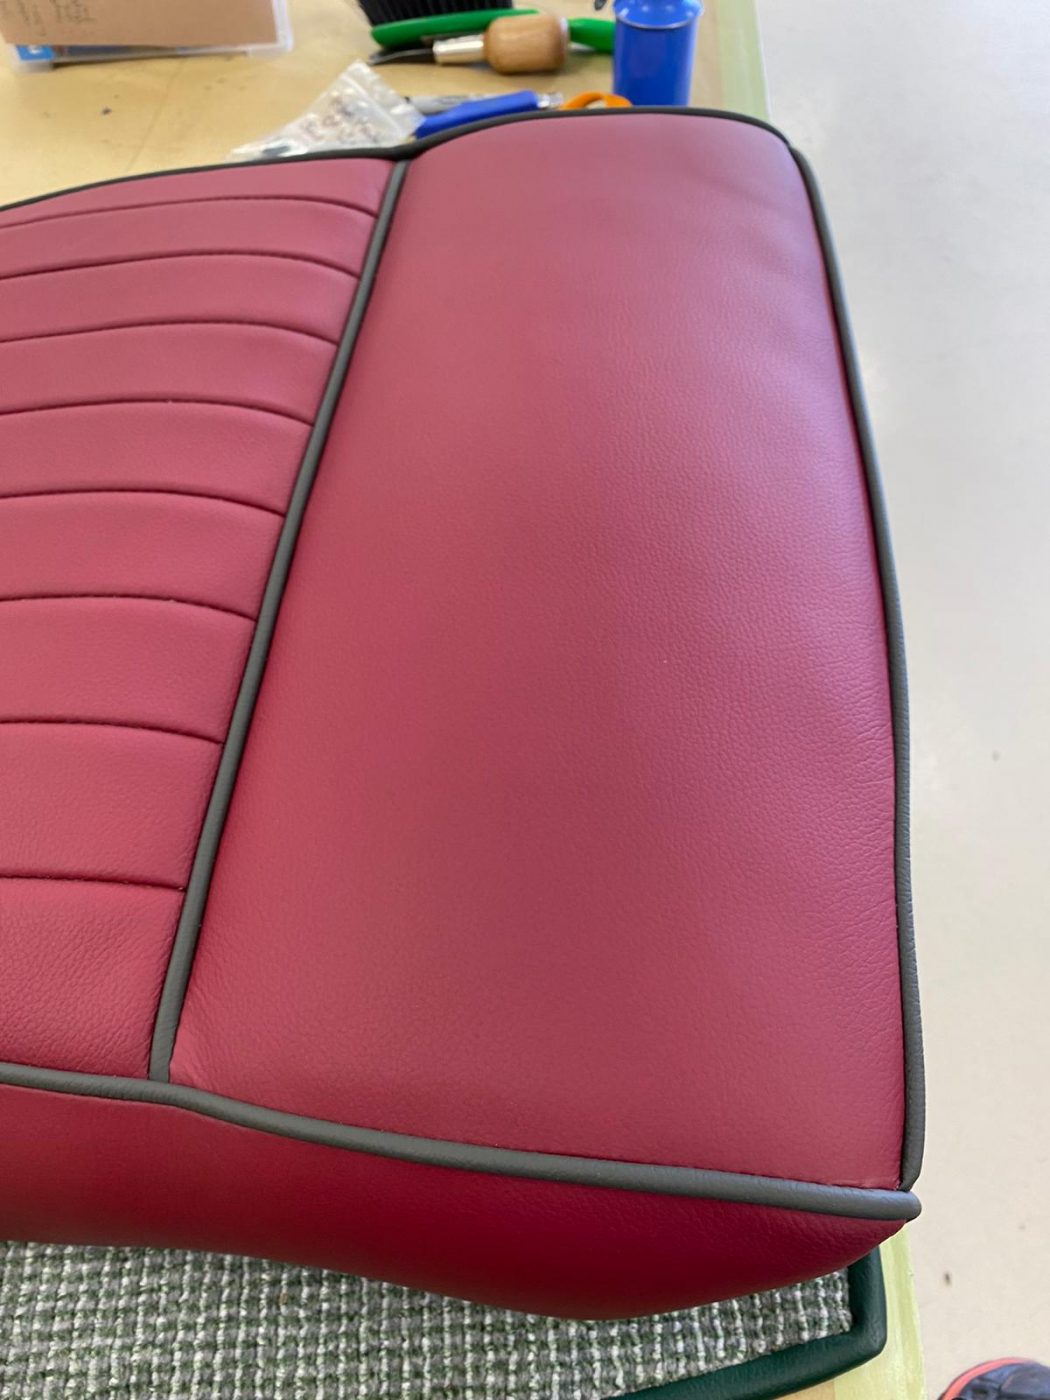
Kath has been fitting the second front base seat cover to its foam and frame for the 1955 Aston Martin DB 2/4. It’s exactly the
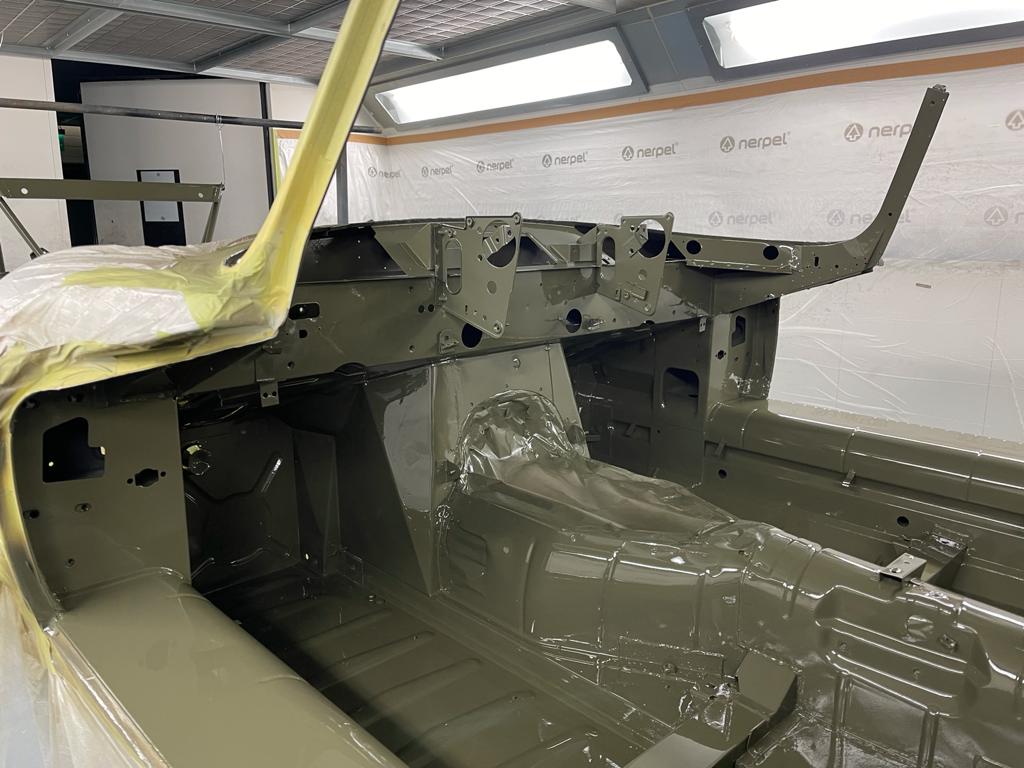
Lydia has finished sanding down the primer on the front frame for the 1973 Jaguar E-Type Roadster Series 3. You can read about the process
James has been continuing his repair work on the 1986 Daimler Double Six. He’s now finished the left-hand side, which you can read about the

Dave has been working on the 1975 Triumph TR6. He’s installed a new speedo cable and new clips to go on them. On the original,

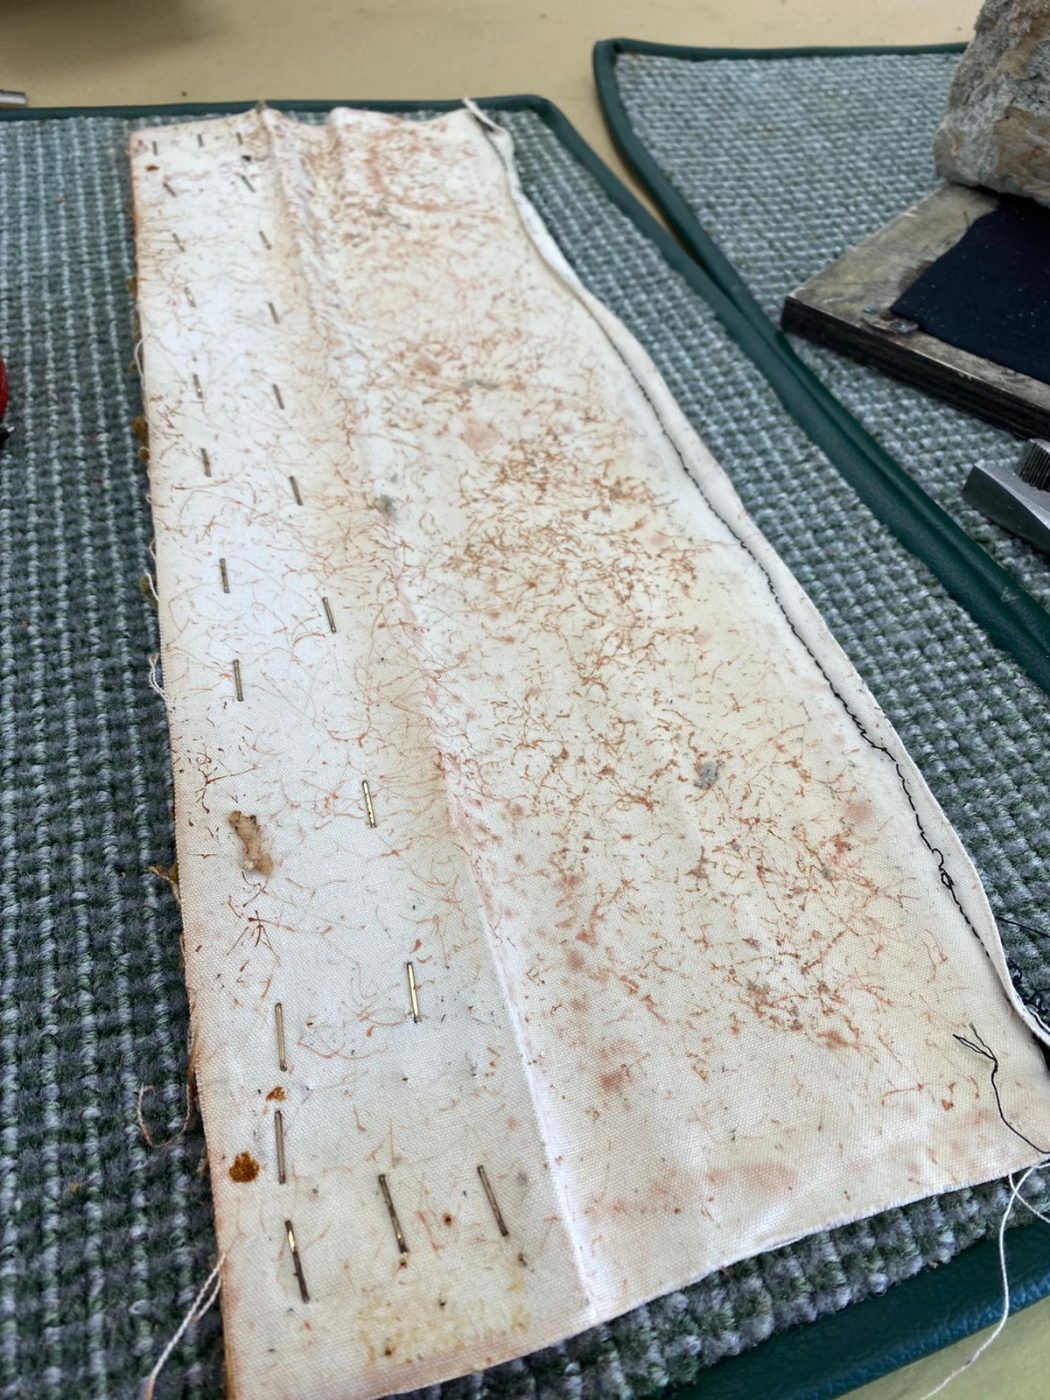
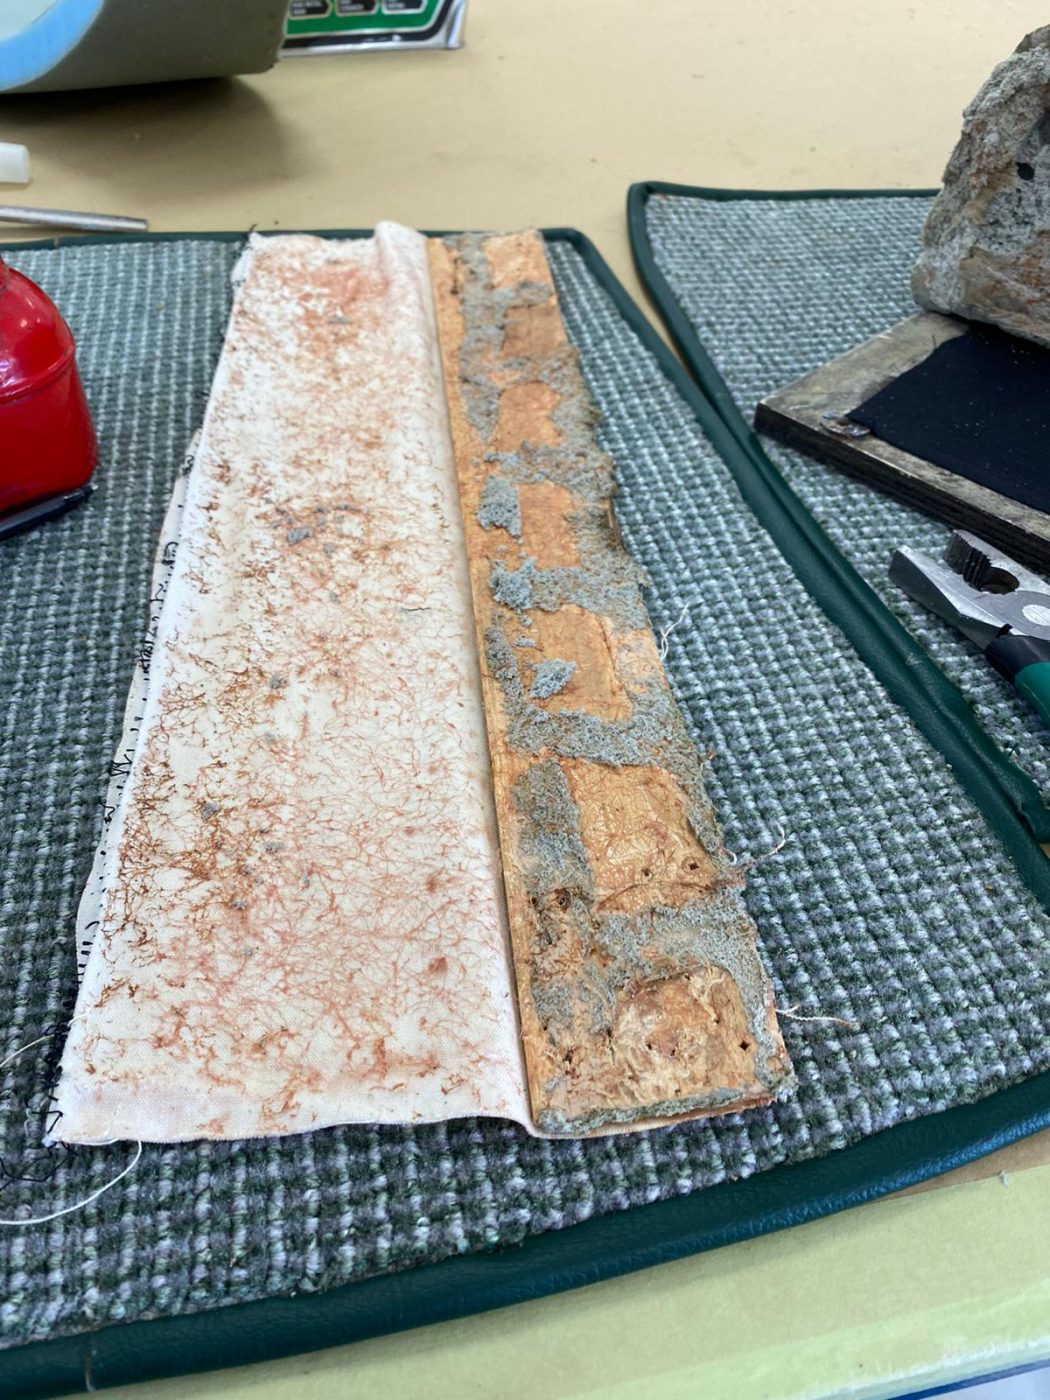
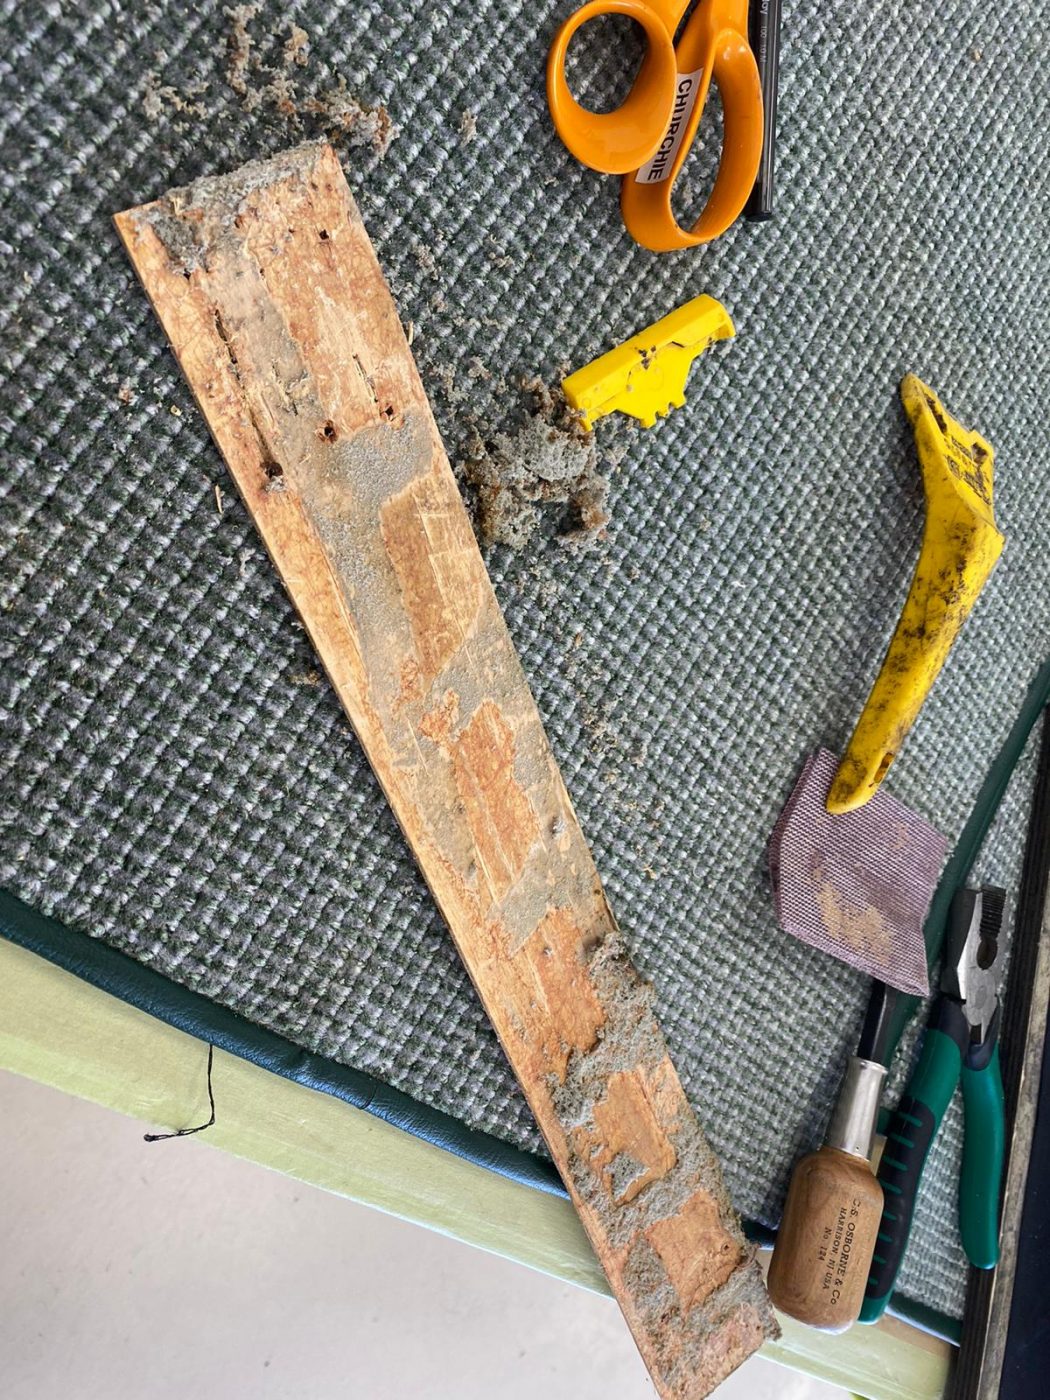
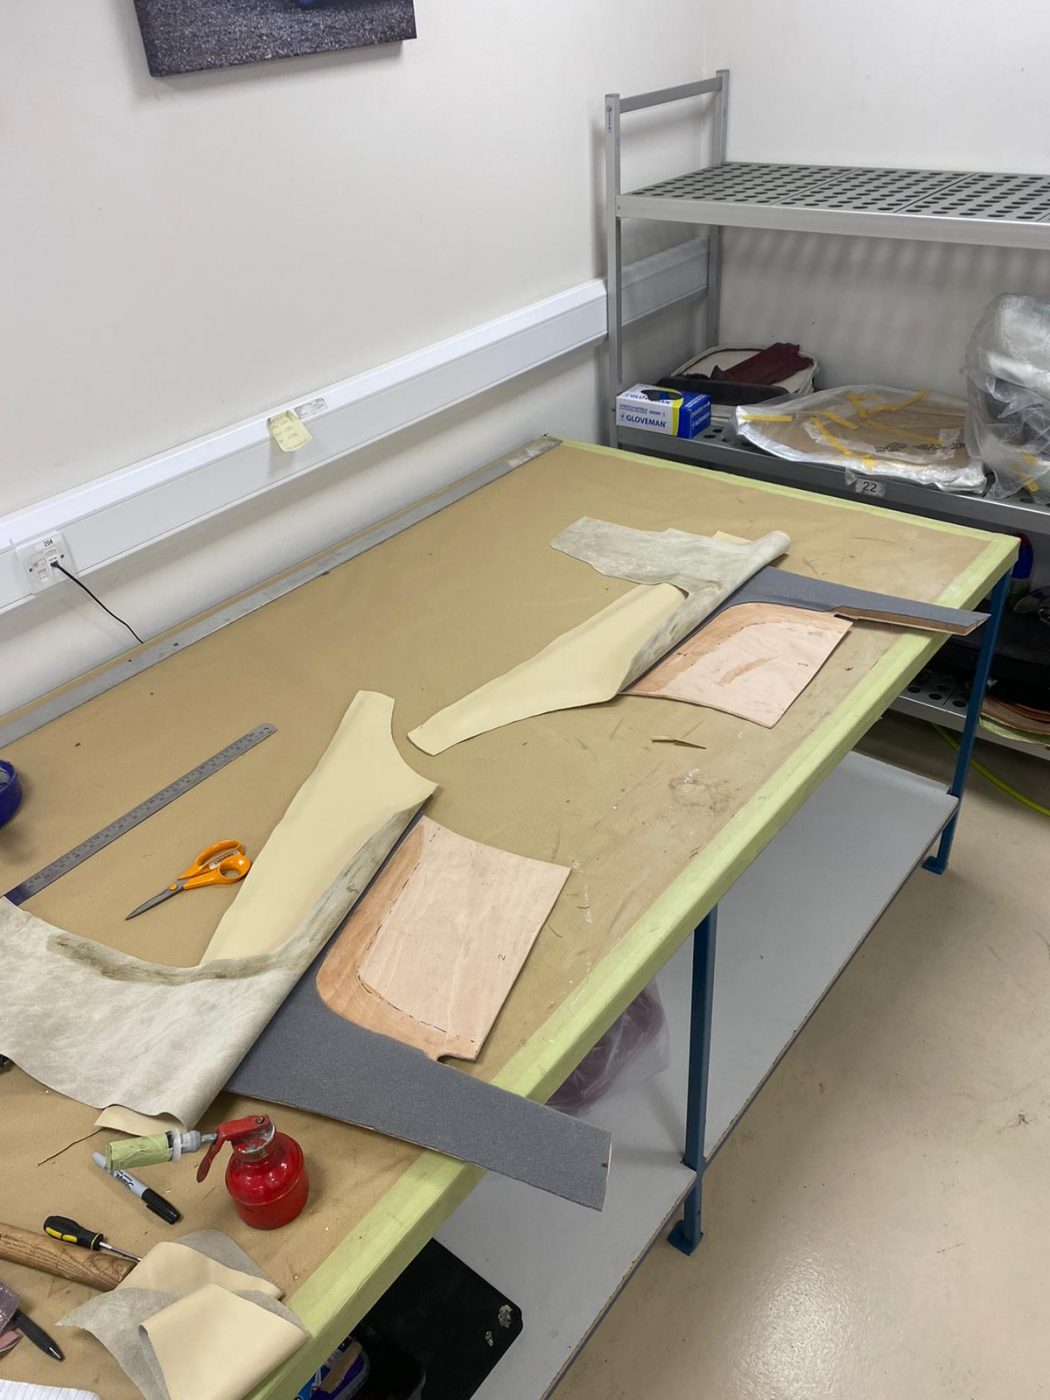
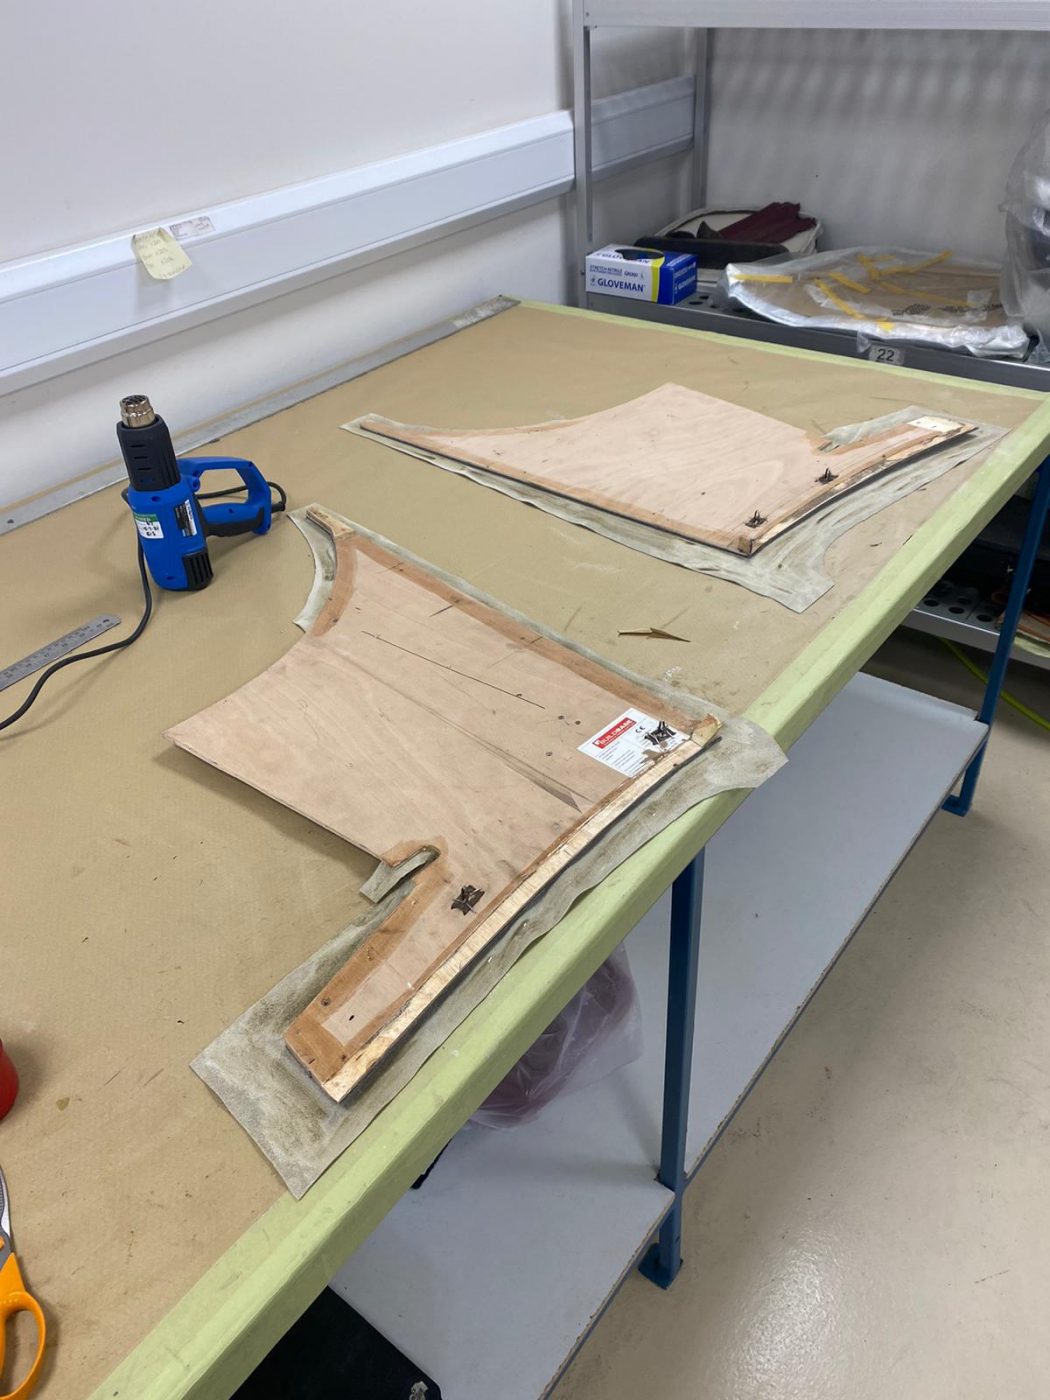
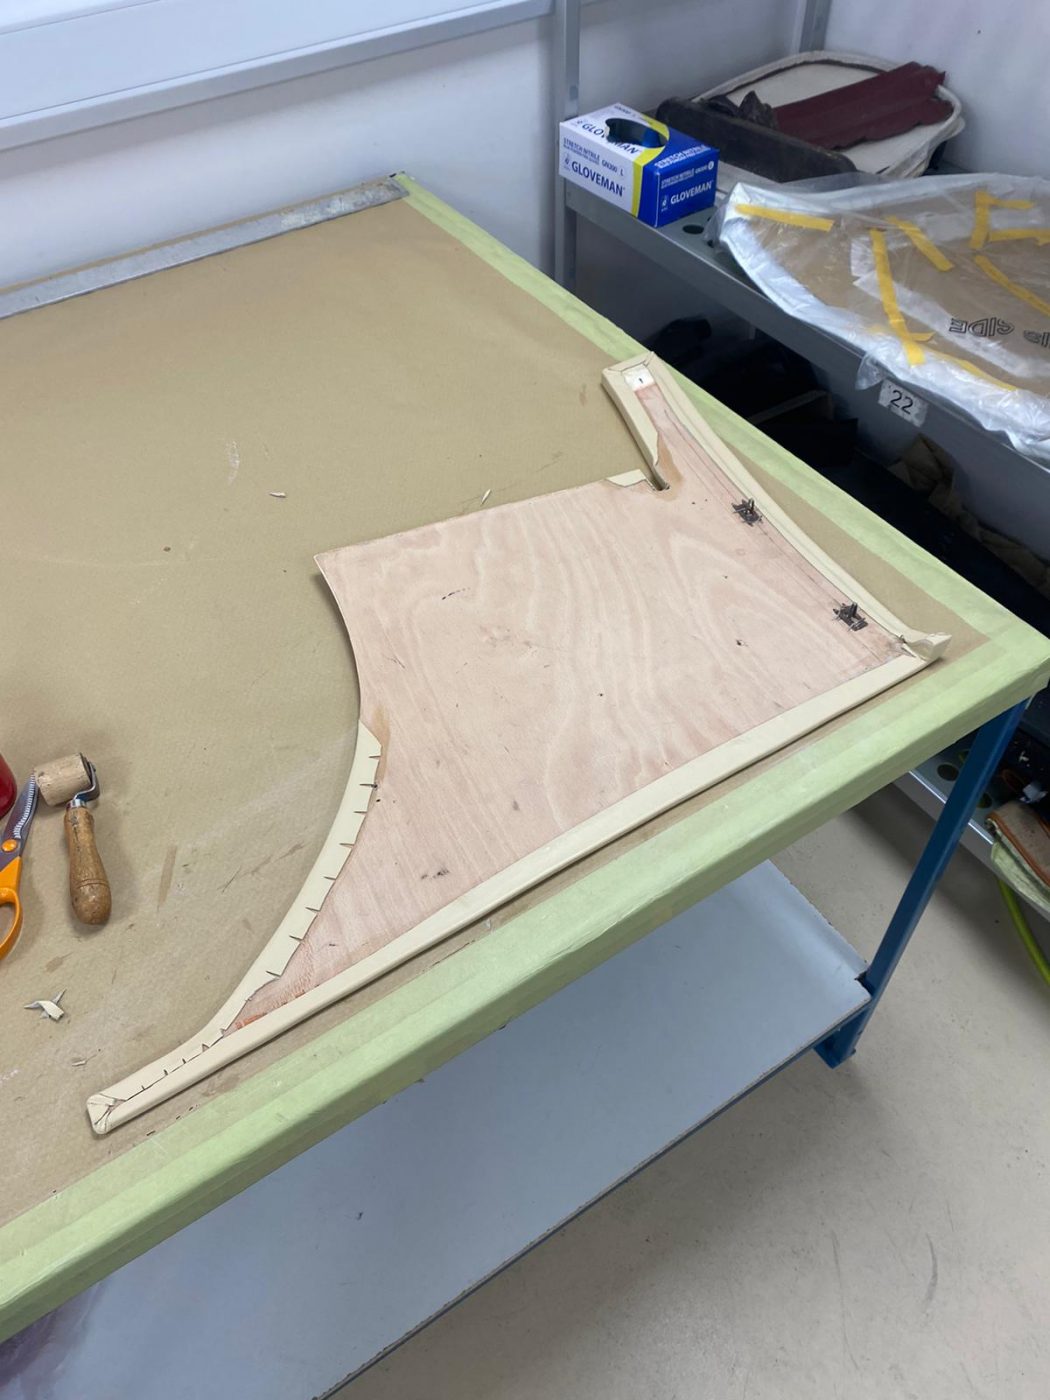
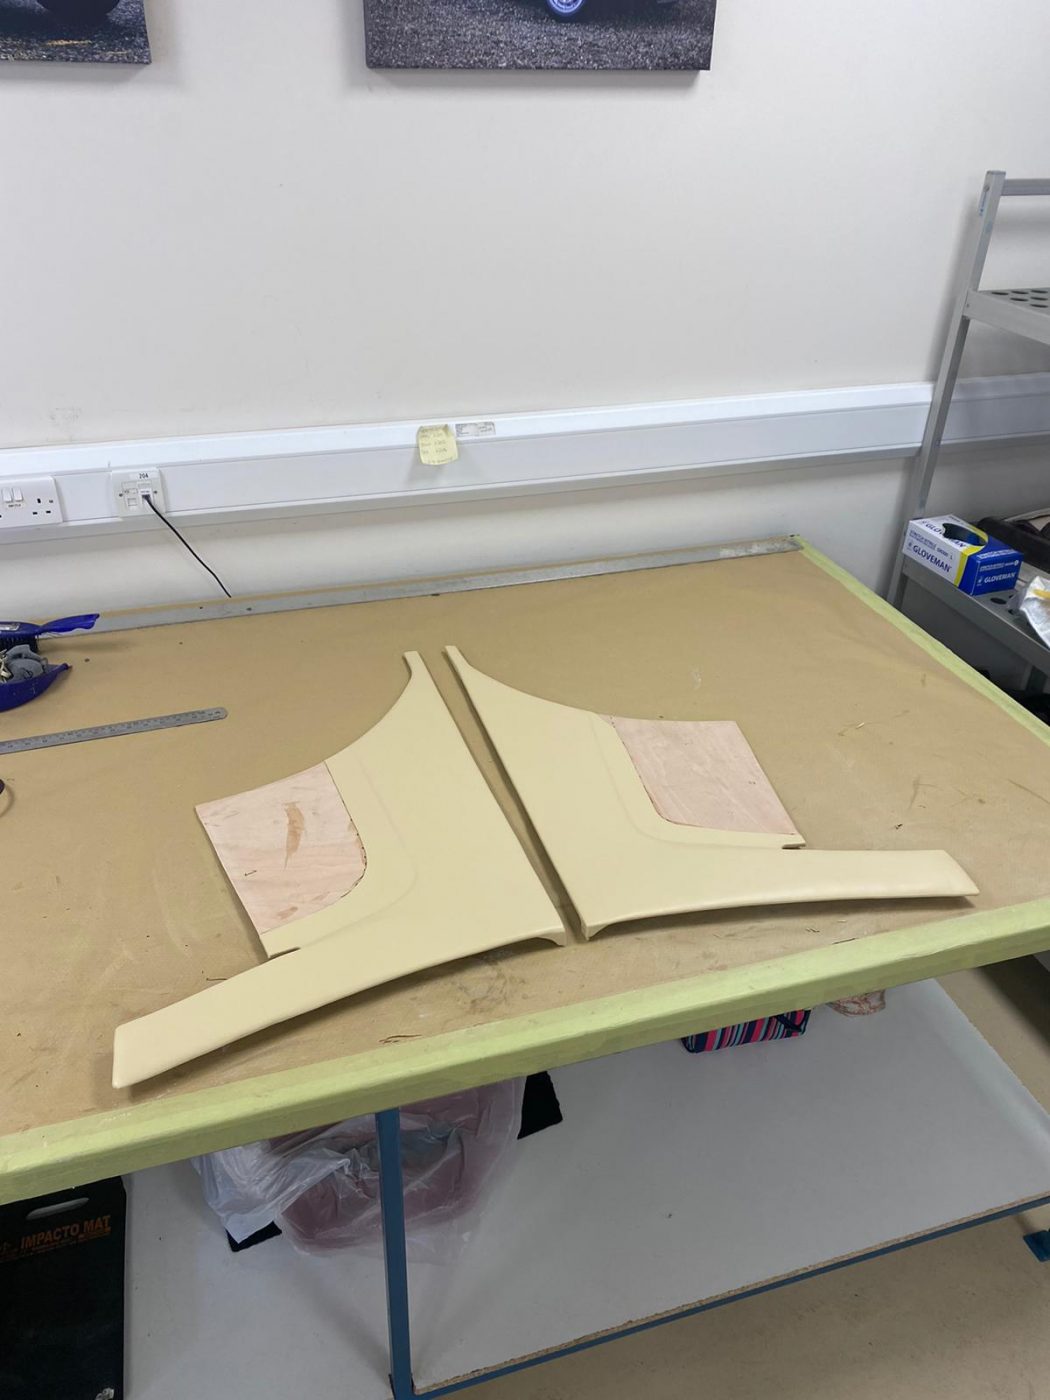
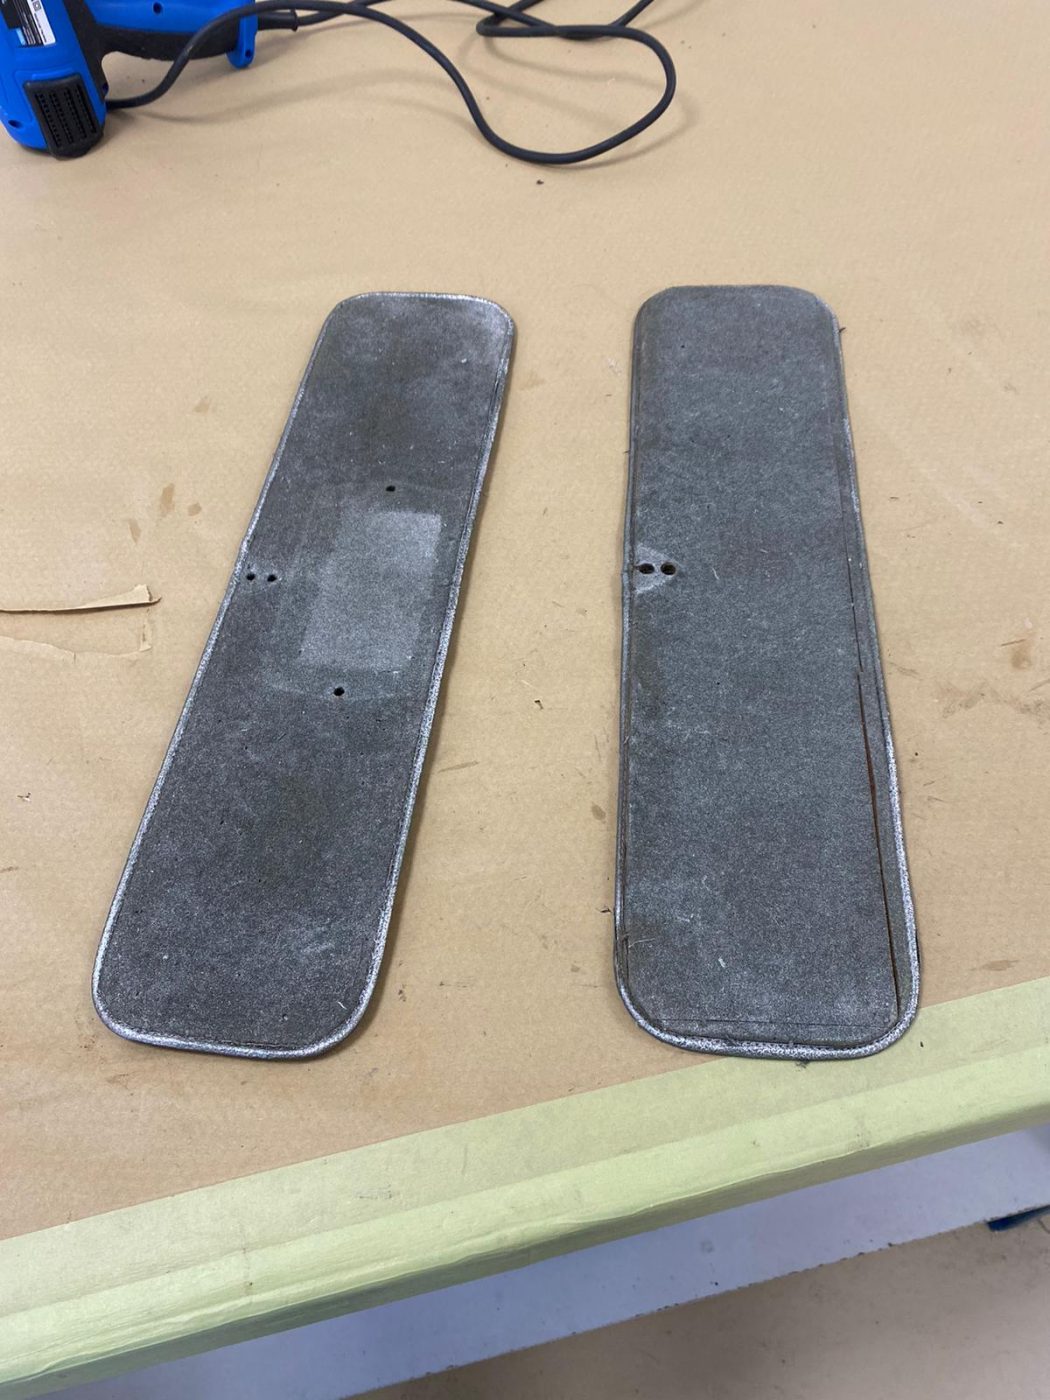
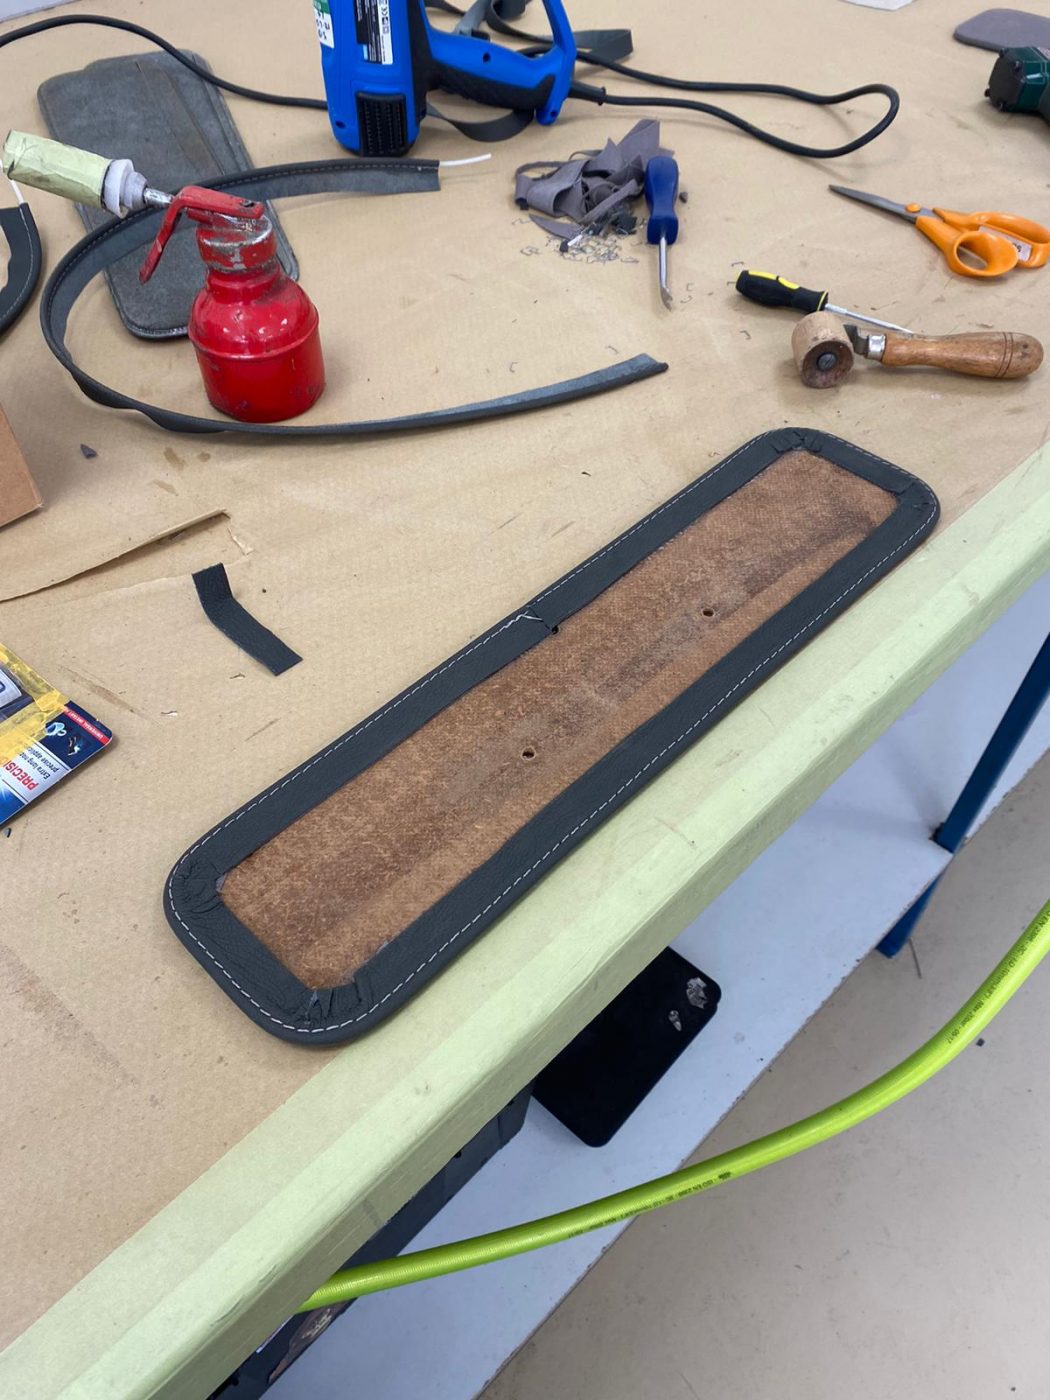
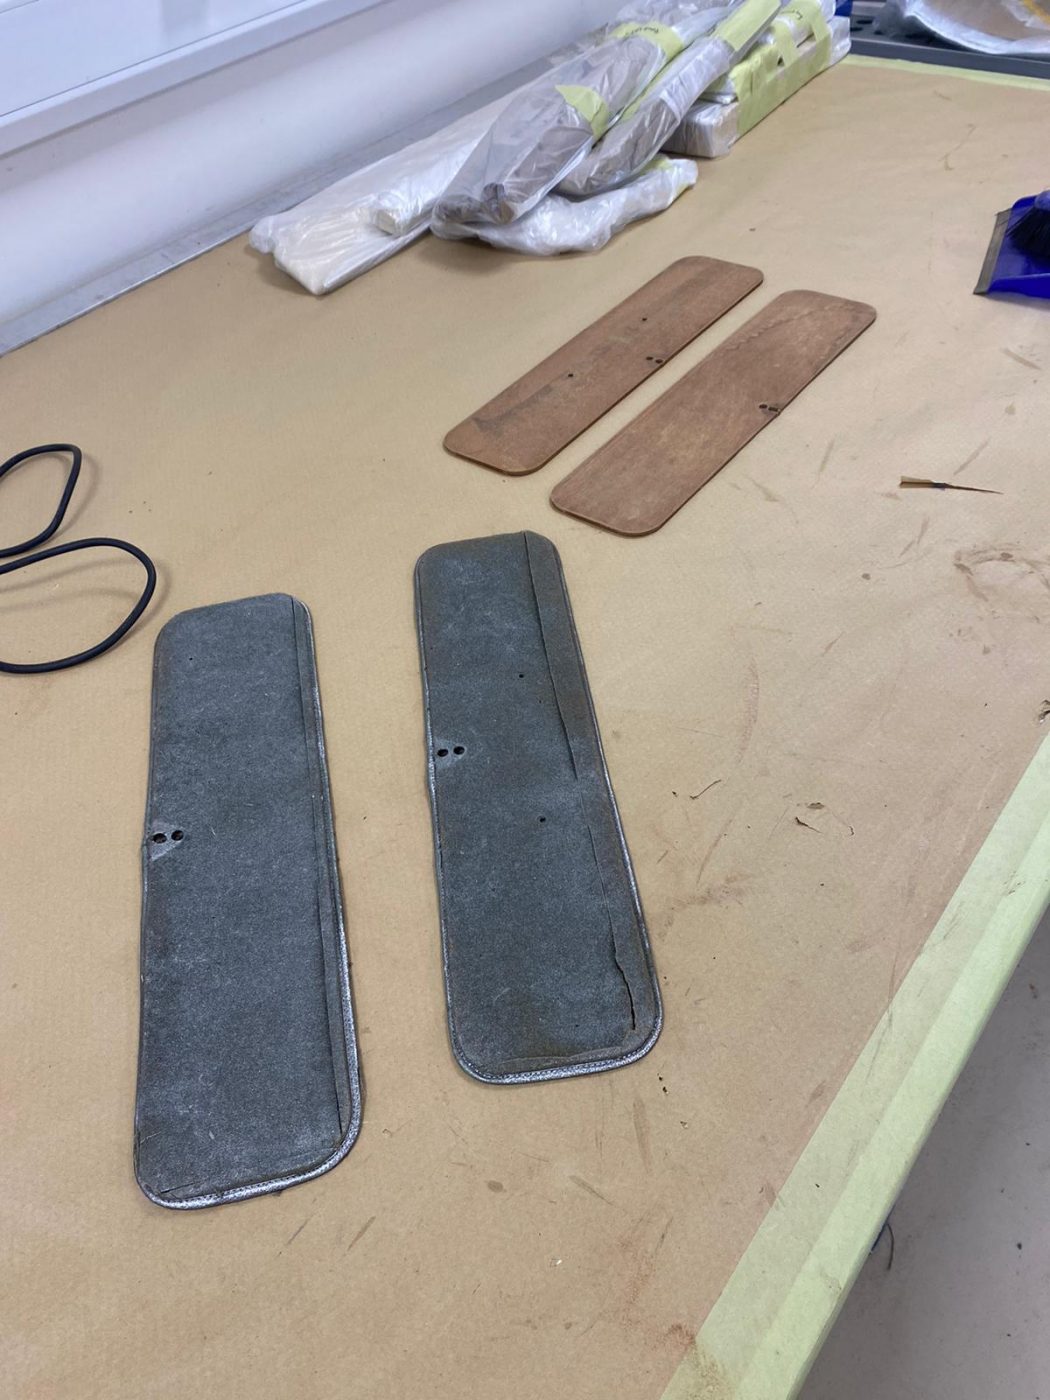
Brian has been re-covering these rear quarter backboards for the 1963 Bentley S3 Continental. They came to us as bare wood, without the original leather

Brian has been re-covering a few more pieces for the 1955 Aston Martin DB 2/4’s interior. The rear seat top panels have been done. He
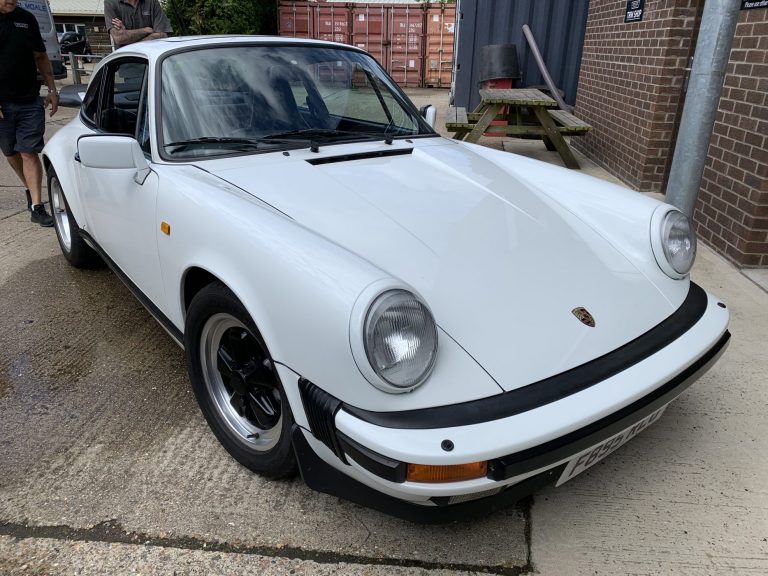
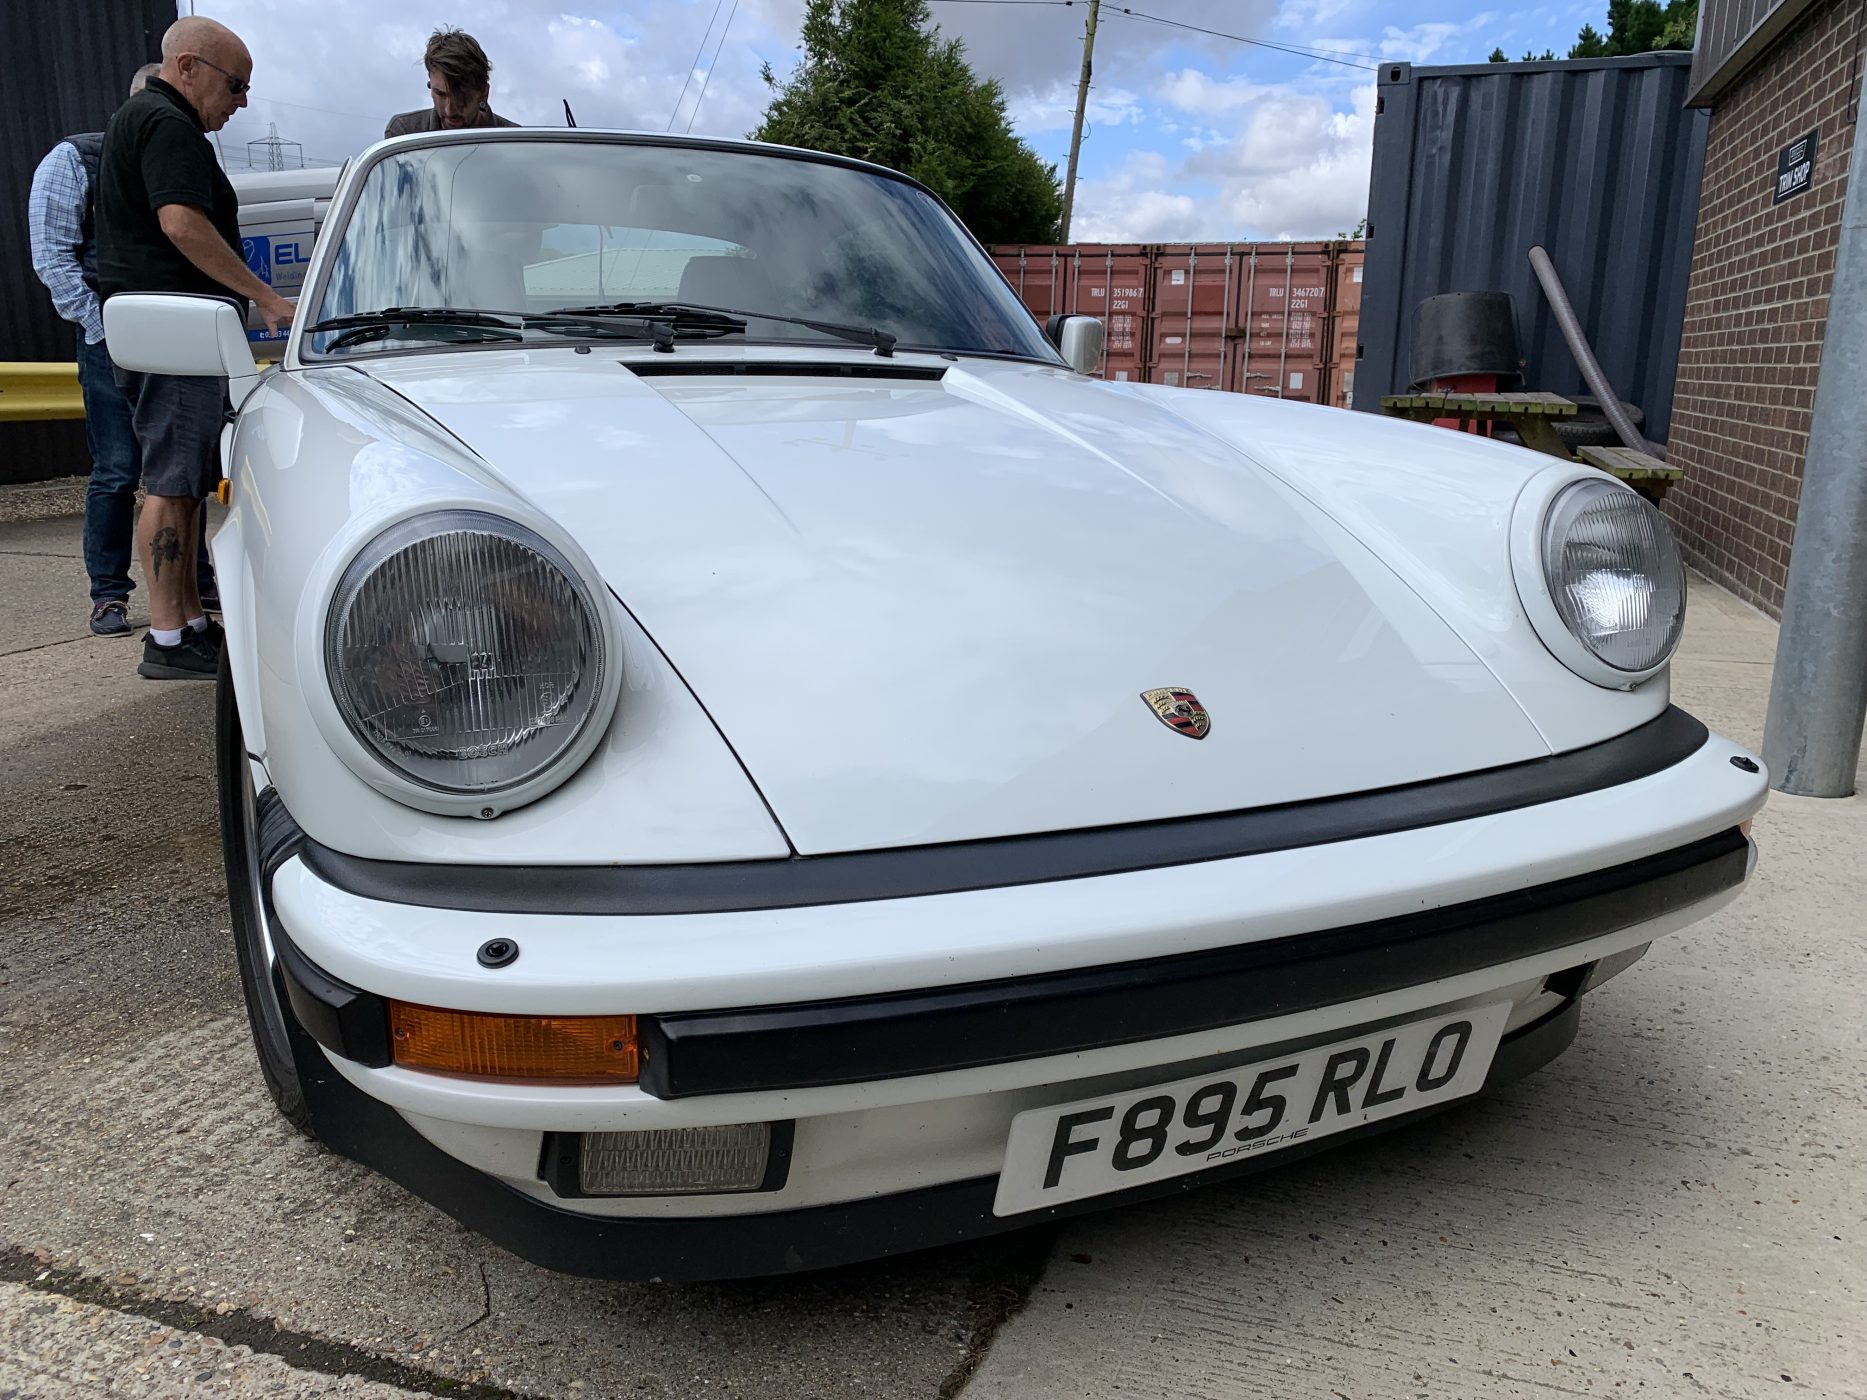
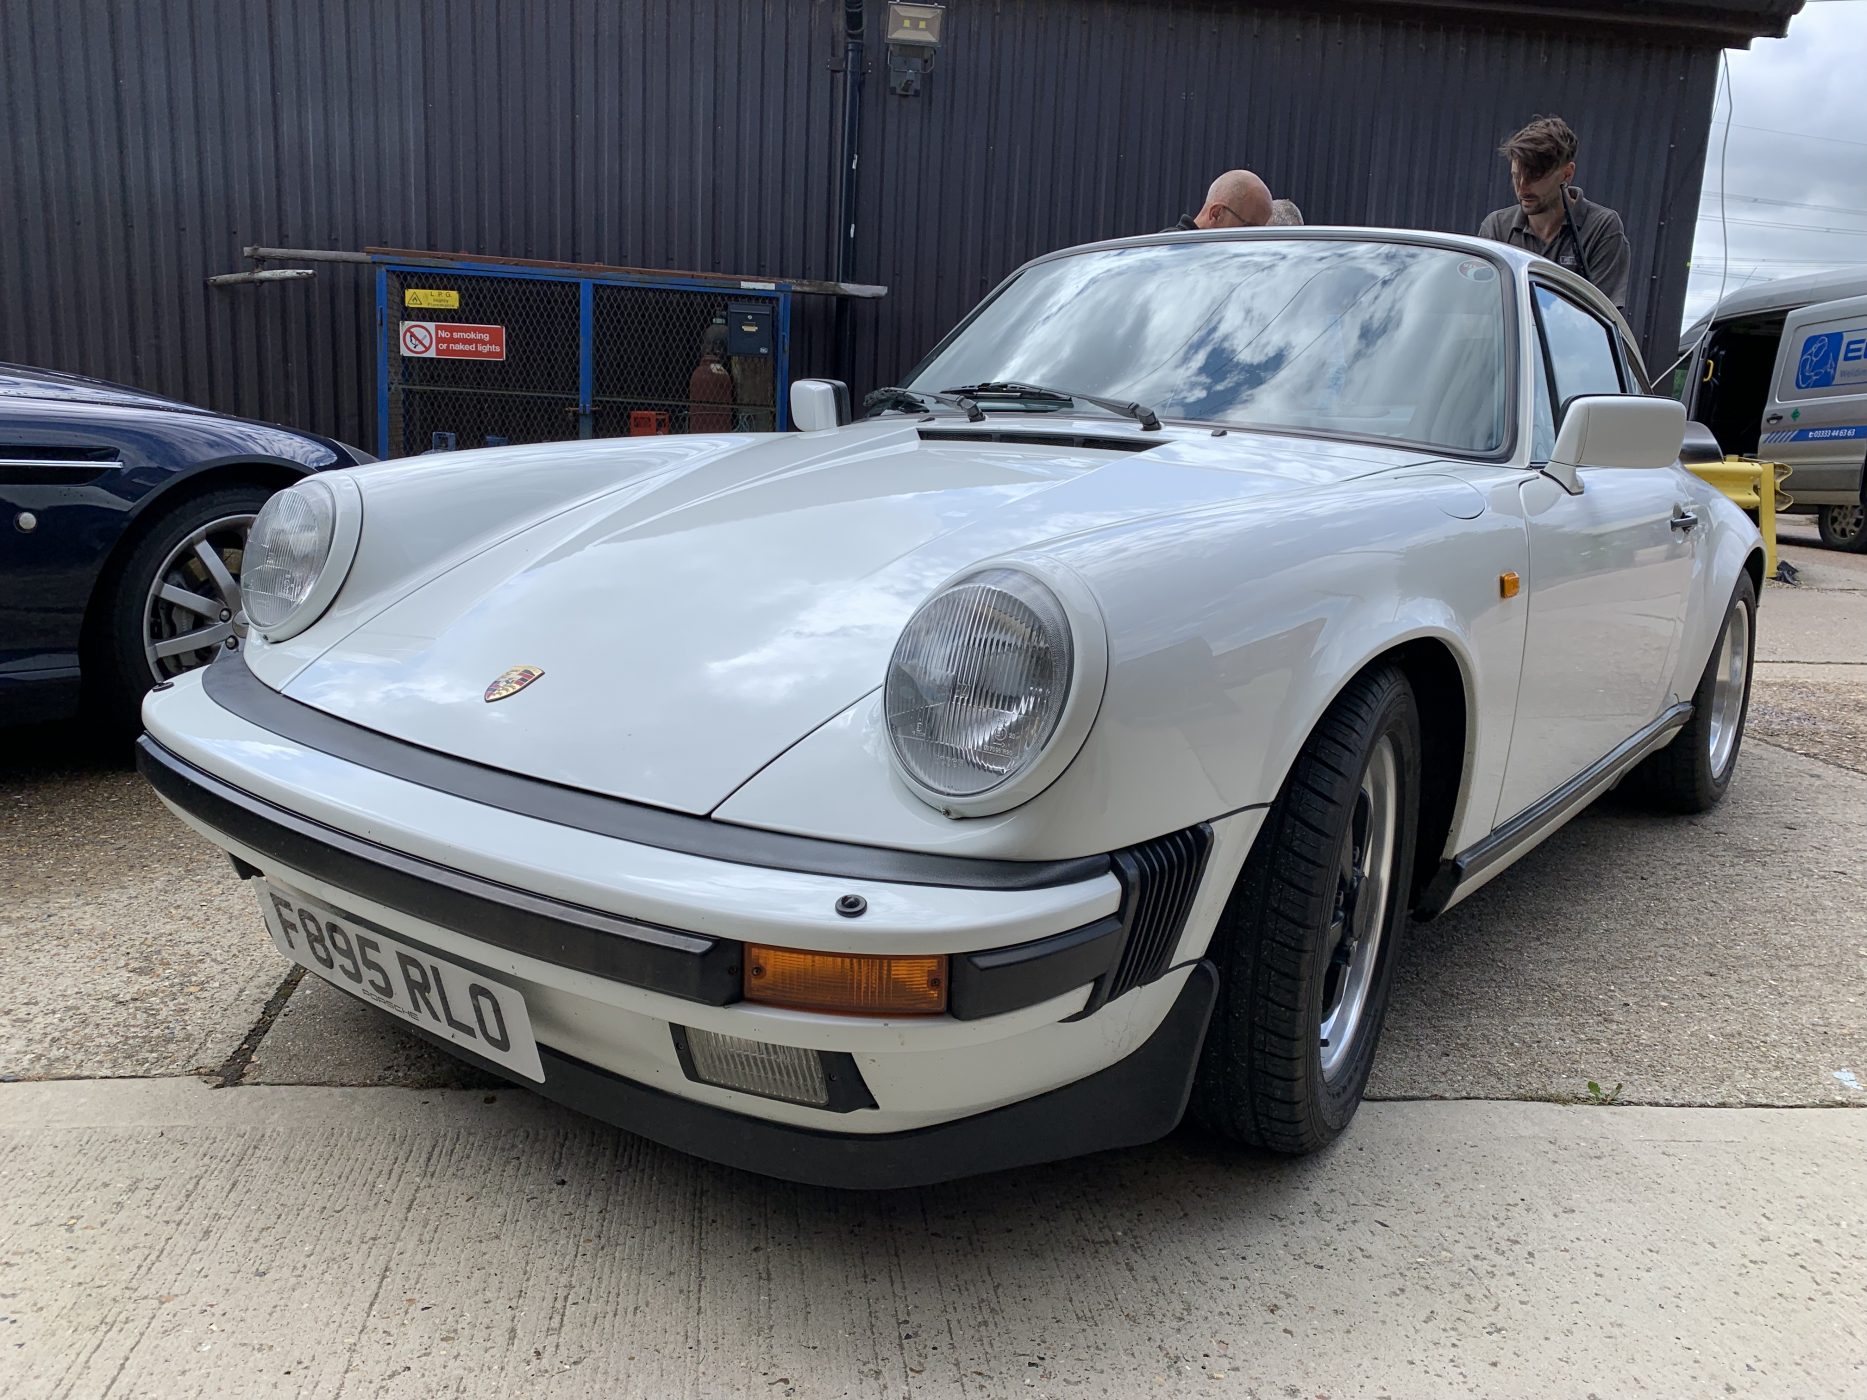
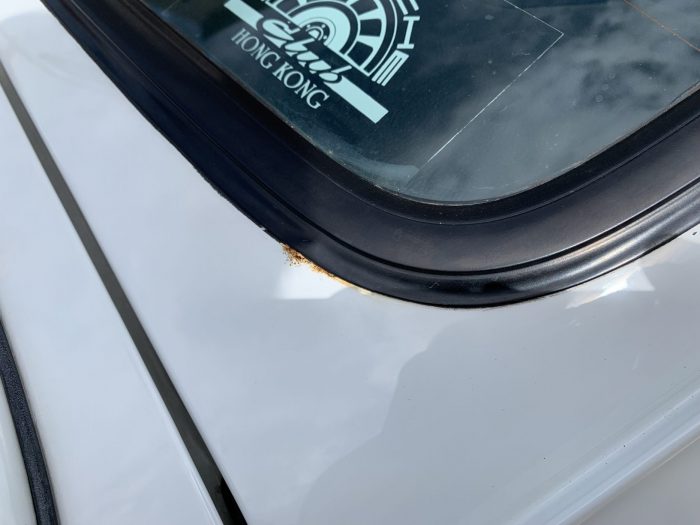
Coming soon we have our beautiful 1989 Porsche 911, in for some preventative corrosion repairs and remedial paintwork. The window will require removal and the

Scott’s been sorting the fuel system for the 1968 Jaguar E-Type 1.5 4.2. There was a smell of fuel in the car, which he tracked
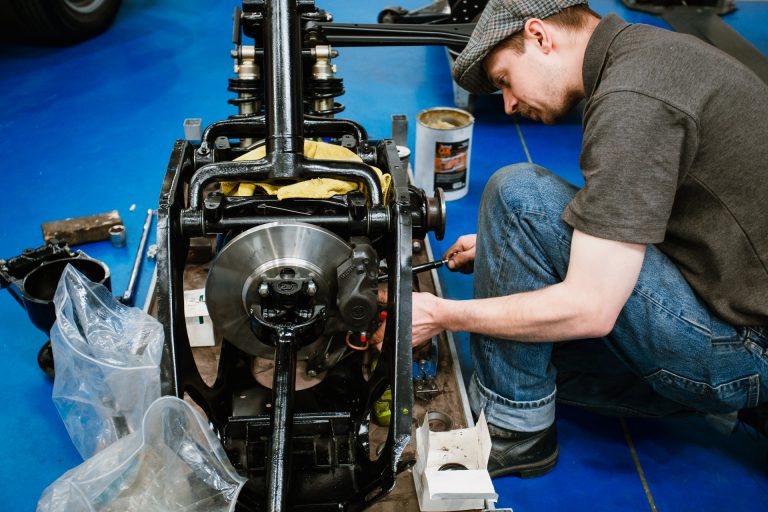
Now that the 1979 Arrow Ferrari Daytona is back in the workshop, Scott’s been straight back to work with it. In these photos you can
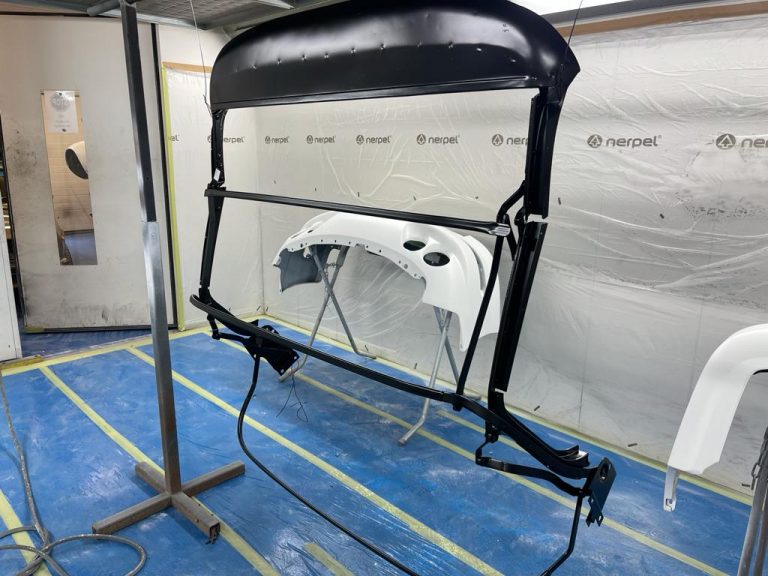
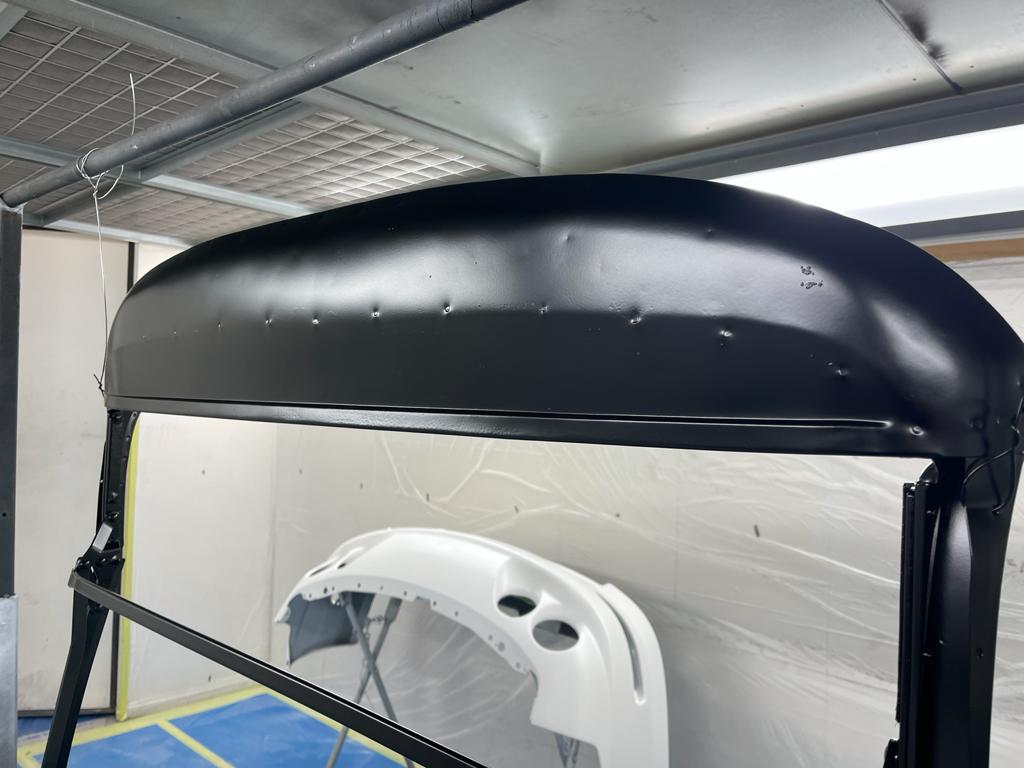
Just a quick update here to show photos of the 1973 Jaguar E-type Roadster Series 3’s hood frame that’s recently been painted by Chris in
The radiator has been removed and sent away to Sheldrake and Wells for further investigations. Sheldrake & Wells Ltd. based in Ipswich, are now the only radiator
John has been giving the heater valve some attention on the peony red 1960 Jensen 541S. When it was being tested, the heater was blowing

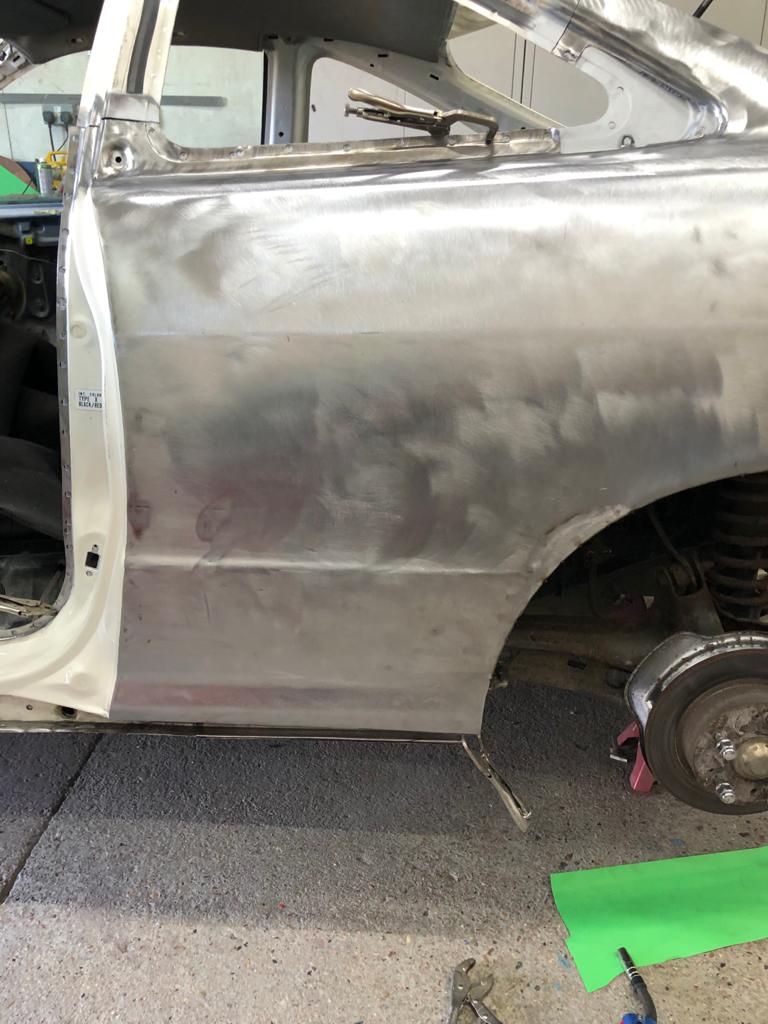
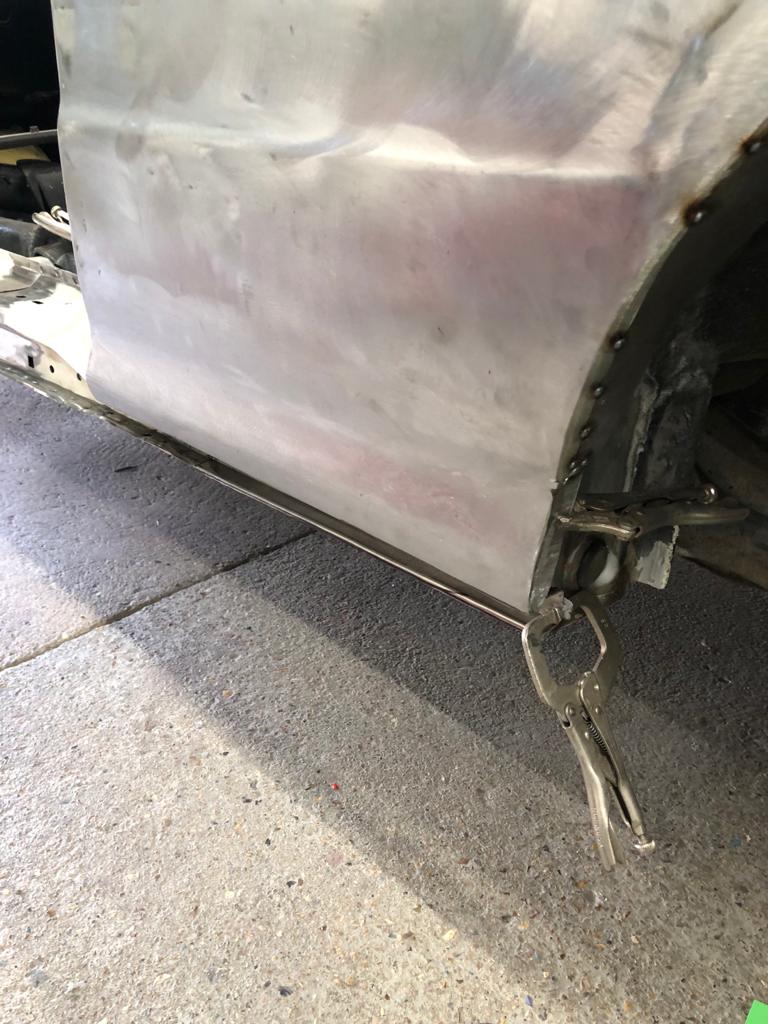
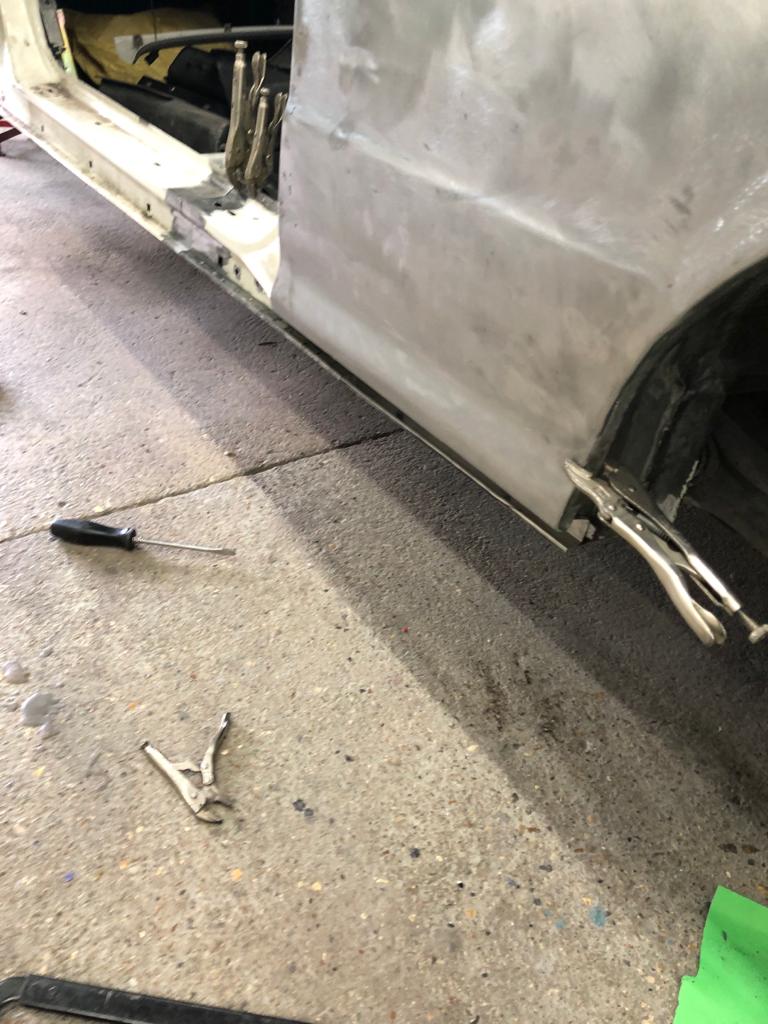
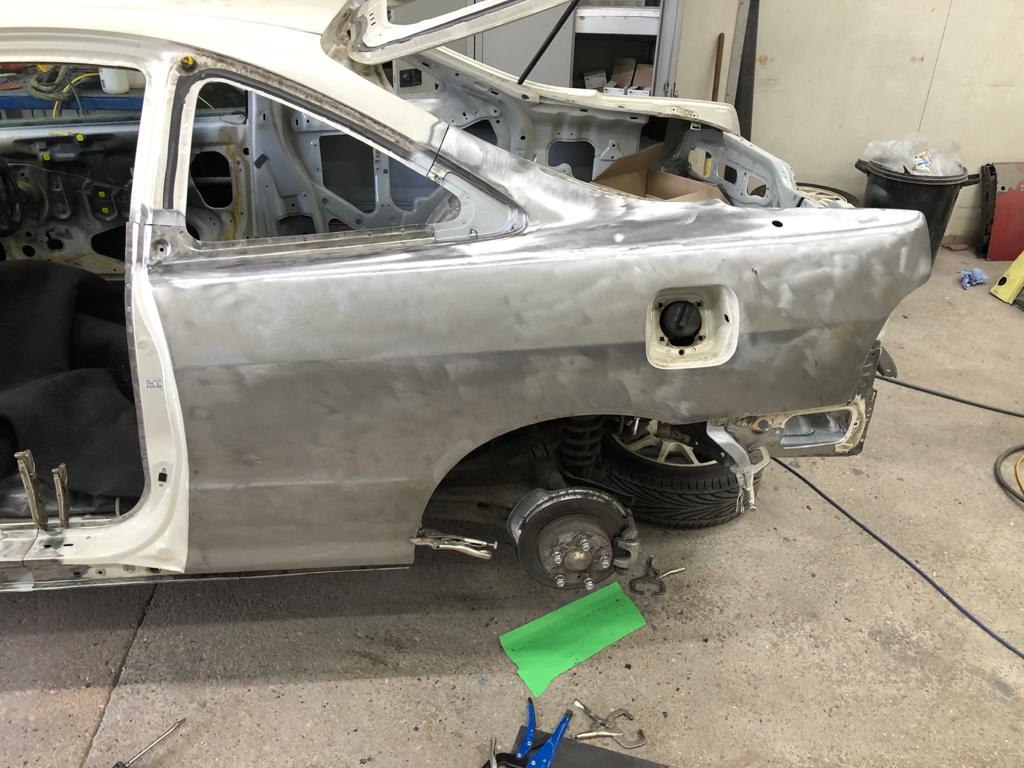
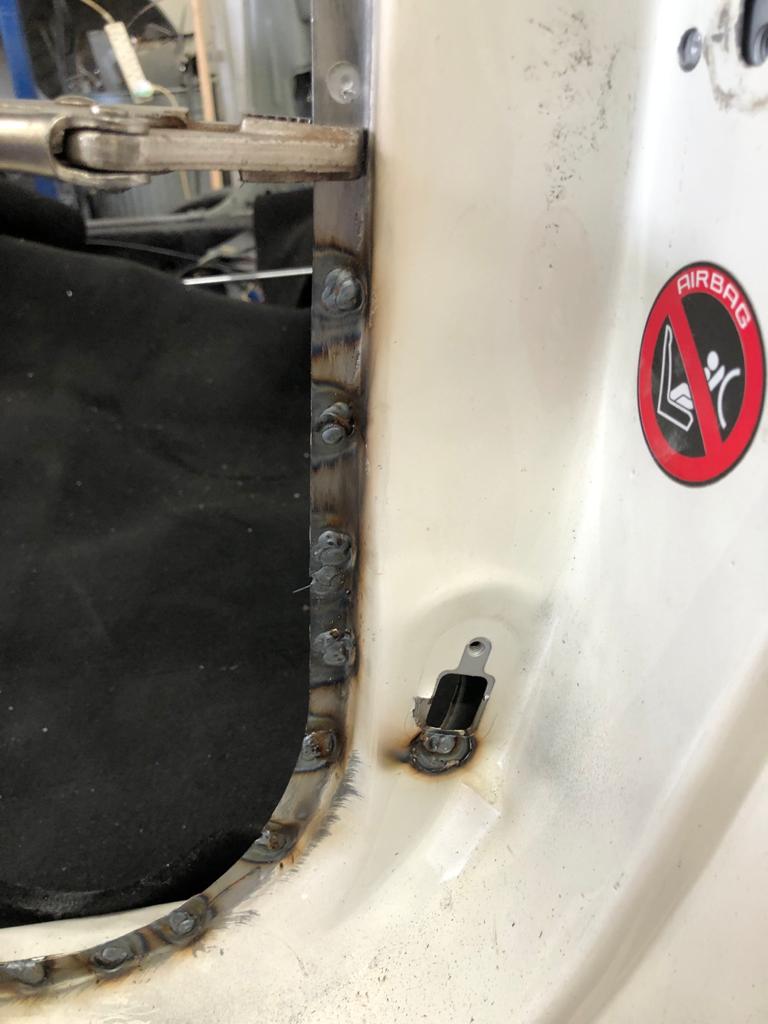
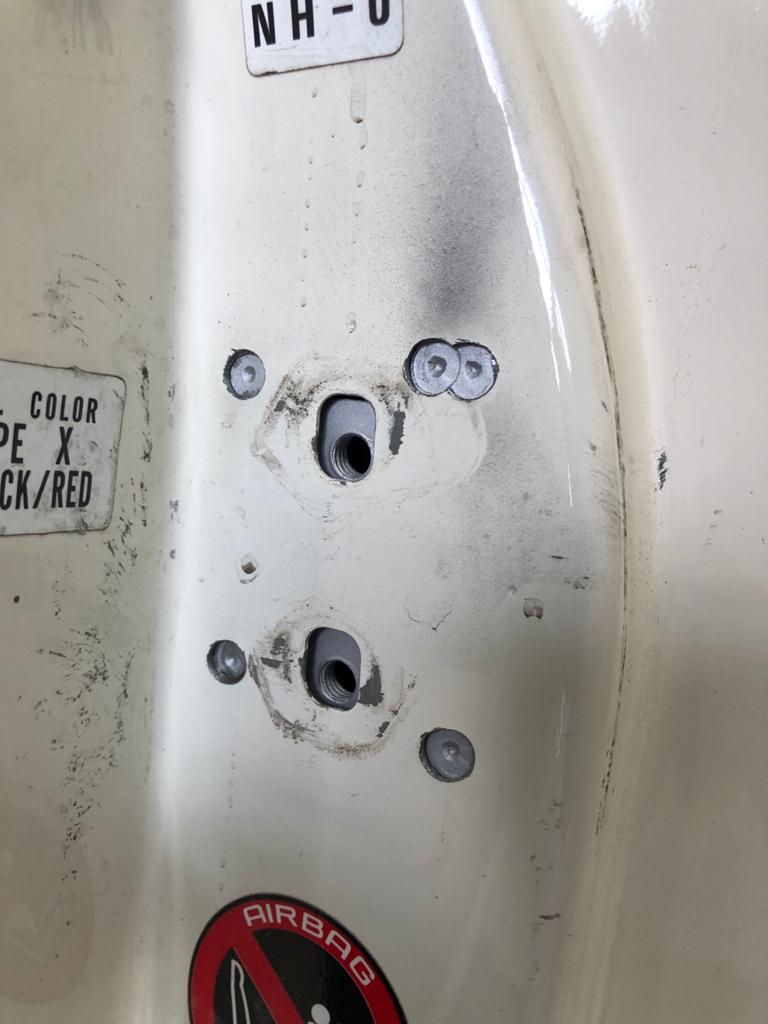
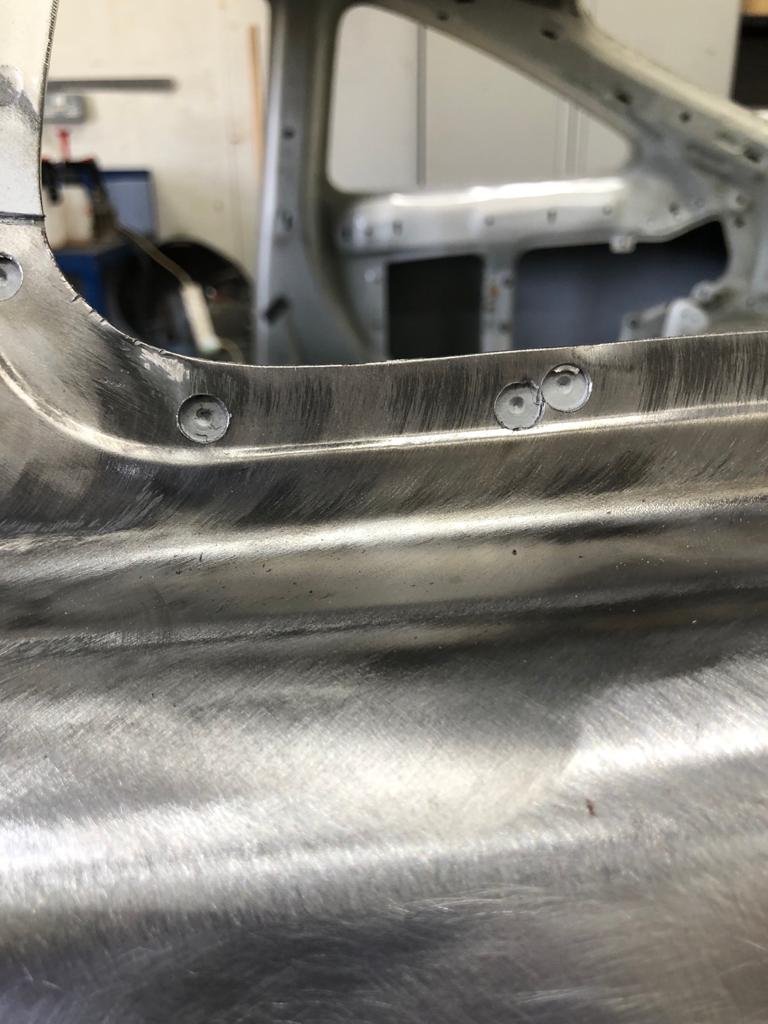
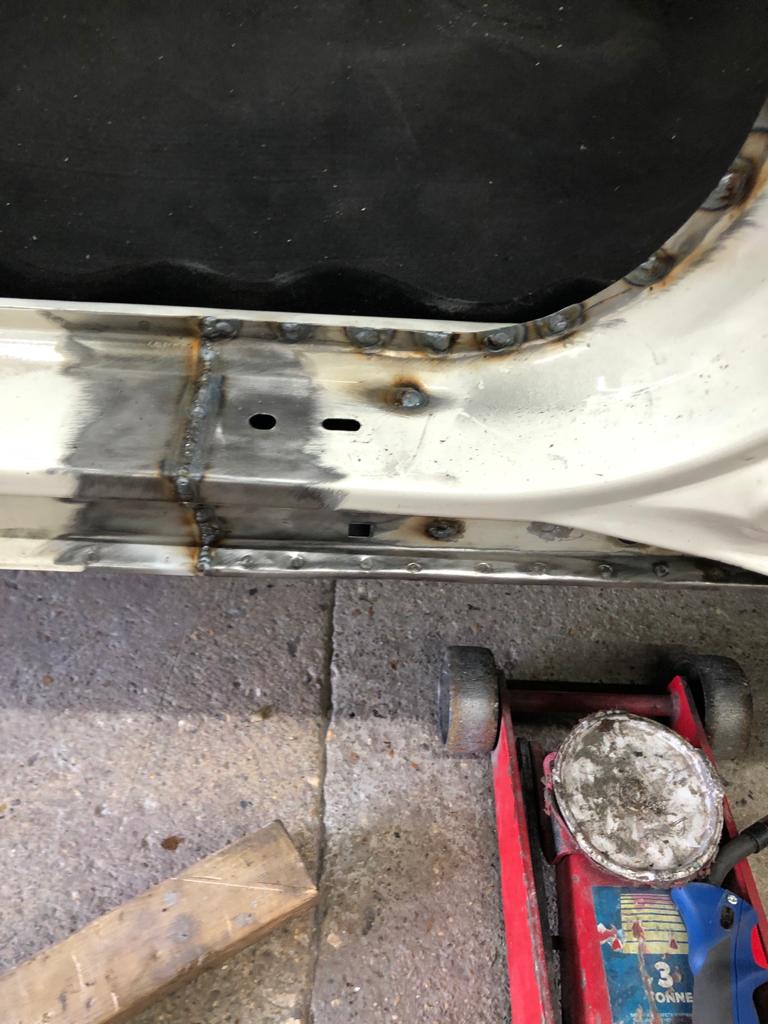
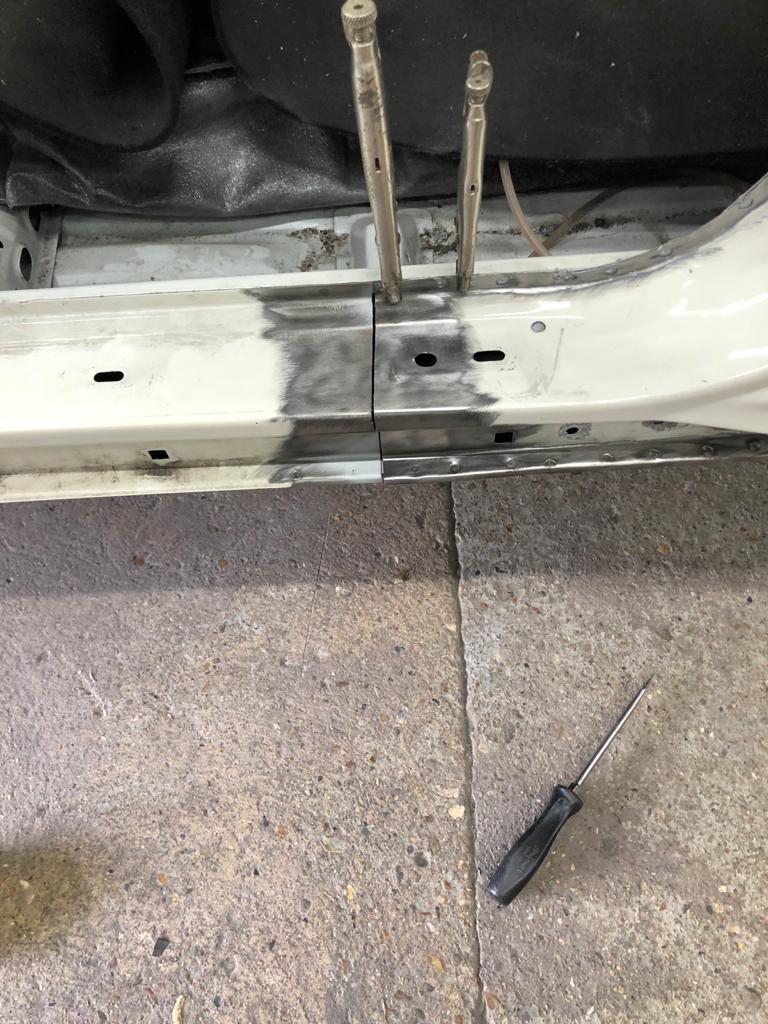
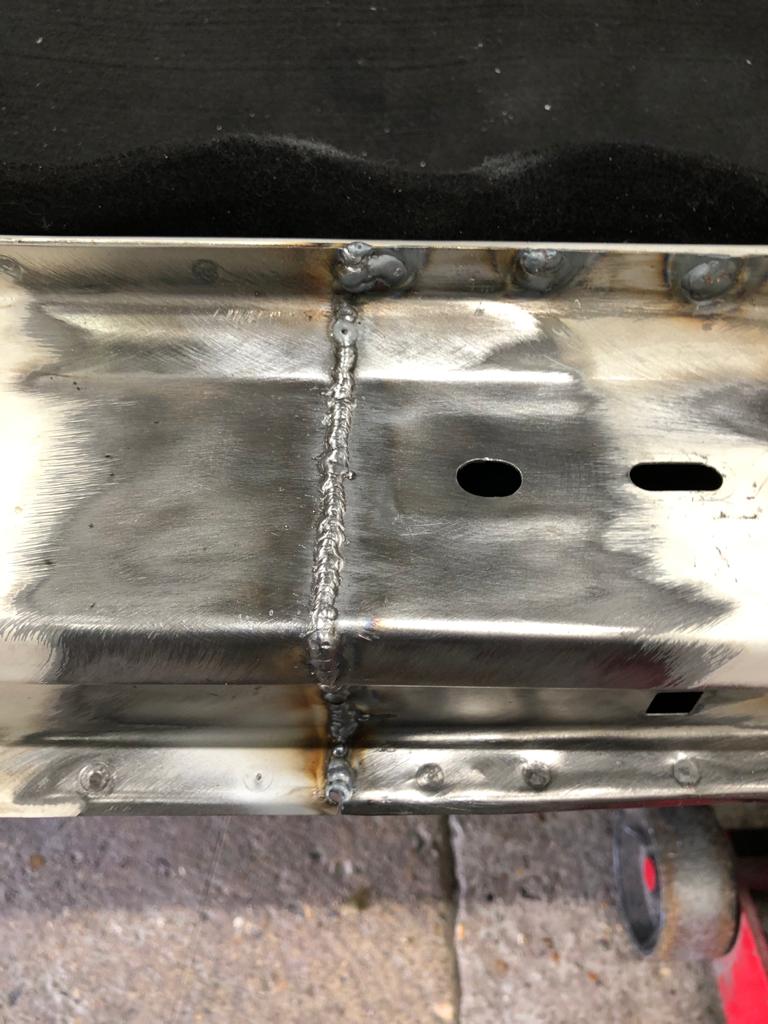
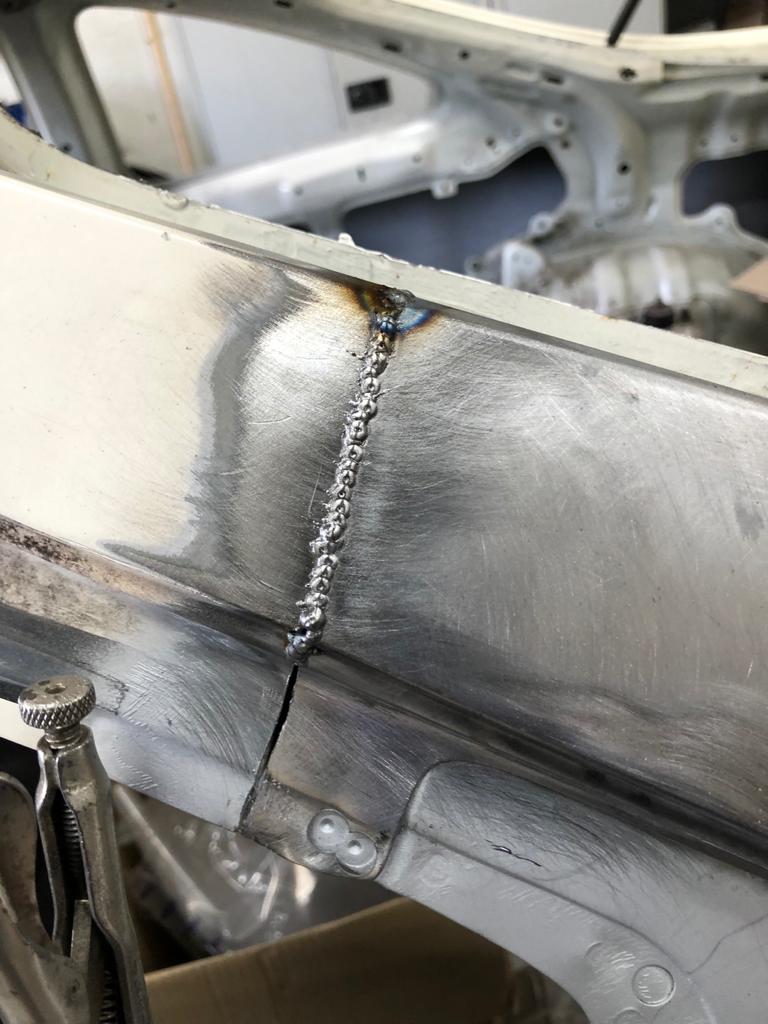
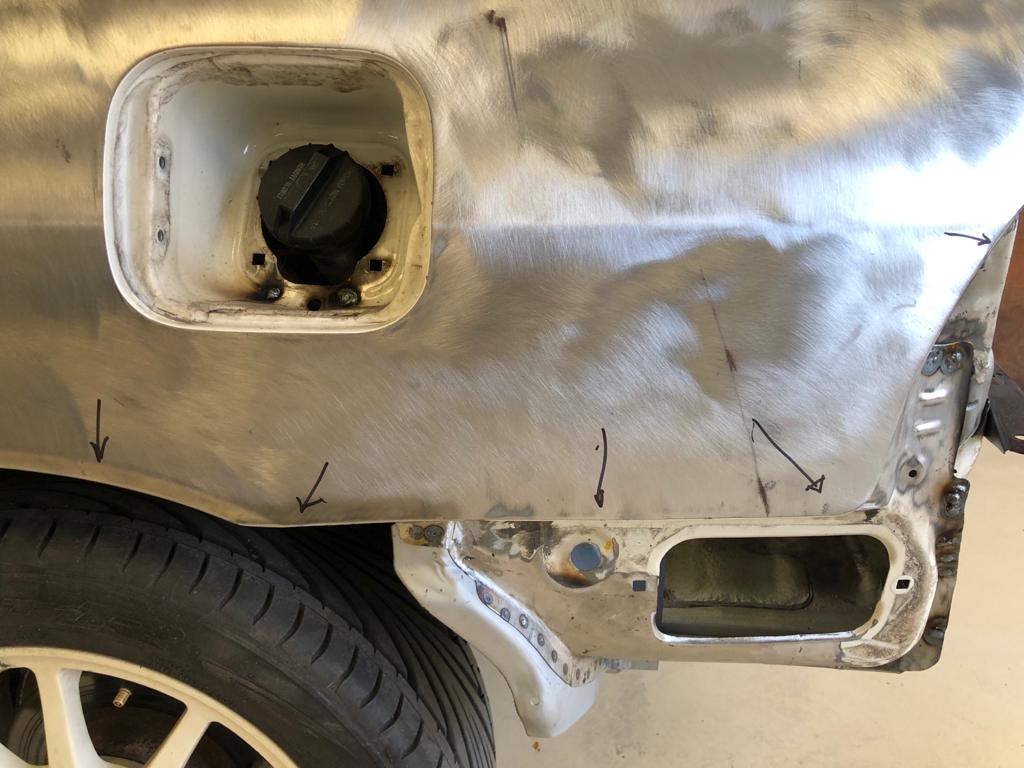
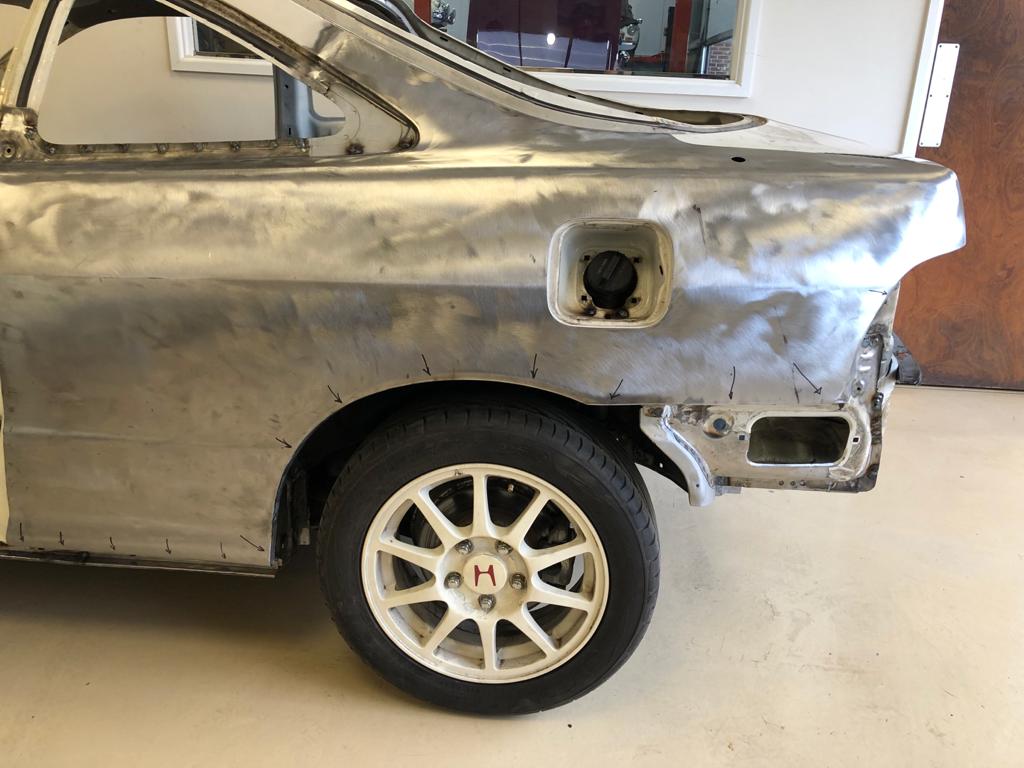
James has been doing the last bits of welding repair work on the 1998 Honda Integra Type R. He removed the left hand quarter panel
James has got the 1986 Daimler Double Six in the fabrication bay and has been starting the welding work on it! He’s been concentrating on

Here we have a new arrival to the workshop, a 1977 Daimler Double-Six. It’s only in for a small amount of work, which is that

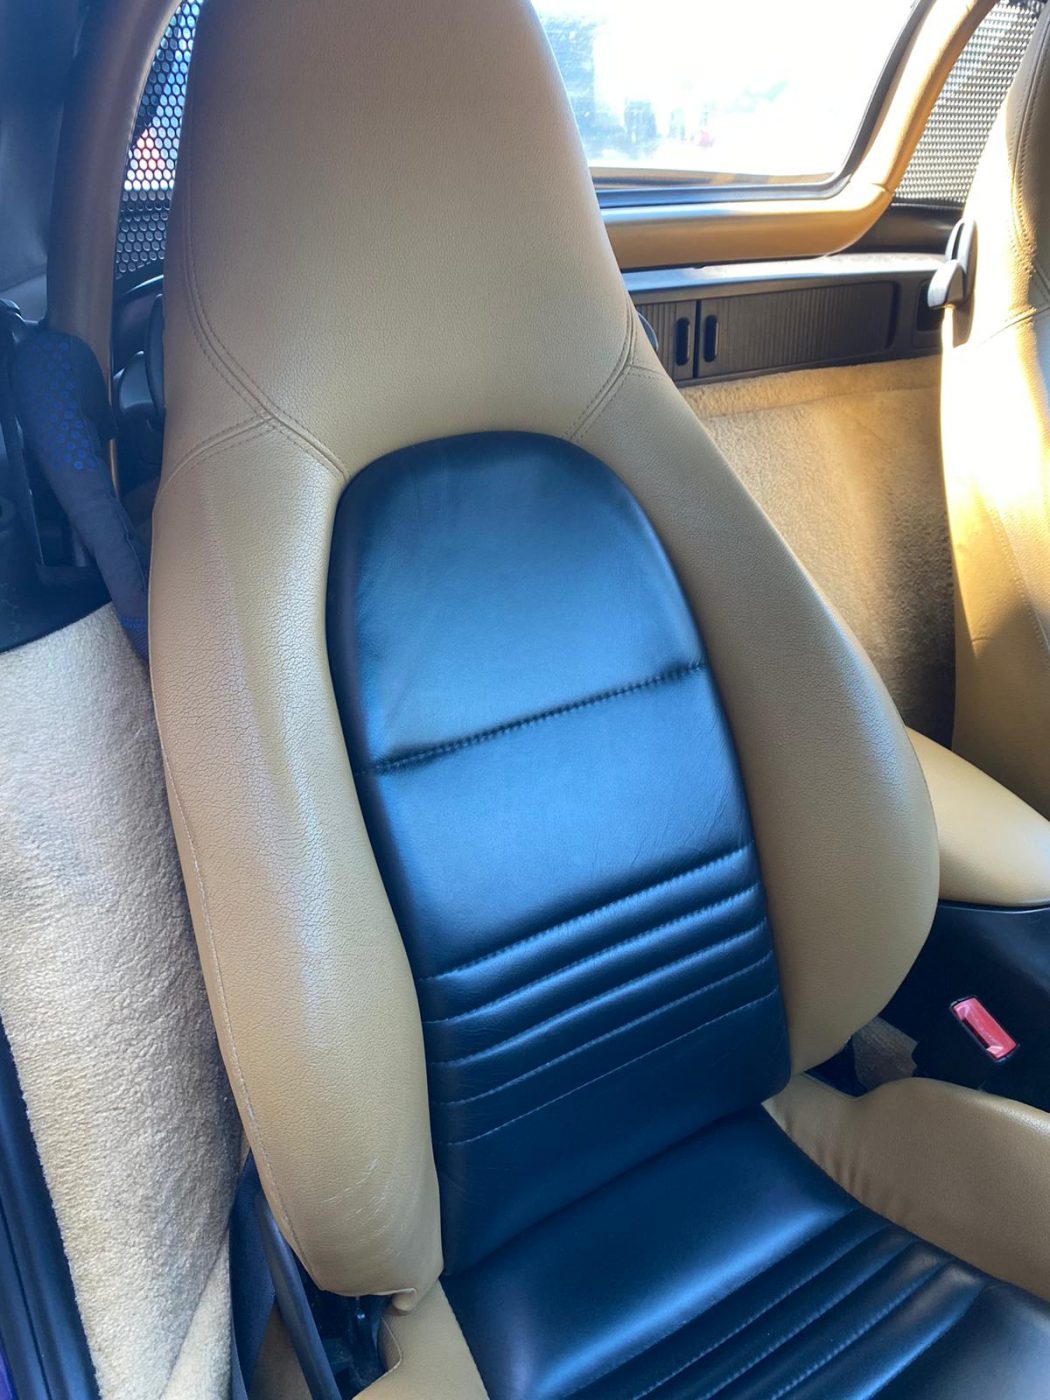
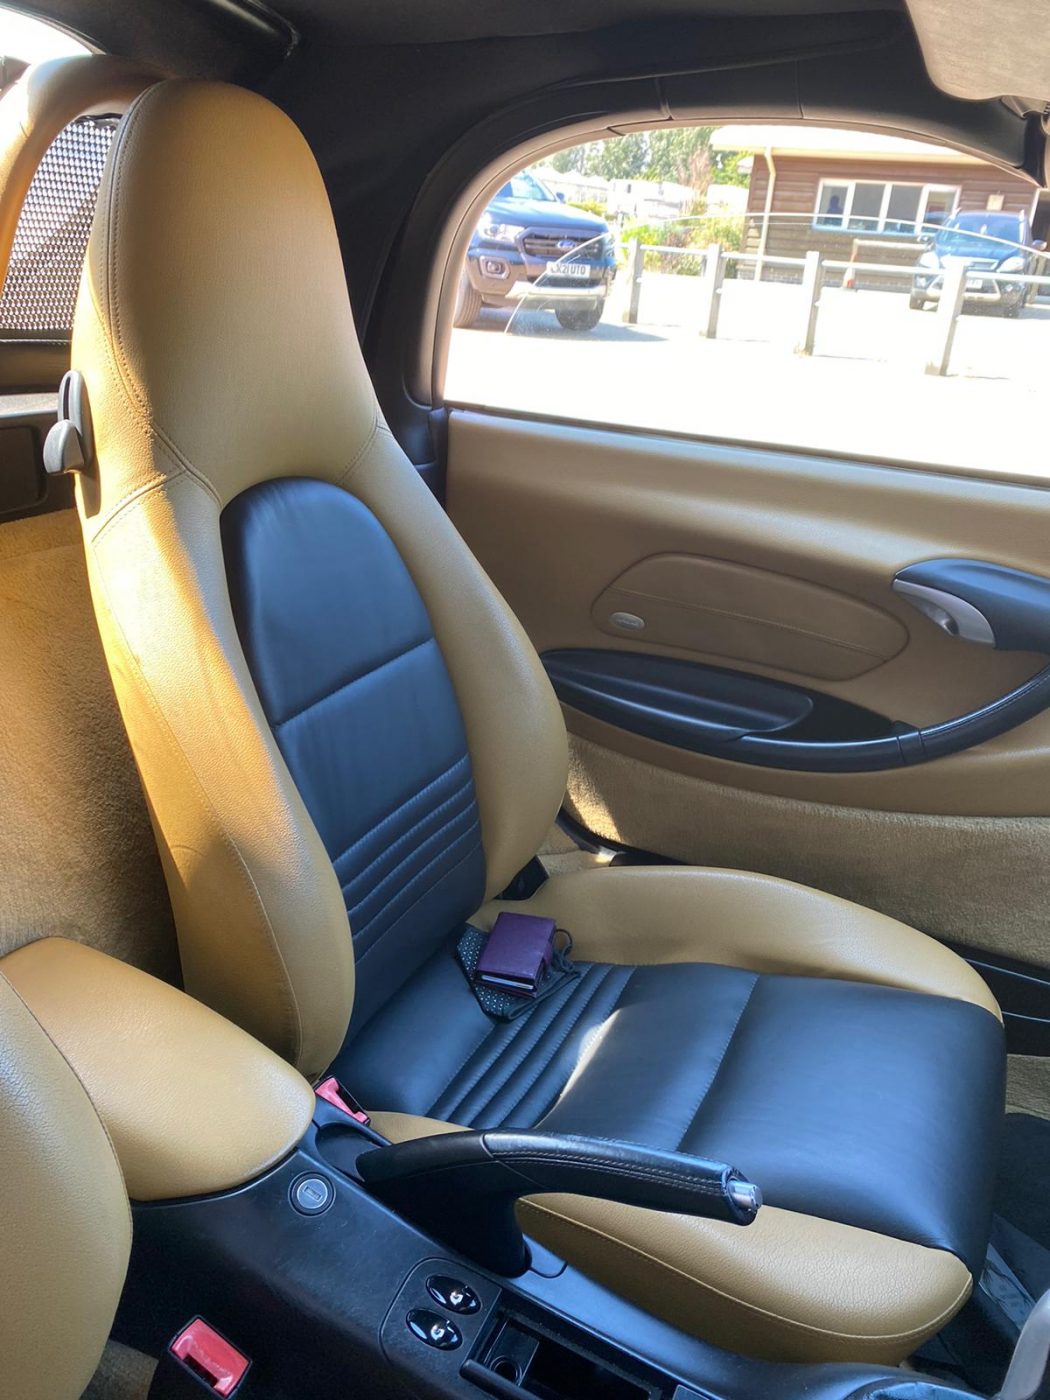
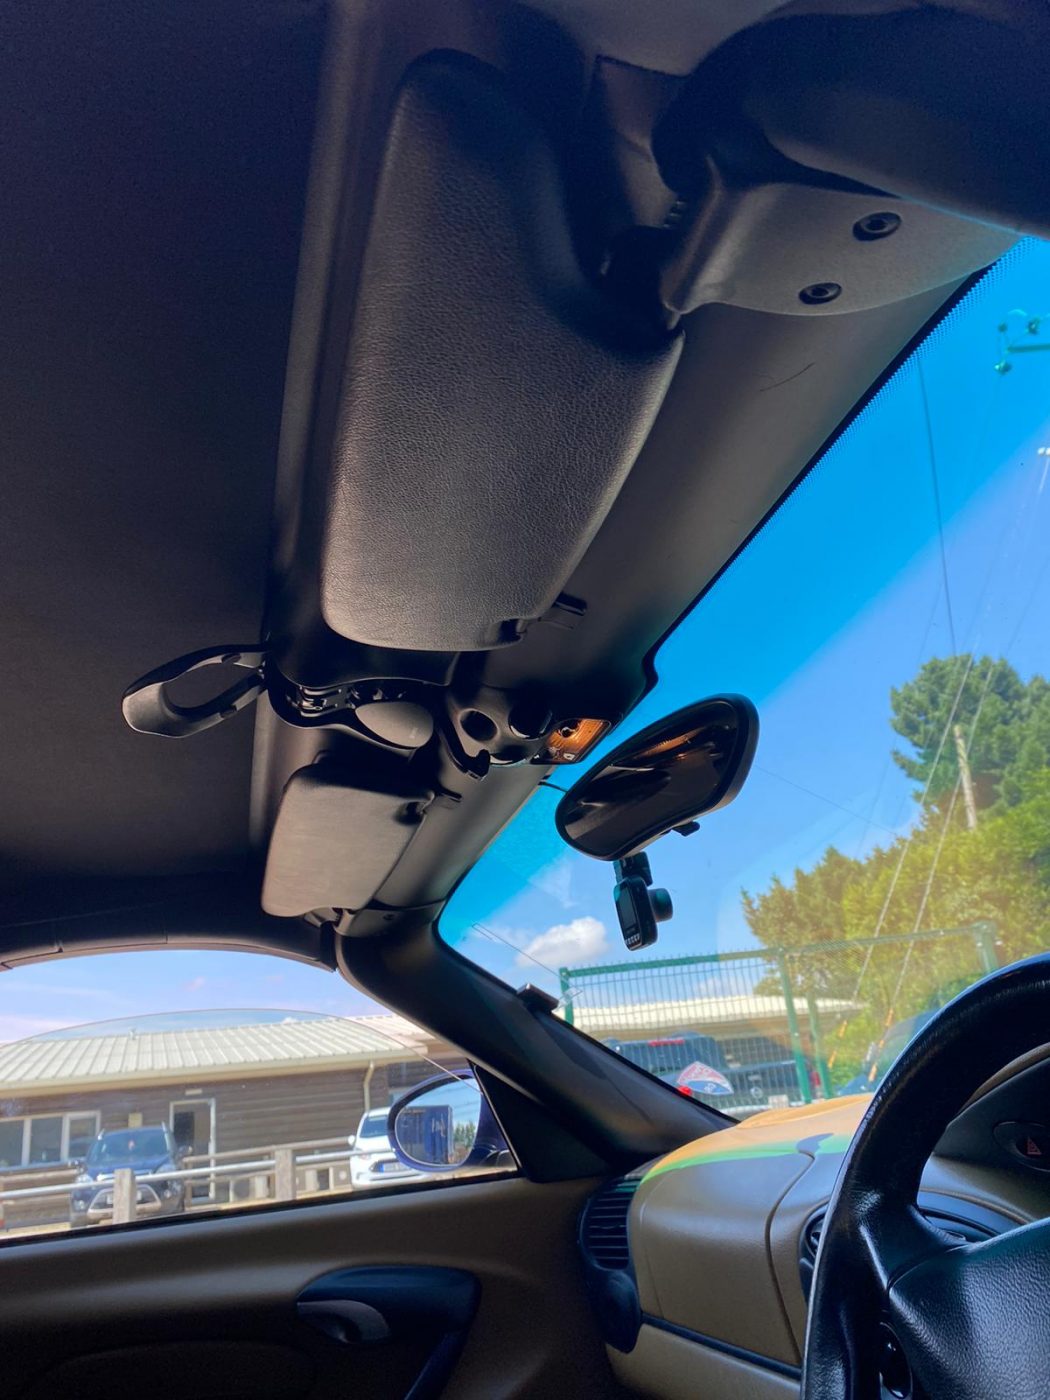
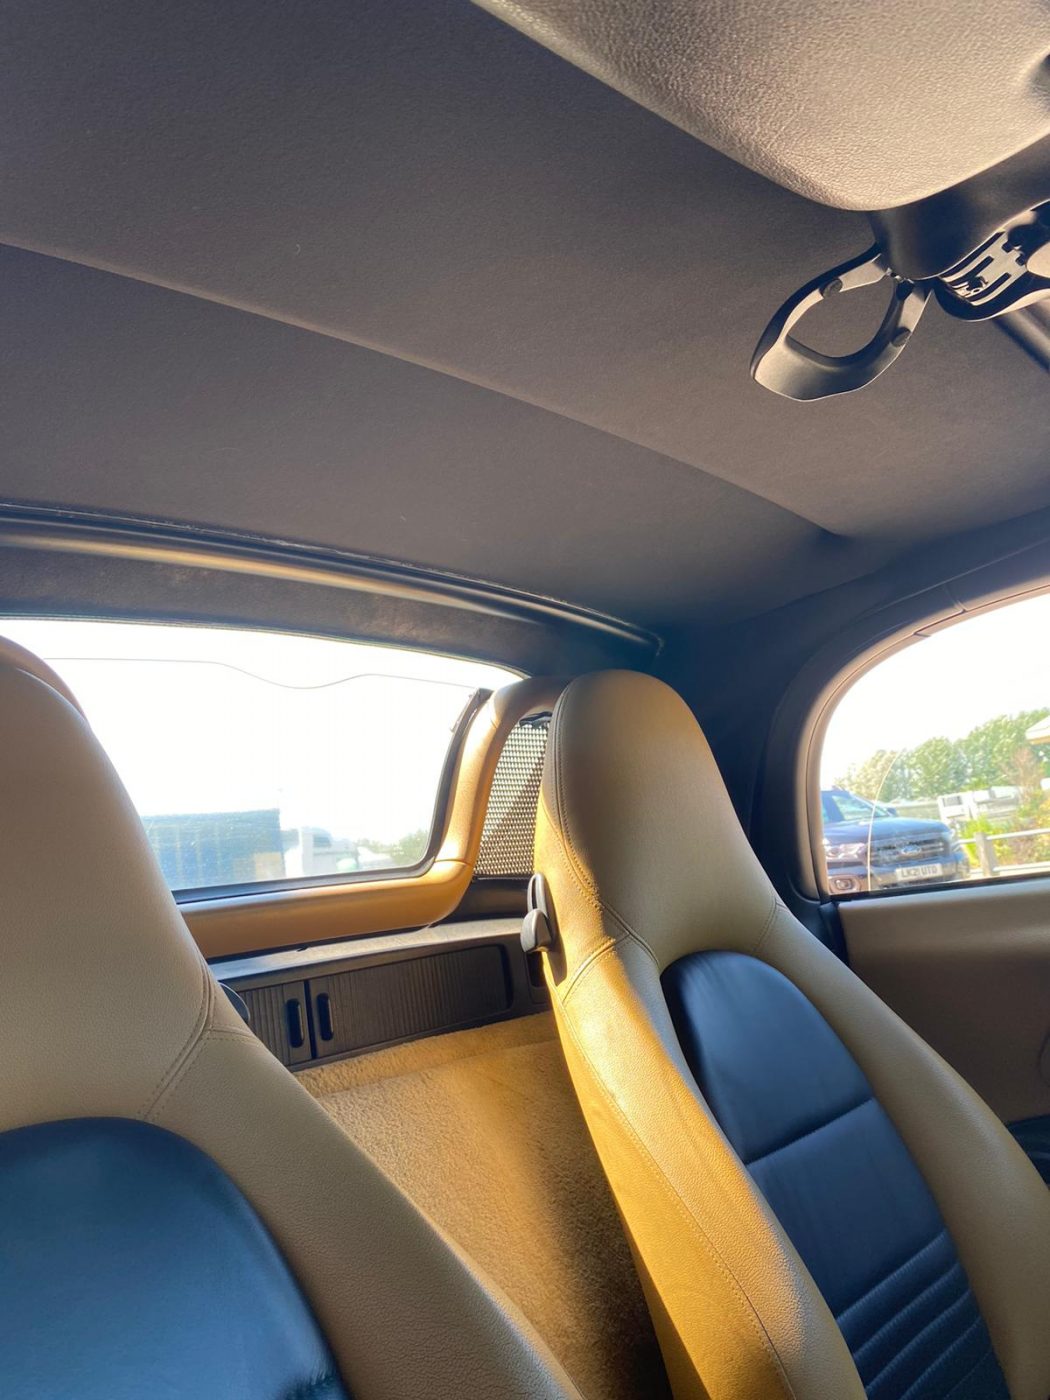
Having recently attended our Classic Car Show the owner of this Porsche Boxter has asked for our help and assistance on some remedial works required
Another little update on the 1955 Aston Martin DB 2/4 coming your way! In the trim shop, Kath has been re-covering the door straps. She
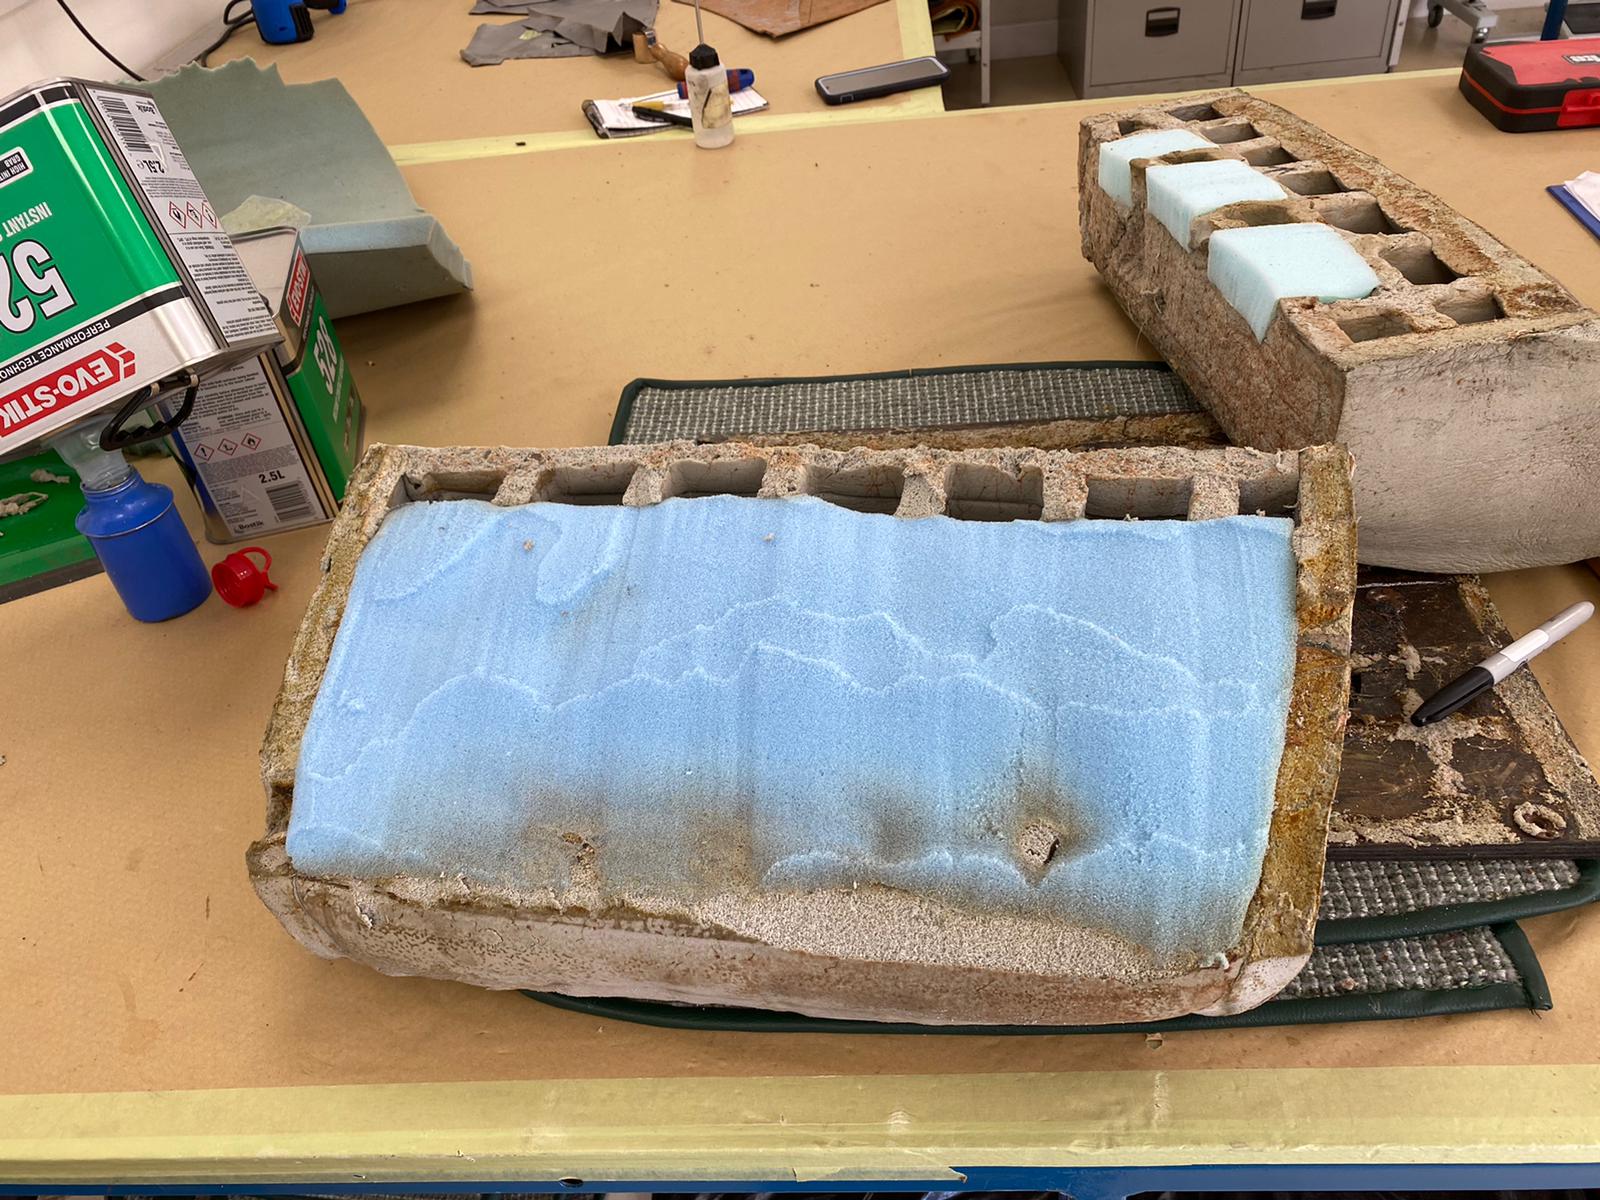
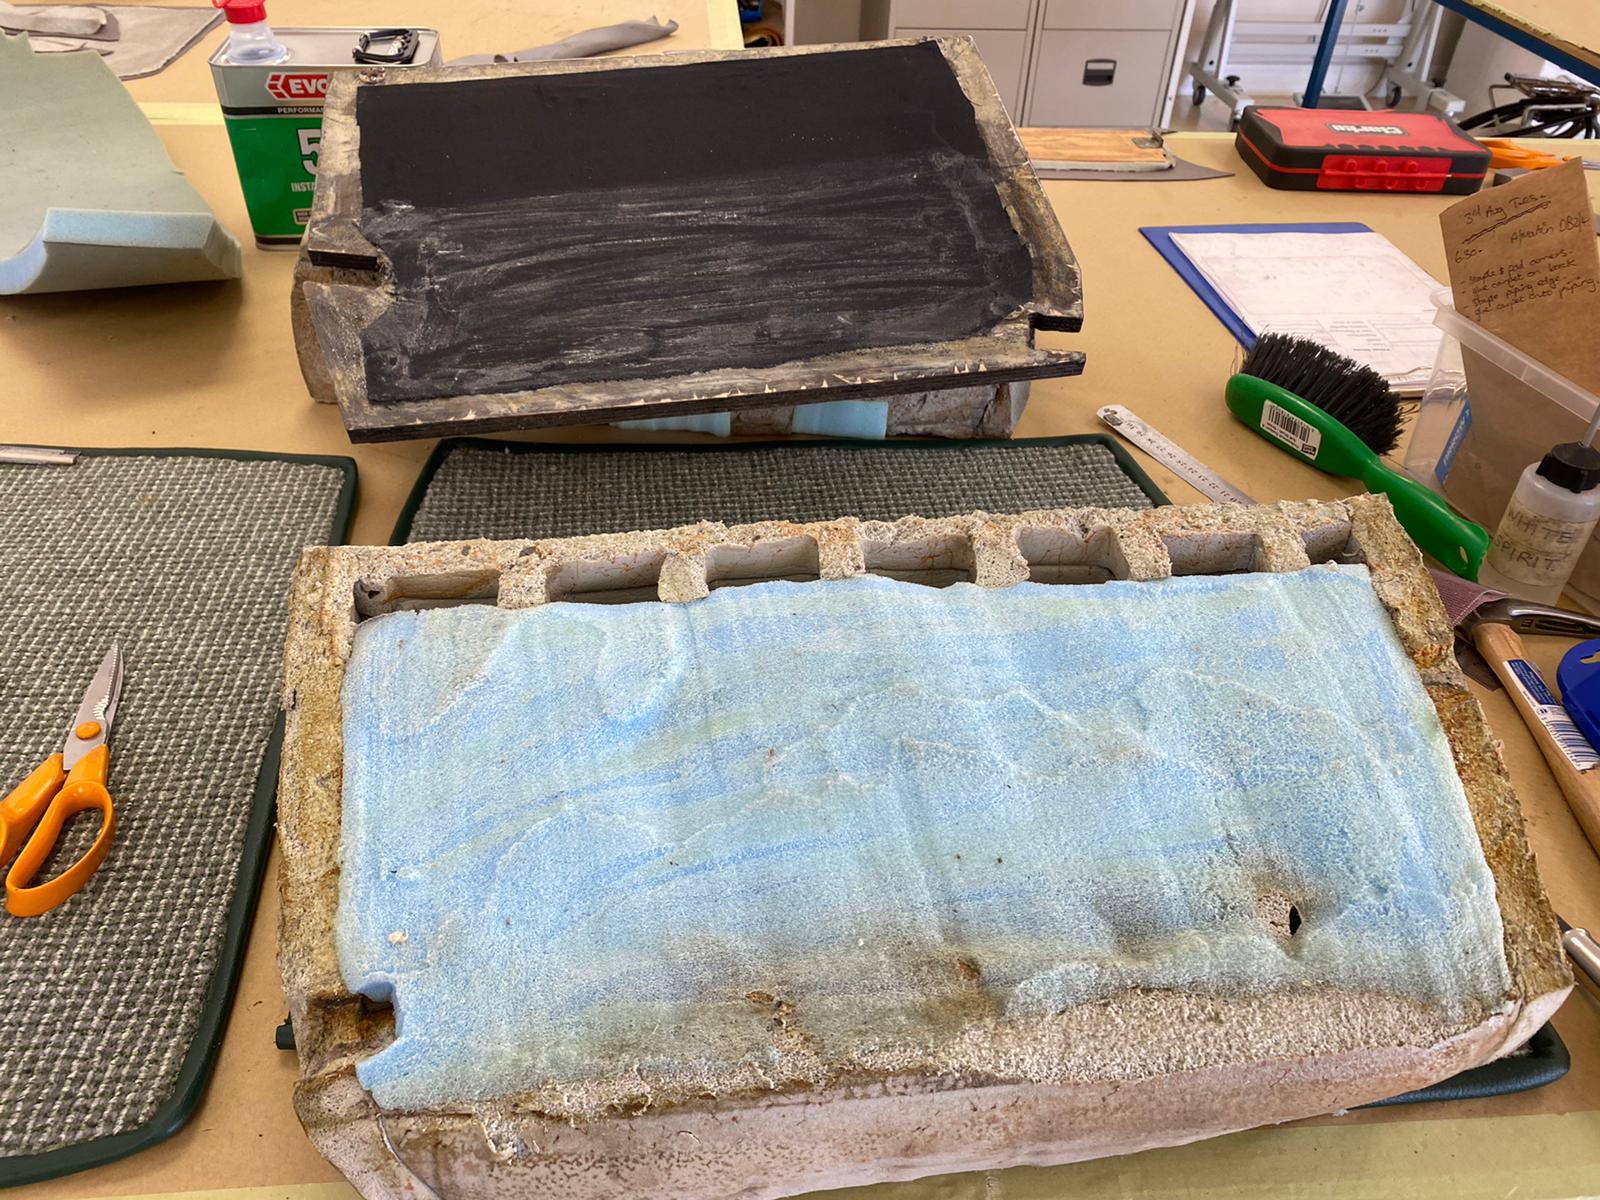
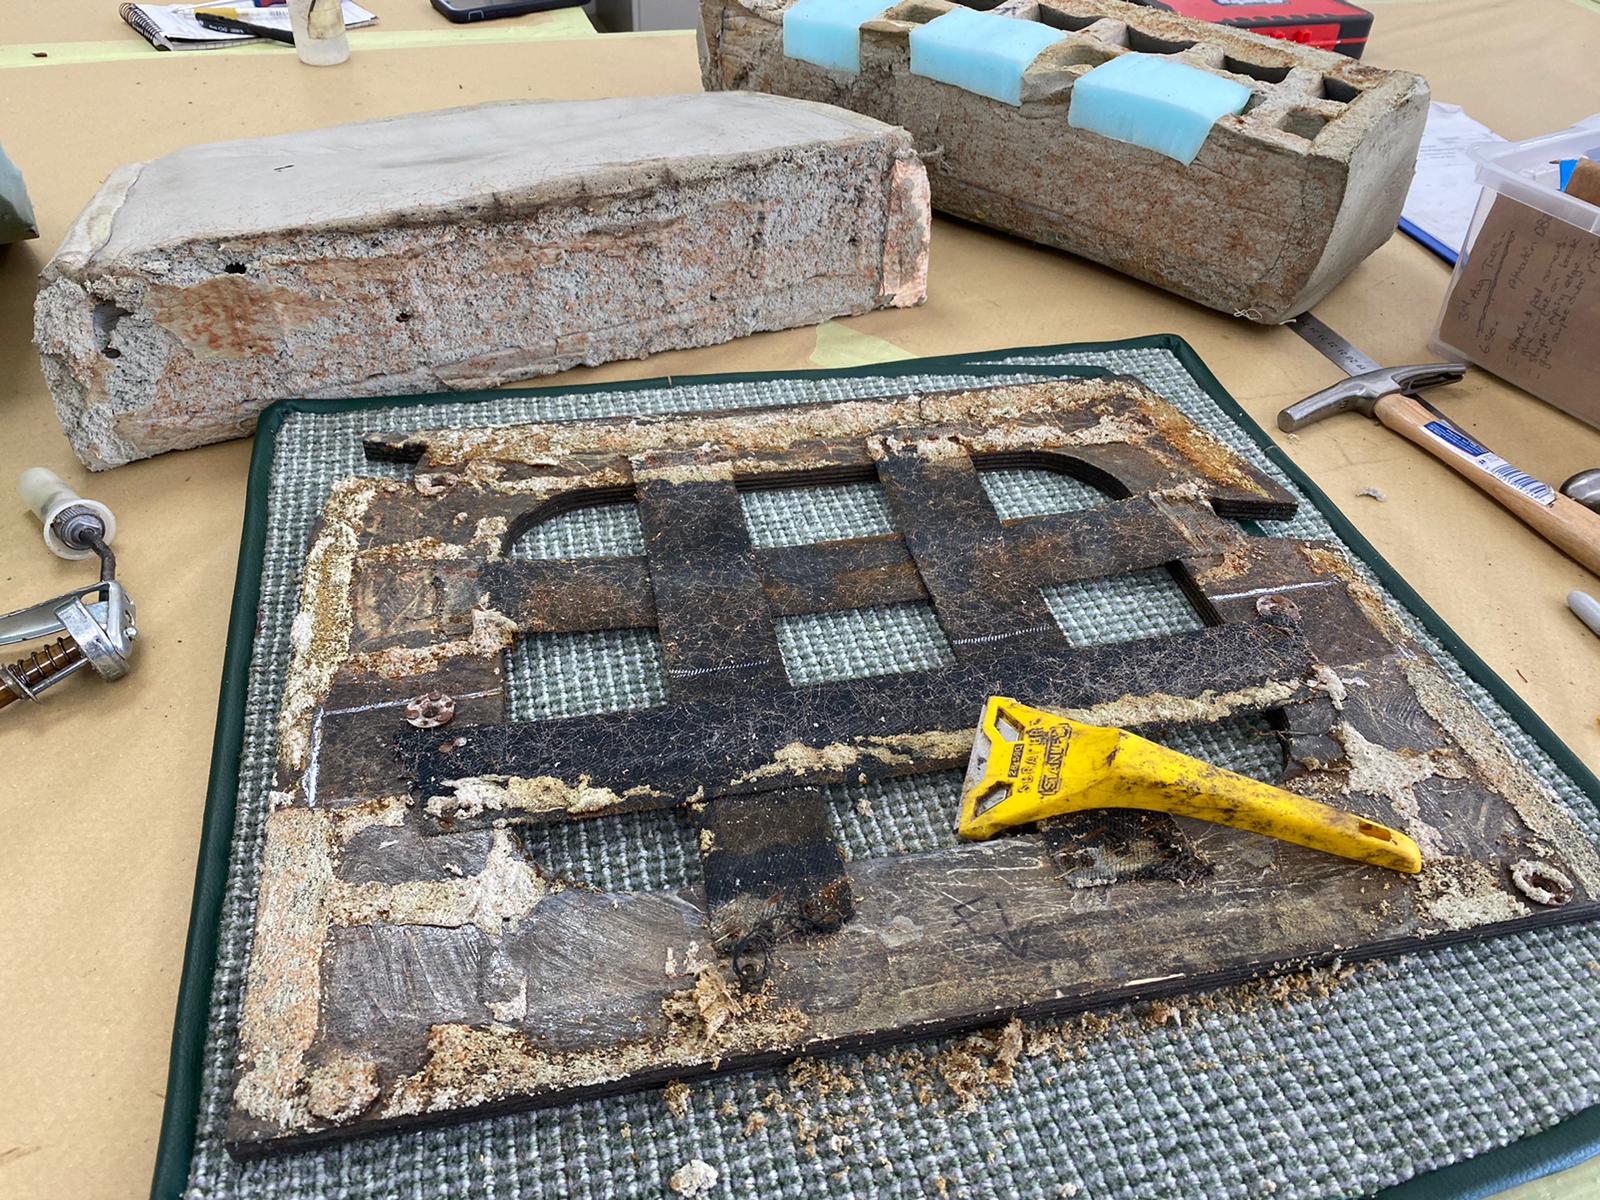
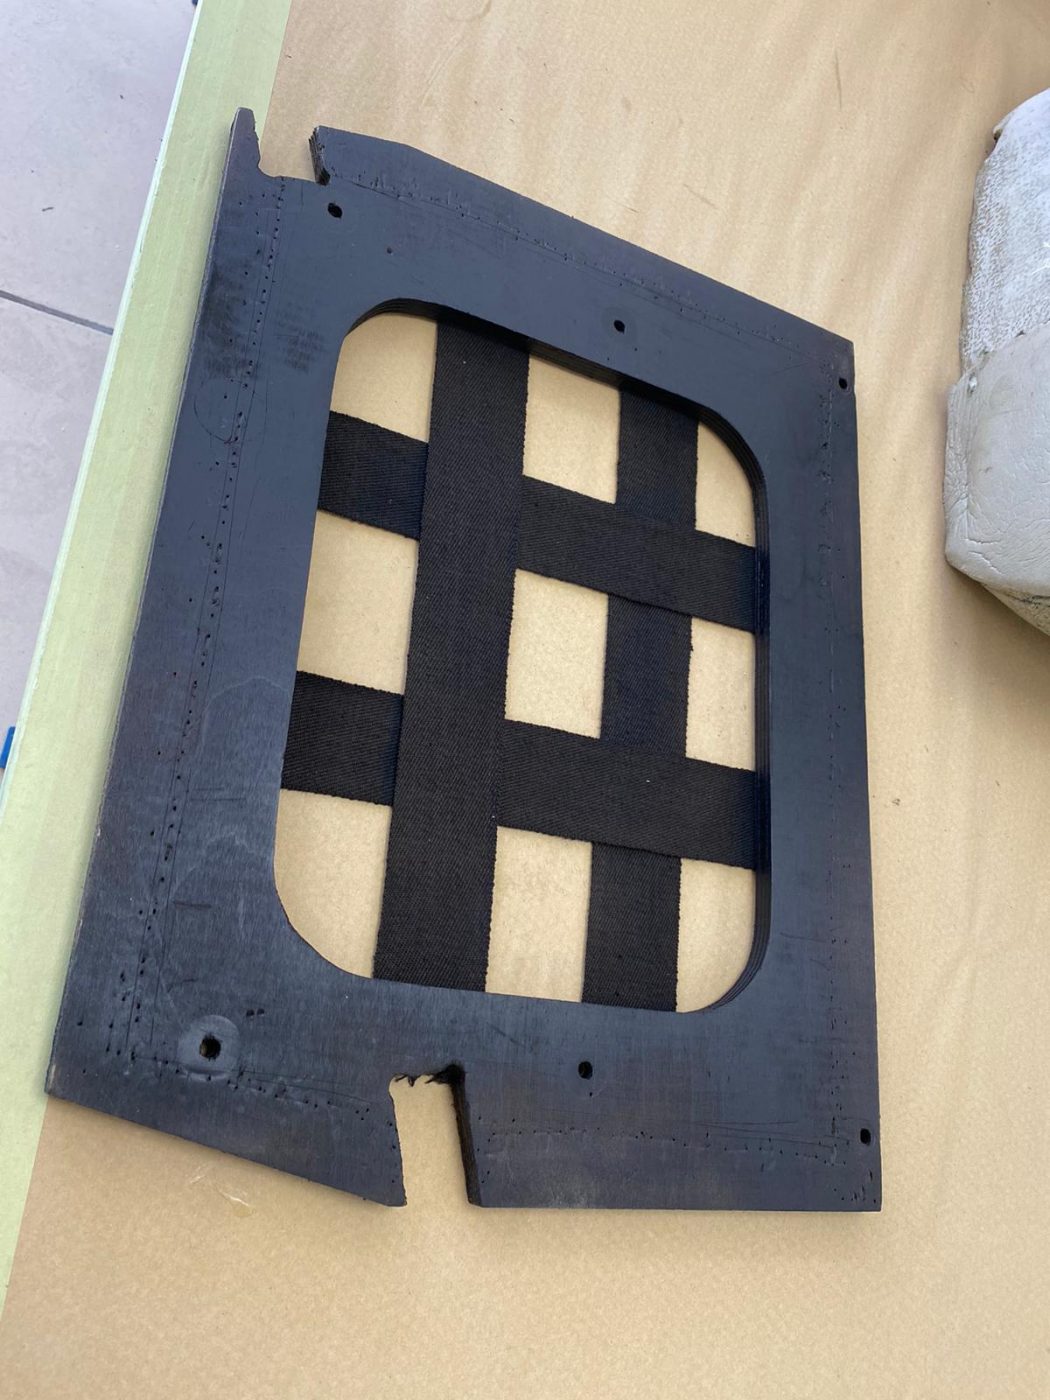
Kath has been doing more seat work for the 1955 Aston Martin DB 2/4. This time around she’s been fitting the front base seat covers
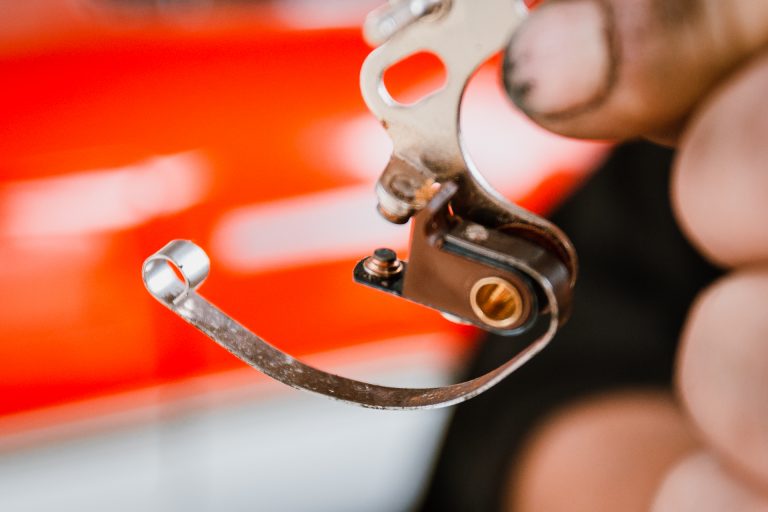
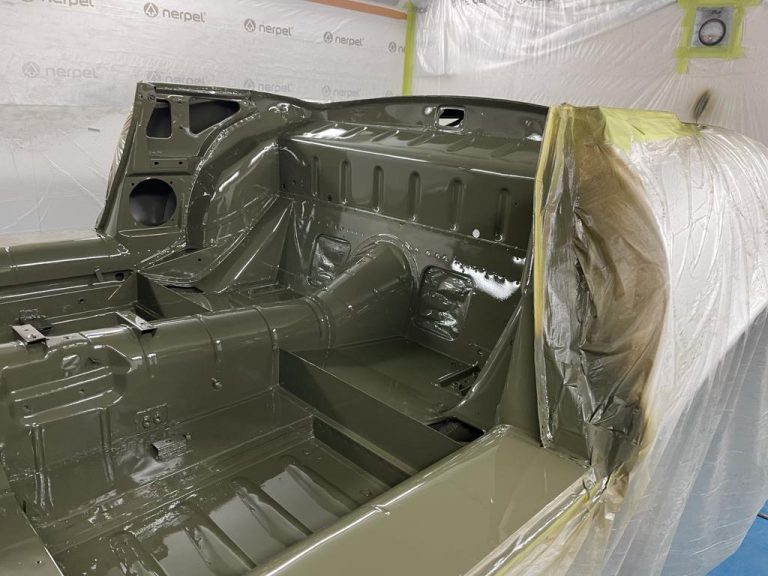
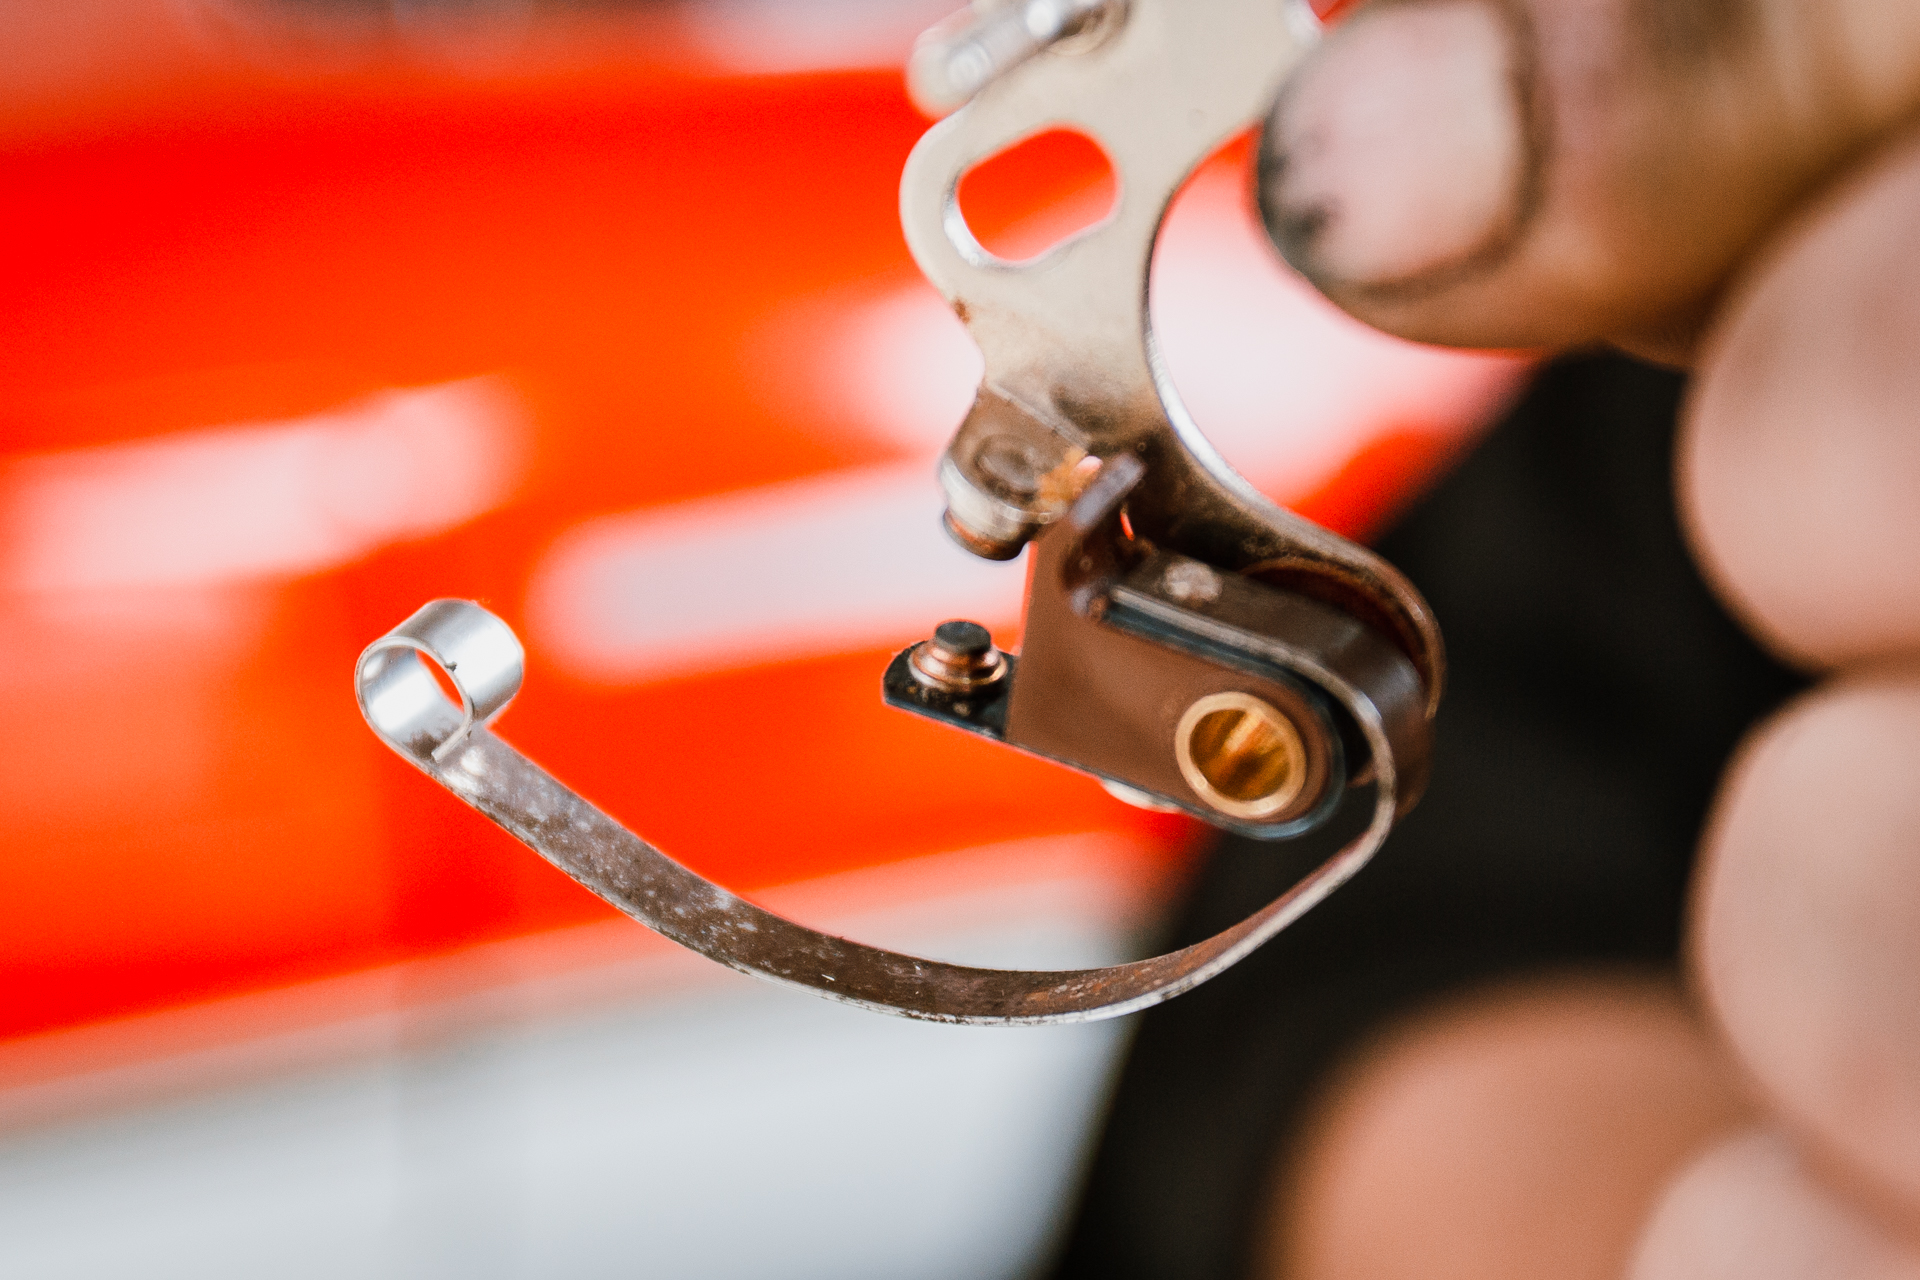
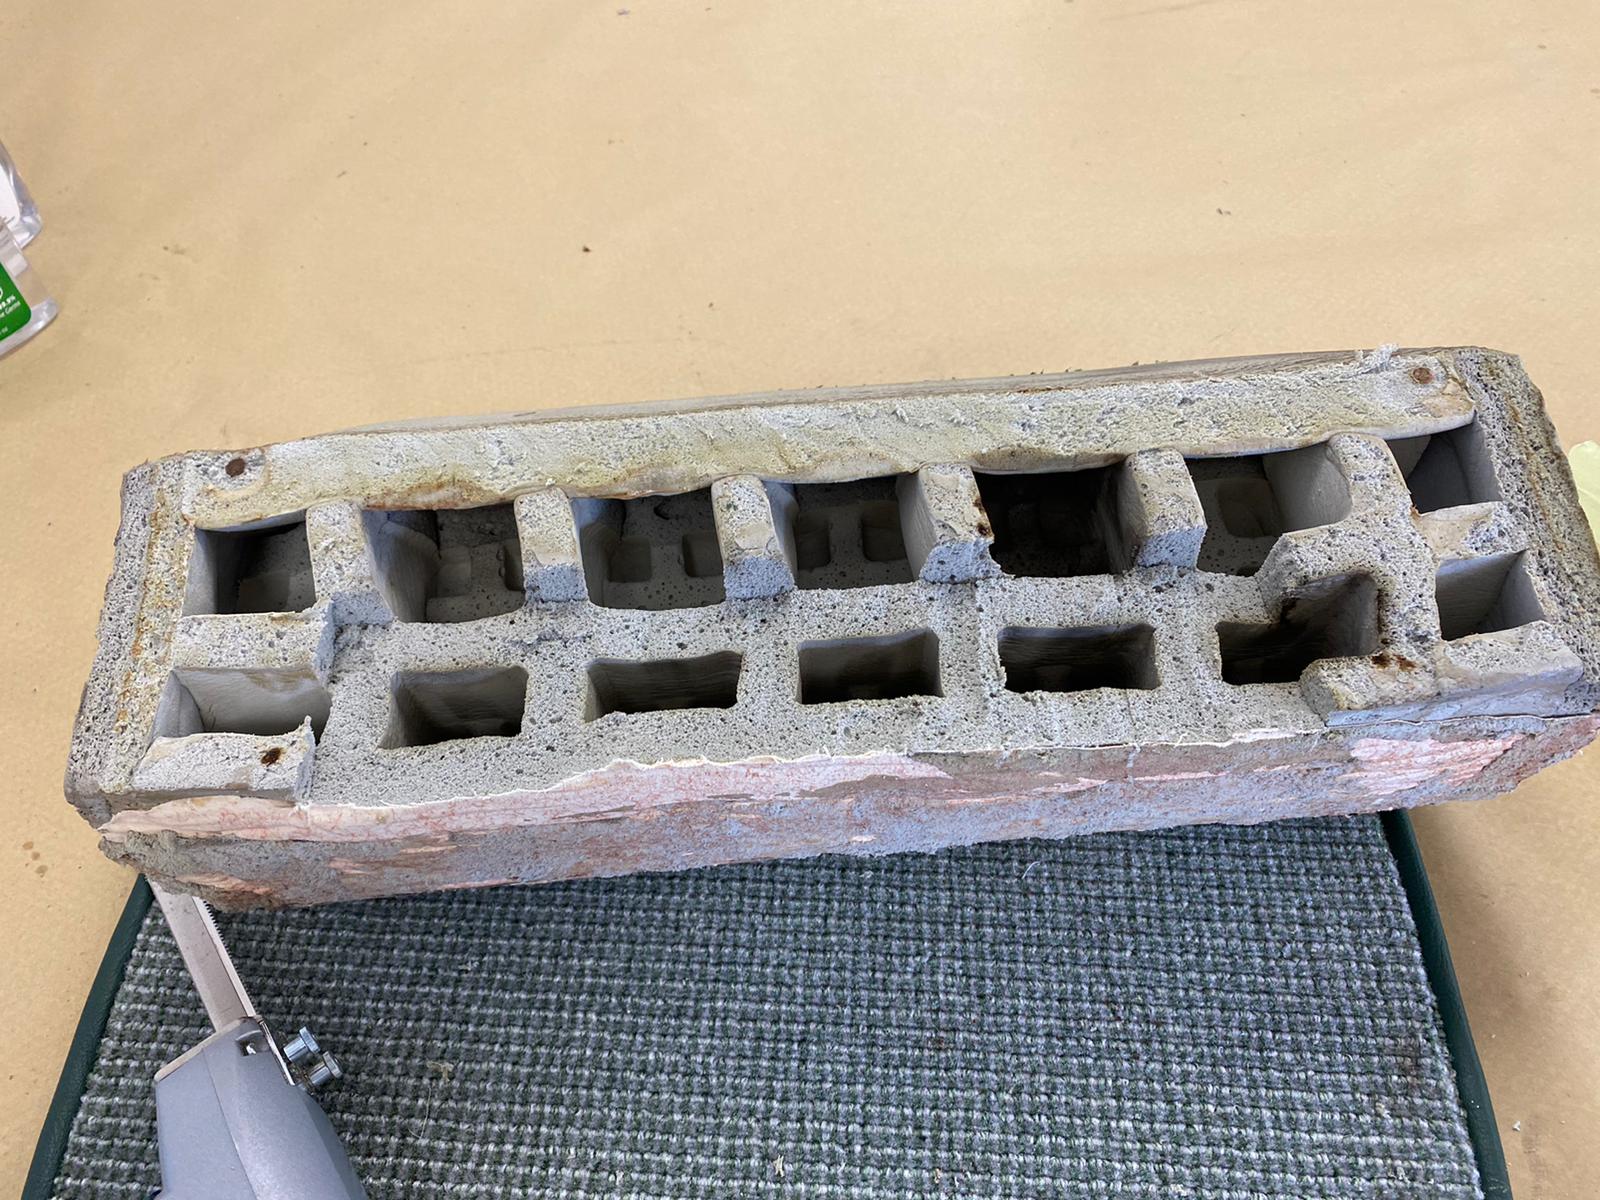
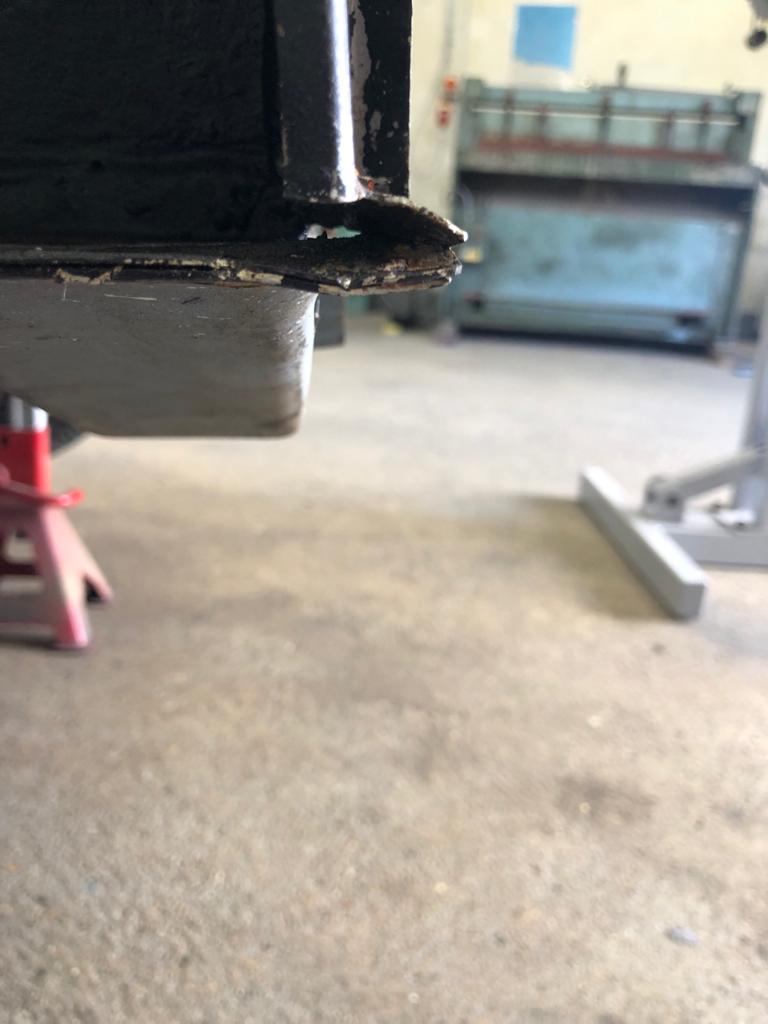
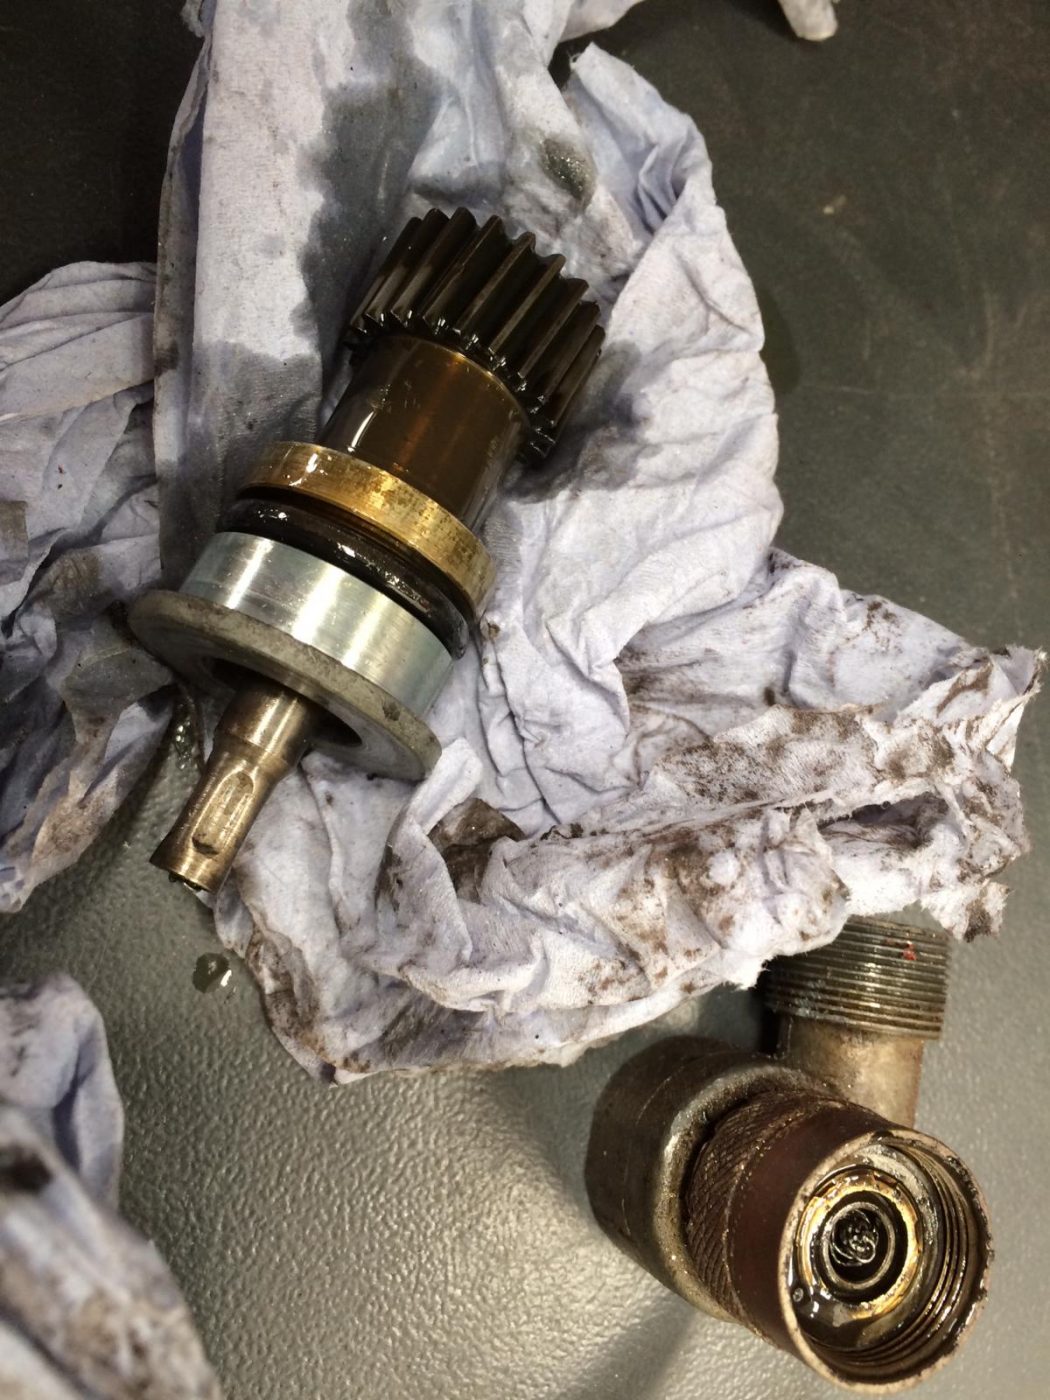
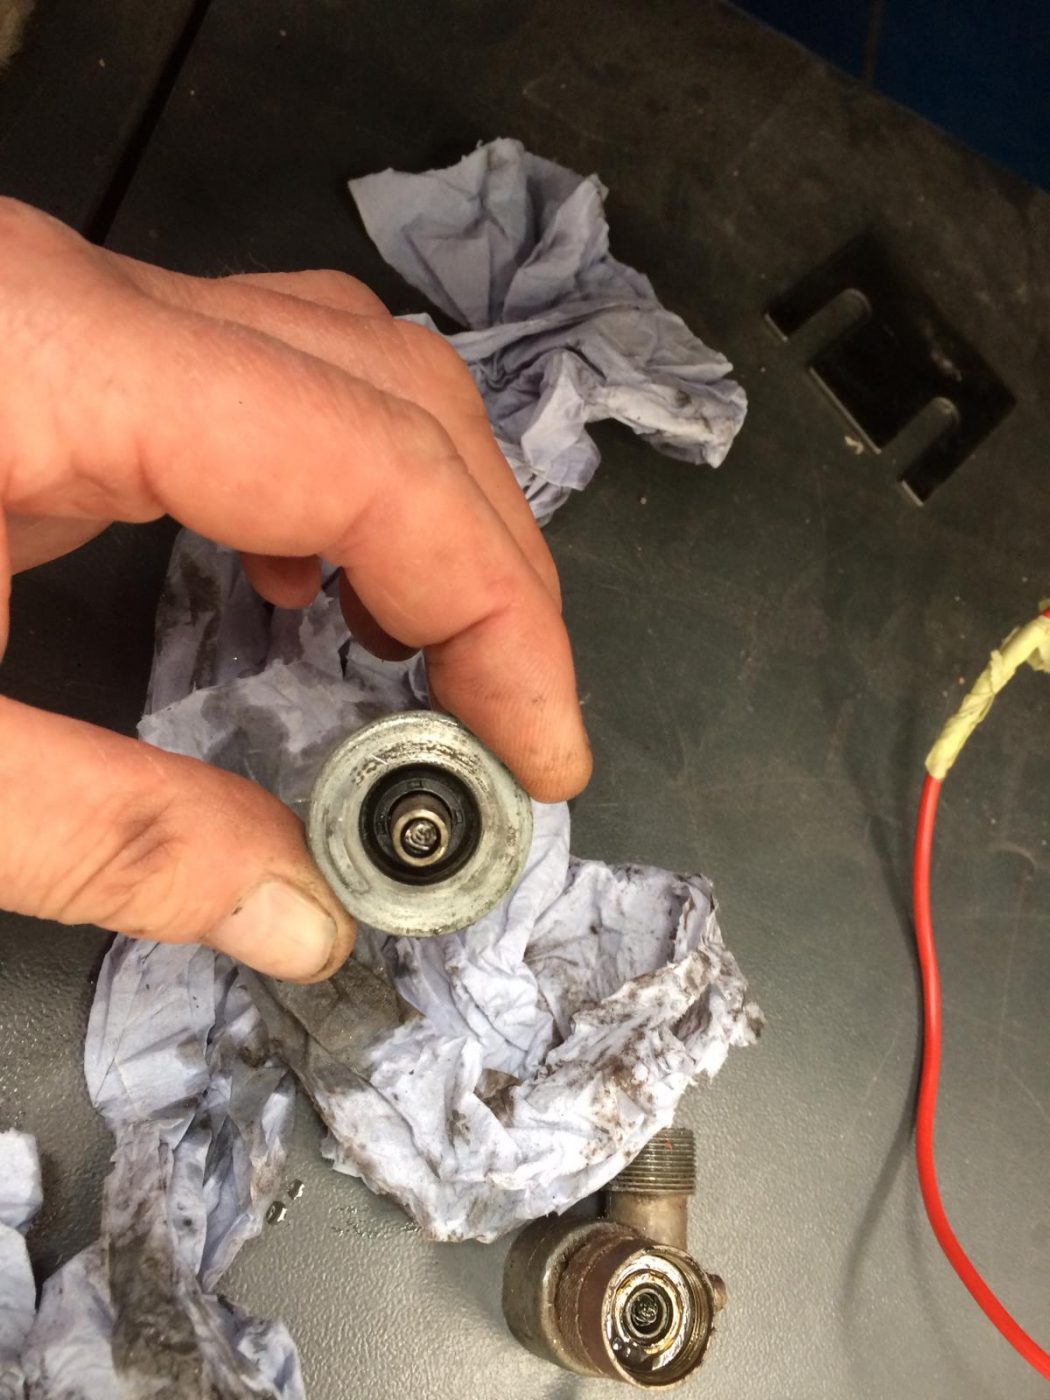
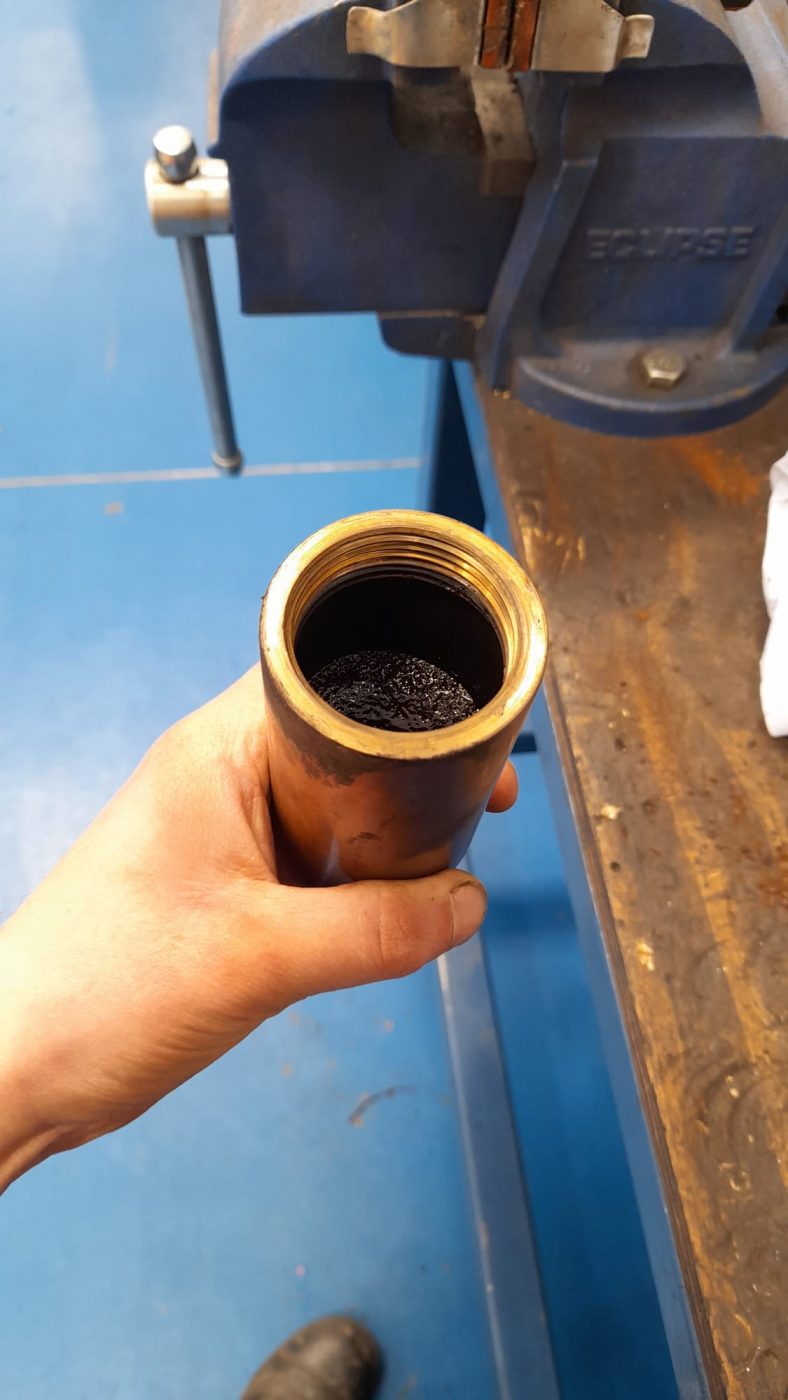
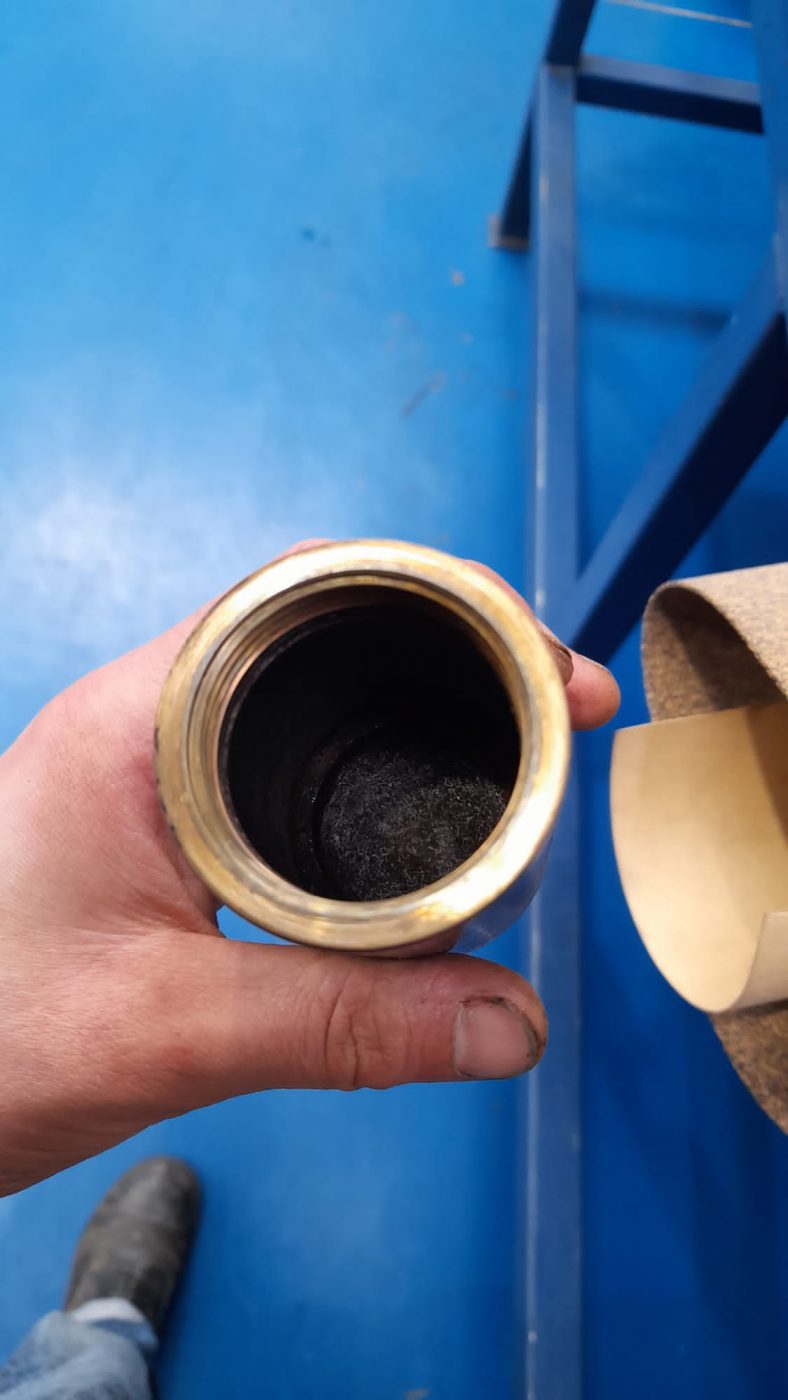
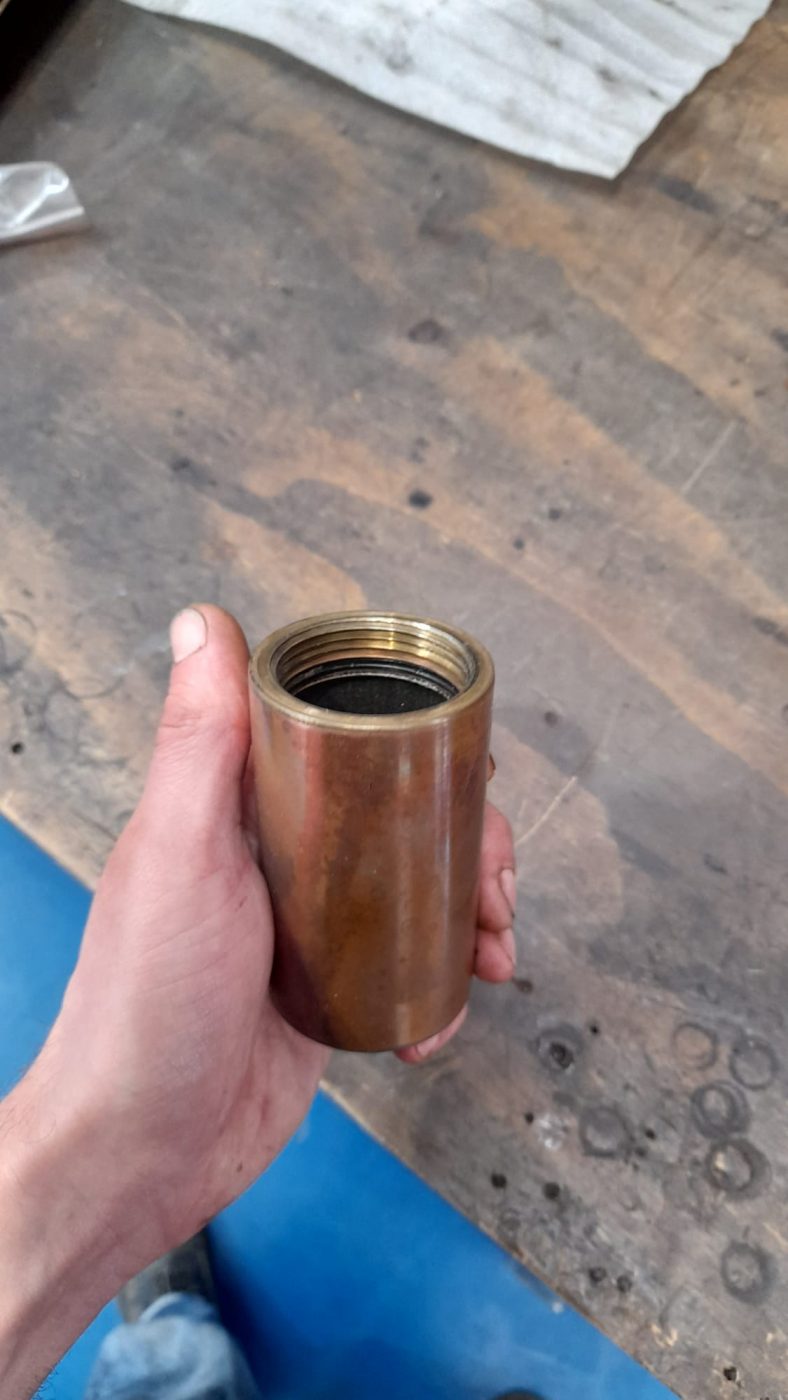
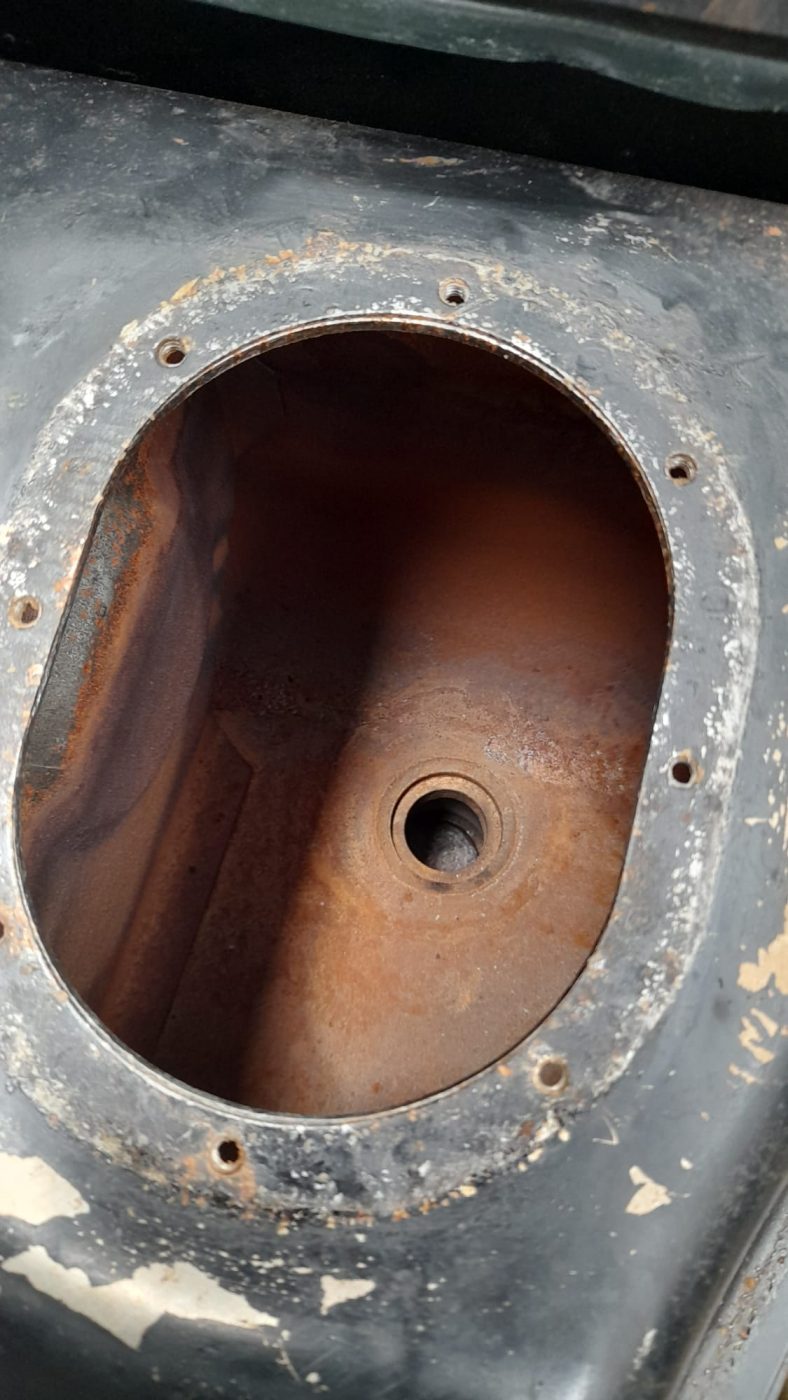
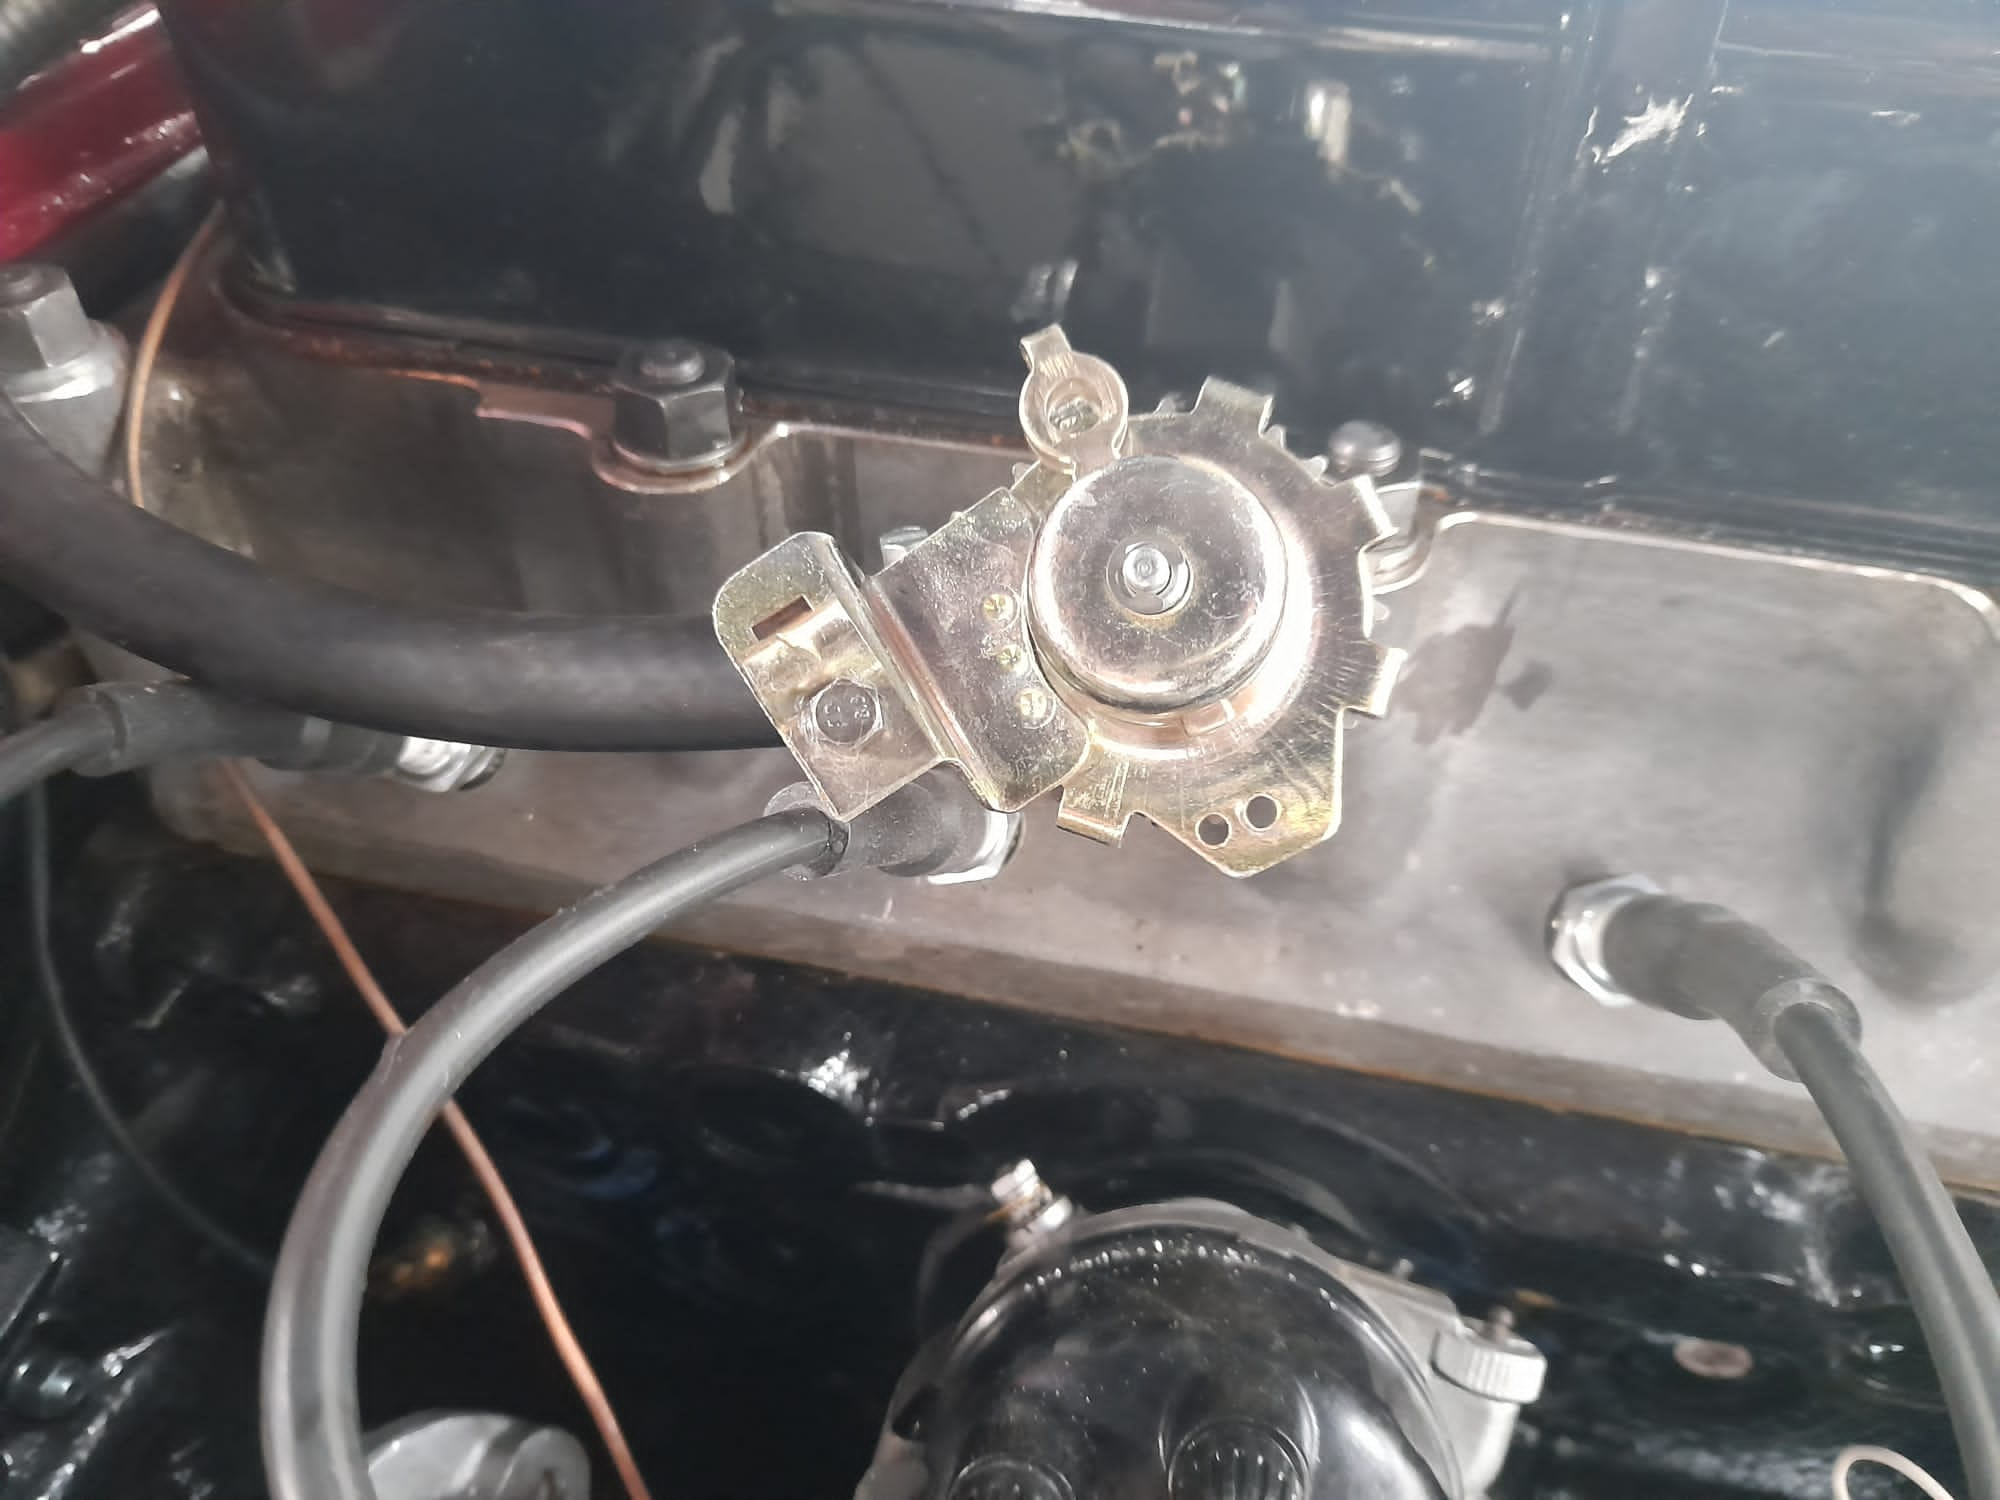
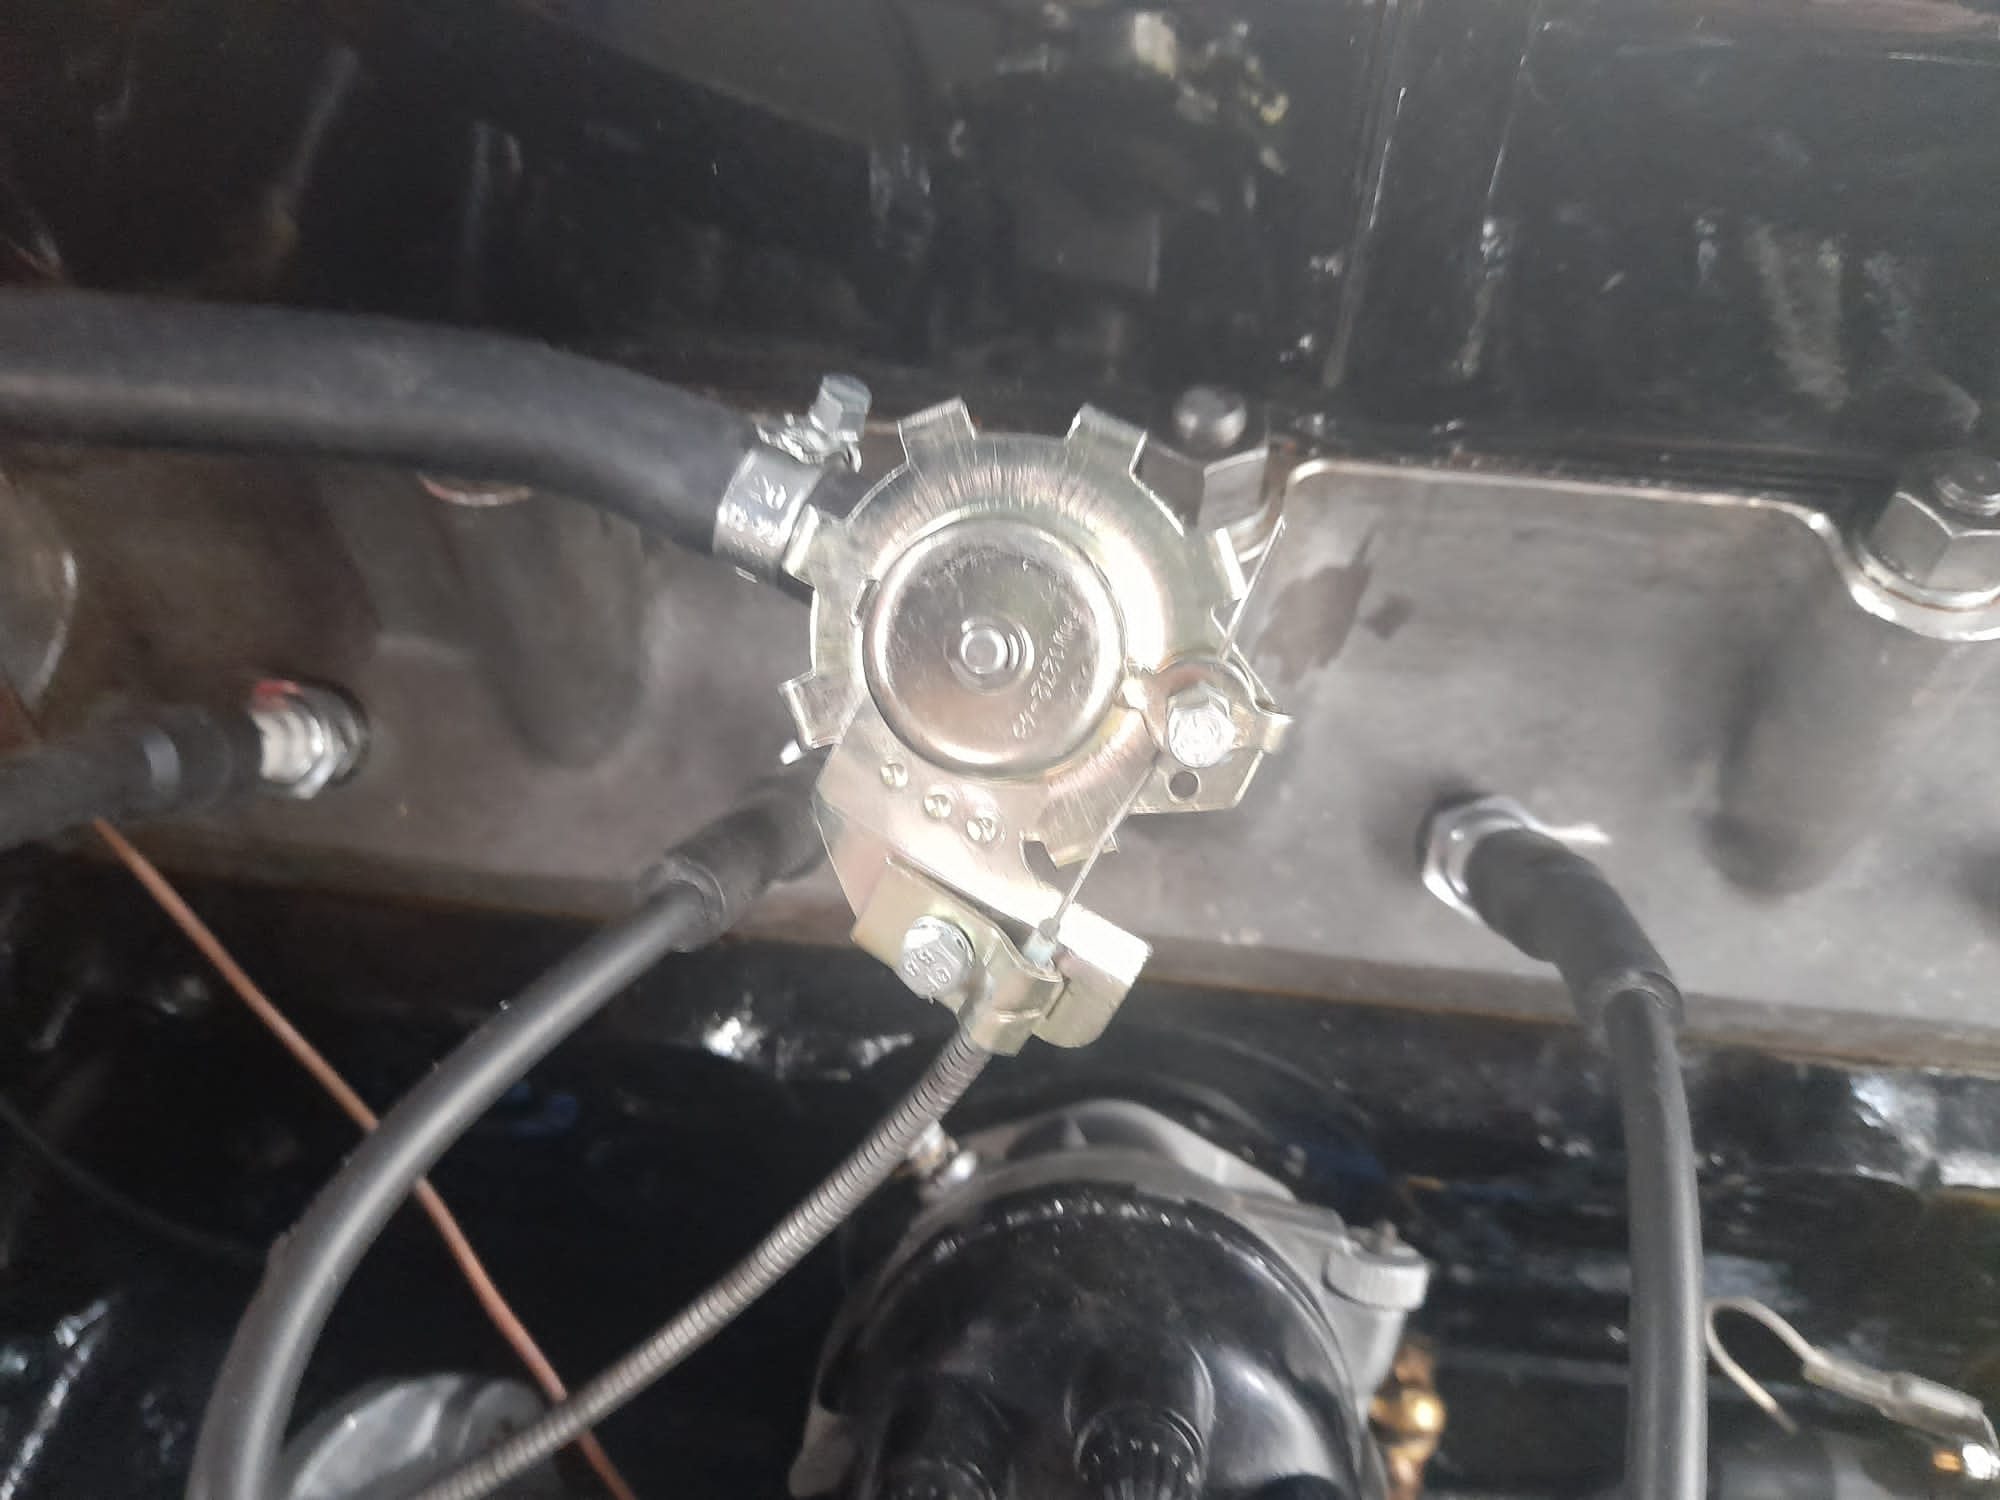
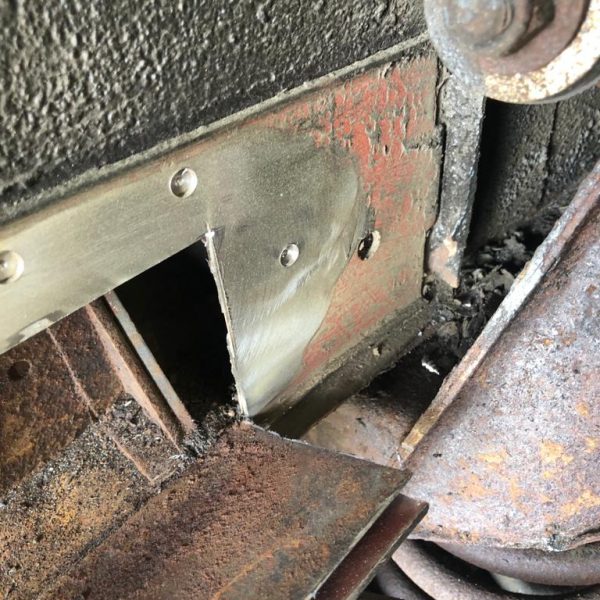
Slight play in the cooling fan of our HMC requires attention. A consideration could be to pack it out with a washer but this wouldn’t be the best outcome. It may do the trick and stop it from wobbling but it wouldn’t be the right solution. As it’s an aftermarket fan, new ones are still available. We have order a nice new replacement which should be with us later in the week.
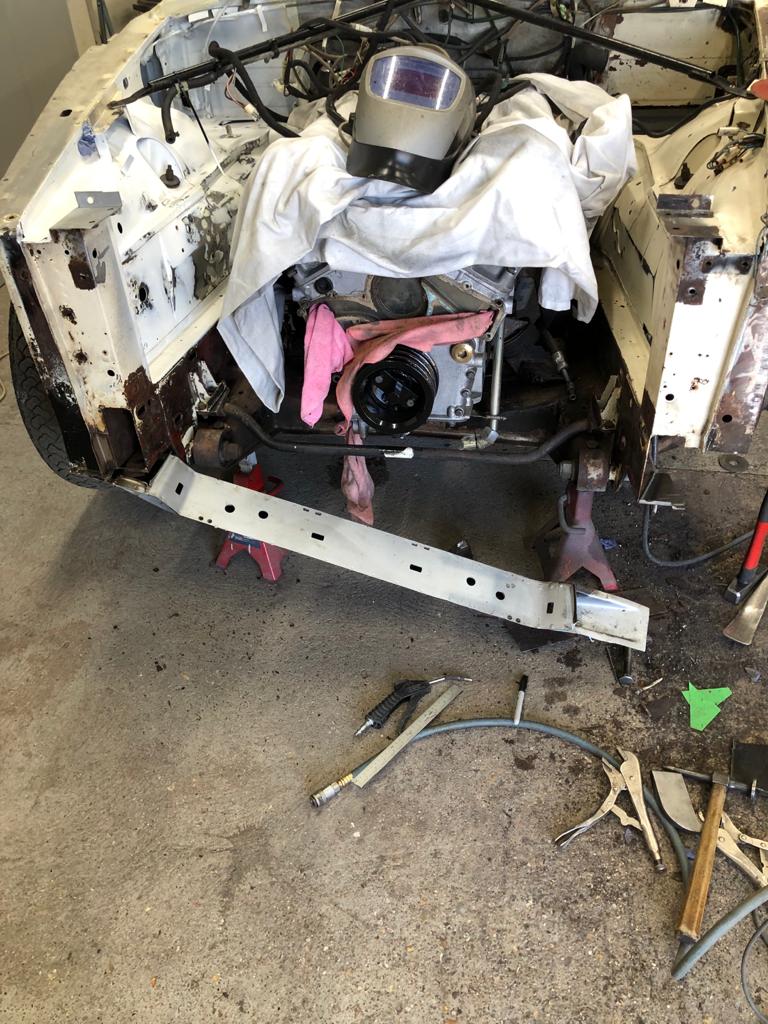
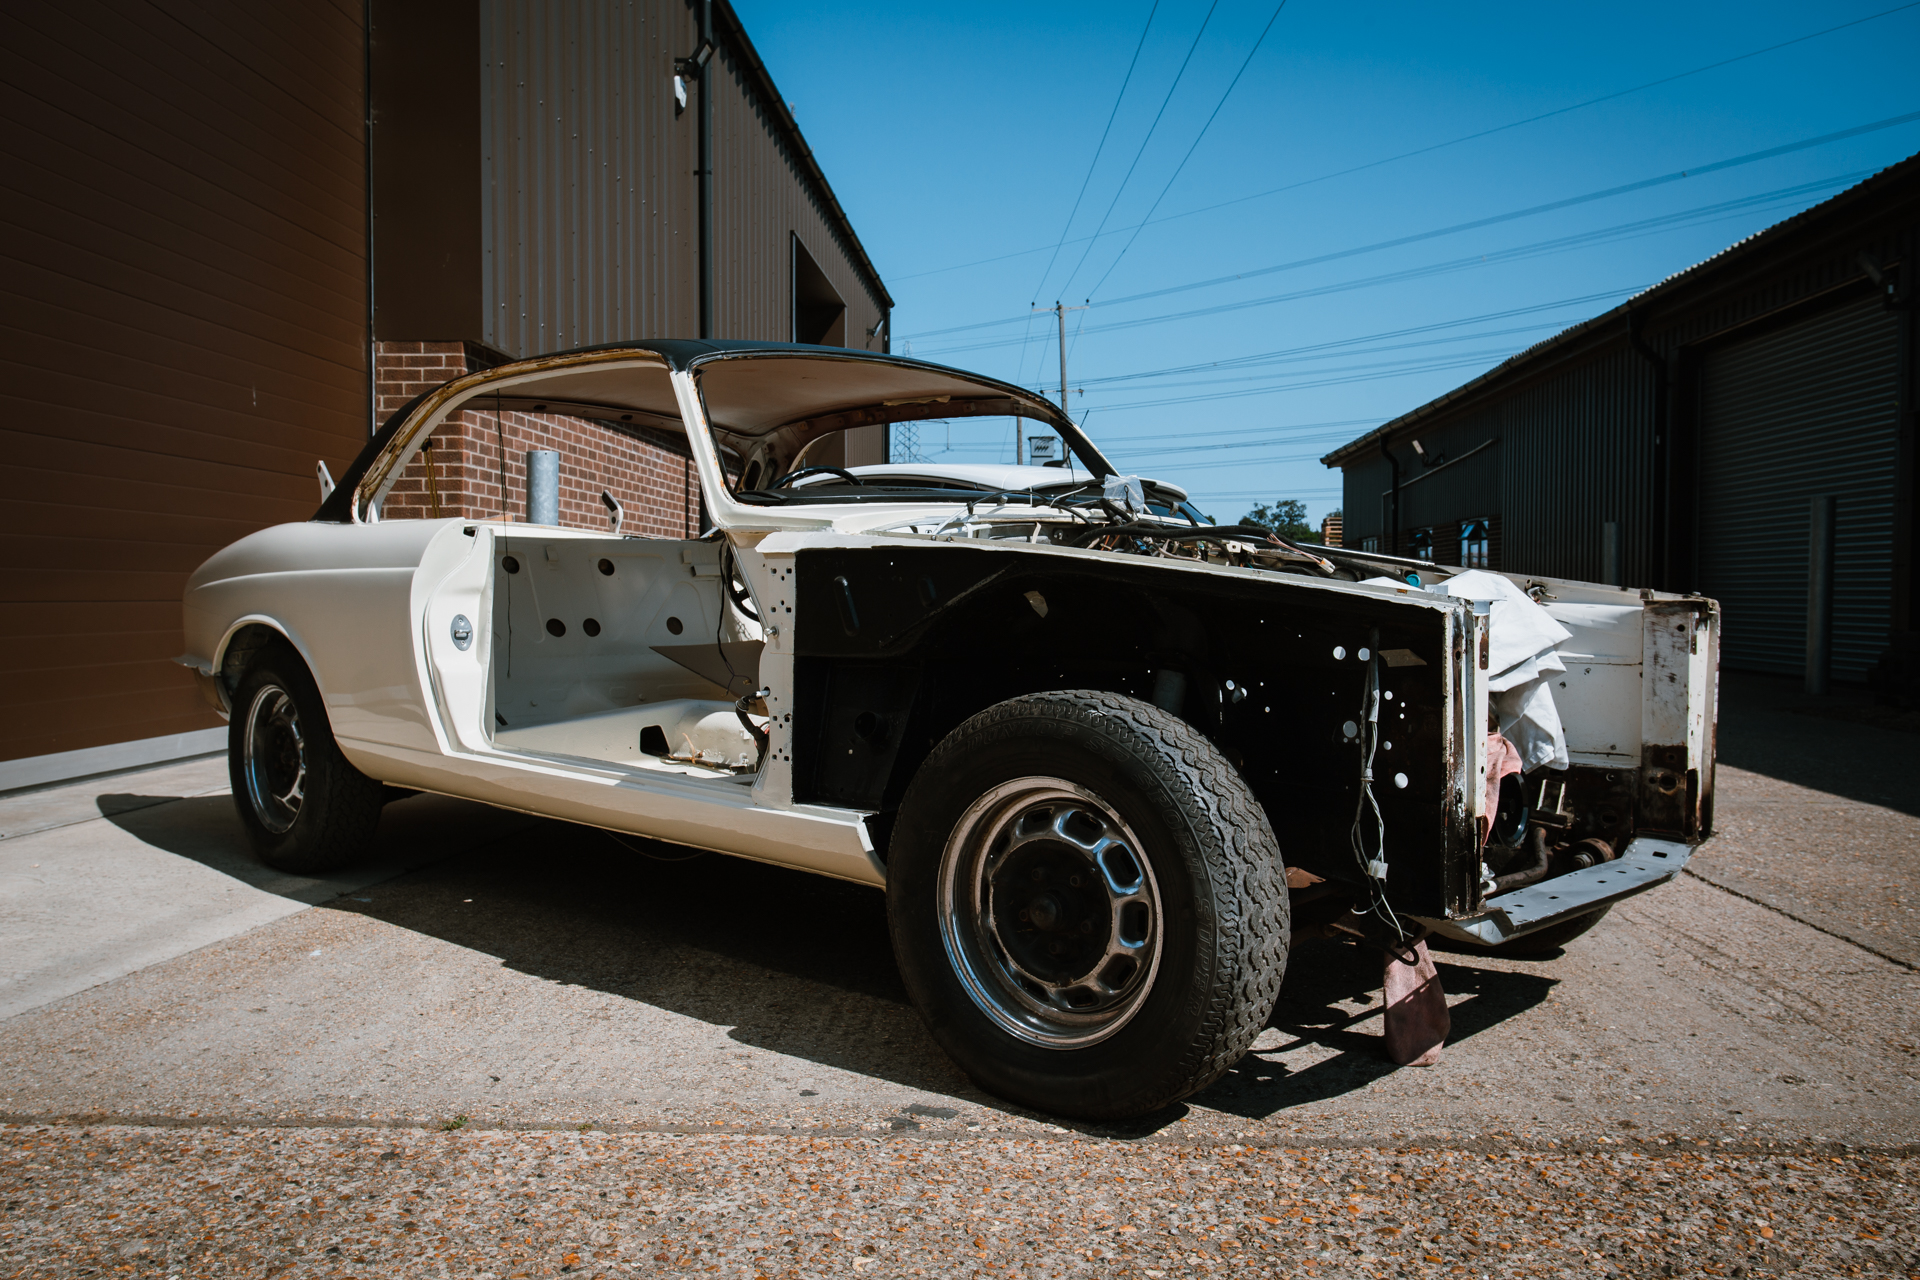
Ady has been continuing his investigation into the engine of the 1971 Lotus Elan. He’s replaced the points condenser and coil and put fresh oil in the car. The underside of the car needs looking at next, where the suspension bushes are.

We’re welcoming this 1971 Lotus Elan into the workshop! It’s in here because it doesn’t run, so the engine needs checking over to see where the issue(s) lies. Stay tuned for progress on the matter.
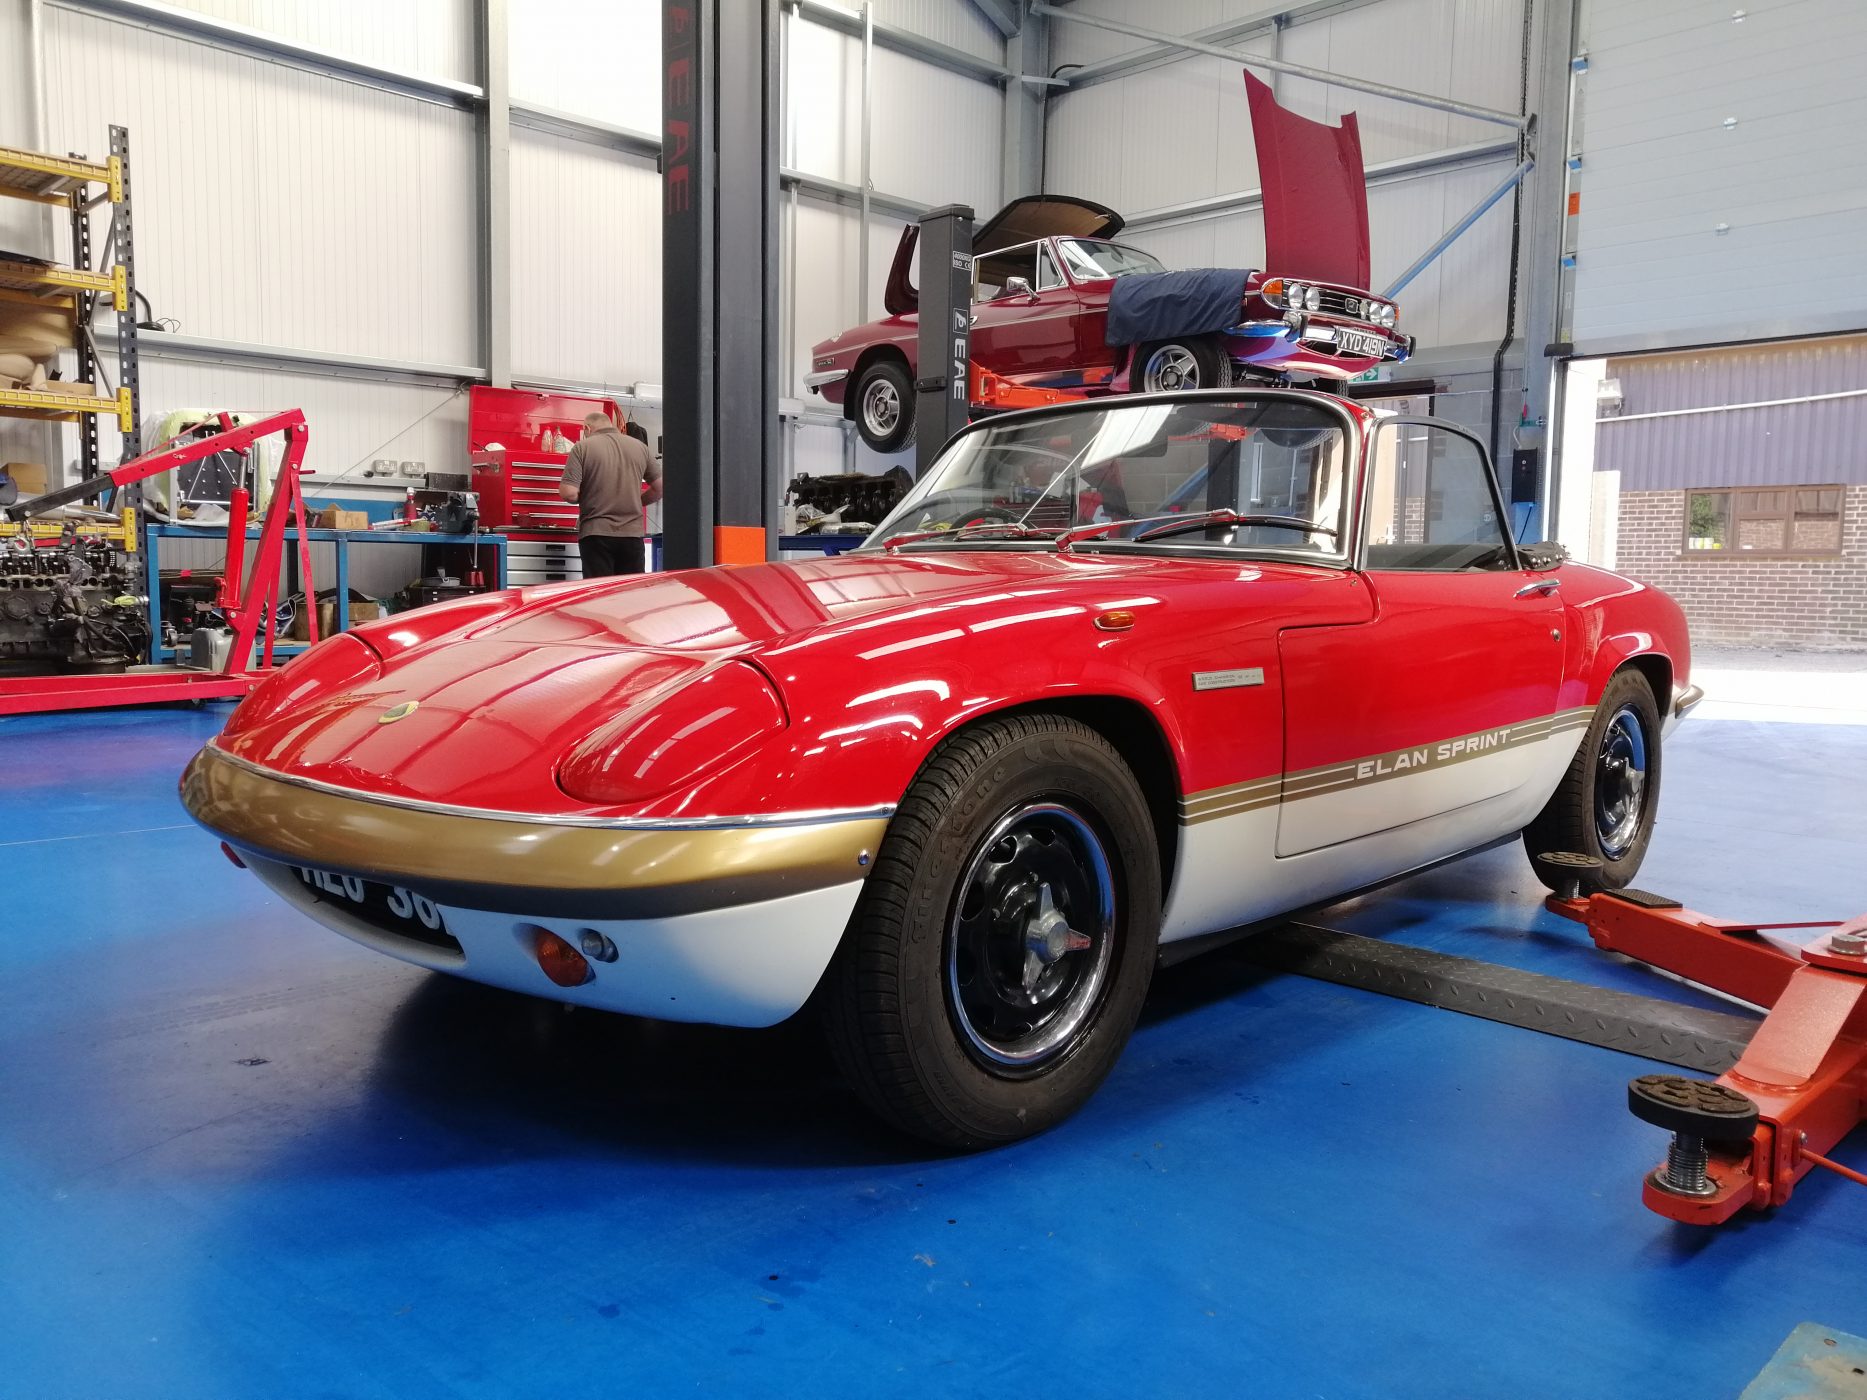
Ady has started investigating this Lotus Elan’s engine after the owner bought it into us because of it not running quite right. He’s found that the tips of the points are black, which is not what they should be, and explains why there’s no spark in the engine. Stay tuned for more progress on this…
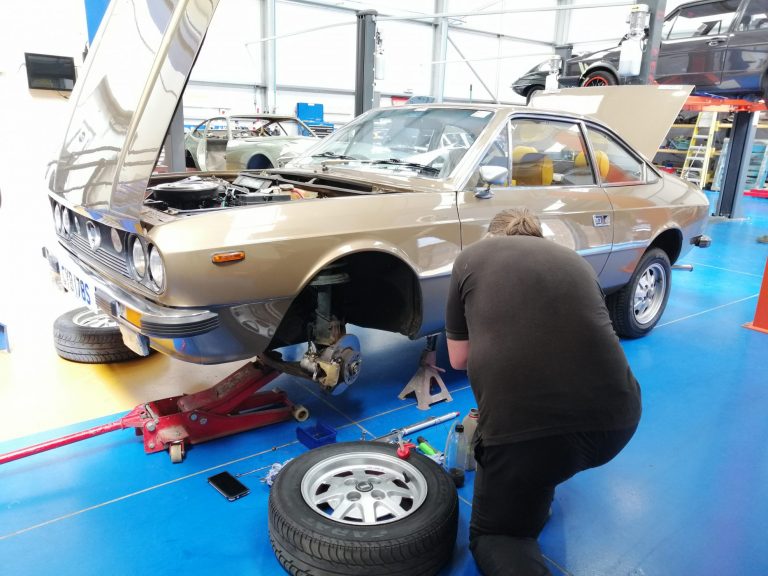
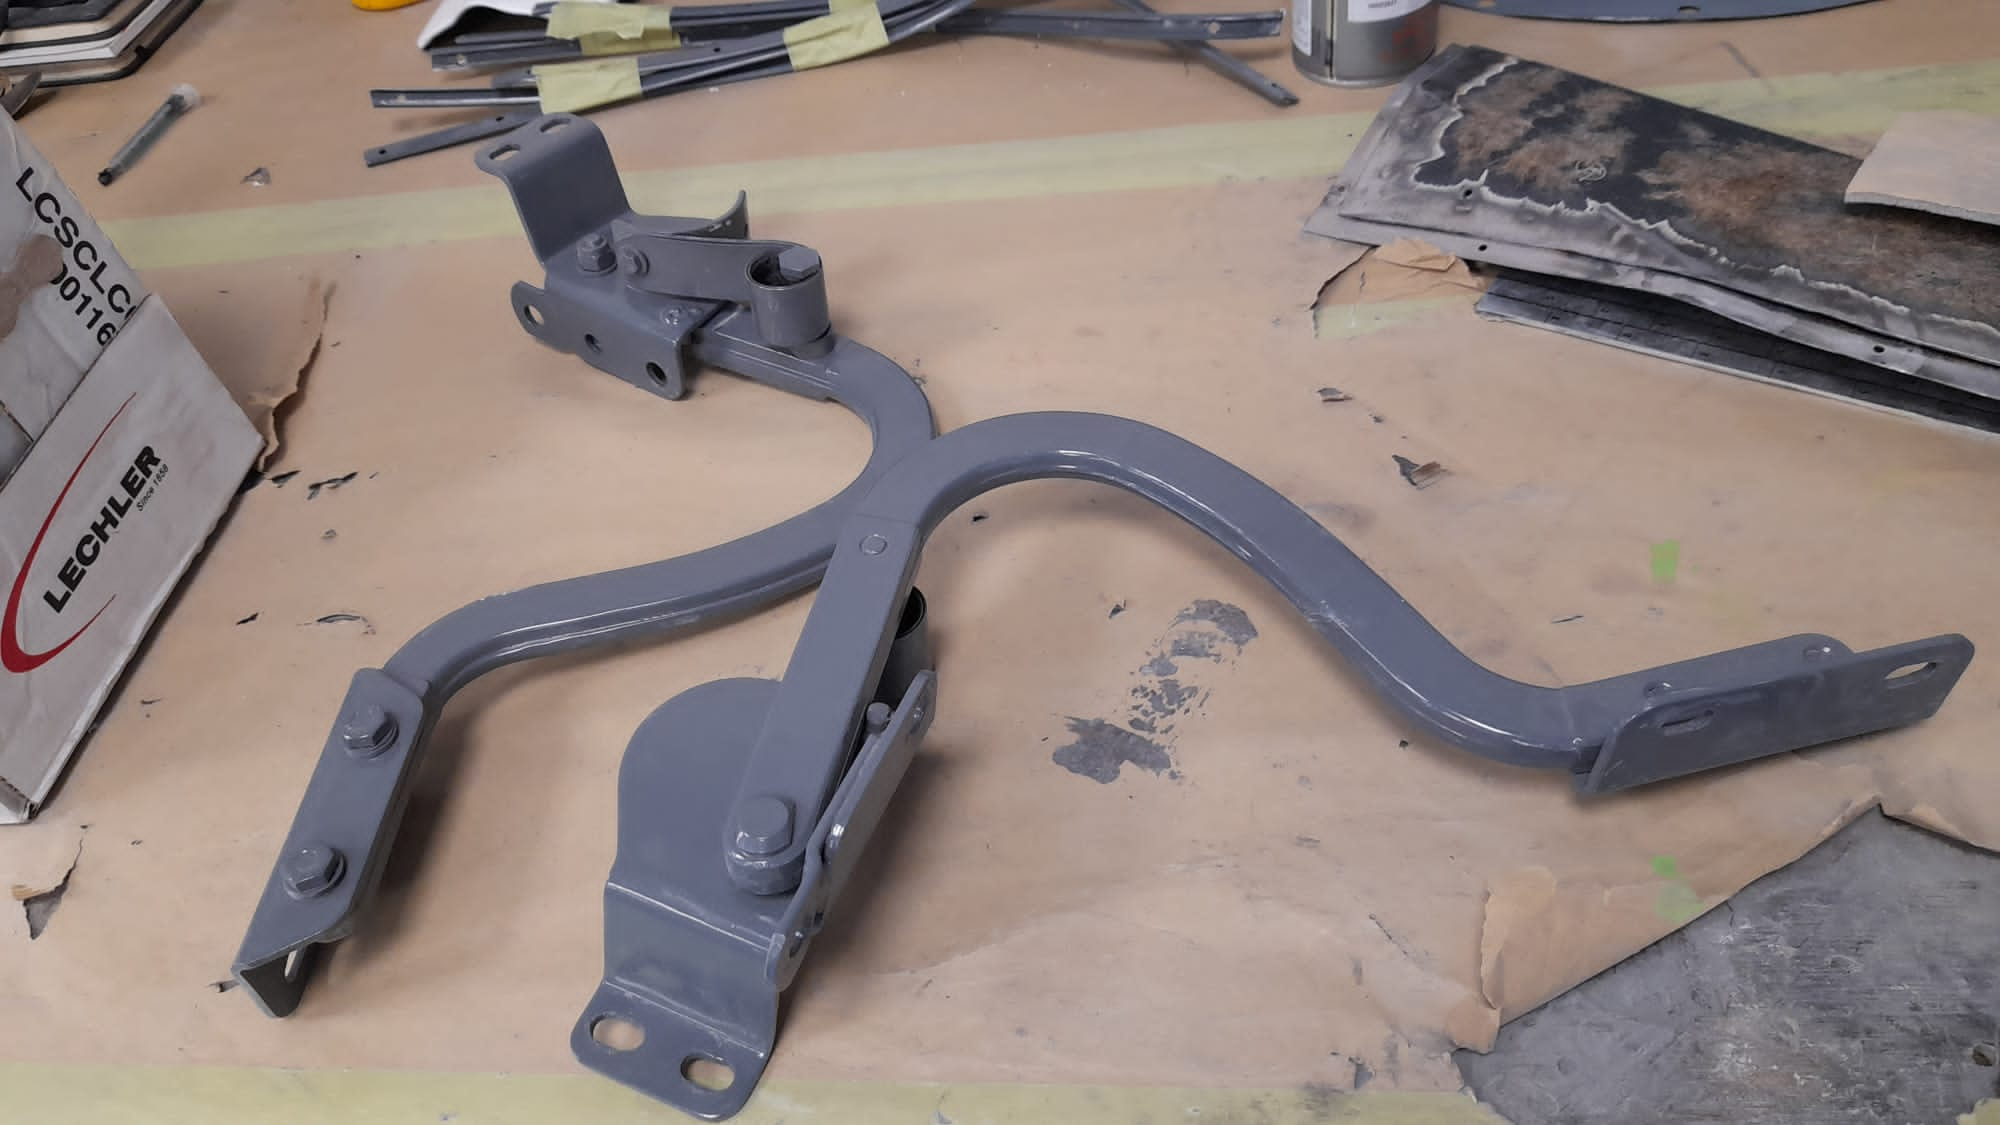
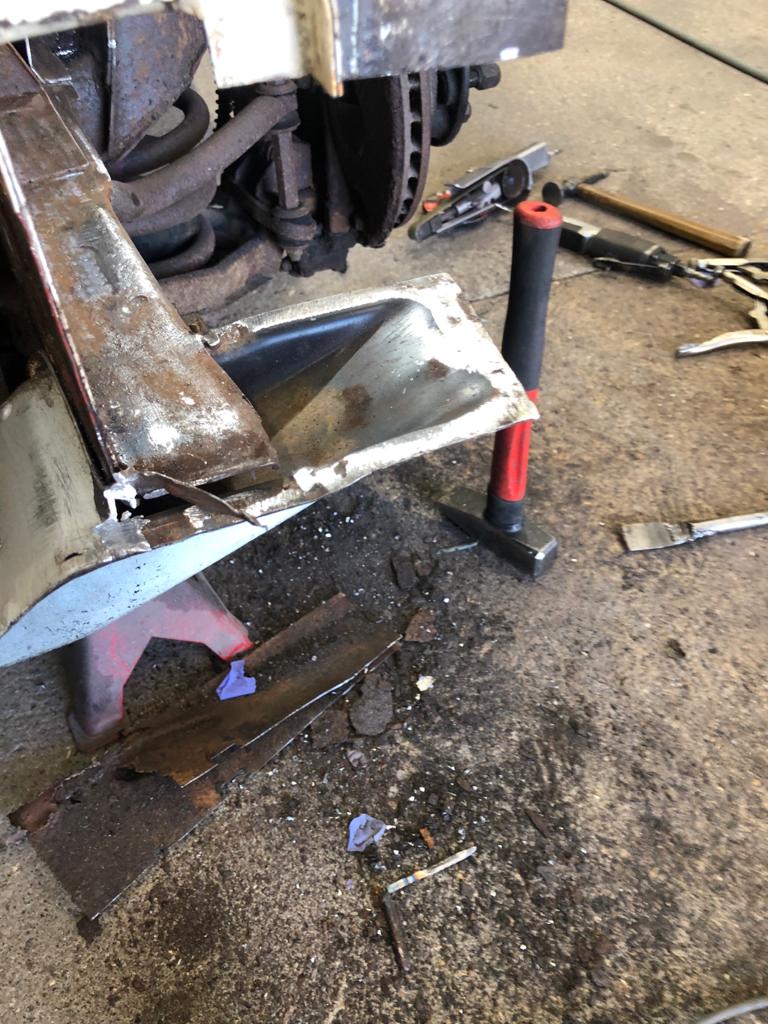
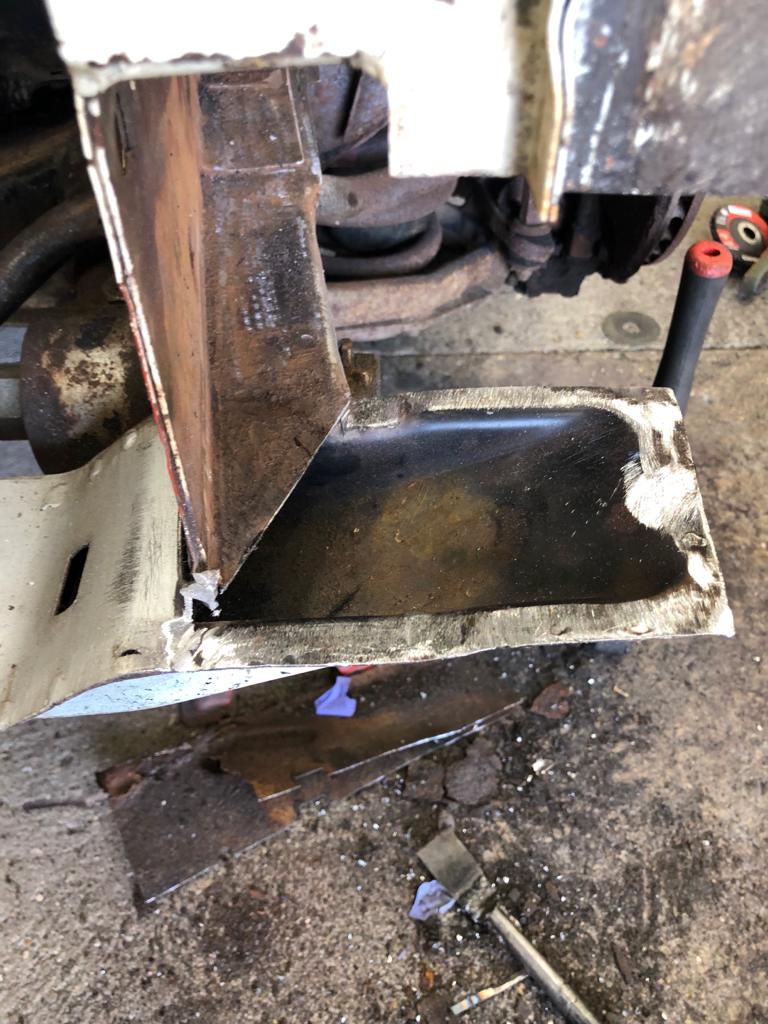
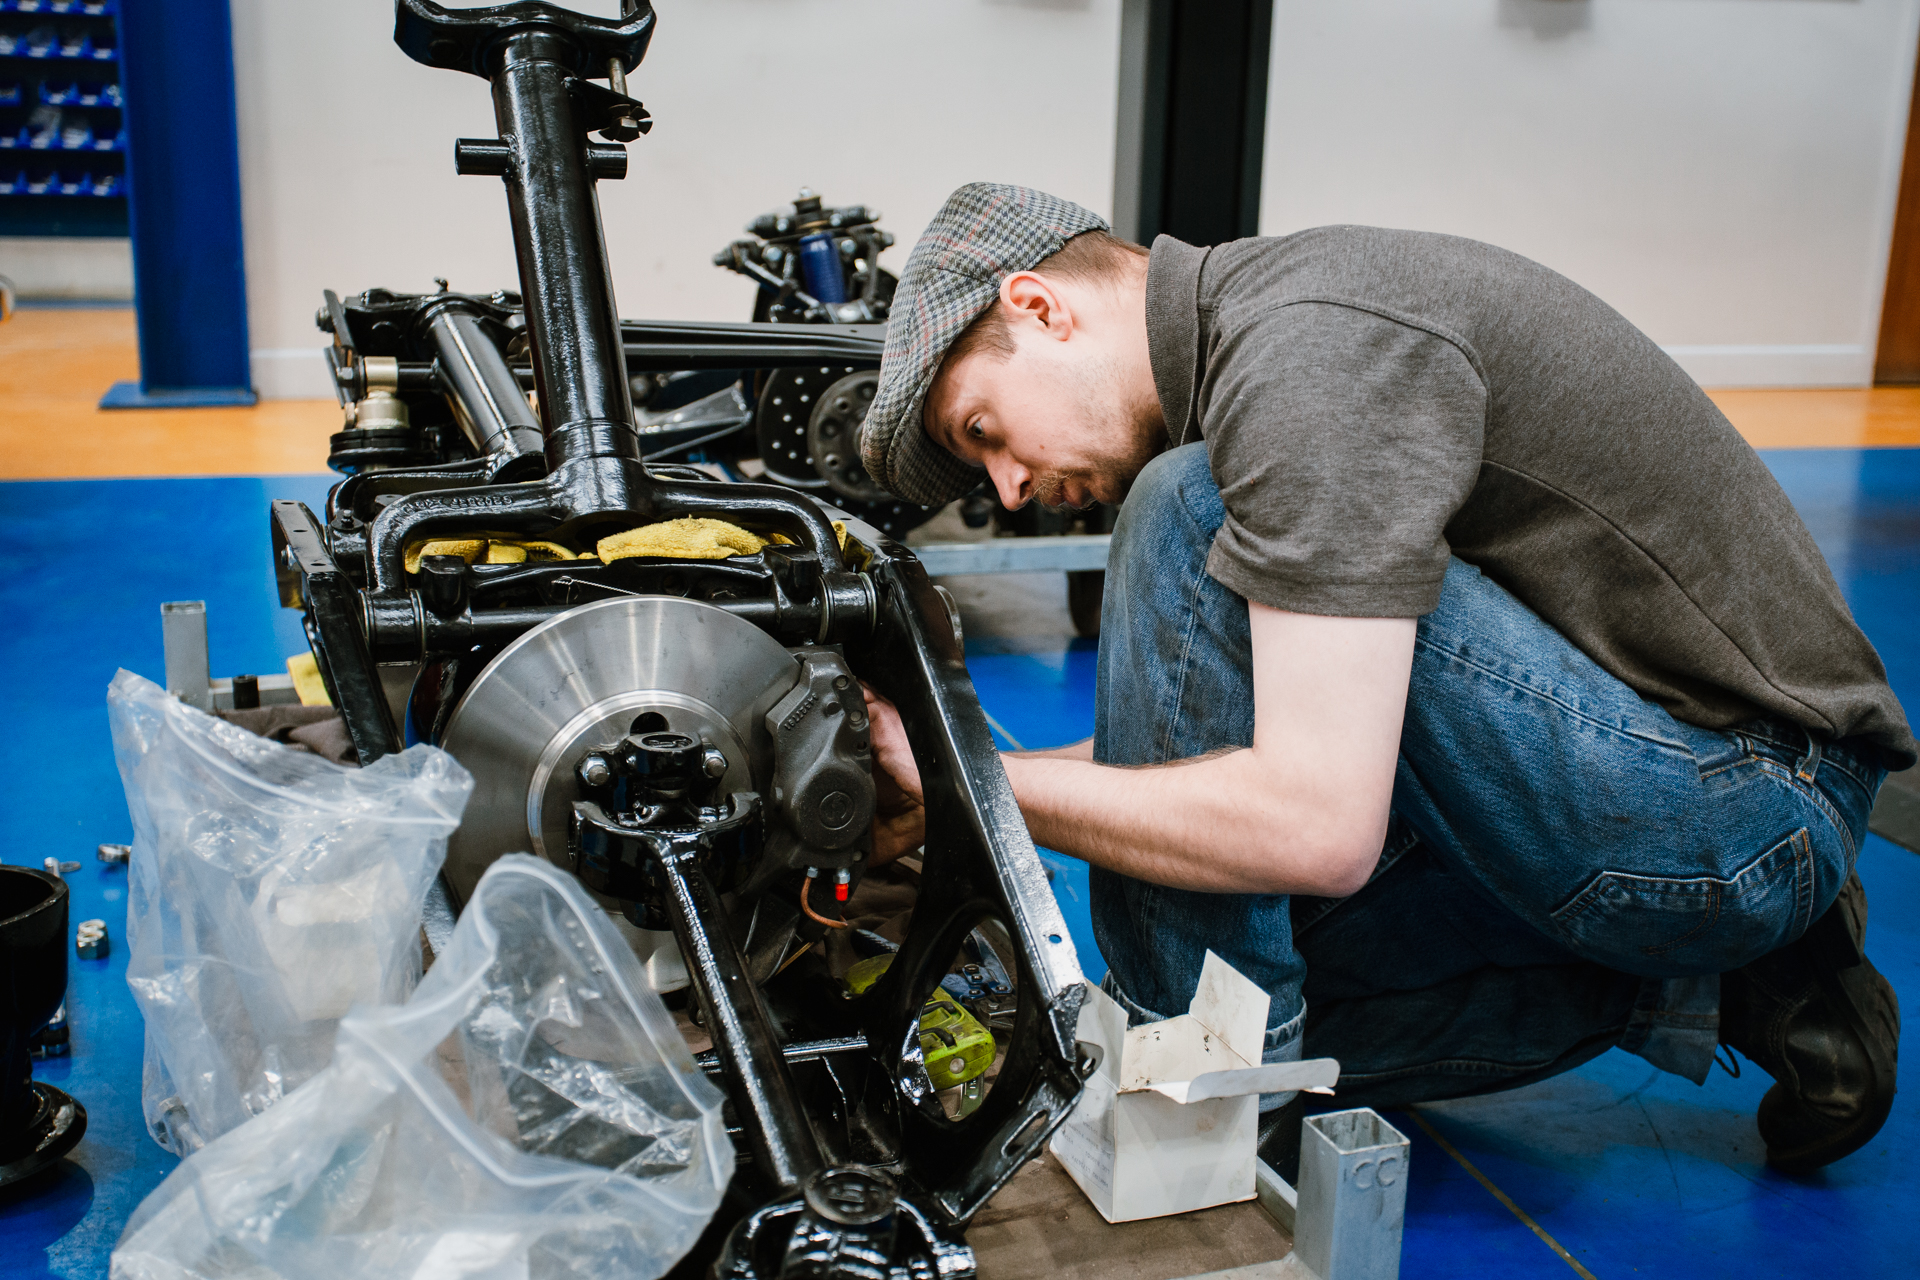
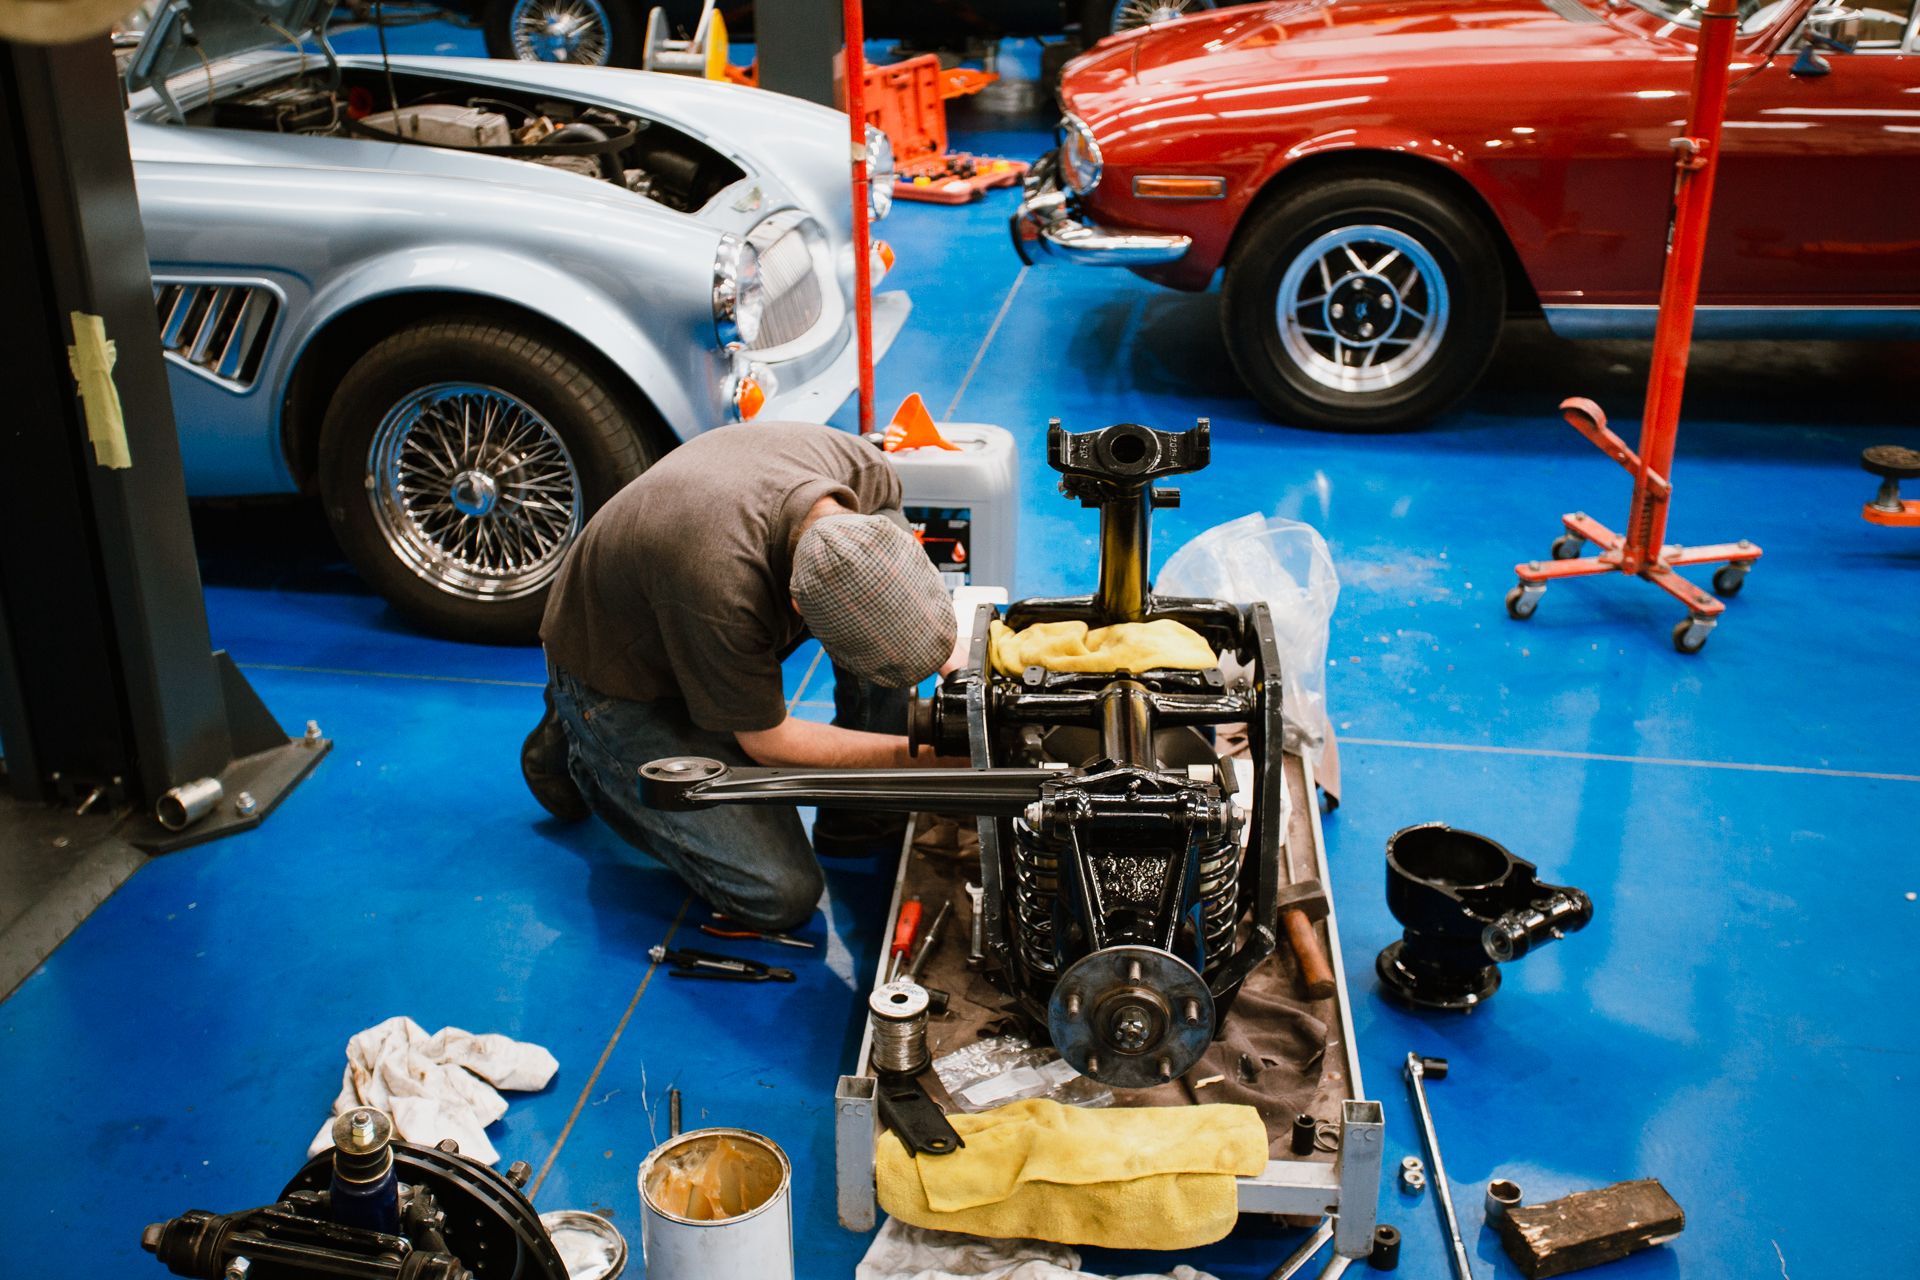
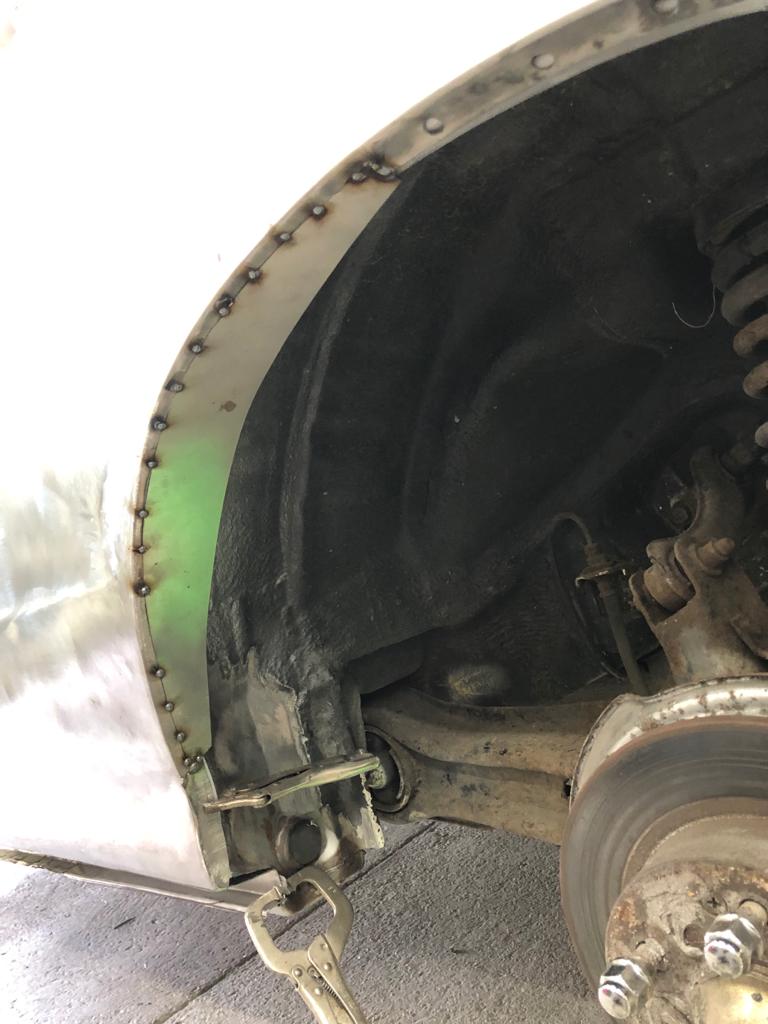
Scott has been getting up to speed on the front axle of the 1979 Arrow Ferrari Daytona. The only tasks left to do on it is that the steering rack needs to be installed, the shocks need to be mounted and the front anti-roll bar needs to be installed. After all that, the front axle will be completed!
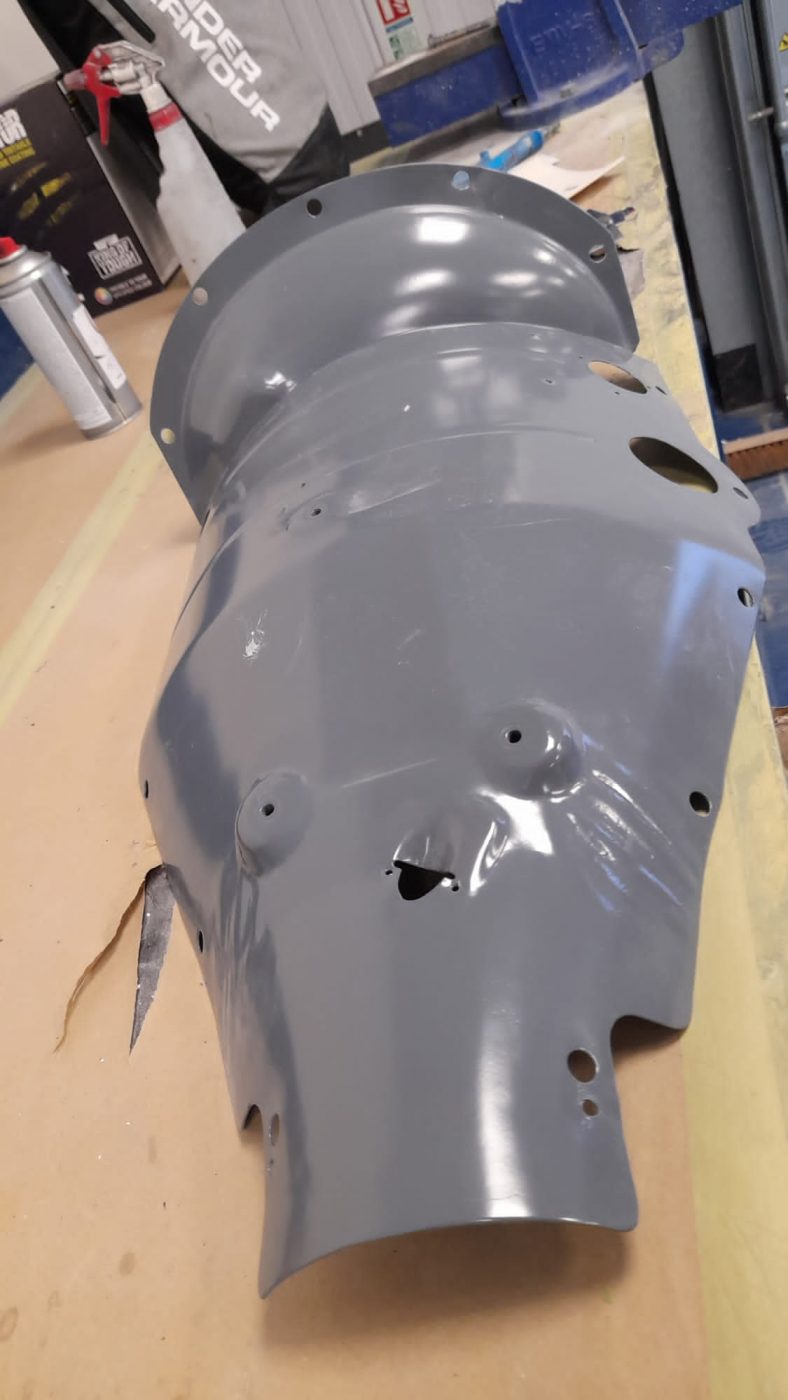
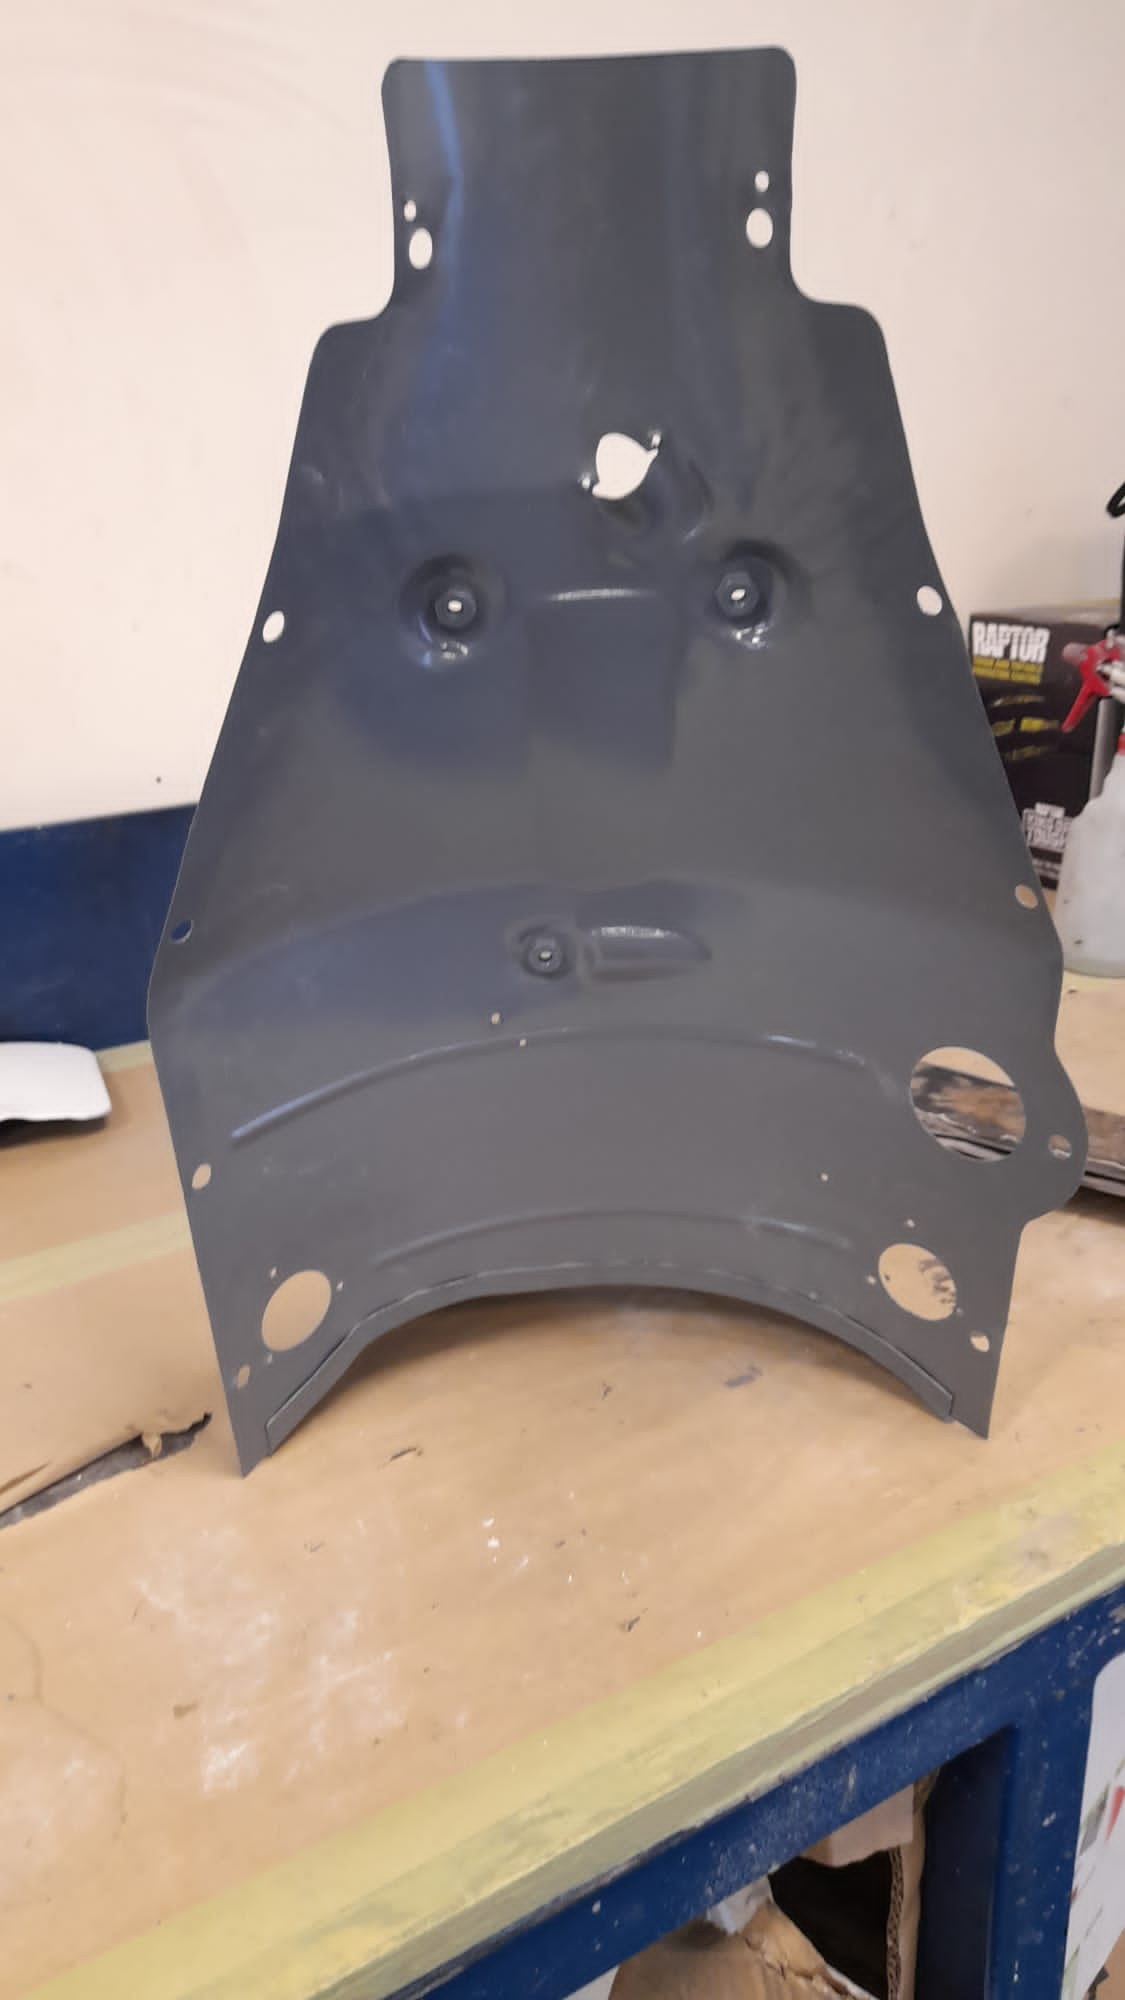
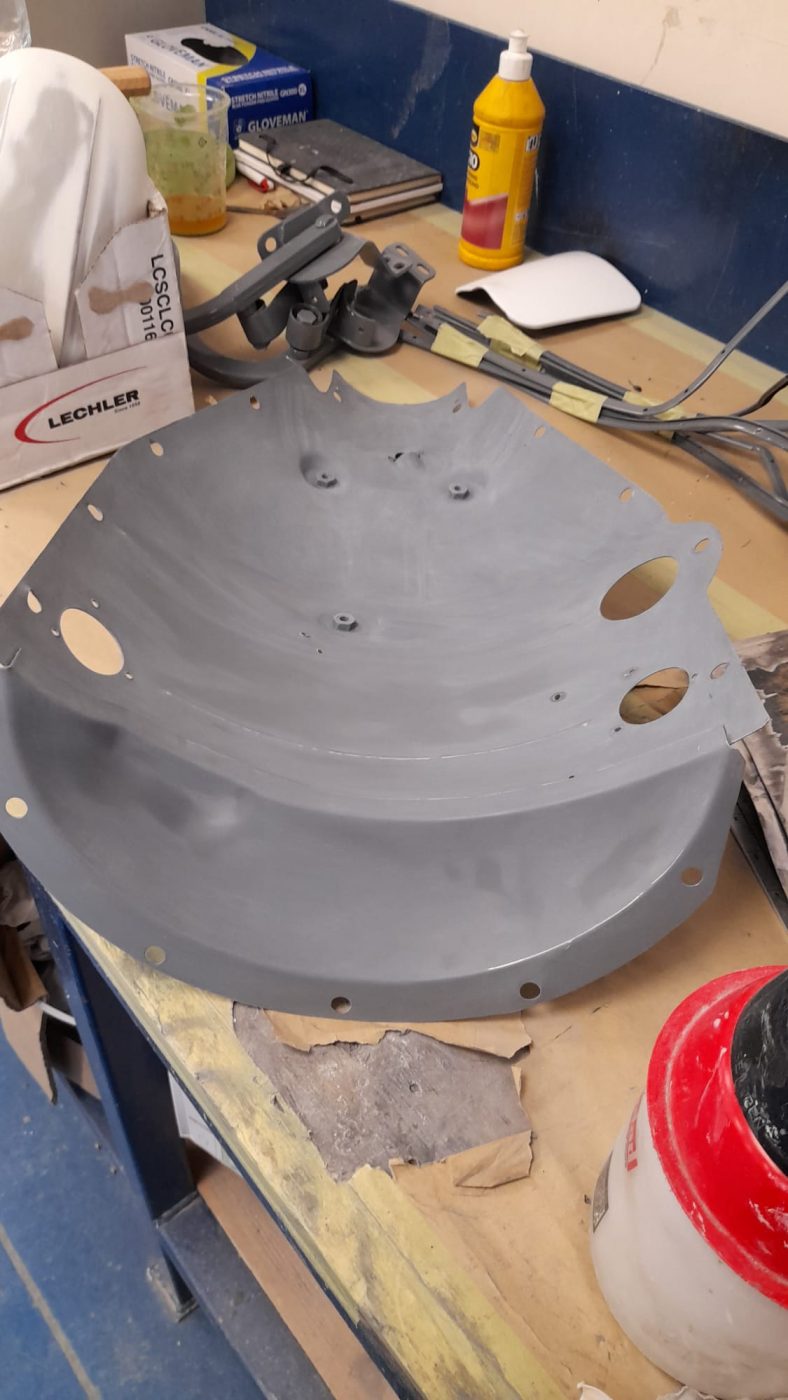
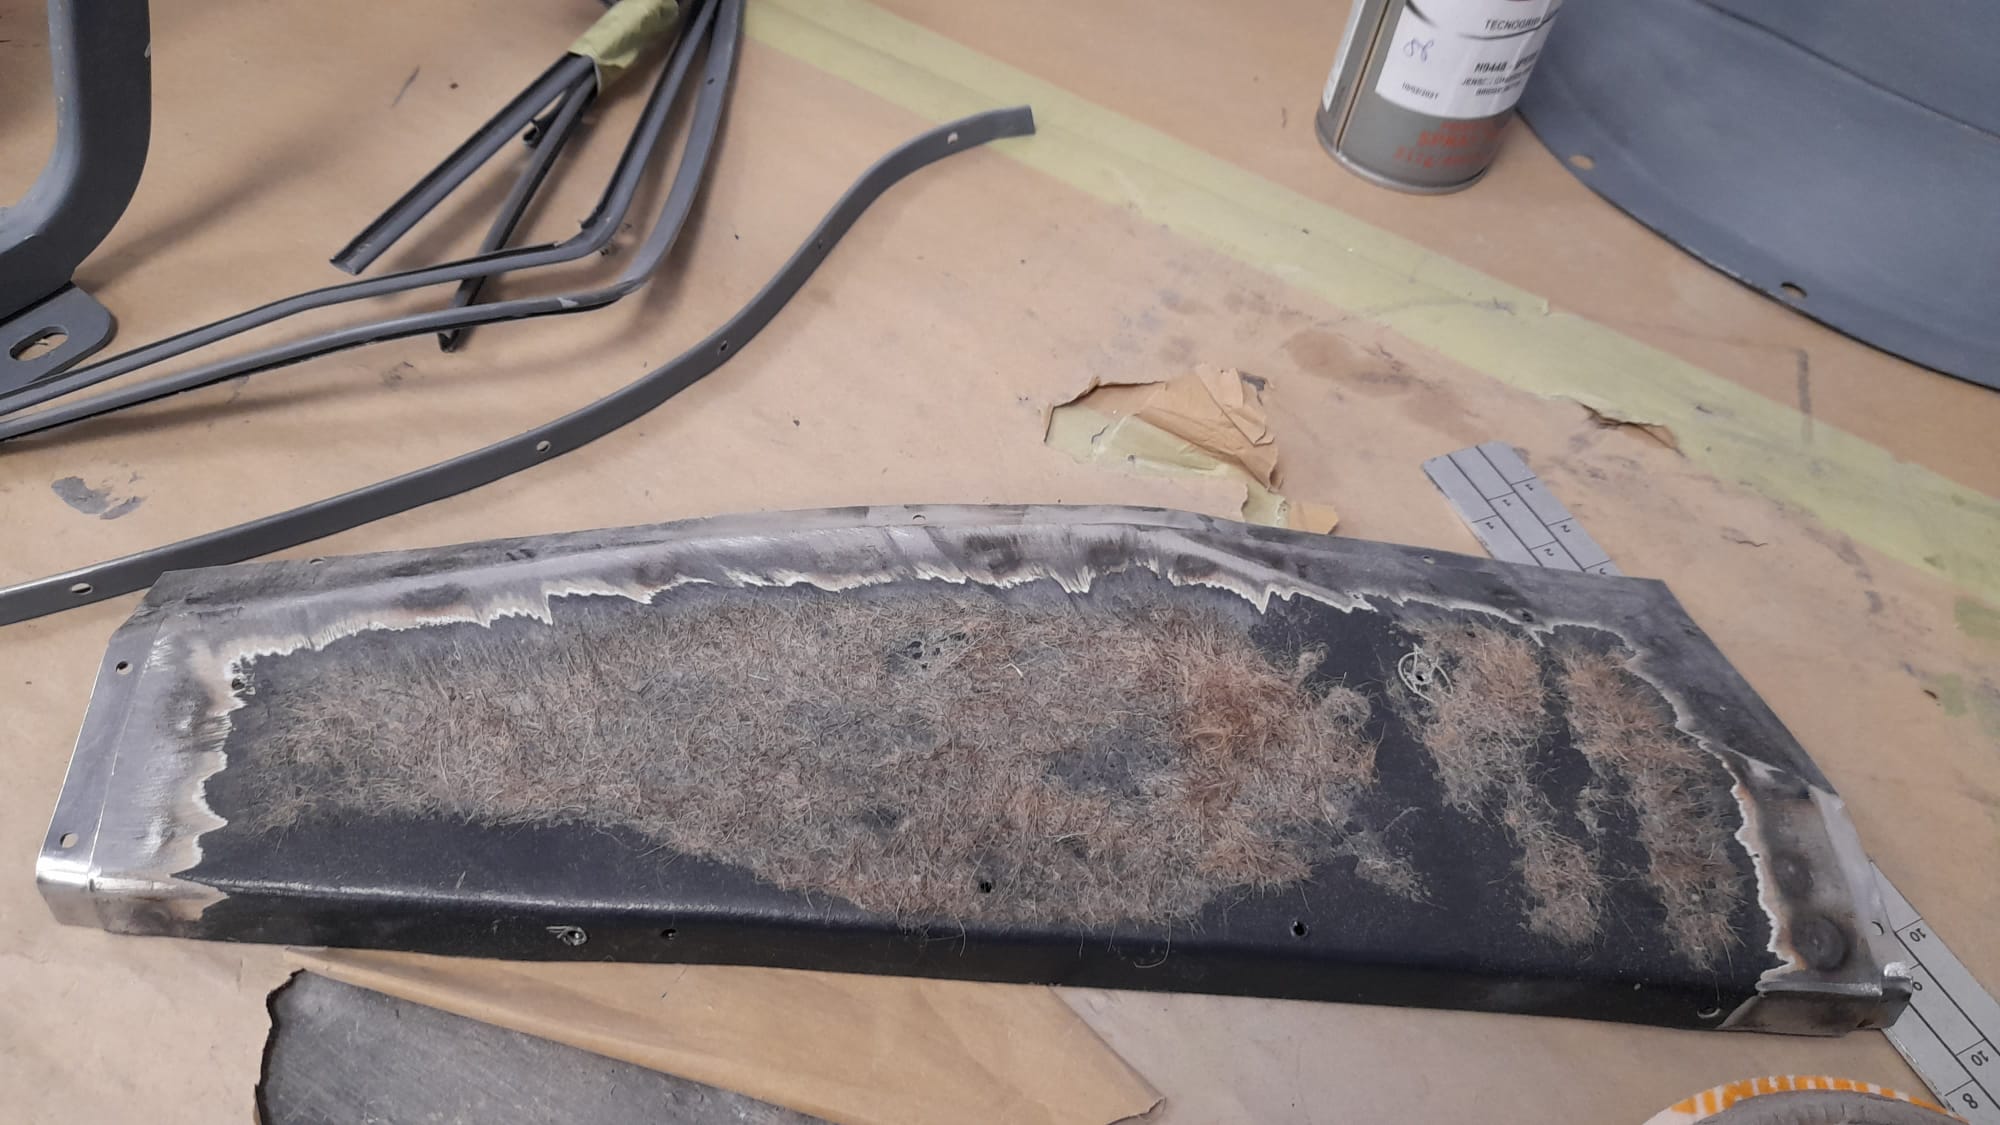
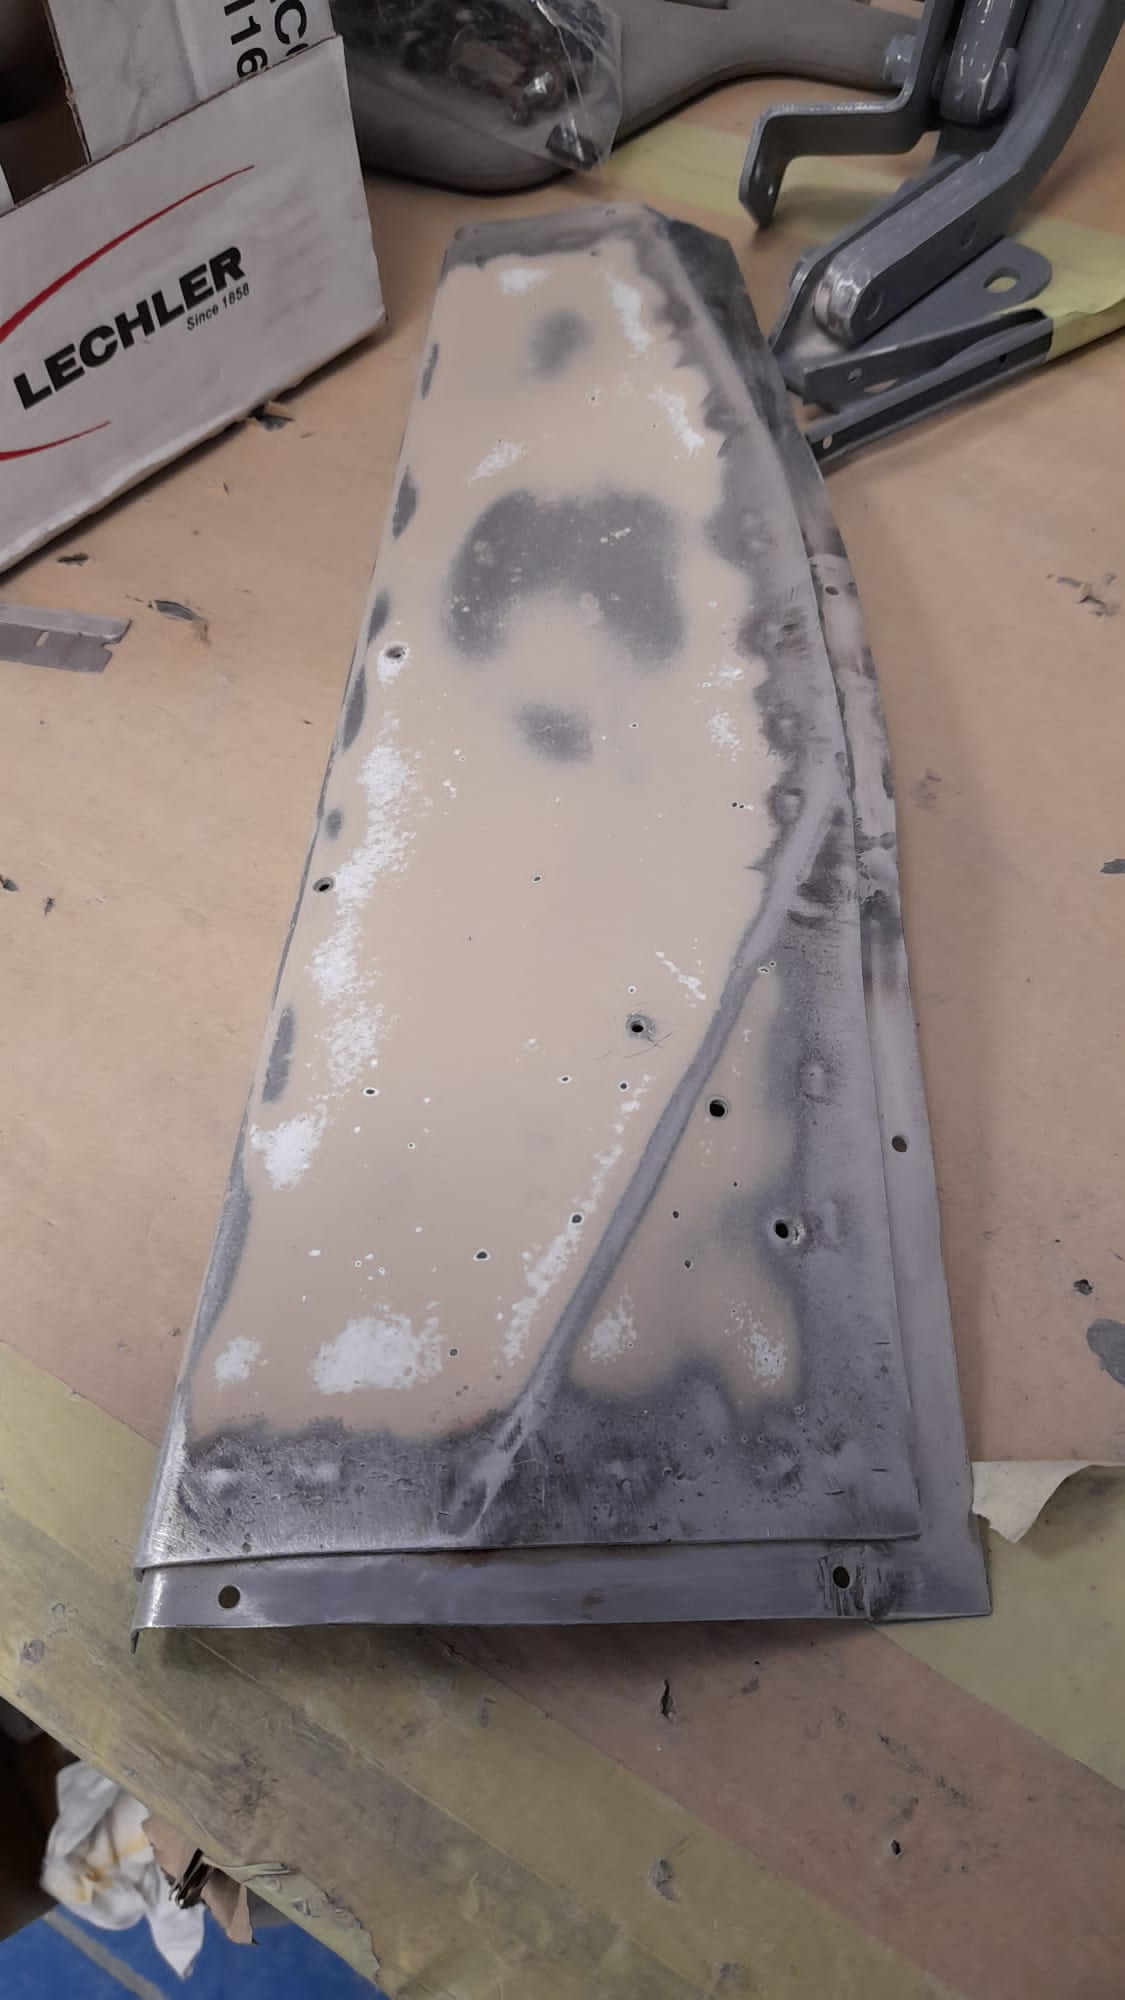
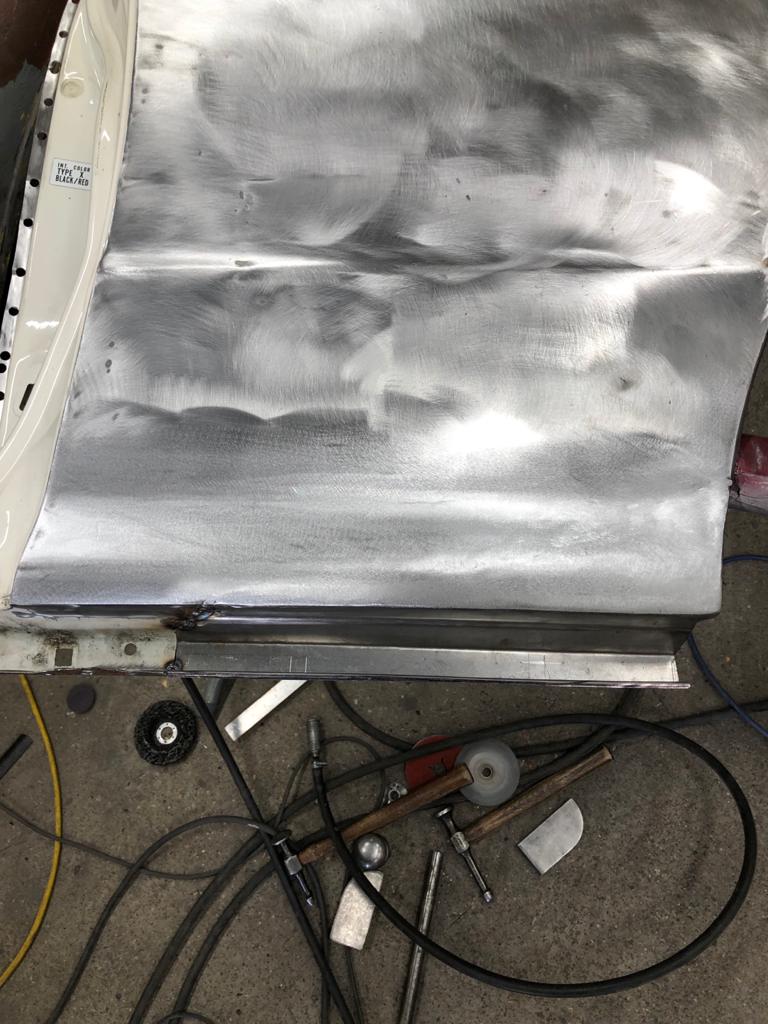
Lydia has continued sanding down the primer on various parts for the 1973 Jaguar E-Type Roadster Series 3. This time it was the gearbox cover, boot hinges and door rubber channels. The gearbox cover had 320 soft grade on the front/face, 180 soft grade underneath and grey scotch pad all over afterwards. The boot hinges had 500 soft grade and then grey scotch pad. The door rubber channels also had 500 soft grade and grey scotch. They were then all cleaned off with panel wipe to get rid of sanding and paint dust.


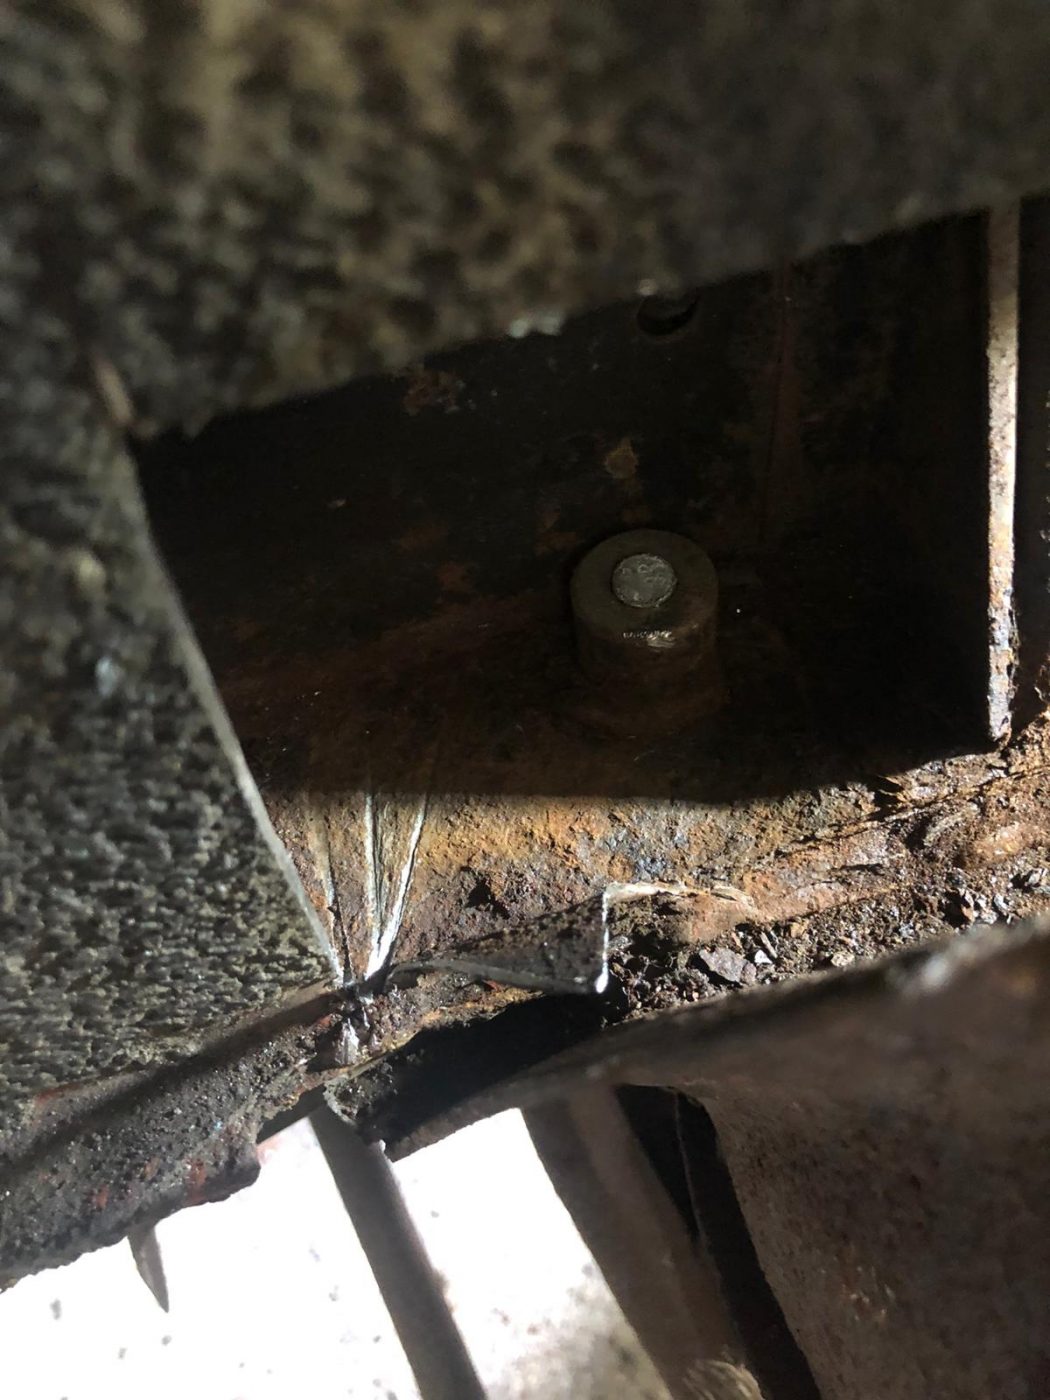
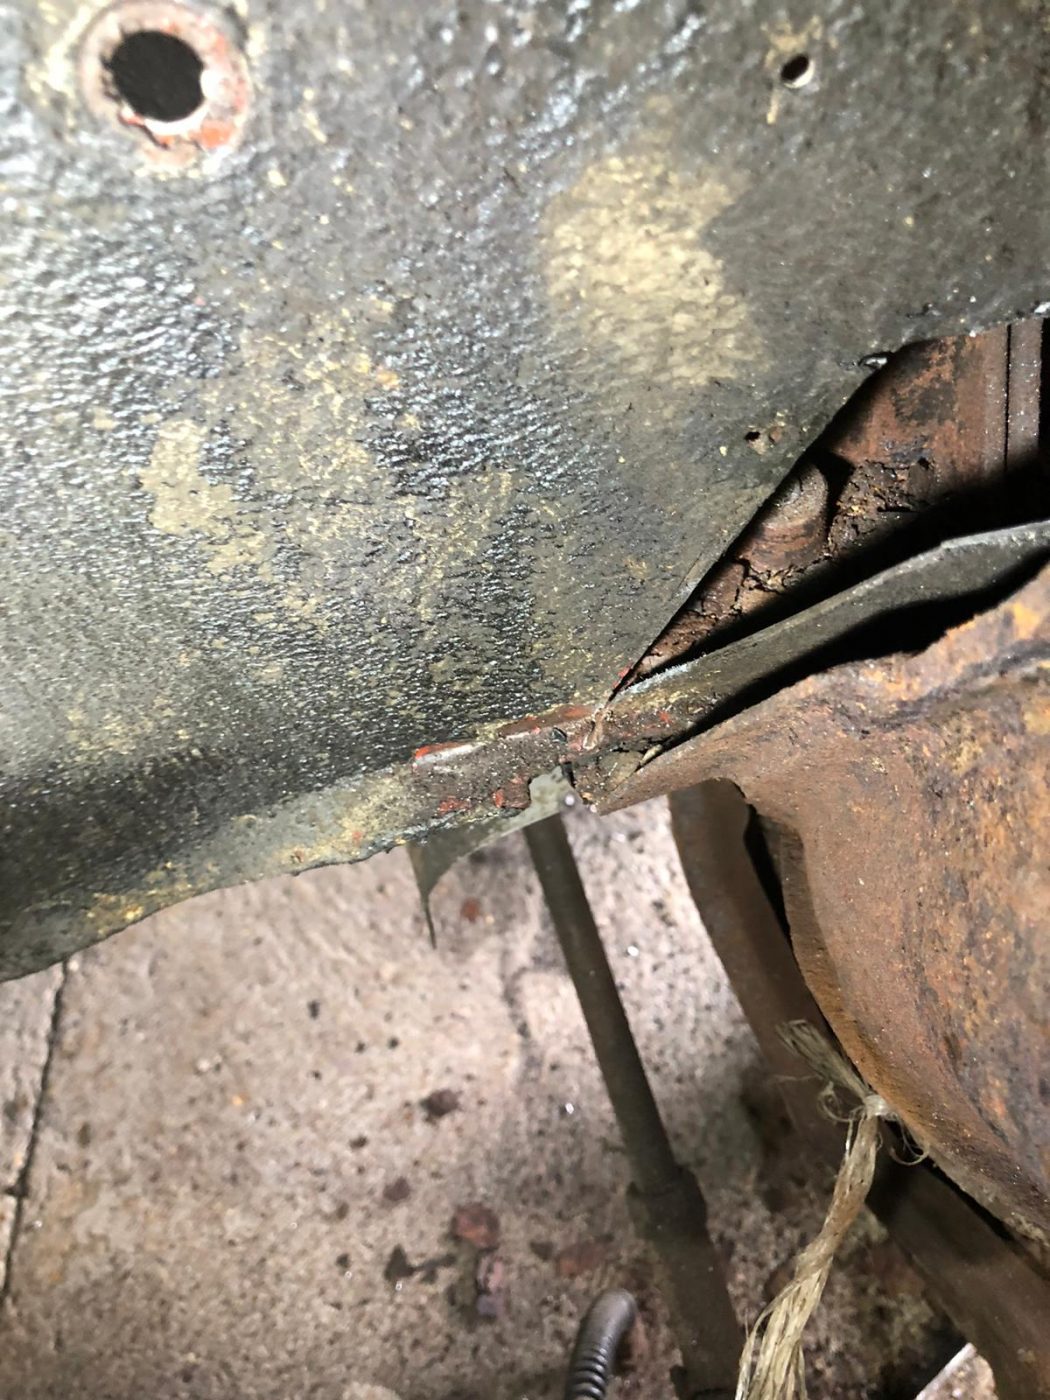
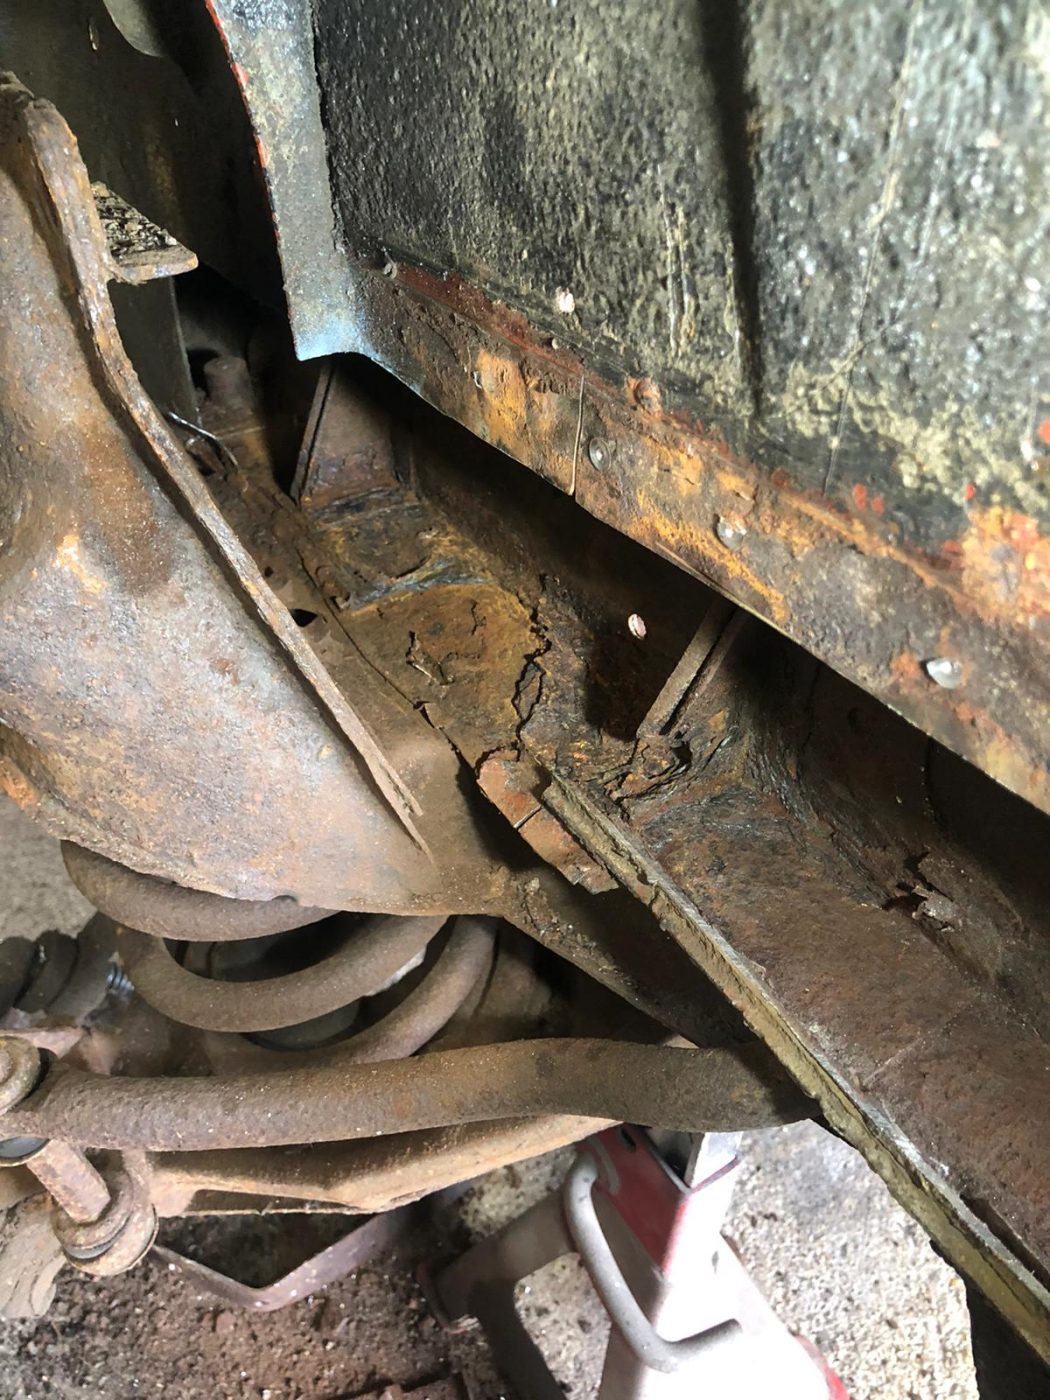
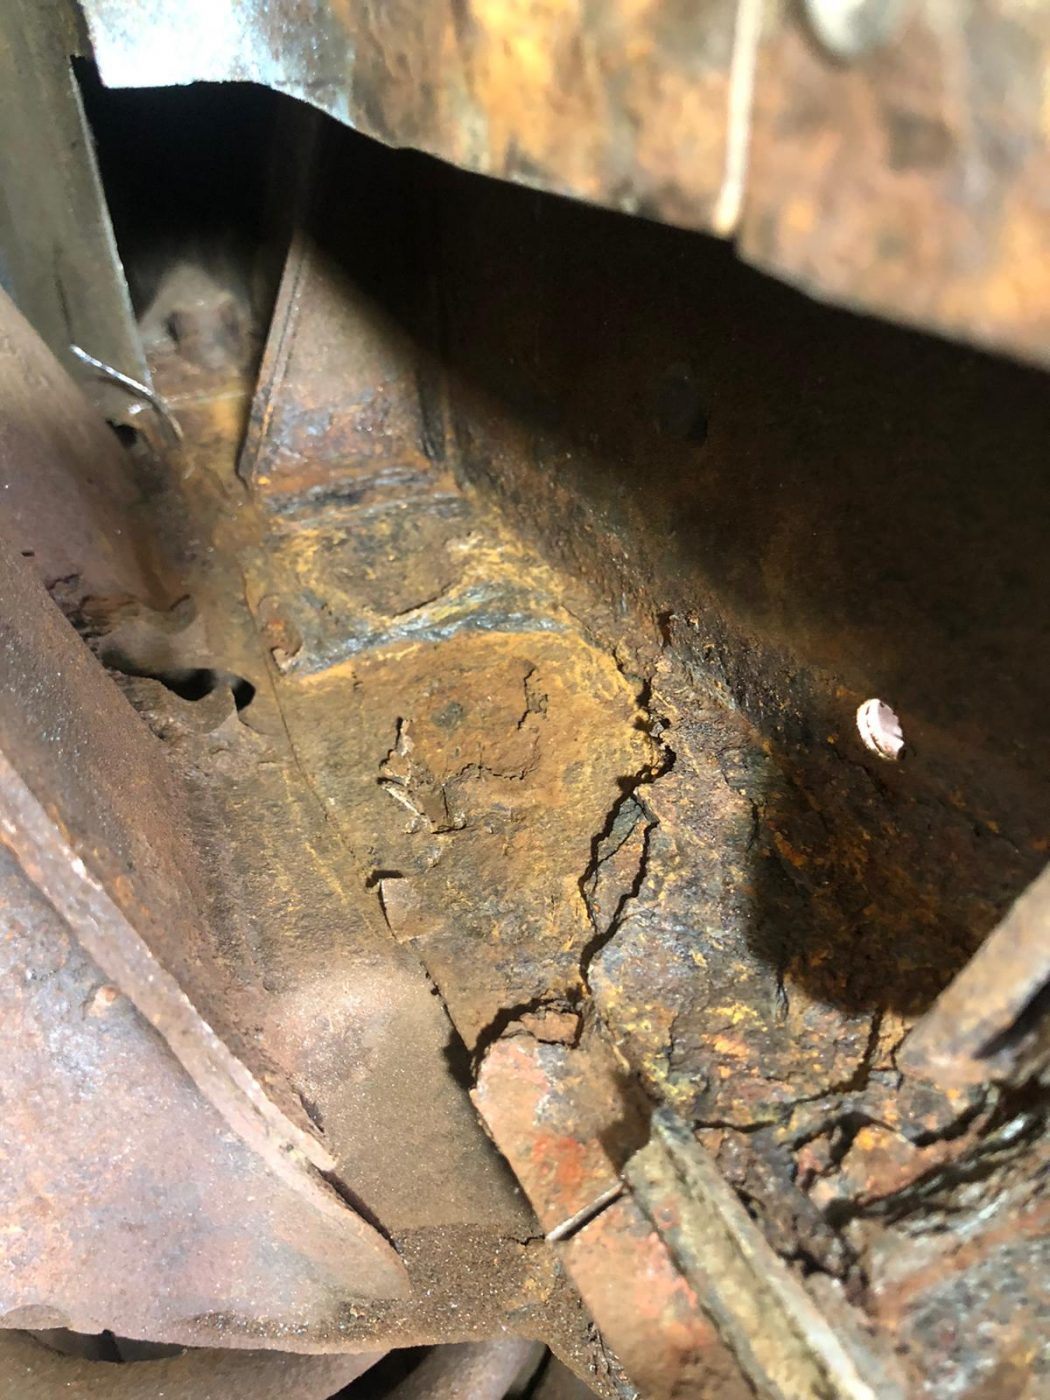
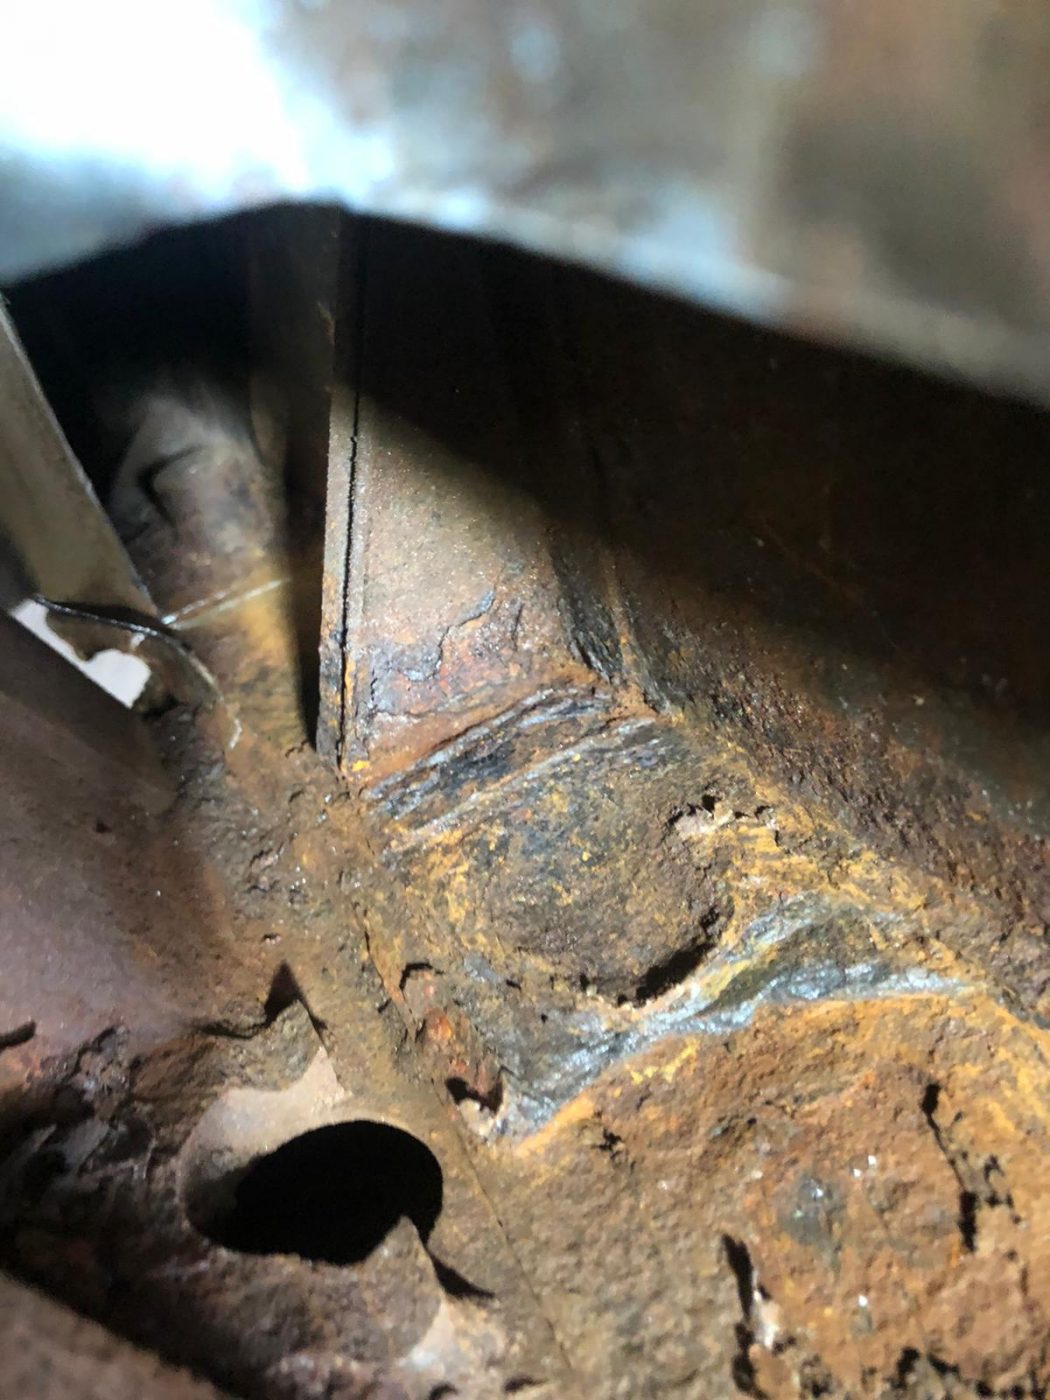
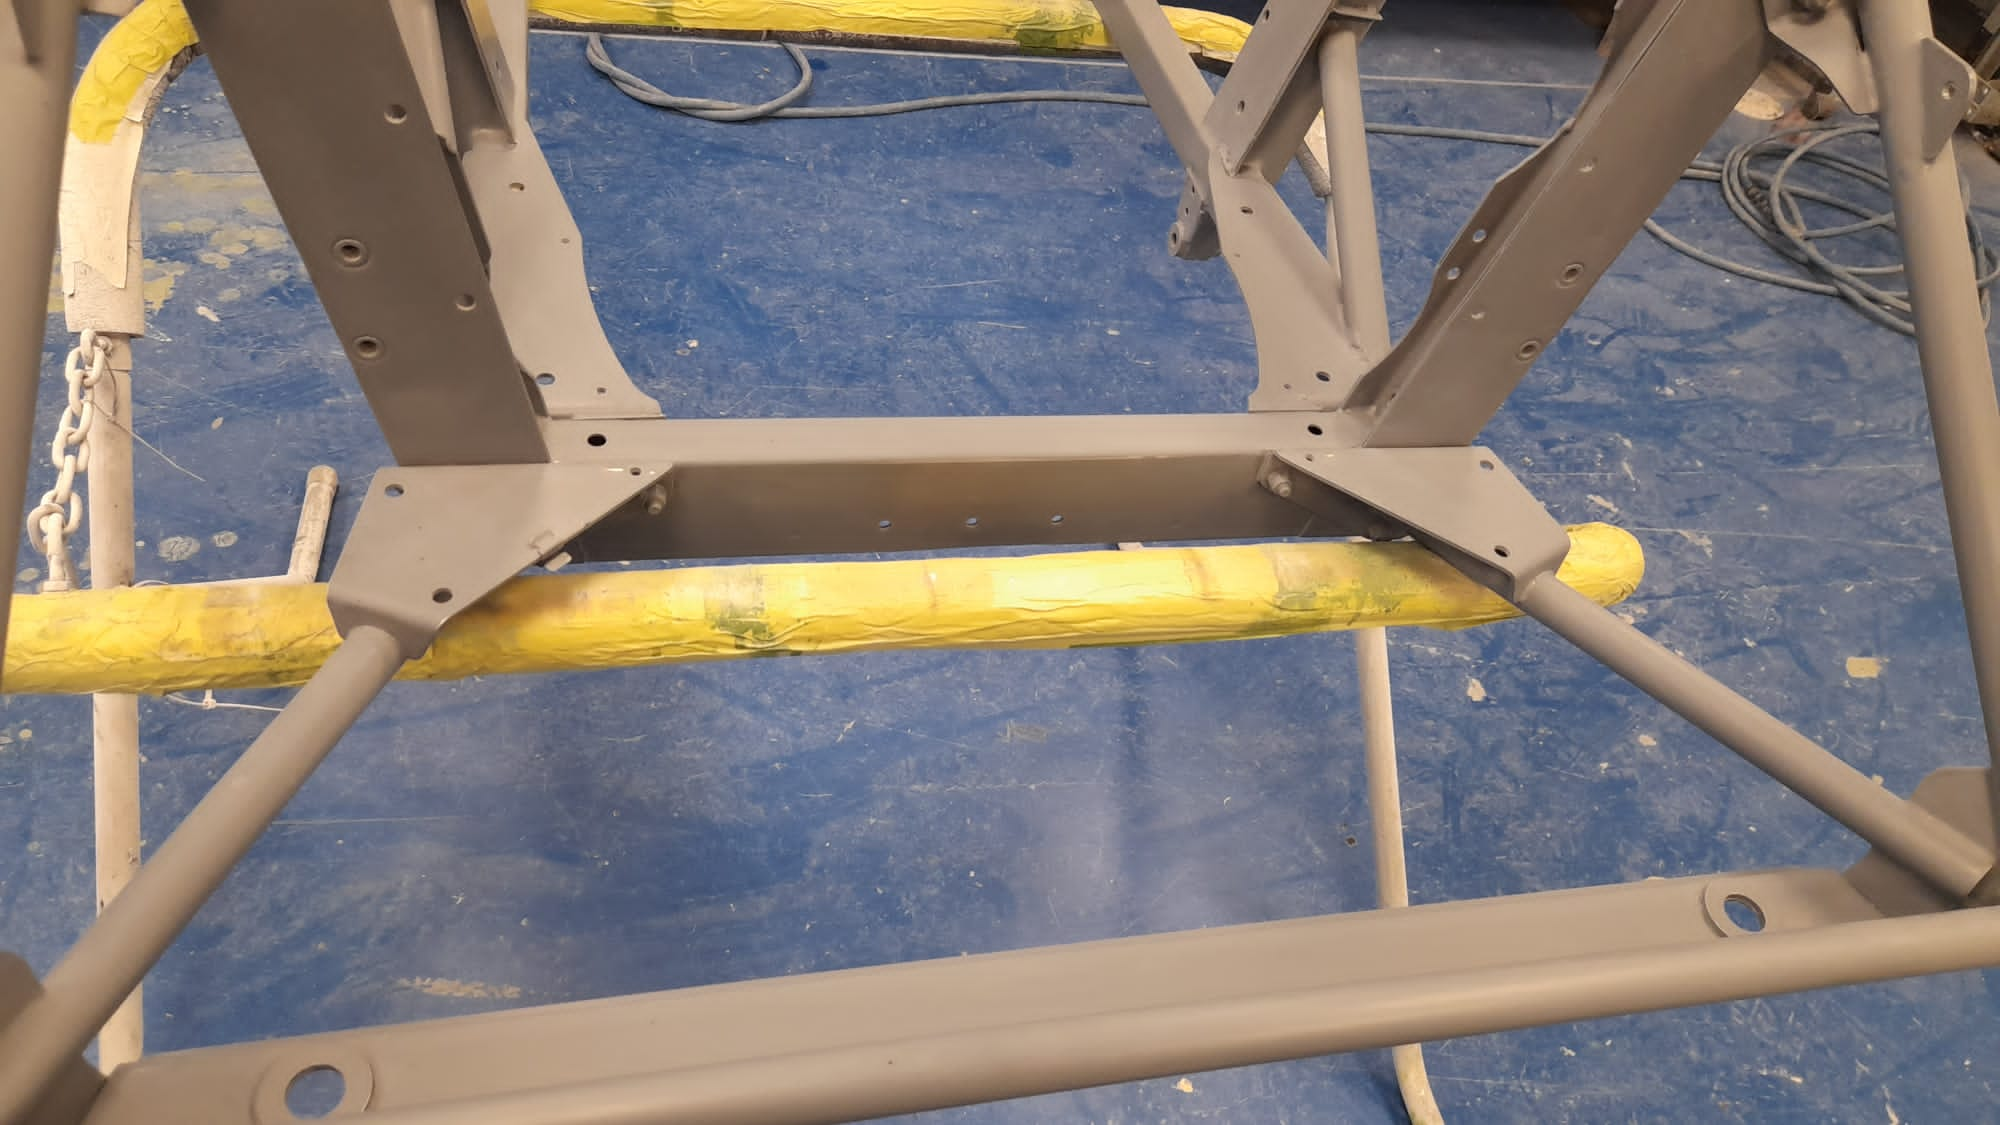
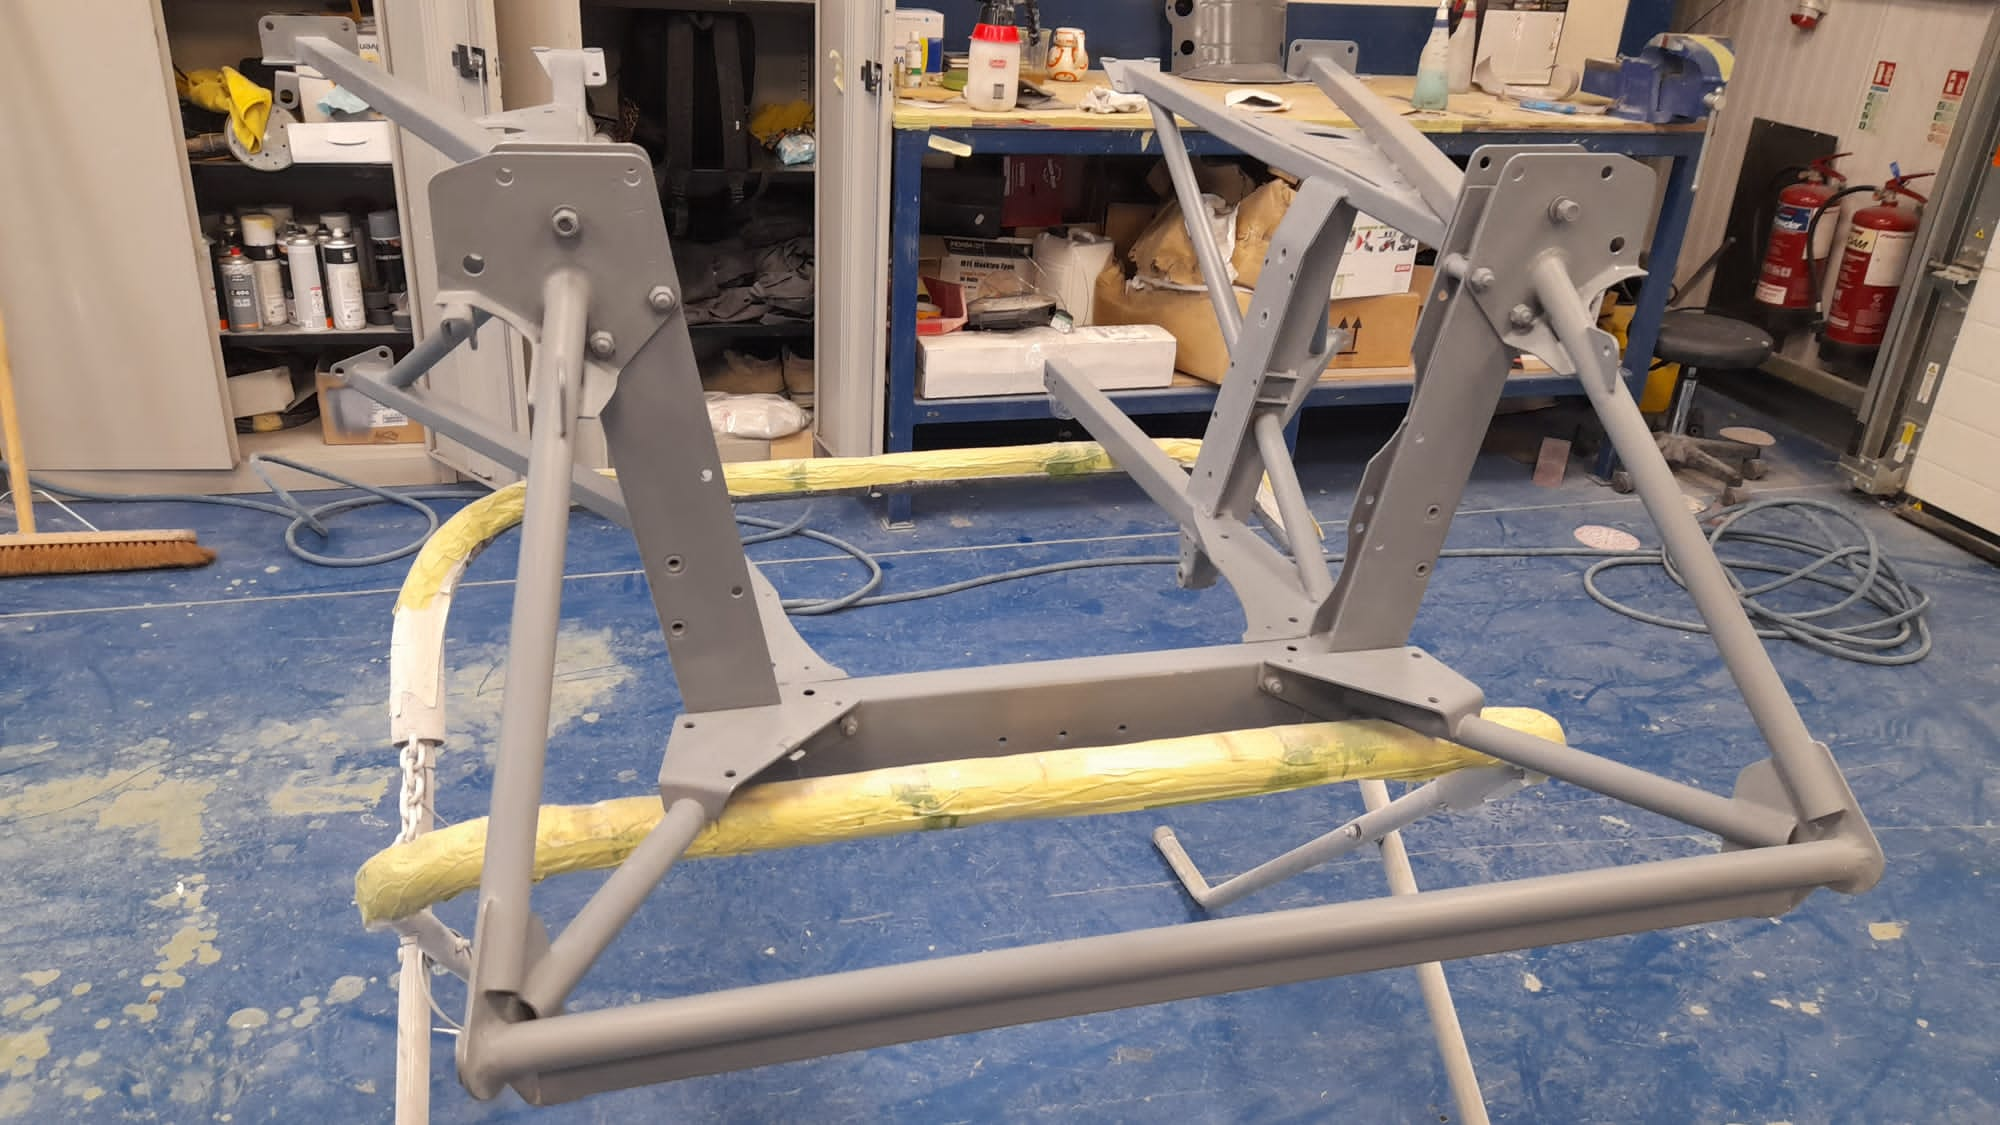
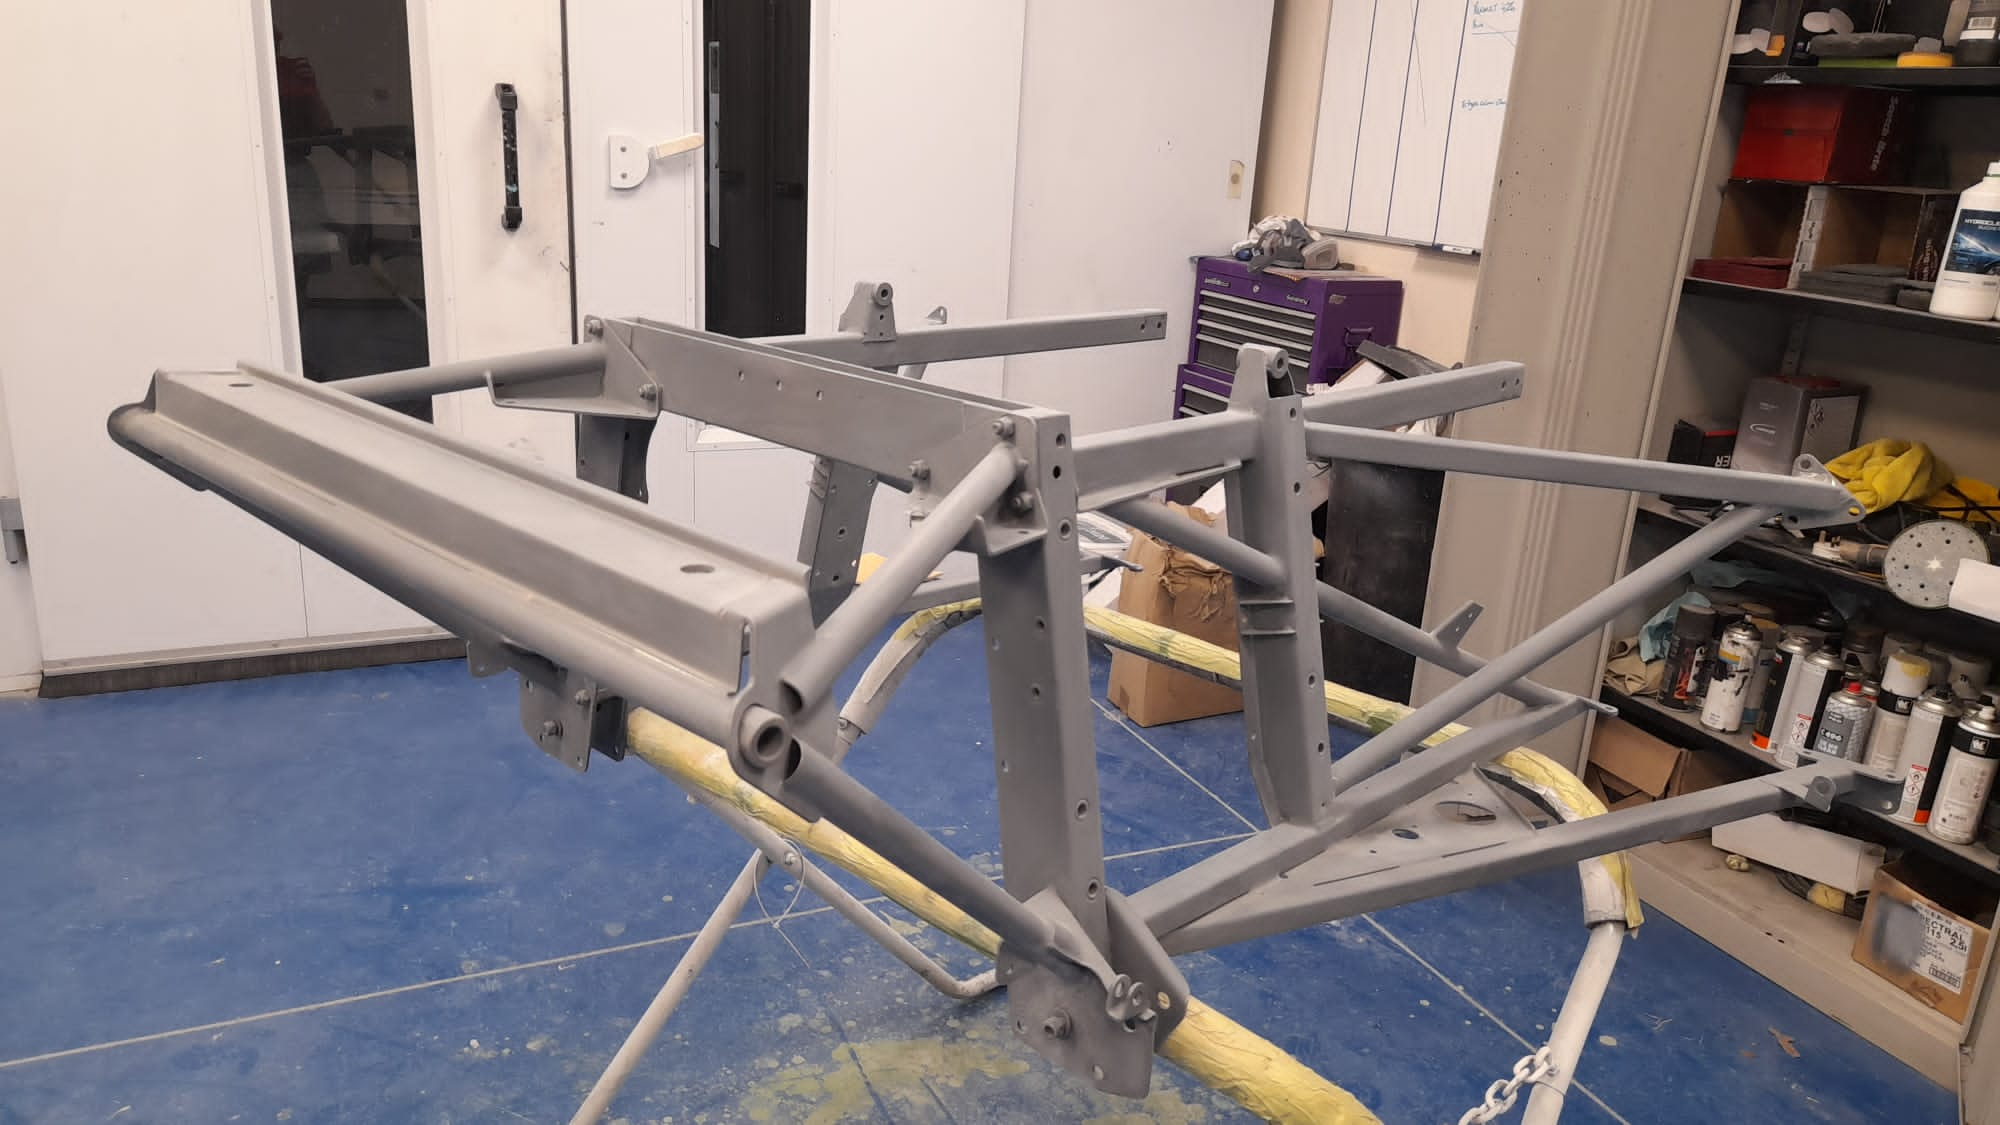
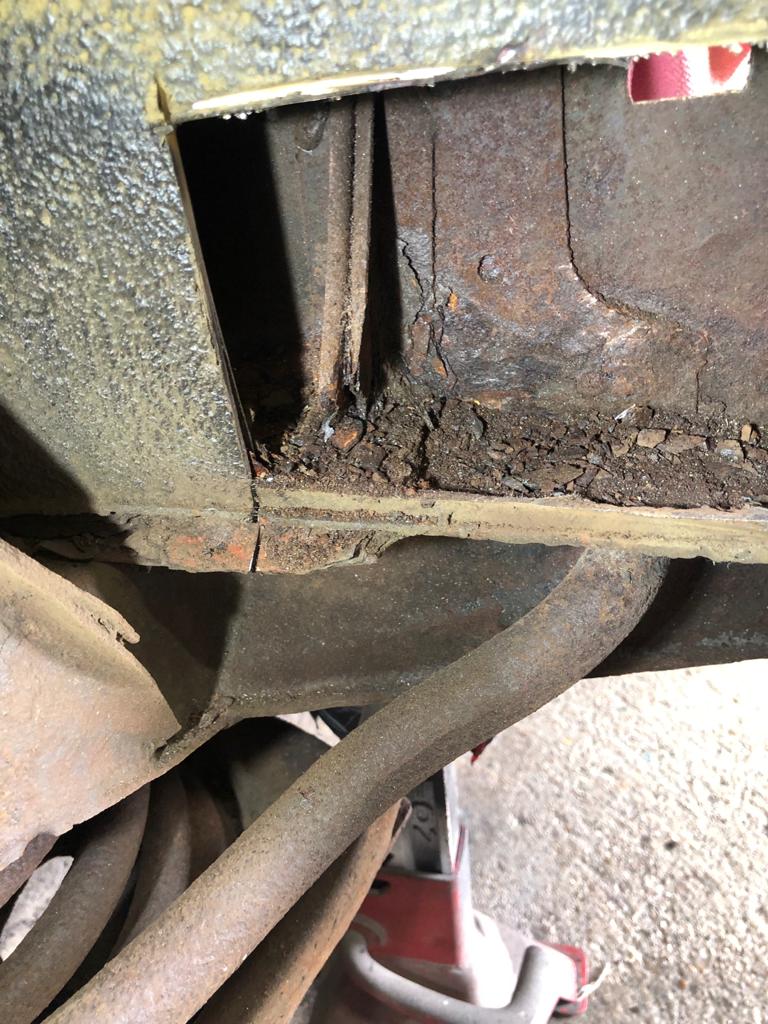
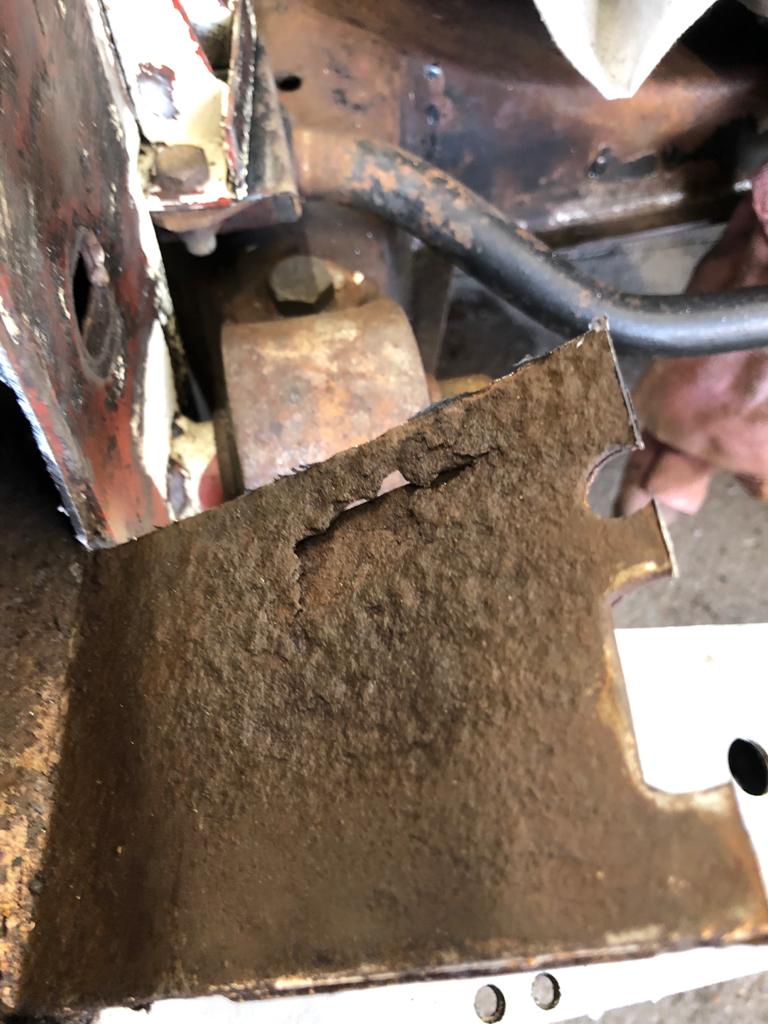
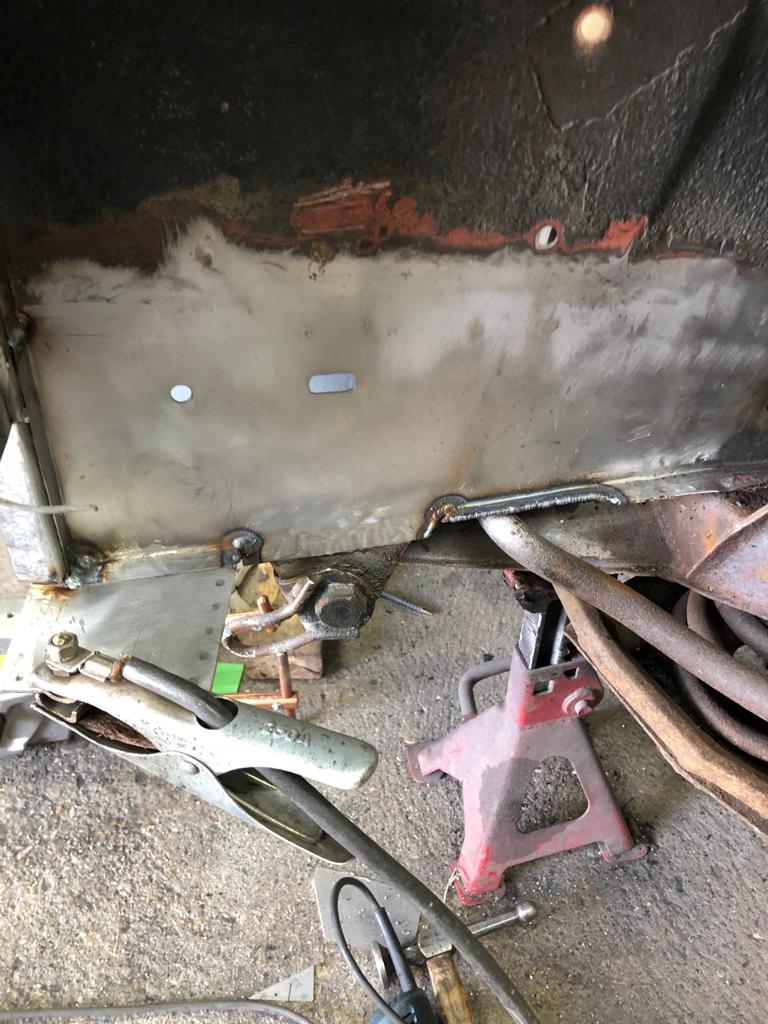
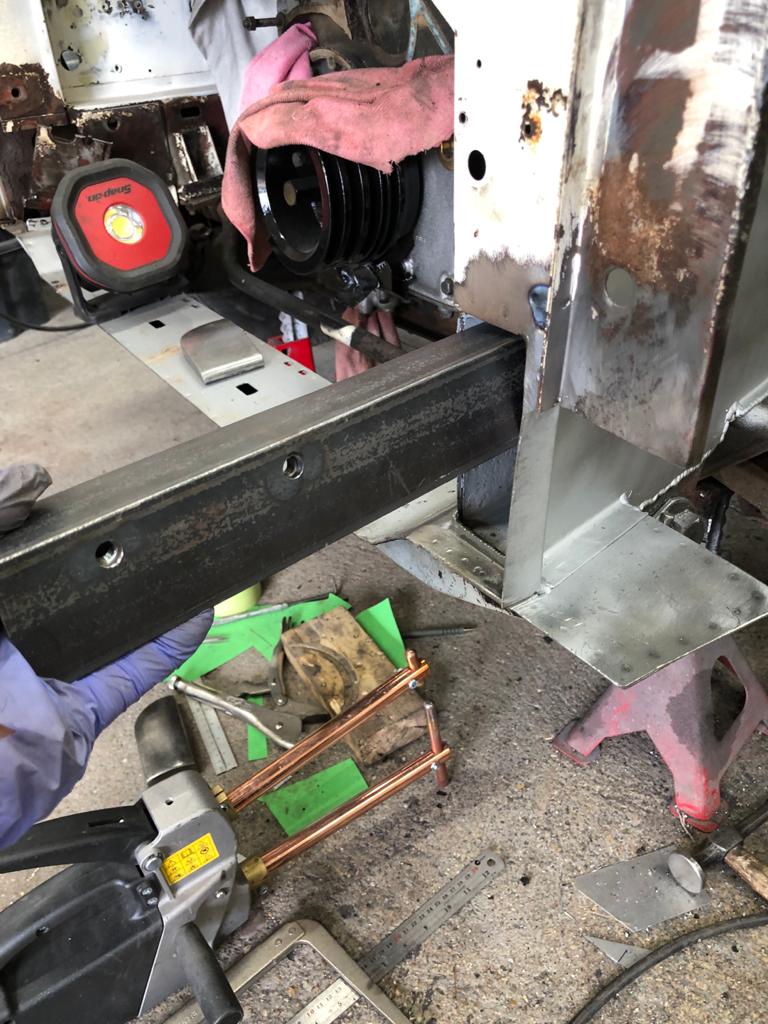
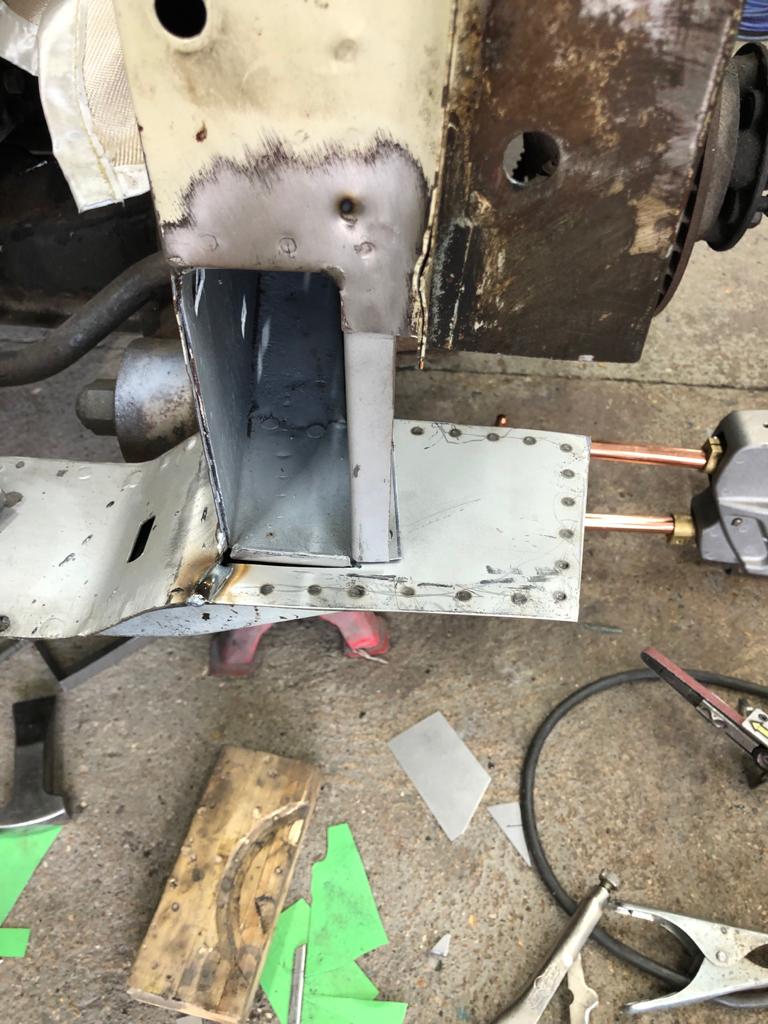
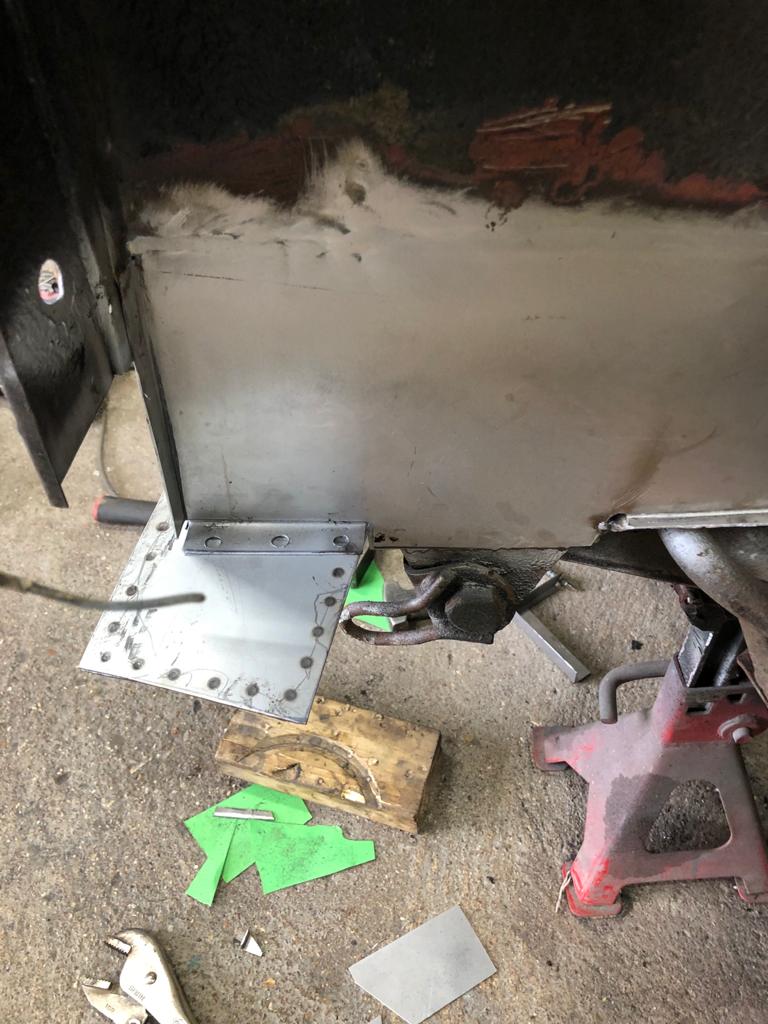
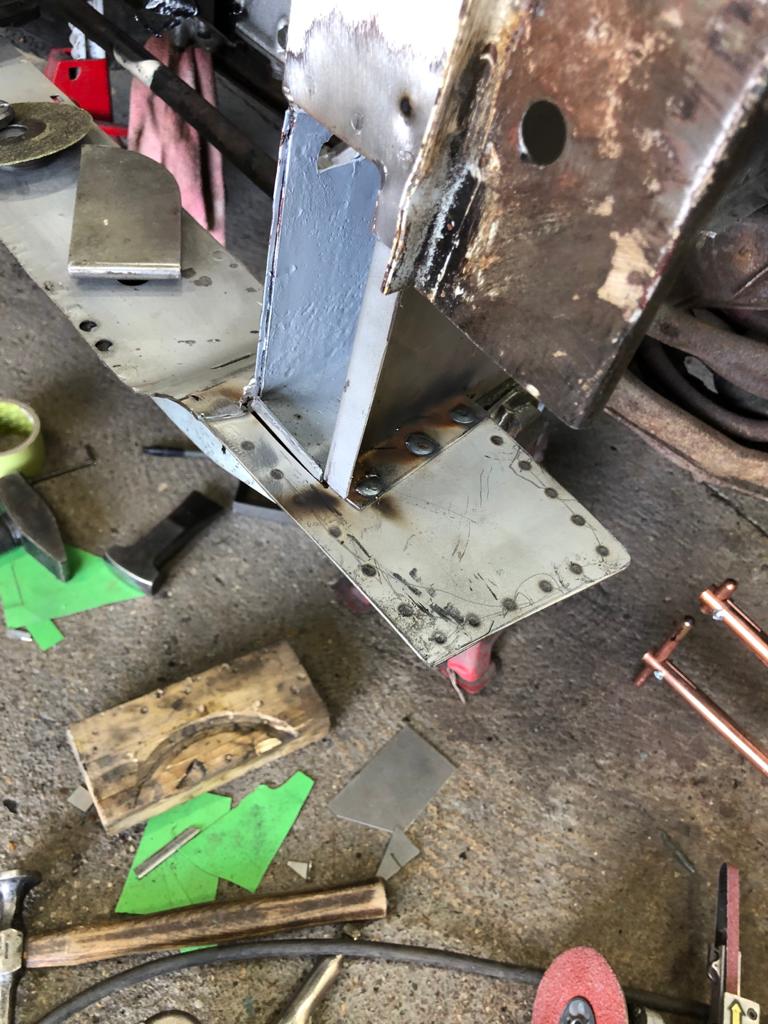
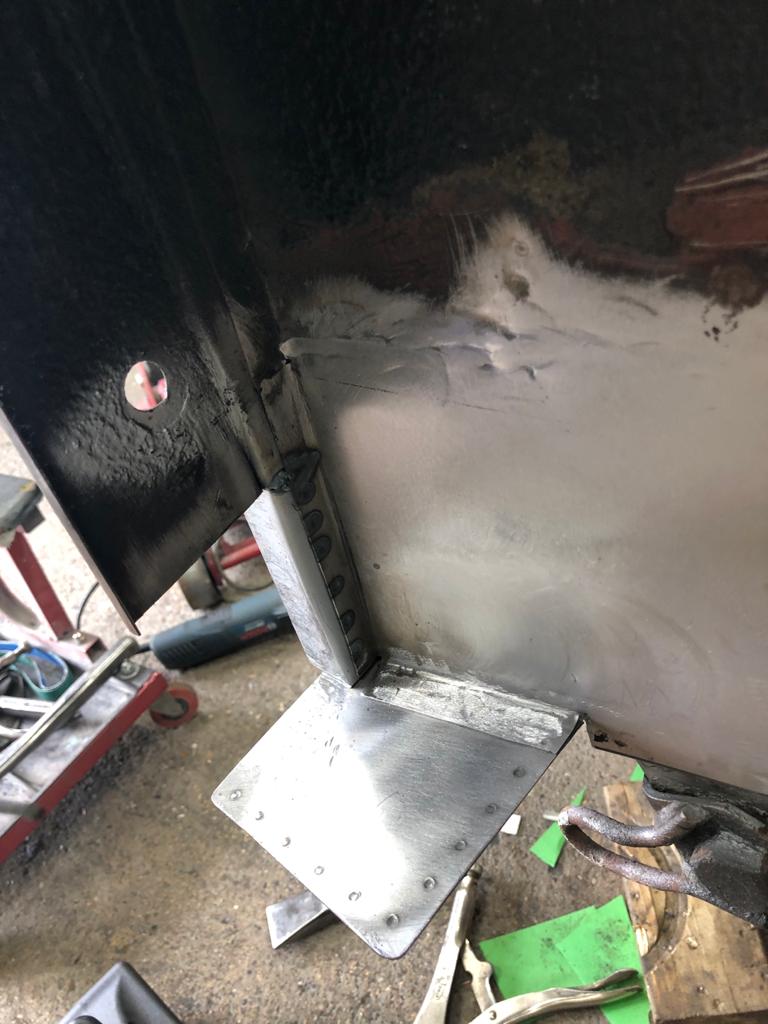
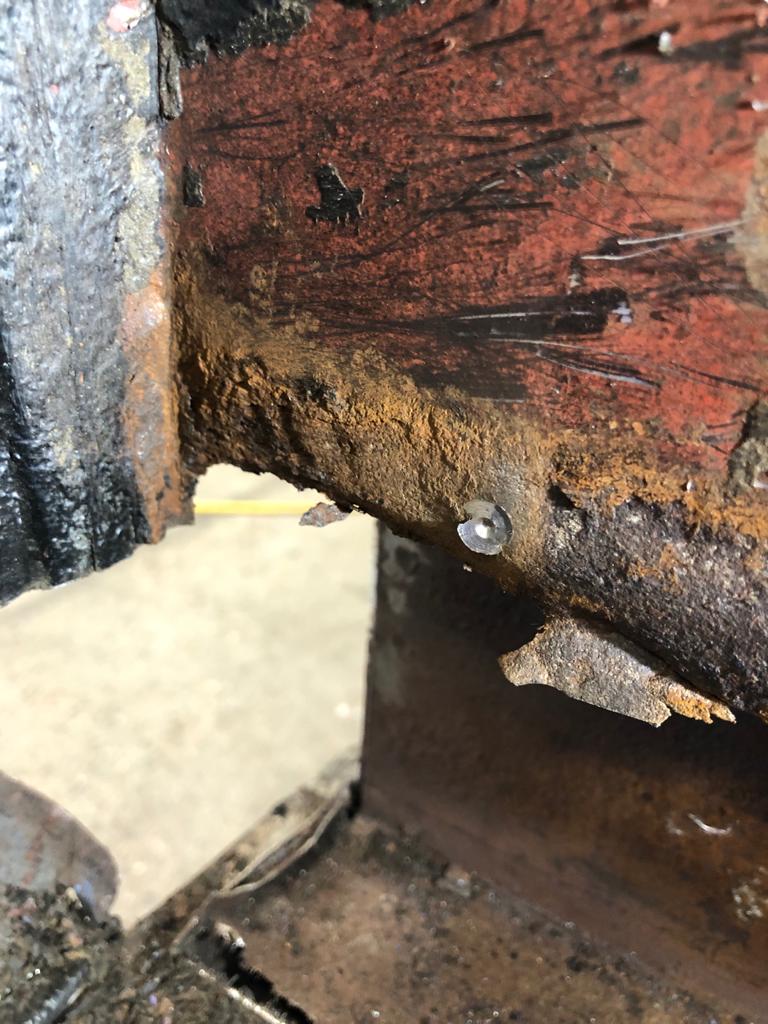
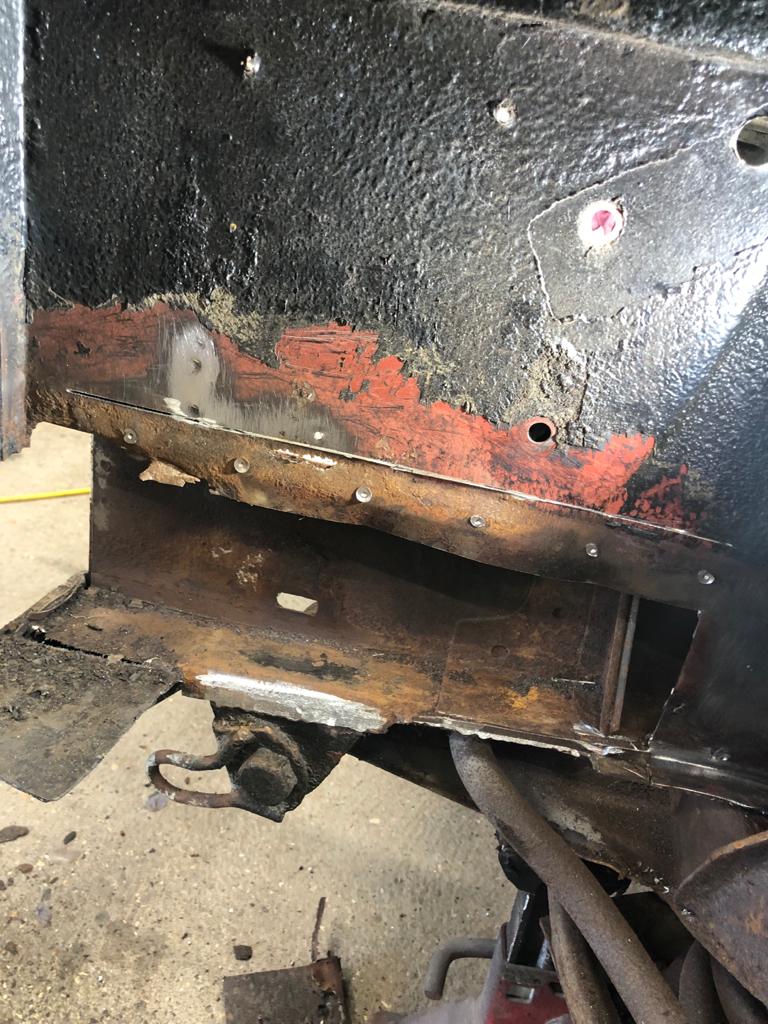
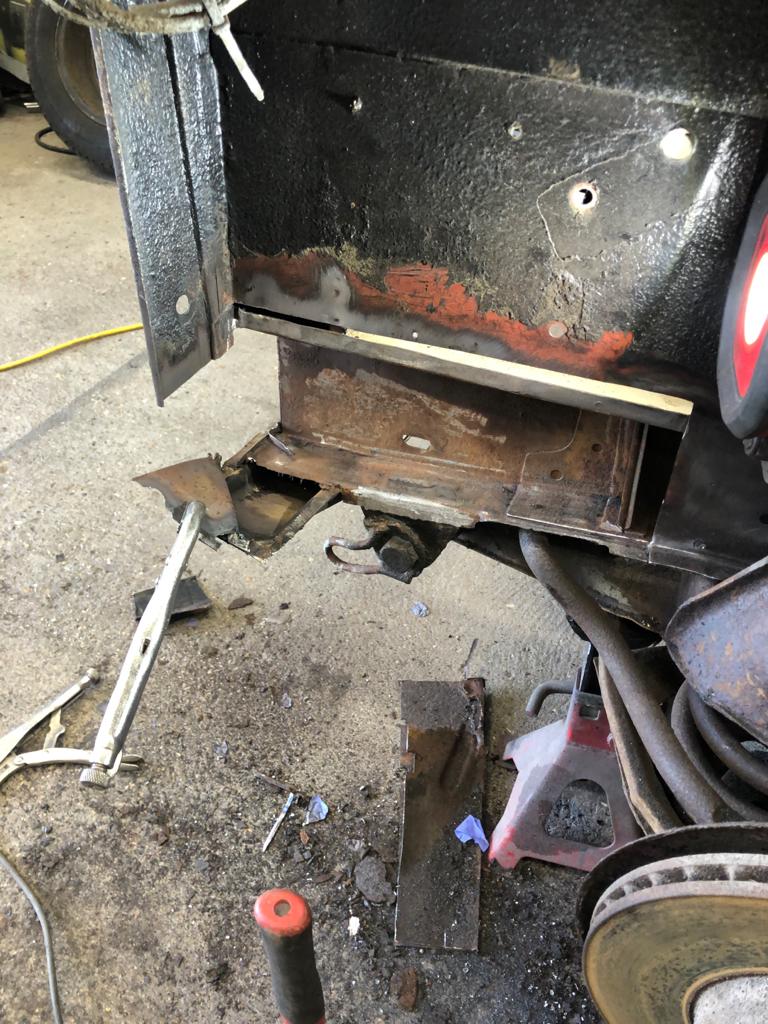
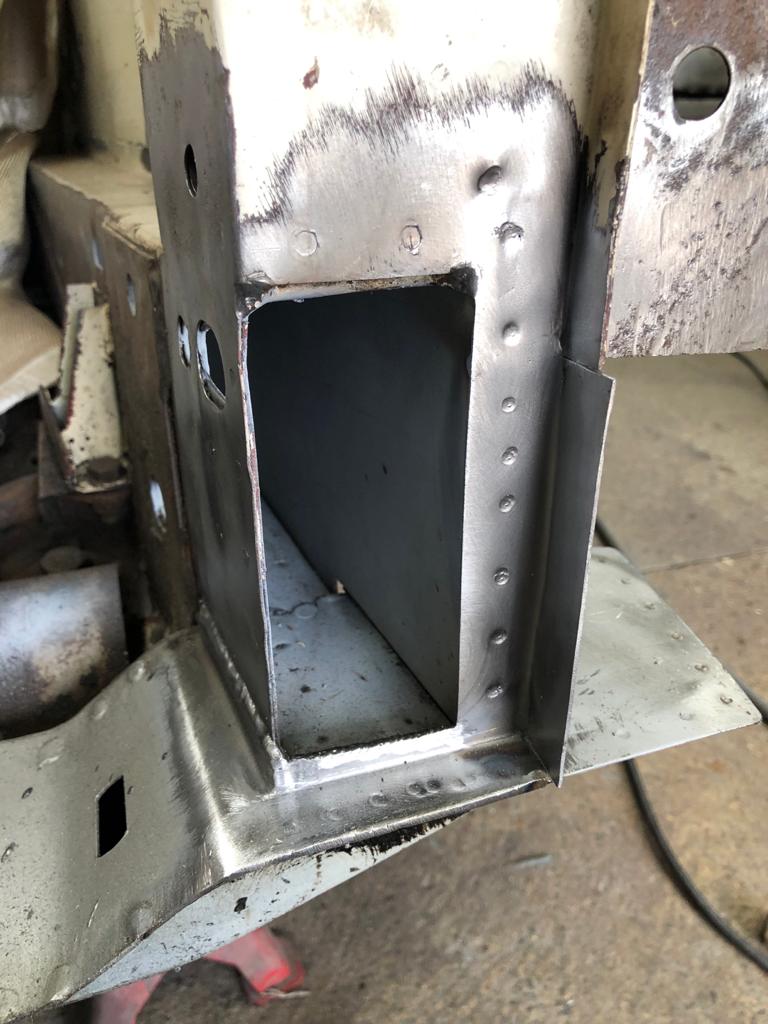
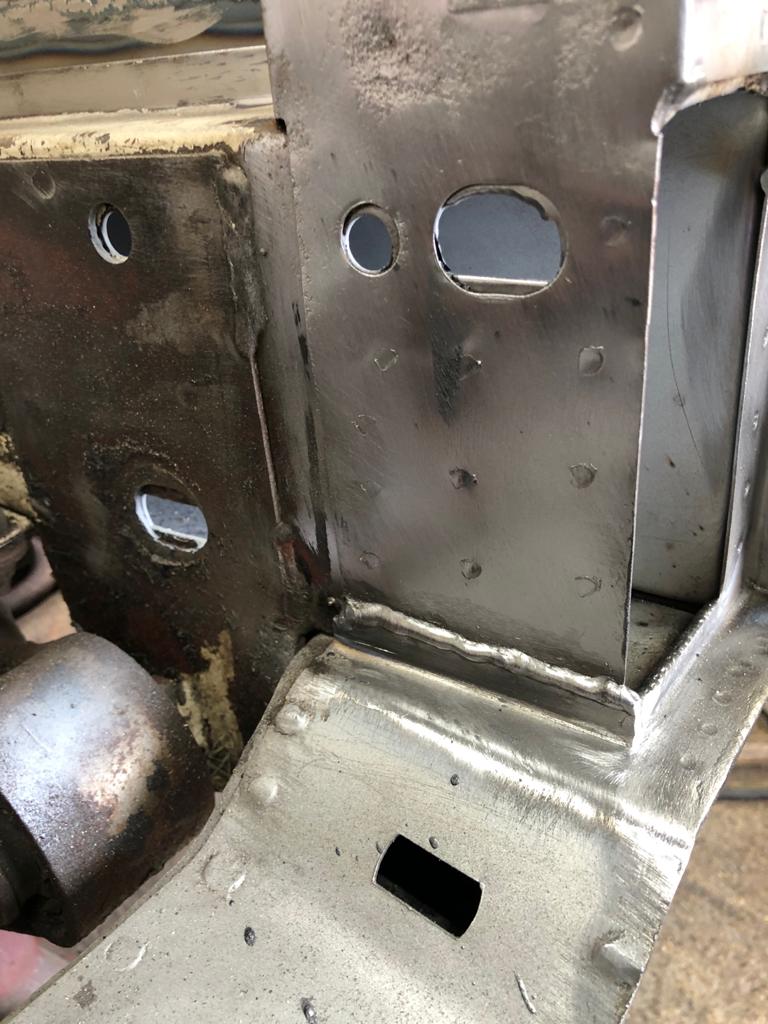
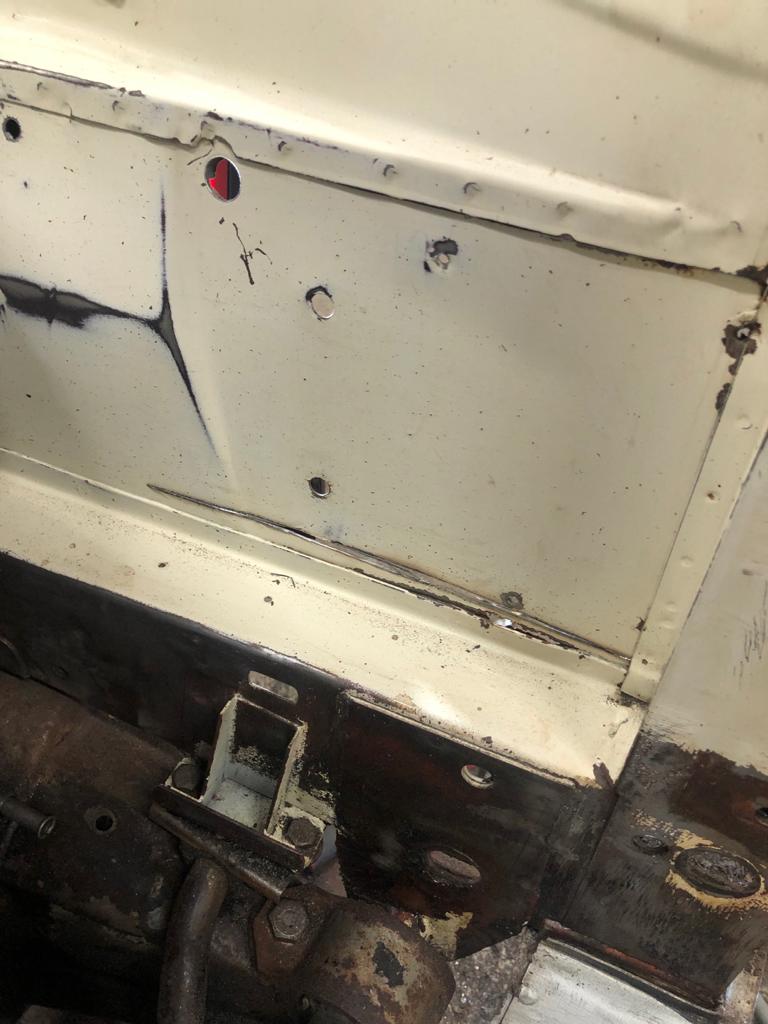
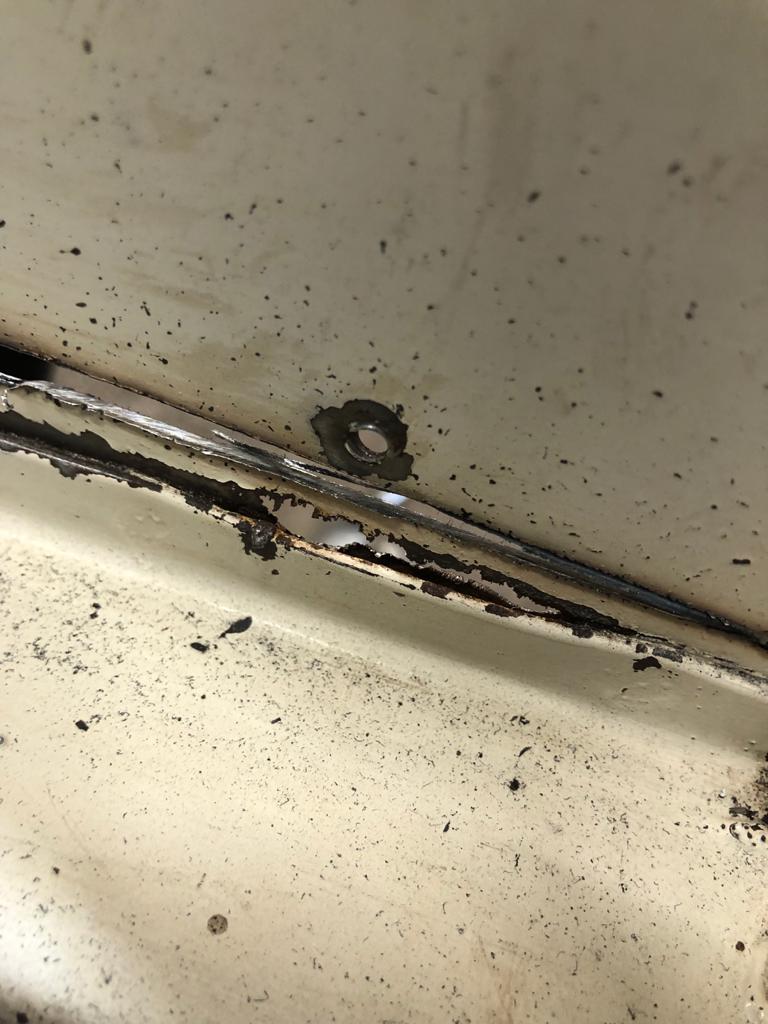
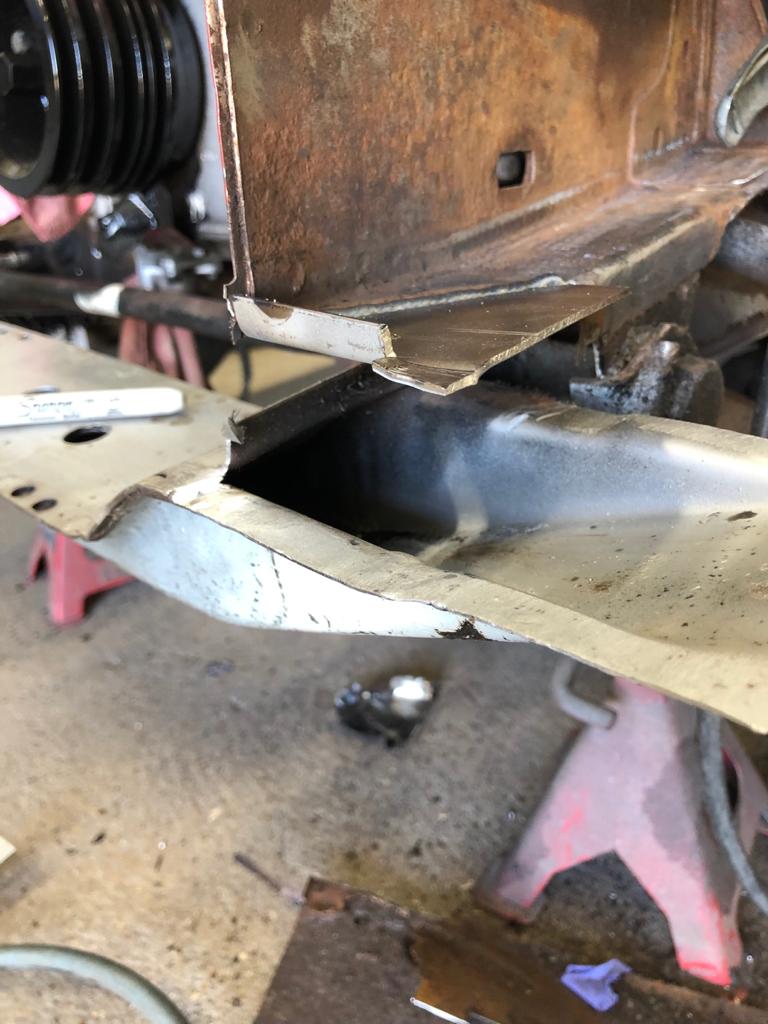
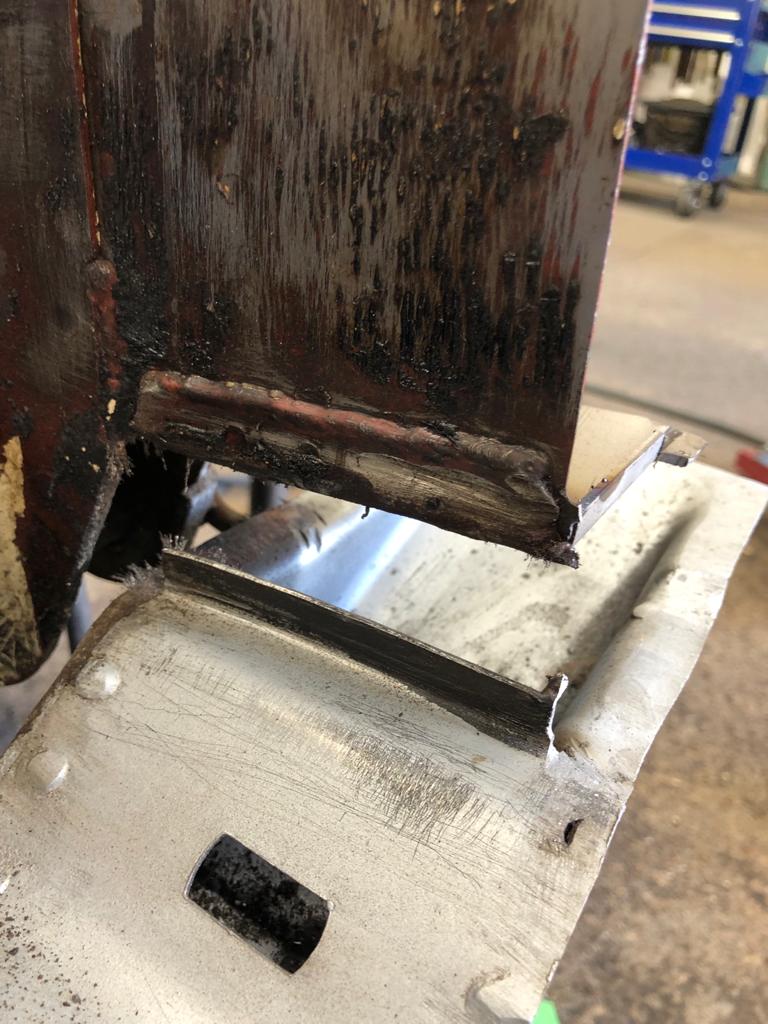
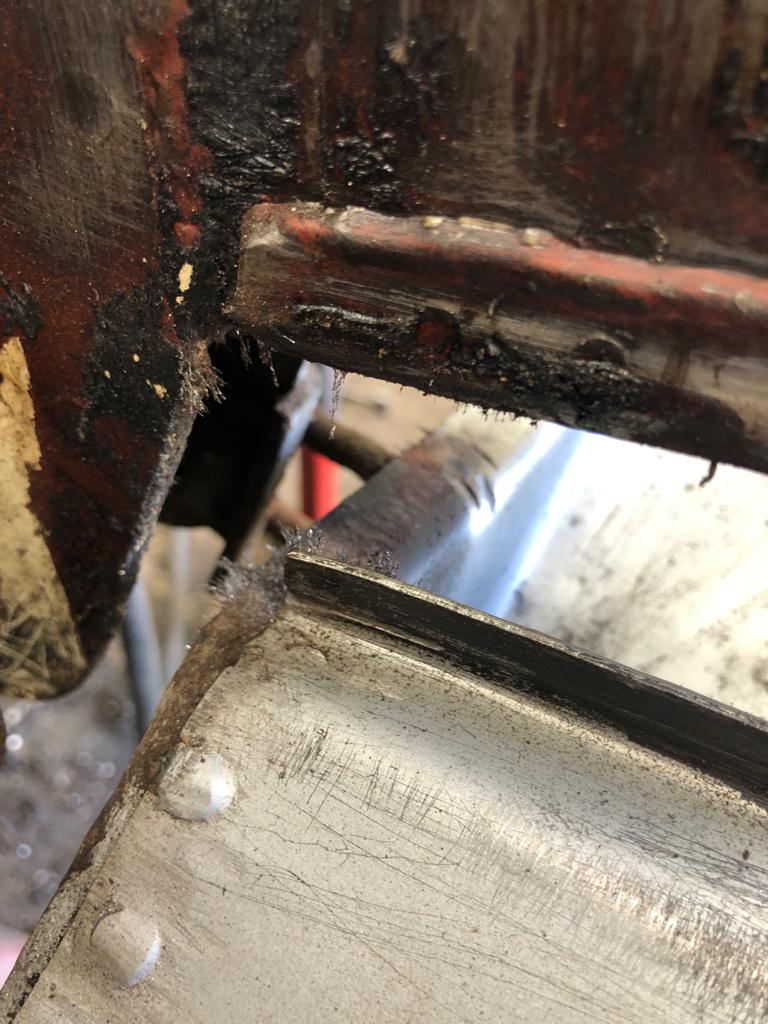
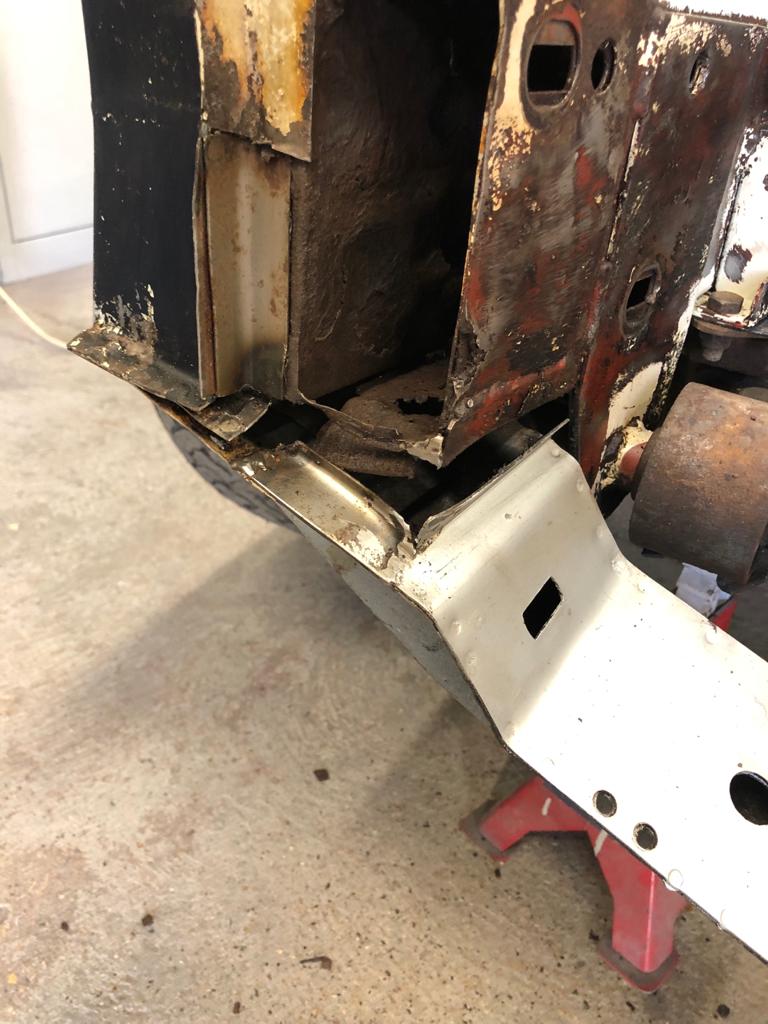
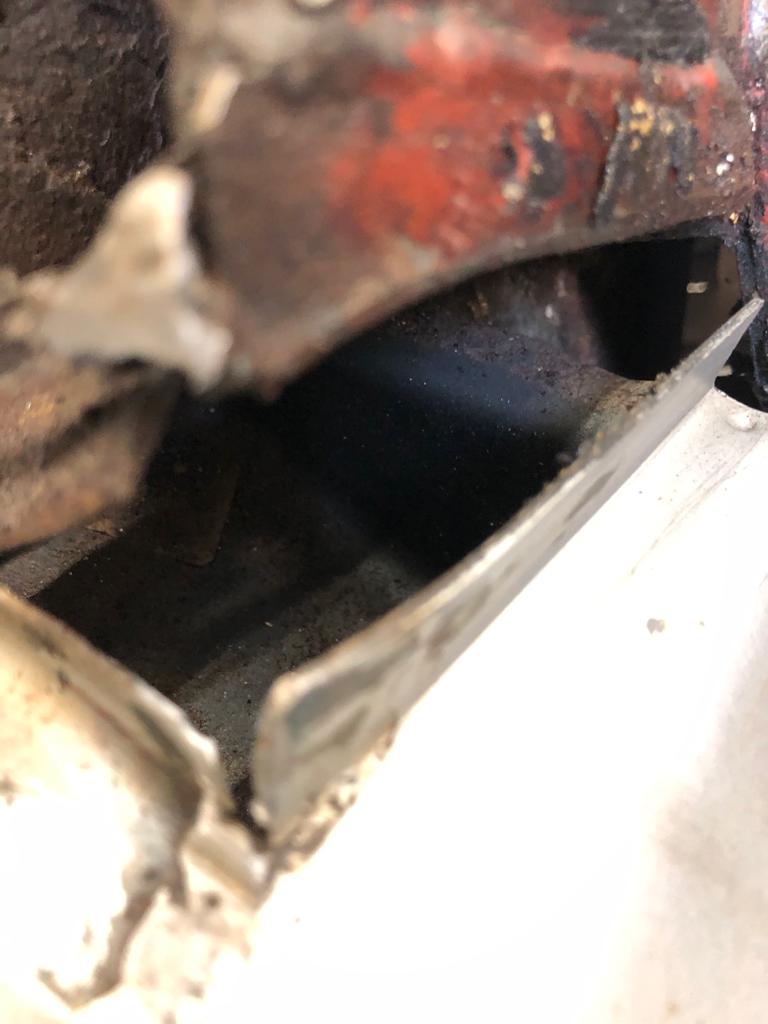
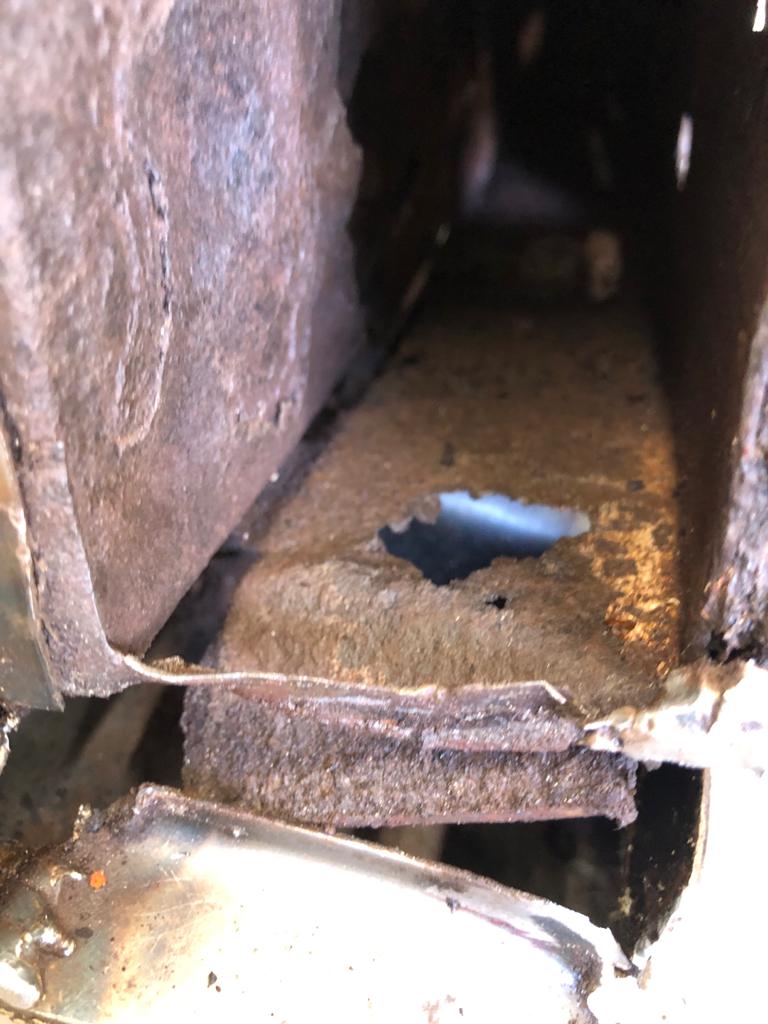
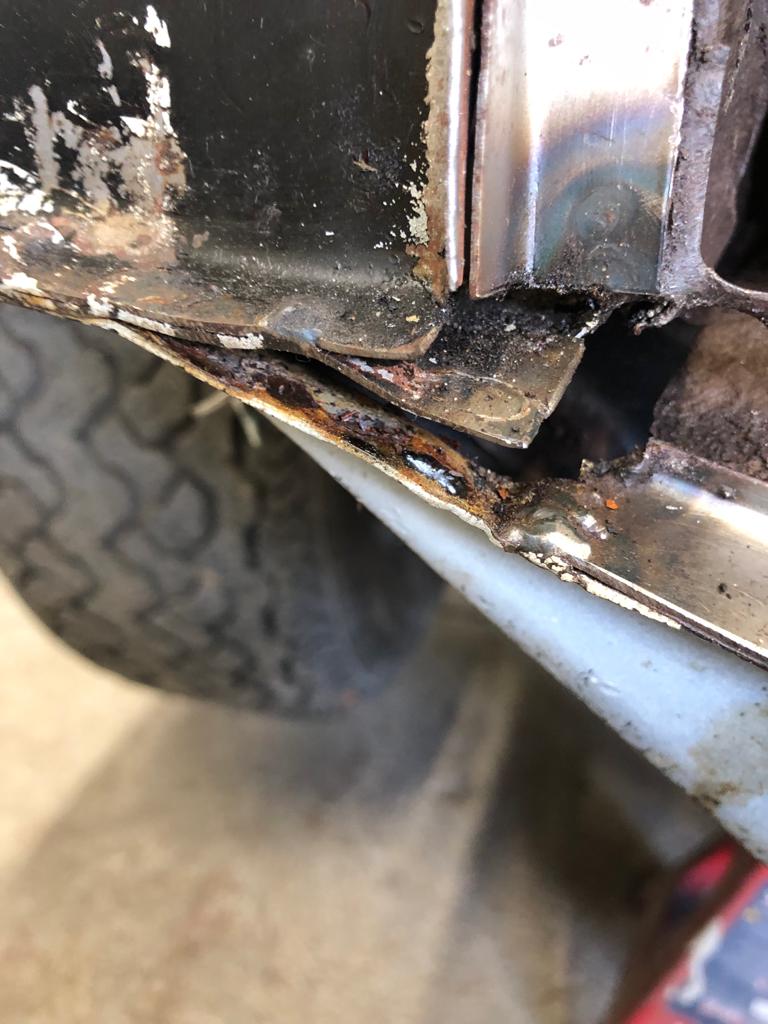
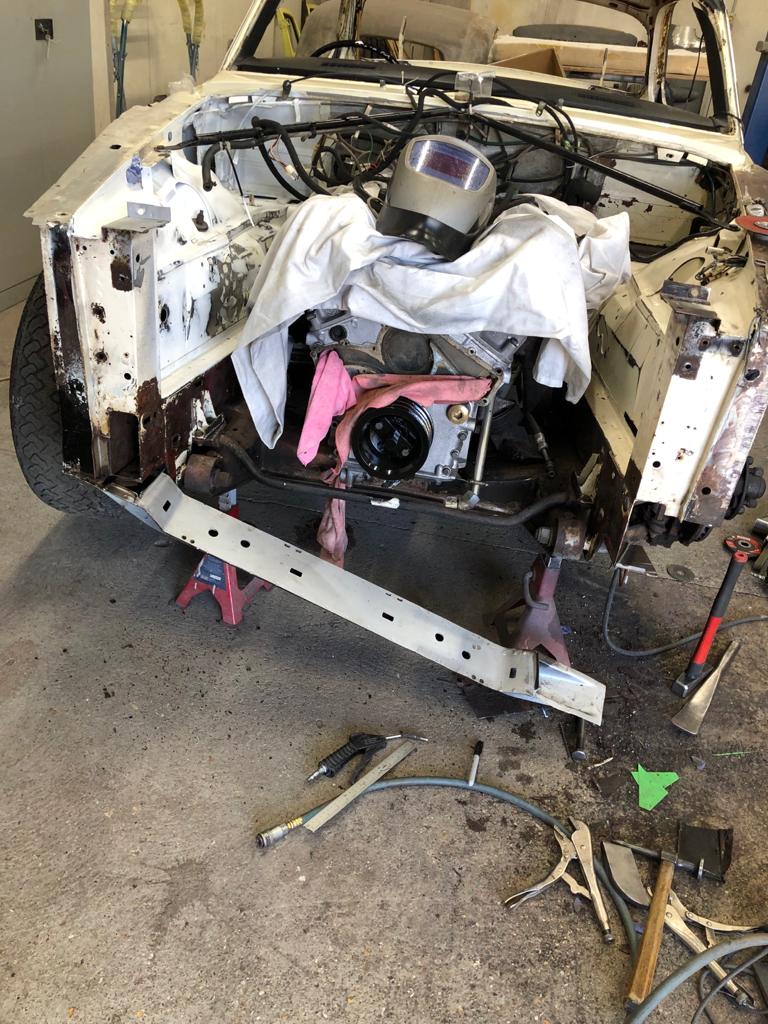
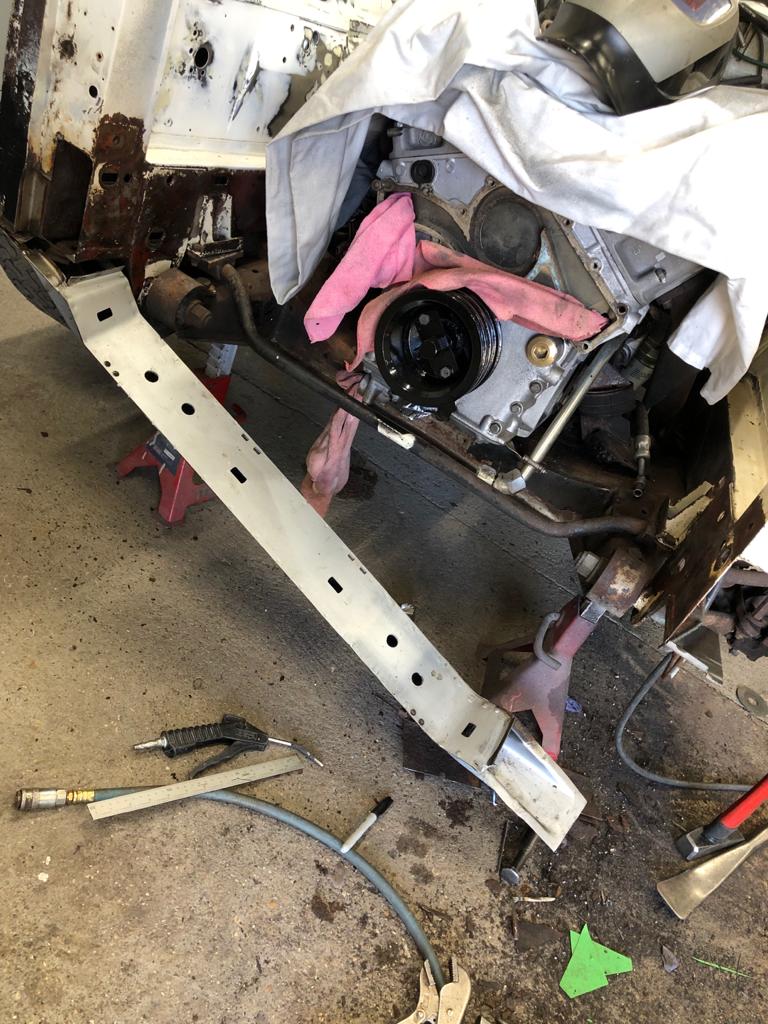
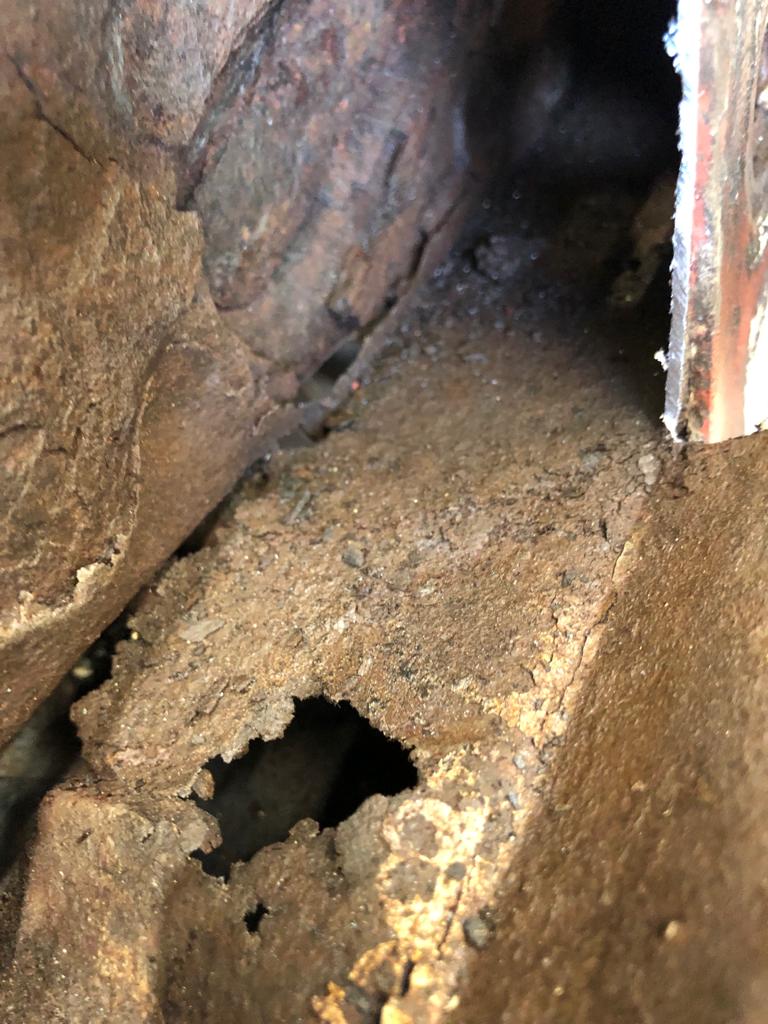
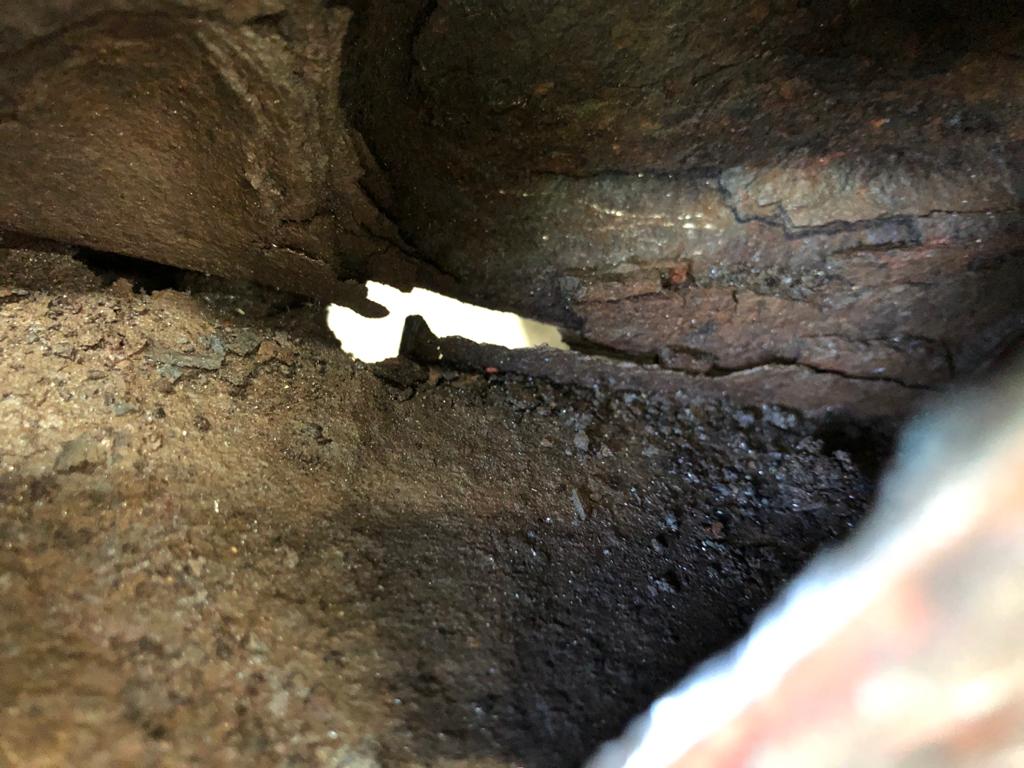
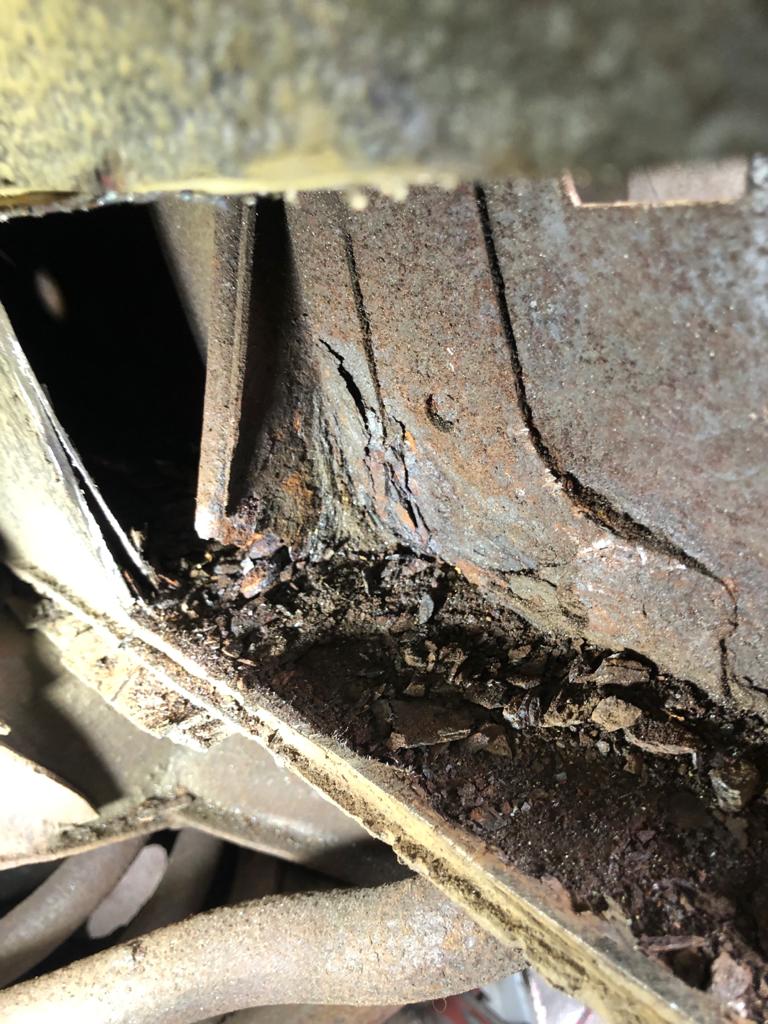
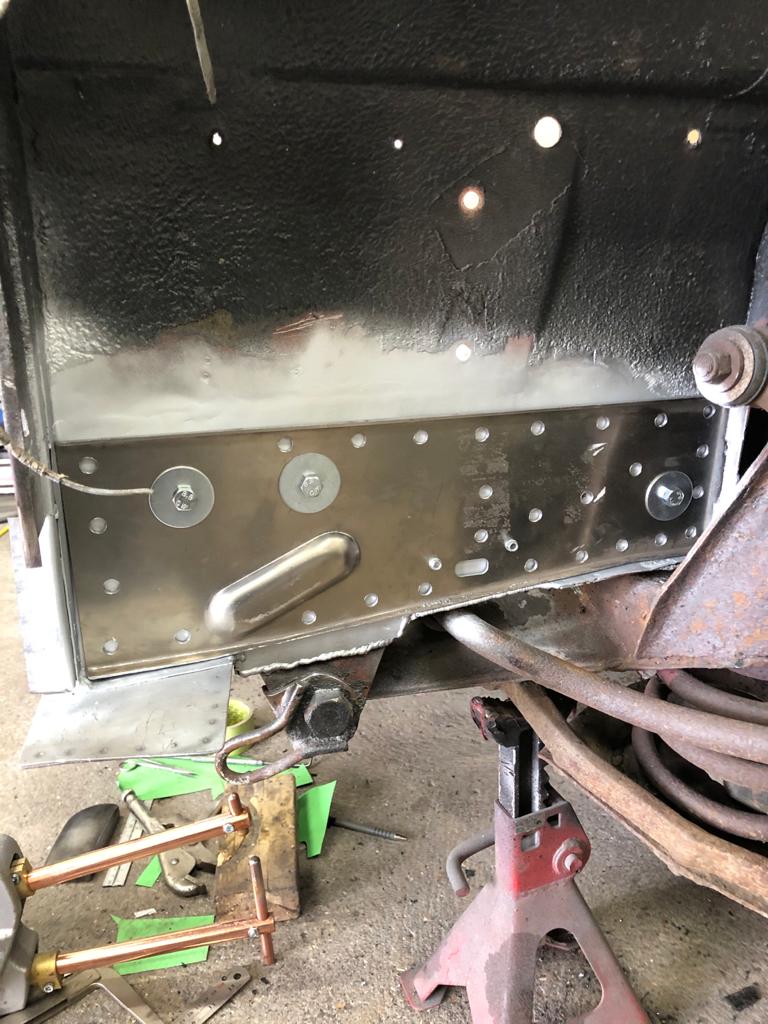
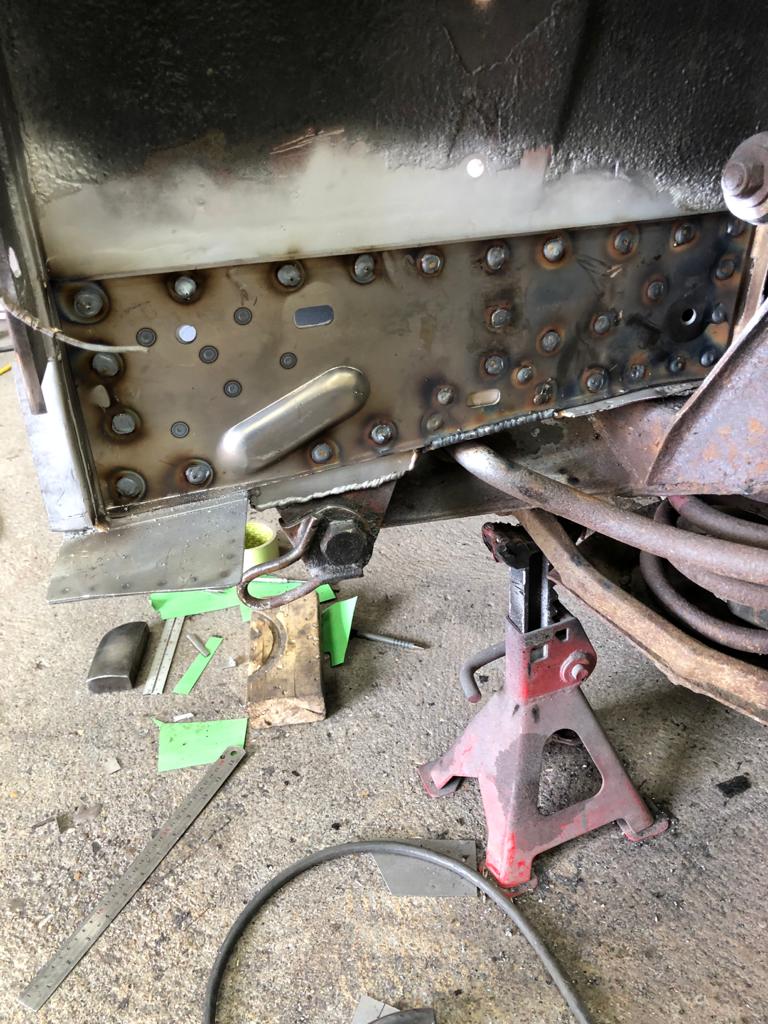
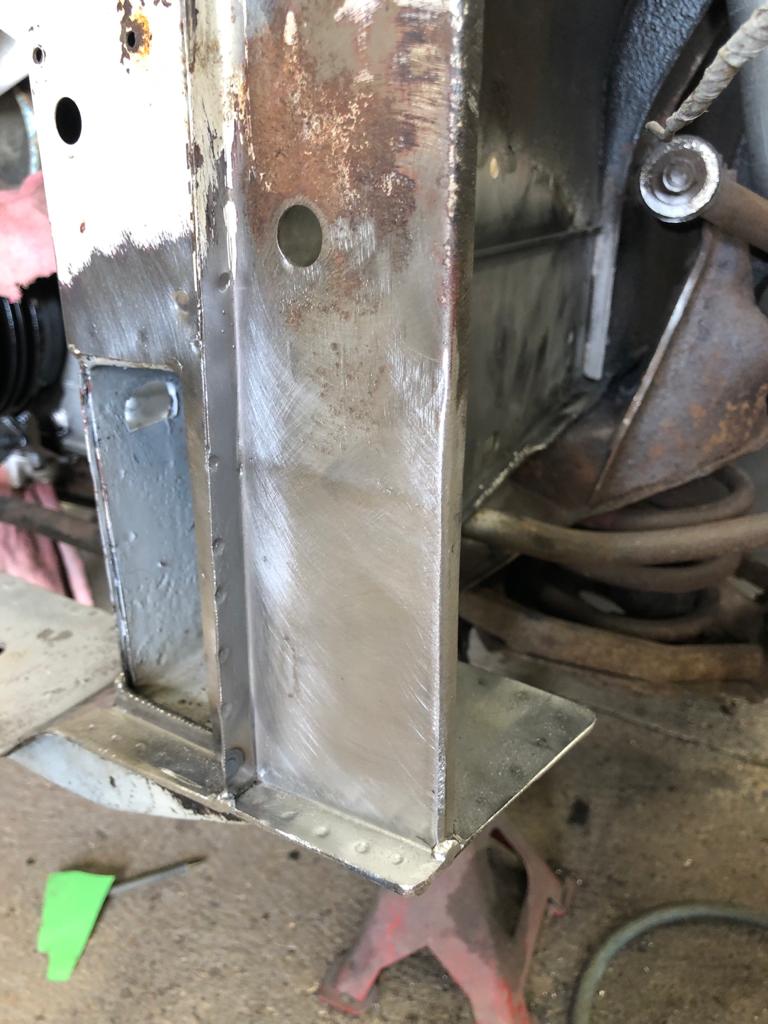
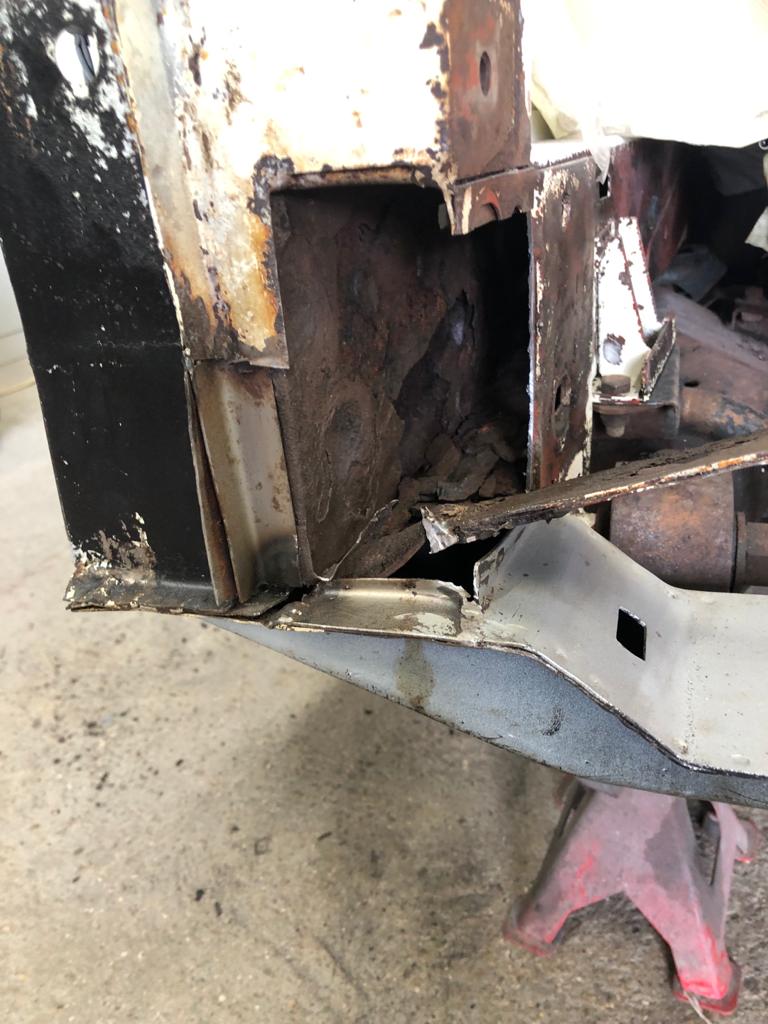
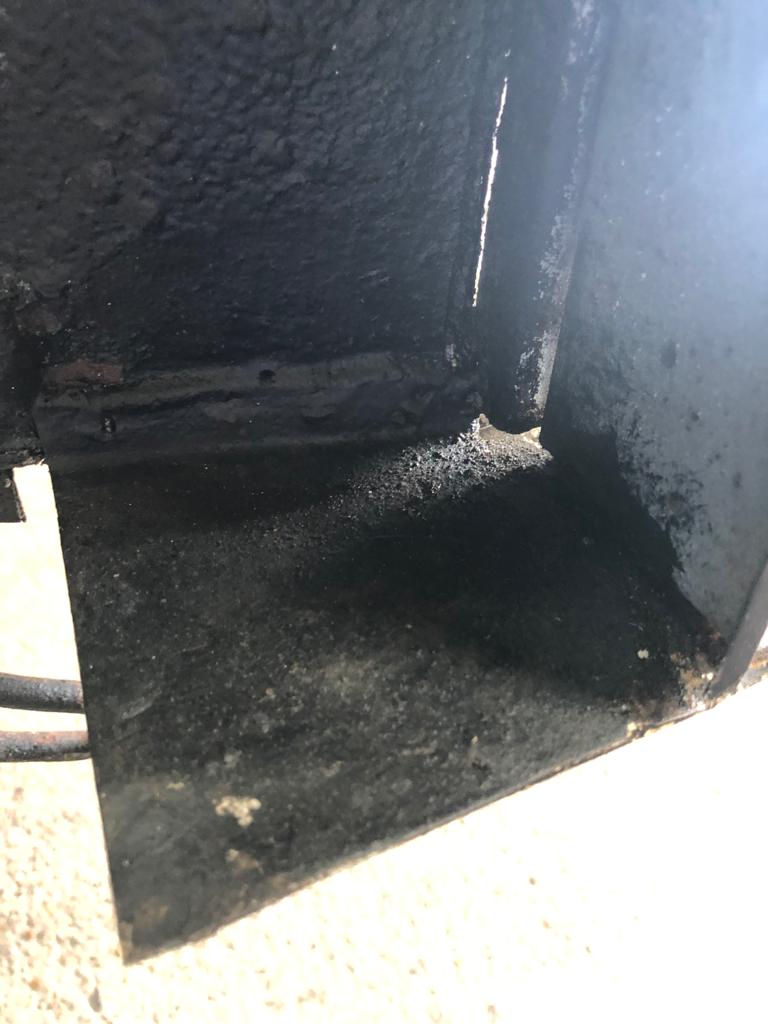
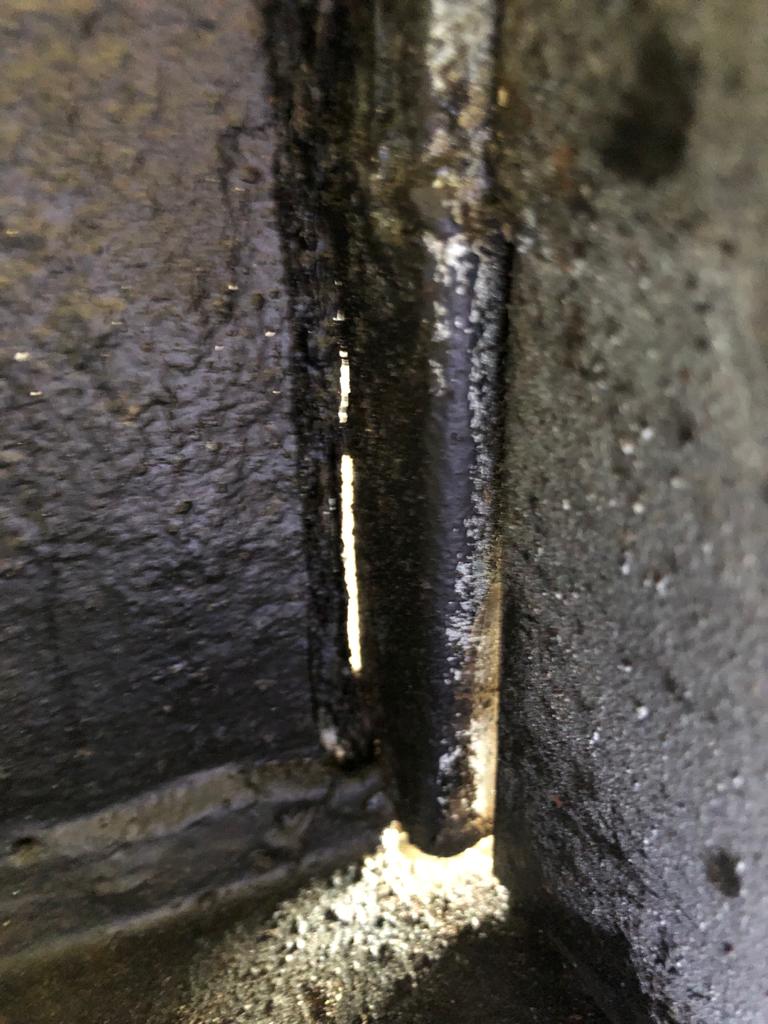
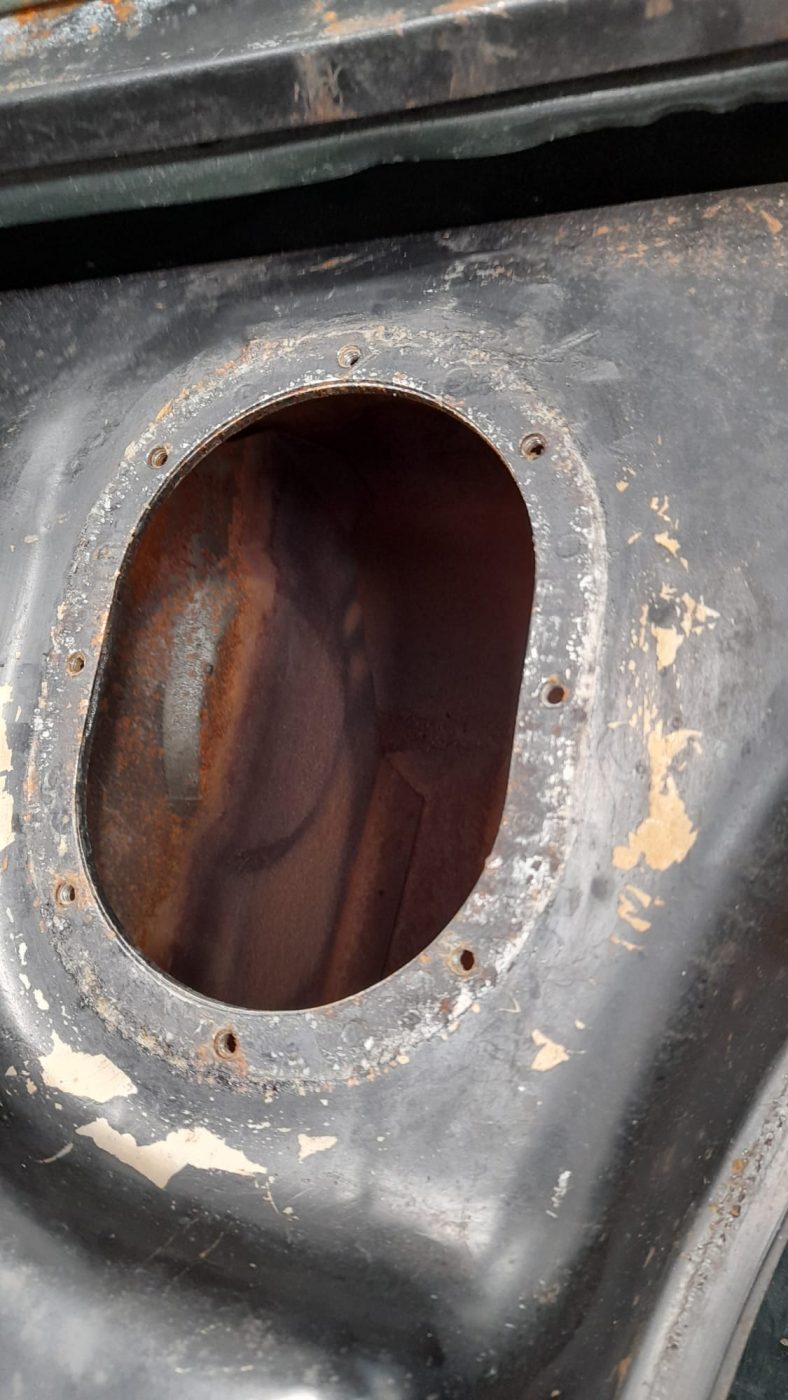
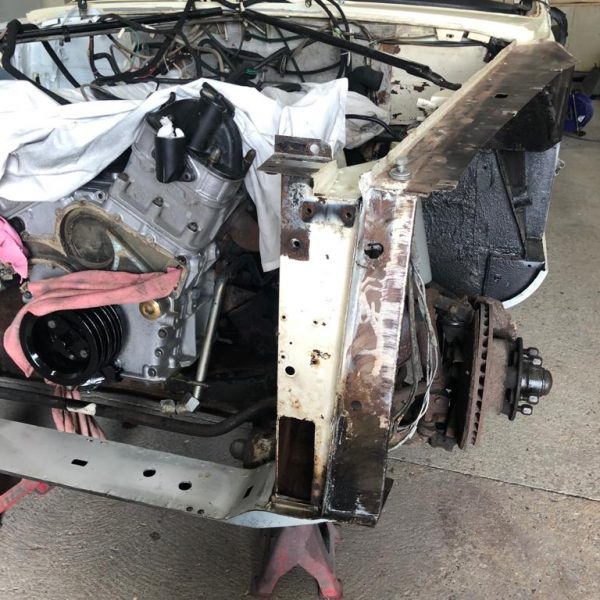
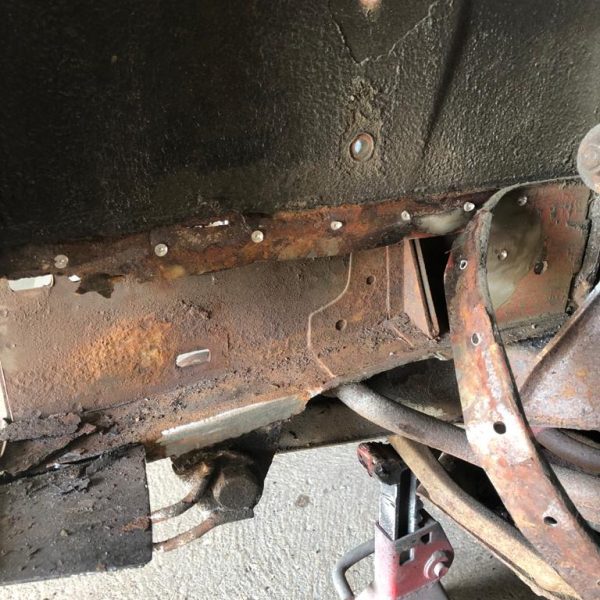
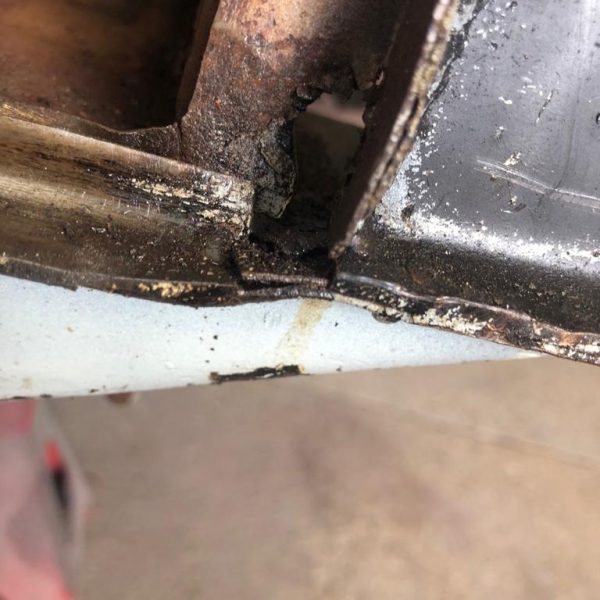
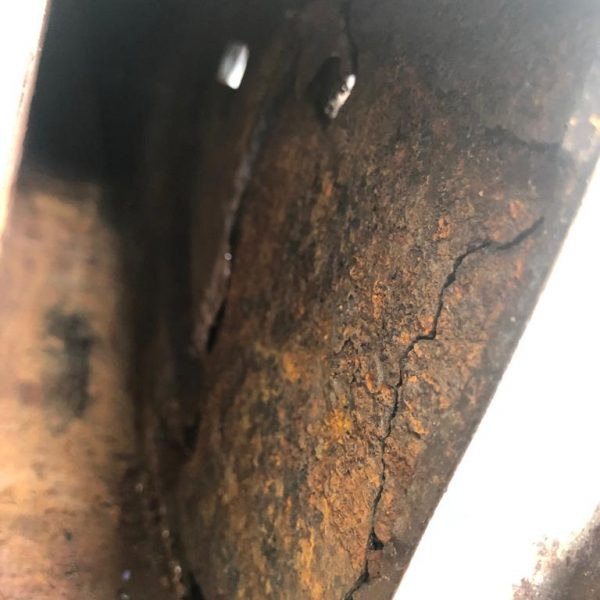
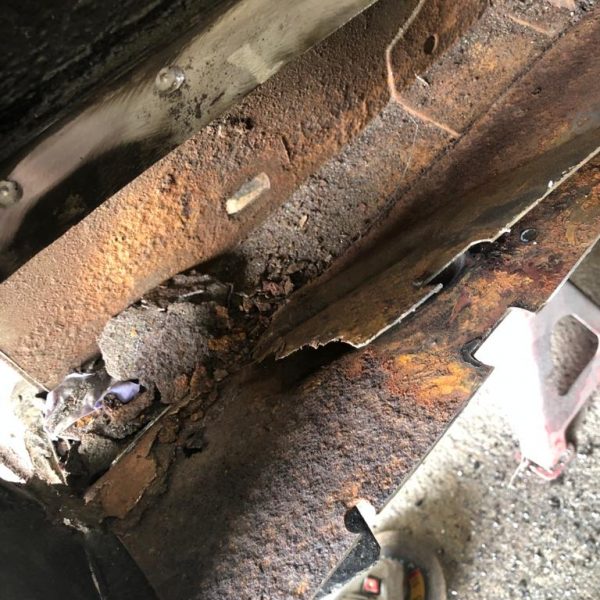
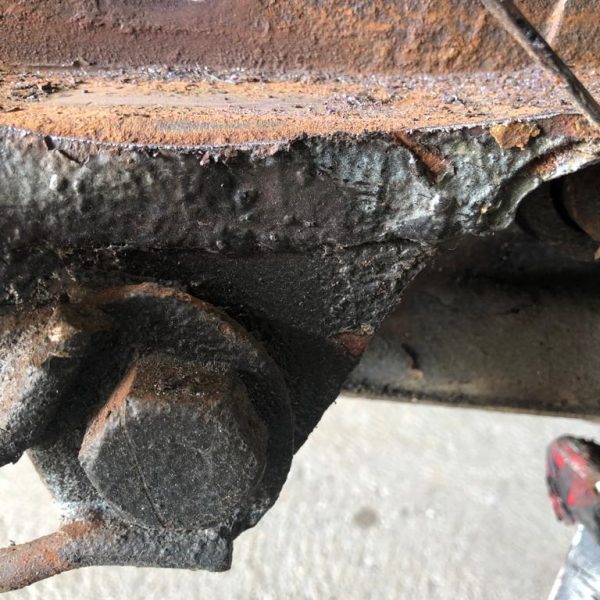
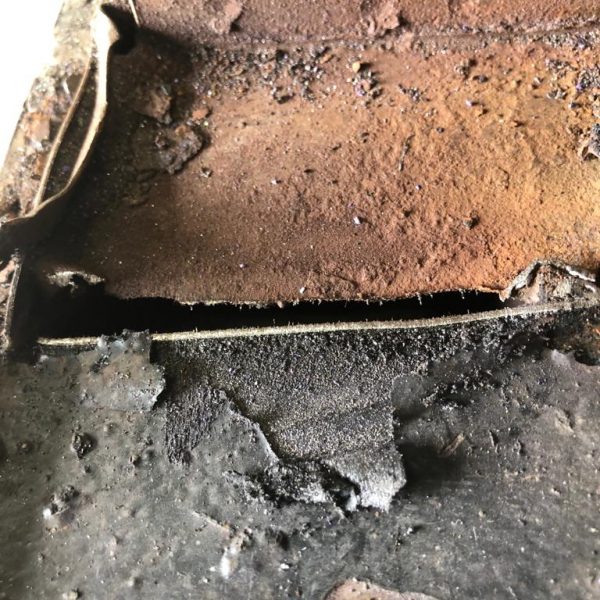
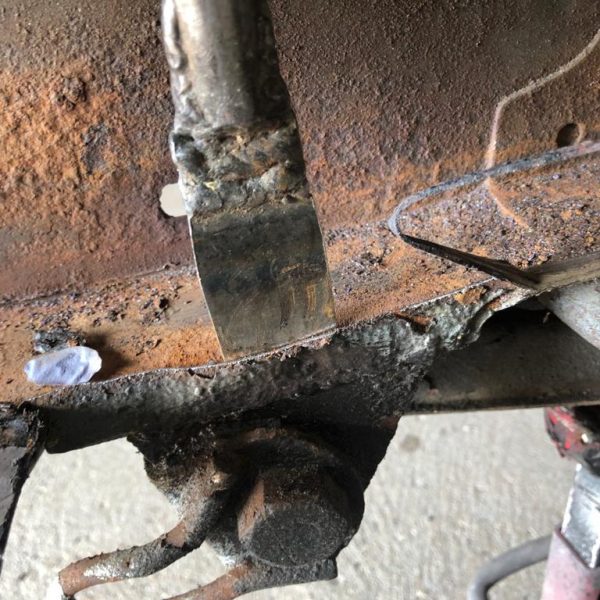
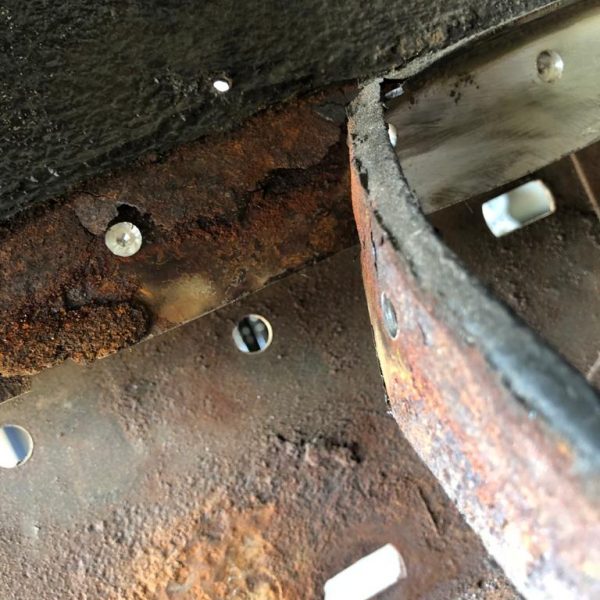
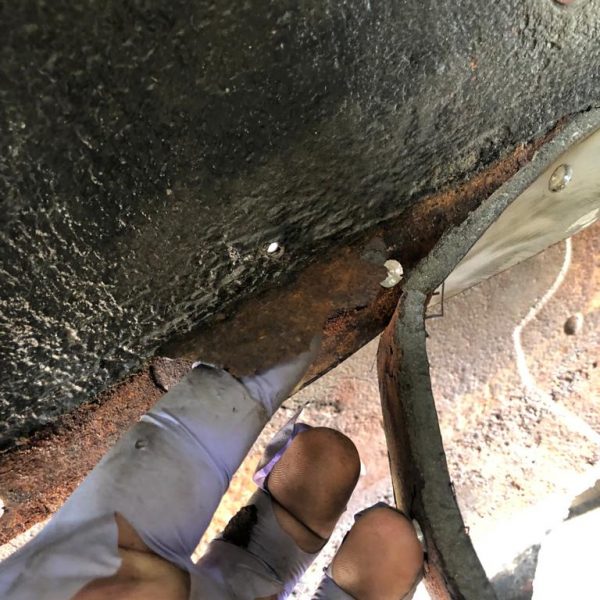
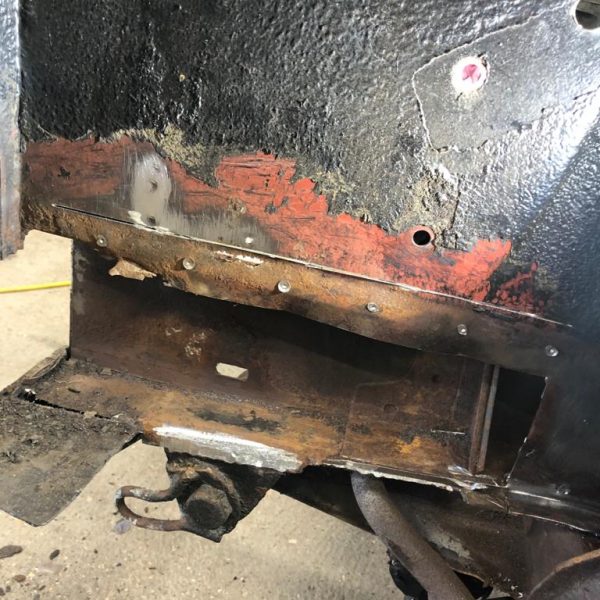
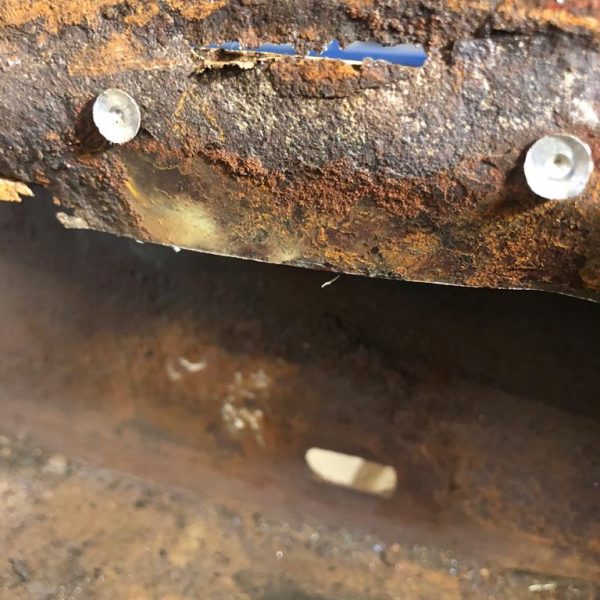
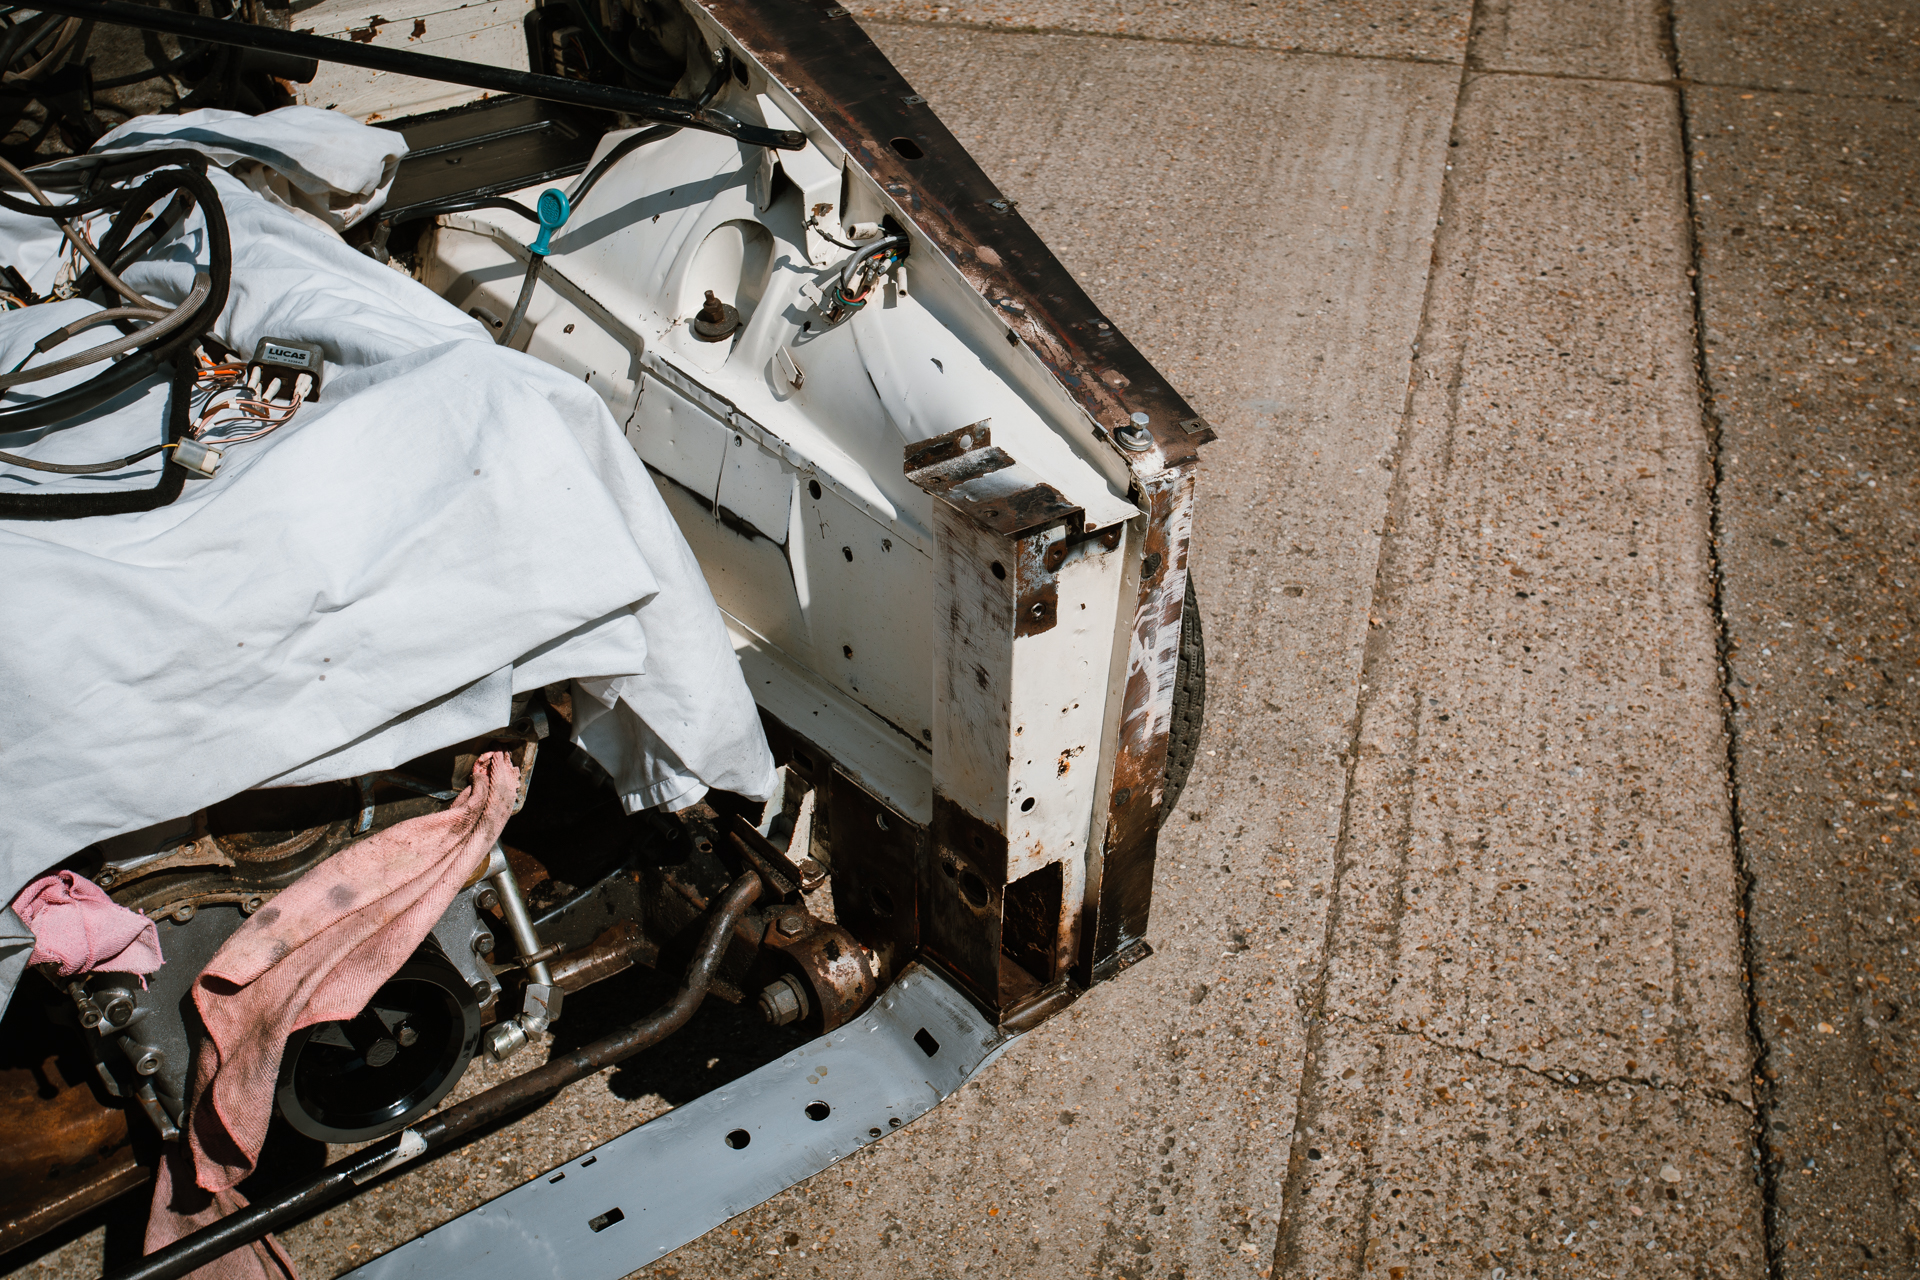
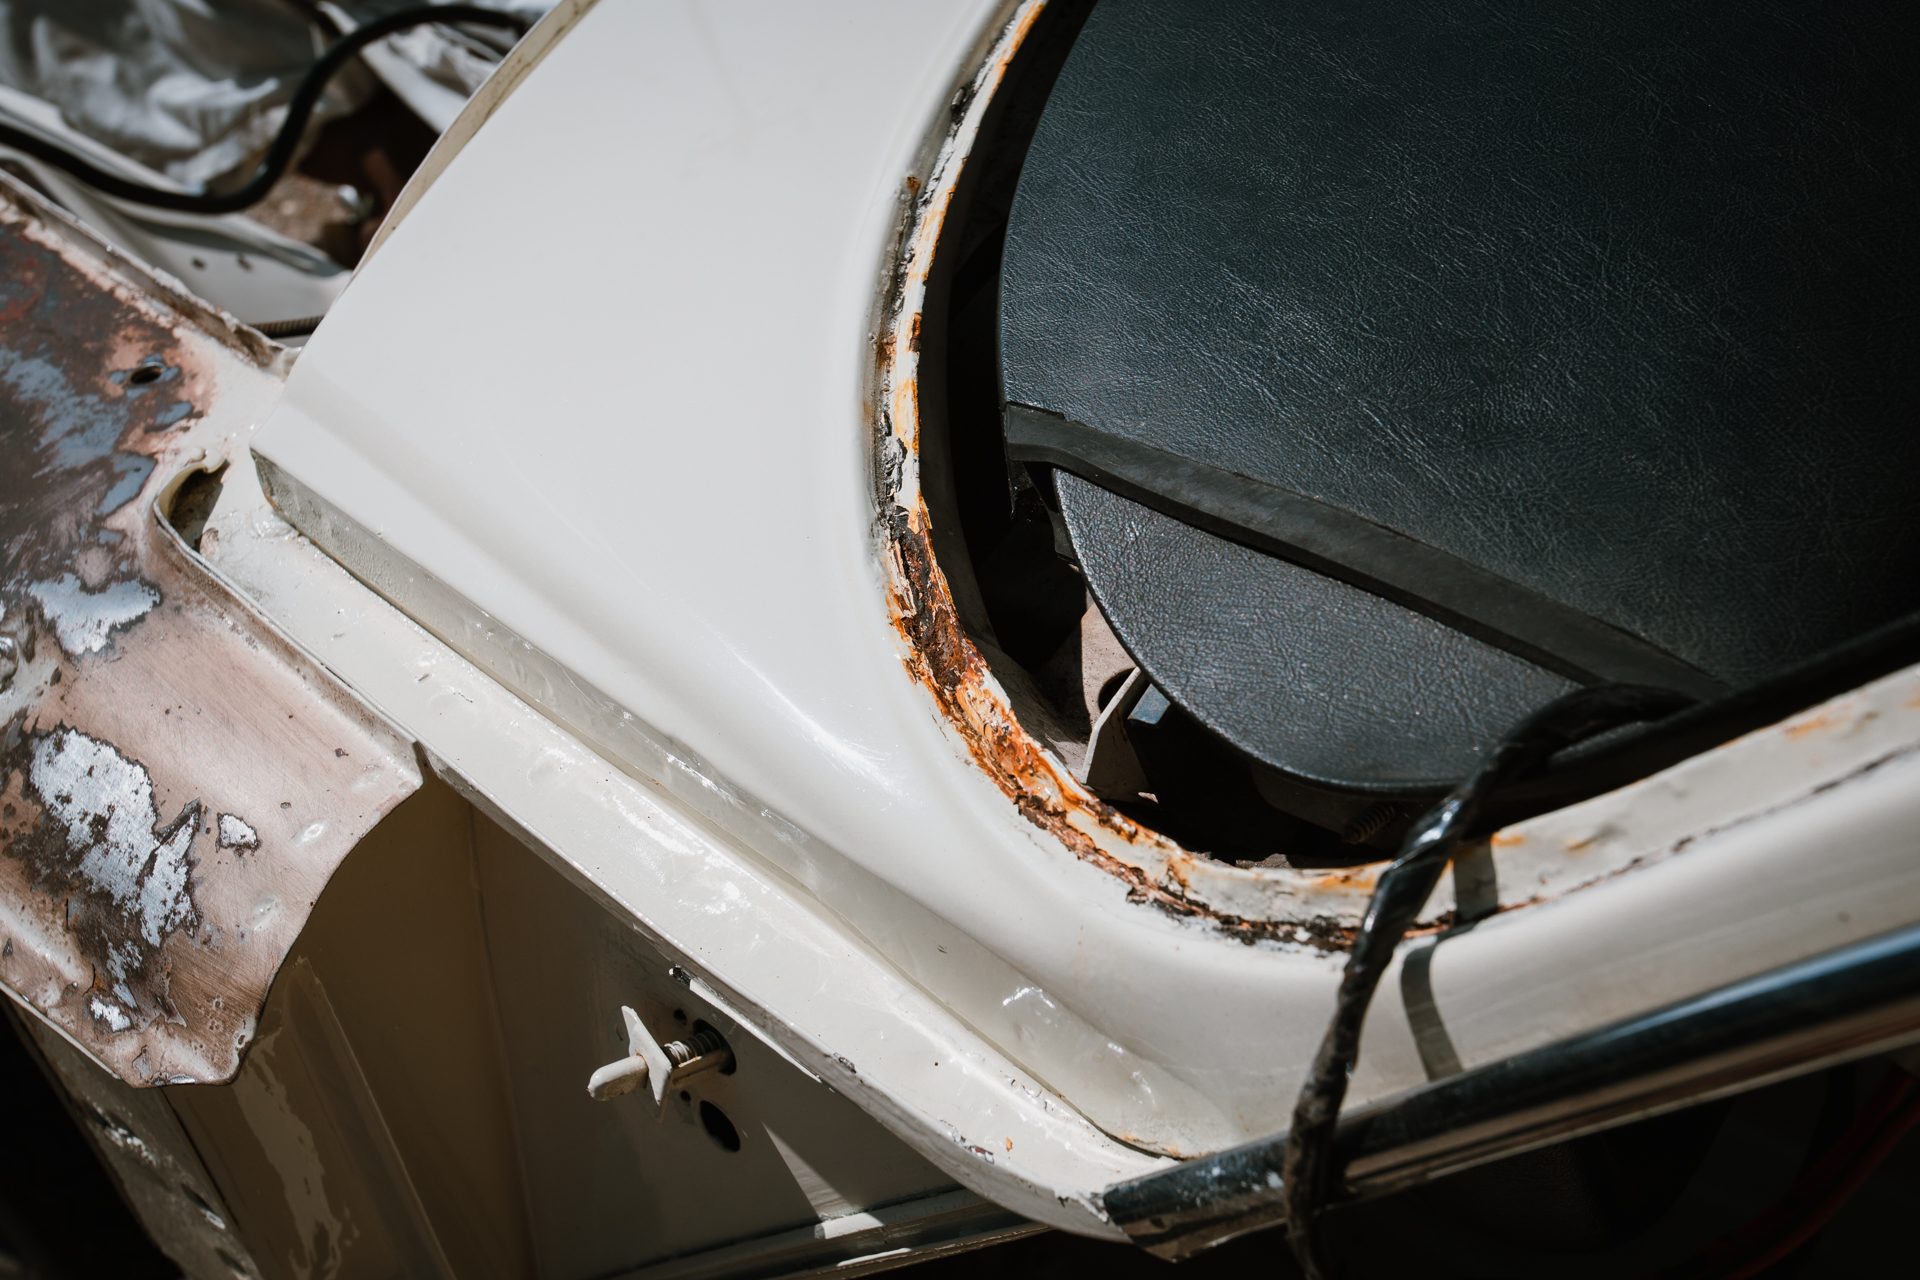
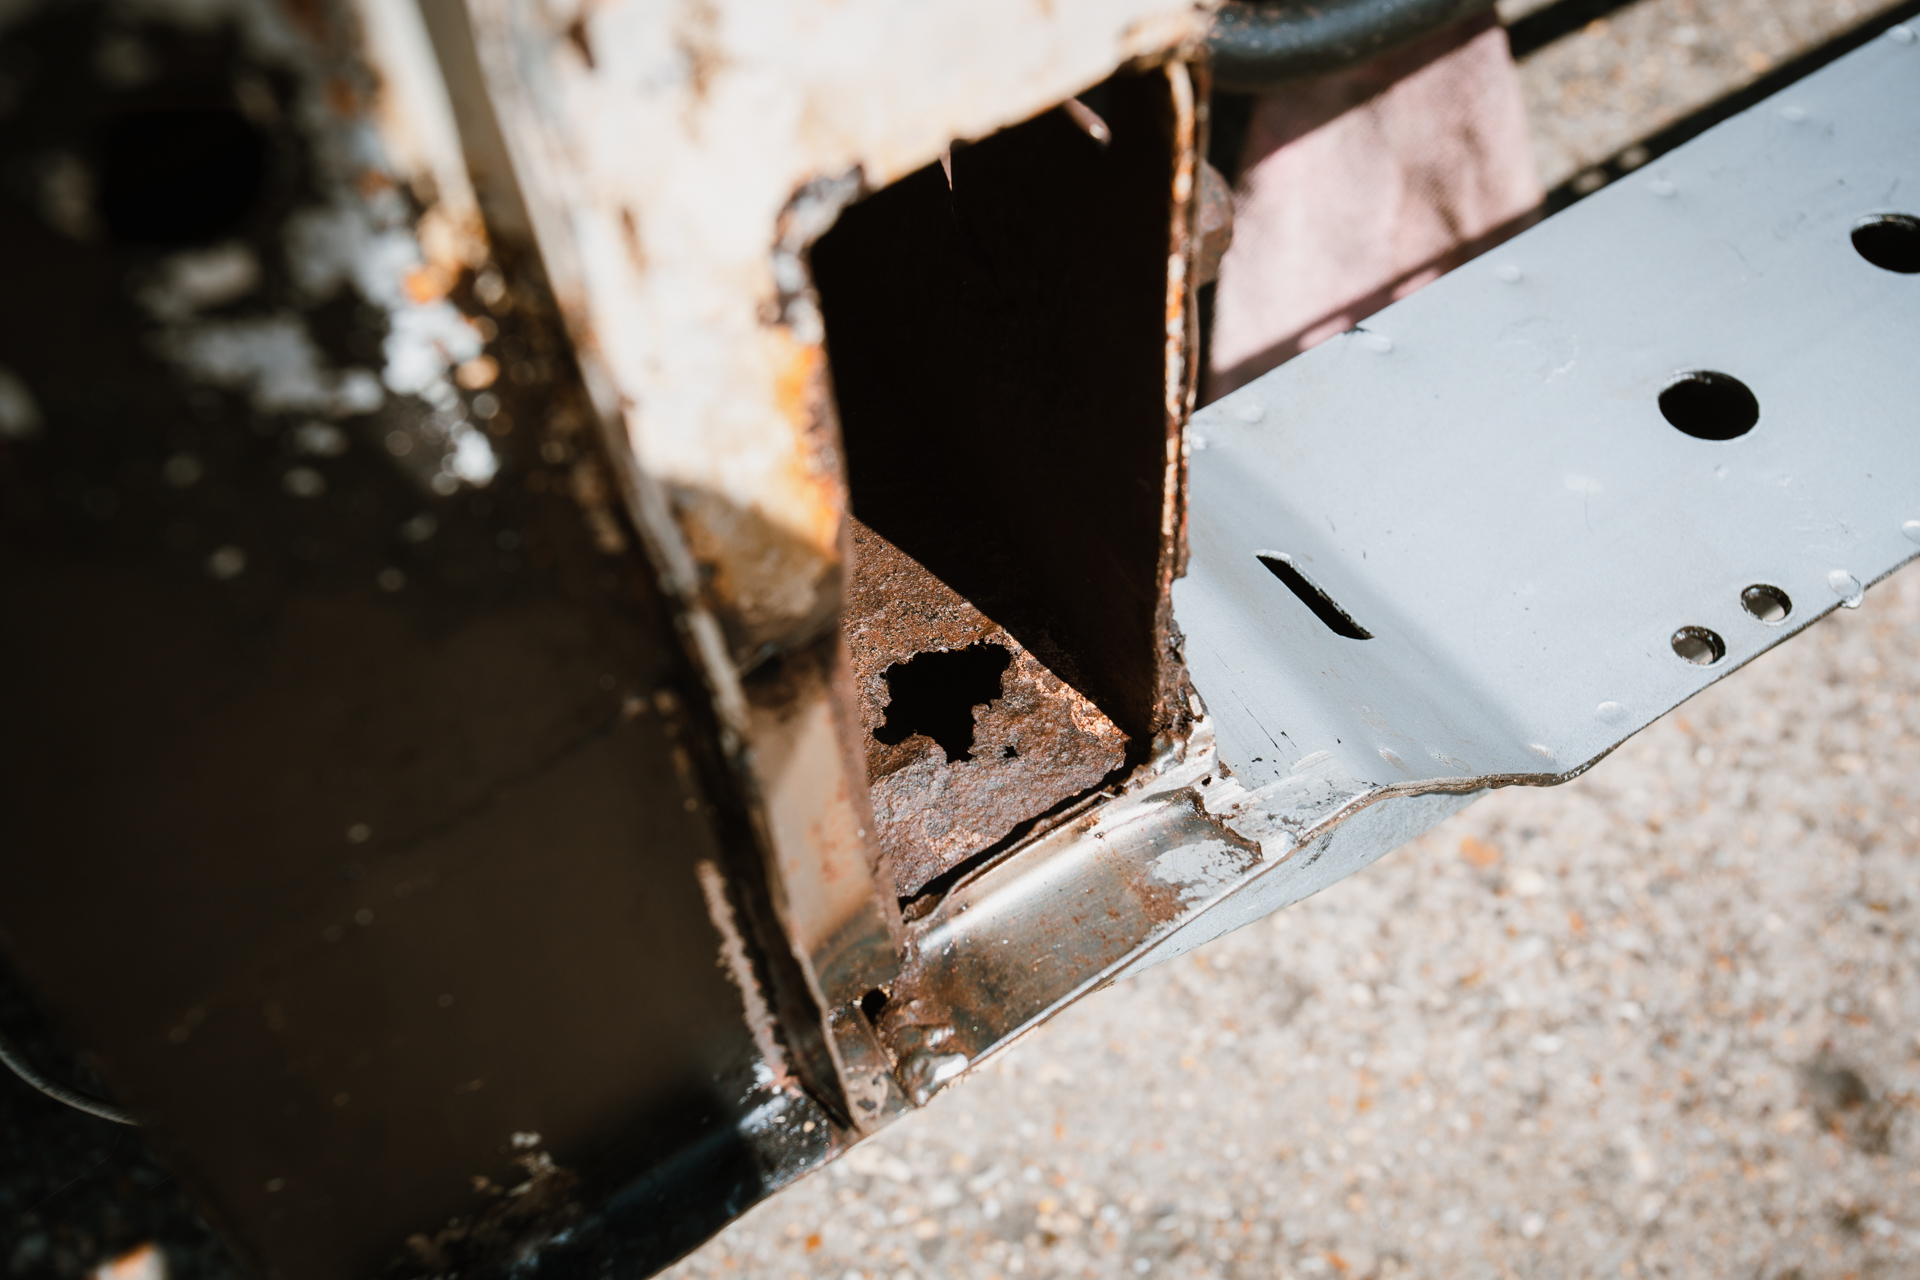
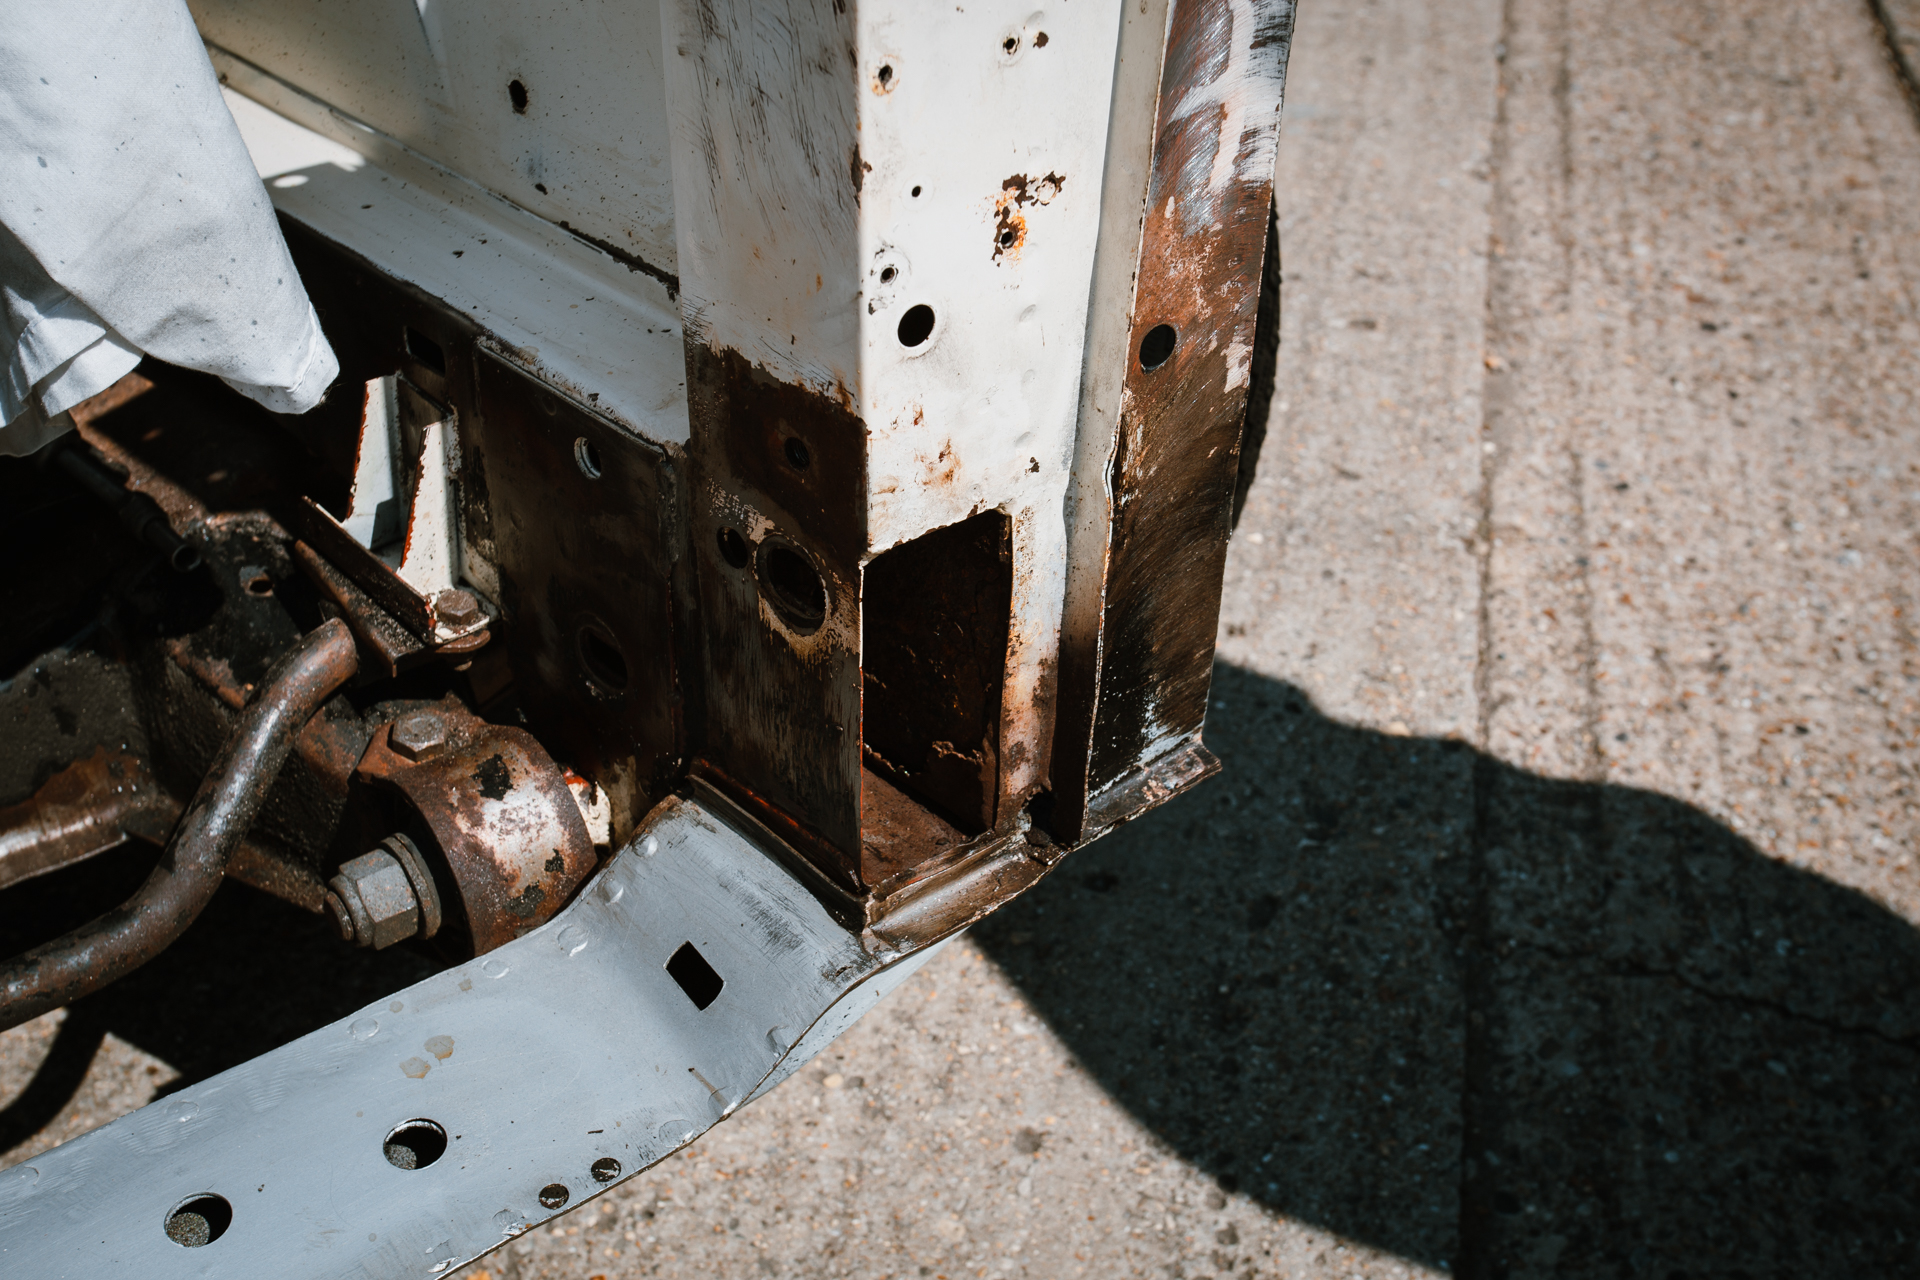
After thinking the 1977 Daimler Double Six would only be in and out rather quickly, James has unfortunately discovered layers of more corrosion than expected on the right-hand side, front inner wing and chassis rail/leg. The whole inside of the subframe is corroded. So James has been going through it all and working out which parts can be repaired and which parts need to be replaced altogether.
Sometimes this is the way with classic cars. You think you have the problem noted down and are prepared for it, but then you start uncovering more than expected. Thankfully we have a talented group of staff that are there to solve these issues!

Dave has been working on the 1960 peony red Jensen 541S. He’s adjusted the cover for the gearbox so it can come apart for an easier inspection. Bolts have been fitted so it’s fixed in securely but also has a way to undo. We definitely have clever people working for us!

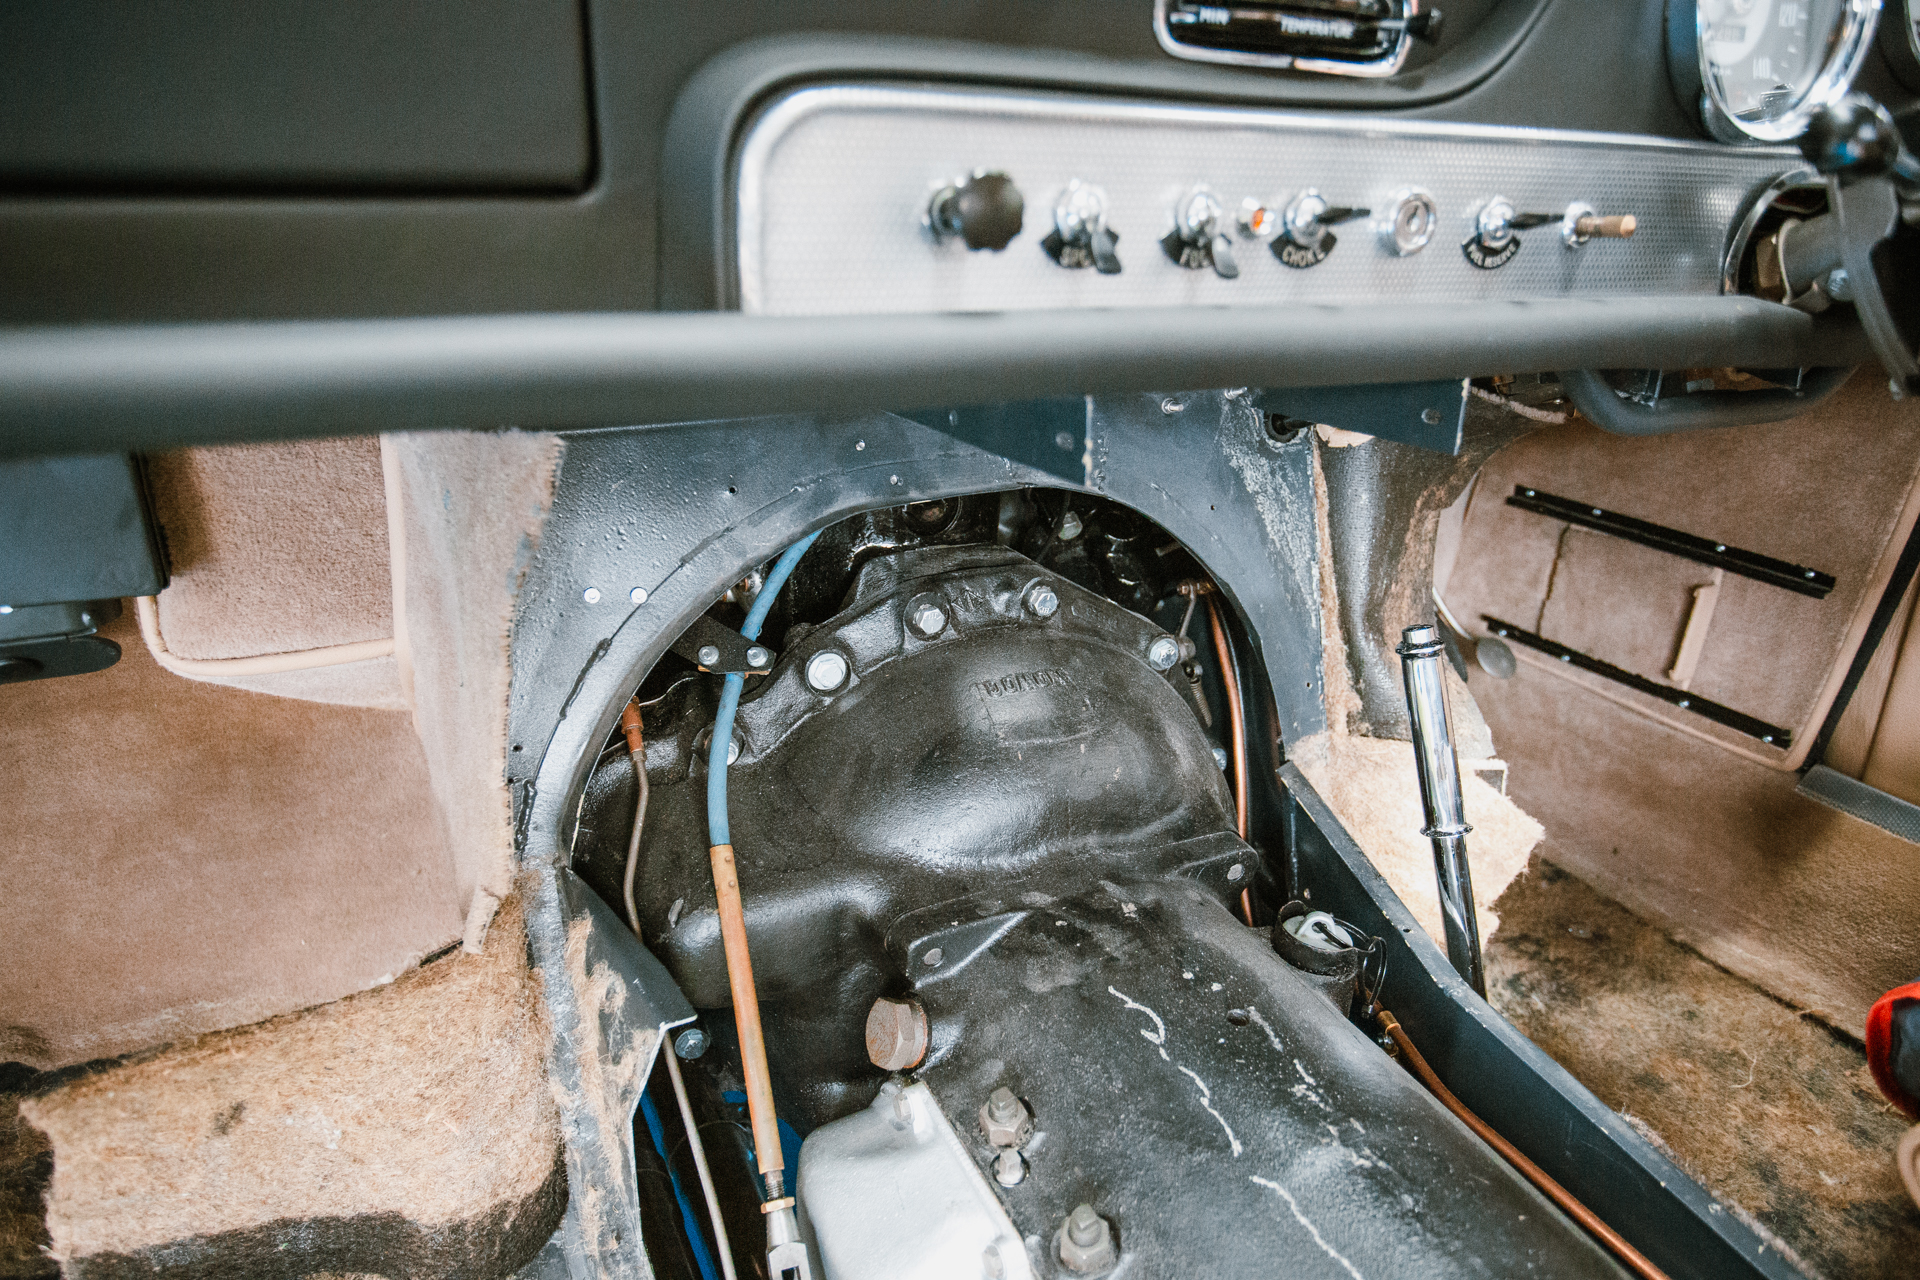

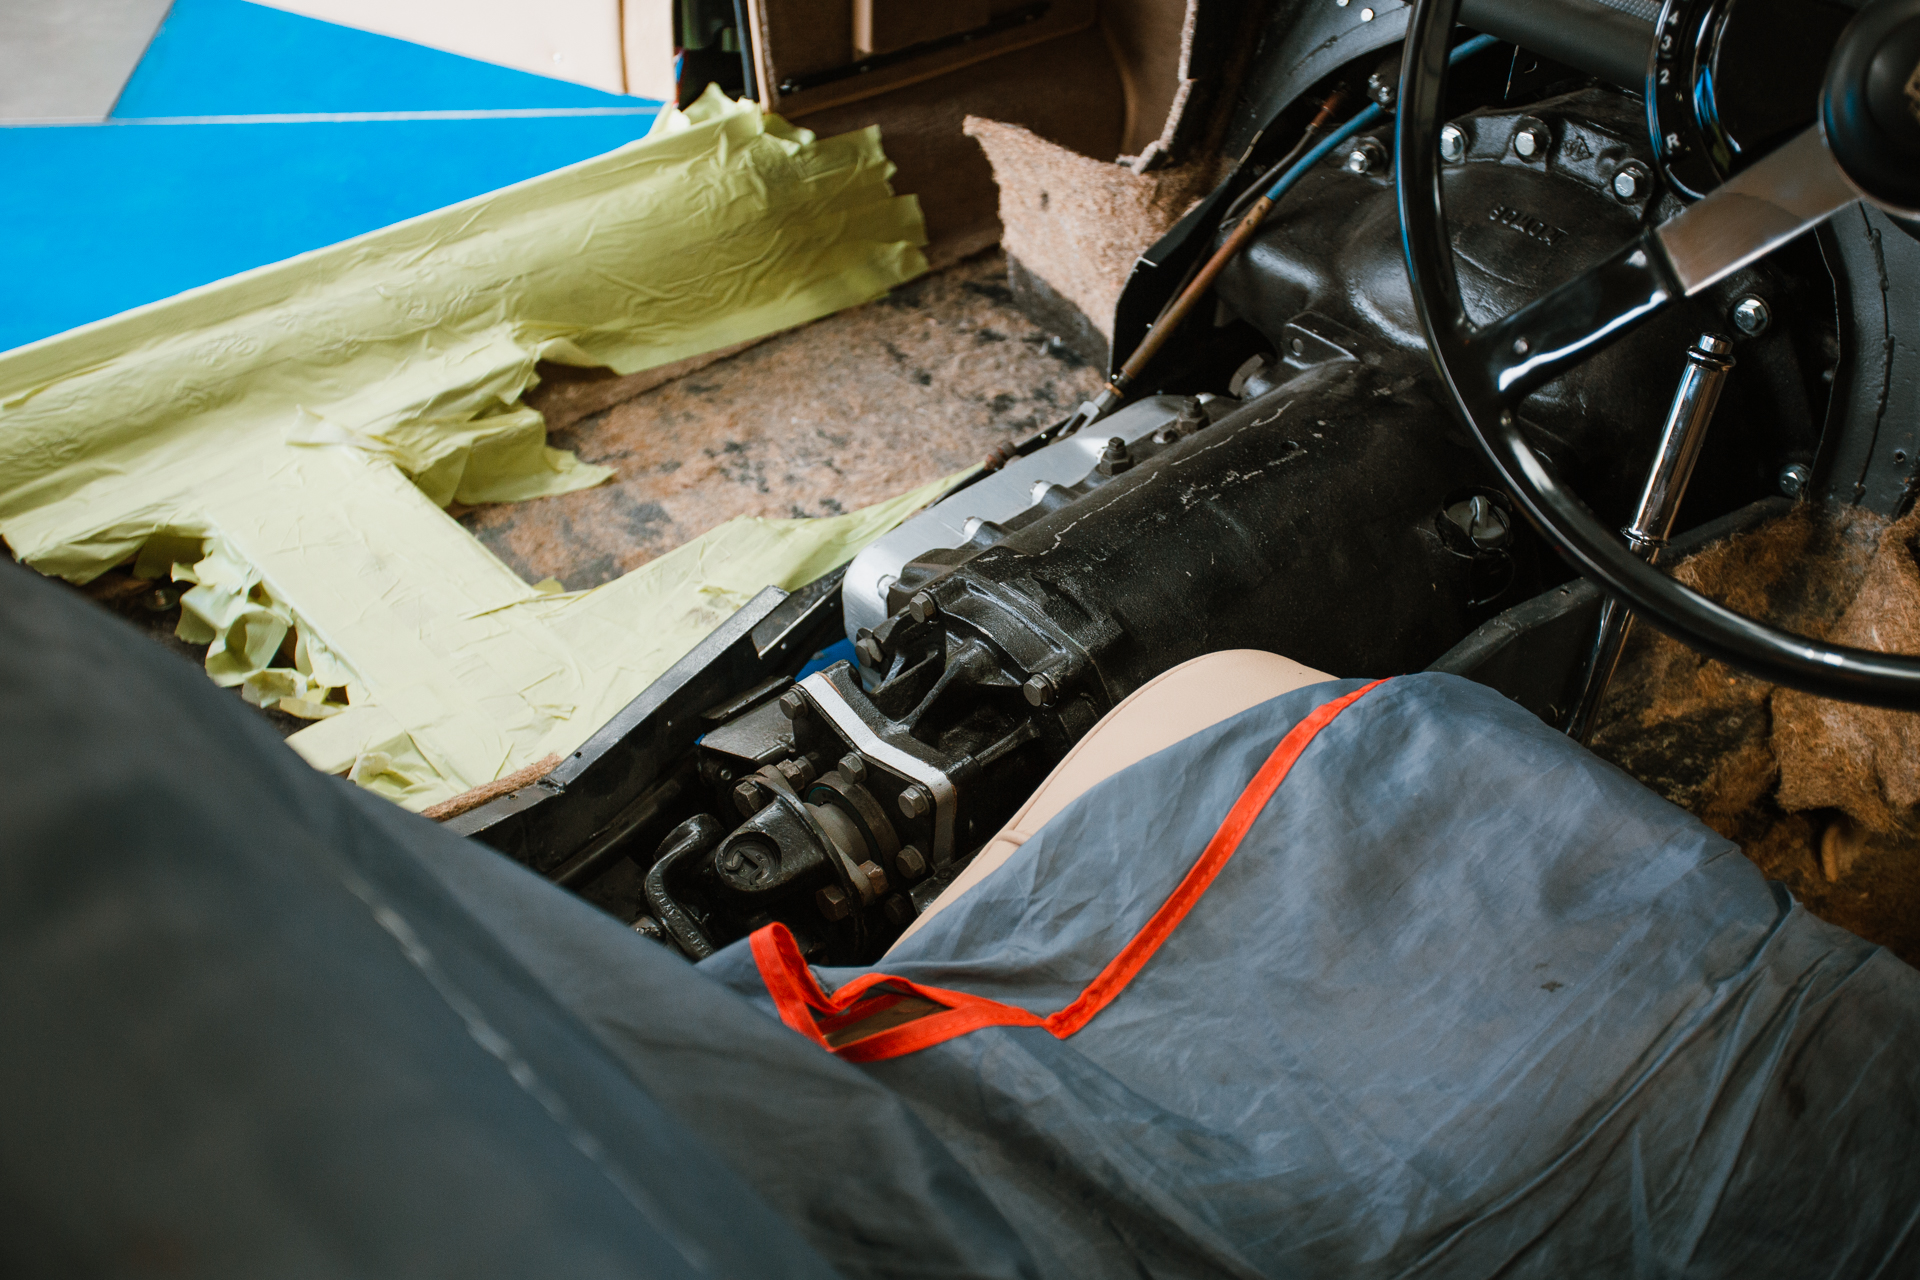

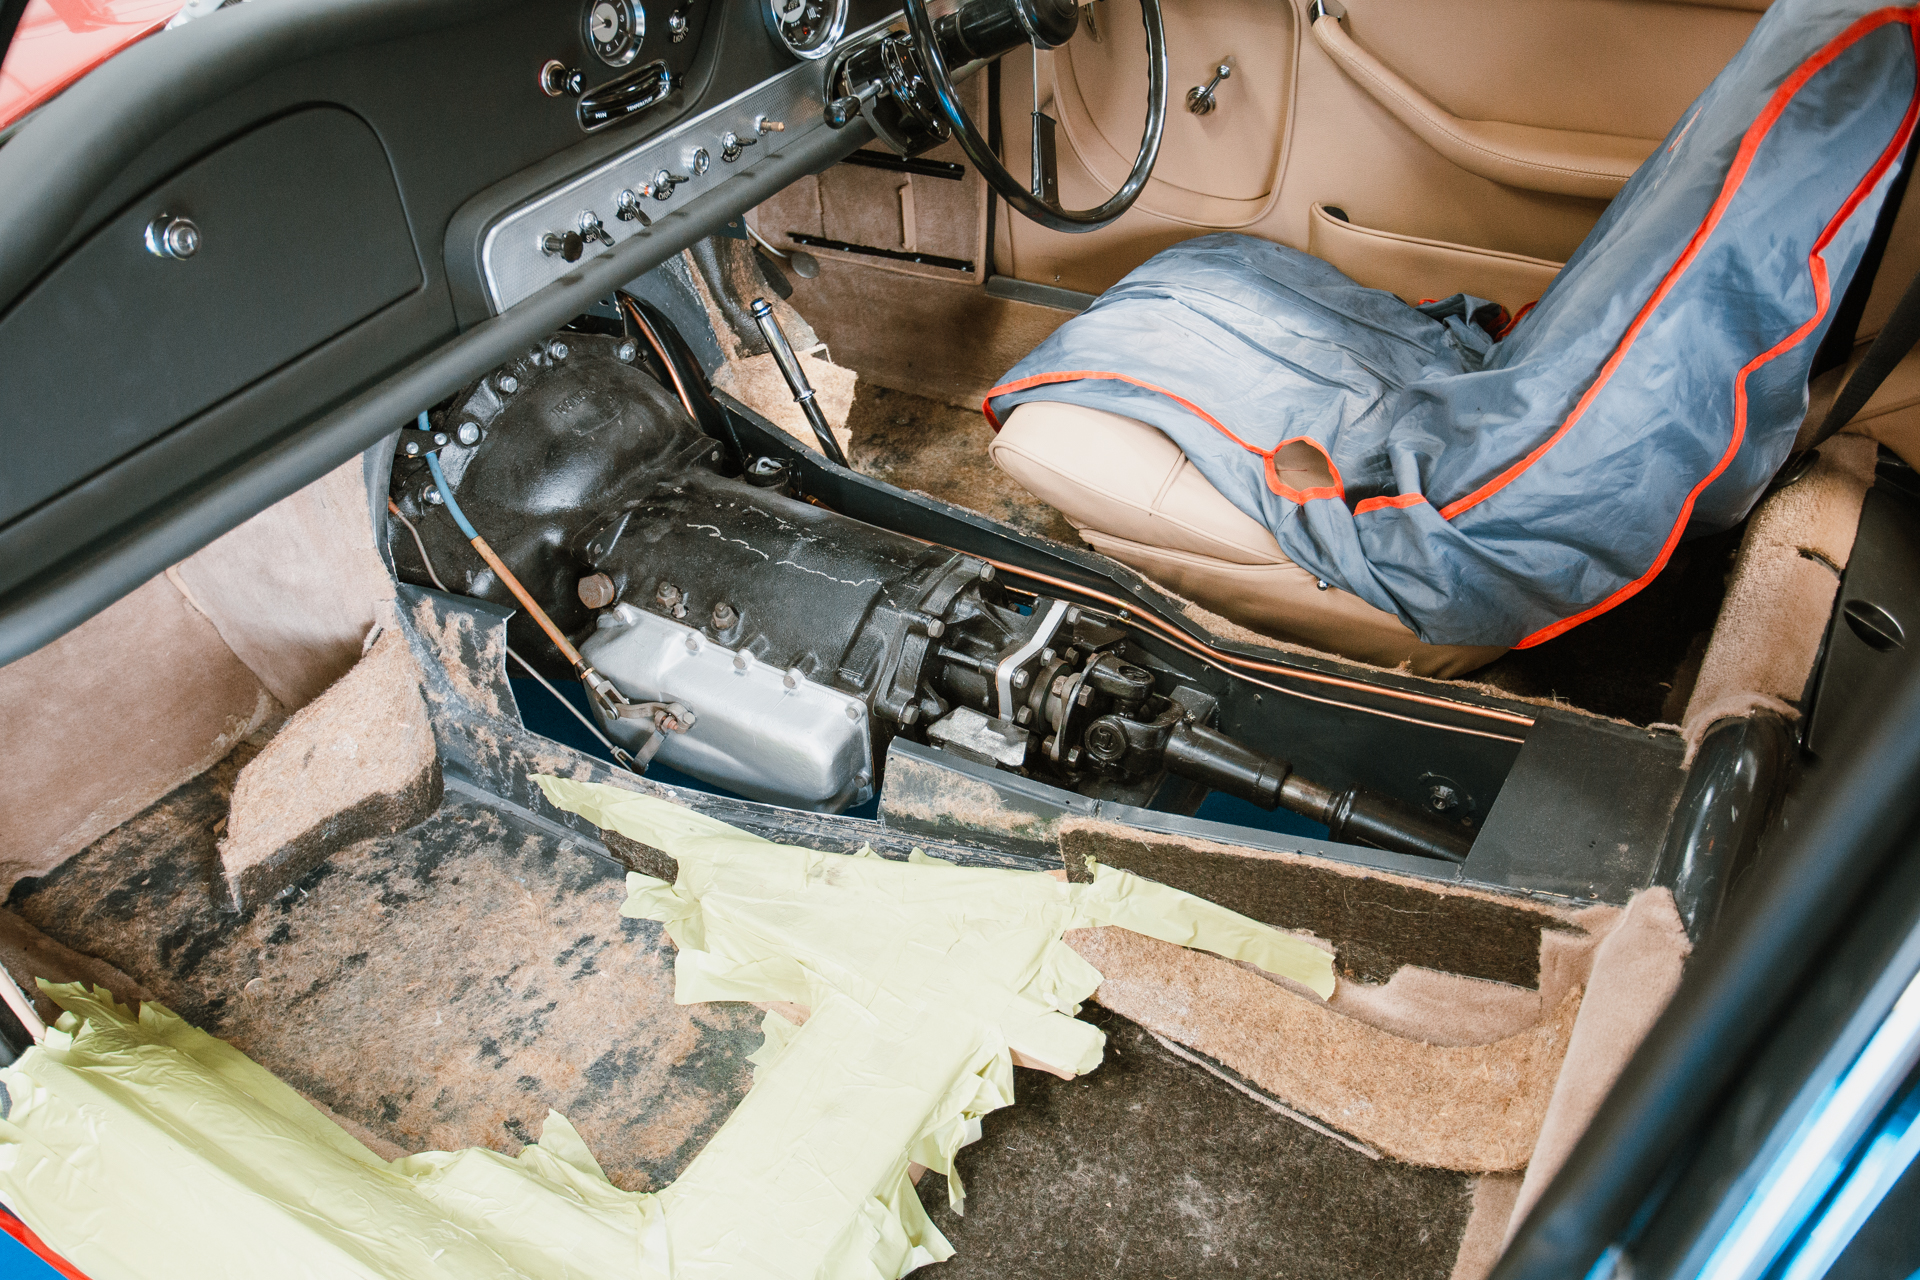
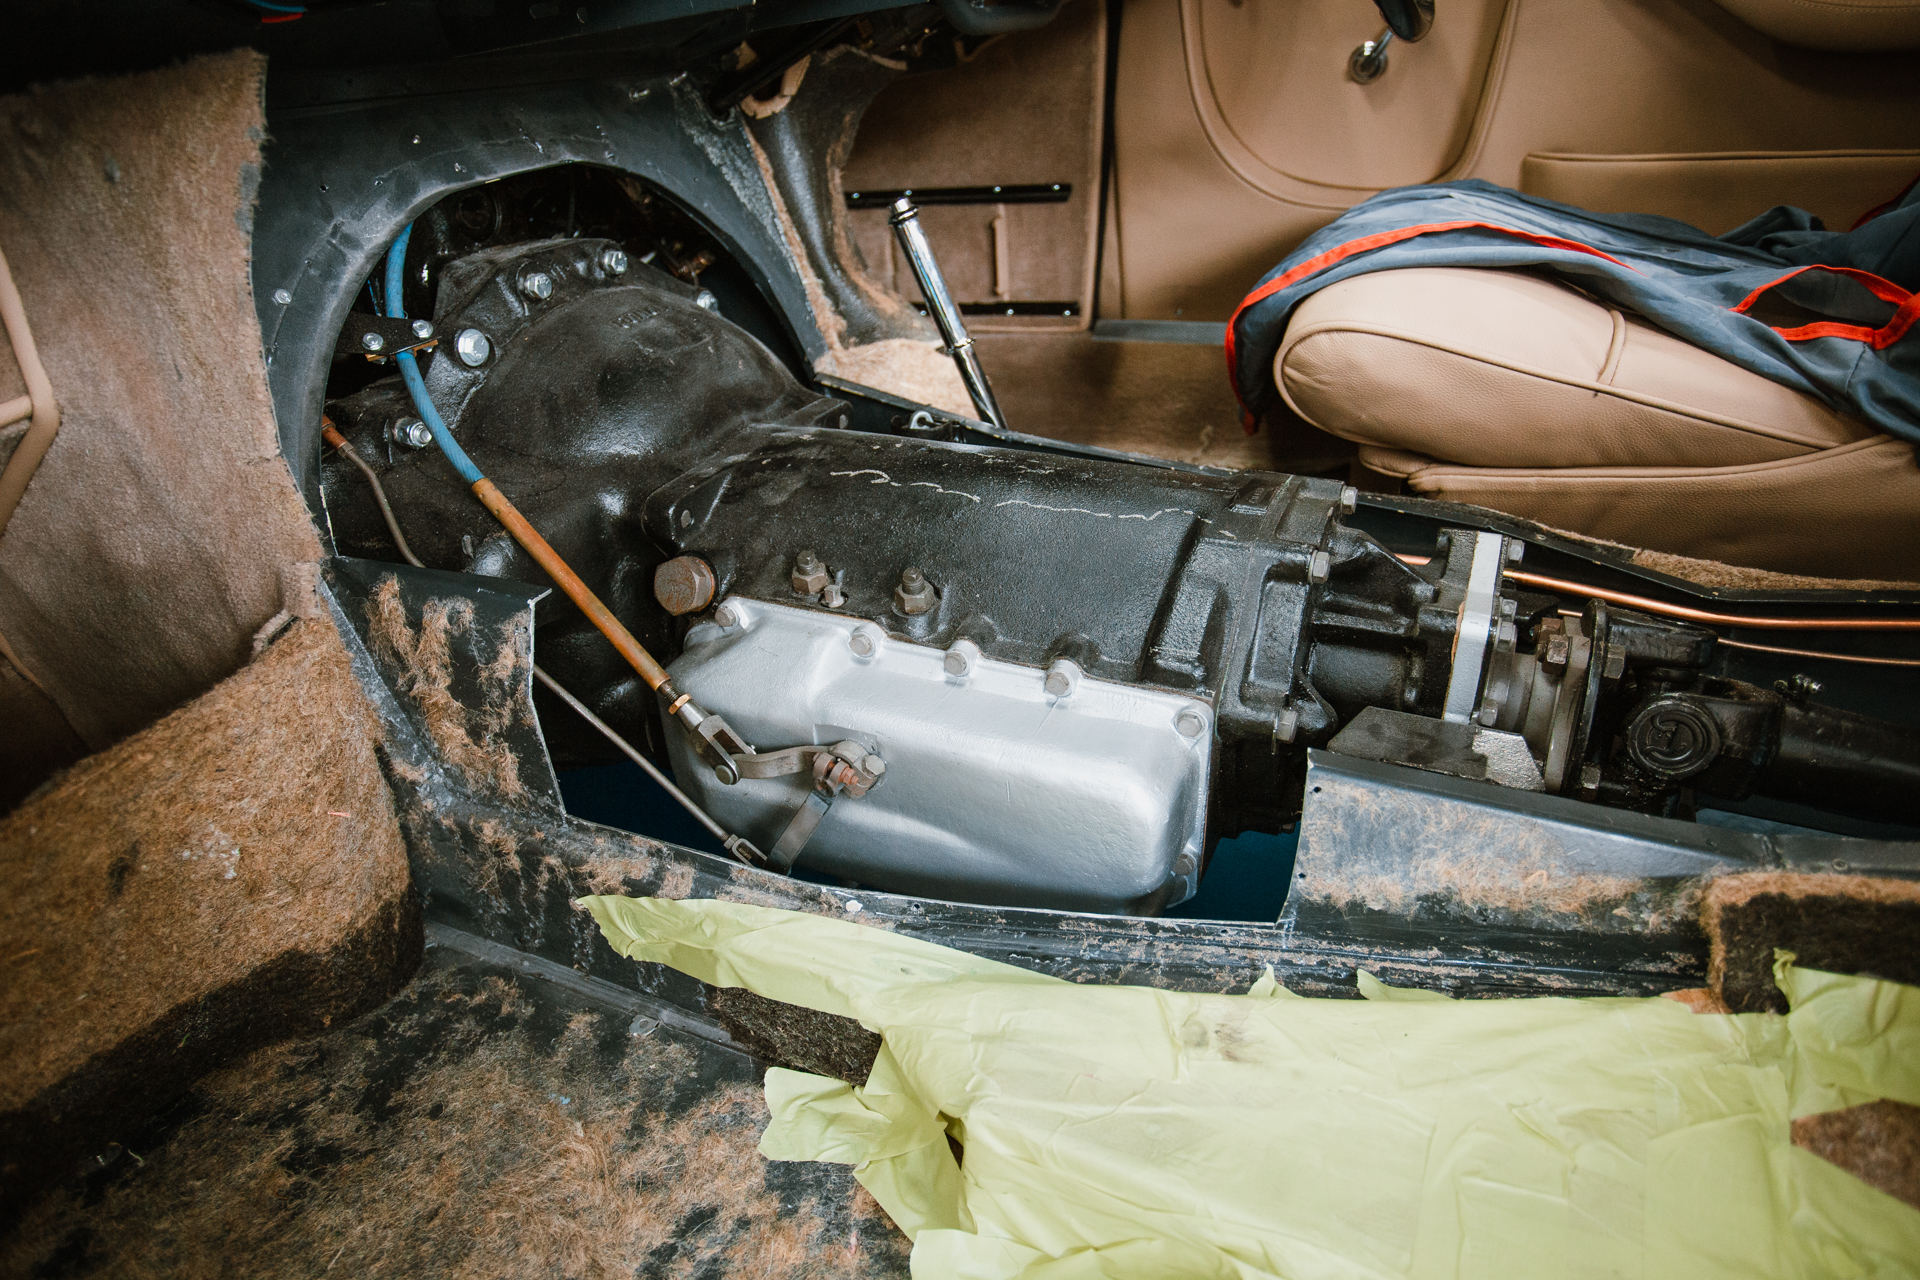
Lydia has also had a part to play in this process by sanding carpet, glue and paint off one of the floor panels that sits underneath the gearbox.

Our 1978 bronze Lancia has recently been getting some TLC. This car is an upcoming competition car and is being serviced just like all the other competition cars, to make sure it’s in good condition before it heads to a new home!
Mauro inspected the vehicle all over last week and now John has been doing work to the brakes after it was found that they were sticking and would go on but not come off. New brake lines have been put on the front and have solved this issue.

Source: Classic Cars and Campers
Fantastic article from our friends at Classic Cars and Campers; ‘Can E-Fuel Rescue Classic Cars?’
Many classic car owners are on tenterhooks with news that the government is moving towards mass electrification of cars, intending to do away with all diesel and even petrol cars by 2050 following a ban on the sale of new combustion vehicles will be introduced in 2030.
Many of us, classic and modern car owners alike, feel reluctant to switch to electric cars. Indeed, for classic car owners, the cost of conversion of a prized vintage vehicle is relatively high. Whilst switching to electricity may seem the best way to help the environment, it is actually a hugely expensive exercise to undertake following the enormous cost implications of Brexit and a global pandemic.
Malcolm McKay, a spokesperson for the Historic and Classic Vehicle Association, said, “This programme is one that is likely to prove a huge mistake as other nations achieve net zero CO2 by a far less costly and disruptive mix of electric power where it’s best suited and e-fuels where they are more efficient.”
He added: “E-fuels, with green generation, are potentially carbon-neutral and are the most viable answer for aircraft, ships and long-haul trucks.
“They offer an achievable solution for poorer countries with older vehicle fleets and inadequate electricity infrastructure.
“They also offer a lifeline for historic vehicles.”
With classic car owners hit by the daily fees of Clean Air Zones and London expanding their ULEZ, could e-fuels be the saviour we are looking for?
Vehicle fuels are composed of a combination of hydrogen and carbon atoms. While conventional fuels such as petrol or diesel are derived from oil, synthetic or E-Fuels can derive their carbon from the air and hydrogen from water. These then form to mimic the structure of oil-based fuels such as petrol or diesel.
These synthetic fuels are almost carbon neutral and can be used as a natural alternative to petrol or diesel. This means that they can be pumped from existing fuel stations, and they work with the combustion engines already fitted in your favourite historic vehicle.
Porsche has joined forces with Siemens Energy to produce e-fuels. This project is taking place in the south of Chile, South America. This southern location was chosen because a reliable wind source is necessary when developing e-fuels, and the wind in this area is plentiful. This wind provides renewable energy for splitting water into hydrogen, which is an electric-intensive process. The use of this wind power means that even after shipping any synthetic fuels back to Europe in a tanker, the fuels are still close to carbon-neutral.
Porsche has taken on this project because they believe that to lower CO2 emissions of legacy cars, e-fuel will be crucial. They would even allow for future plug-in hybrids to alternate between electric propulsion in the city and synthetic fuels for other travel.
Audi has also been involved in creating and innovating e-fuels since 2009, albeit in smaller volumes.
The answer is no. Brazil worked hard to create biofuels from crops; however, unfortunately, the competition with food supplies was too great. At the moment, British fuel is 5% bio-ethanol, but this will rise to 10% over the course of this summer. The E10 formula does reduce CO2 emissions. However, it’s not a substitute for a carbon-neutral alternative.
Synthetic fuel isn’t free; in fact, Porsche estimates that e-petrol is likely to cost over 10 euro per litre initially. However, they predict that the cost will drop to match today’s fuel prices once more refineries are built.
The drop in the cost of e-fuels will be somewhat reliant on the penalties applied by the government to the price of fossil fuels. These penalties would act as a deterrent for fossil fuel use and lower the costs of alternatives such as e-fuel.
While e-fuel may not ultimately win out to electric power, it certainly offers classic car owners a light at the end of the tunnel in the fight to keep their vintage vehicles on the road.
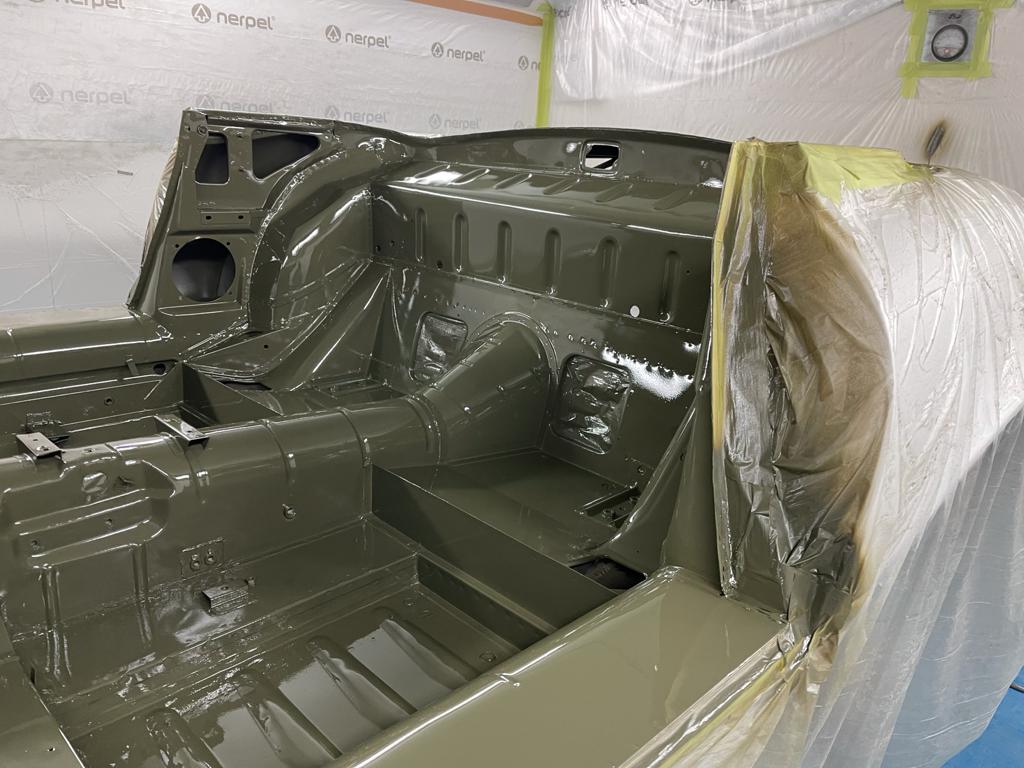
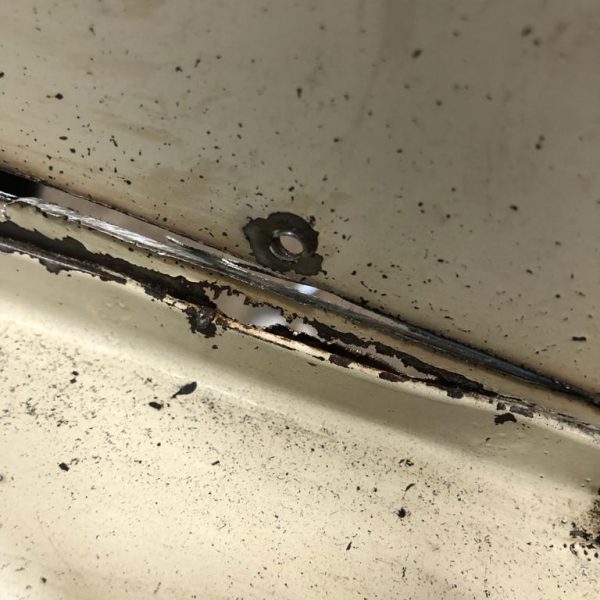
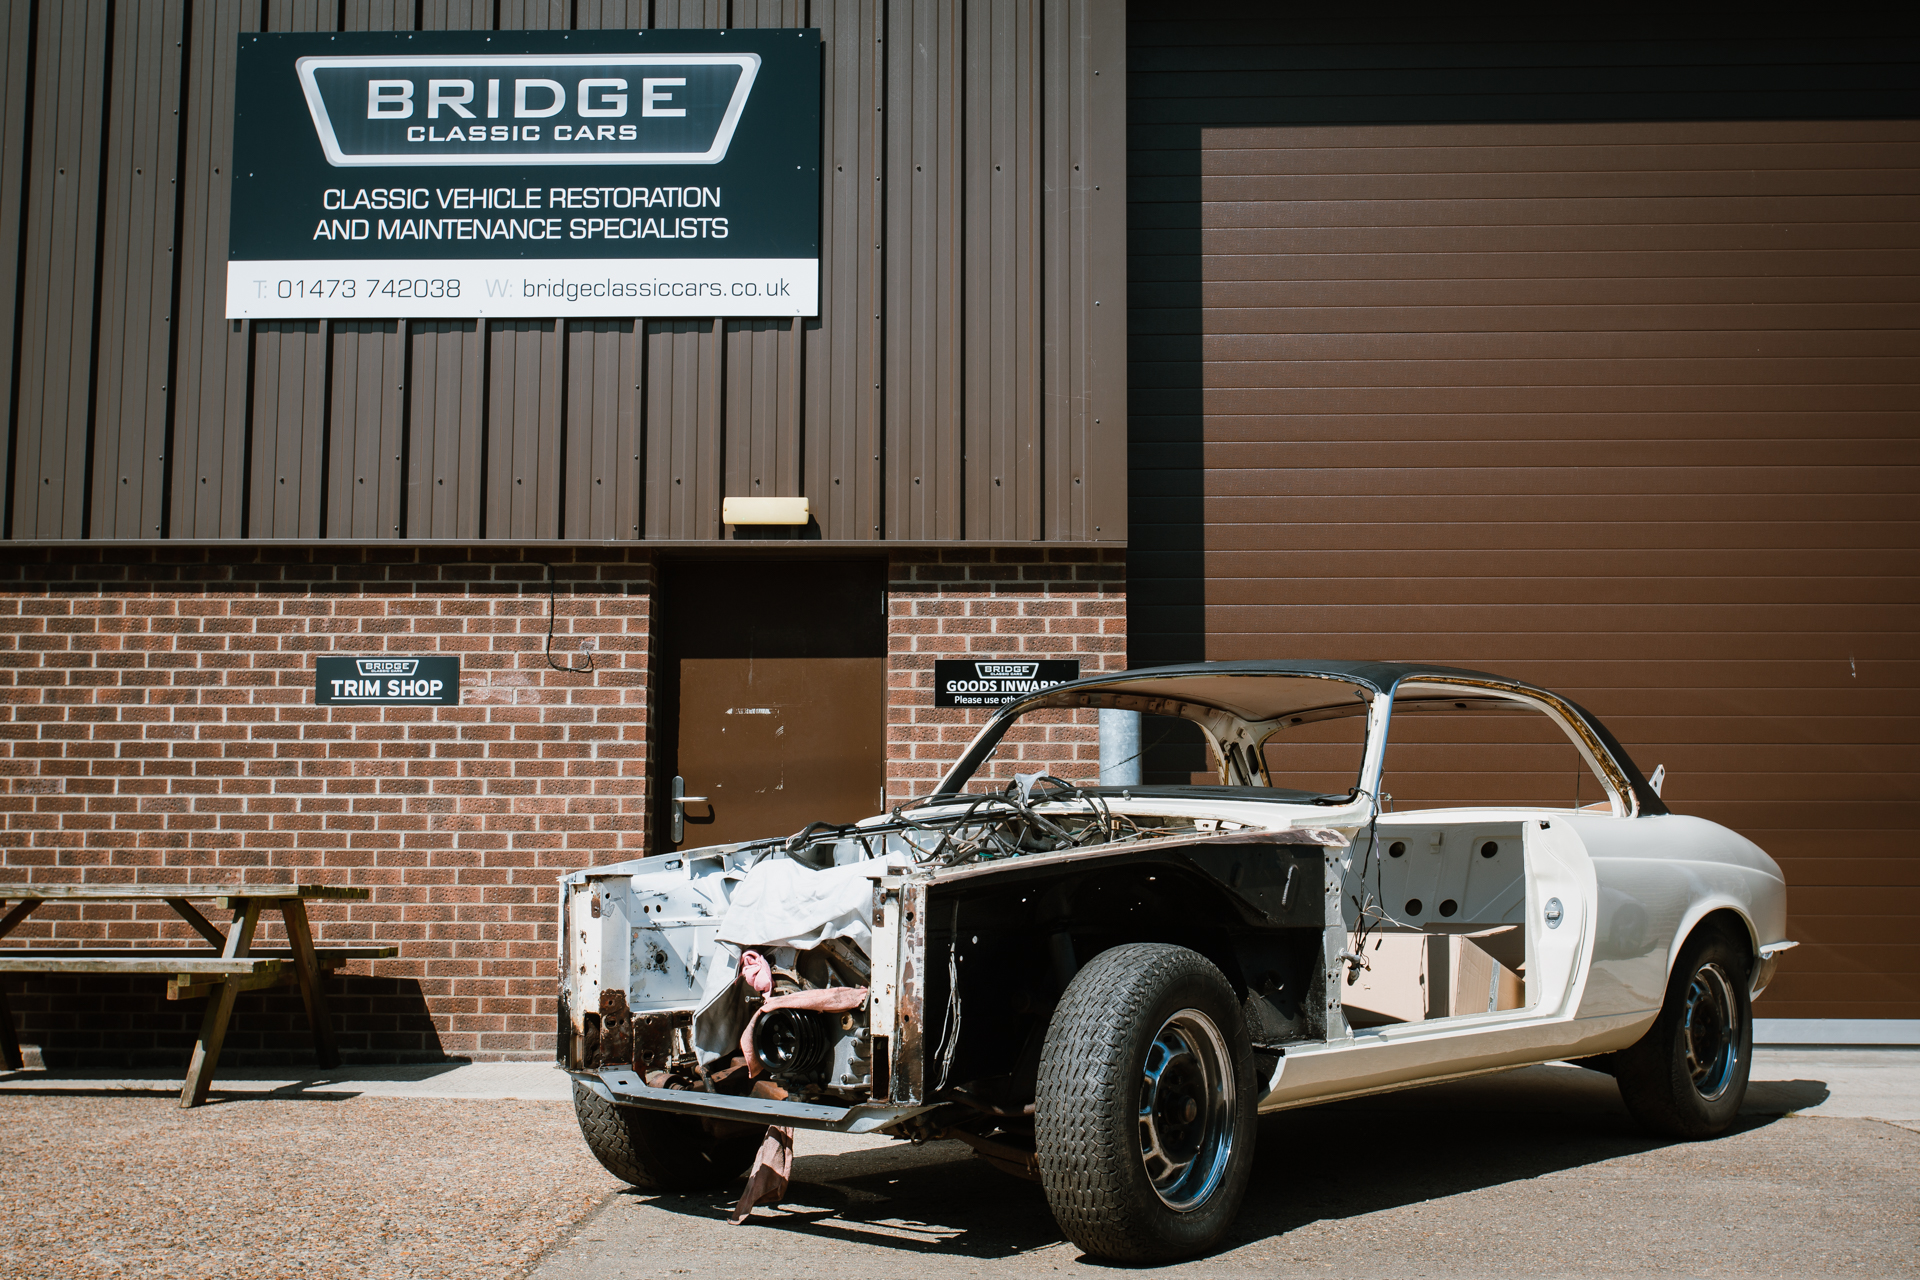
We’ve added a splash of colour to our Beverly Hills 1973 Jaguar E-Type roadster. Having arrived over from the US in an Old English White with maroon stripes, the new colour can now be seen for the first time on the inside of the body shell.
The colour chosen is Fern Grey. According to the XKE data sheets Fern Grey was used on E-Types between 1973 and 1974.
Matt will be painting the exterior later today before leaving the colour to cure for the next couple of days. More pictures to follow soon…
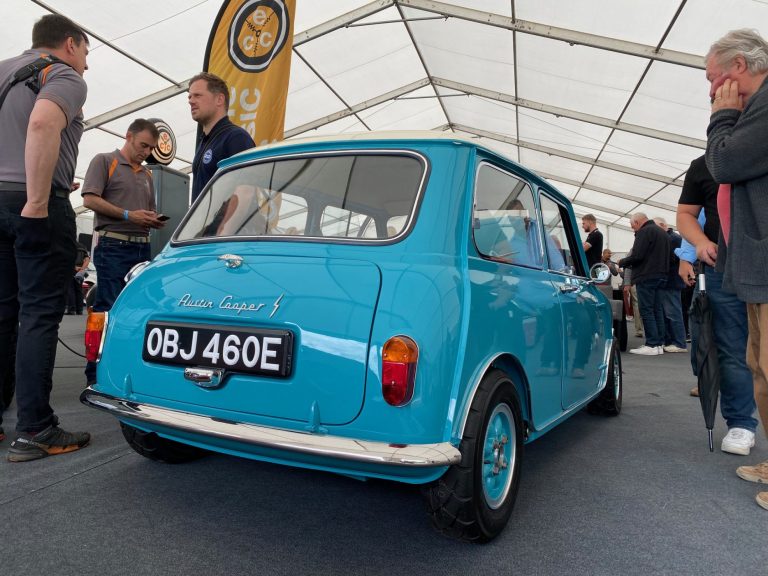
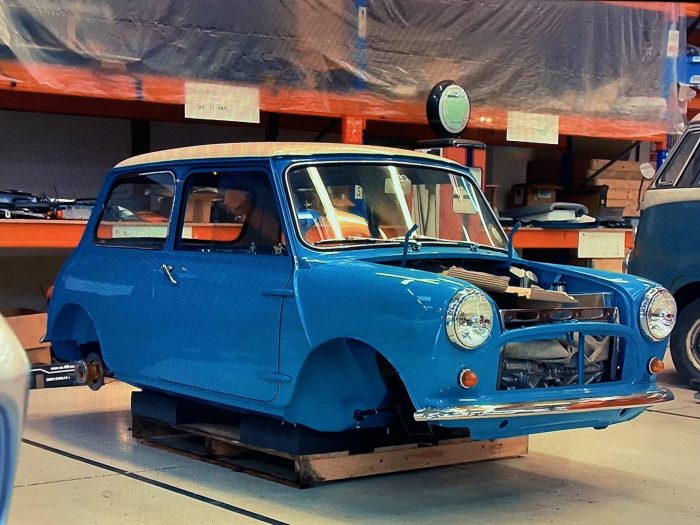
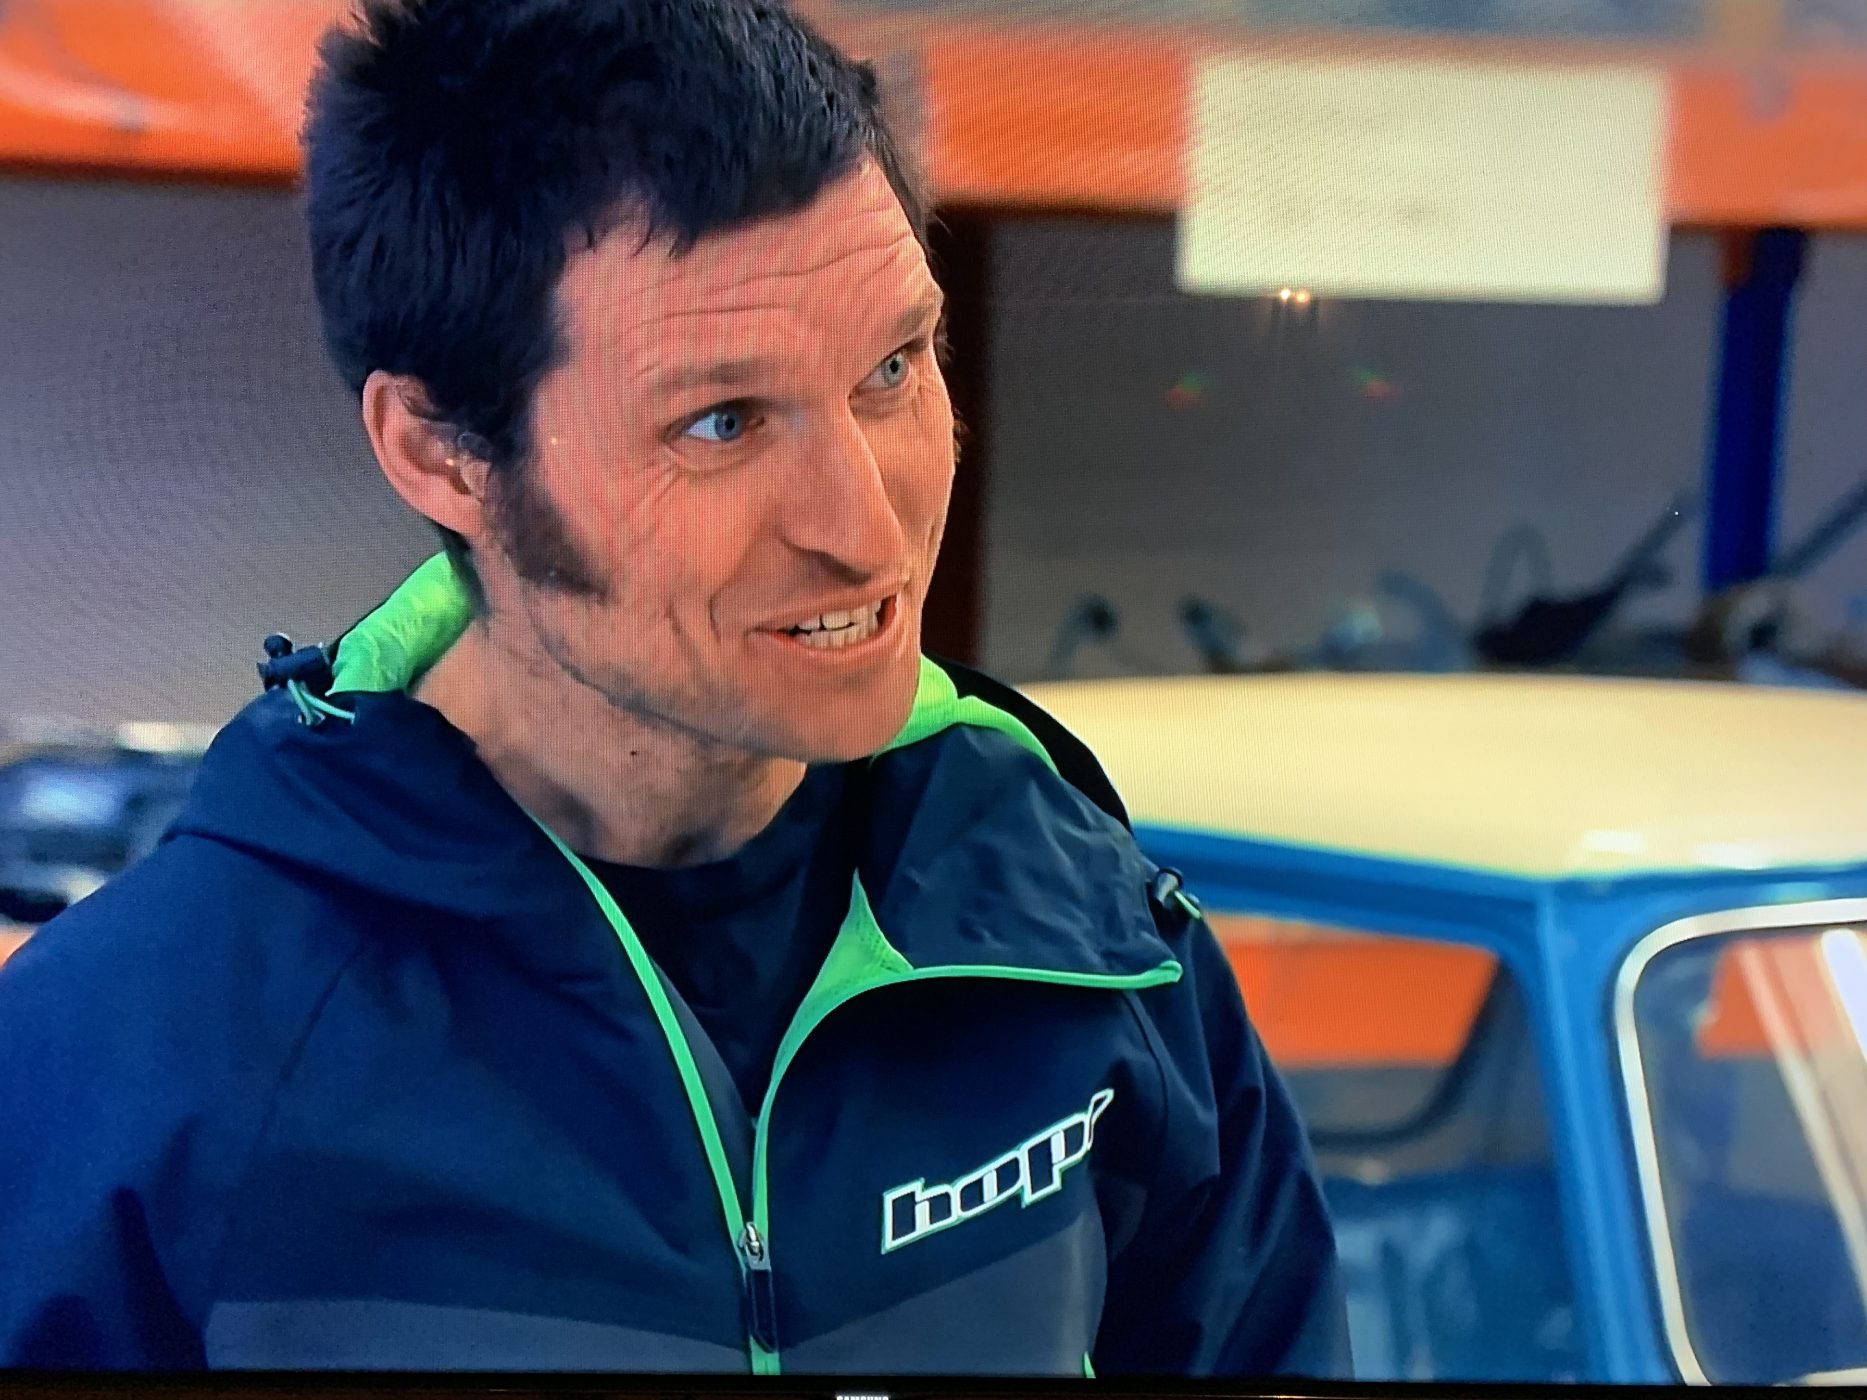
Love it or hate it, it’s clear to see the electric car is here to stay. Guy Martin, a renowned lover of petrol-guzzling engines, is dipping his toes into the classic car world in true Guy Martin fashion…by attempting to make the world’s fastest electric-powered VW Beetle.
Be sure to catch Guy on Channel 4 at 9.00pm tonight. (Monday 9th August). We’ve been told you may even spot one of our own electric classic car projects, our tesla powered 1967 Austin Mini makes an appearance.
What do you think about modifying electric cars to run on electricity? Destroying the spirit of a classic car or allowing them to survive for decades to come?
Update: 10/08/21
Did you spot our Mini? We should be having her back soon and in our Hangar for storage. We can’t wait to see the completed project.
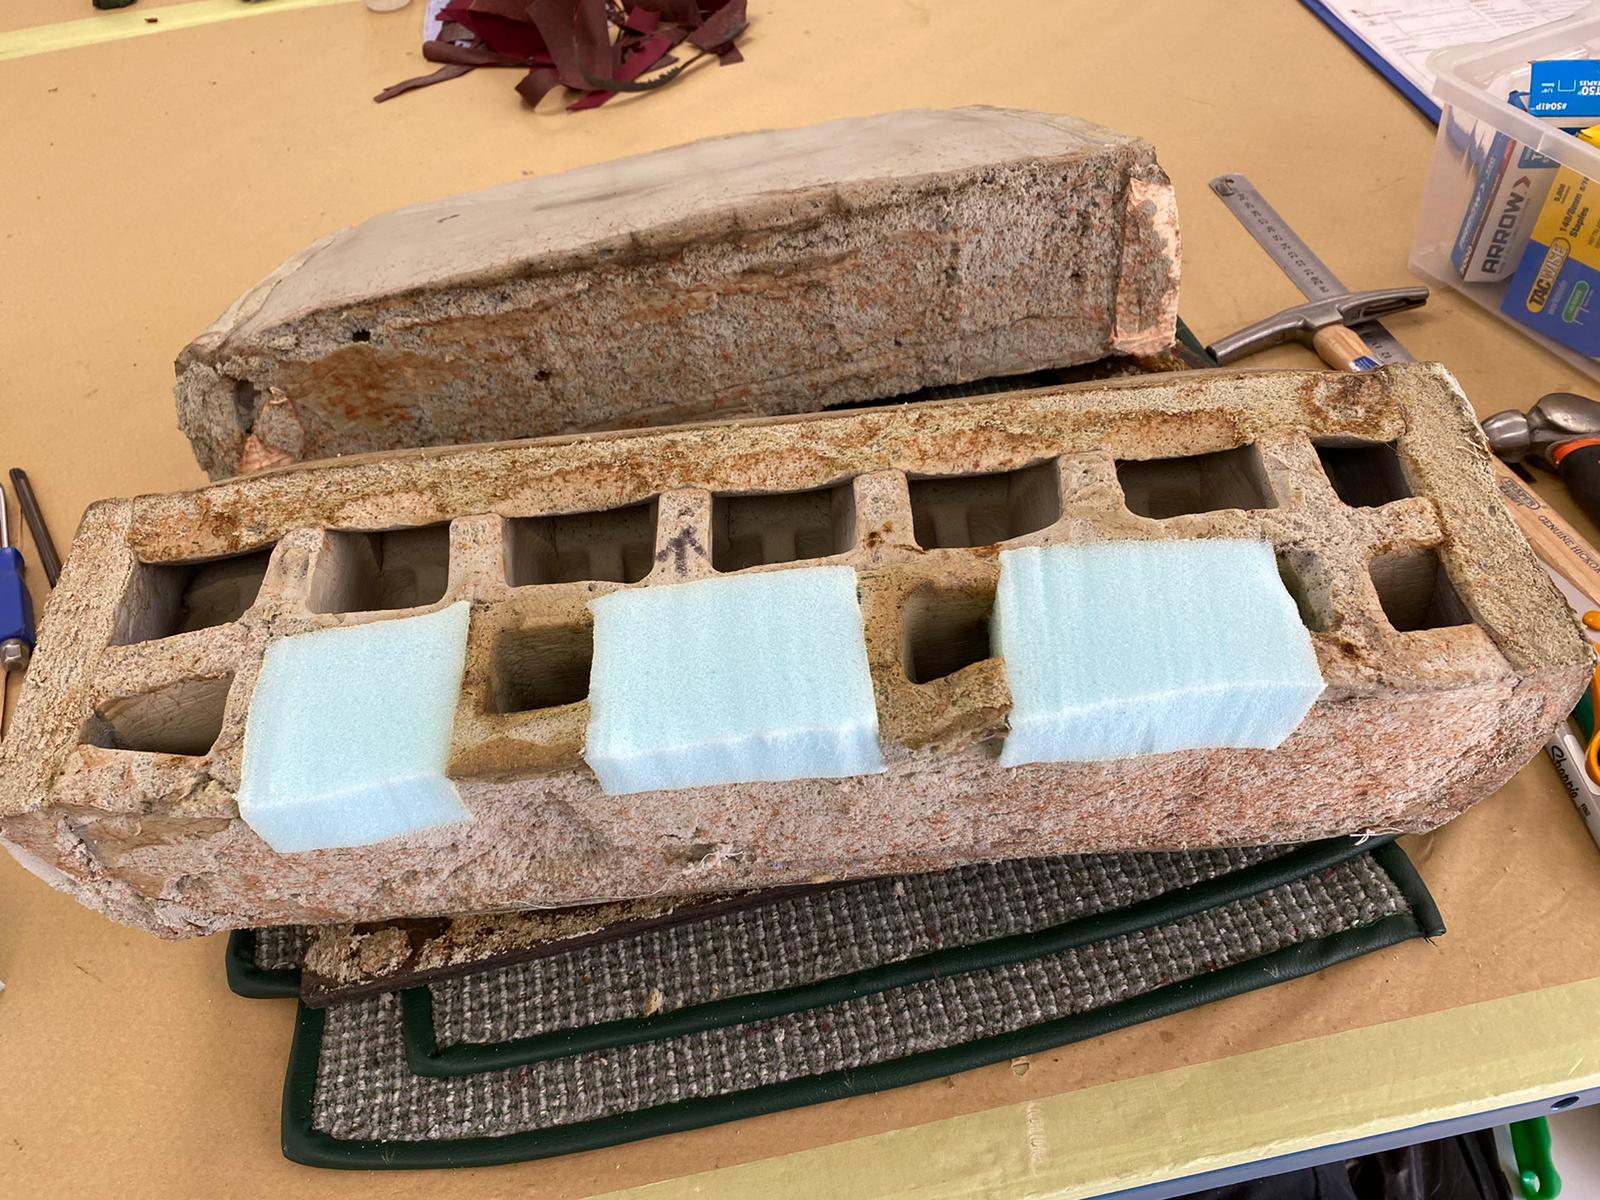
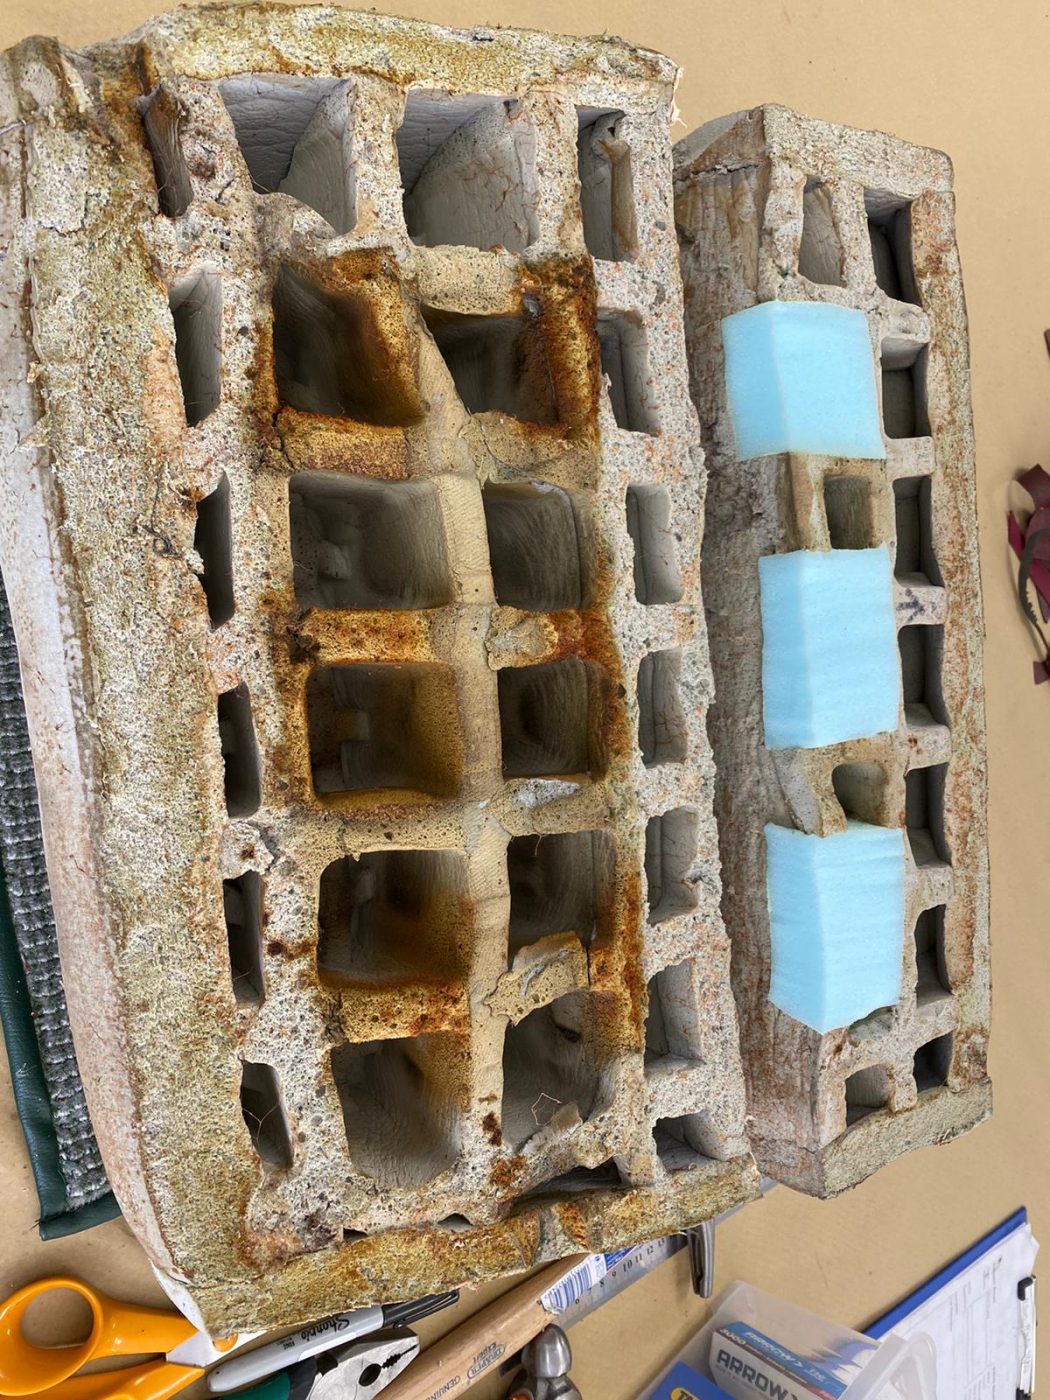
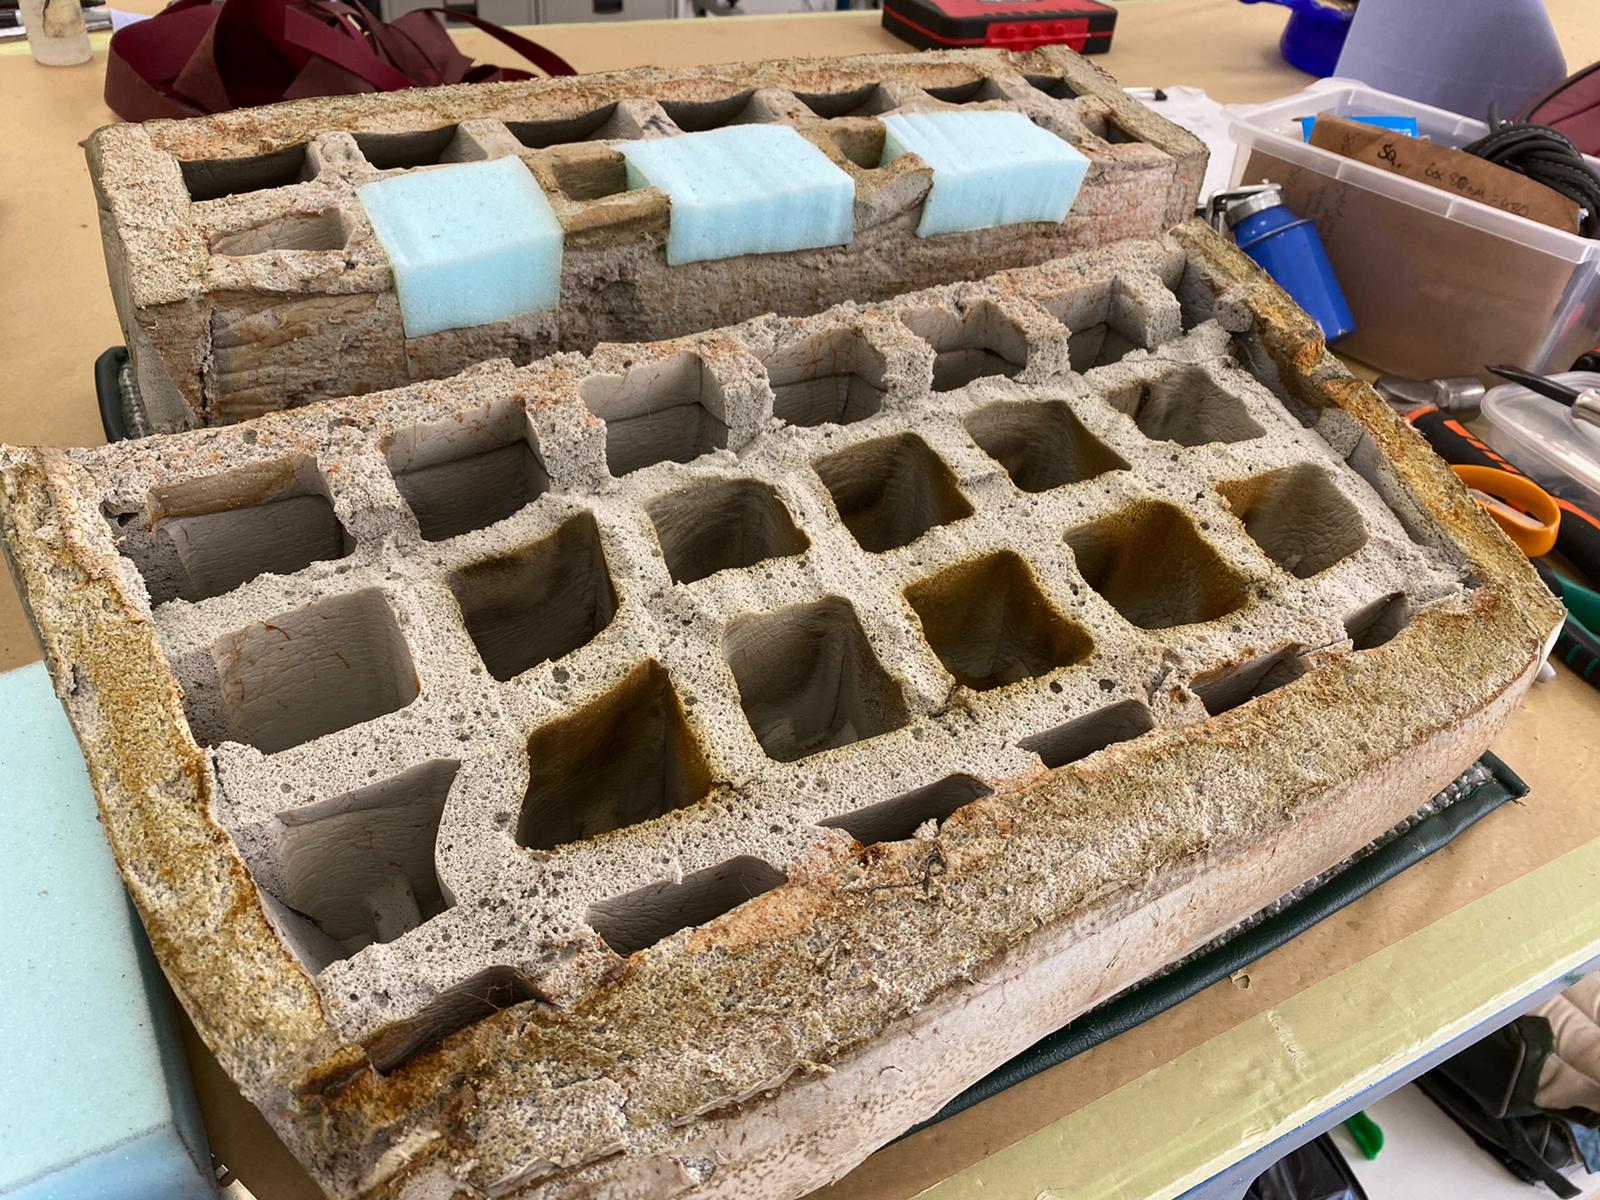
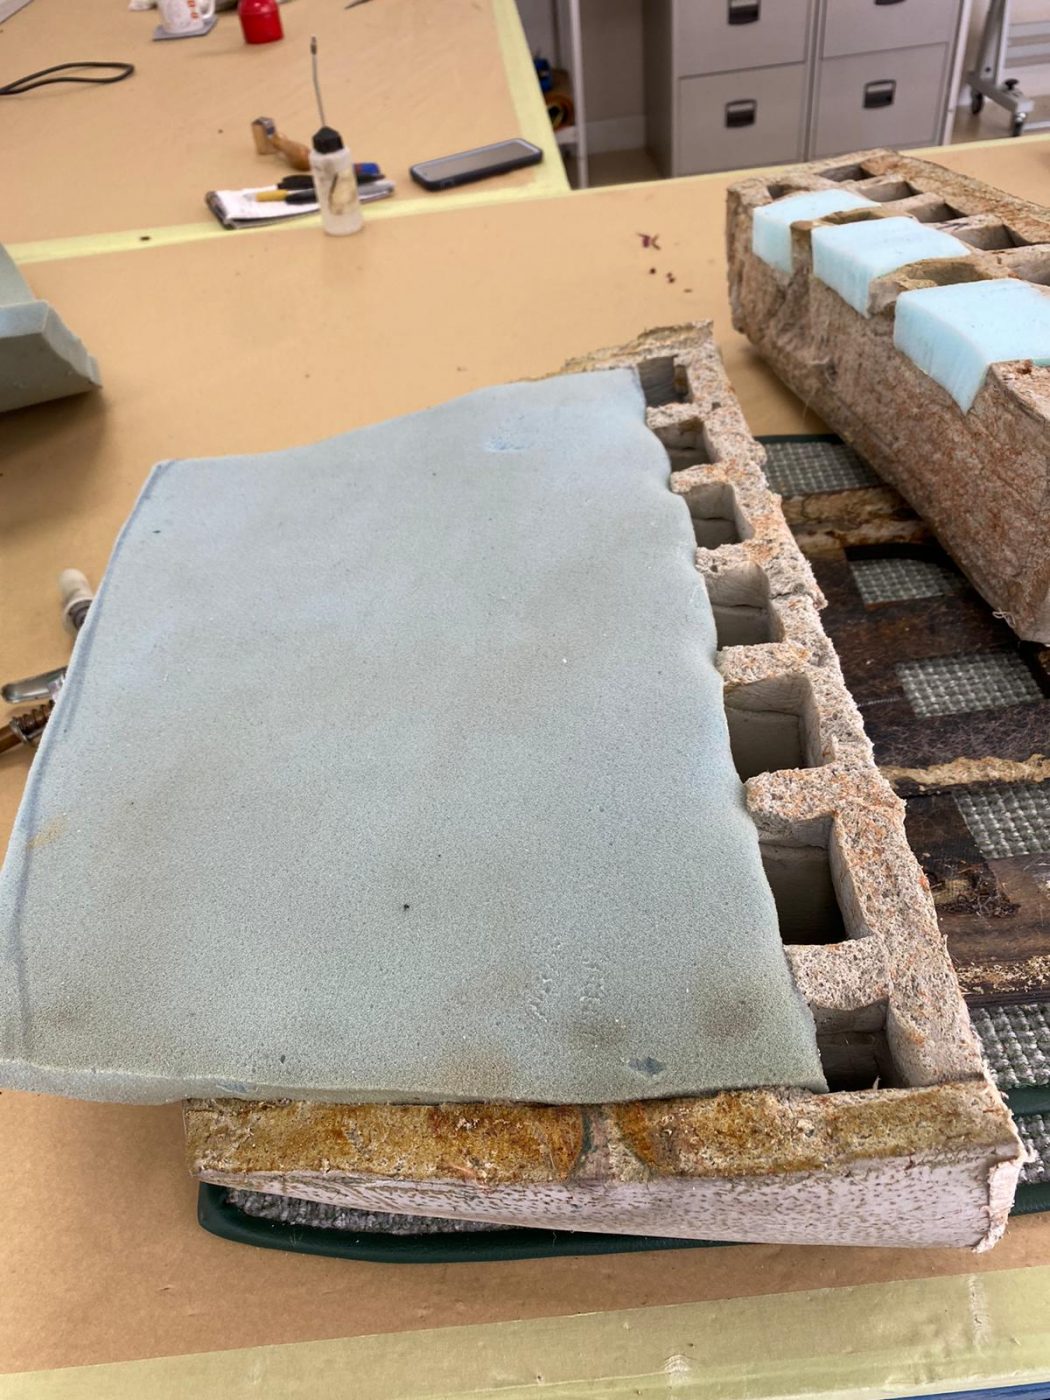
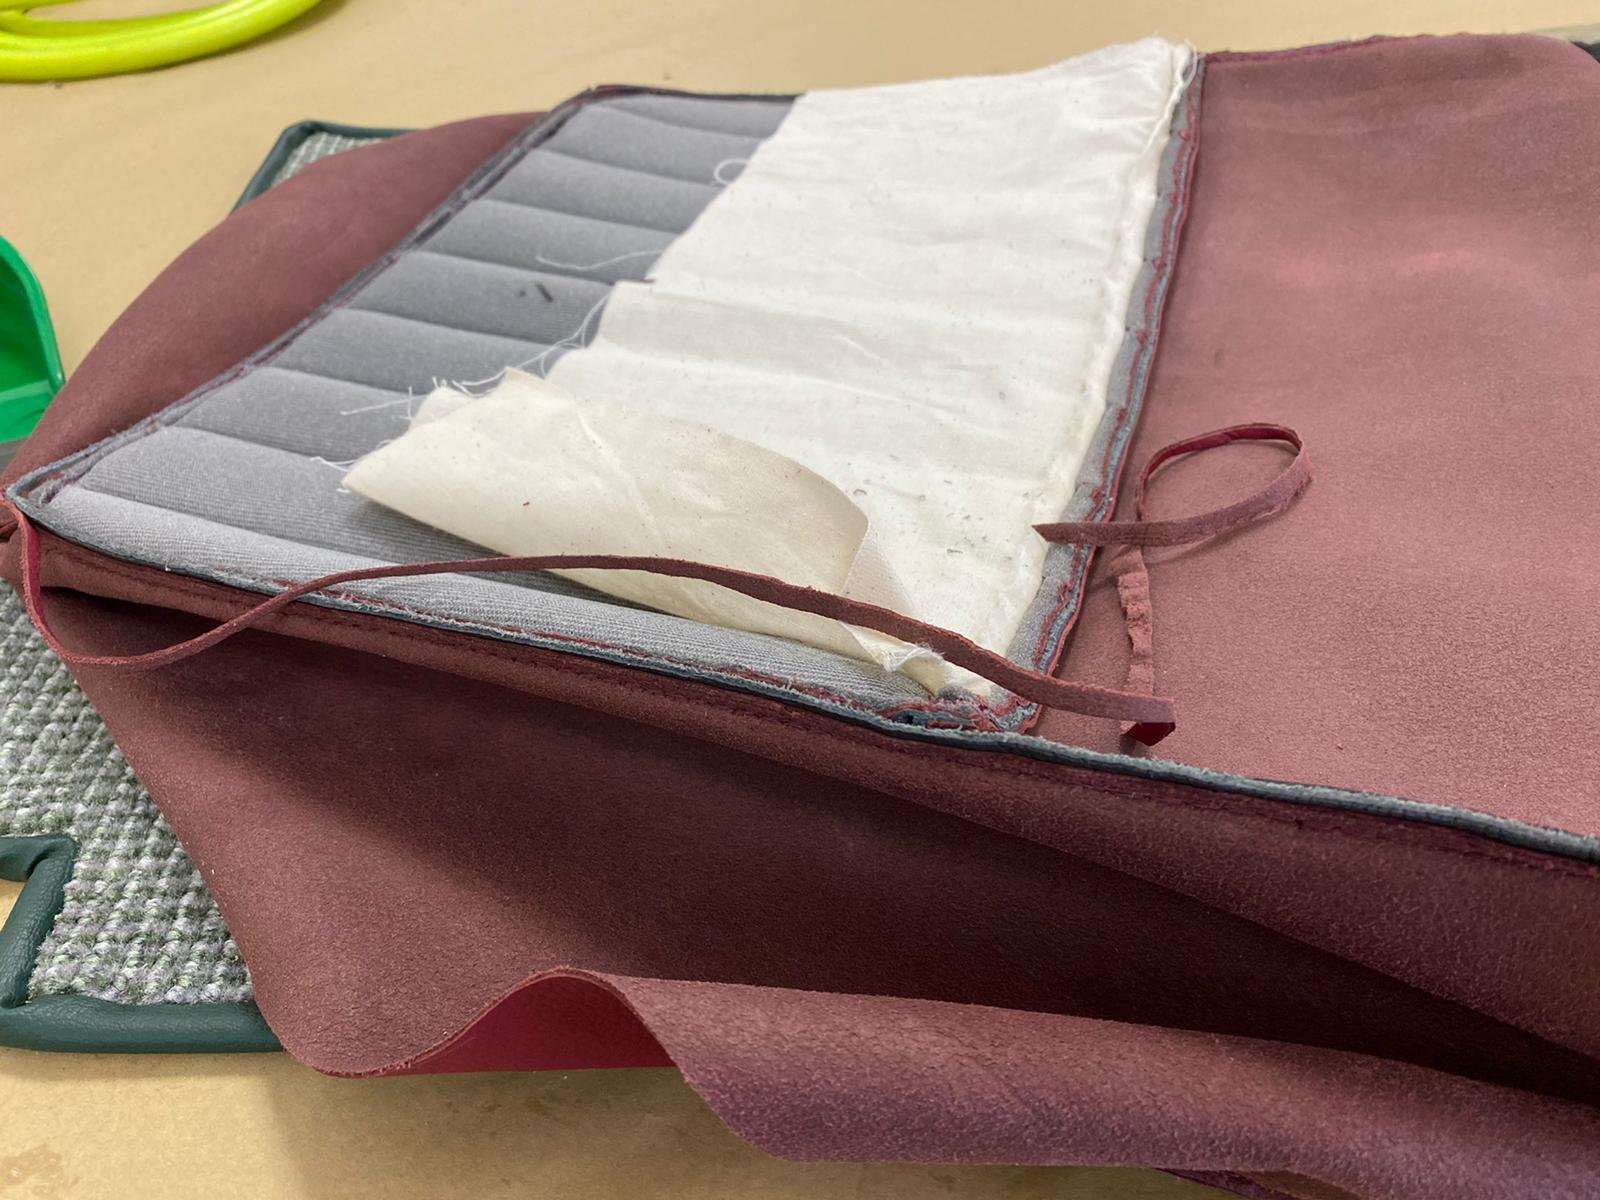
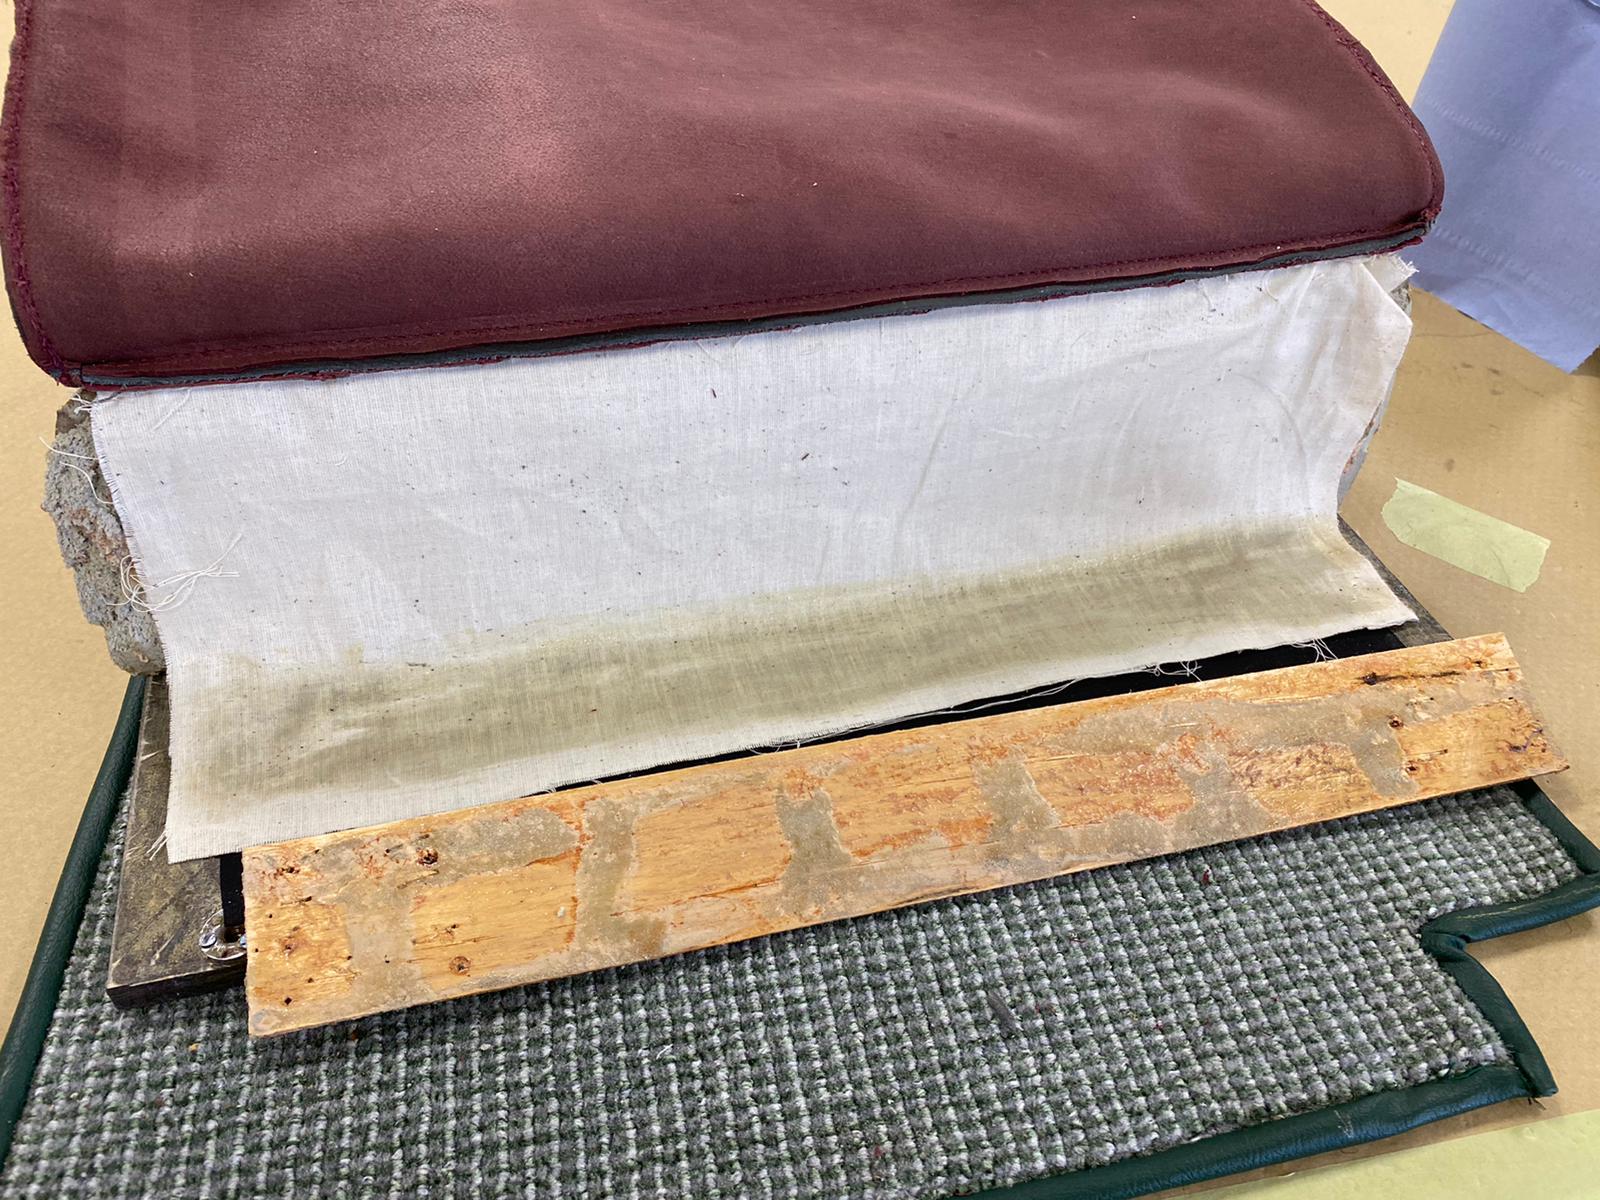
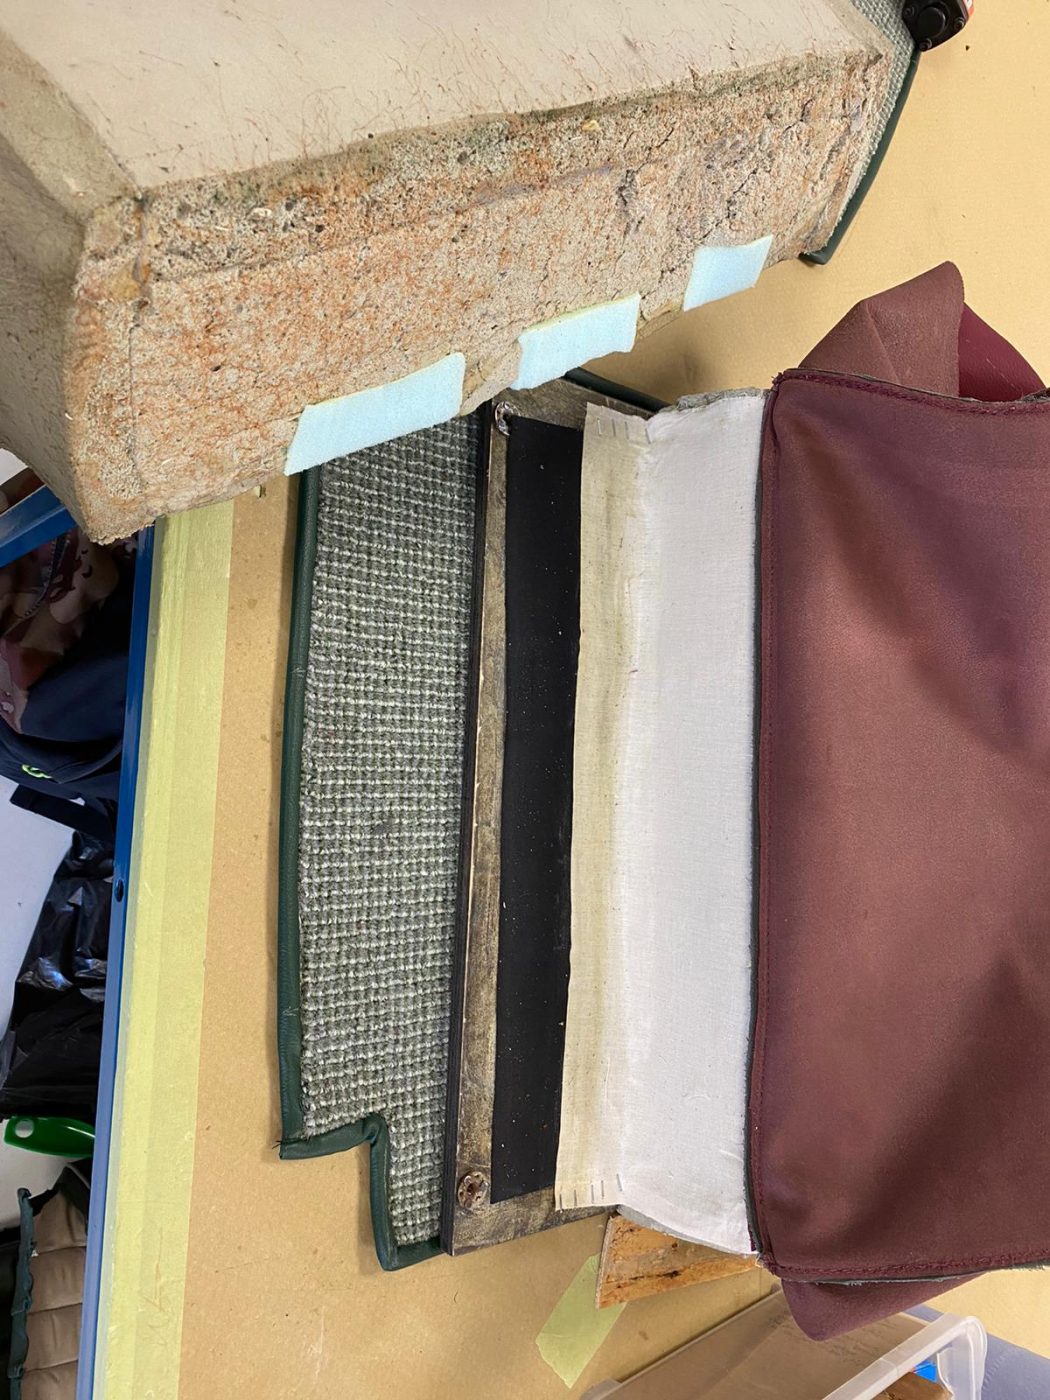
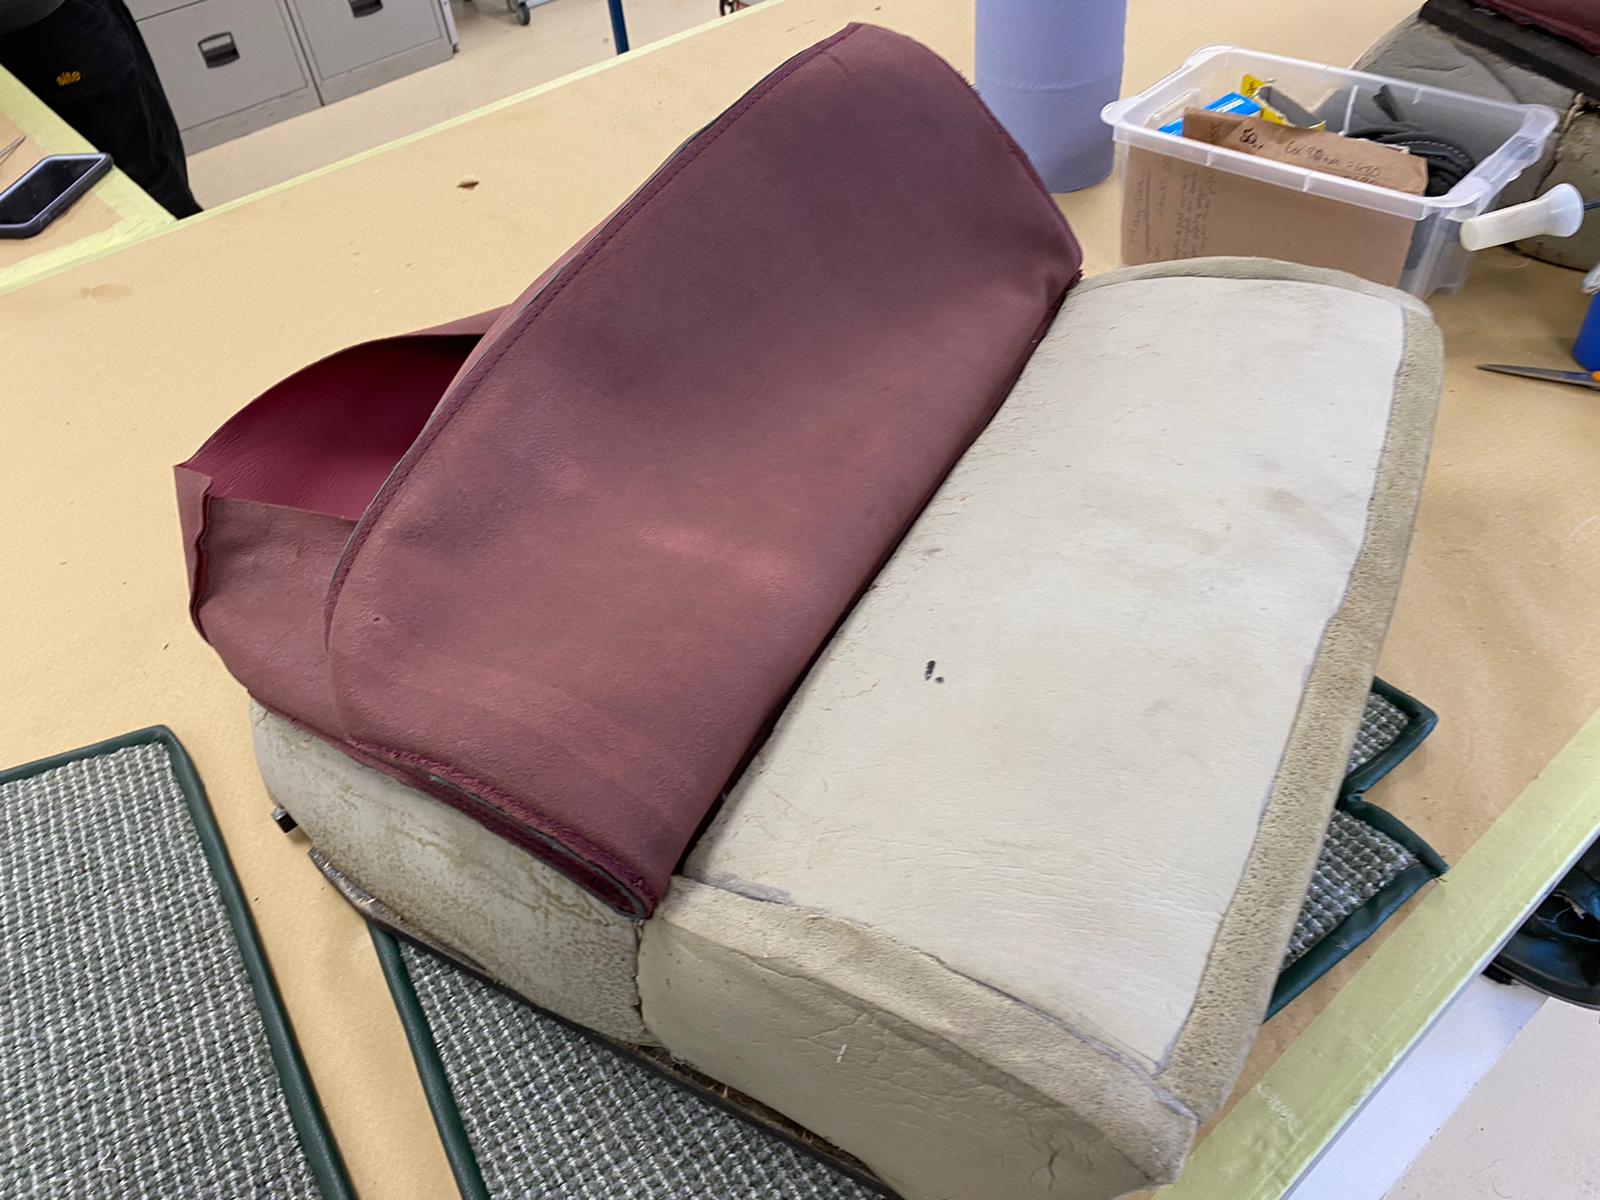
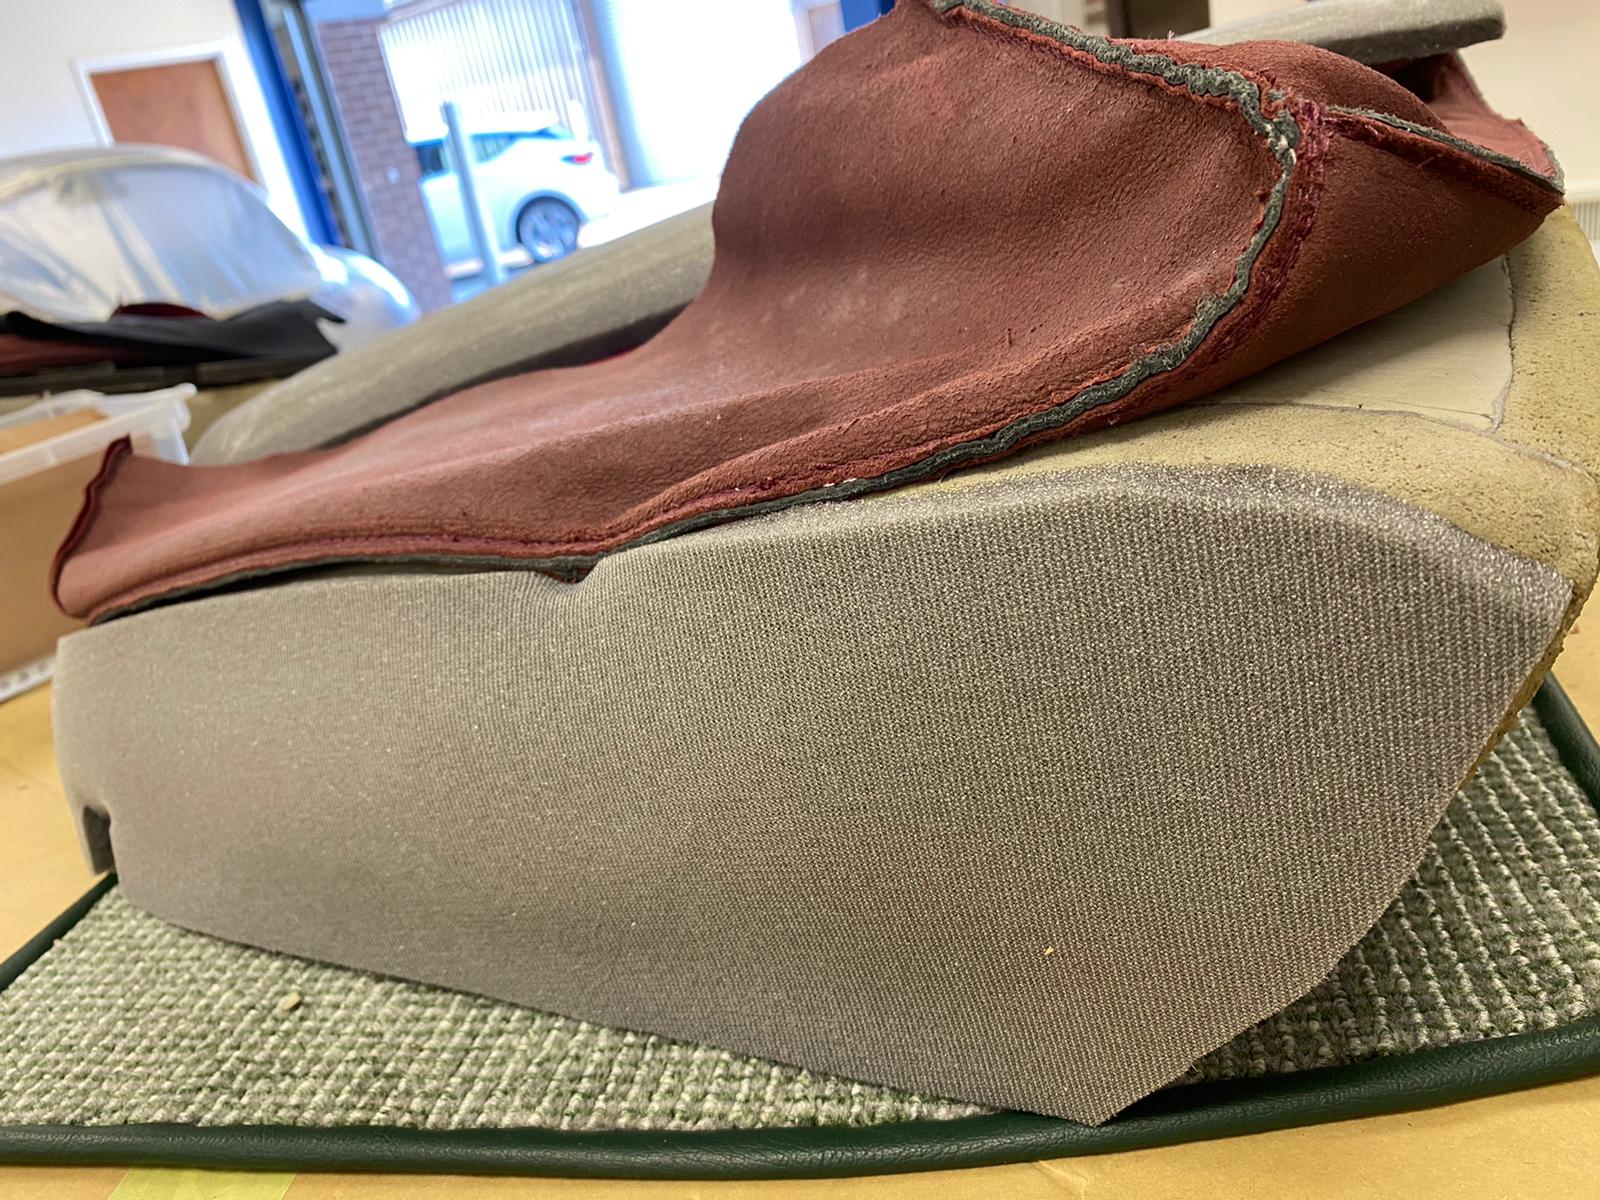
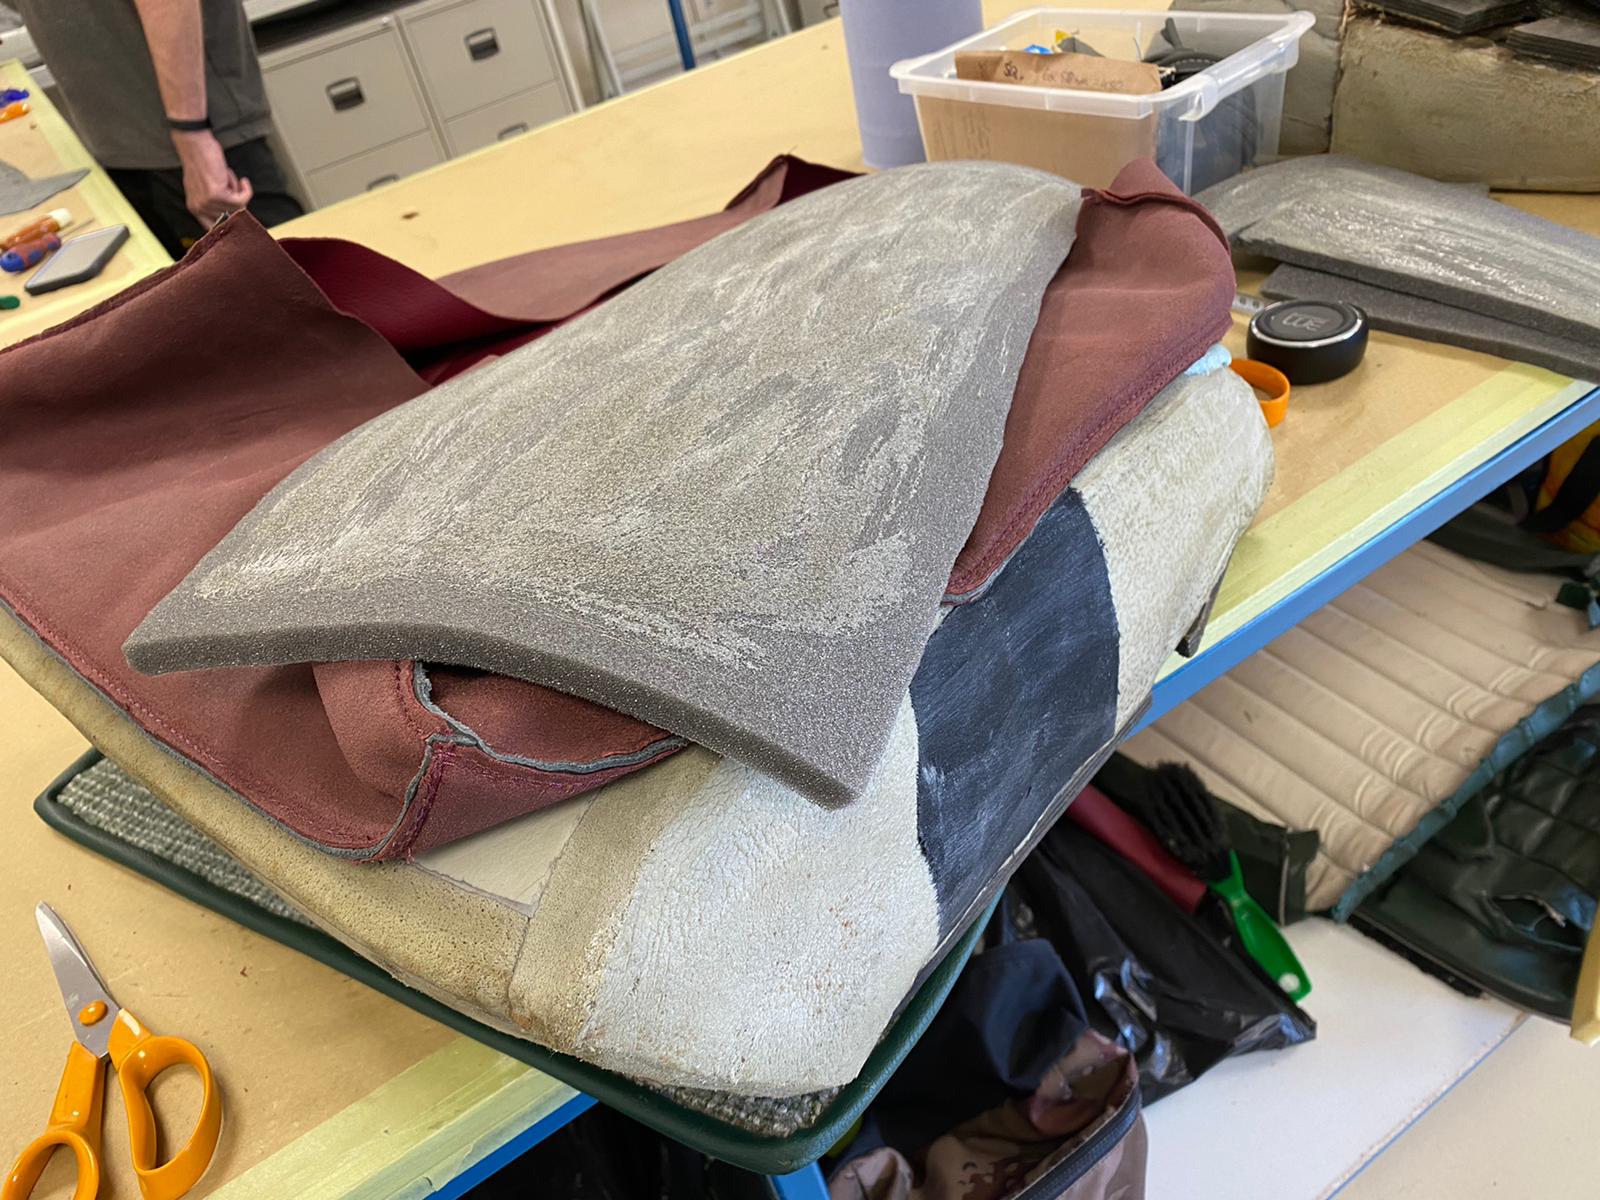
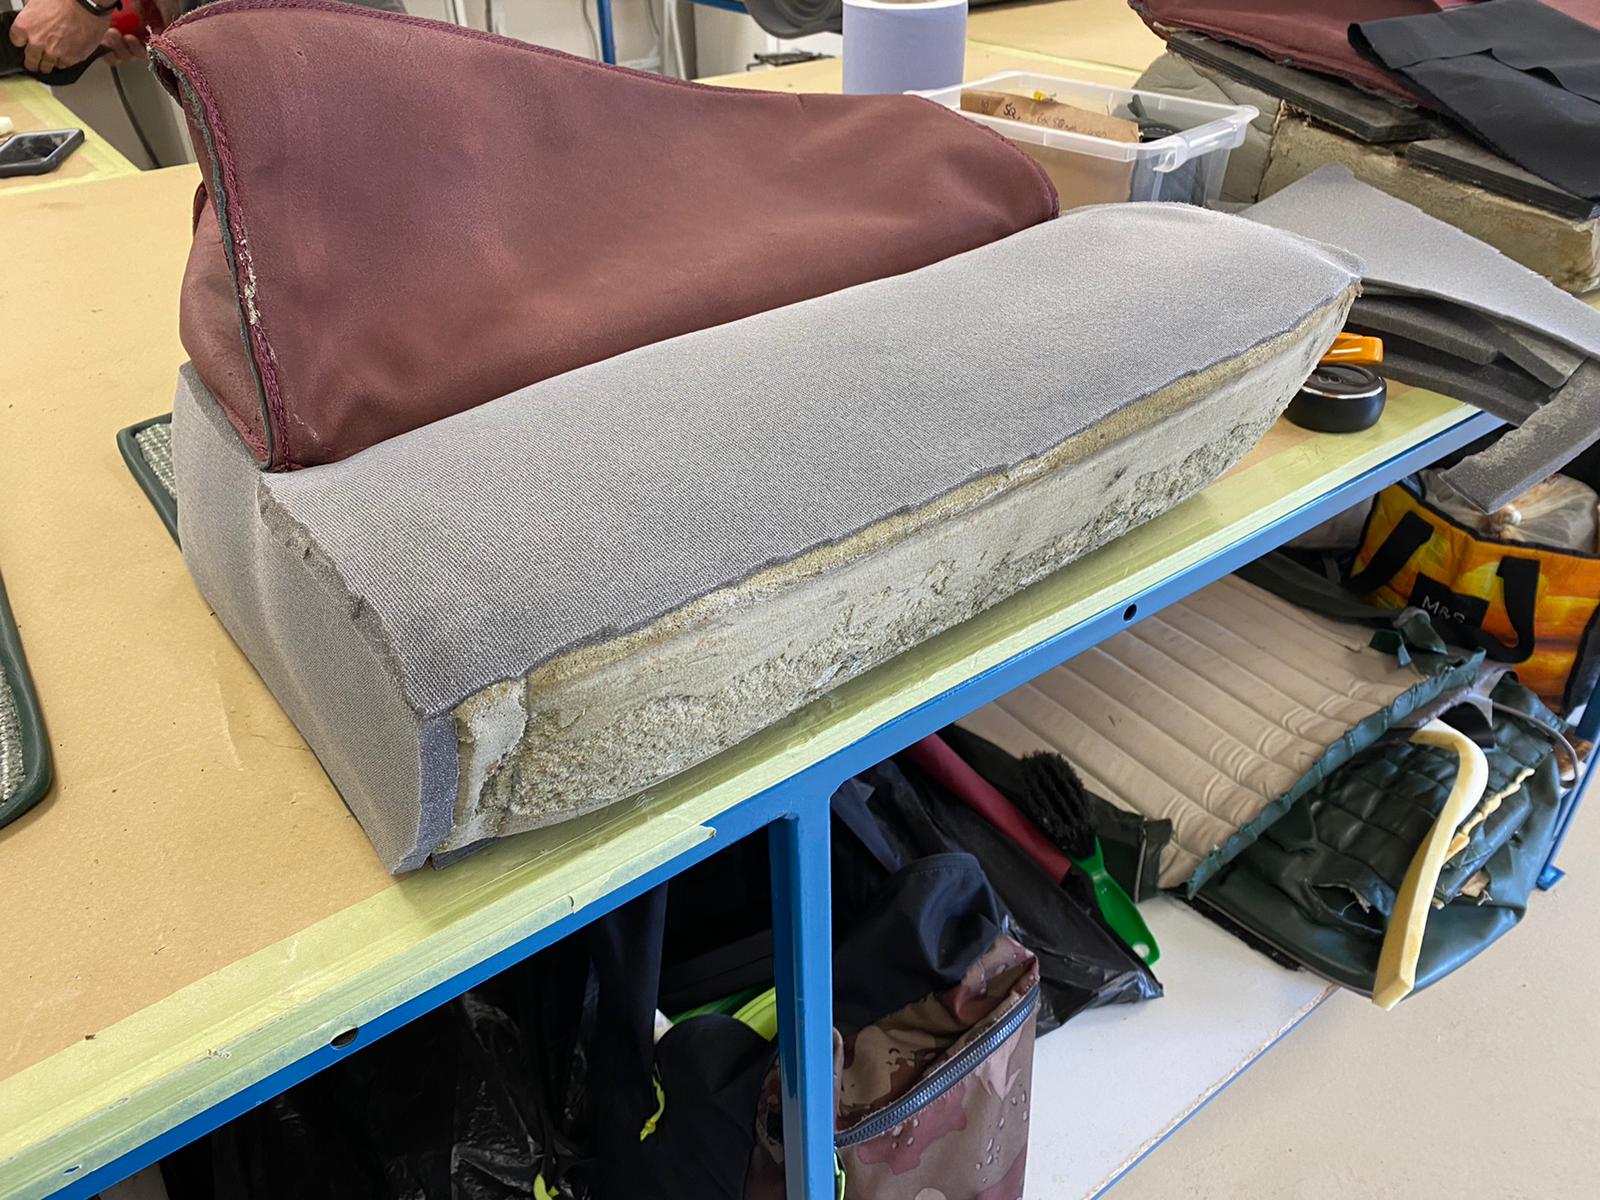
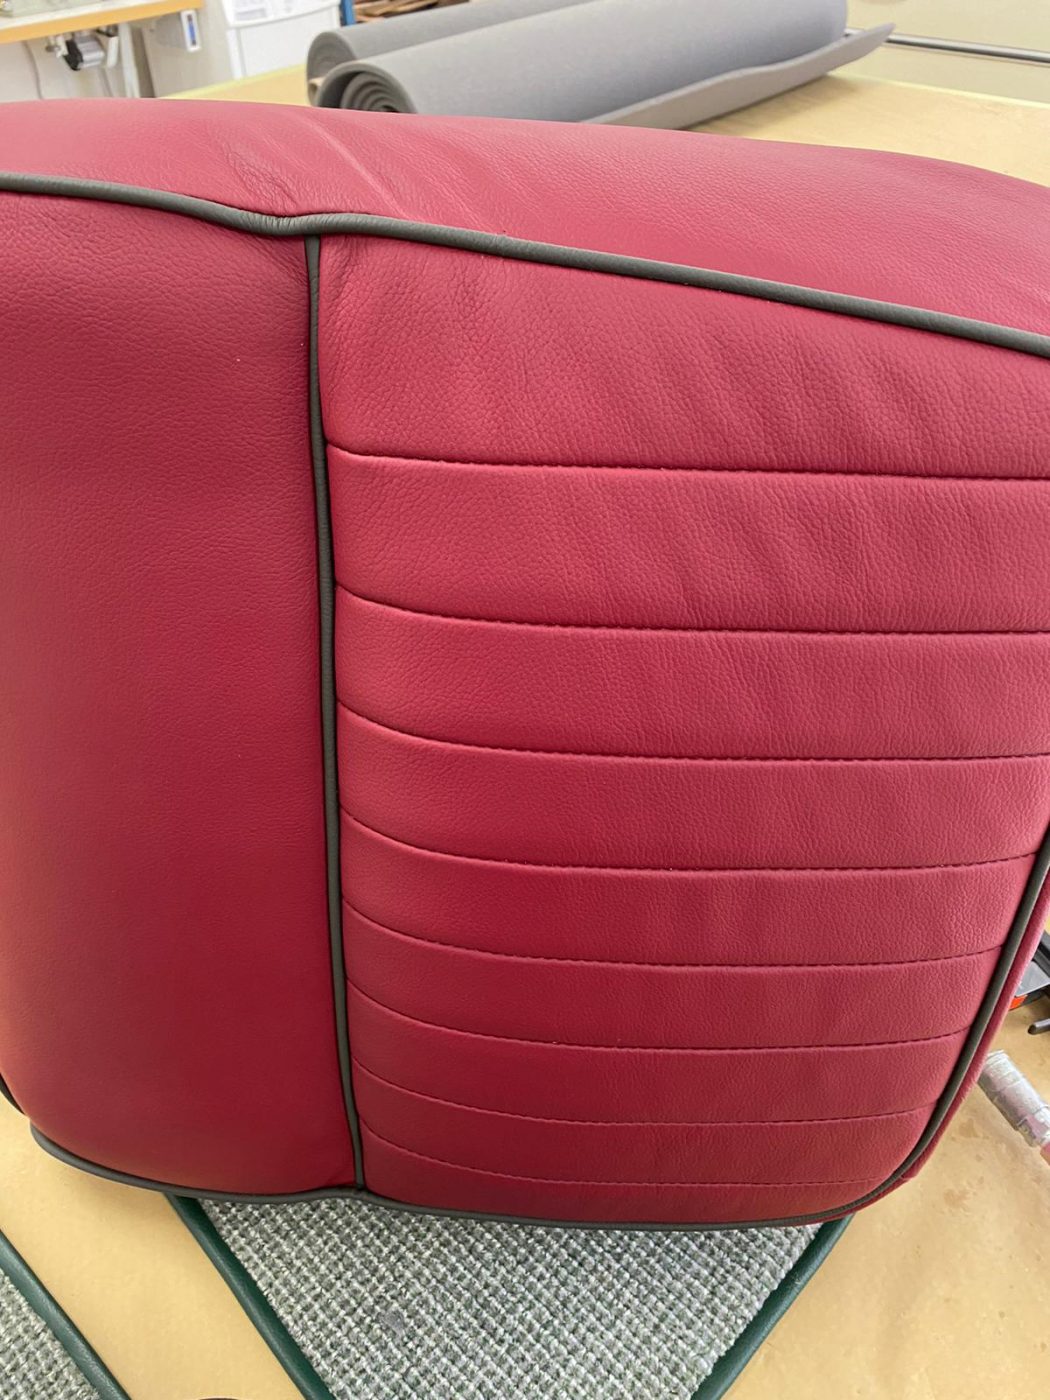
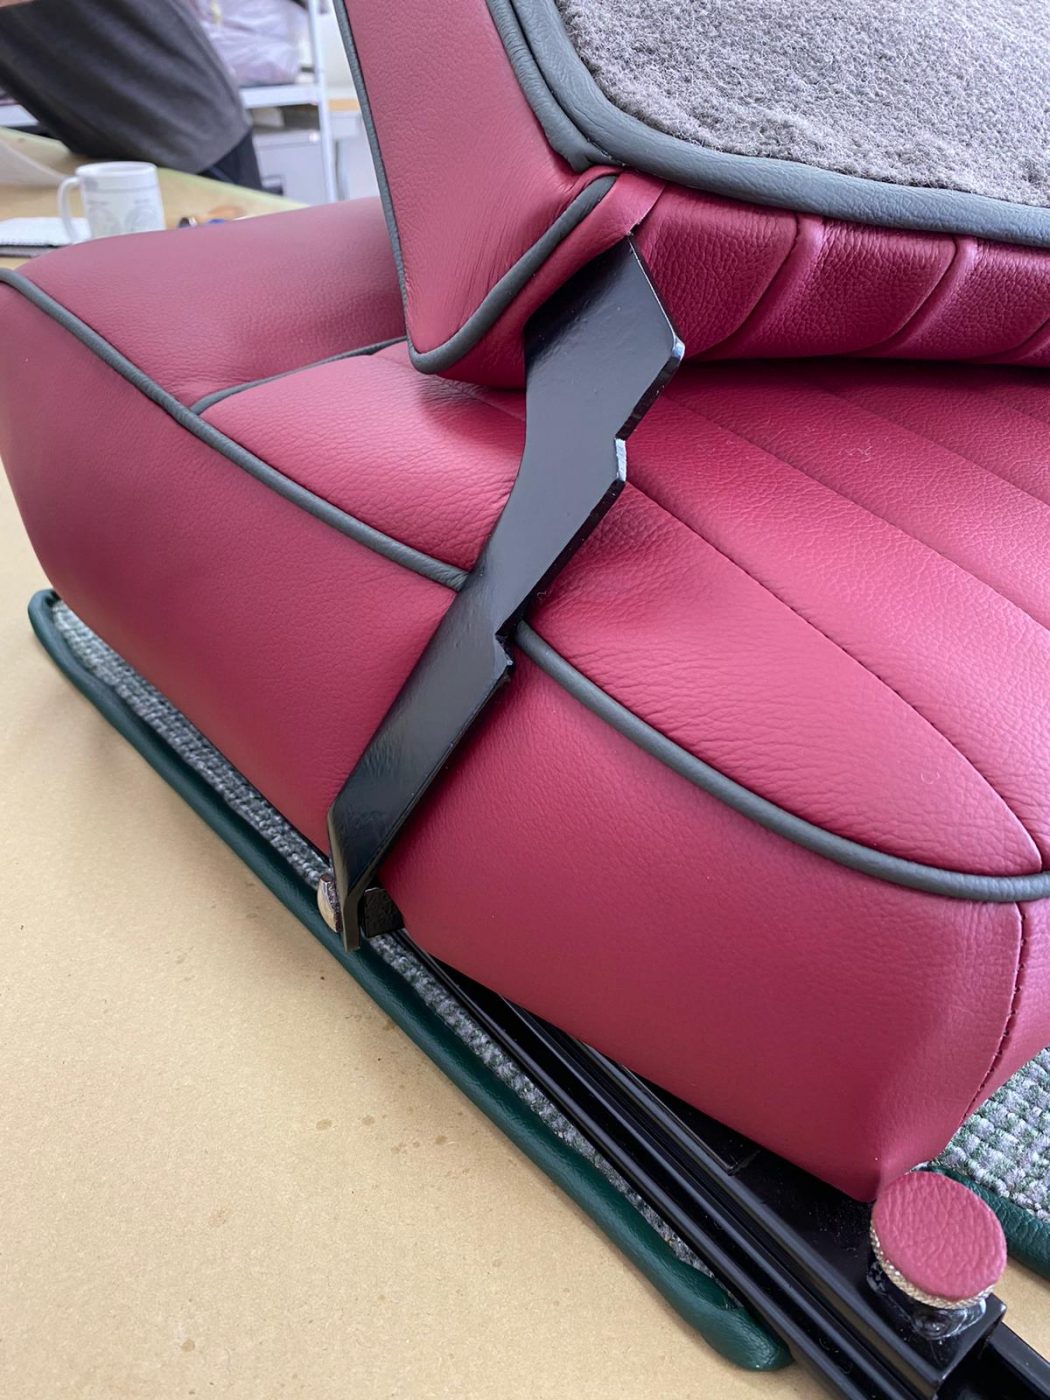
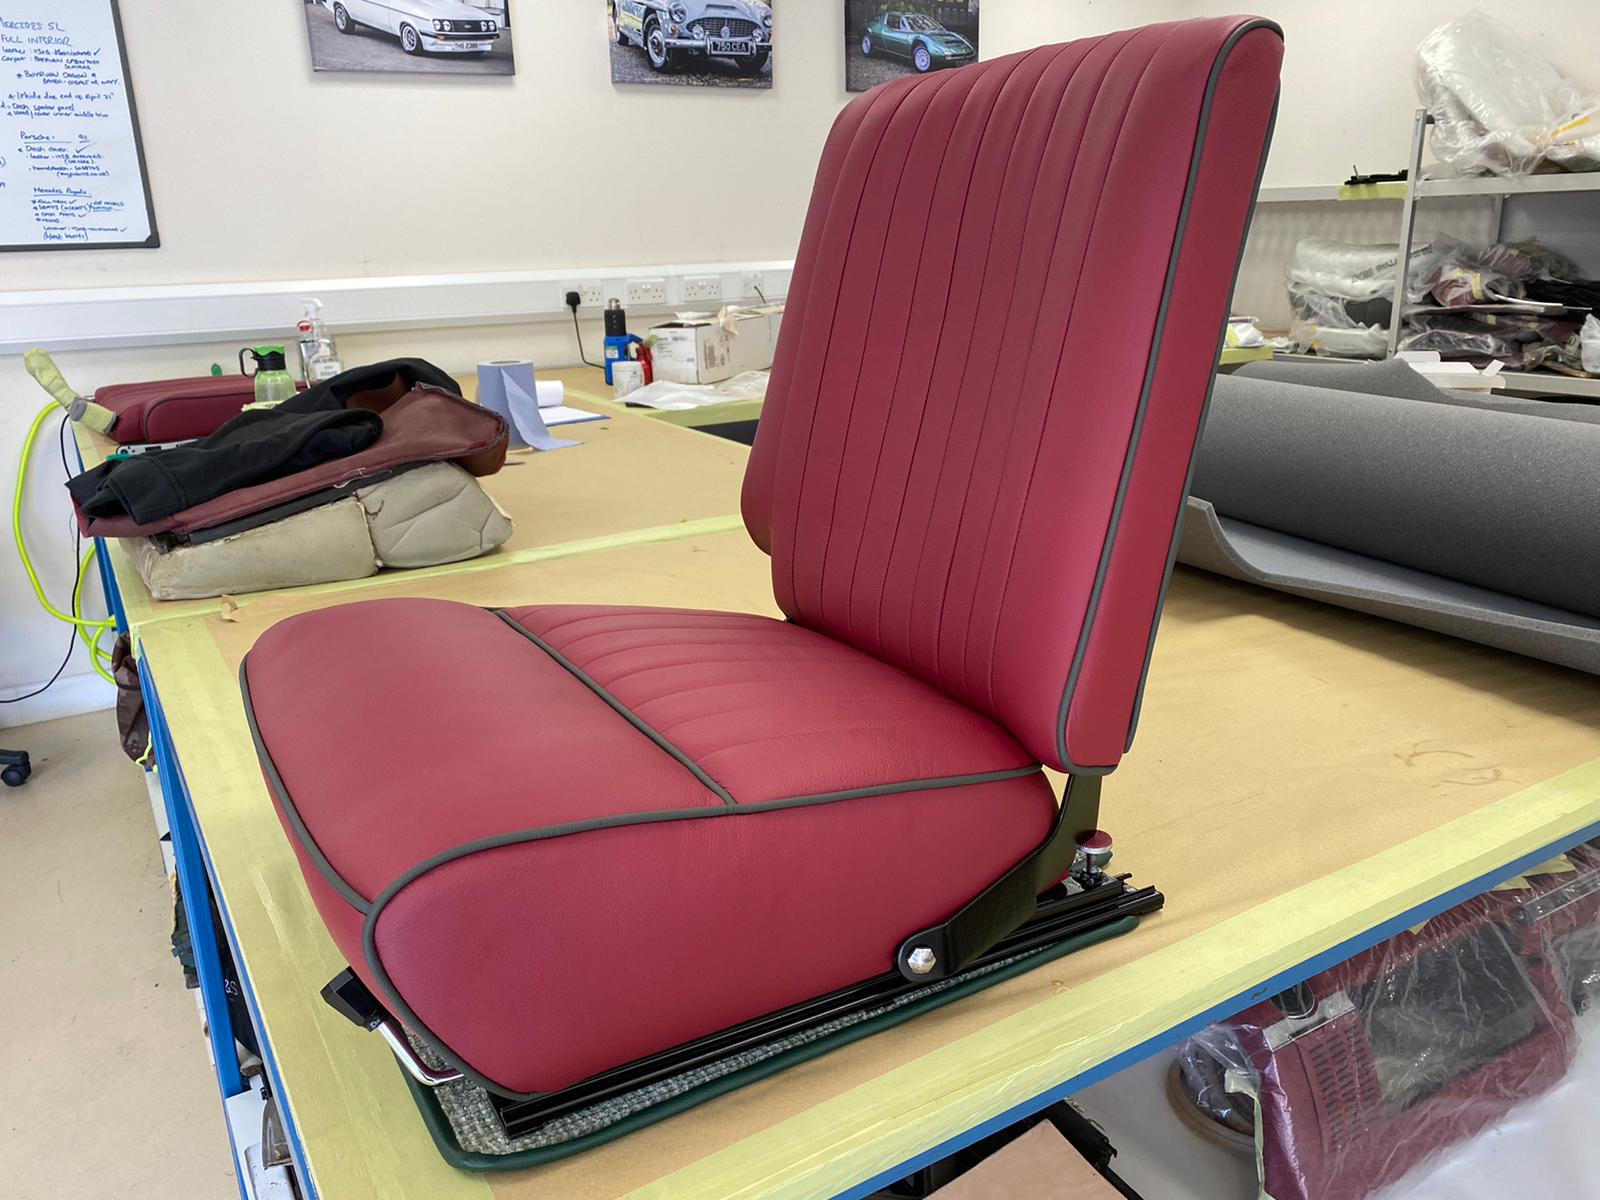
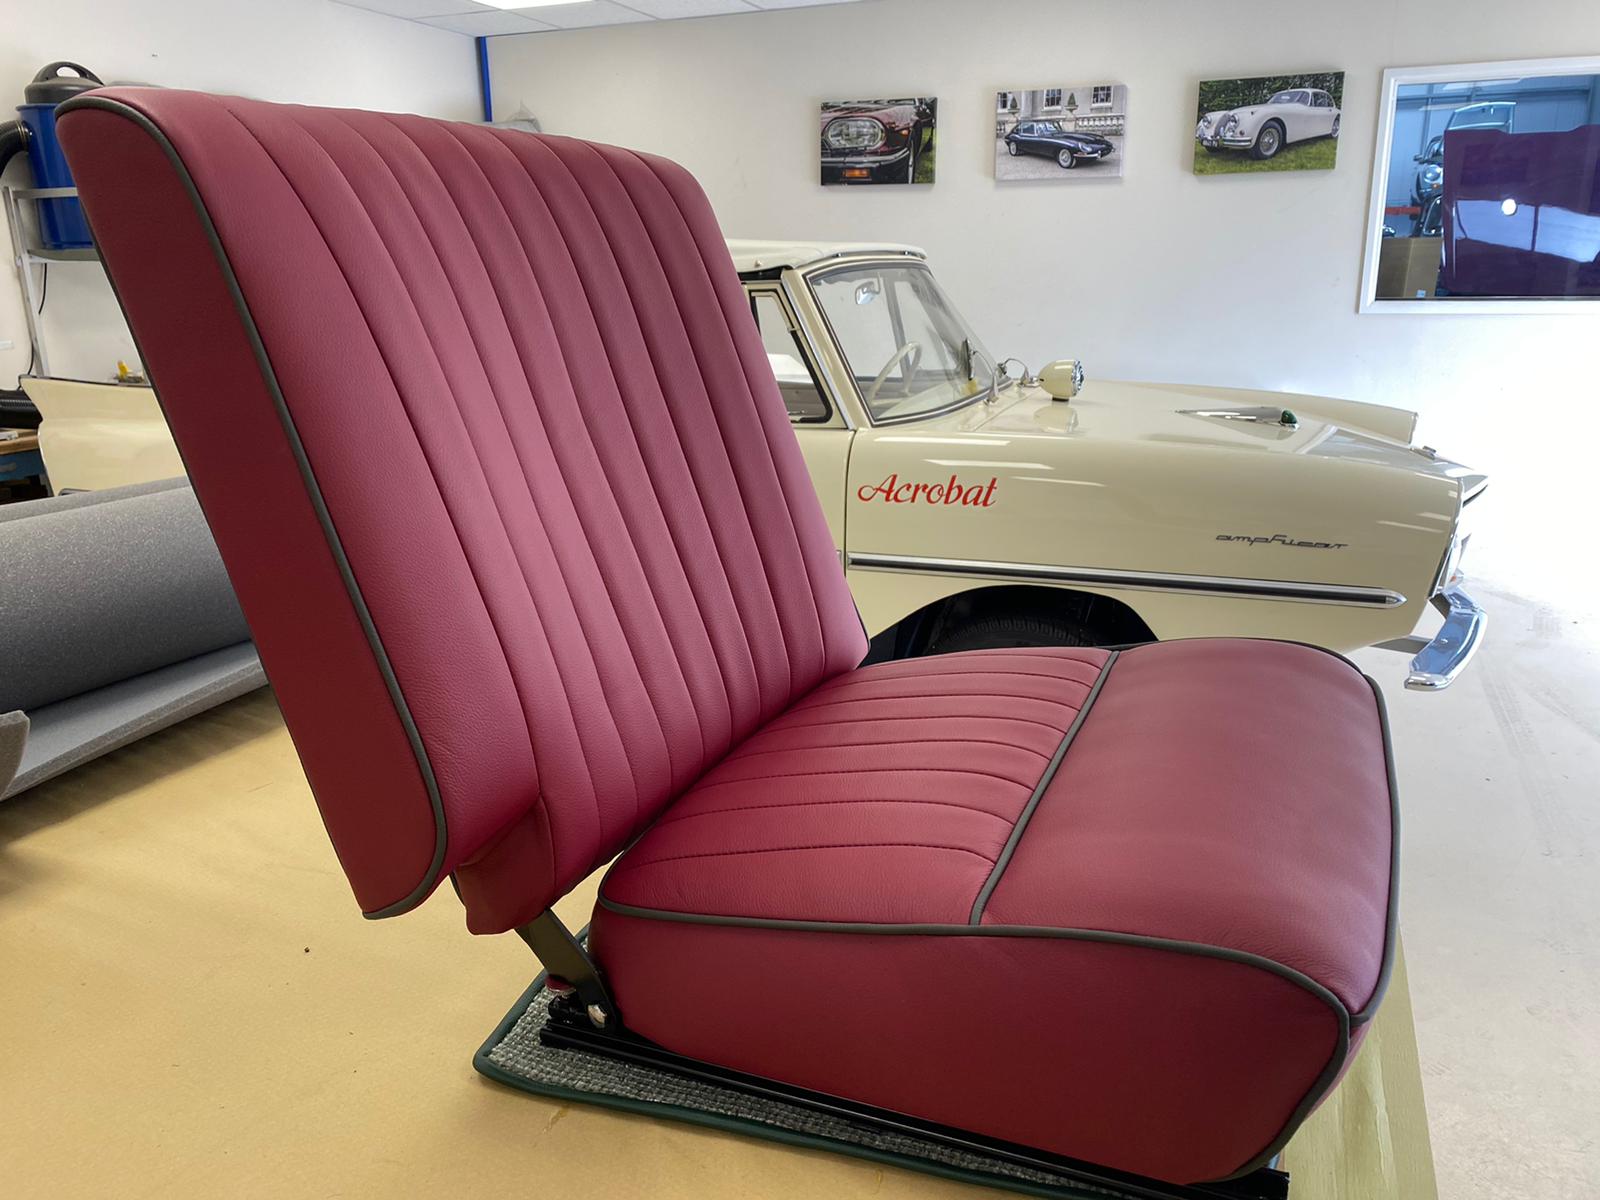
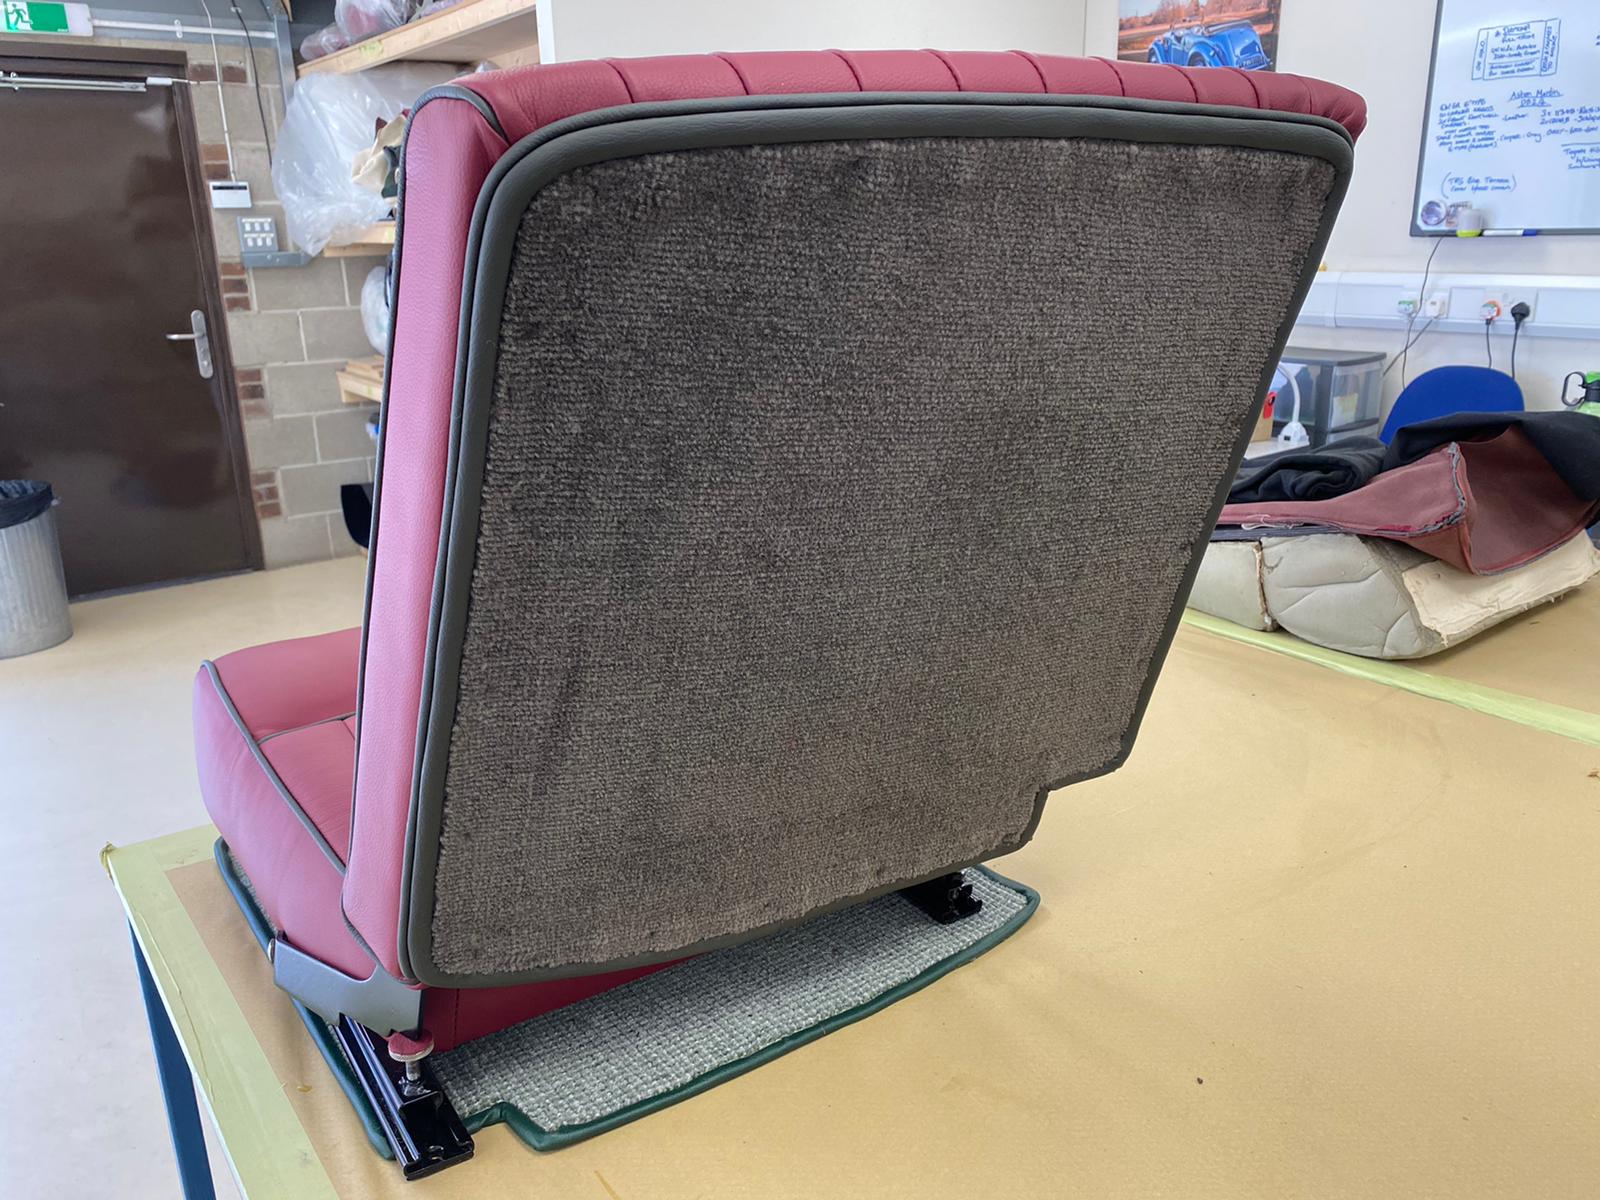
Kath has been fitting the second front base seat cover to its foam and frame for the 1955 Aston Martin DB 2/4. It’s exactly the same process as the other front base, which you can read about here.

Lydia has finished sanding down the primer on the front frame for the 1973 Jaguar E-Type Roadster Series 3. You can read about the process here. The sanding dust has been cleaned off with panel wipe, ready for the frame to be painted now.

James has been continuing his repair work on the 1986 Daimler Double Six. He’s now finished the left-hand side, which you can read about the process of here. The same work will be carried out on the right-hand side now.


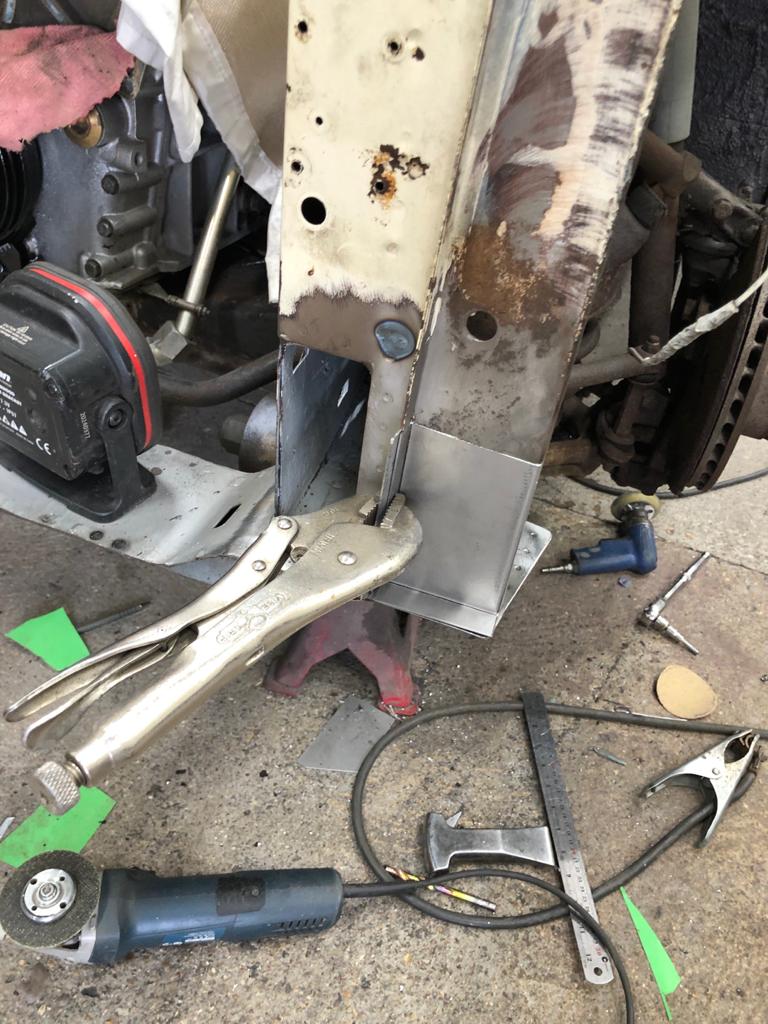
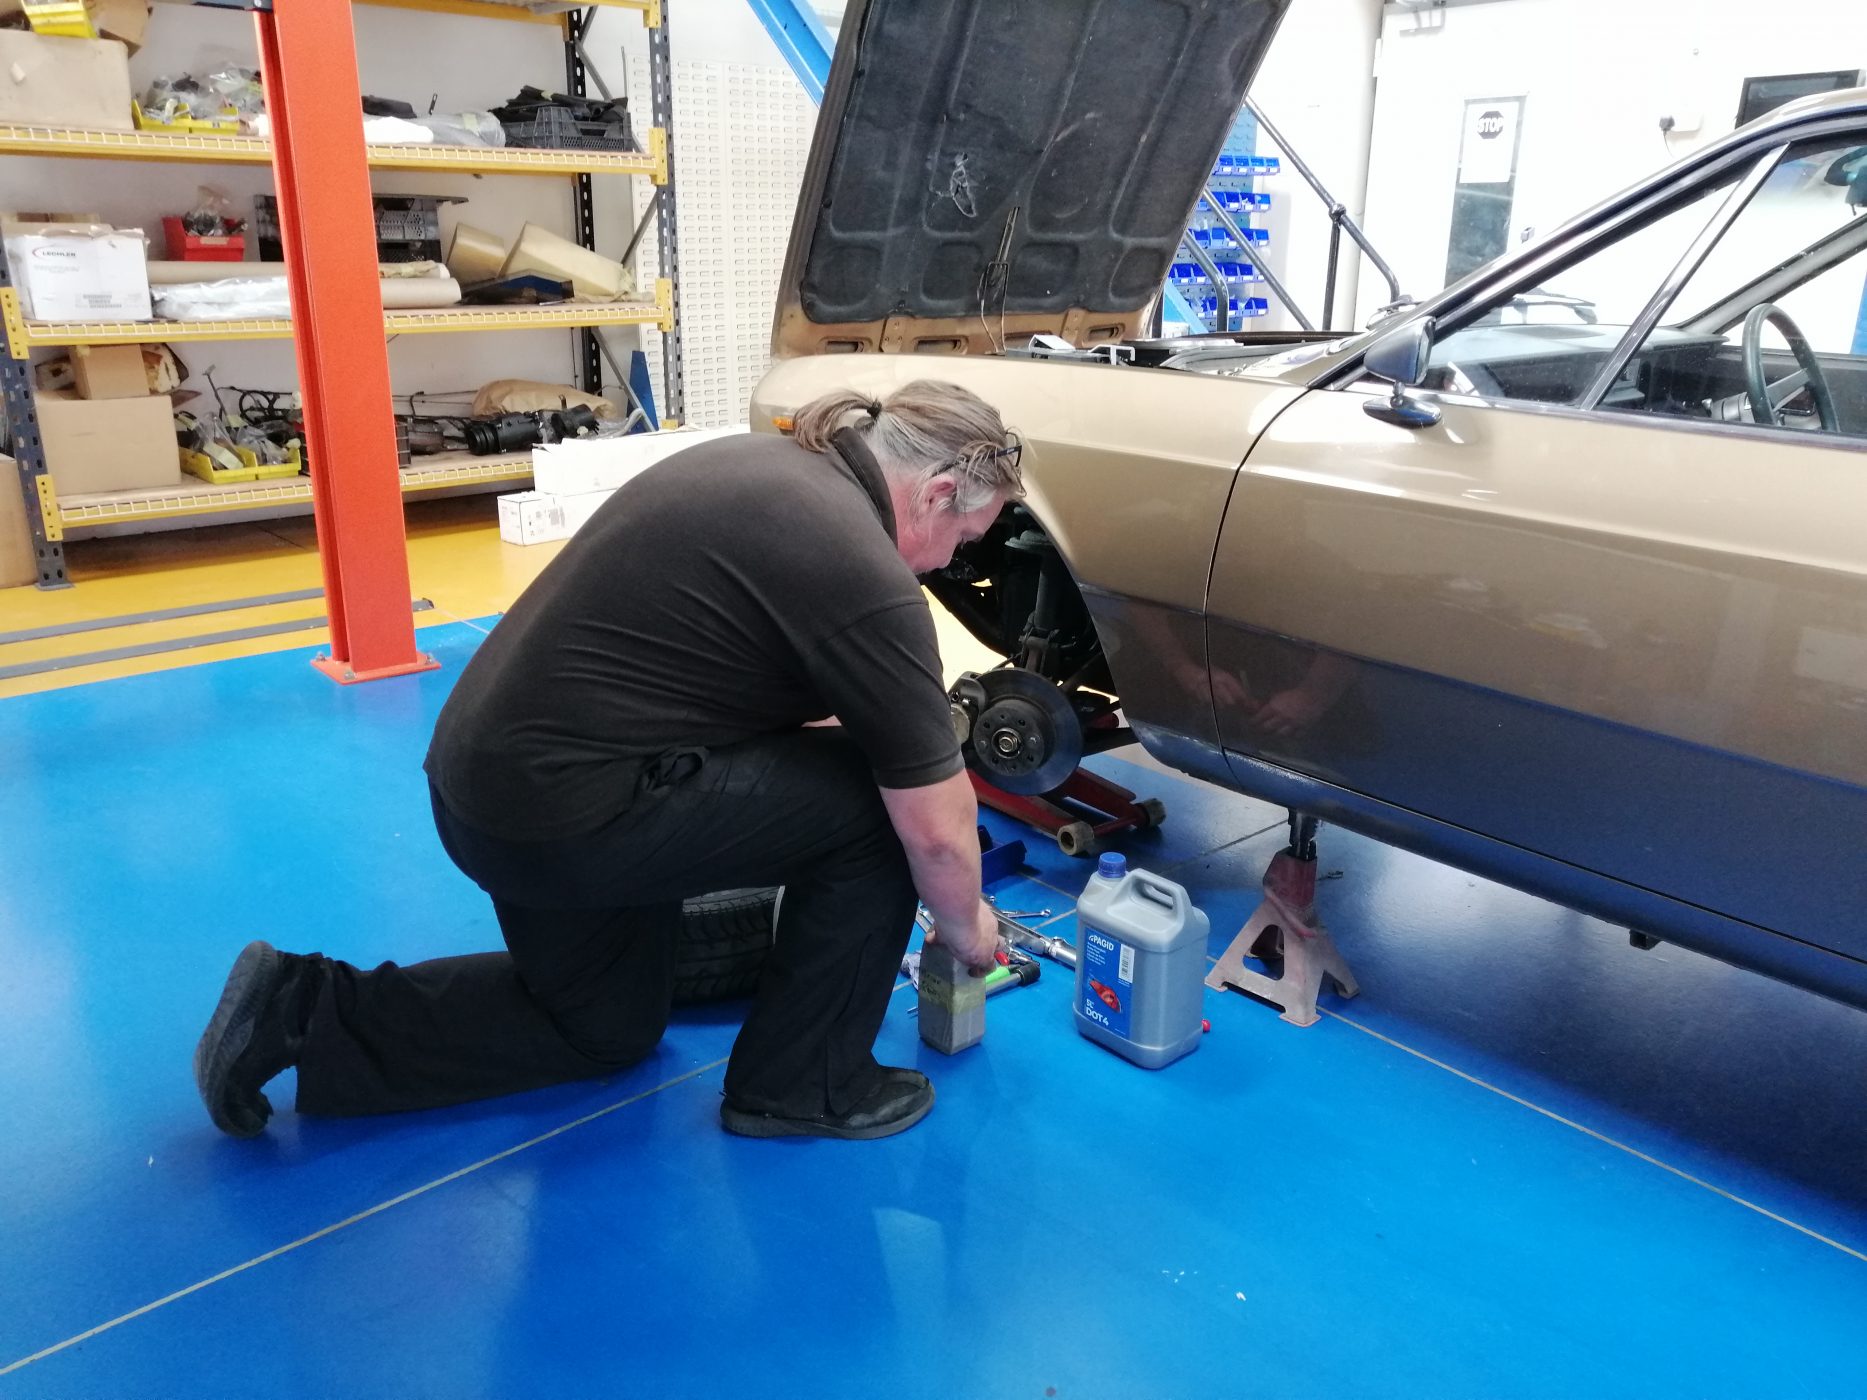
Dave has been working on the 1975 Triumph TR6. He’s installed a new speedo cable and new clips to go on them. On the original, there was a bad earth connection and it appears that the car had been driven with this happening, which meant the cable had melted. Another problem that he encountered was that the angle box had been destroyed from the drive out of the gearbox. Dave had to, unfortunately, take the interior out to access the drive and speedo cable, which always adds time to the process of anything. He also found there was a missing split pin on the offside bottom trunion.
Dave is now in the process of doing the 4 wheel alignment, which means putting lasers on it and setting up the geometry of it all. Shims have to be put in, to square everything up.


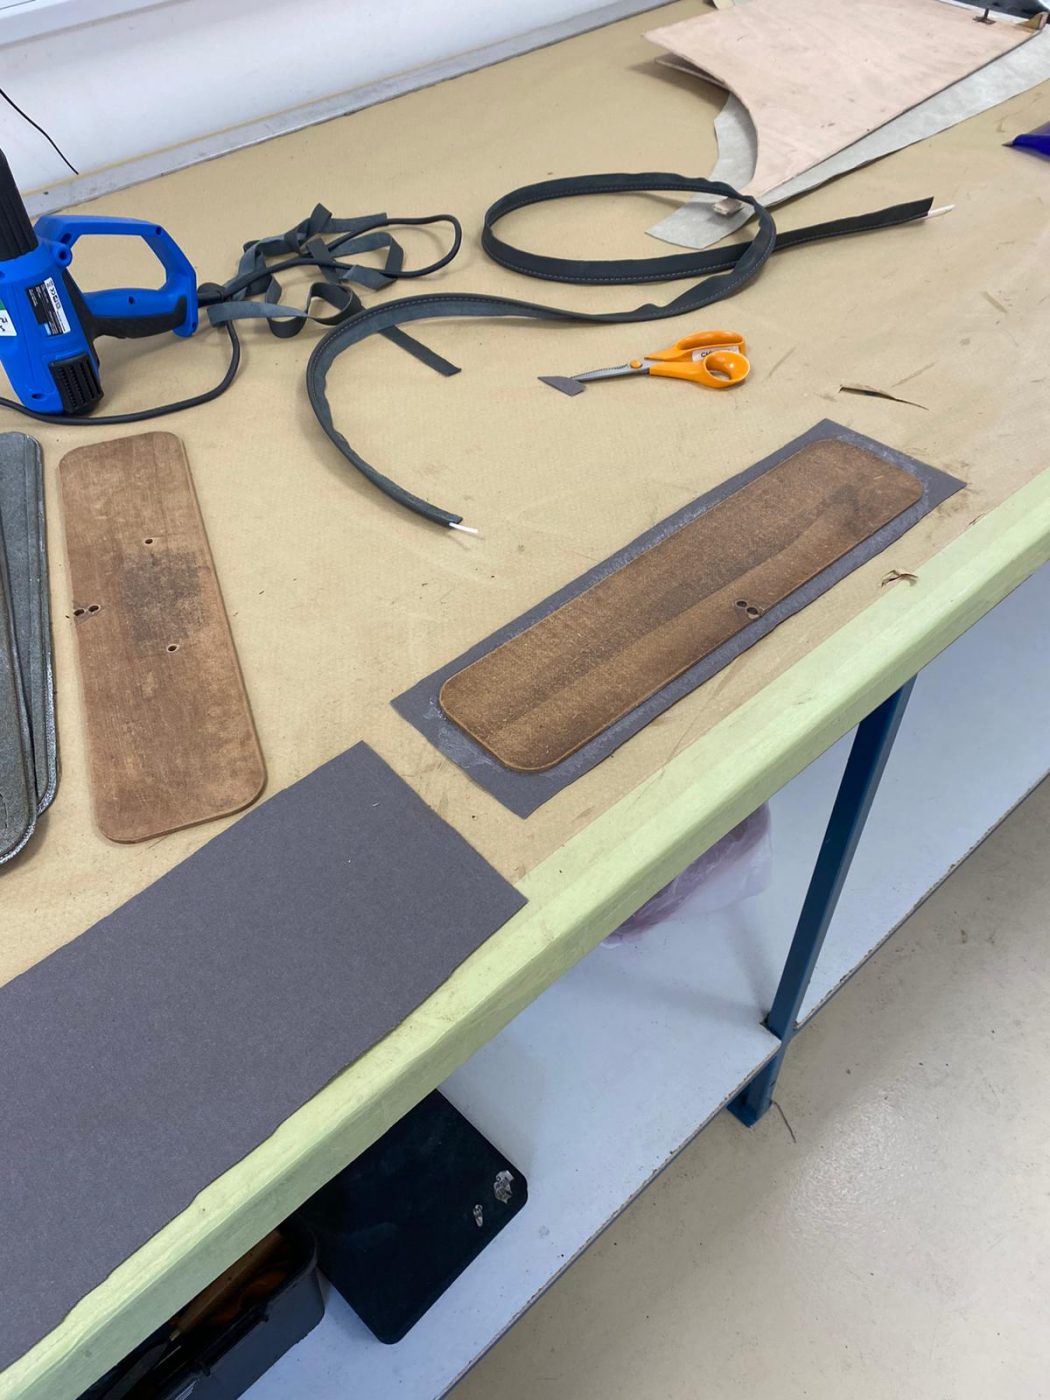
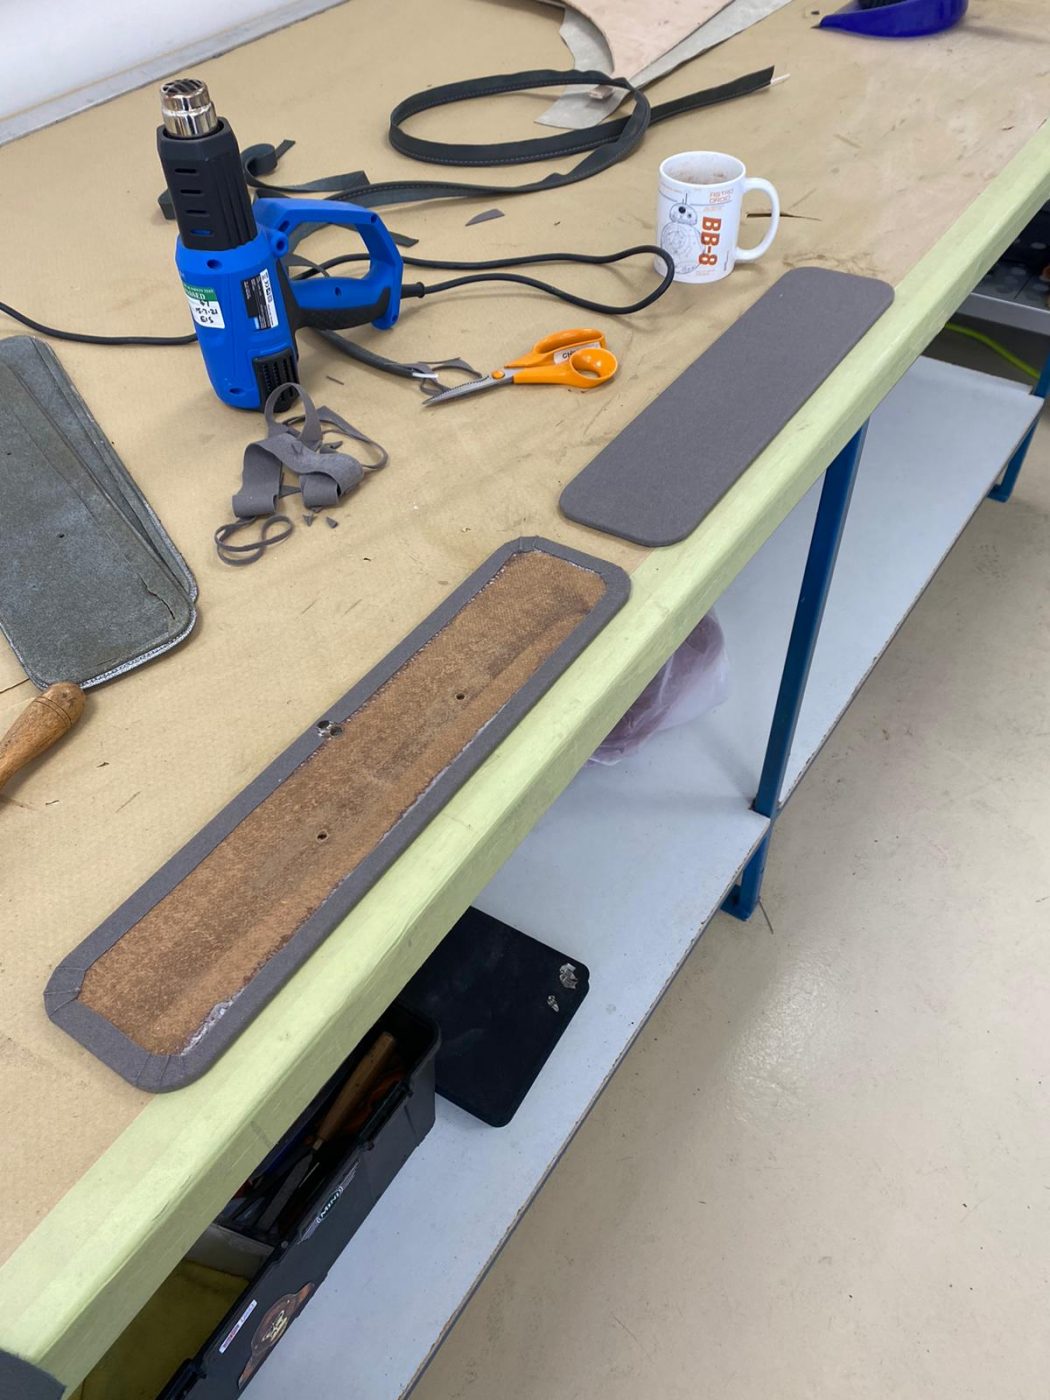
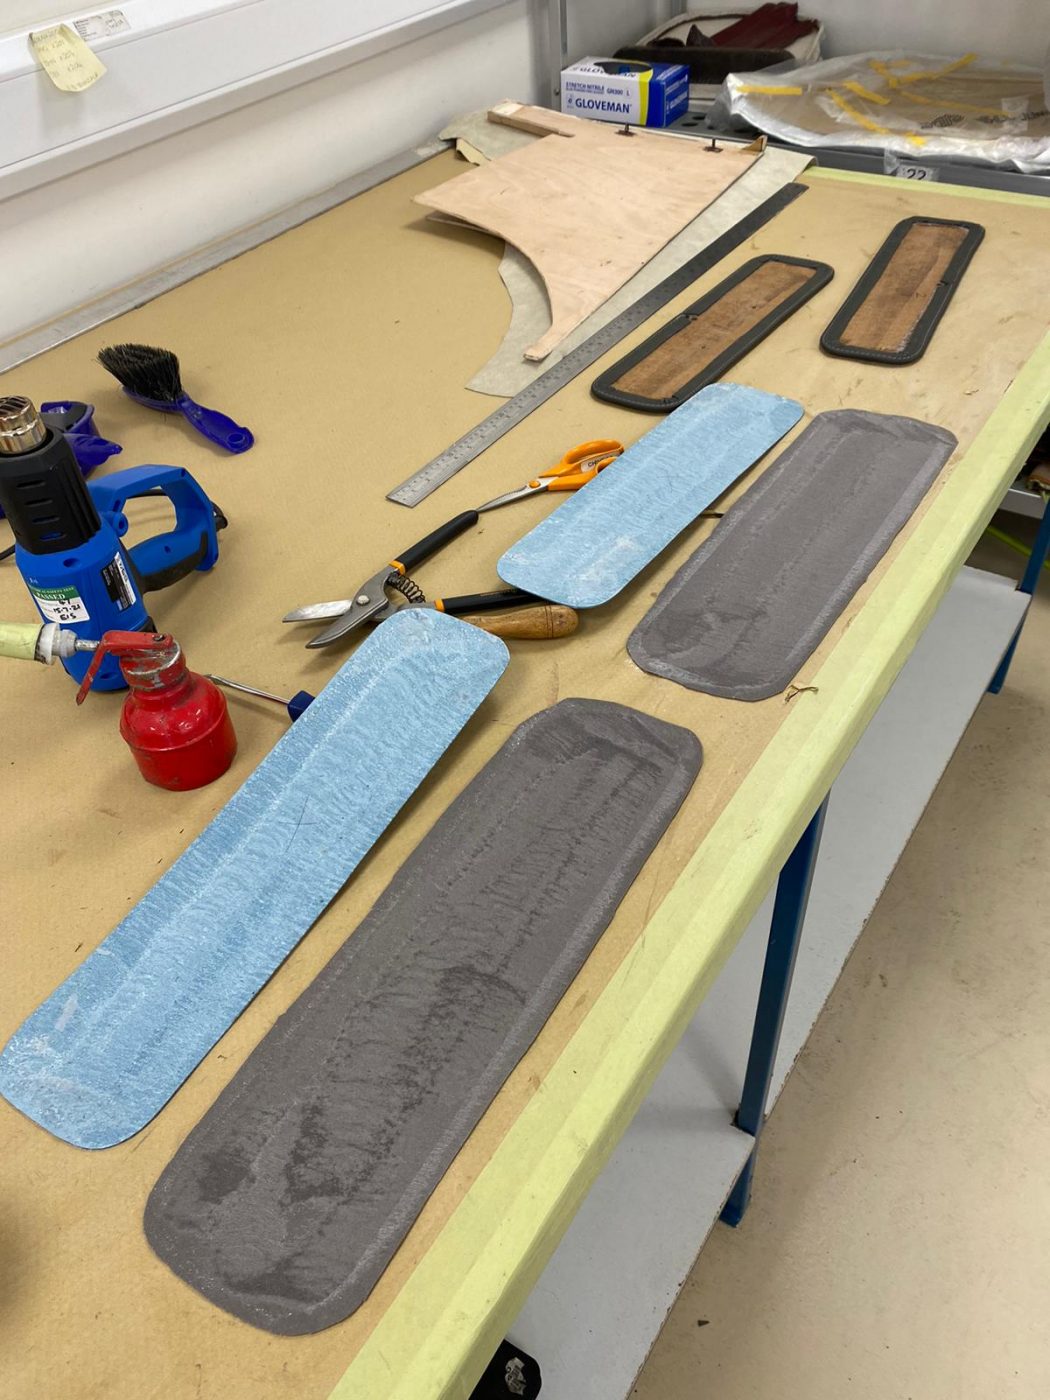
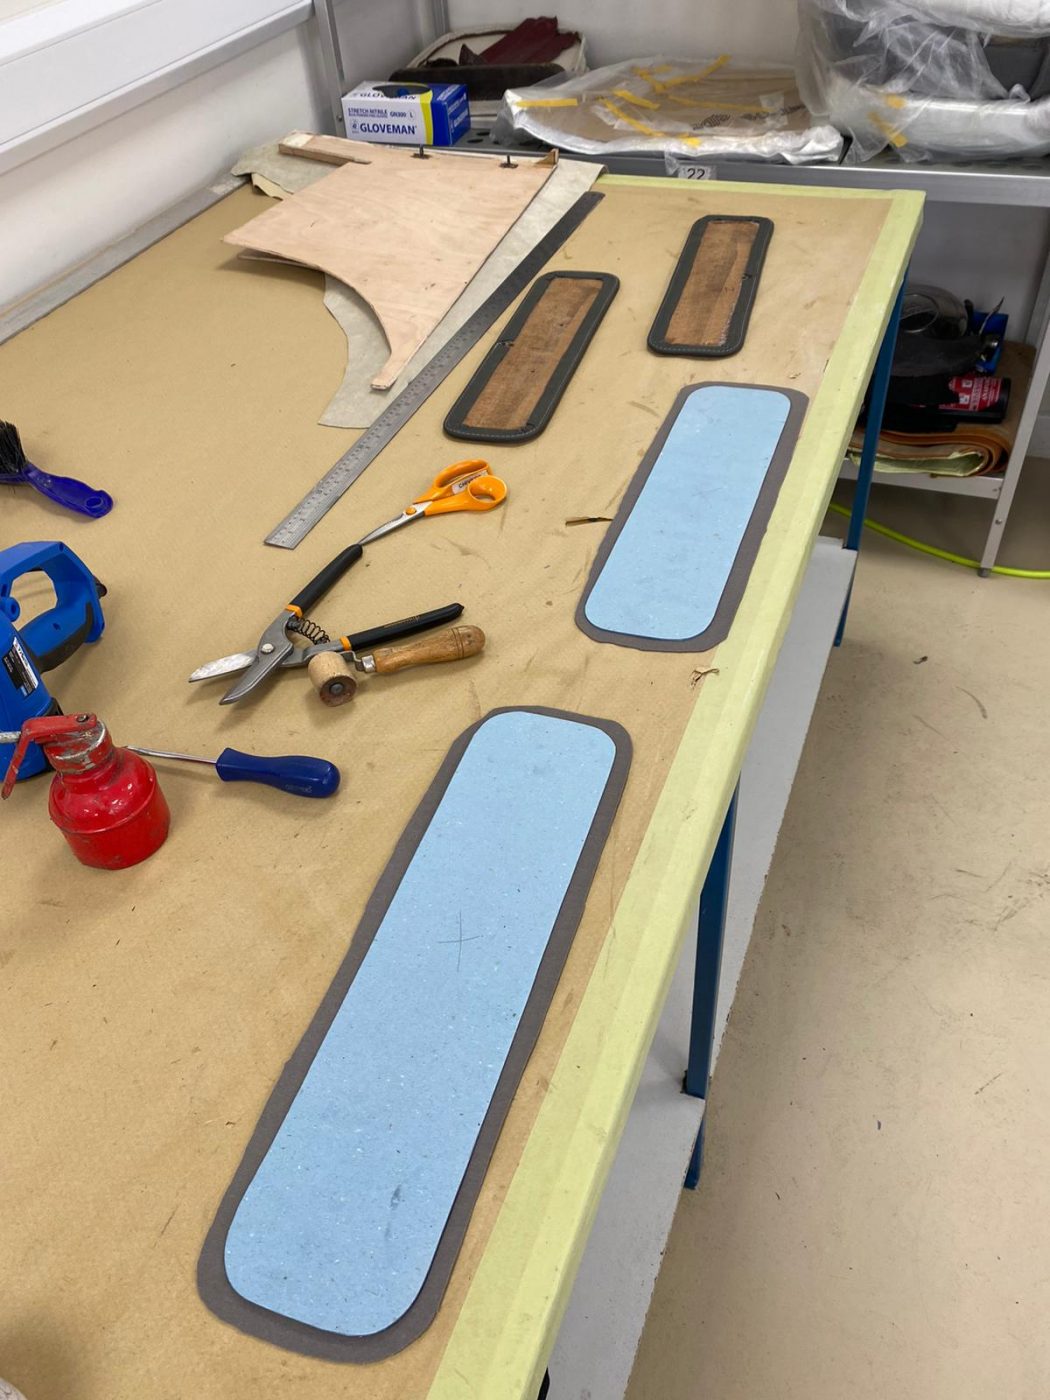
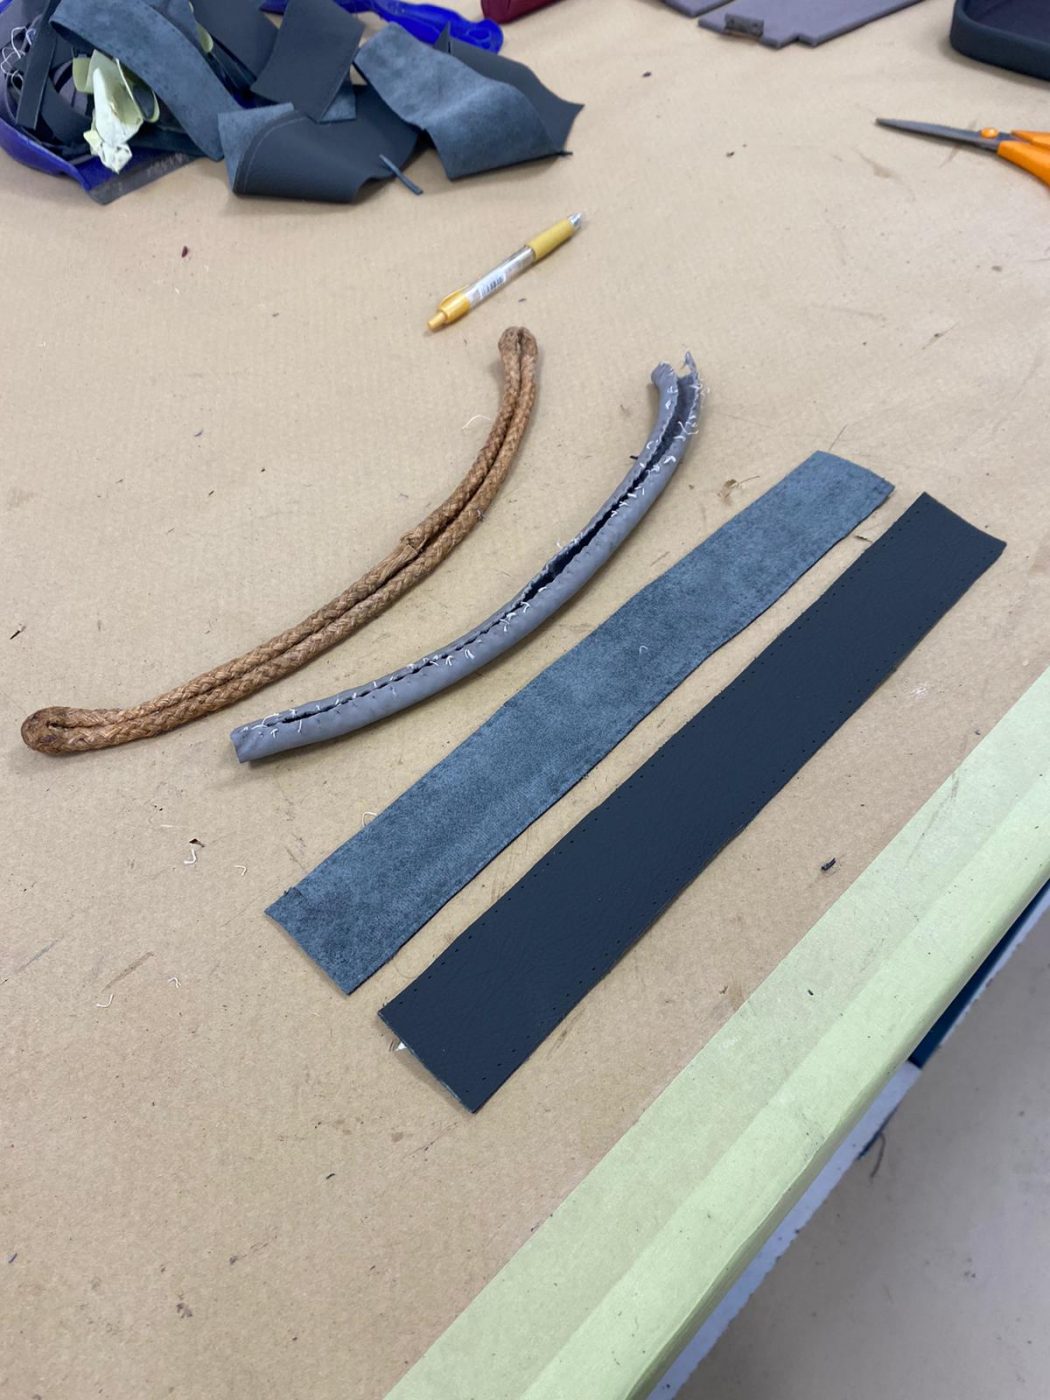
Brian has been re-covering these rear quarter backboards for the 1963 Bentley S3 Continental. They came to us as bare wood, without the original leather on. Brian put some poly-flex filler on parts where it wasn’t flat and sanded this down. He then cut some 3mm foam out for the top part and glued this onto the wood. New leather was marked out and cut out to cover this foam and was glued below the foam and underneath at the sides.
Brian has been re-covering a few more pieces for the 1955 Aston Martin DB 2/4’s interior.
The rear seat top panels have been done. He took the original leather off the wood and cleaned off any old glue that remained. He used the original leather covering as a pattern on the new leather to draw around and then cut out. Brian then simply had to glue the new leather onto the original wood, wrapping the leather around the edges and sealing underneath to provide neat edges. This panel will sit on top of the rear seat once in the car, which just provides a cover so there isn’t a gap. If you think of a modern car and its parcel shelf, that’s the position this will be in.
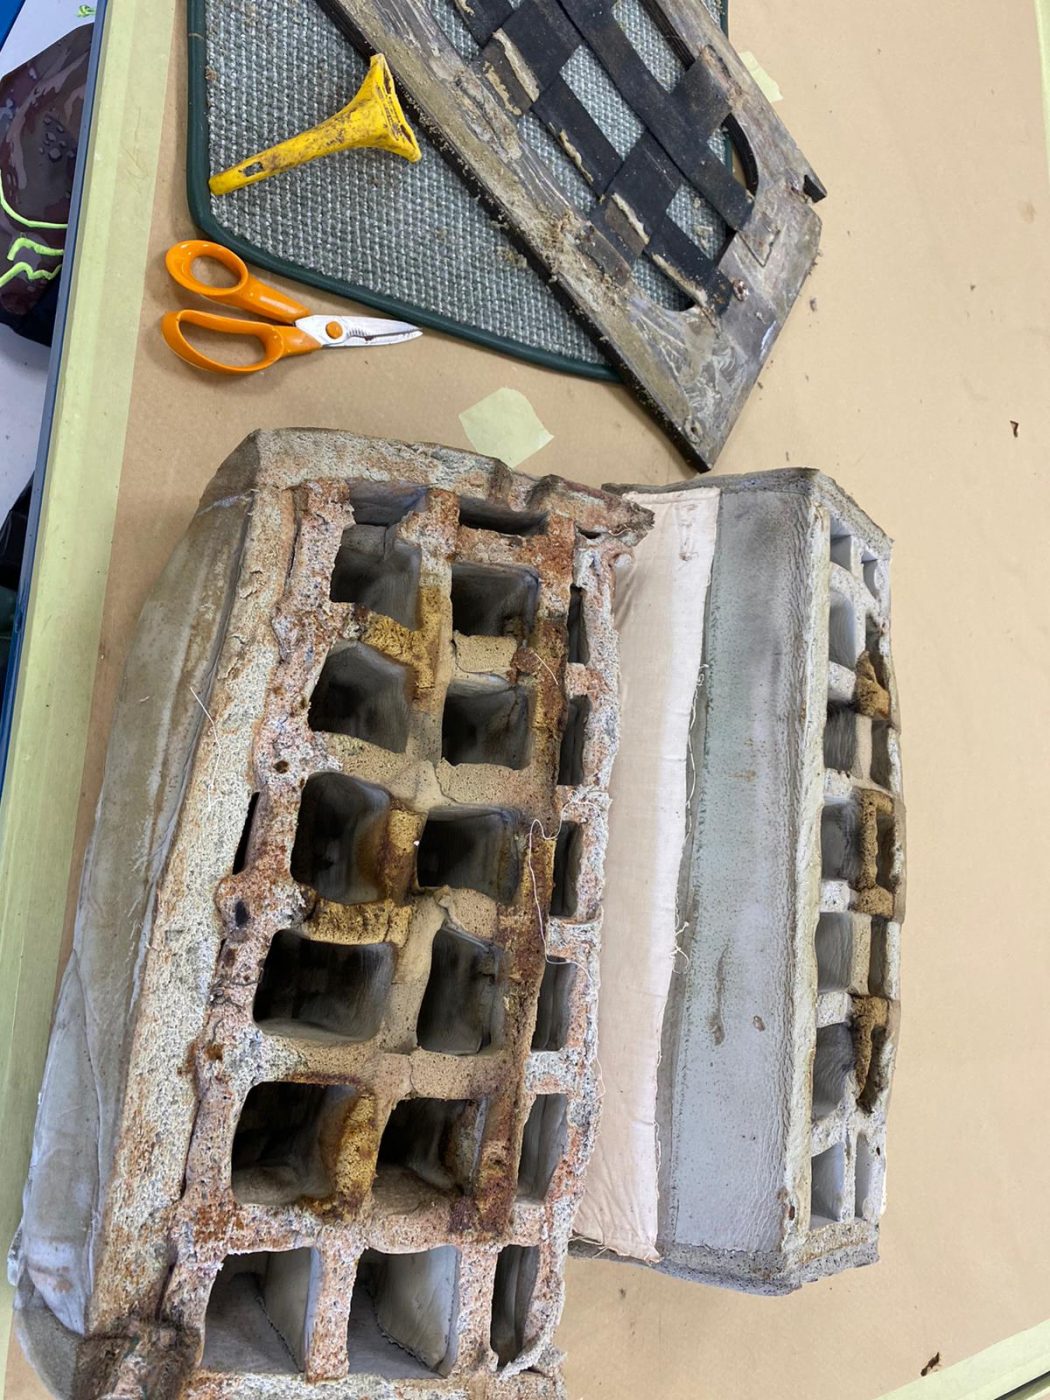
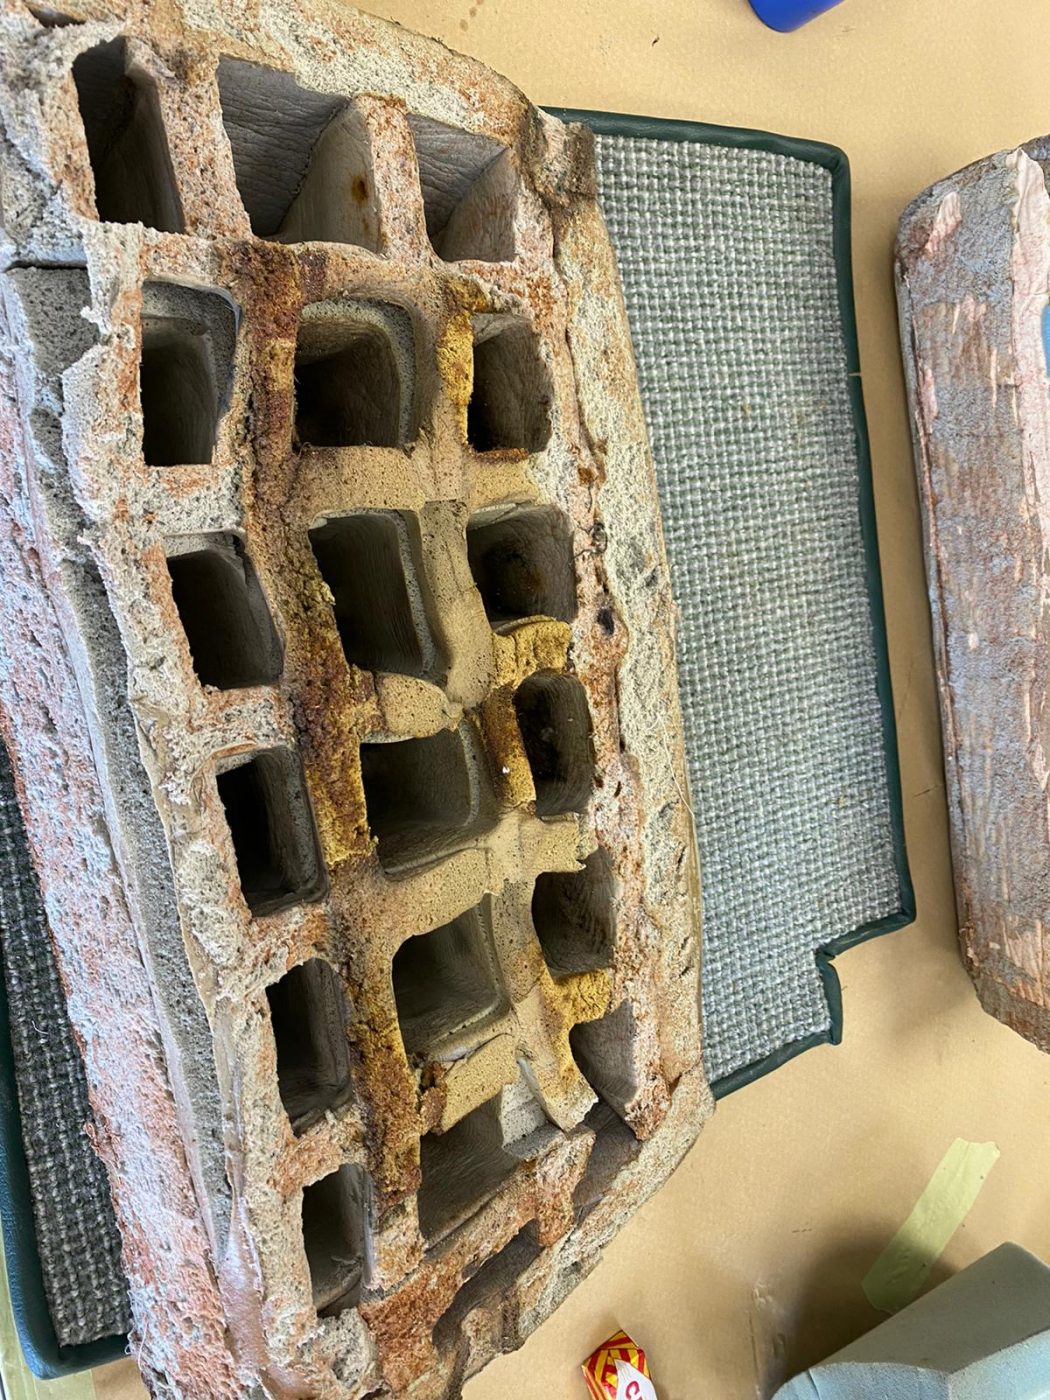
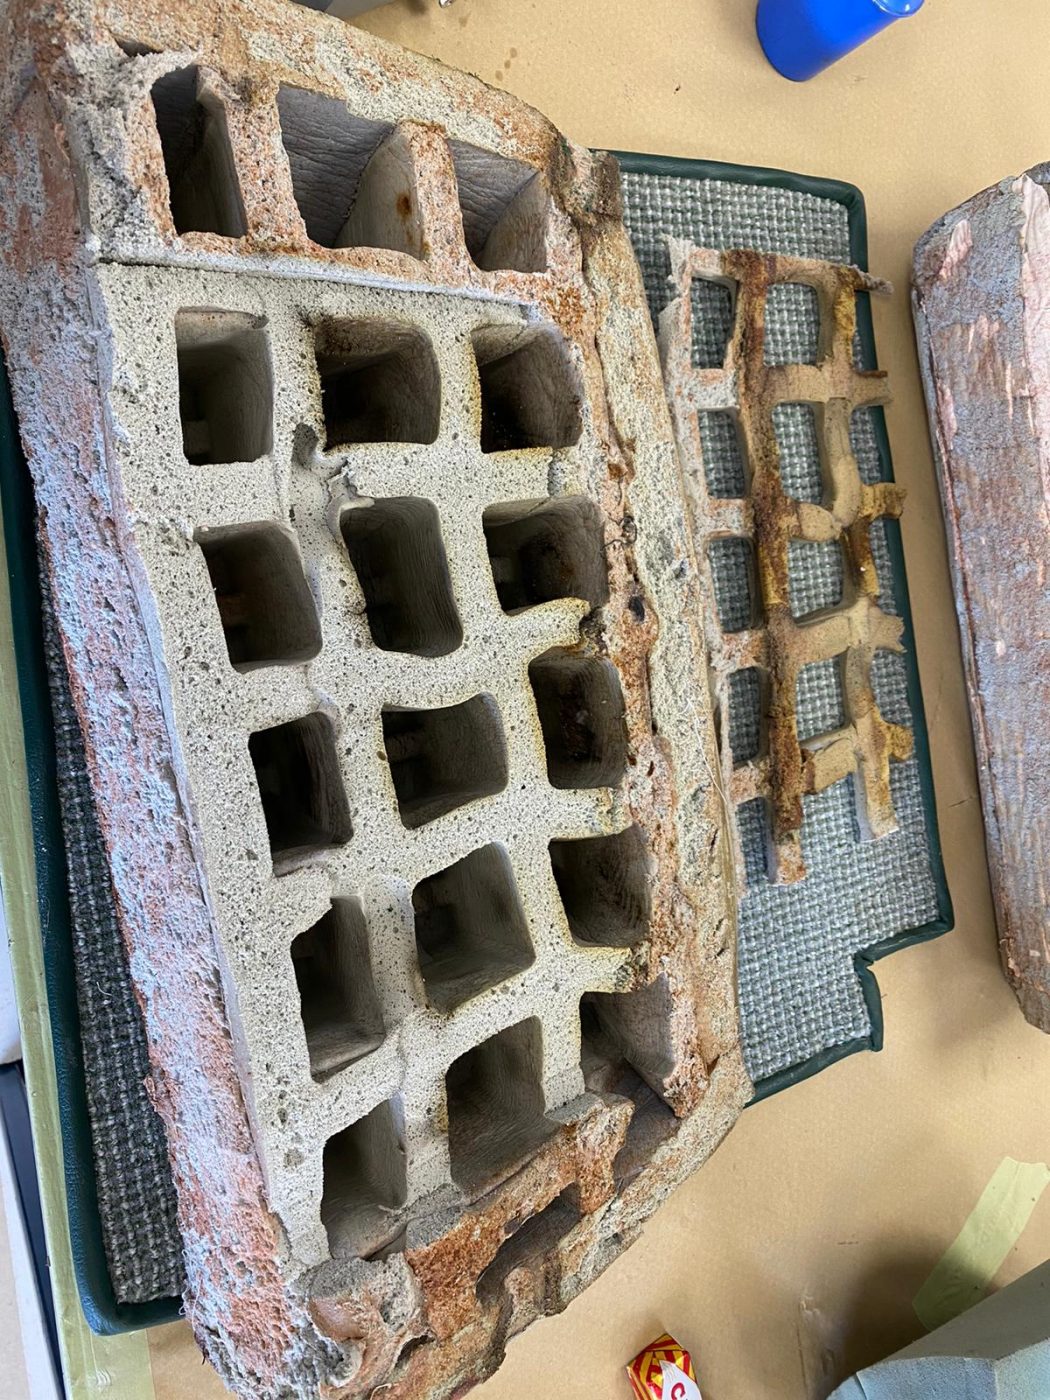
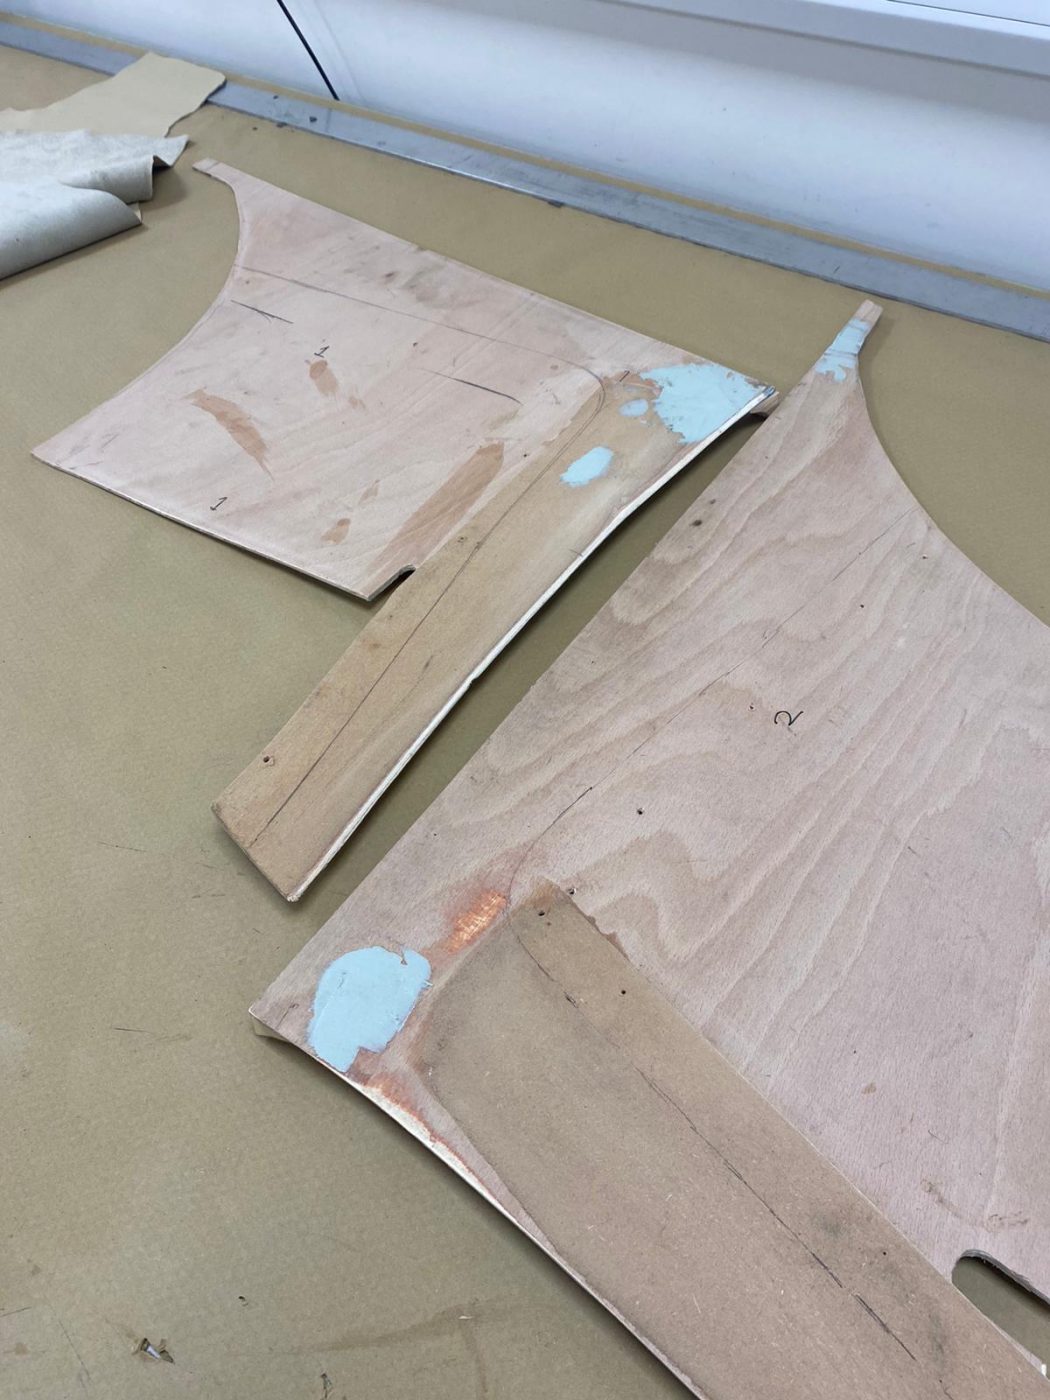
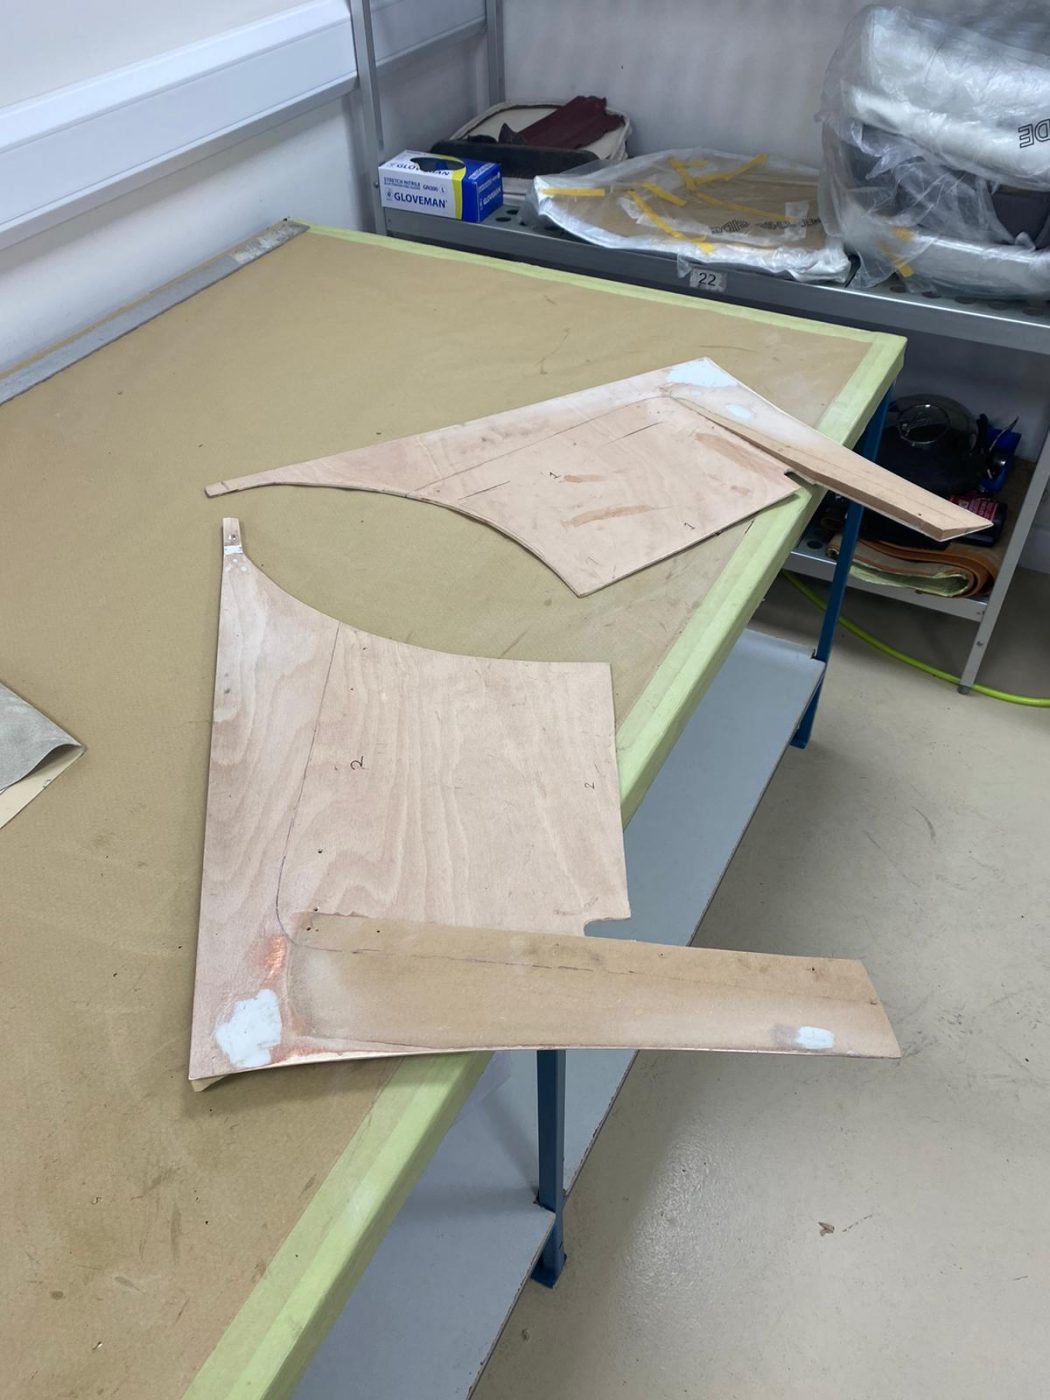
The sun visors have also been recovered. Brian started the process by taking the original material off the boards that formed the sun visors. He then used these boards to work out the measurements of new fabric he needed to cut out. He cut out new boards and then glued the new headlining fabric to one side and wrapped around the edges, sealing in place. Brian trimmed down the flange down one side on lengths of piping and glued it to the inside edge of one board. He then attached the other side of covered board to finish the sun visors.


Coming soon we have our beautiful 1989 Porsche 911, in for some preventative corrosion repairs and remedial paintwork. The window will require removal and the rust patch dealt with before a rear section re-paint.

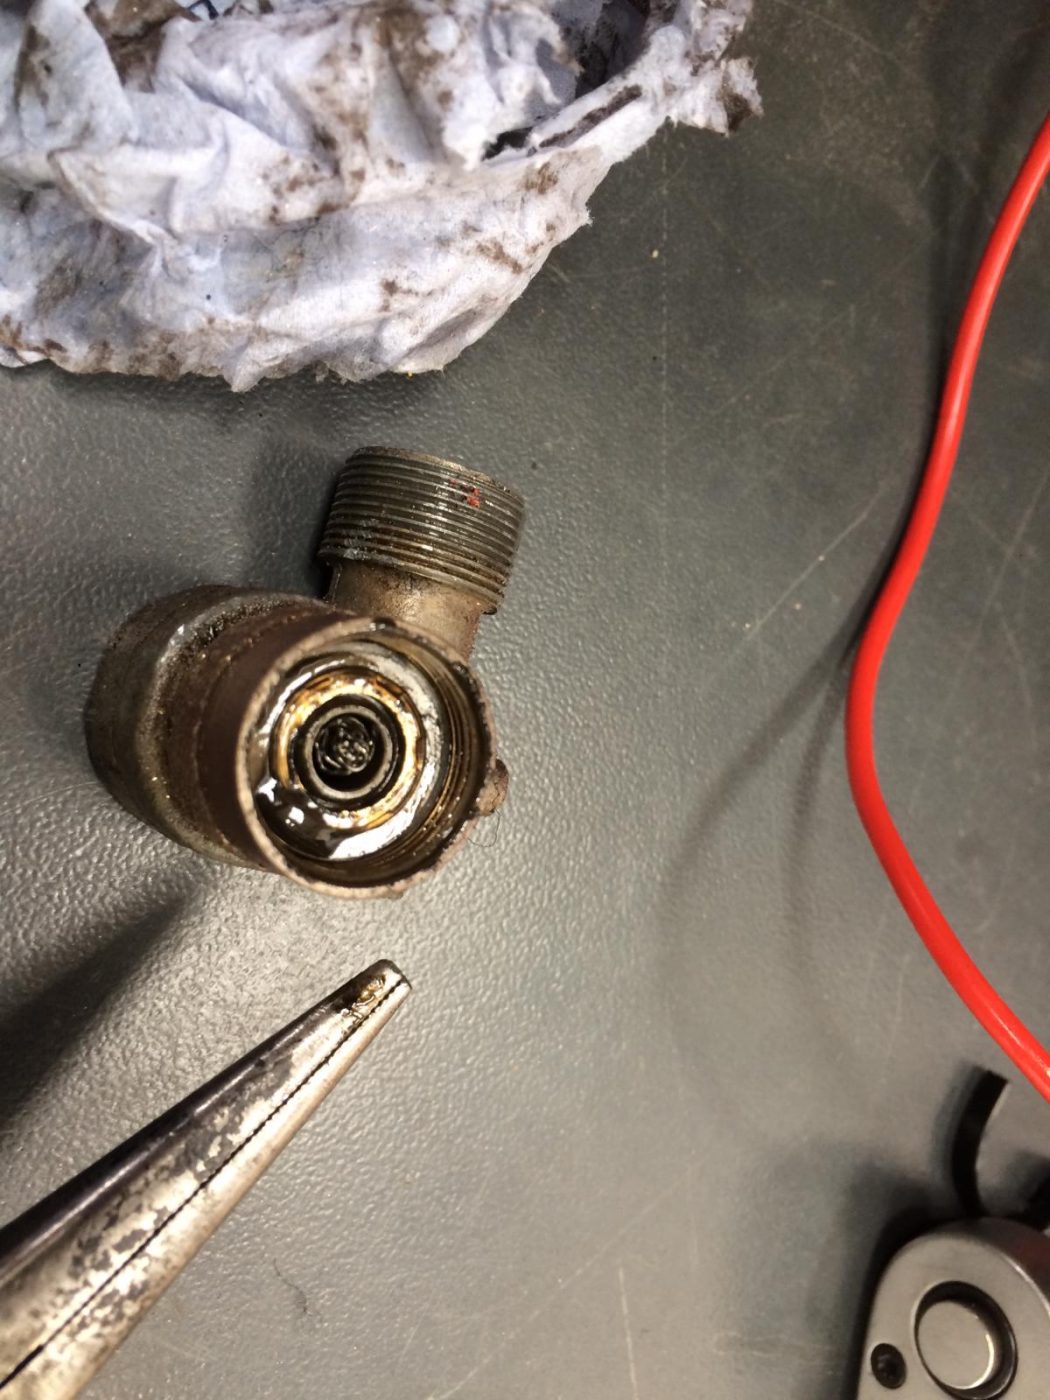
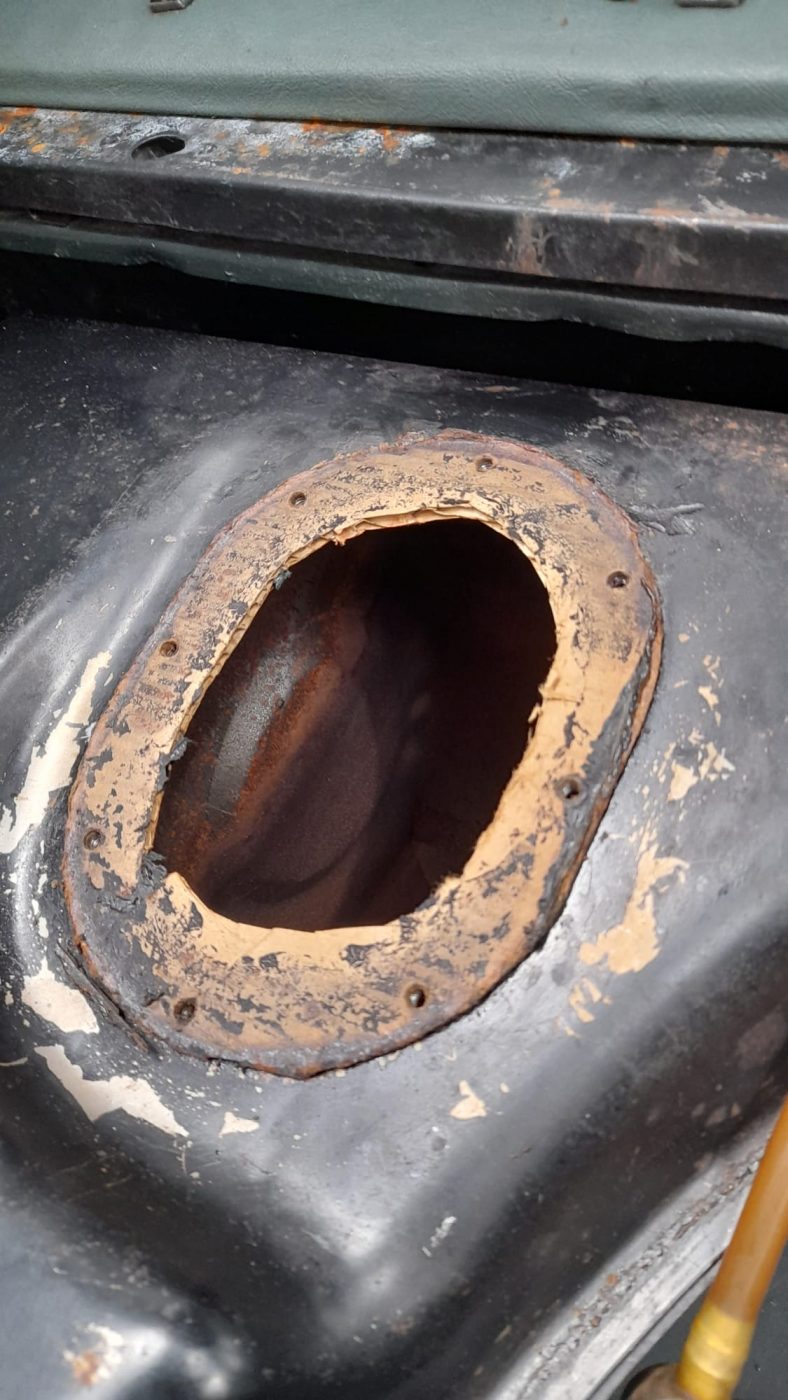
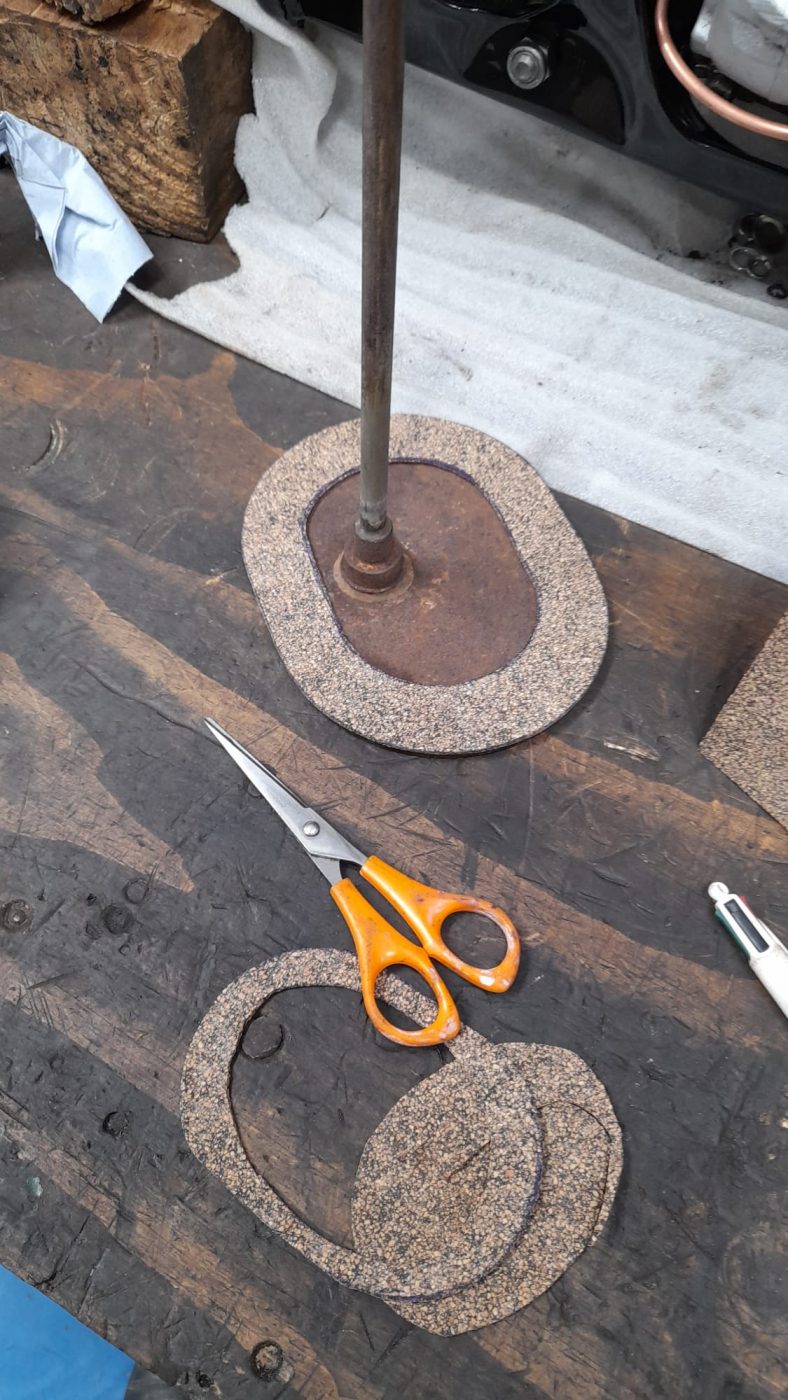
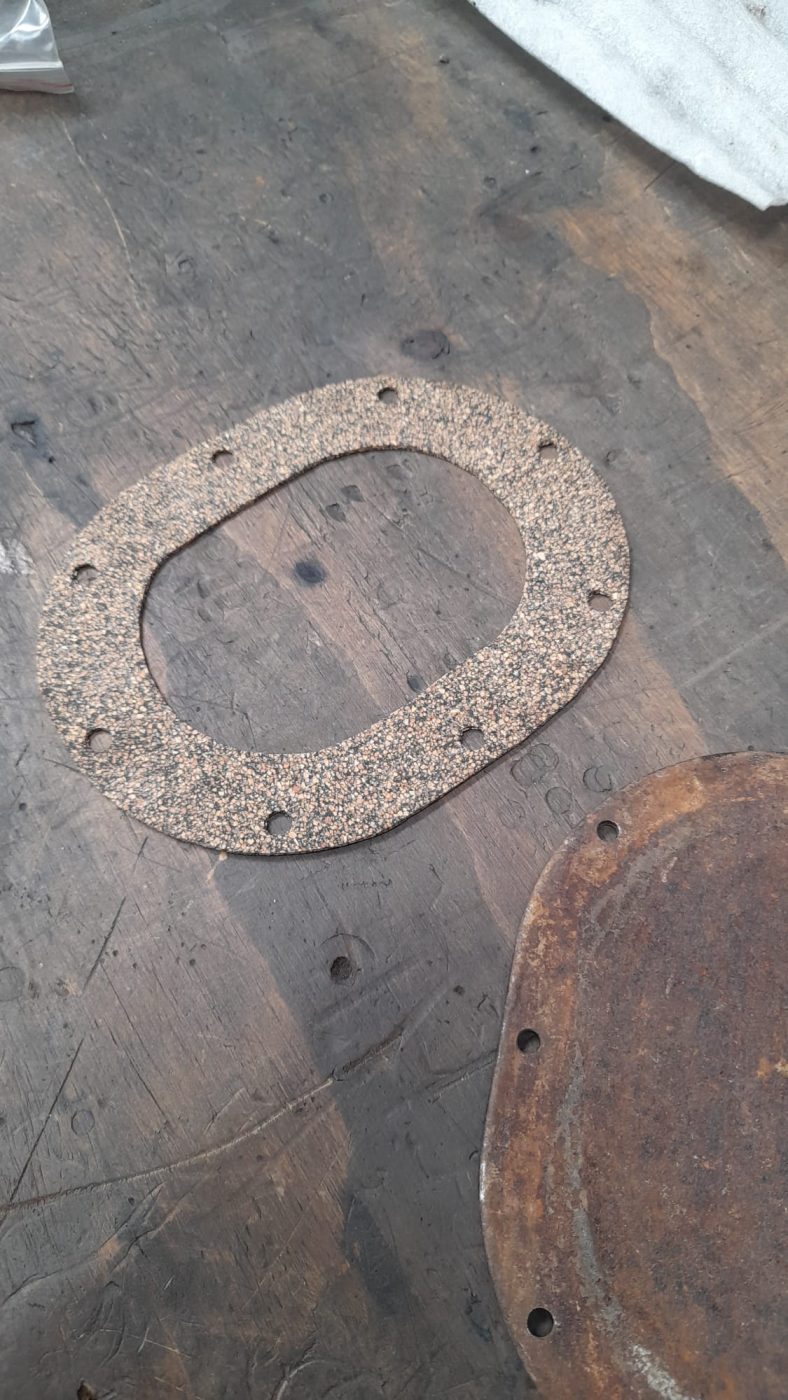
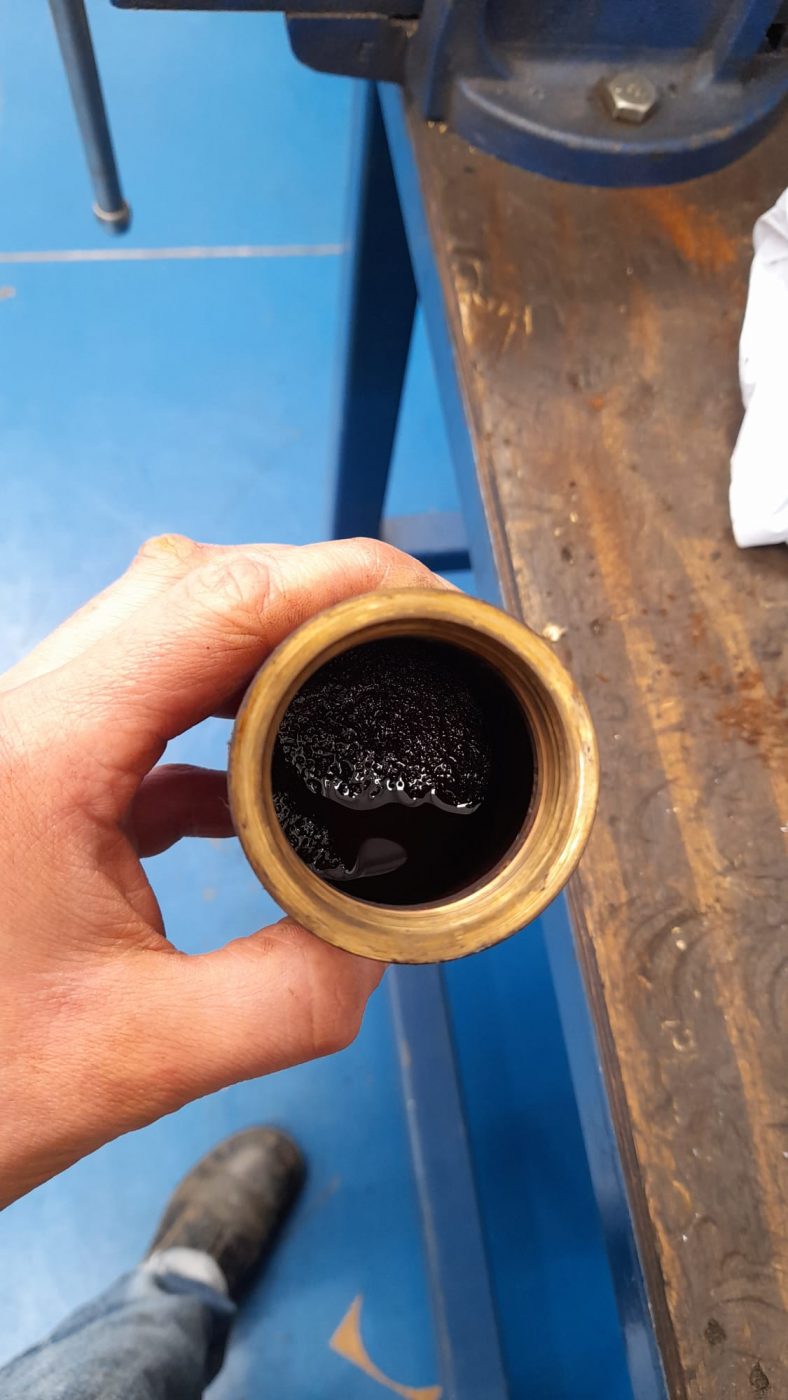
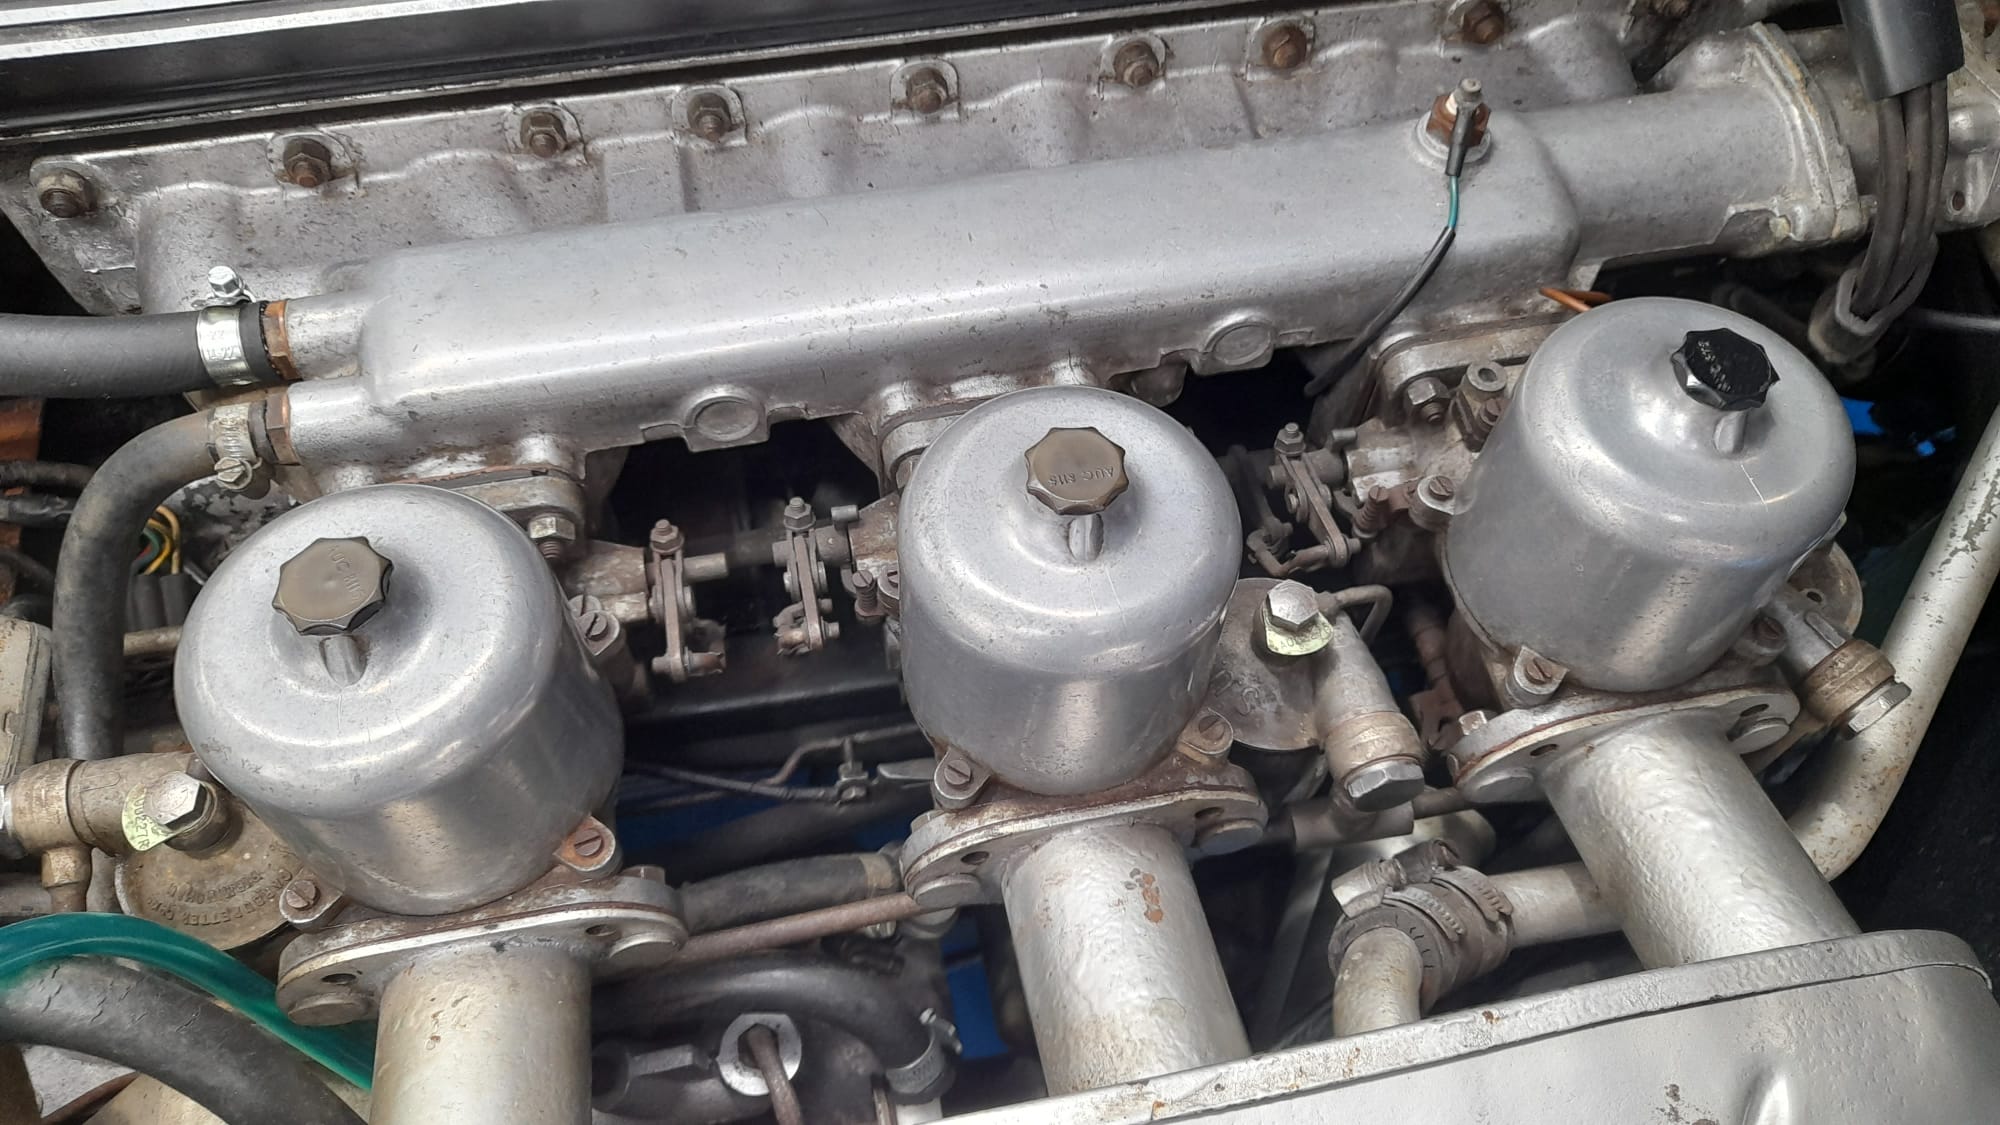
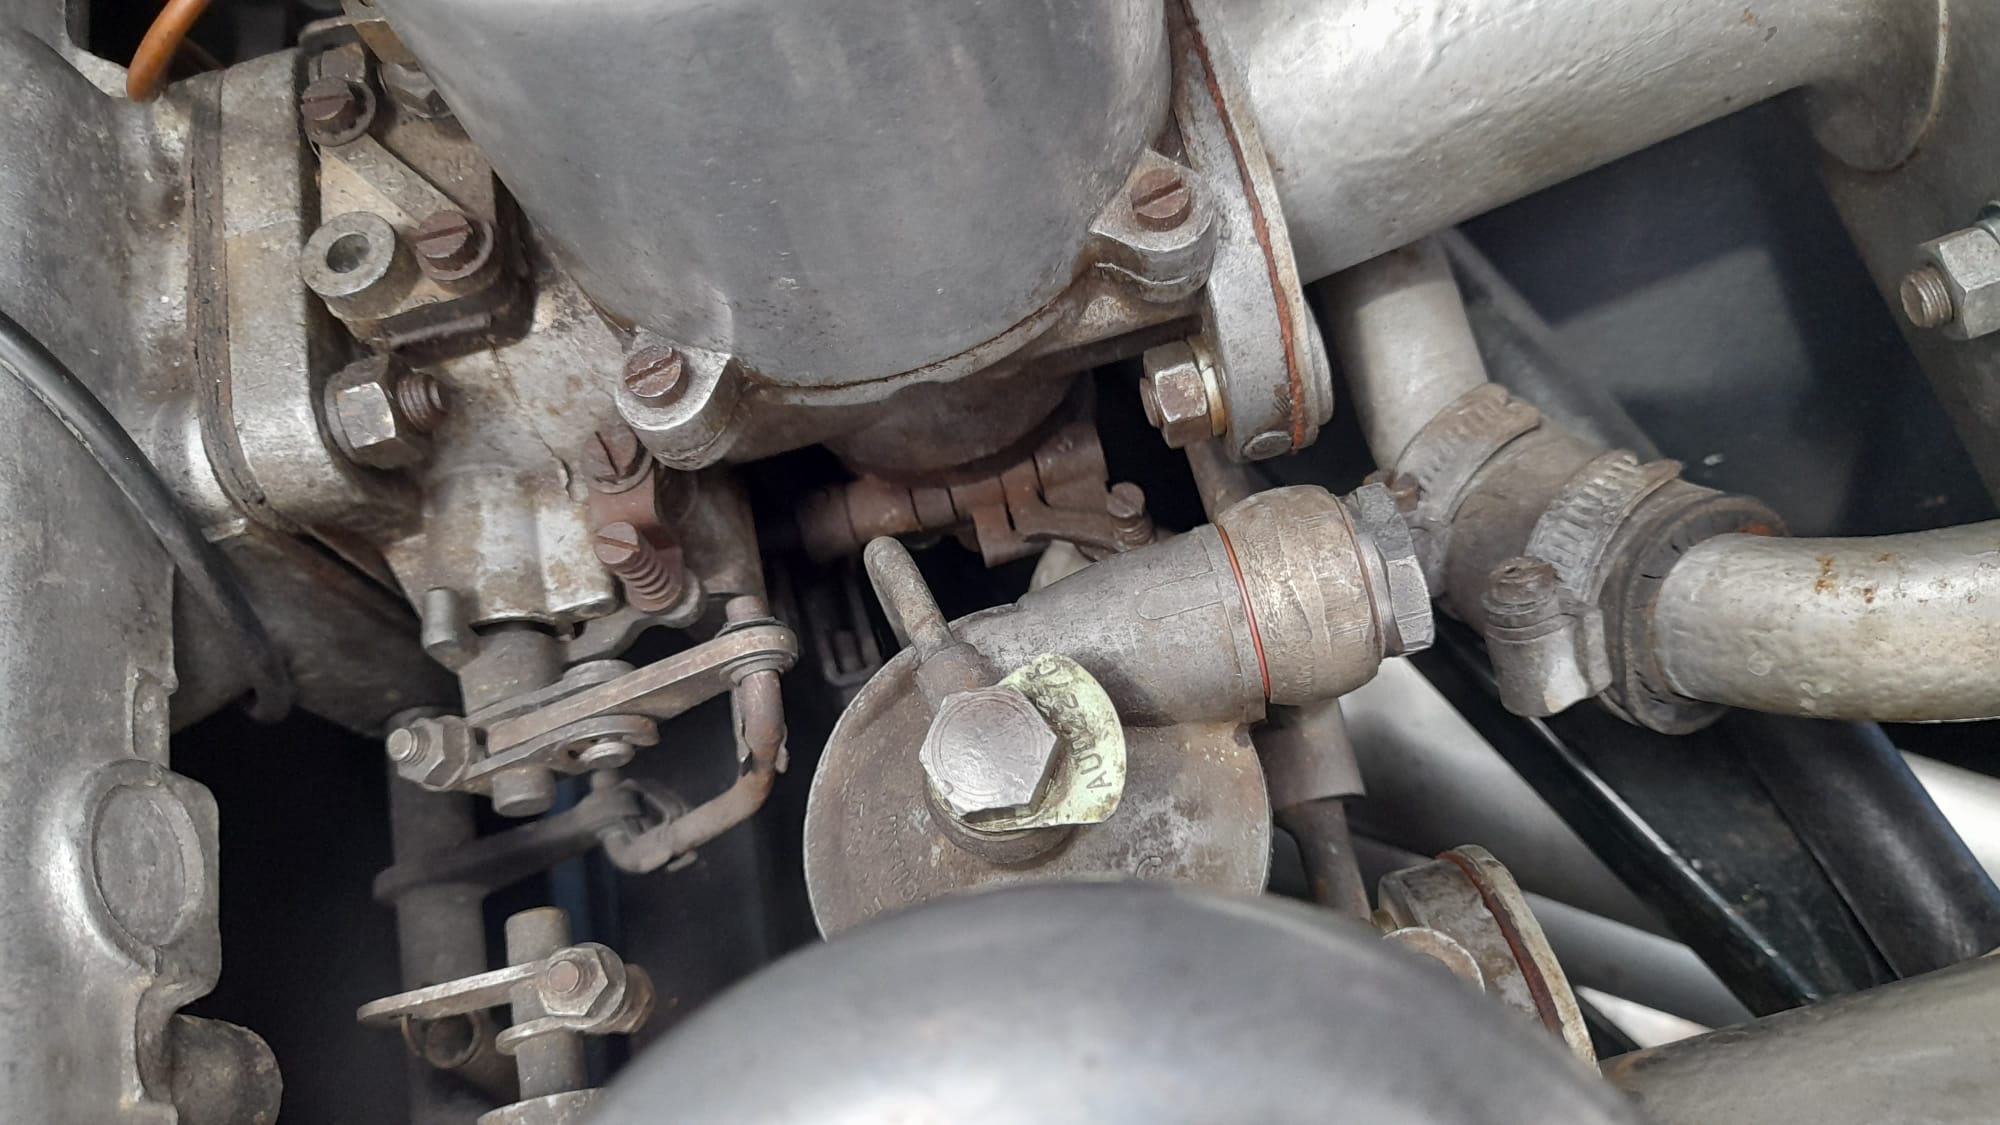
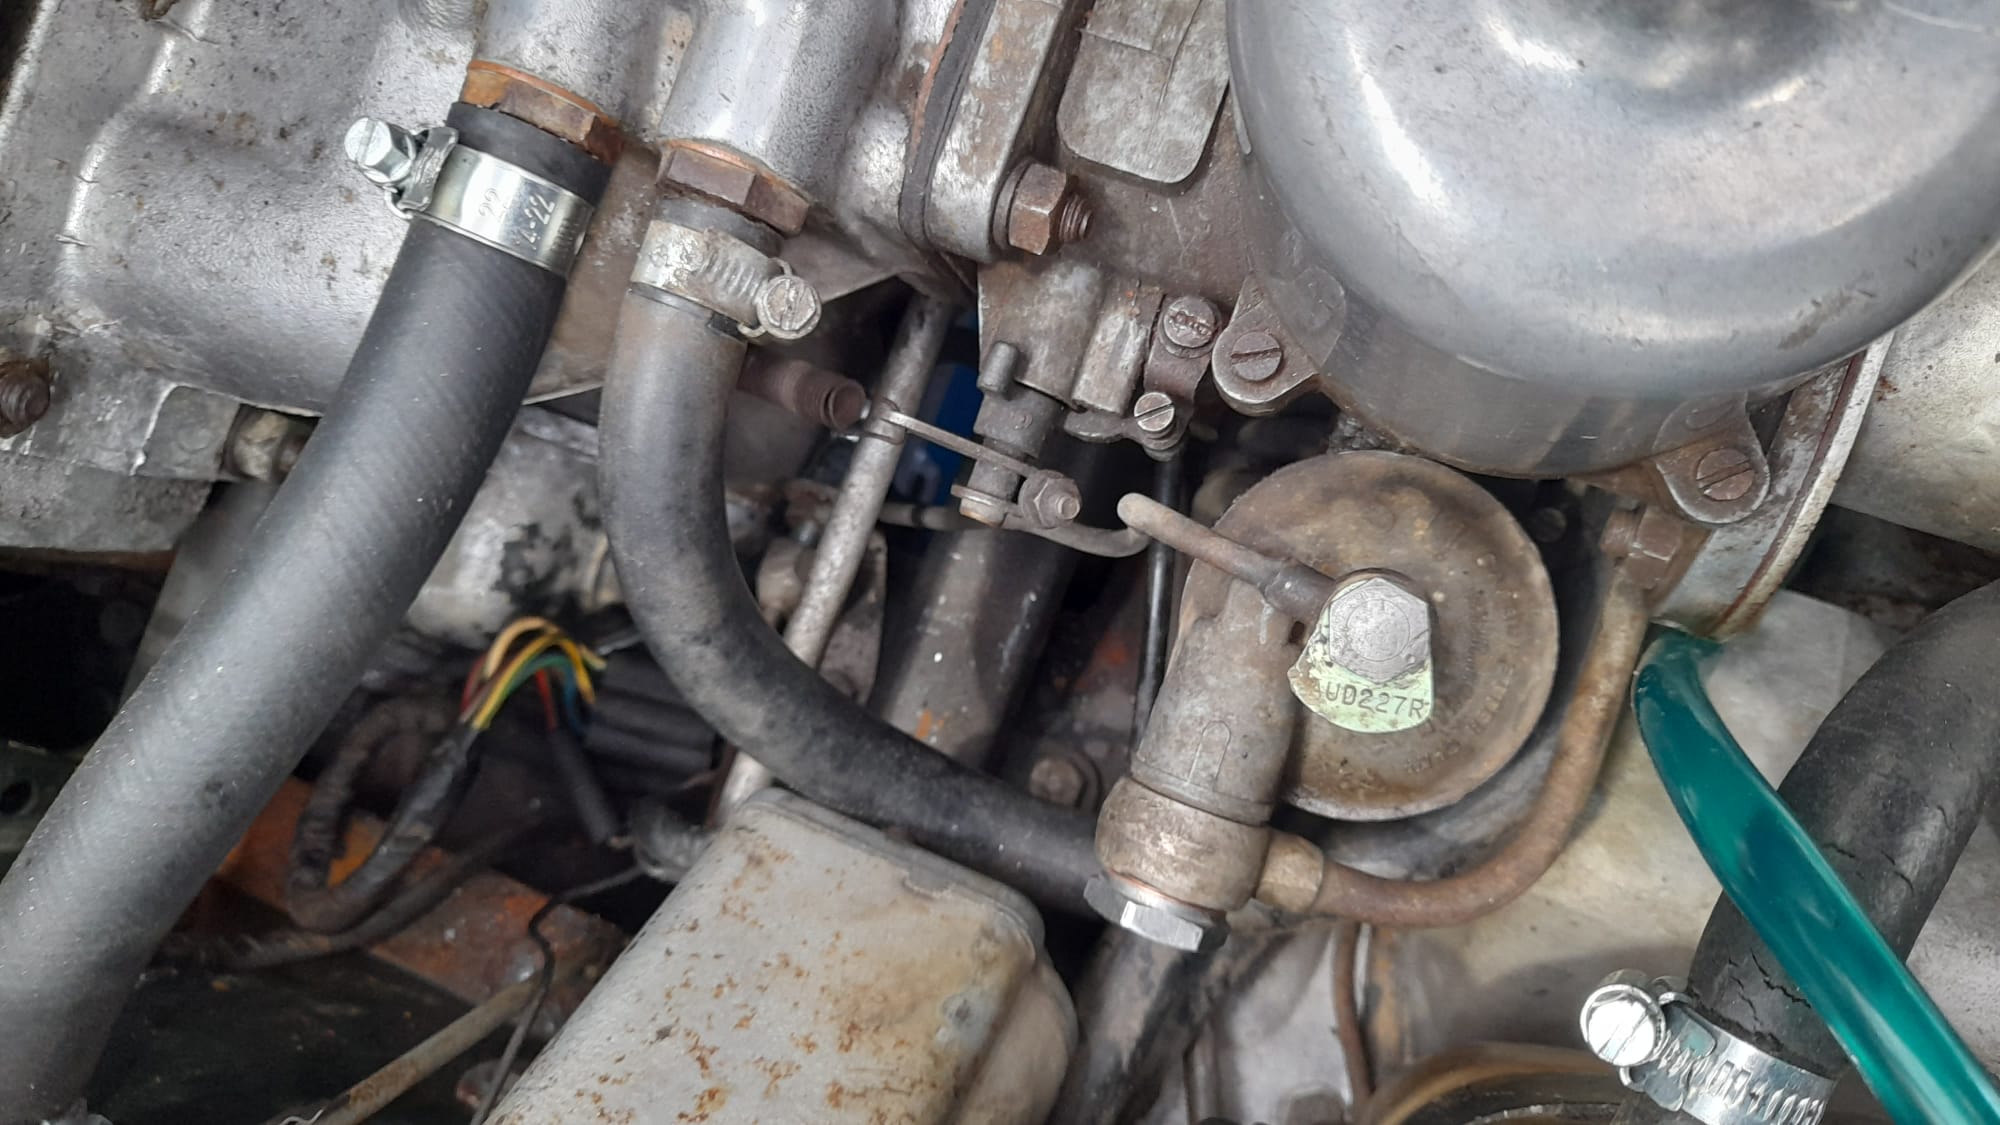
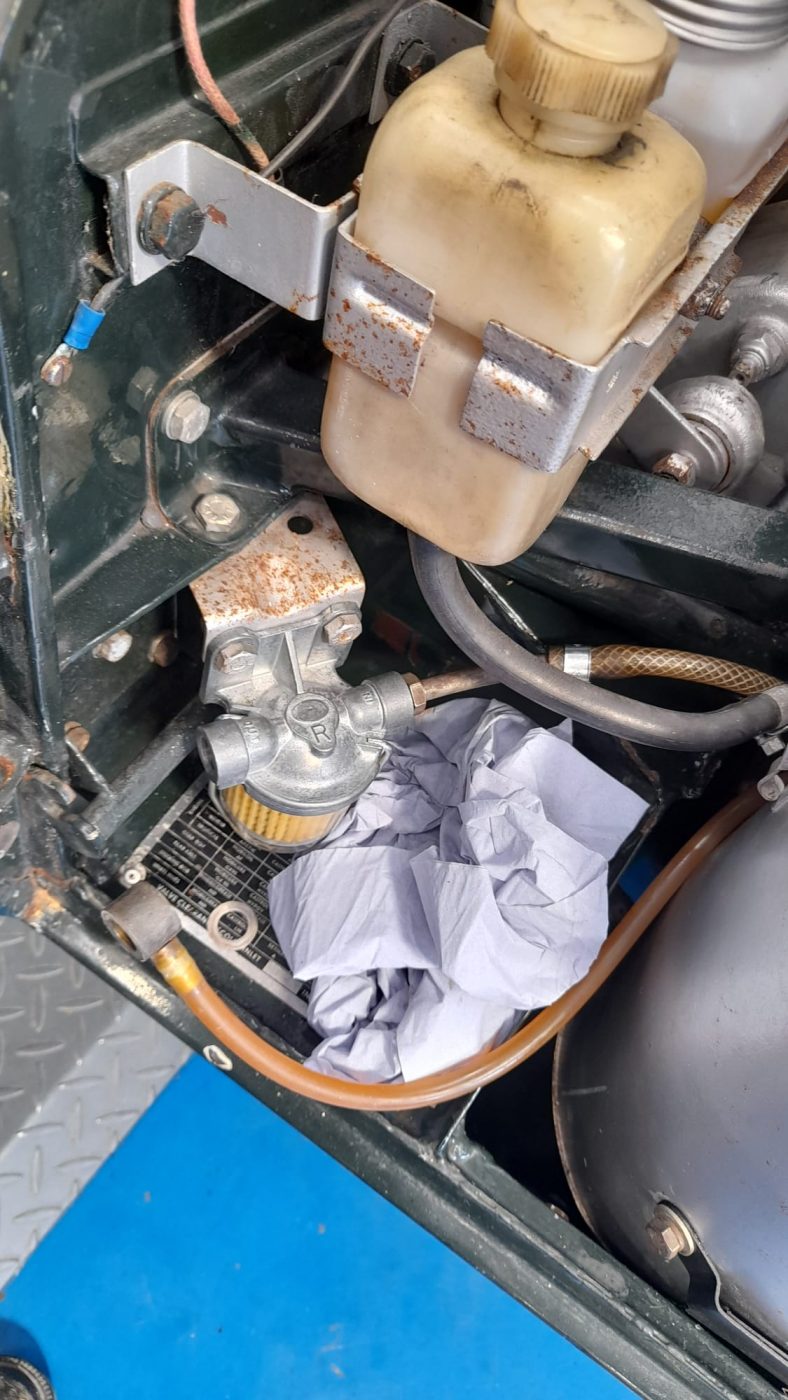
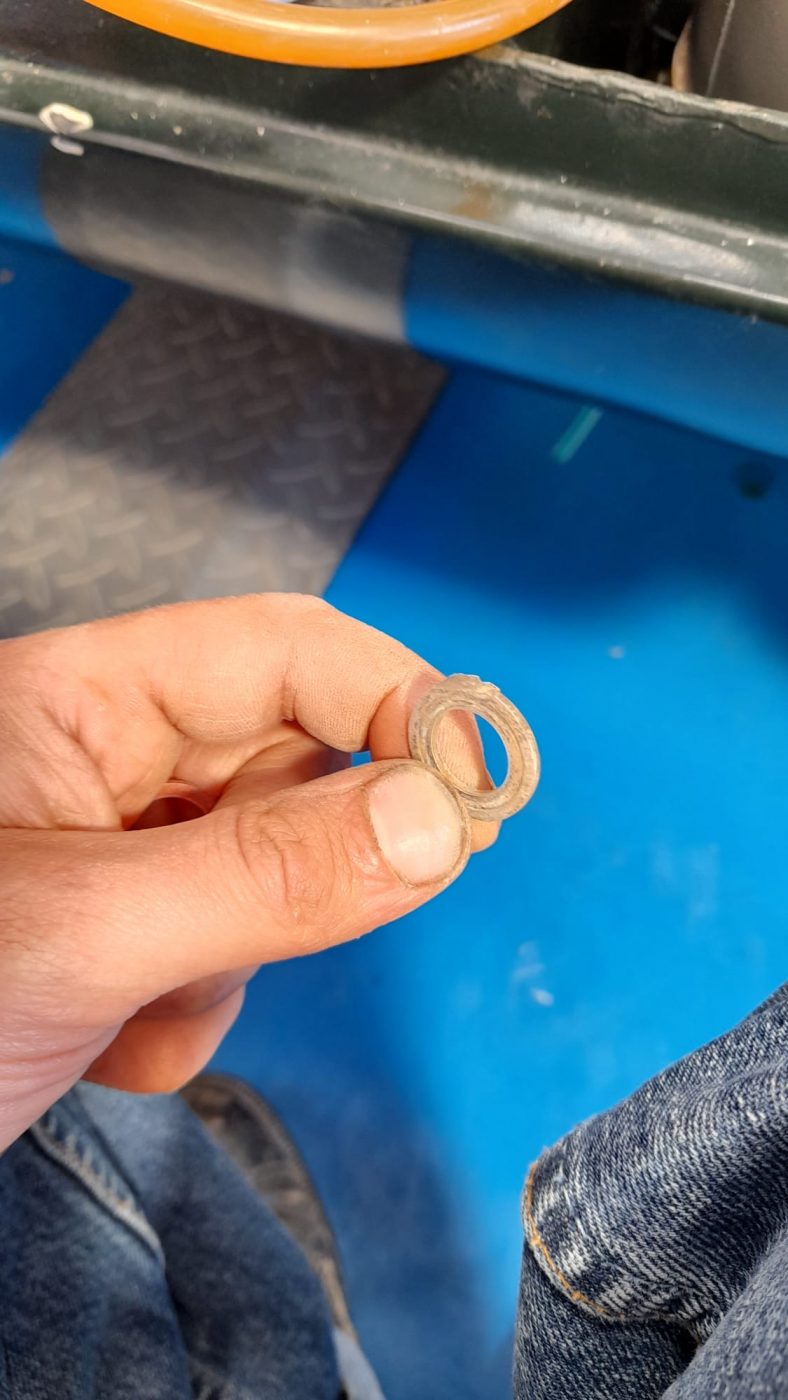
Scott’s been sorting the fuel system for the 1968 Jaguar E-Type 1.5 4.2.
There was a smell of fuel in the car, which he tracked down to a bad gasket between the pick up pipe and the tank. The gasket had been made from a corrugated cardboard box, would you believe it! So Scott went about making a proper gasket made from cork. He then cleaned out the pick up well in the tank because it had a load of sediment in. The sender unit was also cleaned and was re-fitted. The fuel system was then flushed through to get rid of any bad stuff that was in the lines. Scott then plumbed it all back in and checked for leaks. He found that it leaked at the filter and one banjo union on the centre carb. Also, the float had got stuck on the rearmost carb, which meant it was overflowing. So the float level was adjusted and all is working fine now.


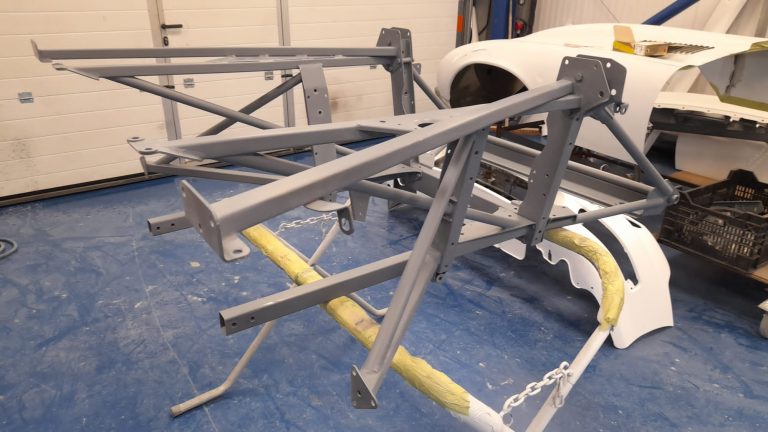
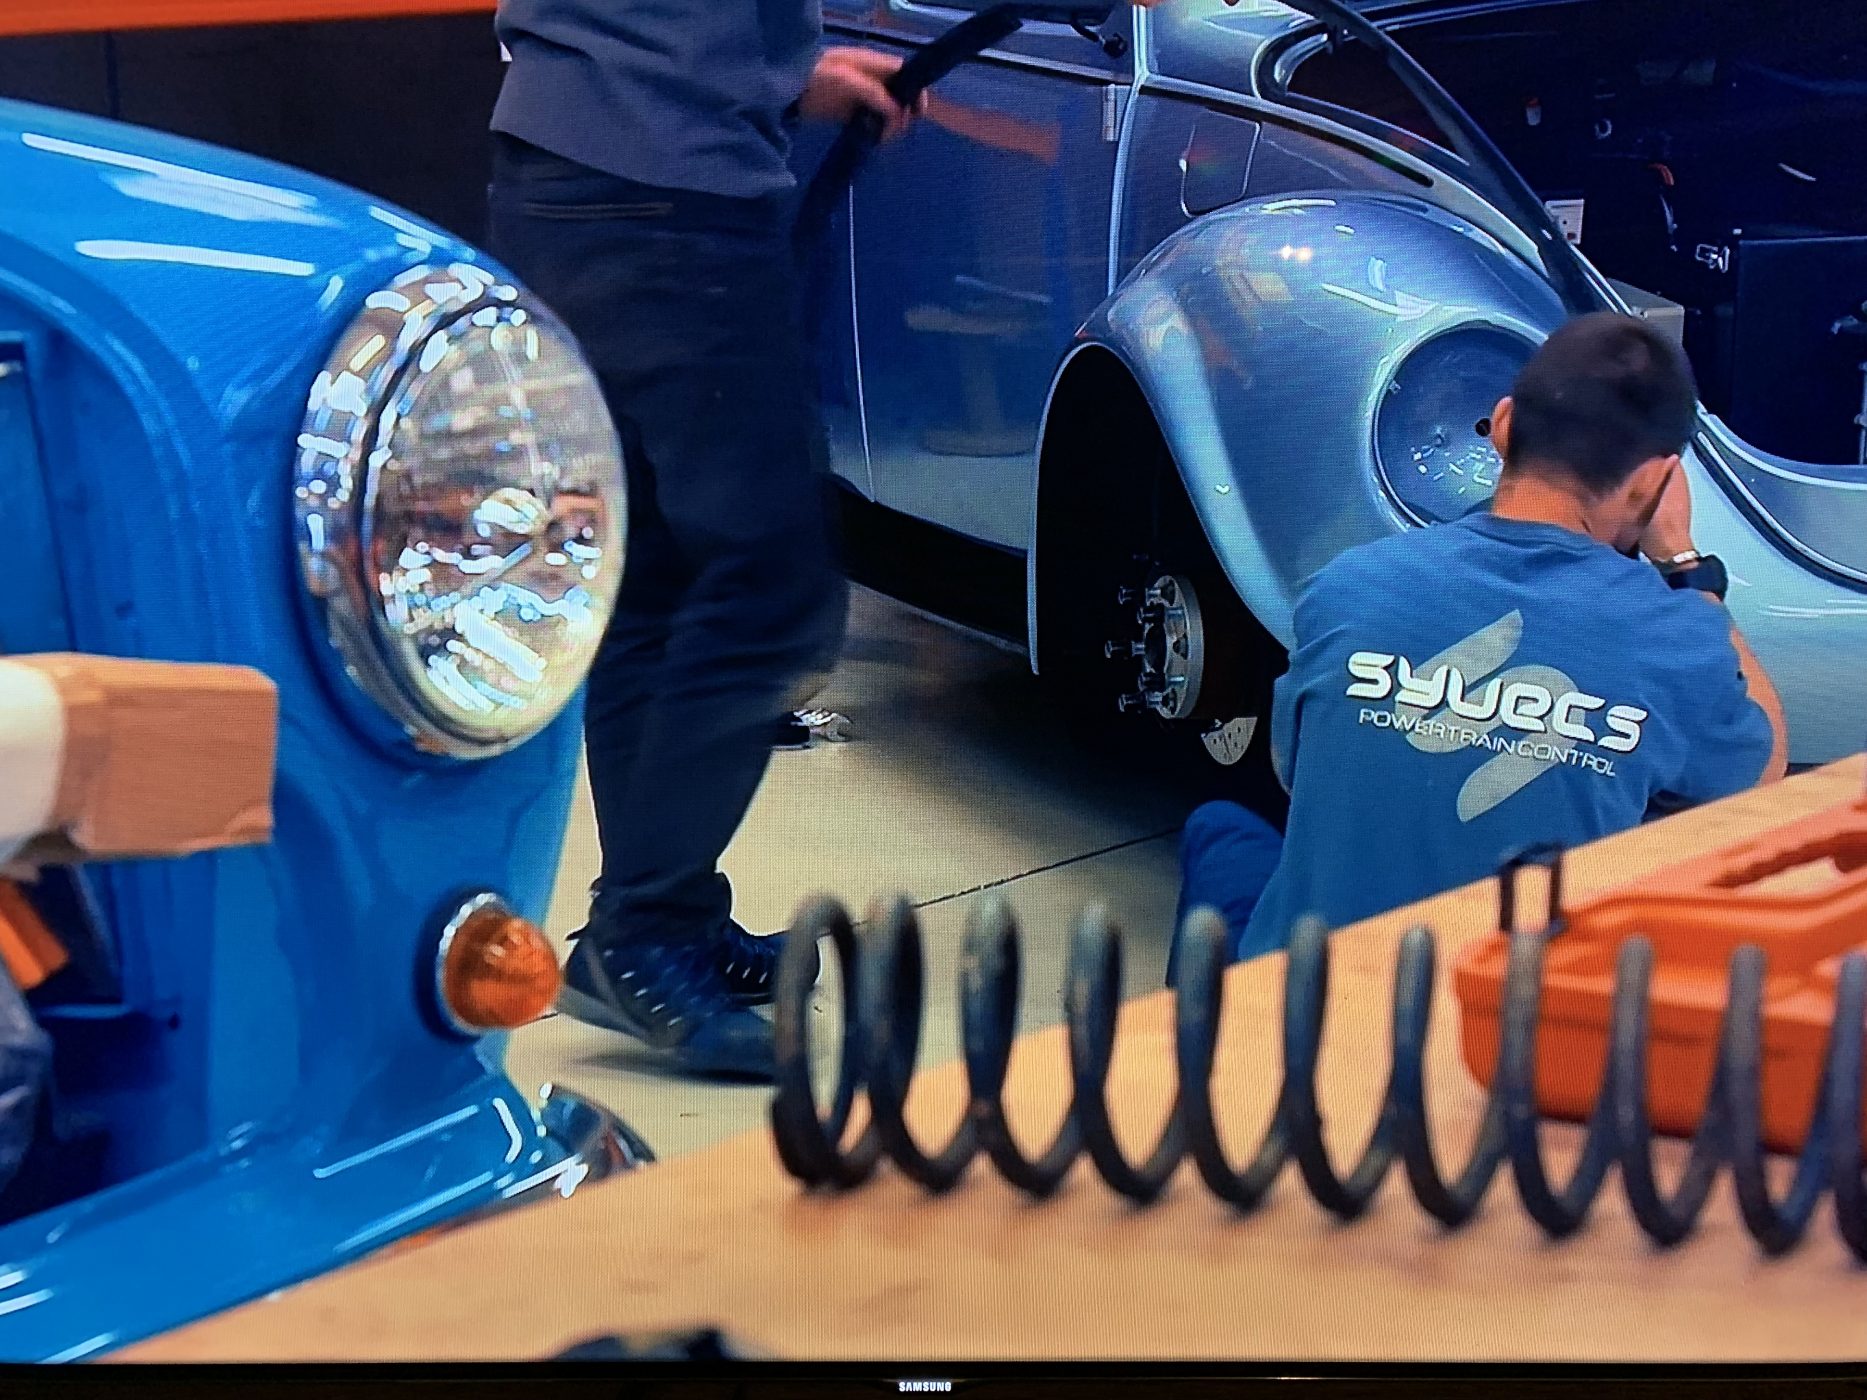
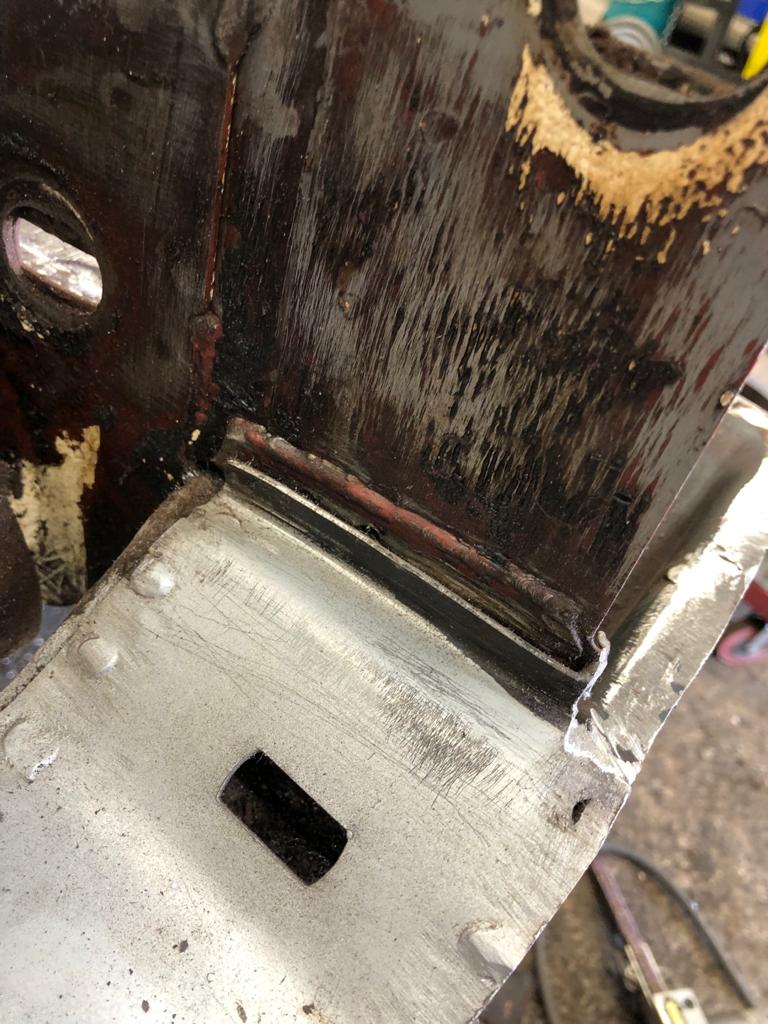
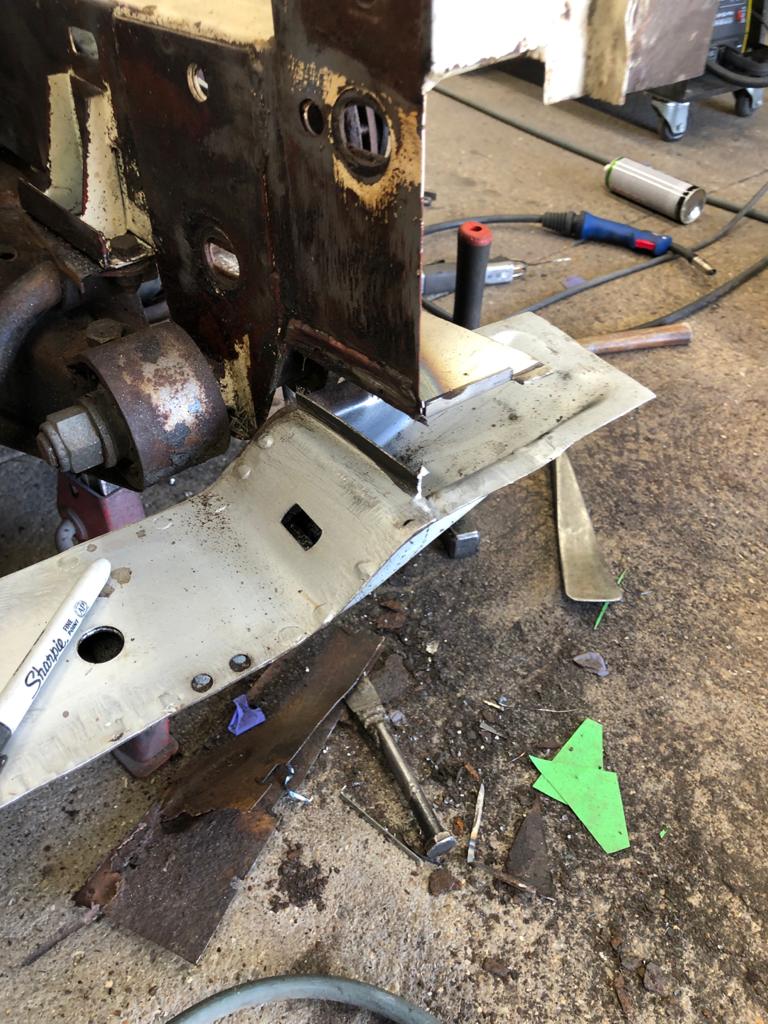
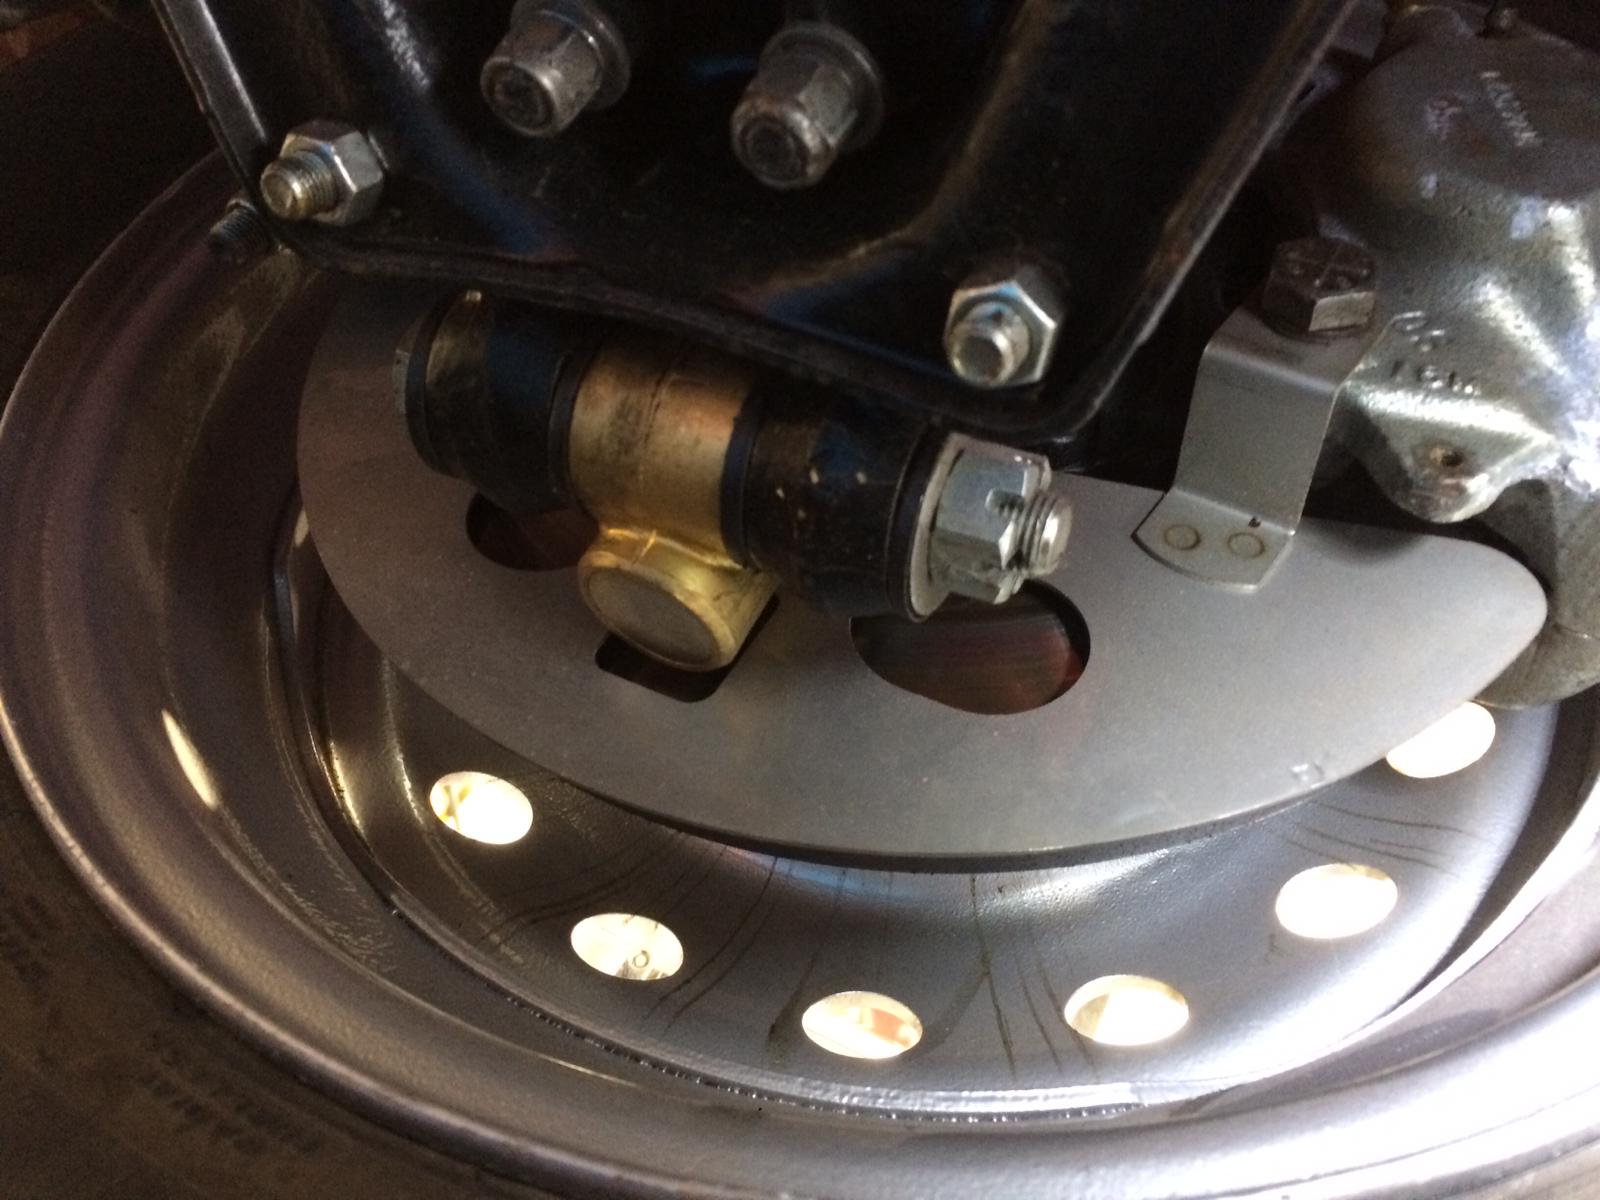
Now that the 1979 Arrow Ferrari Daytona is back in the workshop, Scott’s been straight back to work with it. In these photos you can see he’s started to reassemble the rear axle back together. An interesting point to make with this car is that the discs are on the inside of the rear axle rather than on the actual wheels.

Just a quick update here to show photos of the 1973 Jaguar E-type Roadster Series 3’s hood frame that’s recently been painted by Chris in the paint shop.

The radiator has been removed and sent away to Sheldrake and Wells for further investigations.
Sheldrake & Wells Ltd. based in Ipswich, are now the only radiator specialist in Suffolk that undertake the repair and reconditioning of car, commercial and industrial radiators.
The company was formed back in 1975 and is now under the second generation of family management. Originally formed to provide repair and reconditioning of automotive and commercial radiators but over the years have increased the products to include number plate production and other related services including the supply of air conditioning parts and with over 500 units in stock.
We have worked alongside Sheldrake & Wells for many years and love the work they do!
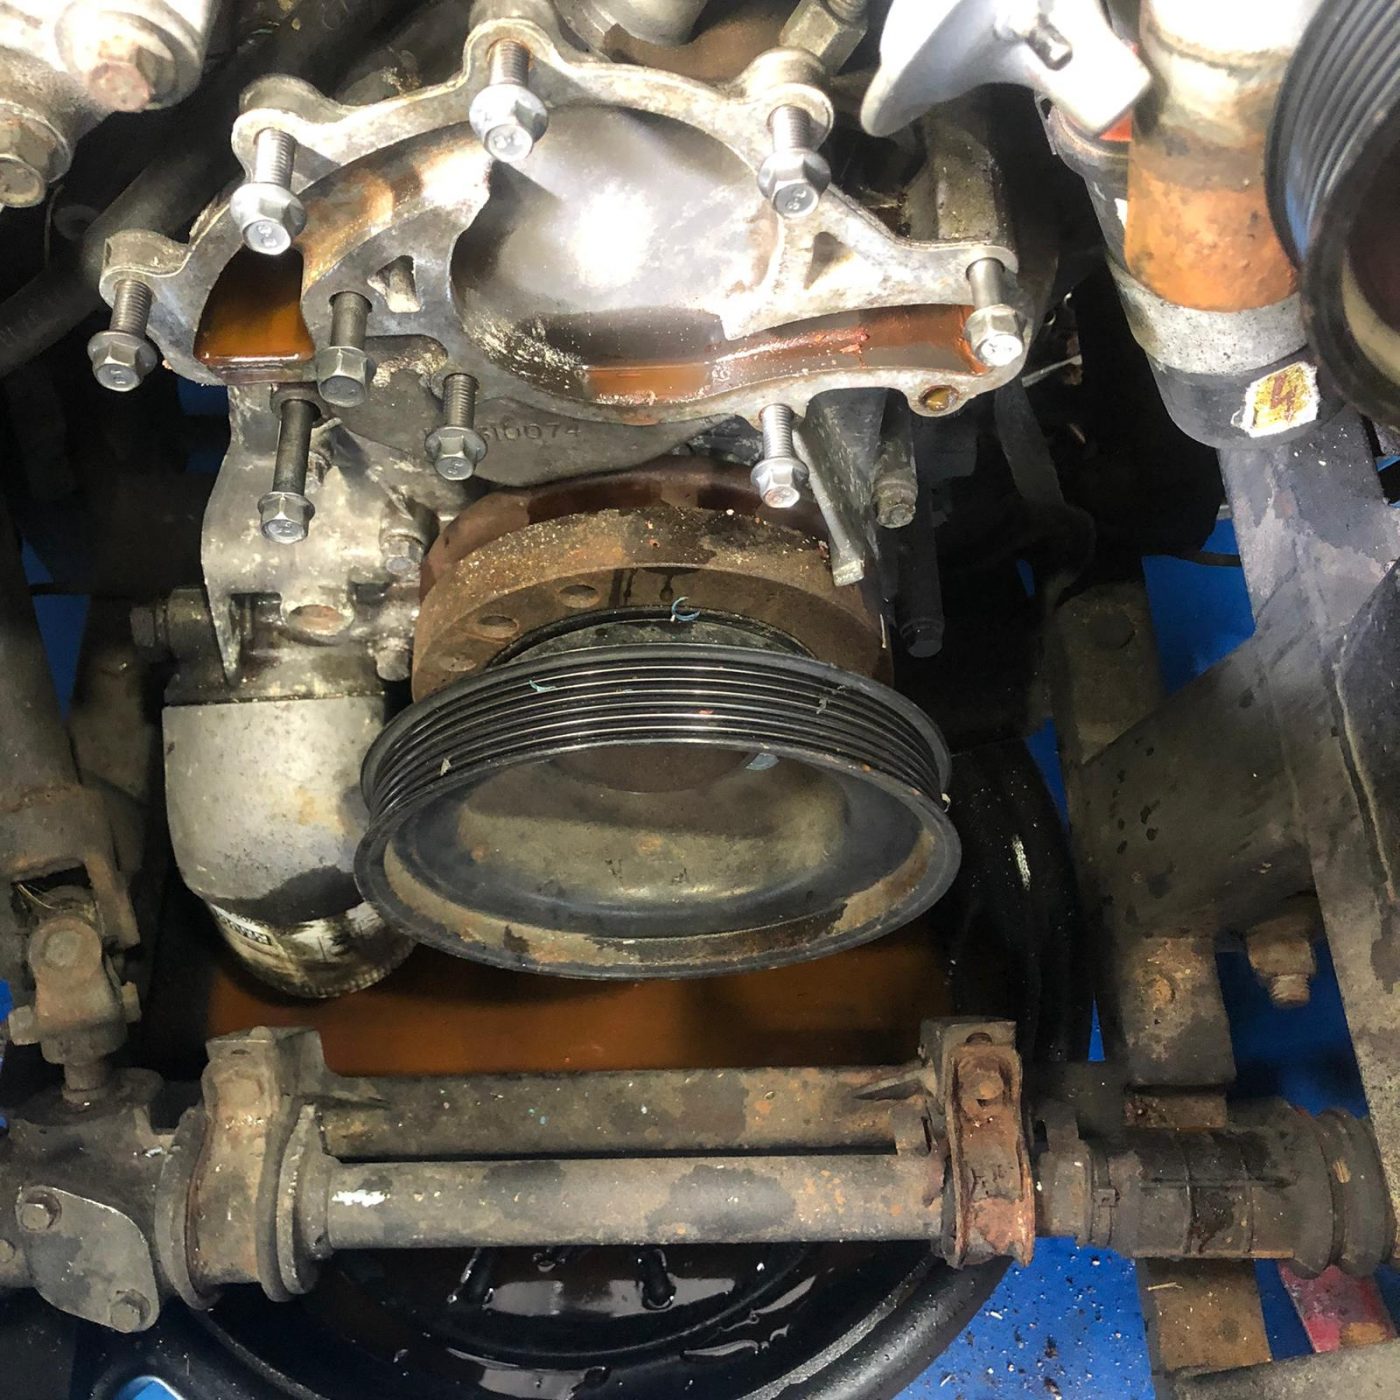
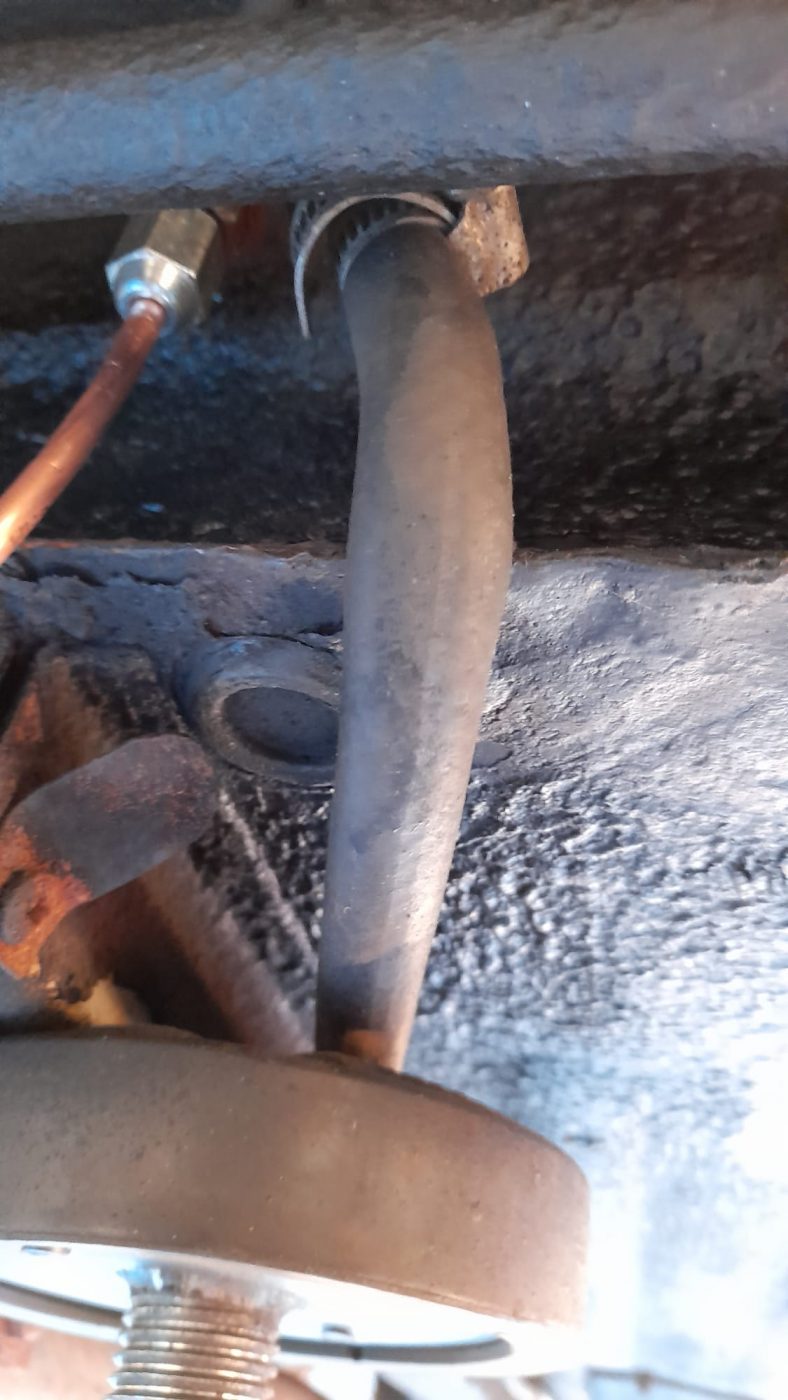
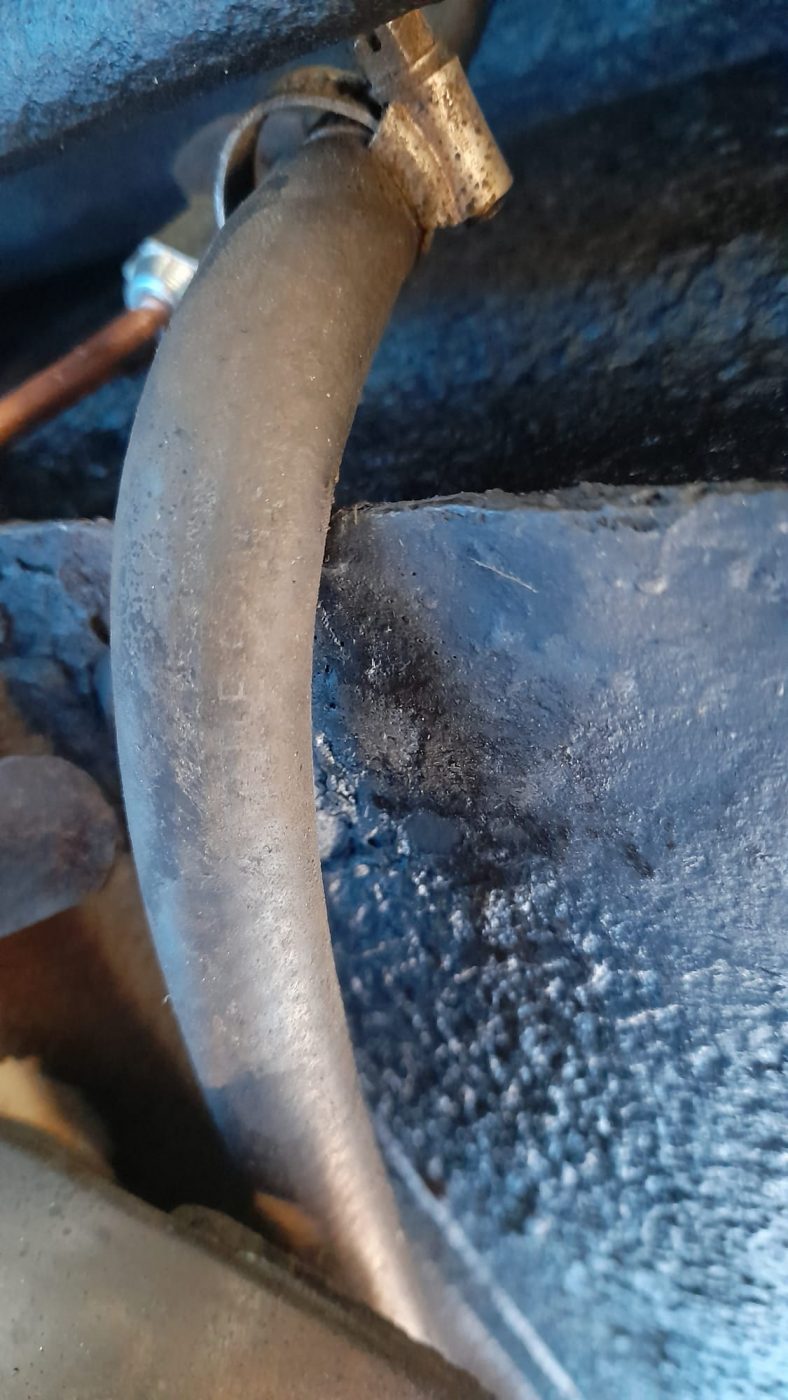
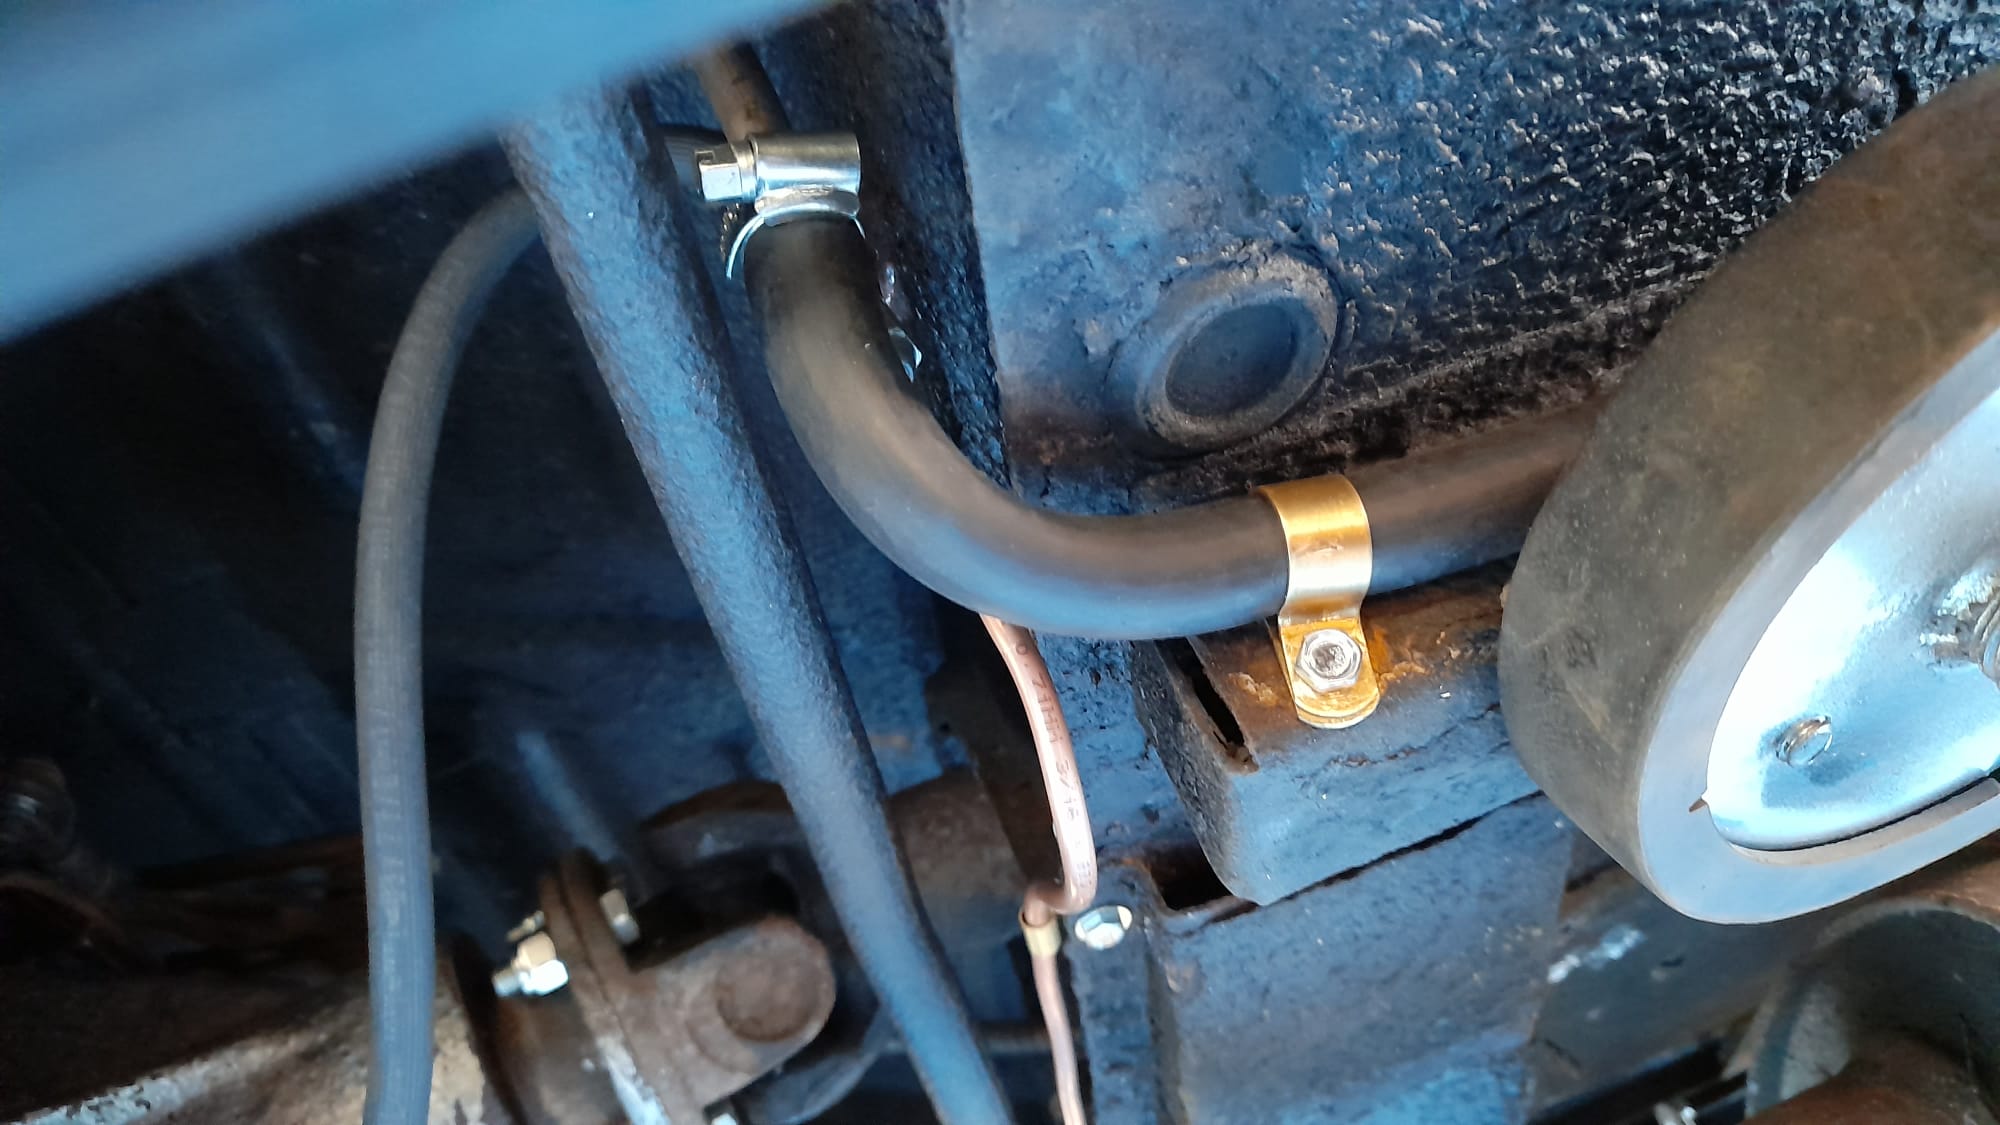
Ady has also removed the water pump to replace with a new unit.
John has been giving the heater valve some attention on the peony red 1960 Jensen 541S. When it was being tested, the heater was blowing hot when it was actually being set to cold on the control. So John set about changing the valve for it to work properly.
James has been doing the last bits of welding repair work on the 1998 Honda Integra Type R. He removed the left hand quarter panel and repaired around the wheel arch. Then he finished the spot welding around the rear wheel arch.

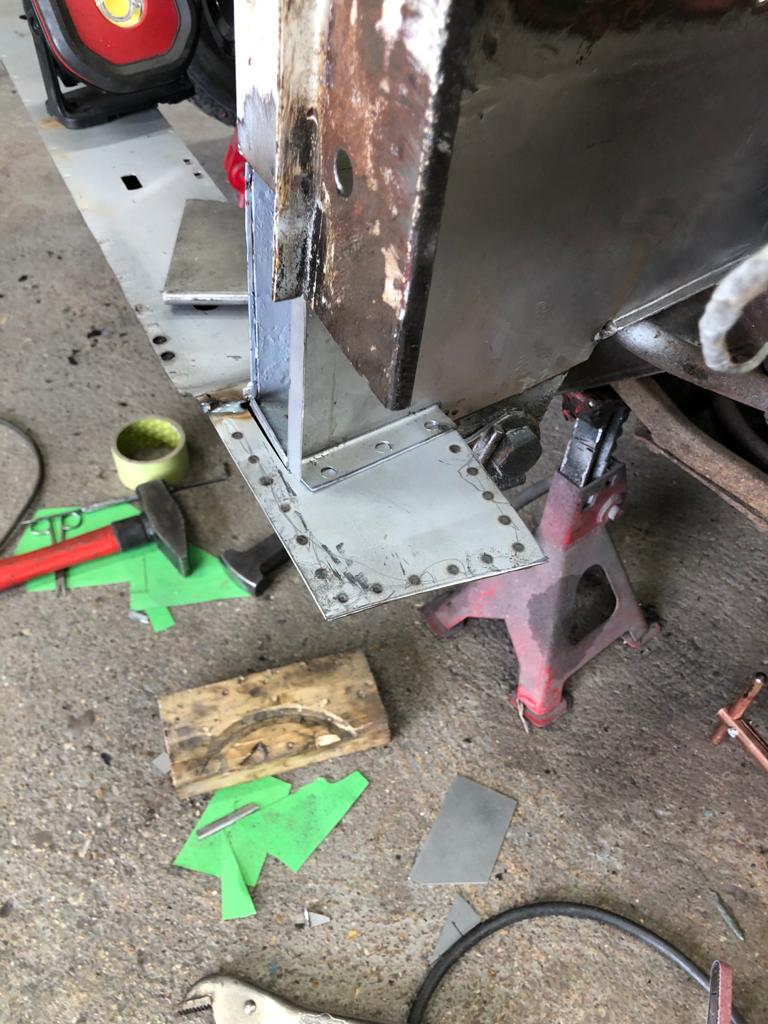
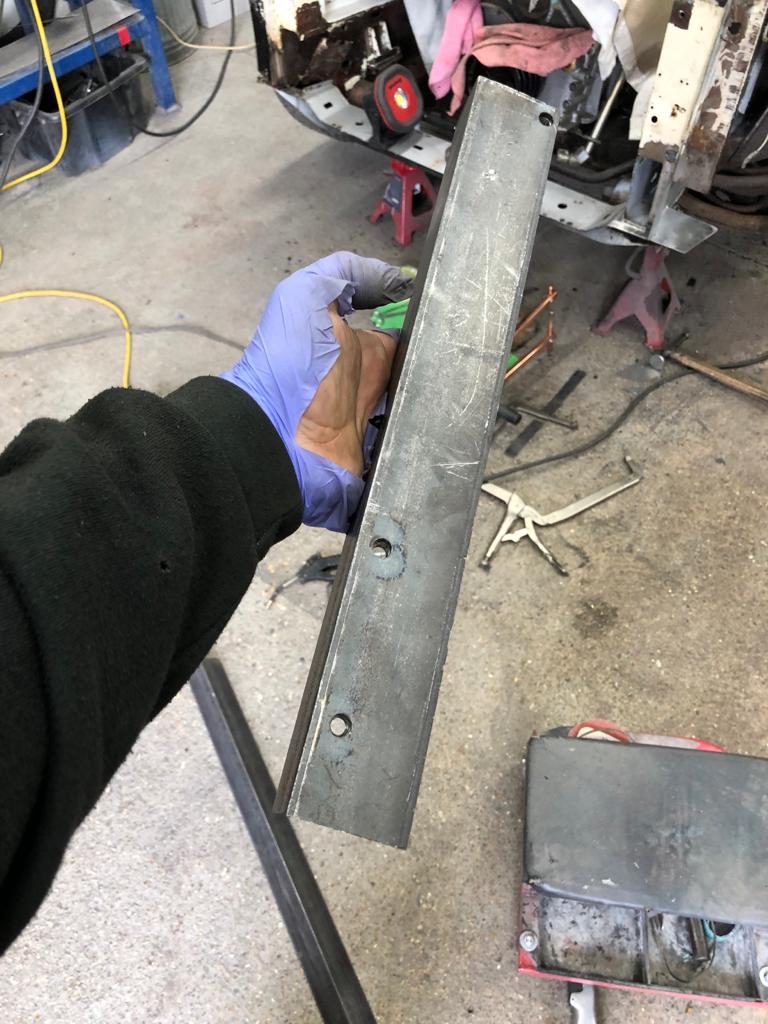
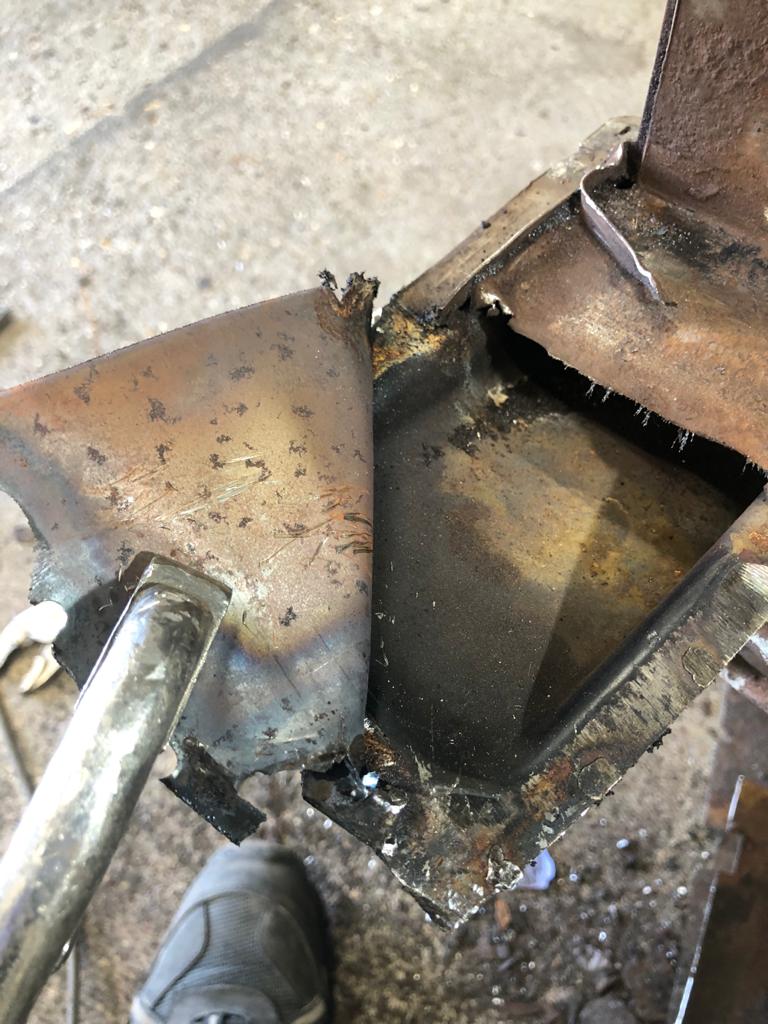
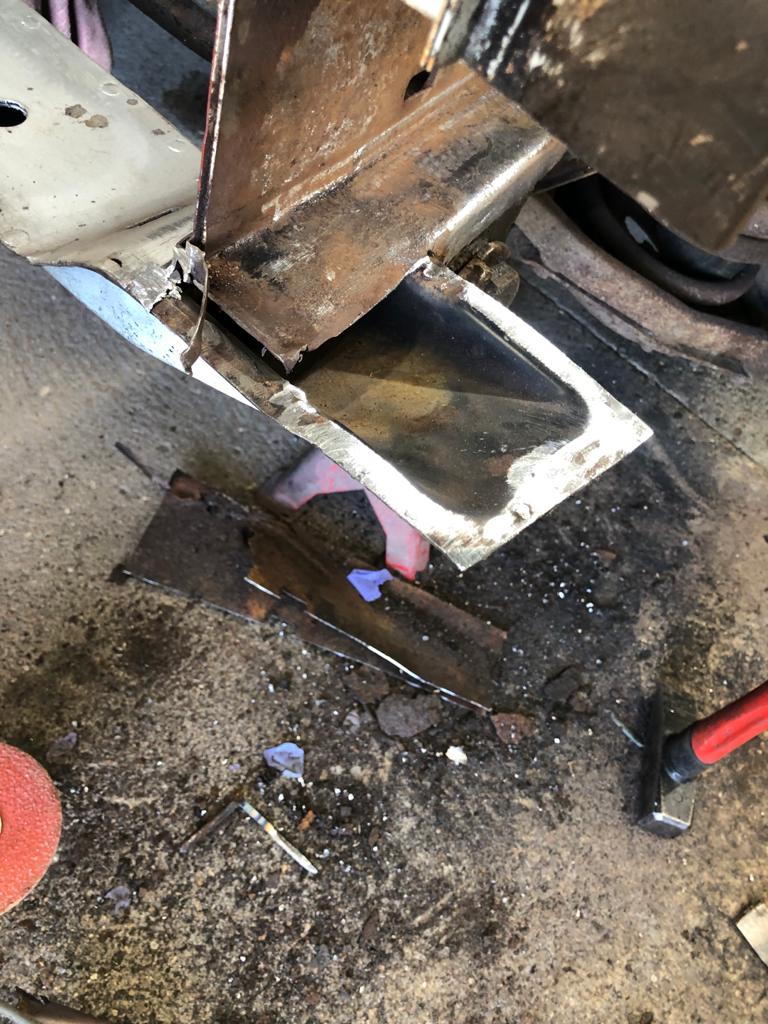
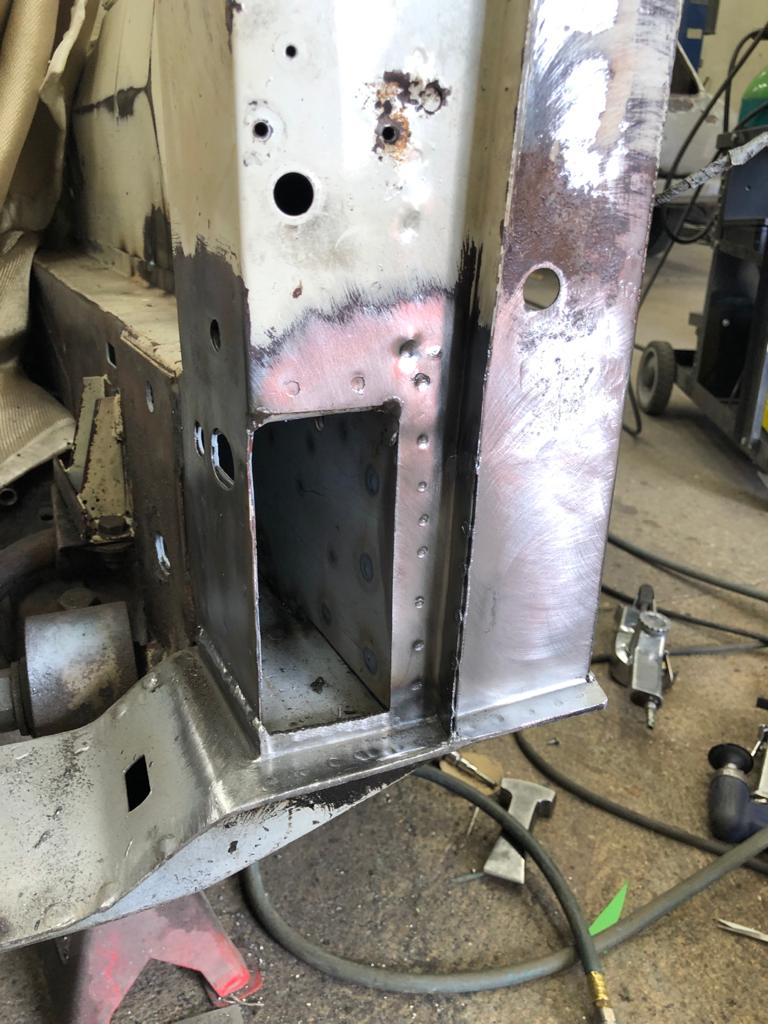
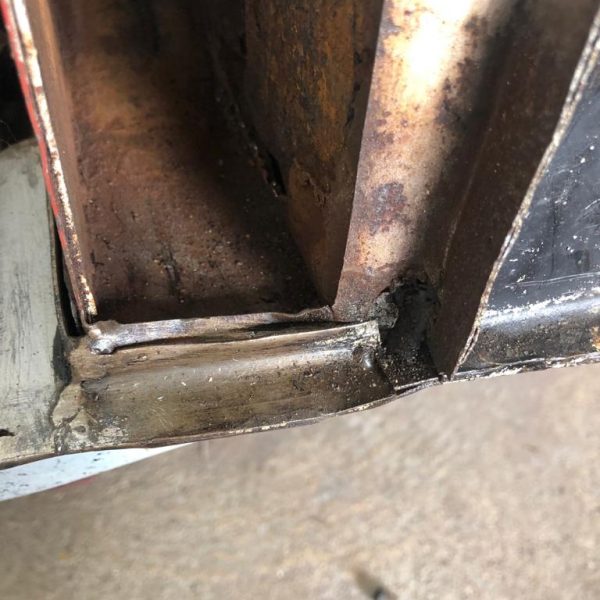
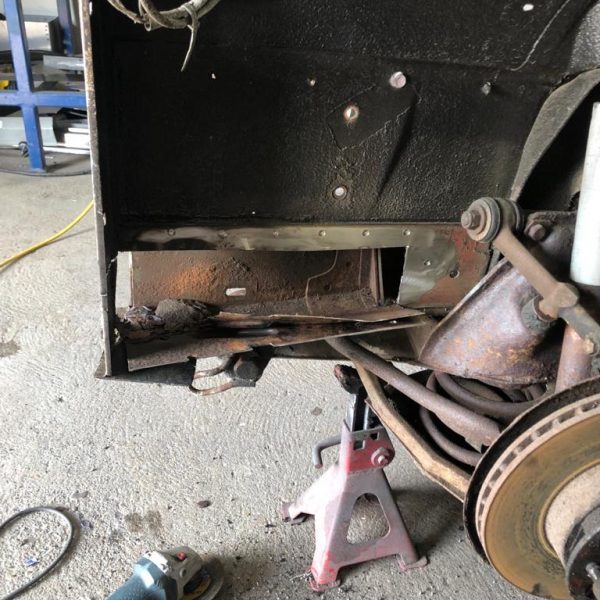
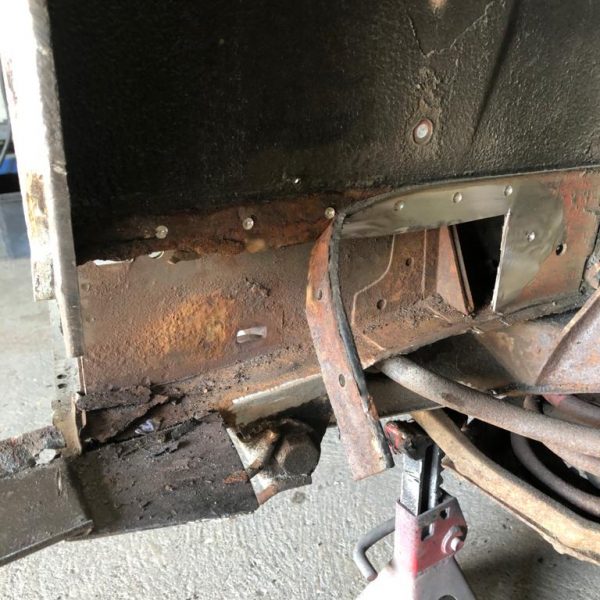
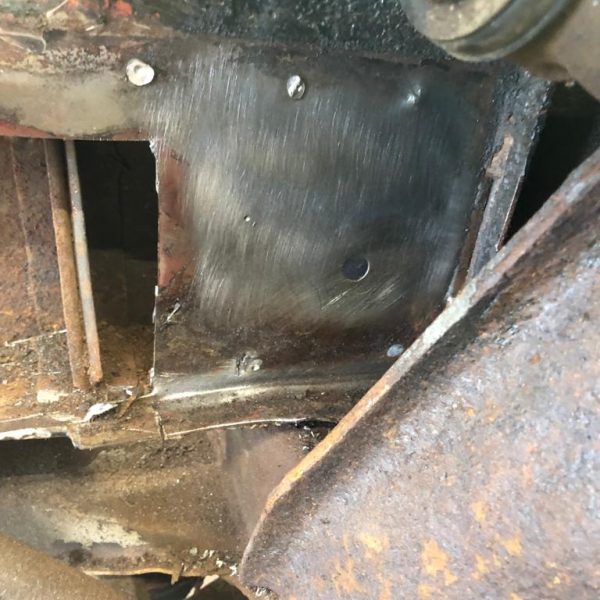
James has got the 1986 Daimler Double Six in the fabrication bay and has been starting the welding work on it!
He’s been concentrating on the inner wing and bonnet hinge housing area today. He found there were spot welds that had been previously been put in and weren’t holding anything in place, so he’s given that some attention and welding parts in properly. He’s also taken out the corroded areas so he can fabricate replacement sections.


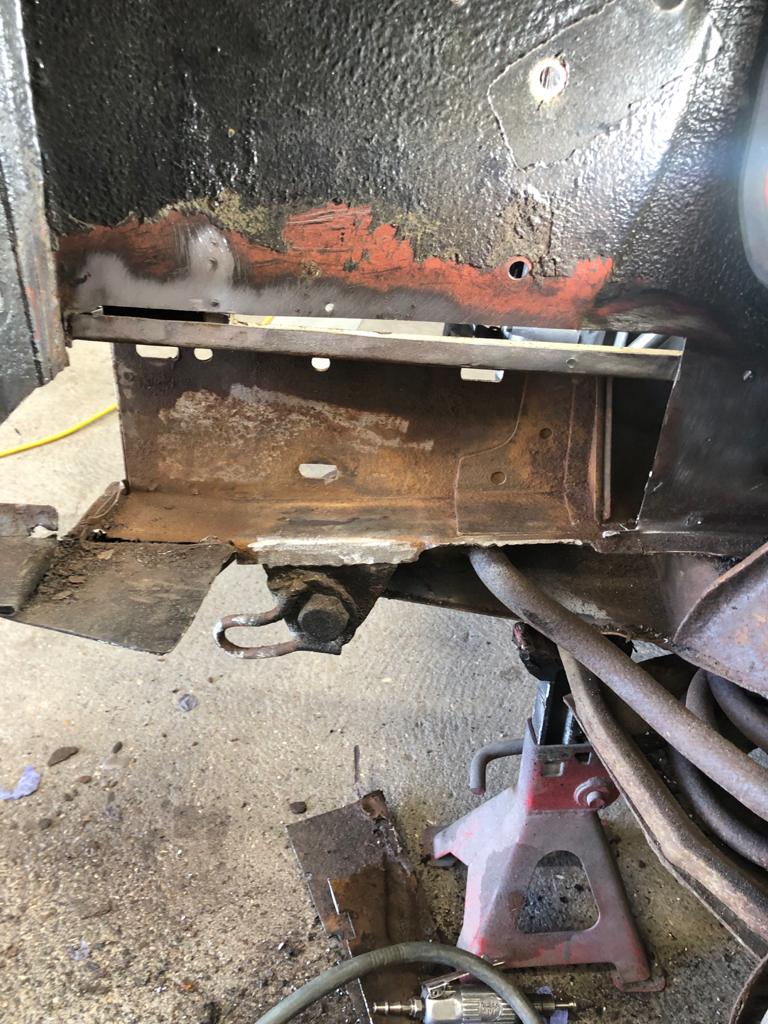
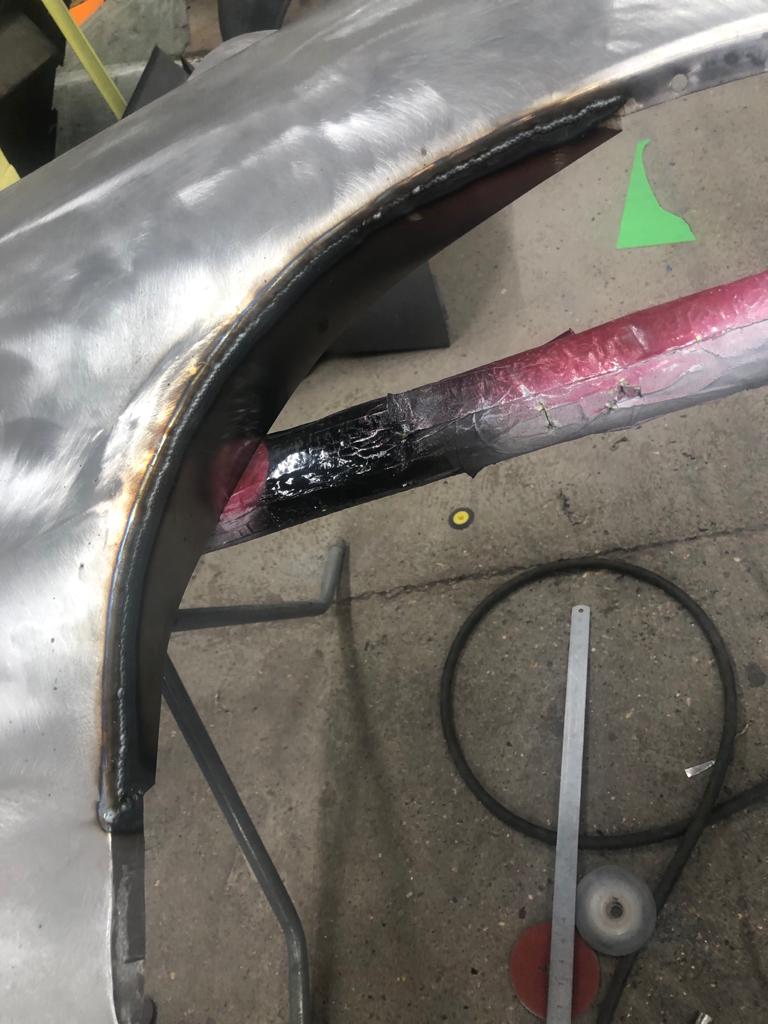
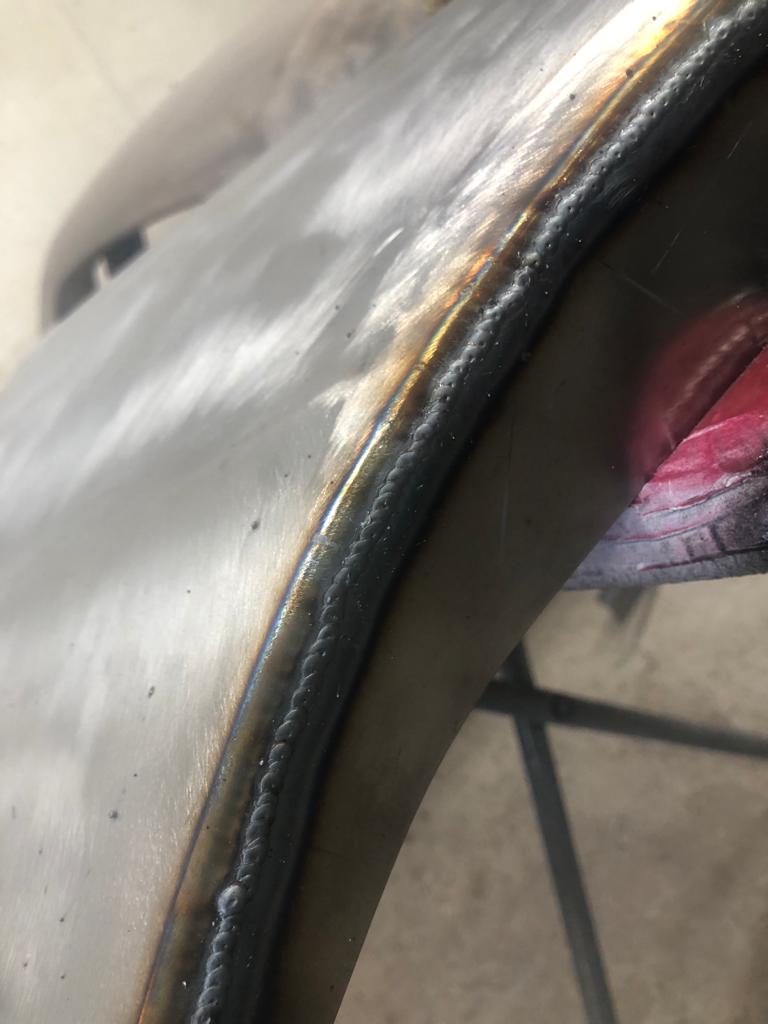
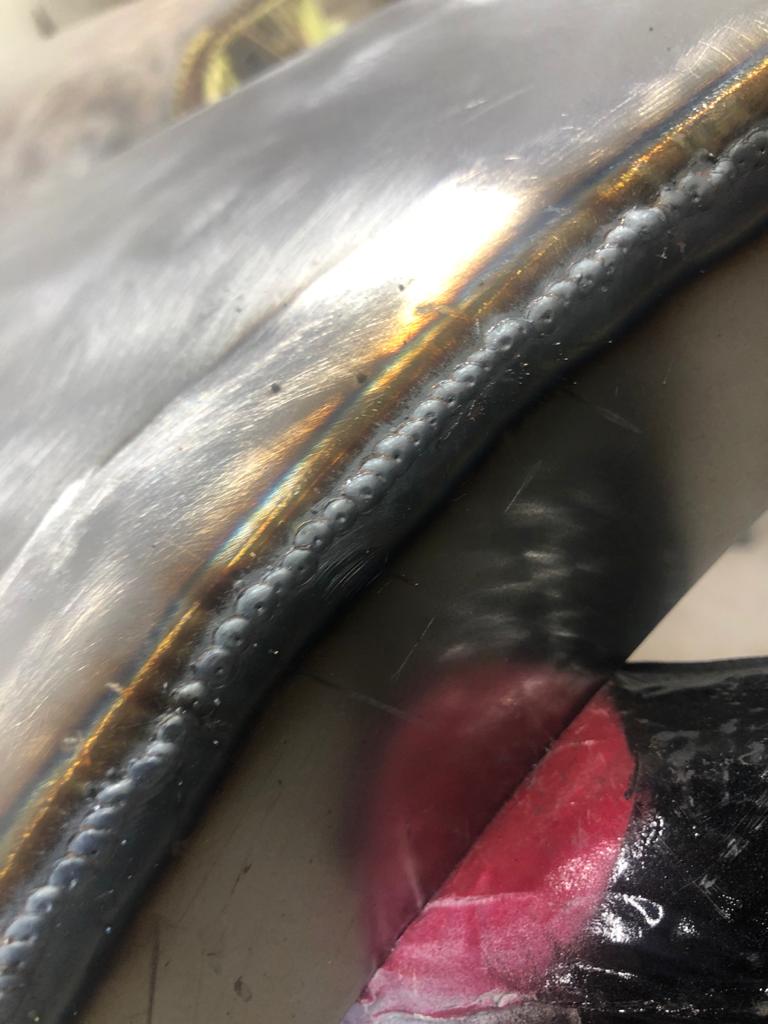
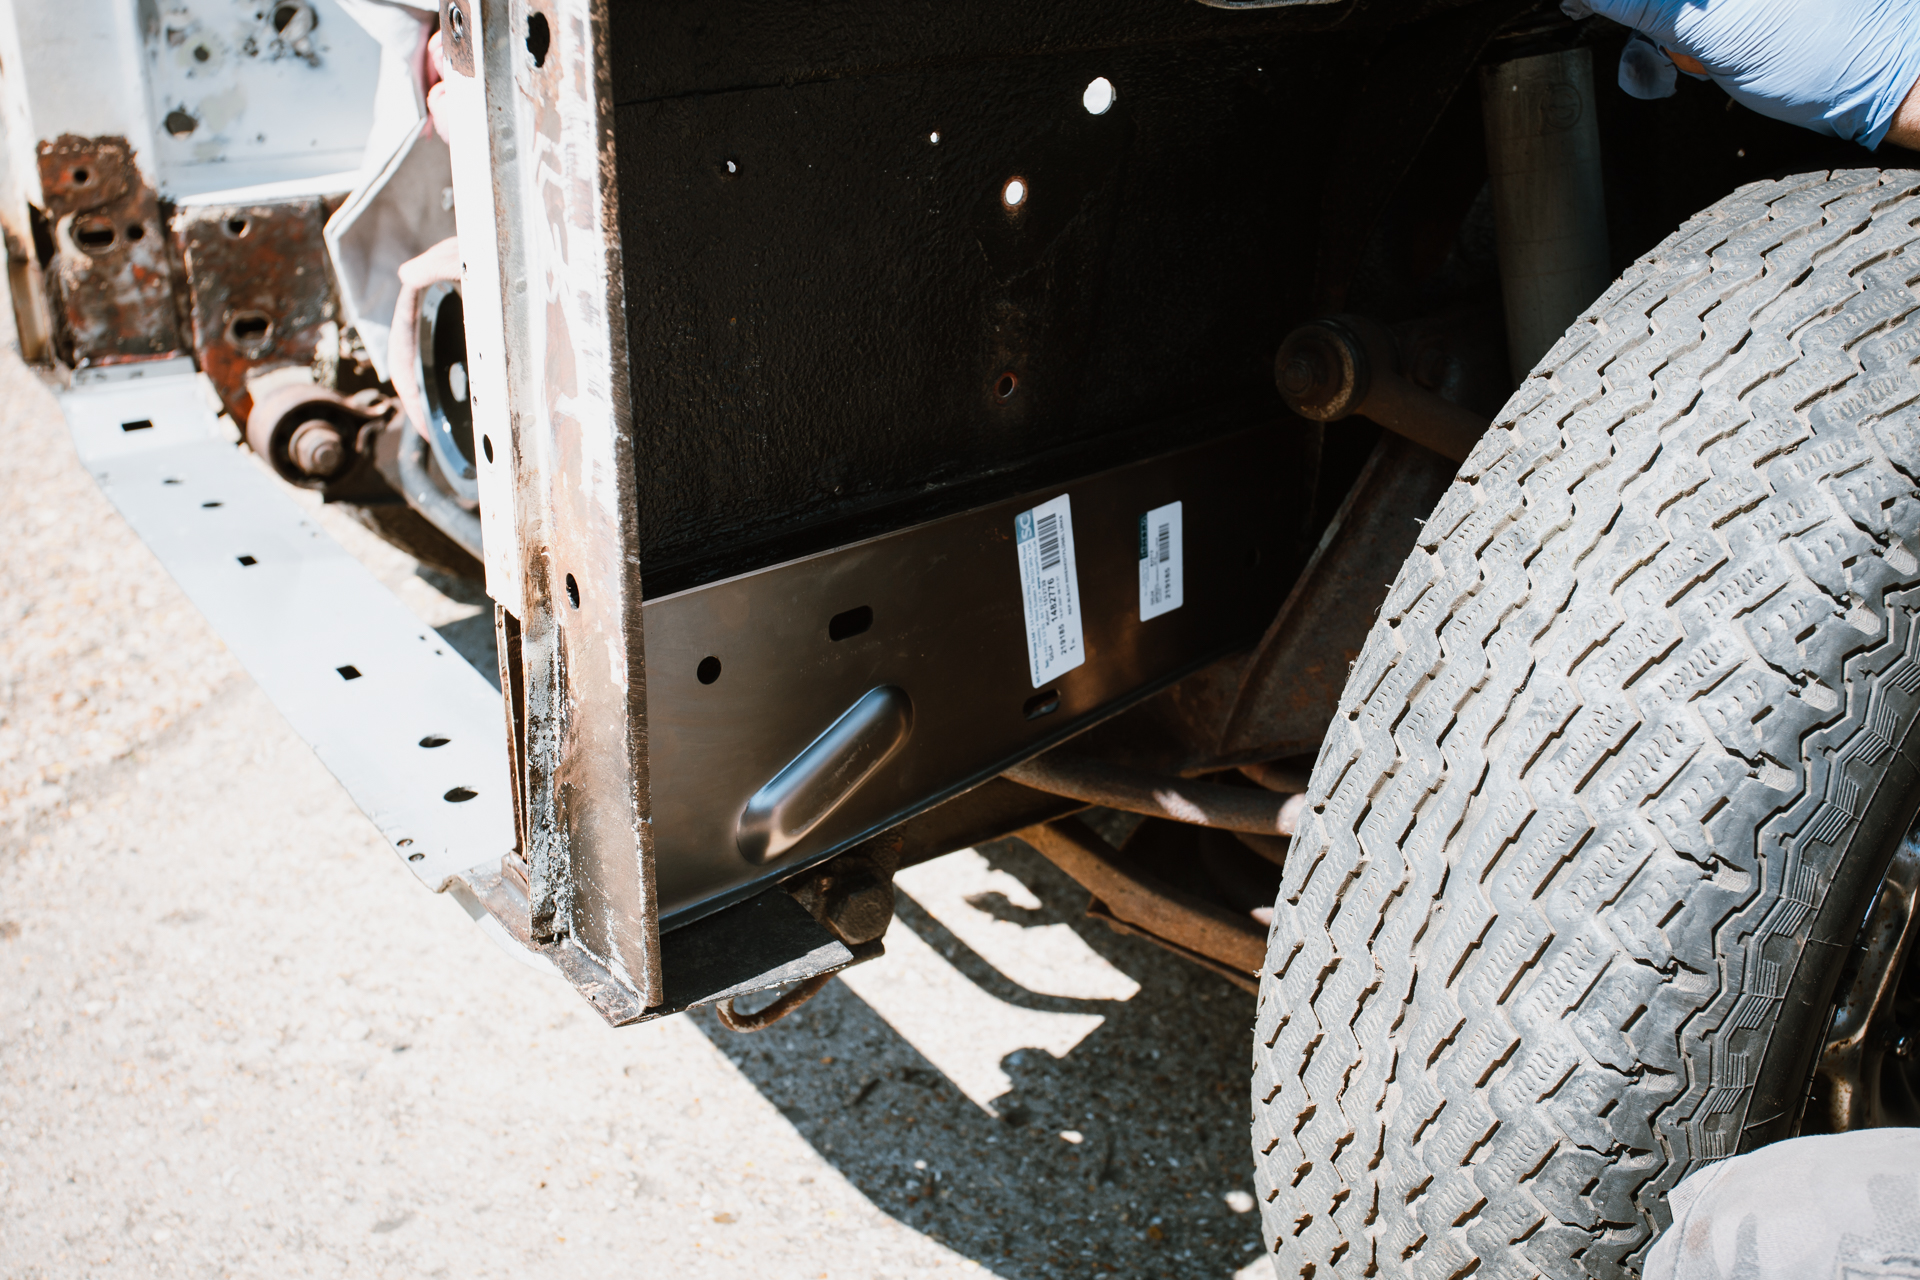
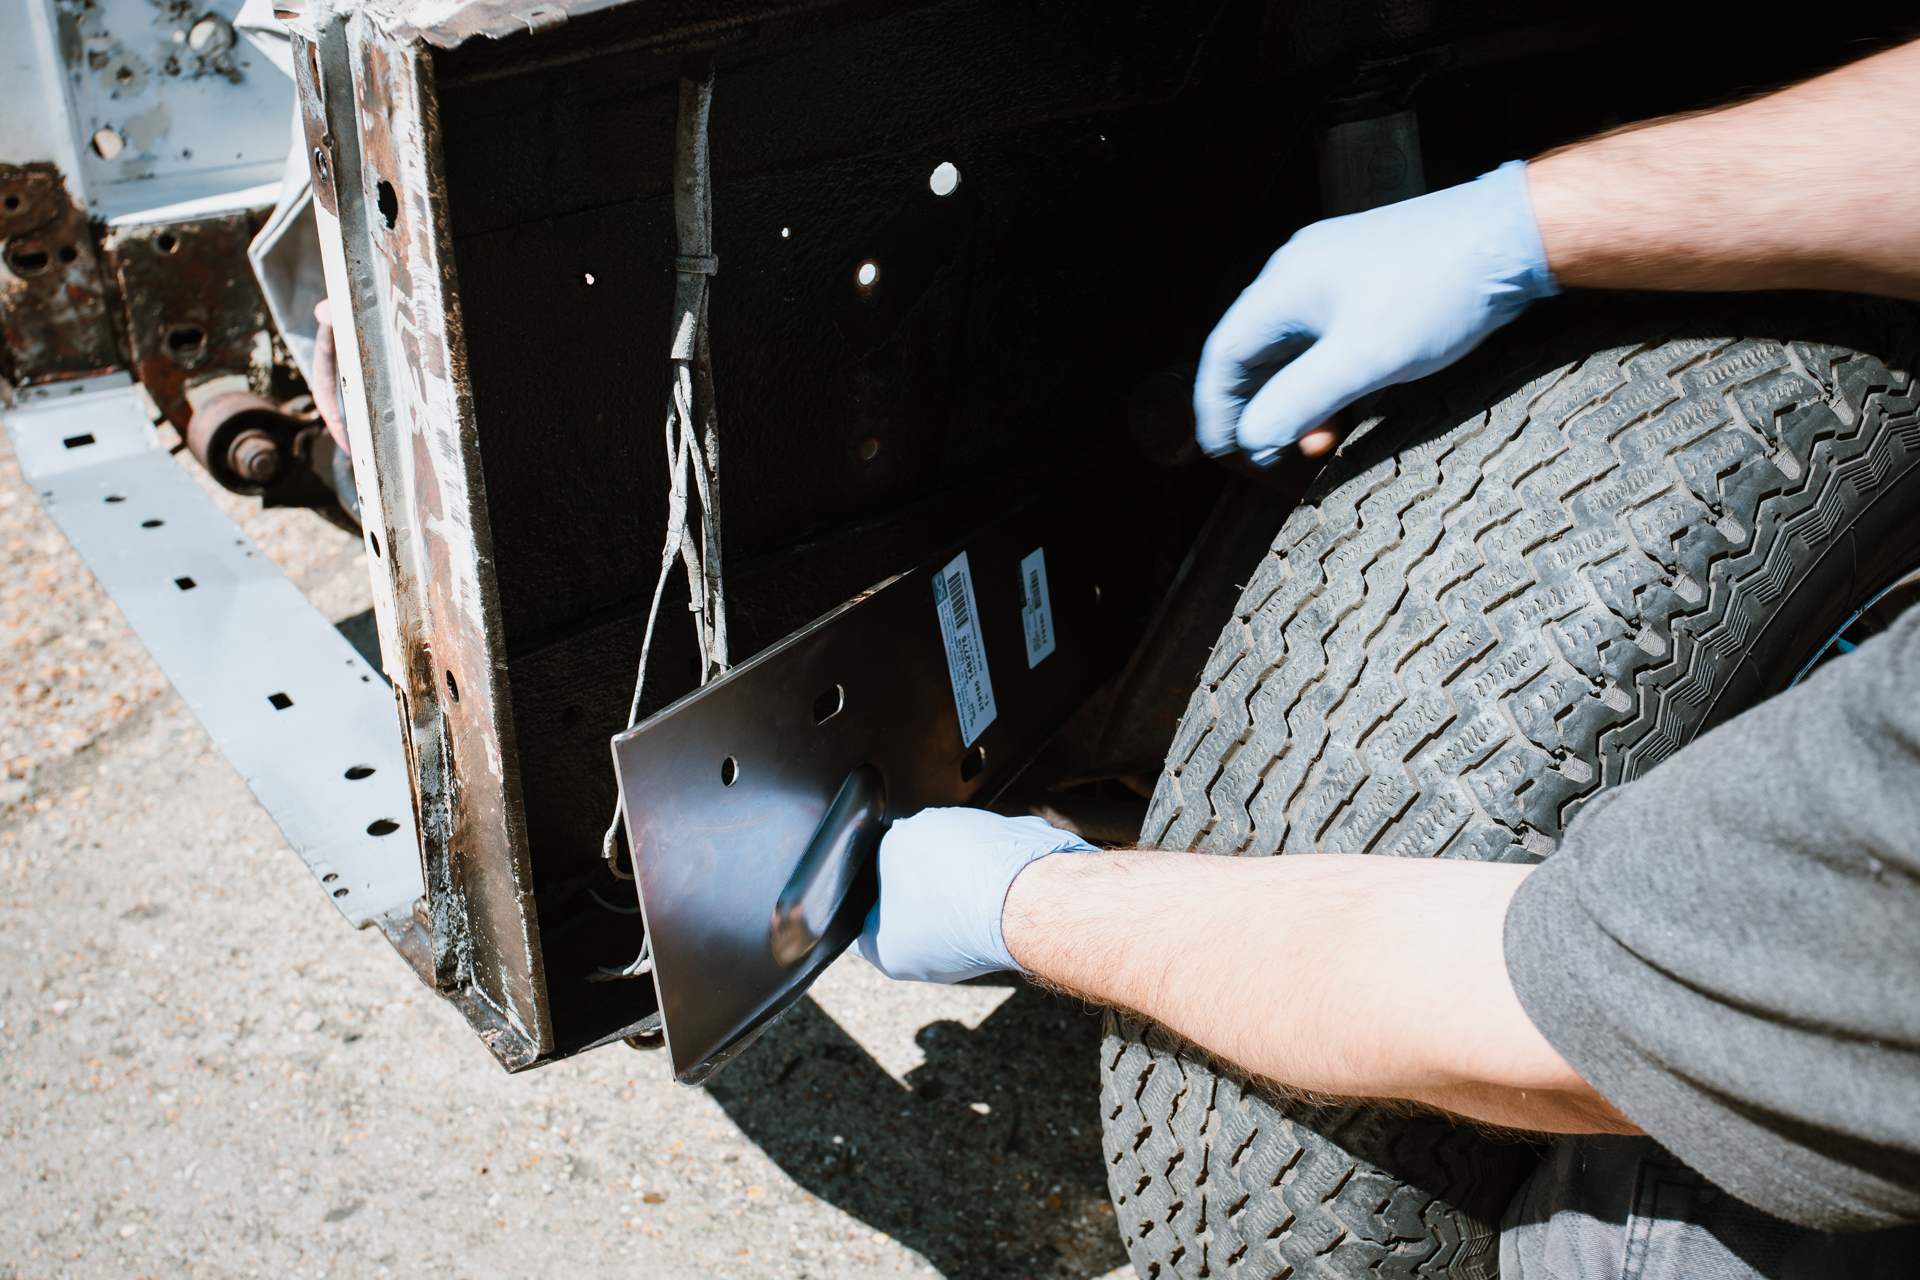
Here we have a new arrival to the workshop, a 1977 Daimler Double-Six. It’s only in for a small amount of work, which is that both front inner wings need to be repaired and painted and there’s a sheered bolt that needs removing from its trailing arm. Stay tuned for the progress!

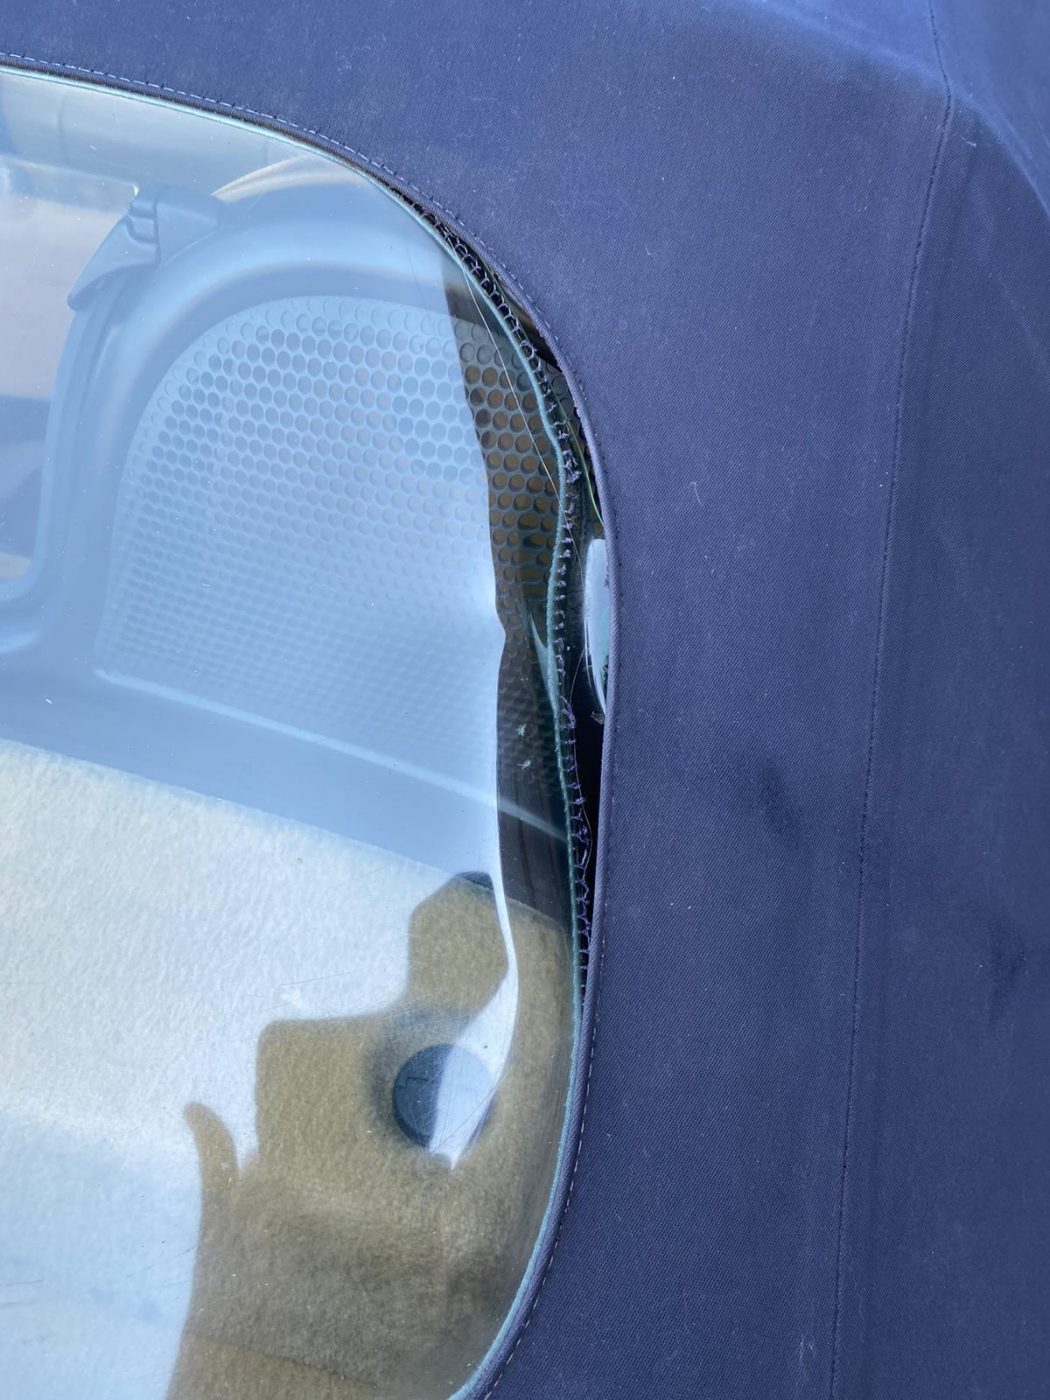
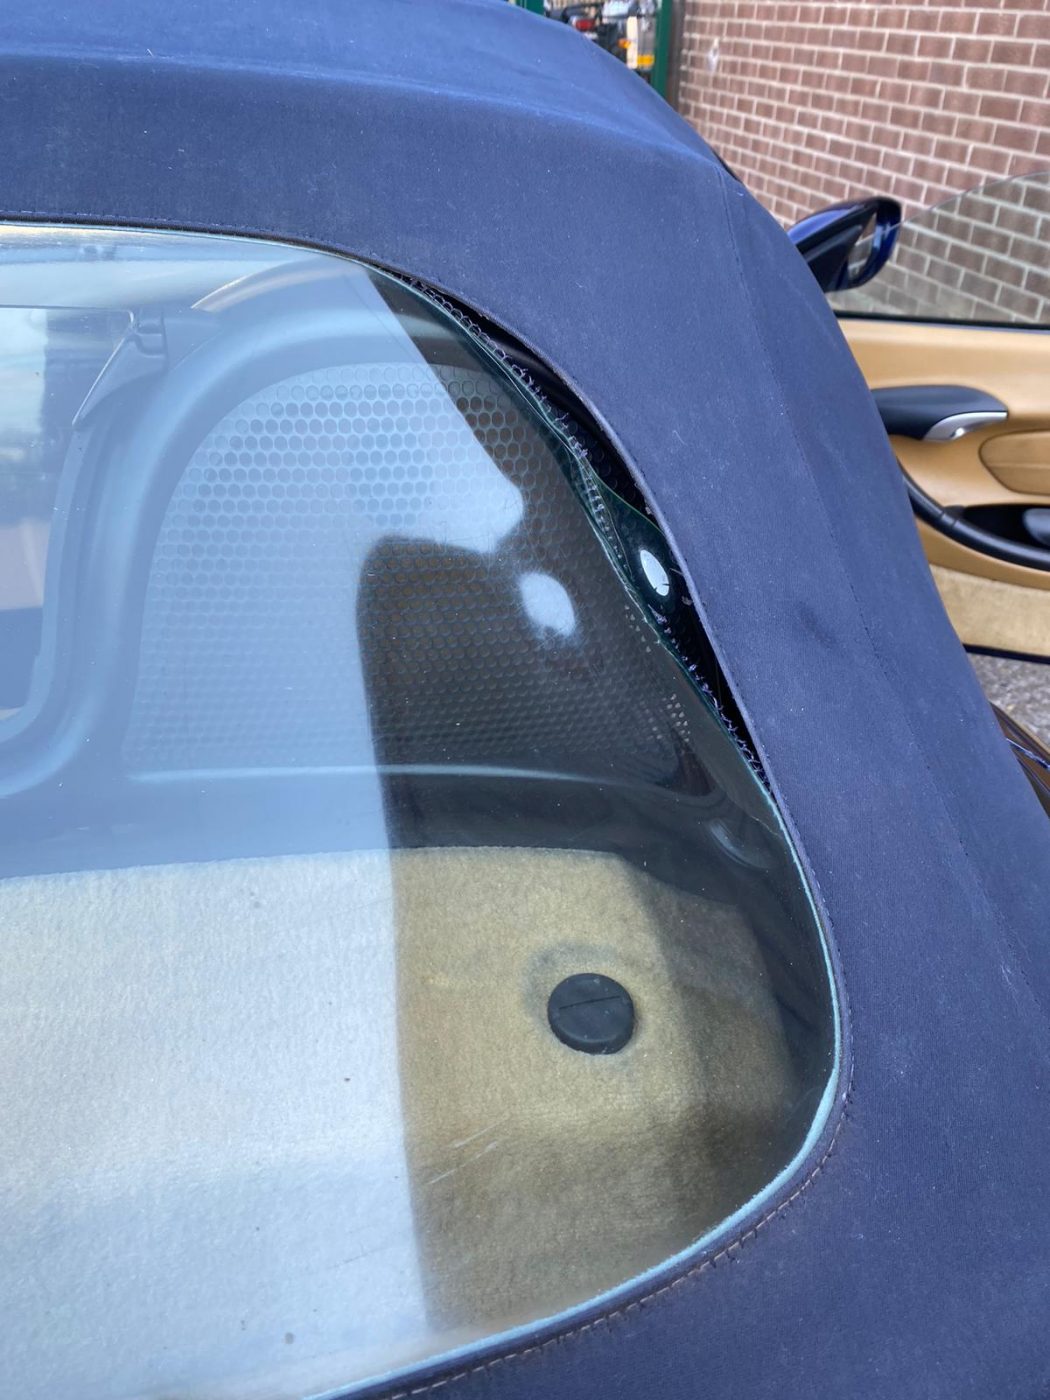
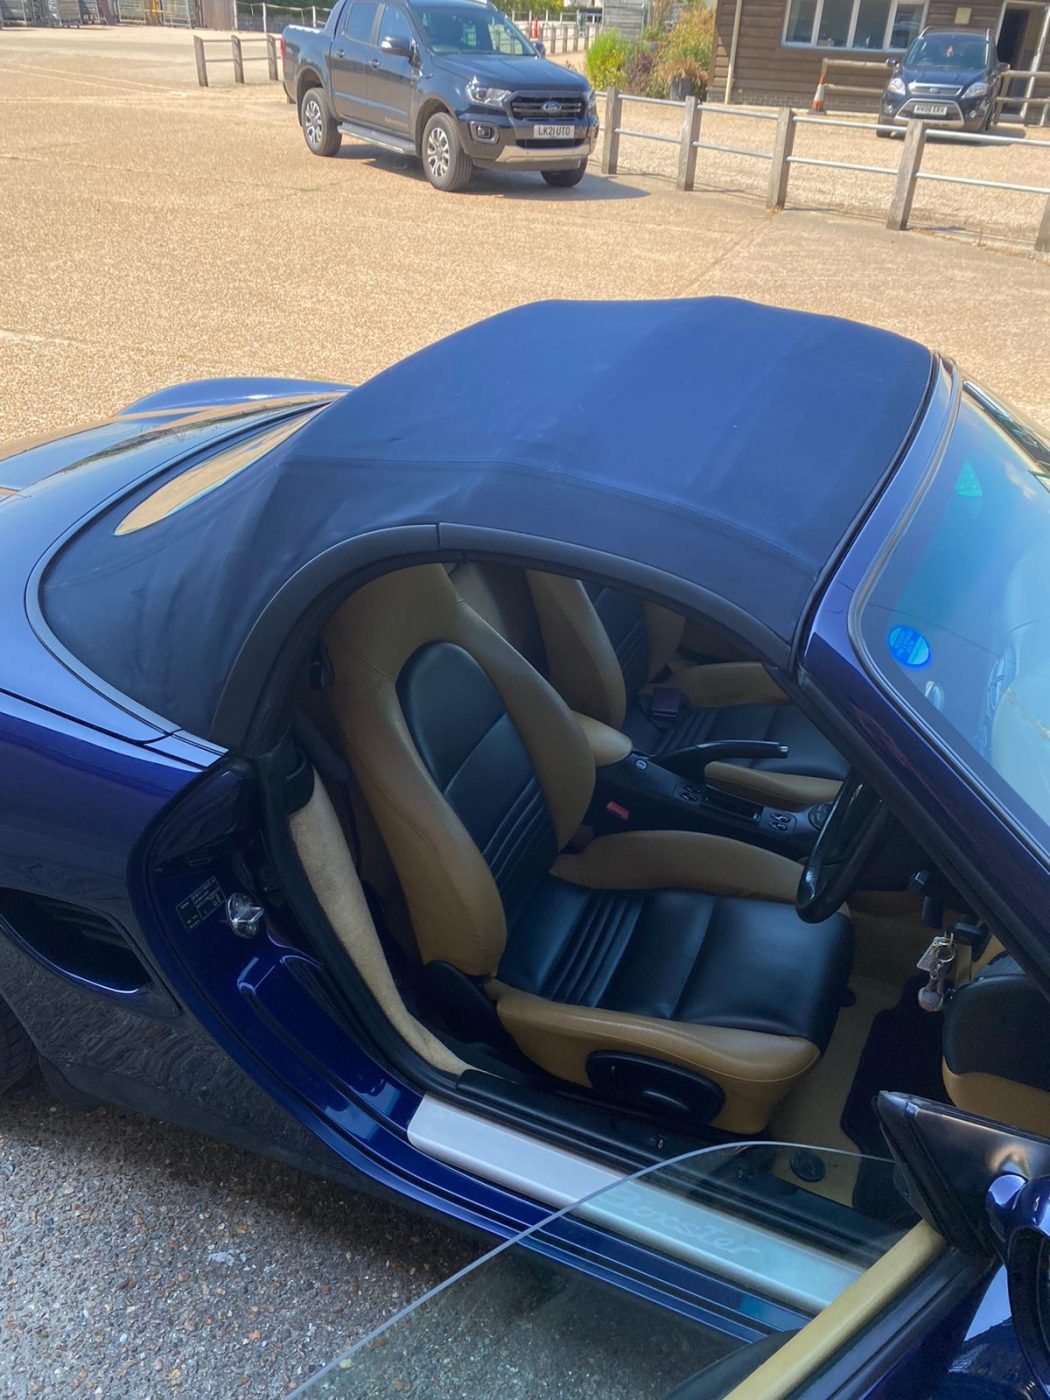
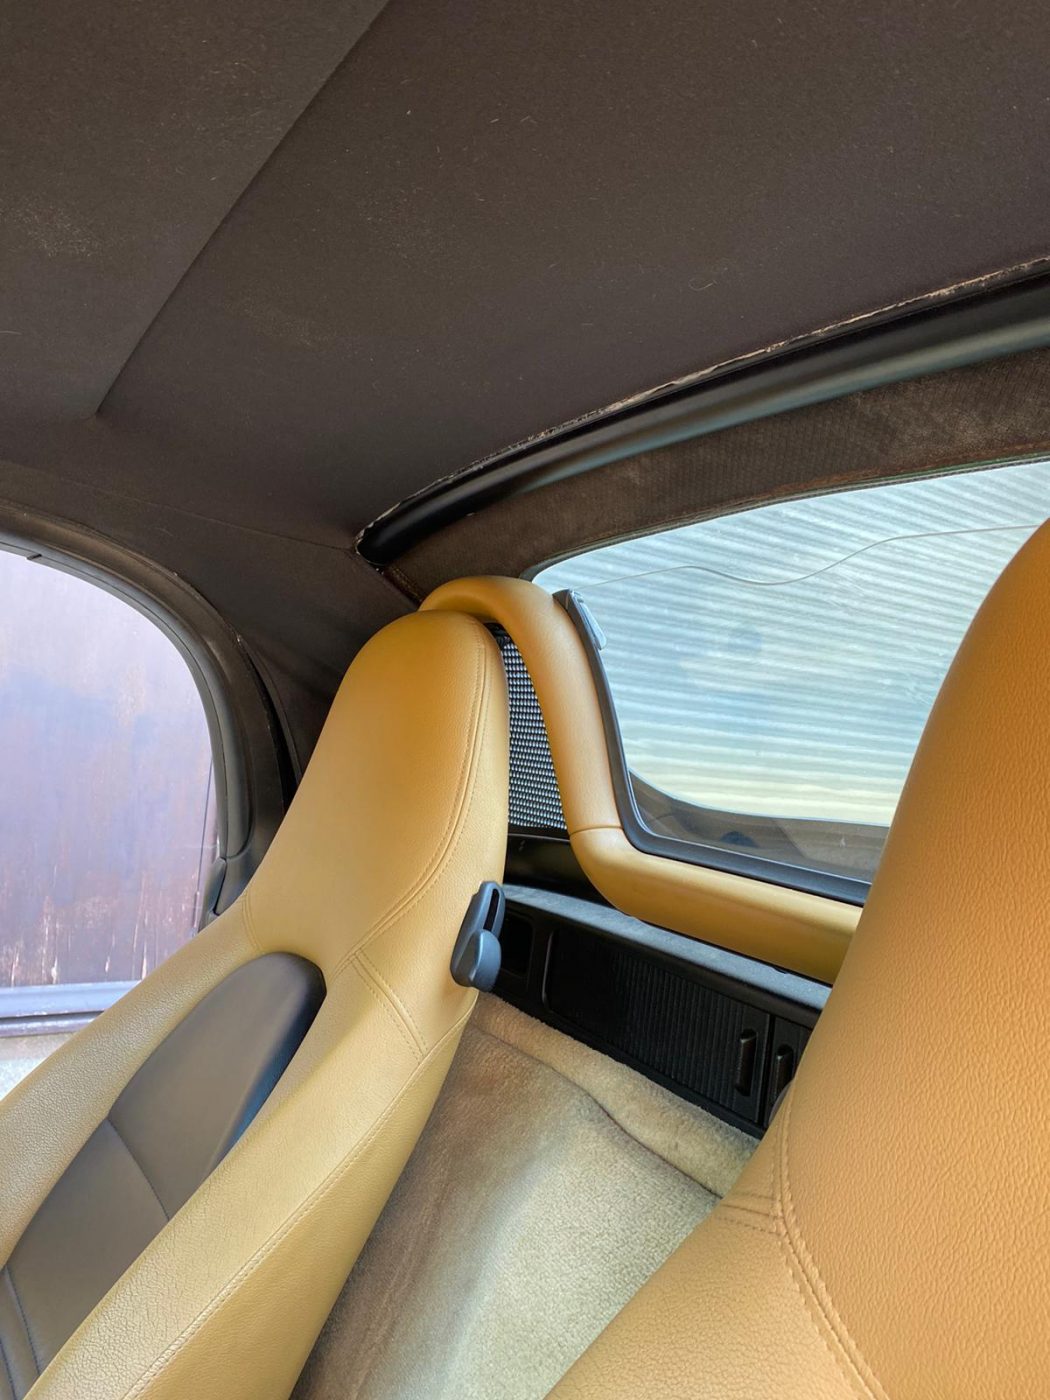
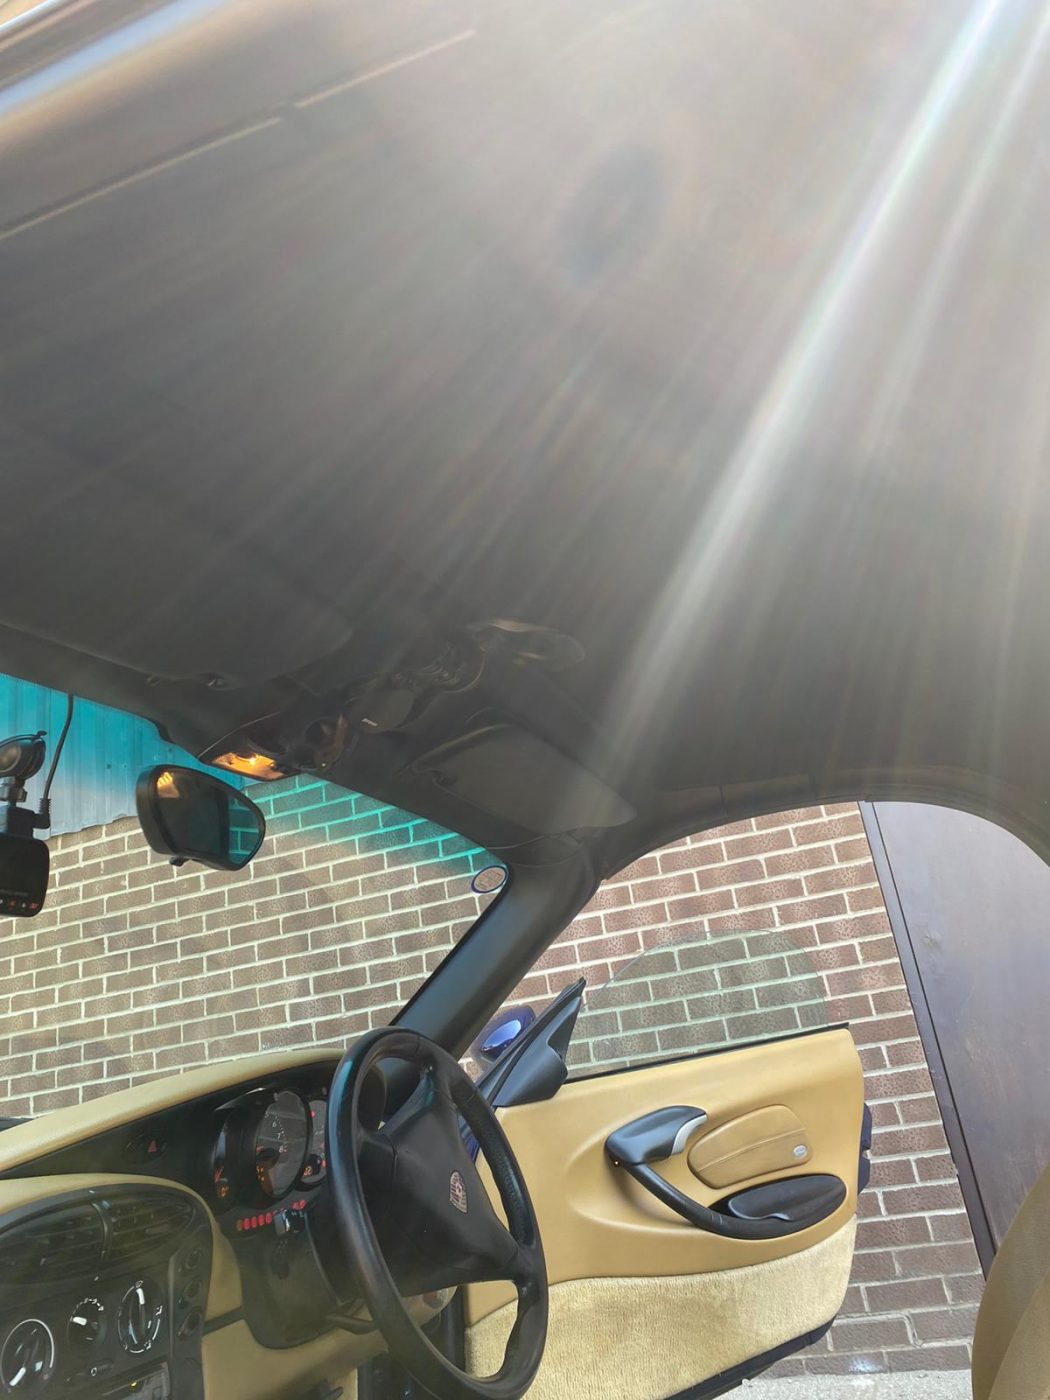
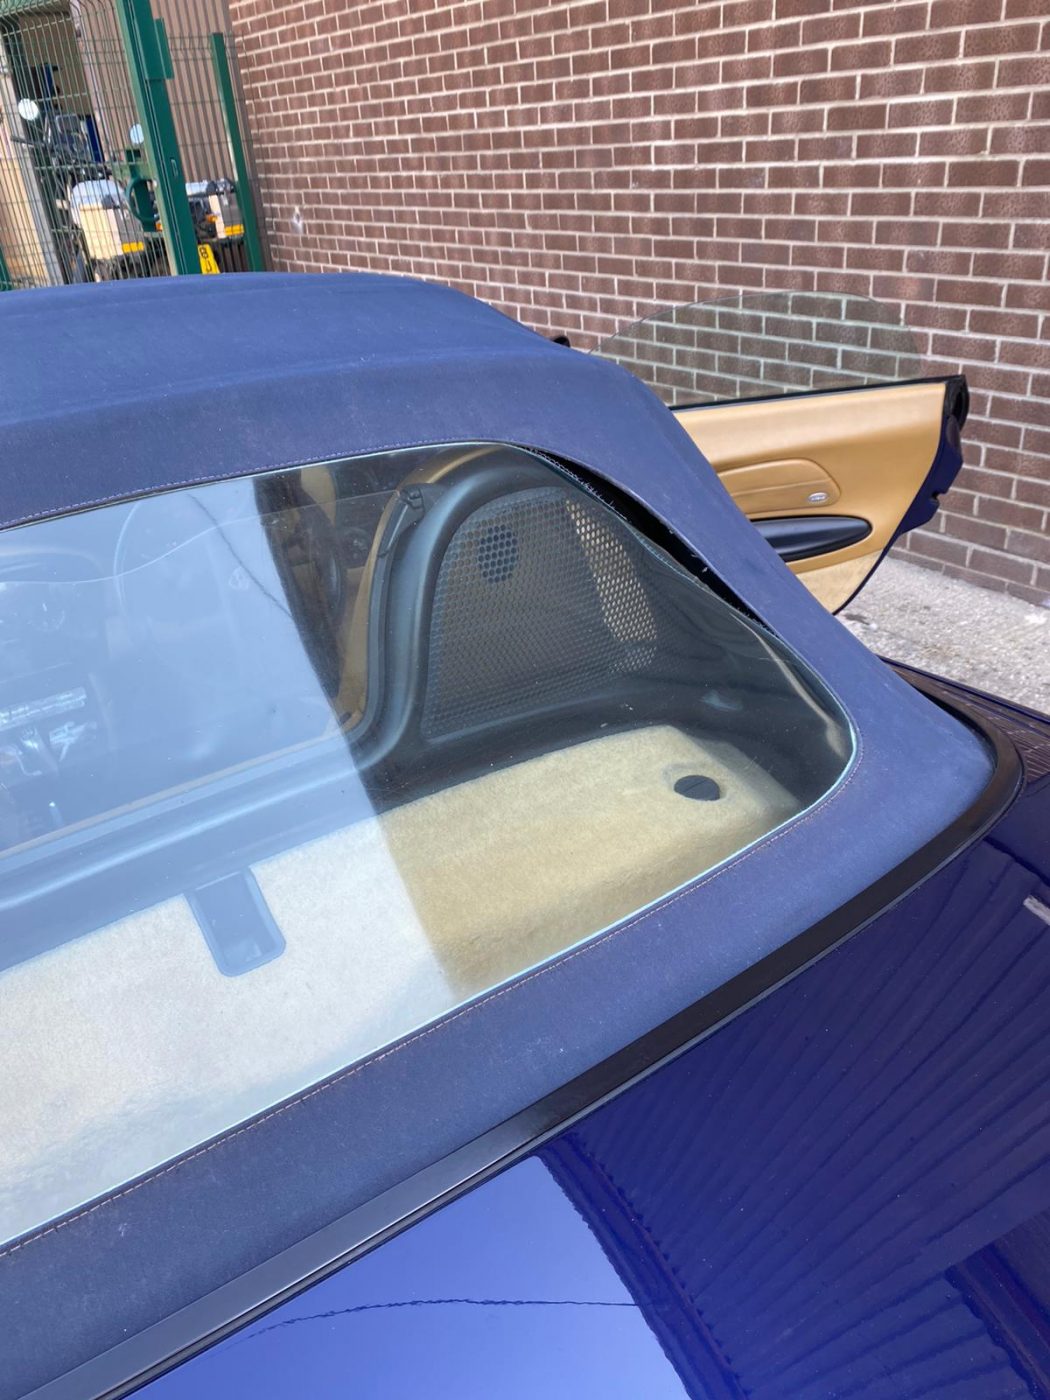
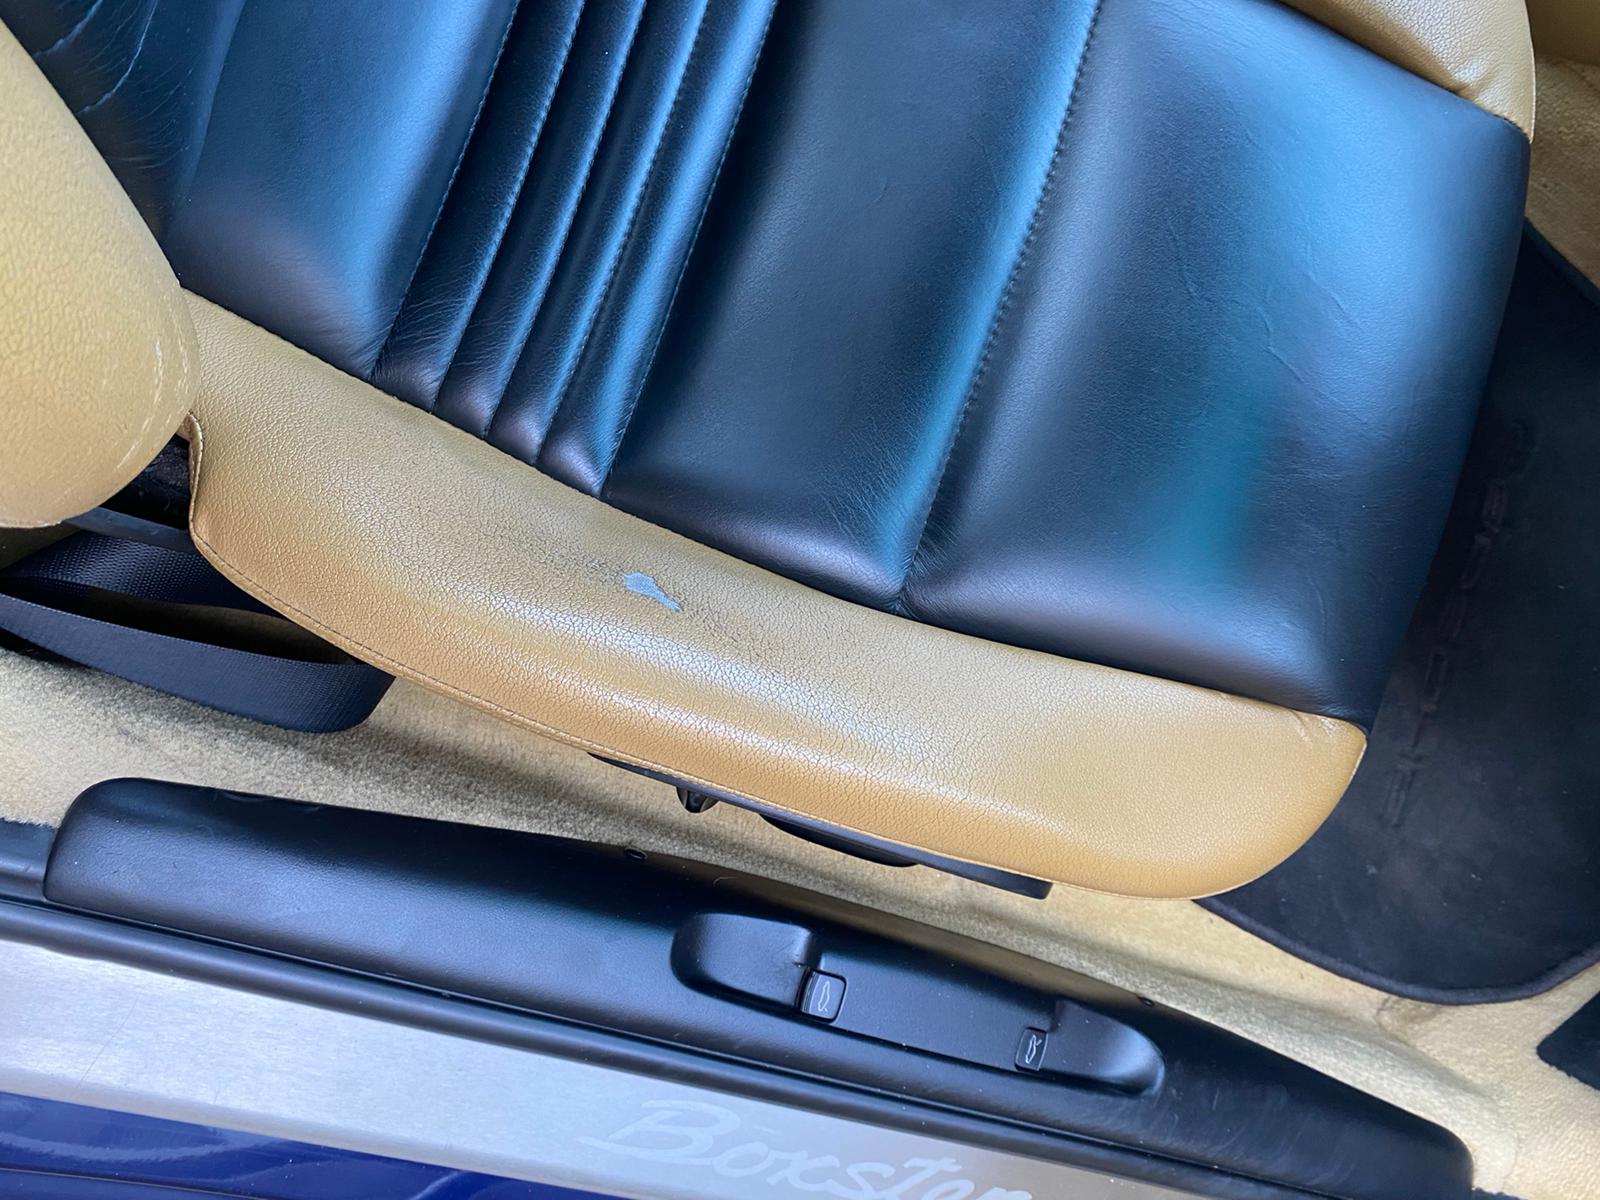
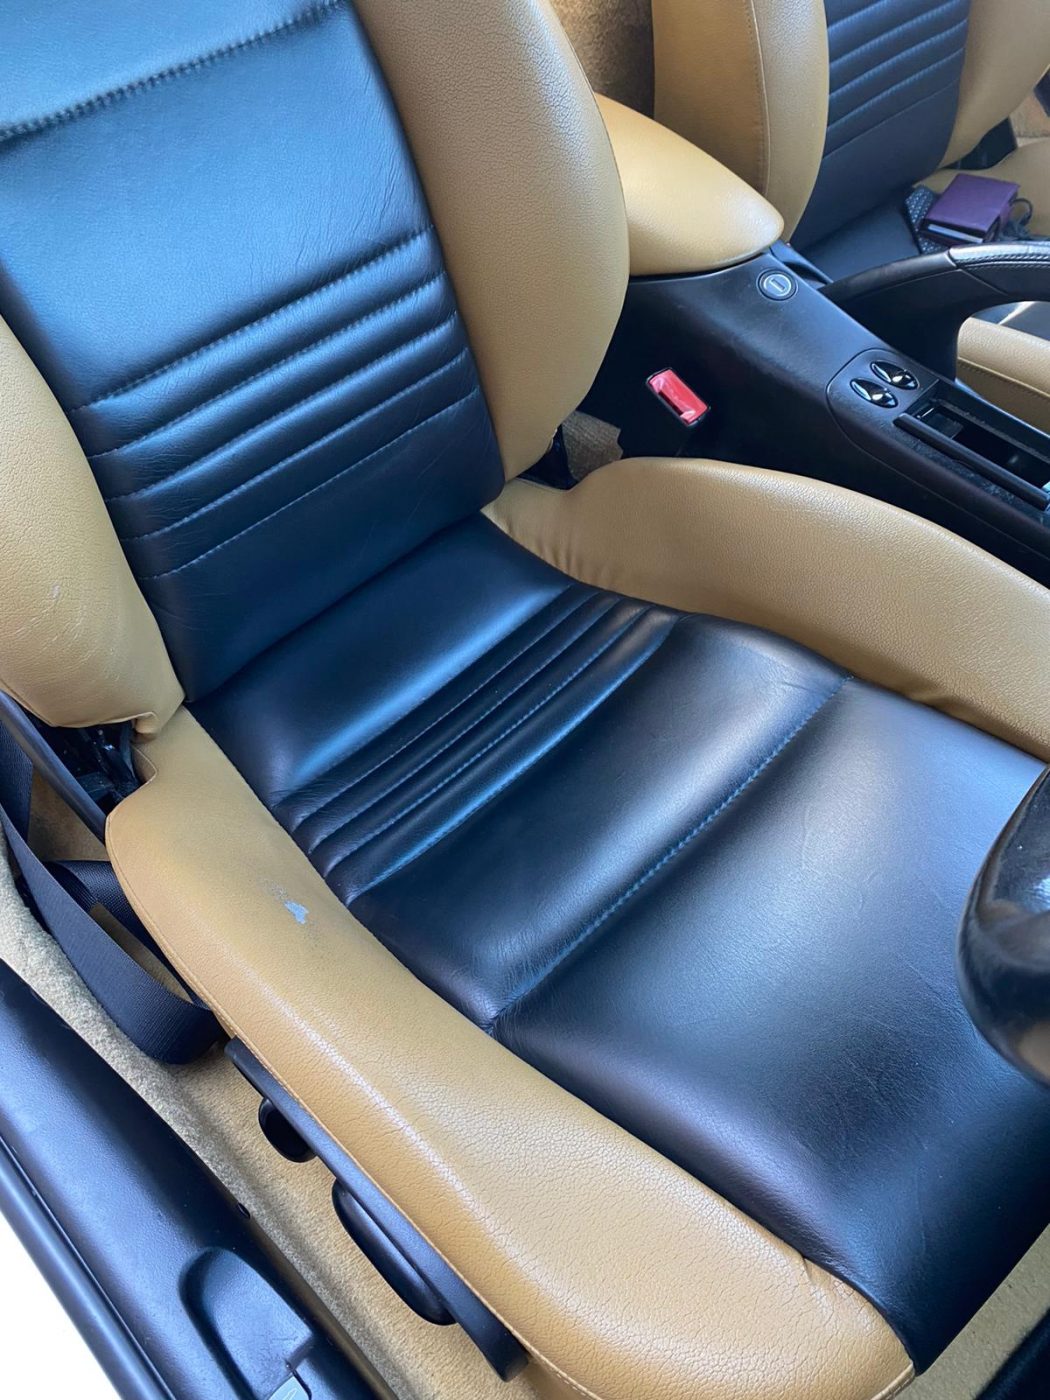
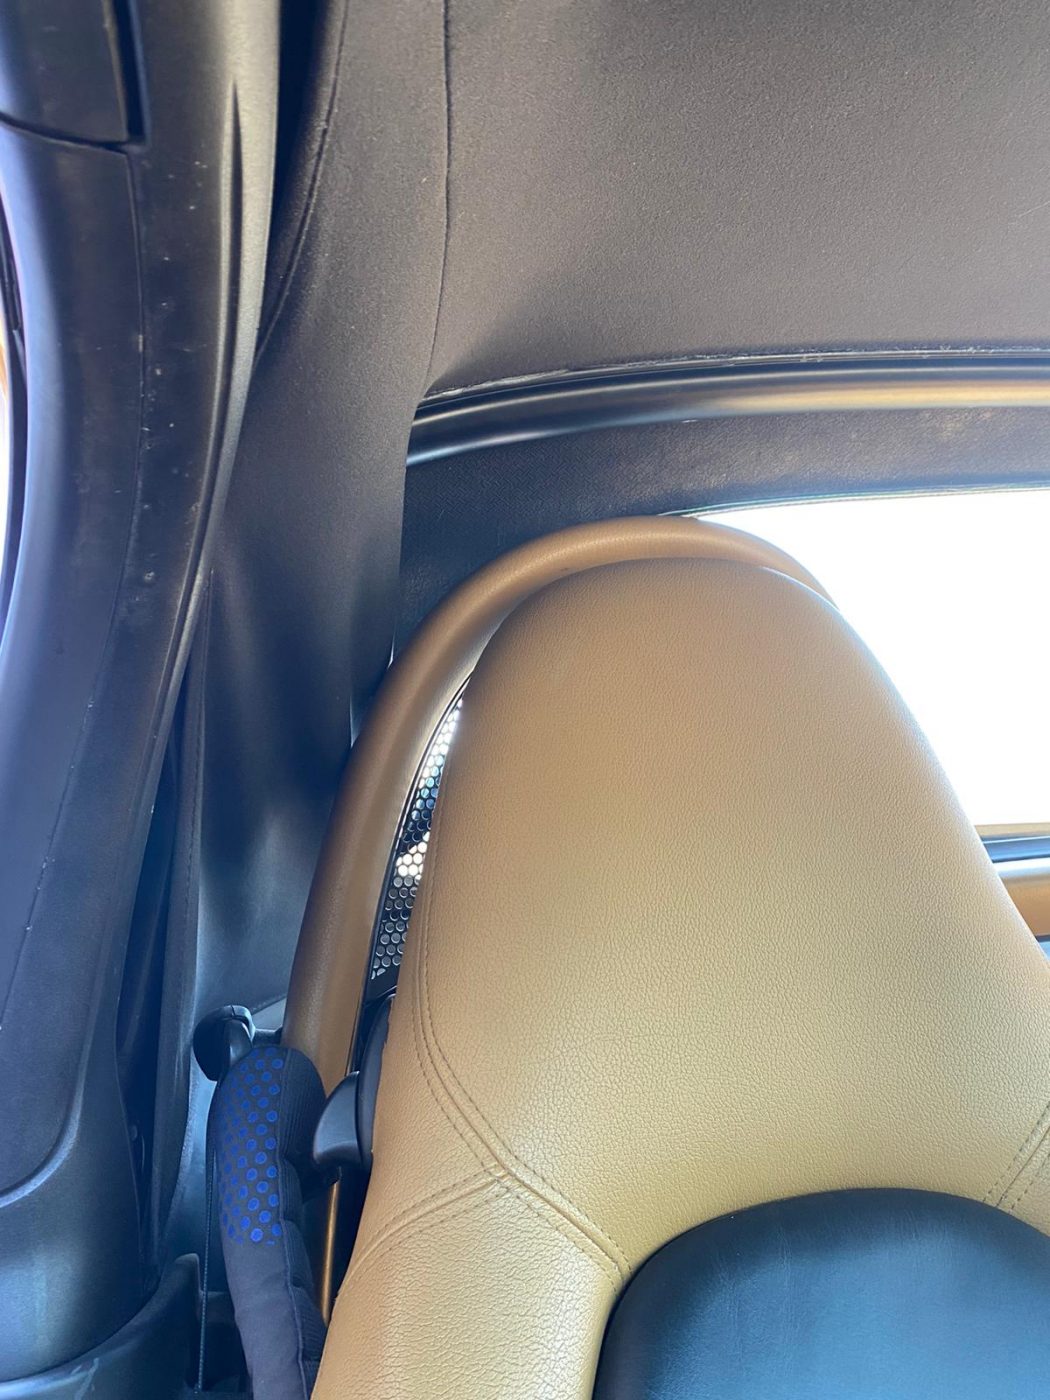
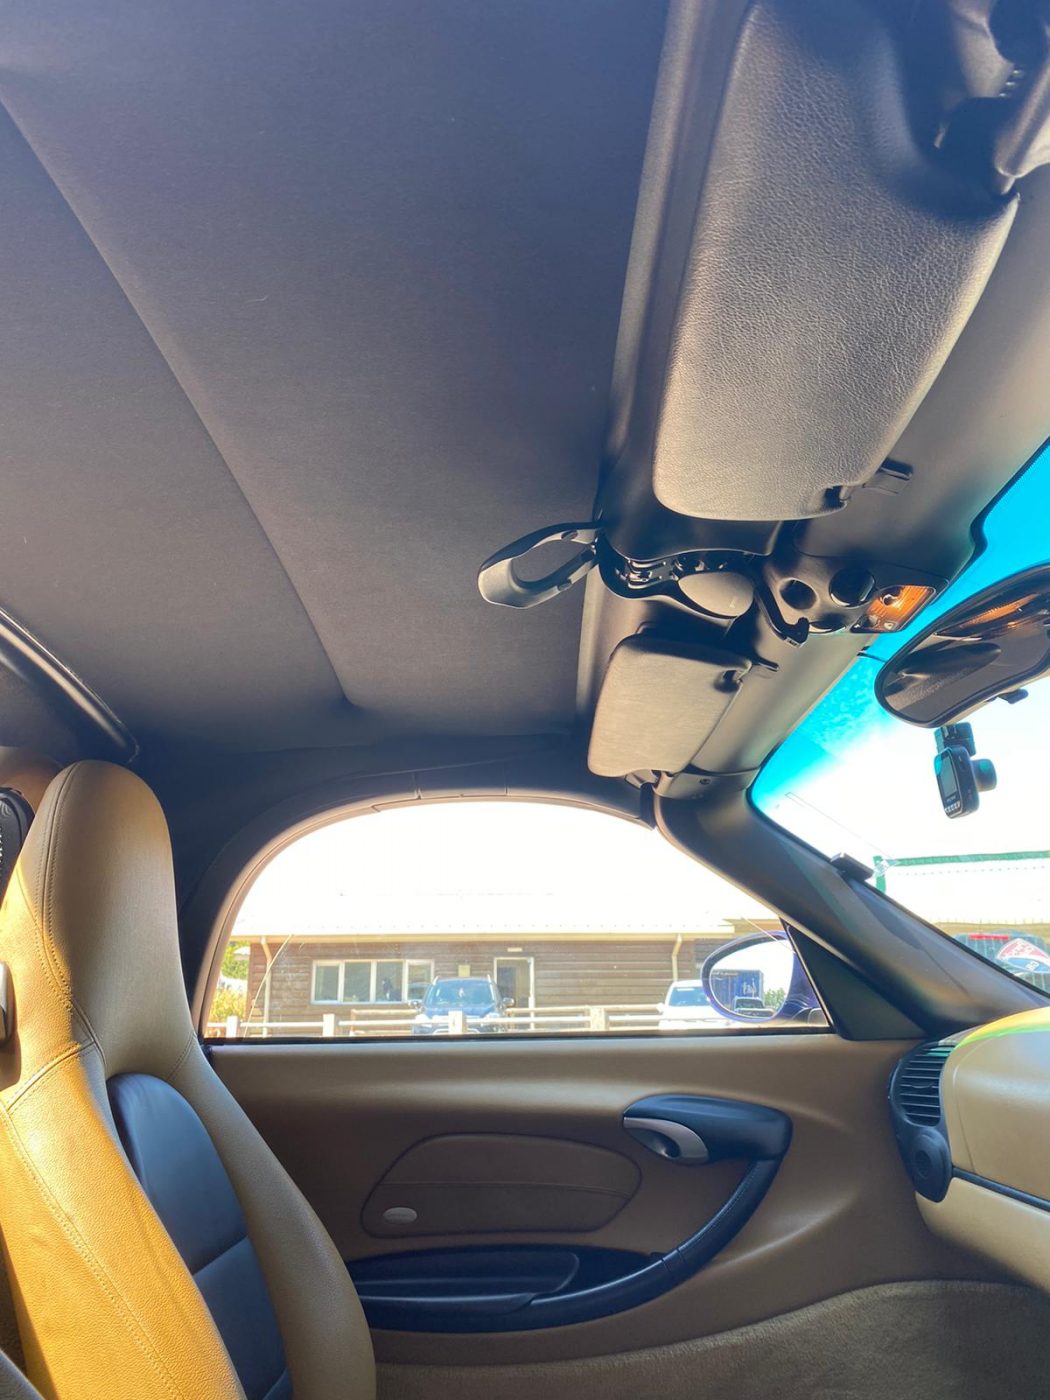
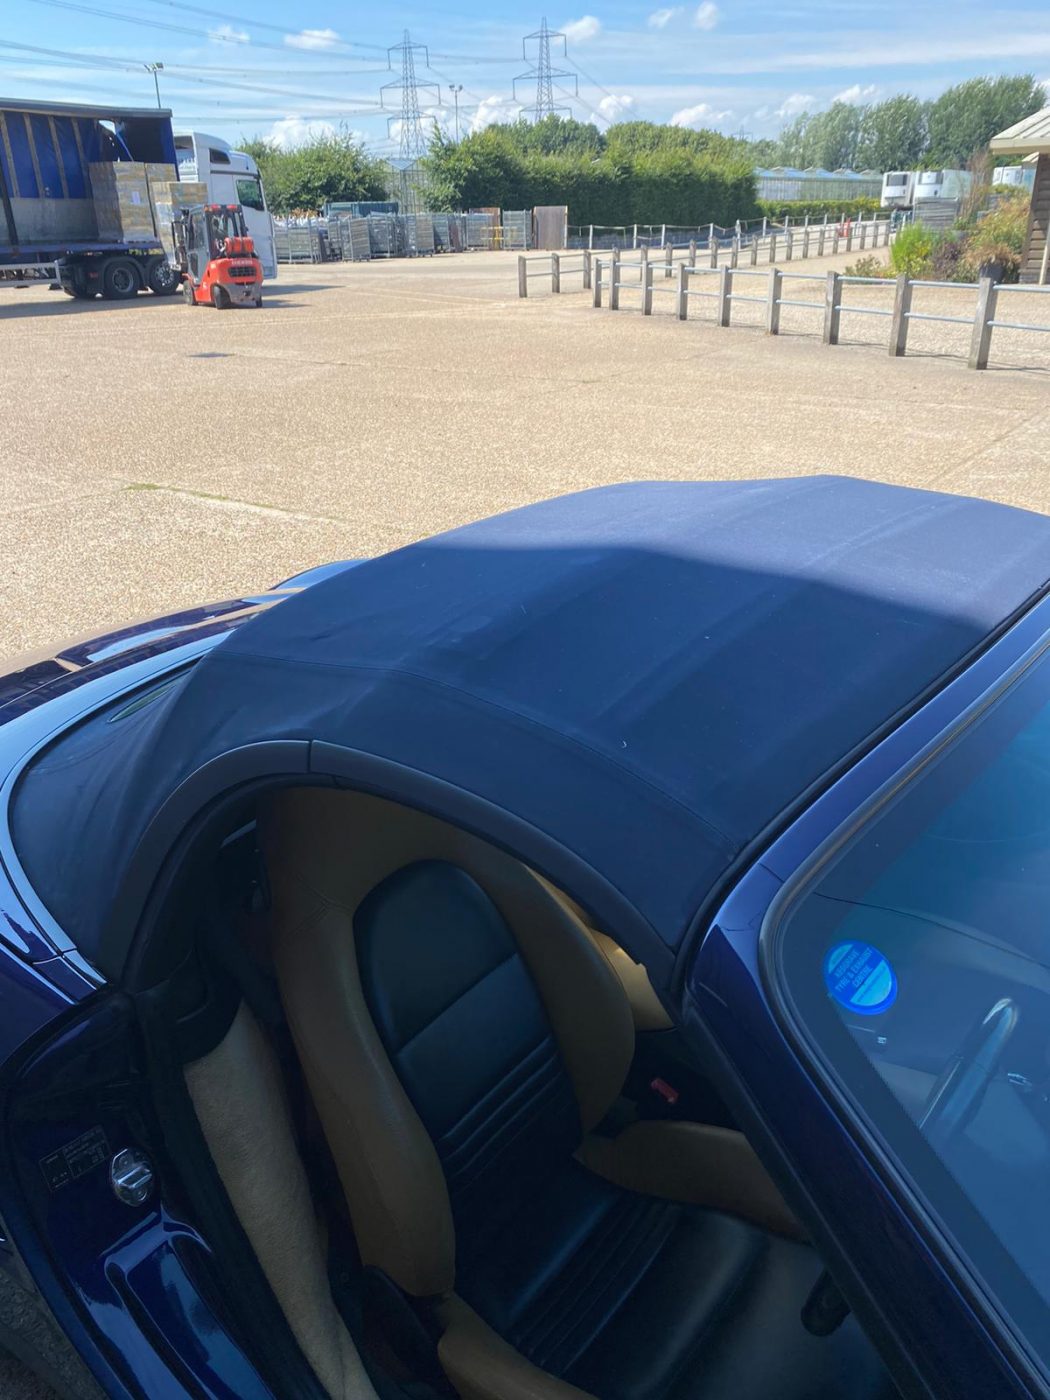
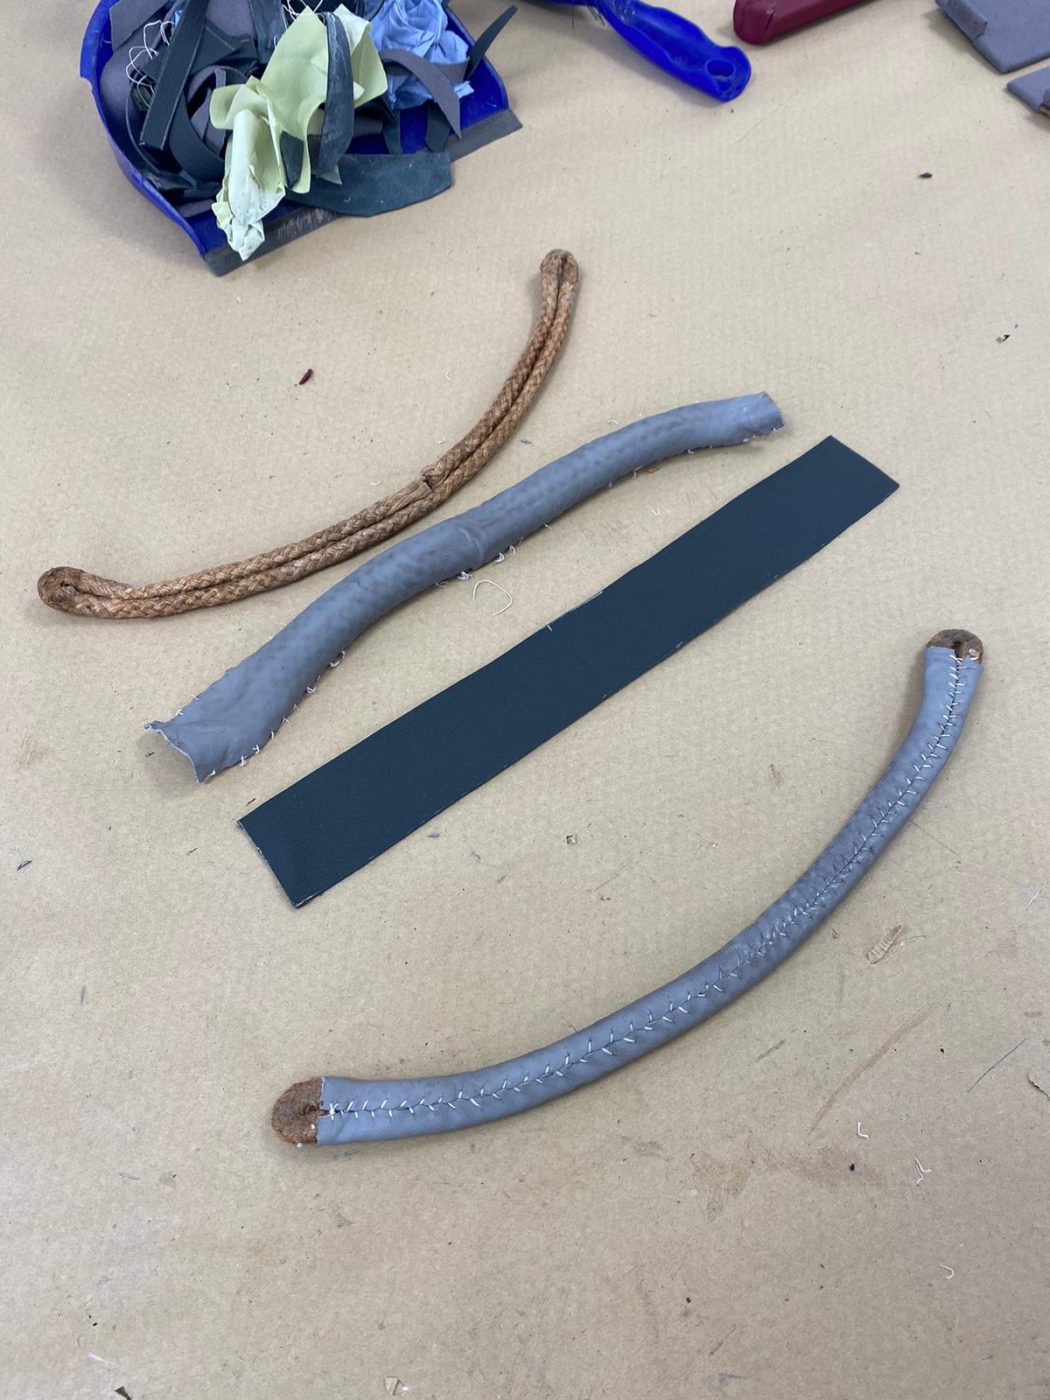
Having recently attended our Classic Car Show the owner of this Porsche Boxter has asked for our help and assistance on some remedial works required on his electric hood.
The clear perspex rear screen is coming away from the hood itself so needs re-attaching. Brian has had a closer look and in order for this to be repaired properly the roof will have to come off the car. Brian feels that re-attaching the existing screen to the hood may only be a temporary fix as the existing holes may be duplicated and therefore the new stitching may not be as tight and secure second time around.
With the entire hood being removed is there an argument to say ‘just replace the hood with one off the shelf?’ The most cost effective solution would be to do this. A bespoke hood manufactured would not be required as there are companies out there that have already produced the hood from a pattern so rather than reinventing the wheel go with a company that has been there and done that!
At the end of the day, the hardest bit is removing and fitting the hood so to fit a brand new one that is beautifully tight would give you the best results.
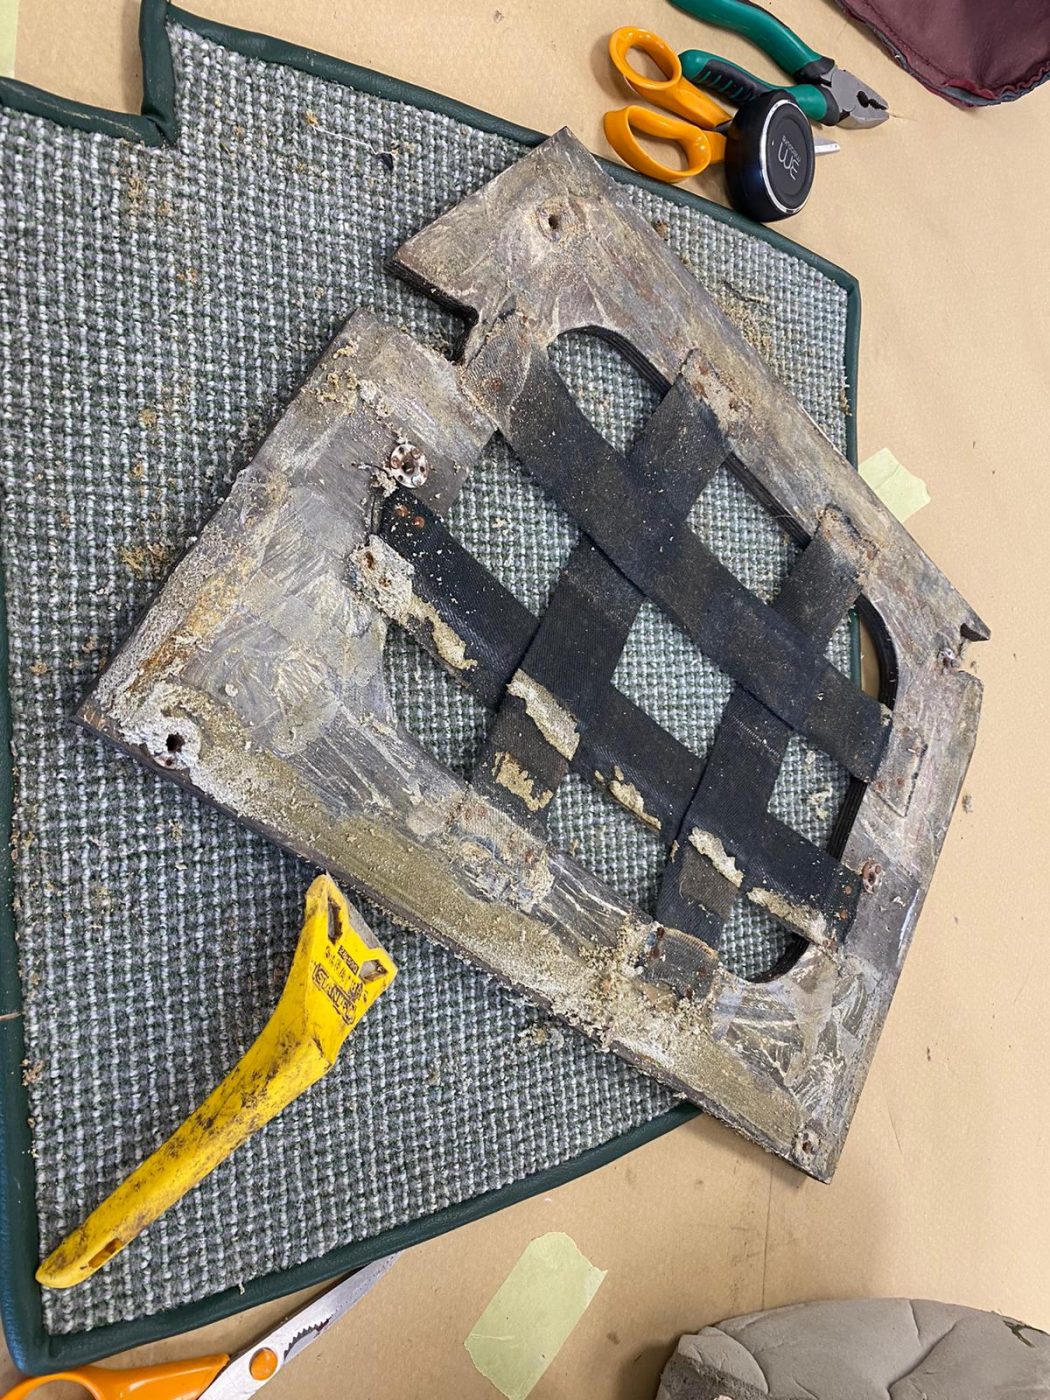
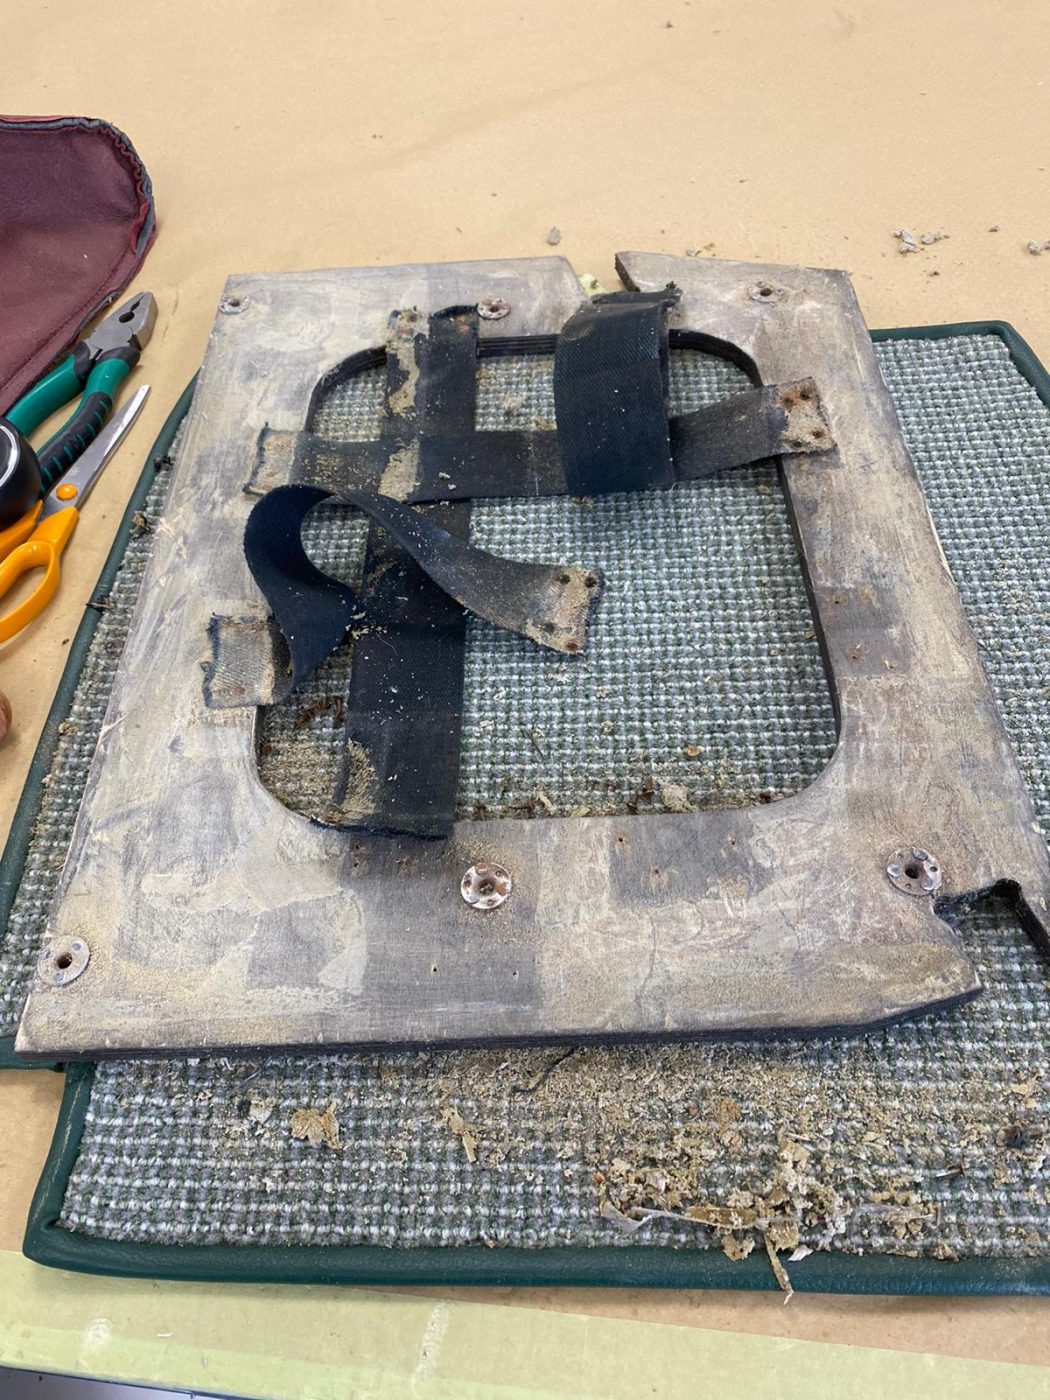
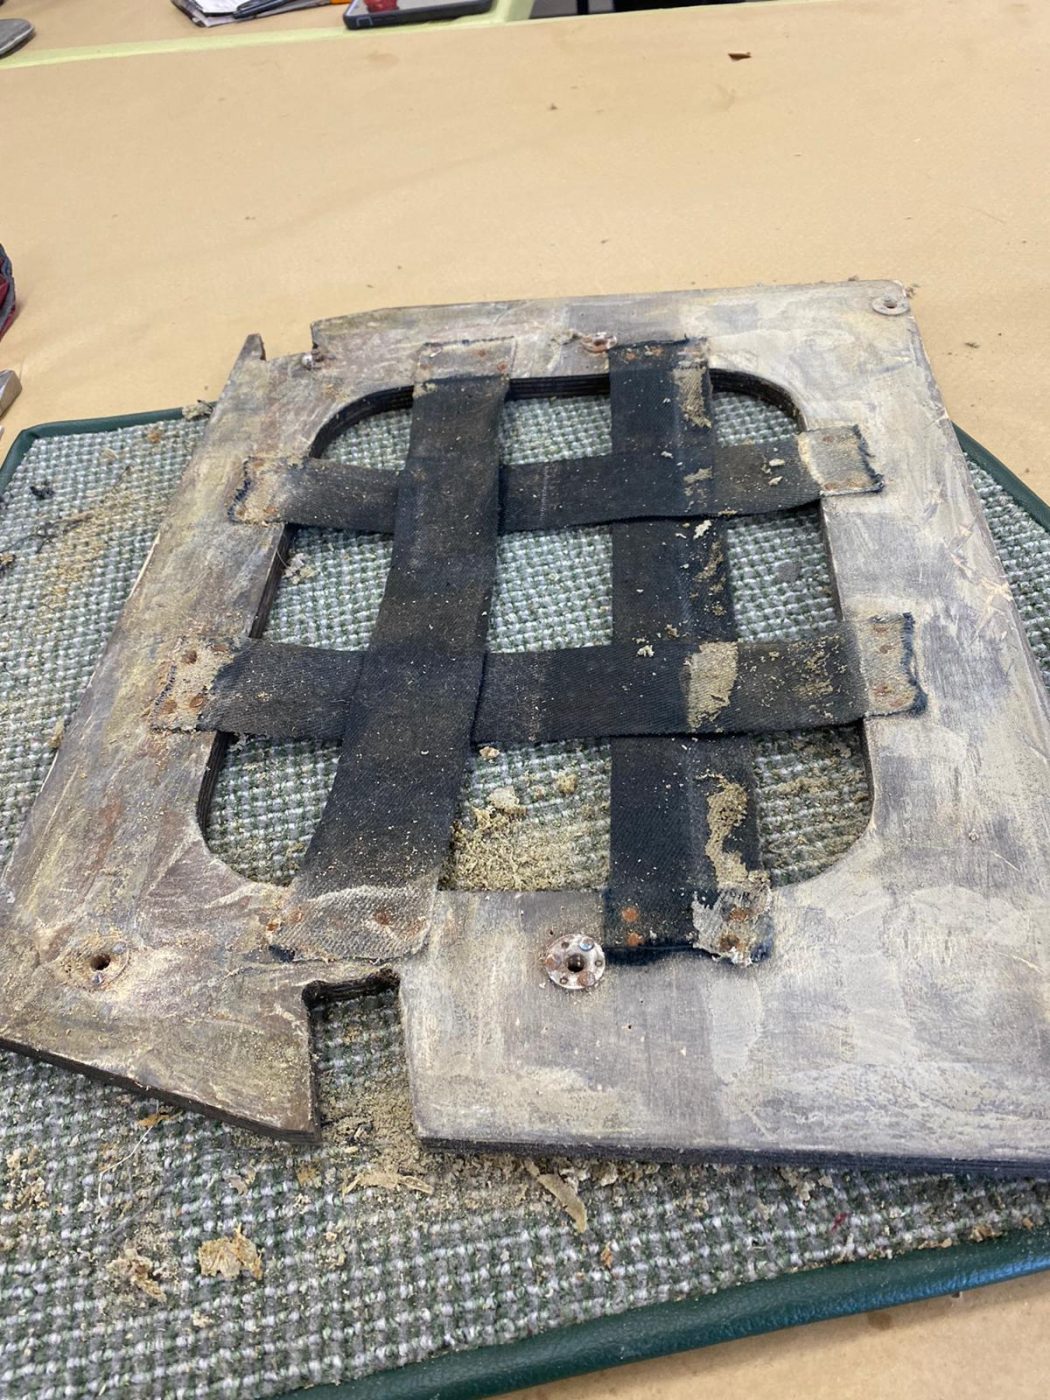
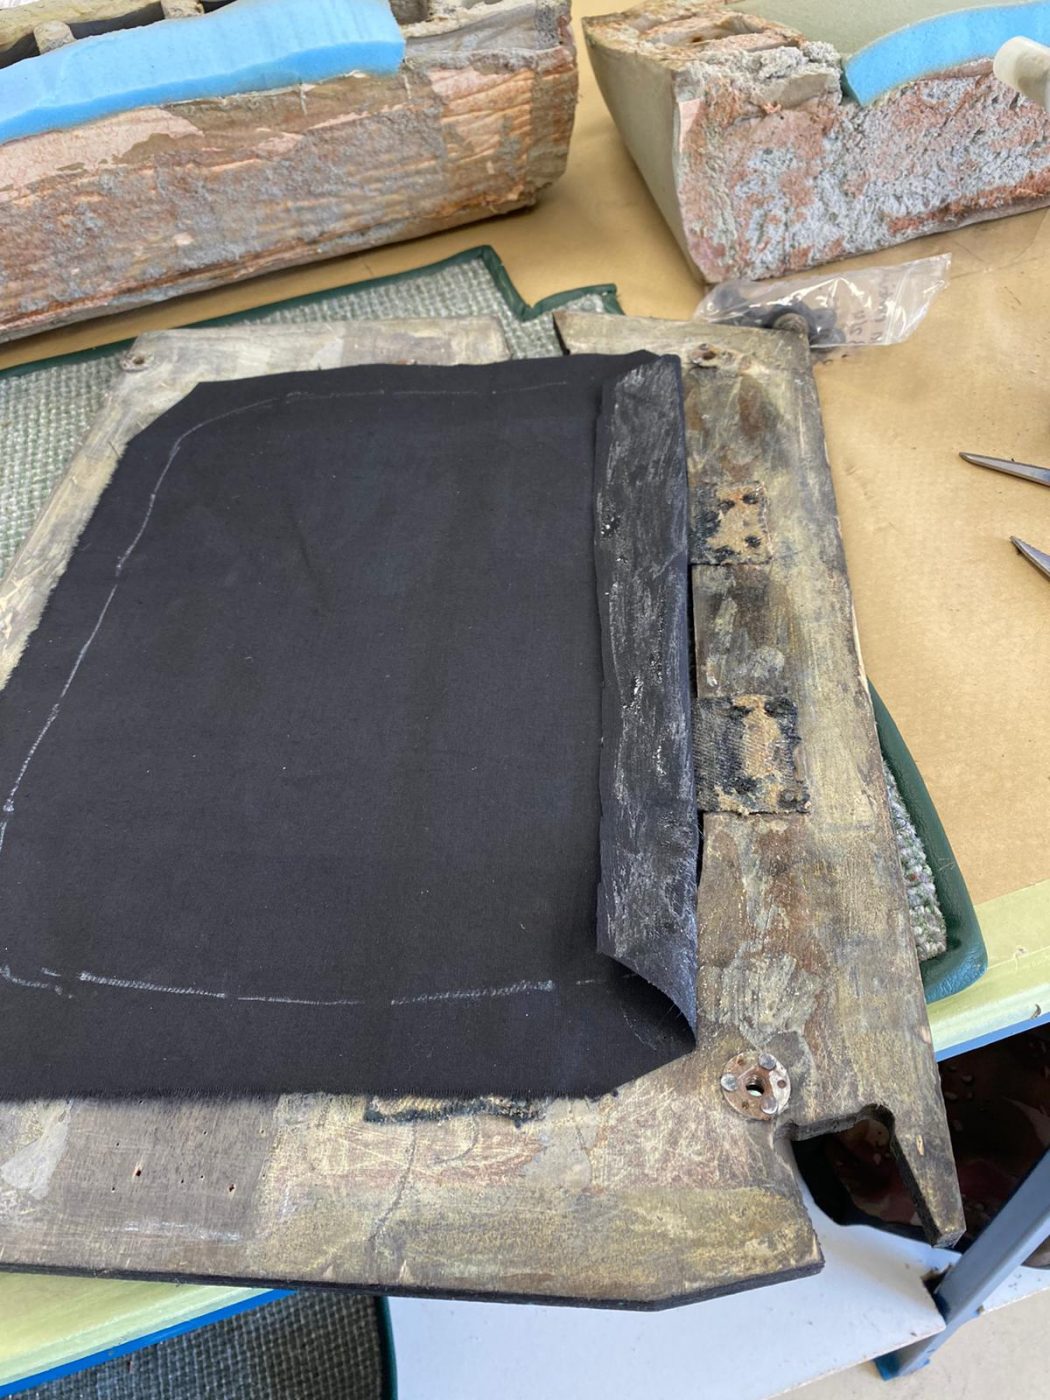
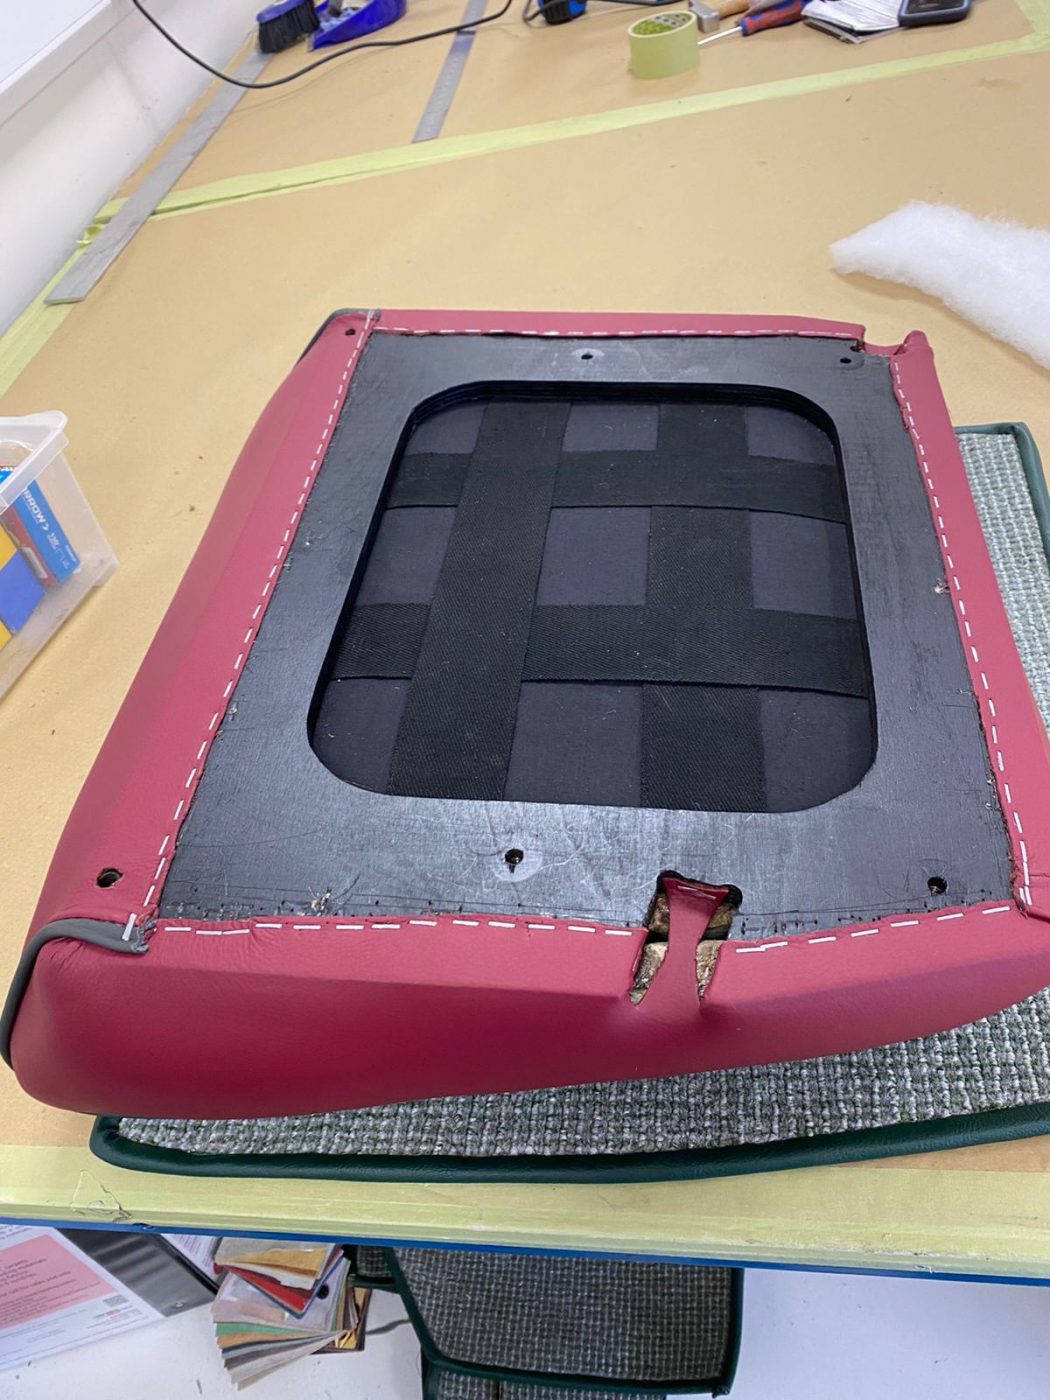
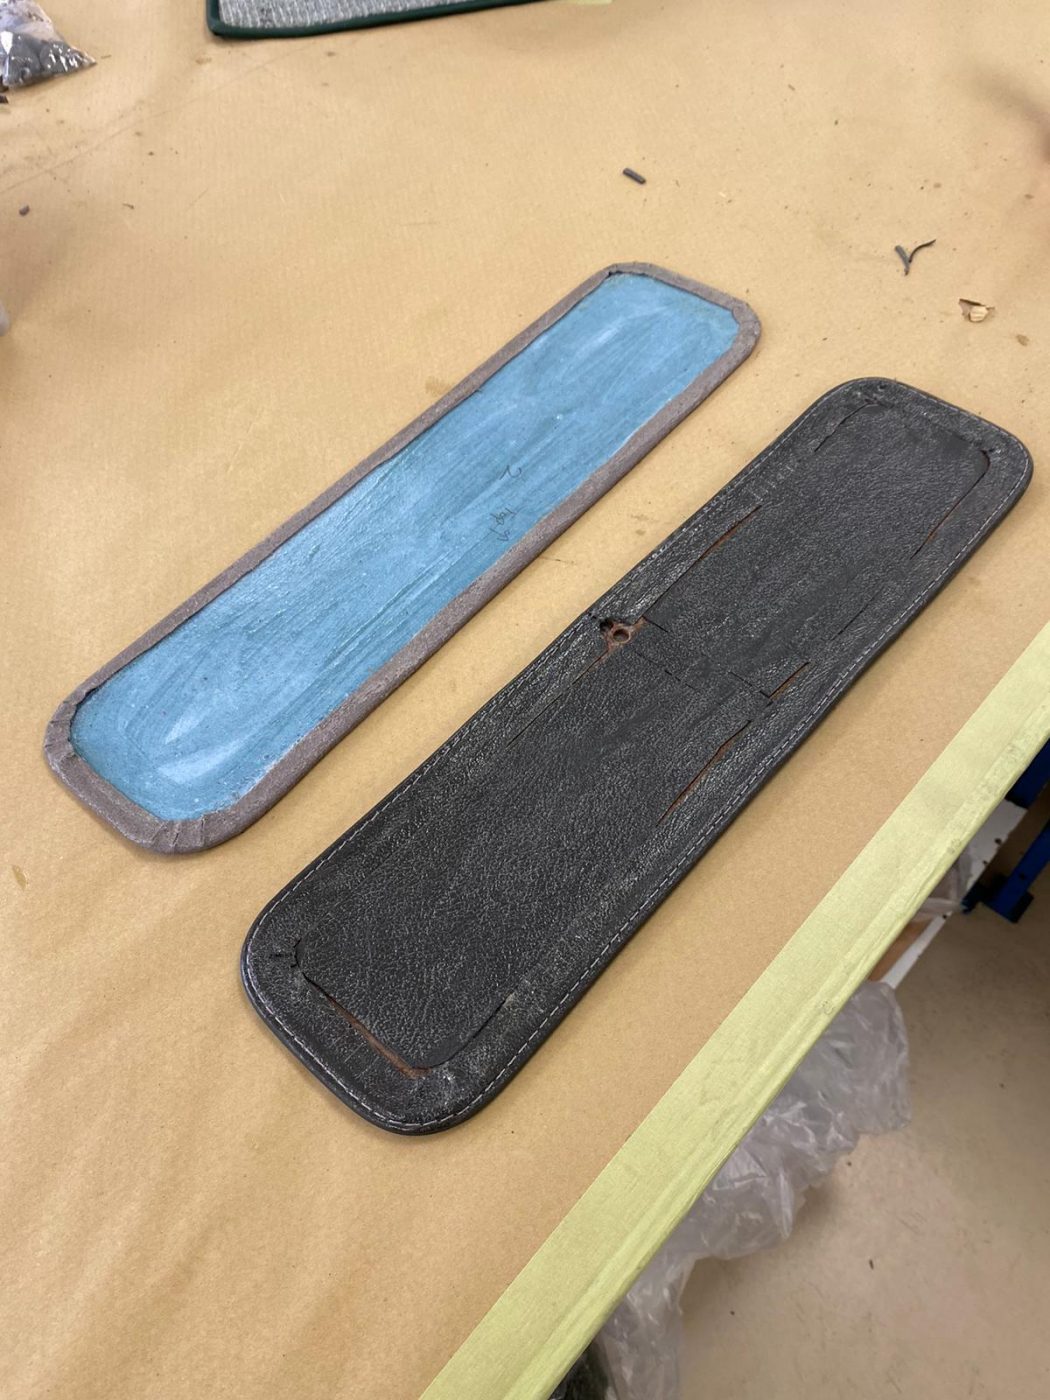
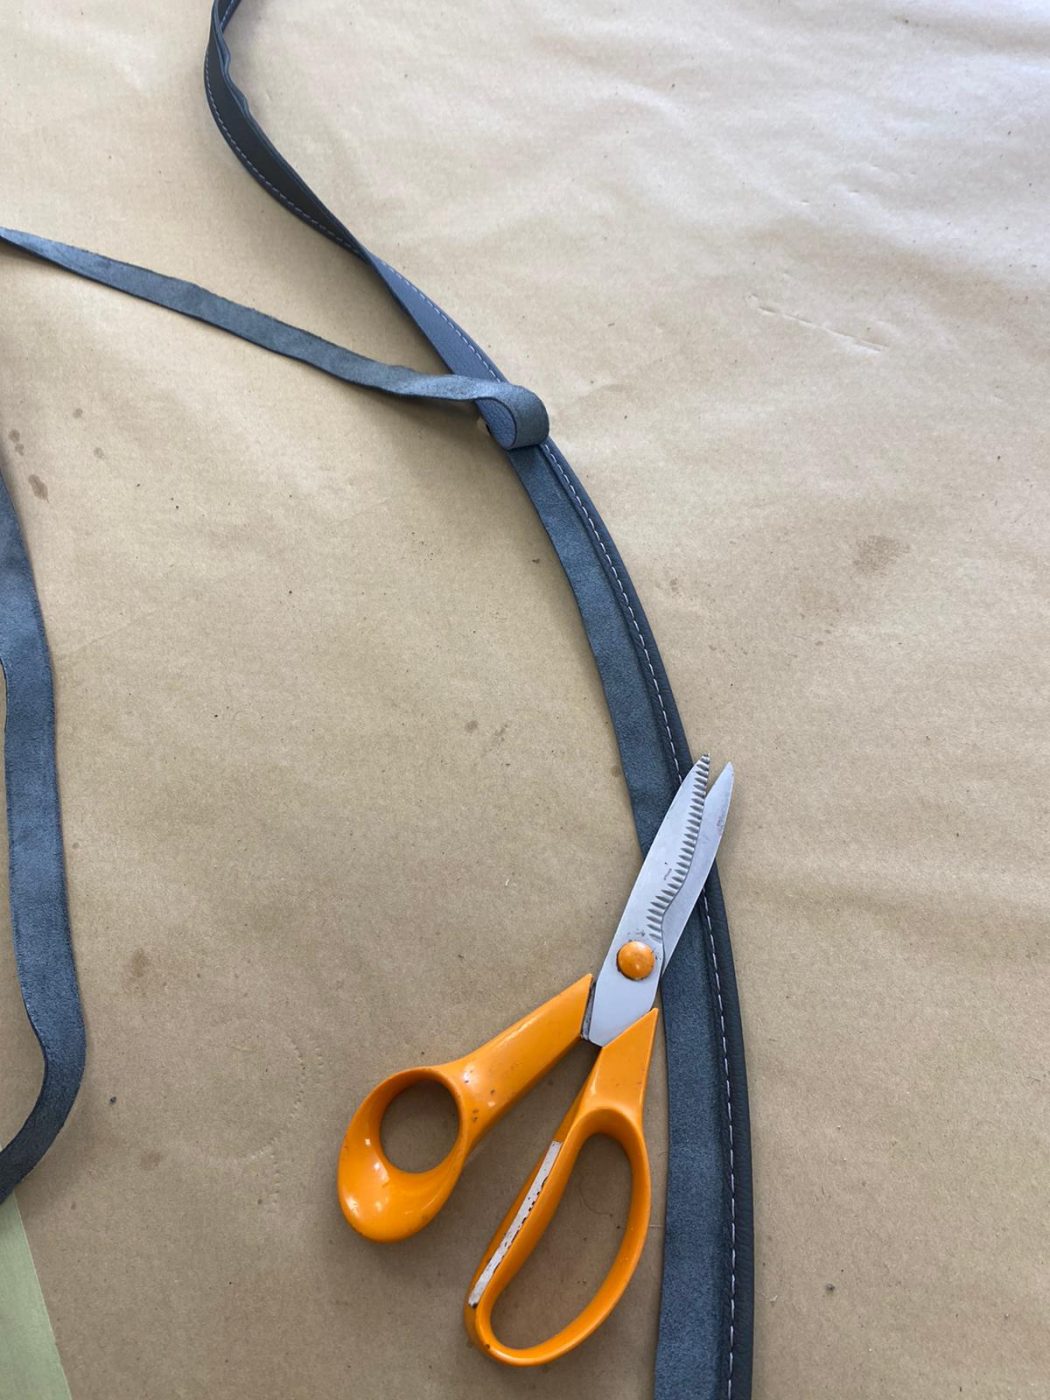
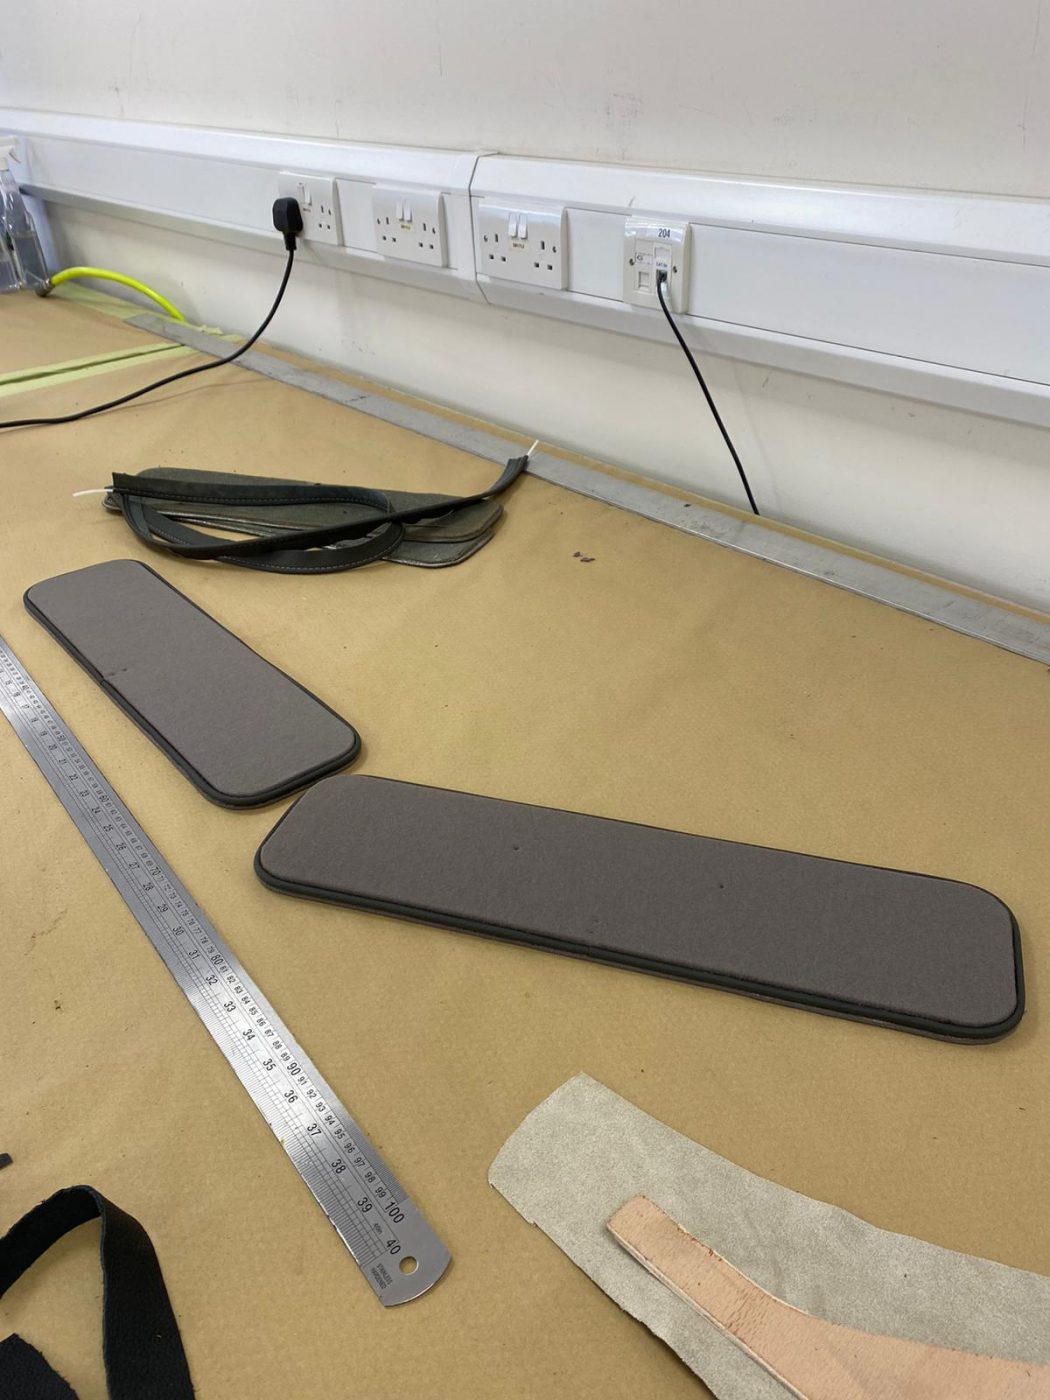
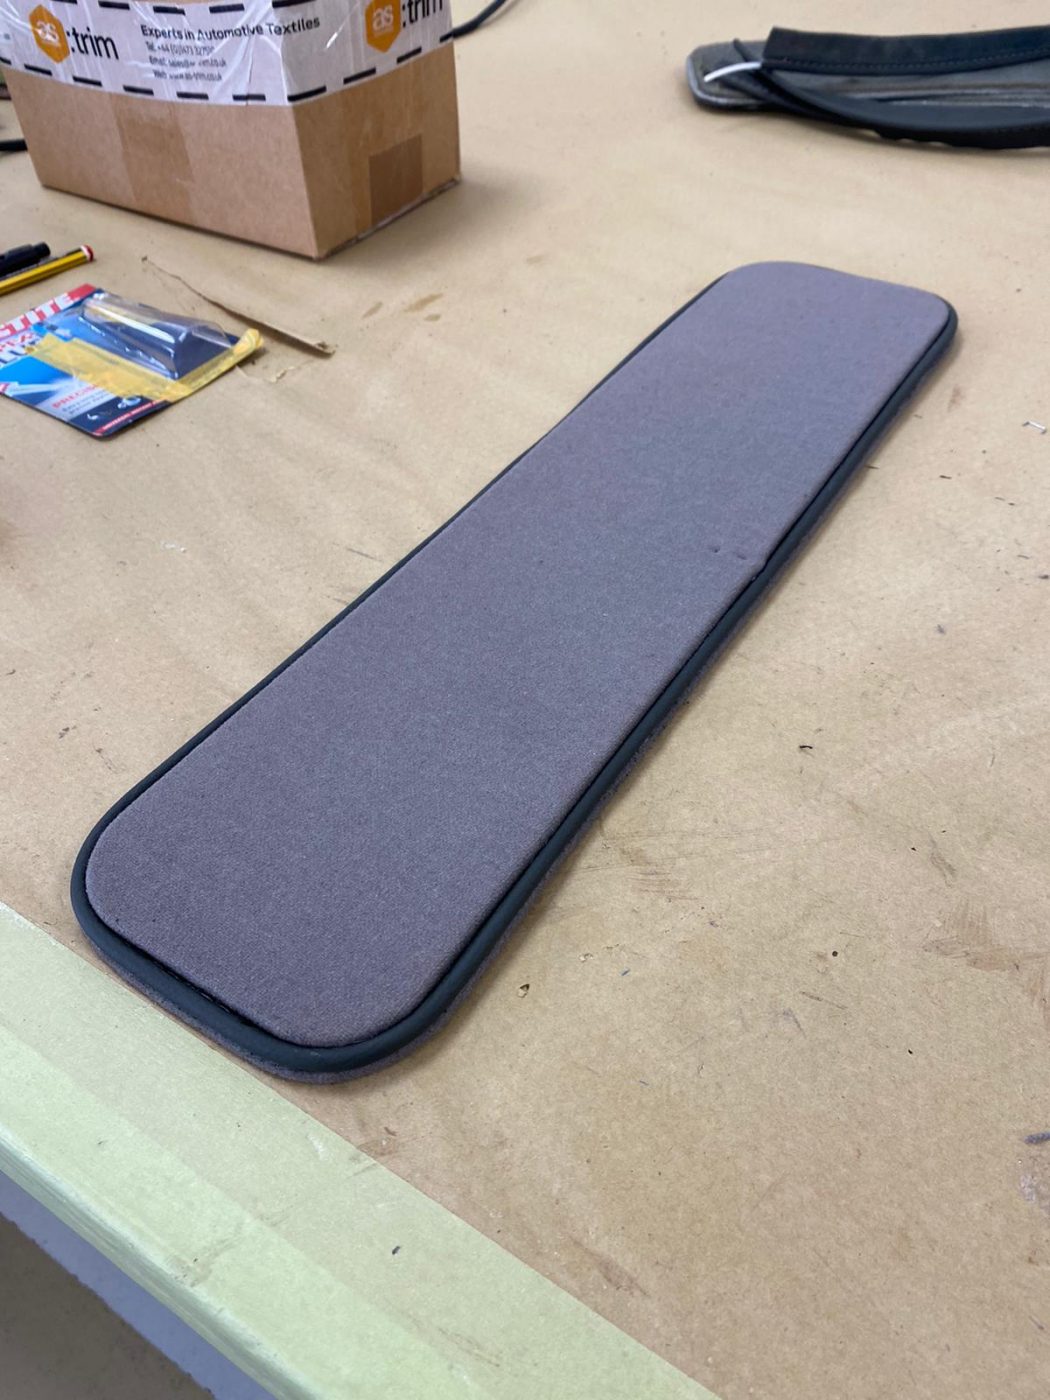
Another little update on the 1955 Aston Martin DB 2/4 coming your way!
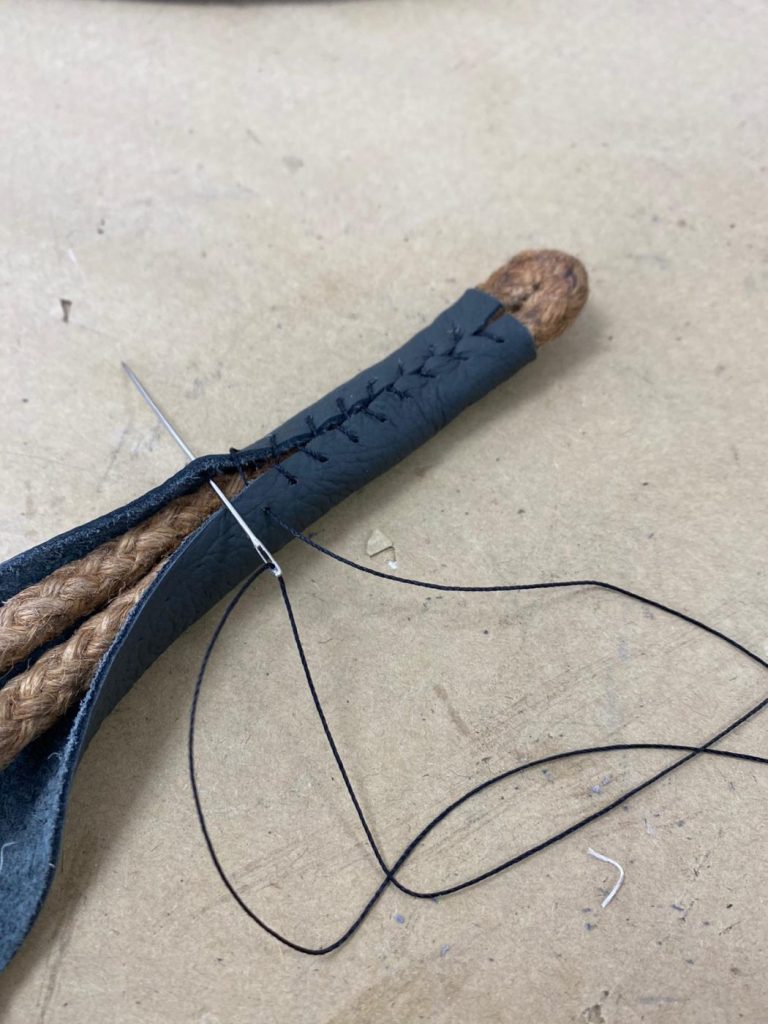
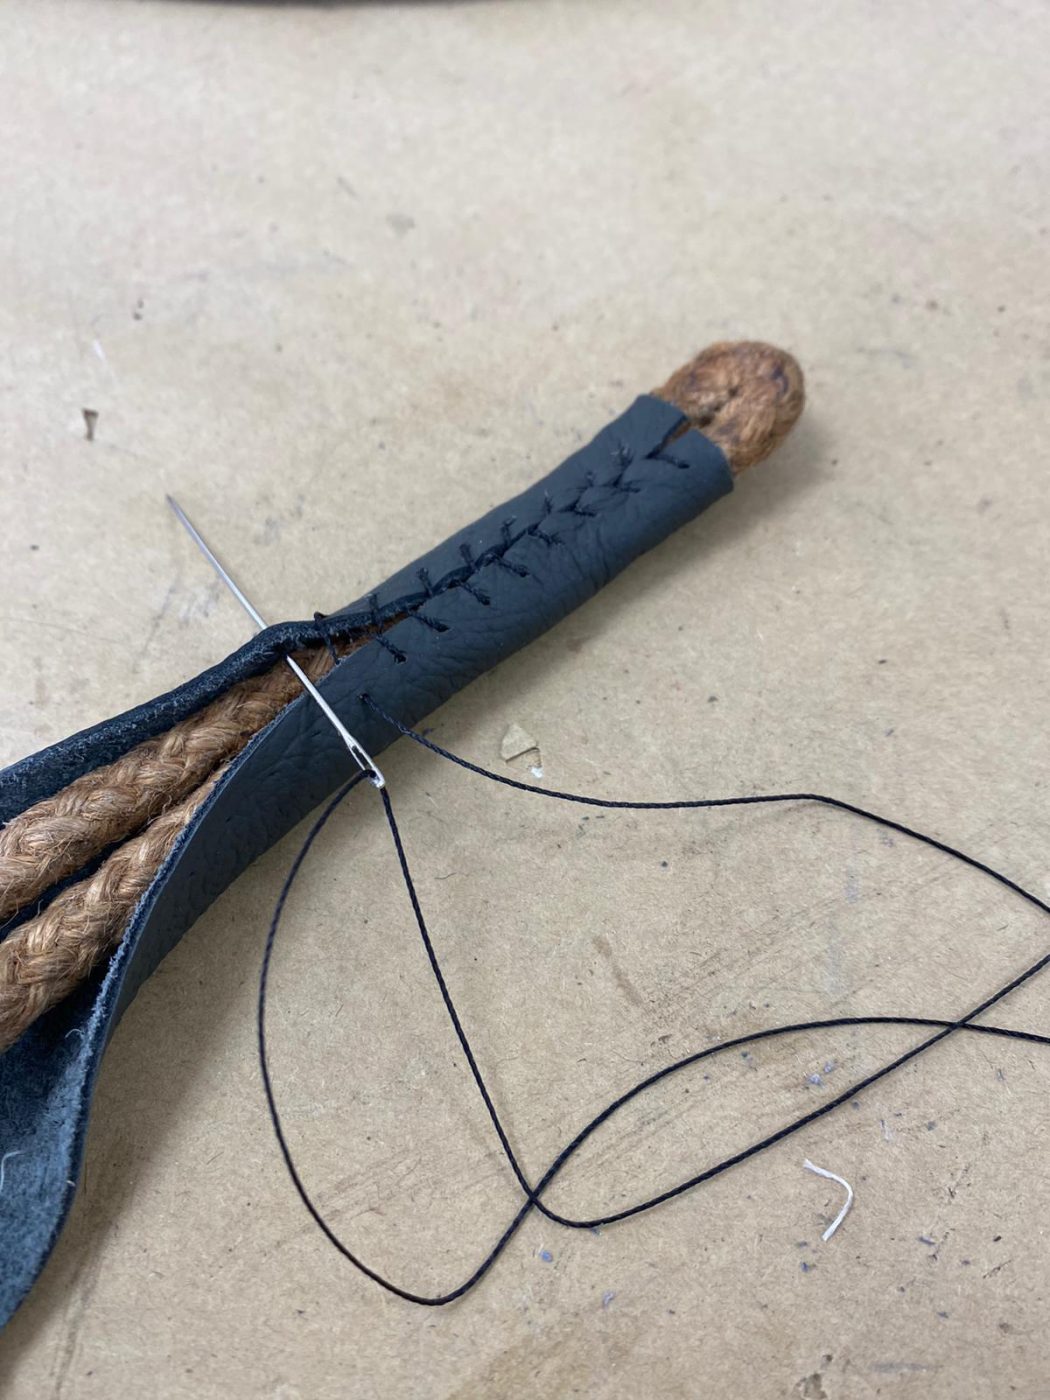
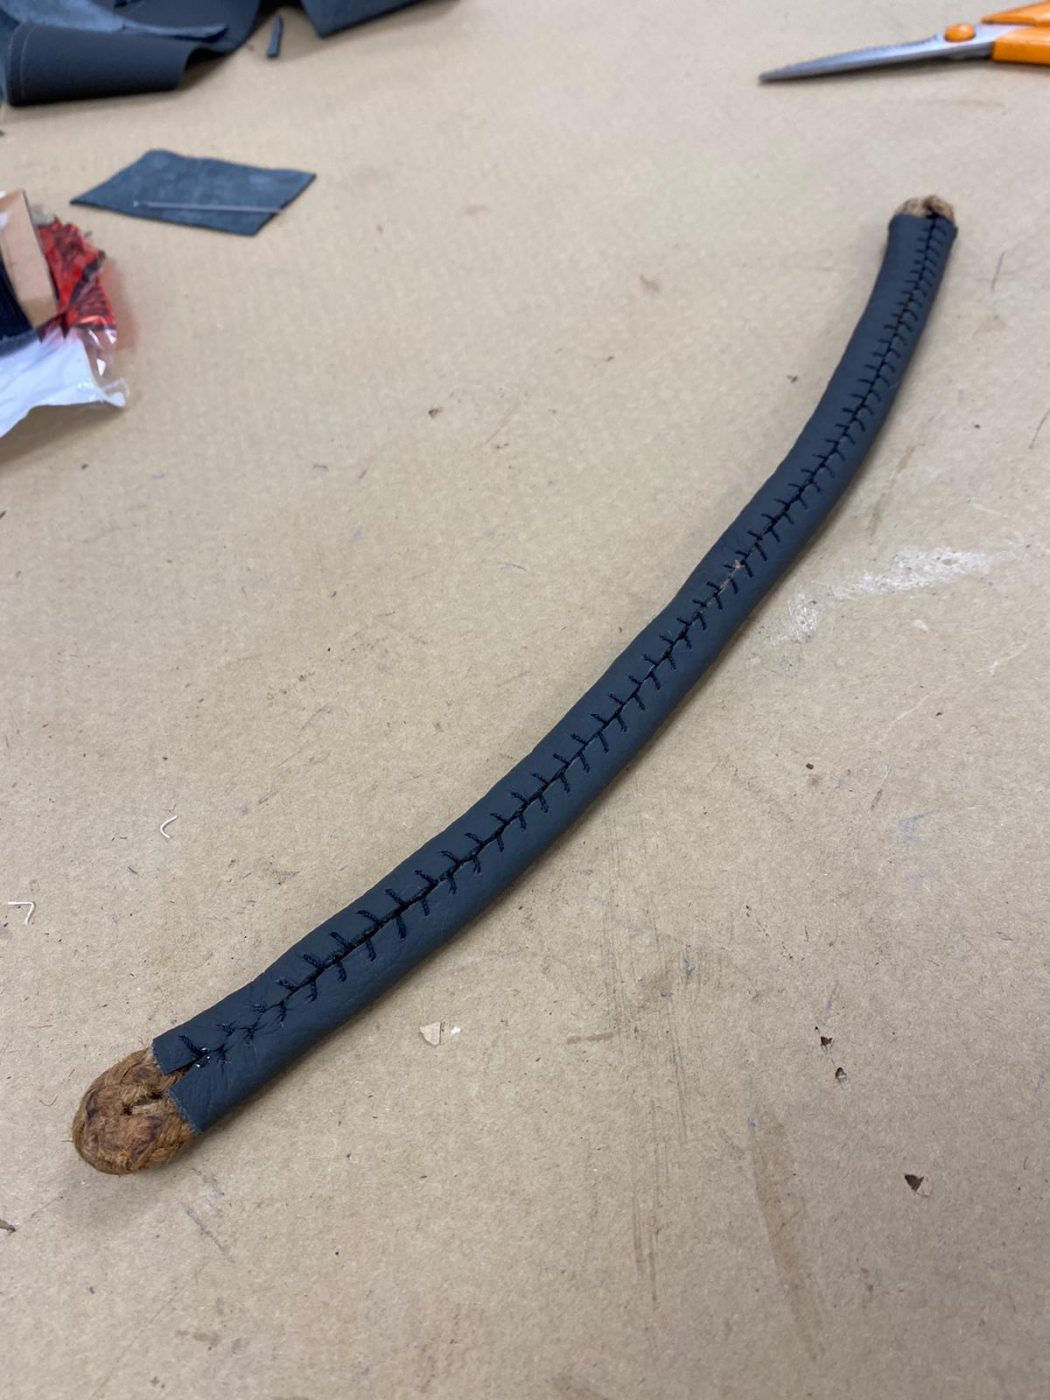
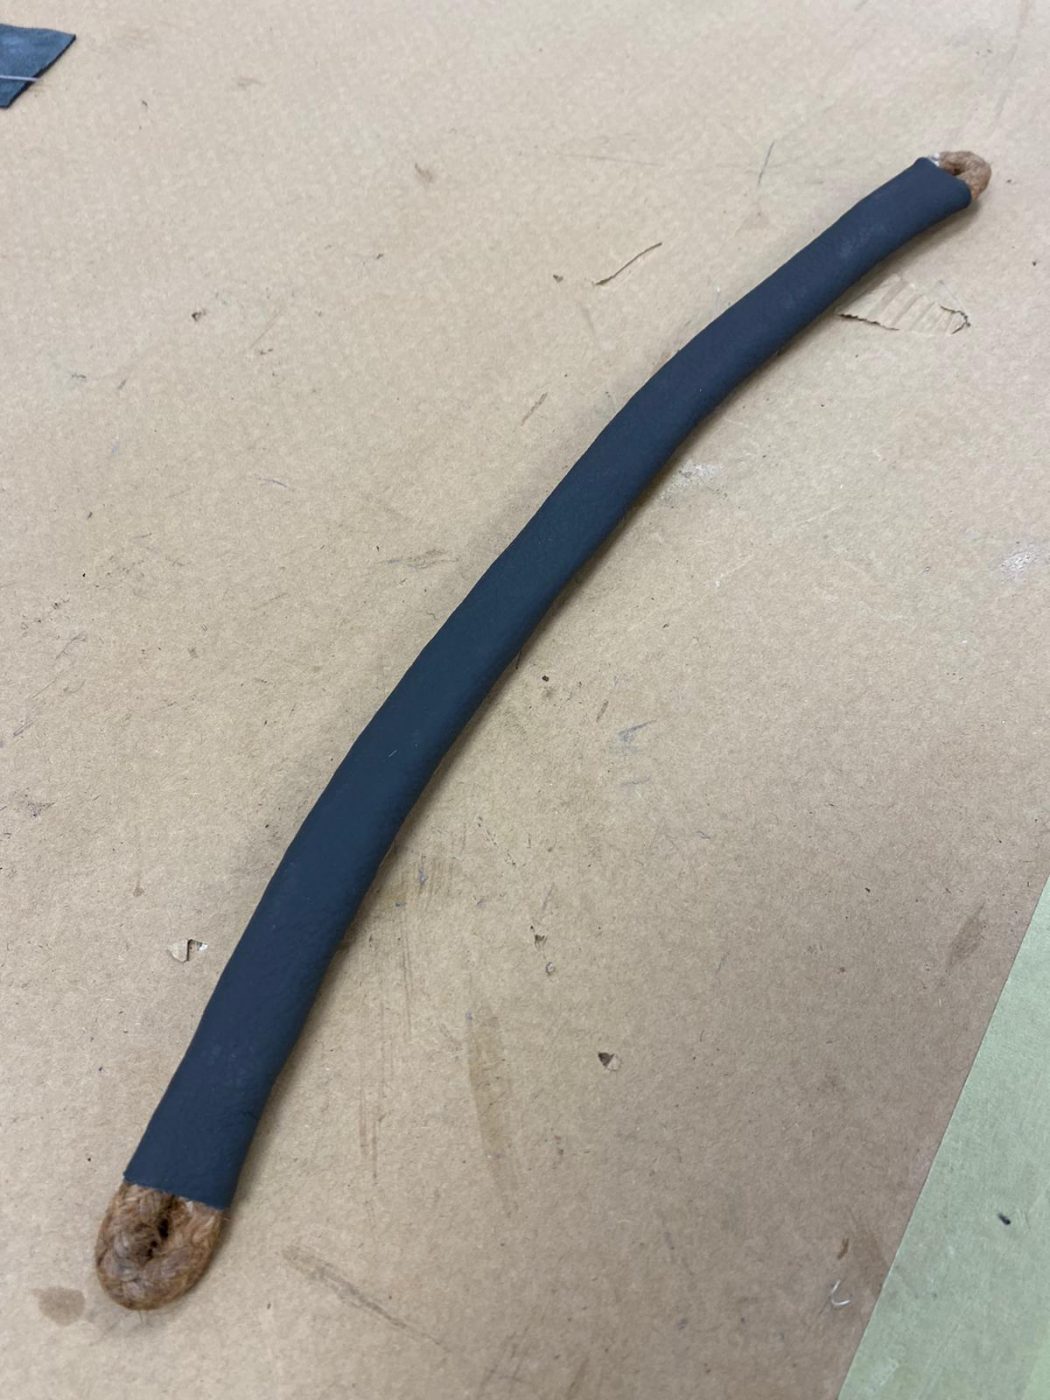
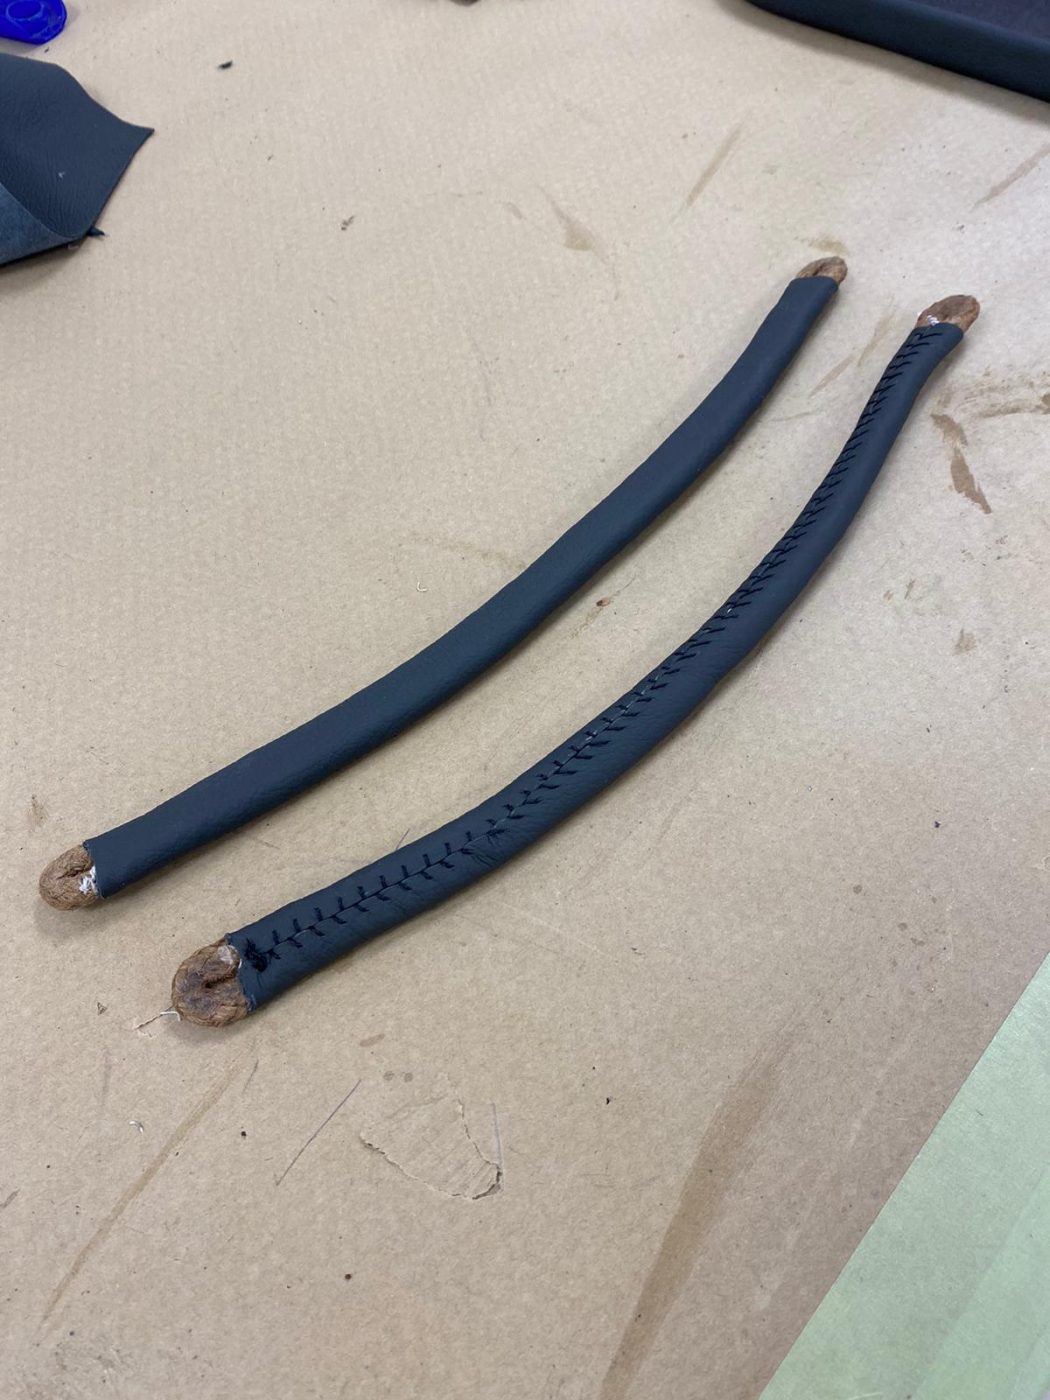
In the trim shop, Kath has been re-covering the door straps. She began the process by taking the original leather off one of them and using it as a pattern for both of them on the new leather. Once cut out, she sewed the new leather piece onto each one, by hand. The way that it was sewn couldn’t have been done by machine.
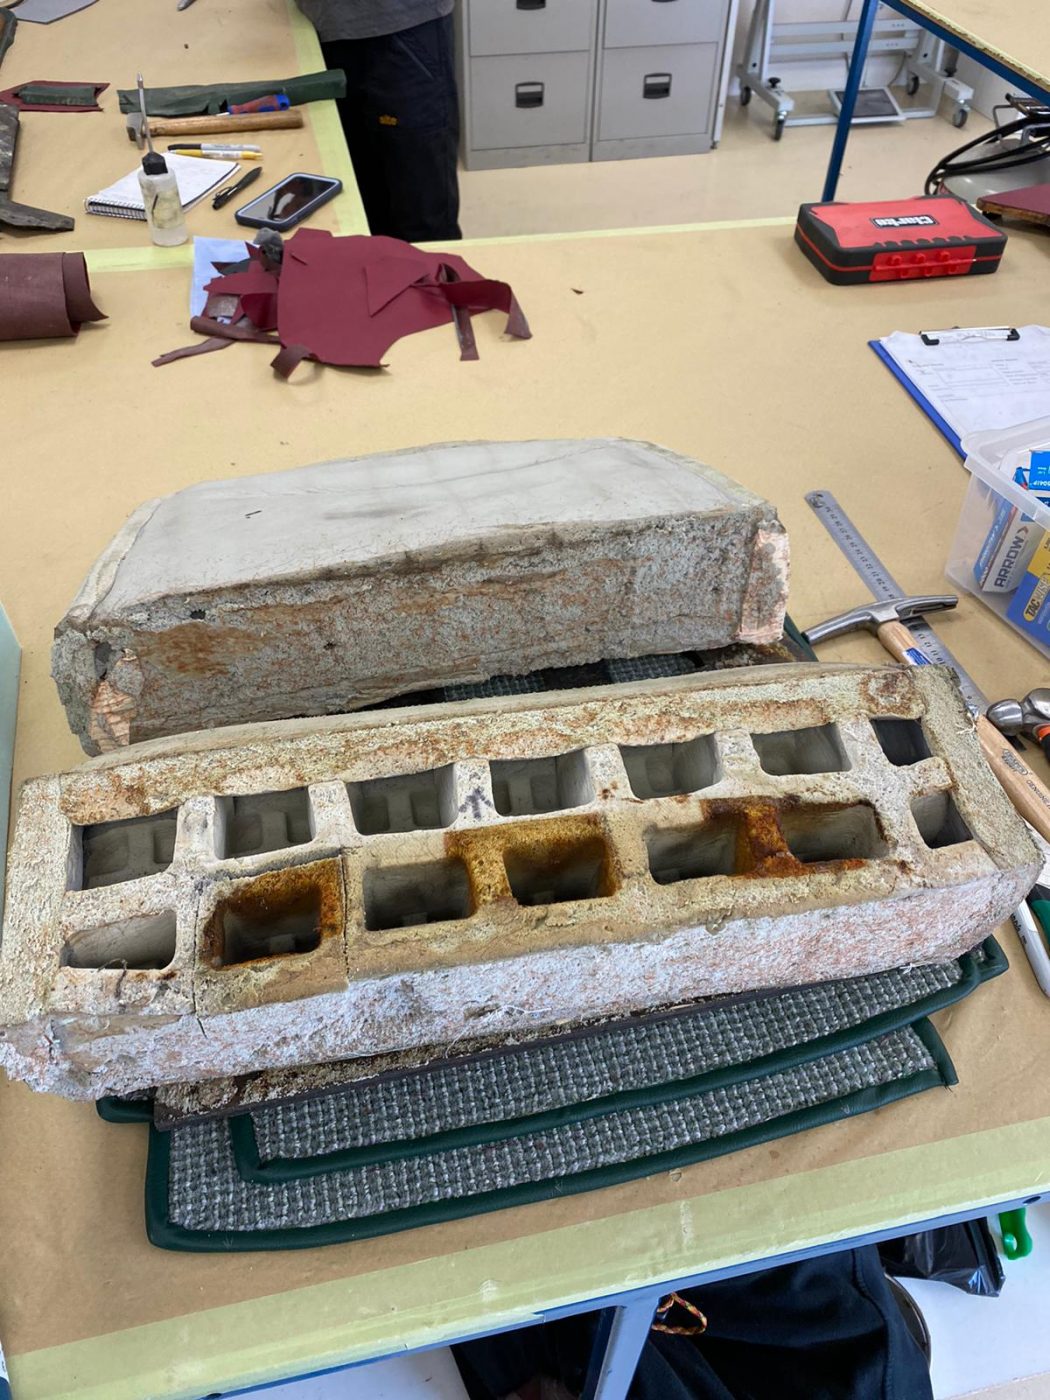
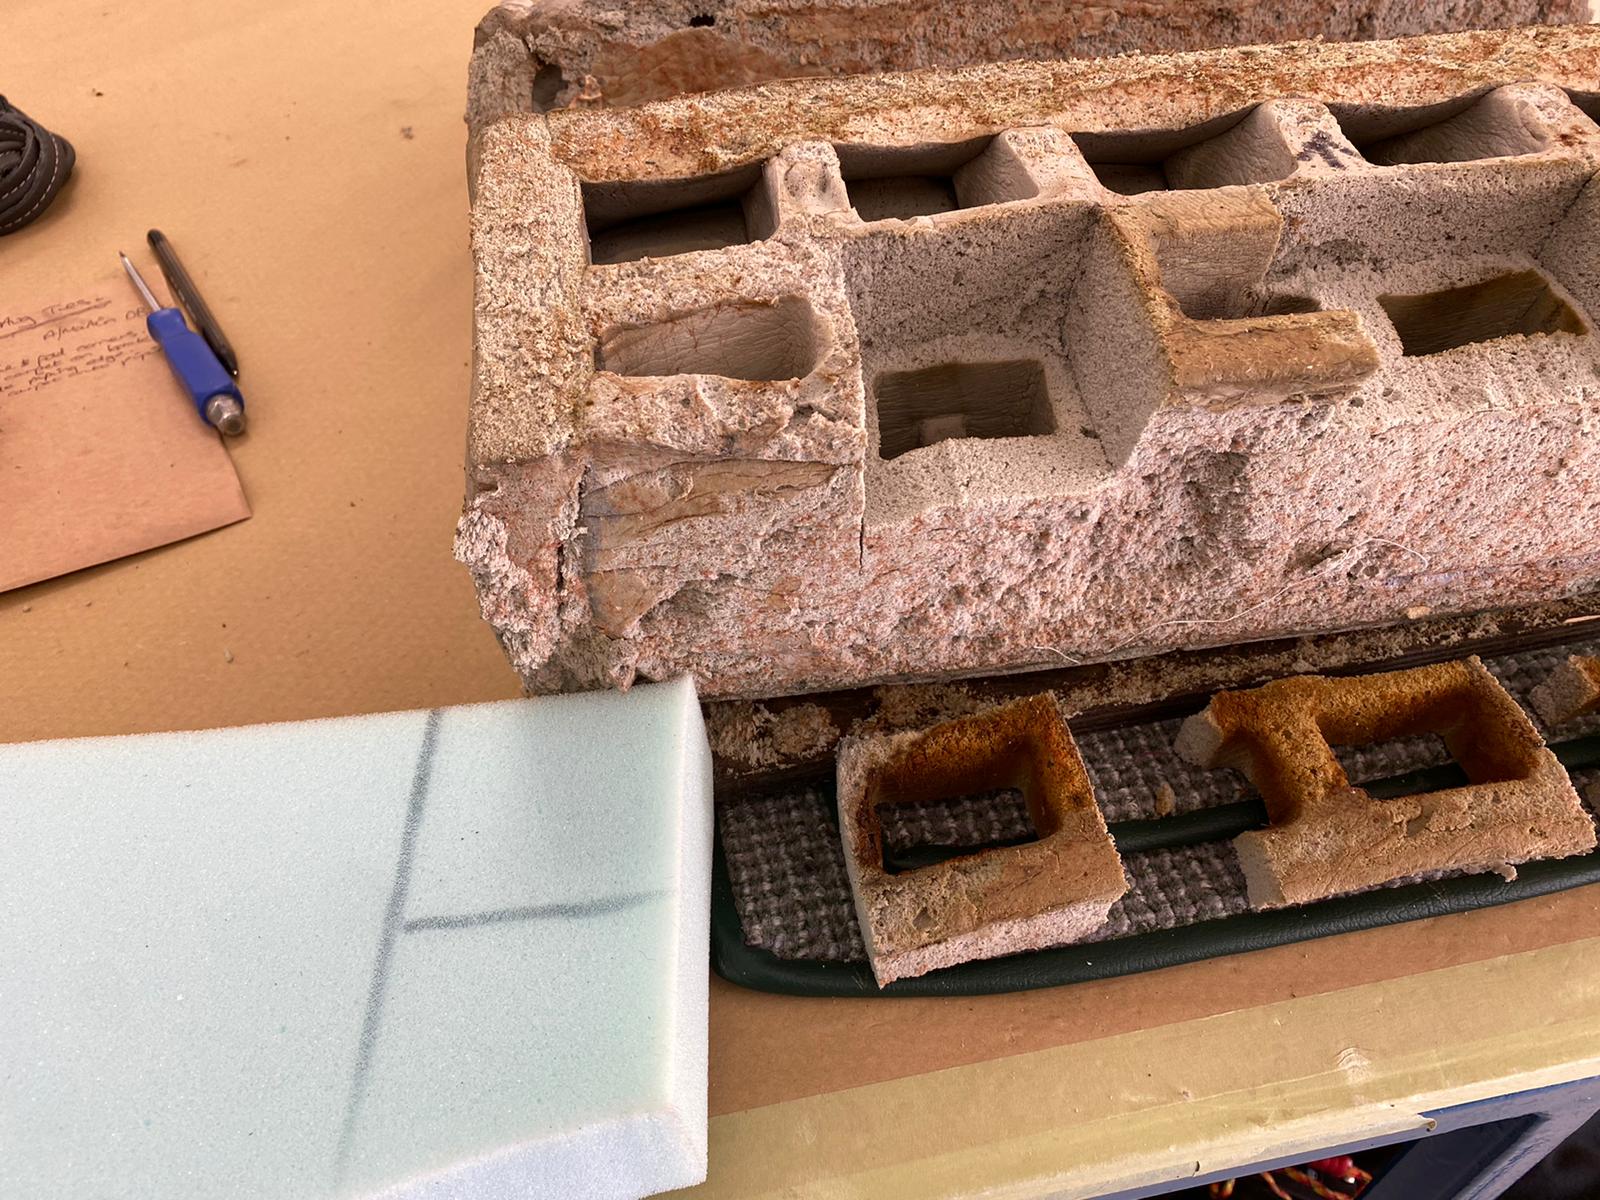
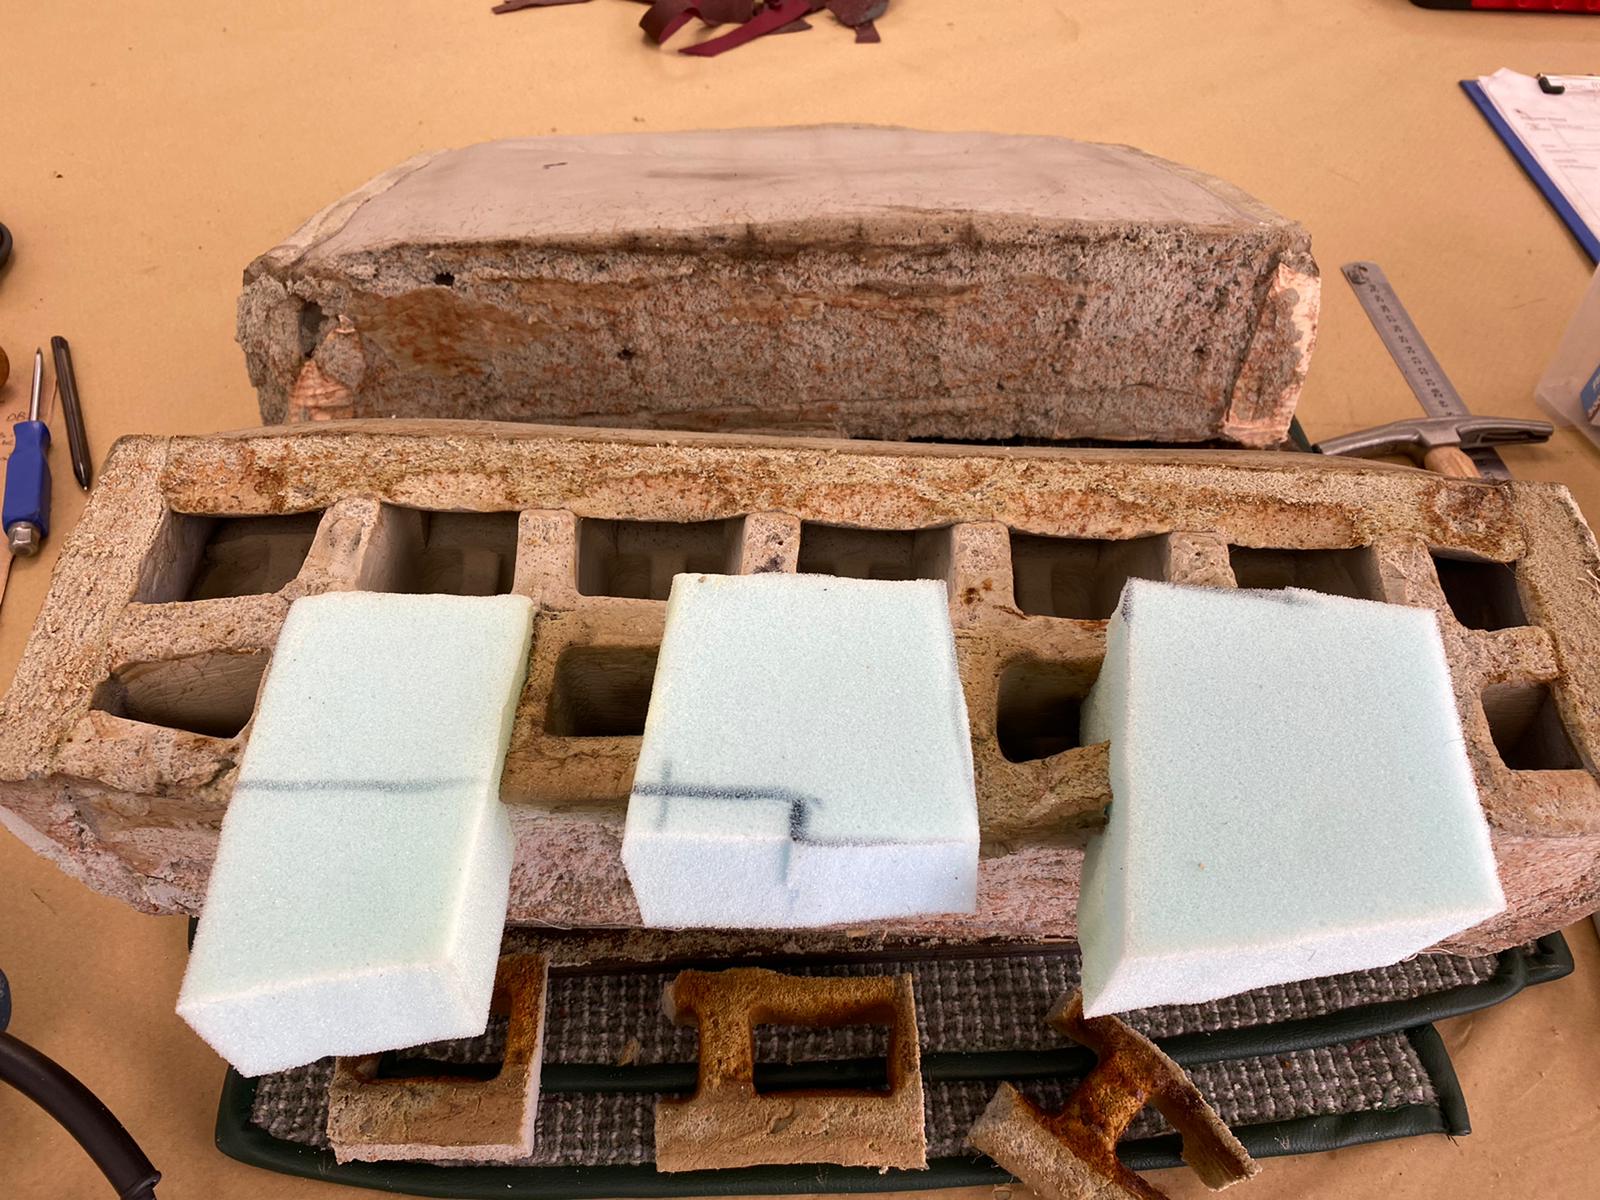
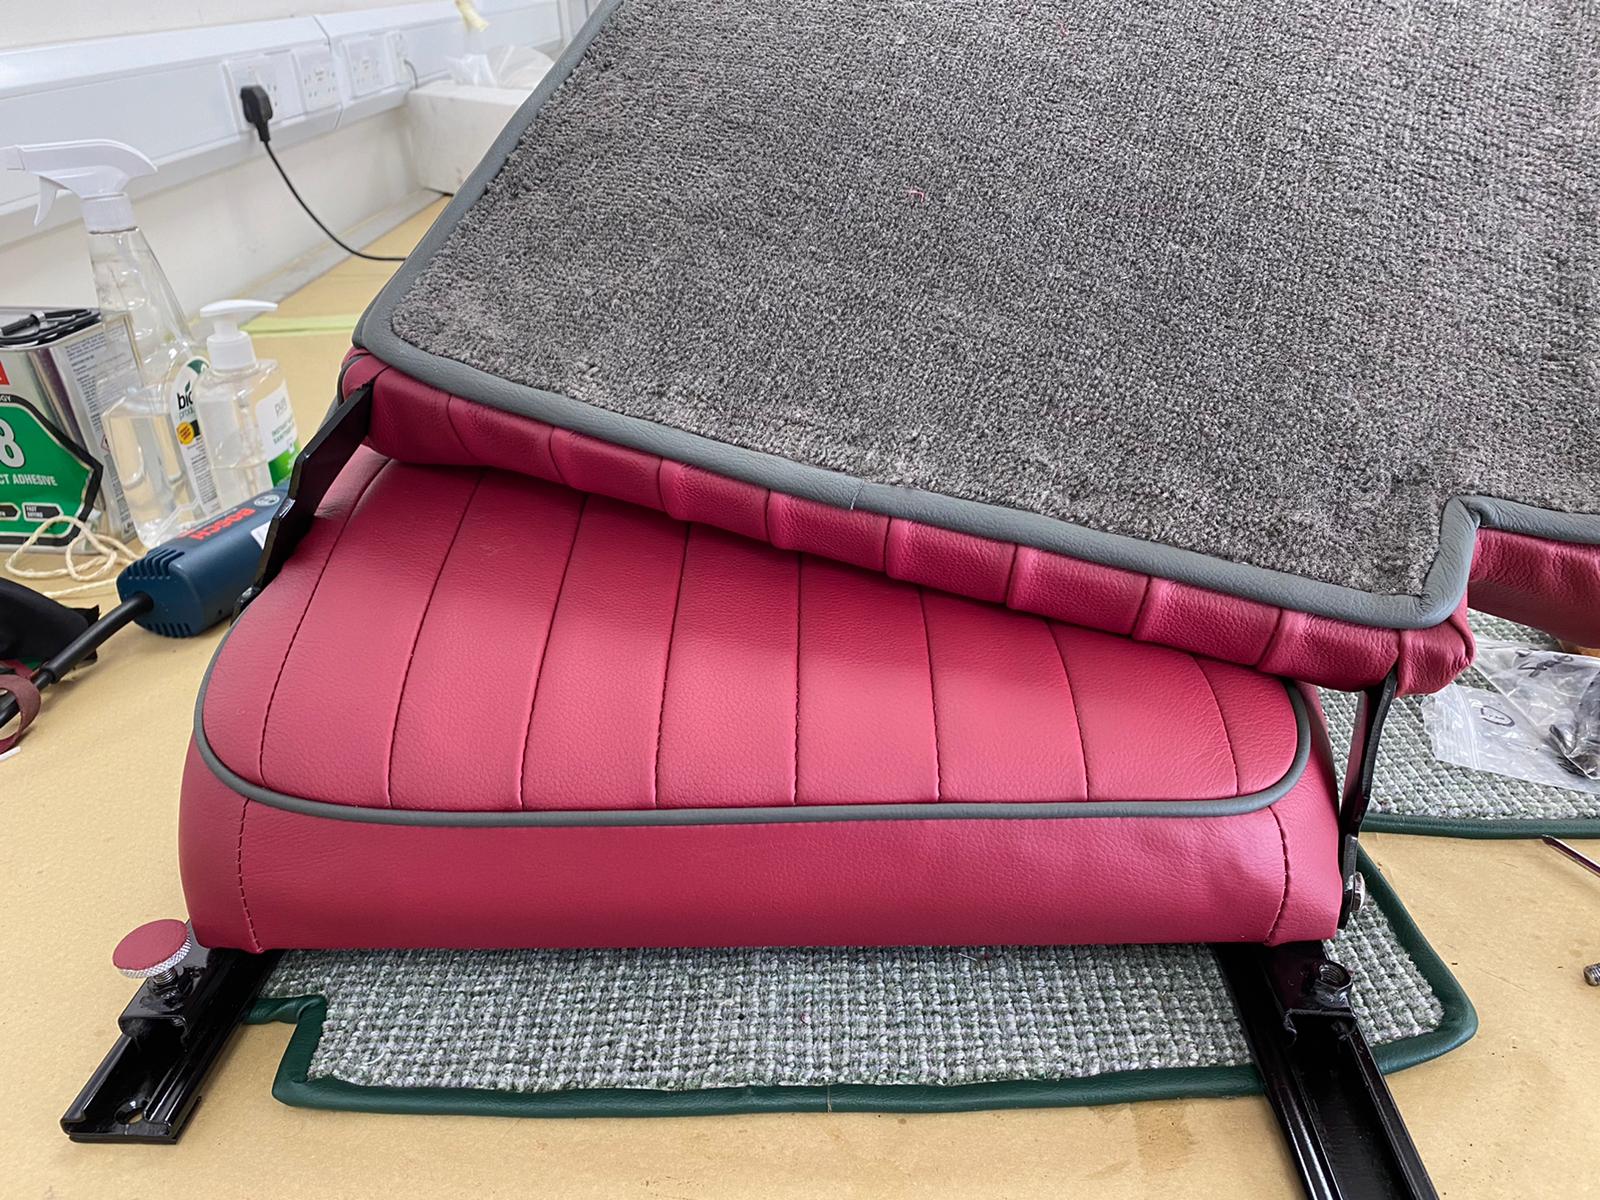
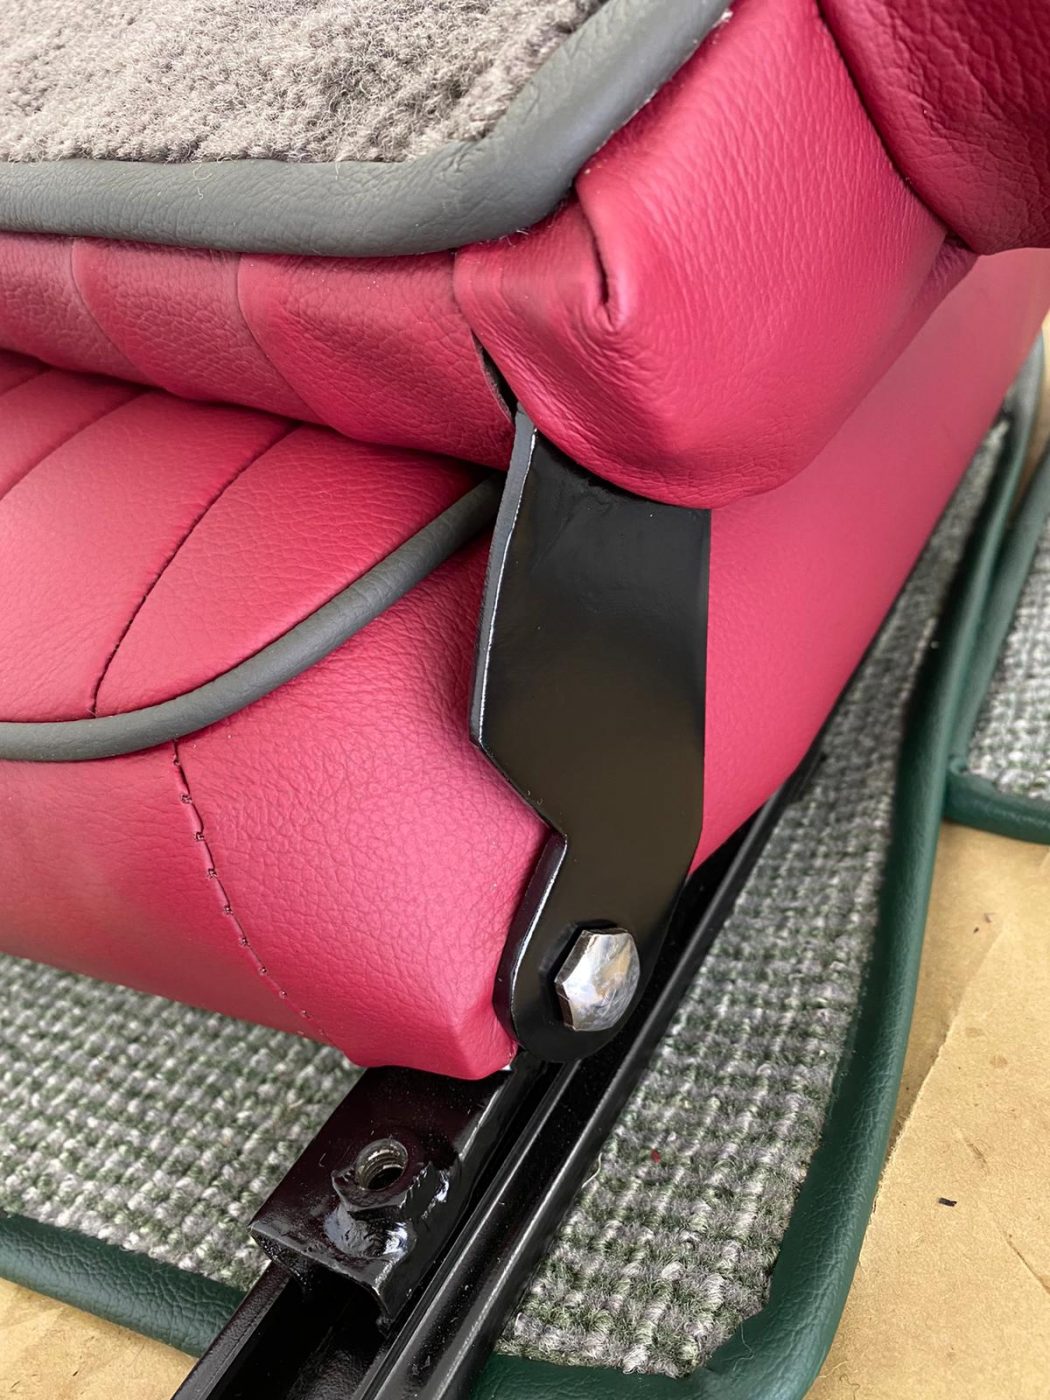
Kath has been doing more seat work for the 1955 Aston Martin DB 2/4. This time around she’s been fitting the front base seat covers onto their foams and frames. She’s already sewn up the new front bases, which you can read about here.
The process started with Kath adding sections of new foam to the original, where it had deteriorated, and blending it in. She then cleaned off old glue from the wood around the straps and re-painted it. She also tightened up the straps after becoming loose from age. Kath took the original strip of wood from the gap in the foam, cleaned it up and attached it to the end of the calico piece that was sewn into the new front base seat. This piece of wood gets attached to the underneath of the foam and straps frame and helps keep the middle piped section down into place. Kath glued a piece of black calico to the wooden frame, to give a neat finish behind the straps. The front base seat could then finally be stapled onto the wooden frame. After that was done, the metal seat sliders were fixed onto the underneath of the seat and the matching front squab was attached to it on top.
Kath is now in the process of fitting up the other front base, so stay tuned!