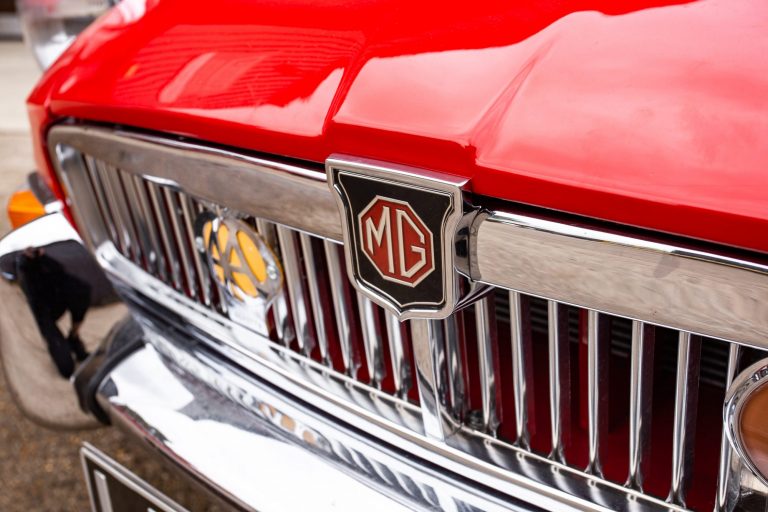
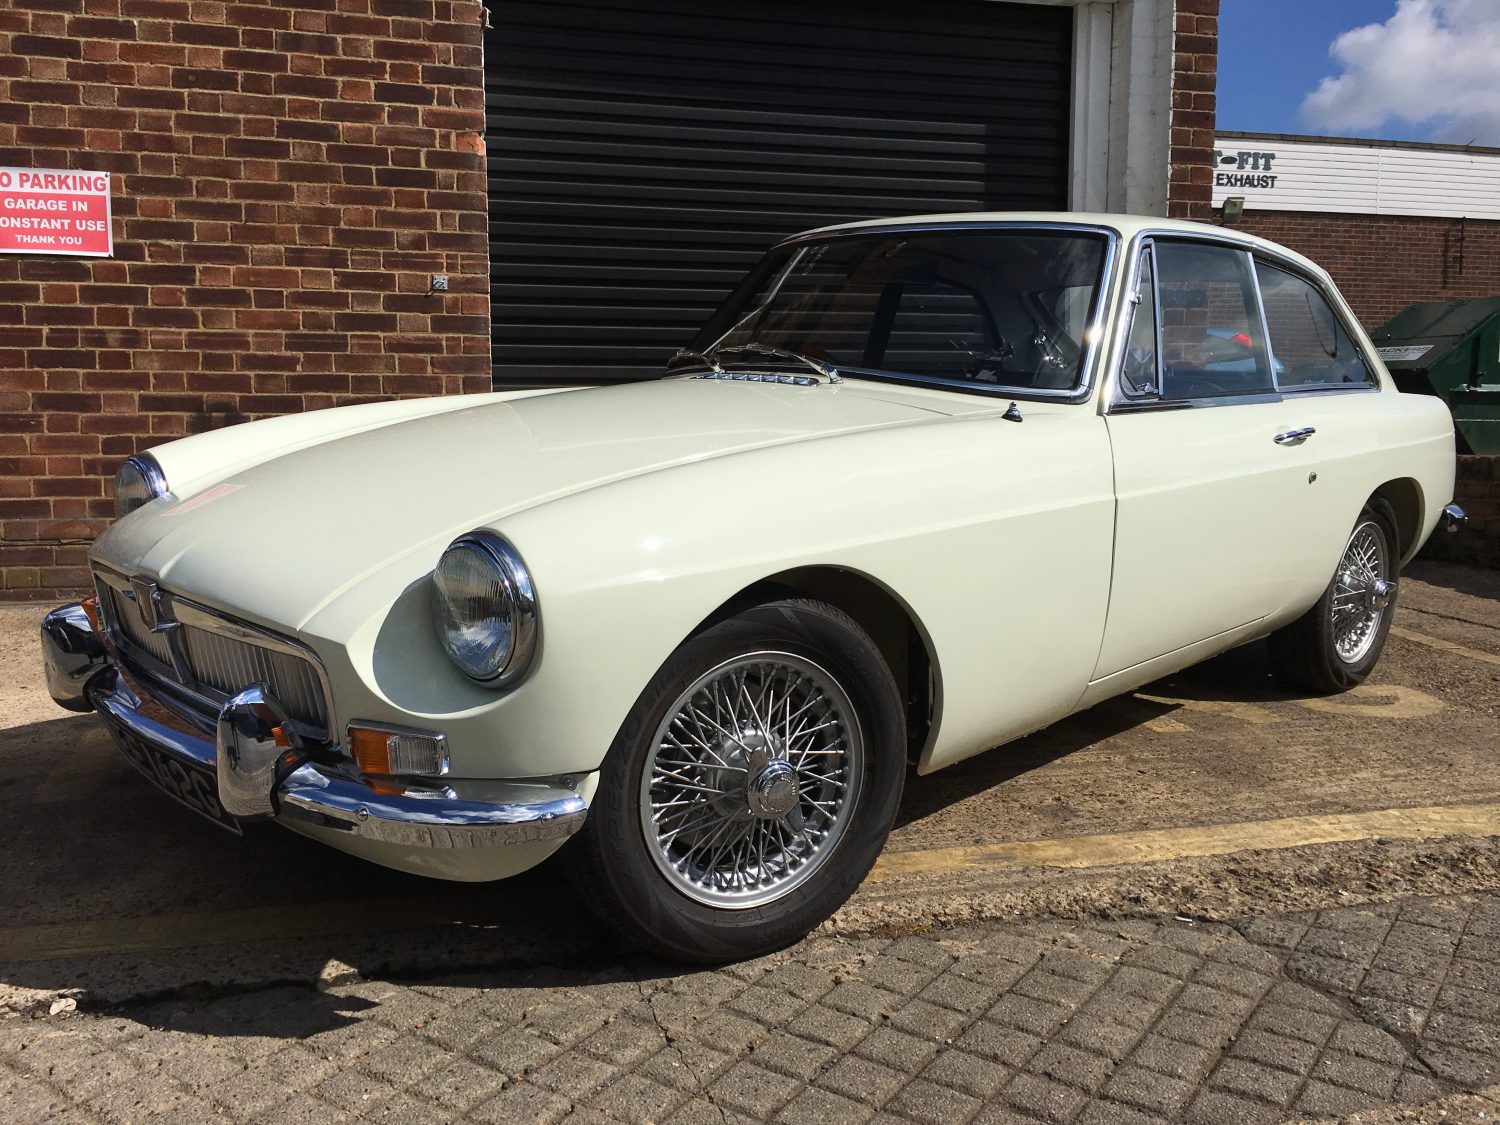
MG B GT Finished
We have finished our 1968 MG B GT which needed the brakes taken apart, cleaned, adjusted and bled, as well as setting up the pointers


We have finished our 1968 MG B GT which needed the brakes taken apart, cleaned, adjusted and bled, as well as setting up the pointers
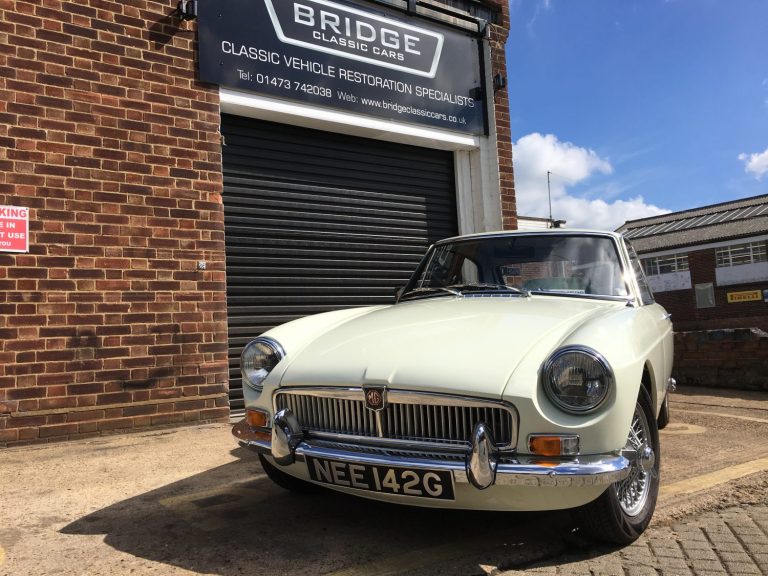
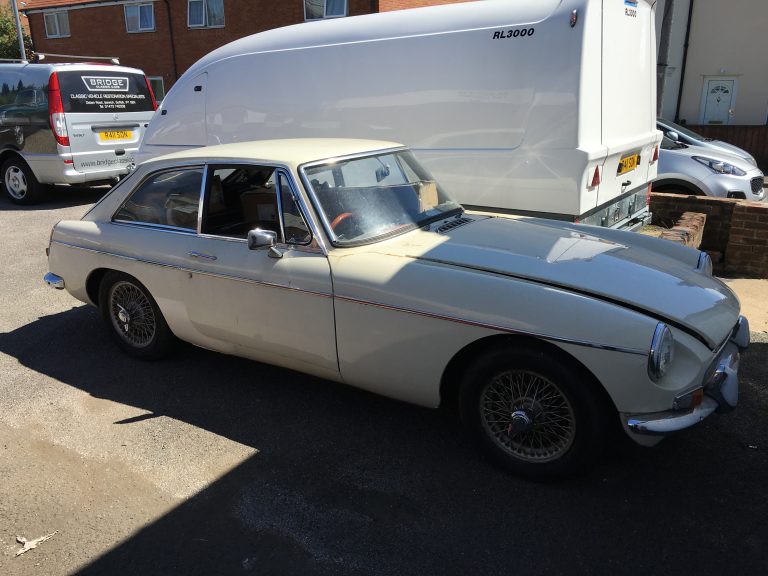
Our recently completed 1968 MGBGT paid us little visit today with a couple of ‘niggling’ jobs that needed to be carried out. Here she is
[vc_row][vc_column][vc_column_text]On the day we put our 1968 MGBGT into storage the weather was awful and even the short 100yd distance from the trailer park to
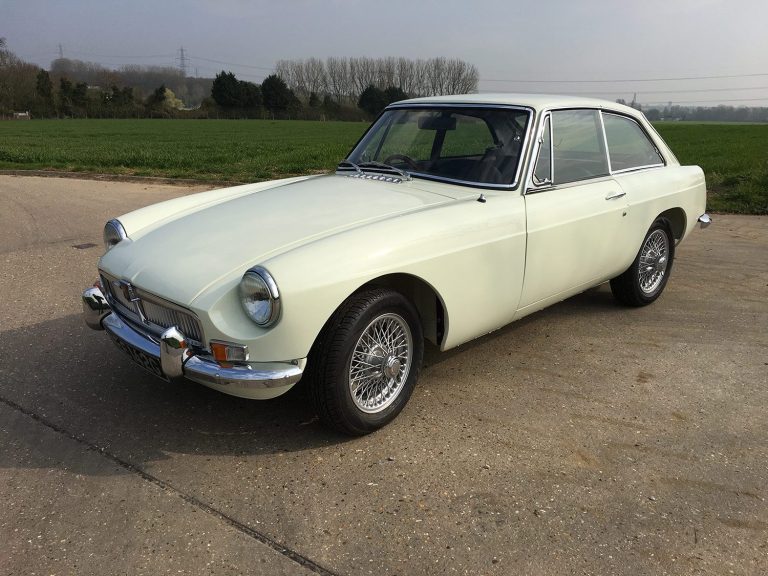
[vc_row][vc_column][vc_column_text]Work is now complete on the full restoration of our 1968 MGBGT. She’s come a long way with us but now looking incredible! After the
Having stripped and cleaned the dashboard we’ve now applied the wrinkle texture paint to give it a fresh, yet aged look. Wrinkle texture paint leaves
After a couple of weeks away for the Christmas period we are now back in our workshops and straight back to work on our projects.
The new cooling kit has arrived today from Revotec. The MGBG Chrome Bumper 1962-76 Cooling Kit from Revotec has been engineered to provide perfect cooling for your

The new front and rear seats are being started today with the end result being a black on black finish. As is often the case,
The interior of our 1968 MGBGT is in need of a spruce, we knew that new covers would be required but until we had stripped
Fitting out our 1968 MGBGT is well underway now with John and Lauren taking full control. First stop today, re-installing the newly refurbished engine. The

After a little TLC the fuel tank has now been refurbished and refitted to our 1968 MGBGT, along with the front brake discs, pads and
Our 1968 MGBGT is really taking shape now as we start the rebuild the car. The rear back axle, the front suspension, steering rack, front

With the MGBGT back from the paint shop Lauren has been busy fitting the new sound deadening matting. Sound Deadener plays a vital role and
Years of wear on the clutch slave pin has resulted in a hole that is no longer circular and a pin that is no longer
A small delay on the restoration due to a couple of imperfections that we found in the paintwork. Nothing too major but worth addressing so

This system was designed and is manufactured by hawk Cars and Hoyle Suspension Ltd. MGB Coil Over Front Suspension This new double wishbone, coil over
[vc_row][vc_column][vc_column_text]Lauren has been busy sorting through the MG BGT chrome work. MG’s are a brilliant vehicle to work on as parts are so readily available.
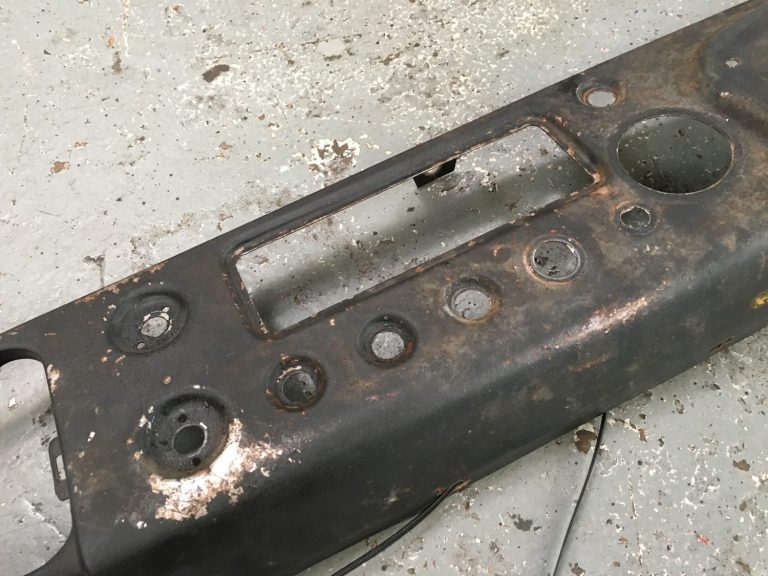
Here we have our 1968 MGBGT dashboard stripped of all its components and ready for Trevor to work his magic on the wrinkle effect paint
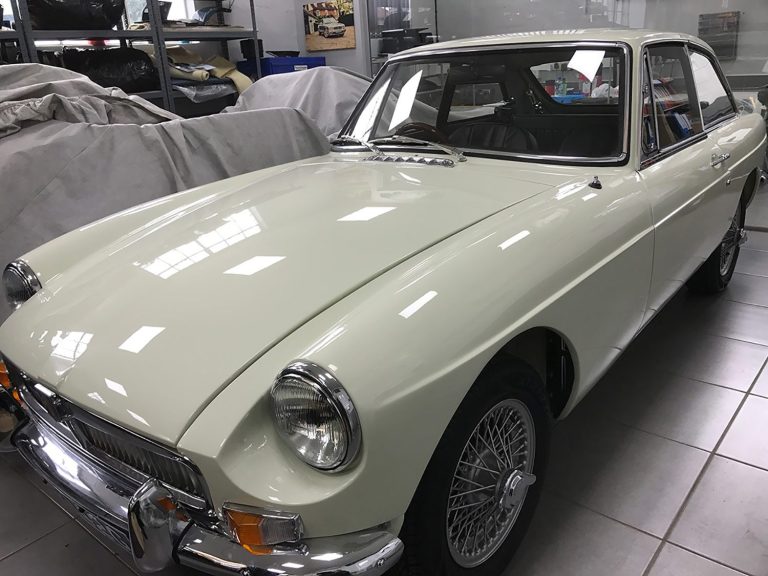
With the majority of the components cleaned up and refurbished and the shell back from the paint shop looking stunning in Snowberry White, tomorrow we
[vc_row][vc_column][vc_column_text]Our 1968 MGBGT is now back with us from the paint shop ready to be refitted. Finished in Snowberry White the shell has been completed
Here we have the first images of the new Snowberry White finish to our 1968 MGBGT. Snowberry White is a very creamy white. It was

Work is well underway on preparing our 1968 MGBGT body shell ready for paint. Not a huge amount is required on the body shell as

Here you can see the extent of work that is required on the existing body shell of our MGBGT. We are never put off by
[vc_row][vc_column][vc_column_text]…and we were expecting to be carrying out a lot more remedial work than what is actually required on this one. Good news for us
As we await the new old body shell that will be arriving at Bridge Classic Cars later this month, work got underway today on stripping and
[vc_row][vc_column][vc_column_text]Whilst John is busy stripping the MGBGT of it’s interior and exterior components he is photographing and documenting the wiring as it is so that
Mark and Sean have been busy stripping our MGBGT of all of it’s components in preparation for the new body shell to arrive. As parts
[vc_row][vc_column][vc_column_text]We’ve just arrived back to the workshop having collected a 1968 MGBGT that requires a bit of attention. Our first assignment is to replace the
We have finished our 1968 MG B GT which needed the brakes taken apart, cleaned, adjusted and bled, as well as setting up the pointers gap and timing for the carburettors, which were also stripped cleaned and adjusted. We also addressed the scraping noise which turned out to be the drum hitting the back plate.
Our recently completed 1968 MGBGT paid us little visit today with a couple of ‘niggling’ jobs that needed to be carried out. Here she is sitting outside Bridge Classic Cars HQ.


[vc_row][vc_column][vc_column_text]On the day we put our 1968 MGBGT into storage the weather was awful and even the short 100yd distance from the trailer park to the storage unit was enough to get mud on the arches.
…and we can’t leave a freshly restored car like that, it’s just not right.
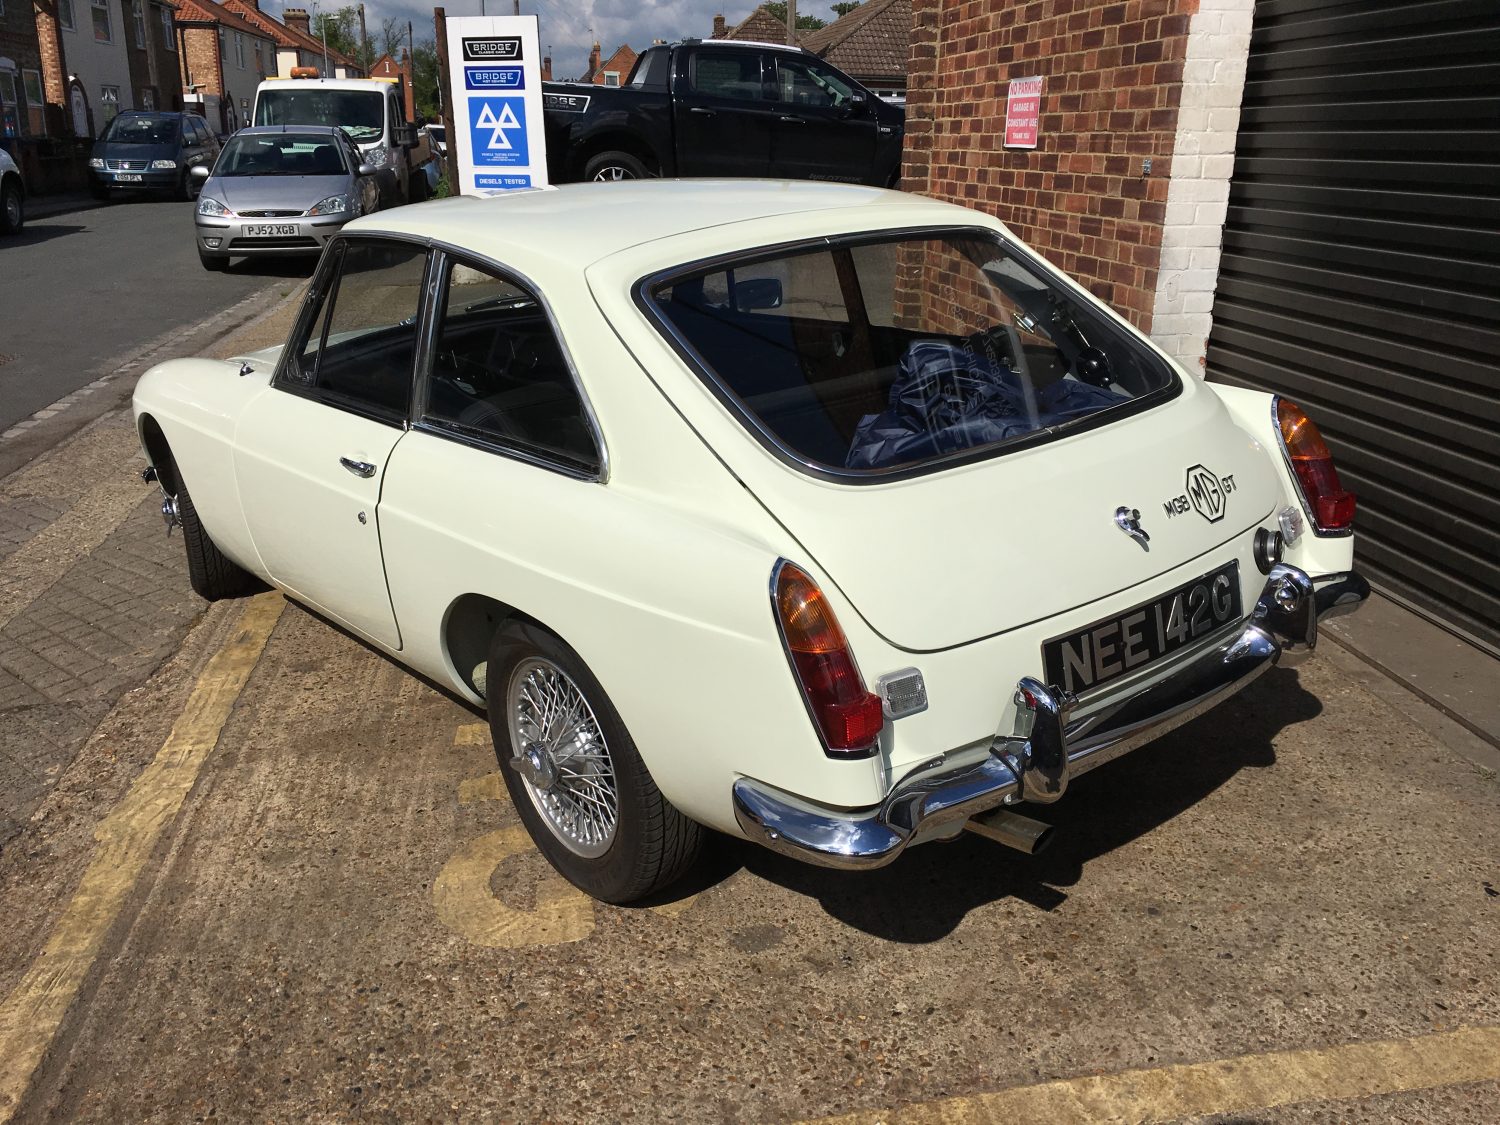
It was a beautiful sunny day today so it was the perfect day to head over to Hadleigh to see our 1968 MGBGT. As it has been a few since it left our workshops I thought it was best to go on a little run into Layham before giving her that good clean that was promised.
[/vc_column_text][/vc_column][/vc_row][vc_row][vc_column][vc_gallery type=”image_grid” images=”11123,11124,11125,11126,11127,11128,11129,11130,11131,11132,11133,11134,11135,11136,11137,11139,11140,11141,11142,11143″][/vc_column][/vc_row]
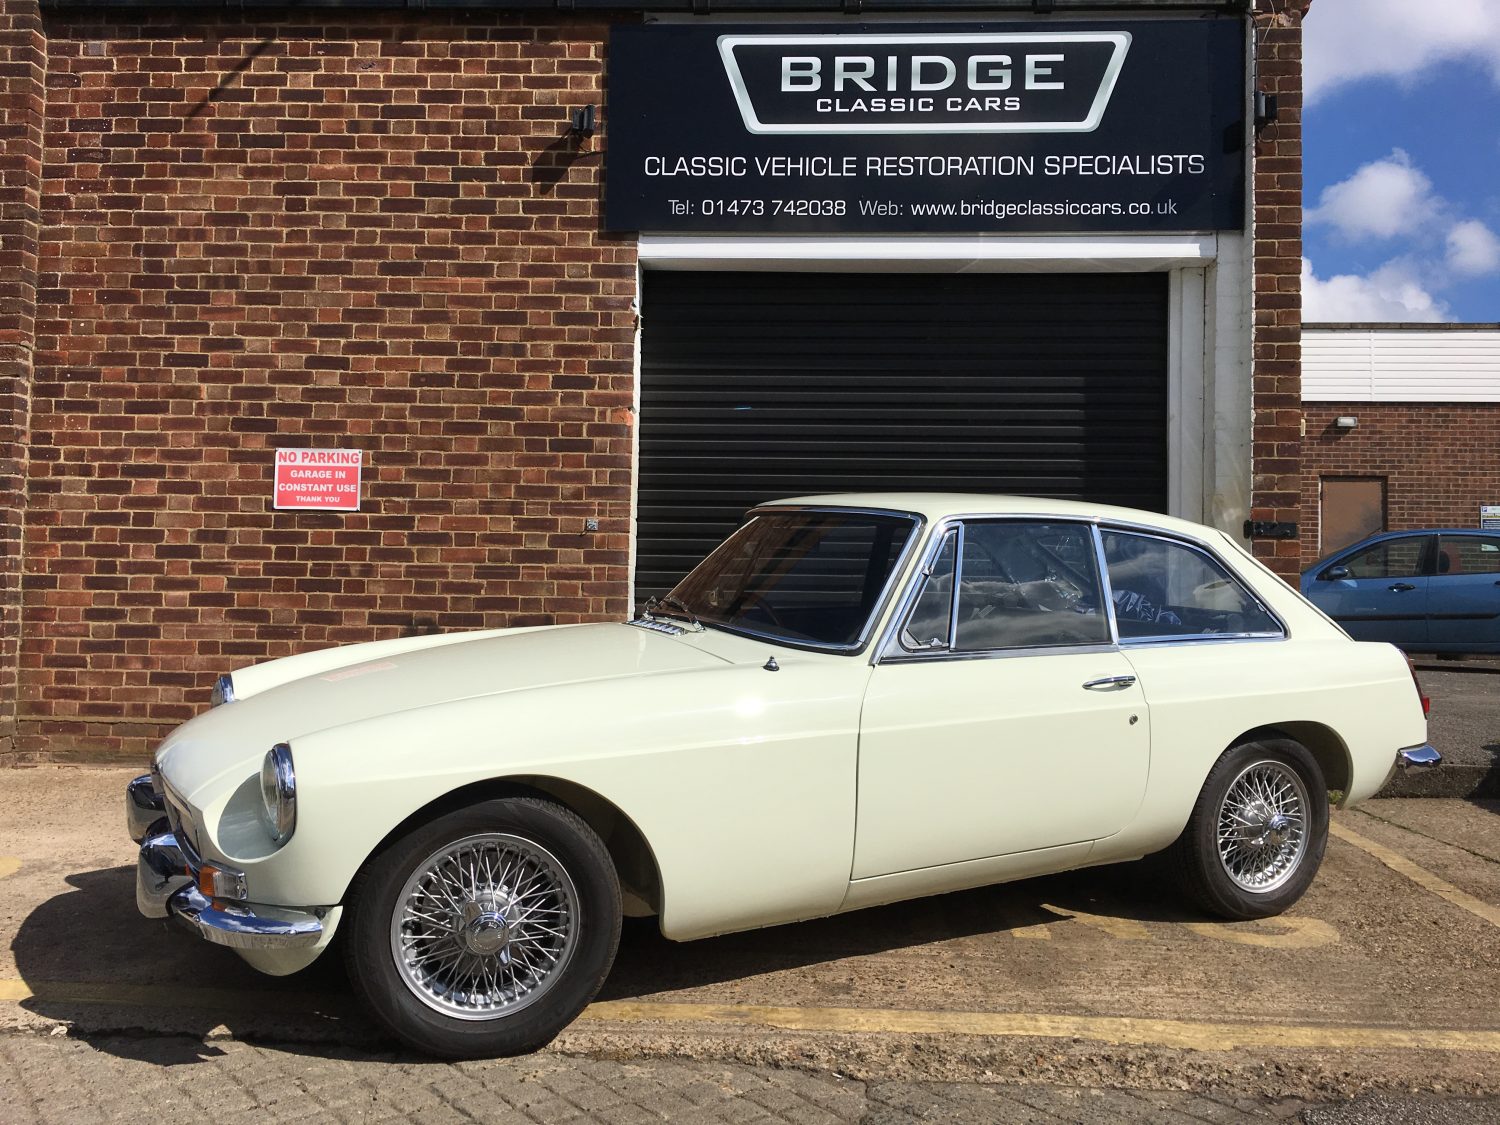
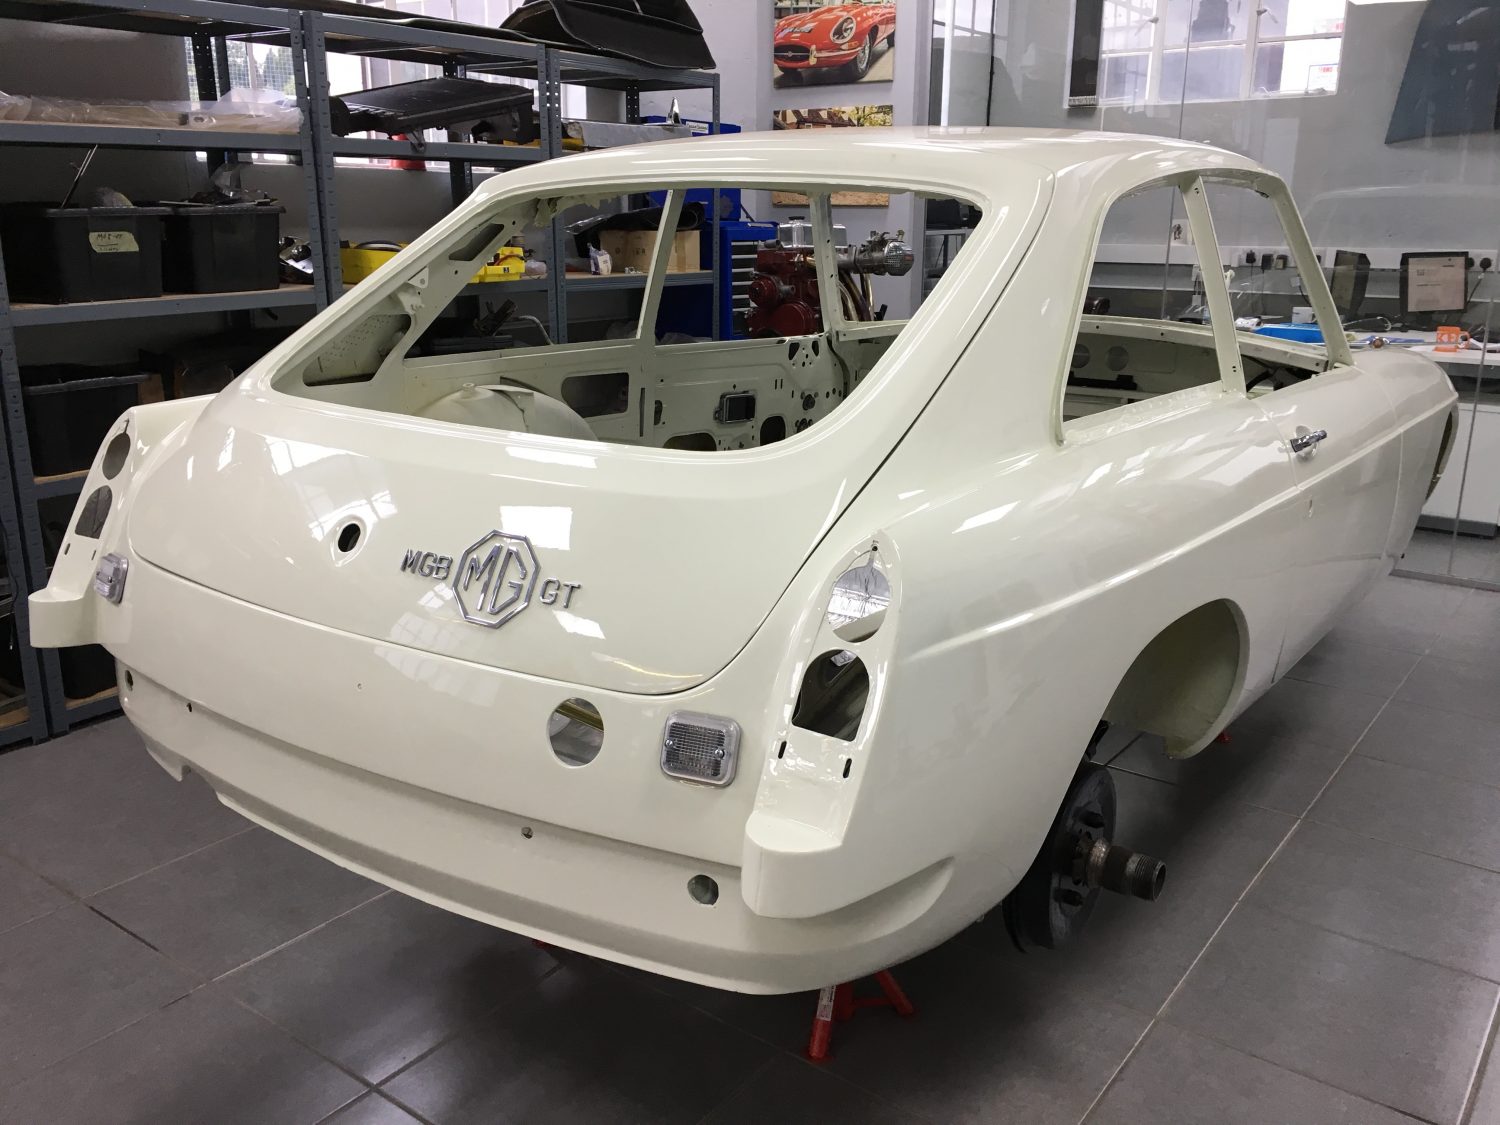
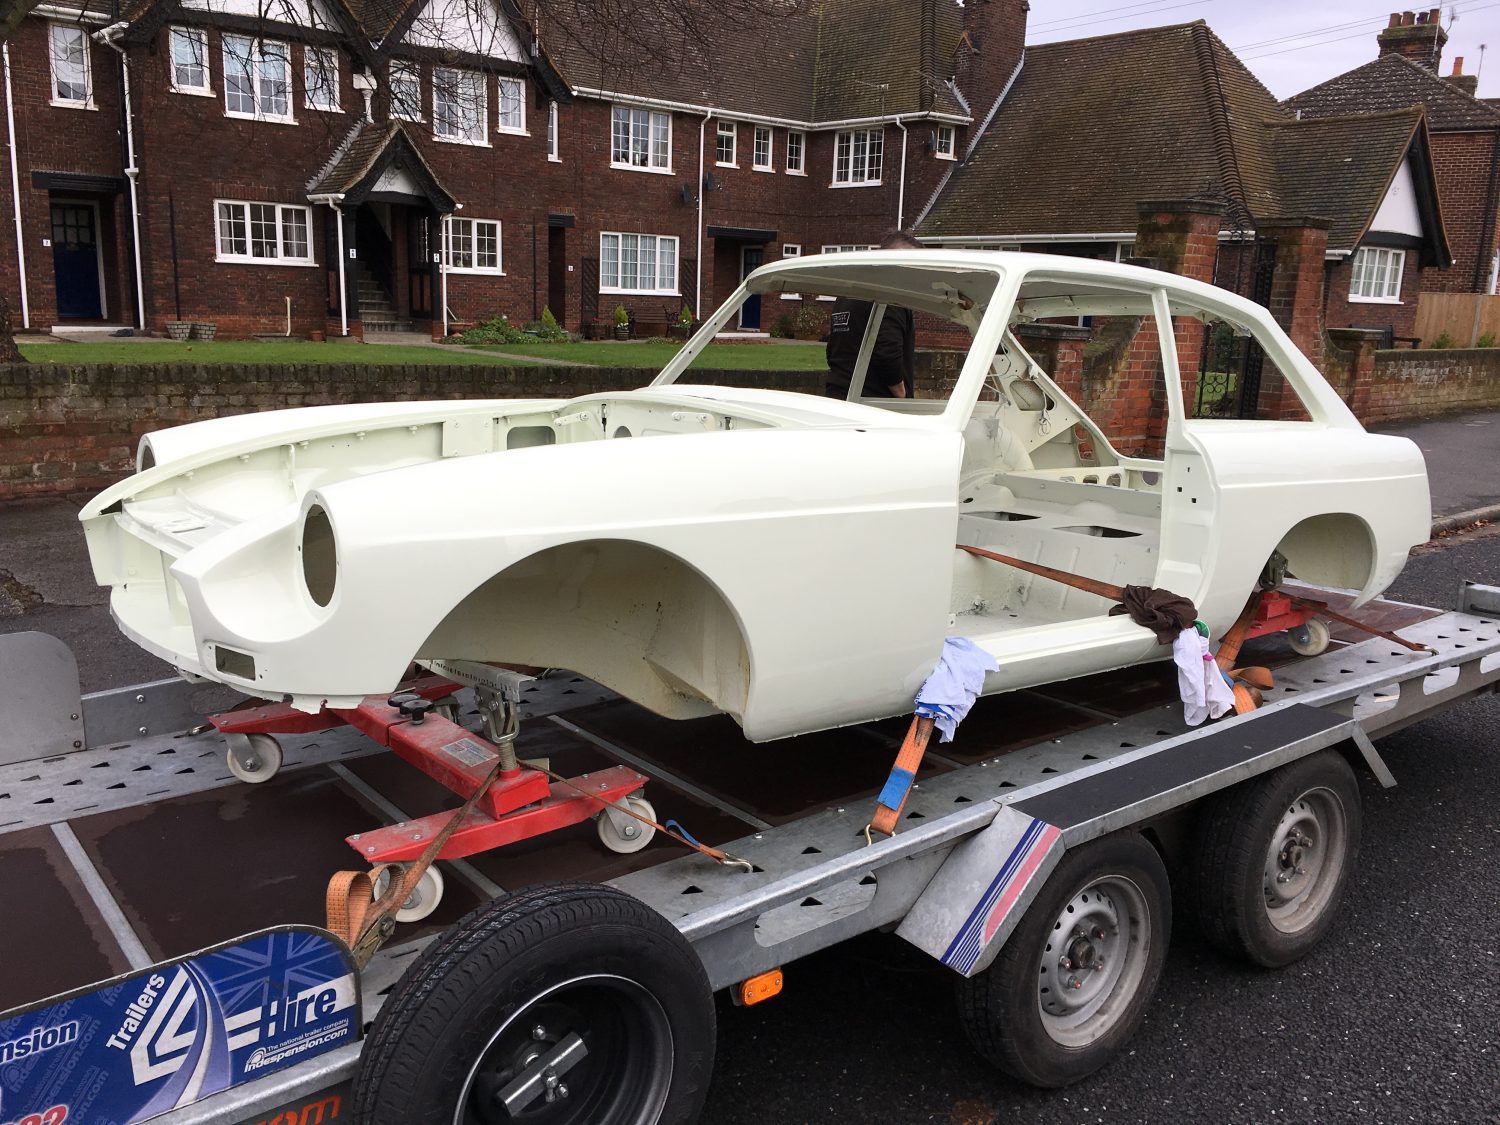
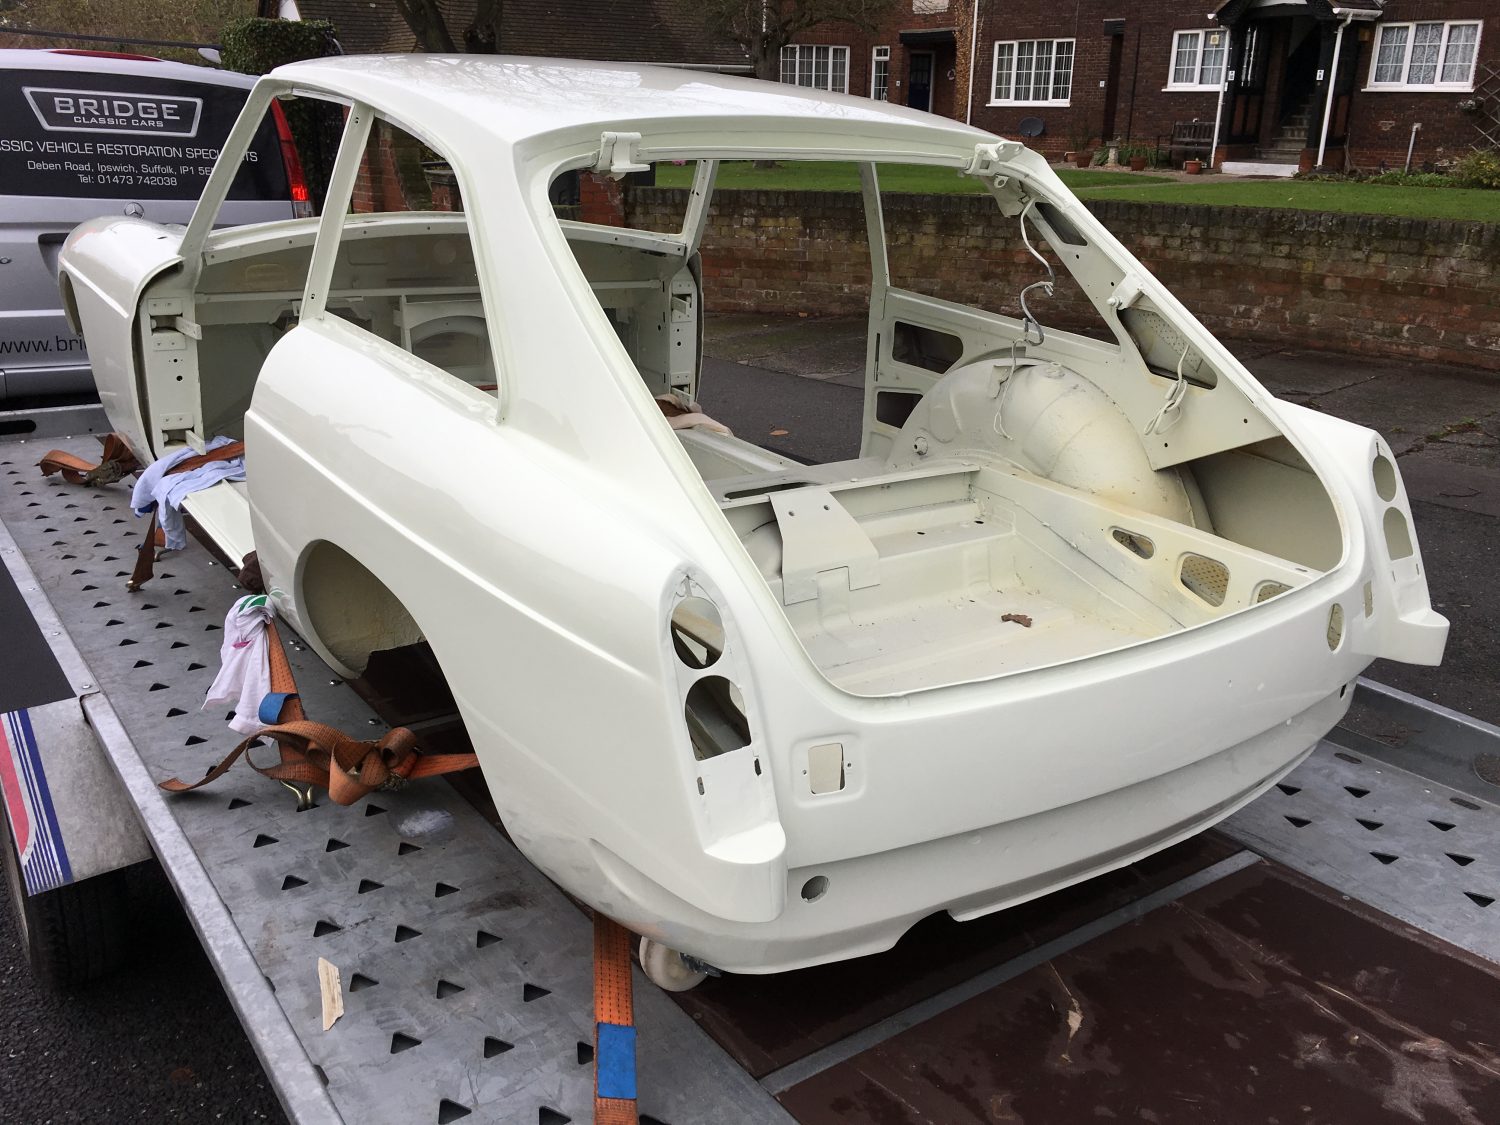
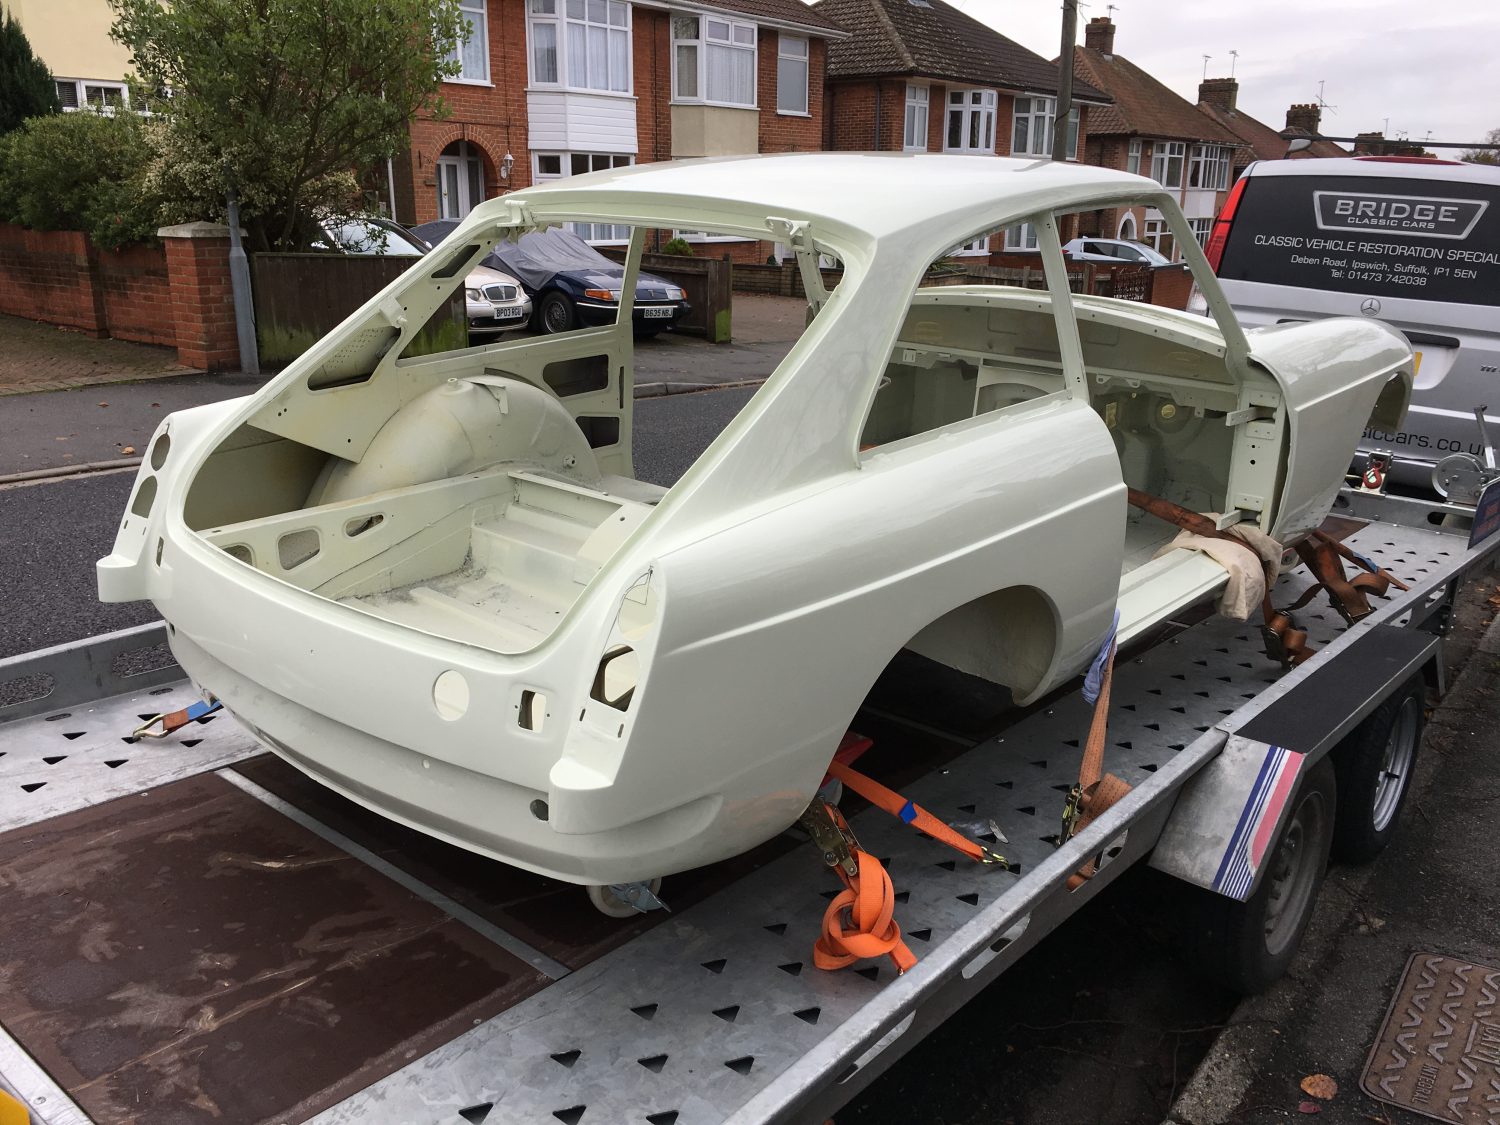
[vc_row][vc_column][vc_column_text]Work is now complete on the full restoration of our 1968 MGBGT.
She’s come a long way with us but now looking incredible!
After the initial discussions of carrying out some remedial repair work to the sills, we soon discovered that the body and chassis we suffering with age so a decision needed to be made.

I’m sure you’ll agree, the right decision was definitely made…
The car will now be stored away ready for the better weather and upcoming summer shows.
The next stage for us is to decide on a suitable location ready for Jason at Sugar and Spice Photography to carry out yet another fantastic photo shoot.
[/vc_column_text][/vc_column][/vc_row][vc_row][vc_column][vc_gallery type=”image_grid” images=”10458,10457,10456,10455,10454,10453″][/vc_column][/vc_row]
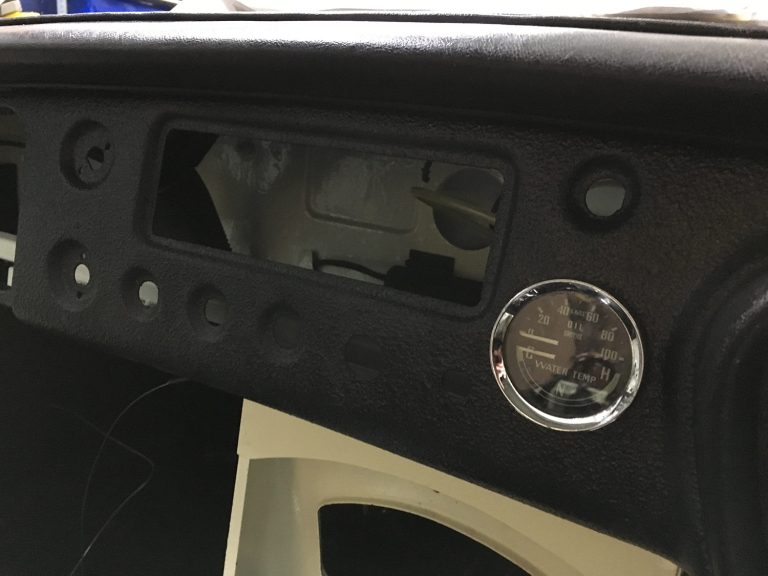
Having stripped and cleaned the dashboard we’ve now applied the wrinkle texture paint to give it a fresh, yet aged look.
Wrinkle texture paint leaves a distinctive custom crinkle finish that you both see and feel. The crackle finish is extremely durable, long lasting and chemical resistant. It is temperature resistant to 350°F (177°C) and is ideal for adding a touch of ‘patina’ to your metalwork. It resists colour fading, grease, de-greasers and severe weather conditions. This tough durable finish is extremely resistant to rust, corrosion, chipping and cracking.
Now that the texture has set we’ve refitted the dash back to the car with the existing dials back into position.
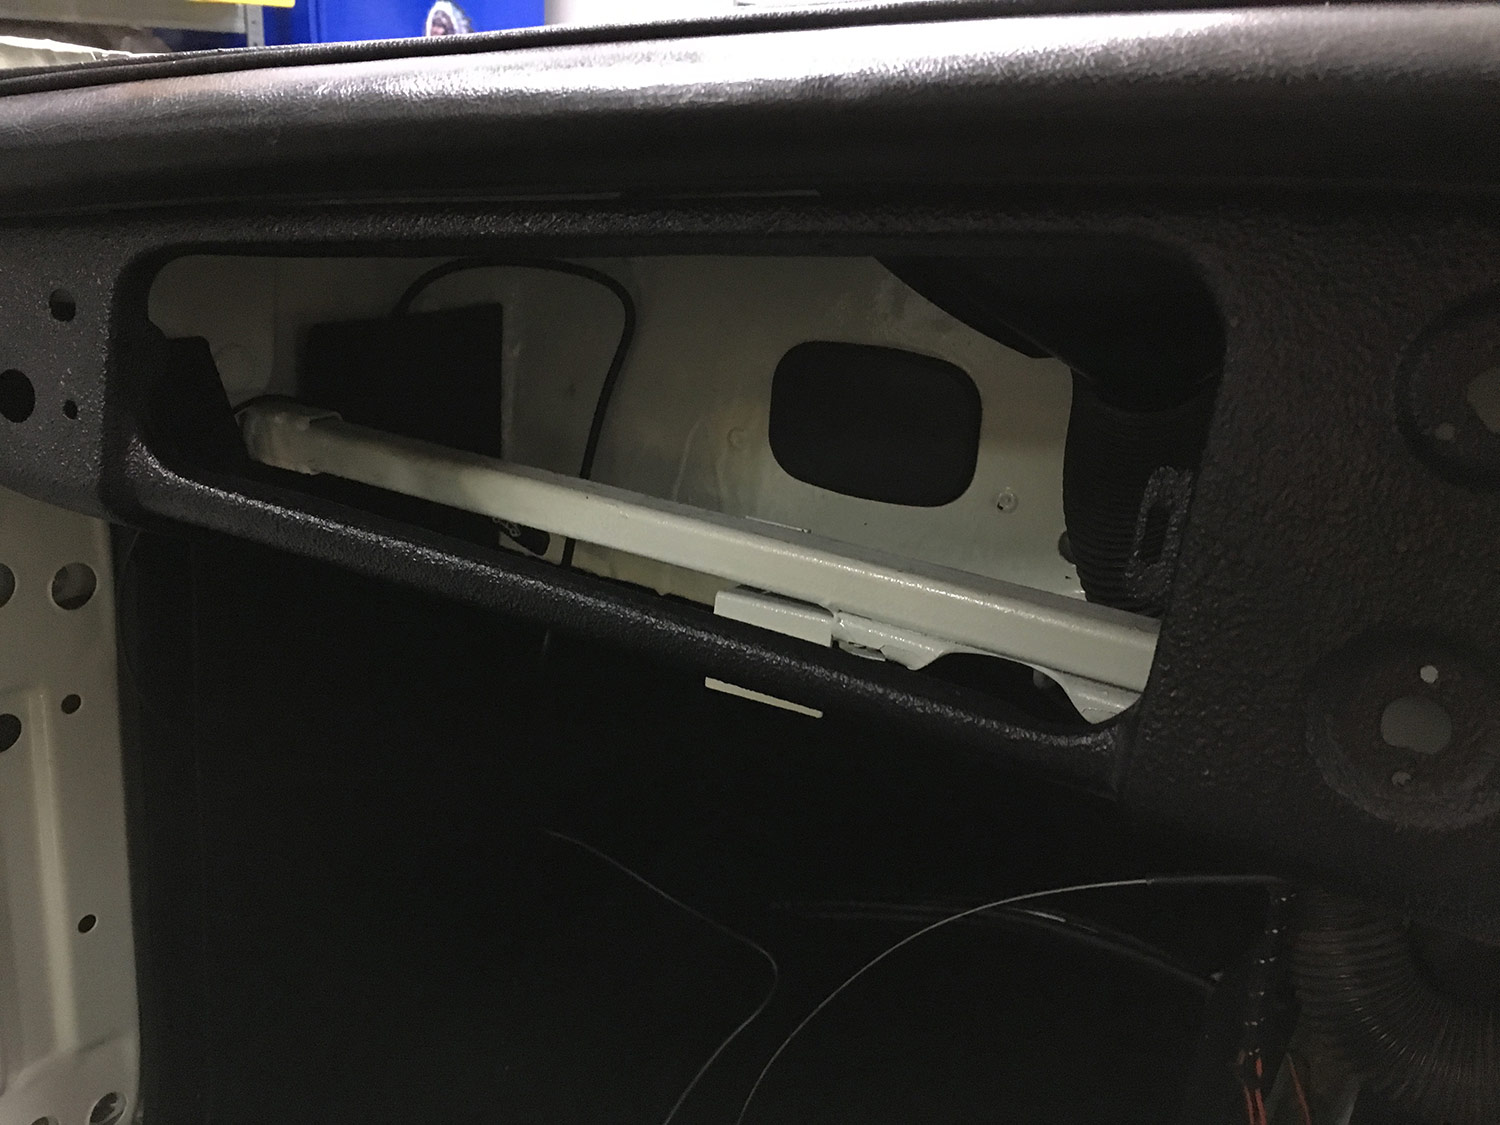
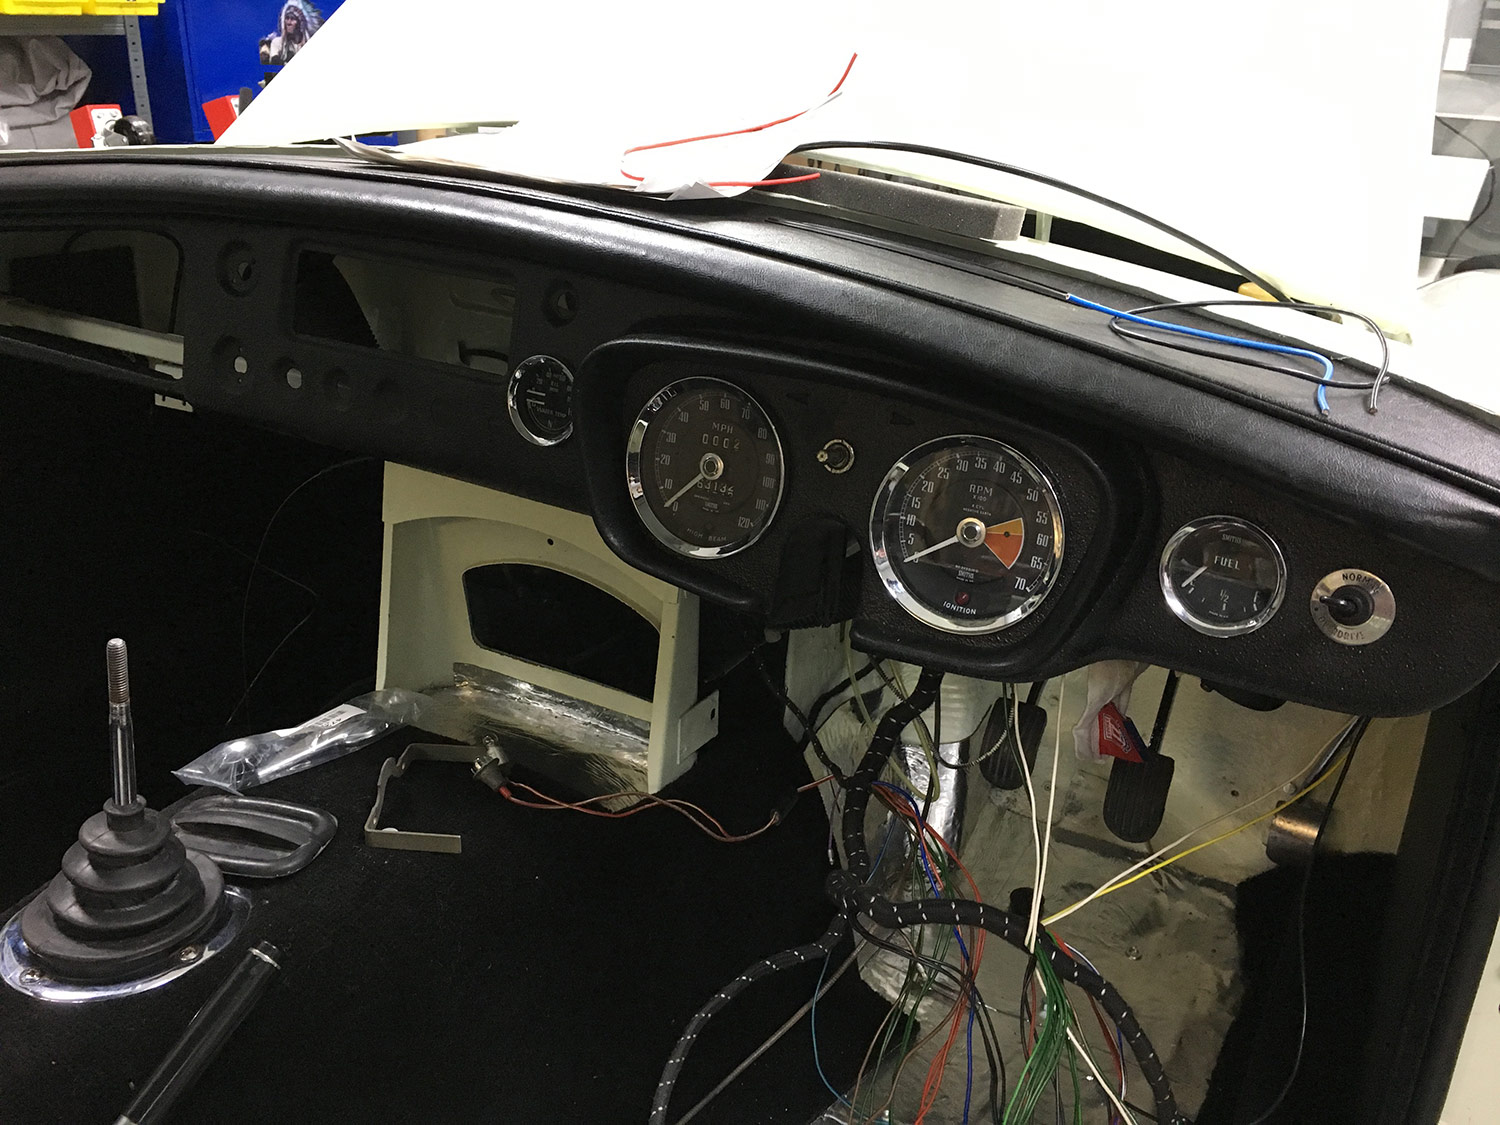

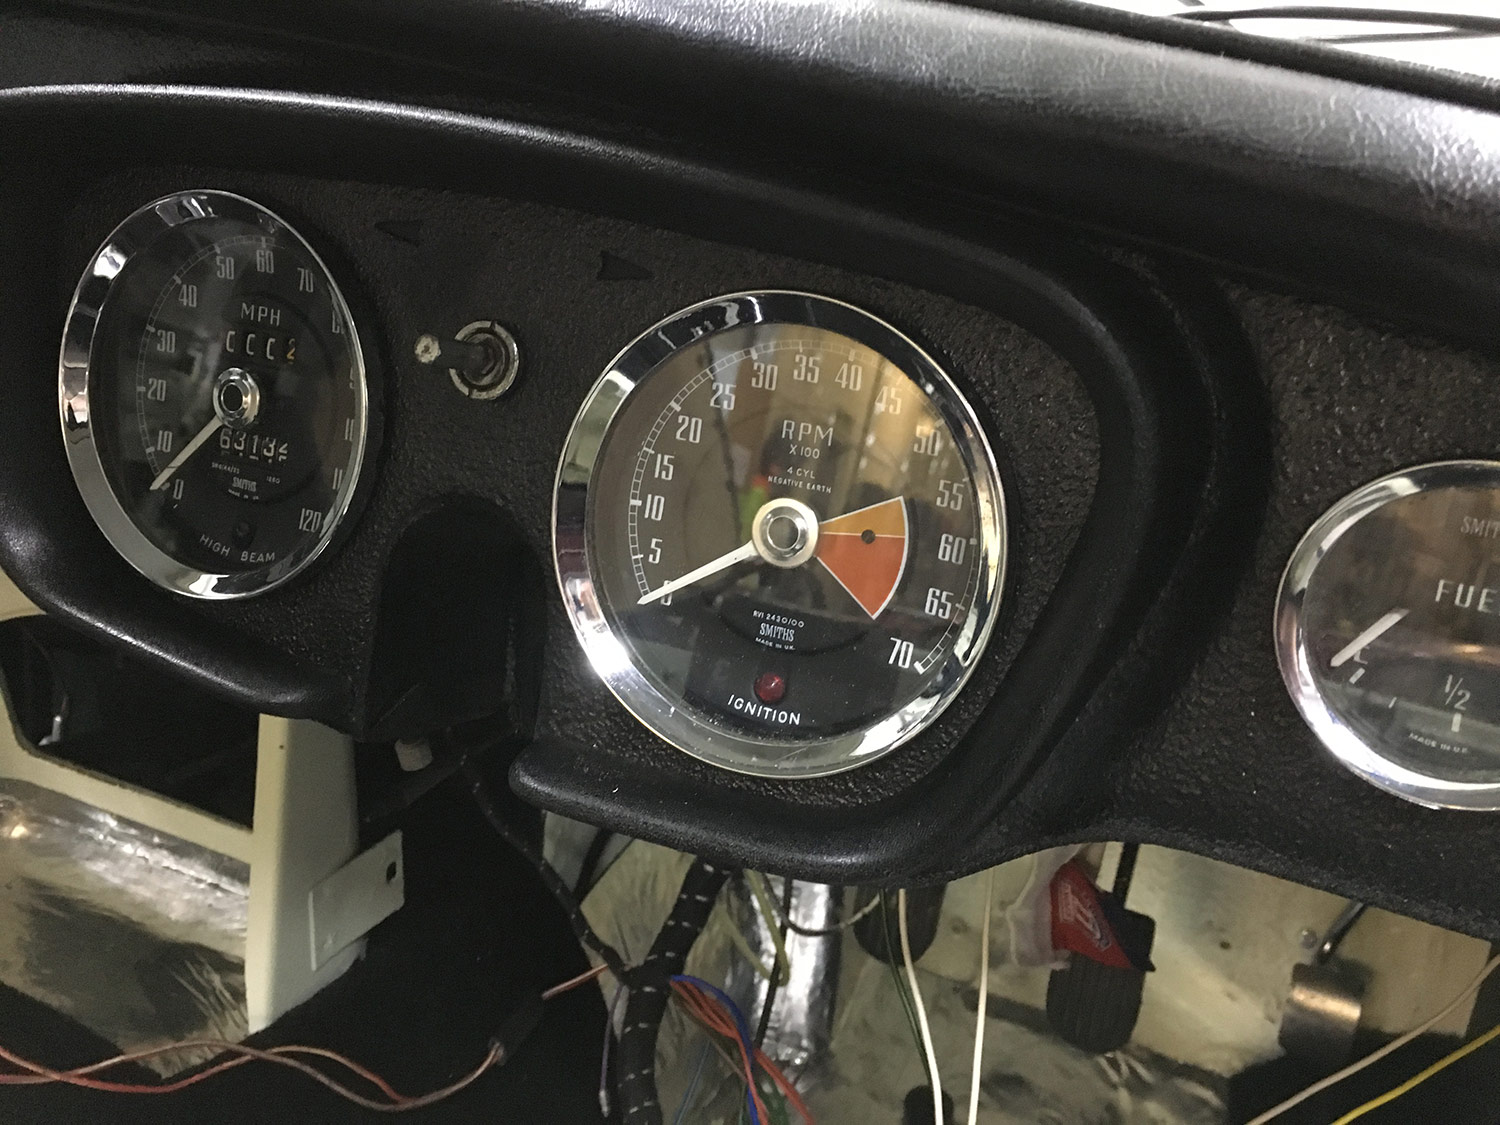
We’ve also managed to refit the front grille into position too.

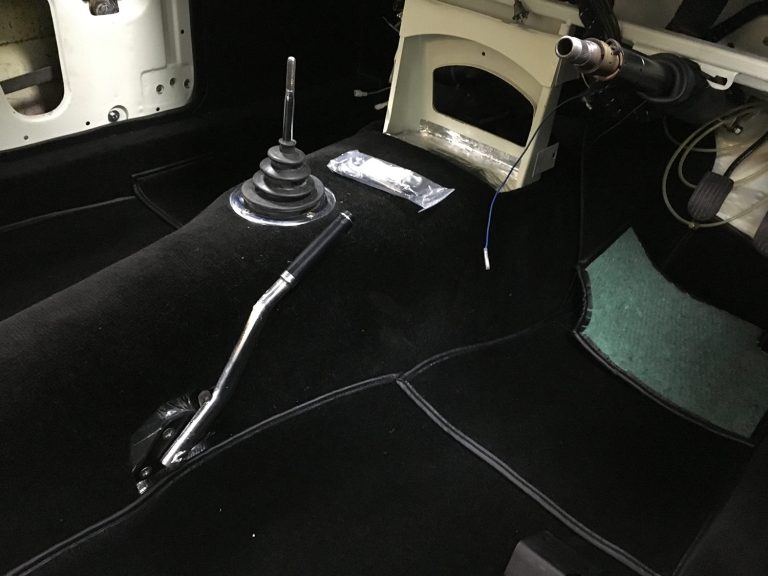
After a couple of weeks away for the Christmas period we are now back in our workshops and straight back to work on our projects.
We have started work on fitting the brand new carpets to our MGBGT.

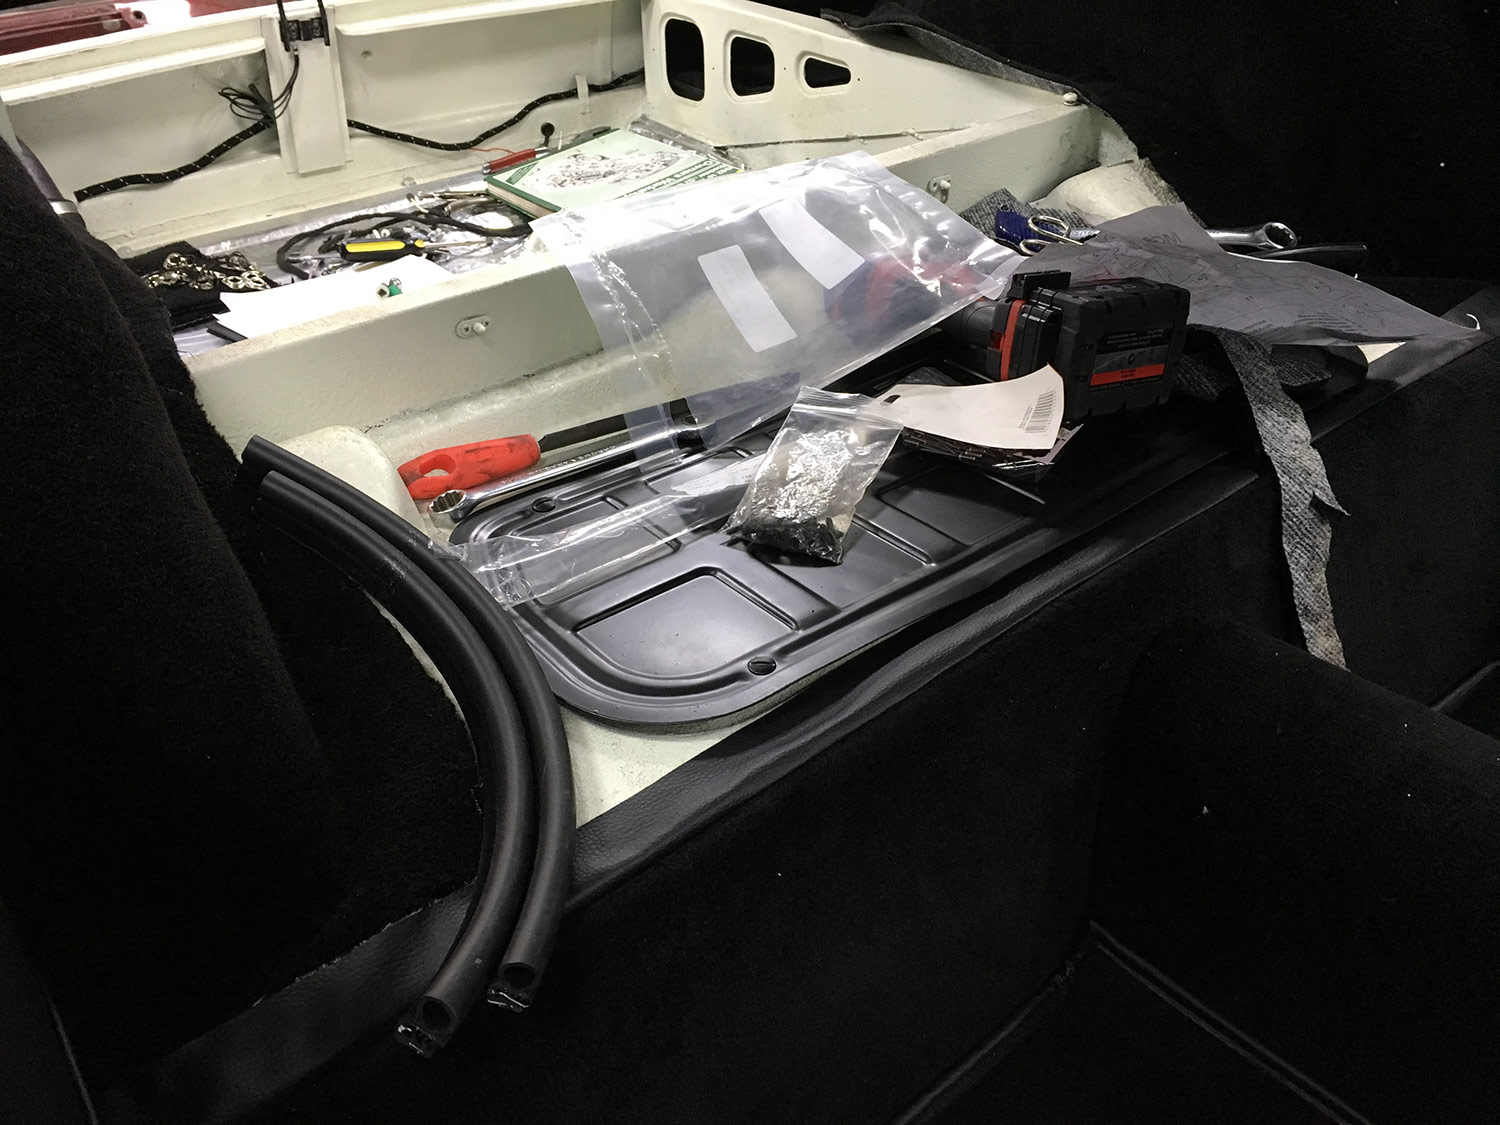
We have also fitted the existing rear gutter trims and windows back into position. Our brief is to build a car that still has the ‘Patina’ look. Our customer is not wanting to renew everything on the vehicle as he feels it will give too much of a clean look. he wants a car to enjoy and drive. We’ve replaced parts with new but some features remain as they are.


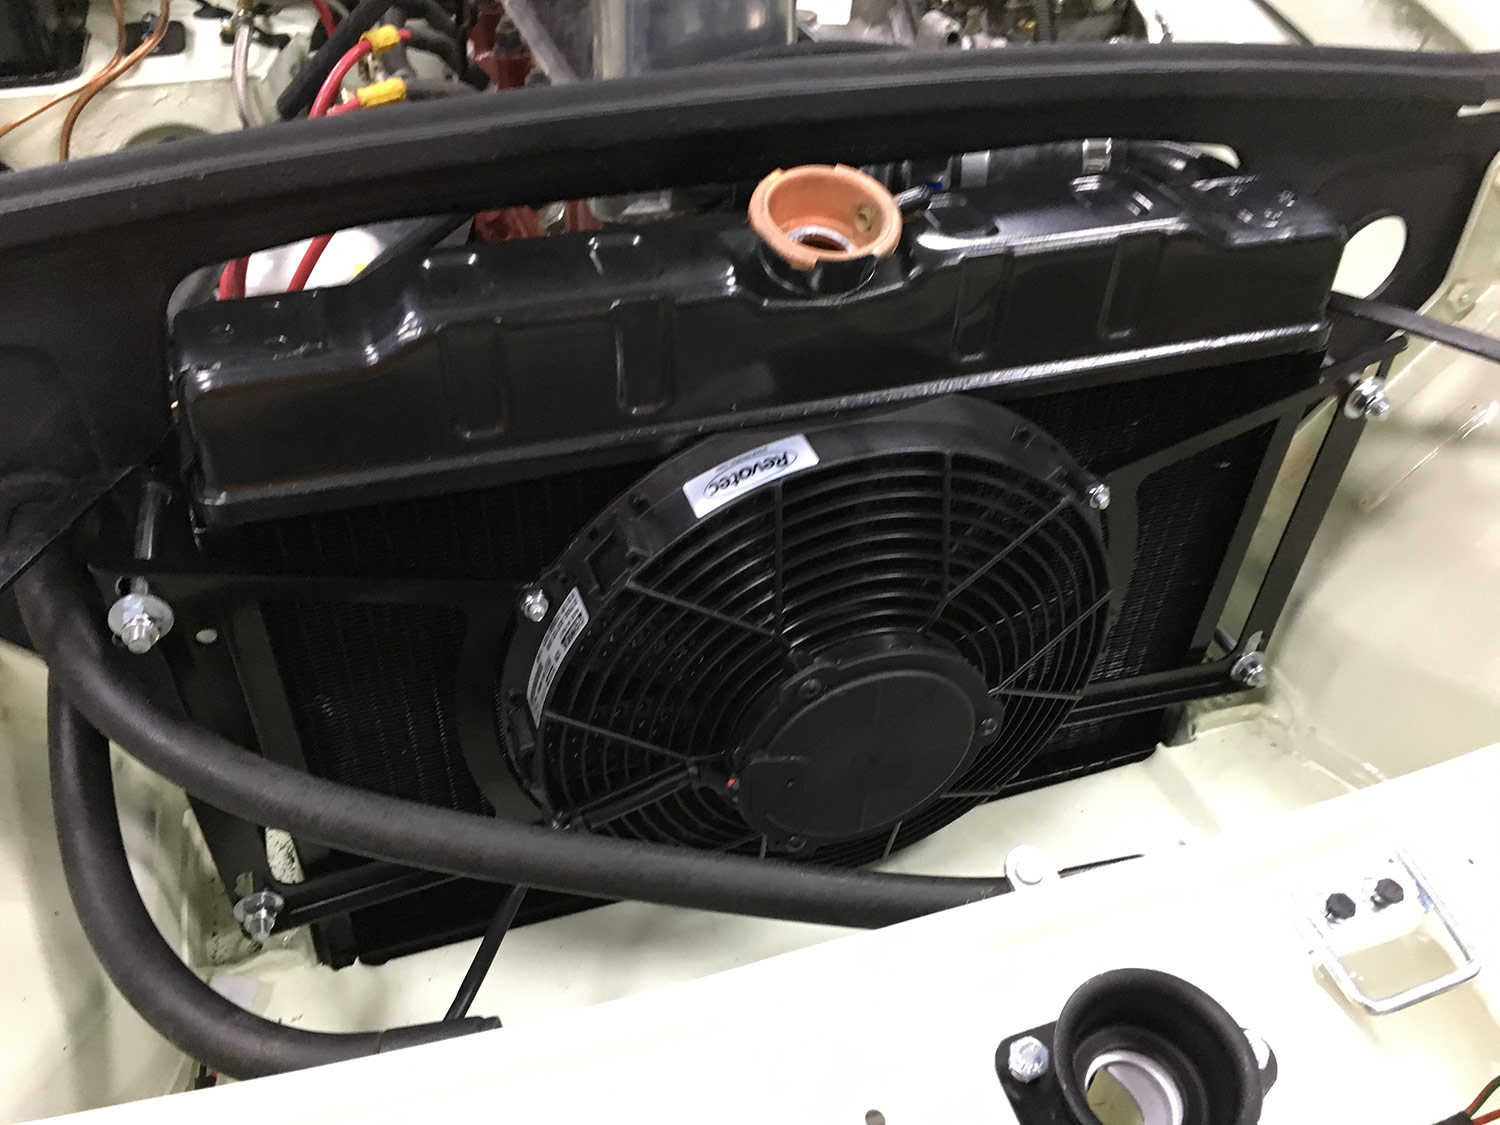
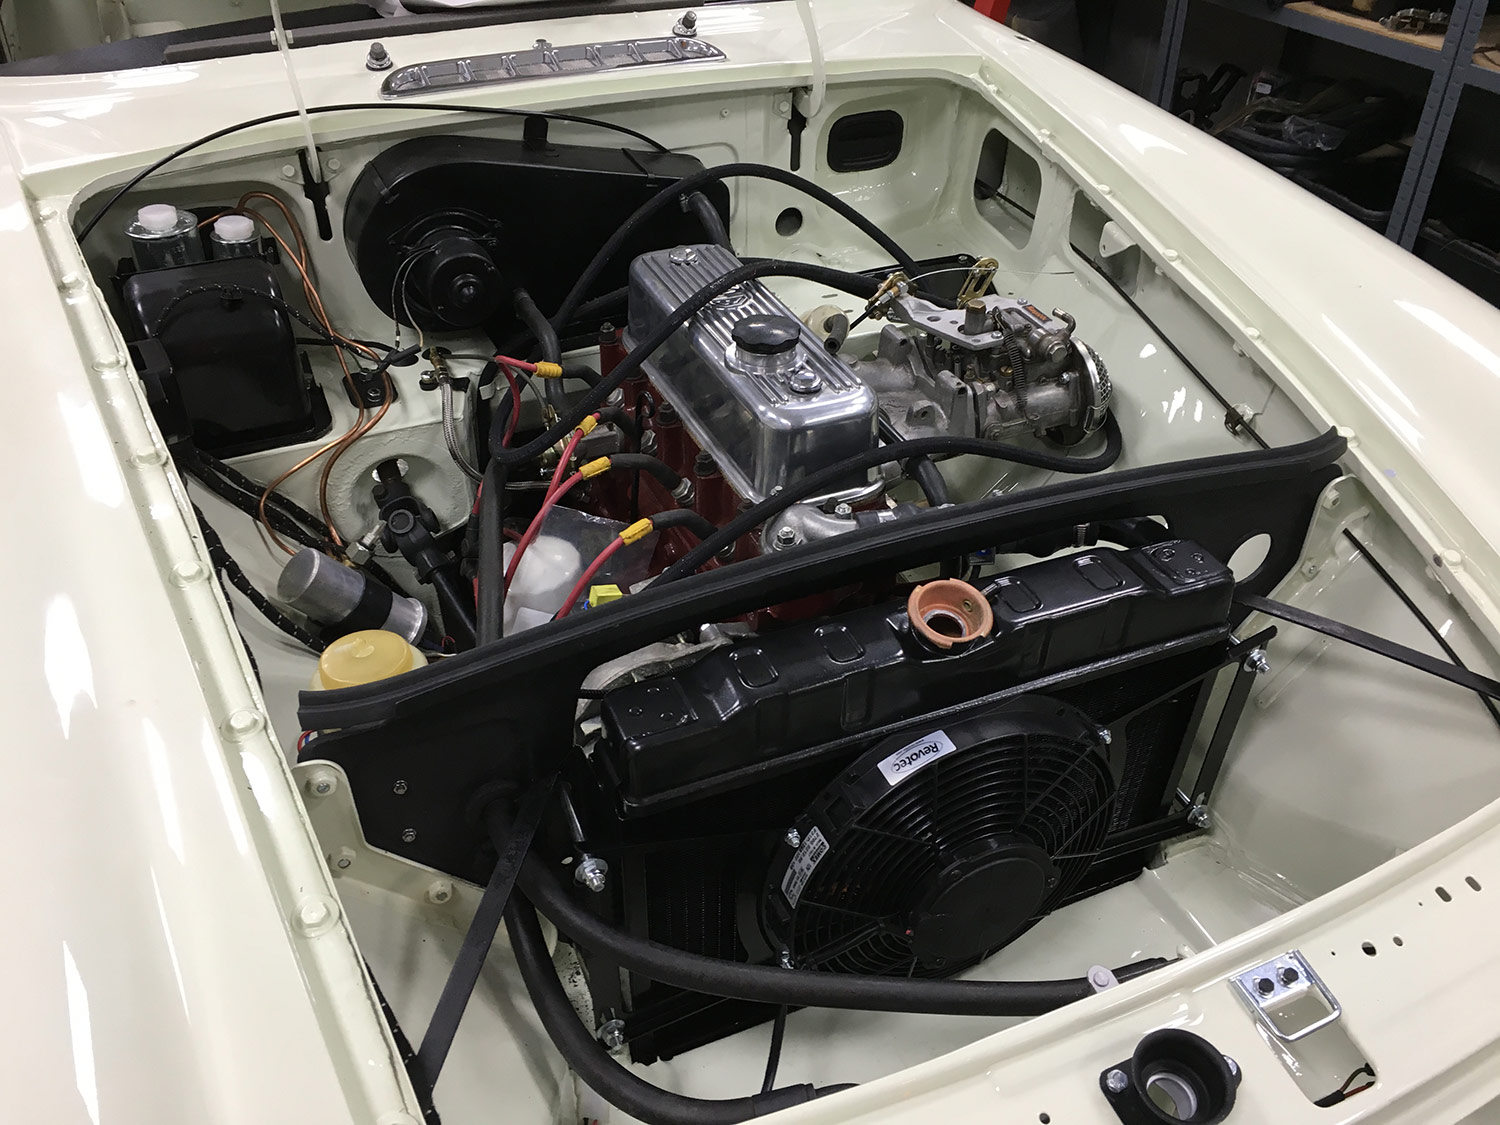
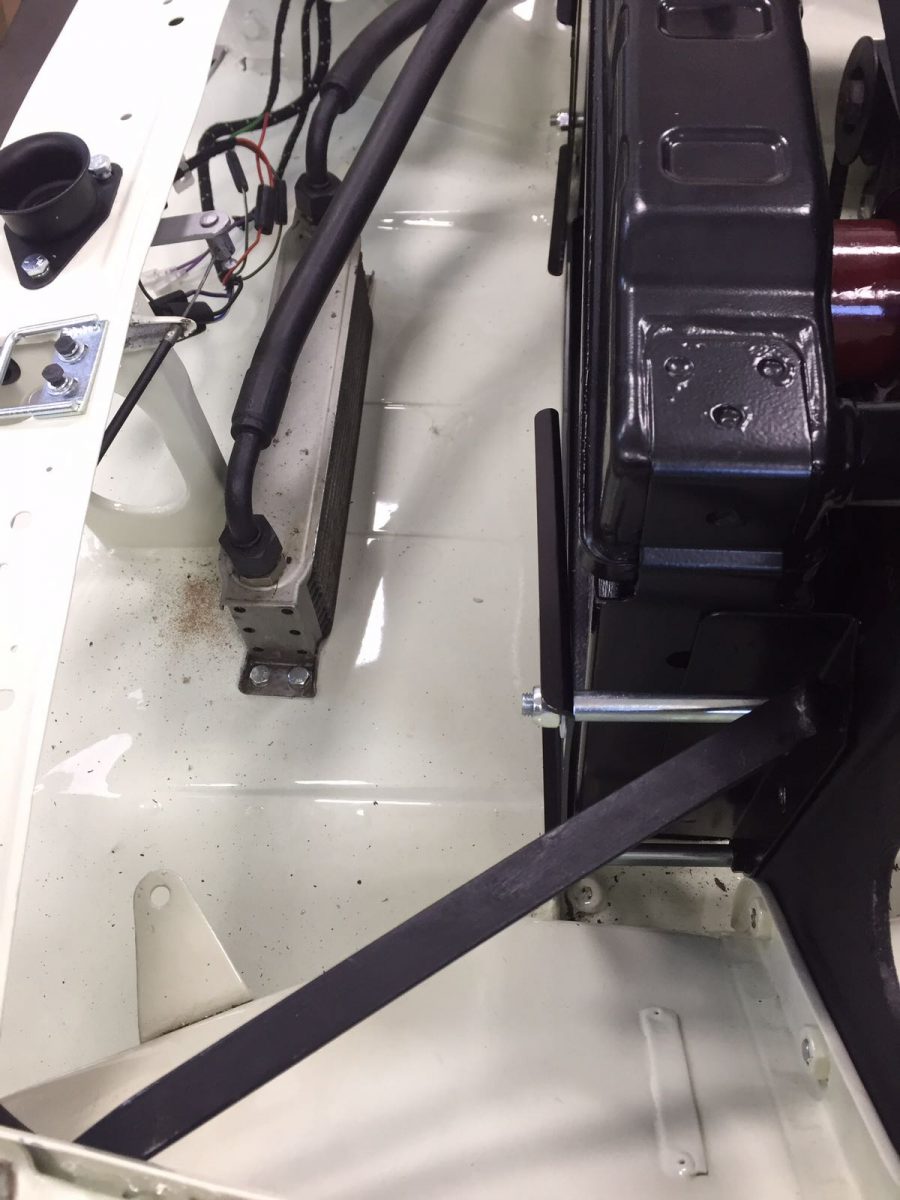
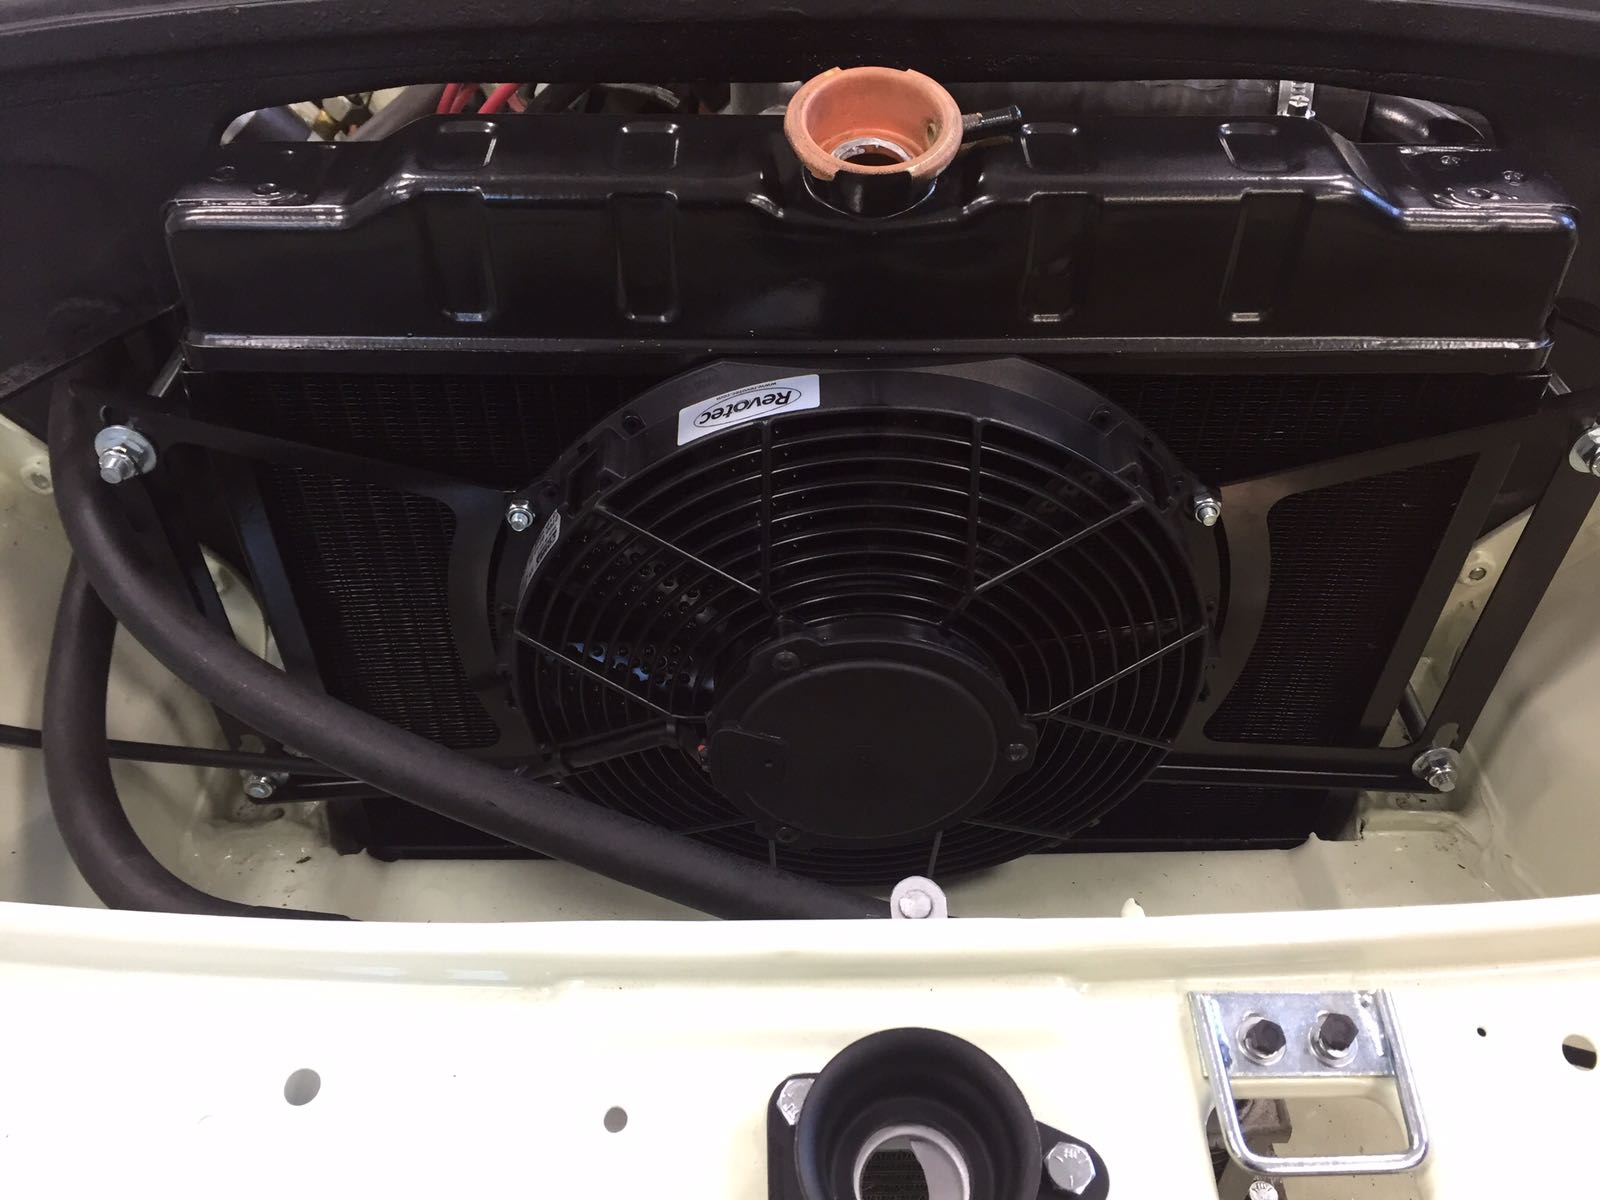
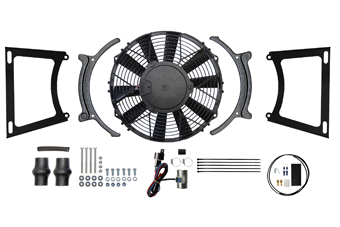 The new cooling kit has arrived today from Revotec.
The MGBG Chrome Bumper 1962-76 Cooling Kit from Revotec has been engineered to provide perfect cooling for your MGB.
Part number: B-MGB 62-76-BLK
New – Black Anodized Engineered Brackets
Kit Contains: 10″ High Power Blowing fan, Laser cut aluminium anodized black fan mounting brackets, 28mm Revotec Electronic fan controller
Top hose replacement kit, Earth wire kit, Bolts & fittings.

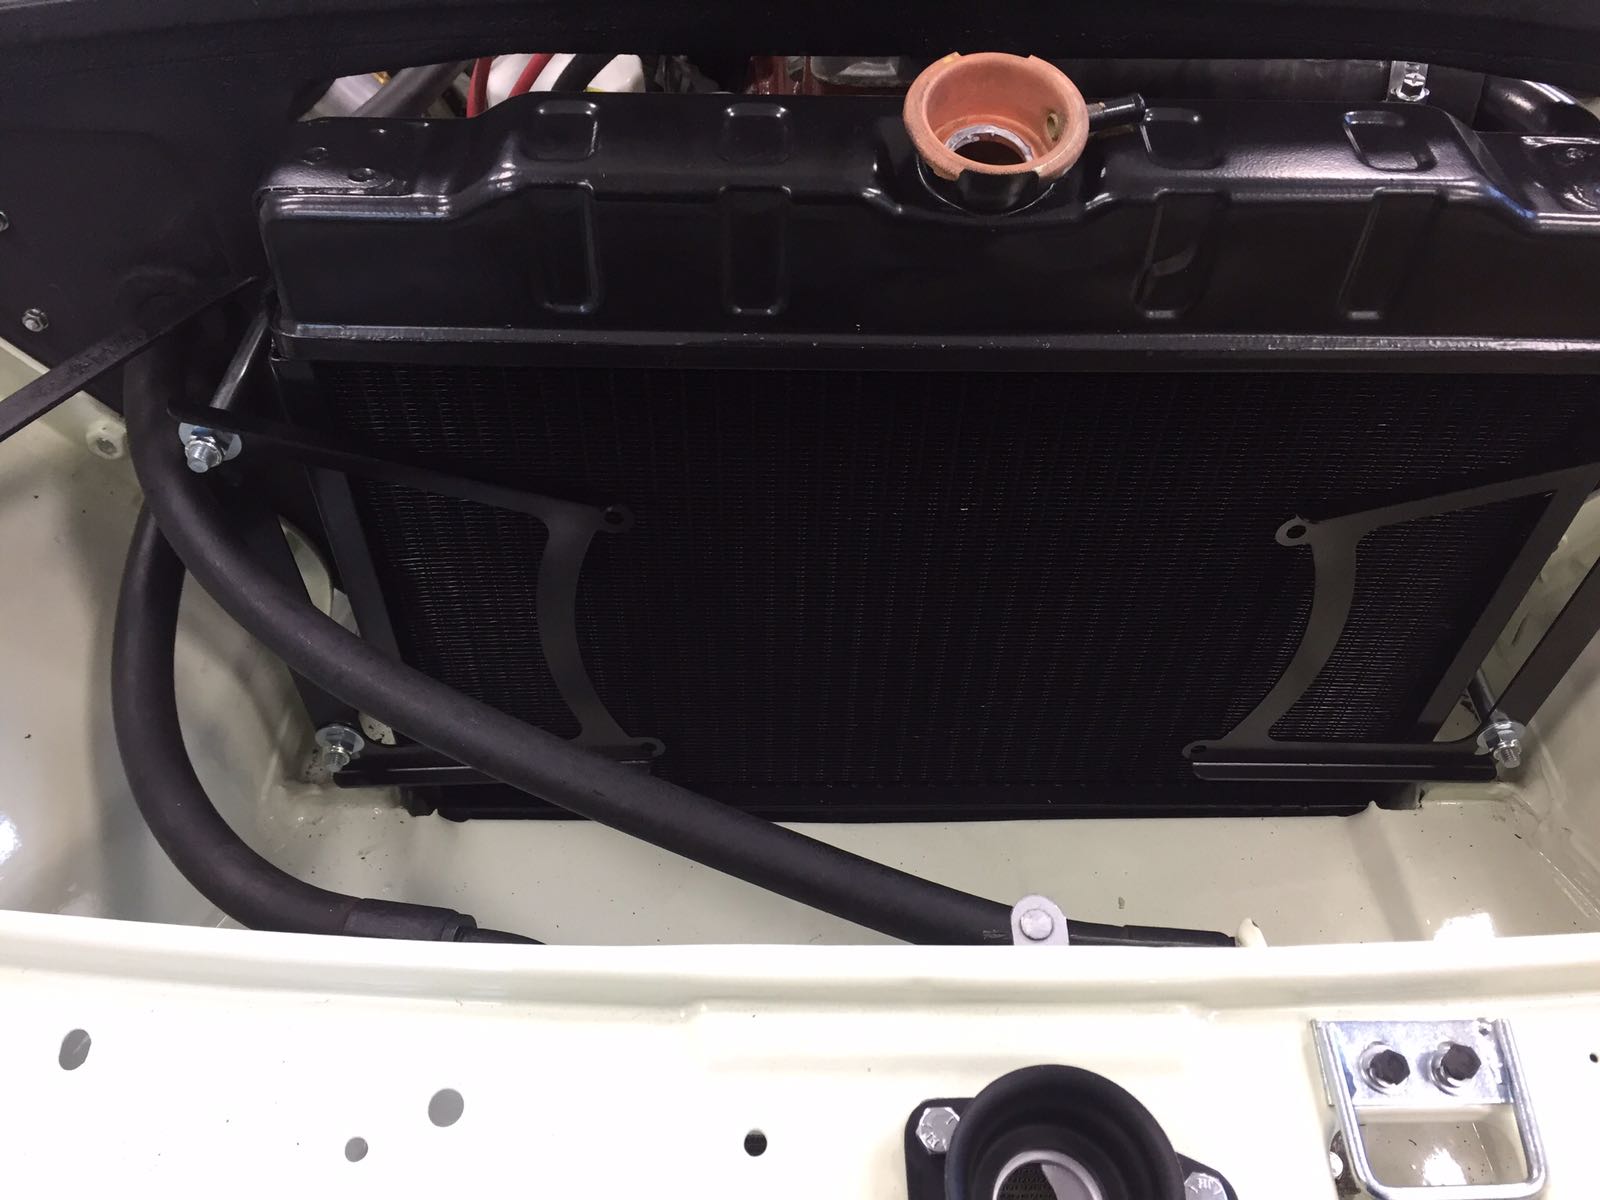
Lauren soon got on to the task at hand, fitting up the new cooling kit.
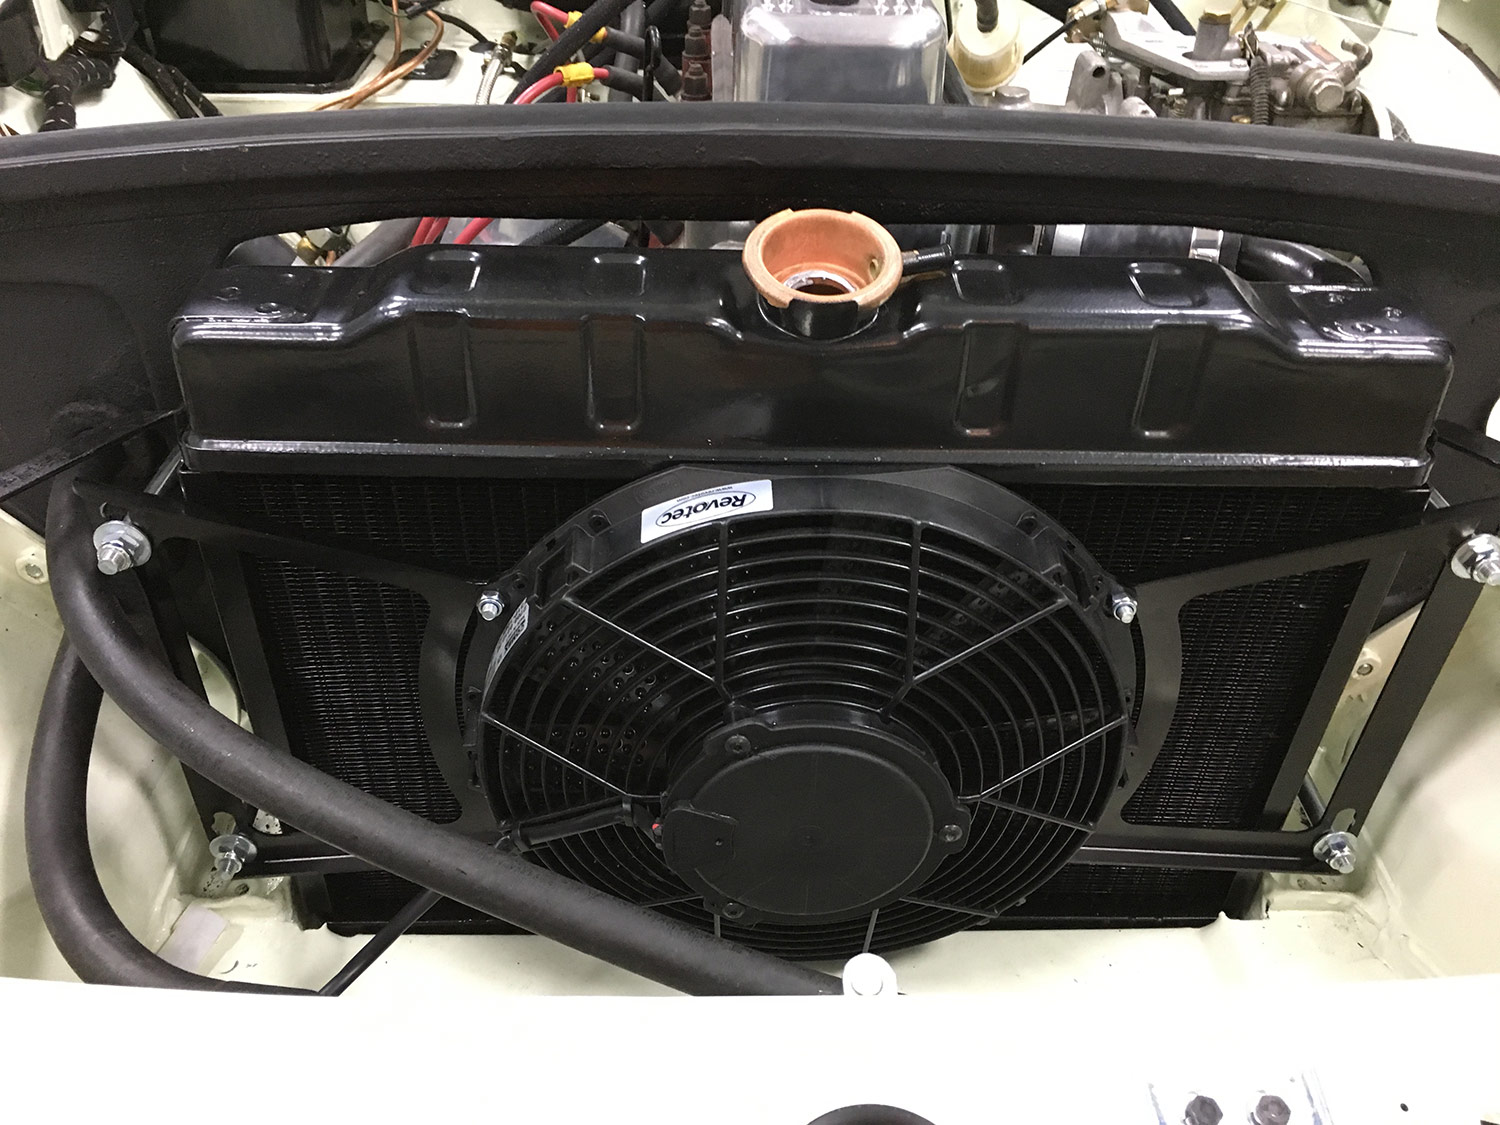
If you purchase the MGB Chrome Bumper 1962-76 Cooling Kit from Revotec, here’s a handy installation guide to help you fit it yourself.
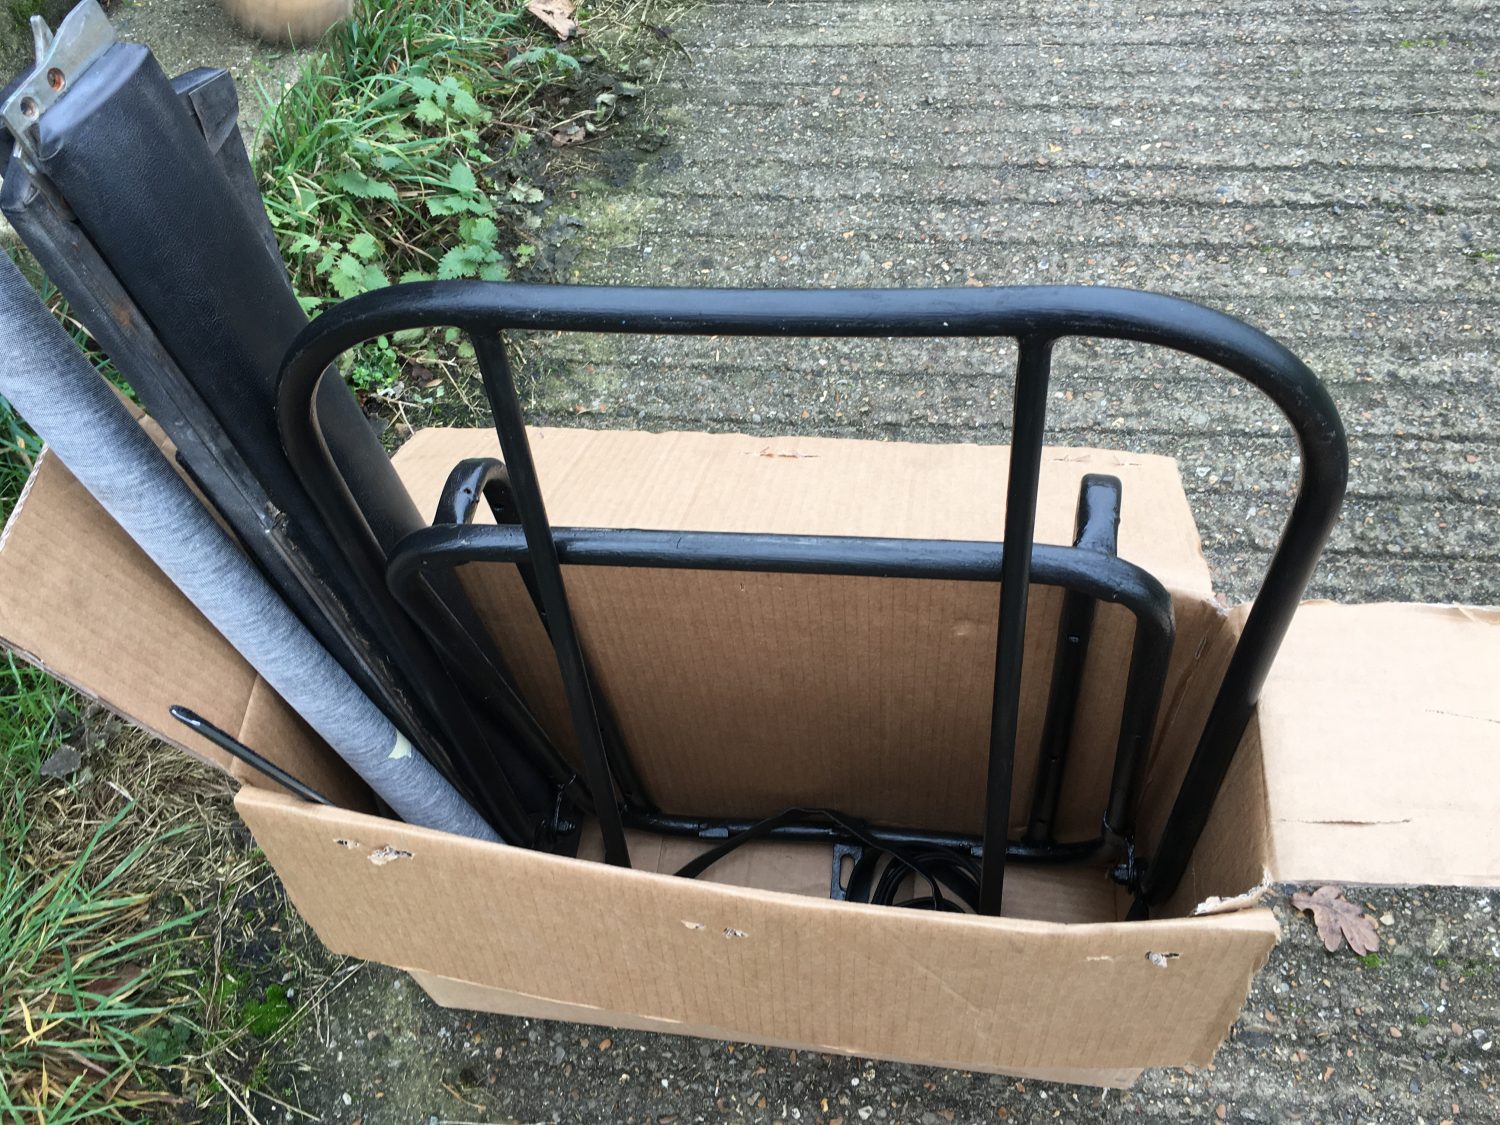
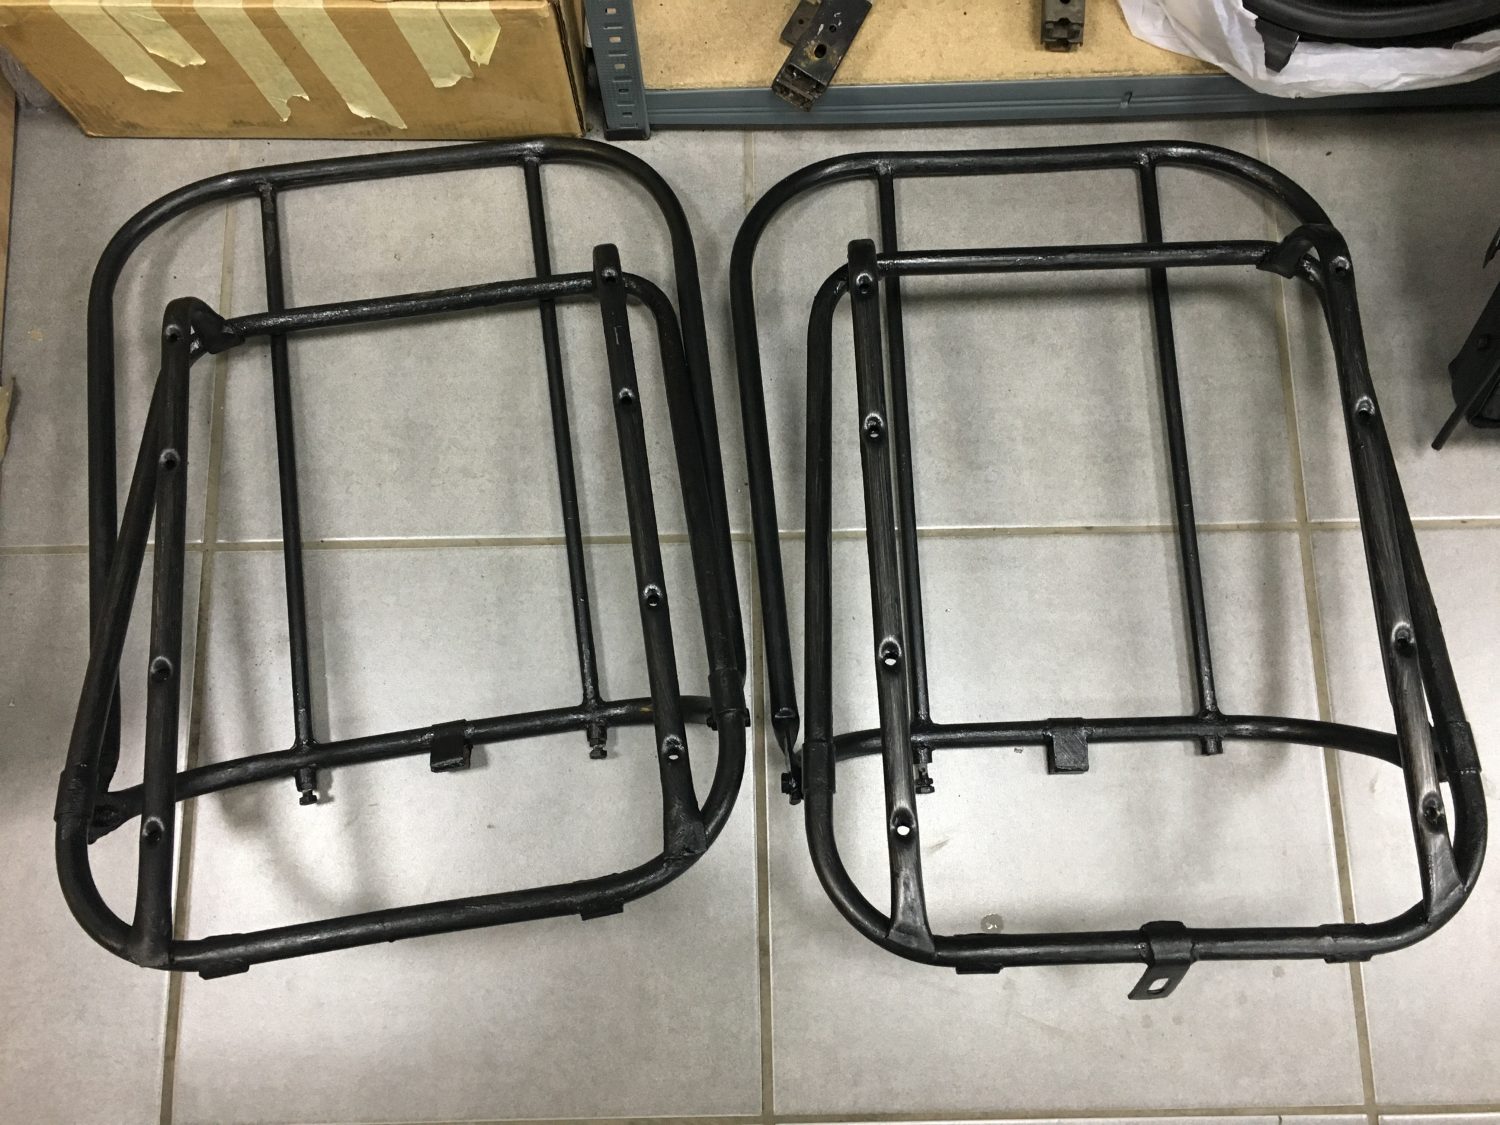
The new front and rear seats are being started today with the end result being a black on black finish.
As is often the case, the frames are still in great condition but just needed a little attention to the paint finish, just to freshen them up.
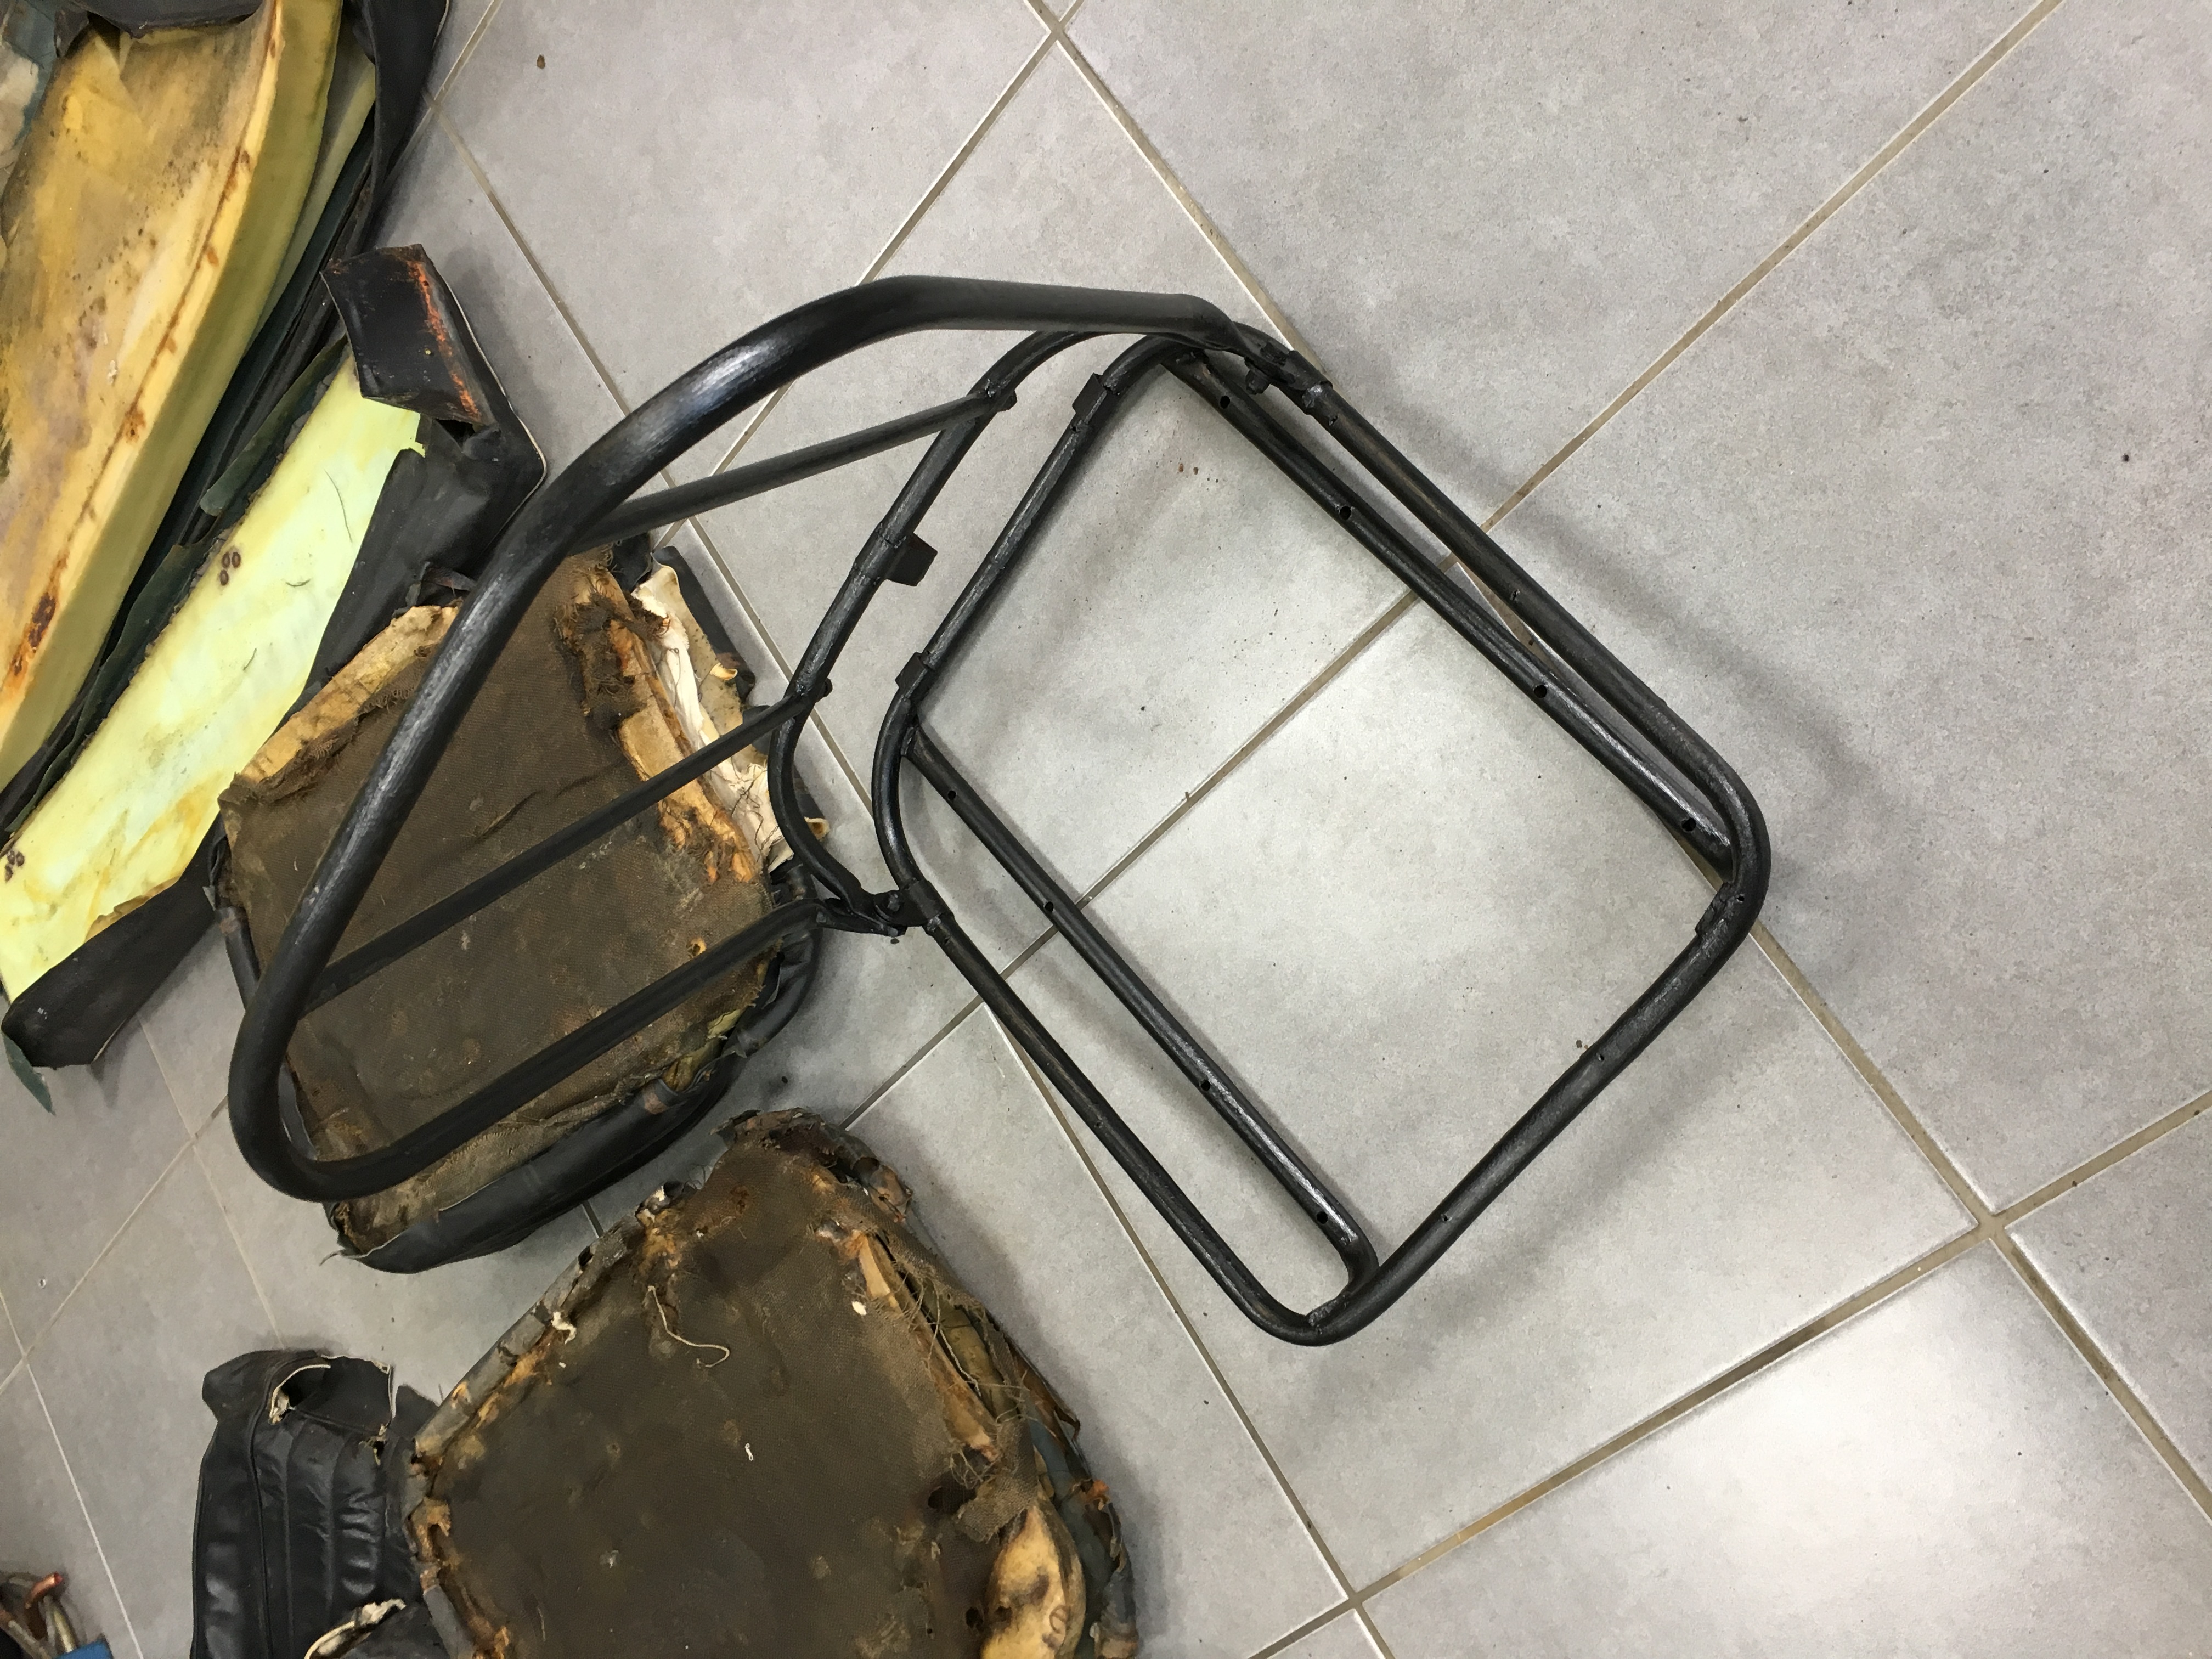
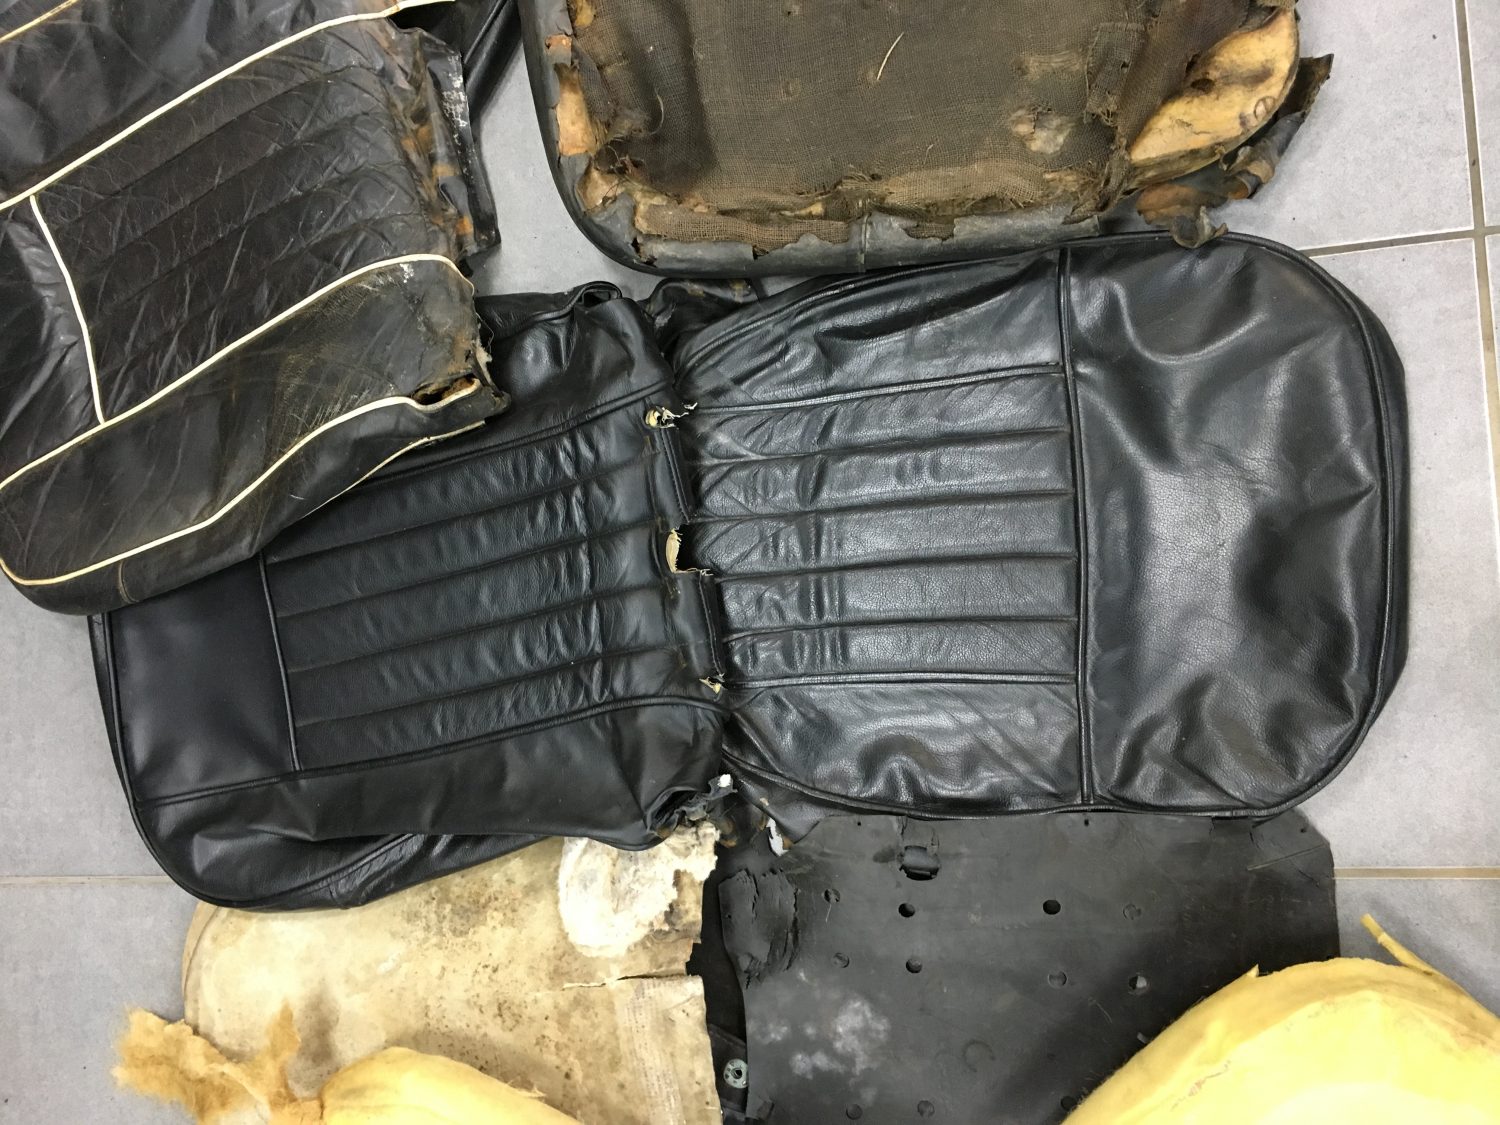
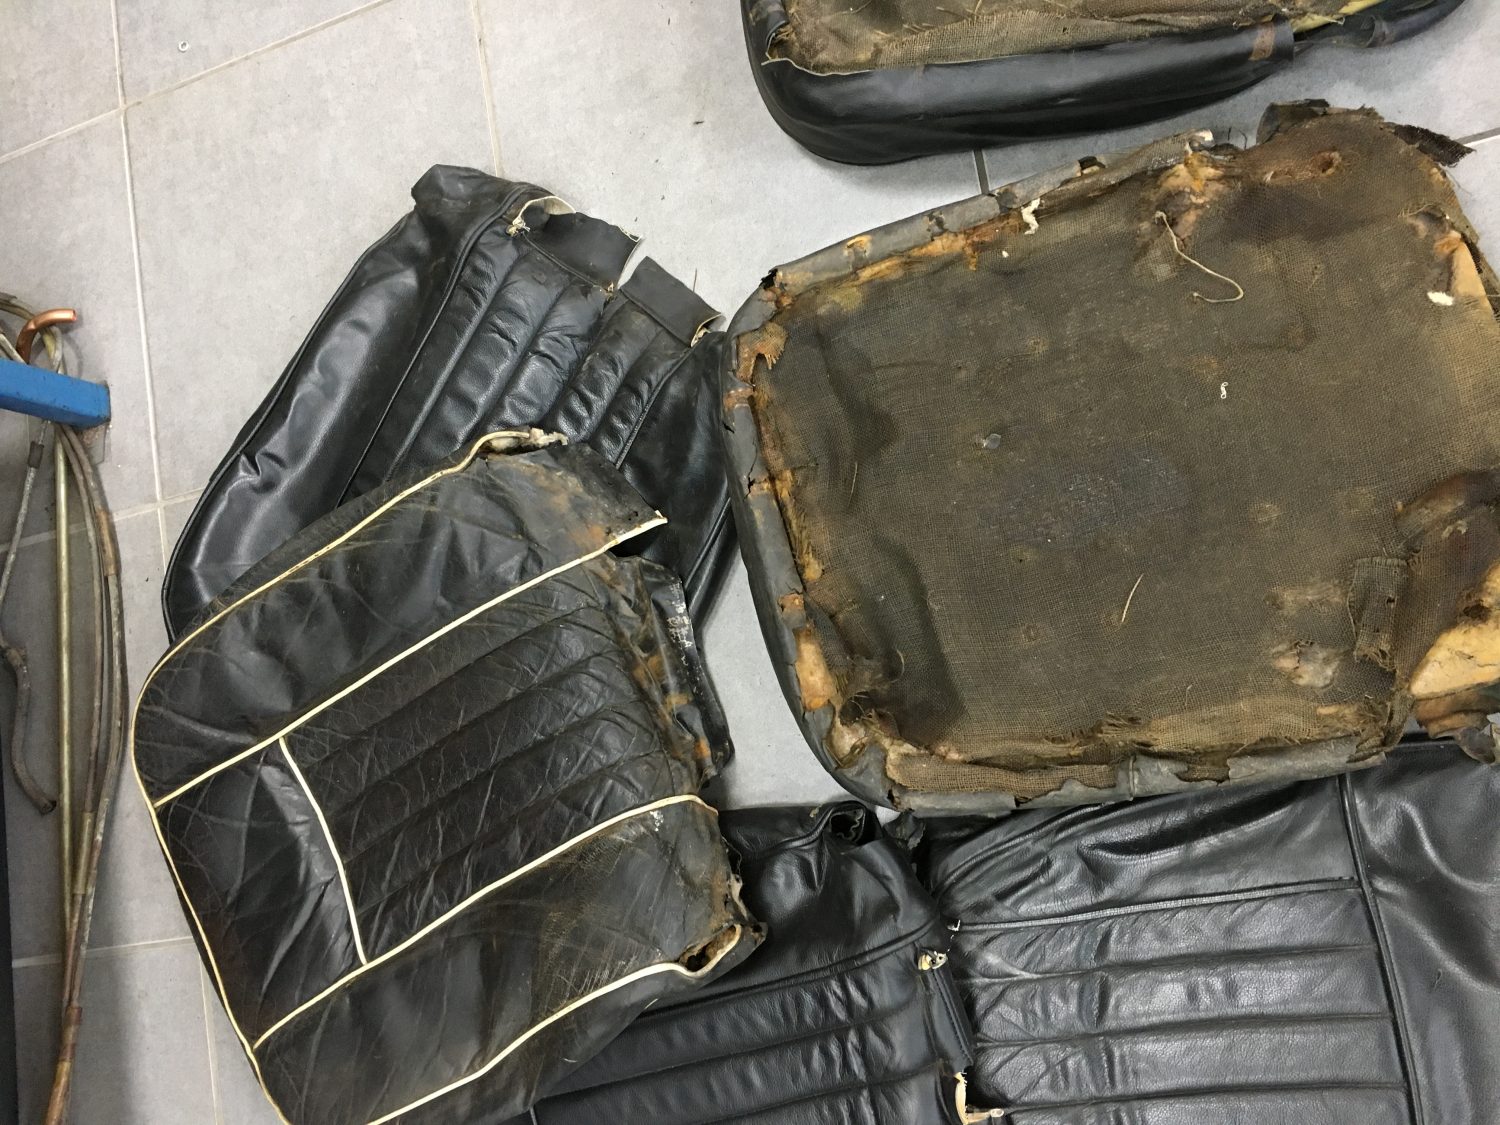
The seats have been stripped of all components, in our opinion the bases and cushions are good enough to be re-used, the diaphragms have worn and the seat covers themselves are looking really tired.
One of the seats has been covered over the covers so we’ve decided to give the inside a full makeover too.
They are now in the hands of Kim, our interior specialist and she’ll look to replace the interior with new. It is not always the case but sometimes it is actually more viable for us to build the interior from scratch ourselves rather than to buy off the shelf. Certainly in this case, it is the most cost effective option with most suppliers being out of stock and the others costing a substantial amount.
Its times like these when we are fortunate to have the experts with the skills to be able to build interiors from essentially nothing.
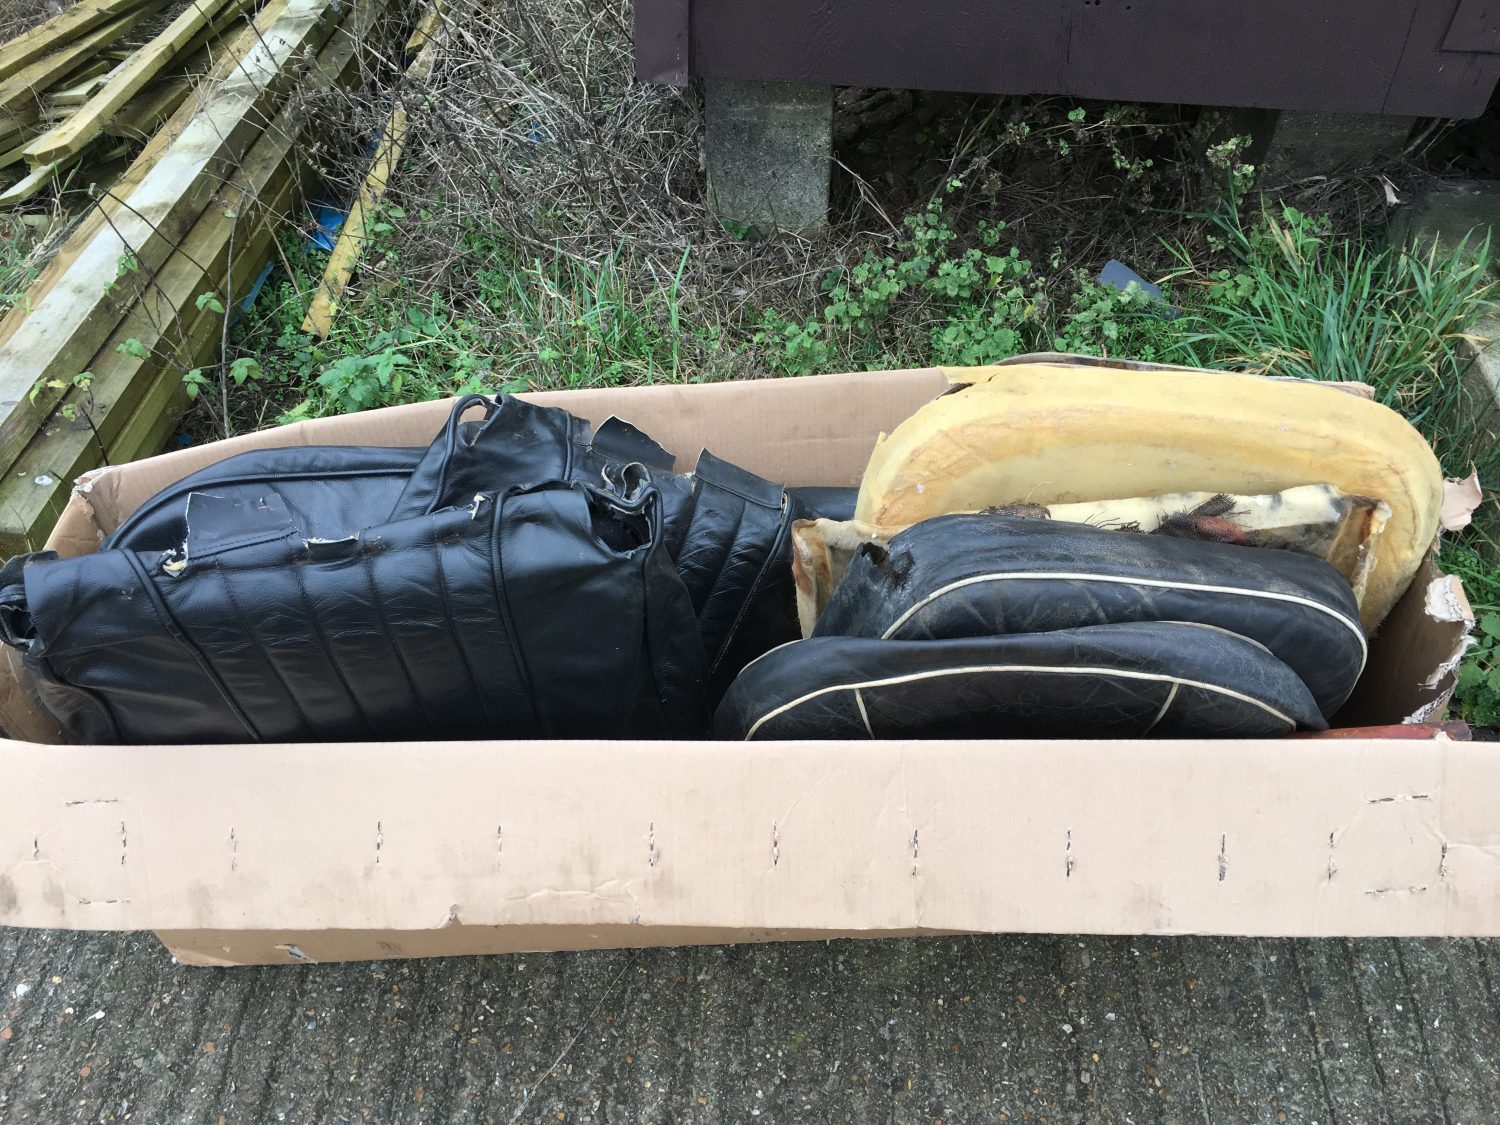

The interior of our 1968 MGBGT is in need of a spruce, we knew that new covers would be required but until we had stripped the seats completely we did not know how much more would need to be replace.
The frames are perfectly fine so Lauren has prepared the frames, repainted them in Satin black before we look at the options of building or buying new interior.
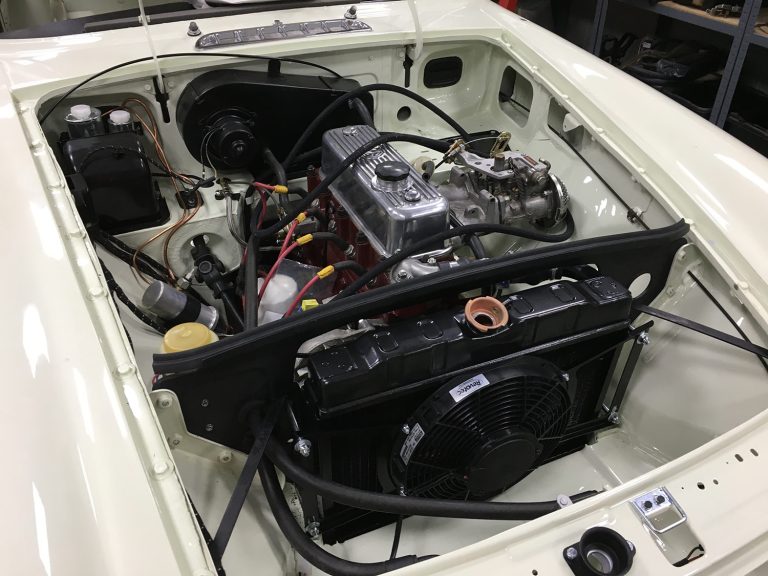
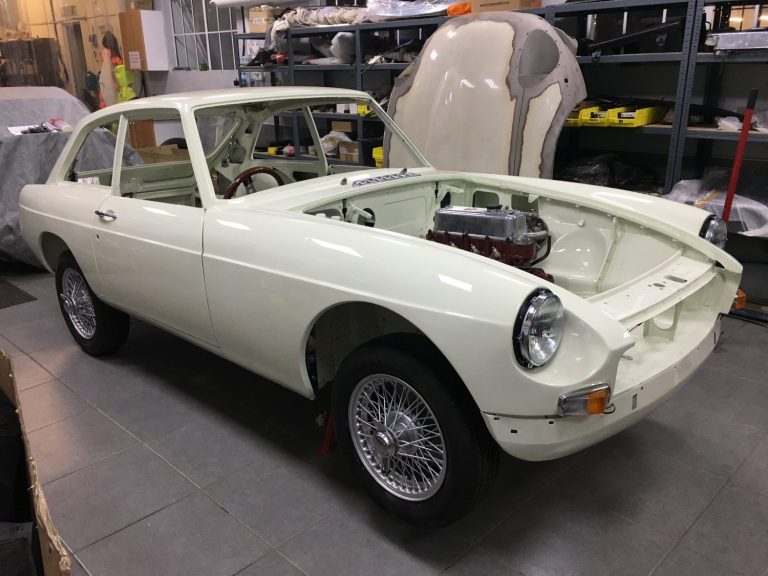
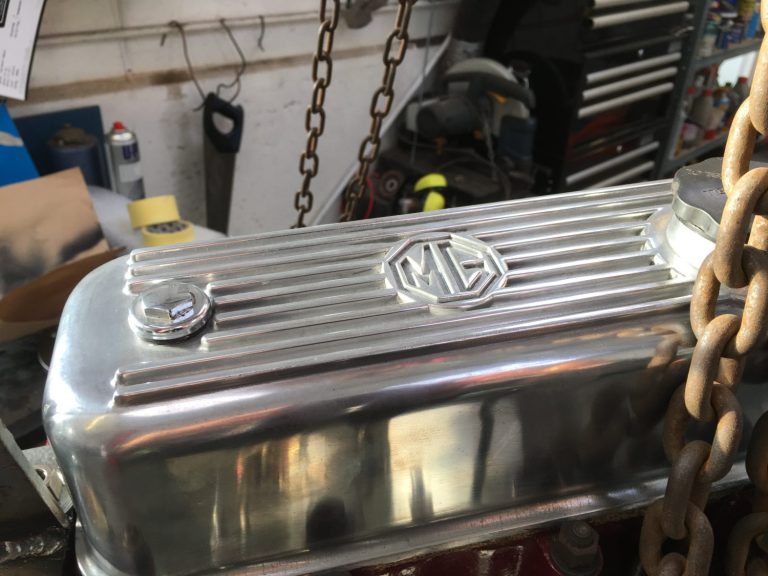
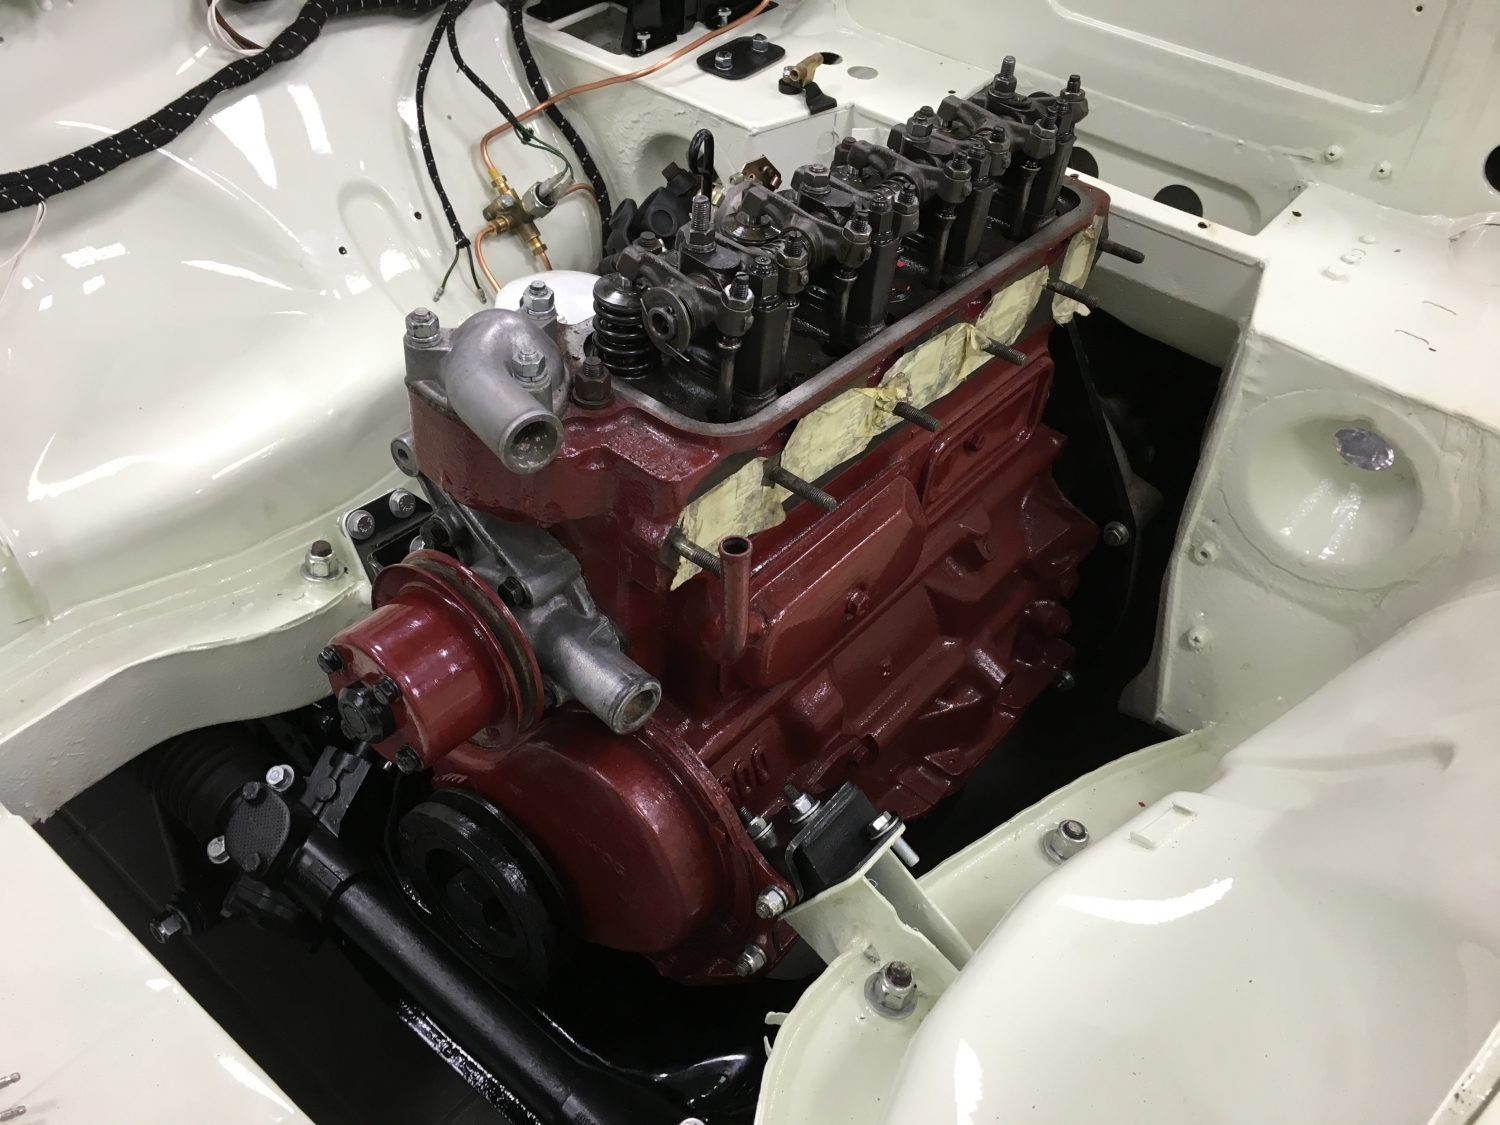
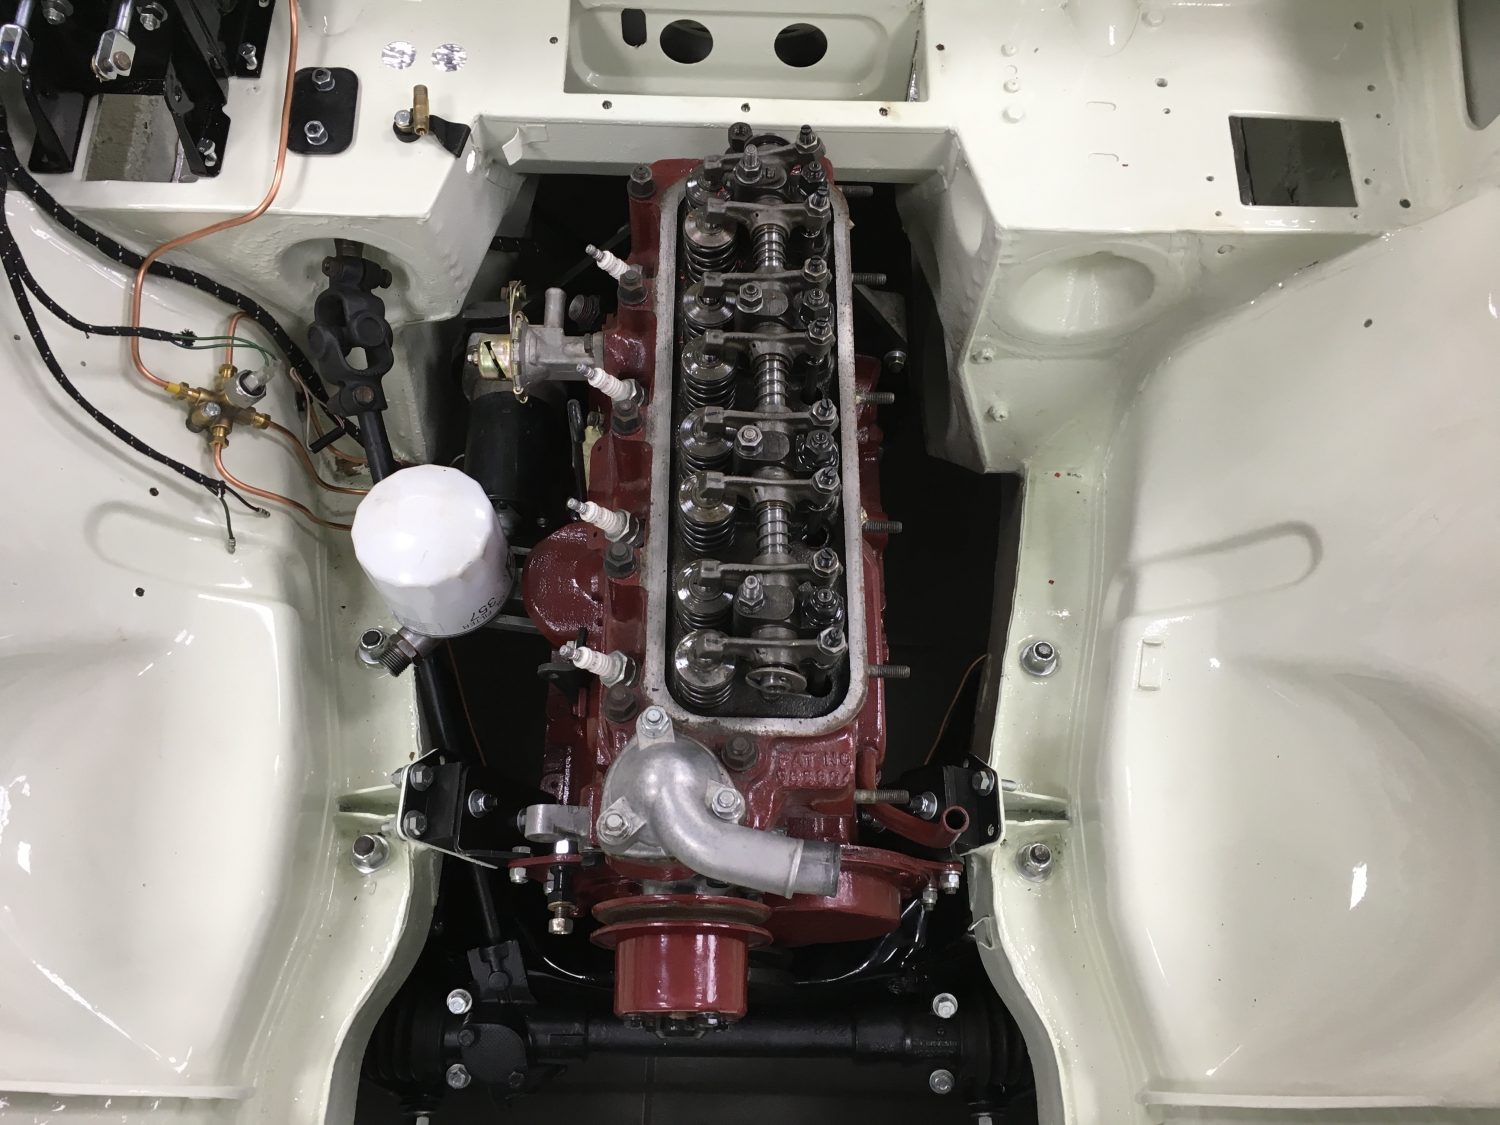
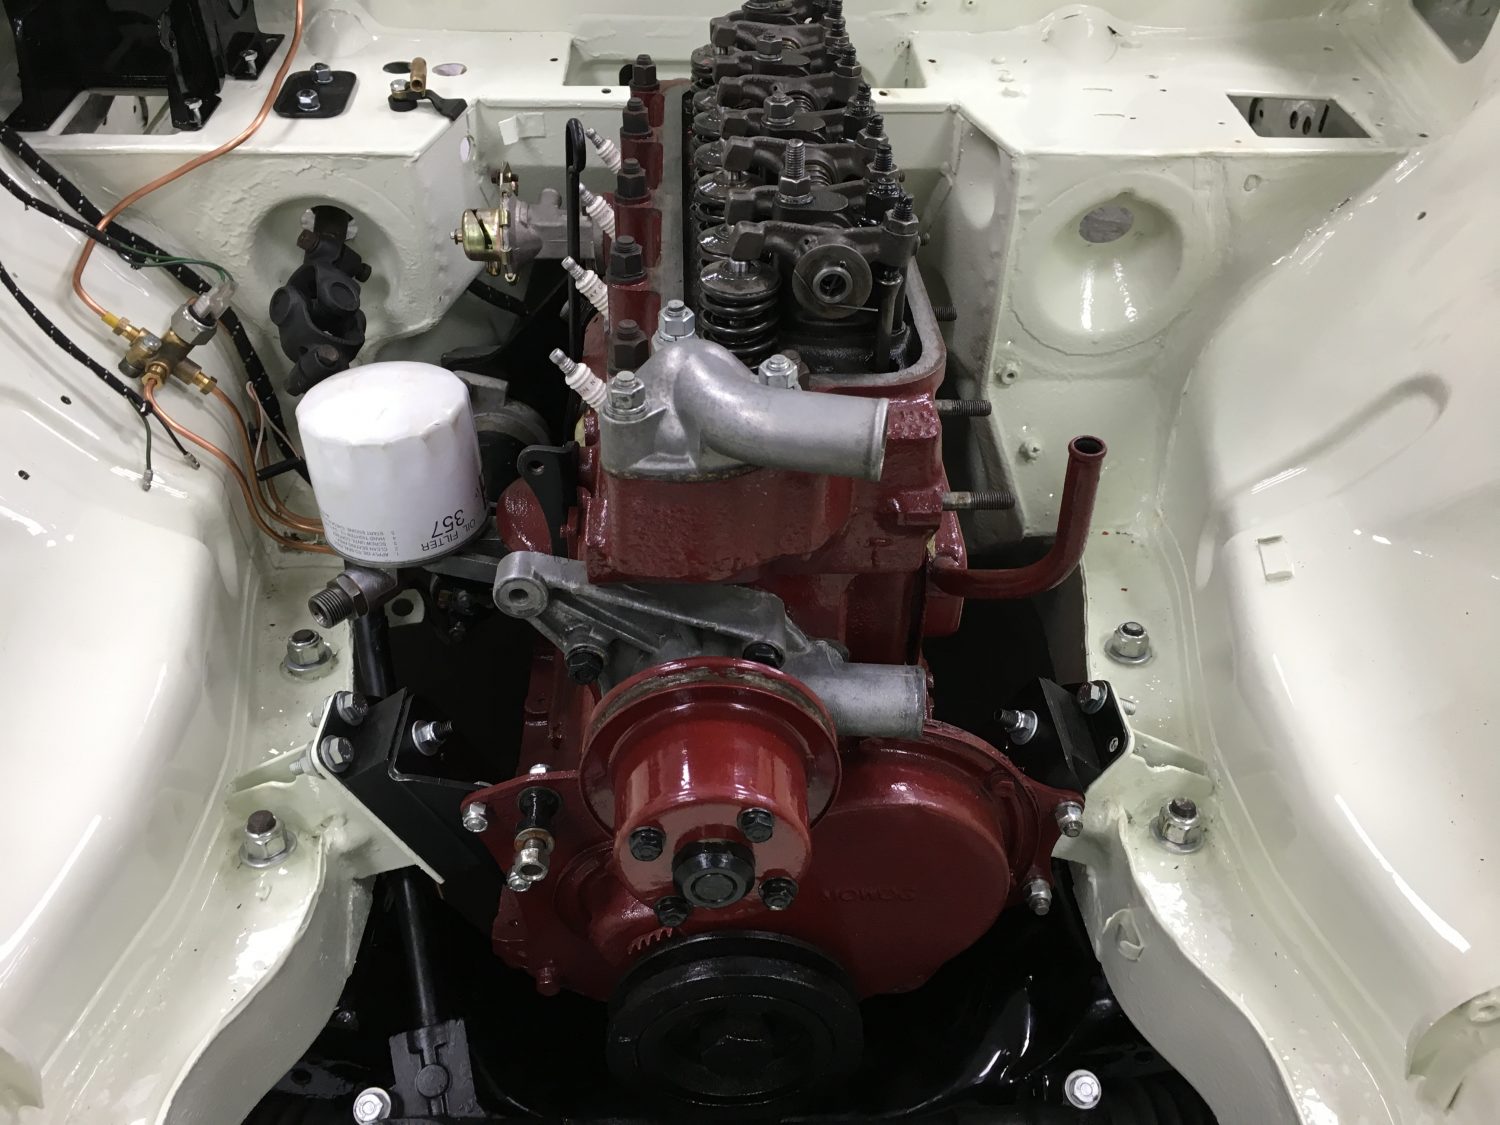
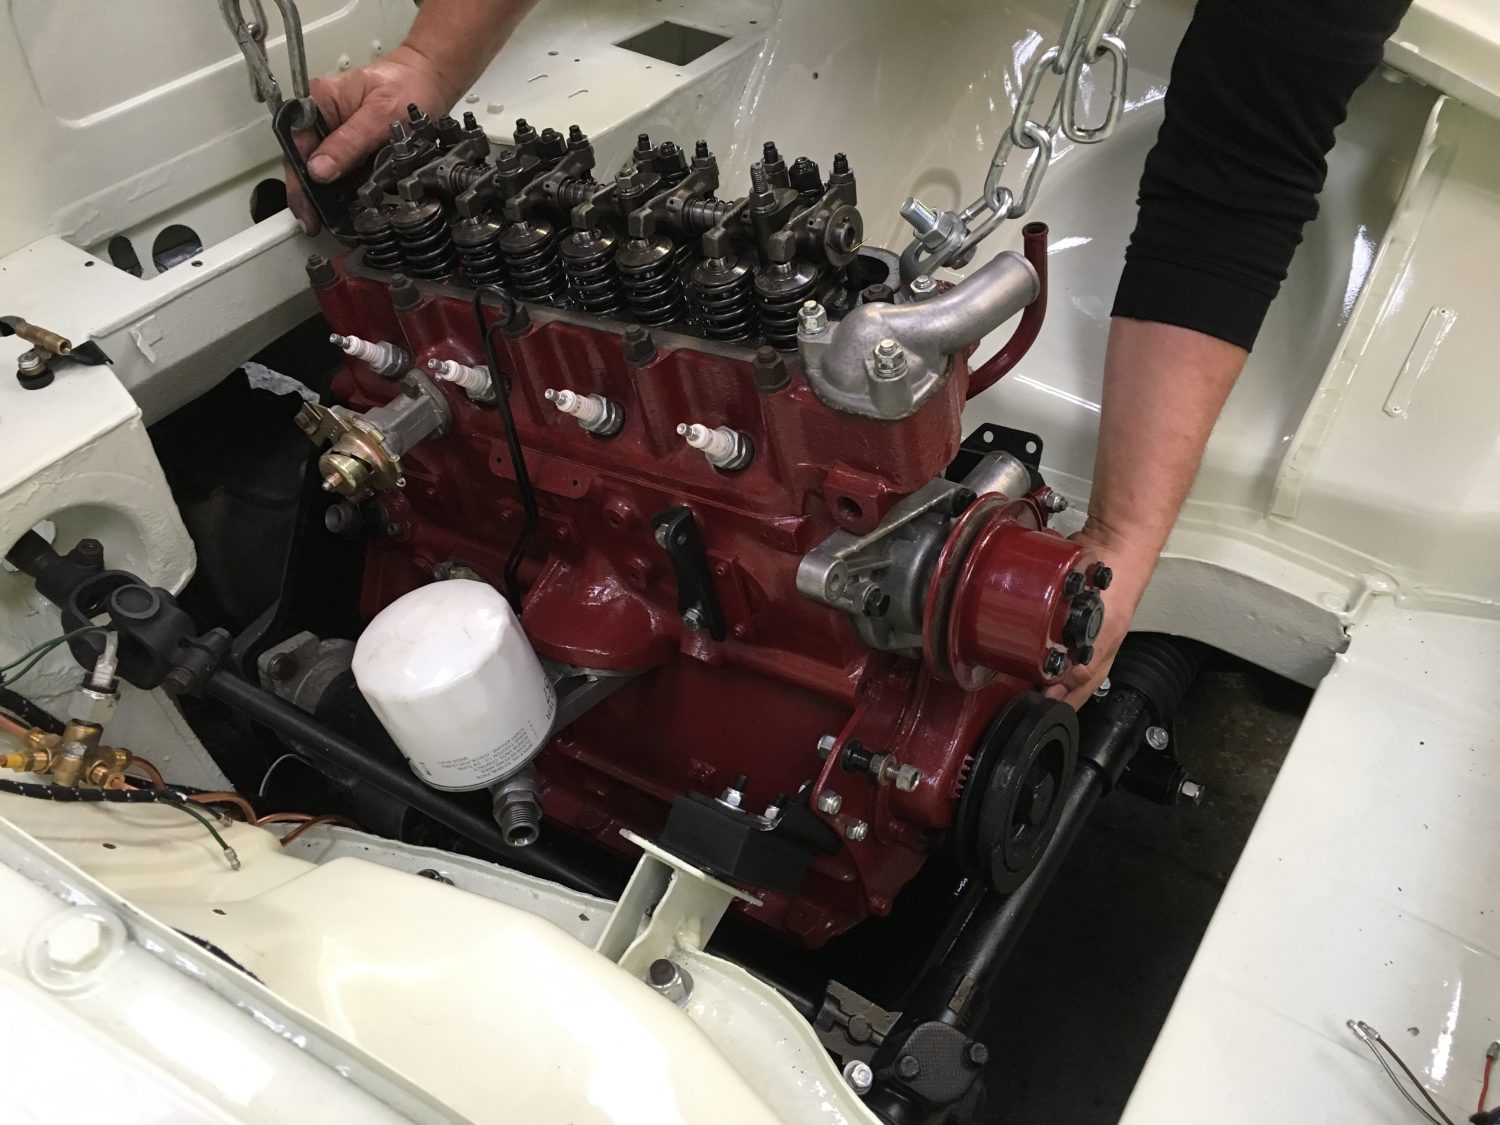
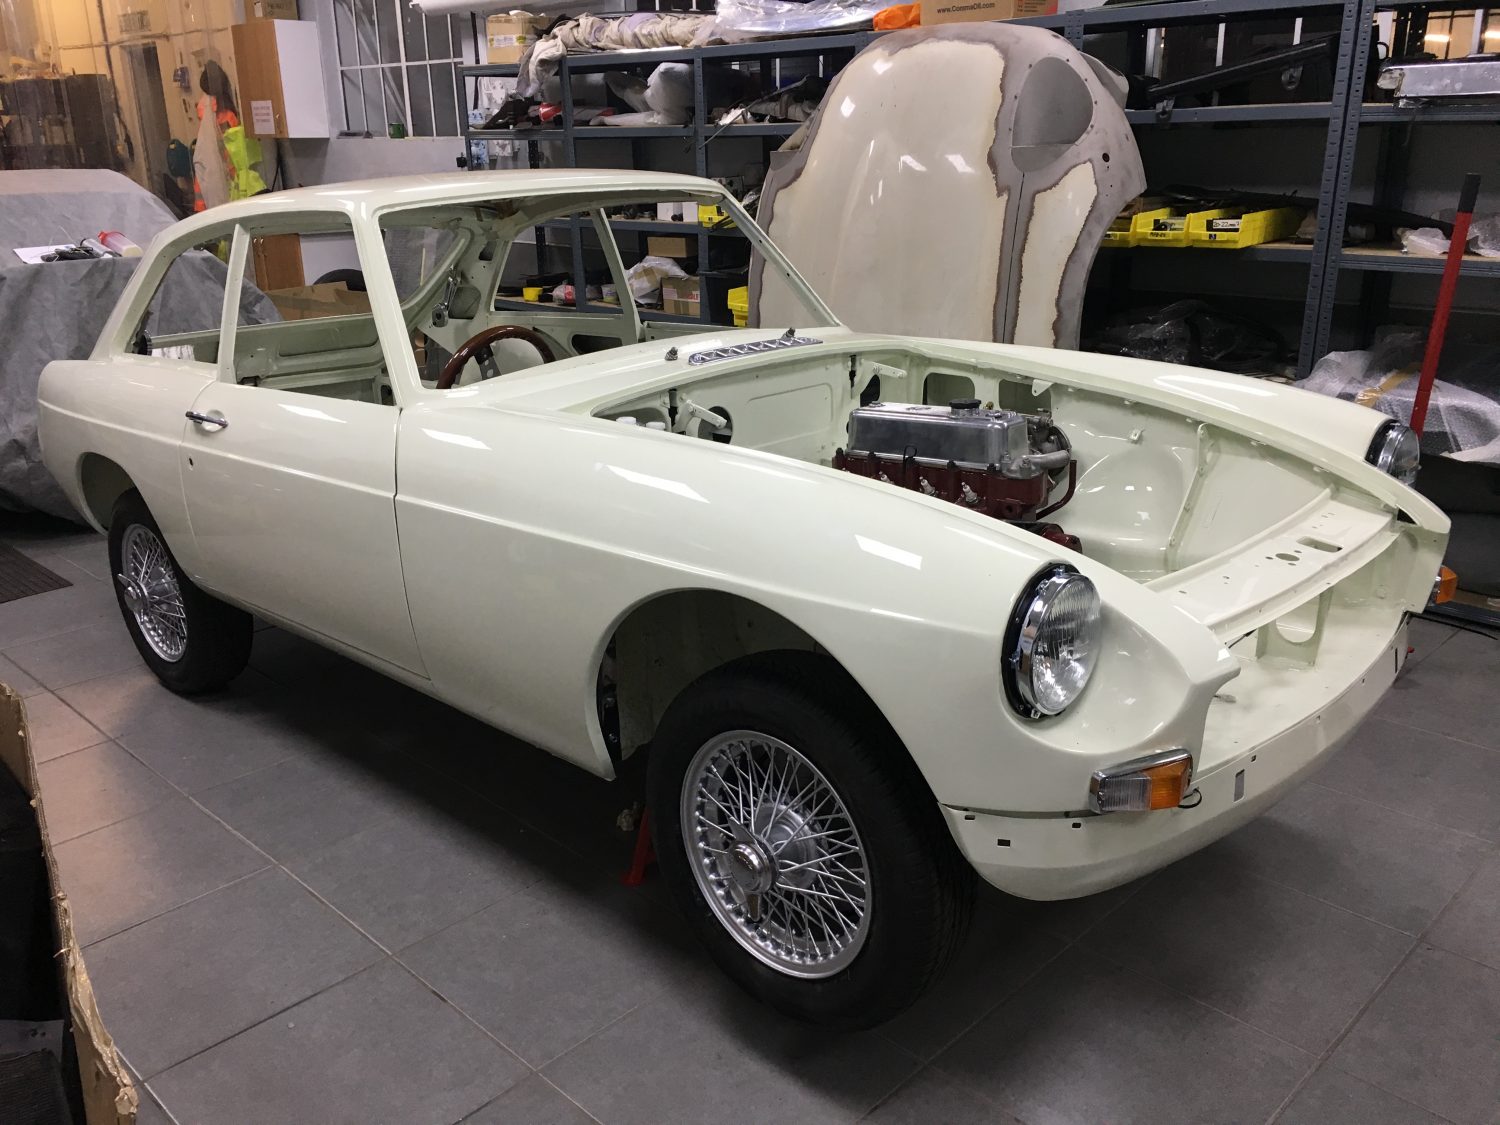
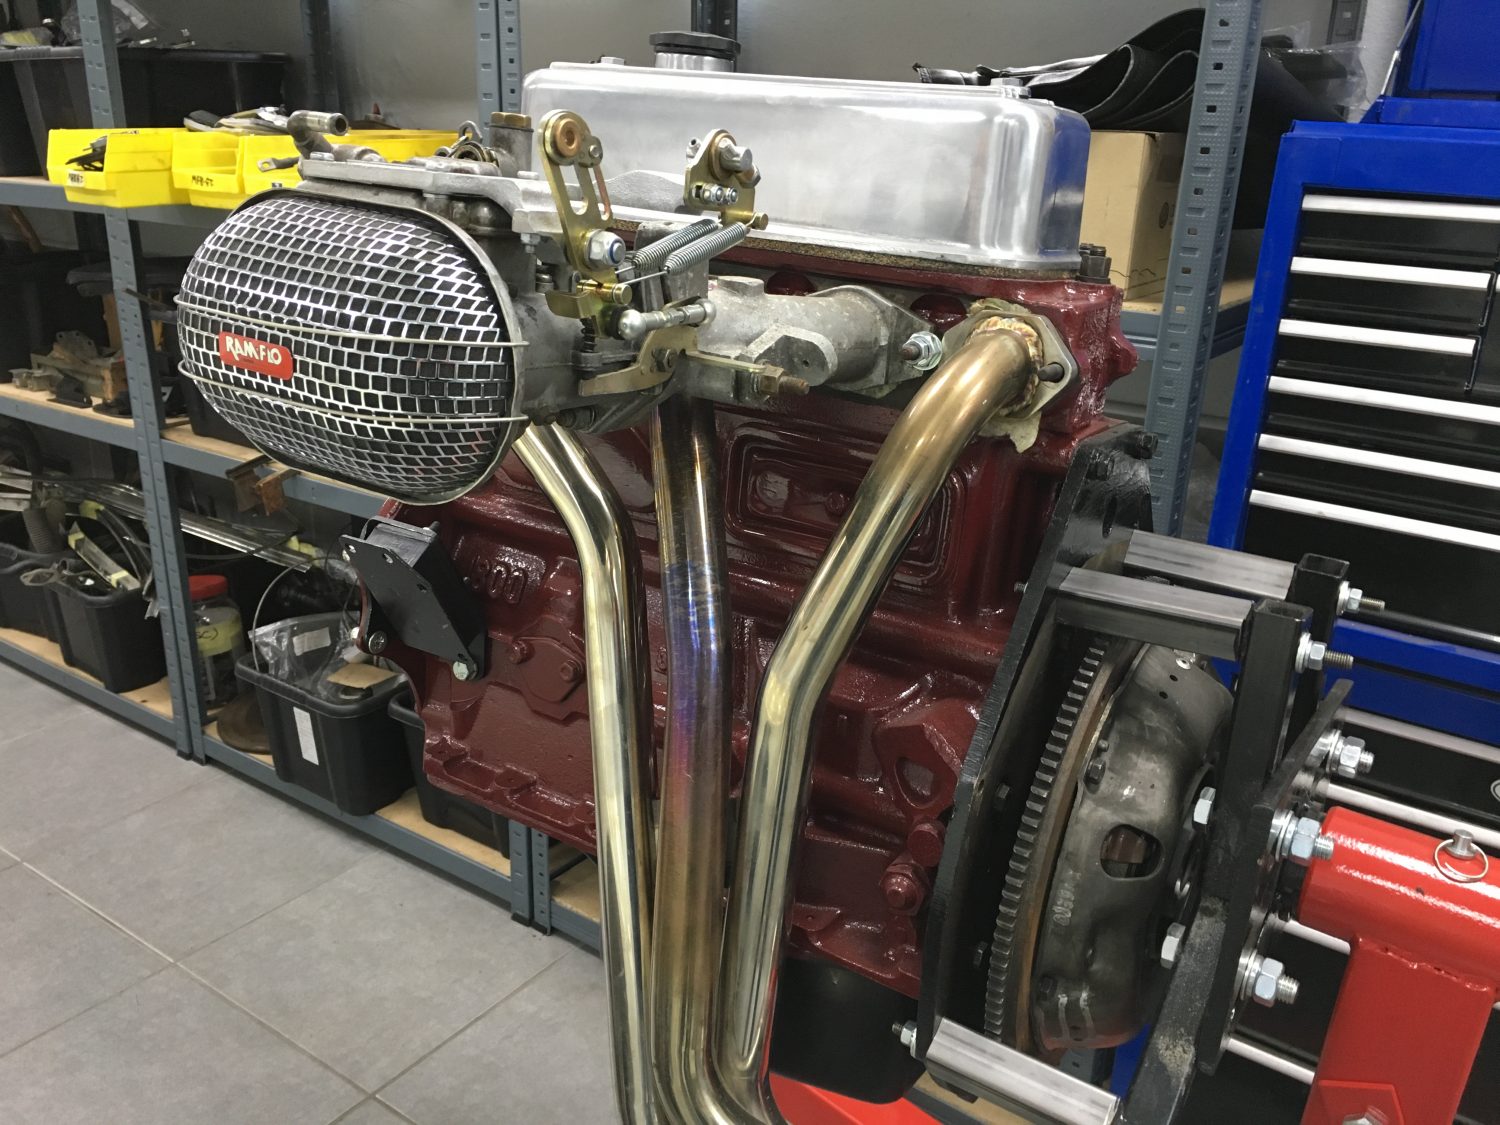
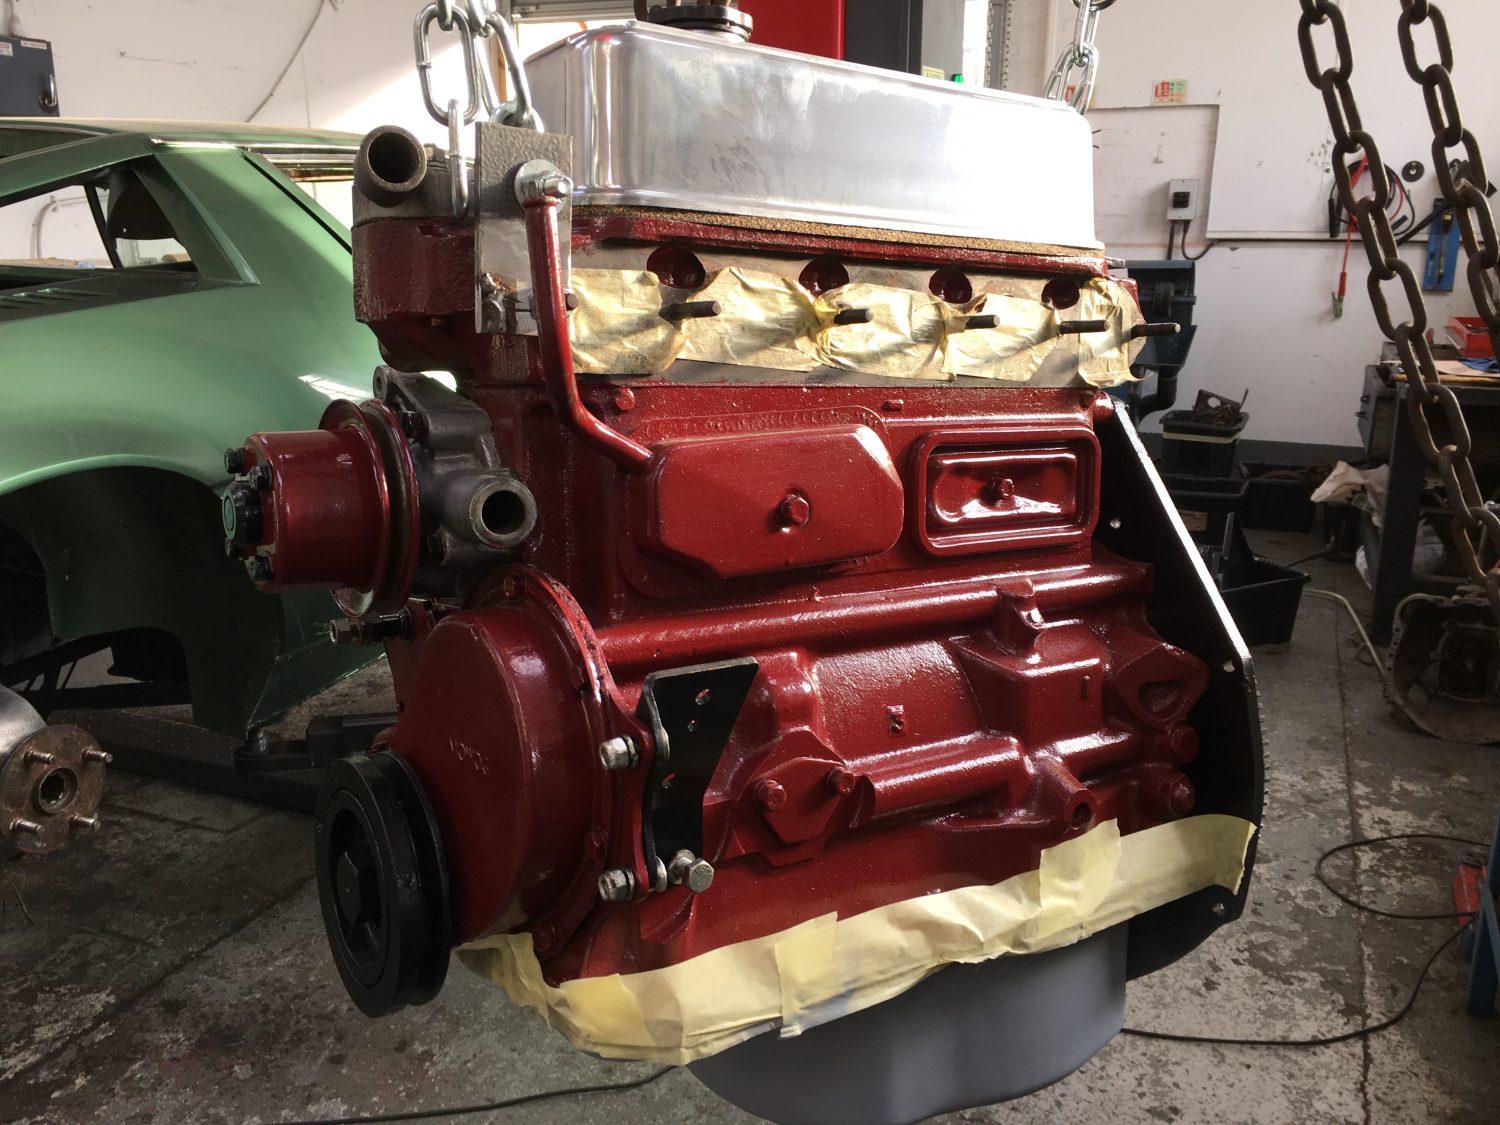
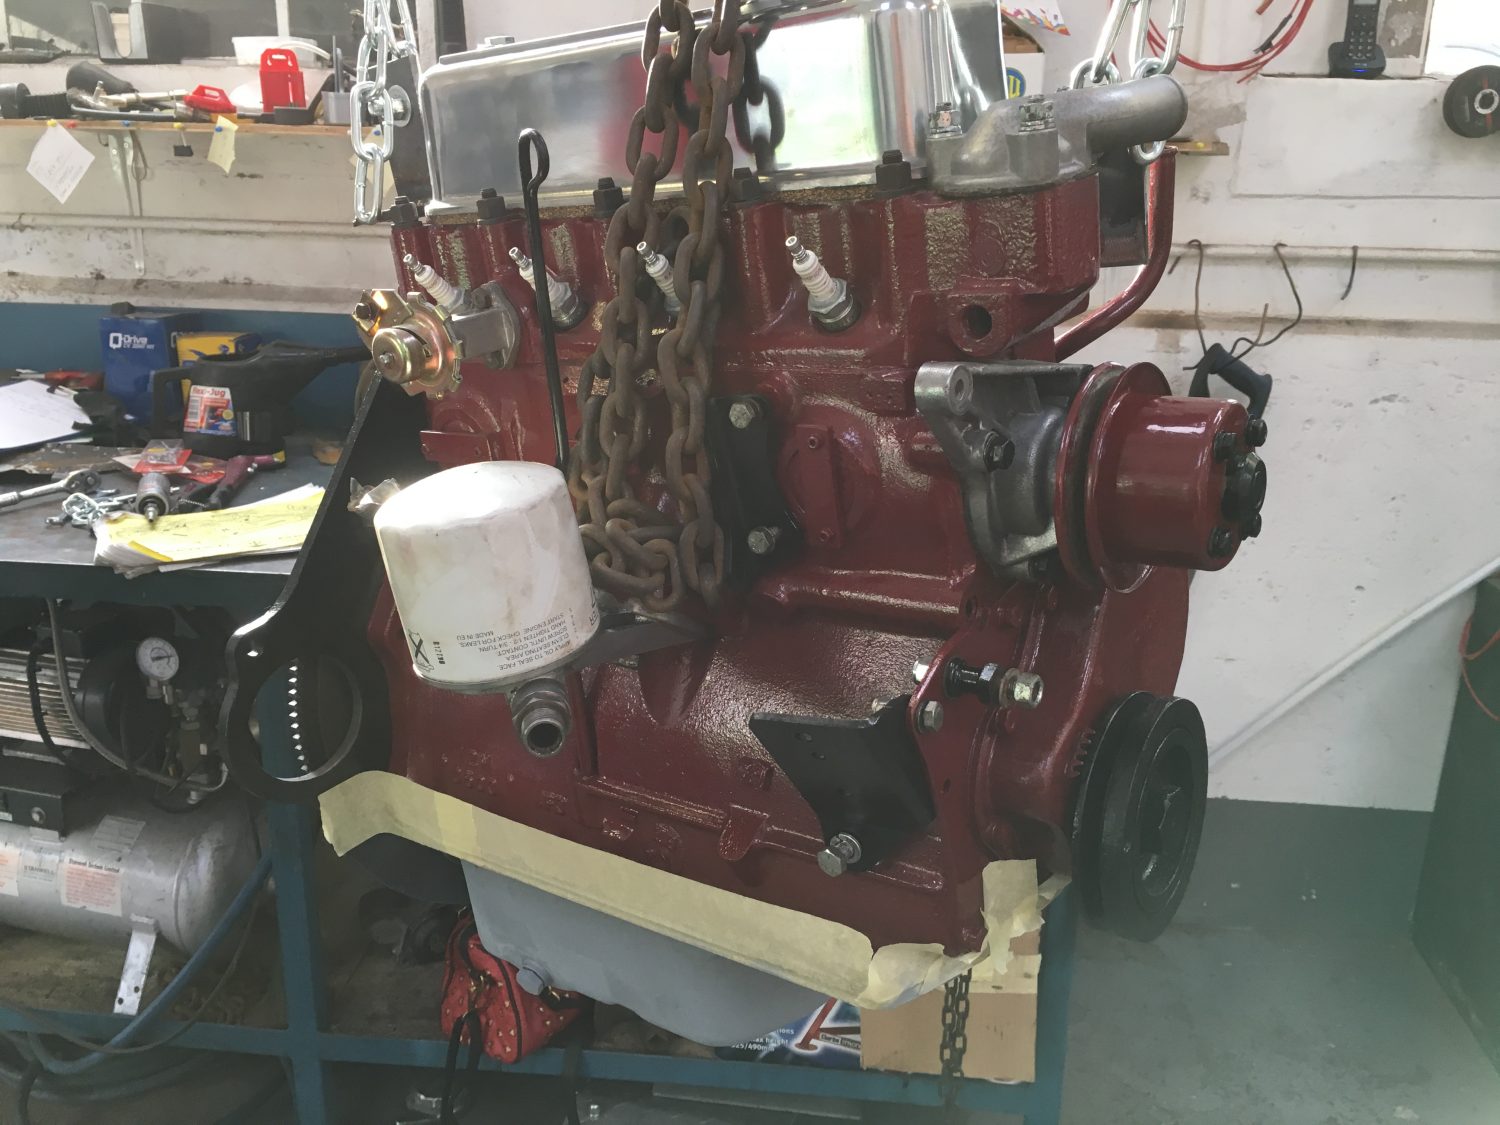
Fitting out our 1968 MGBGT is well underway now with John and Lauren taking full control.
First stop today, re-installing the newly refurbished engine. The colour combination of the original MG Damask Red engine against the Snowberry White body looks stunning.


Our brief is to create a restored car that has certain aspects of Patina. Mr D wants a useable restoration, one that has kept some of the original features where possible rather than replacing everything with brand new. He wants a car that he can enjoy.
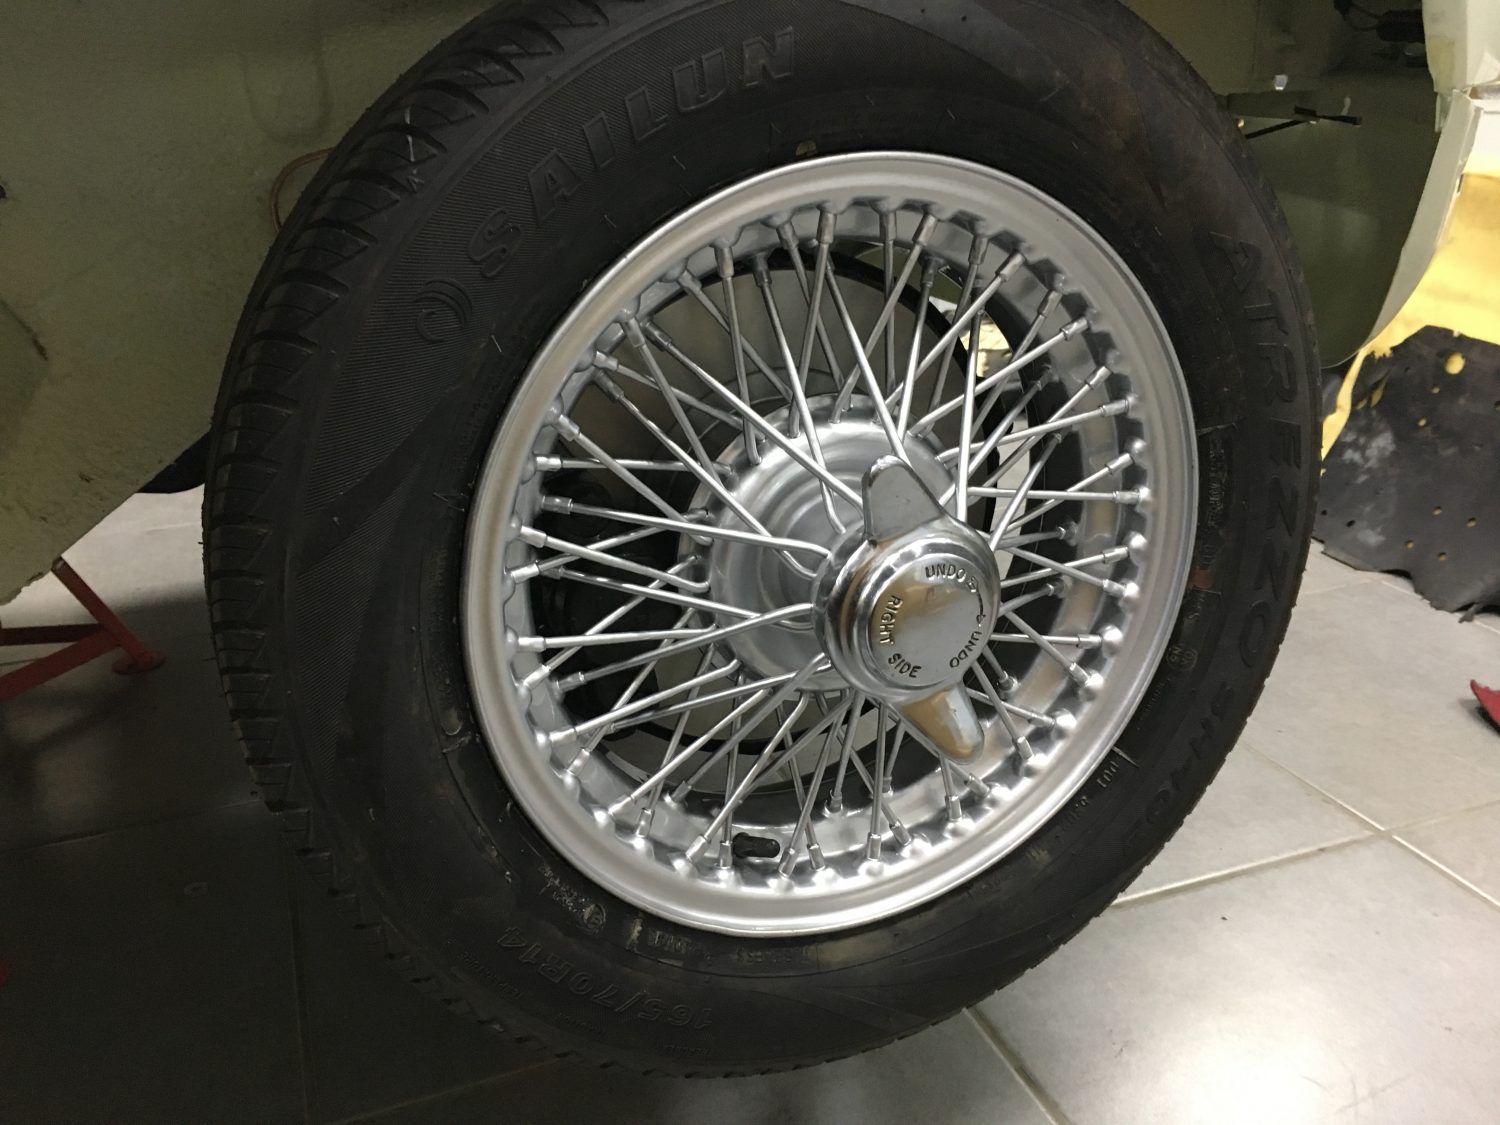
We make the decision to restore the original steel wheels rather than replacing with new. They were in fantastic, physical condition but they did require a facelift so we stripped them back and reapplied a slightly metallic paint finish. It gives the look of a brand new set for a fraction of the cost…and we we’re able to keep the original parts, that’s always good!
Next up we managed to rescue the original dashboard cover. With the dash away at our paint shop for the wrinkle effect application it gave Lauren time to sort the interior components and assessed what could be saved. I think you’ll agree, the top of the dash has come up beautifully so why replace with new?
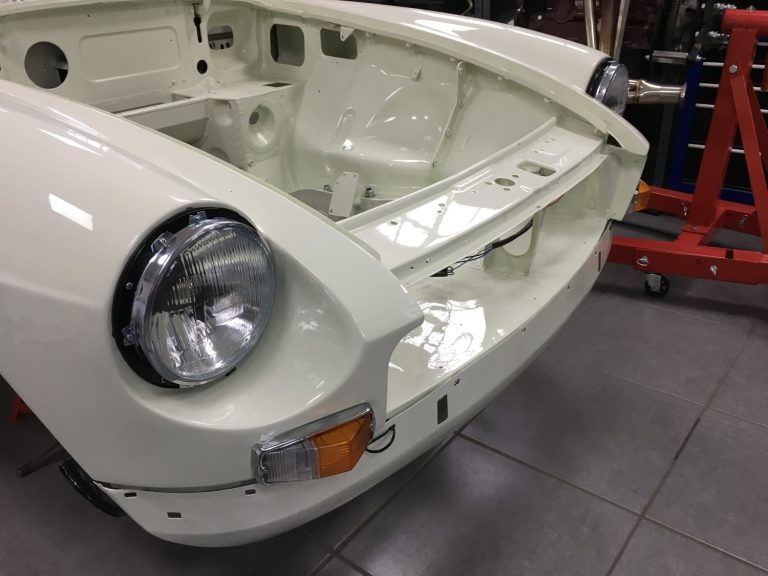
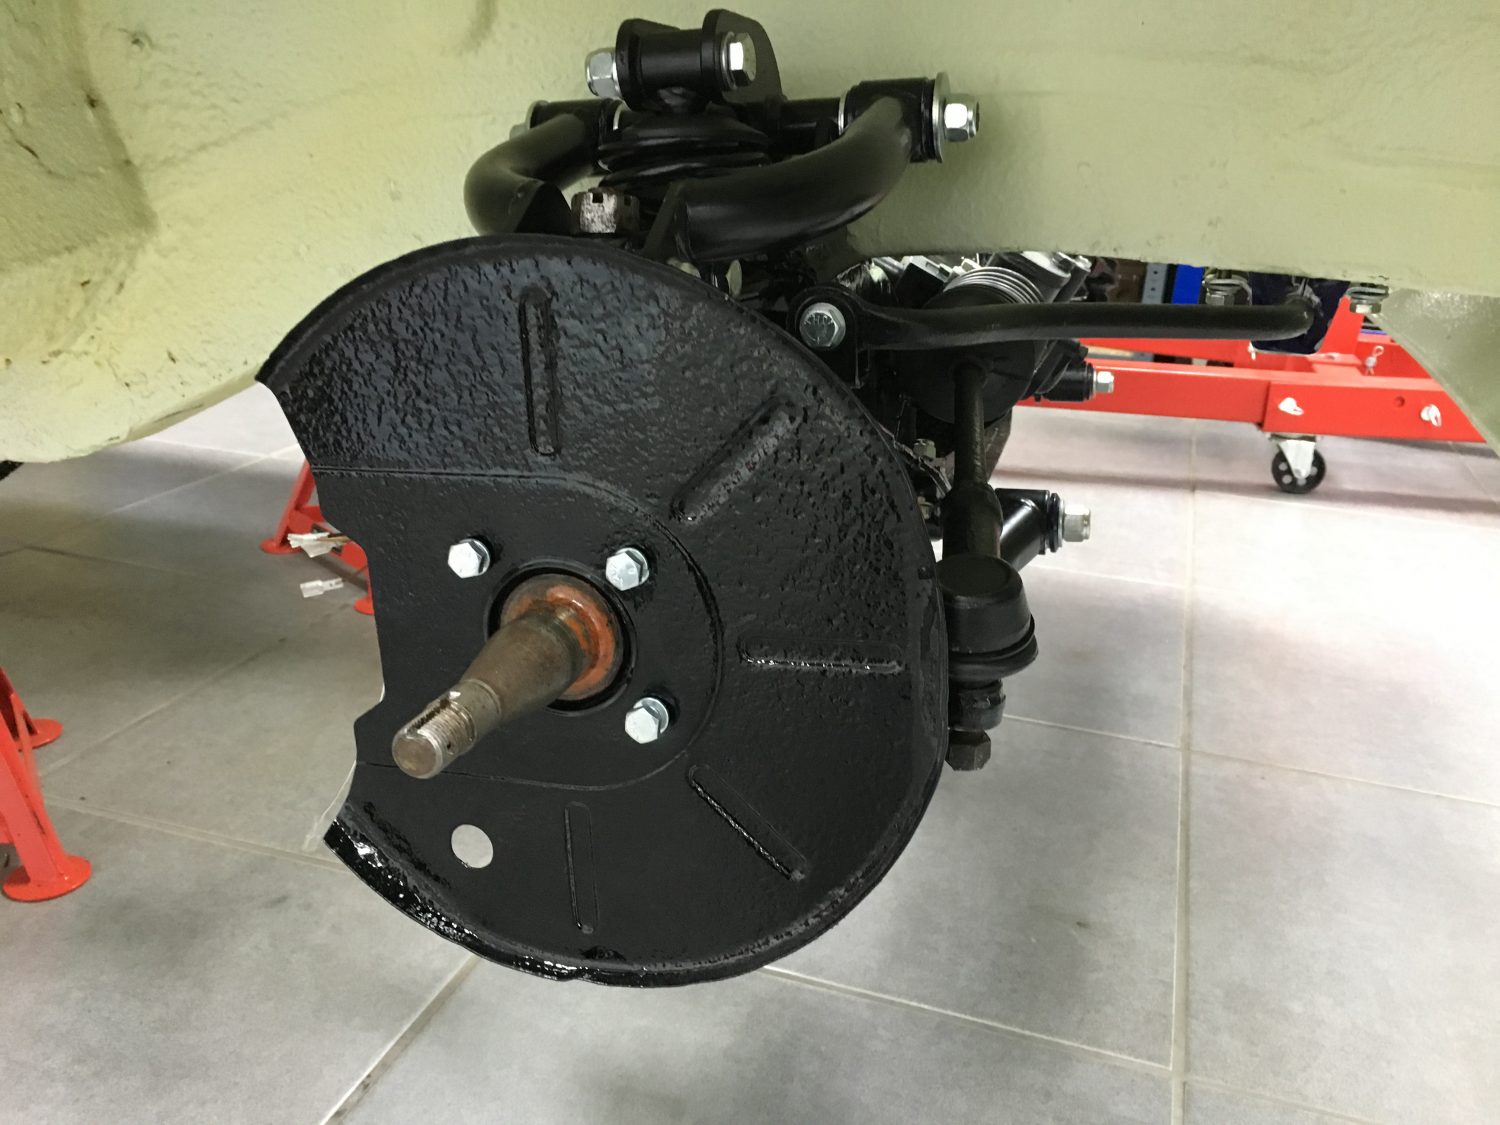
After a little TLC the fuel tank has now been refurbished and refitted to our 1968 MGBGT, along with the front brake discs, pads and pedal box.
We are just waiting on a couple more components to arrive for the pedal box mechanism and then this can be properly installed and fitted perfectly.

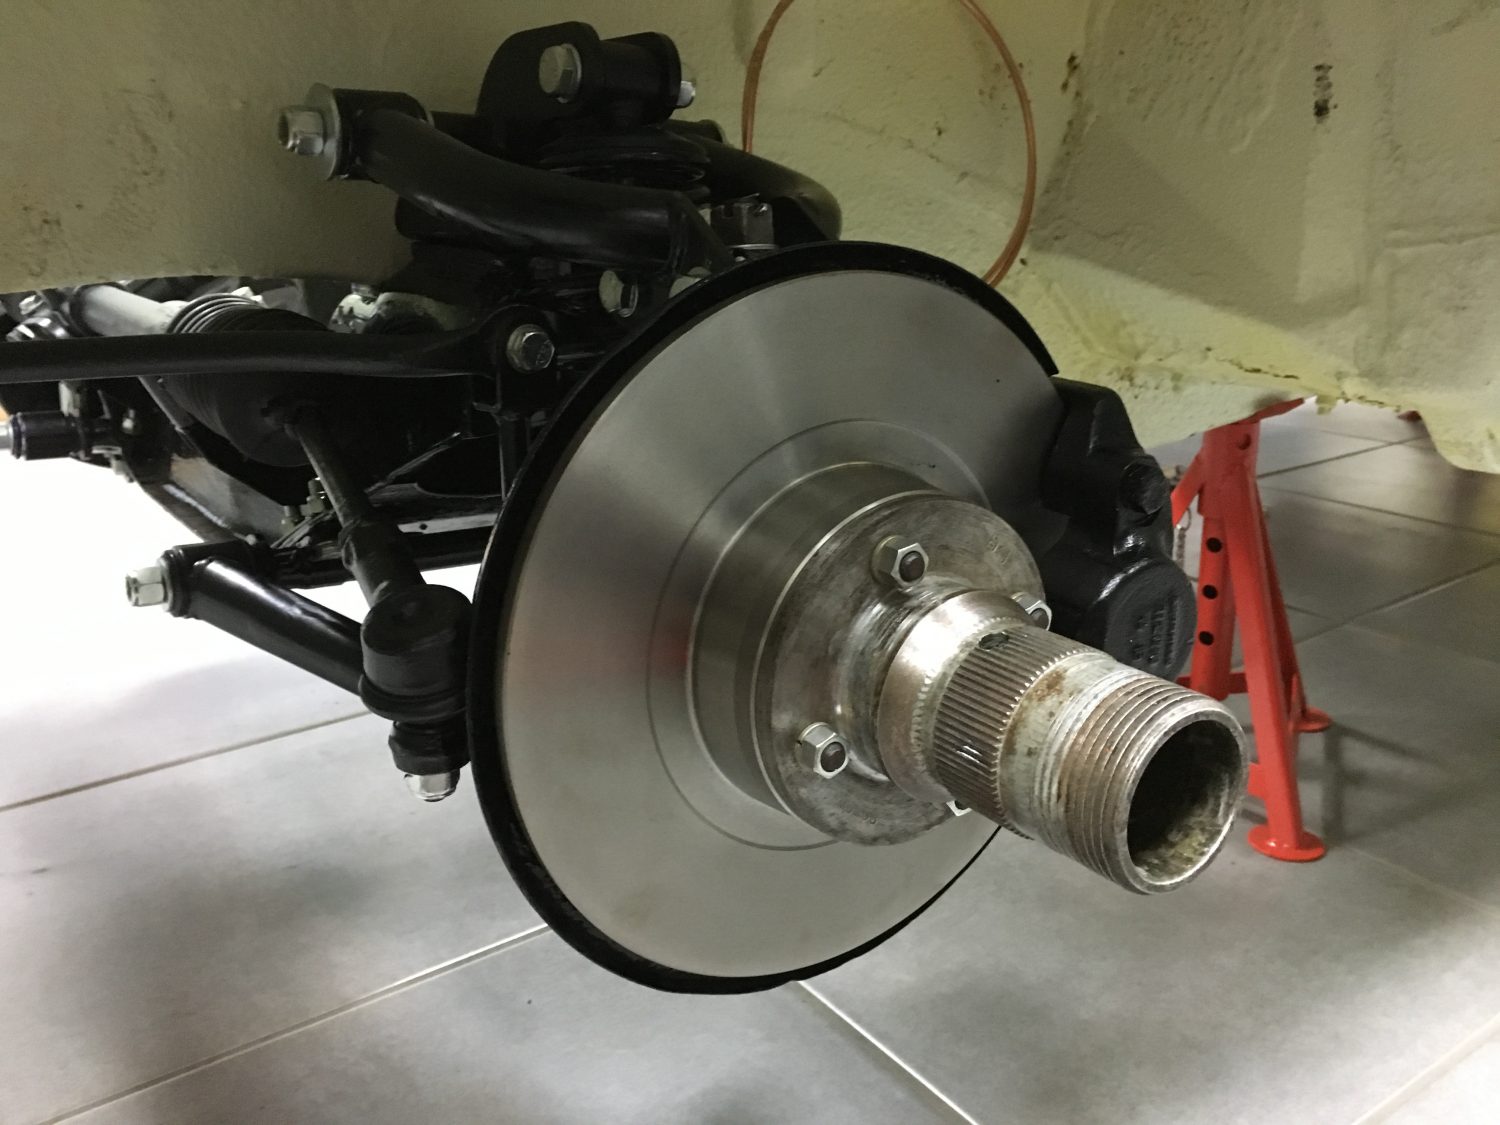
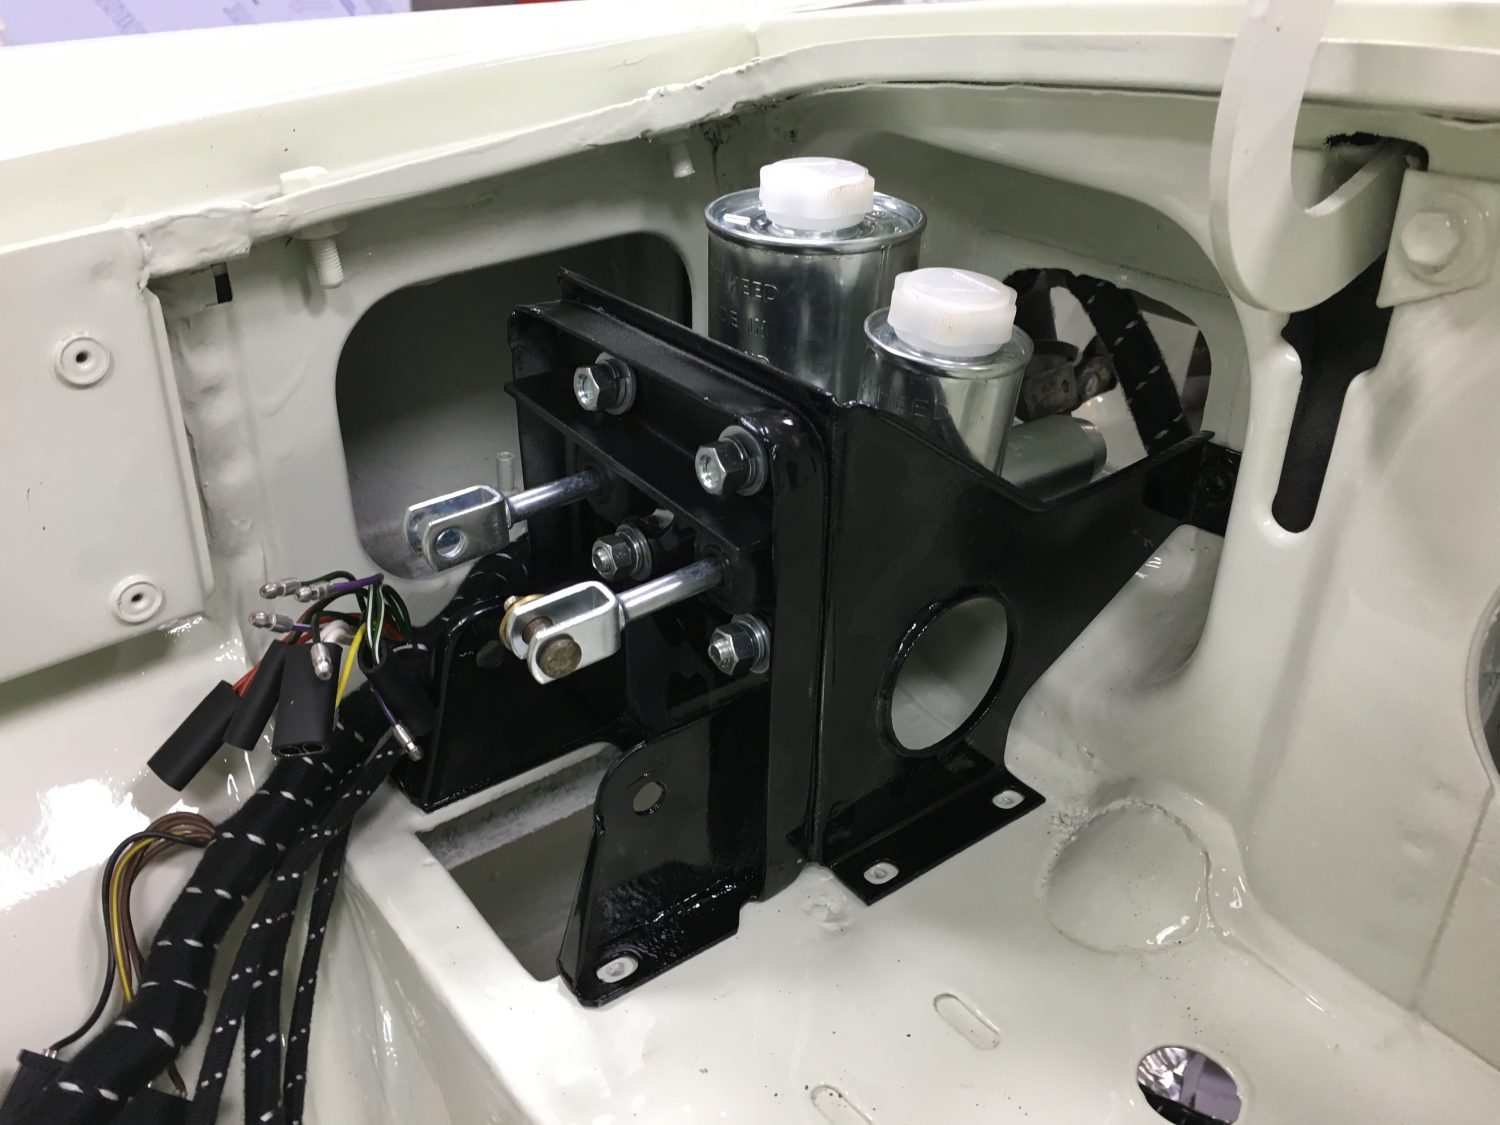
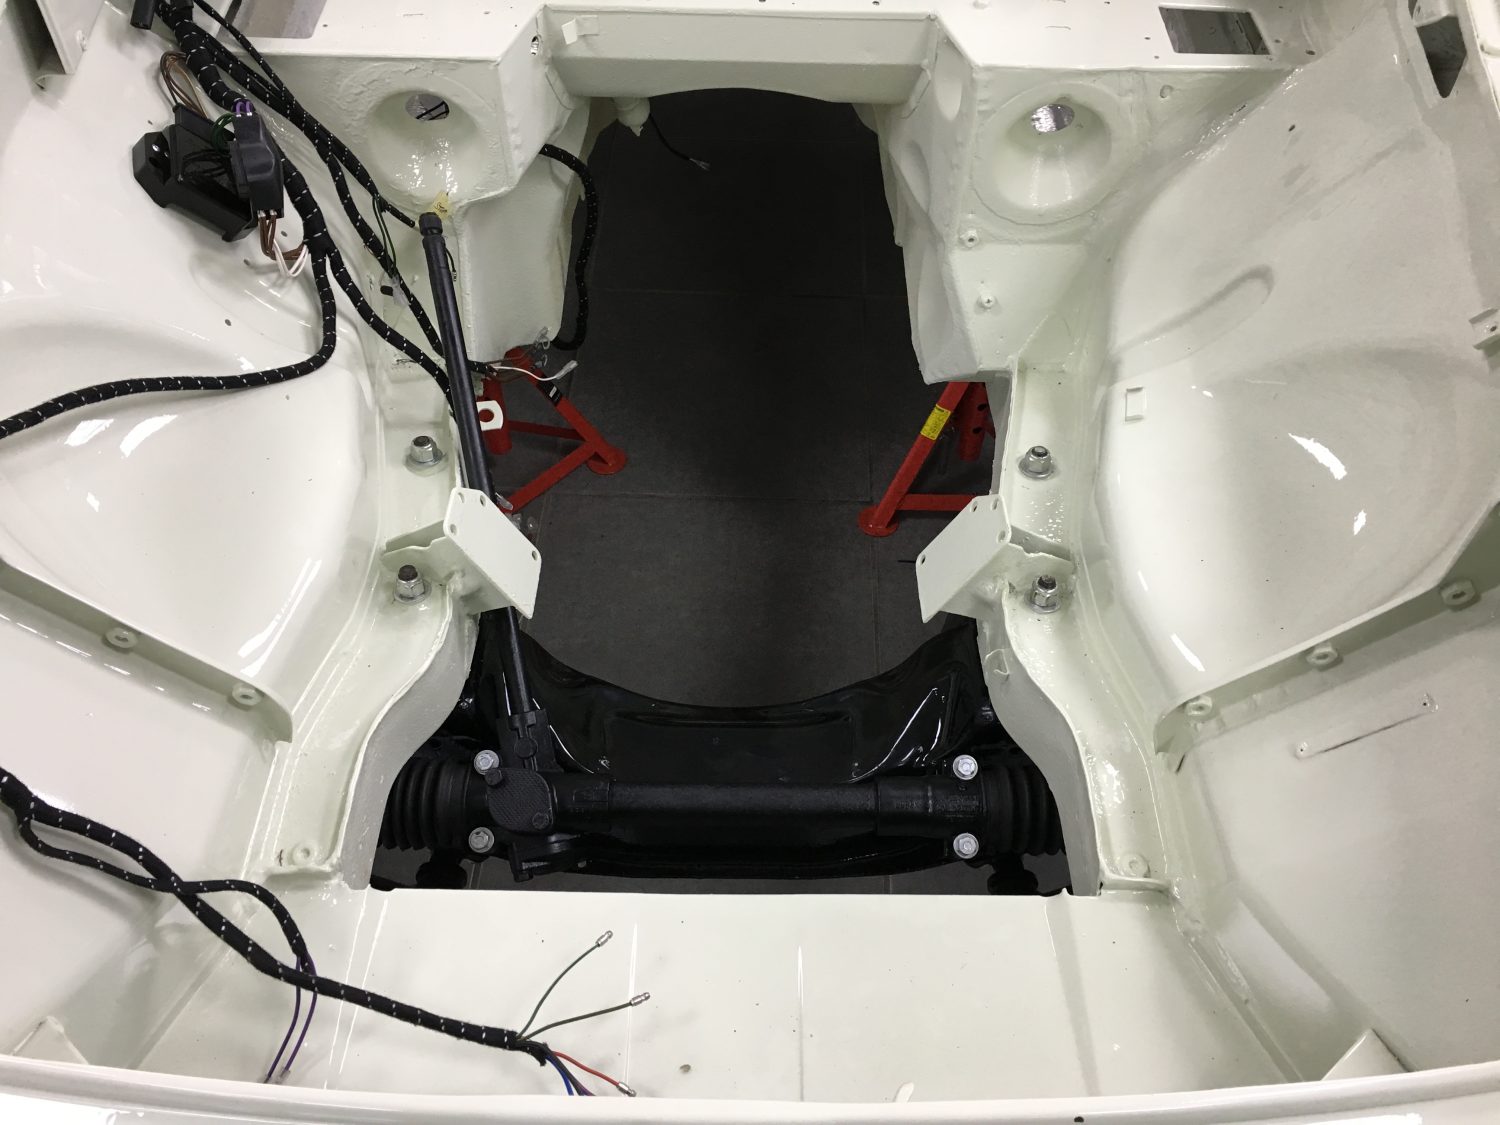
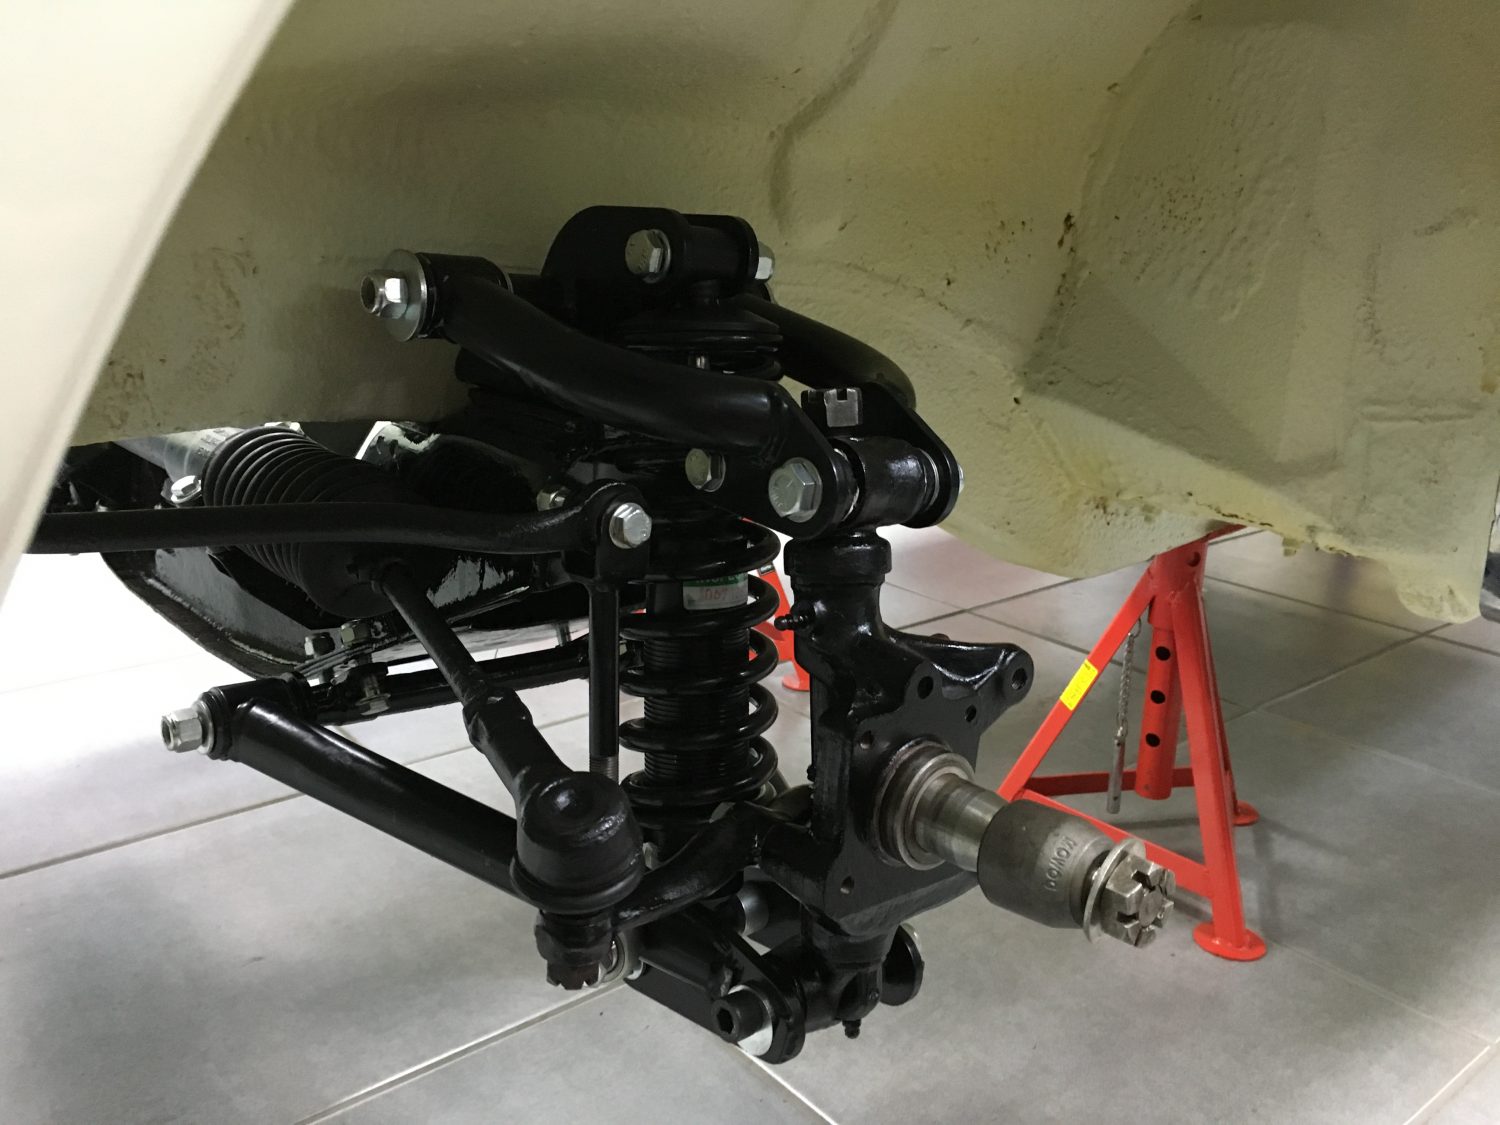
Our 1968 MGBGT is really taking shape now as we start the rebuild the car. The rear back axle, the front suspension, steering rack, front lights and wiring loom have all been fitted.
The wheels have been refurbished and will be arriving back at the beginning of the week.

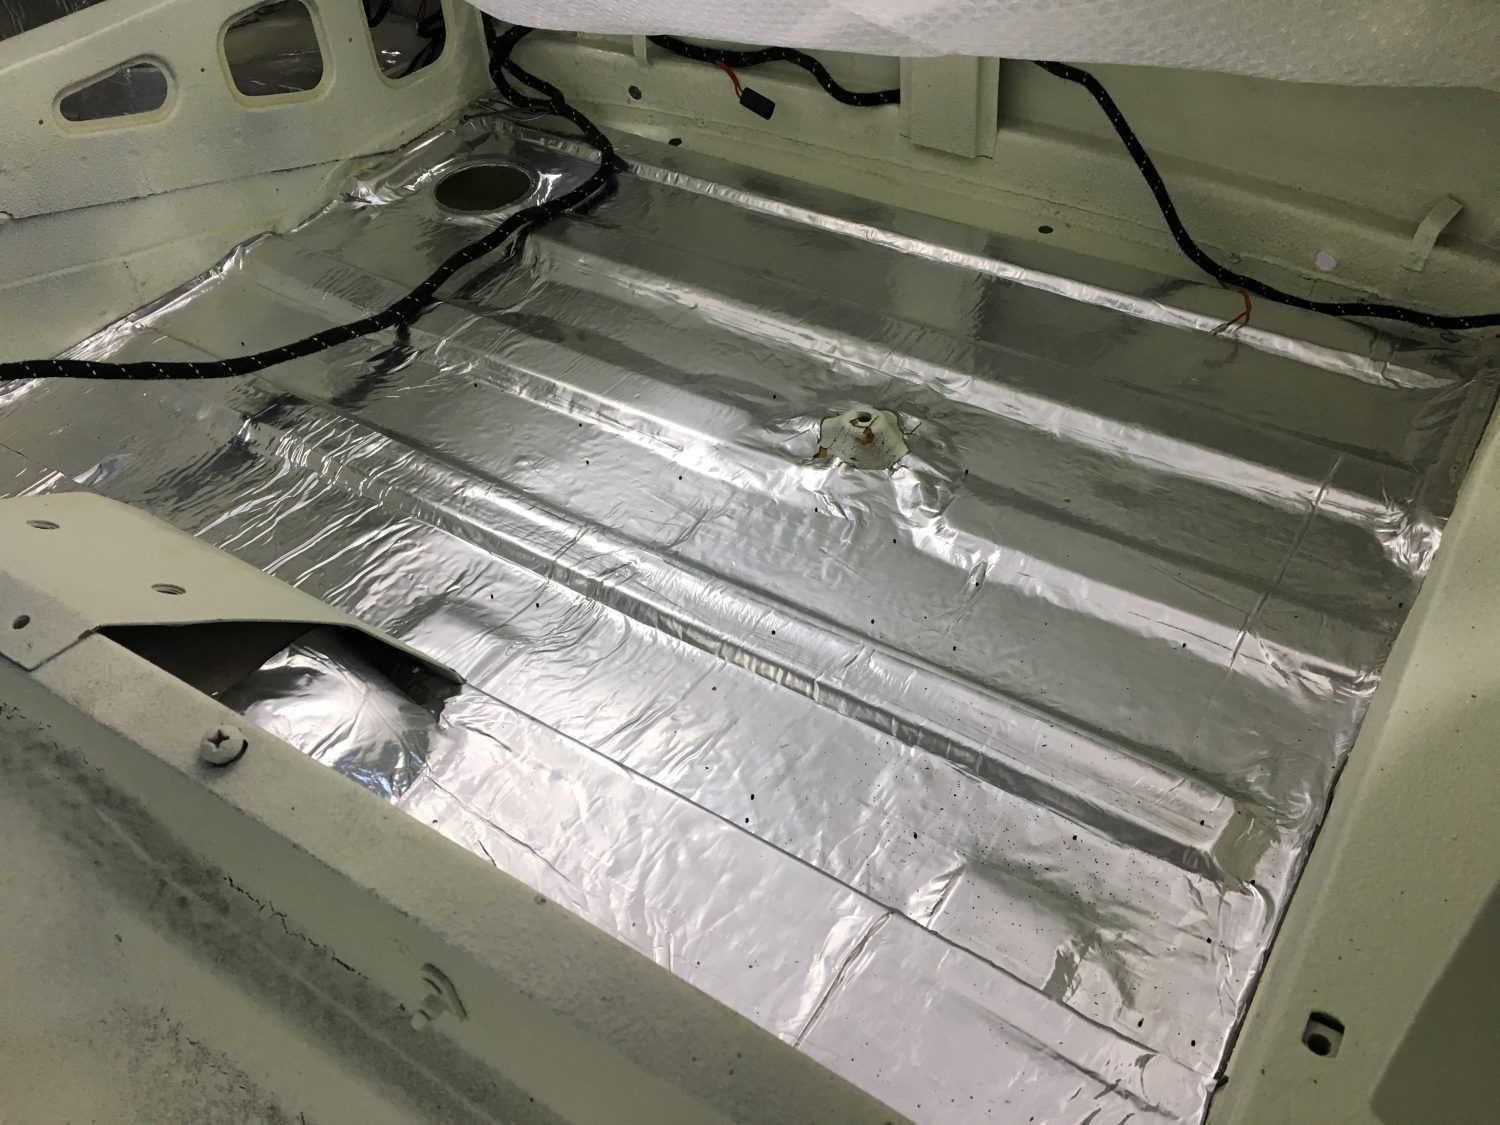
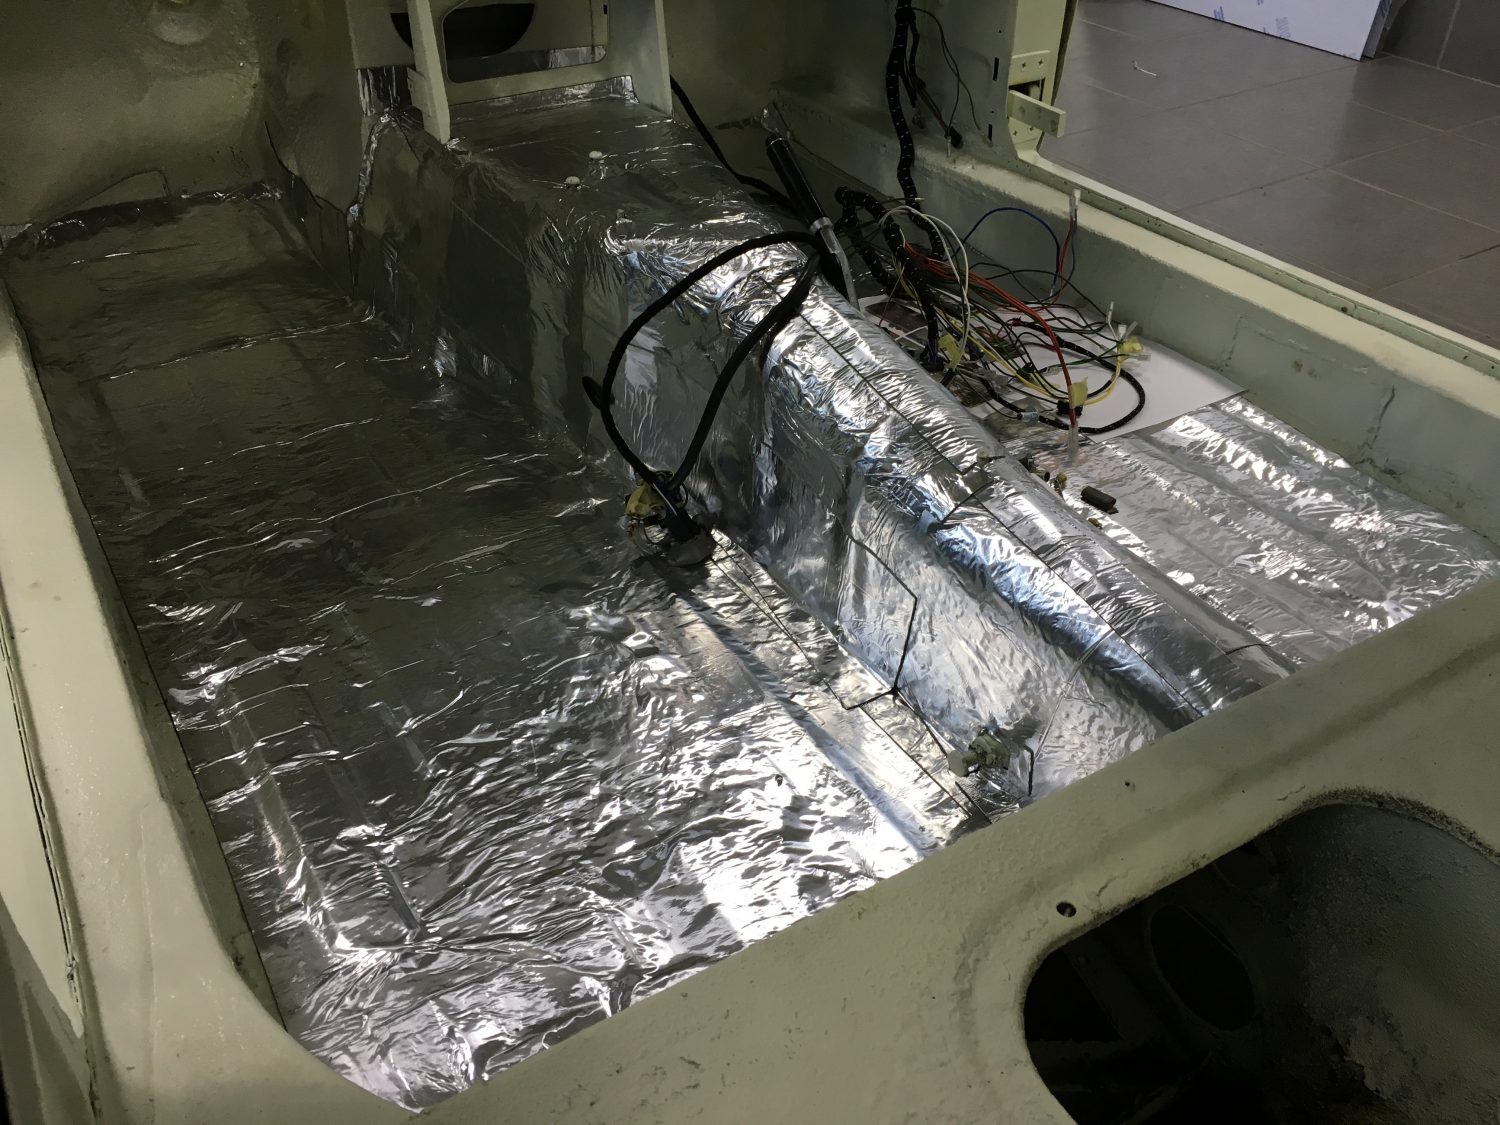
With the MGBGT back from the paint shop Lauren has been busy fitting the new sound deadening matting.
Sound Deadener plays a vital role and is one of the most crucial enhancements you can make to your vehicle!
FatMat extreme will Stop Nasty Rattles, Vibrations, Road Noise as well as increase your Car Audio’s Sound & Bass, and they guarantee it or your money back! The key ingredients to any vehicle are the way they perform, the way they drive, the way they look and of course the way they sound.


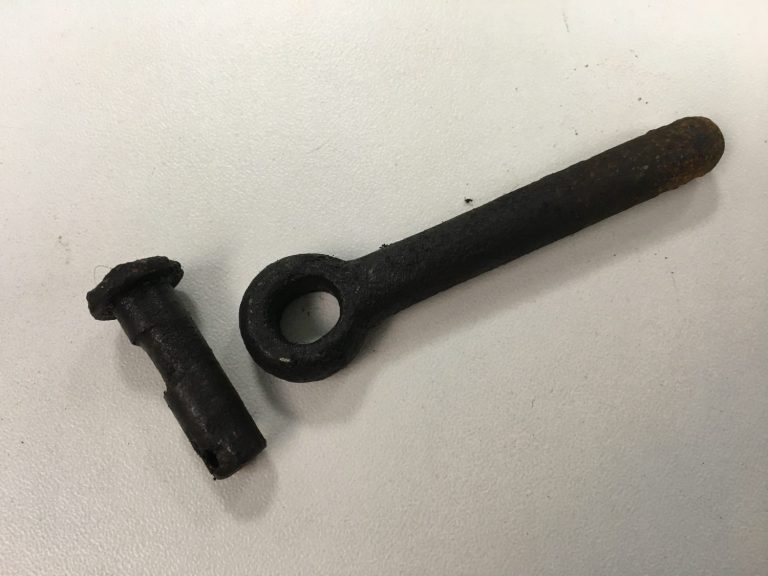
Years of wear on the clutch slave pin has resulted in a hole that is no longer circular and a pin that is no longer ‘wear’ free!
Lucky we caught it when we did but fortunately it is a part that is easily obtainable so this will be fitted, brand new, once it arrives from Moss Europe.
A small delay on the restoration due to a couple of imperfections that we found in the paintwork.
Nothing too major but worth addressing so we’ve had it back in the paint shop for a couple of weeks to rectify the issues.
We now have it back in our workshops, all done and looking fantastic so time for John to get back on with rebuilding. First job is to get it back onto it’s wheels.

This new double wishbone, coil over front suspension system has been specially designed to overcome some of the criticism of the original or other alternative options.
The kit replaces some of the components normally fitted, there are:
The coil over shocks are specially made ‘click’ adjustable, rebuildable units with adjustable spring seats to enable to change the ride height of your car. The springs supplied are a standard 2 1/4″ ID which are used on a variety of special and race cars. These can be obtained in a wide variety of poundages and lengths. In order to be able to fit a full size spring shocker of this type it is necessary to modify the front crossmember in order to give clearance. We can do this for you by supplying a ready modified unit on exchange. If you wish to carry out the modification yourself it its necessary to cut a curved section from each end of your crossmember and weld in a gusset, this is supplied in the kit. The advantage of using your original crossmember is that it can be modified in situ.
The special mounting brackets supplied have to be fitted to the crossmember in place of the original lever arm shock absorber.
It is essential to make sure that the threads in your crossmember are in sound condition. The brackets are secured using special high tensile allen bolts torqued to the correct setting as in the owners manual. We recommend you use ‘loctite’ for these.
The original lower wishbone pivots are retained, make sure that these are straight and in good condition.
The lower wishbones (straight ones) attach to the wishbone pivots using either MGB V8 rubber bushes or if you prefer we can supply special polyurethane bushes (which are of a special high grade material). Notice that two of the wishbone arms have threaded bosses to accept the anti-roll bar link arms, these go to the front of the car.
Note: the bushes on the inner ends of the wishbones will last longer if their retaining buts are tightened when the vehicle is at ride height.
Assemble the springs onto the shock absorber after first unscreing the adjustable seat (to its lowest positon). We always recommend the use of a coil spring compressor when handling these components. It is a good idea to put ‘copperslip’ on the threads and collars.
The spring shockers are assembled to the suspension with the adjuster facing the engine and using the special 12mm bolts and spacers supplied.
We suggest that you start with the springs wound fairly high to start with and if you wish to lower the car then make sure you don’t go too low and have problems with ‘sleeping policemen’ etc. the upper wishbones are curved and these are attached to the special mounting brackets in the same way as the lower wishbones and use the wishbone bushes. You will therefore need a total of eight new wishbone bushes altogether.
A new bolt is supplied for the top wishbone to stub axle the standard tapered bushes (or polyurethane) are used here. Please note that two special shim washers rebuked each side these bushes at the top, these are to enable the castor angle to be adjusted should you wish. There is also a special spacer that is fitted slightly inboard of this which increases the rigidity of the top wishbone assembly.
The bottom stub axle retains the original seals, thrust washers and spacer tubes etc, but a special bolt replaces the original item. The special high tensile bolt has a small flat machined on it which carries two snail cams, one under the bolt head and one under the nut. This enables the camber angle to be adjusted simply by slackening the nut and then rotating the bolt with an allen key. When you have set the desired chamber you must tighten the nut securely without letting the bolt rotate. Make sure that your bottom link parts are in good condition and kept well greased. If in doubt replace them – refer to owners manual if you need guidance on these parts.
The anti-roll bar link arms are replaced with our type, which are threaded to accept a special spherical joint. The spherical joints can be screwed up or down in order to set the anti-roll bar evenly and without bias. It is important to make sure that the joints are locked in place with a lock nut and that they are positioned carefully not to interfere or foul during operation. This can be checked with the shock absorber in place, with the spring removed, by checking clearance through the full suspension and steering lock travels.
To set up your suspension the car needs to have the full weight on the wheels. First adjust the ride height (easier to do if the car is jacked up and the wheel removed – yes I know we said have it on its wheels!!!) so that the bottom wishbones are horizontal (parallel to the ground), this will give you the standard height. This can be lowered if you wish, but the amount by which it is lowered will reduce the bump (upward) travel by the same amount. Secondly the chamber should be adjusted, for road use 1/2 – 1 degree negative is suggested. Finally the tracking can be set up to standard MGB spec – 1/16@ toe in. A good starting point with the shocker adjustment is ‘two clicks’ in and see how the car feels on the road. Increasing (turning knob clockwise) the number of clocks will make the shocker harder and vice versa. Keep increasing the damper setting until you feel the ride is too firm then drop it back a couple of clicks.
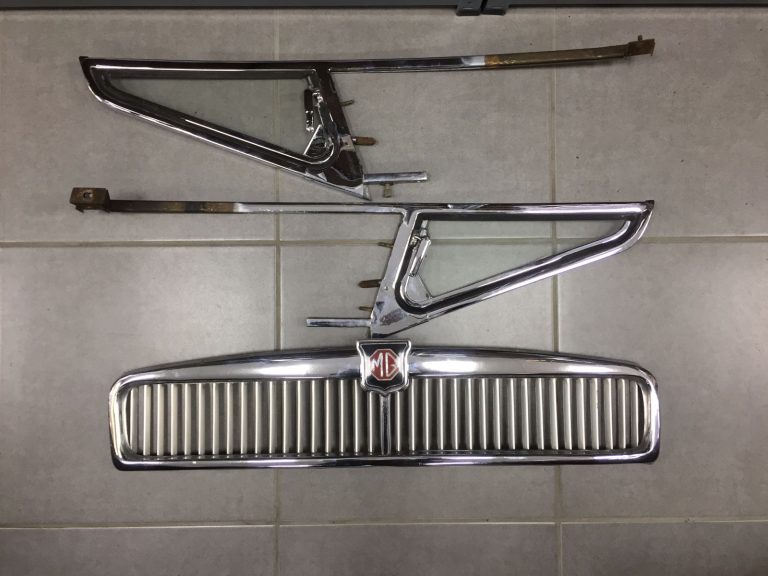
[vc_row][vc_column][vc_column_text]Lauren has been busy sorting through the MG BGT chrome work.
MG’s are a brilliant vehicle to work on as parts are so readily available. Our job now is to decide on ‘what needs to be re-chromed’ against ‘what can be purchased new’ against ‘what is good enough to be polished and reused’.
When making your decisions on this, there are a lot of factors to consider; what’s the most cost effective, are the parts you are being supplied from a reputable company, is the quality of new components as good as the originals, will your decision reflect on the overall look you are trying to achieve?
[/vc_column_text][/vc_column][/vc_row][vc_row][vc_column][vc_gallery type=”image_grid” images=”8145,8146,8147,8148,8149,8150,8151,8152,8153,8154,8155,8156,8157,8158,8159″][/vc_column][/vc_row]
Here we have our 1968 MGBGT dashboard stripped of all its components and ready for Trevor to work his magic on the wrinkle effect paint coating.


With the majority of the components cleaned up and refurbished and the shell back from the paint shop looking stunning in Snowberry White, tomorrow we all plan to get together to discuss the next step of the build.
We are hoping that after tomorrow’s meeting we’ll have a better idea as to any special requirements that will be needed prior to the rebuild process taking place.


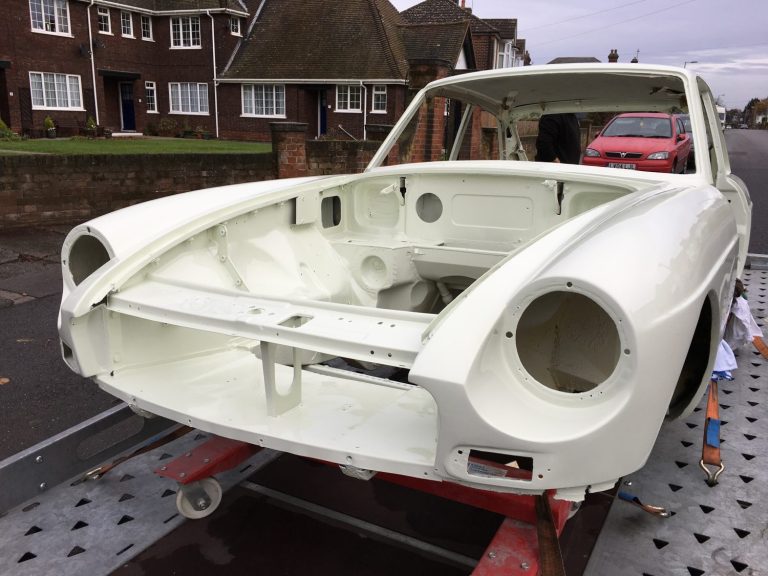
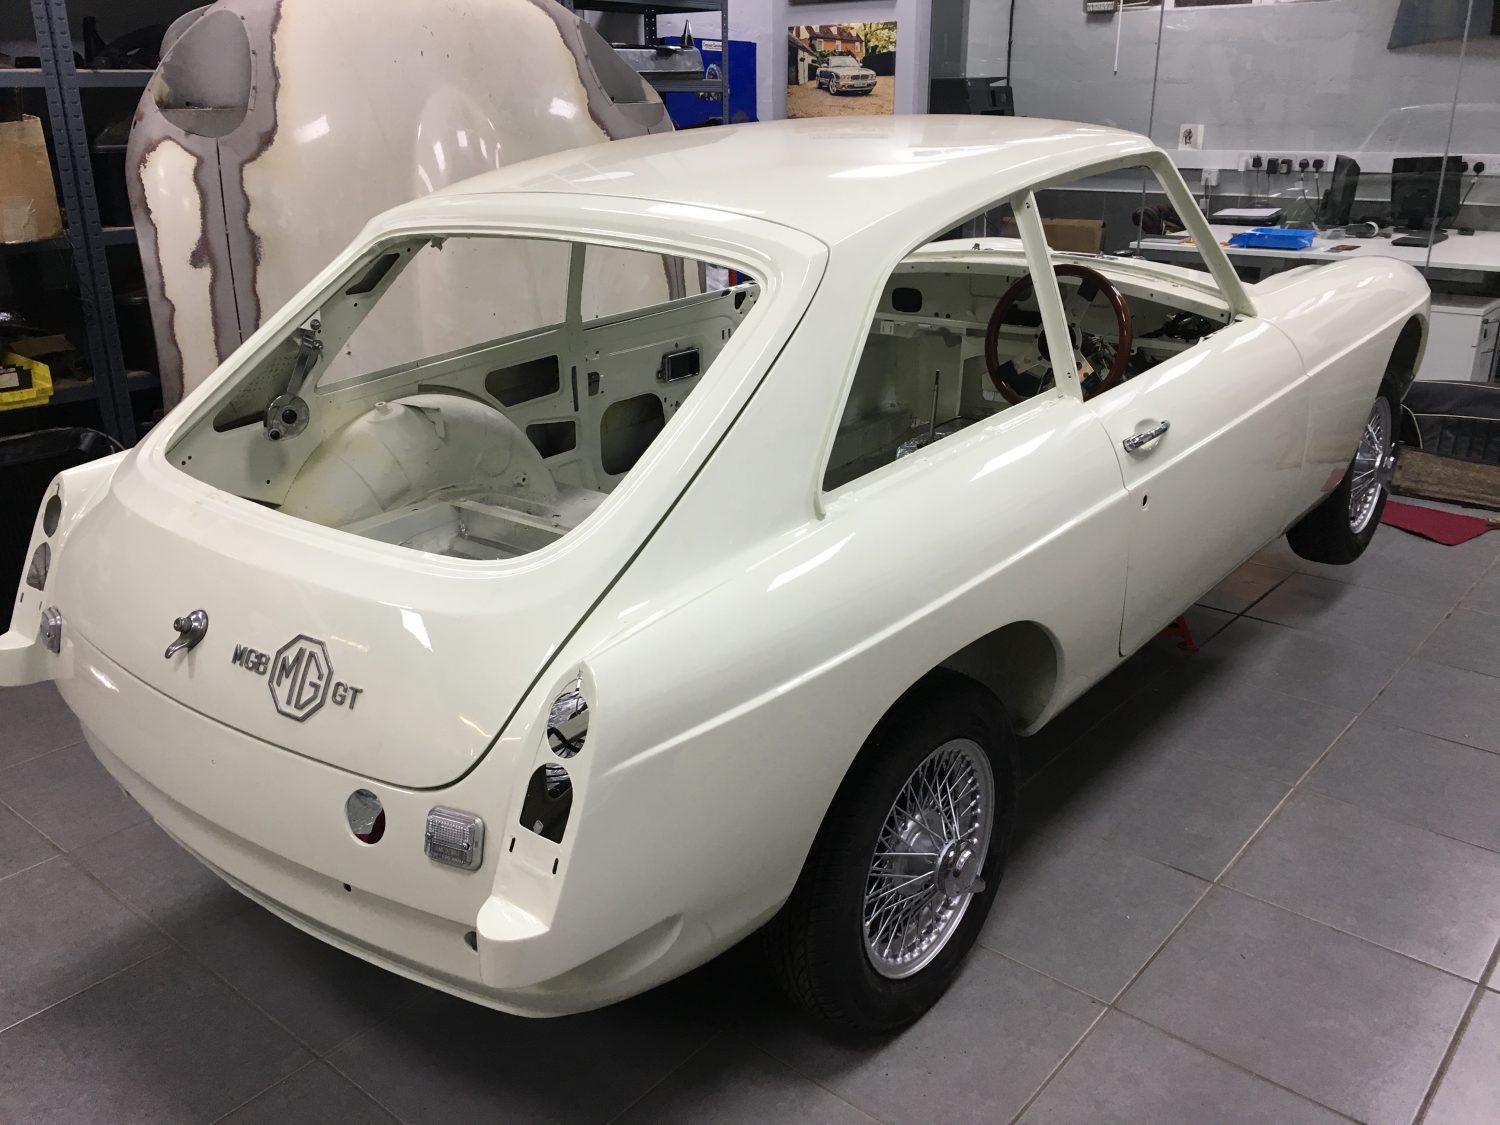
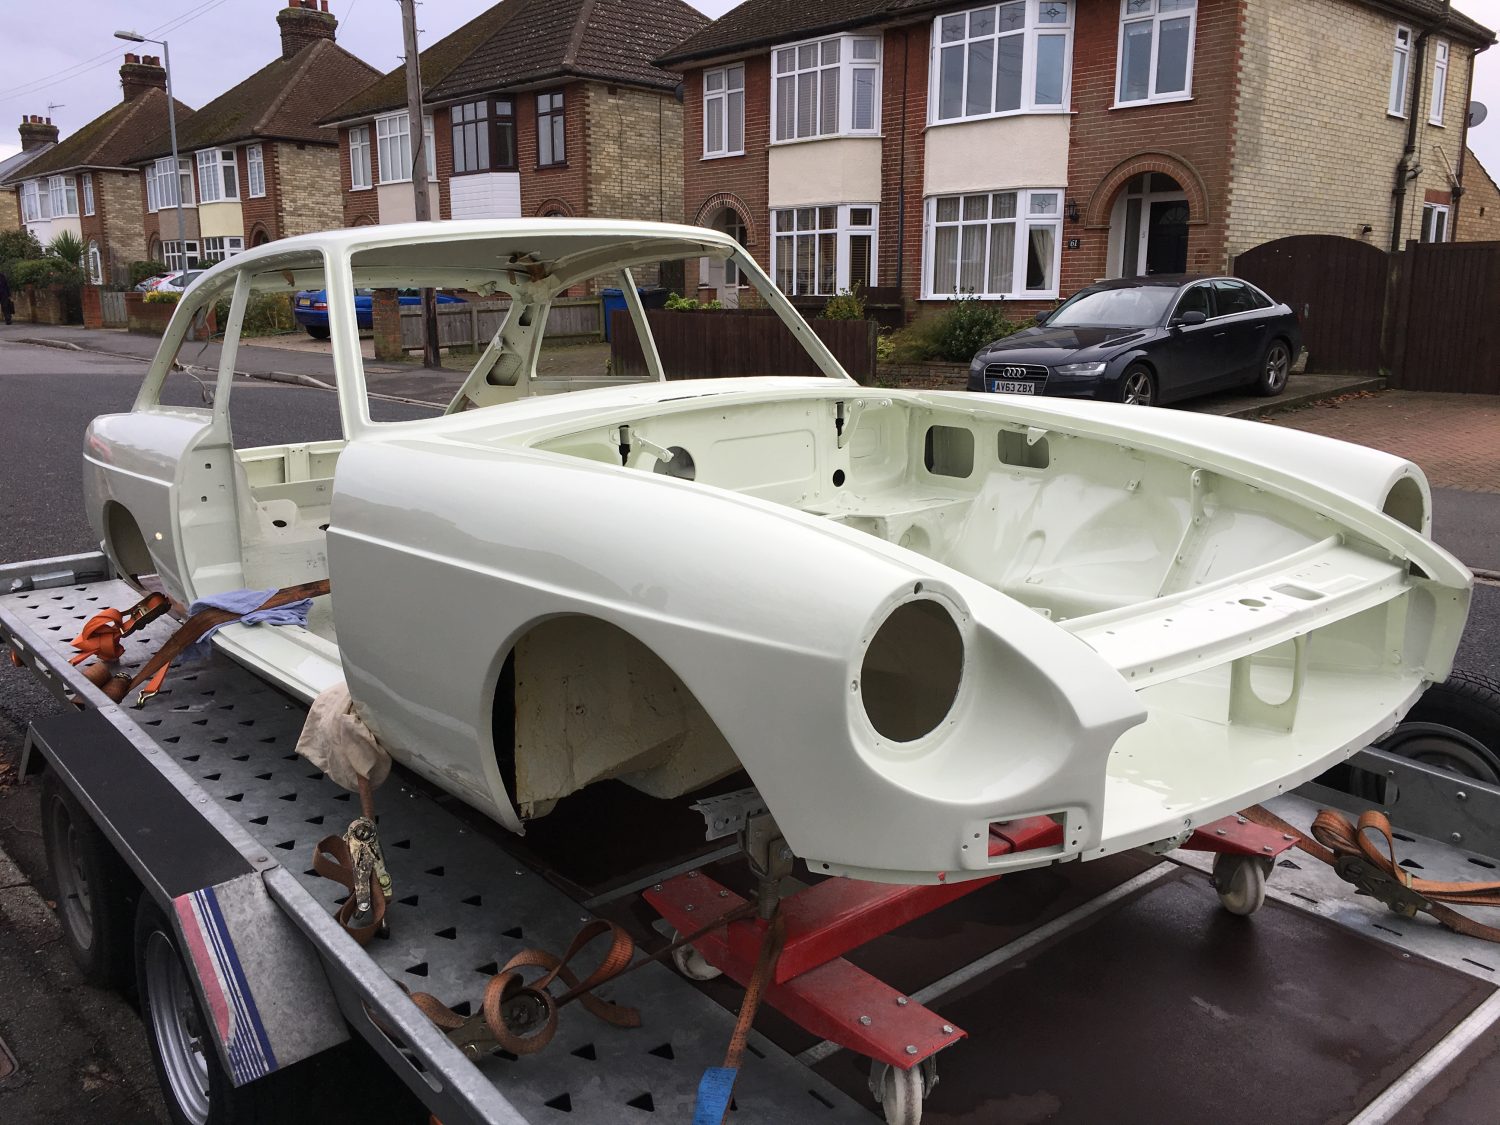
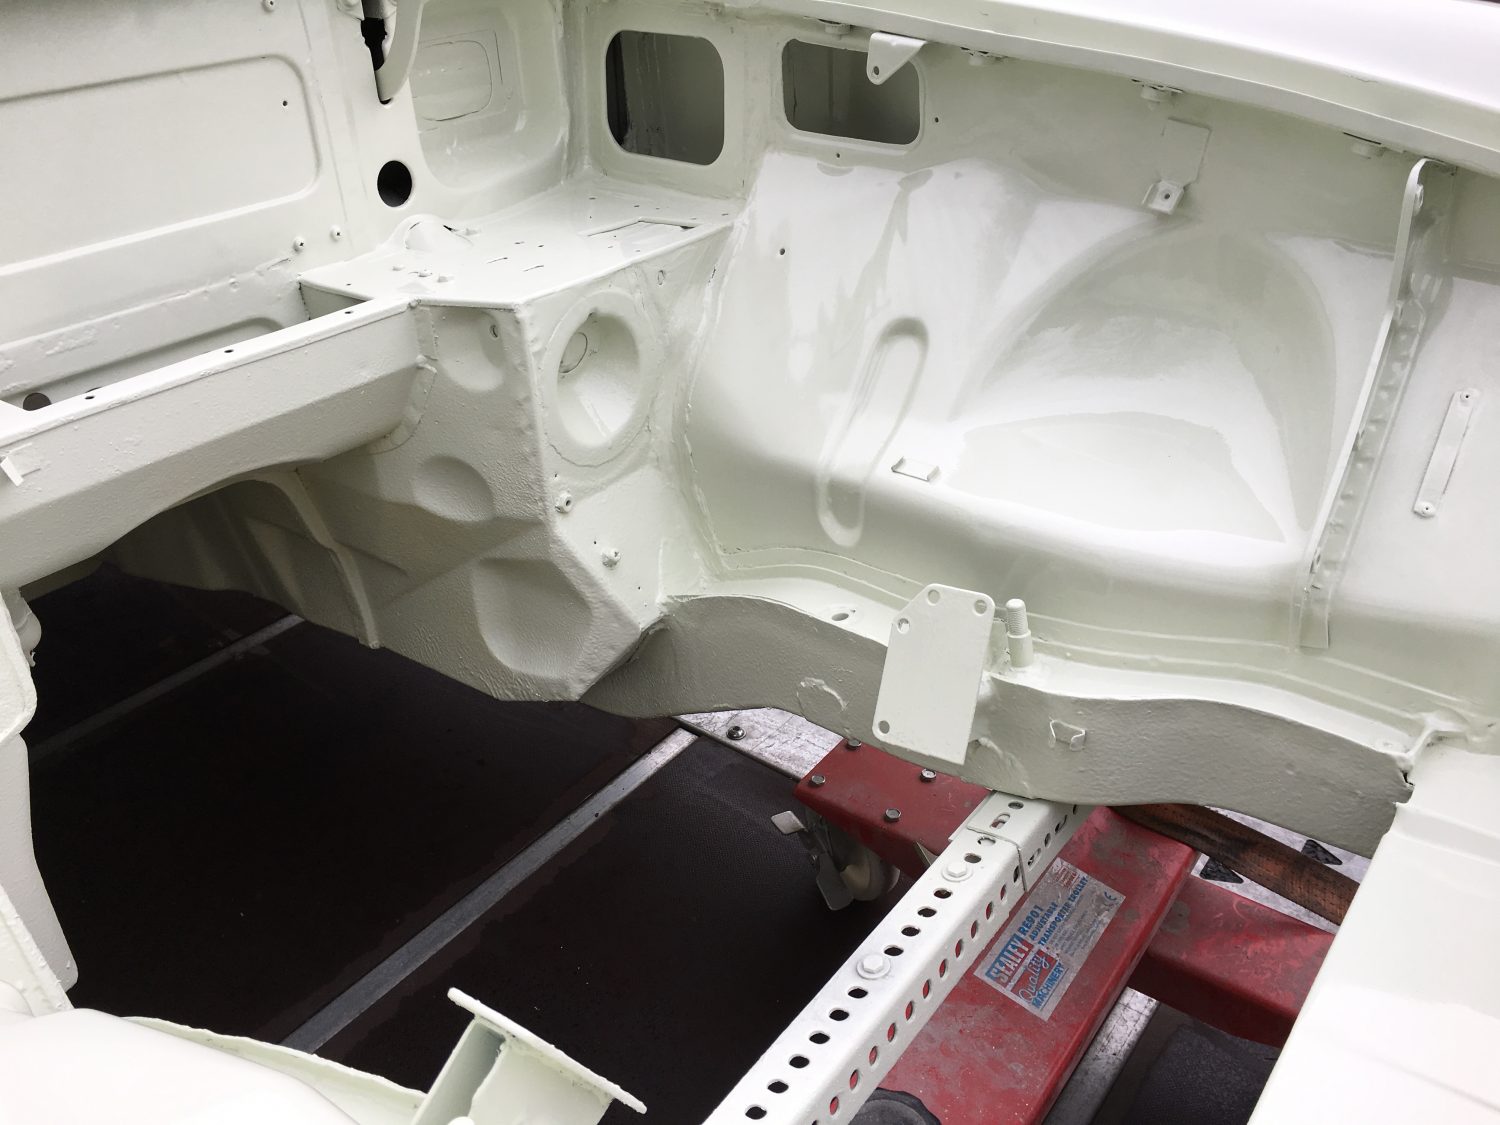
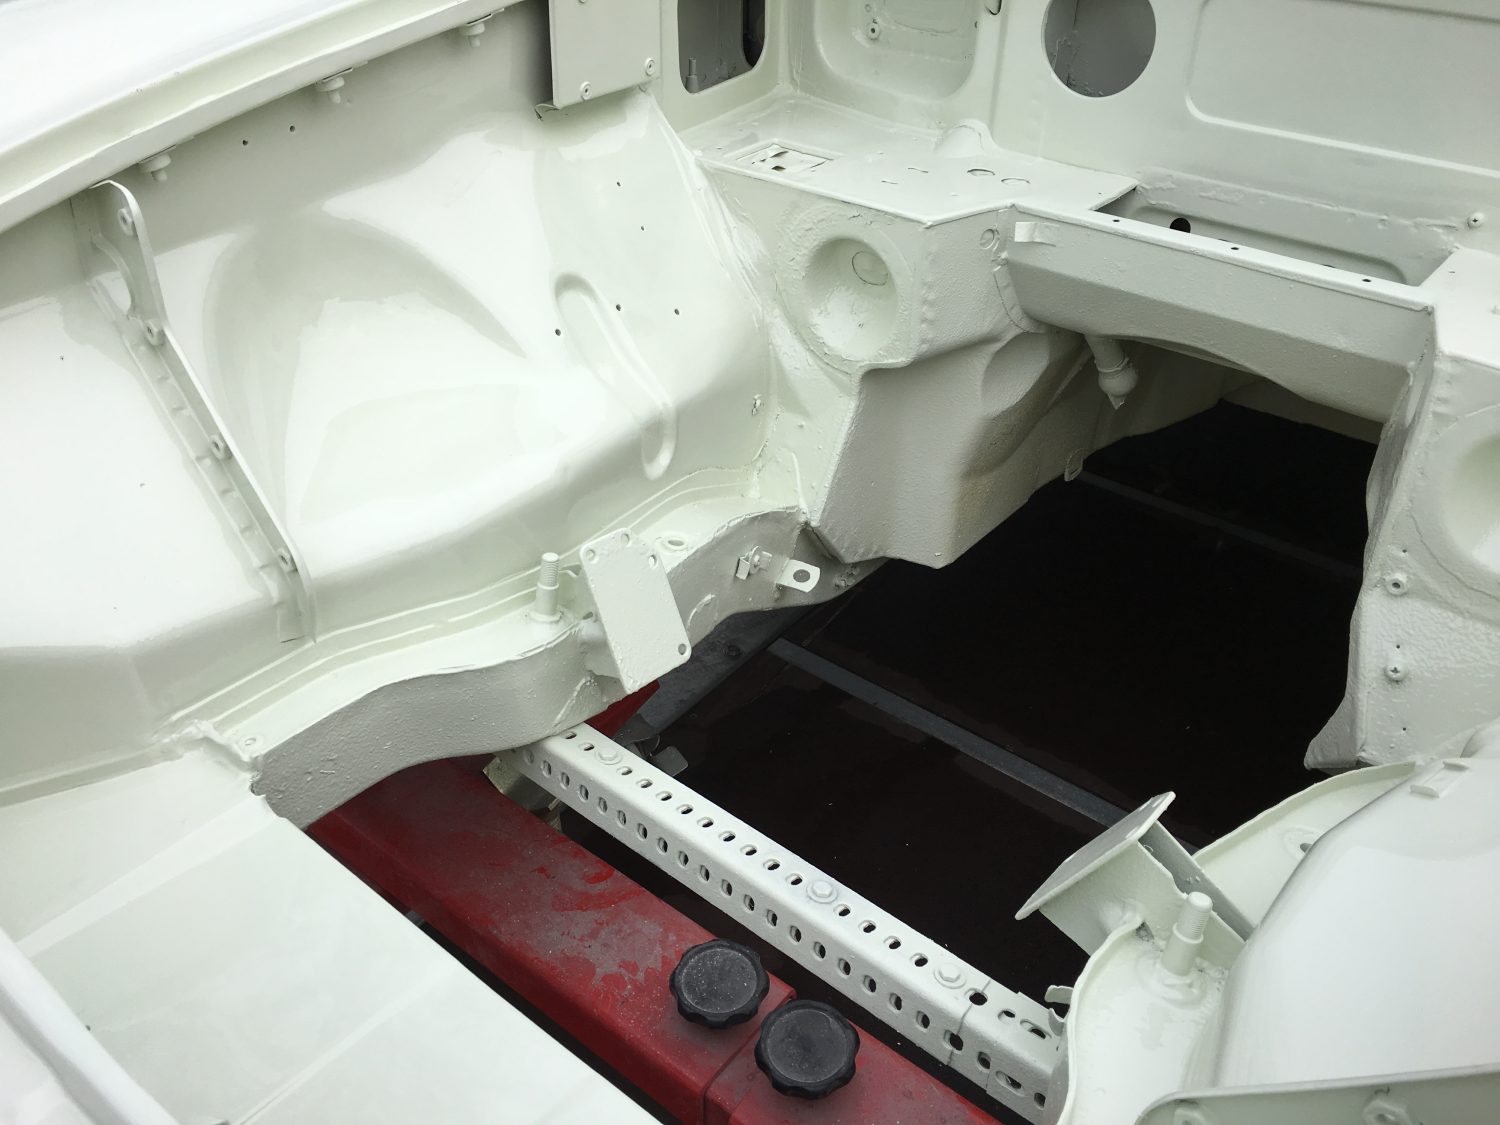
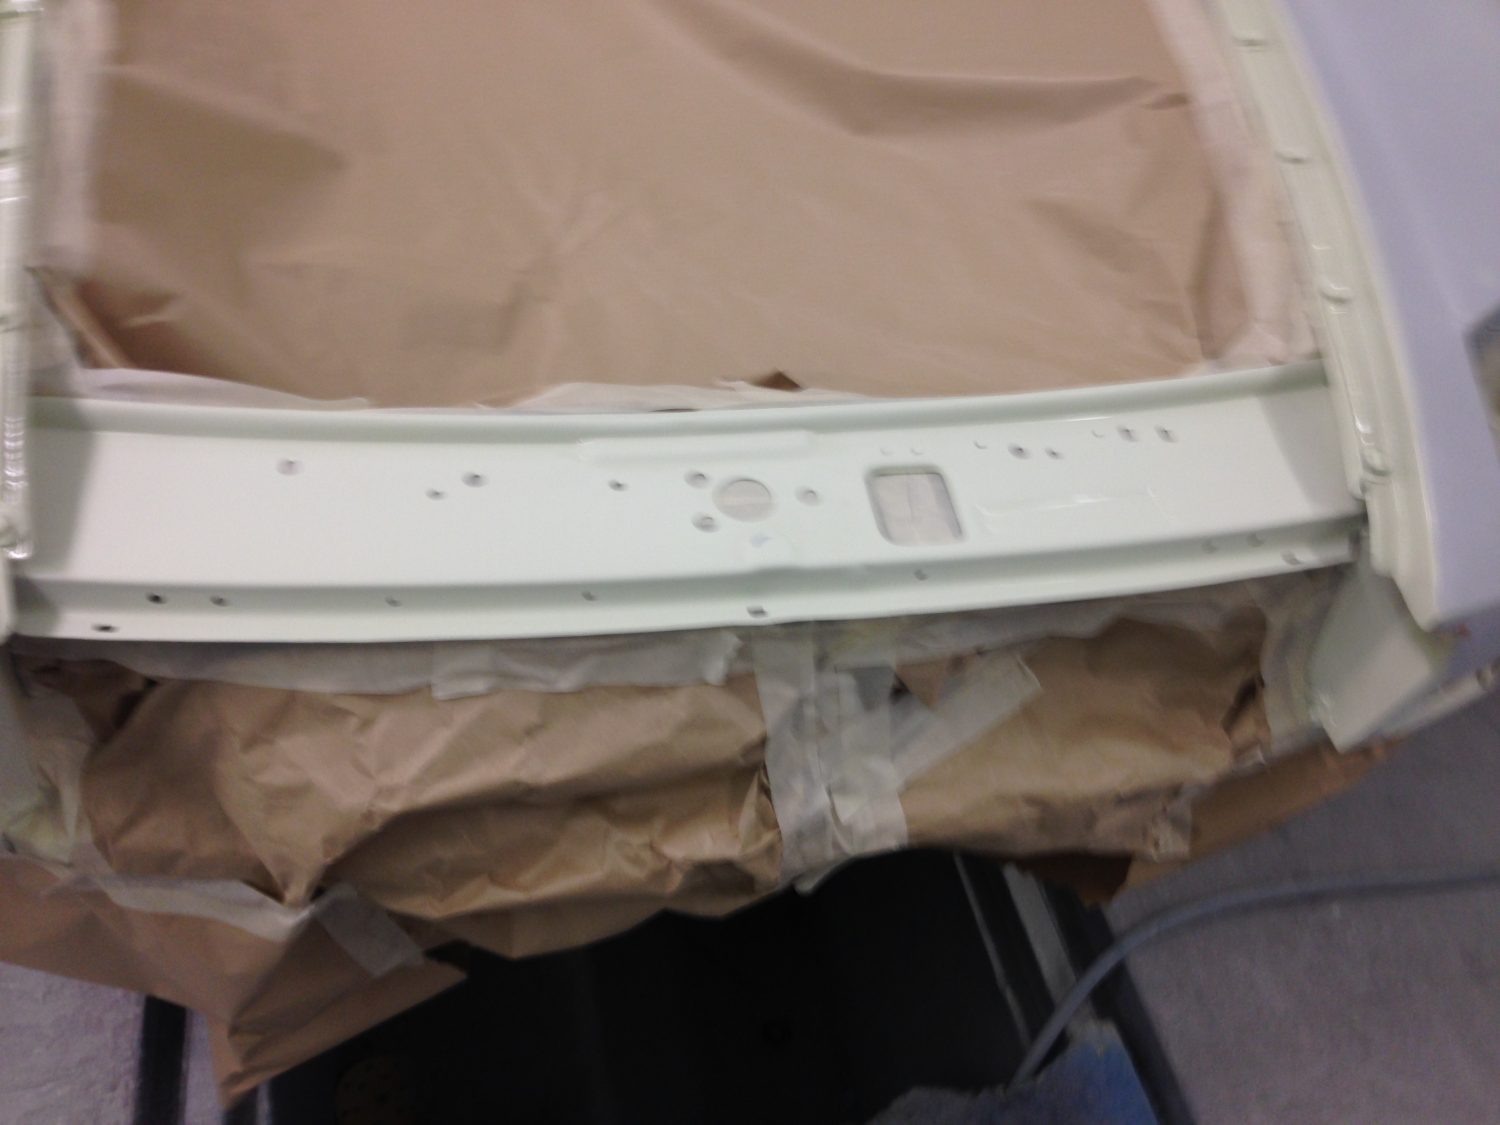
[vc_row][vc_column][vc_column_text]Our 1968 MGBGT is now back with us from the paint shop ready to be refitted.
Finished in Snowberry White the shell has been completed re-sprayed and a special Snowberry White stone chip has been applied to the underneath for extra protection.
[/vc_column_text][/vc_column][/vc_row][vc_row][vc_column][vc_gallery type=”image_grid” images=”7611,7612,7613,7614,7615,7616,7617,7618,7619,7620″][/vc_column][/vc_row]
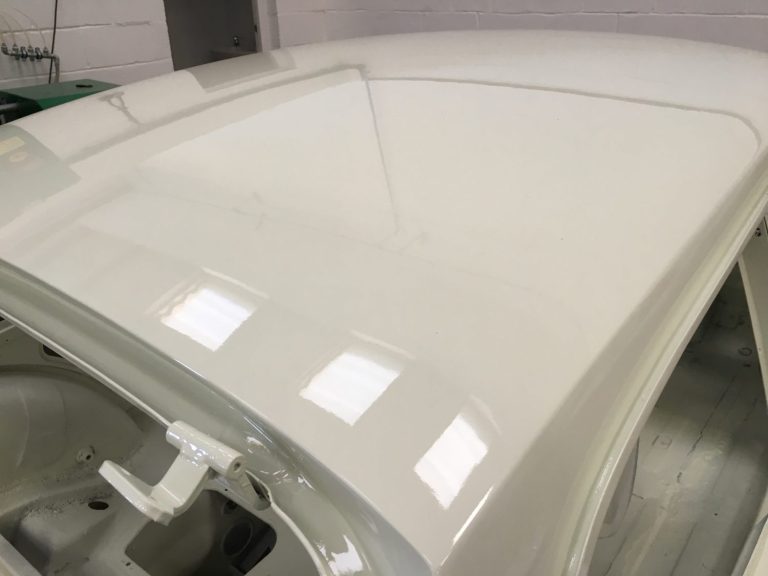
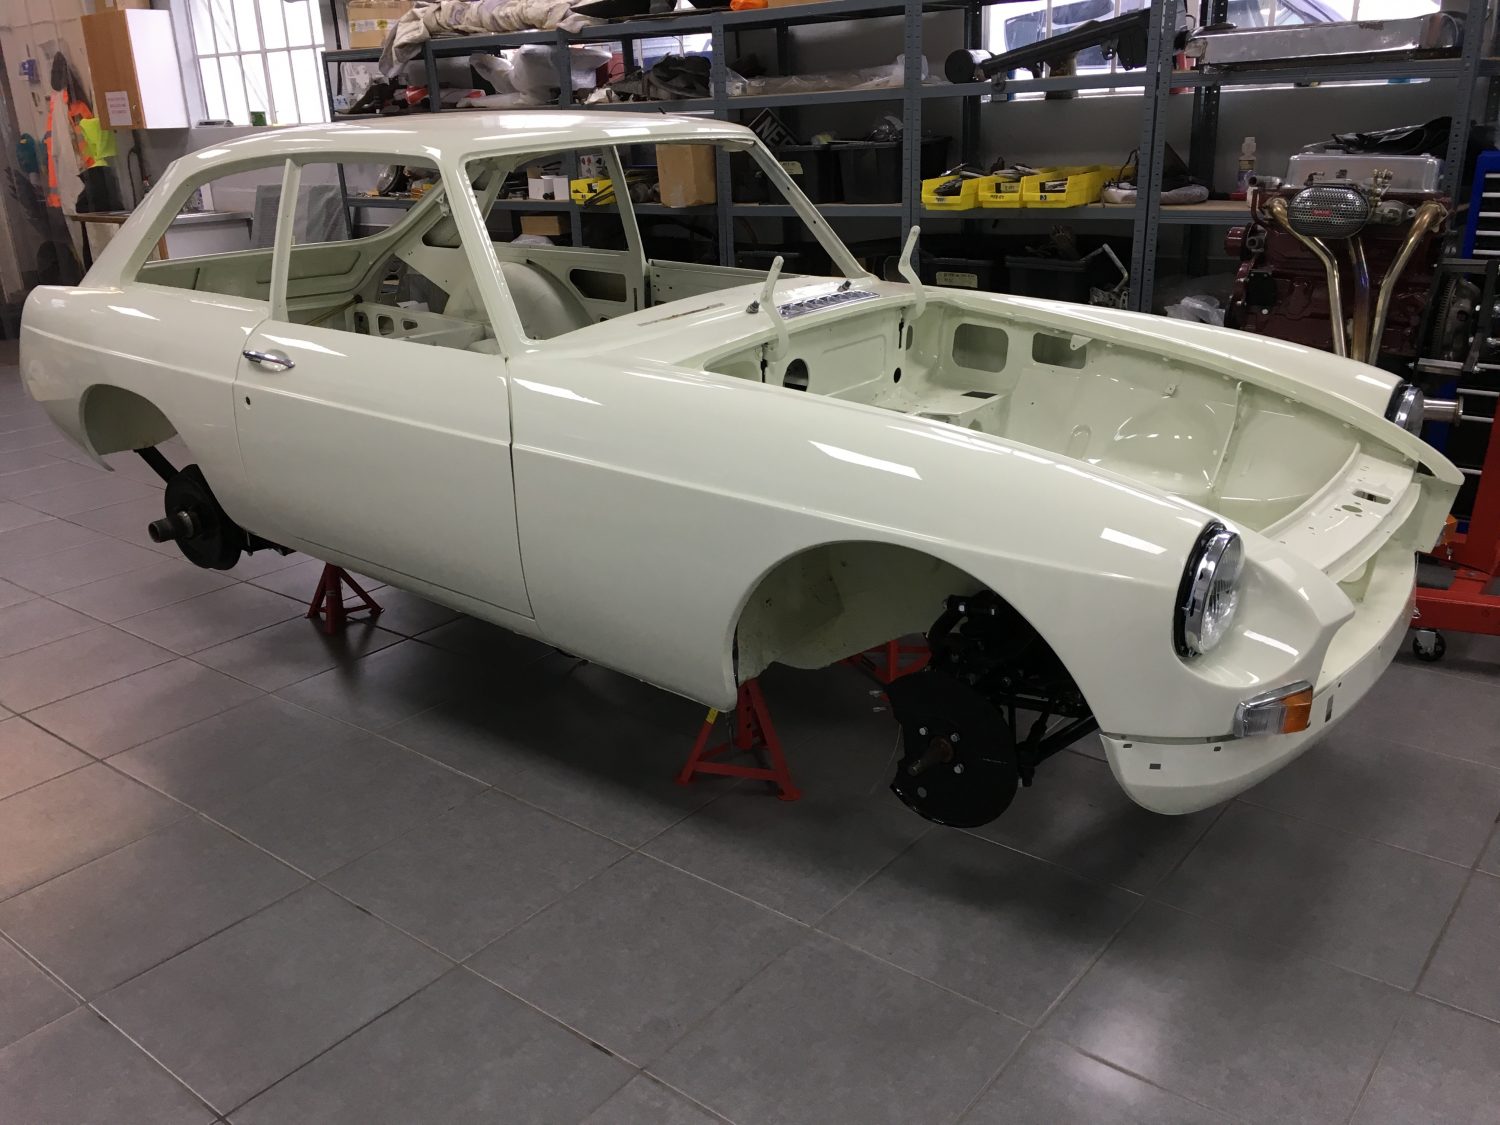
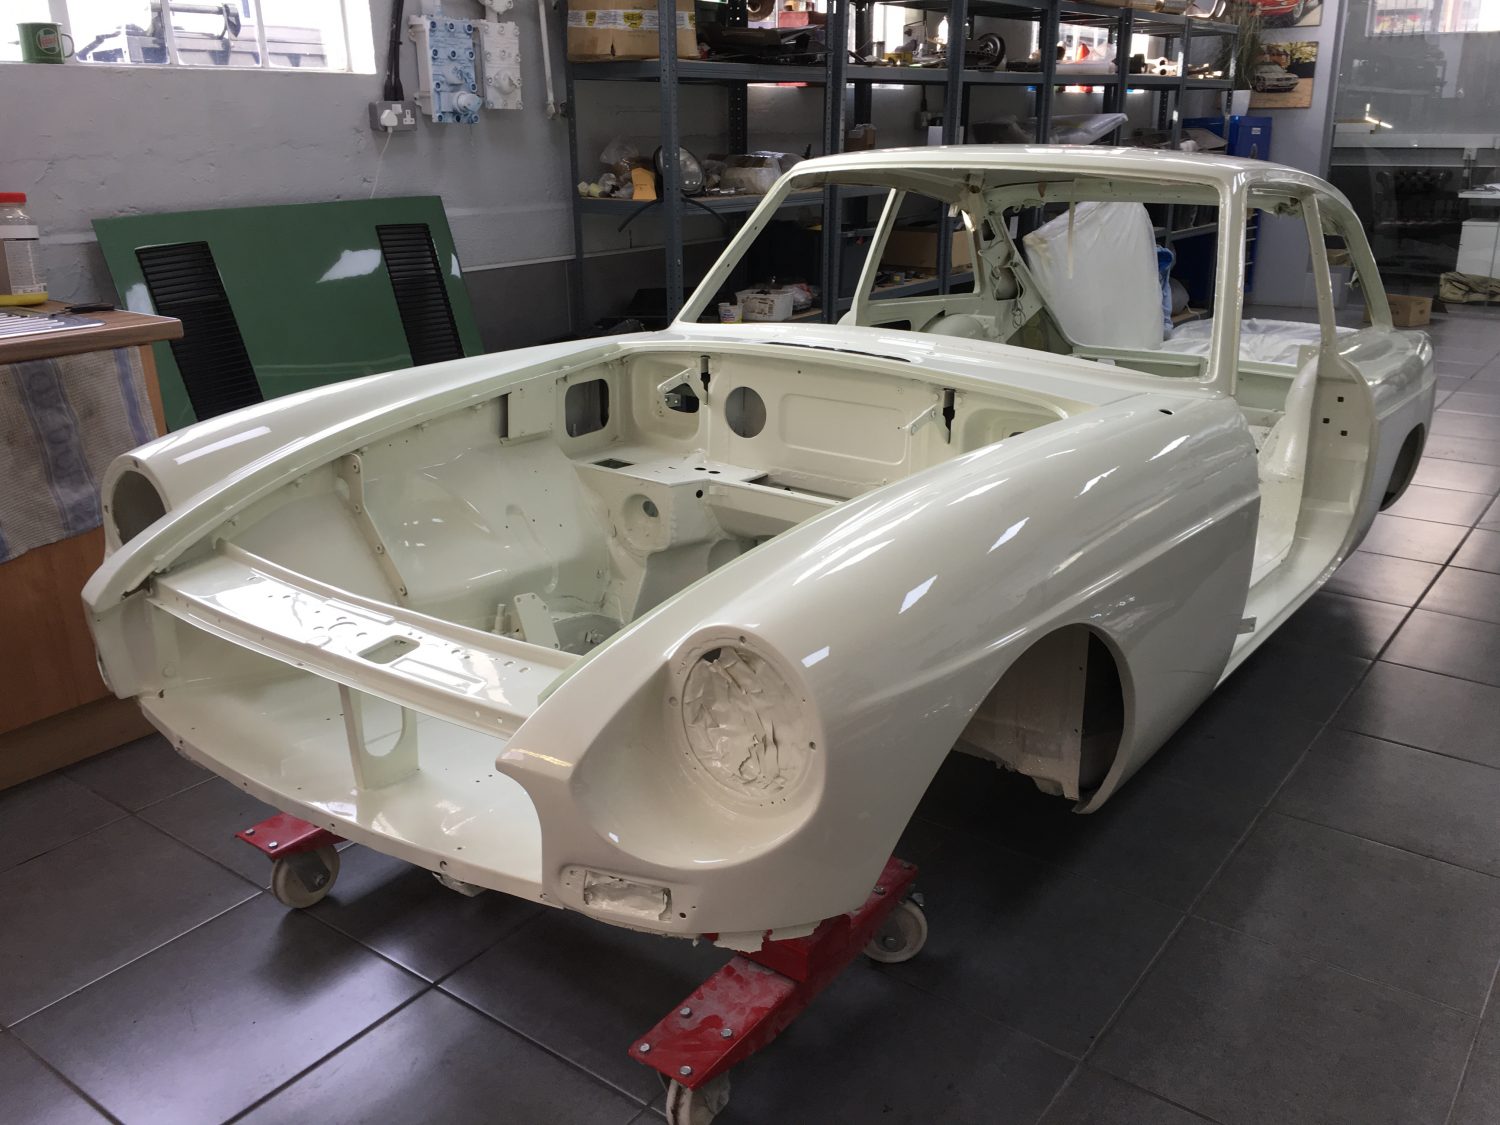
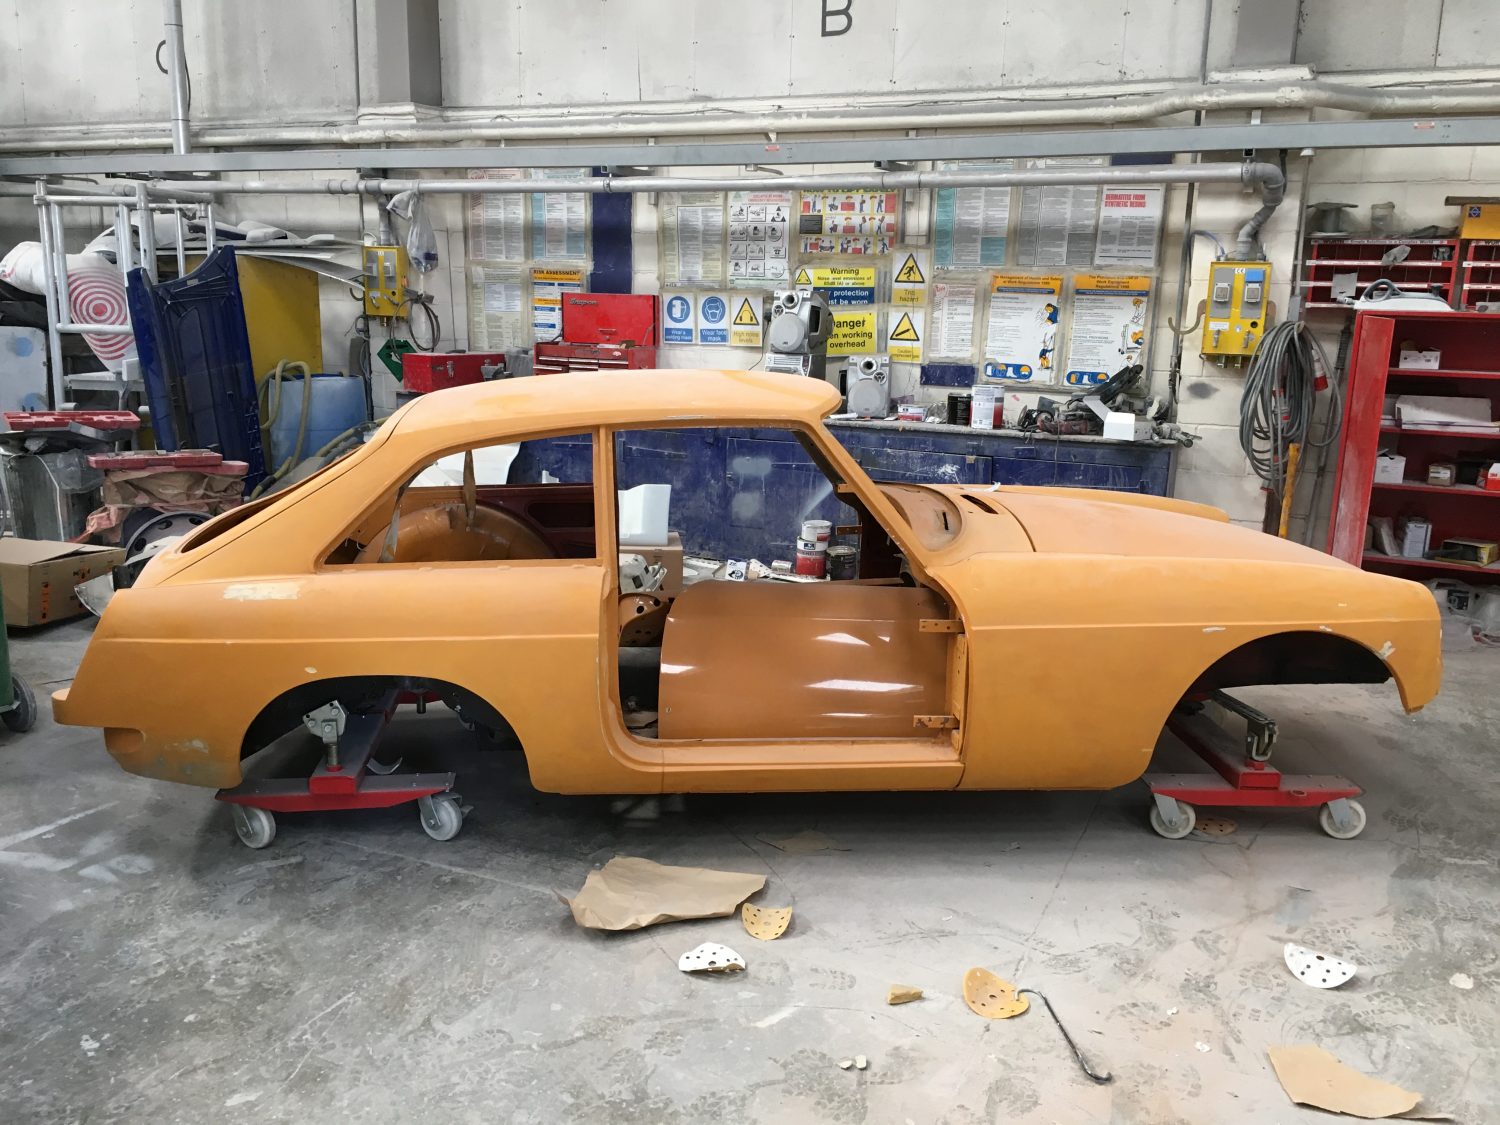
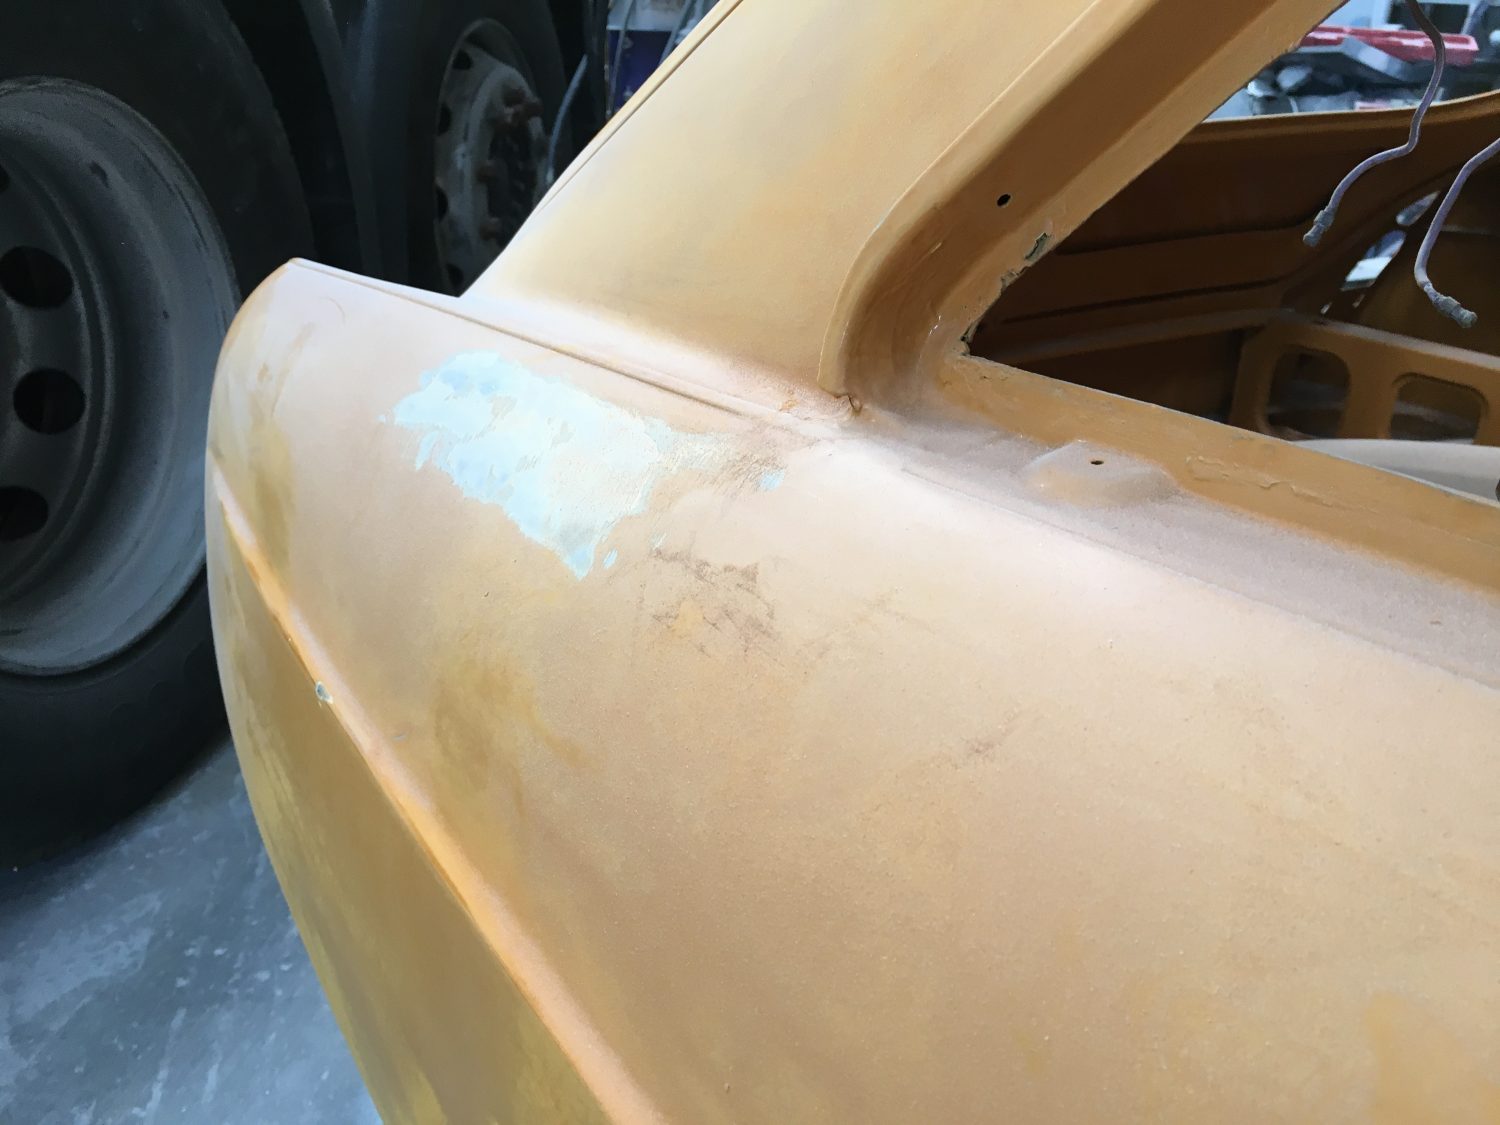
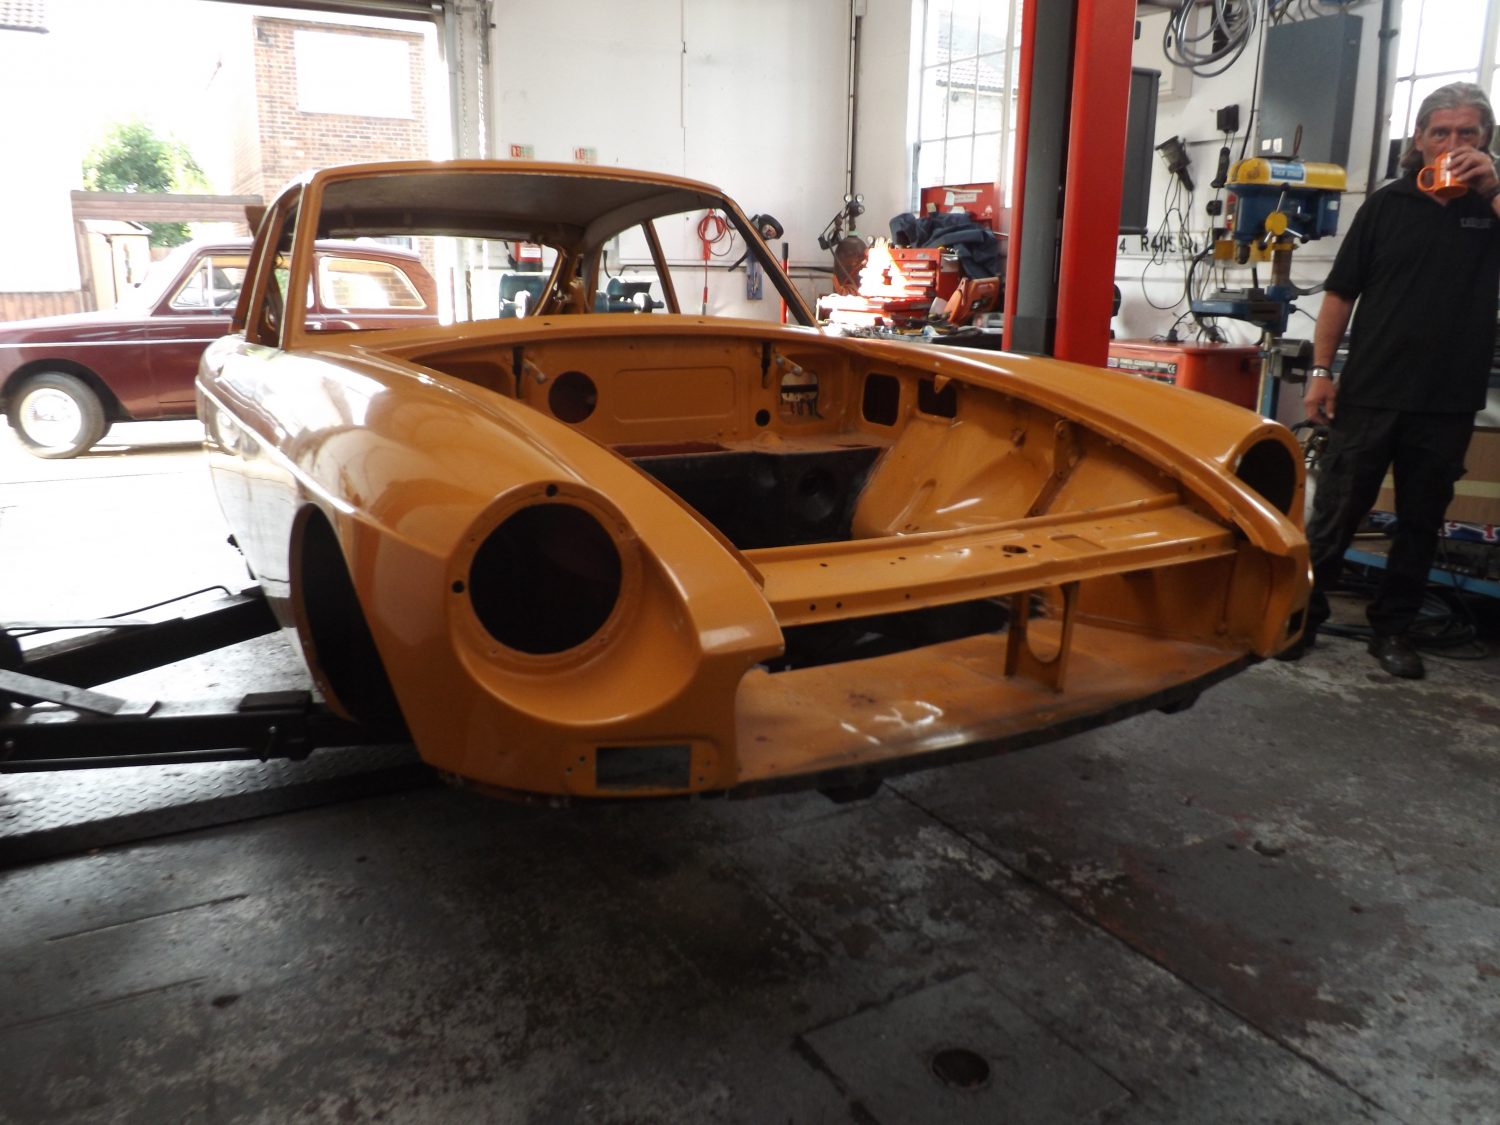
Here we have the first images of the new Snowberry White finish to our 1968 MGBGT.
Snowberry White is a very creamy white. It was a very popular colour used in the 1960’s and generally speaking was used by the MG, Austin and Rover motor companies.

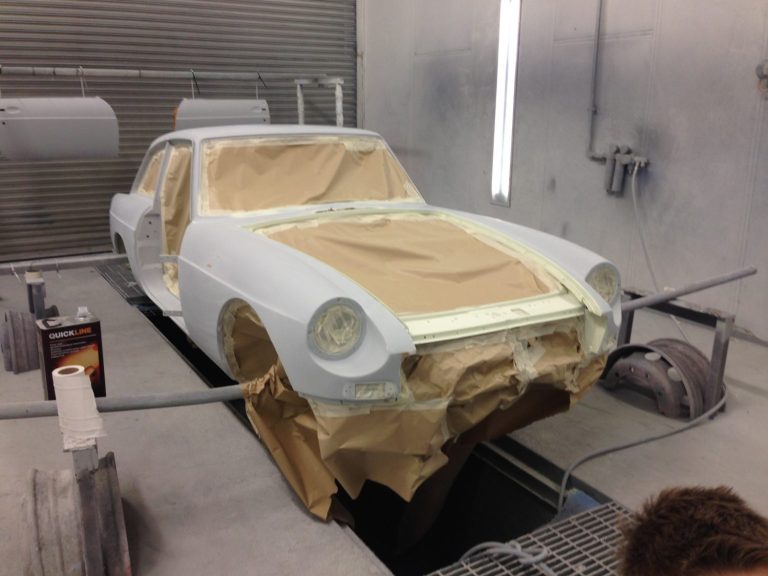
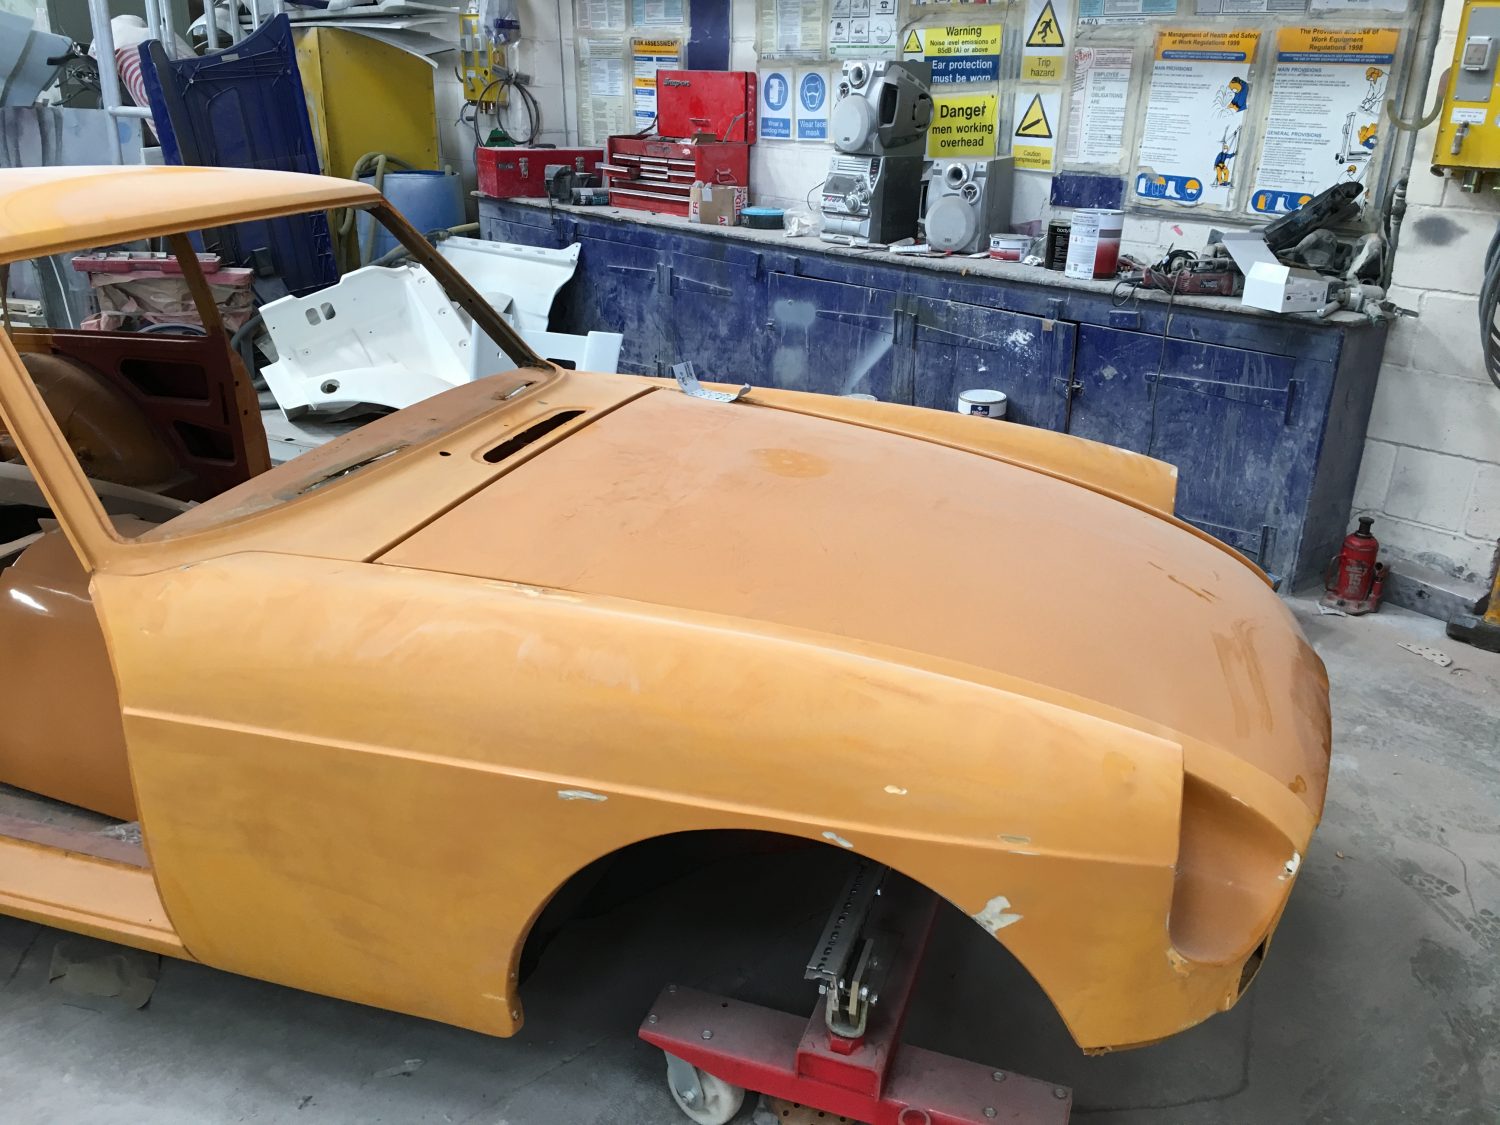
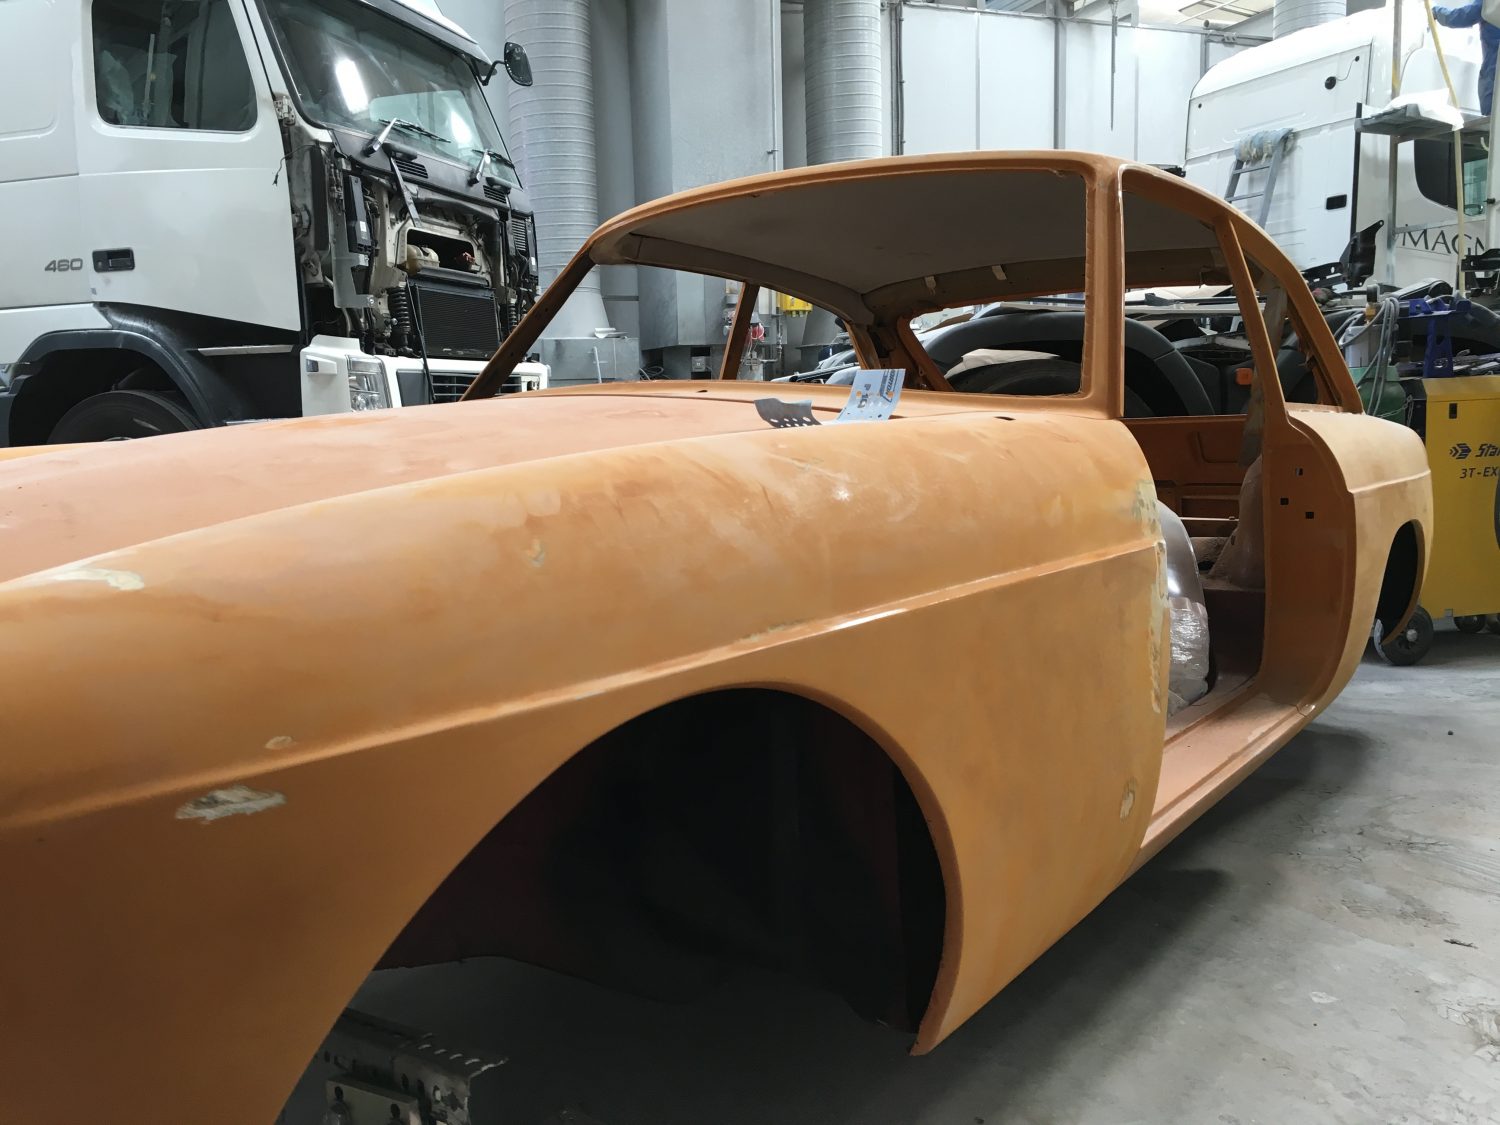
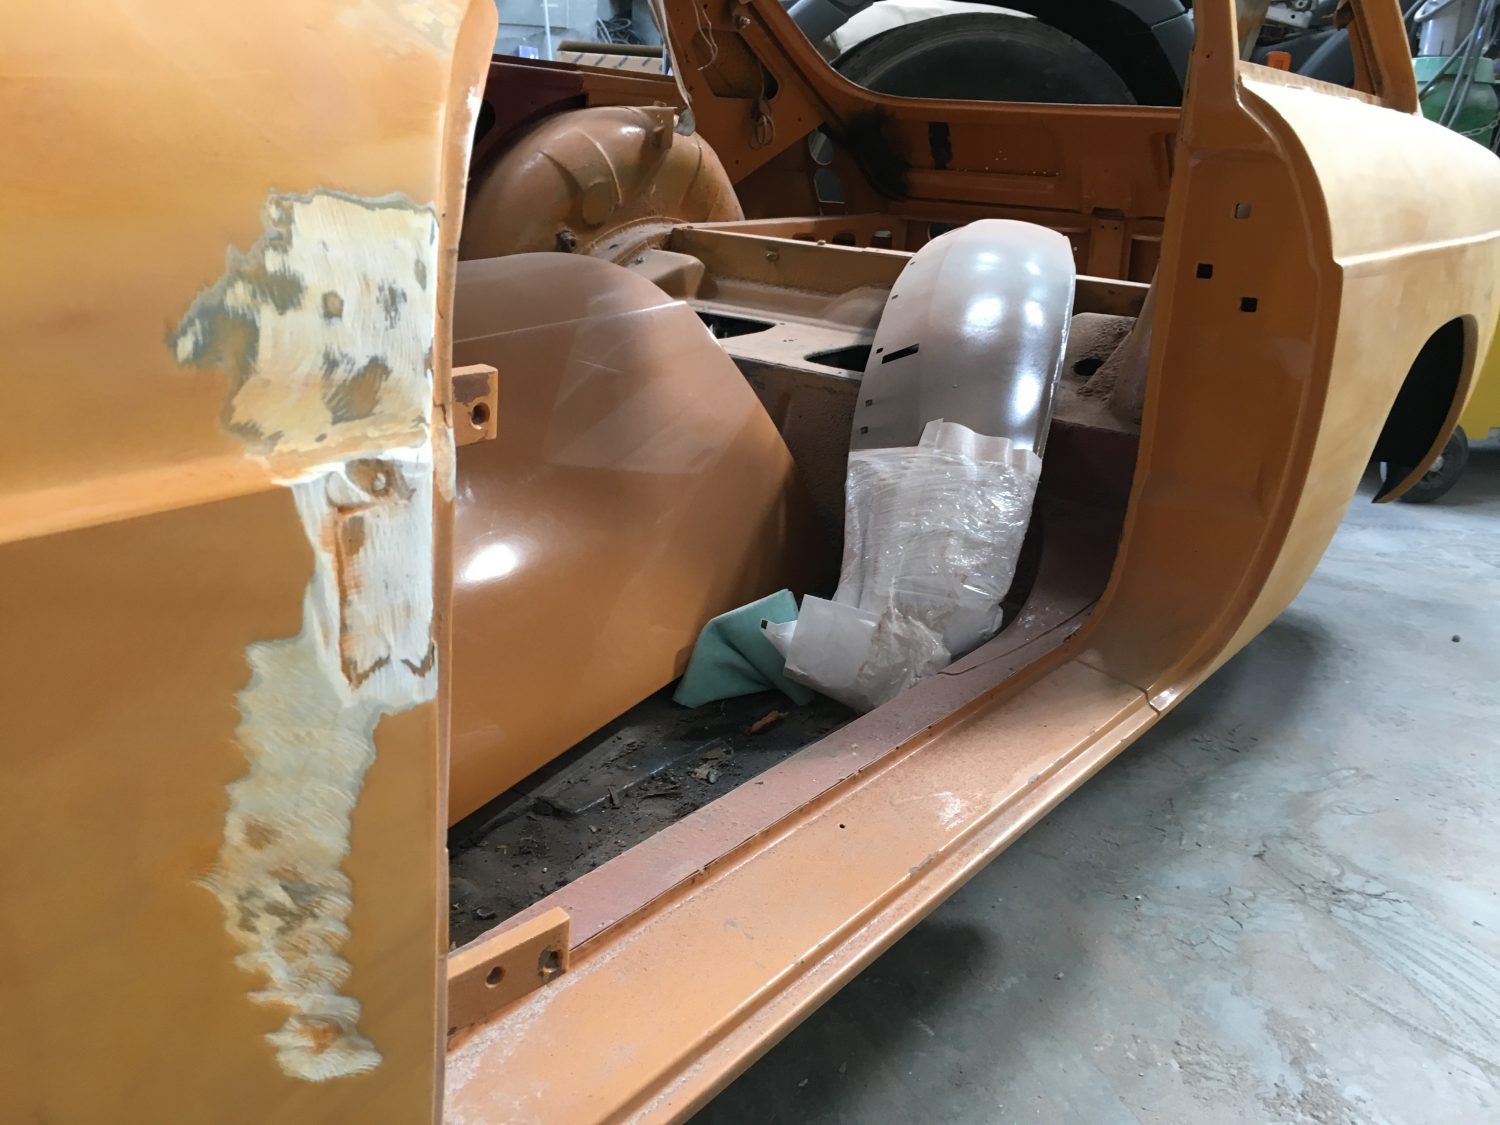
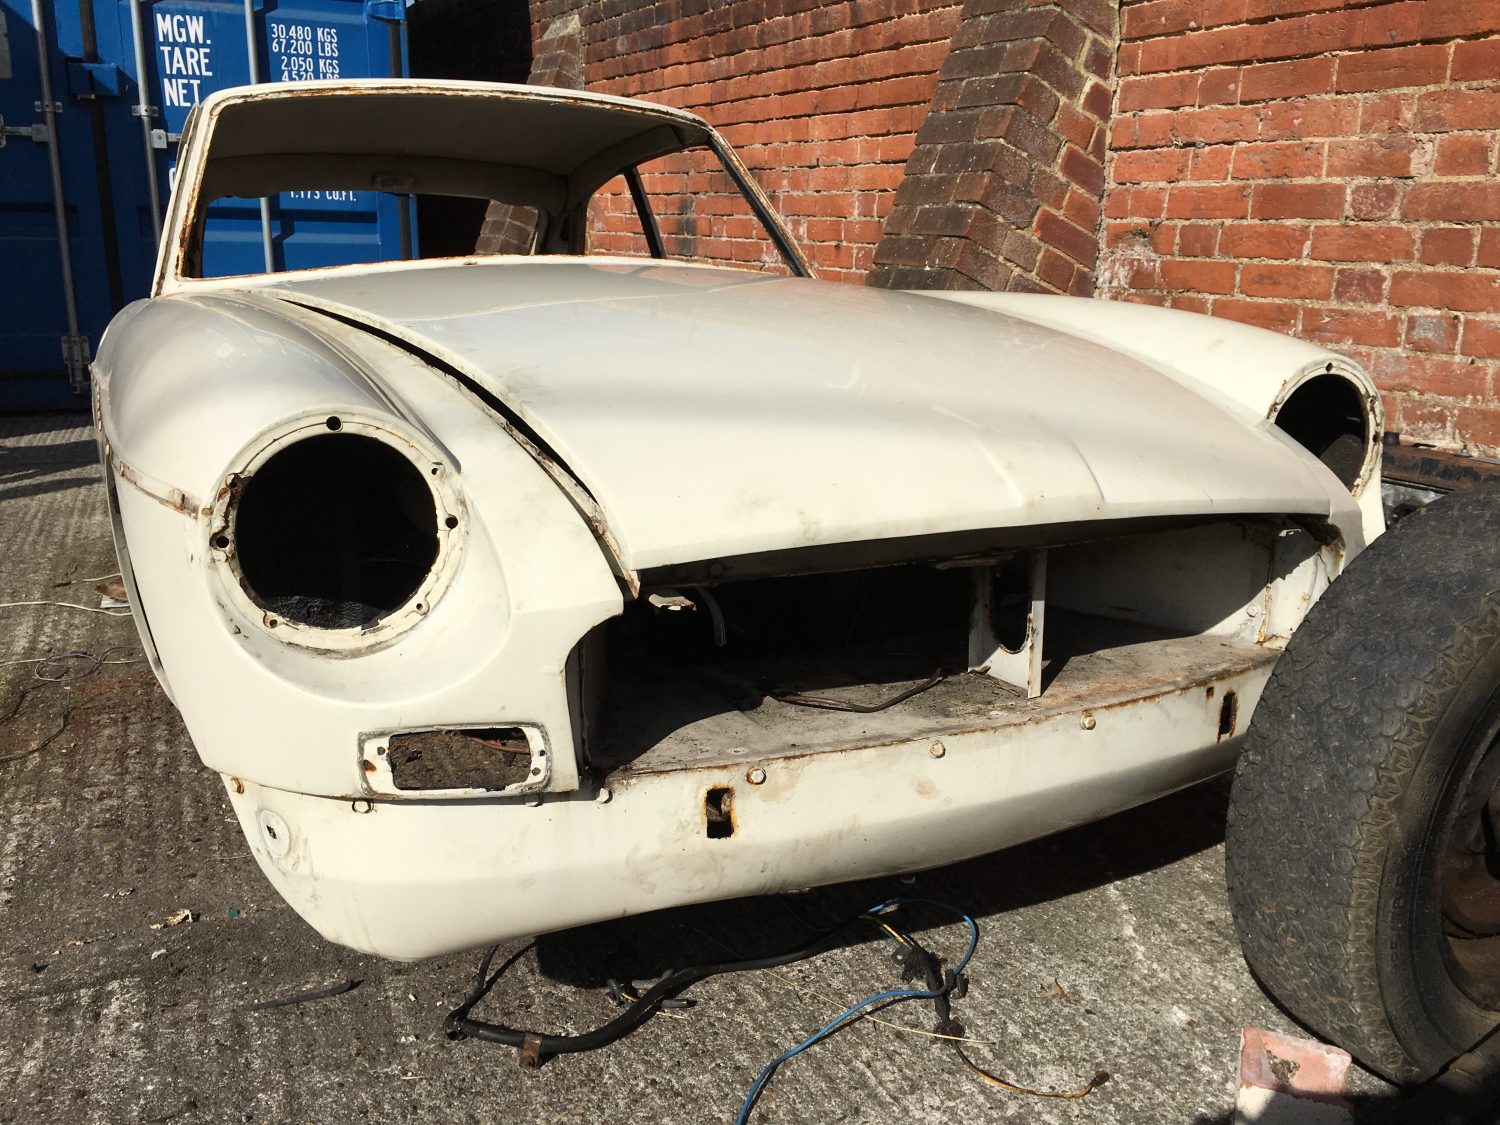
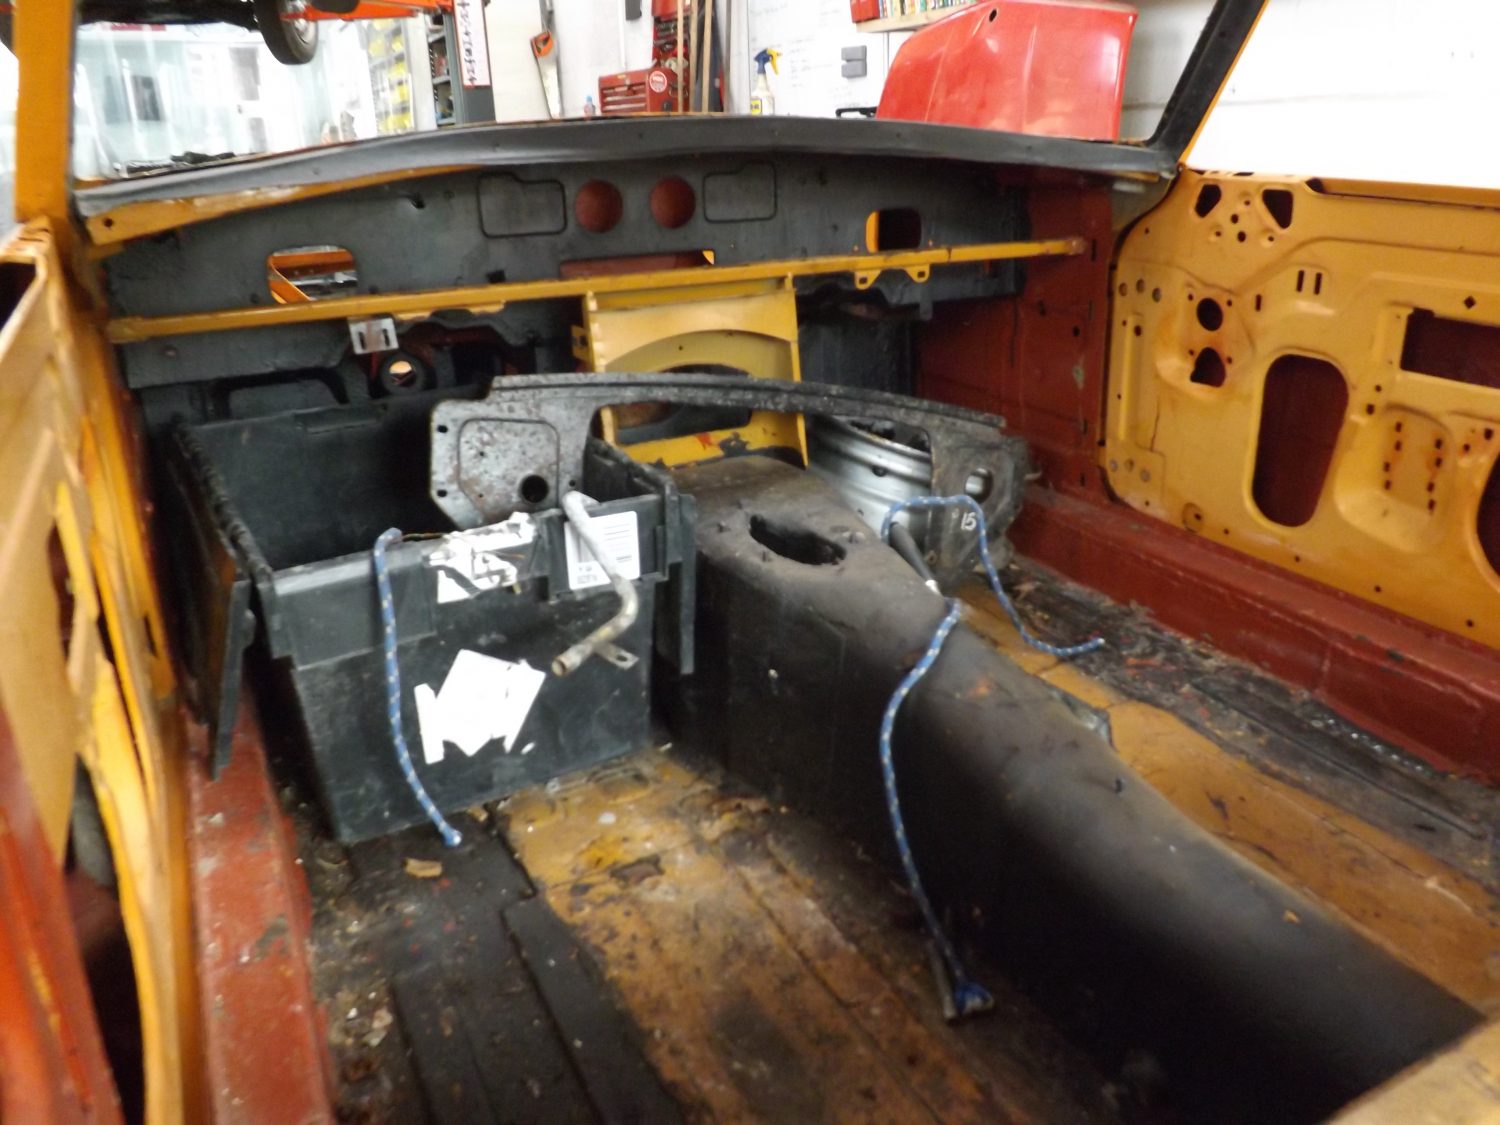
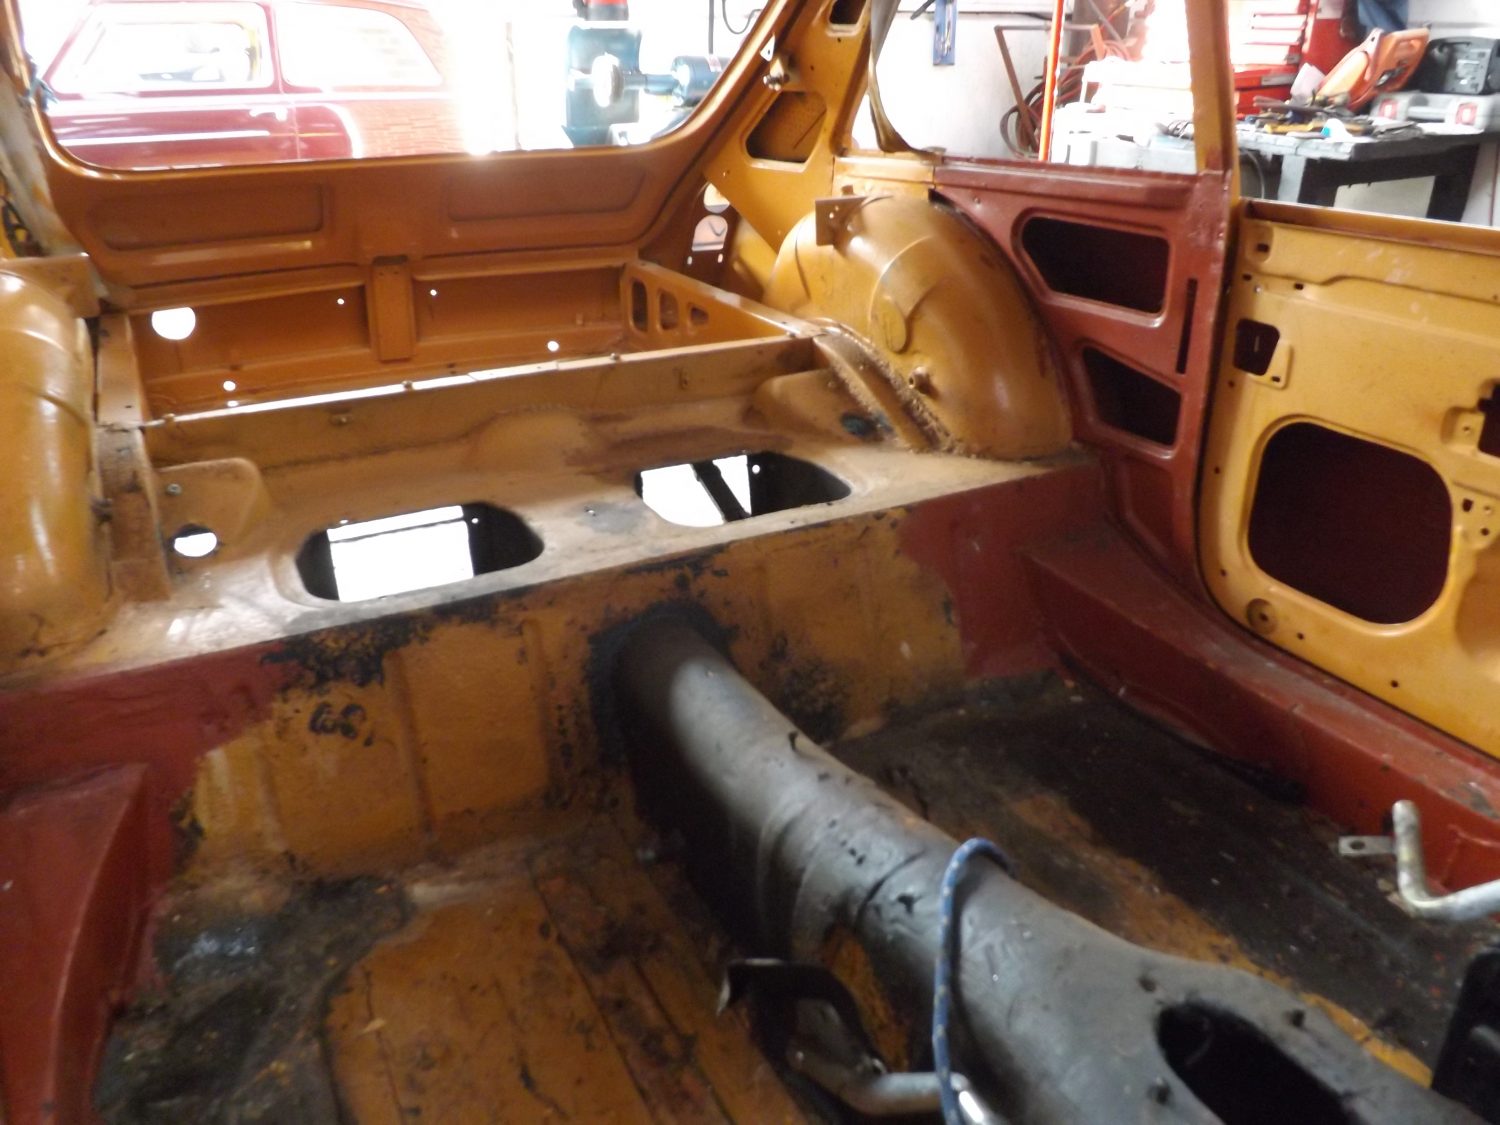
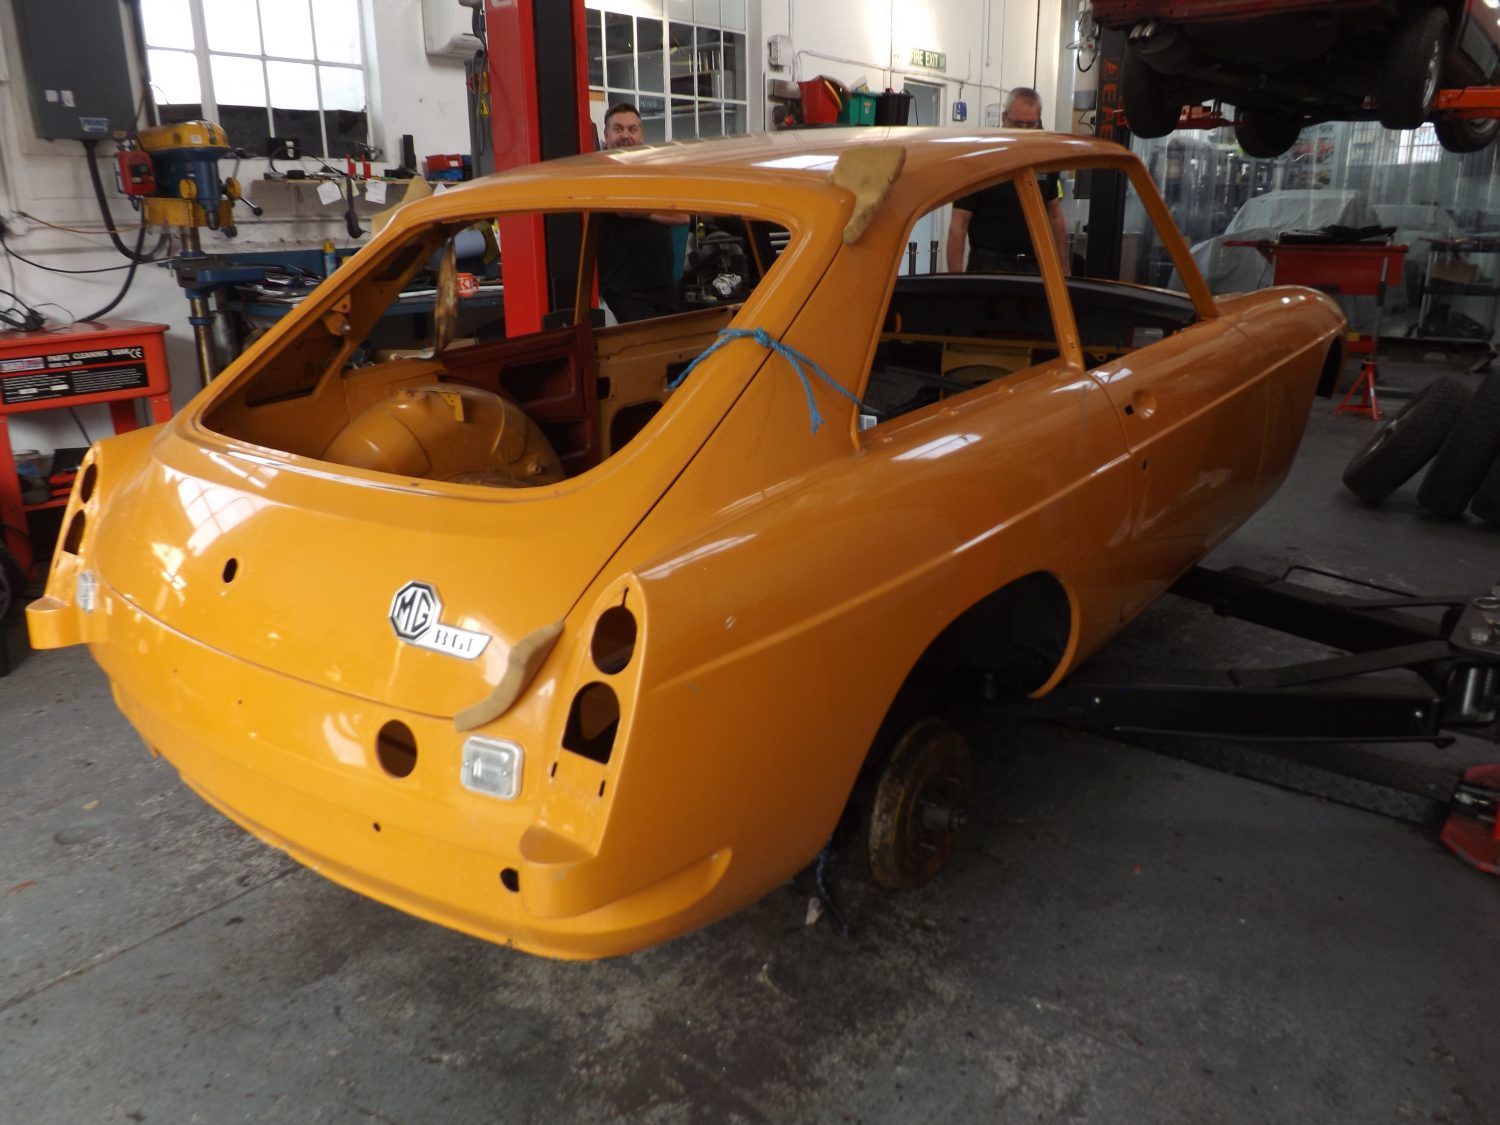
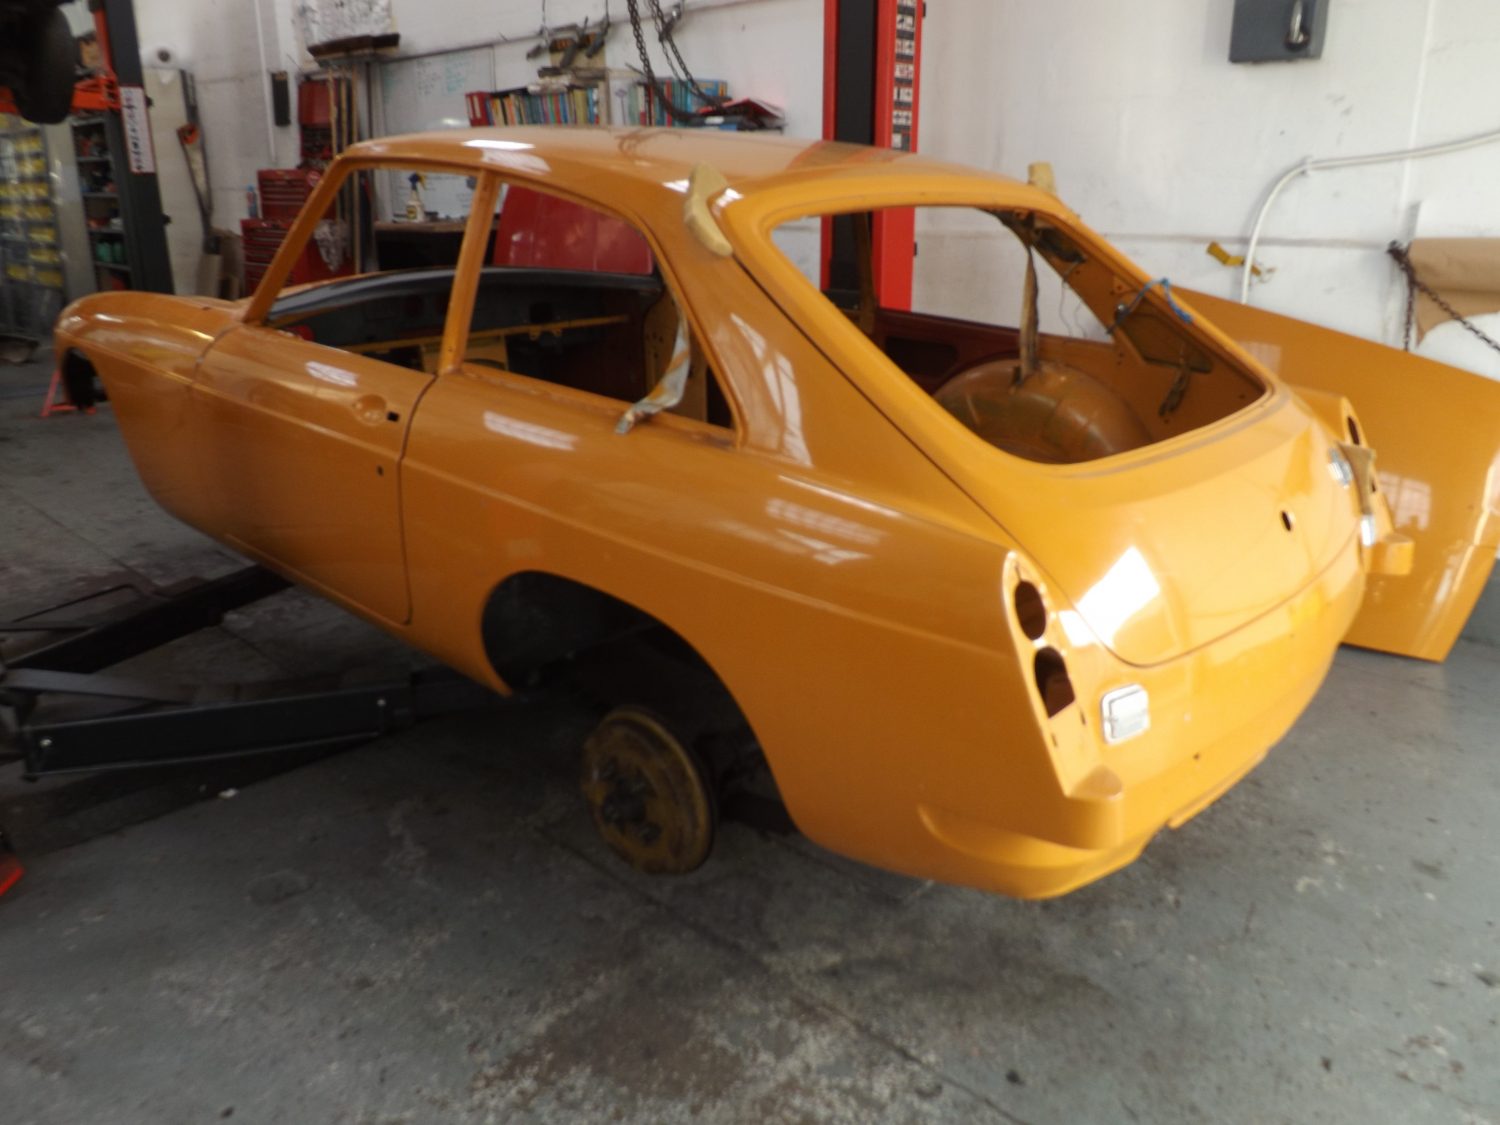
Work is well underway on preparing our 1968 MGBGT body shell ready for paint.
Not a huge amount is required on the body shell as it arrived to us in very good condition.
By the end of this week we should see her finished in Snowberry White.
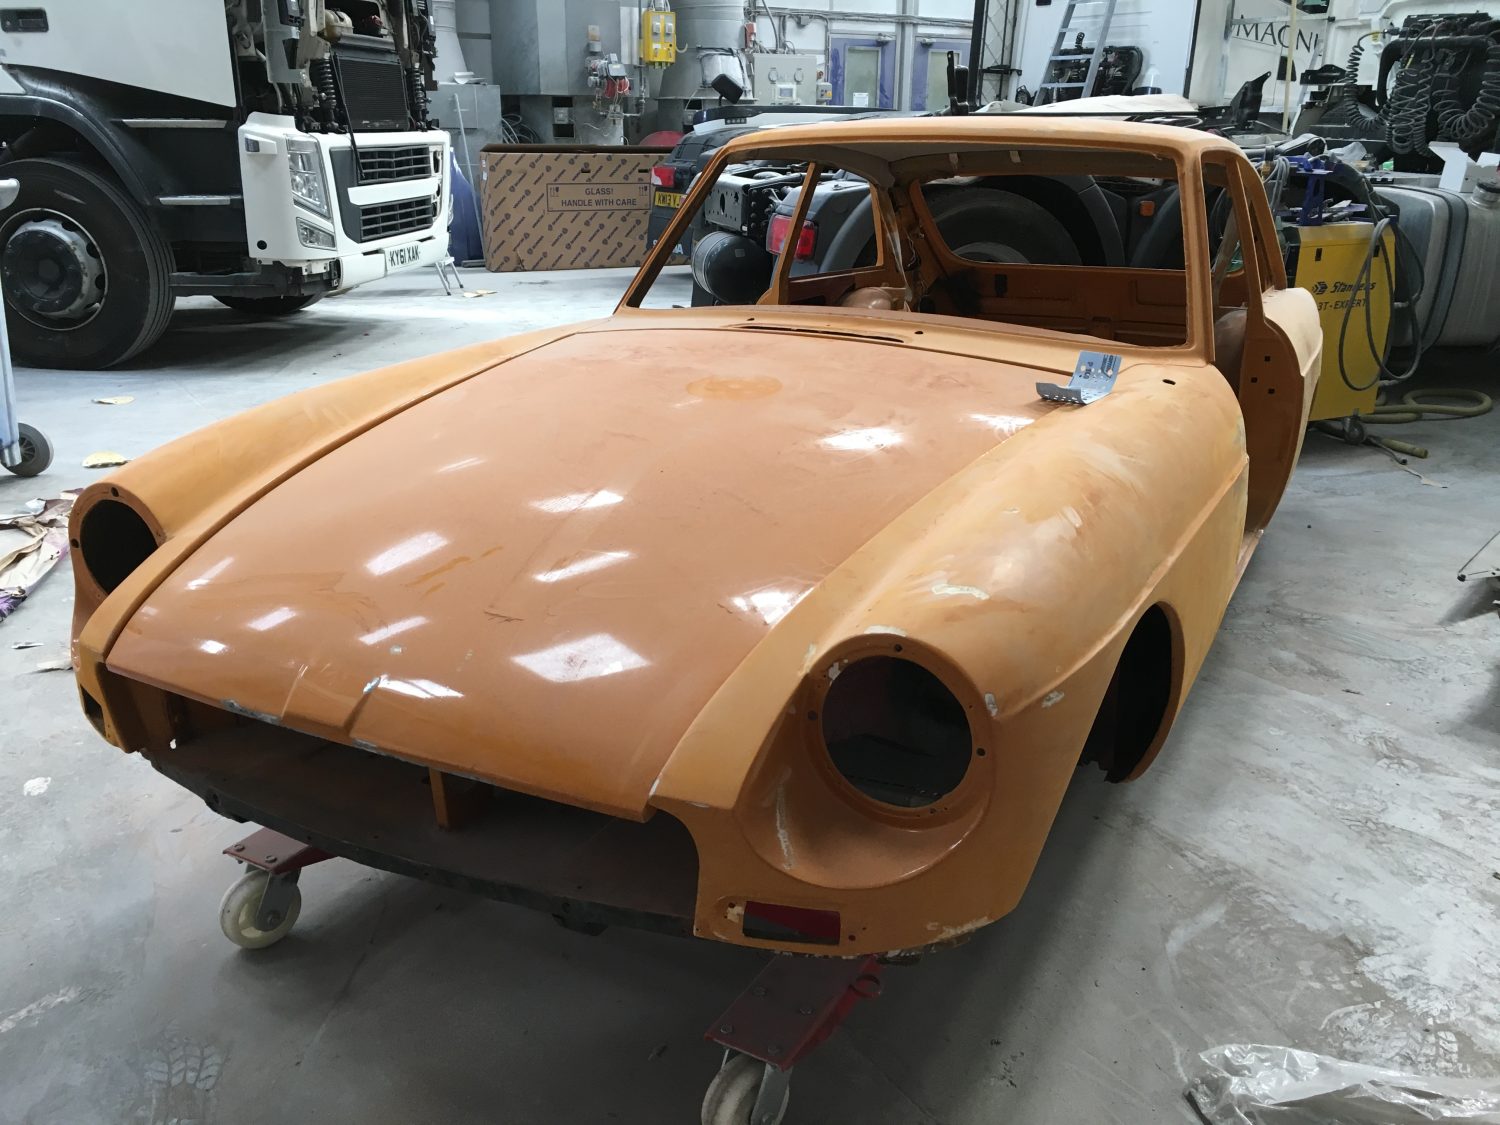
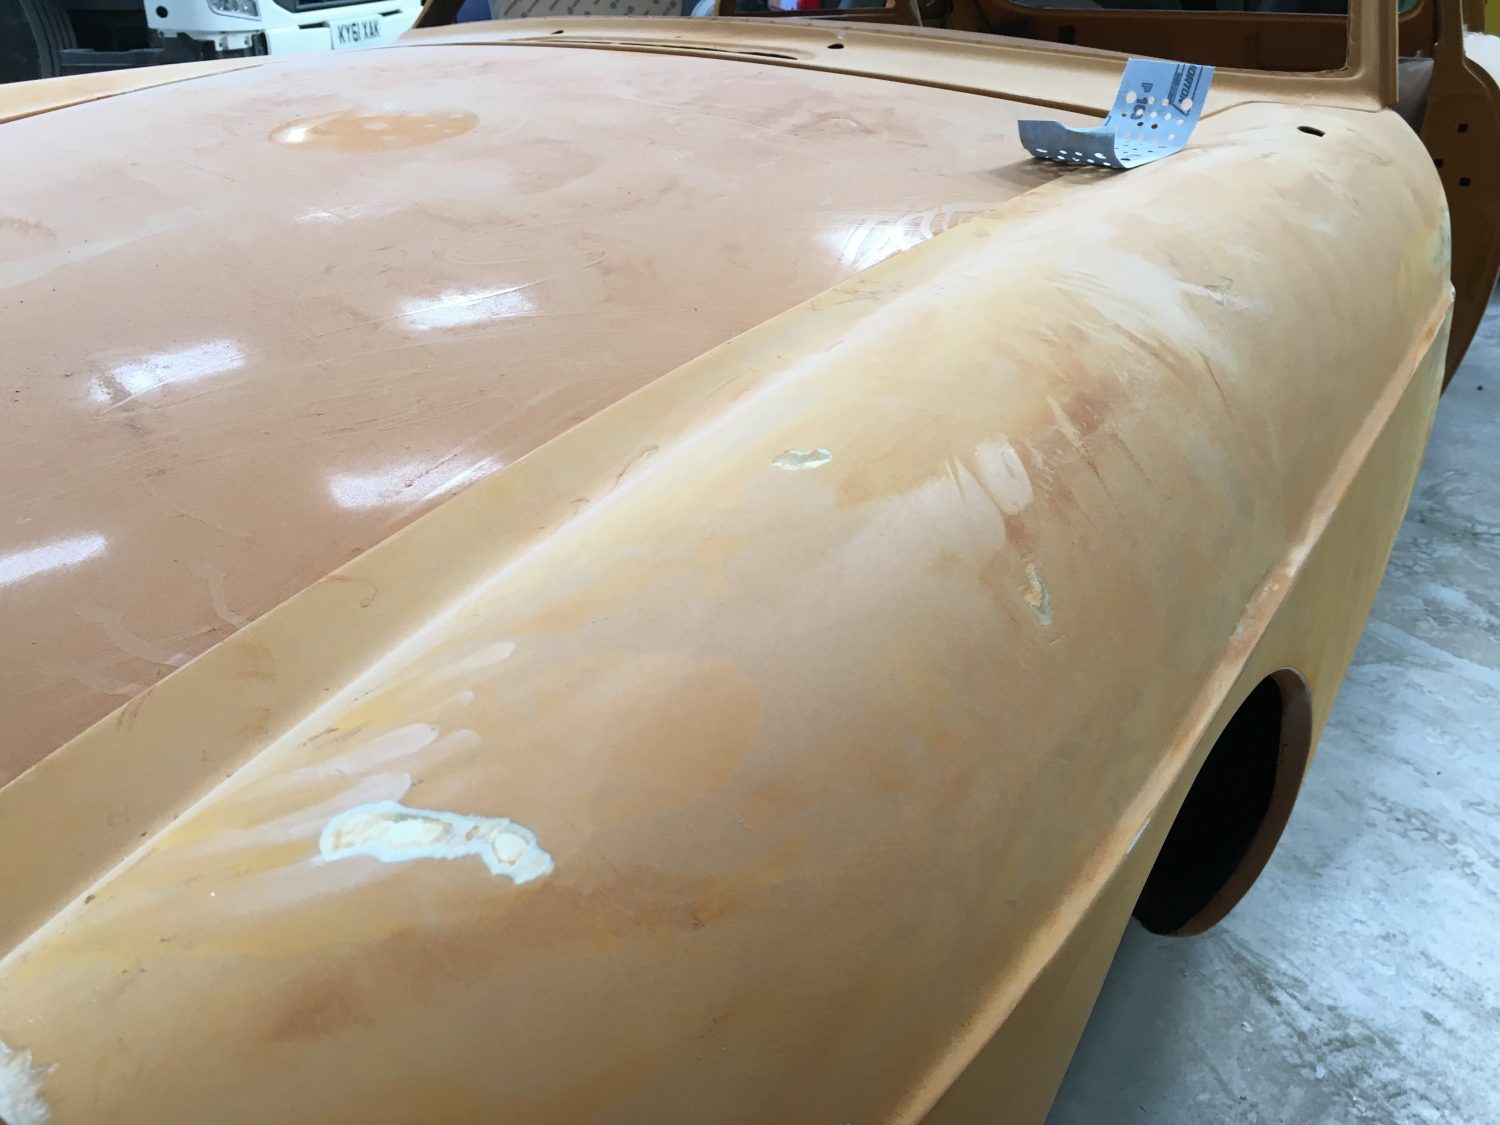

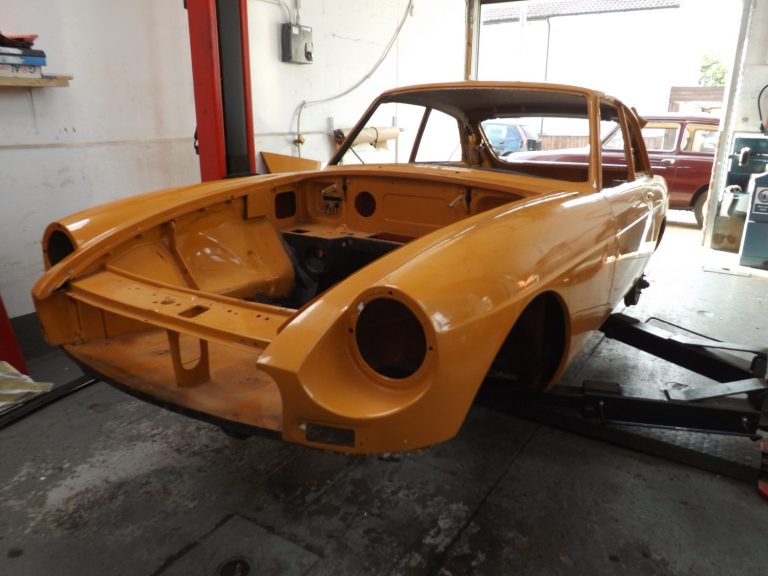
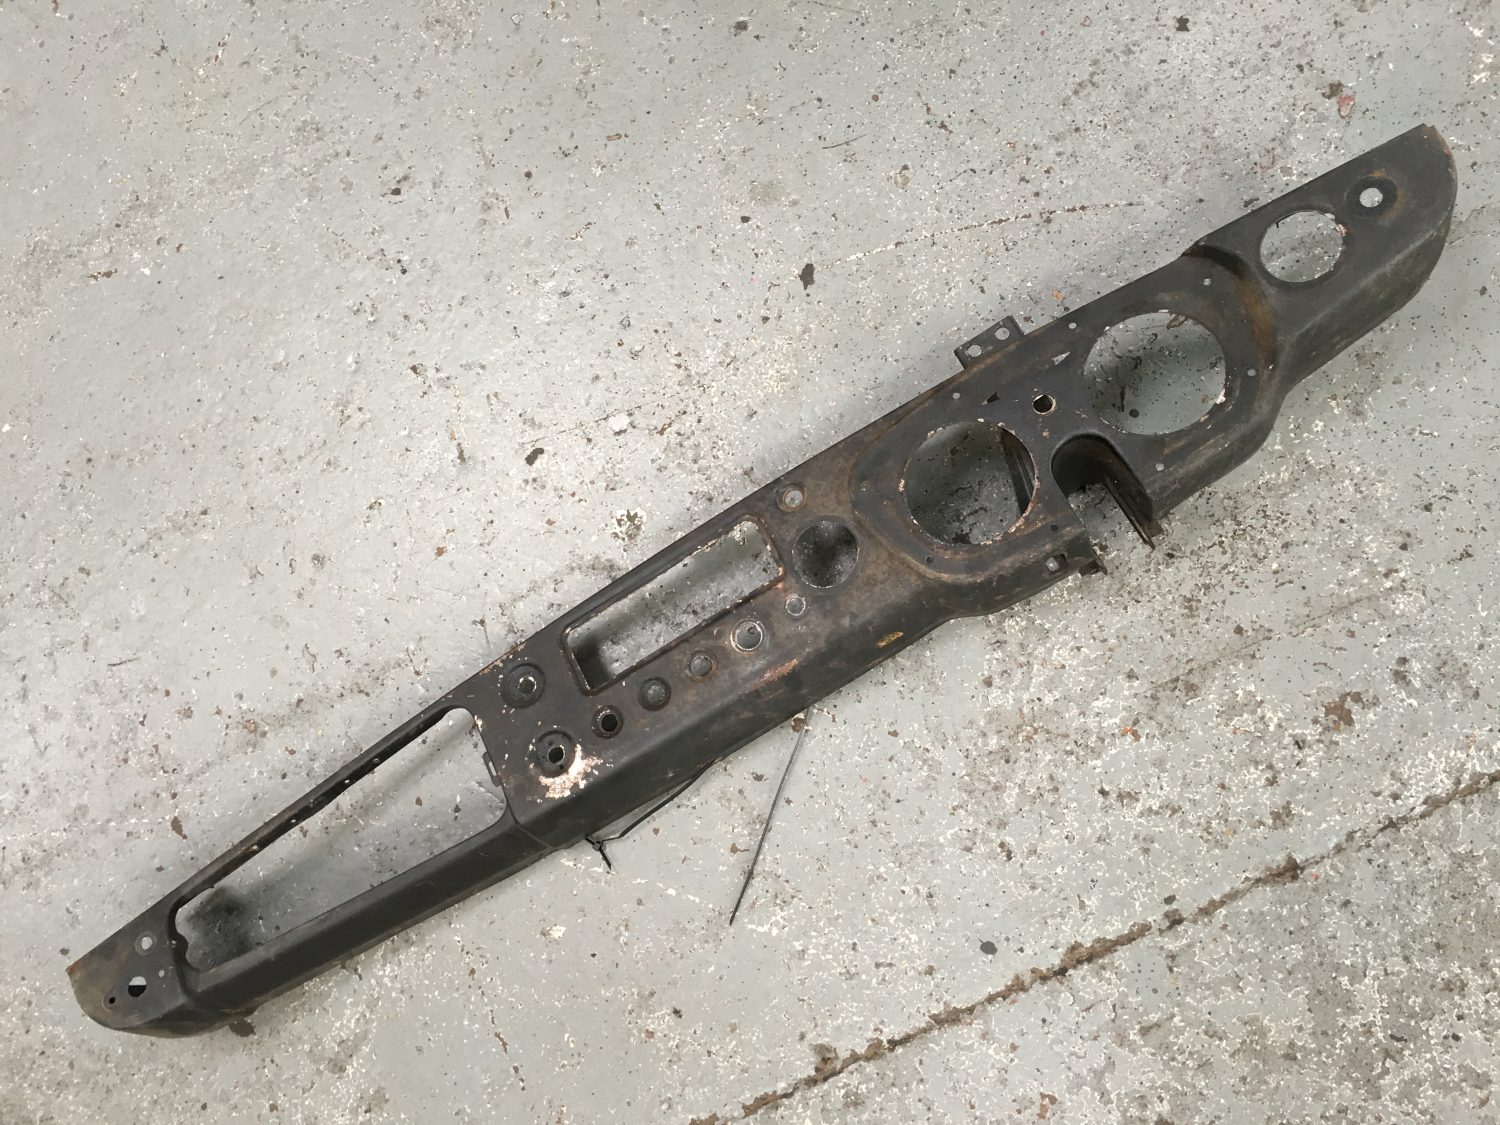
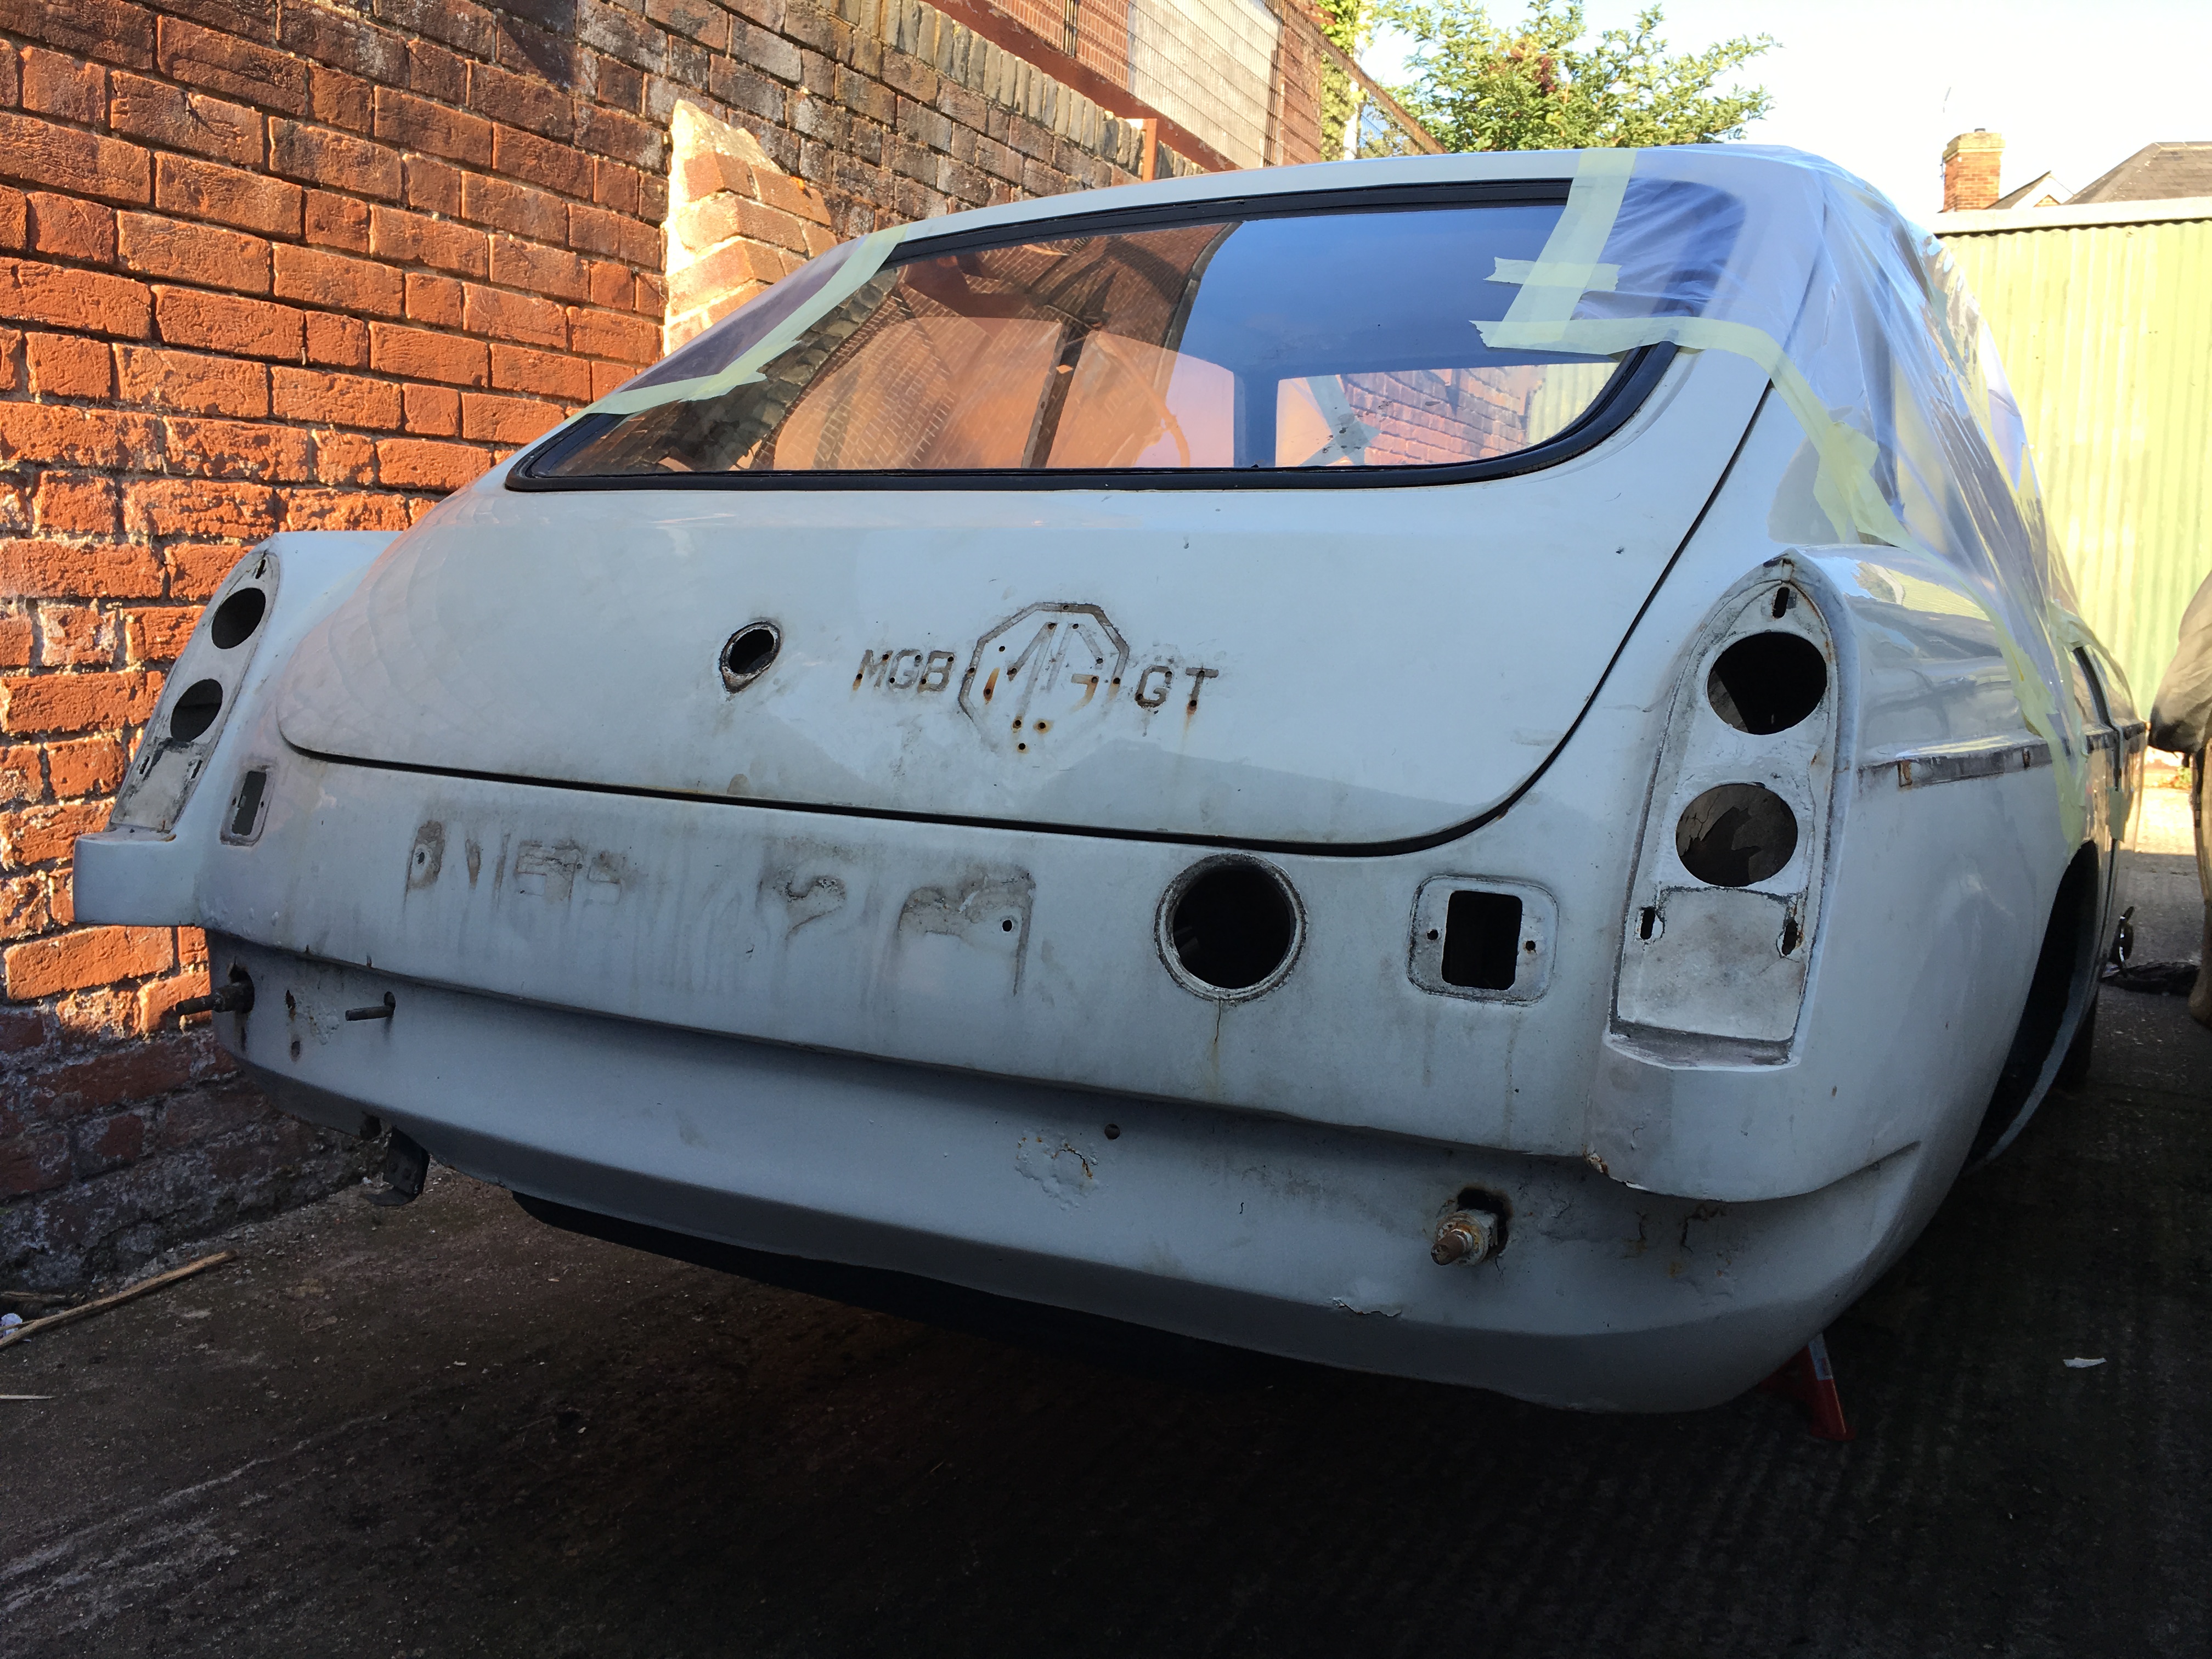
Here you can see the extent of work that is required on the existing body shell of our MGBGT.
We are never put off by the amount of bodywork that is required on a restoration. At the end of the day, we are restoration specialists so no task is ever too daunting but we always consider our customer’s purse strings; our time in labour is not always the most cost effective option!
This is a prime example of why a new body shell for our 1968 MGBGT restoration was by far the better option.

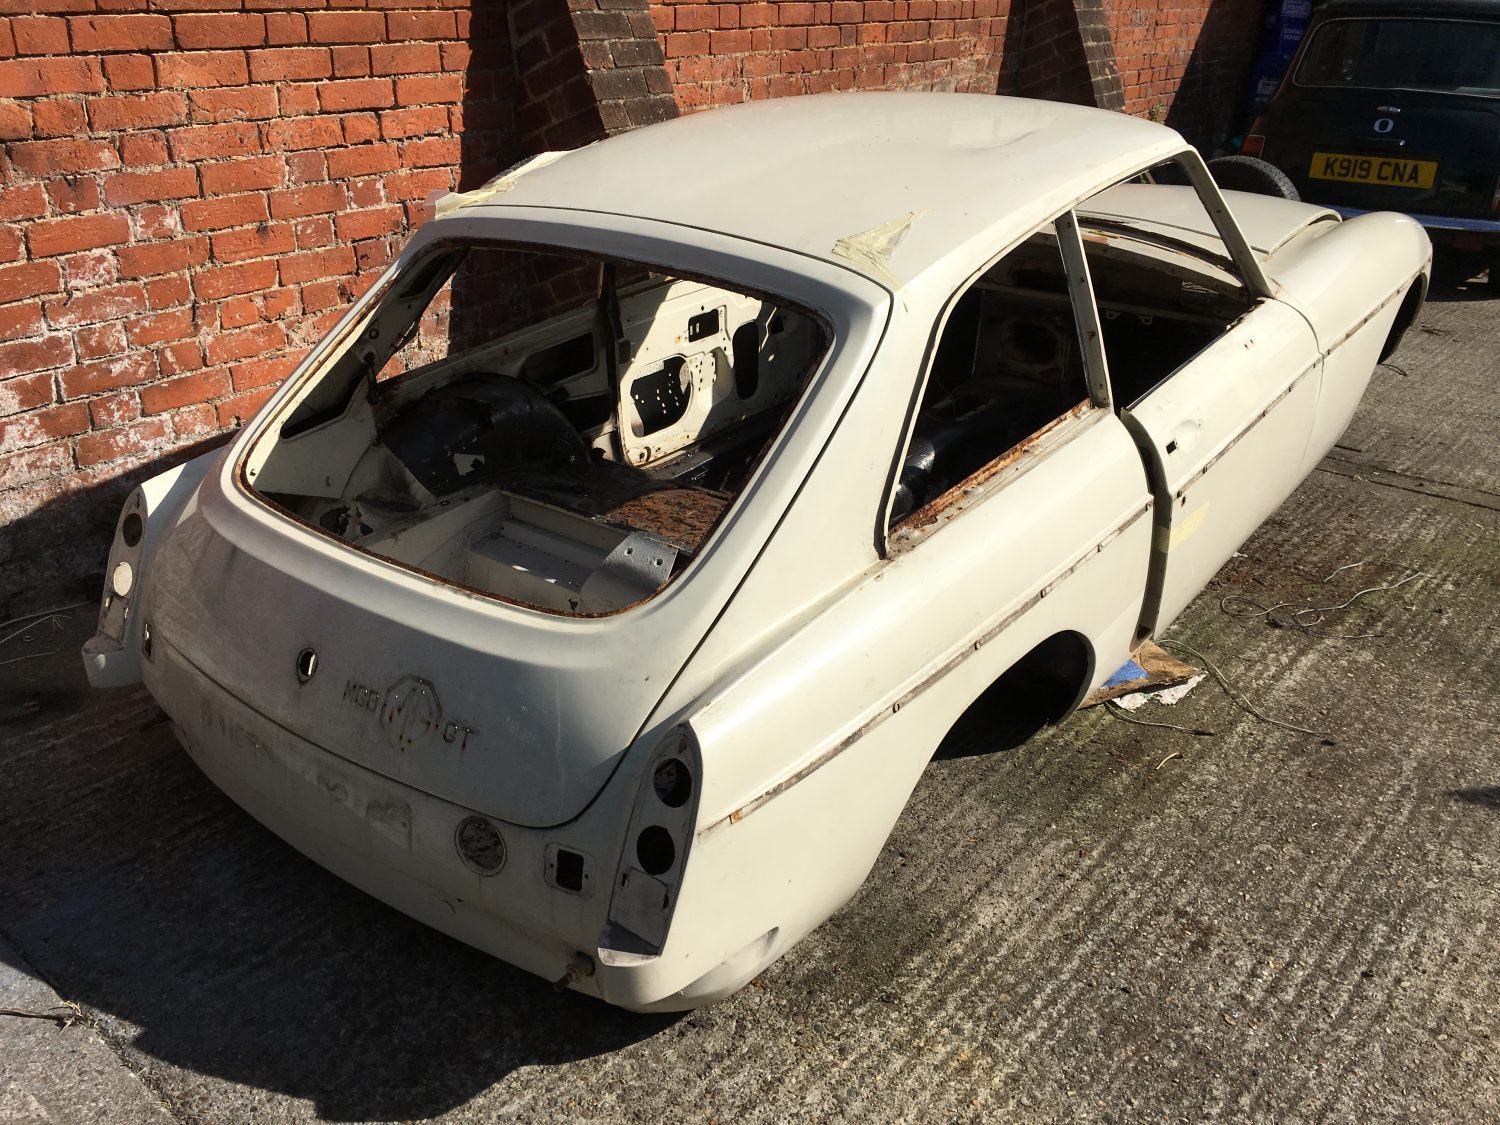
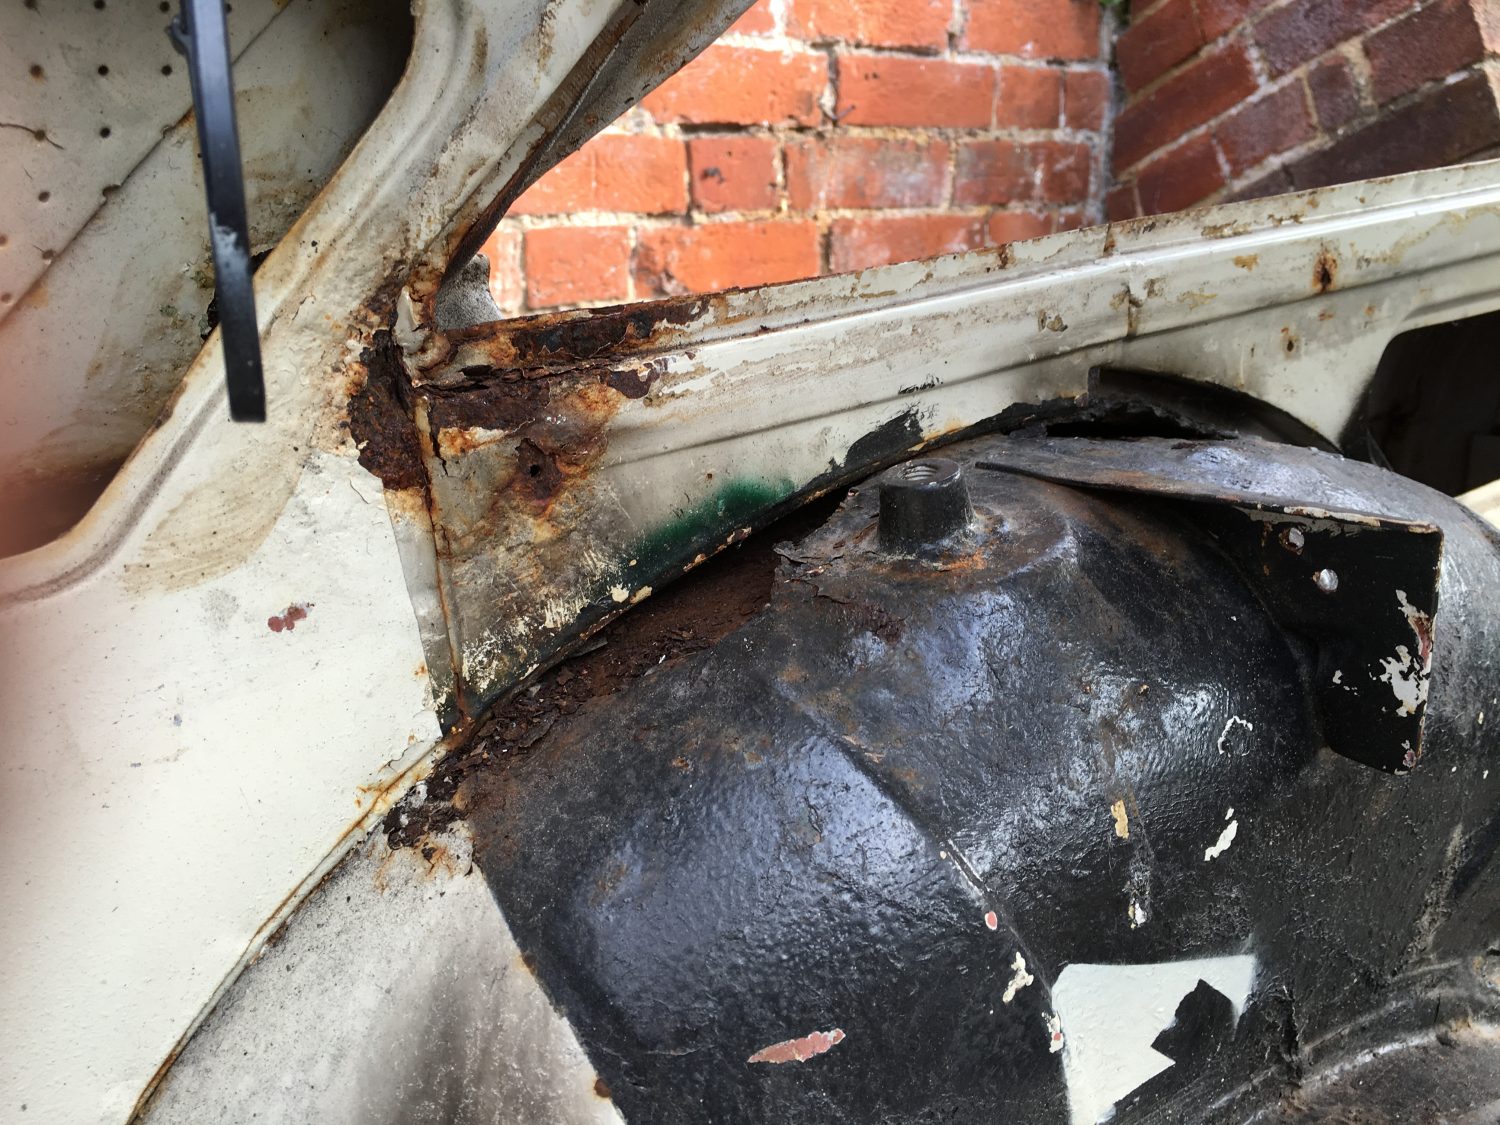

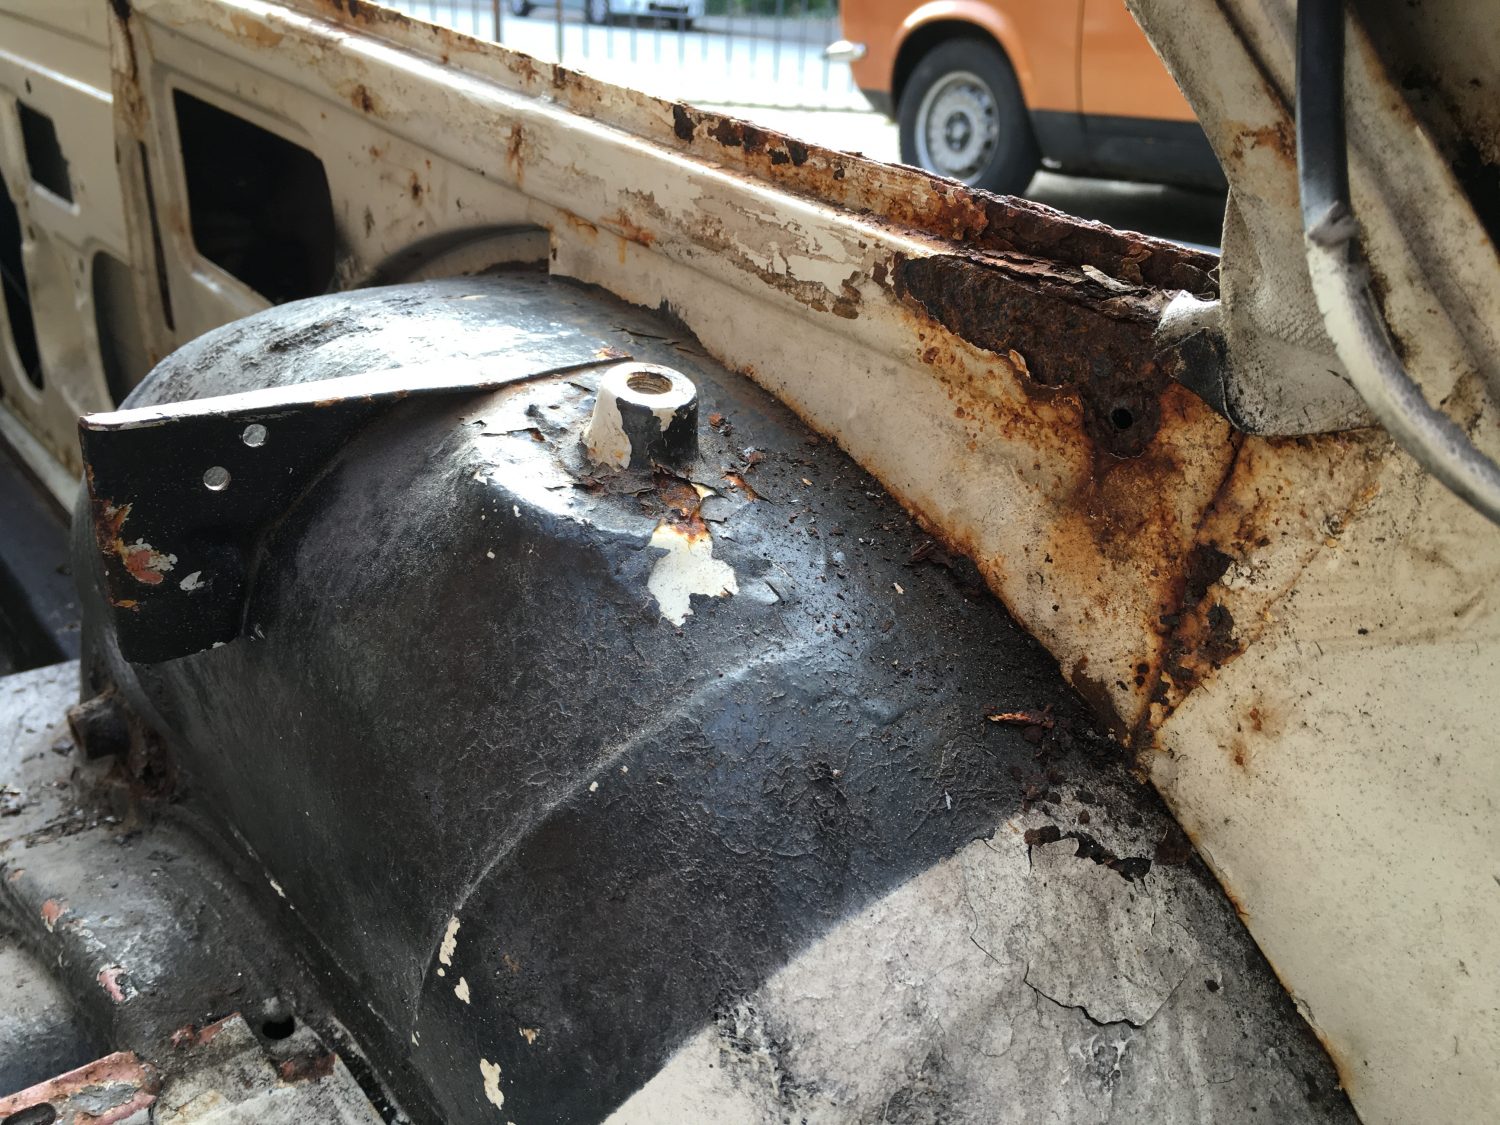


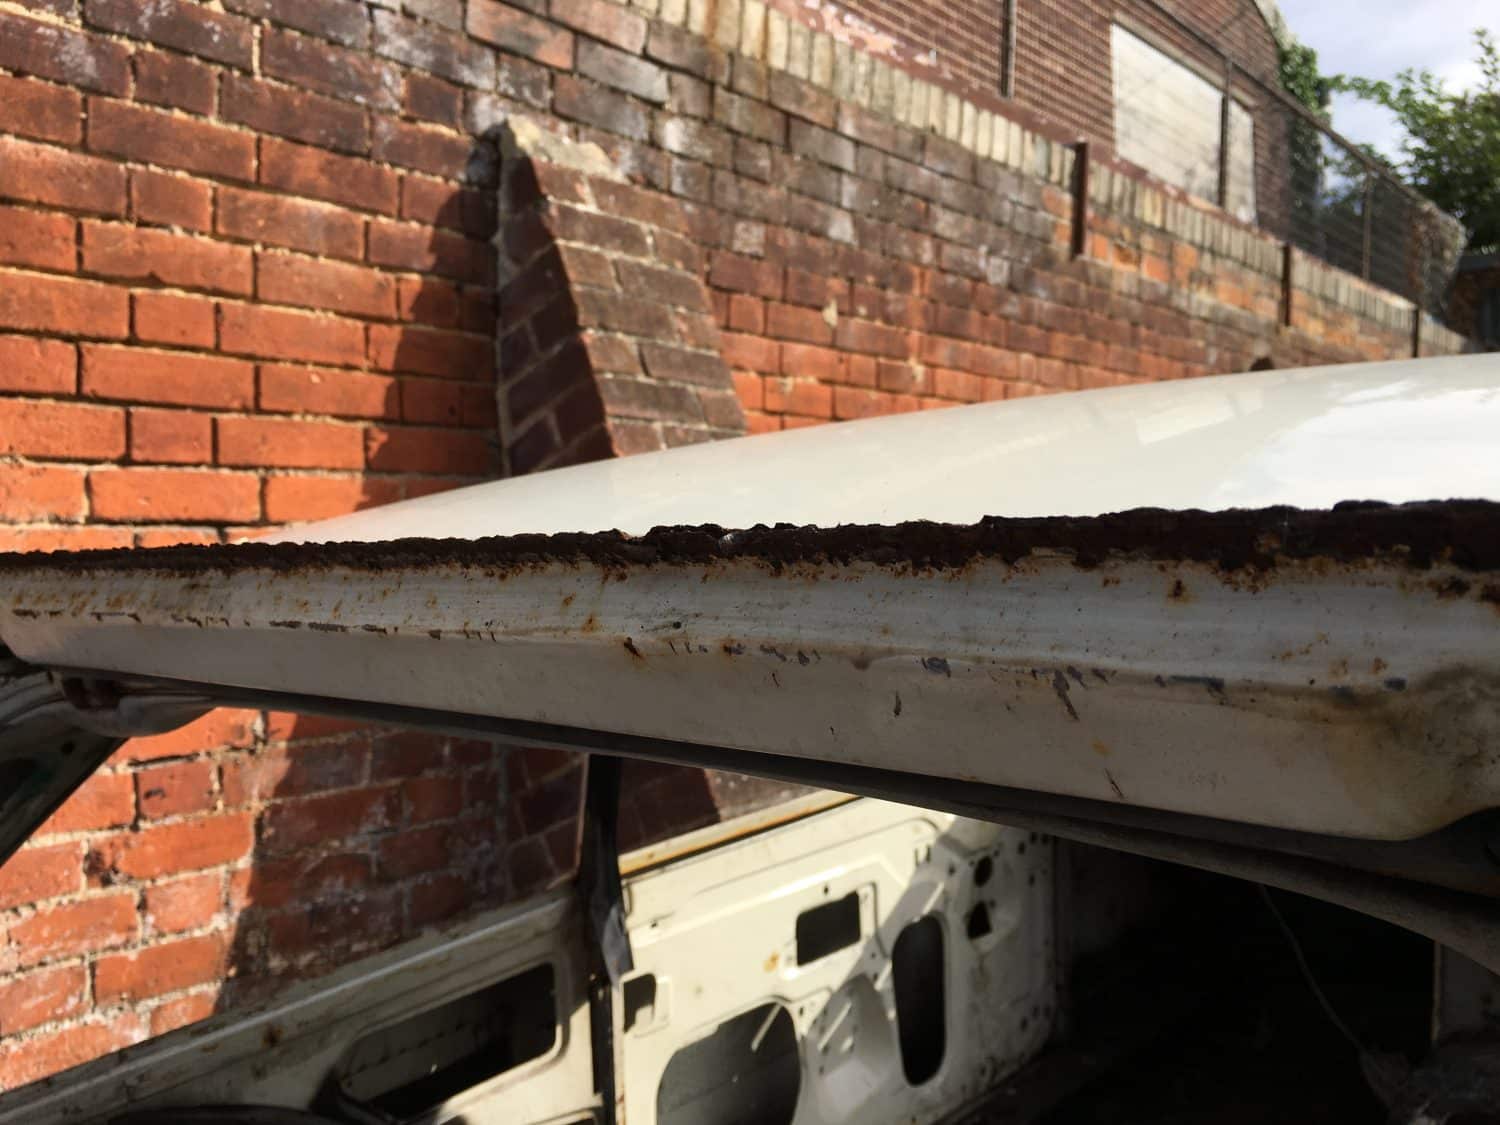
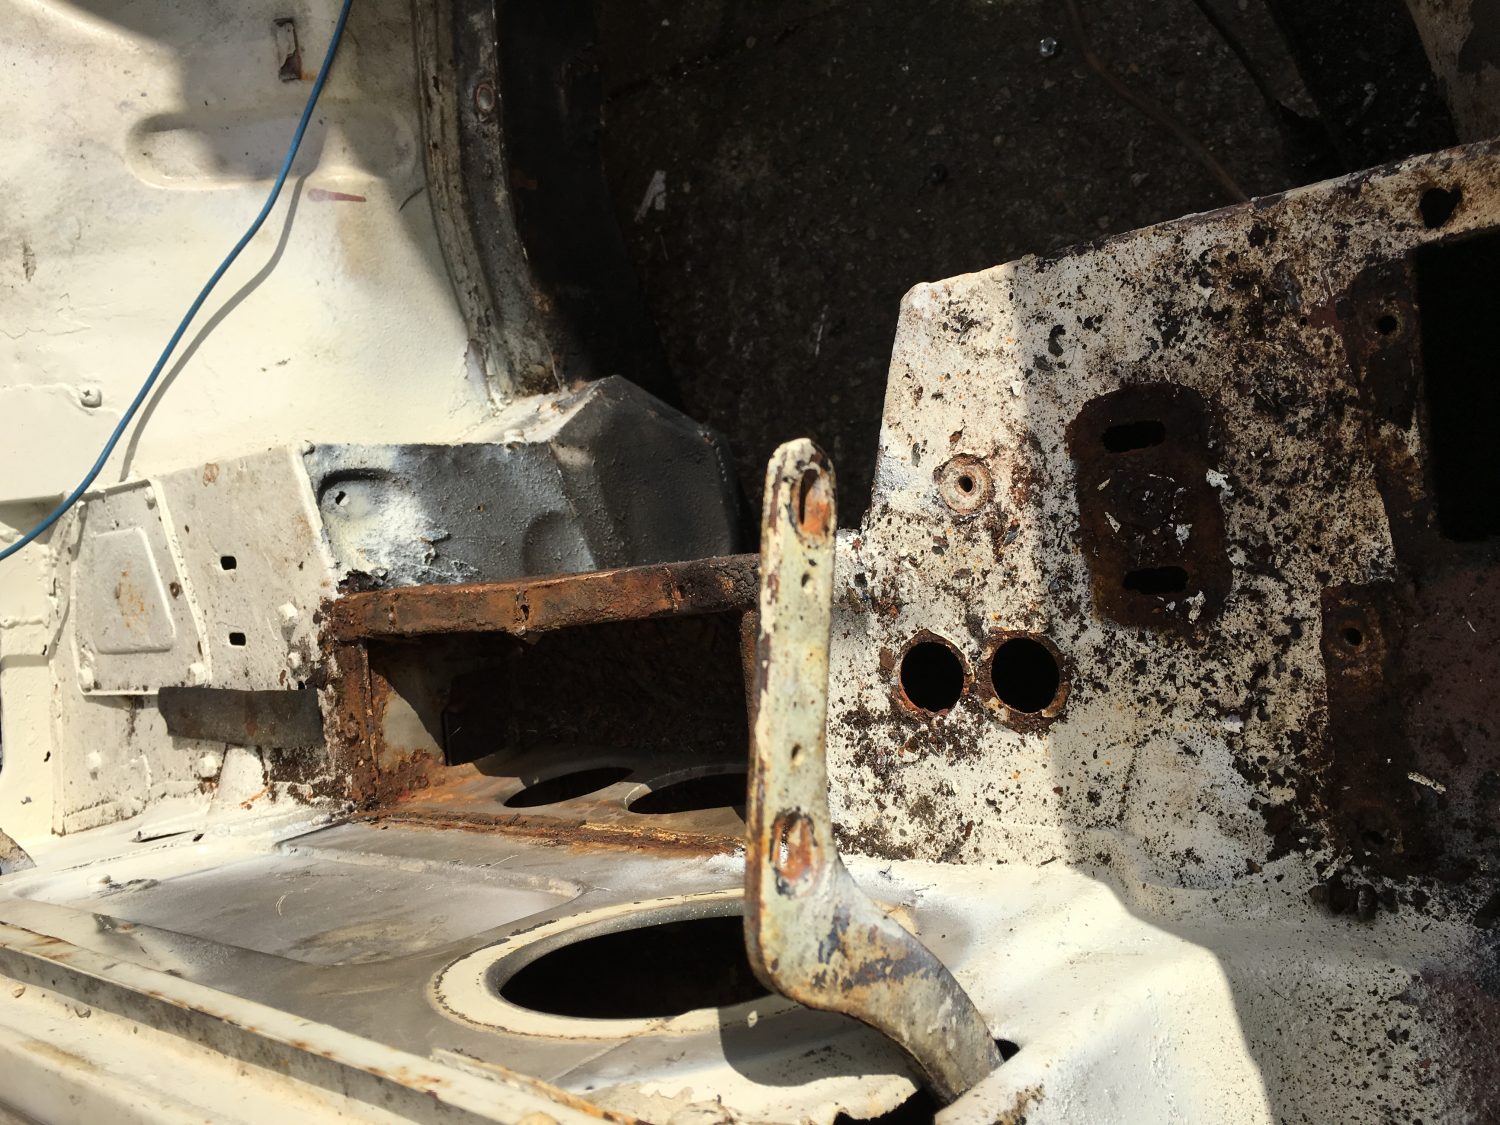
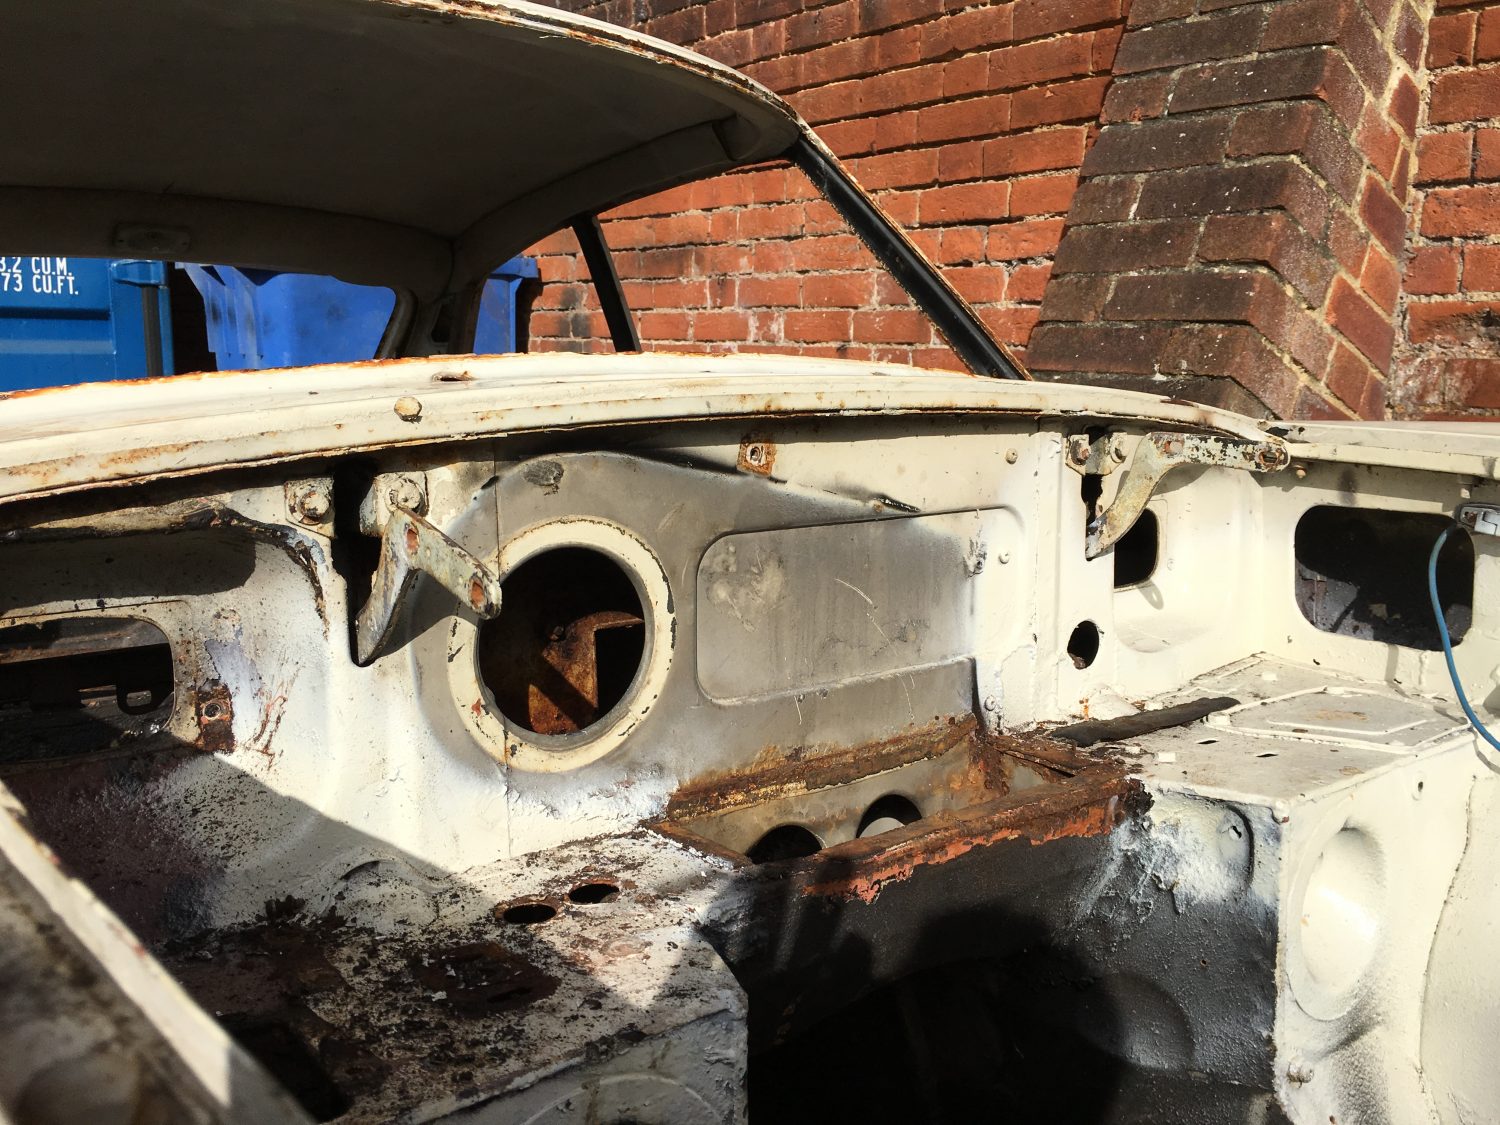
A lot of time and effort would be required to get this back up to Bridge Classic Cars standards whereas…

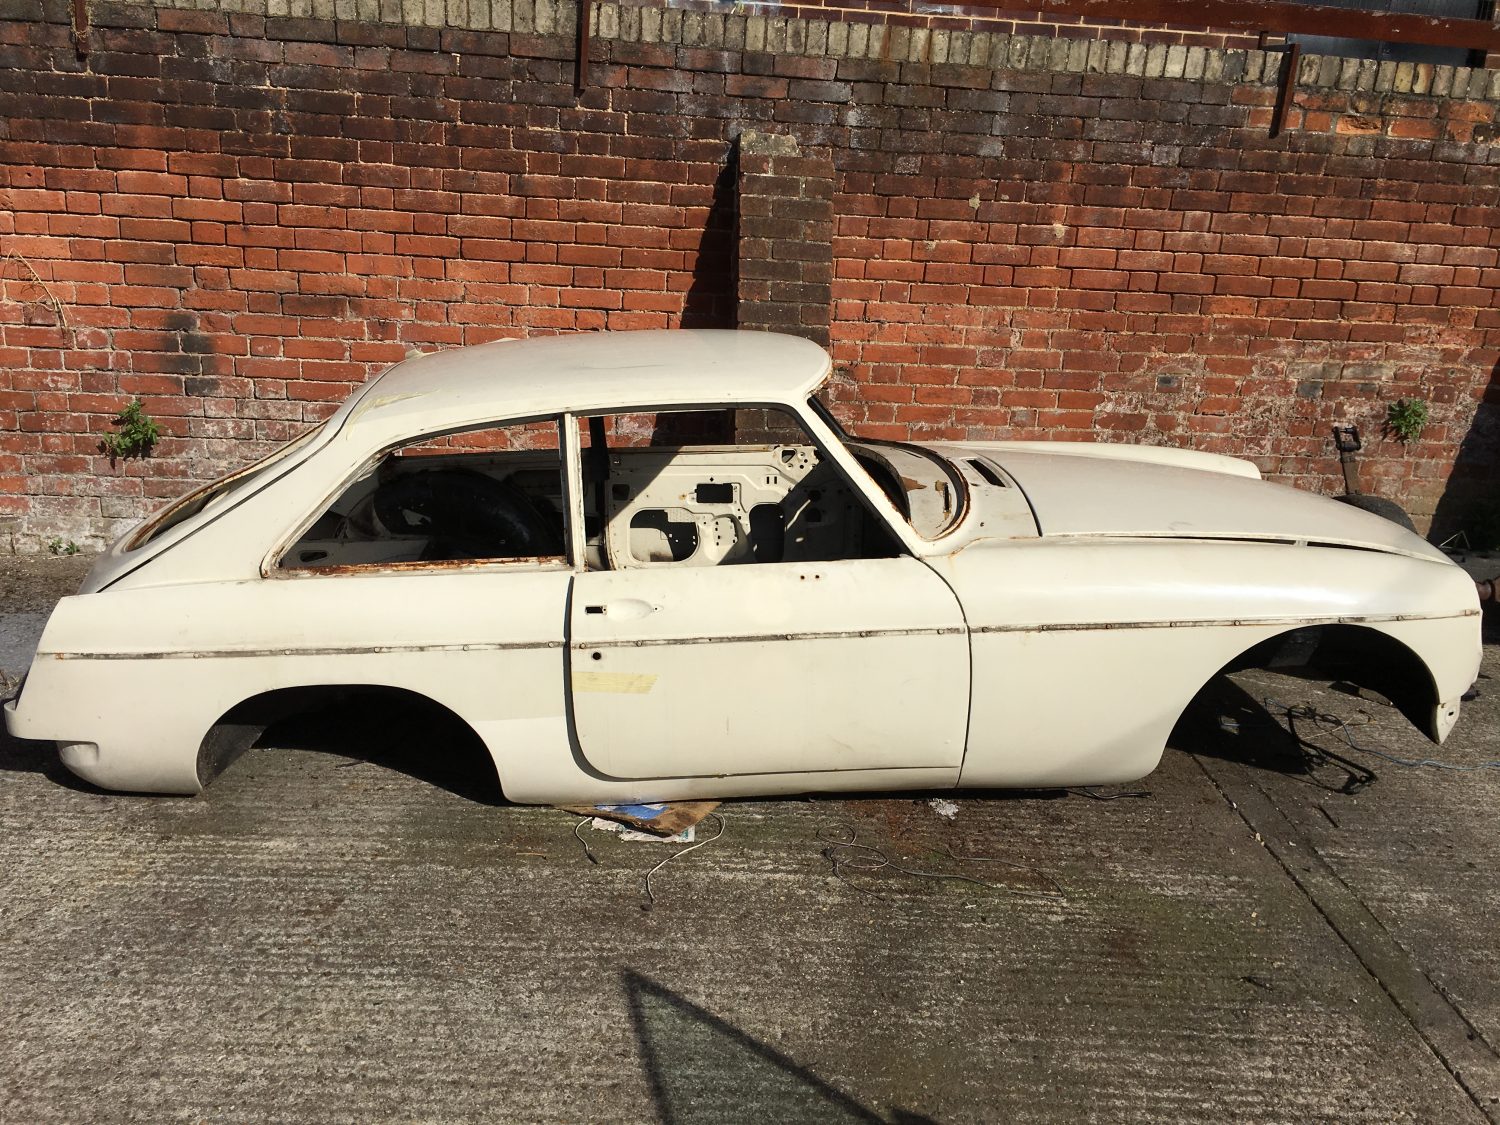
As you can see, we try, as best as we can, to match our coffee mugs with the colour of the vehicle we are working on!!

[vc_row][vc_column][vc_column_text]…and we were expecting to be carrying out a lot more remedial work than what is actually required on this one. Good news for us as Asa, John and Mark can be working on different parts of this project now and even better news for Mr D as he’ll be incurring less labour charges which will all help keep within his his budget.
Now all of the components are removed and the bodyshell is here the next stop is the body shop. The next time we see this beauty she’ll be Snowberry White.[/vc_column_text][vc_gallery type=”image_grid” images=”6403,6402,6401,6399,6398,6397,6396,6582,6583″][/vc_column][/vc_row]
As we await the new old body shell that will be arriving at Bridge Classic Cars later this month, work got underway today on stripping and removing all of the components from our existing MGBGT ready for the restoration to begin.
Sean joined the Bridge Classic Cars team today and immediately got stuck in to the project.
Just one day down and the removal task is almost done!!
[vc_row][vc_column][vc_column_text]Whilst John is busy stripping the MGBGT of it’s interior and exterior components he is photographing and documenting the wiring as it is so that it makes the job of reinstalling that bit easier. Although we’ll be fitting a brand new wiring loom throughout a record may come in very handy as a place to refer back to.[/vc_column_text][/vc_column][/vc_row][vc_row][vc_column][vc_gallery type=”image_grid” images=”8306,8307,8308,8309,8310,8311,8312,8313,8314,8315″][/vc_column][/vc_row]
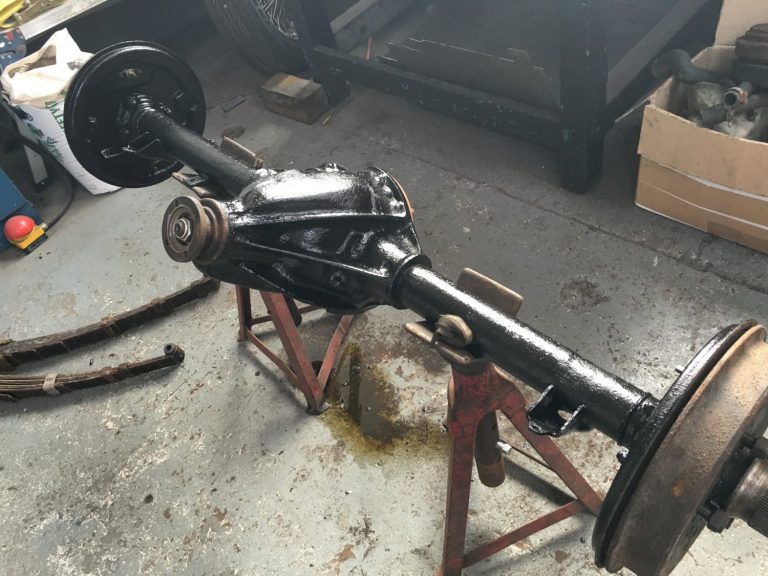
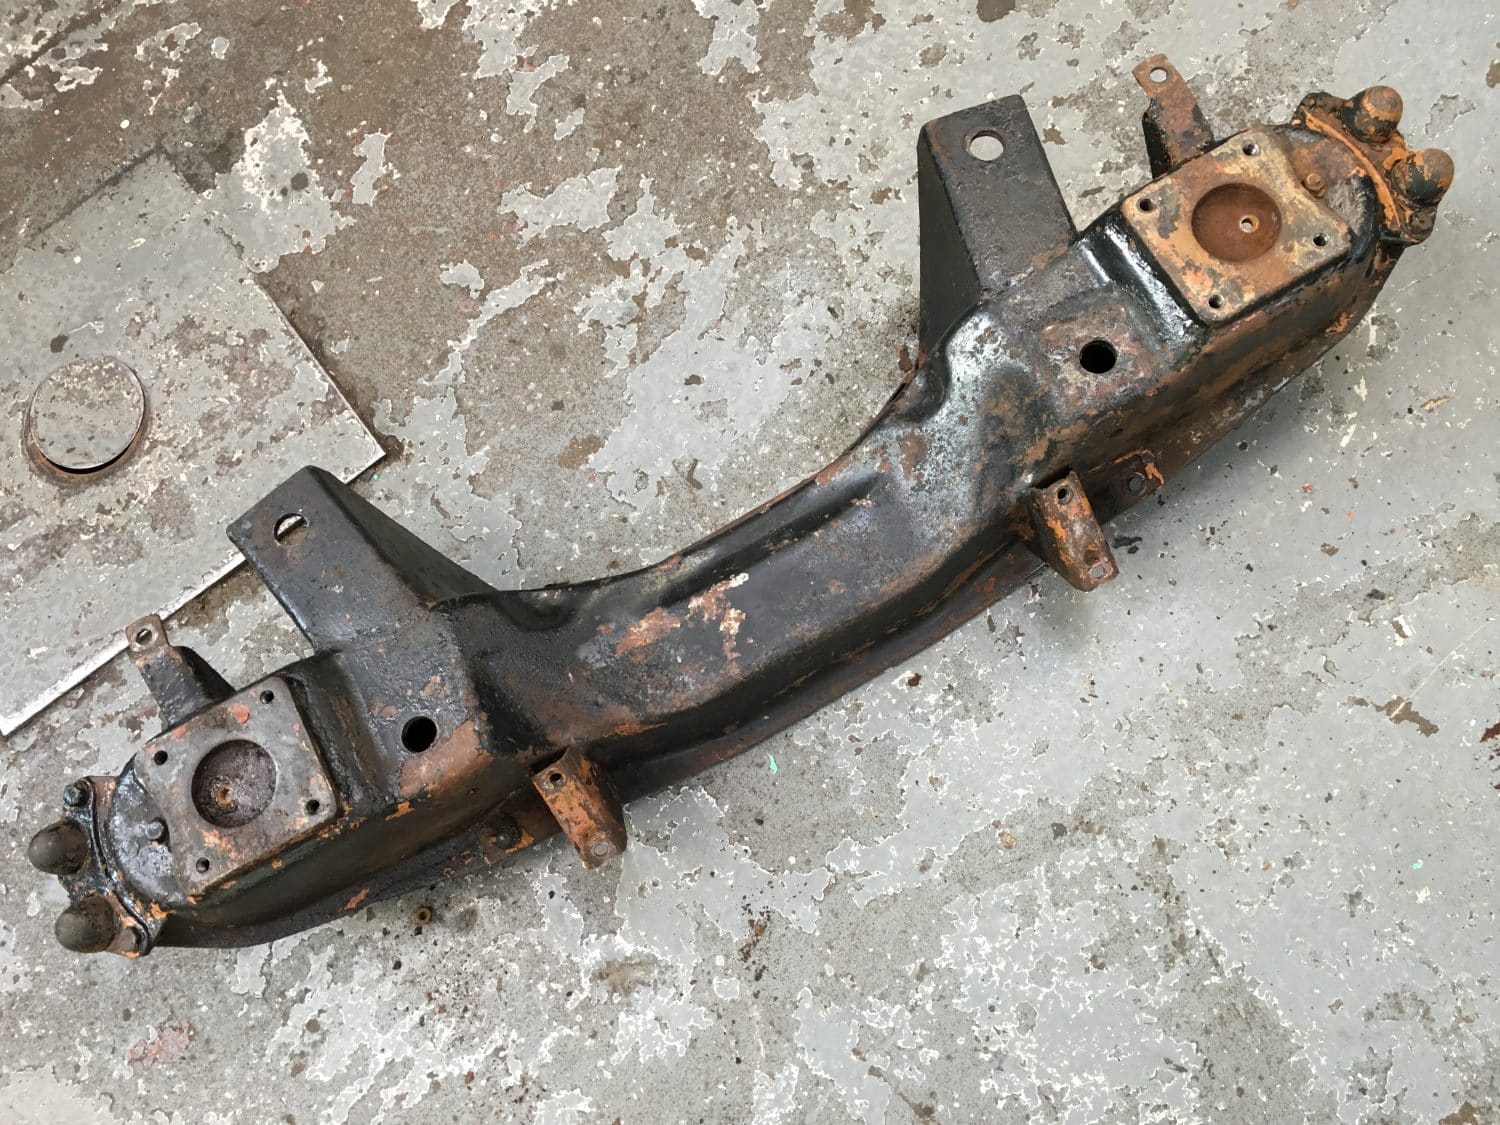
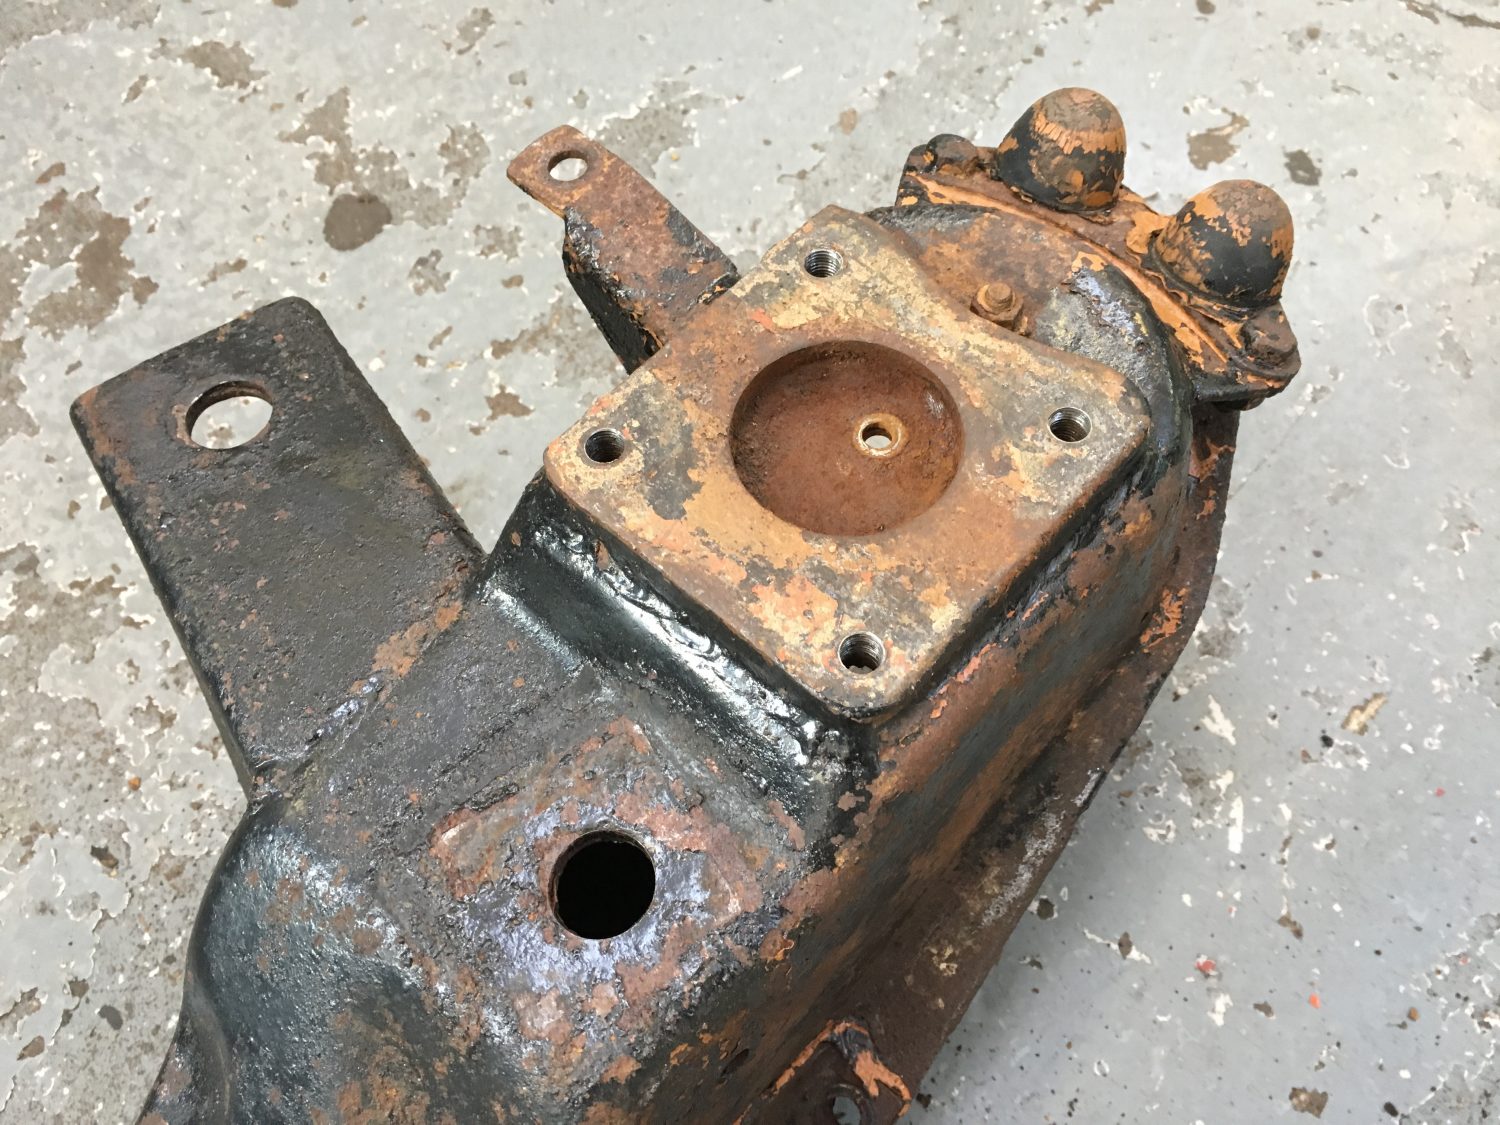
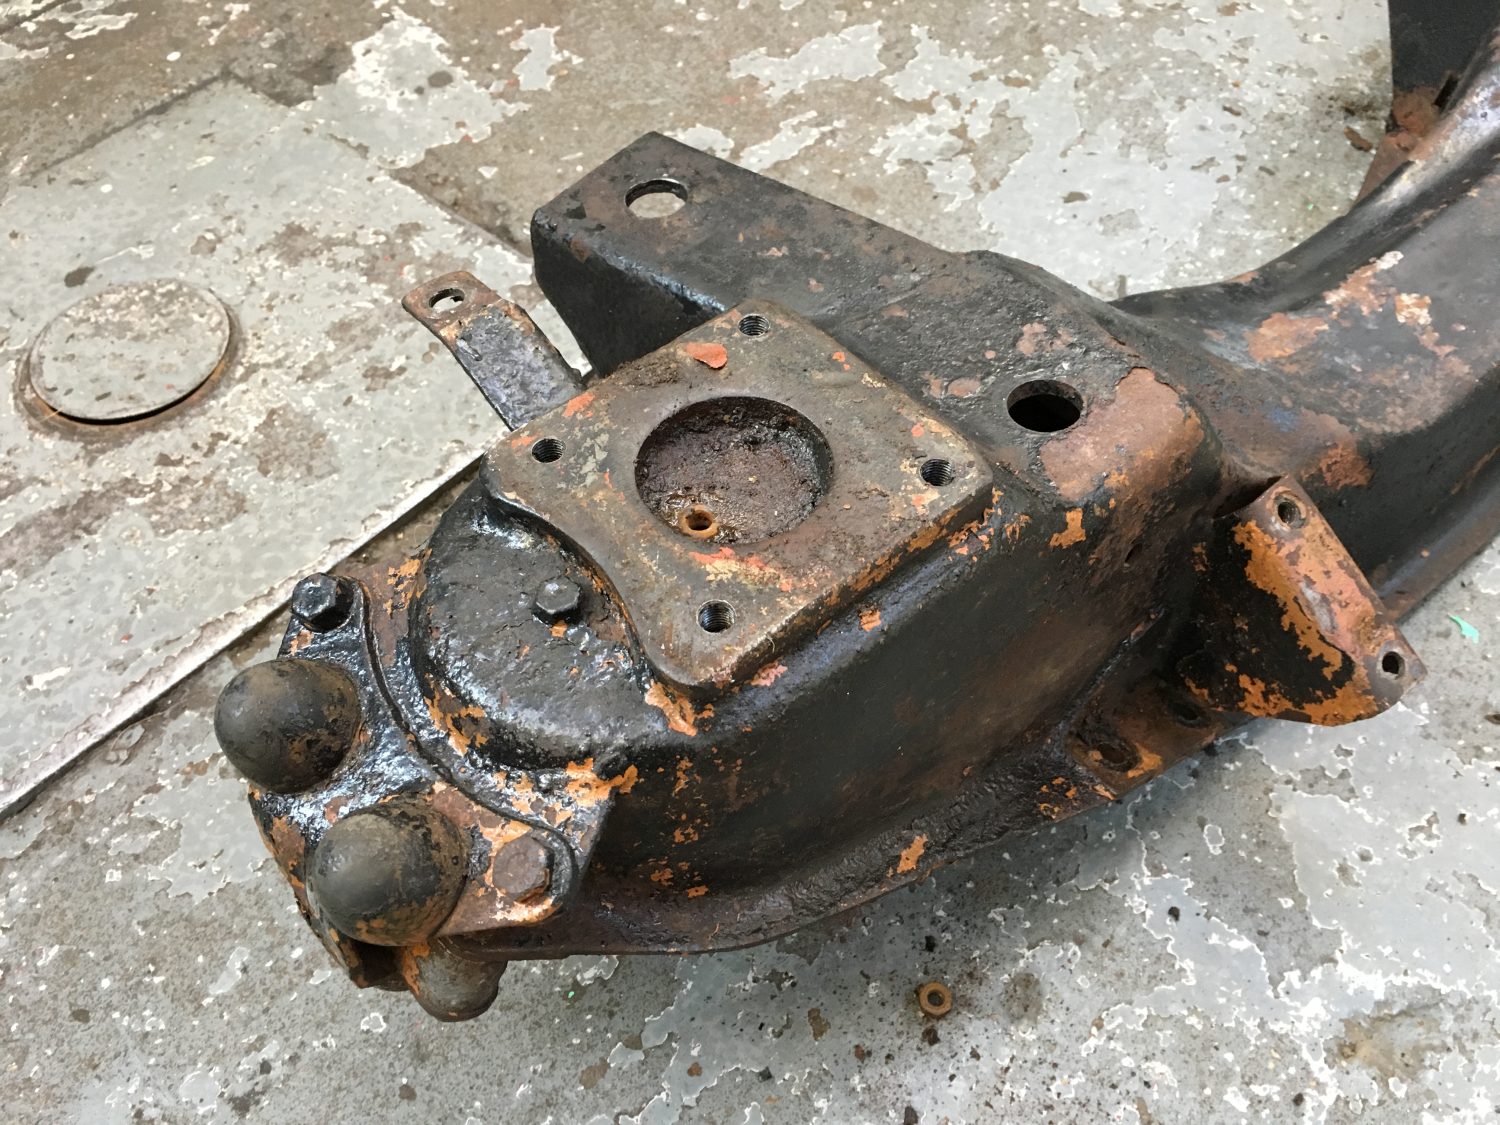
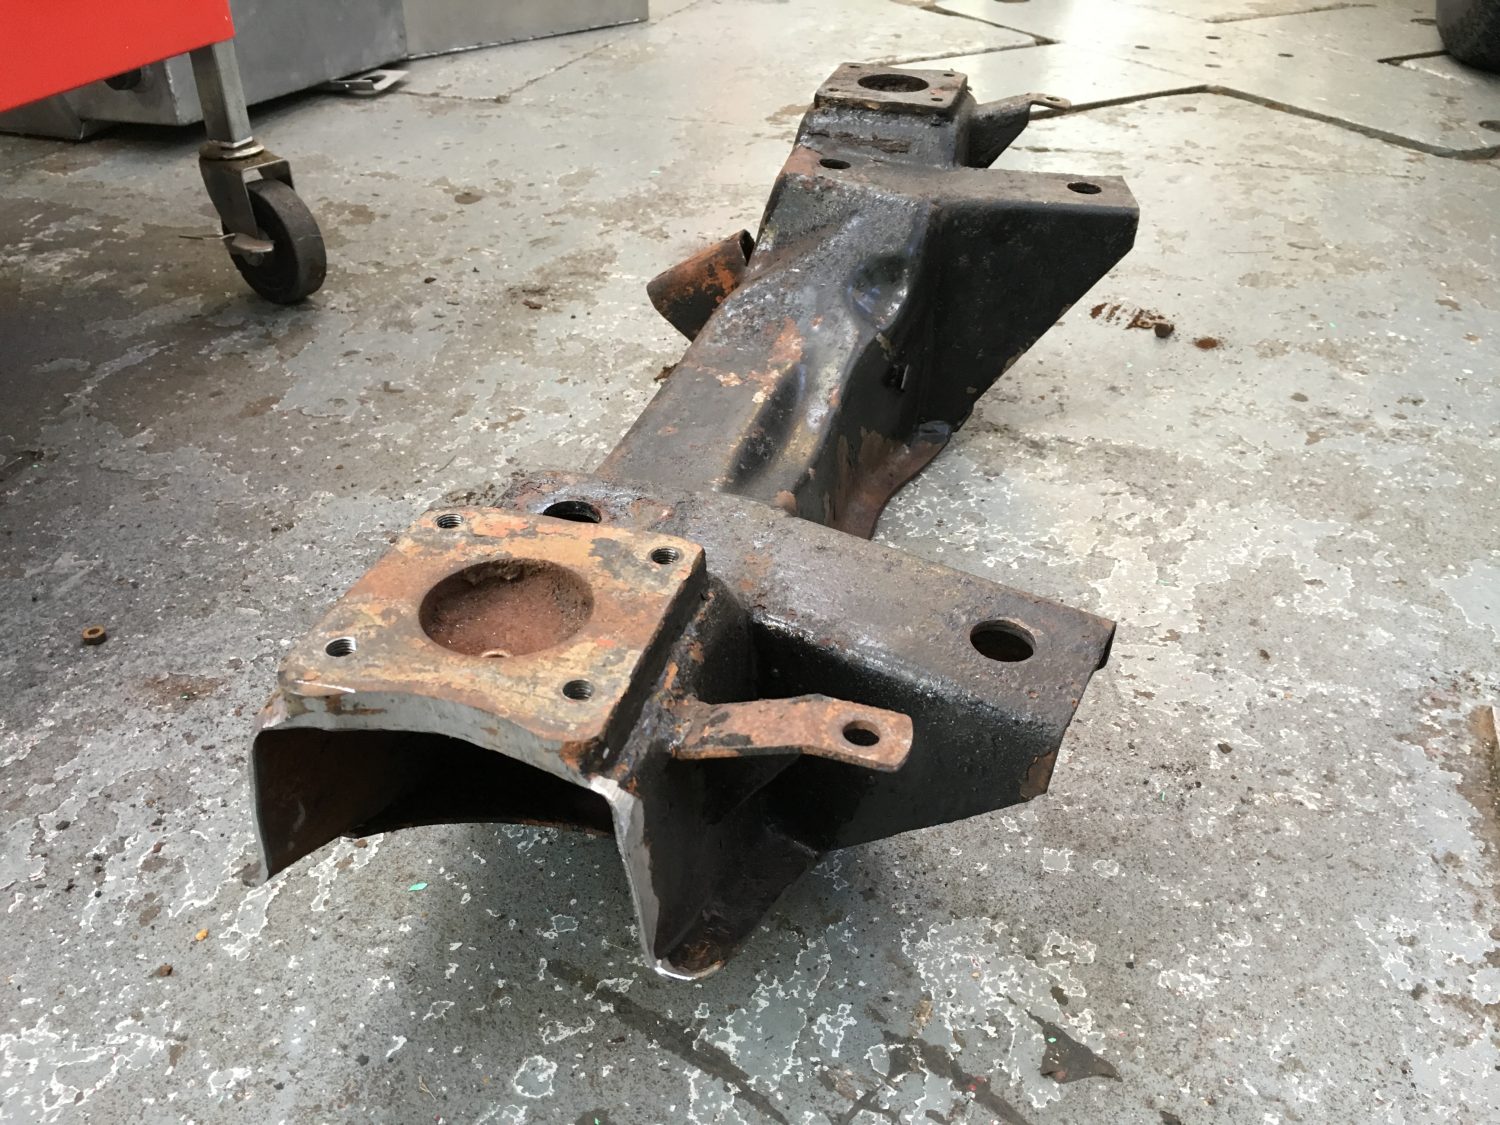
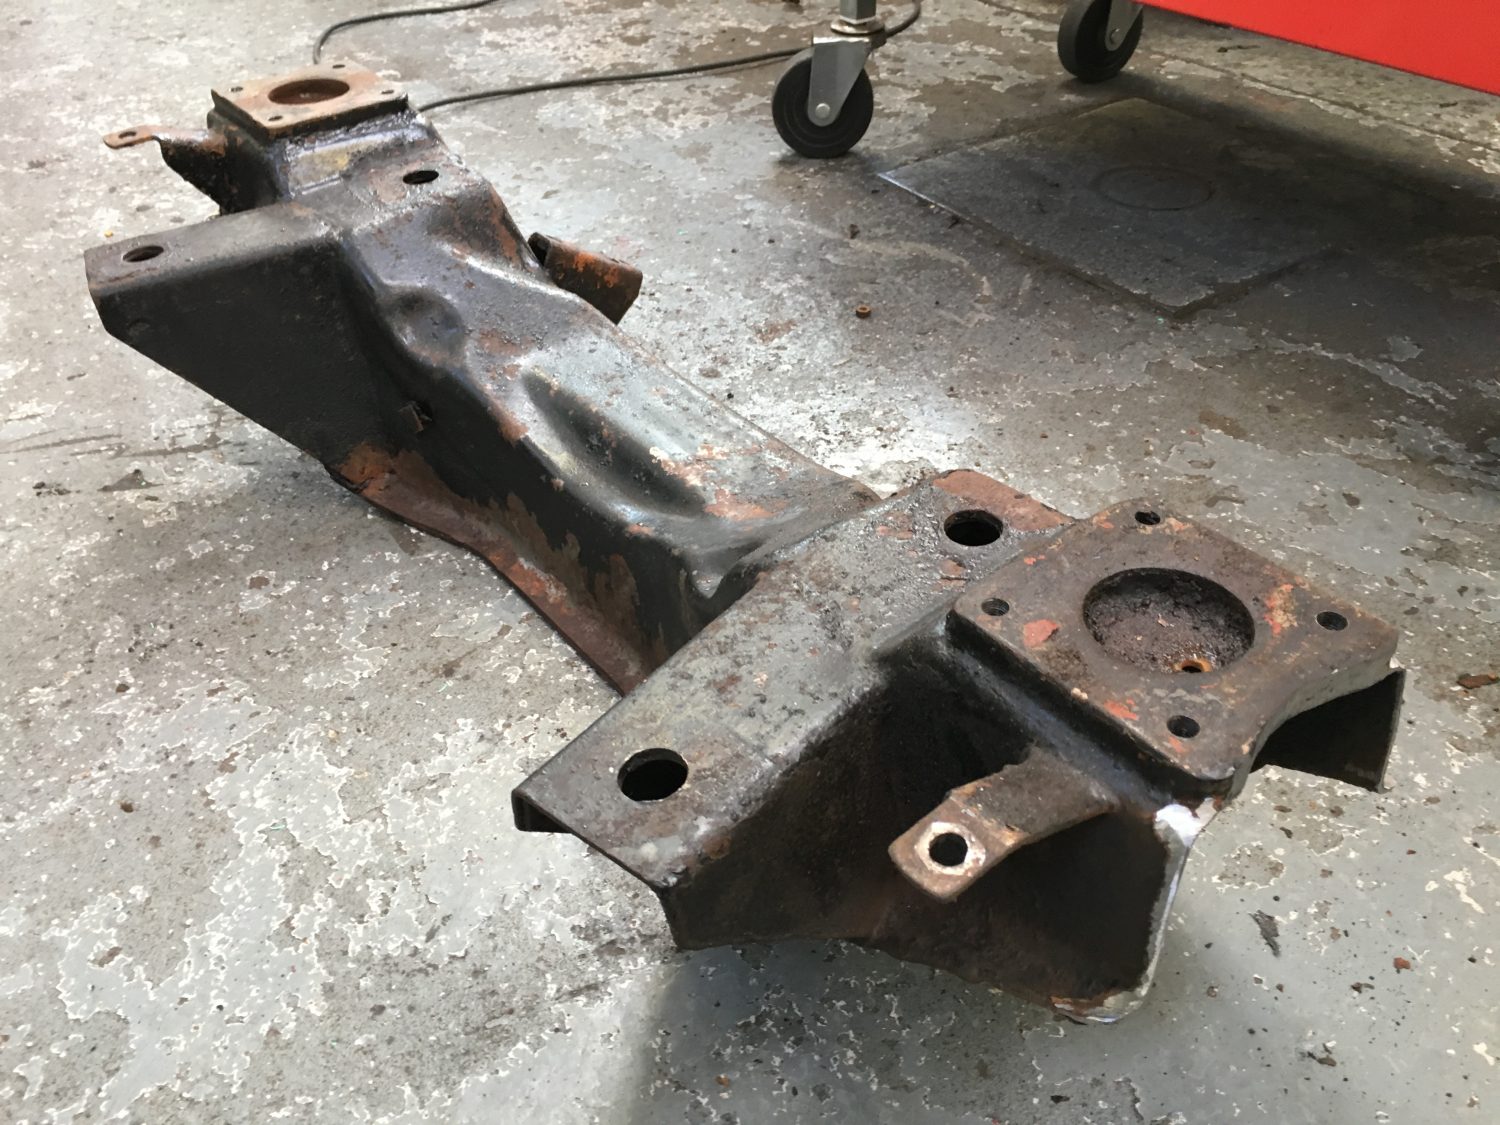
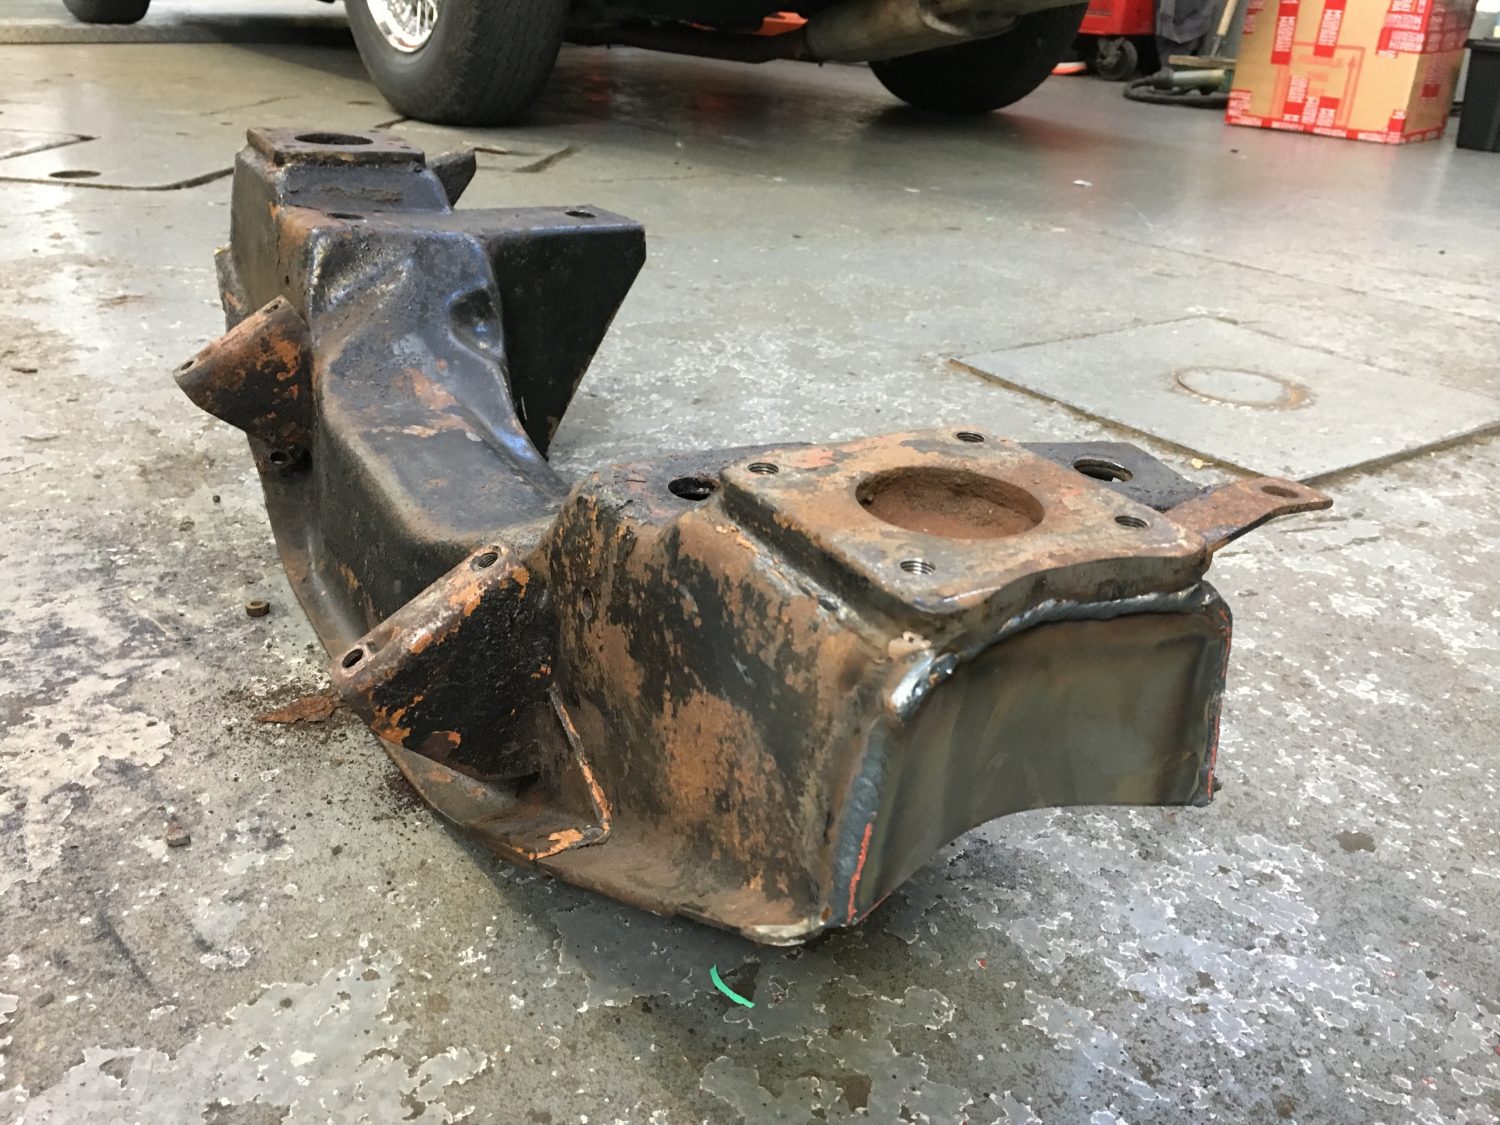
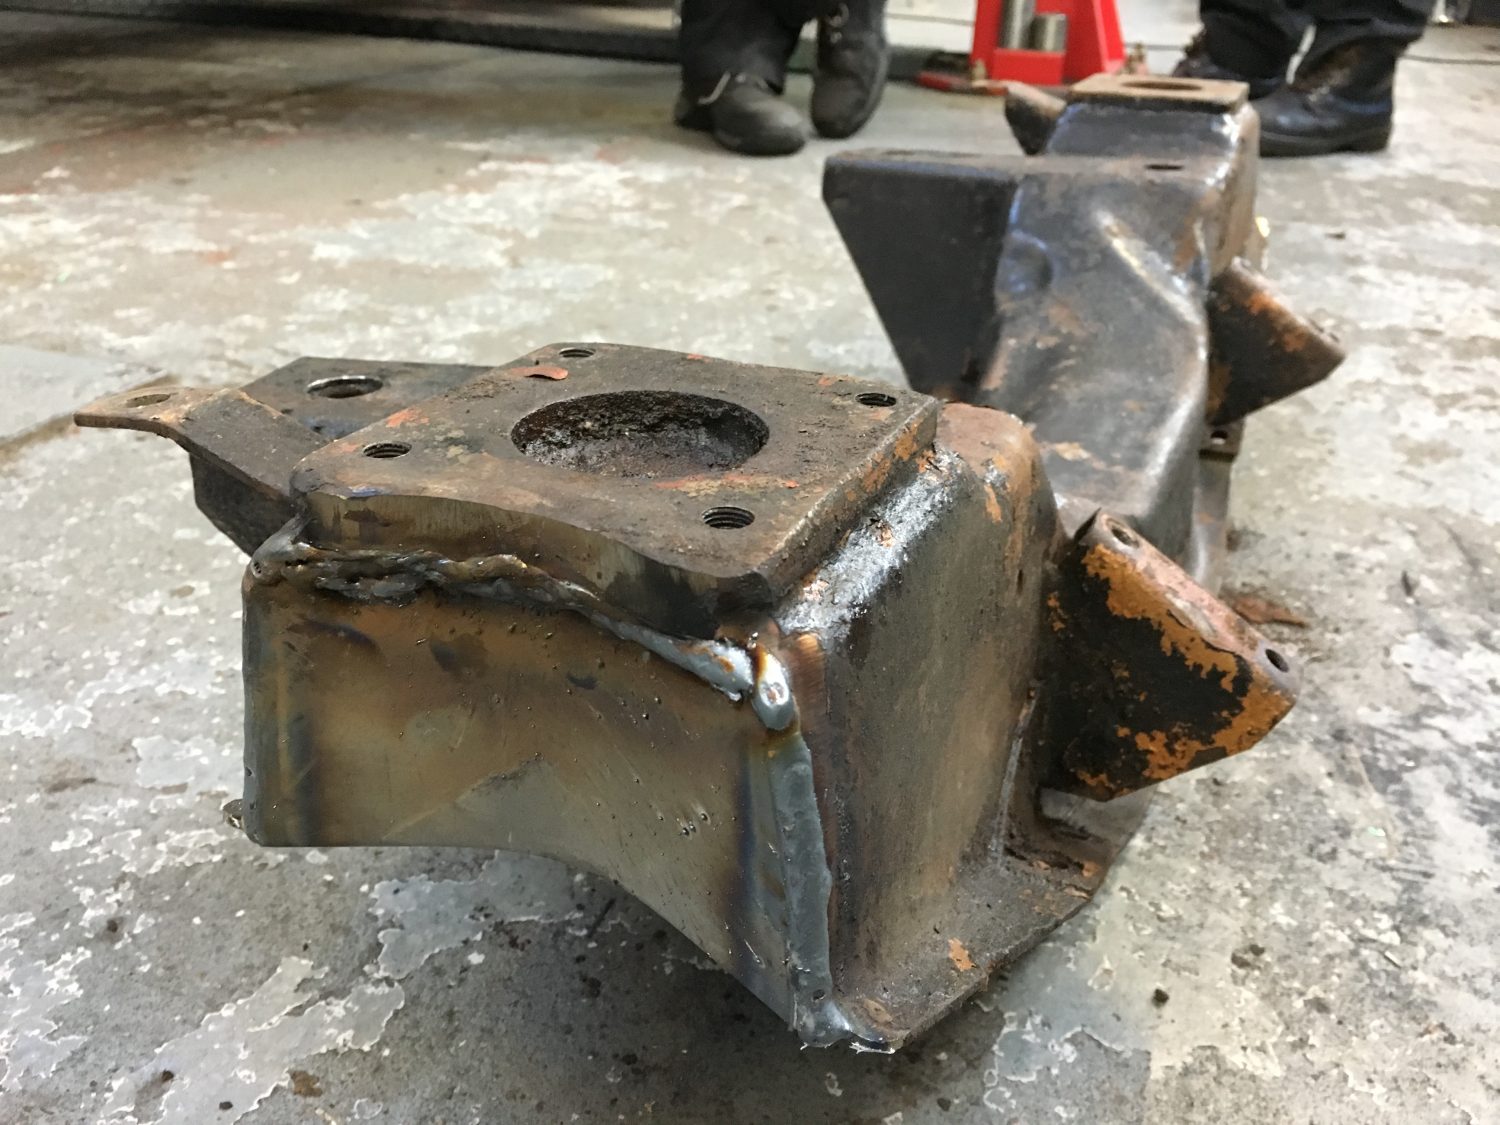
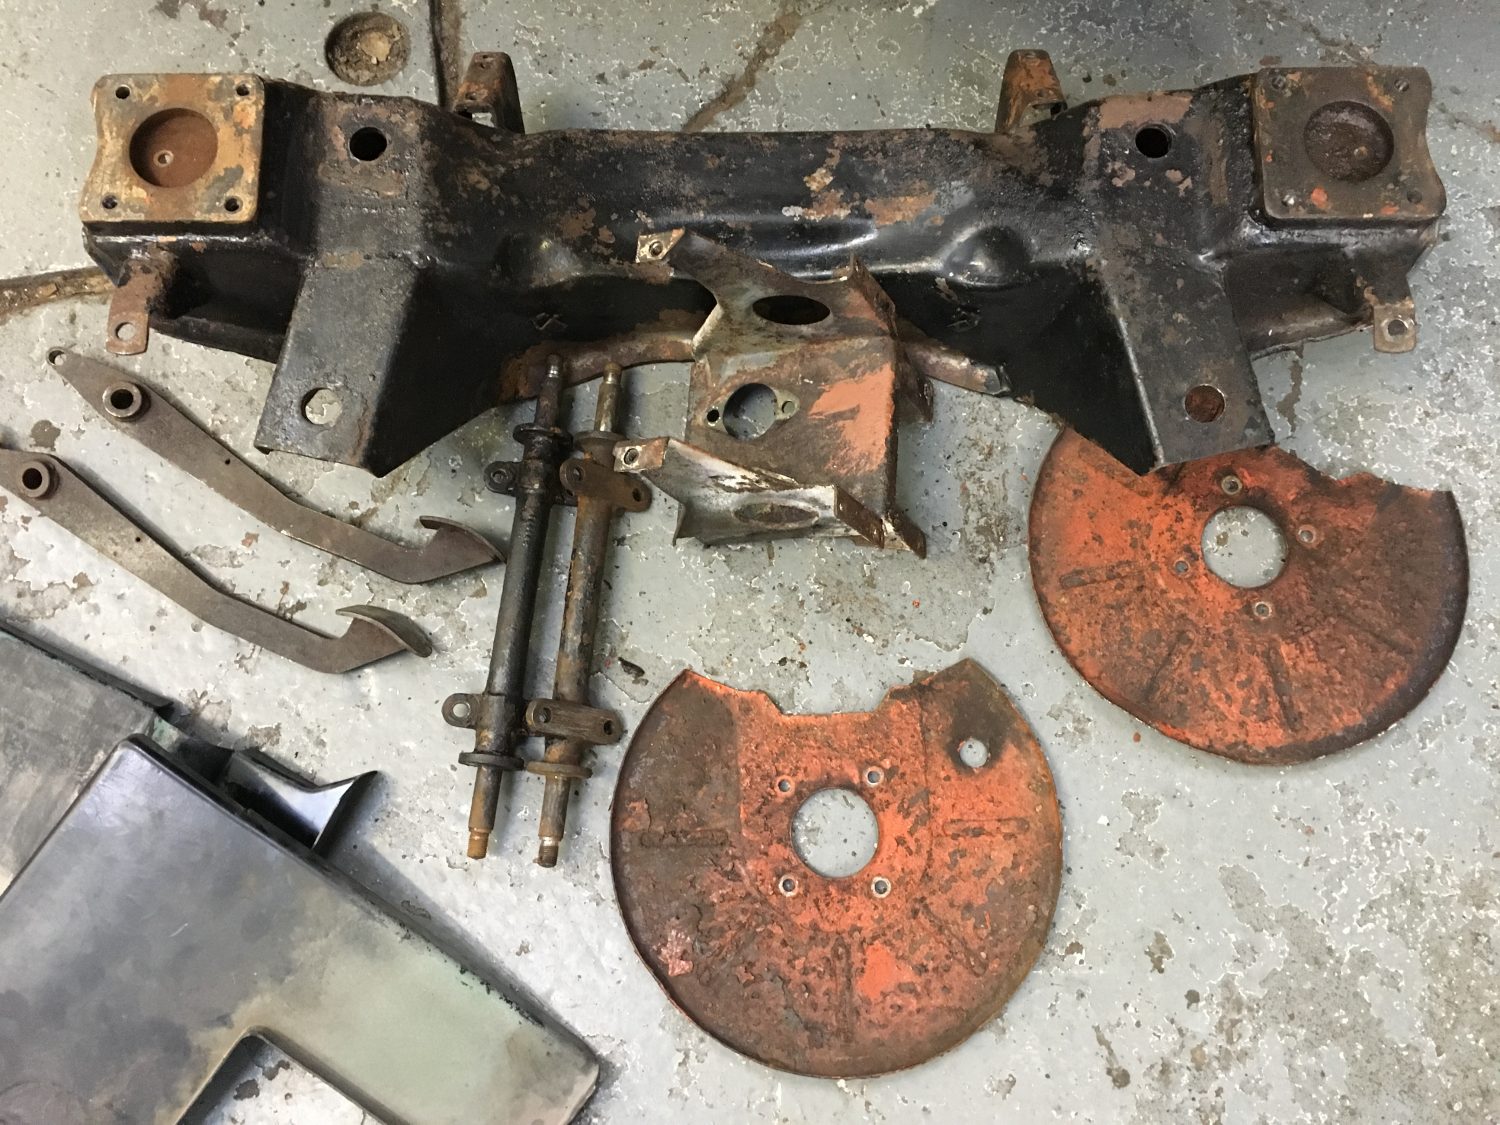
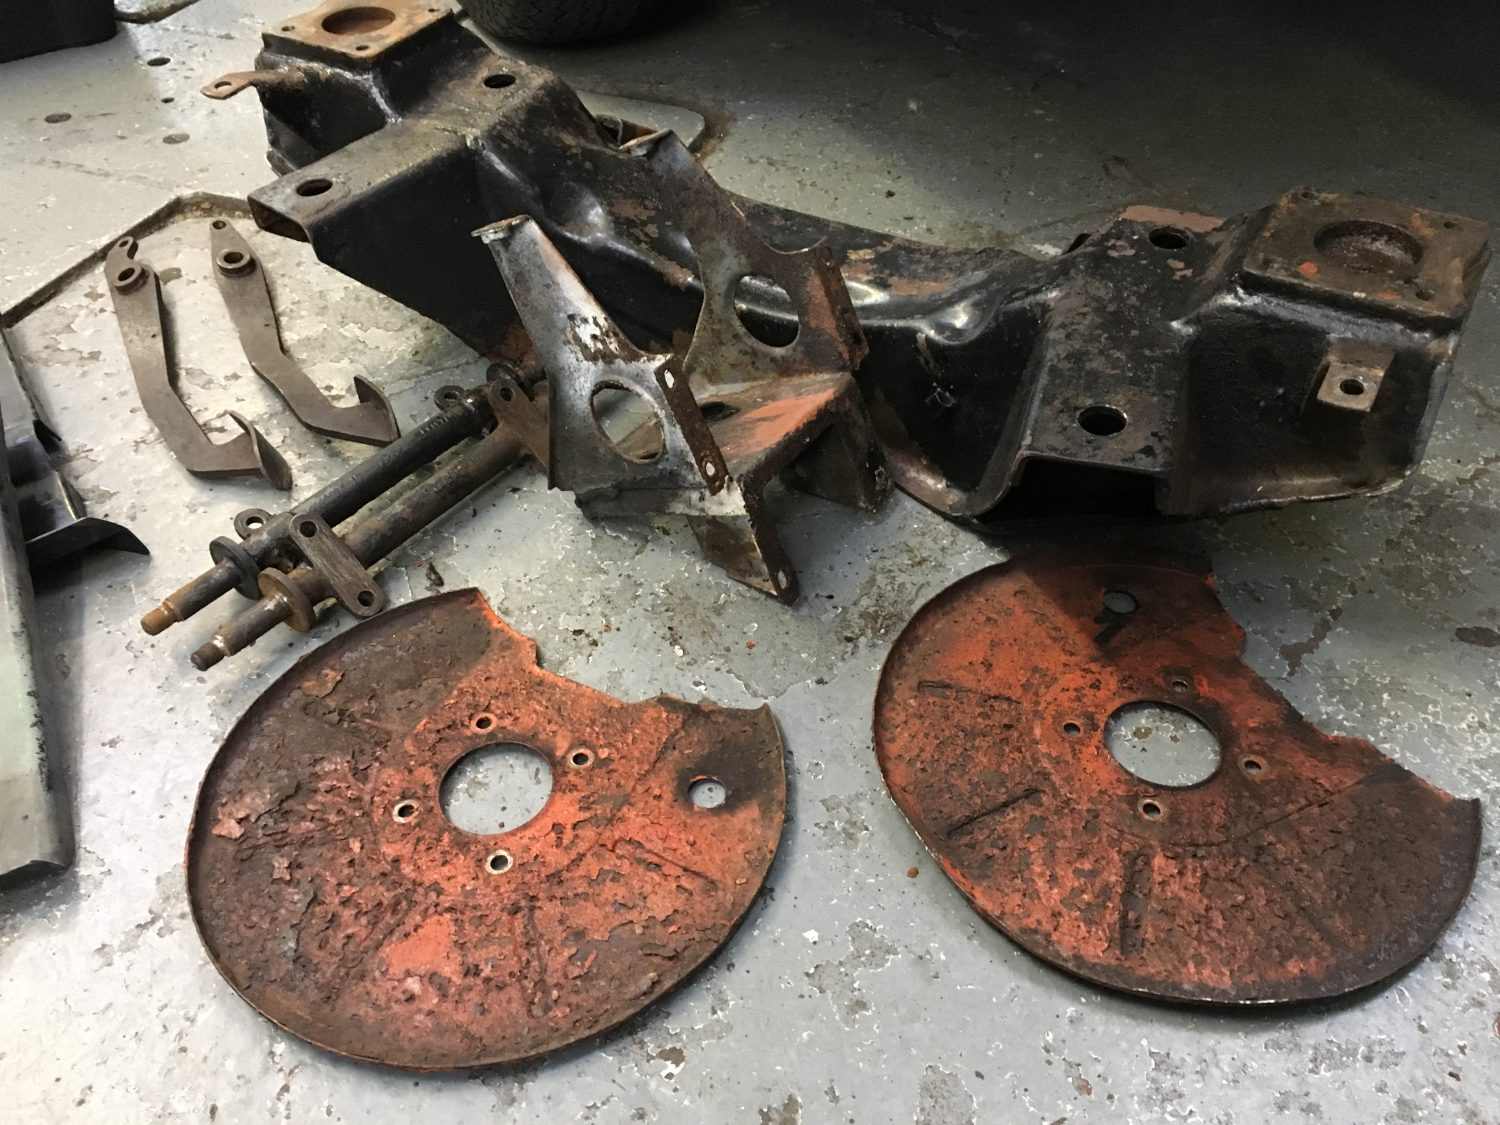
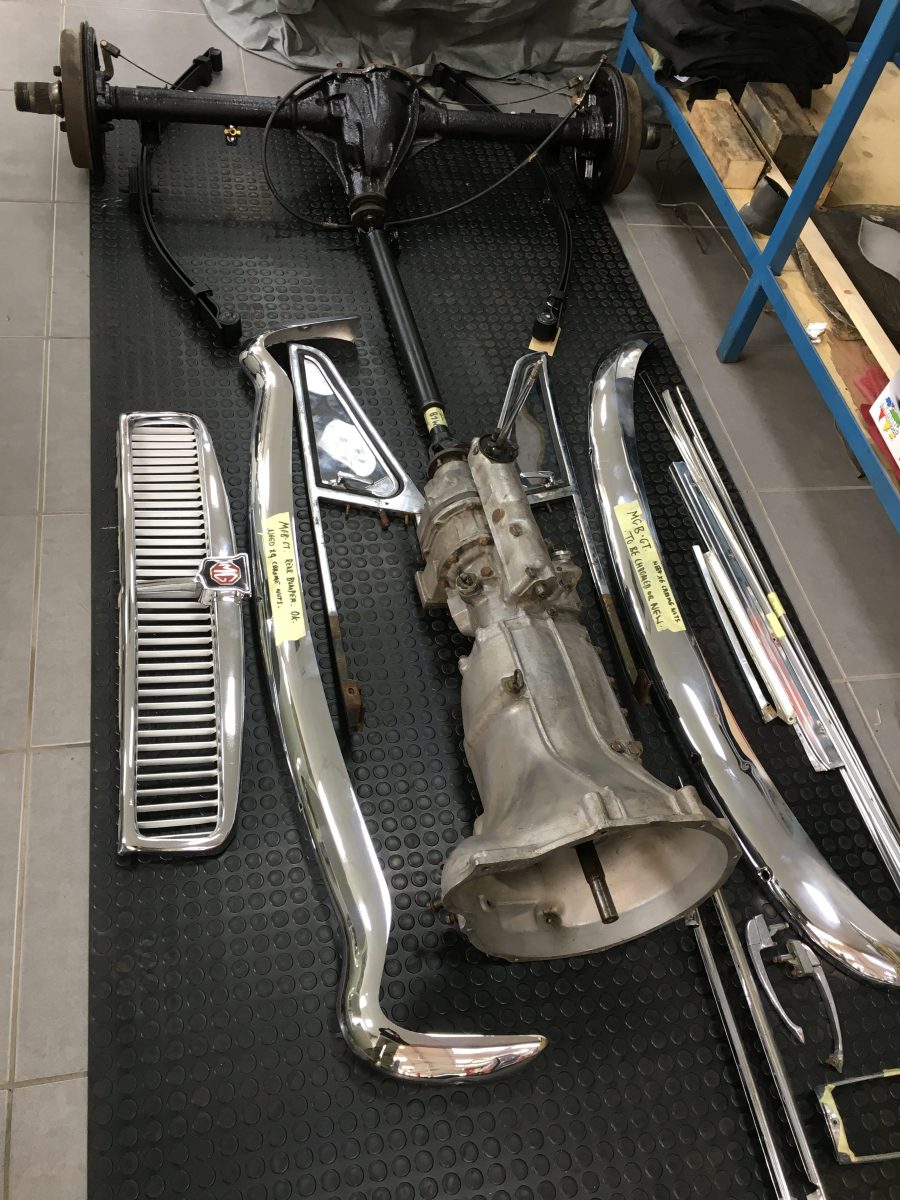
Mark and Sean have been busy stripping our MGBGT of all of it’s components in preparation for the new body shell to arrive.
As parts are being removed, we are stripping, cleaning, repairing and refurbishing any components that we intend on refitting.
We find it best to refurbish as we go, not only does it add a bit of variety to the tasks in hand (as stripping a car all day everyday can become a bit boring) but it is also a good exercise to analyse what parts can be re-used and whether new parts will be a more cost effective option.
Here we are working on the MGBGT axle, it’s cleaned up and one coat of paint has been applied to freshen it up.


[vc_row][vc_column][vc_column_text]We’ve just arrived back to the workshop having collected a 1968 MGBGT that requires a bit of attention.
Our first assignment is to replace the sills before we discuss phase 2 of the work to be carried out.
Here we are arriving back at the Bridge Classic Cars workshops on Deben Road in Ipswich.[/vc_column_text][/vc_column][/vc_row][vc_row][vc_column][vc_gallery type=”image_grid” images=”5316,5317,5318,5319,5320,5321,5322,5323,5312,5315″][/vc_column][/vc_row]
