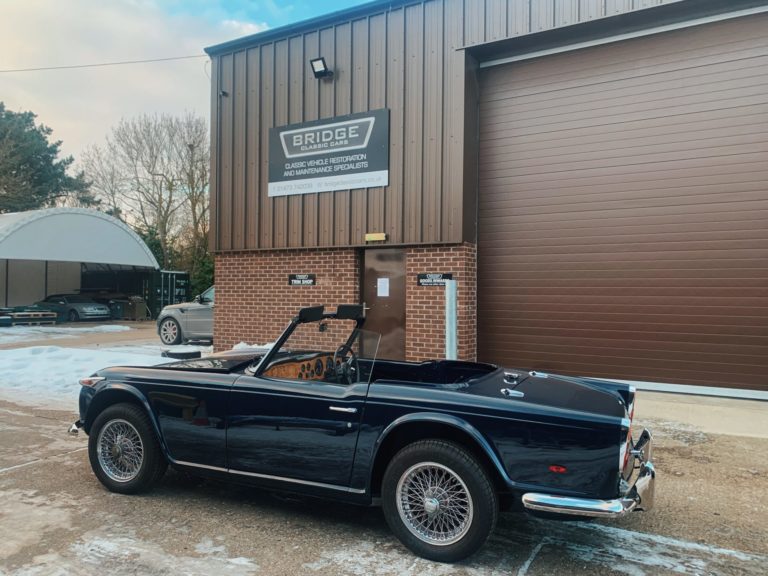
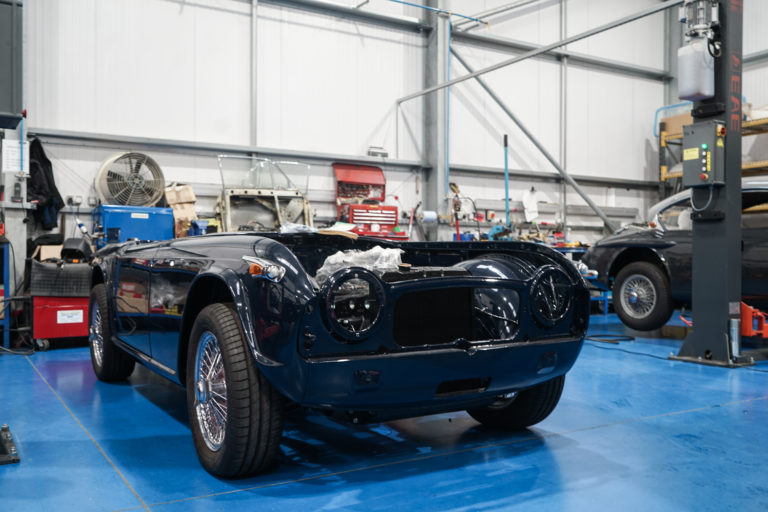
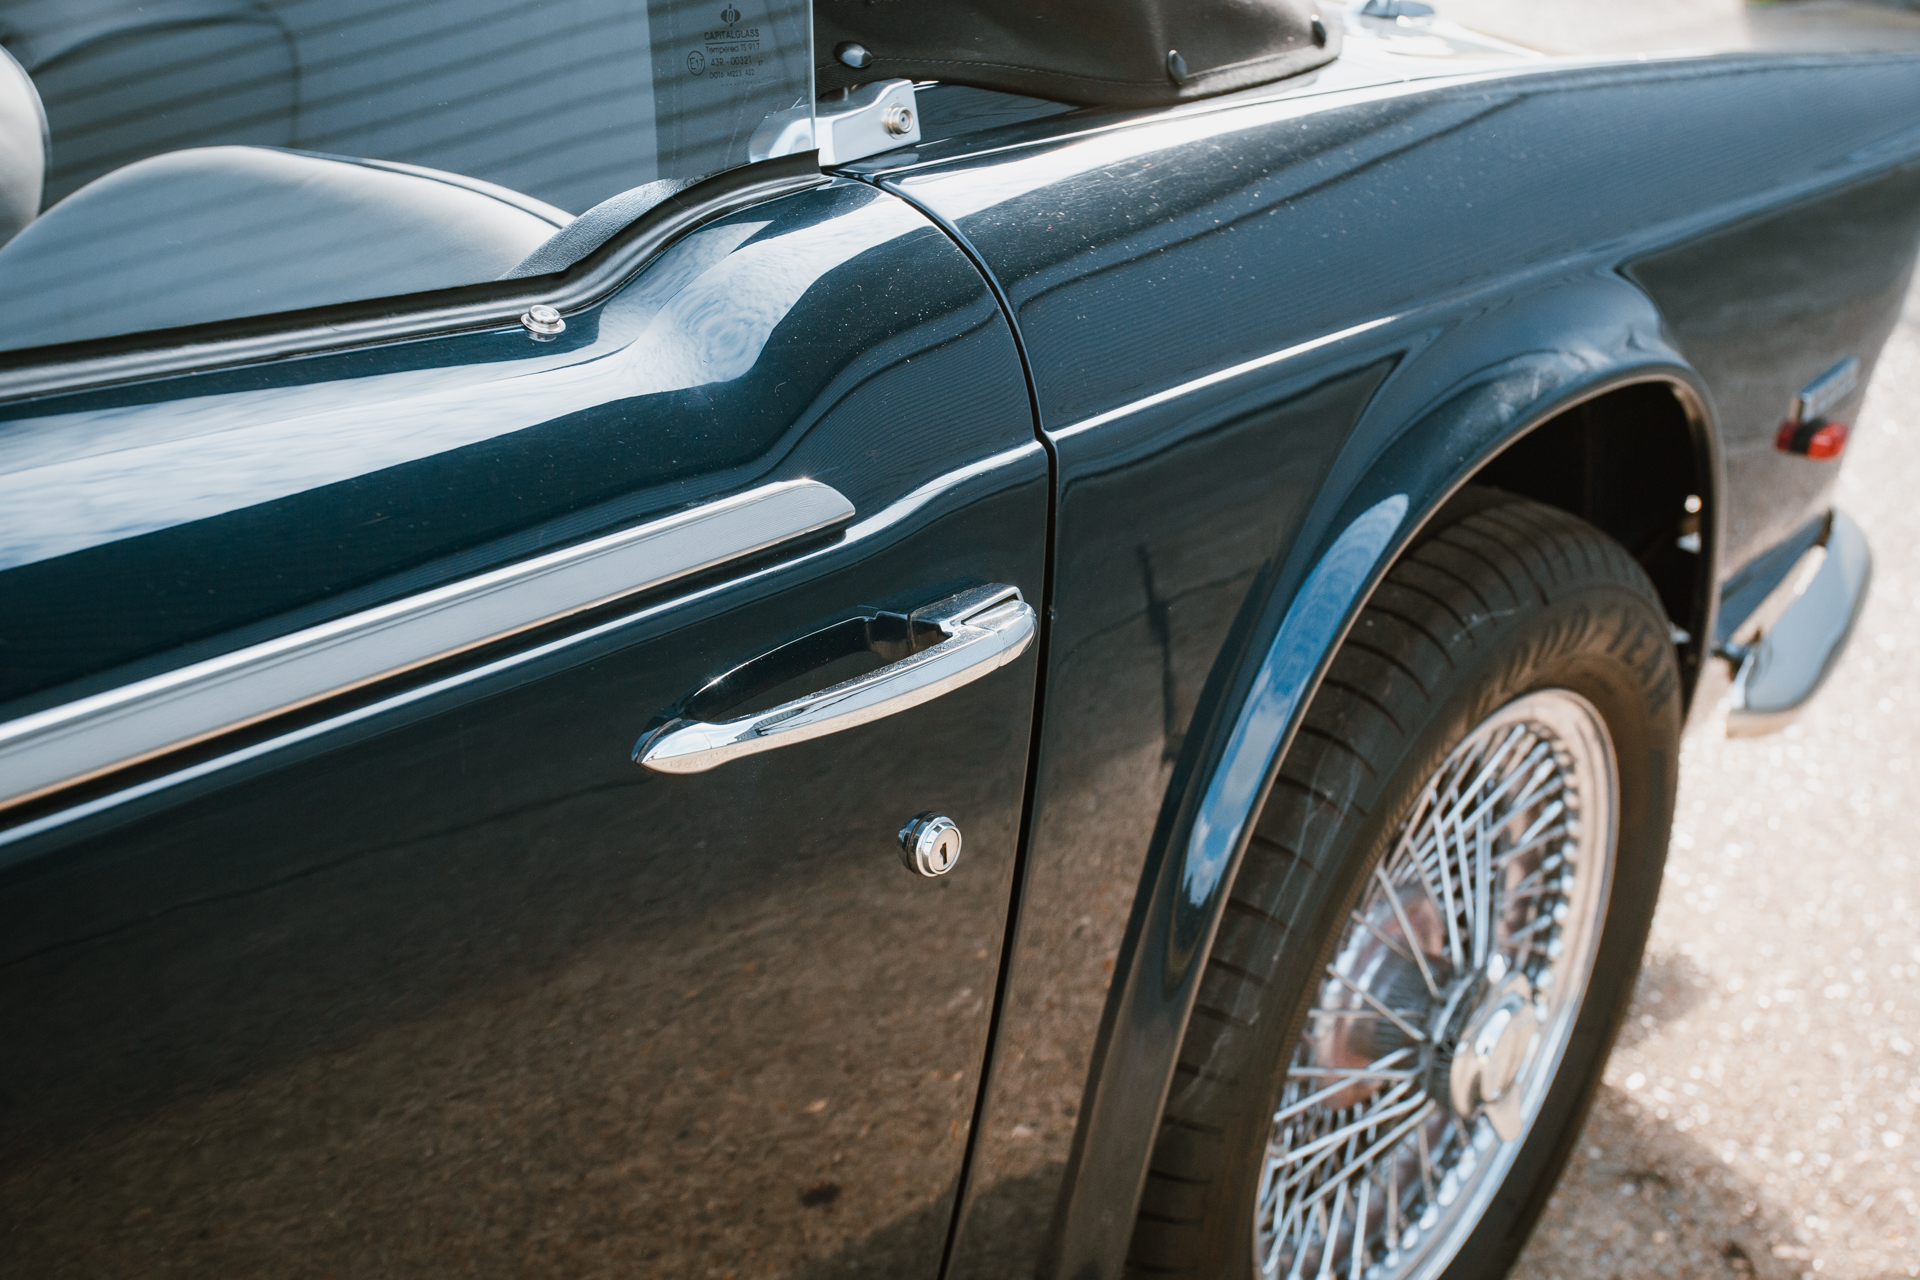
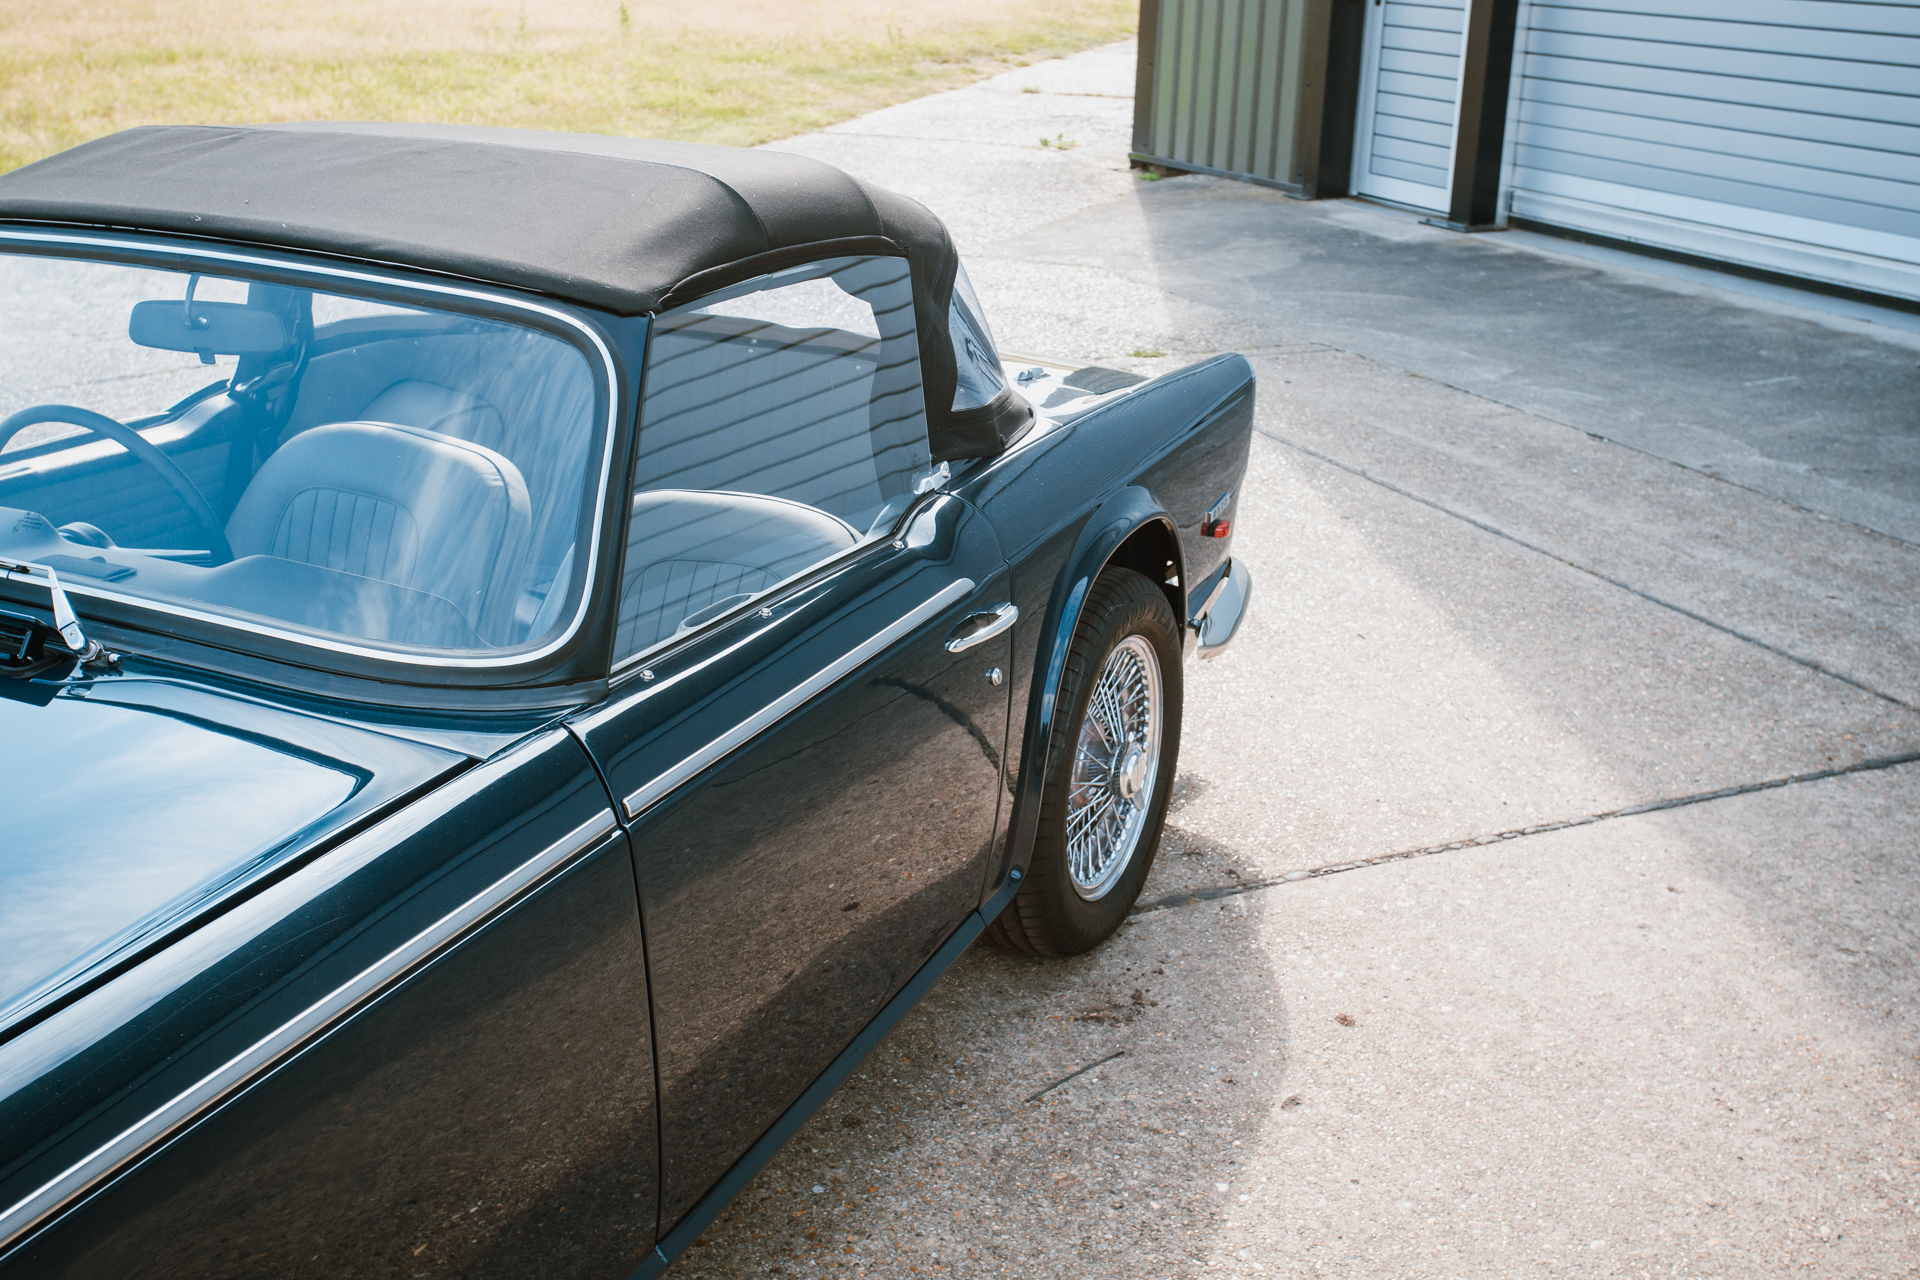
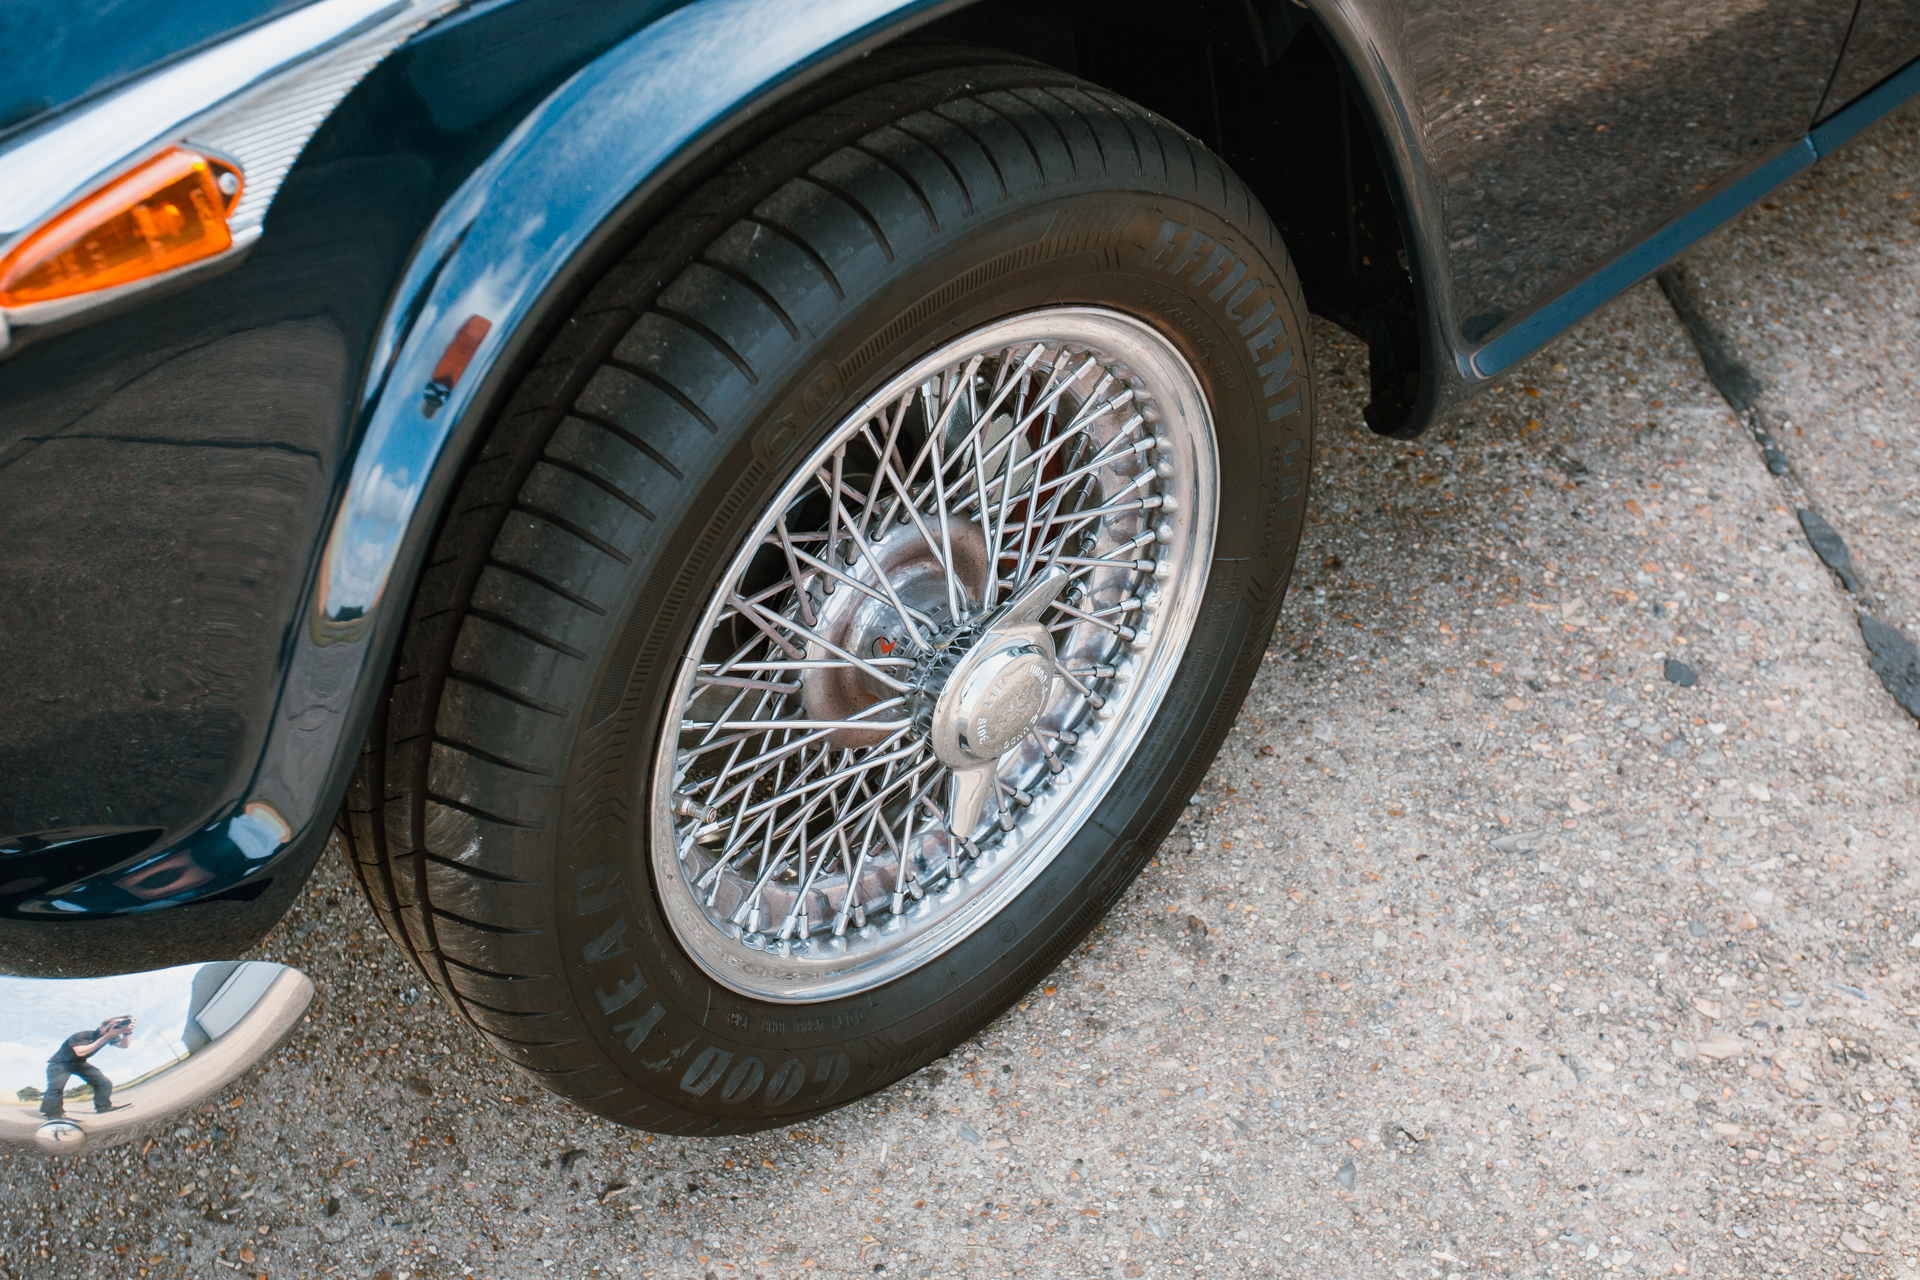
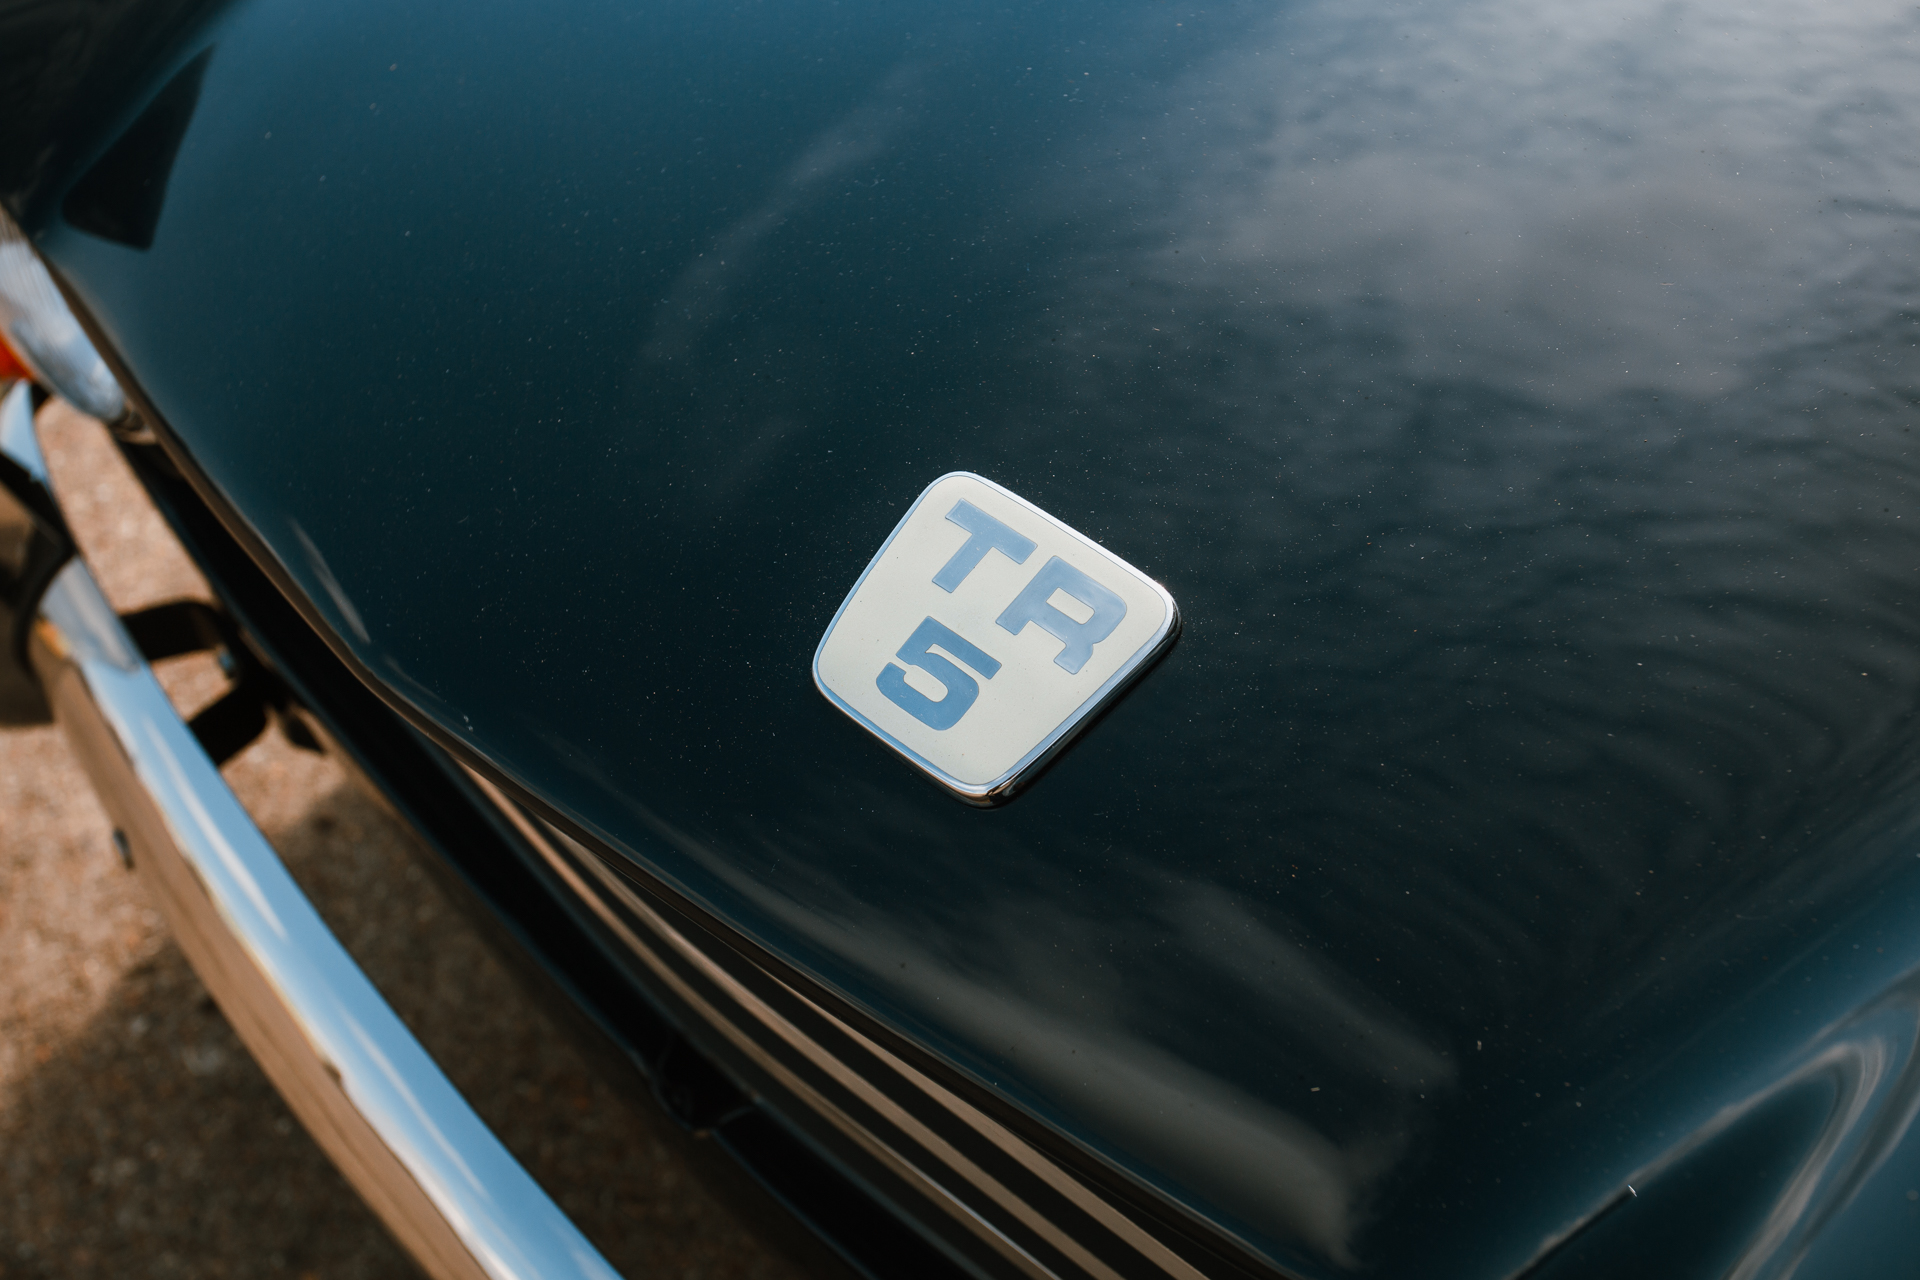
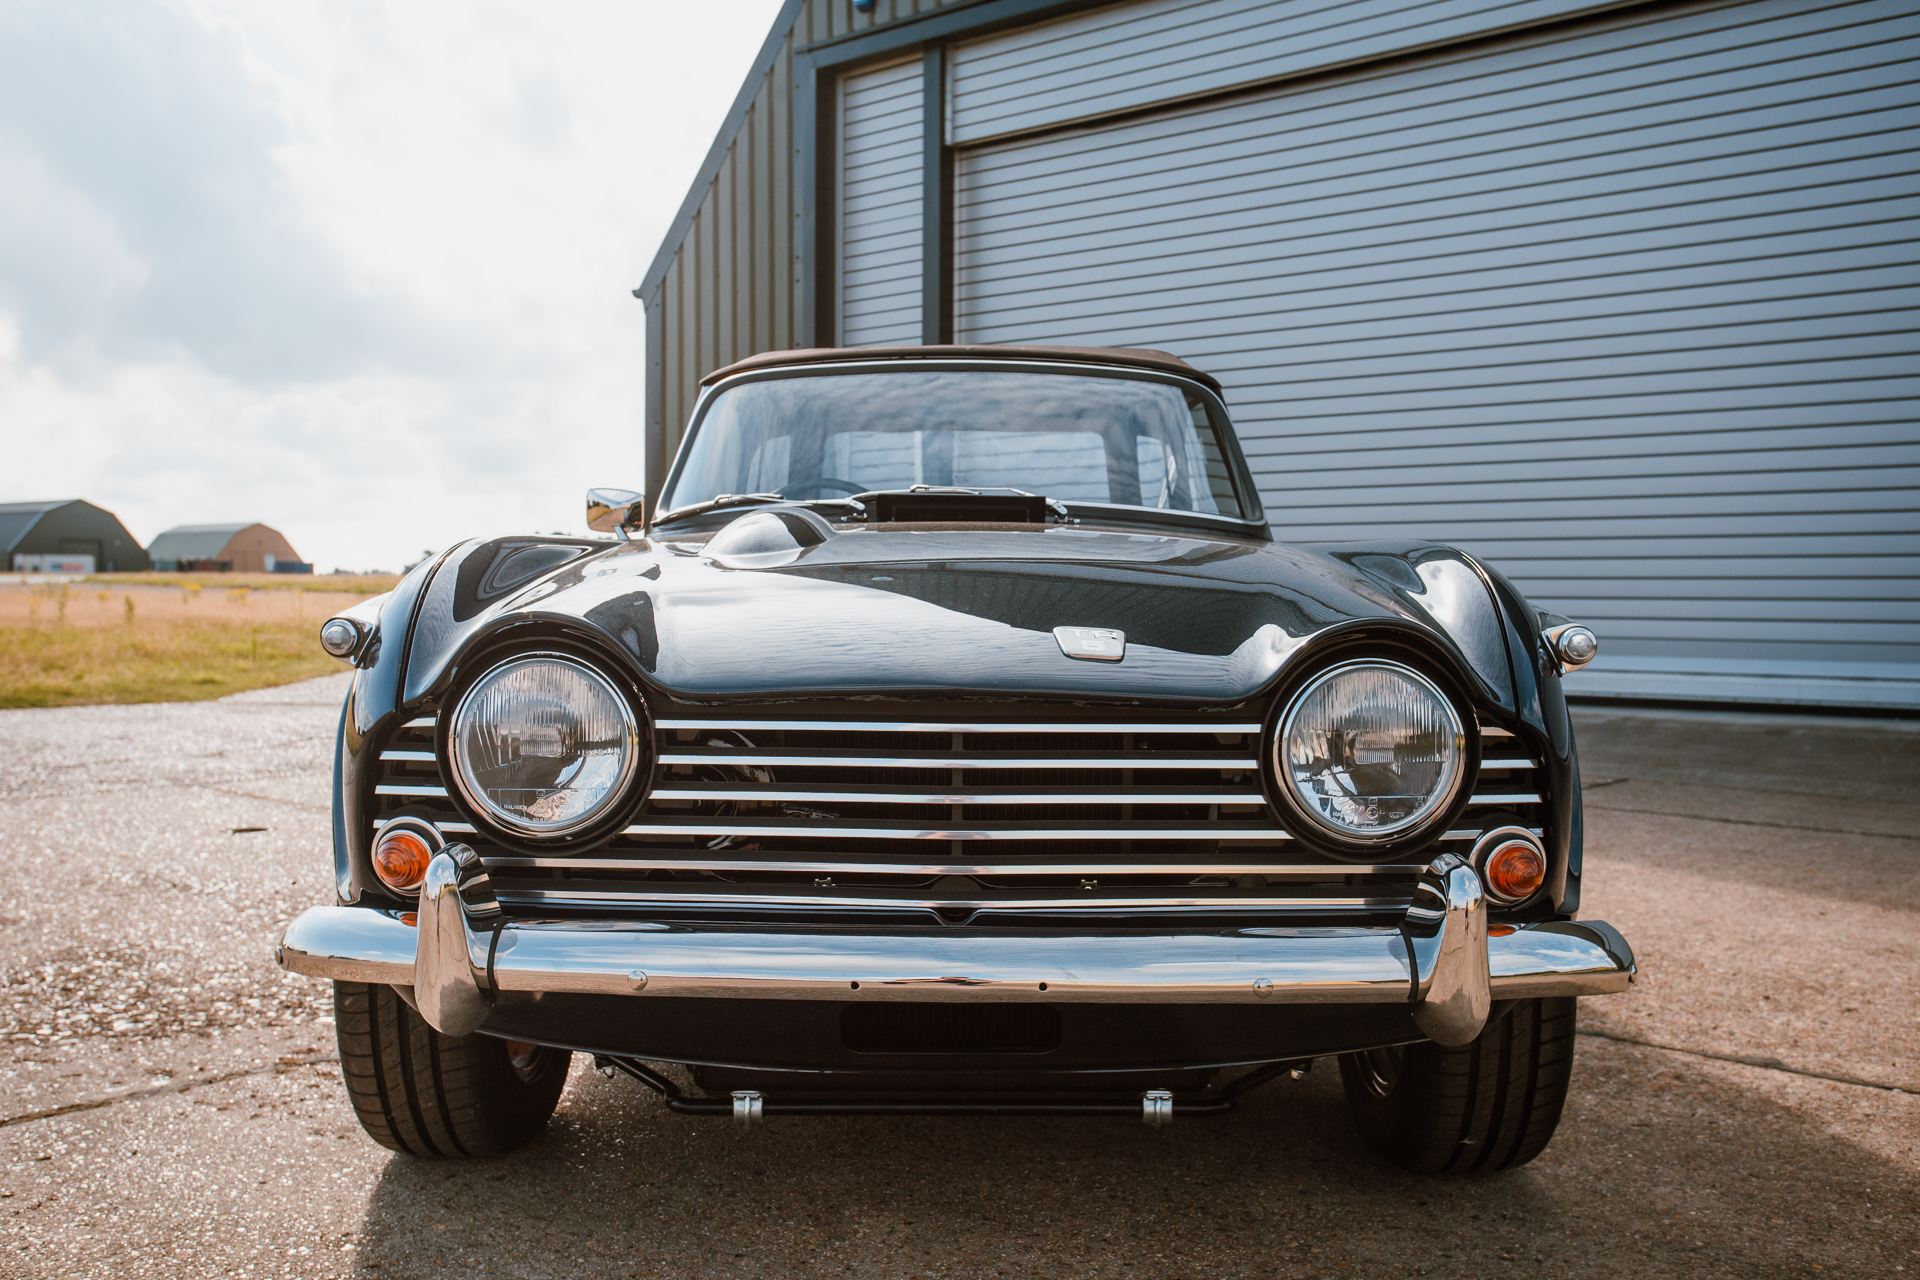
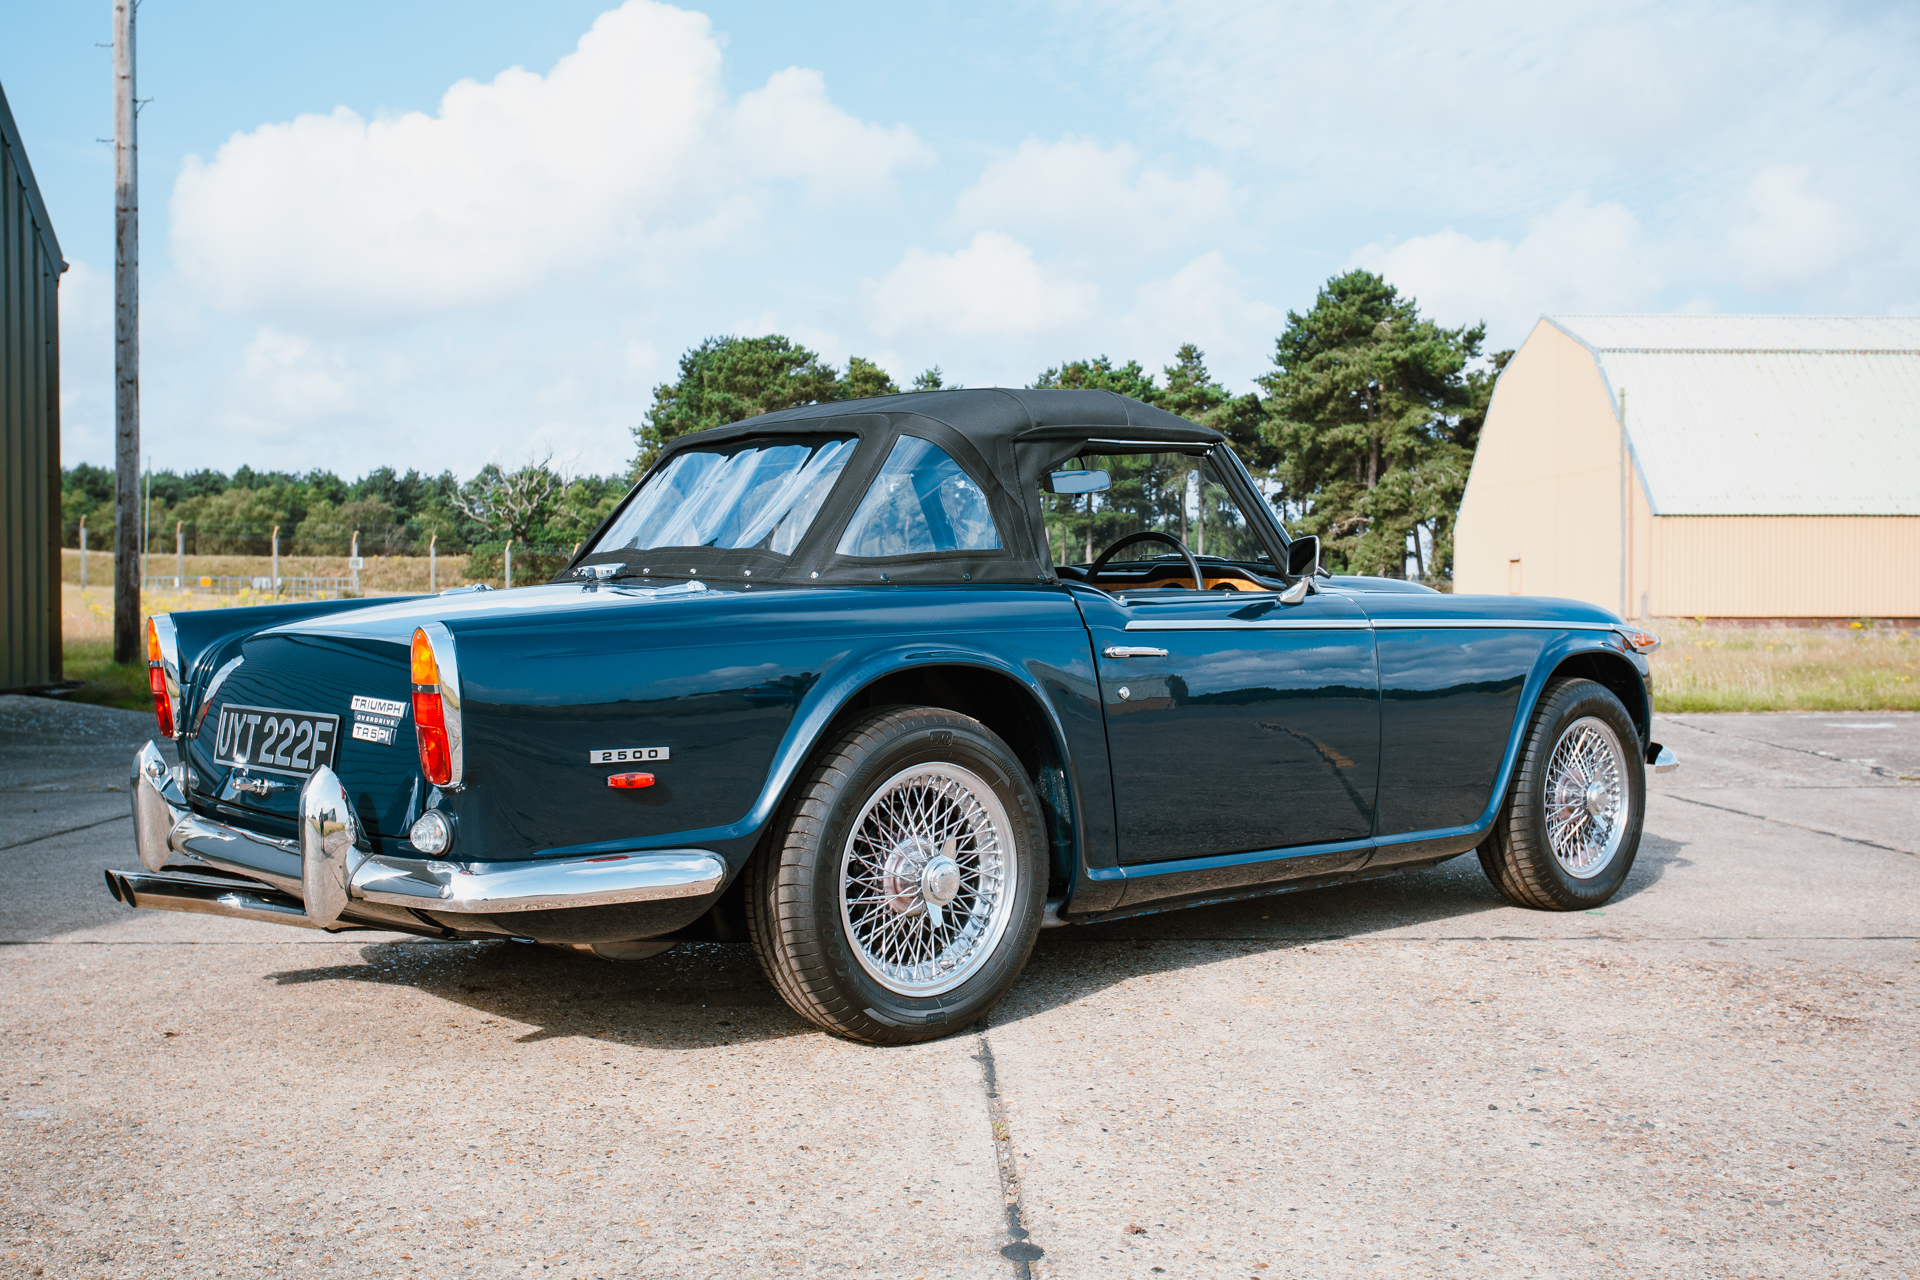
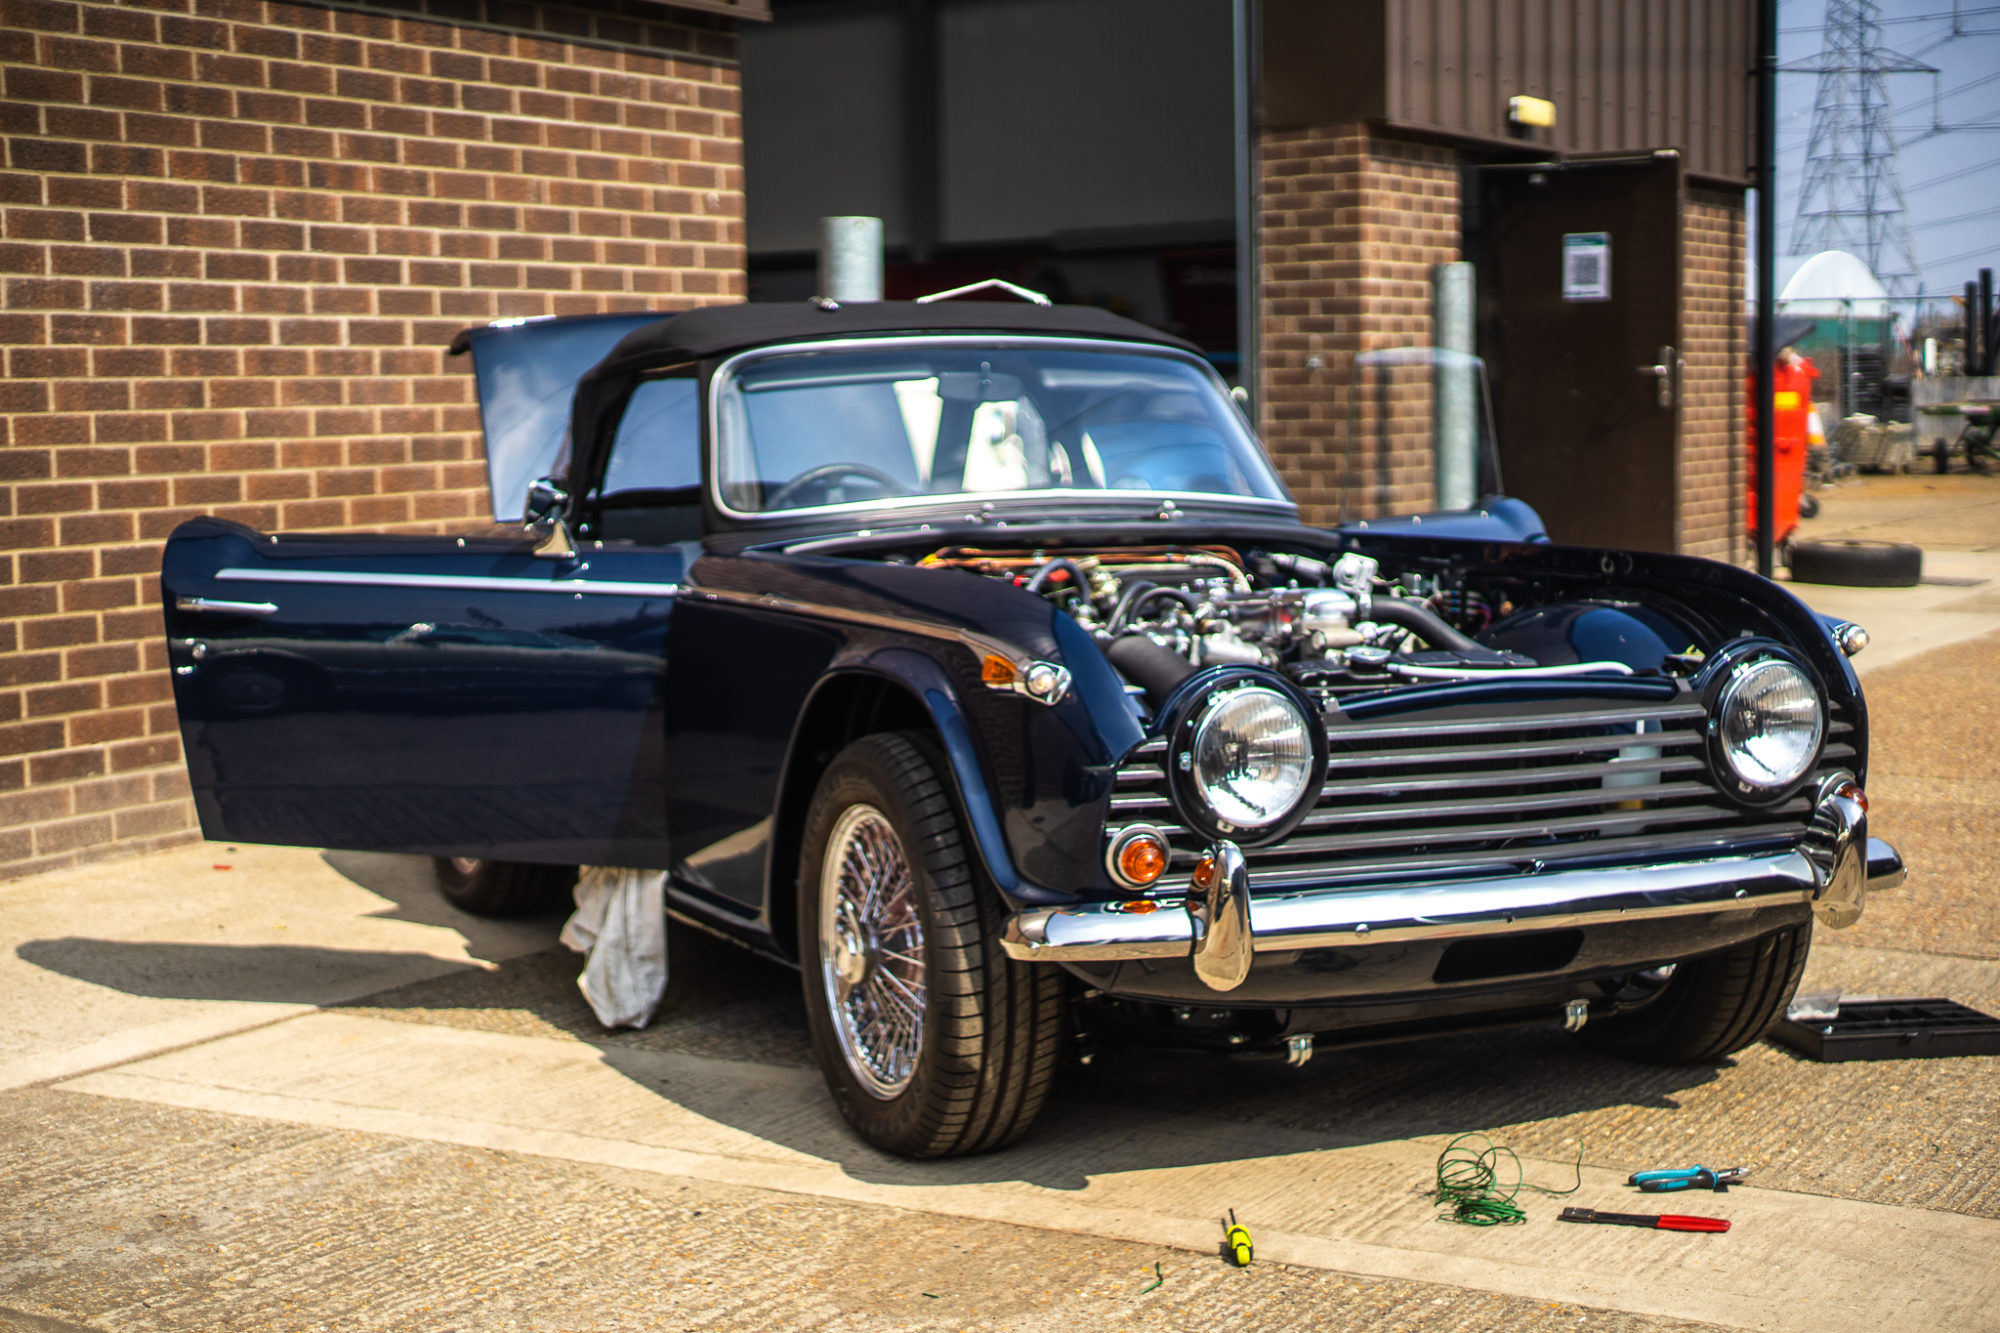
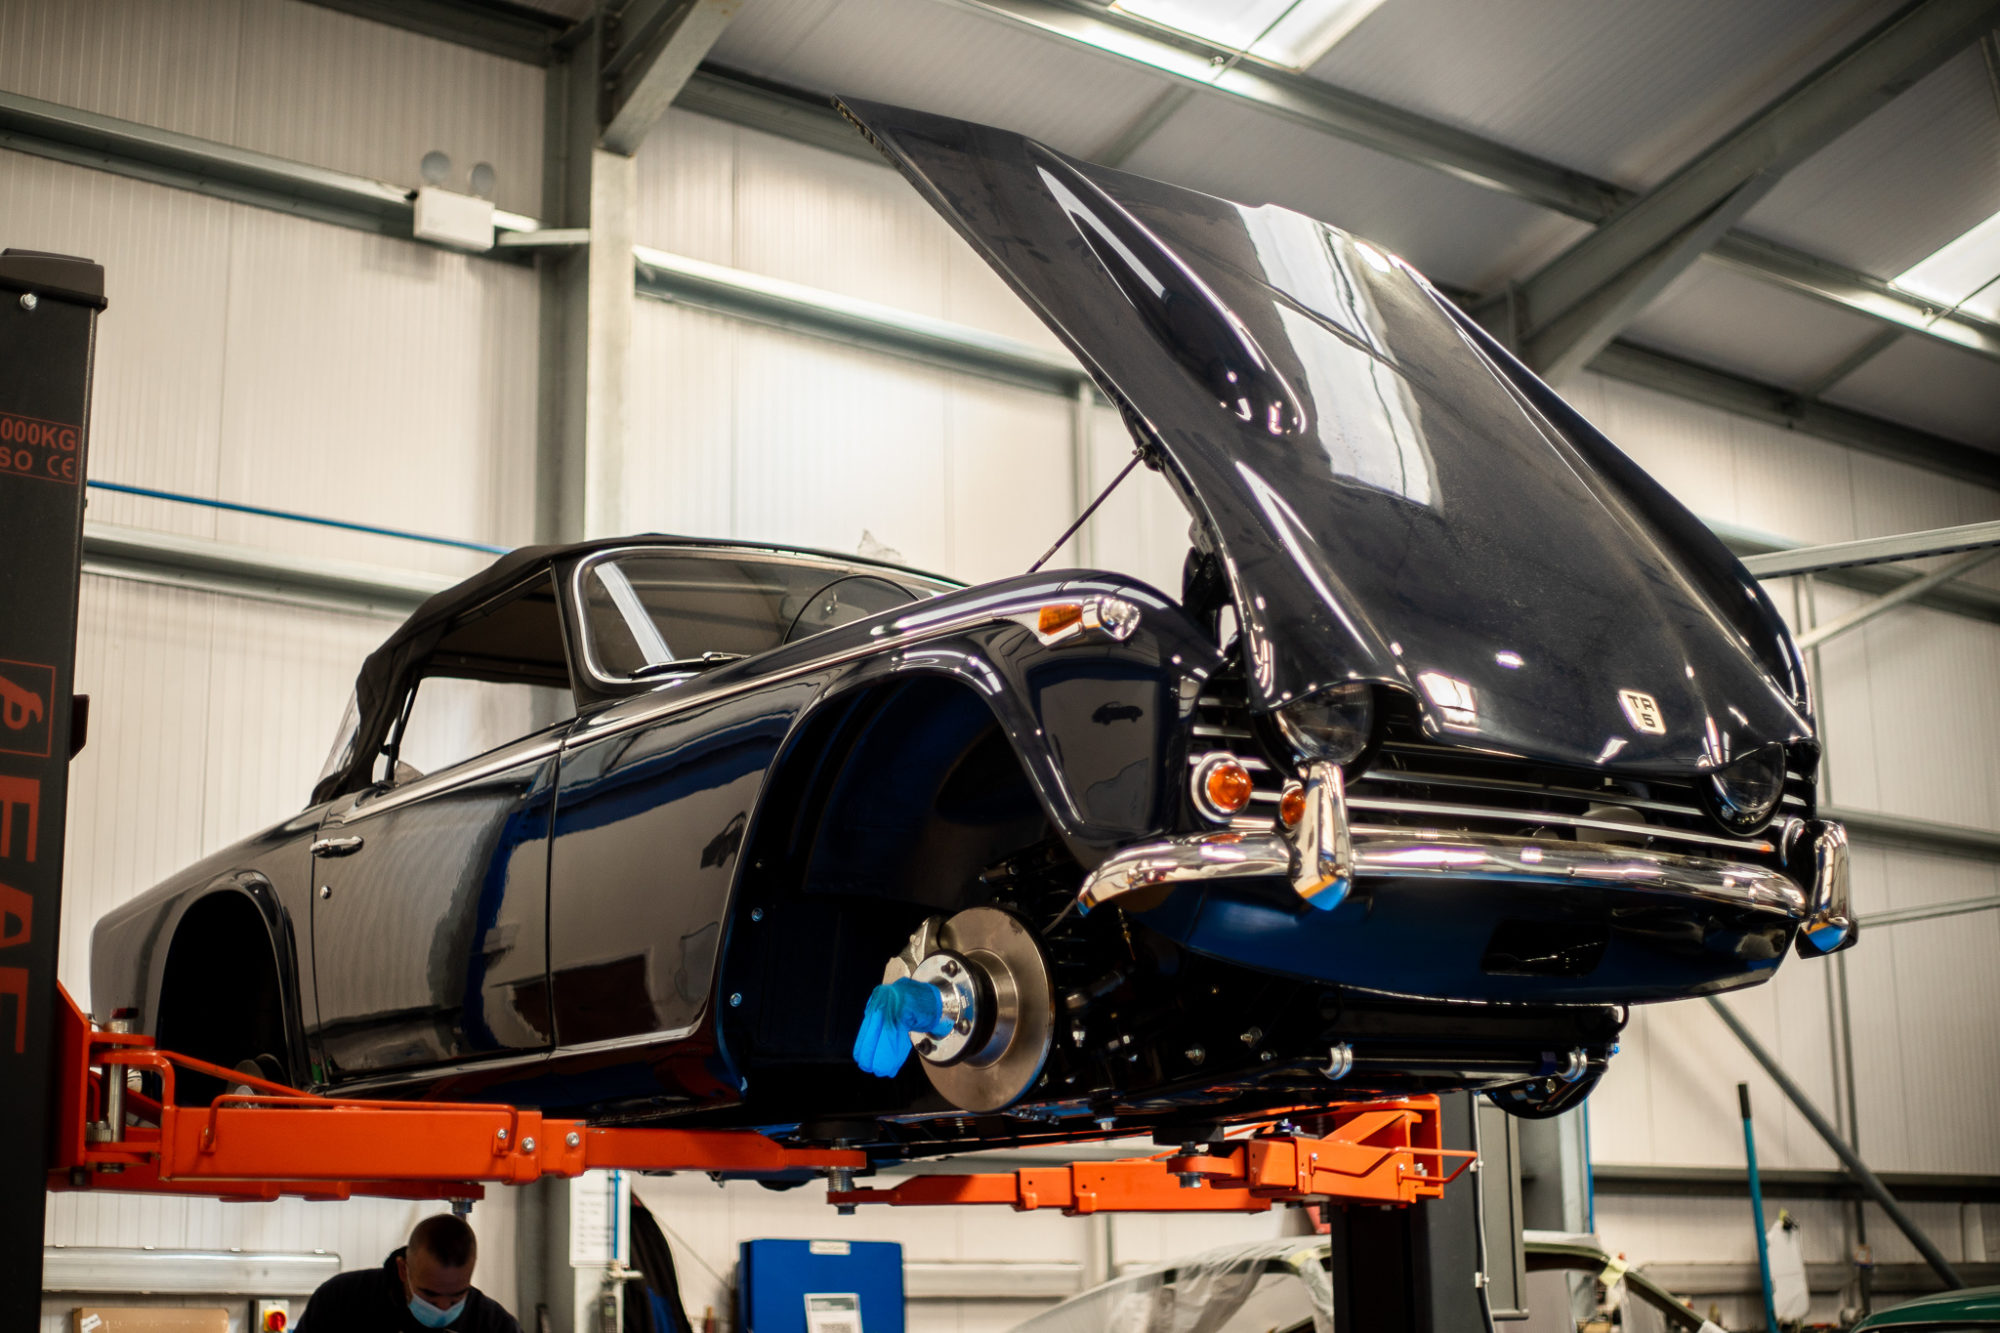
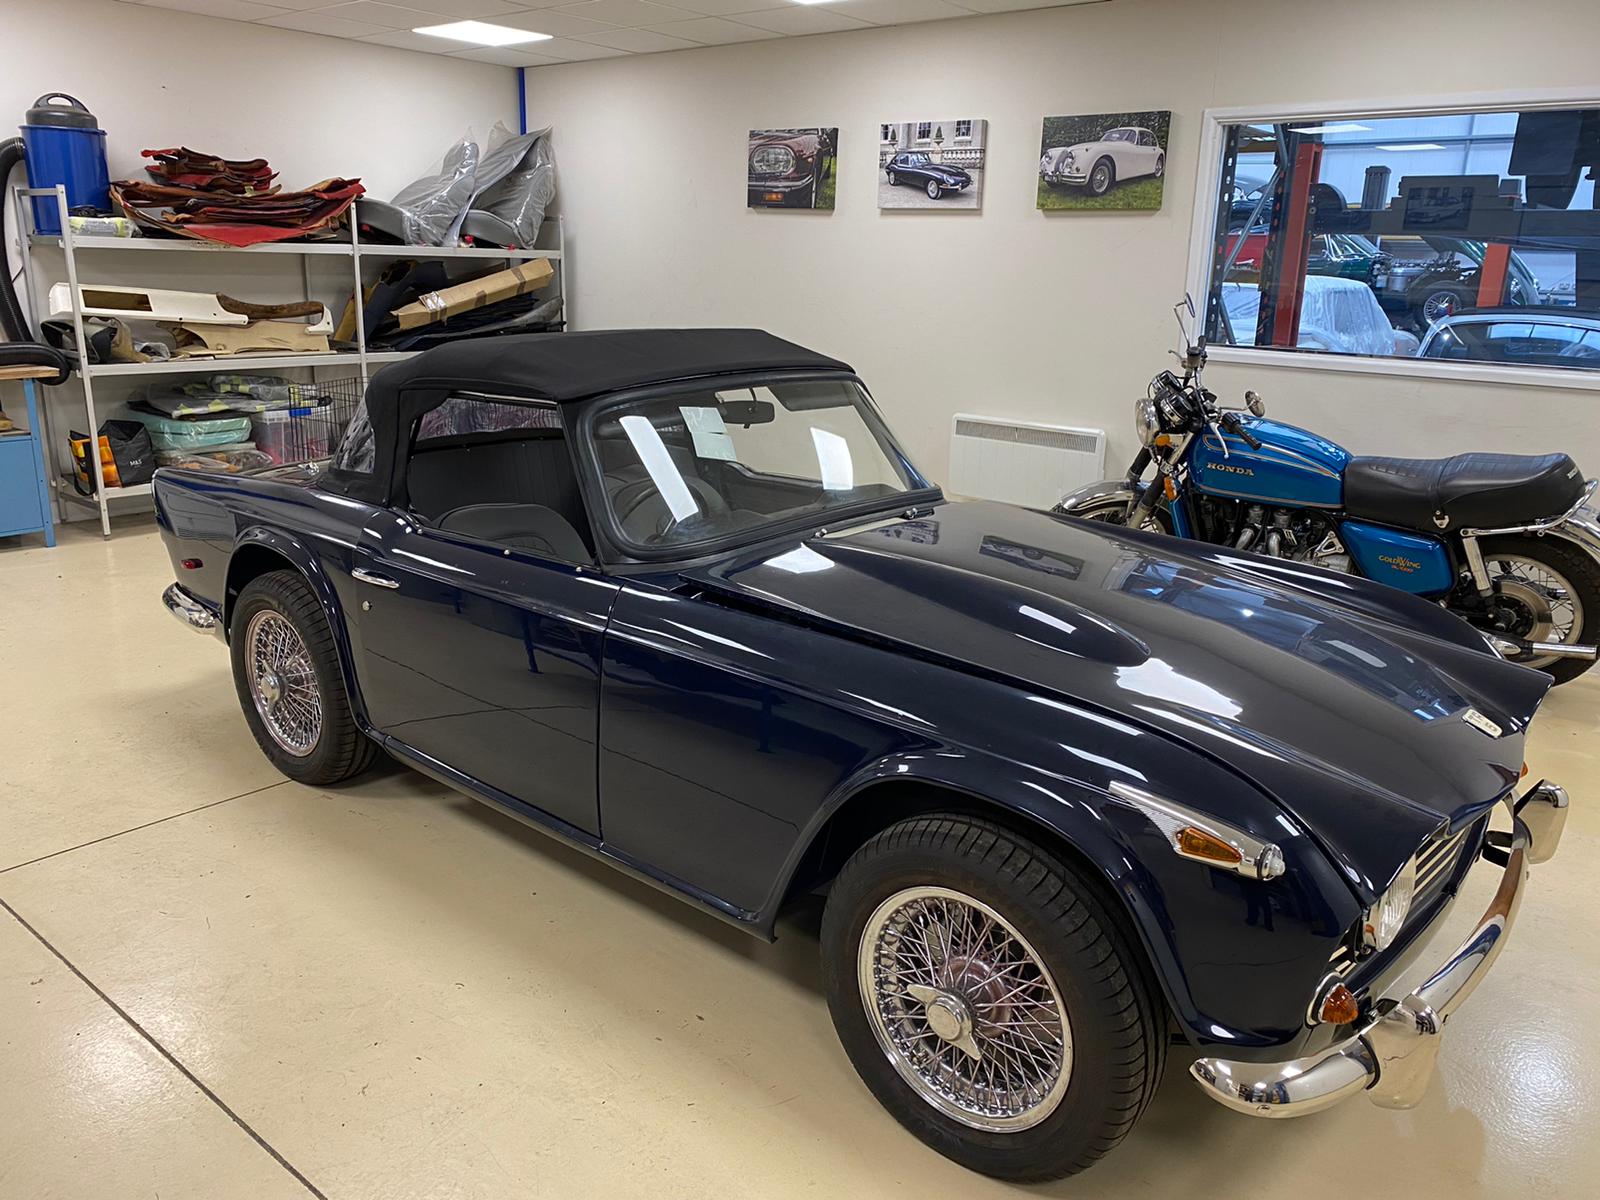
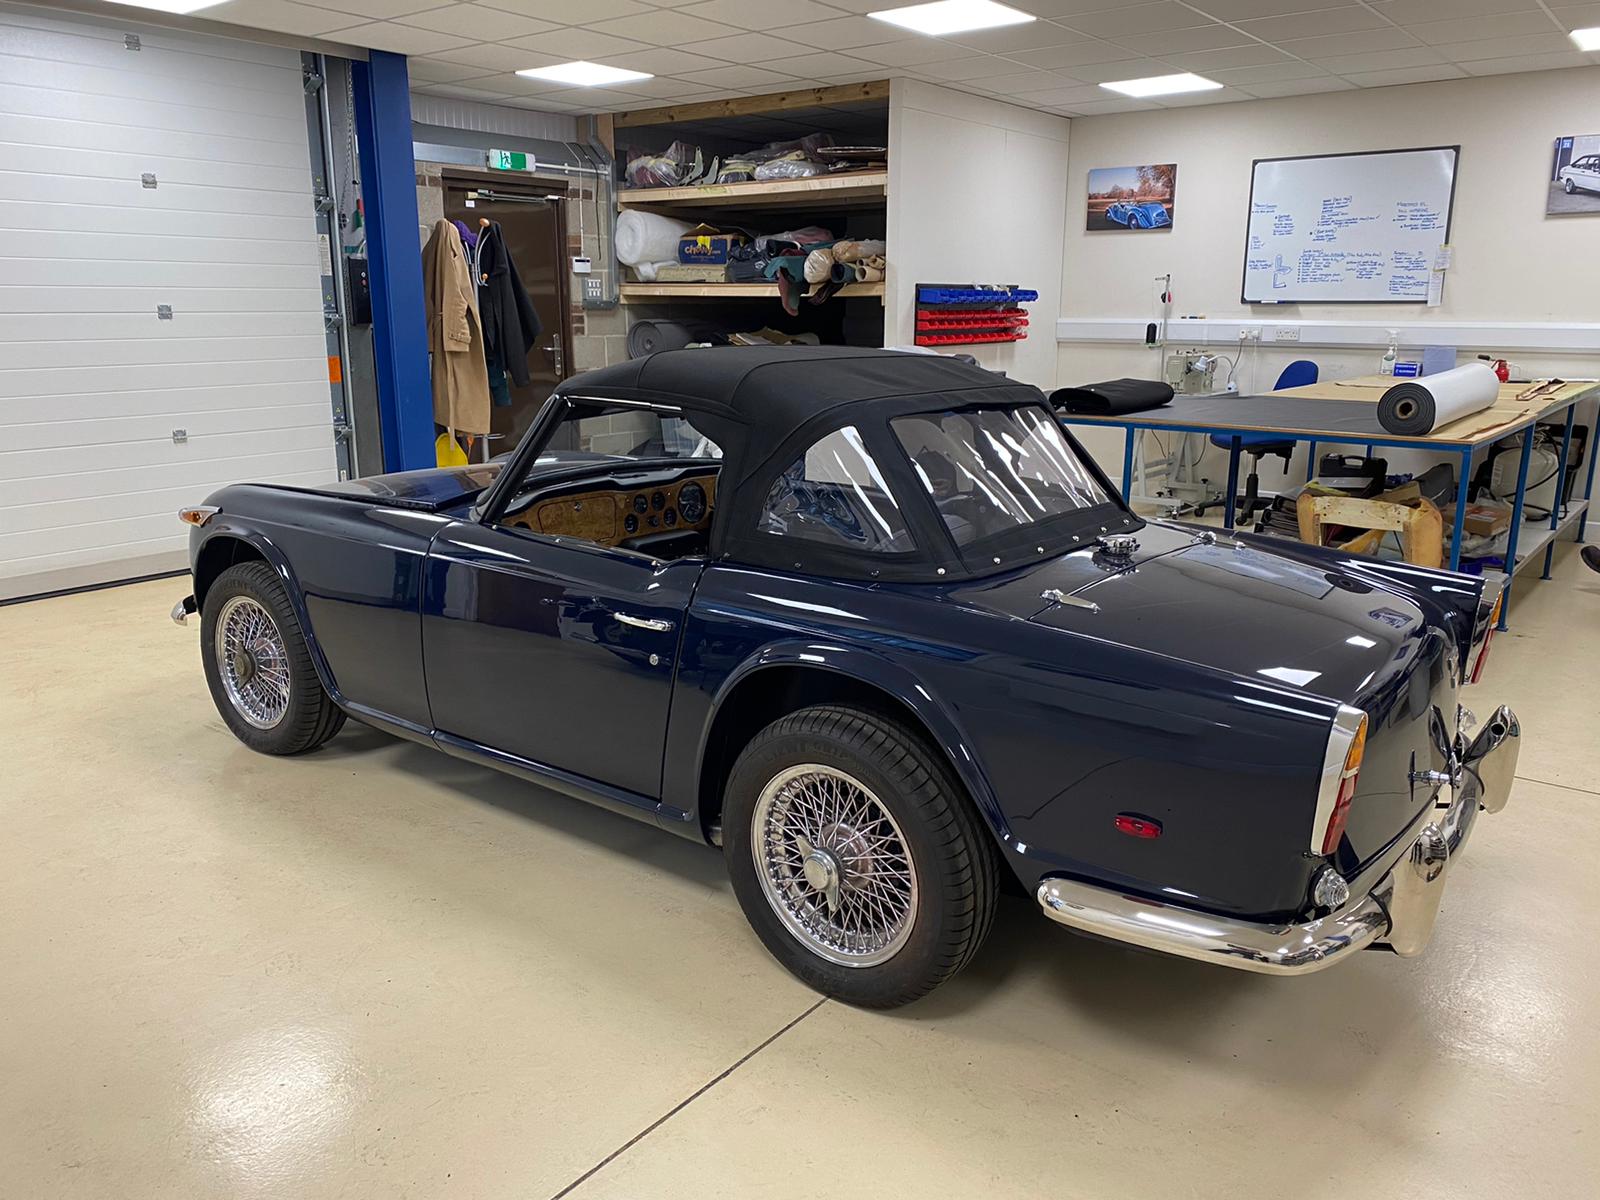
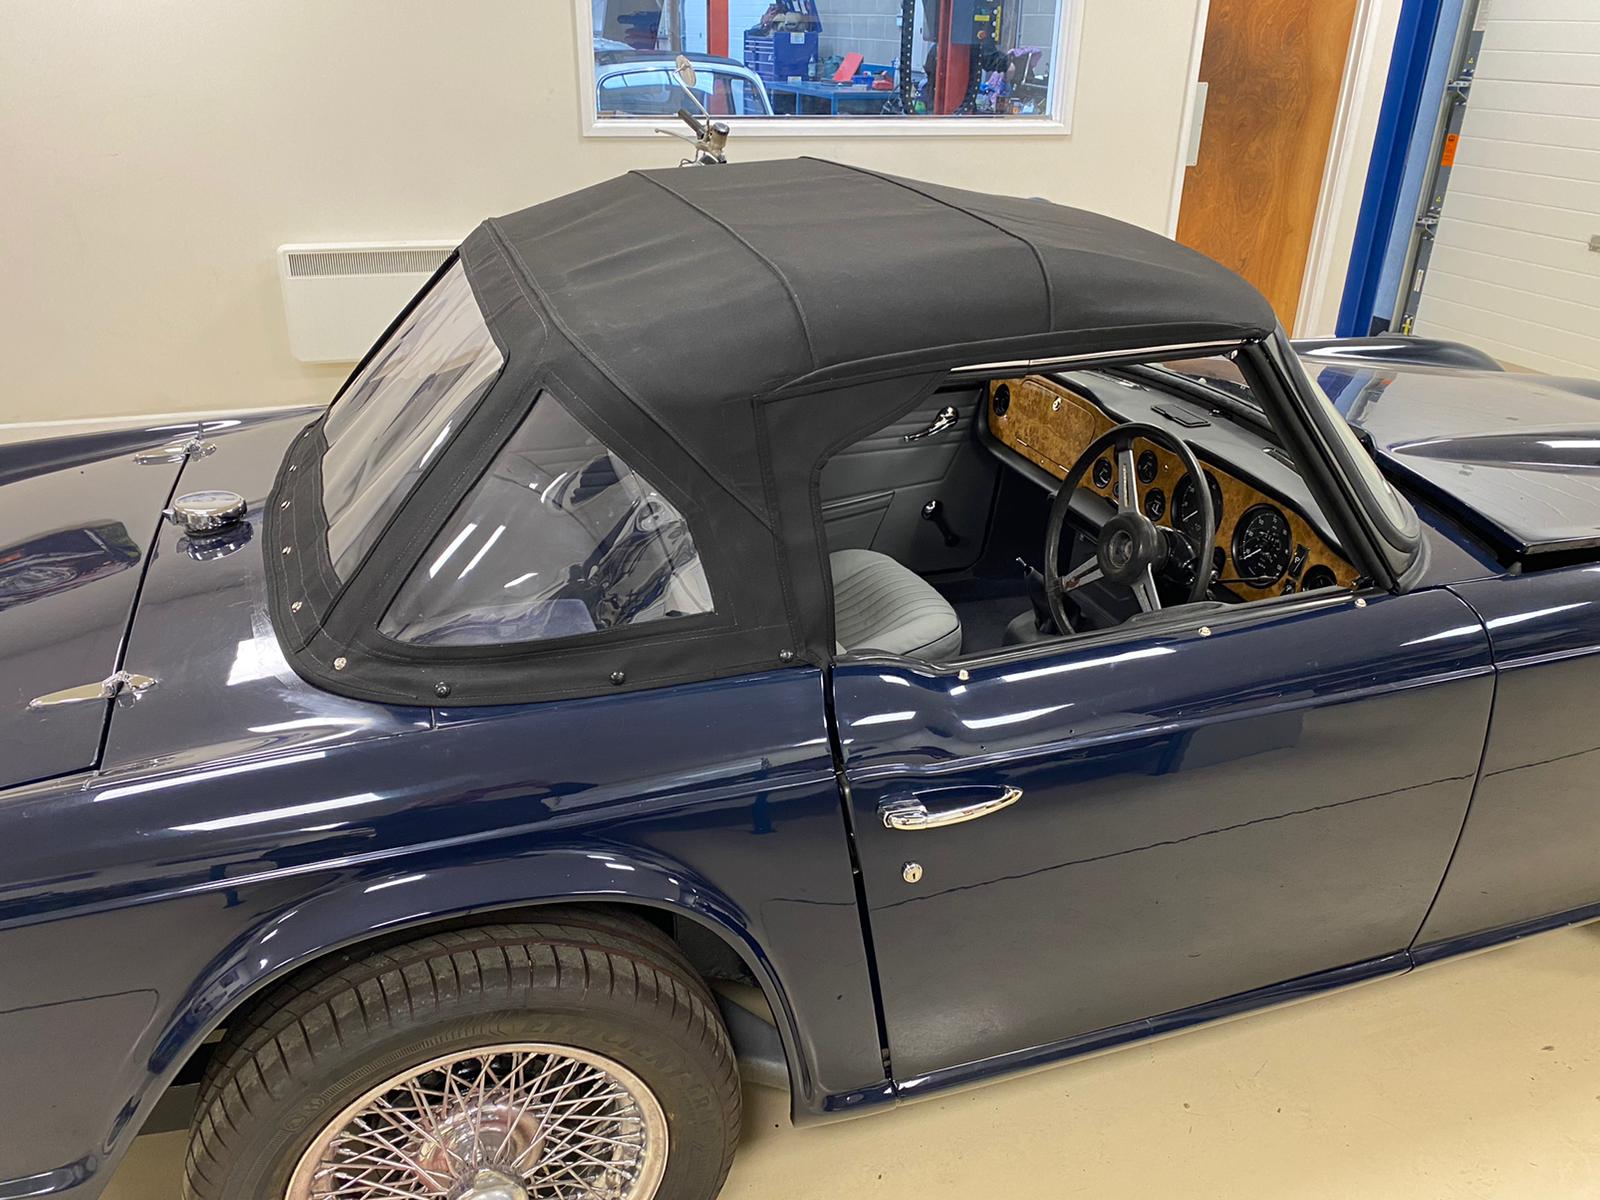
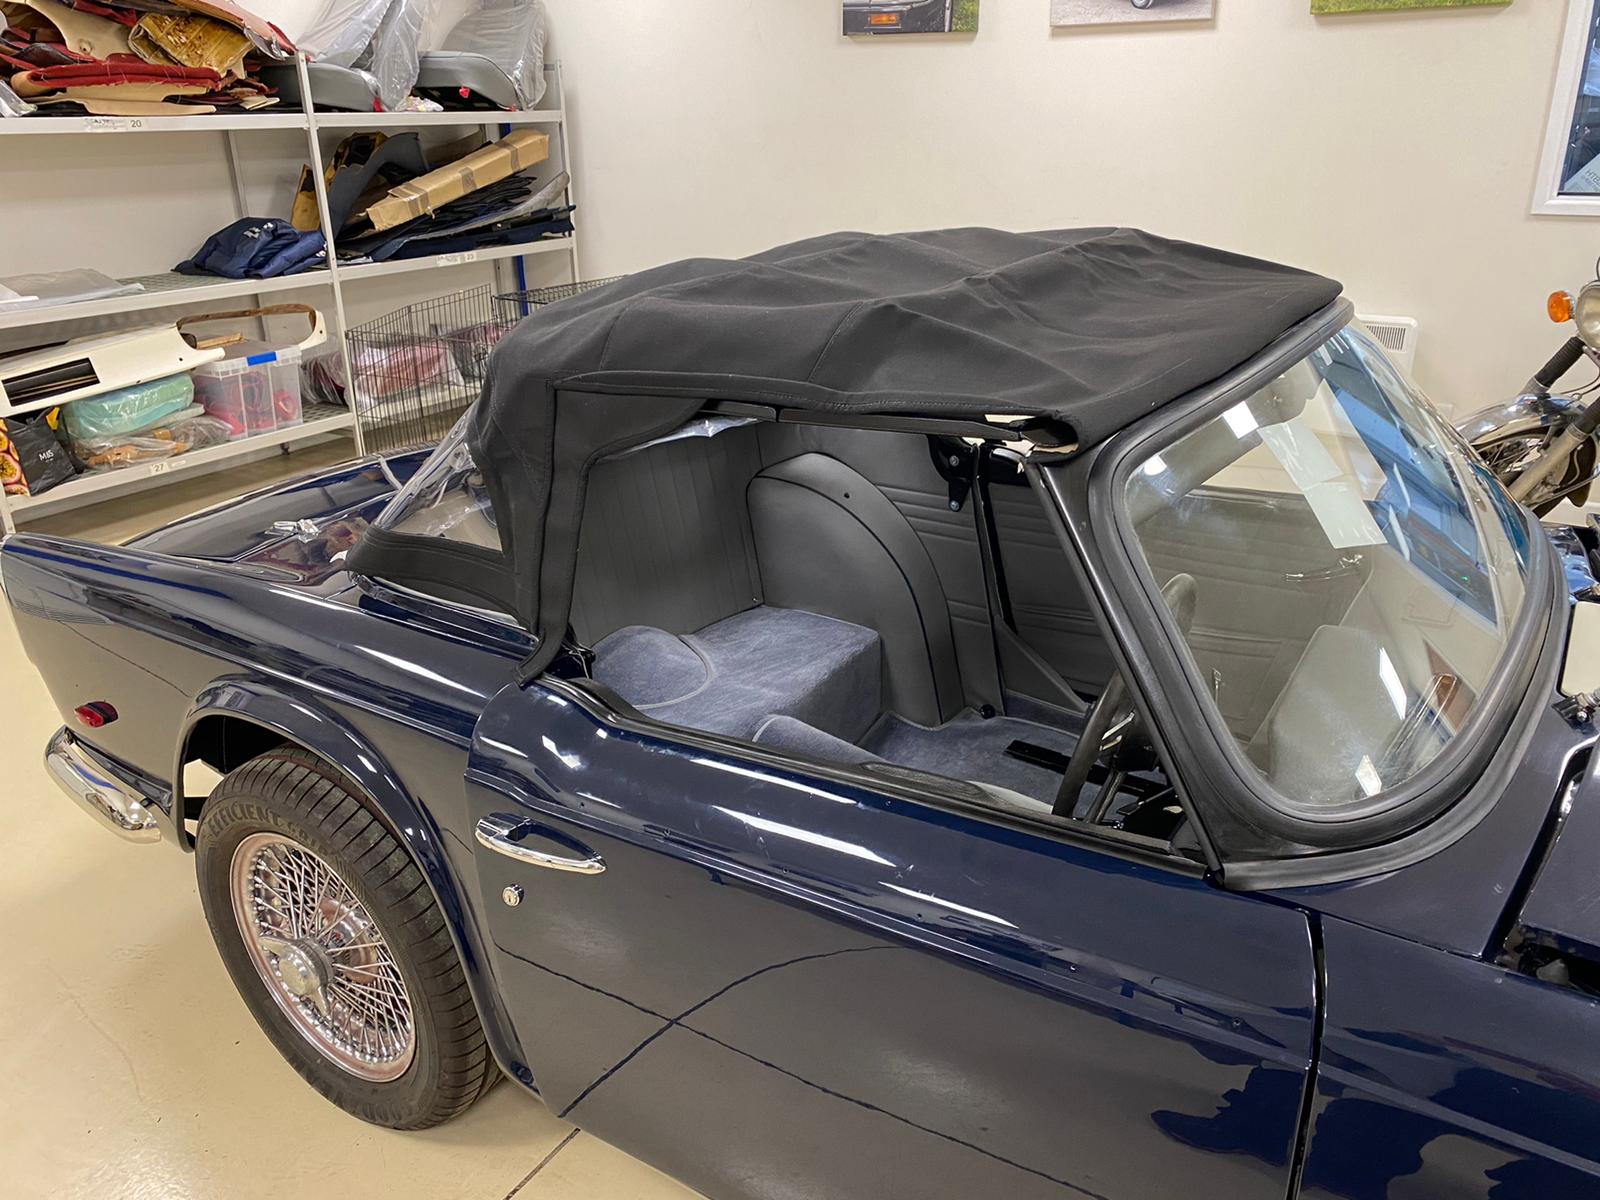
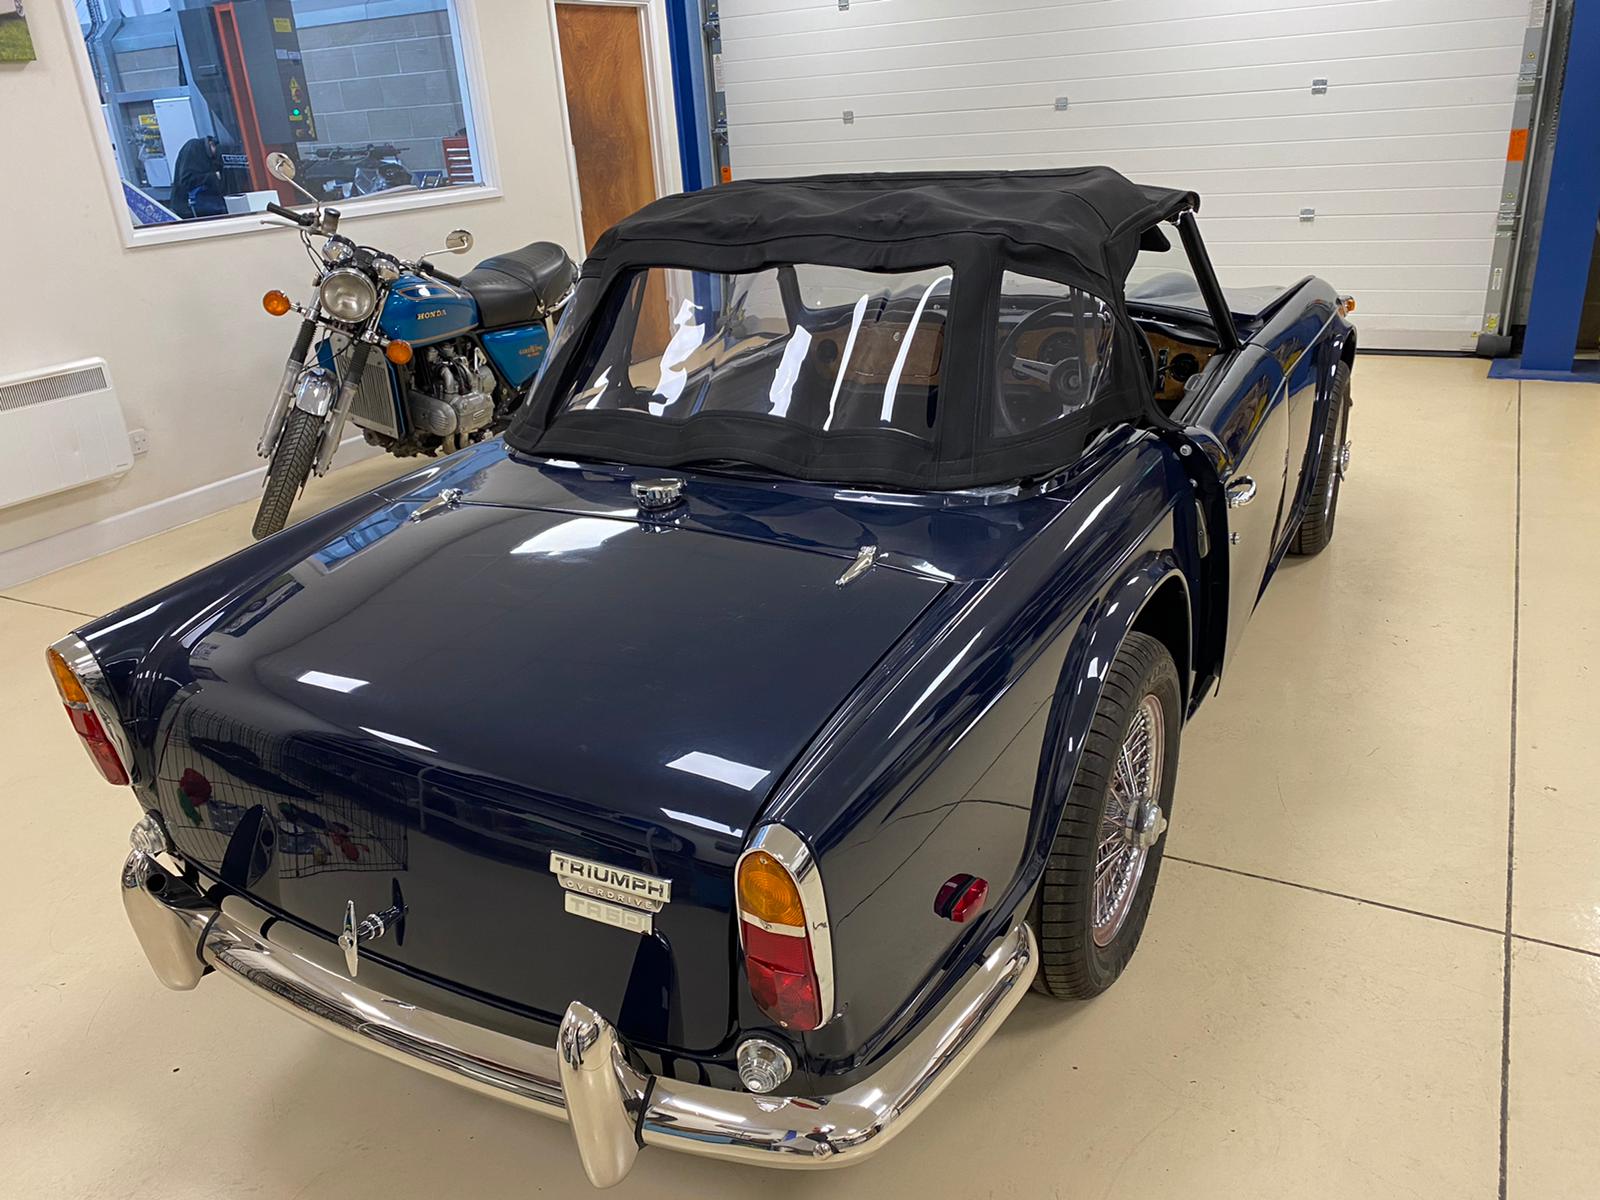
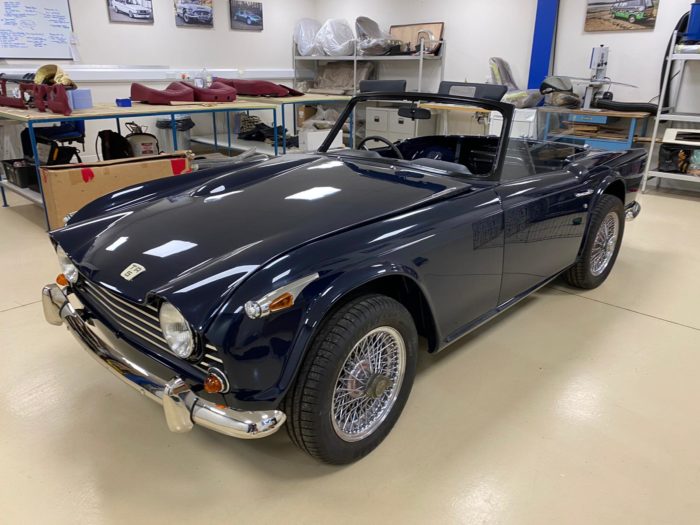
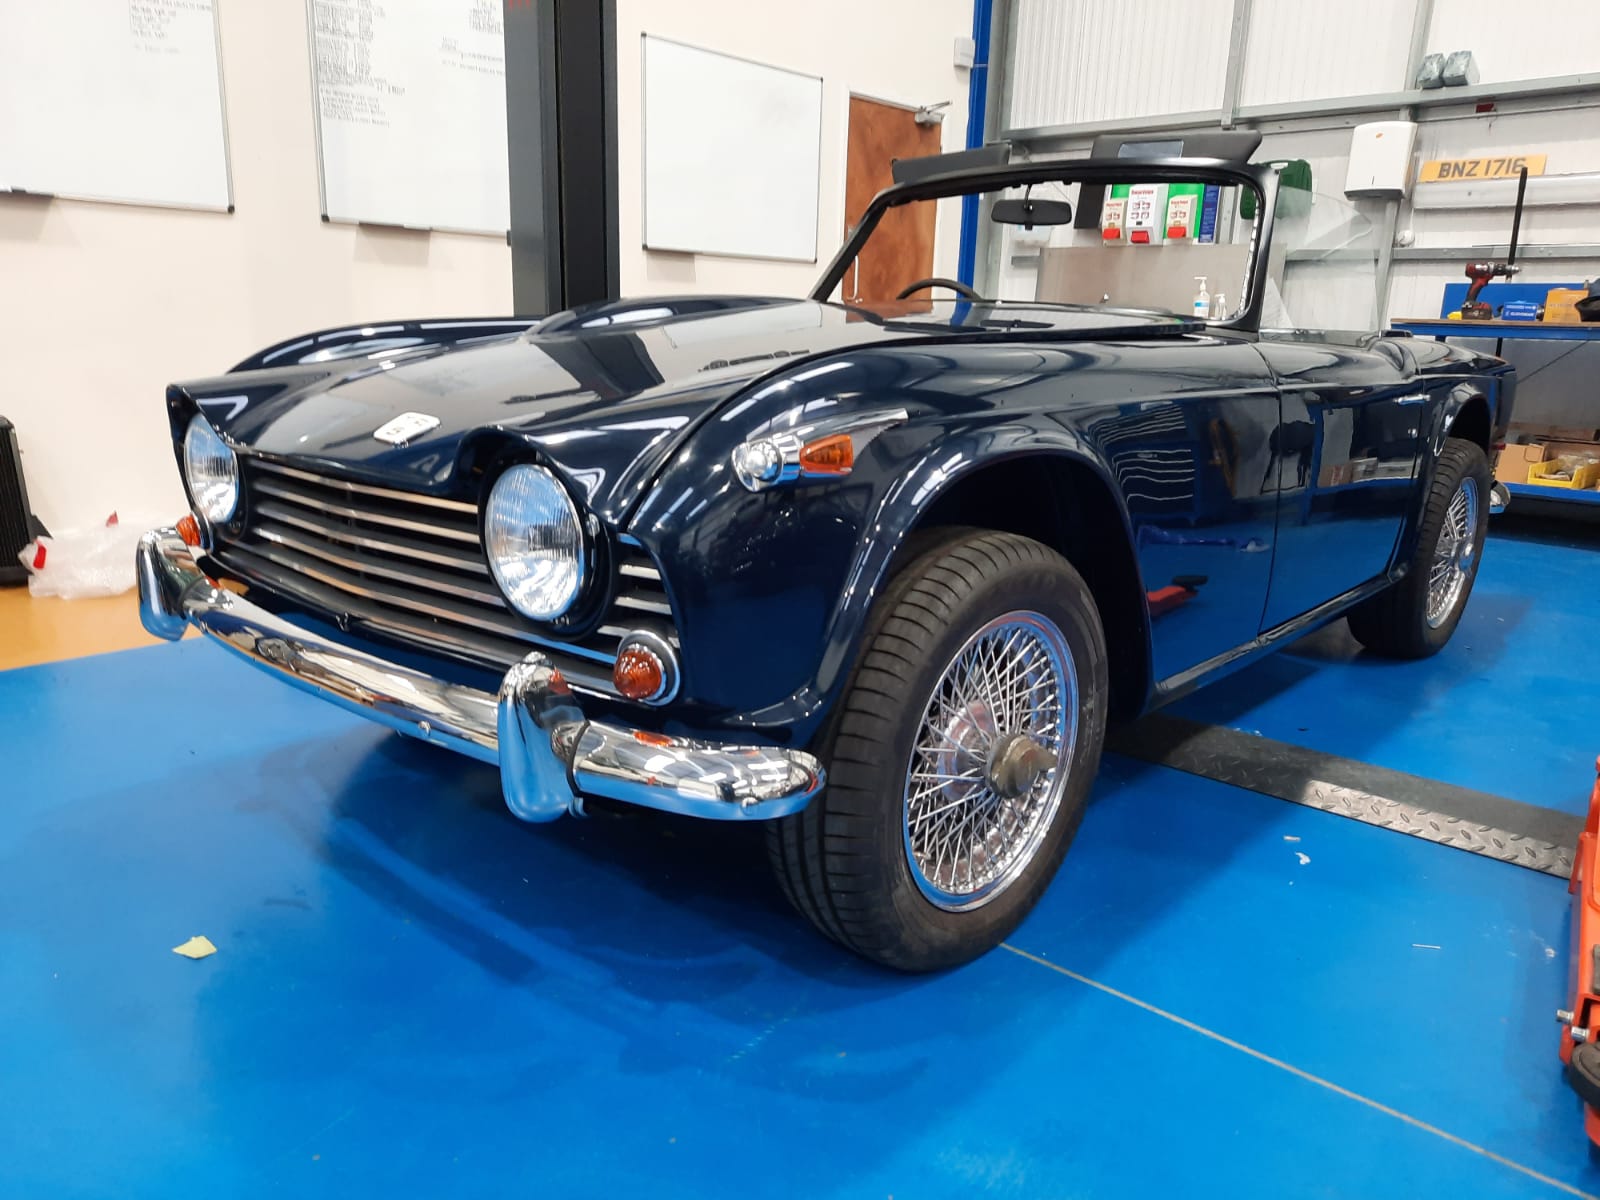
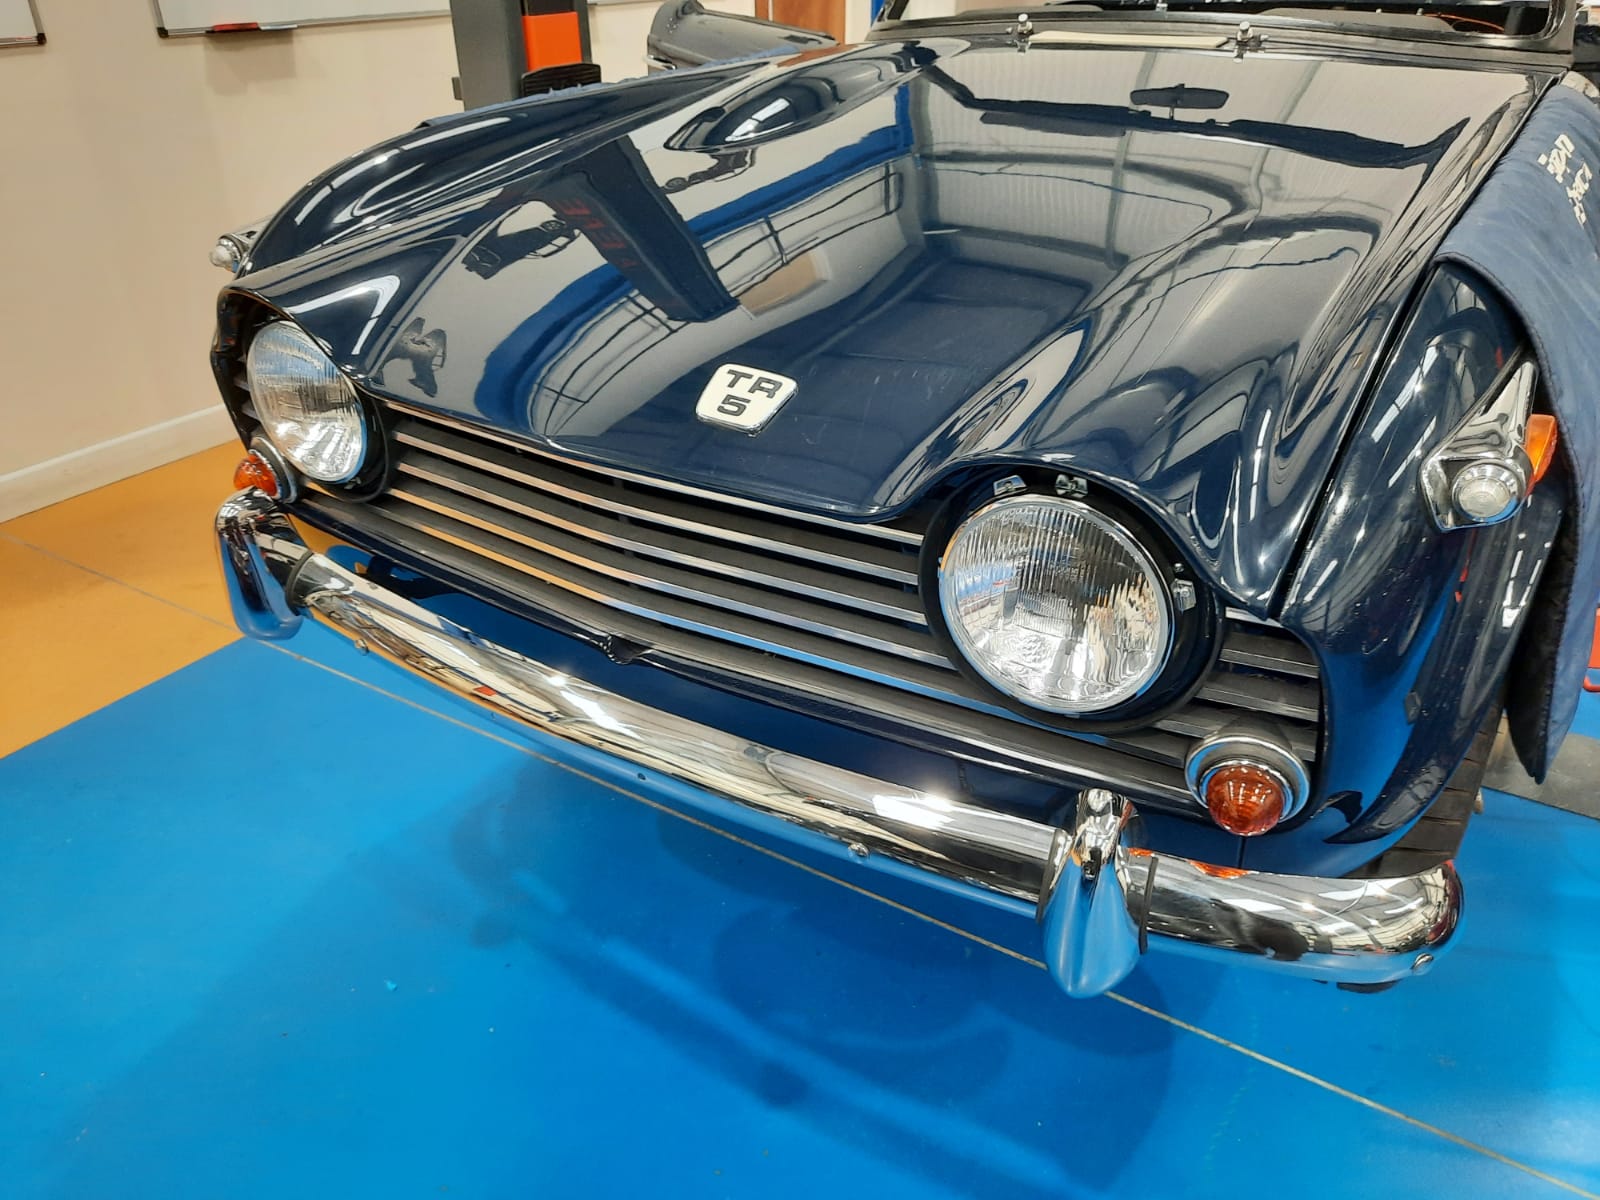
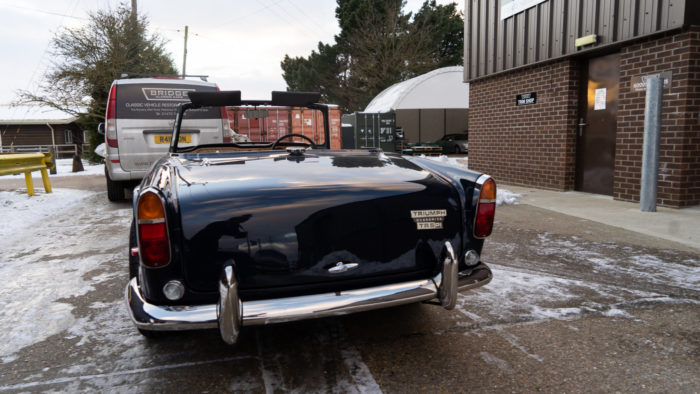
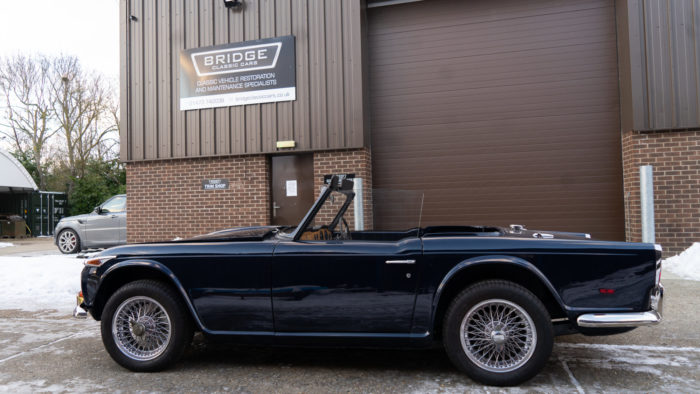
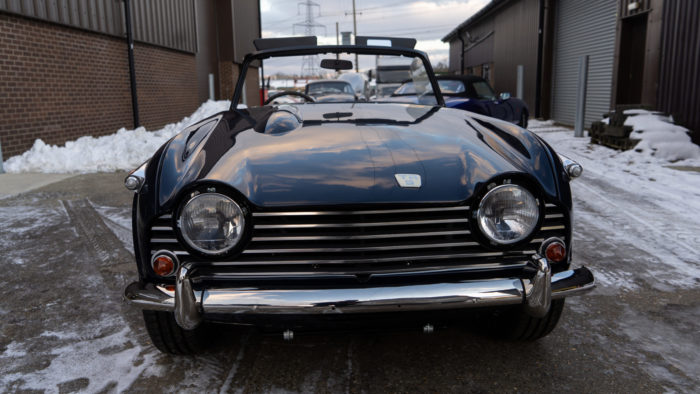
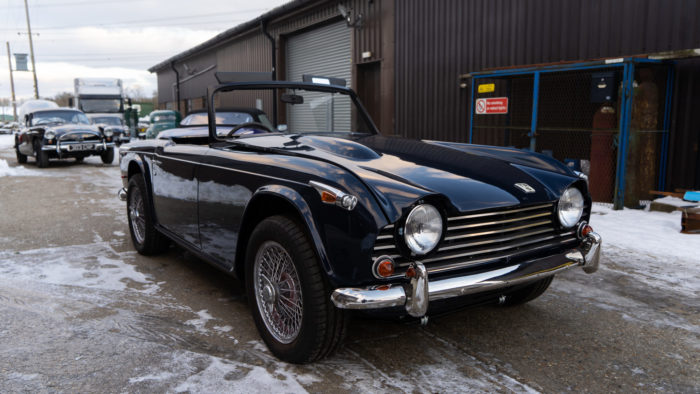
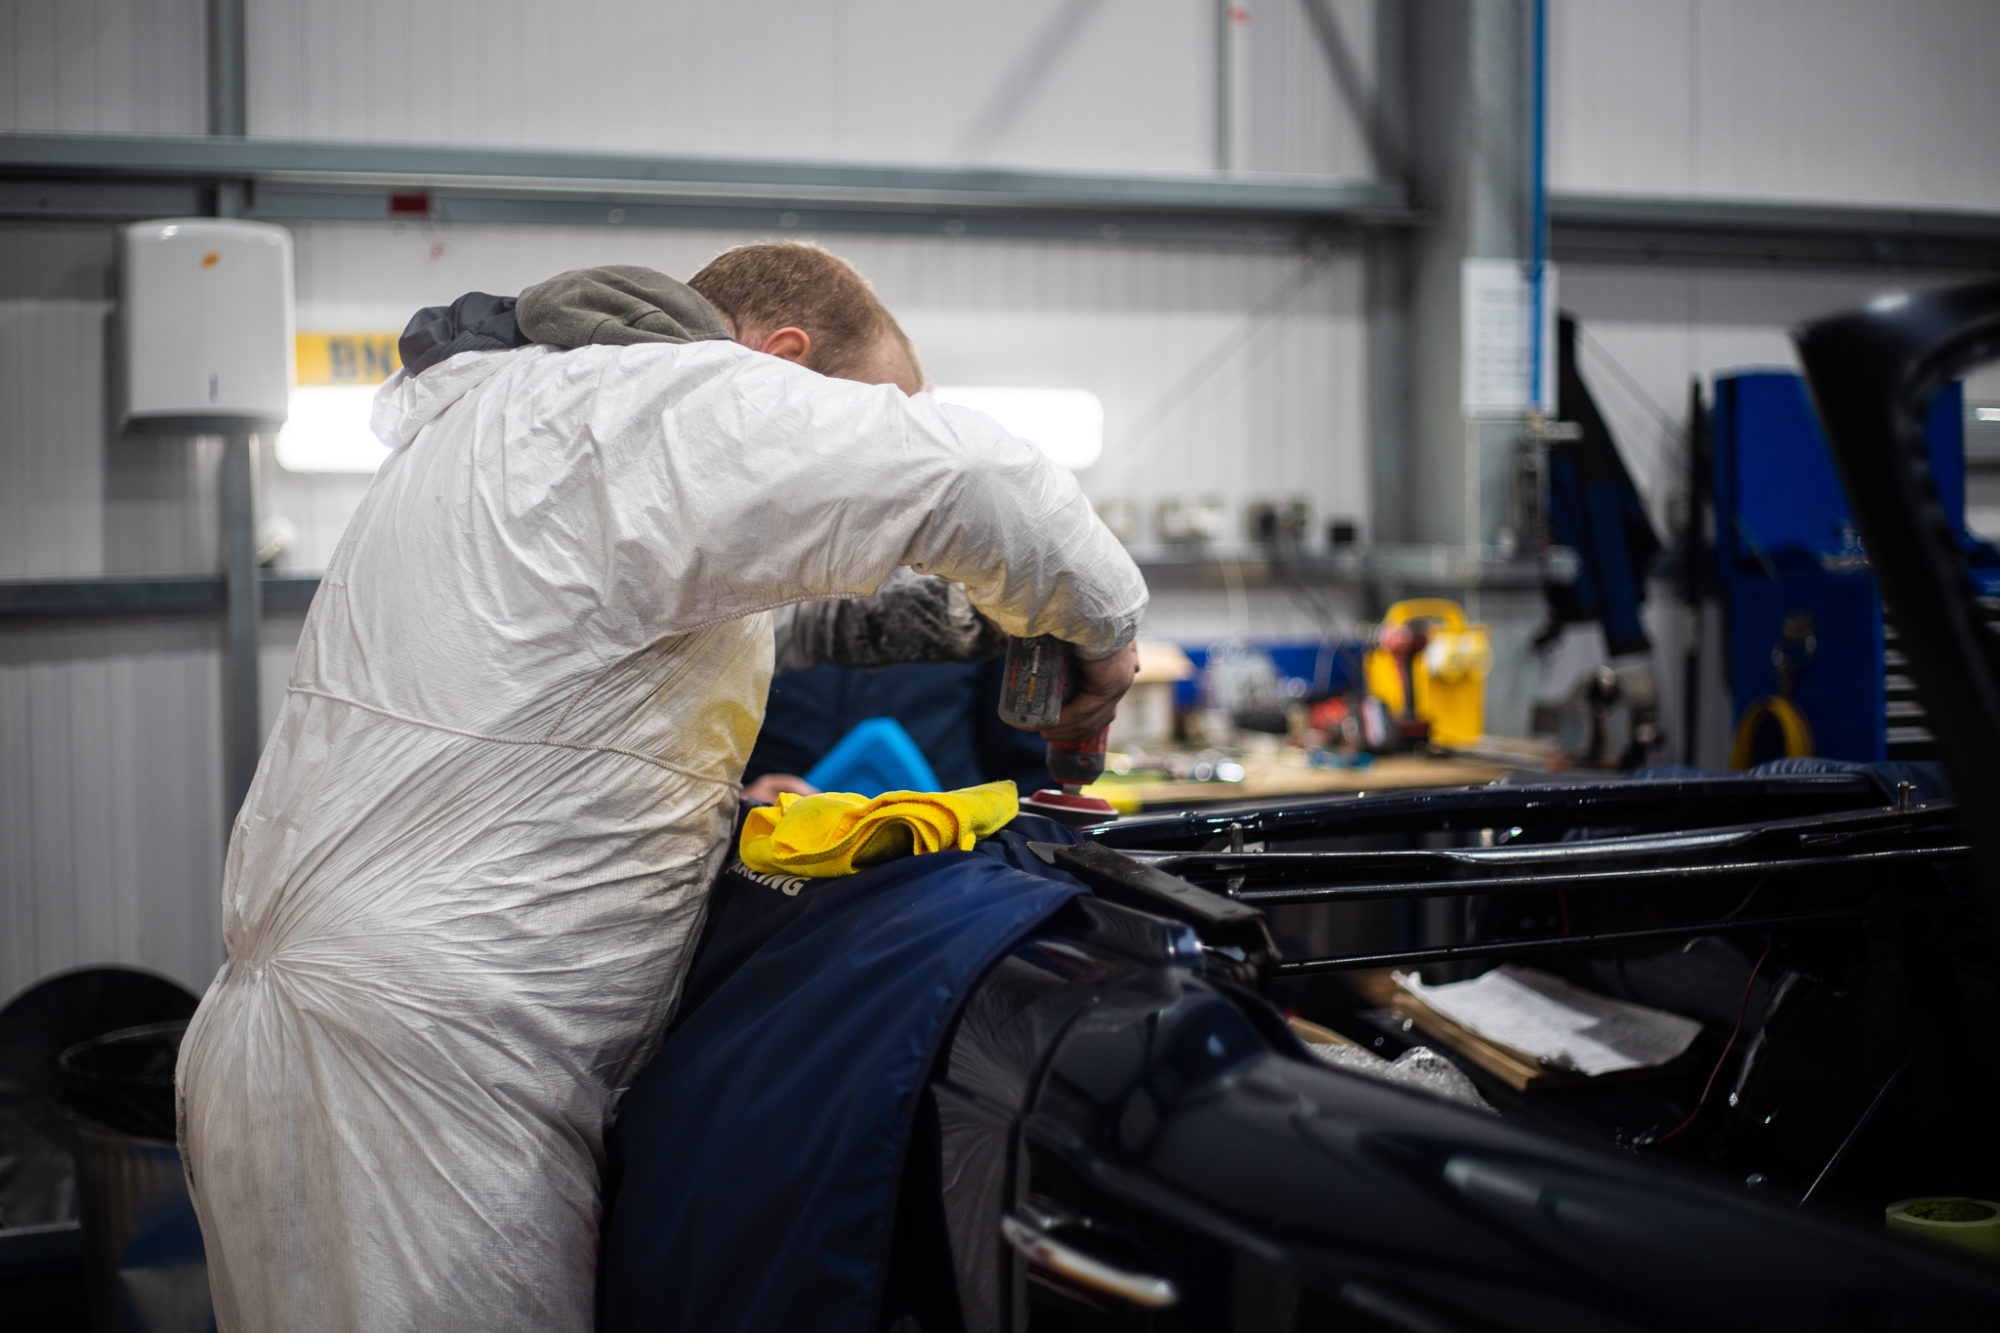
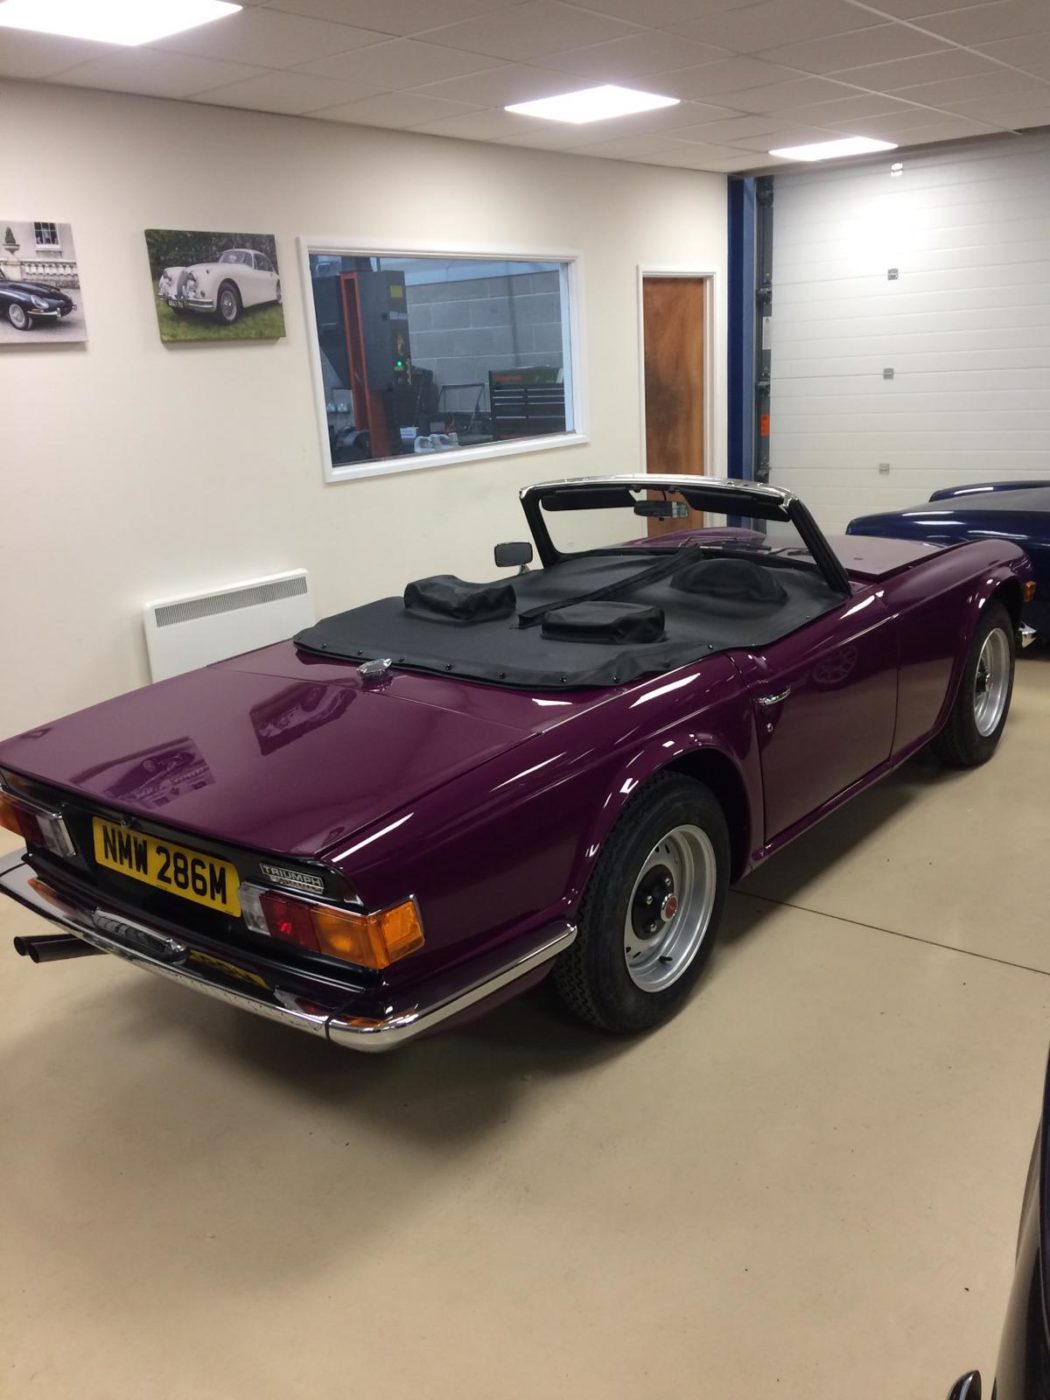
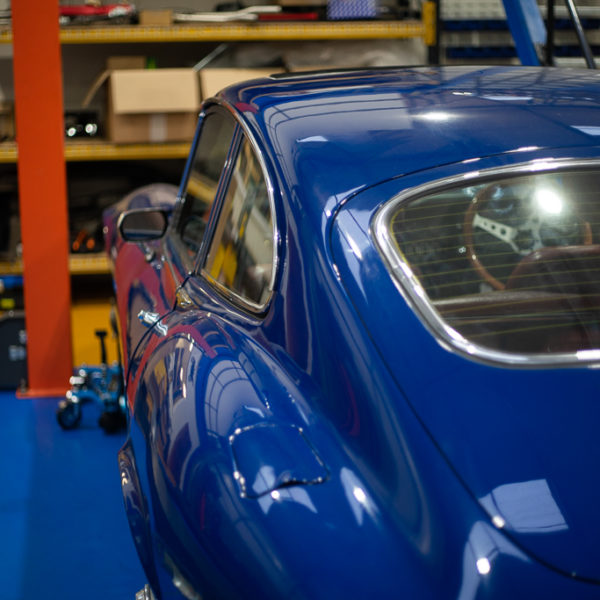
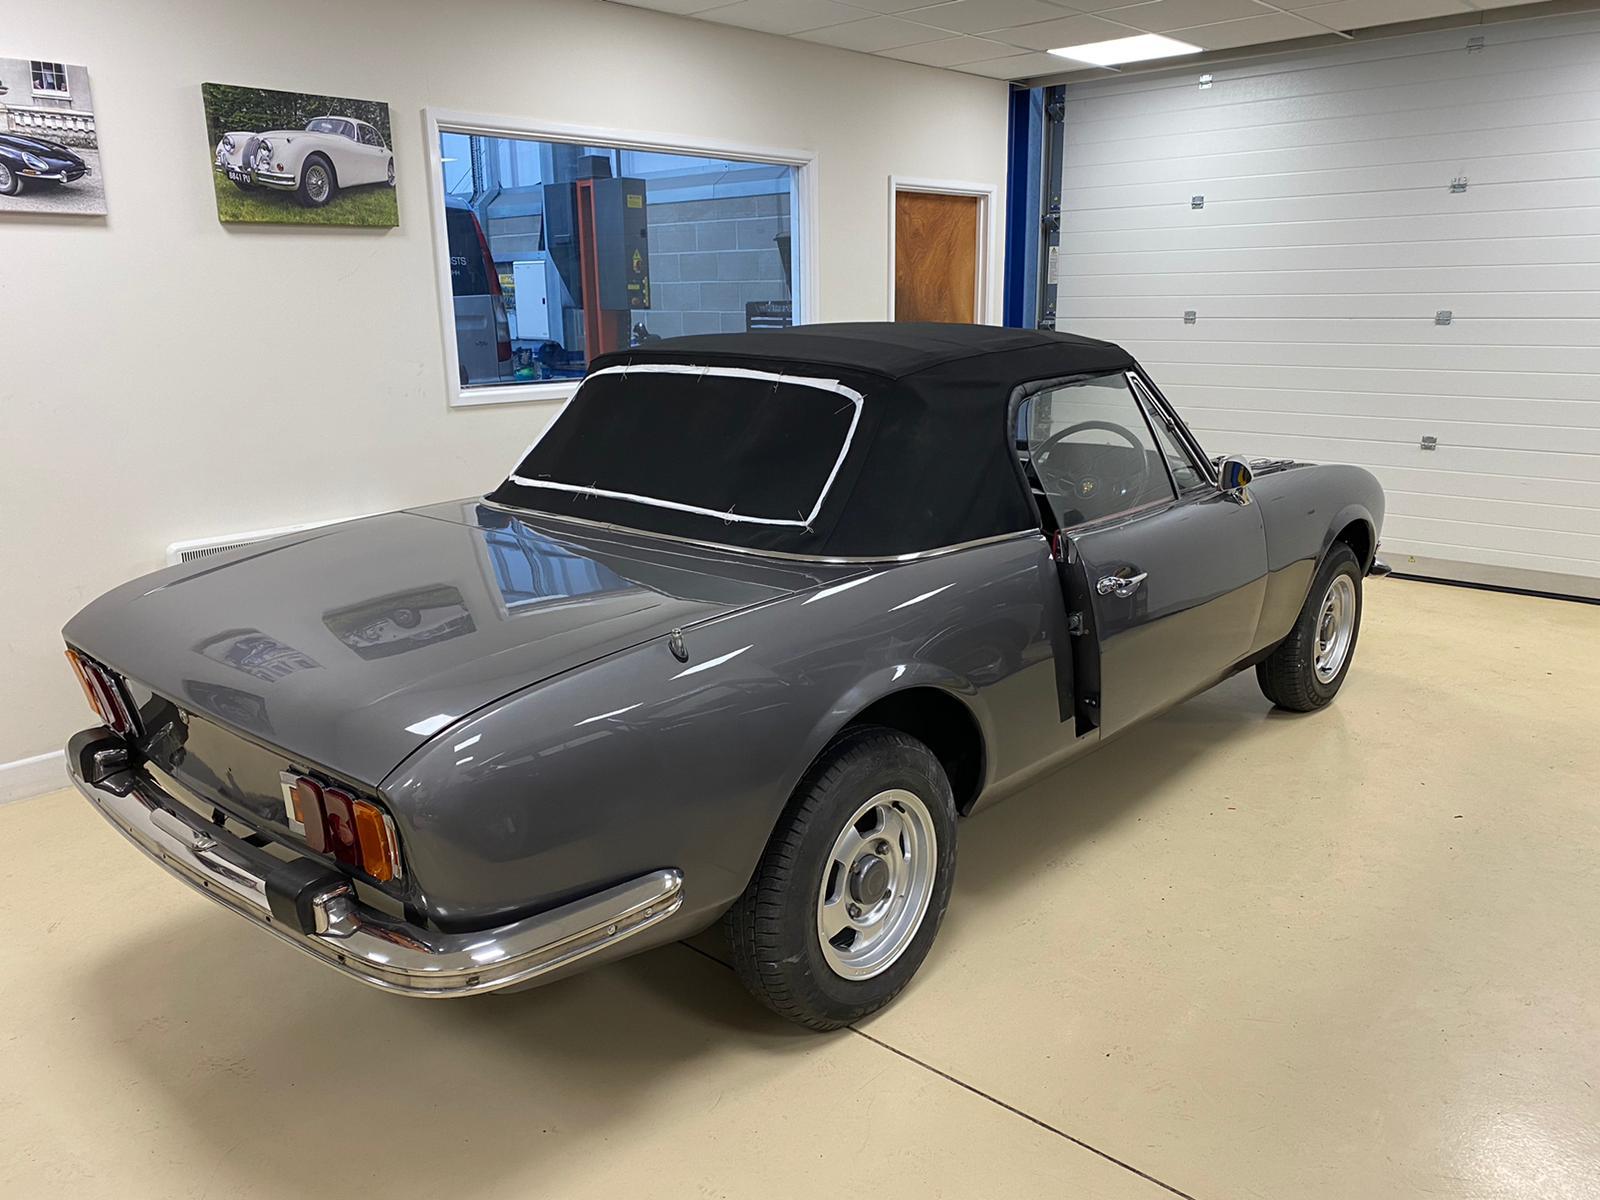
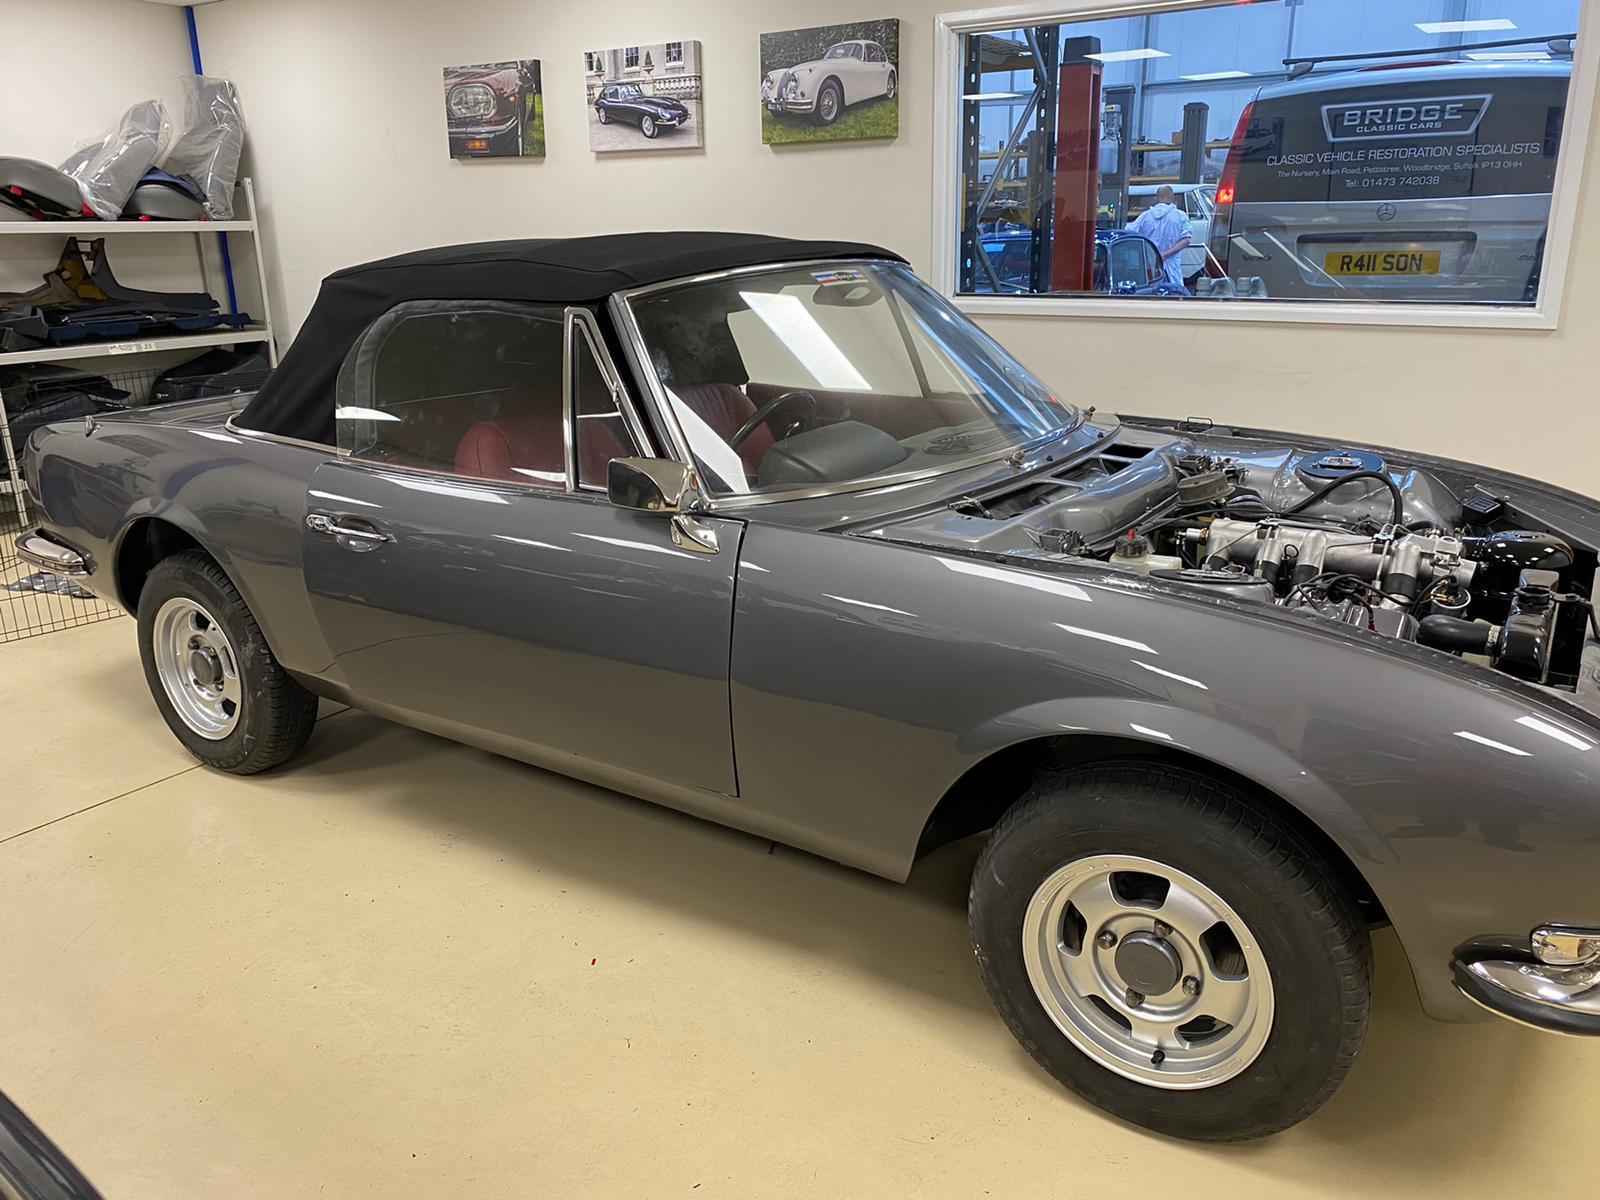
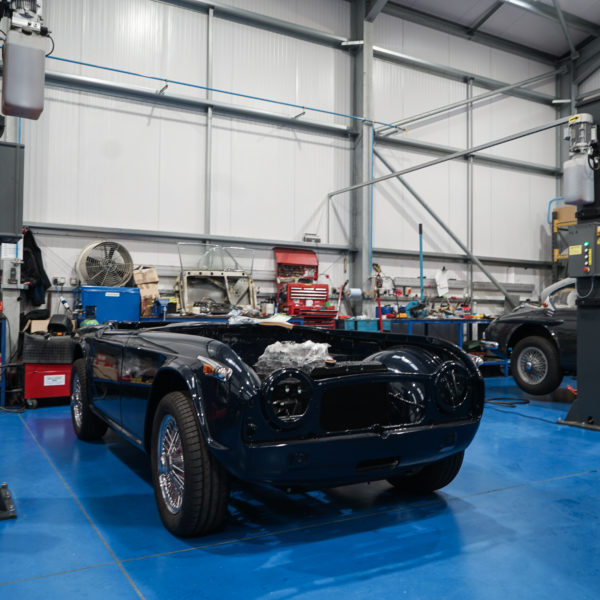
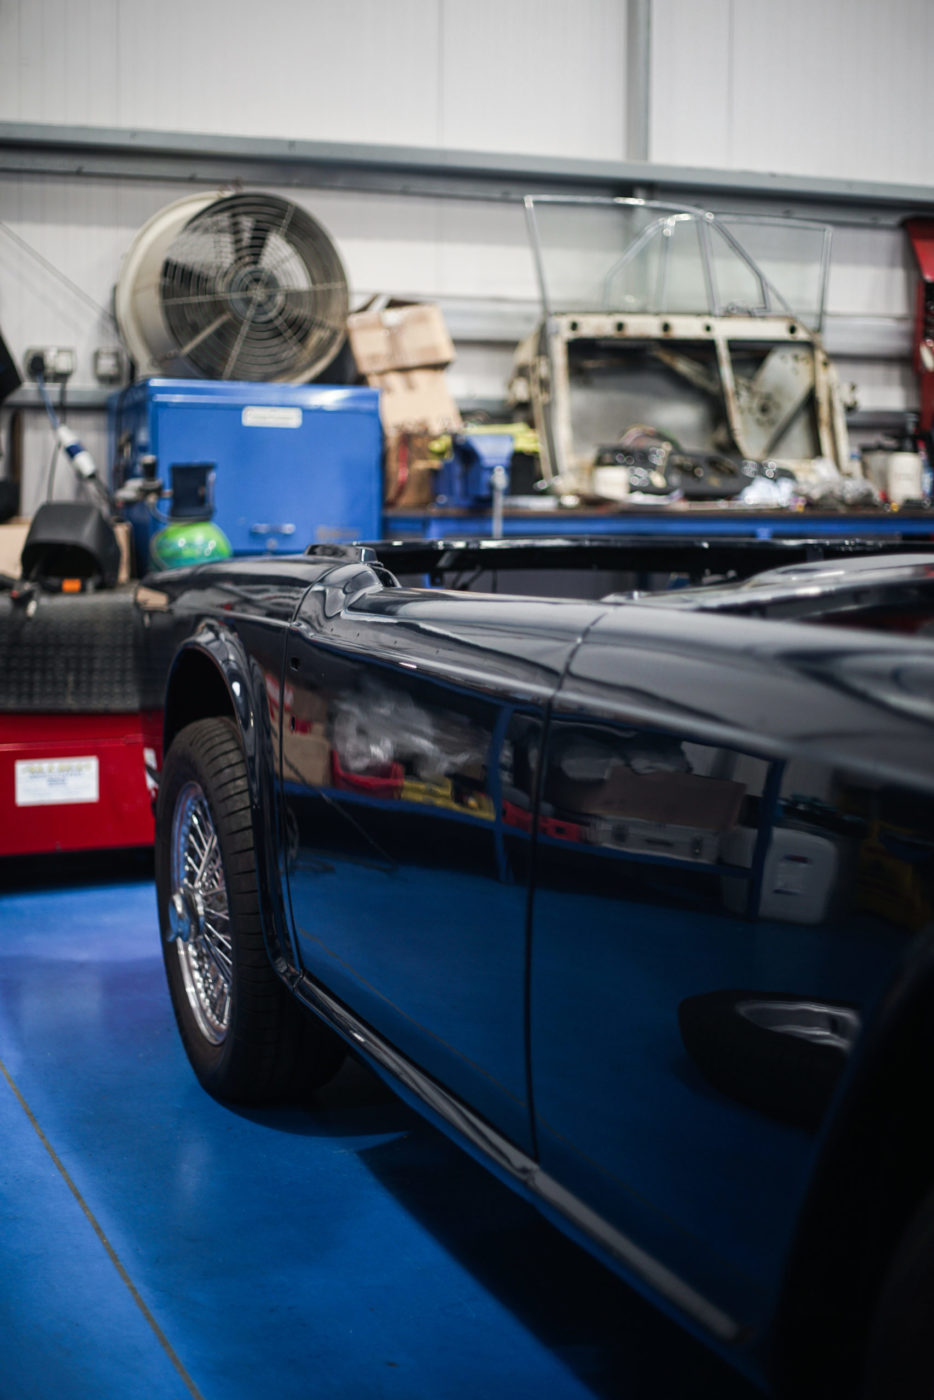
TR5 completion!
You can read about the full story of this car here! At the start of November 2019, this 1968 Triumph TR5 came into our workshop


You can read about the full story of this car here! At the start of November 2019, this 1968 Triumph TR5 came into our workshop
Our 1968 Triumph TR5 is on the home straight with just a handful of fine tuning tweaks that need to be carried out. We’ve noticed

Our 1968 Triumph TR5 has been a total nut and bolt restoration, with it looking like just a chassis and some mechanics only 6 months

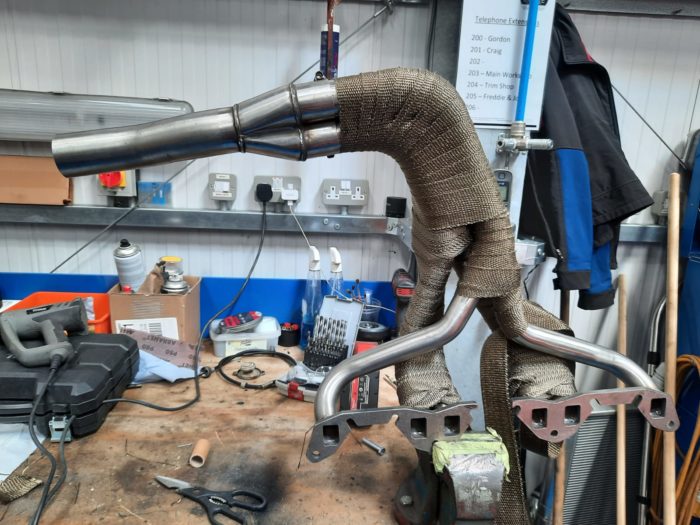
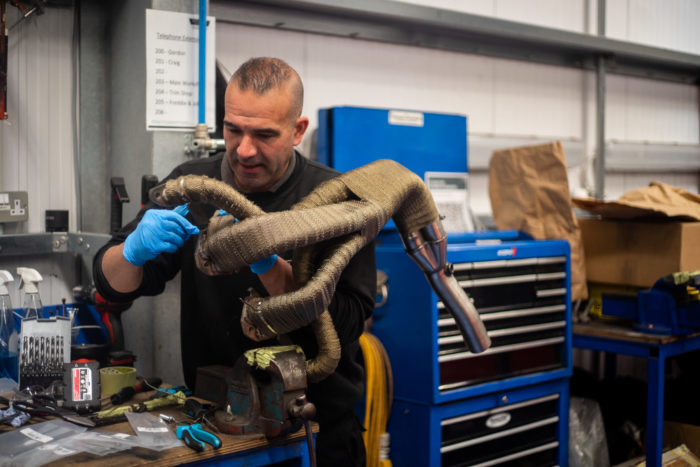
Mauro has been heat-wrapping the Triumph TR5 exhaust using a Header Wrap. This is done to improve the exhaust flow and to reduce the risk of

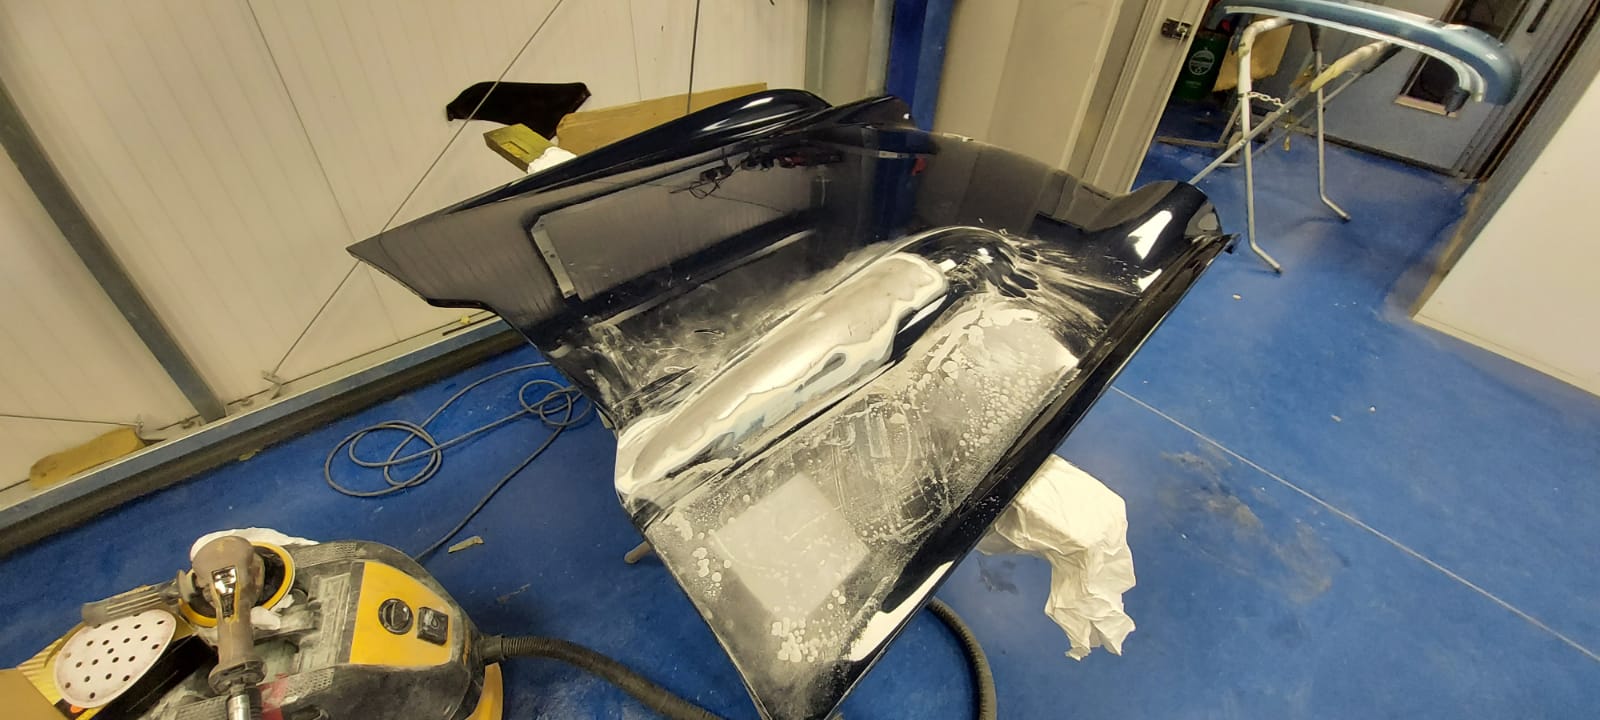
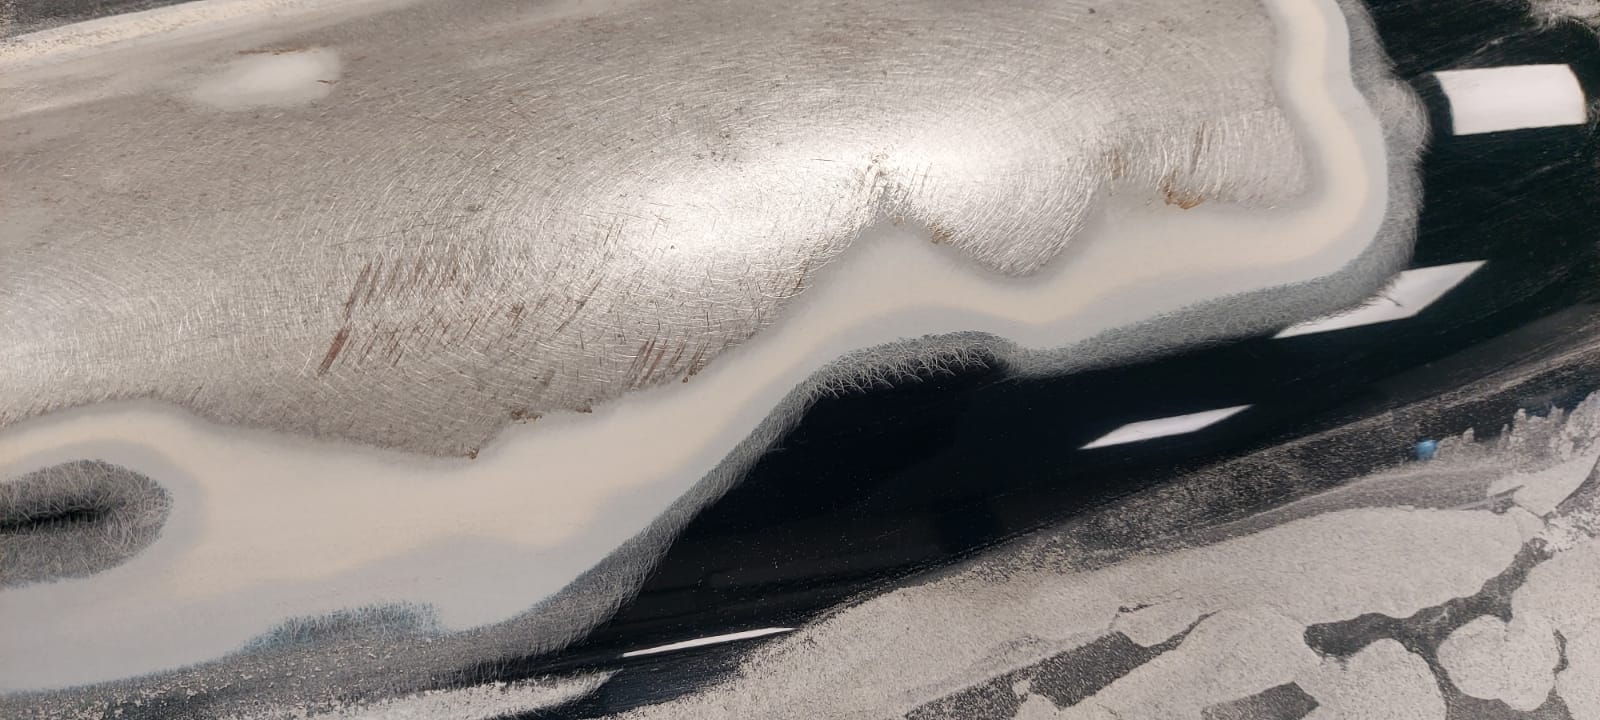
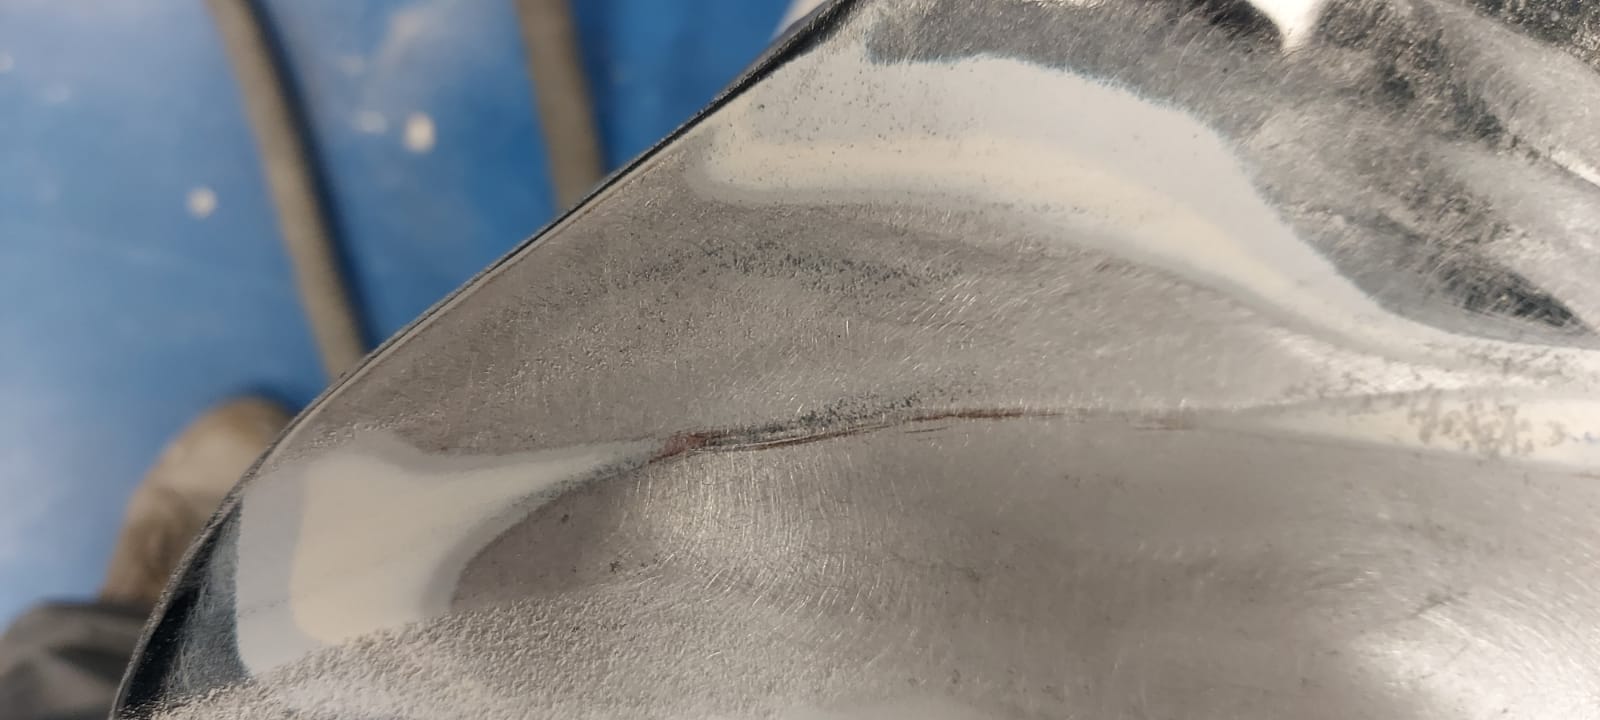
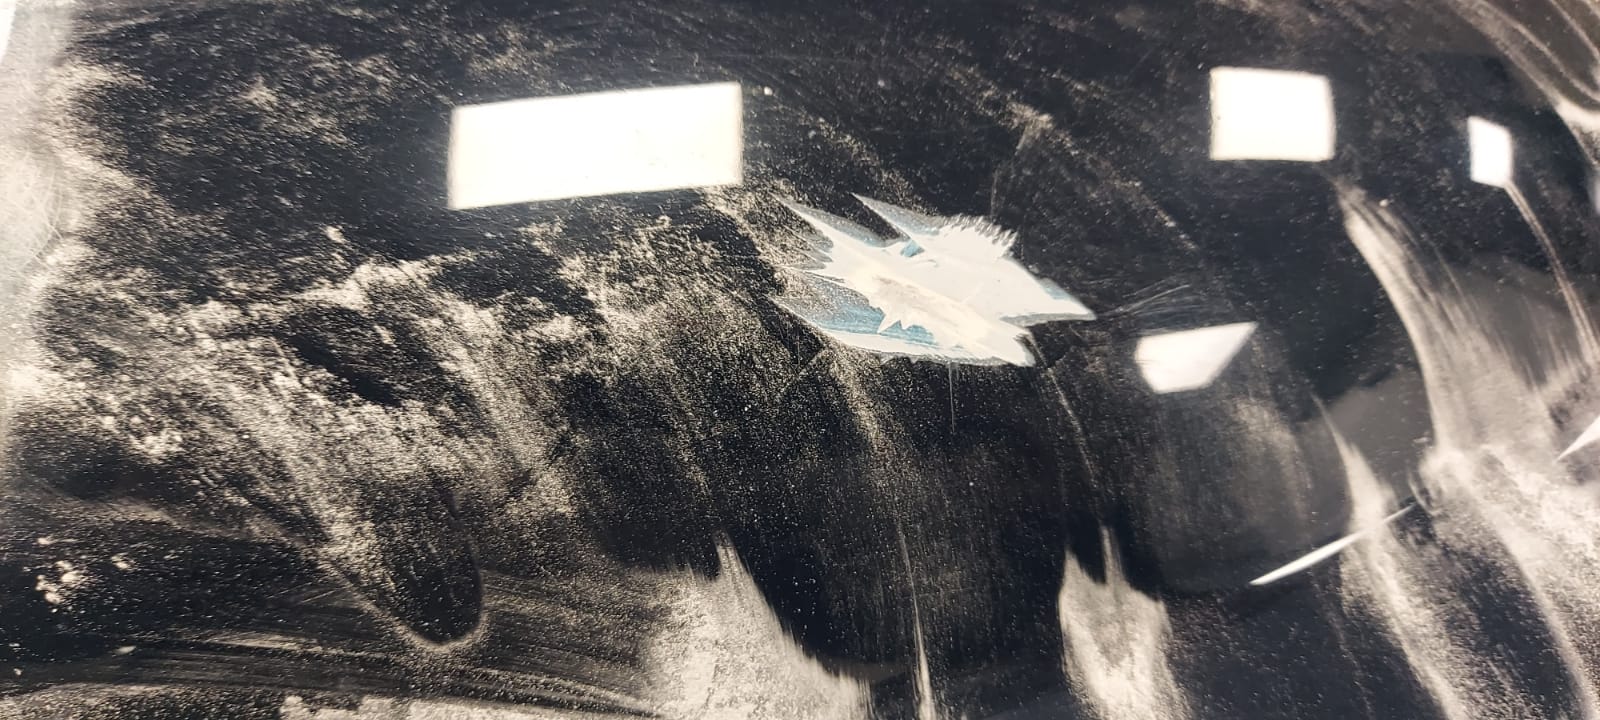
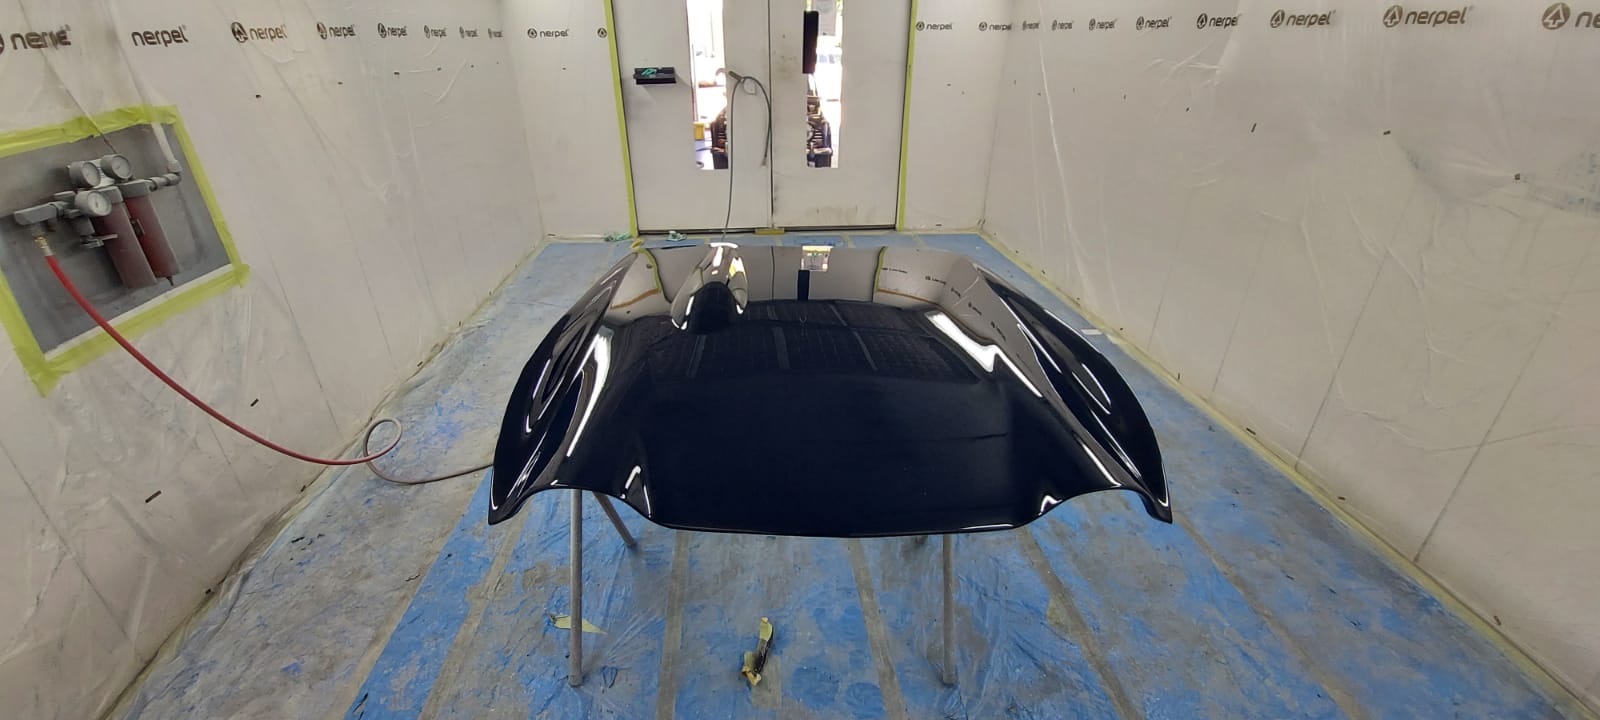
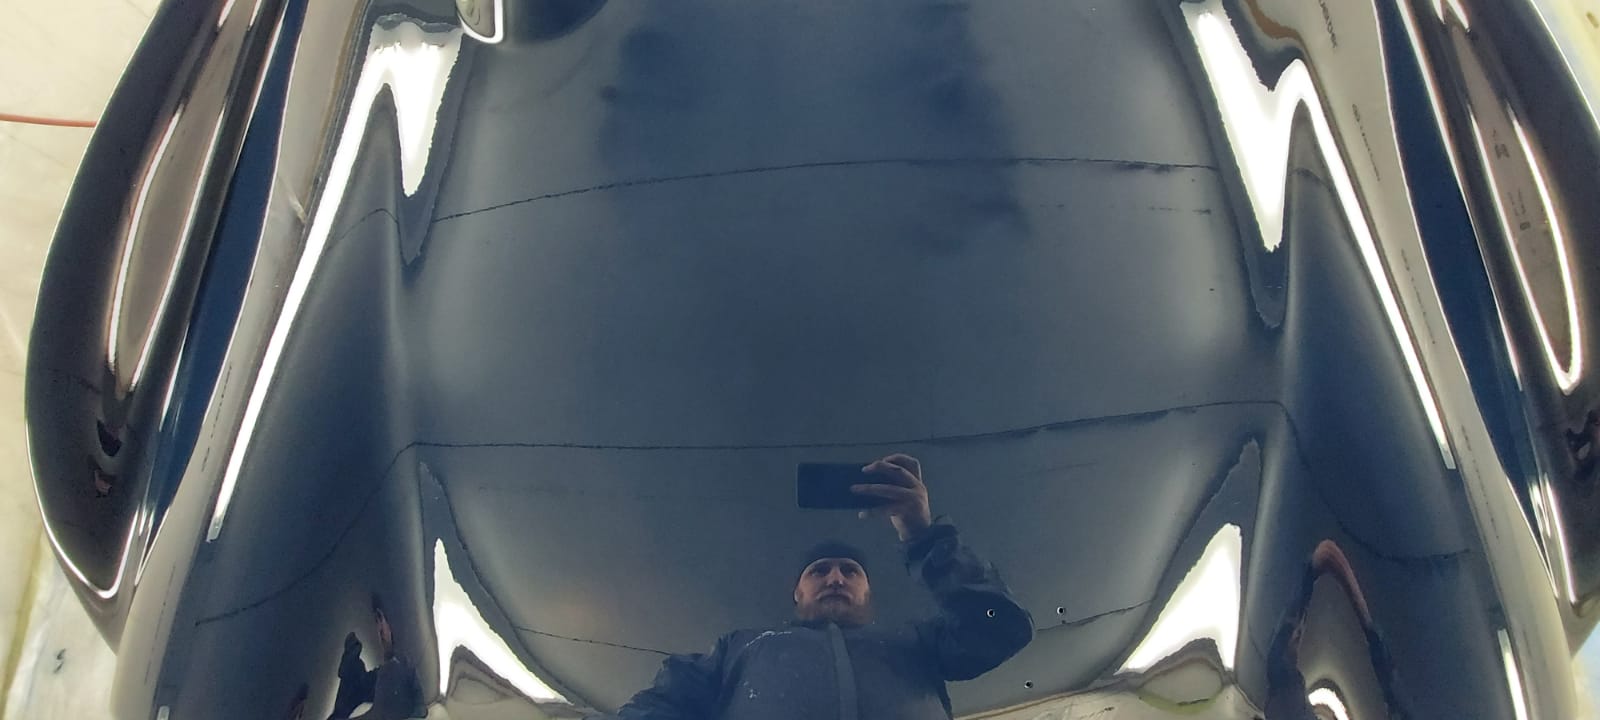
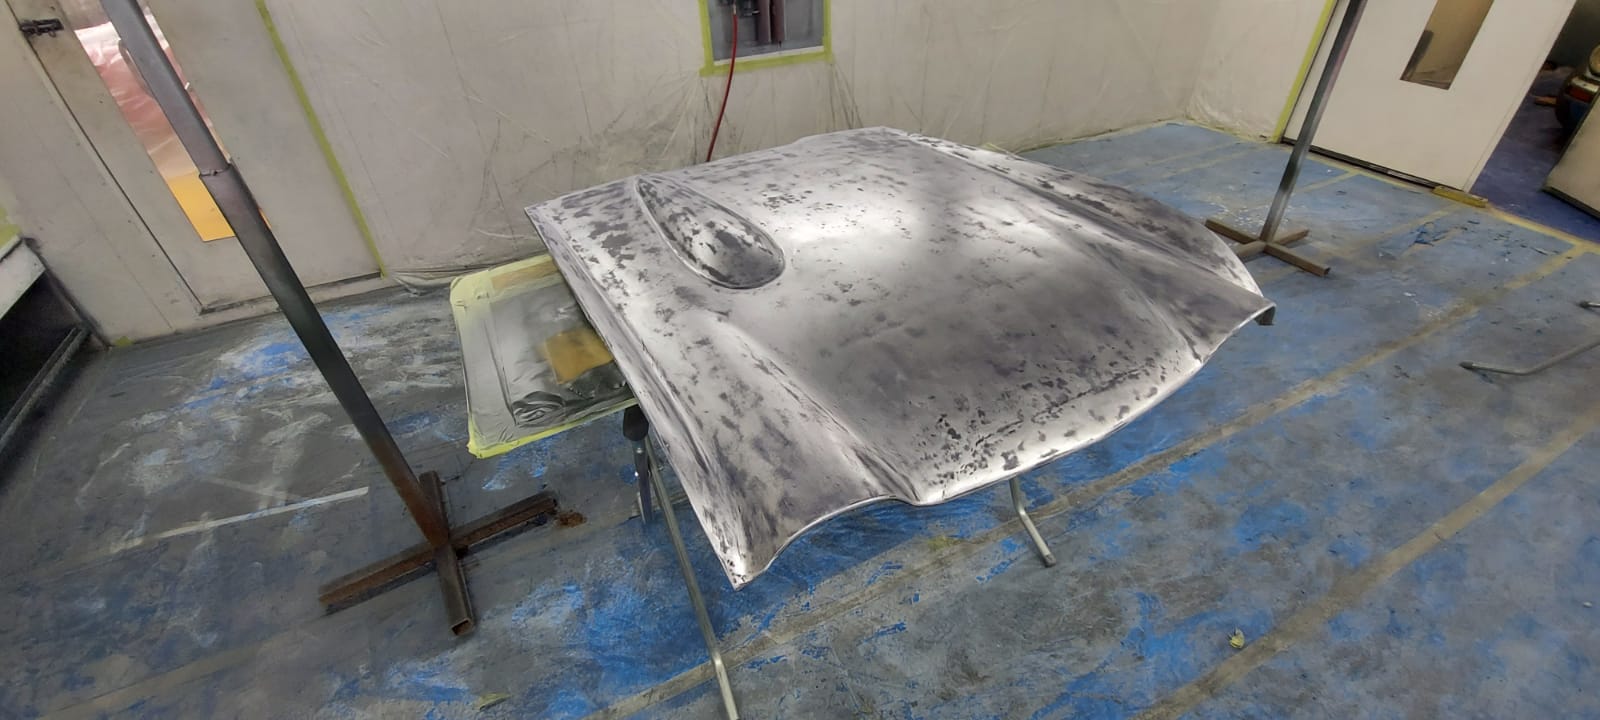
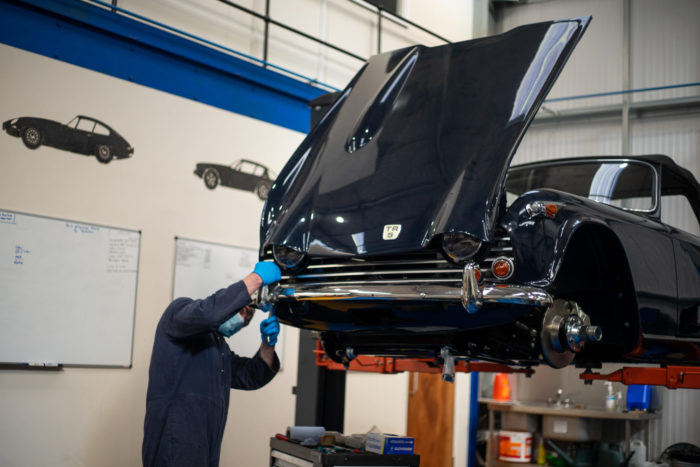
We had Auto Electrics come over to wire up all of the electrics on our 1968 Triumph TR5. Our TR5 has had its bonnet repainted.
The 1968 Triumph TR5 has had its seat belts fitted by Mauro who tells us they needed a bit of modifying and focus to get
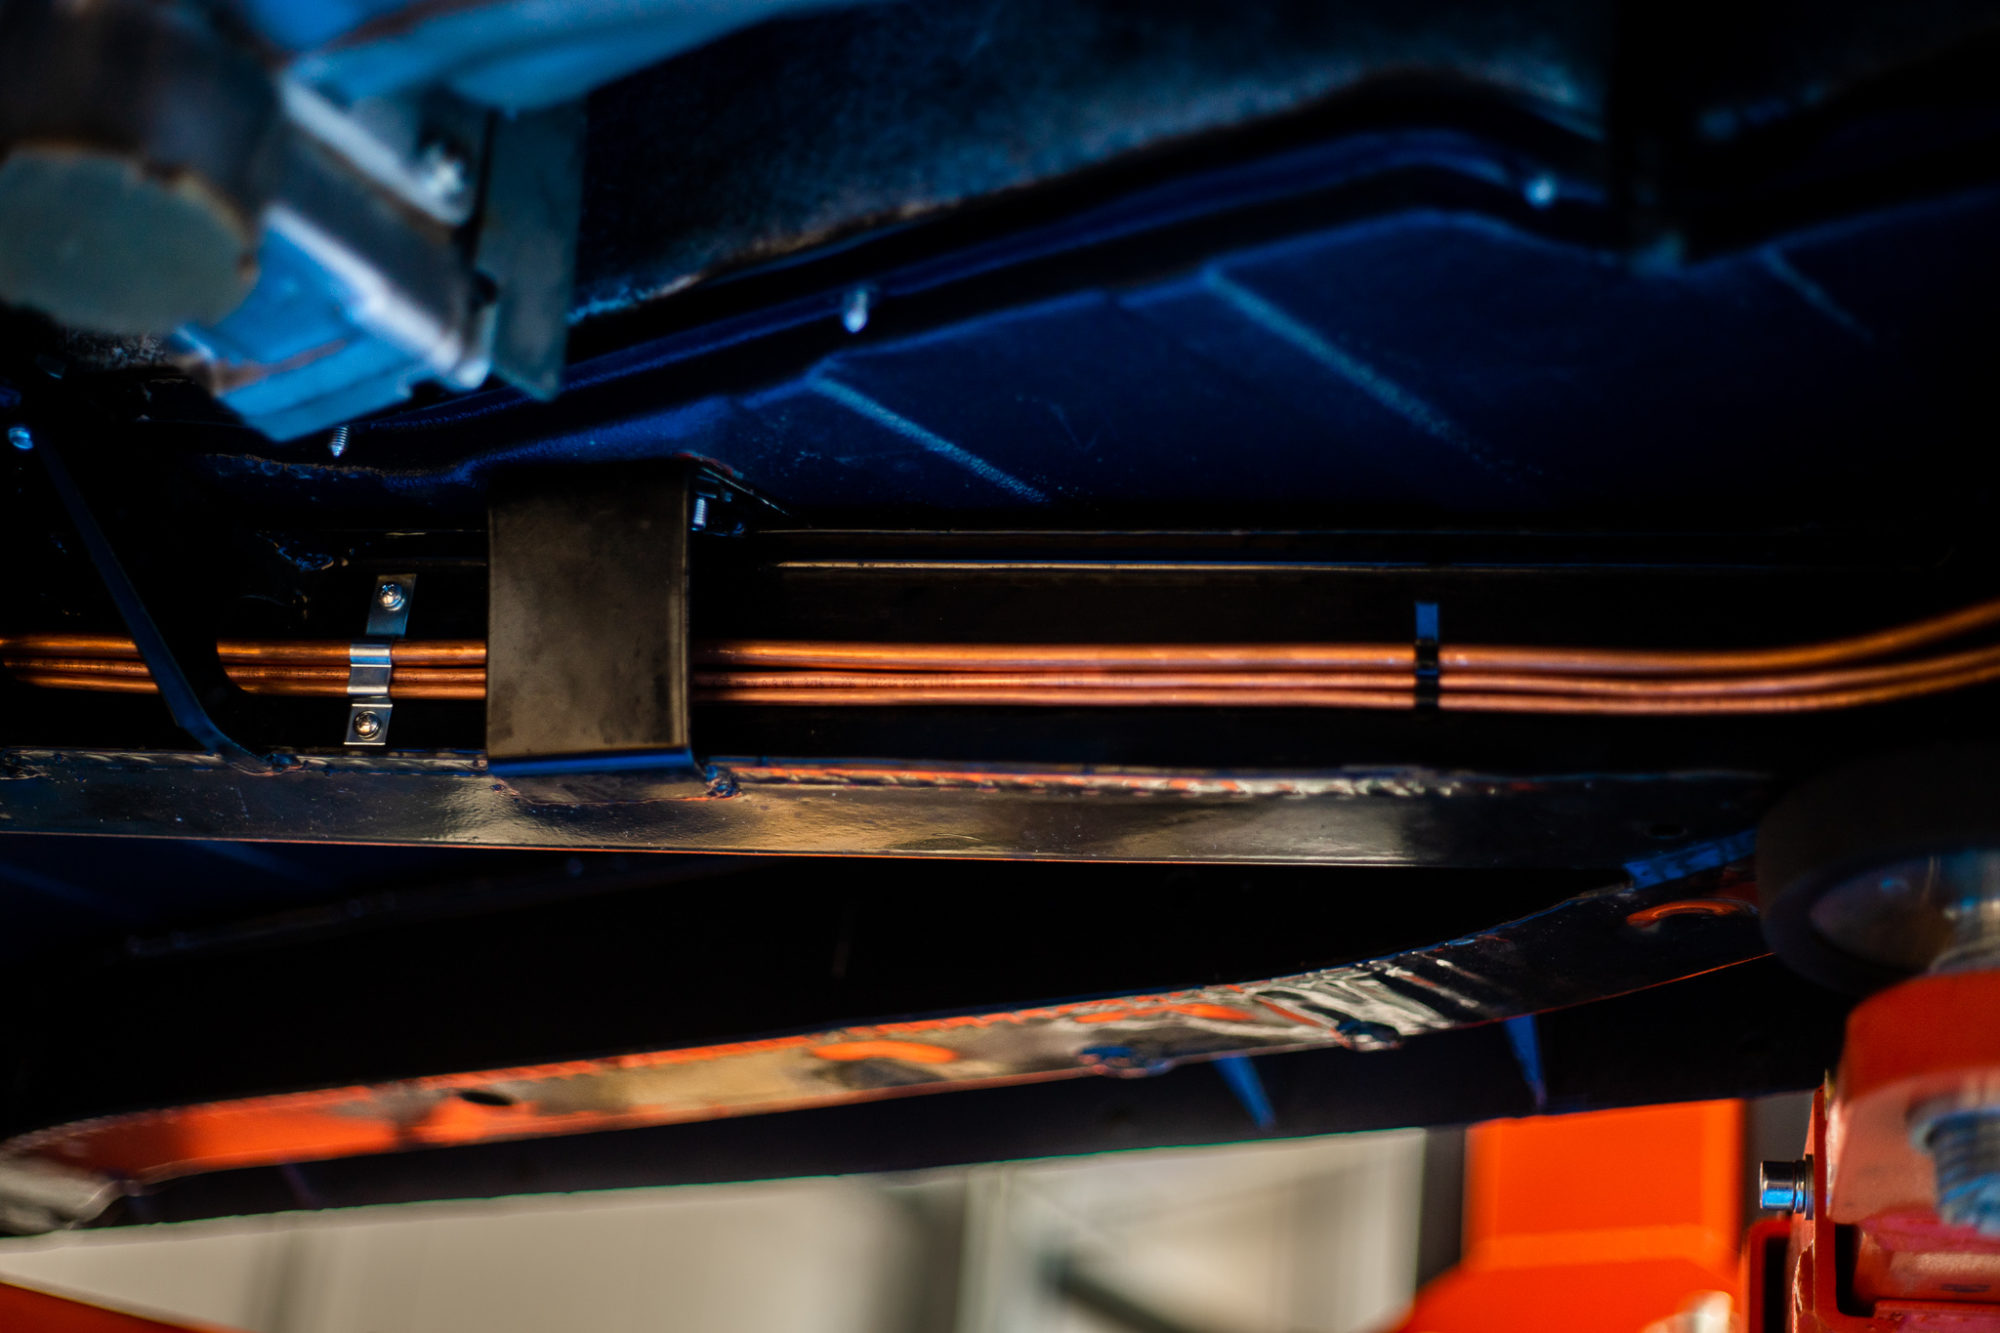
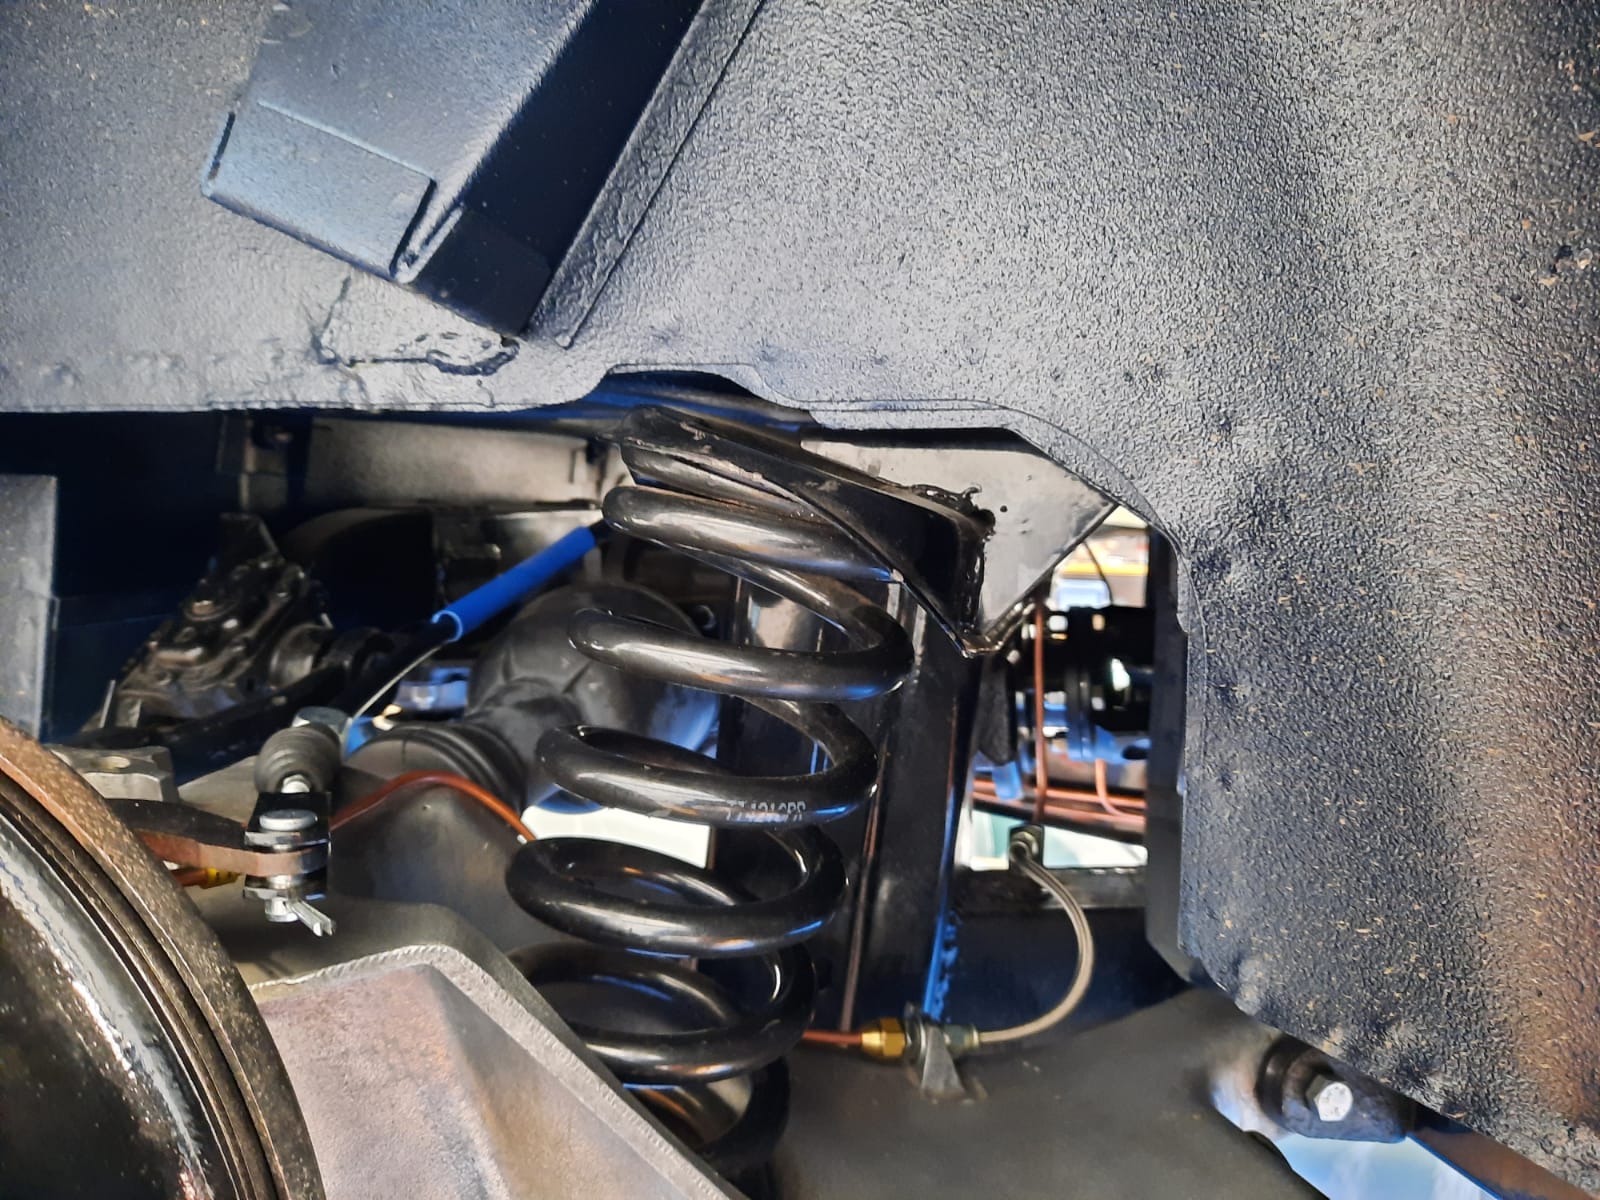
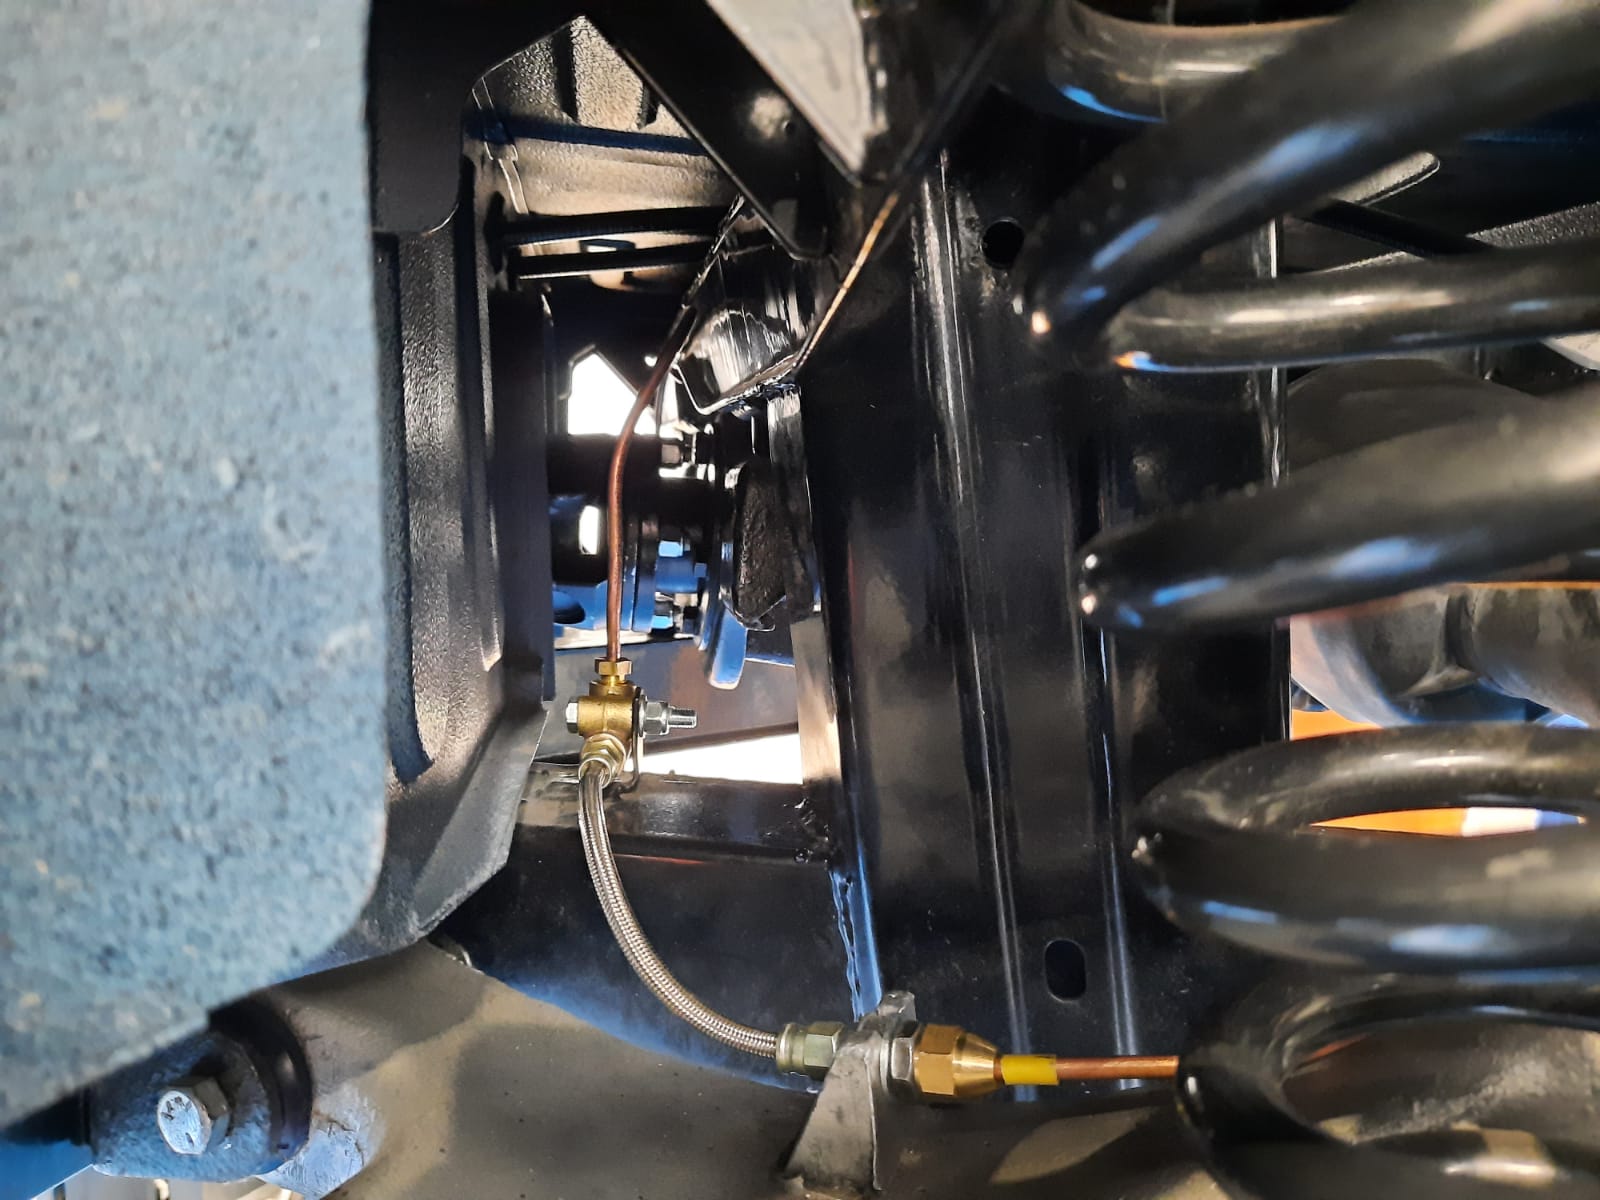
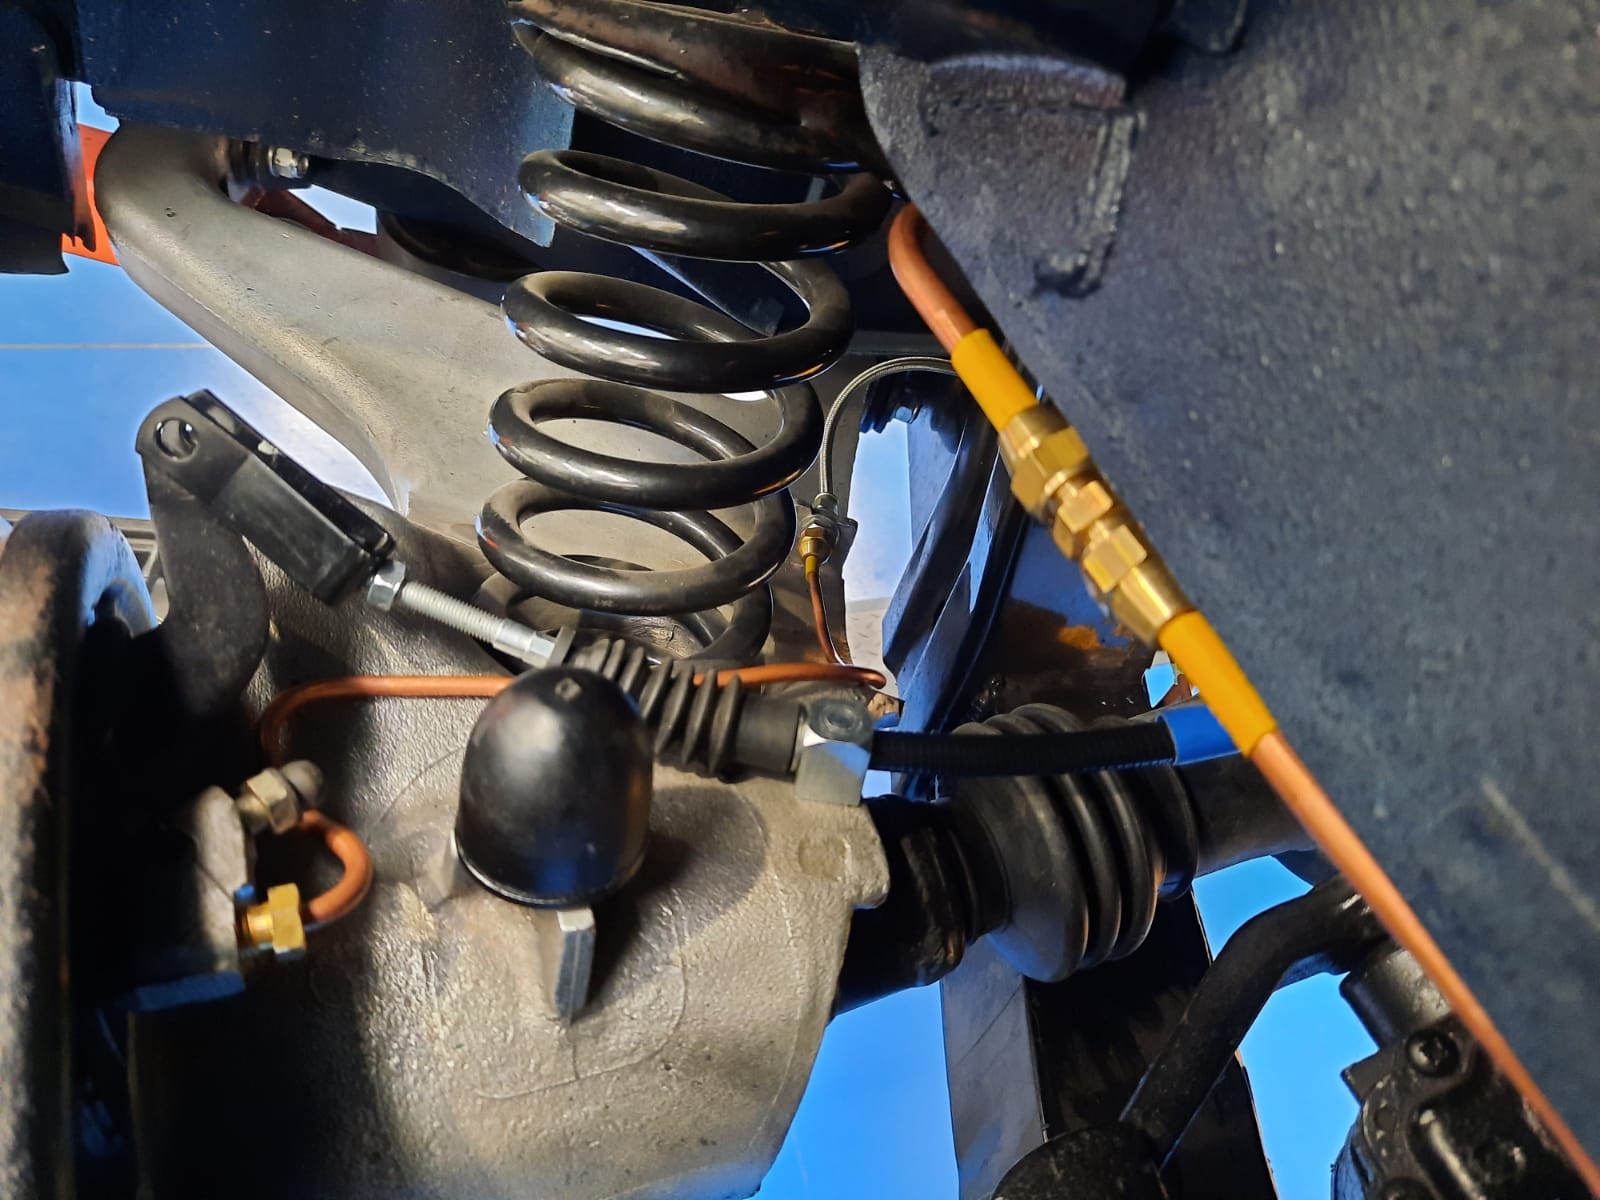
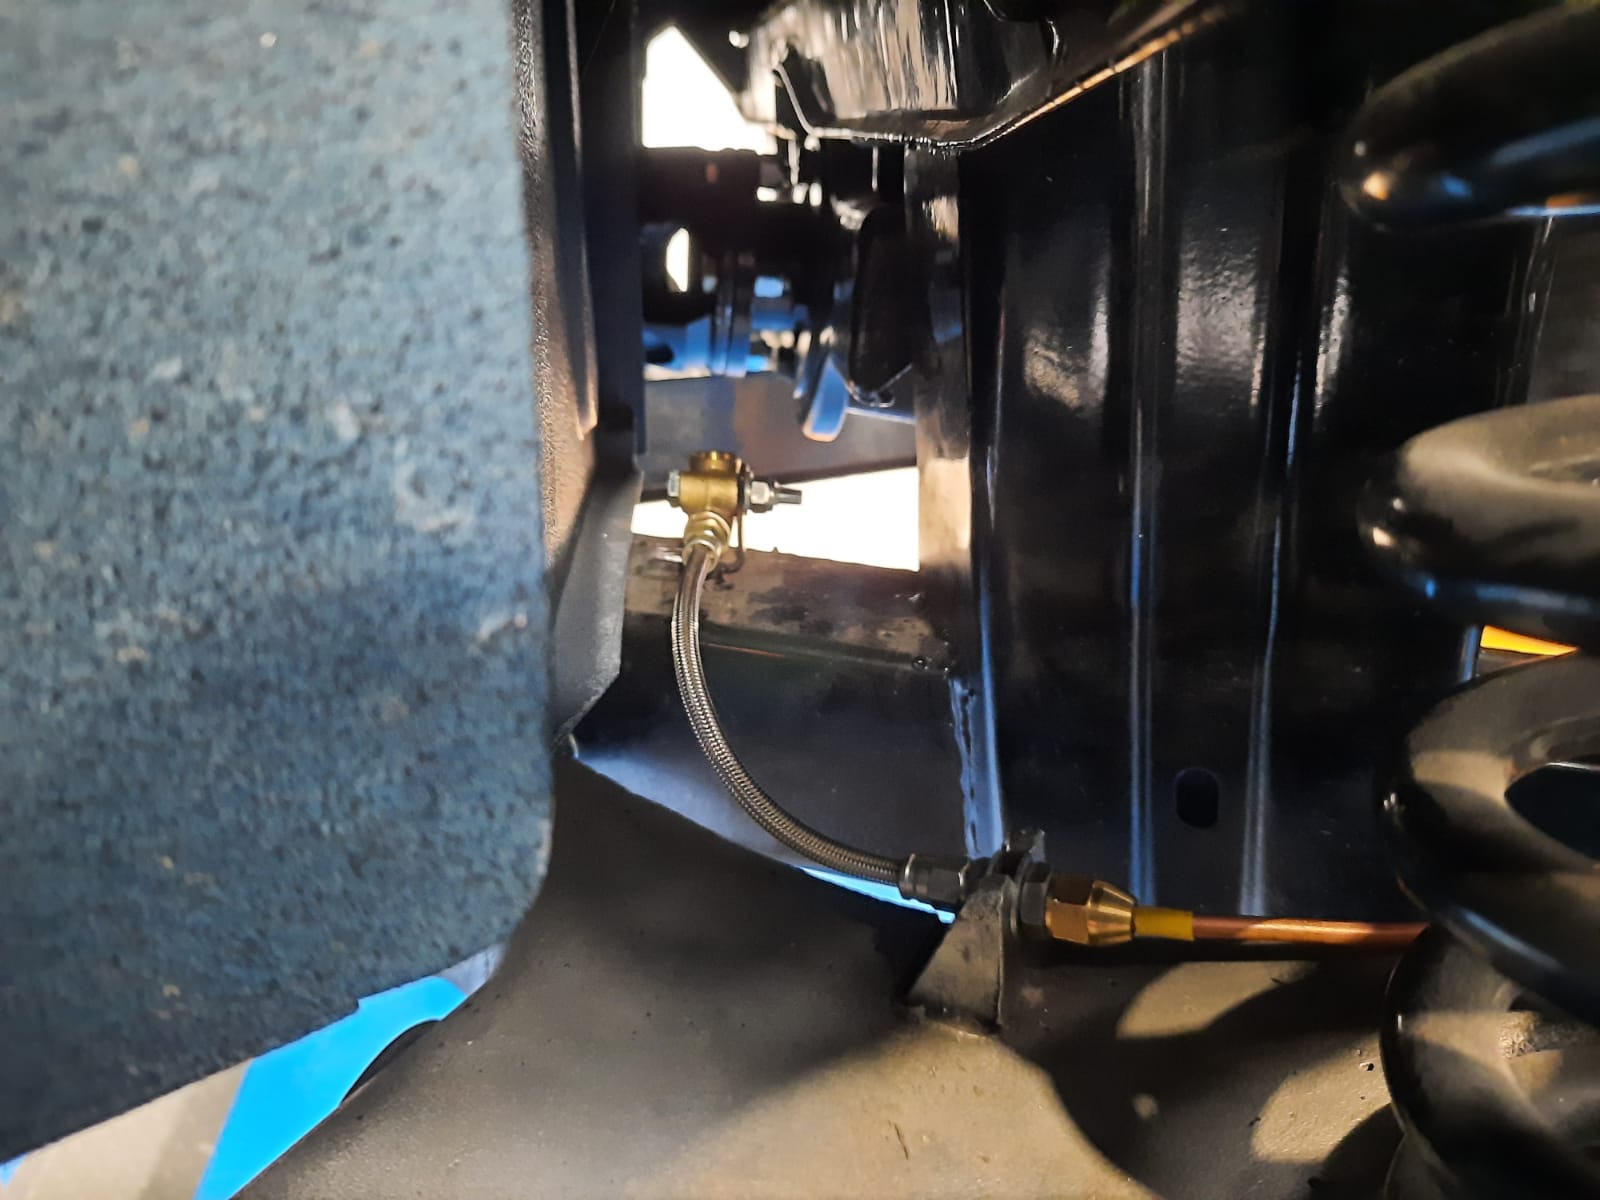
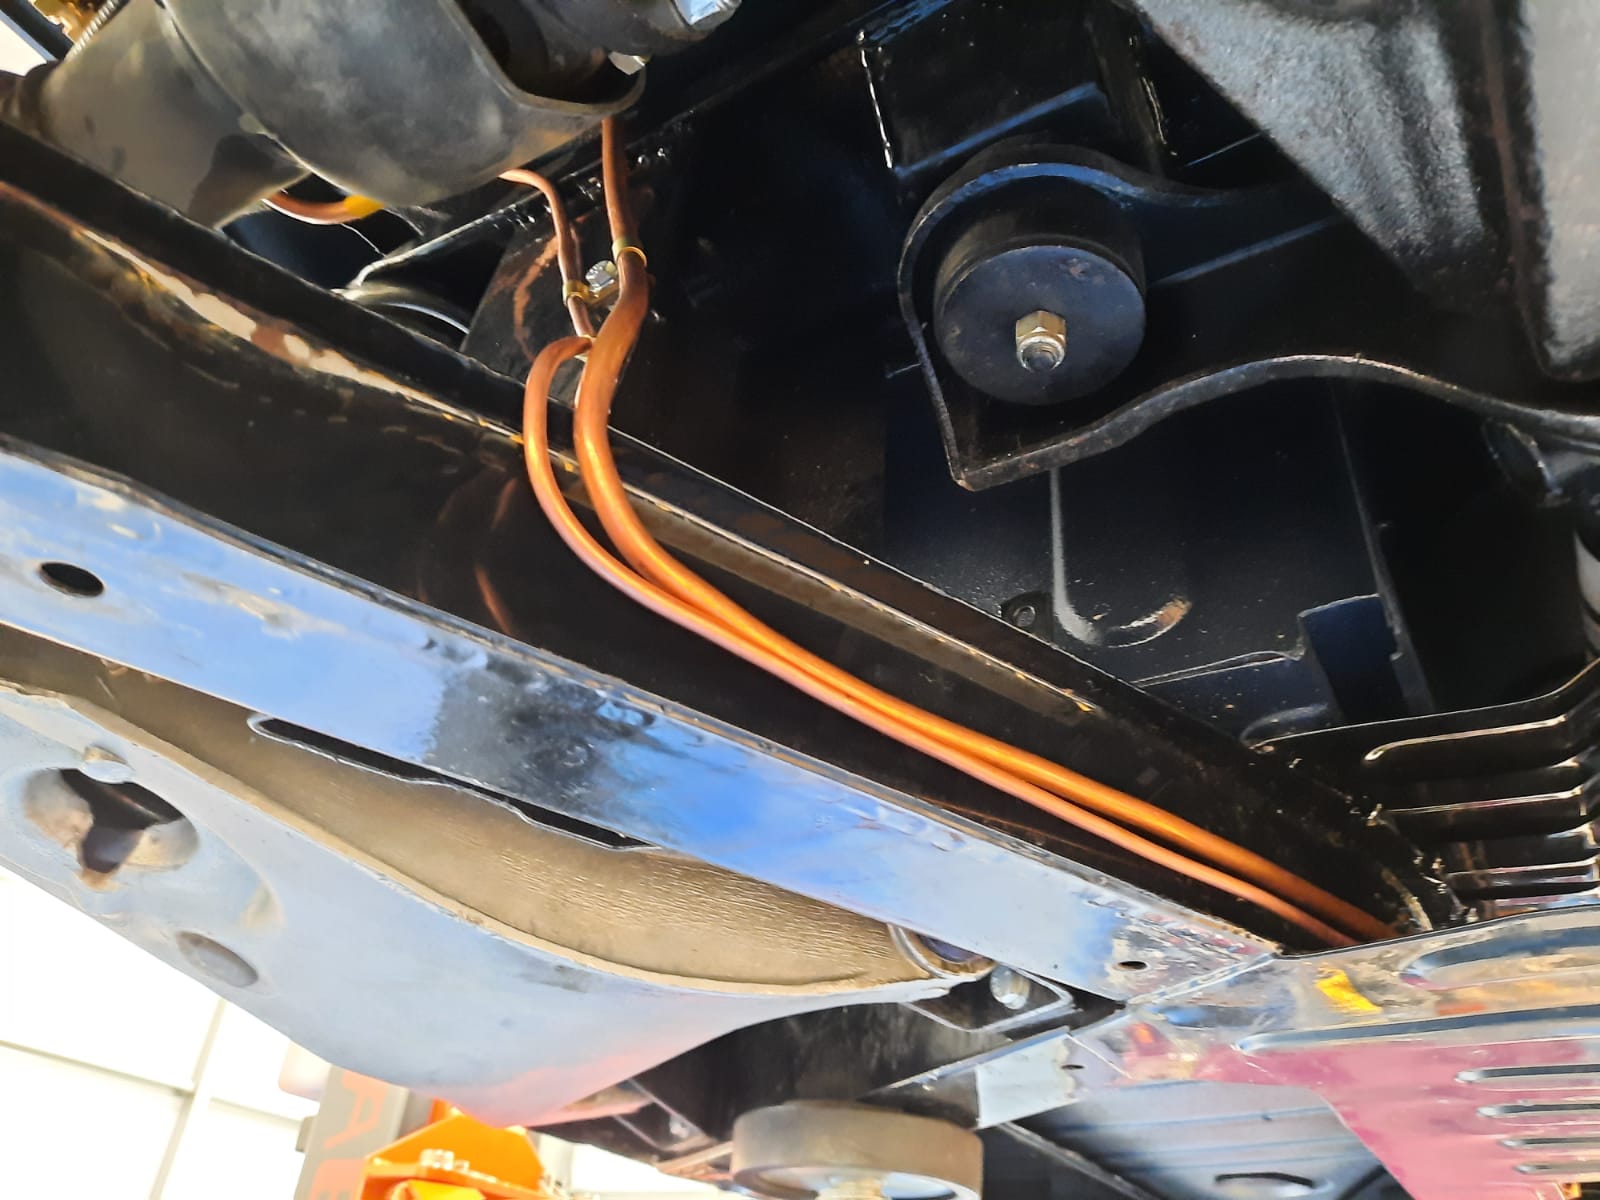
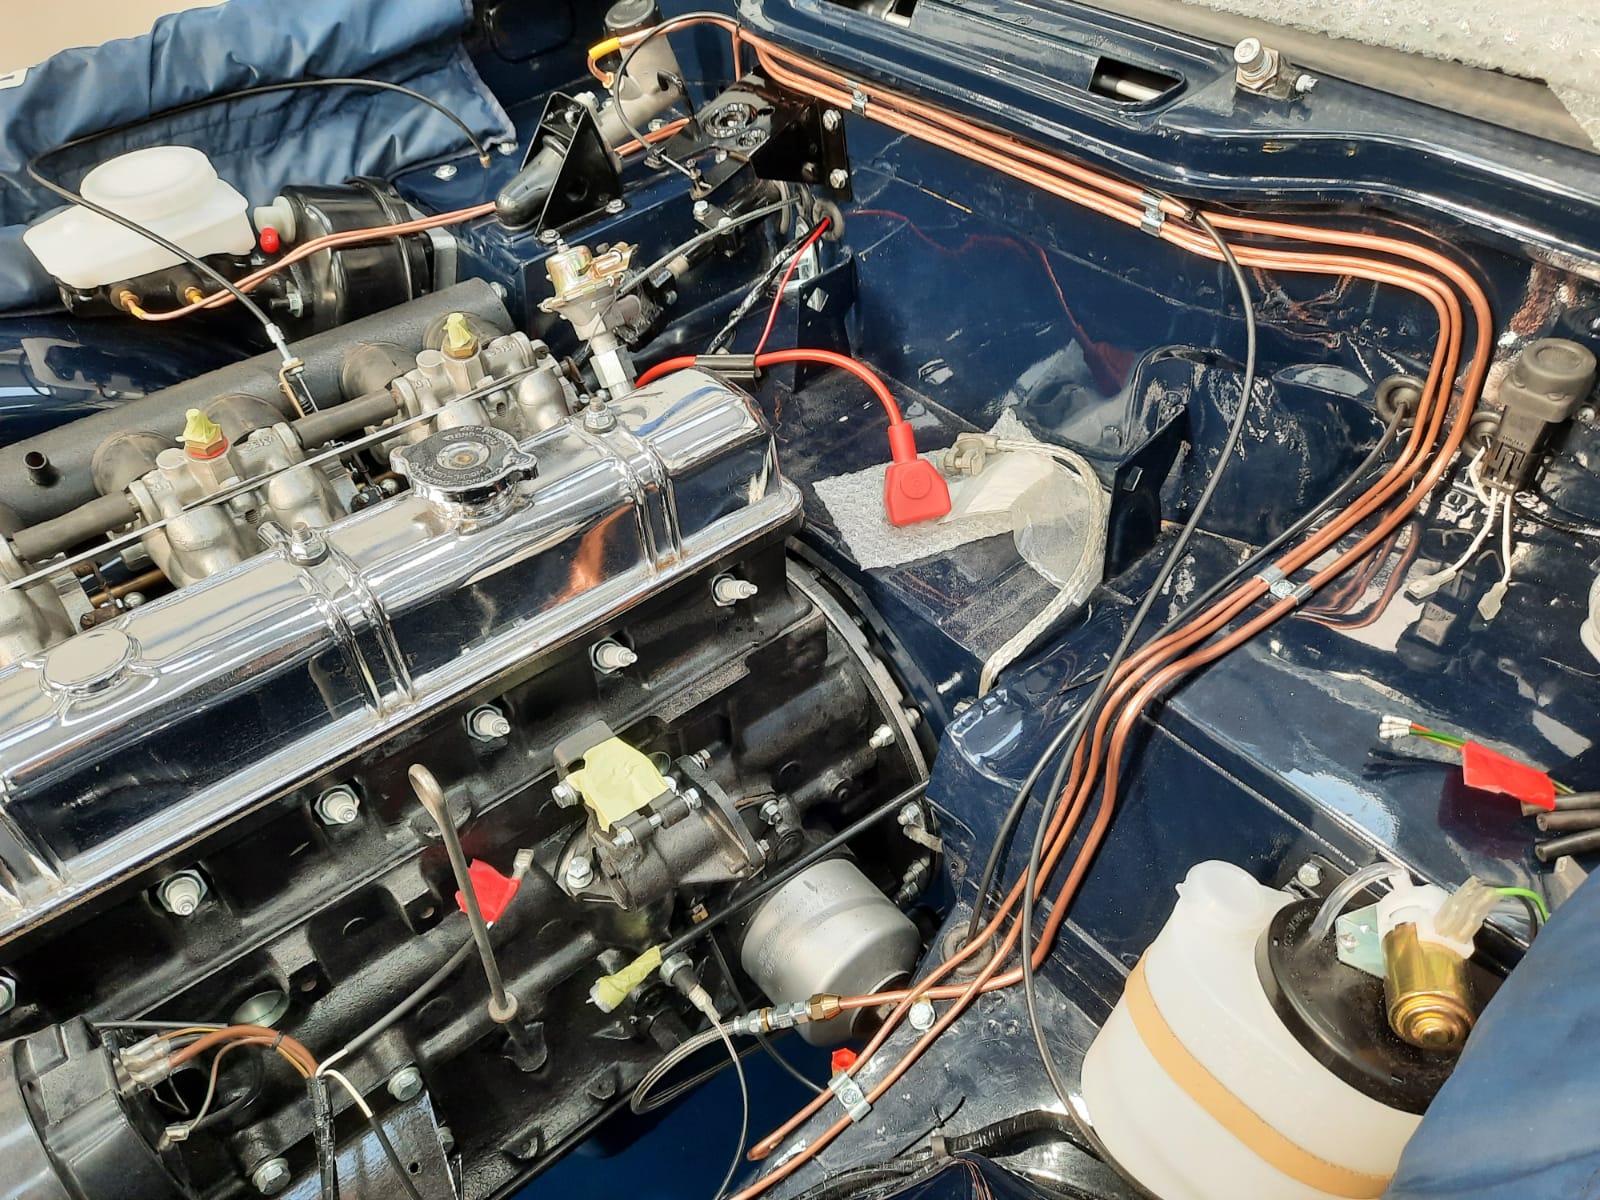
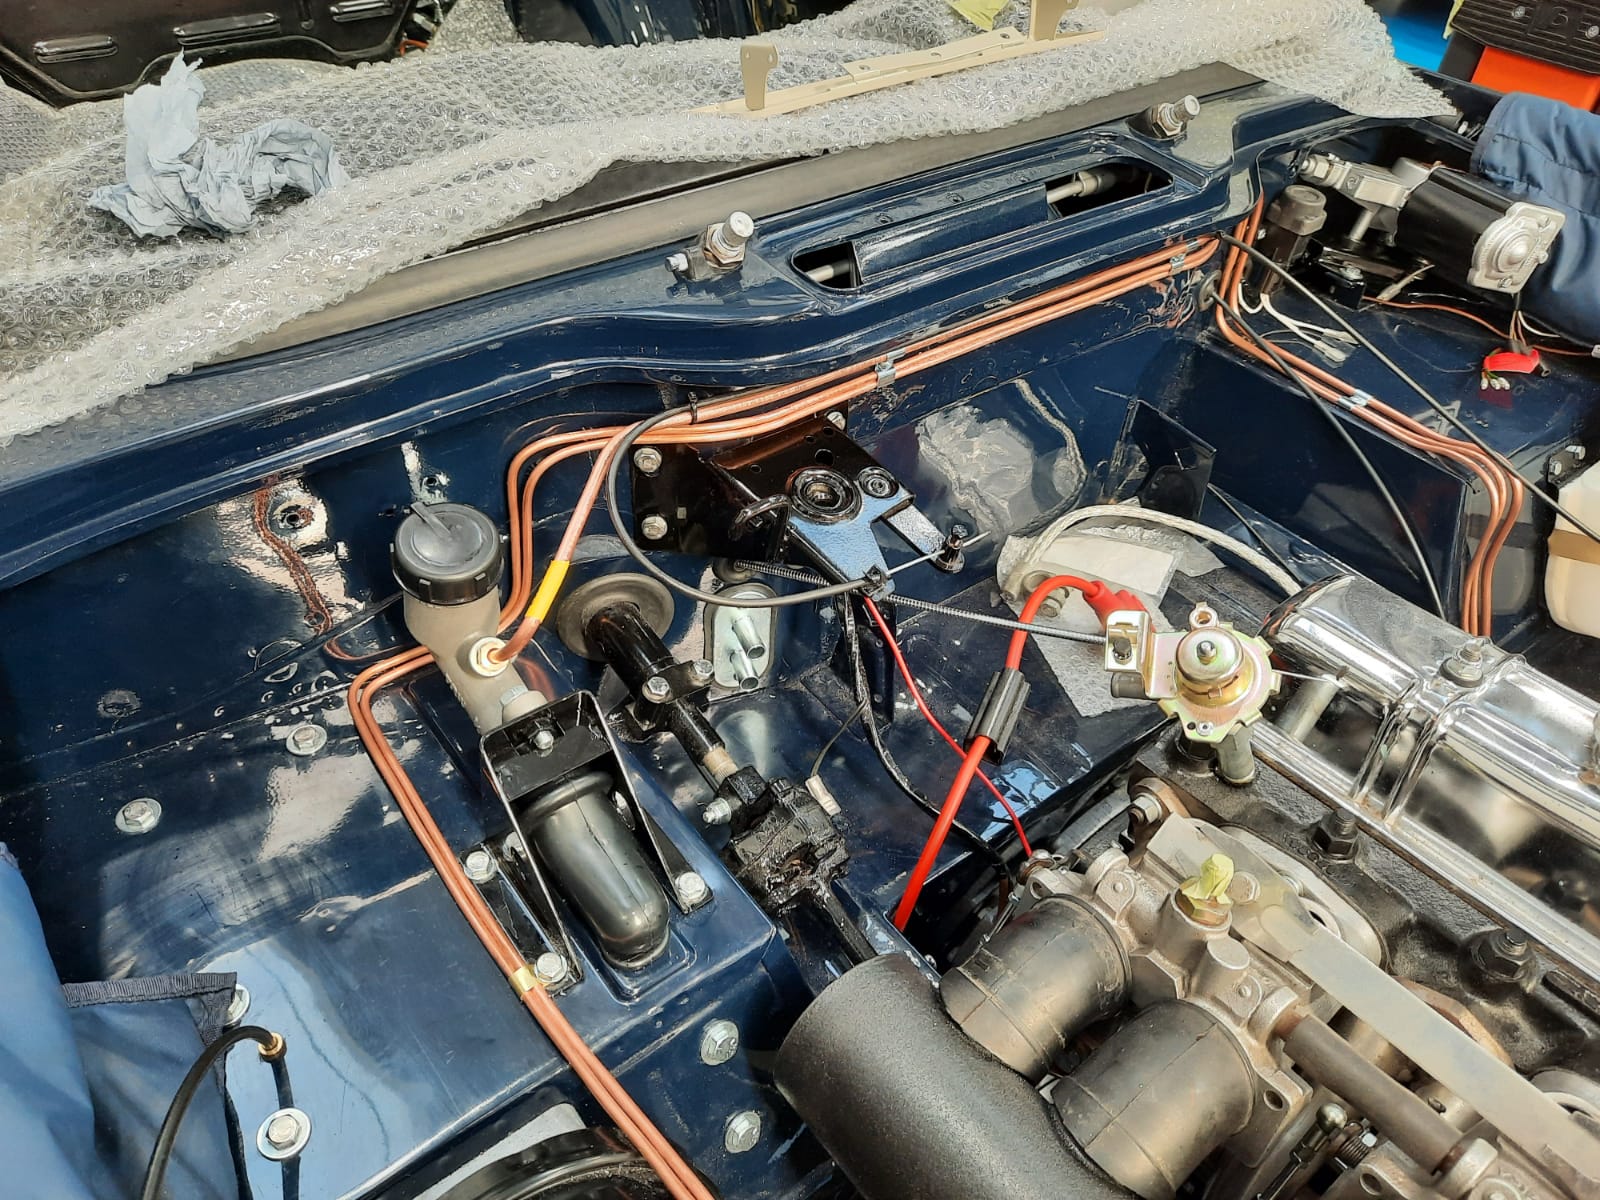
Our classic Triumph TR5 is progressing well through its nut and bolt restoration. Mauro has recently fitted the fuel and brake lines as well as

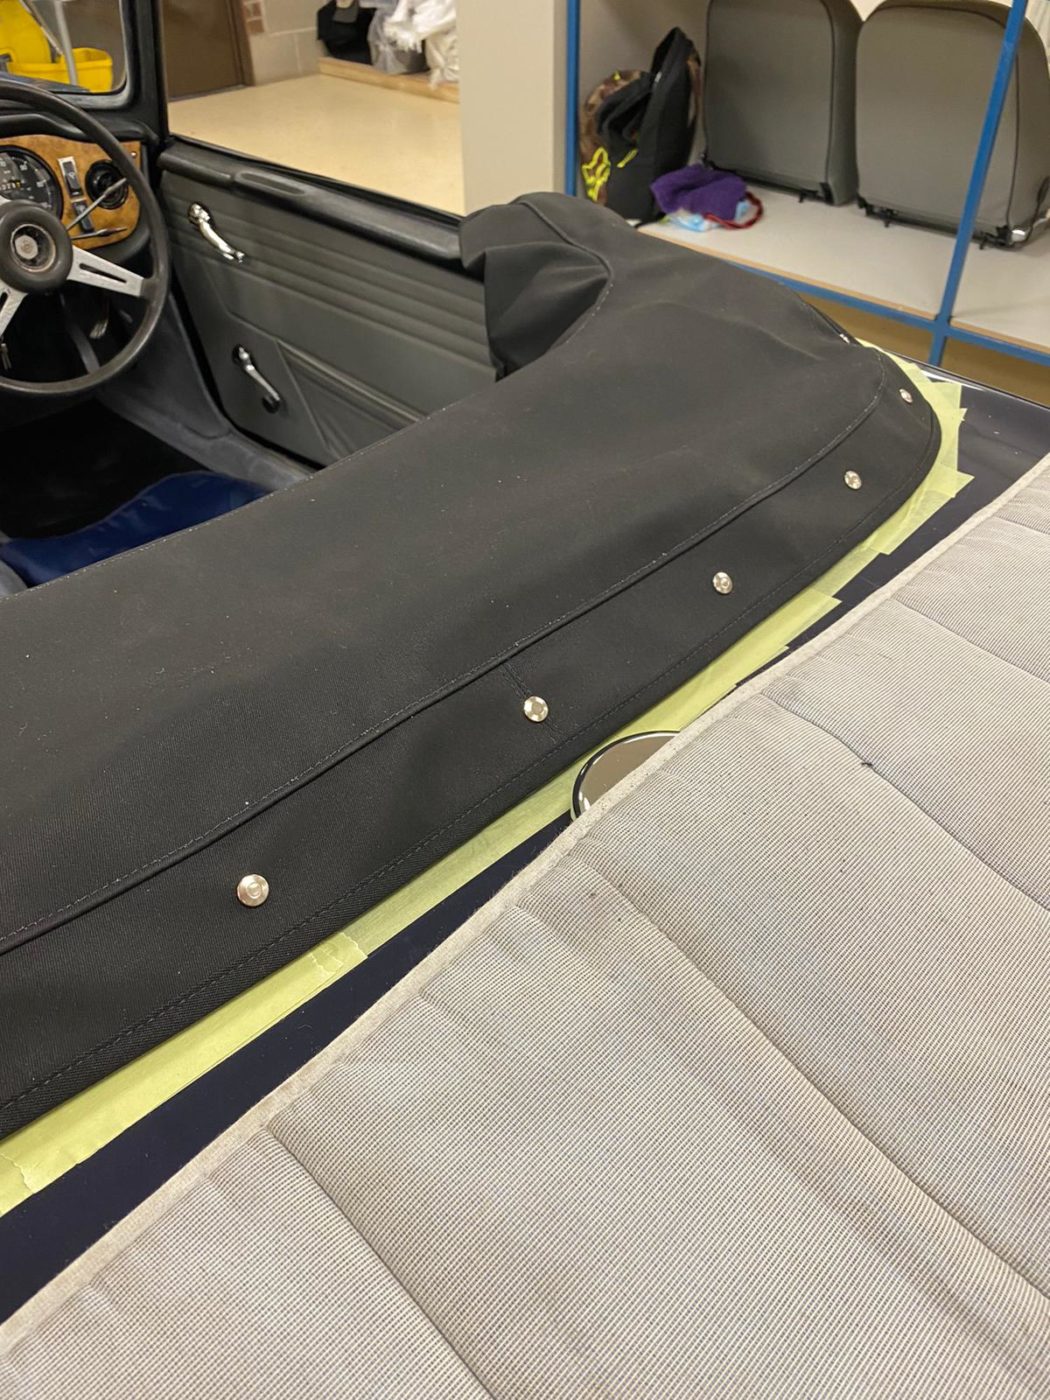
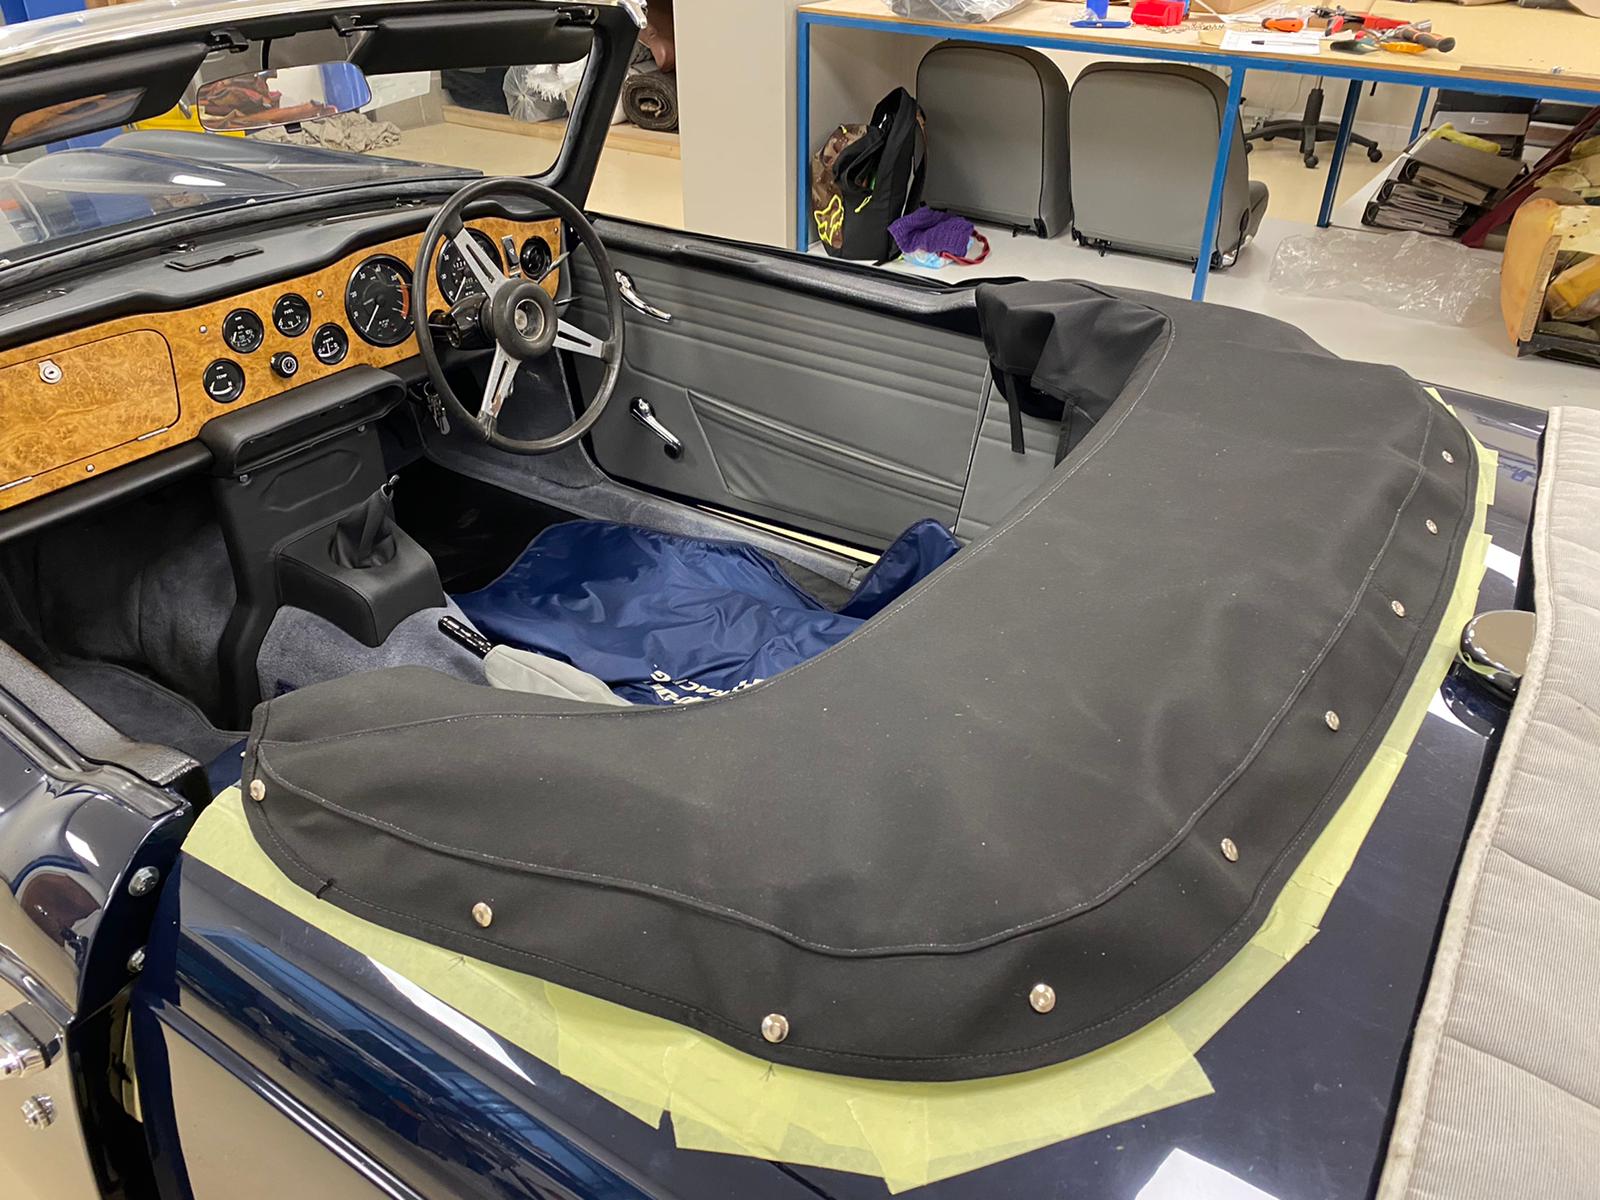
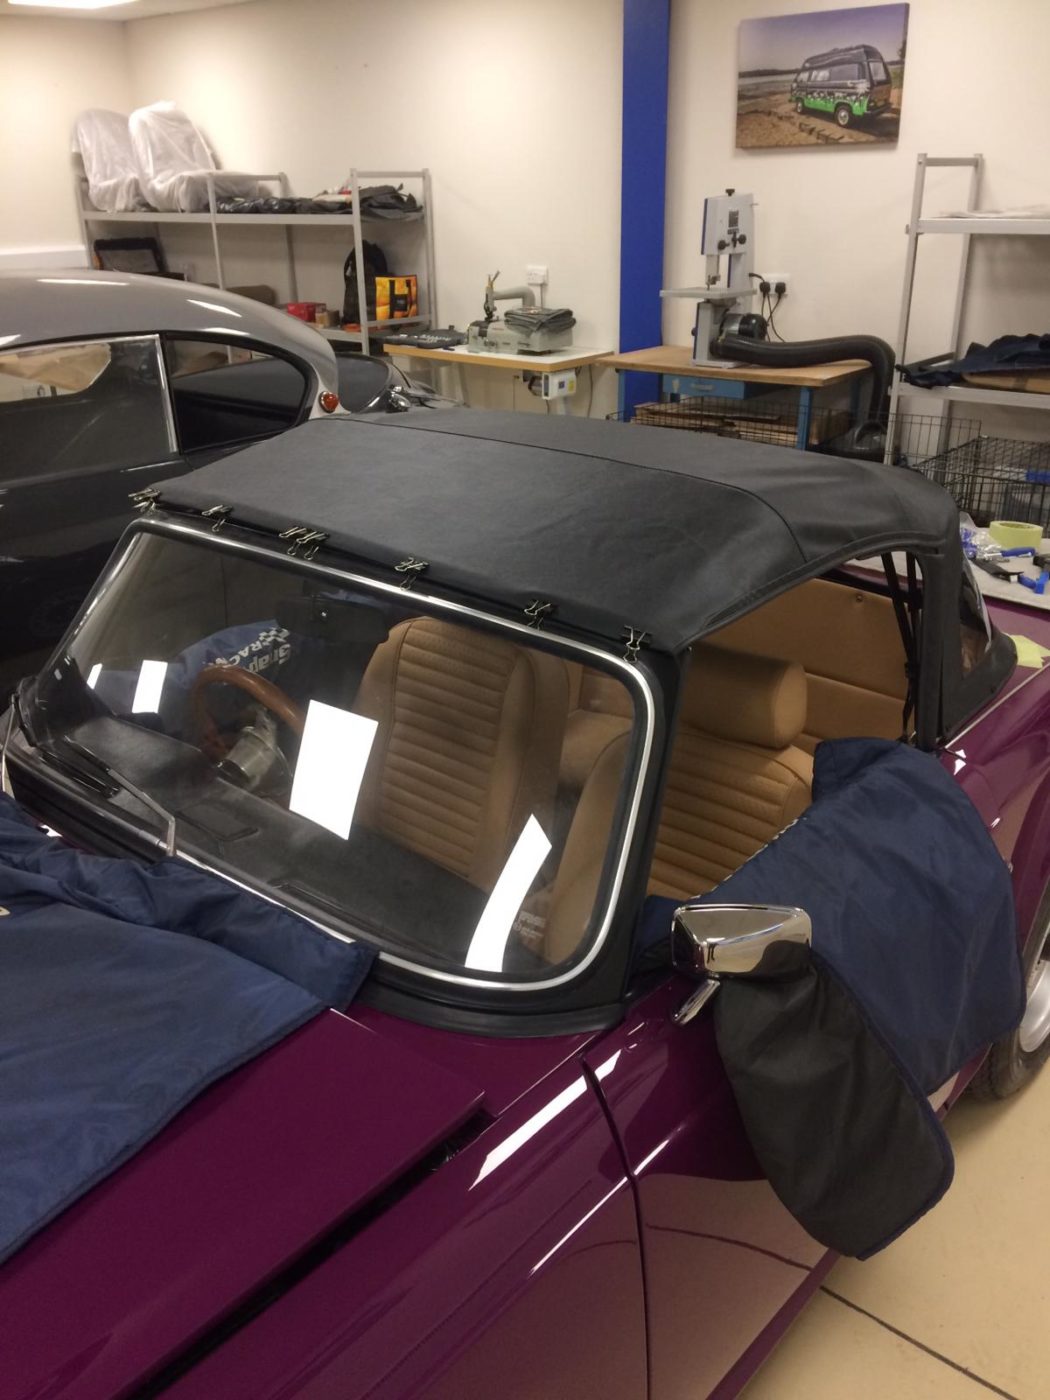
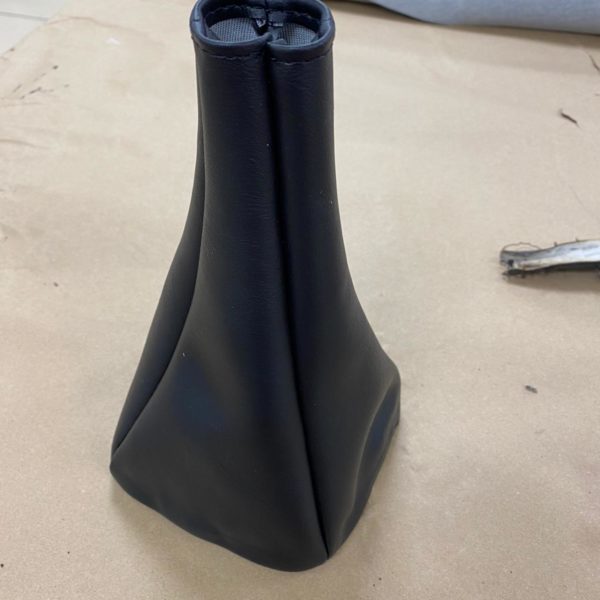
Kath has been working on the TR5 hood recently in the trim shop with the rest of the team. She bagan the process of making

Kath and Brian have both been working on our 1968 Triumph TR5 recently. Kath has fitted the door cards which could be placed in now

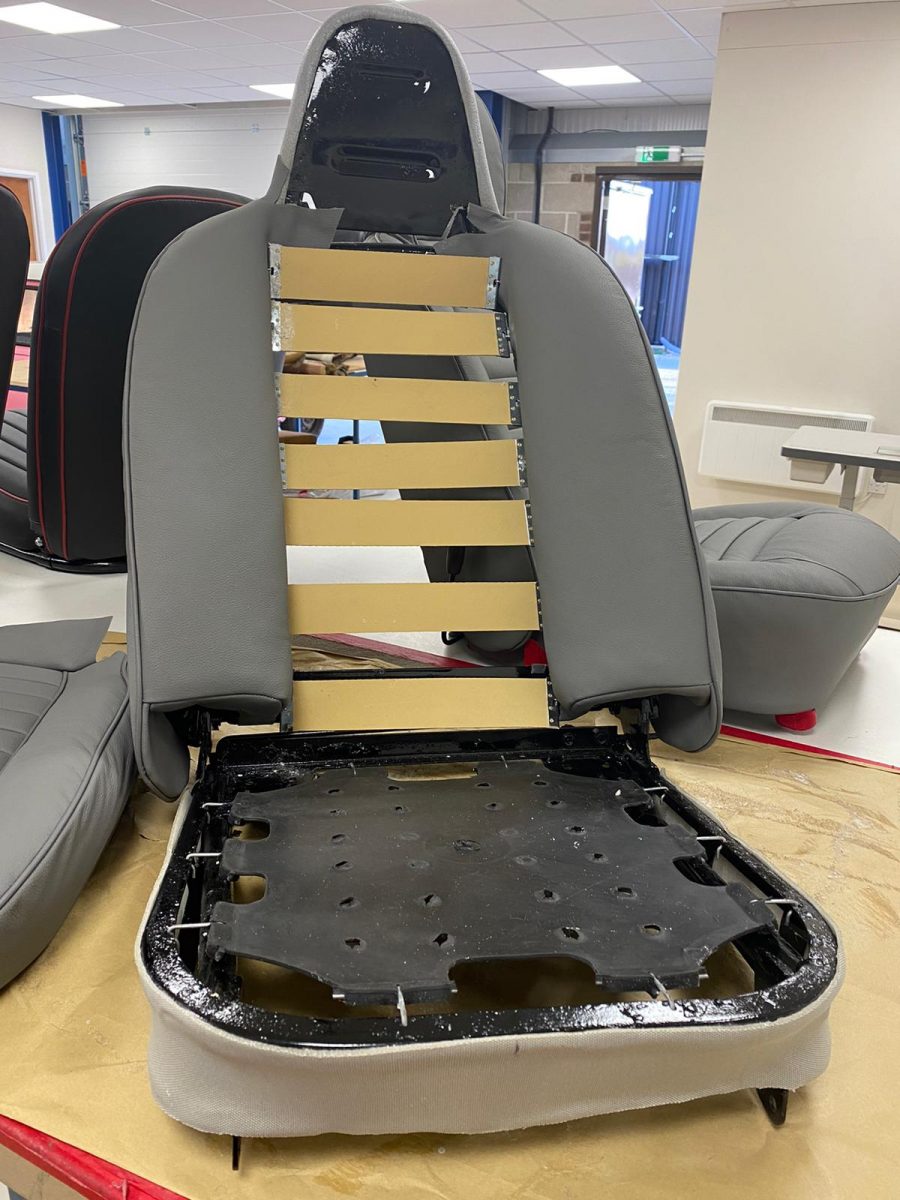
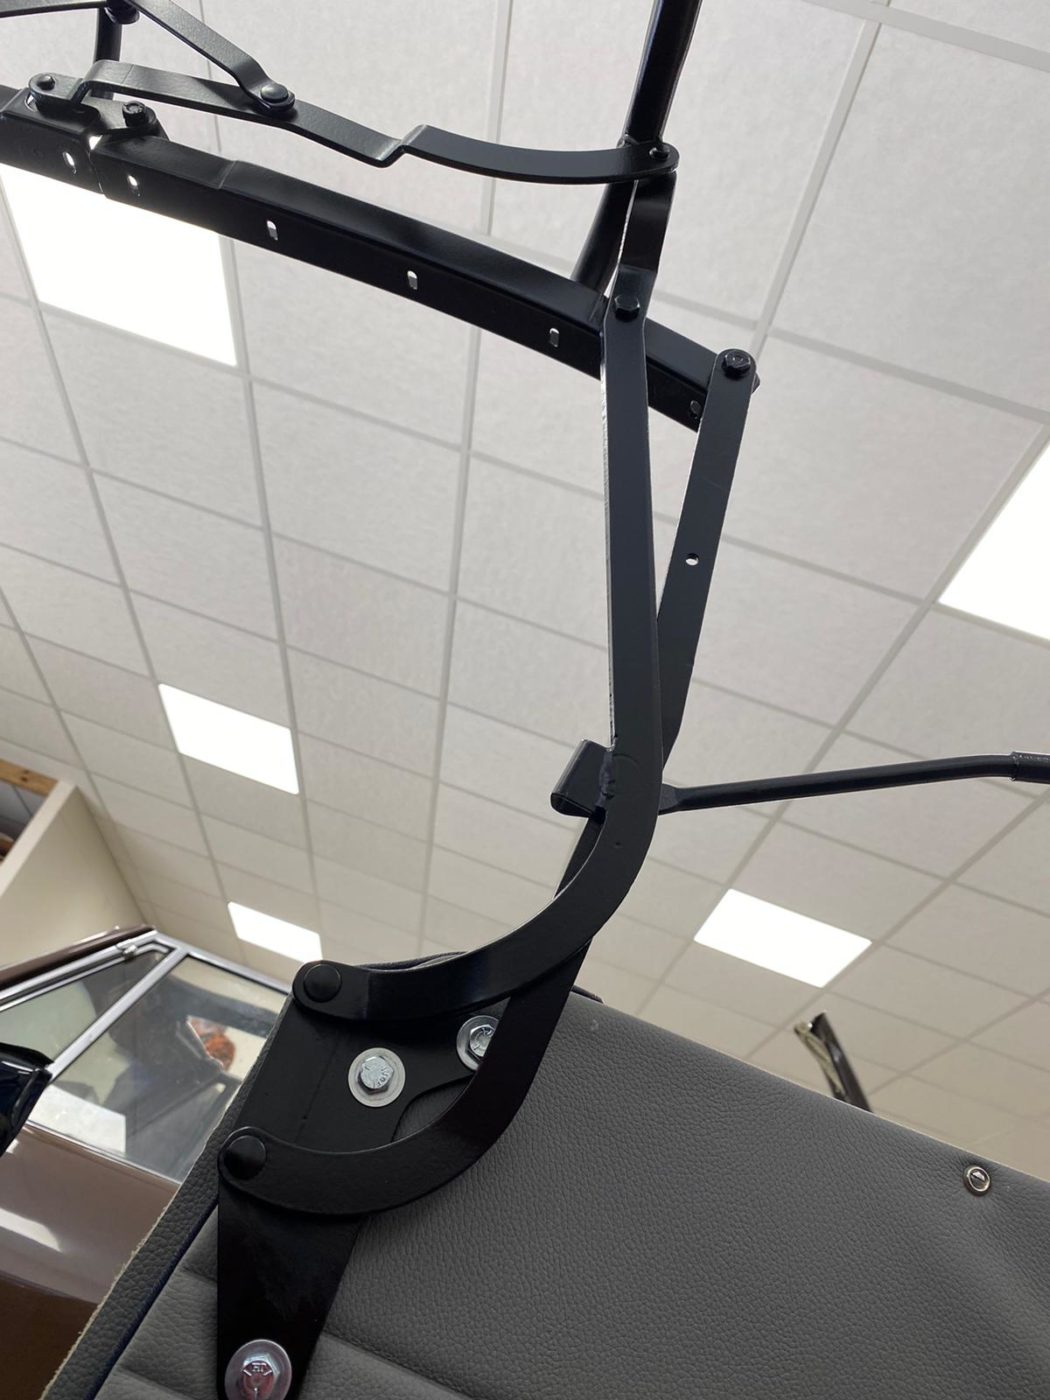
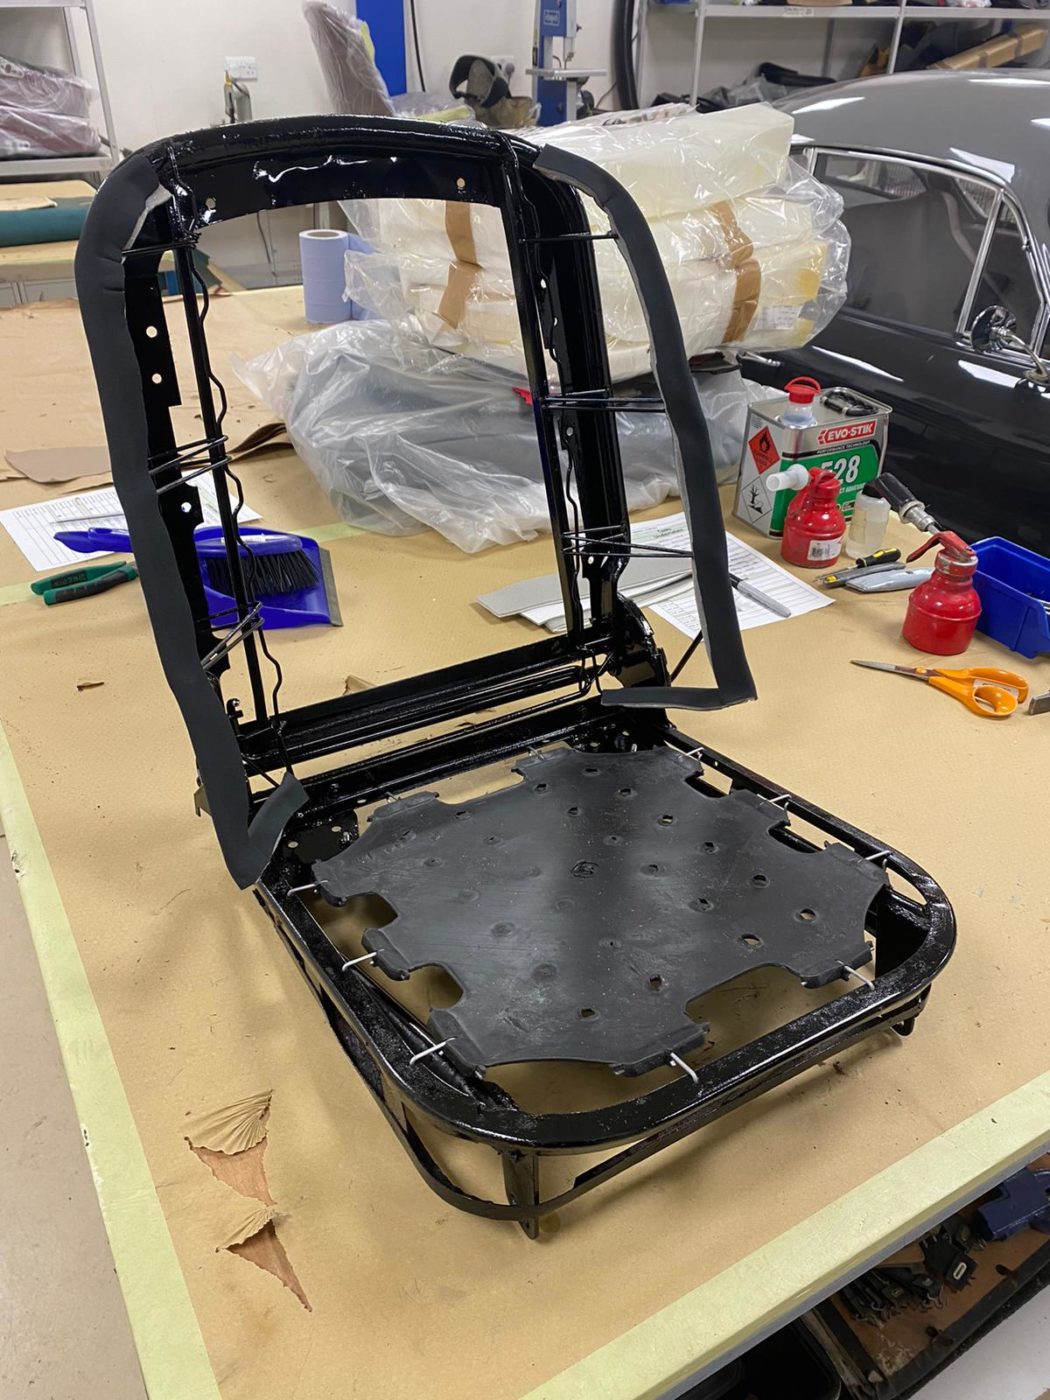
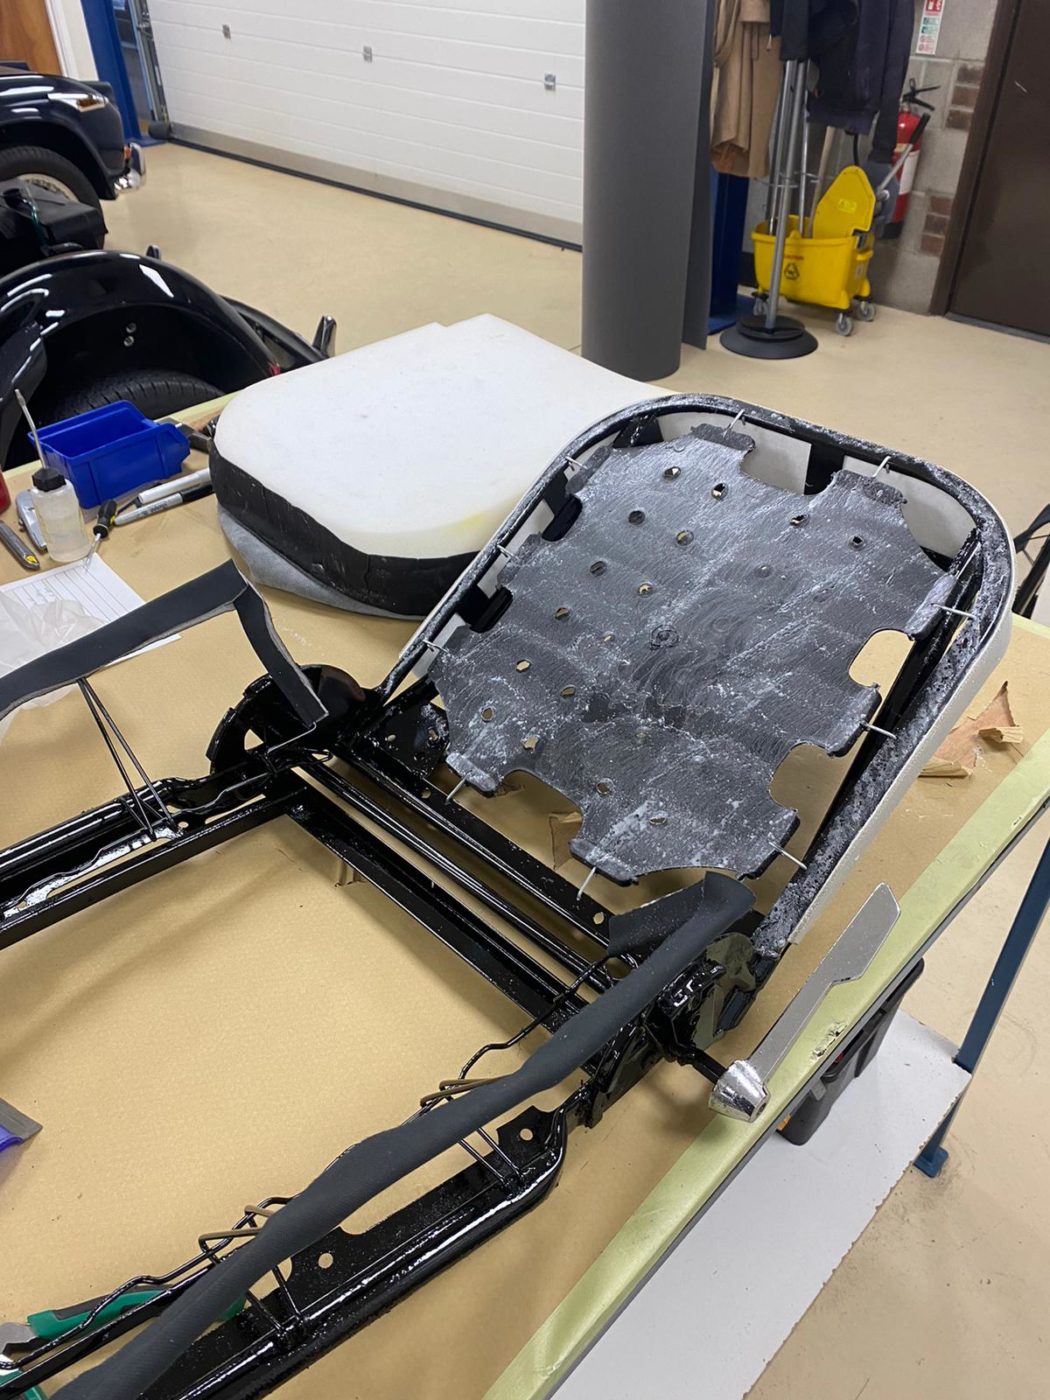
Brian has completed restoring the frame of our Triumph TR5 seats and has installed a reclining hinge joint. He made this element by hand out
Kath and Brian have continued their work with the 1968 Triumph TR5 and are now tackling the rear quarter. Kath has added foam over the
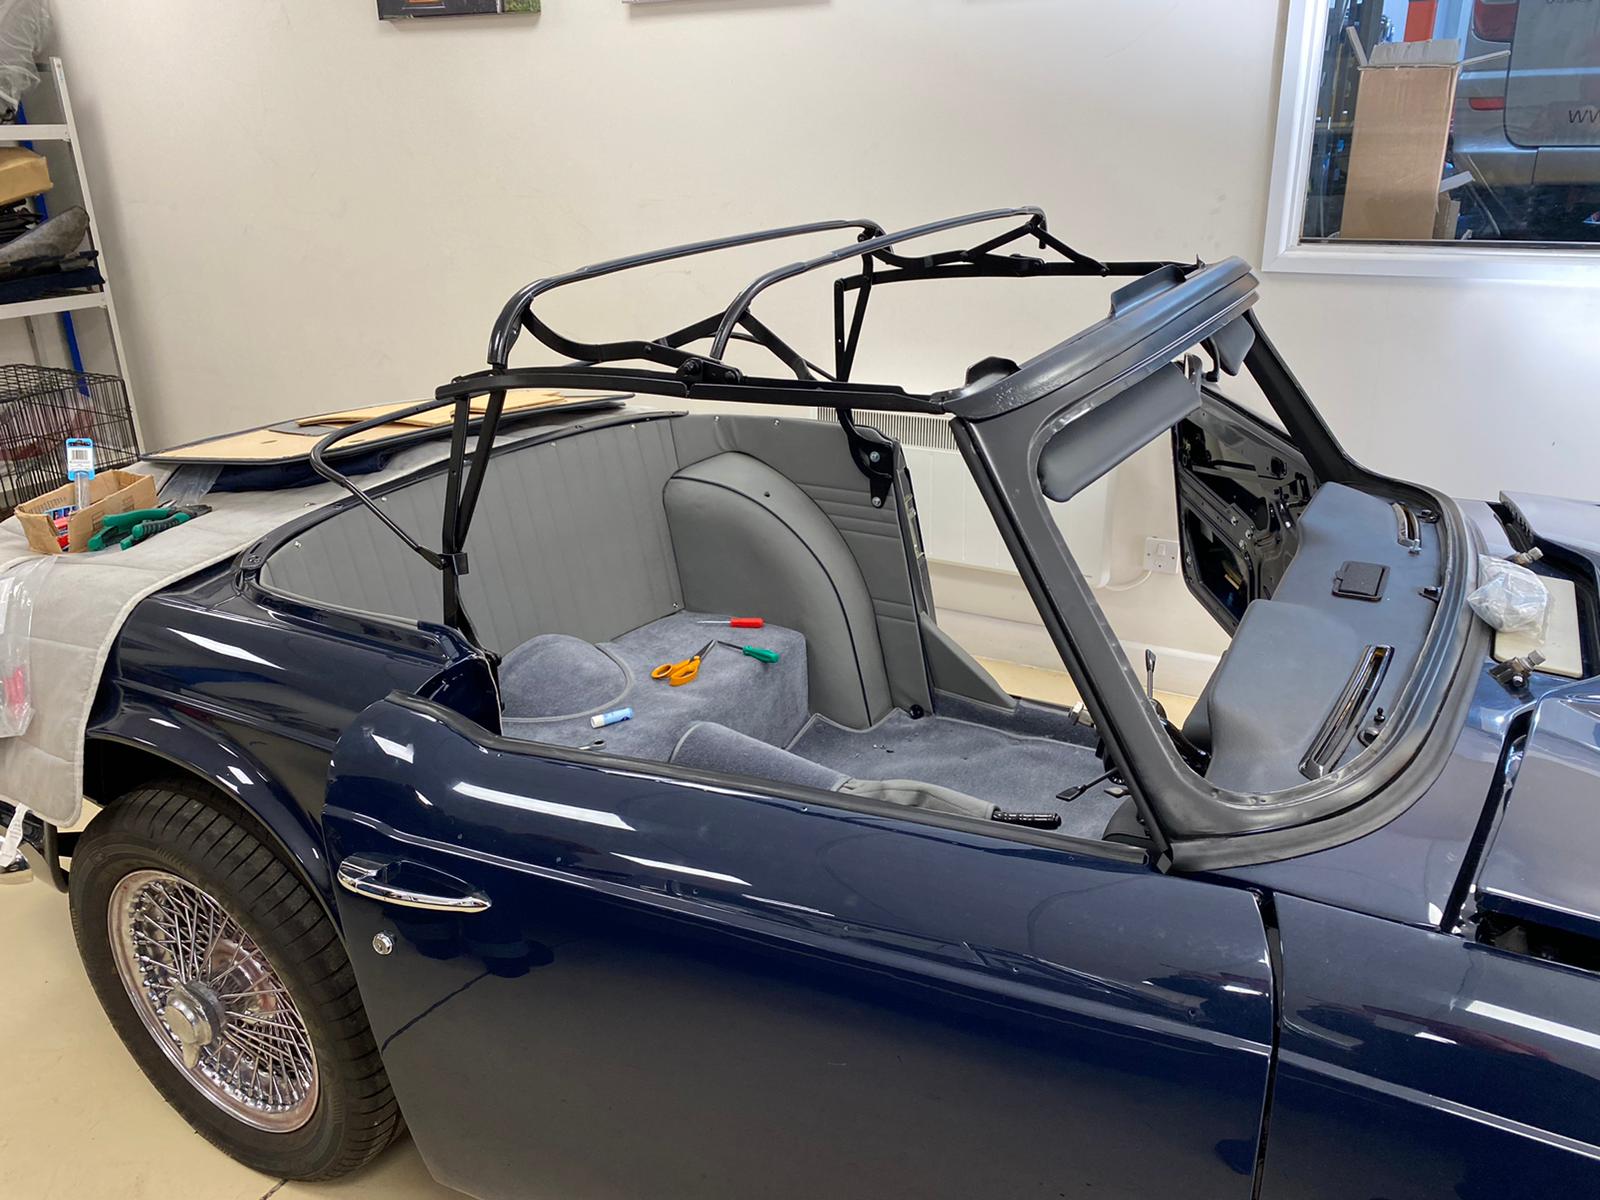
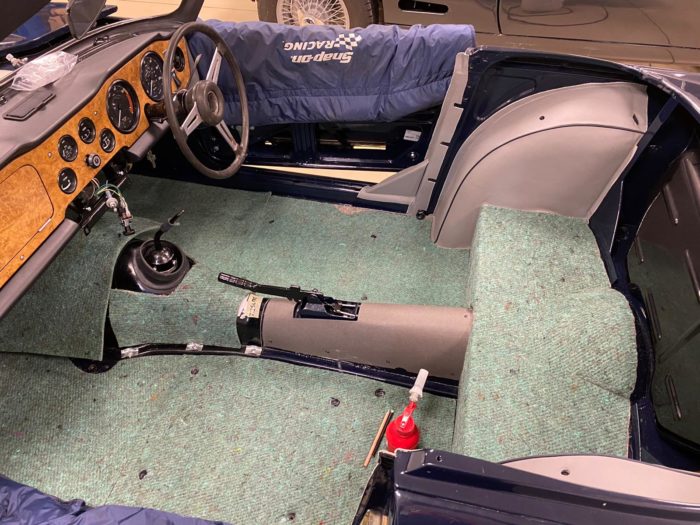
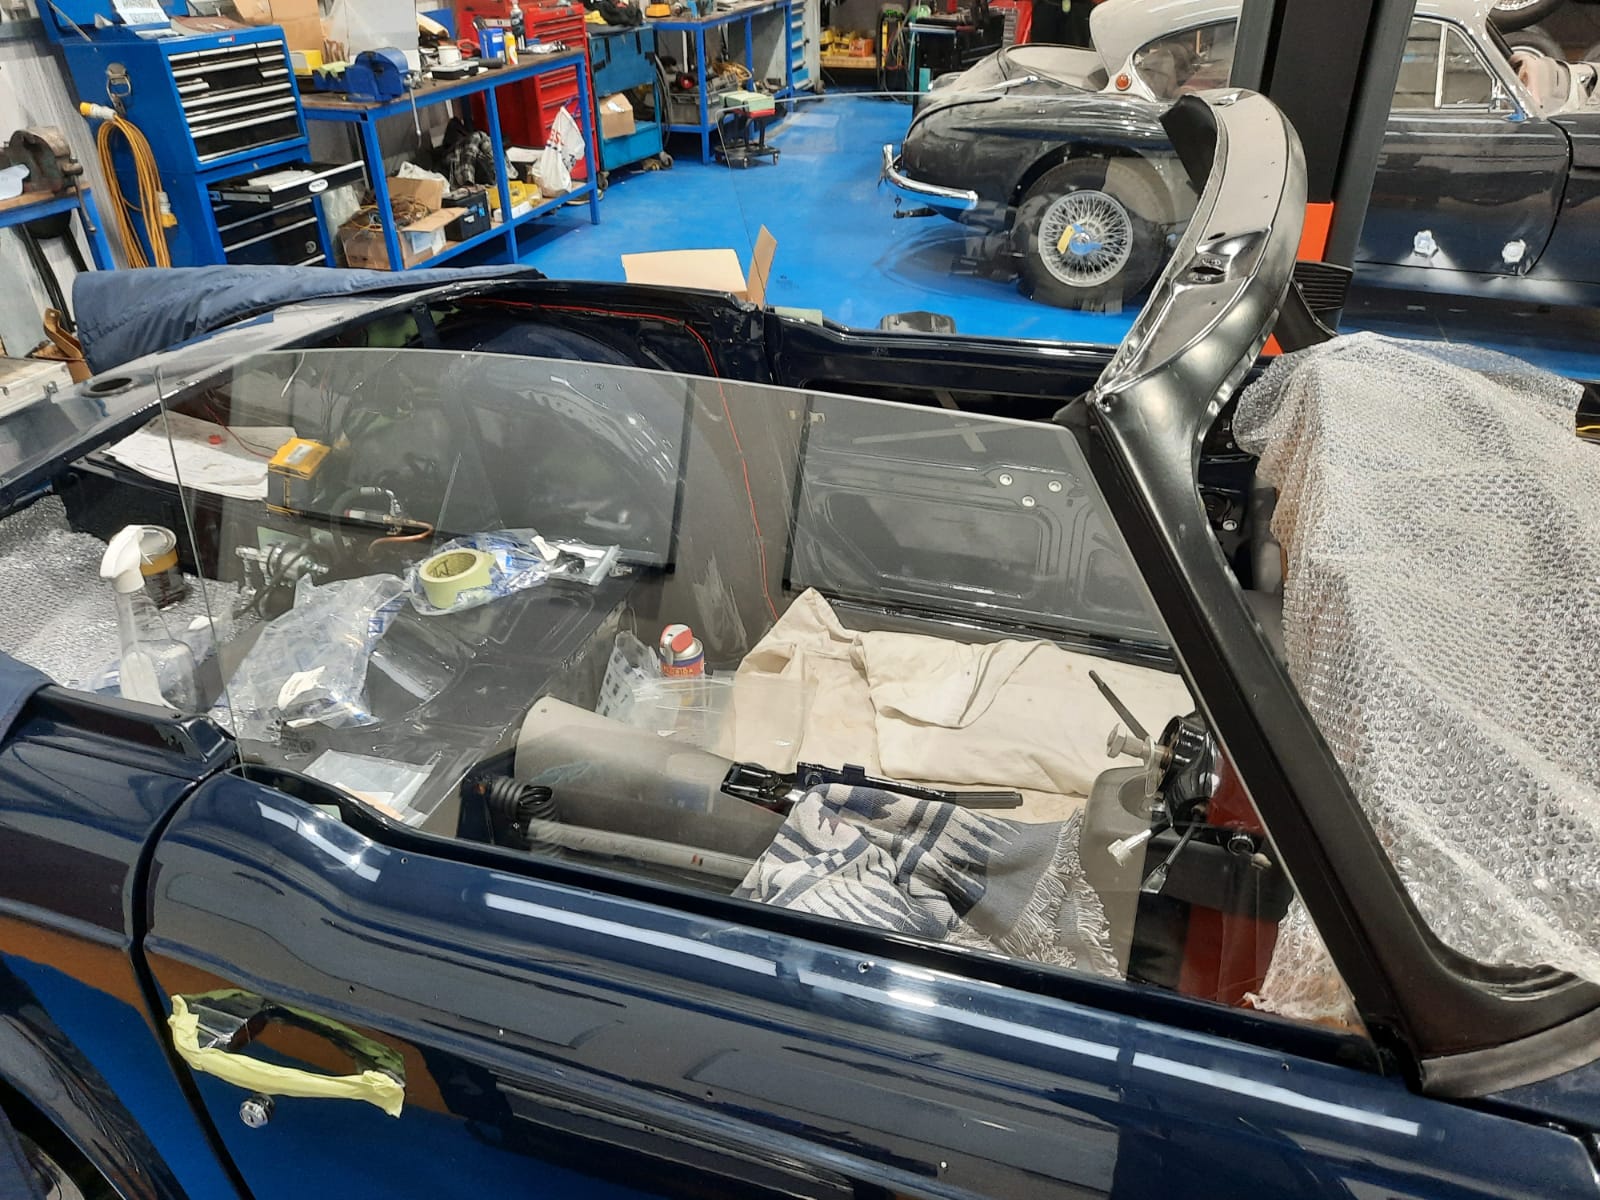
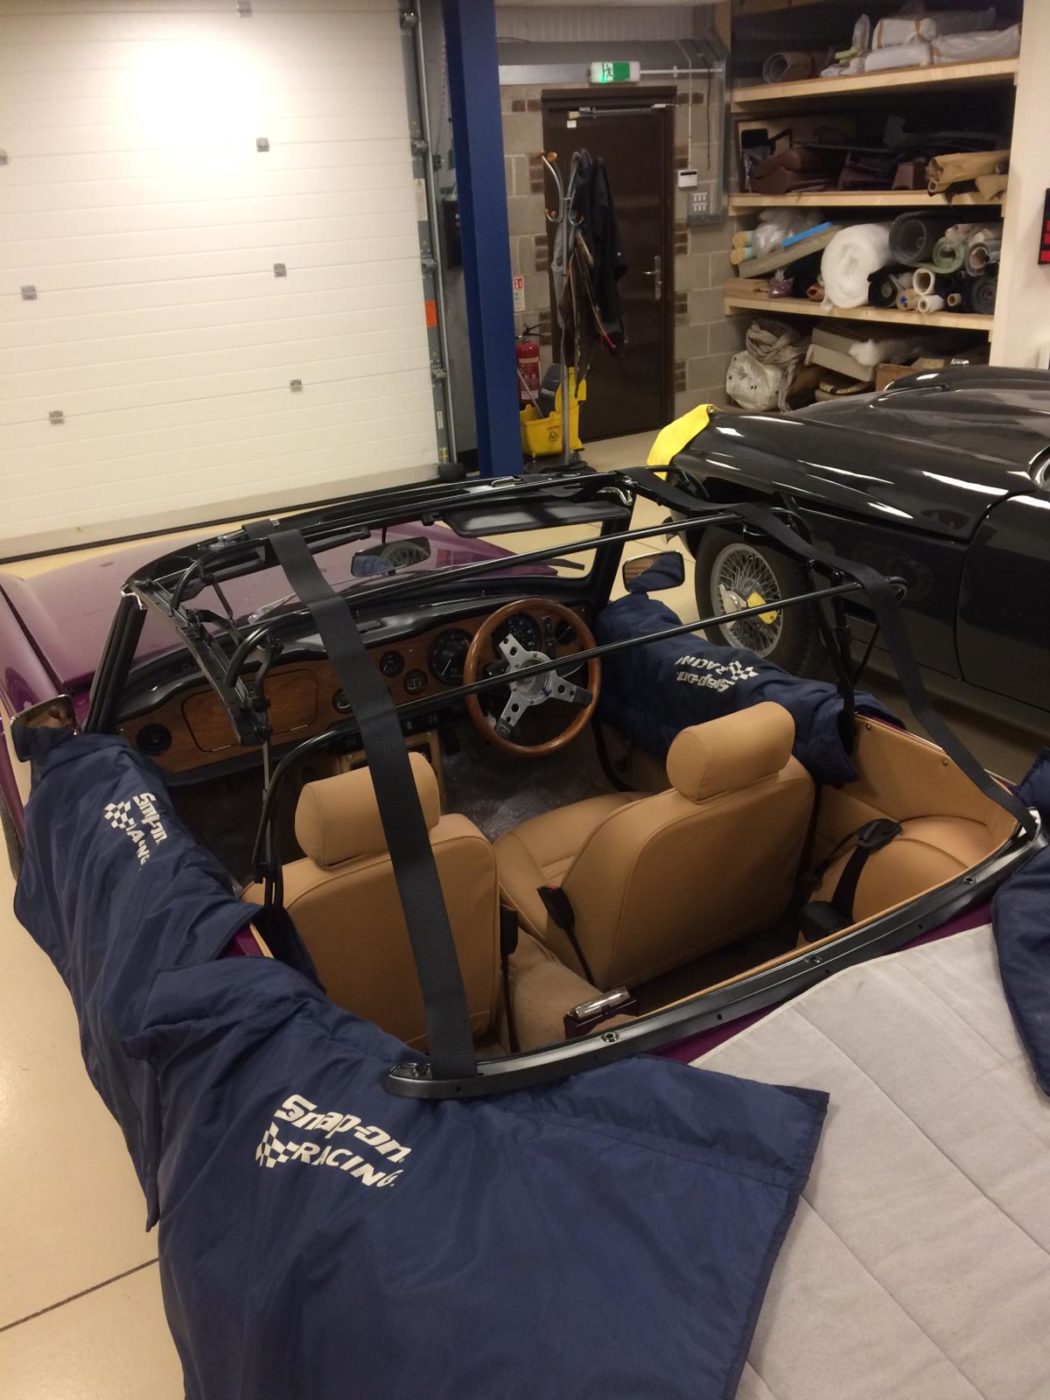
Our 1968 Triumph TR5 is still sat in the trim shop having its new interior fitted! Its a very exciting development as fitting trim to
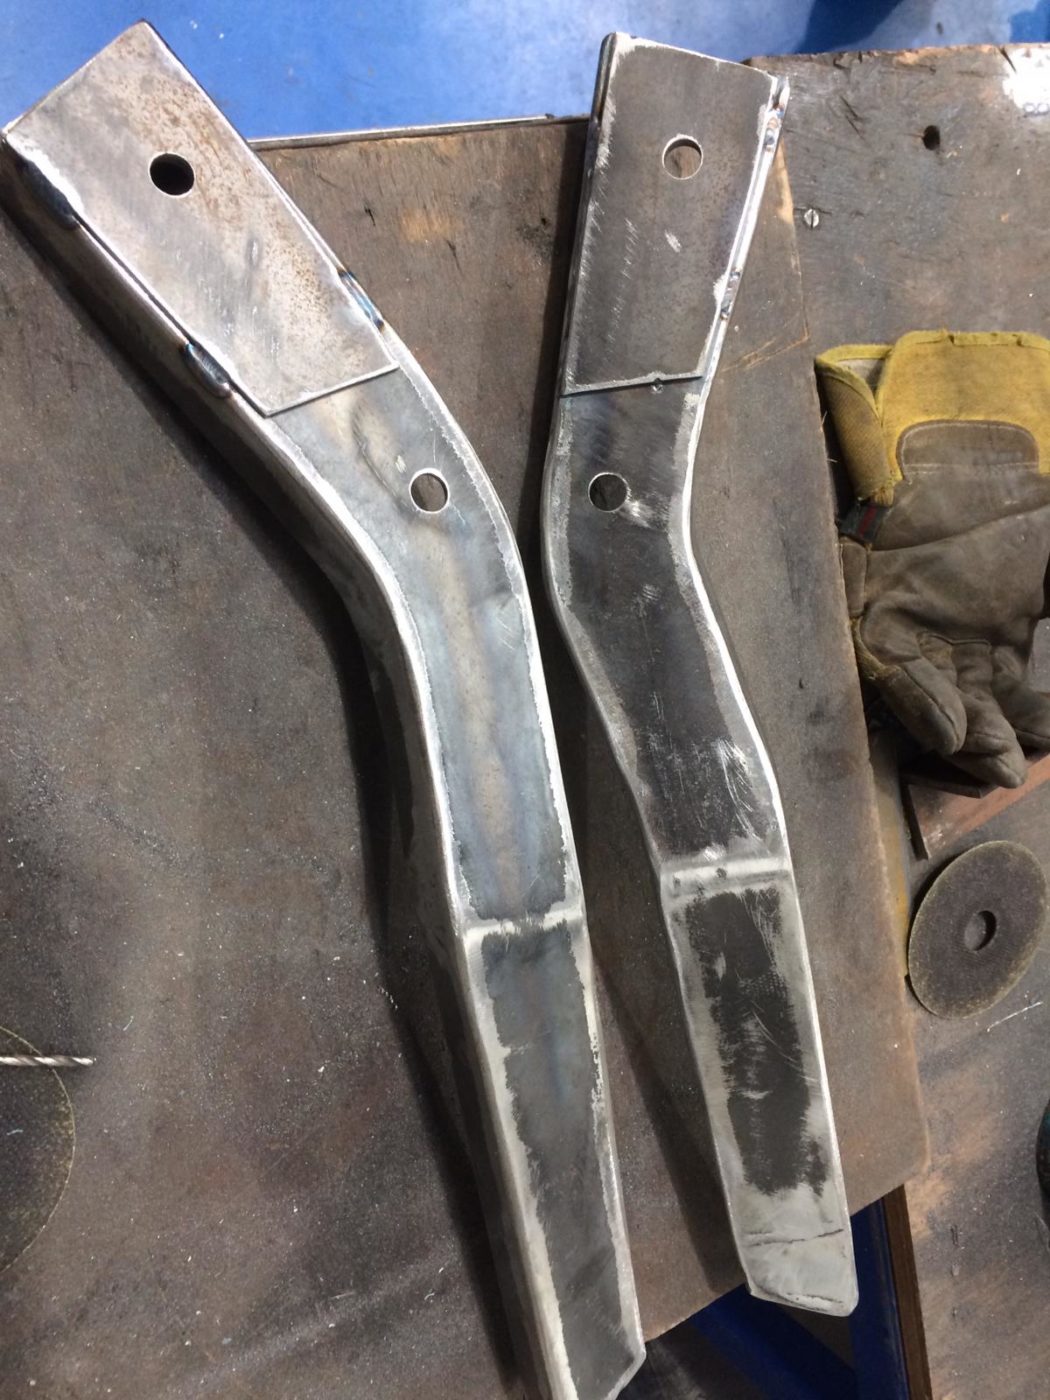
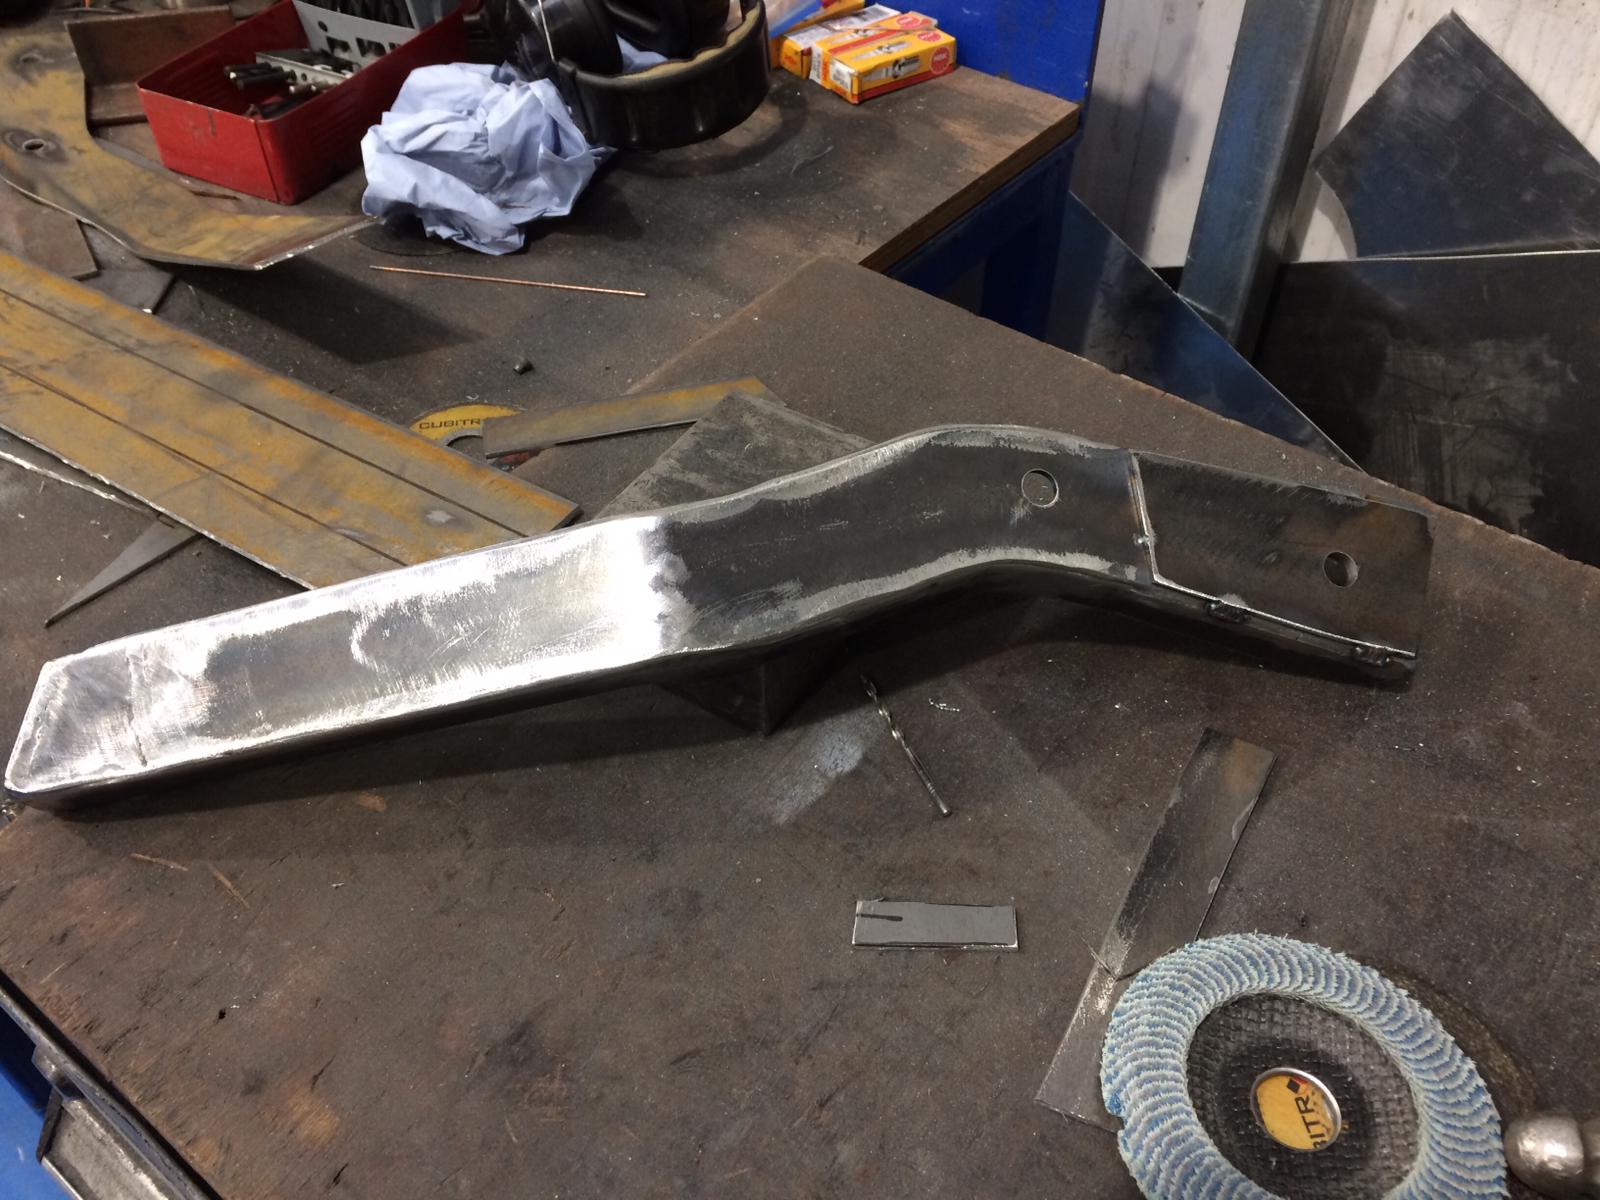
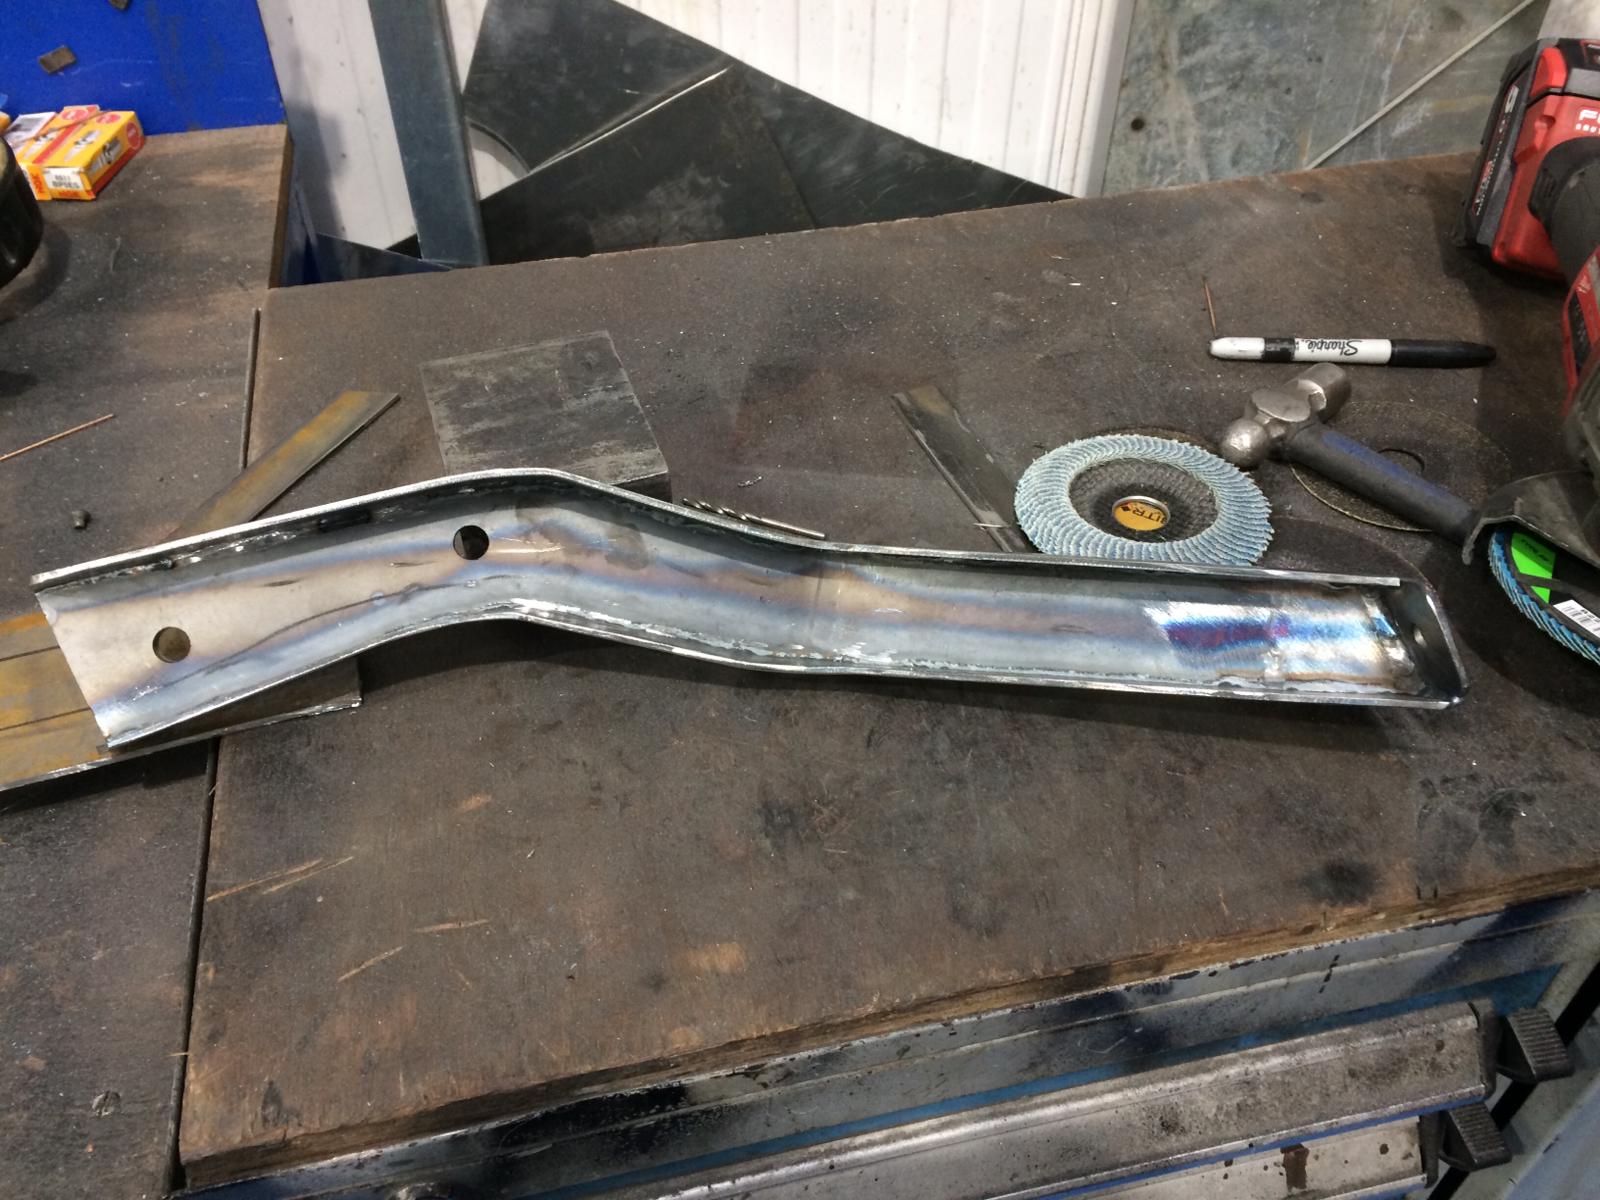
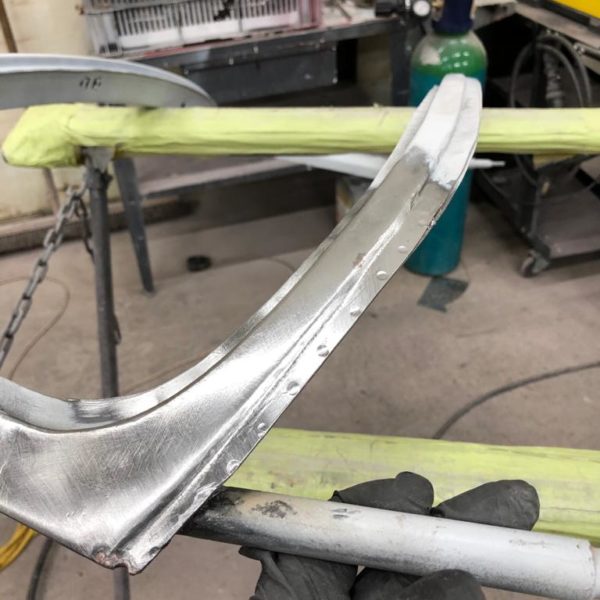
Our Triumph TR5 has had a bespoke bumper iron made in the workshop to fit underneath behind the front wheel. One of our technicians made
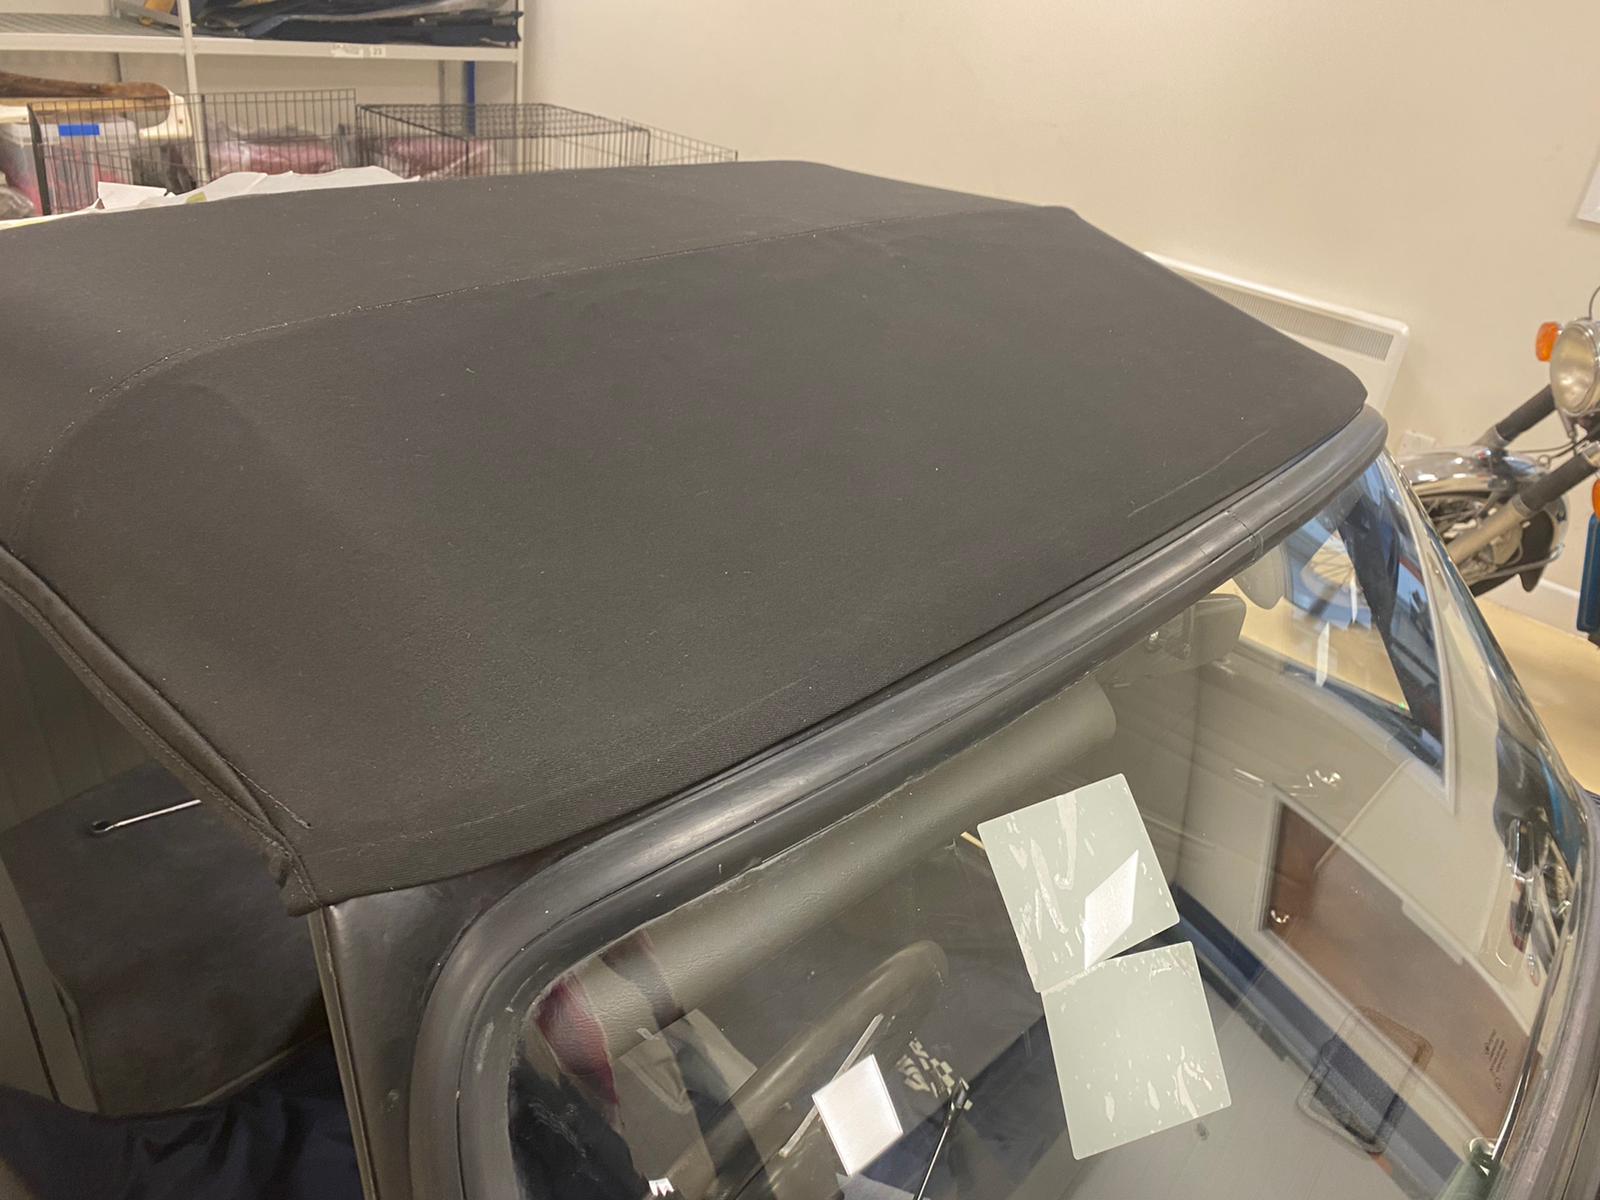
Our 1968 Triumph TR5 has been progressing in leaps and bounds under the expert eye of our technician Mauro. Chris has painted the roof in

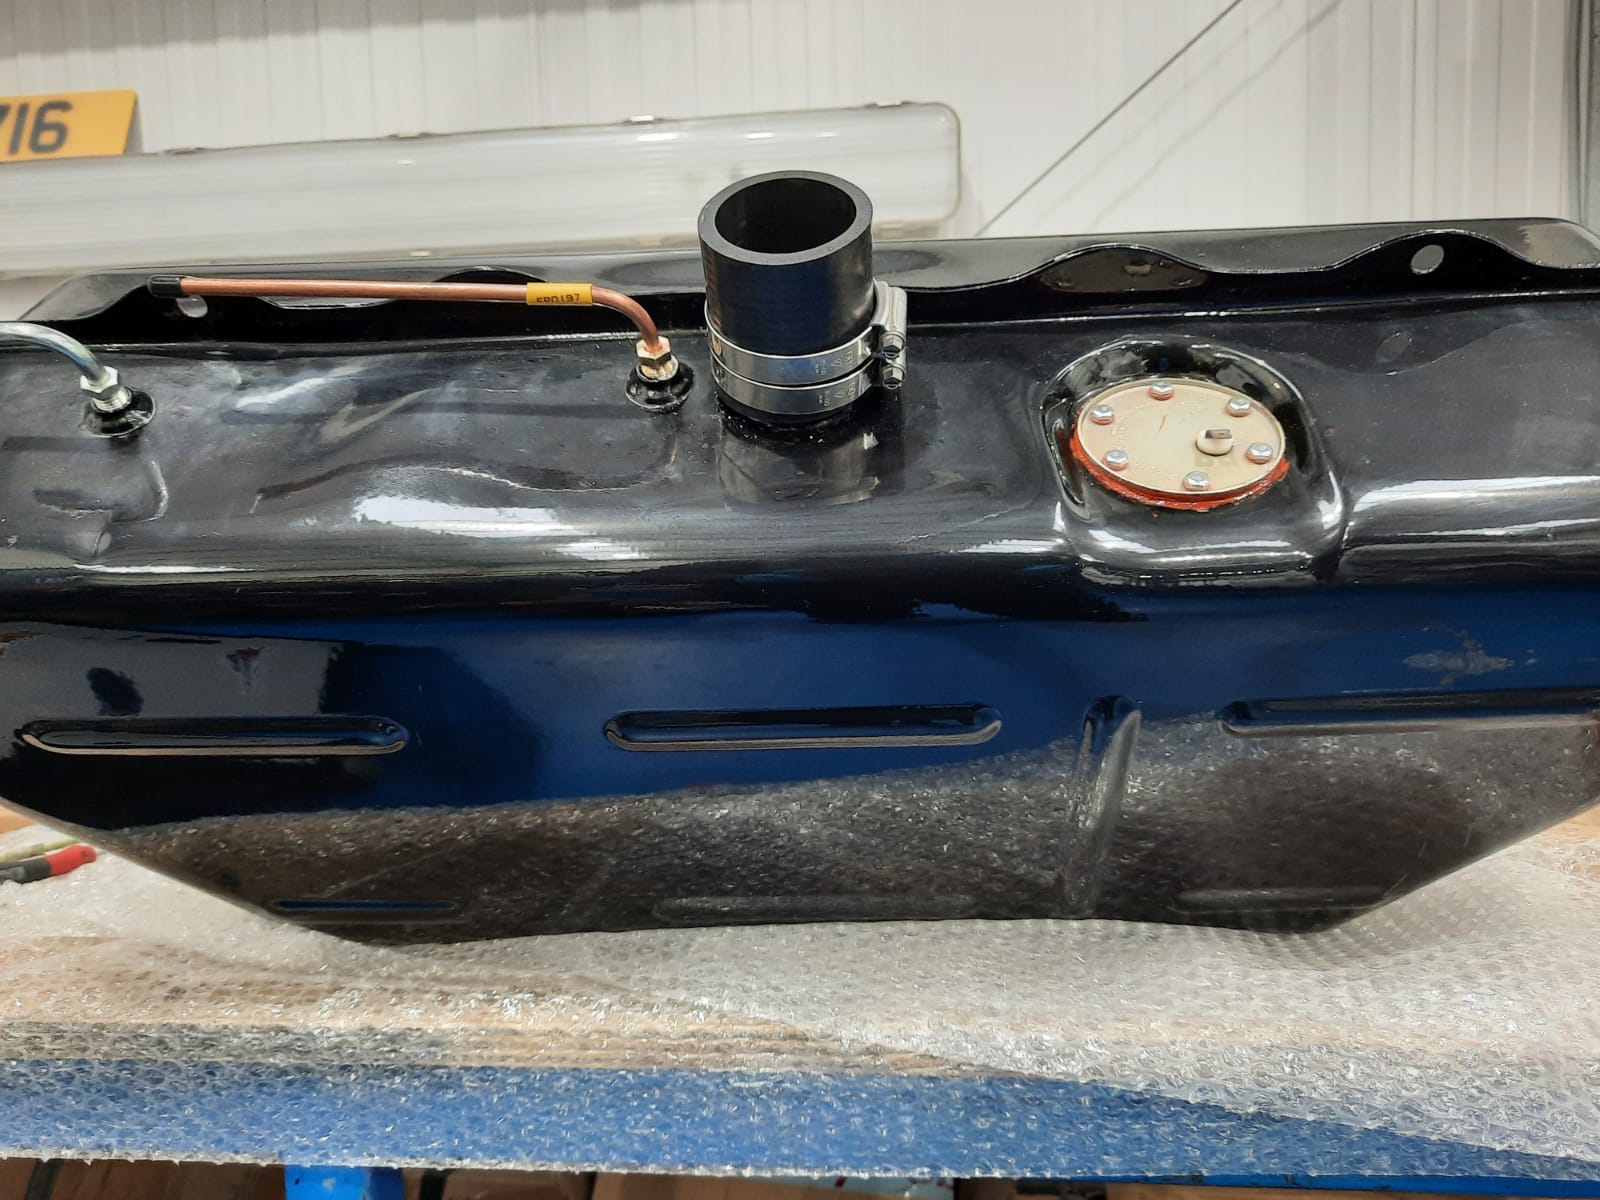
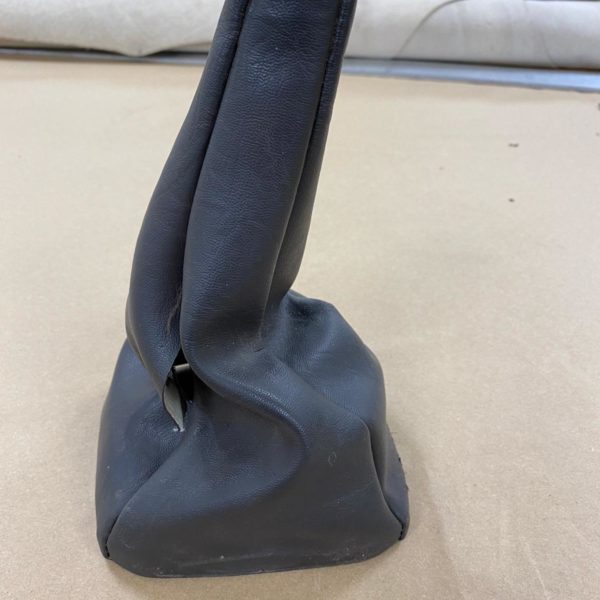
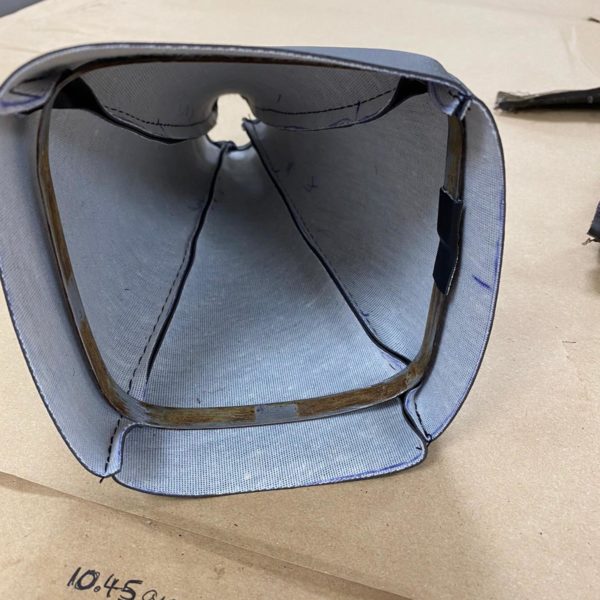
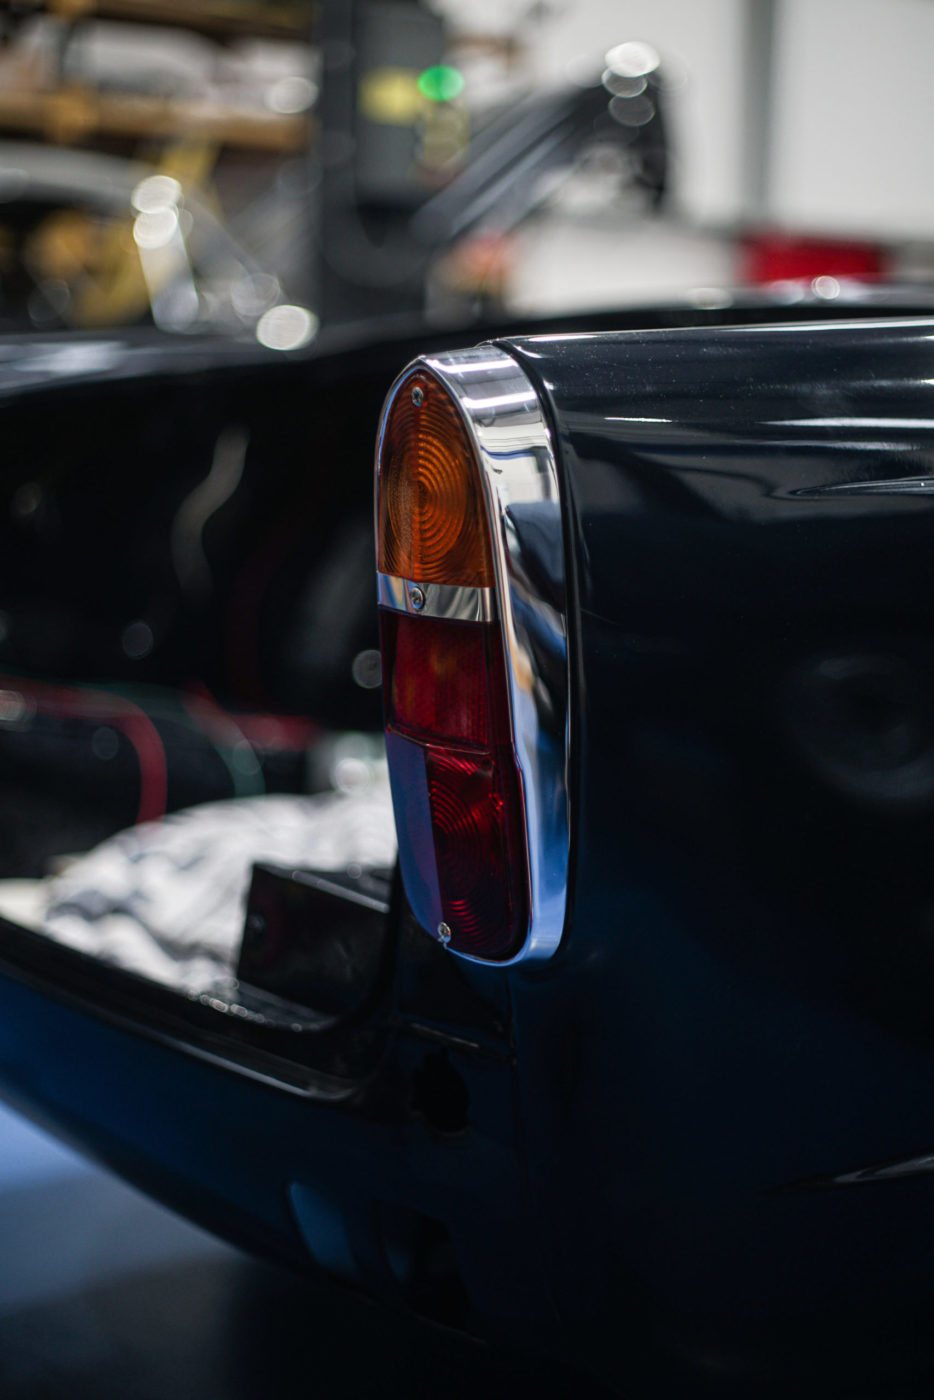
The reverse lights have been fitted to the TR5 along with the fuel gauge sender unit fuel return pipes and fuel hose filler. Rubber and
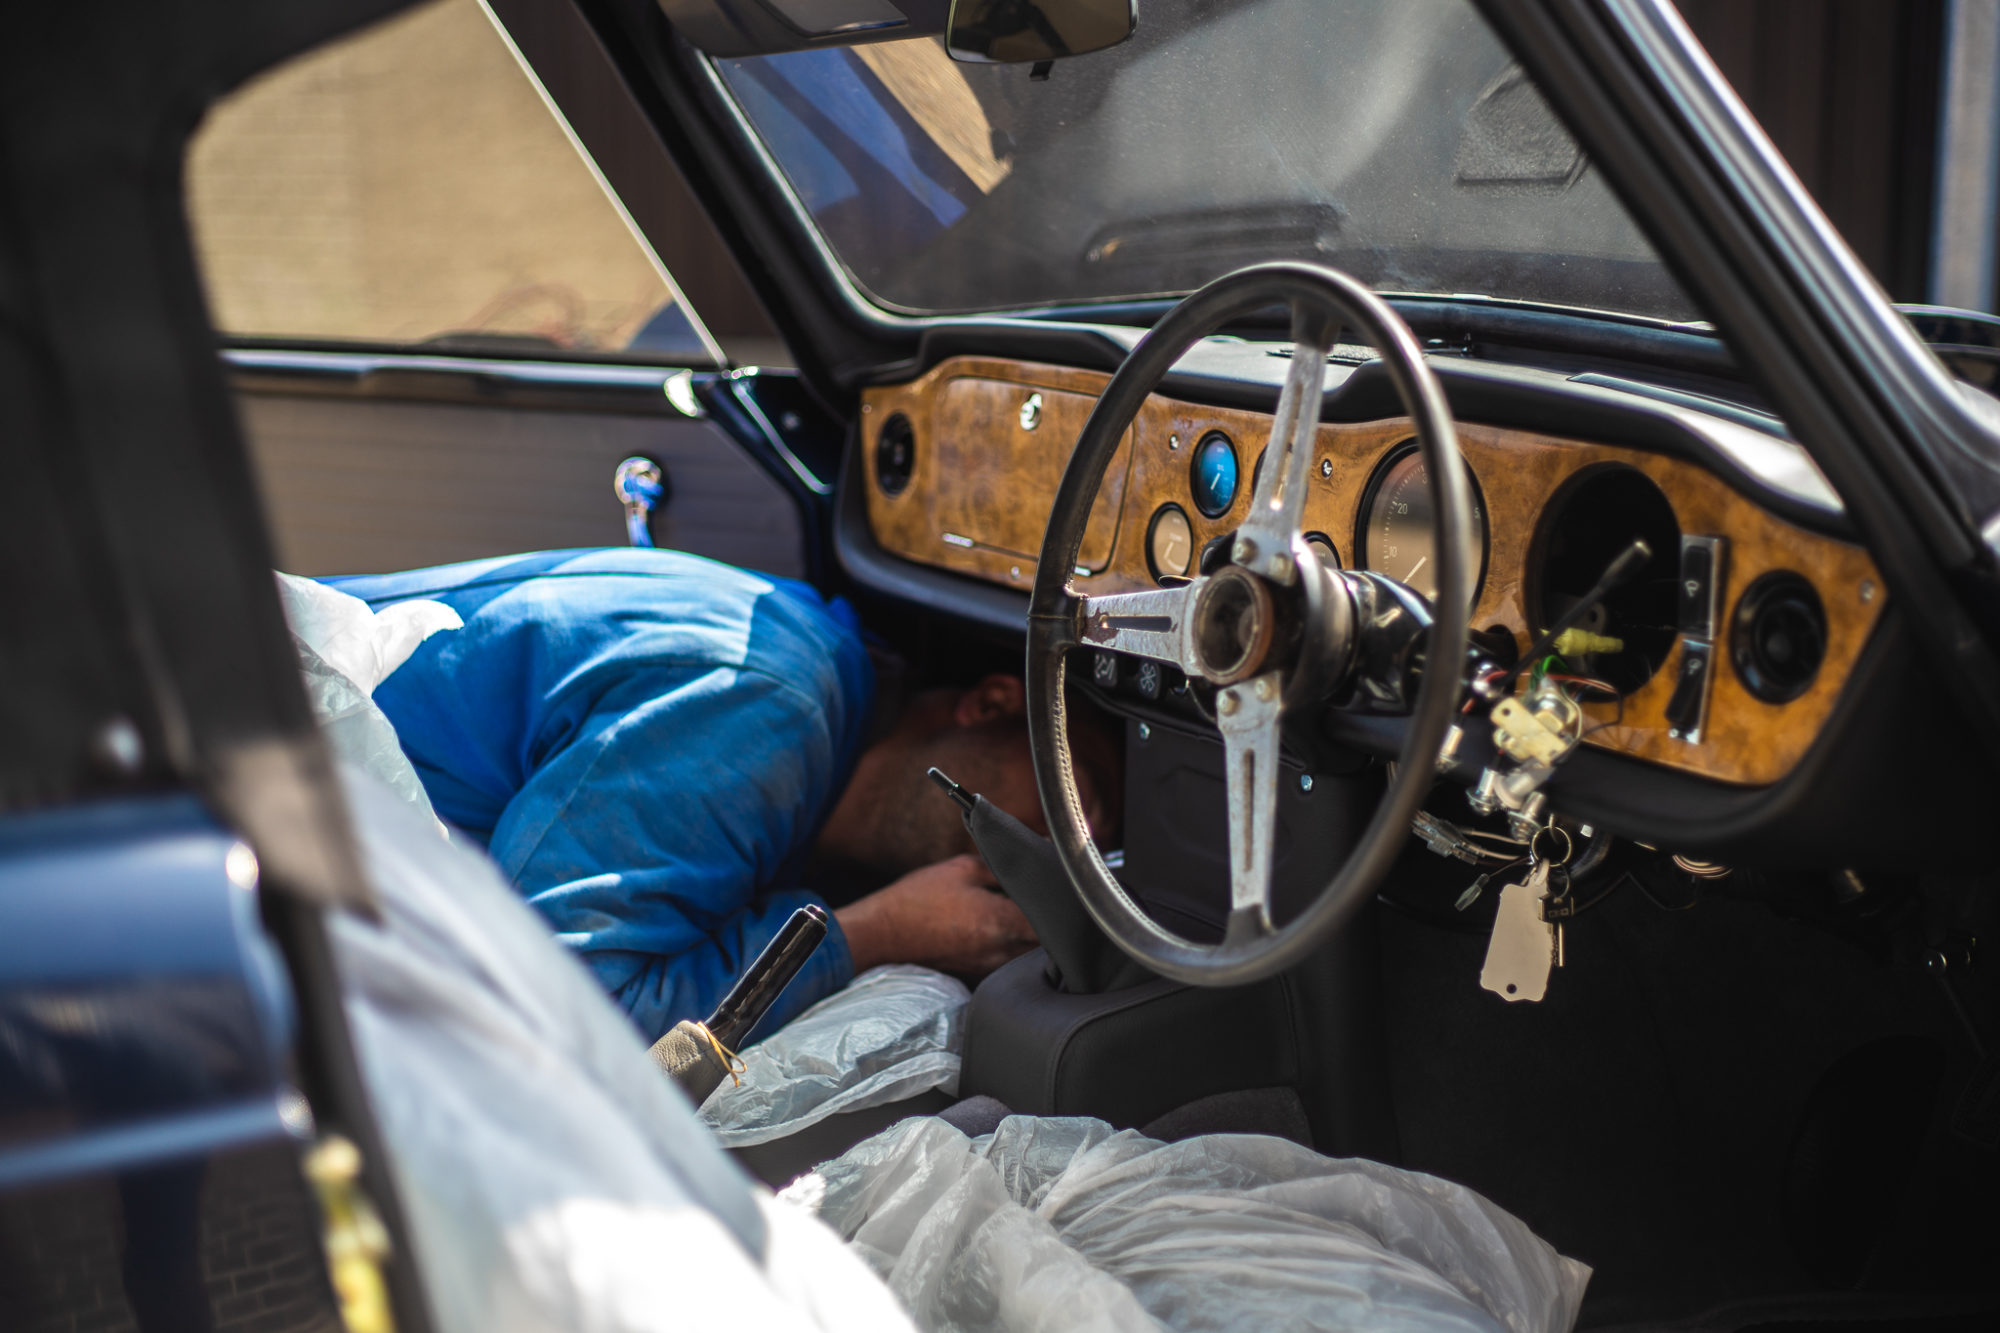
As I’m sure you know by now, Mauro is Mr TR5, handling the majority of the restoration on our lovely 1968 Triumph TR5. The latest
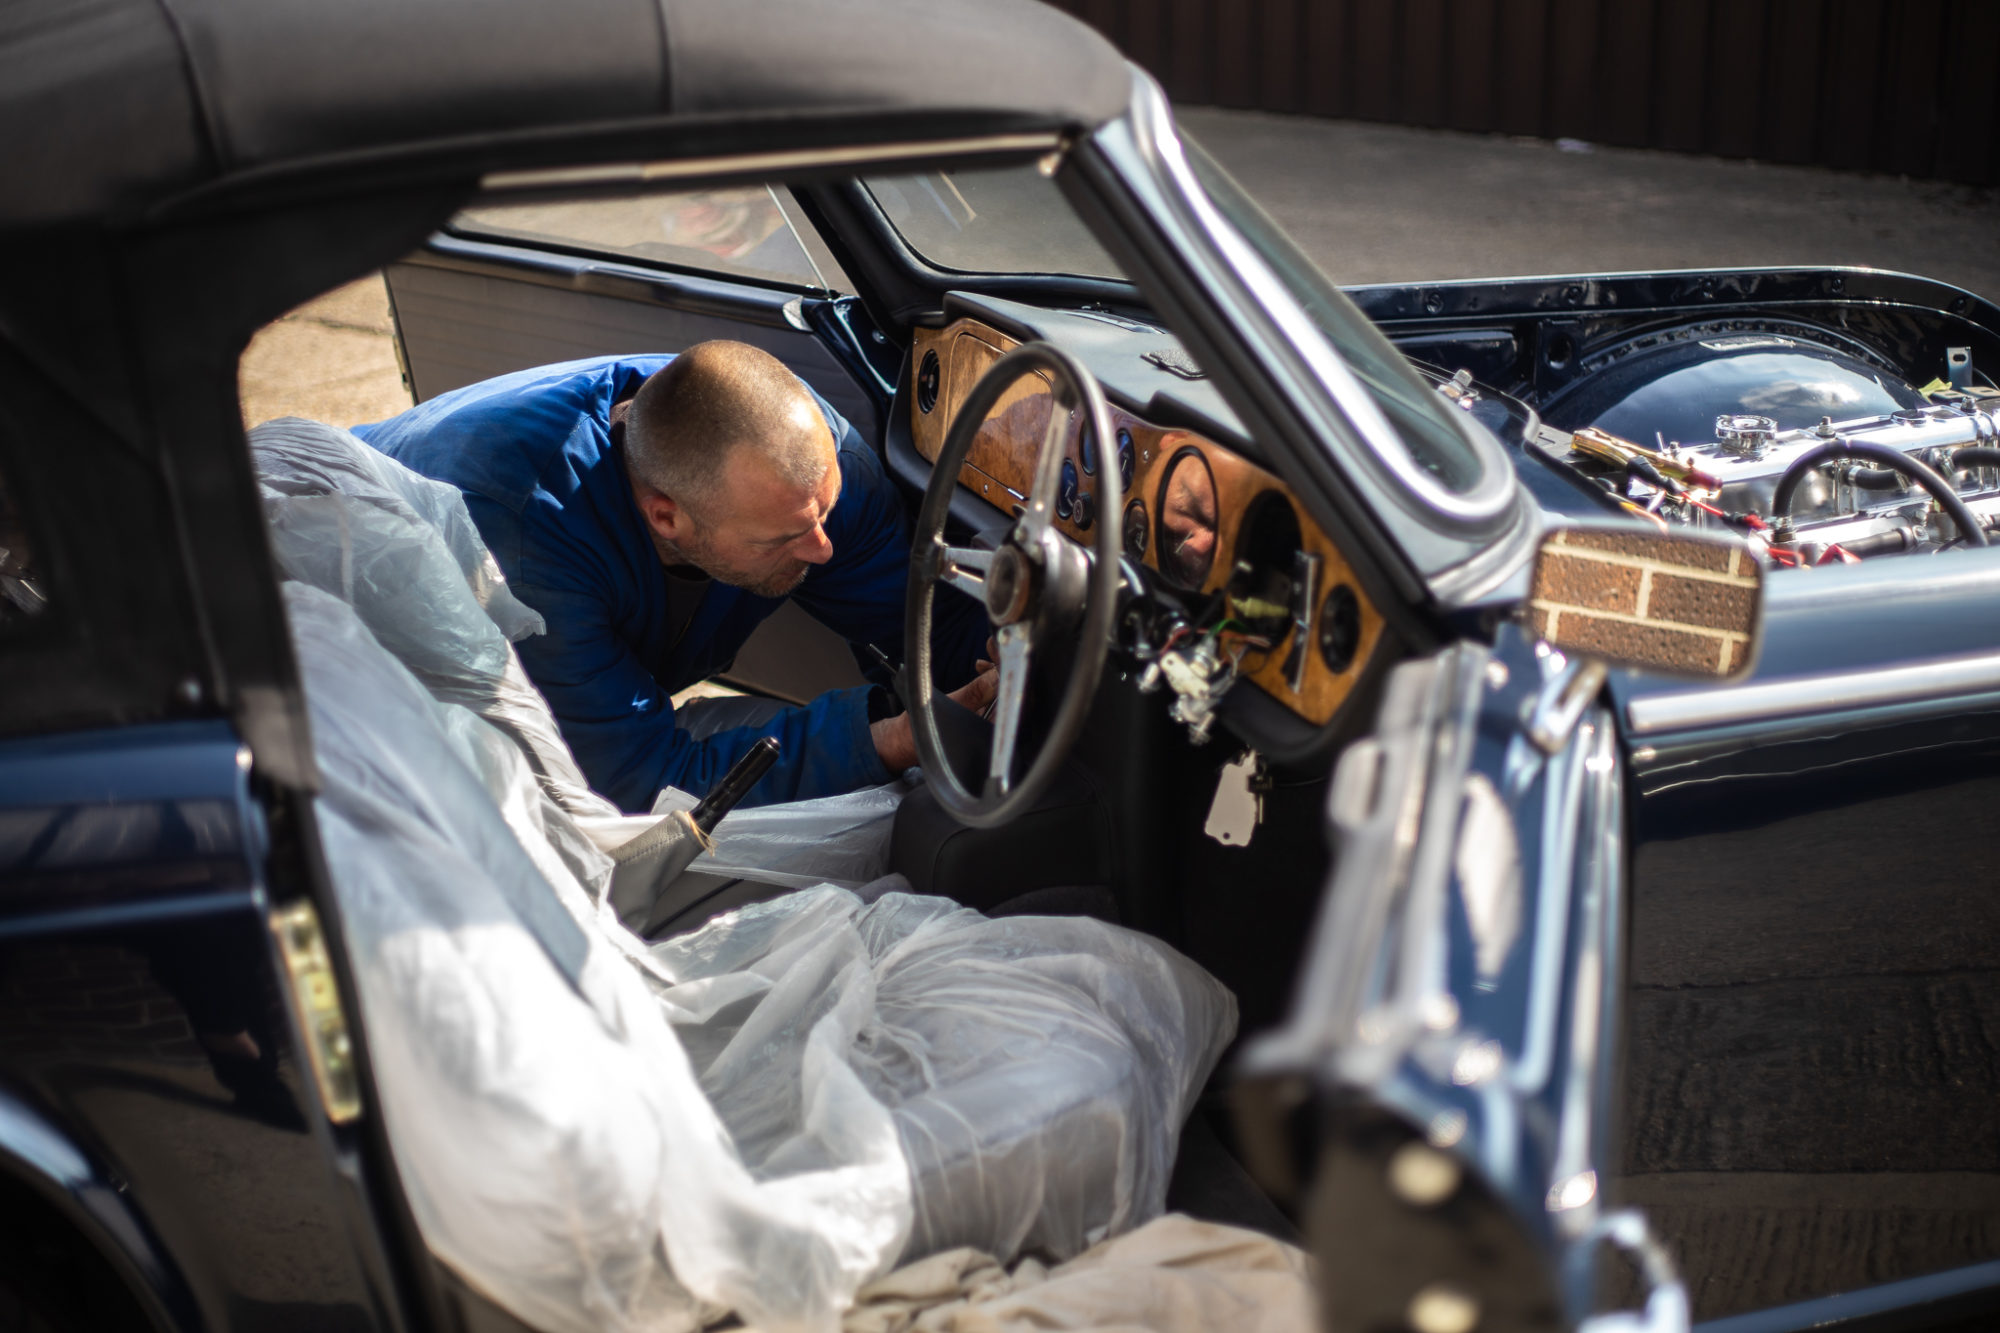
Mauro’s recent adjustments to our 1968 Triumph Tr5 include added fittings to the dashboard and many small mechanisms added throughout the vehicle. It’s the small

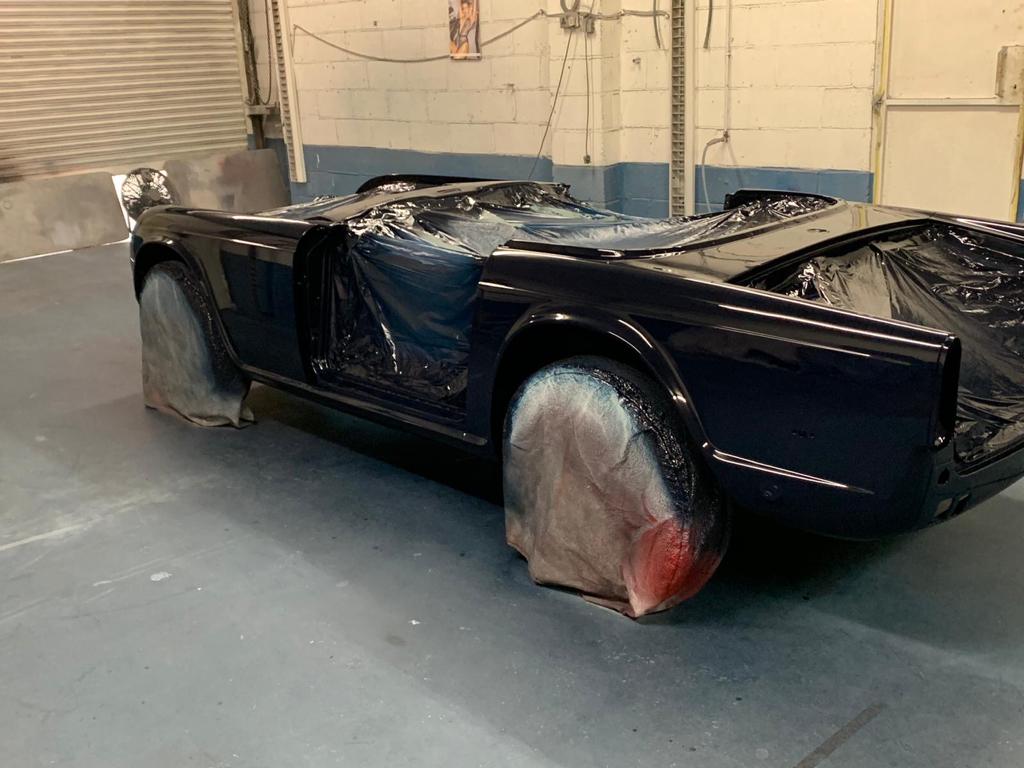
Our TR5 has been colour matched today by our friend and partner, Dean, from GB Refinish.
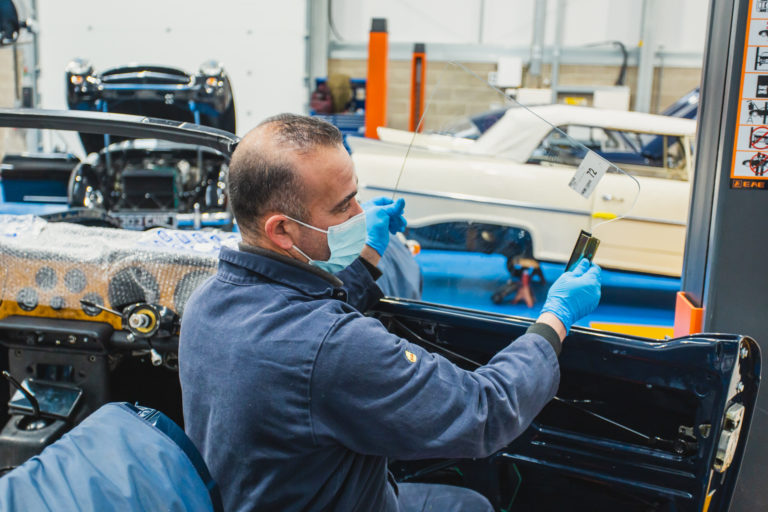
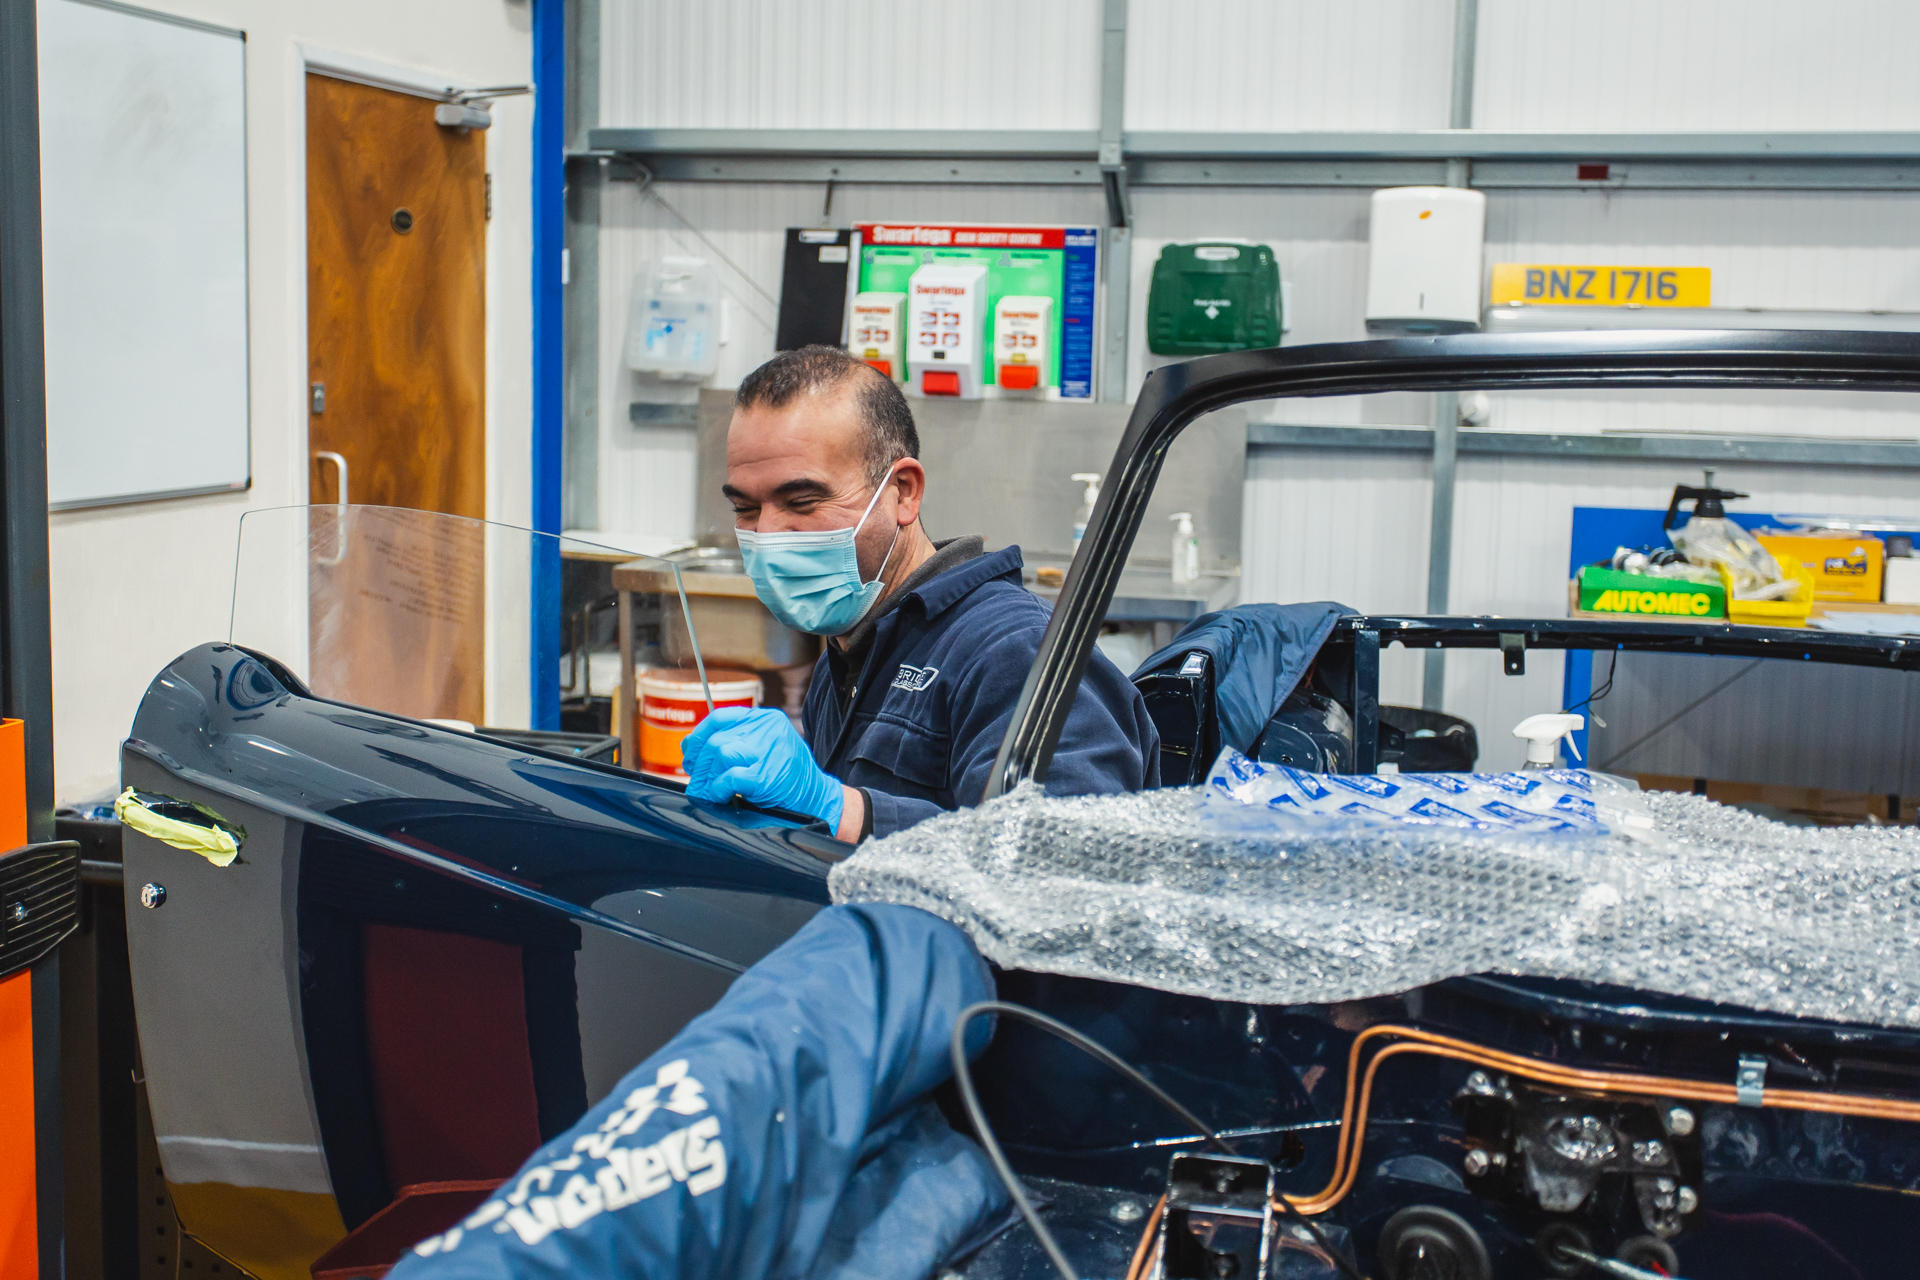
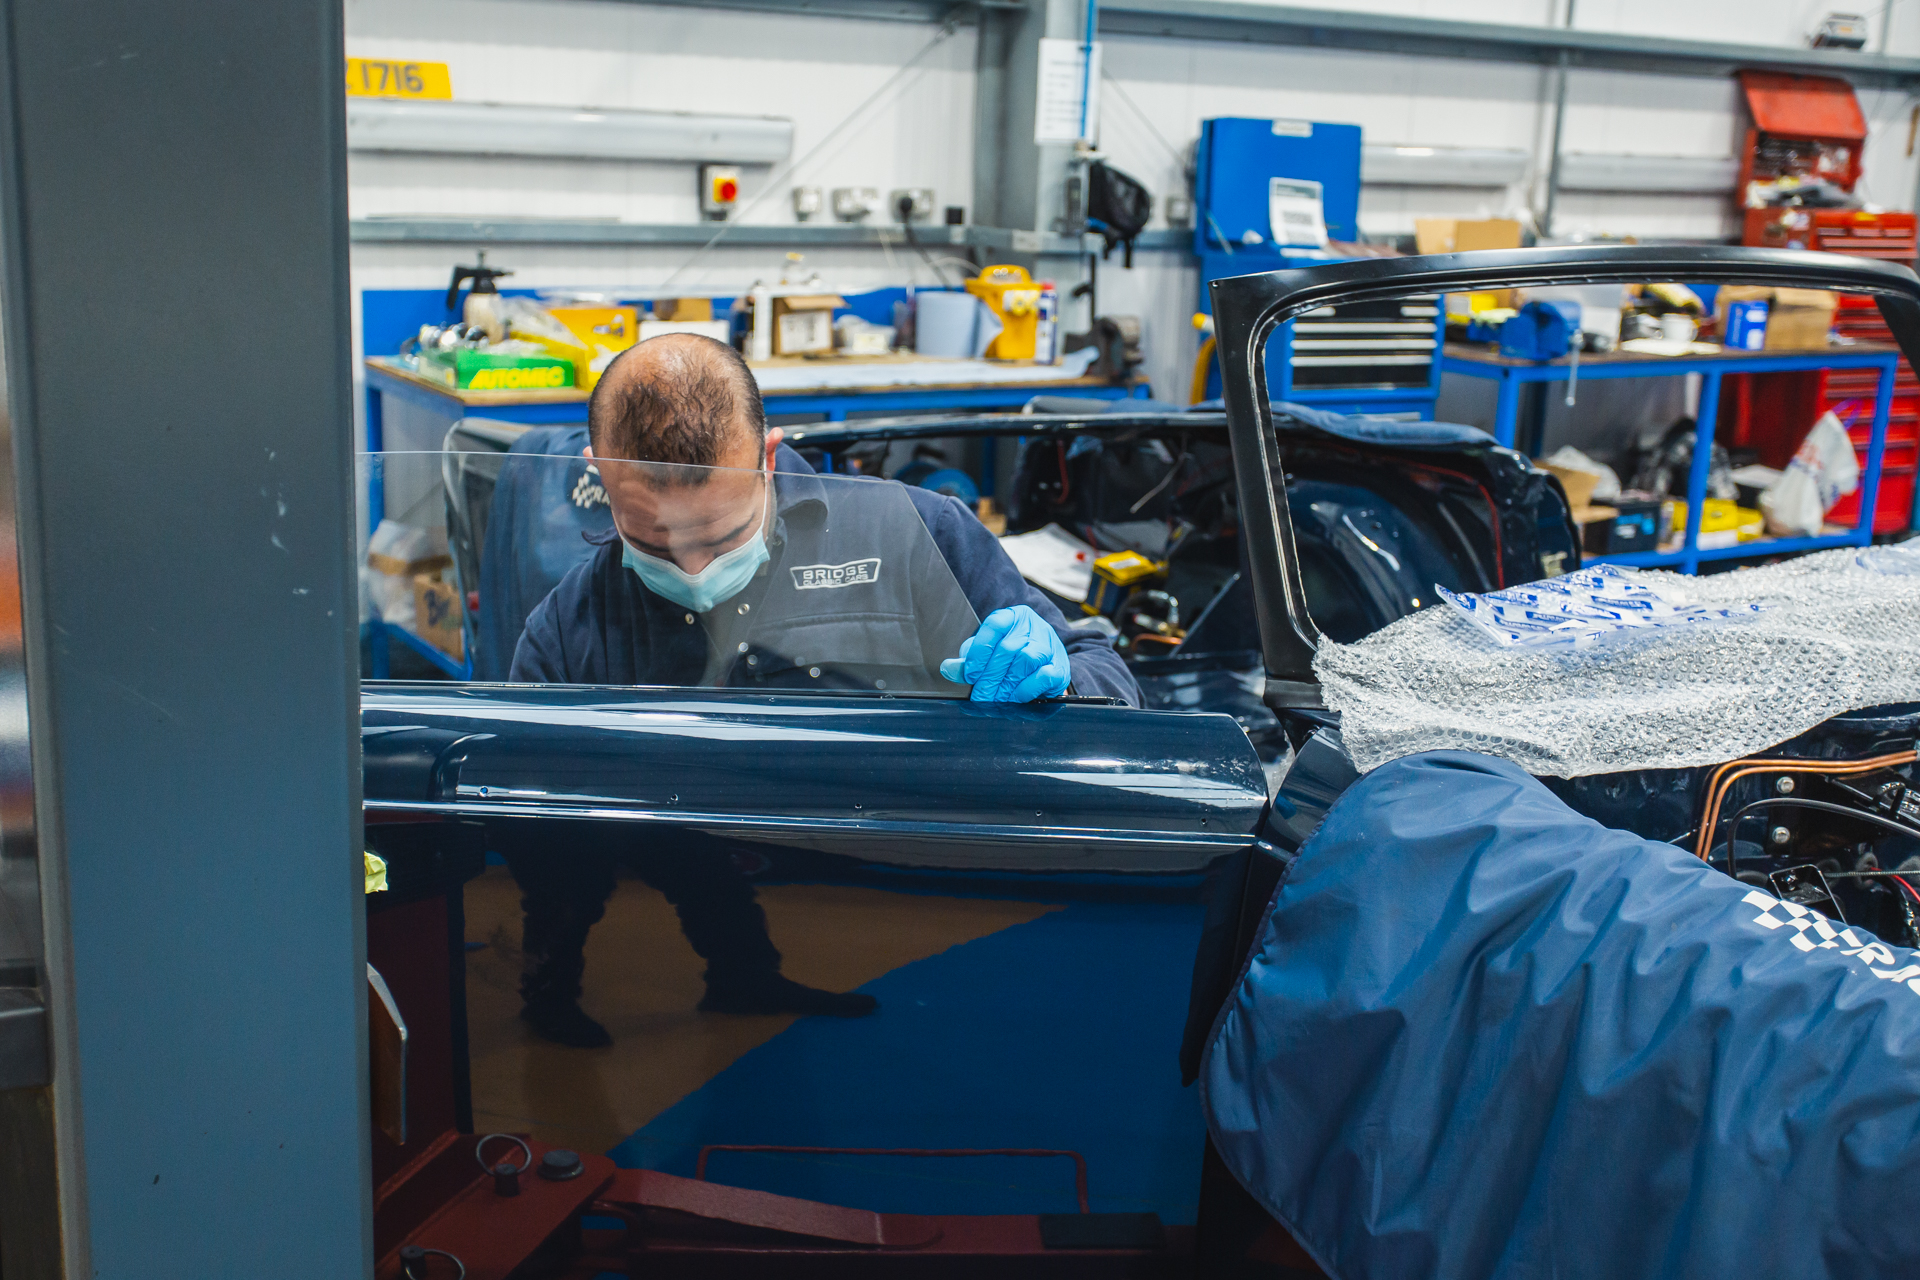
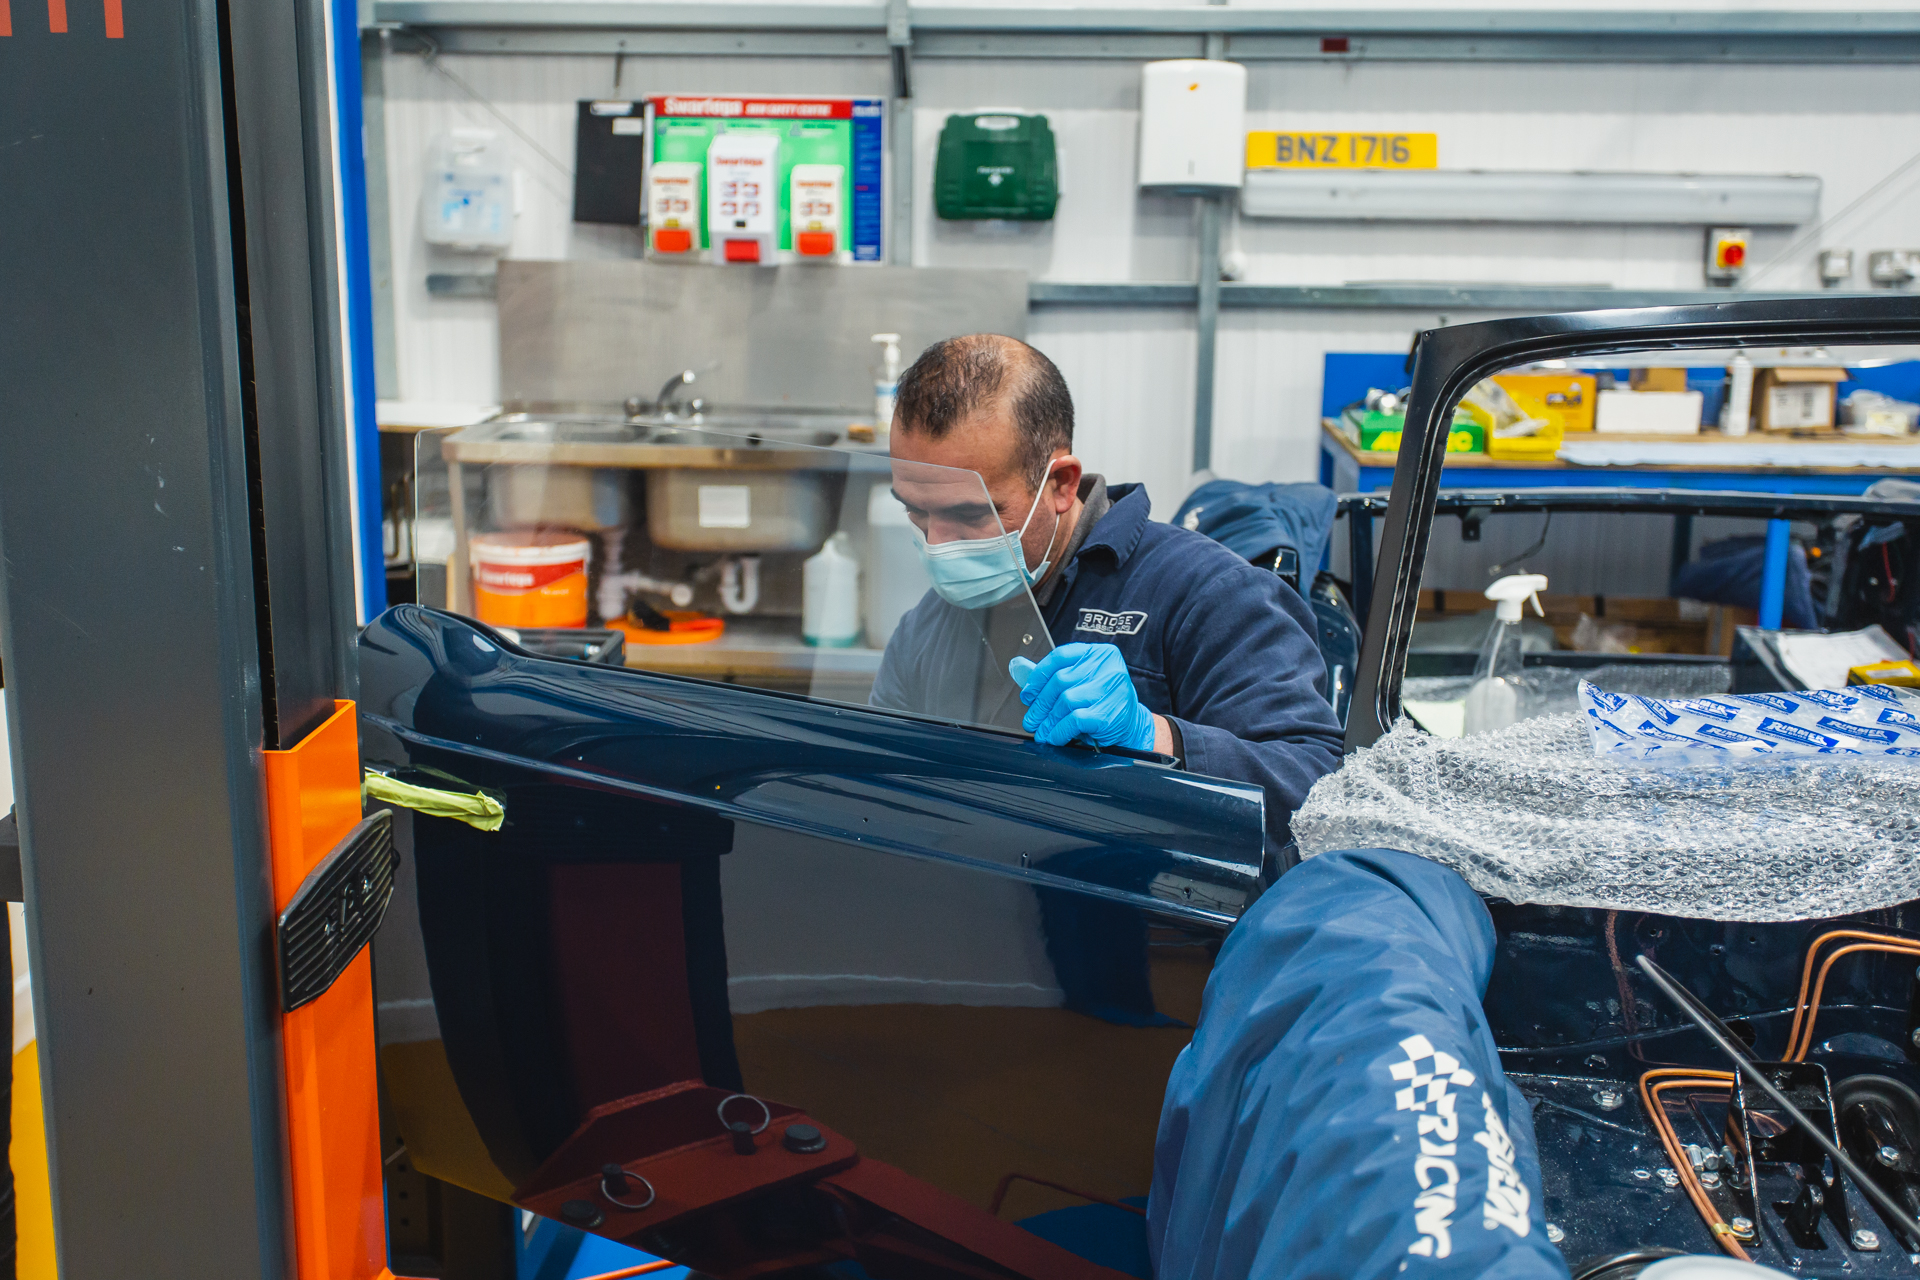
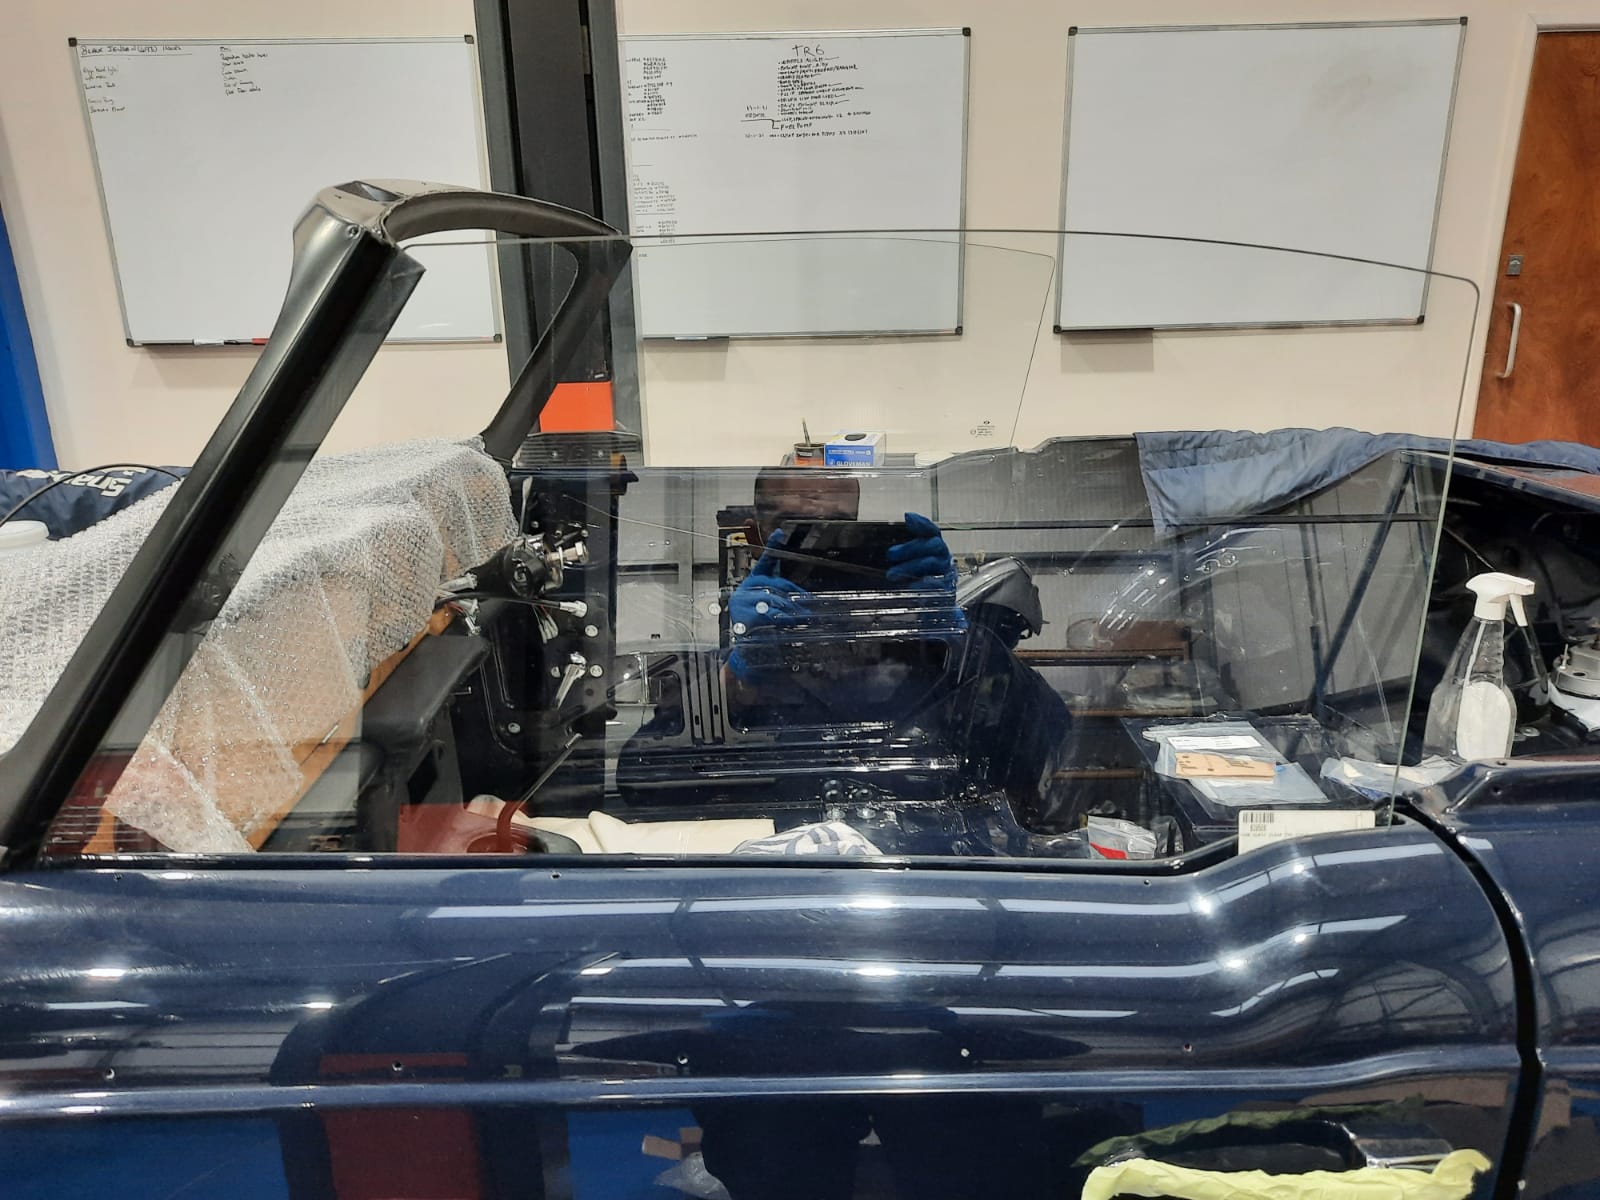
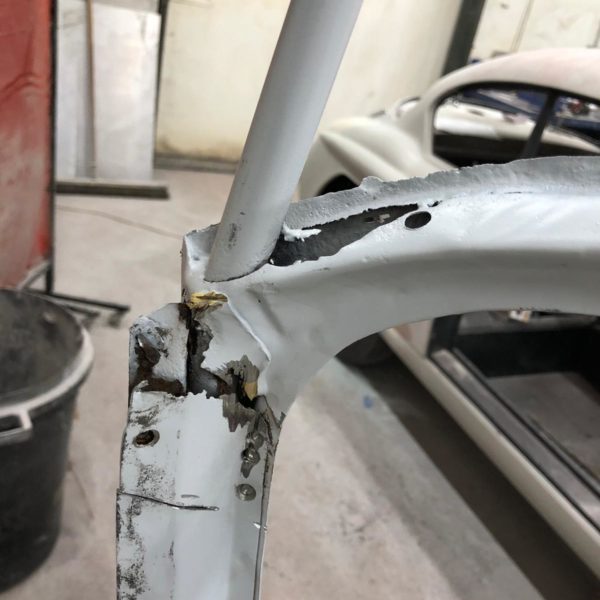
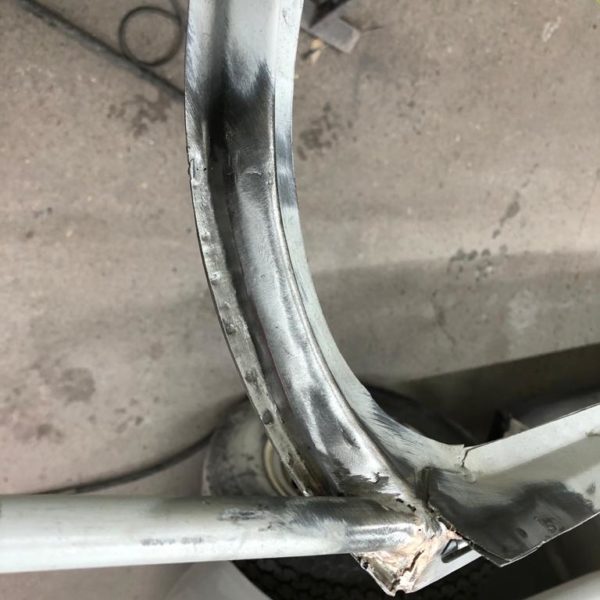
James has been working in the fabrication bay to prepare the Triumph TR5’s windscreen. The front screen surround frame has corroded in the lower right-hand

Mauro has been dedicated to the renovation of our beautiful 1968 Triumph TR5 that is slowly resembling more of a car now. With the engine

Our week has been very busy with two photoshoots at the start of the week and new projects arriving in the workshop. Tr6’s new hood

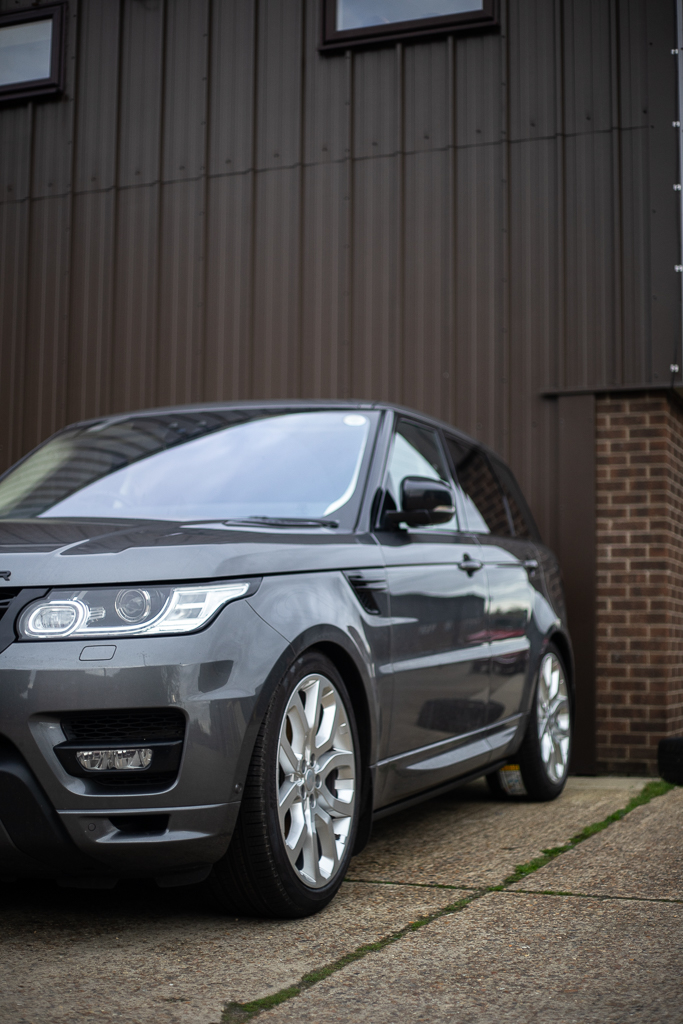
There’s been a lot going with week already and its only Wednesday! Take a look at what’s been going on s far. Range Rover Sport

The latest step on the TR5 is that it’s air intake for the engine has received a fresh layer of VHT Crinkle heat resistant paint
The parts for our 1968 Triumph TR5 have arrived and our technician Mauro has set them all out to assess what’s there and If anything more needs to be ordered.
Although it has a long road ahead of it, we’re already pleased by the progress the TR5 is making. Our Triumph TR5 is set to
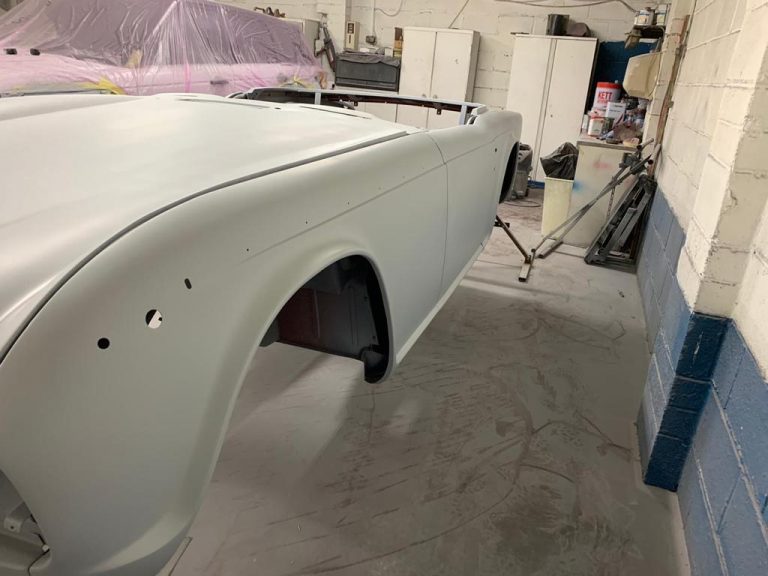
More pictures have arrived to us from the body shop that is currently working on the Triumph TR5 body shell. The project came to us

We’ve been sent some progress photos from the bodyshop preparing the TR5. Please note, this work is being carried out by another company as the
Our TR5 Restoration continues as another load of parts arrive. We’re currently waiting on the bodywork to arrive to really start making progress on this
Our Triumph was brought to us part way through it’s restoration. As such, the body shell is being restored elsewhere. We’ve been sent images as

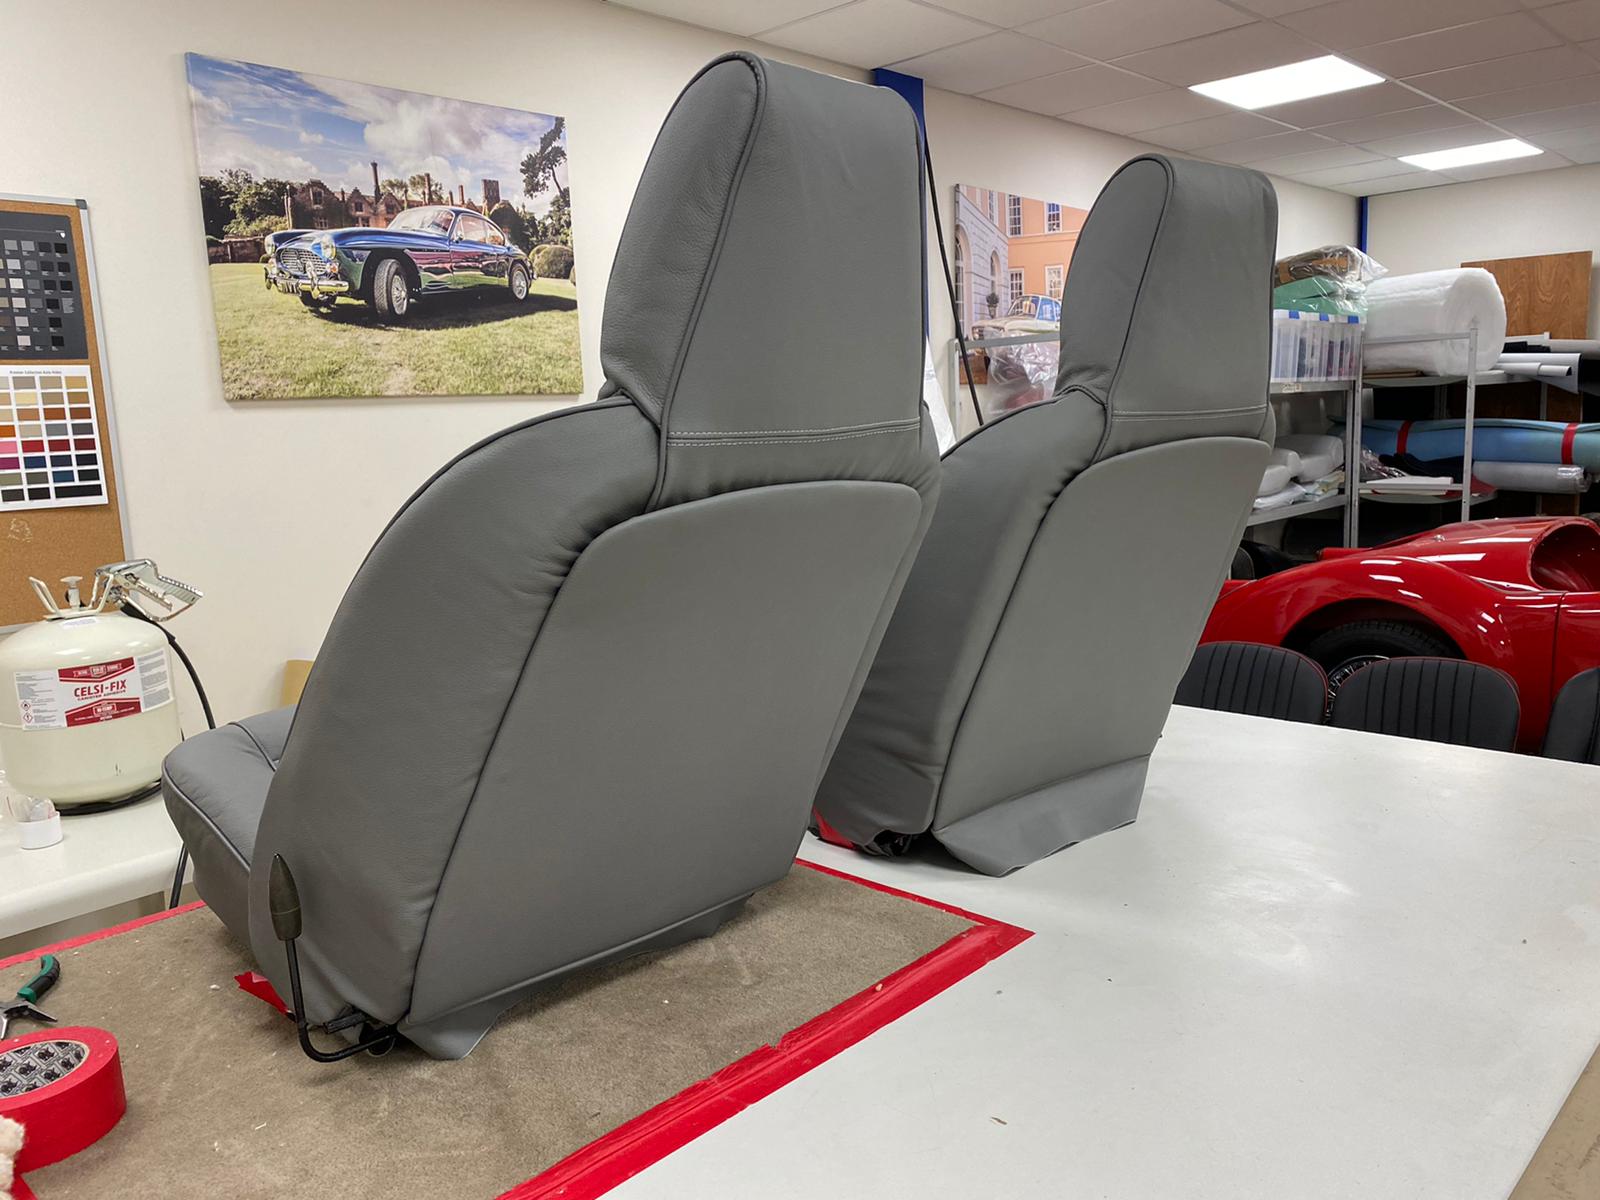
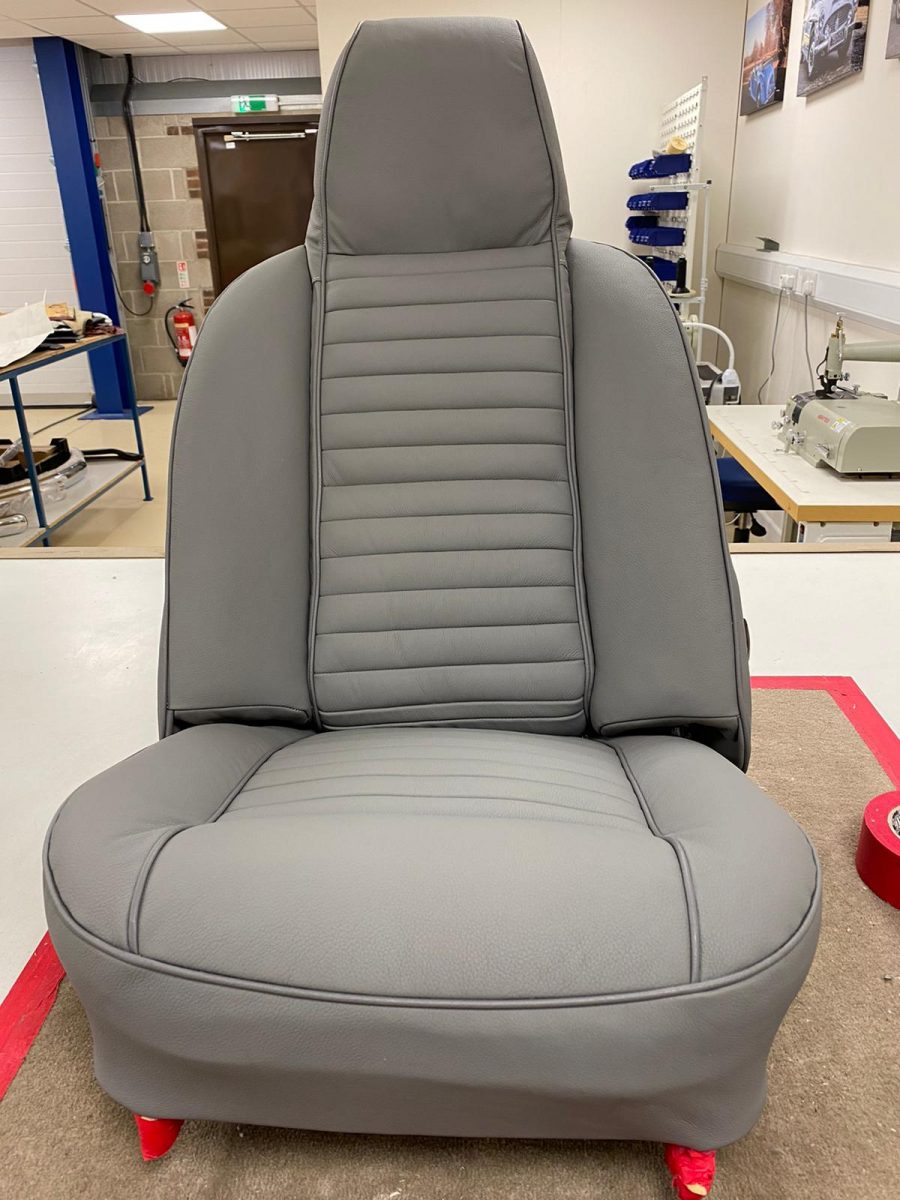
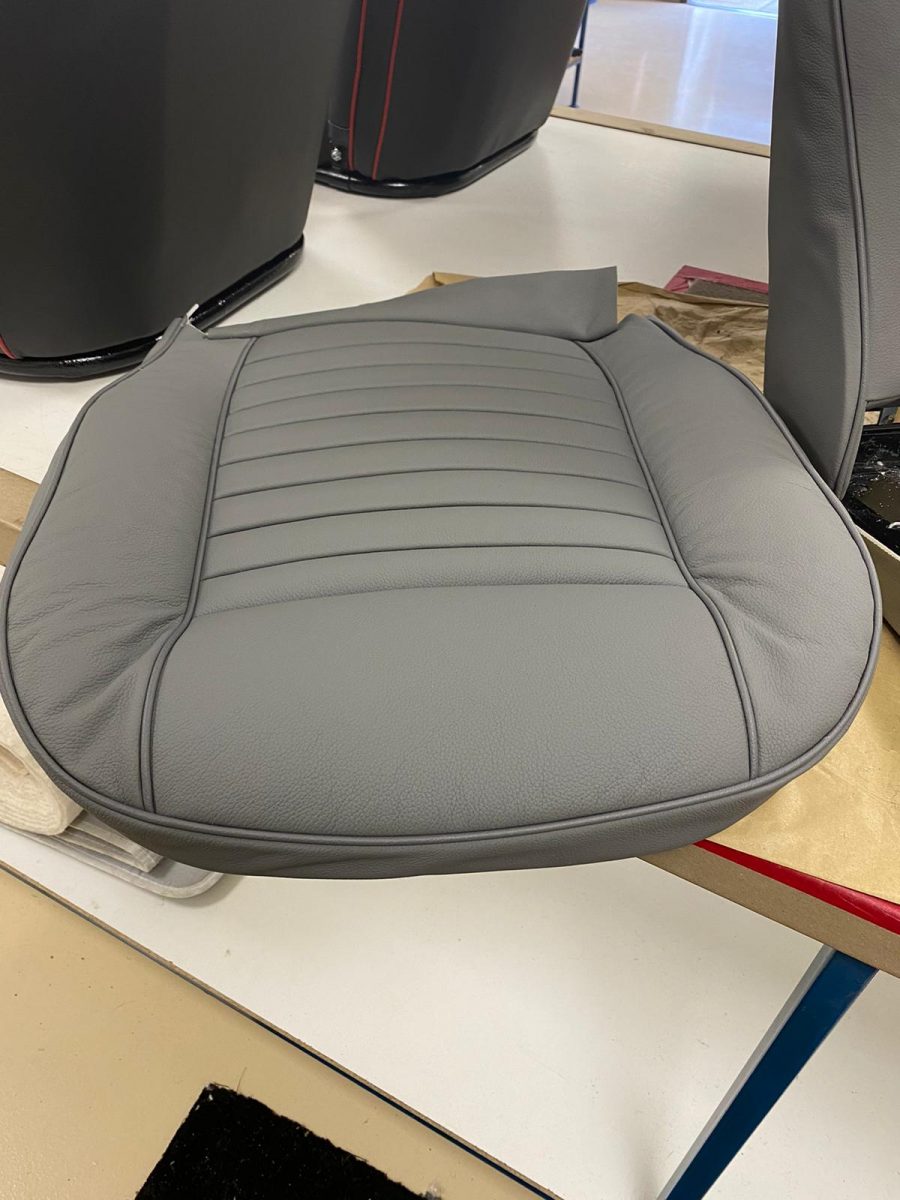
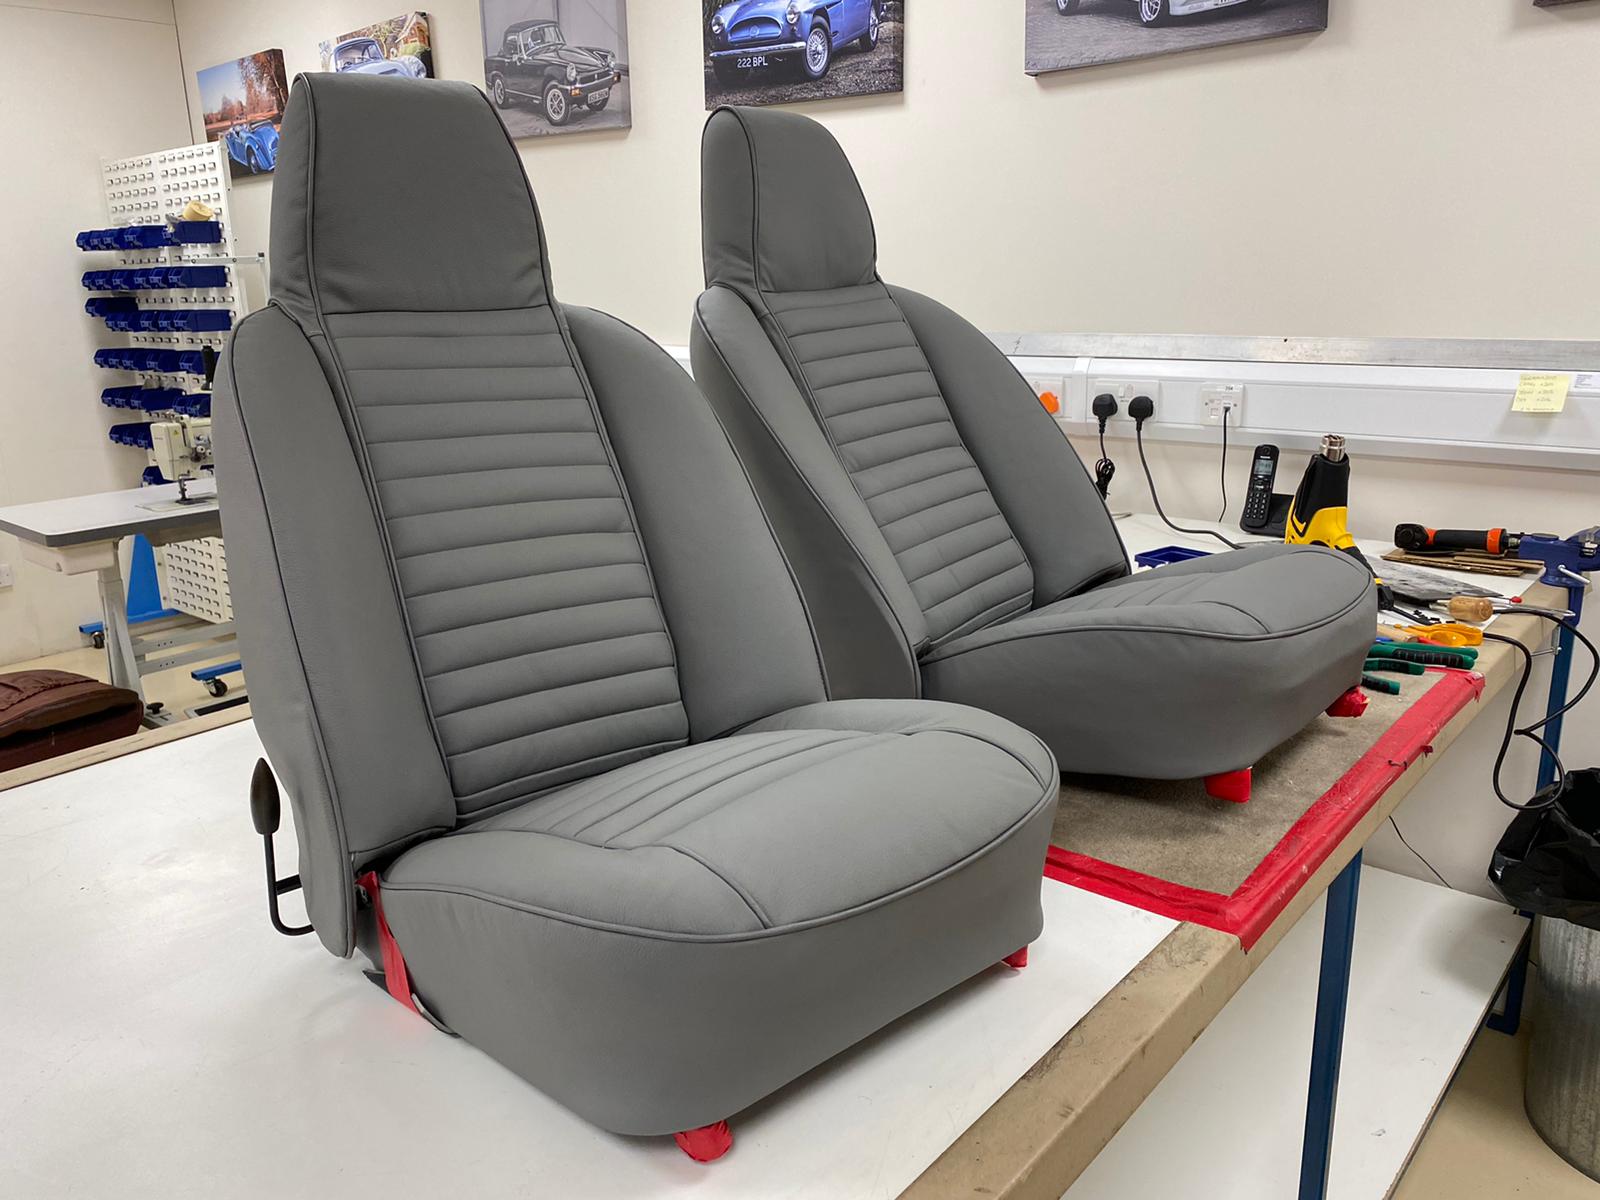
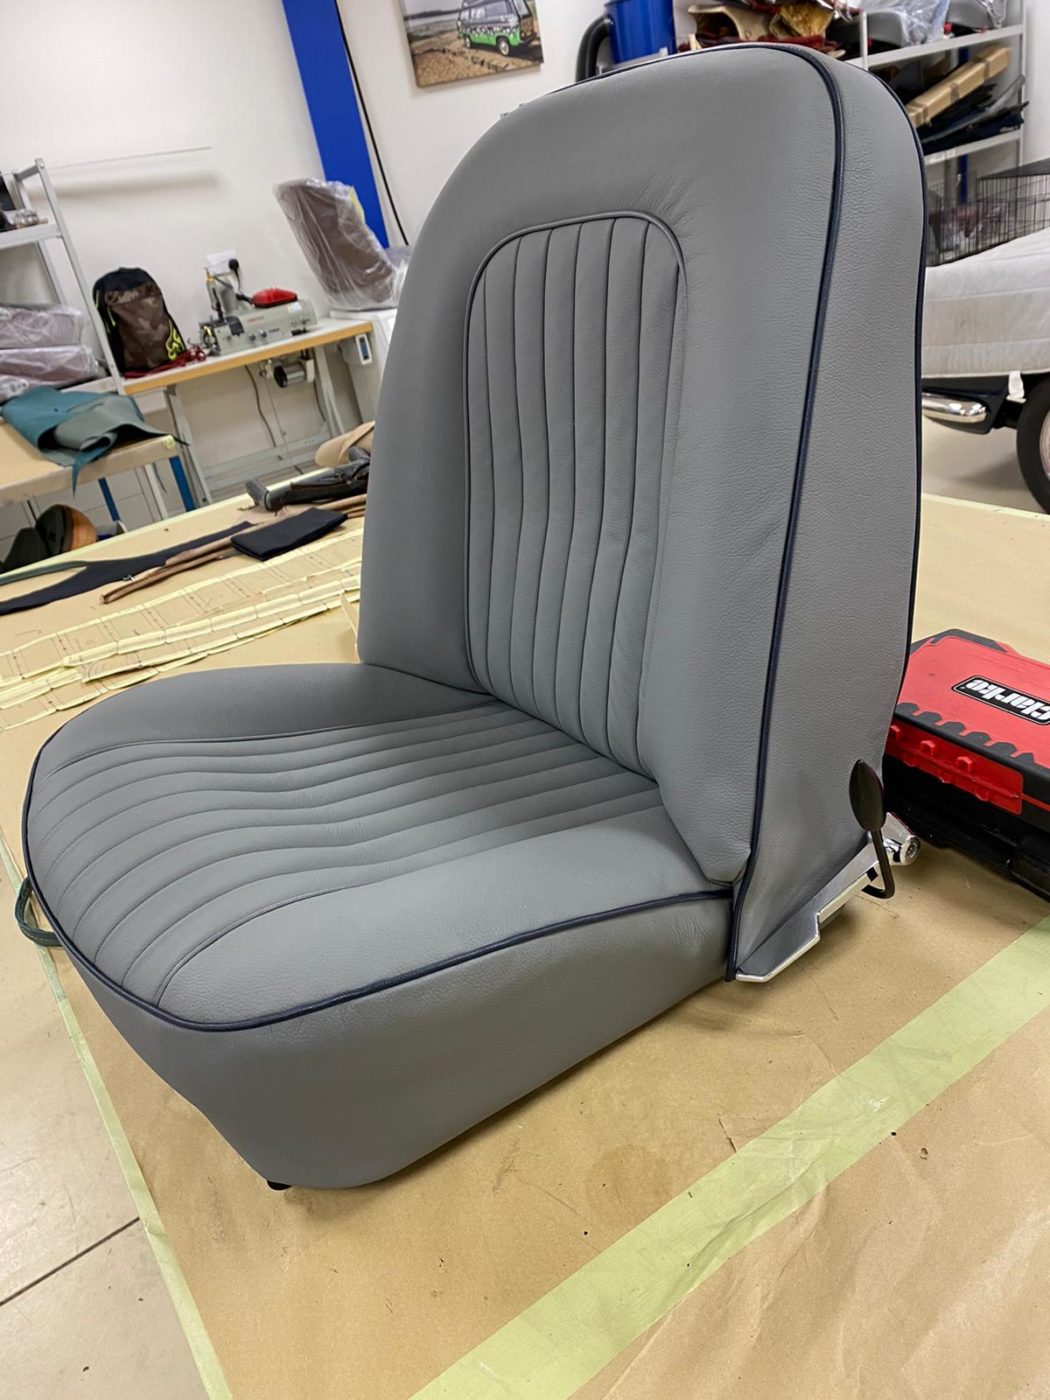
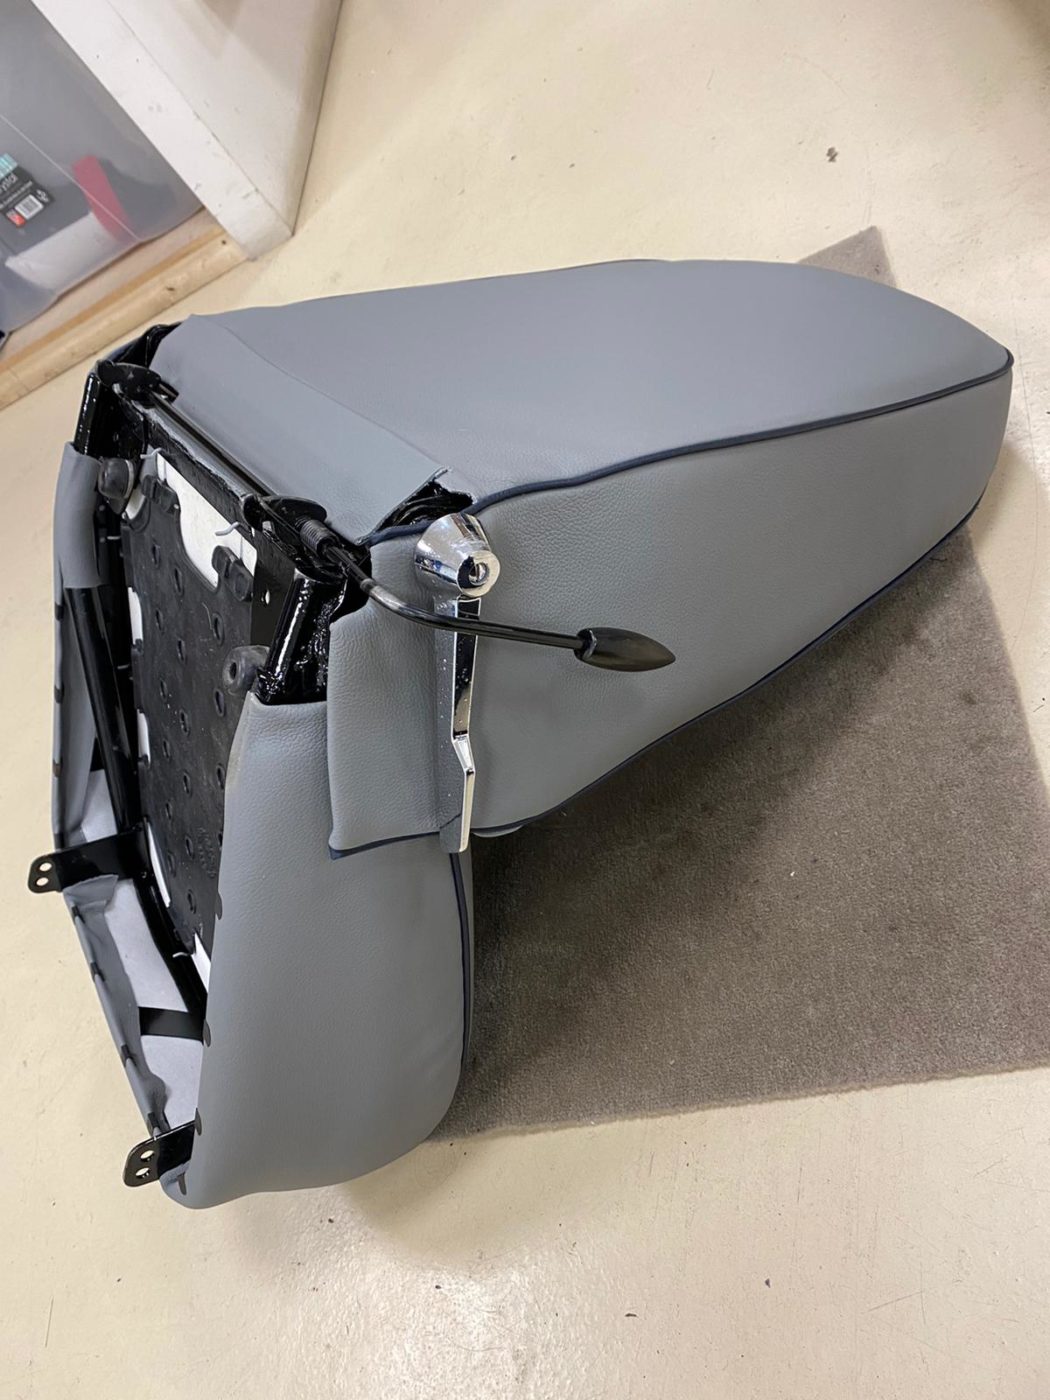
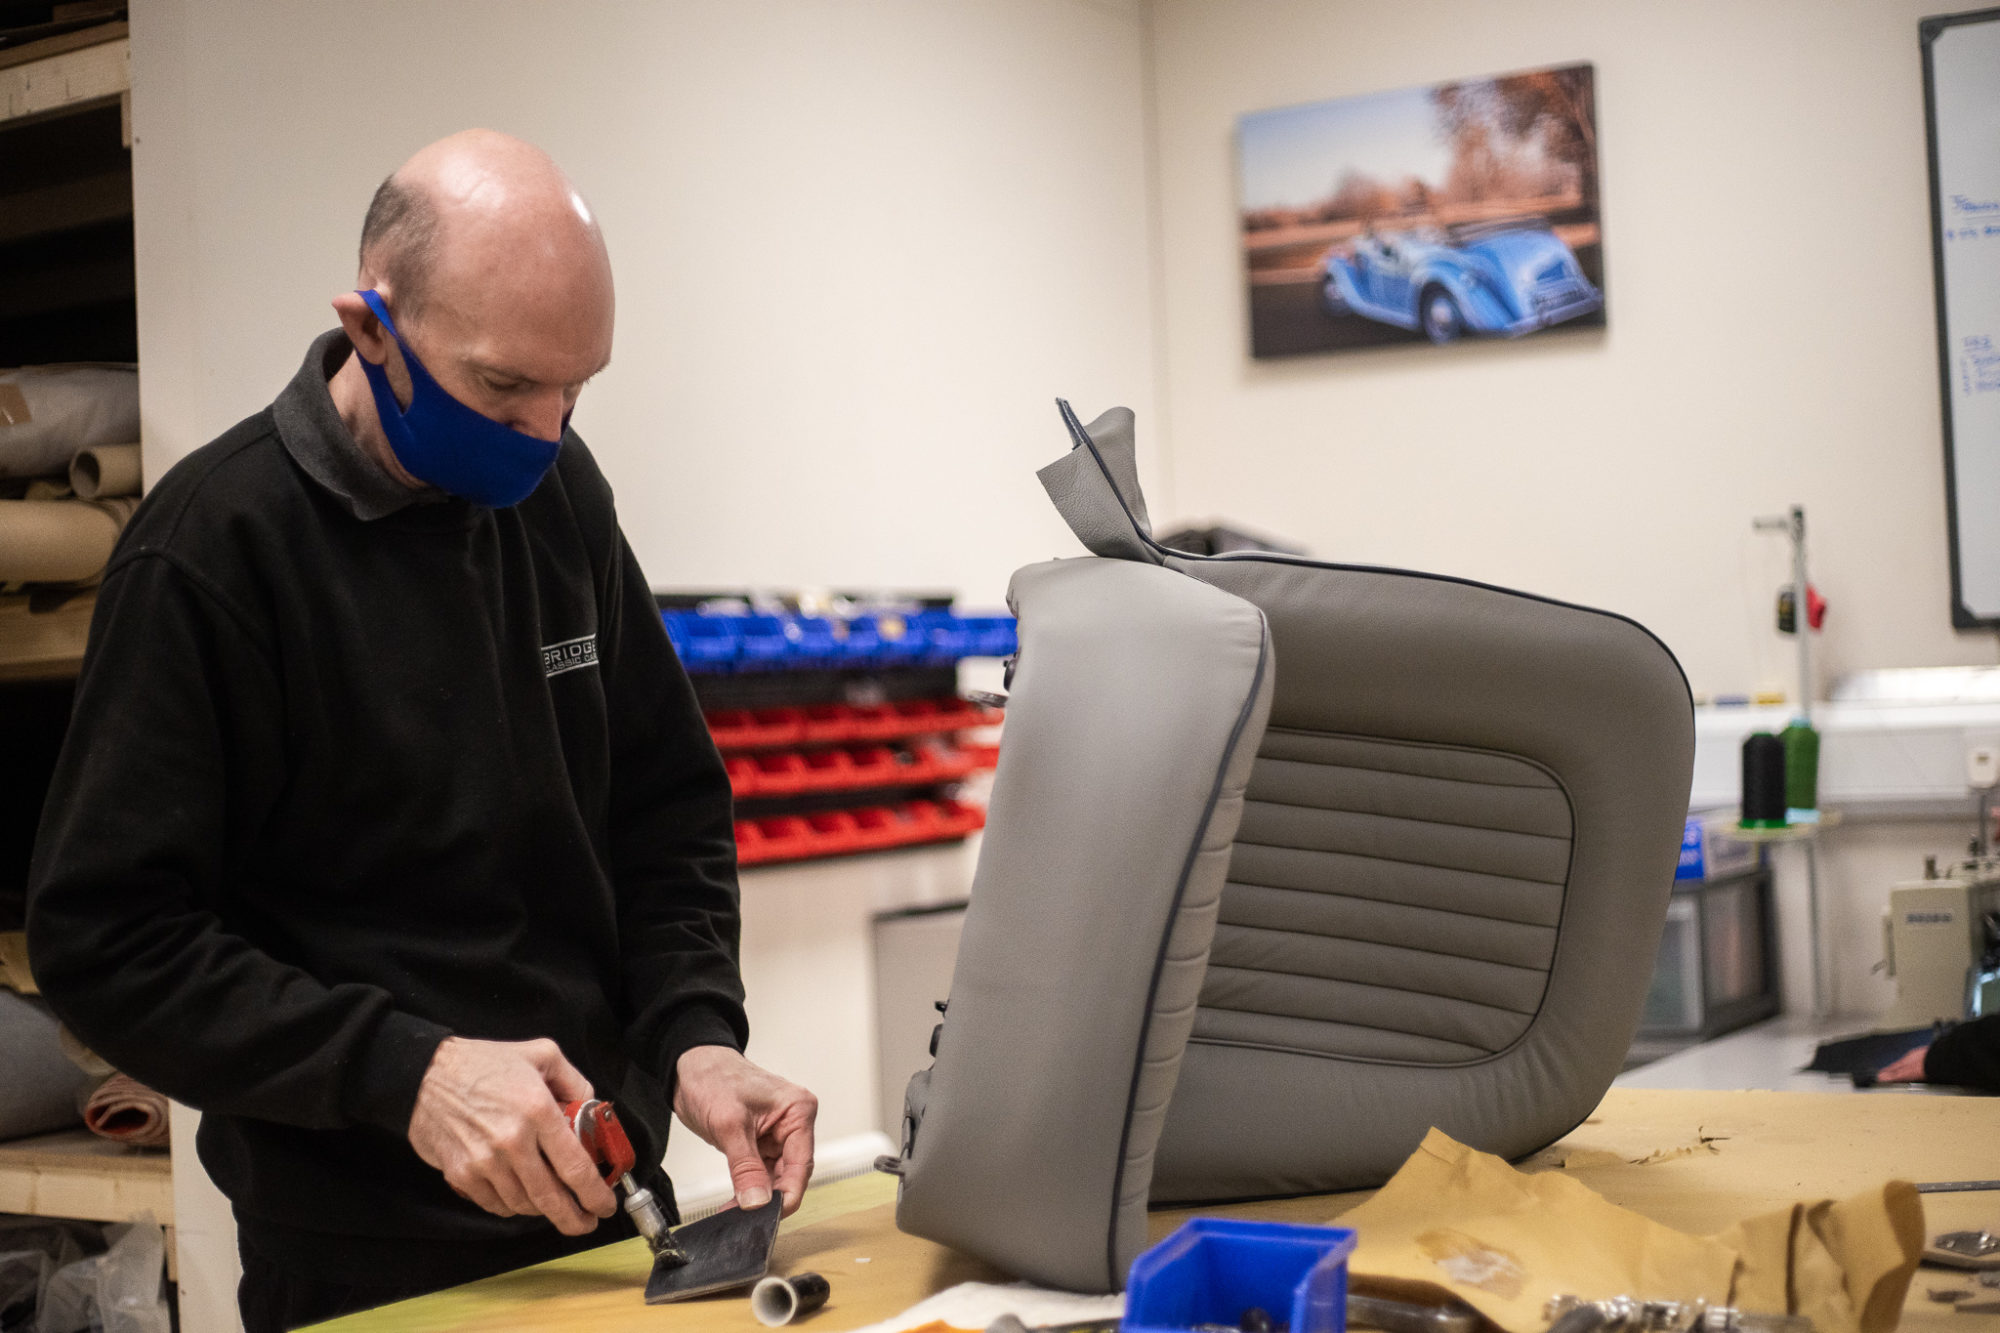
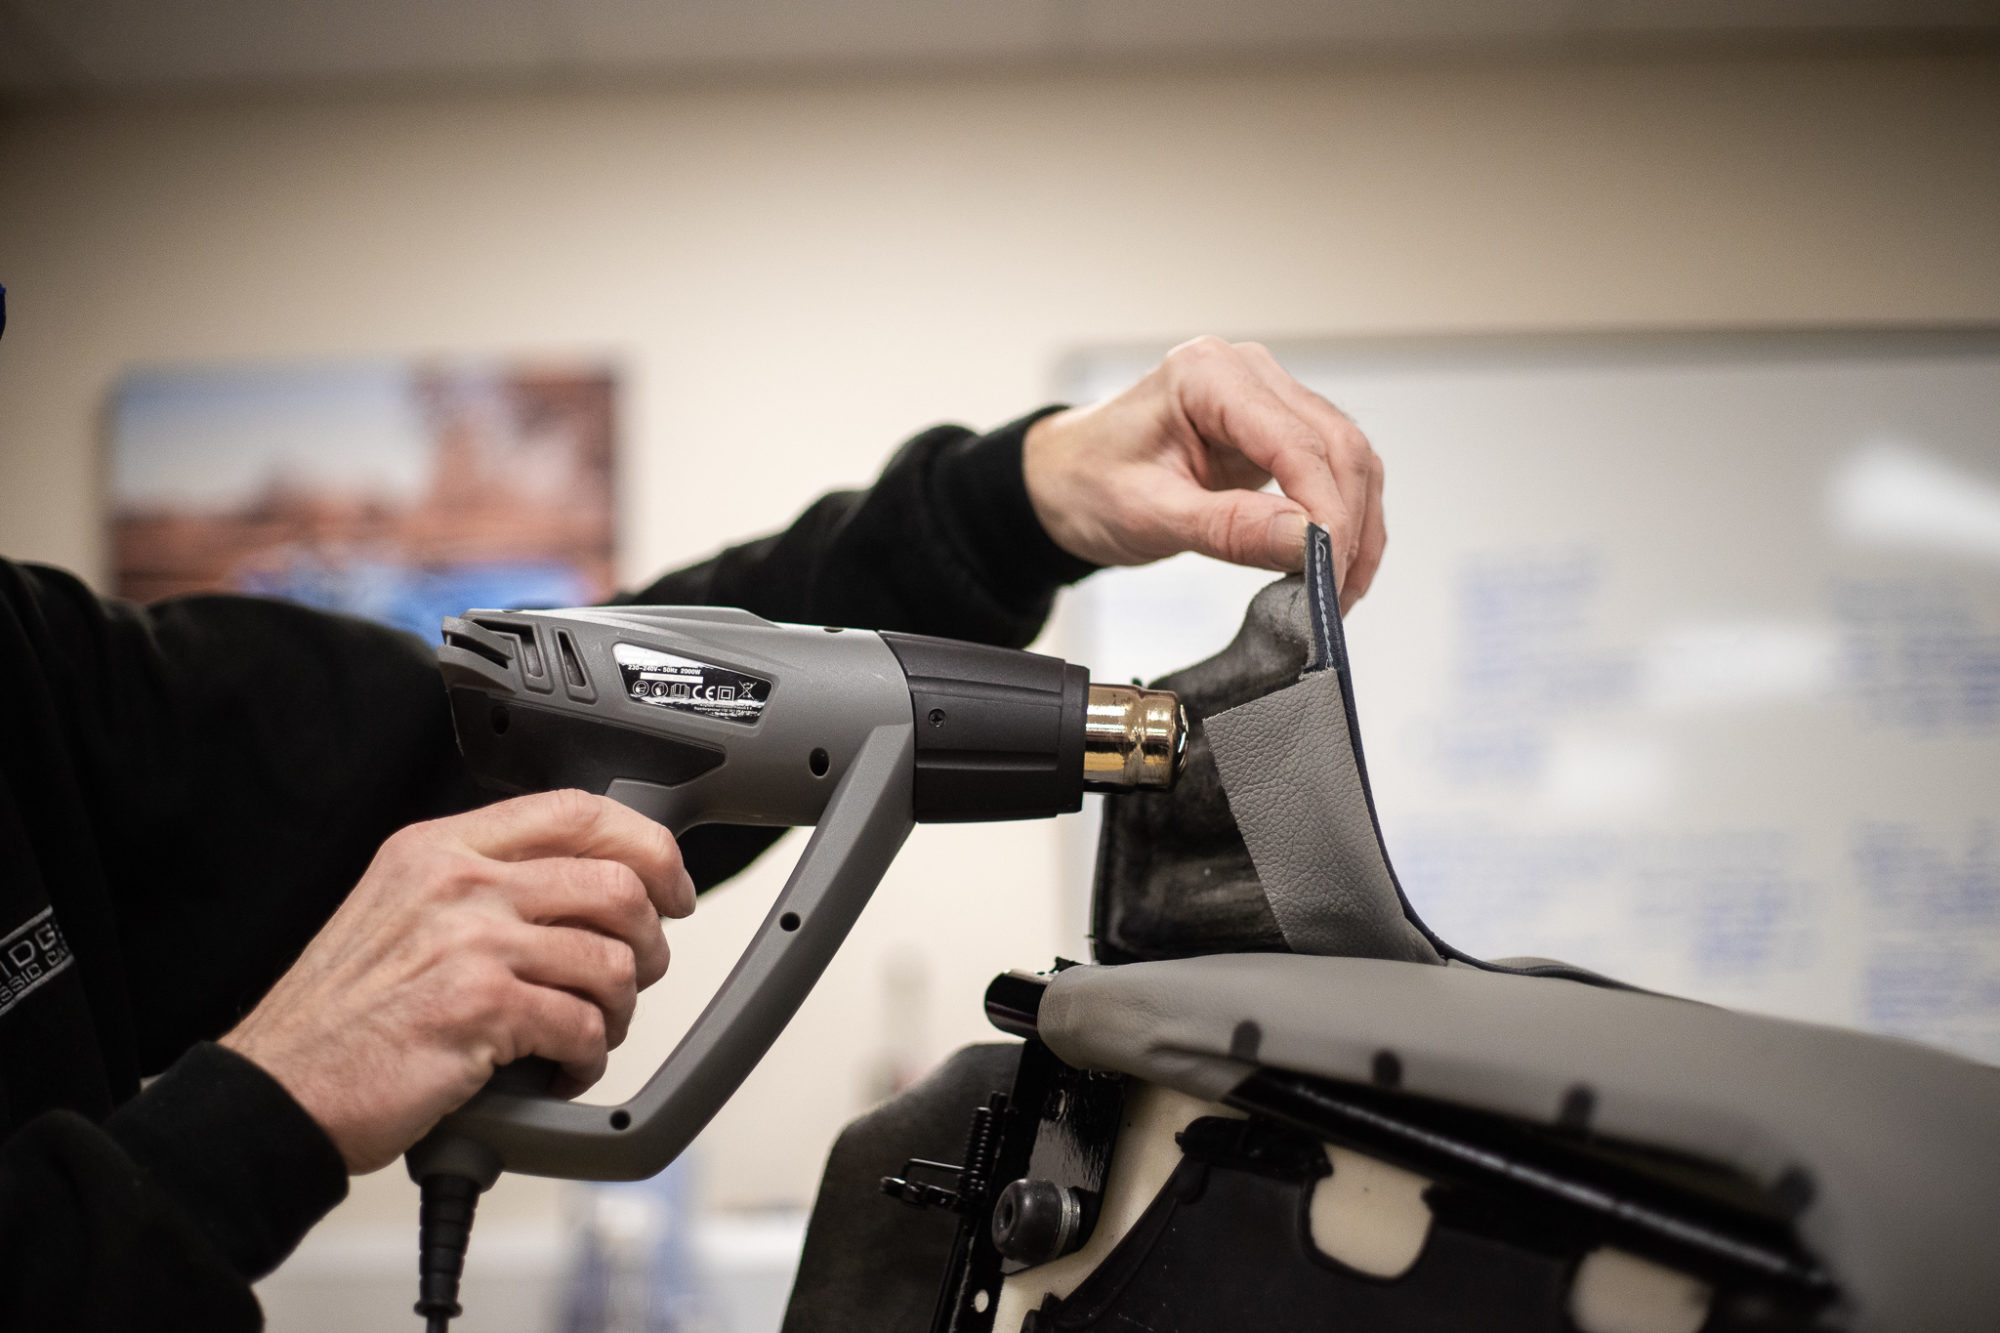
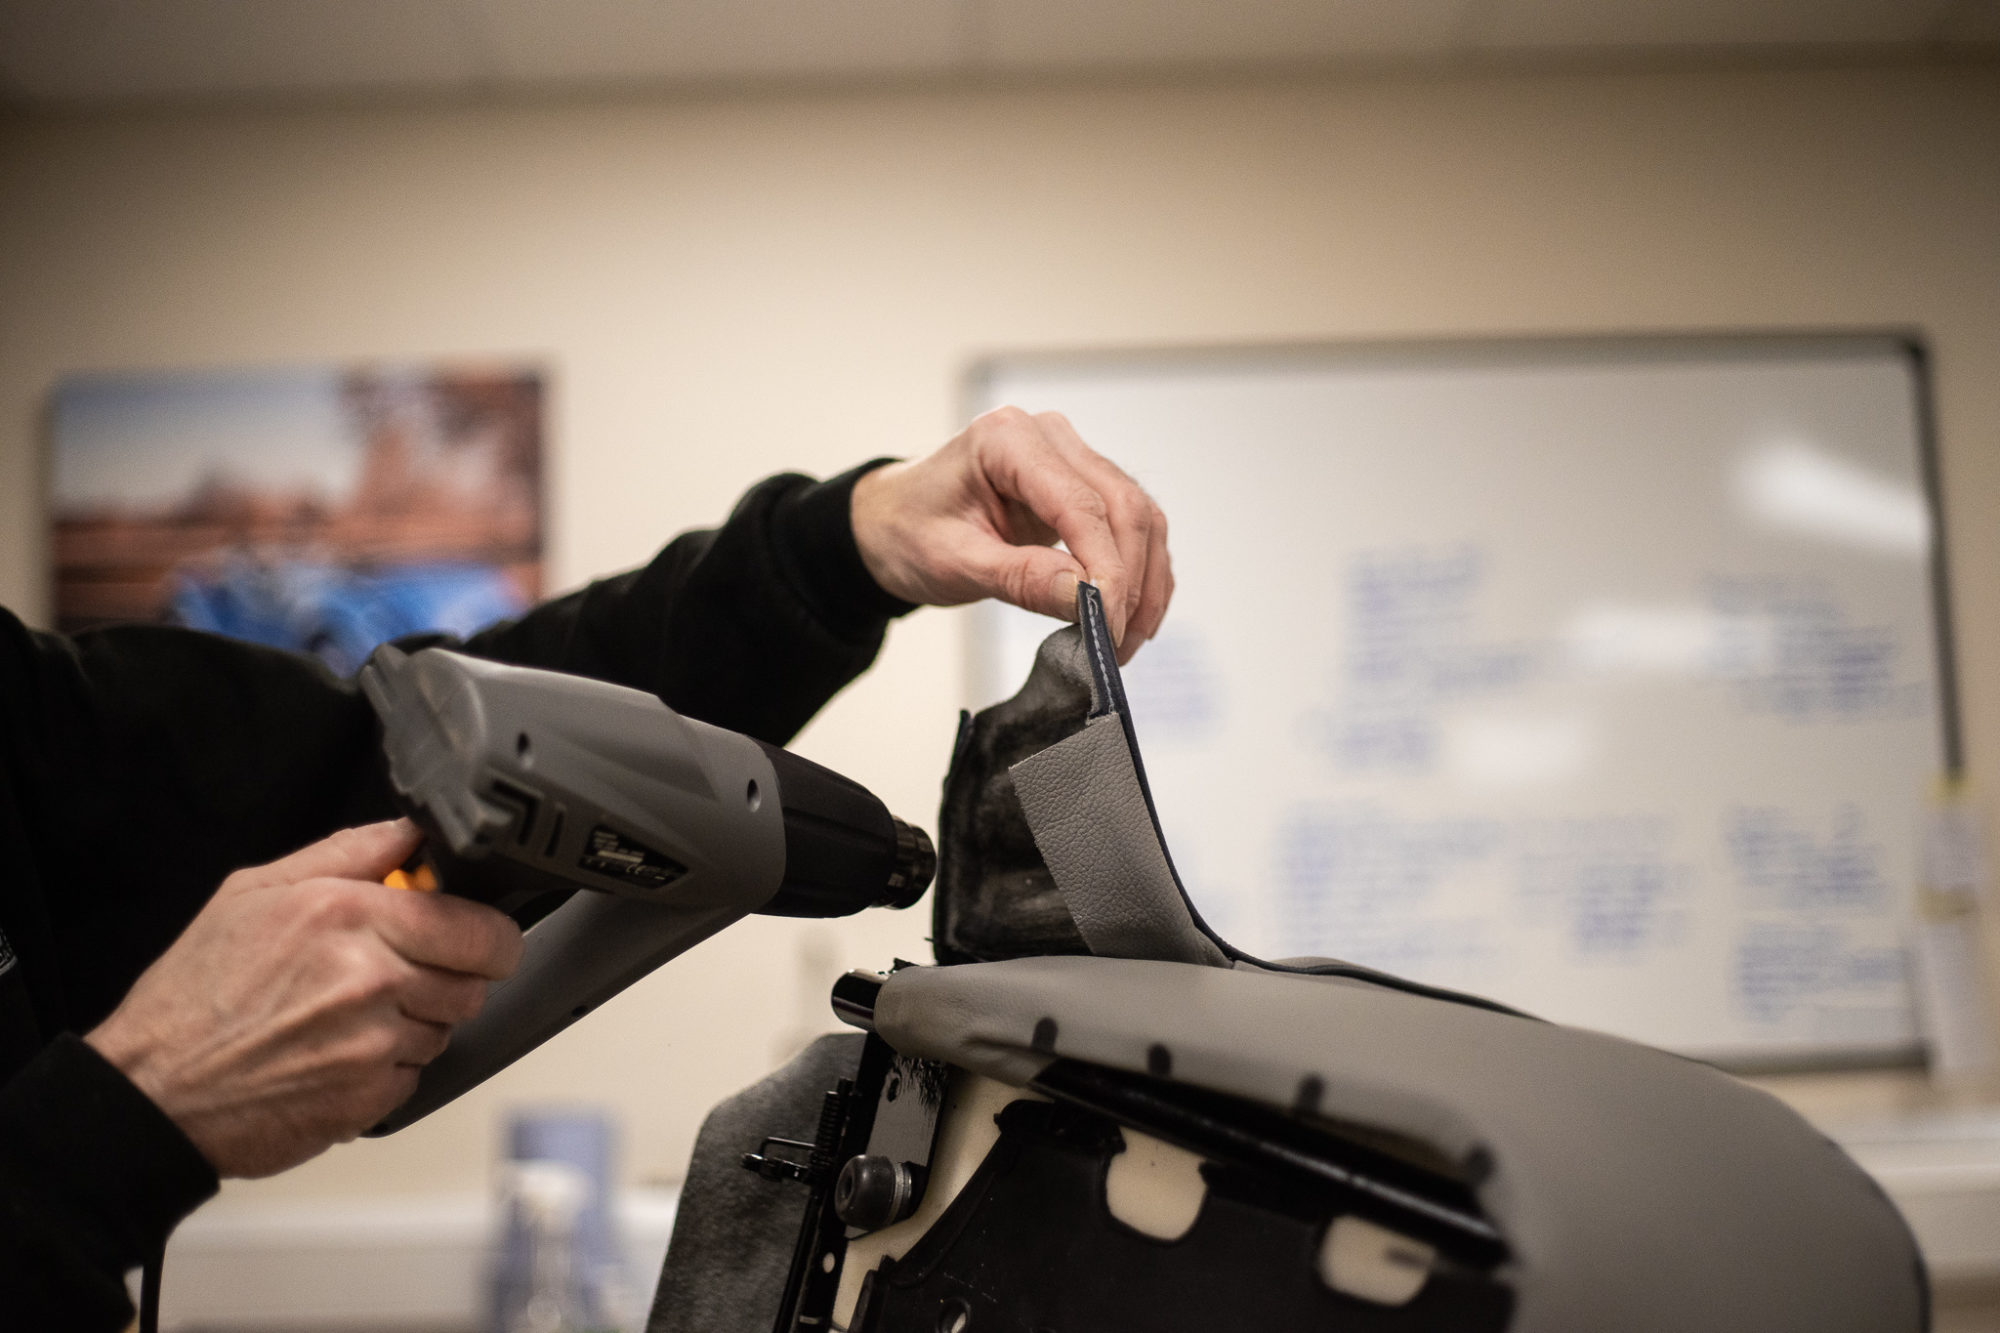
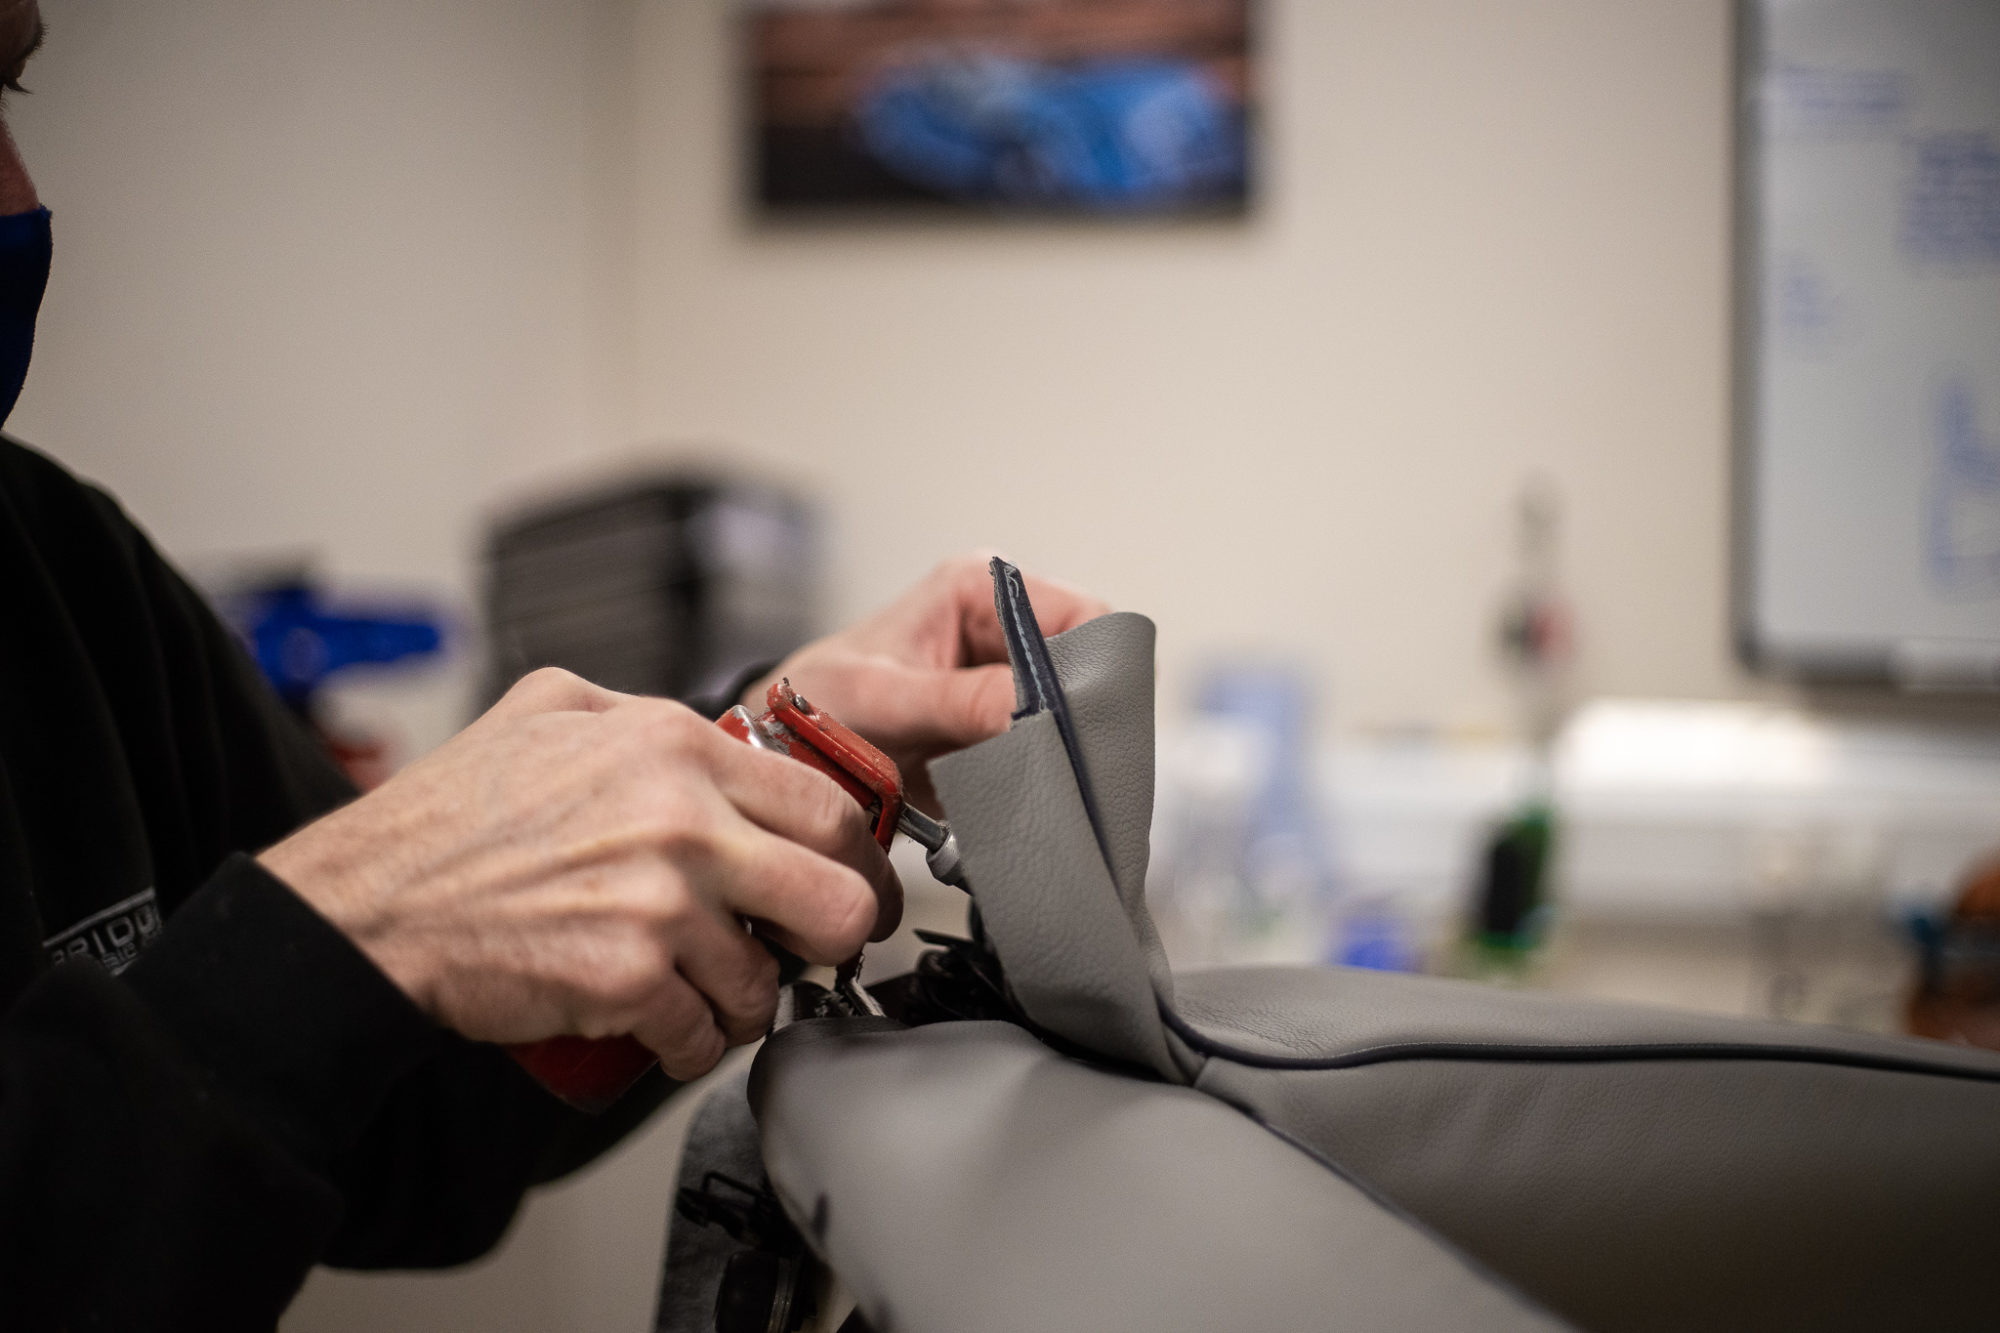
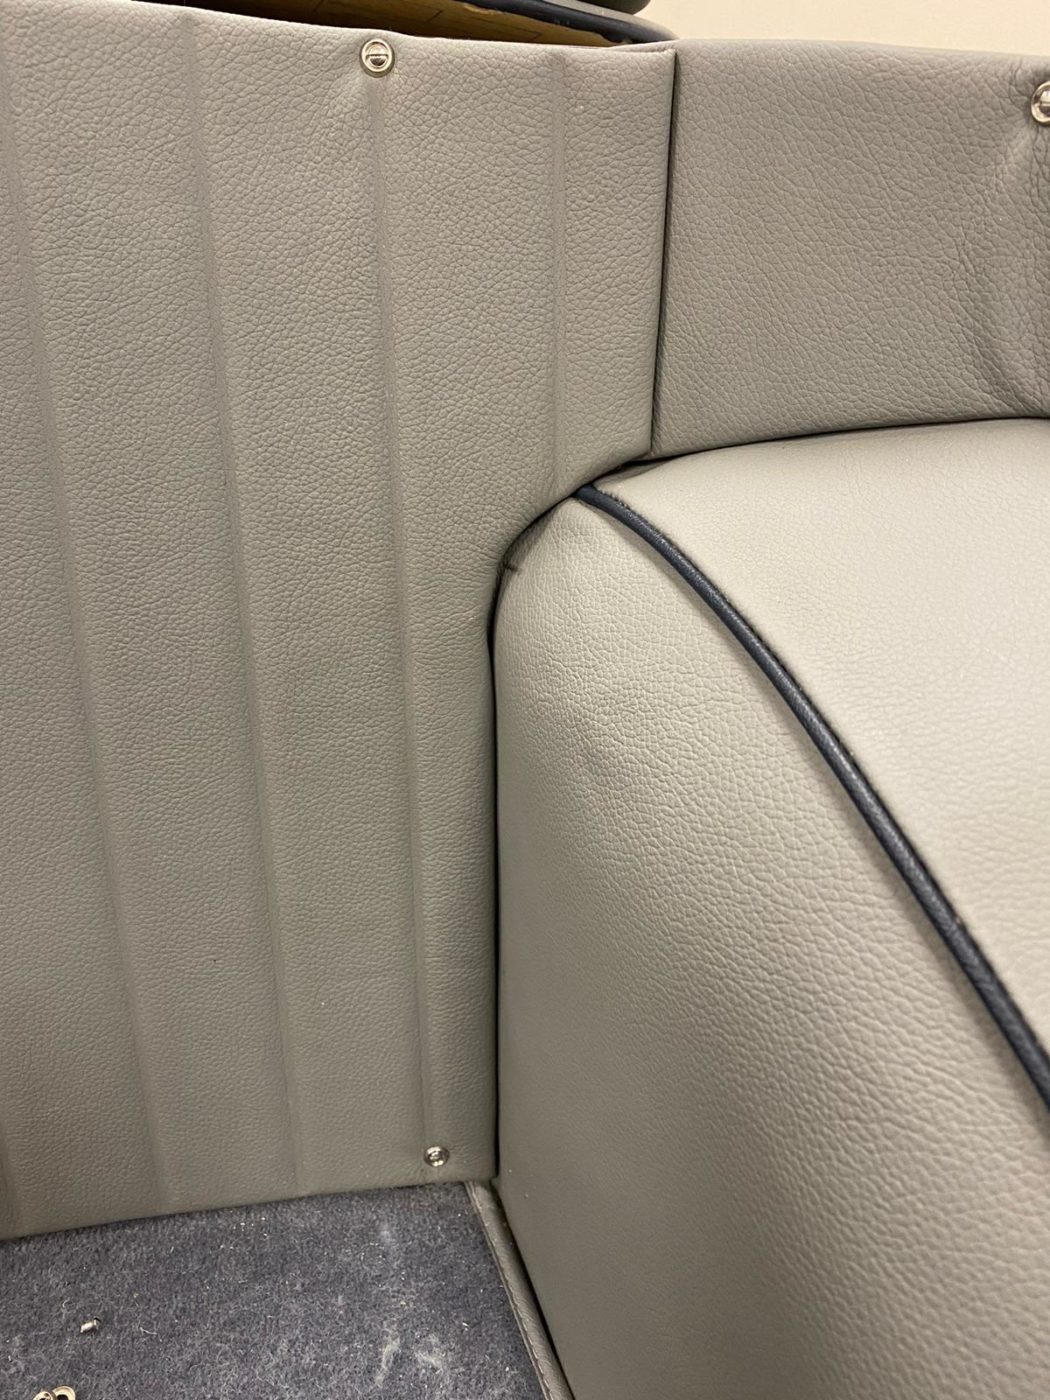
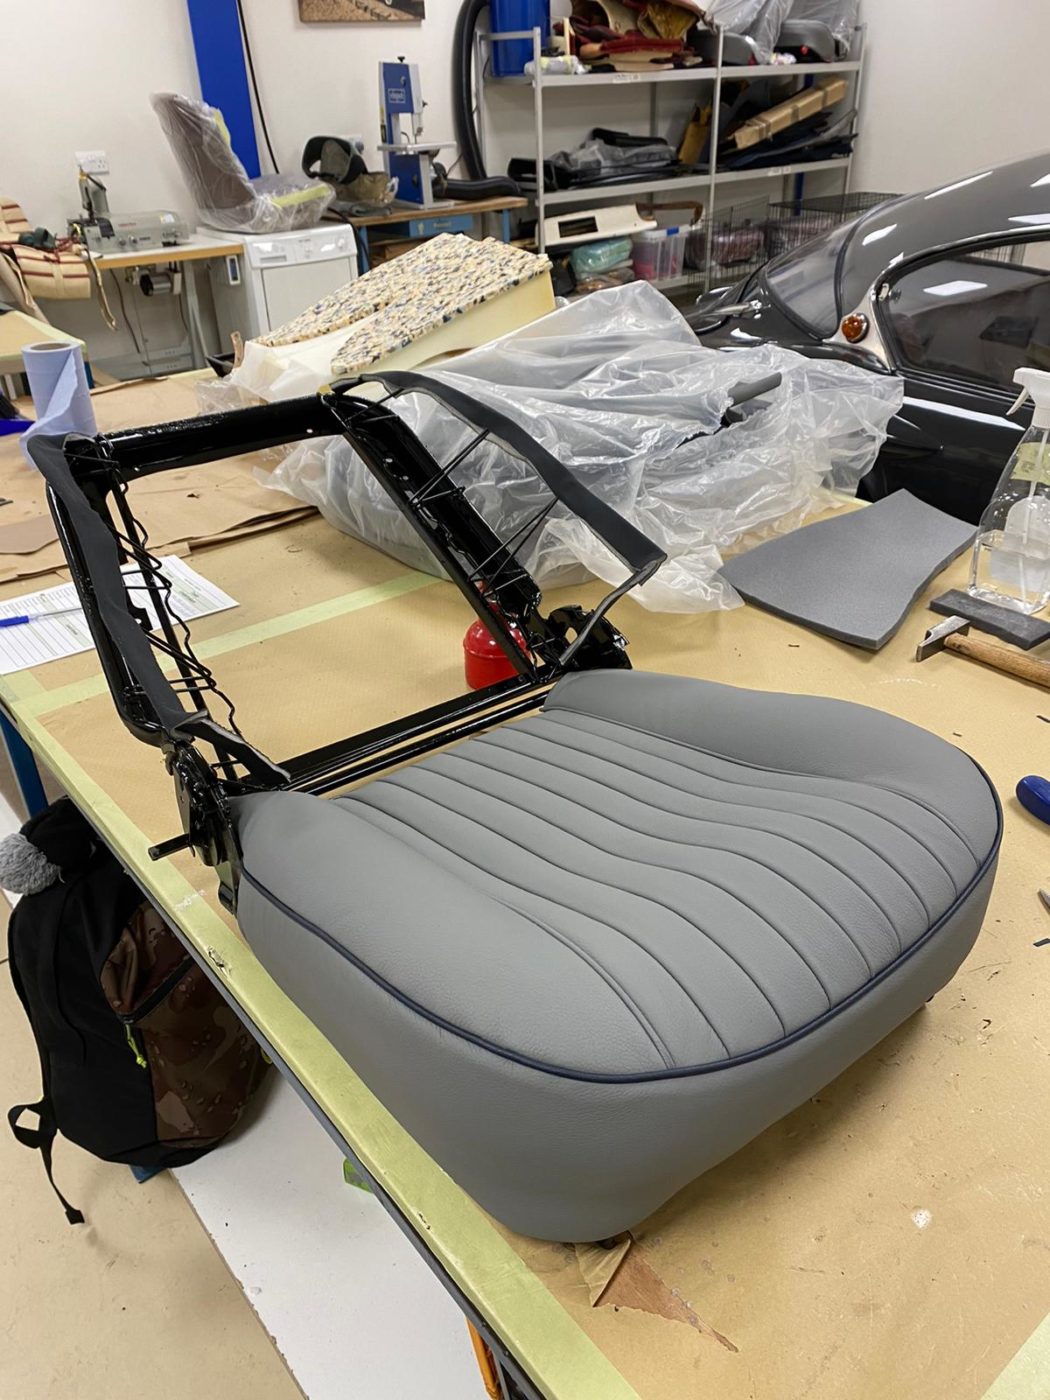
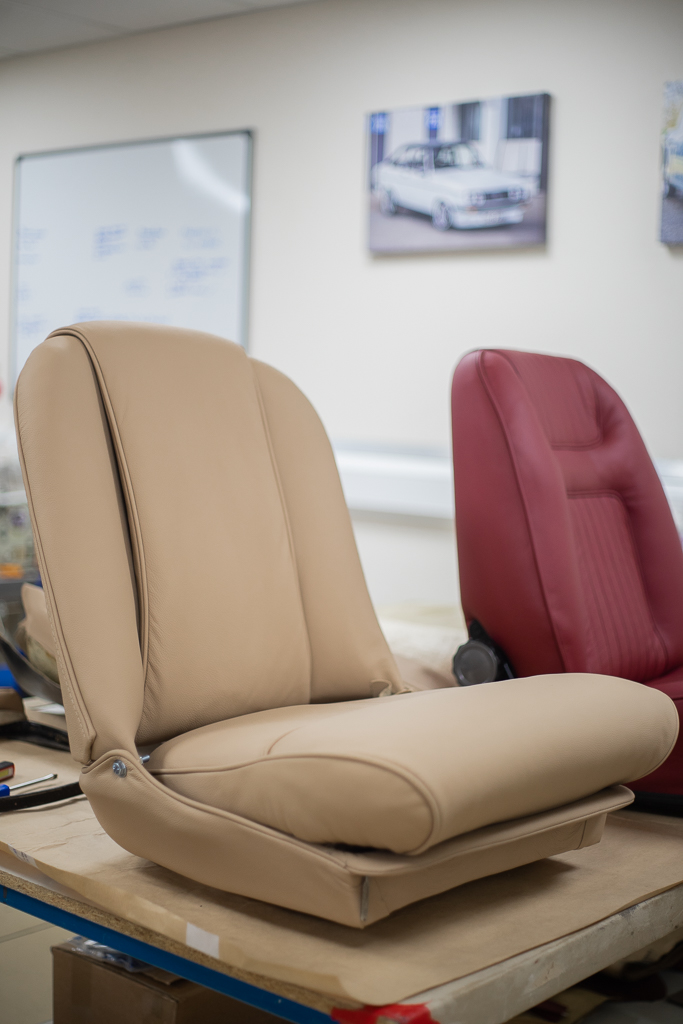
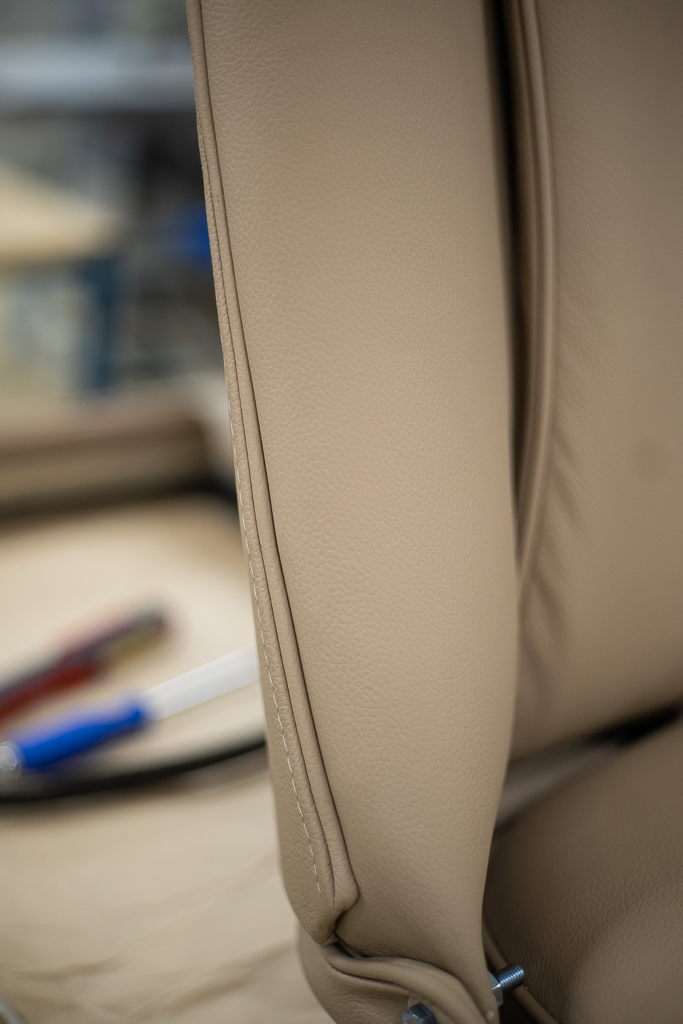
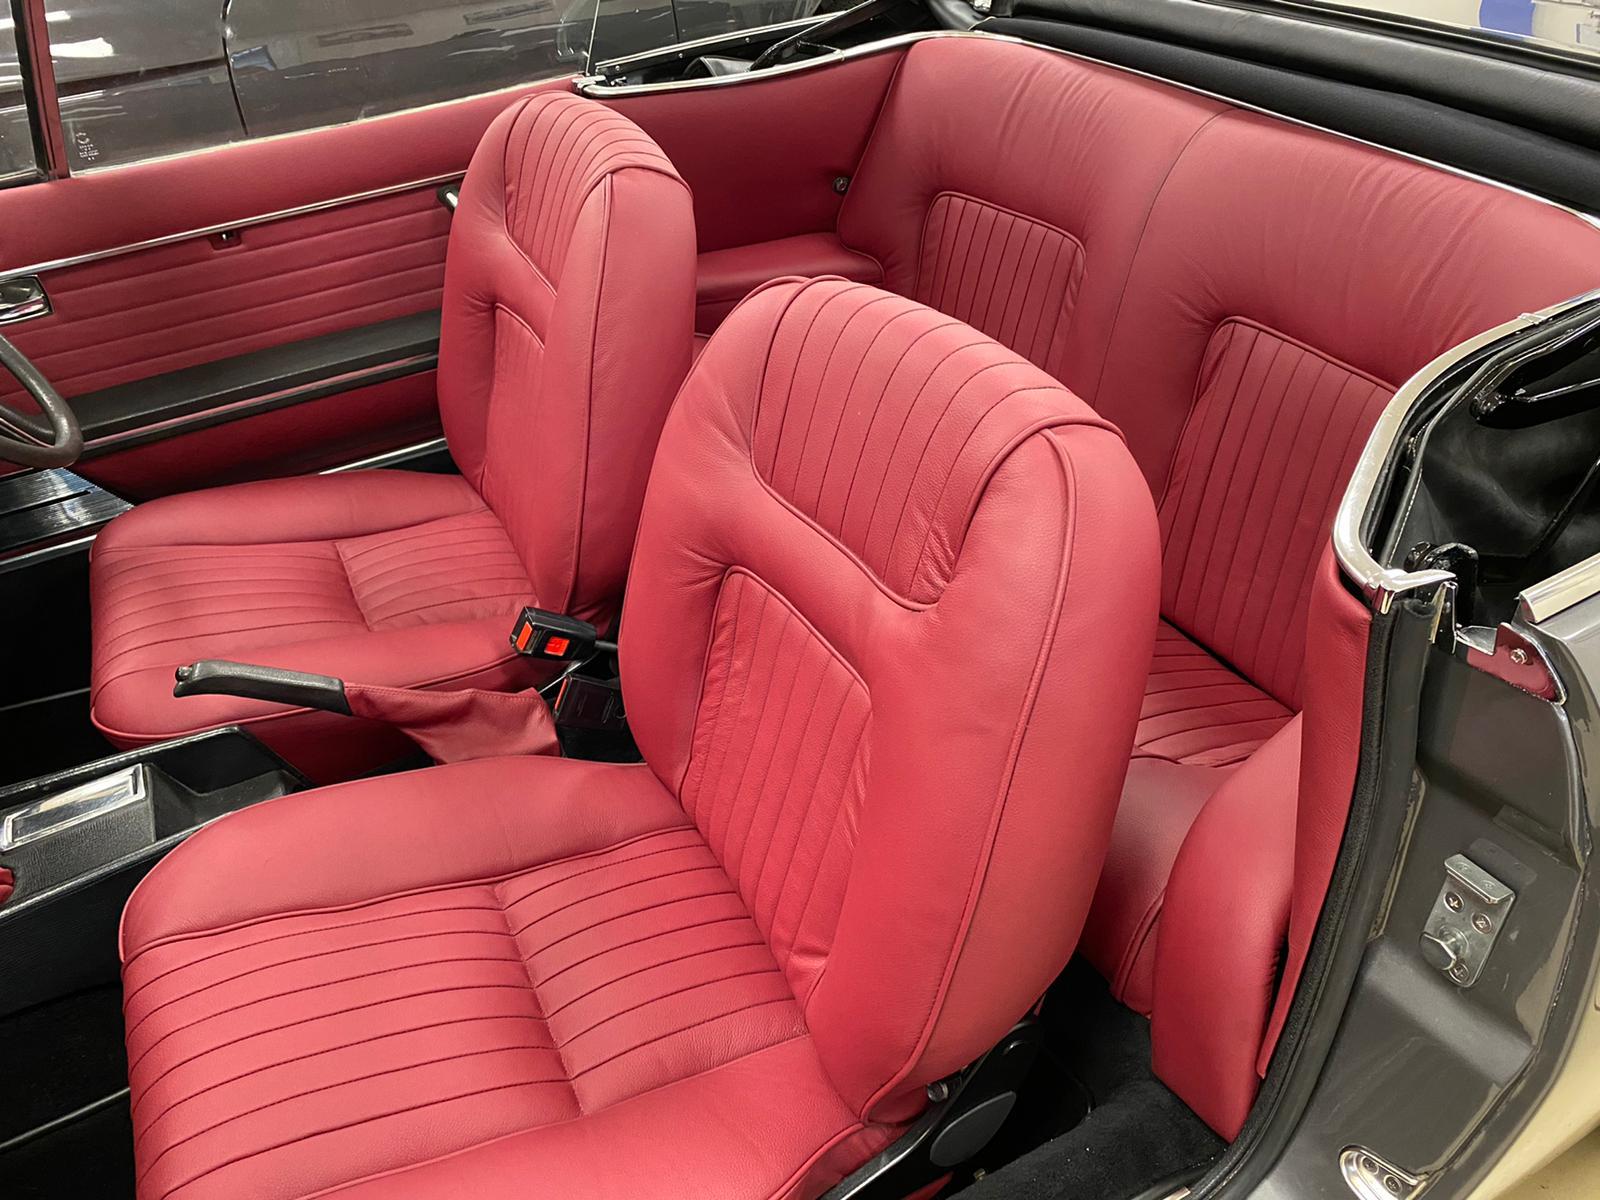
Kath has now completed restoring our Triumph TR5 seats in this lovely grey leather work. We can’t wait to see how they’ll look in the
You can read about the full story of this car here!
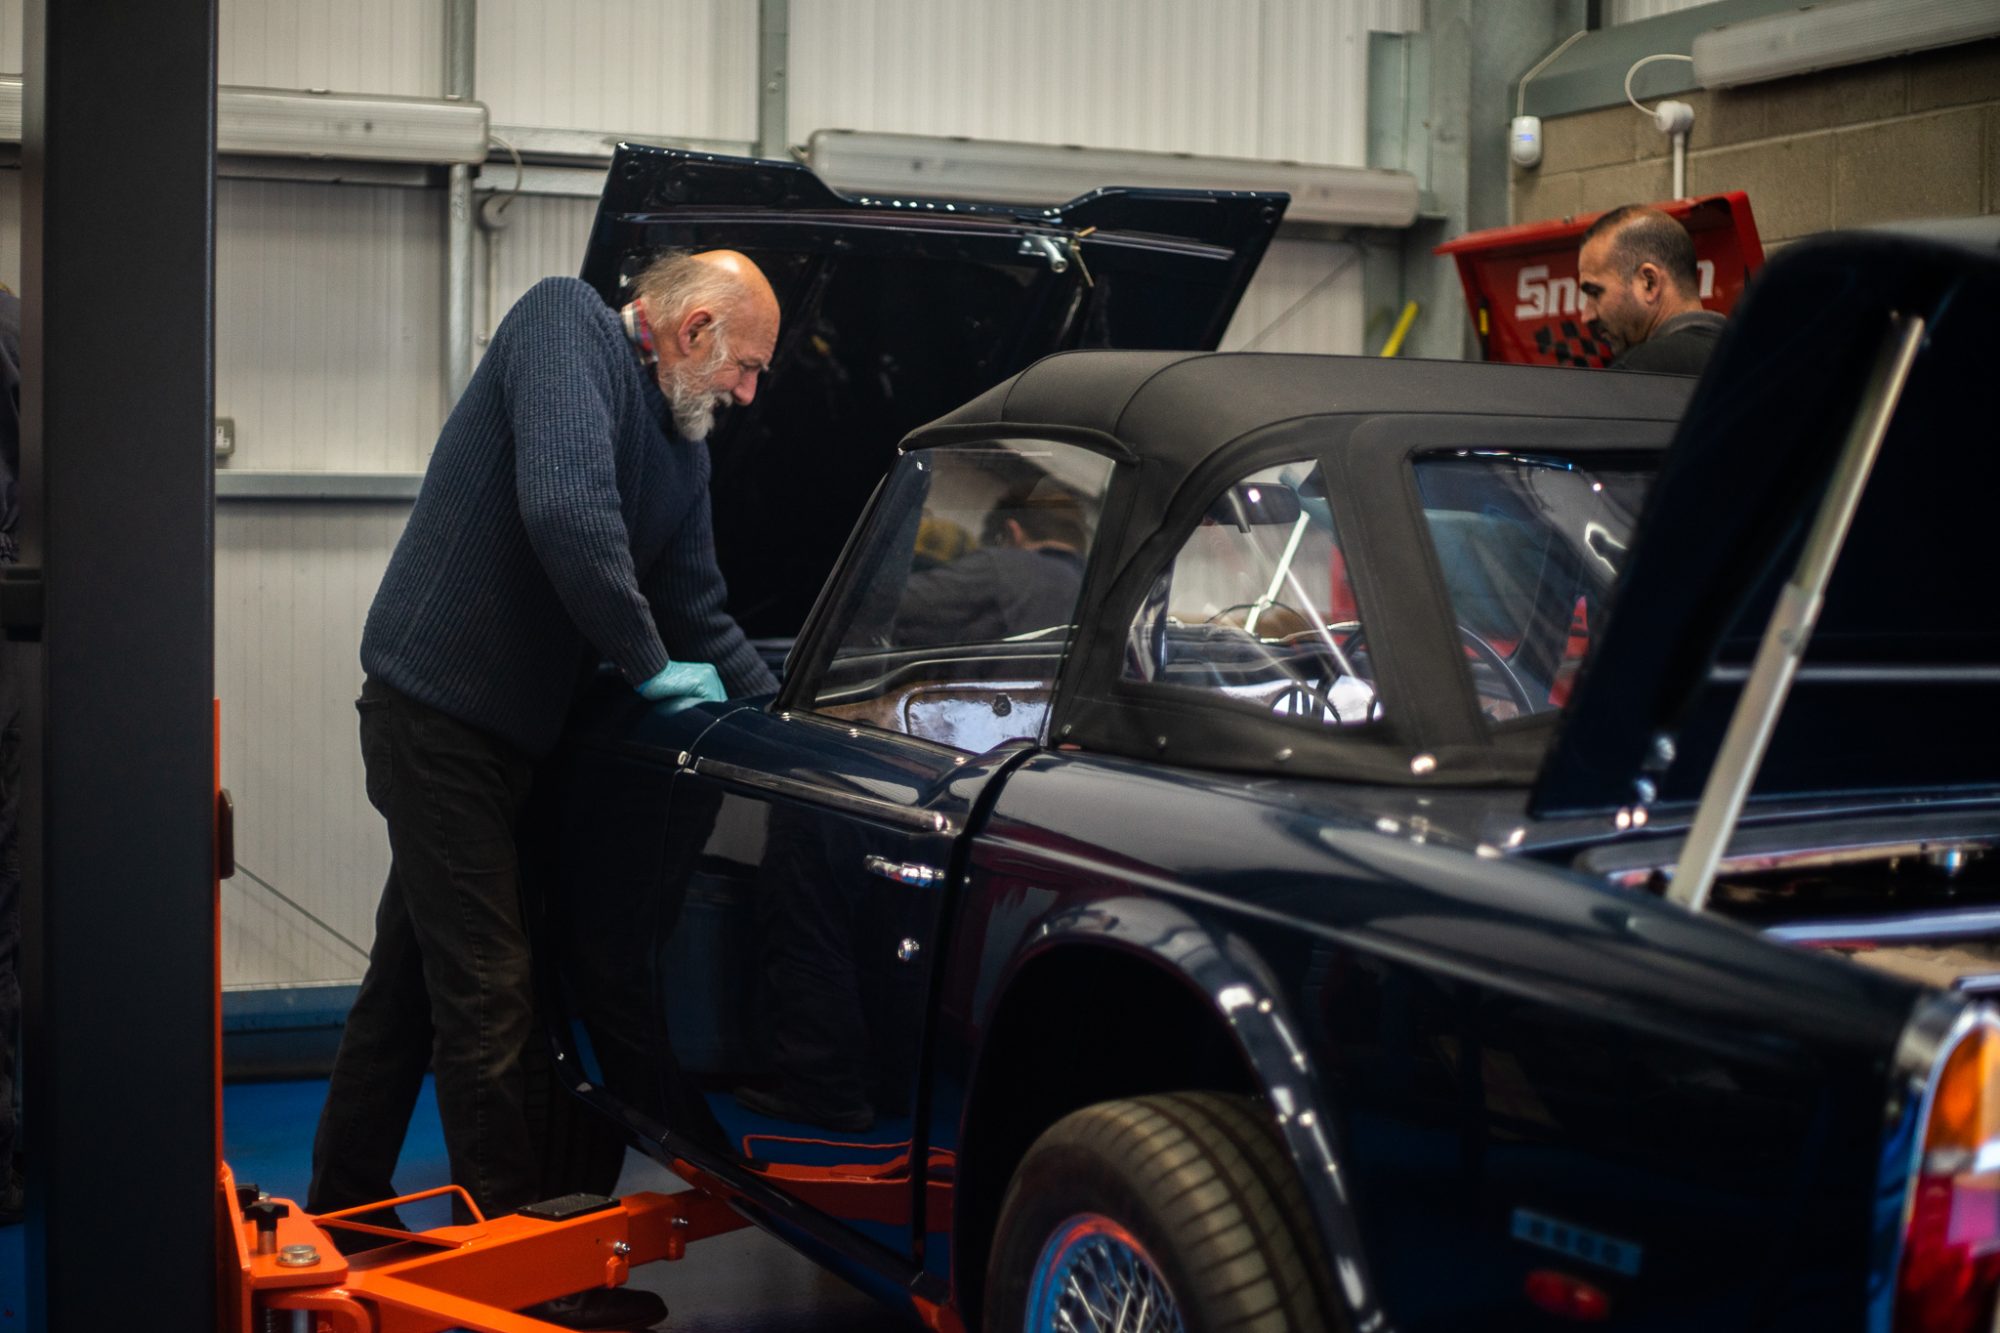
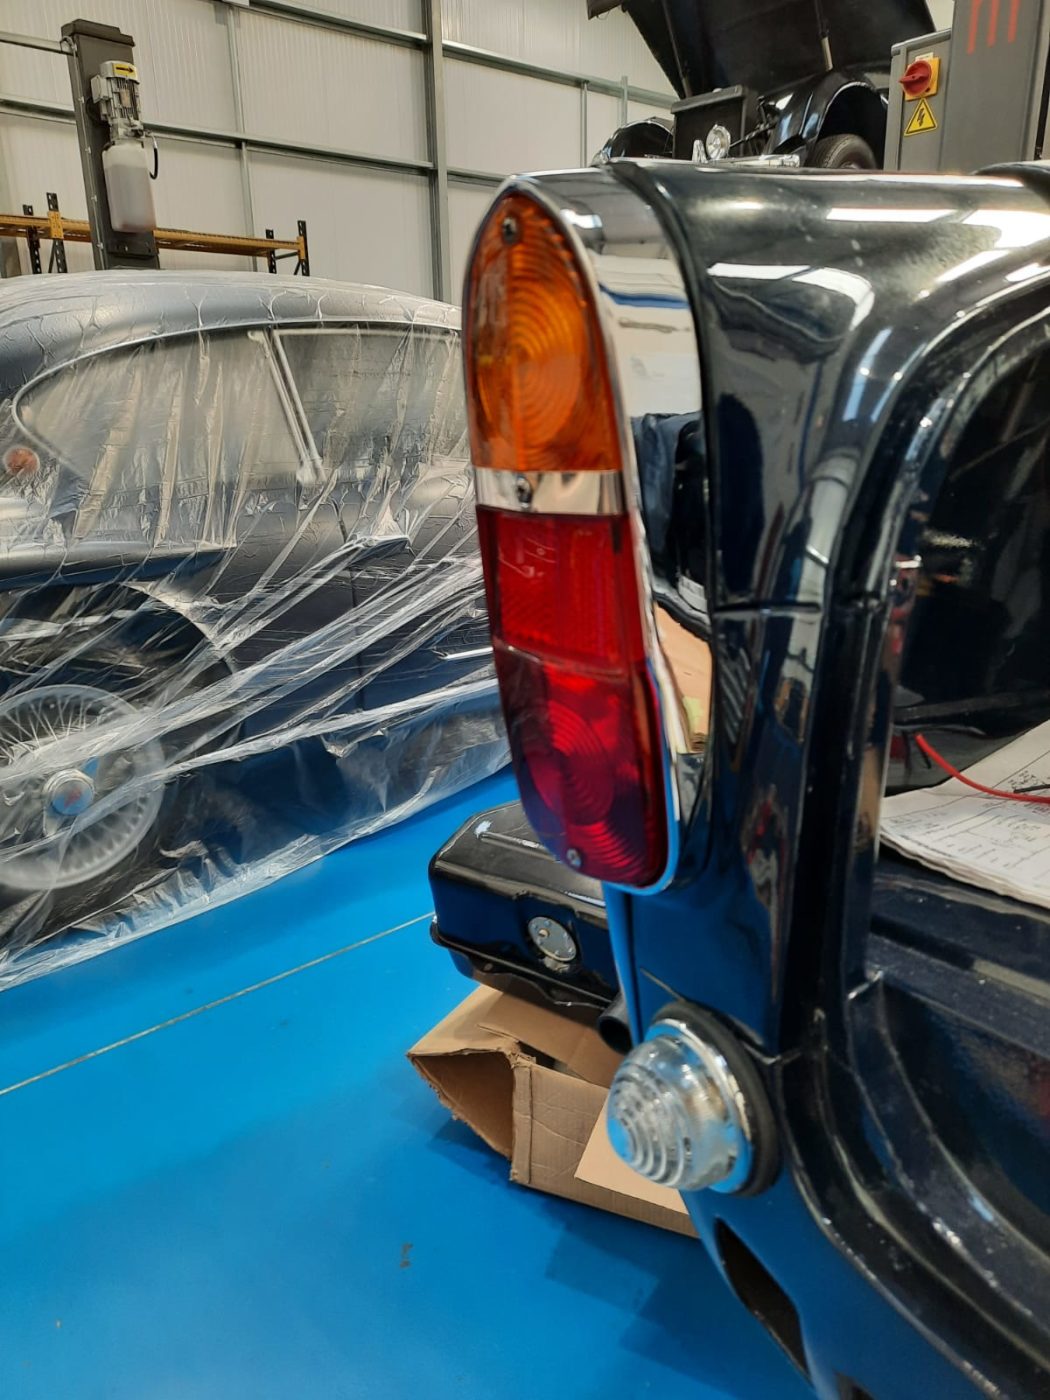
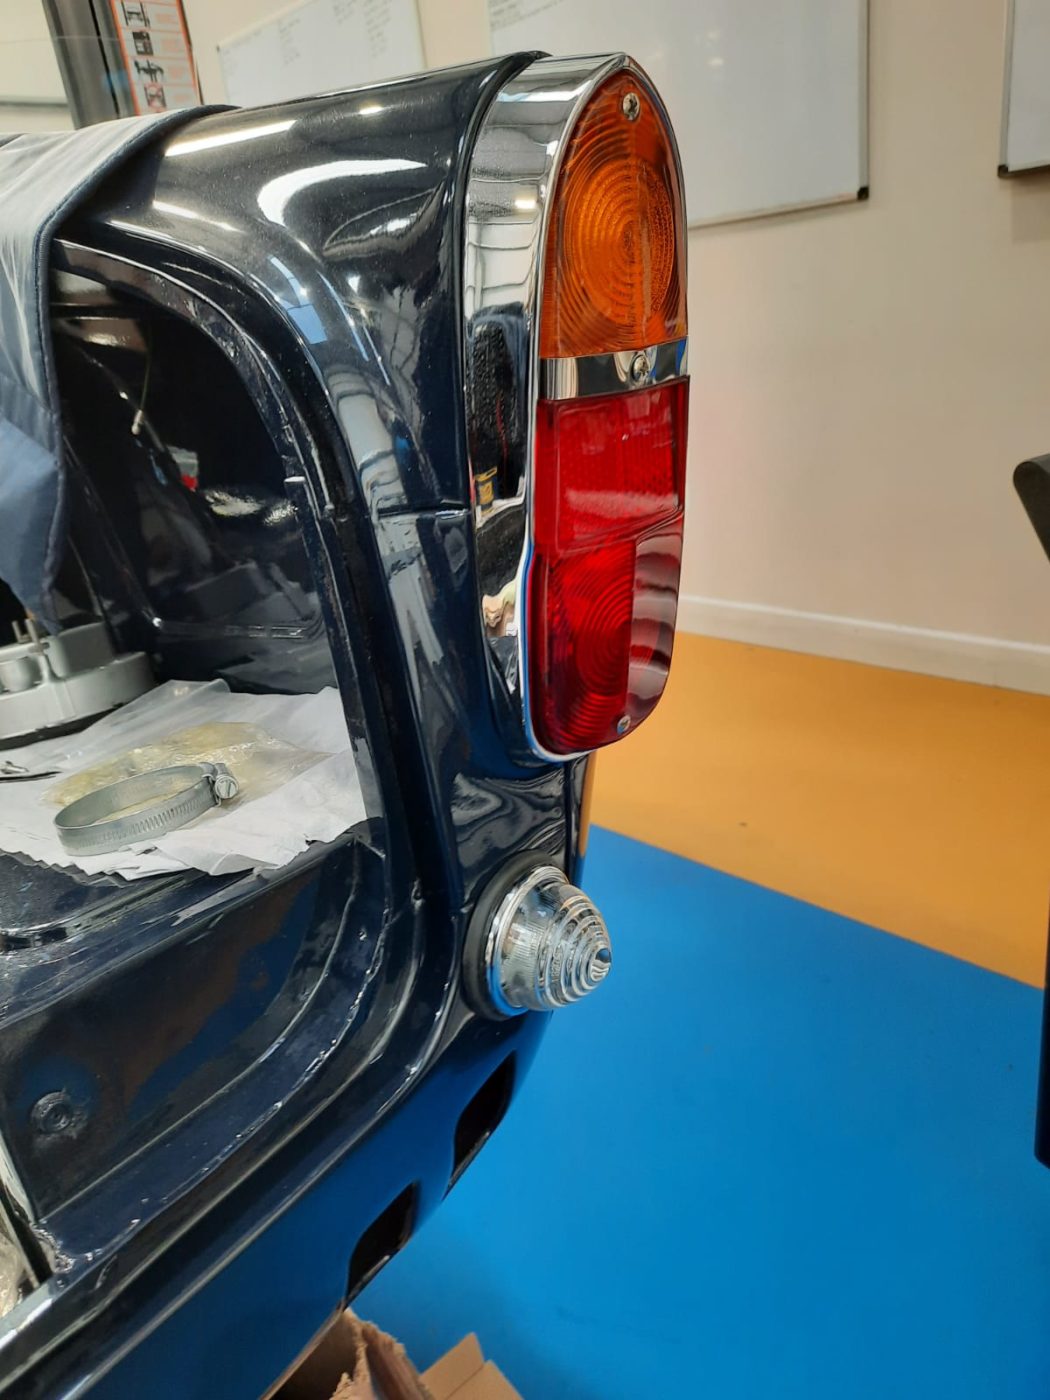
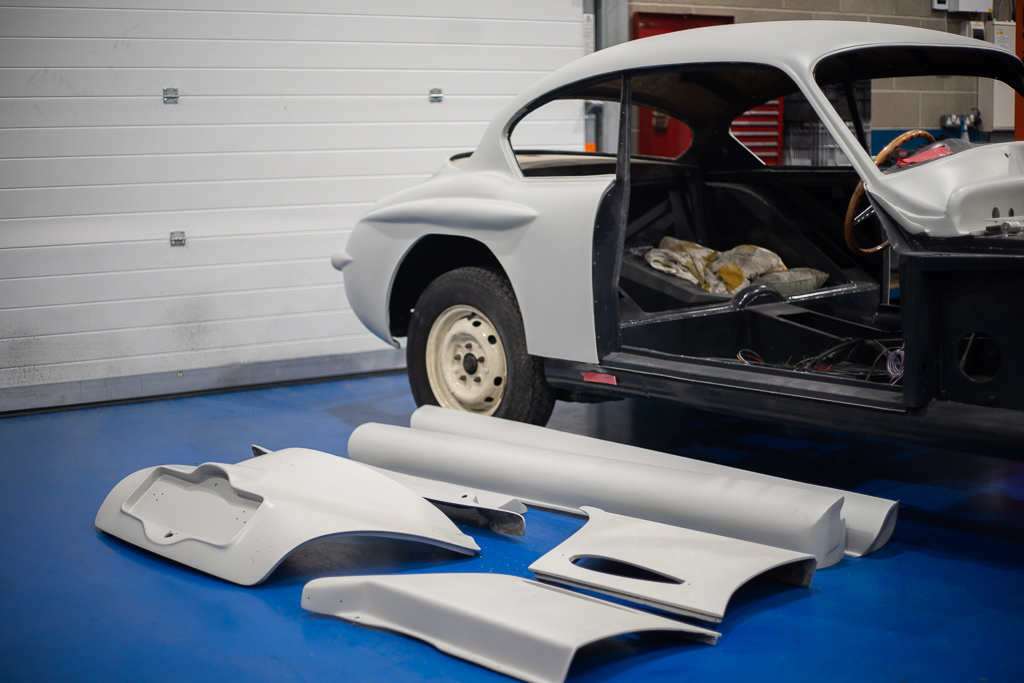
At the start of November 2019, this 1968 Triumph TR5 came into our workshop as a part restoration. In January 2020, the components were stripped to assess which parts could be refurbished and which parts needed to be replaced. In February 2020, the interior work began and the chassis was built up. In March 2020 the seats were finished, the body shell was repaired and we welcomed in a delivery of parts. In April 2020 more body shell repair work was carried out. In October 2020 the body was mounted onto the chassis and electronics were carried out. In November 2020 heat resistant paint was applied to areas. In January 2021 engine bay work was carried out, work on corrosion was carried out, colour matching to the paintwork was done and windows were fitted. And from then to June this year, the finishing touches were put into place.
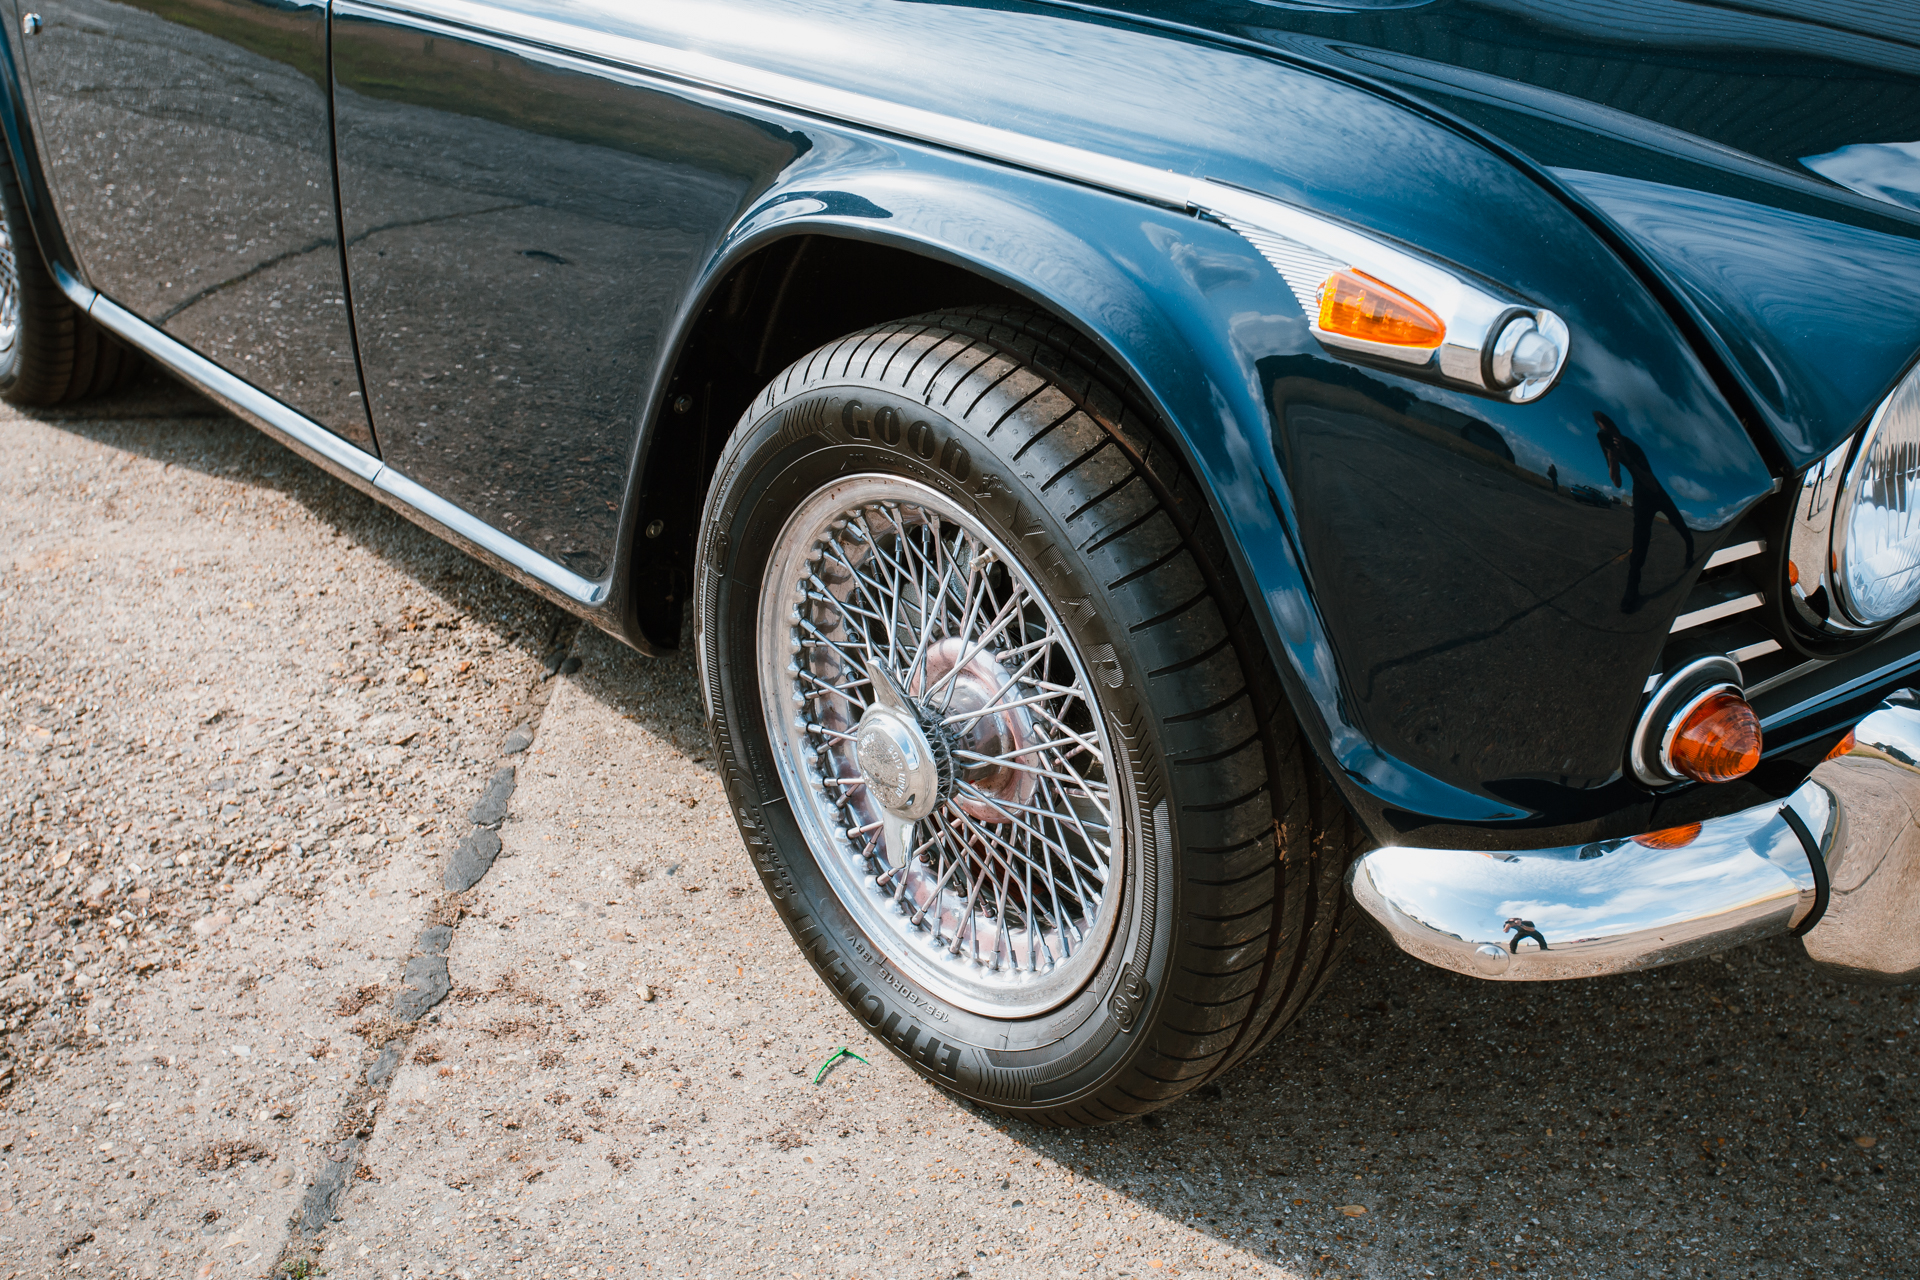
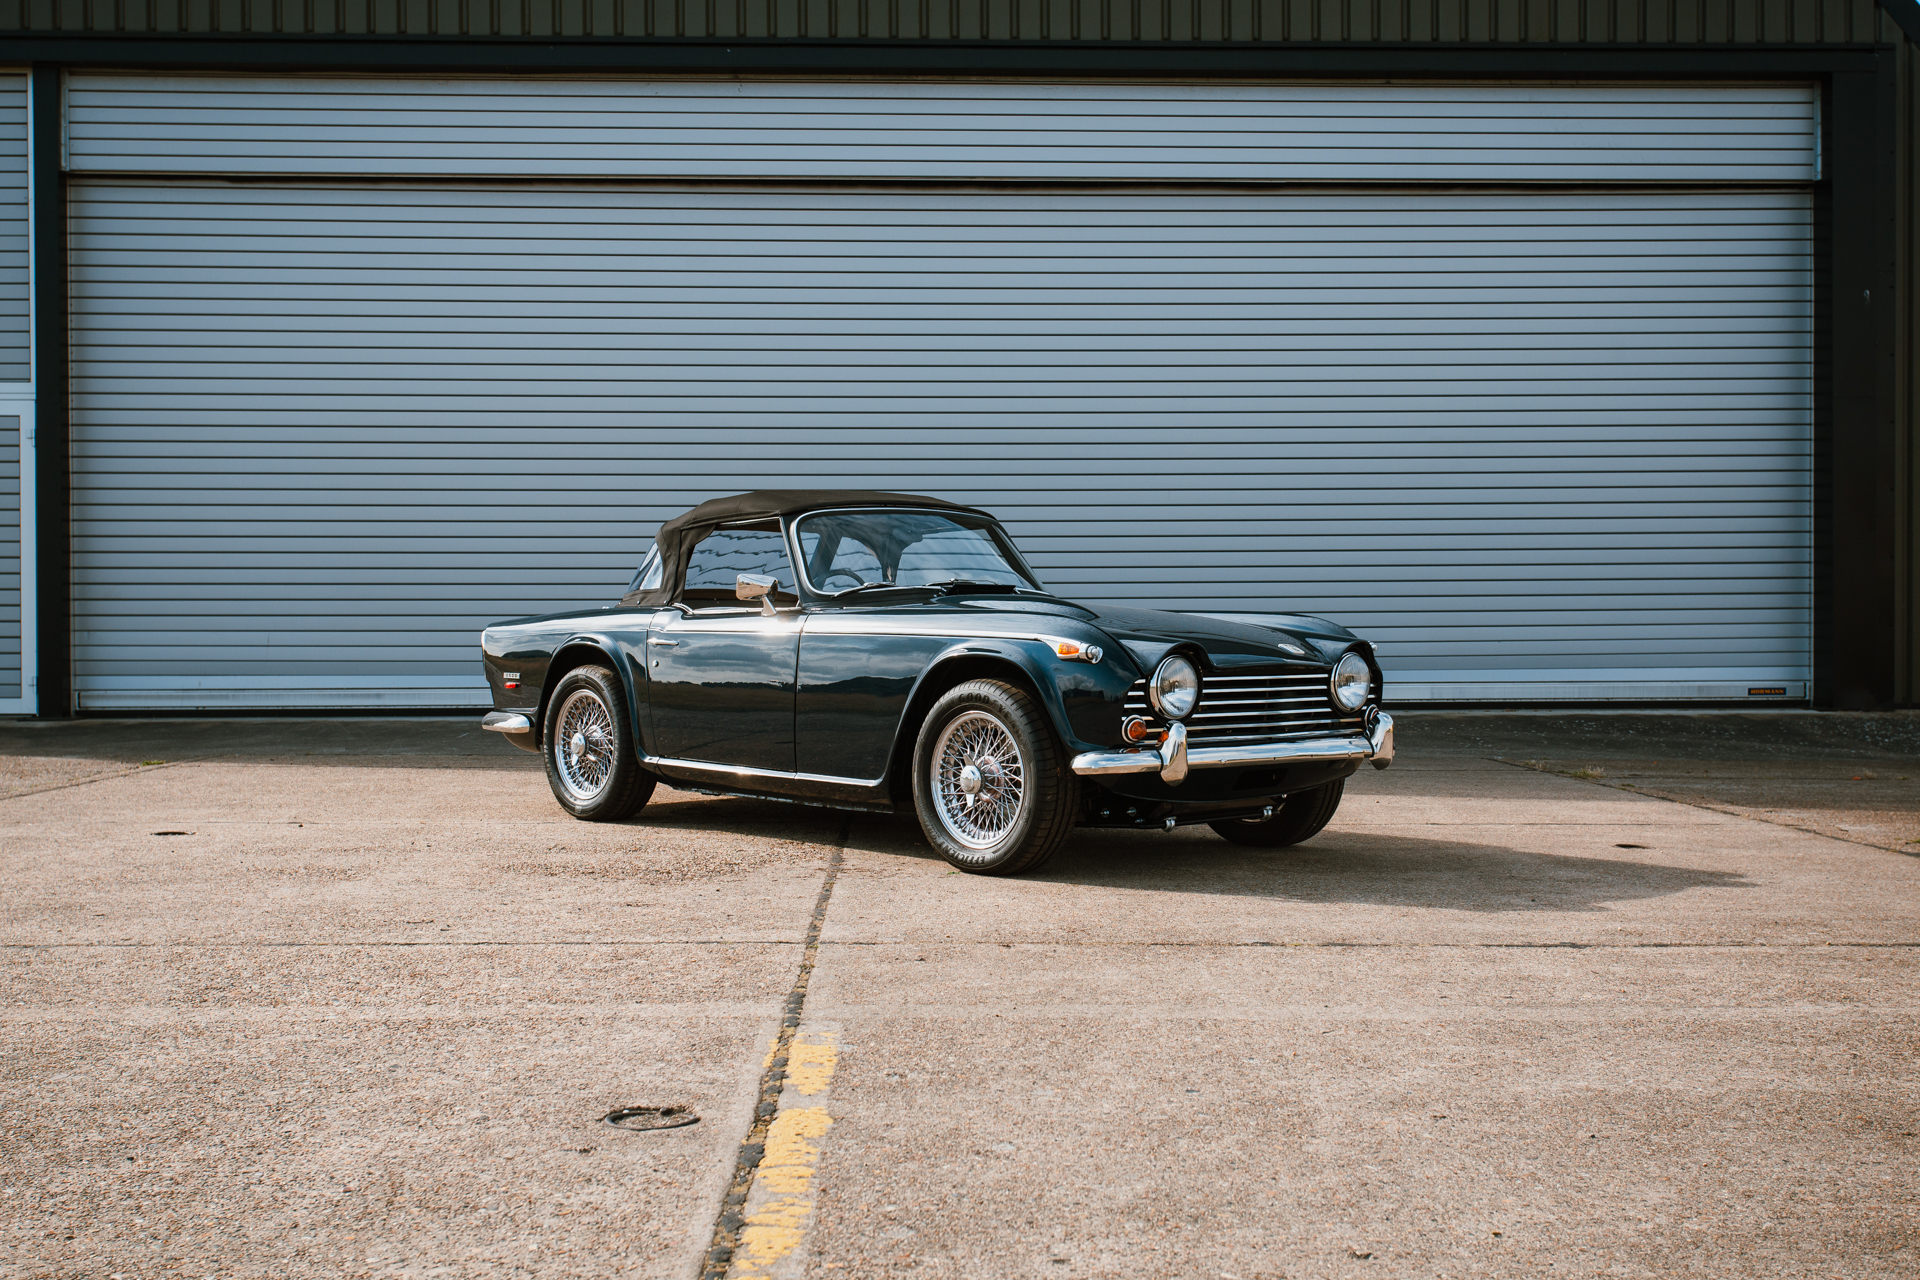
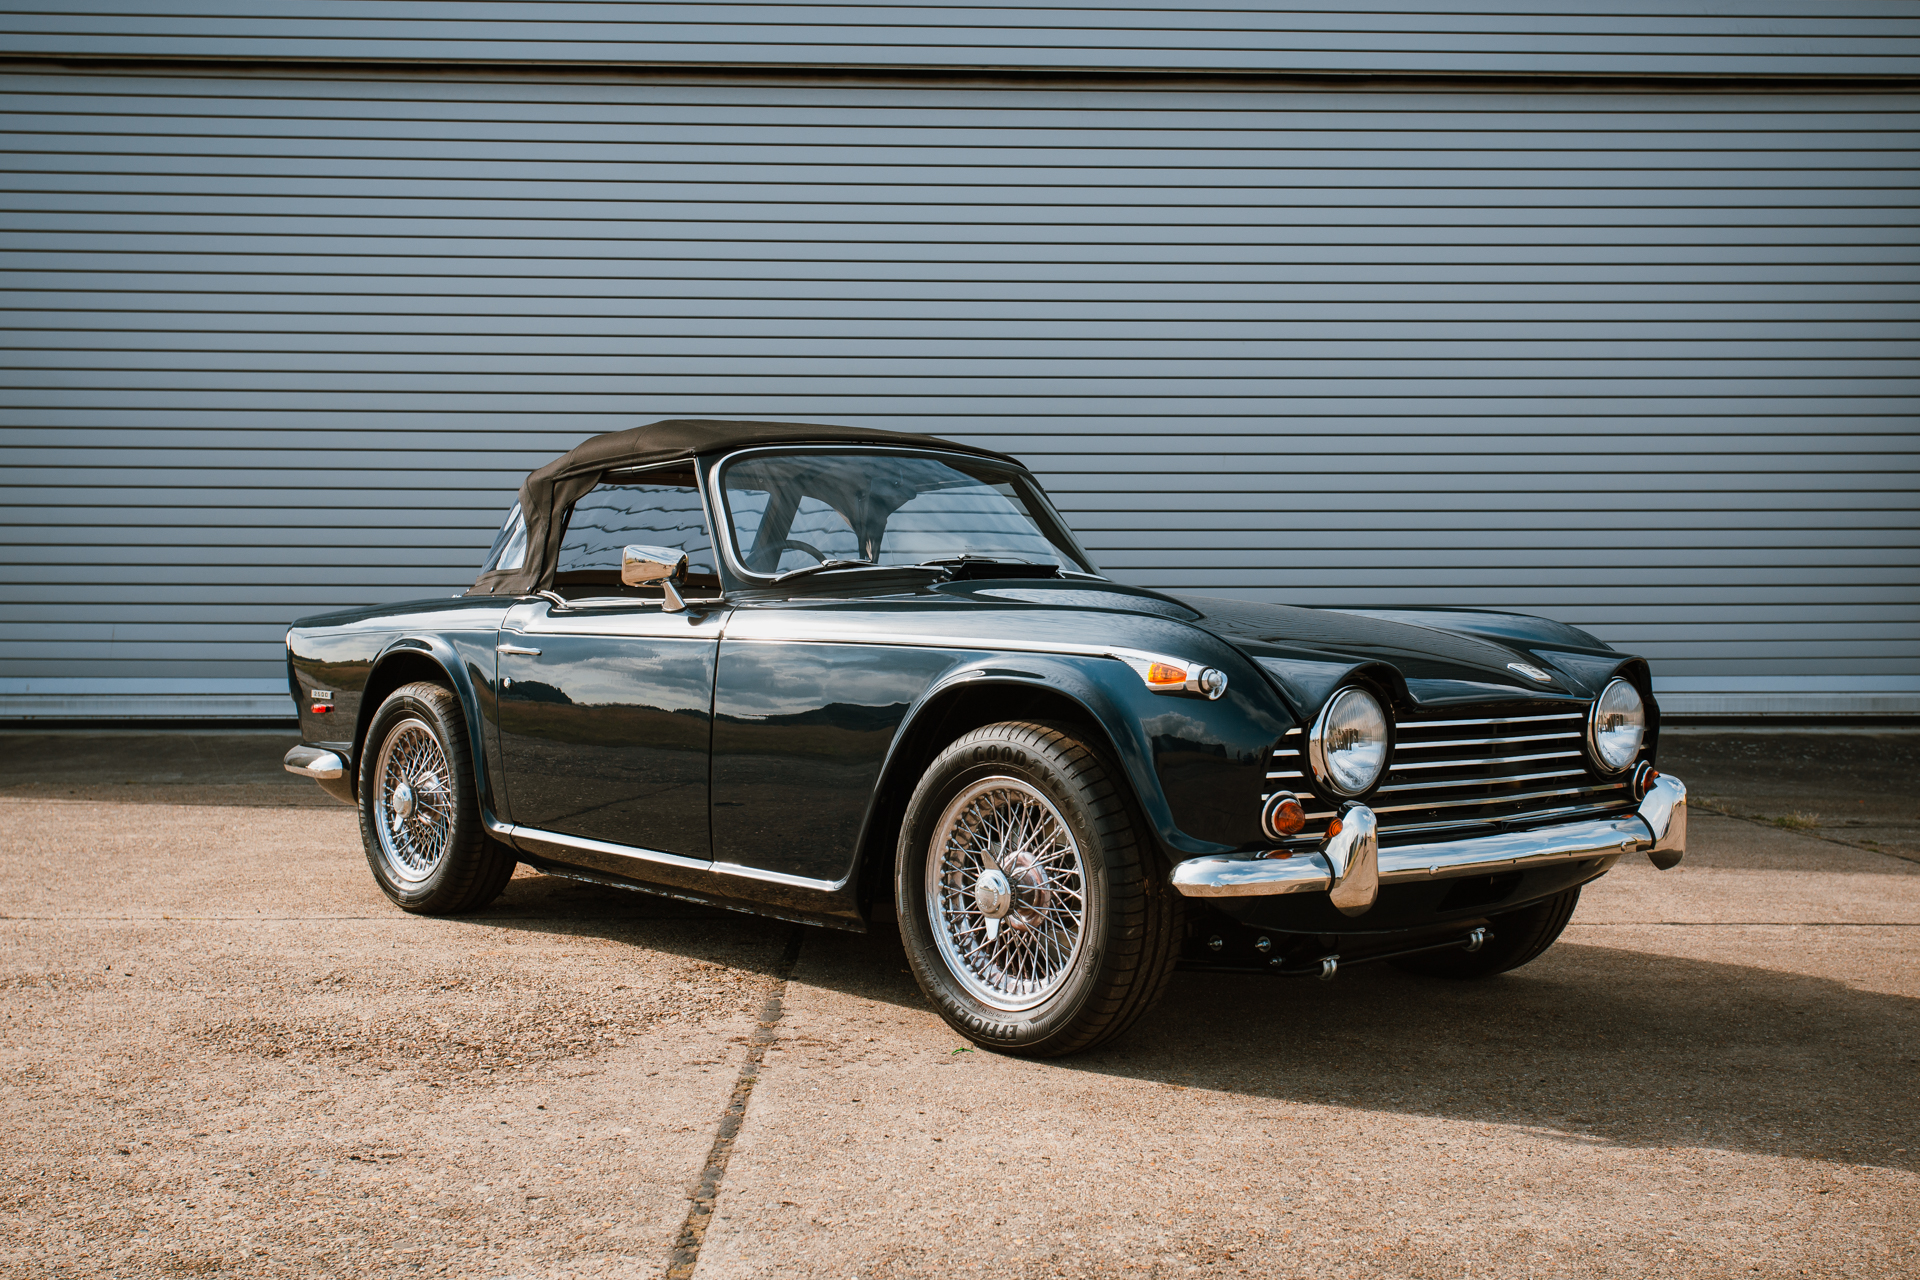
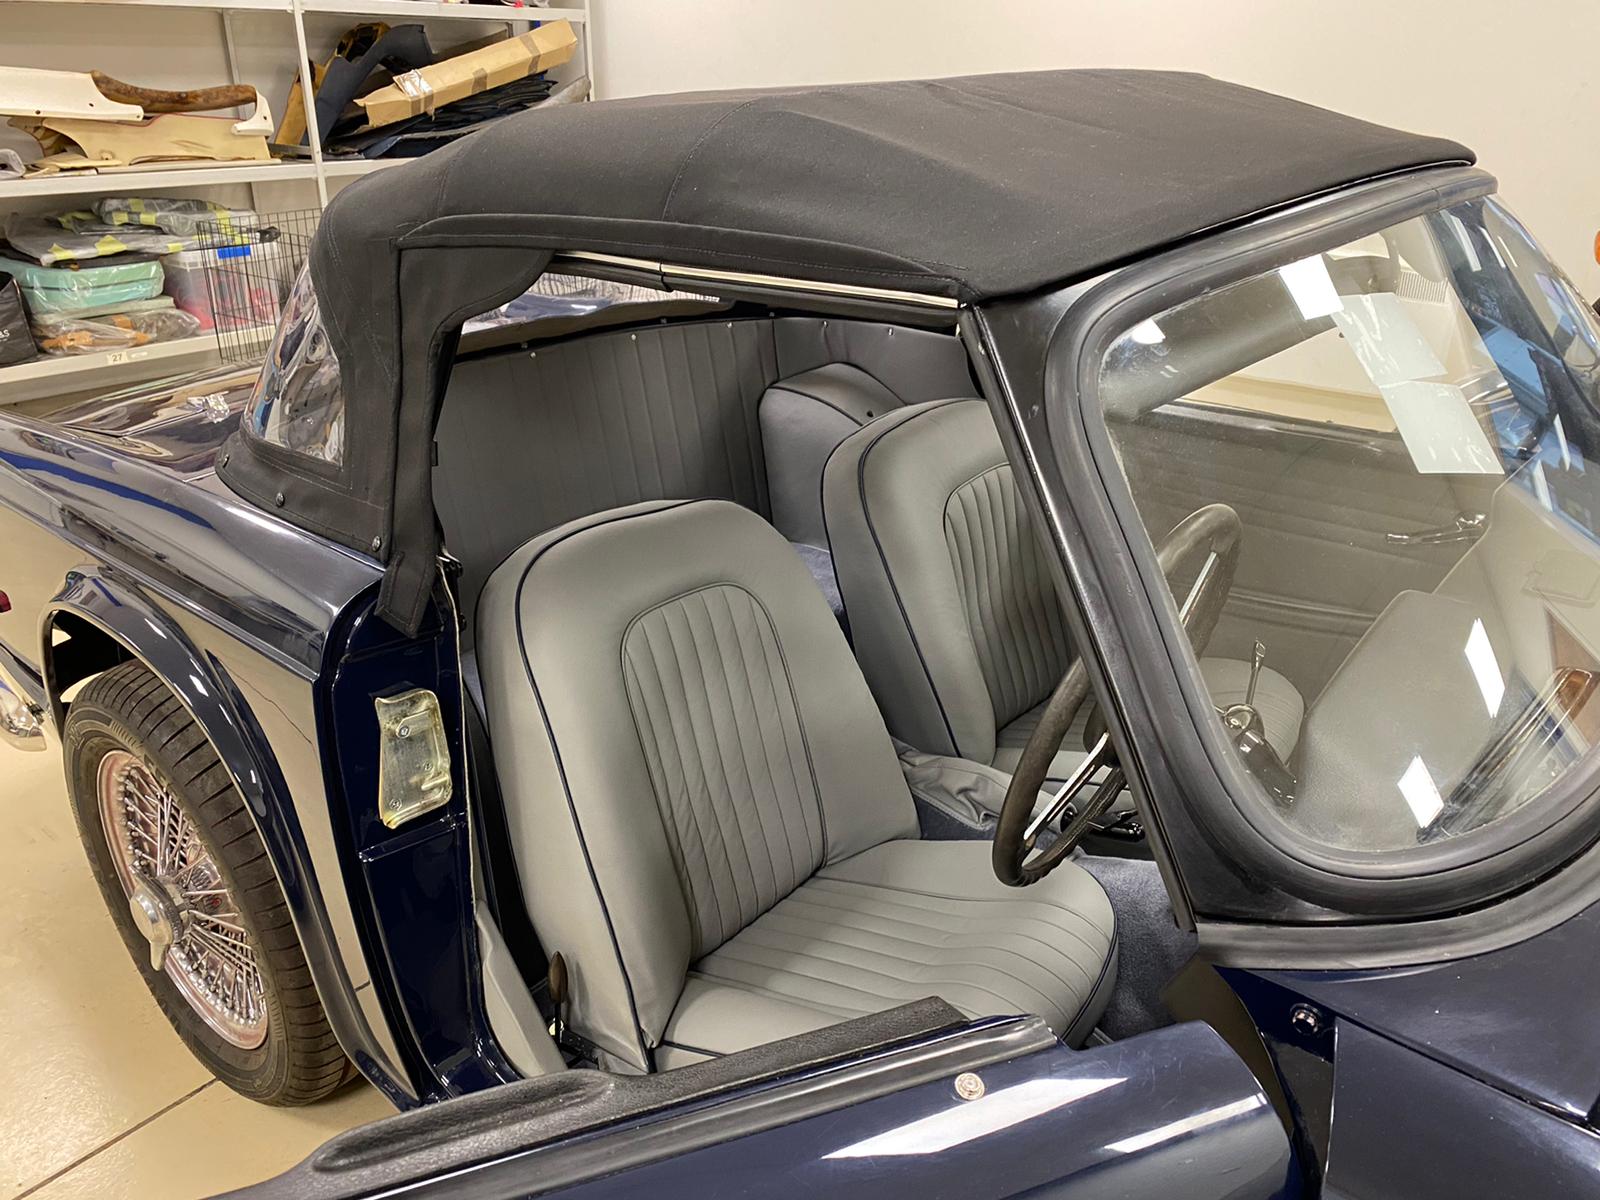
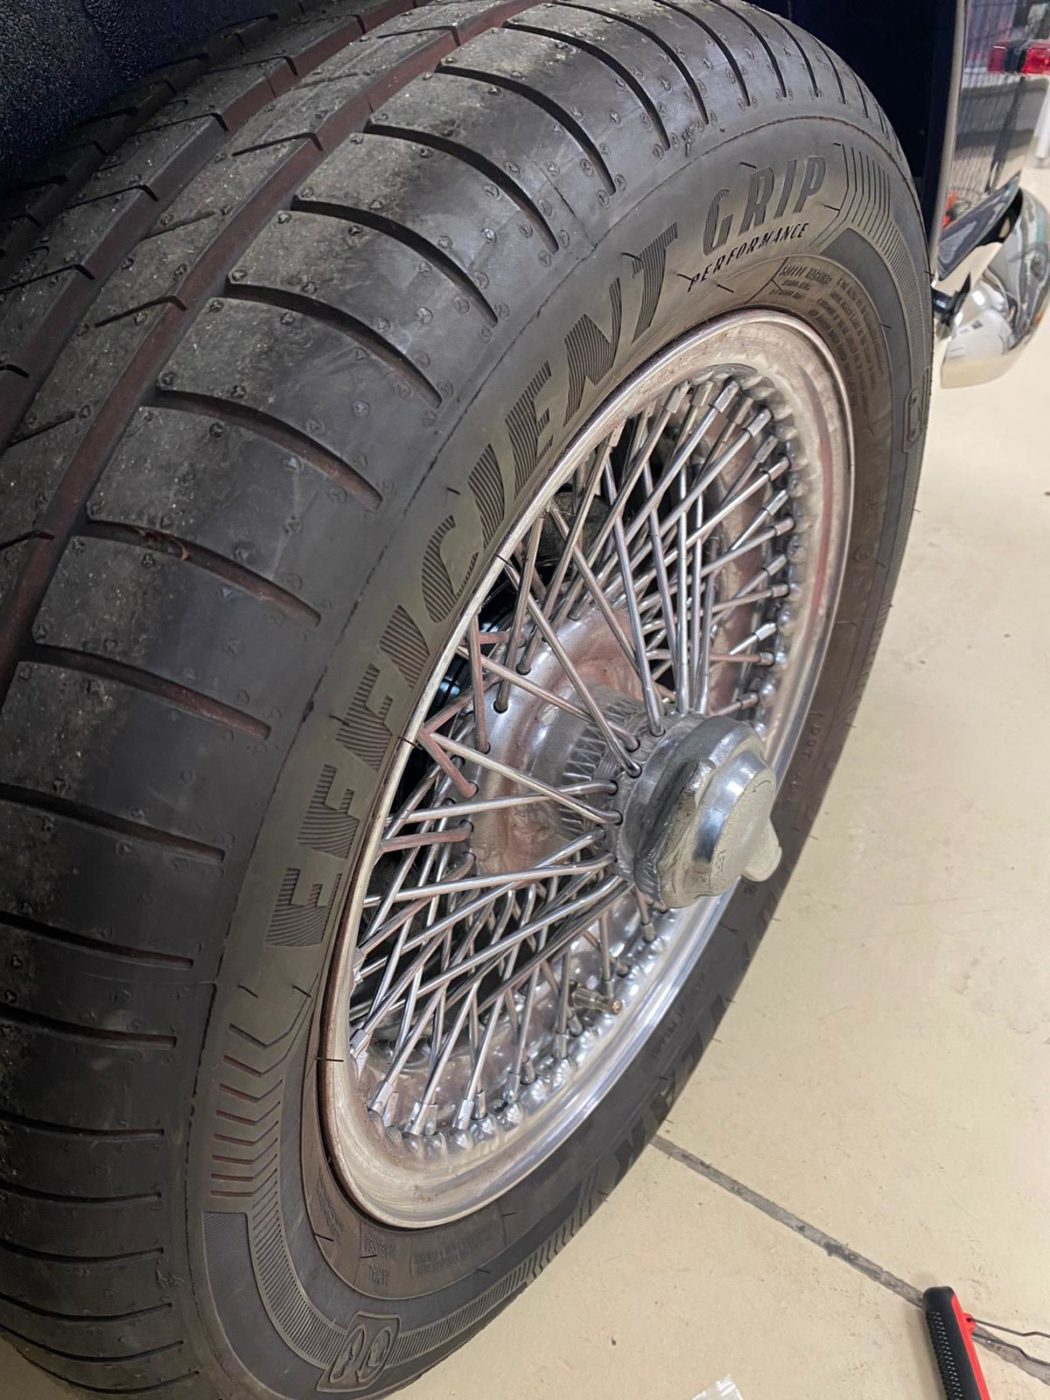
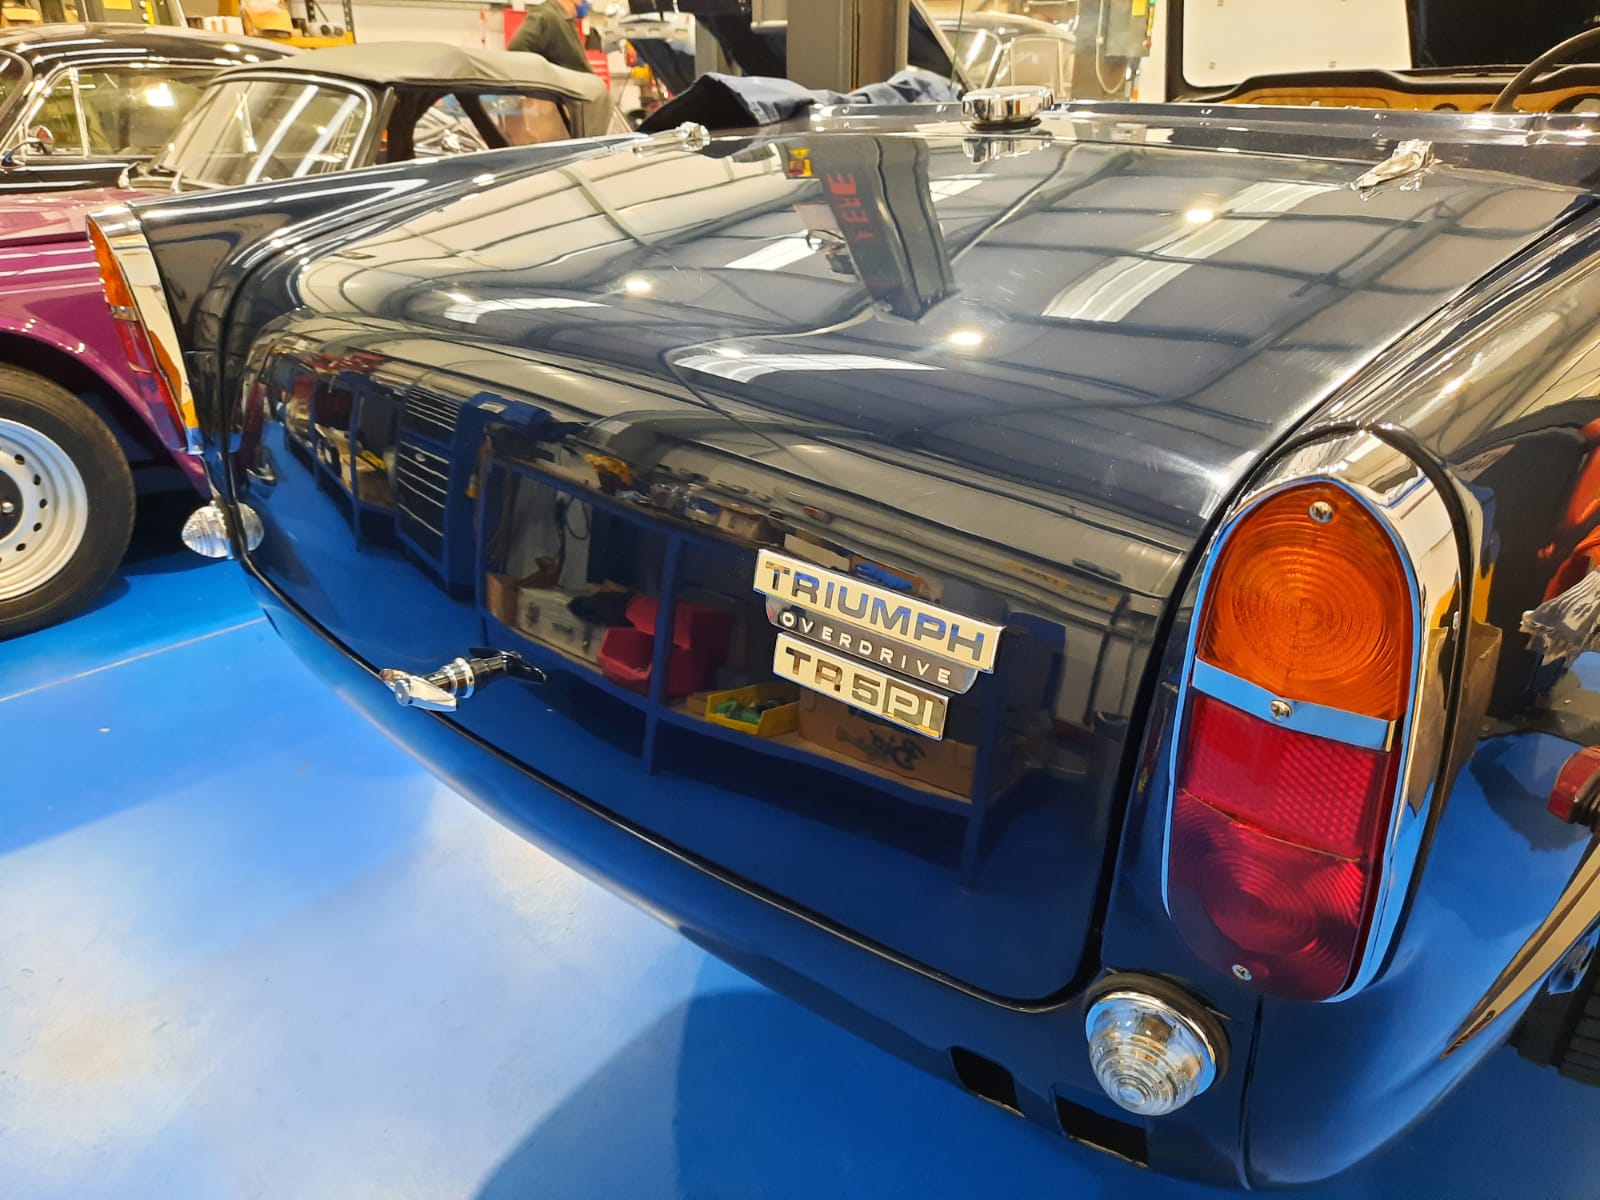
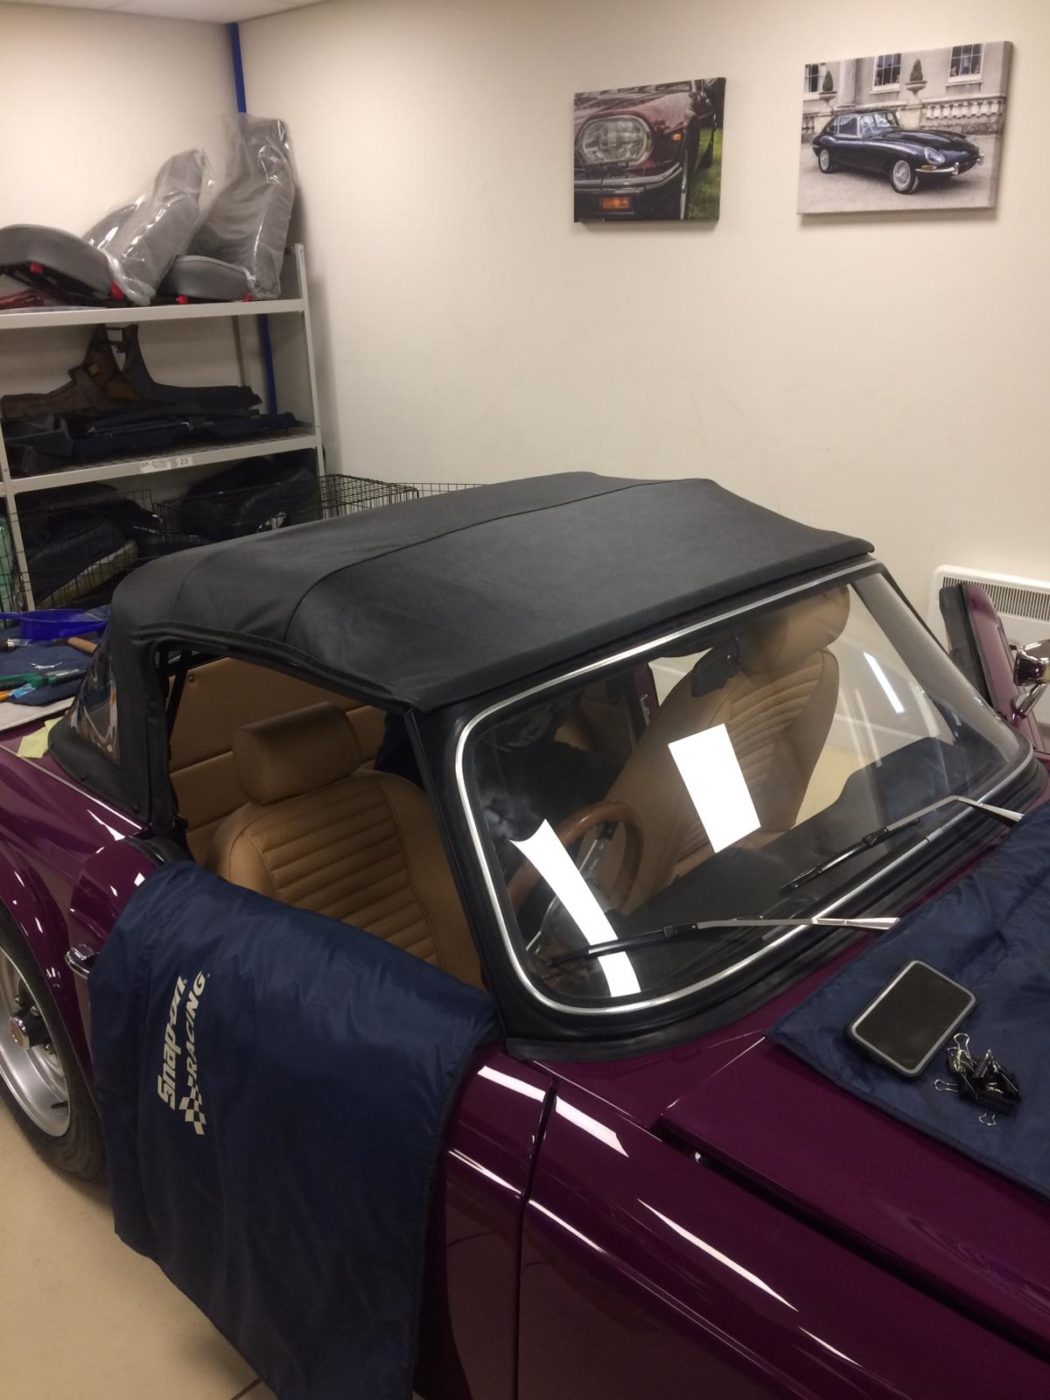
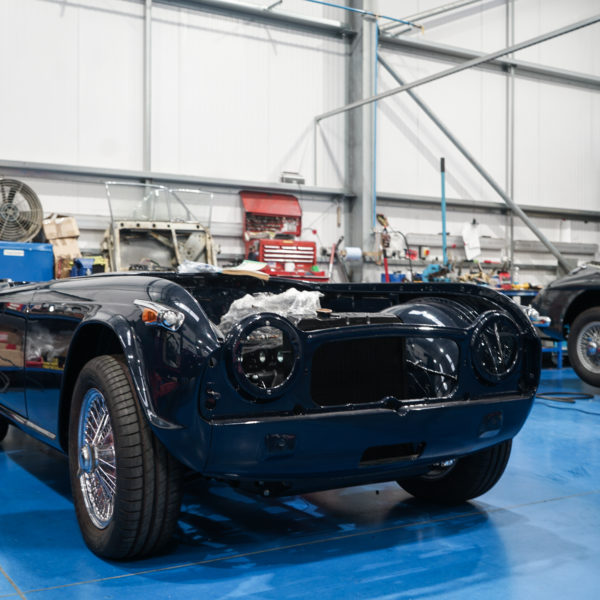
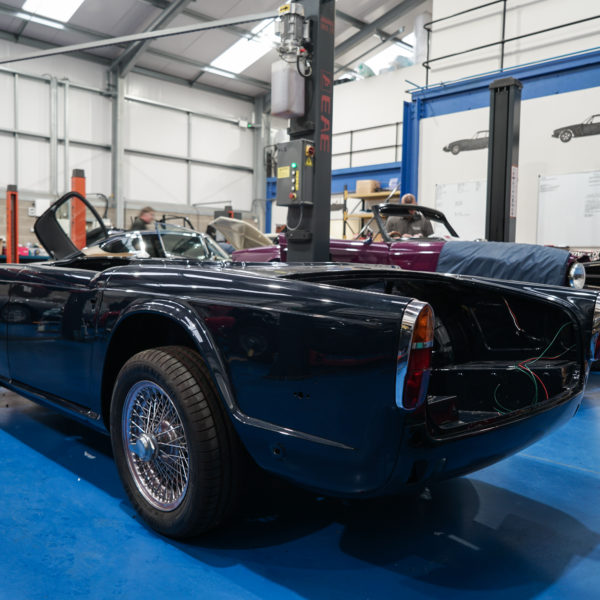
Fast forward to today, where the car is now complete and ready to go!

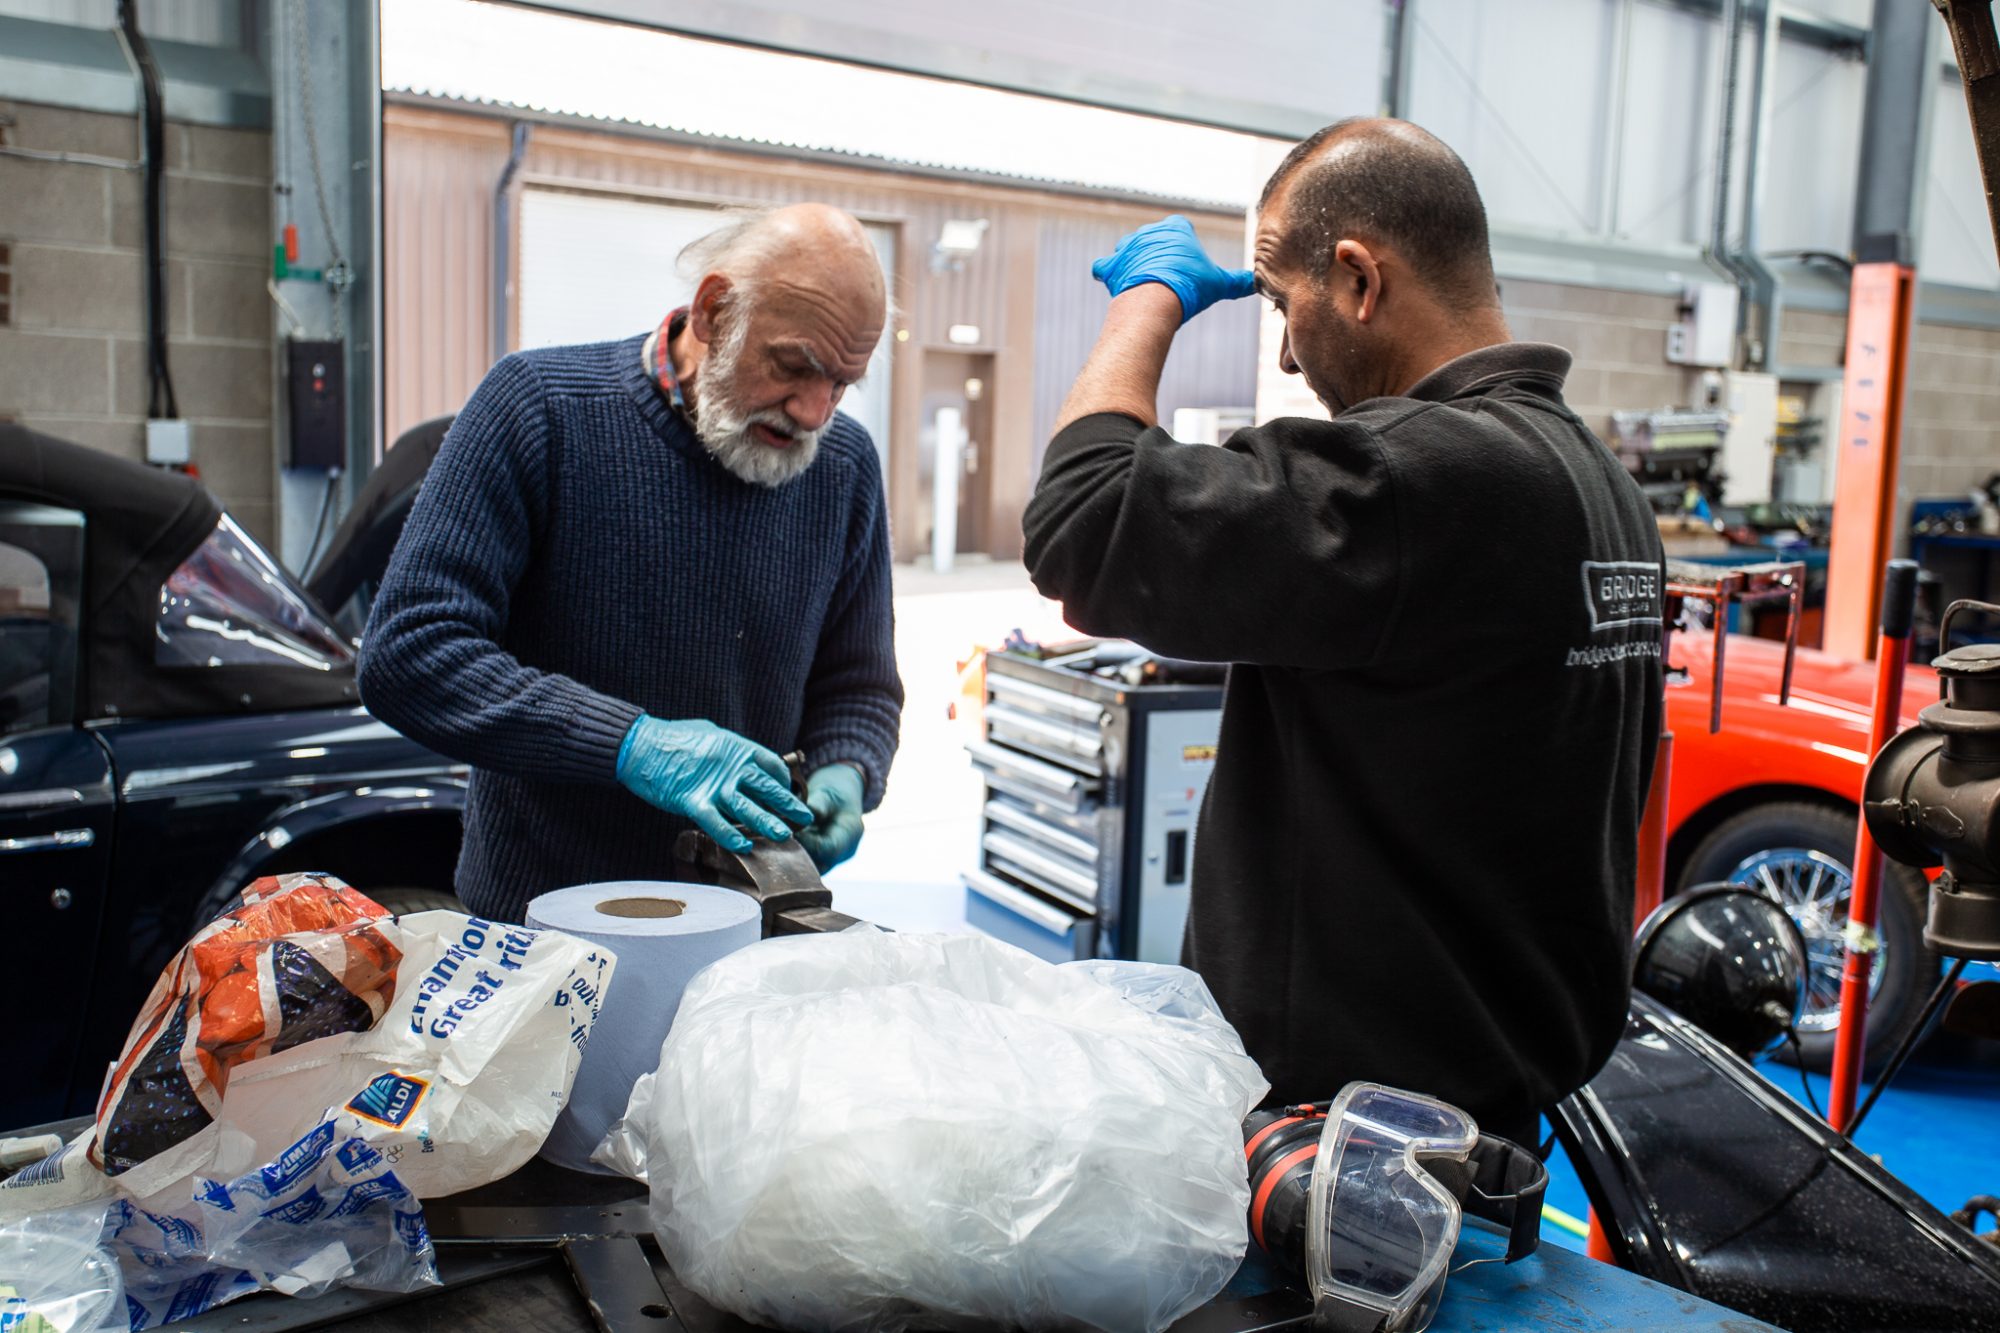
Our 1968 Triumph TR5 is on the home straight with just a handful of fine tuning tweaks that need to be carried out. We’ve noticed a few small running issues and exhaust troubles that we will address next.

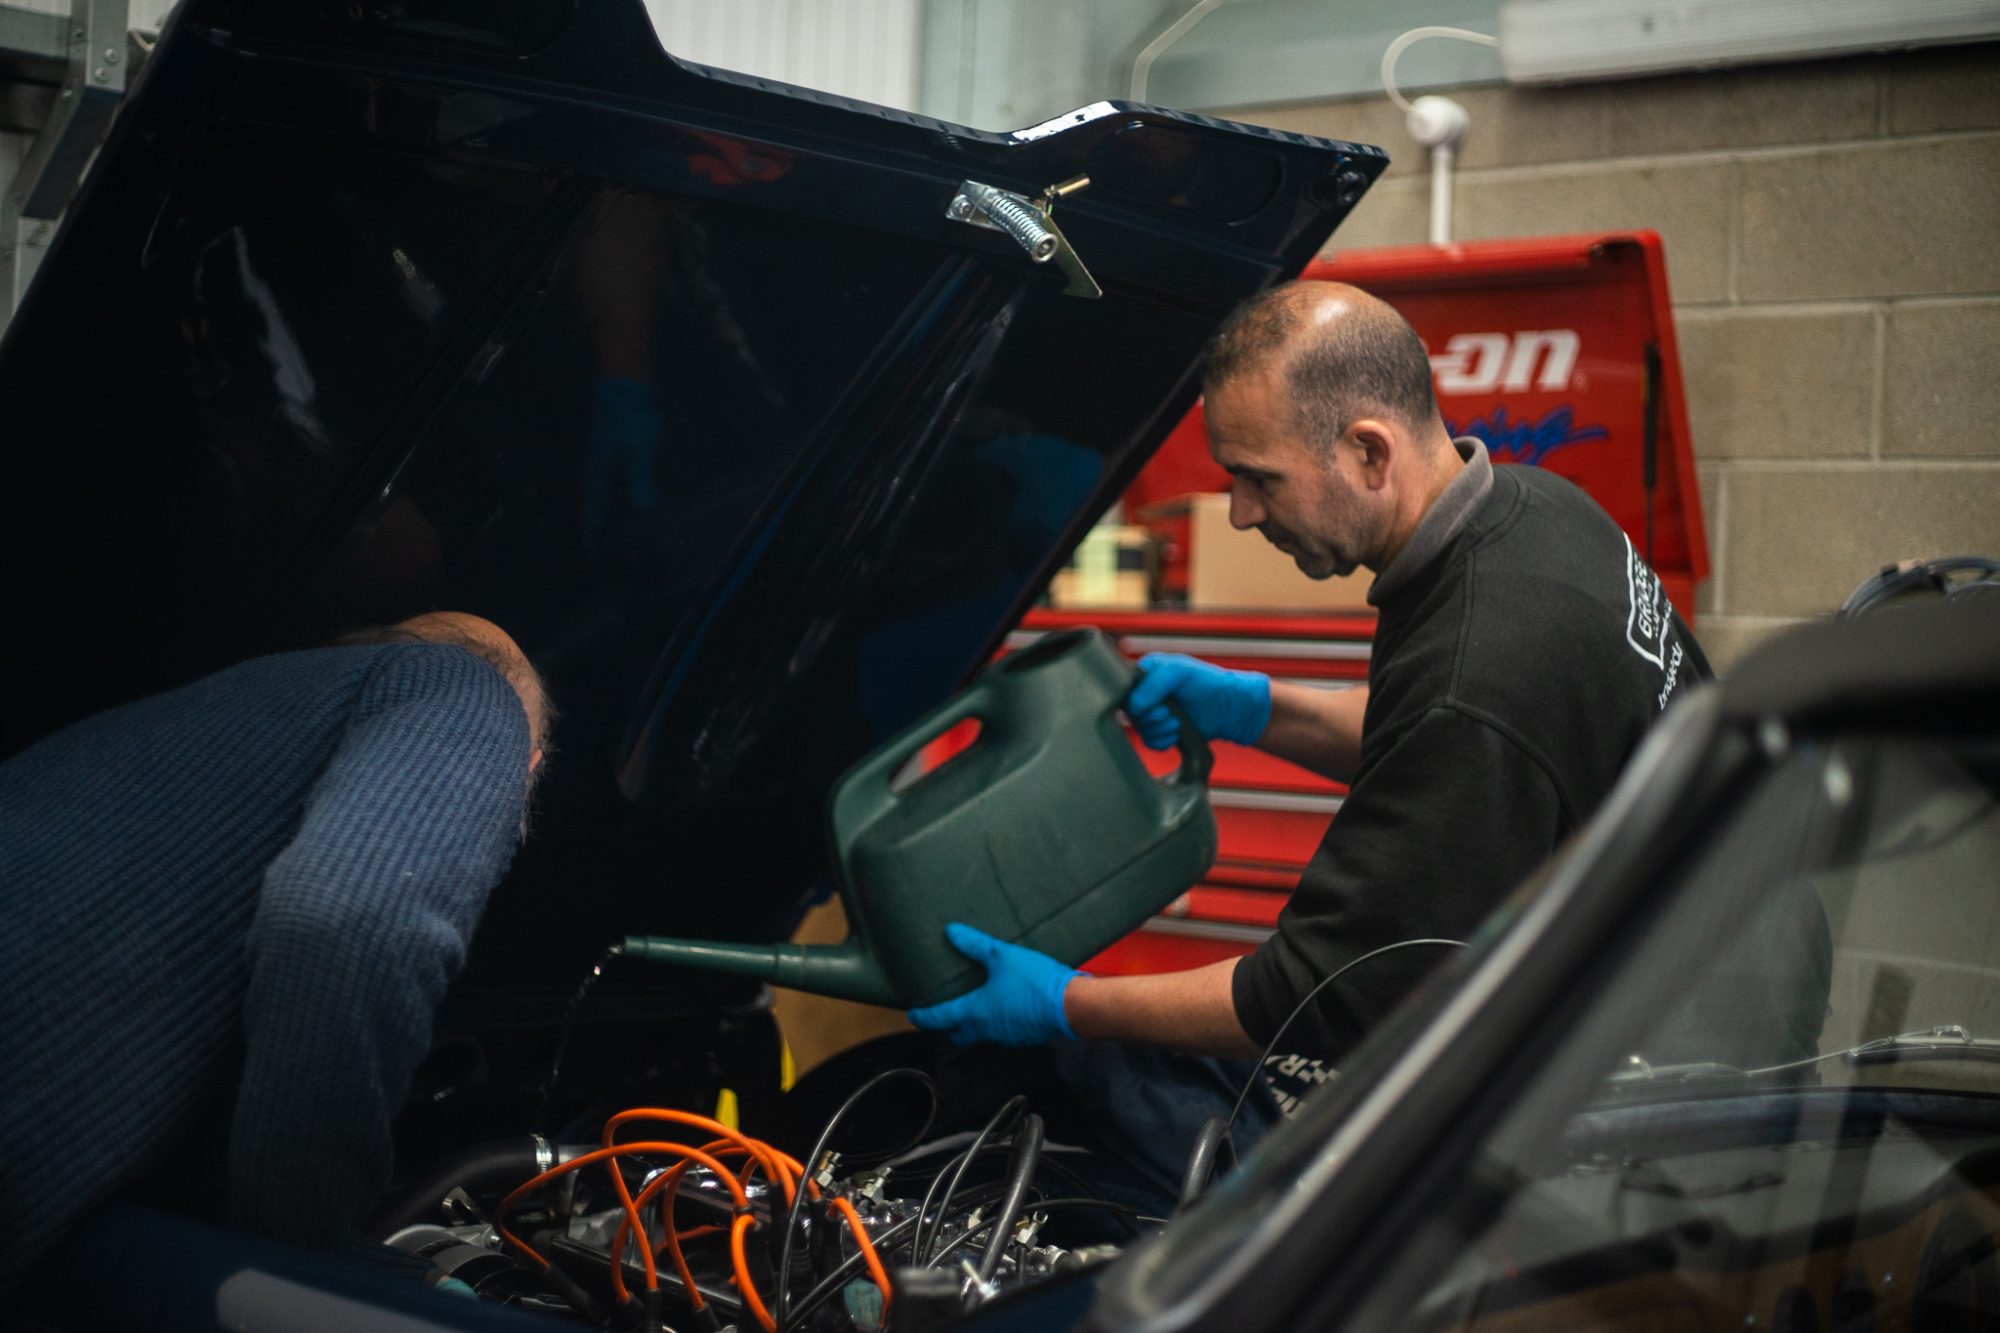
Our 1968 Triumph TR5 has been a total nut and bolt restoration, with it looking like just a chassis and some mechanics only 6 months ago. Today it was started for the first time and it ran as expected with no series issues. The expected teething issues of a brand new engine have occurred, including a large amount of smoke as the new components are run for the first time. The next step is to road test it to see how it runs.
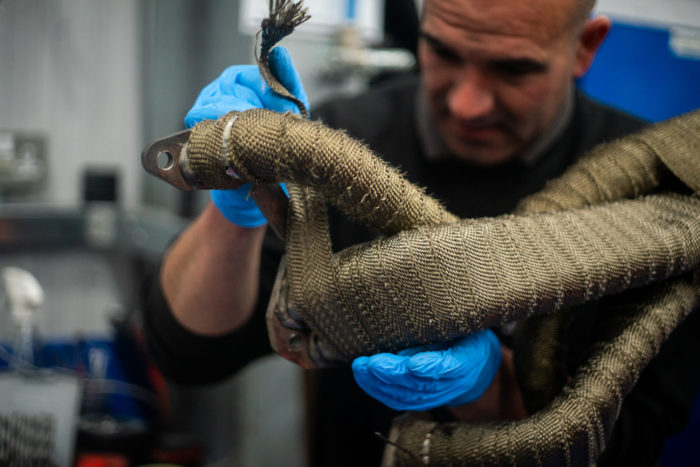
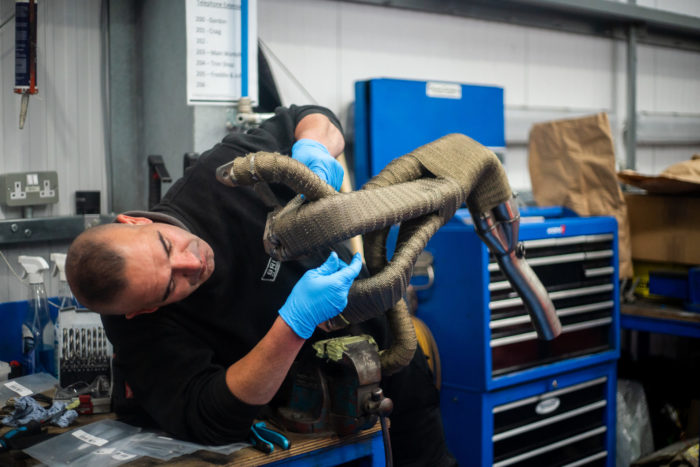
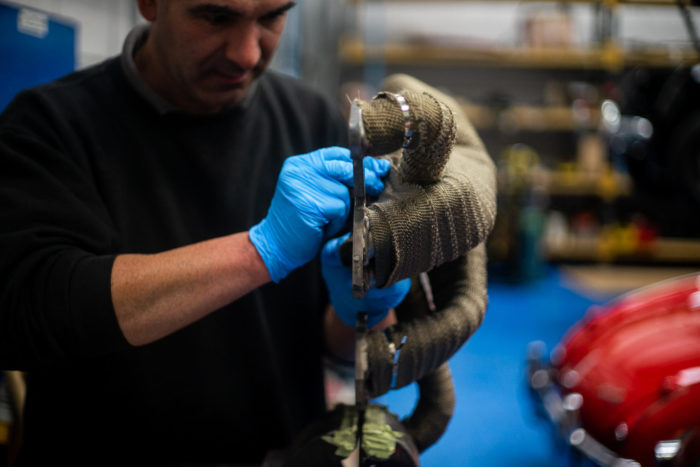
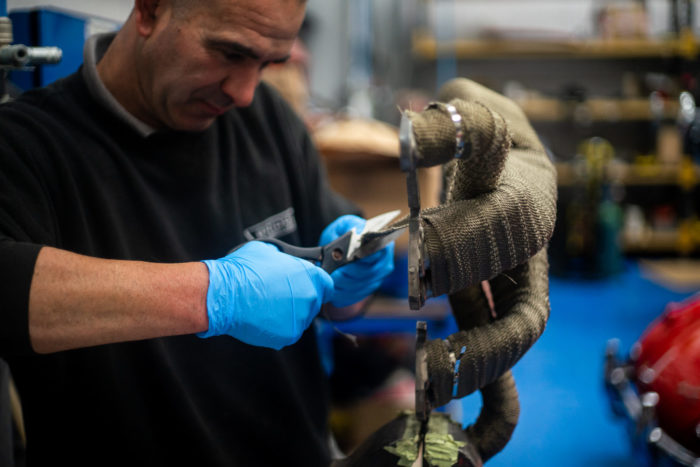
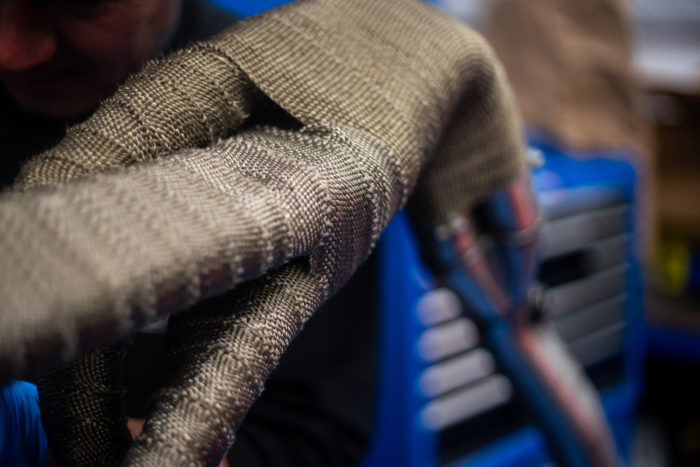
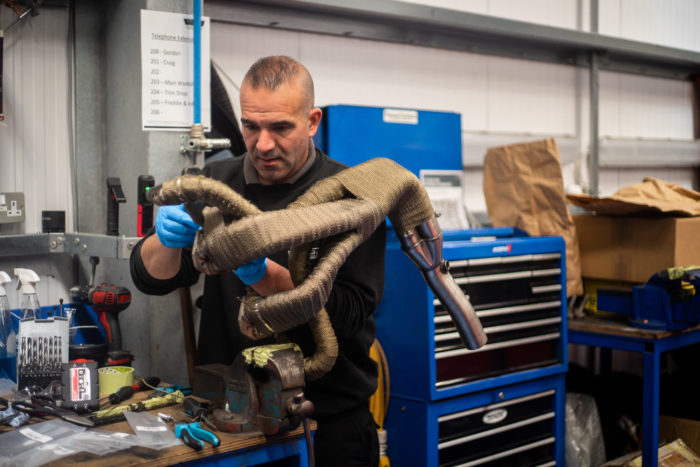
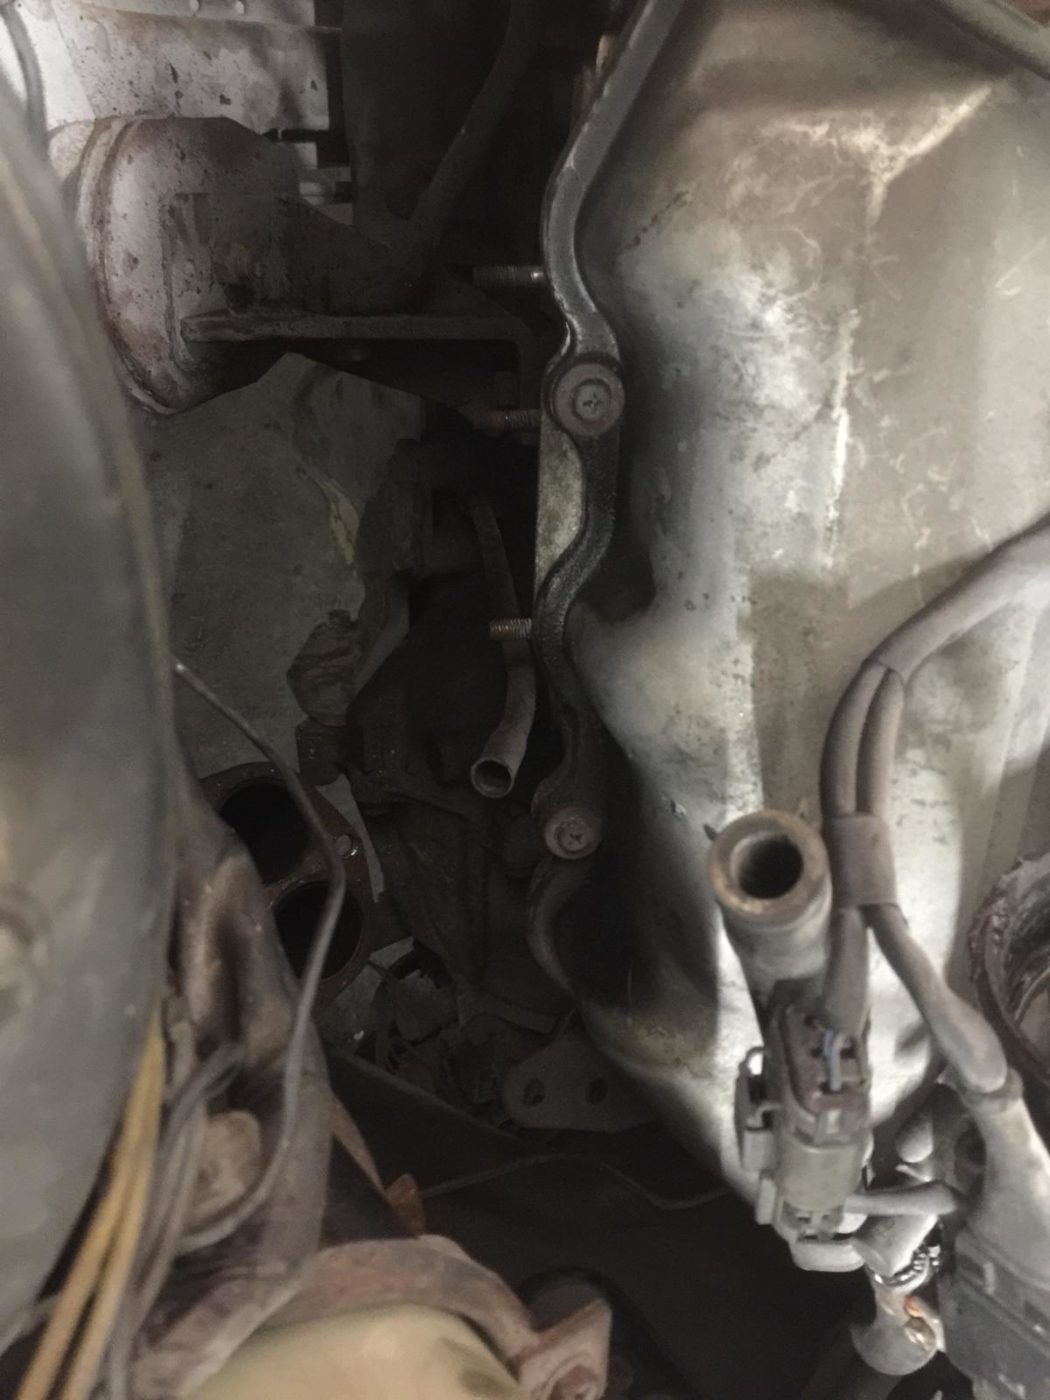
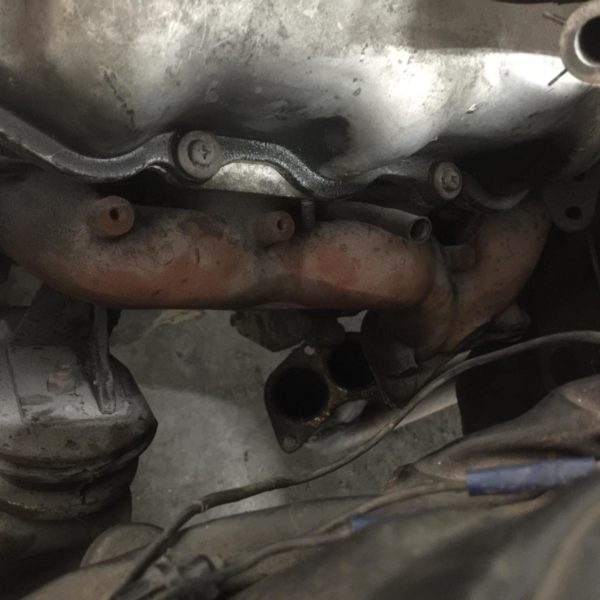
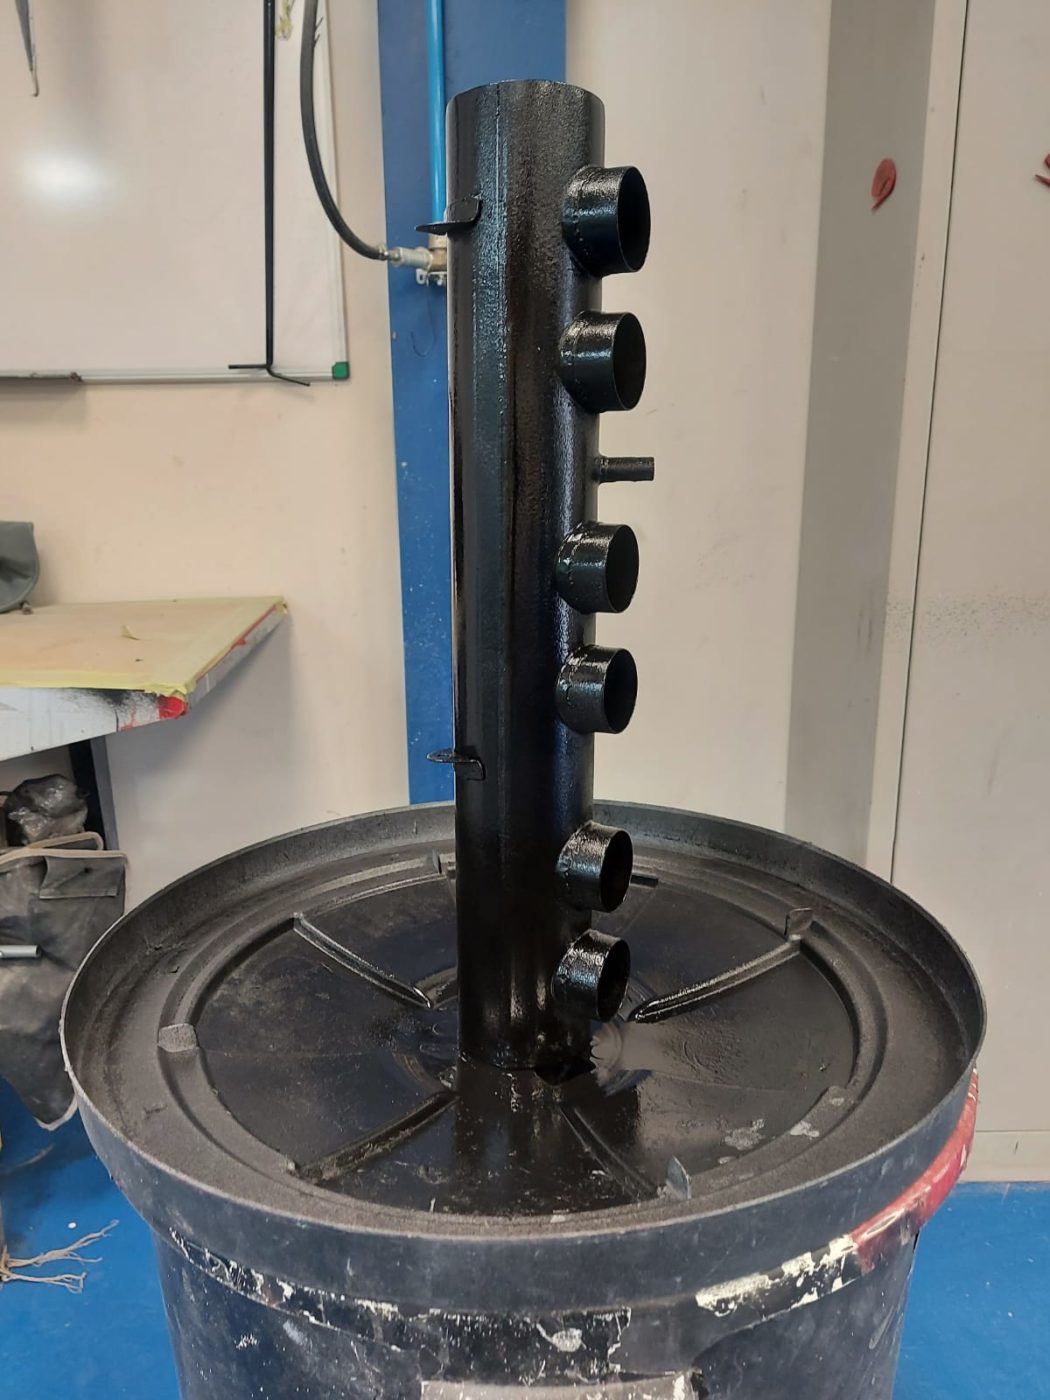
Mauro has been heat-wrapping the Triumph TR5 exhaust using a Header Wrap. This is done to improve the exhaust flow and to reduce the risk of the Scavenging Effect. Scavenging occurs when the rush of the exhaust gas leaves the cylinder pulls in more fresh air and fuel.
It also lowers the temperature in the engine to reduce the risk of overheating. Wrapped headers will increase the torque and horse power by a small amount as well.

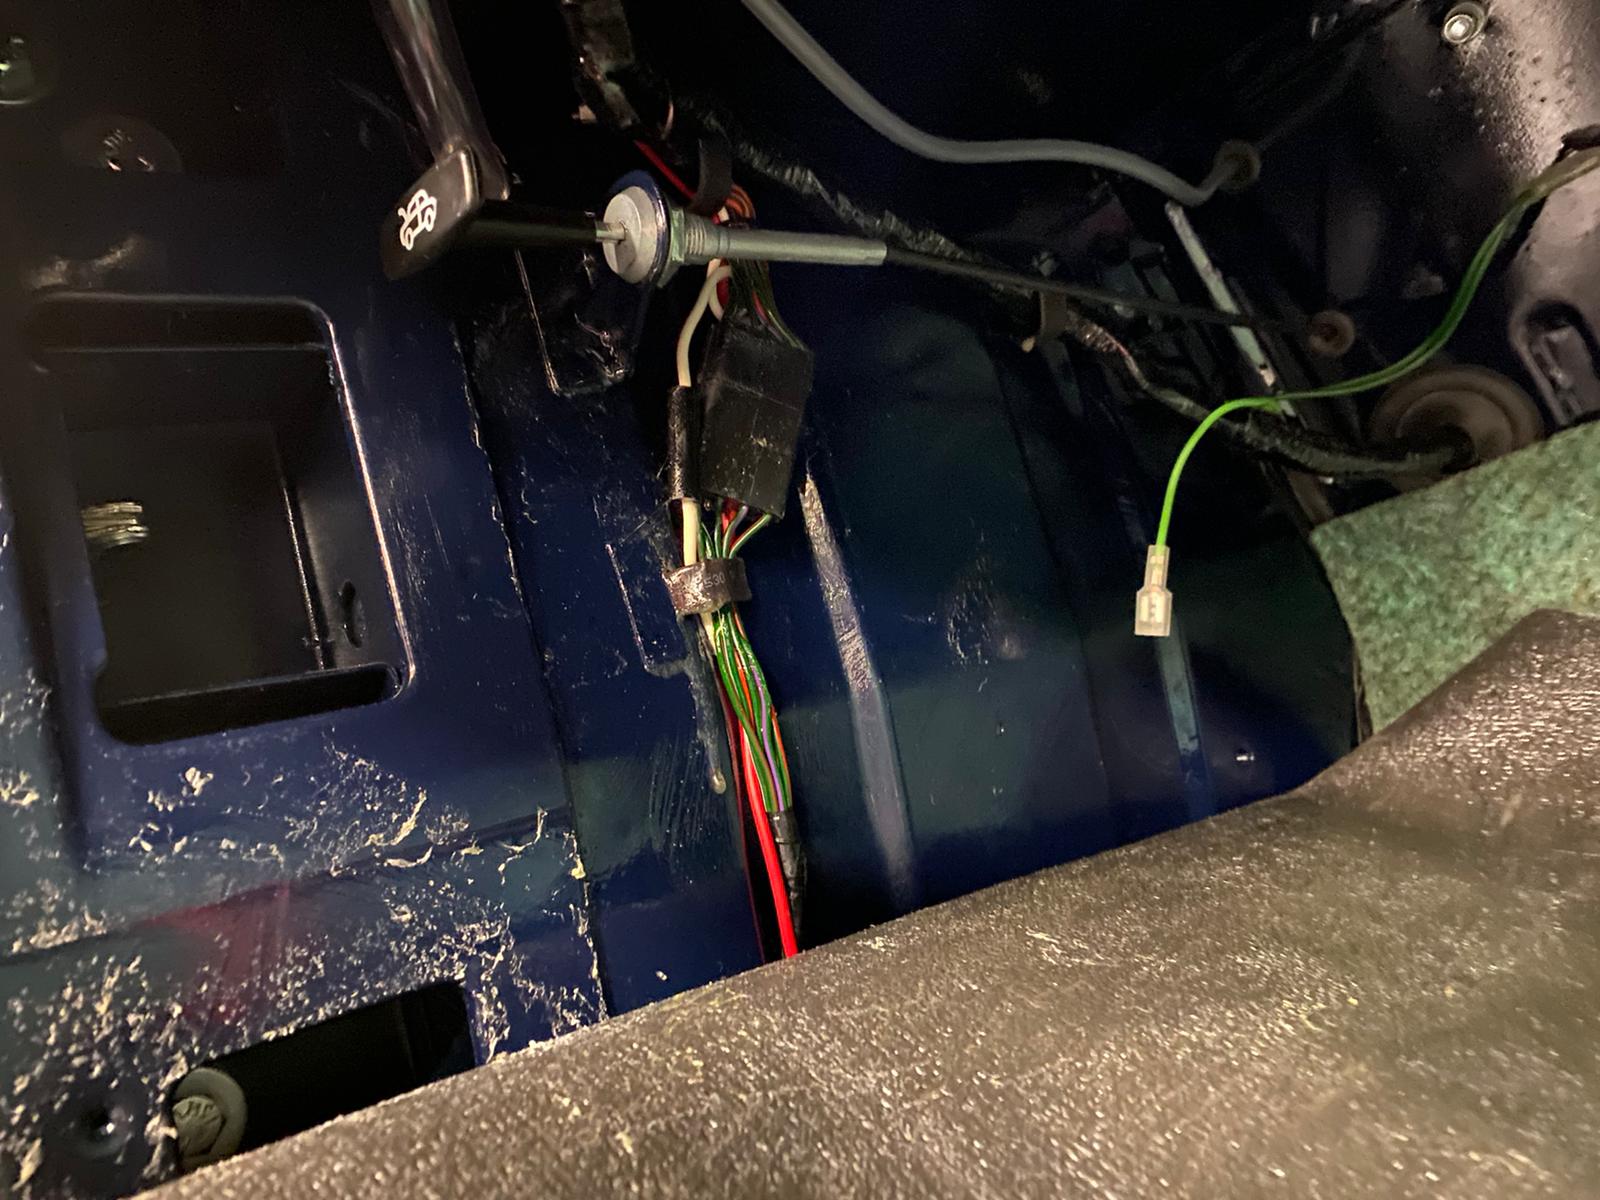
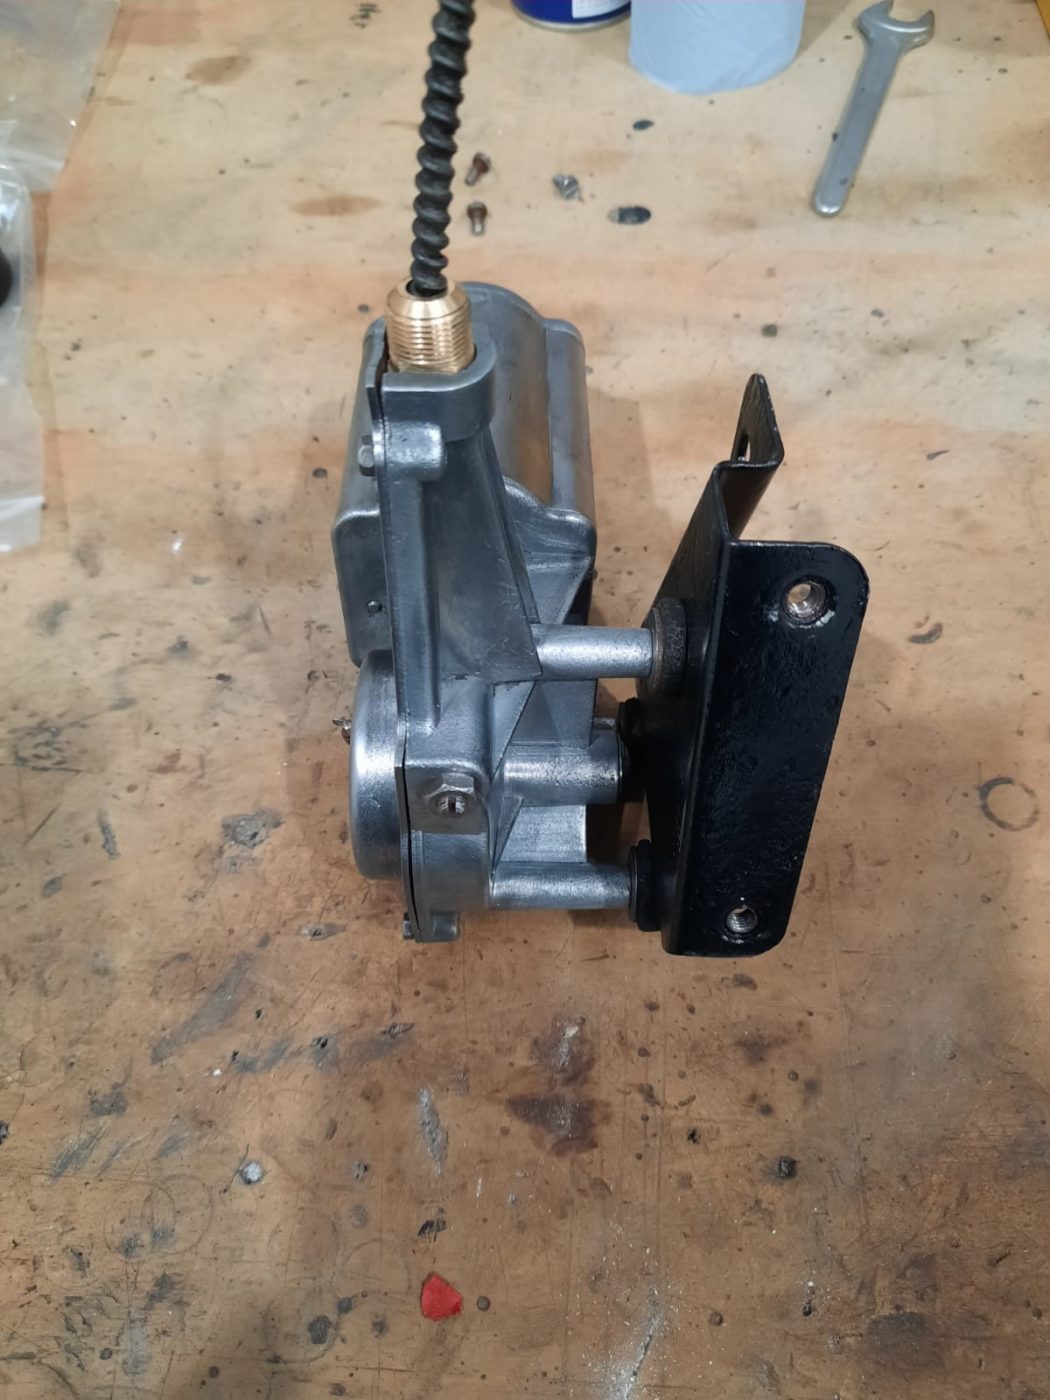
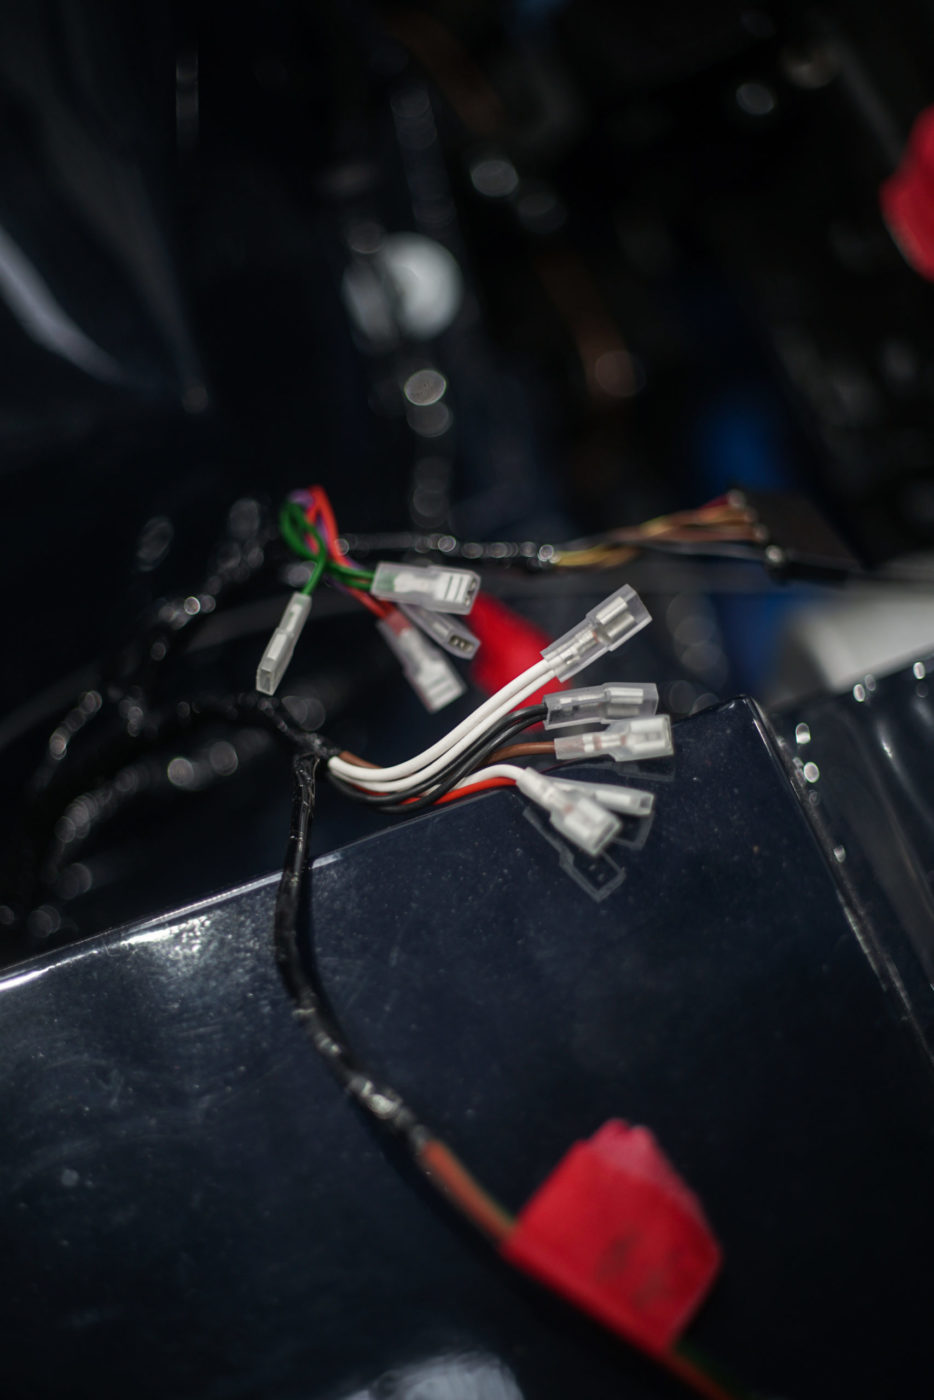
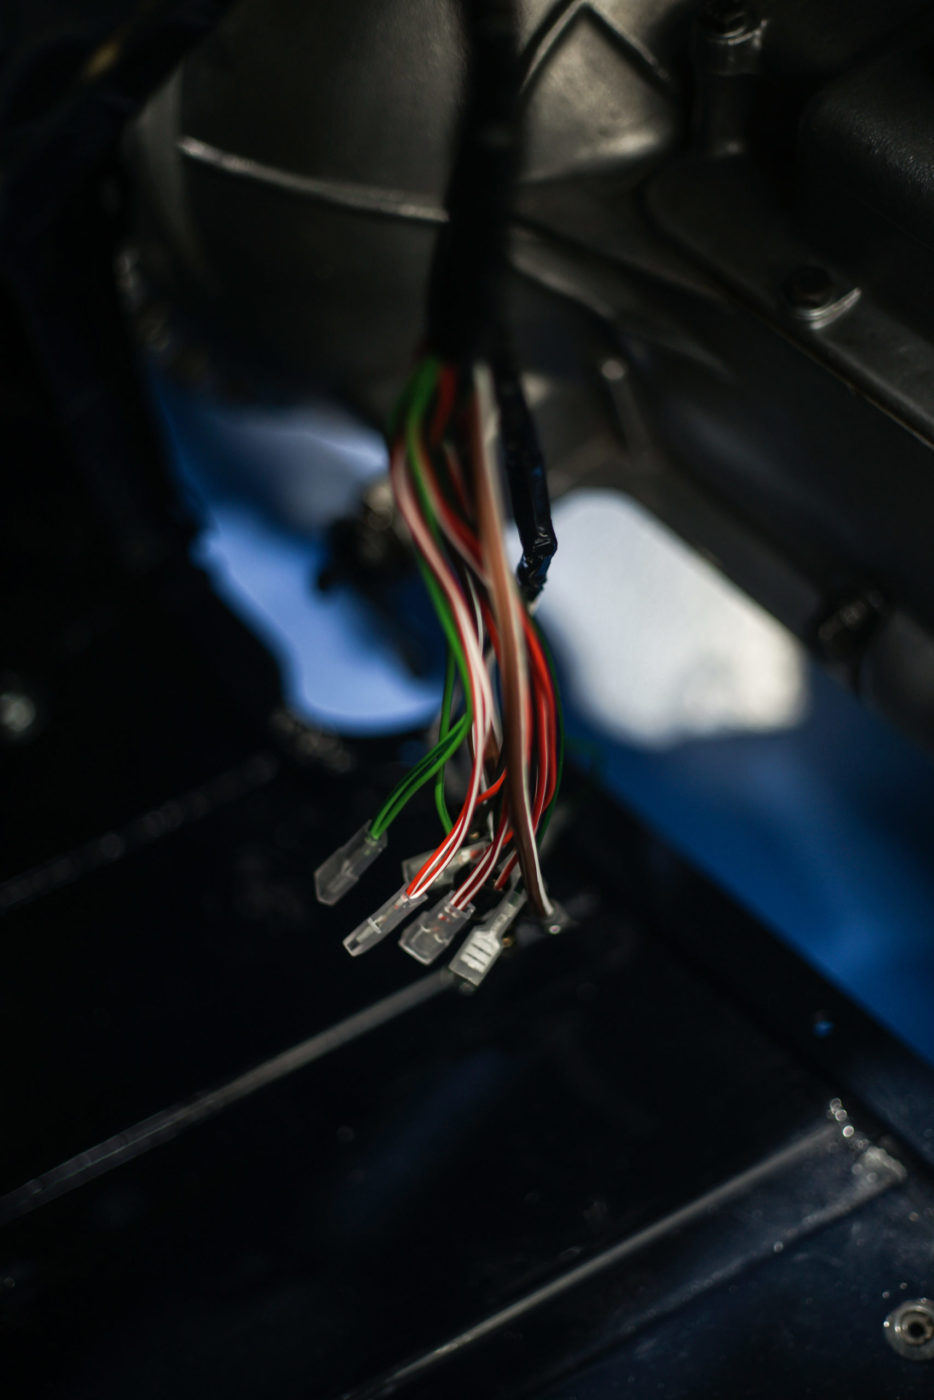
We had Auto Electrics come over to wire up all of the electrics on our 1968 Triumph TR5.
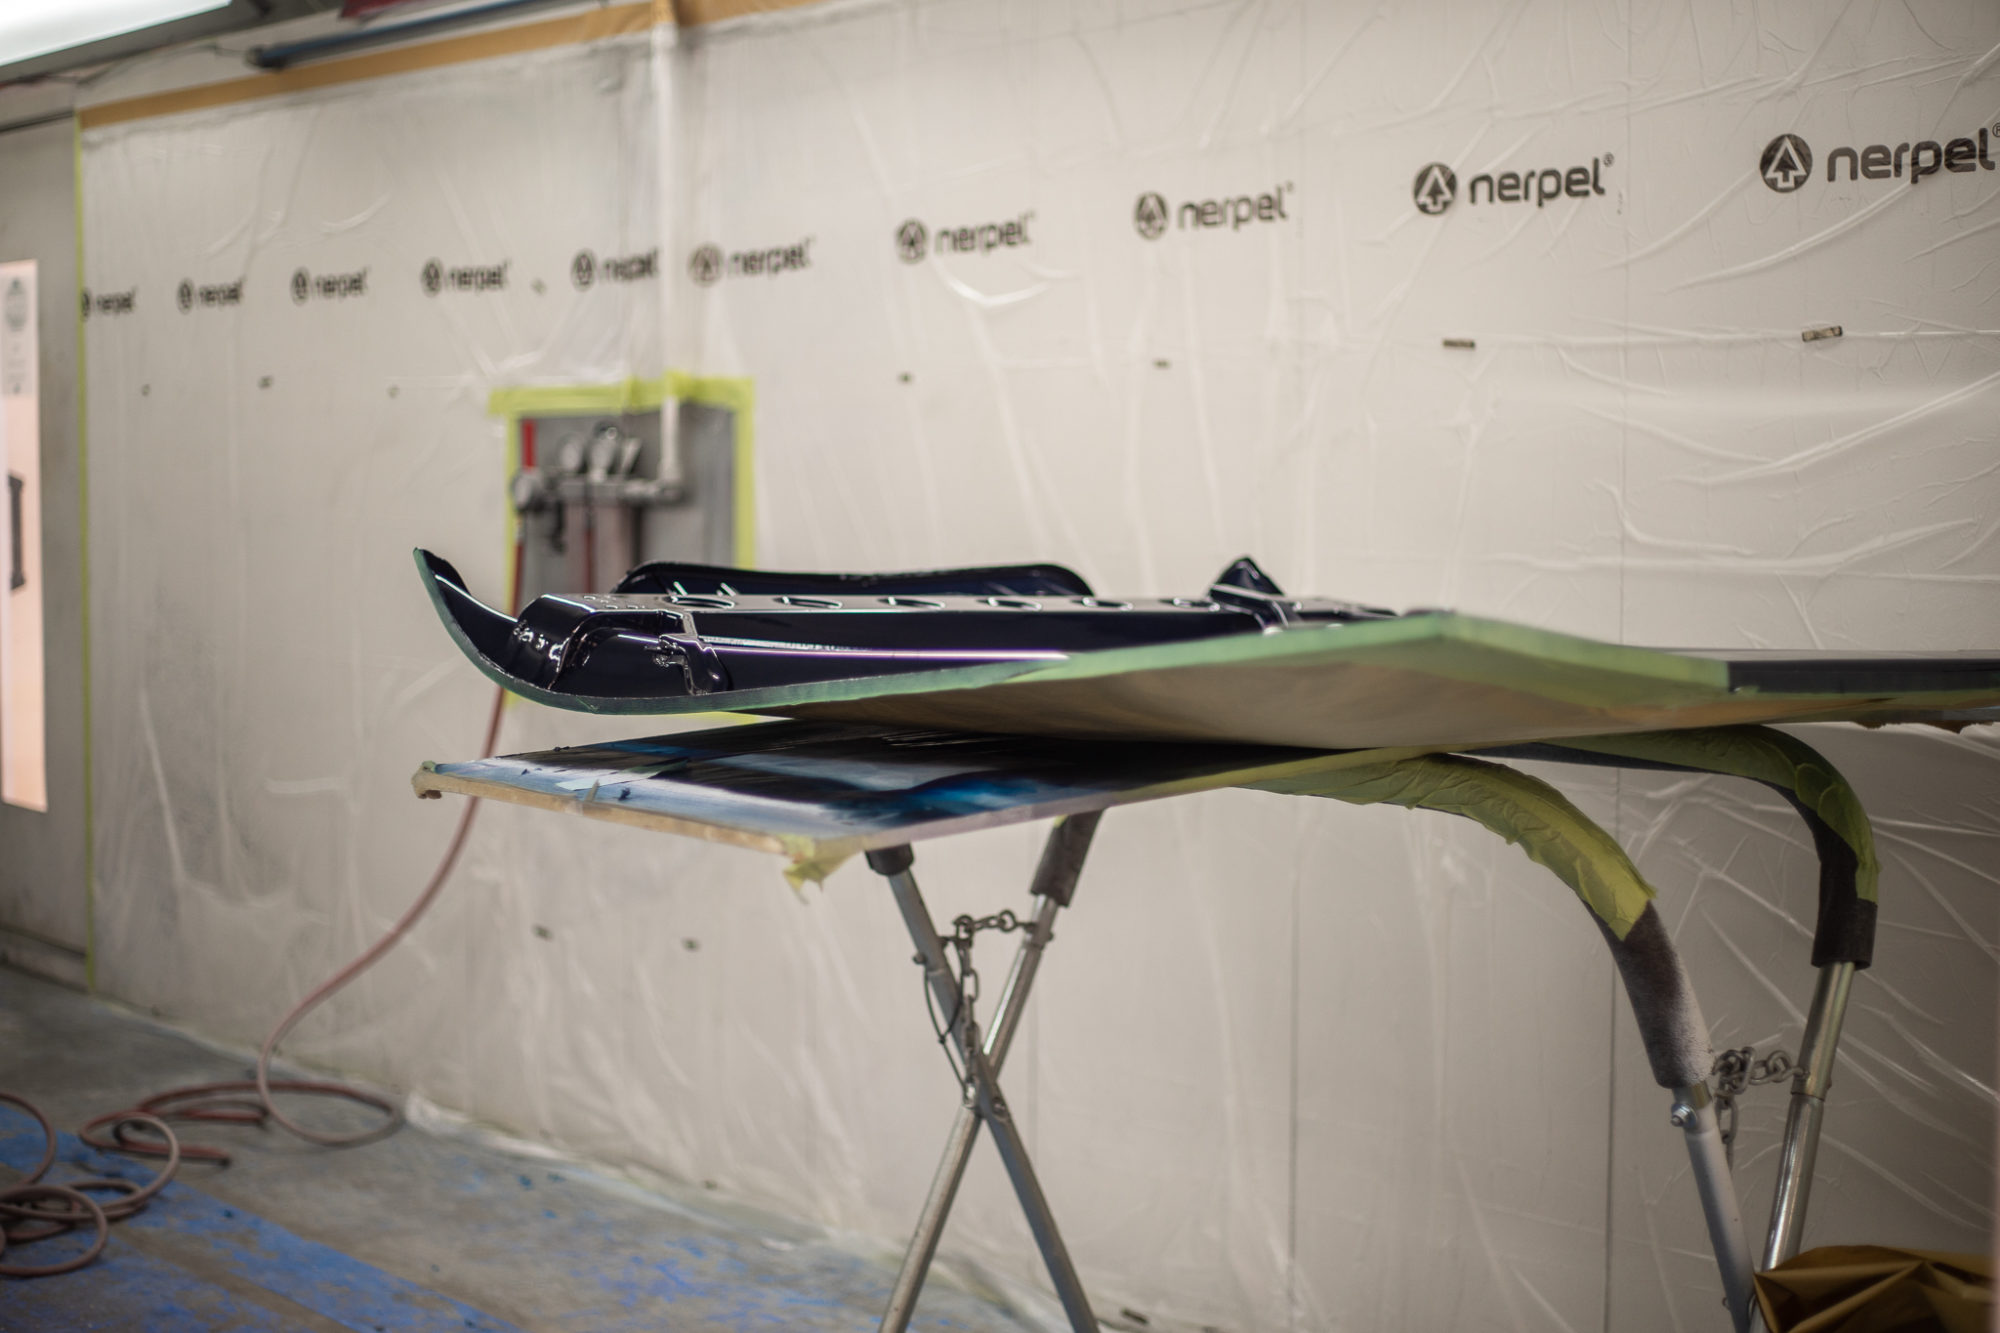
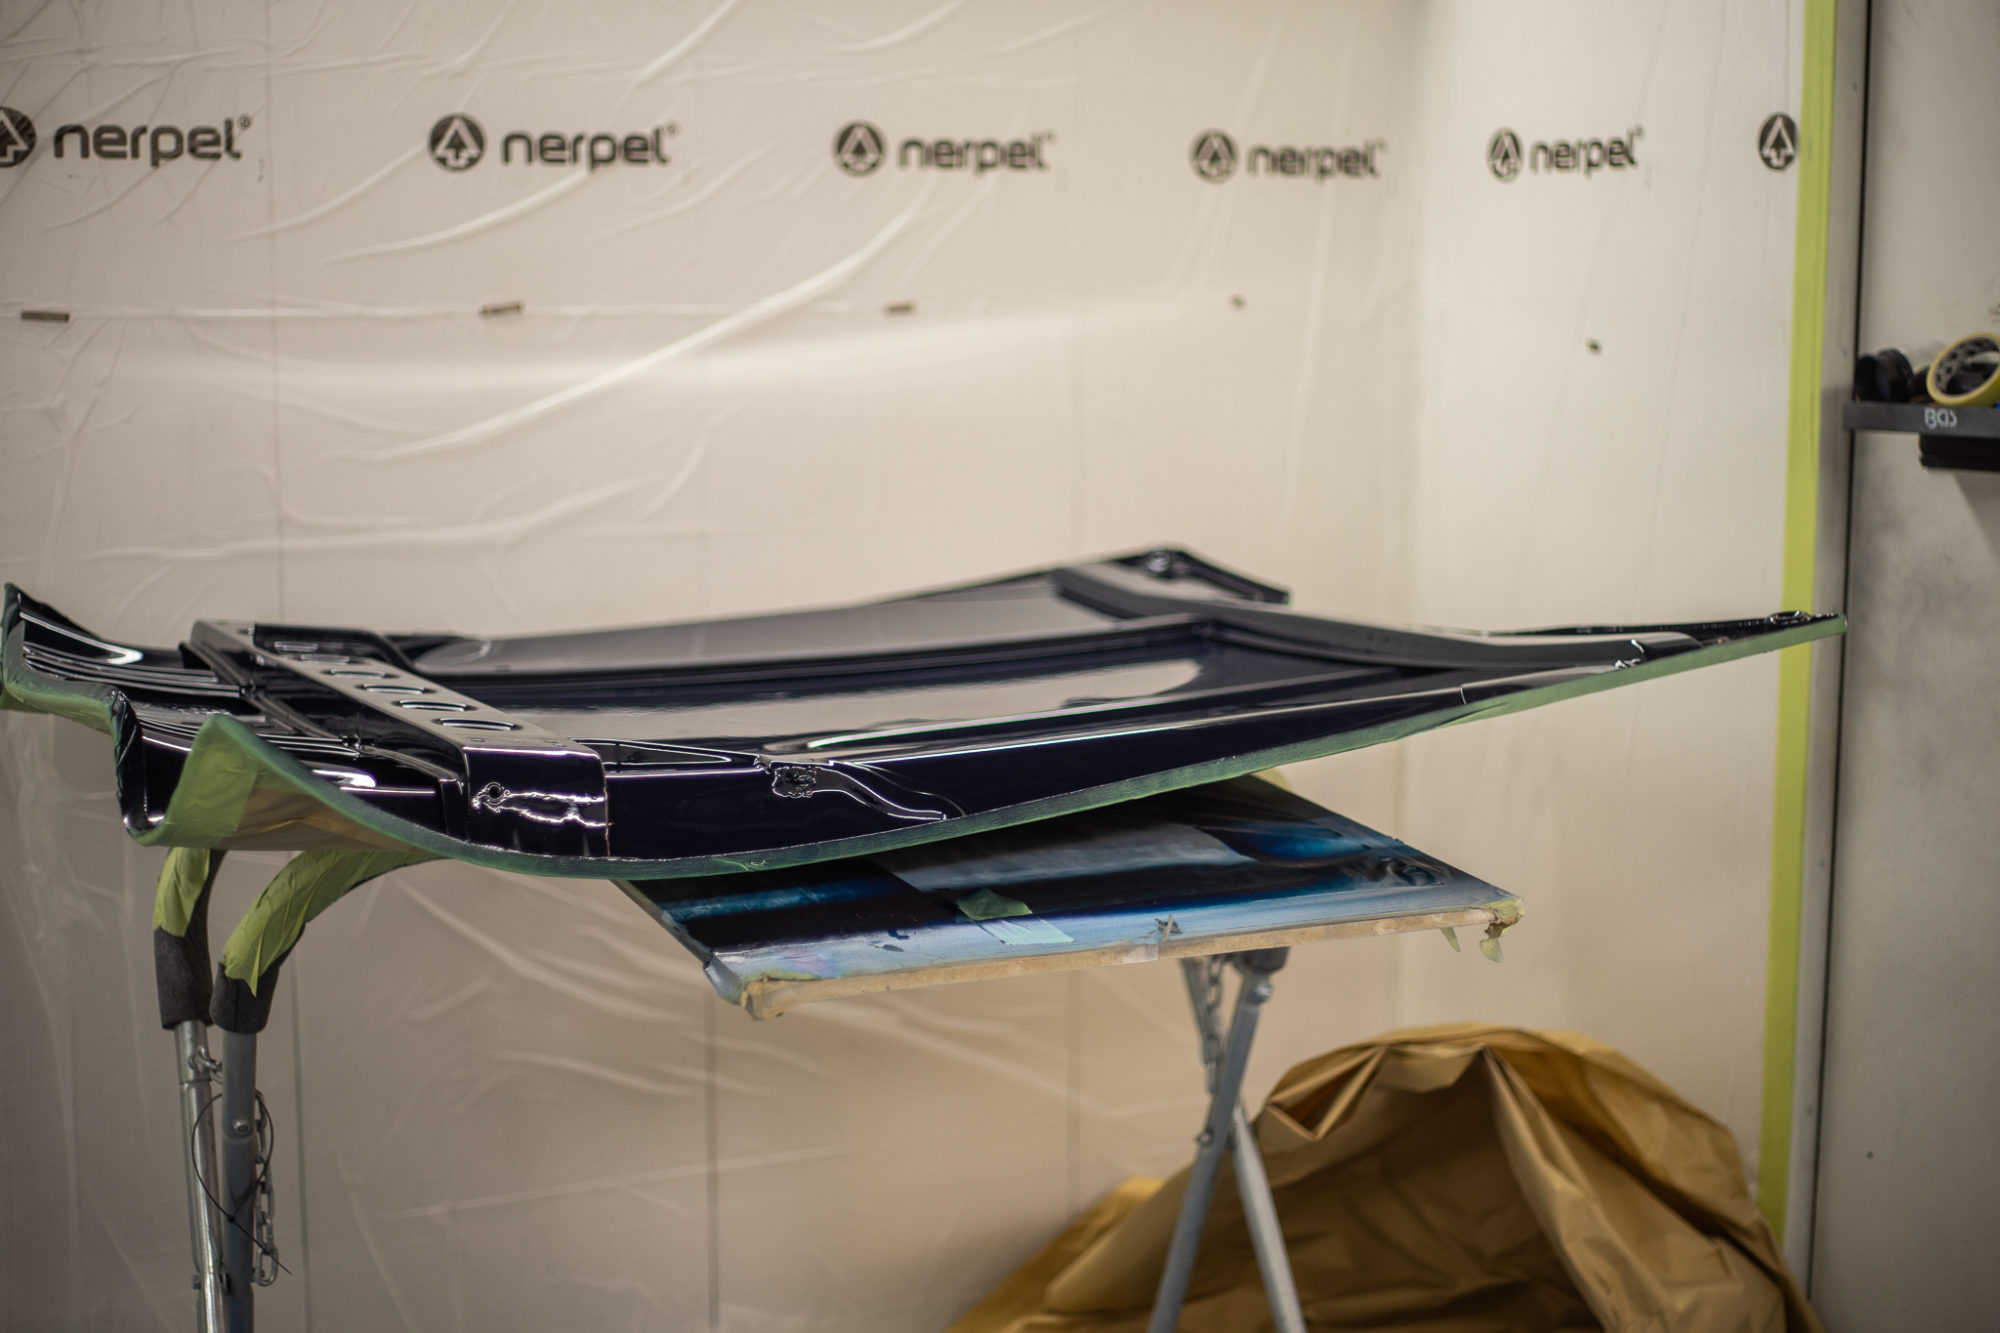
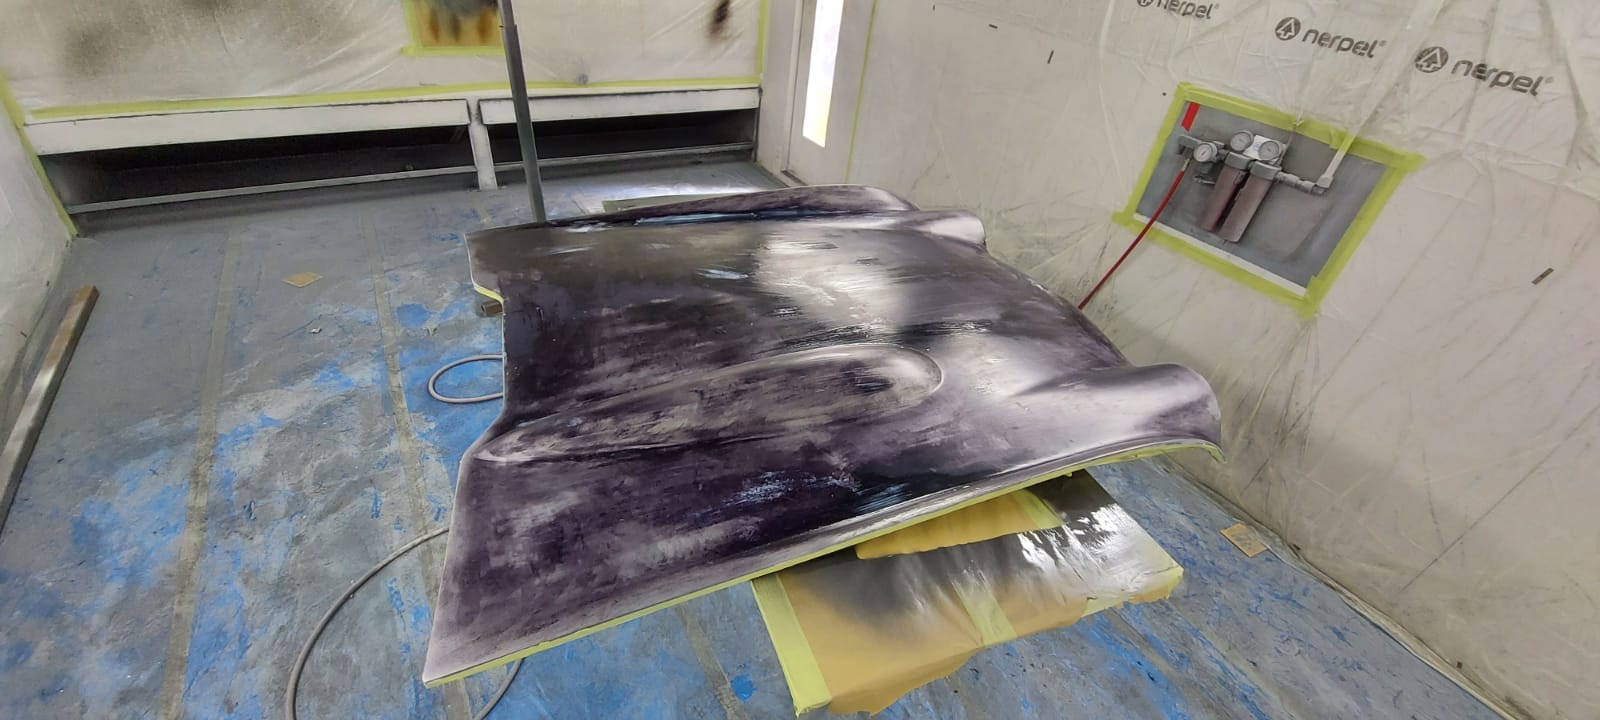
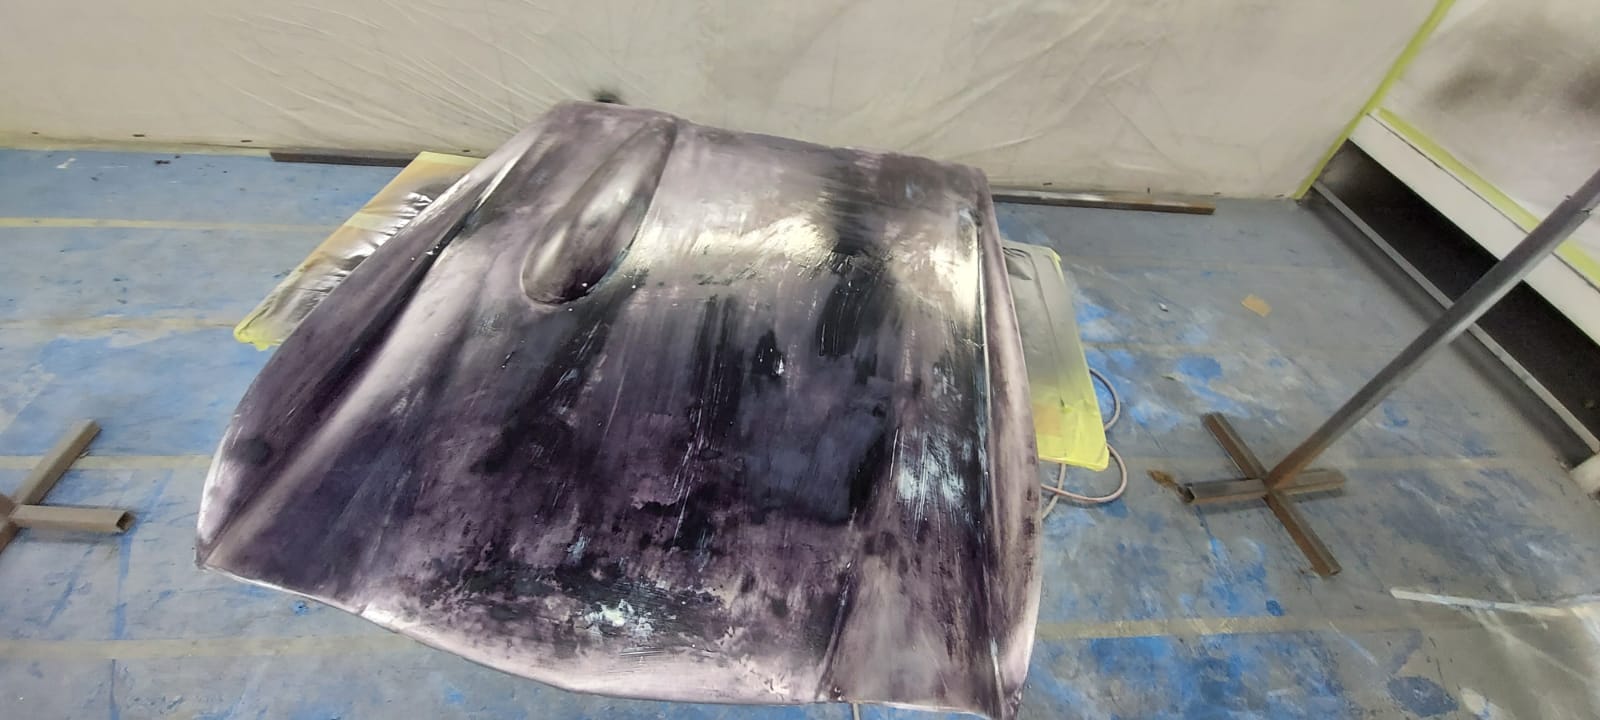
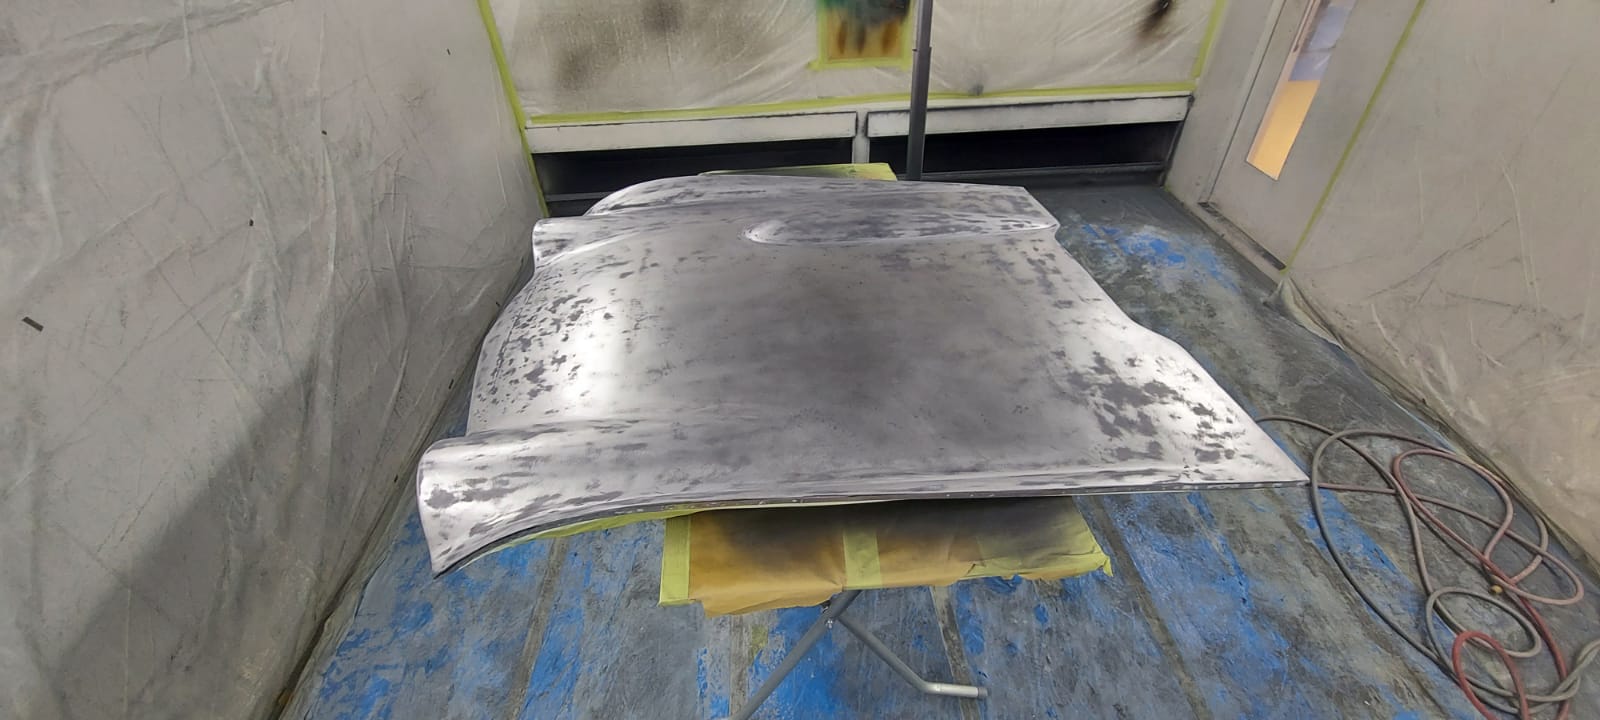
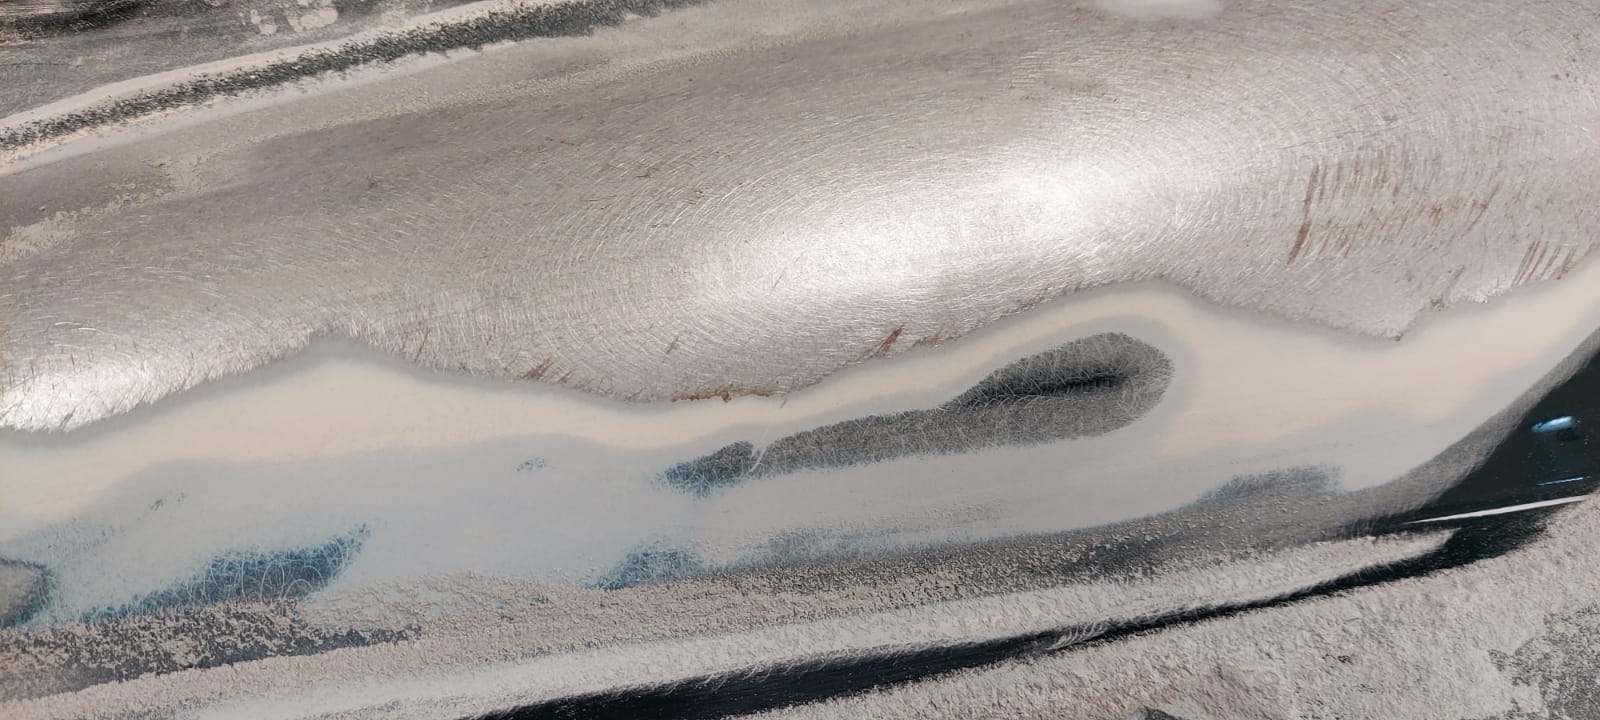
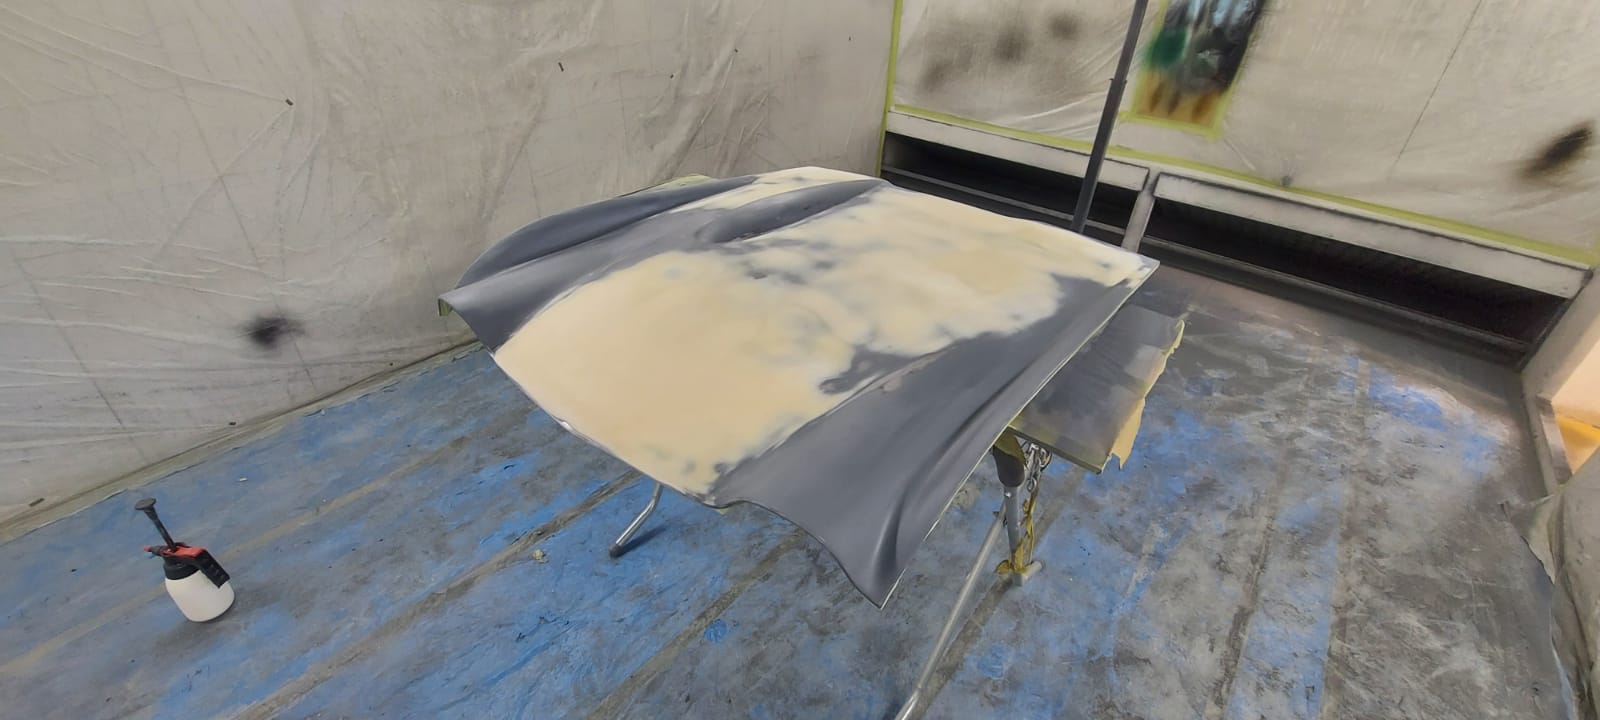
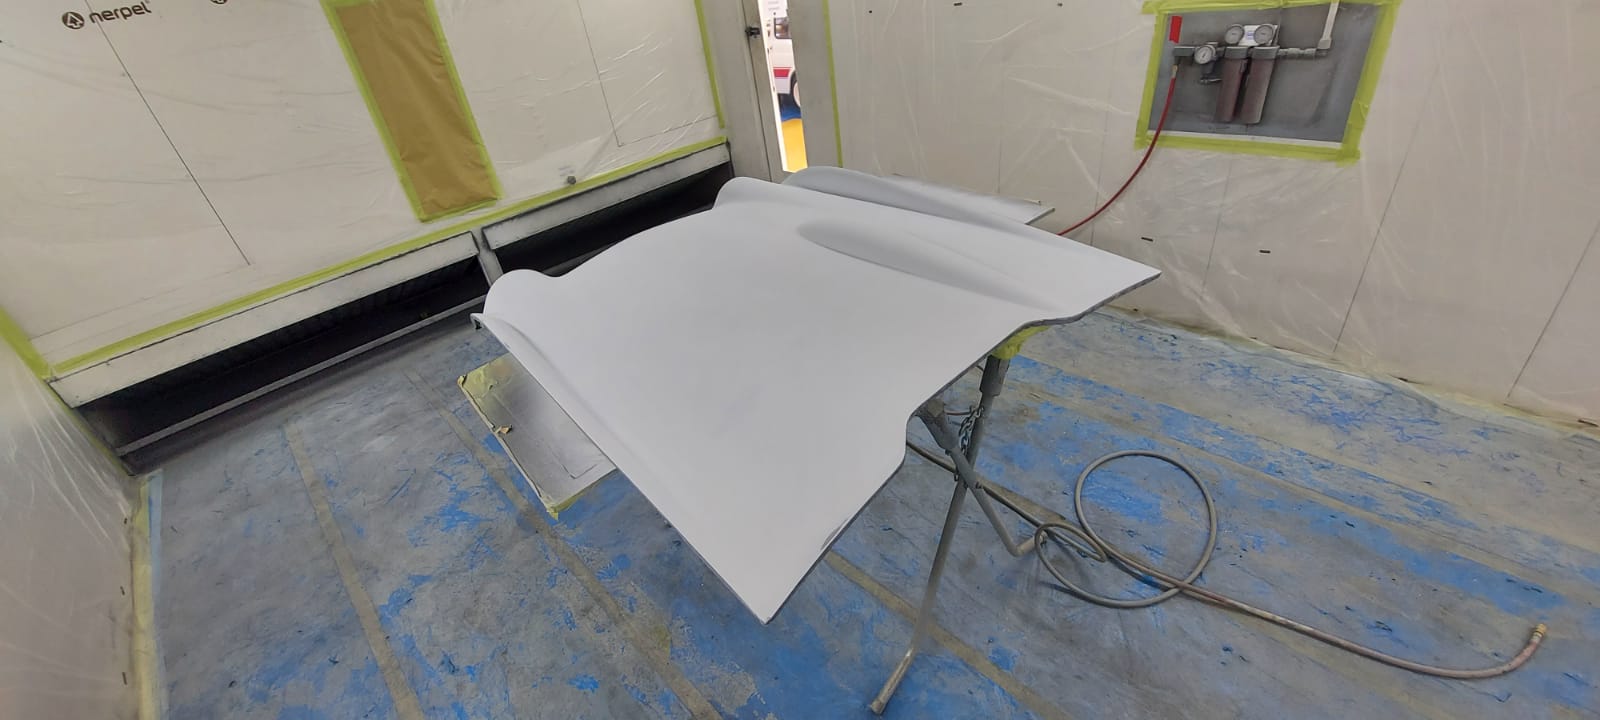
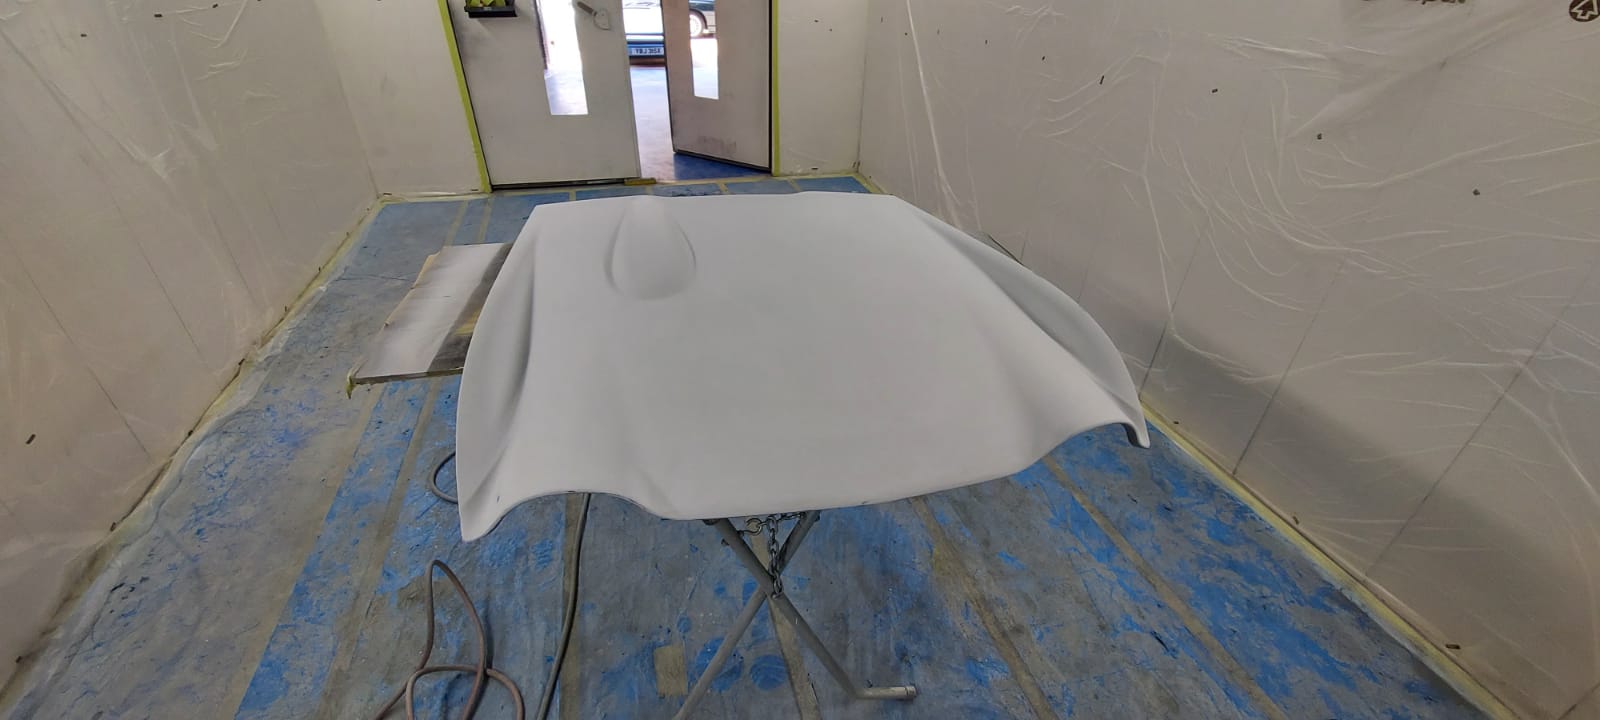
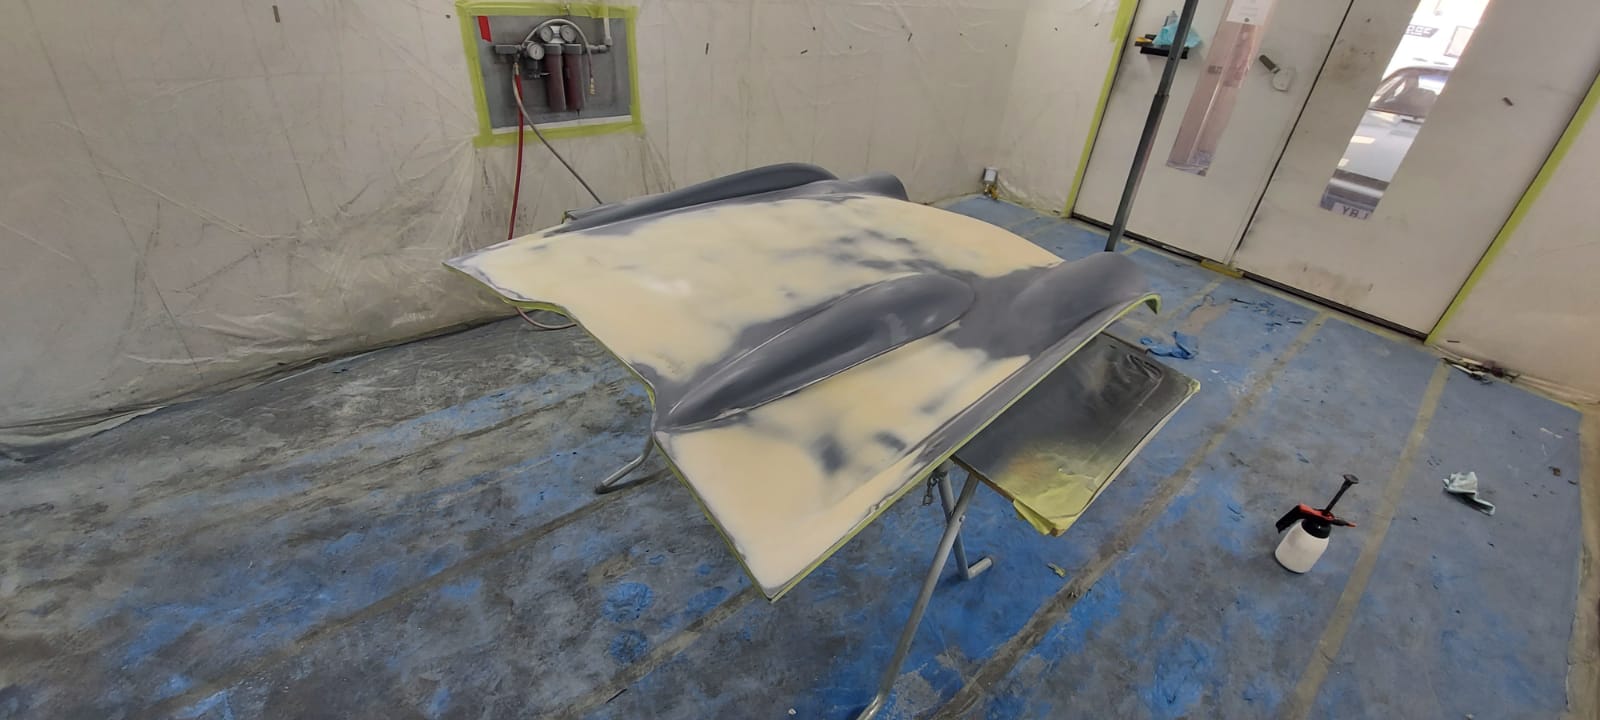
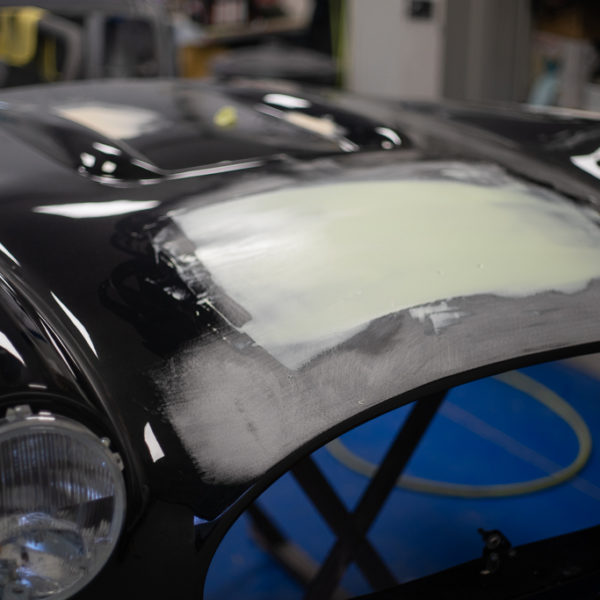
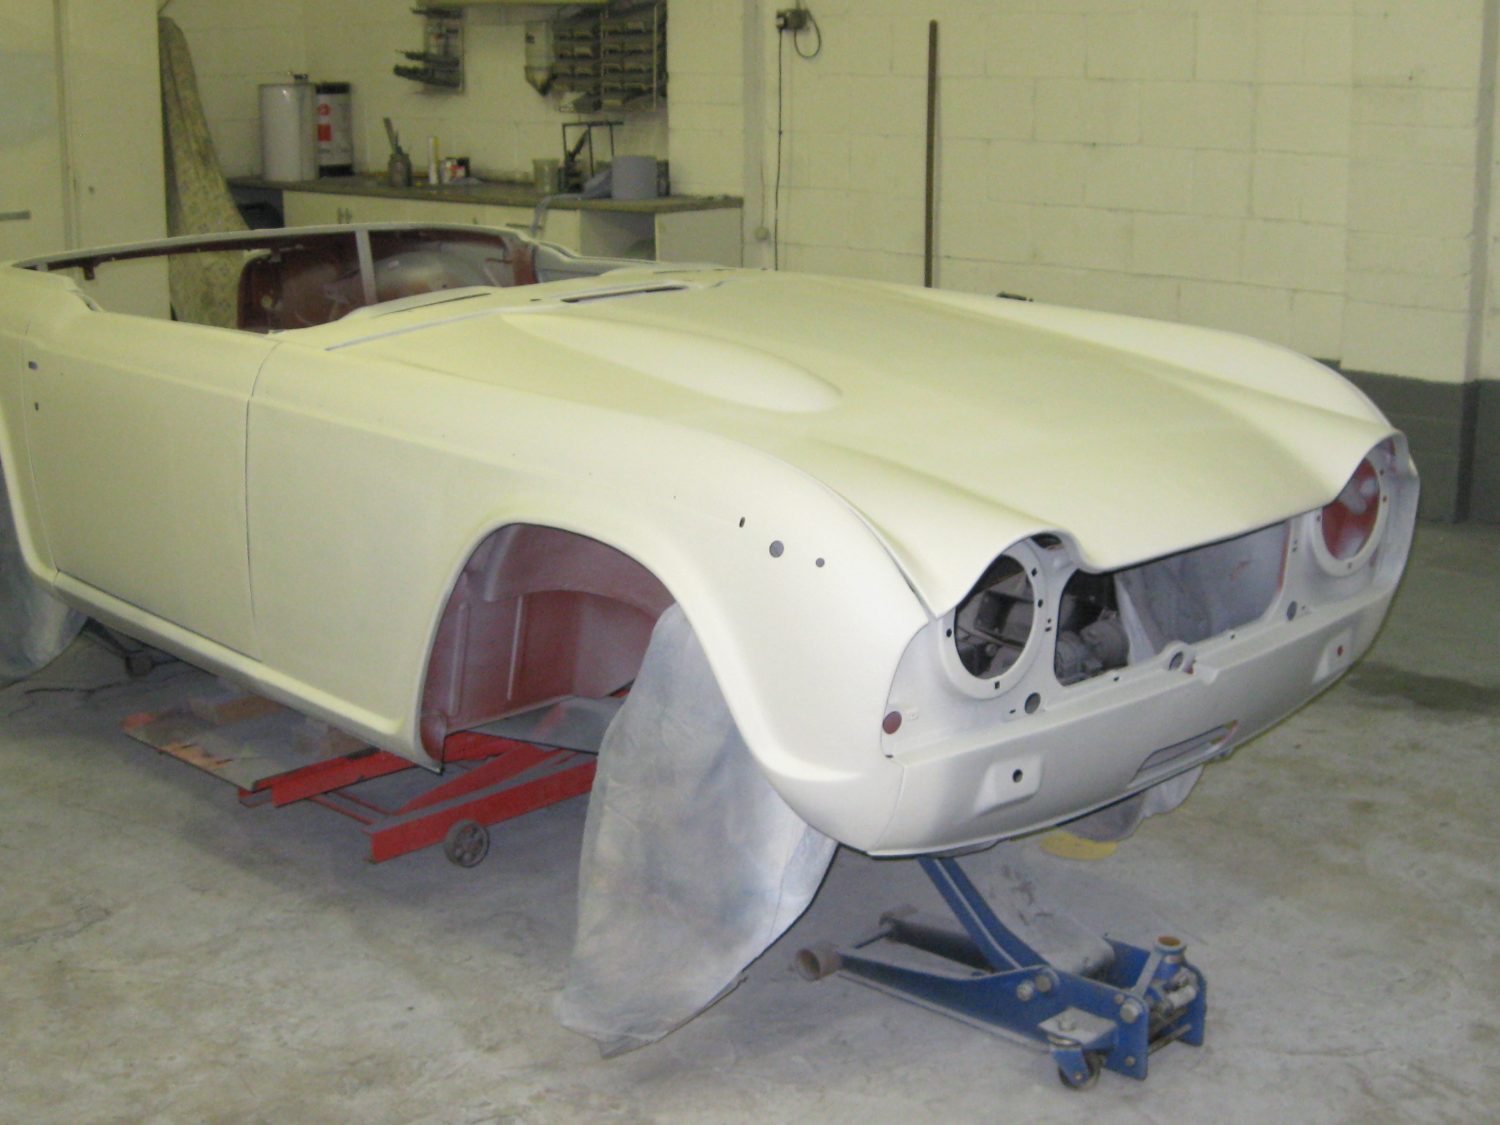
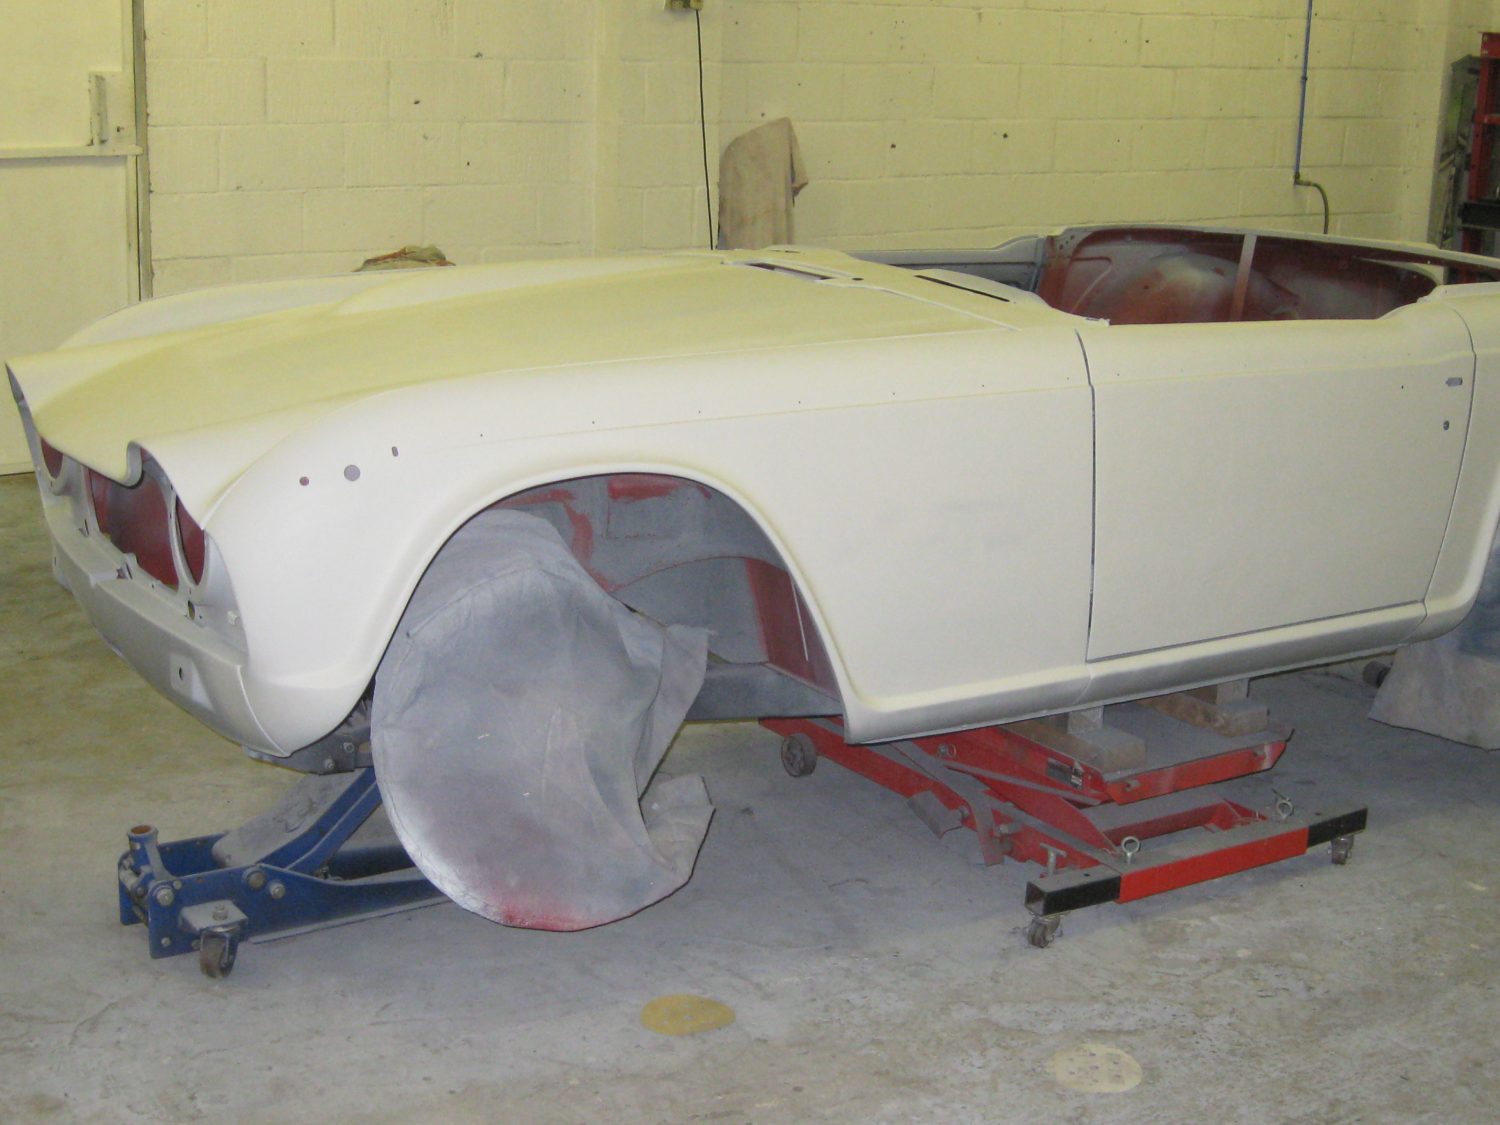
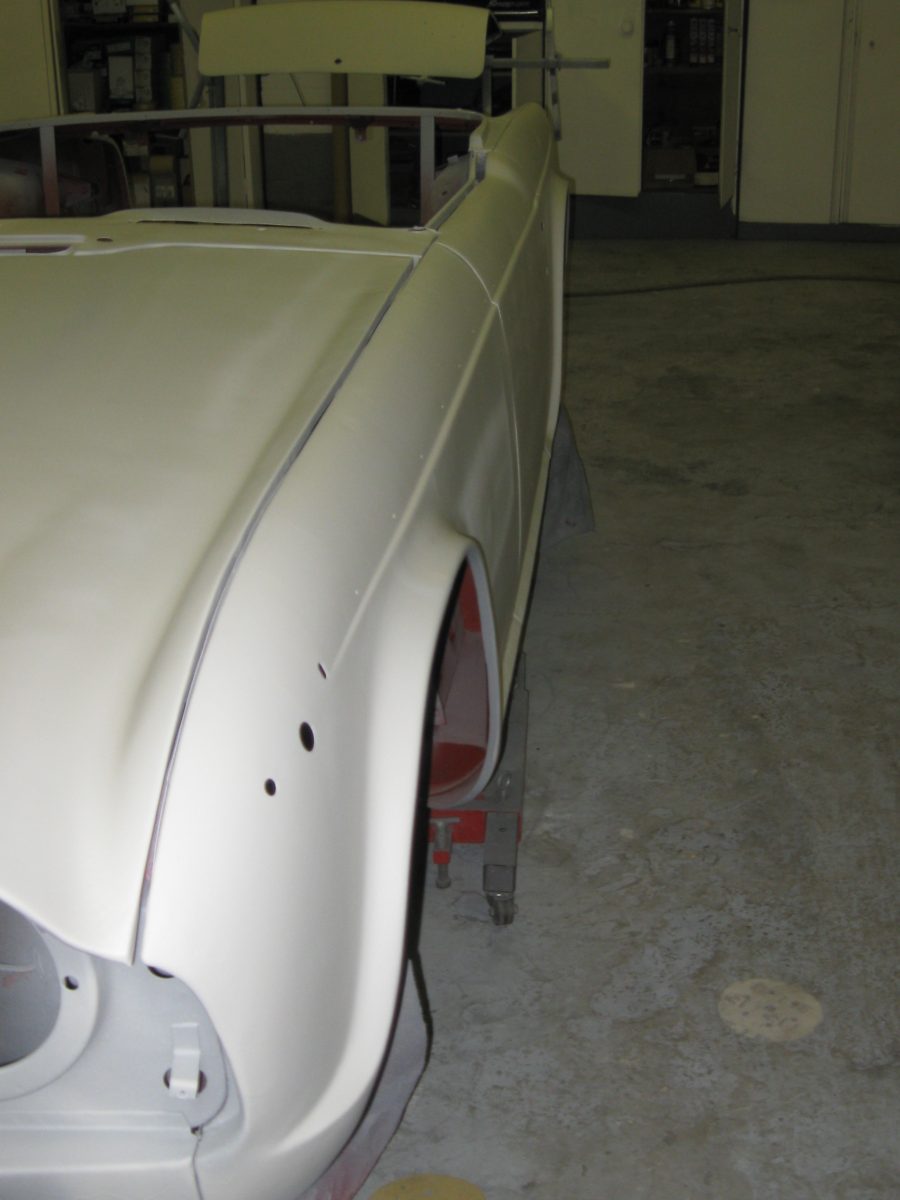
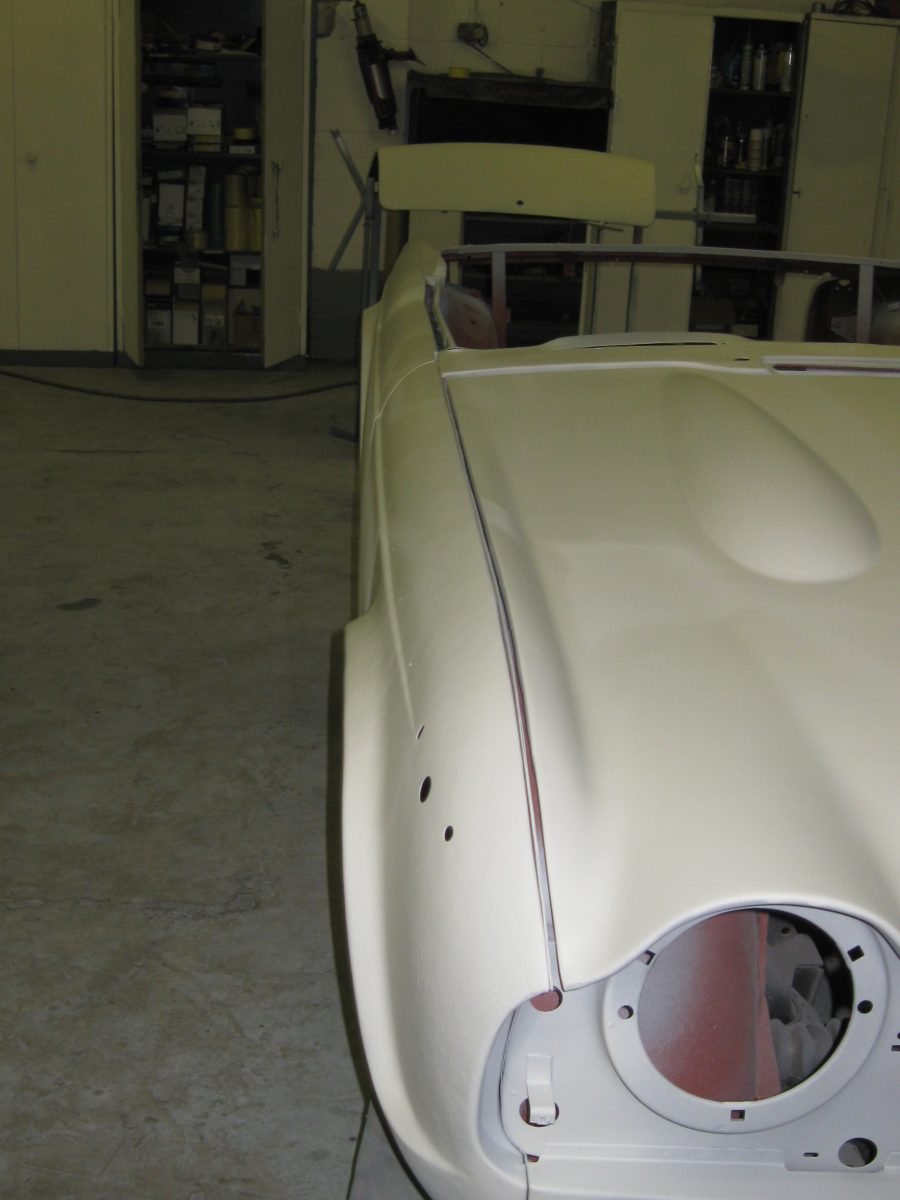
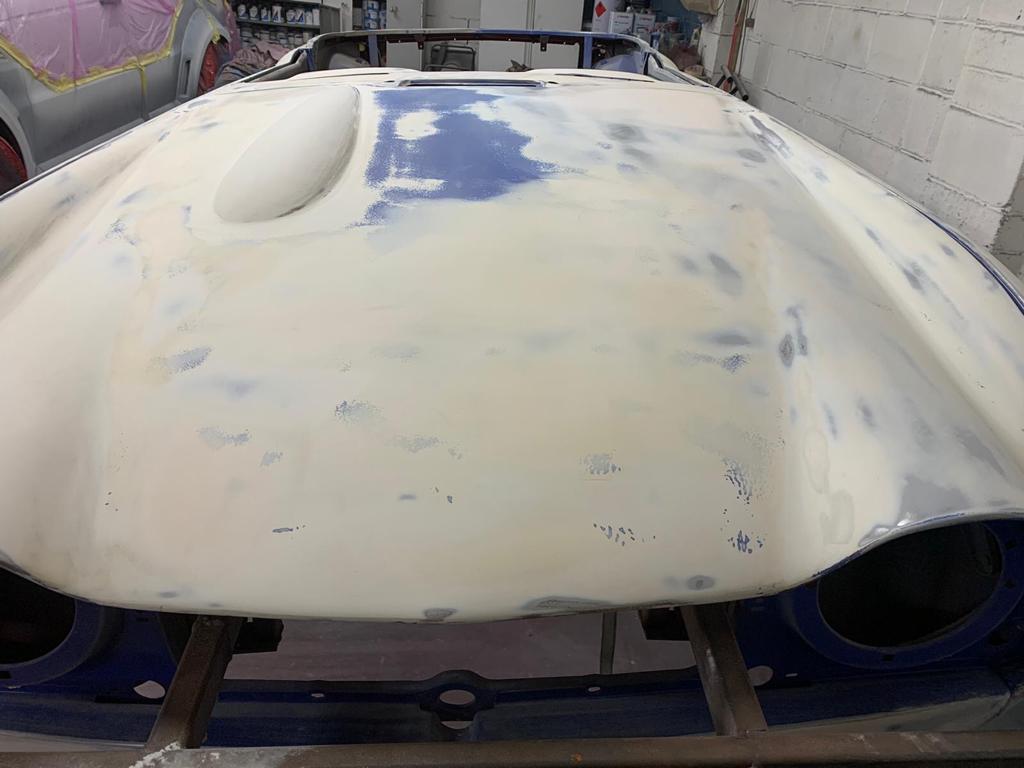
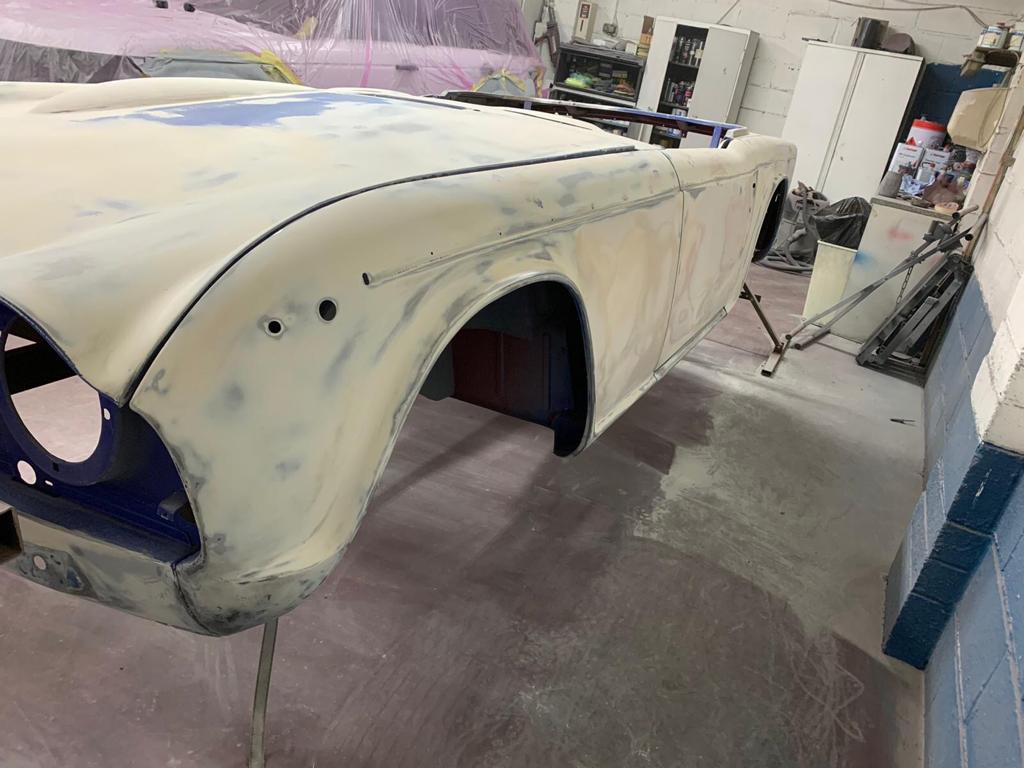
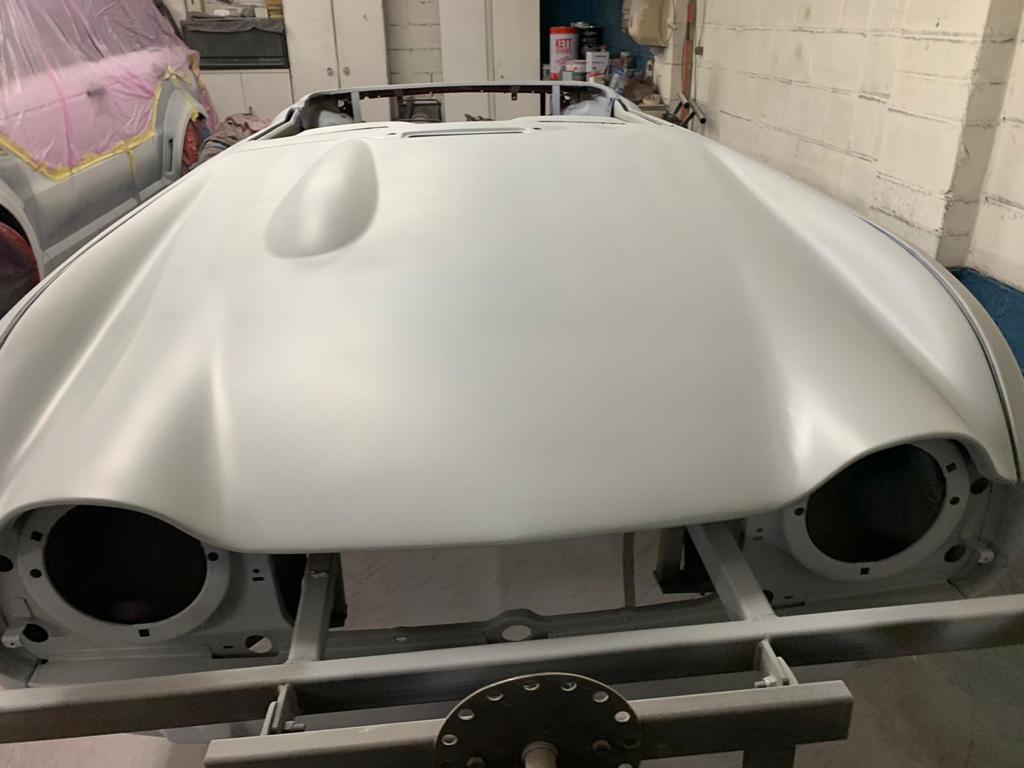
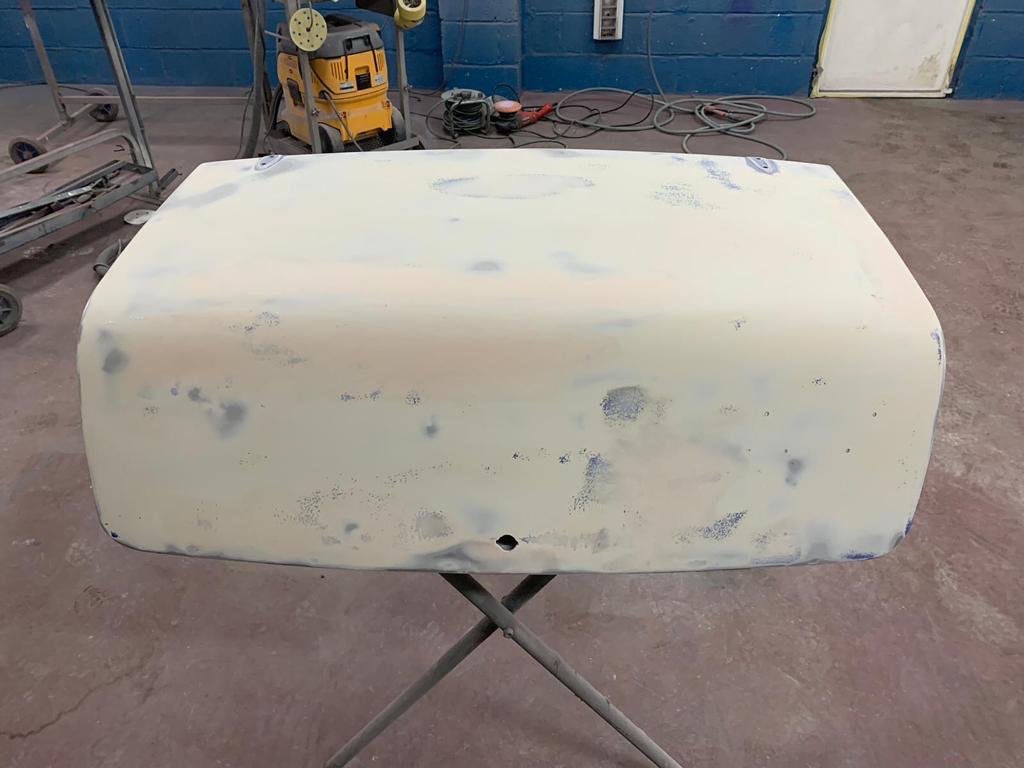
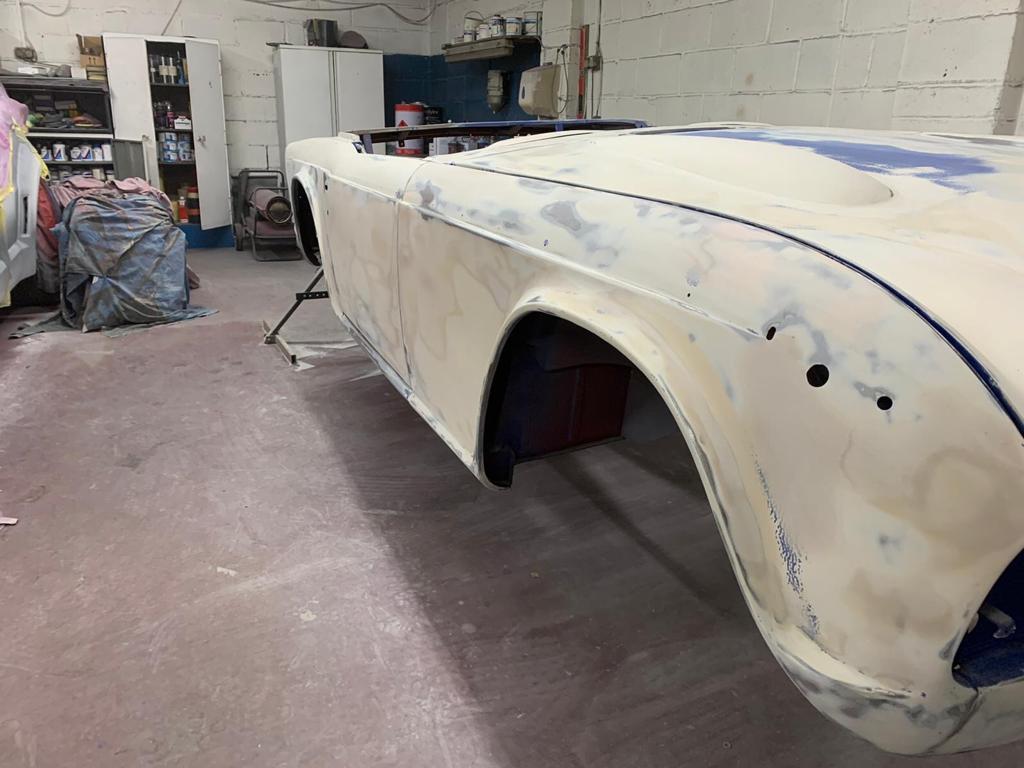
Our TR5 has had its bonnet repainted. The original paint job for this vehicle was done externally as per the clients request however we are now starting to see micro blistering within the paint and are endeavouring the rectify the problems.
Chris has stripped the bonnet to bare metal, applied rust treatment, added epoxy primer, body fill to smooth the imperfections and then applied polyfan filler primer which was rubbed down and covered in a high build primer. The final step was to then rub it down and re-paint it.


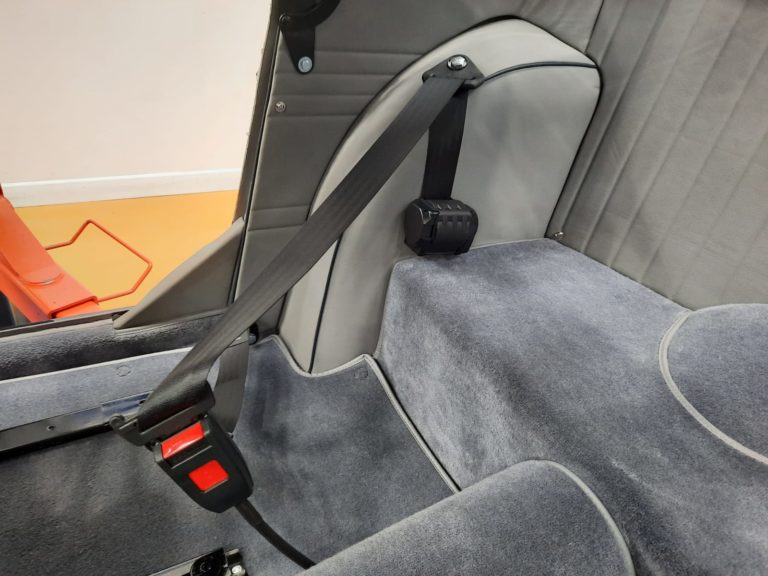
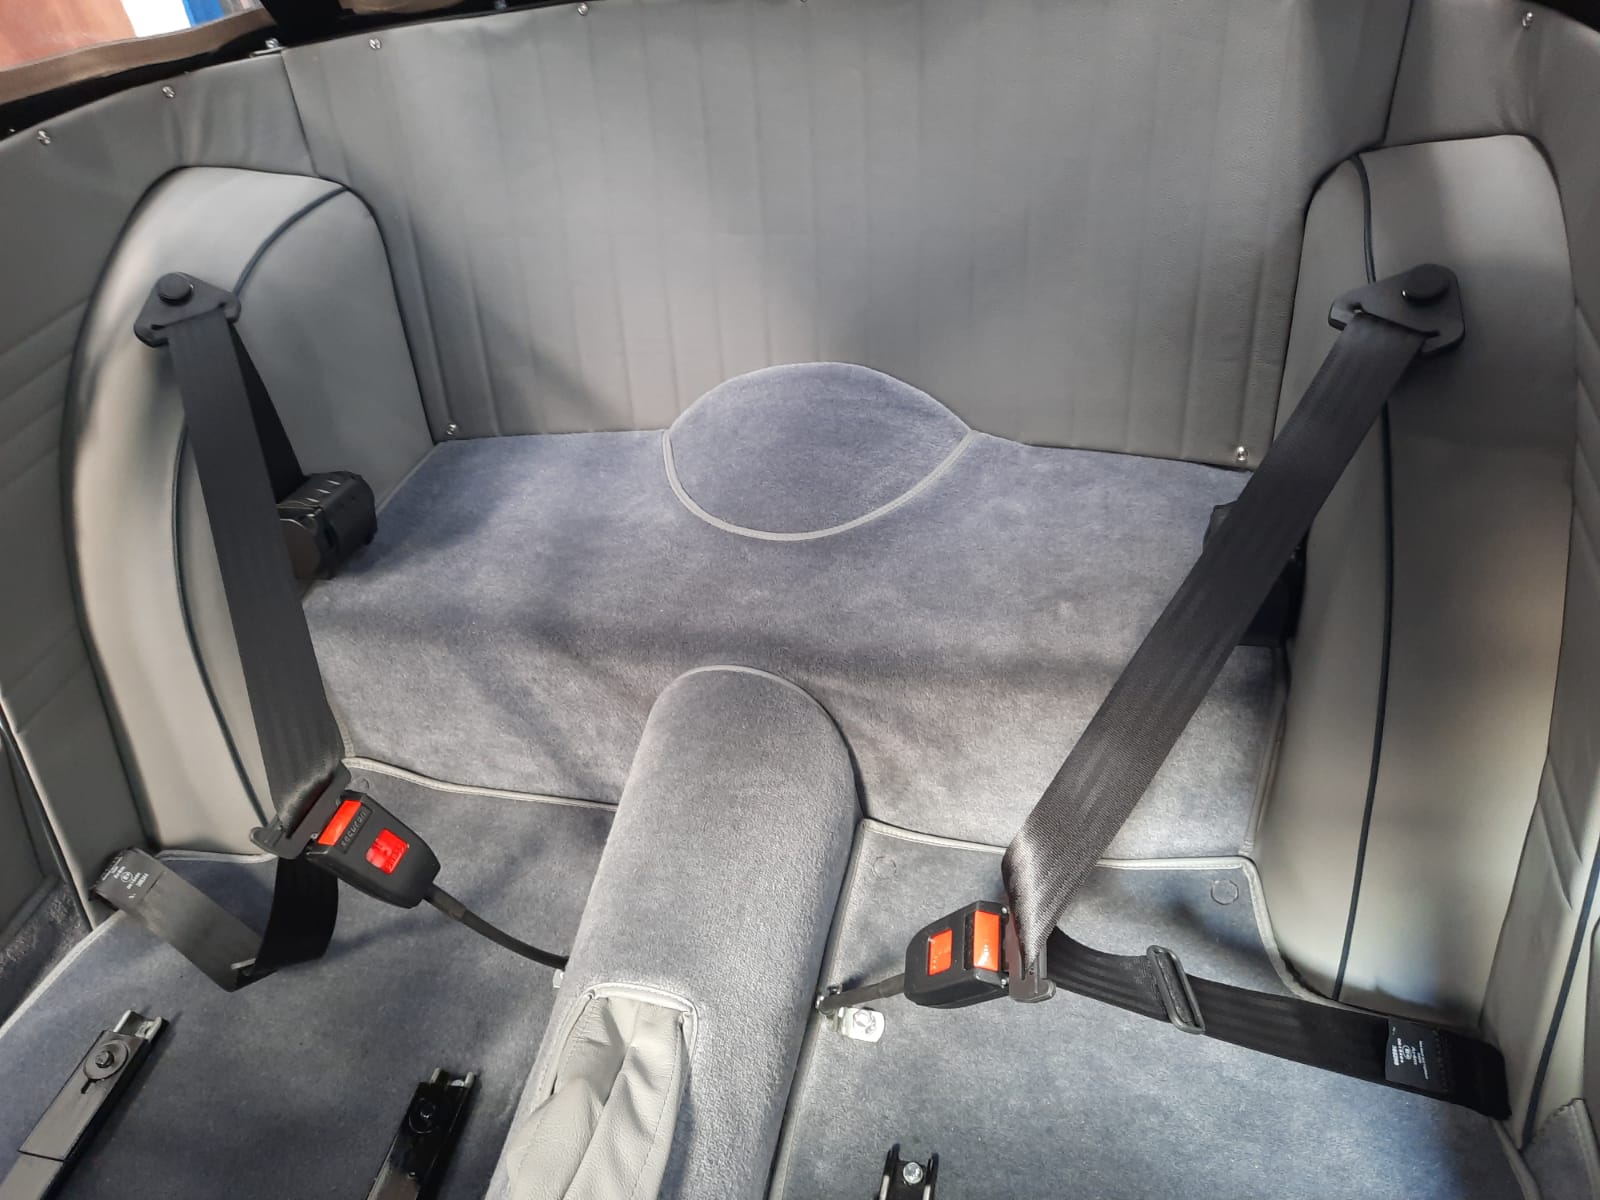
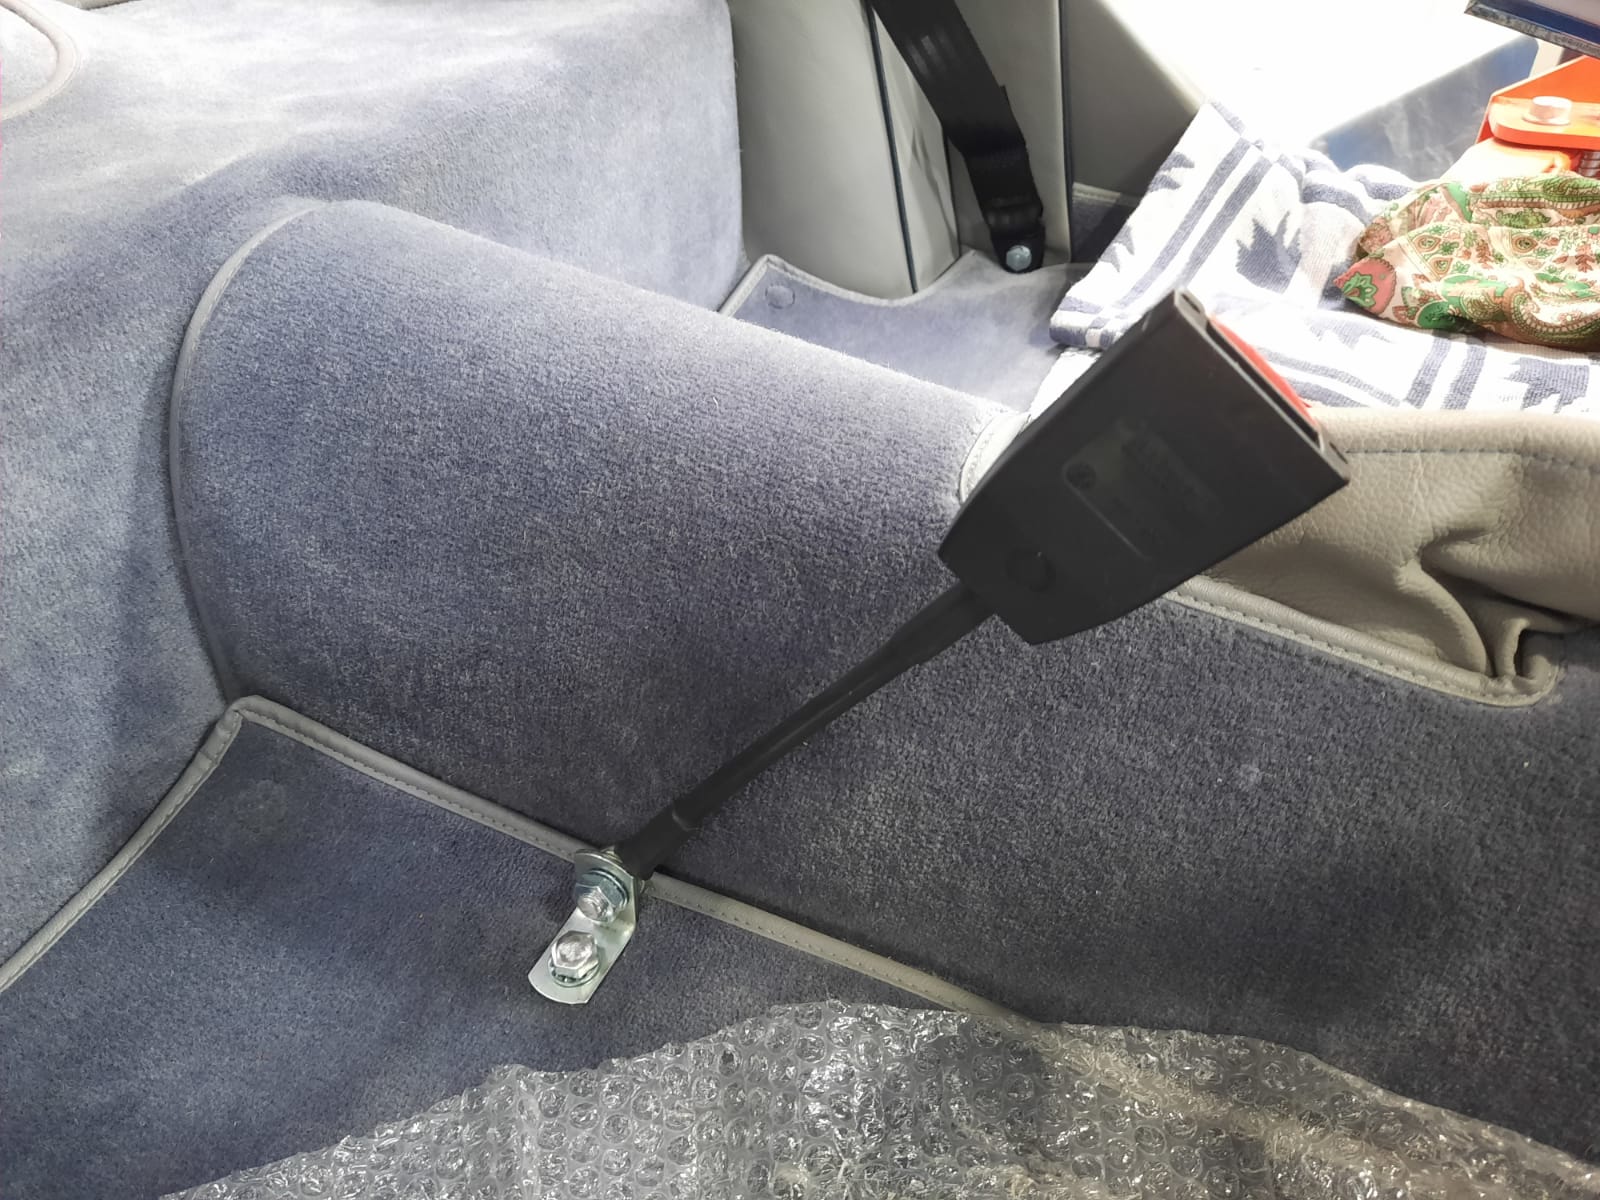
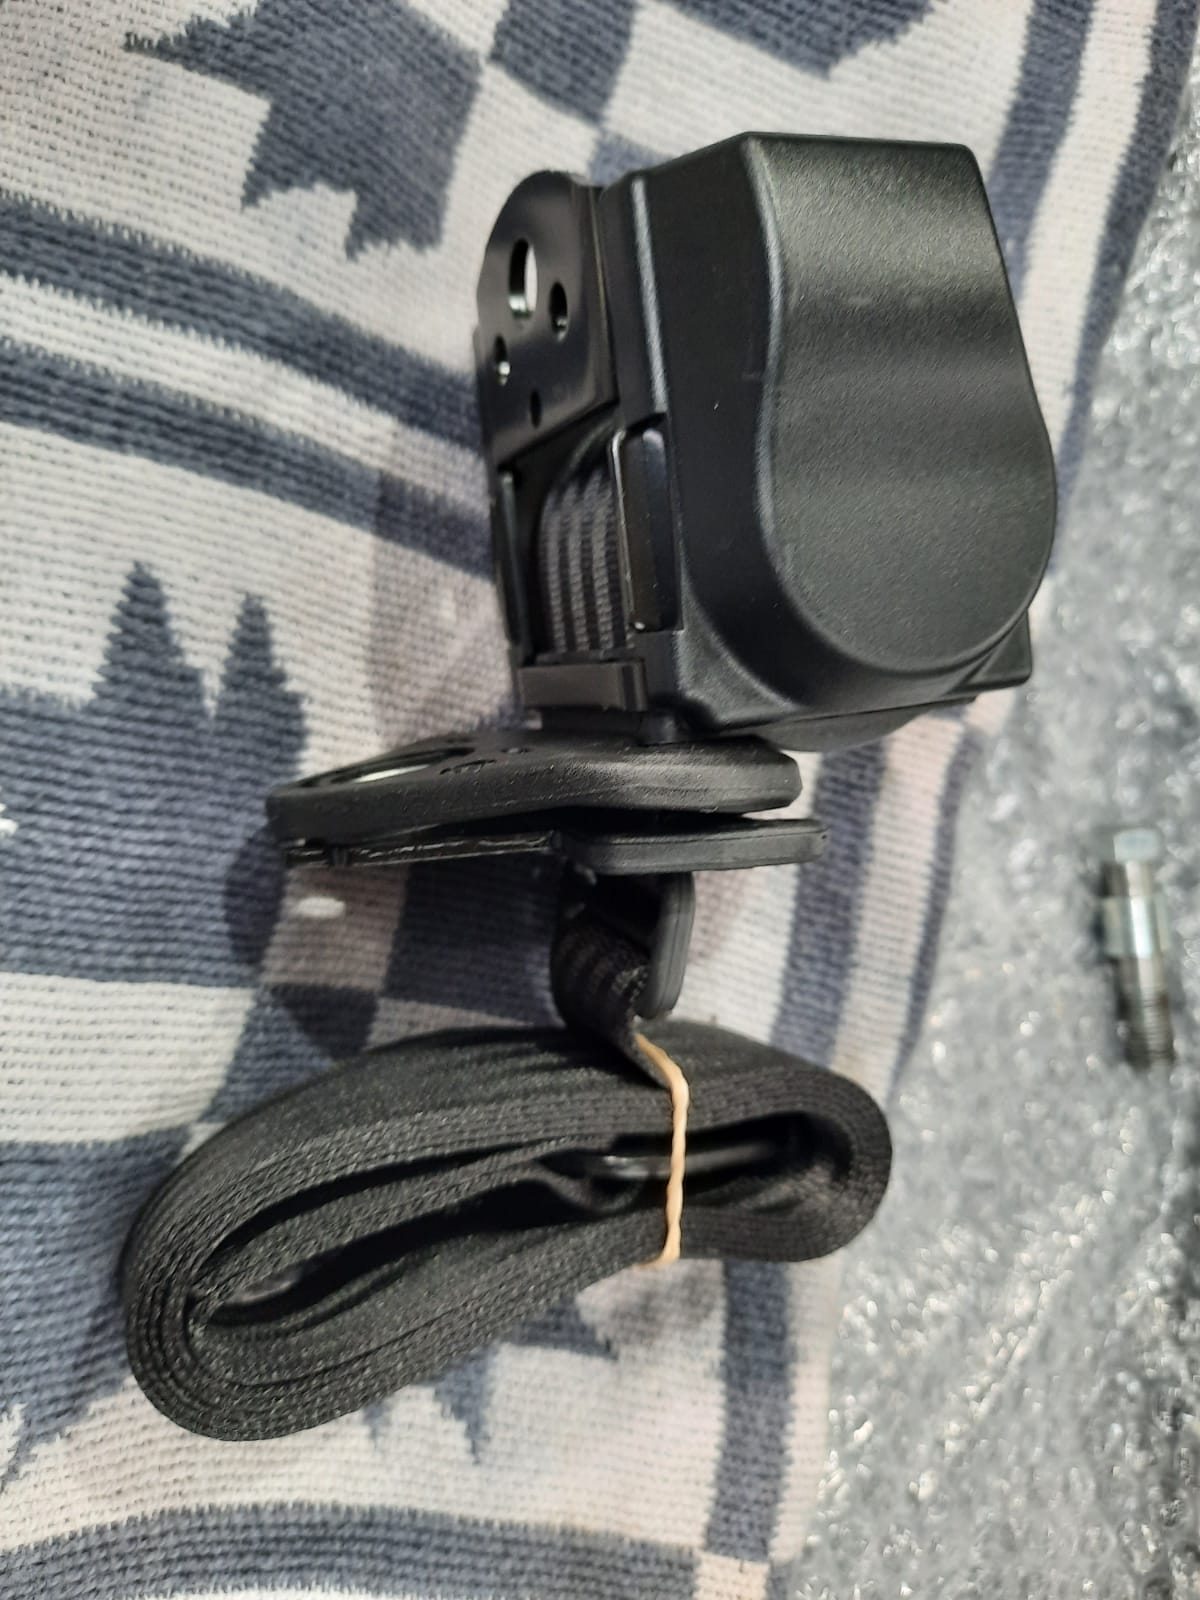
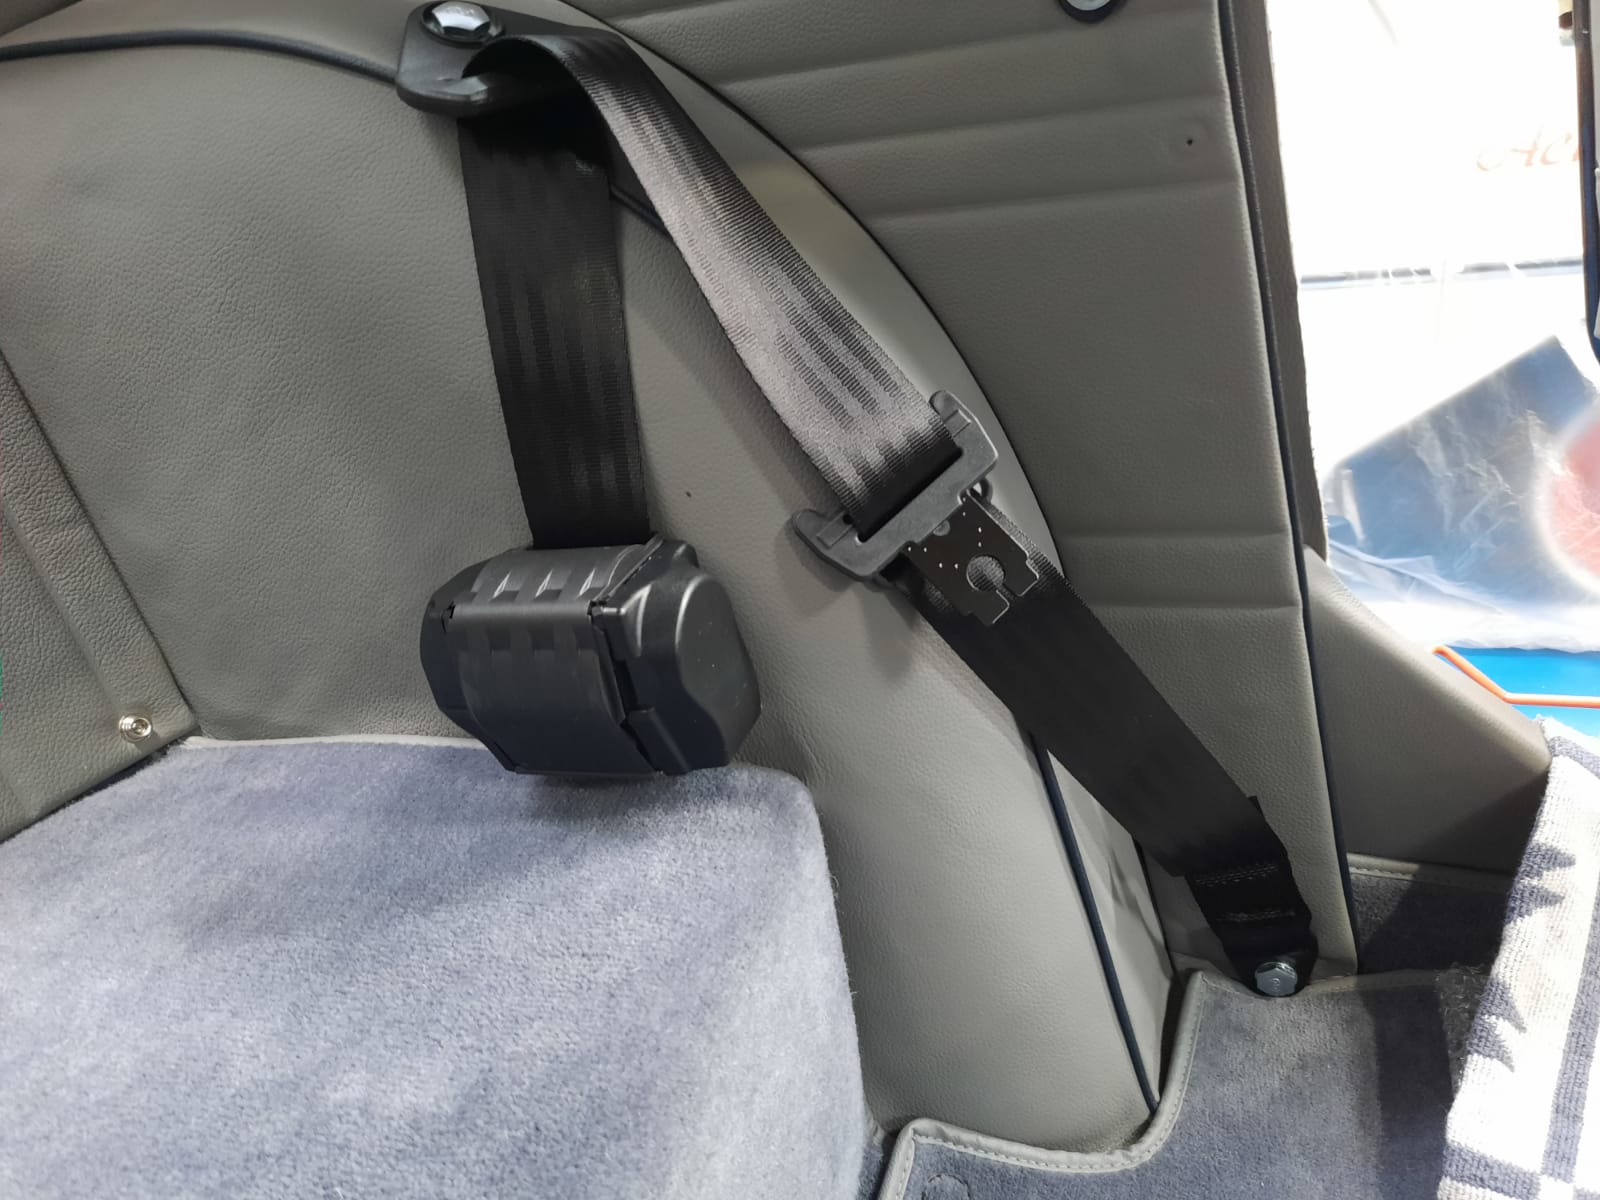
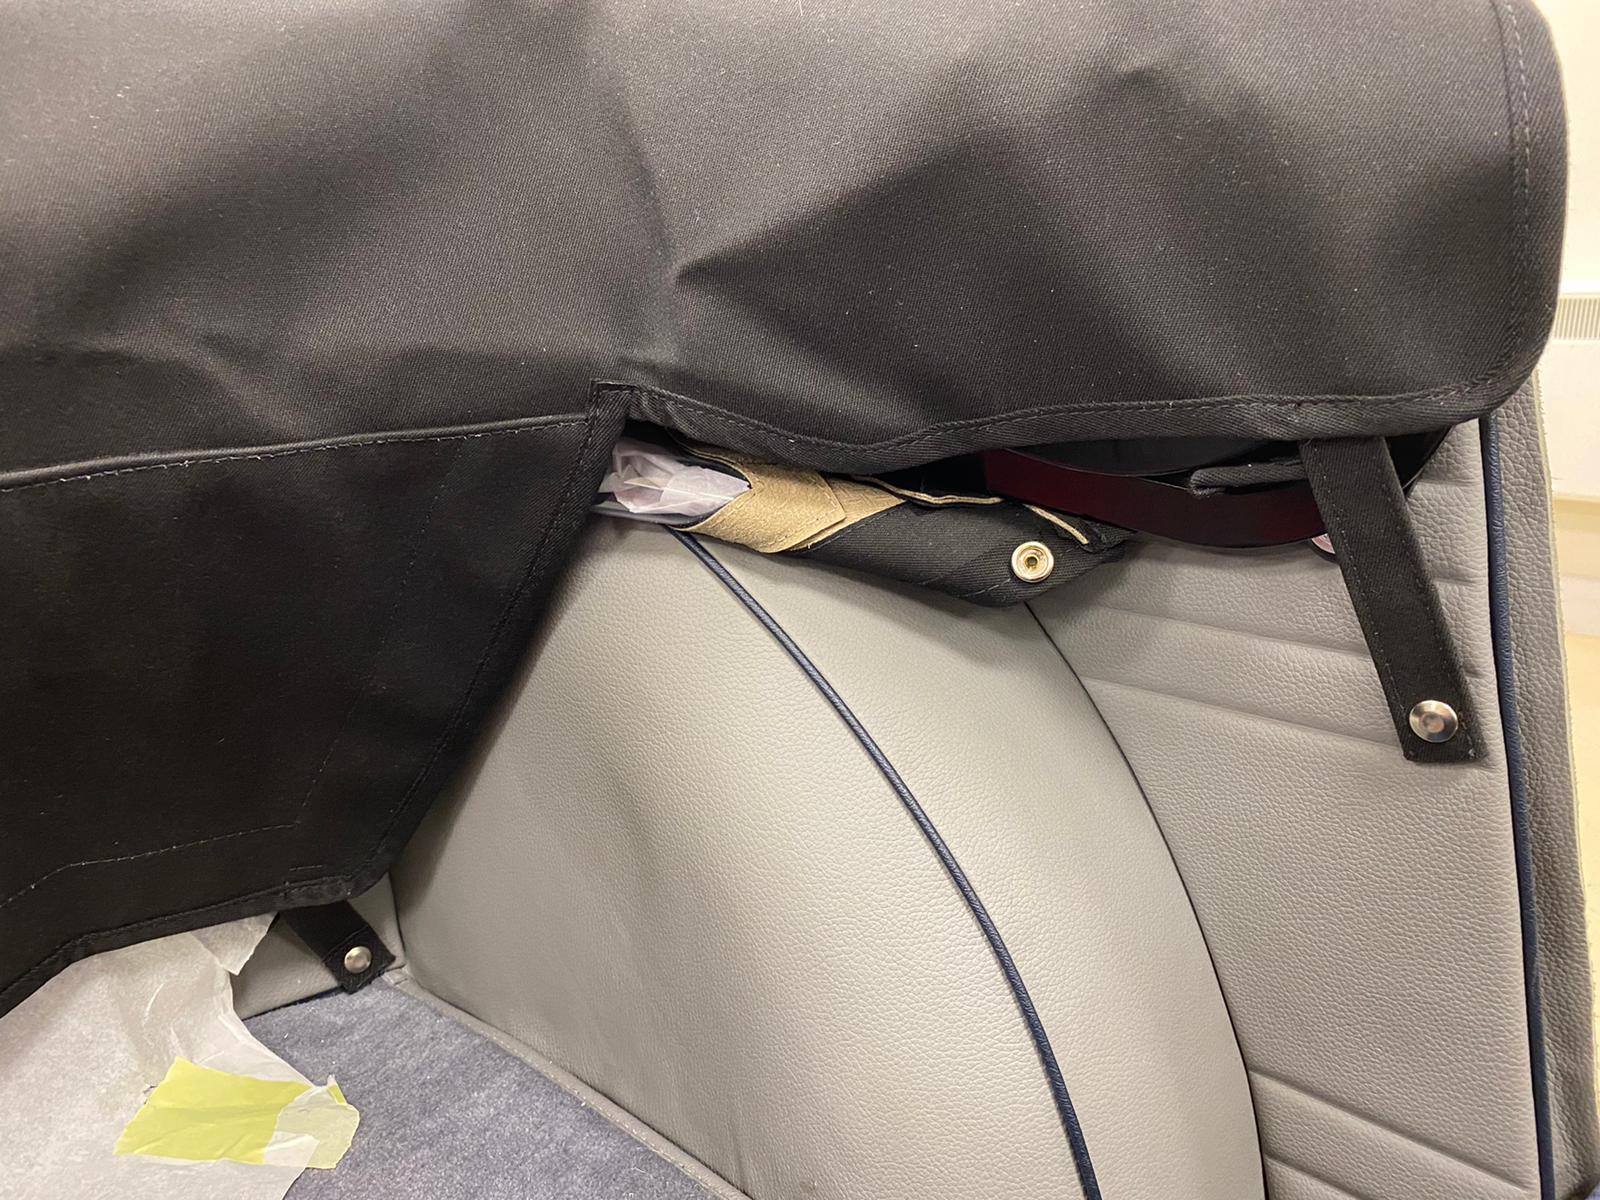
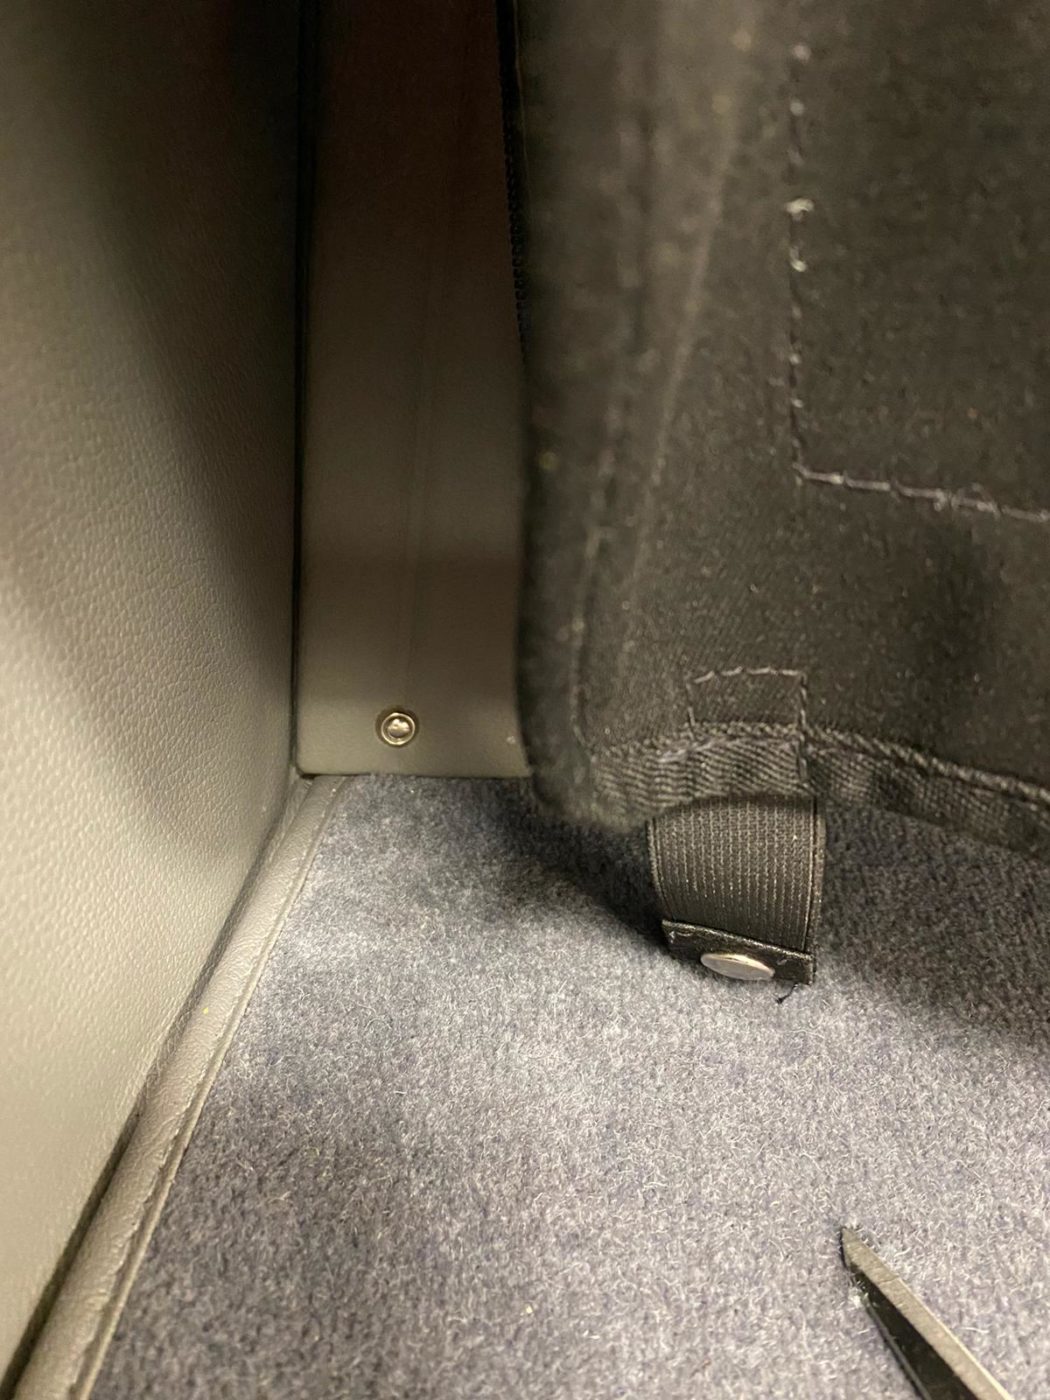
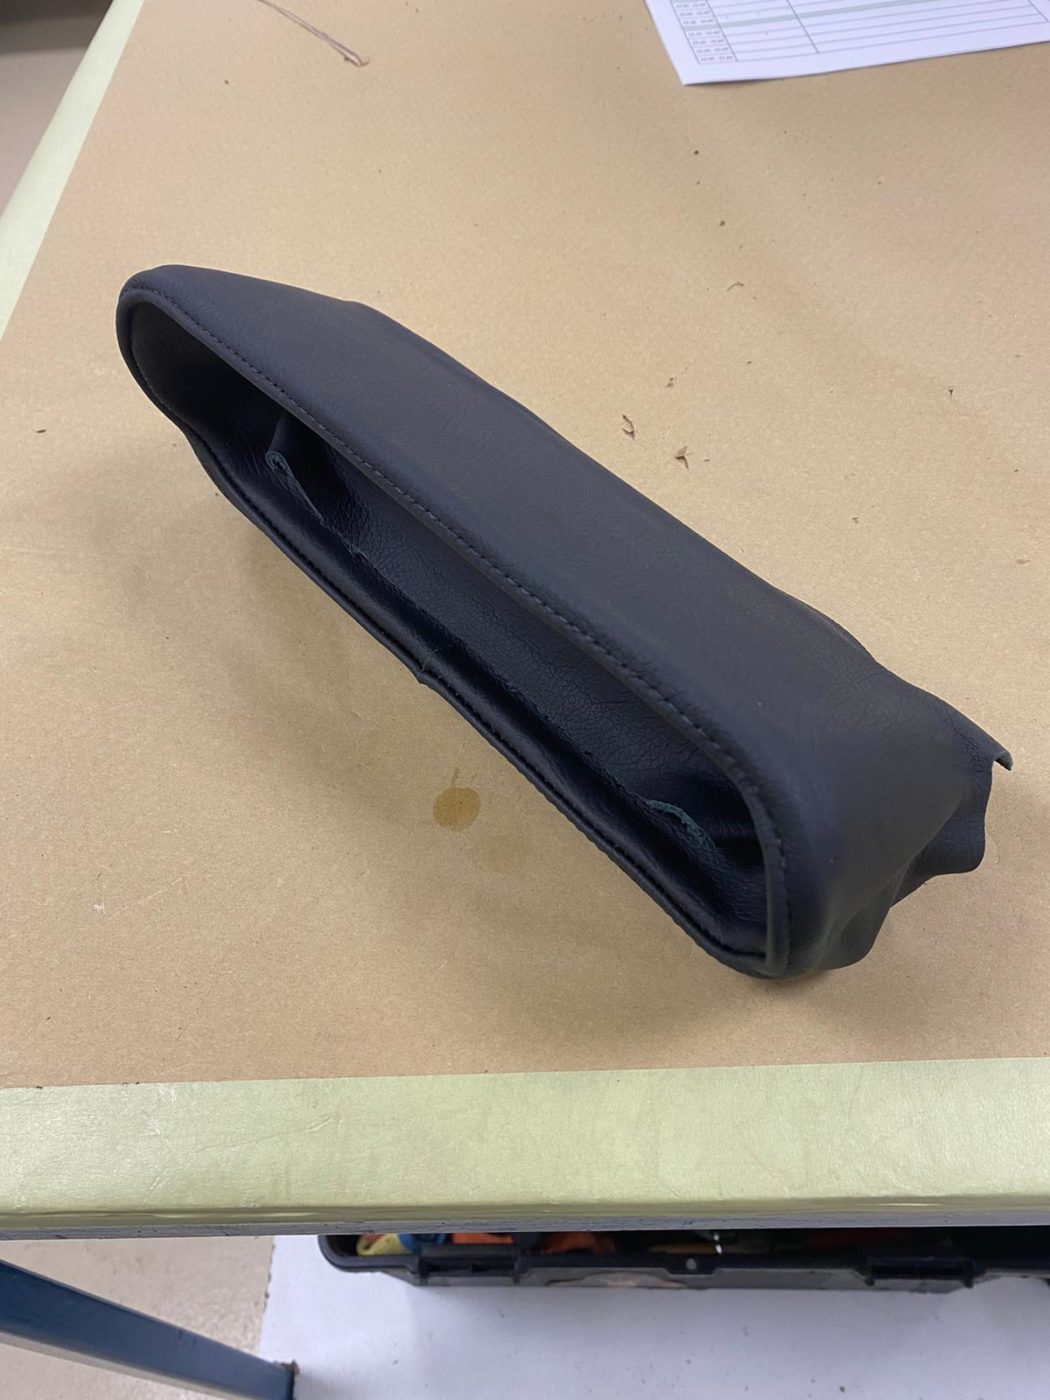
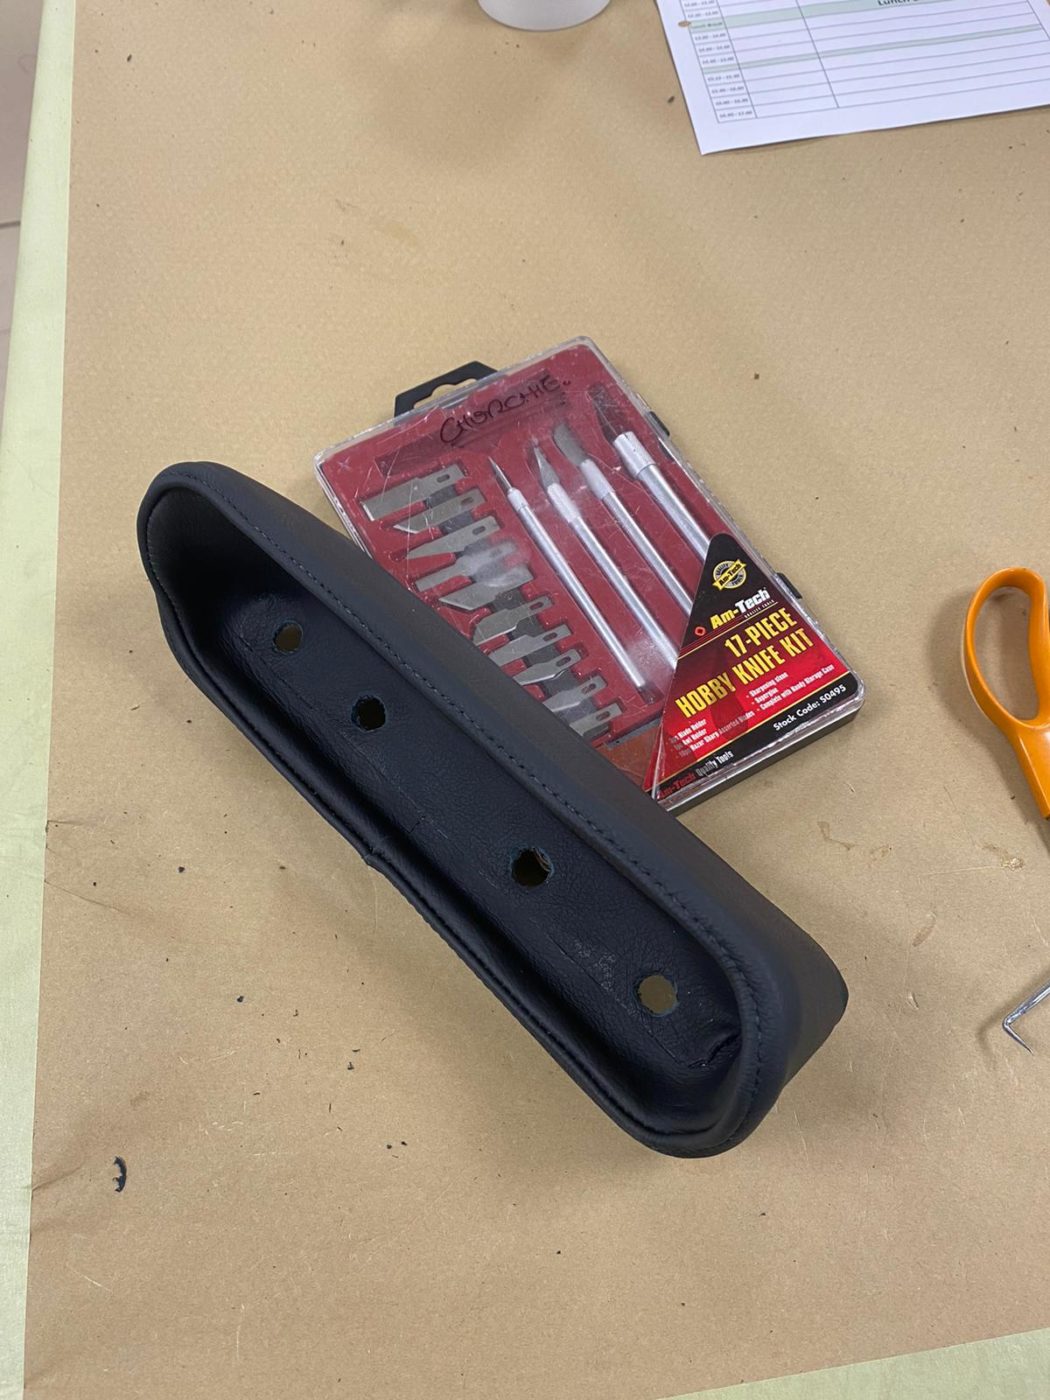
The 1968 Triumph TR5 has had its seat belts fitted by Mauro who tells us they needed a bit of modifying and focus to get them to fit perfectly, however no problem is too small or big for our technicians. With the seat belts firmly fitted, our TR5 is progressively becoming more and more road worthy!

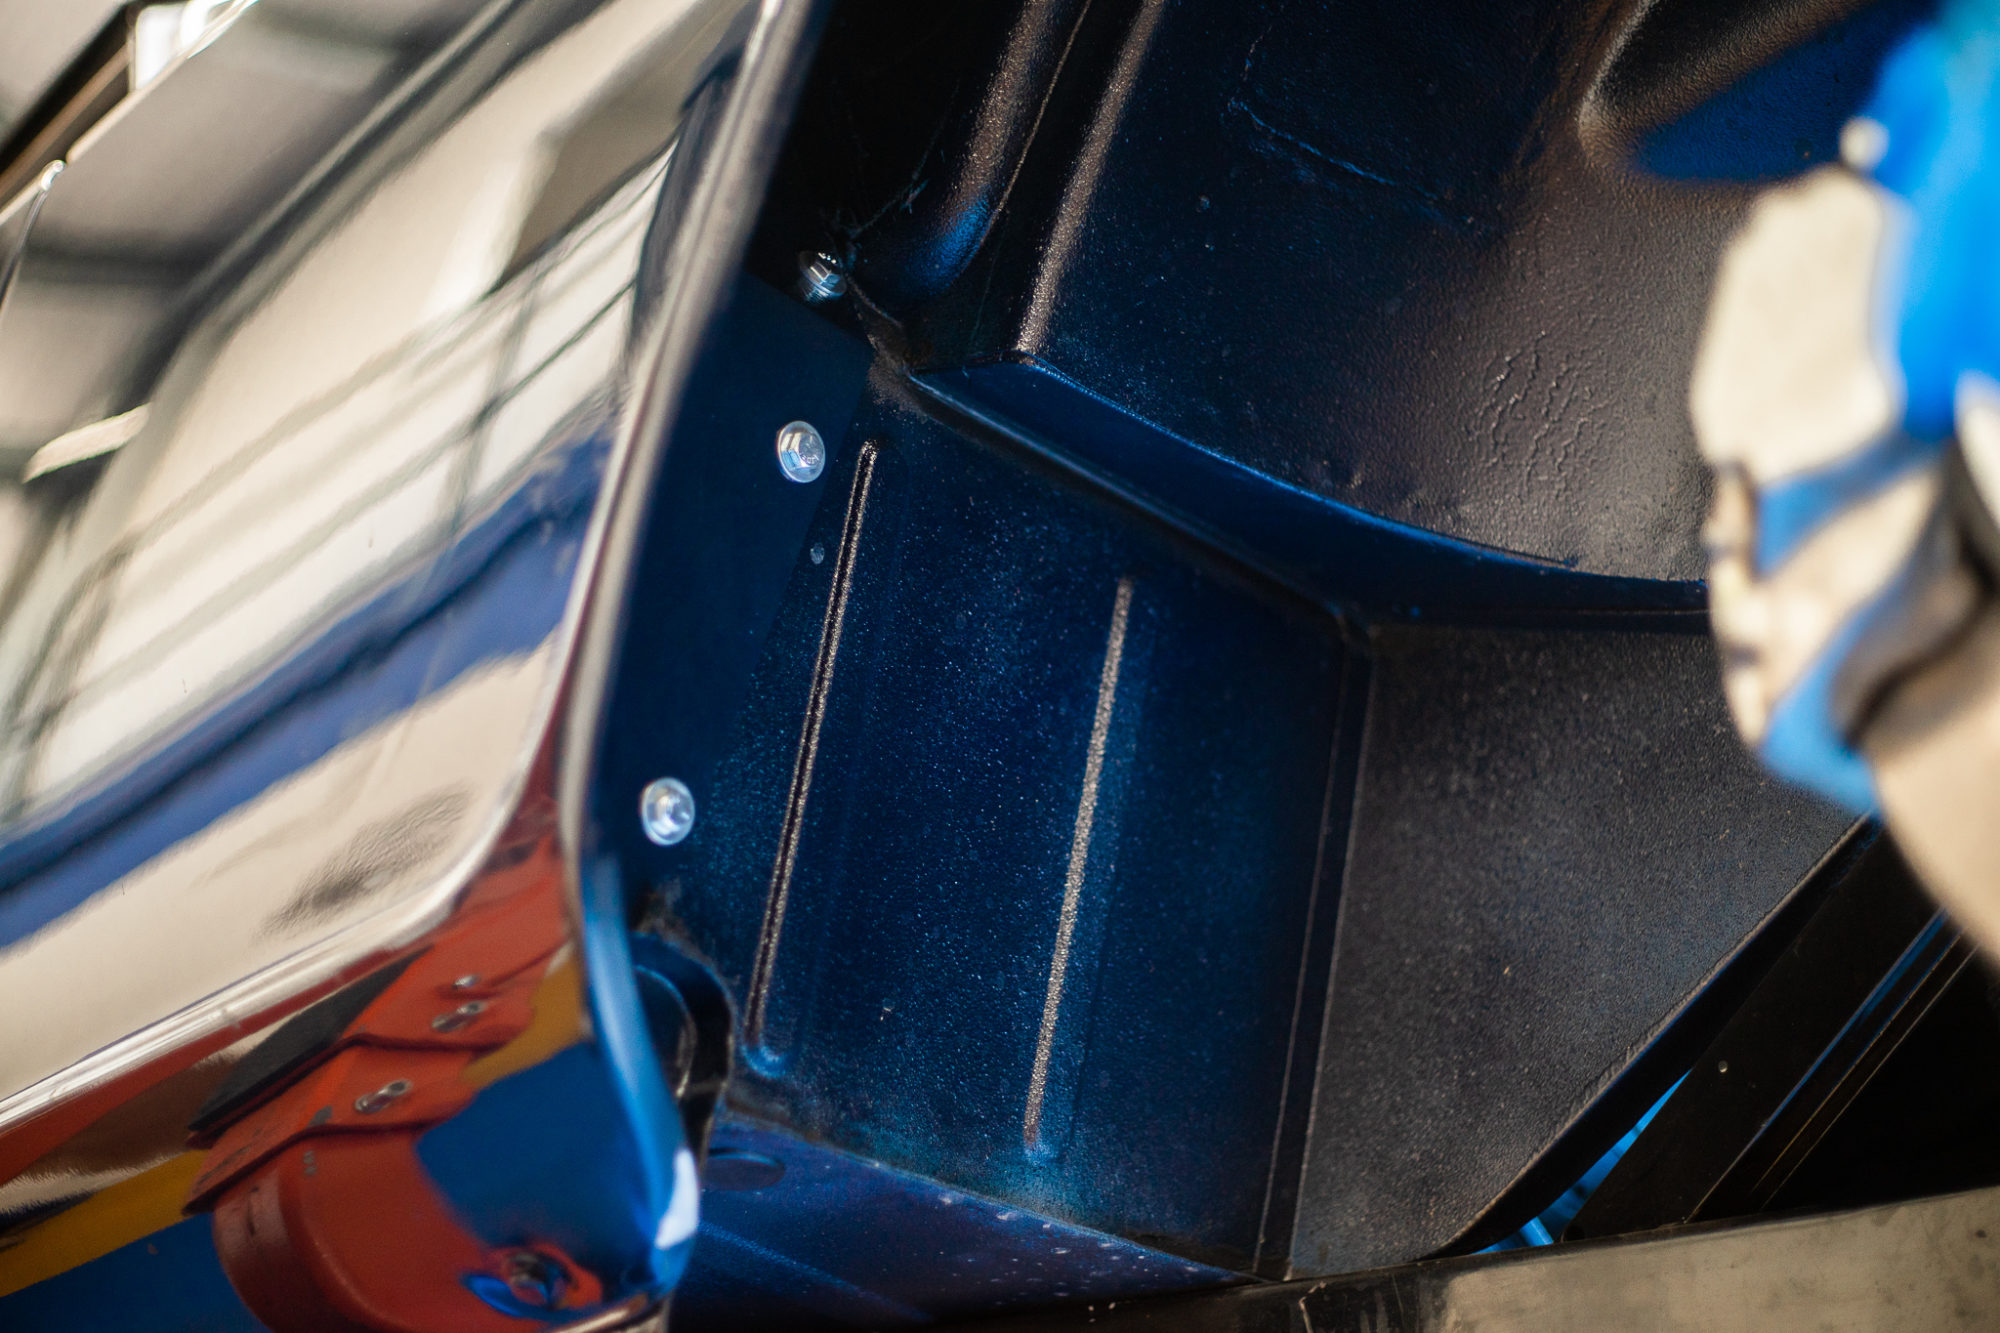
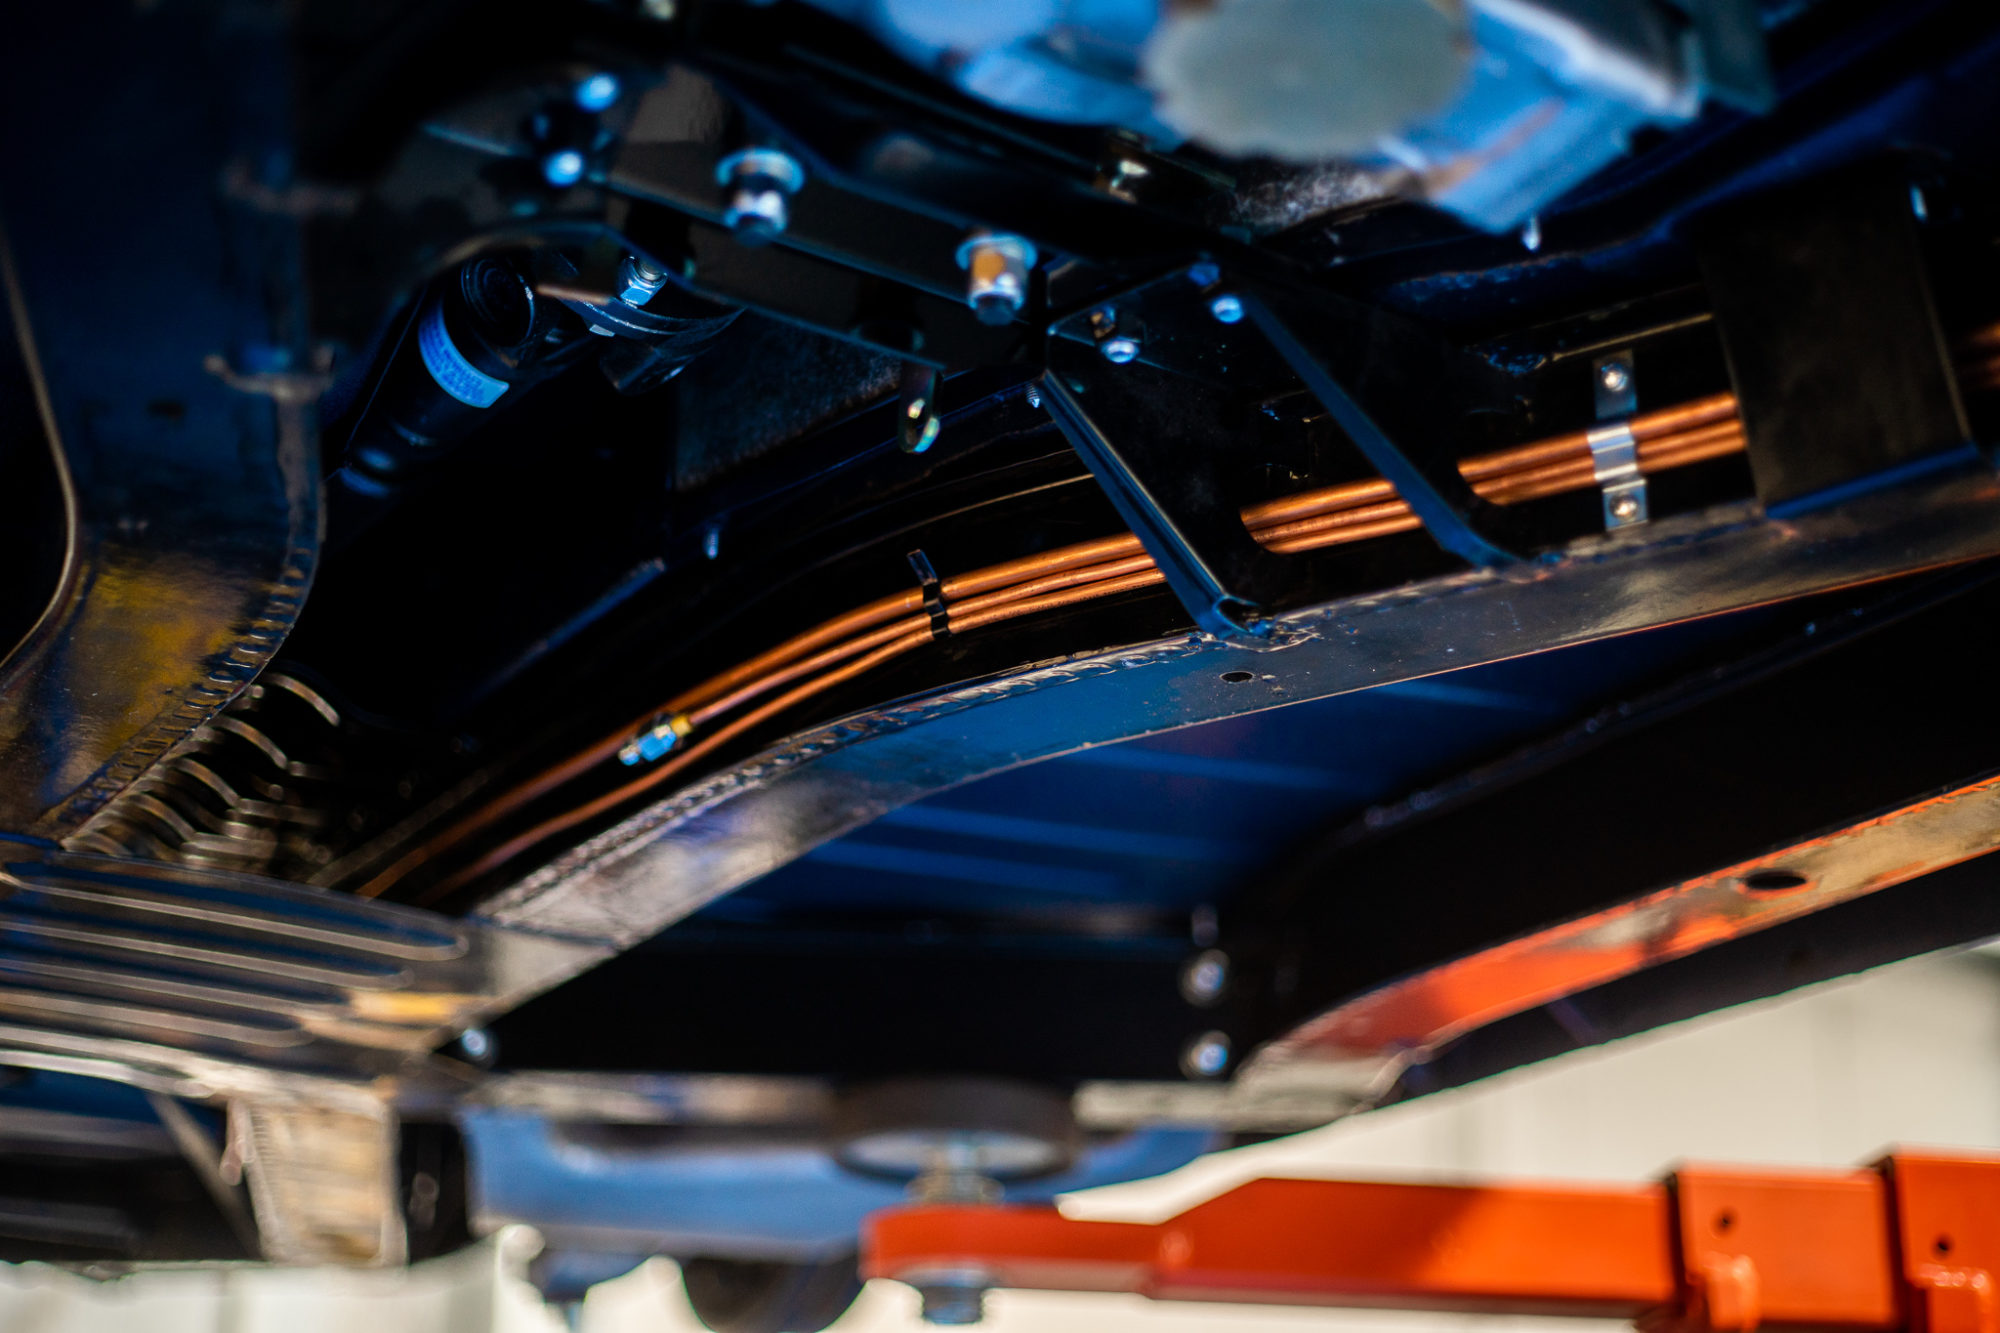
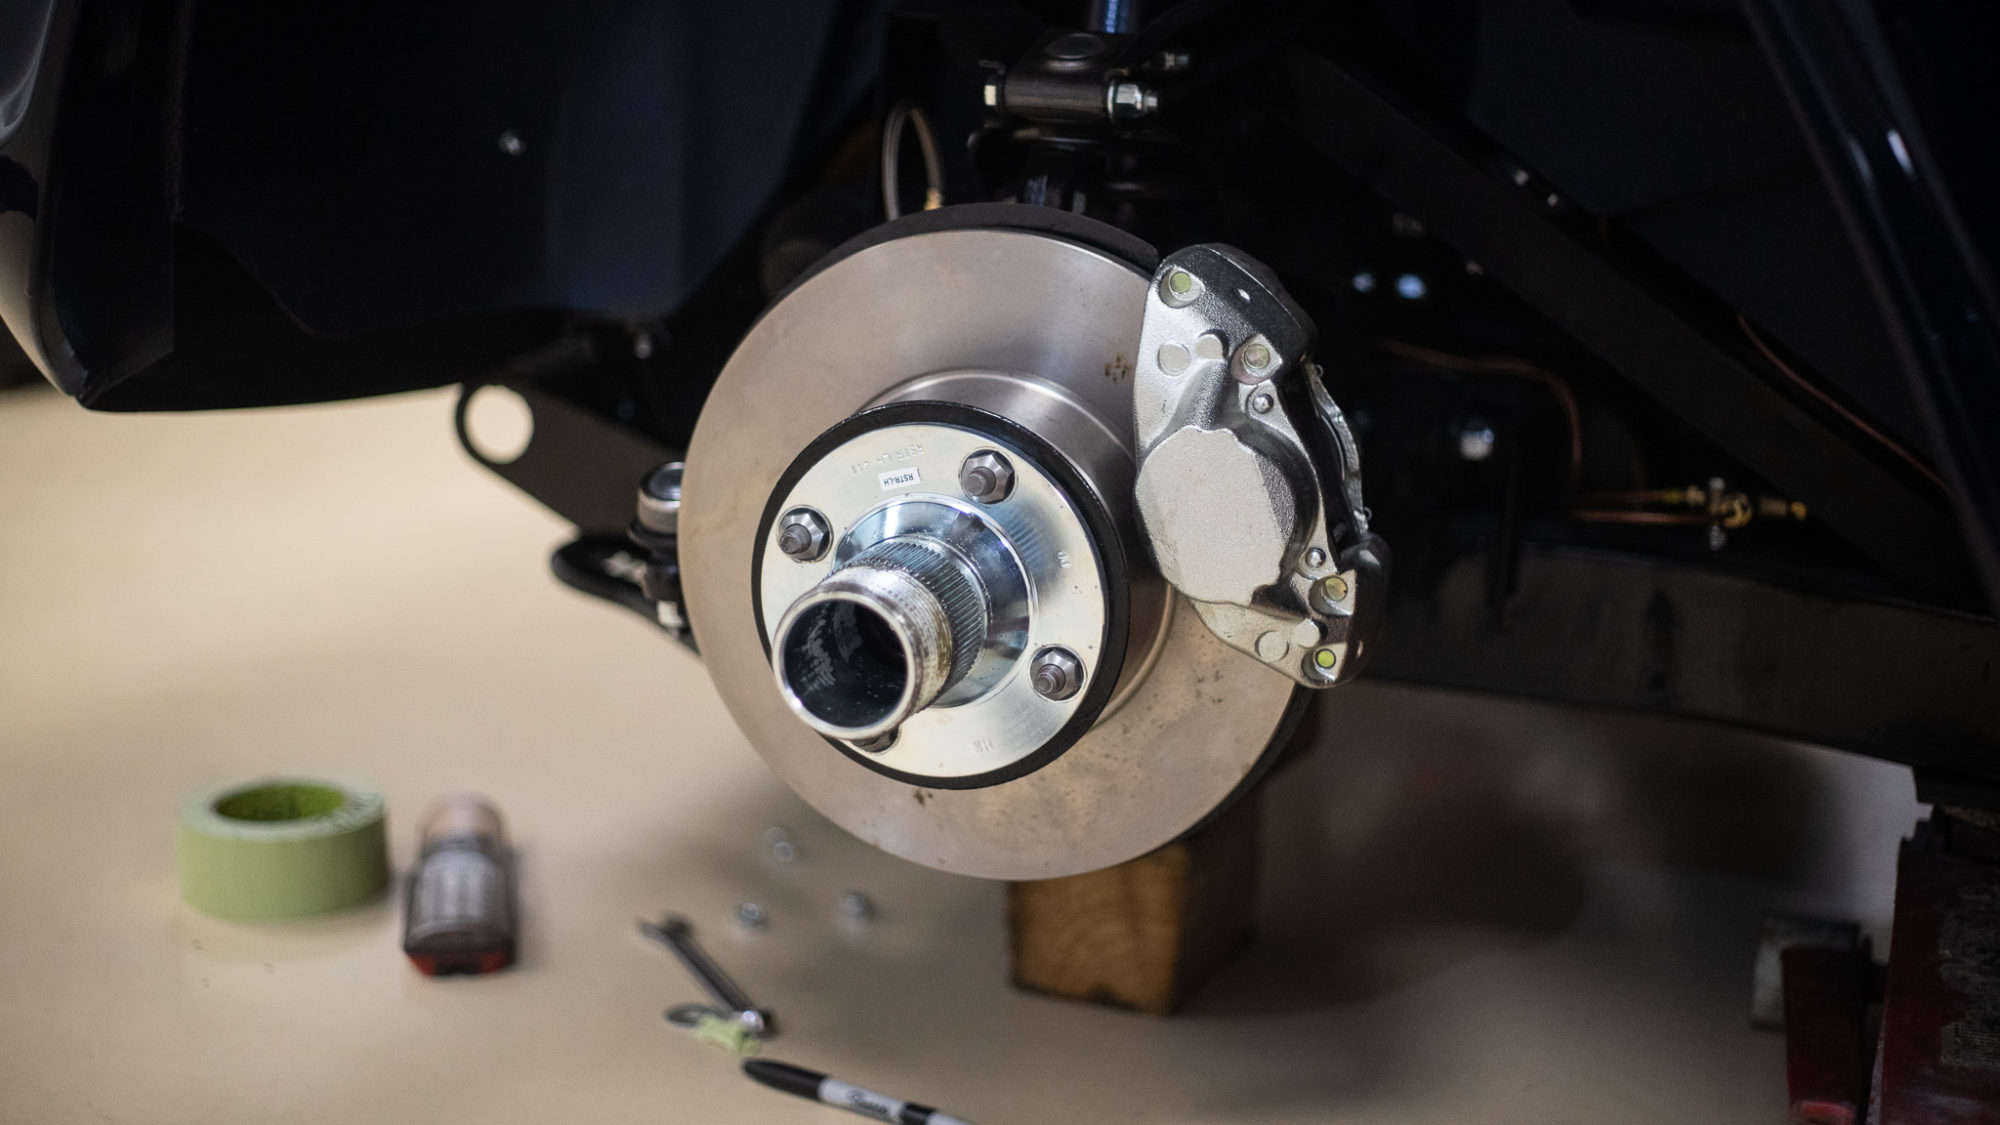
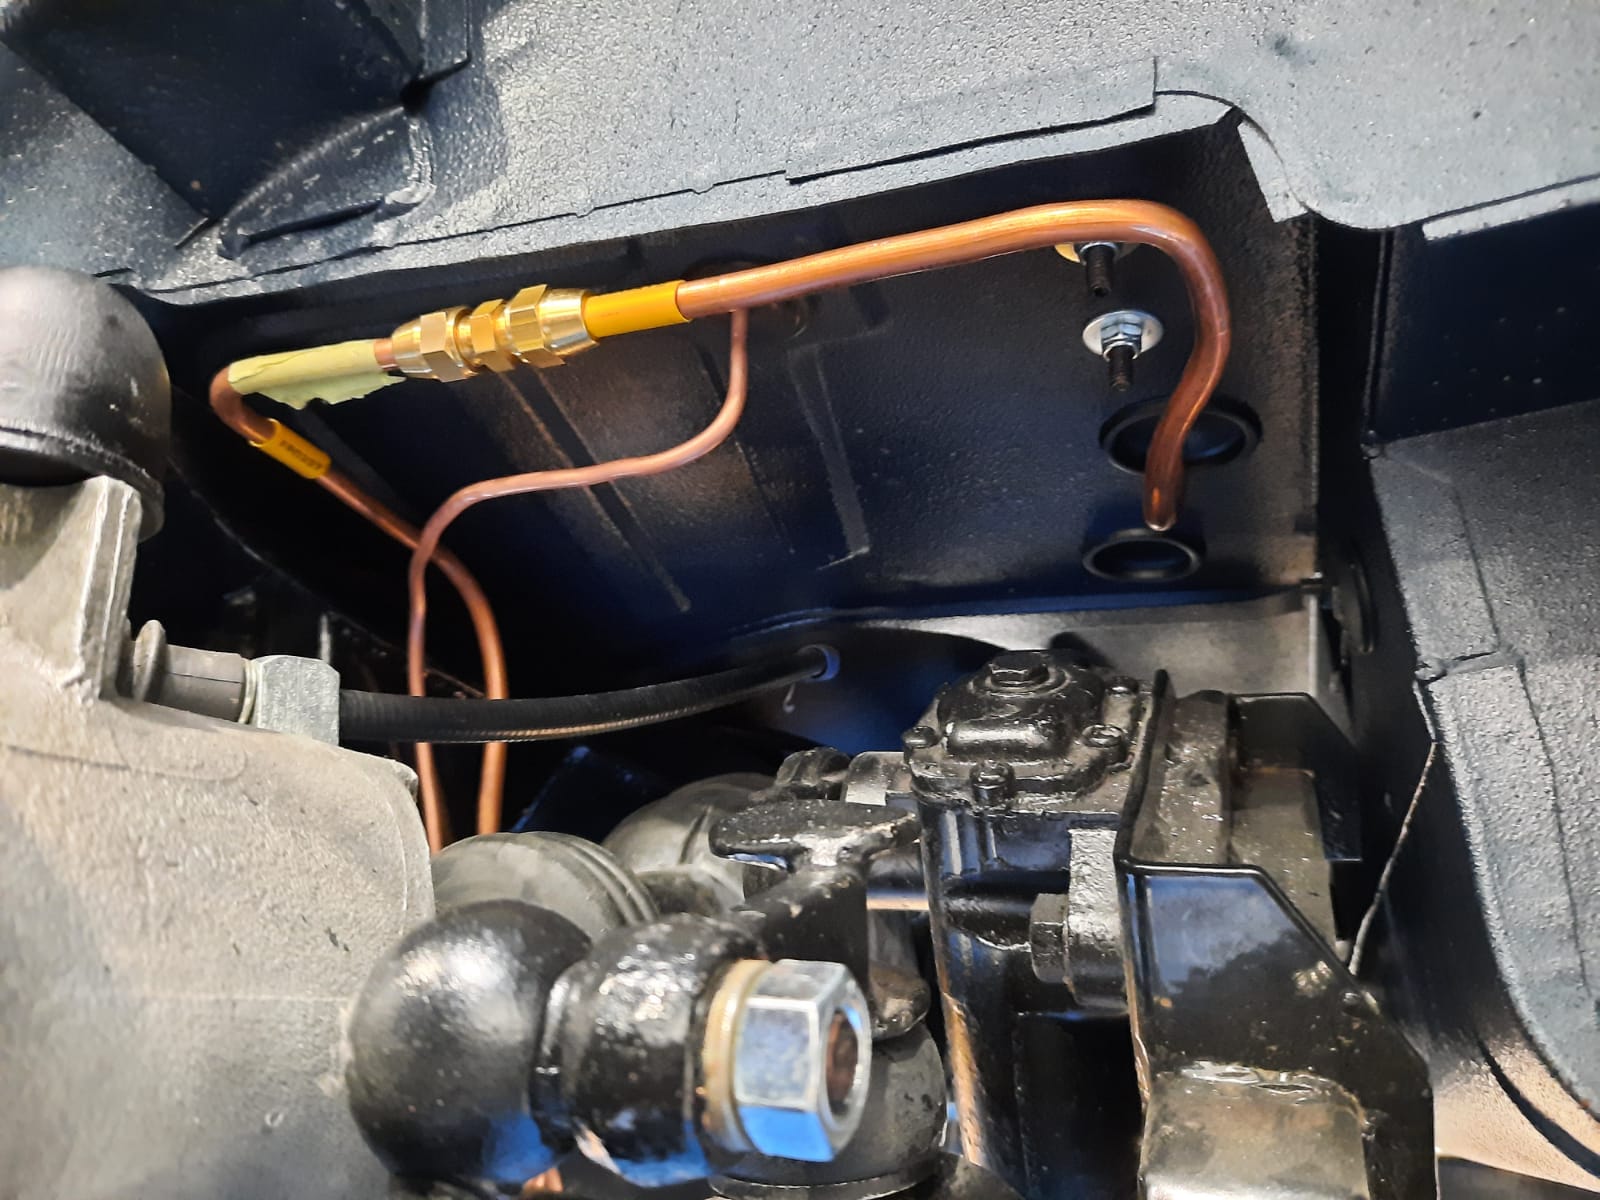
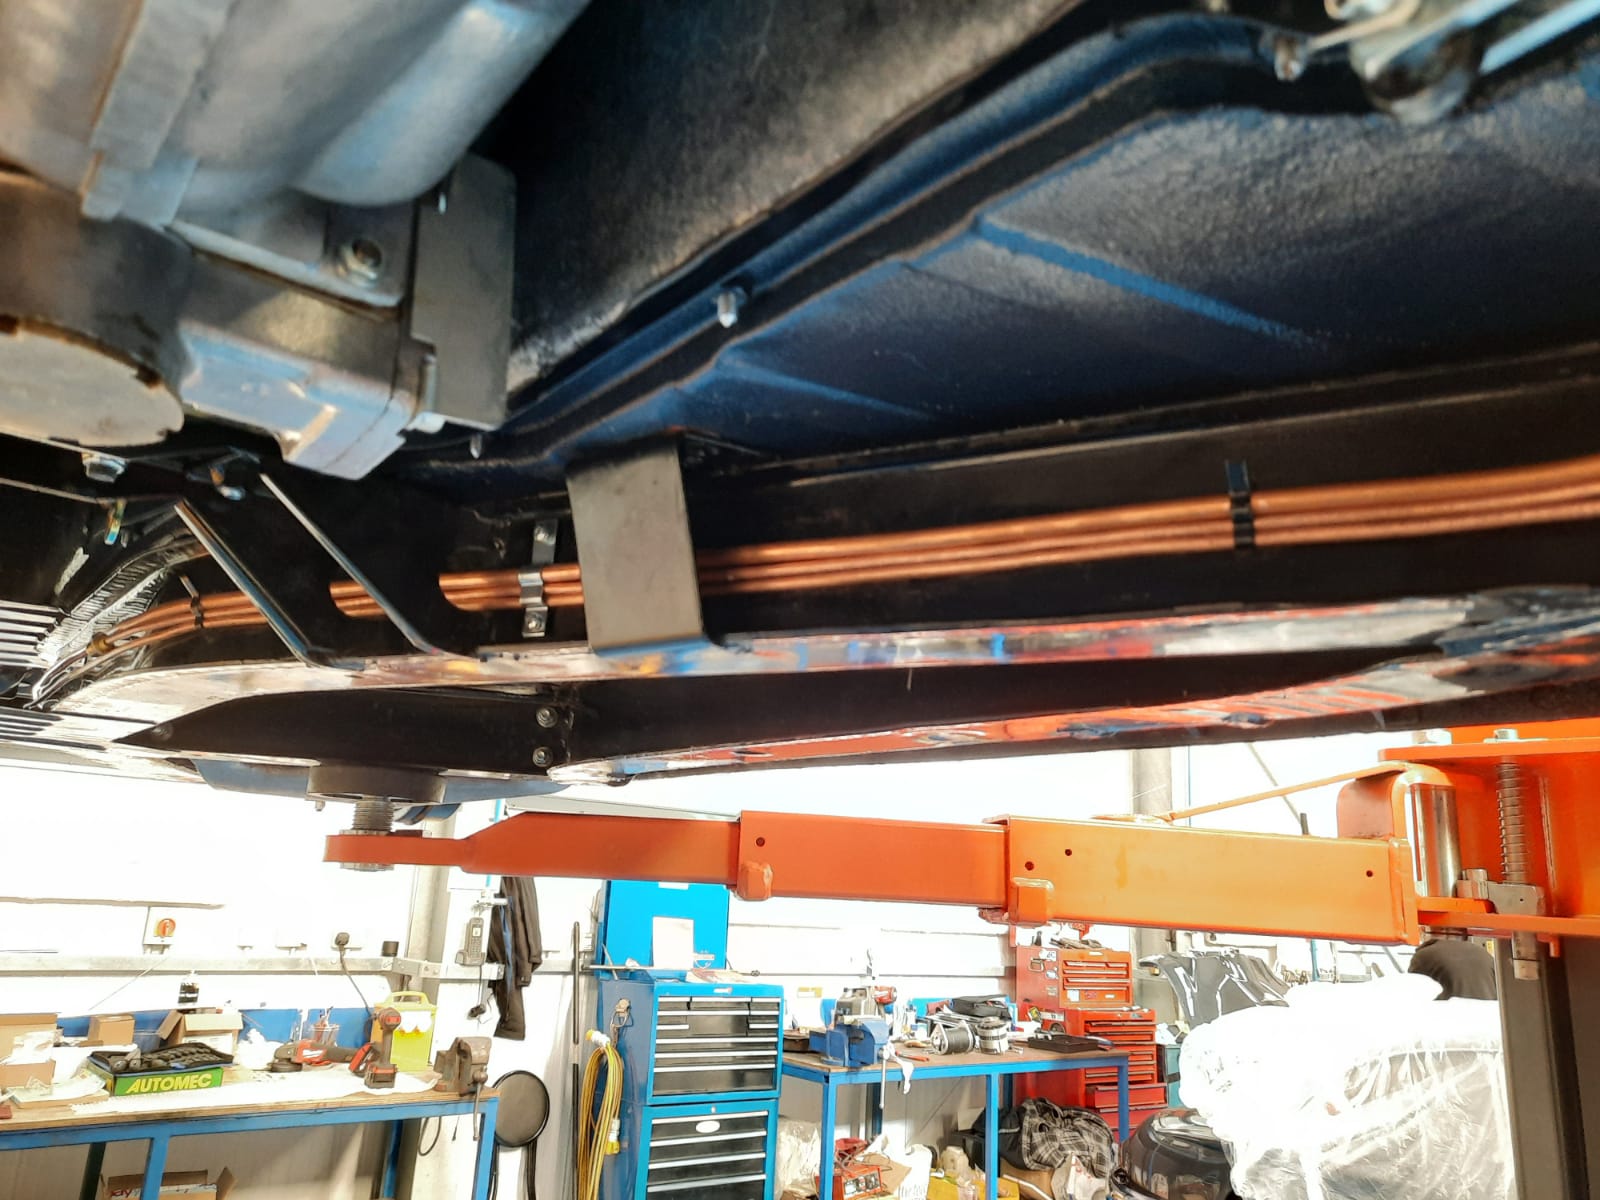
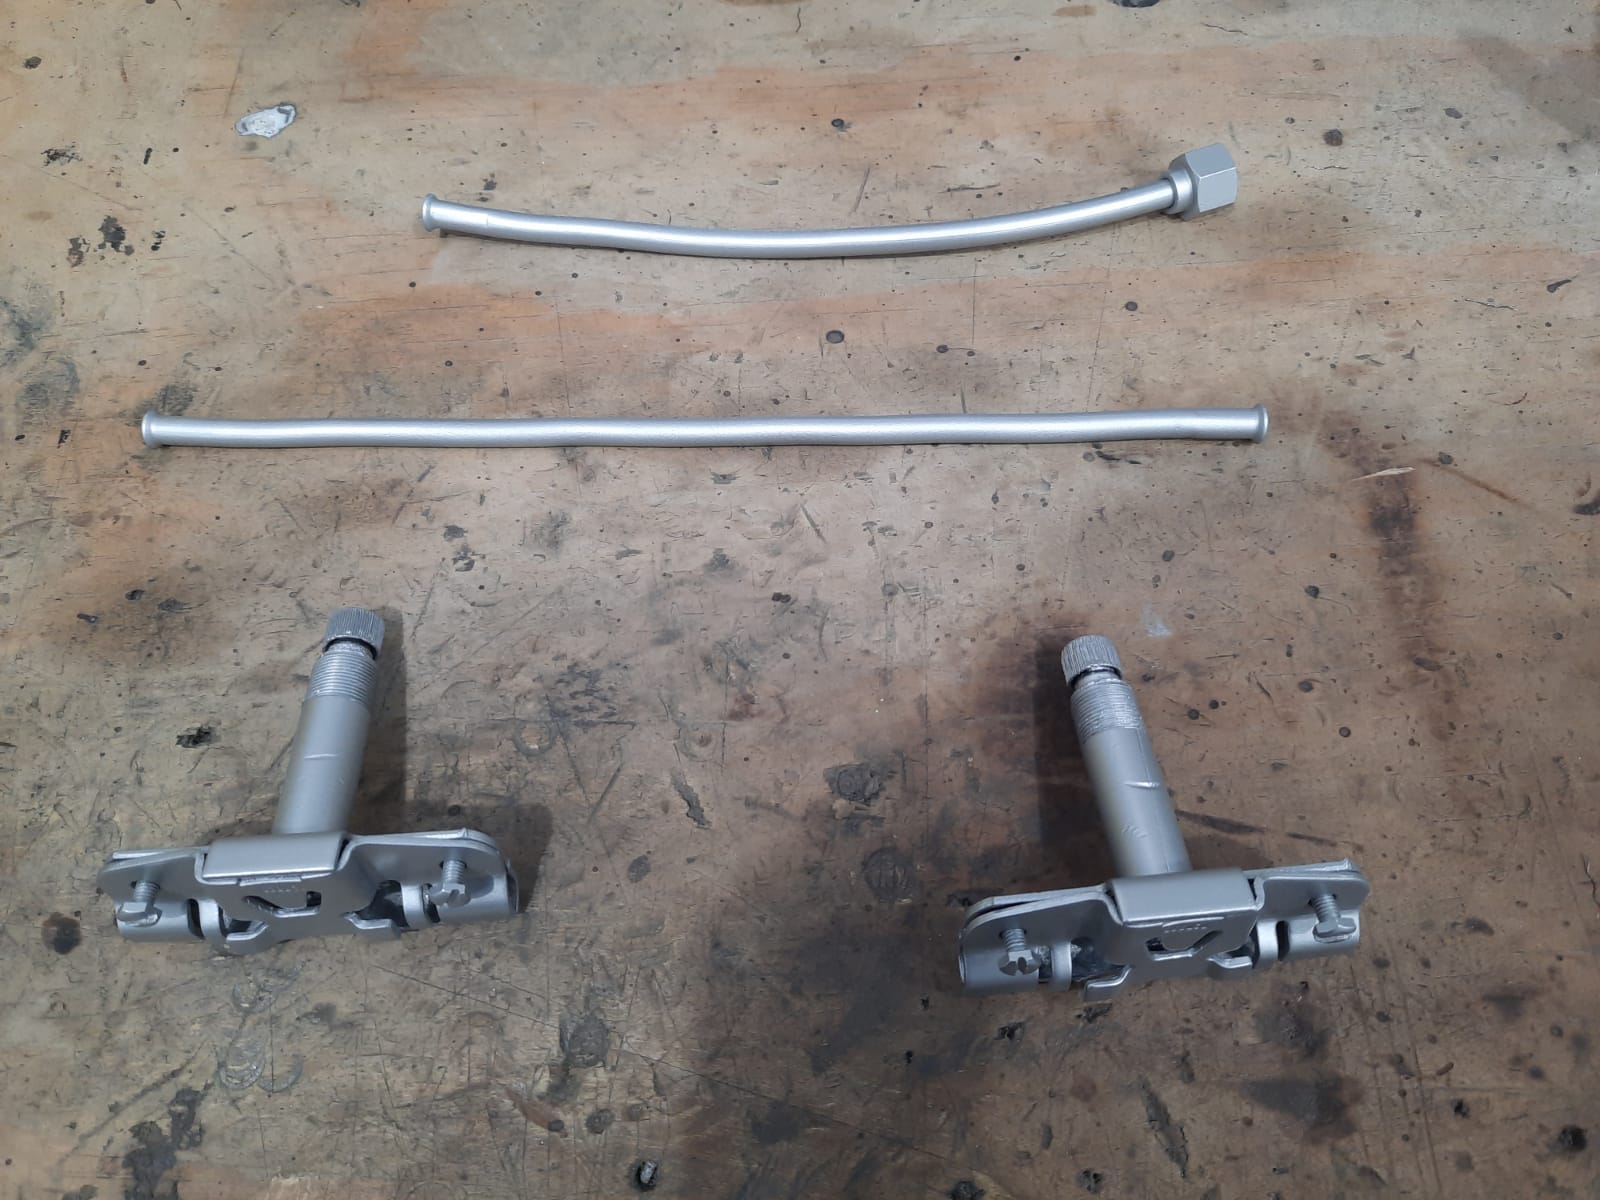
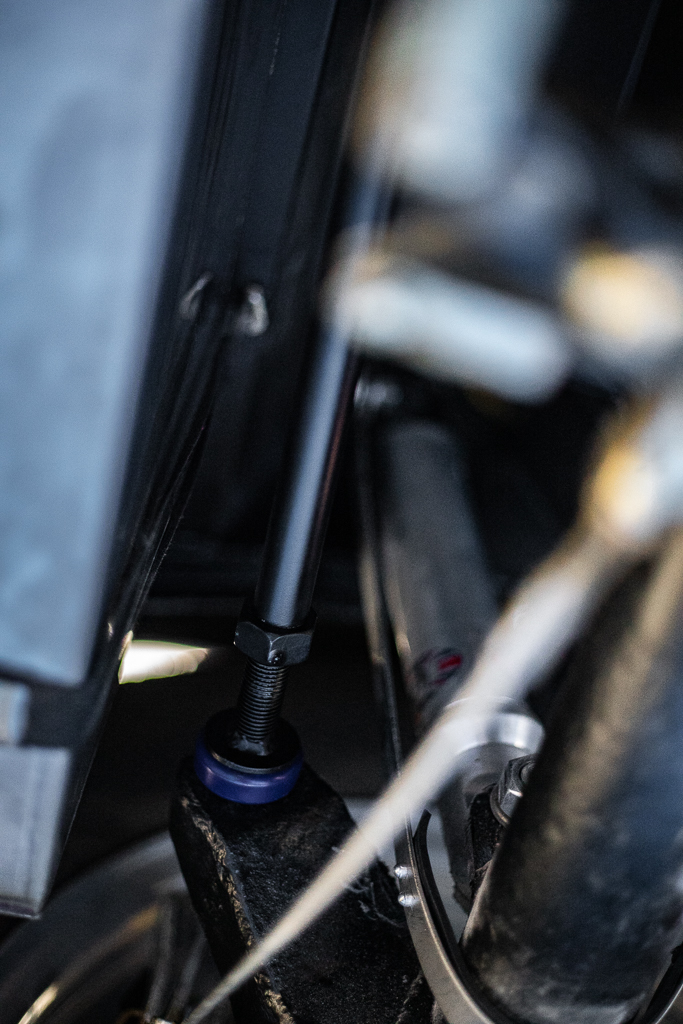
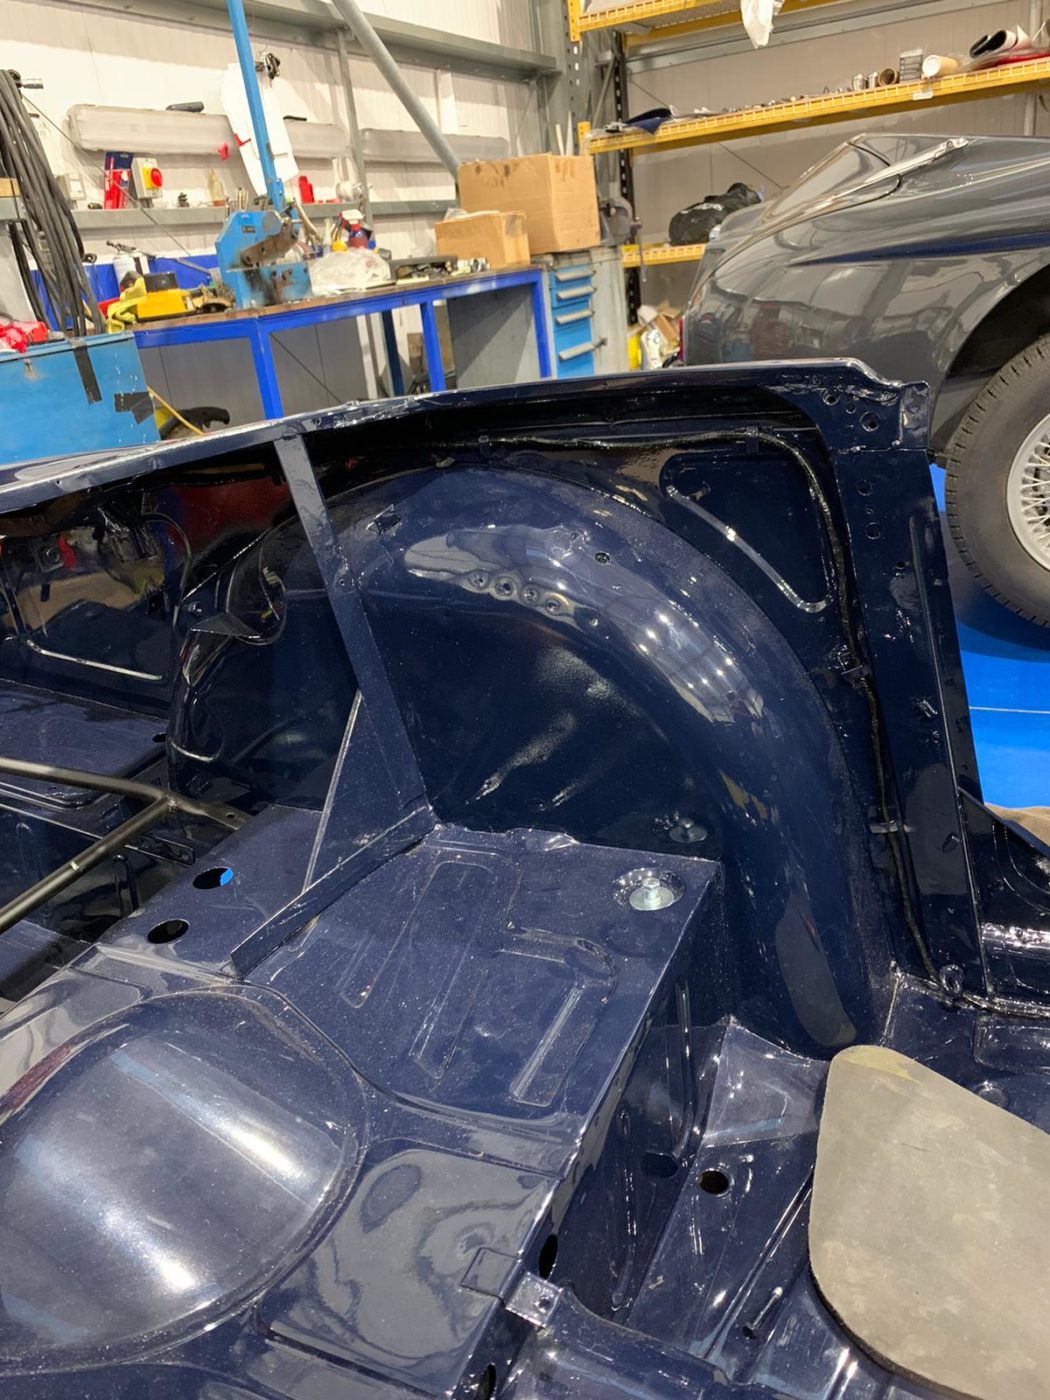
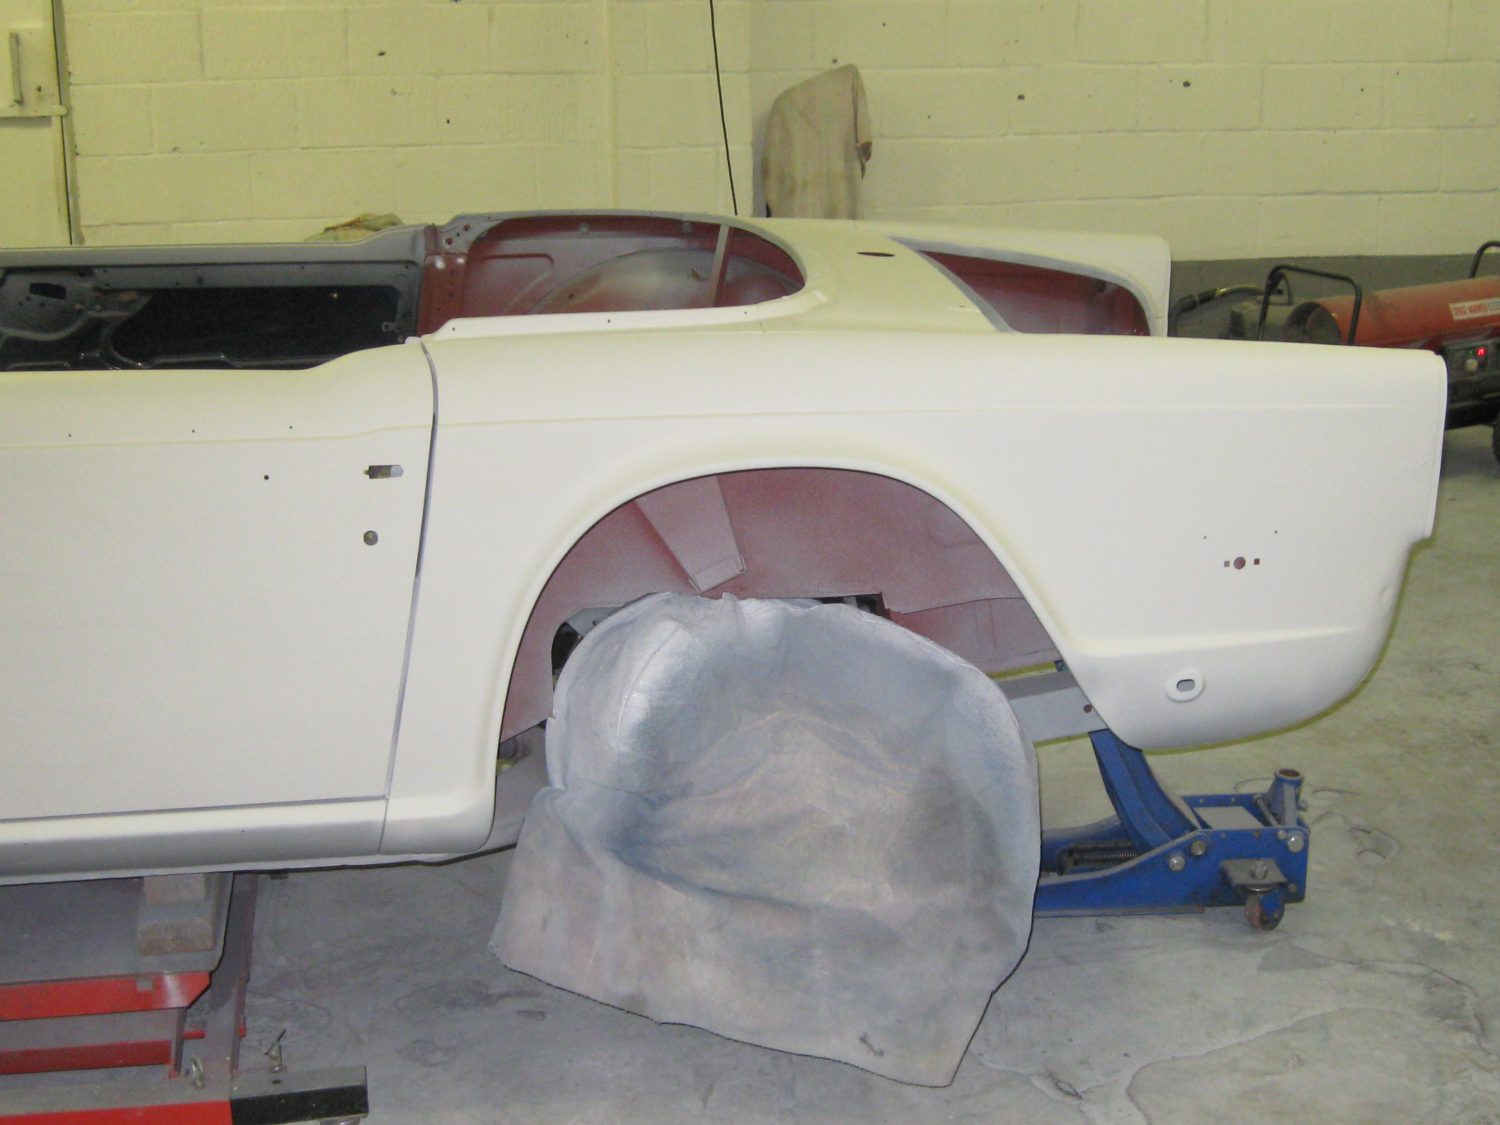
Our classic Triumph TR5 is progressing well through its nut and bolt restoration. Mauro has recently fitted the fuel and brake lines as well as fitting the panel in the wheel arch known as the ‘baffle’ plate.

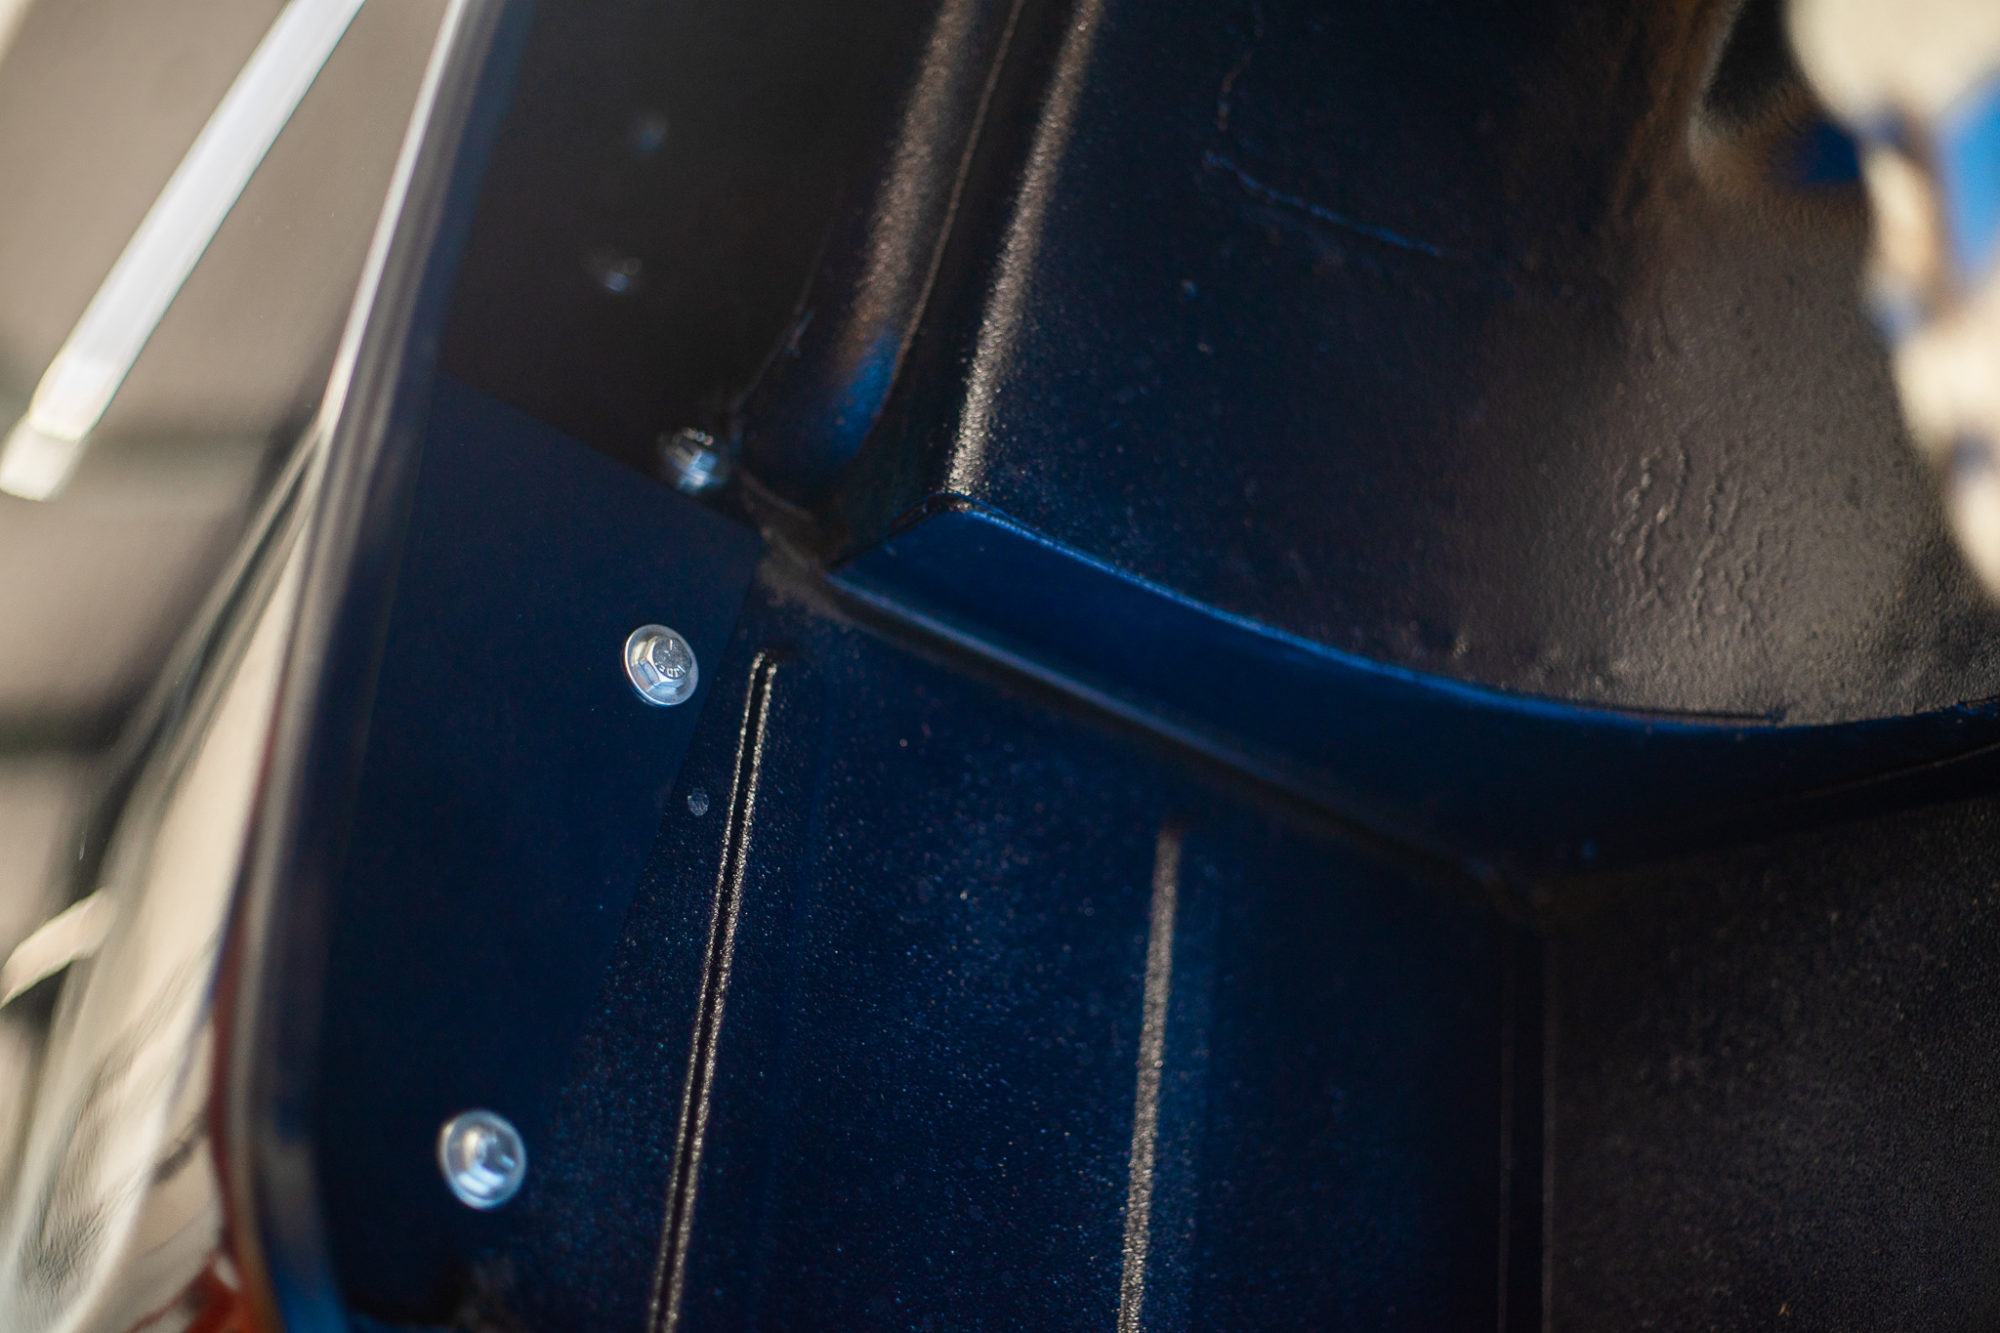
Mauro has also been working on correcting and fitting the bumper as he wasn’t happy with how it was sat.
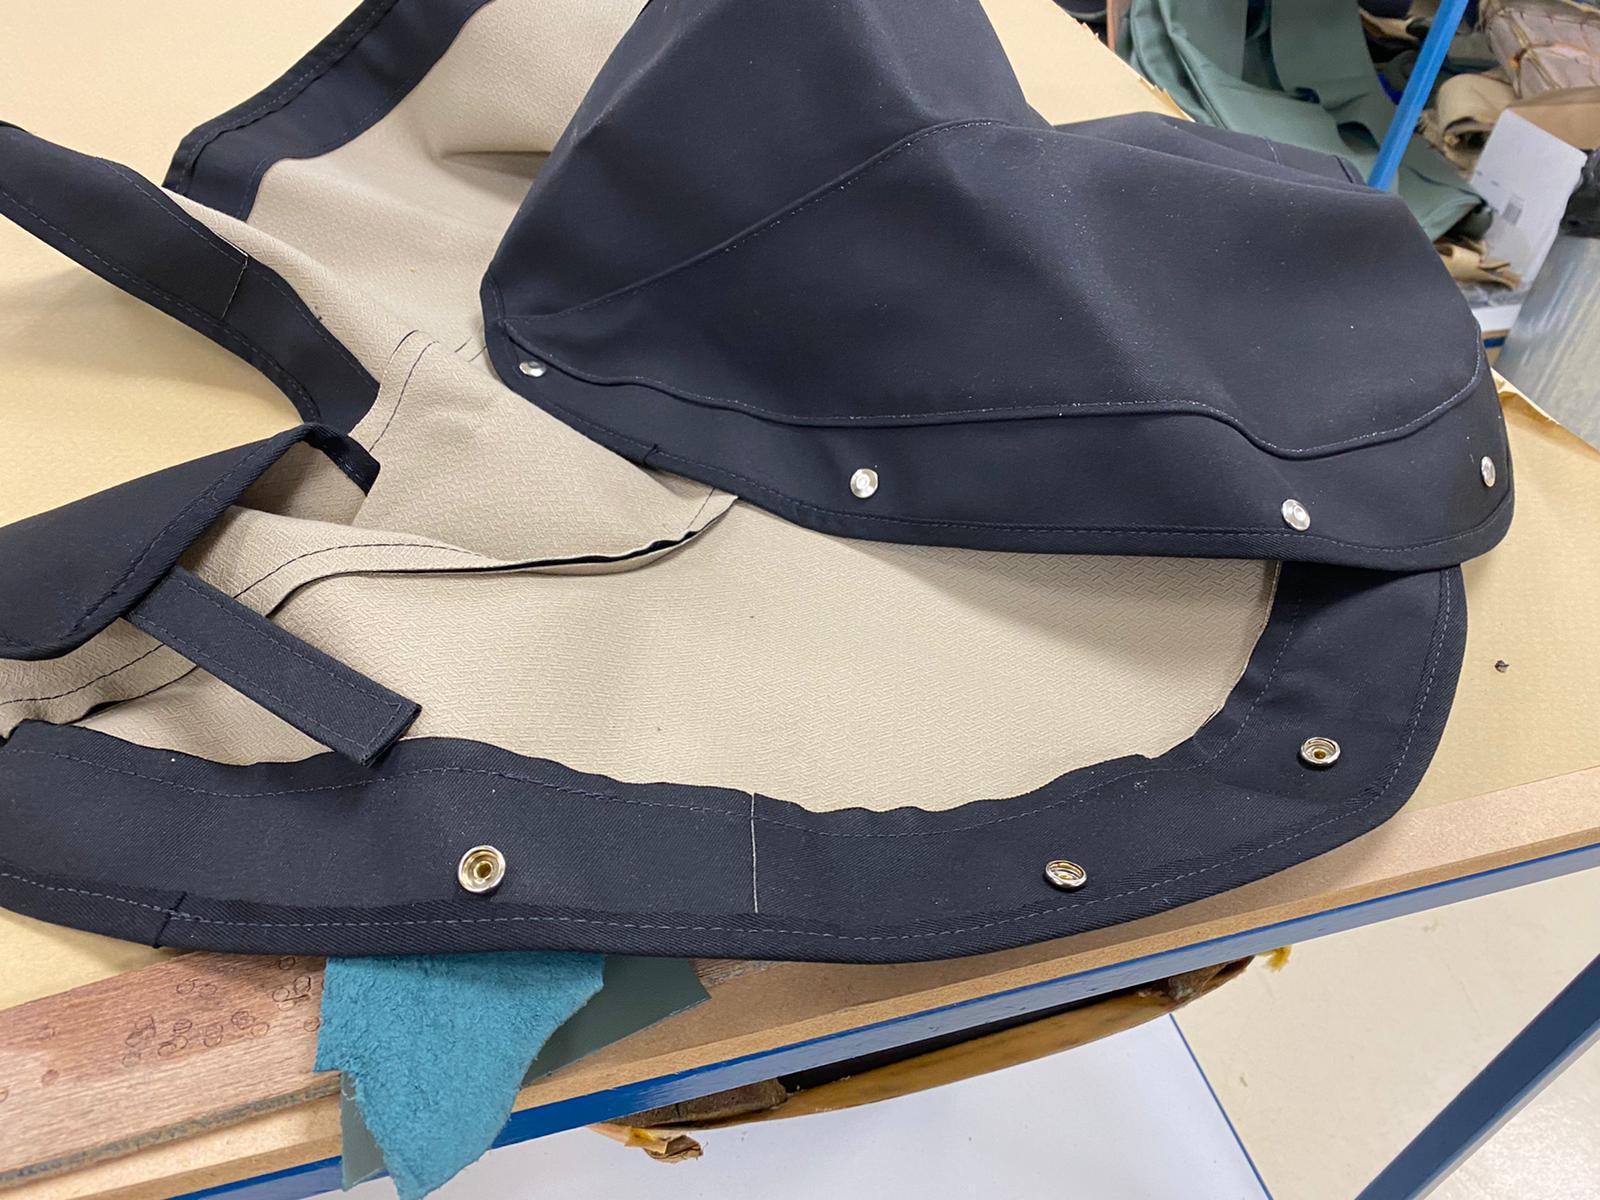
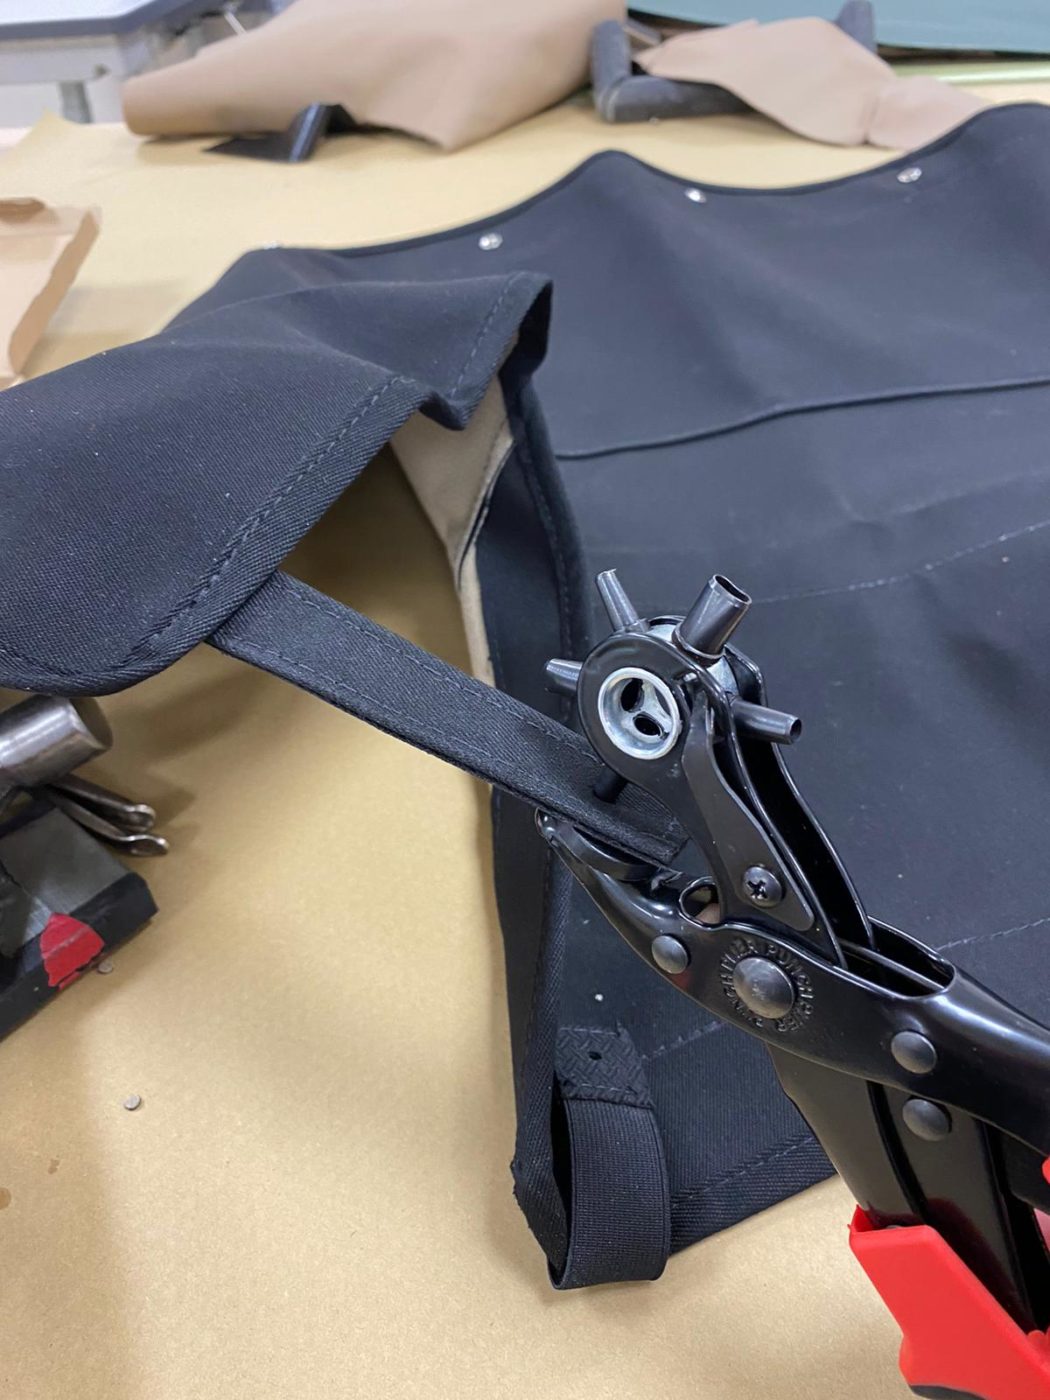
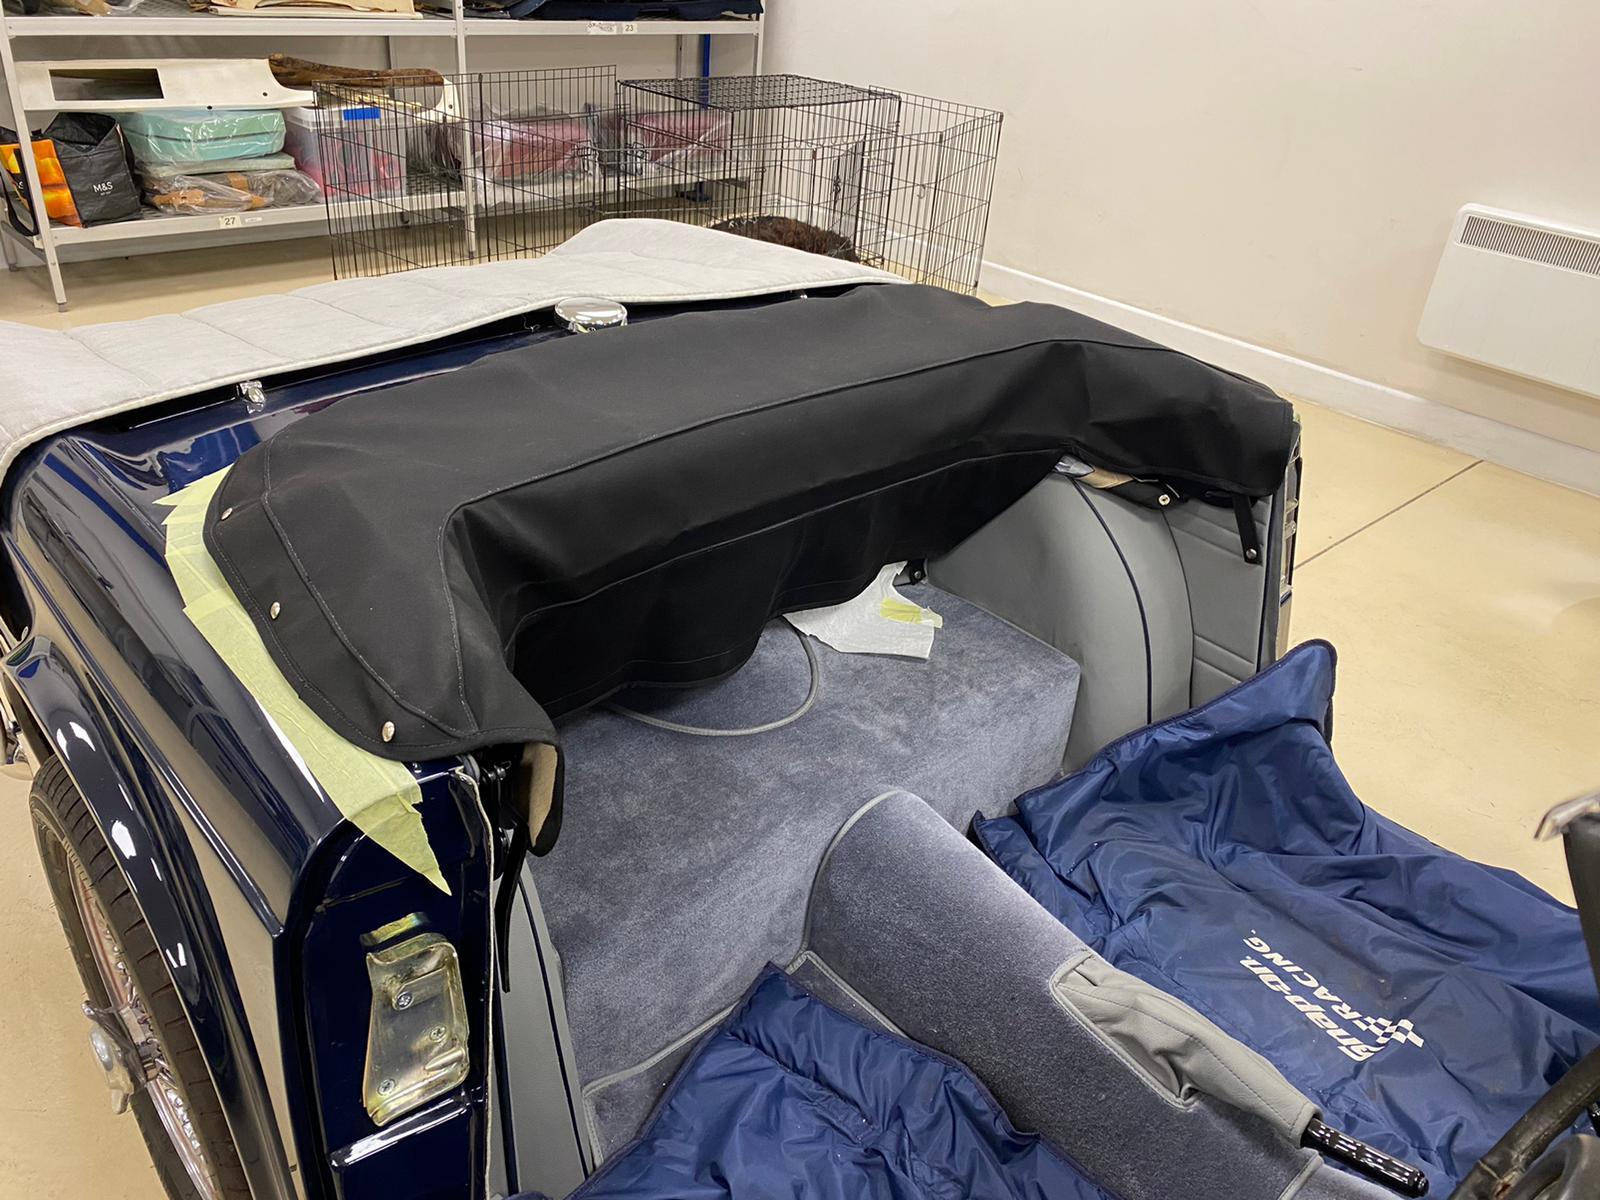
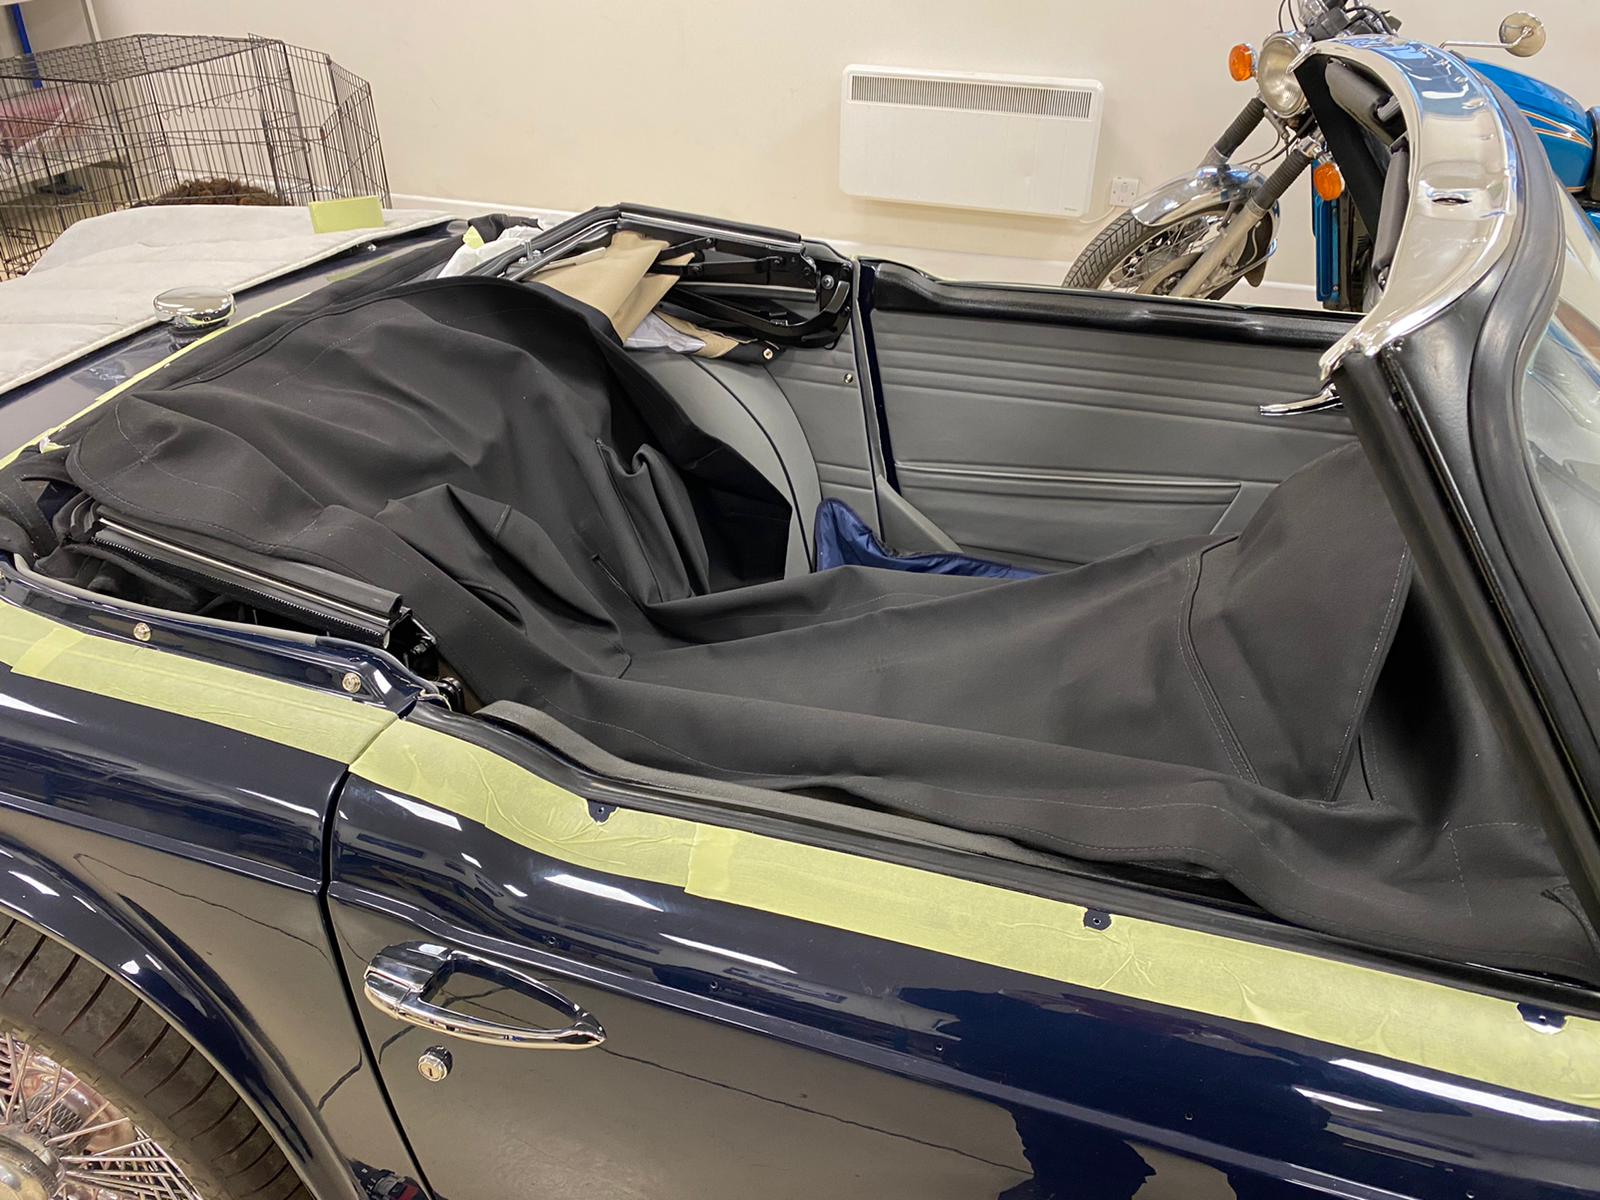
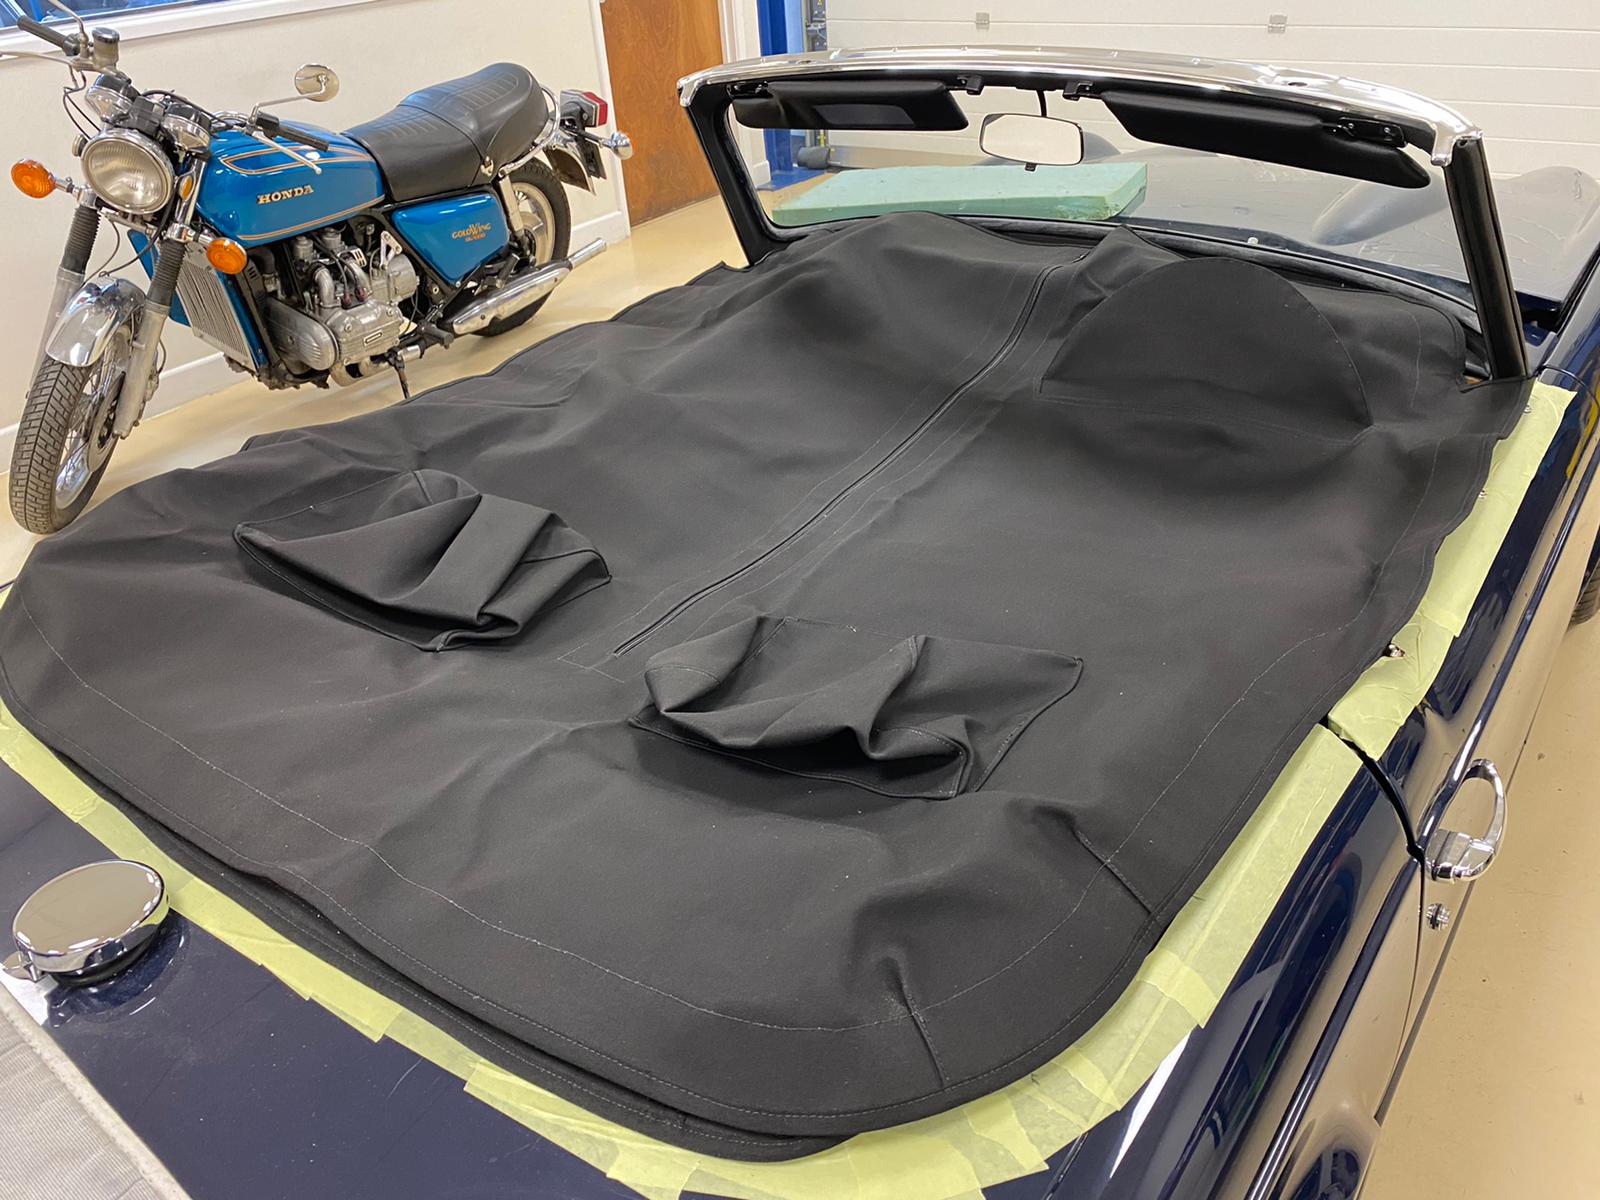
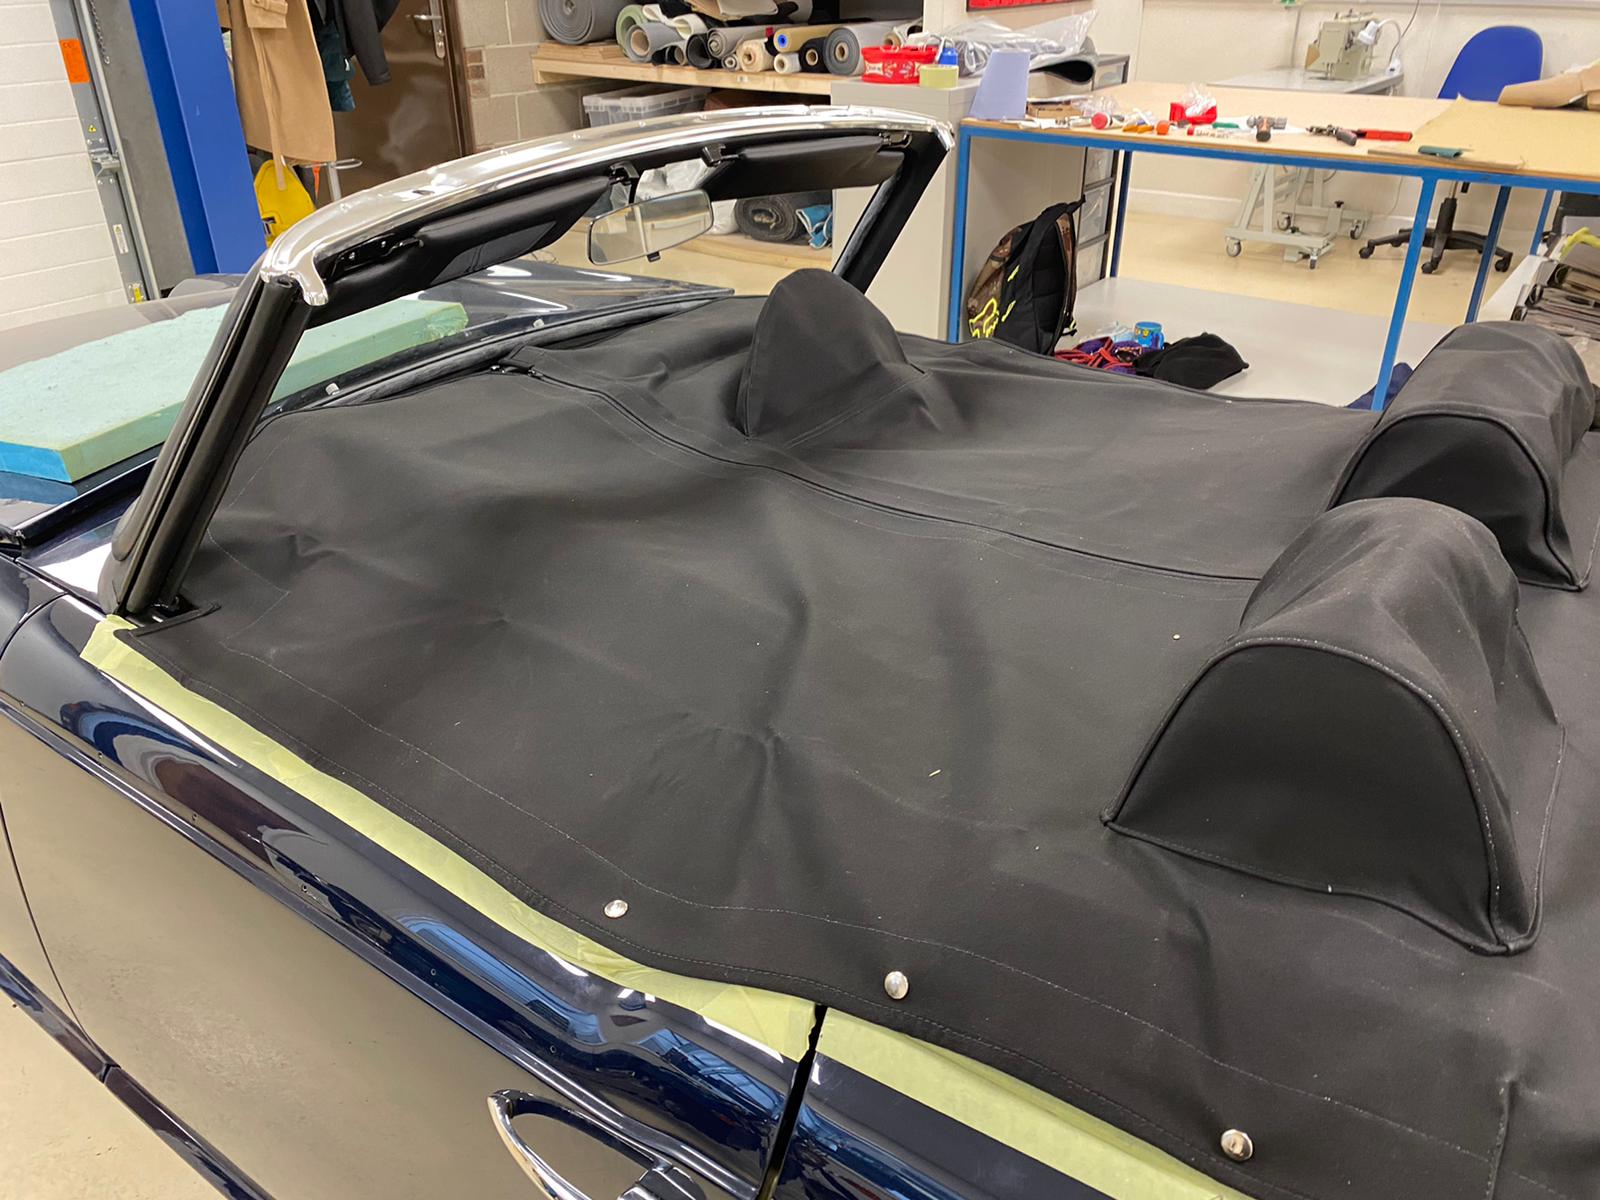
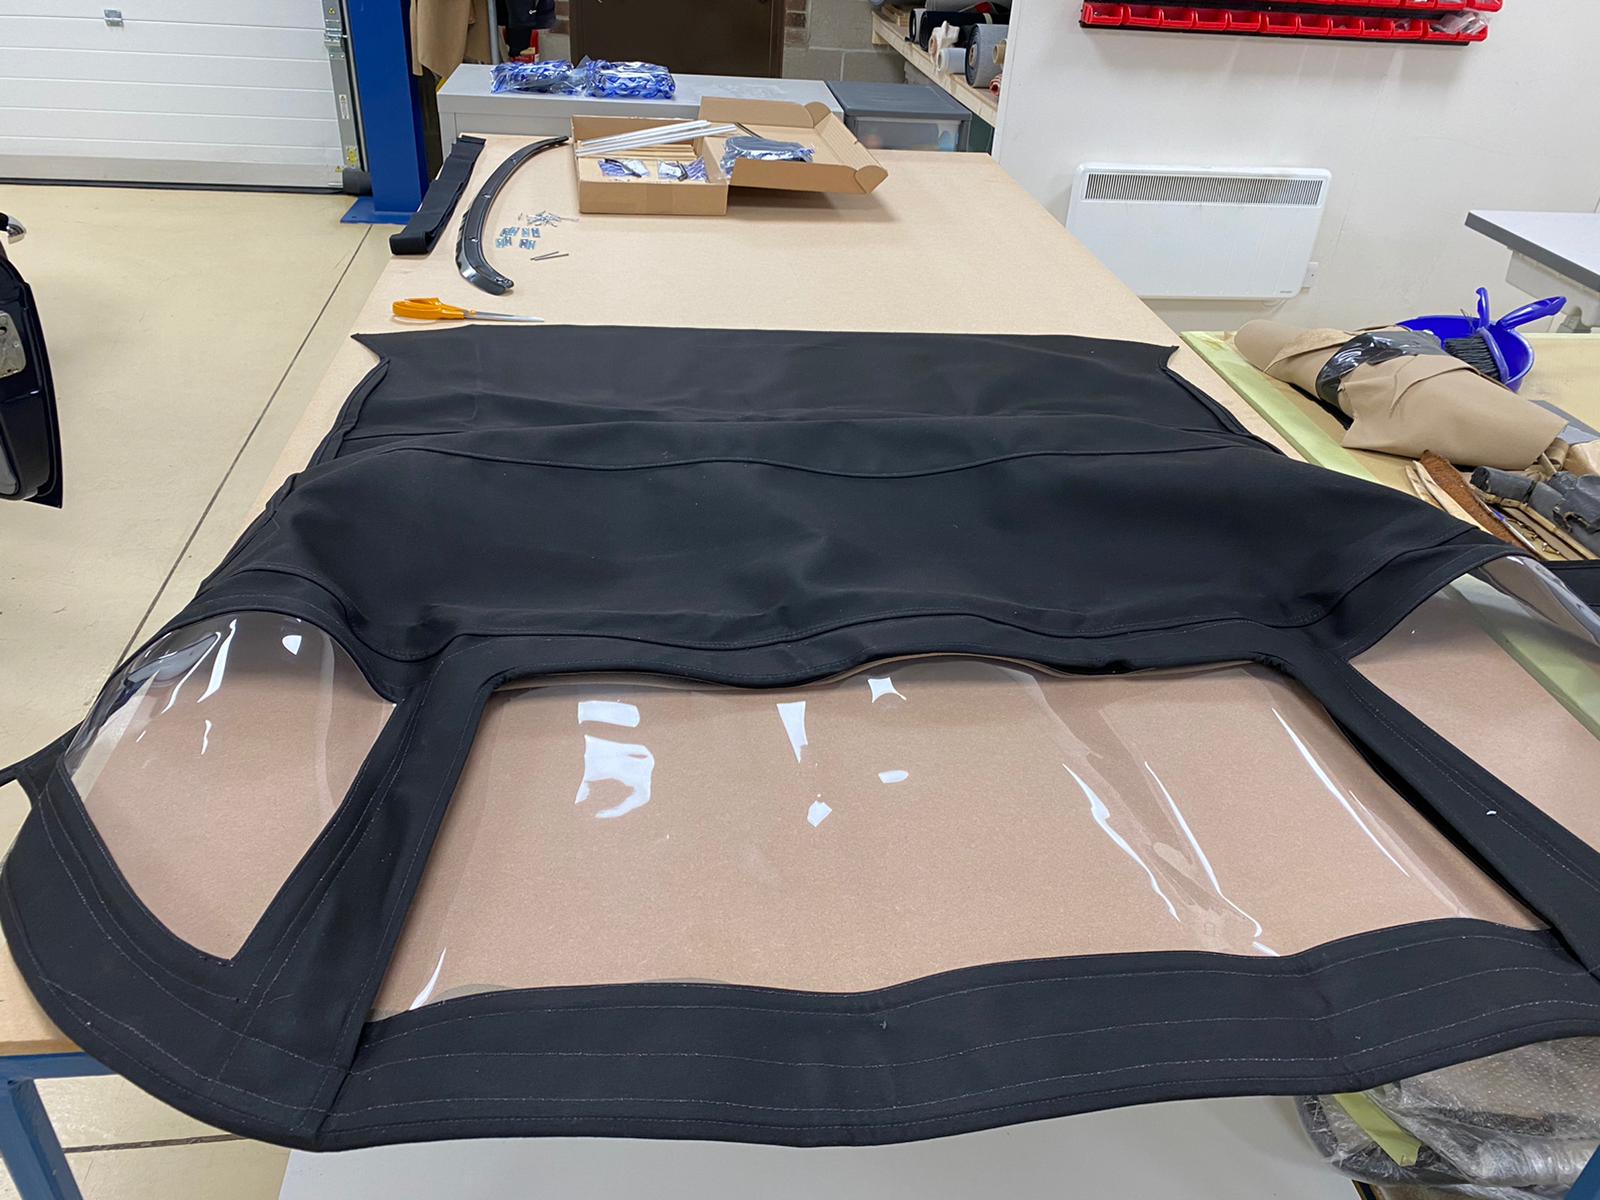
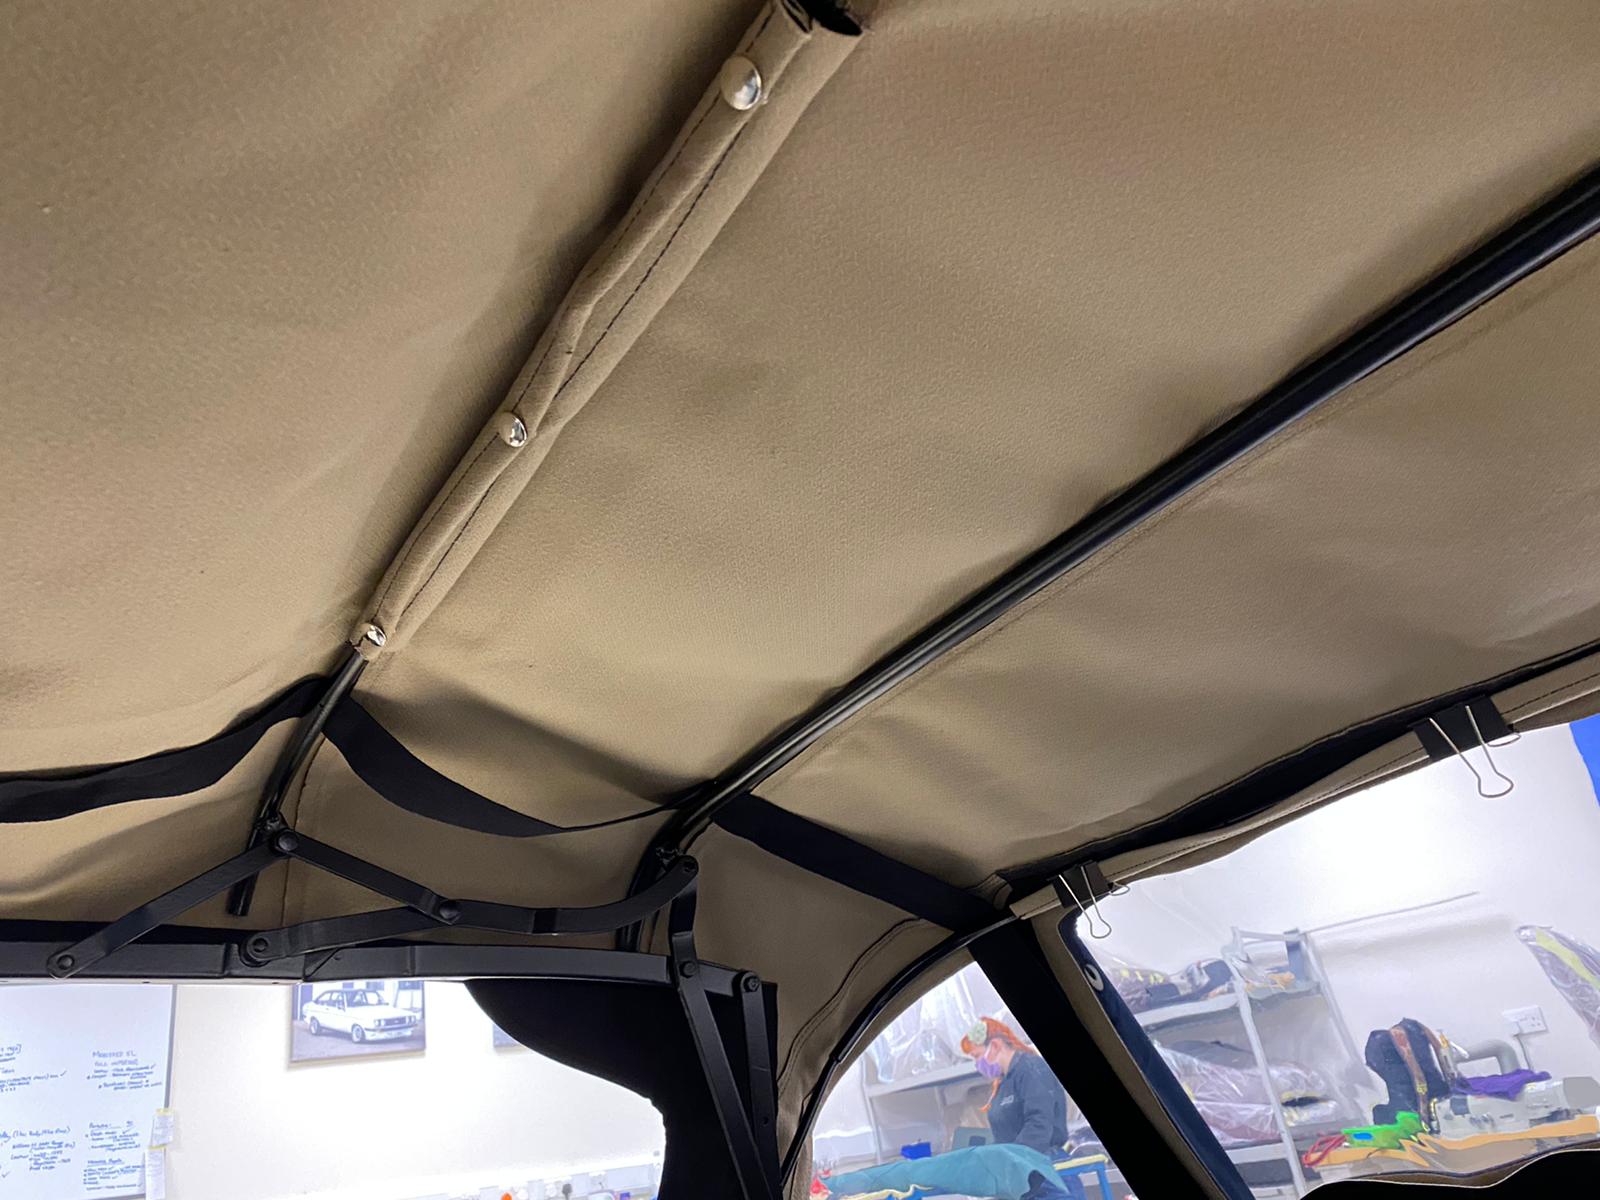
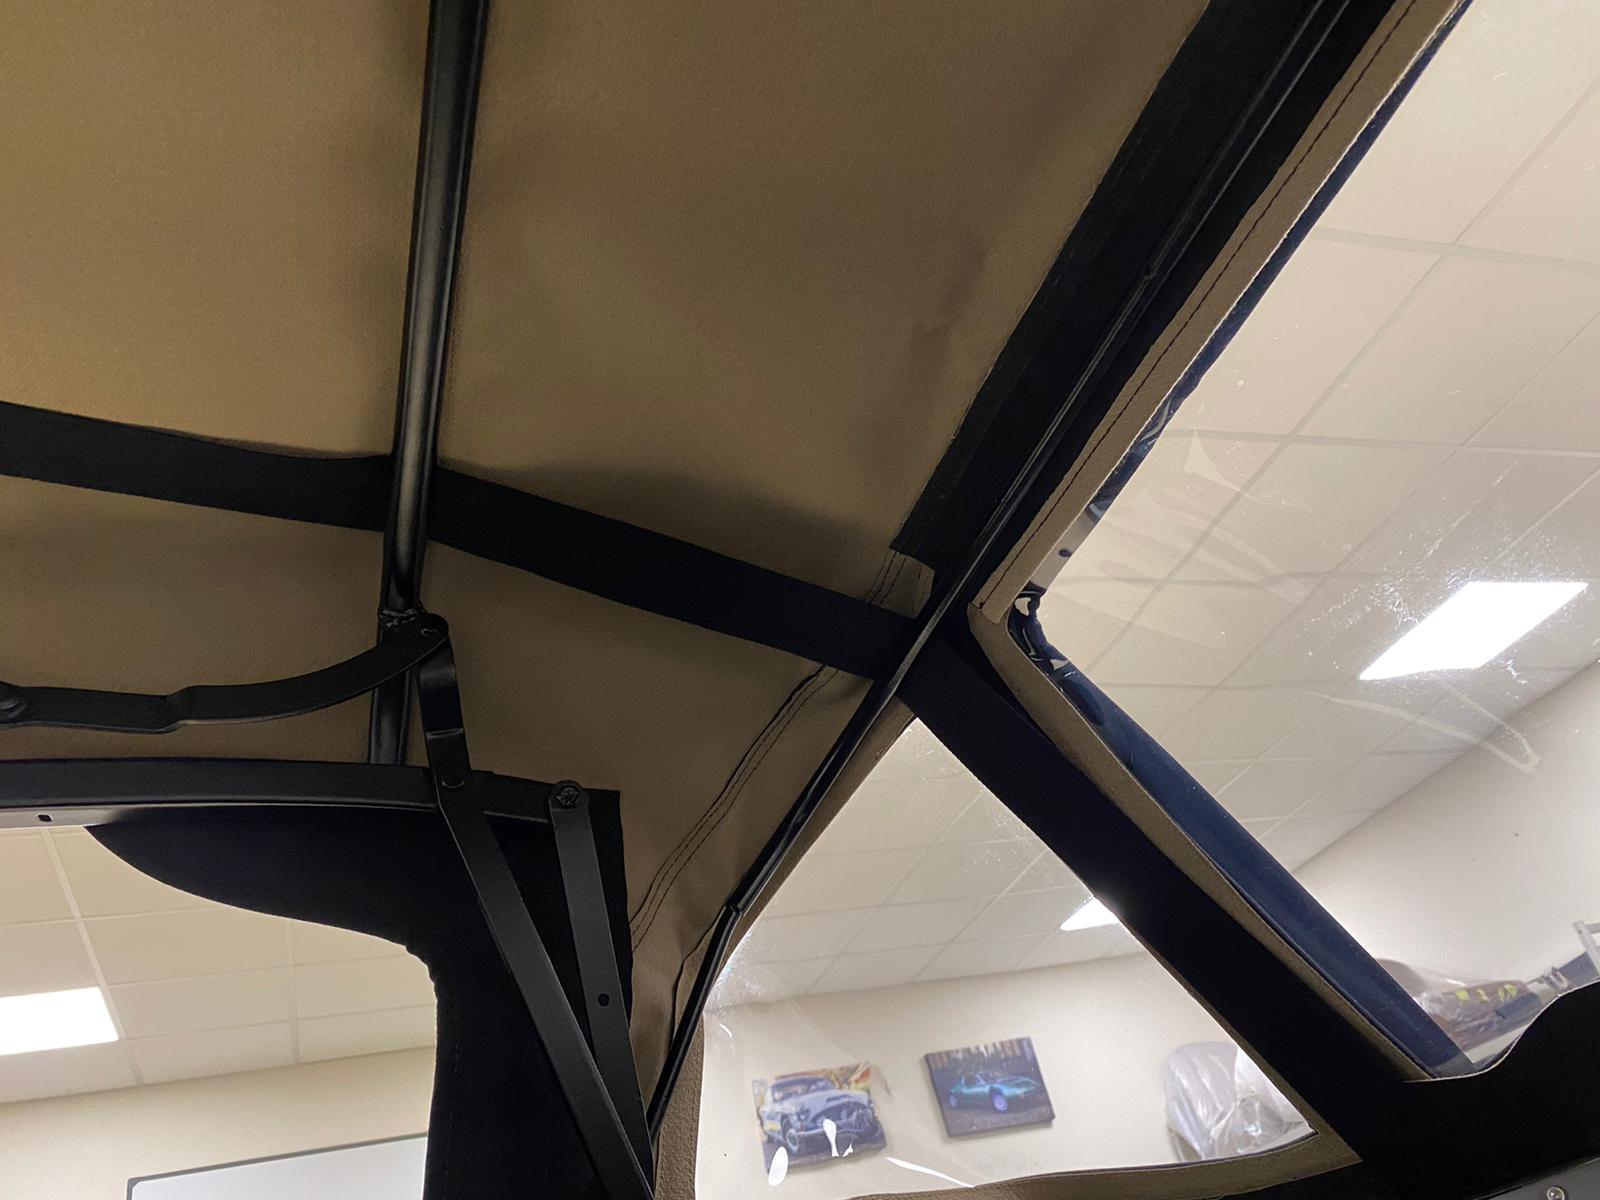
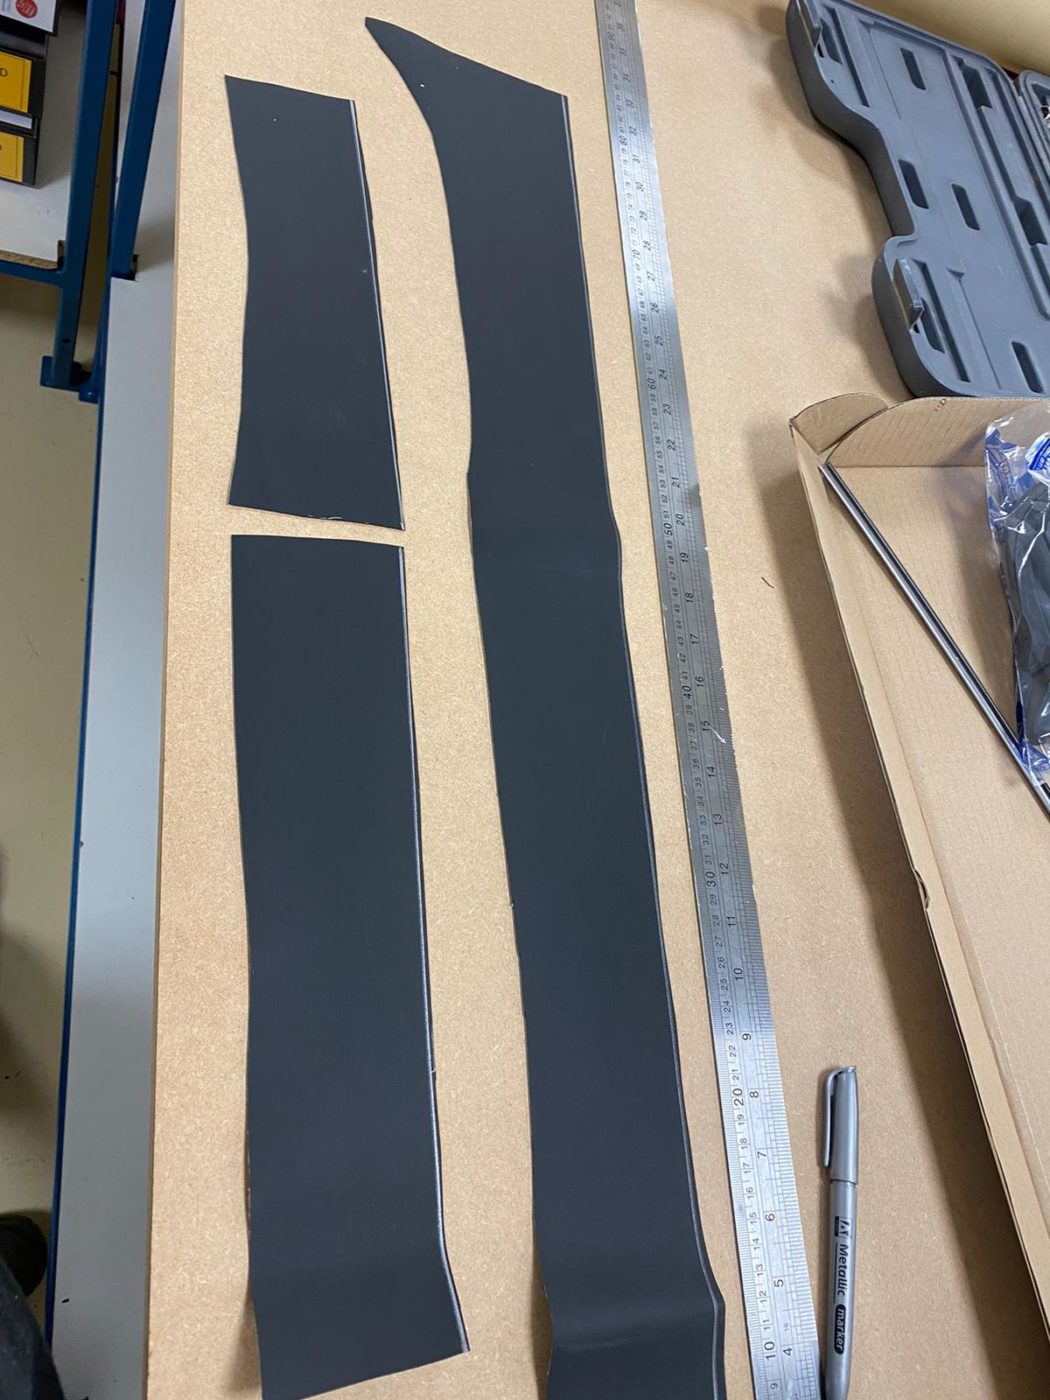
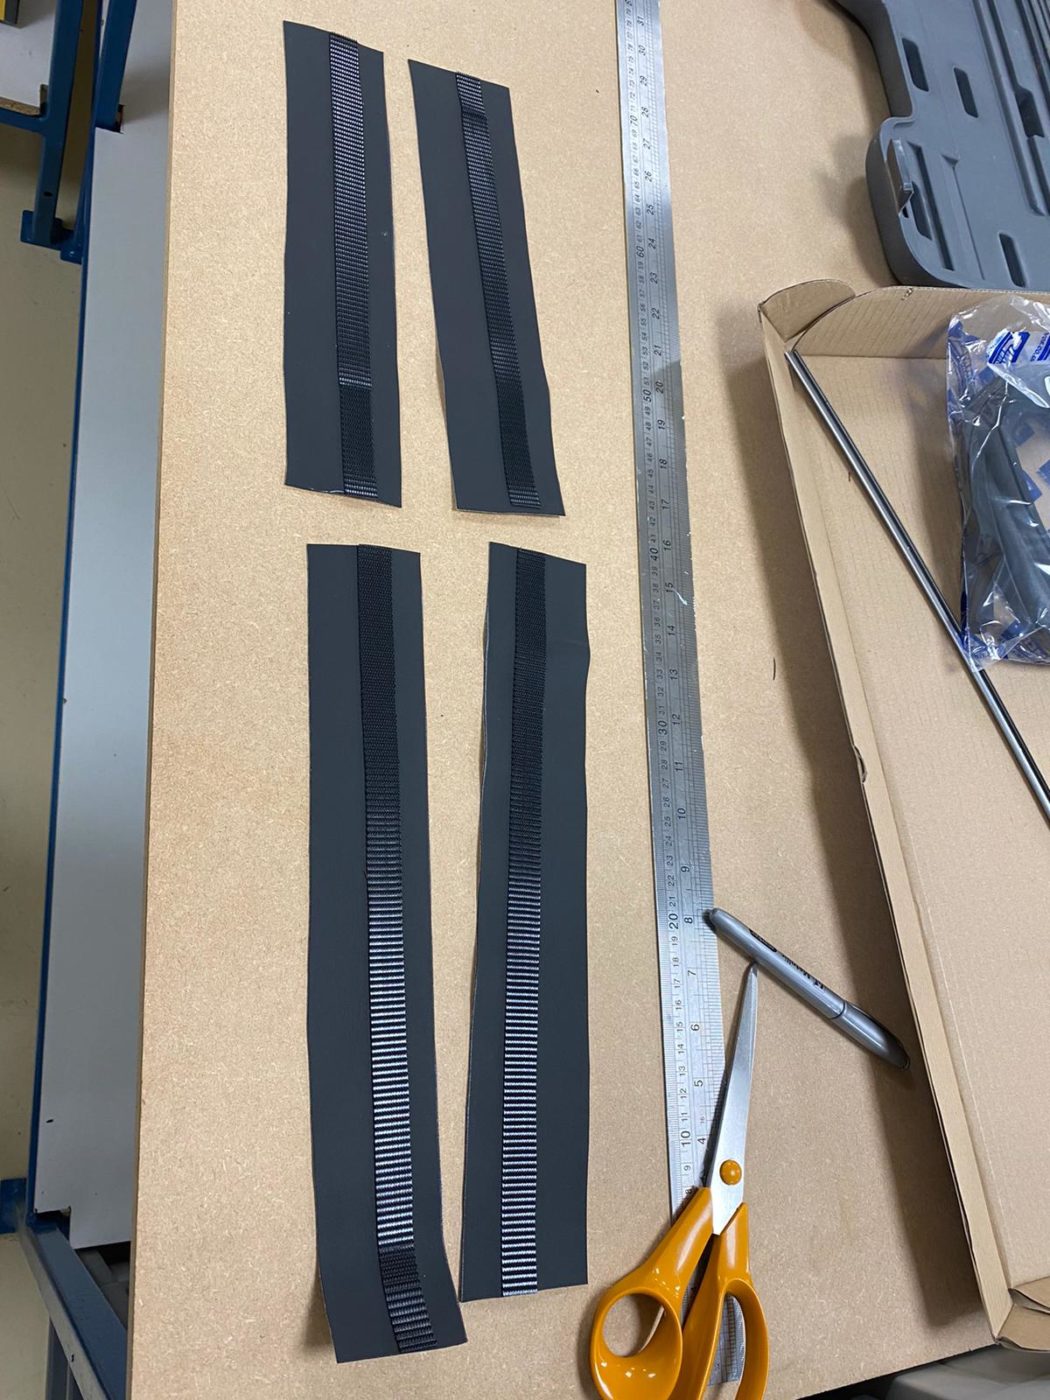
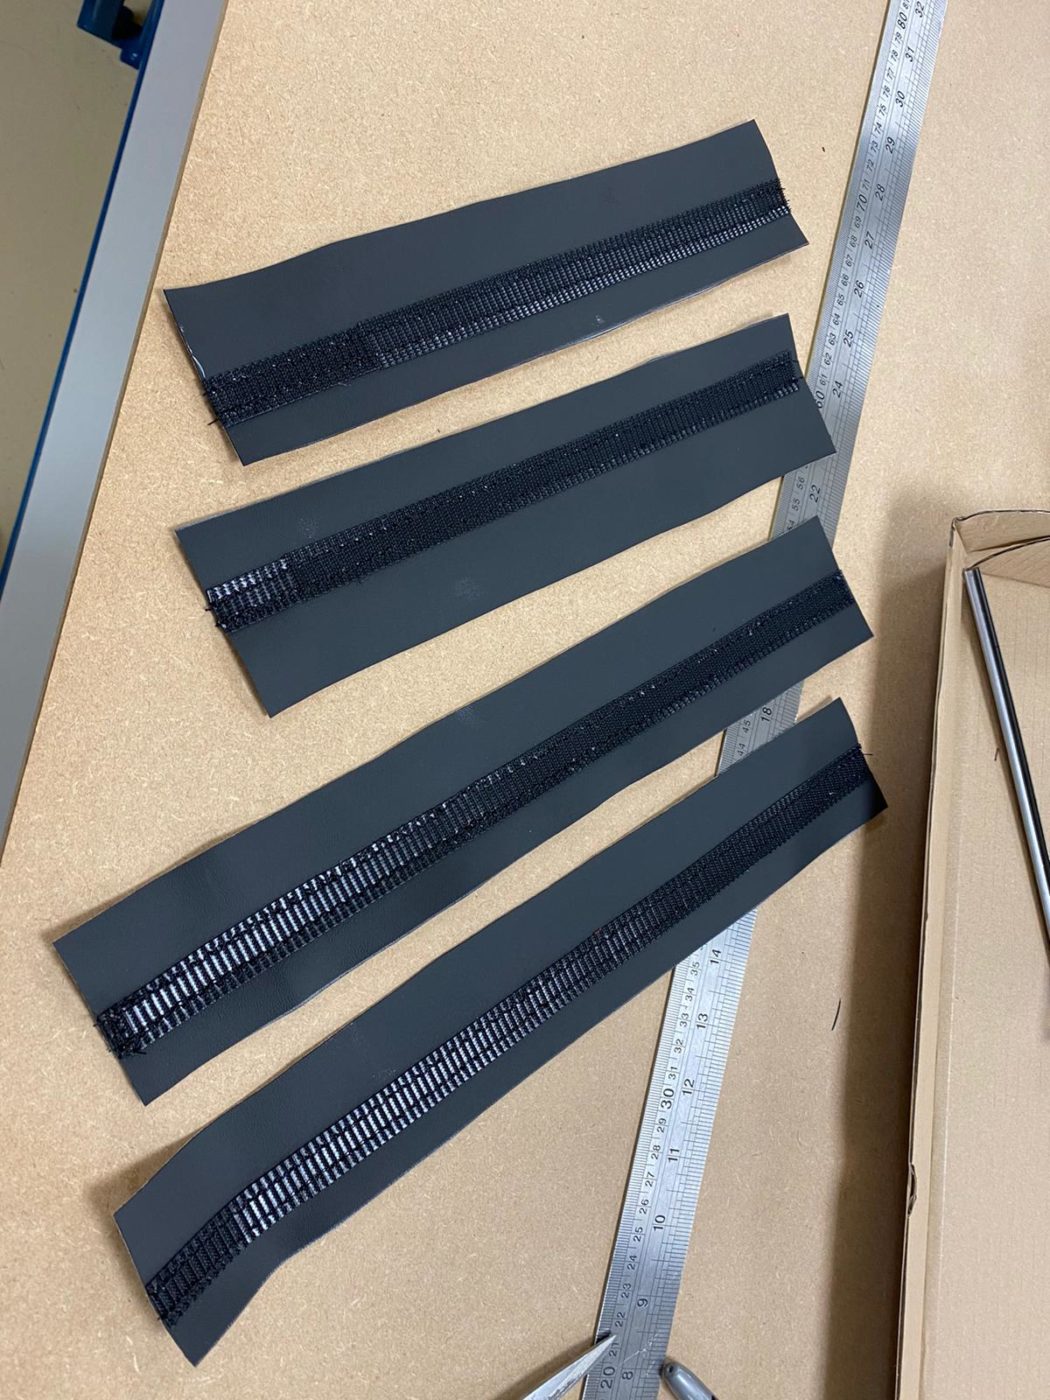
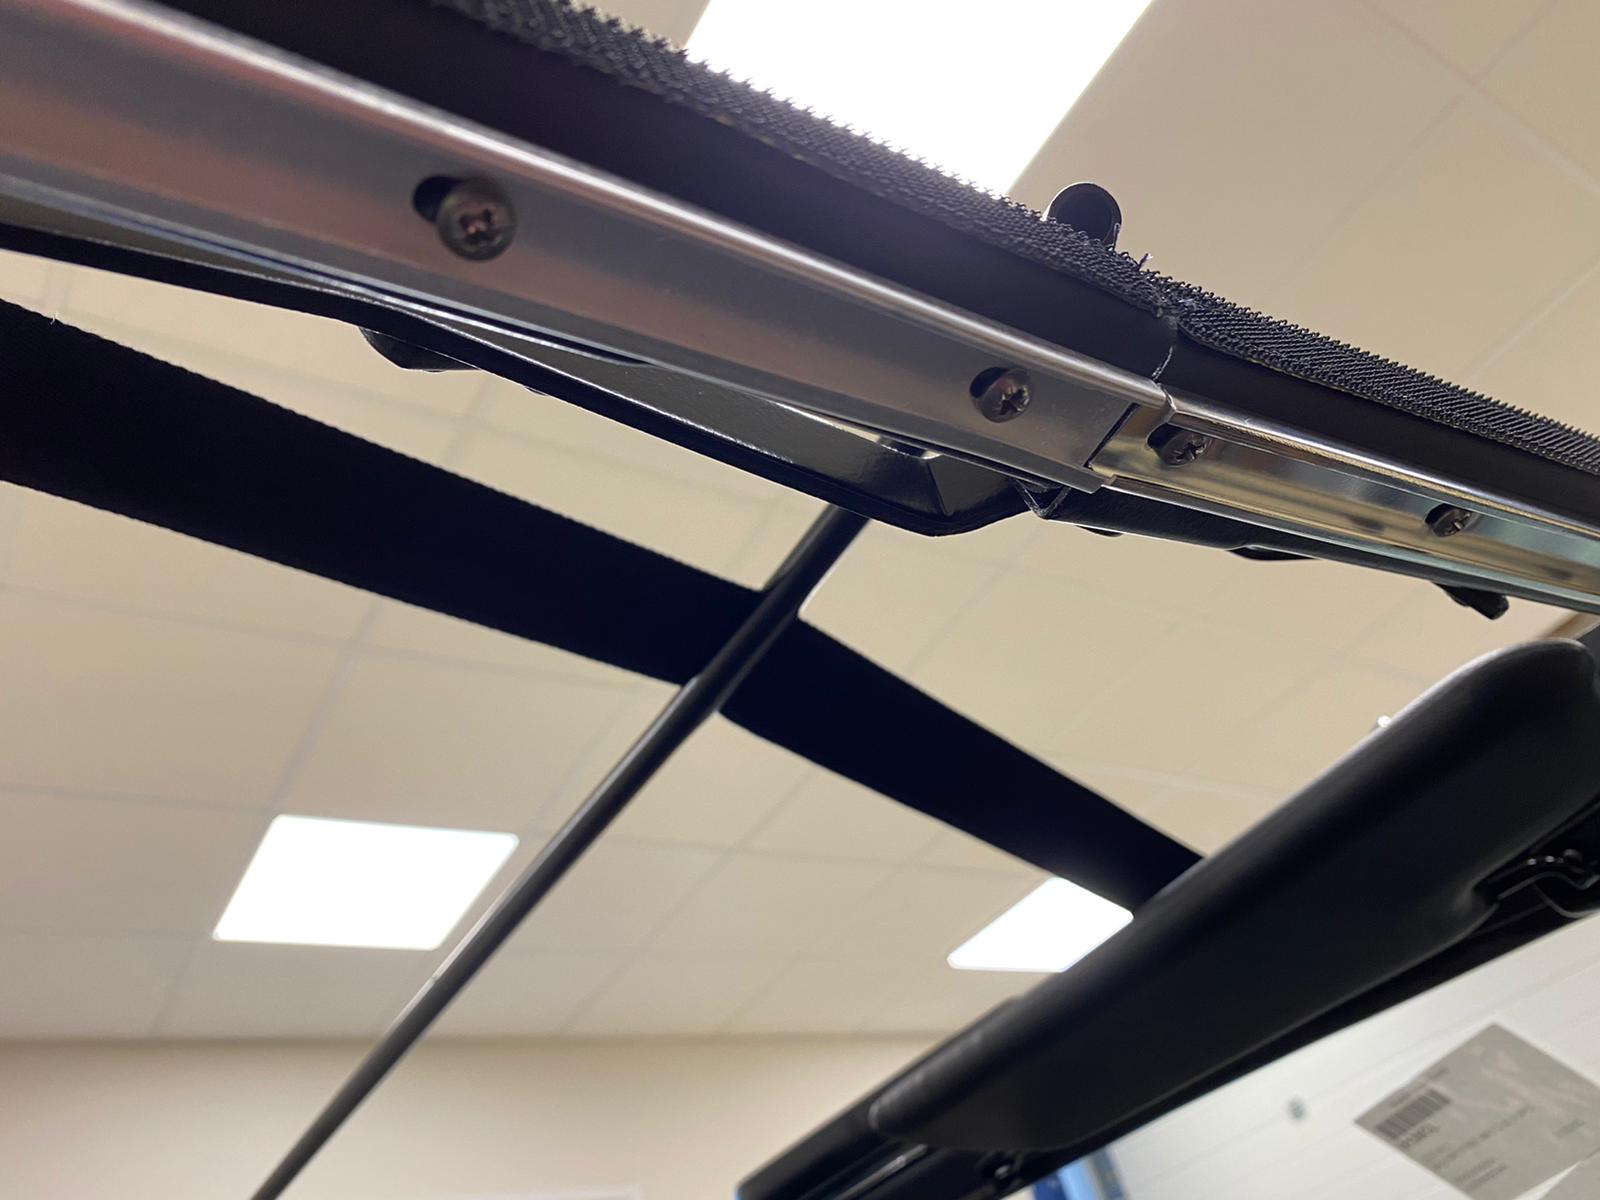
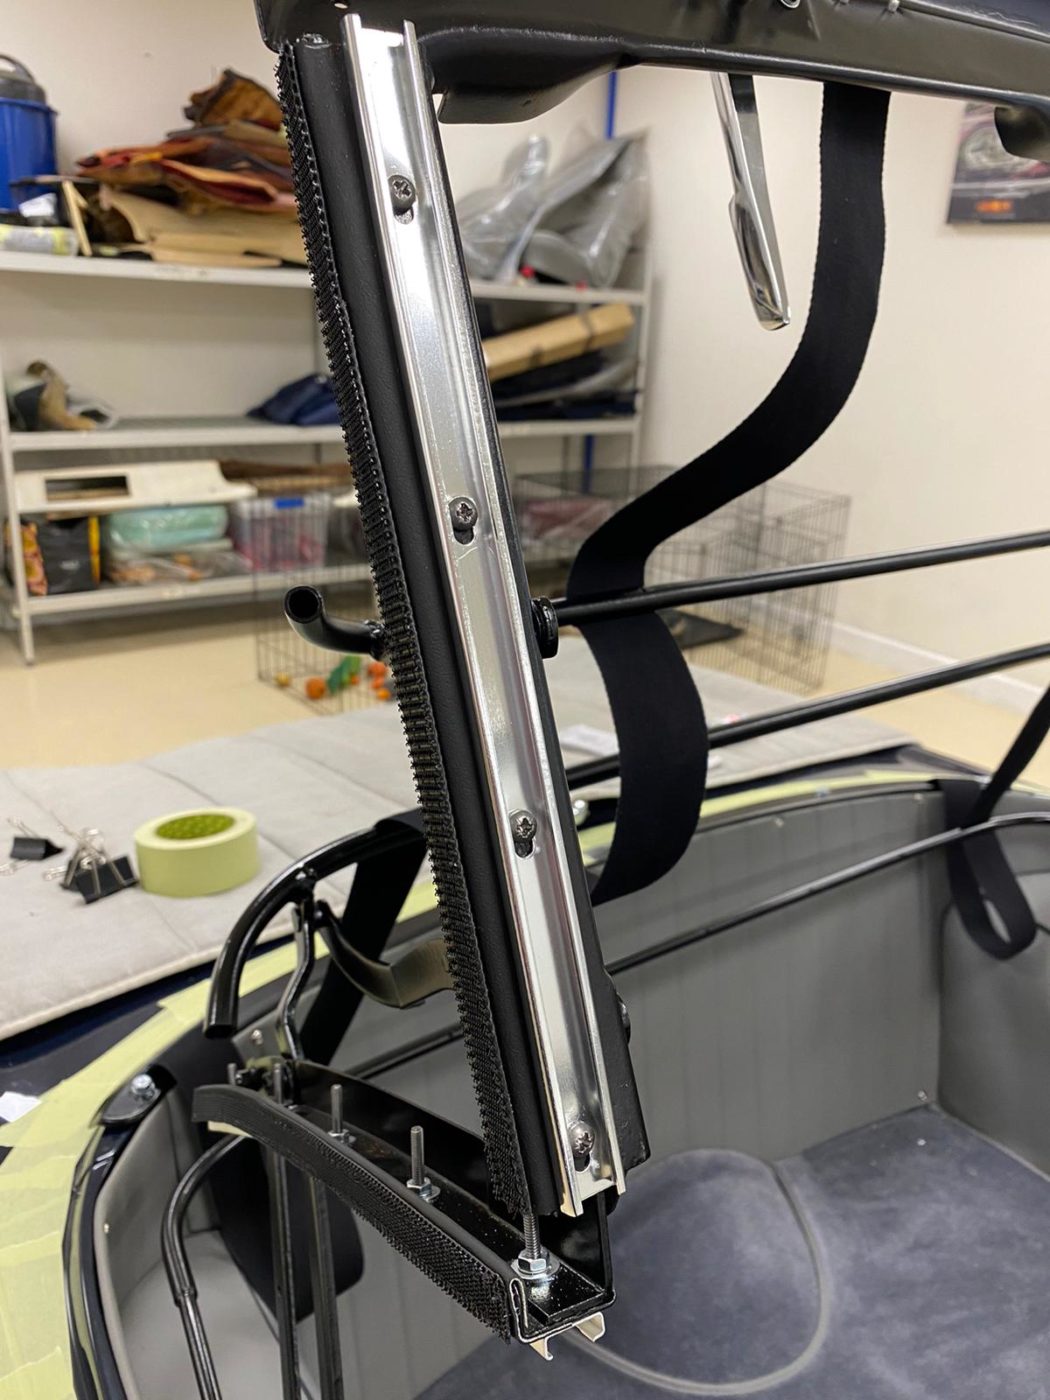
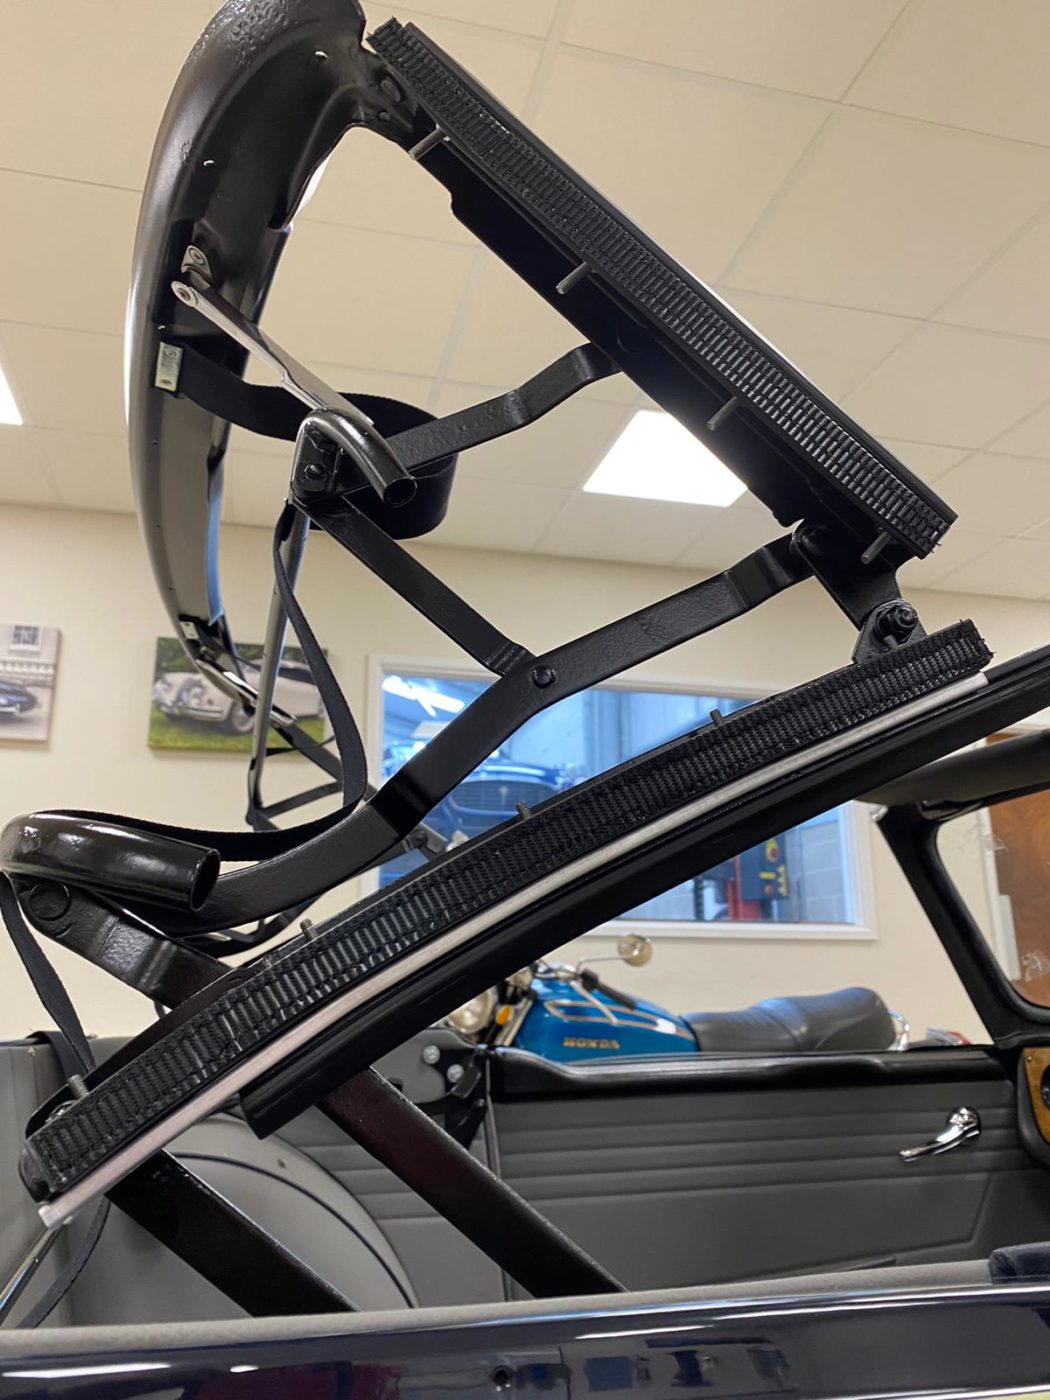
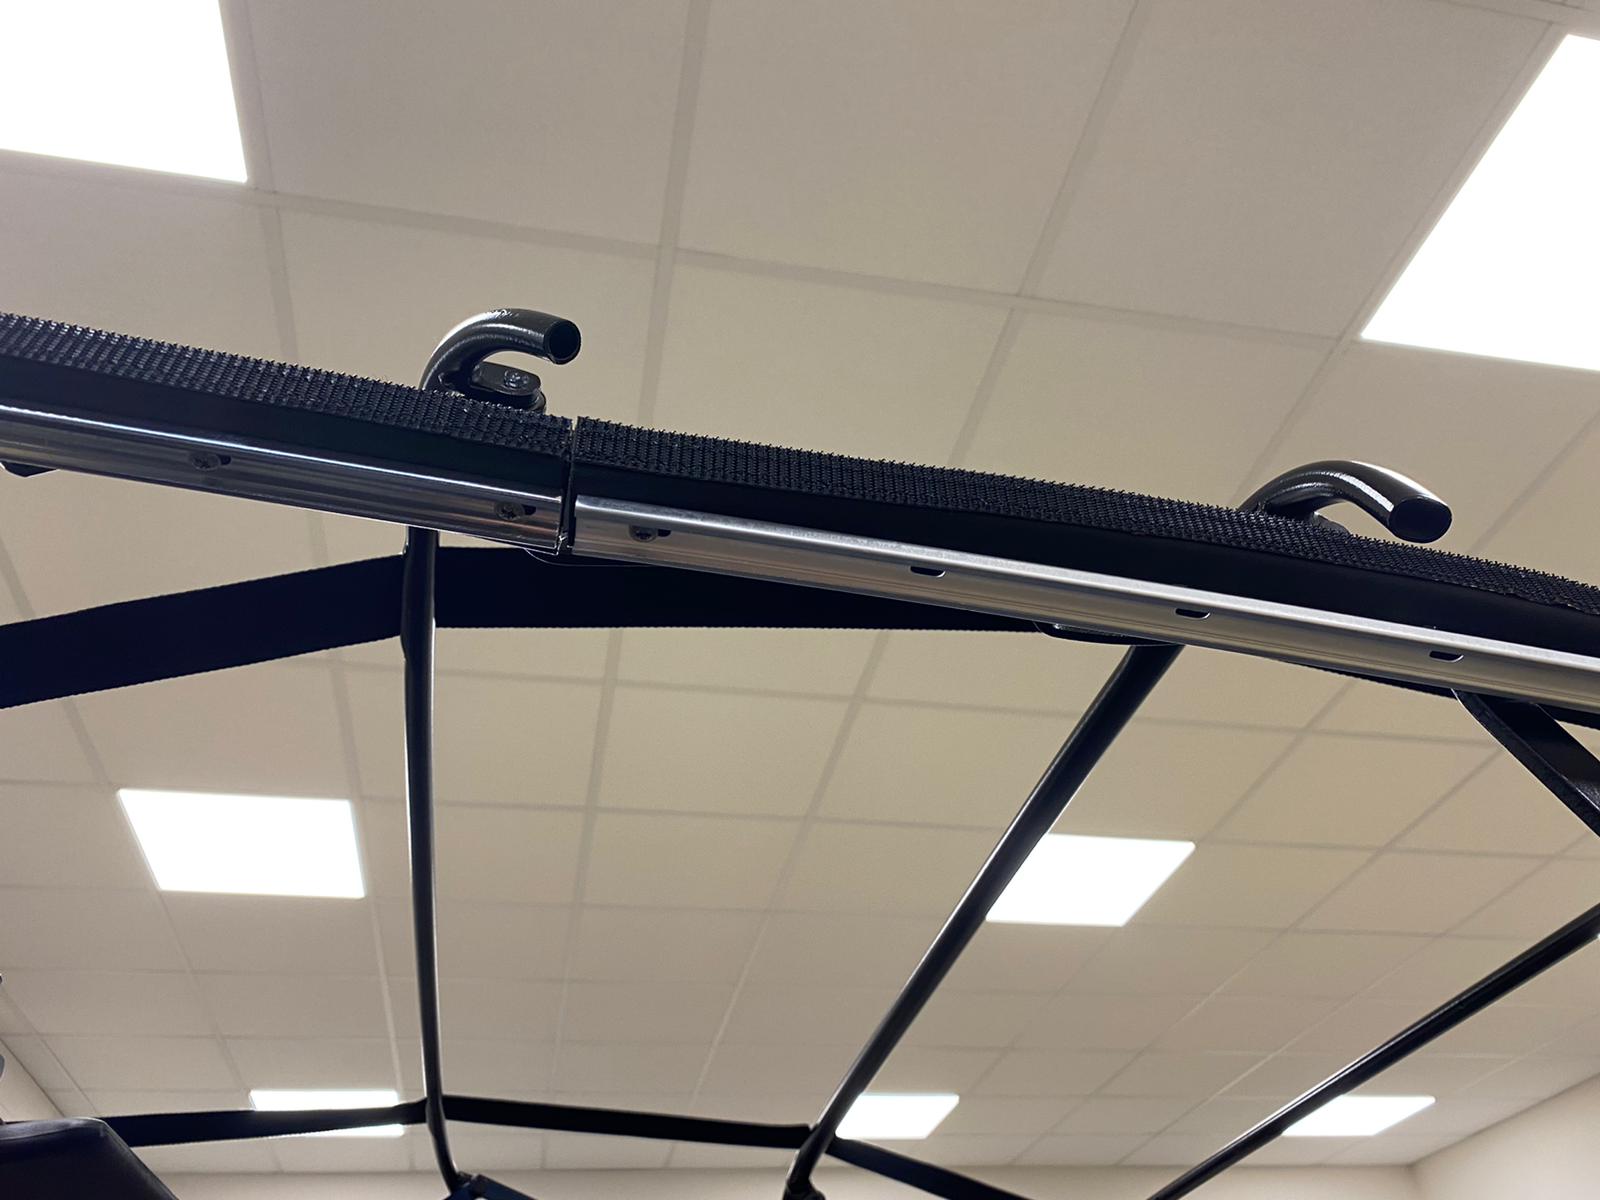
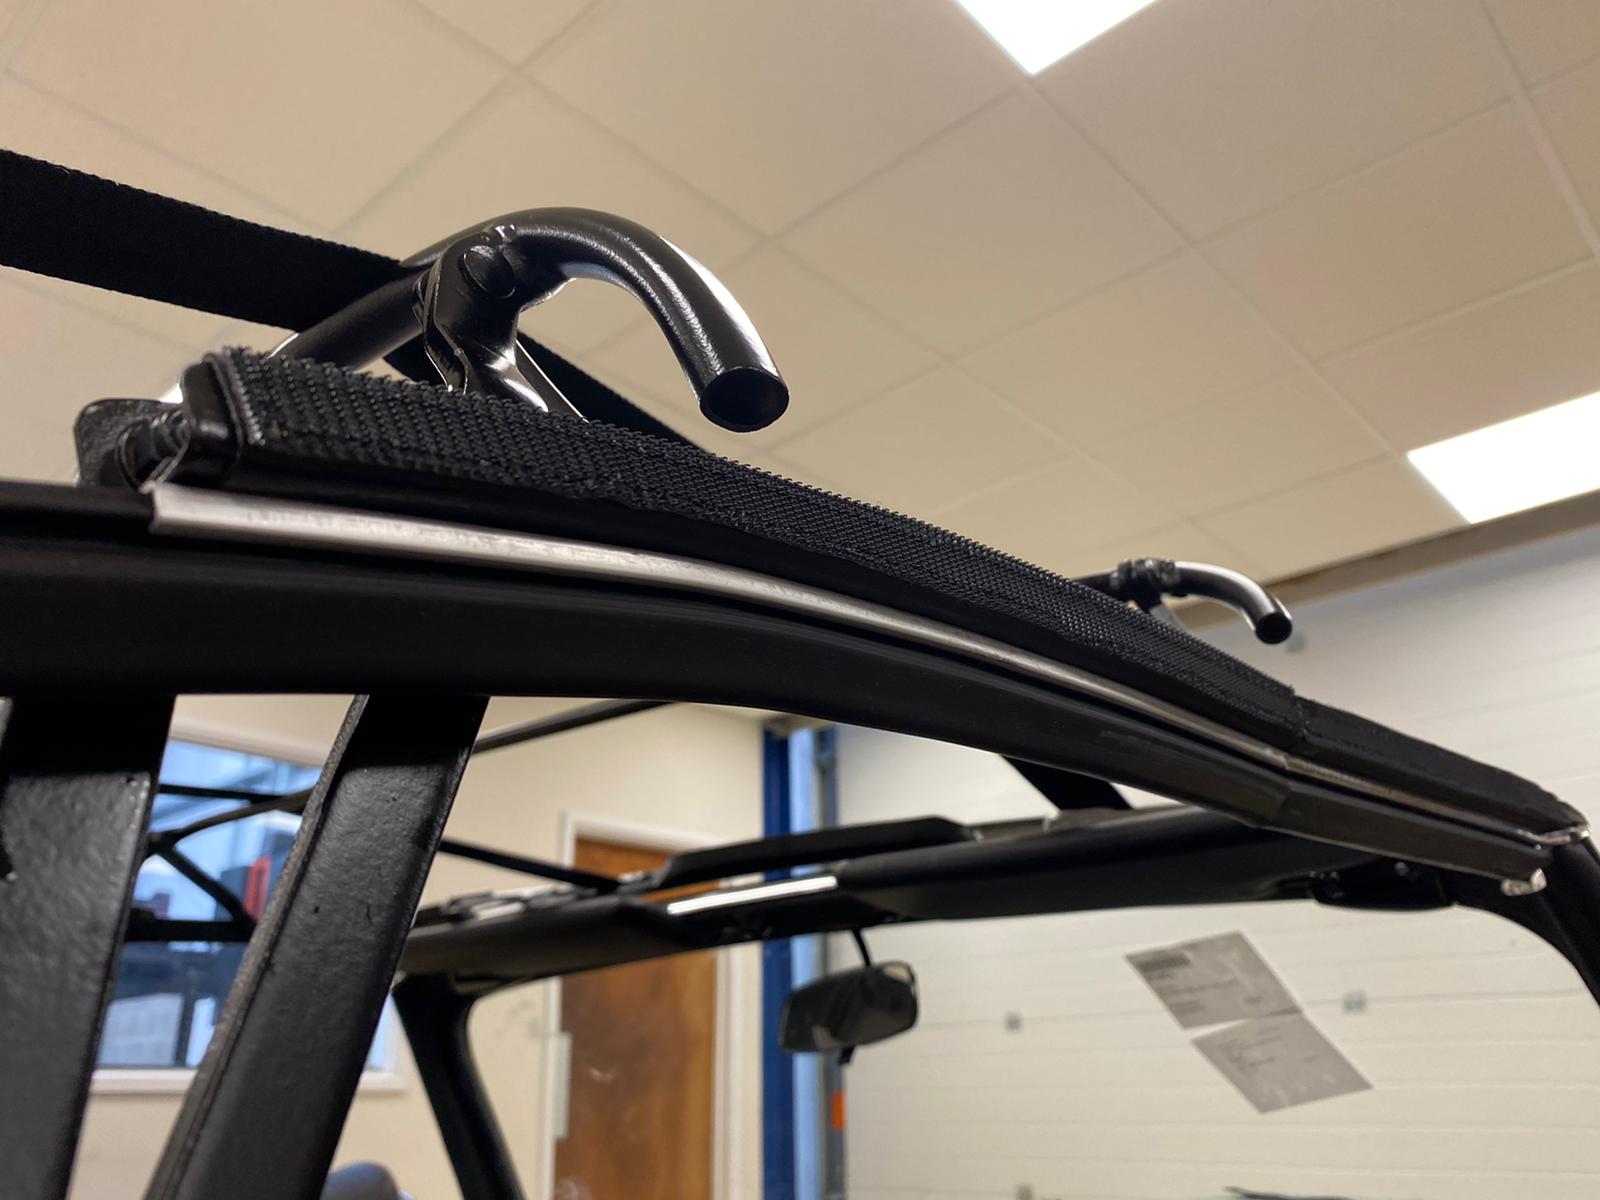
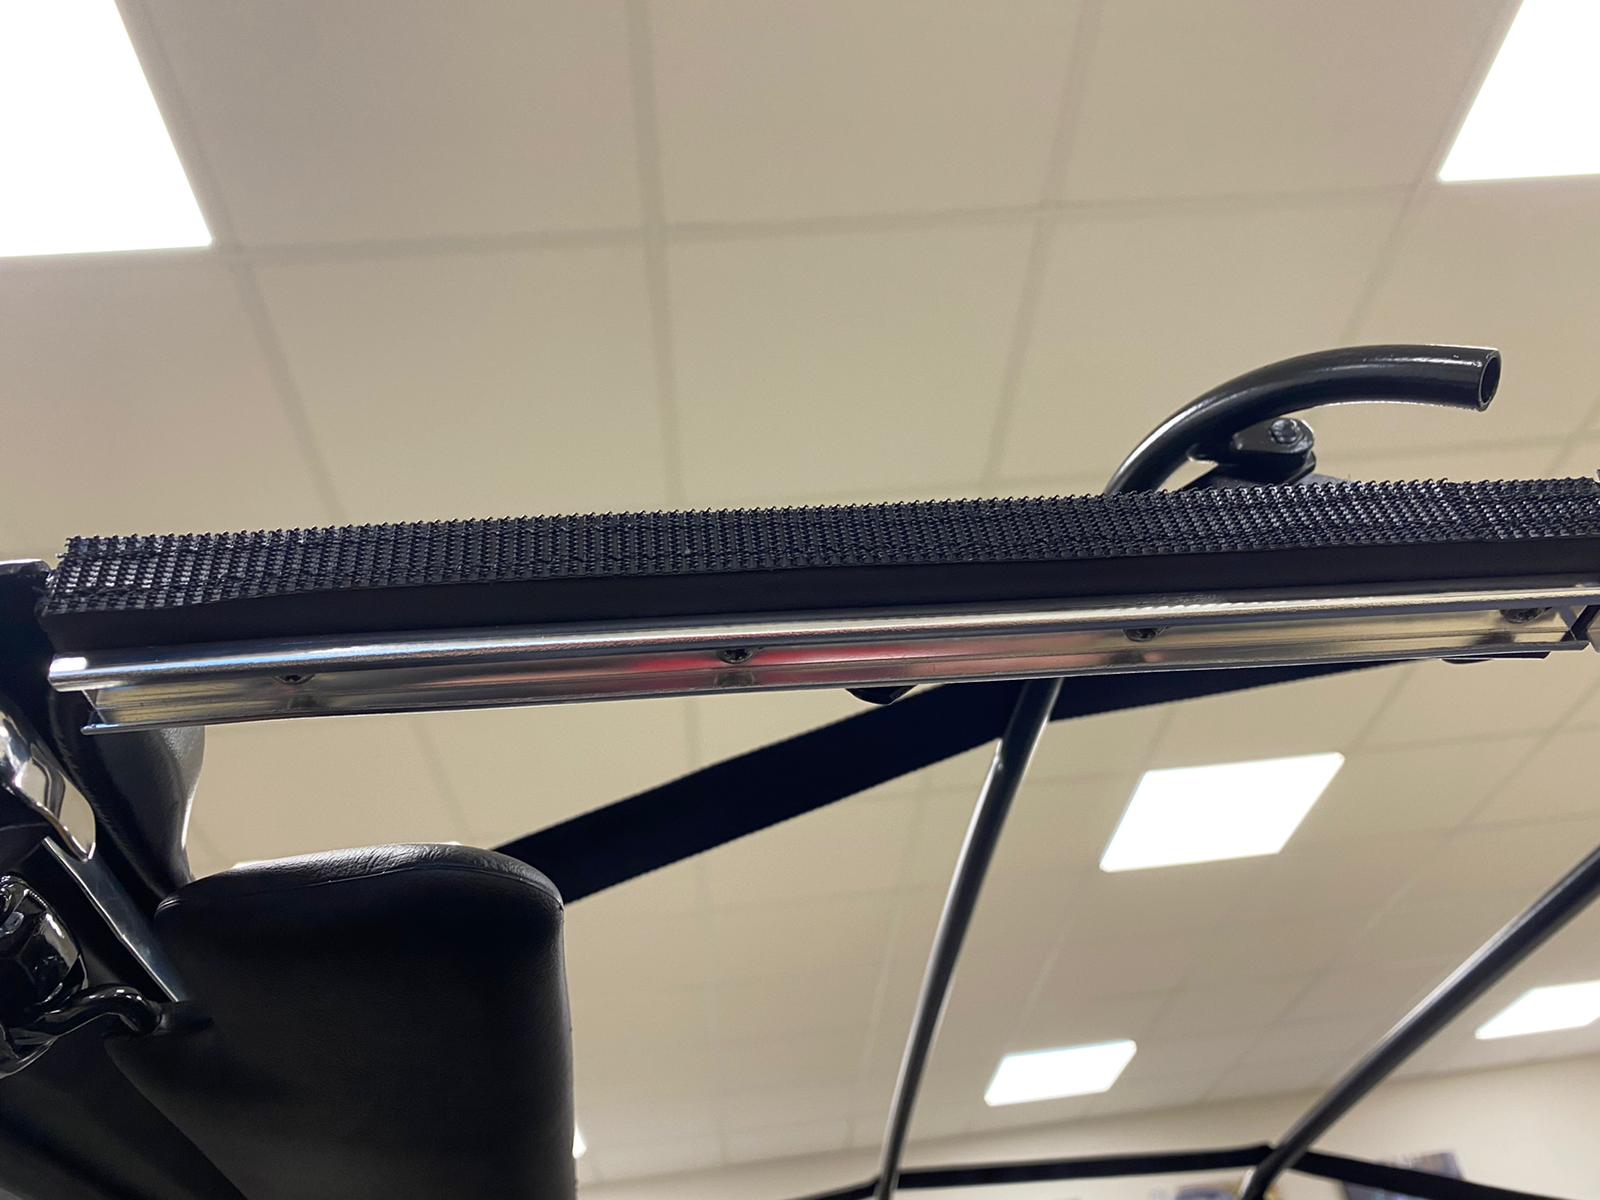
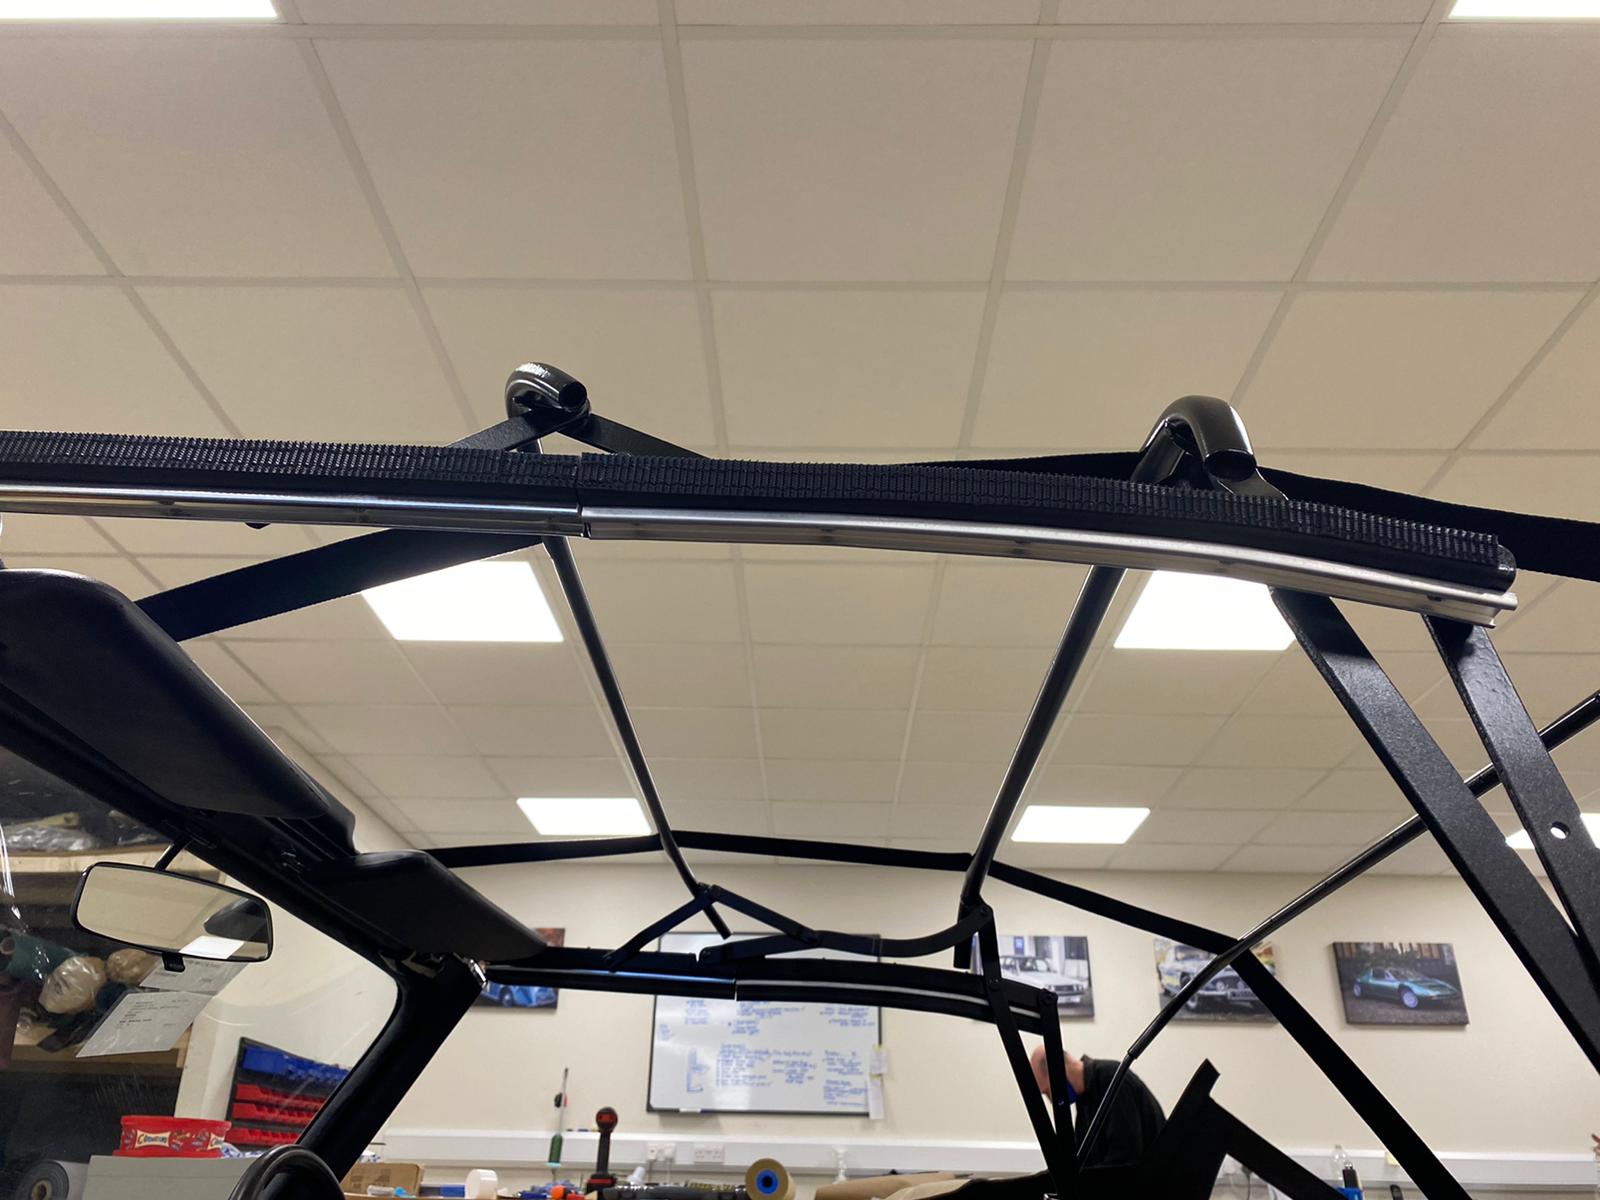
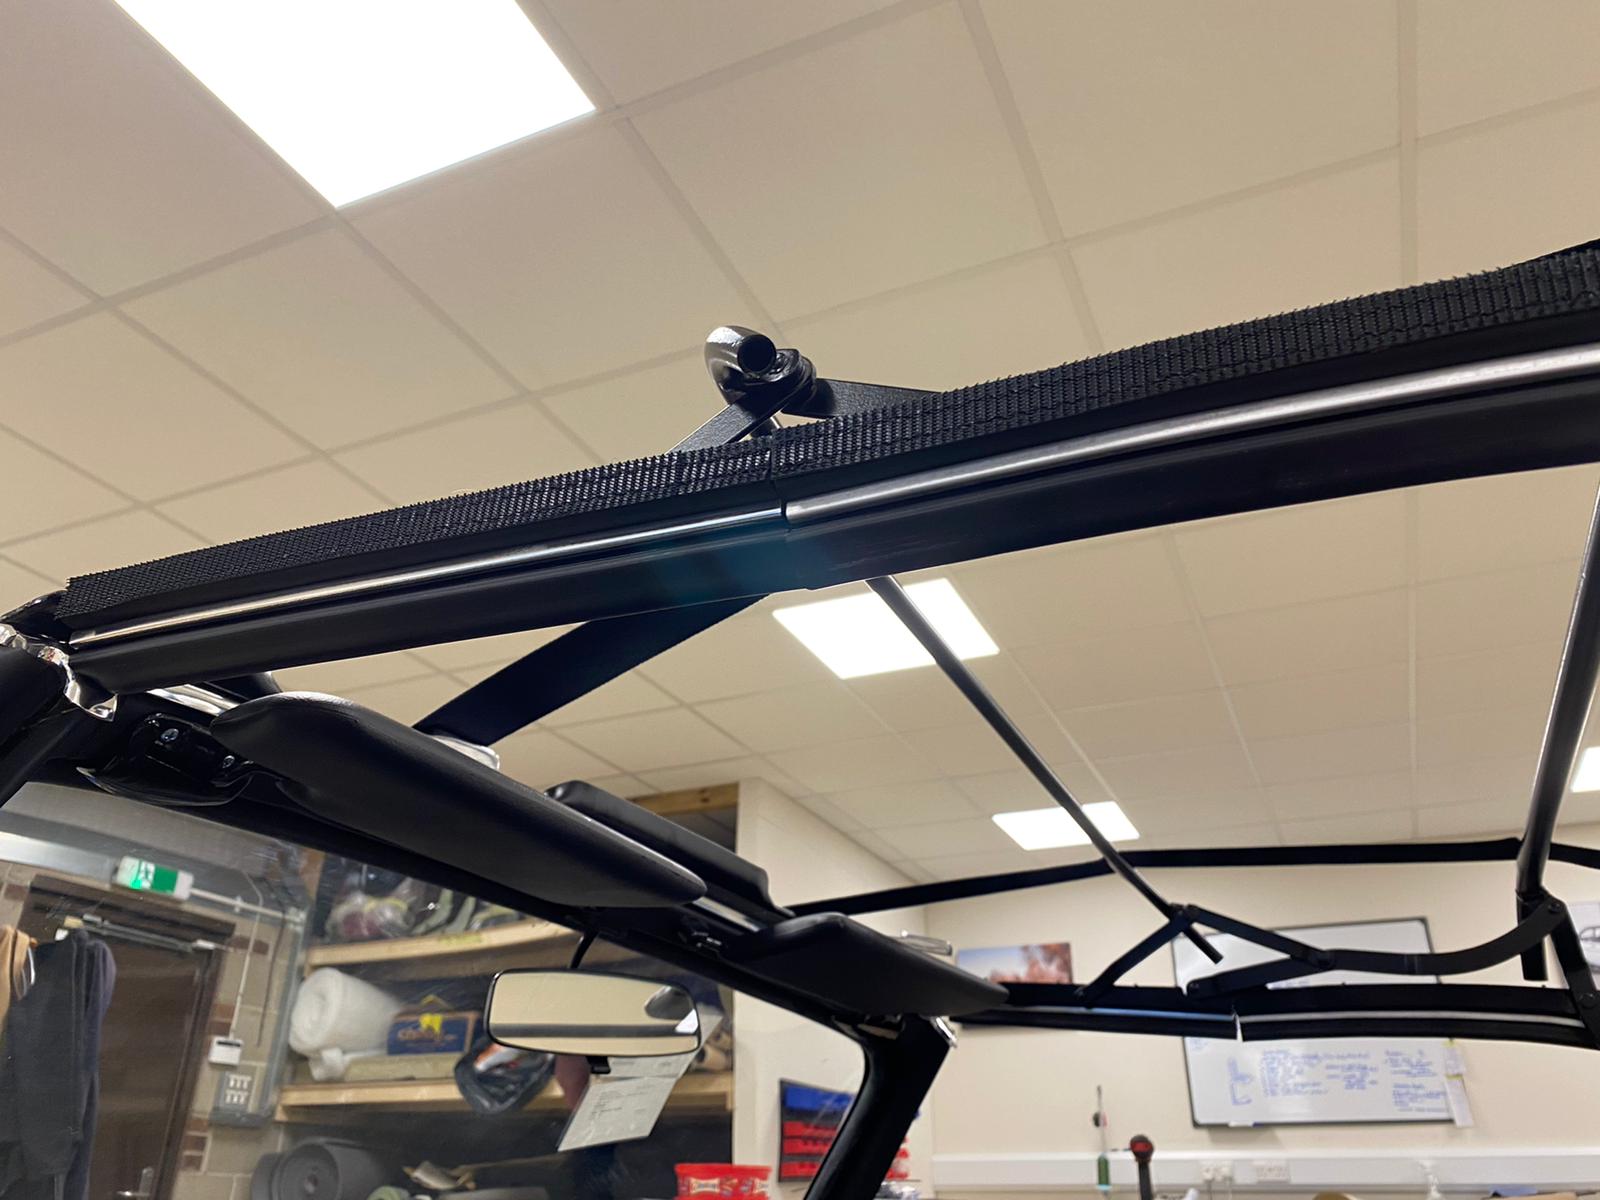
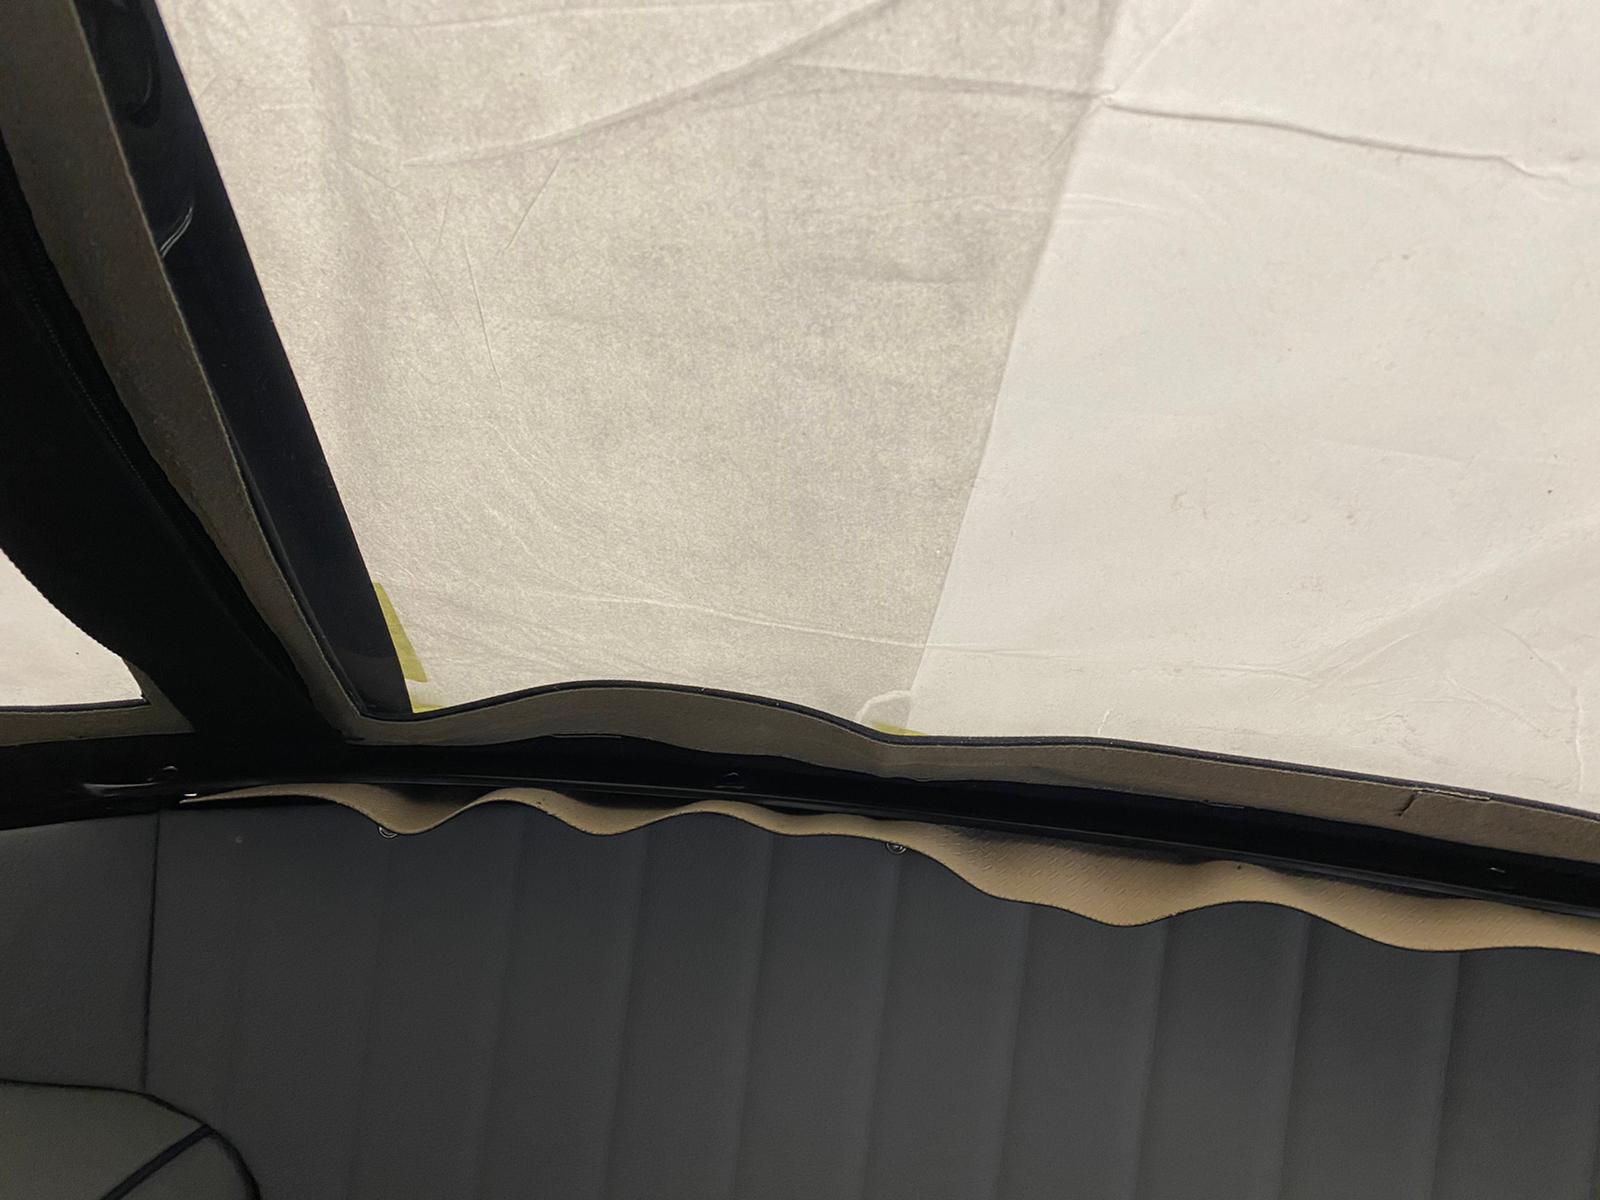
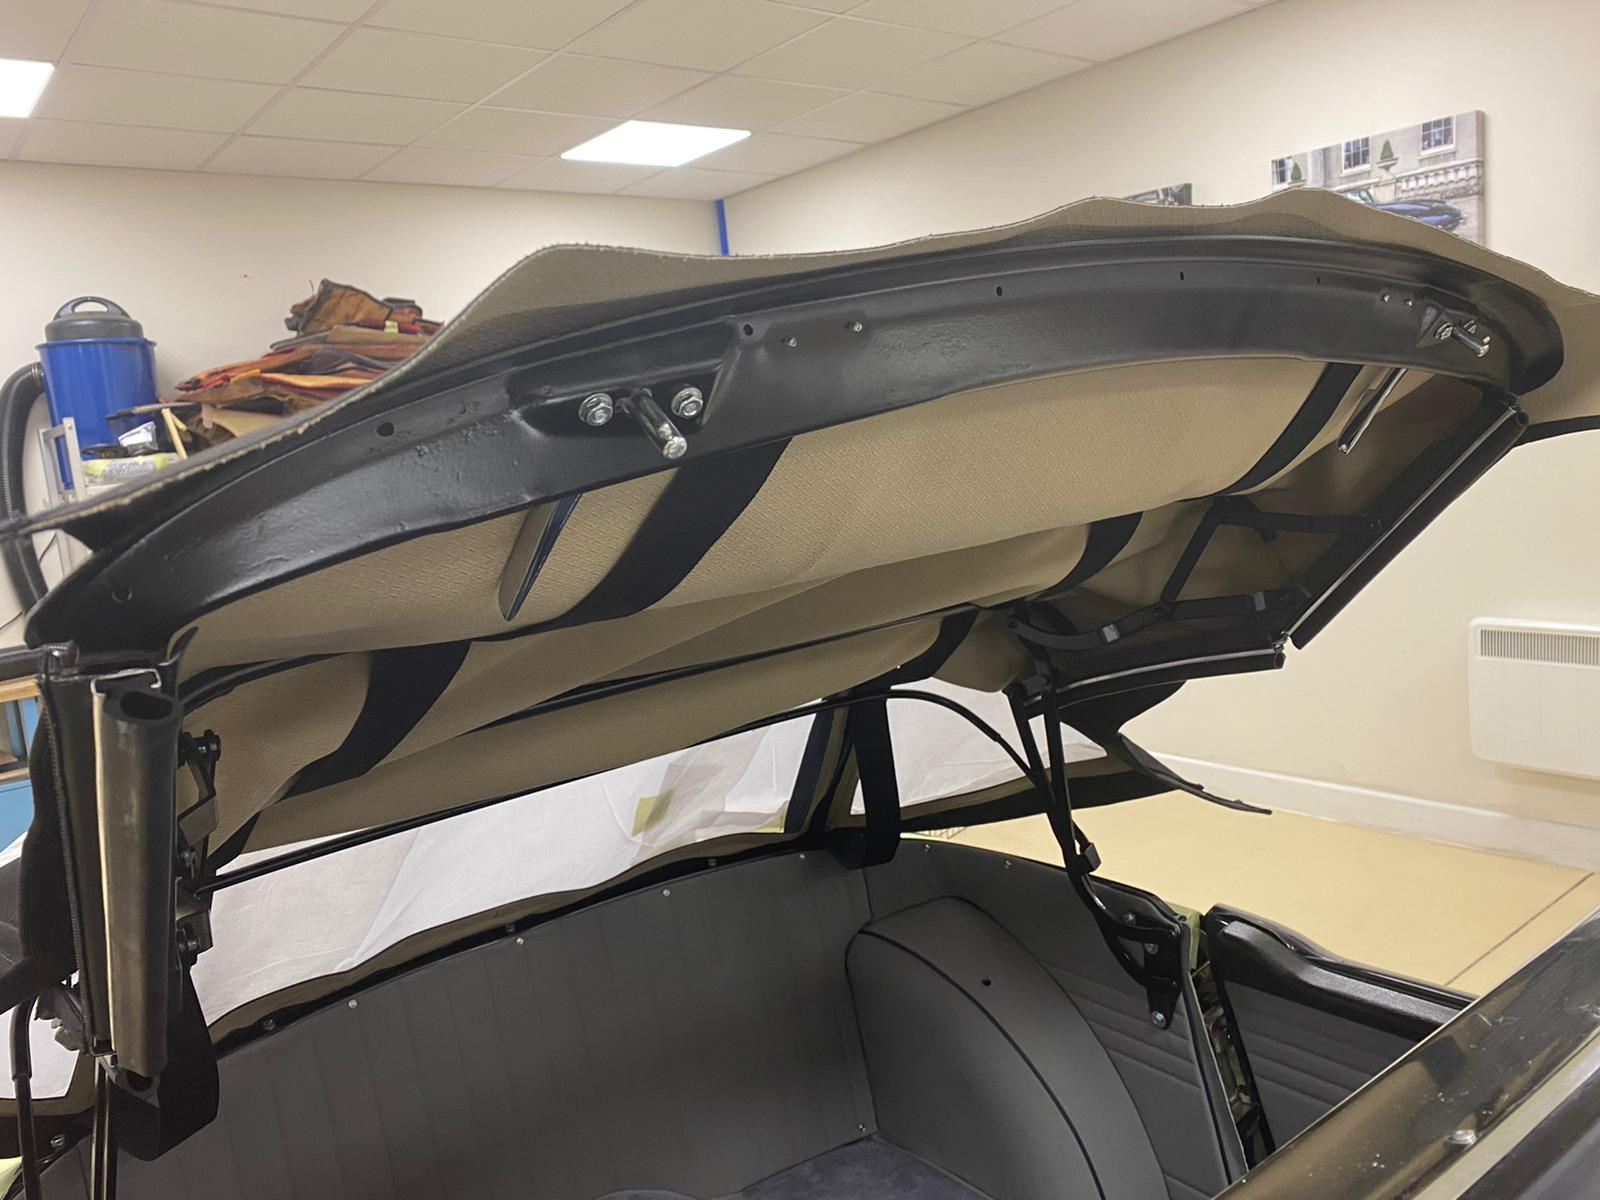
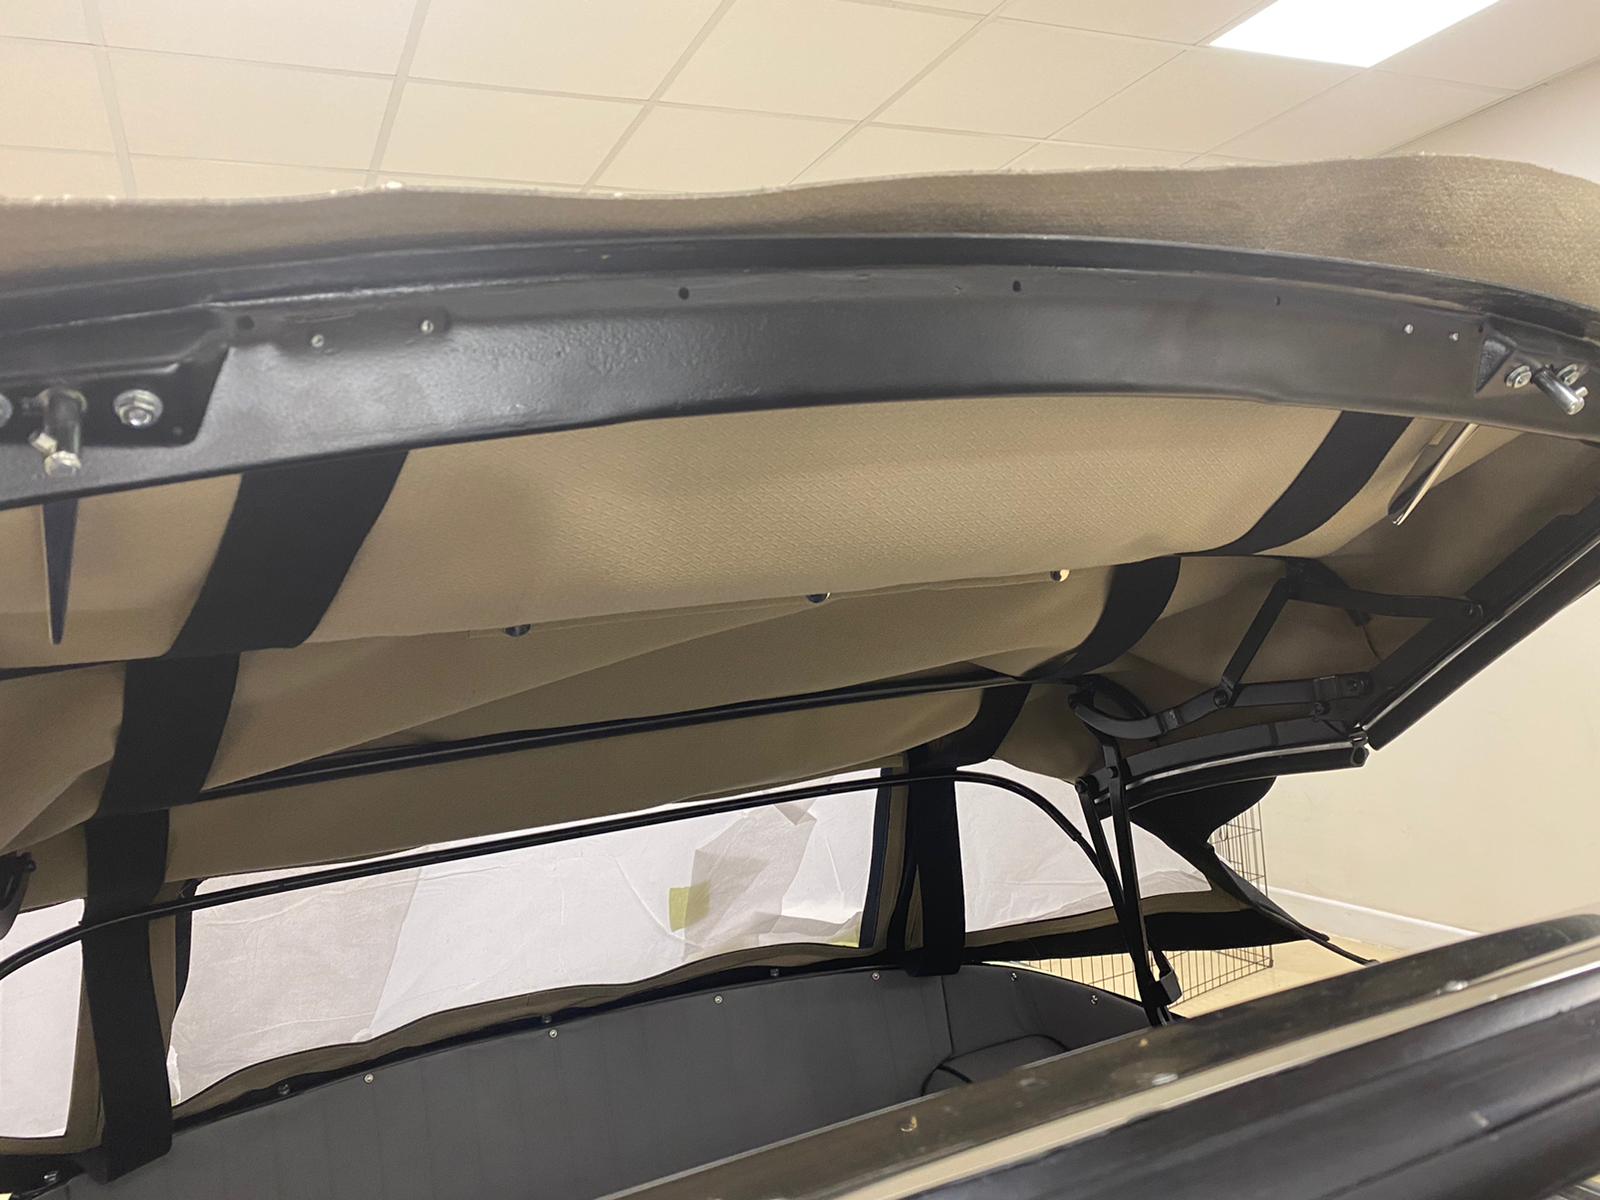
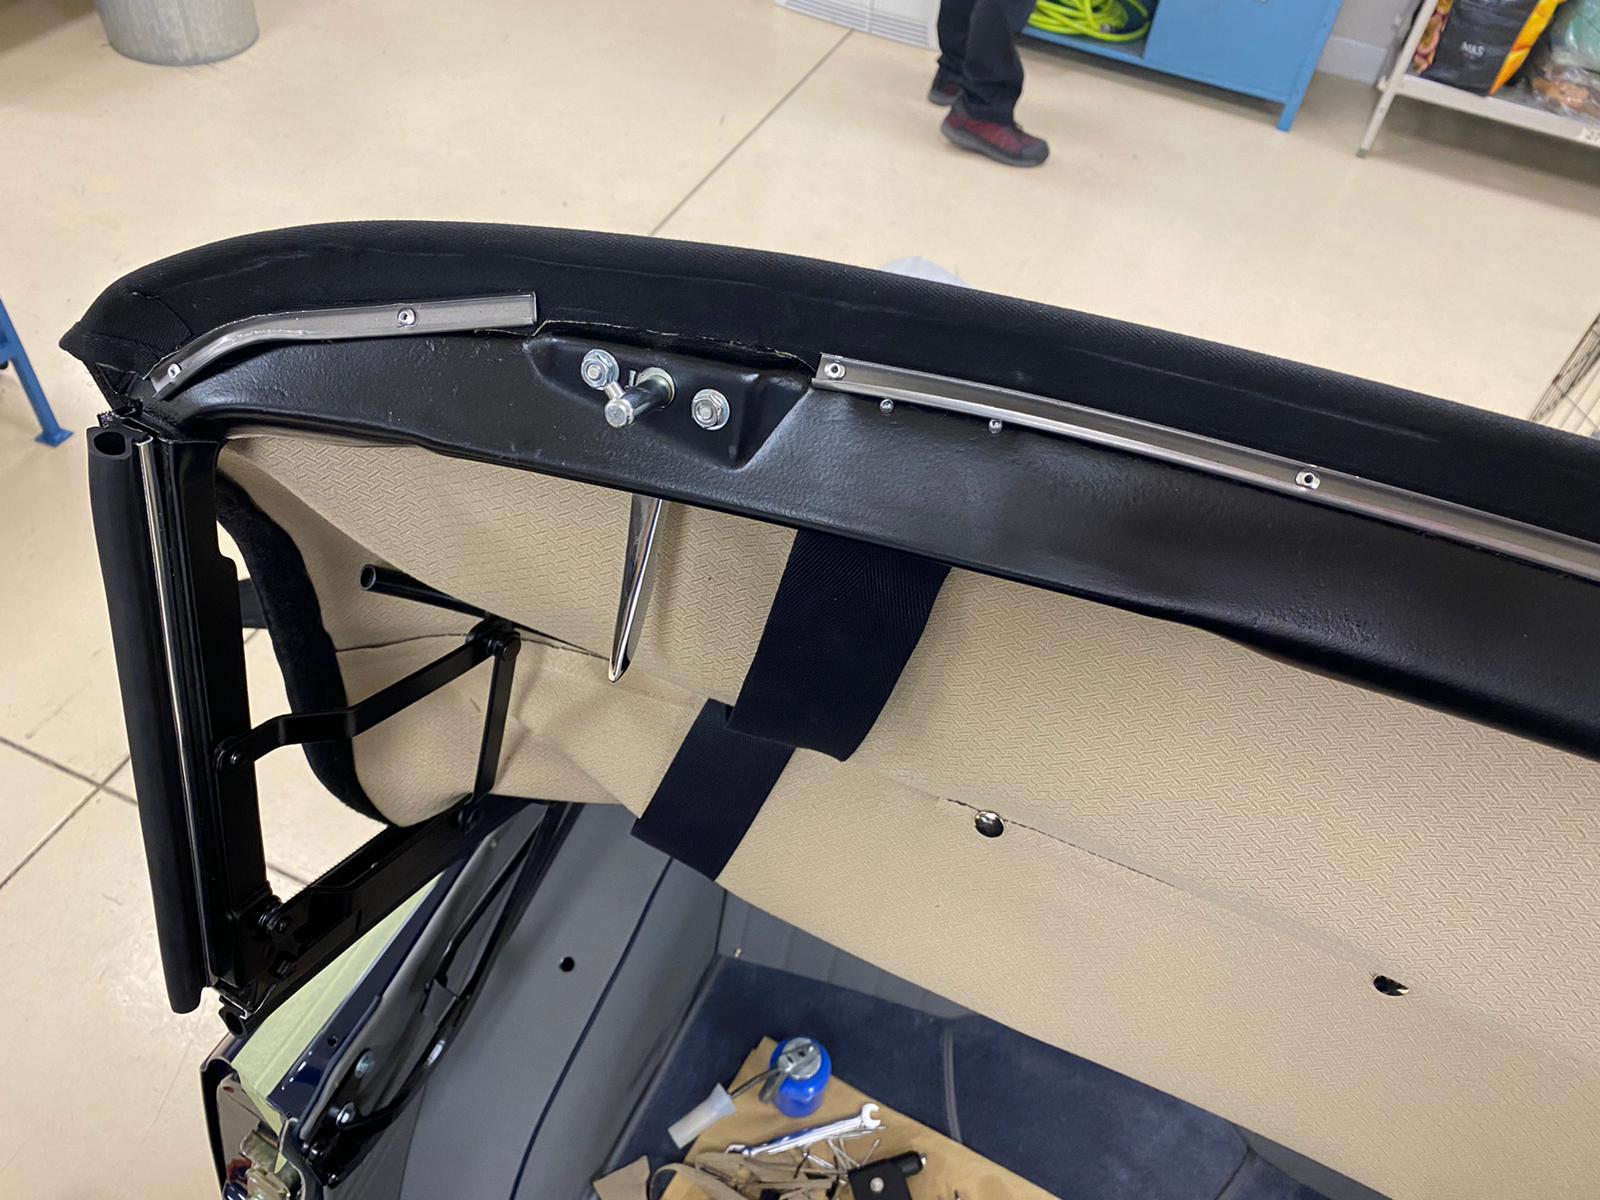
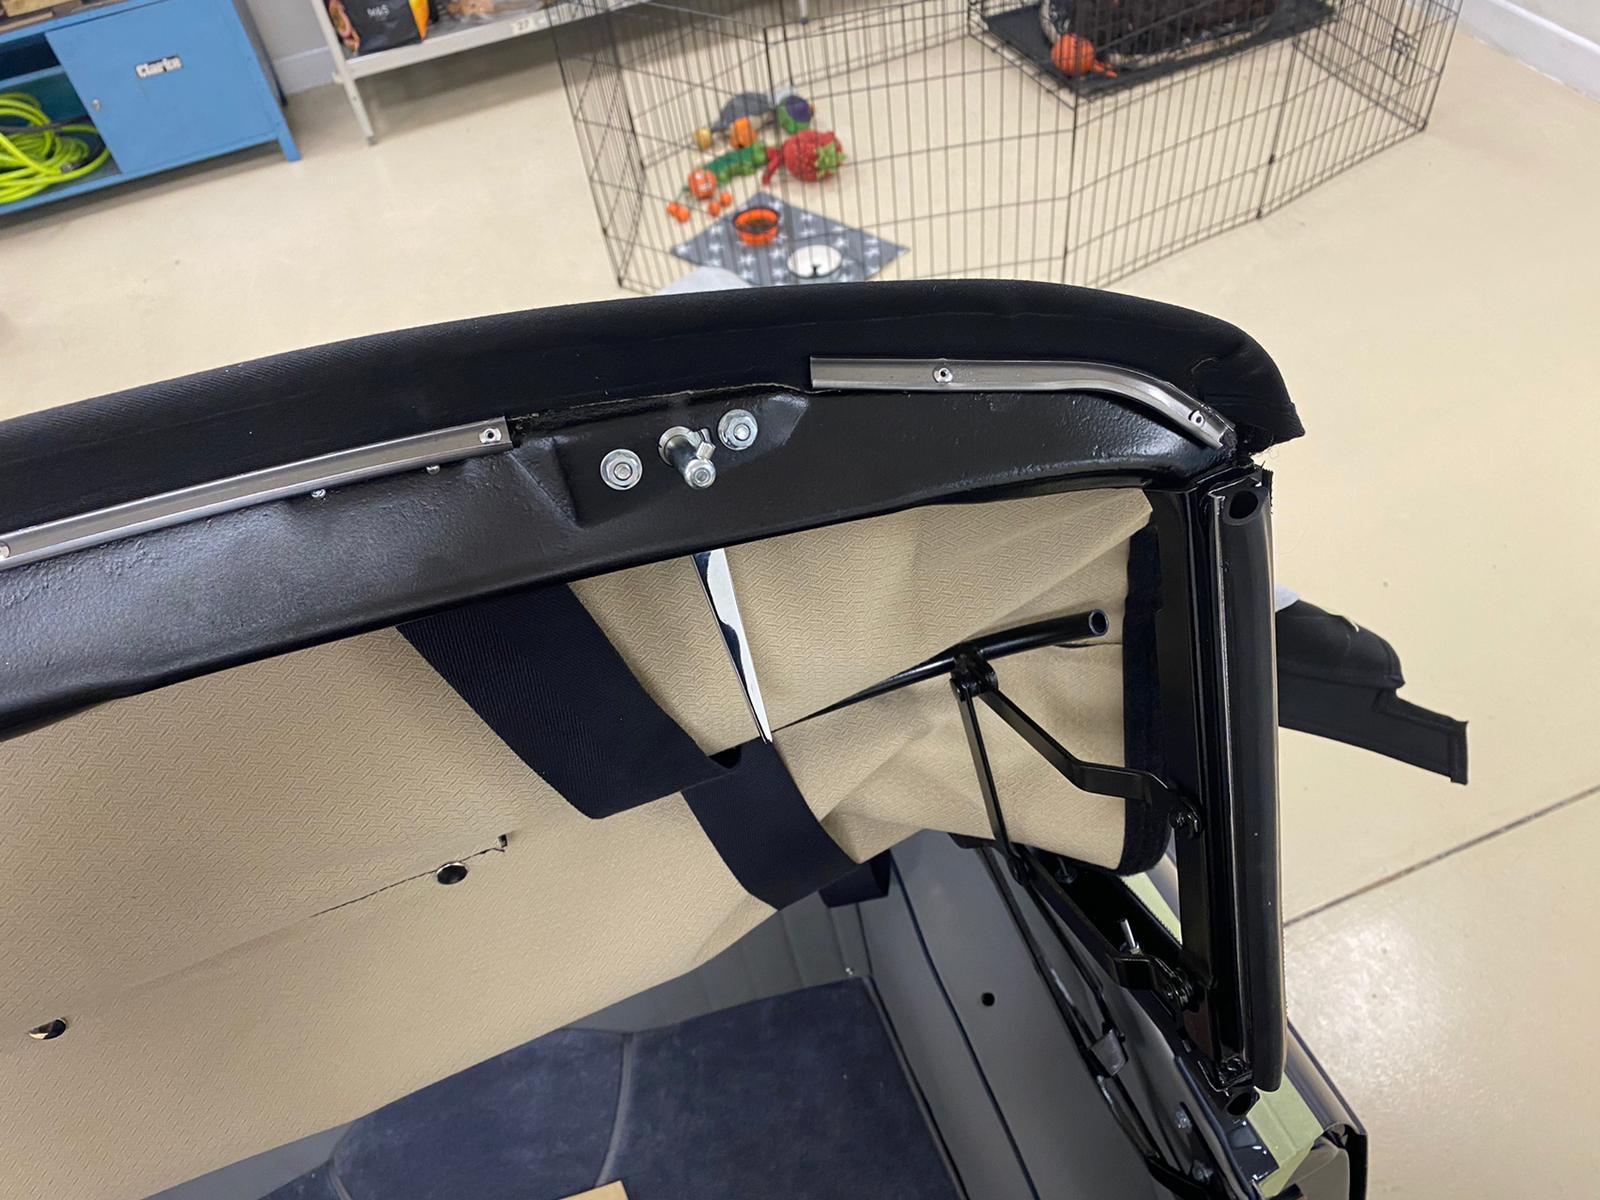
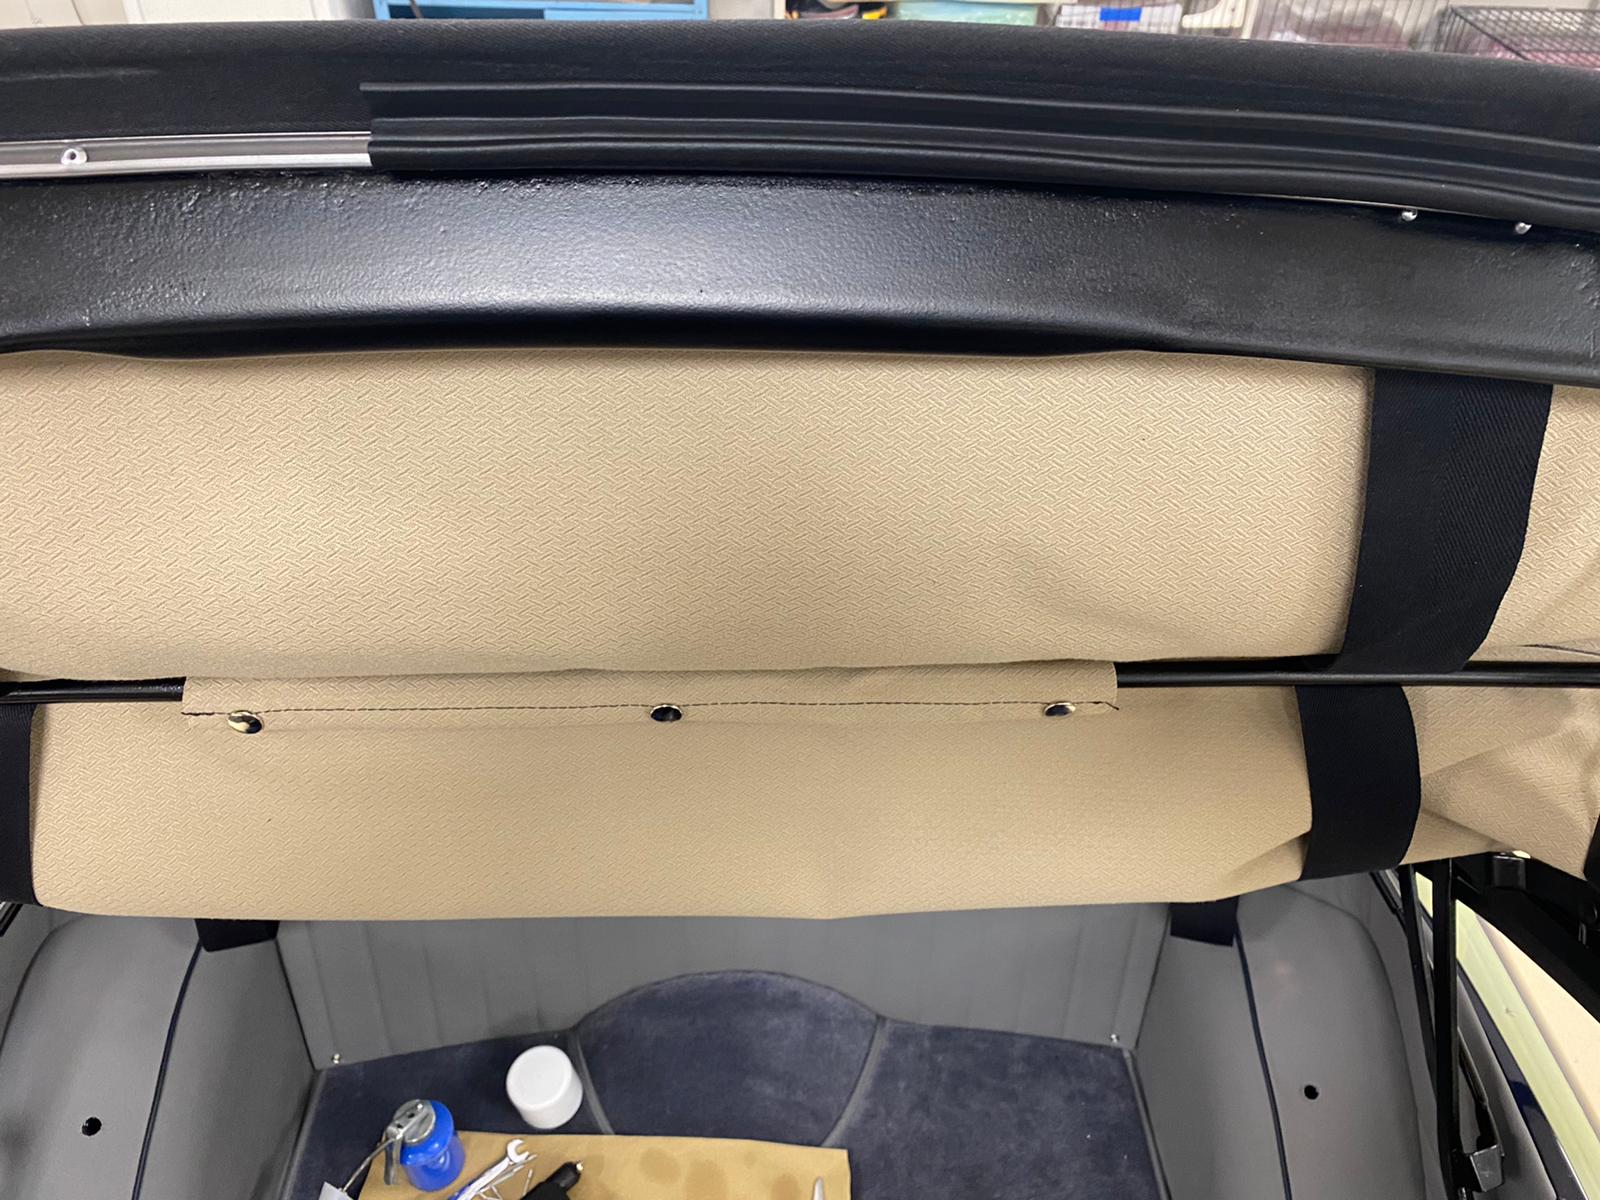
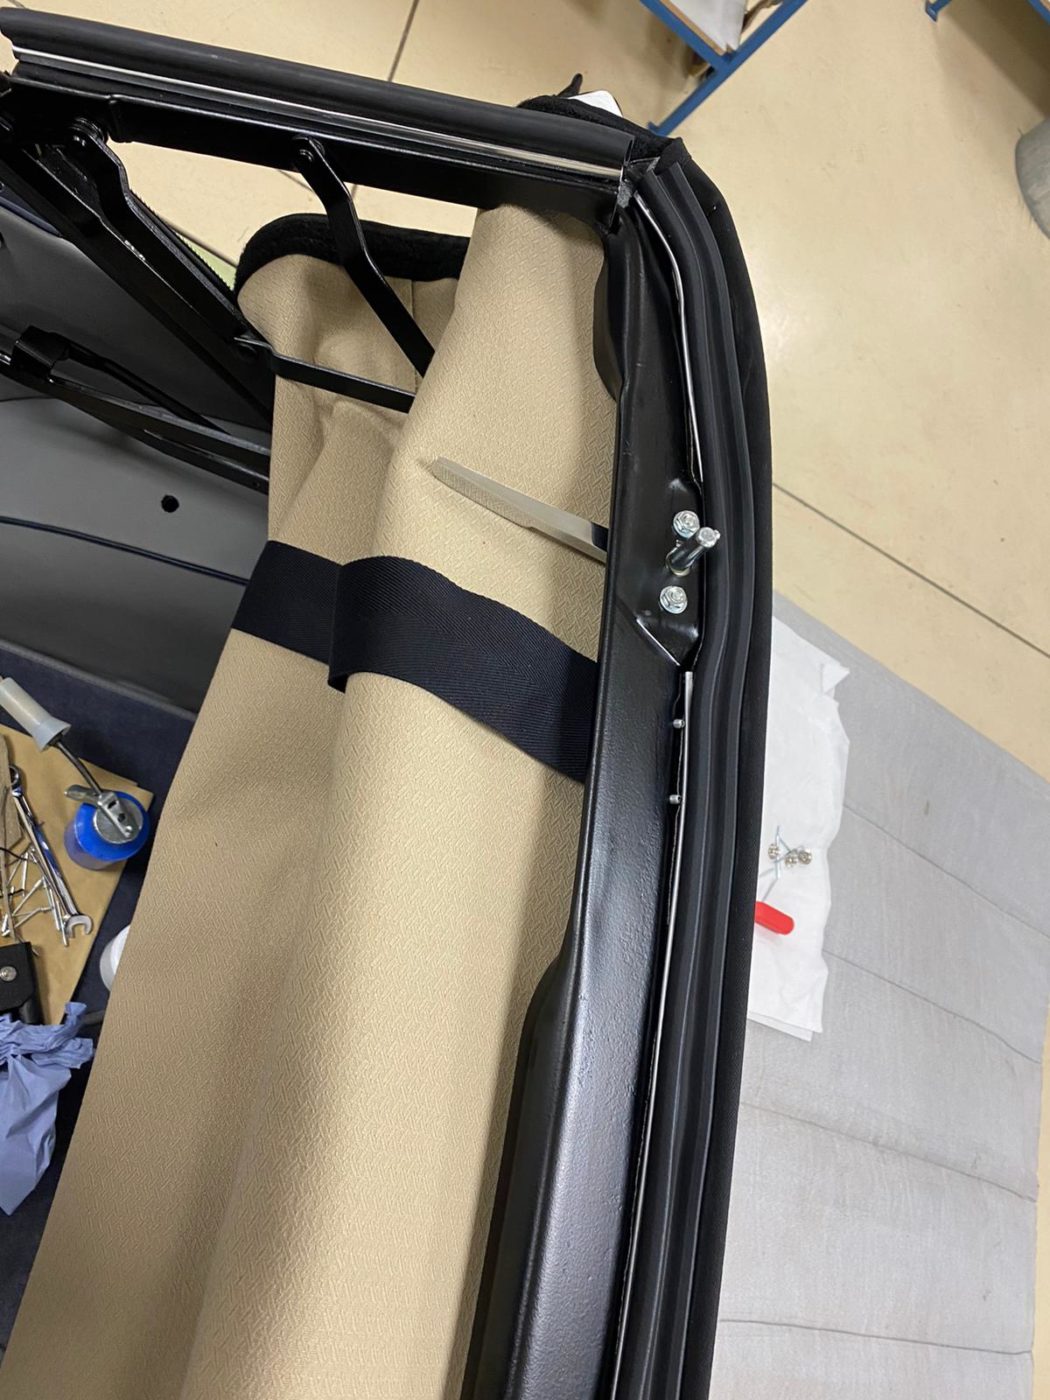
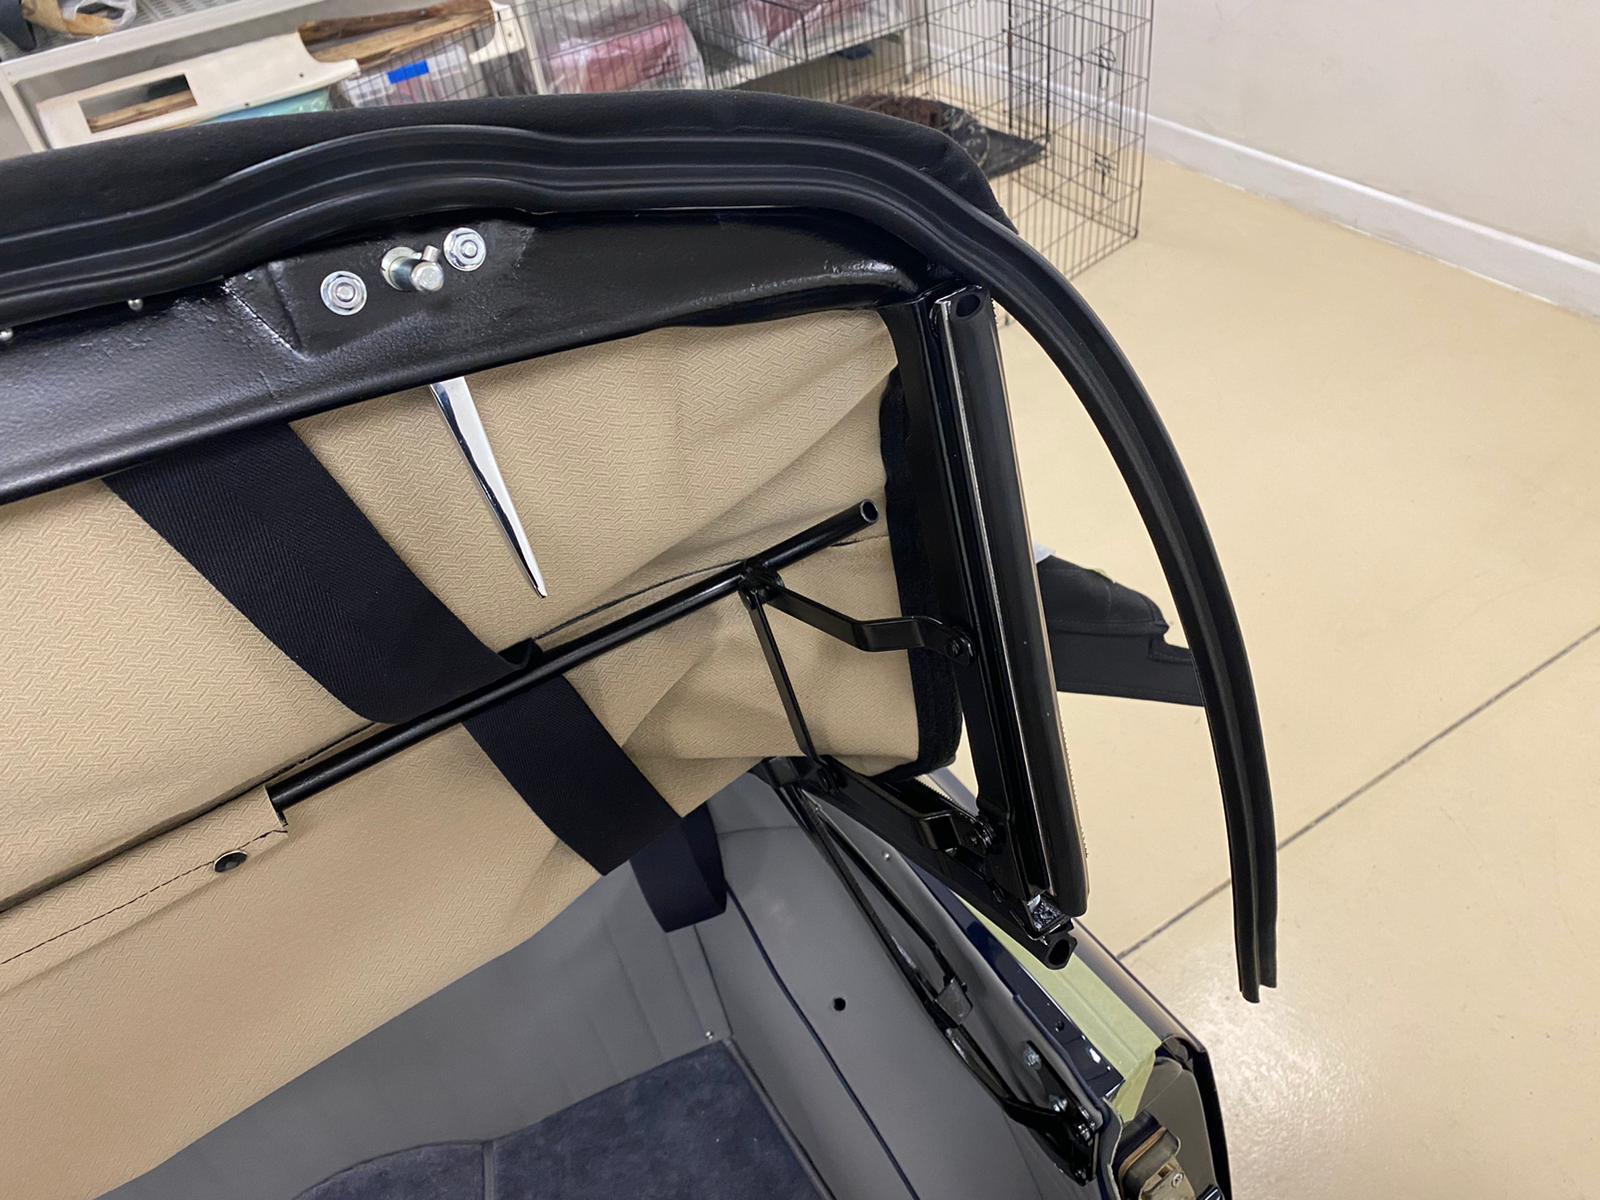
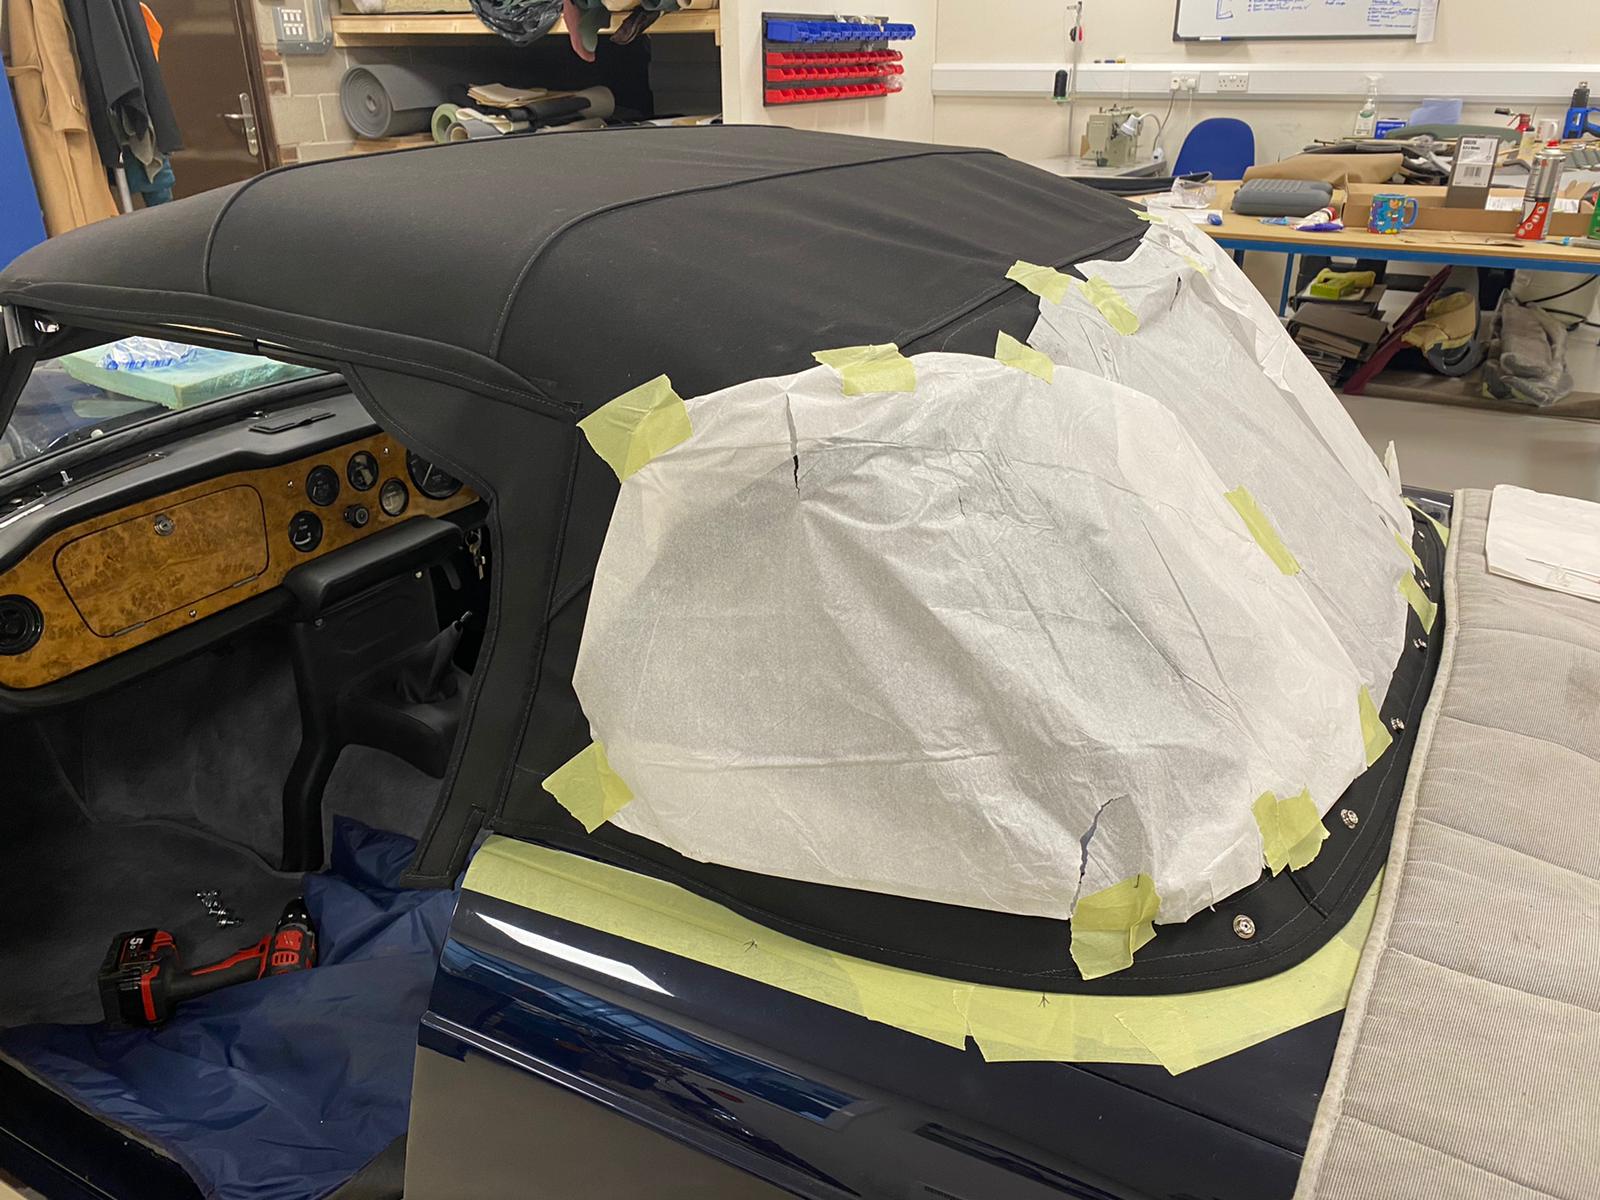
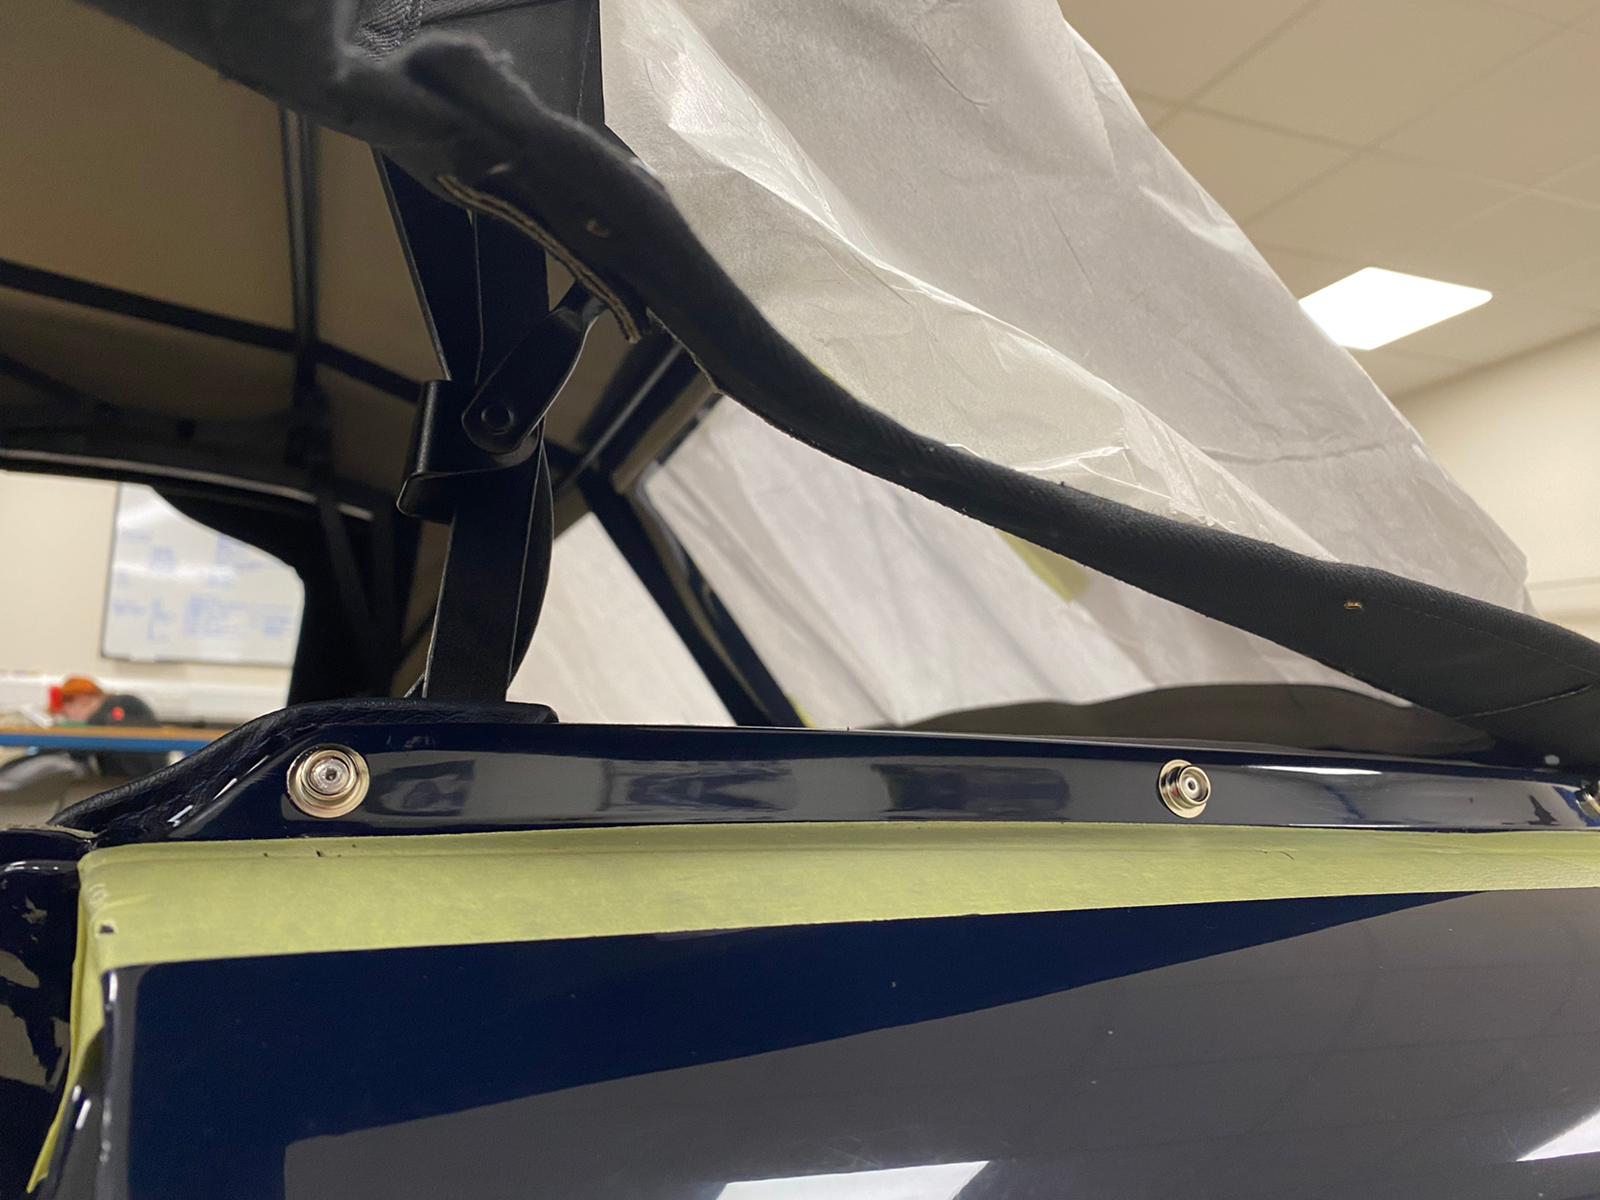
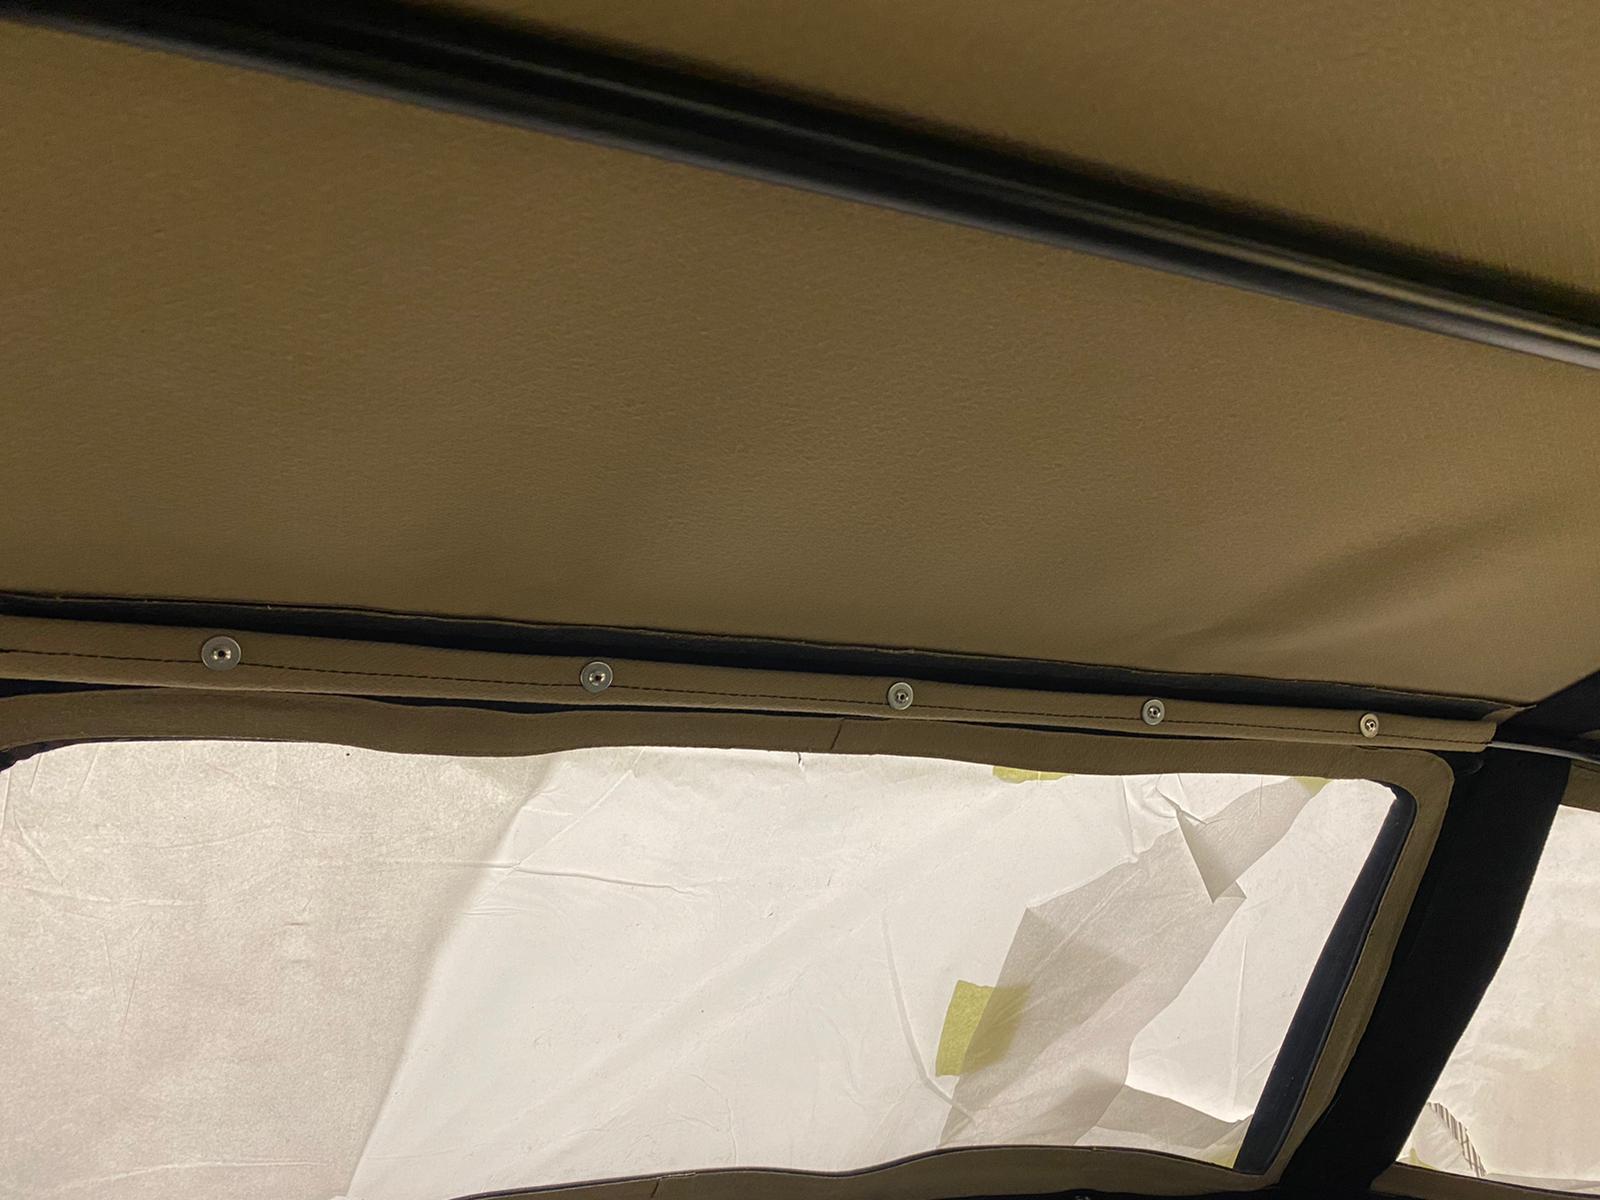
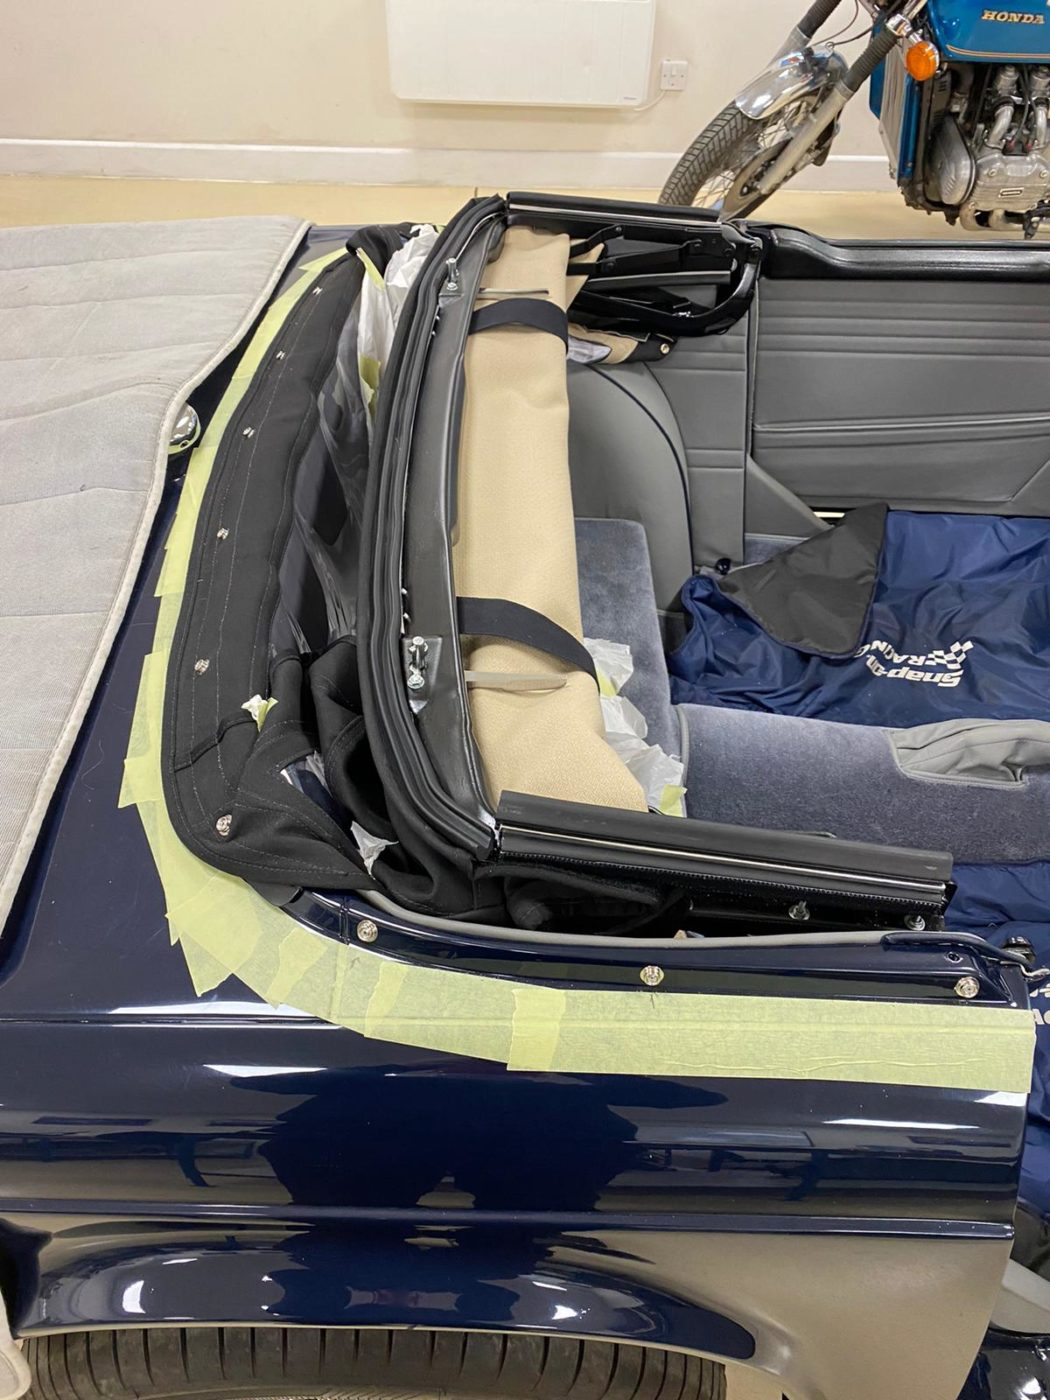
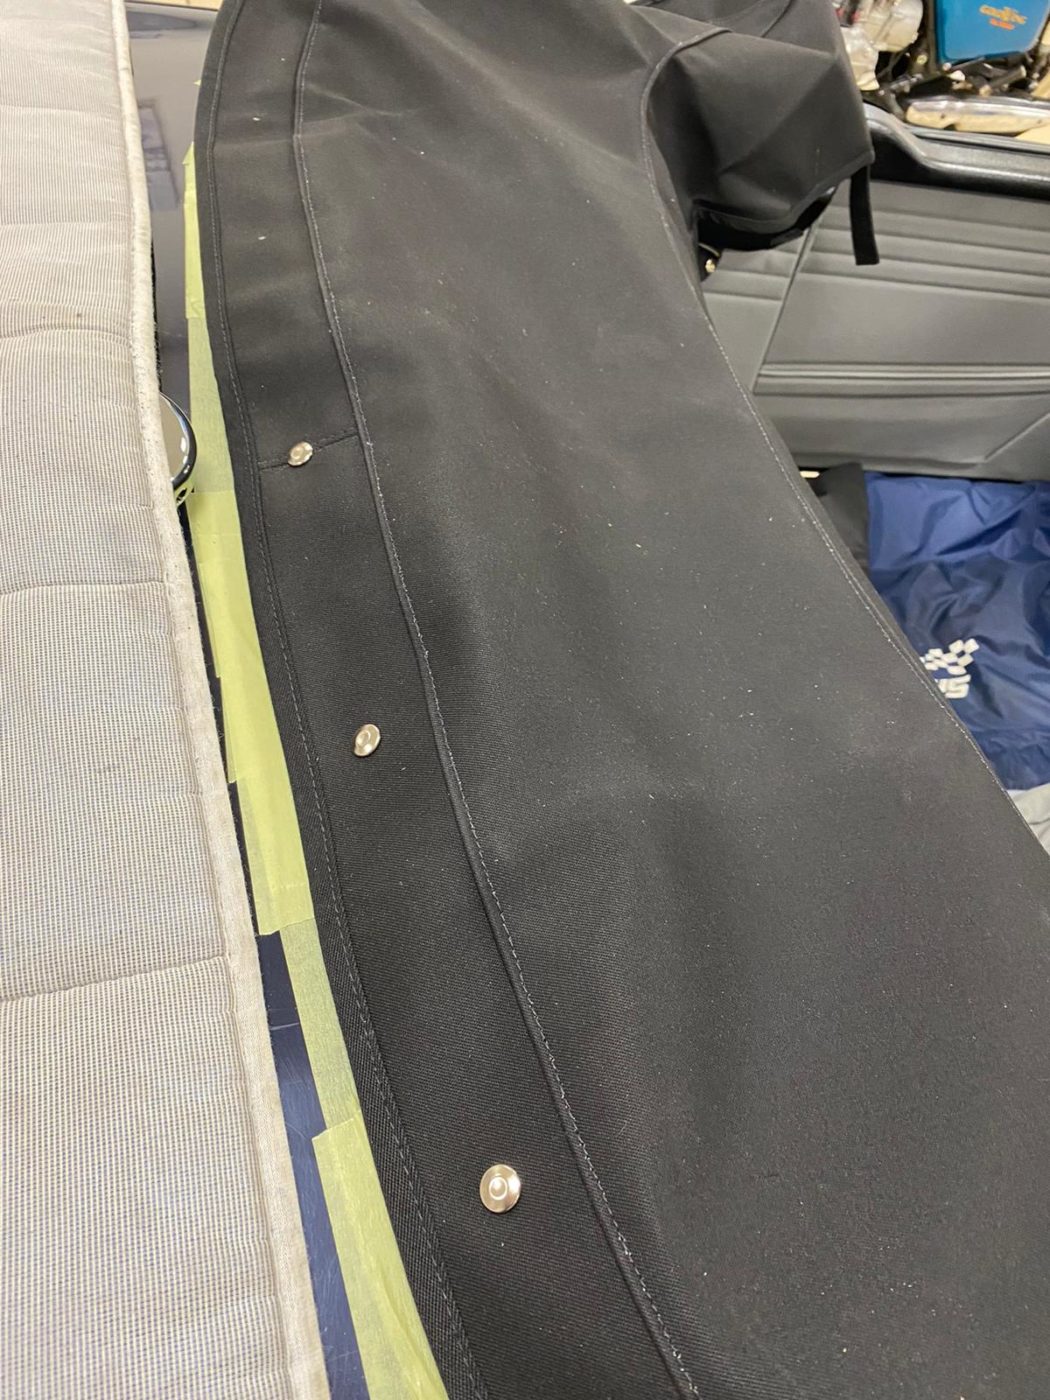
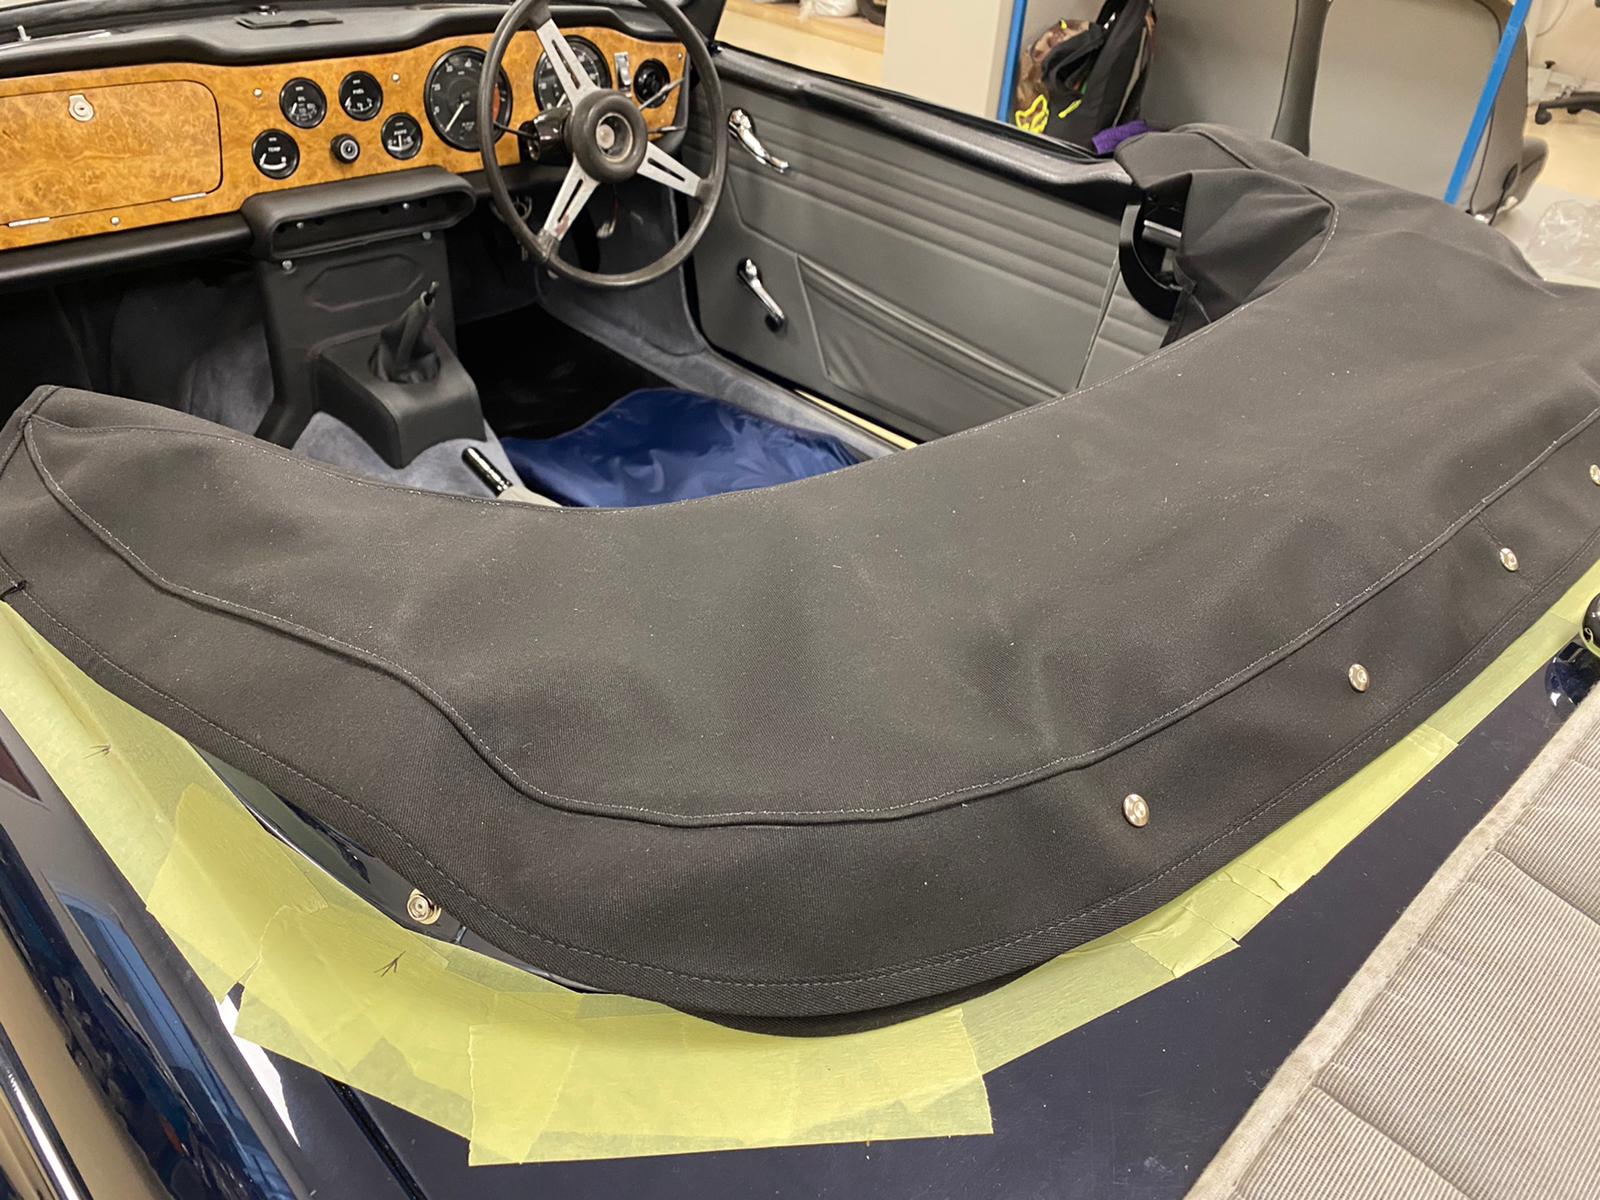
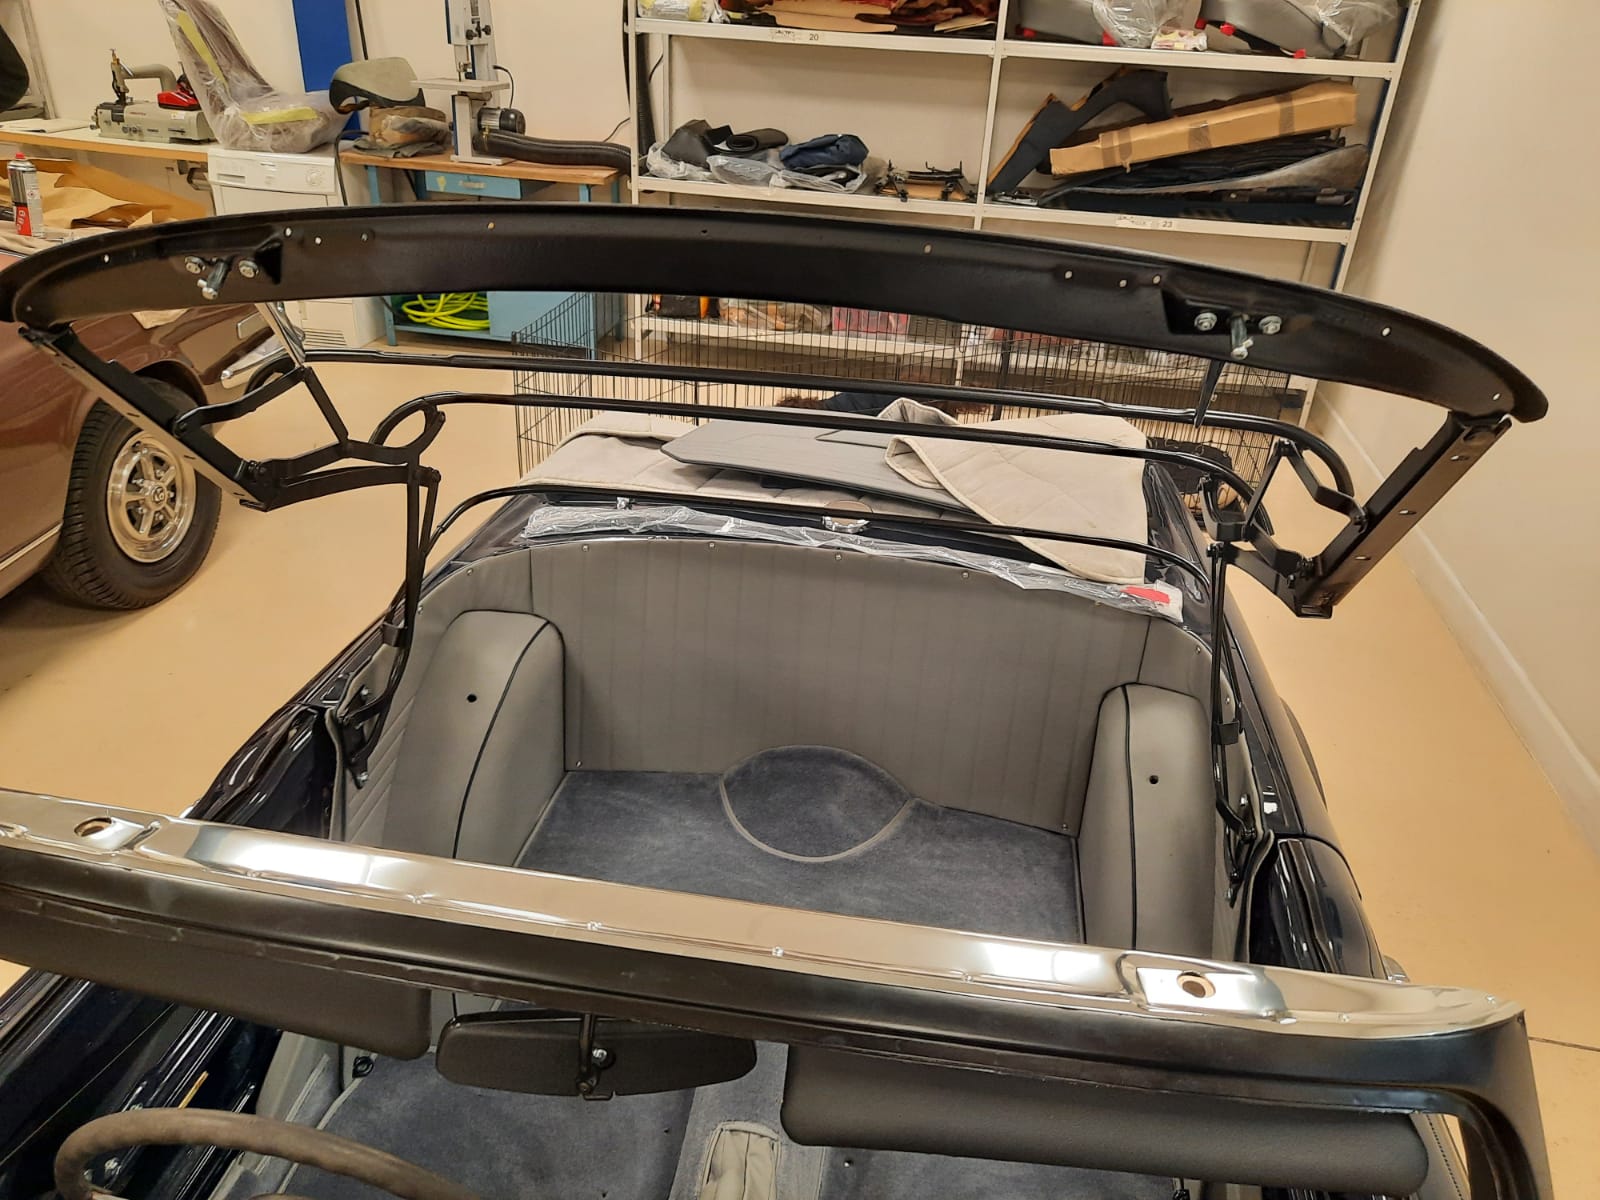
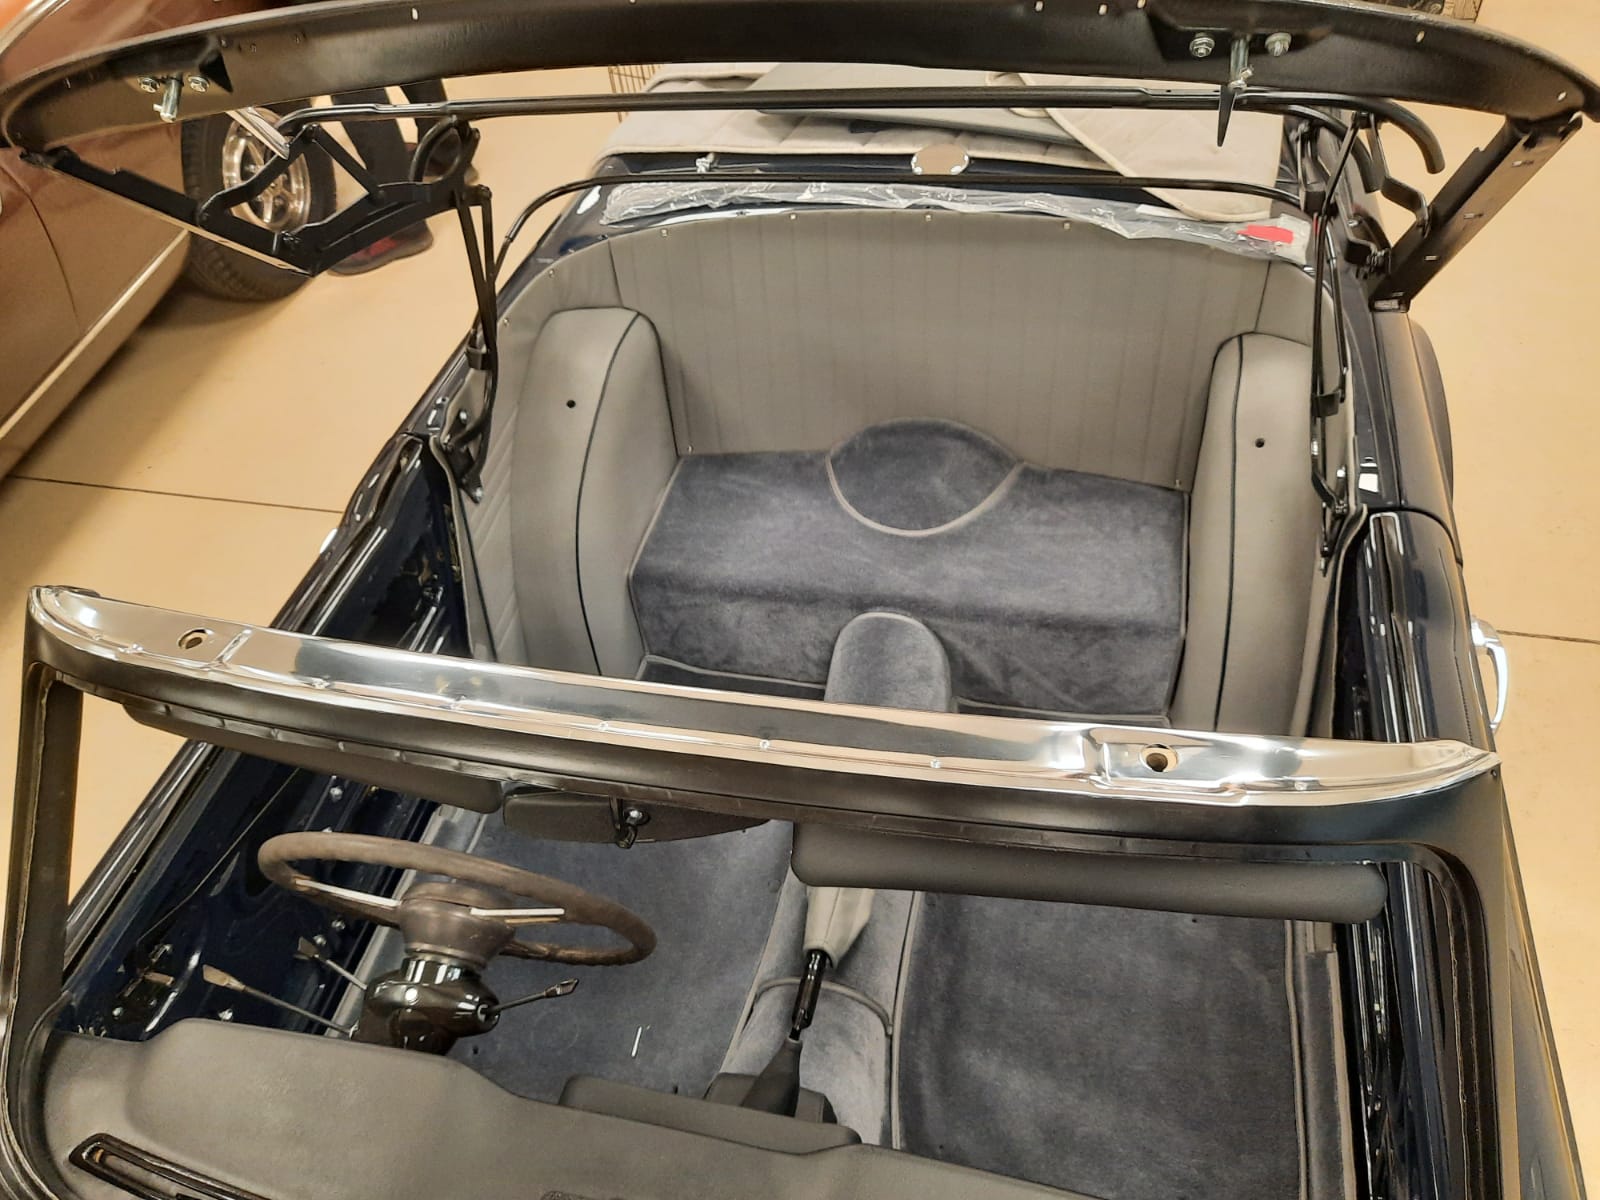
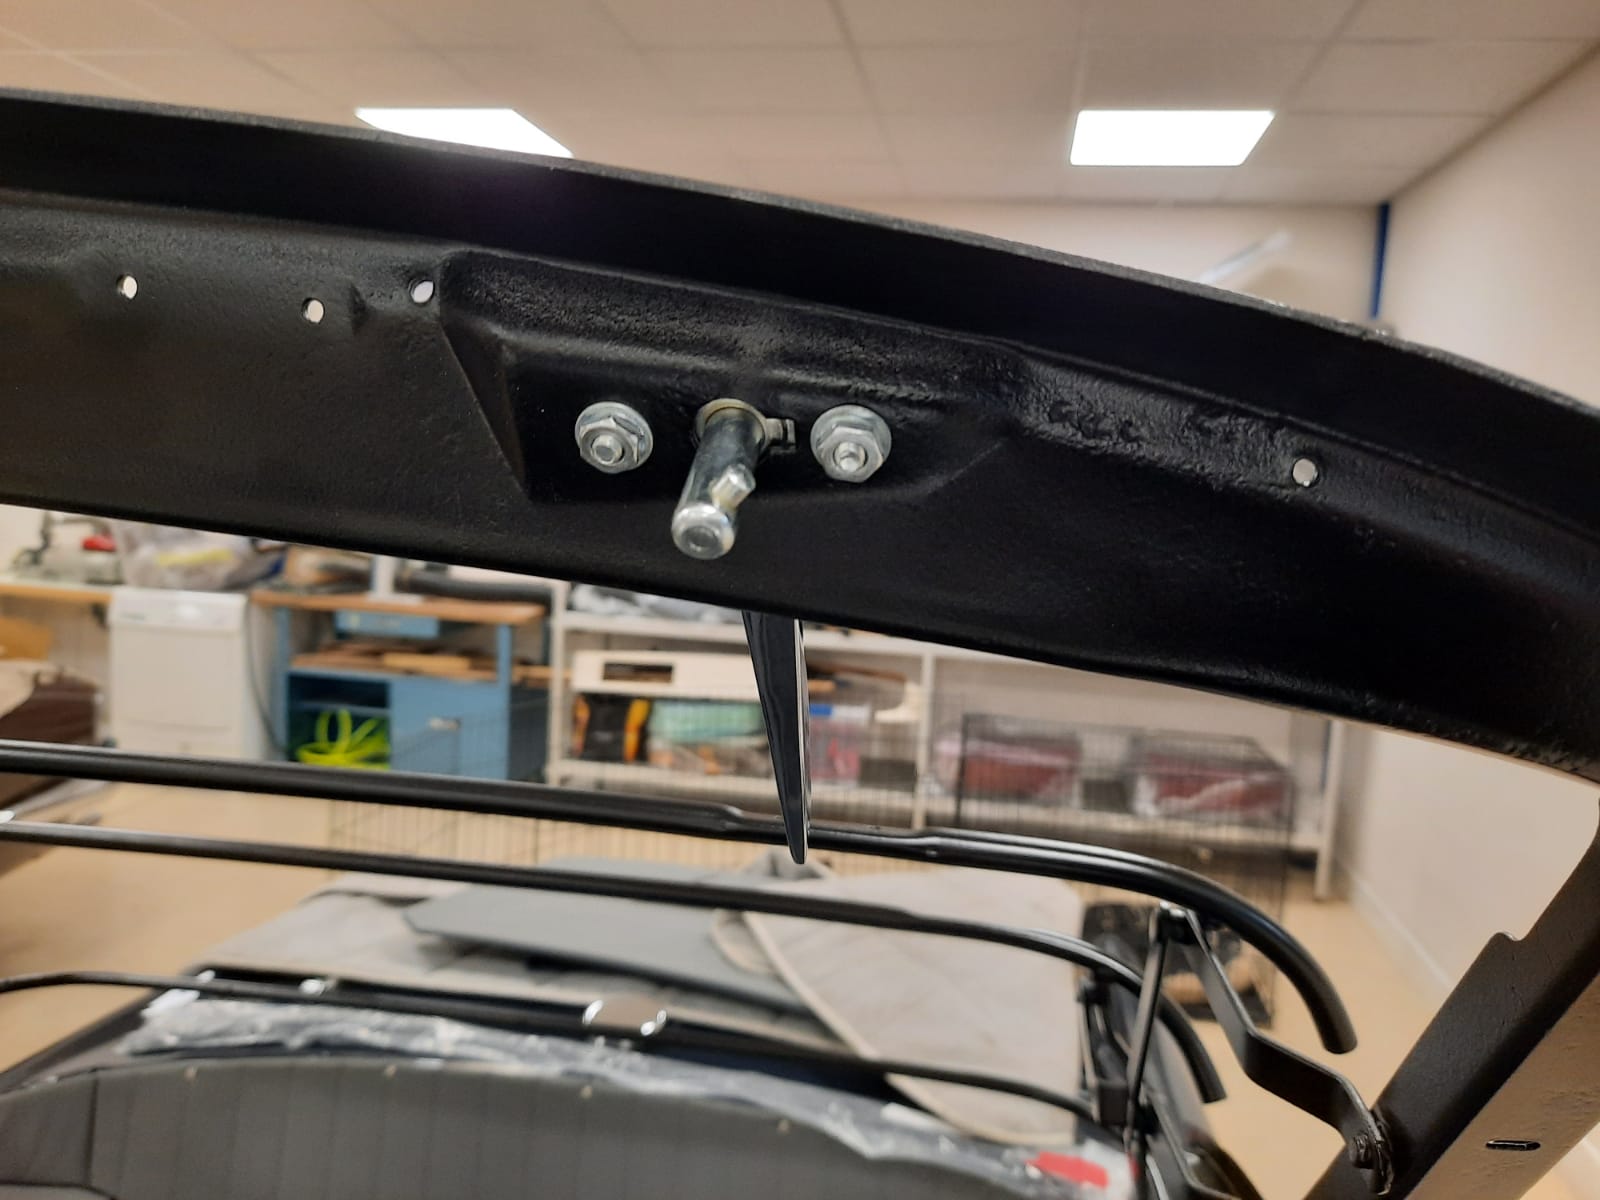
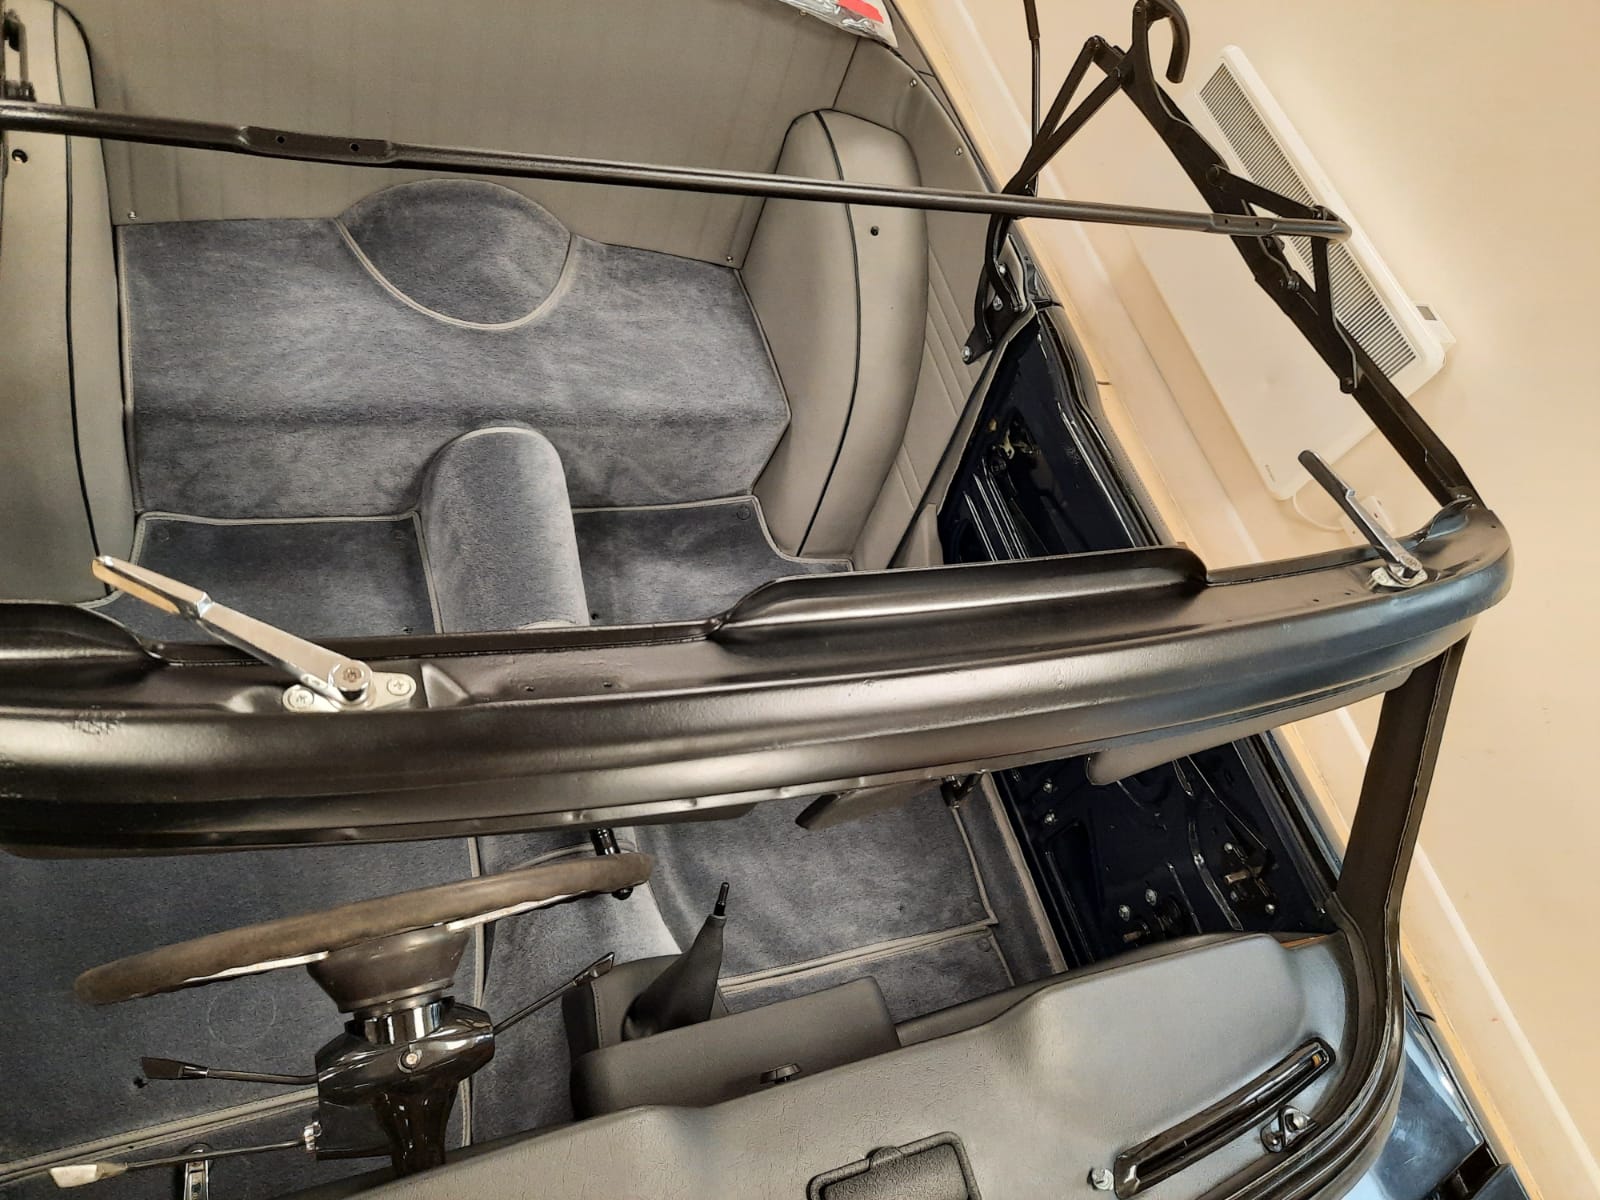
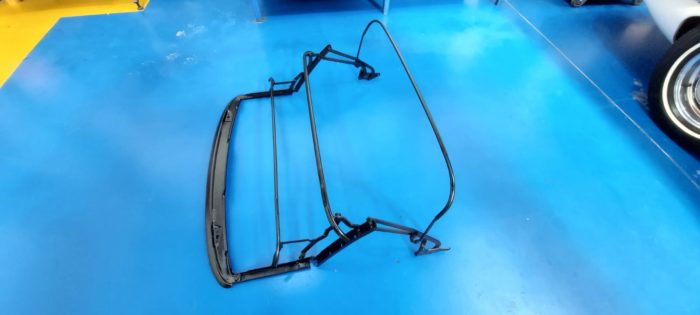
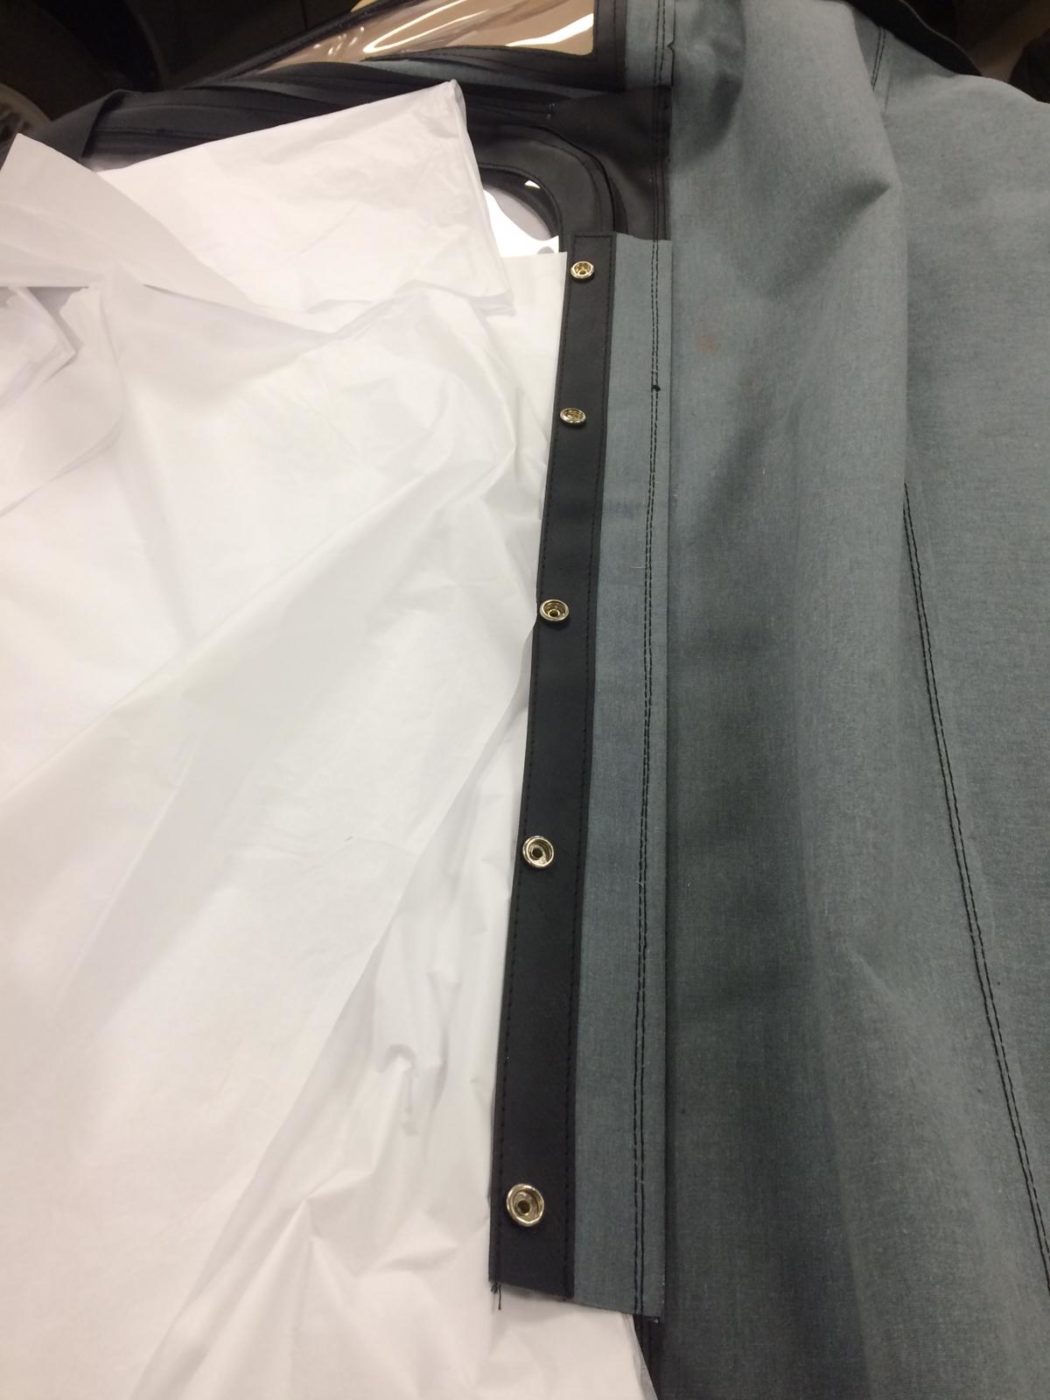
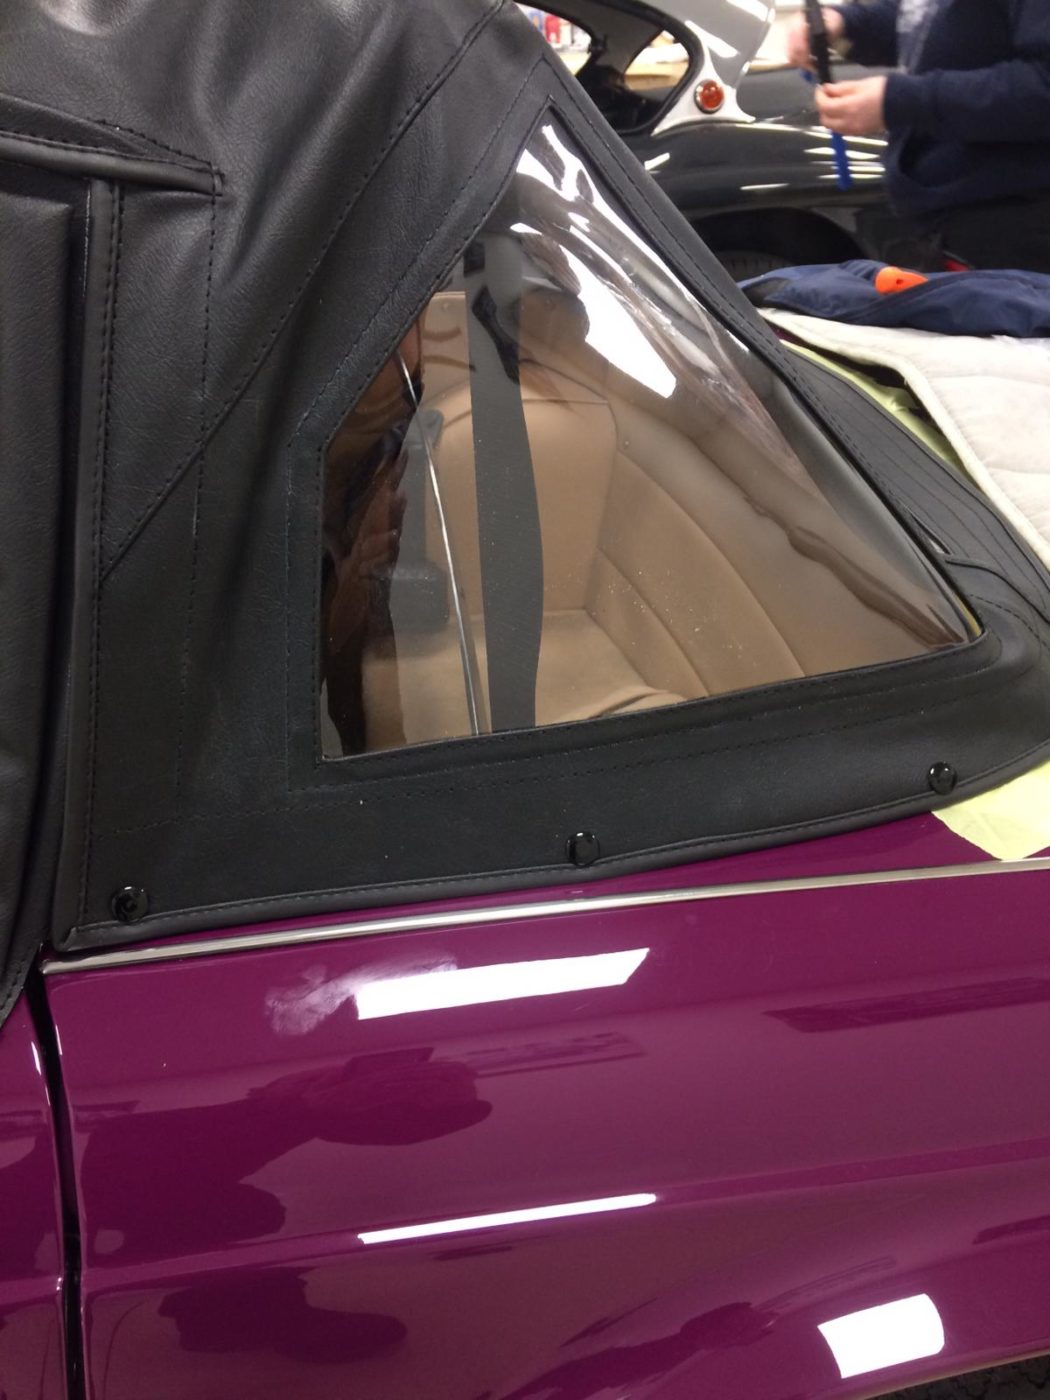
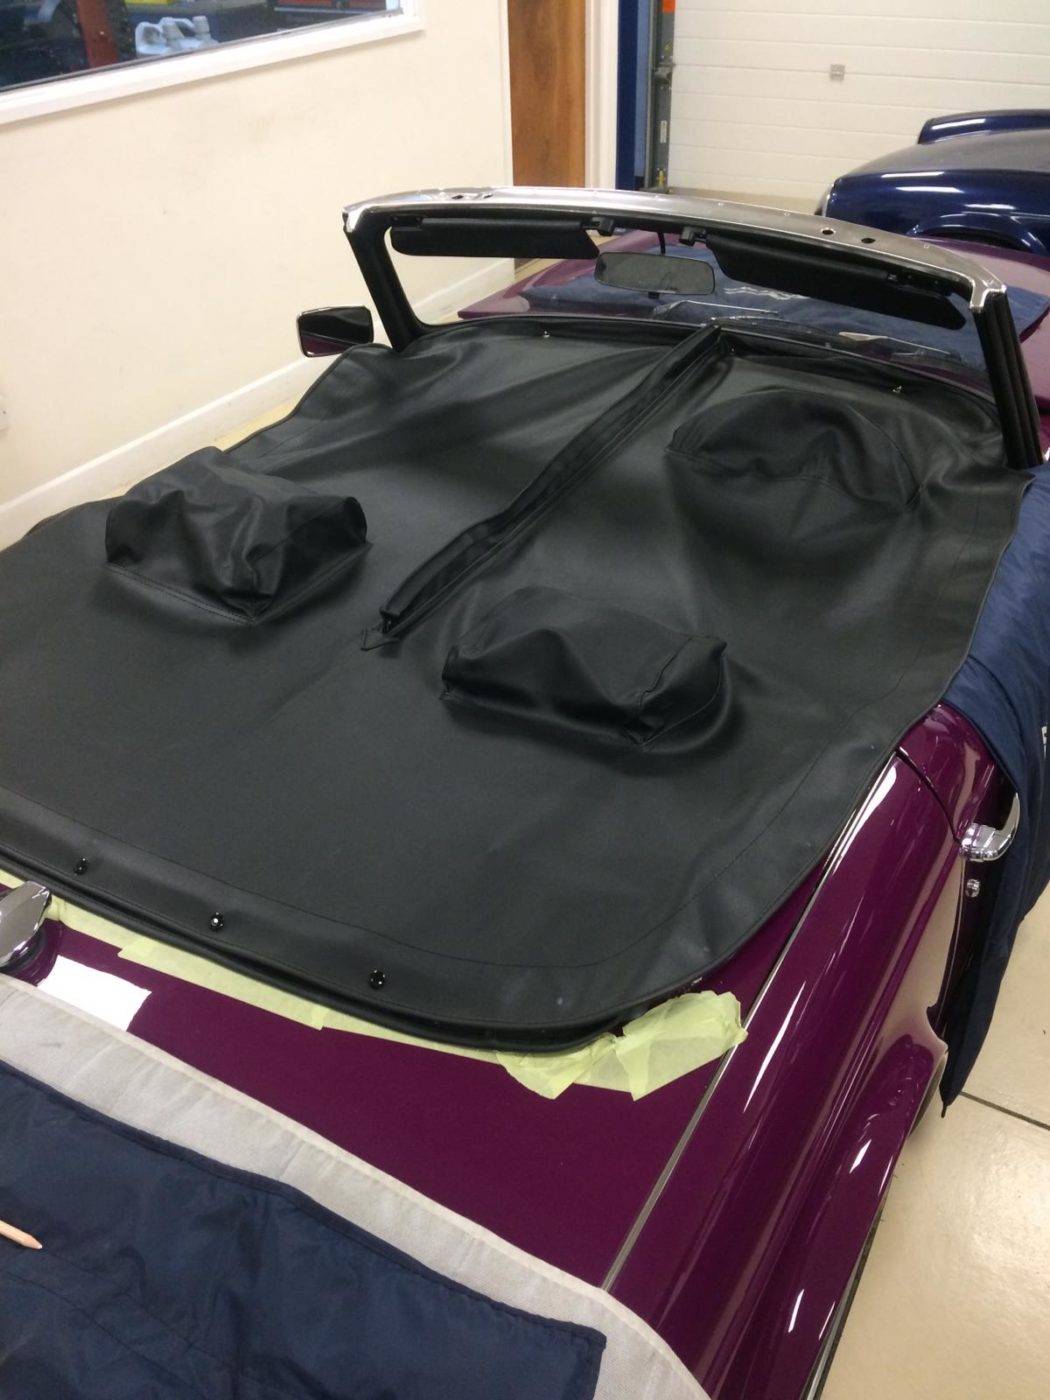
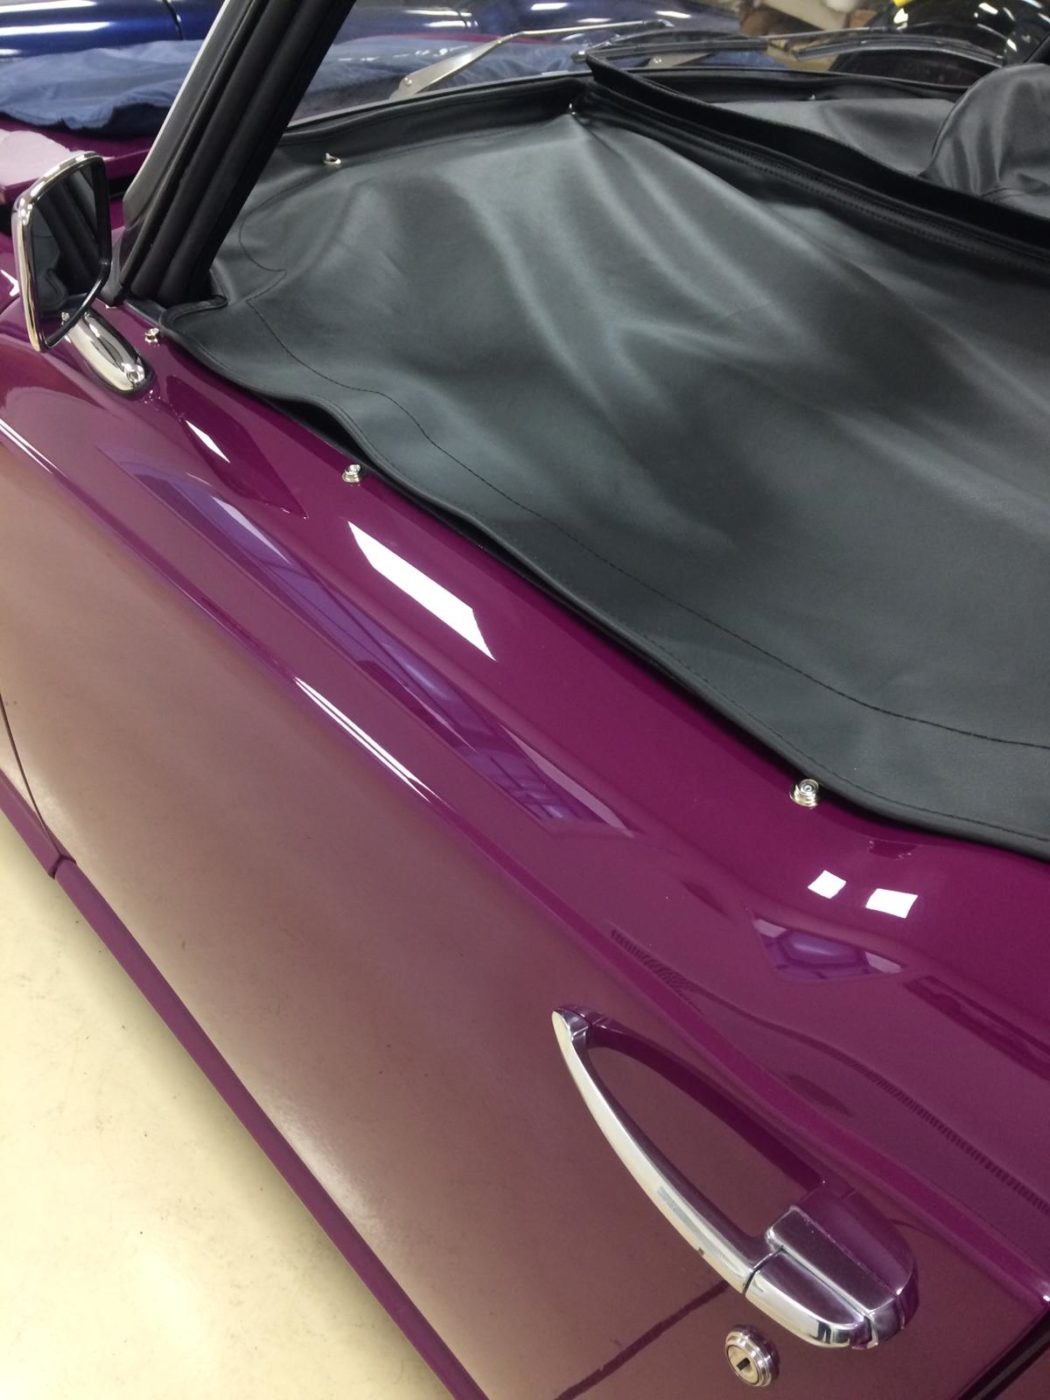
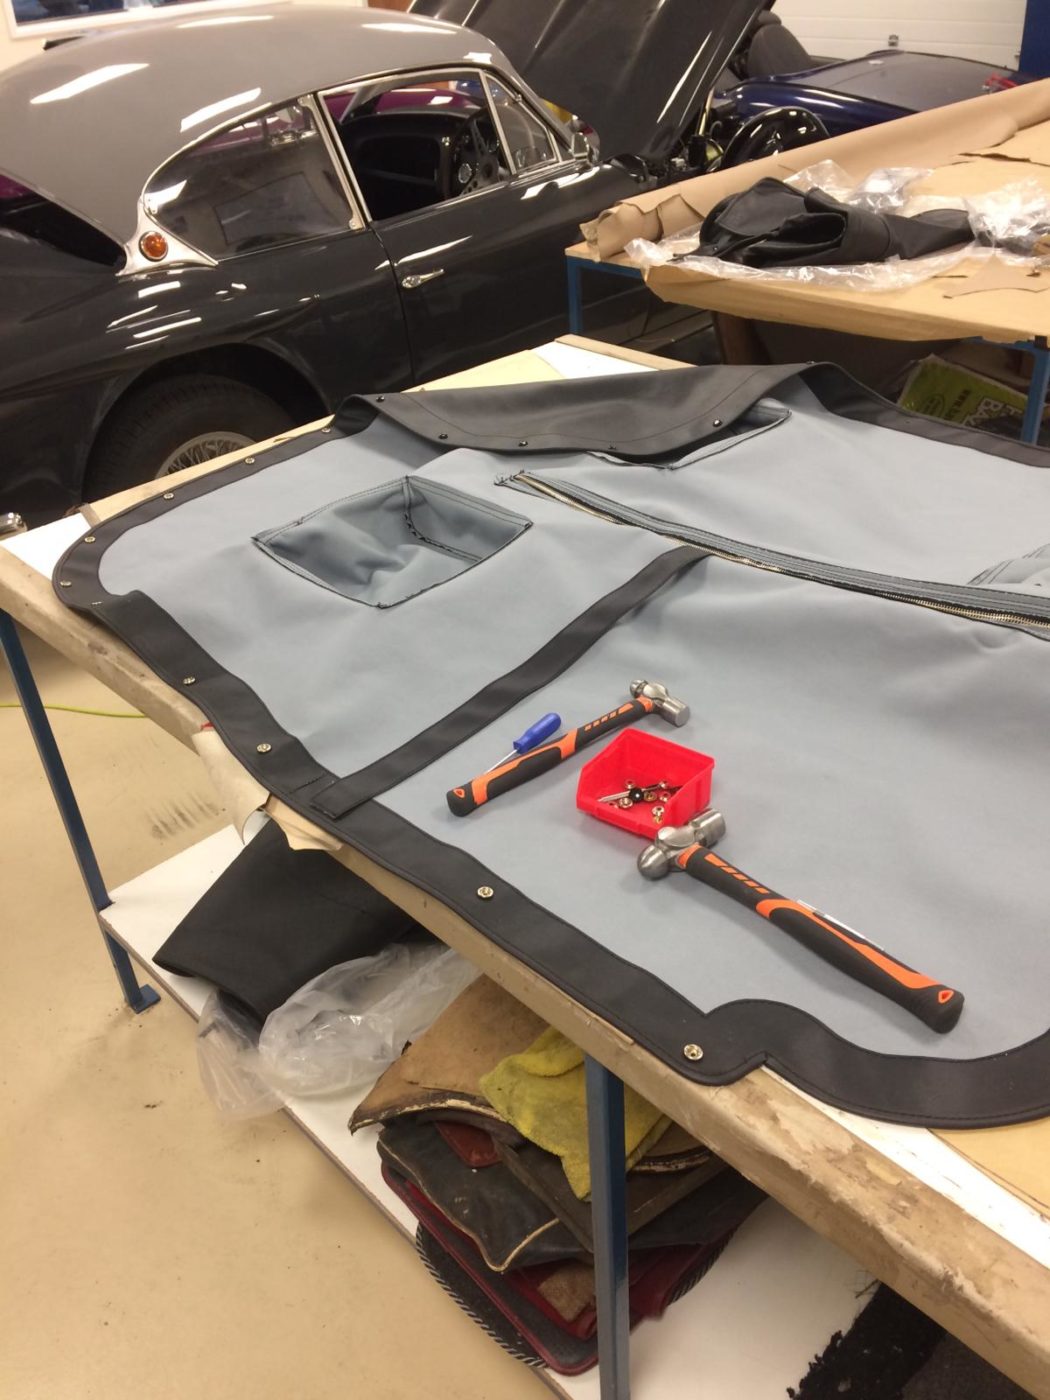
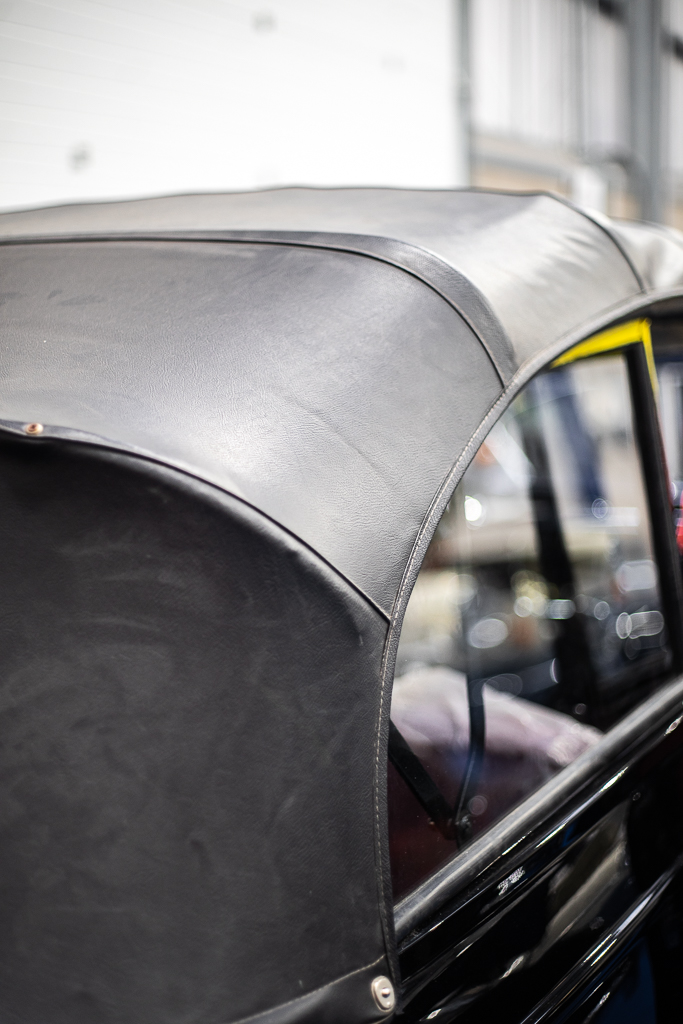
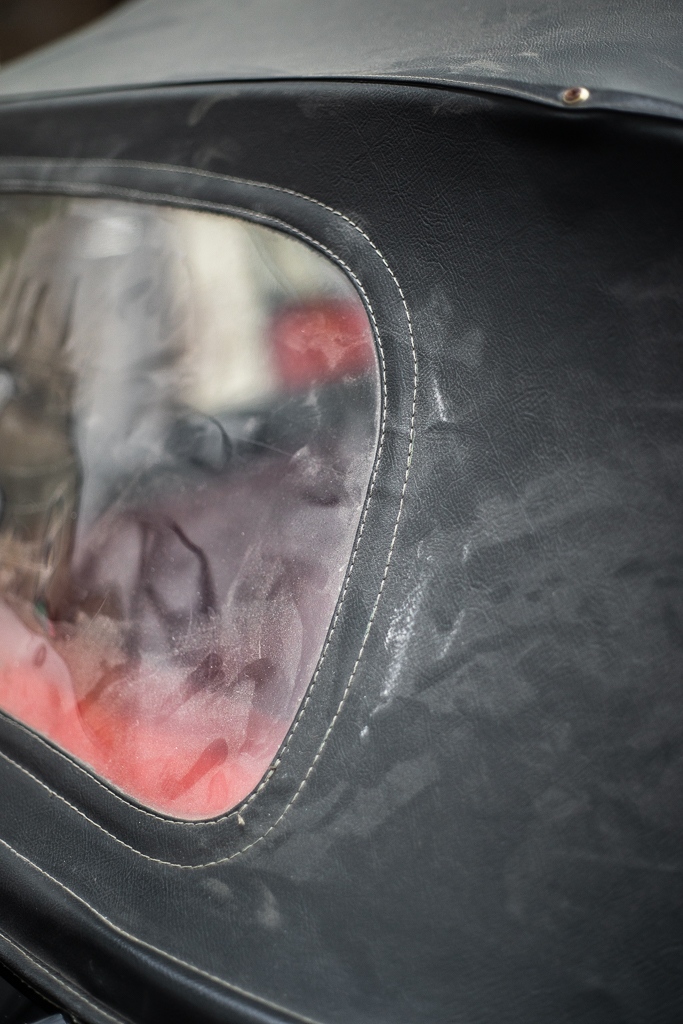
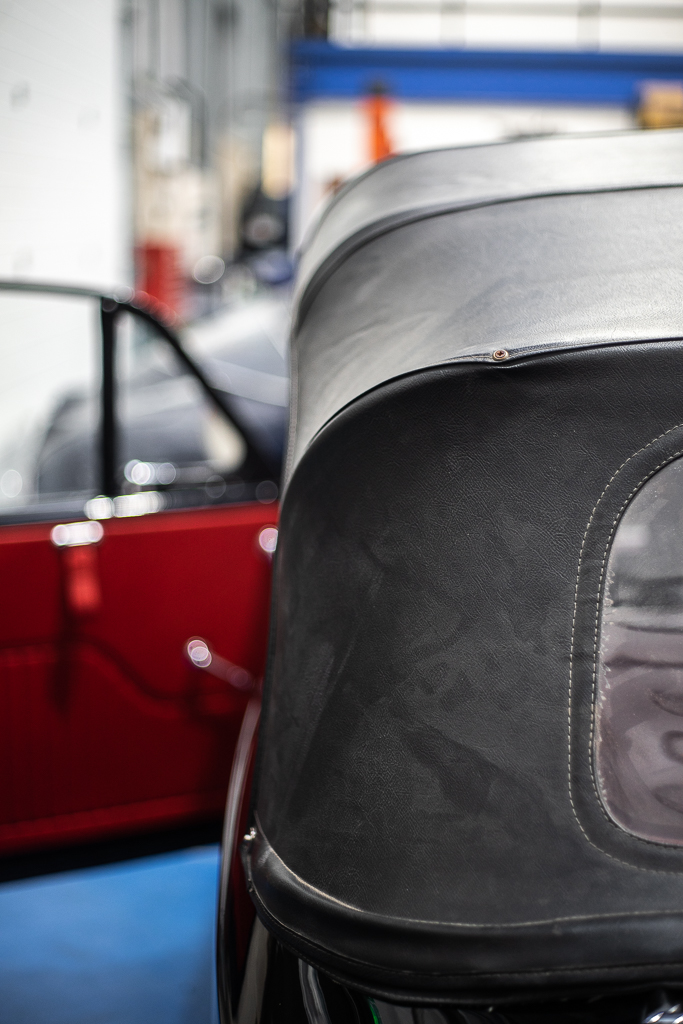
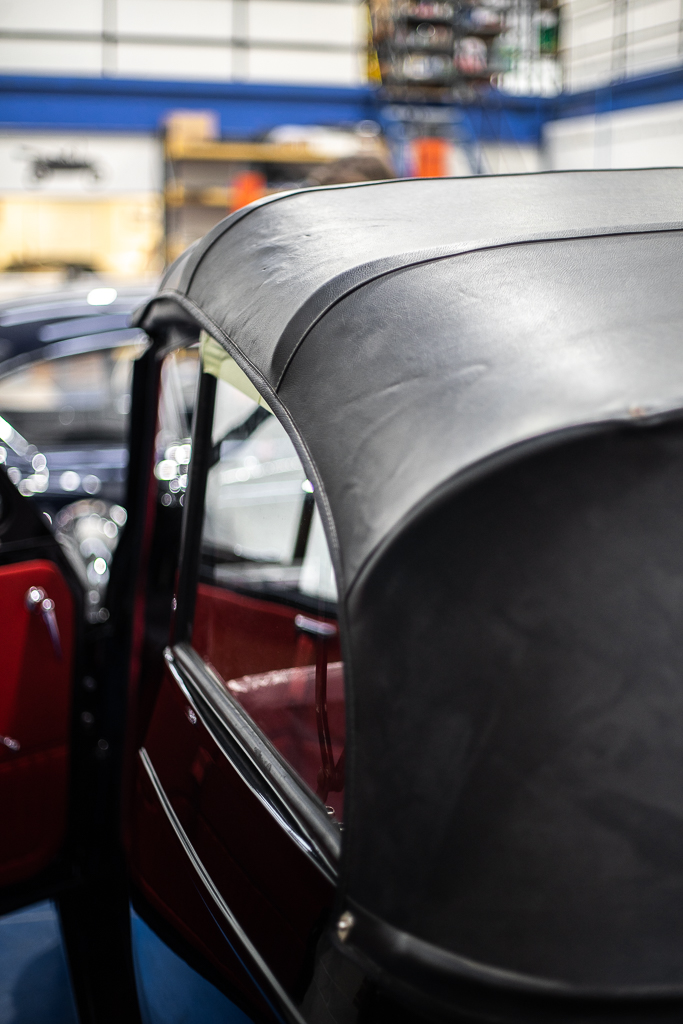
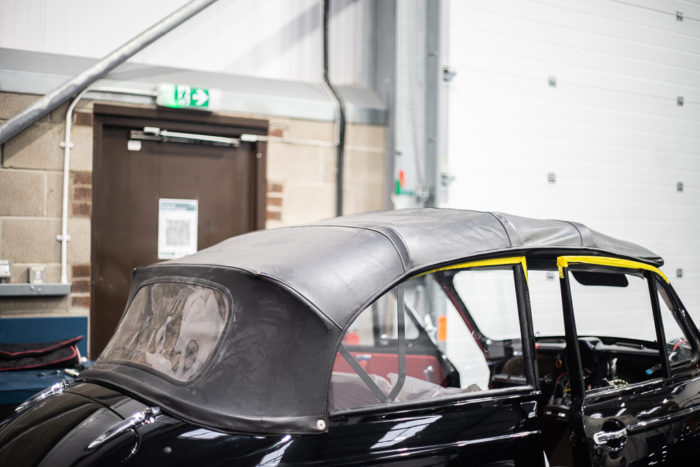
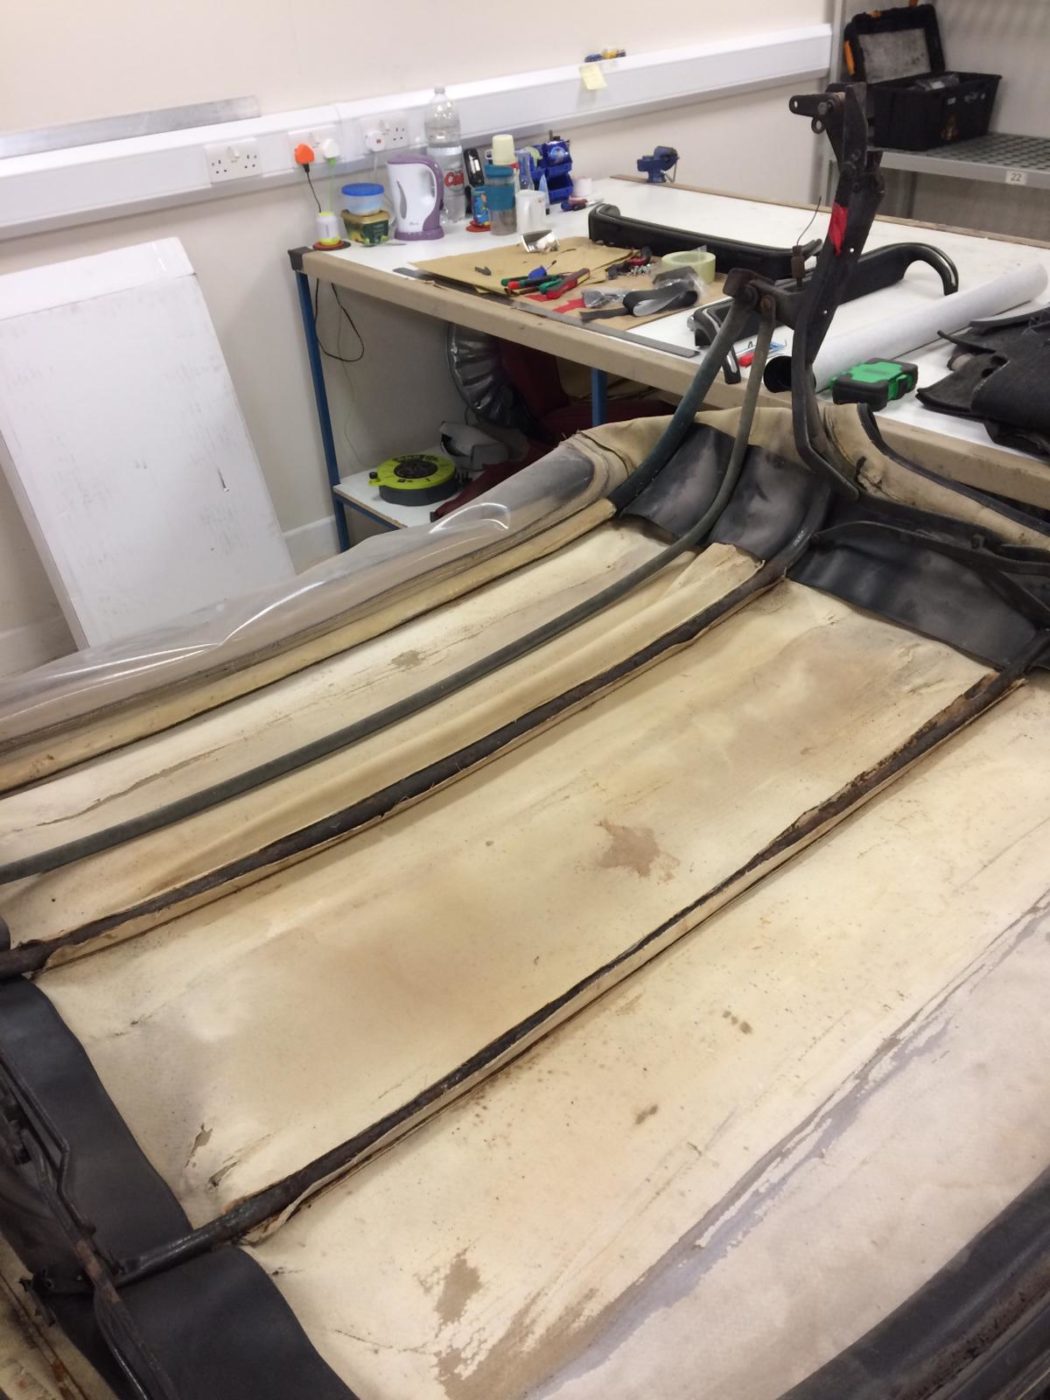
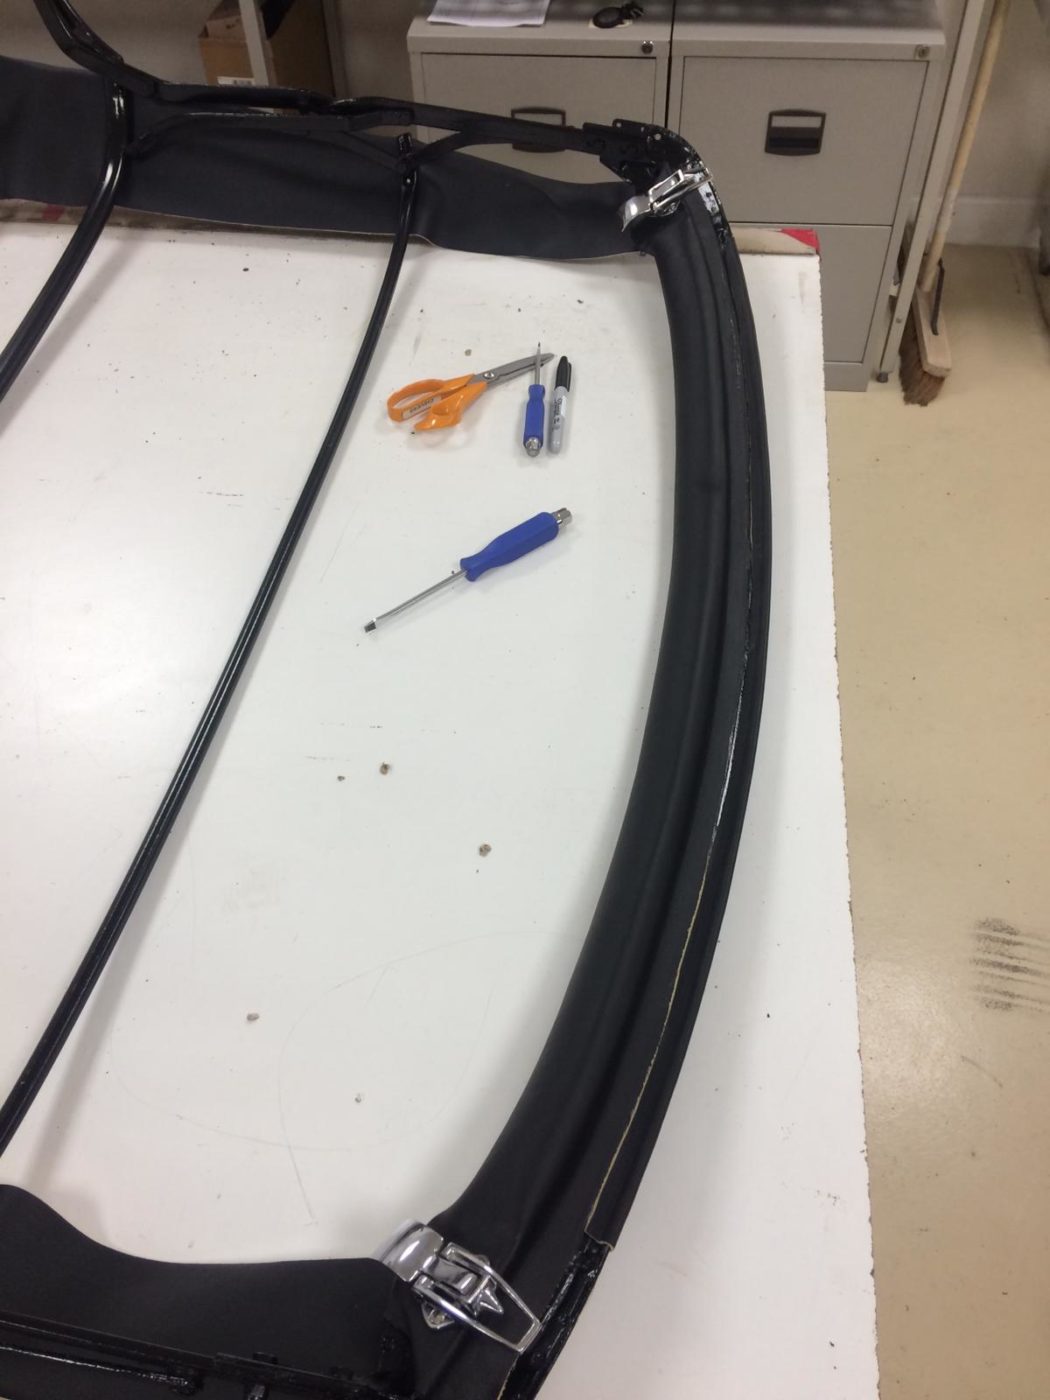
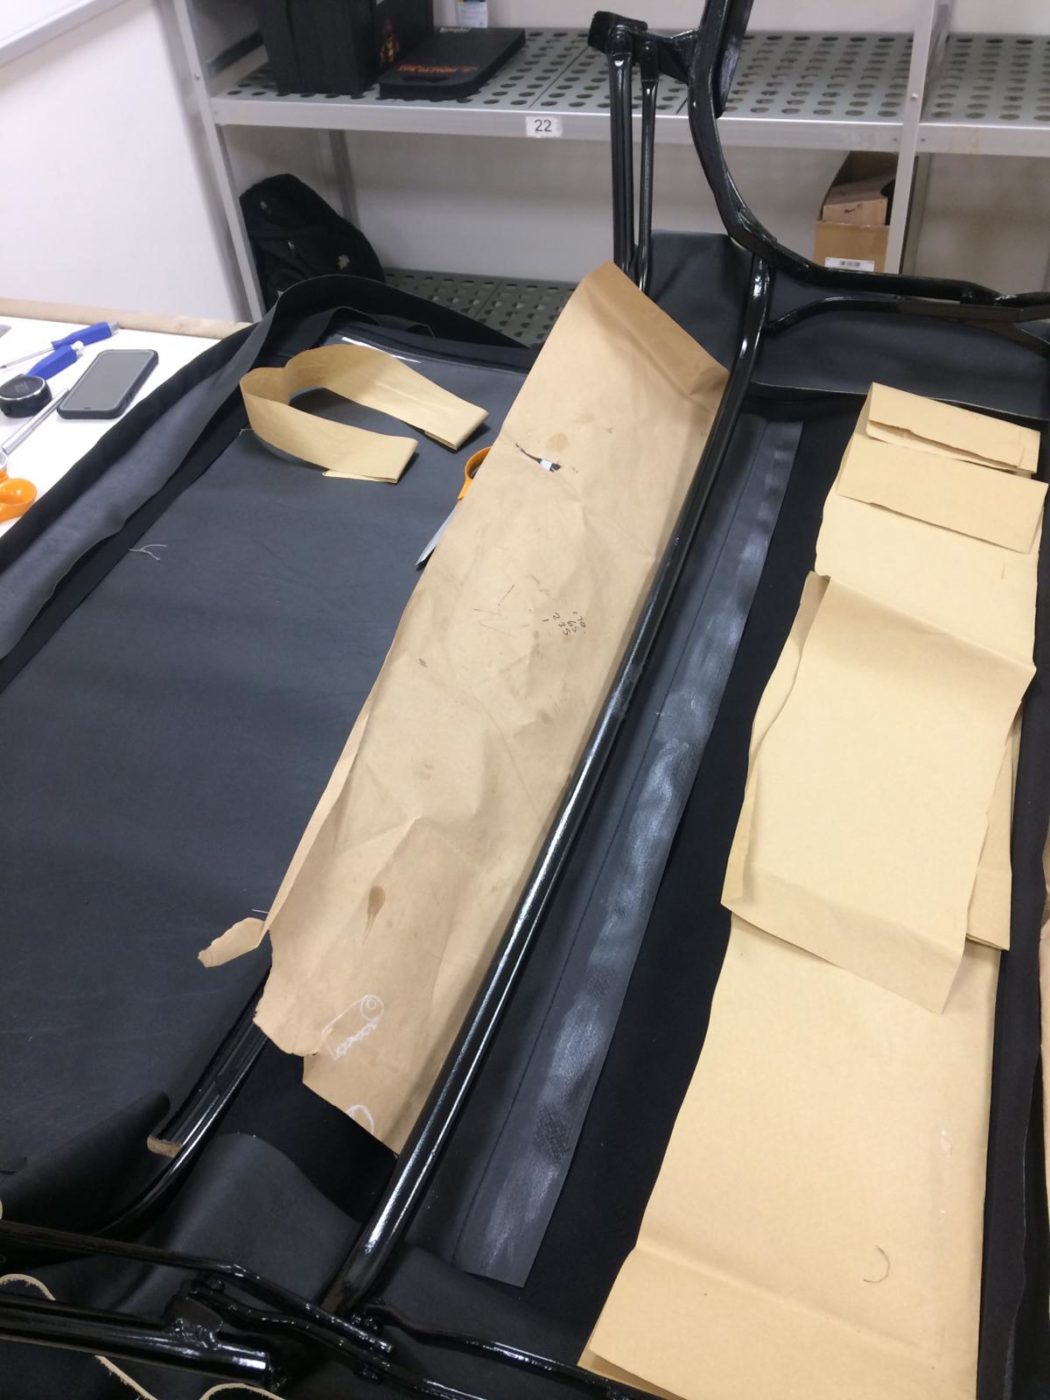
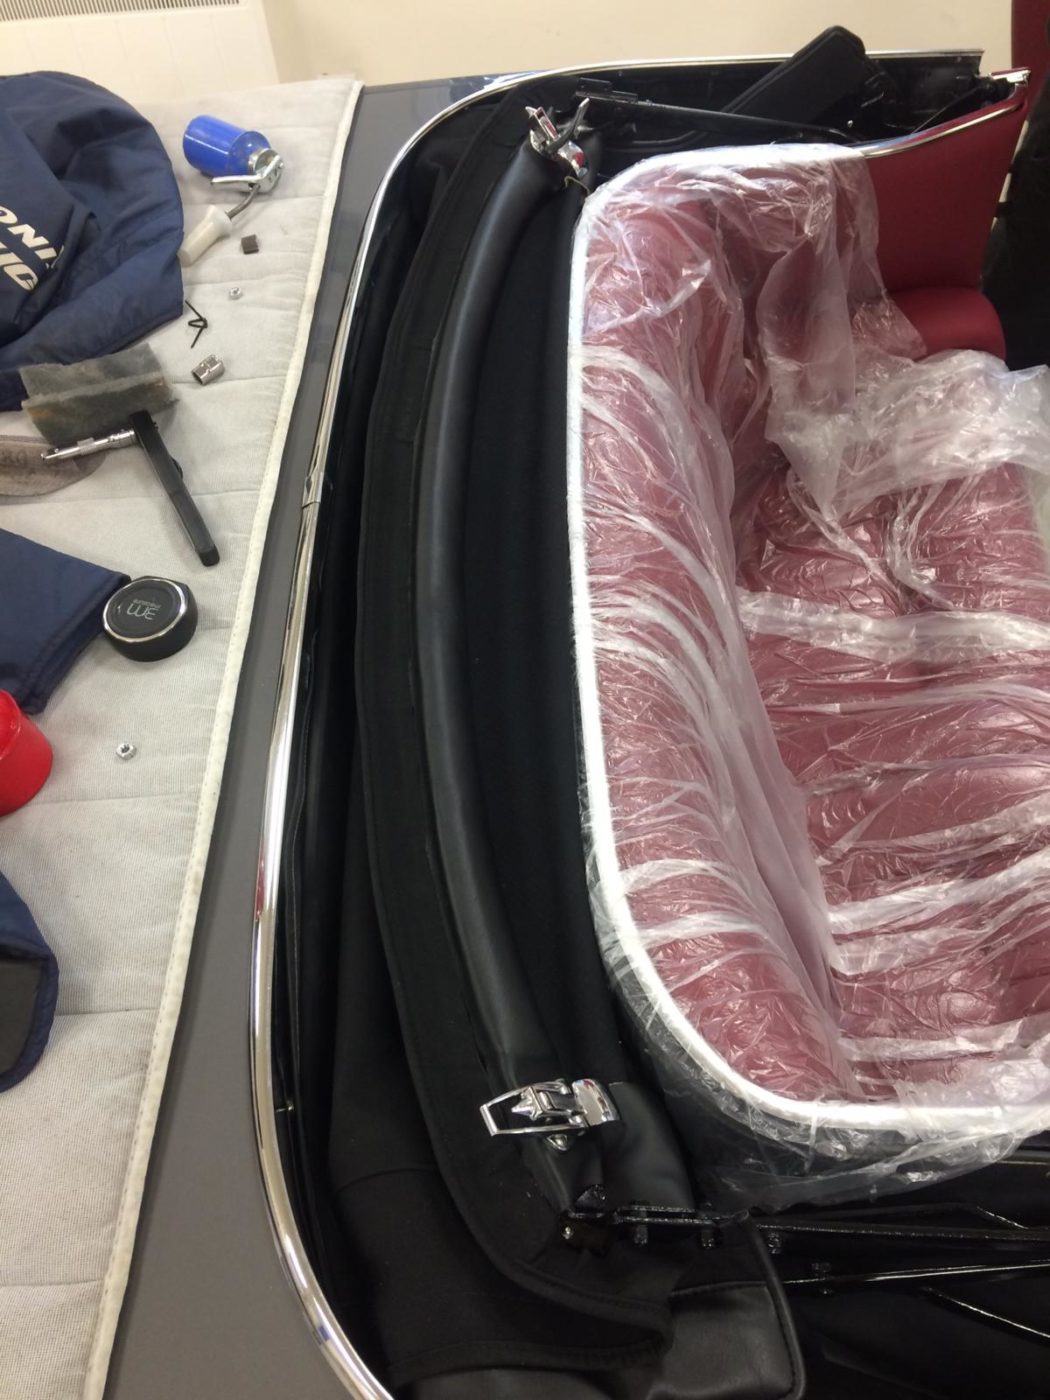
Kath has been working on the TR5 hood recently in the trim shop with the rest of the team. She bagan the process of making the hood by laying the cover over the hood frame and lined up the roof bars with the hood seams. She then took the cover off, attached the webbing to the bars to keep the frame in the right position using the rivets and metal plates. She then made up some vinyl for the edges to go along the side of the frame with Velcro sewn on. This is done so the hood can fasten to the frame.
Kath then glued up the frame and vinyl, attached the Velcro strips and bolted on the metal channels on each side for the rubber seal around the top of the window. The next step was to insert the rubber seal, trim the excess off once in the channel and fit a rubber seal along the windows. The rear window rail was then pushed in between the hood cloth so it sits comfortably in the middle.
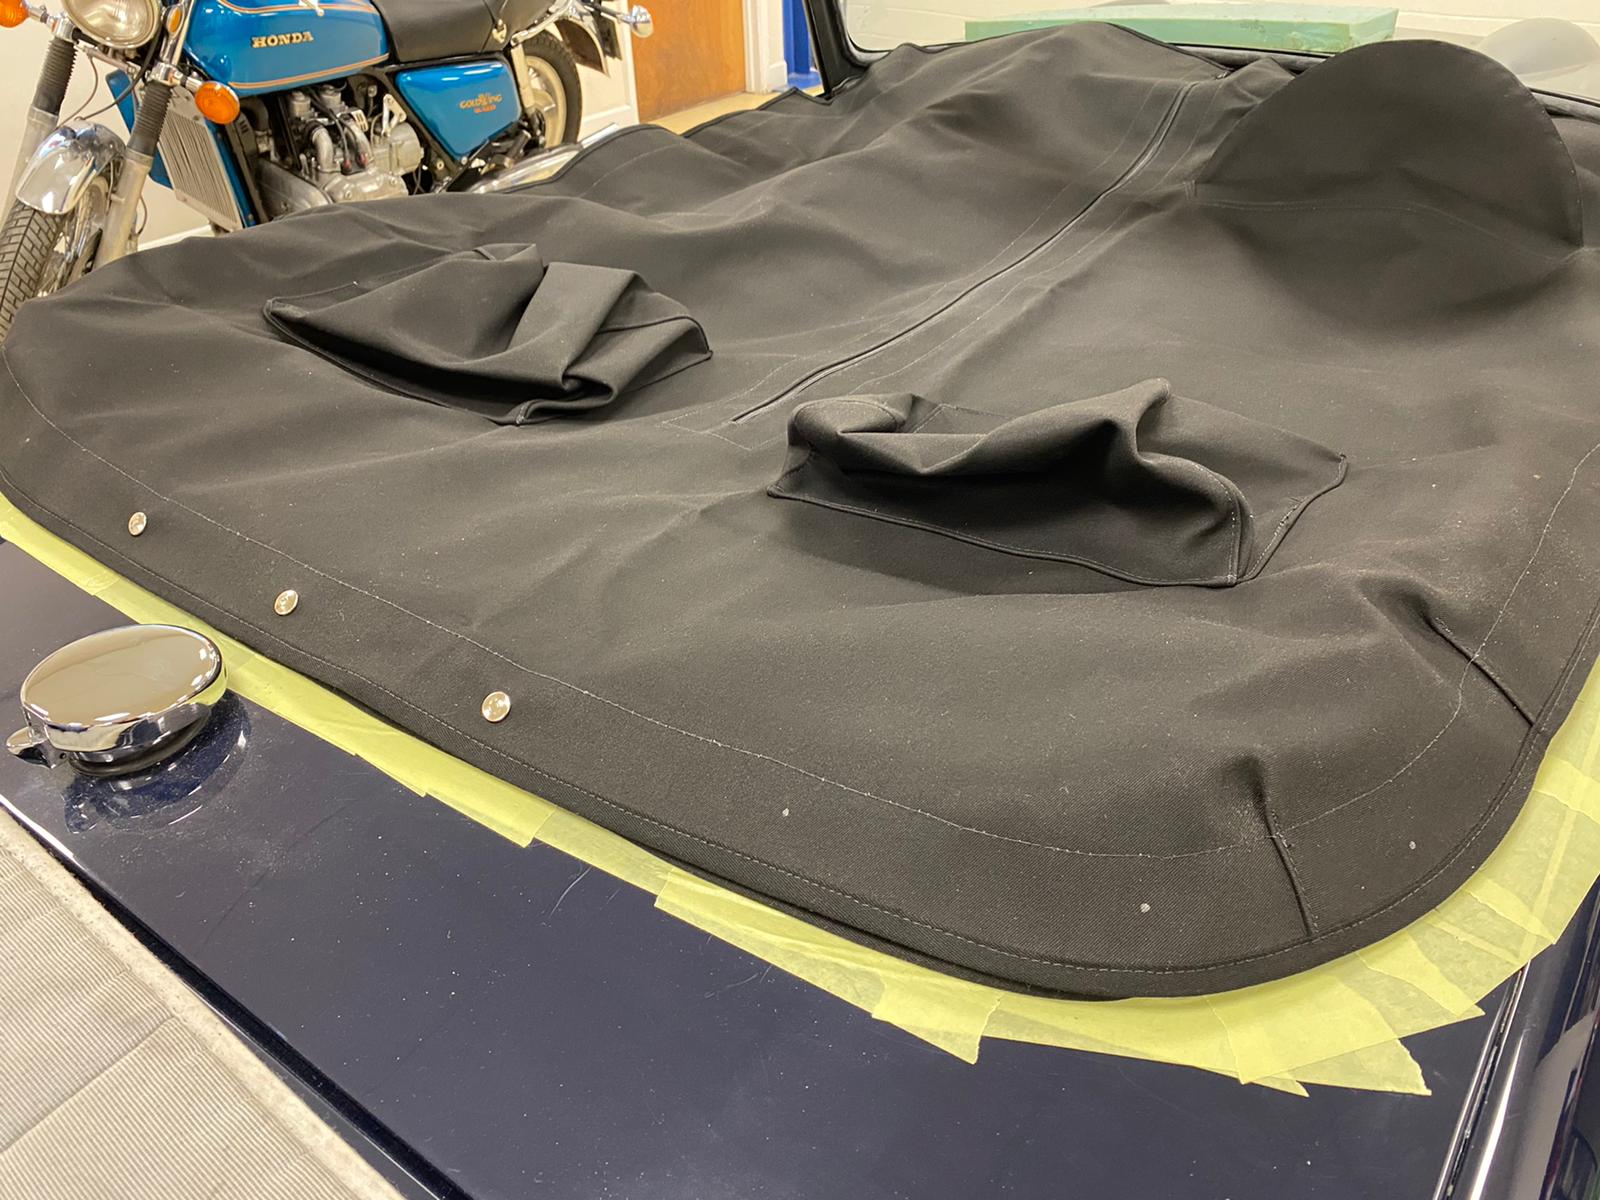
Kath then centred up and glued the cover in underneath the rail. To neaten it up, Kath trimmed off the excess material and bolt down the rear rail onto the car. She then attached stud sockets to the top of the cover at the back and riveted them in place. She could then pull the cover tight at the front of the car, marked the position on the front of the car with some chalk and glued along the header rail and under the front cover. Kath attached the metal channel along the front with the rivets so that they ready to have the rubber inserted in. The rubber is often hard to fit into the riverts so Kath applies some ‘easy slide’ to help it fit in.
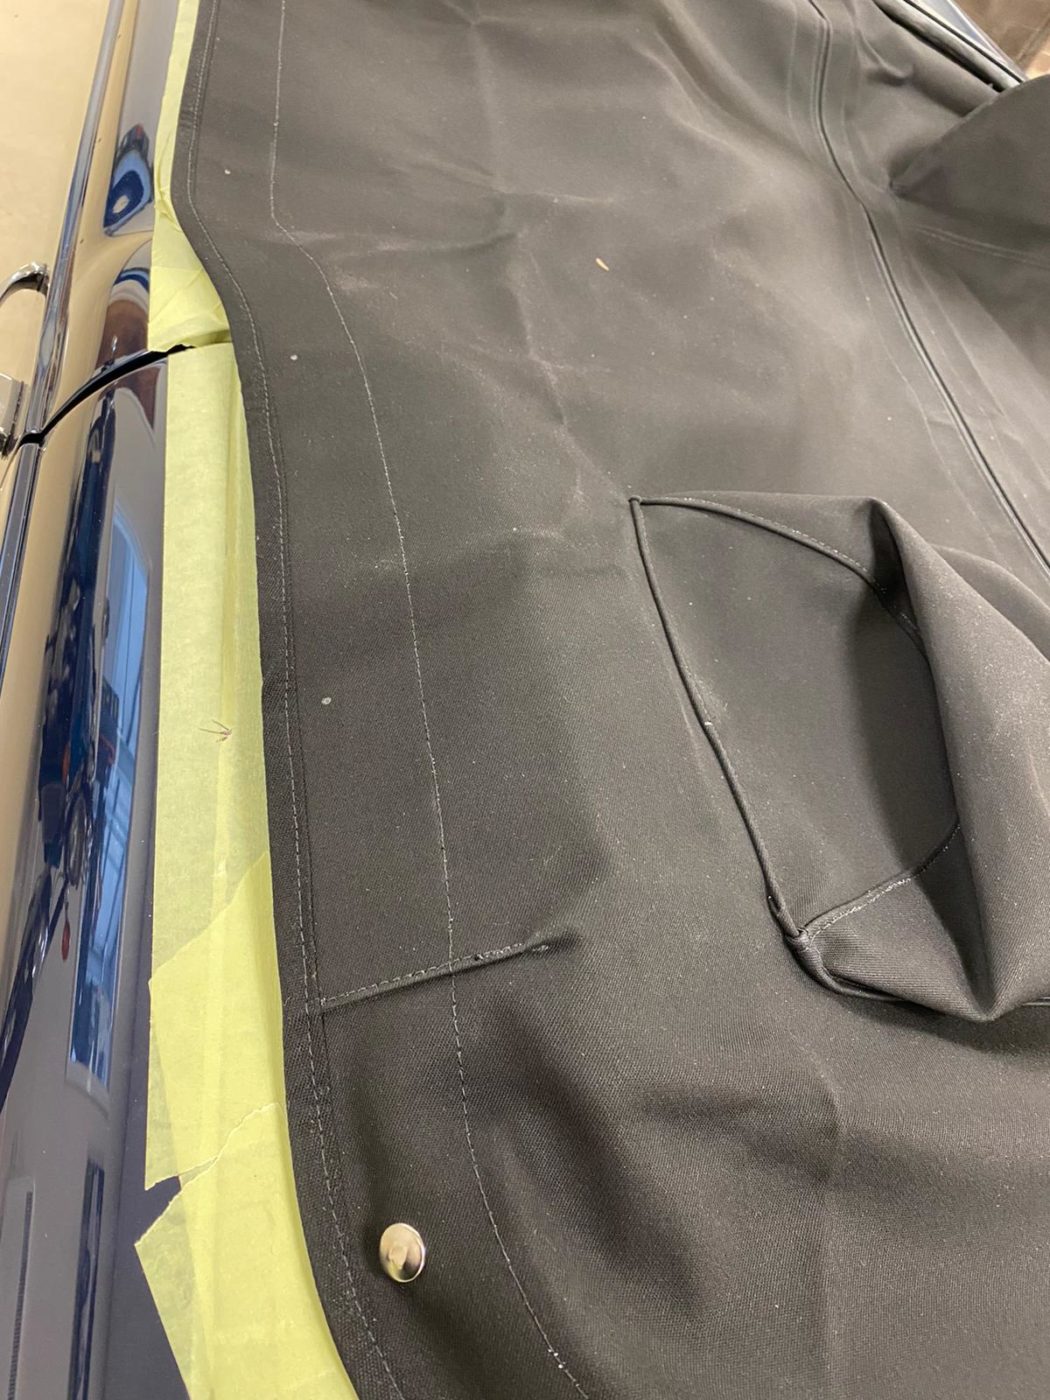
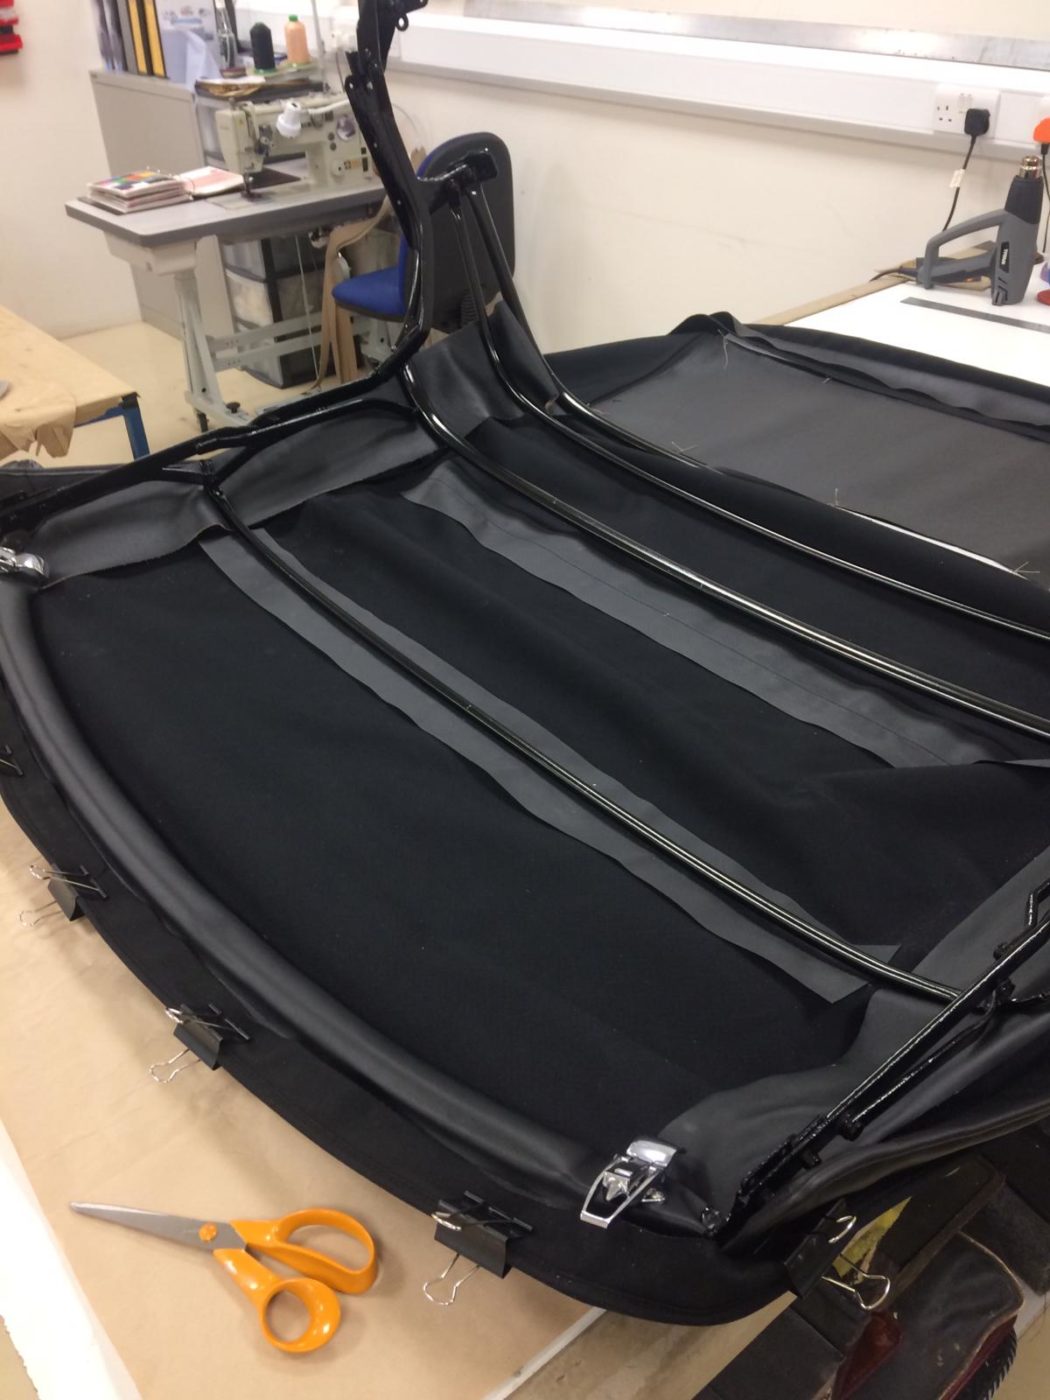
The next step in the process was to attach 3 stud buttons on each rear side to secure hood down. These were riverted on each side of car. Next Kath wrapped the rear rail around & secured it with rivets.
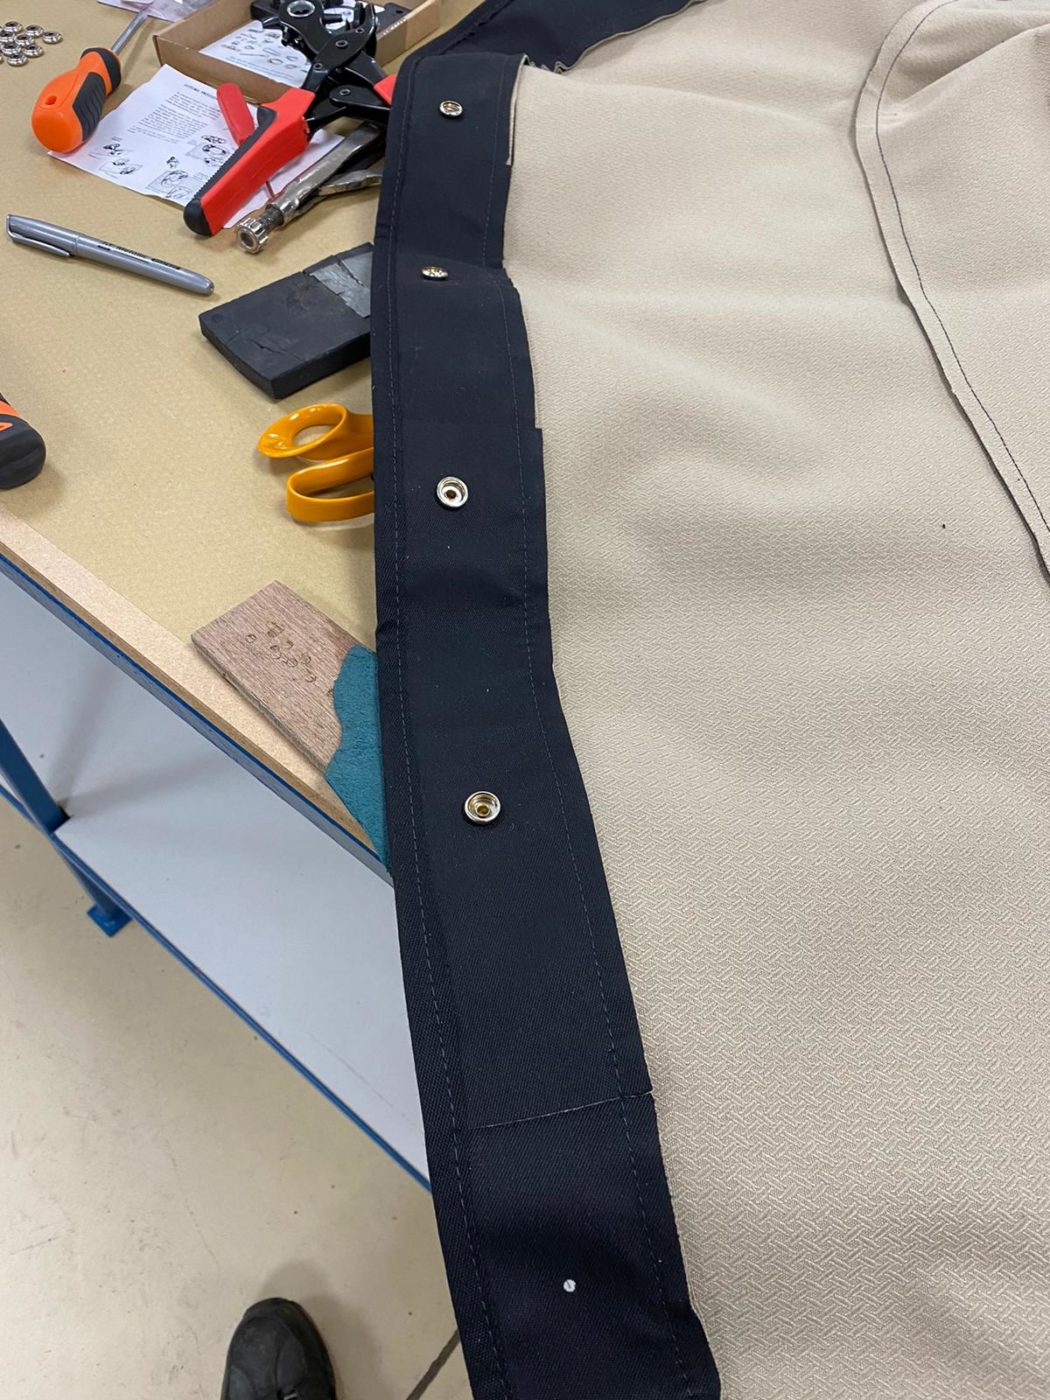
The rear hood cover has also been made by positioning the template cover over the hood and Kath marked the centre. She attached a fastener, pulled the cover tight and marked a few positions of fasteners. She punched the hole out and then attached the buttons. She did this around the outside edge and once the outside was complete, she attached a couple of fasteners inside.
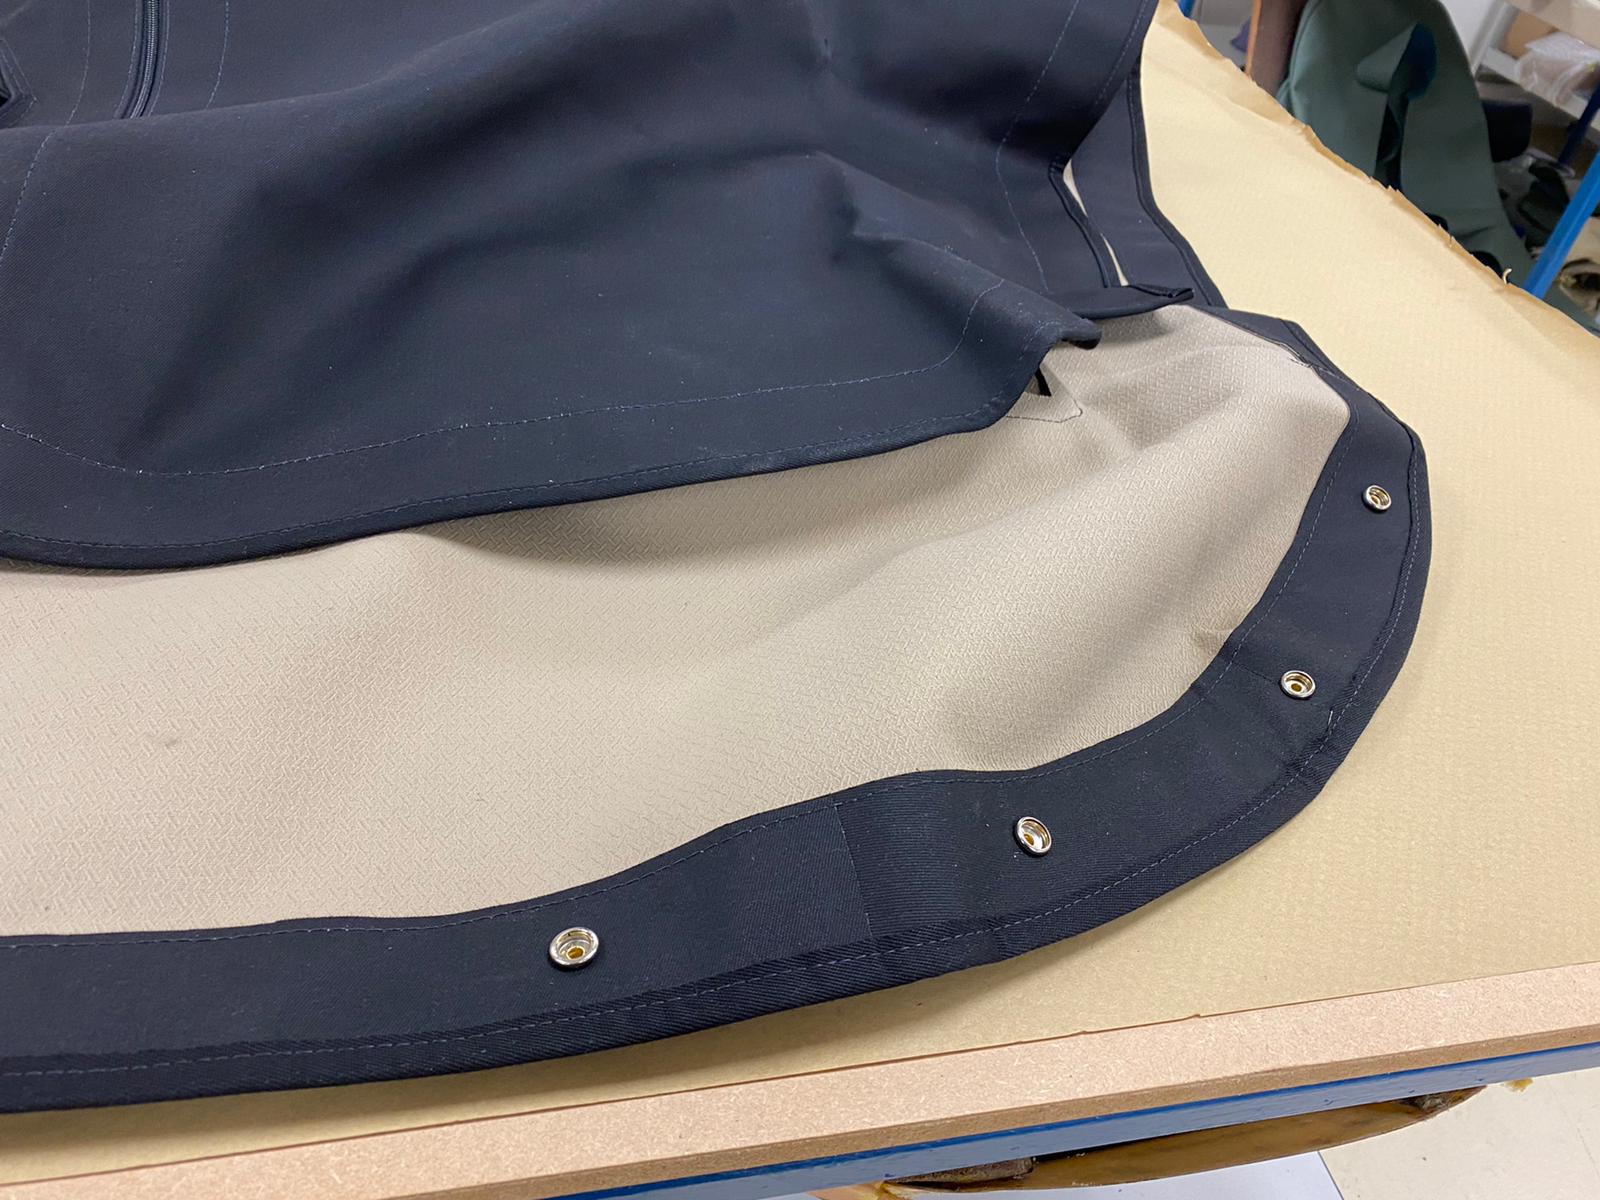
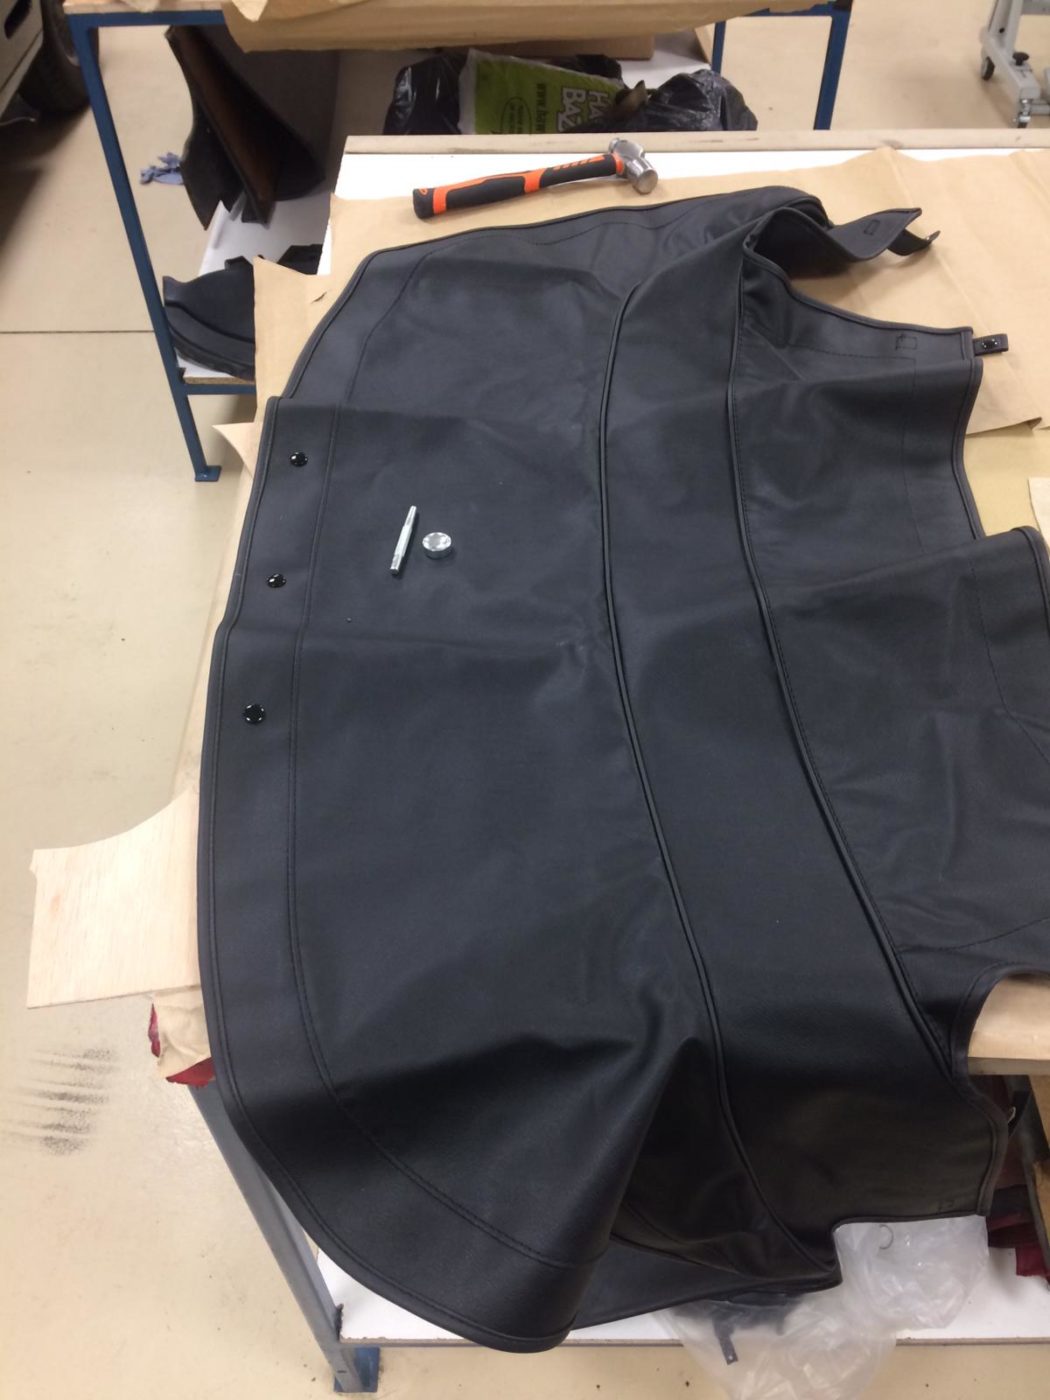
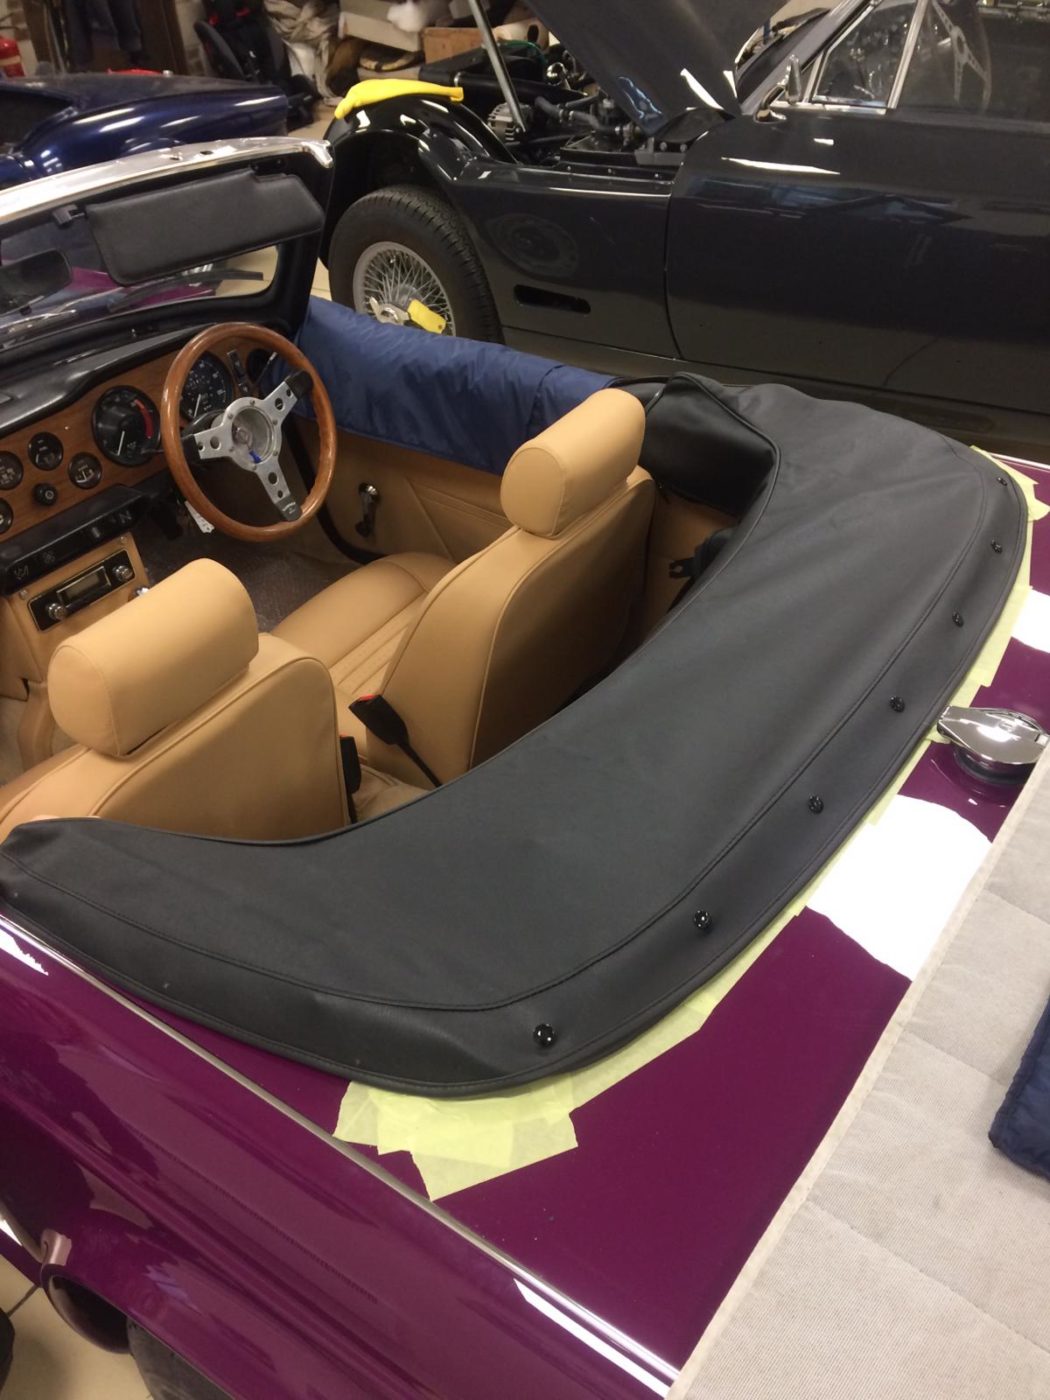
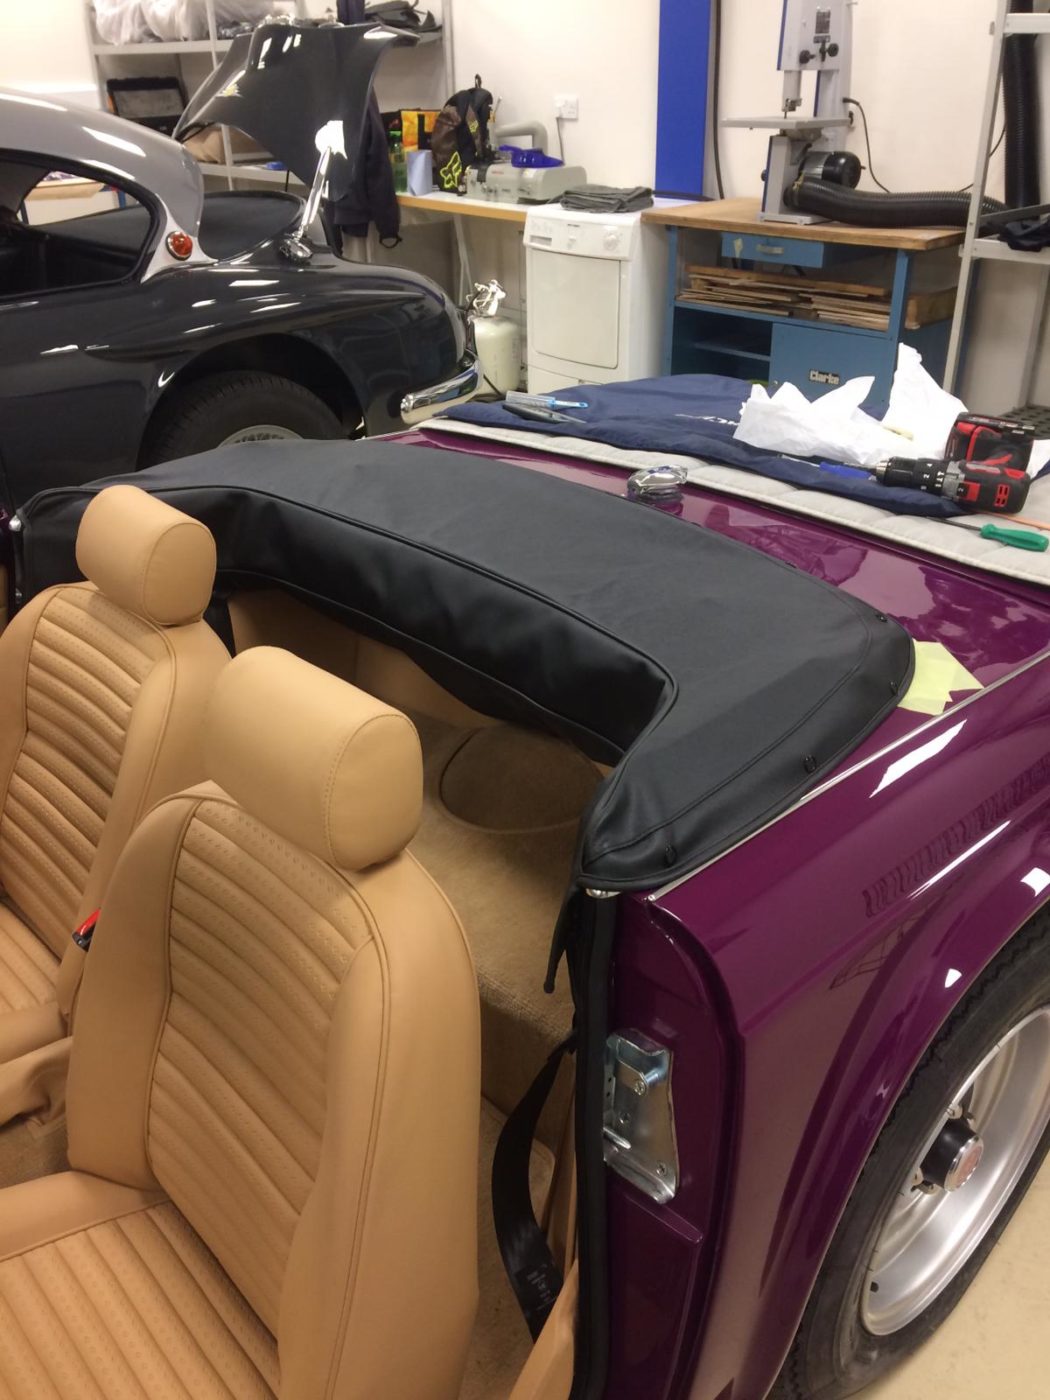
The final step was to make the tonneau cover. Kath added some fasteners along the top edge of the door, riveted them in place on both sides and centred up the cover before adding any fasteners. Kath marked the position of the first few stud buttons, attached the fasteners, clipped them down and finished by gradually go around the edge pulling the cover tight.


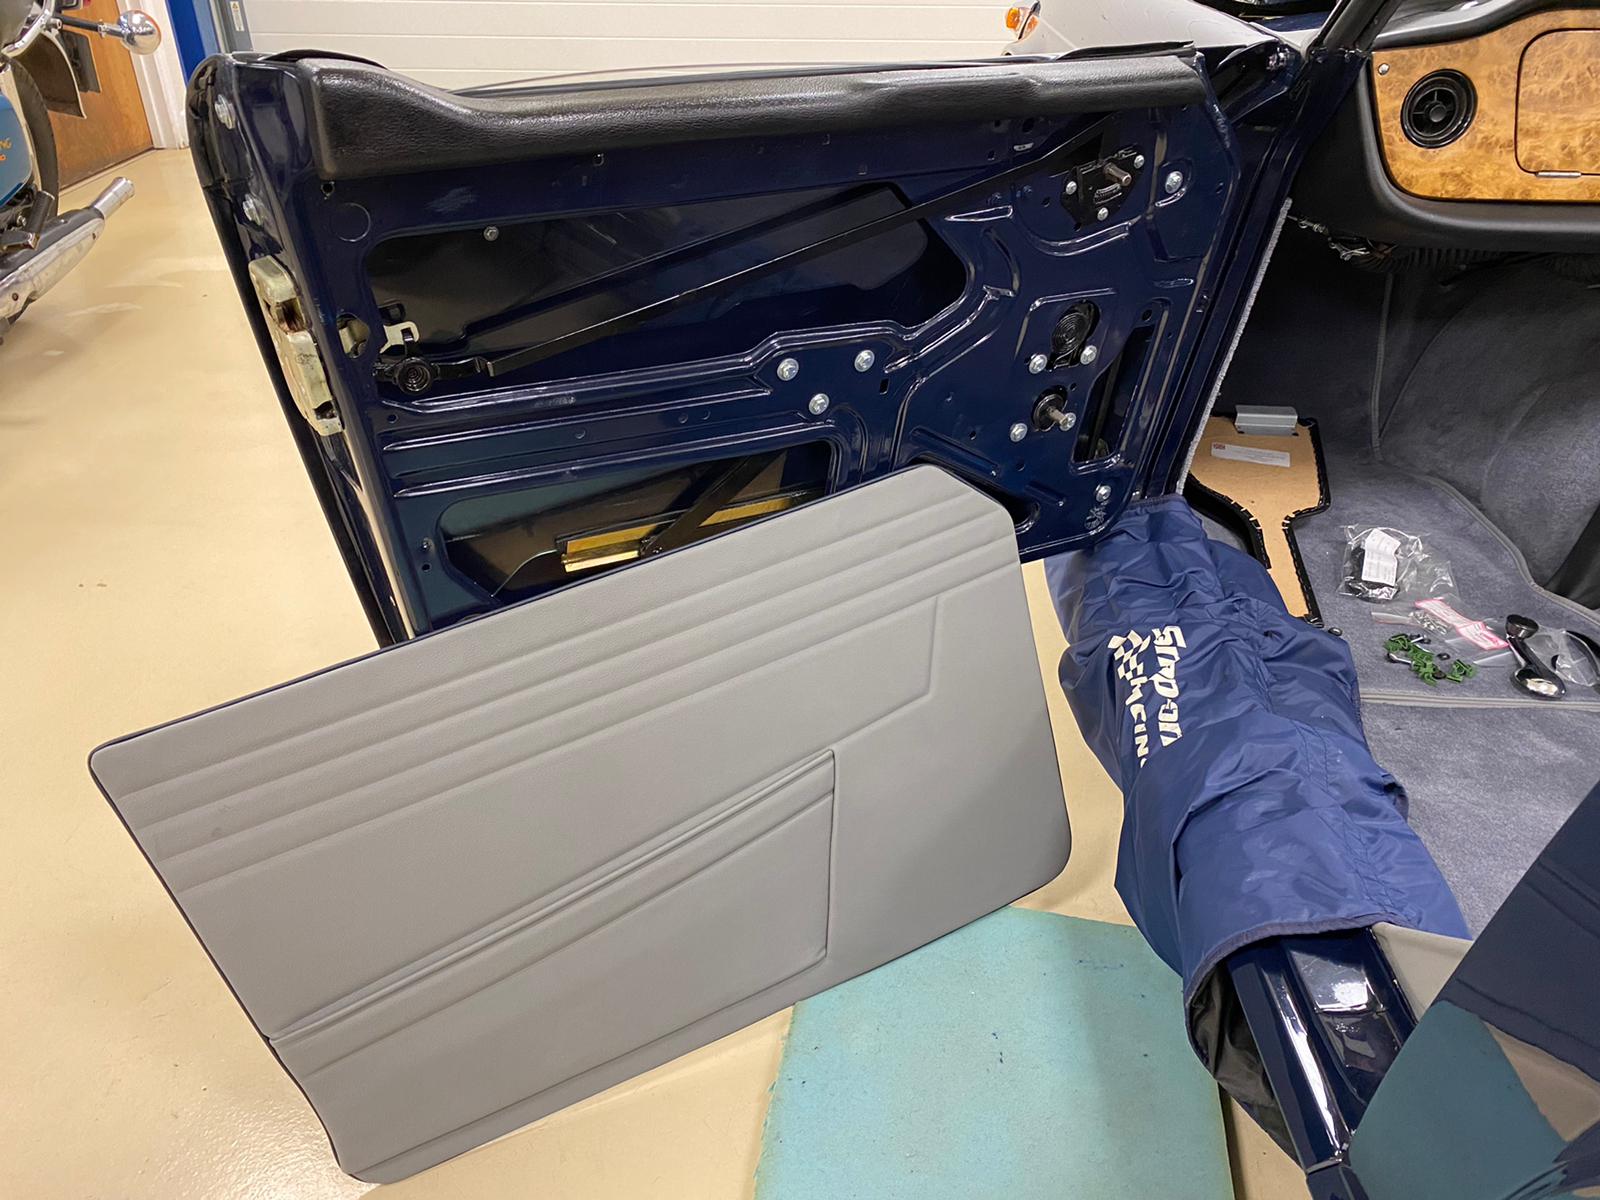
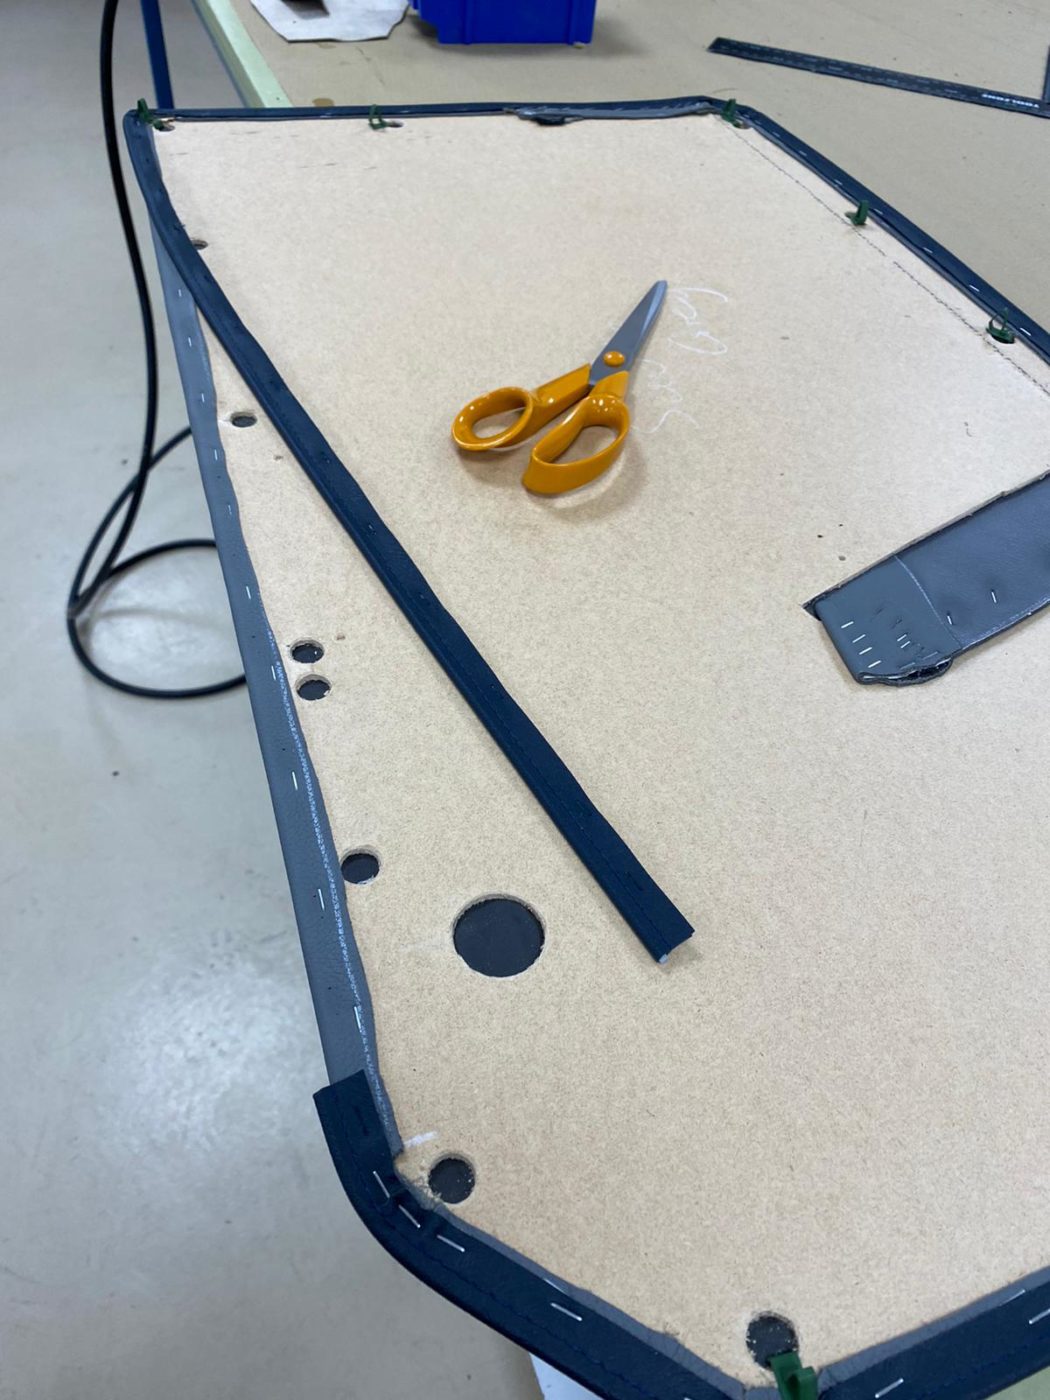
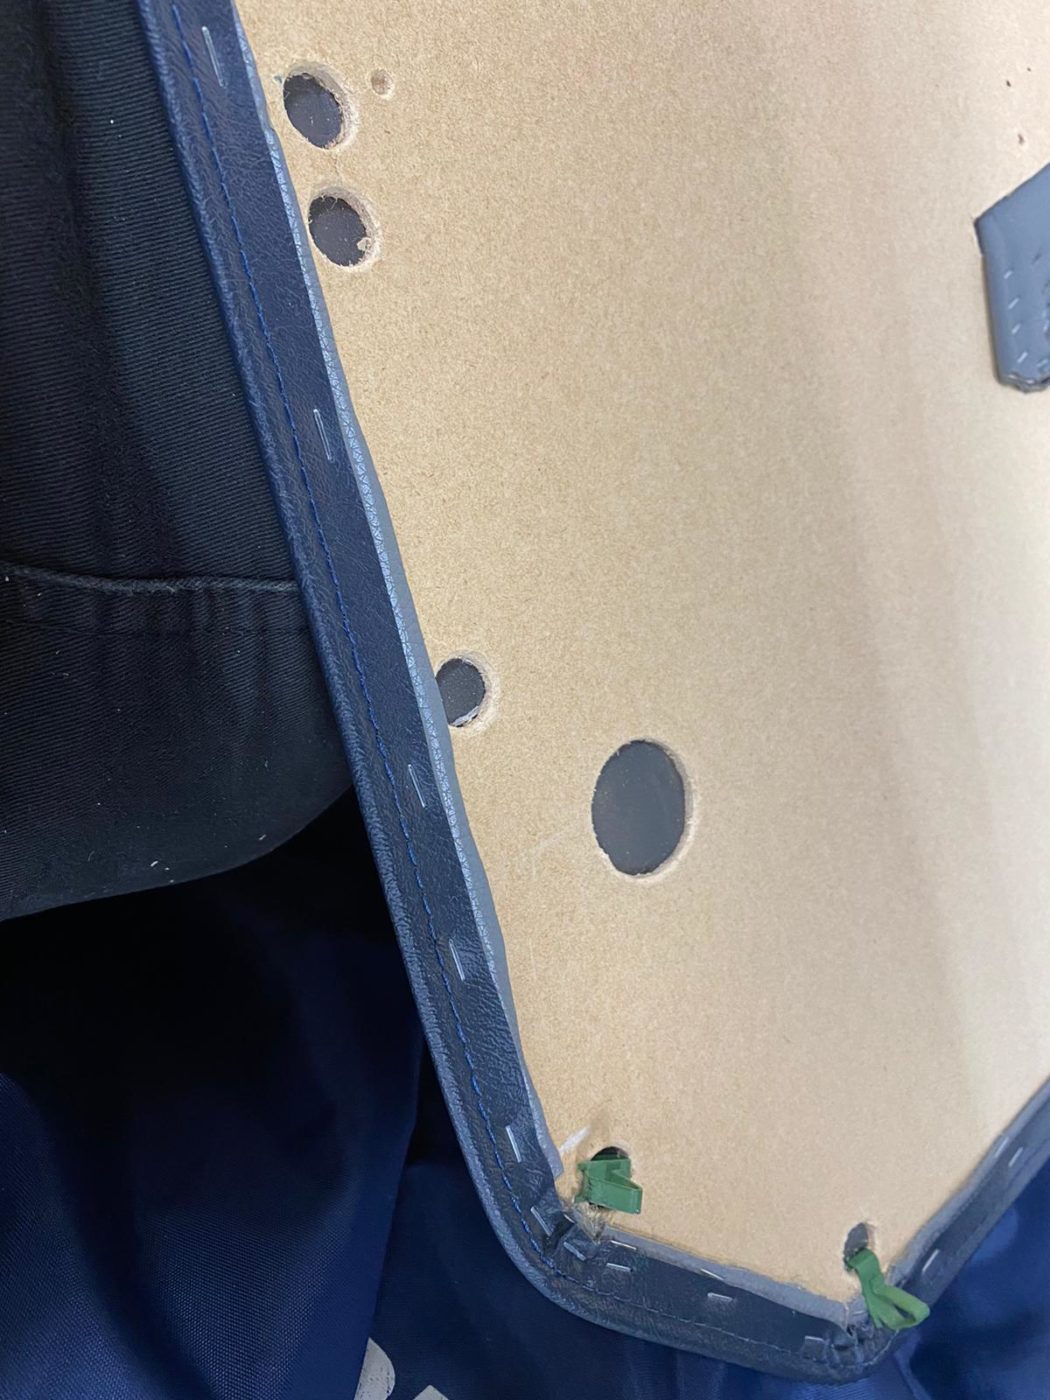
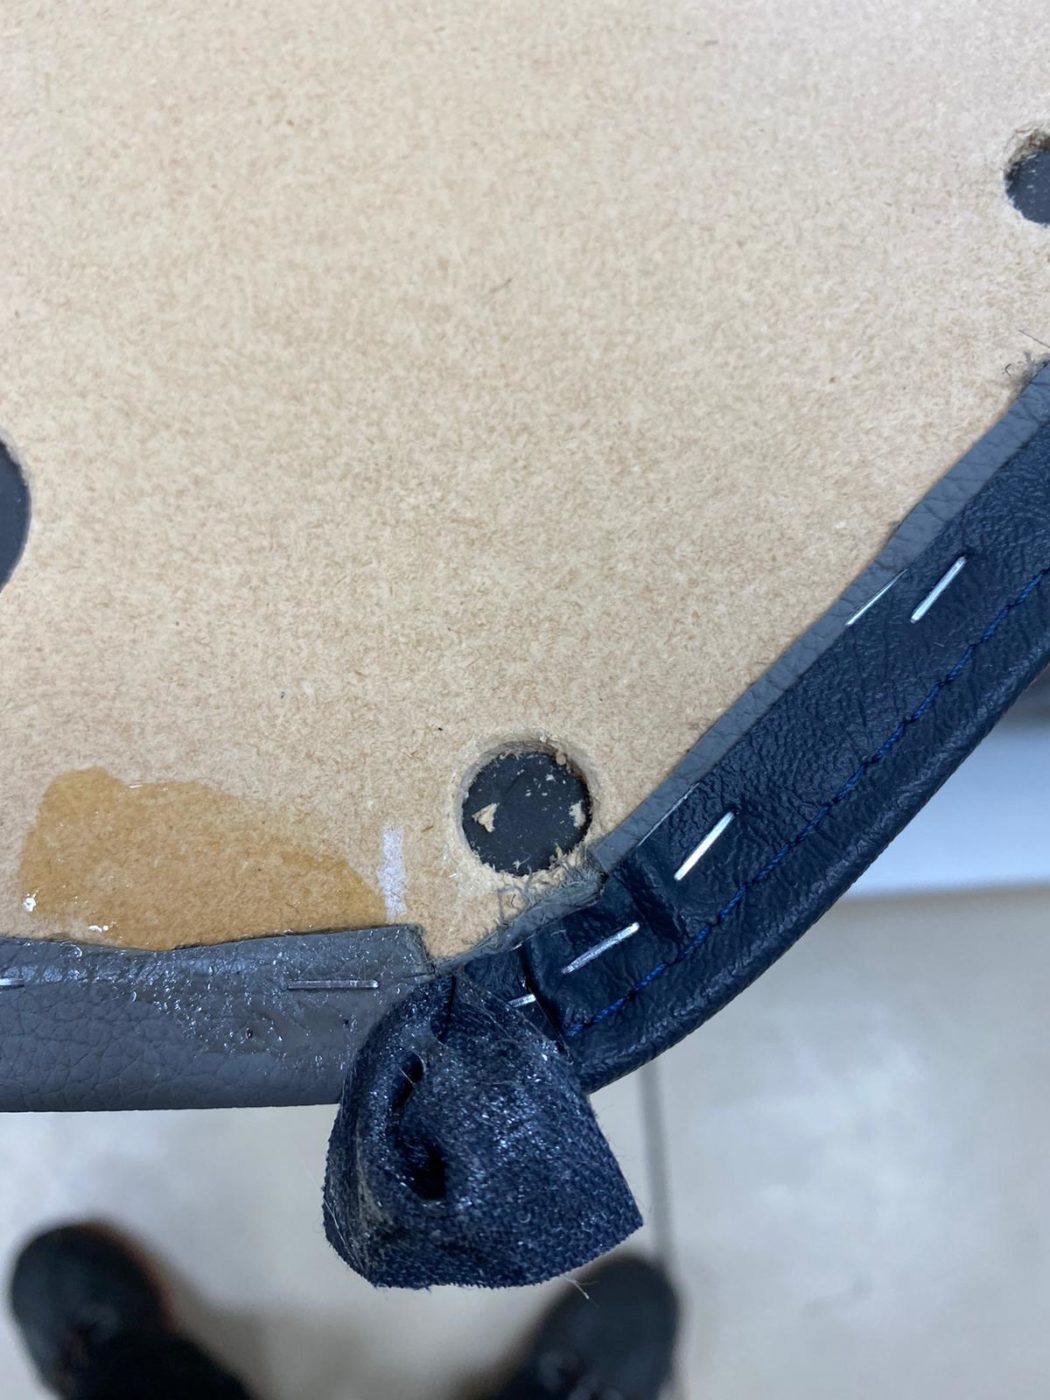
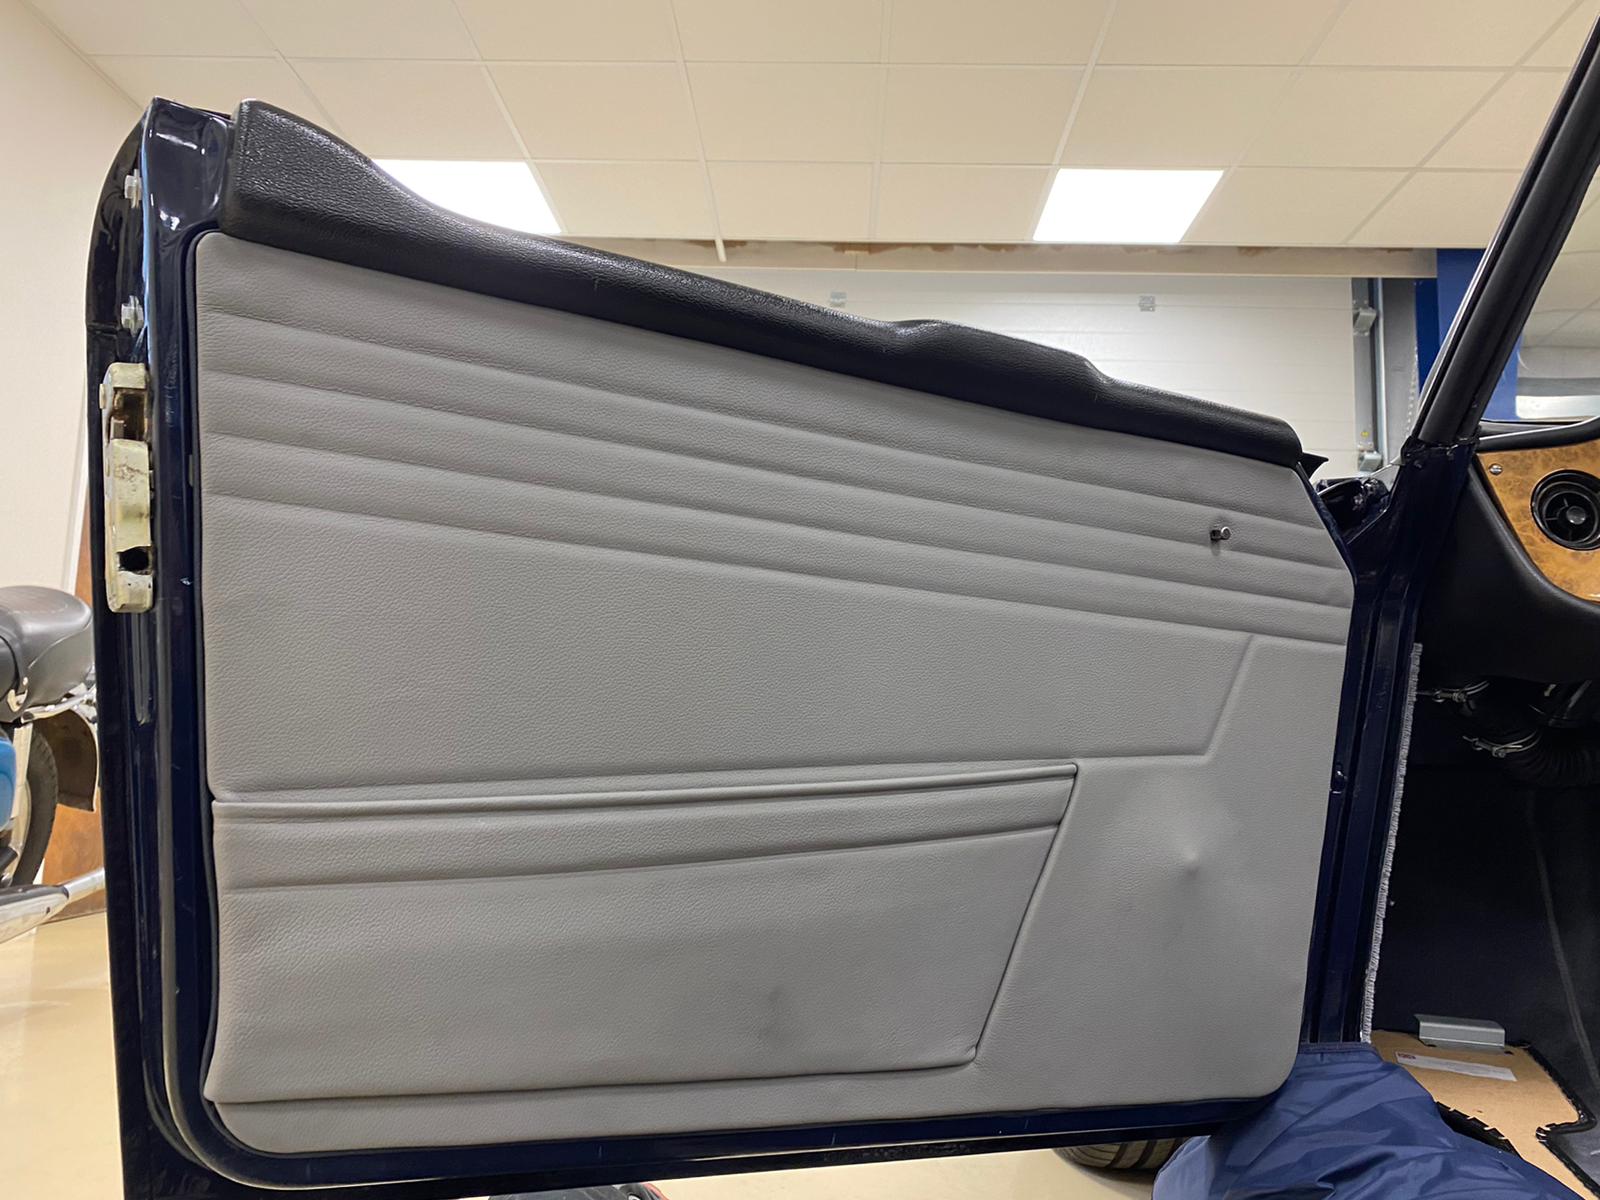
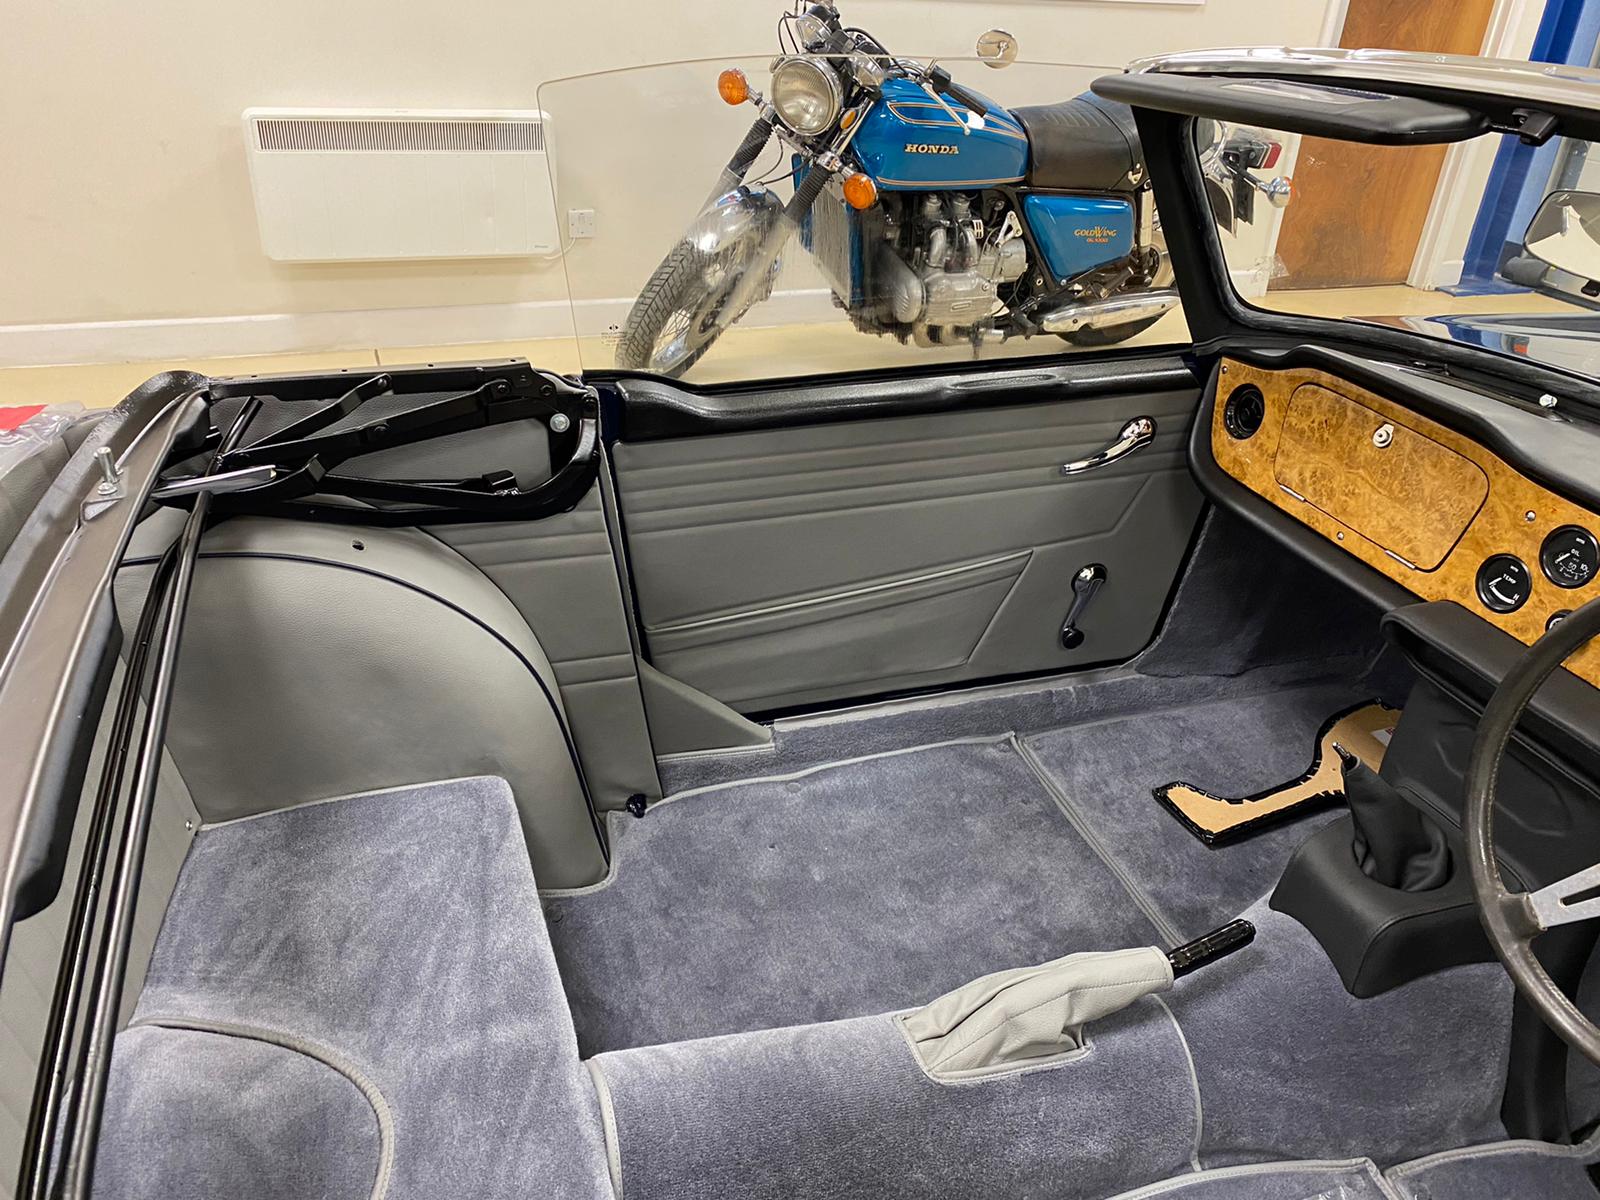
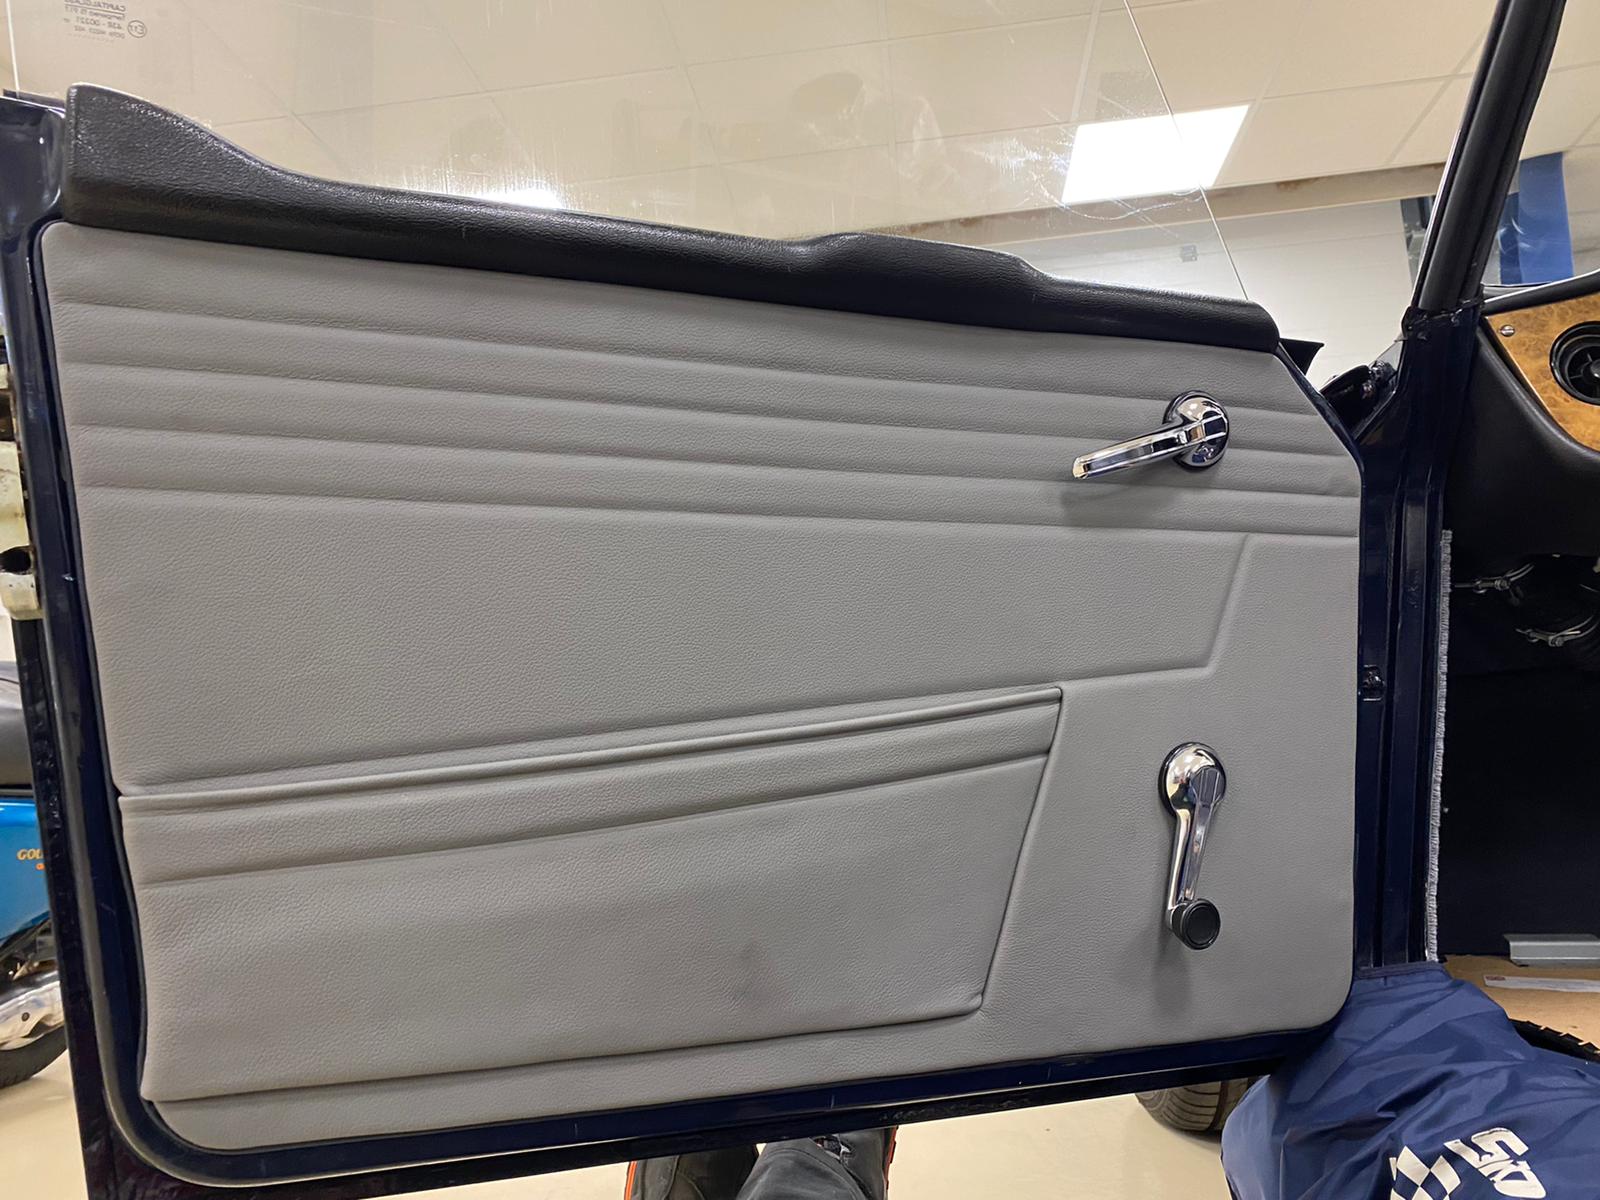
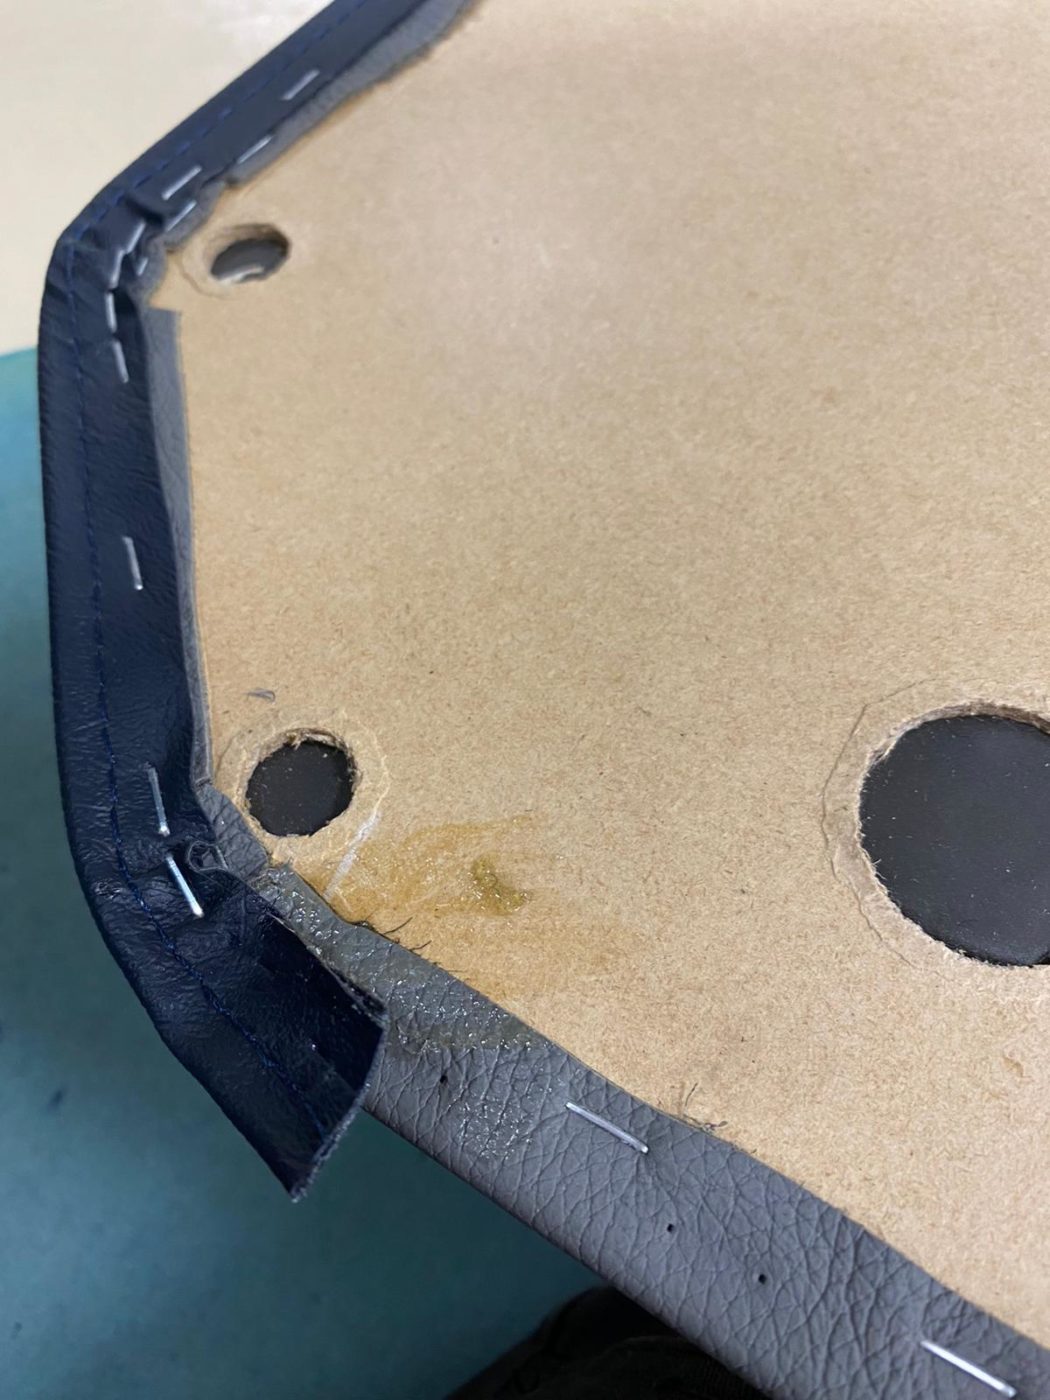
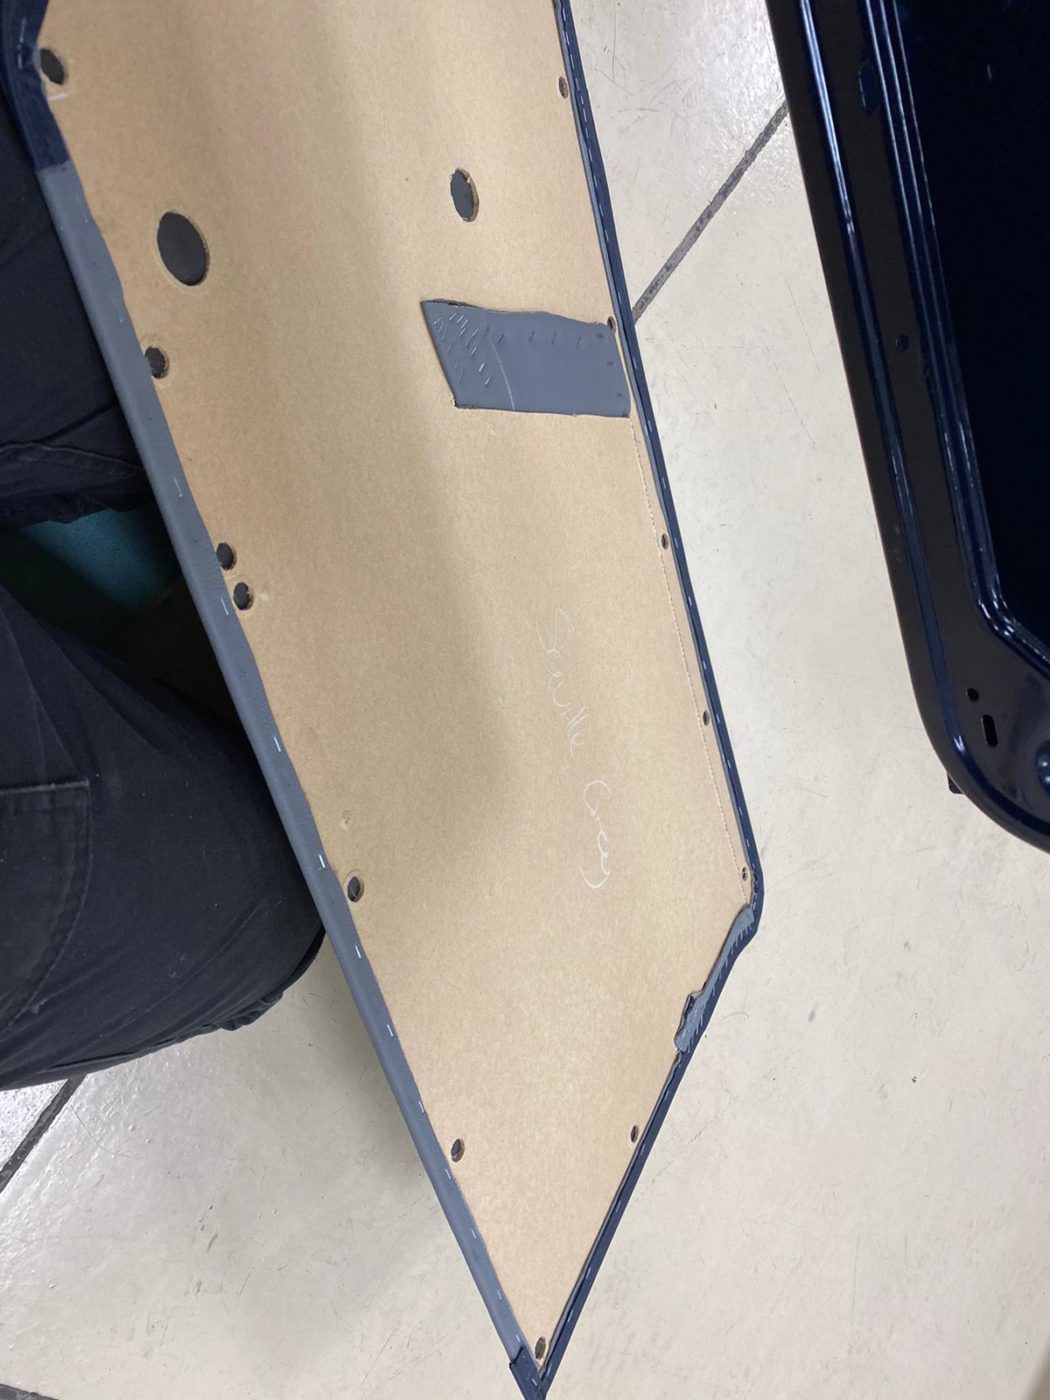
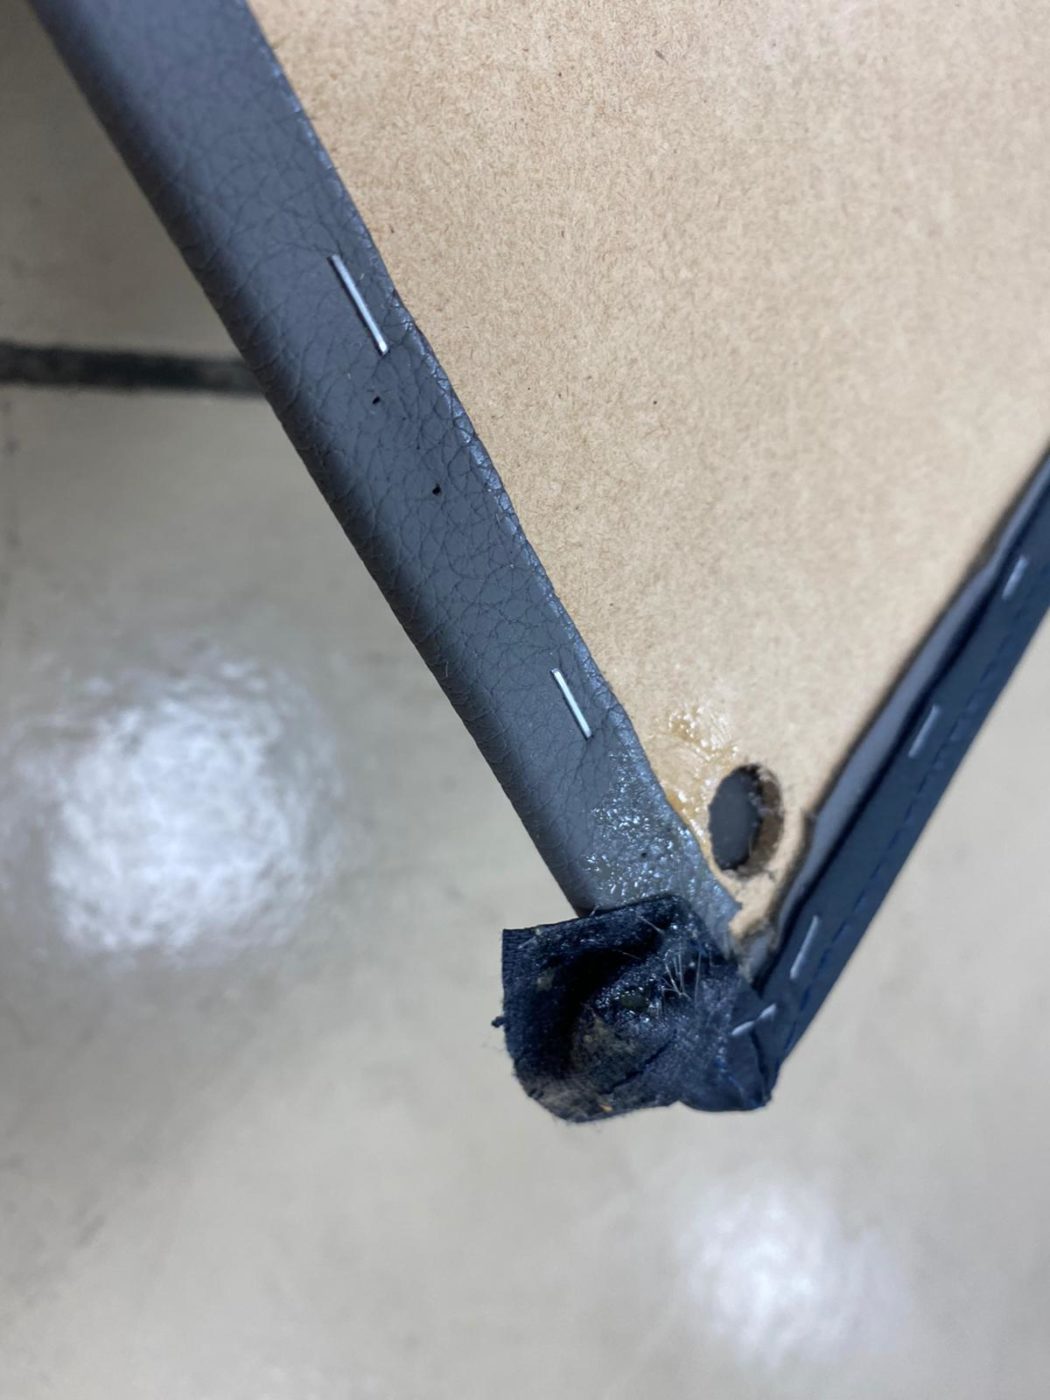
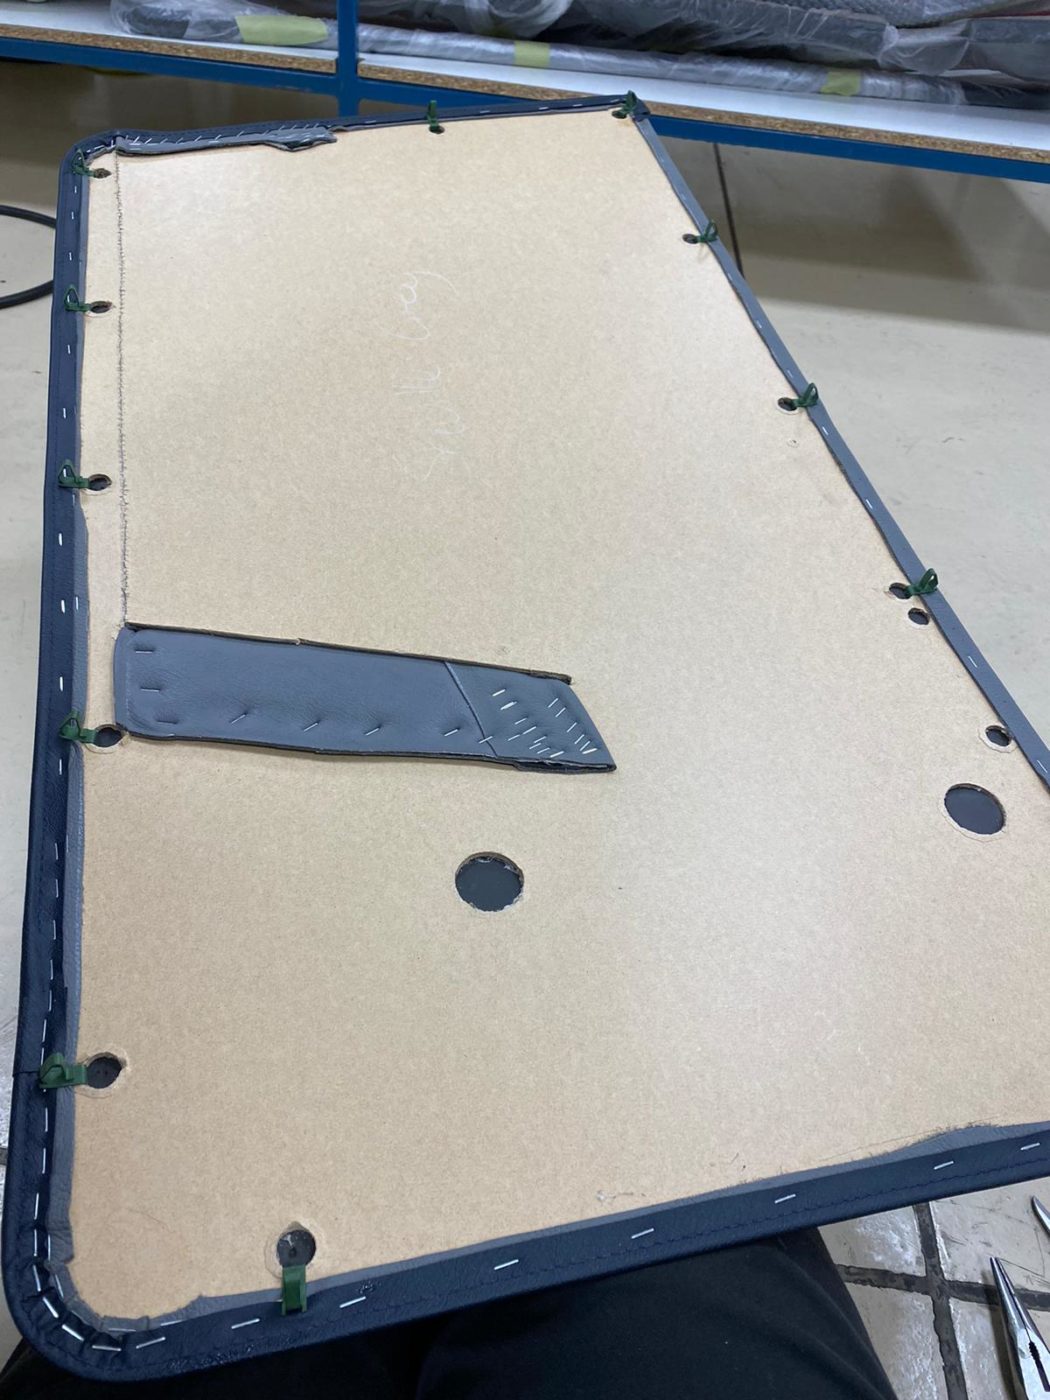
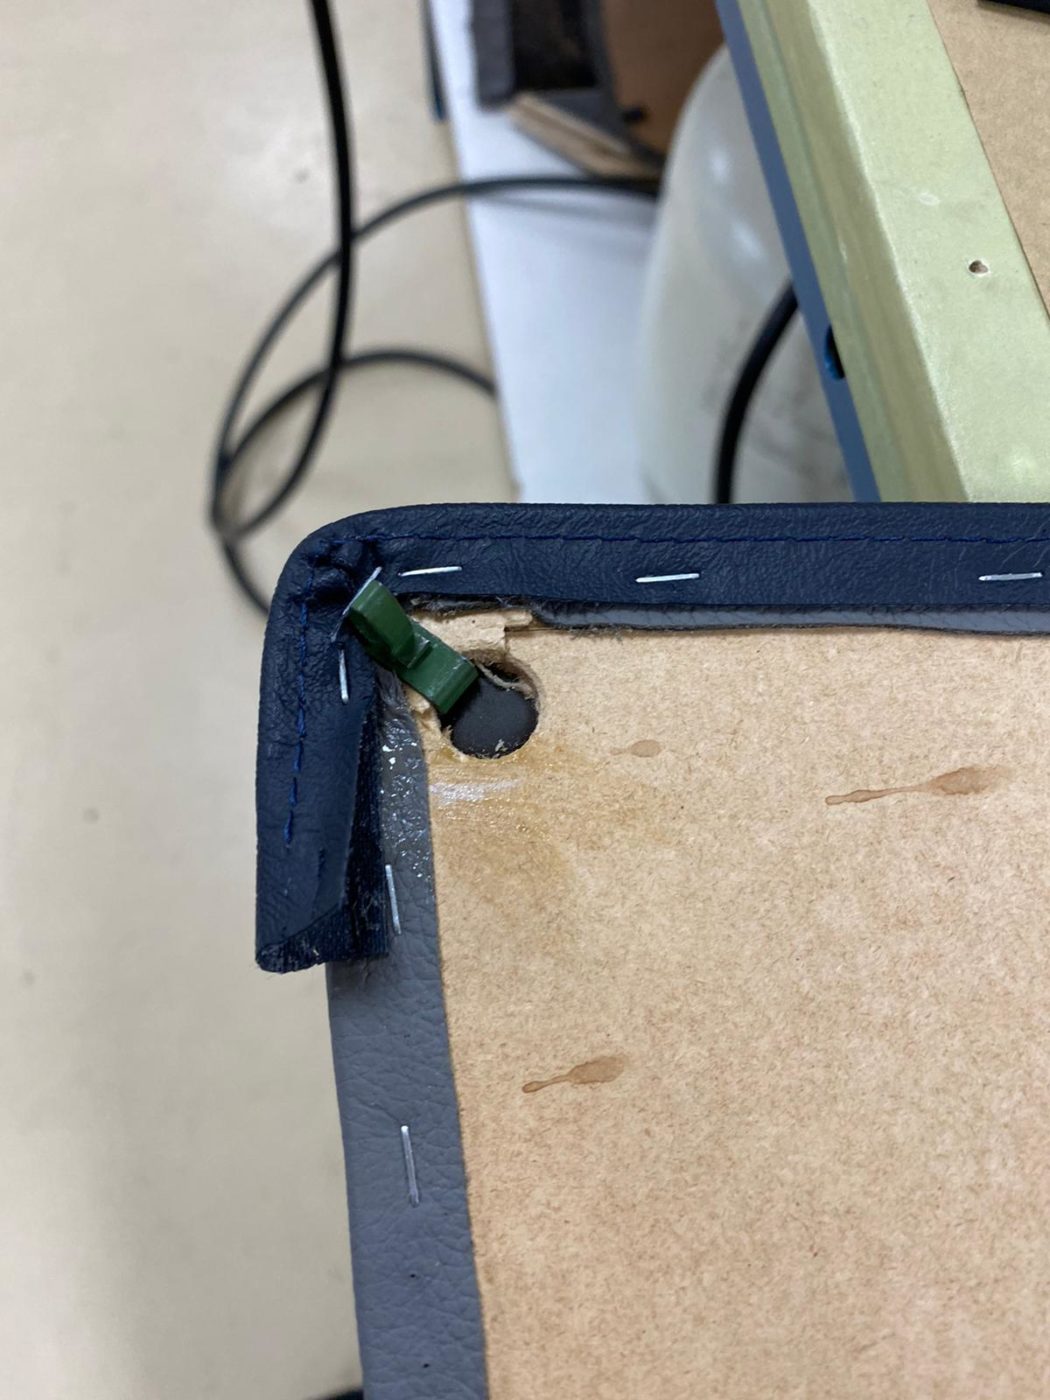
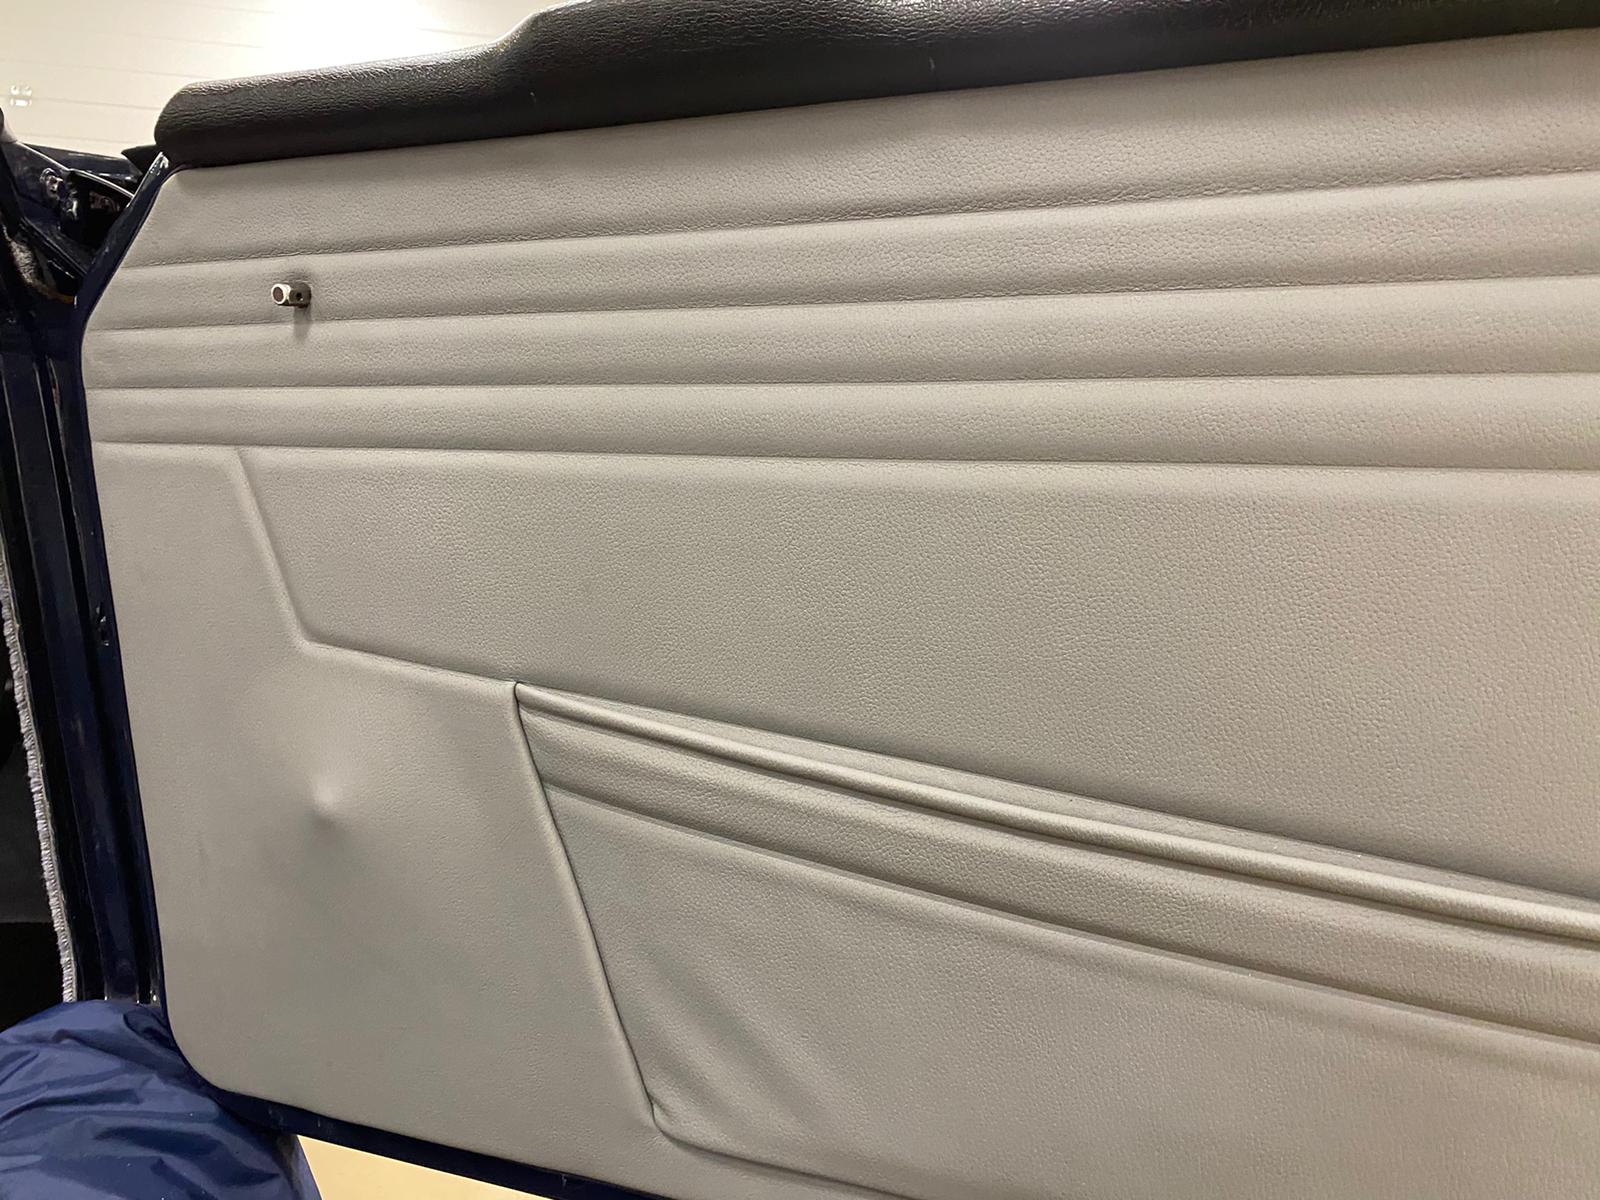
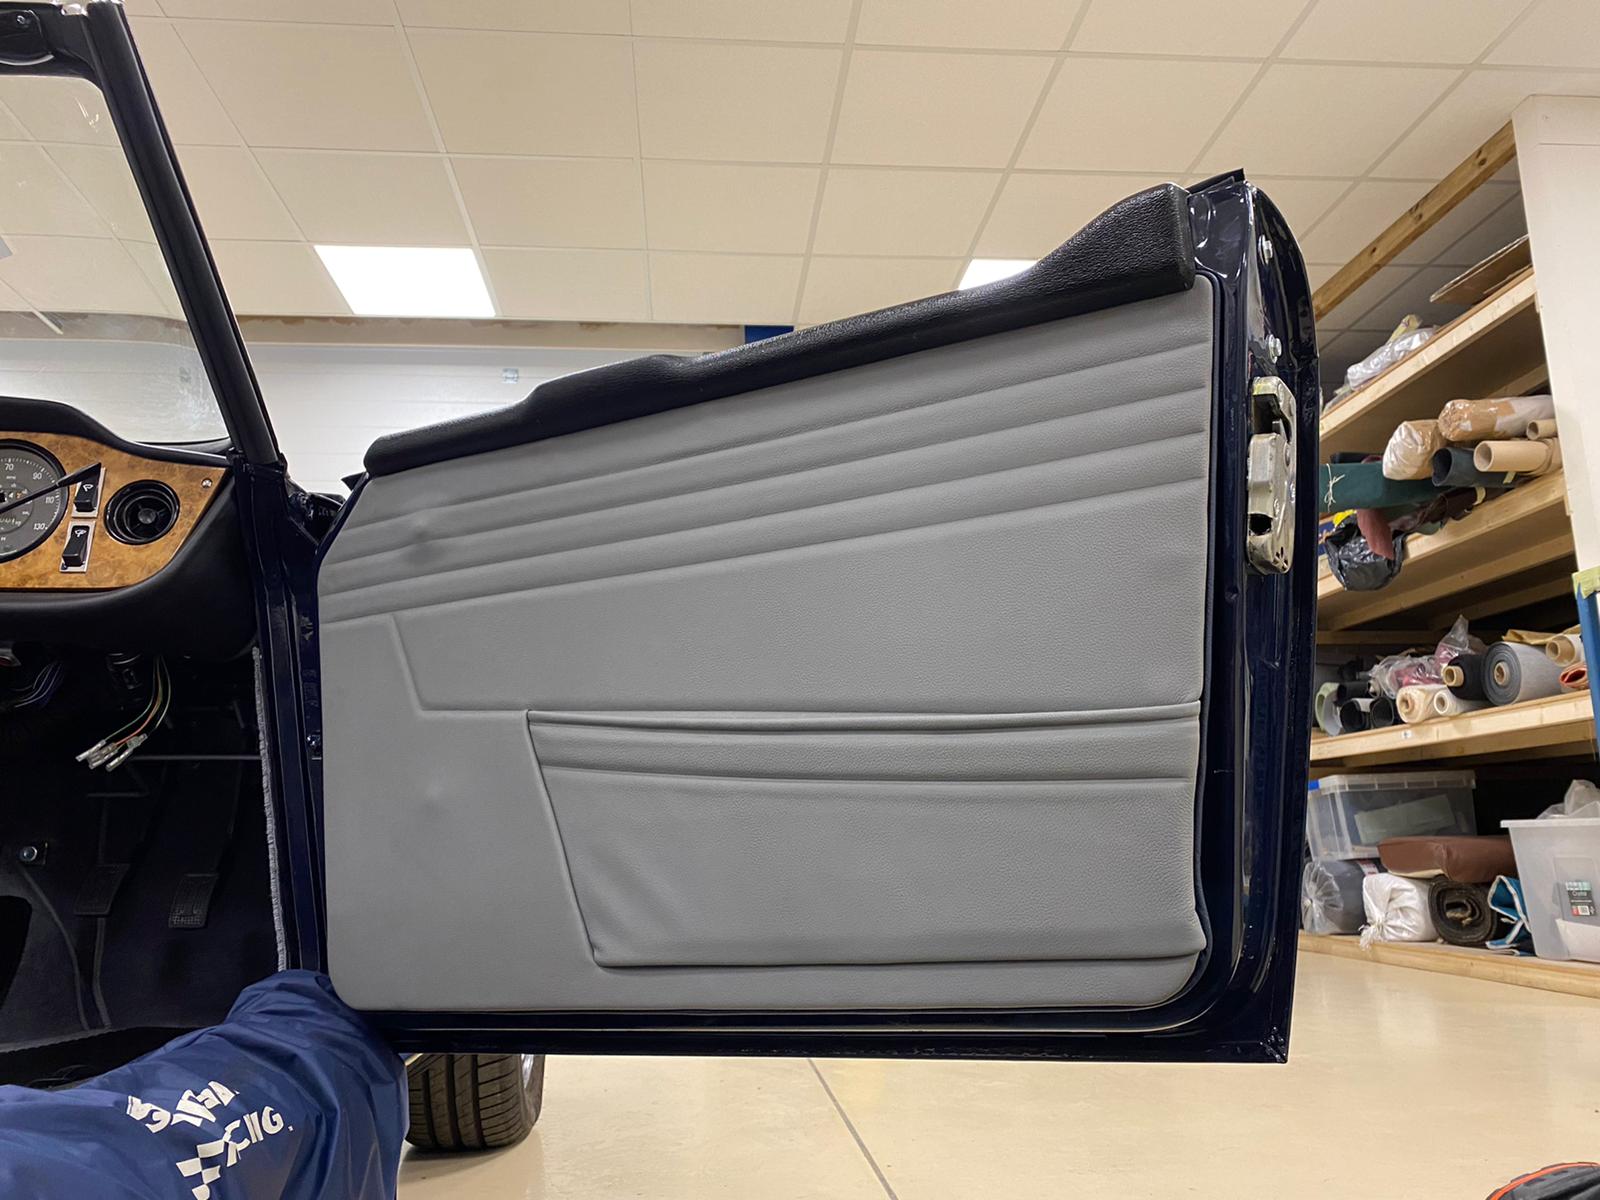
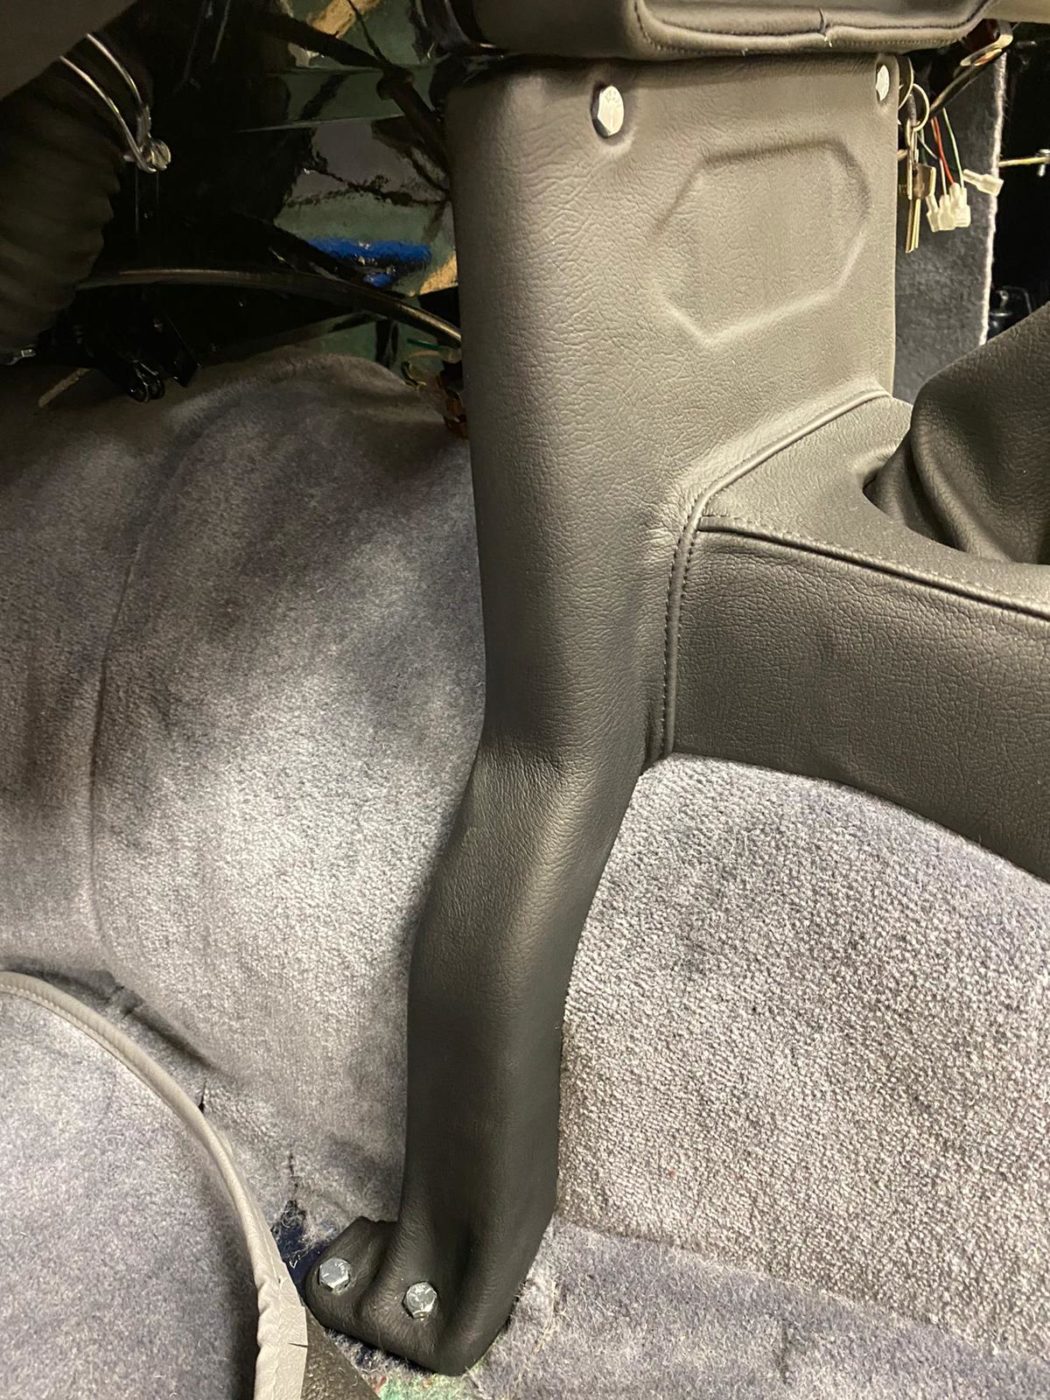
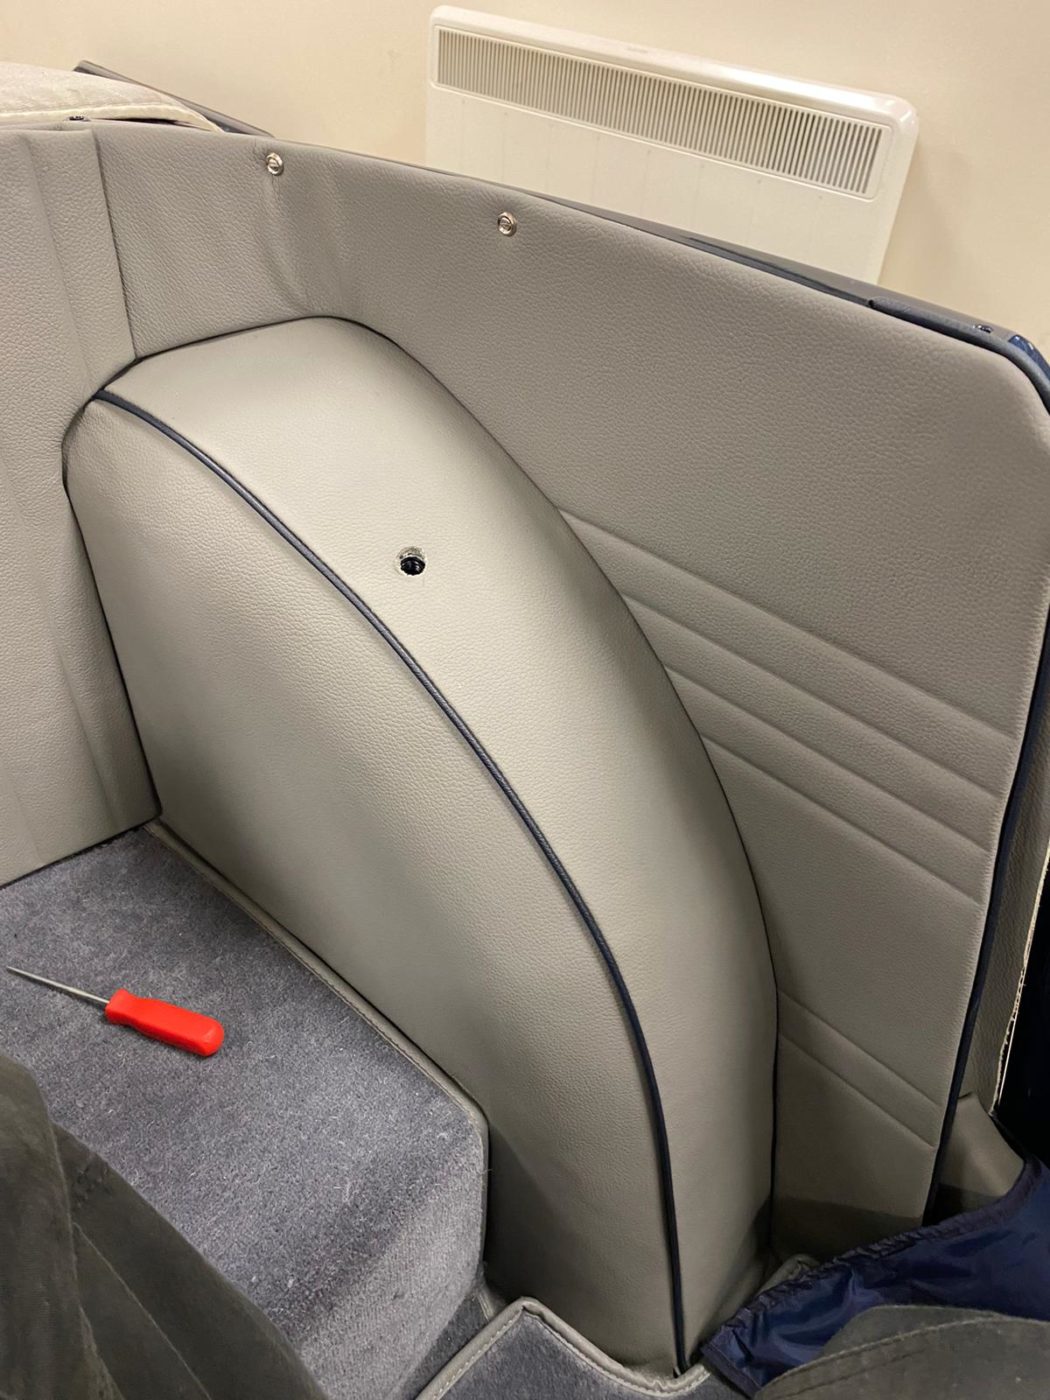
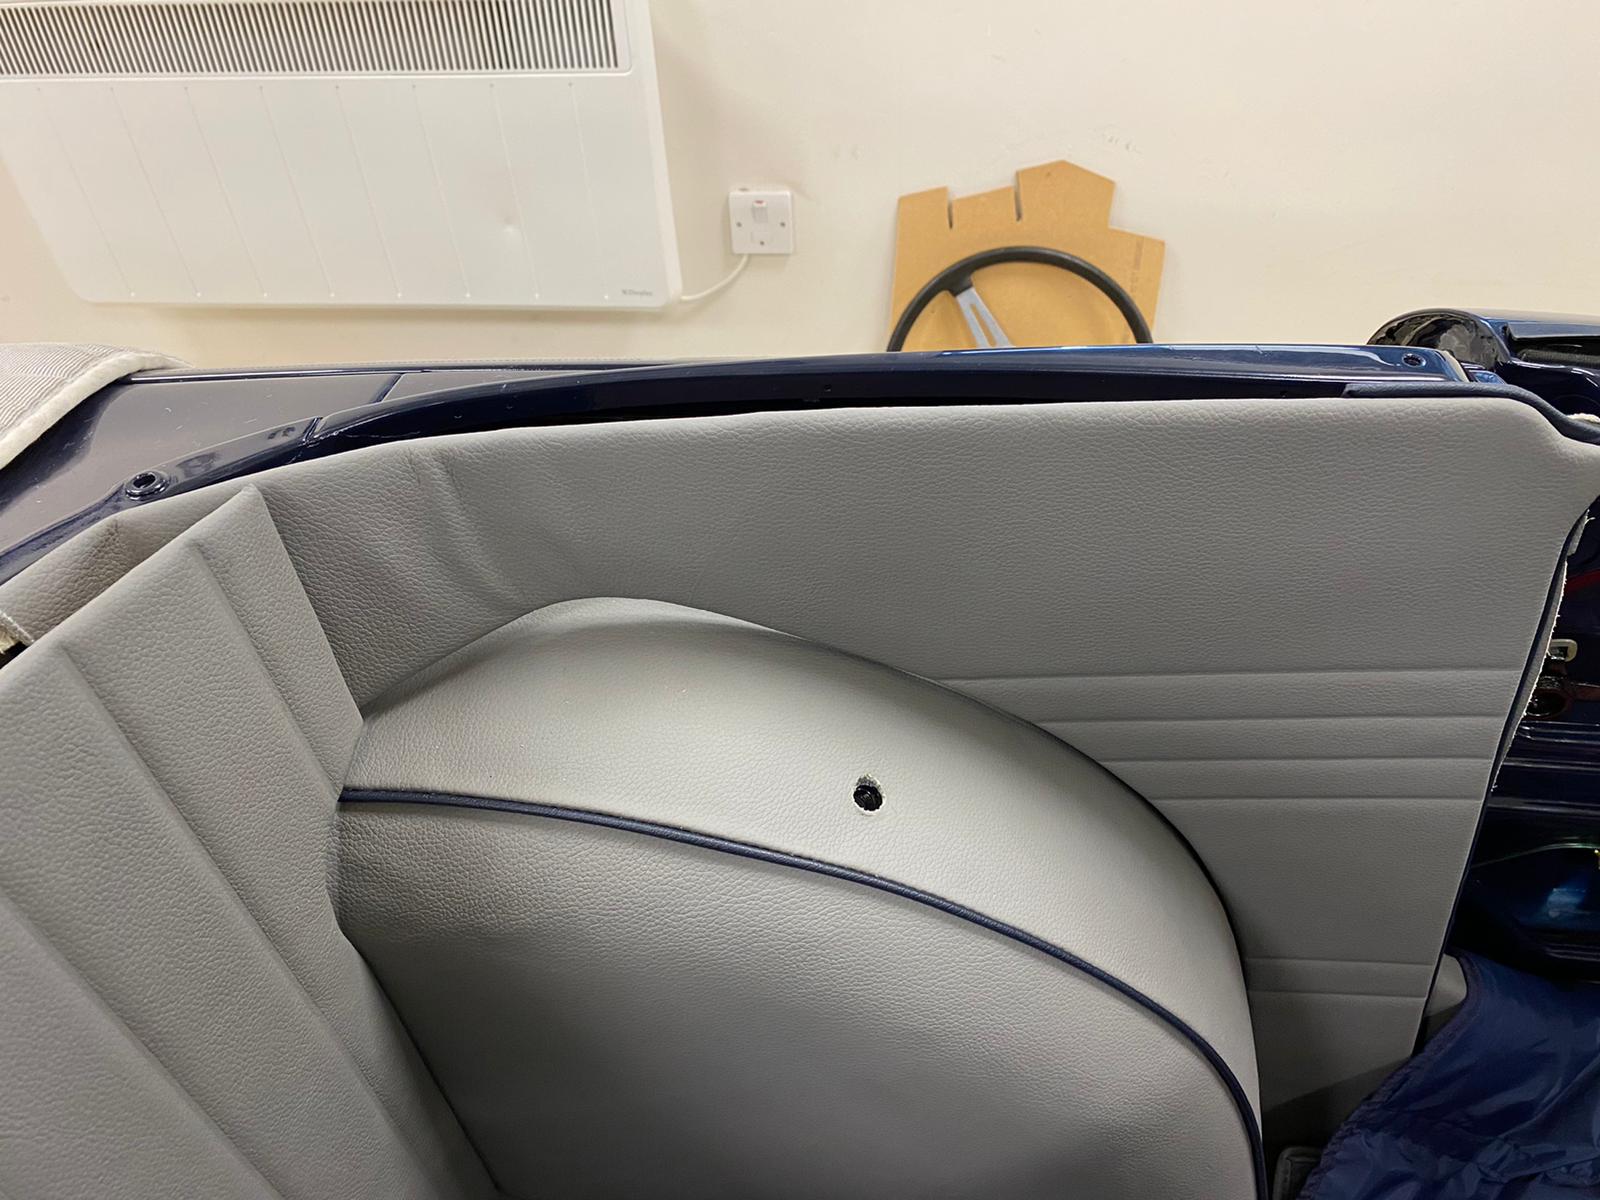
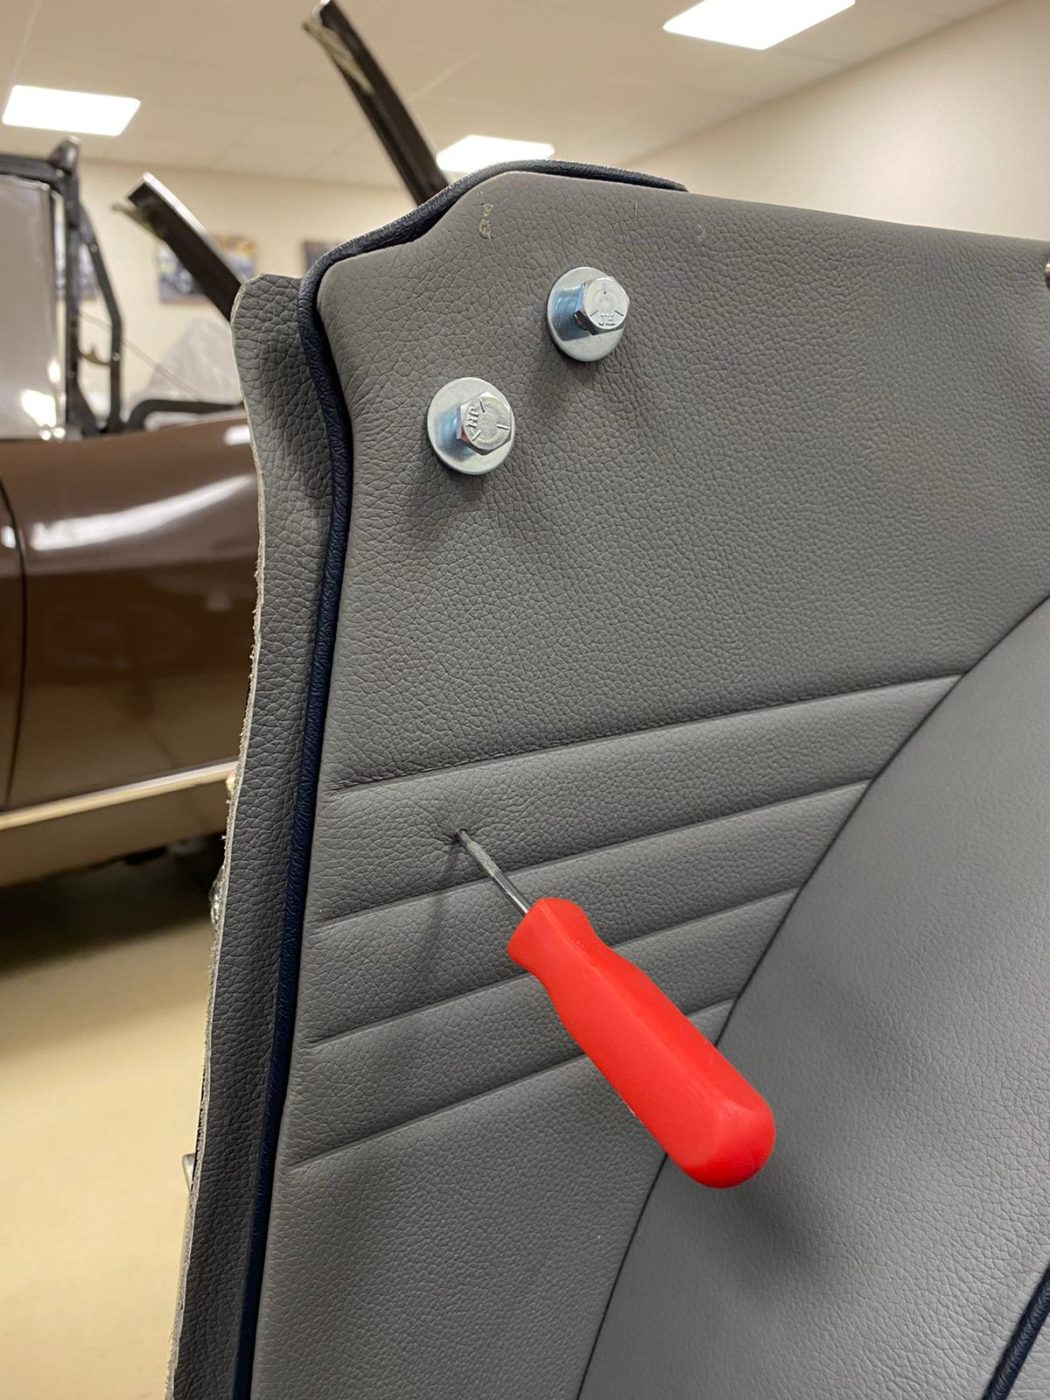
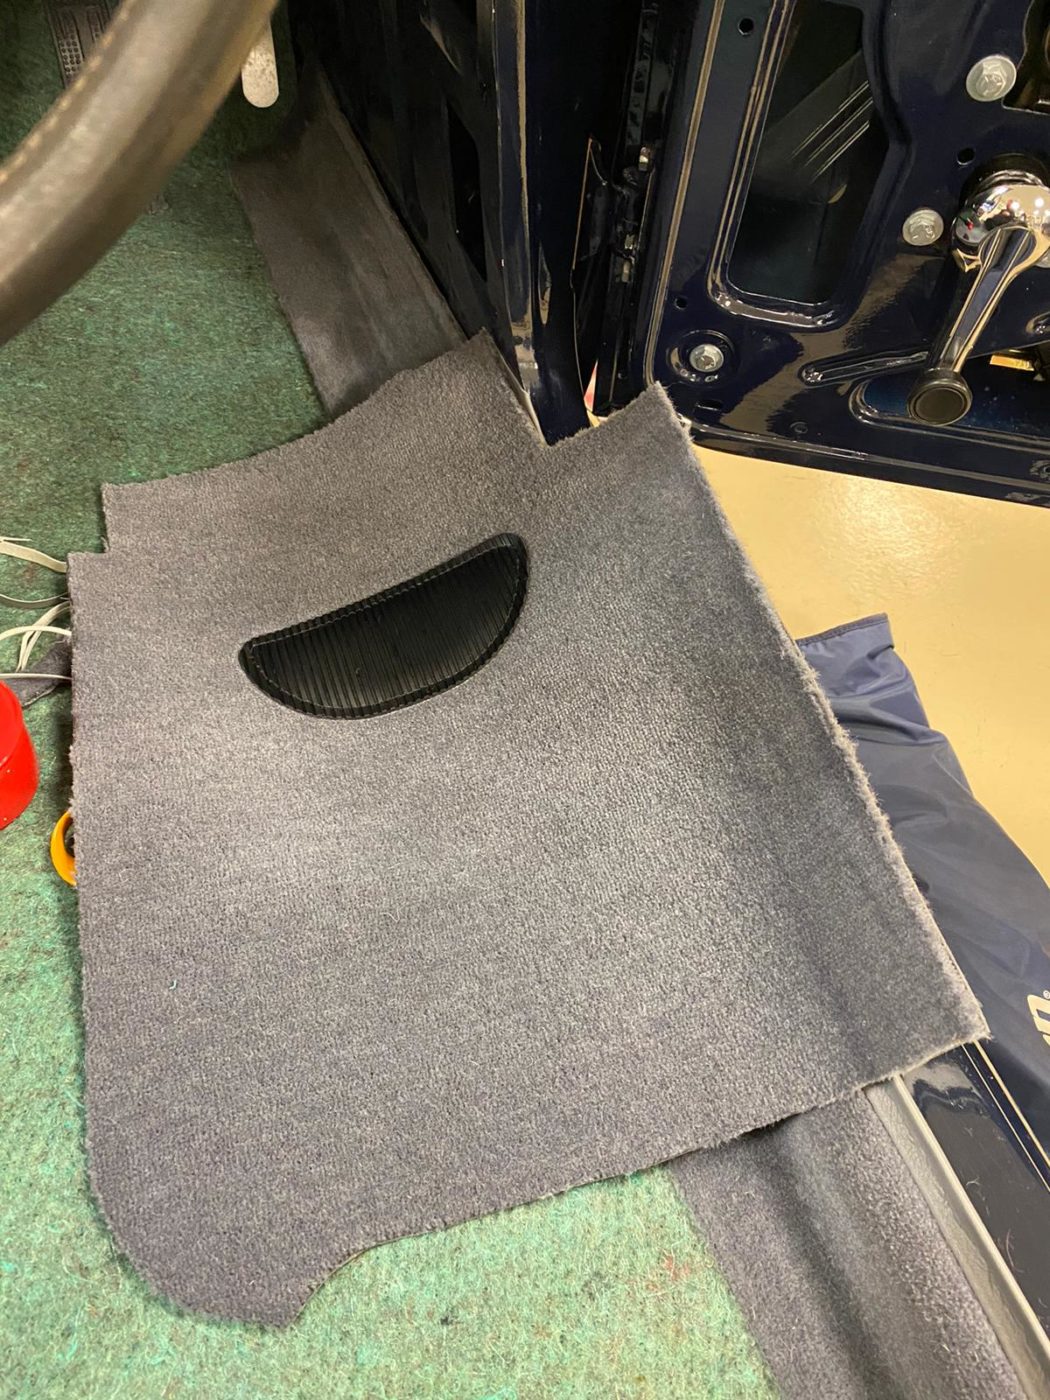
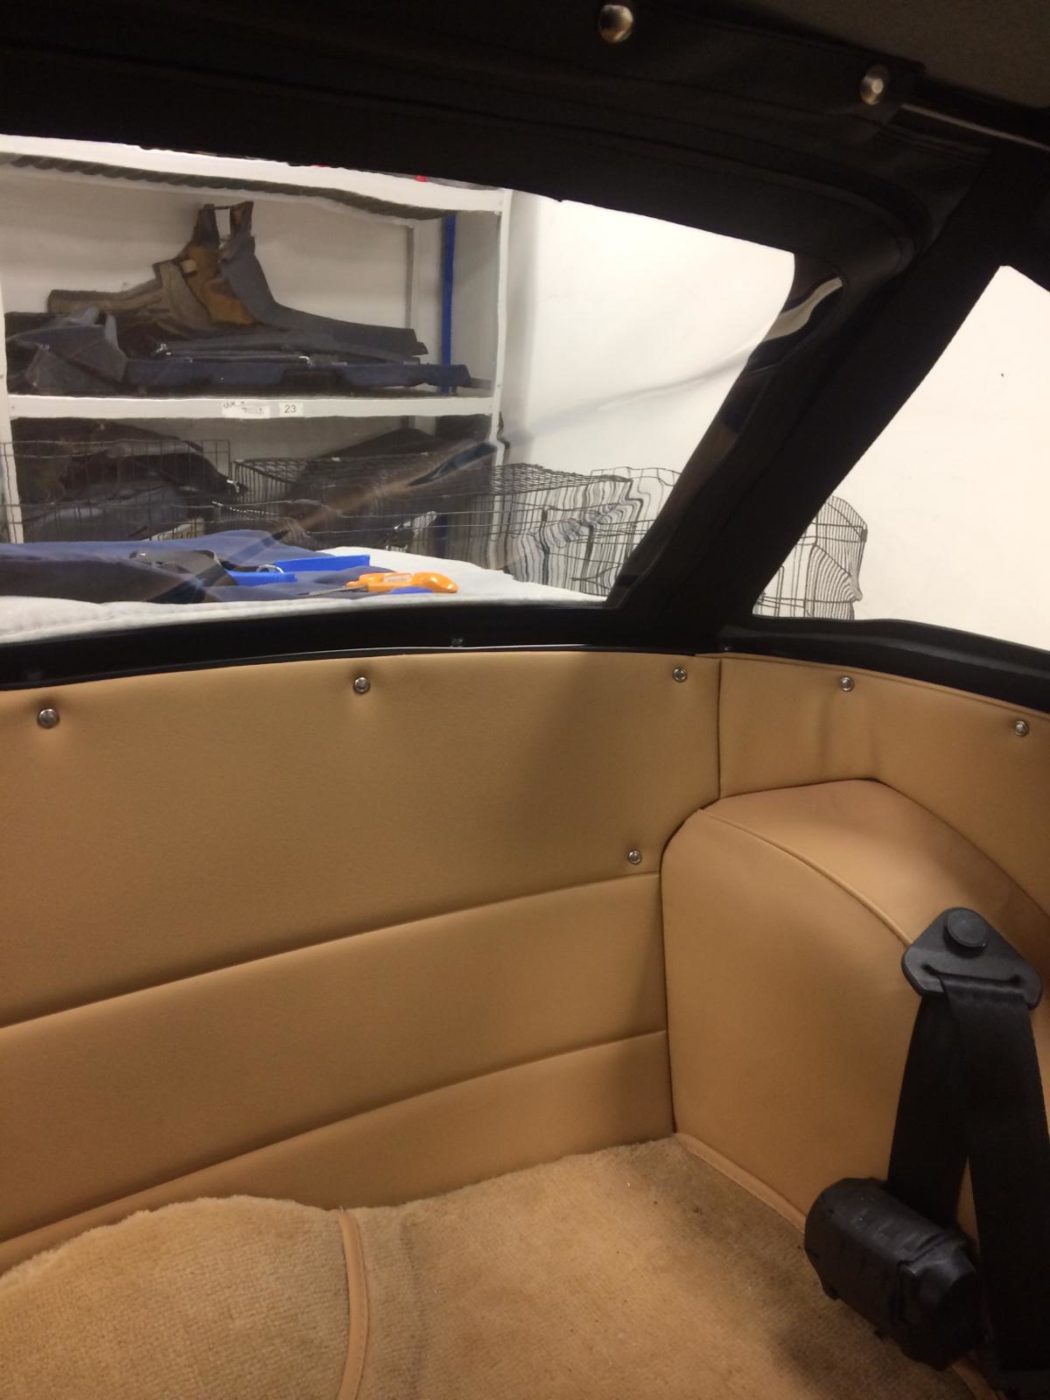
Kath and Brian have both been working on our 1968 Triumph TR5 recently. Kath has fitted the door cards which could be placed in now that the door capping’s have been fit. Kath began by pushing in the panel clips into the back of the panel and aligning the clip with the hole in the door to push it into place. At first Kath noted that it wasn’t sitting straight forward so she had to adjust the panel by cutting off the piping from the top.
Once Kath had the clips in at the top, she could then go round the rest of the panel clips, cut out the holes for the window winder and door handle, fit the handles and move on to the other side to do the same thing again.
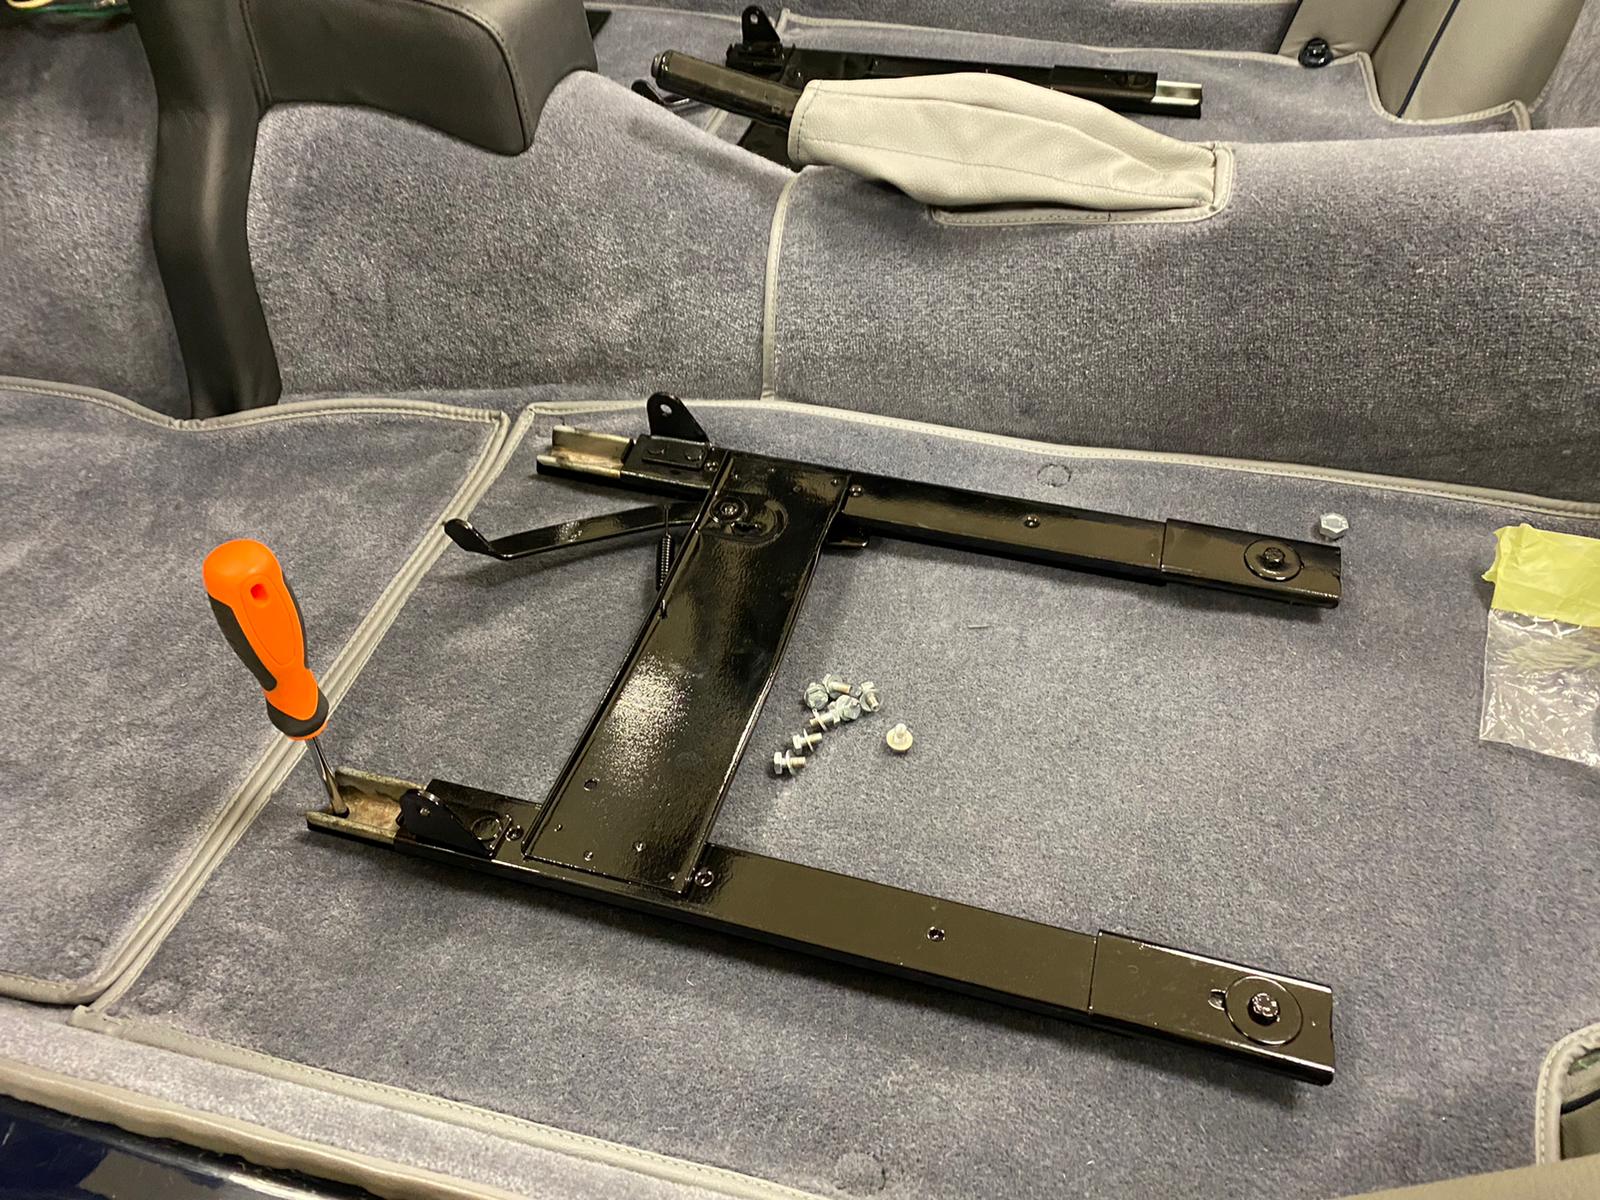
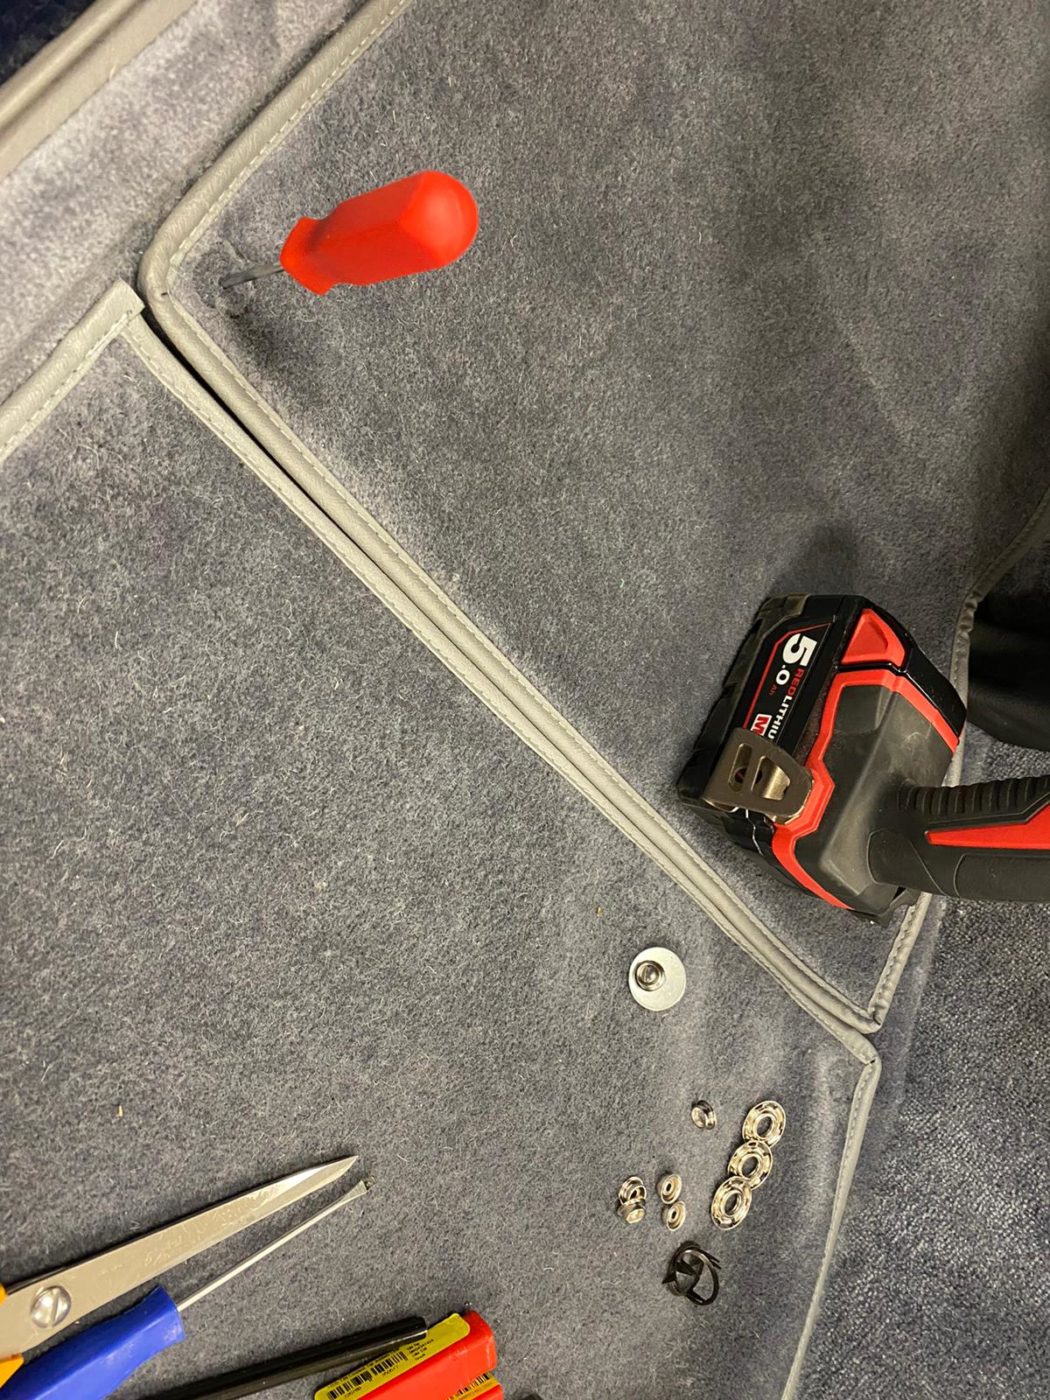
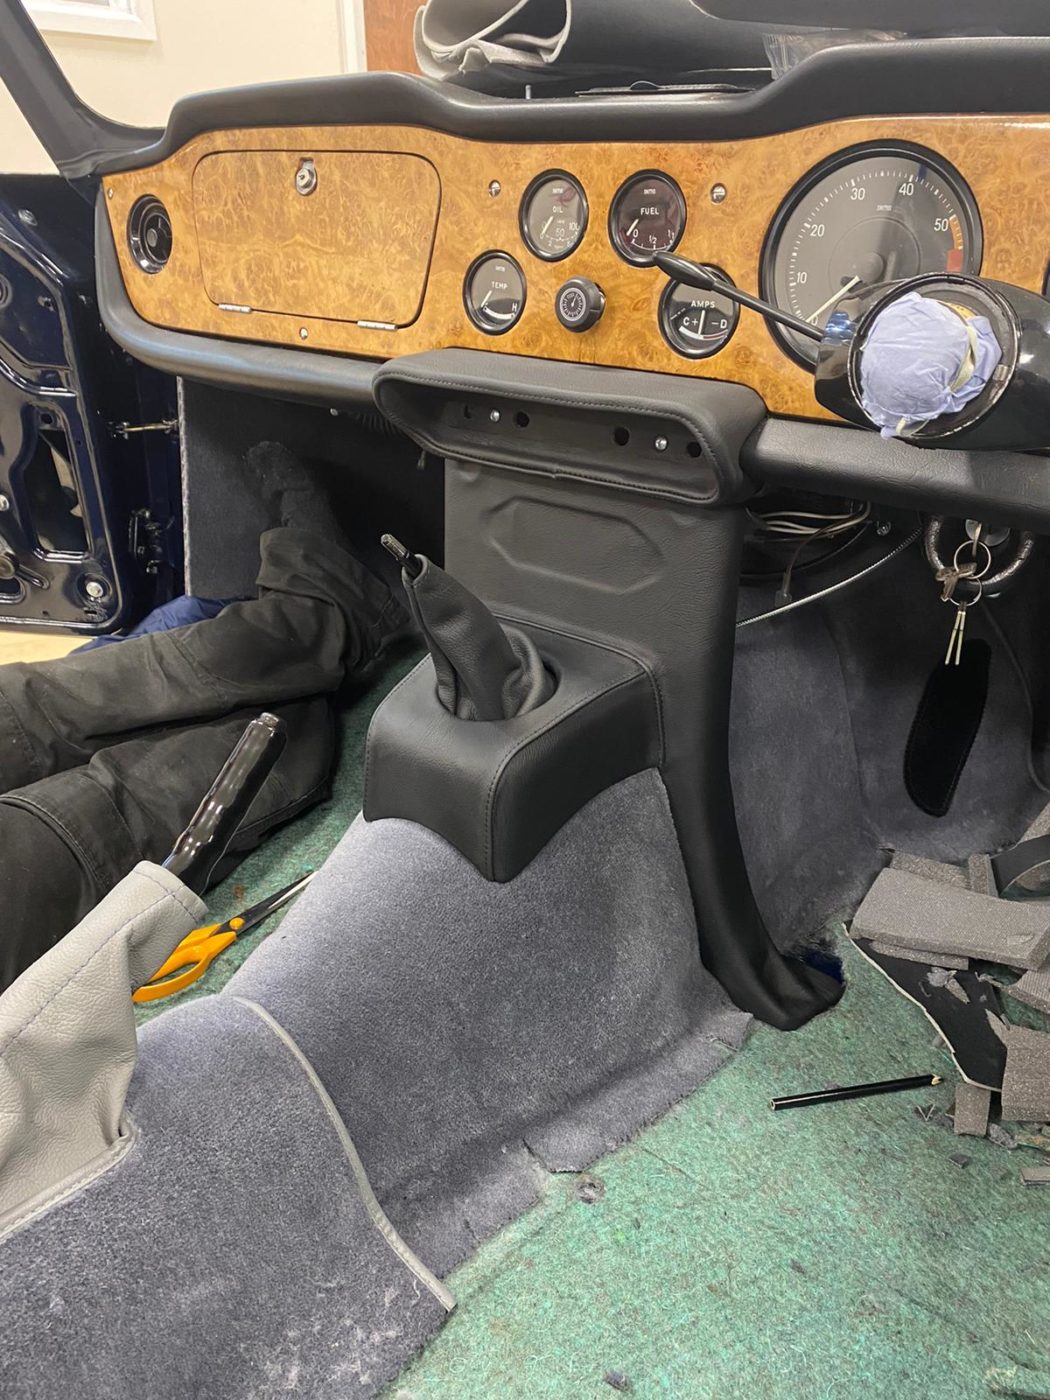
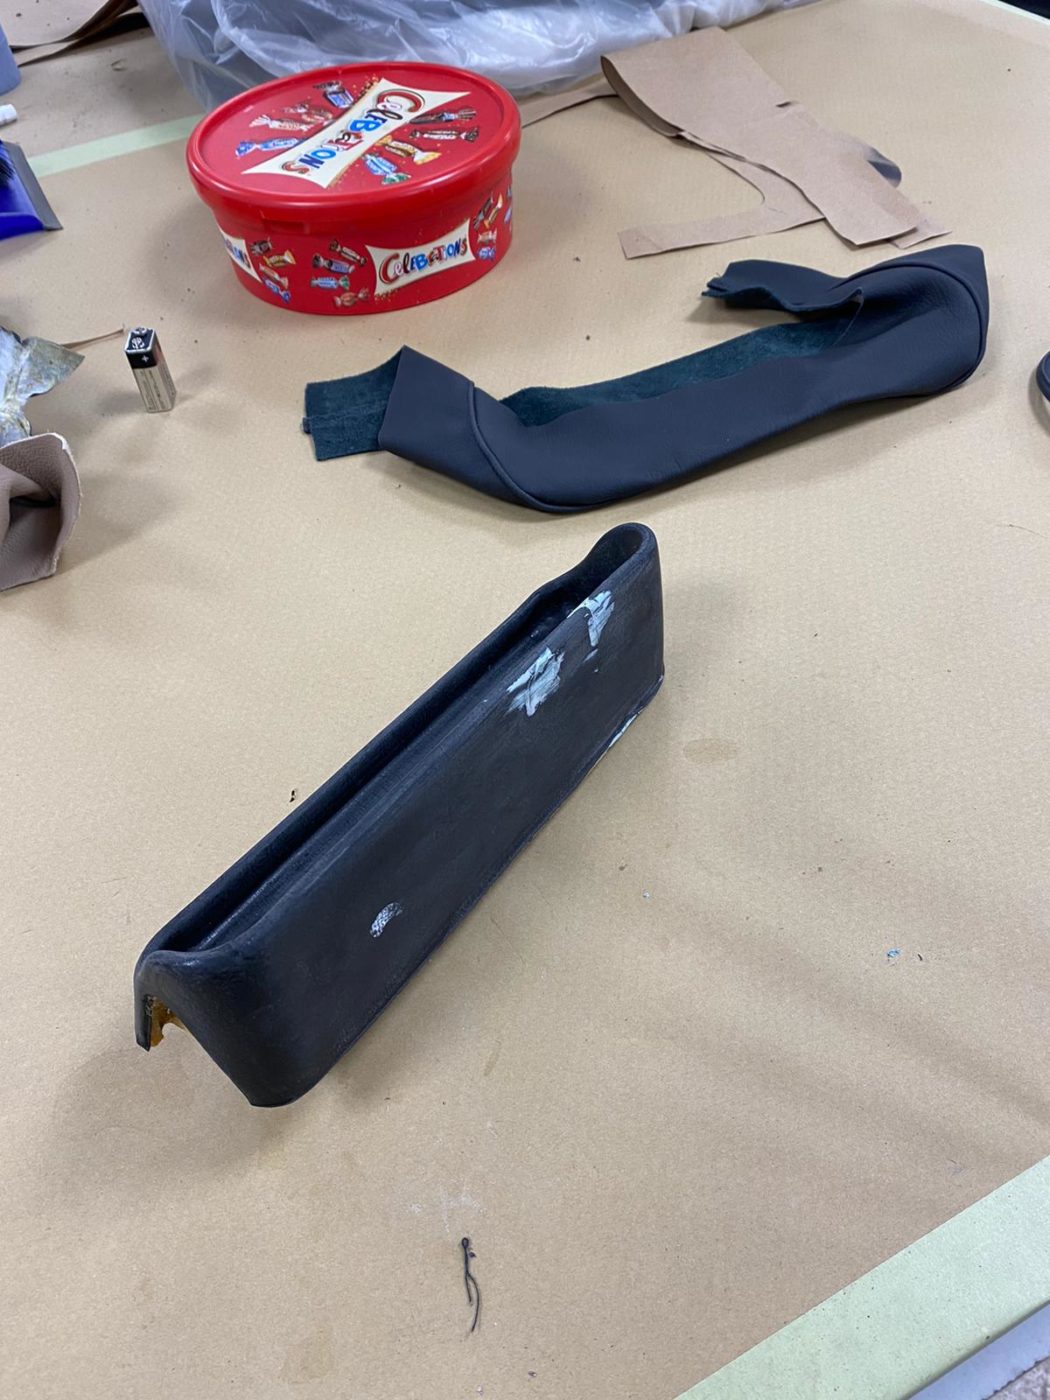
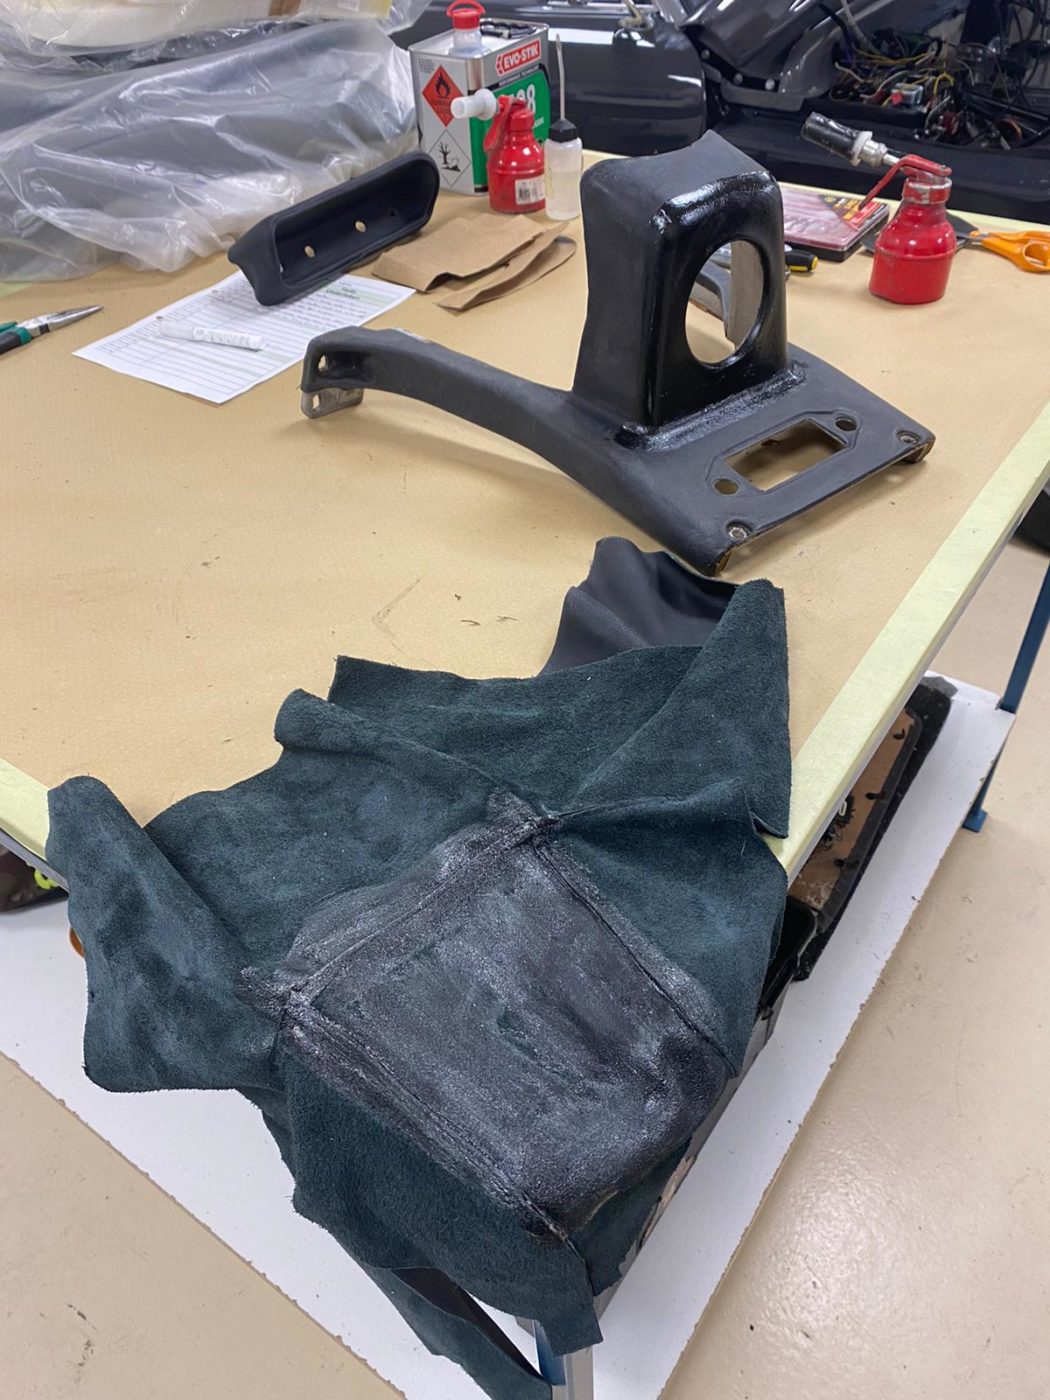
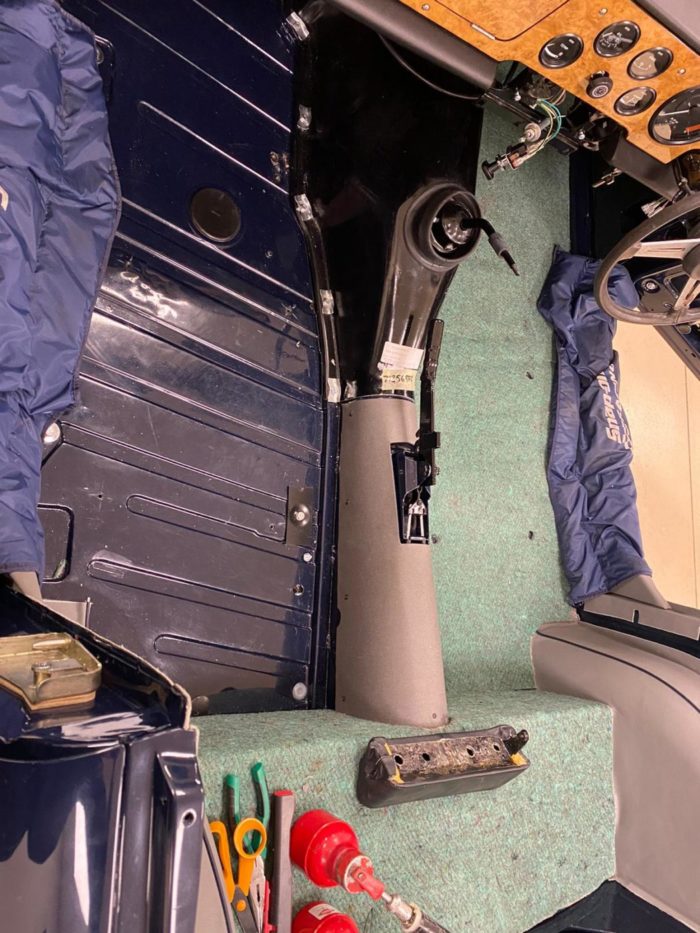
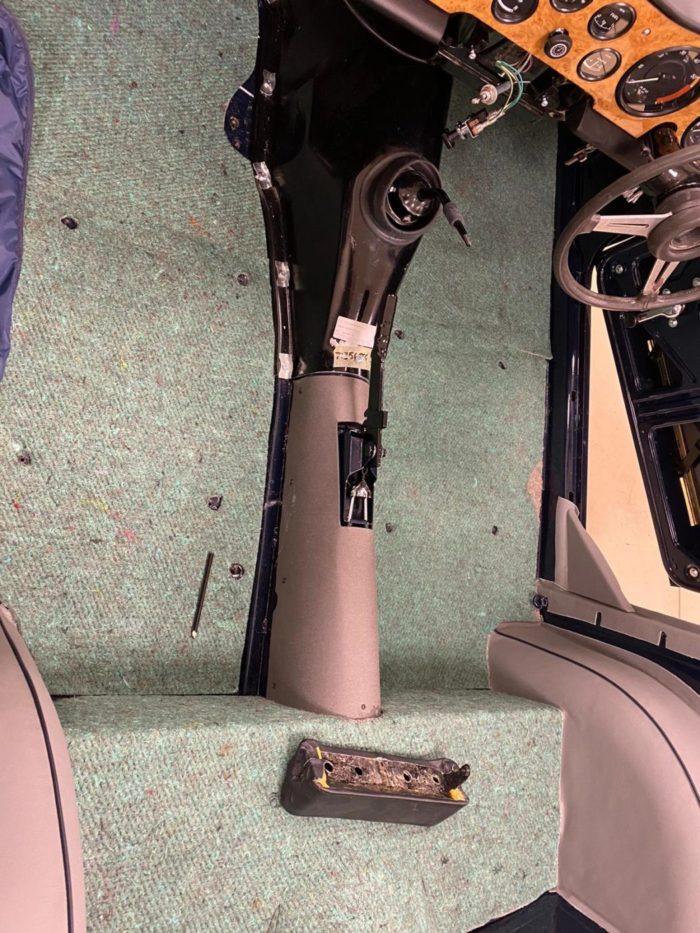
Kath also bolted the seat runners onto the floor and bolted in the centre console. This included fixing two bolts into the floor pan each side of tunnel section and one each side at the top.
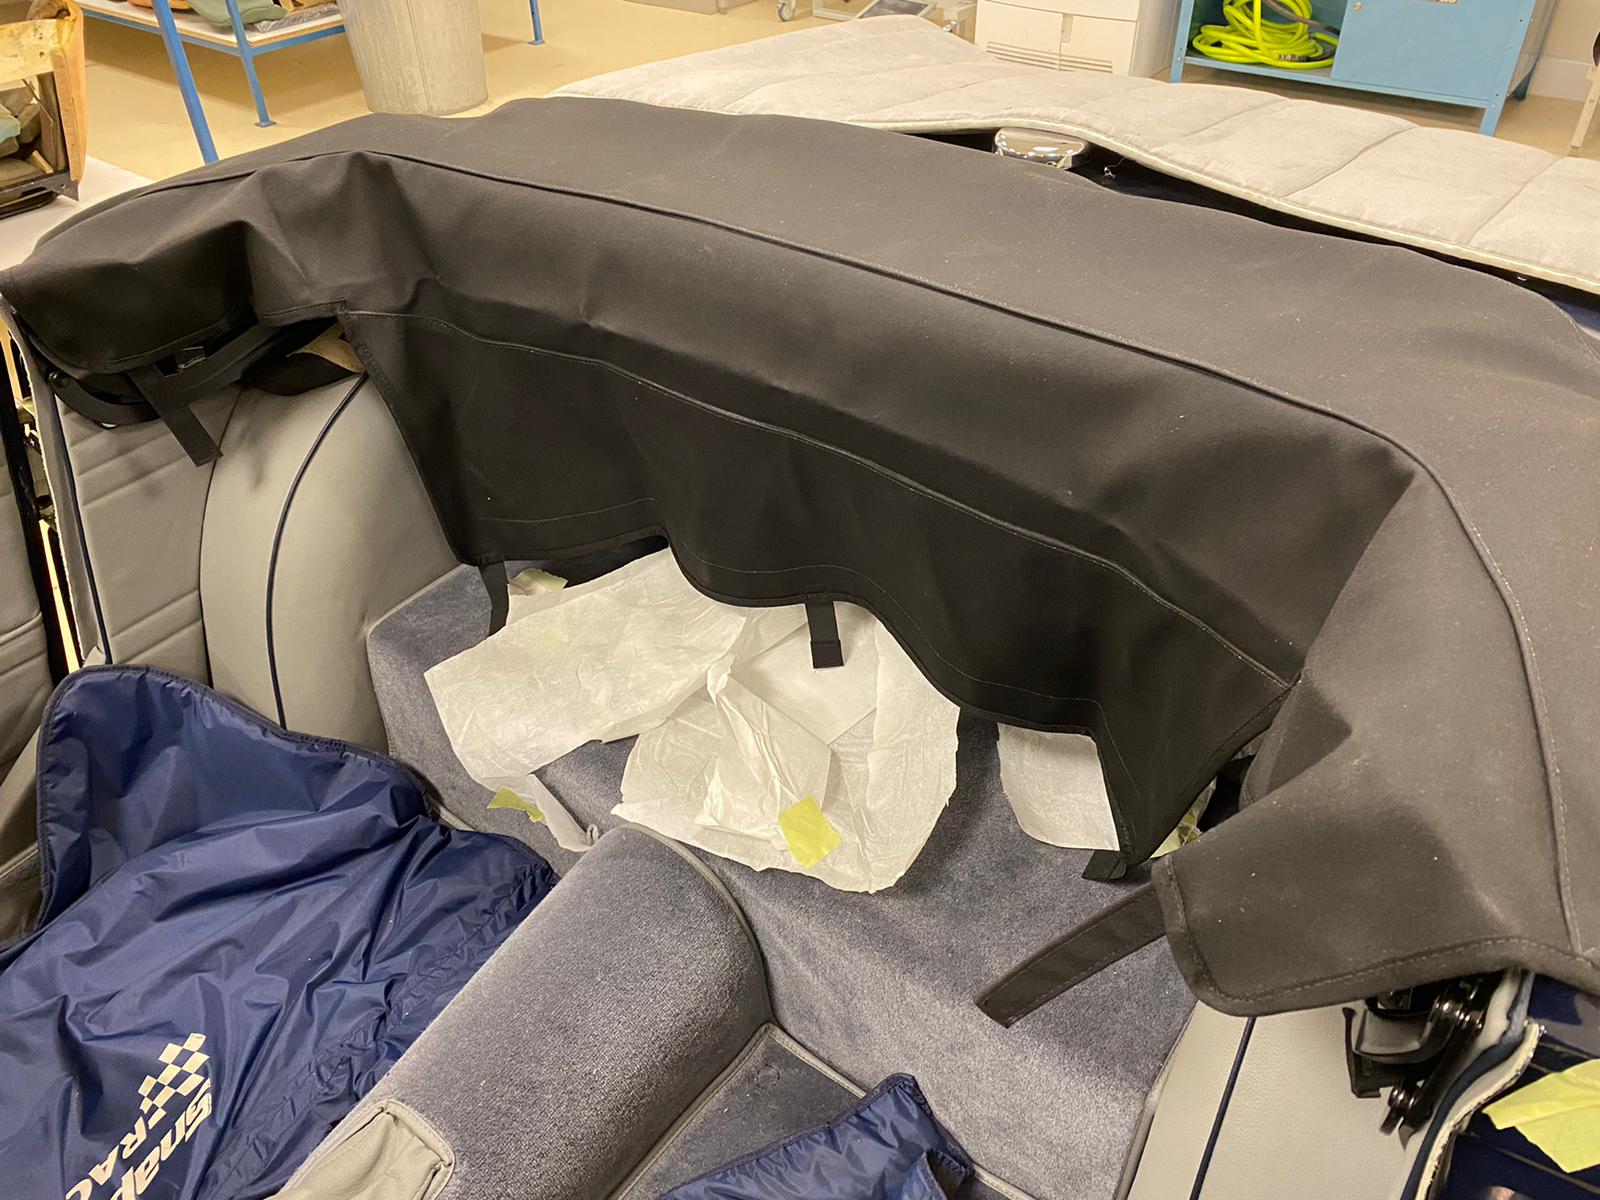
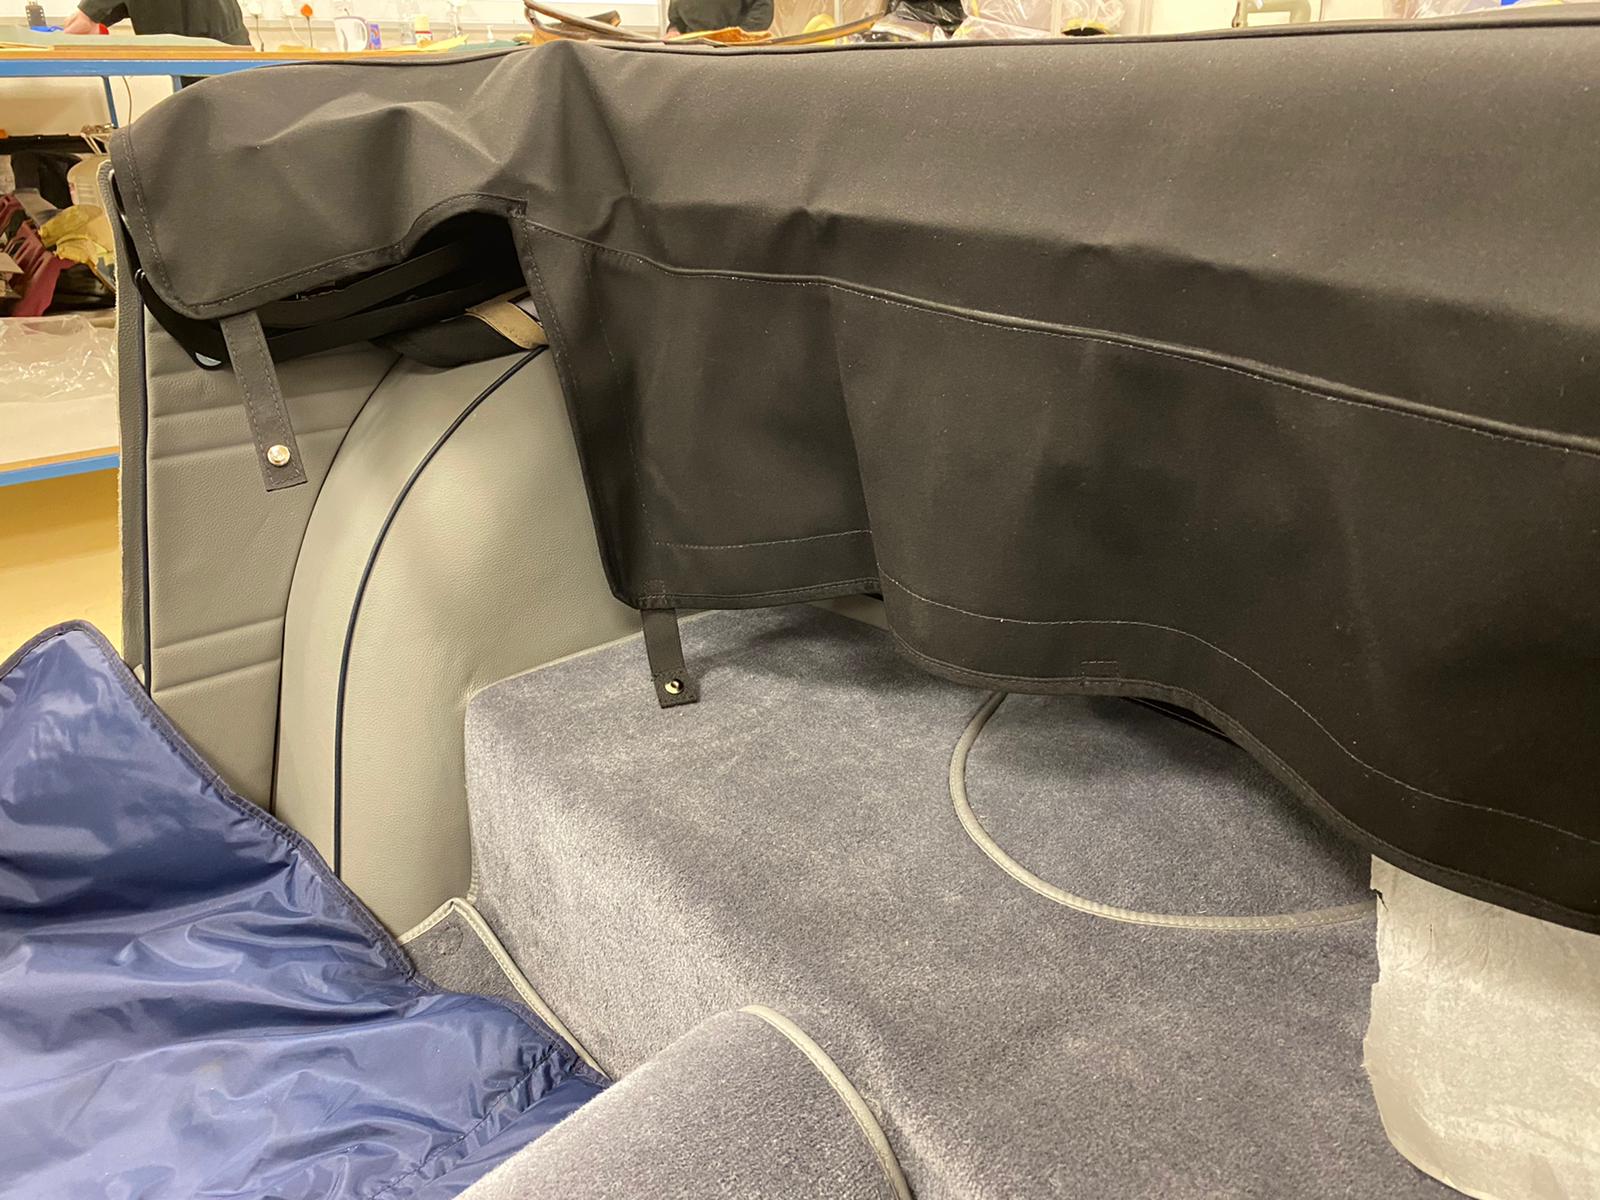
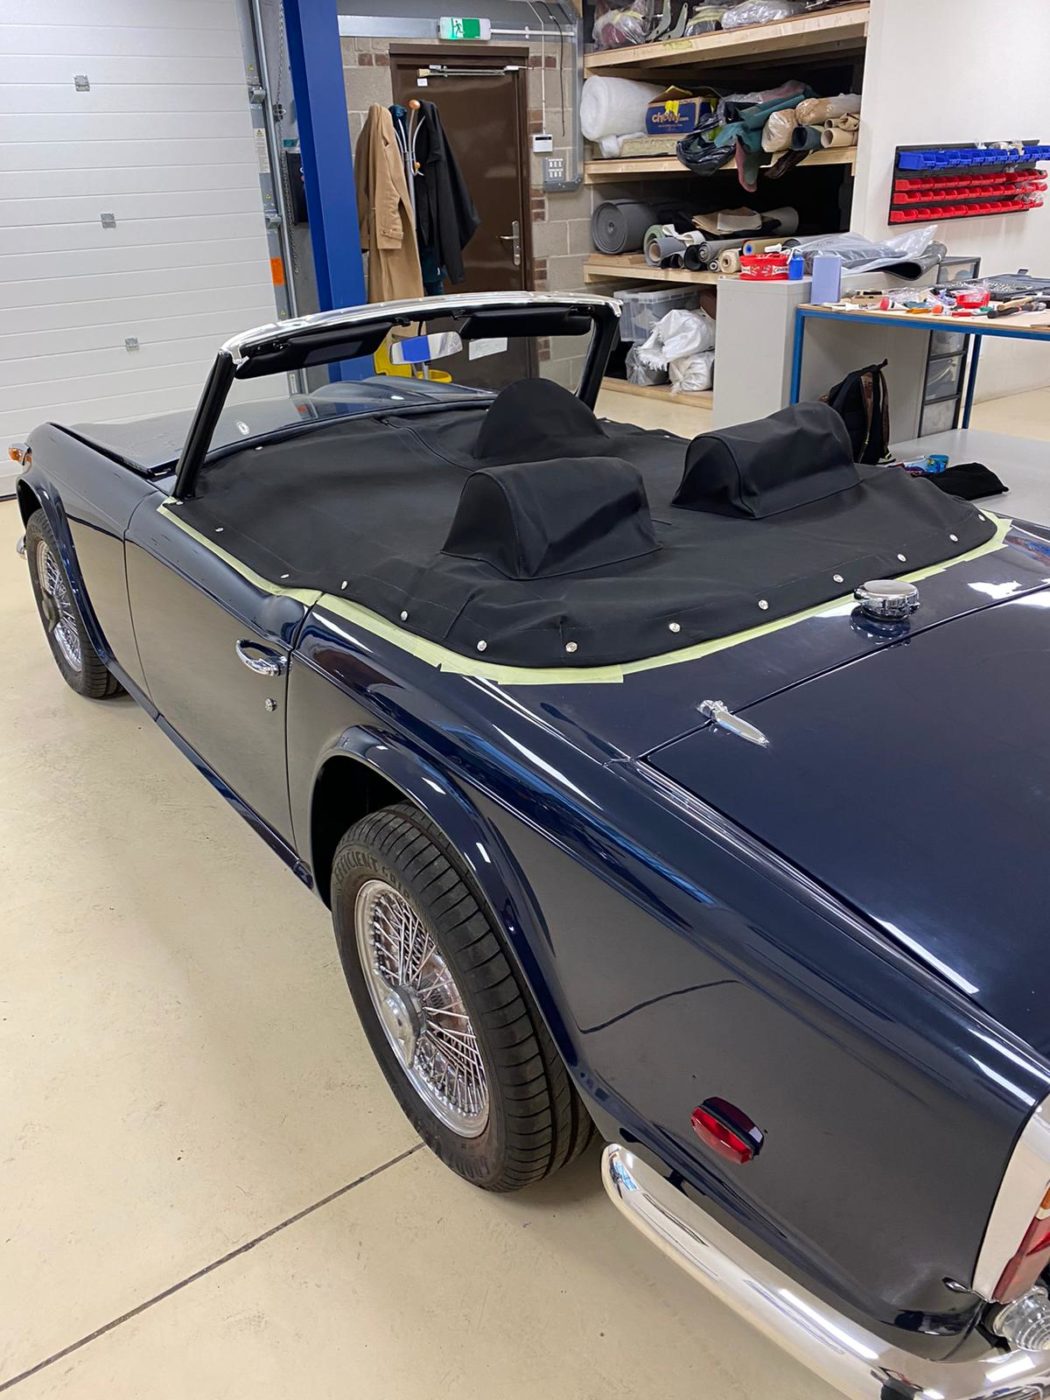
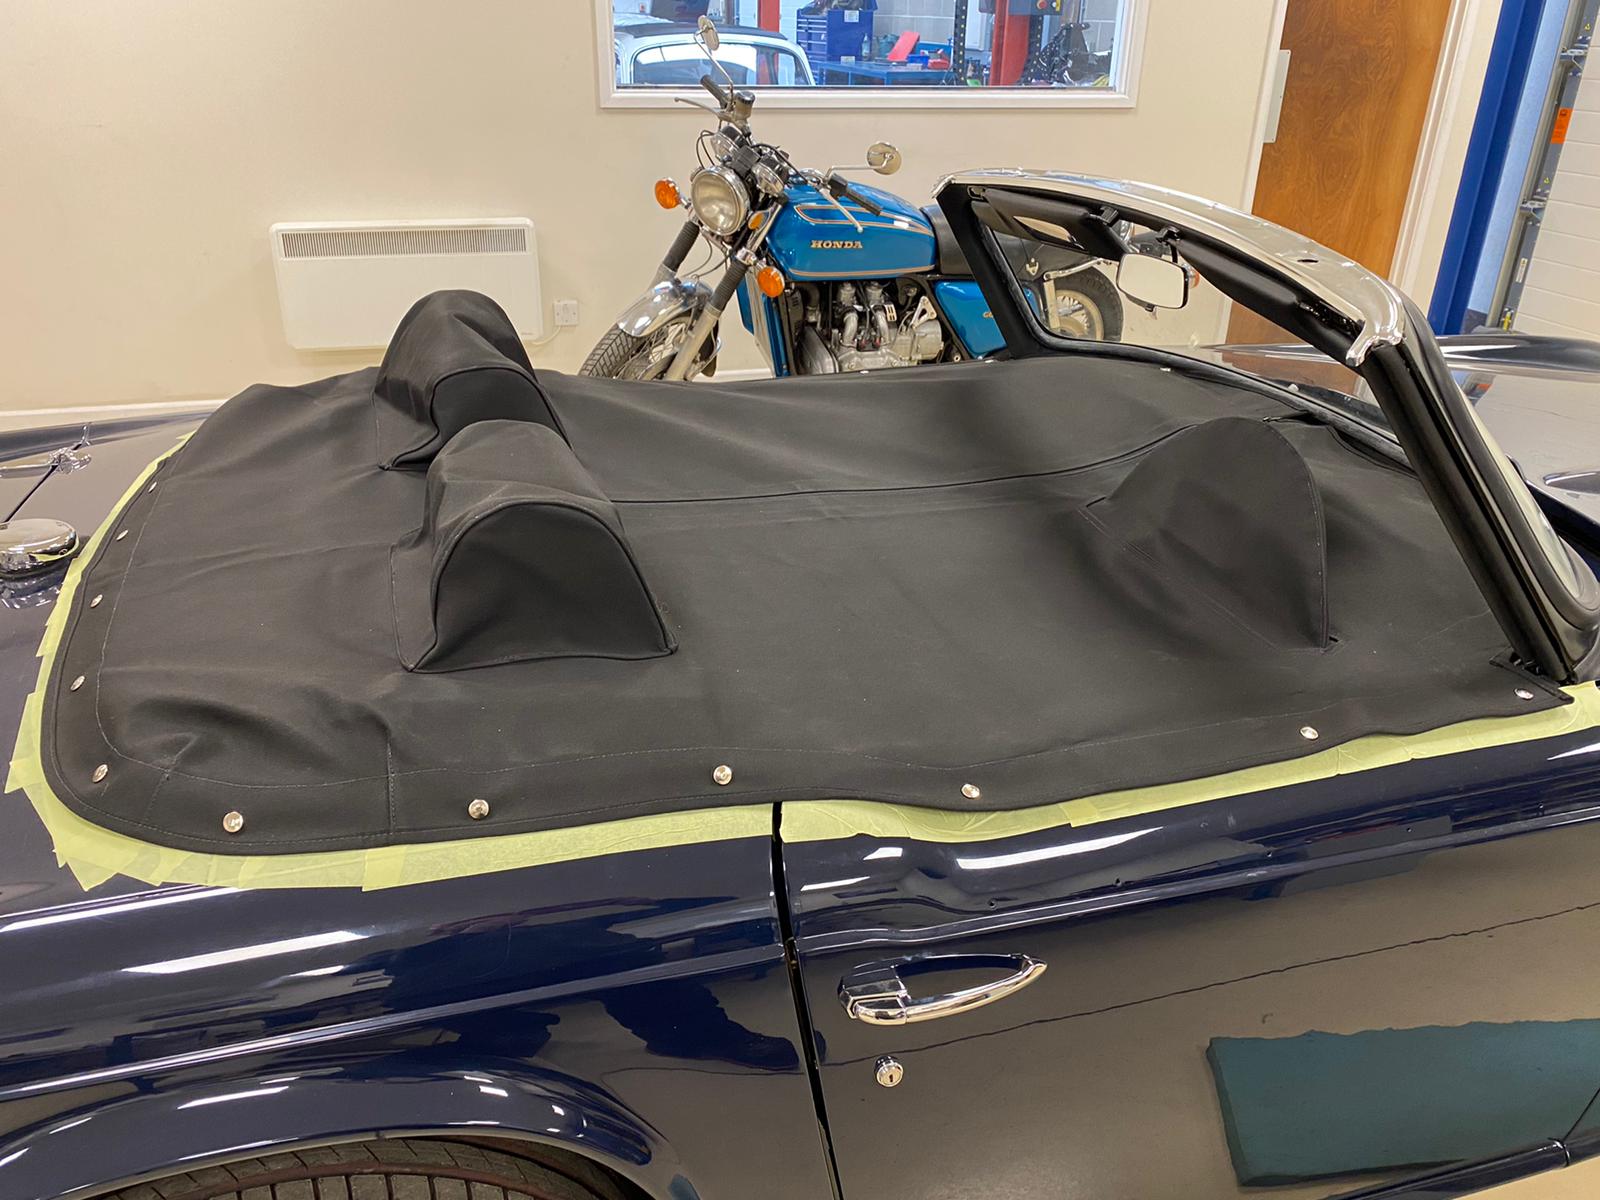
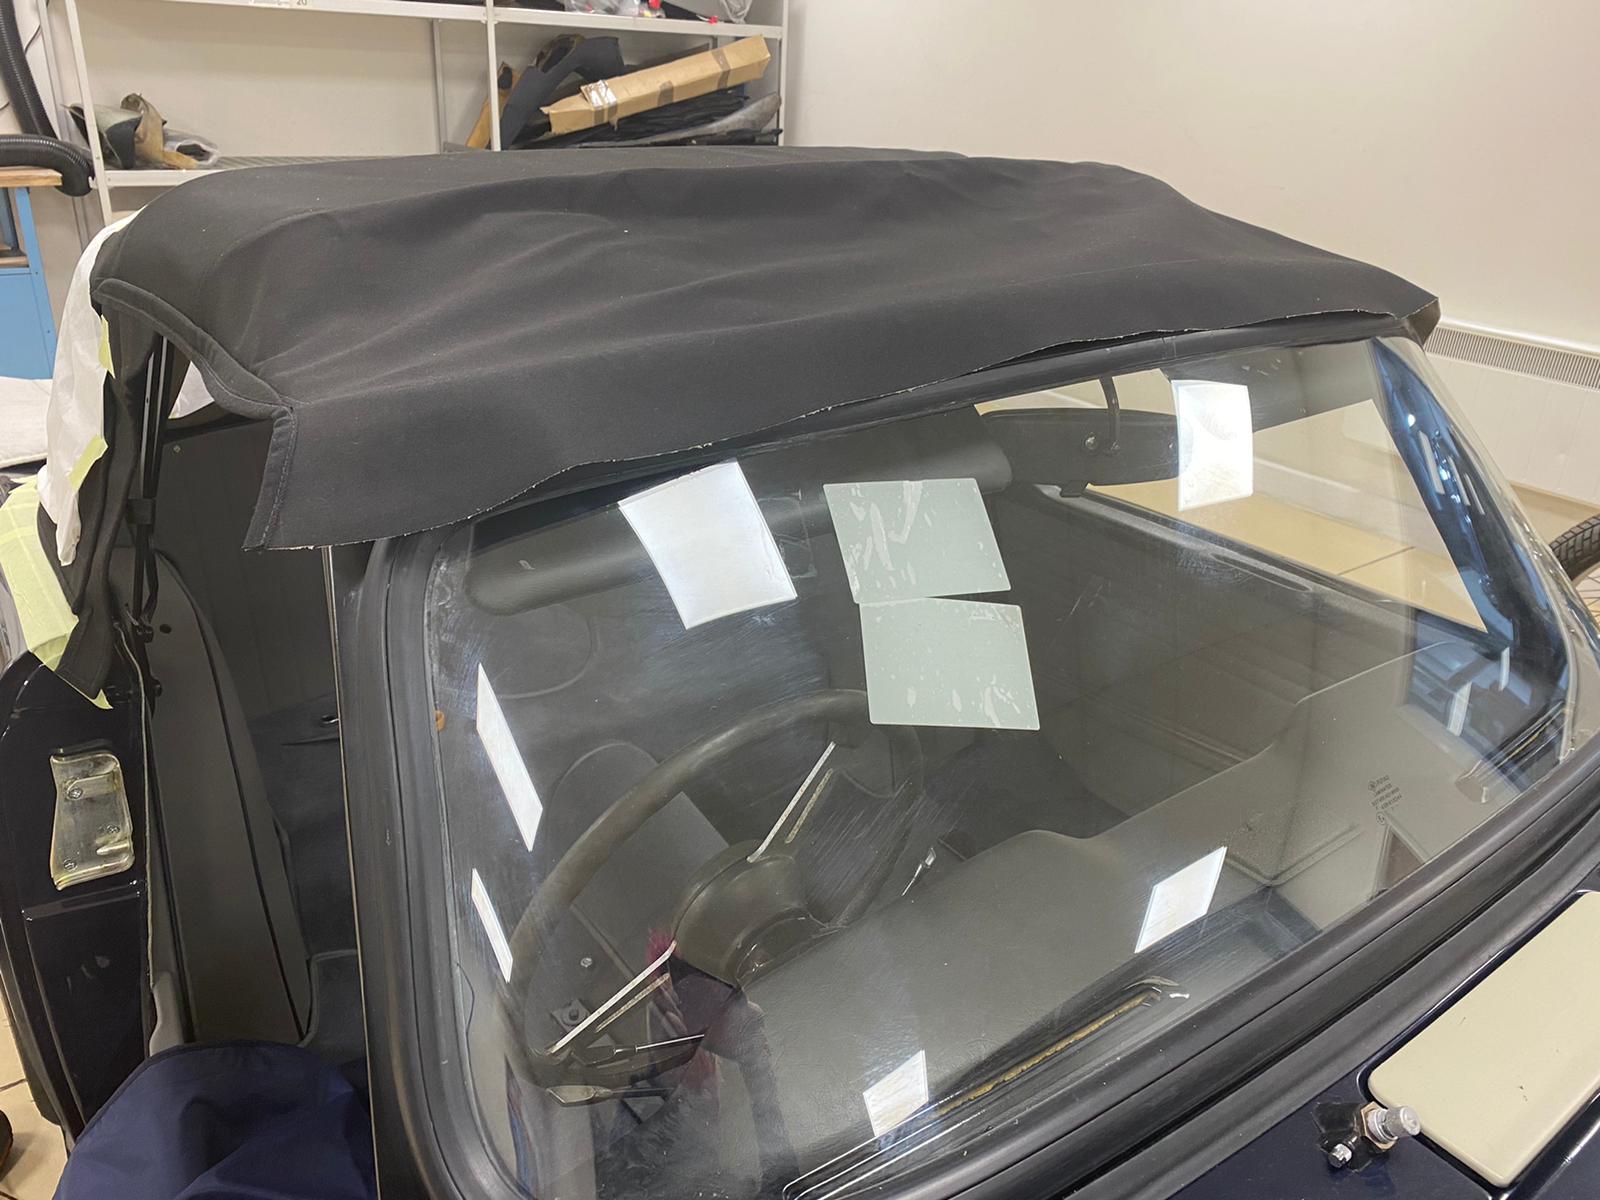
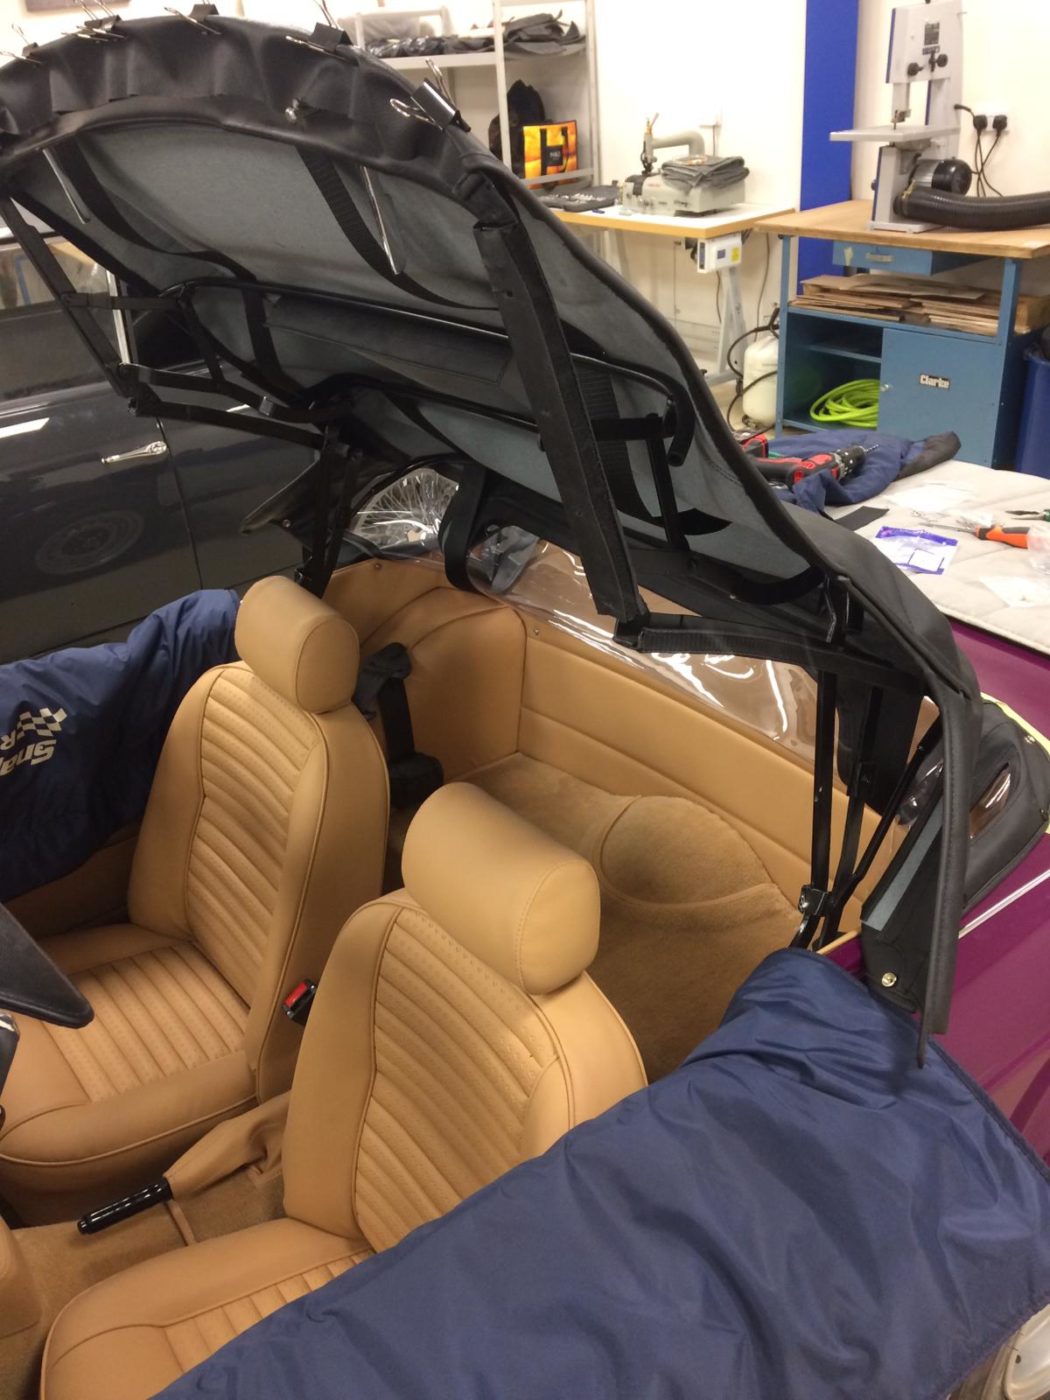
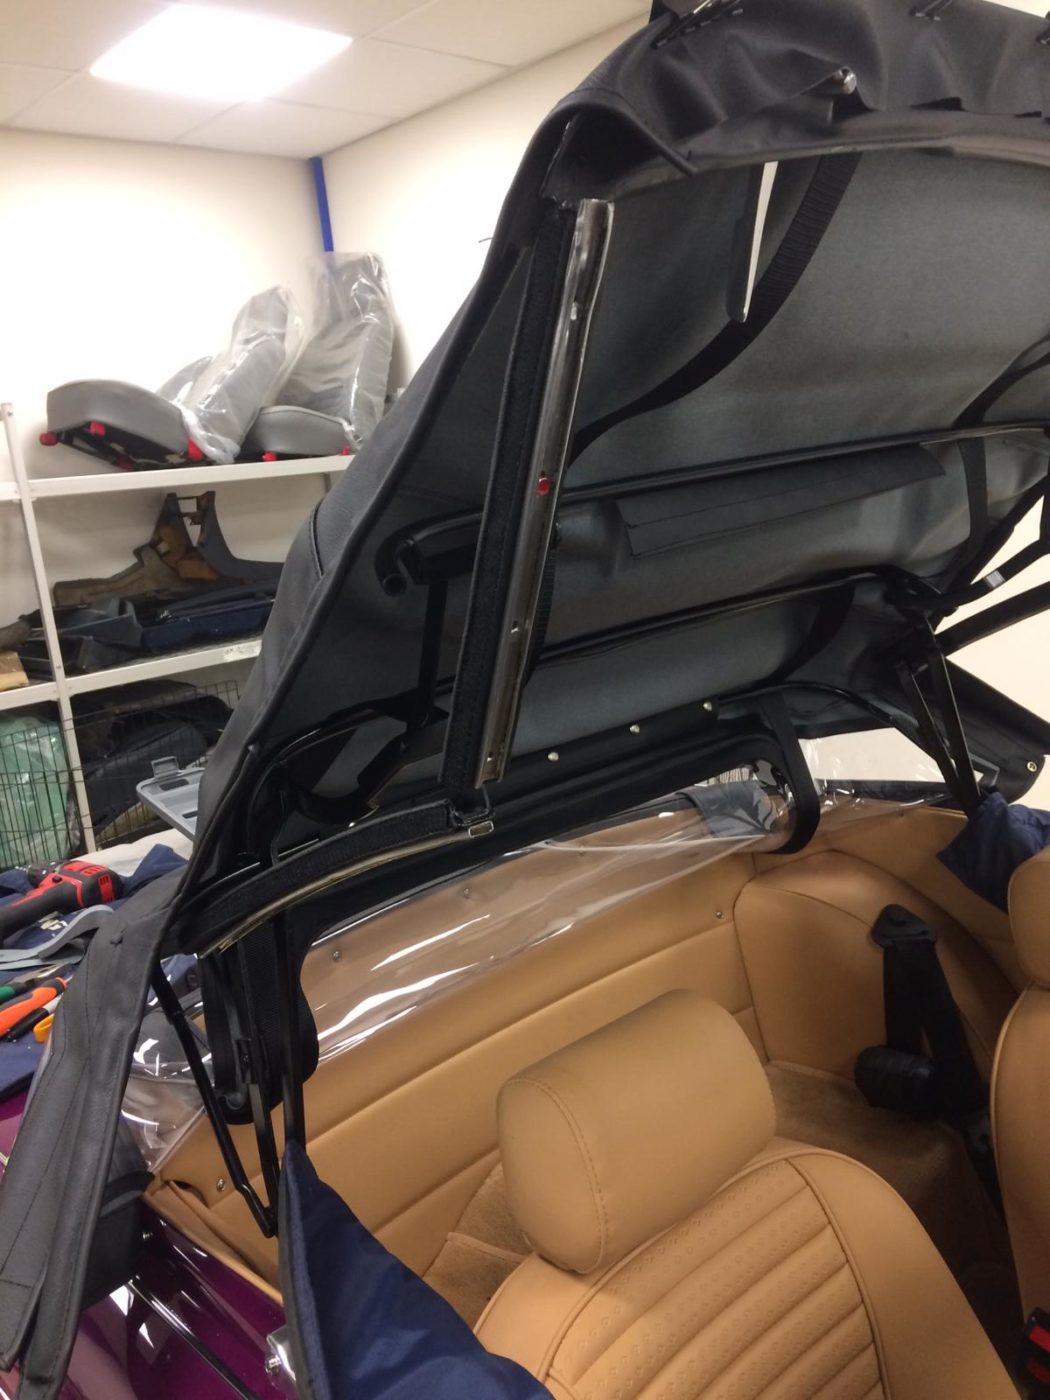
The hood has also been fitted to check that the measurements align well. Kath laid the hood over the car ready to fit it later whilst she was waiting for the rubbers and header rail parts to arrive. By placing it over the frame, Kath could see if anything needed to be modified.
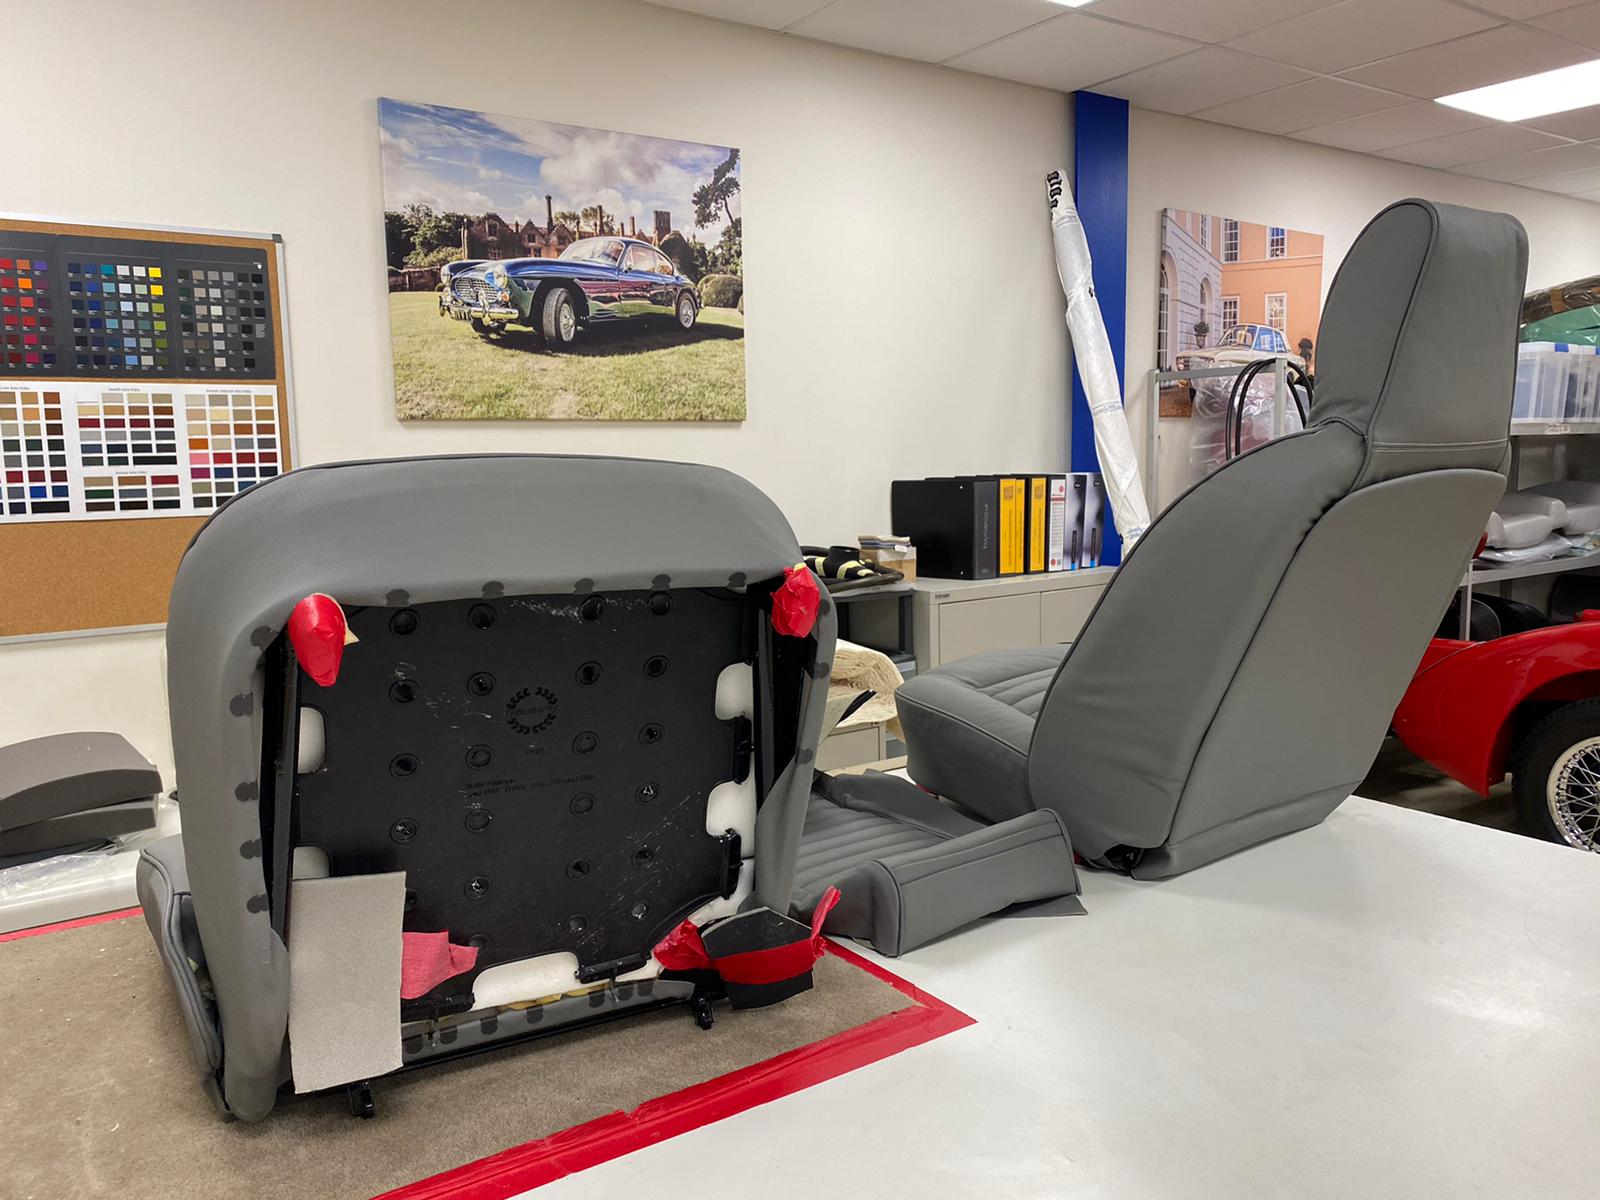
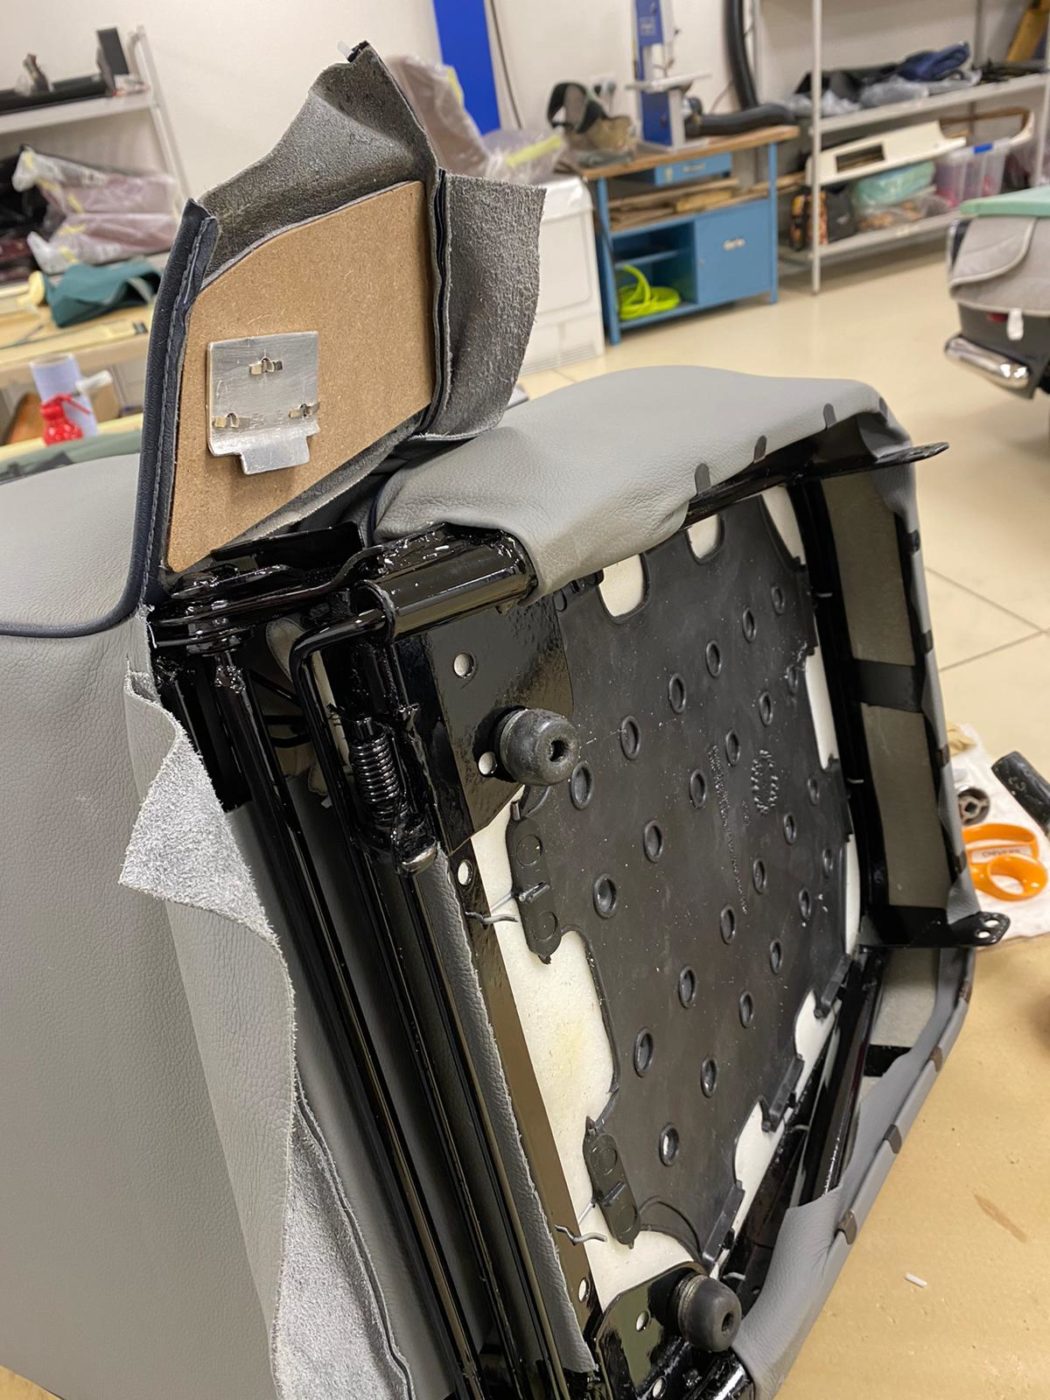
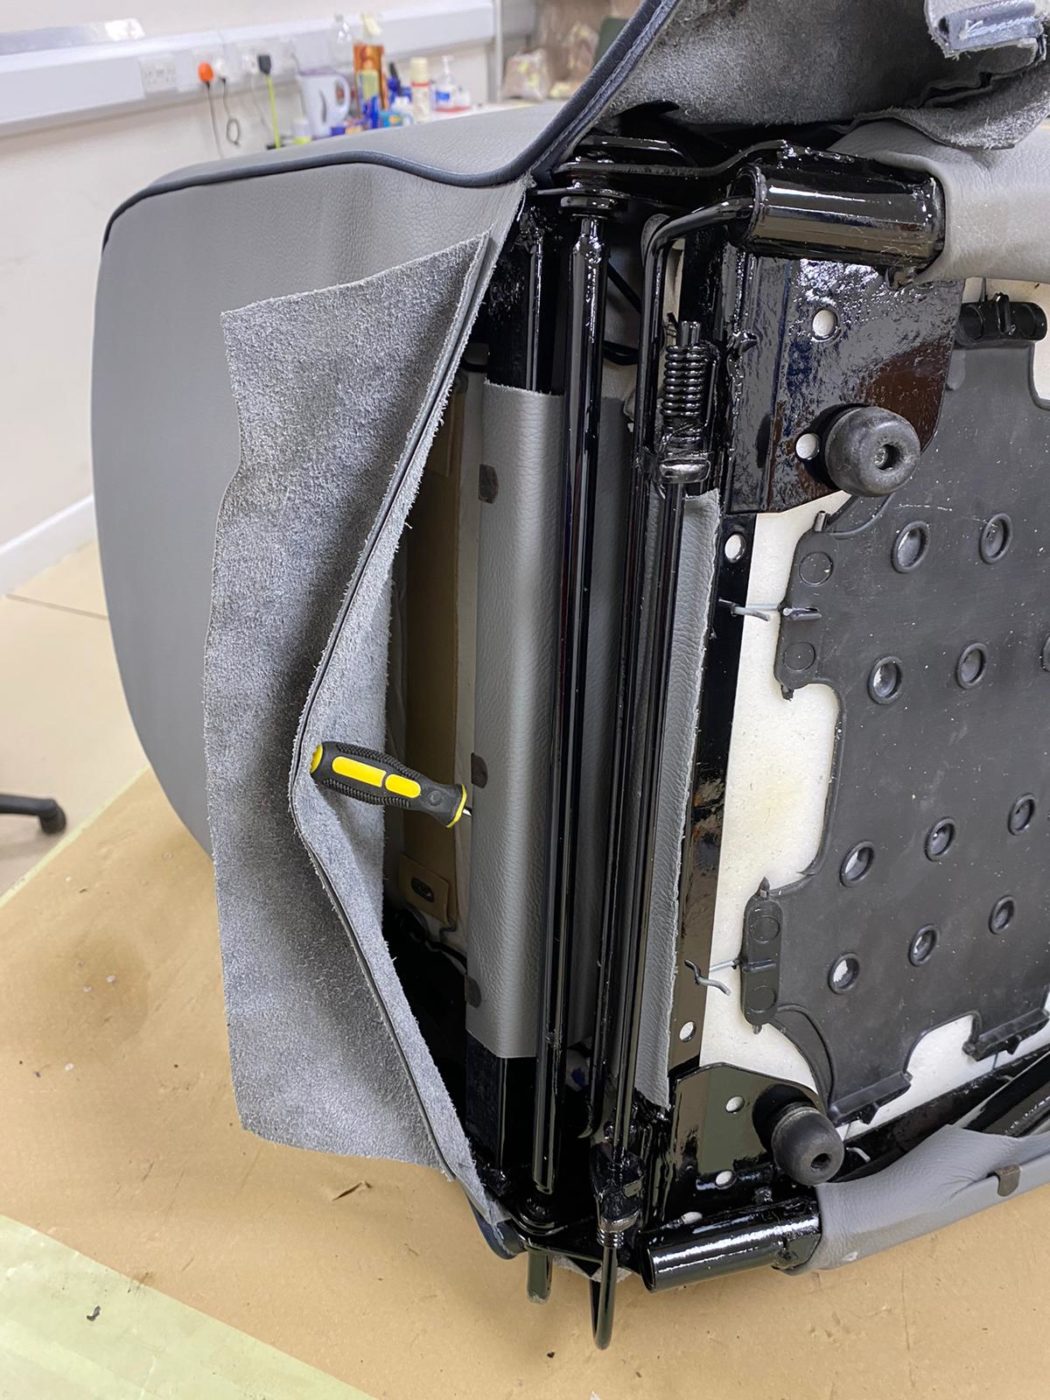
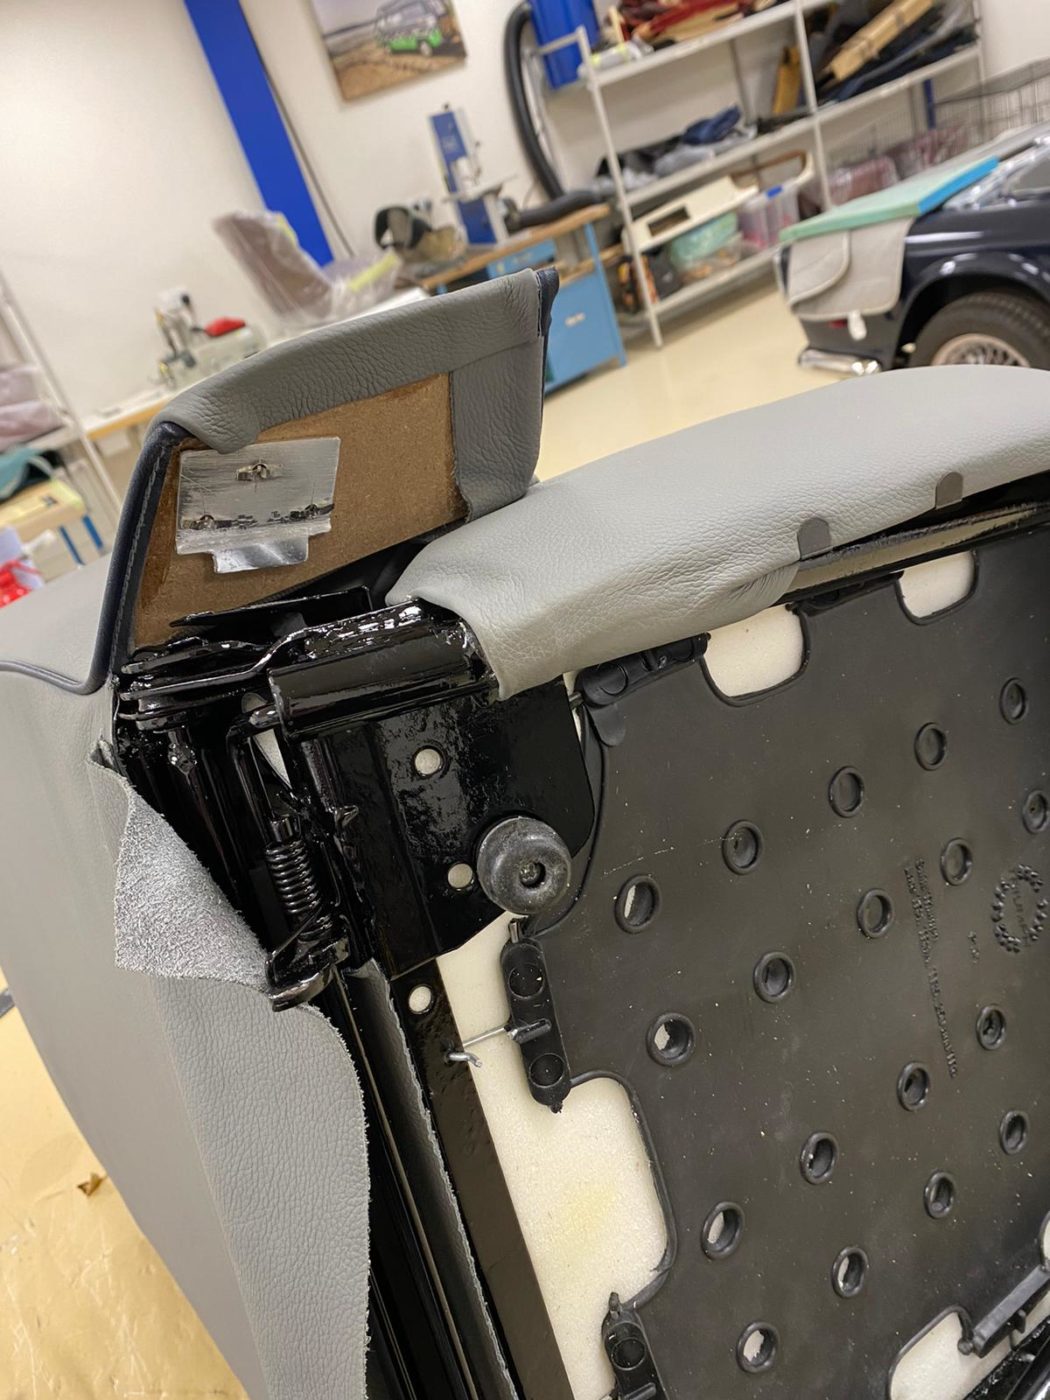
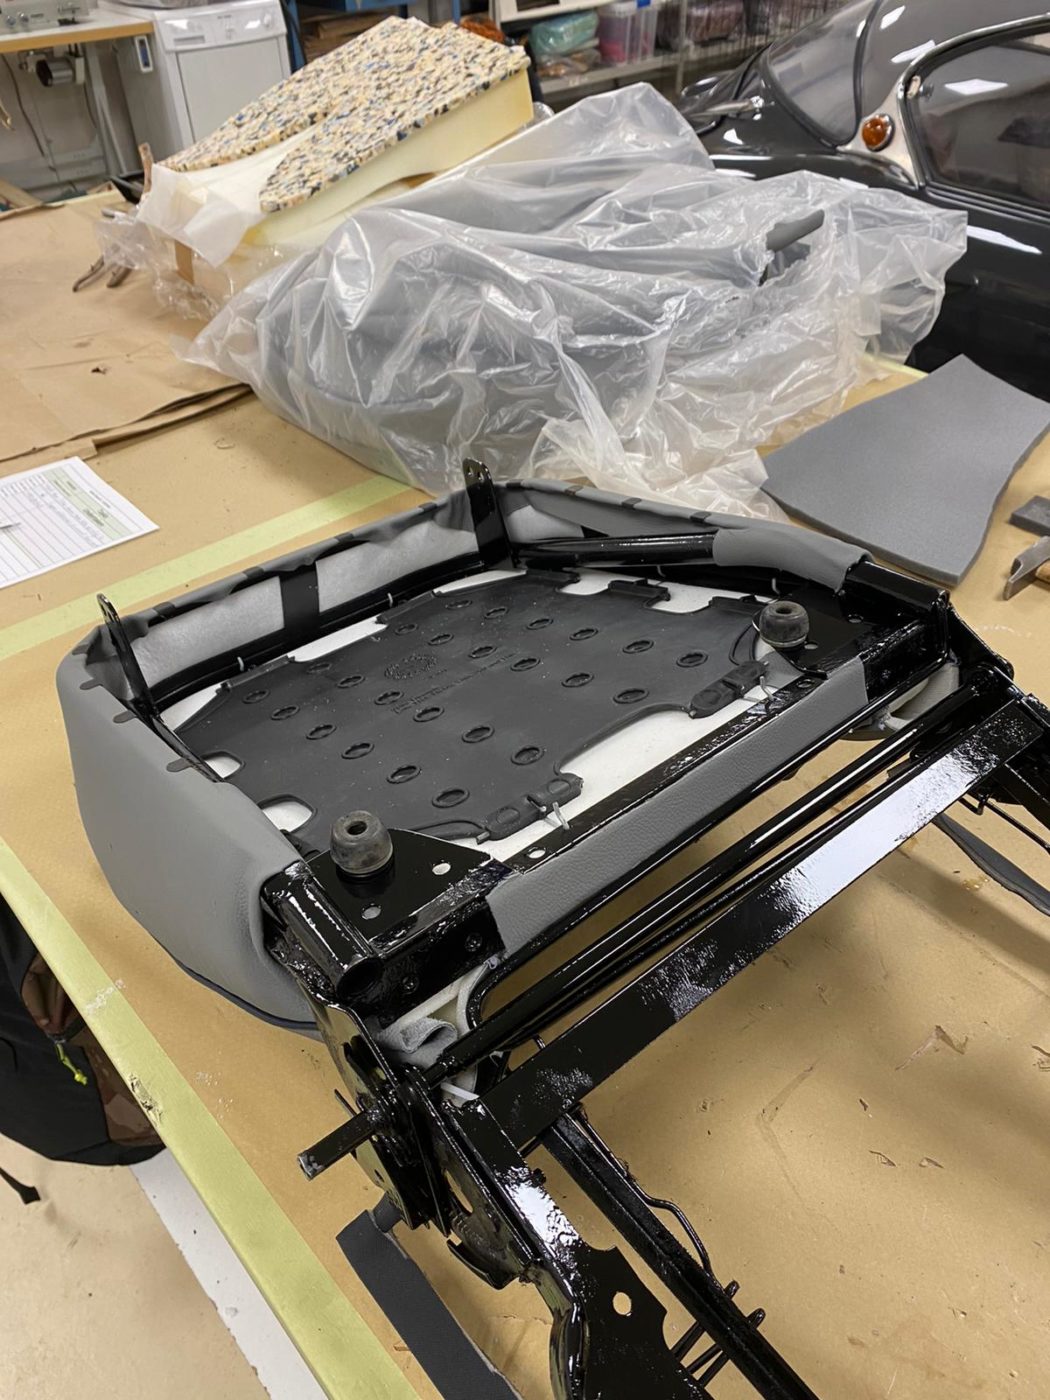
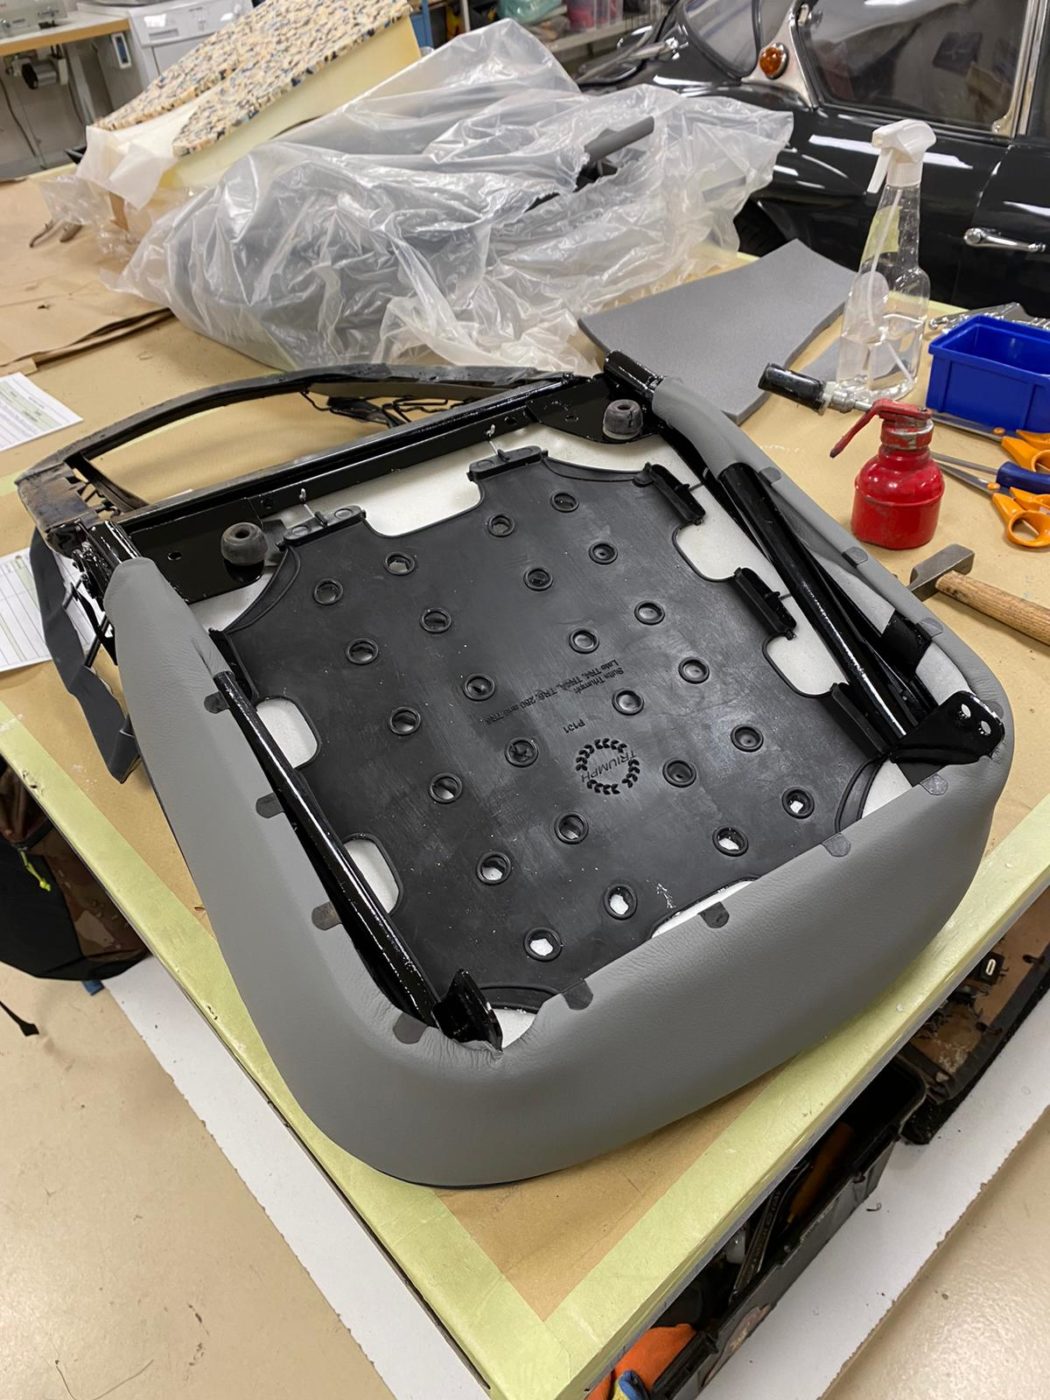
Brian has been fitting the chrome handle and lift up bar mechanism to the seats that allow the seat to move forward or back on the runners or from its hinges.

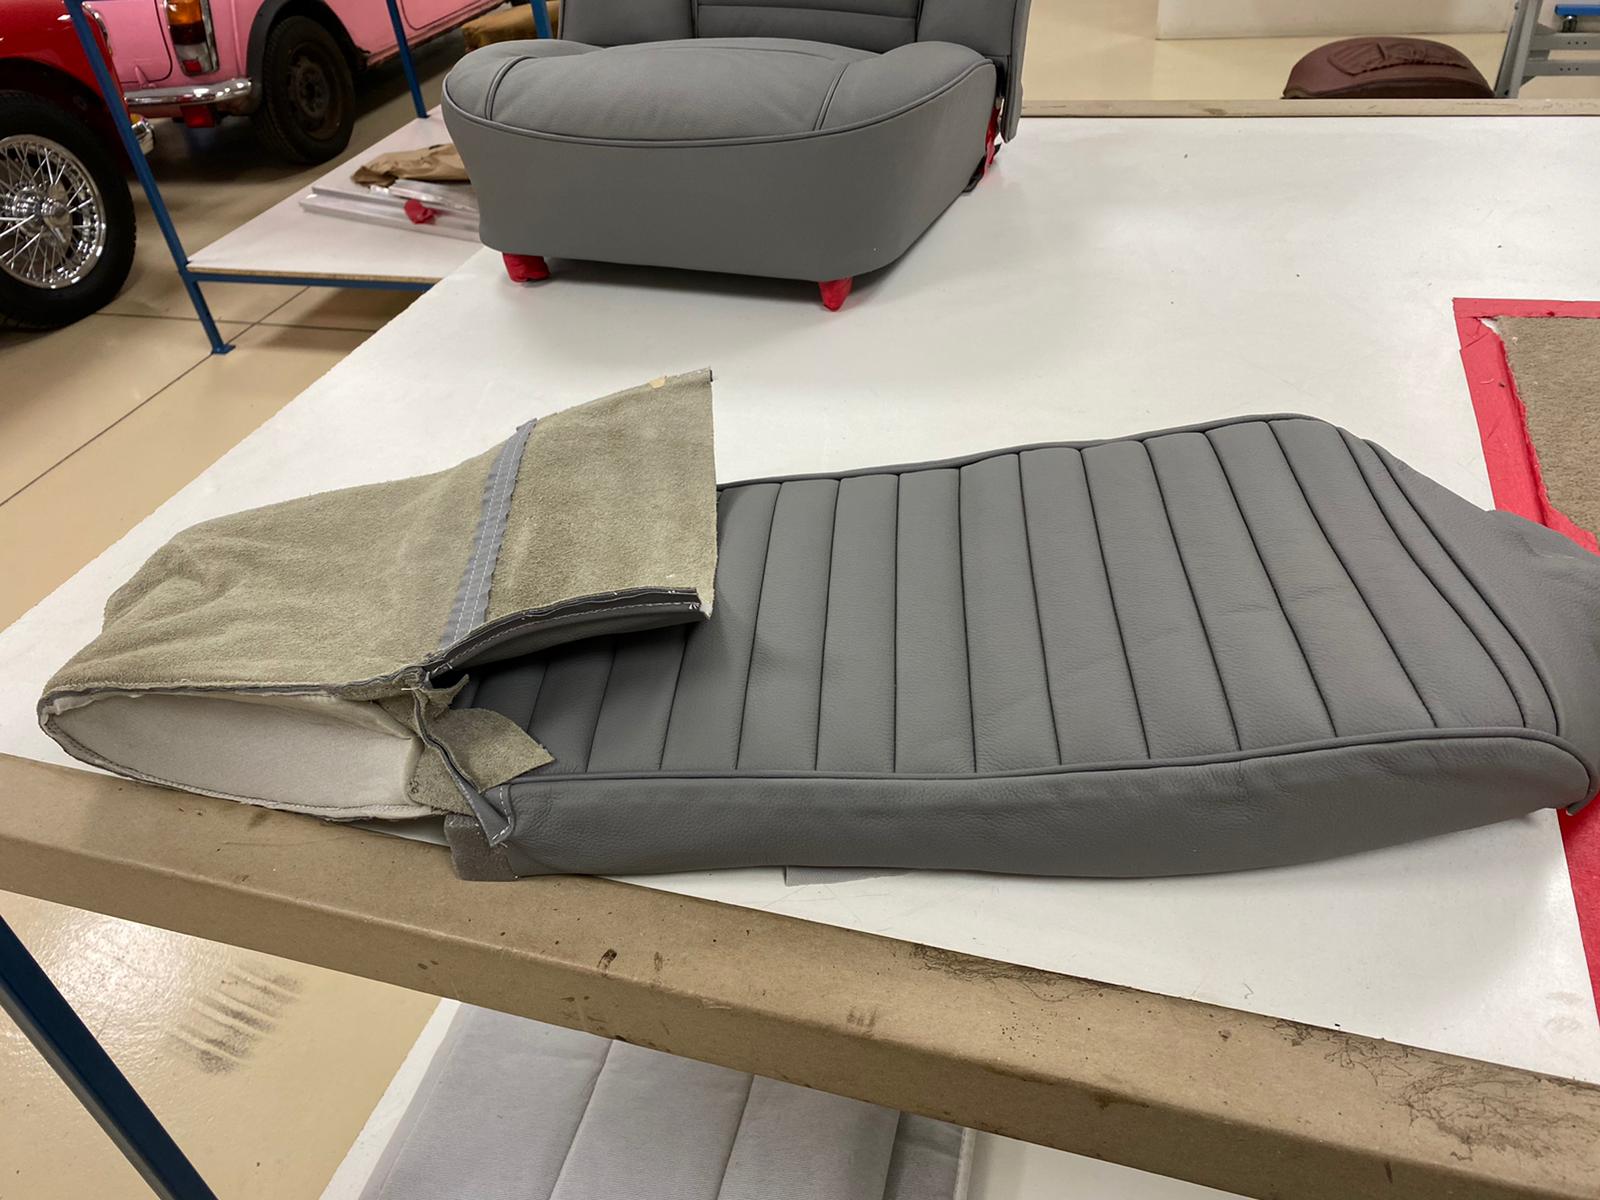
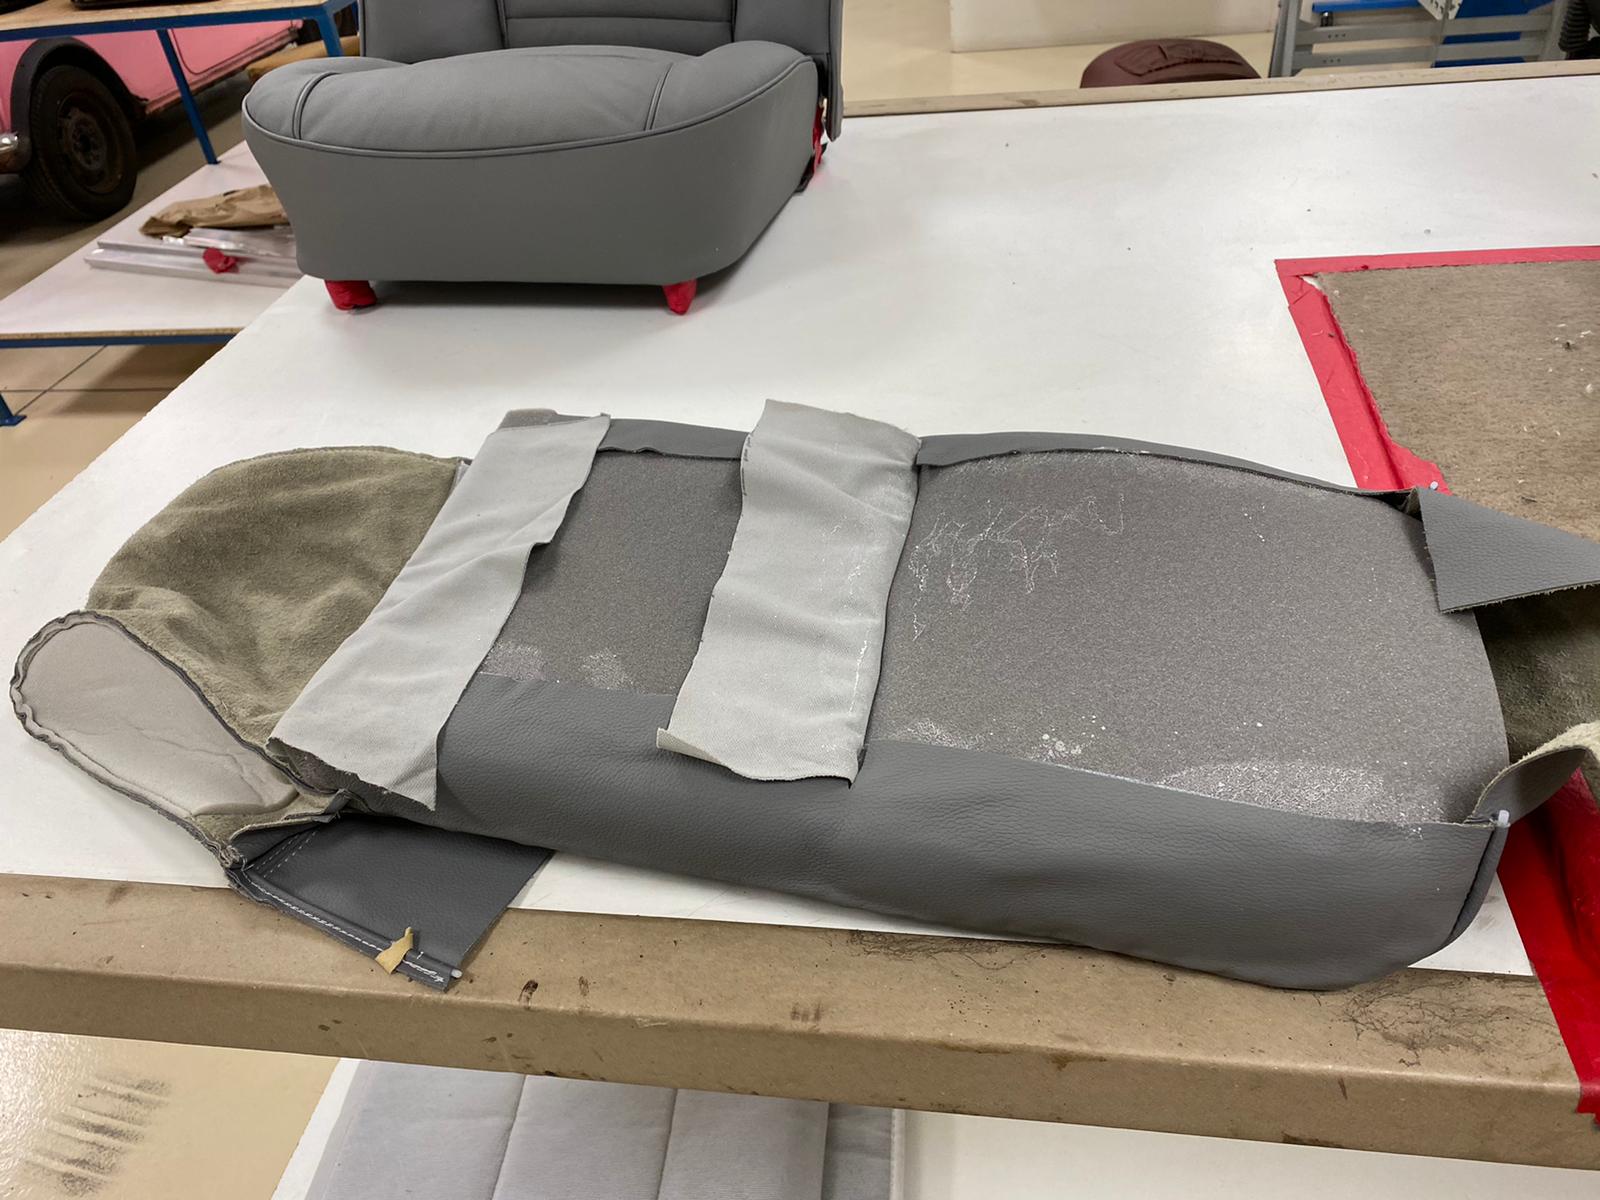
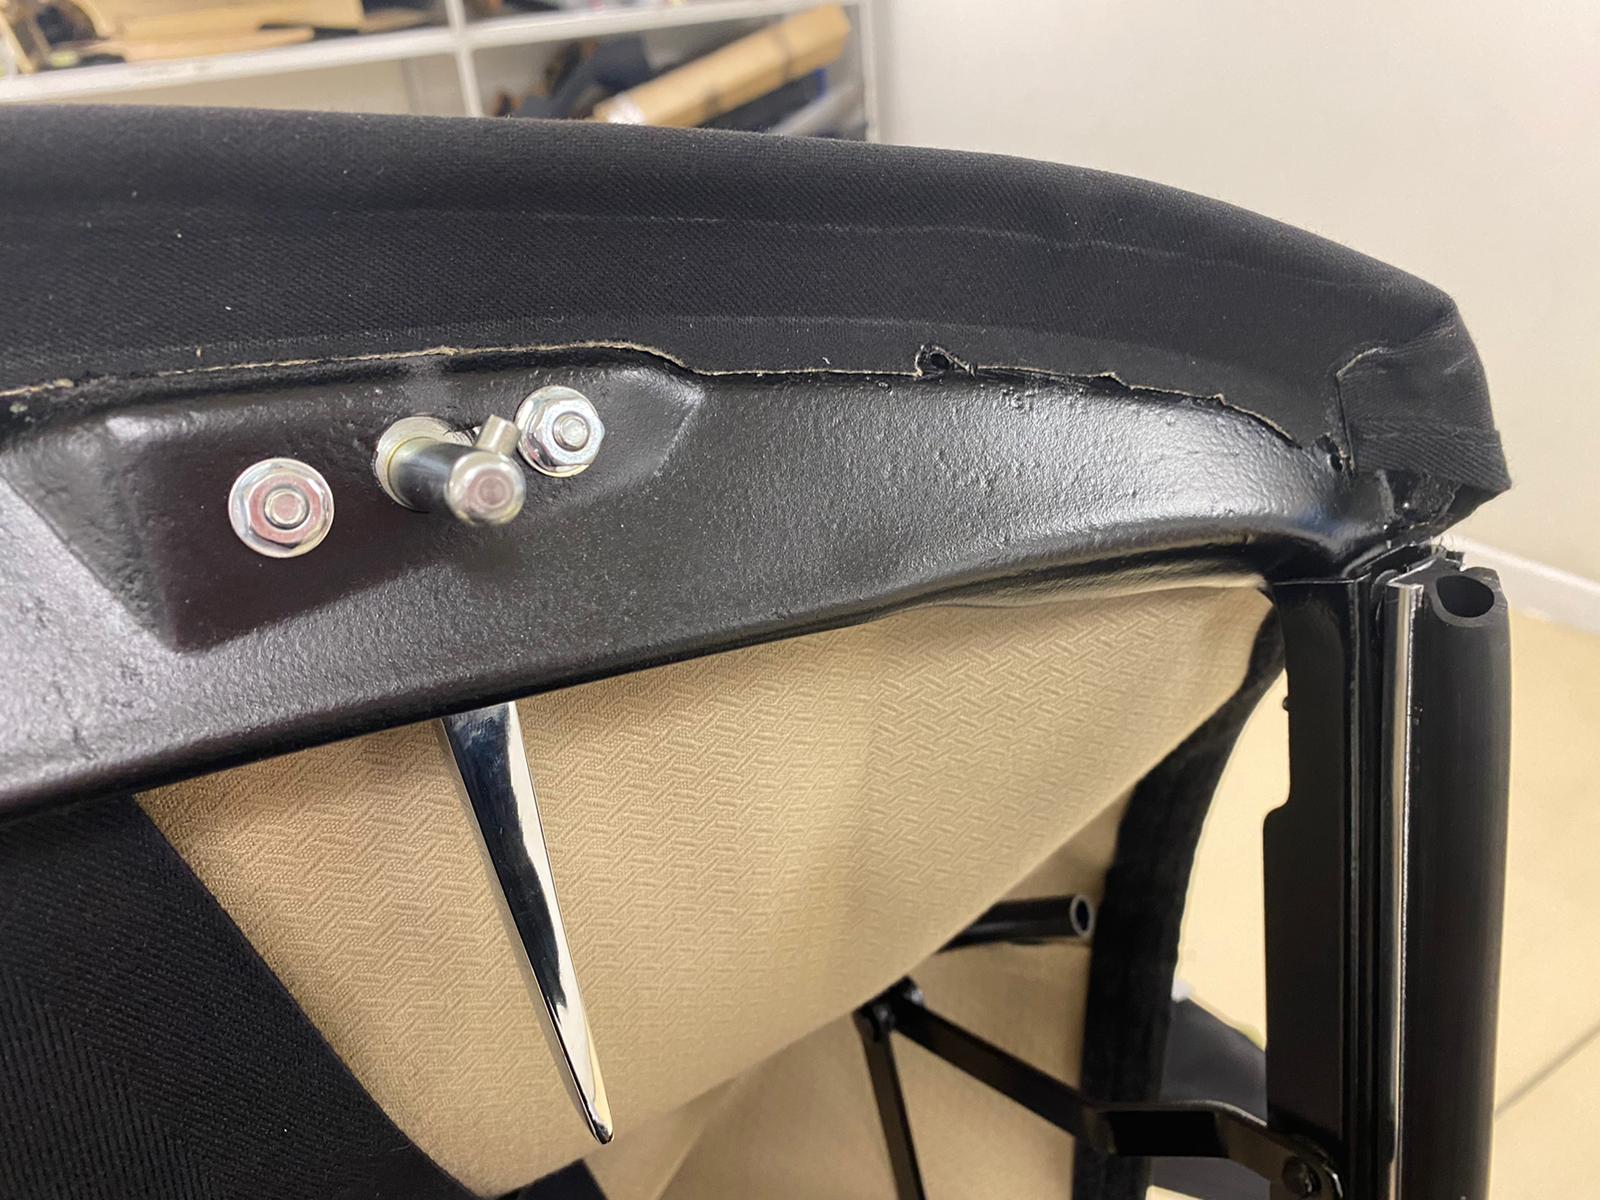
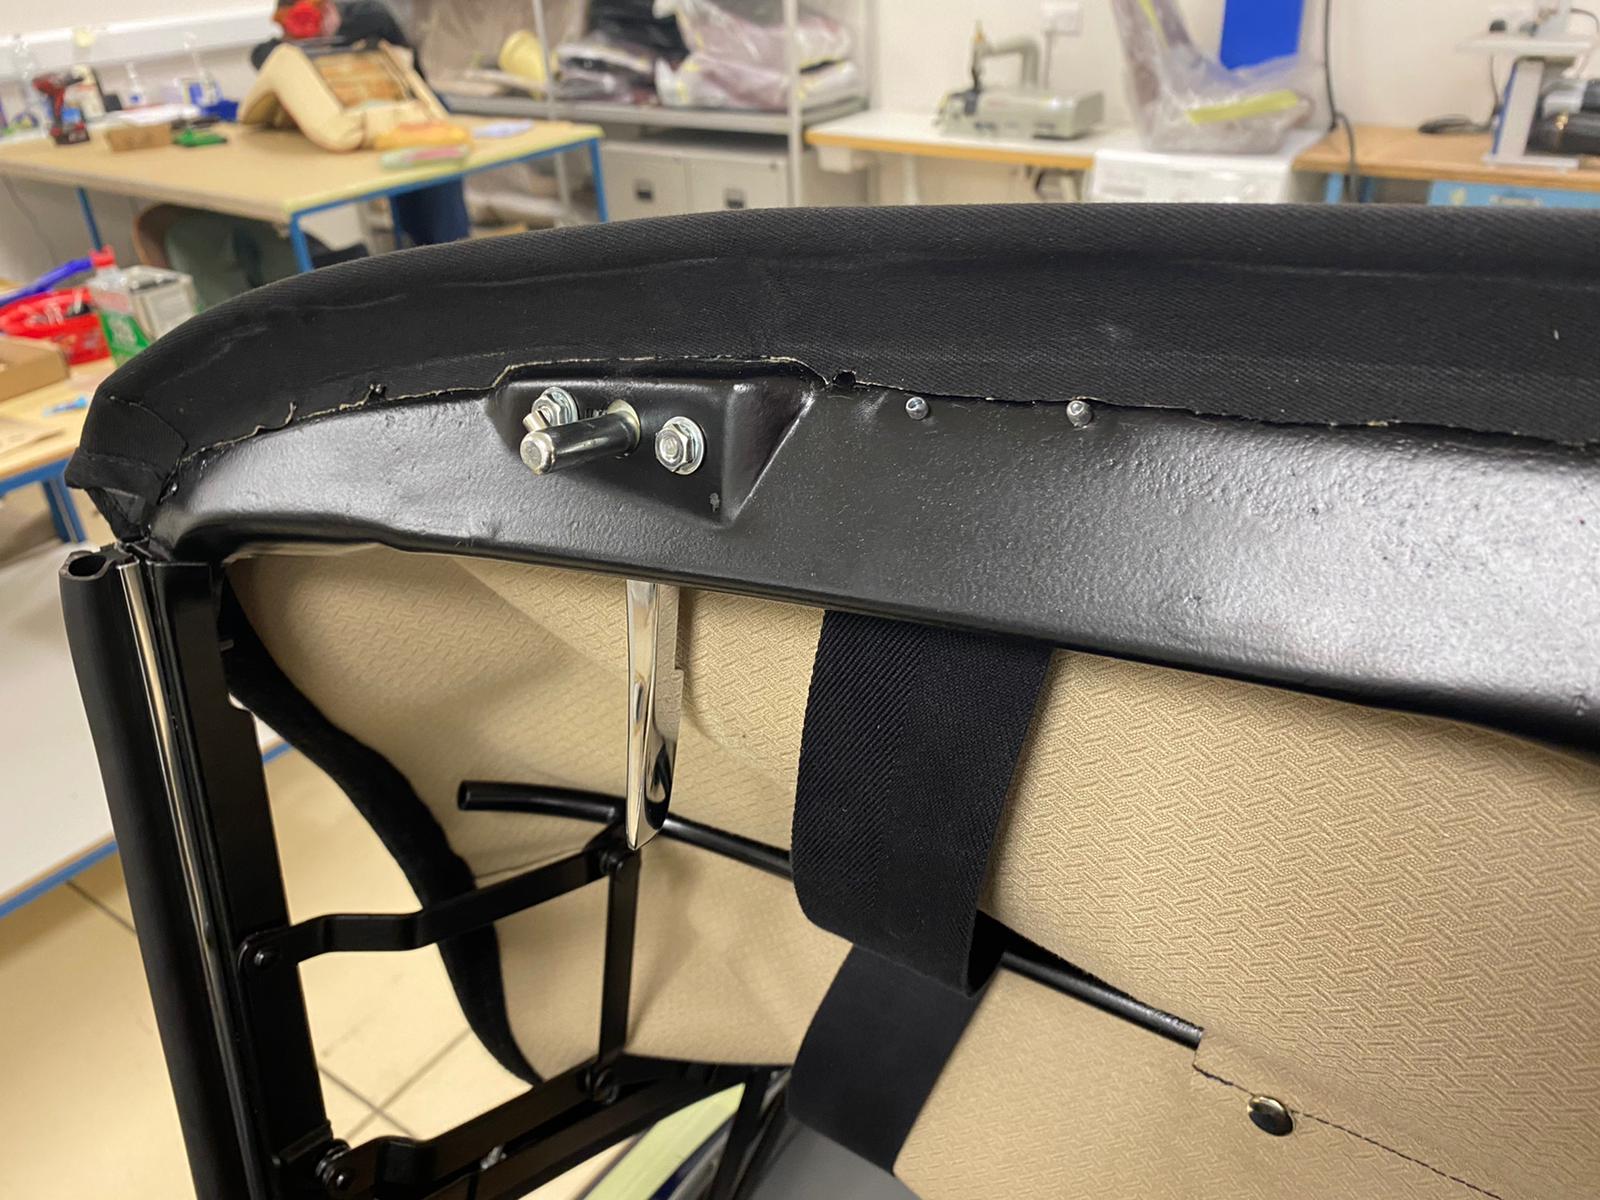
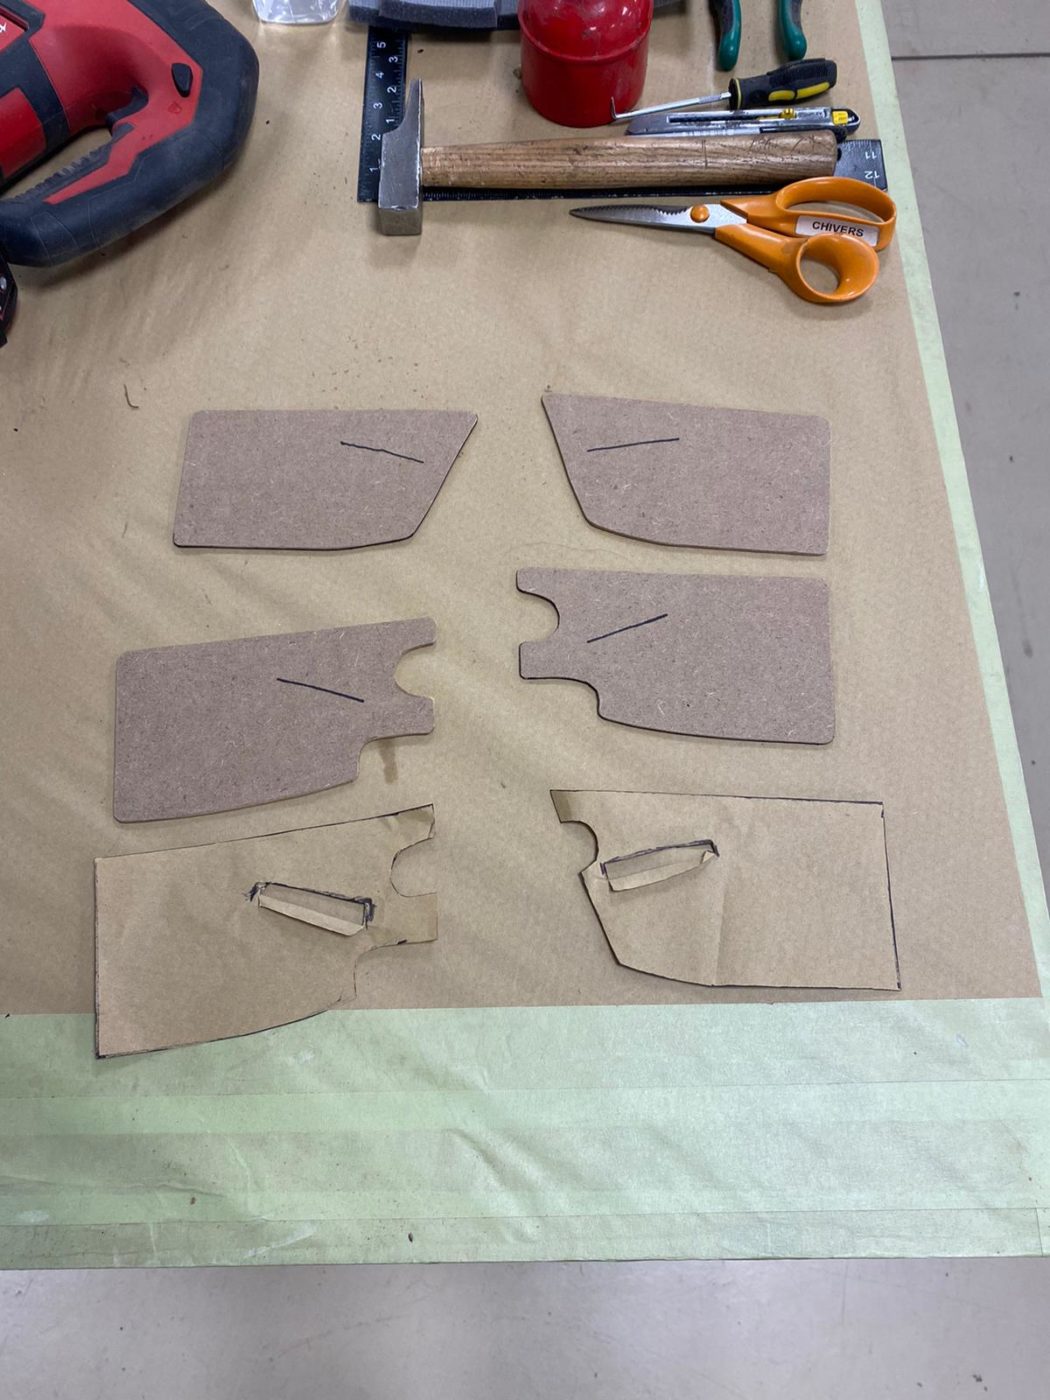
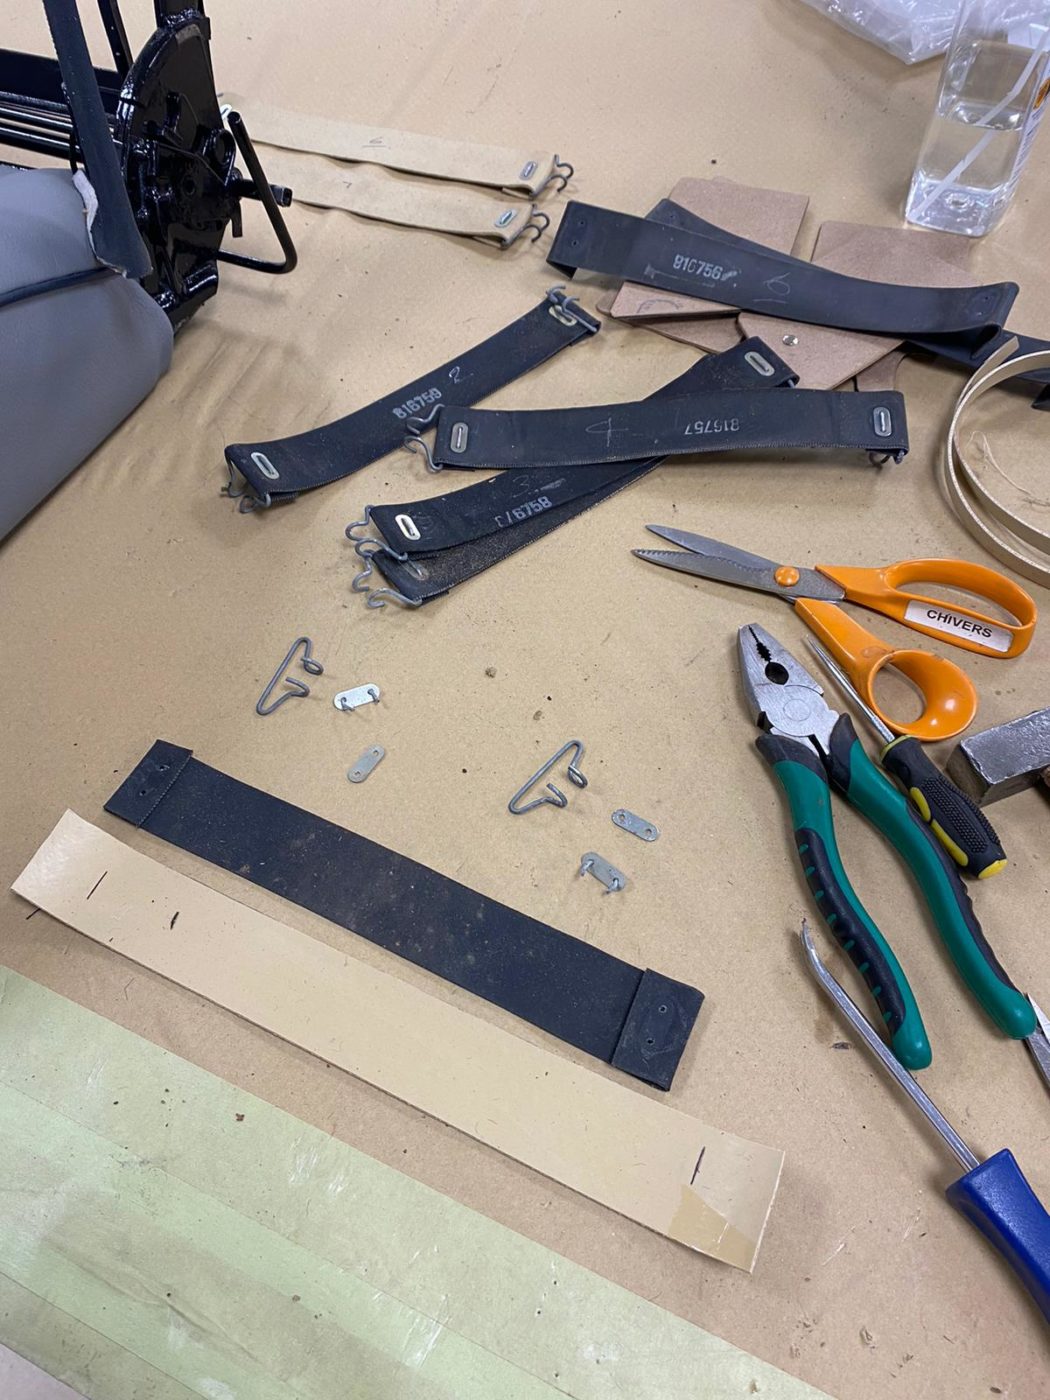
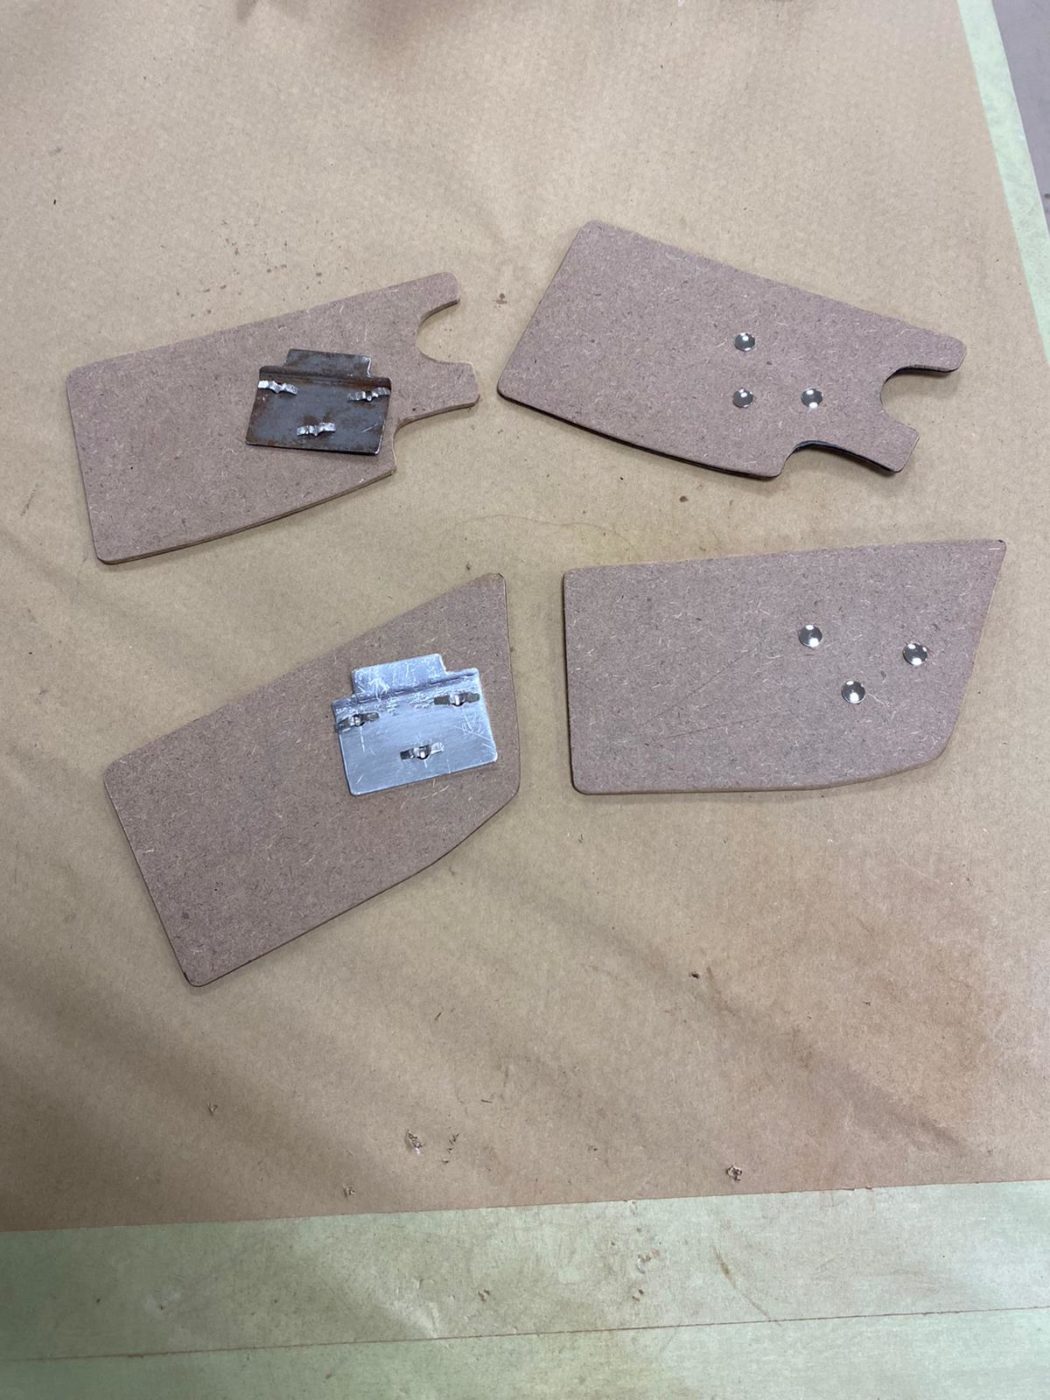
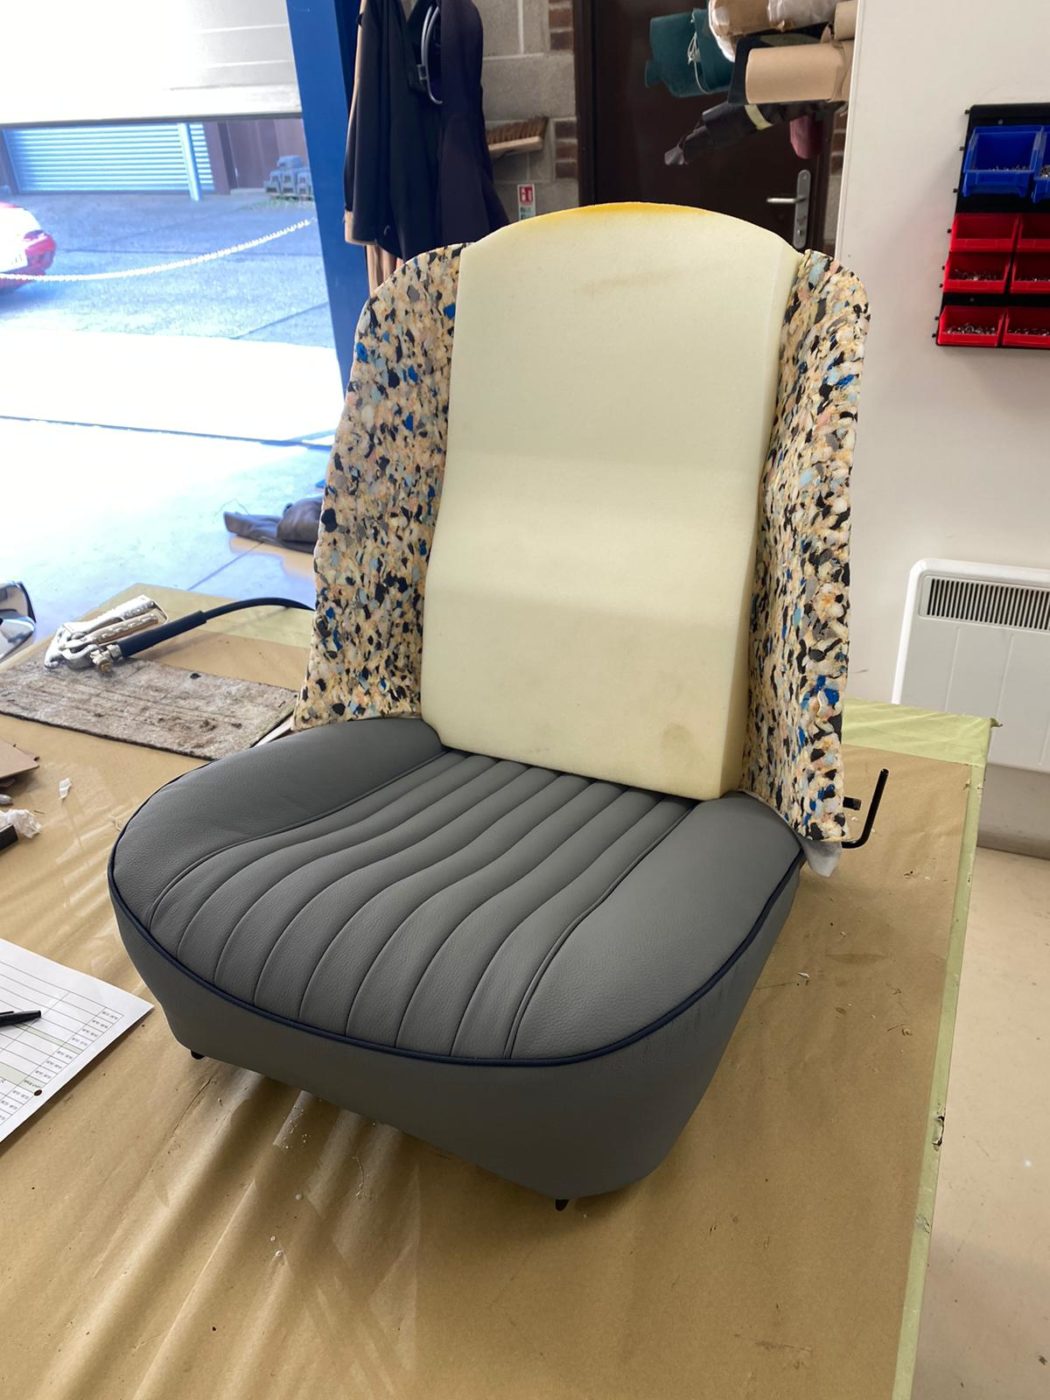
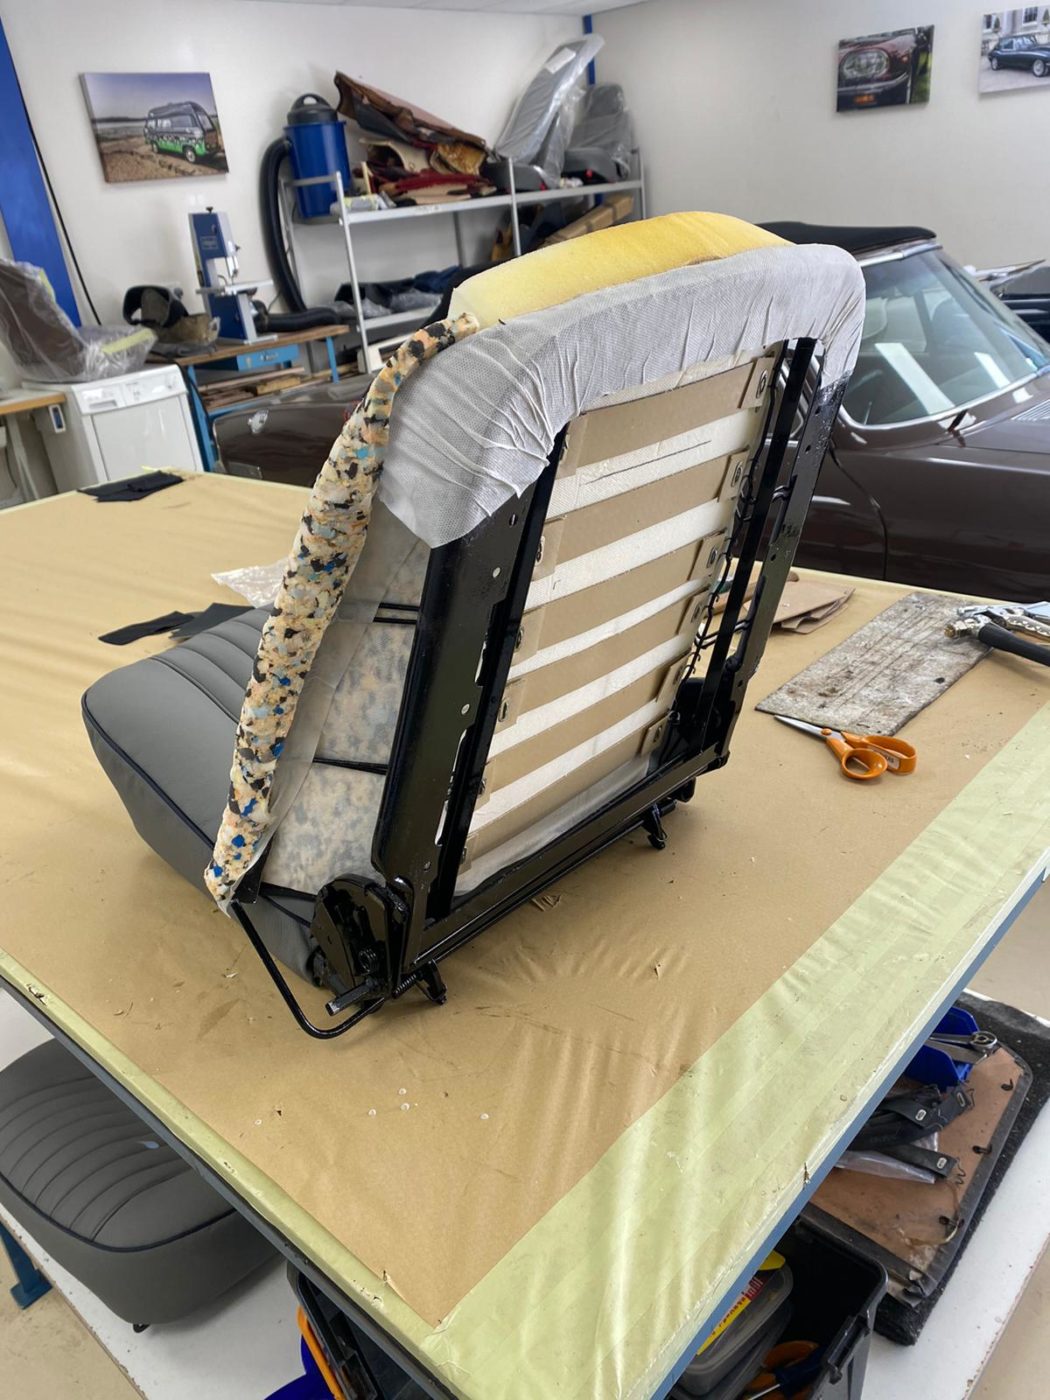
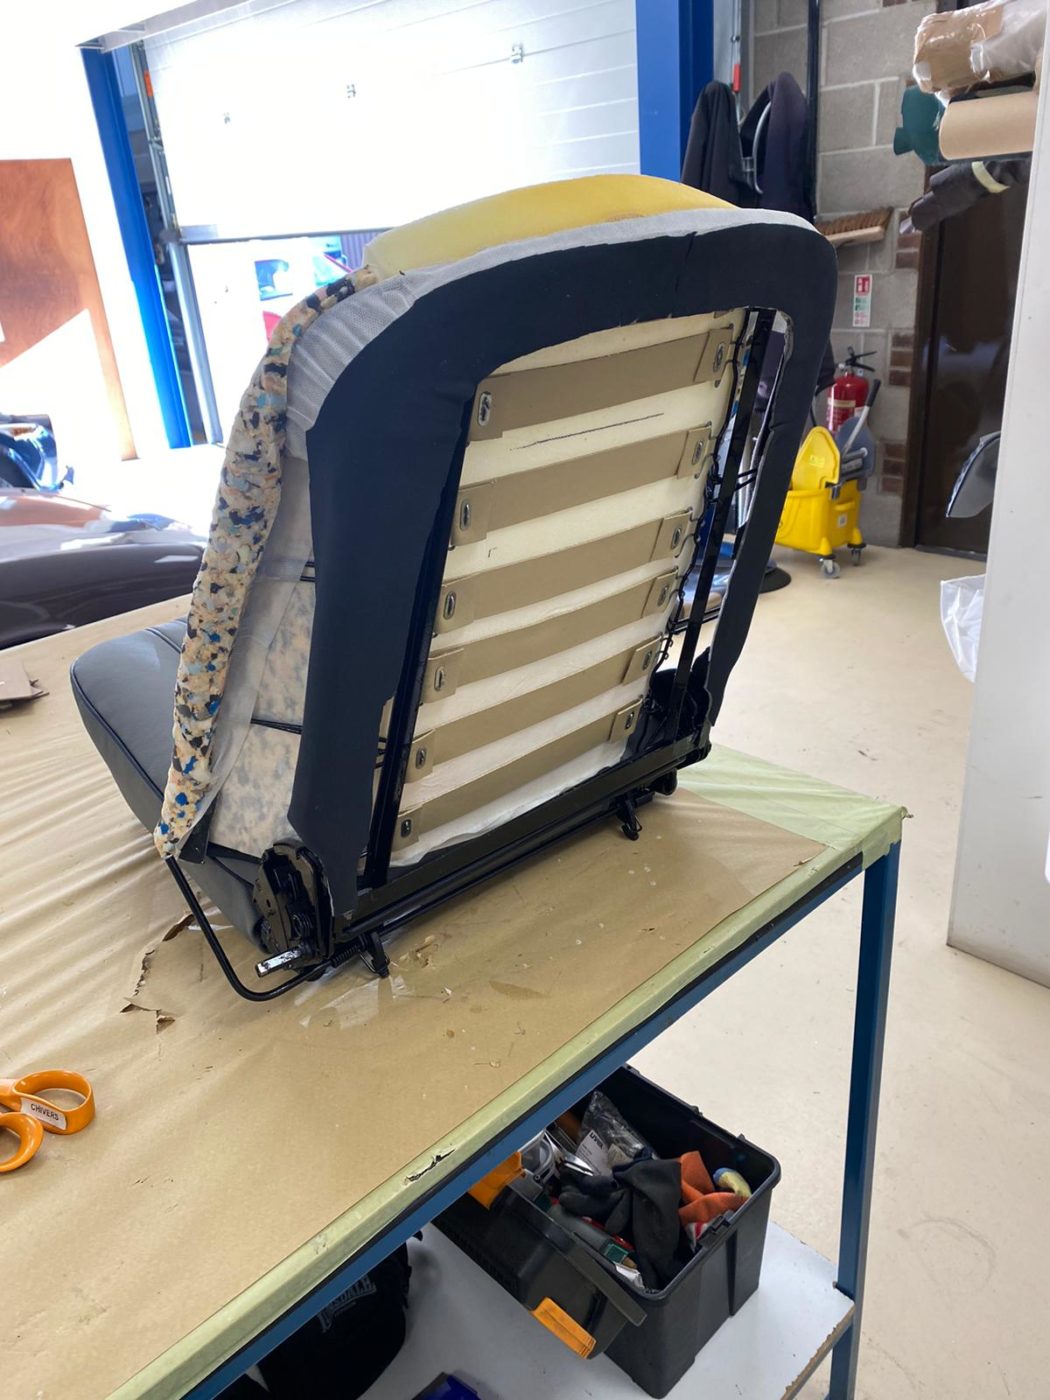
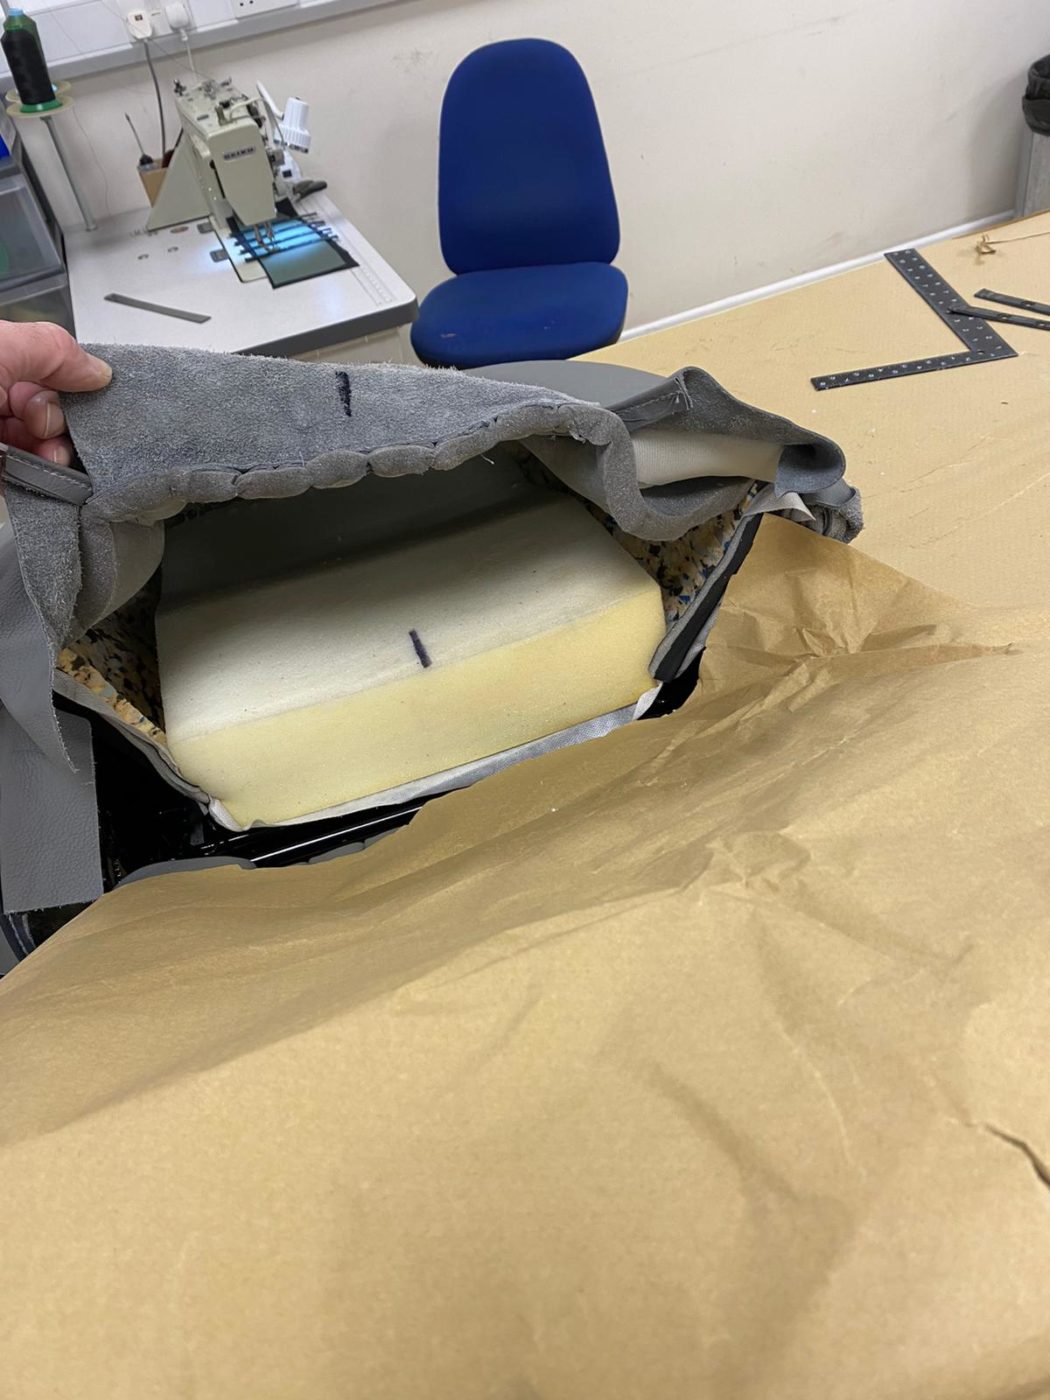
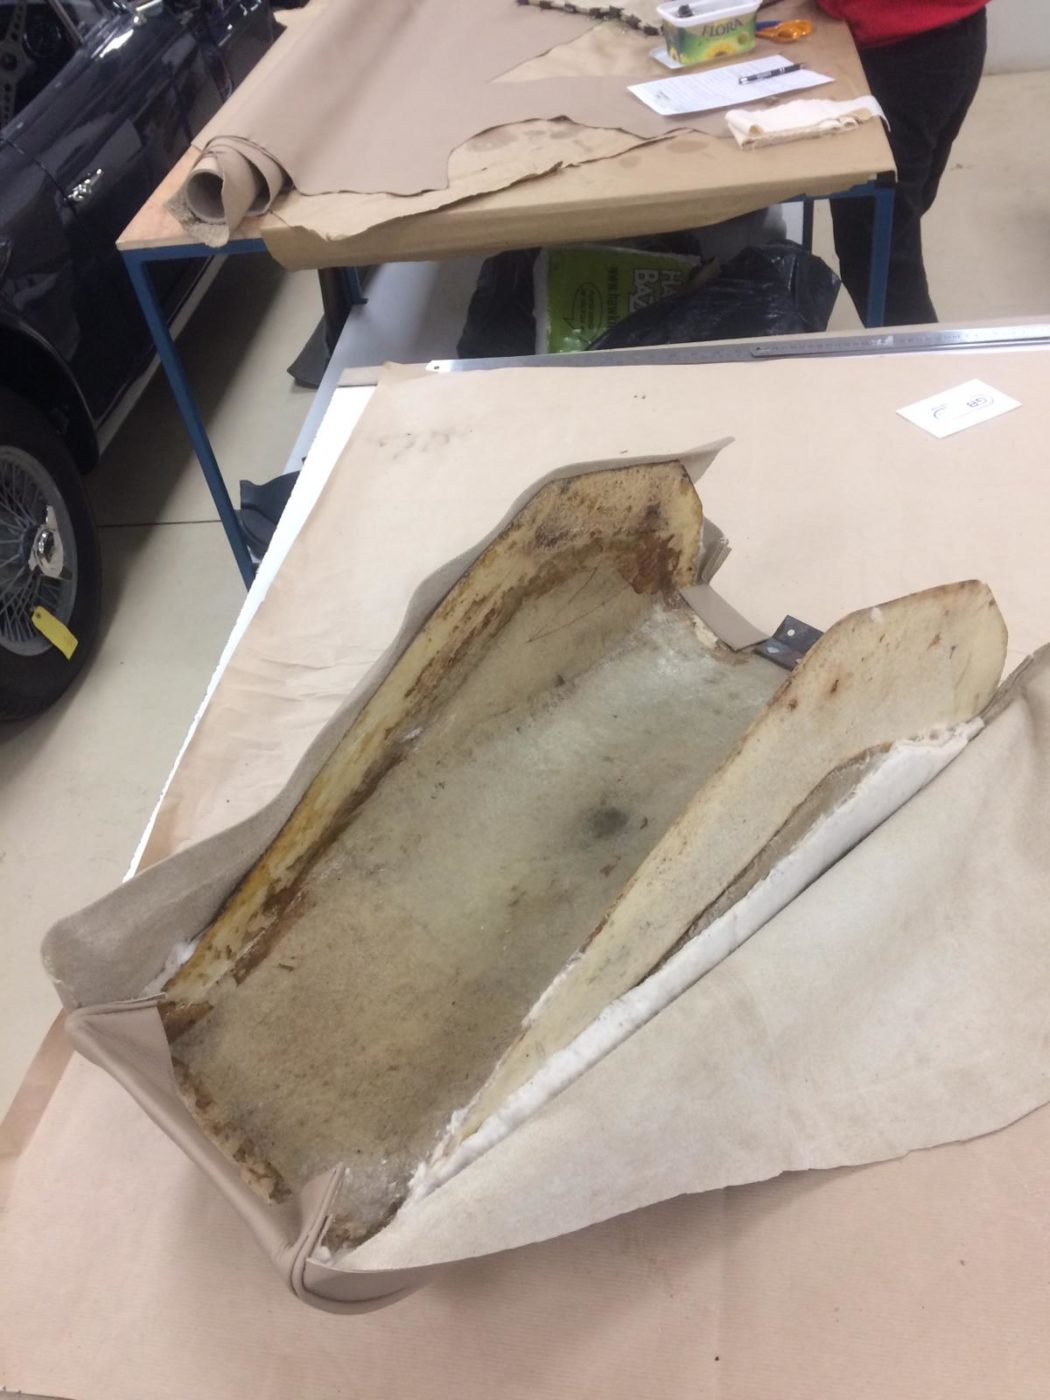
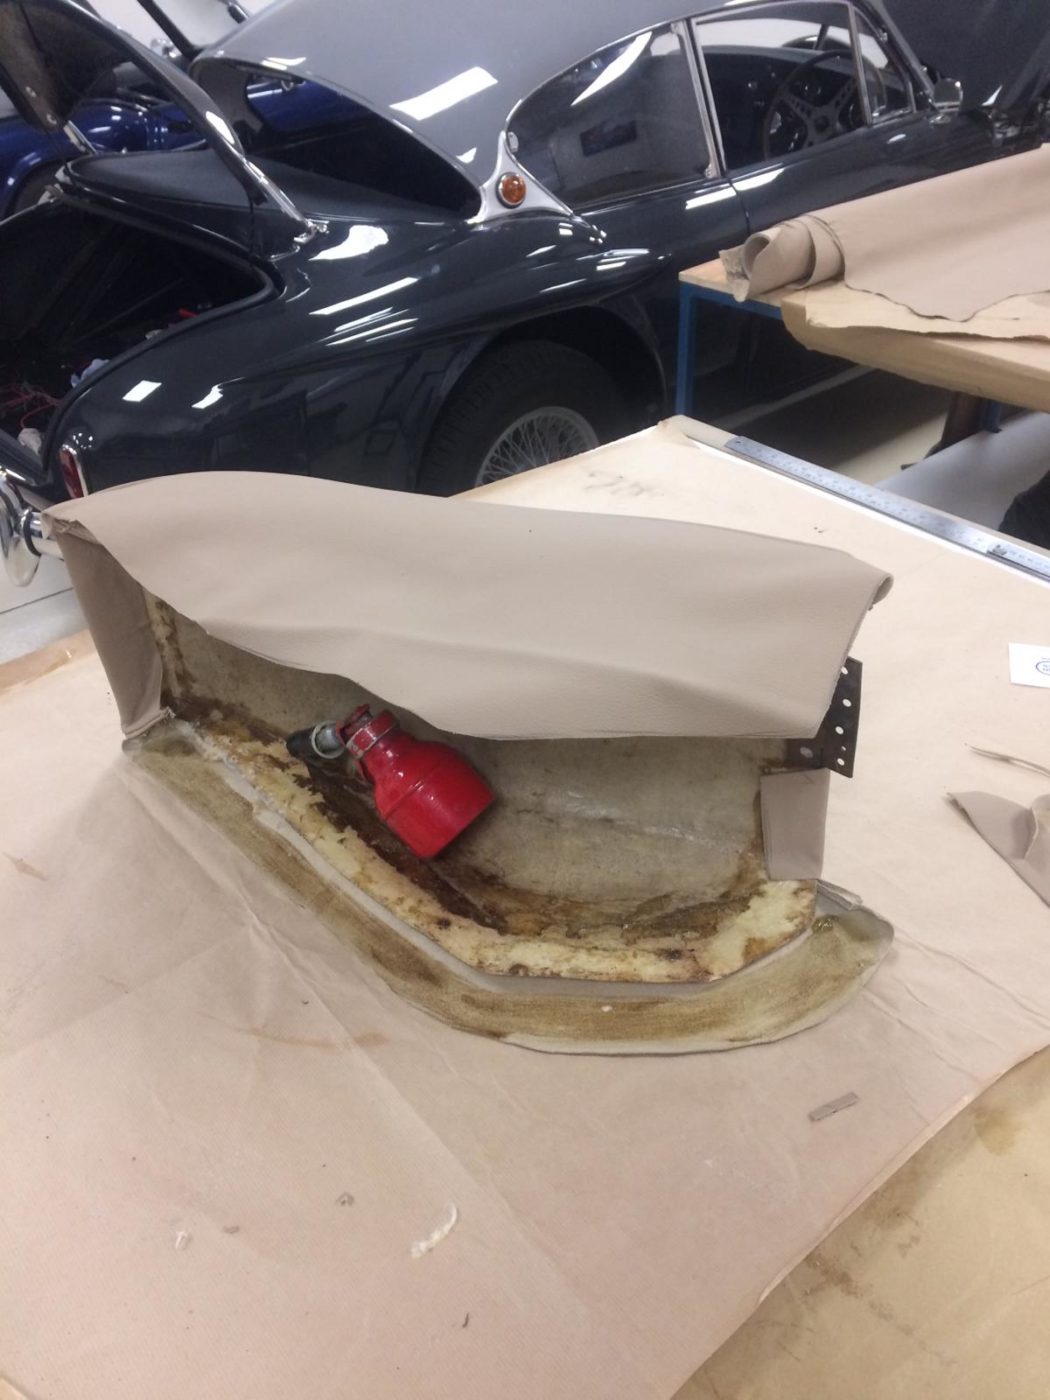
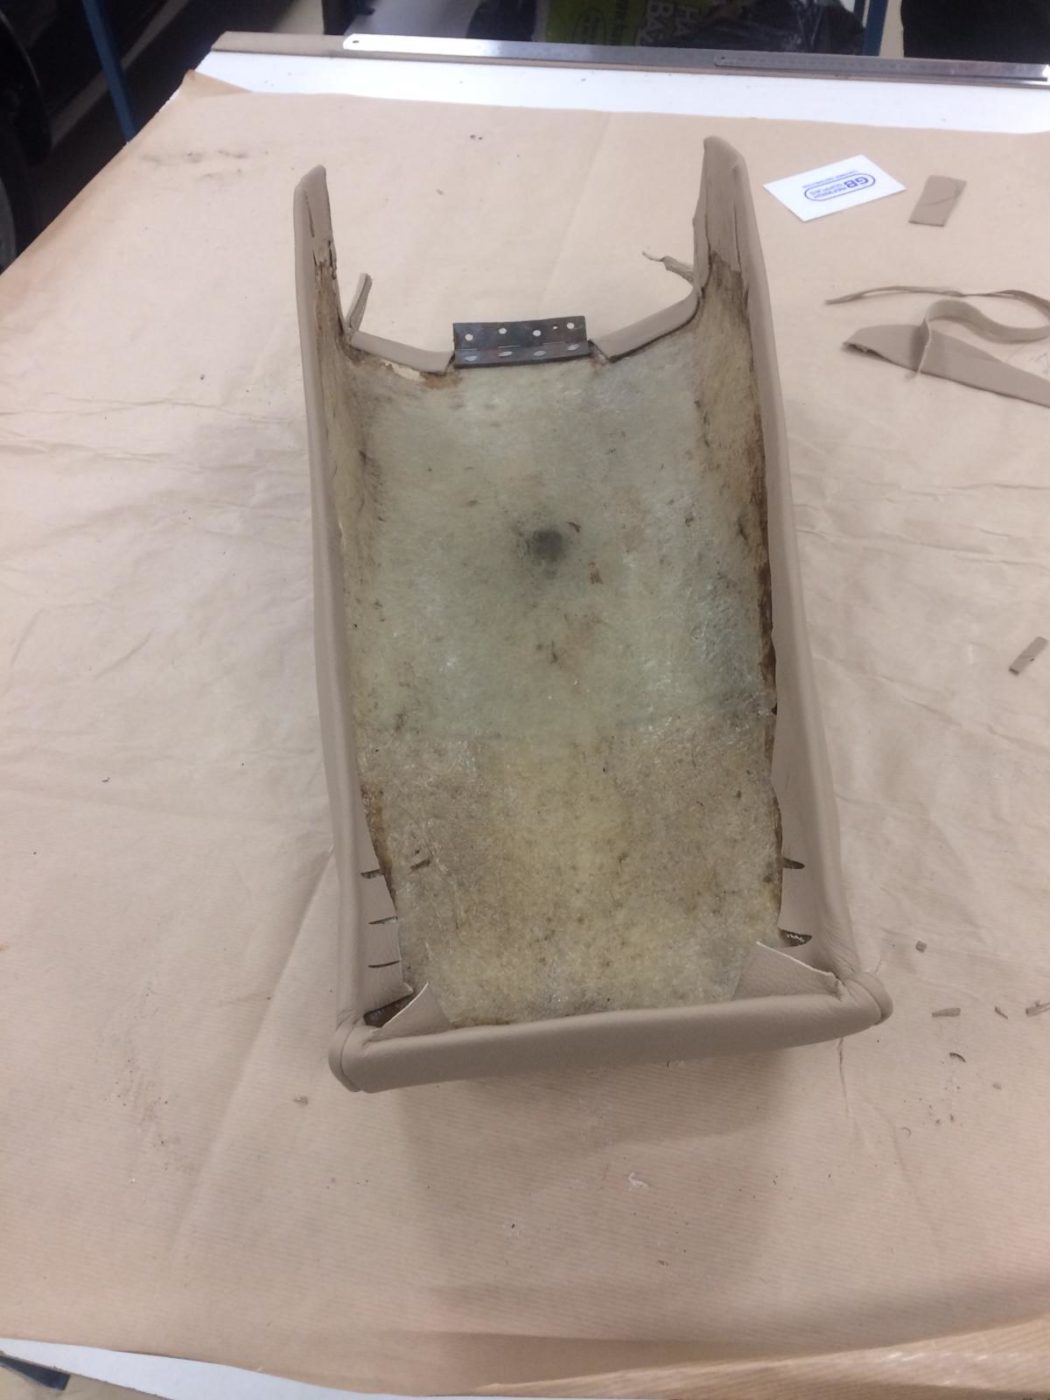
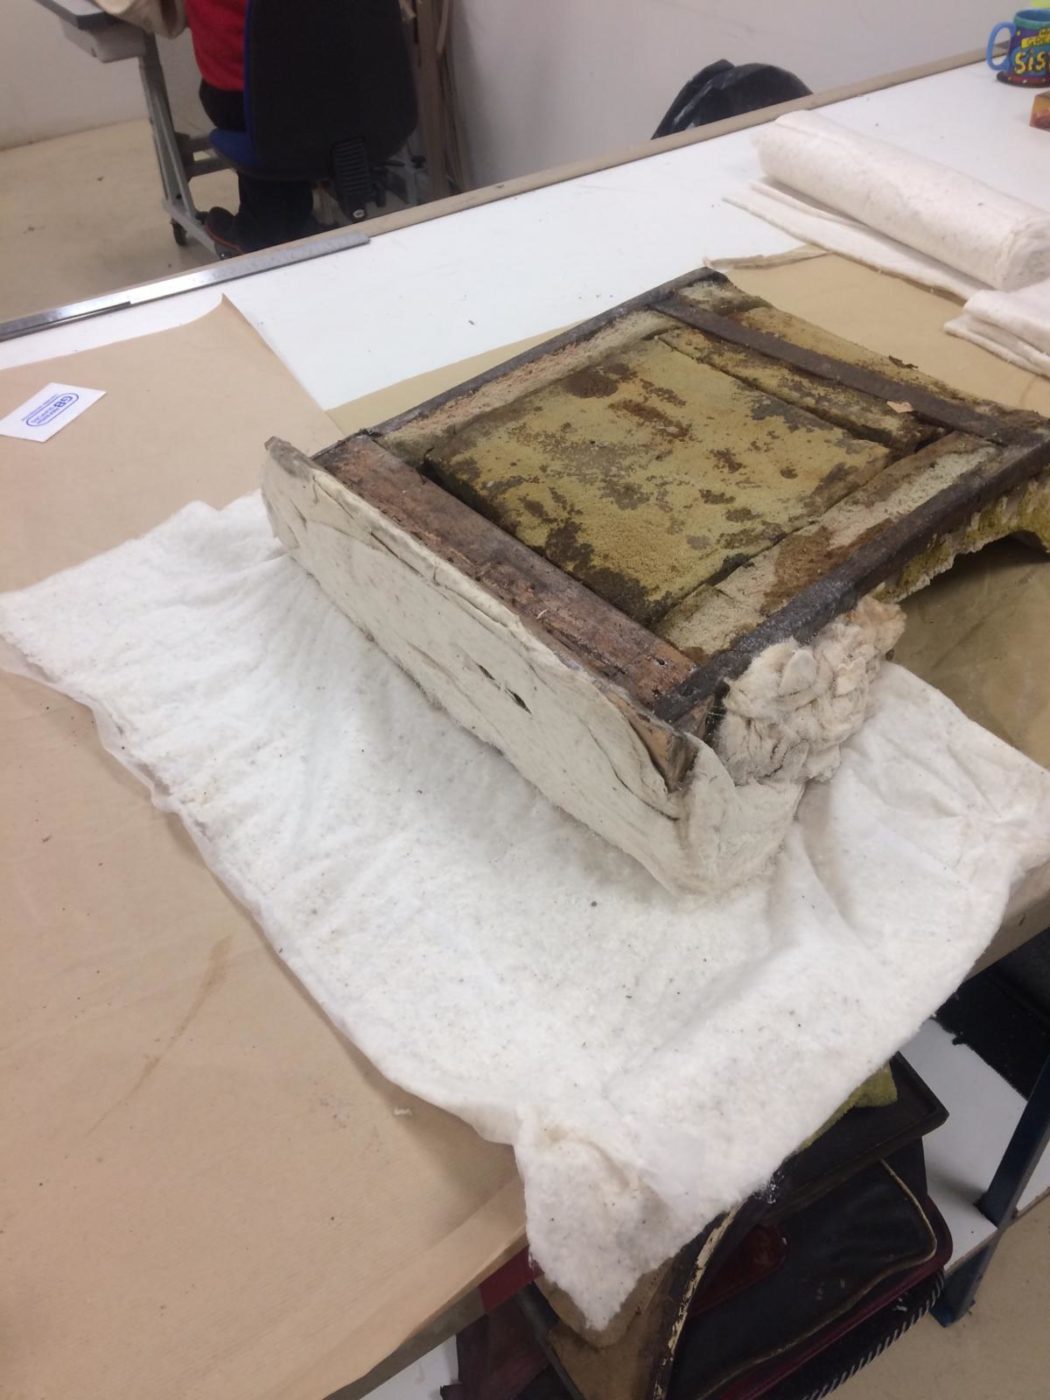
Brian has completed restoring the frame of our Triumph TR5 seats and has installed a reclining hinge joint. He made this element by hand out of plywood and fitted it inside the chair. The fabric was then glued, heated to make the glue go tacky, and pulled over the new joint,
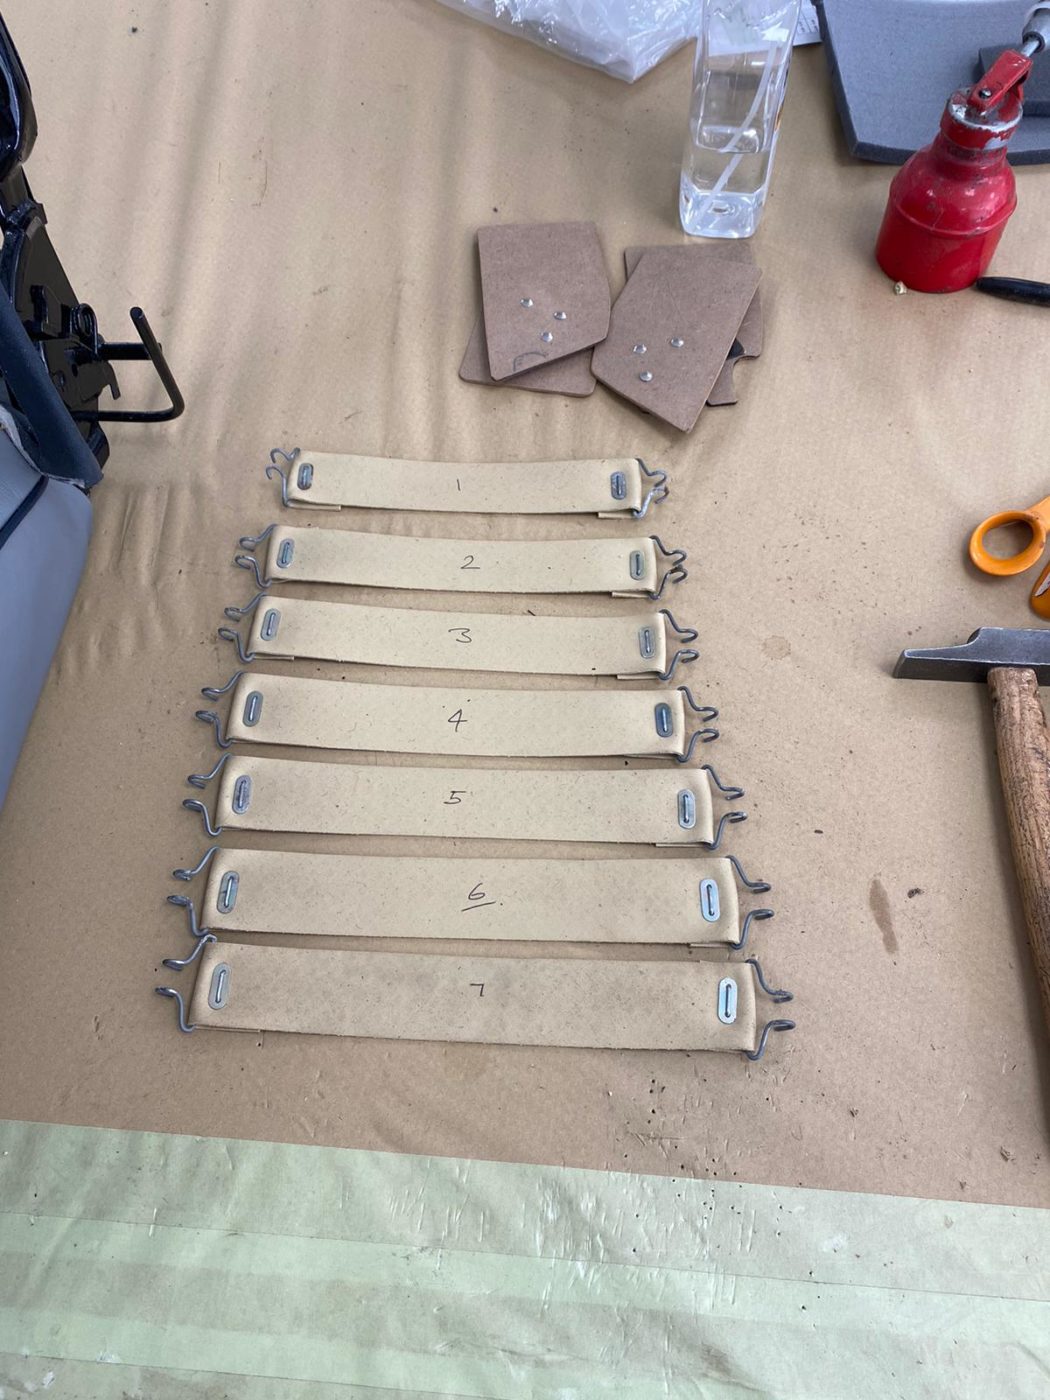
Brian explains how he made new side band boards to allow cover to fit around recliner mechanism as well as making new rubber straps using the original hooks and fitting it all to the frame.
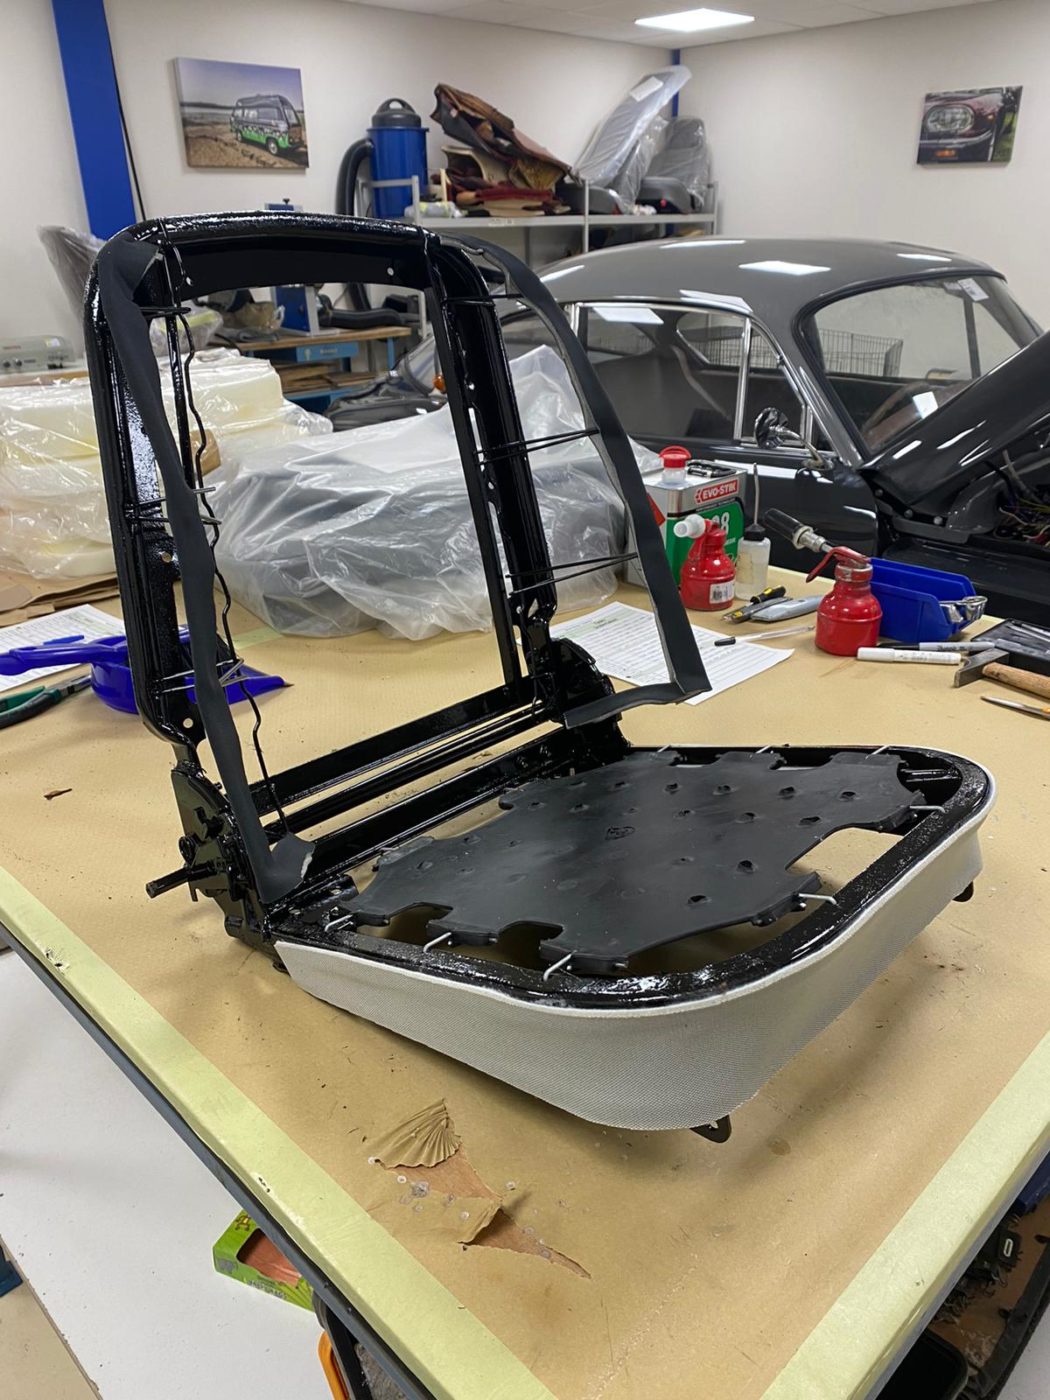
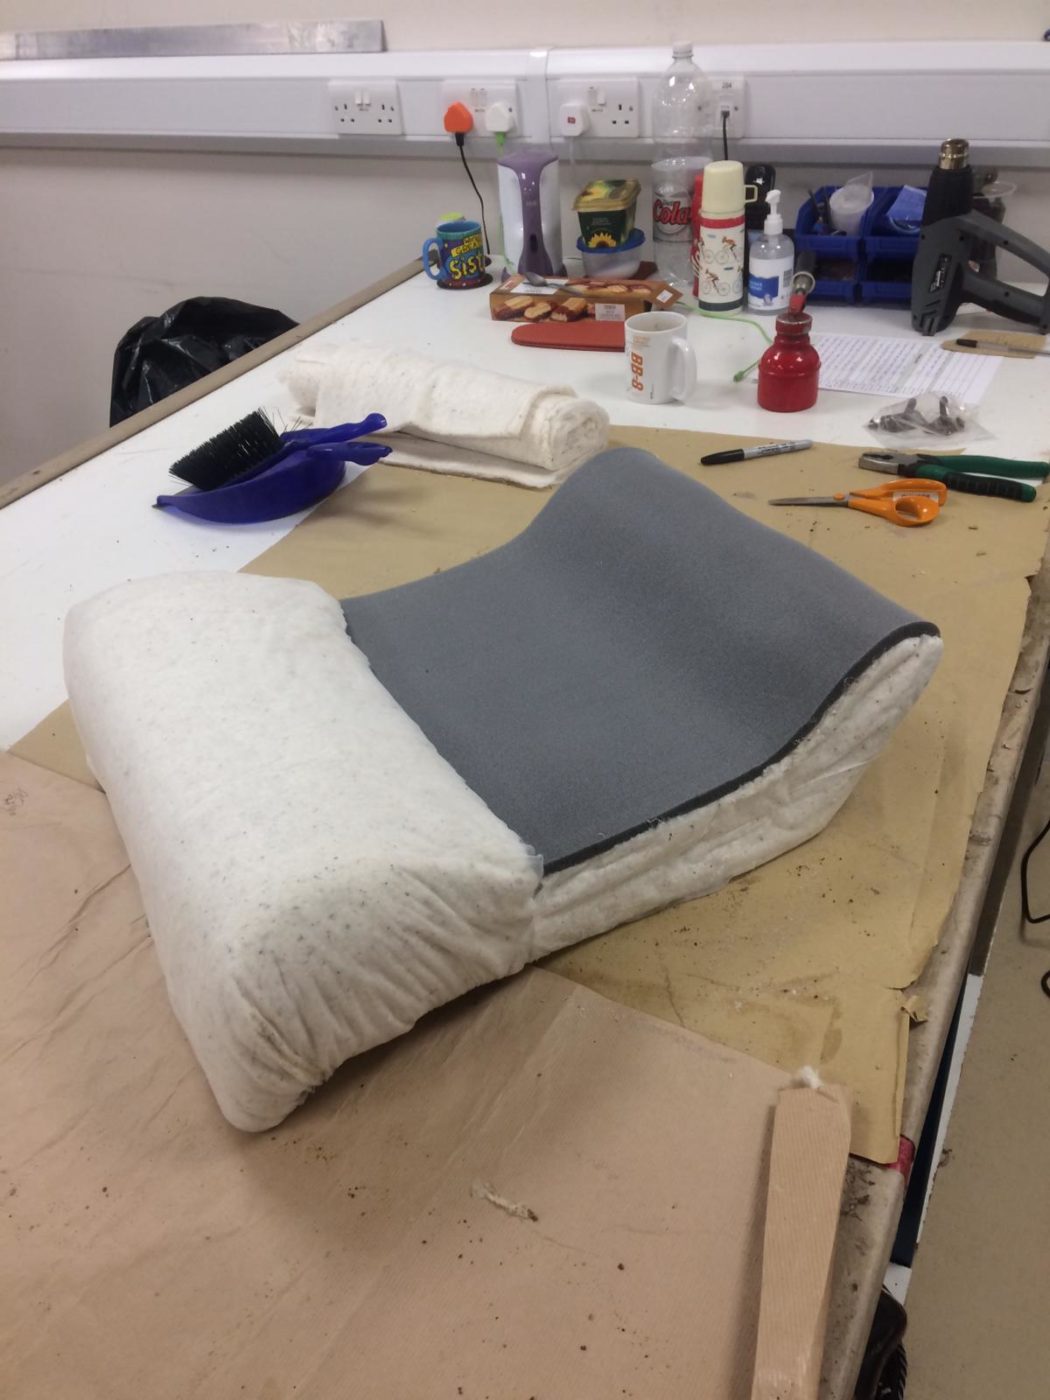
Brian has then fitted the squab foam in place and added new foam to the back of the frame. He managed to slide the cover over the frame and glue the centre section to foam. Brian then glued the centre section in place, and tucked in the flaps on the side sections. Once fitted, he could pull the centre flap through and clip it down to the frame. To finish, Brian fitted the side board mechanisms in place and glued them down.
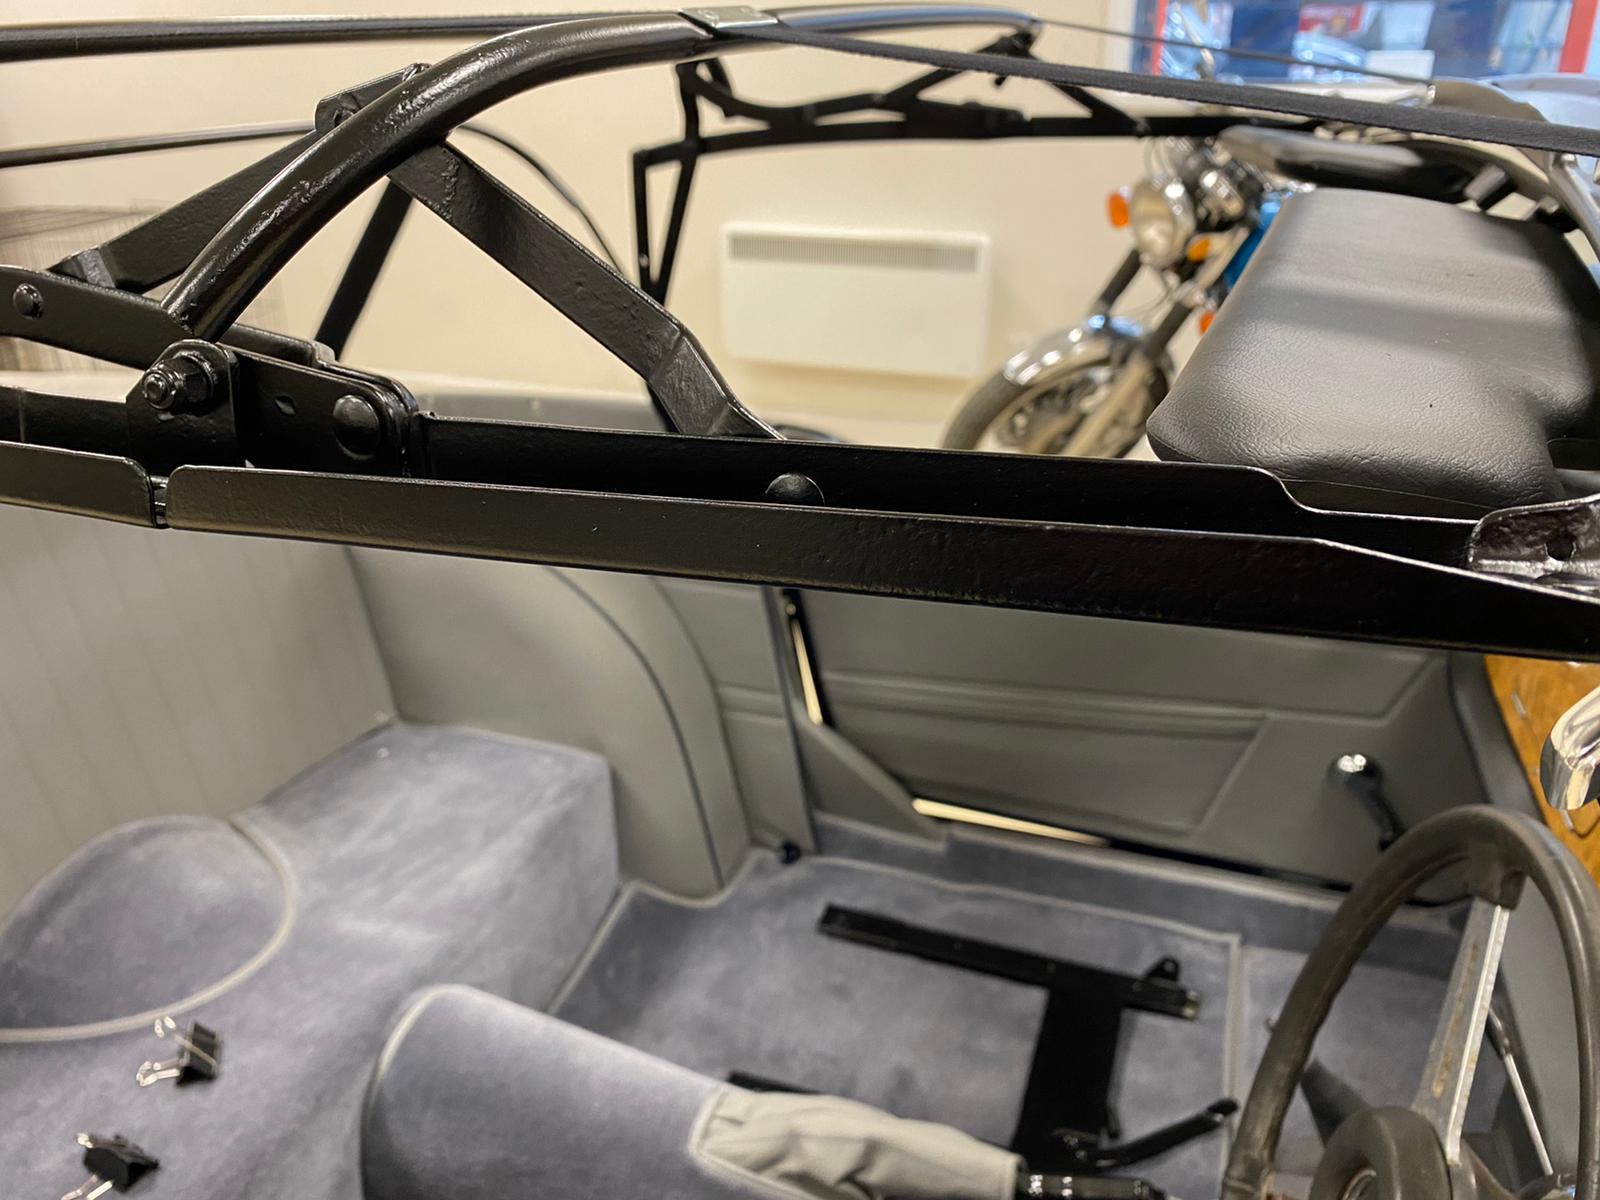
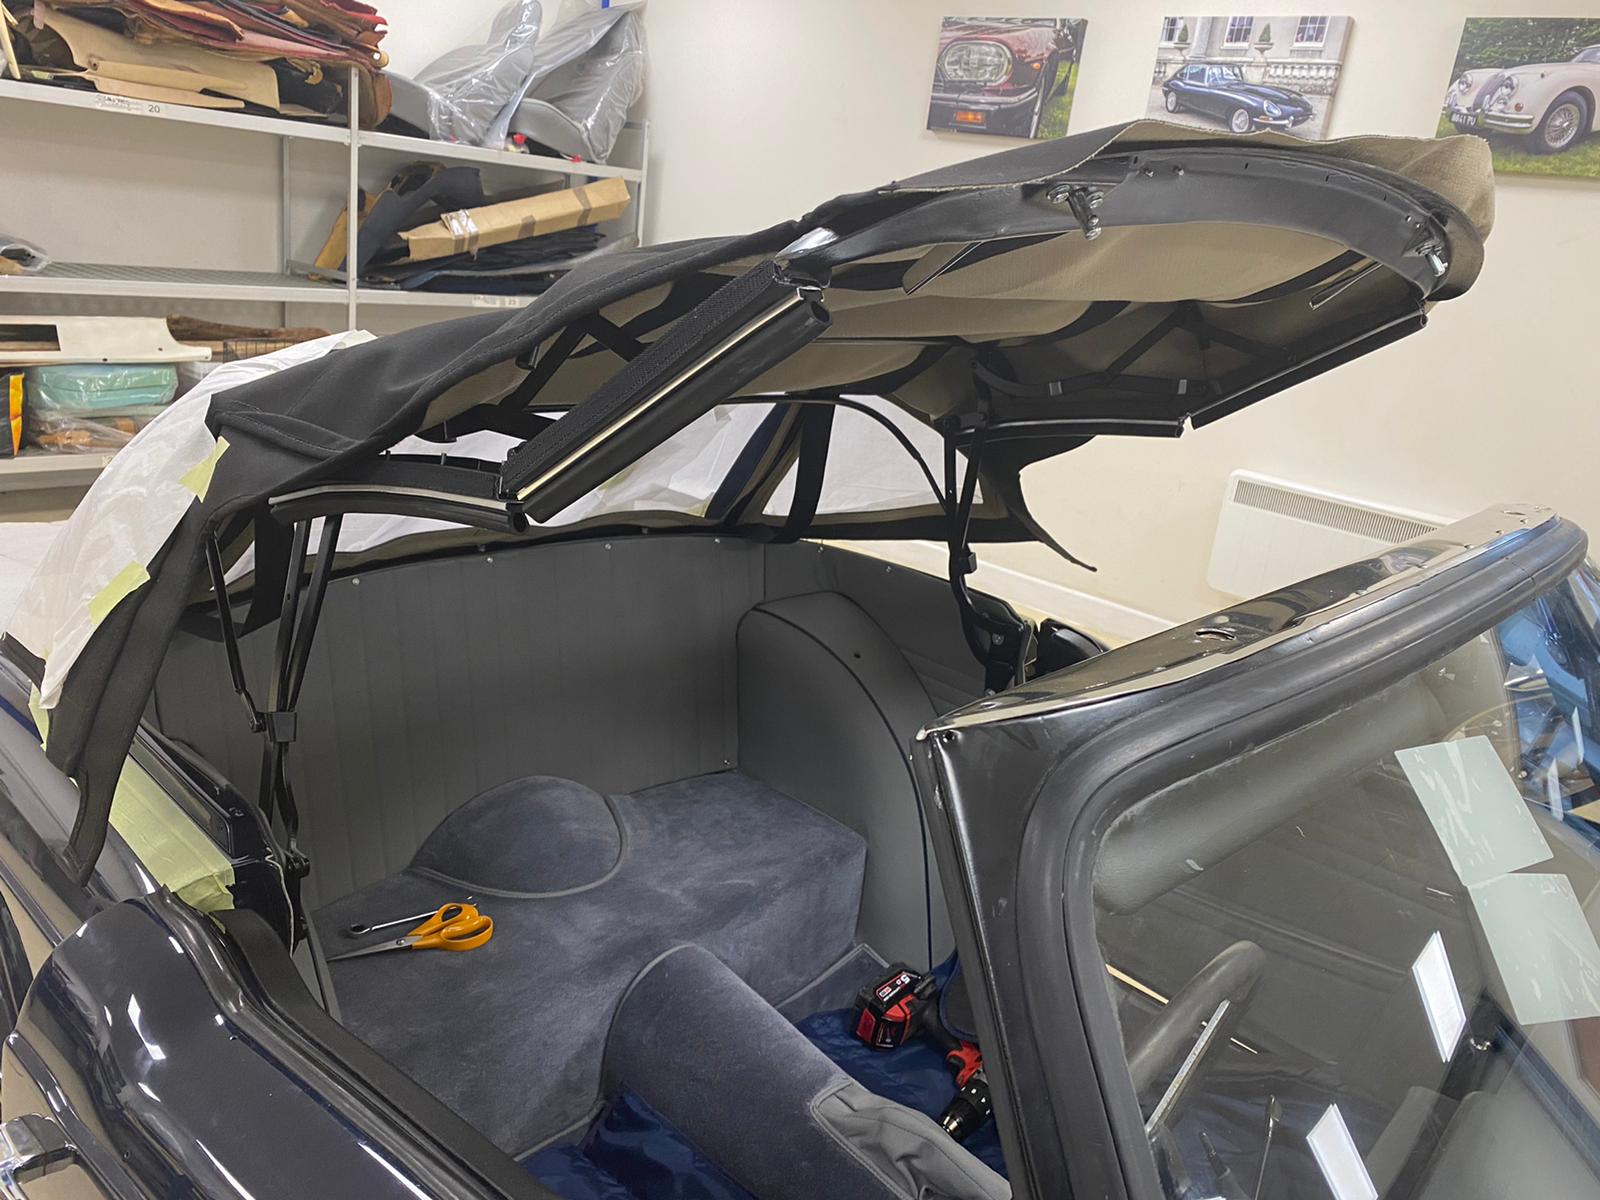
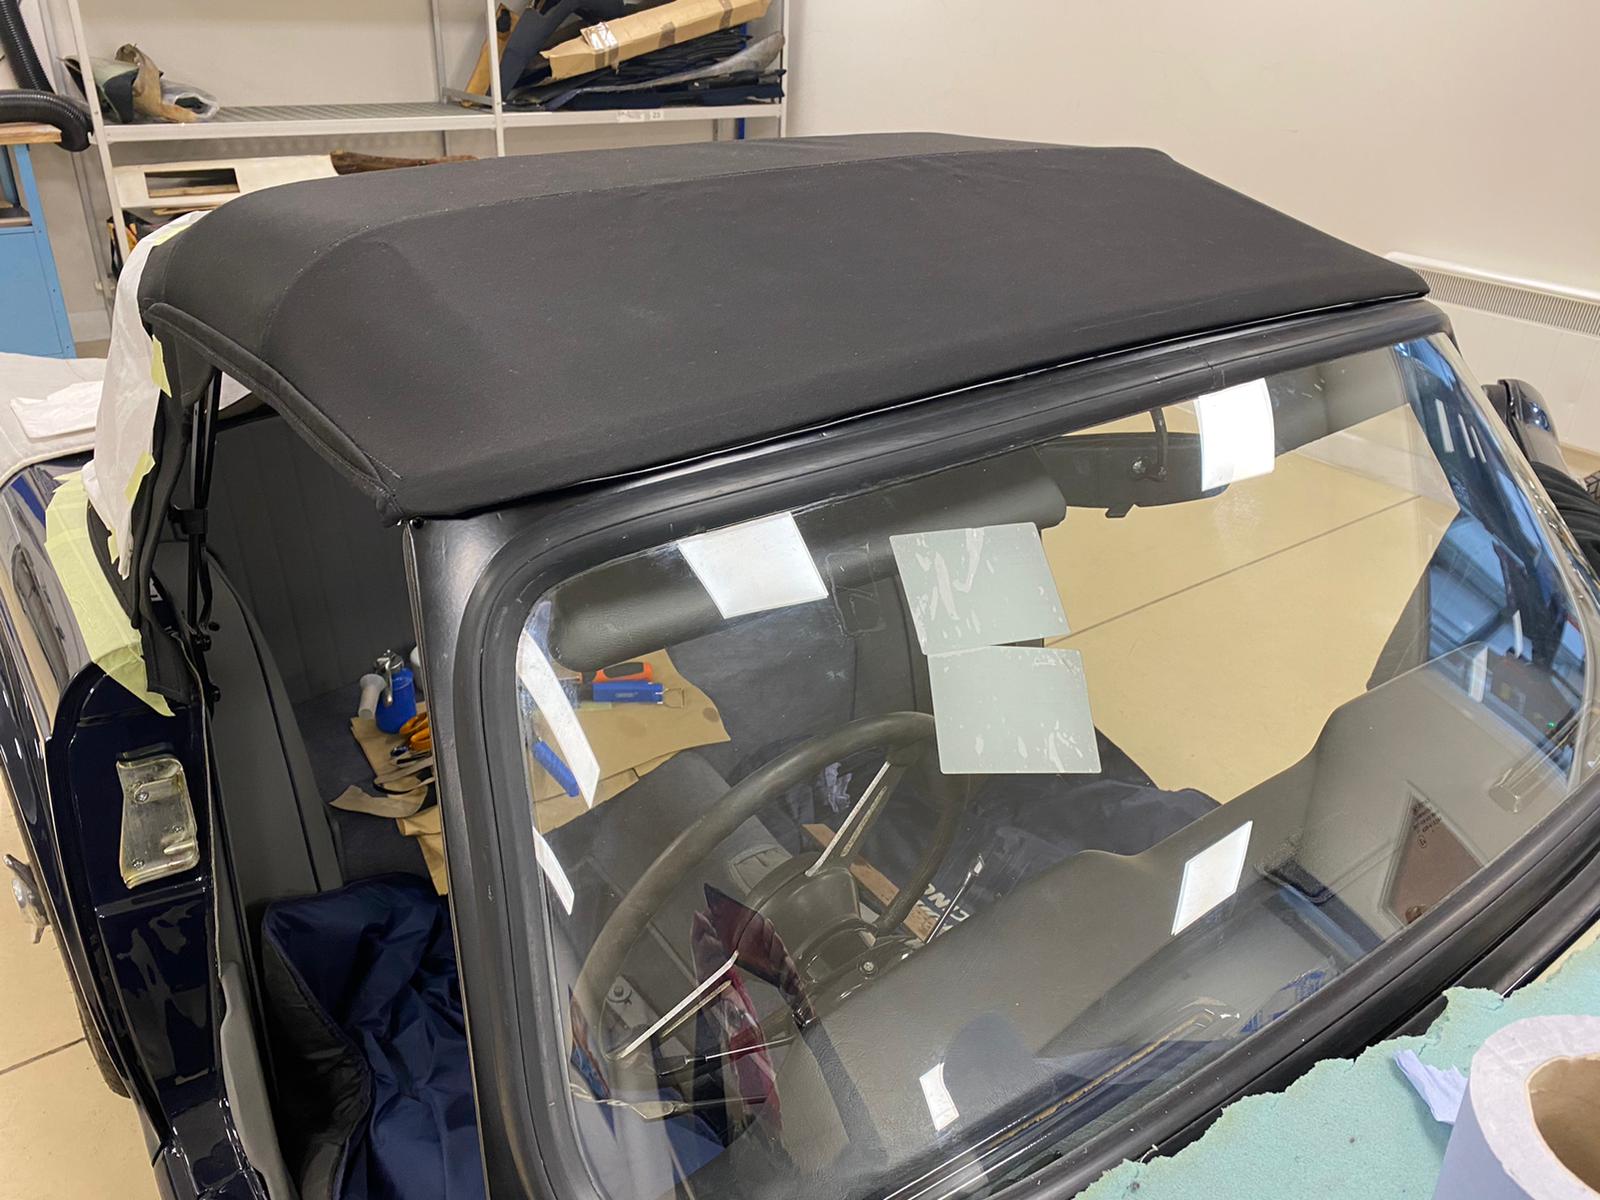
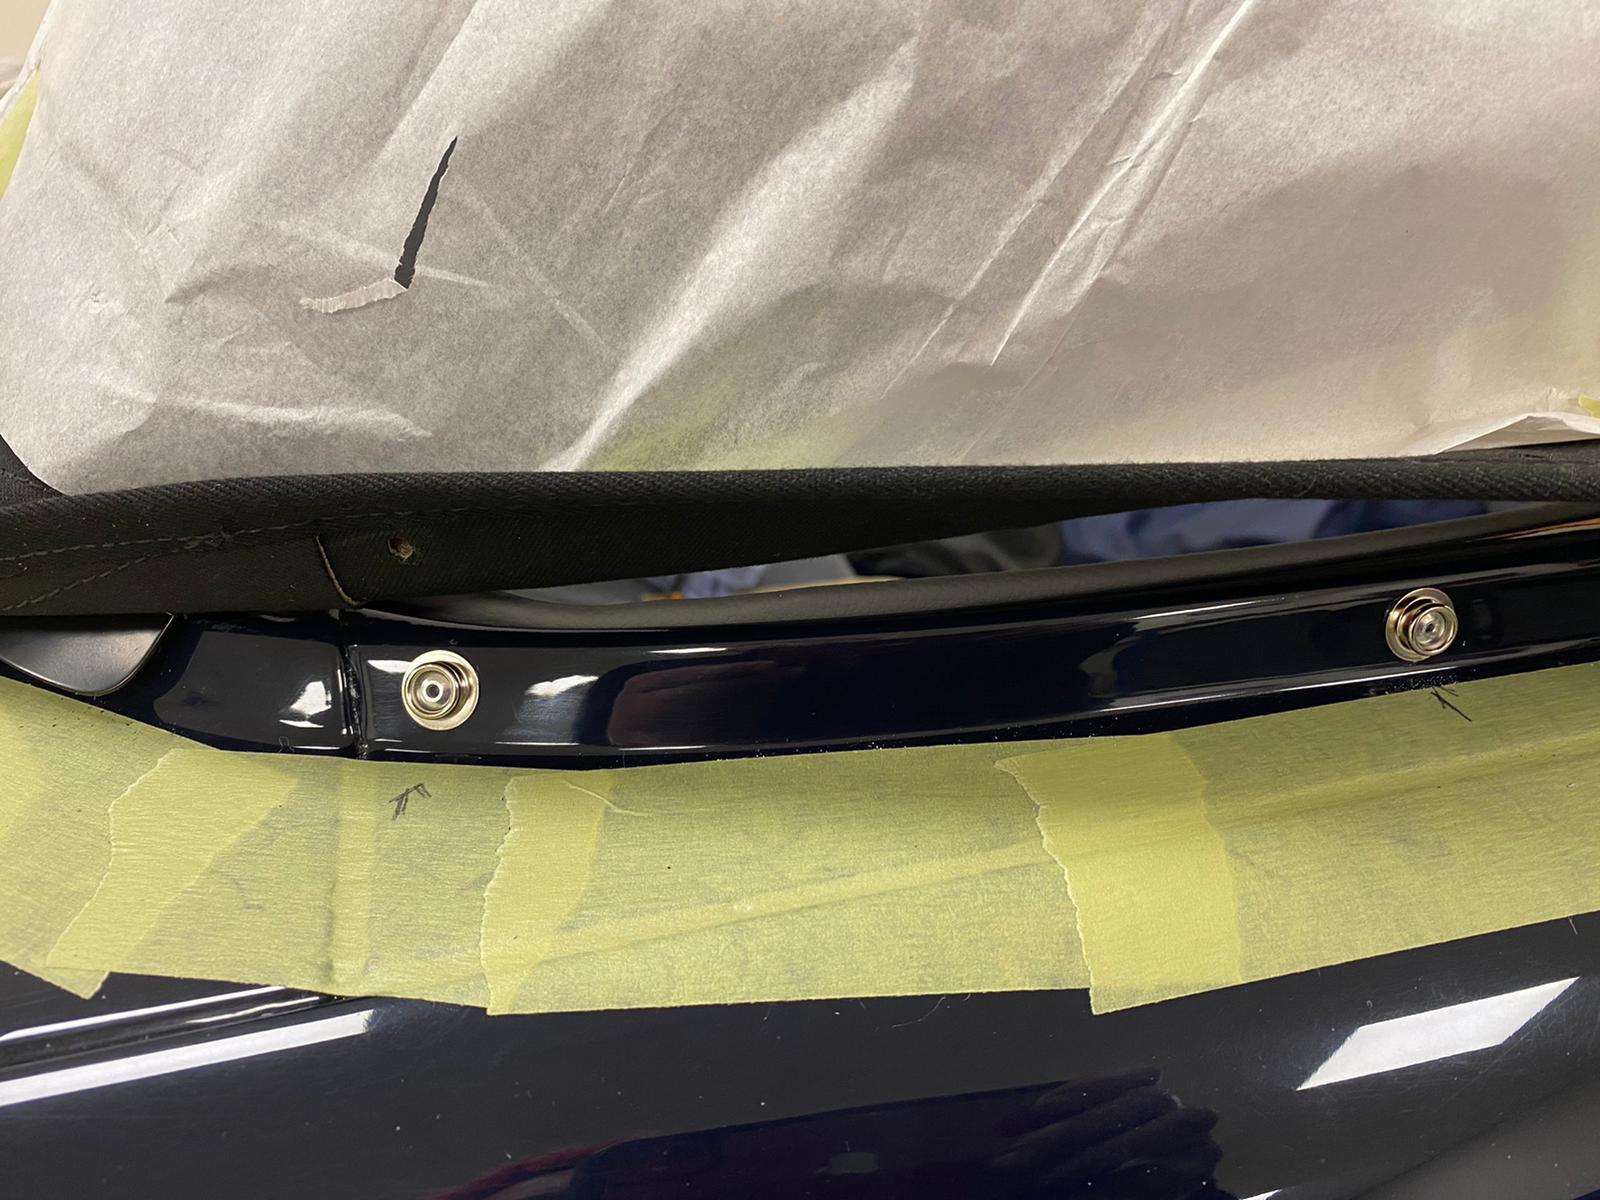
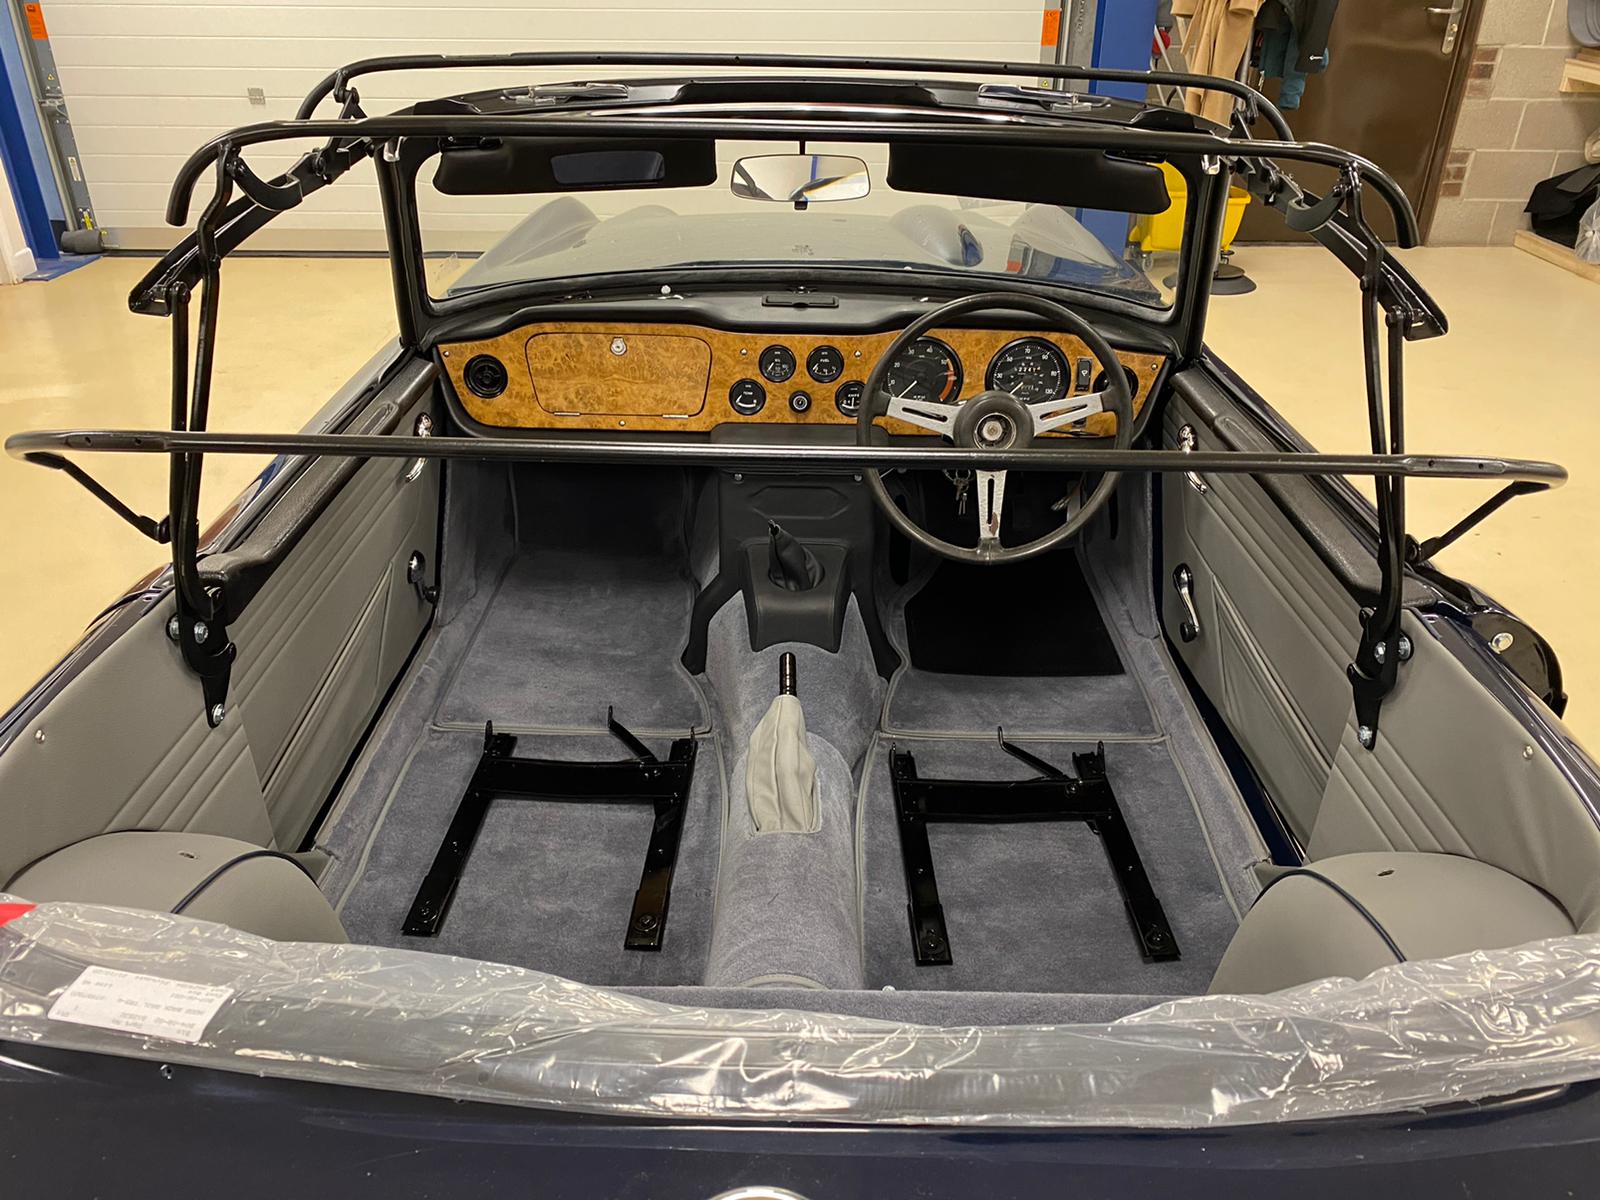
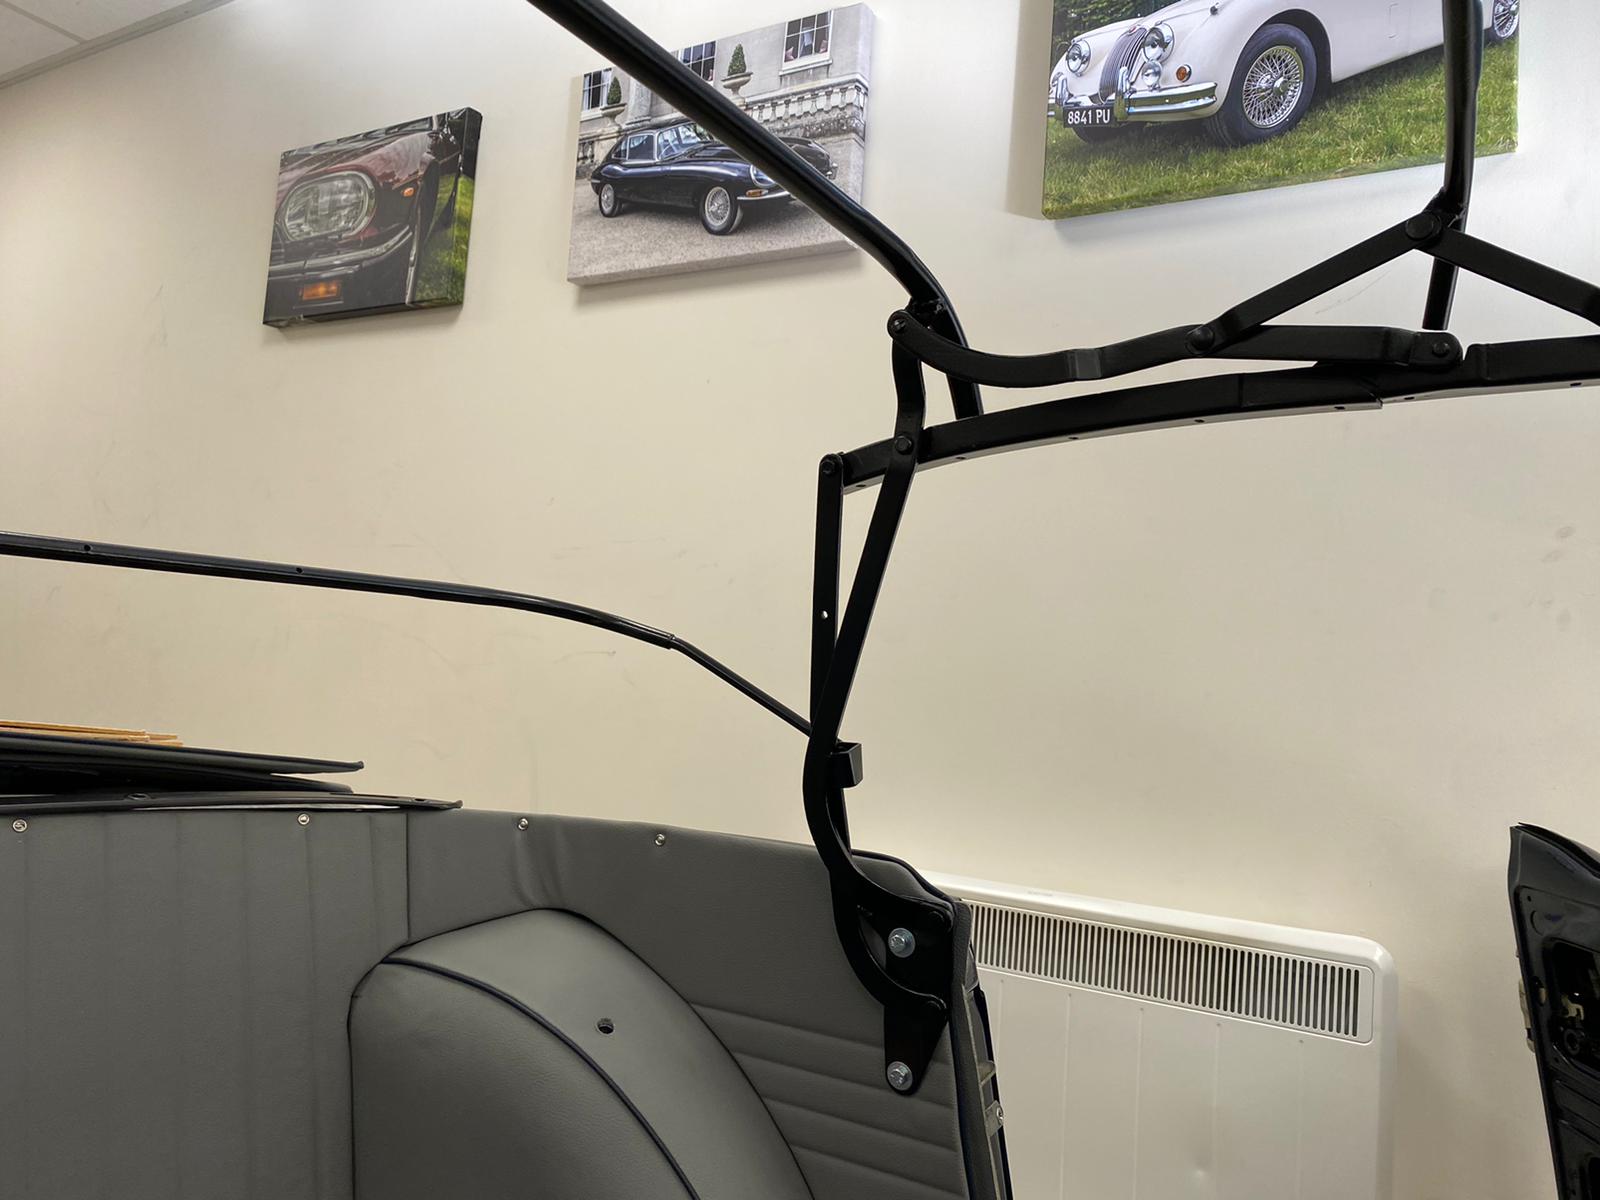
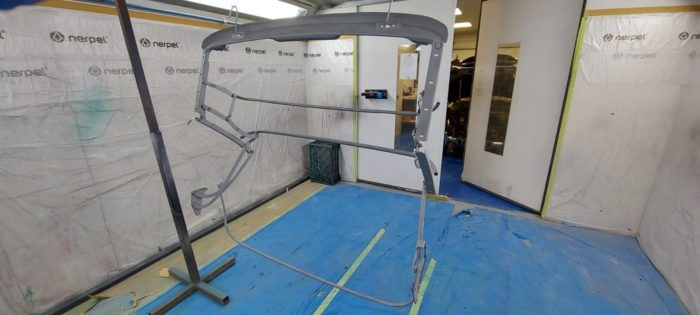
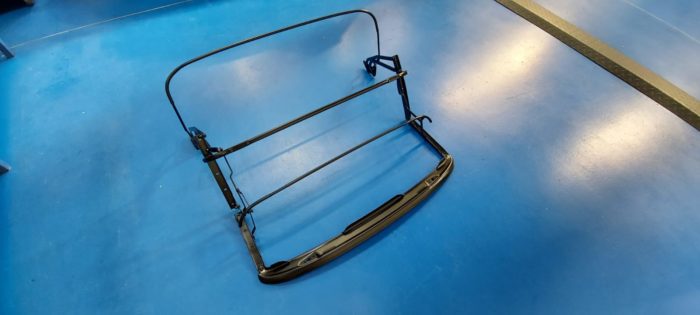
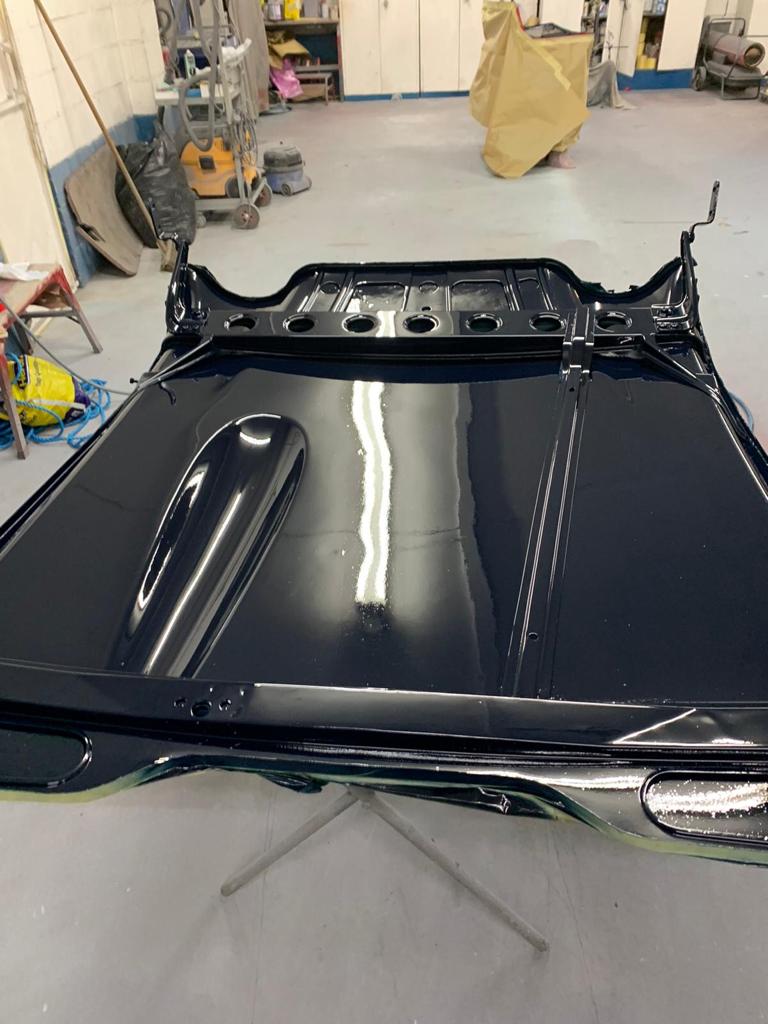
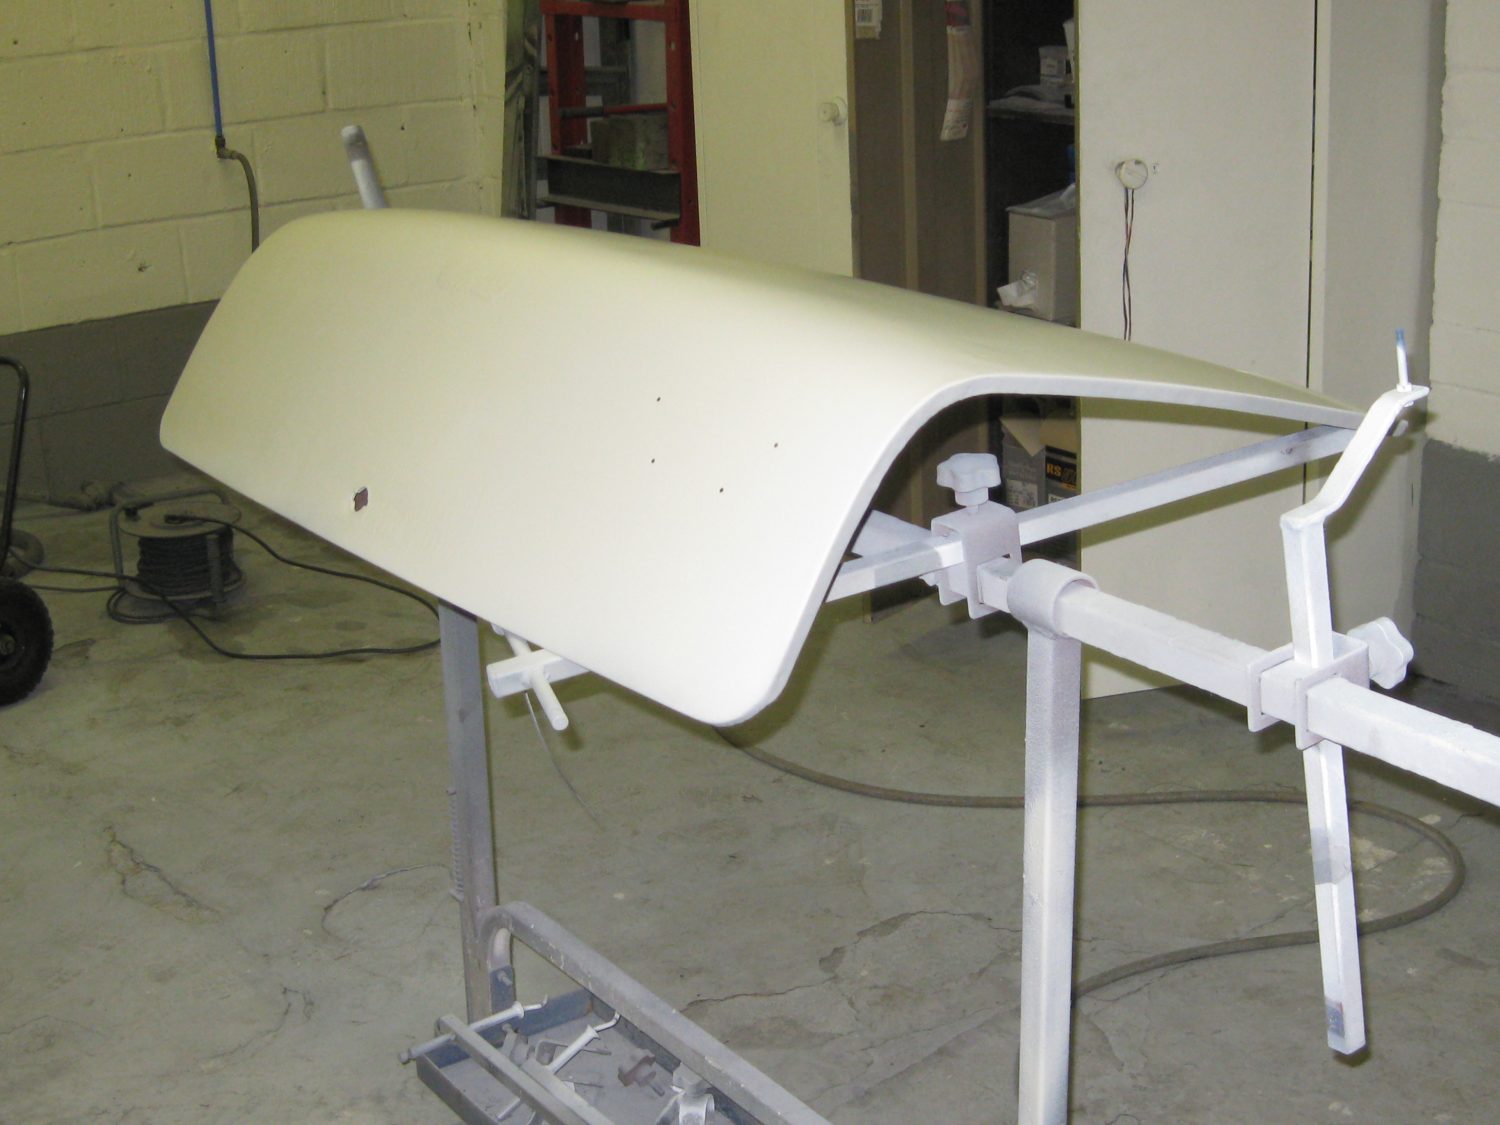
The hood frame has been completed for our 1968 Triumph TR5 and is now ready for it’s hood to be fitted.
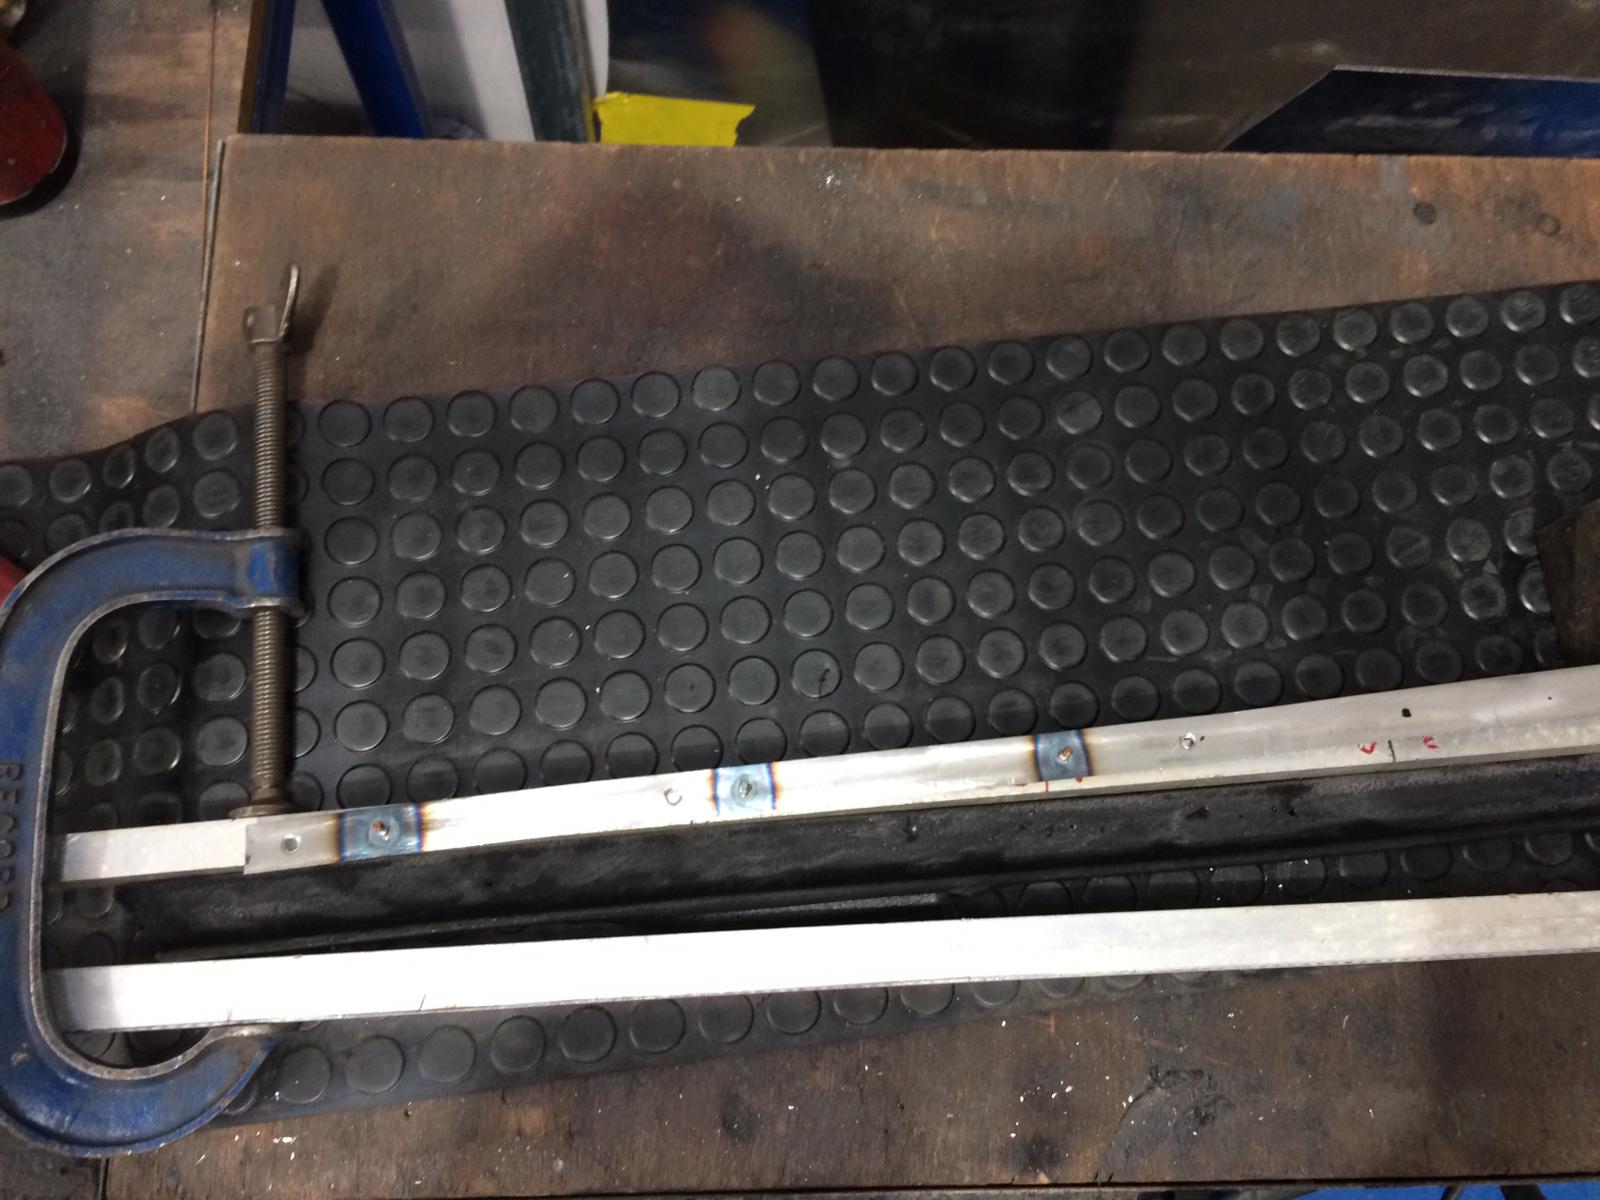
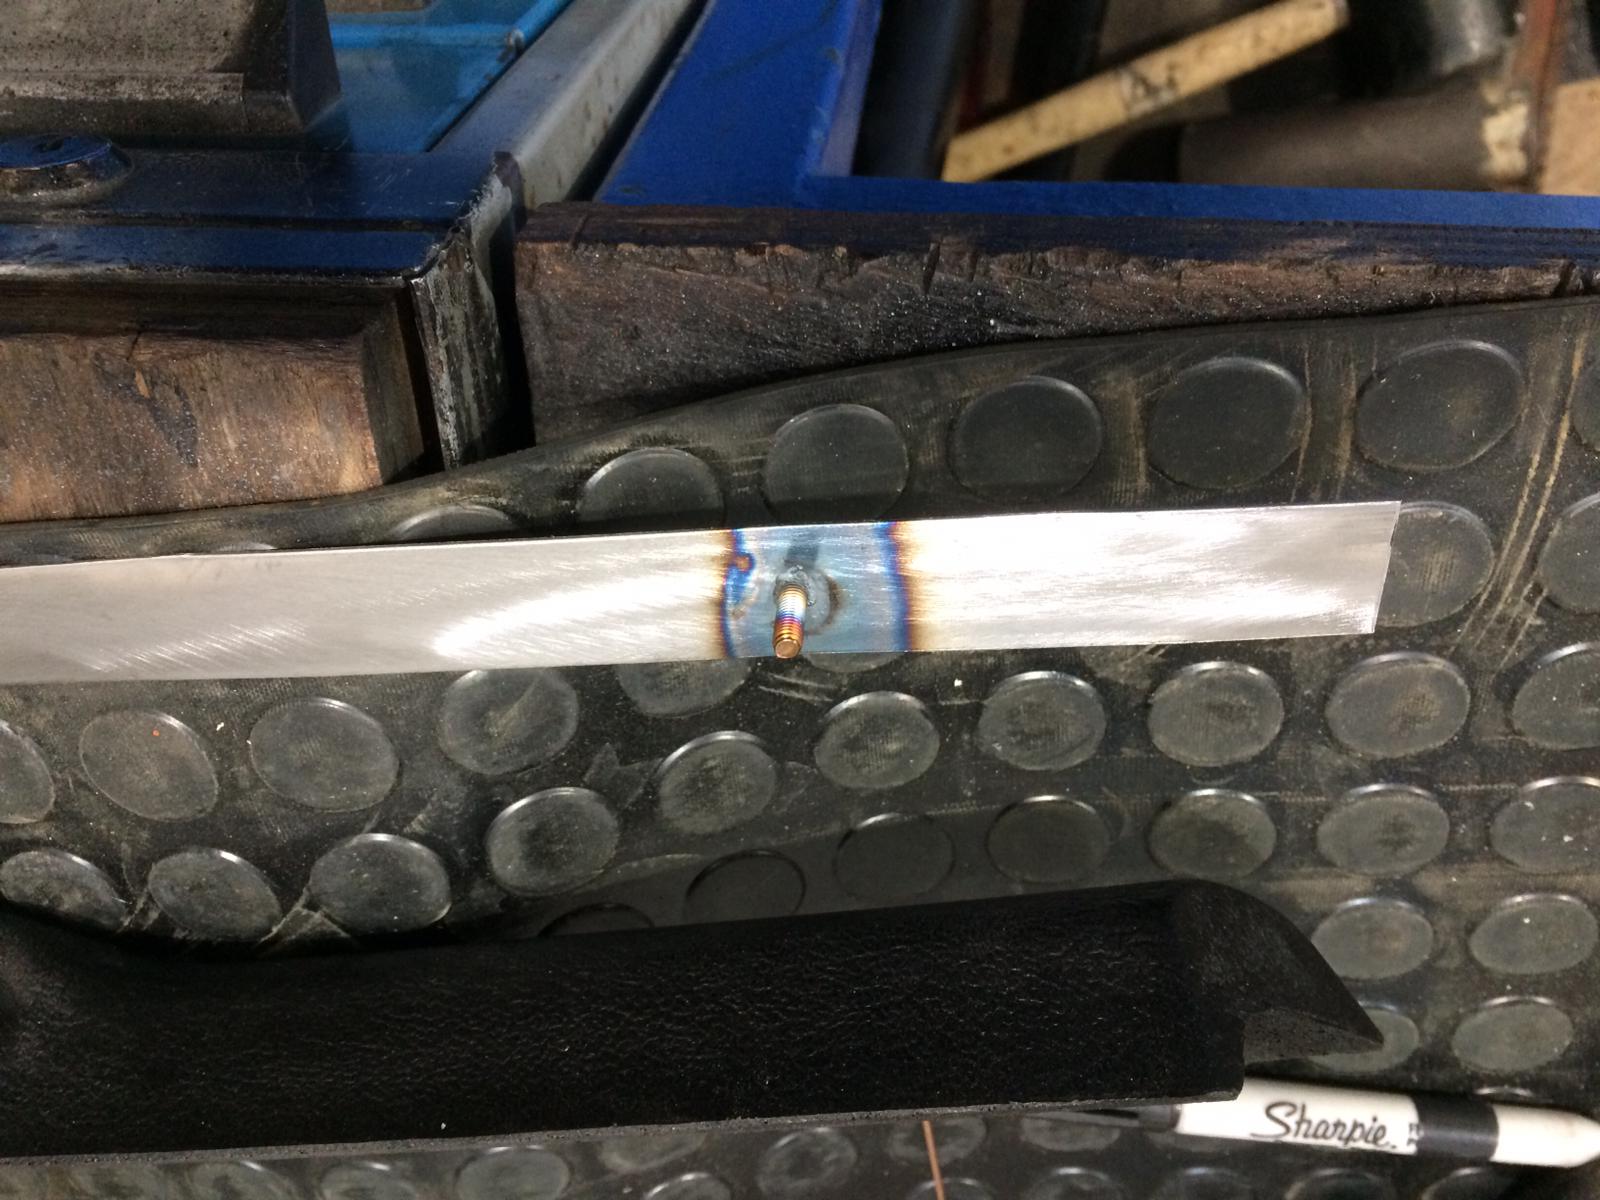
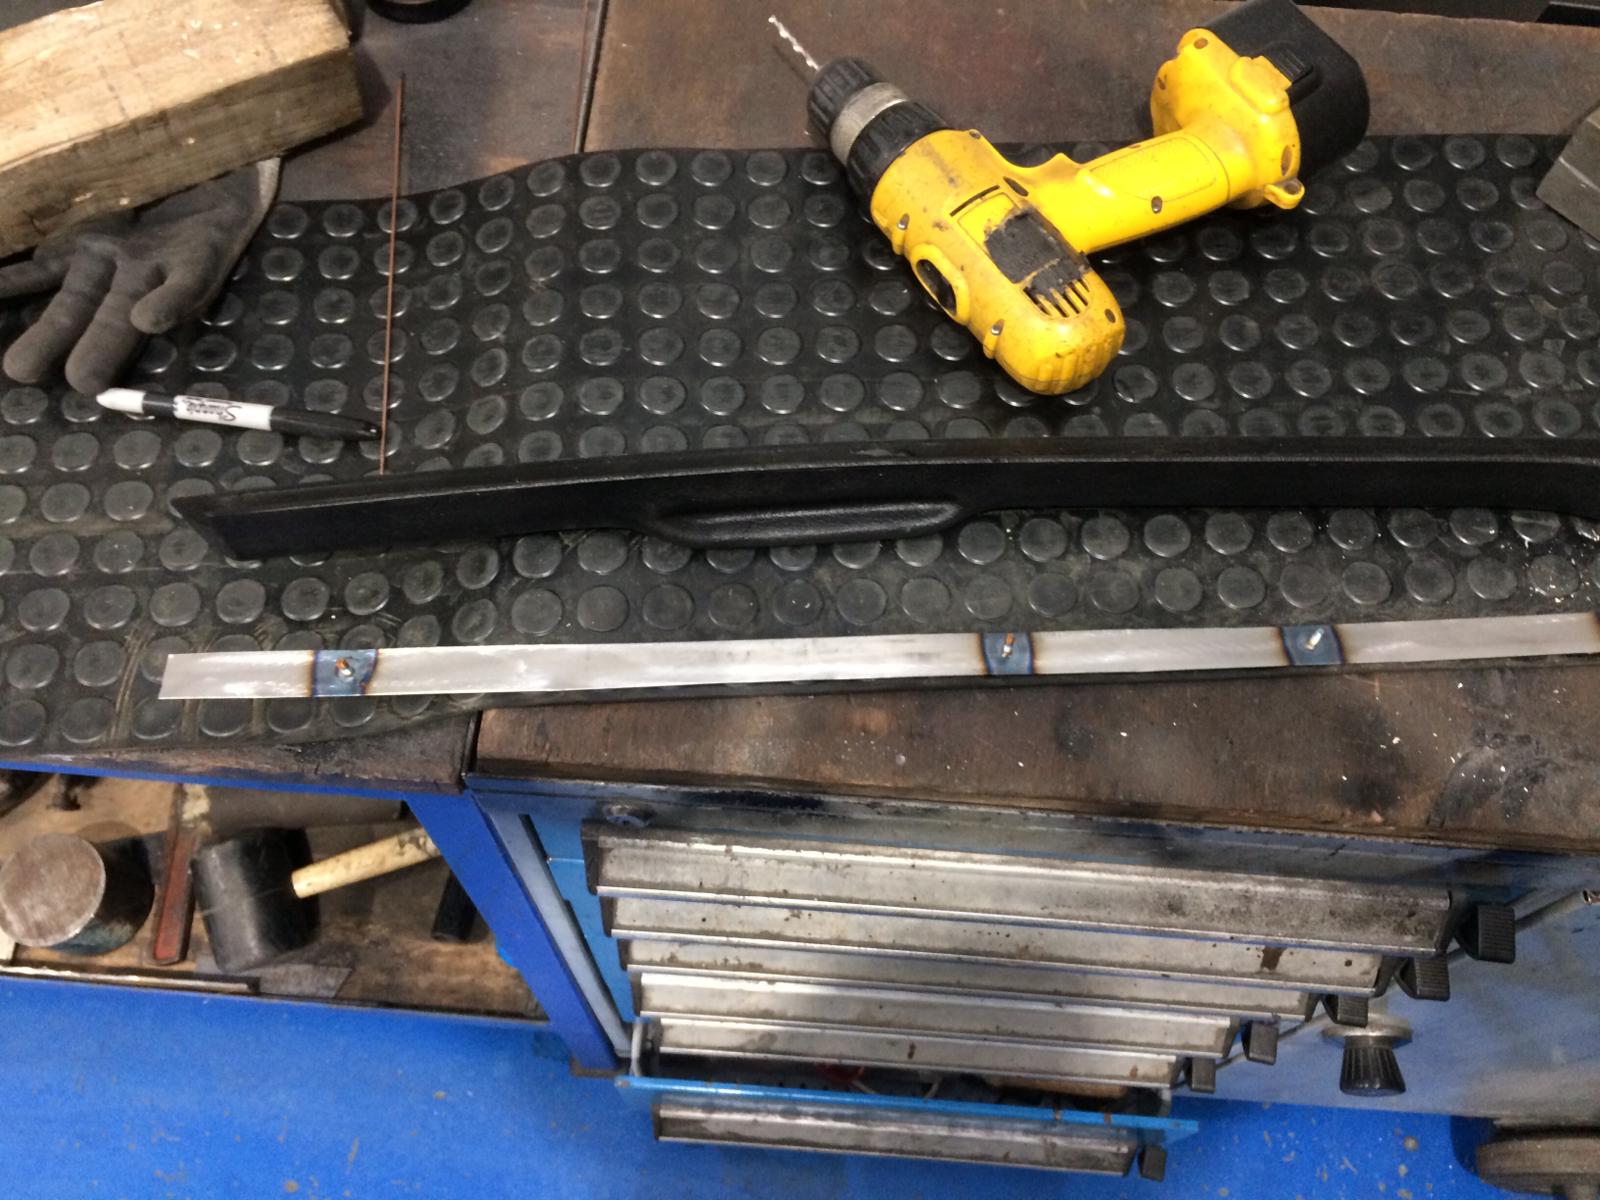
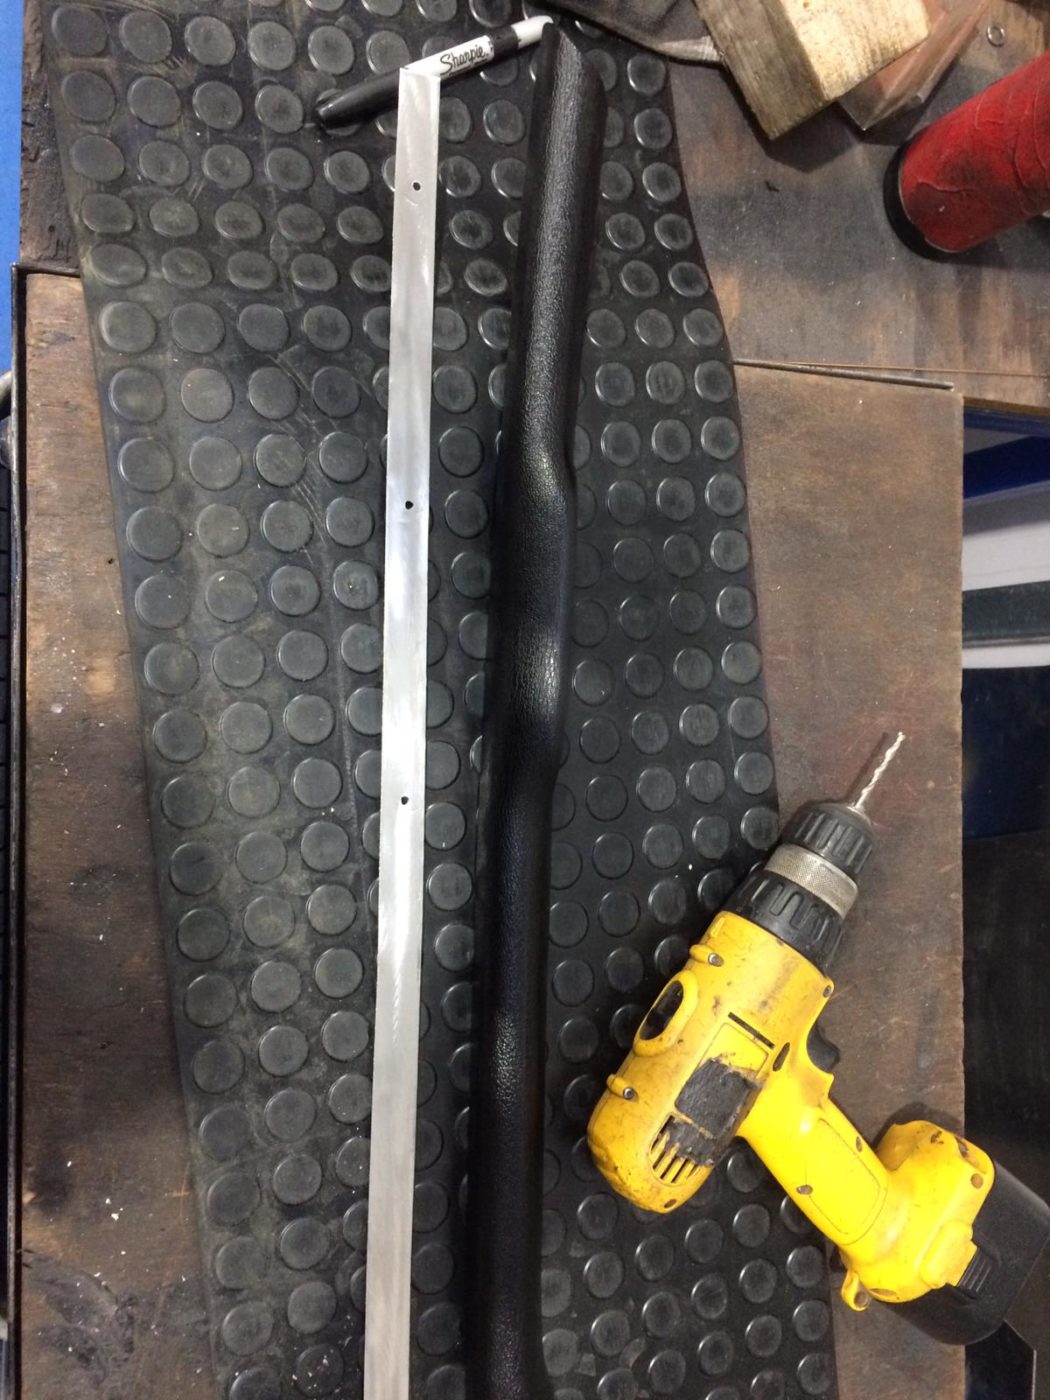
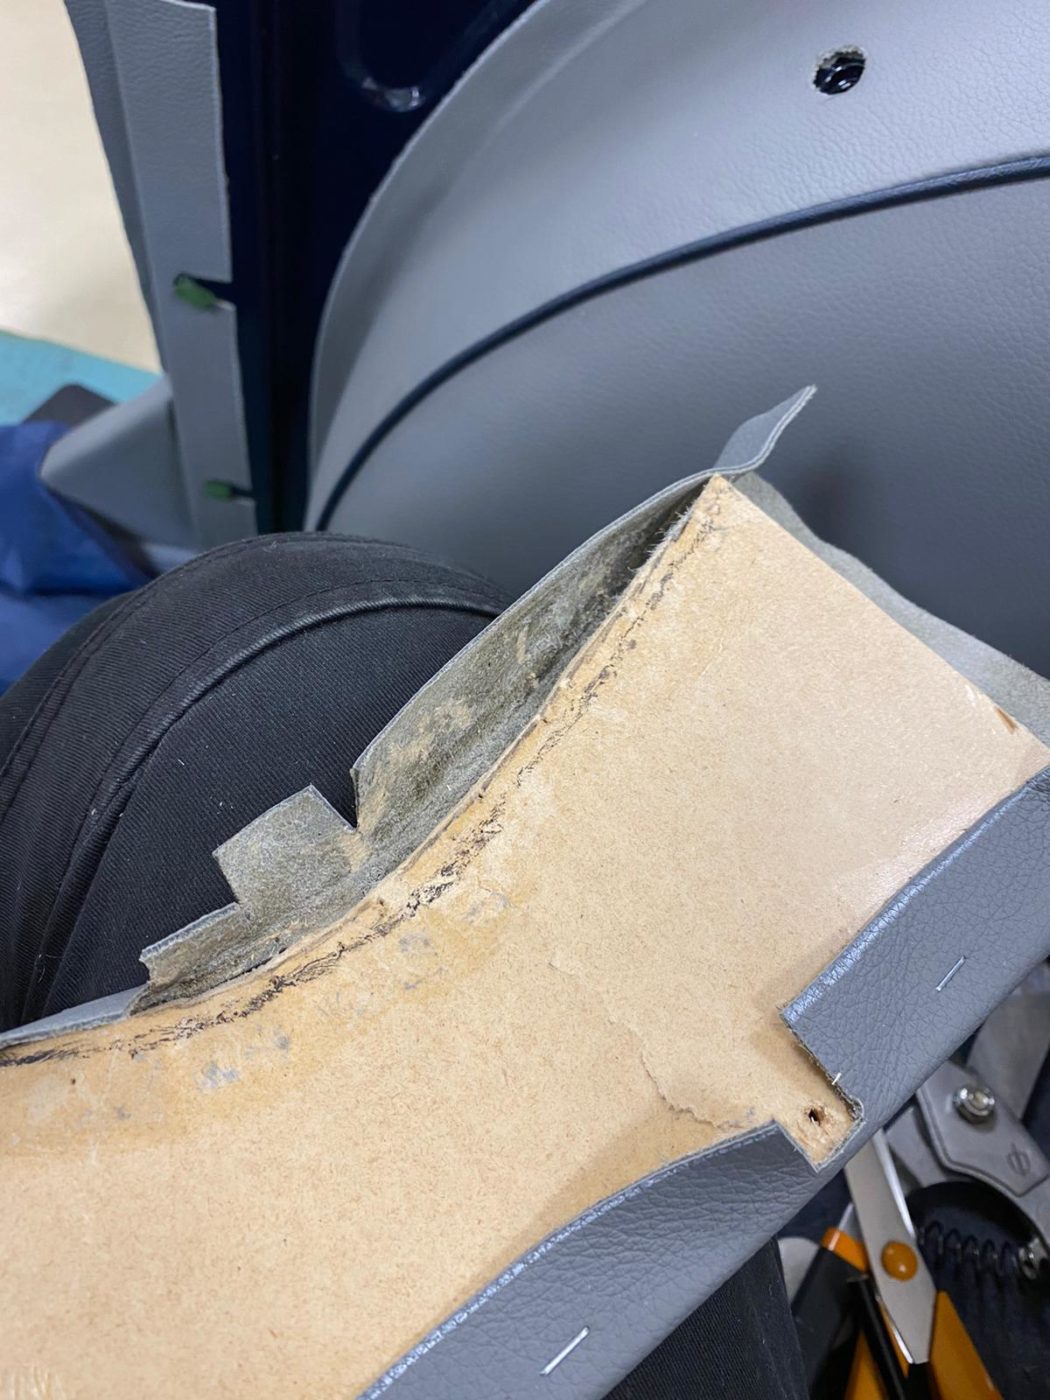
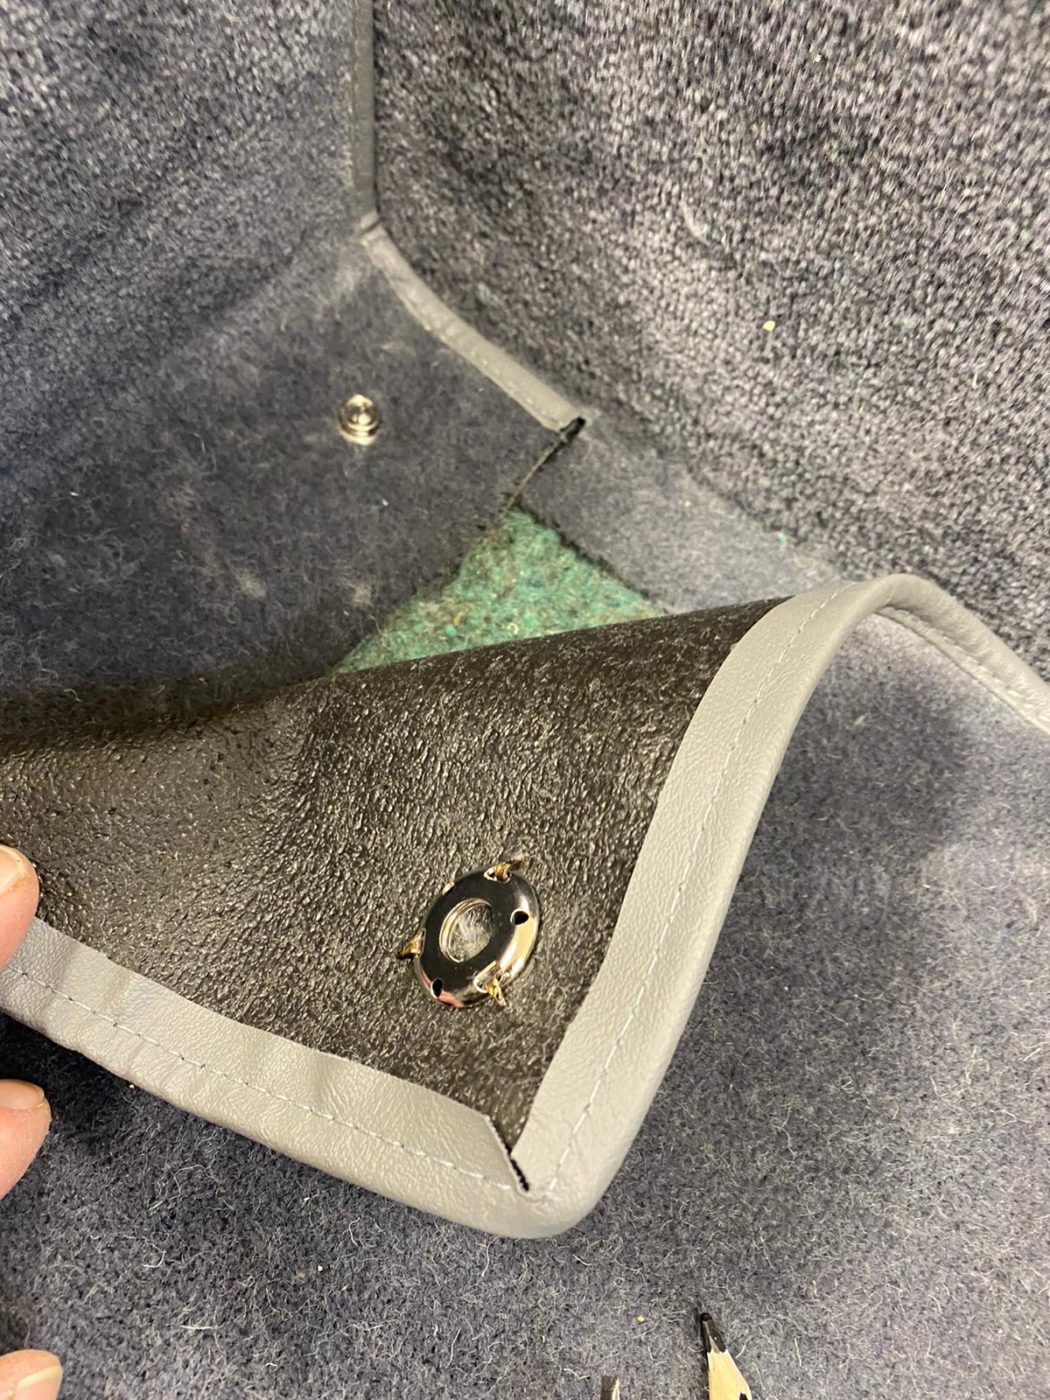
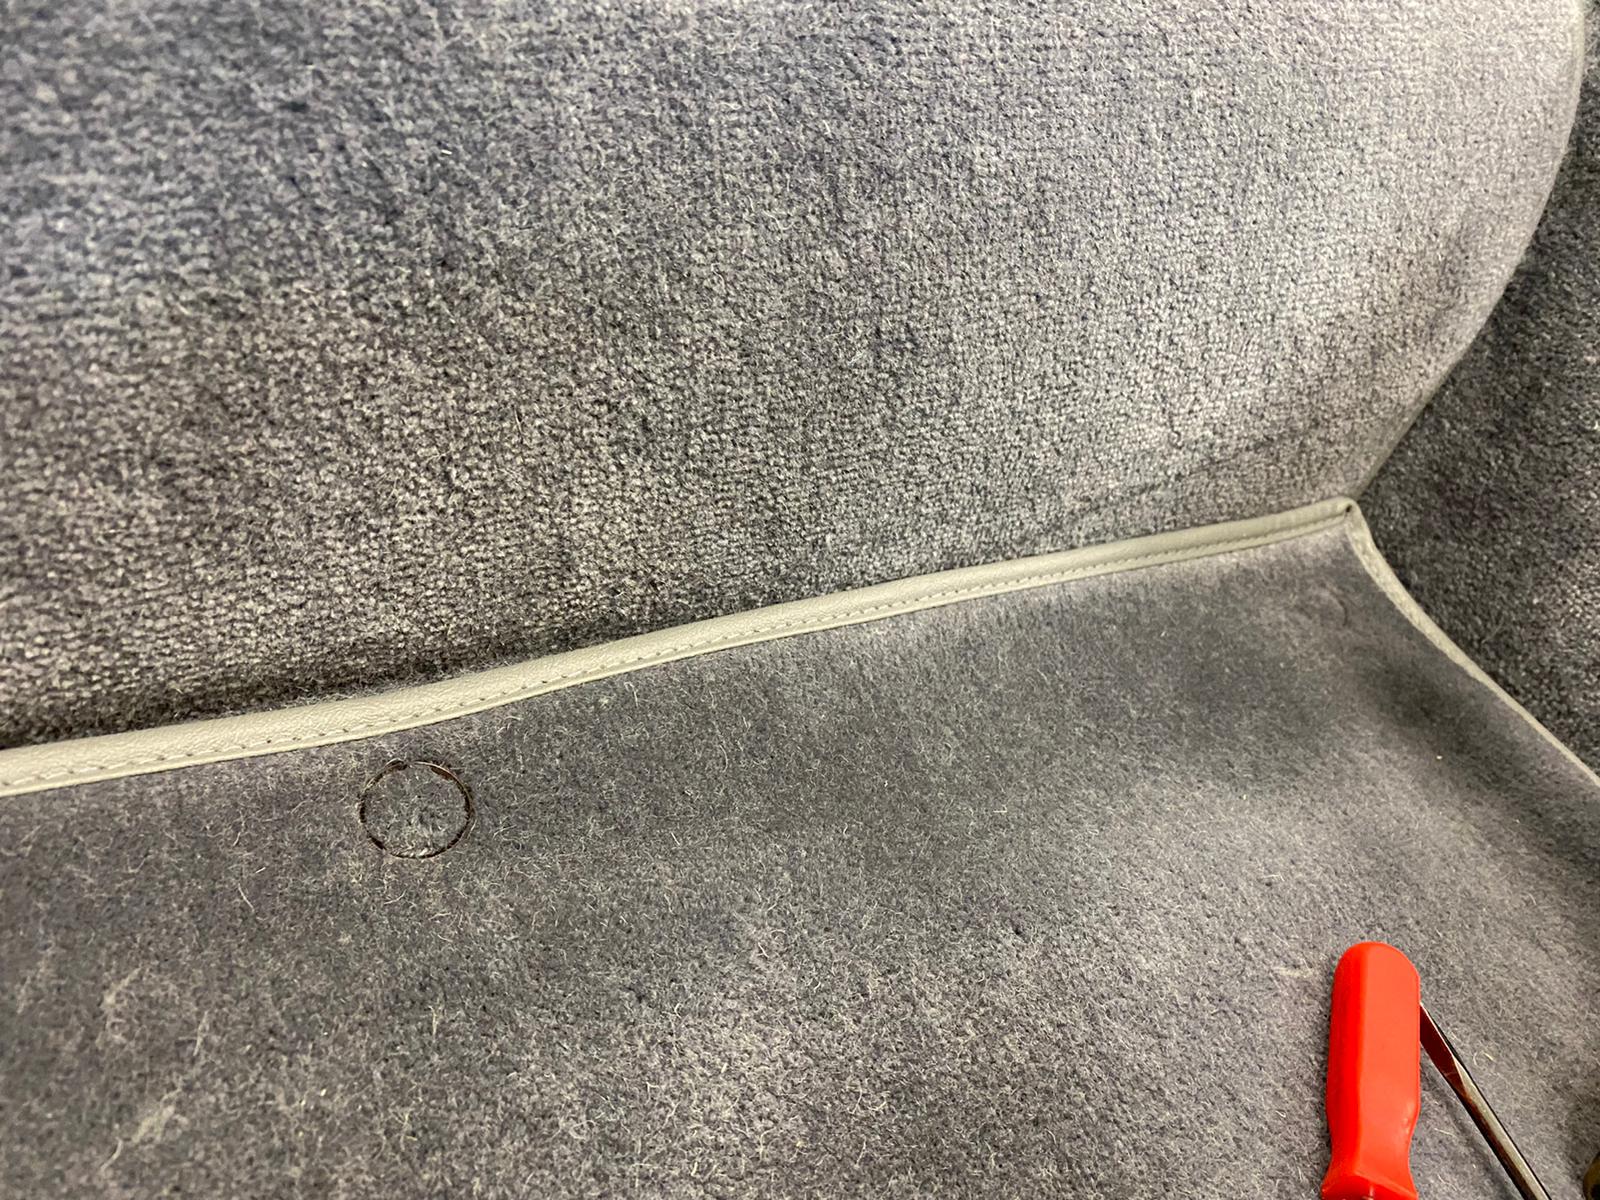
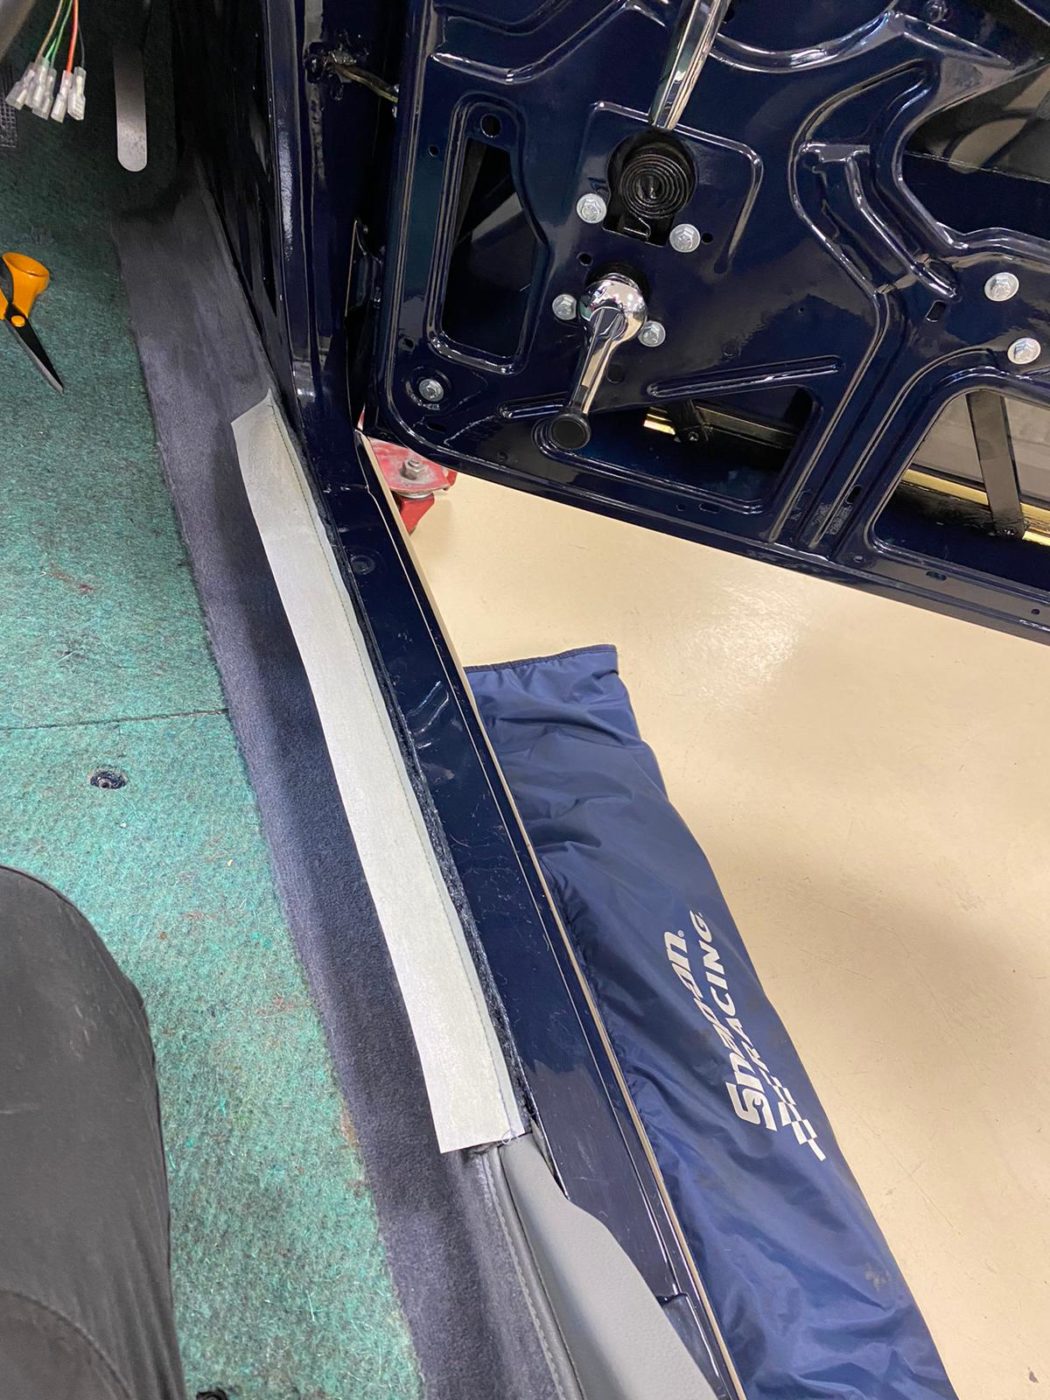
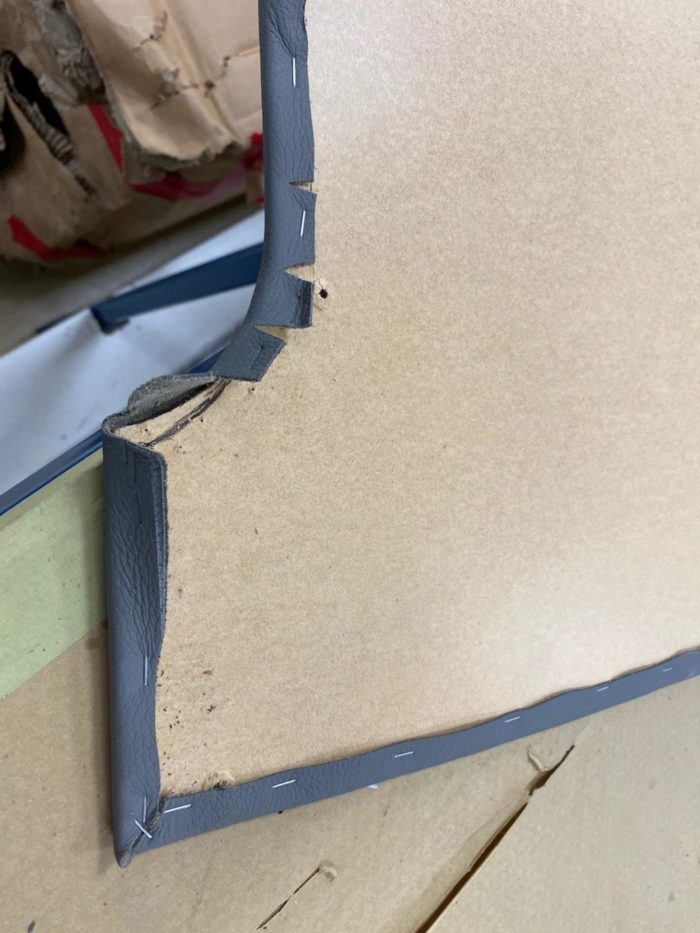
We’ve also fitted the crash padding into the door of our TR5. Originally, there was no way of fitting padding so we had here is means of fitting this to make a backing plate which involved cutting a strip of steel welding in studs and glueing and screwing the steel strip to the crash pad. We then located the position on the door to drill and bolt to the top of the door.
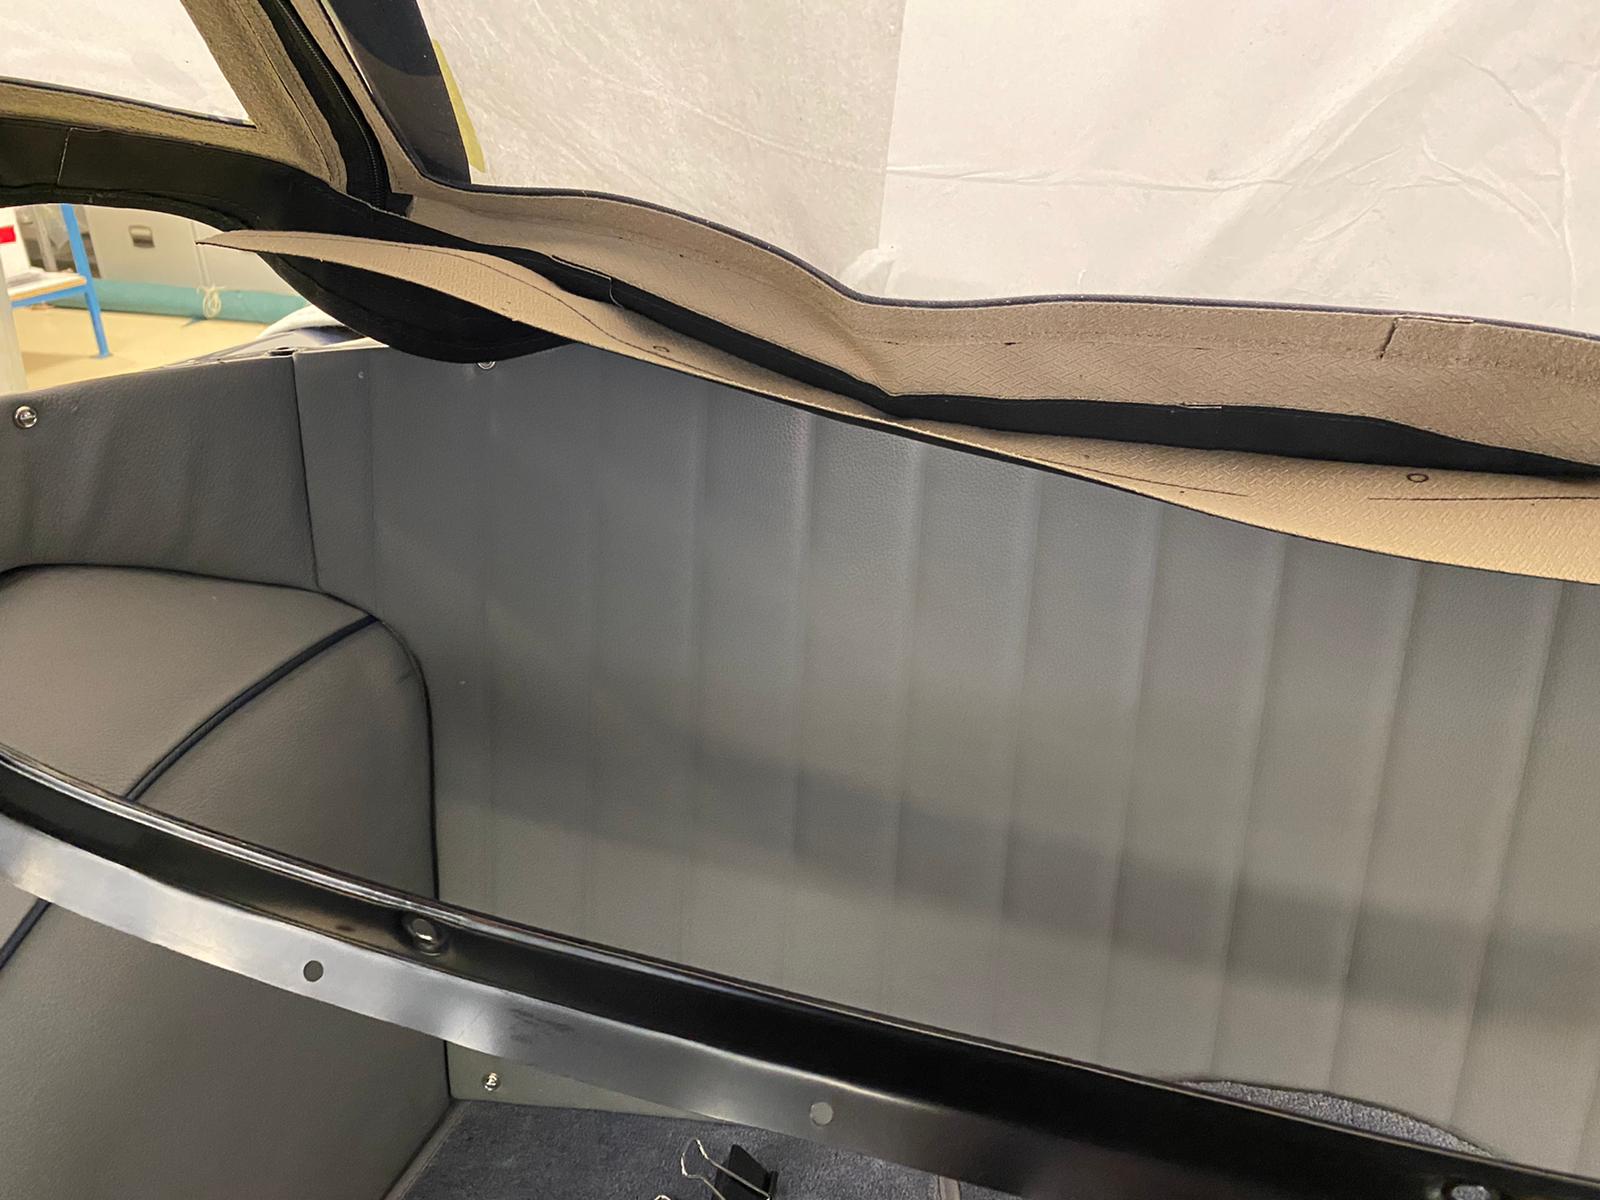
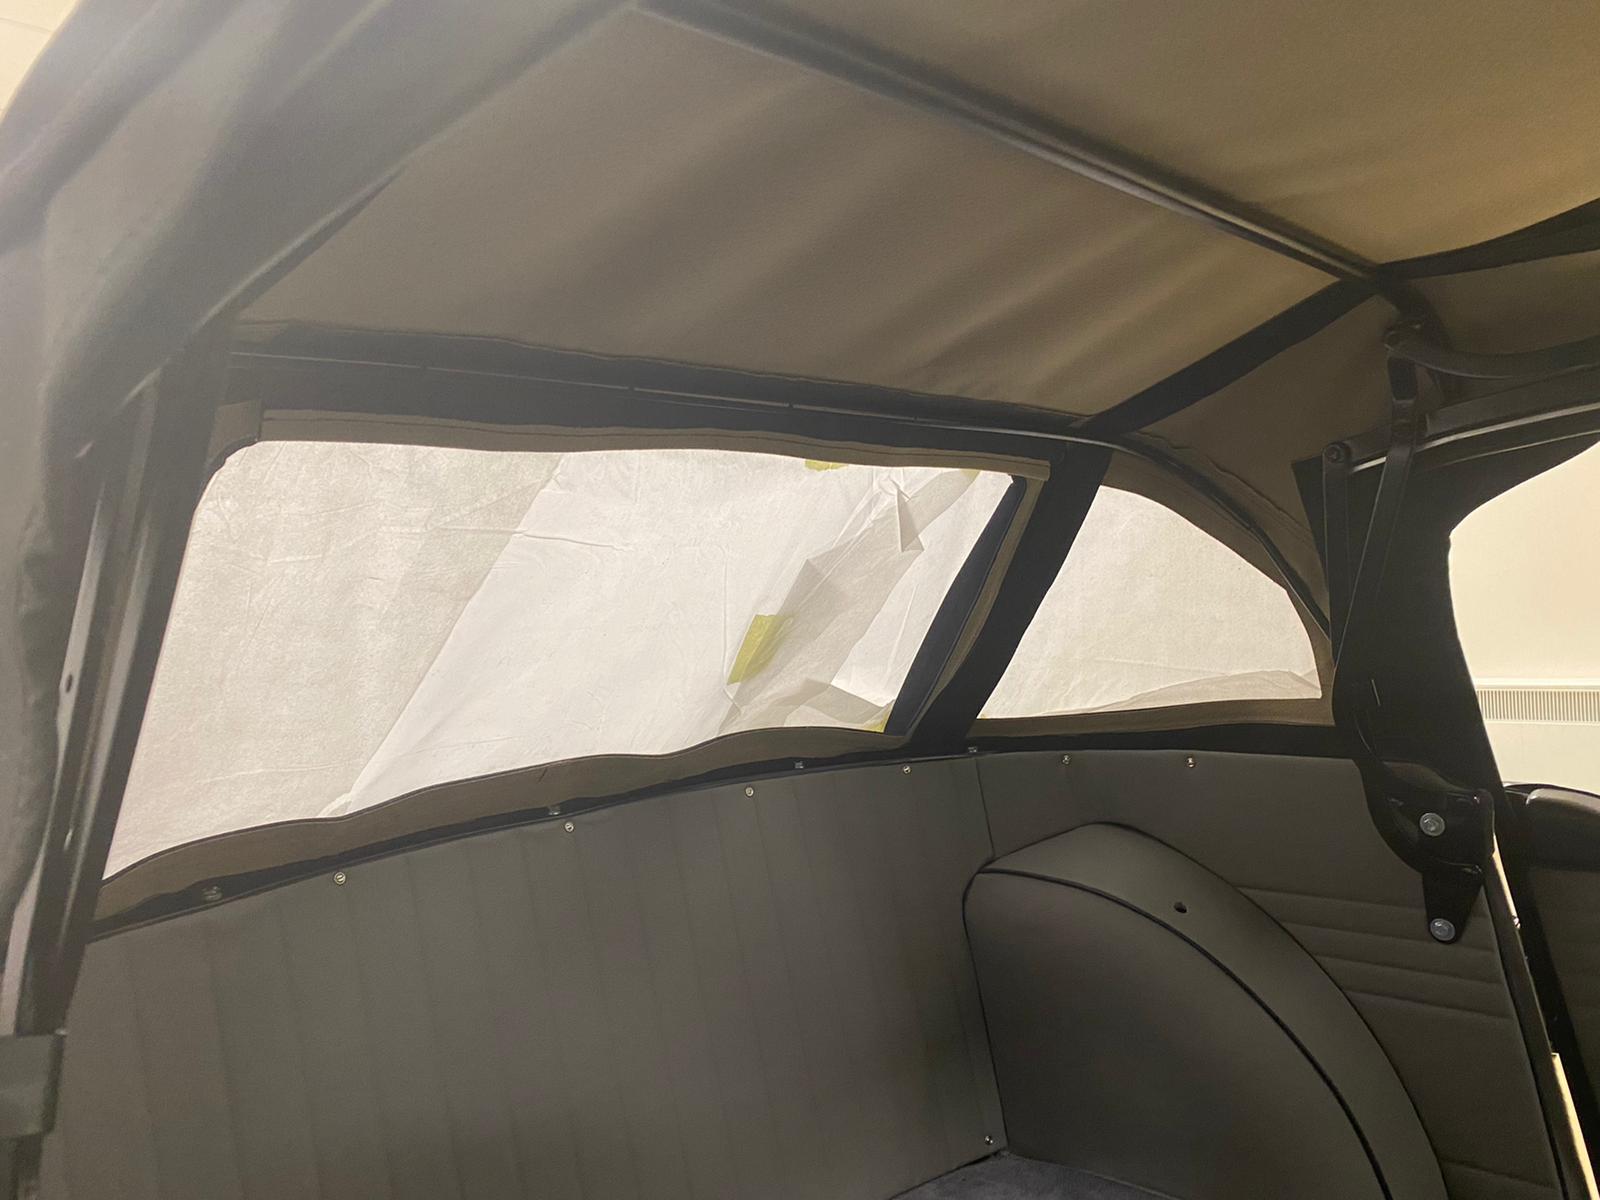
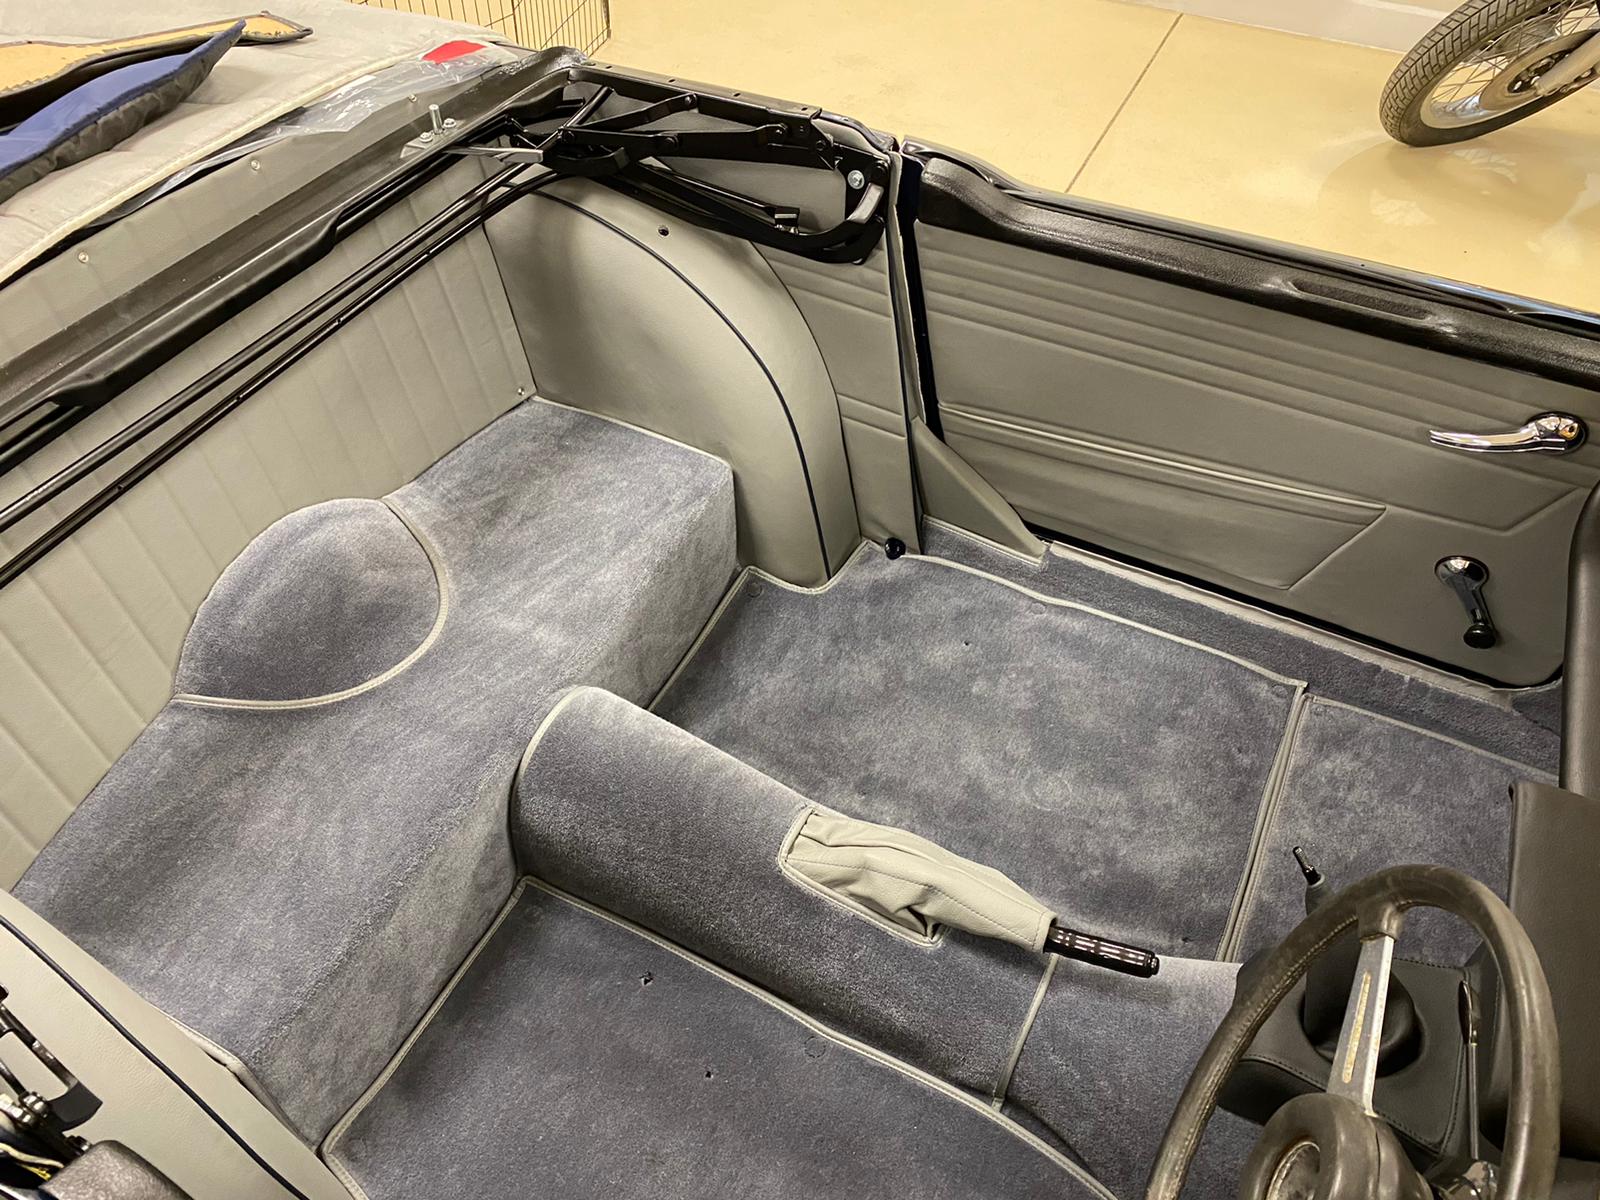
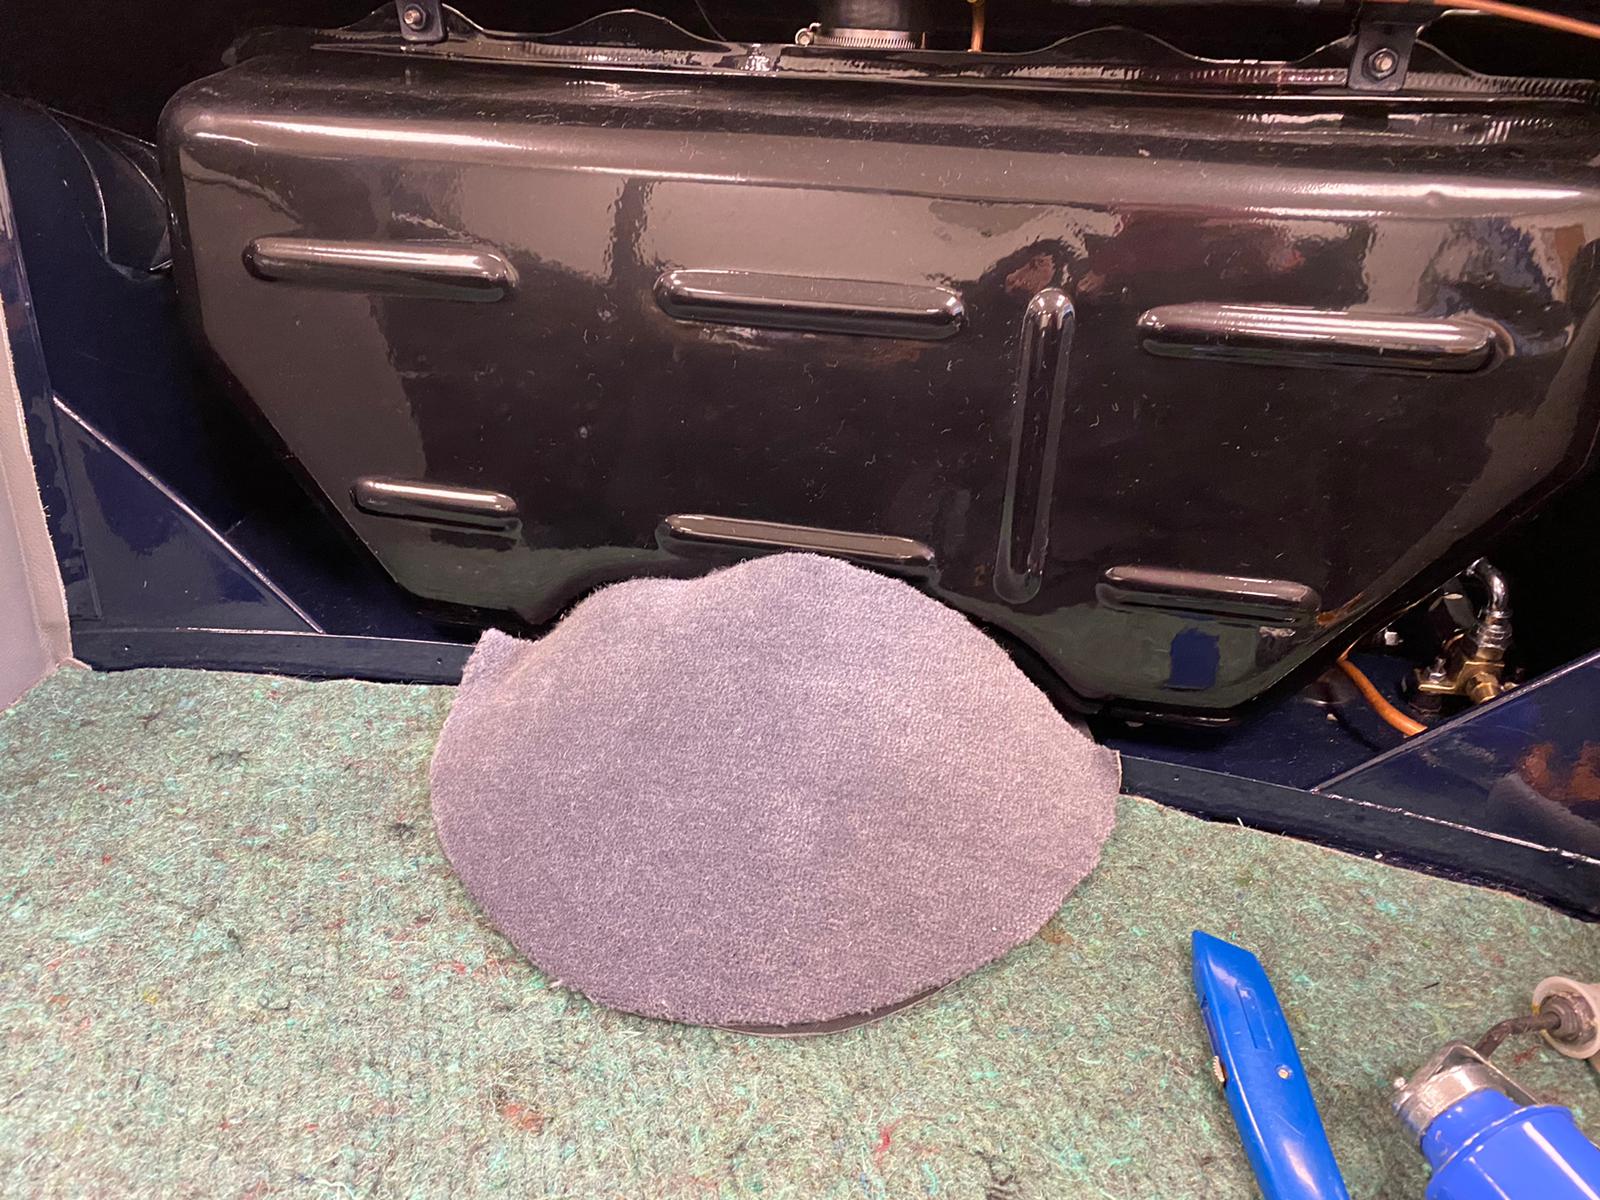
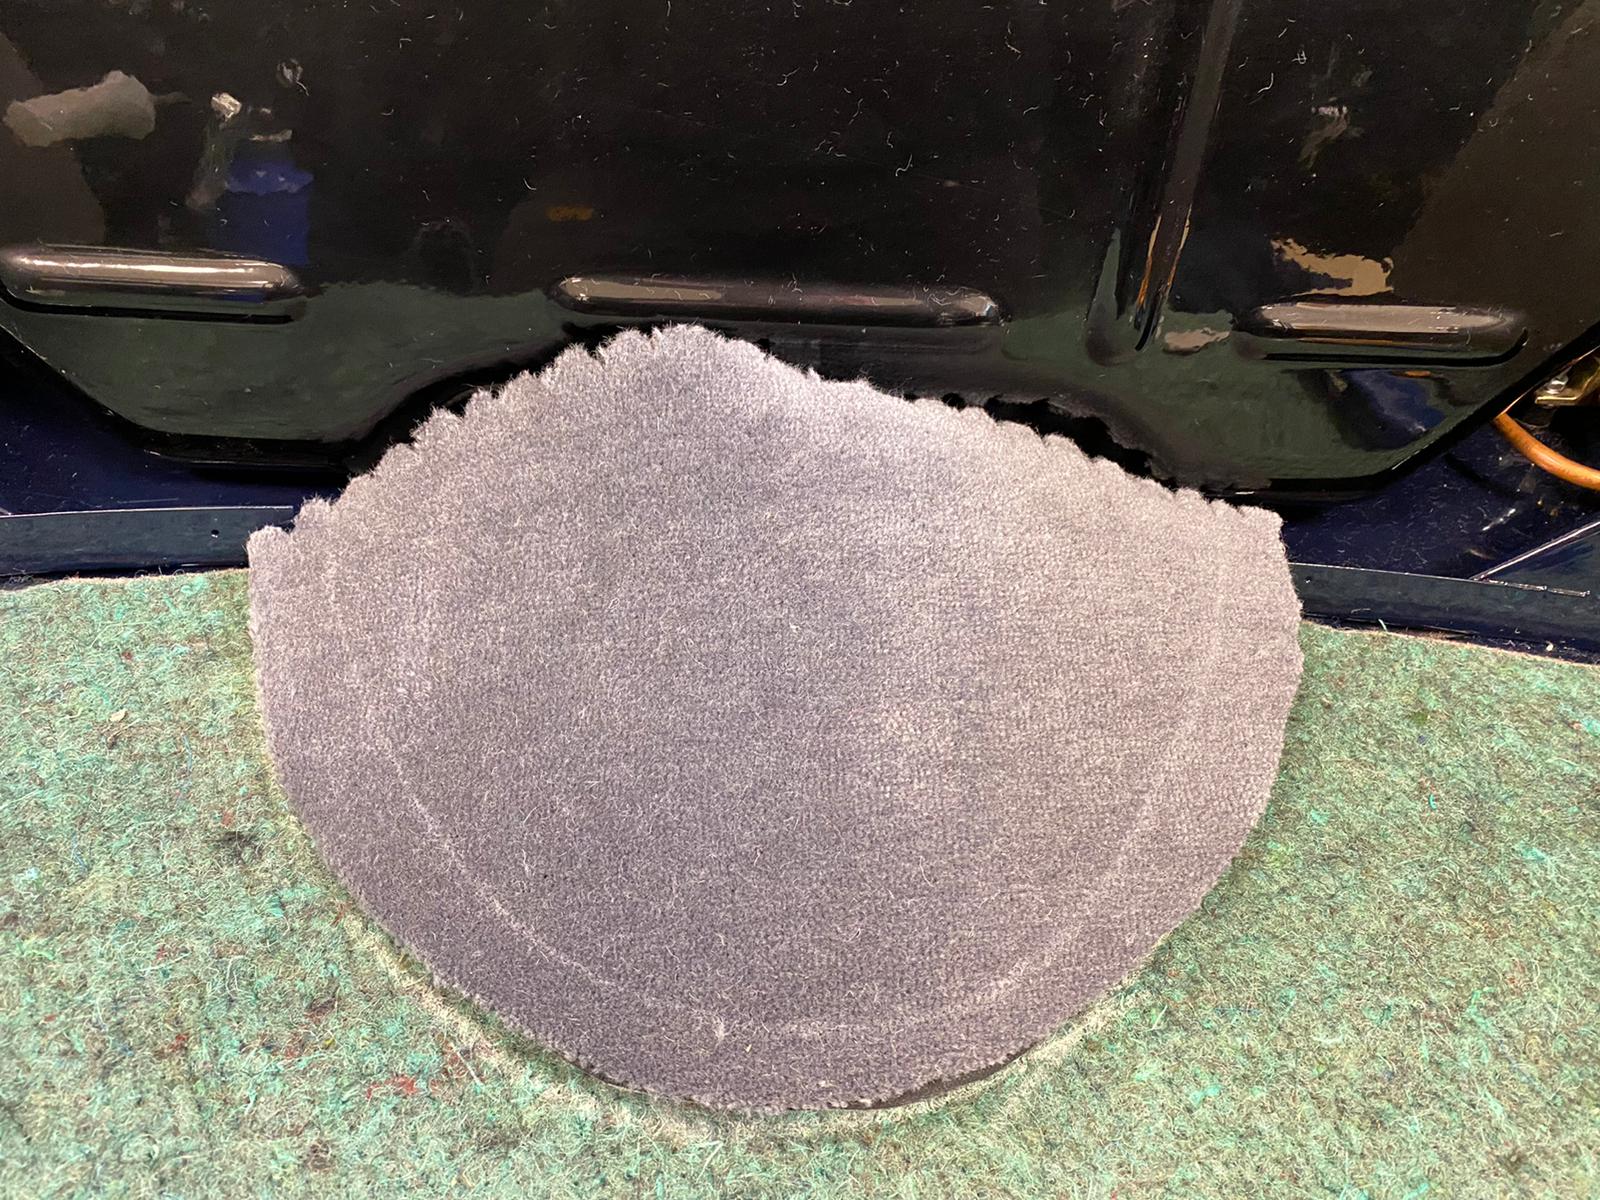
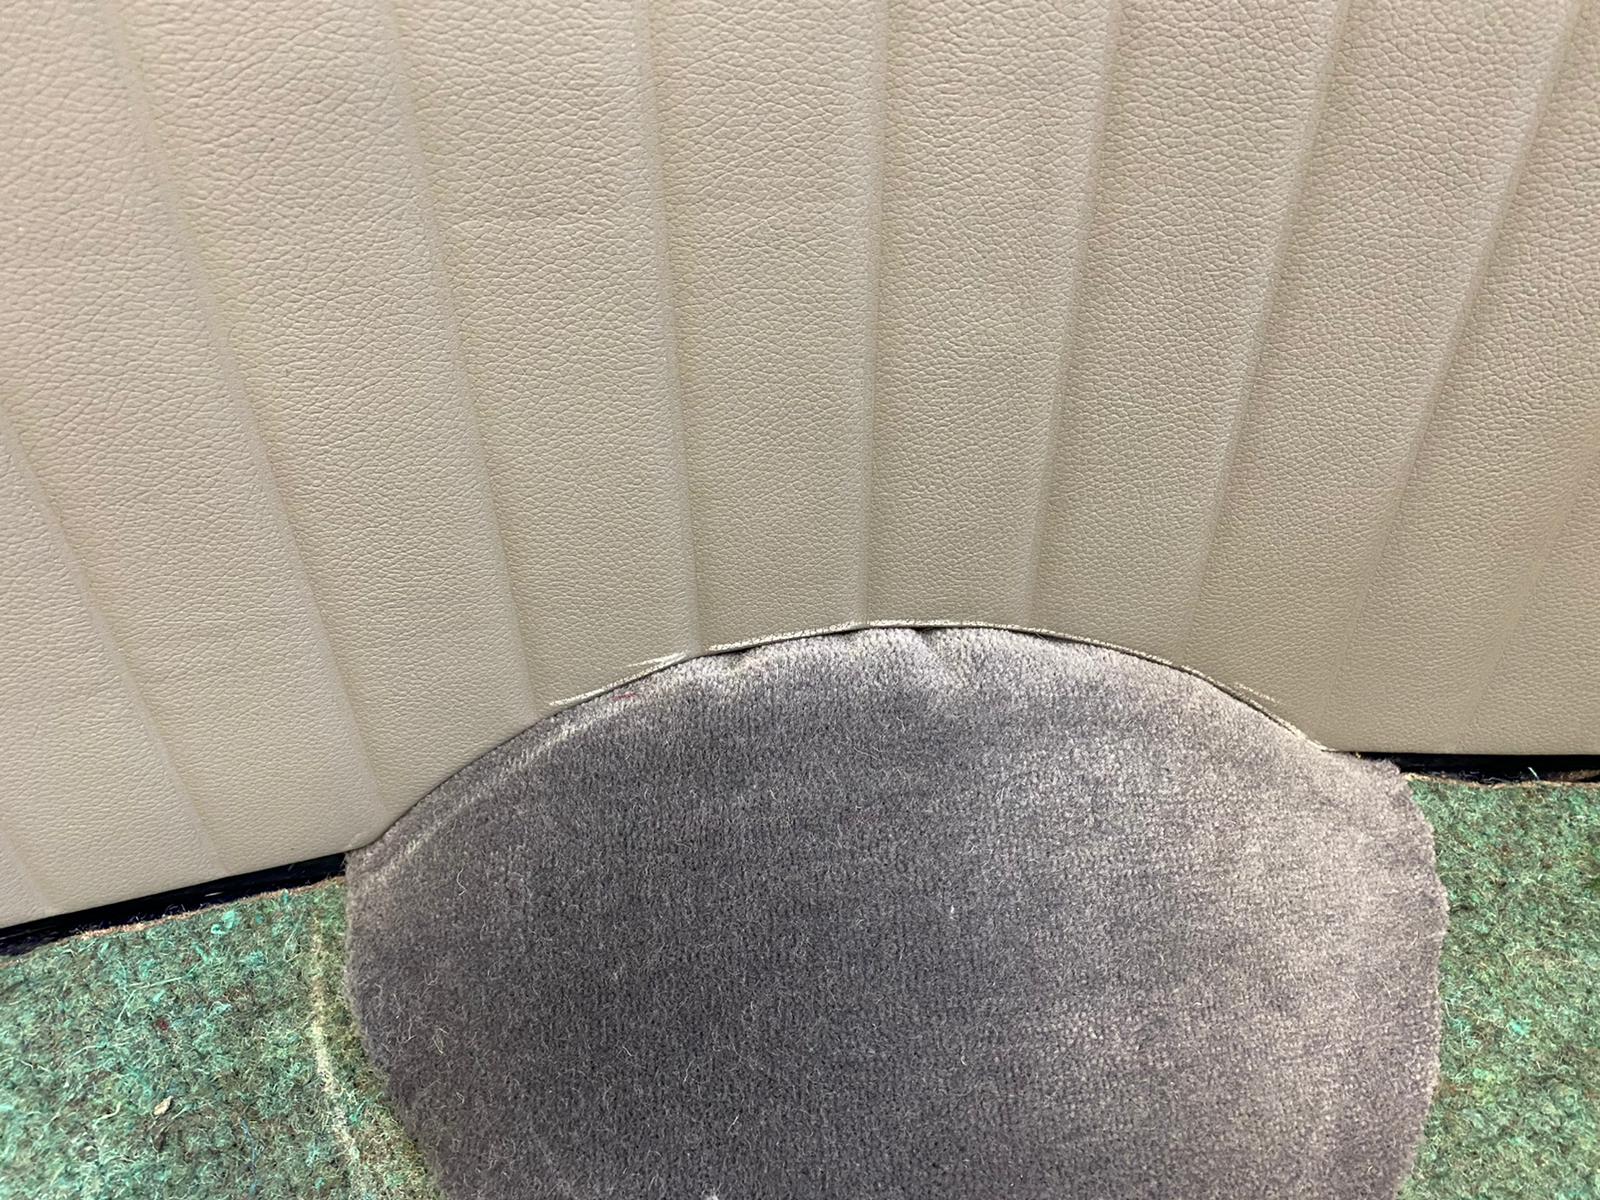
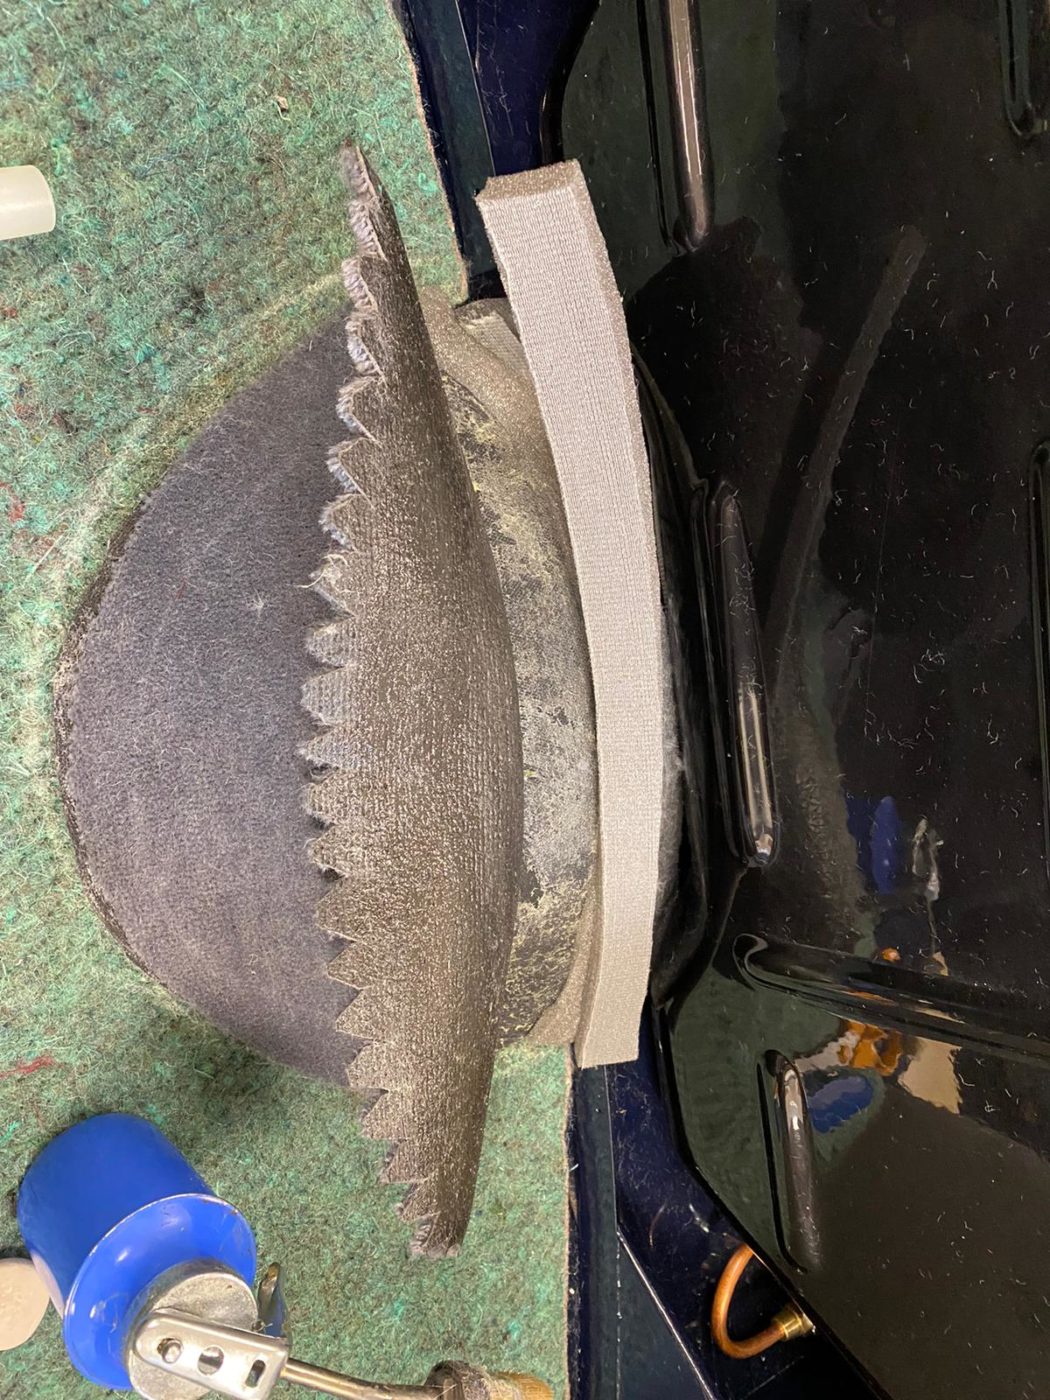
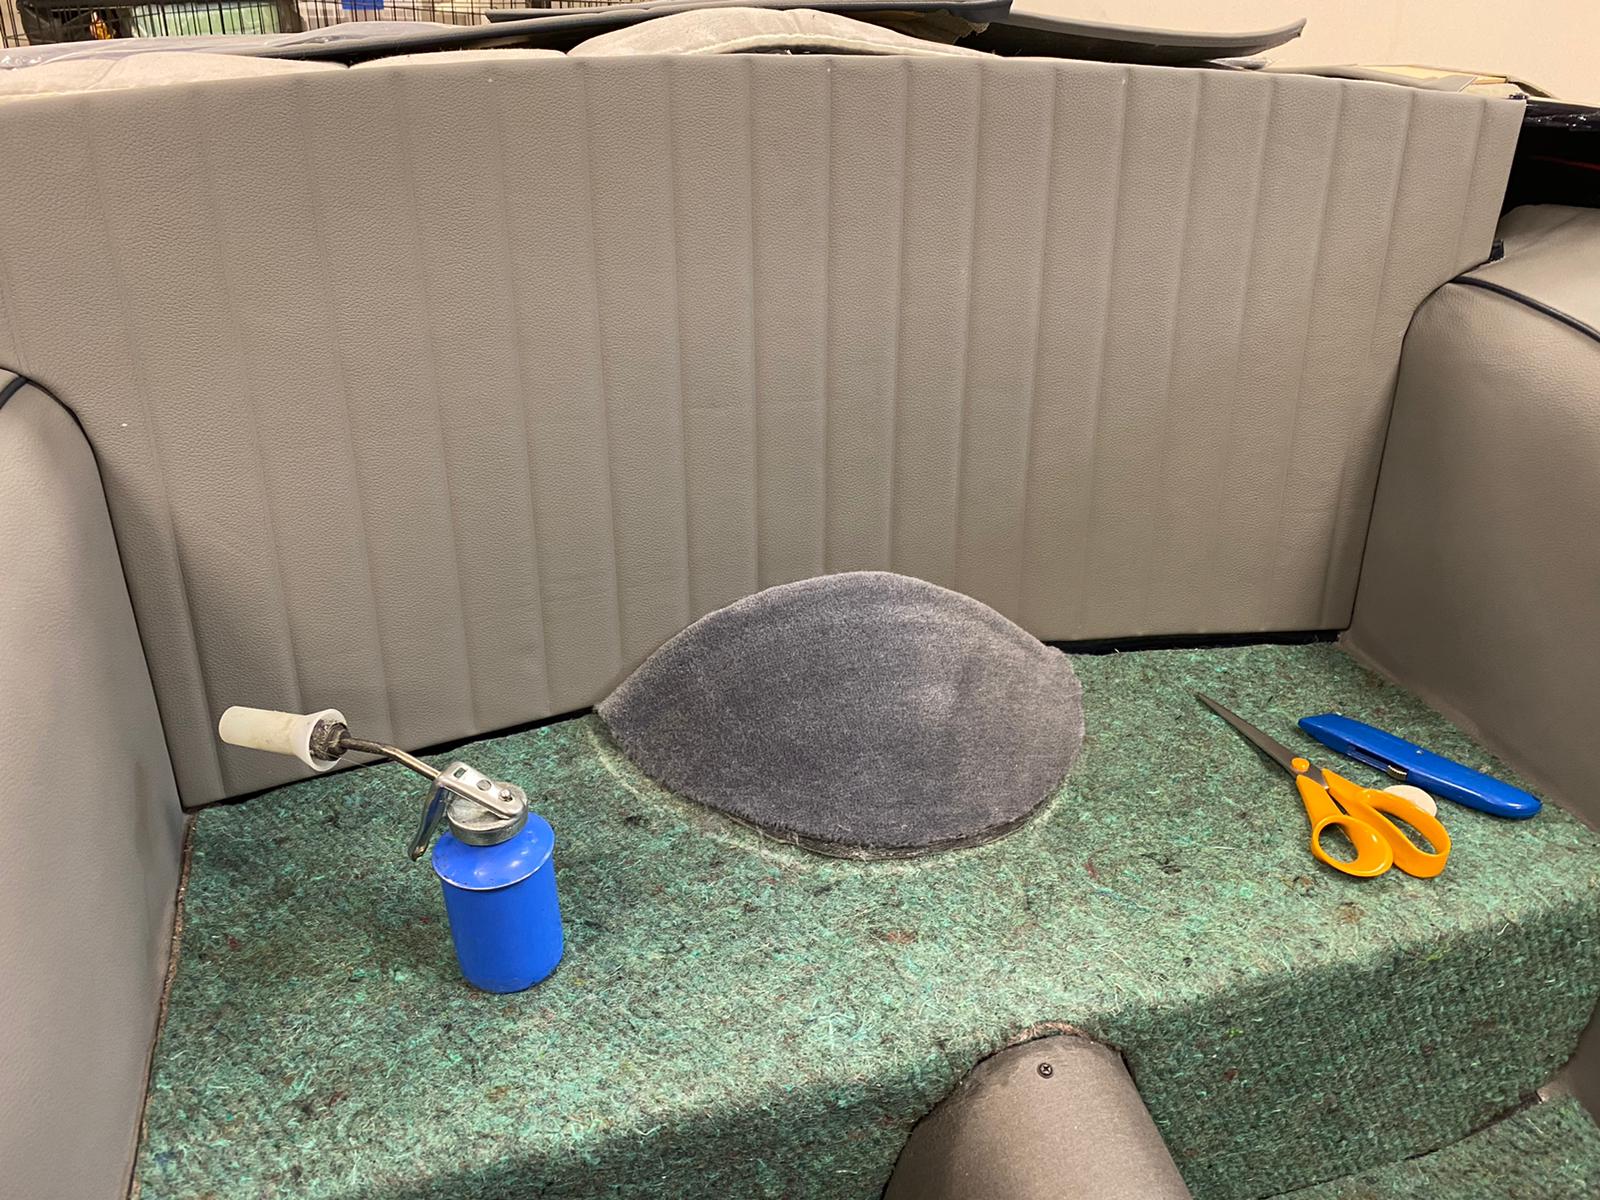
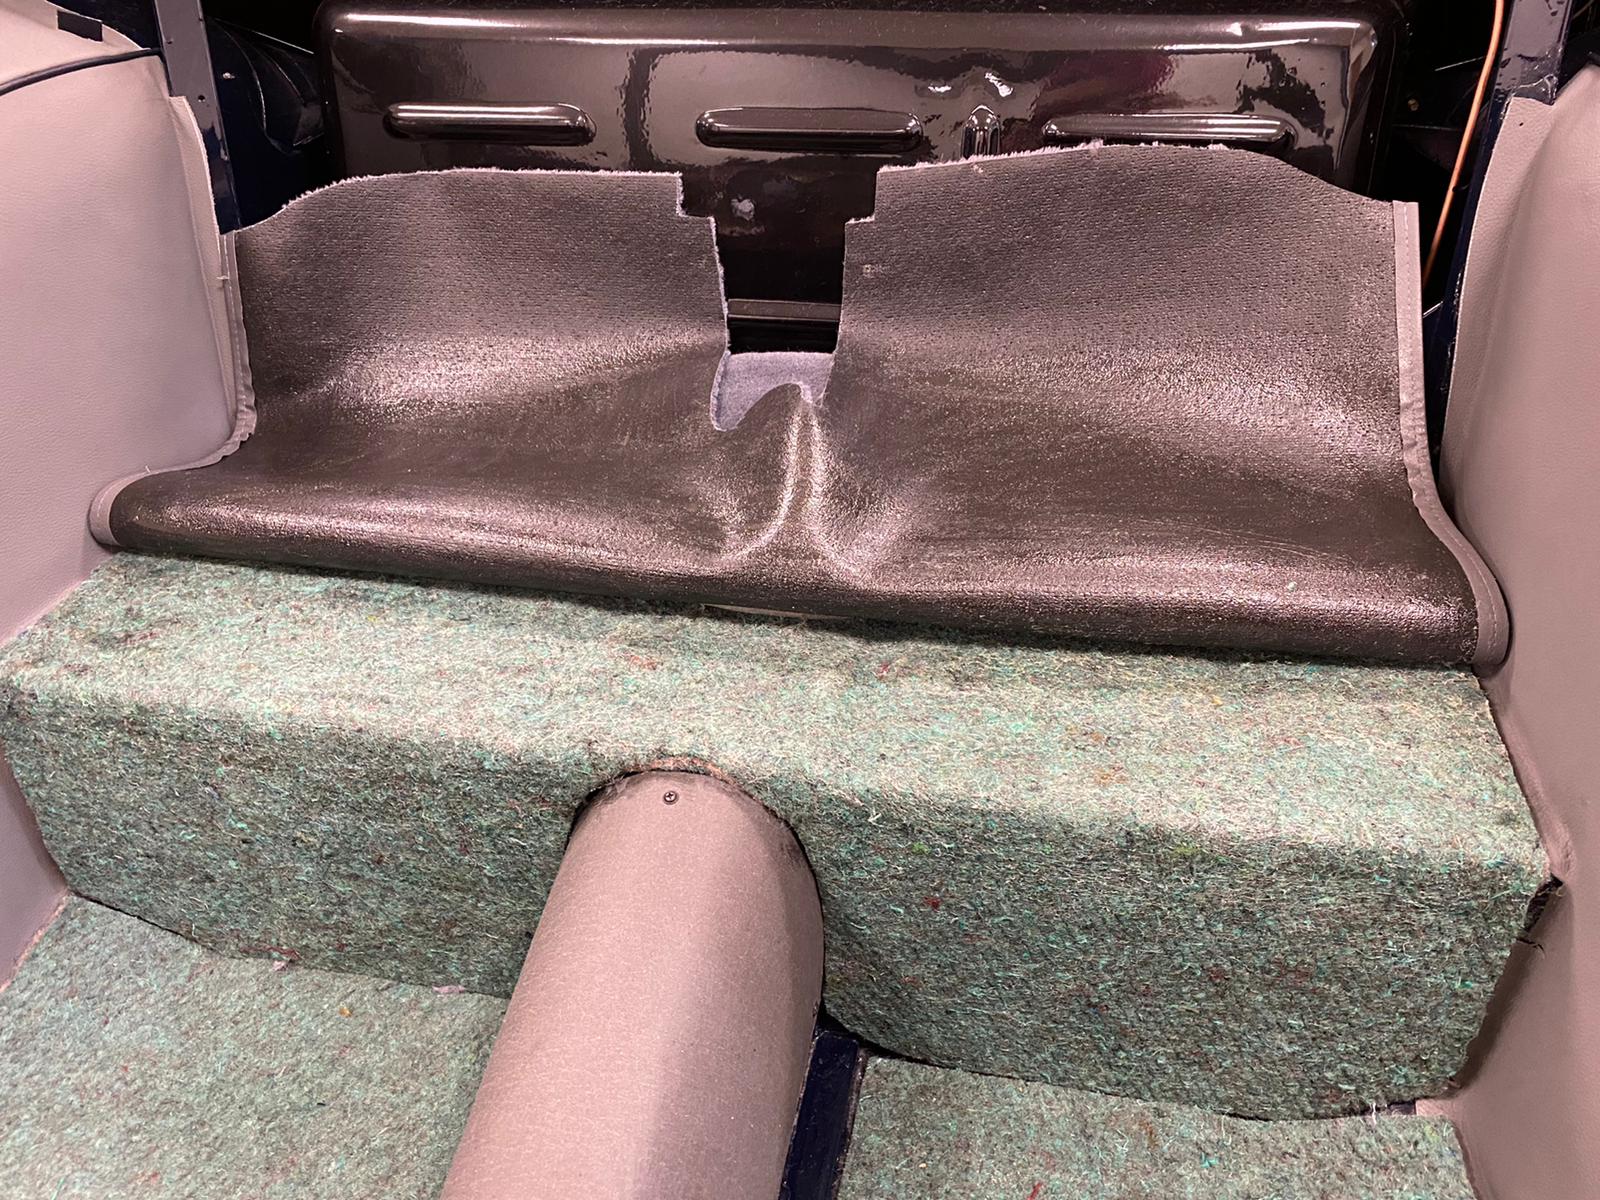
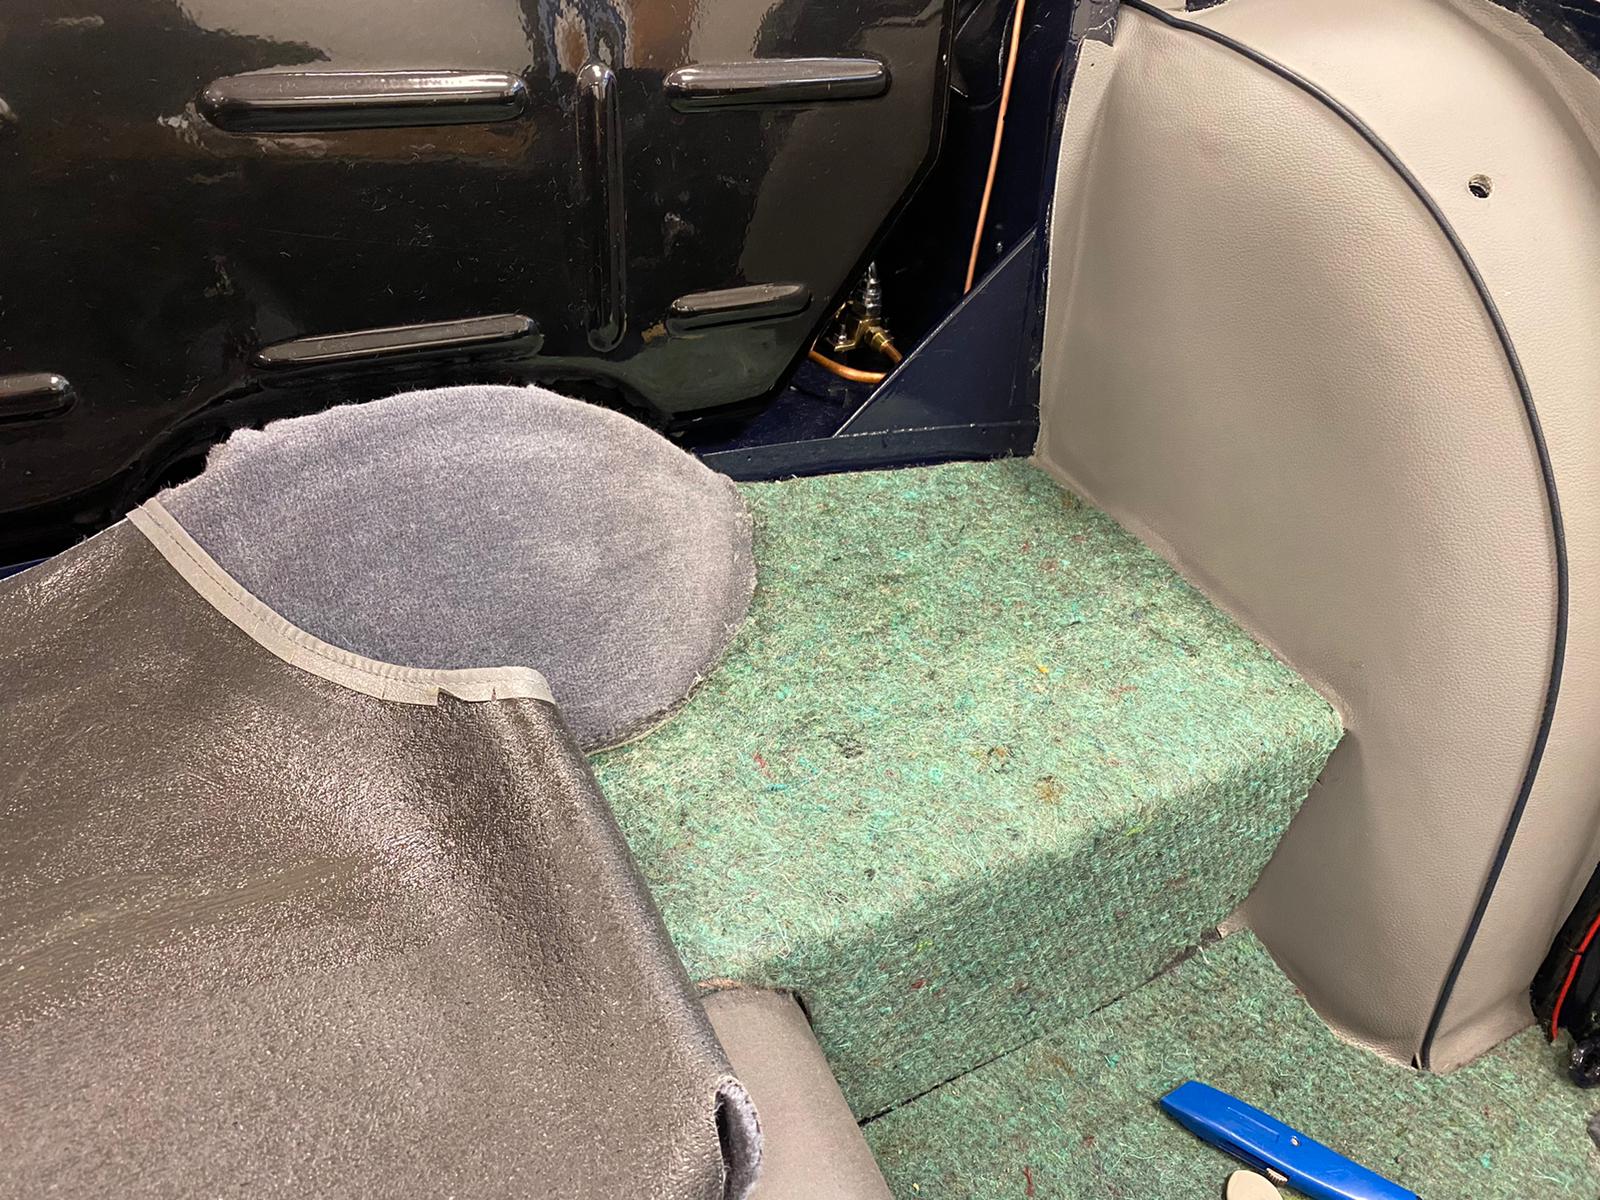
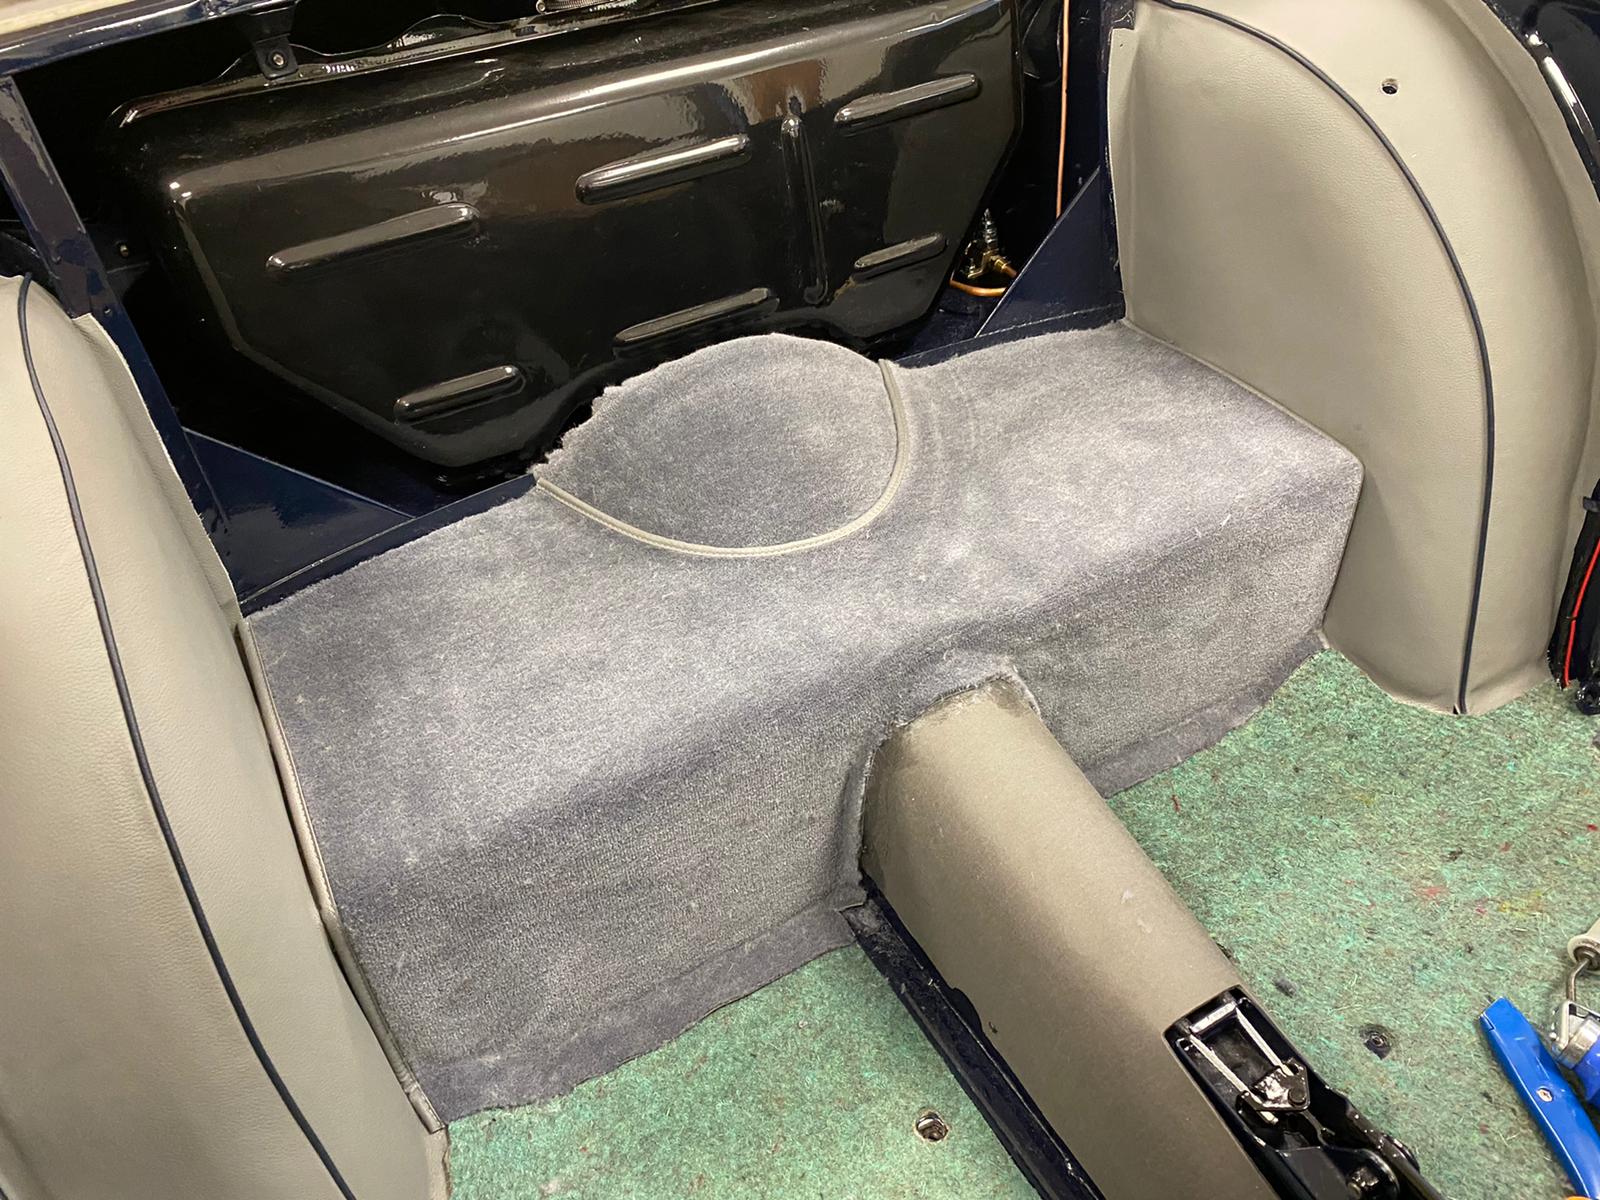
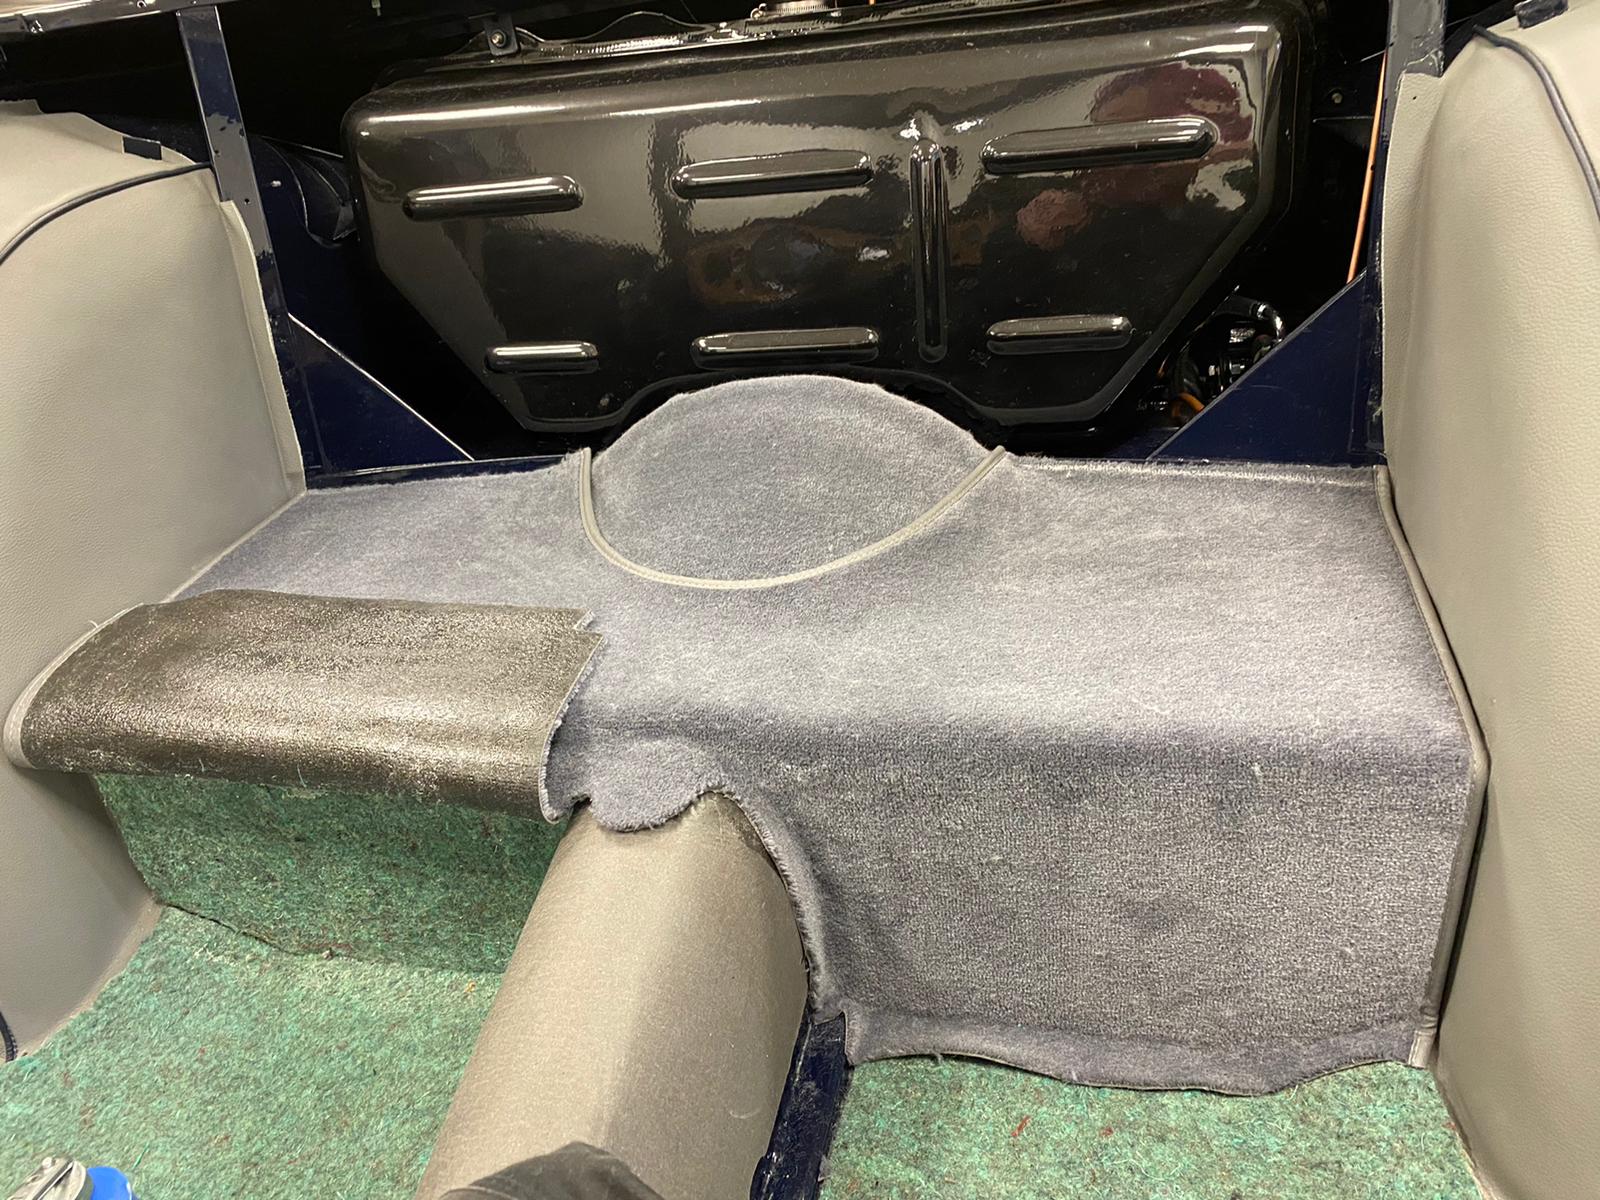
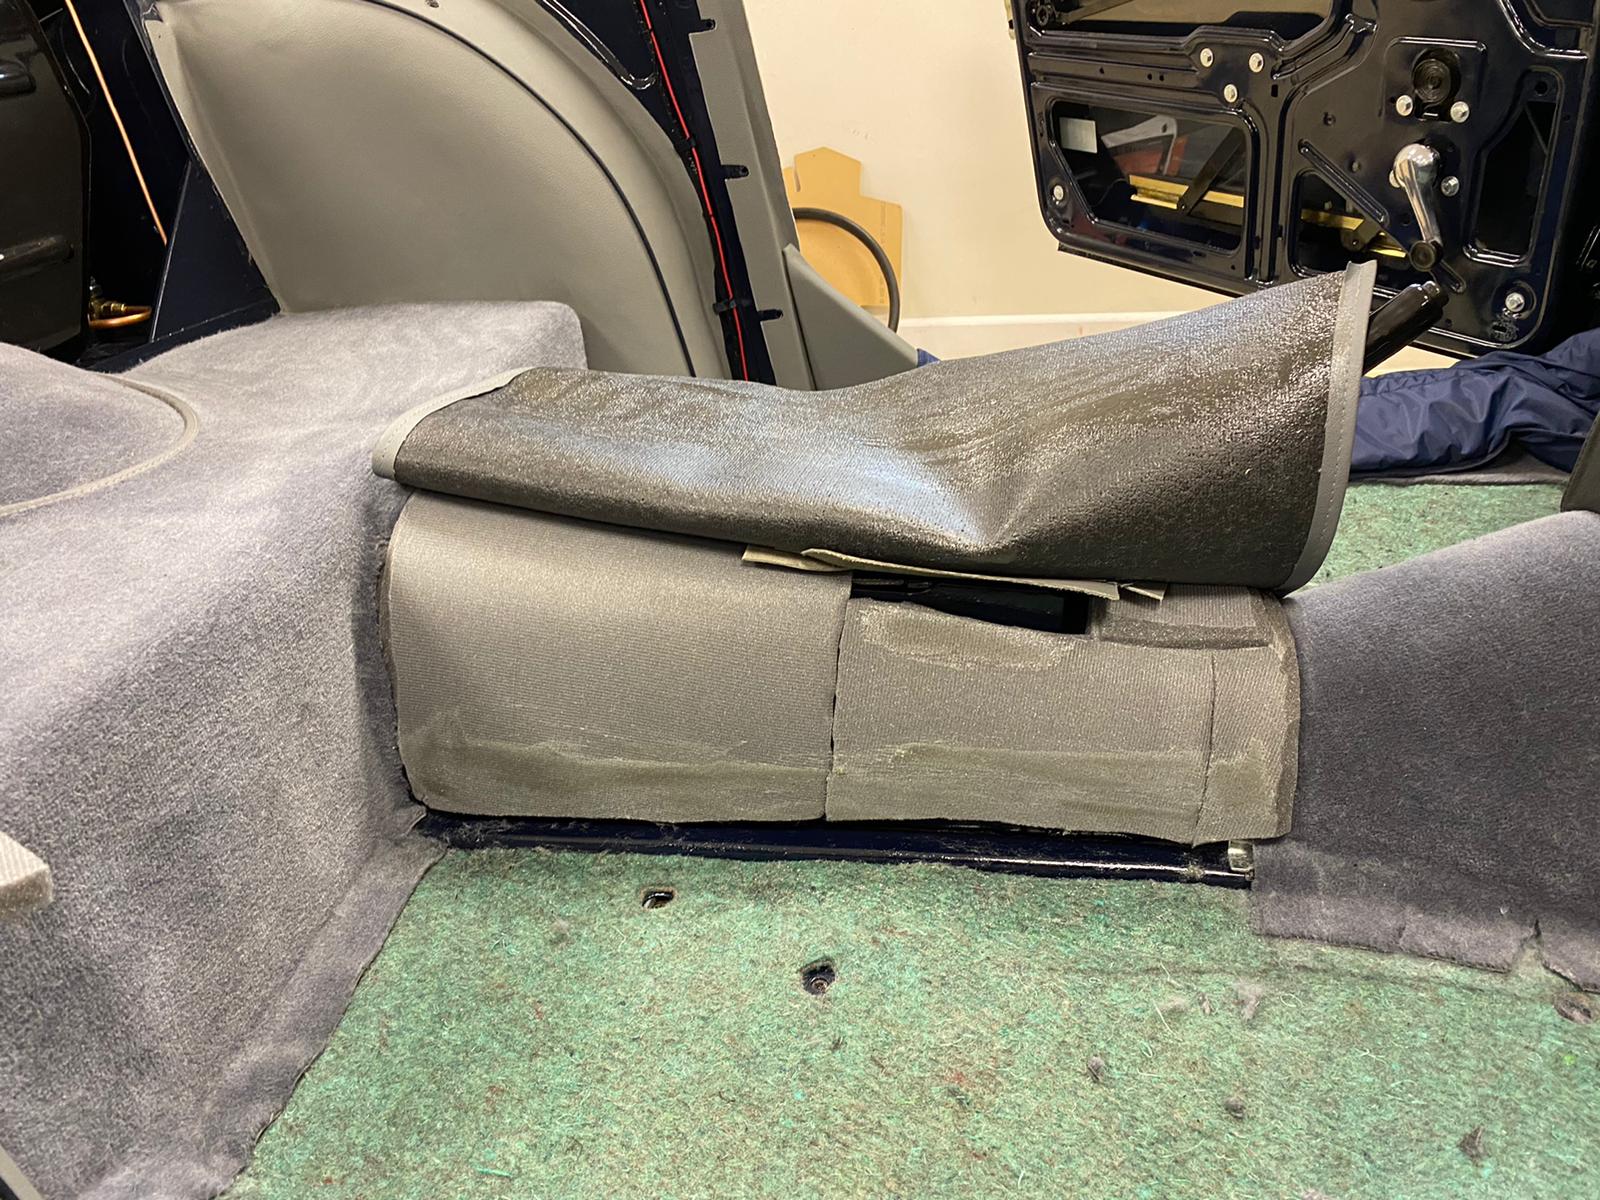
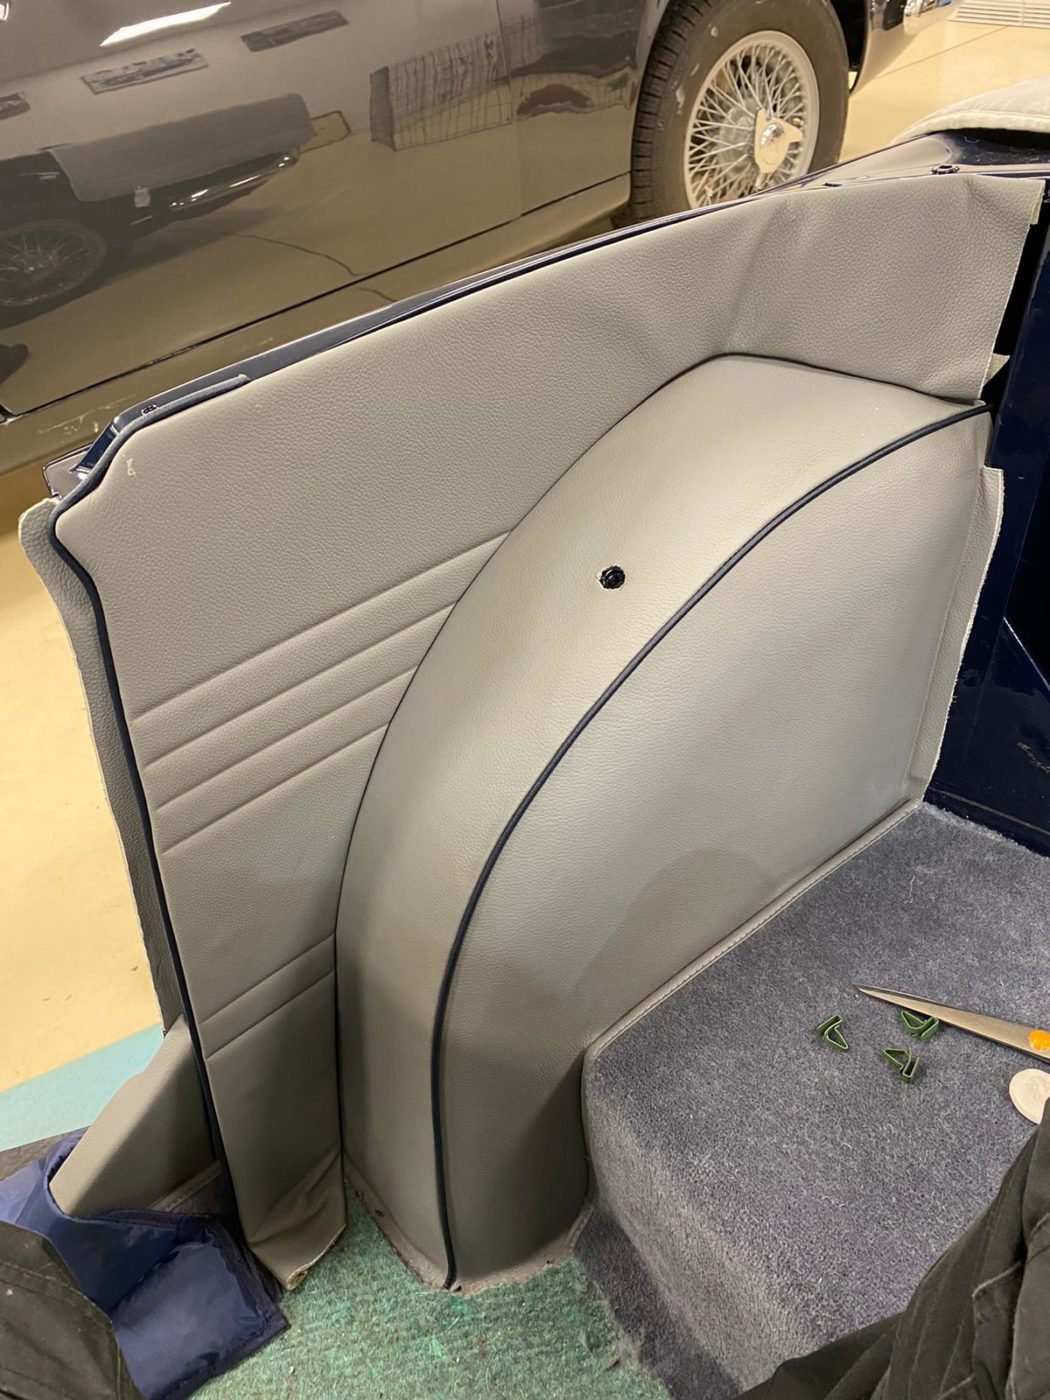
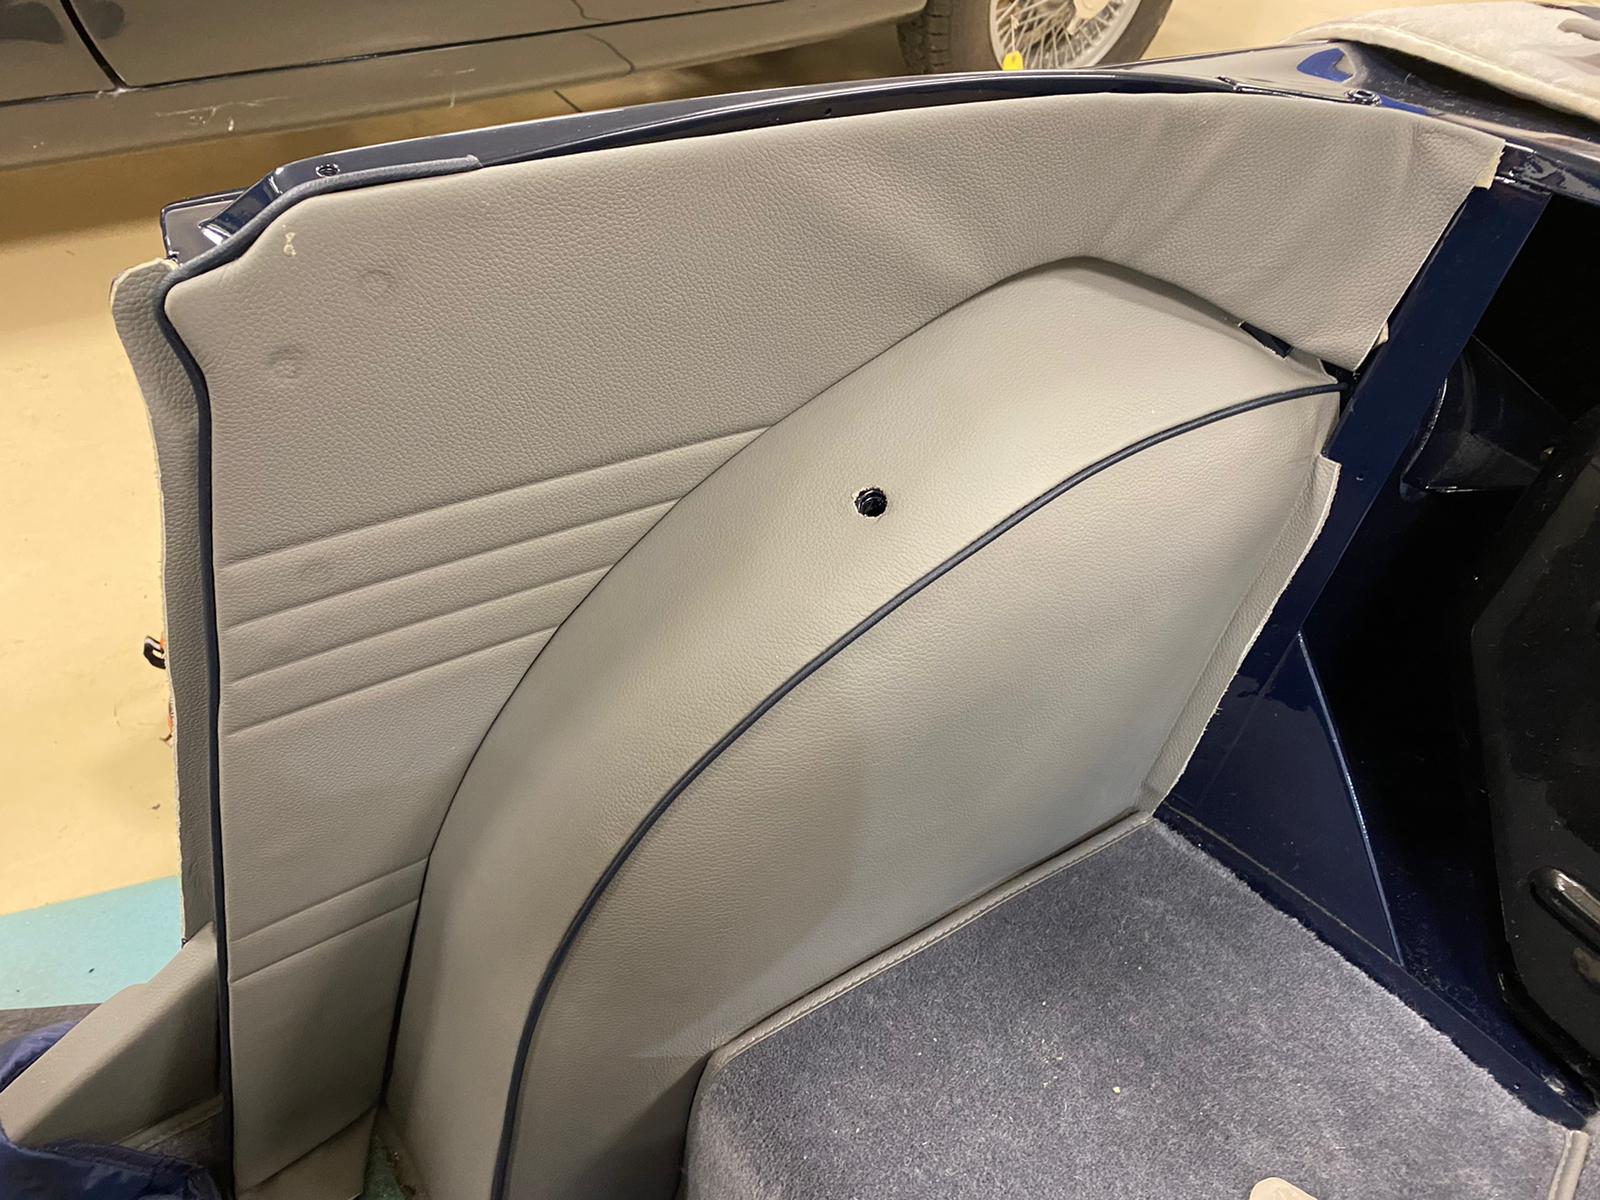
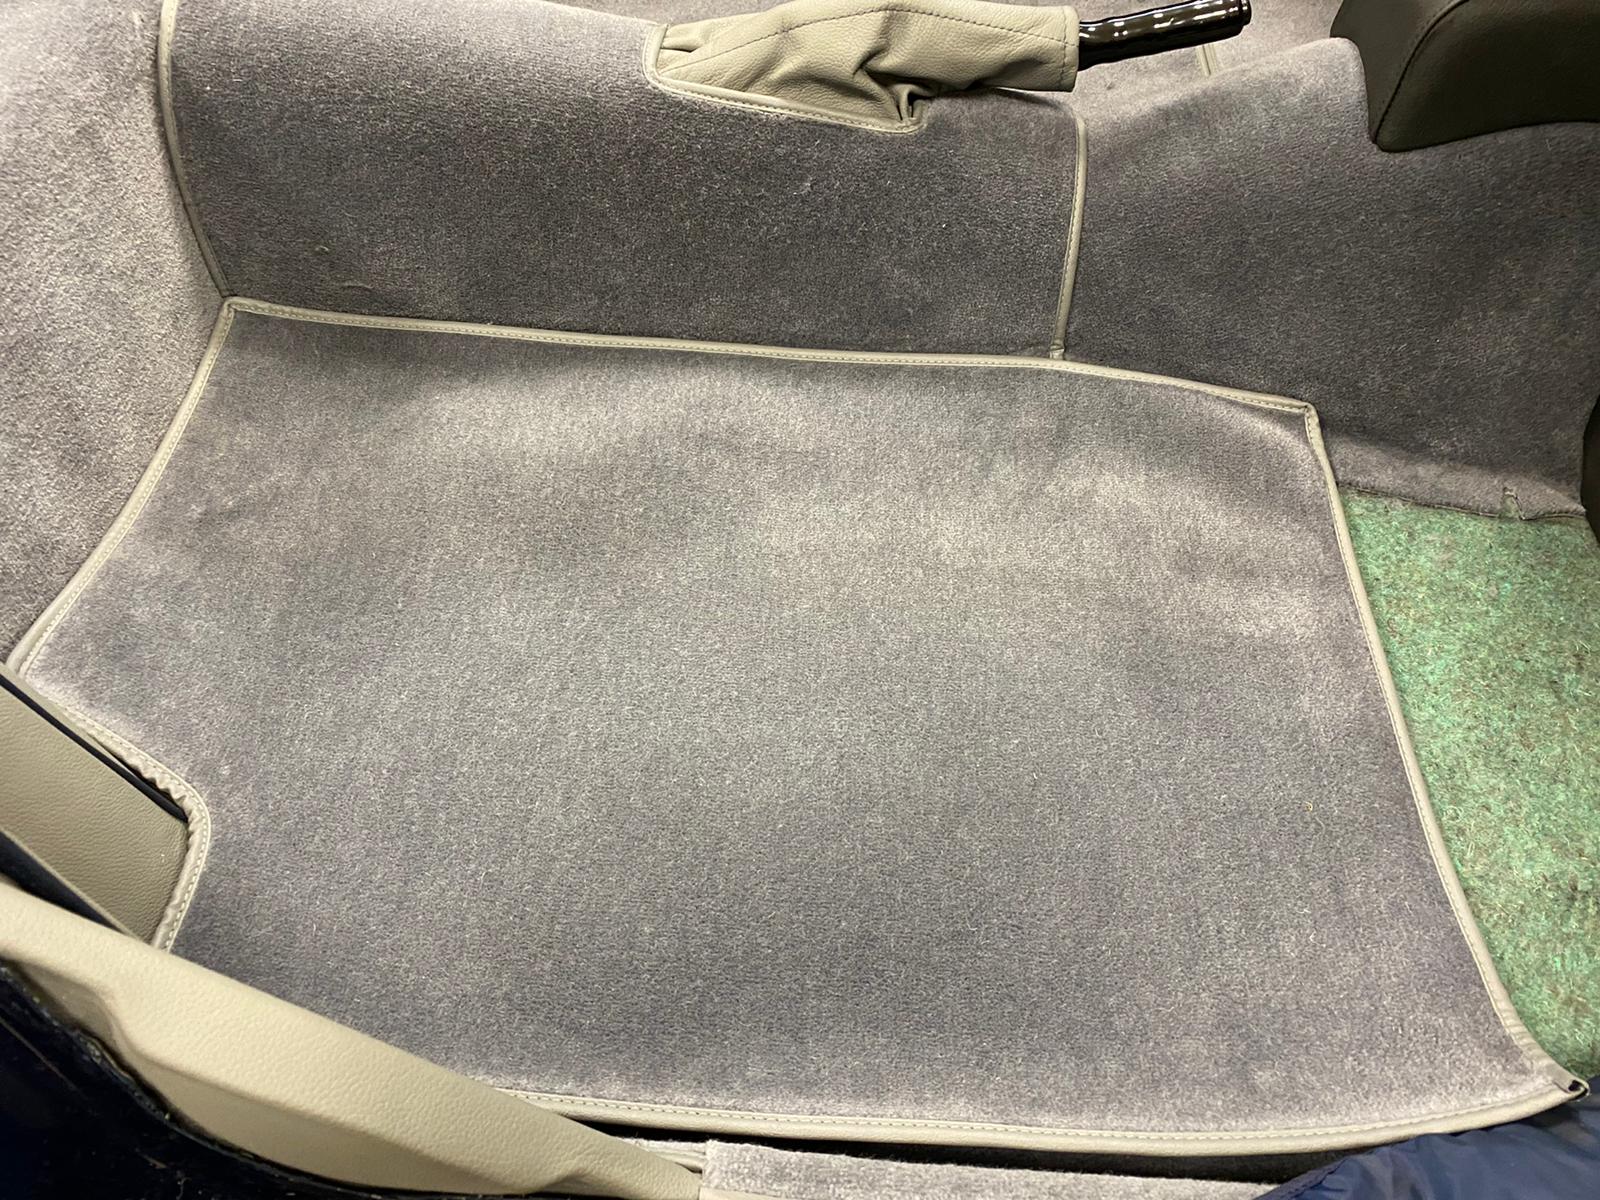
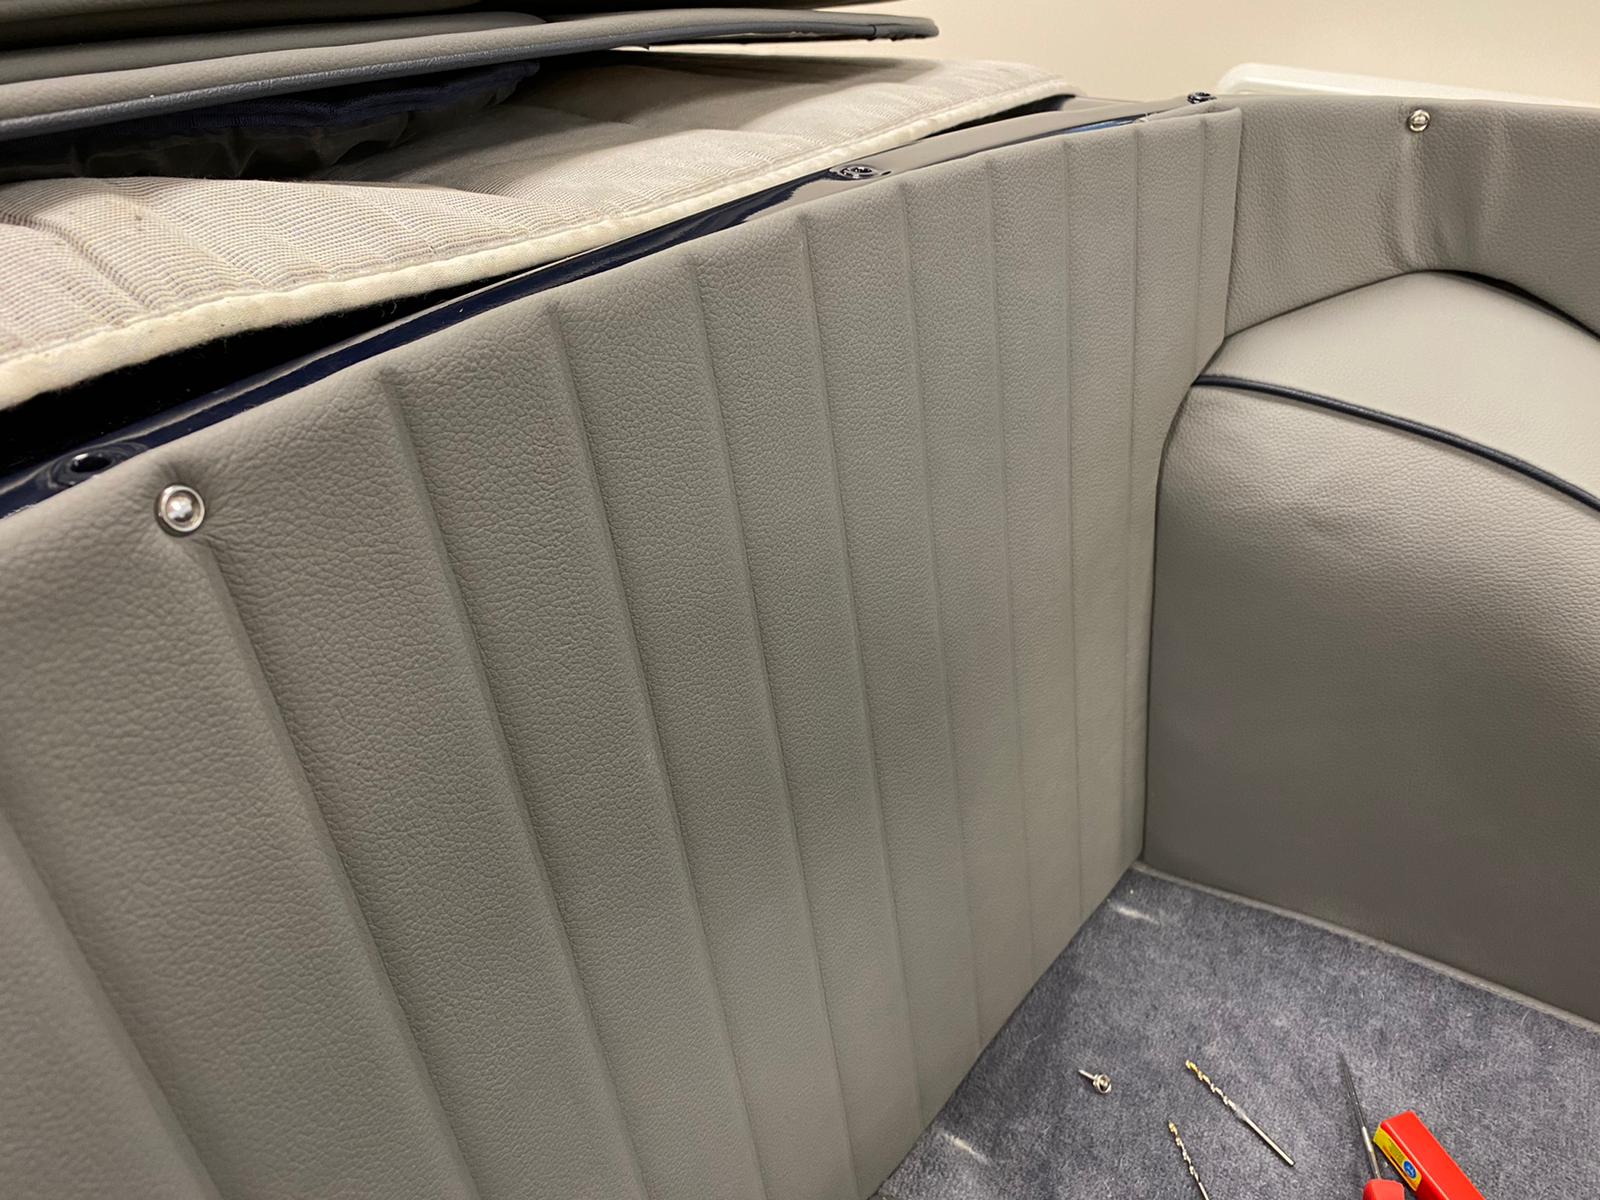
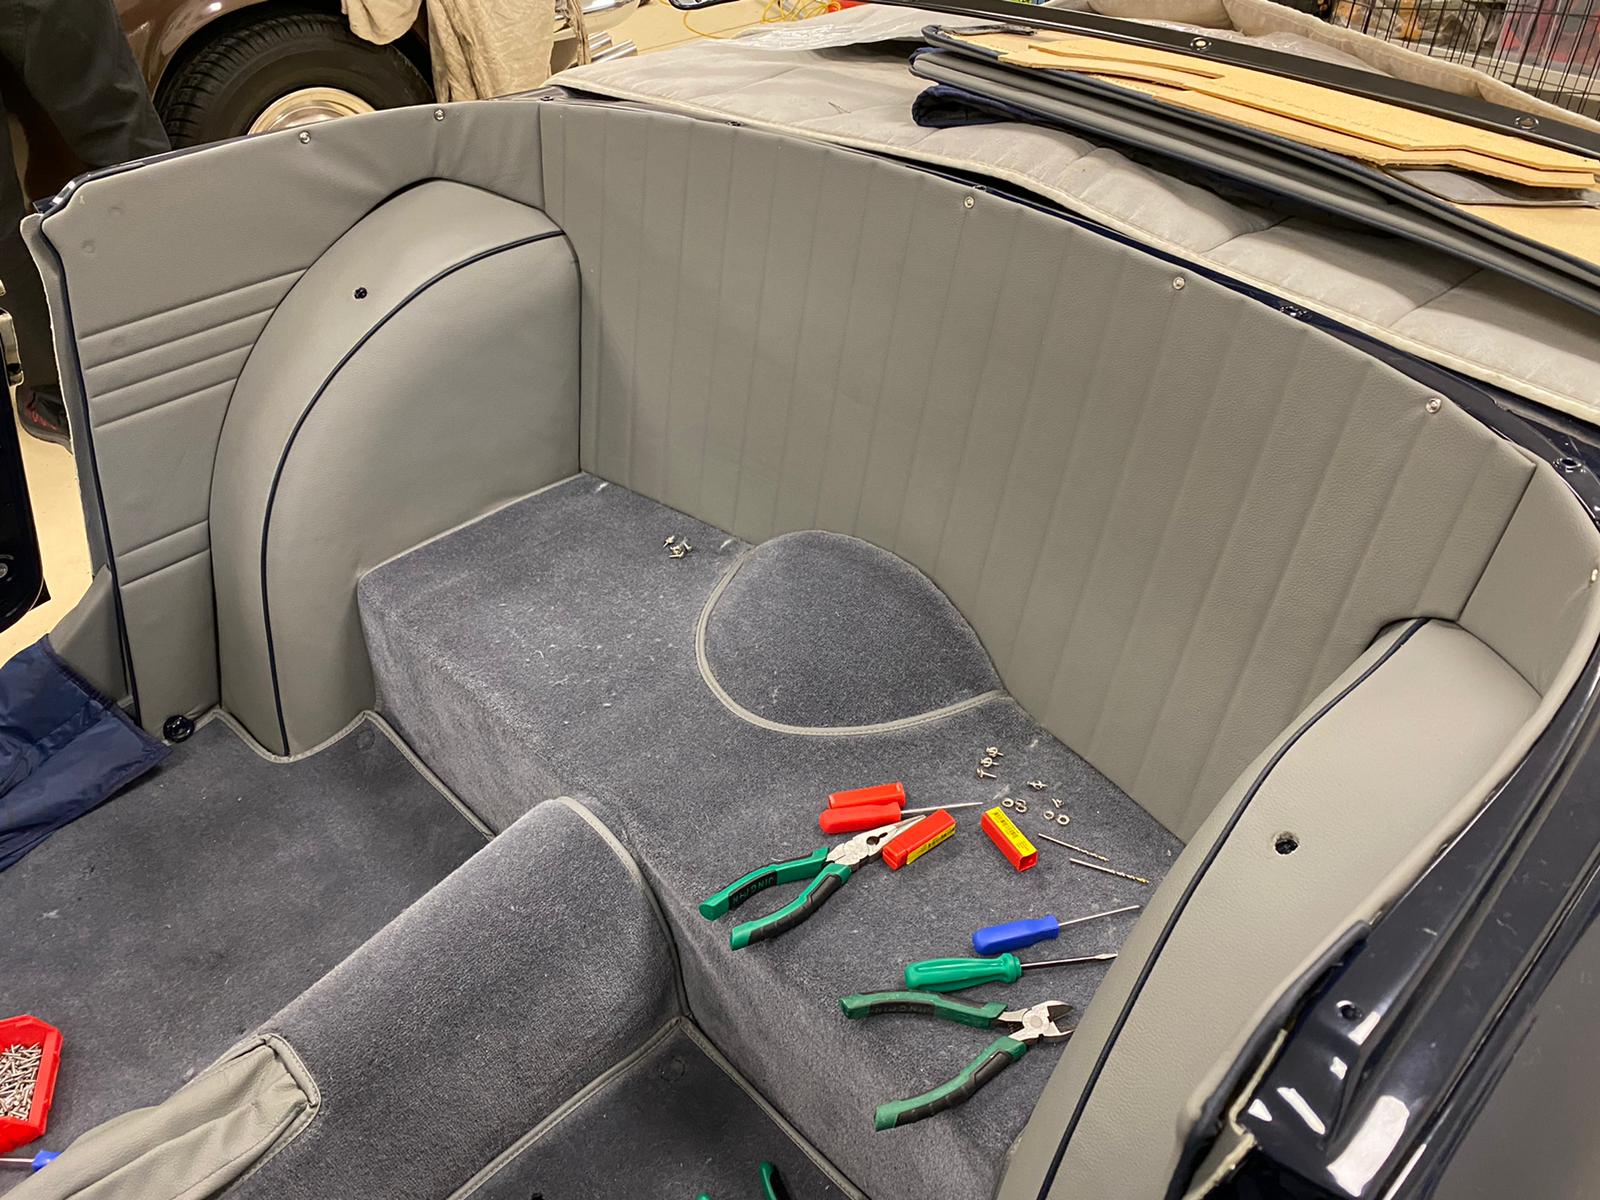
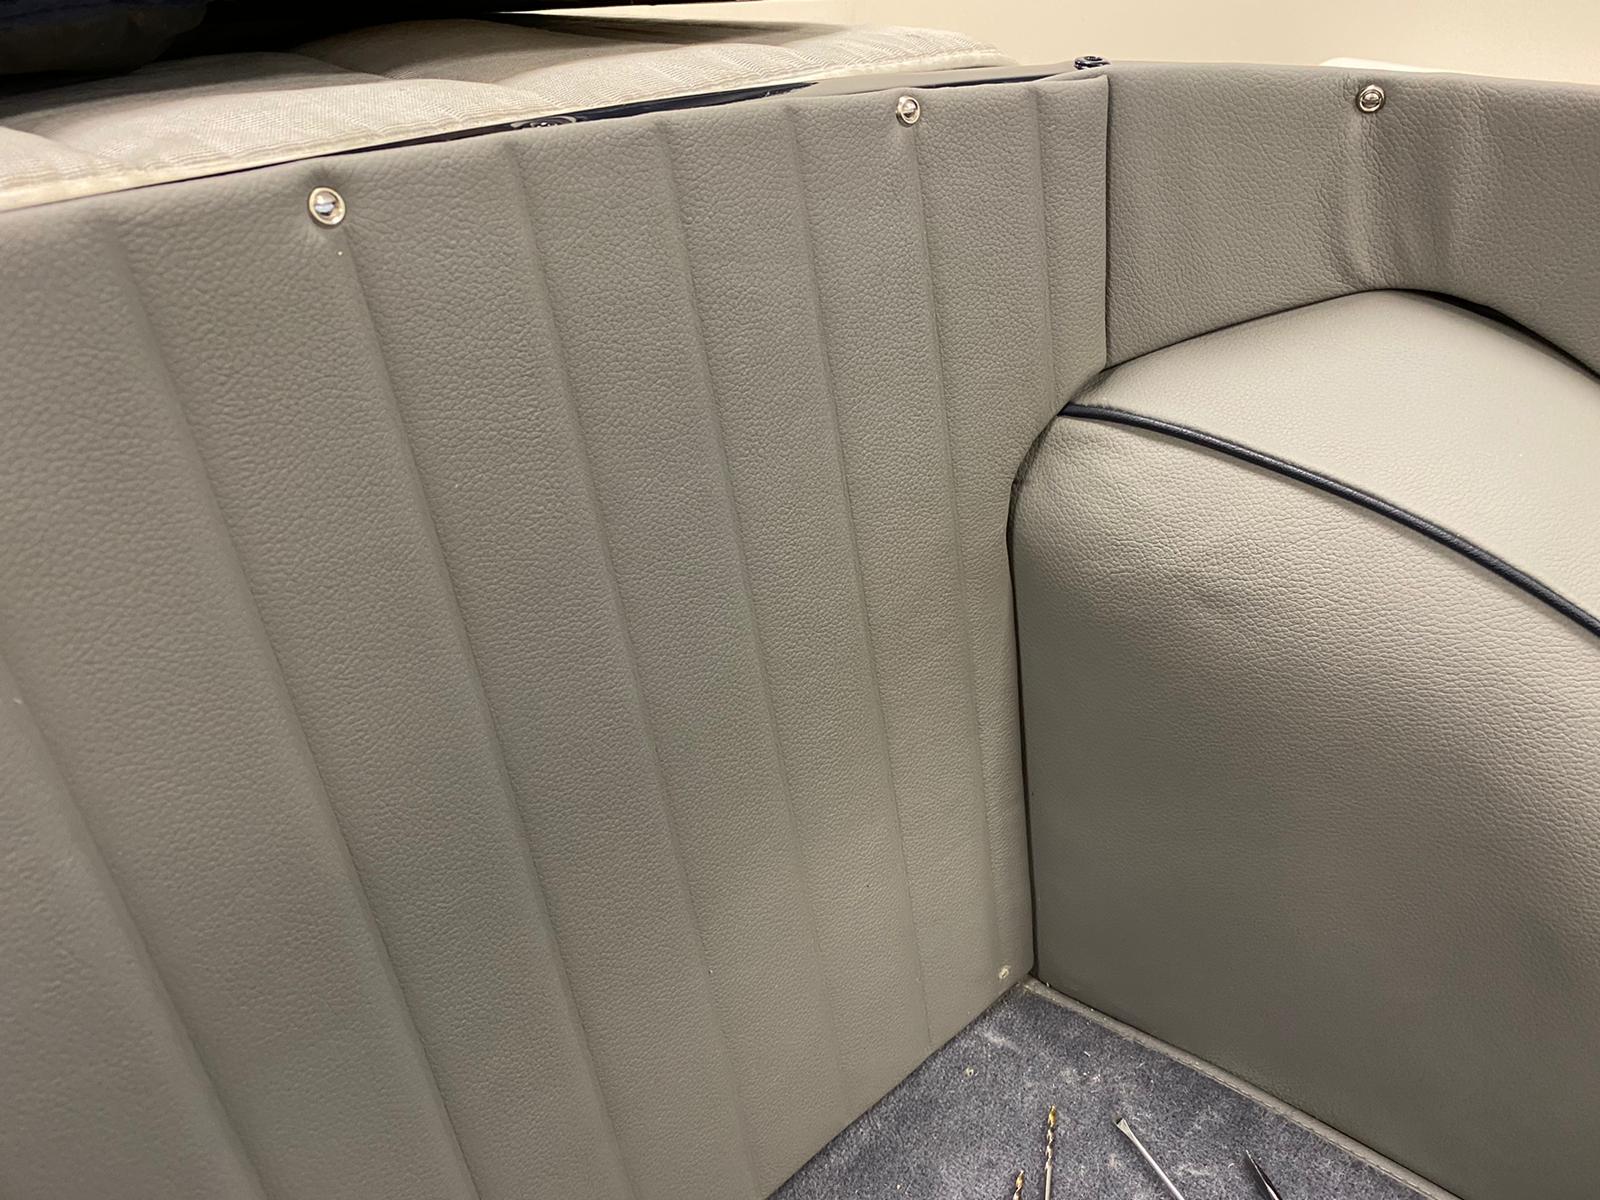
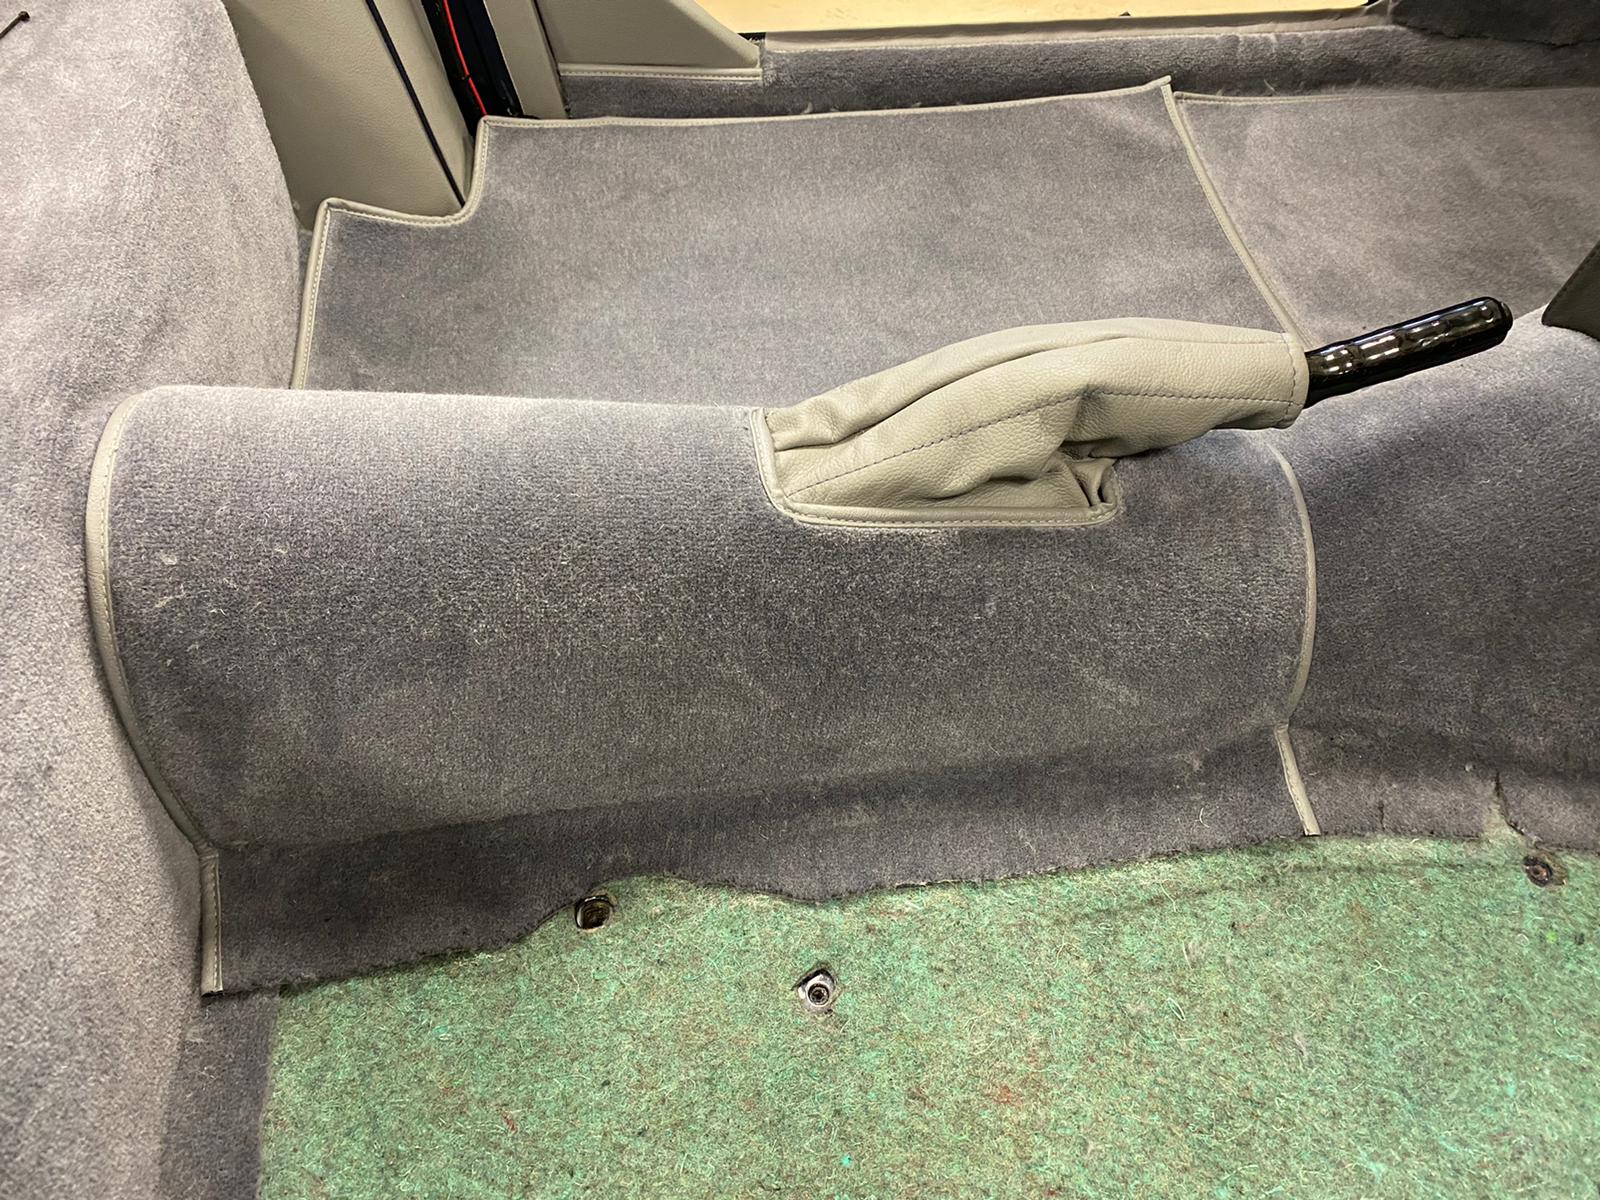
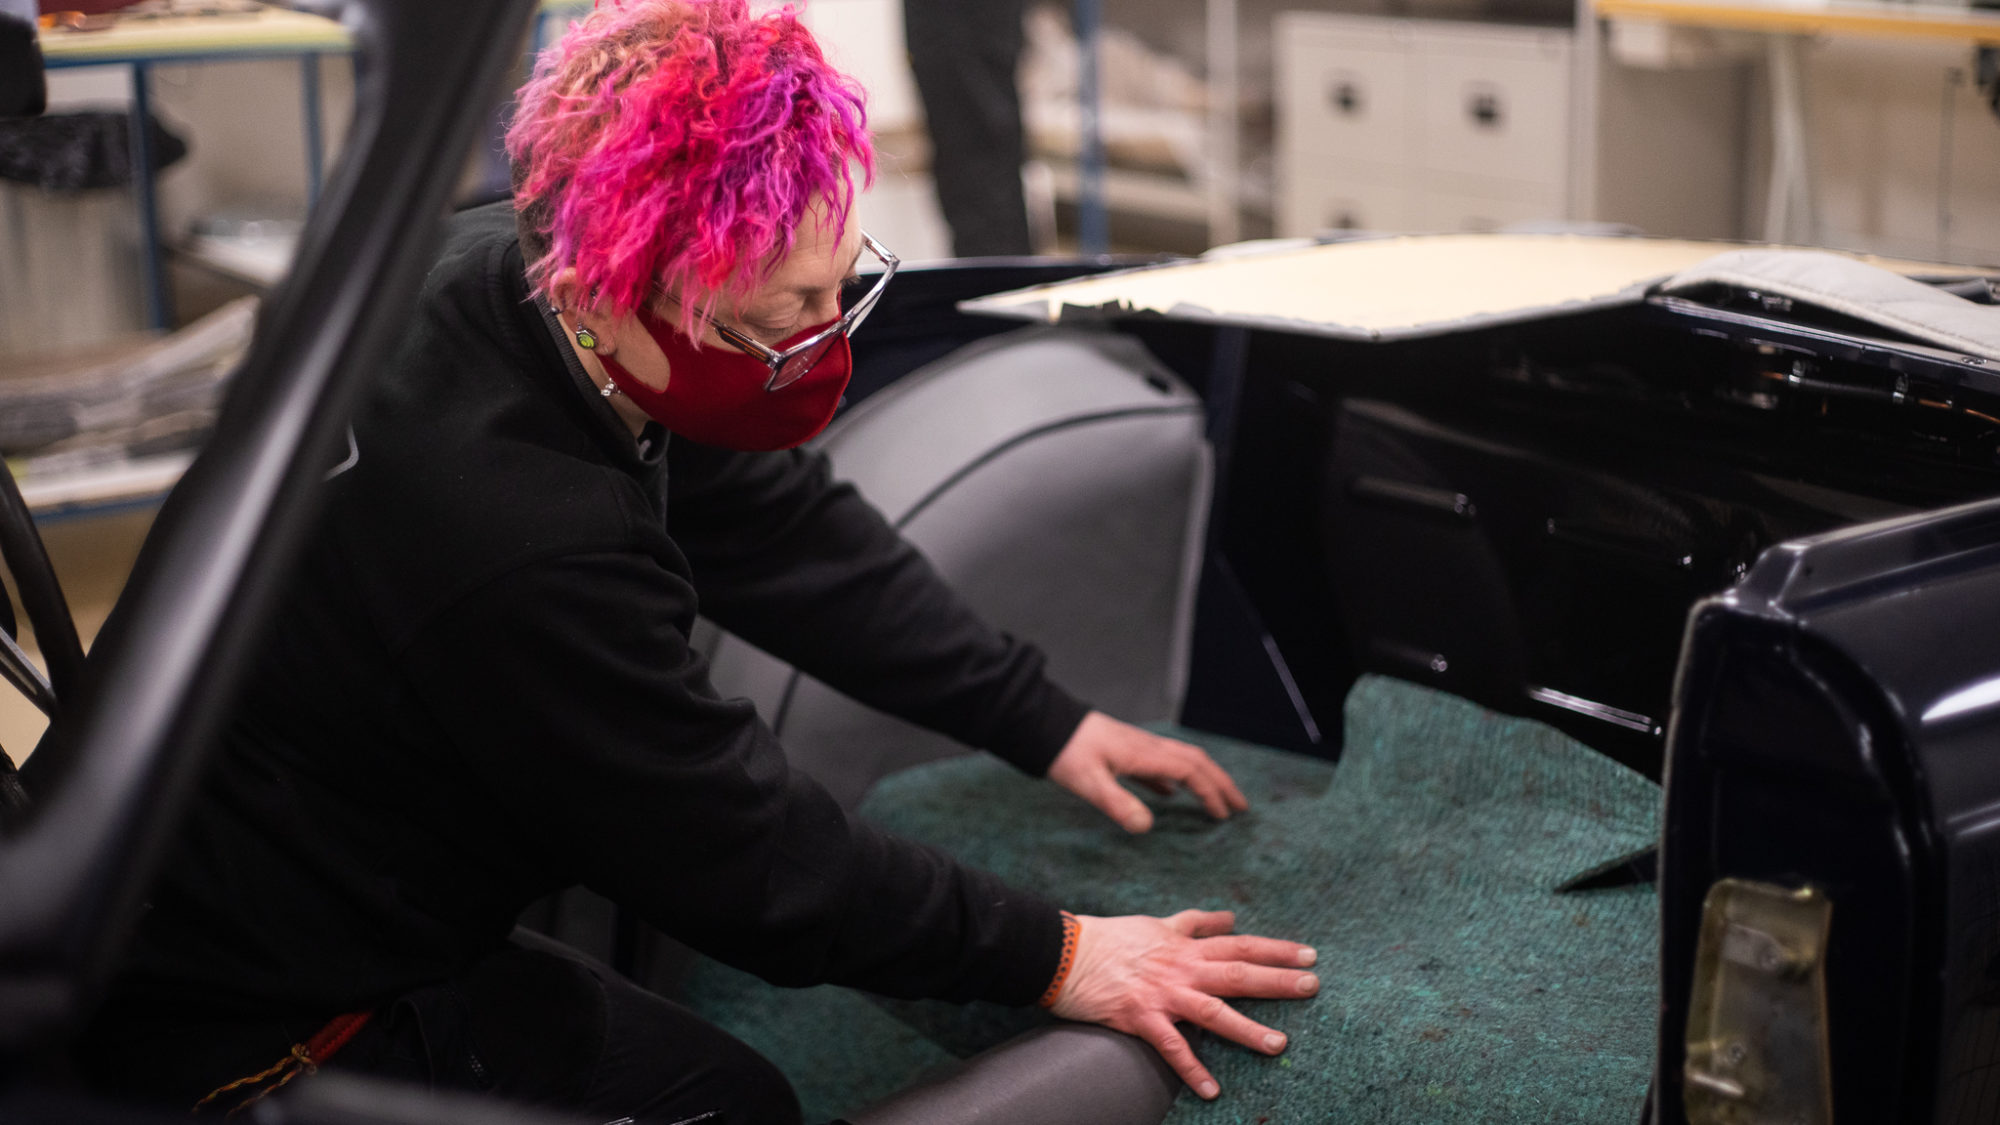
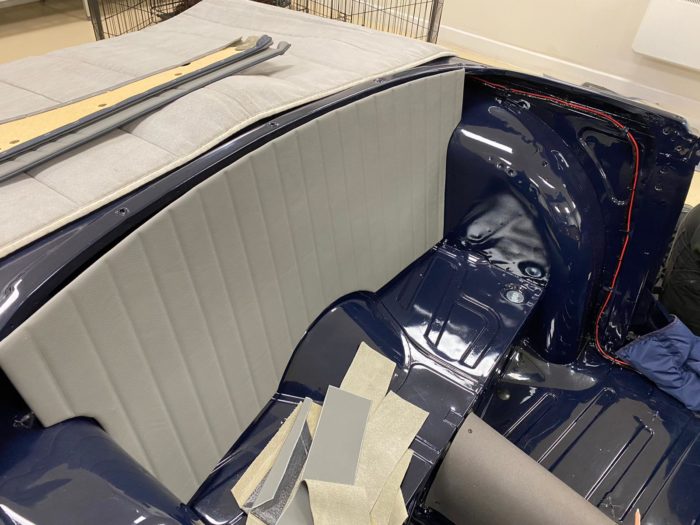
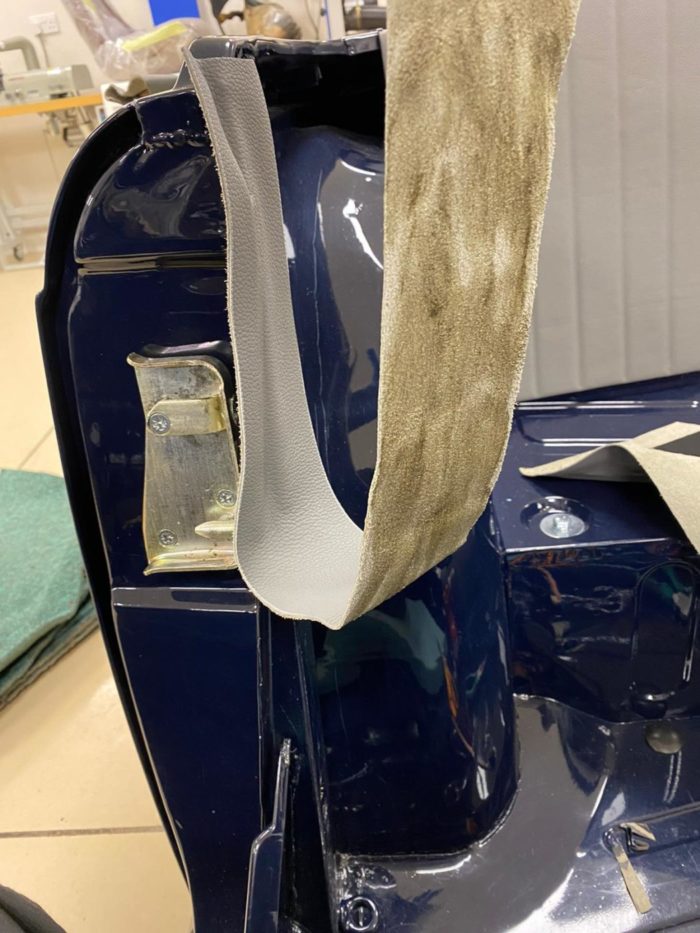
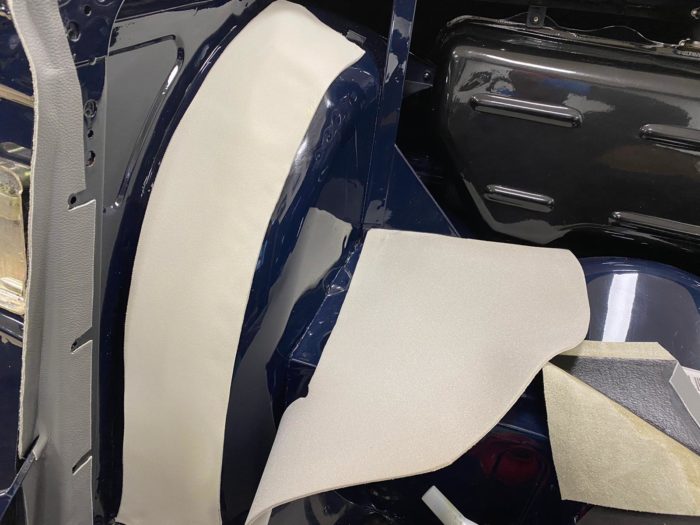
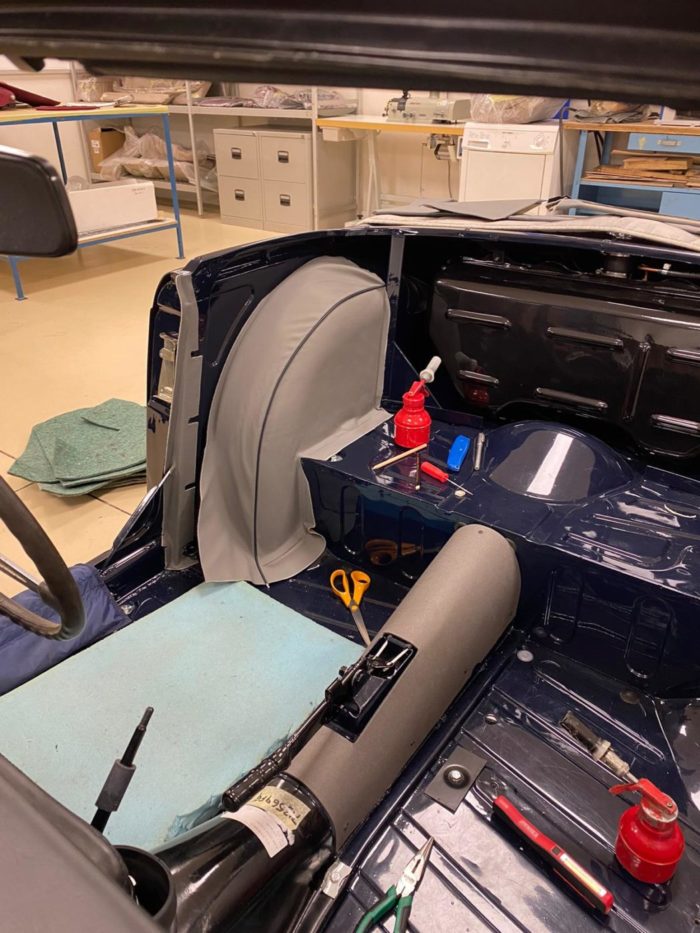
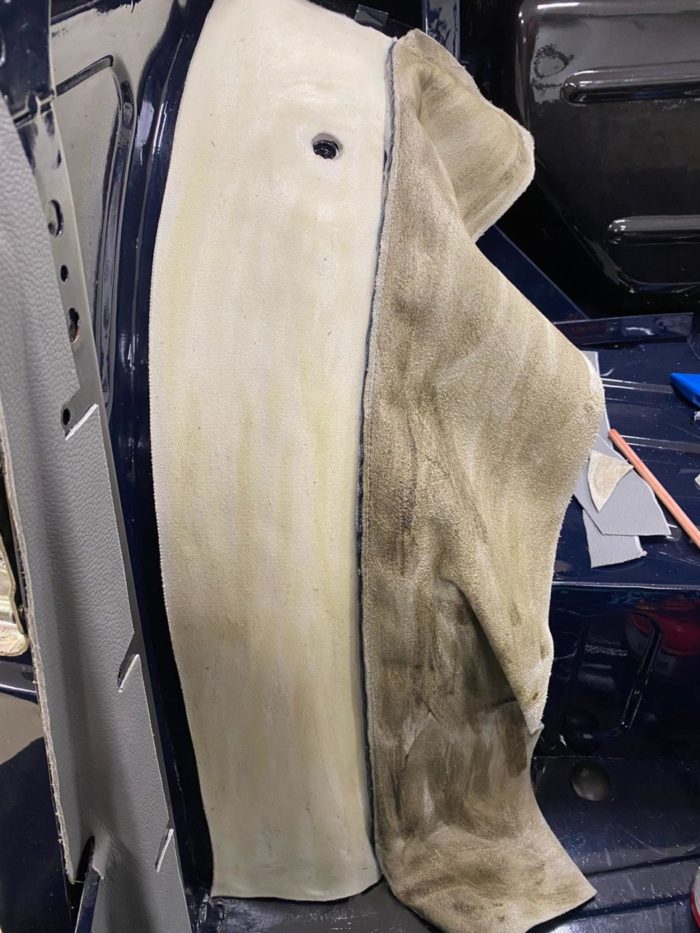
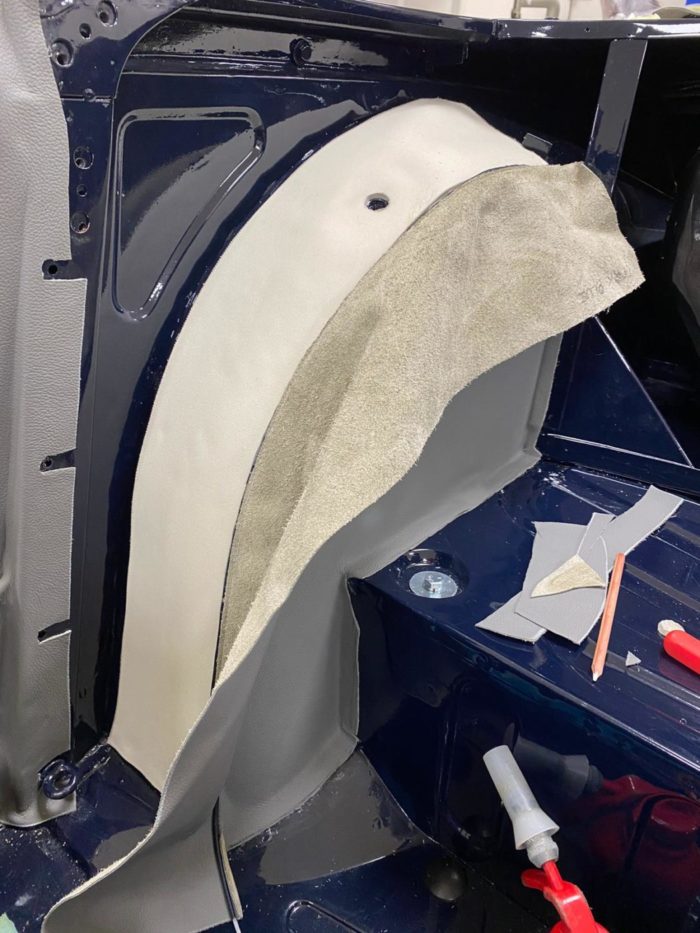
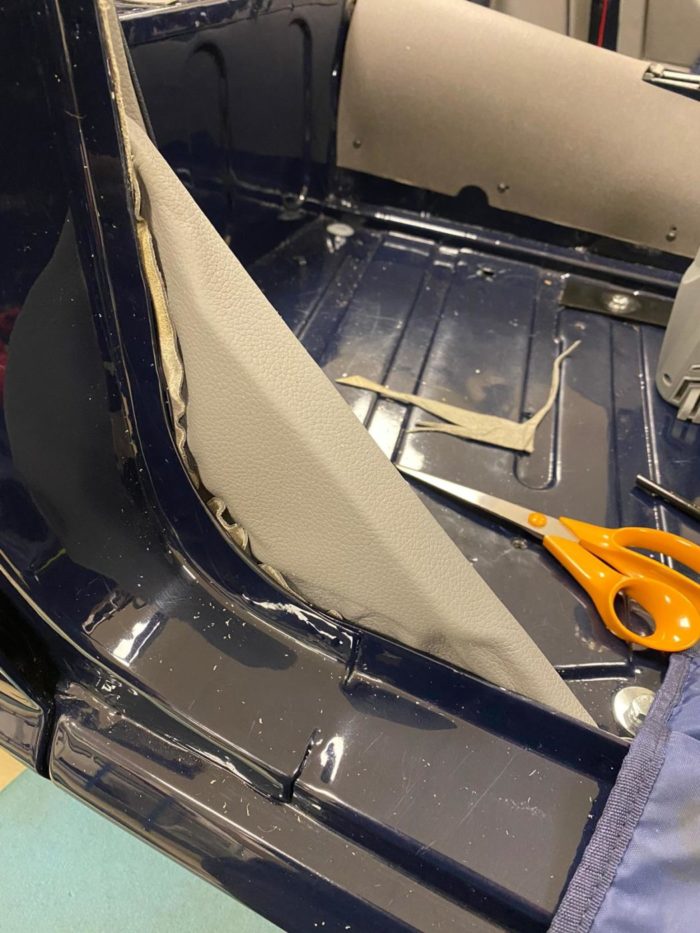
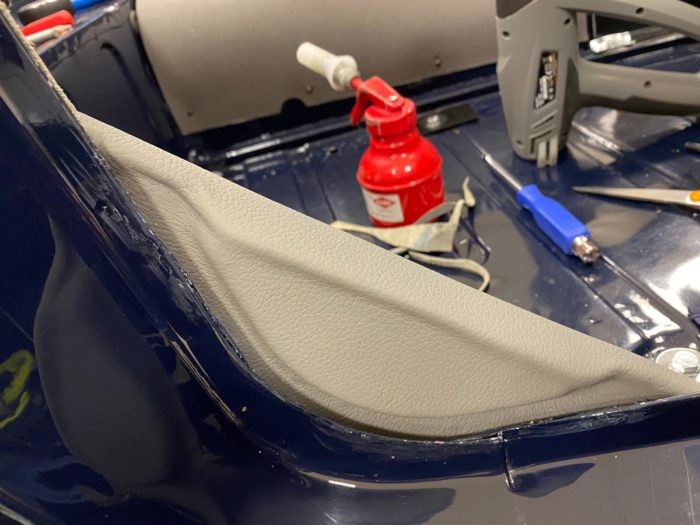
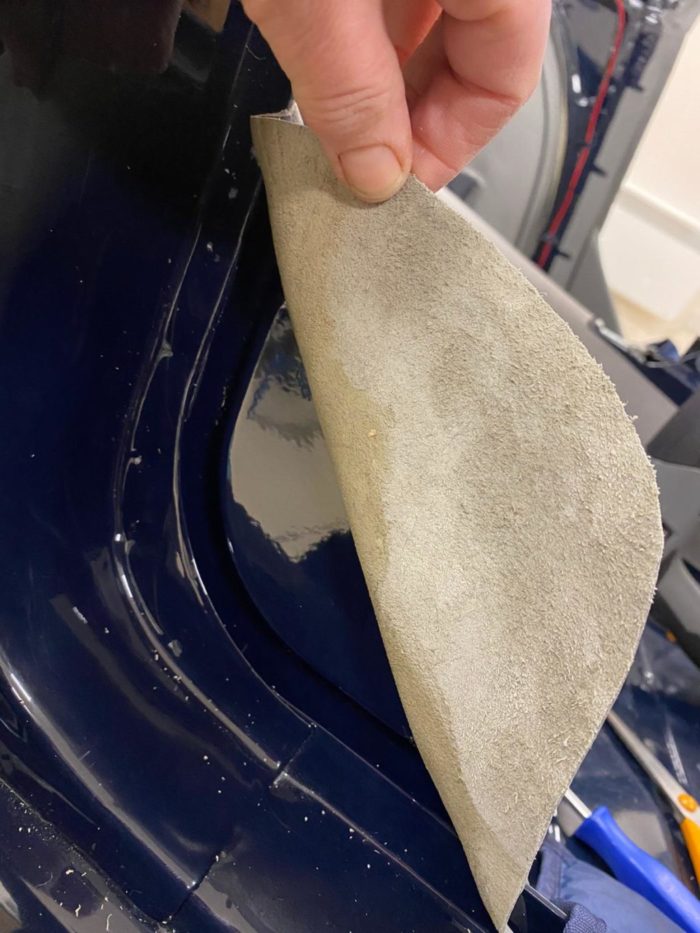
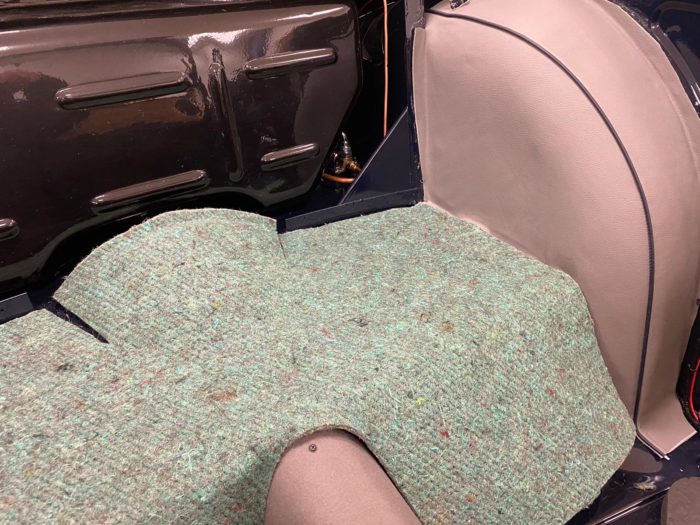
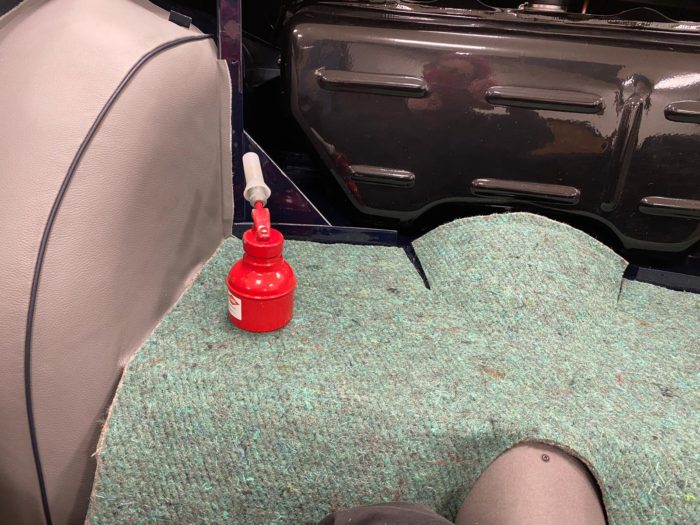
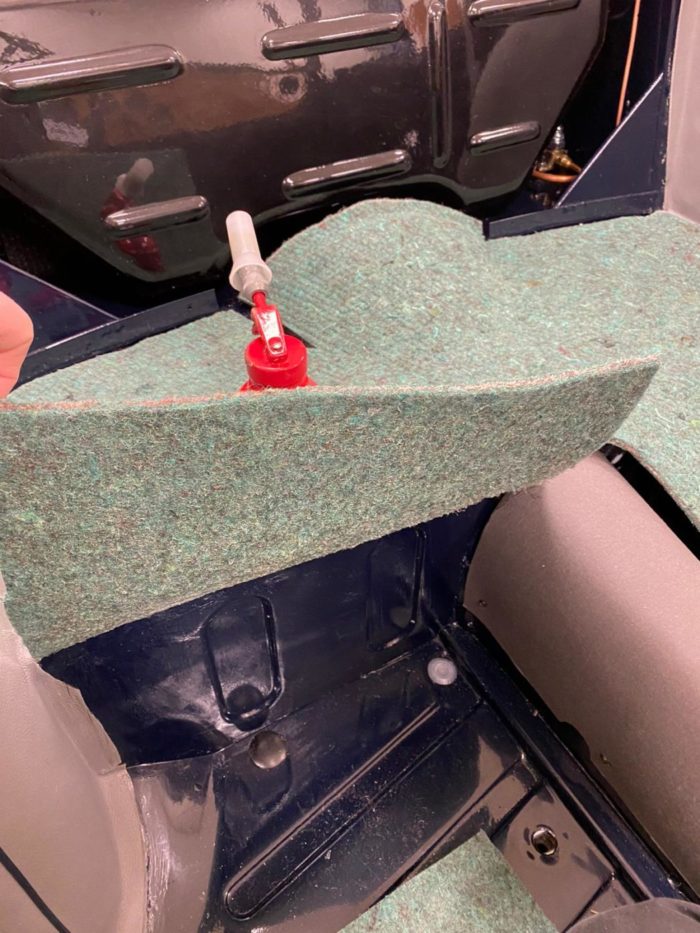
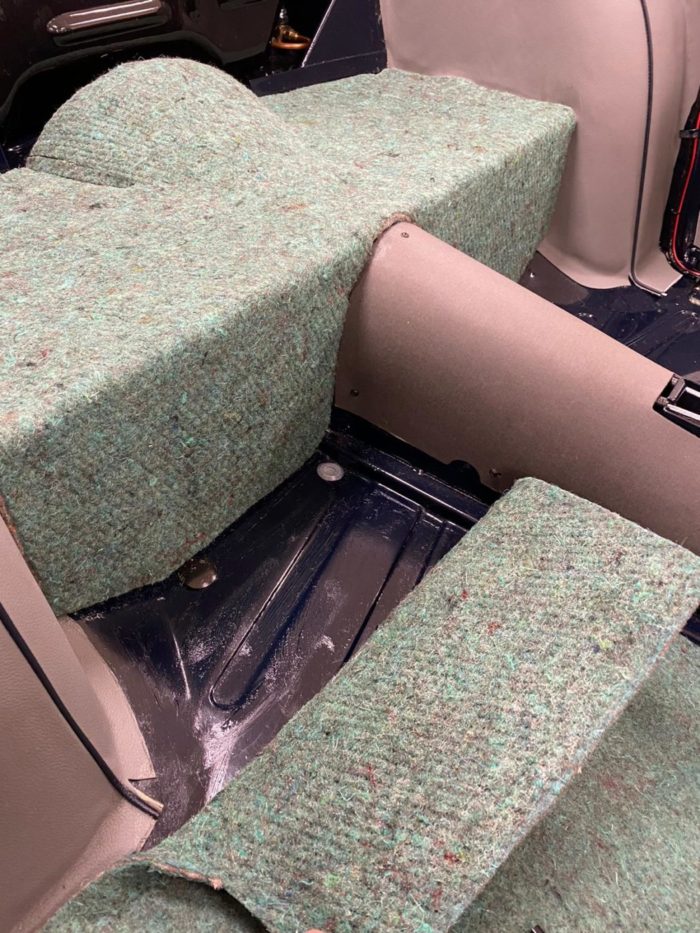
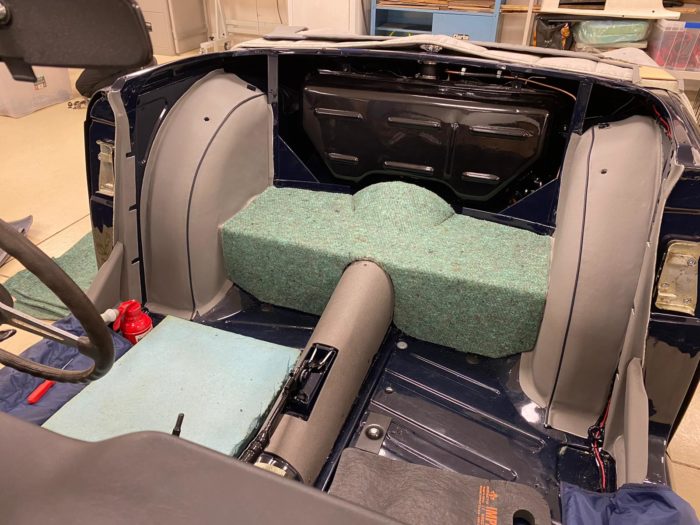
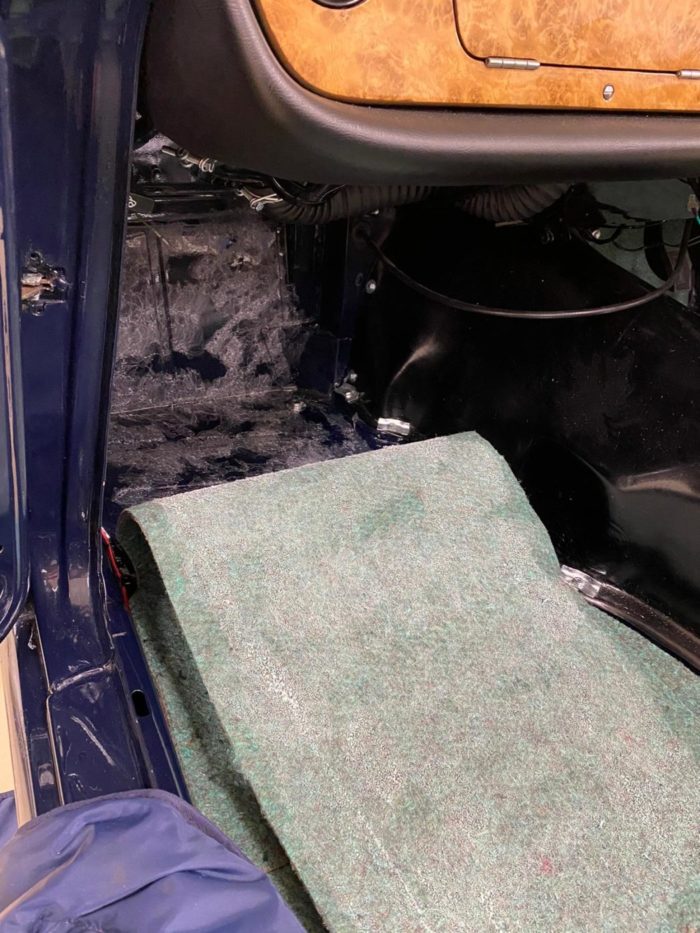
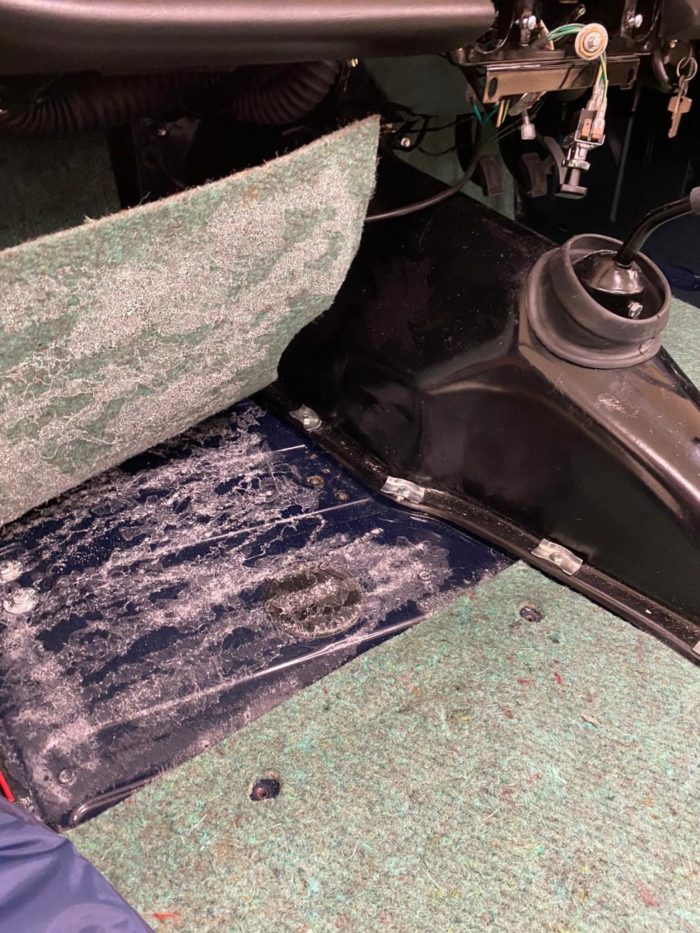
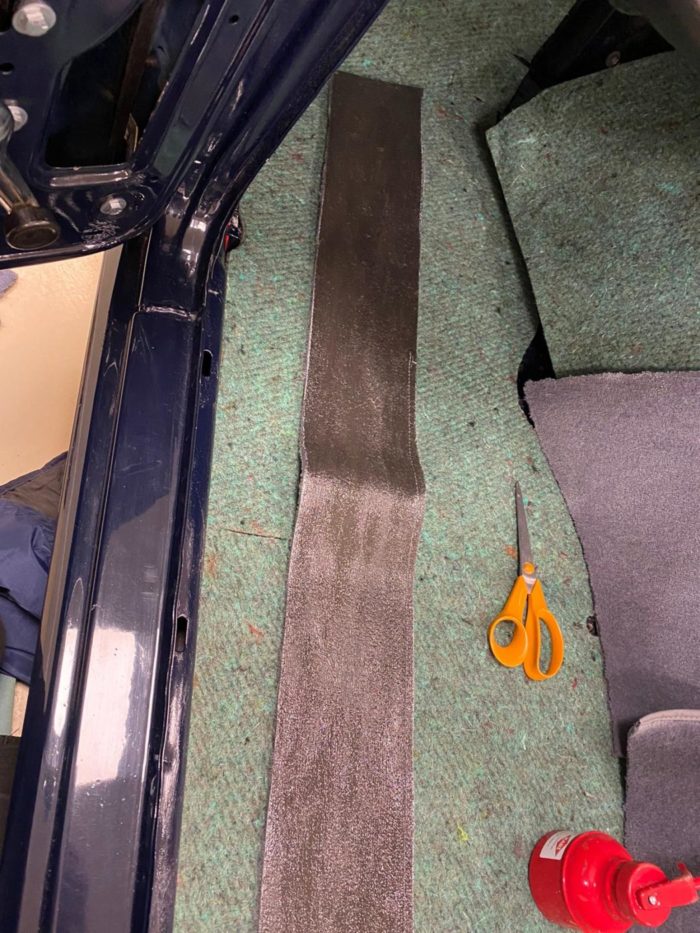
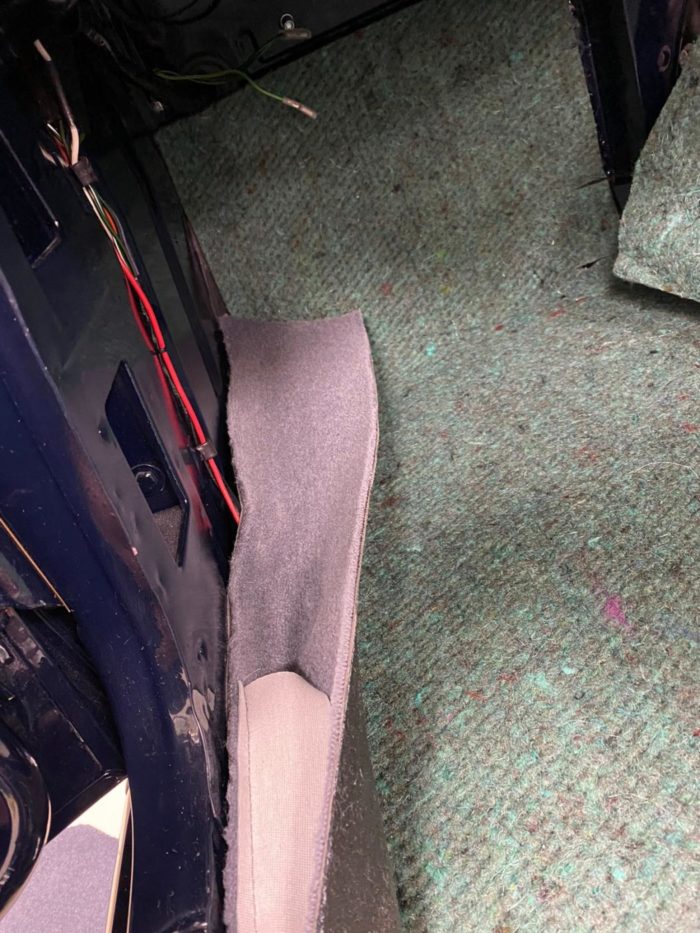
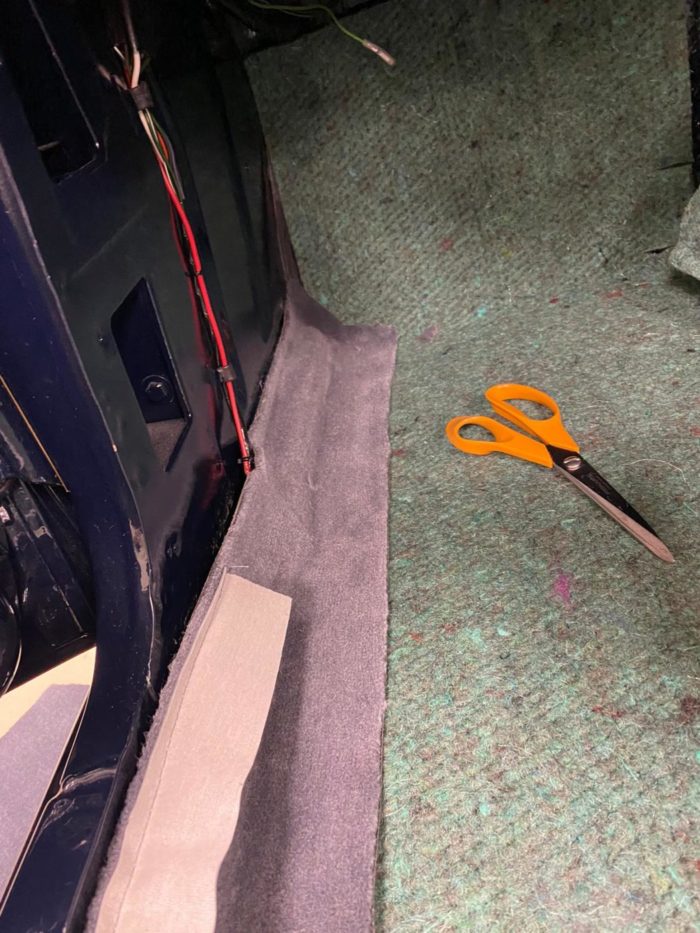
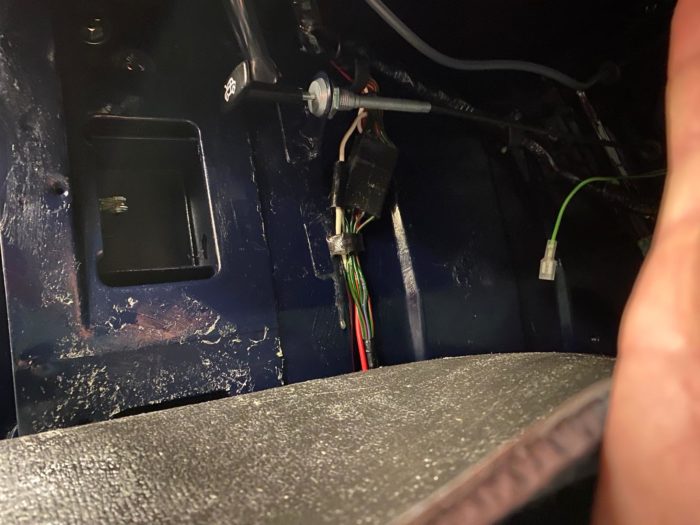
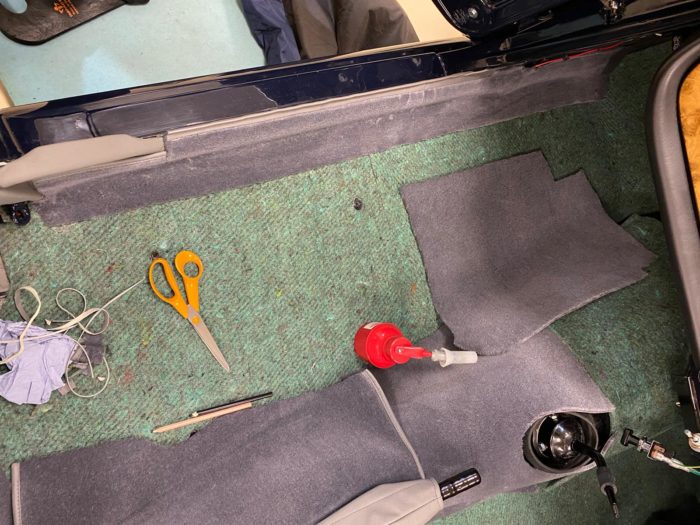
Kath and Brian have continued their work with the 1968 Triumph TR5 and are now tackling the rear quarter.
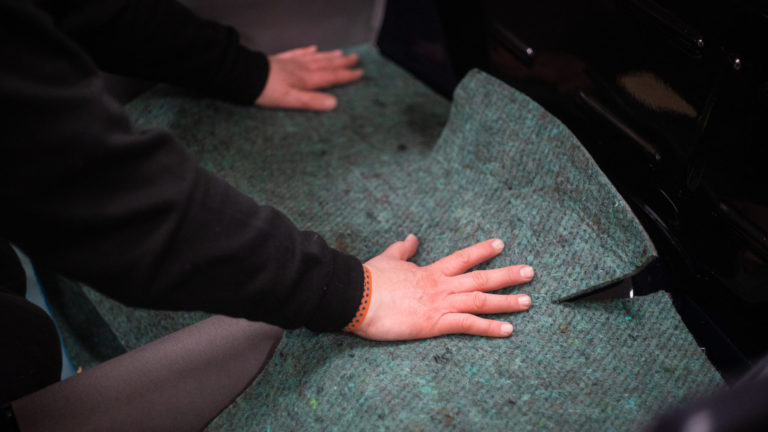
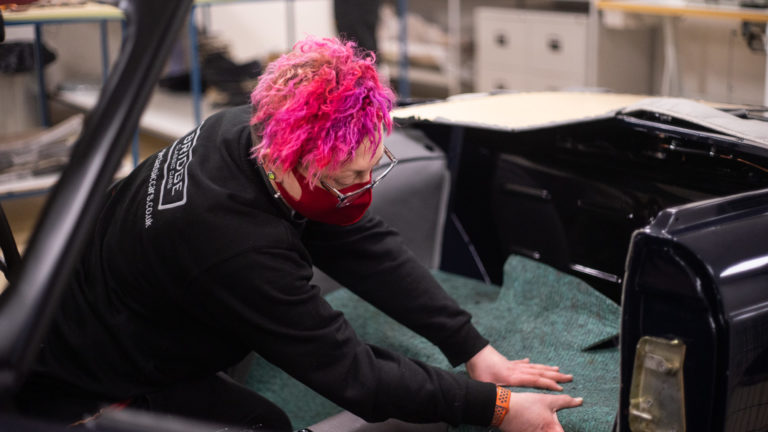
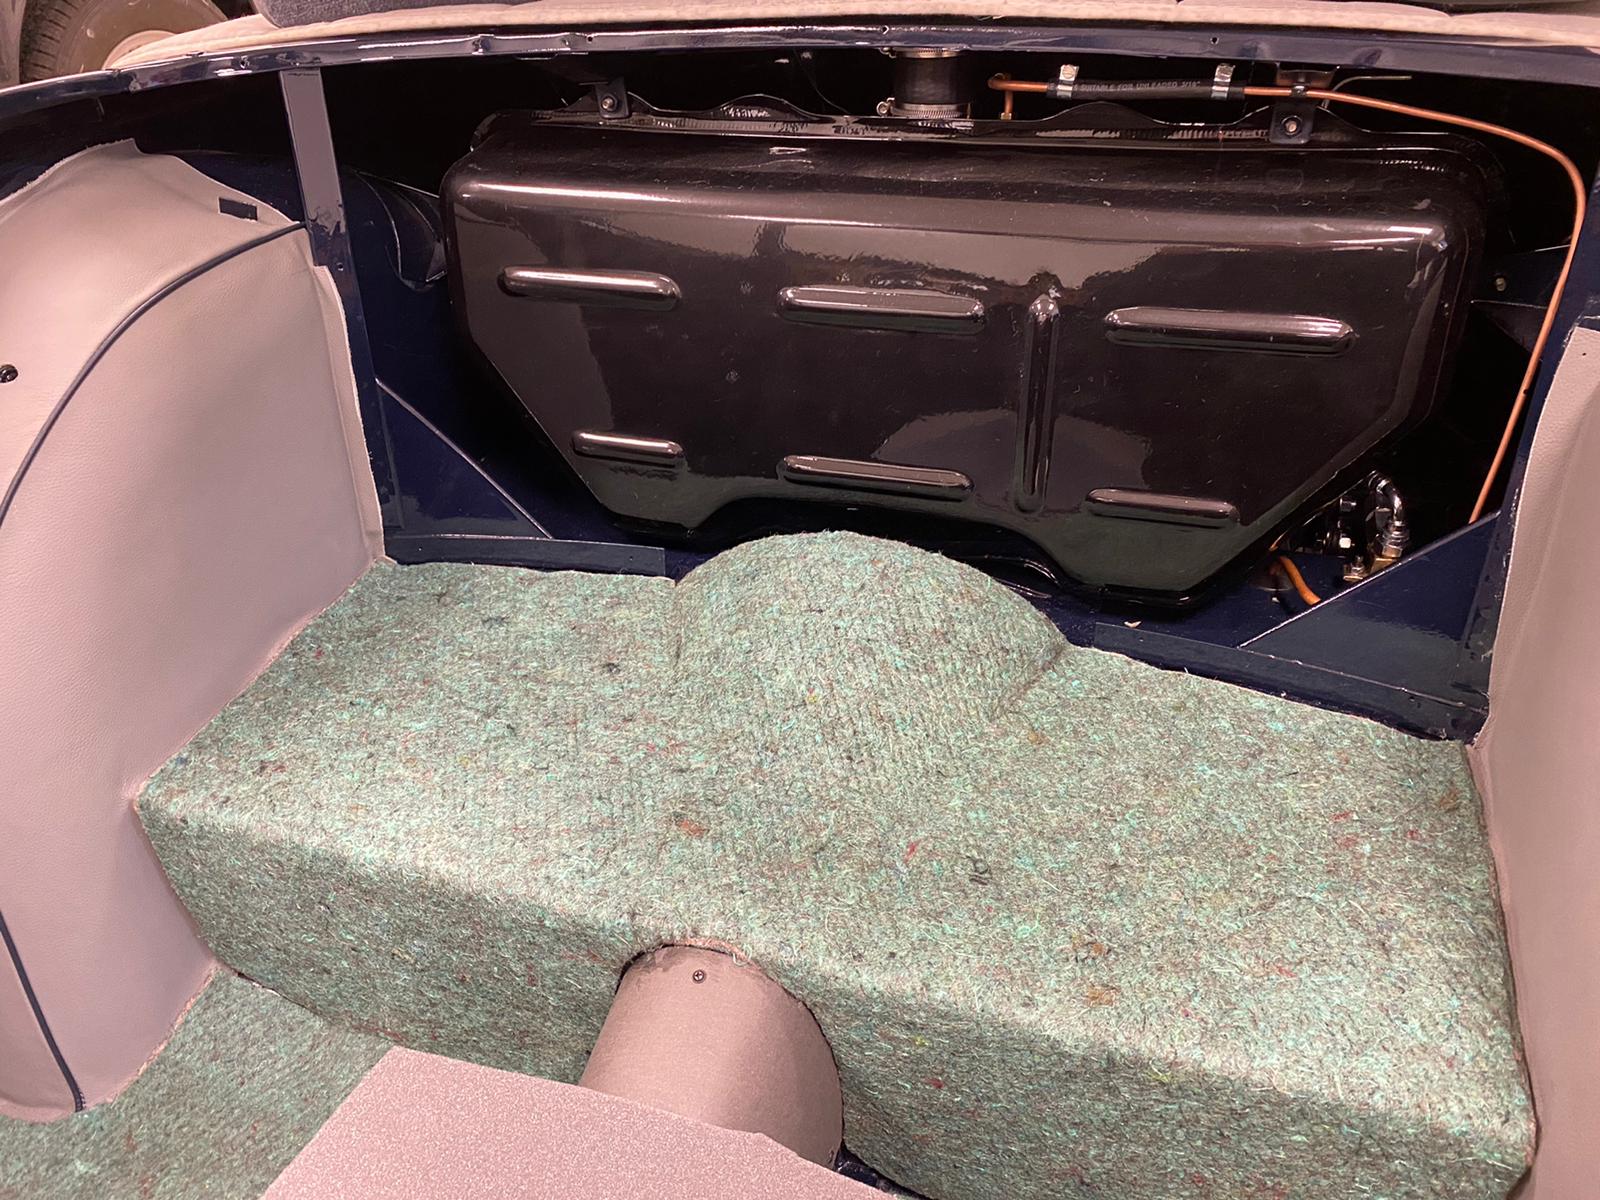
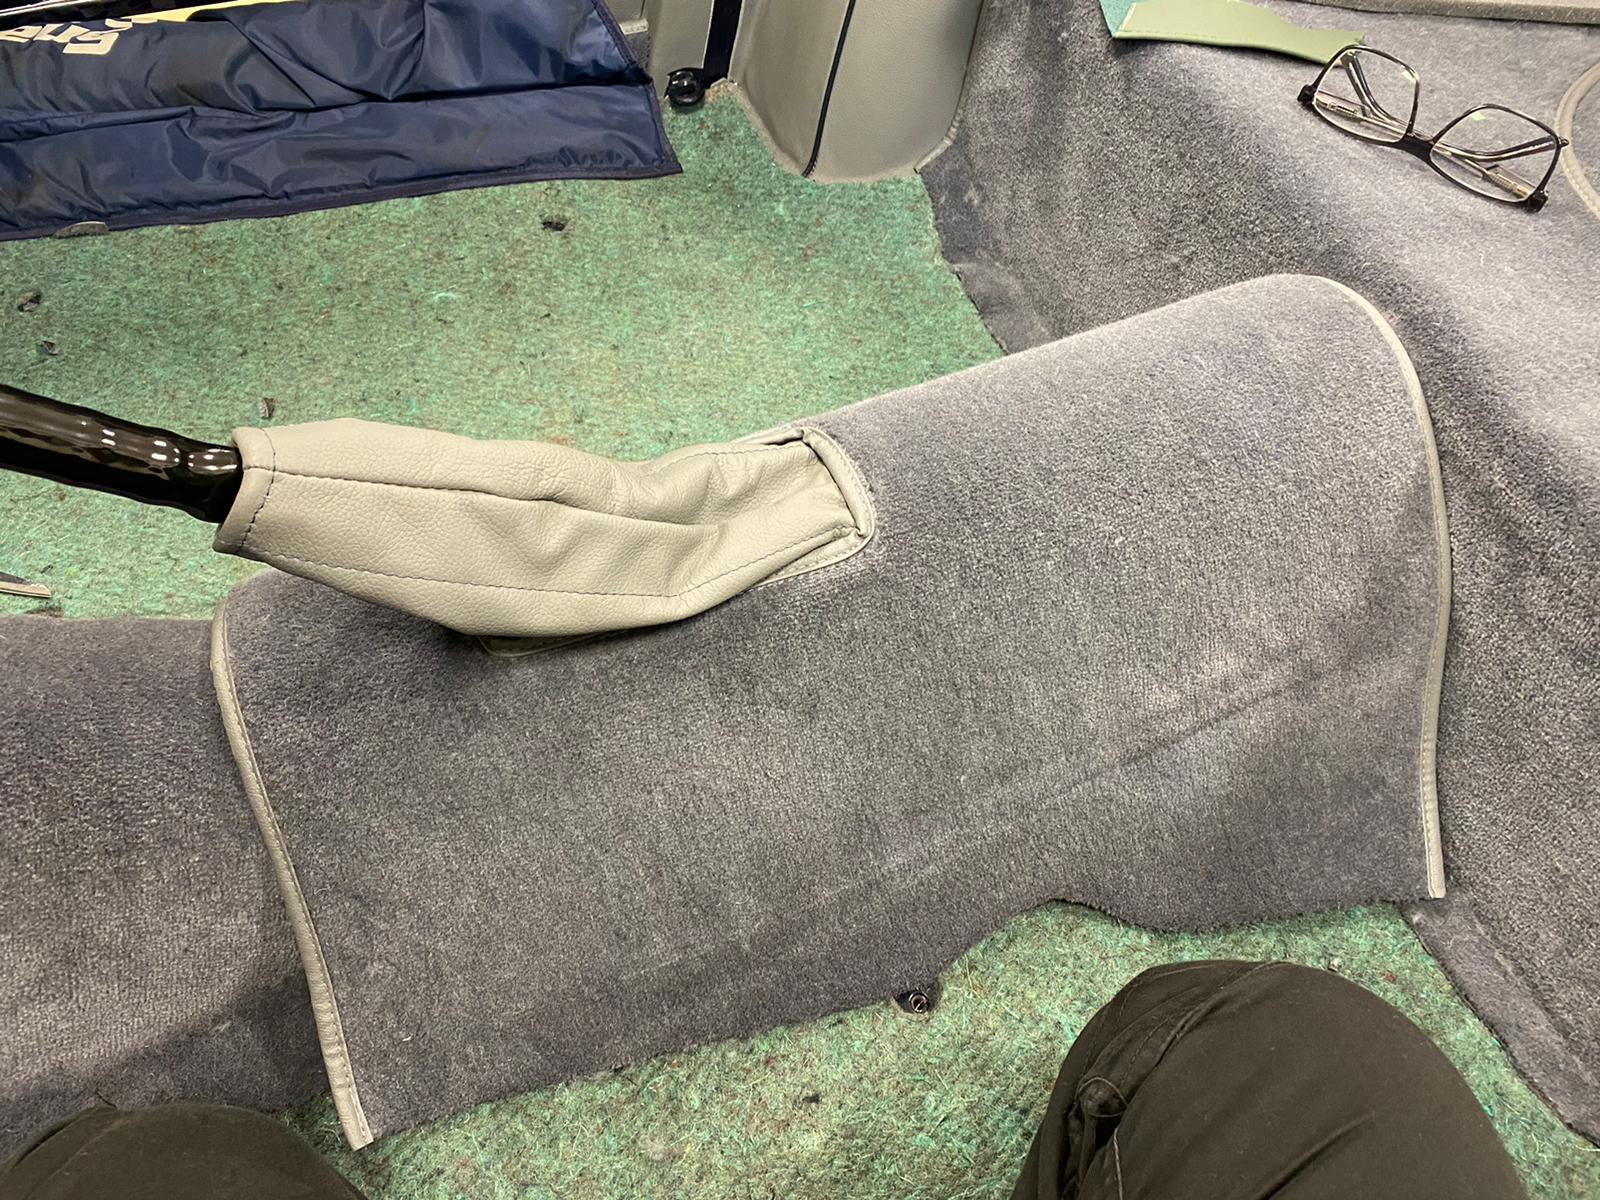
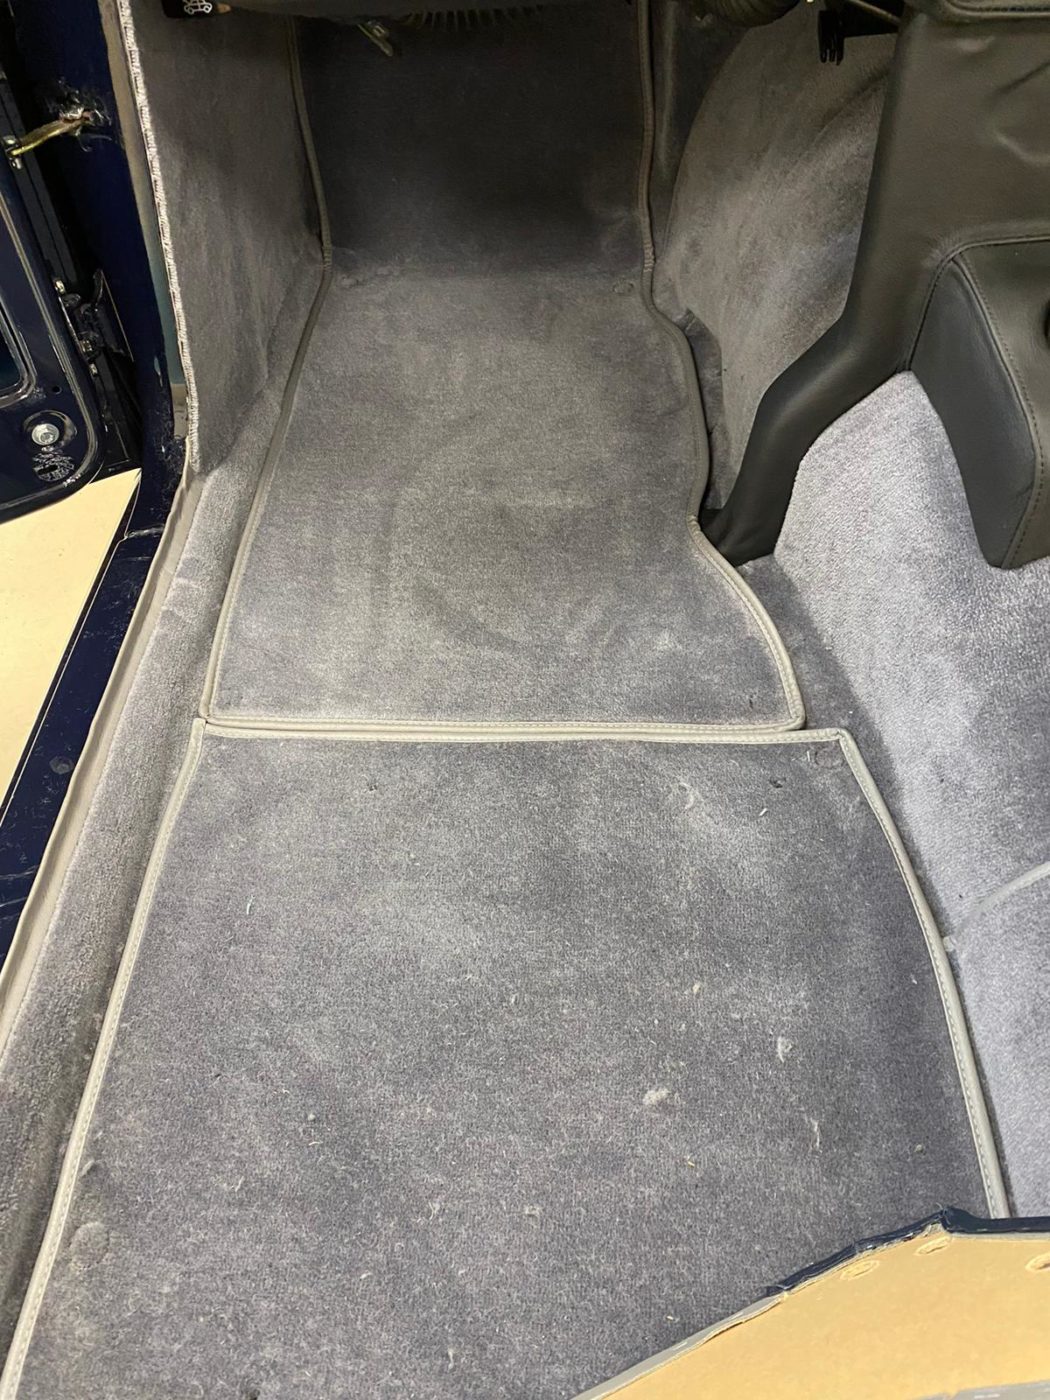
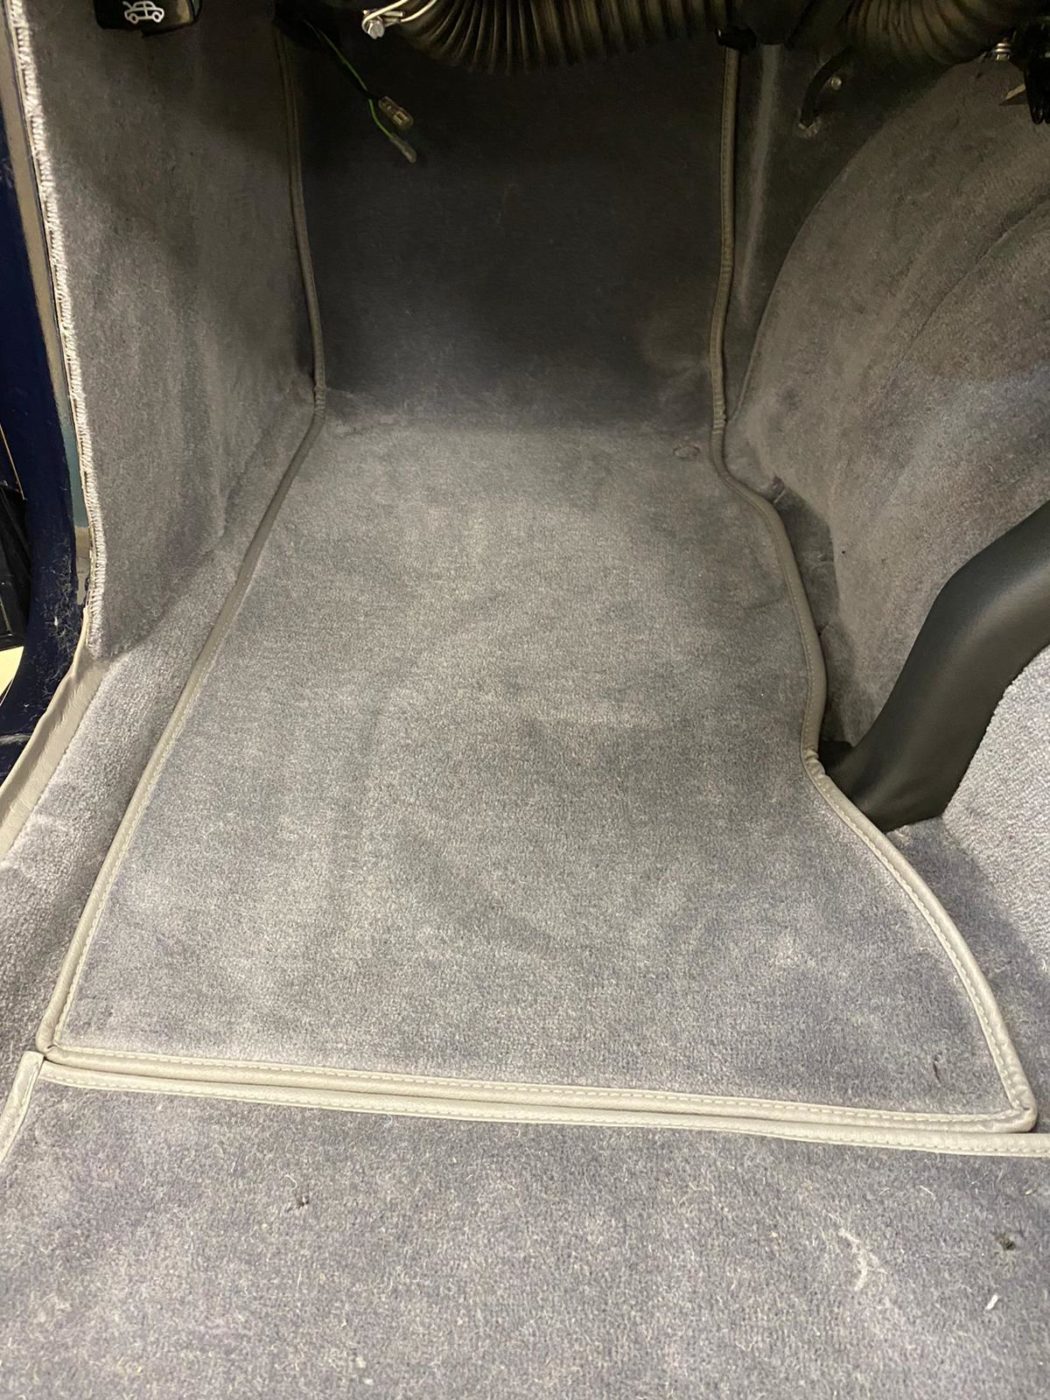
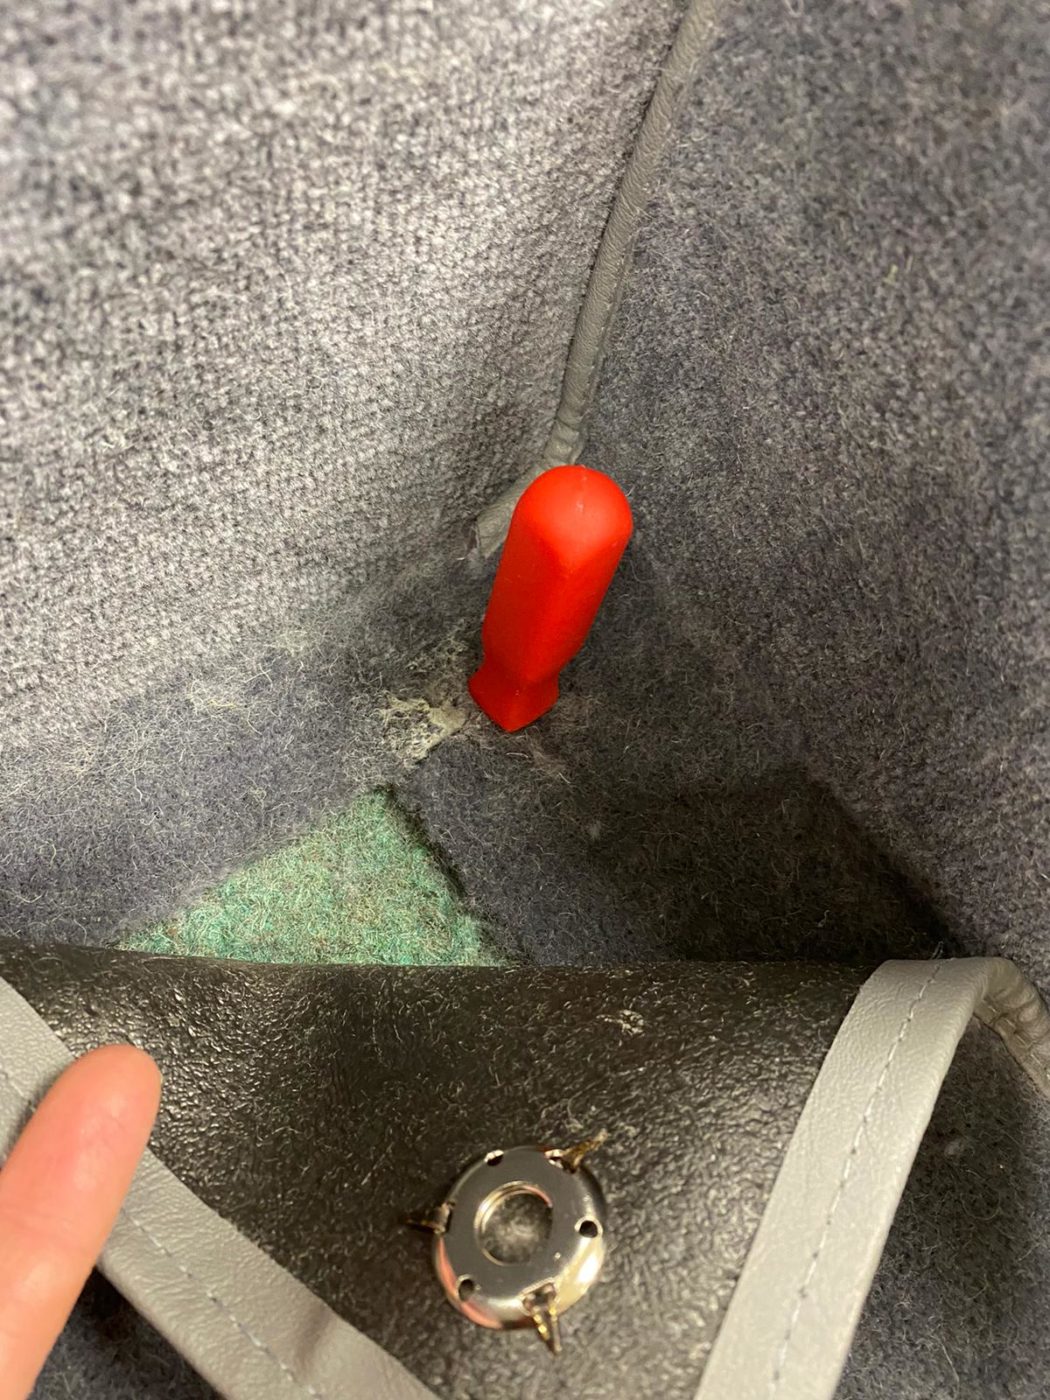
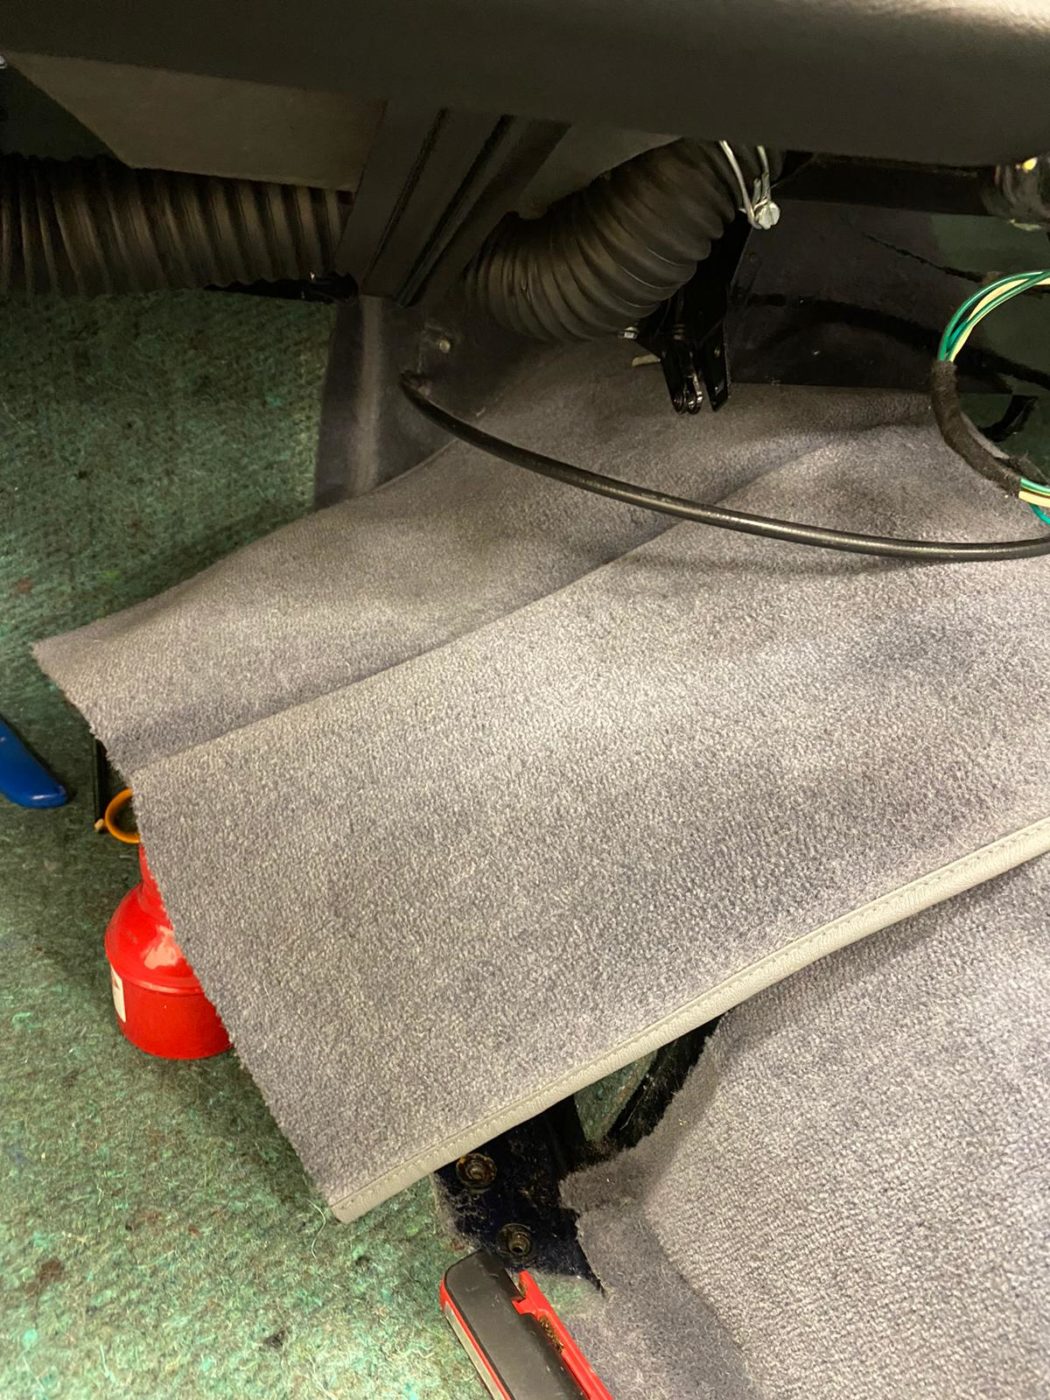
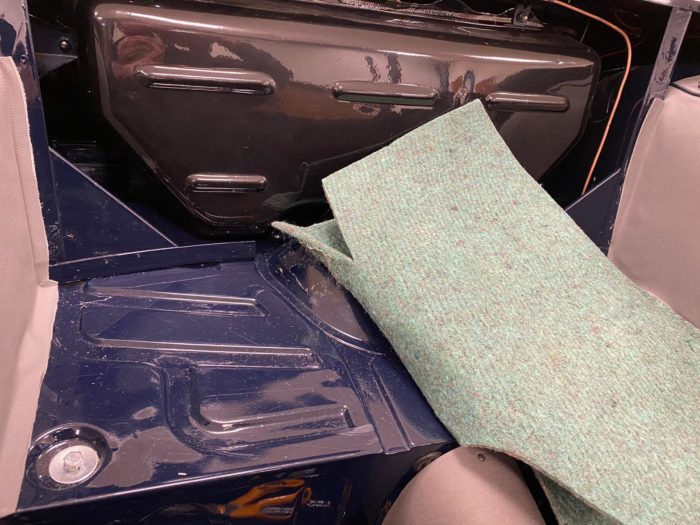
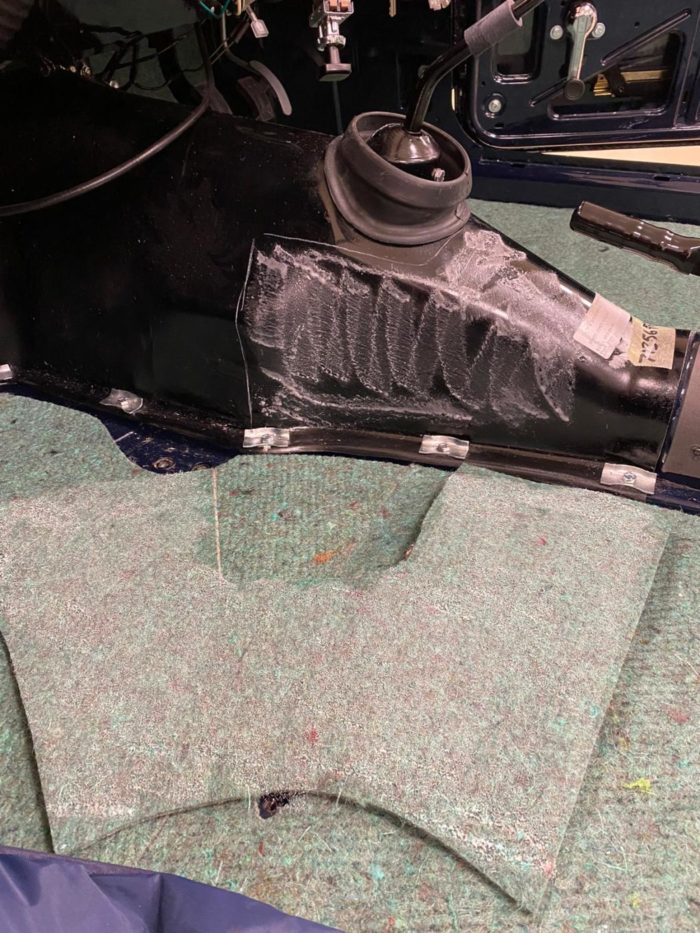
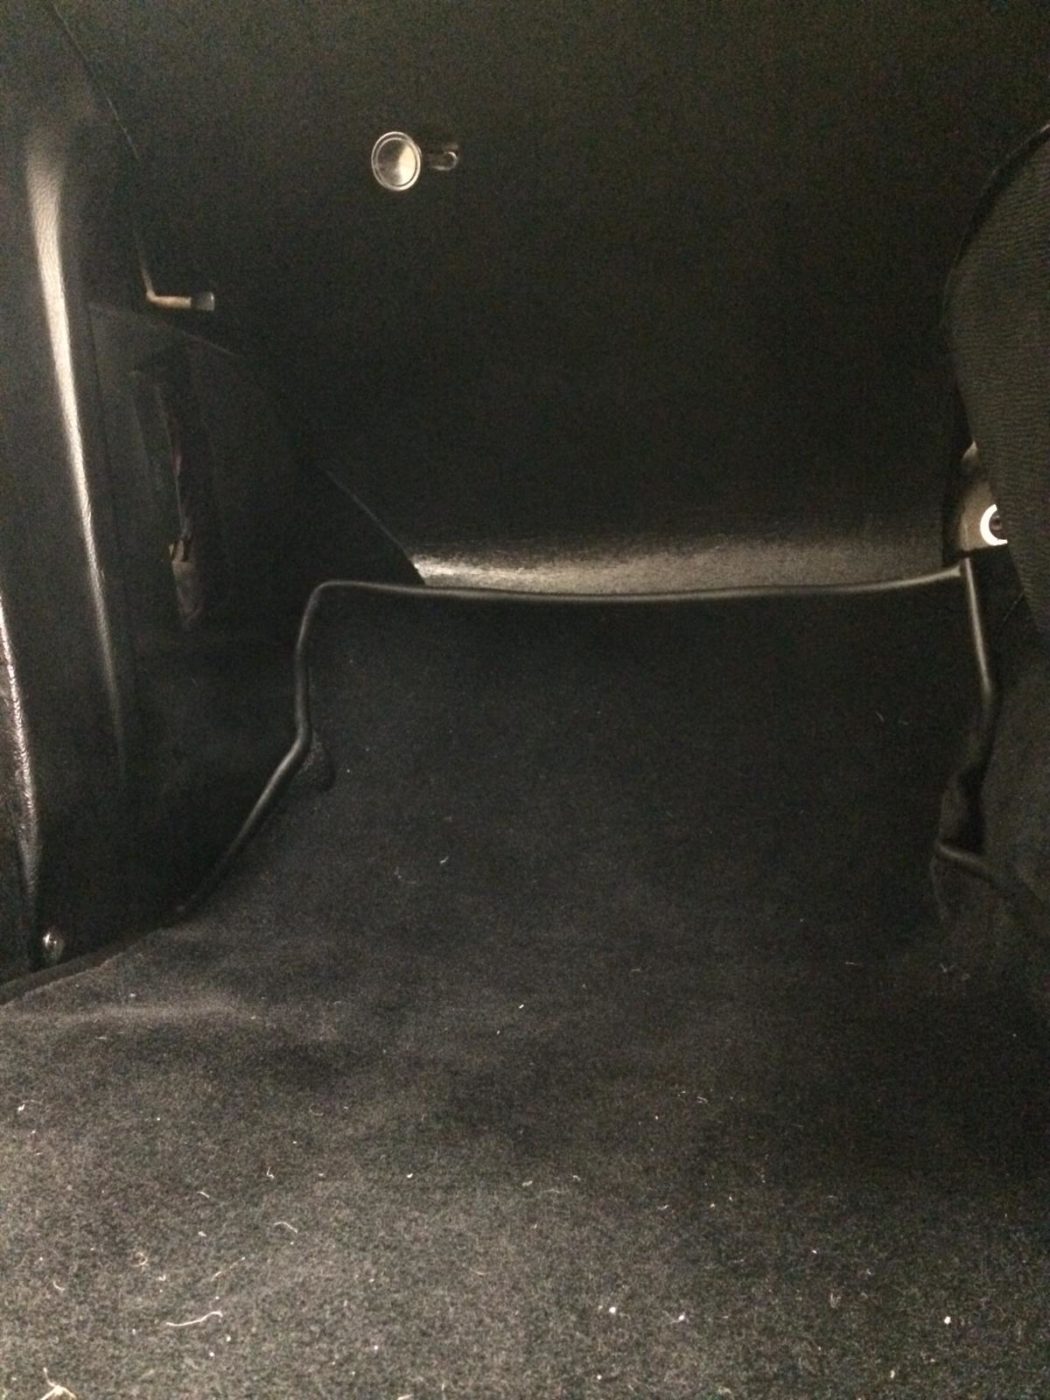
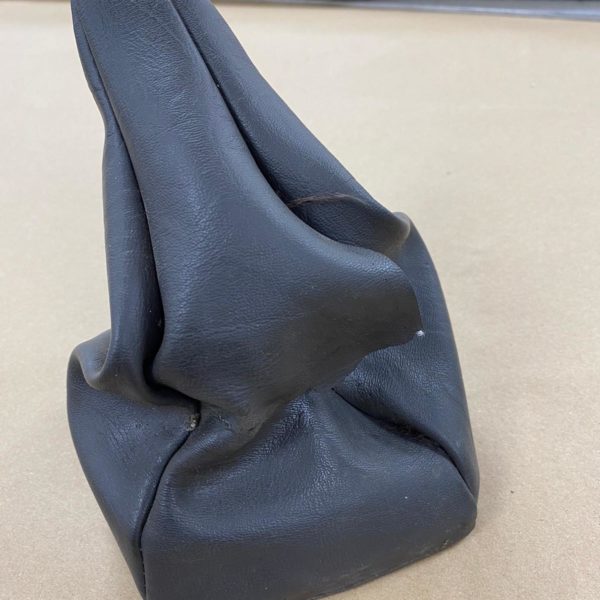
Kath has added foam over the raised section in the boot and positioned the carpet over the foam to get an idea of how it would fit. Once happy, Kath could then glue the foam sections down and pack it out around the fuel tank. Once the foam is stuck down, Kath could then lay in and glue down the carpet in sections, pulling the carpet over the edge and down into footwell so that it fits tight. Once in place, Kath could trim around the corners, and get started on the hand brake gaiter section.
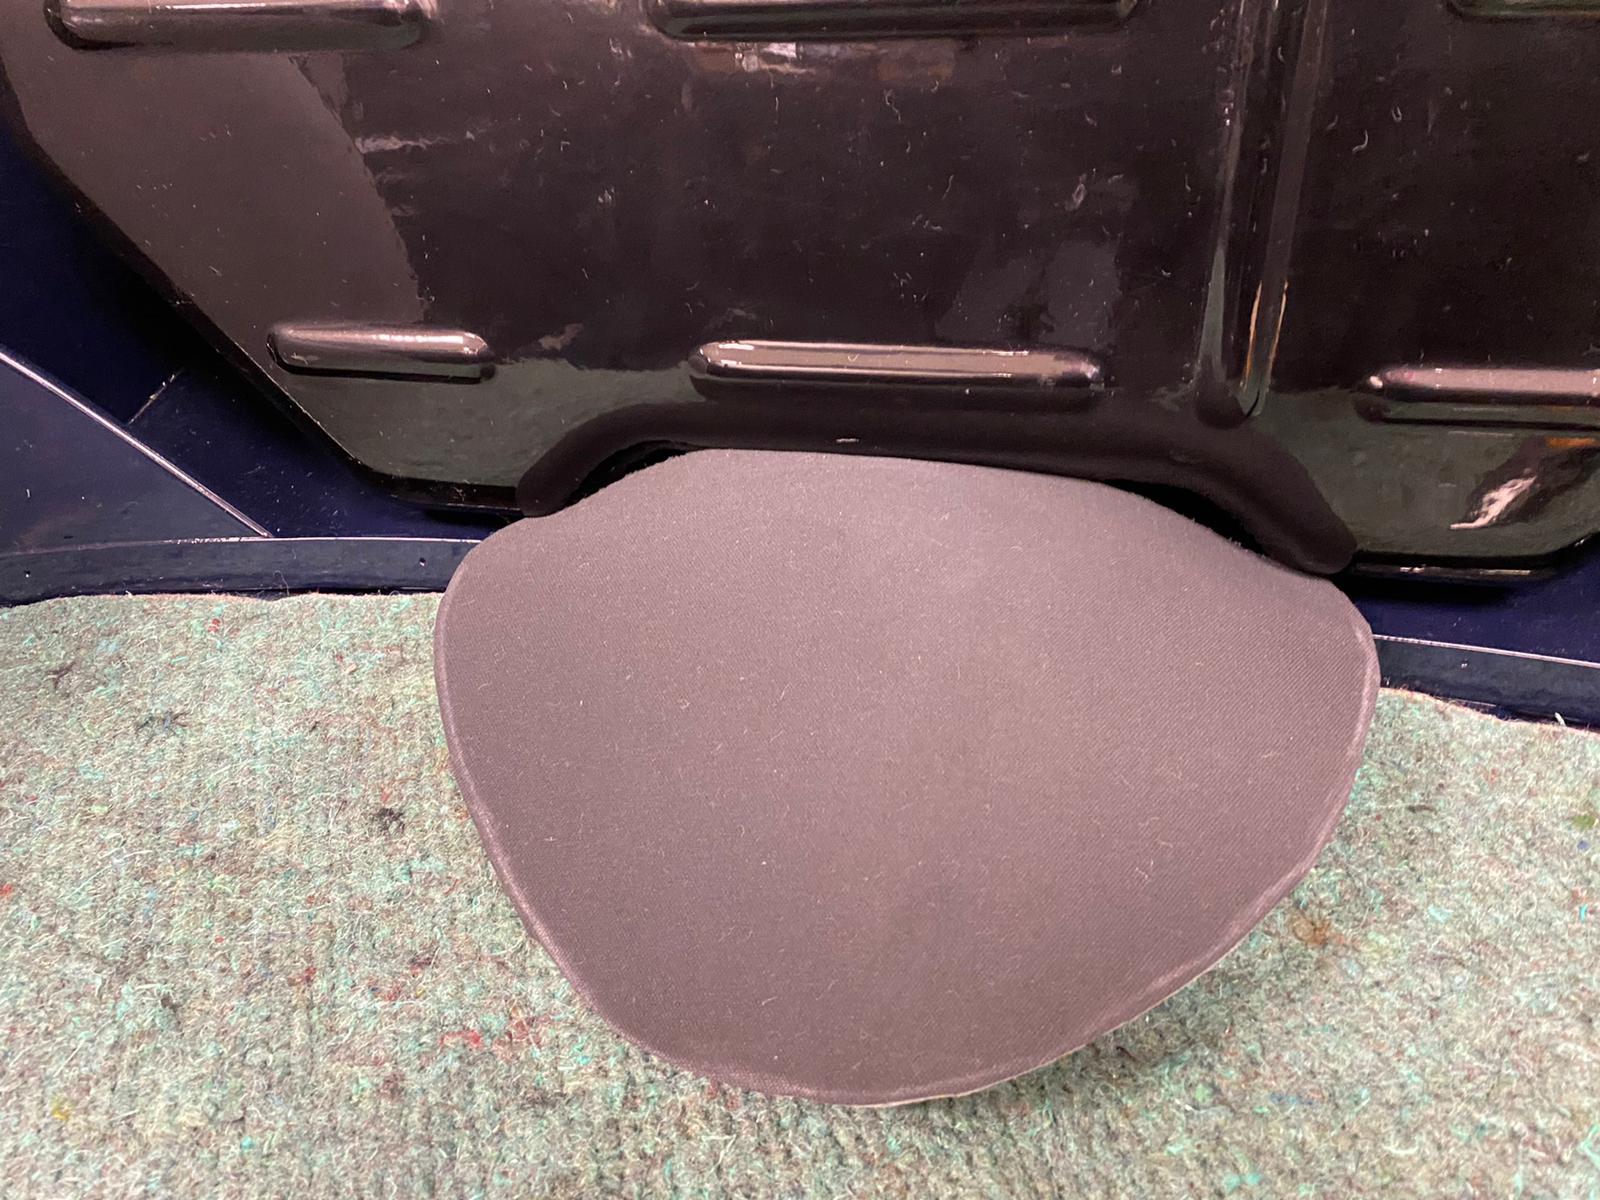
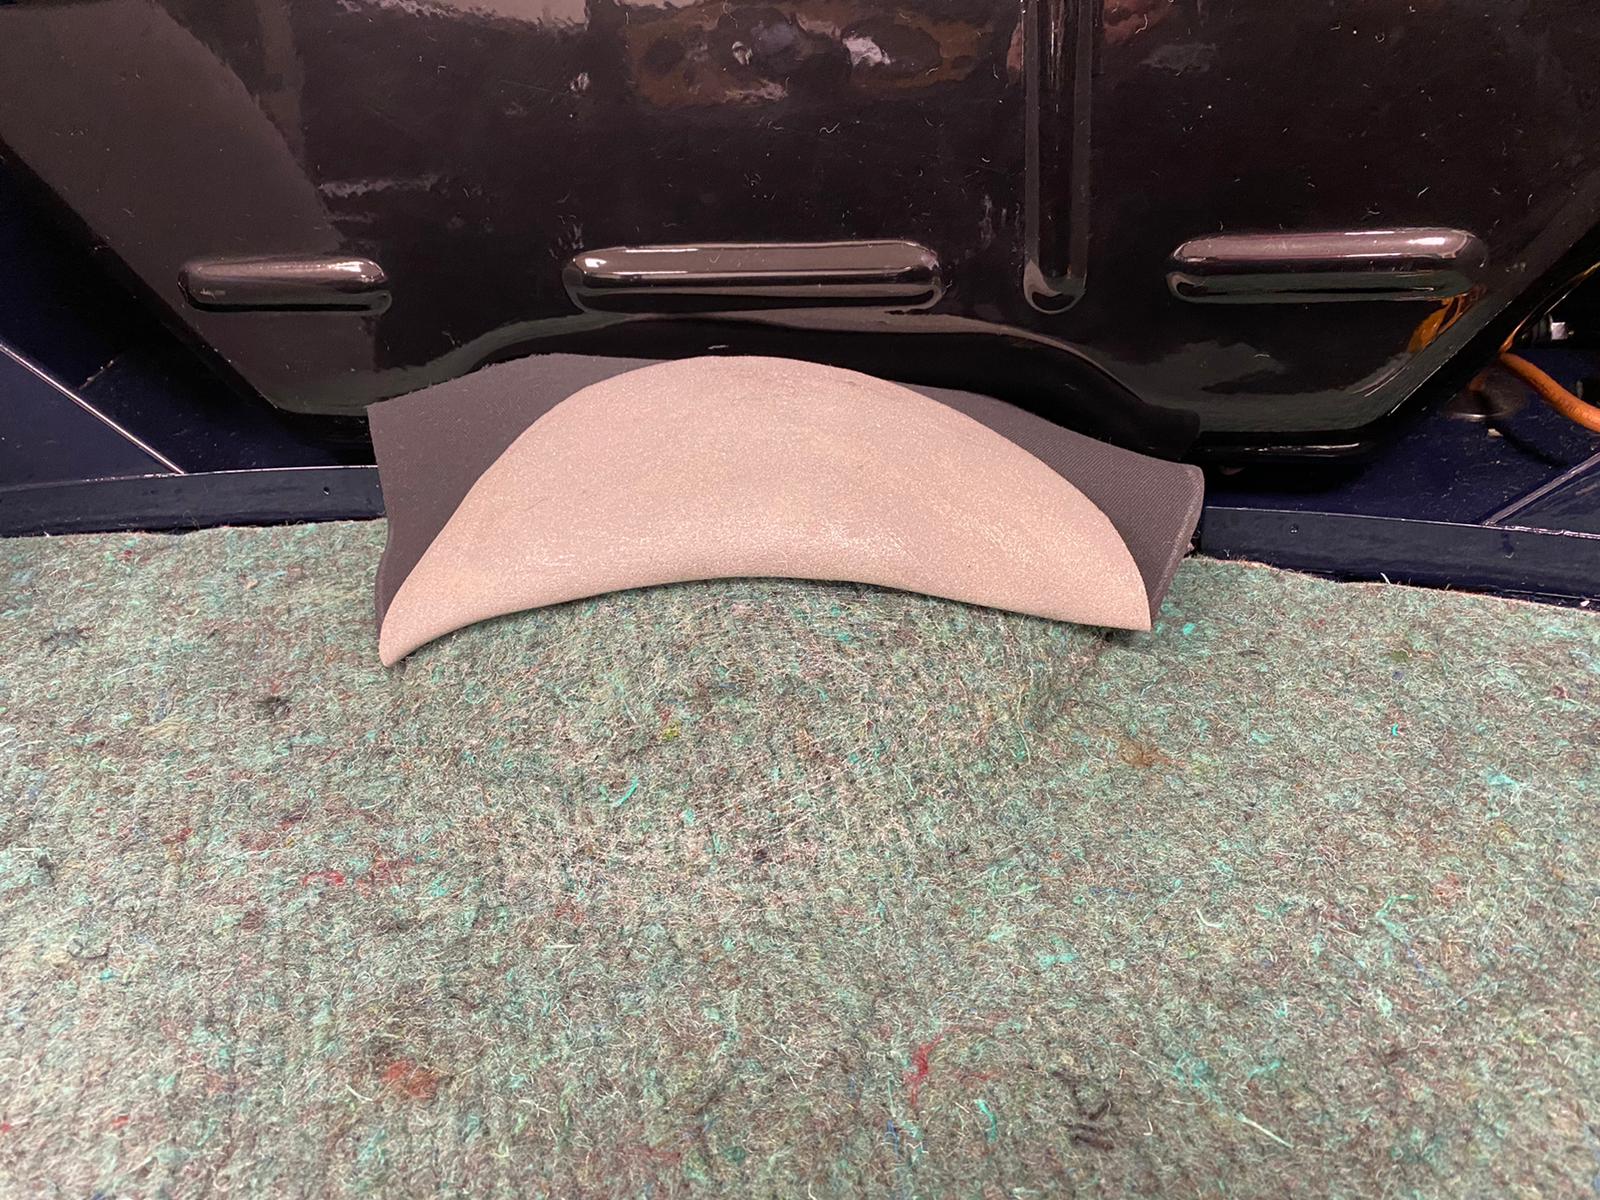
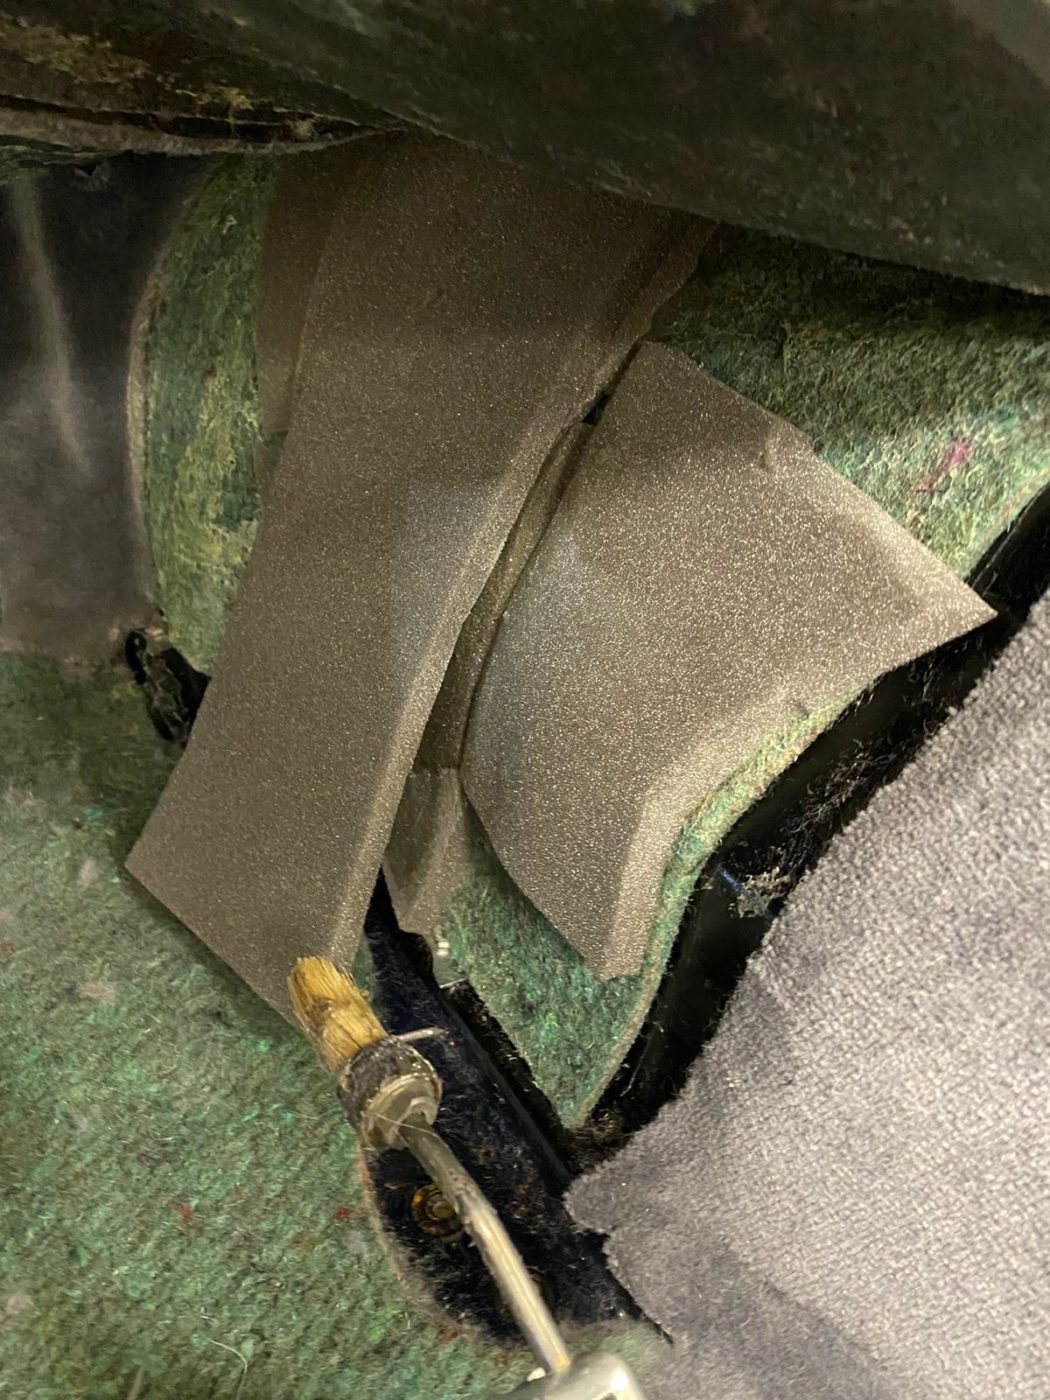
The hand brake gaiter section needed to have foam packed around the hand brake with an 11mm scrim foam piece so that the get carpet fits nicely. Once in position, the carpet can be glued down, making sure the fabric is pulled taught to ensure a fitted finish.
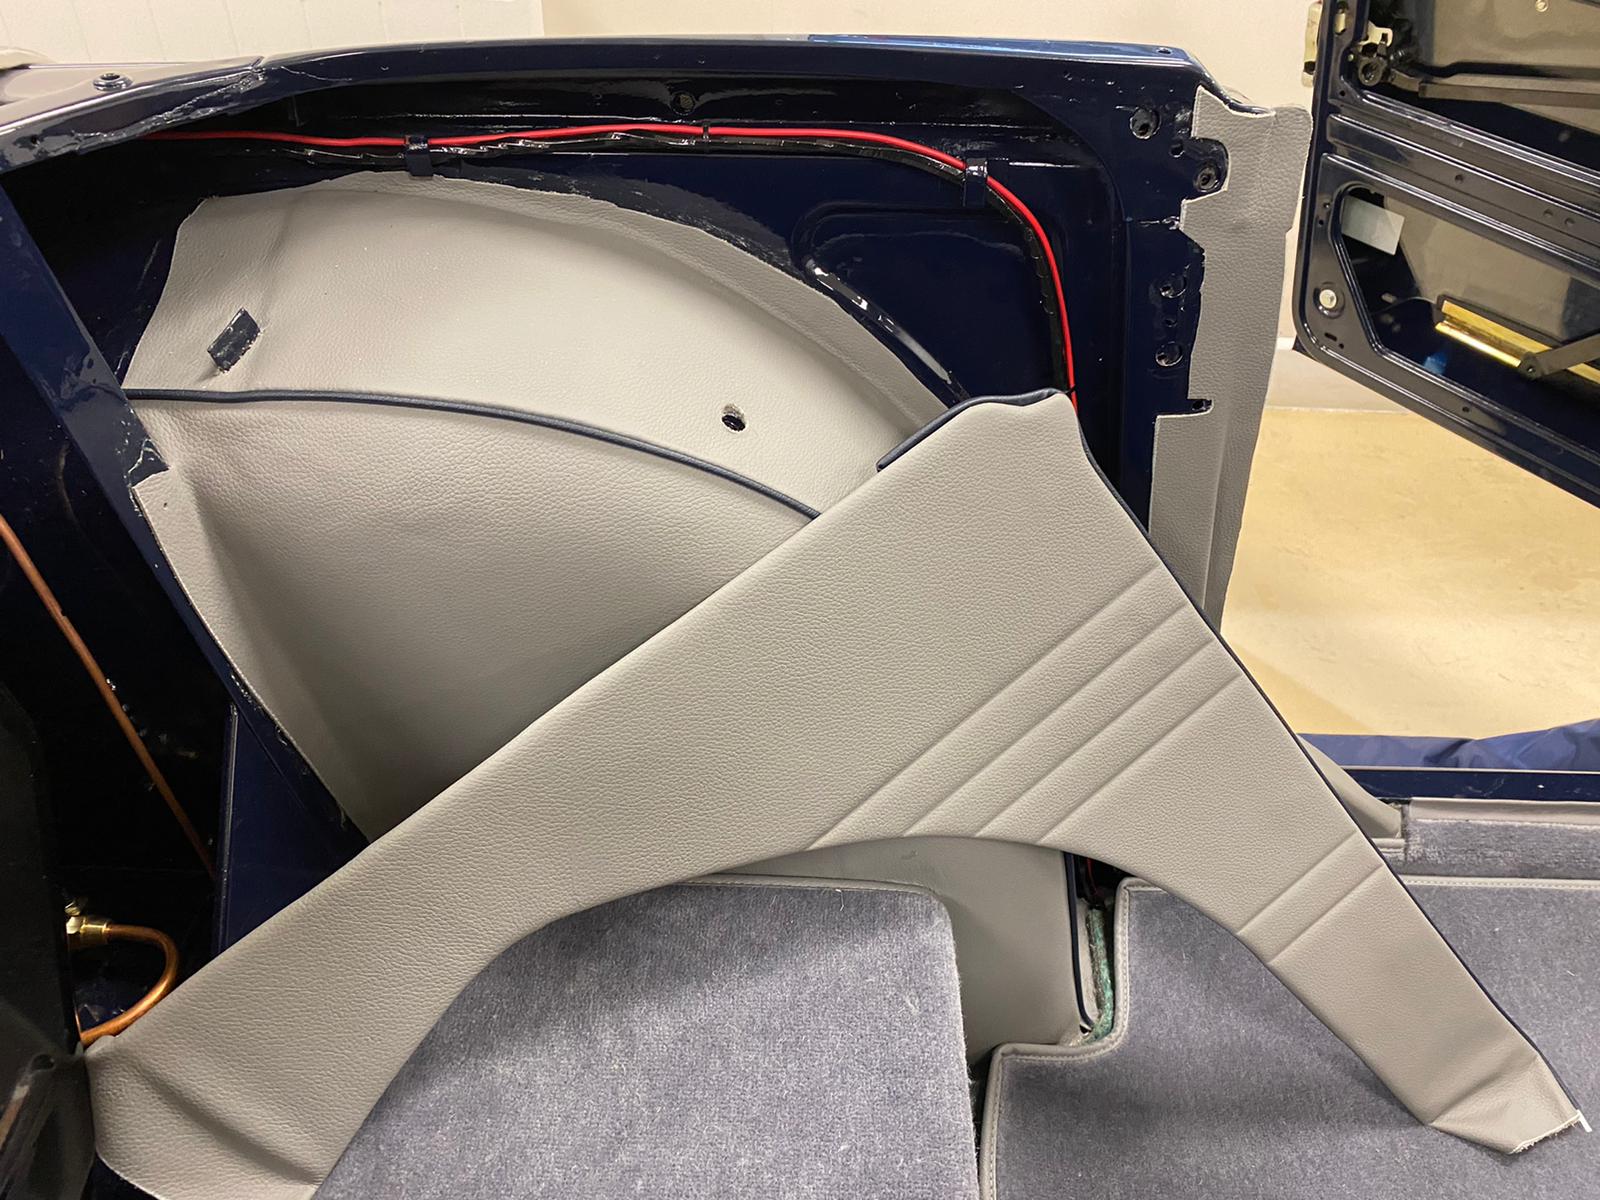
The next step was to fit the rear quarter panels and the door panel which clips onto a board. Kath found that she needed to adjust the panel around the wheel arch and the bottom section for seat belt eyelet first before fitting the sections. Once she had fitted the drivers side rear, Kath could then fit the passenger side and attach the carpet fasteers to footwells so that the mats don’t move about.
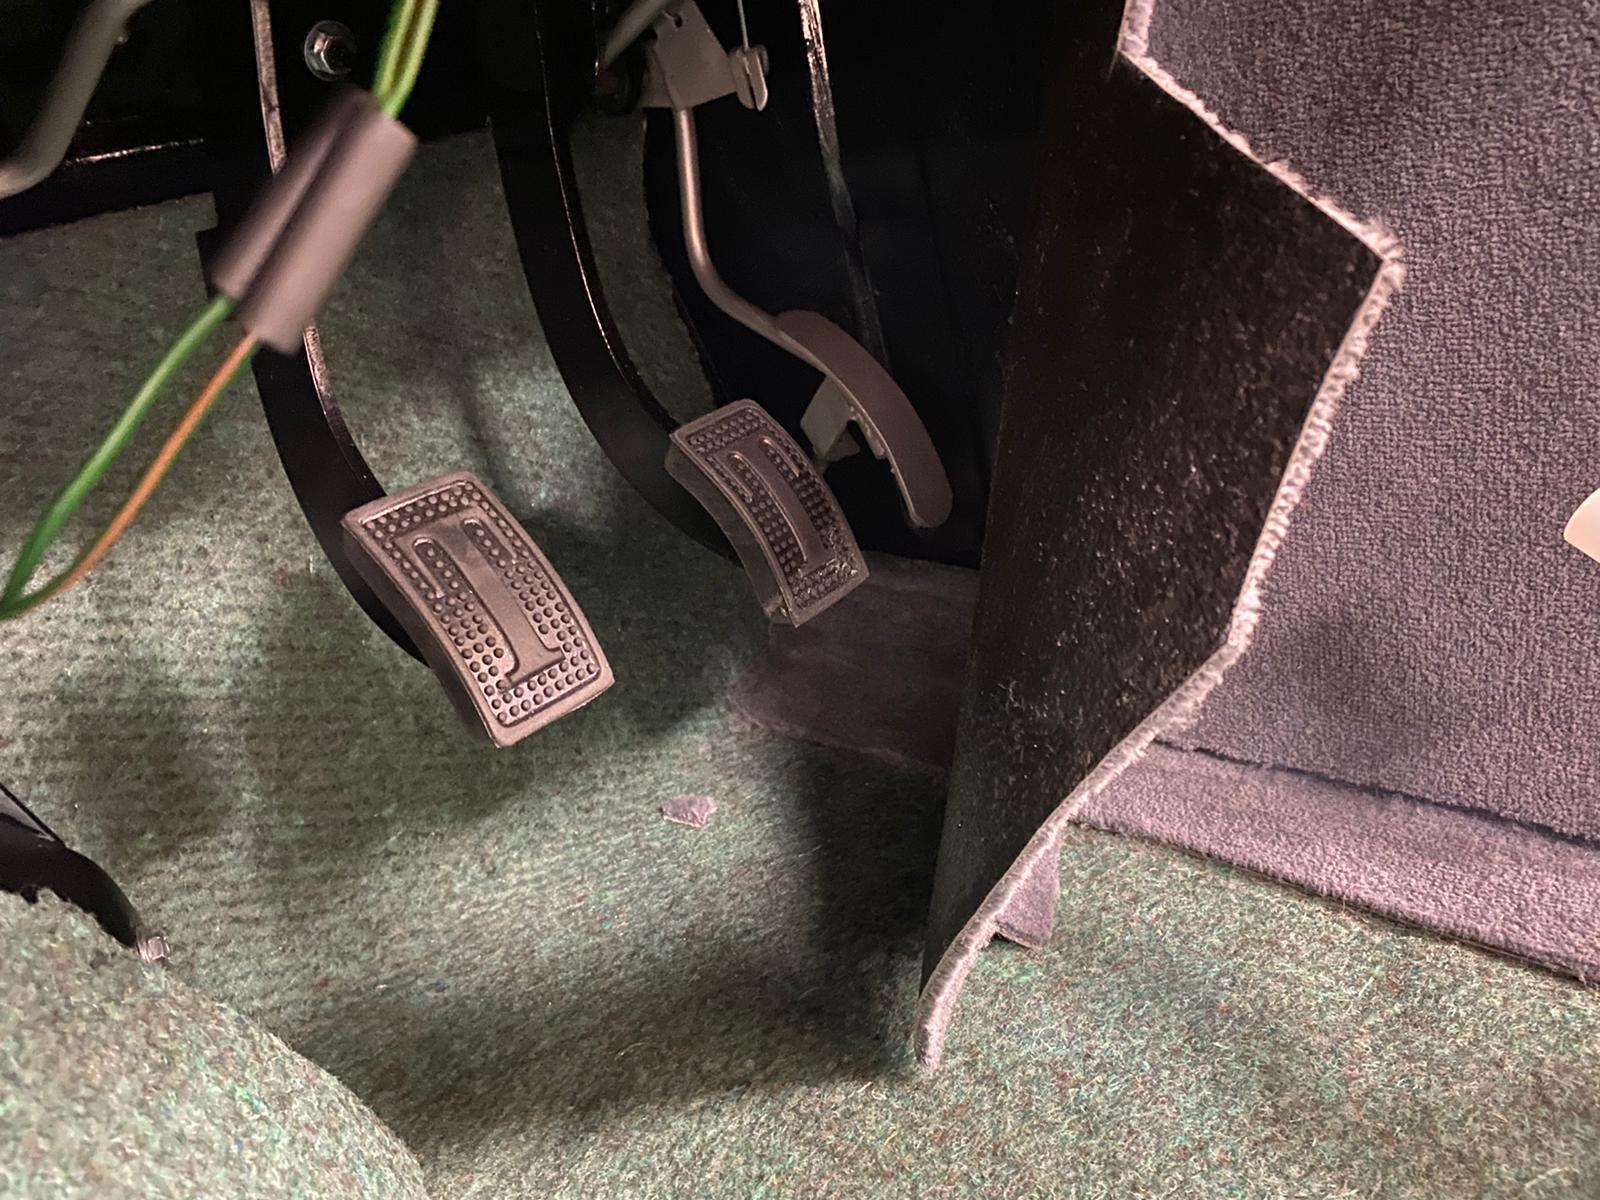
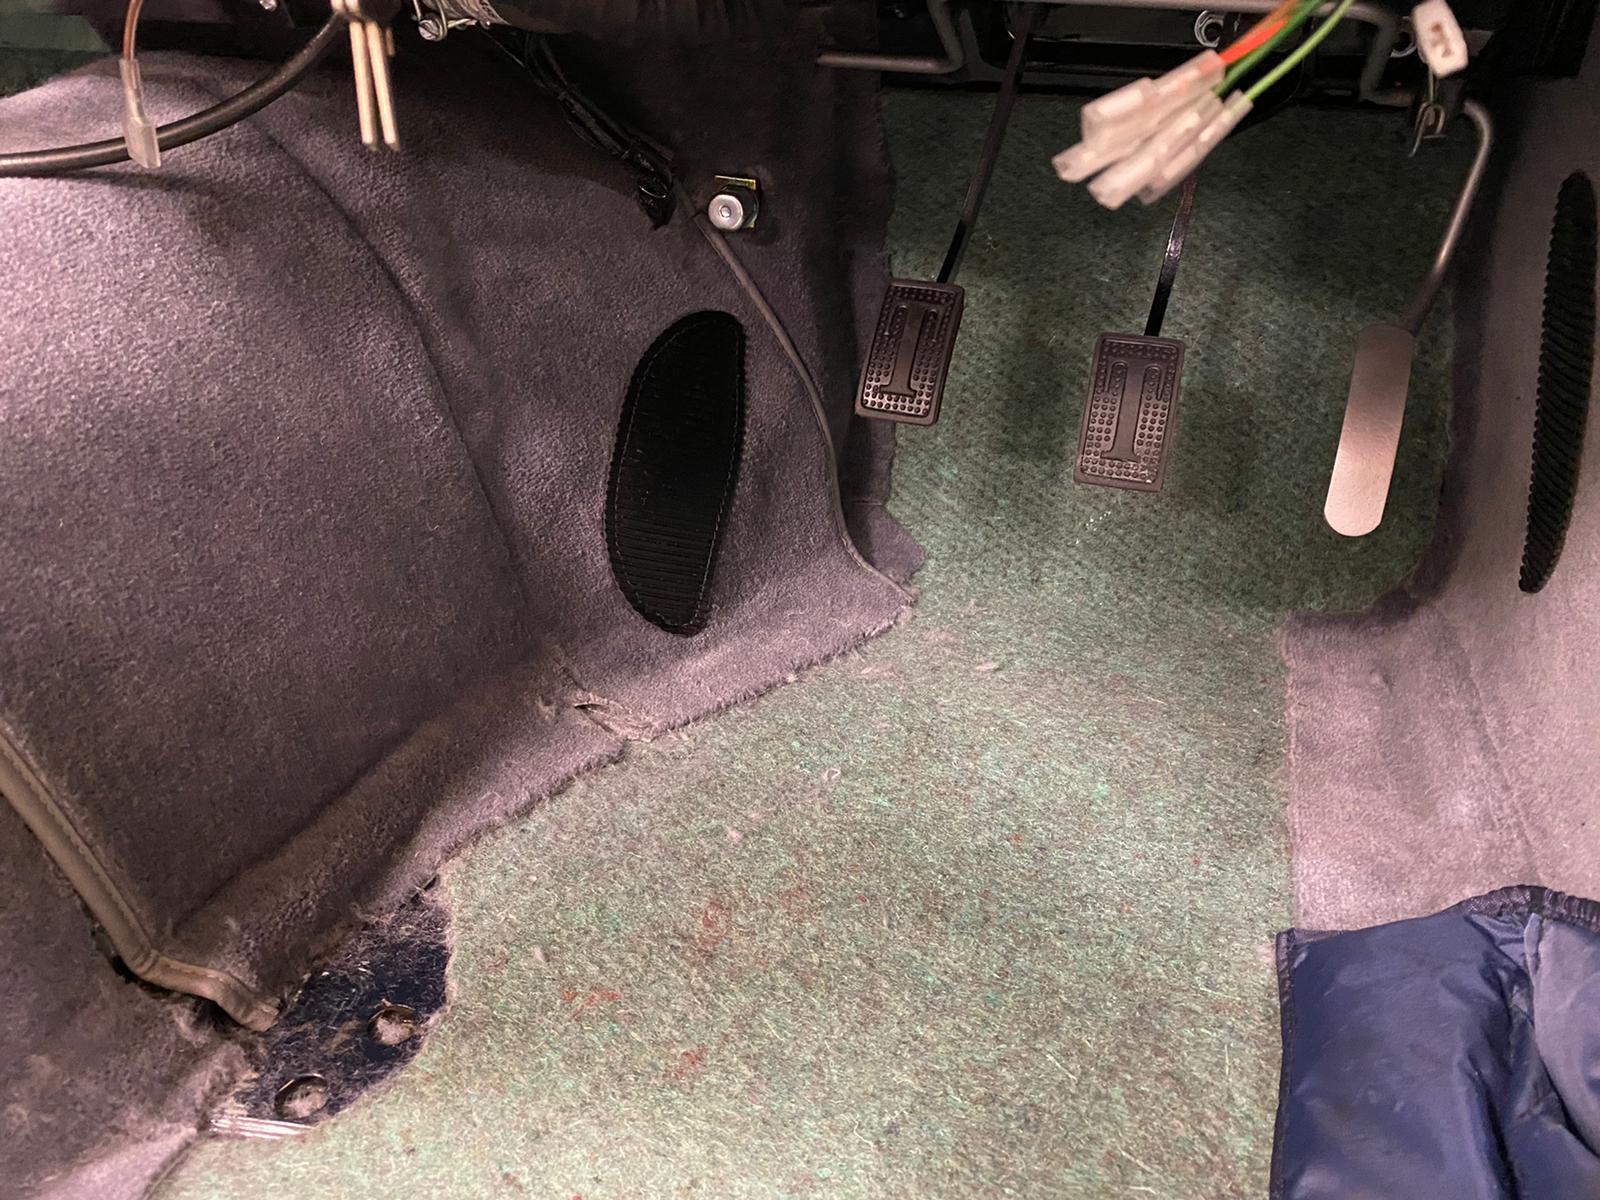
Finally, Kath could secure the carpet down in the upper foot well around the pedals and focus on the rear cockpit panel which needed to be screwed into place. Kath cut holes out for the hood mechanism and fit the hood mechanism in place so that it’s ready for the hood.


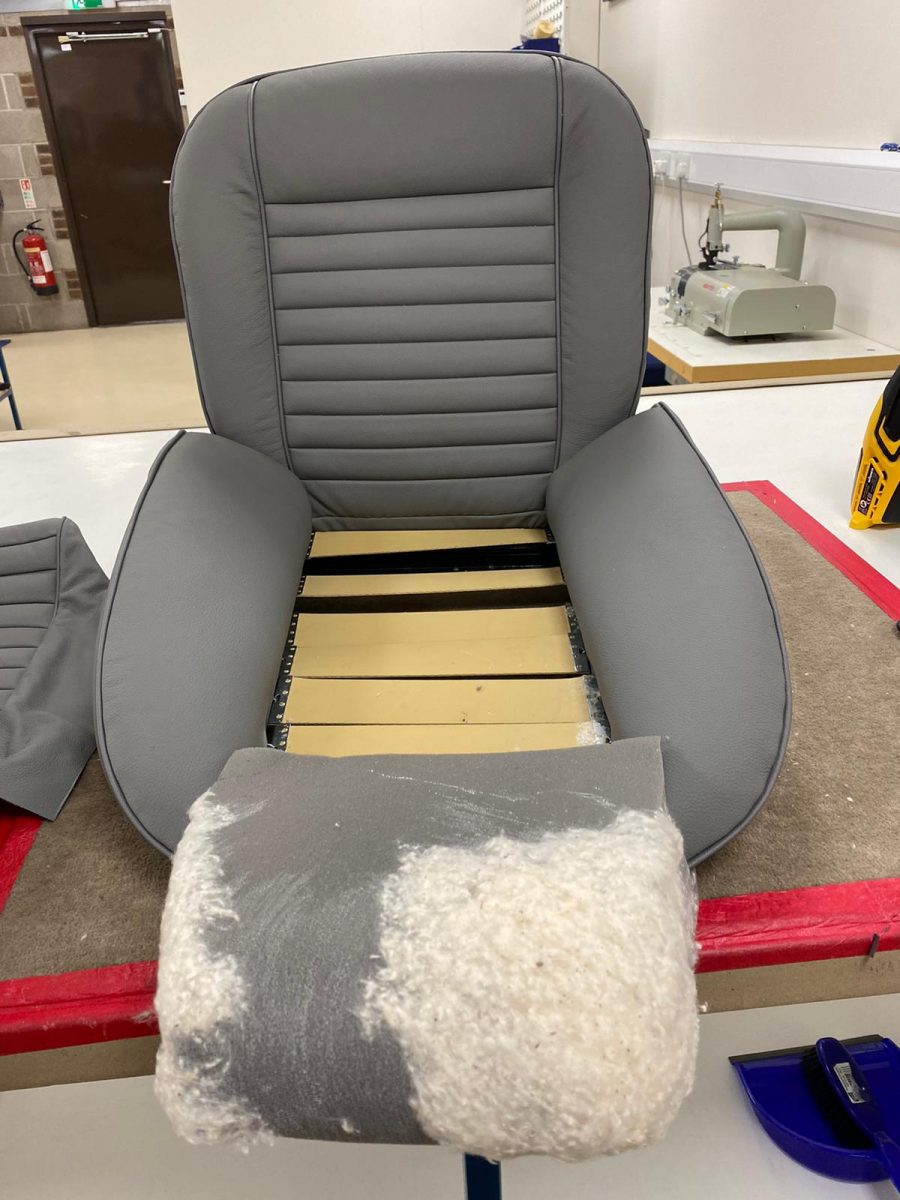
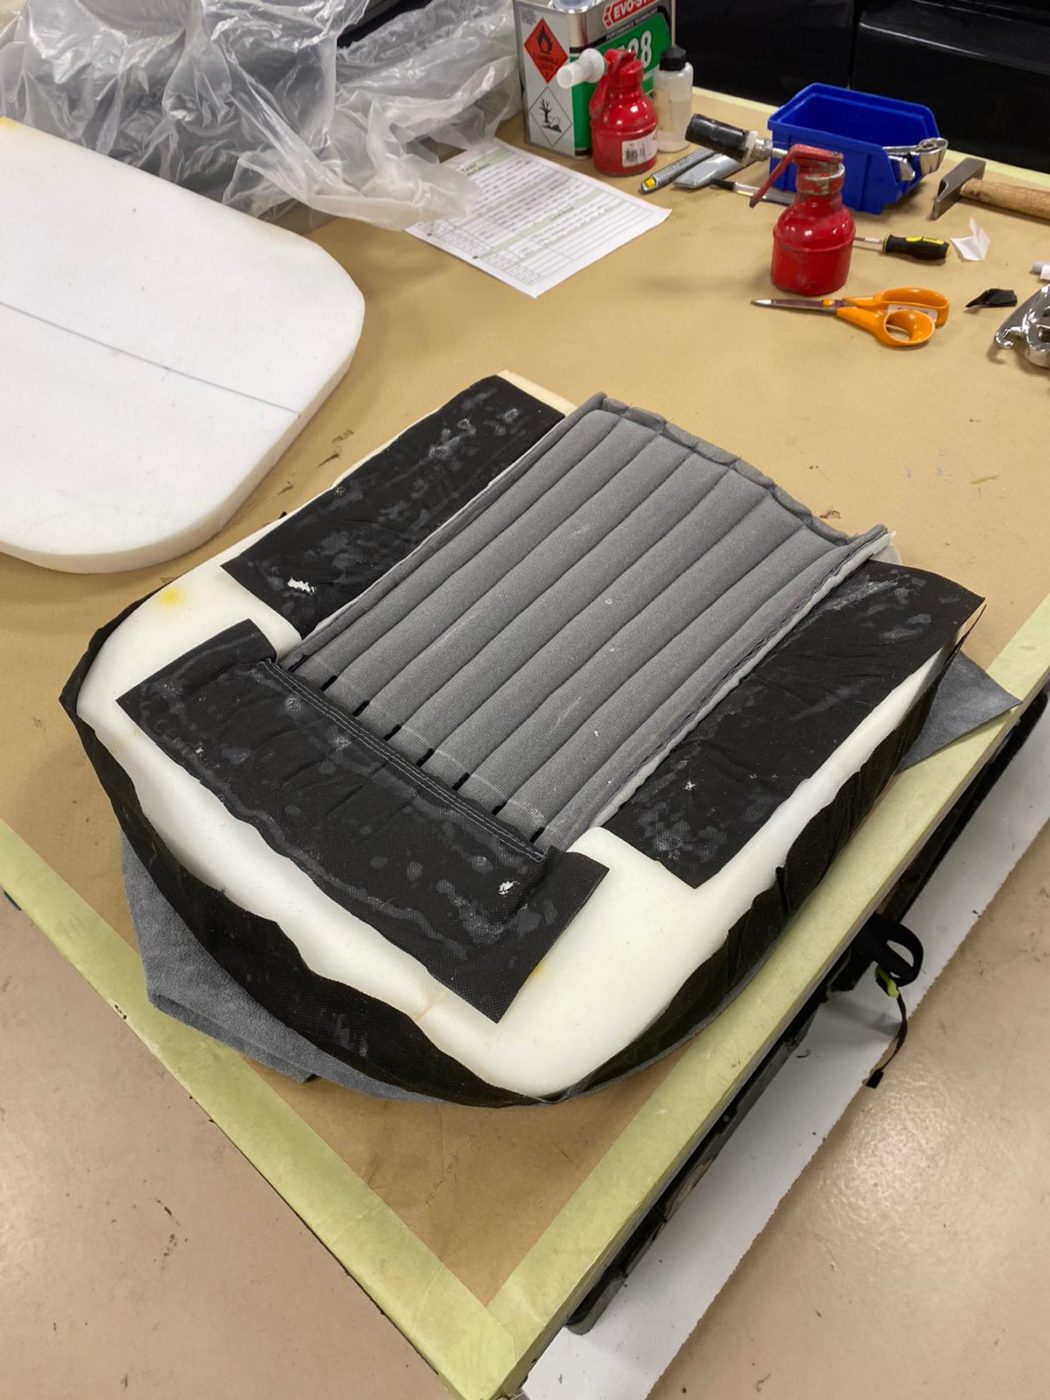
Brian started on the seats and their frames. He began by fitting the rubber diaphragm to the base seat and added foam around the front edge. He then glued the base cover to the upper foam and secured the lower foam in place underneath. The next step was to glue the base foam and cover to the seat frame and add extra foam around the front edge. By pulling the cover tight around the frame and clipping it in place, Brian could then glue the rear flap to the frame.
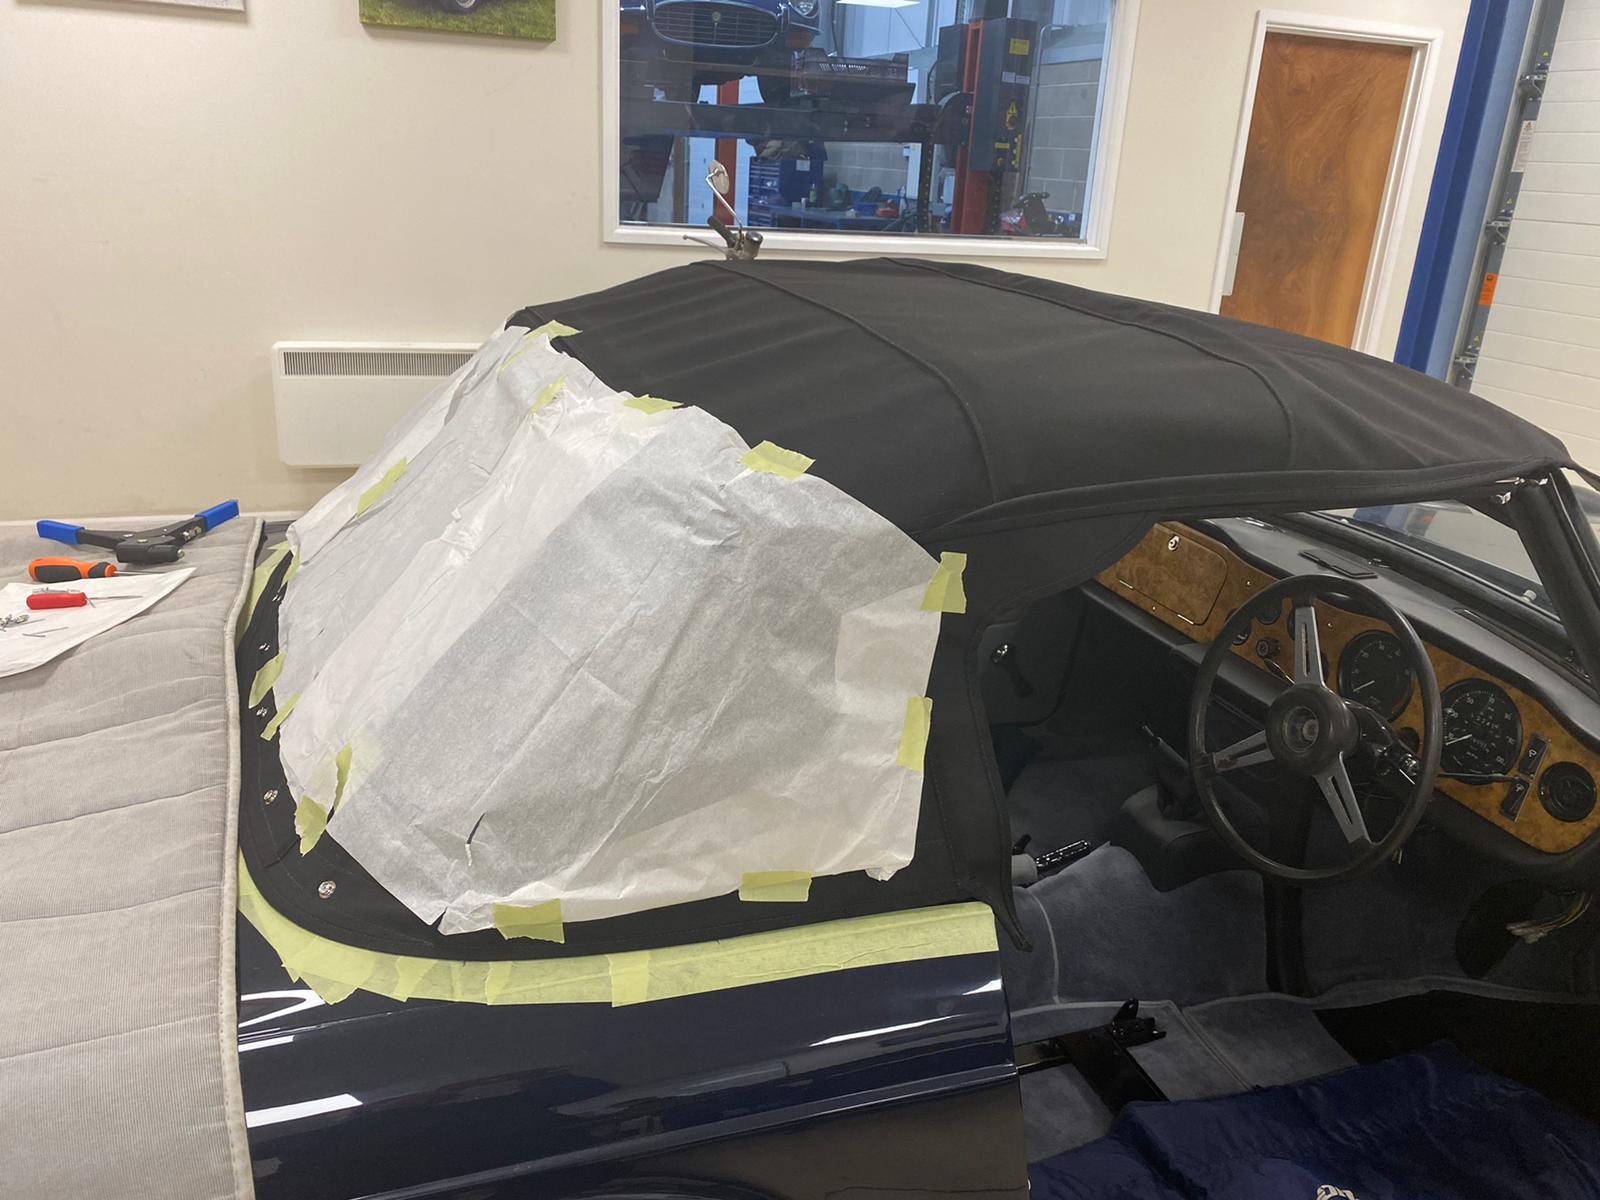
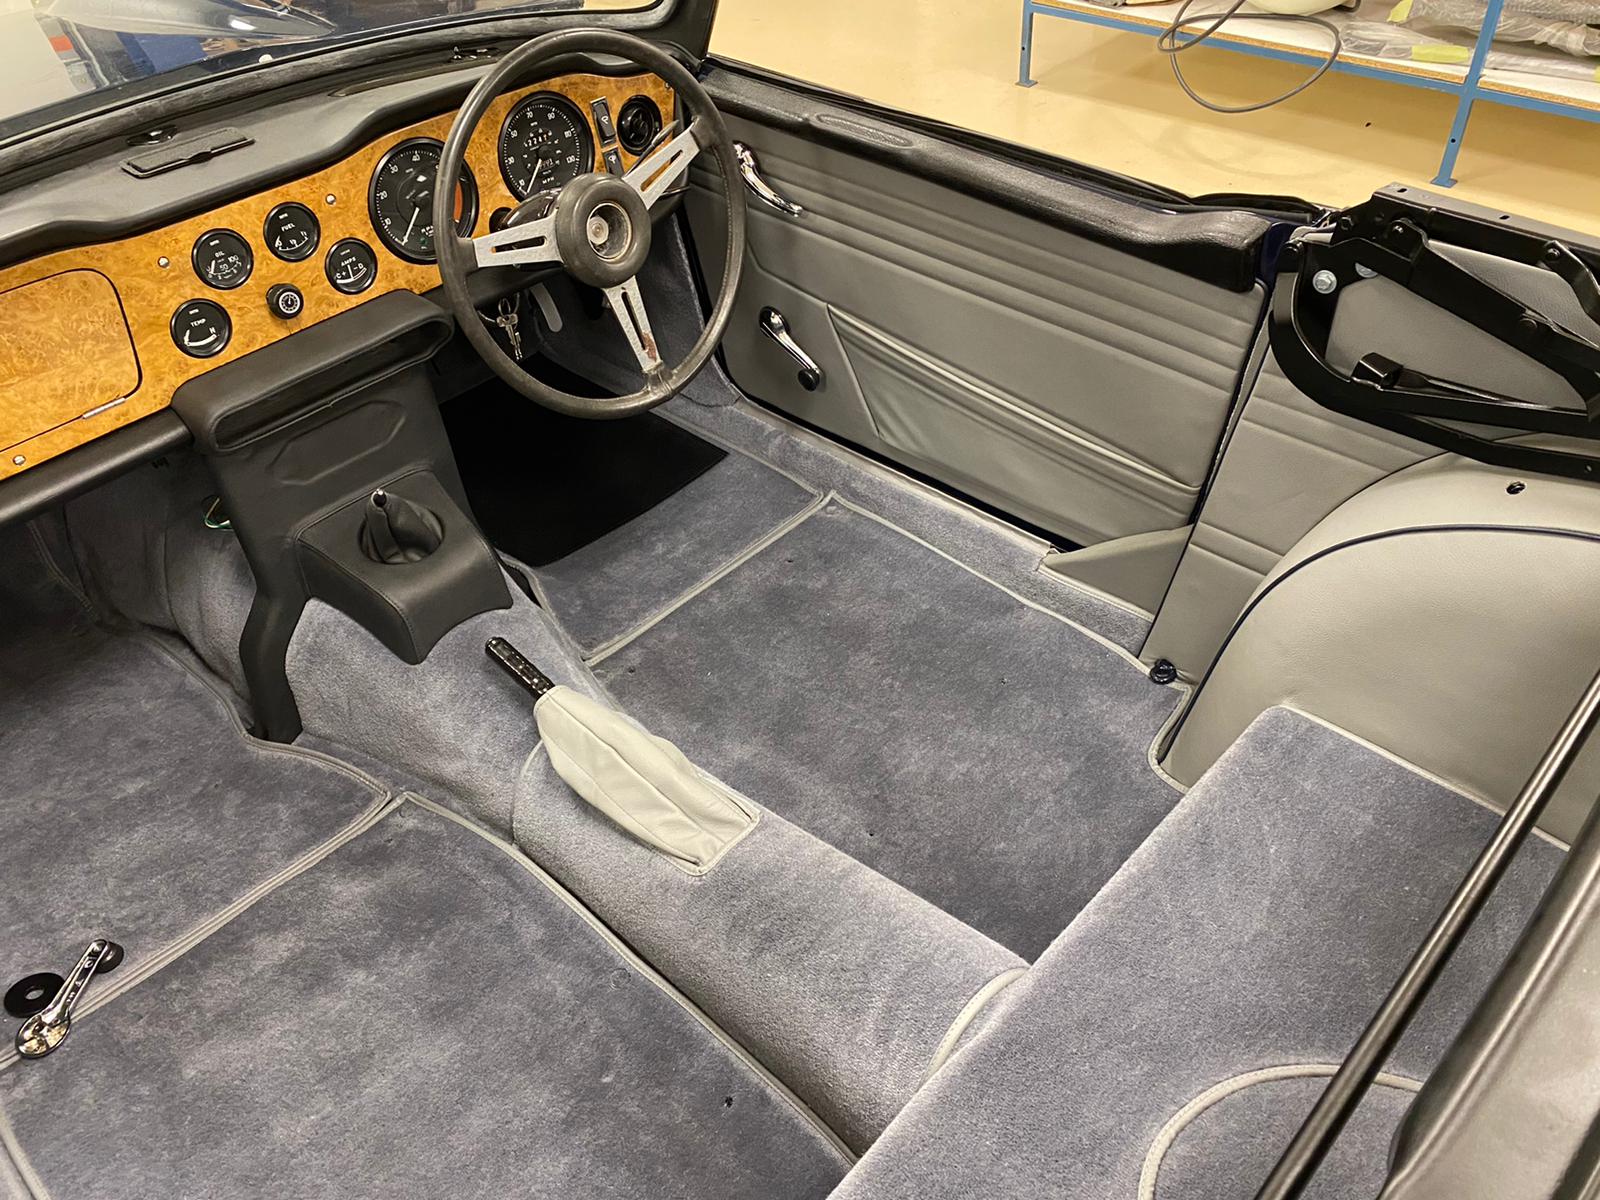
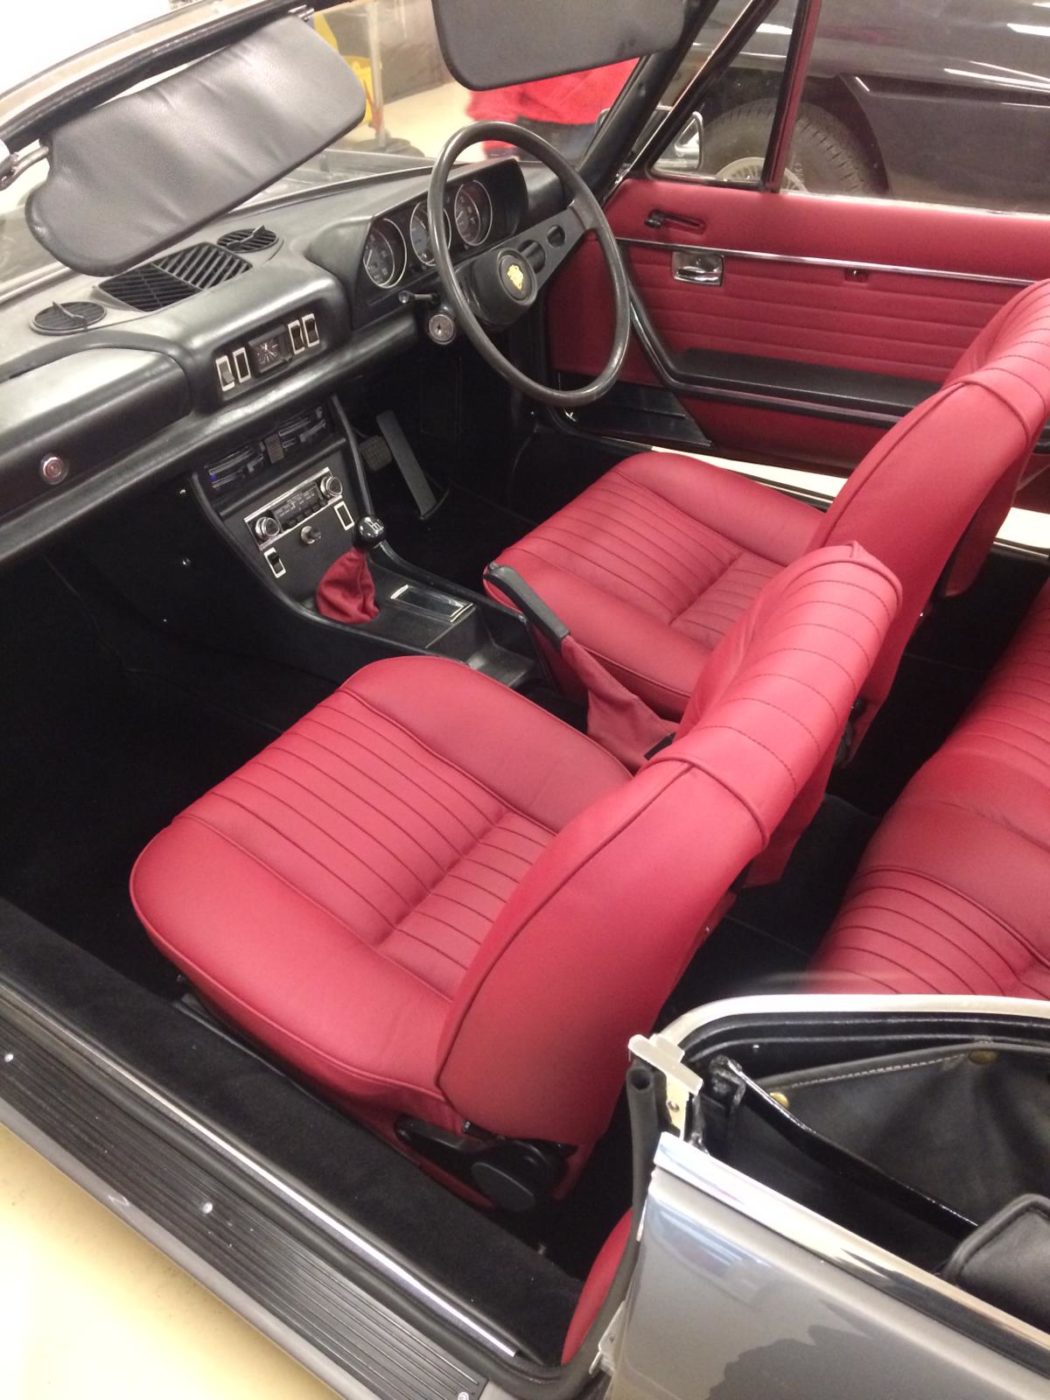
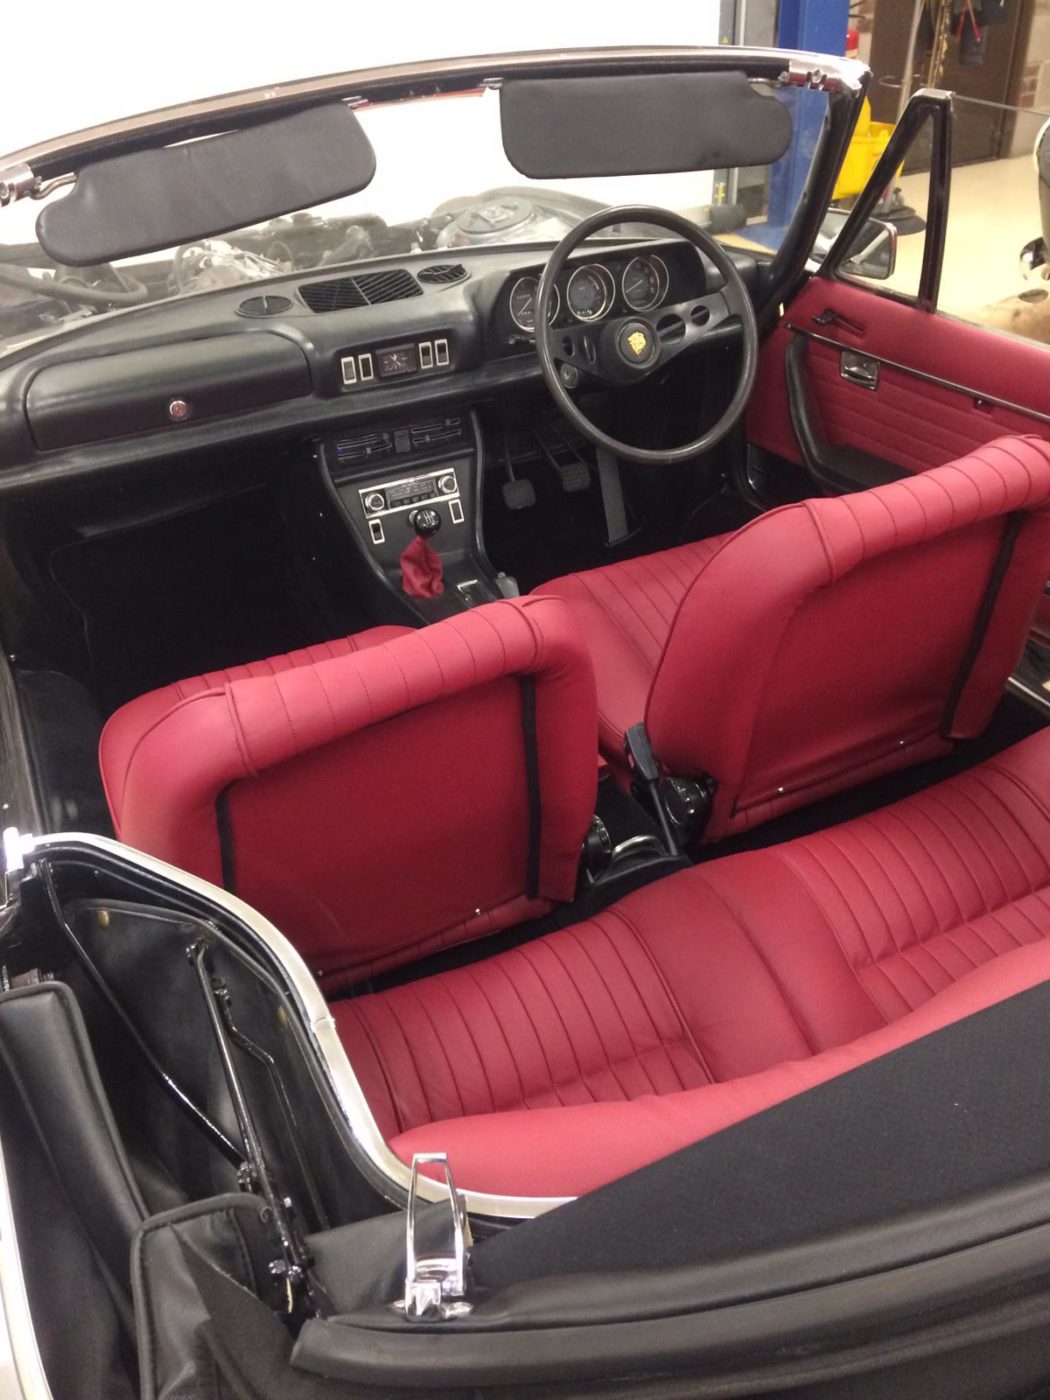
Our 1968 Triumph TR5 is still sat in the trim shop having its new interior fitted! Its a very exciting development as fitting trim to a vehicle is one of the final sections that really makes all the difference visually!
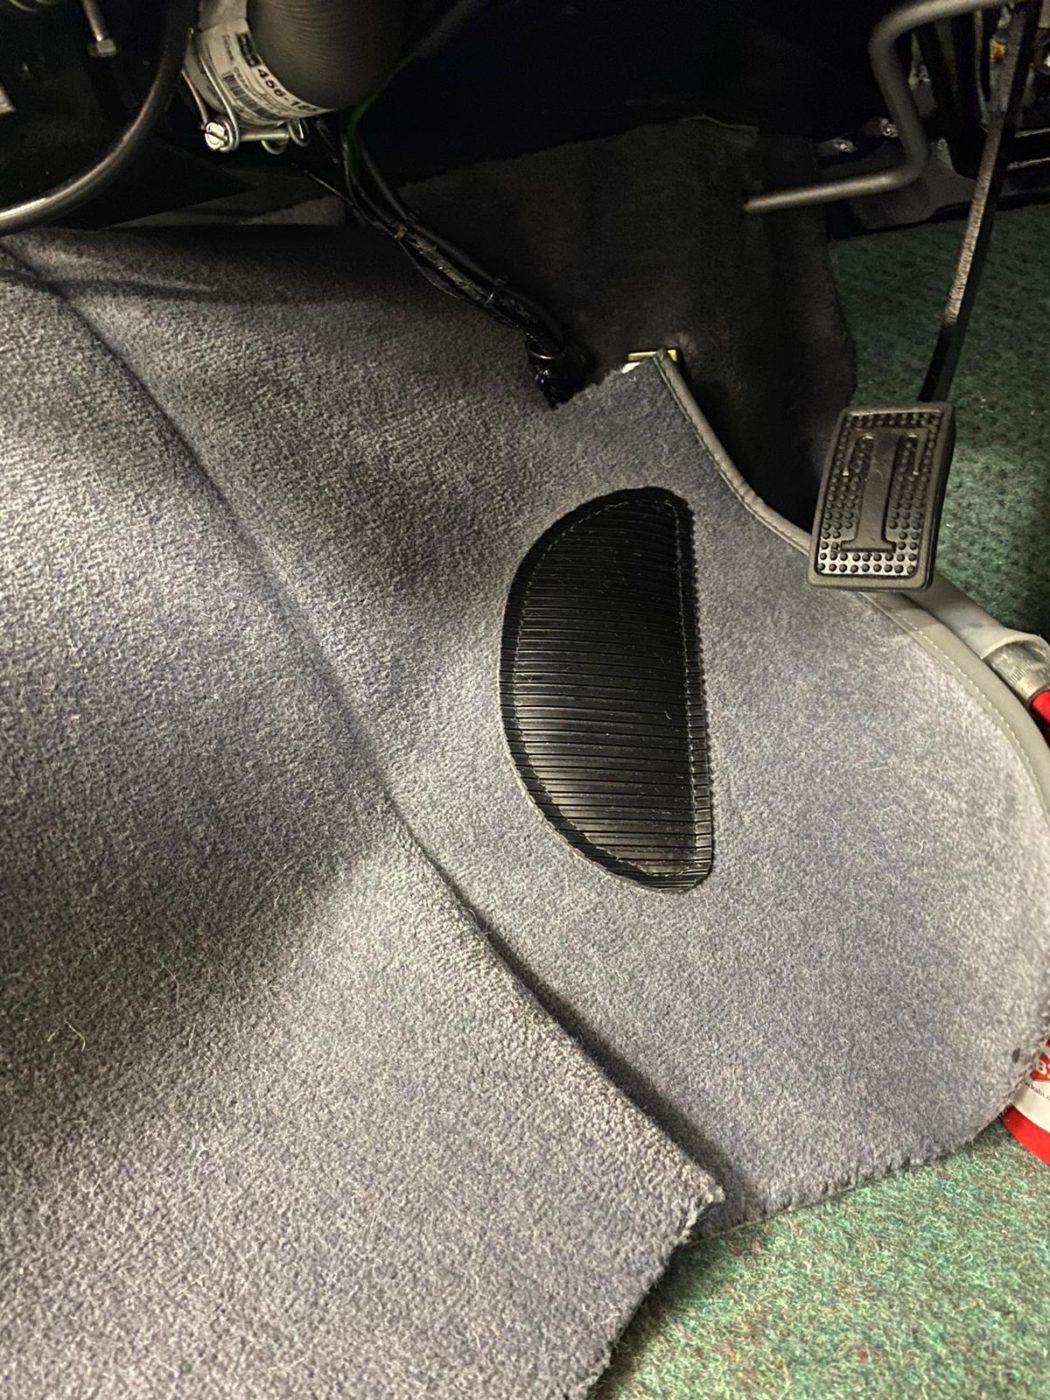
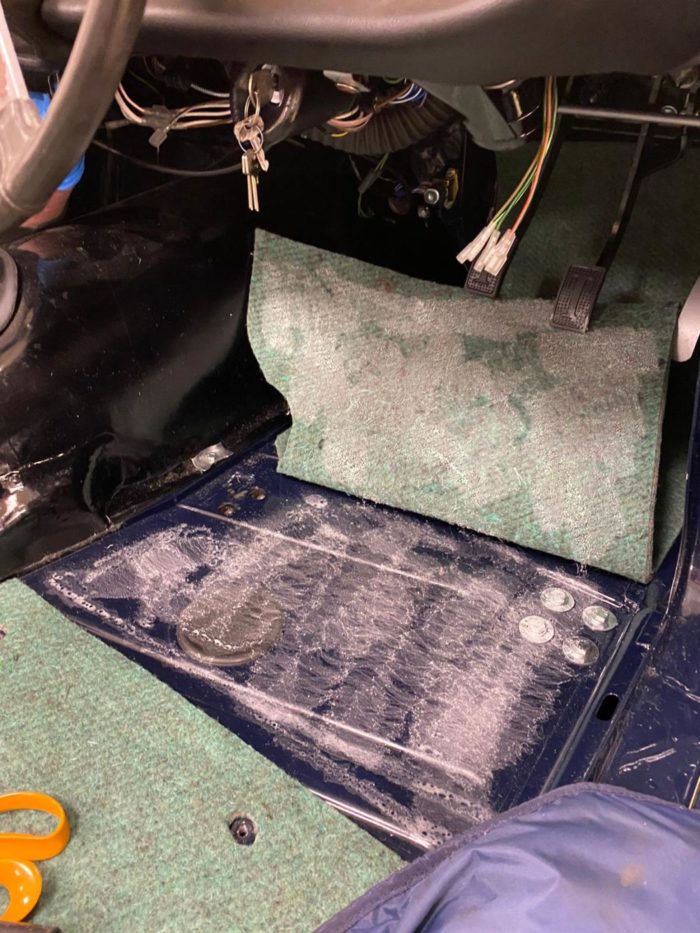
Kath has trimmed around and glued into position the carpet on the driver’s side under the pedals. She’s also fitted the driver’s side sill and the carpet near the accelerator pedal.
The centre console was then just laid in place to make sure it fits with the sound deadening now in place. Once everything definitely fit, Kath could glue in the sound deadening around the upper tunnel section and glue the carpet in the upper head of the tunnel. She then trimmed around the pipes and wires and lay in the tunnel section. The next step was to then put the centre console in over the carpet to make sure it still fits after each modification. The driver’s side and passenger tunnel section could then be glued in and packed out with foam to make a better fit.
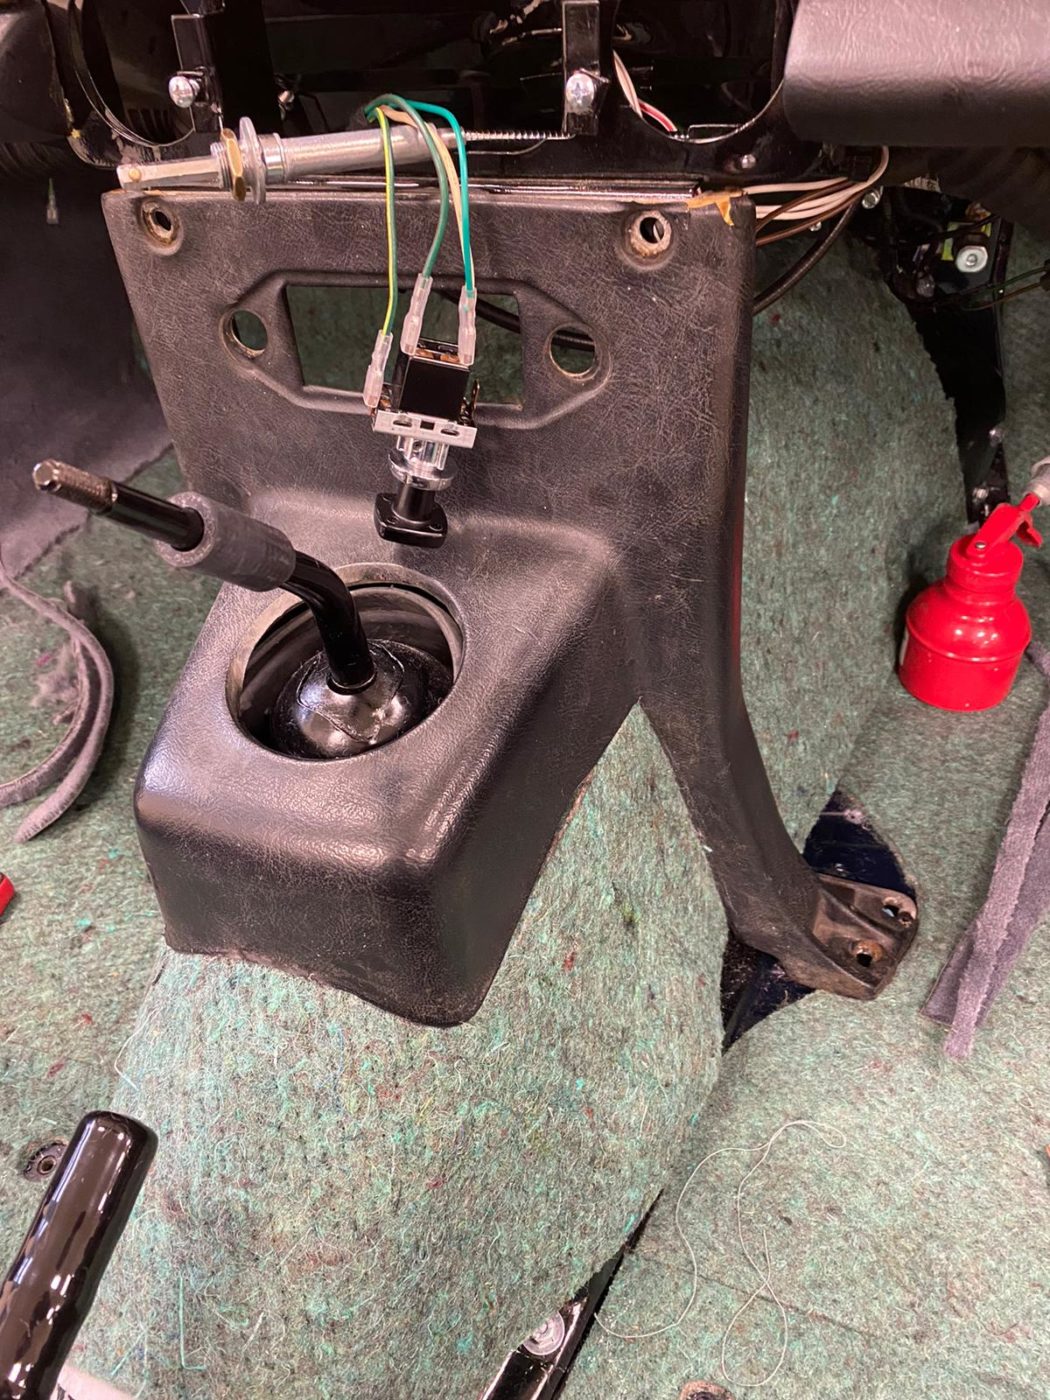
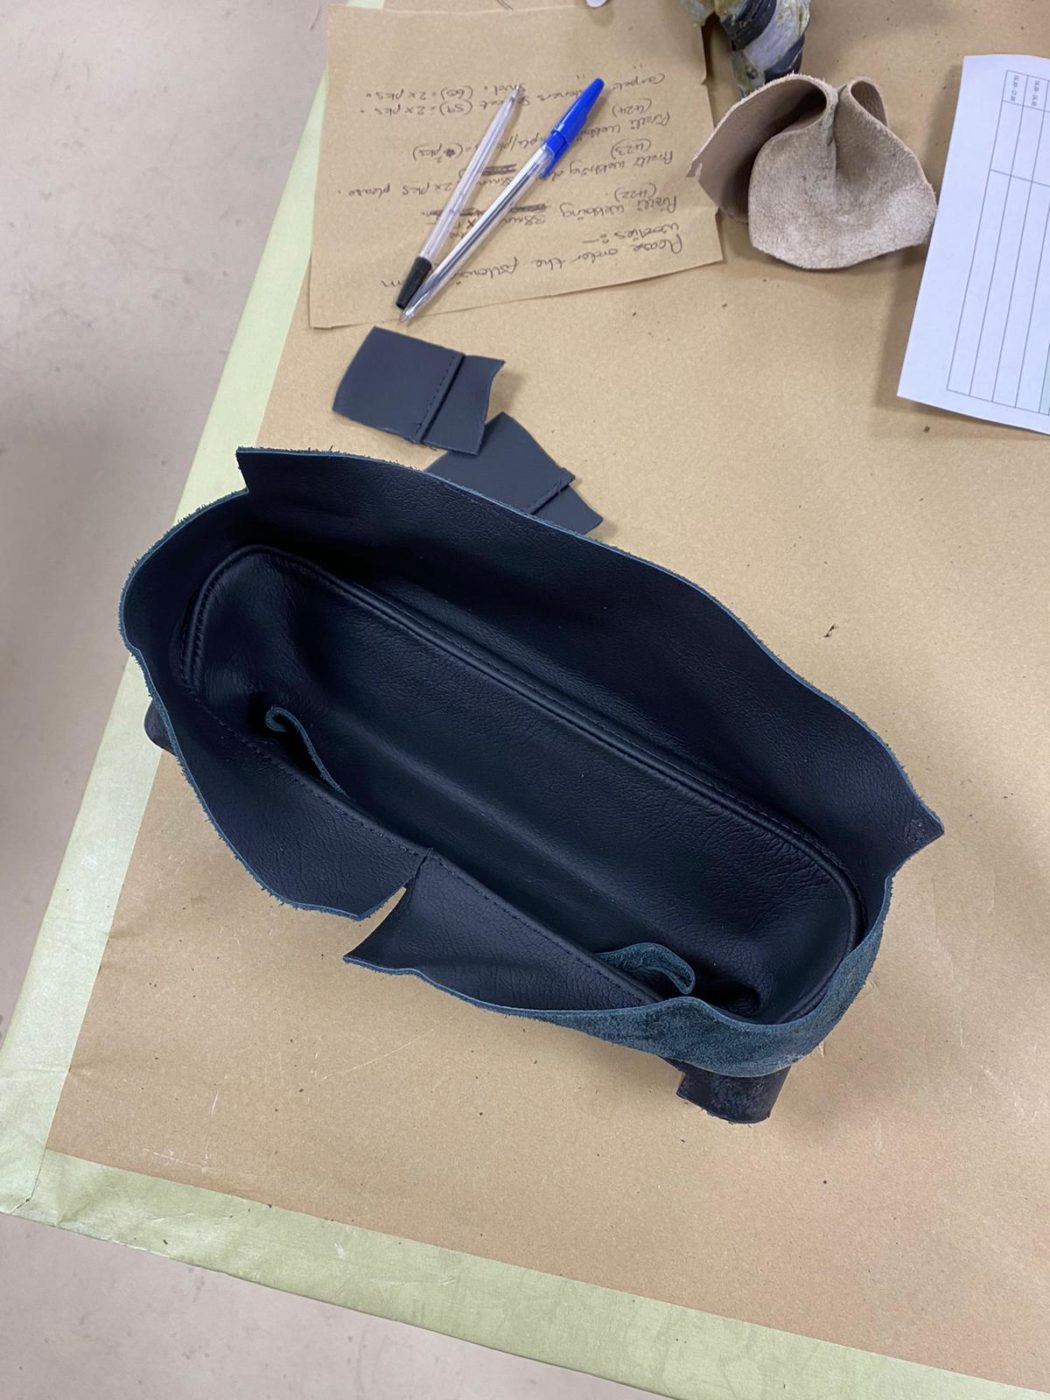
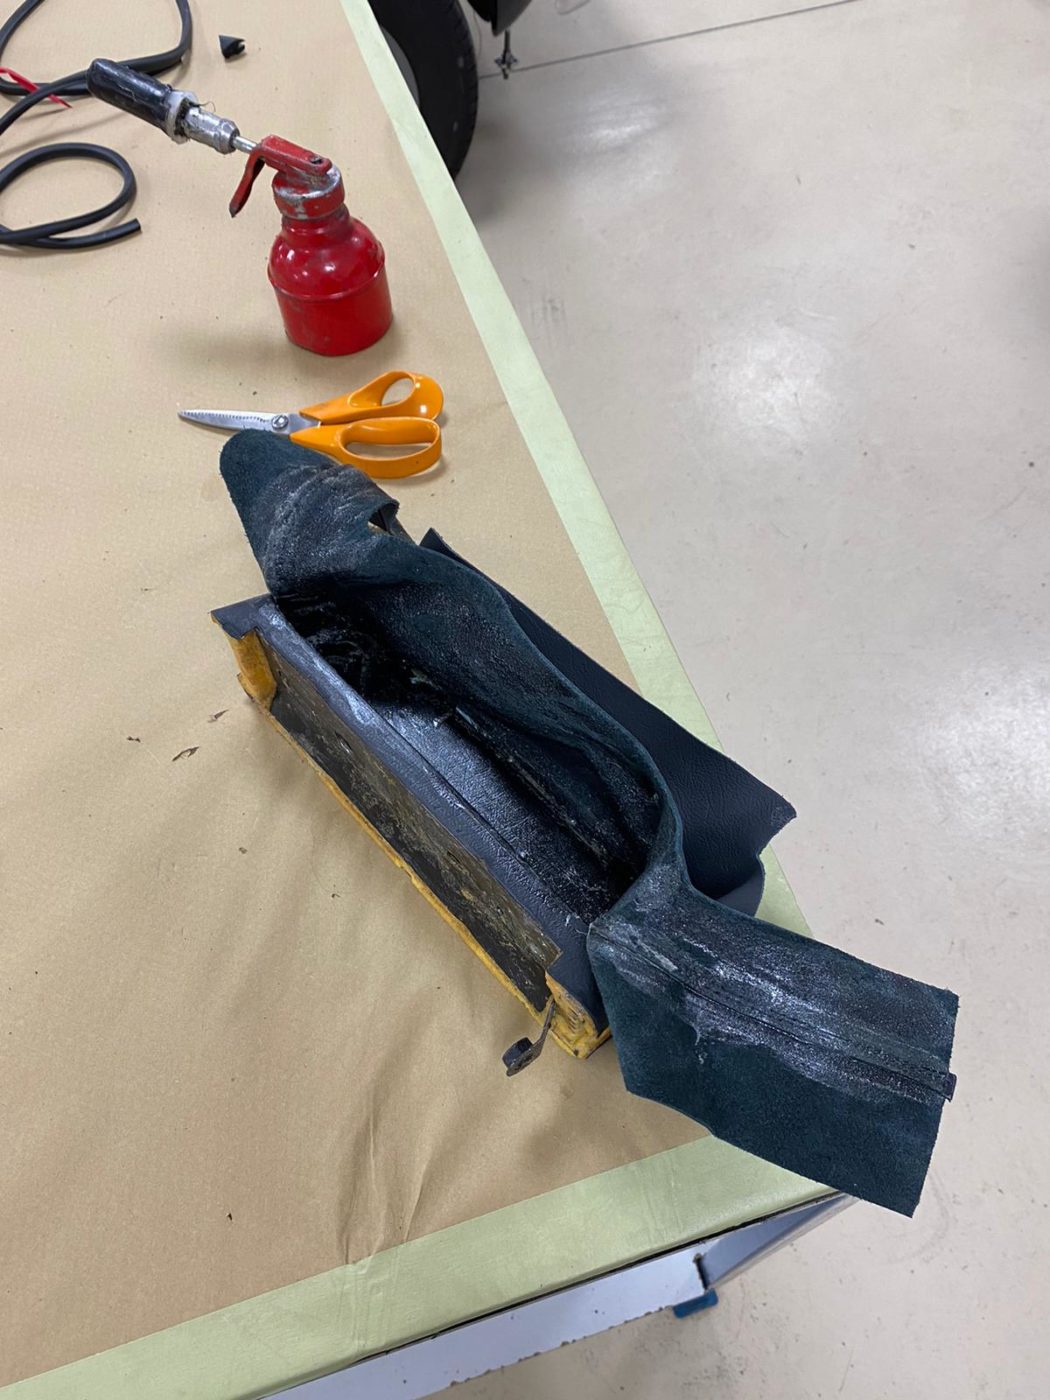
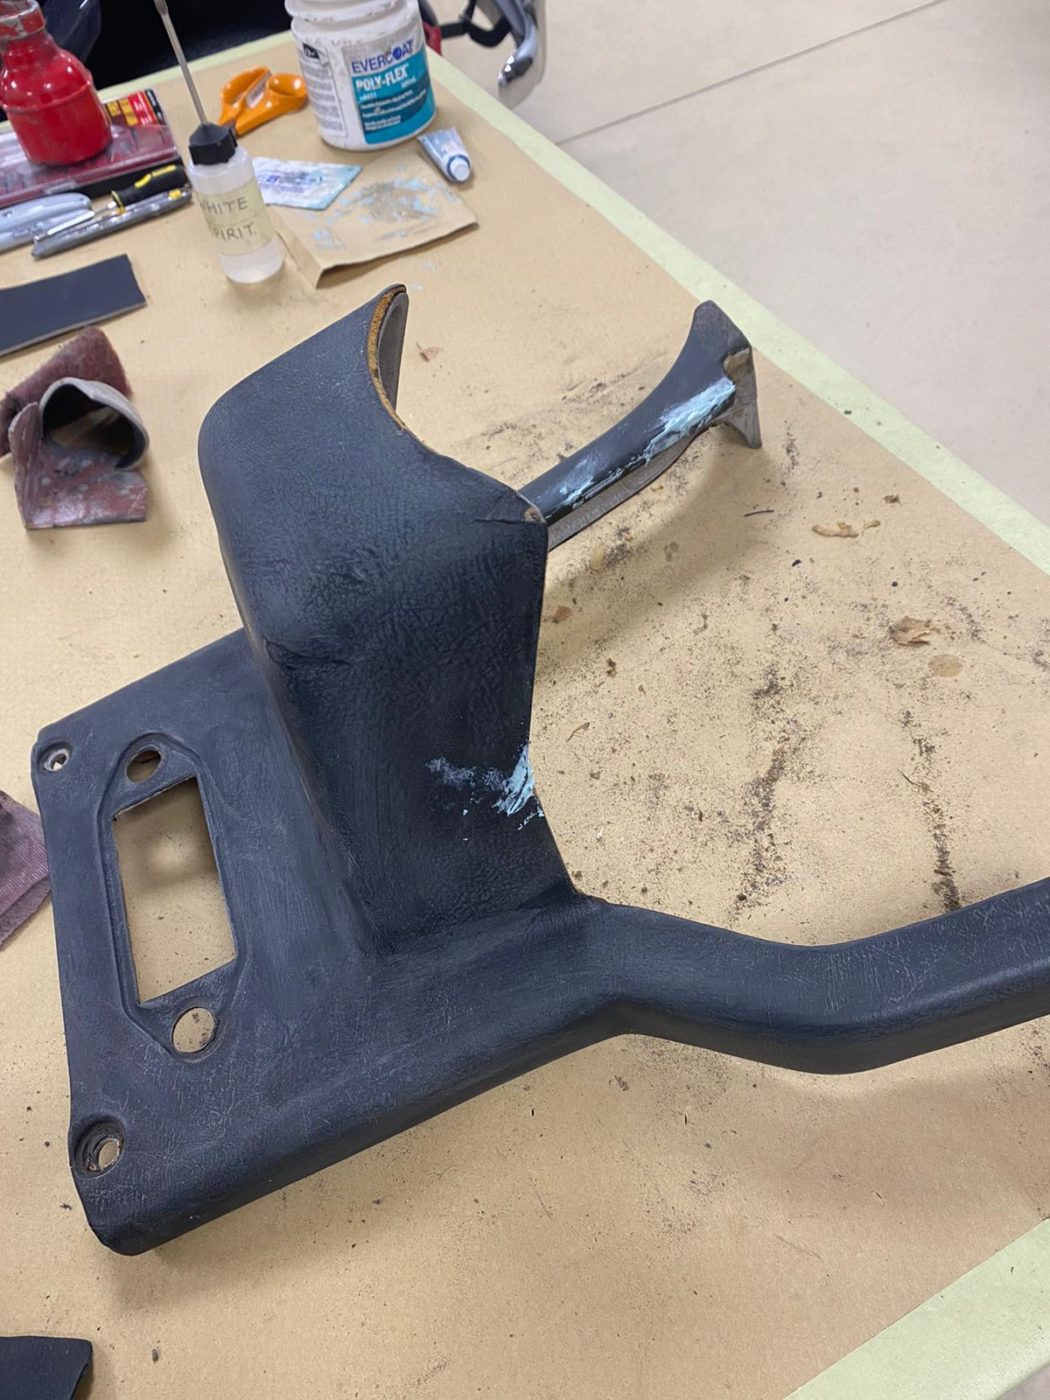
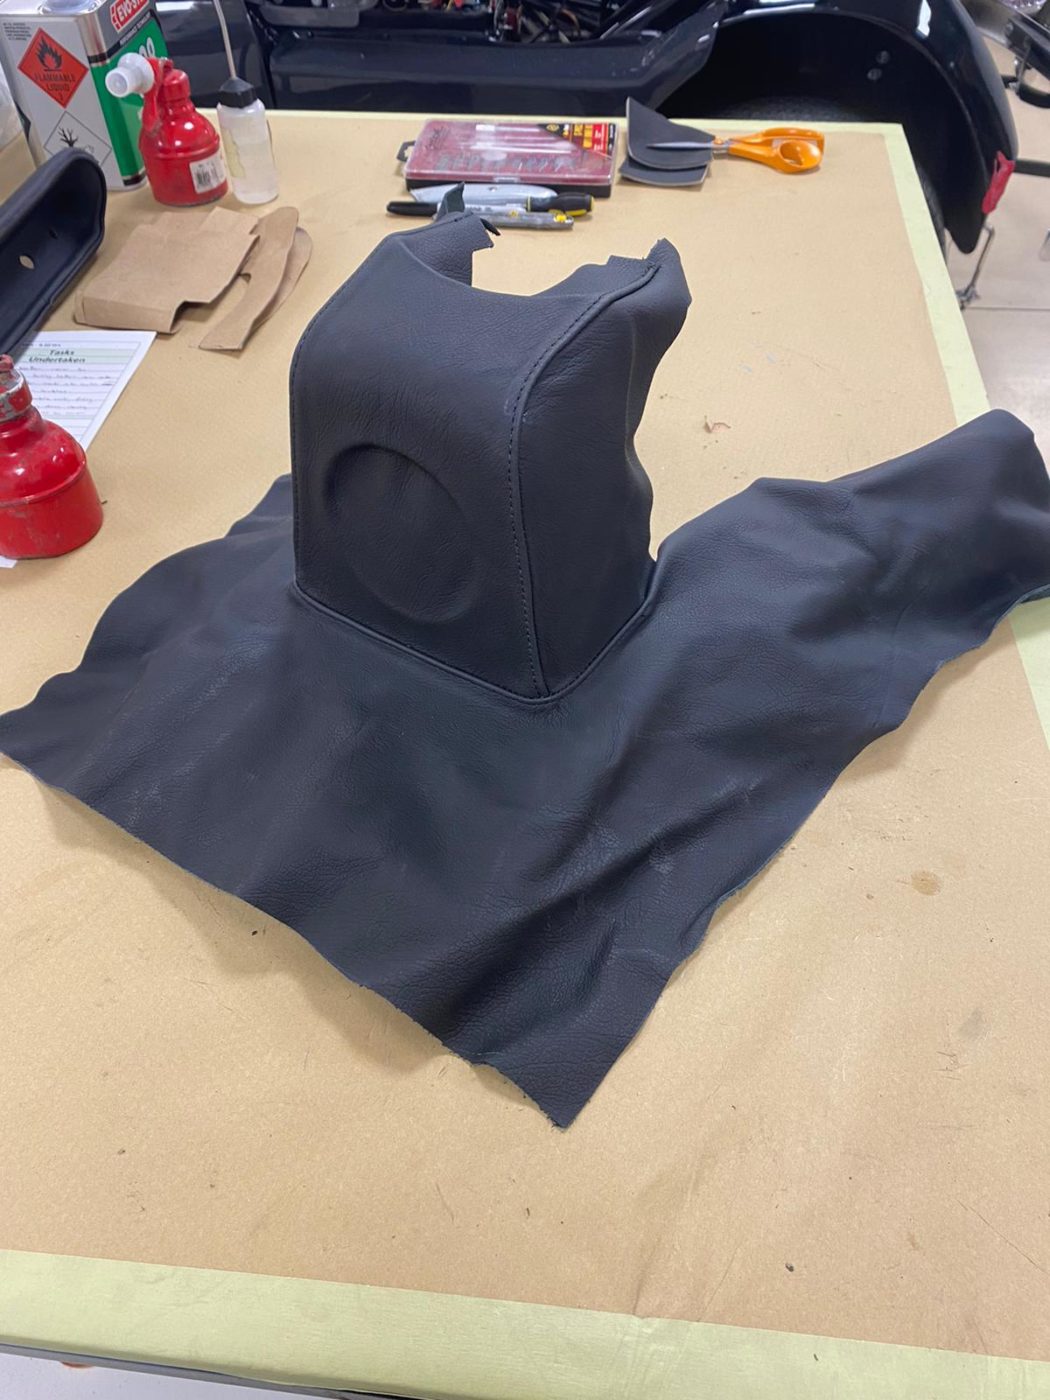
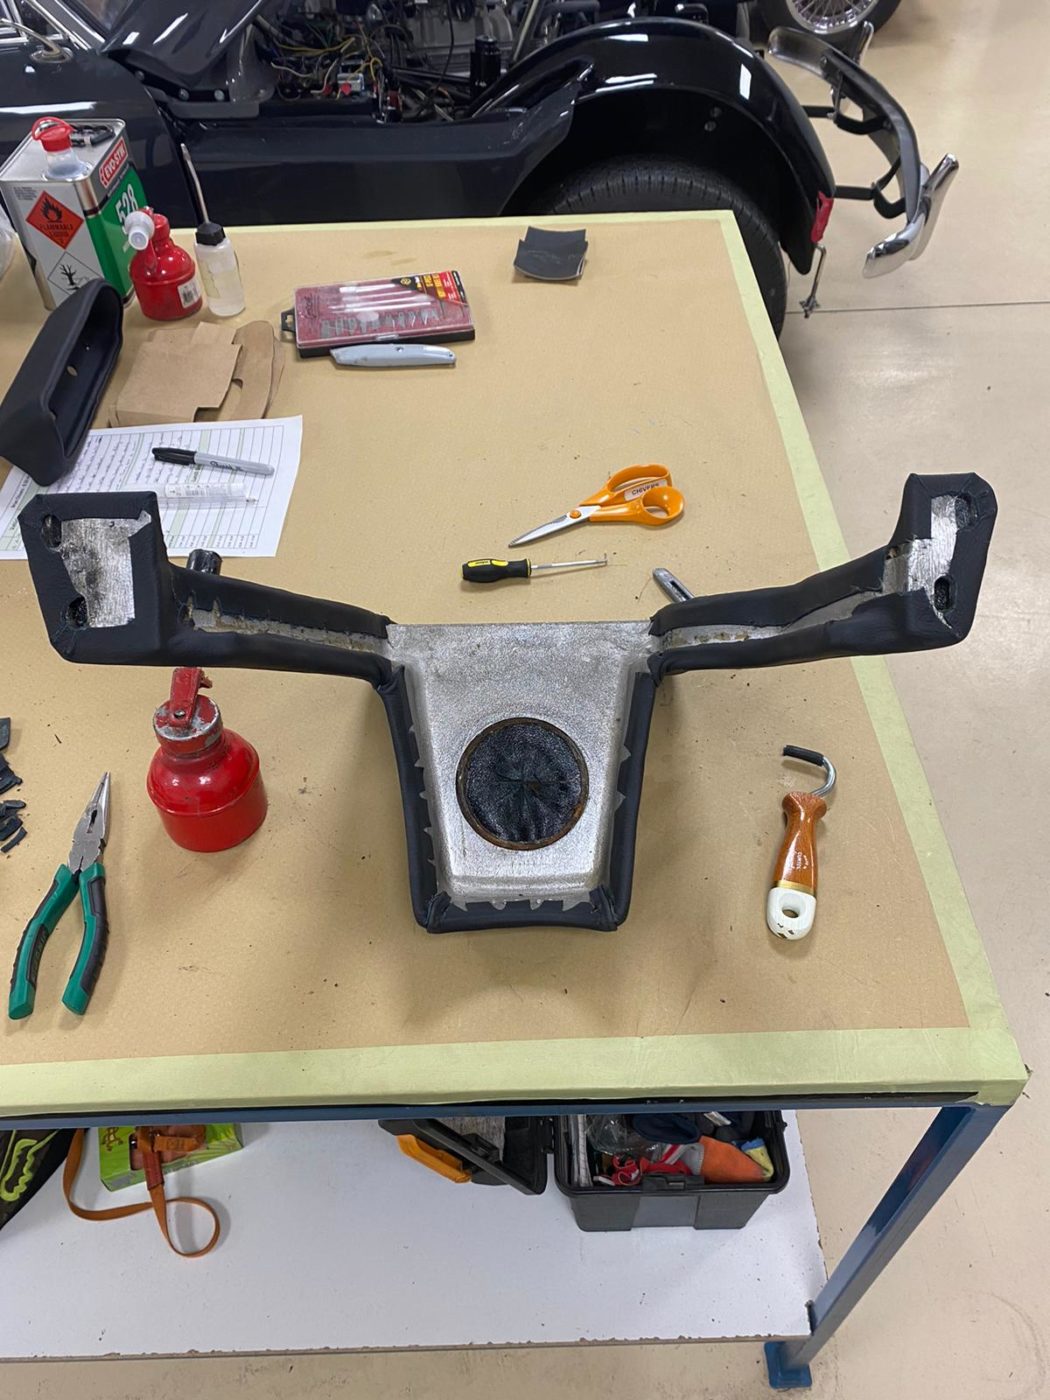
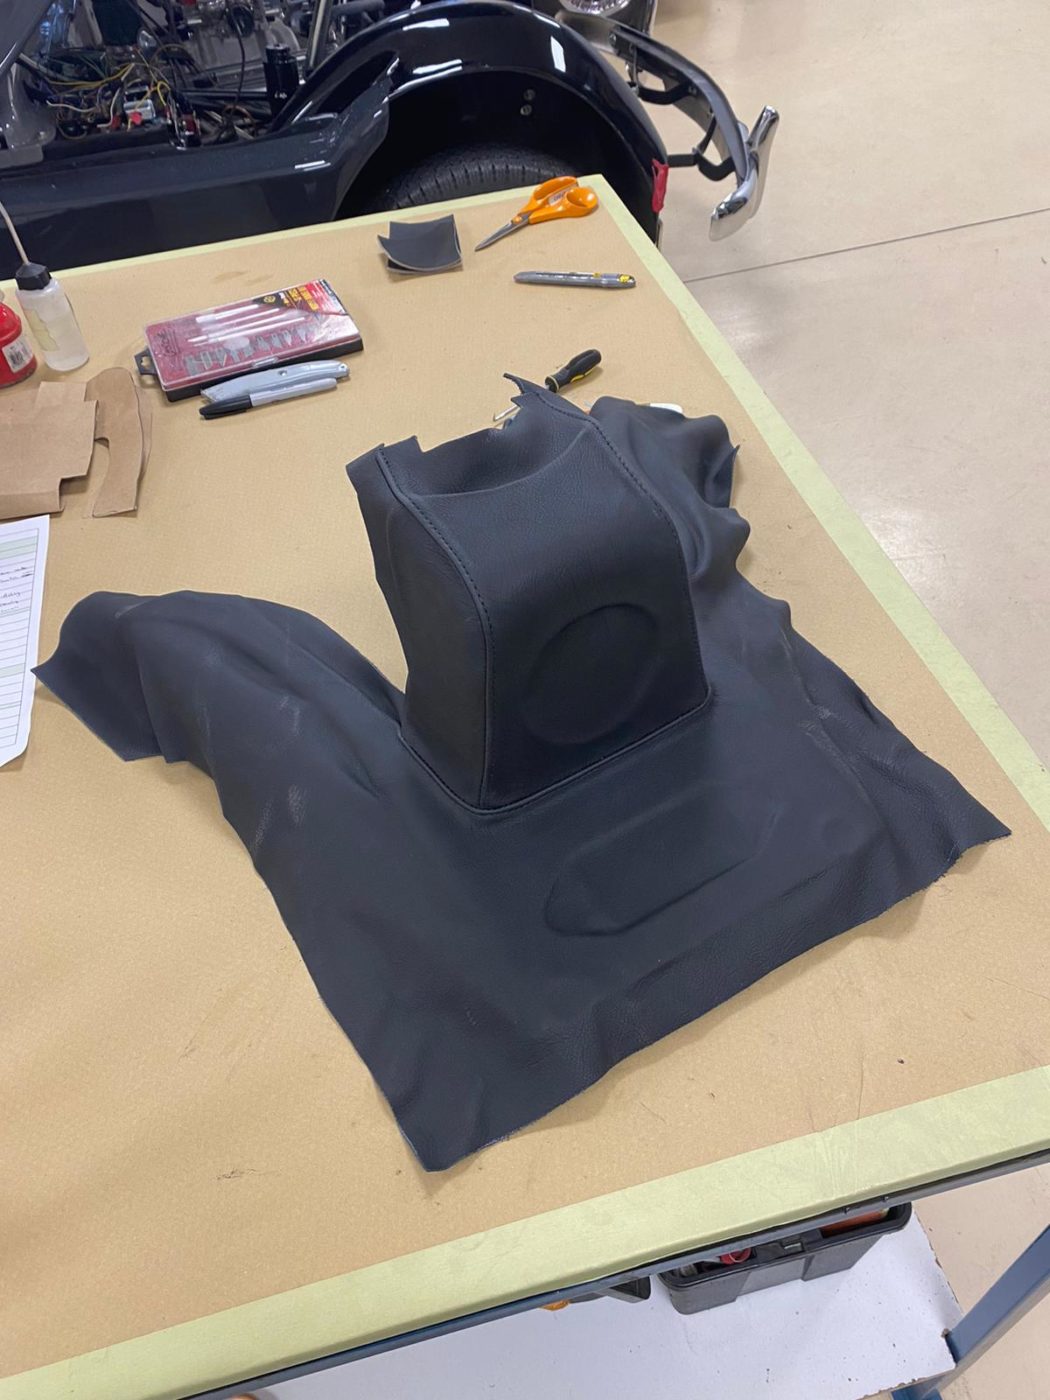
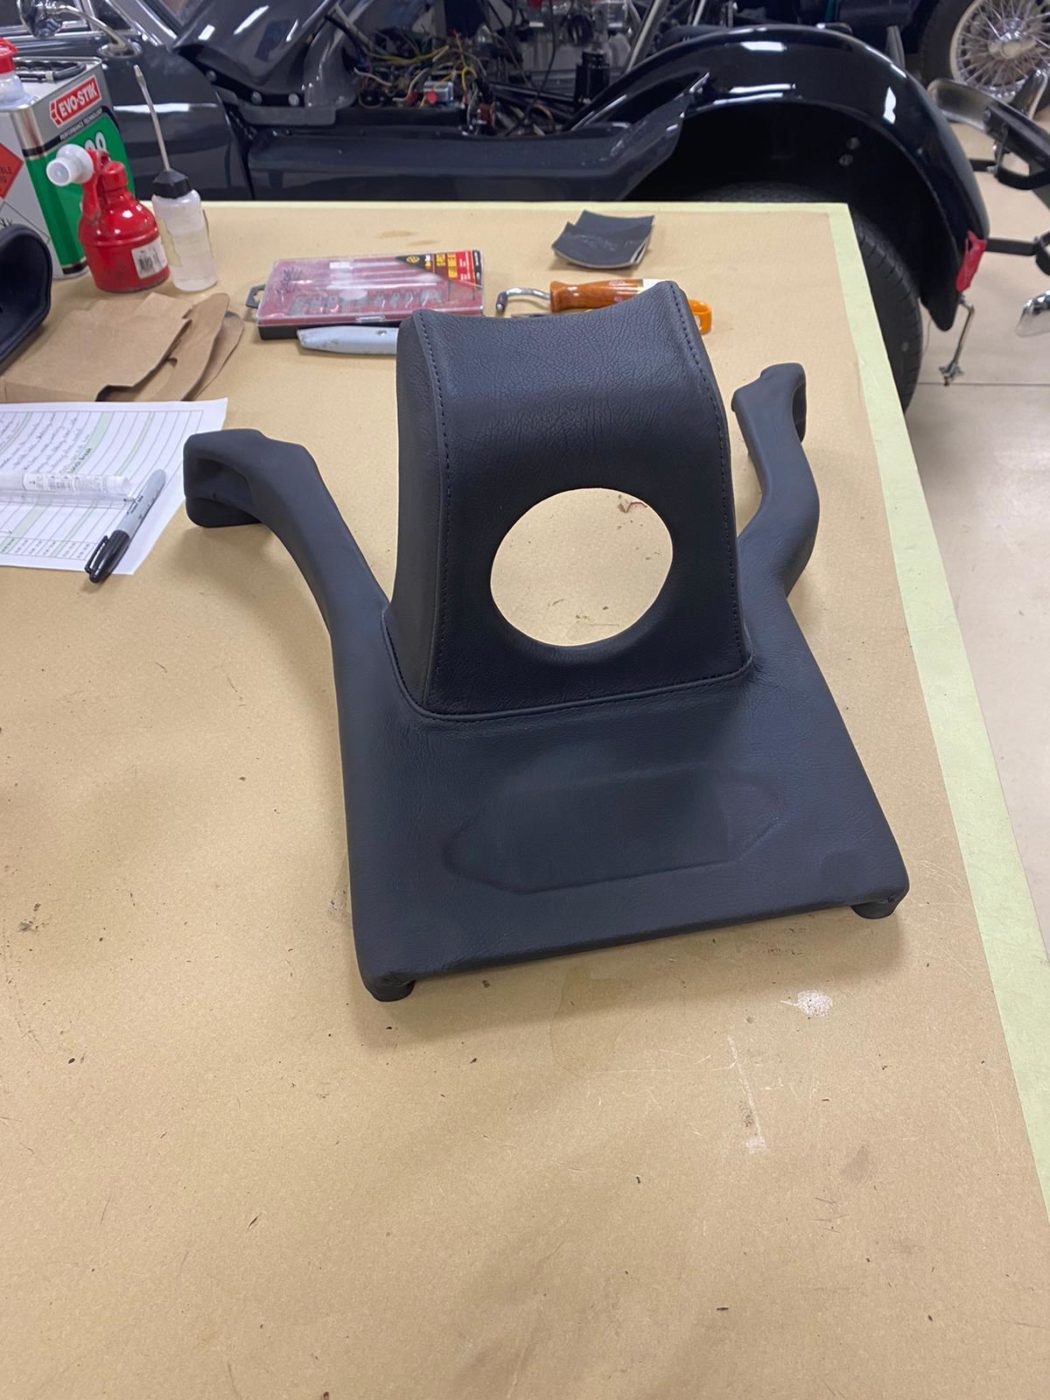
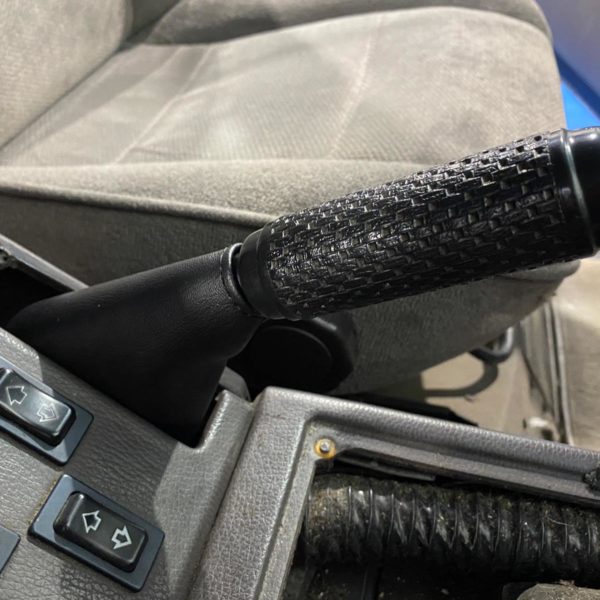
Brian has made up the centre console by sanding and filling the cracks in the existing centre console switch unit. He’s glued the inner section and pushed the leather into place and followed it up by glueing the outer section and pulling it tight around all edges.
Brian could then cut the holes for the switches and fill the cracks. Once repaired and sanded, Brian was ready to glue the leather to the console, and start on the gearstick section by glueing and stretching the leather around all edges of the console. He then cut and trim the leather to get it to fit perfectly around the back of the console. Once these modifications were made, he could glue the leather and turn over the edges for the gearshift hole. Once these steps were completed, Brian fitted the console into the TR5.


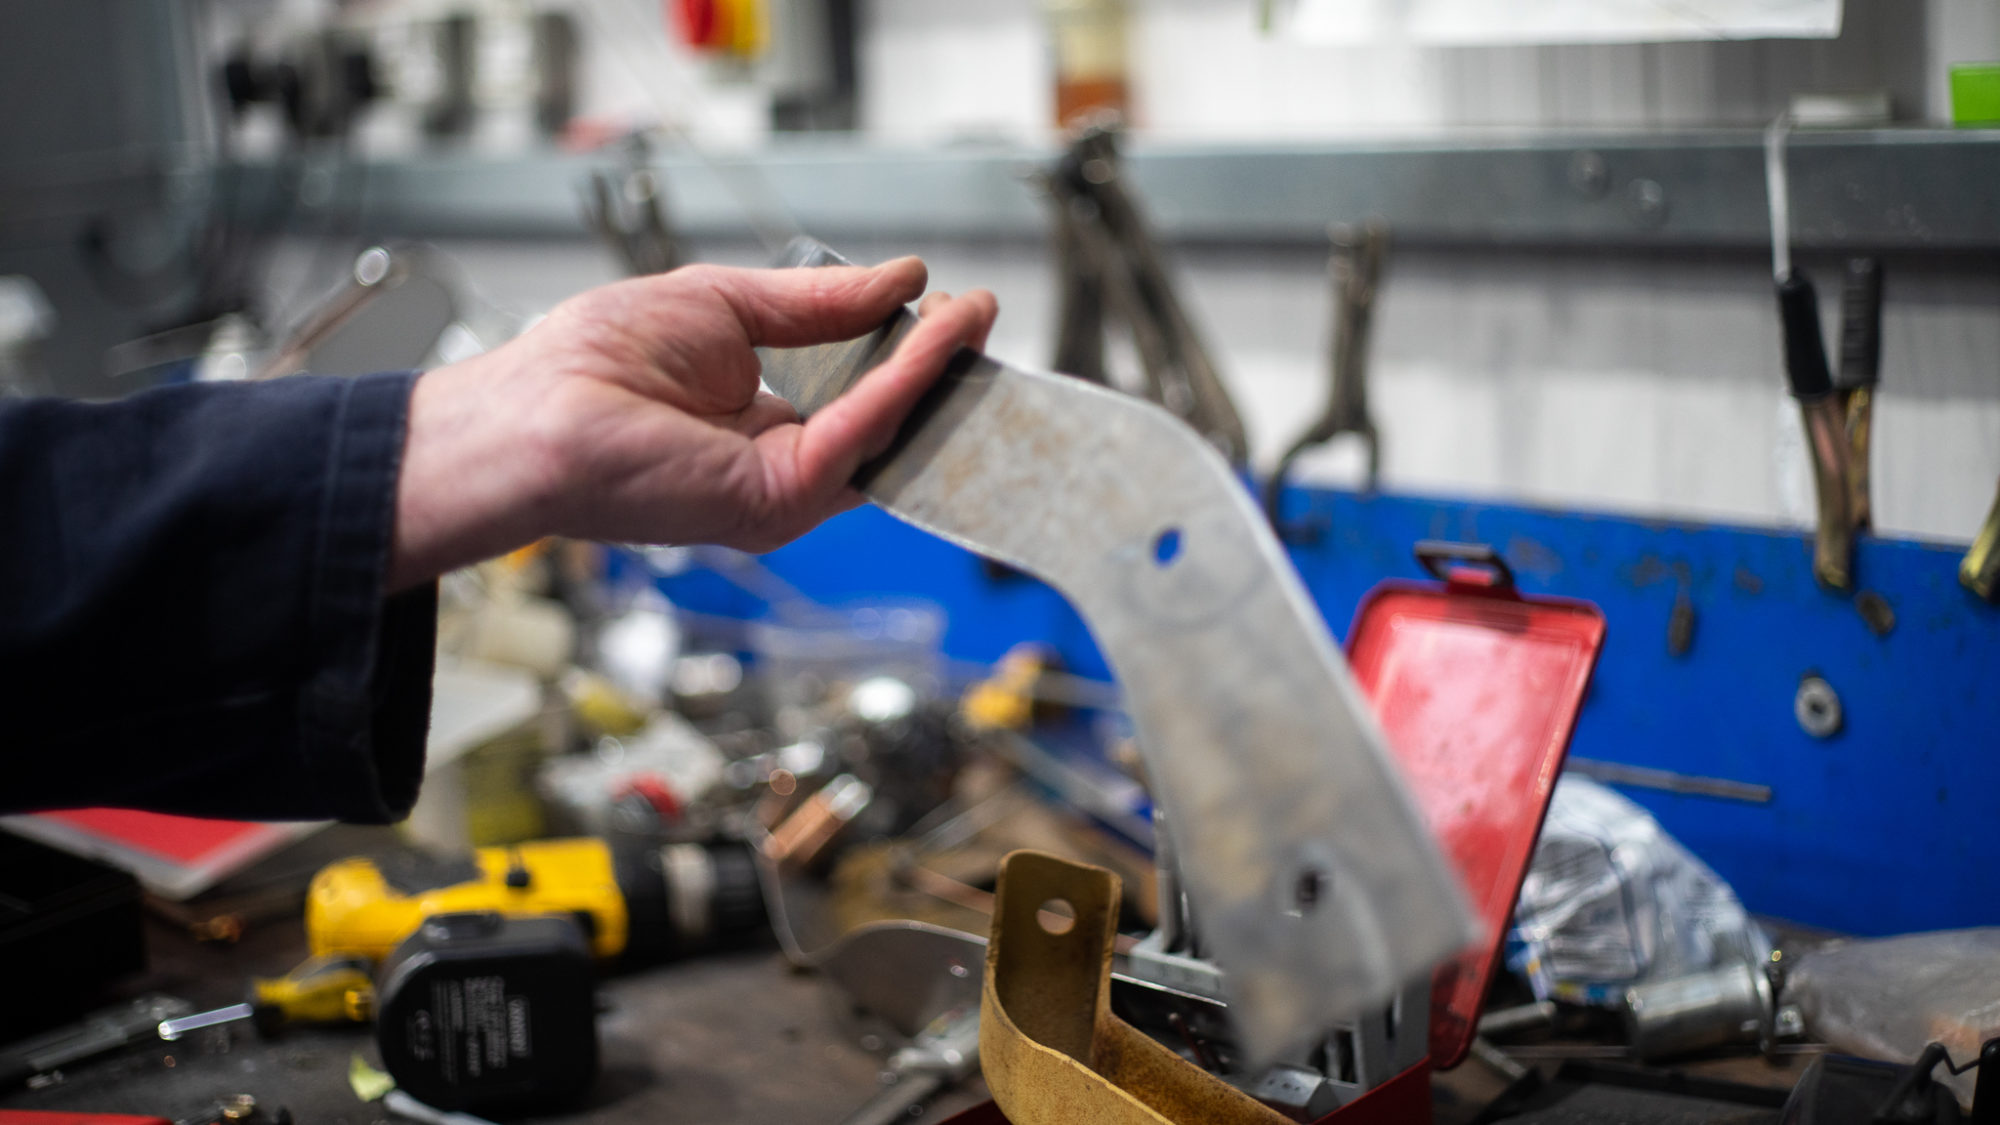
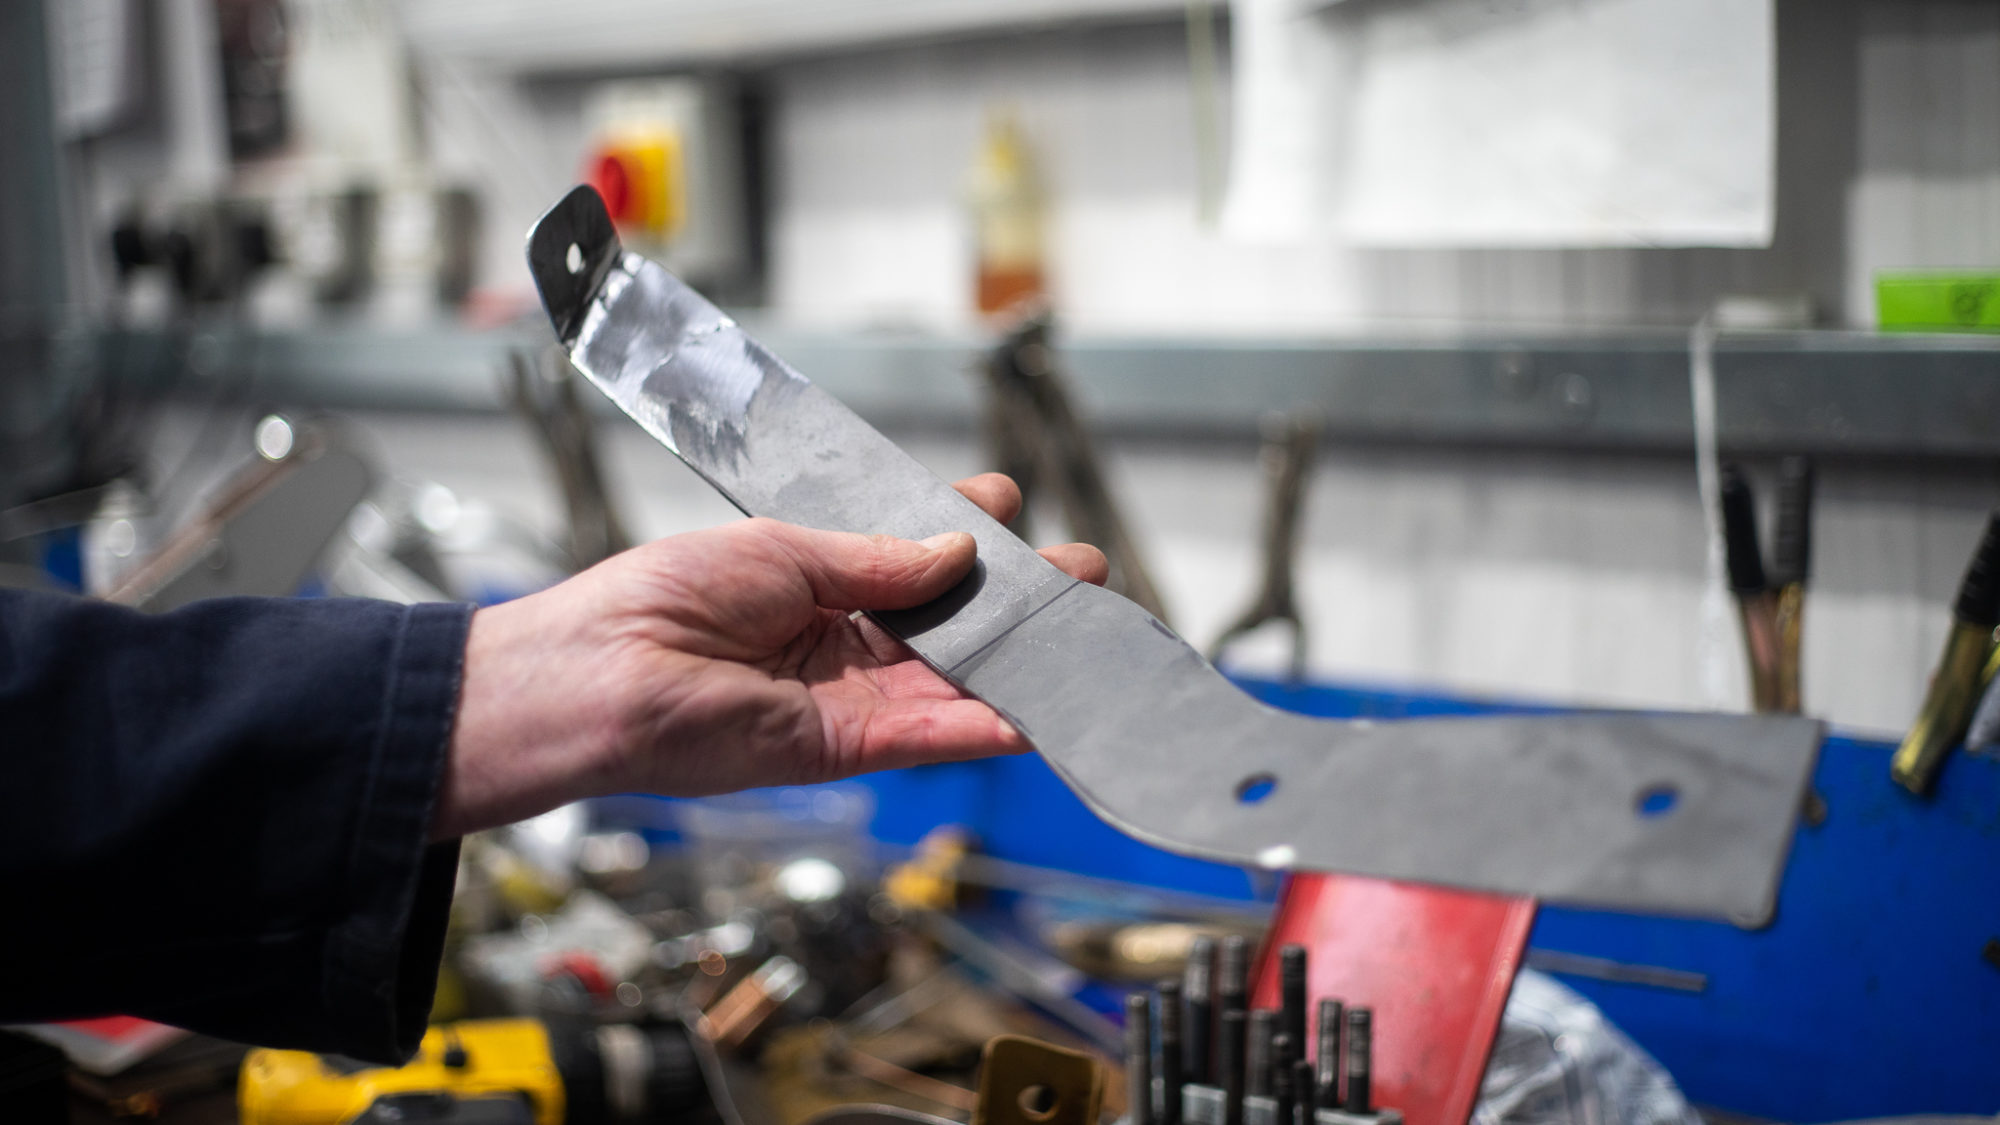
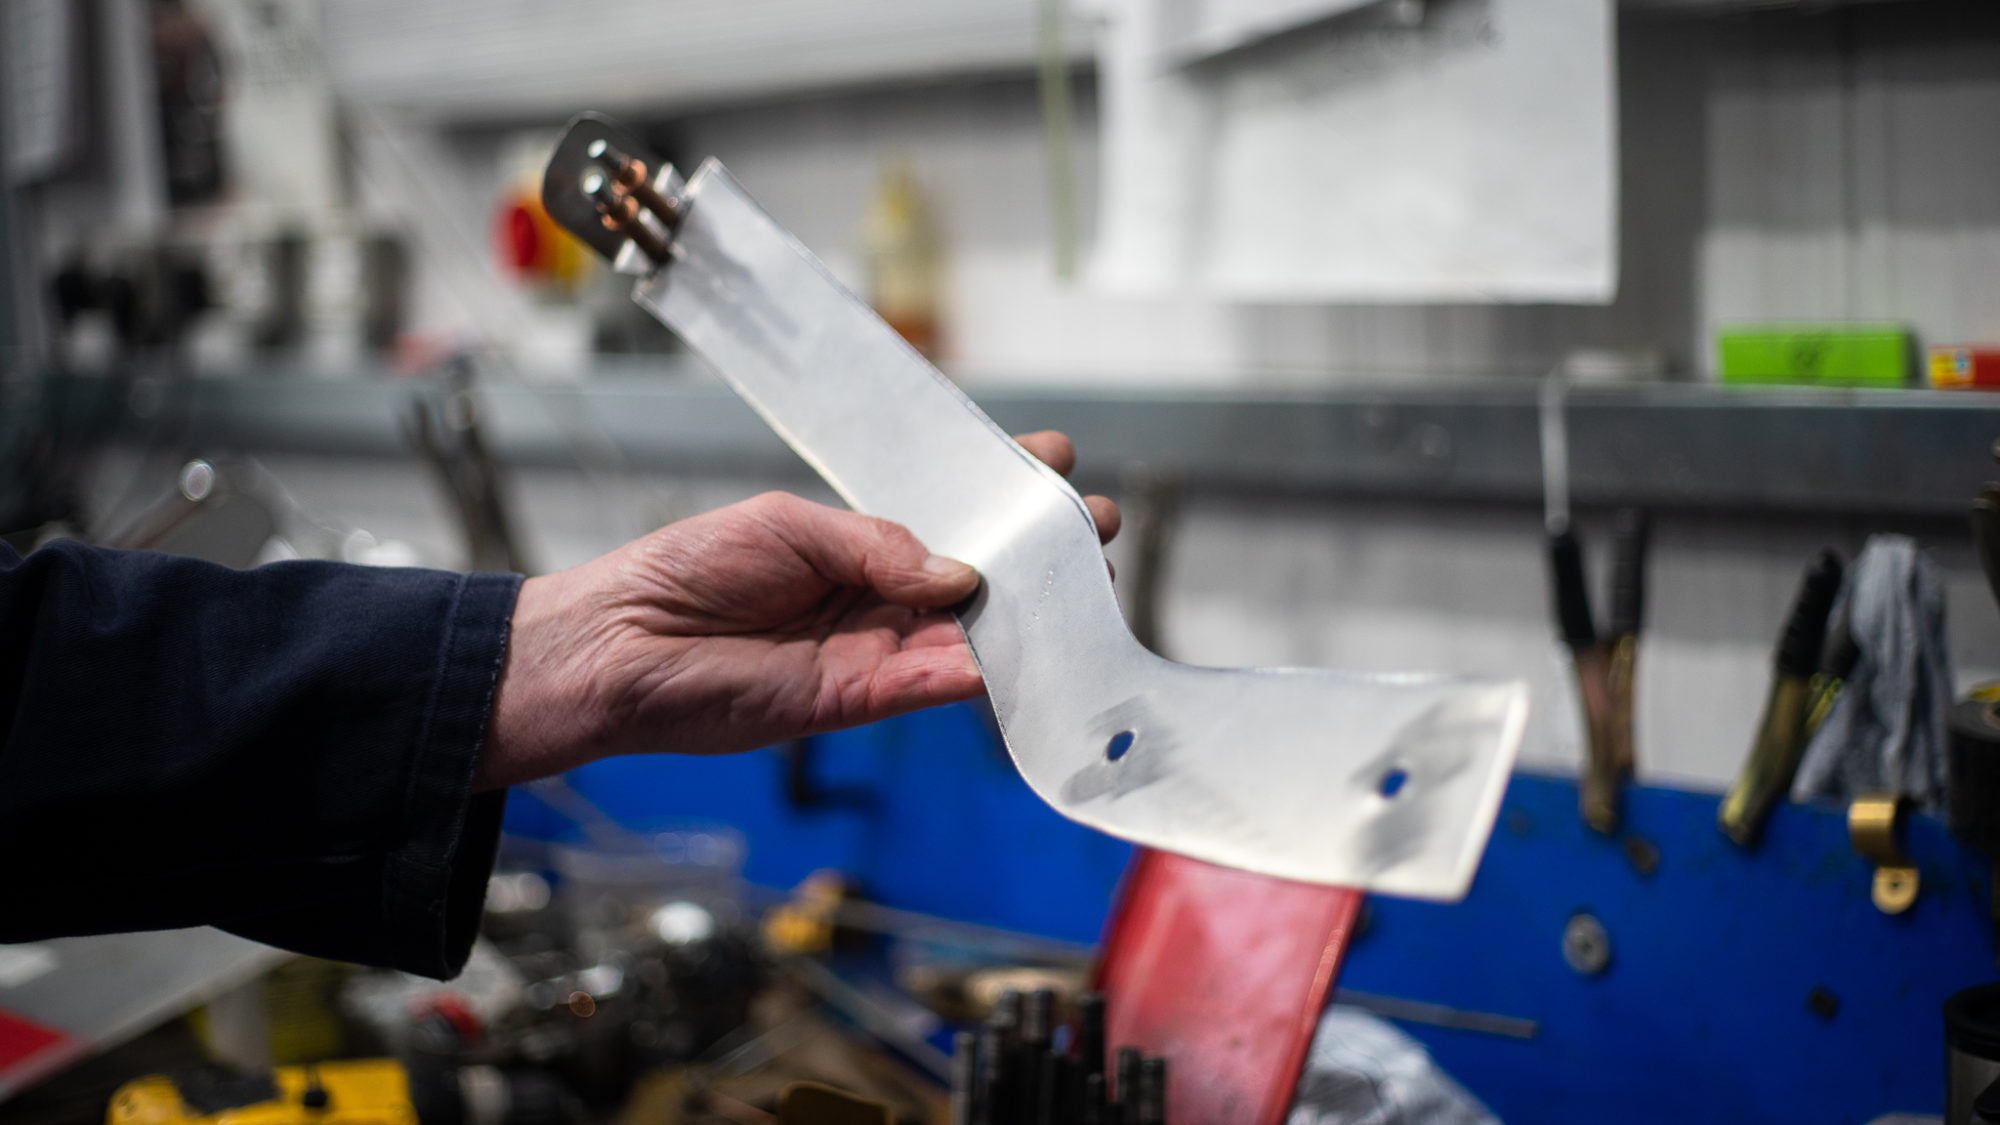
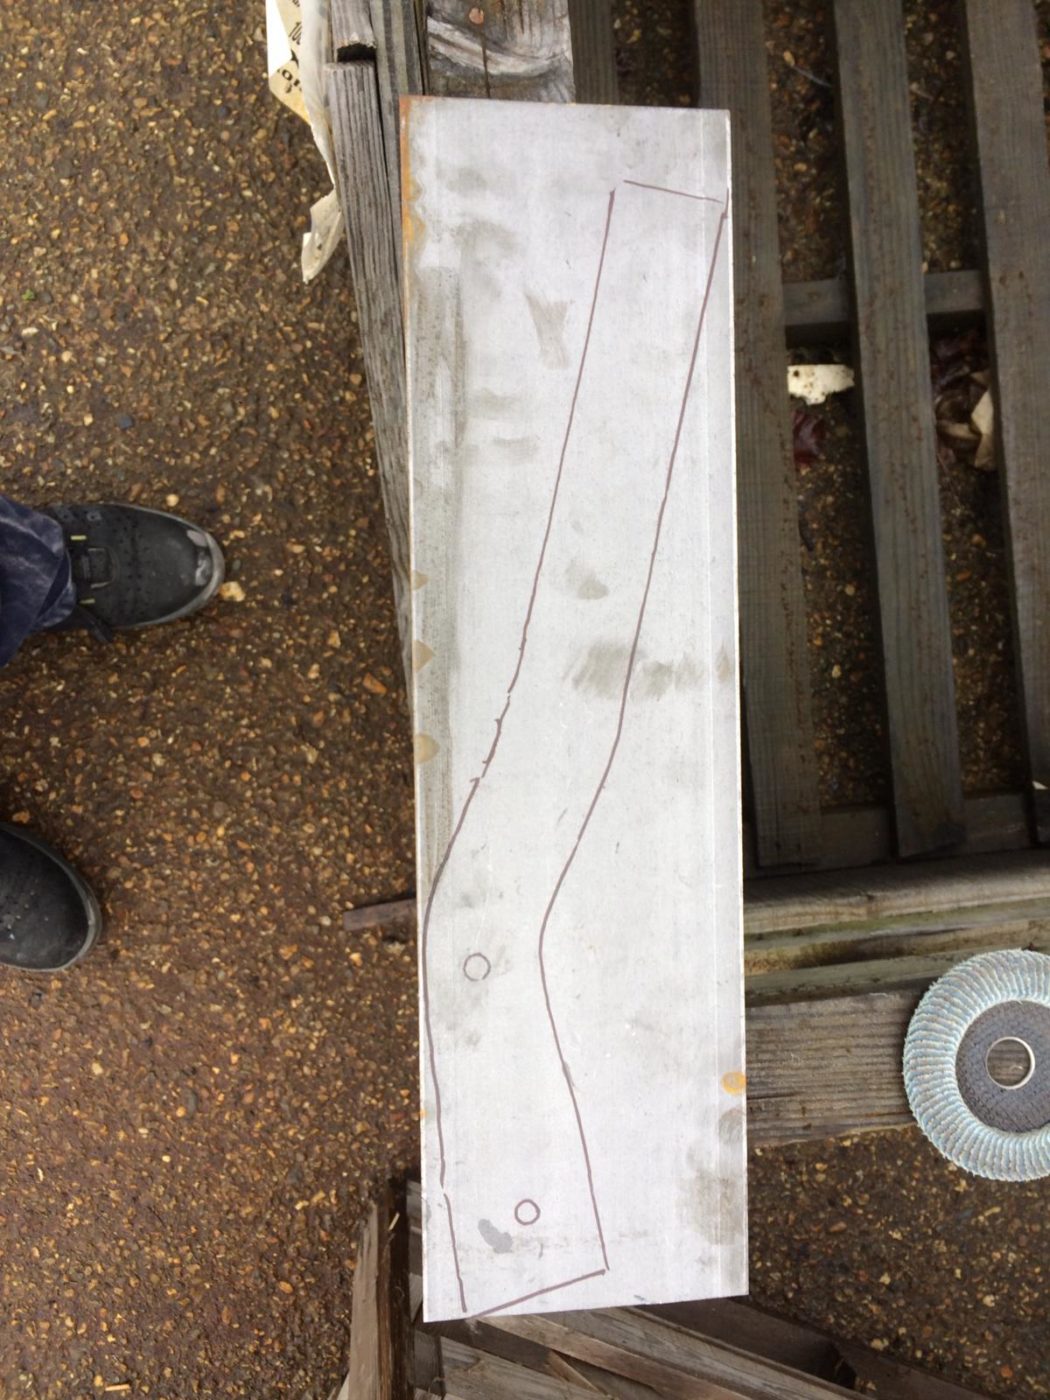
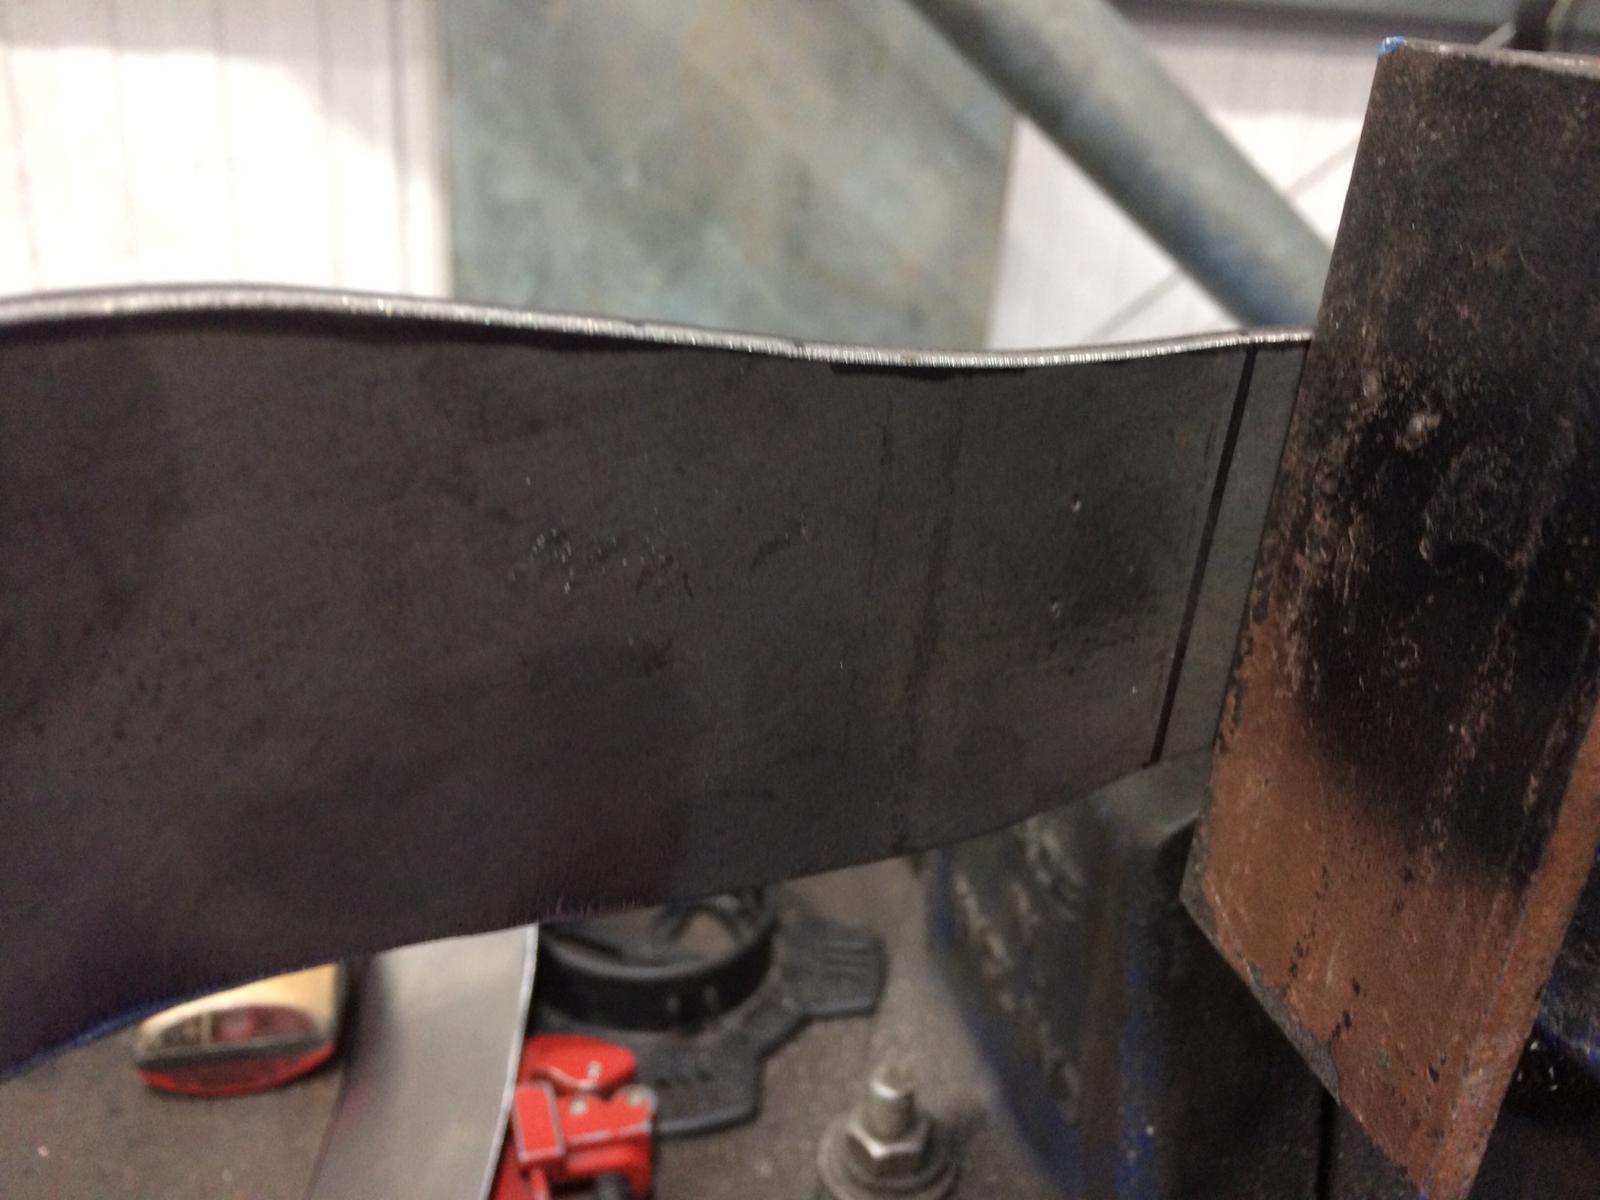
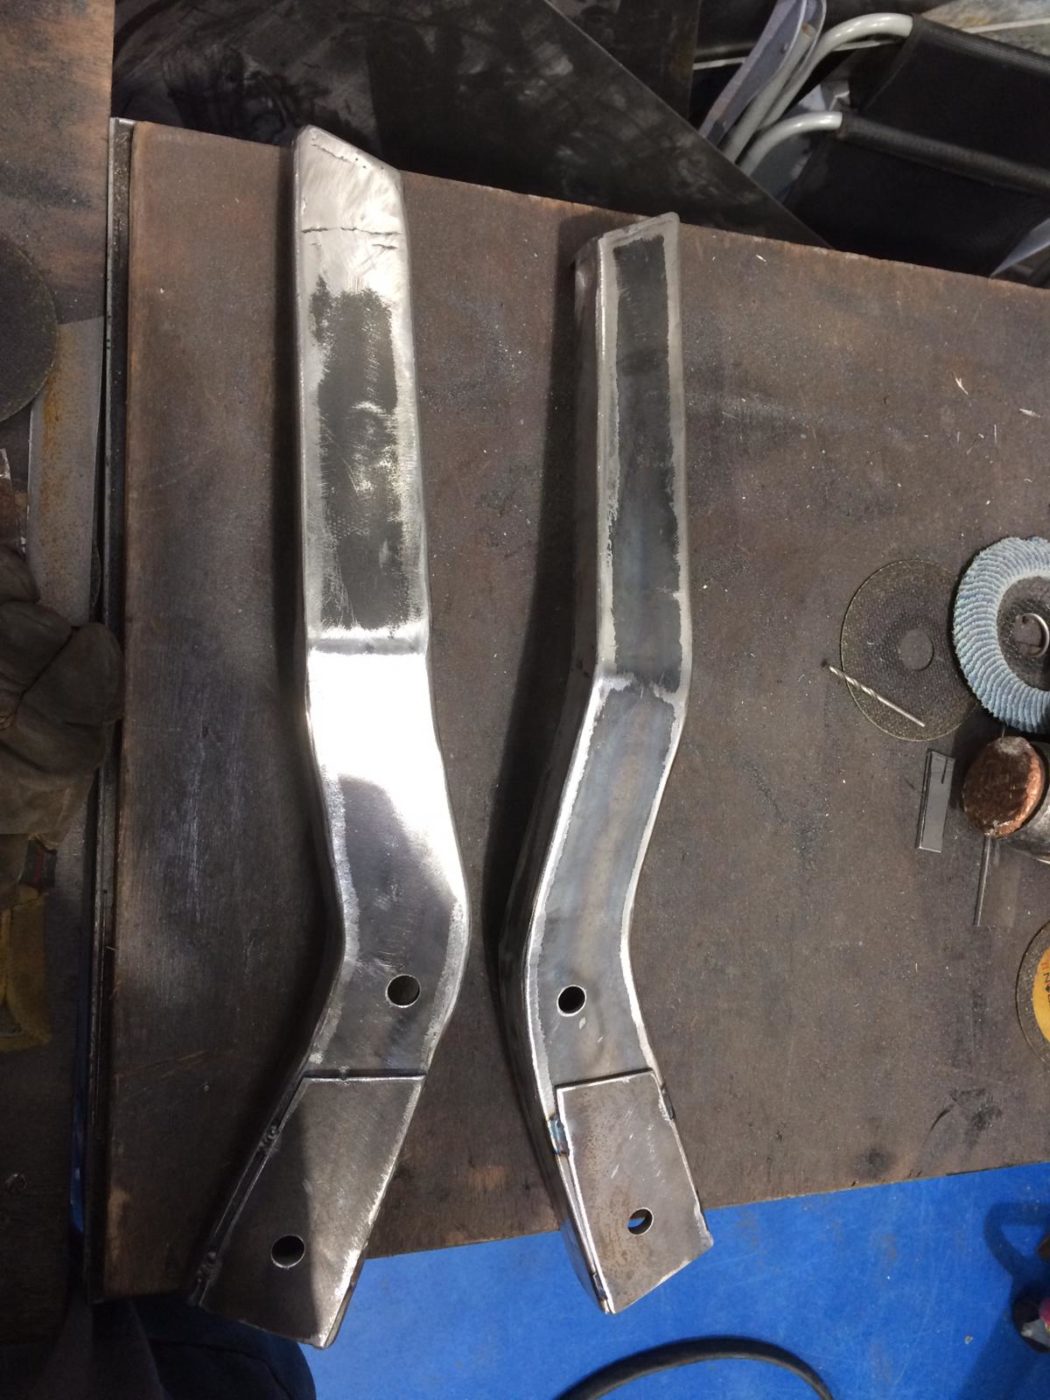
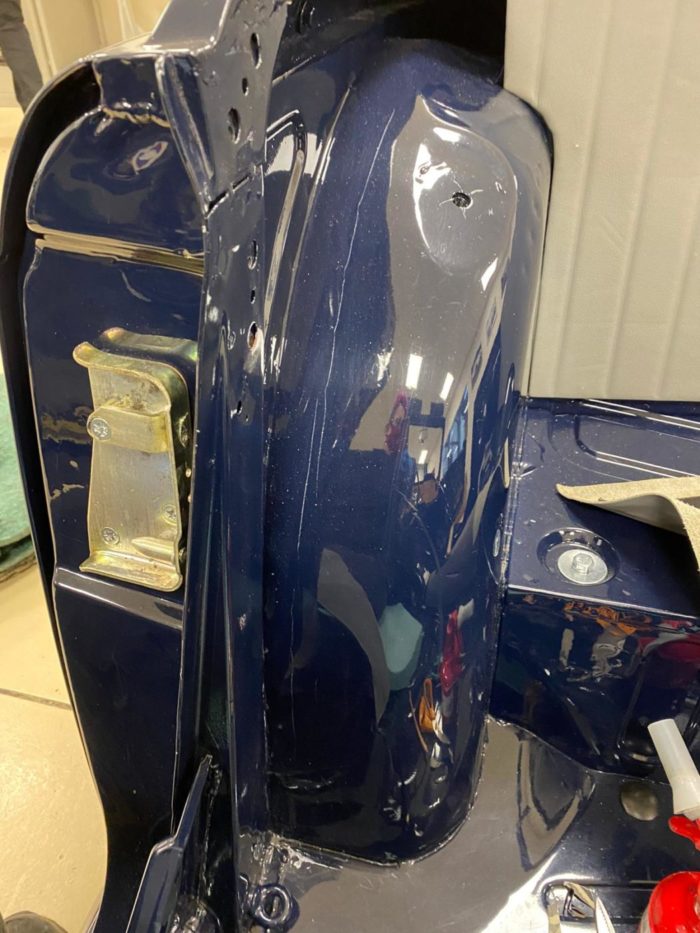
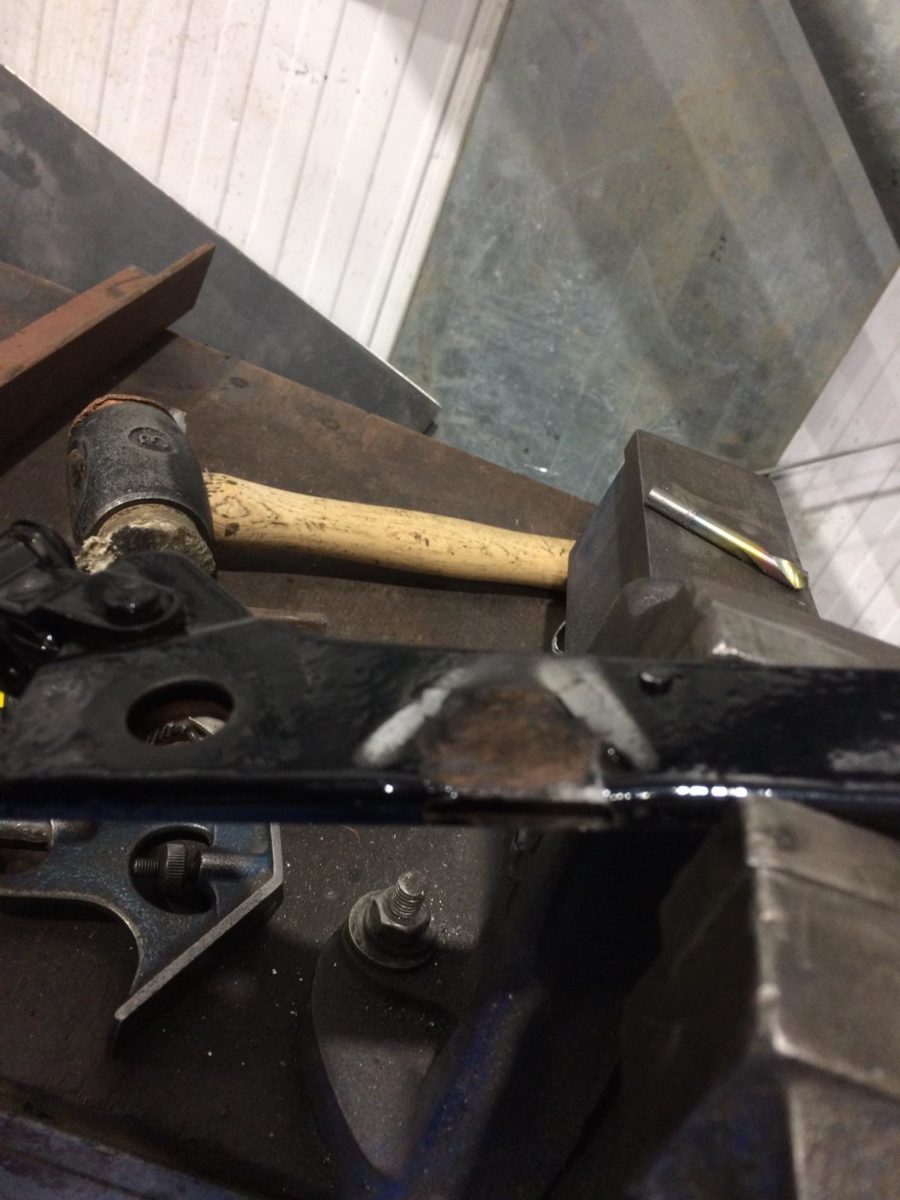
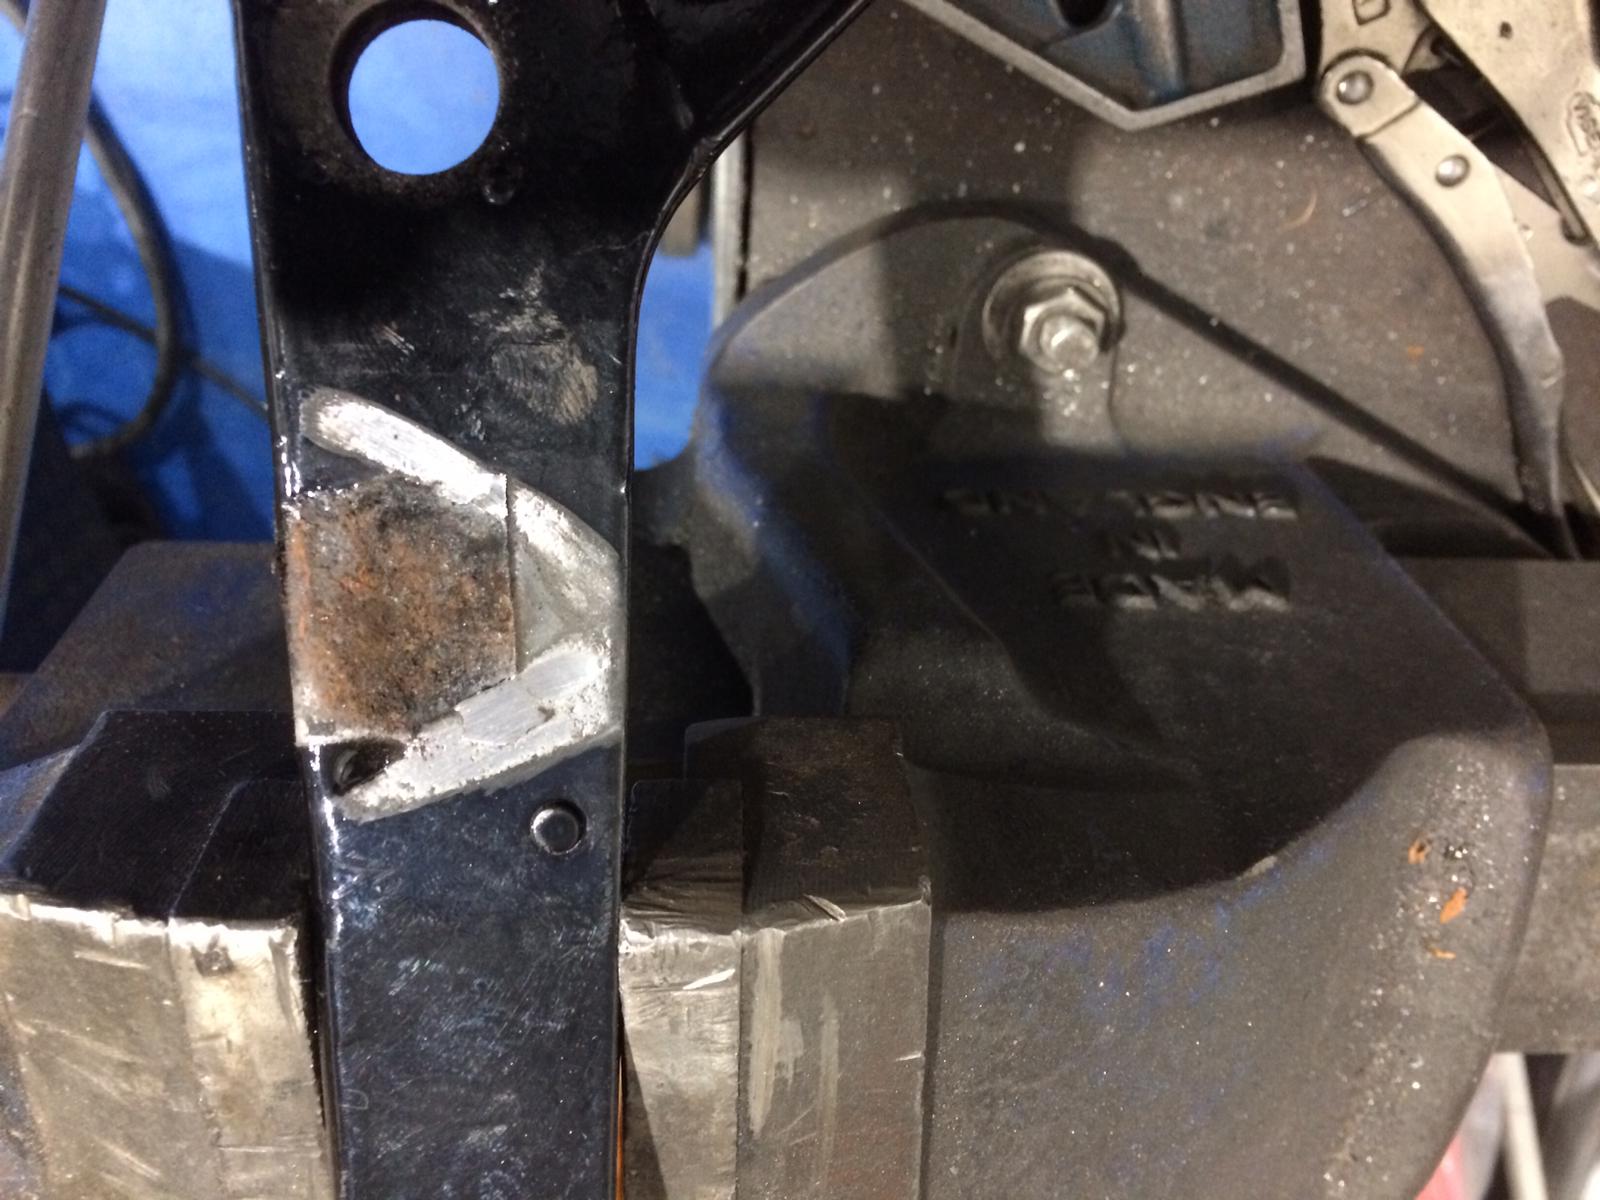
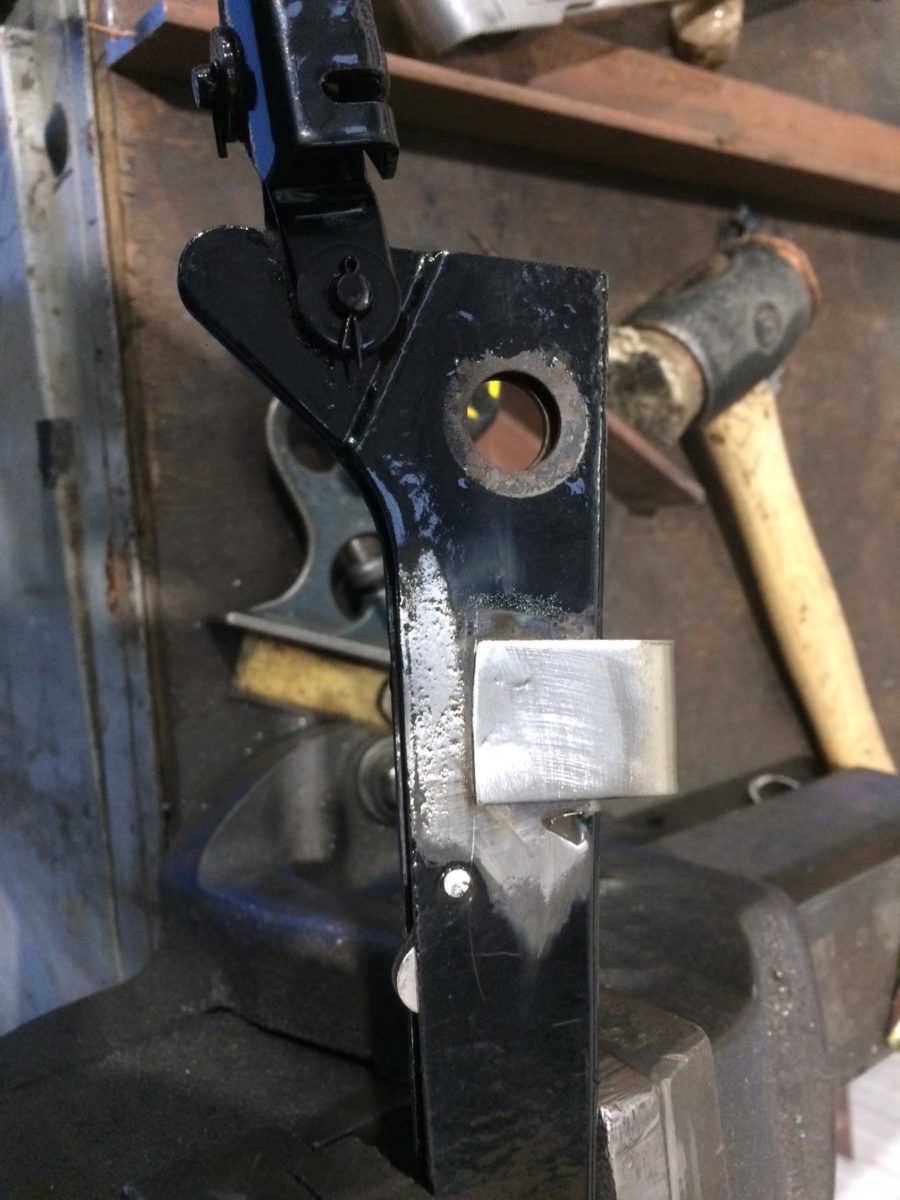
Our Triumph TR5 has had a bespoke bumper iron made in the workshop to fit underneath behind the front wheel. One of our technicians made a template based off a similar car’s bumper iron and once he was happy, then made up the final design.
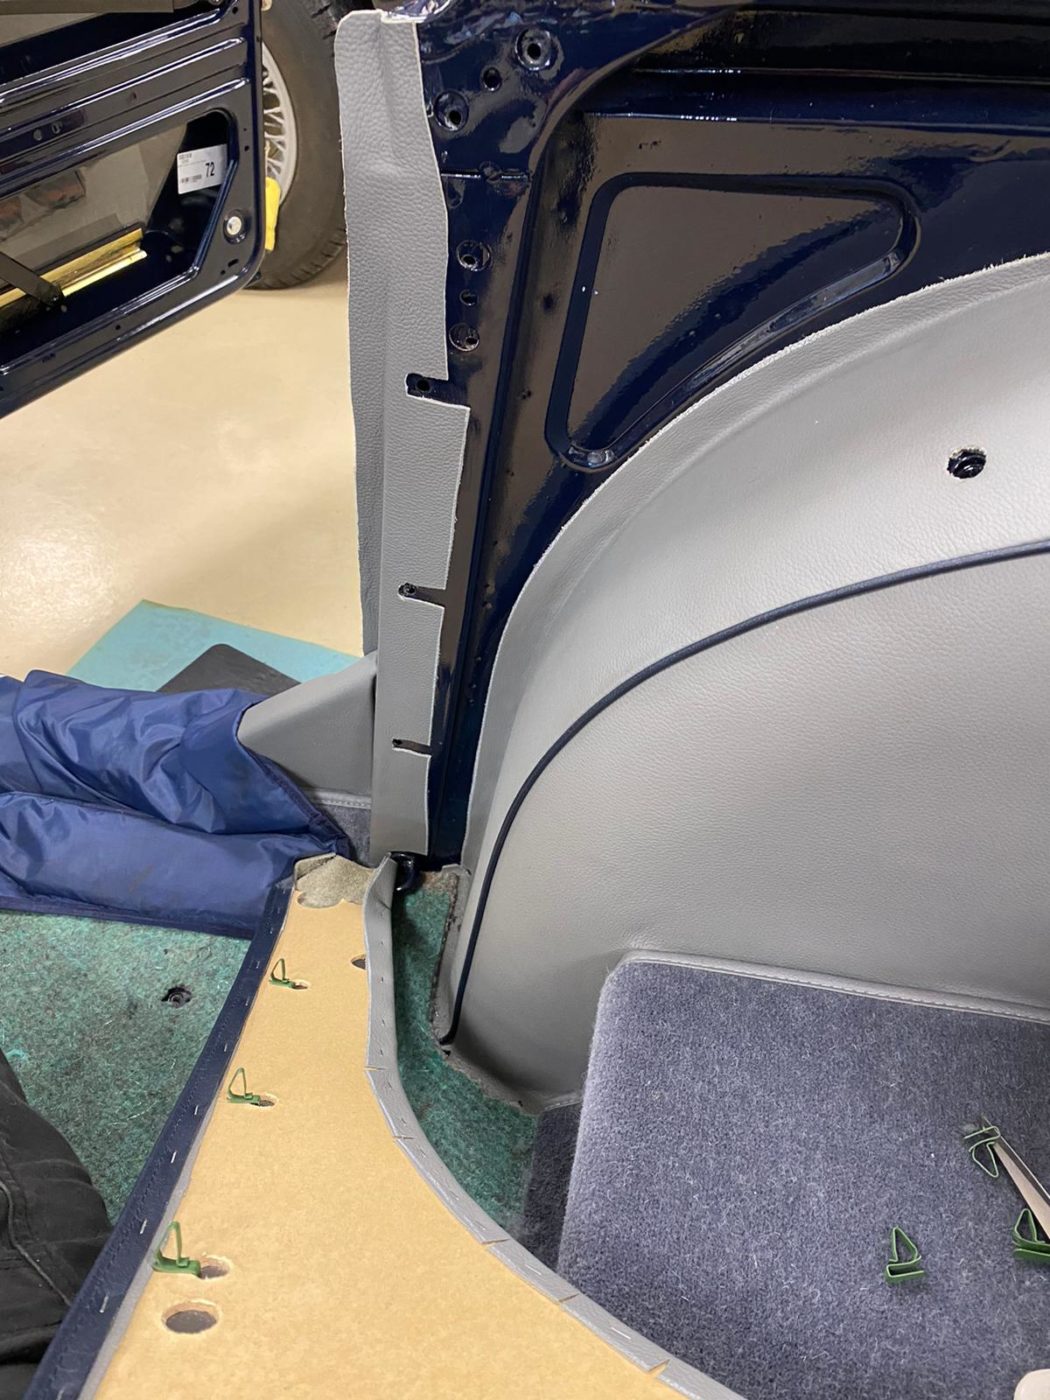
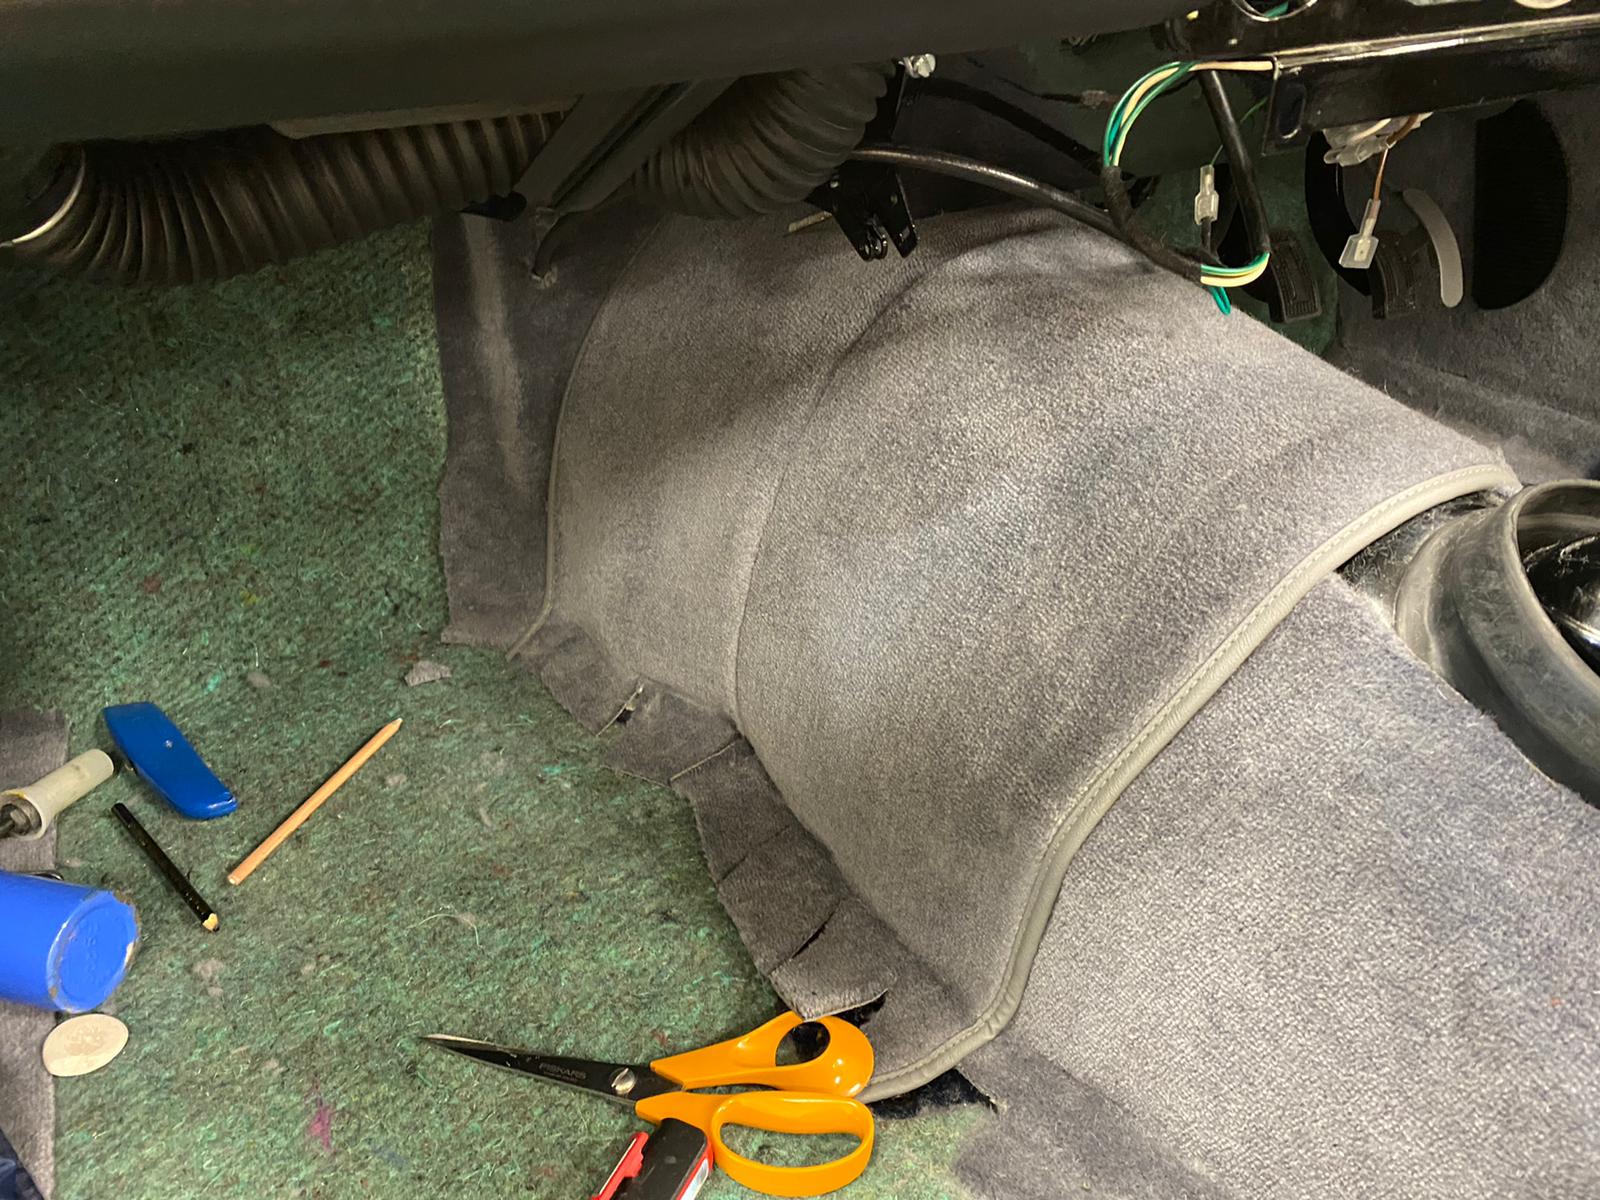
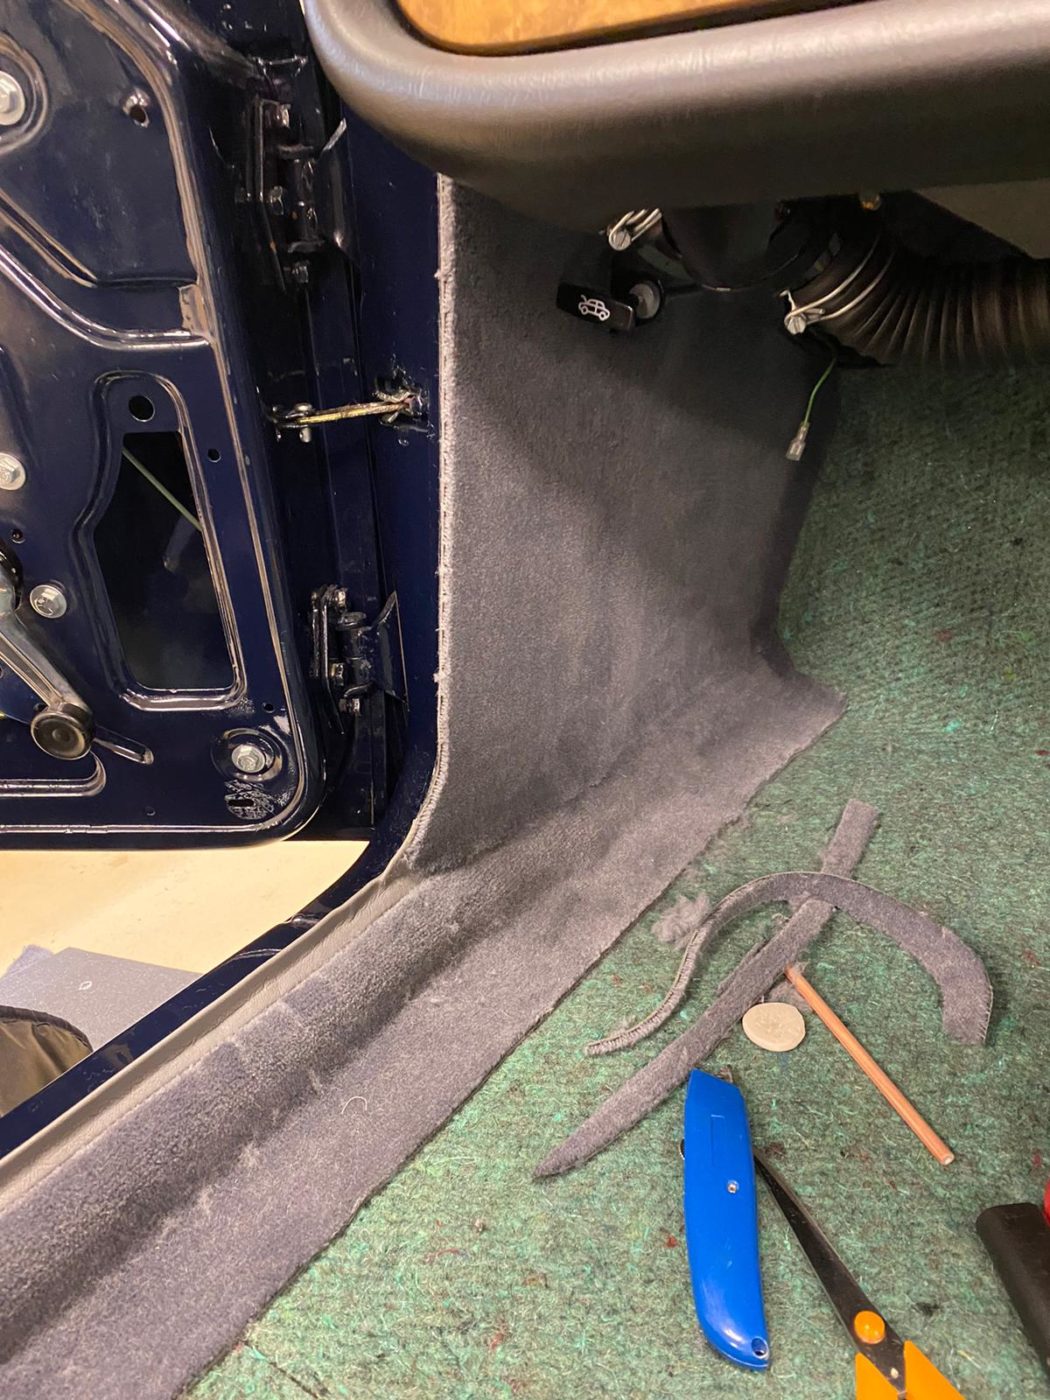
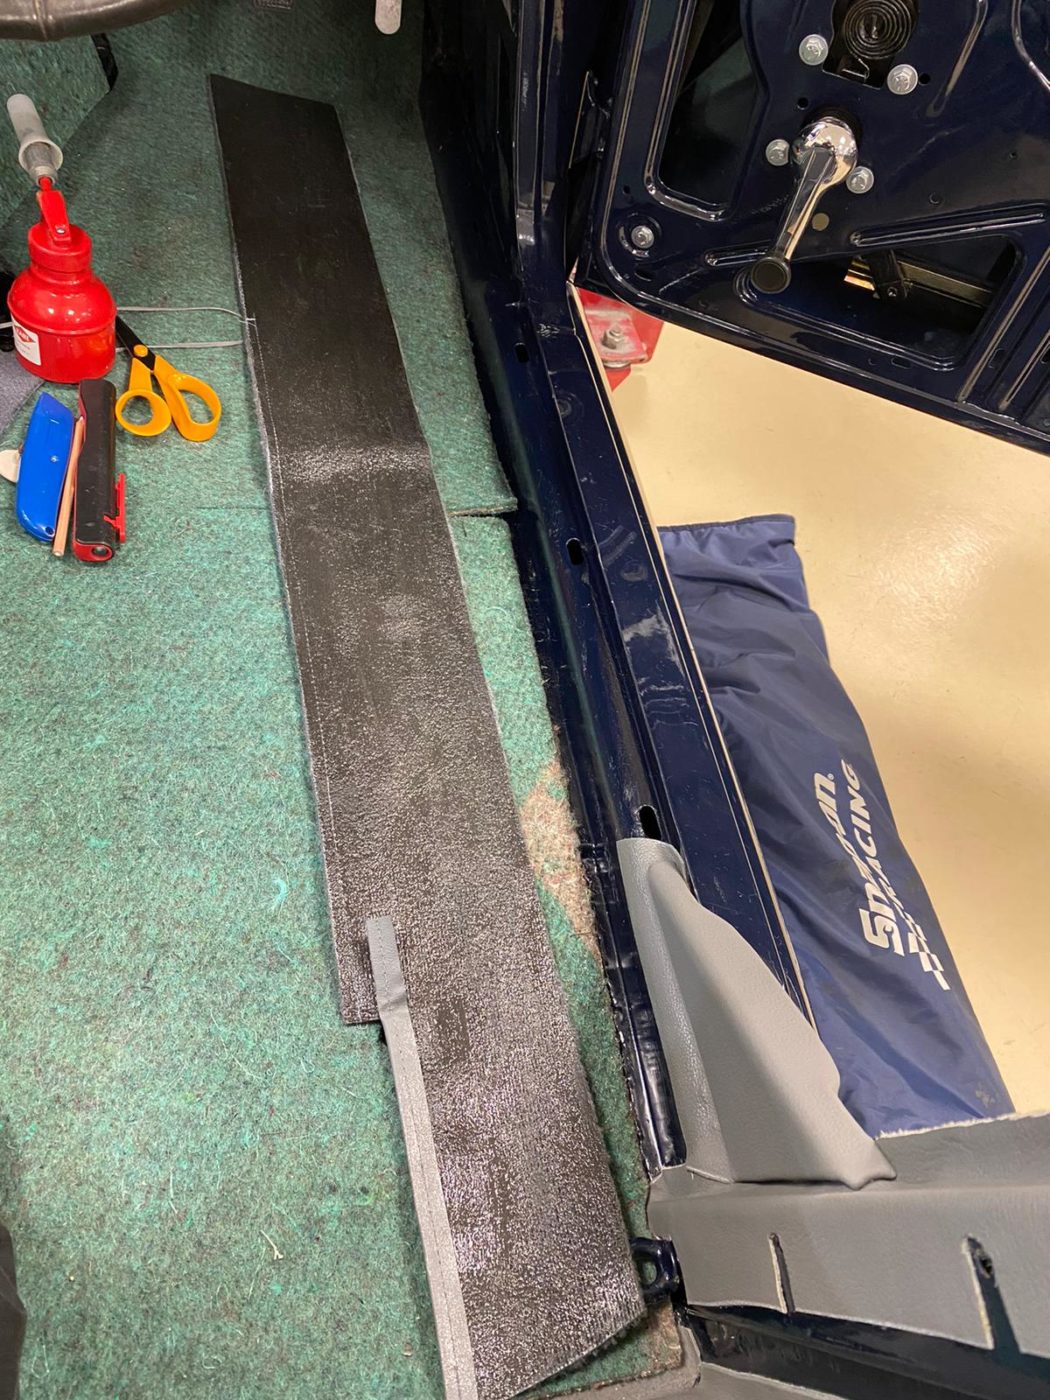
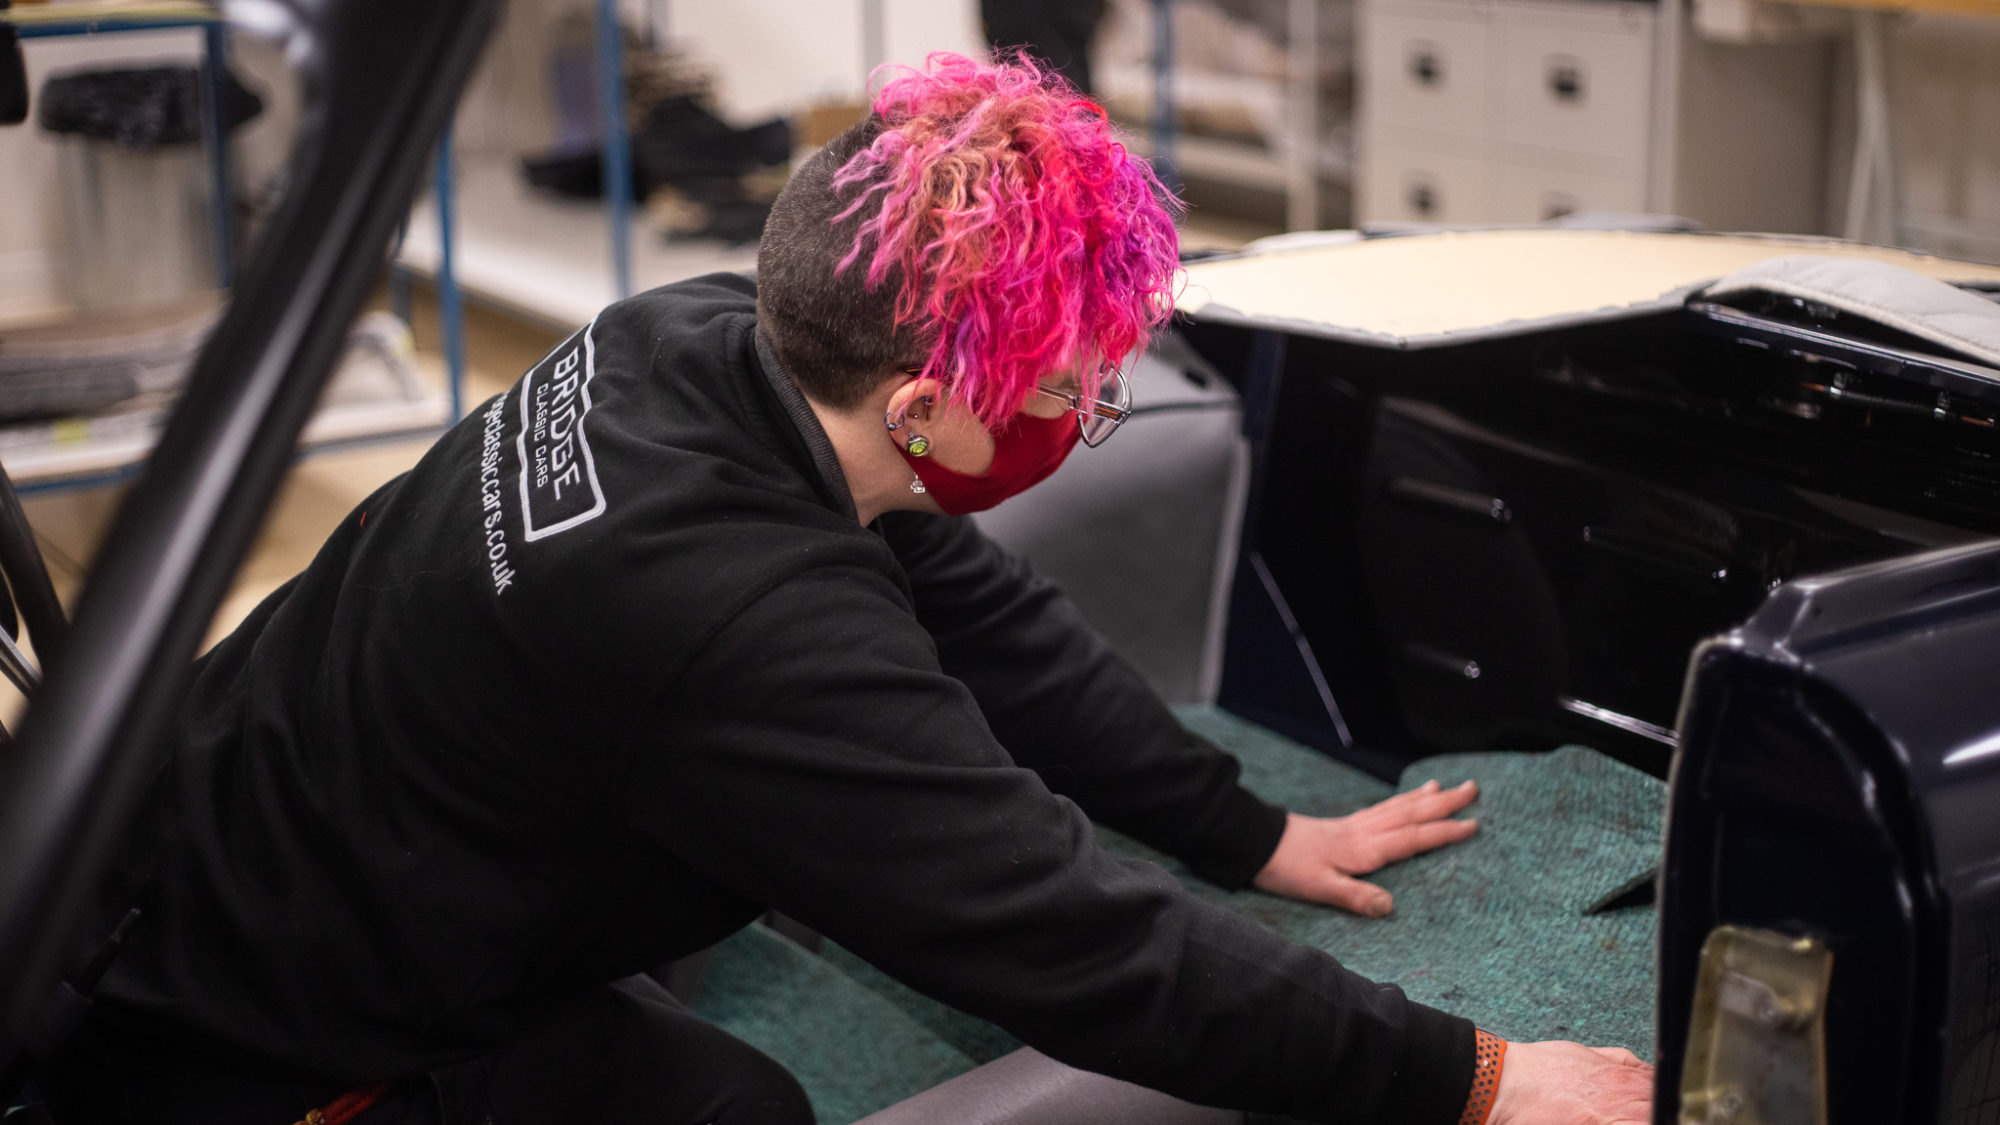
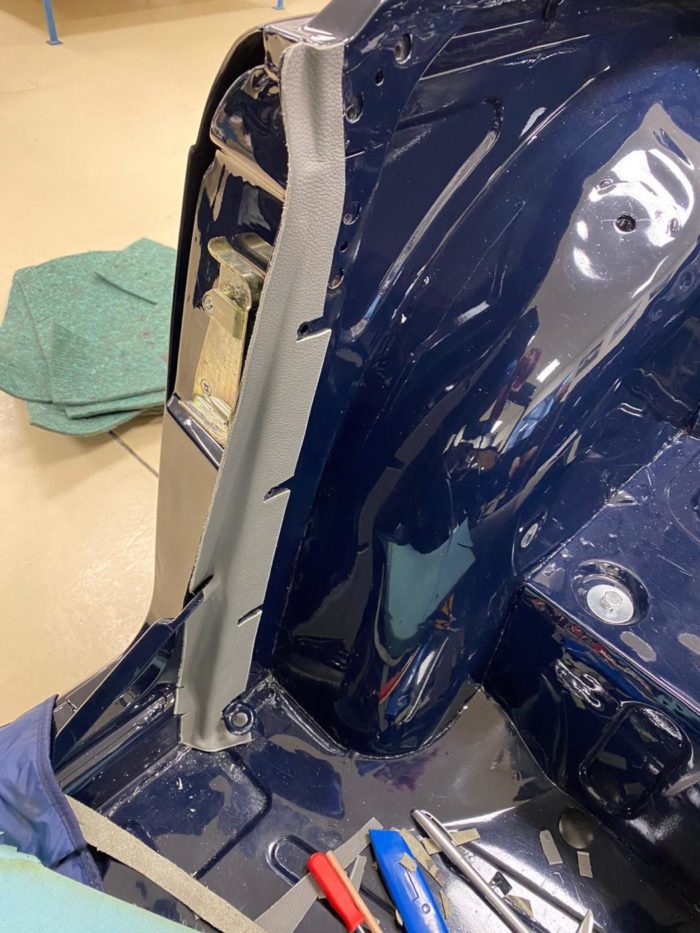
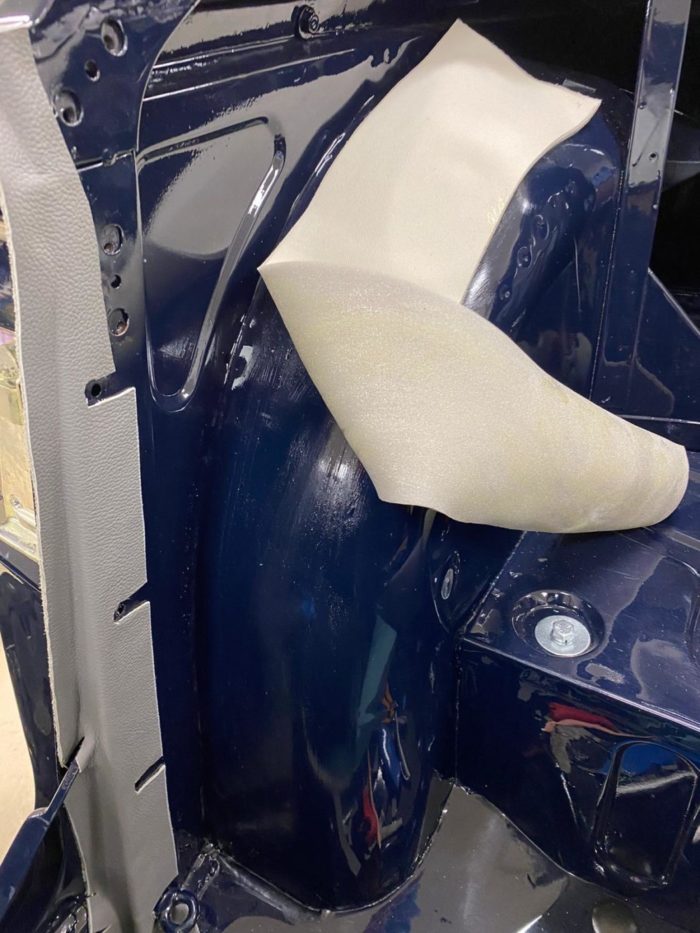
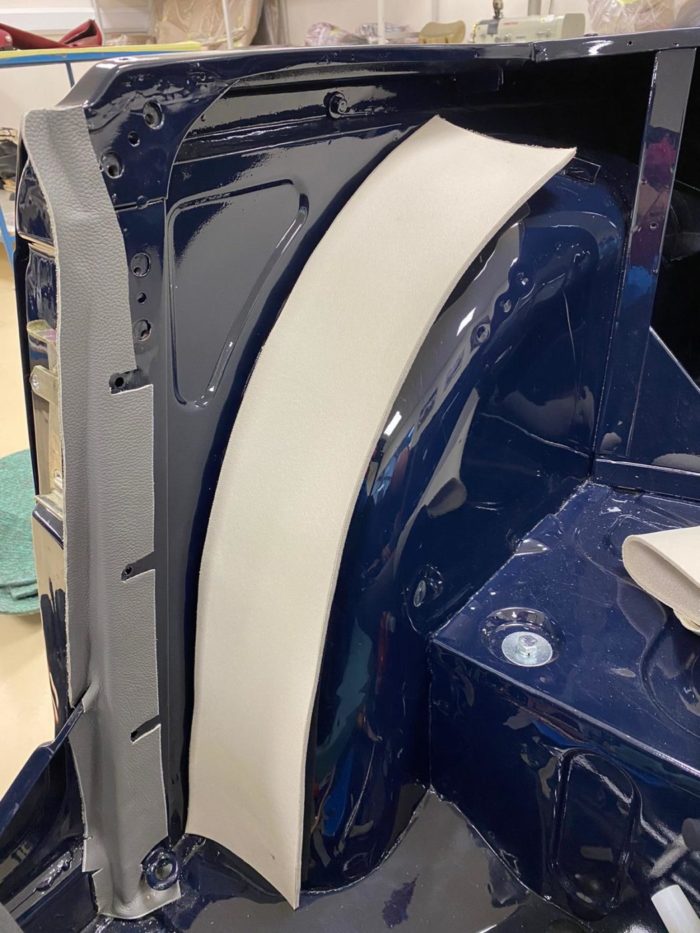
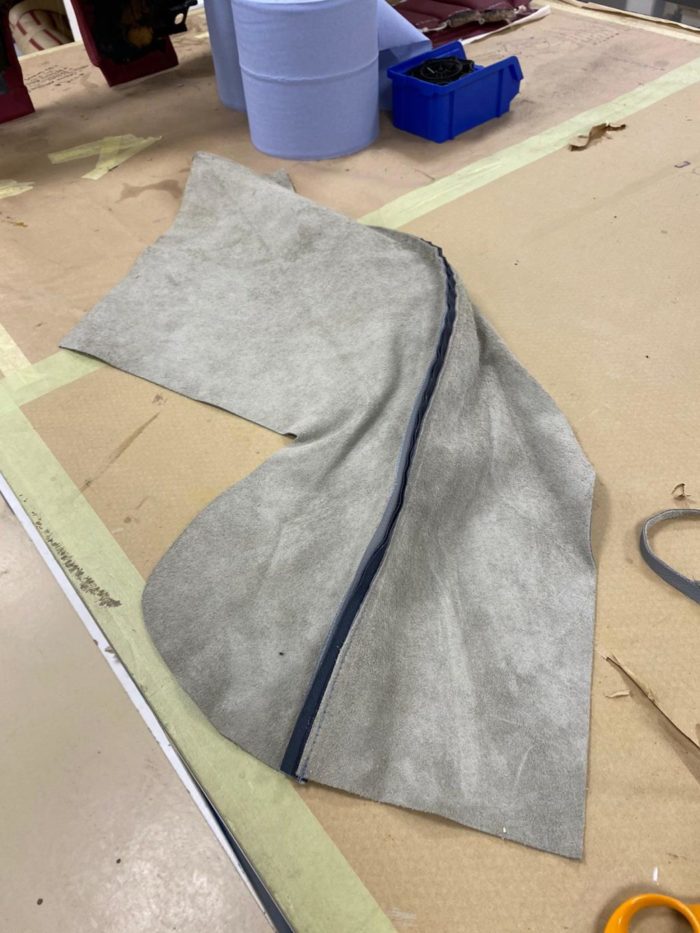
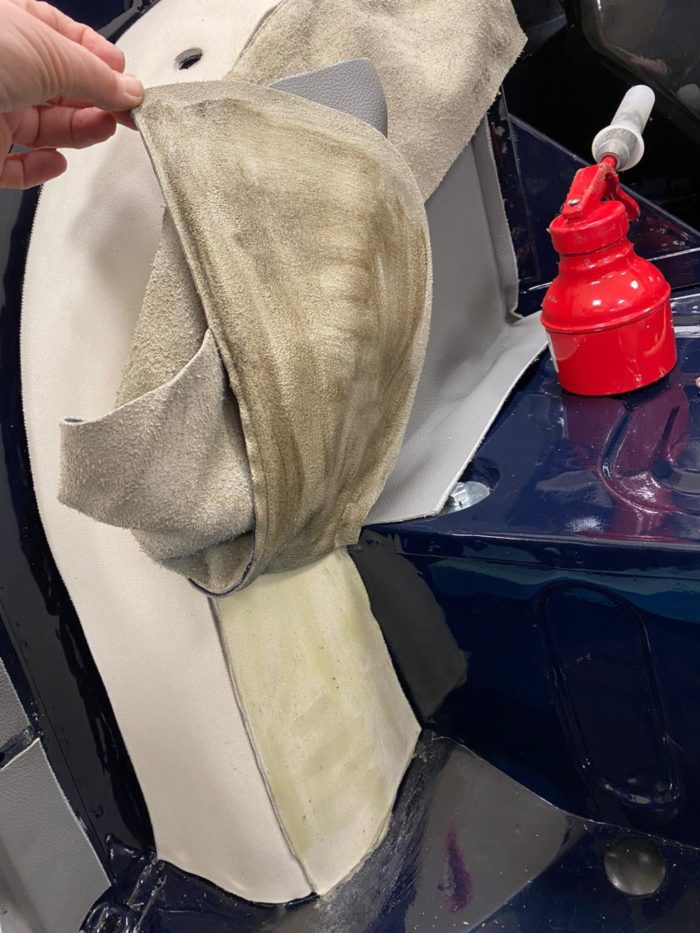
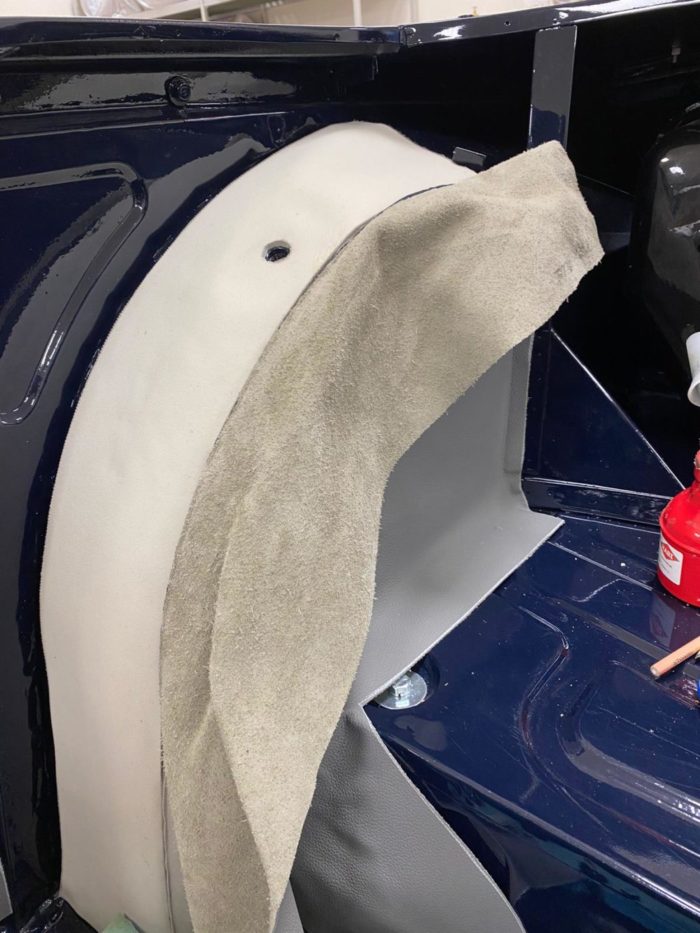
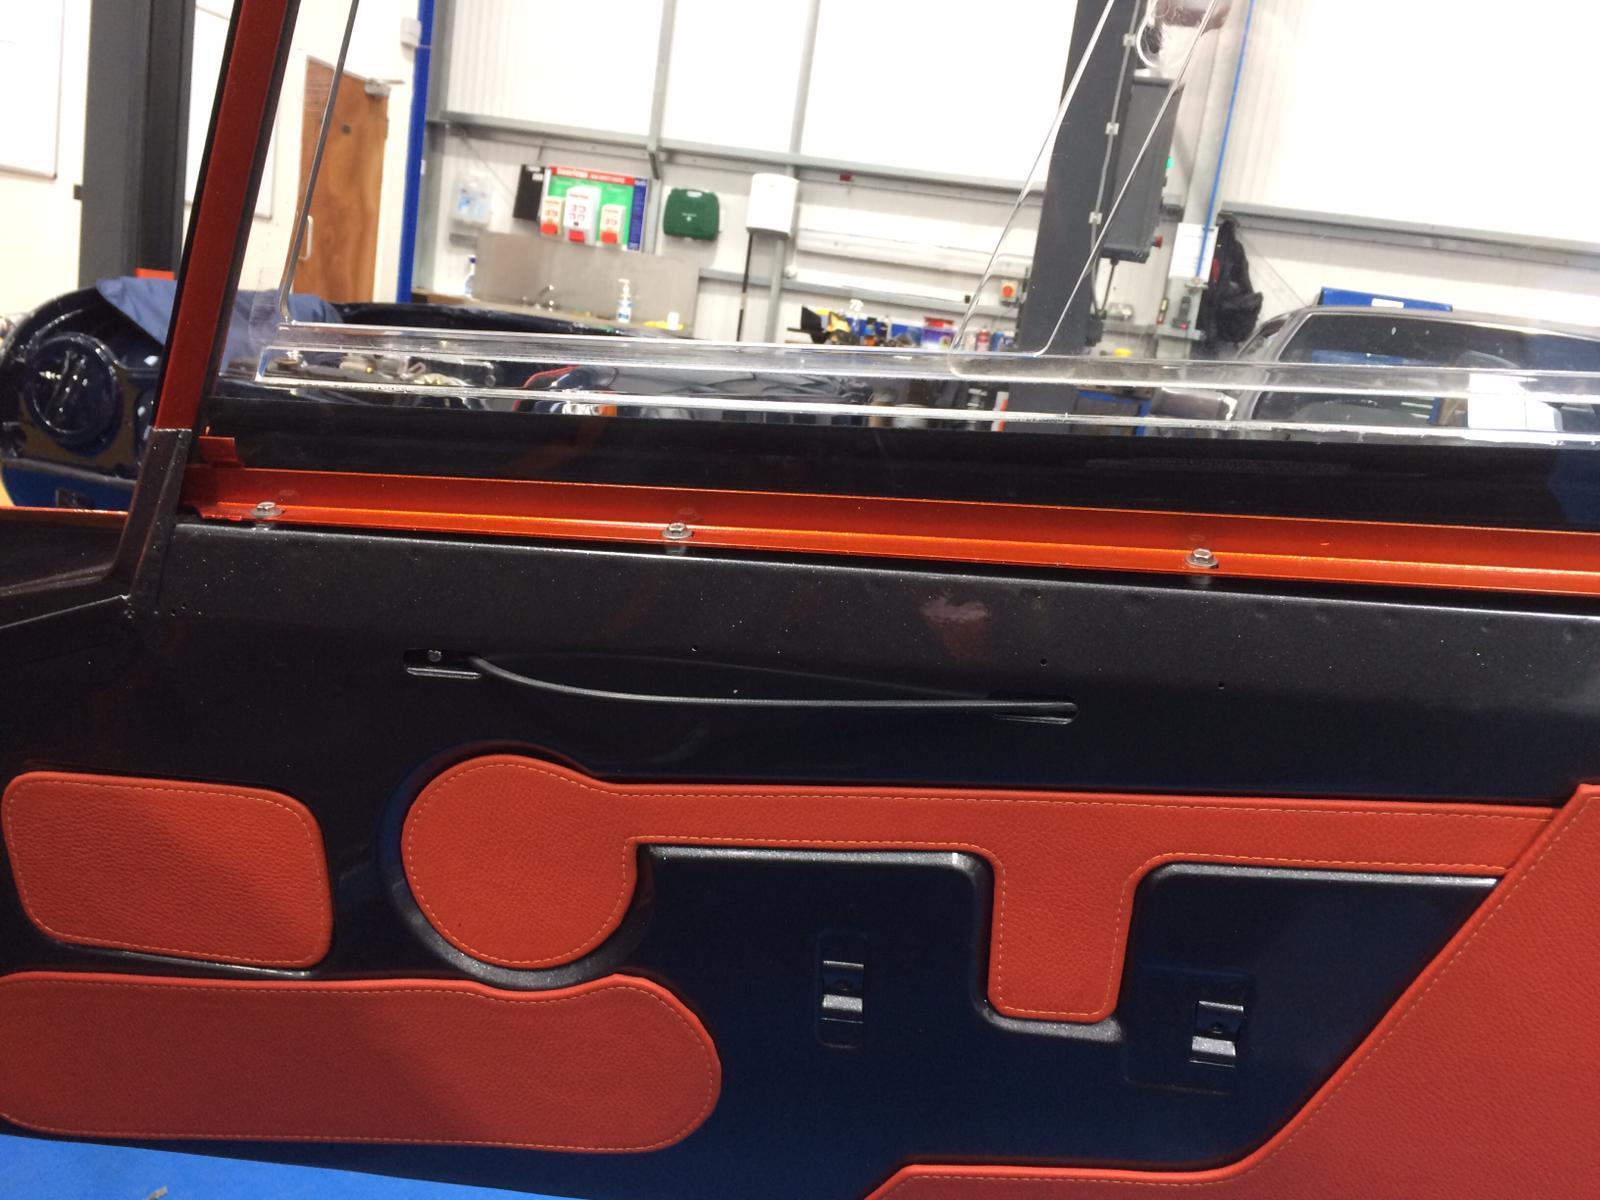
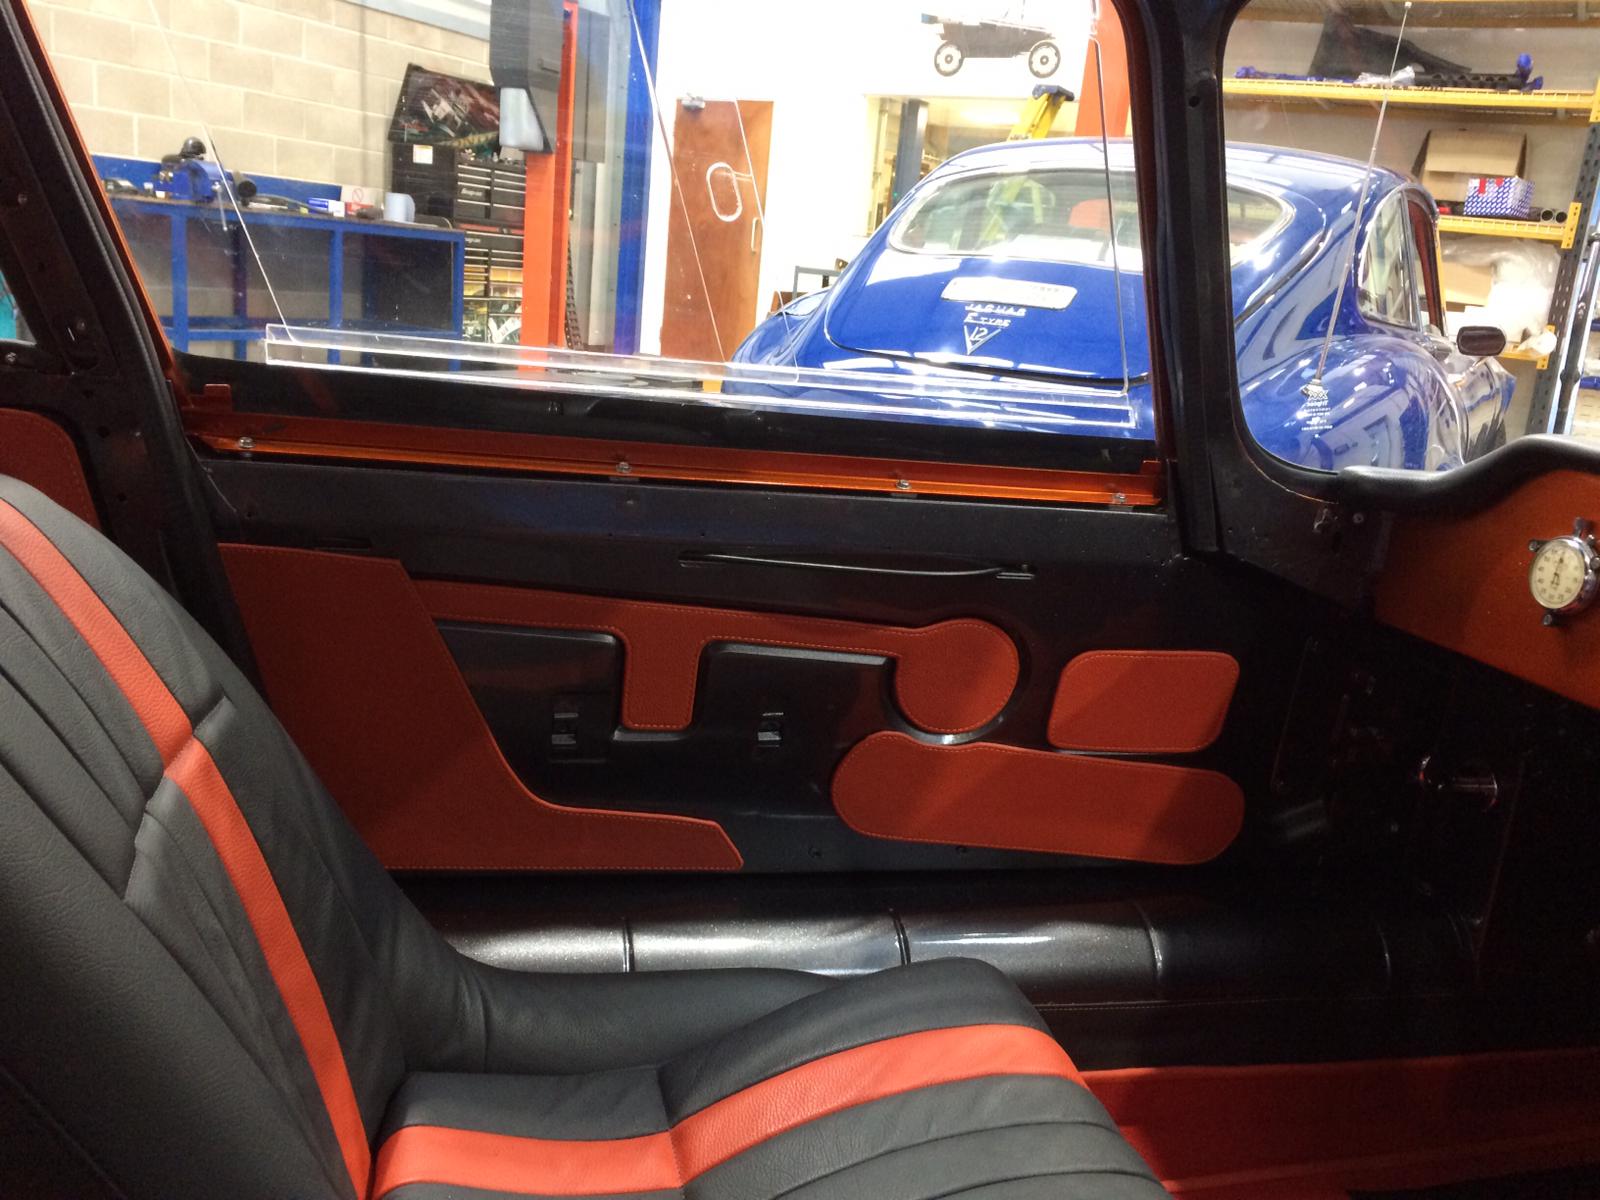
The TR5 has also entered the trim shop where our trim team are fitting the interior fabric. On this occasion, the client ordered a pack of TR5 interior pieces meaning we’re just fitting the sections rather than making them from hand. Although these sets are designed to fit perfectly, sometimes they need to be modified as every classic is unique. The majority of the work will include sticking and bolting each piece in place and ensuring that it all fits perfectly.


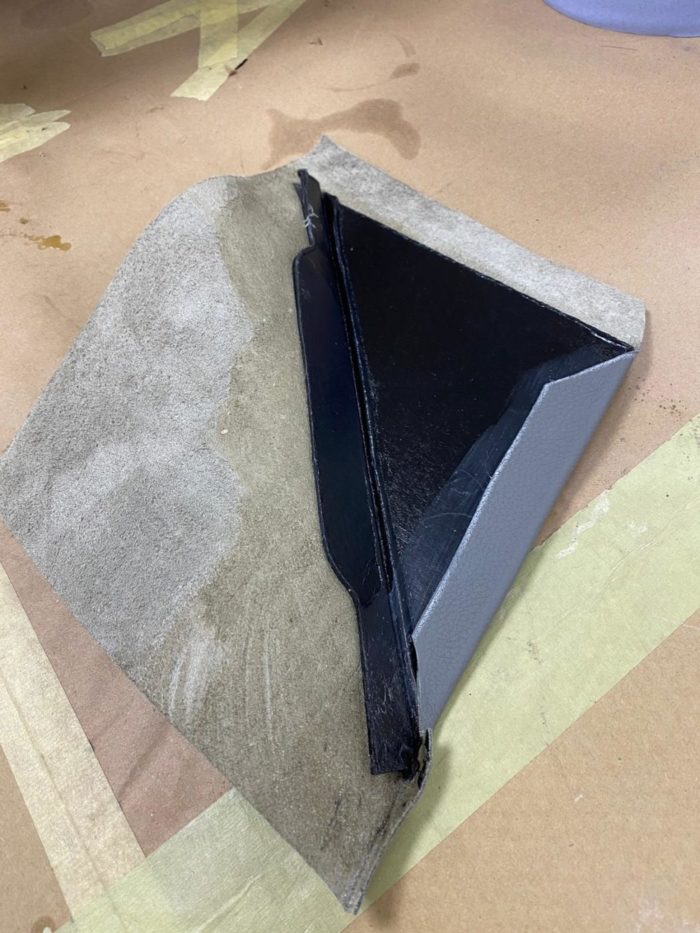
Kath began by adjusting and cutting around the corners of the panels so they fit well when applied later. The Kath glued the foam in place under the wheel arches and trimmed the excess material off along the seam of the wheel arch trim. Once done, she could glue in place the wheel arch cover and glue in the triangle piece down near the bottom door seal.
Kath also fitted the sound deadening and glued it in place throughout the vehicle. Once fitted in place, Kath then begun to trim along the sides of the sills to remove any extra deadening fabric.
Once complete, the passenger footwell carpet could be laid and the sill fitted to the drivers side.


Our 1968 Triumph TR5 has been progressing in leaps and bounds under the expert eye of our technician Mauro.
Chris has painted the roof in DTM (direct to metal) satin black, making its smart and ready to be attached.

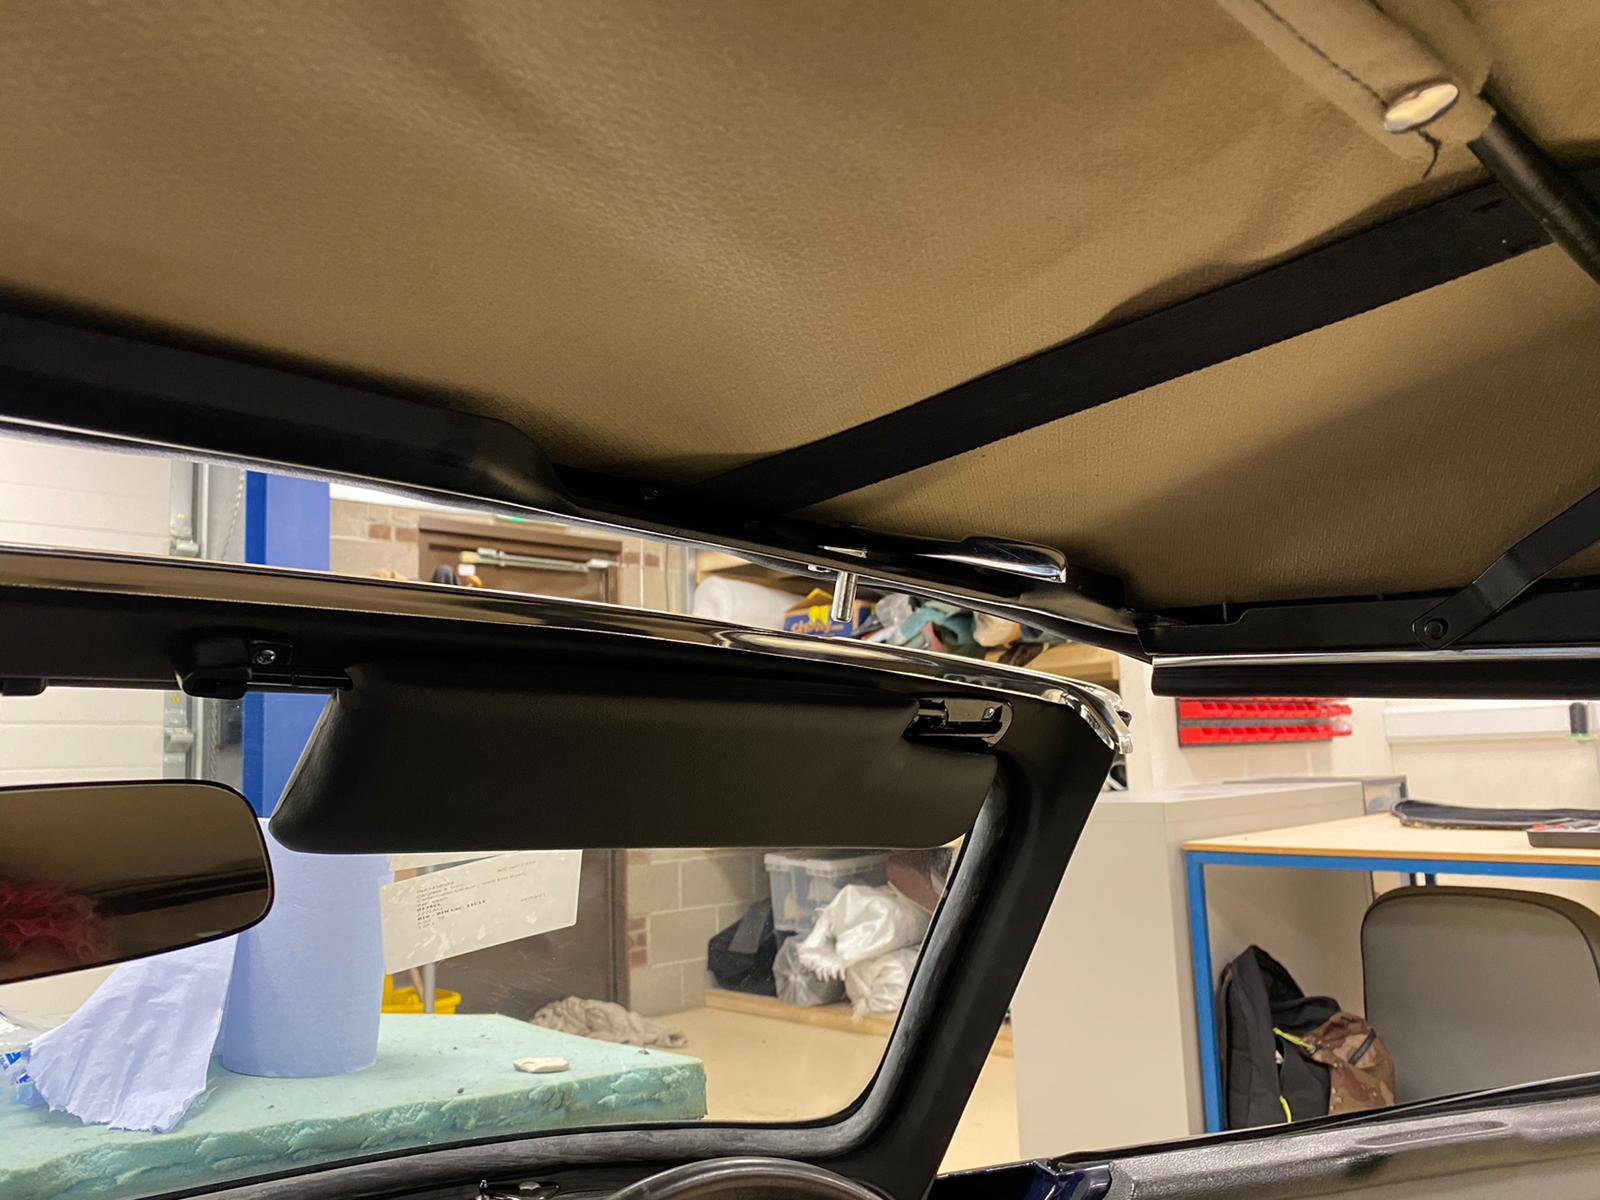
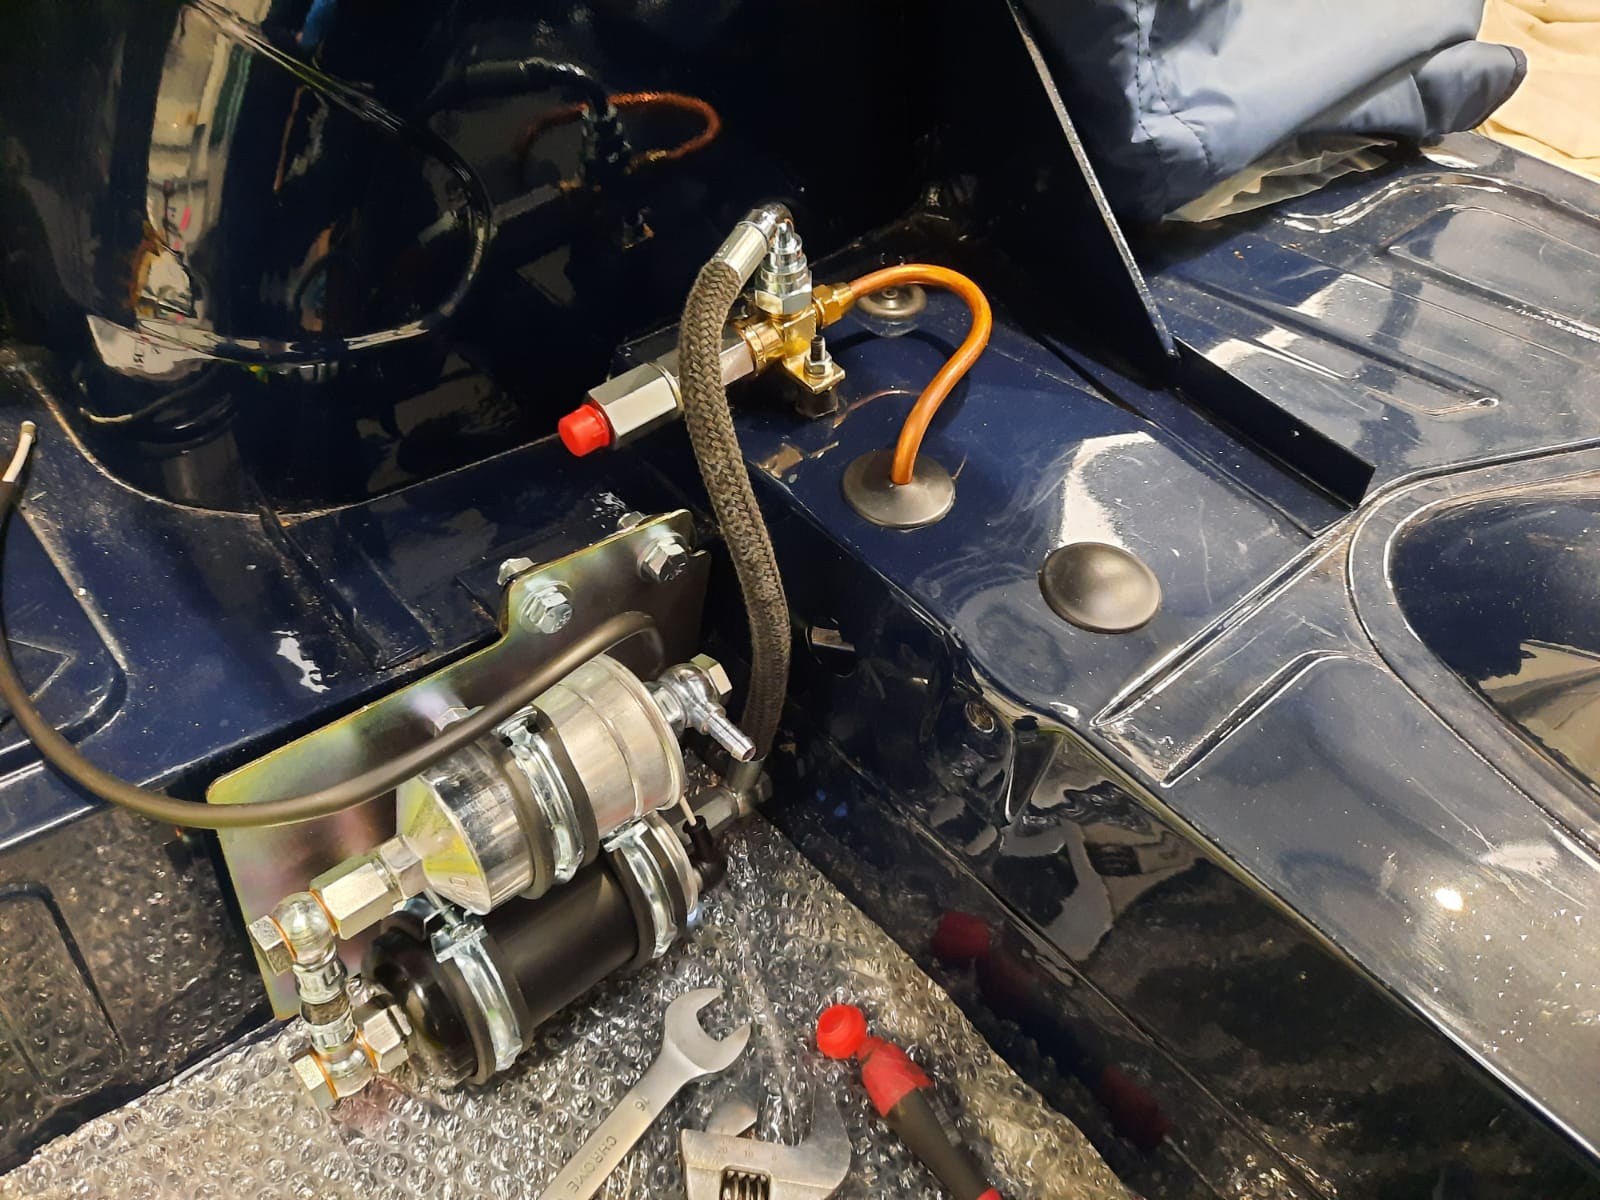
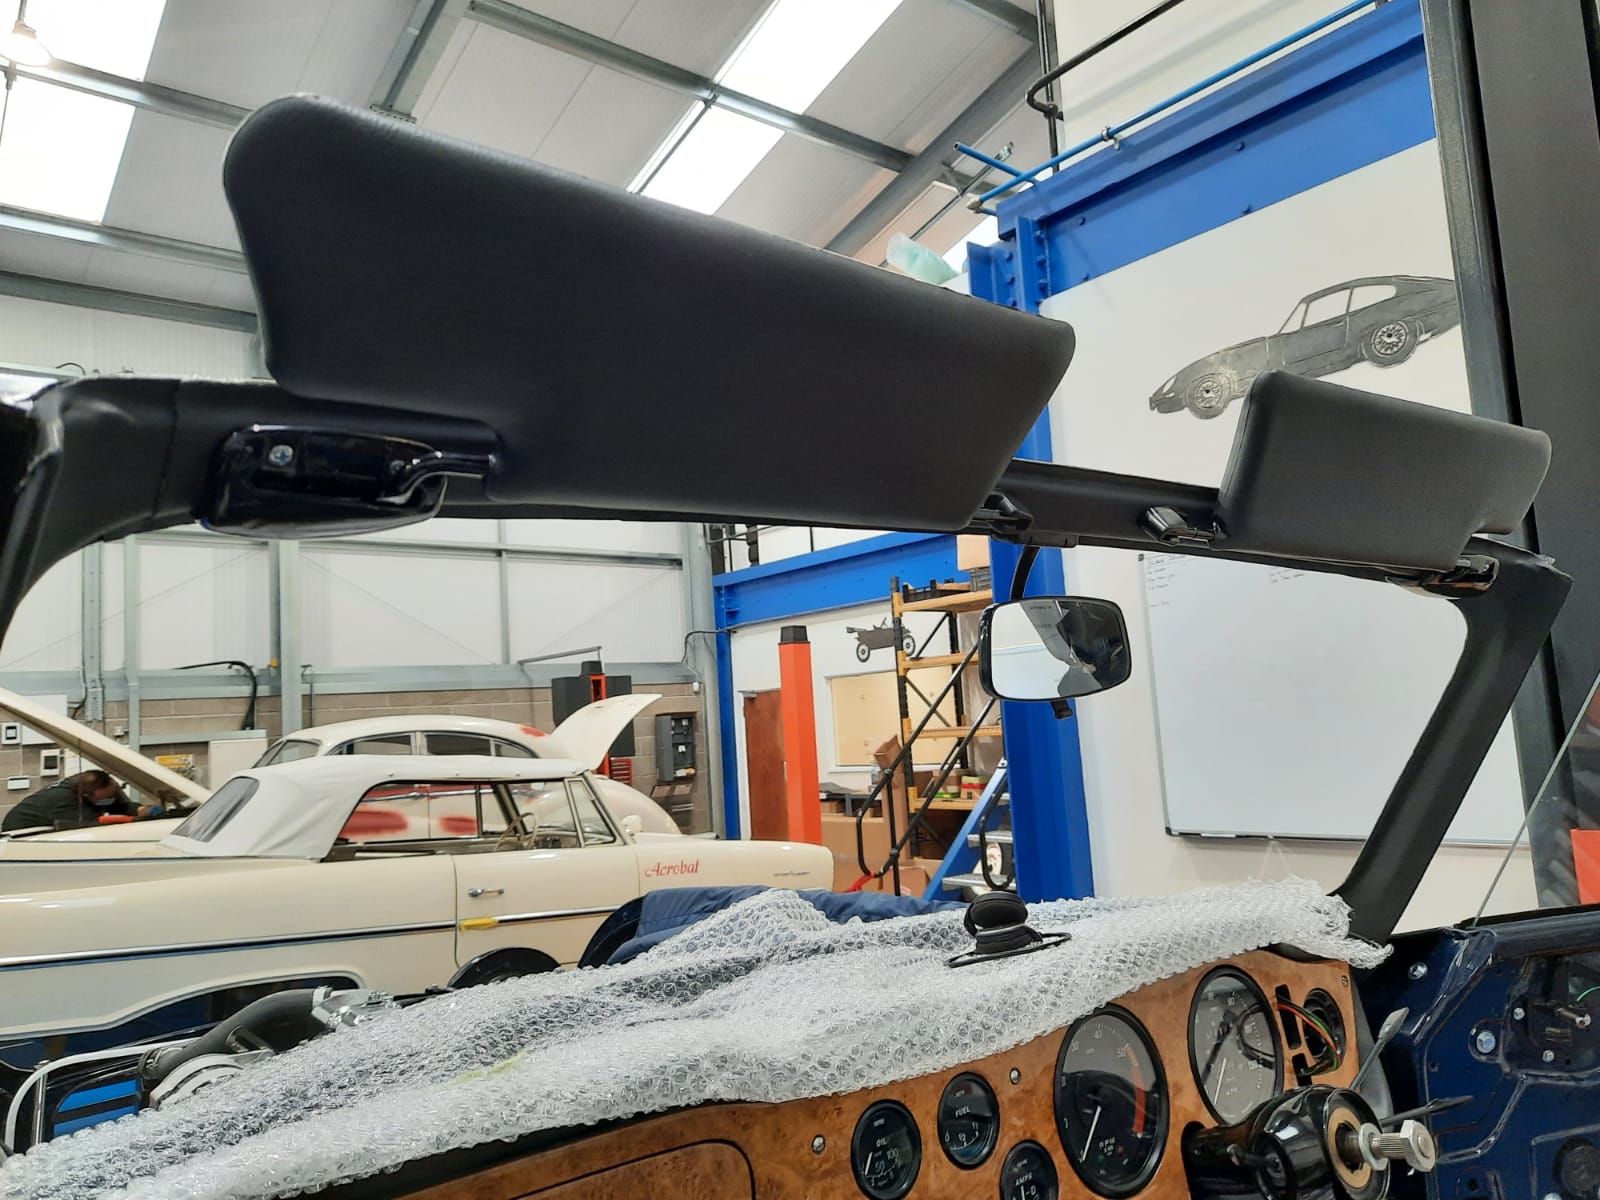
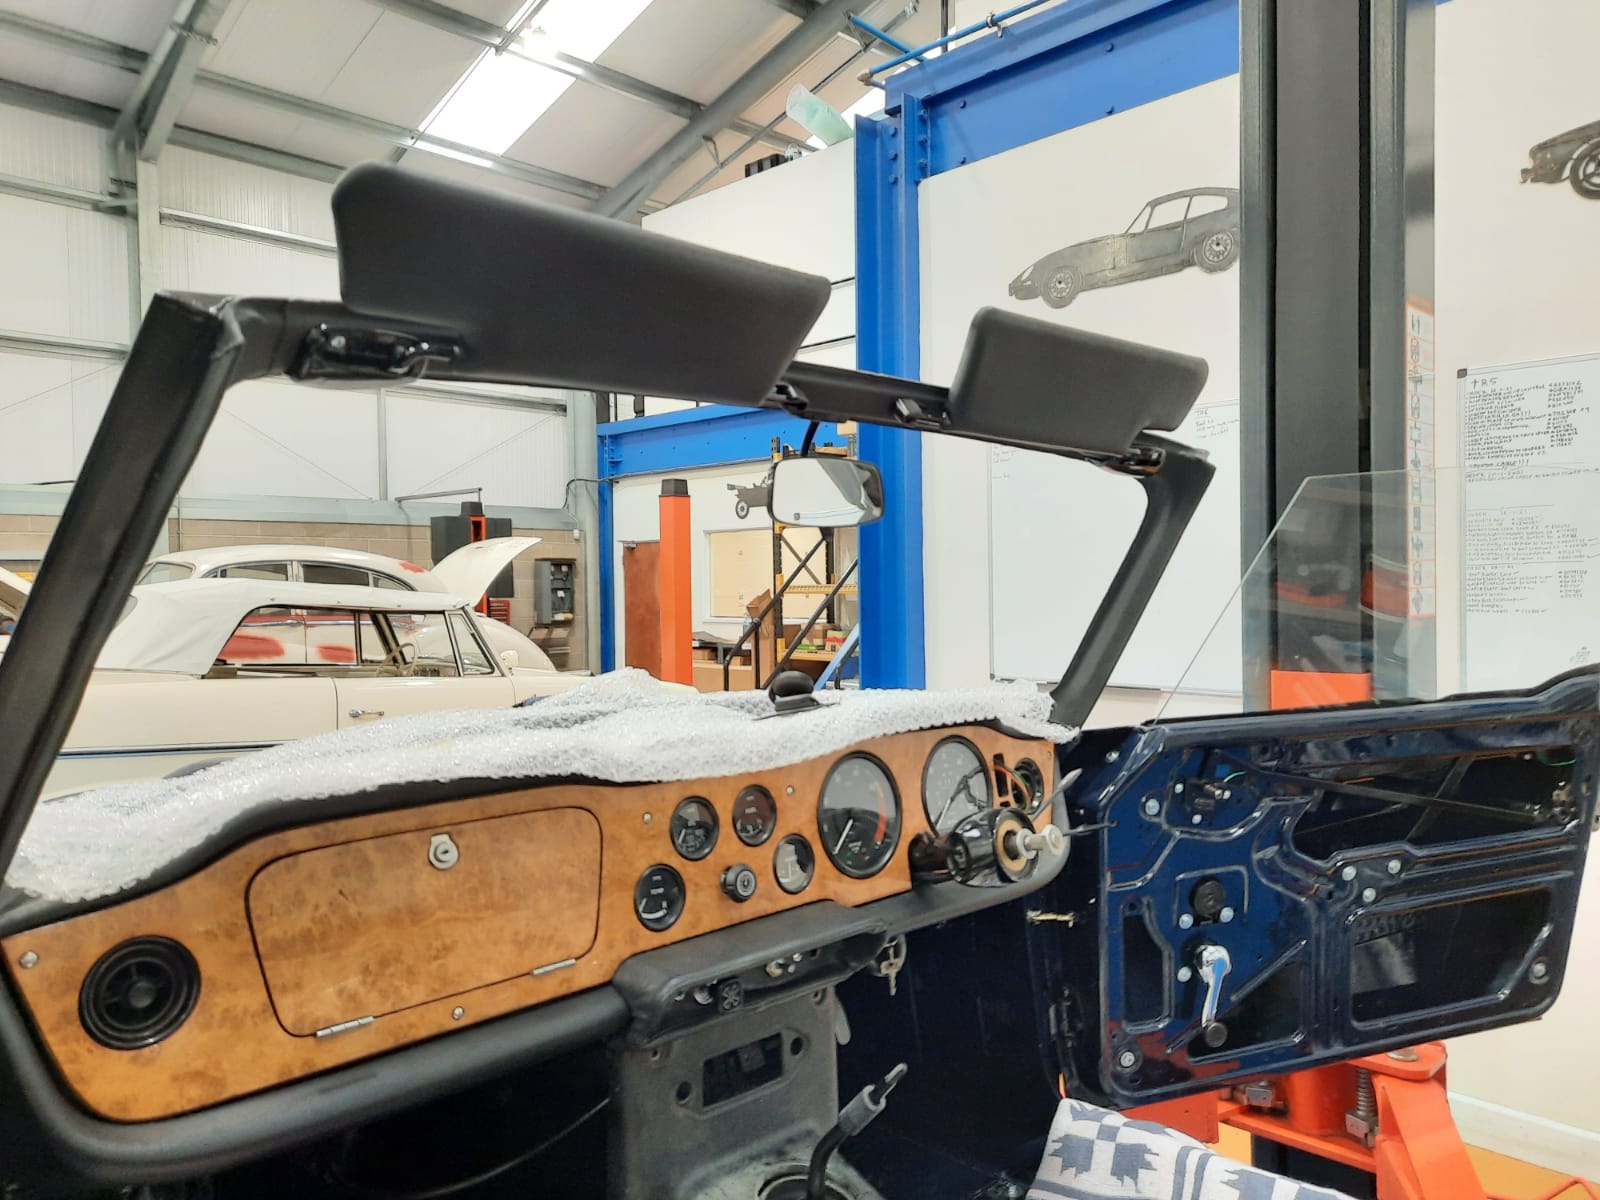
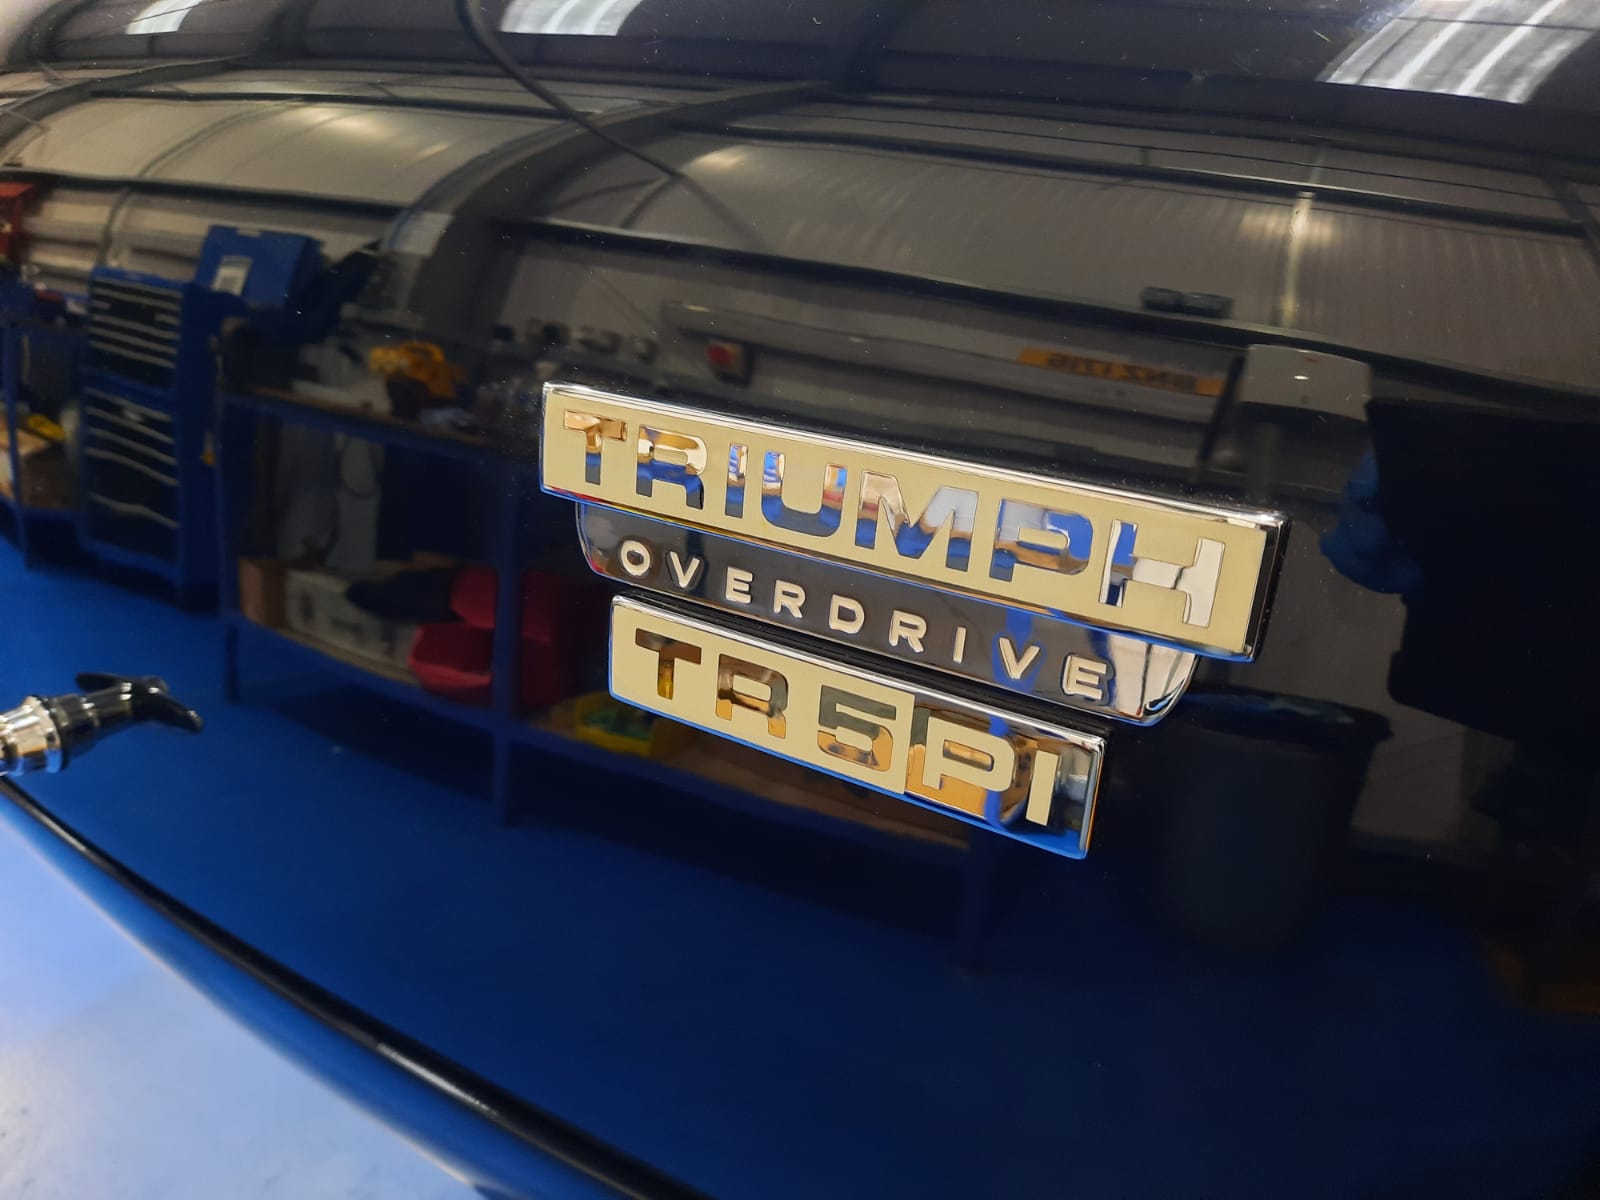
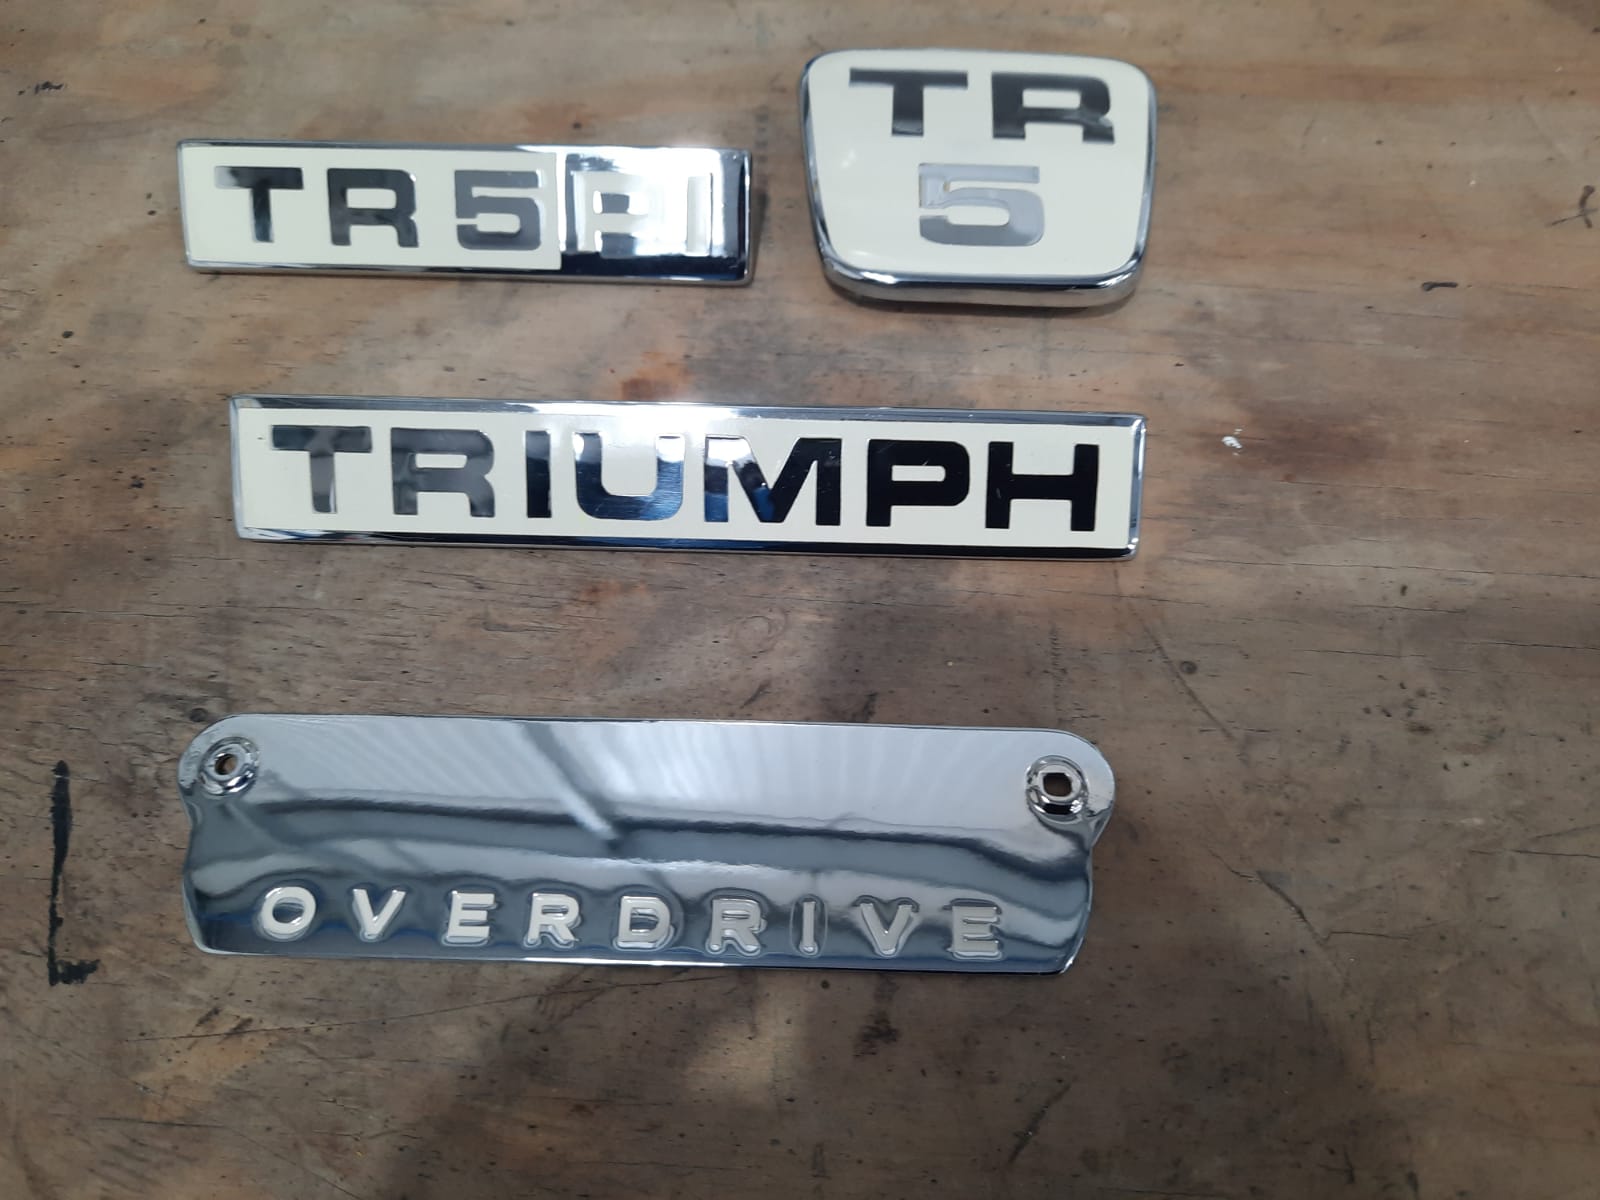
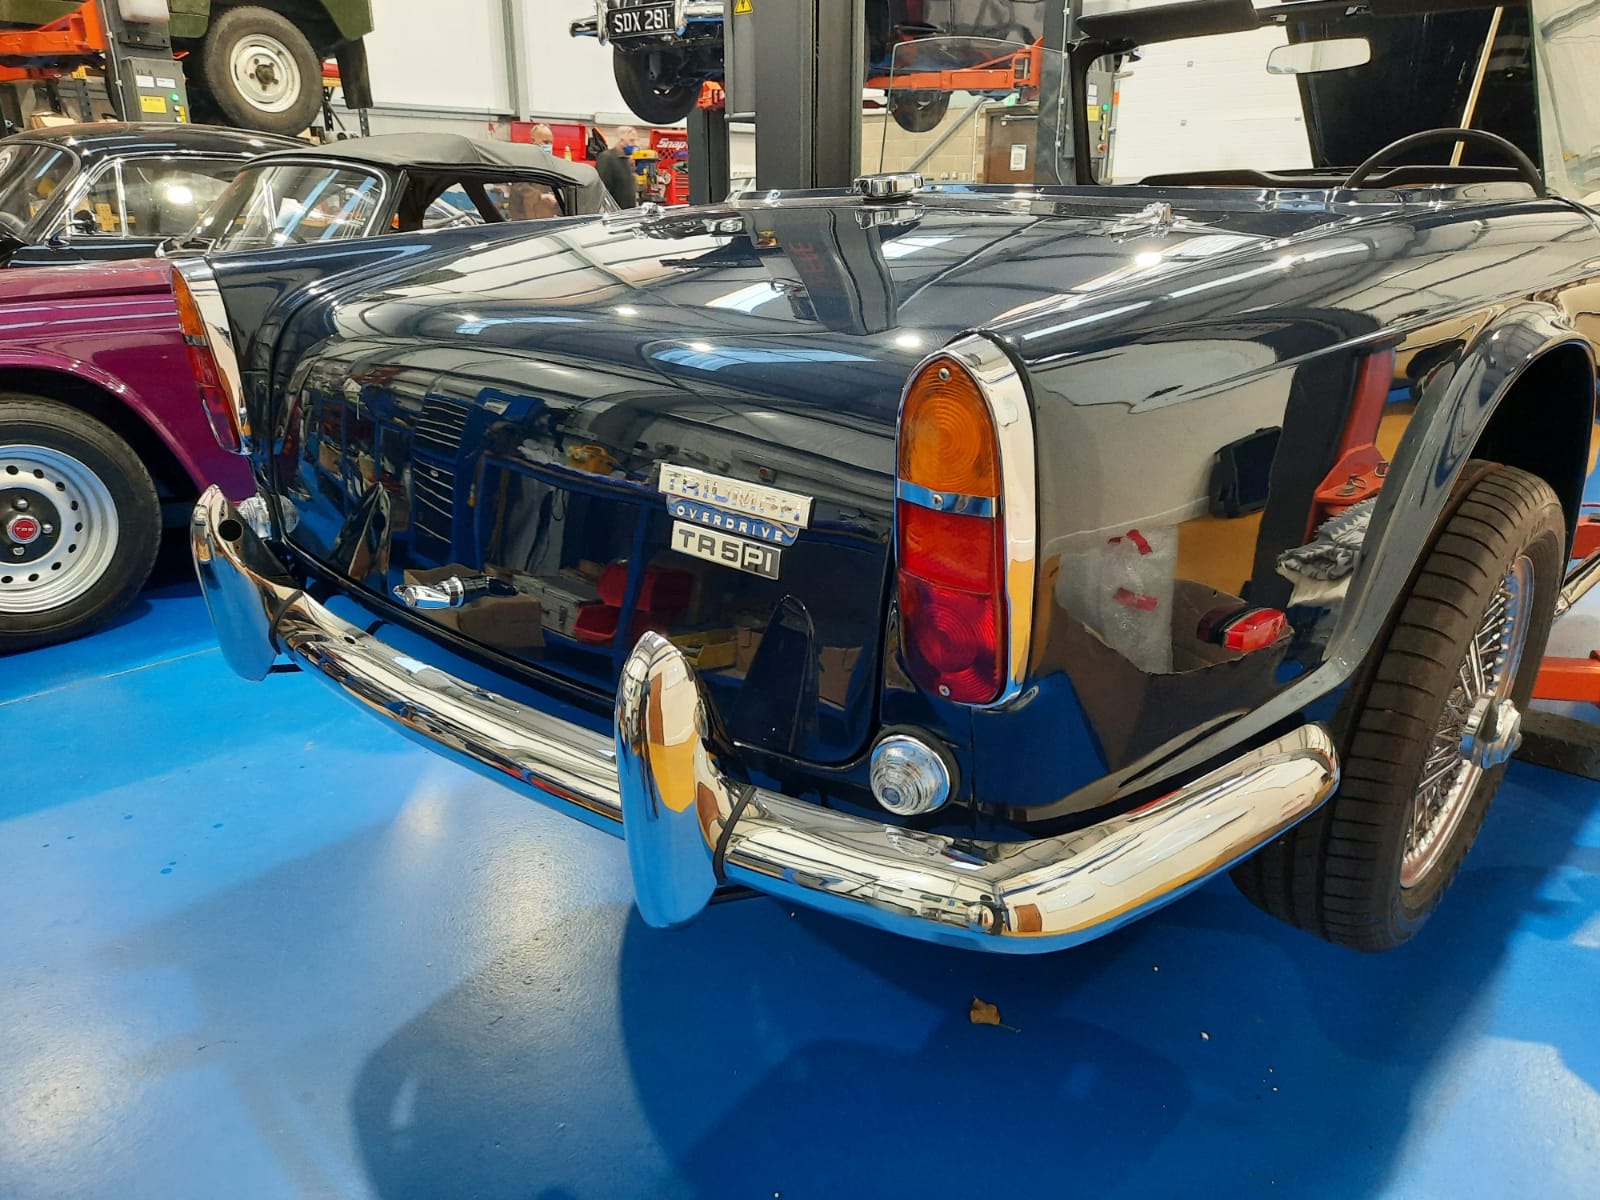
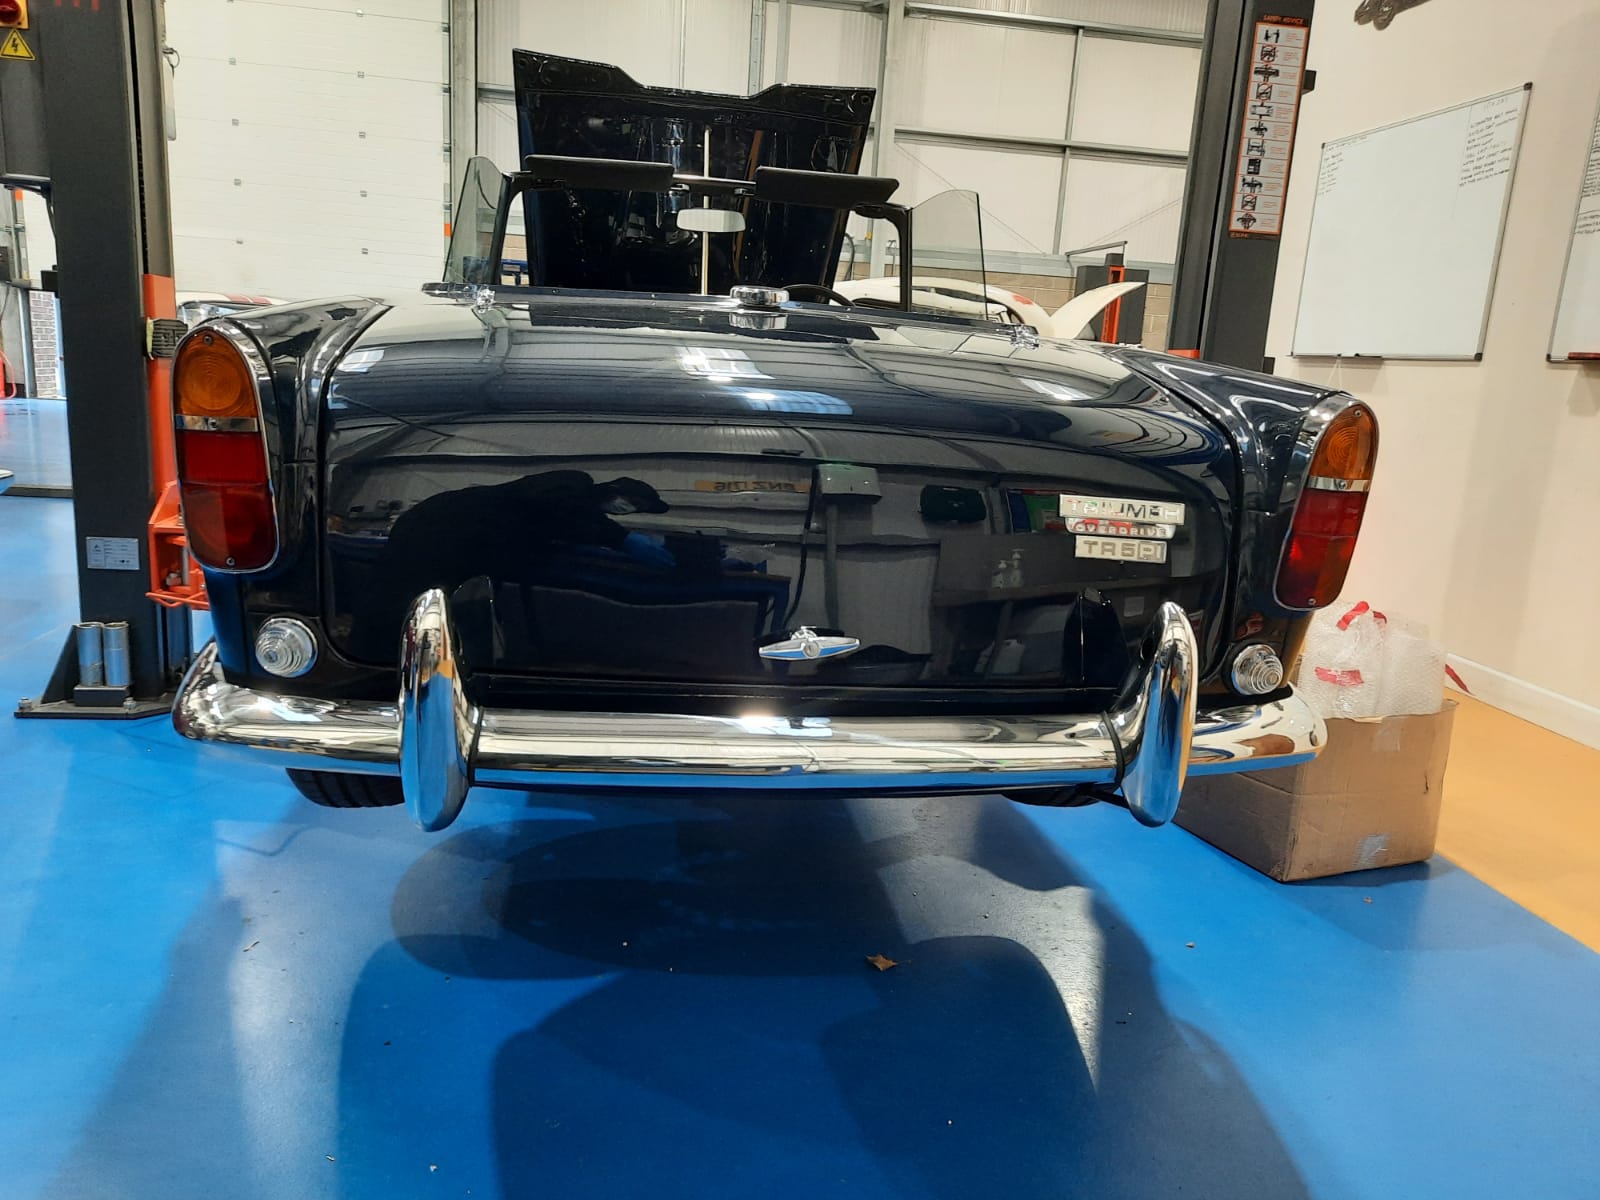
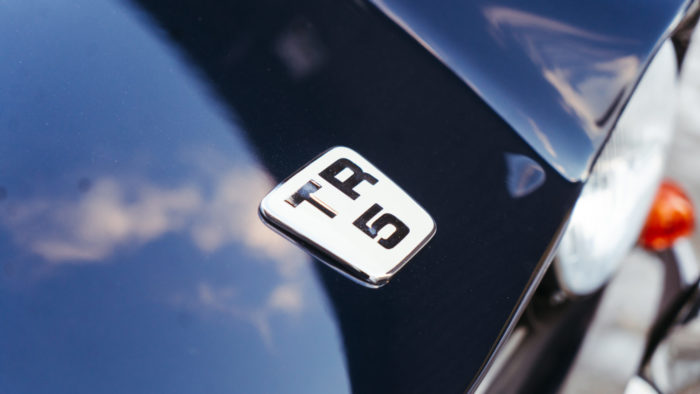
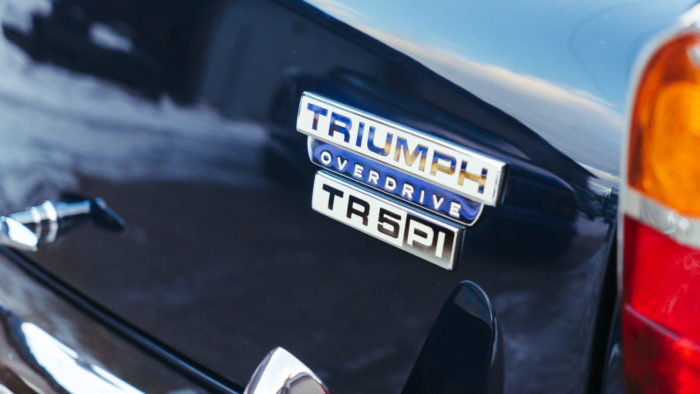
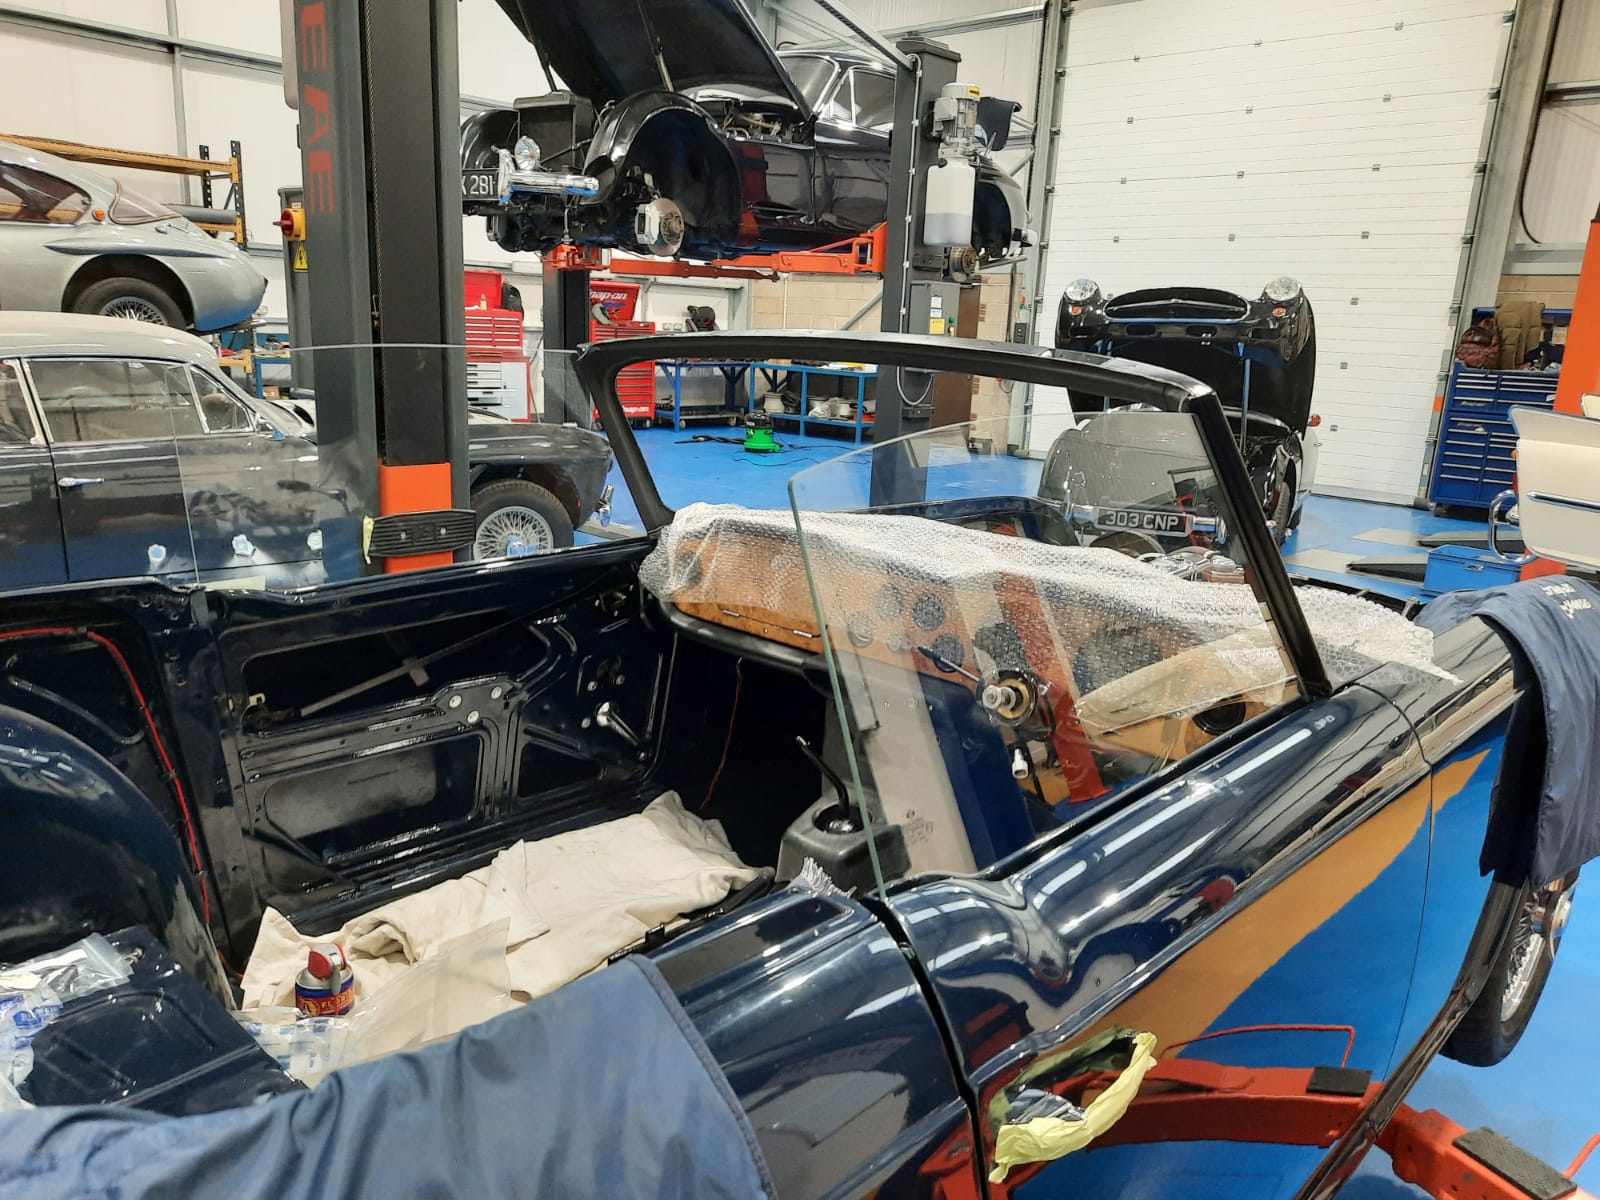
Mauro has attached the fuel pressure relief valve and installed the fuel lines, fitted the clutch master and slave cylinder, fitted the windscreen frame, sun visors and interior mirror. You might also notice that all the badges have been fitted along with the bumpers and chassis plate. This magnificent classic is now started to resemble a car again.


During our weekly deep clean (that goes alongside our daily workshop cleans), we emptied the workshop of all our cars whilst we tidied up the workshop. This allowed us to really get a good look at the TR5 off the frame.

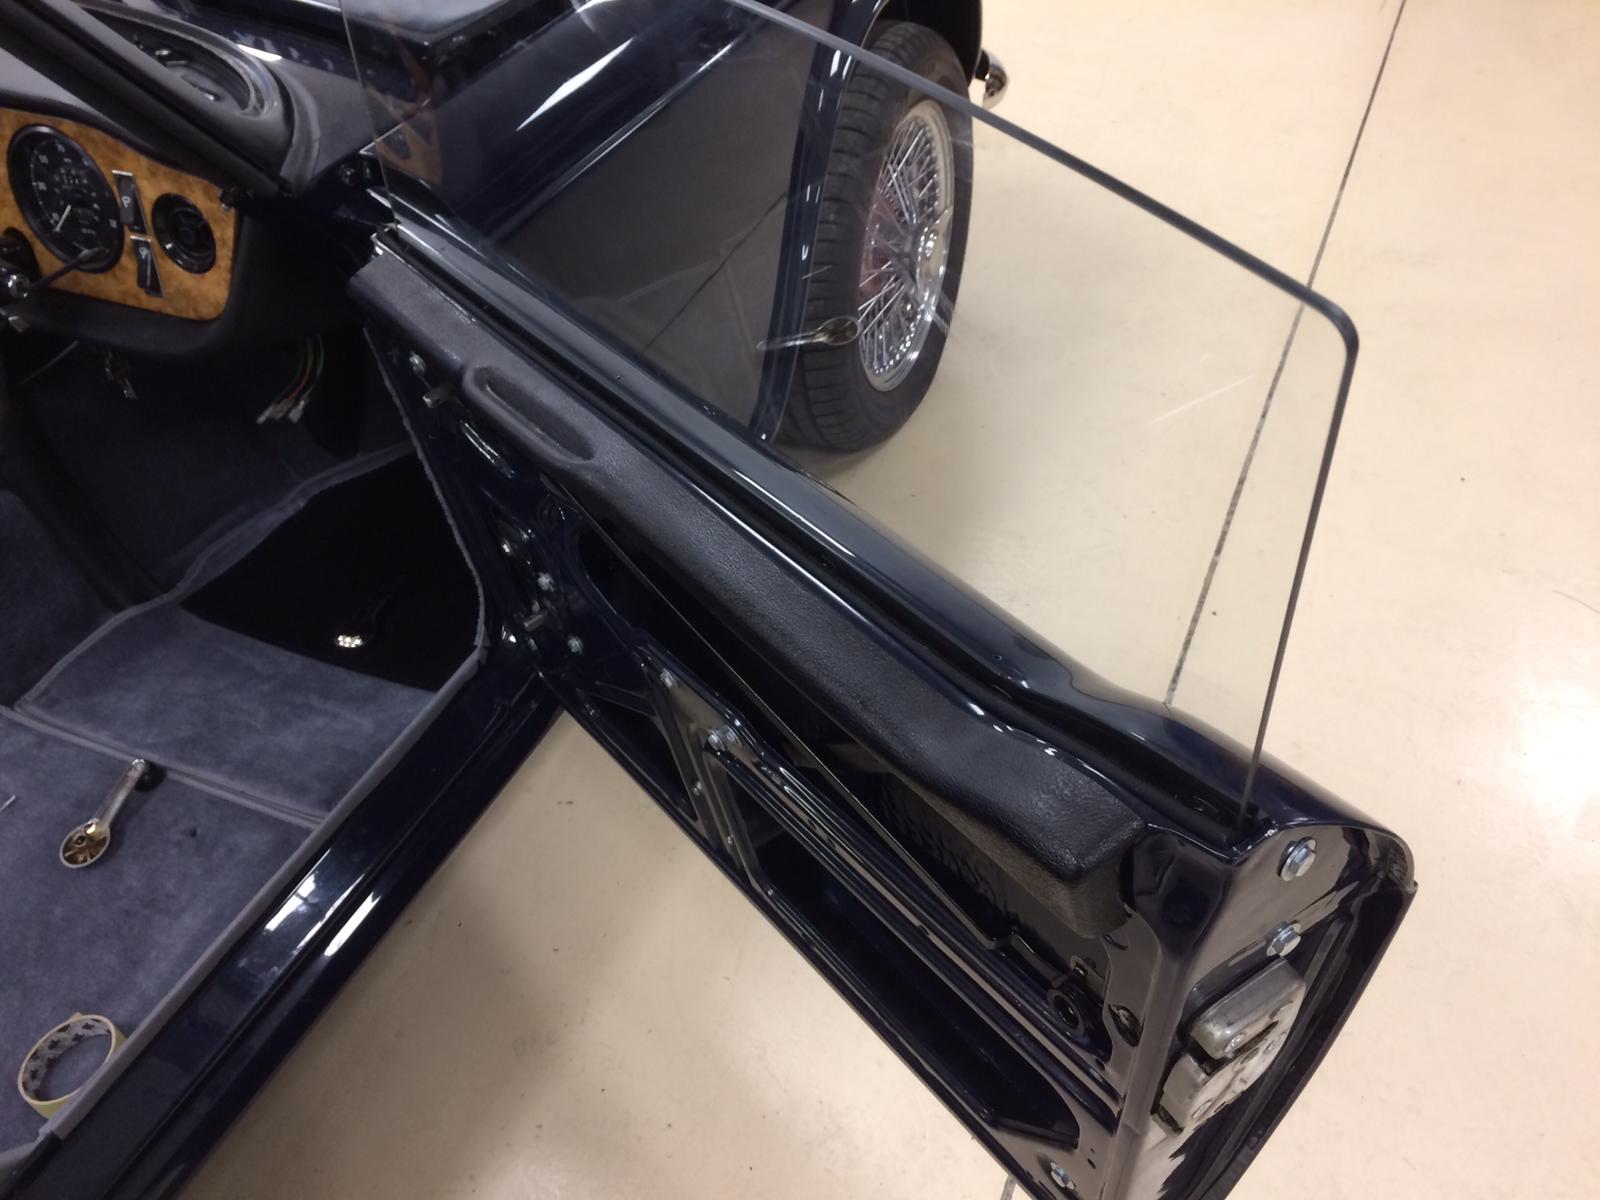
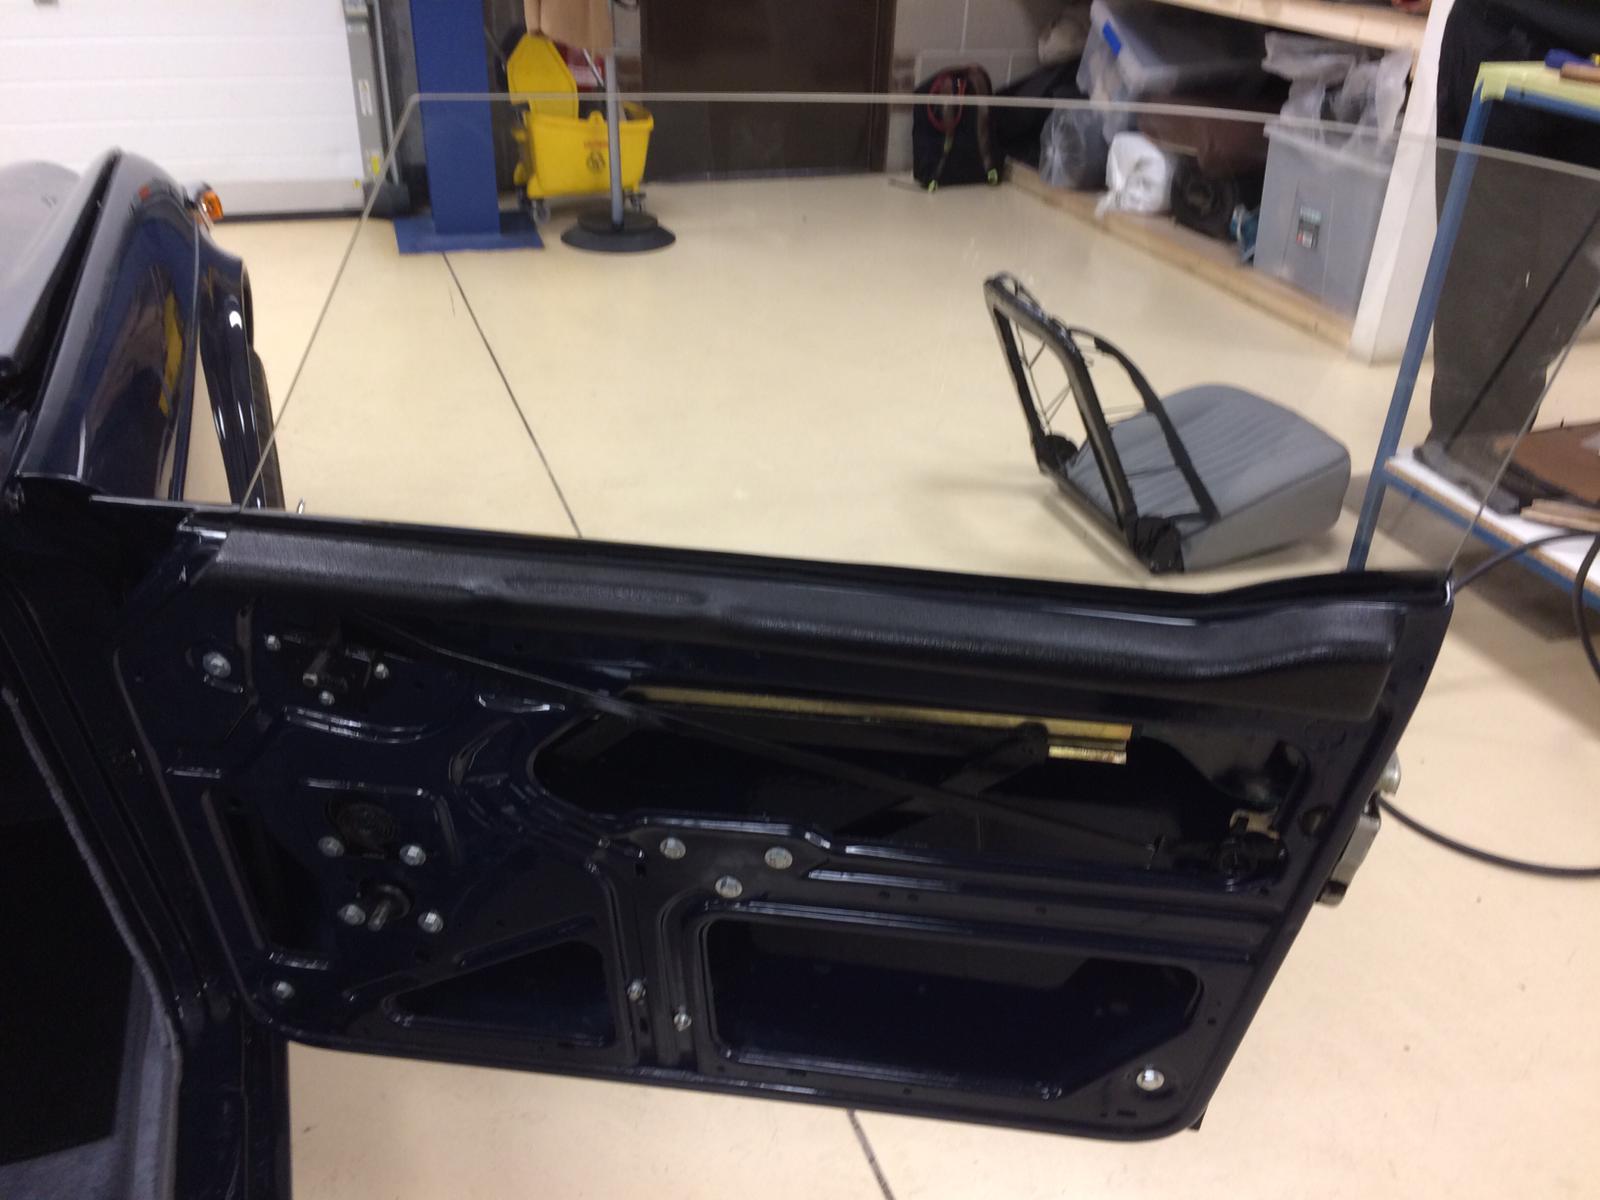
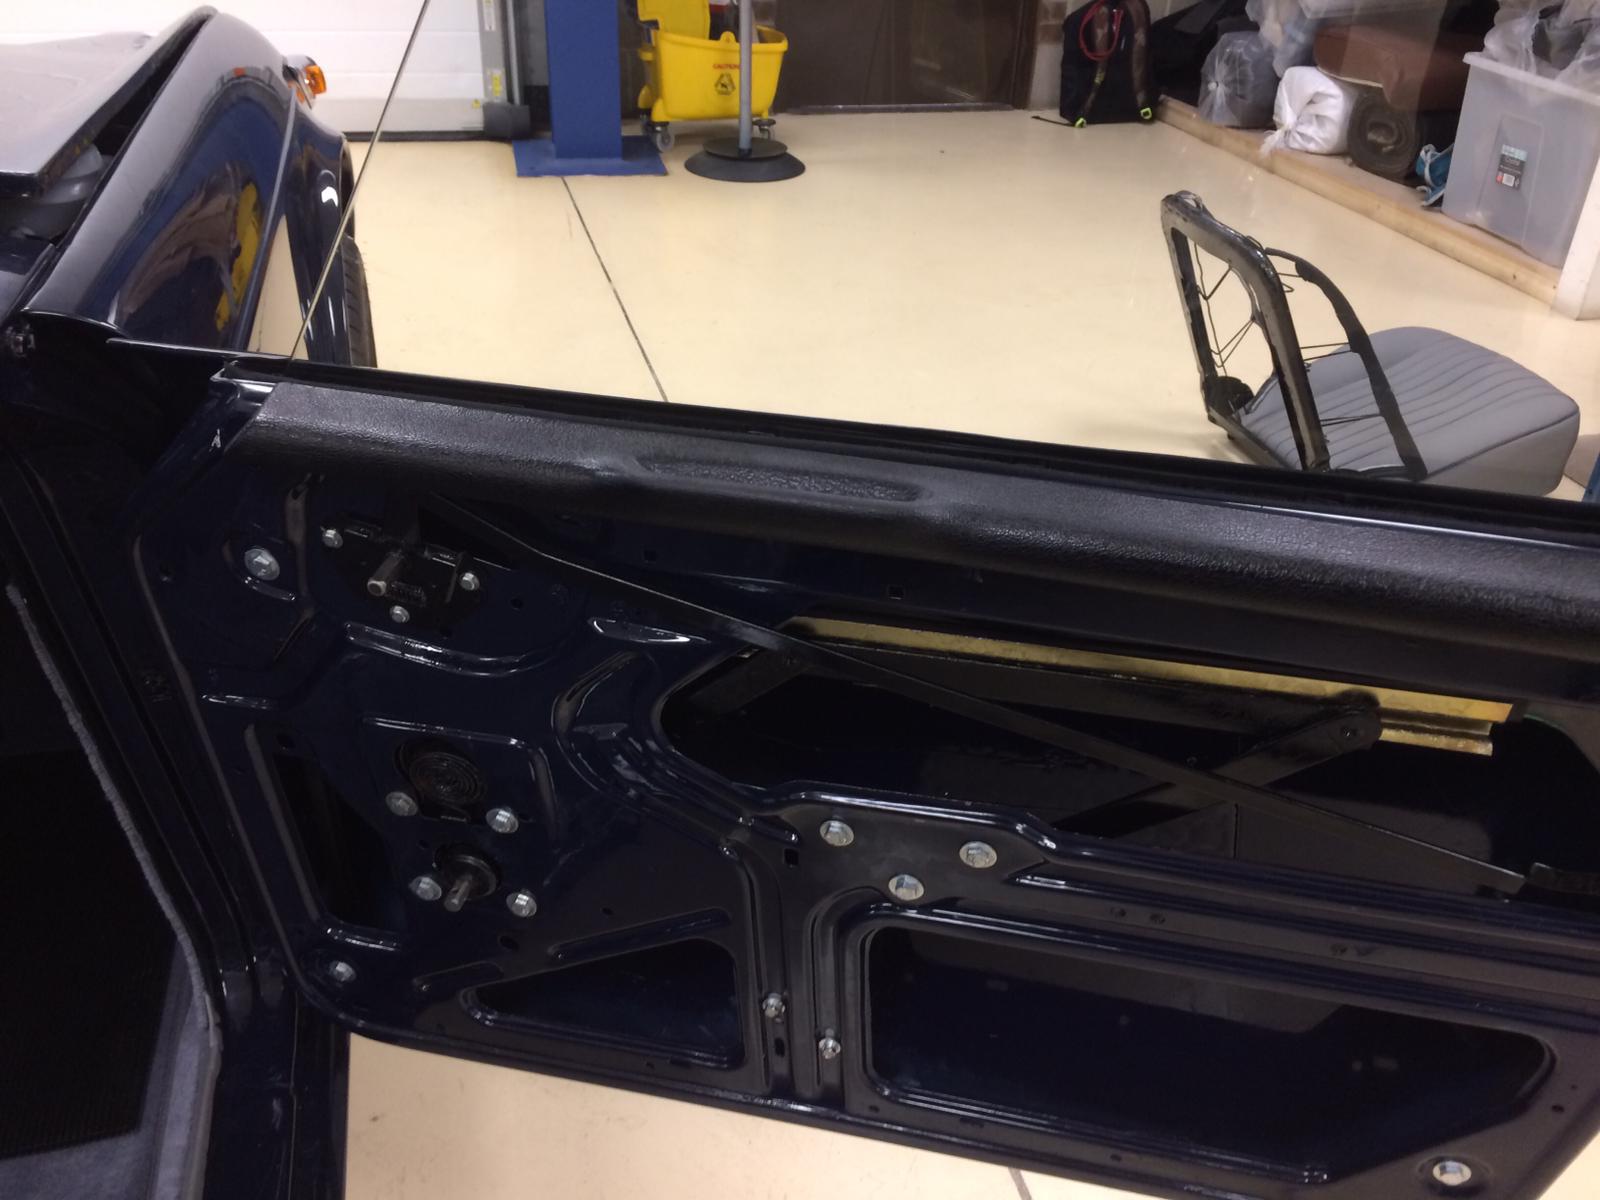
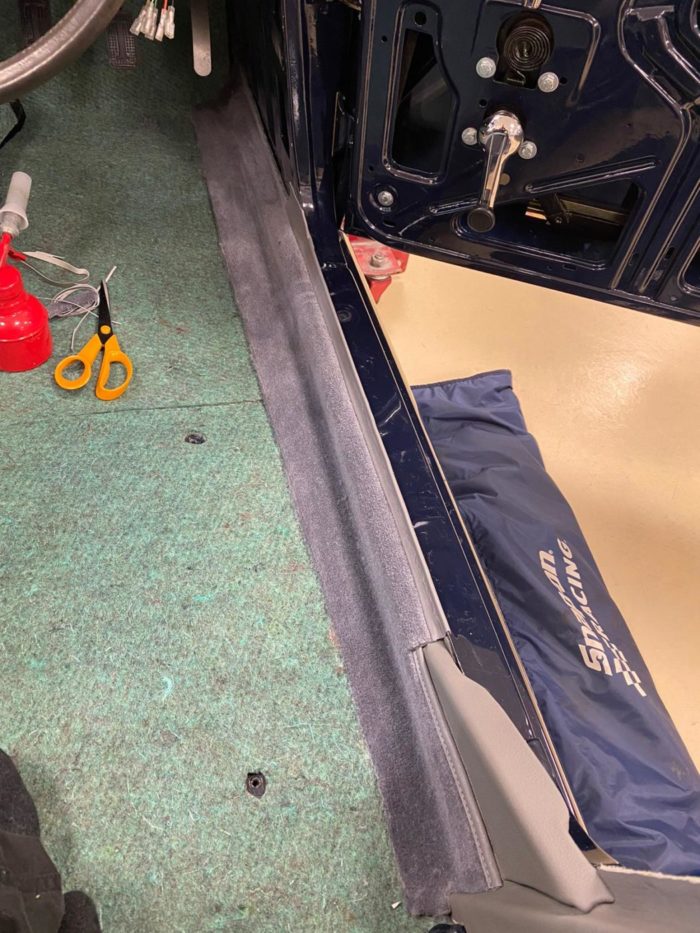
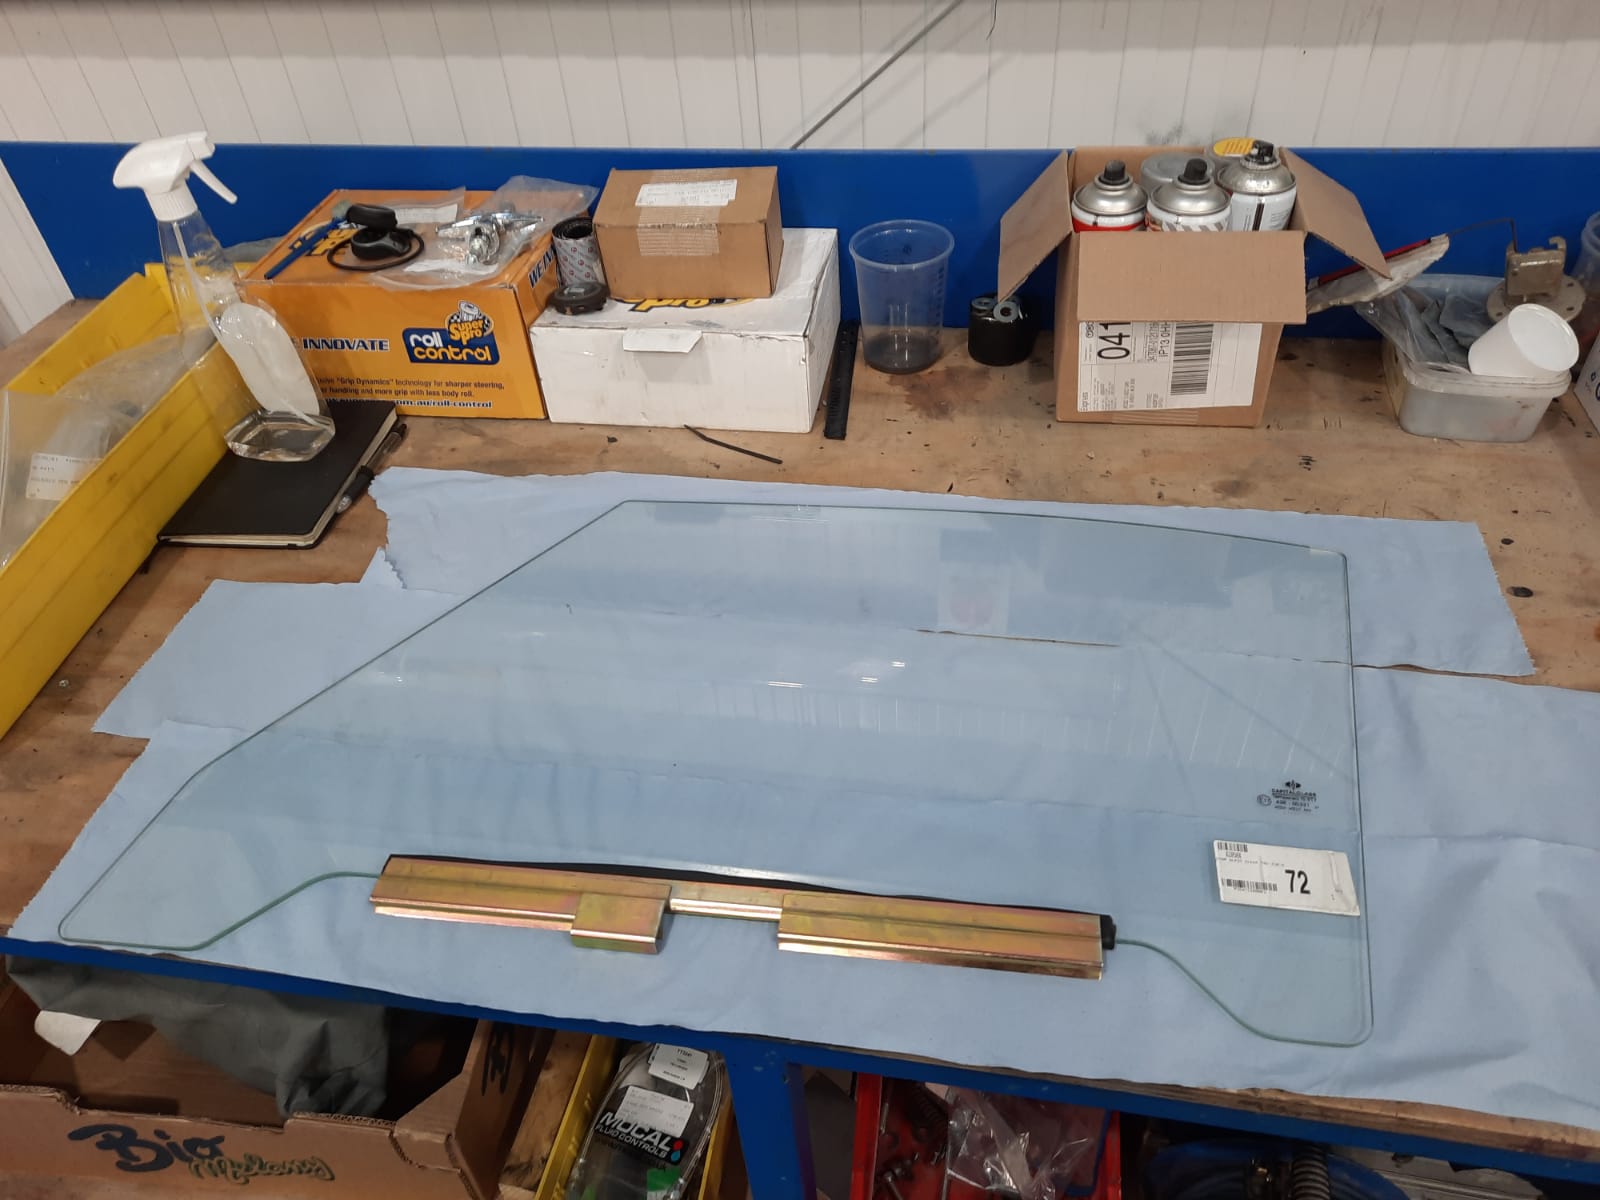
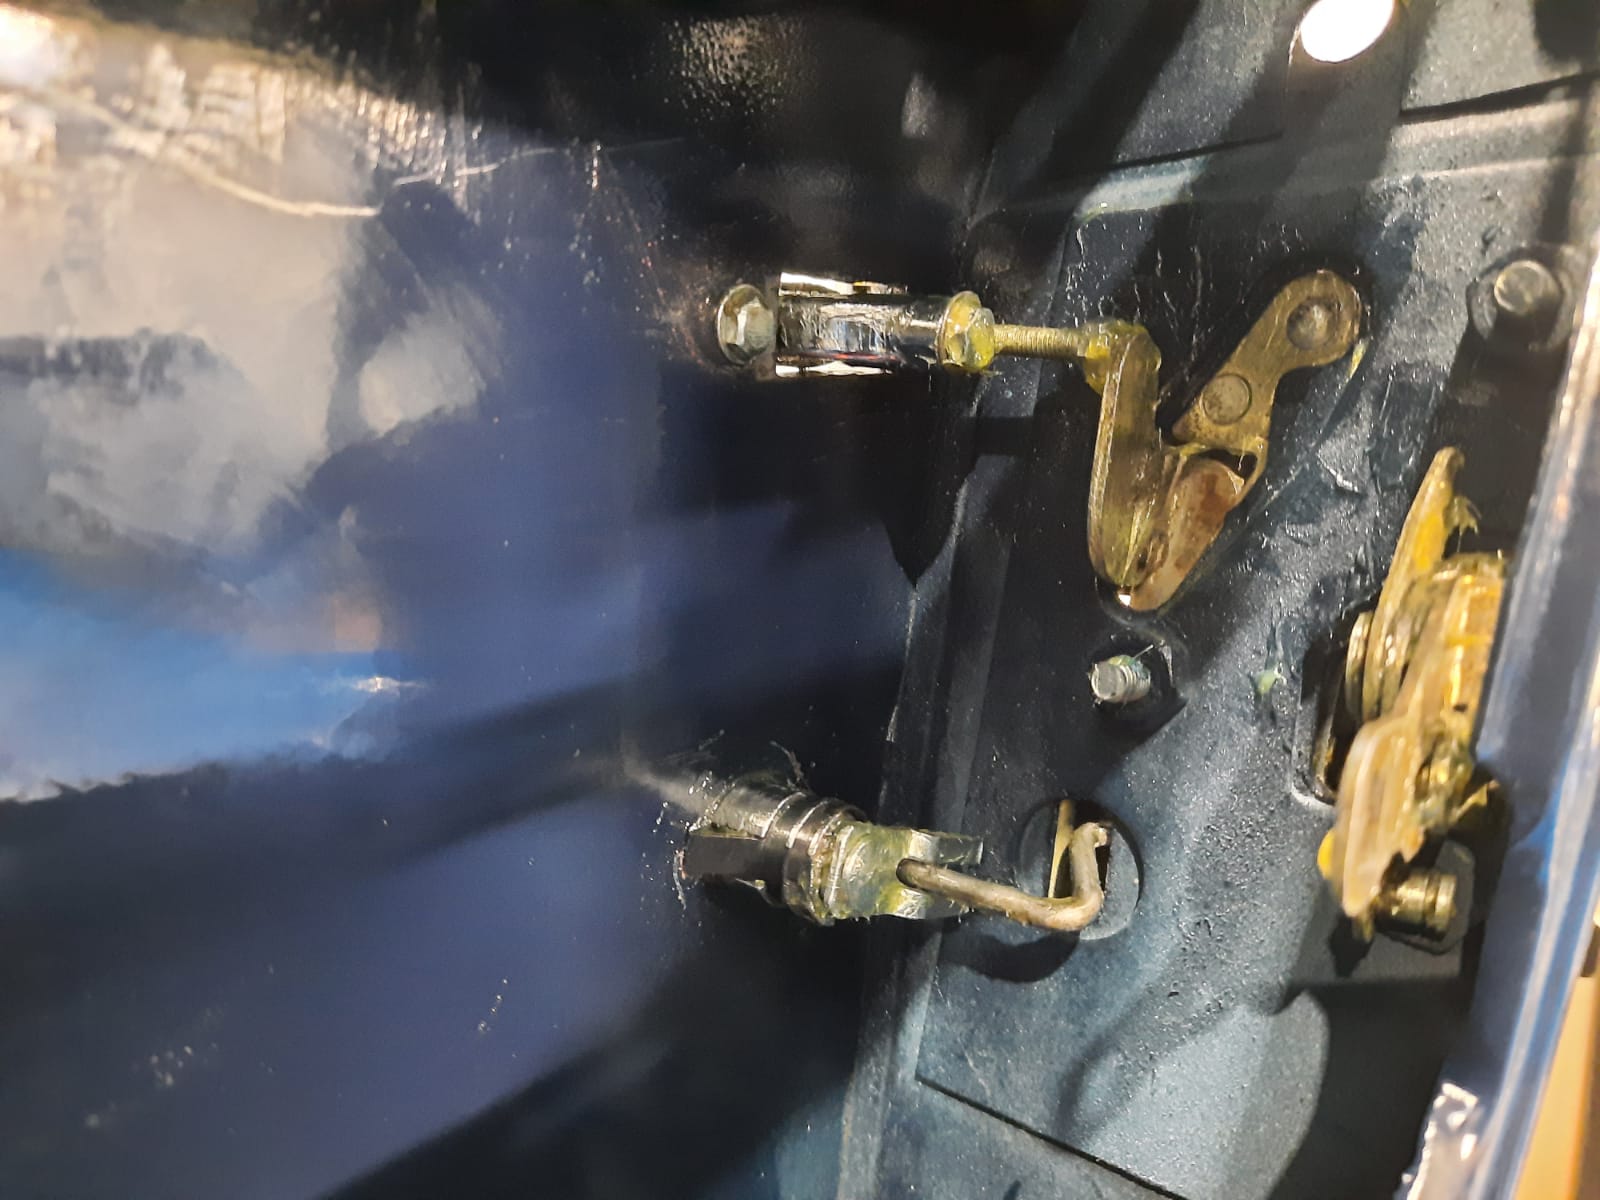
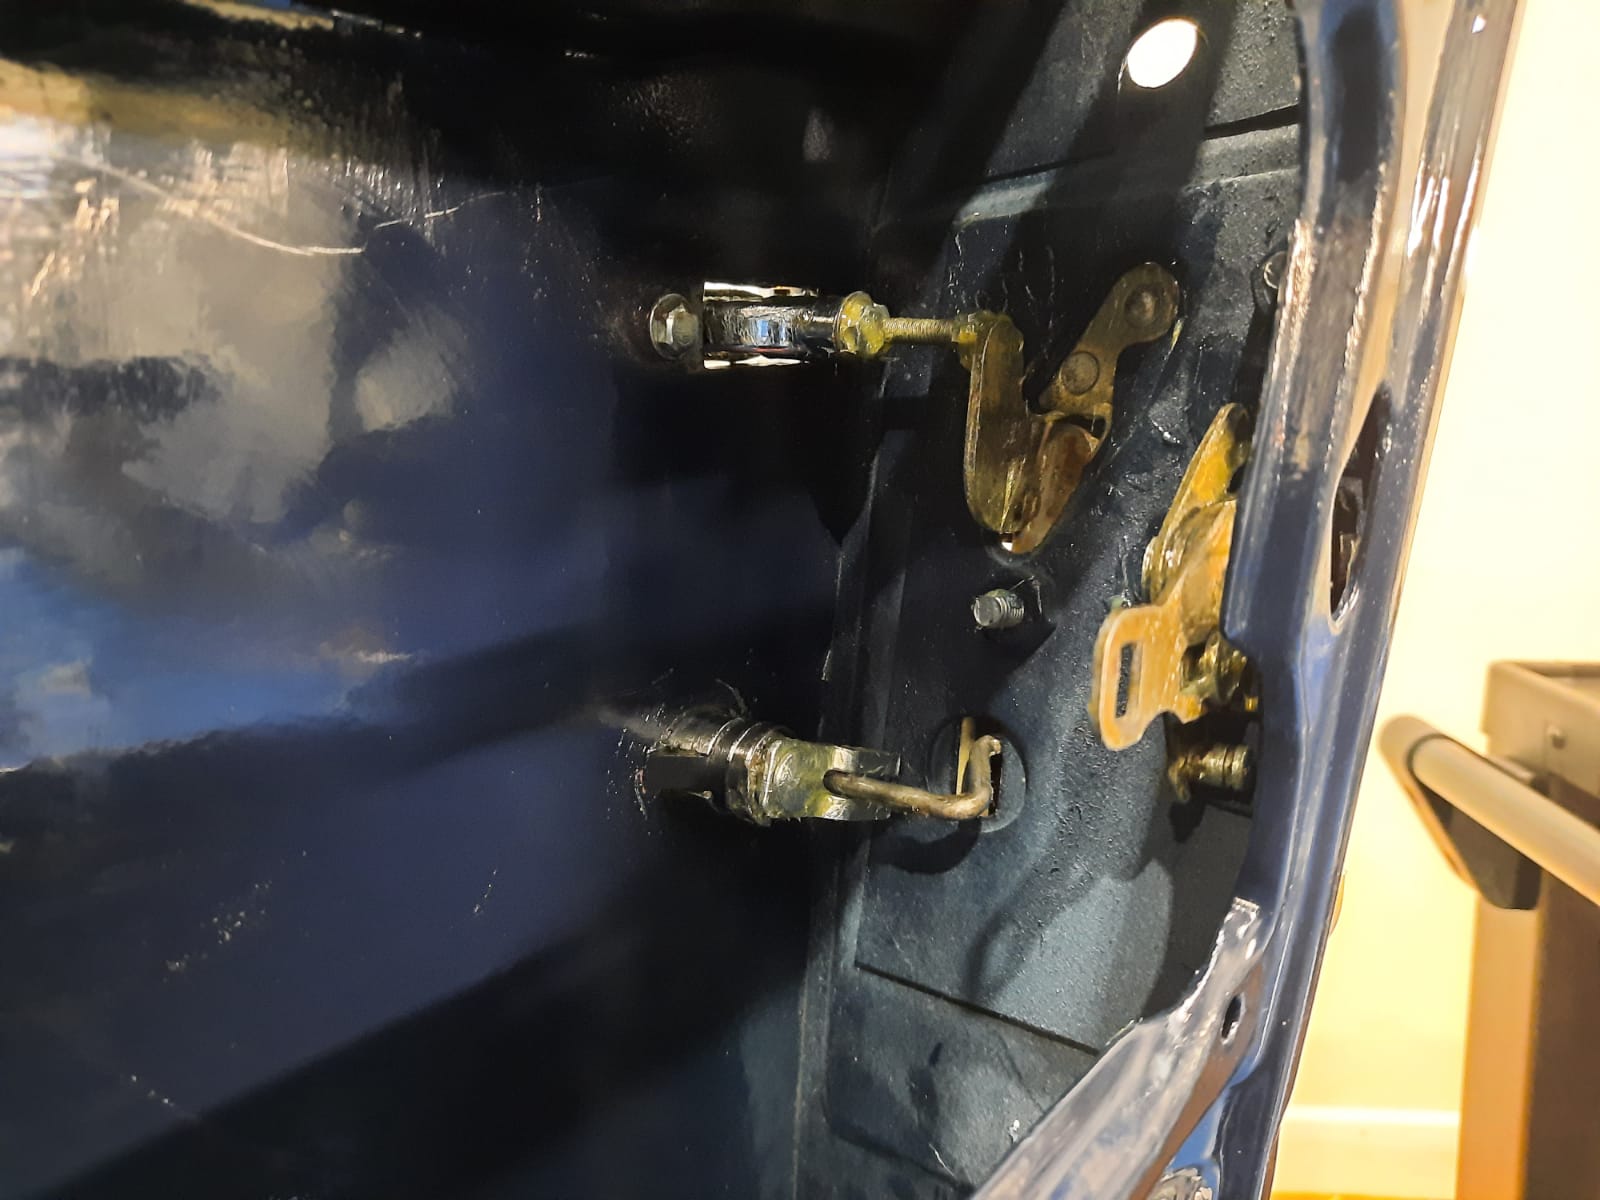
The reverse lights have been fitted to the TR5 along with the fuel gauge sender unit fuel return pipes and fuel hose filler. Rubber and material covered sills have been fitted between the glass and the door panel on the front door windows to allow the glass to move up and down without moving.


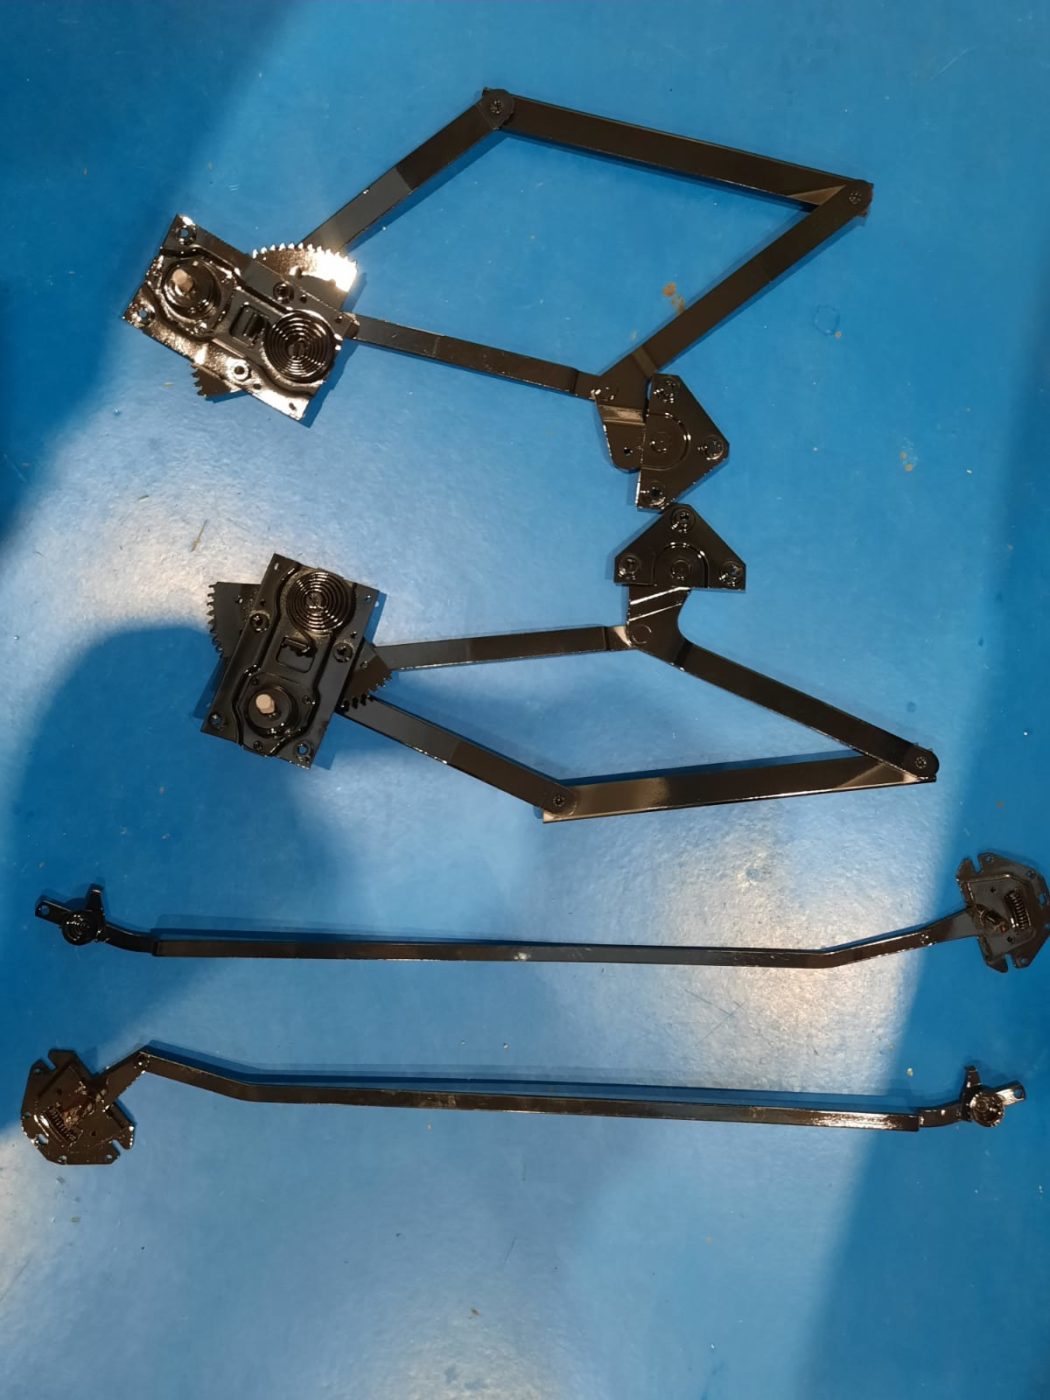
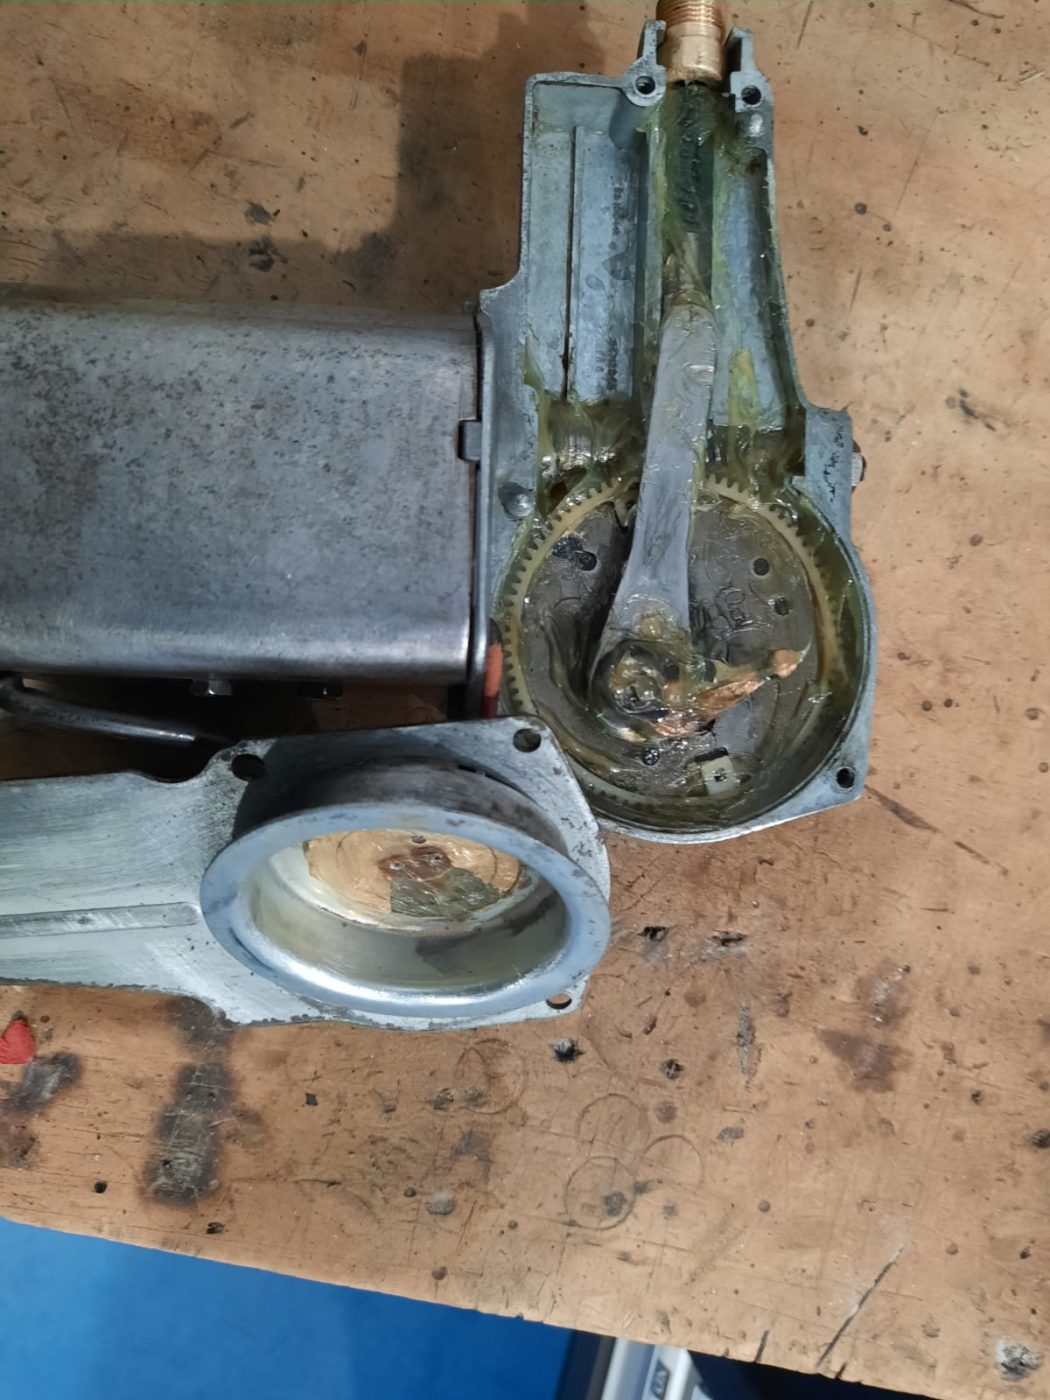
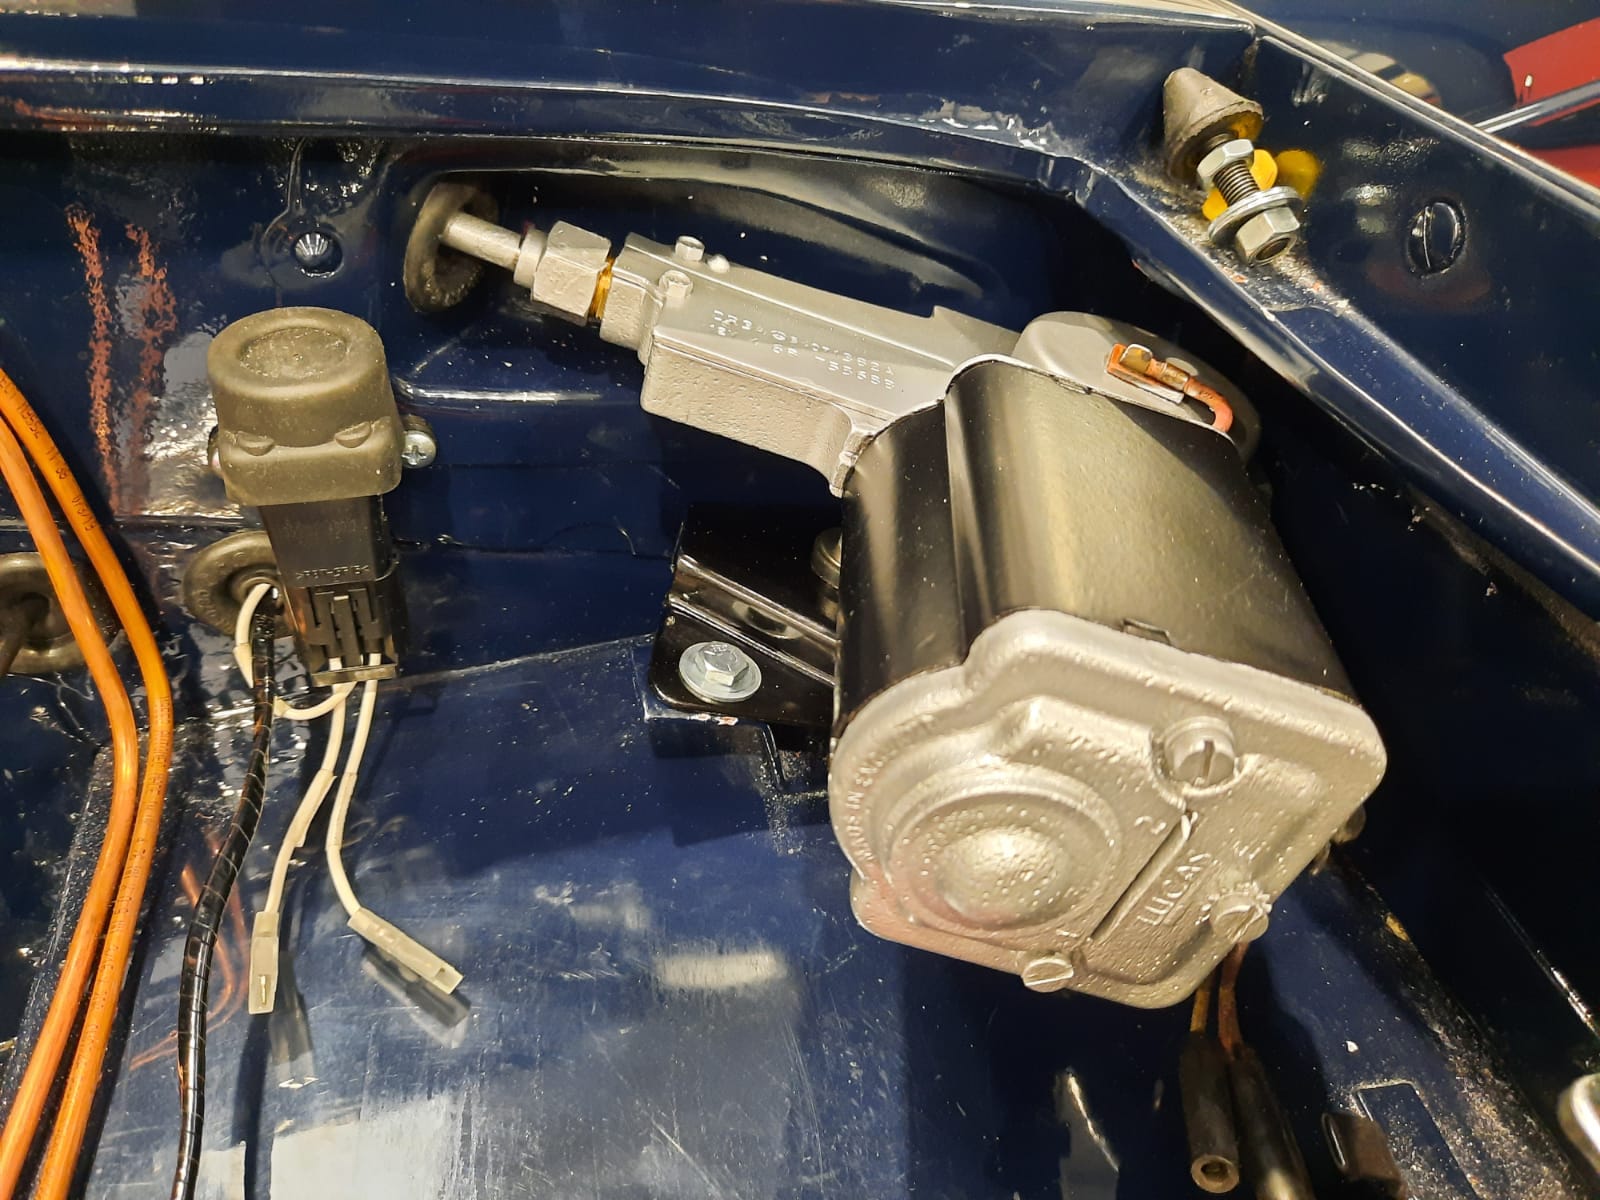
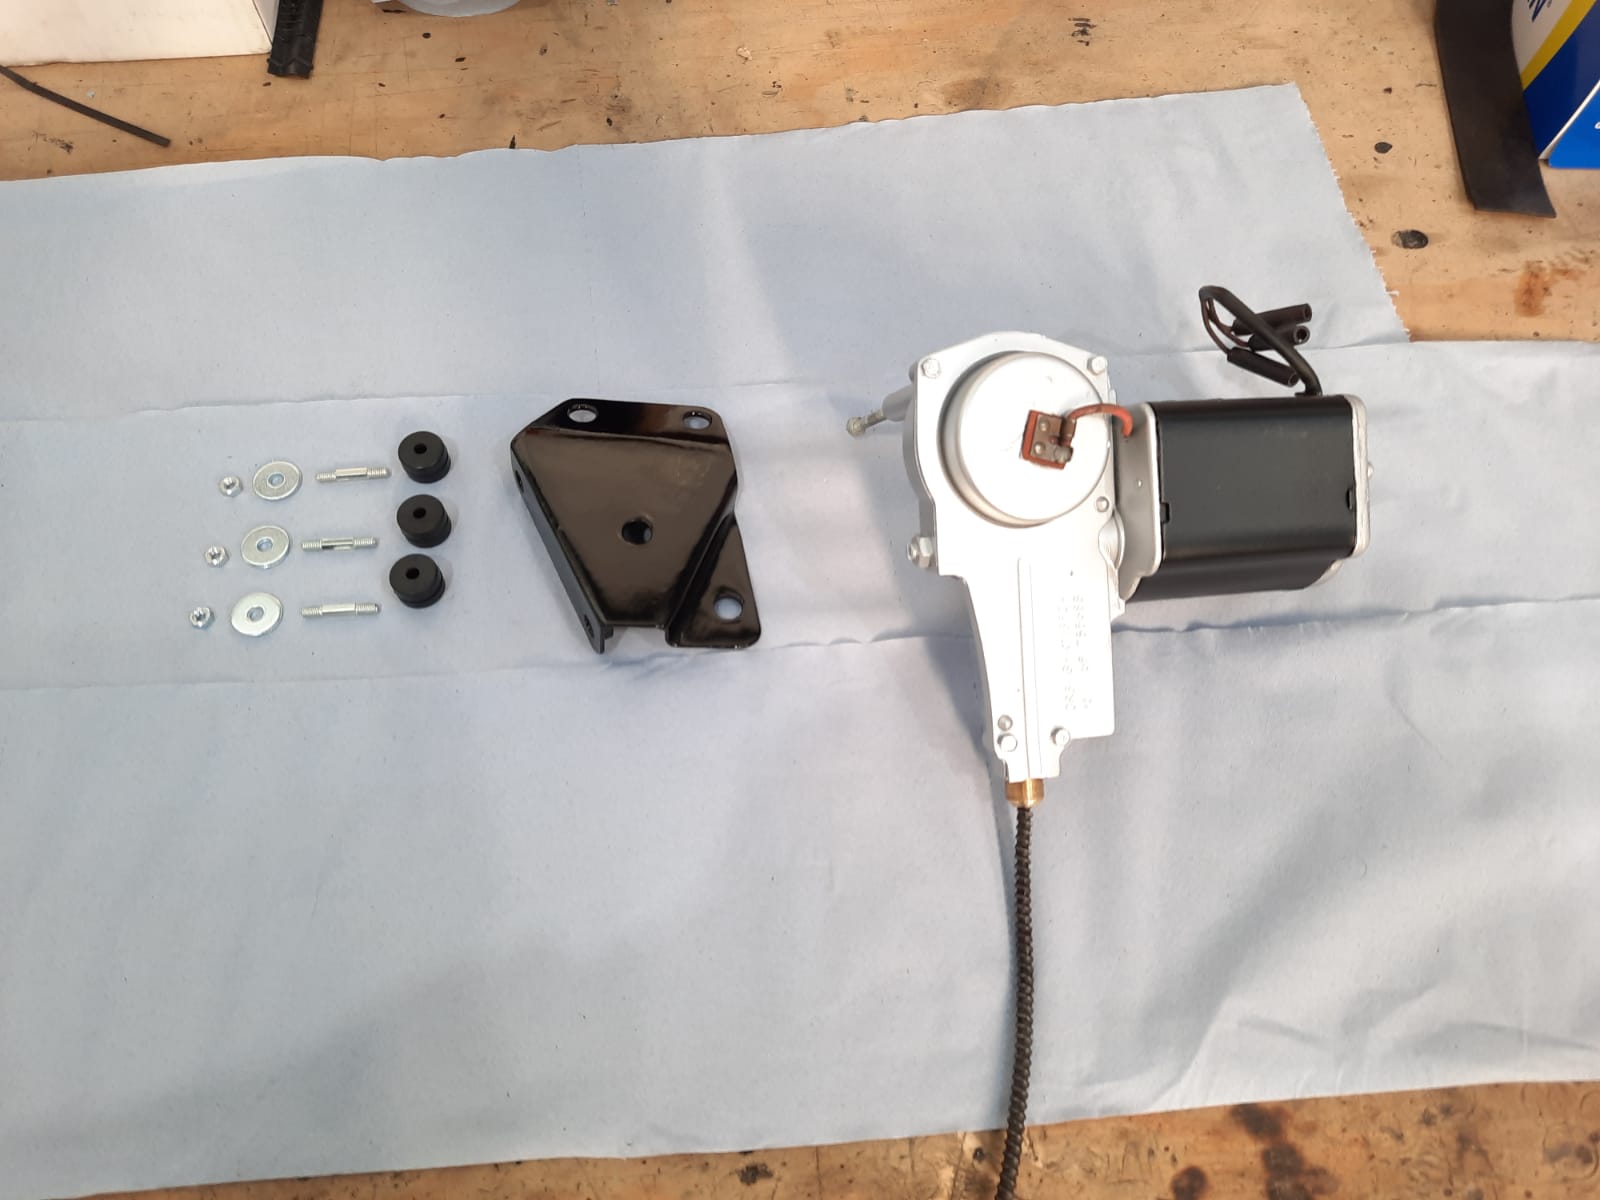
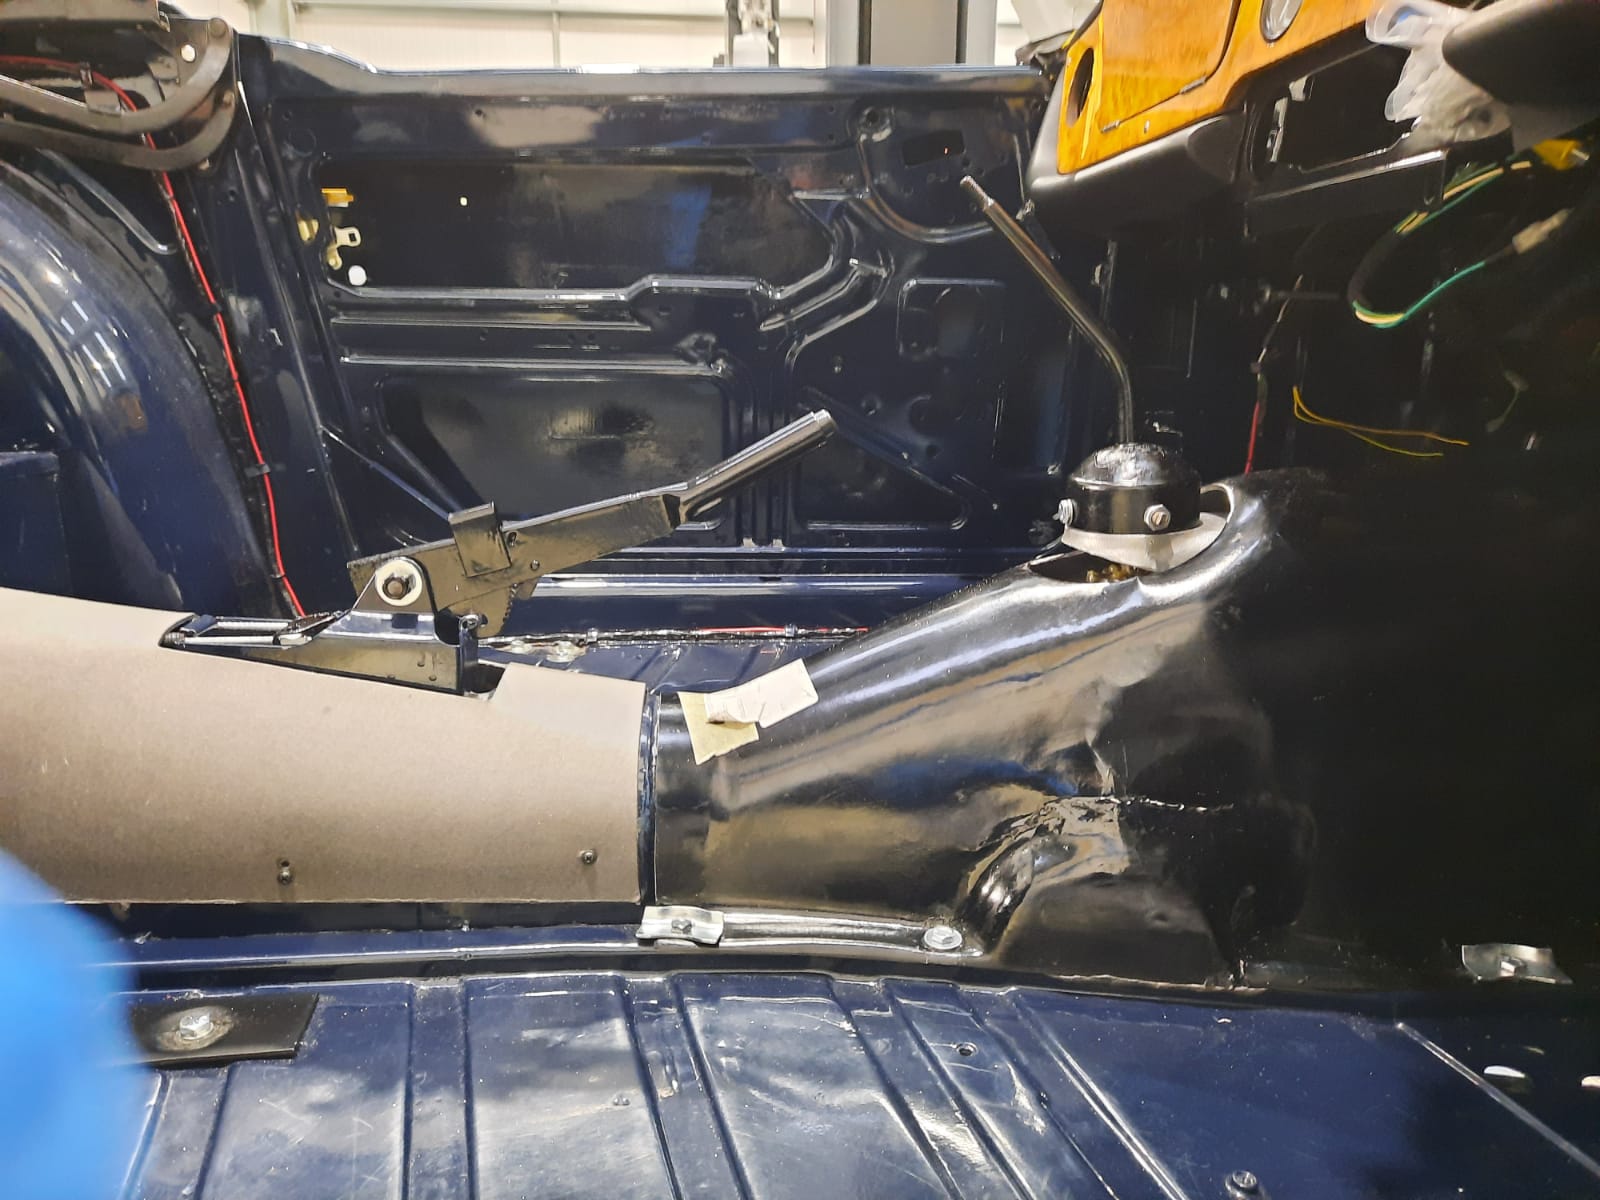
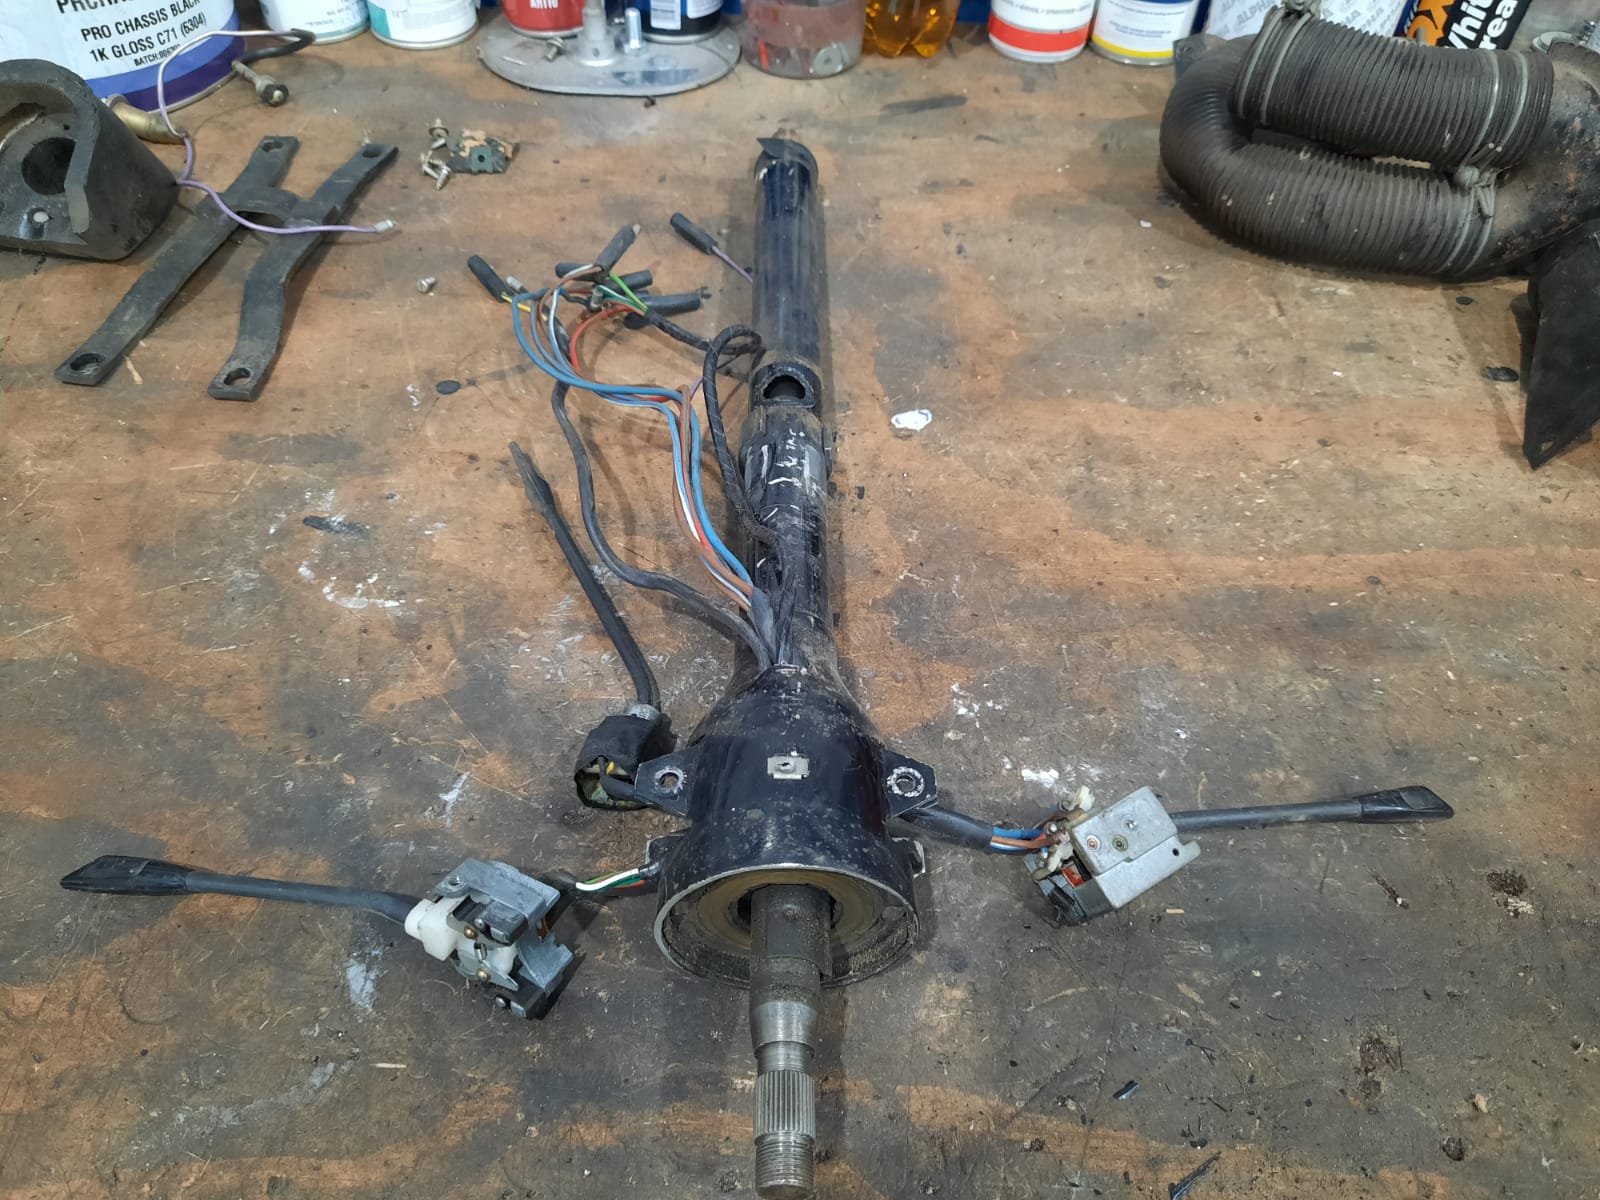
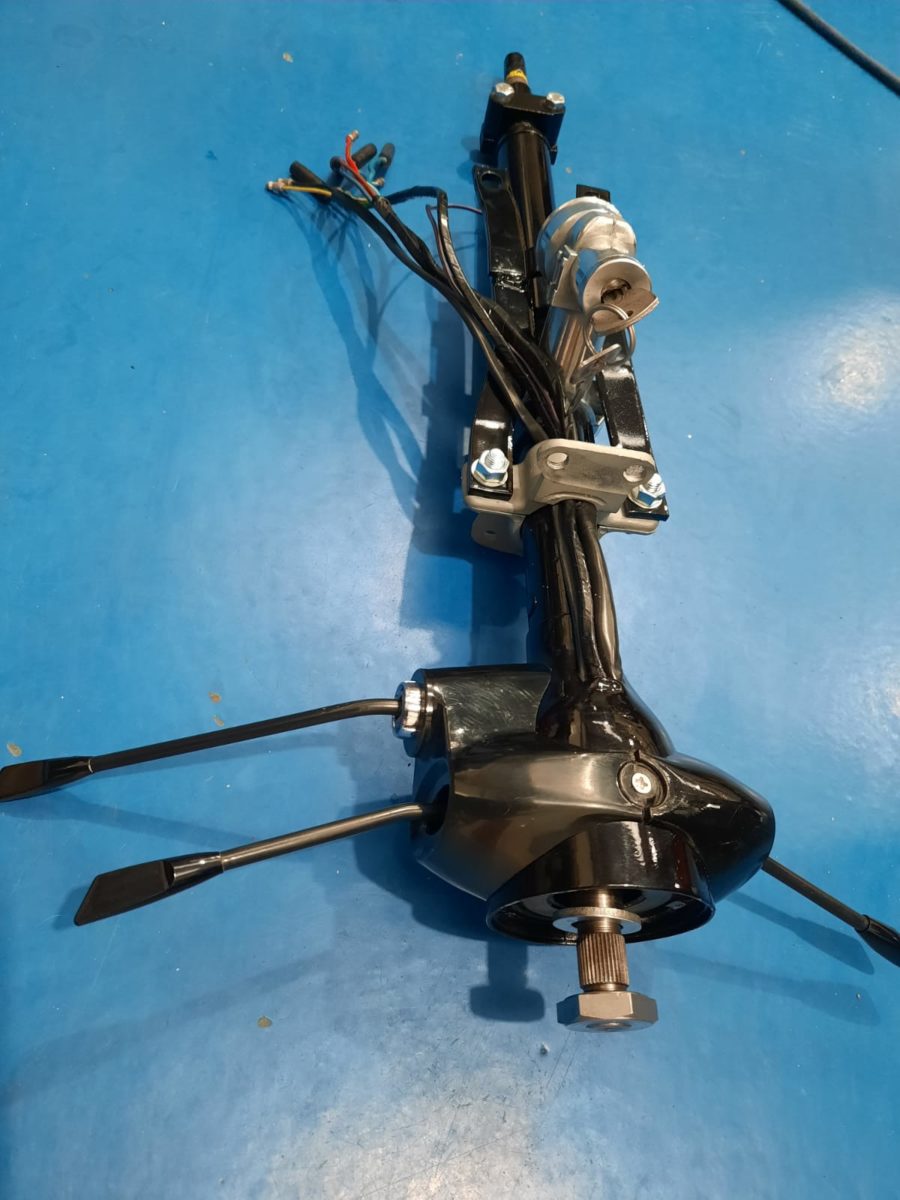
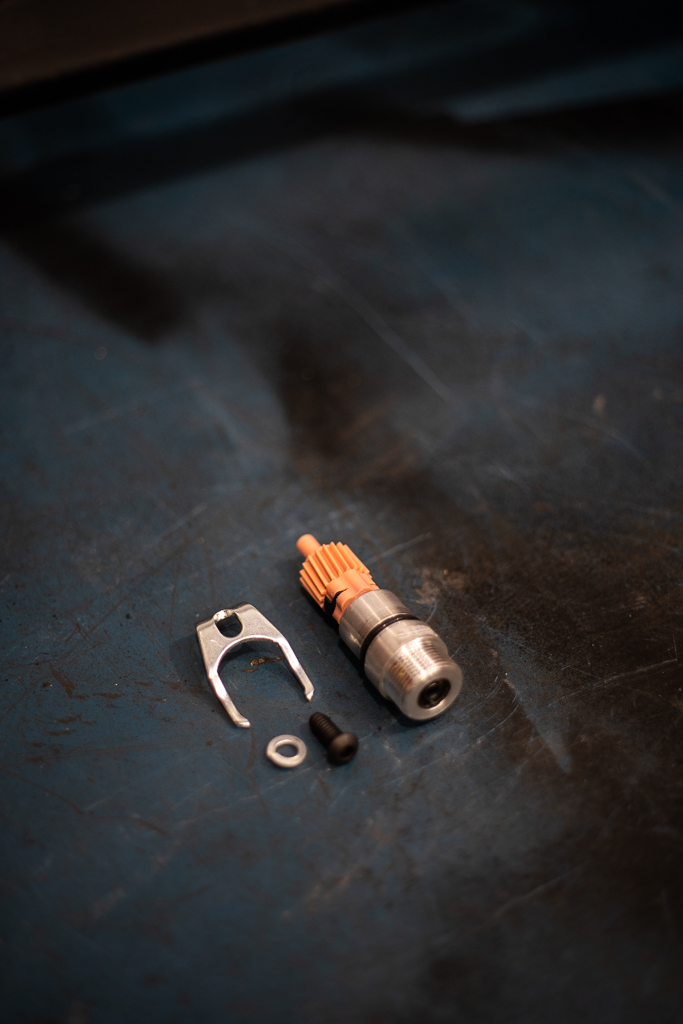
As I’m sure you know by now, Mauro is Mr TR5, handling the majority of the restoration on our lovely 1968 Triumph TR5. The latest development has been installing the window winding mechanism. Being able to see how the mechanism works beneath the pannel is very interesting as its something that would usually be hidden behind the trim panel.
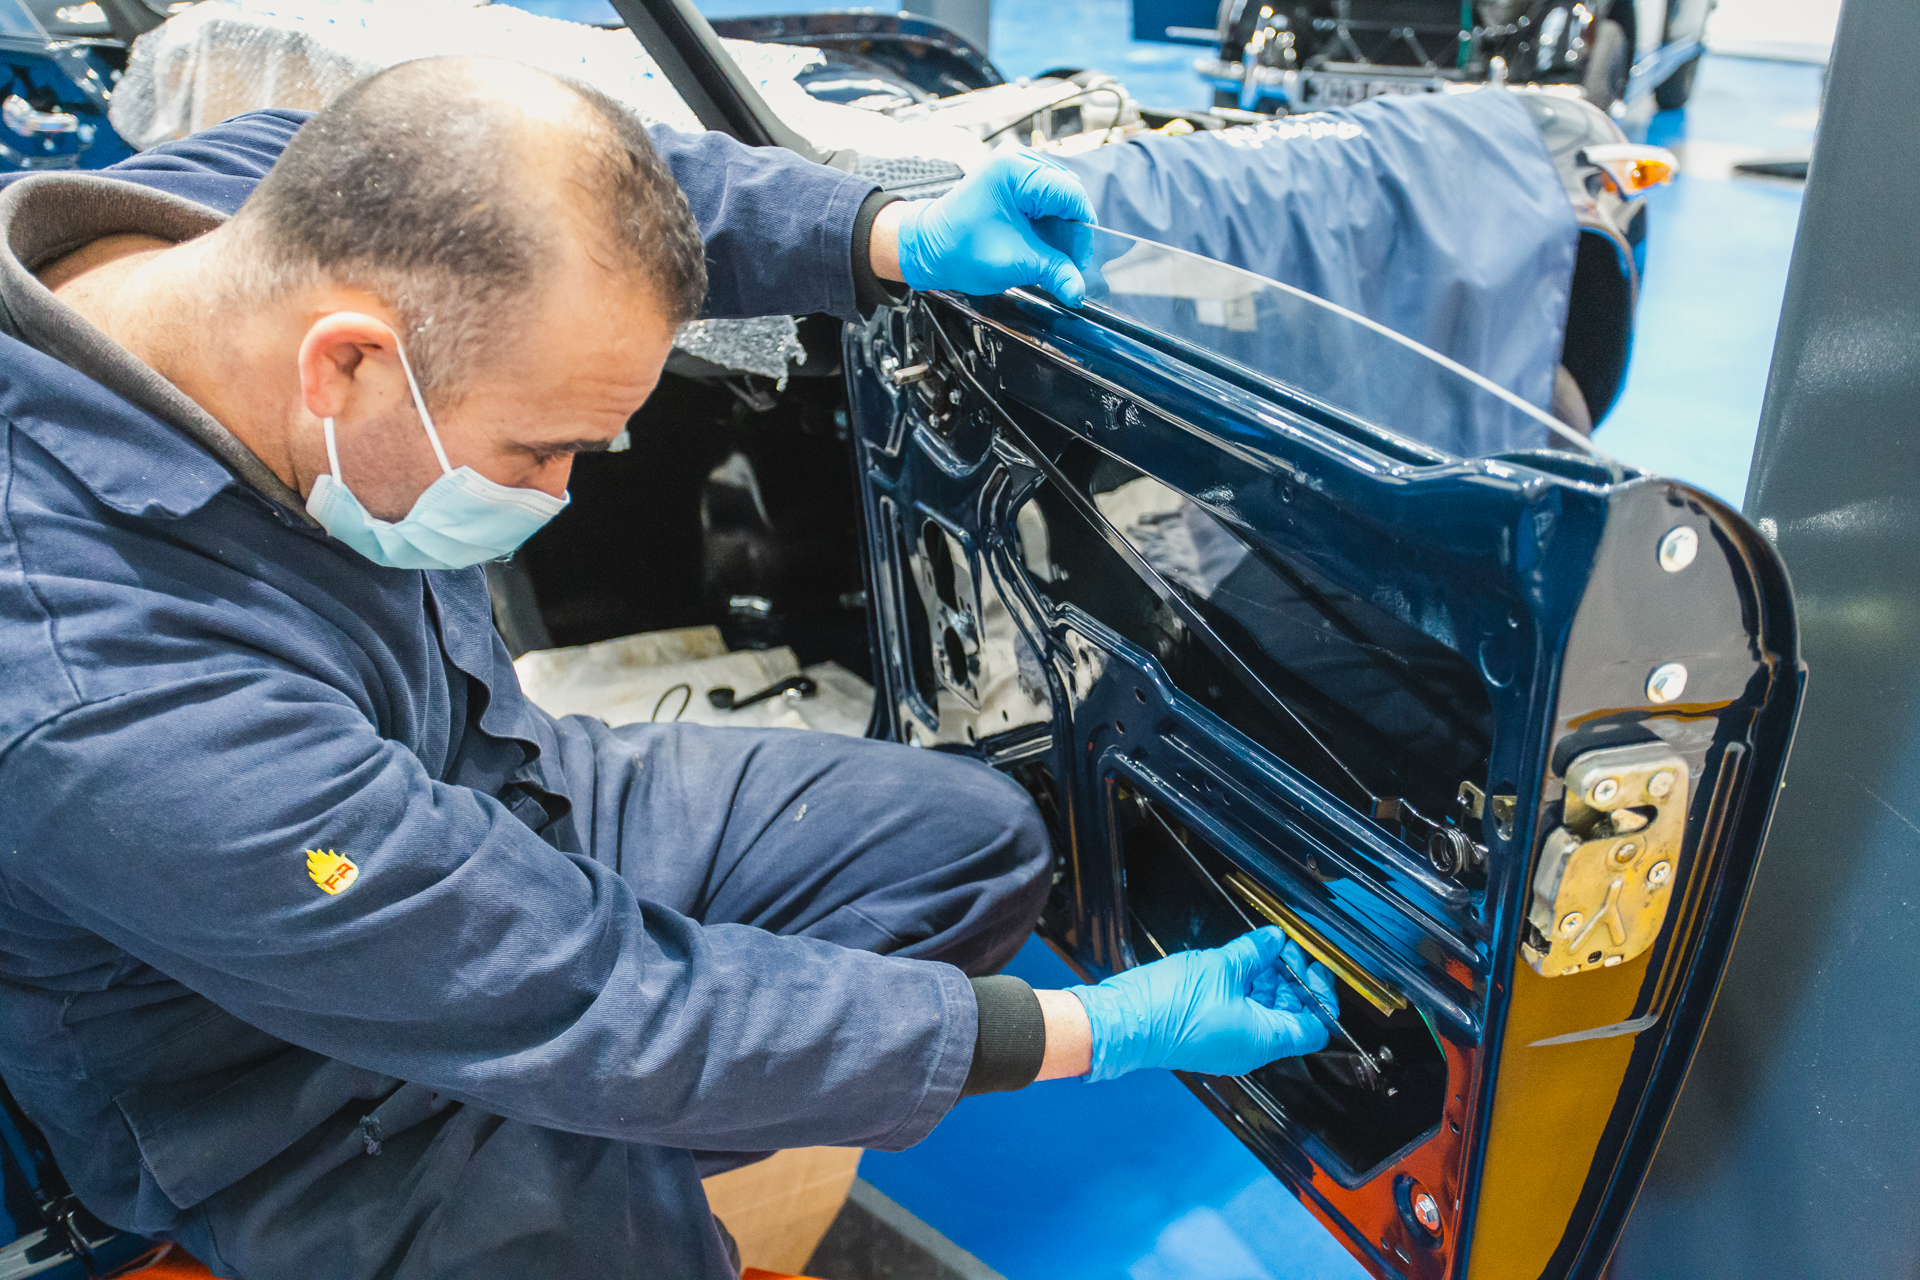
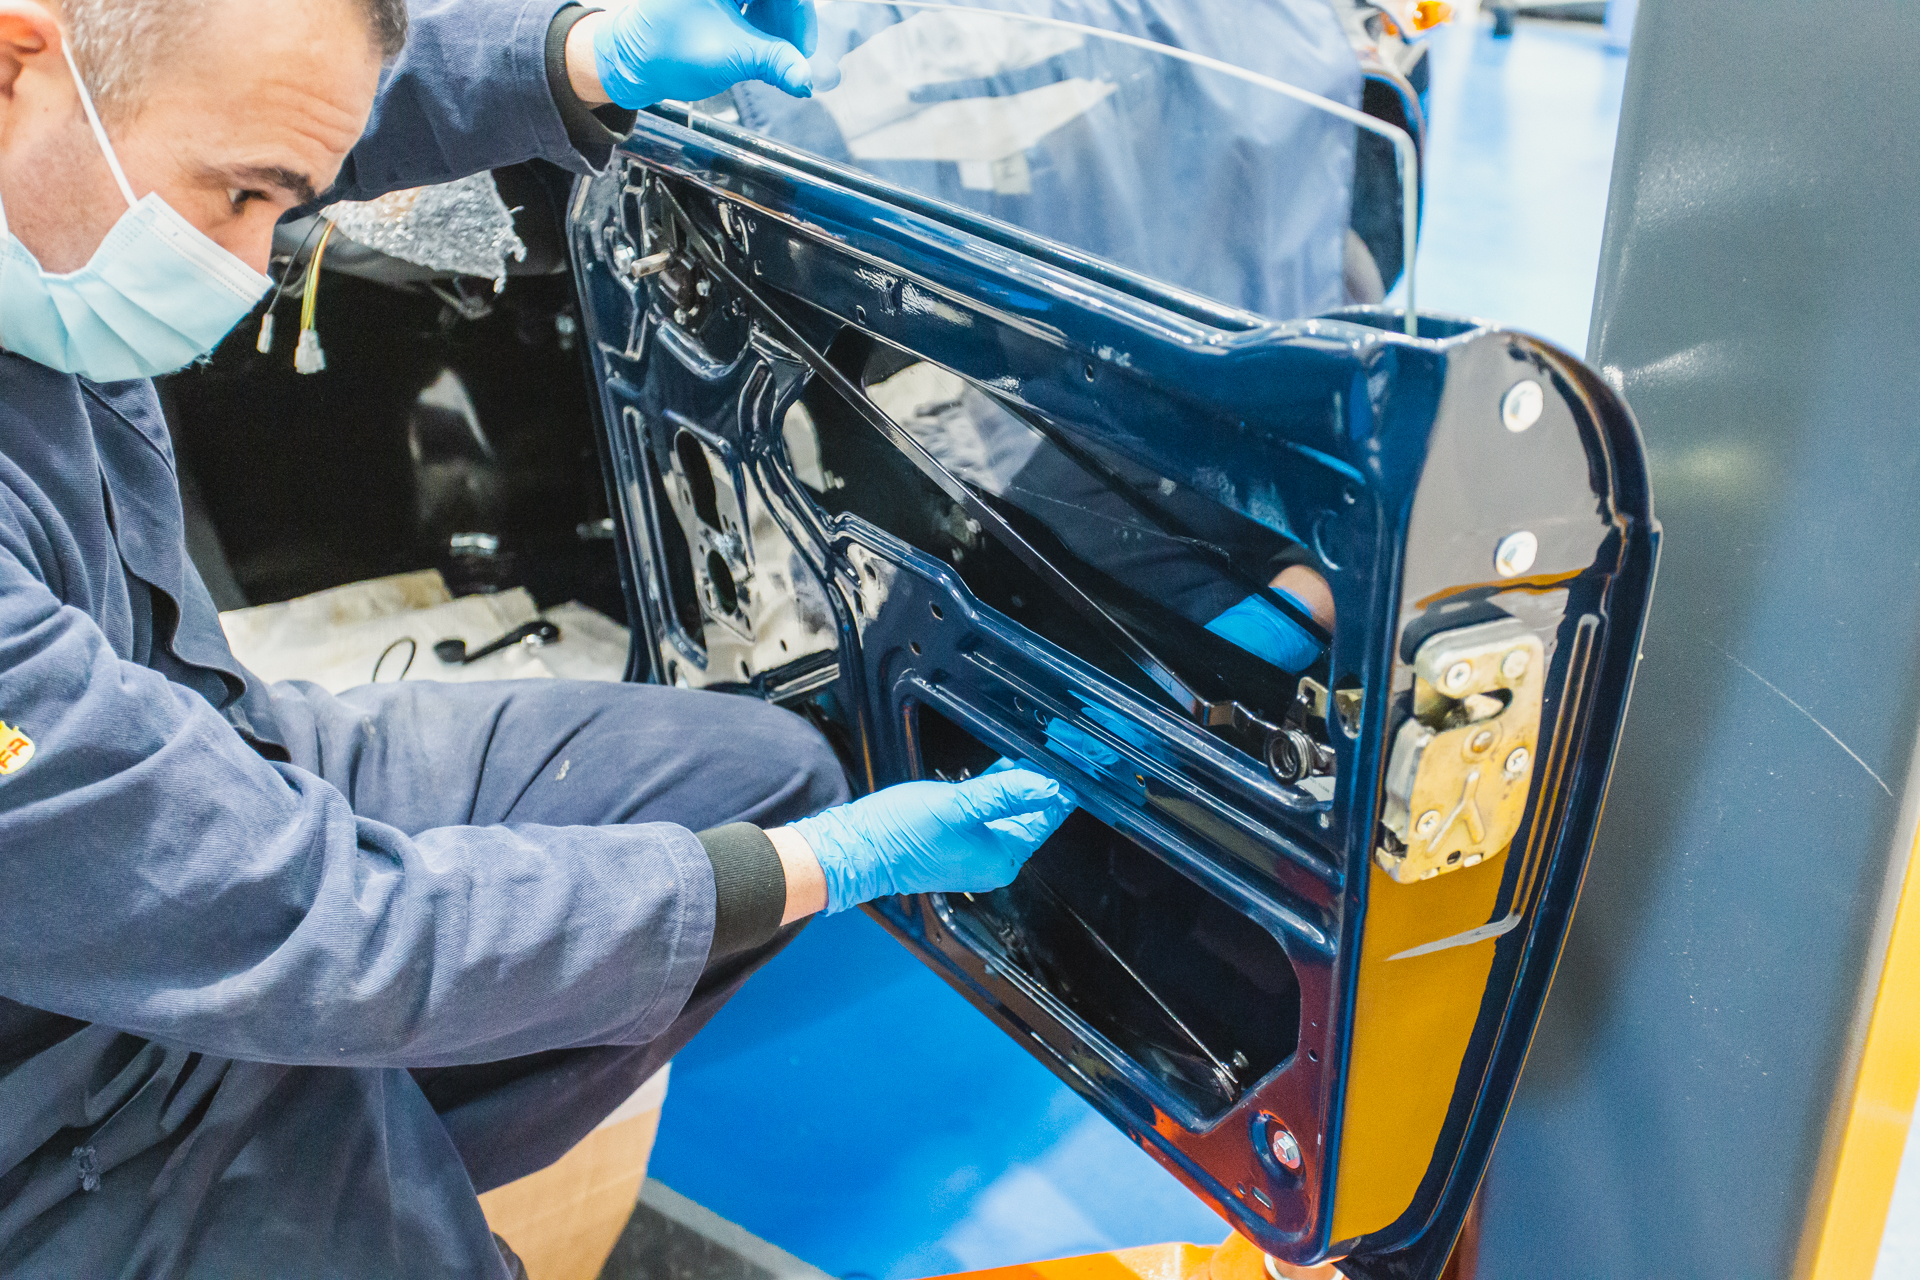


Mauro’s process to ensure the working of the window mechanism was to refurbish and restore all of the working components, cleaning each down and rebuilding them again.


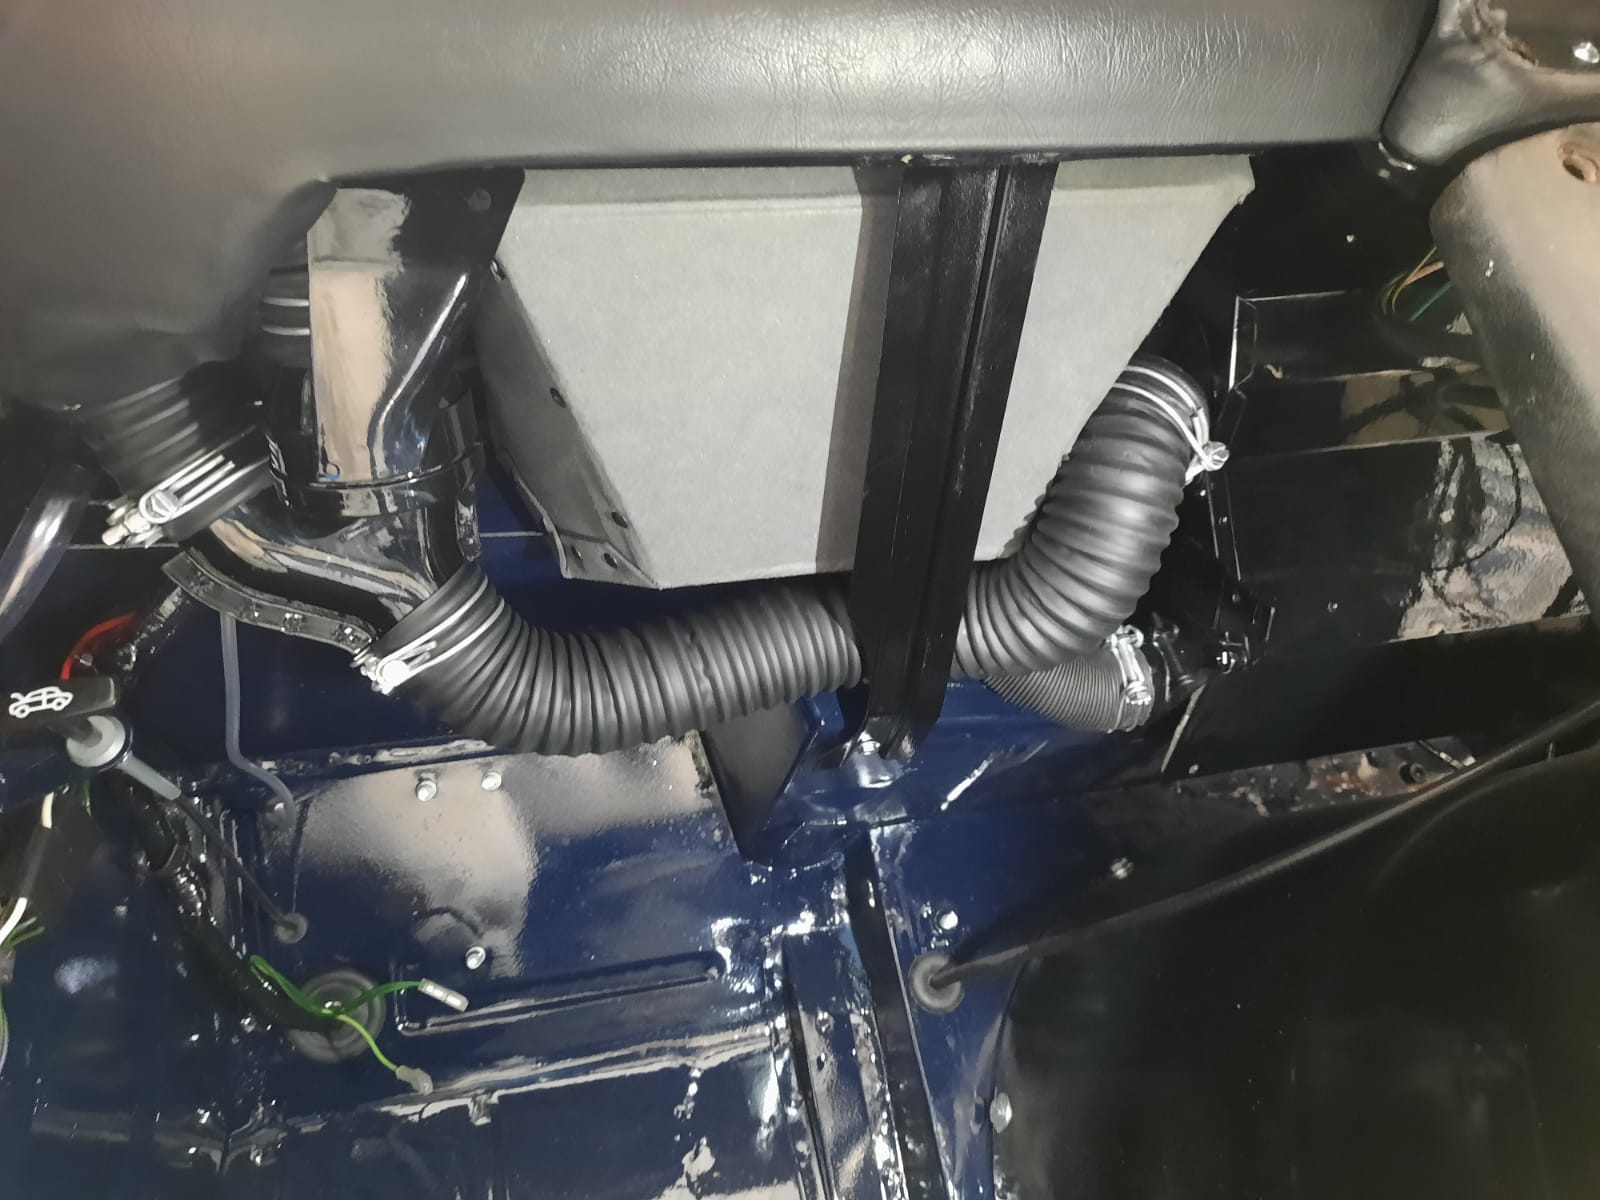
The glove box has also been fitted as well as the new heater vent hoses.


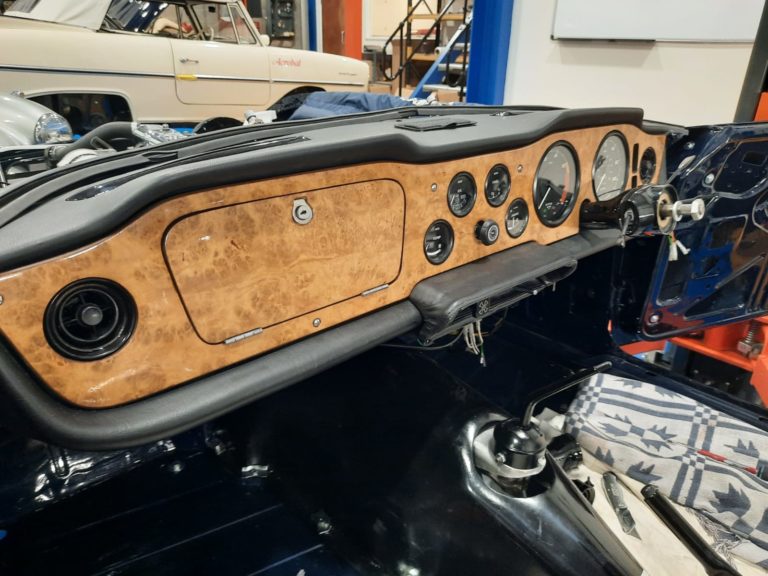
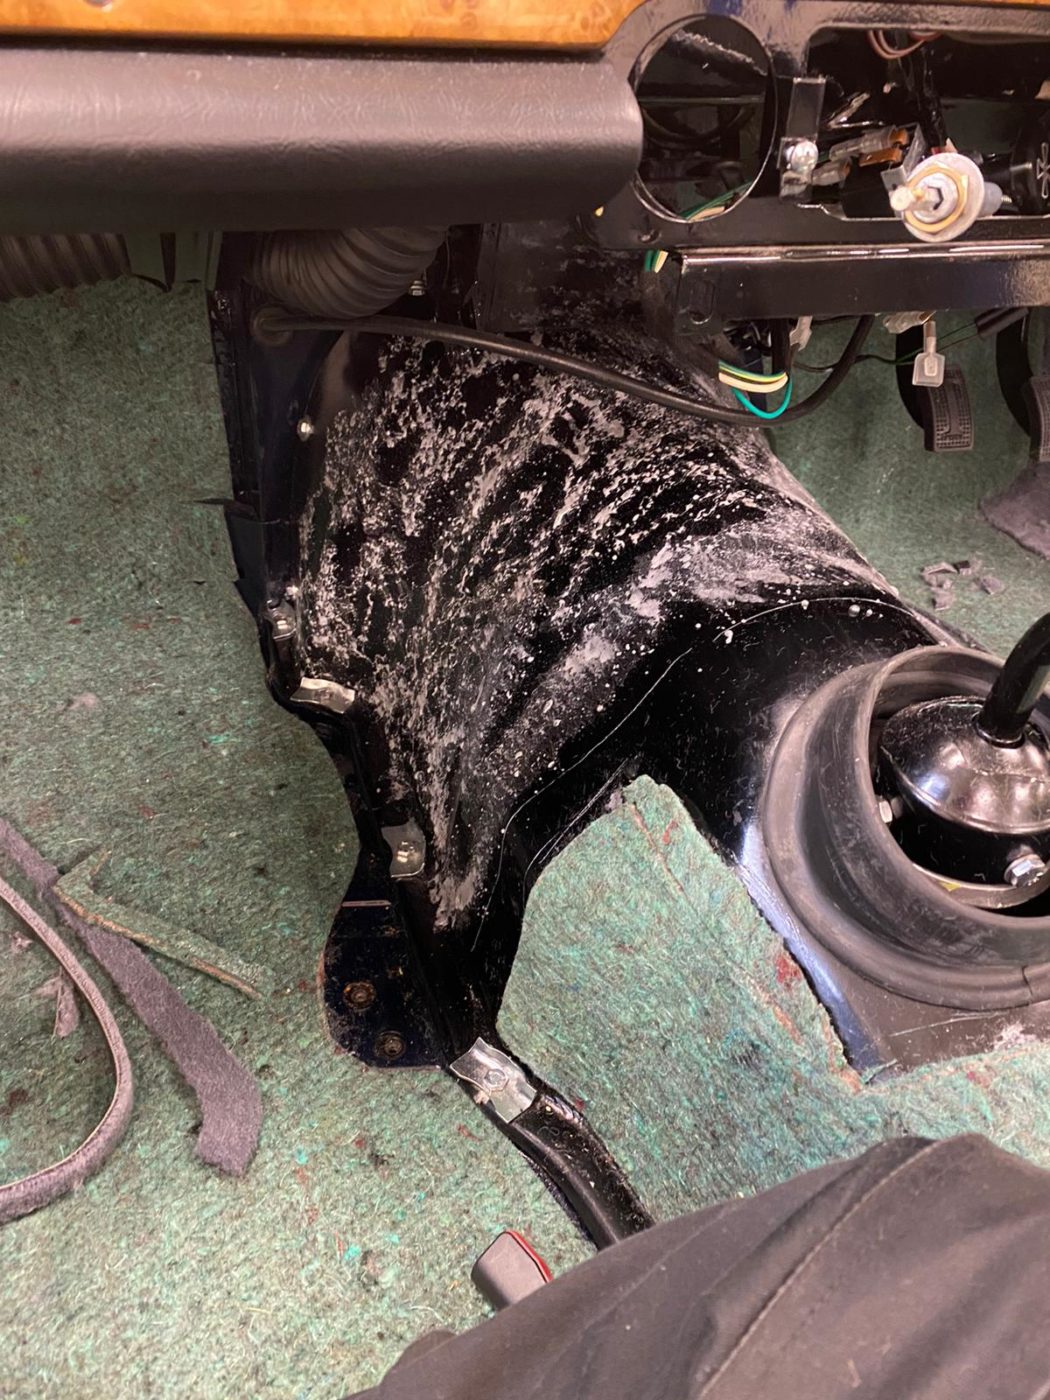
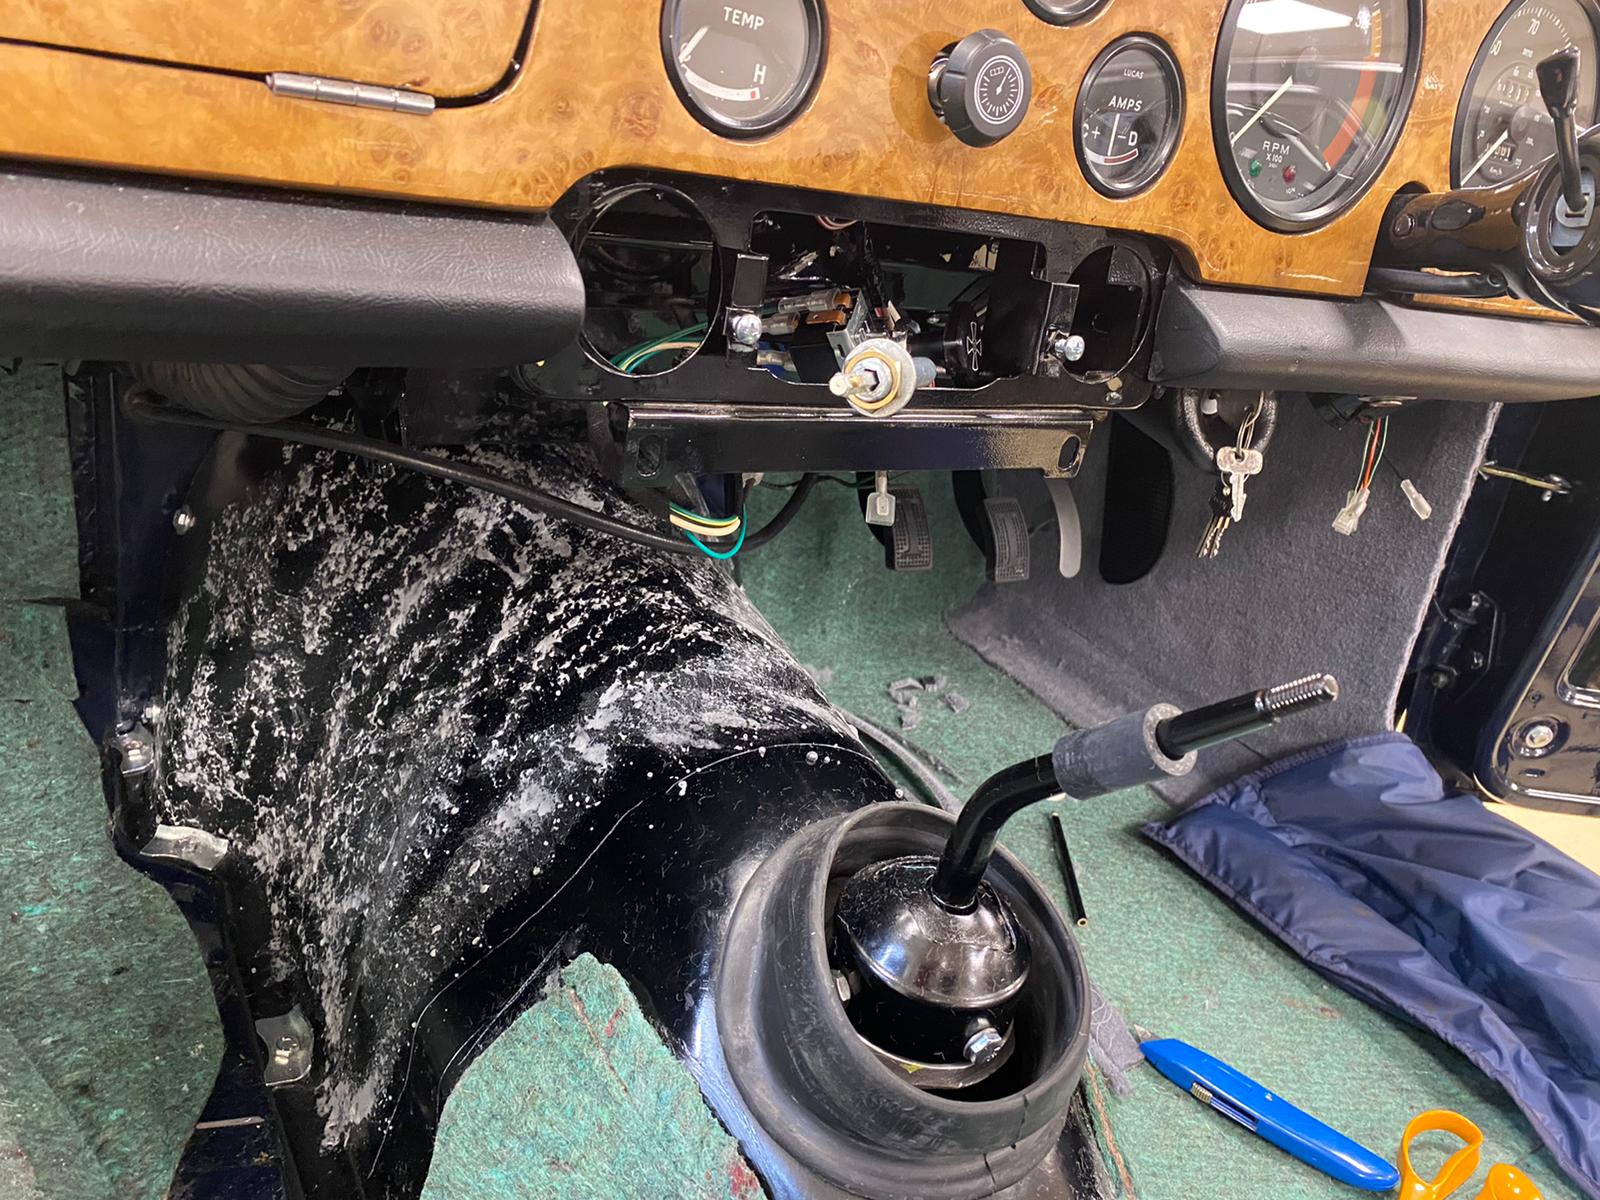
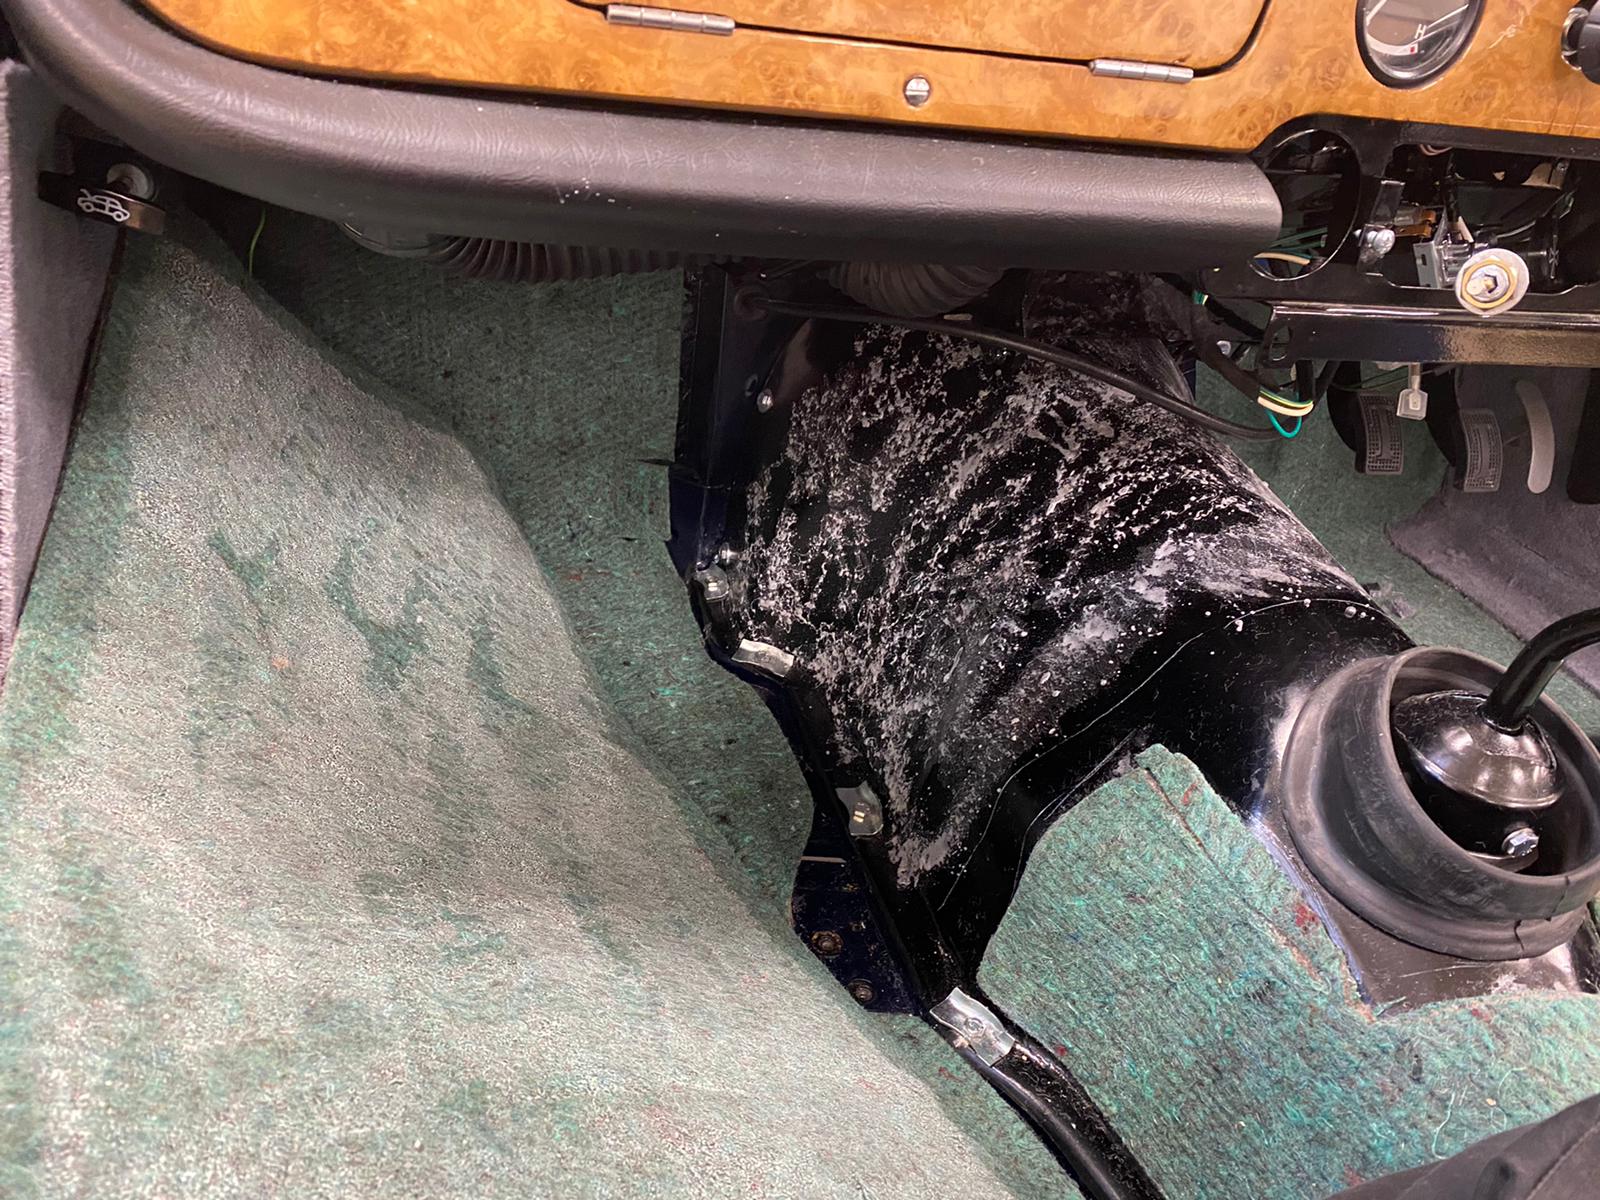
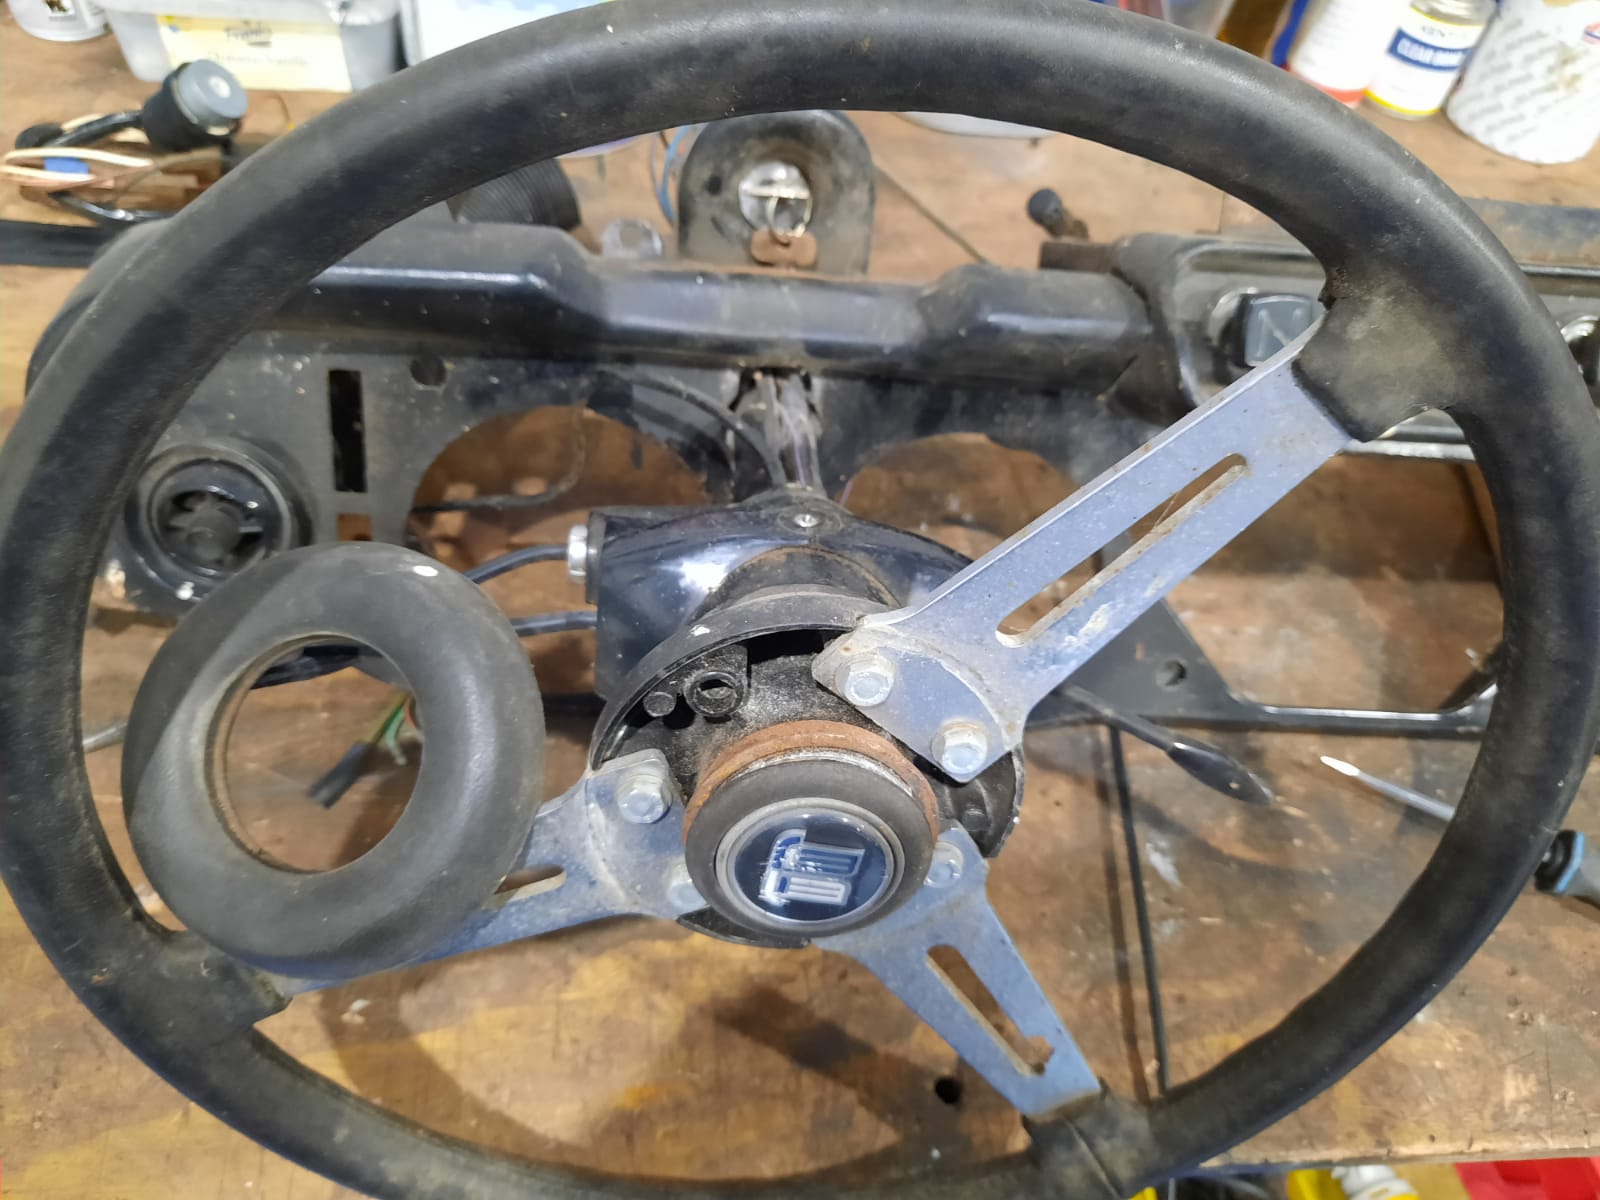
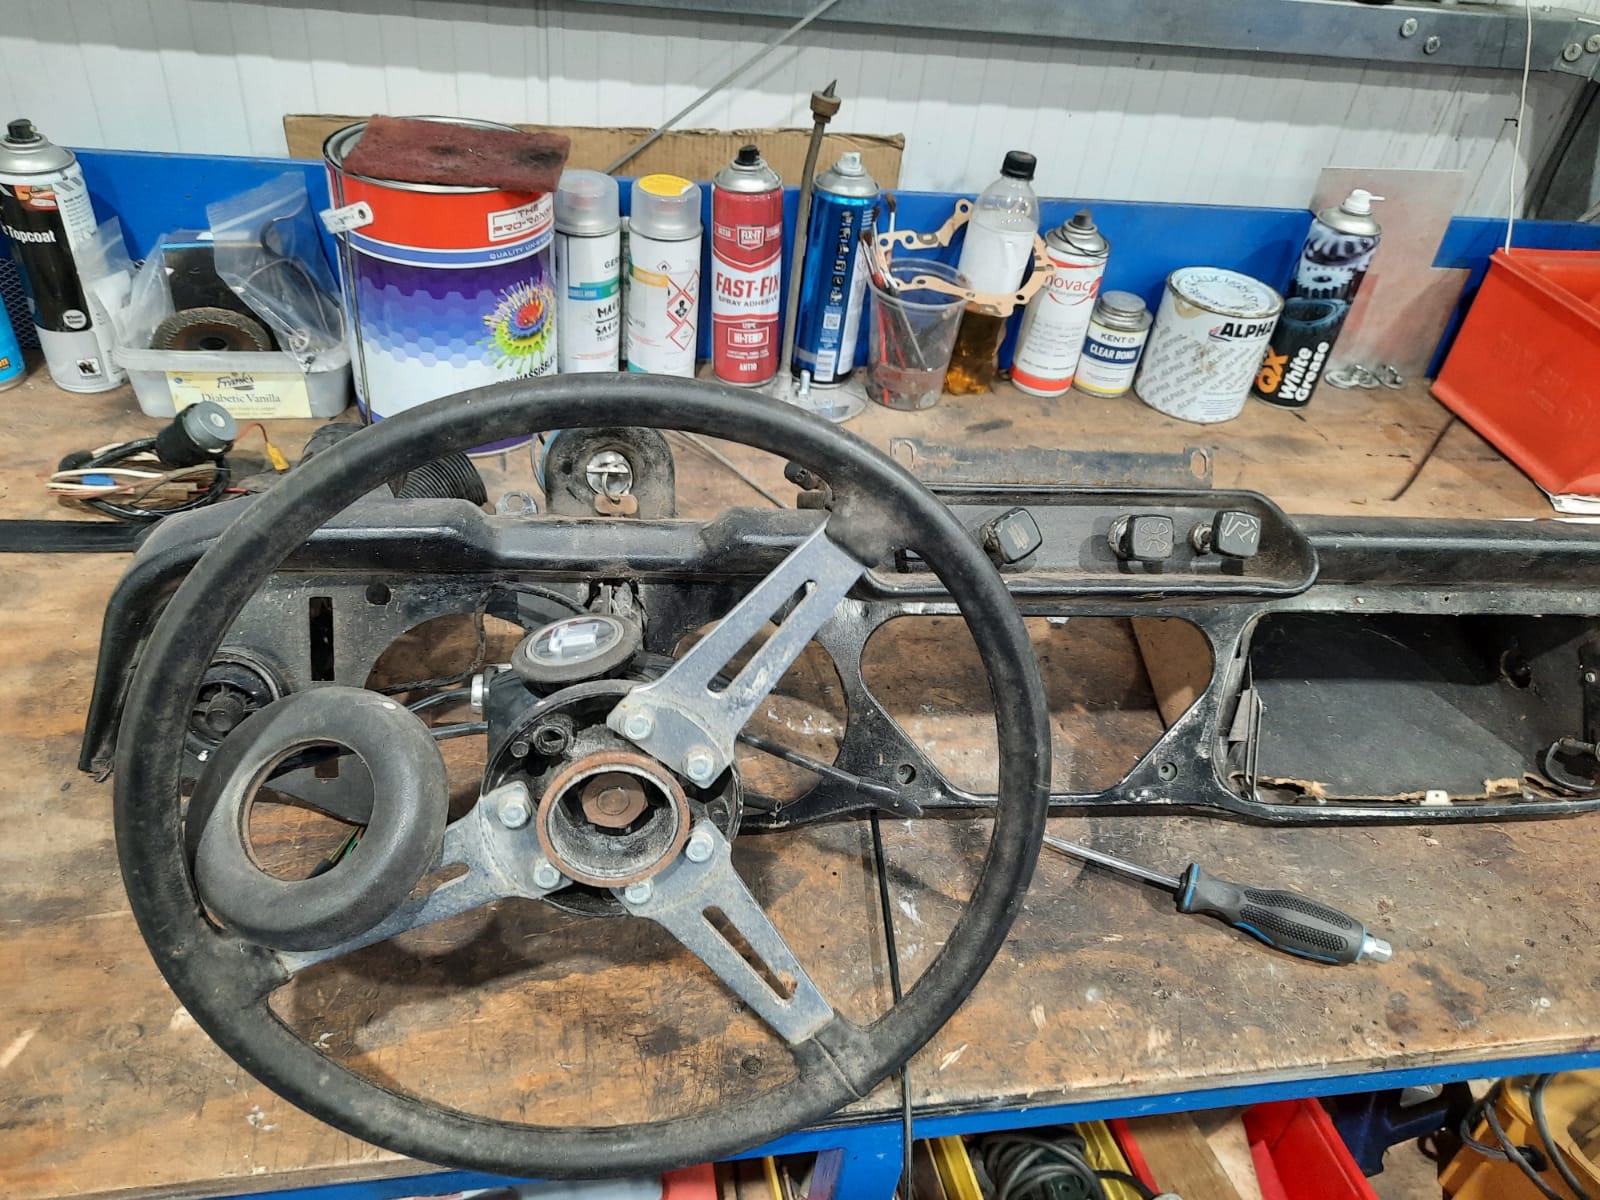
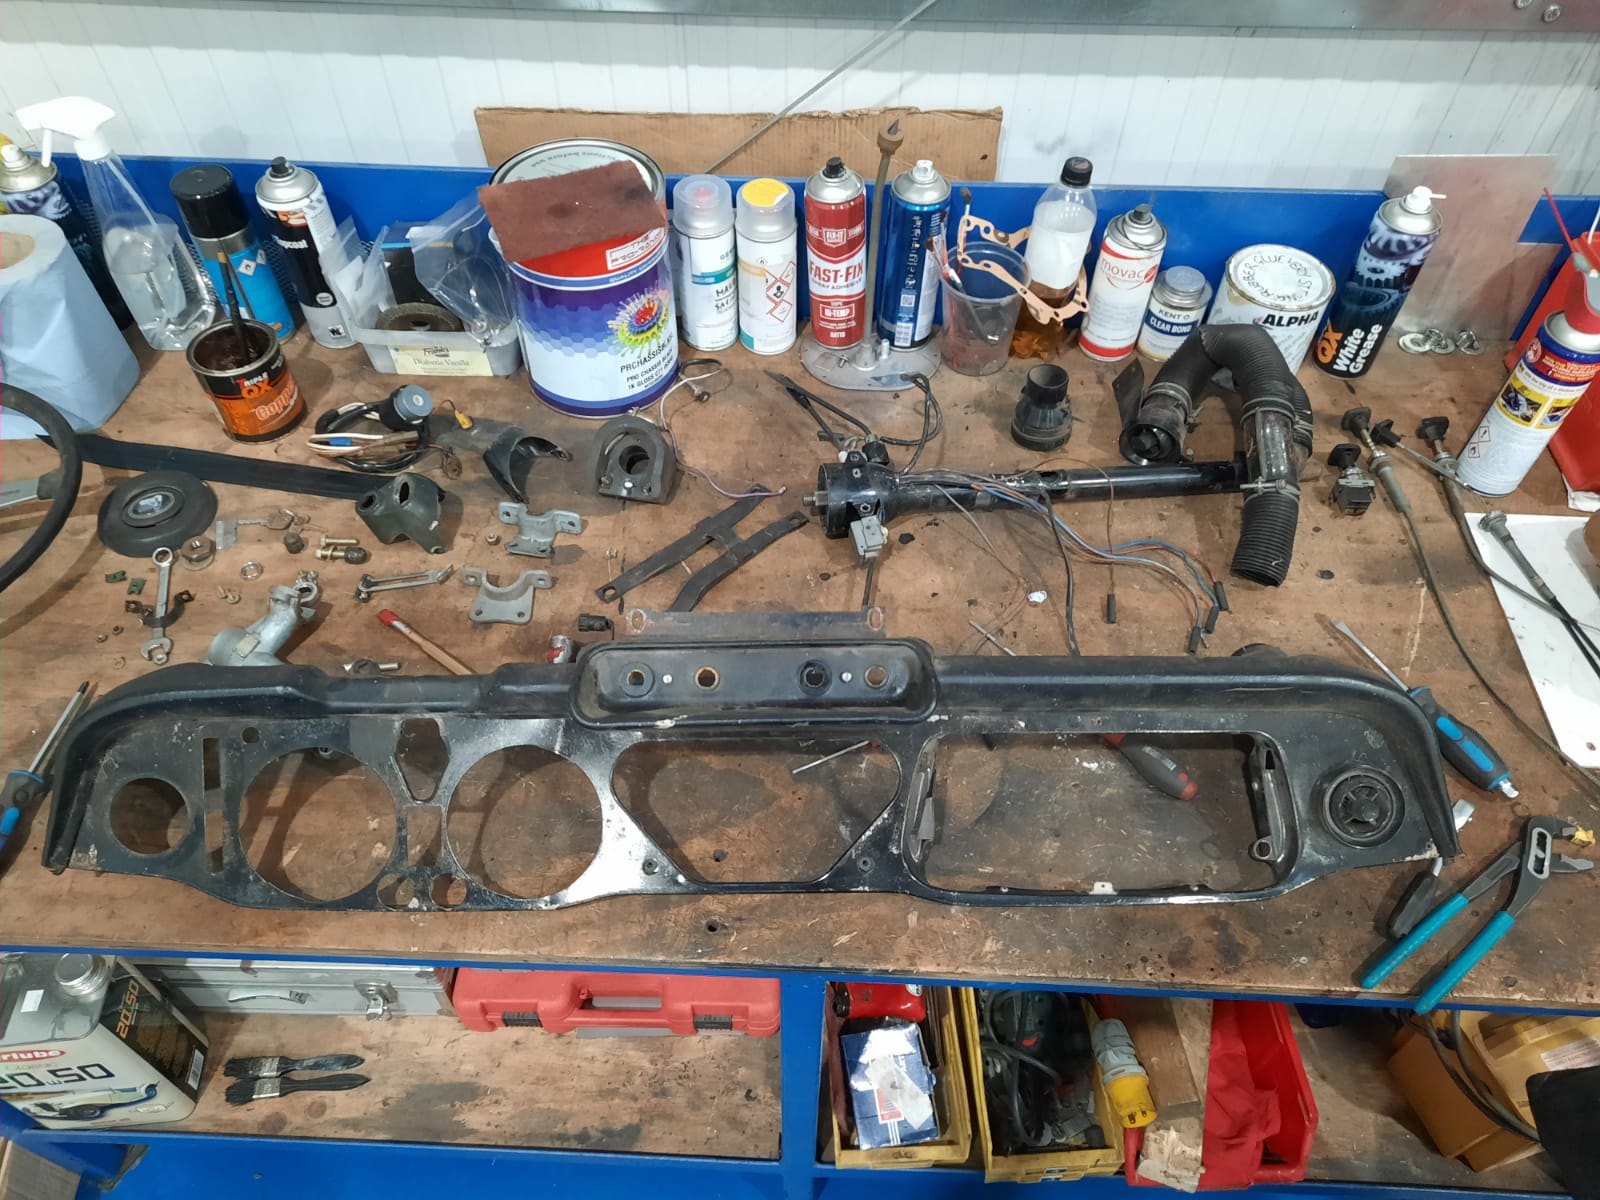
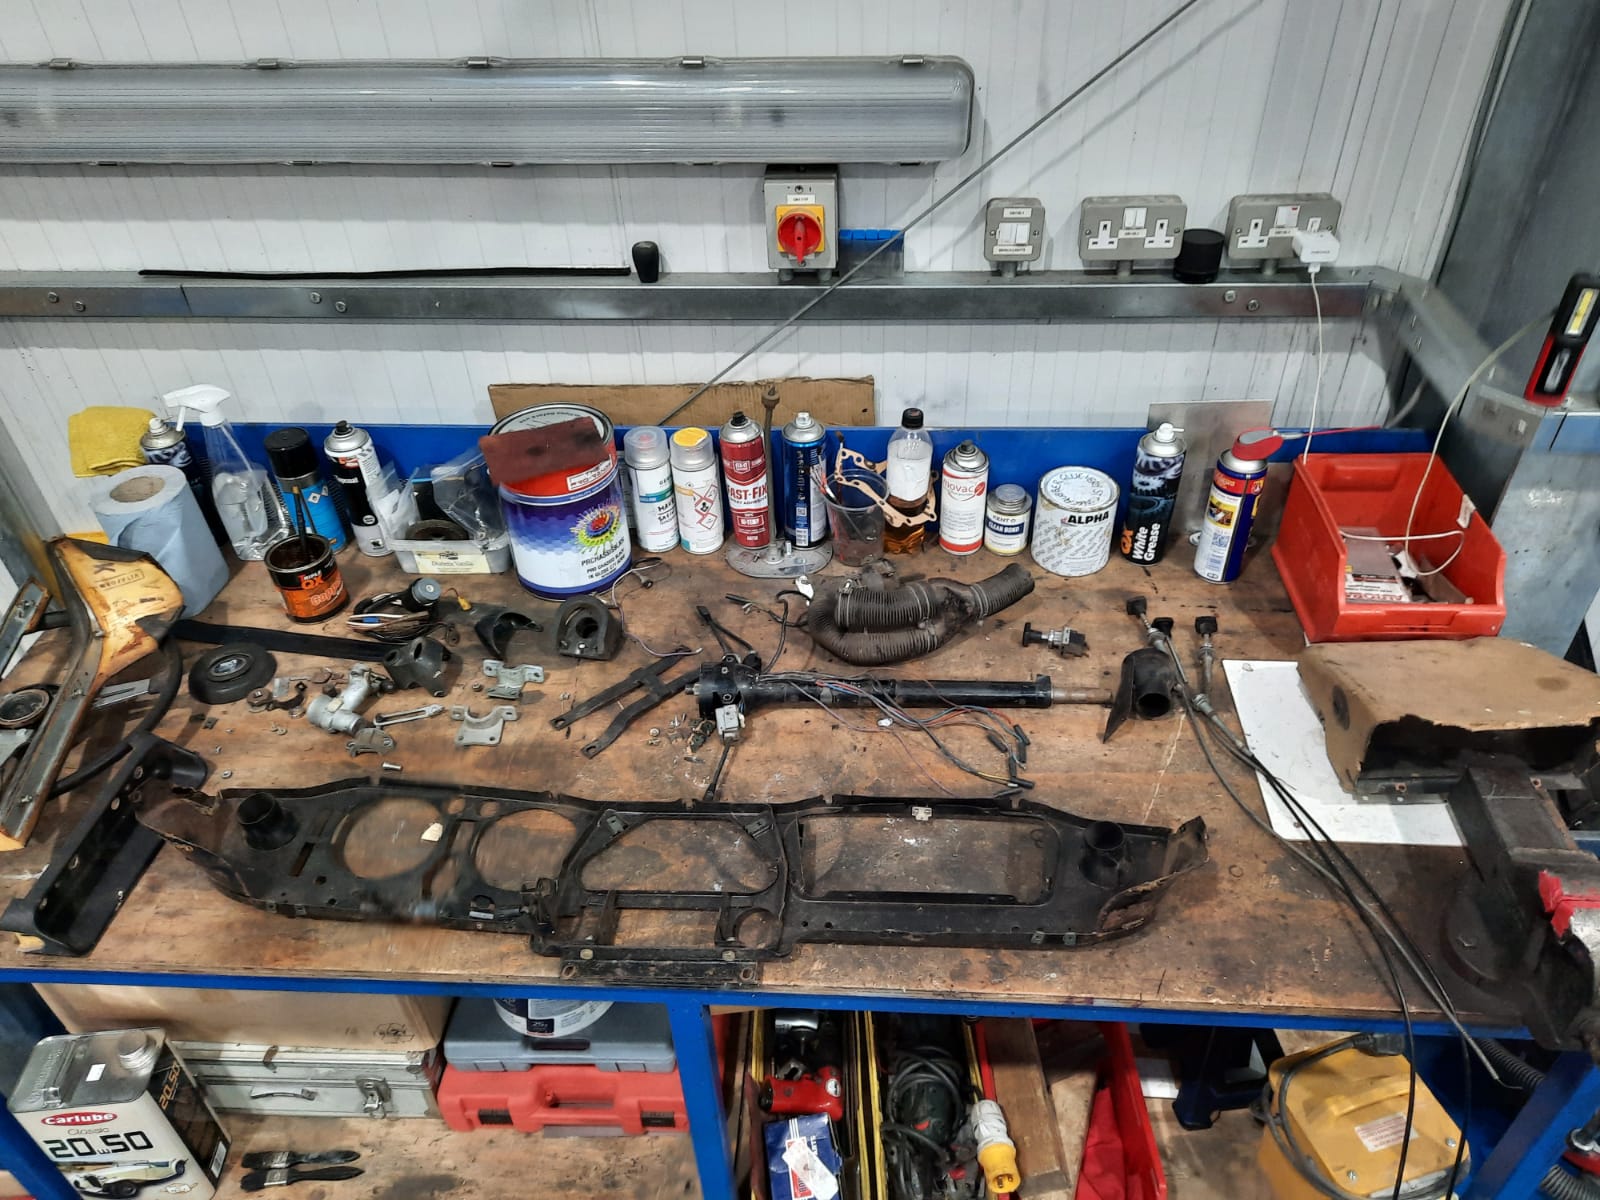
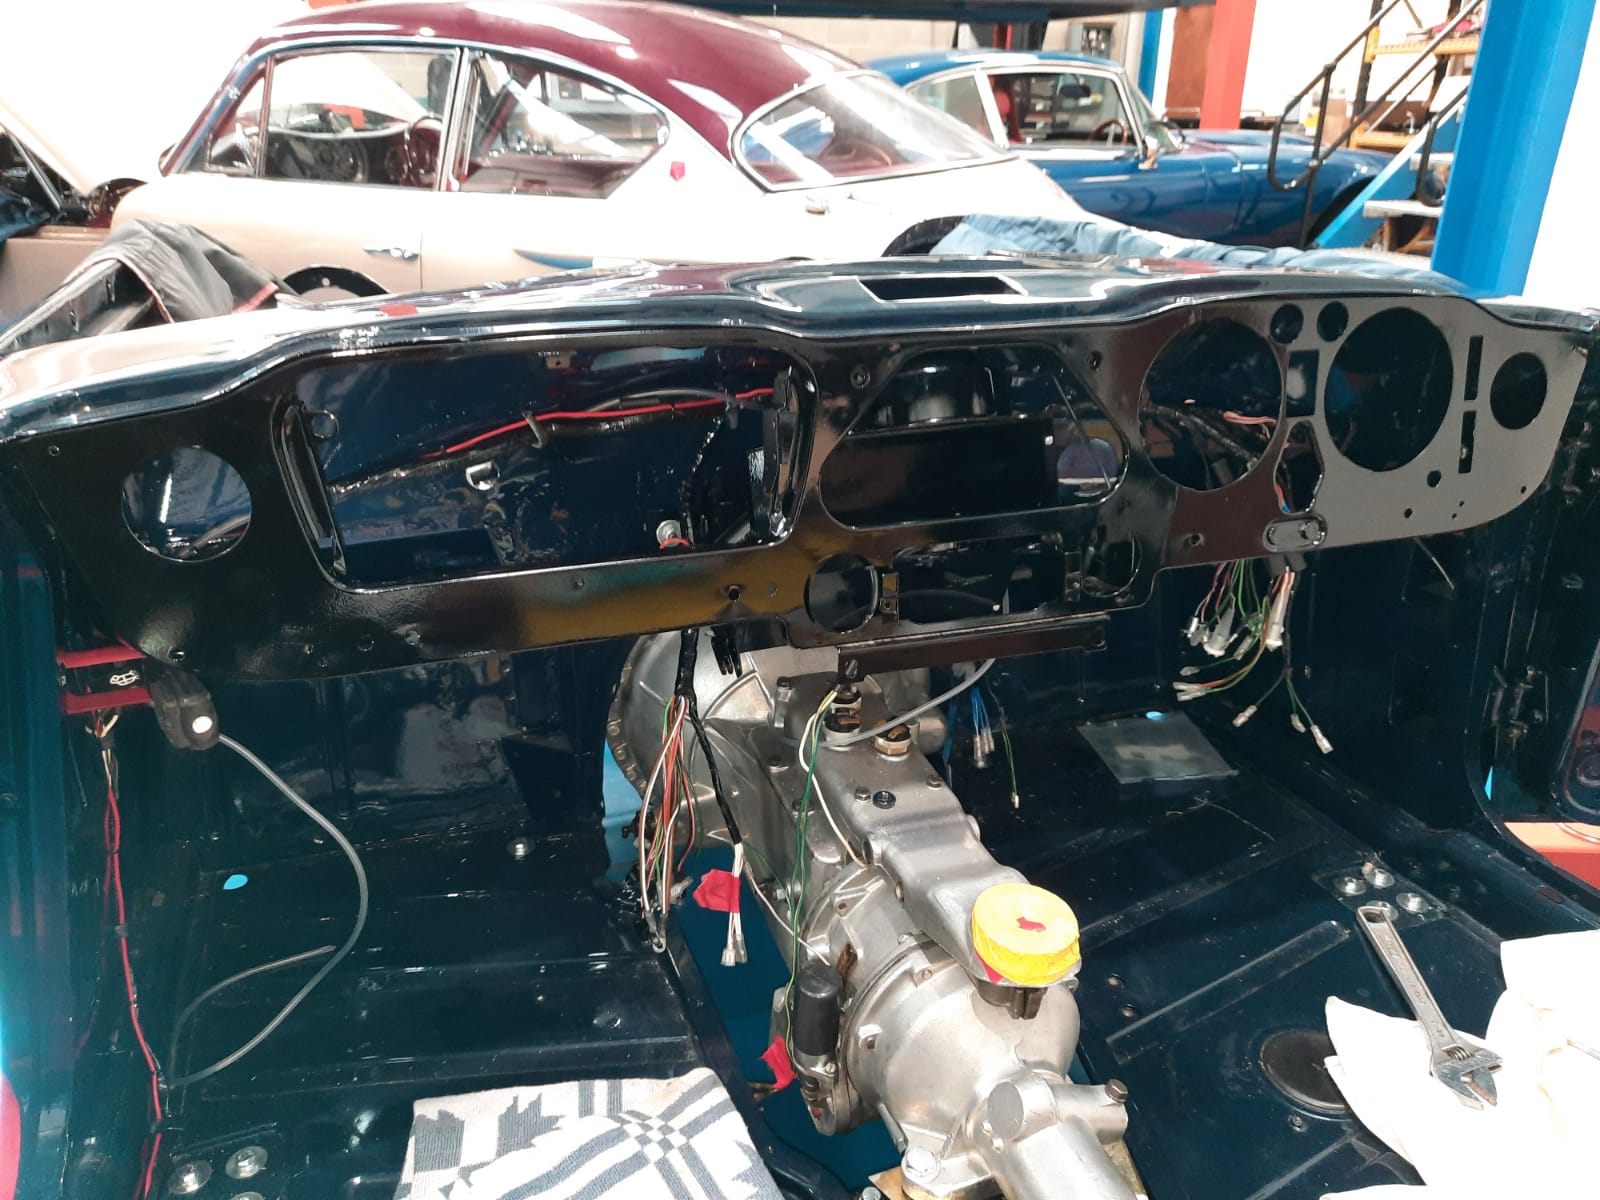
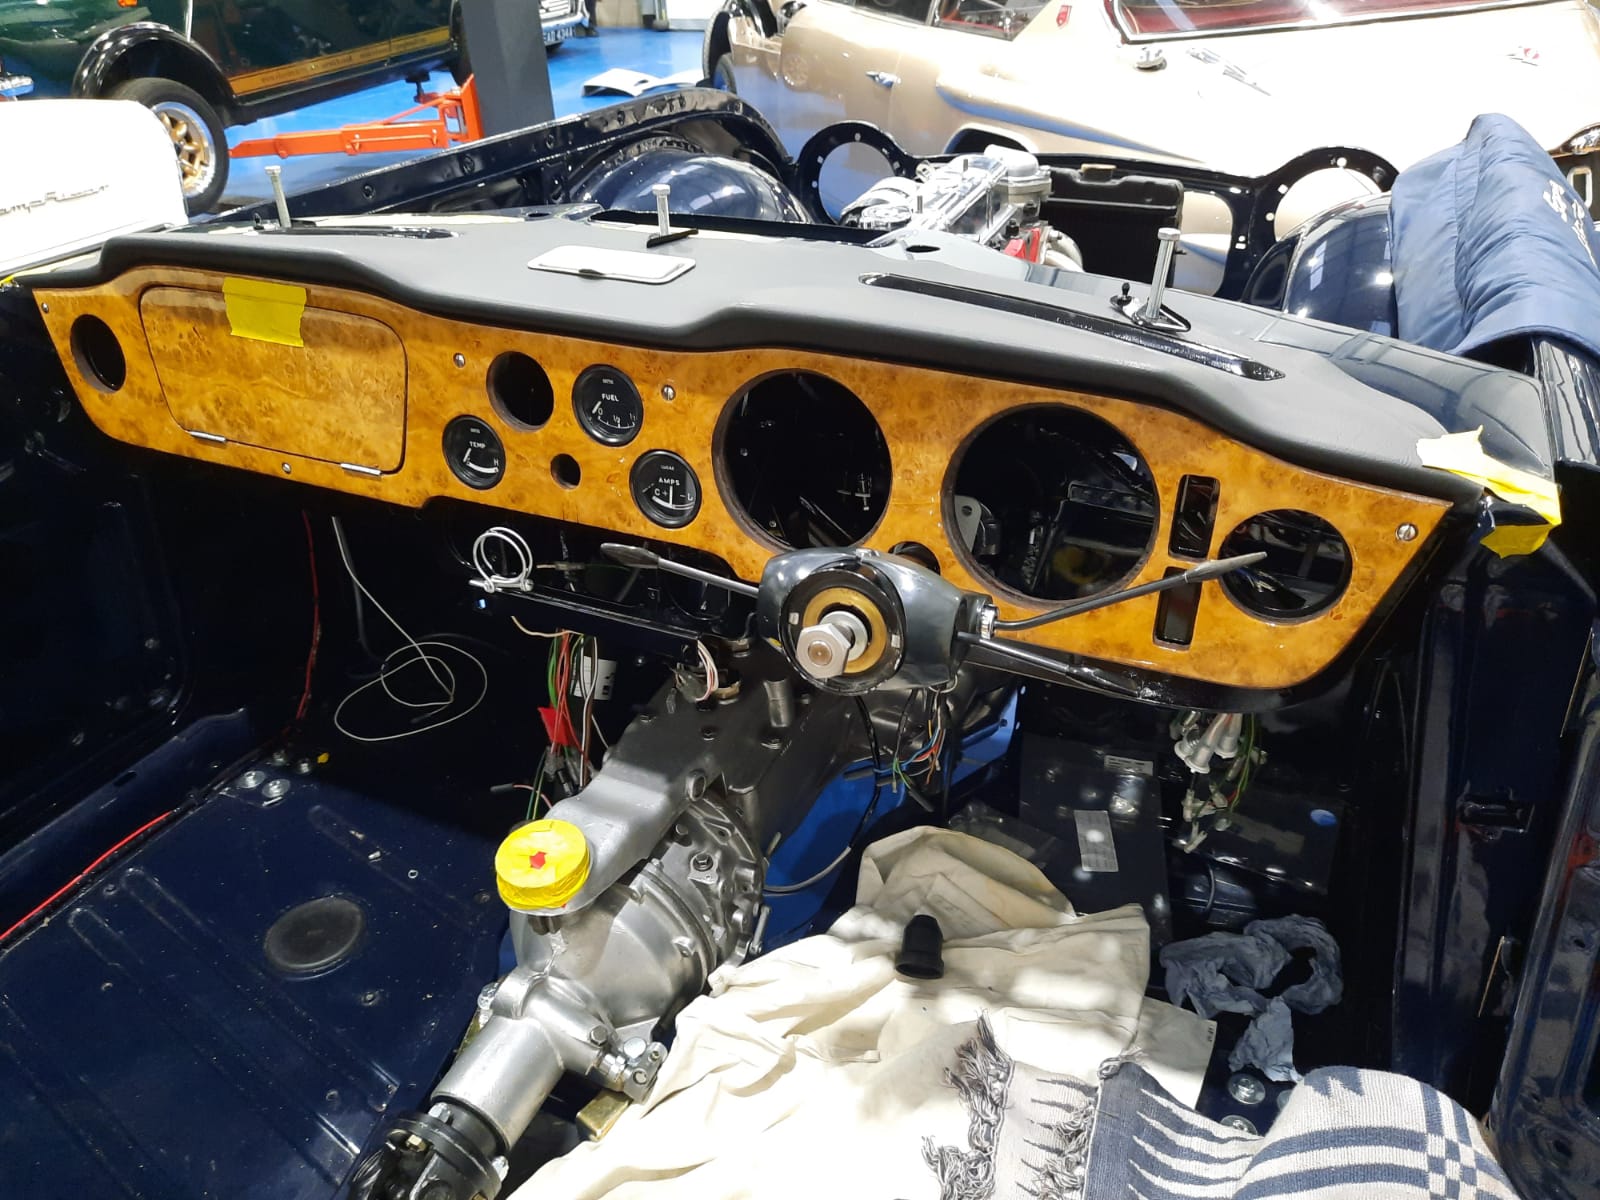
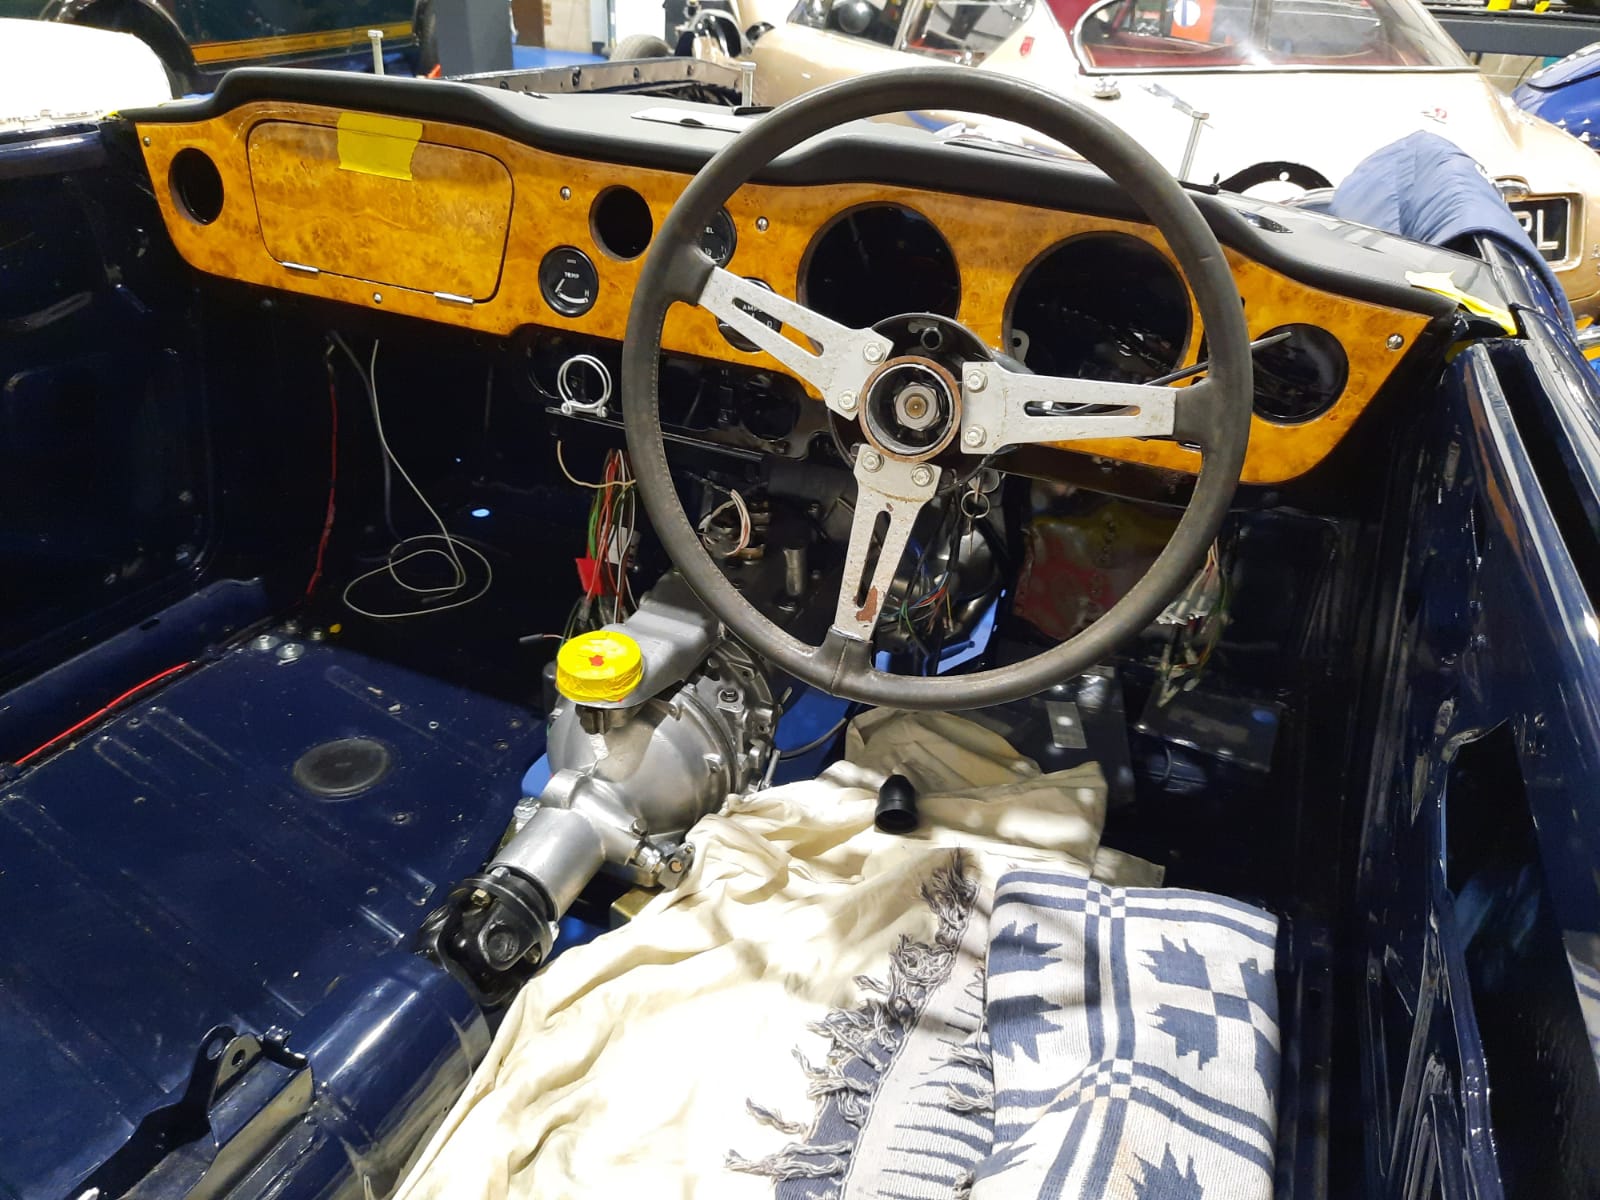
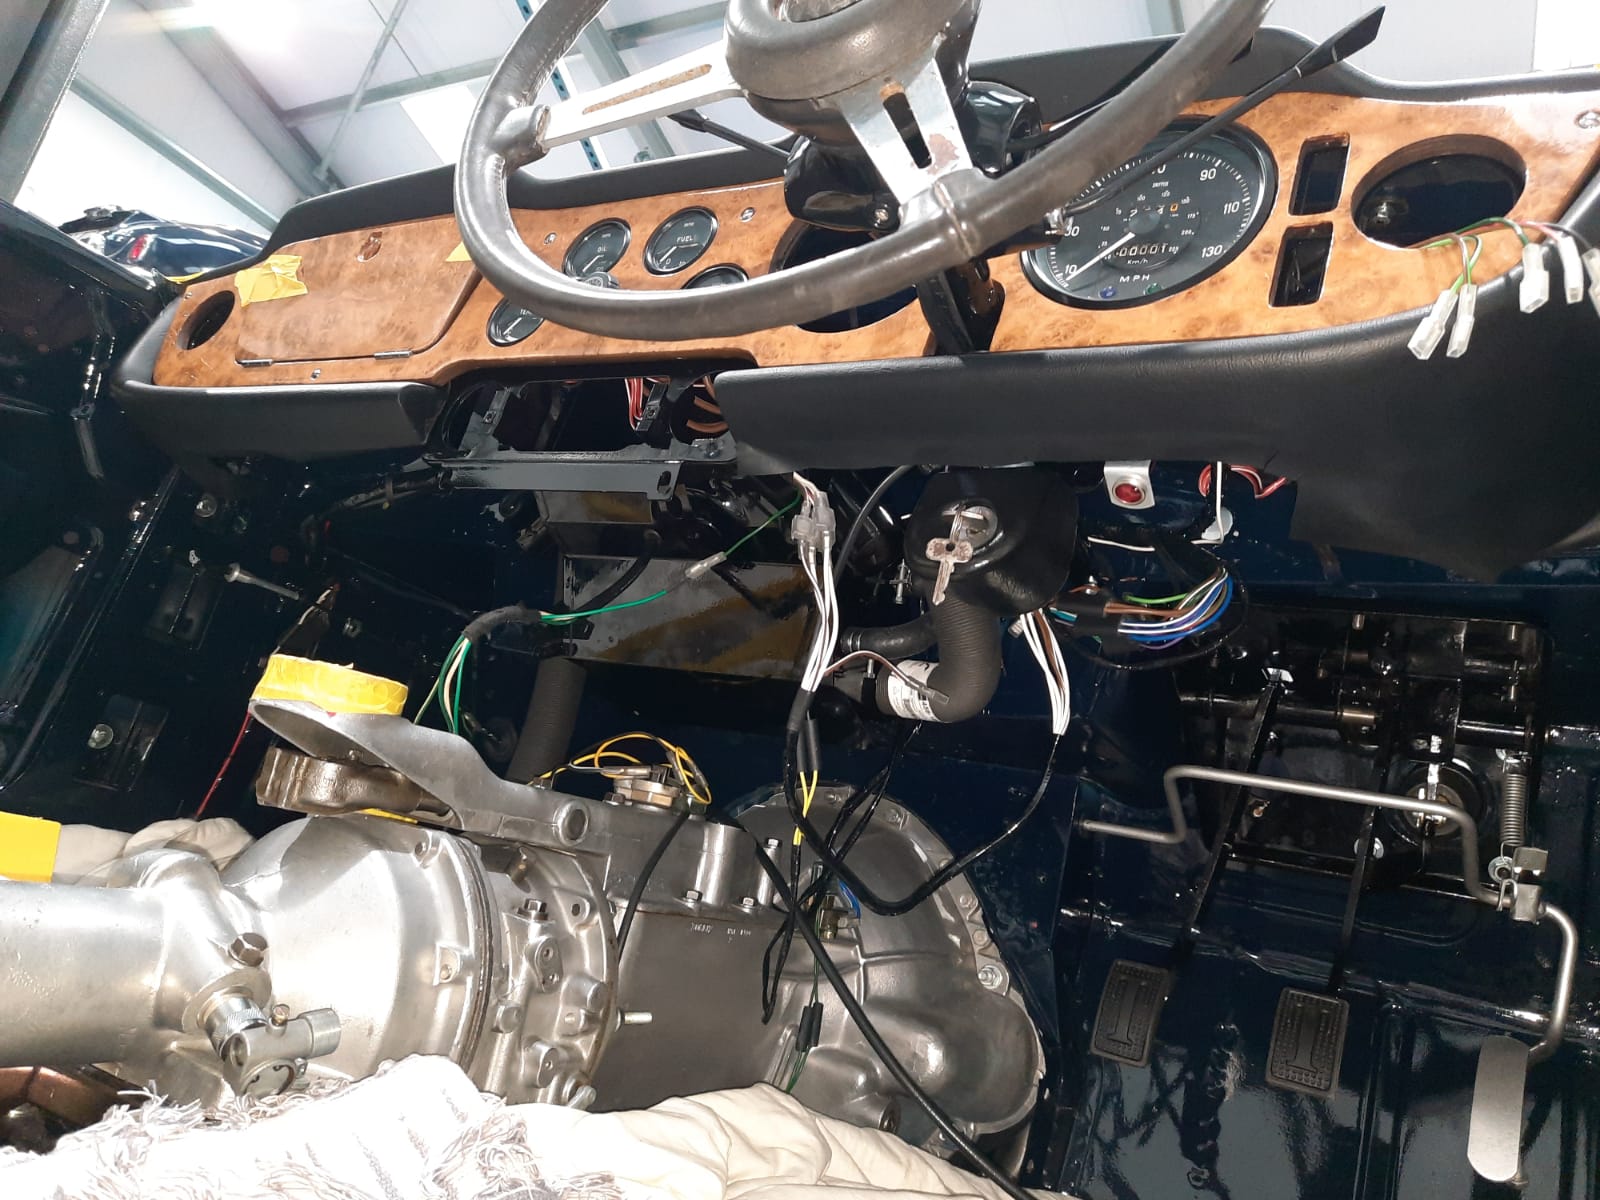
Mauro’s recent adjustments to our 1968 Triumph Tr5 include added fittings to the dashboard and many small mechanisms added throughout the vehicle. It’s the small details that make a big difference.
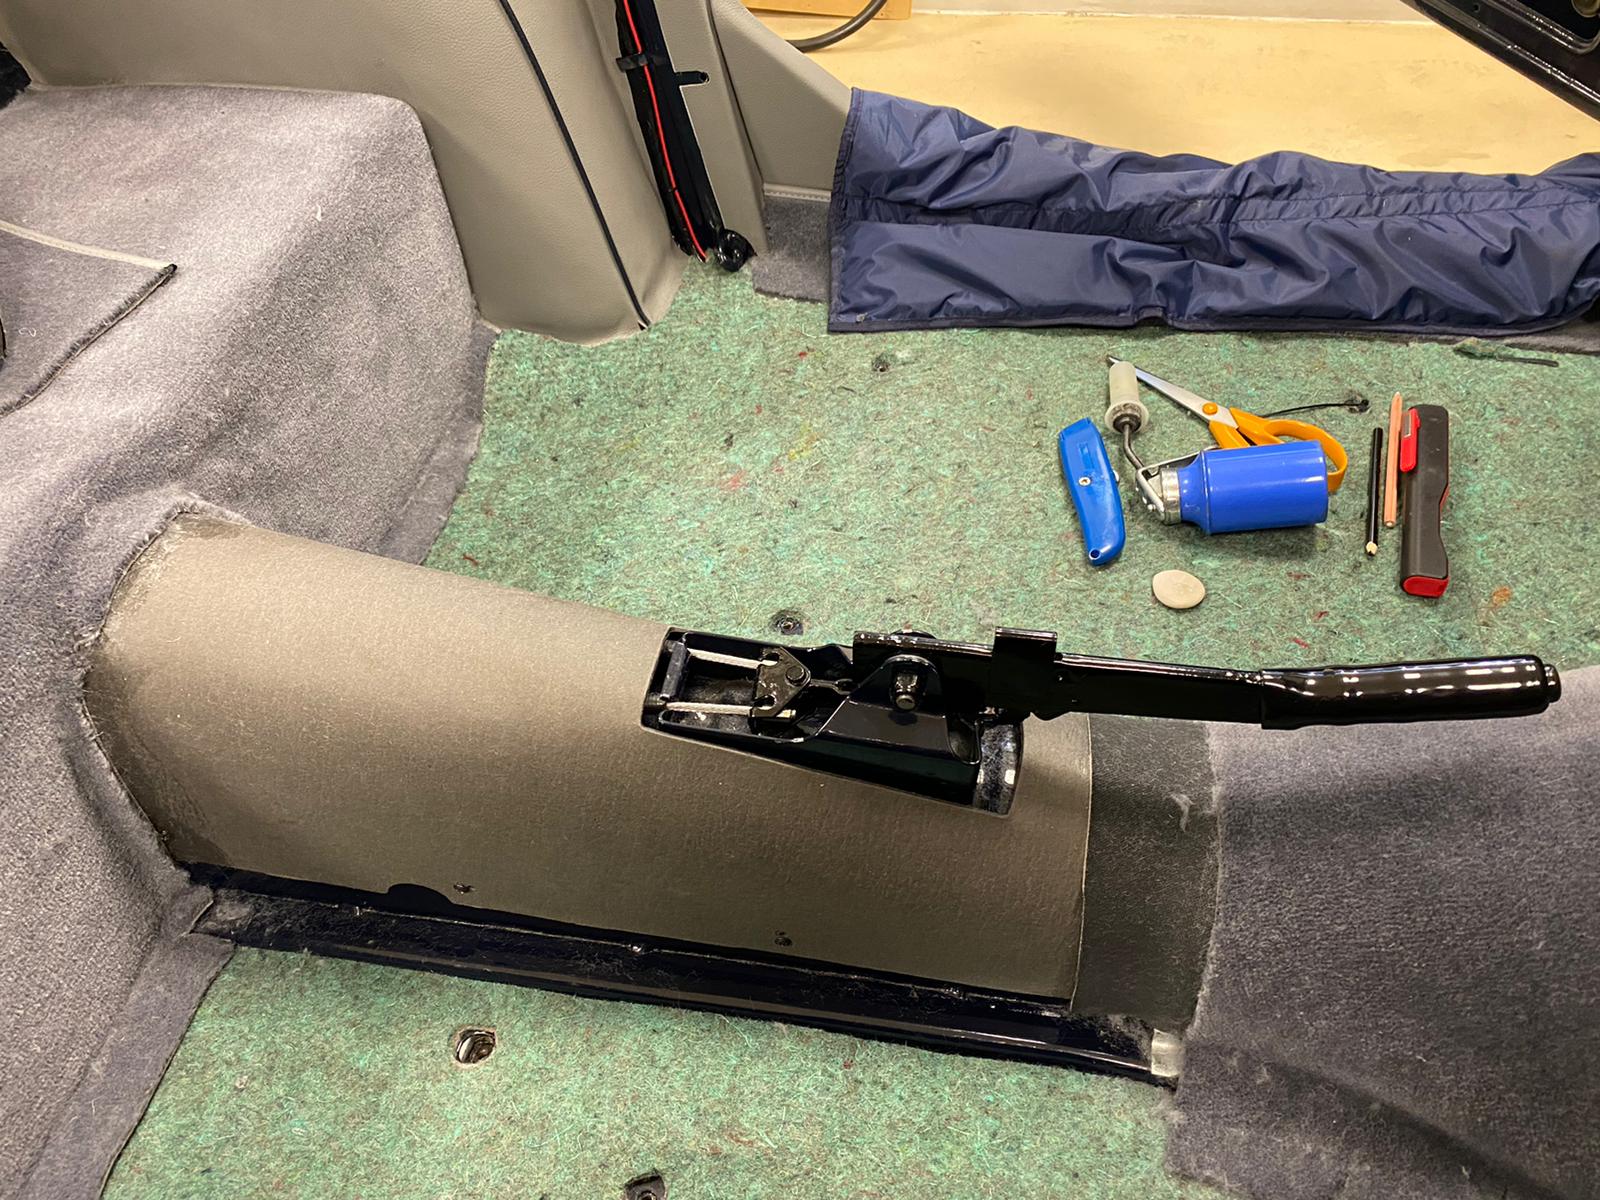
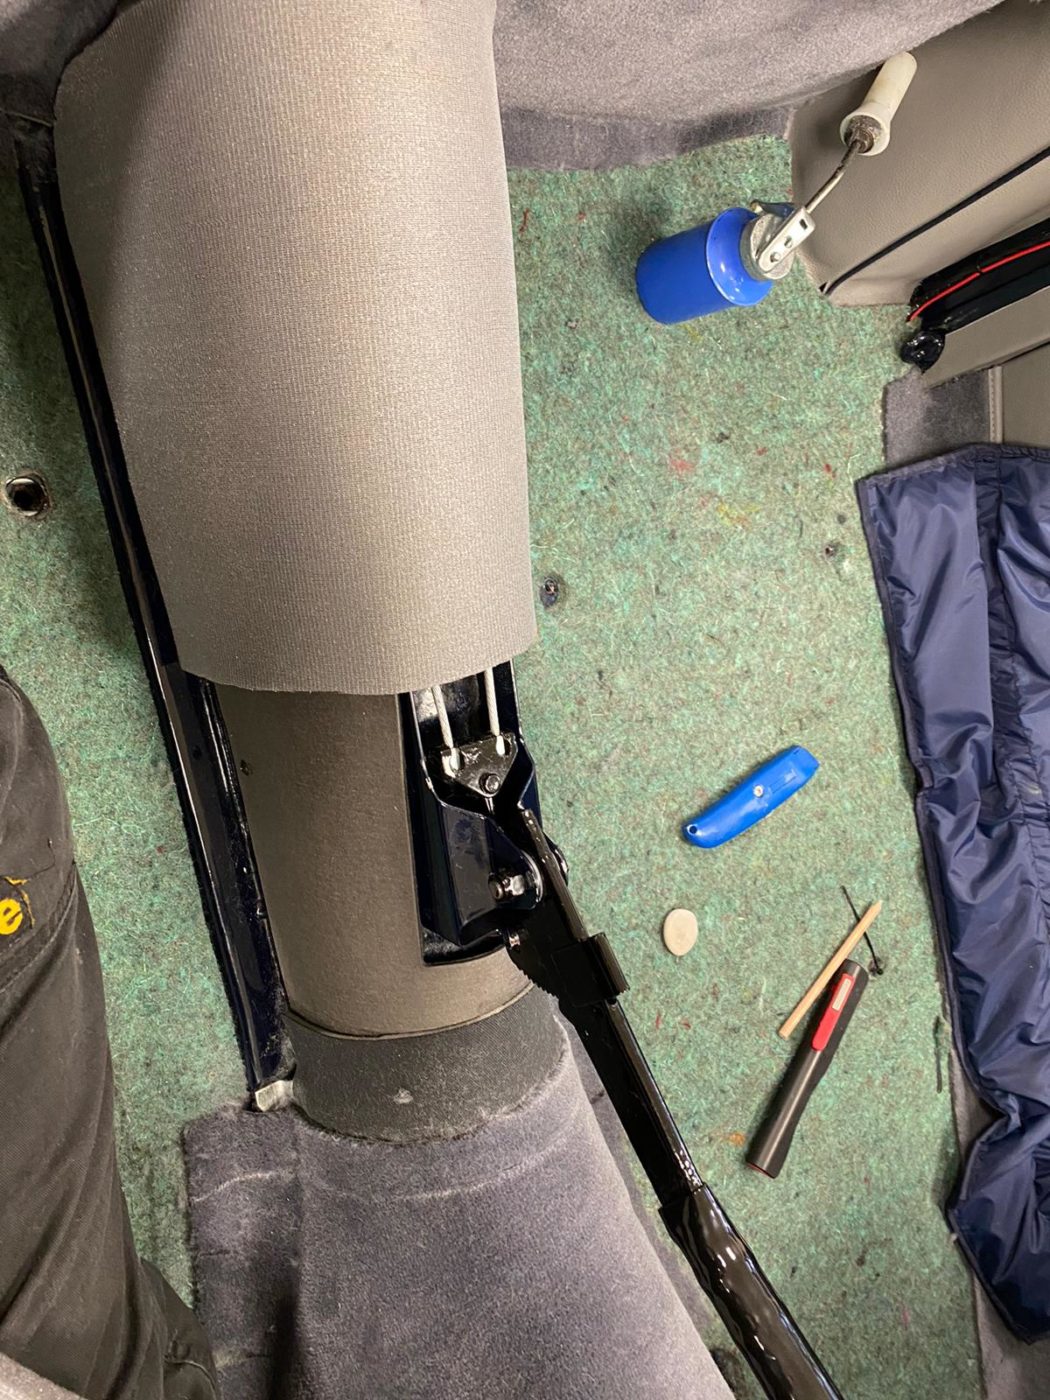
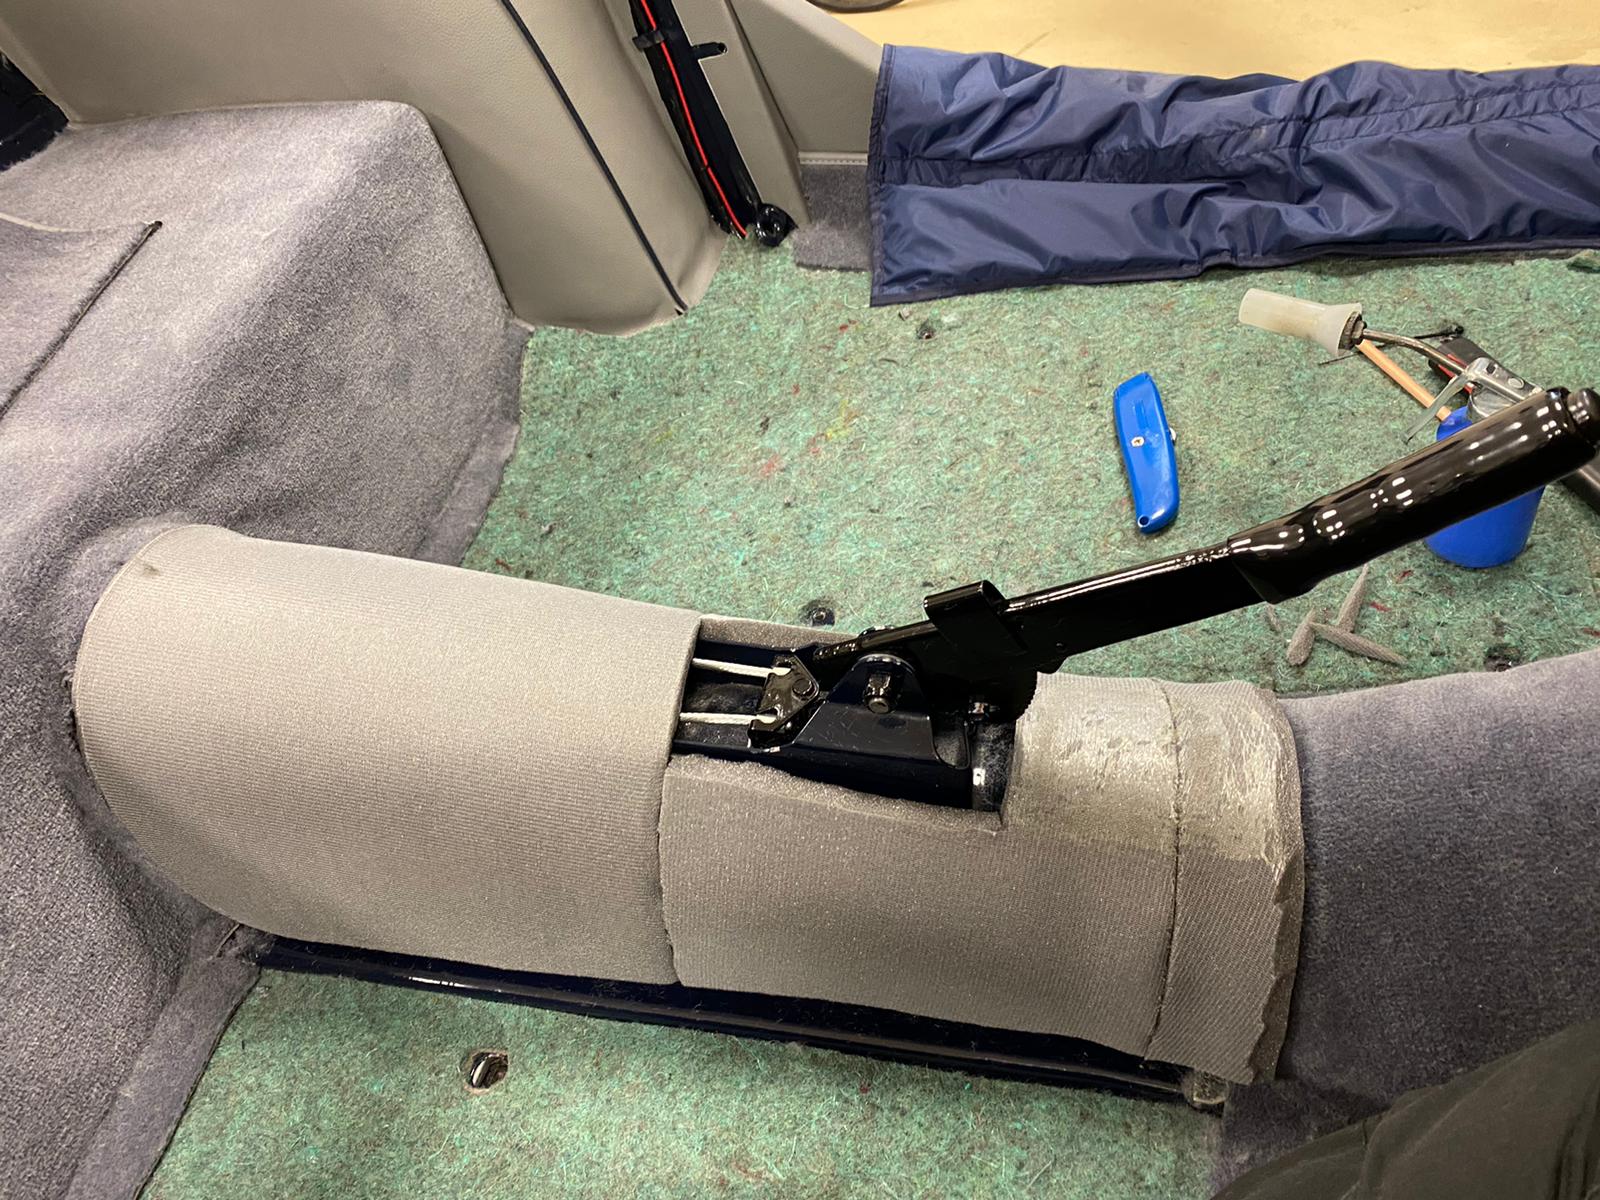
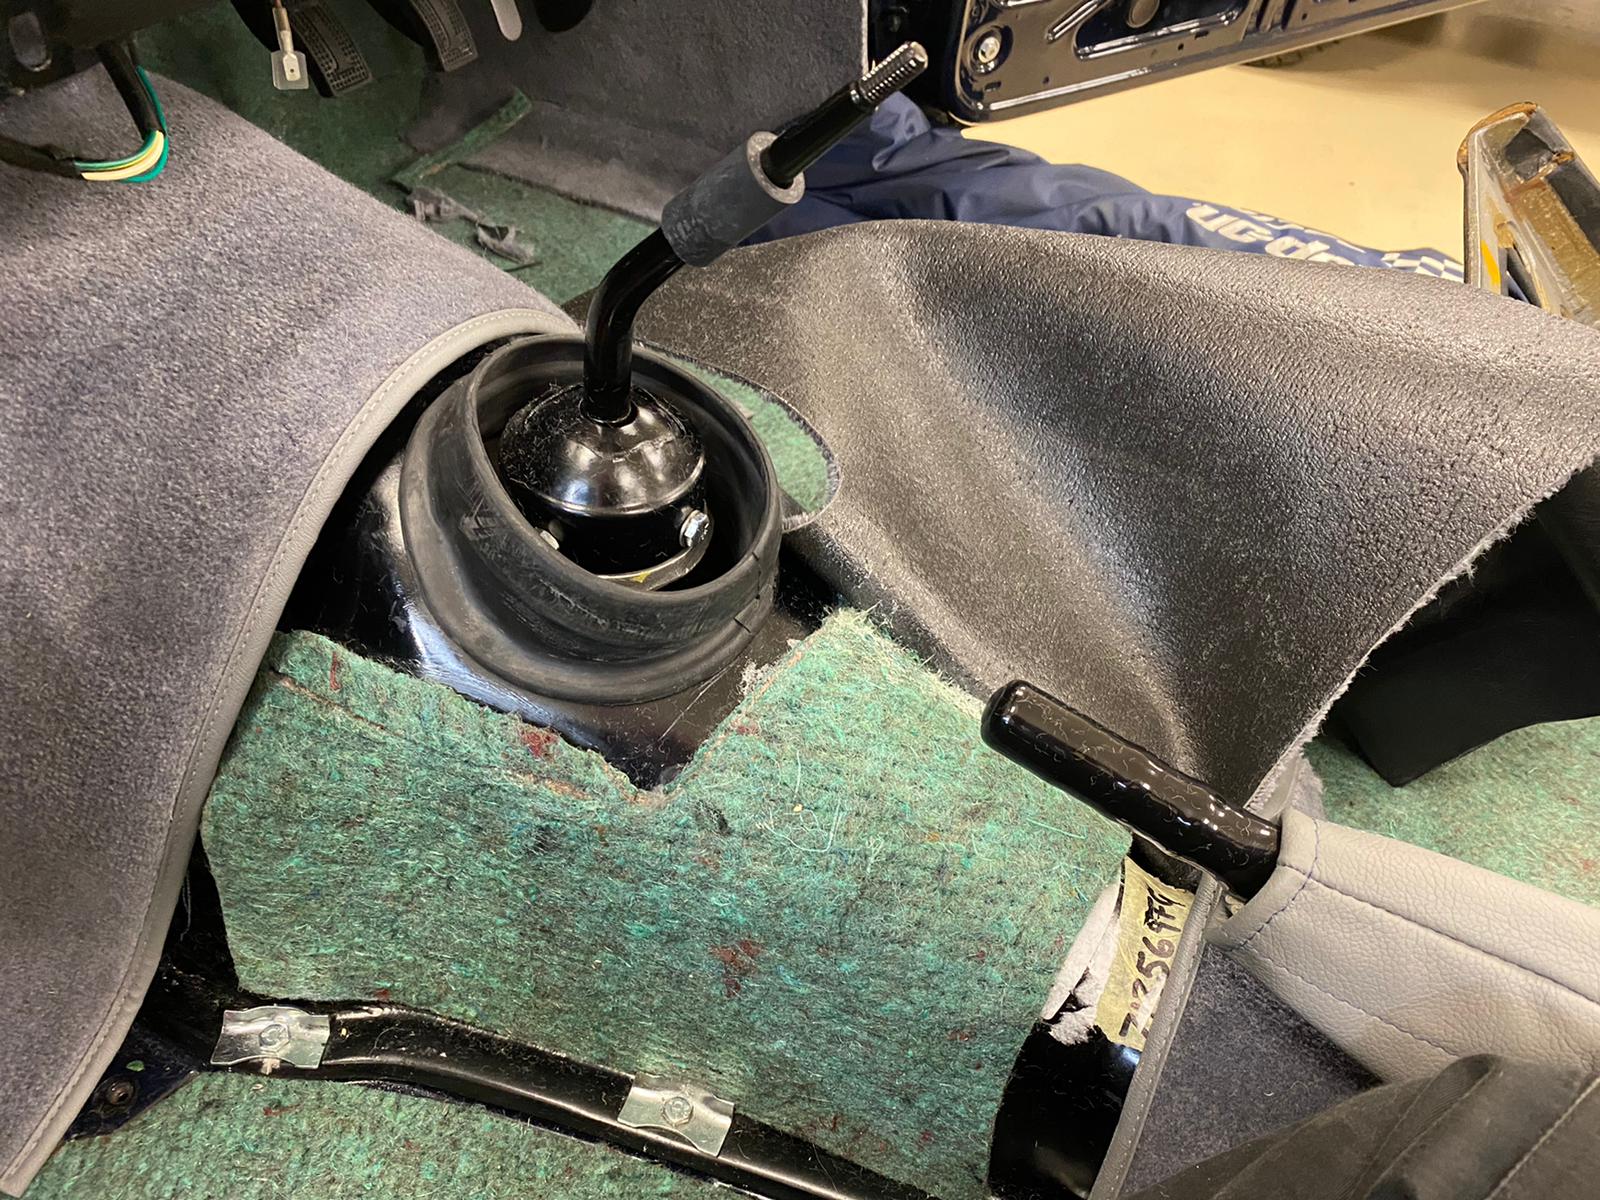
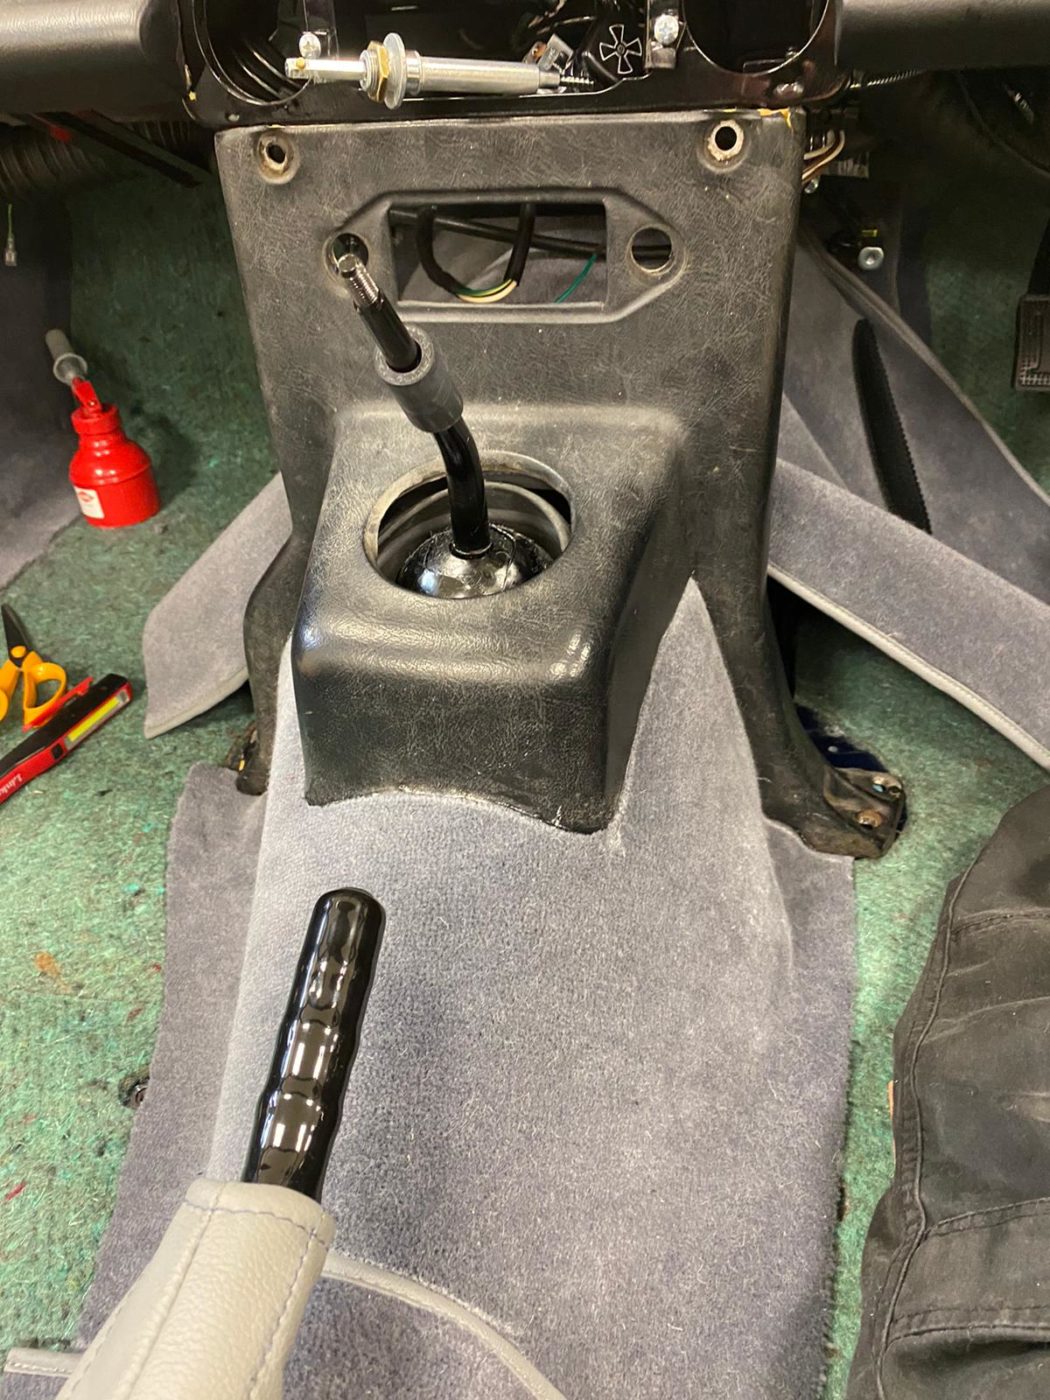
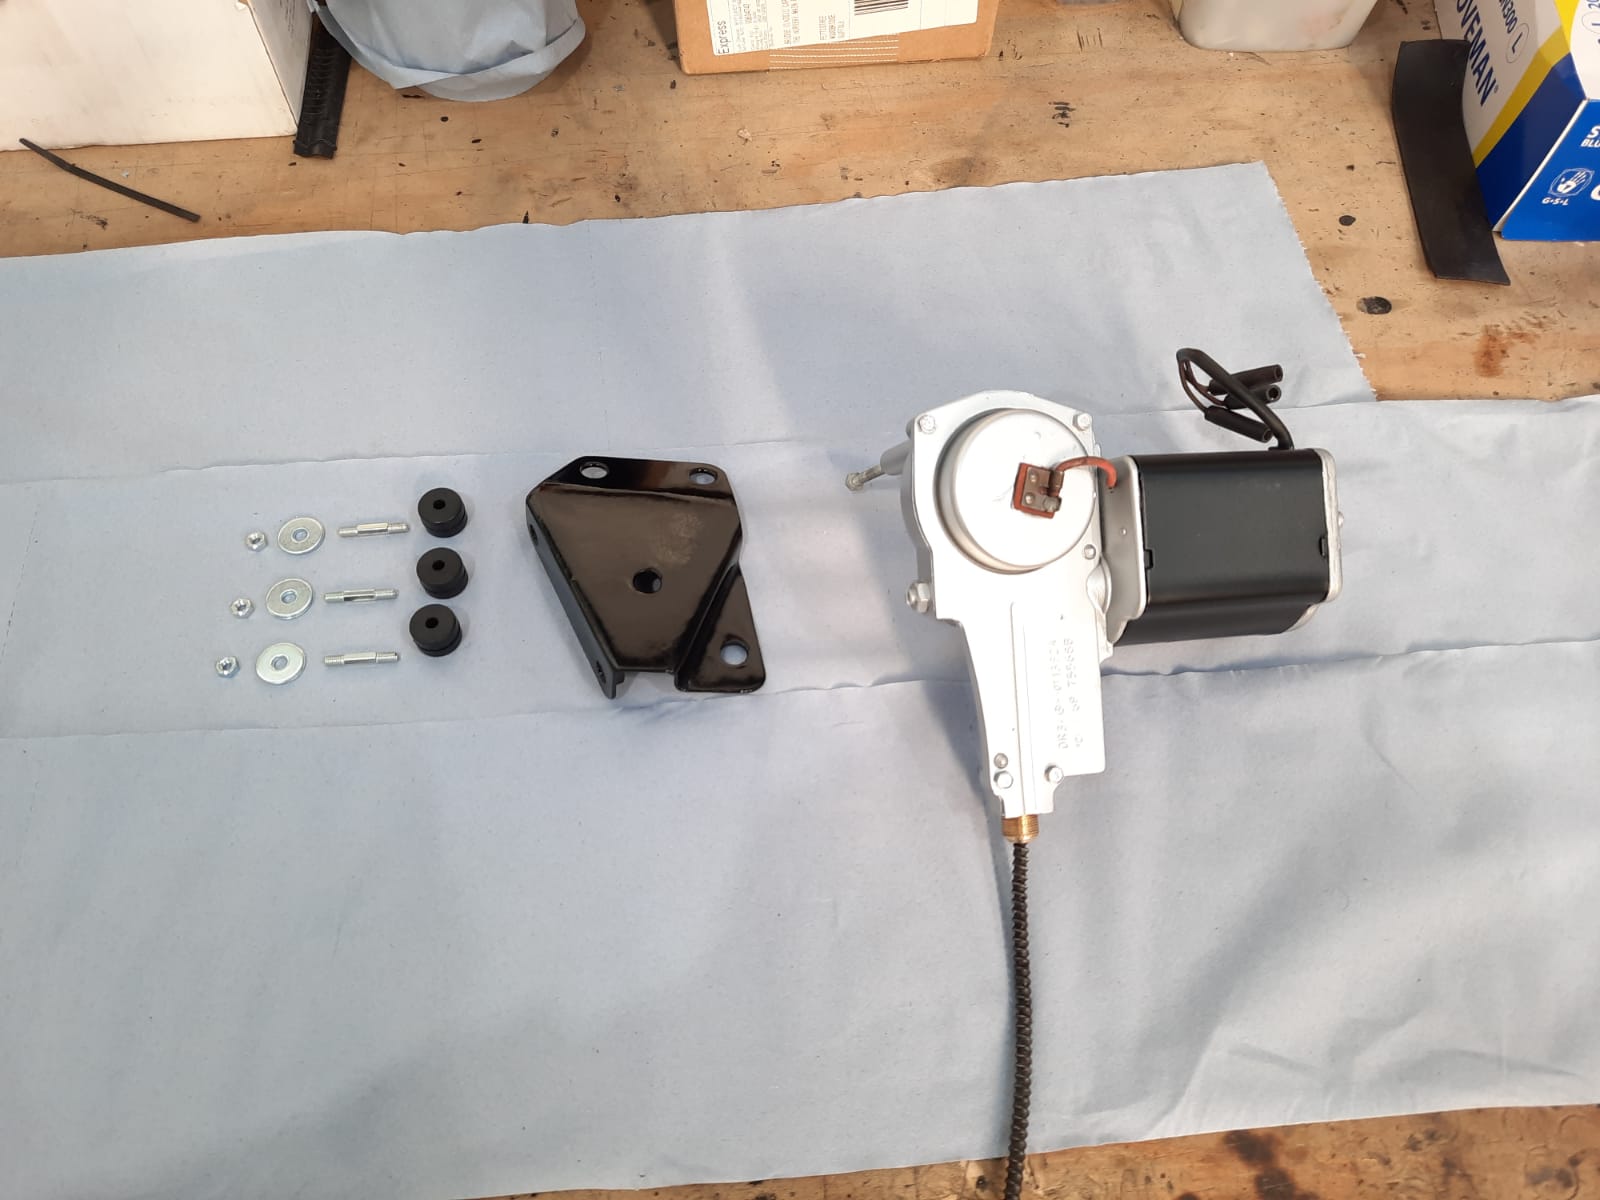
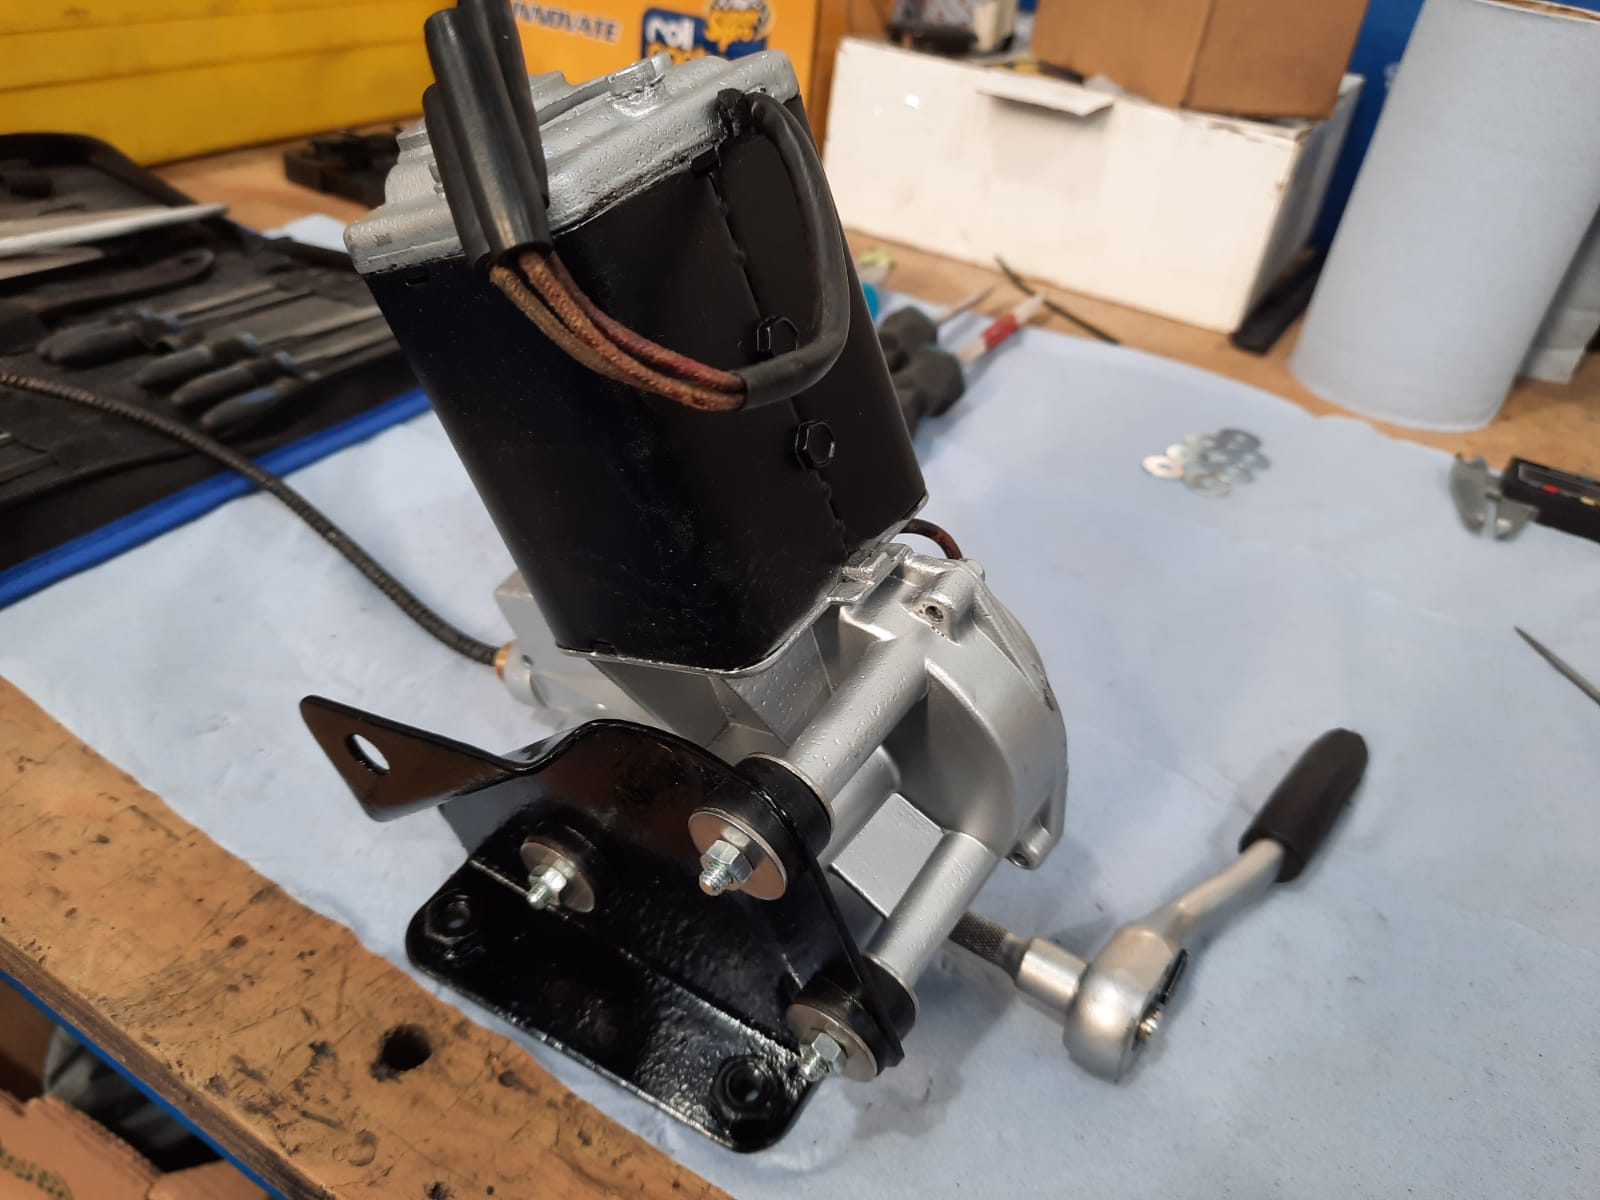
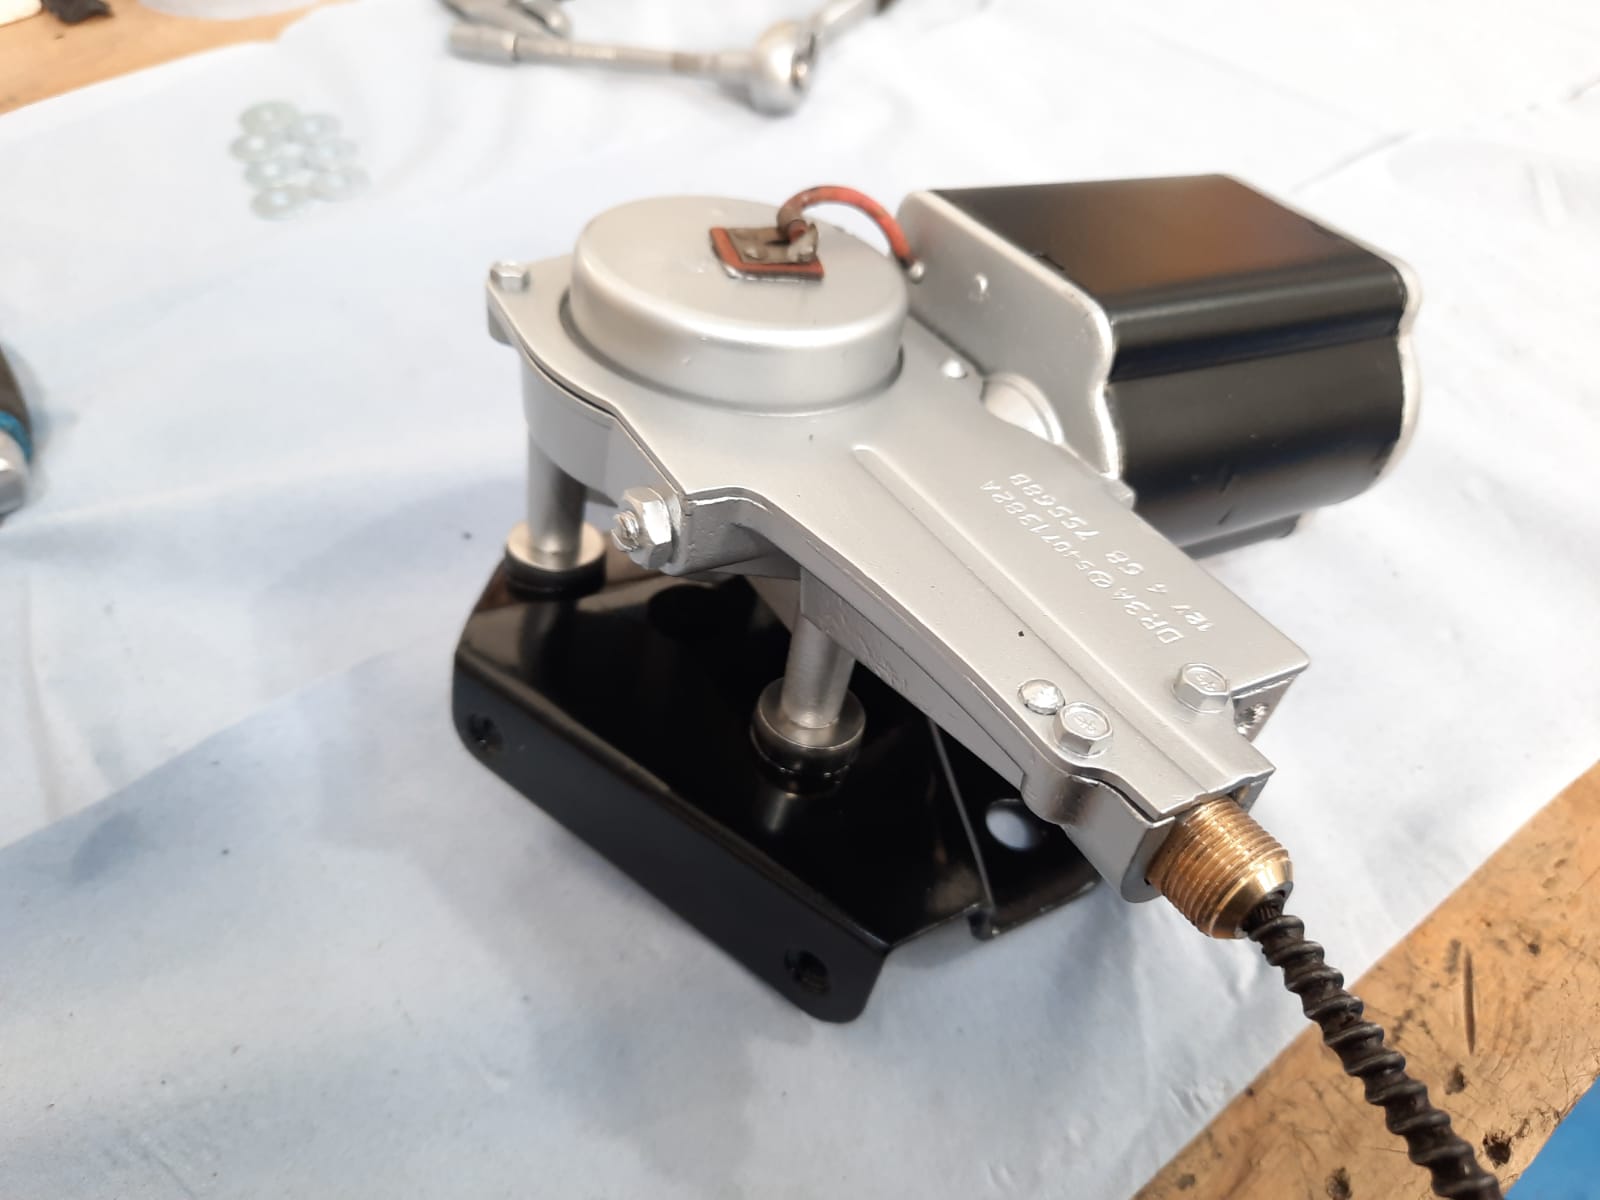
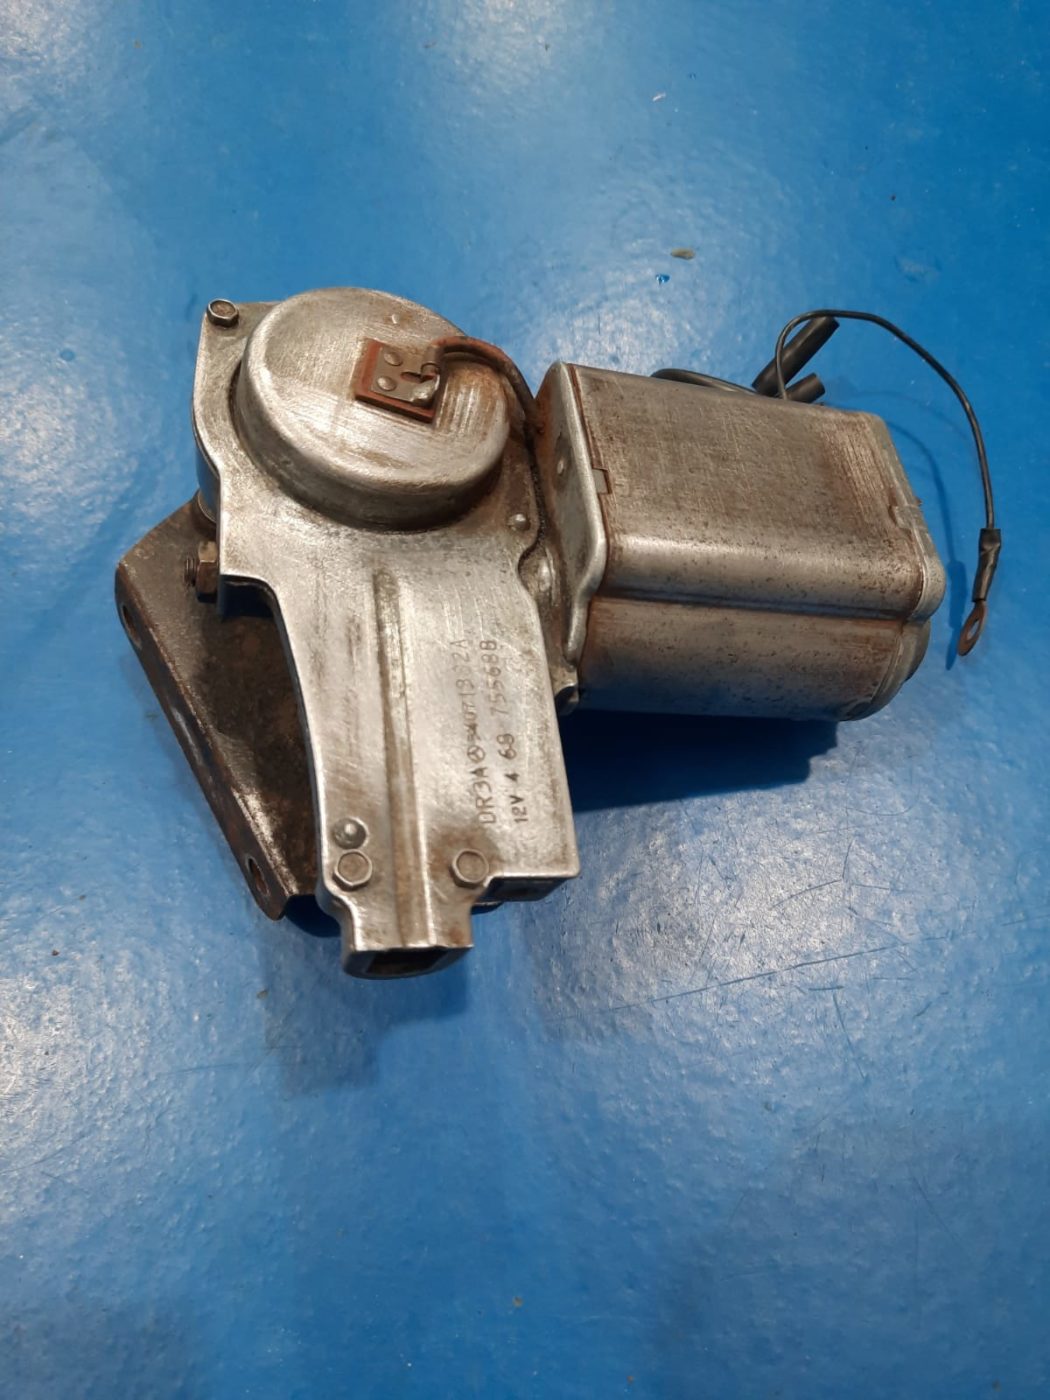
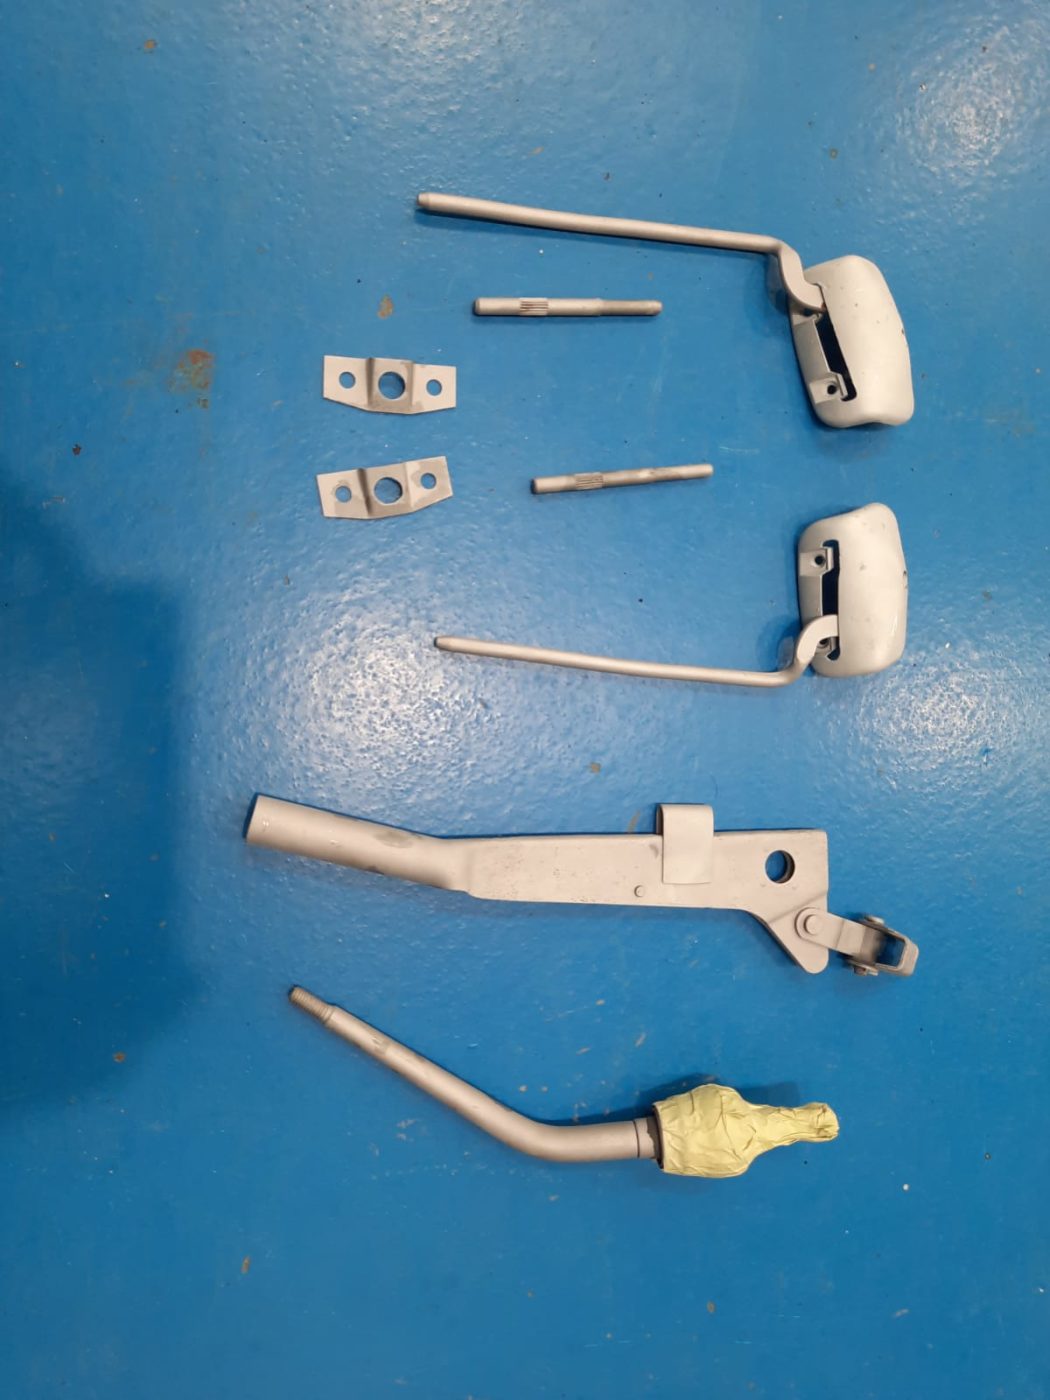
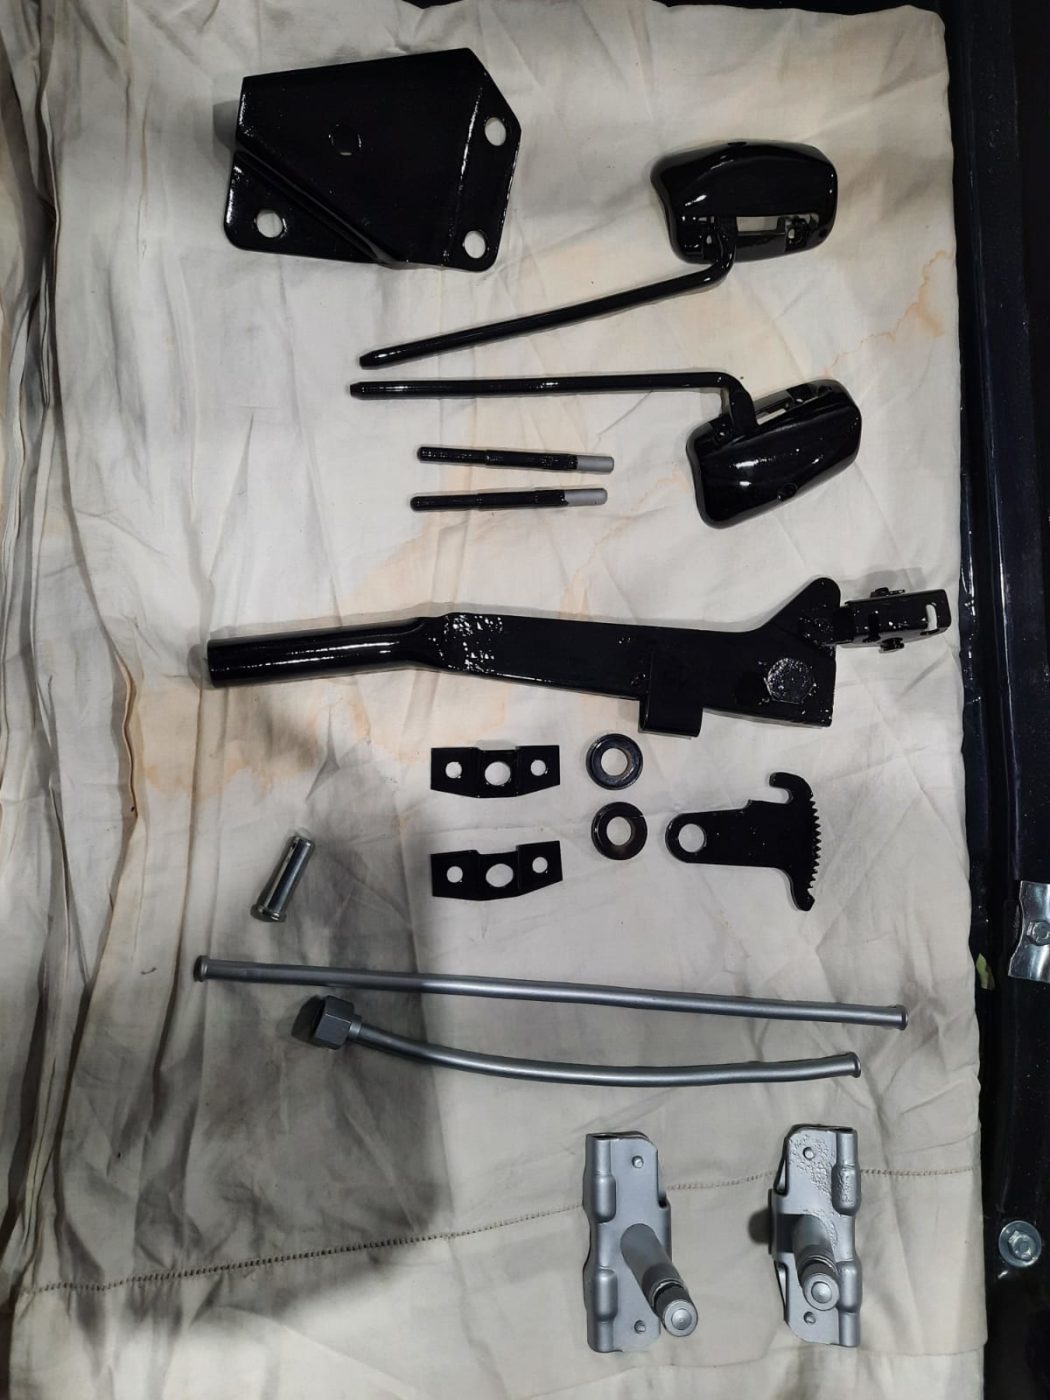
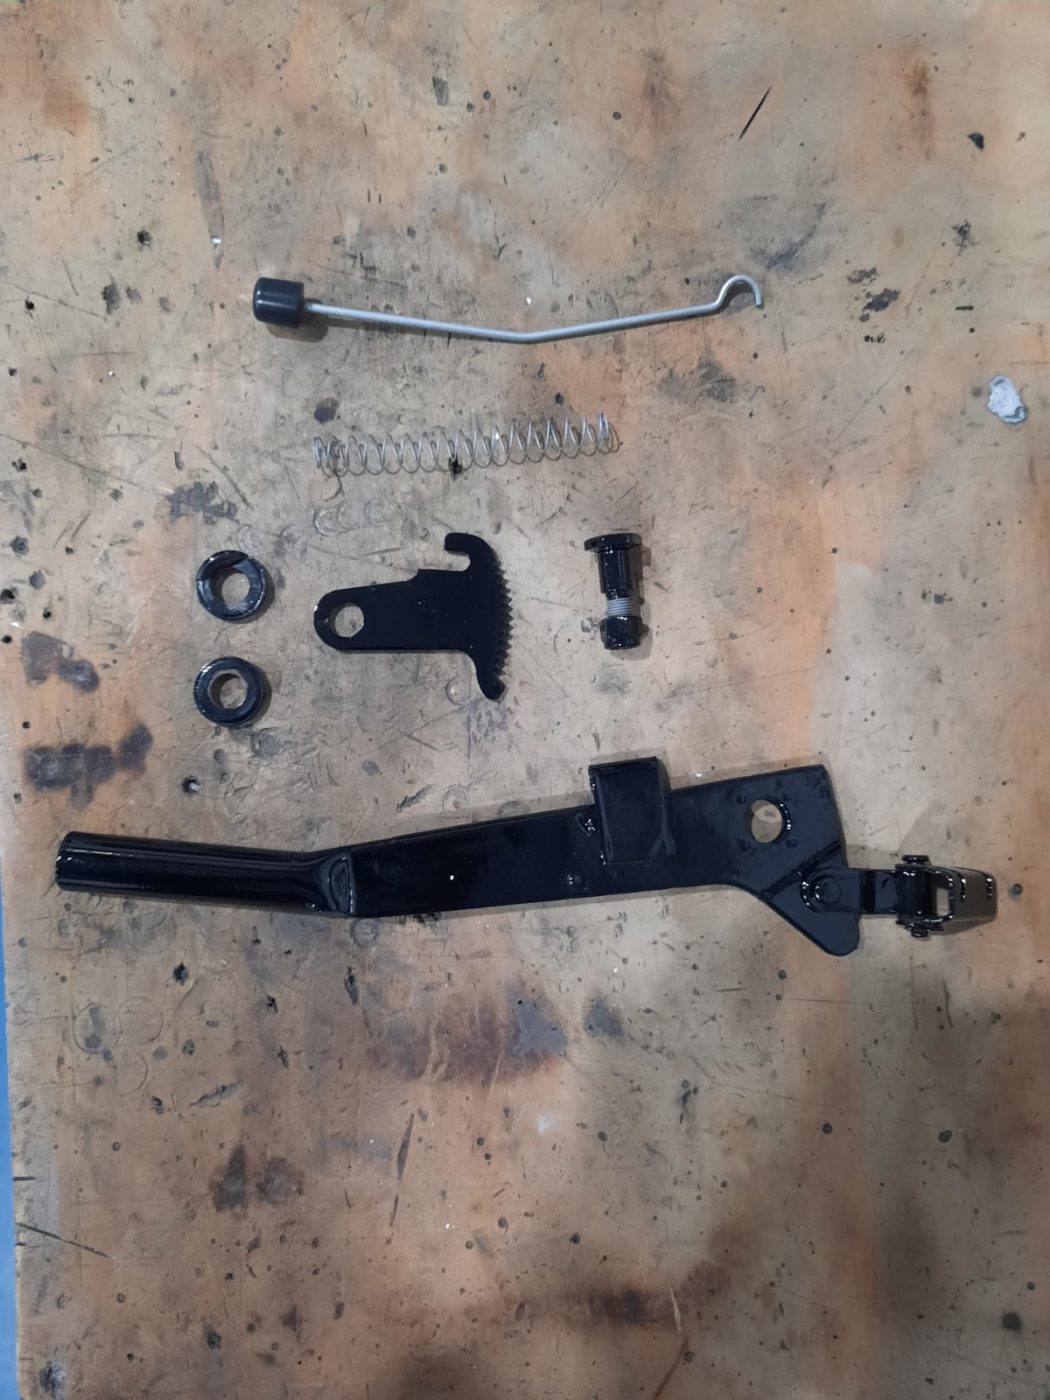
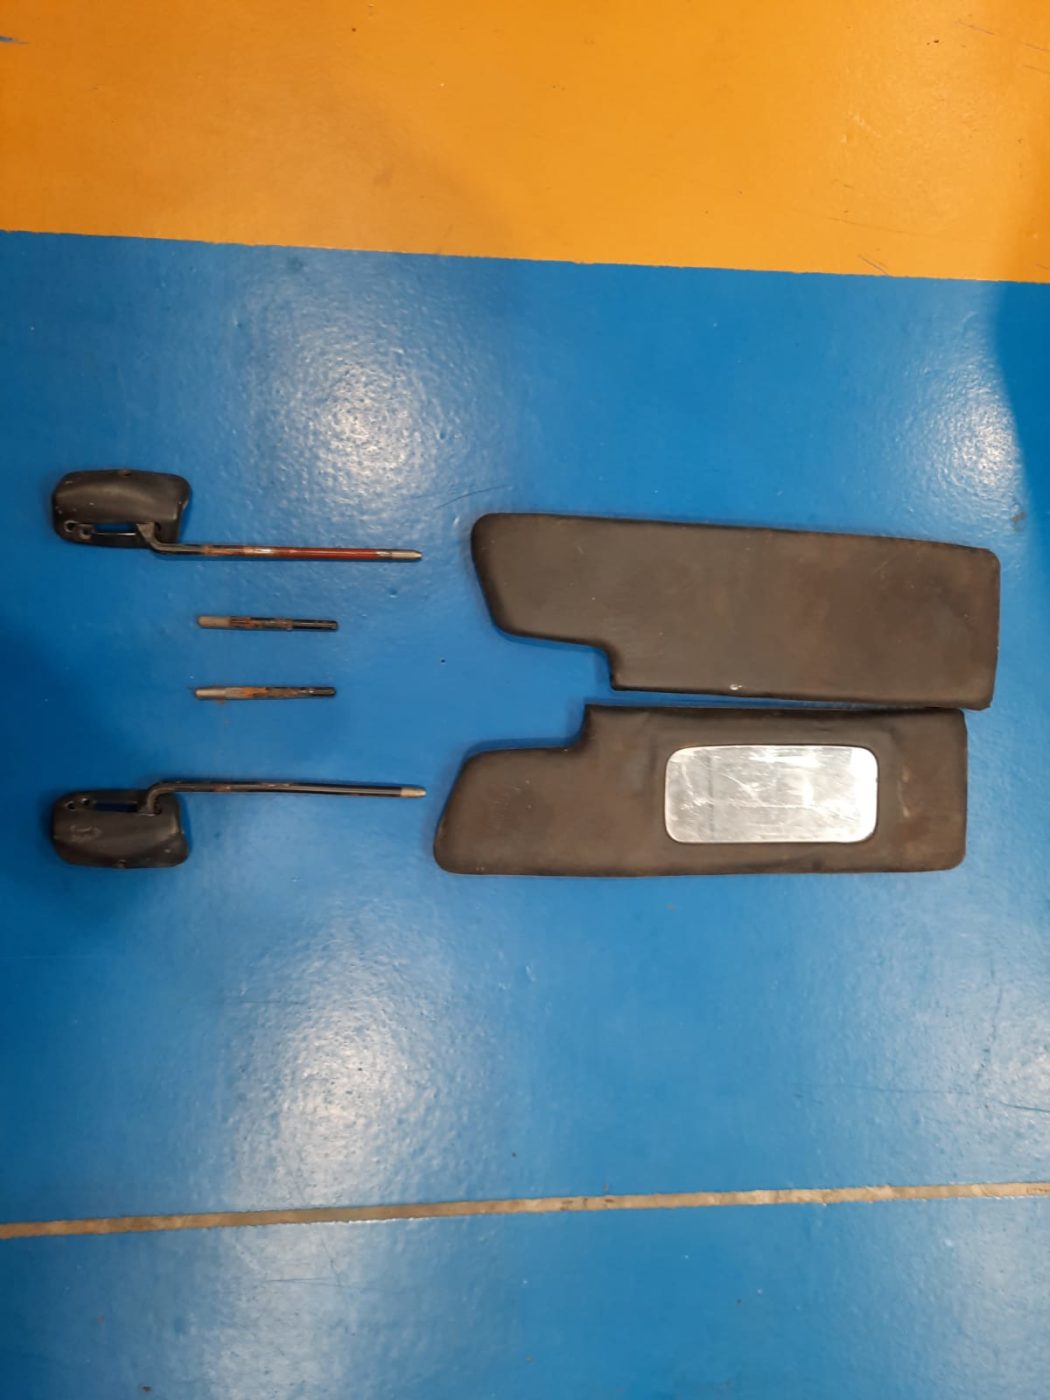
His recent work includes cleaning the wiper engine mechanisms and restoring the hand brake, gearbox lever and sun visor brackets.
The rev tachometer has been fitted meaning that the dash is almost finished.
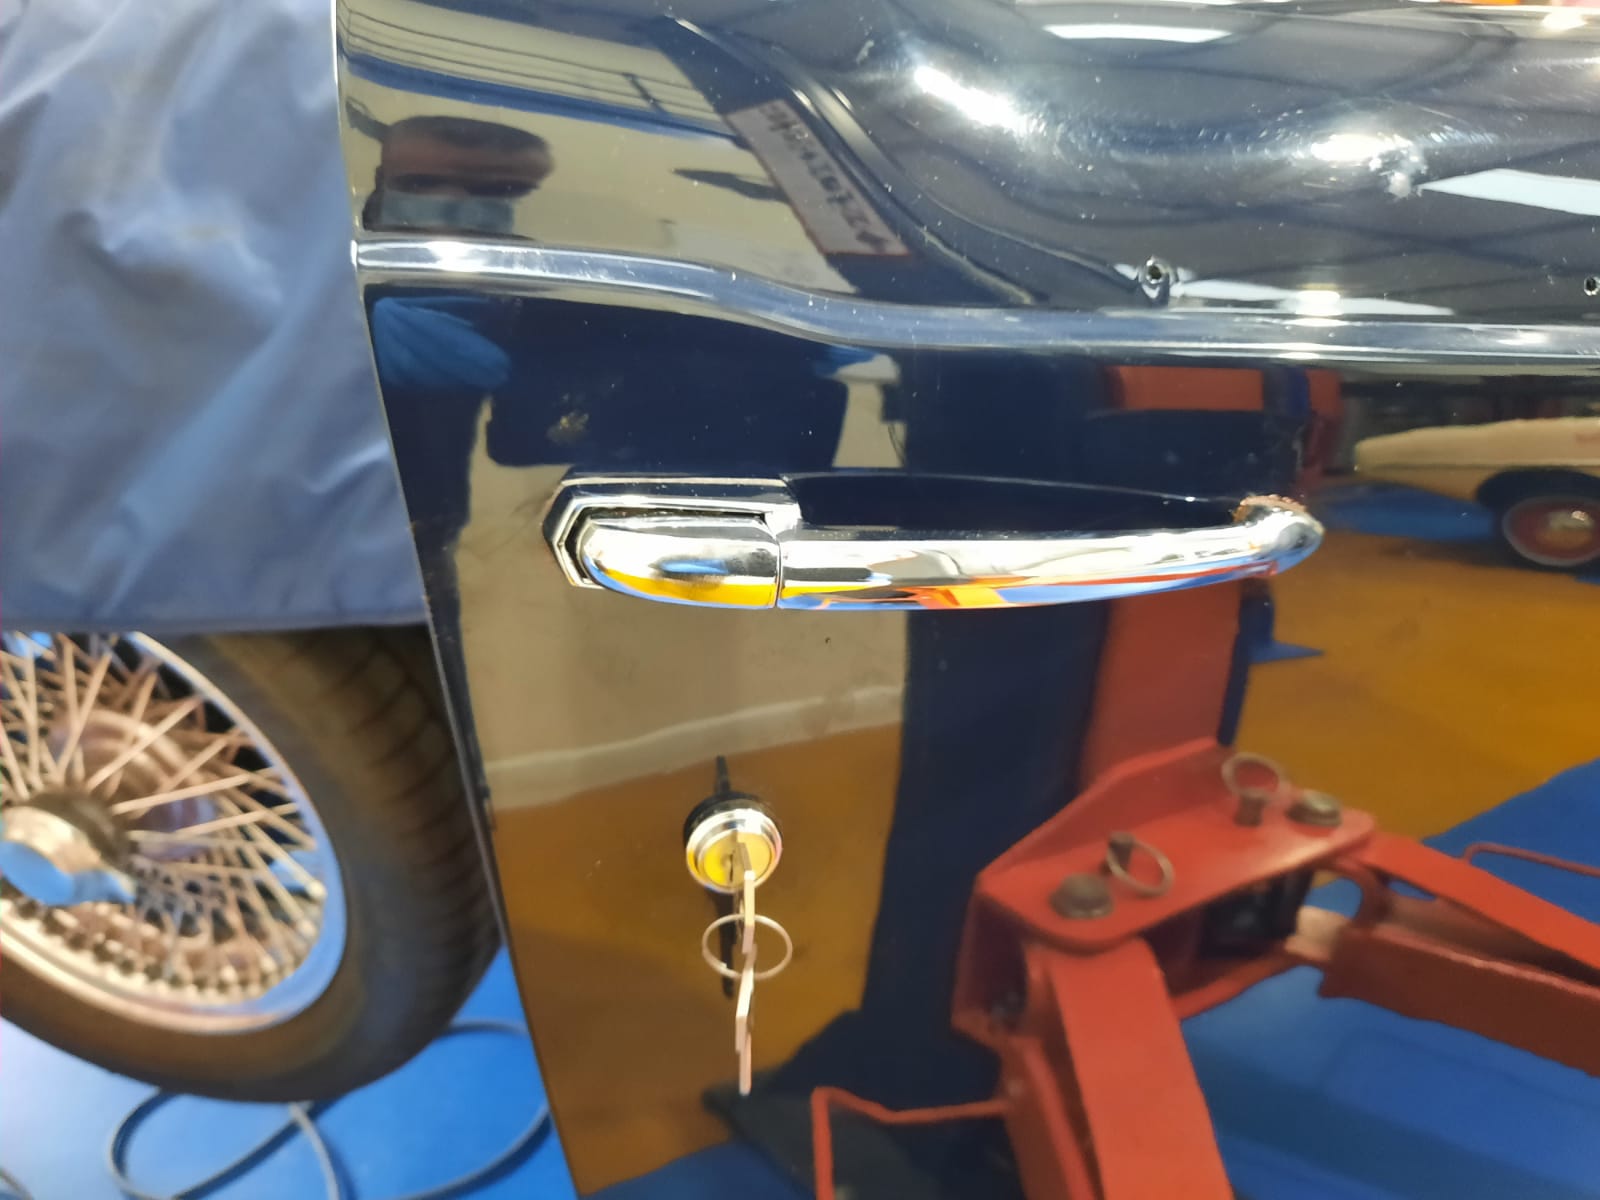
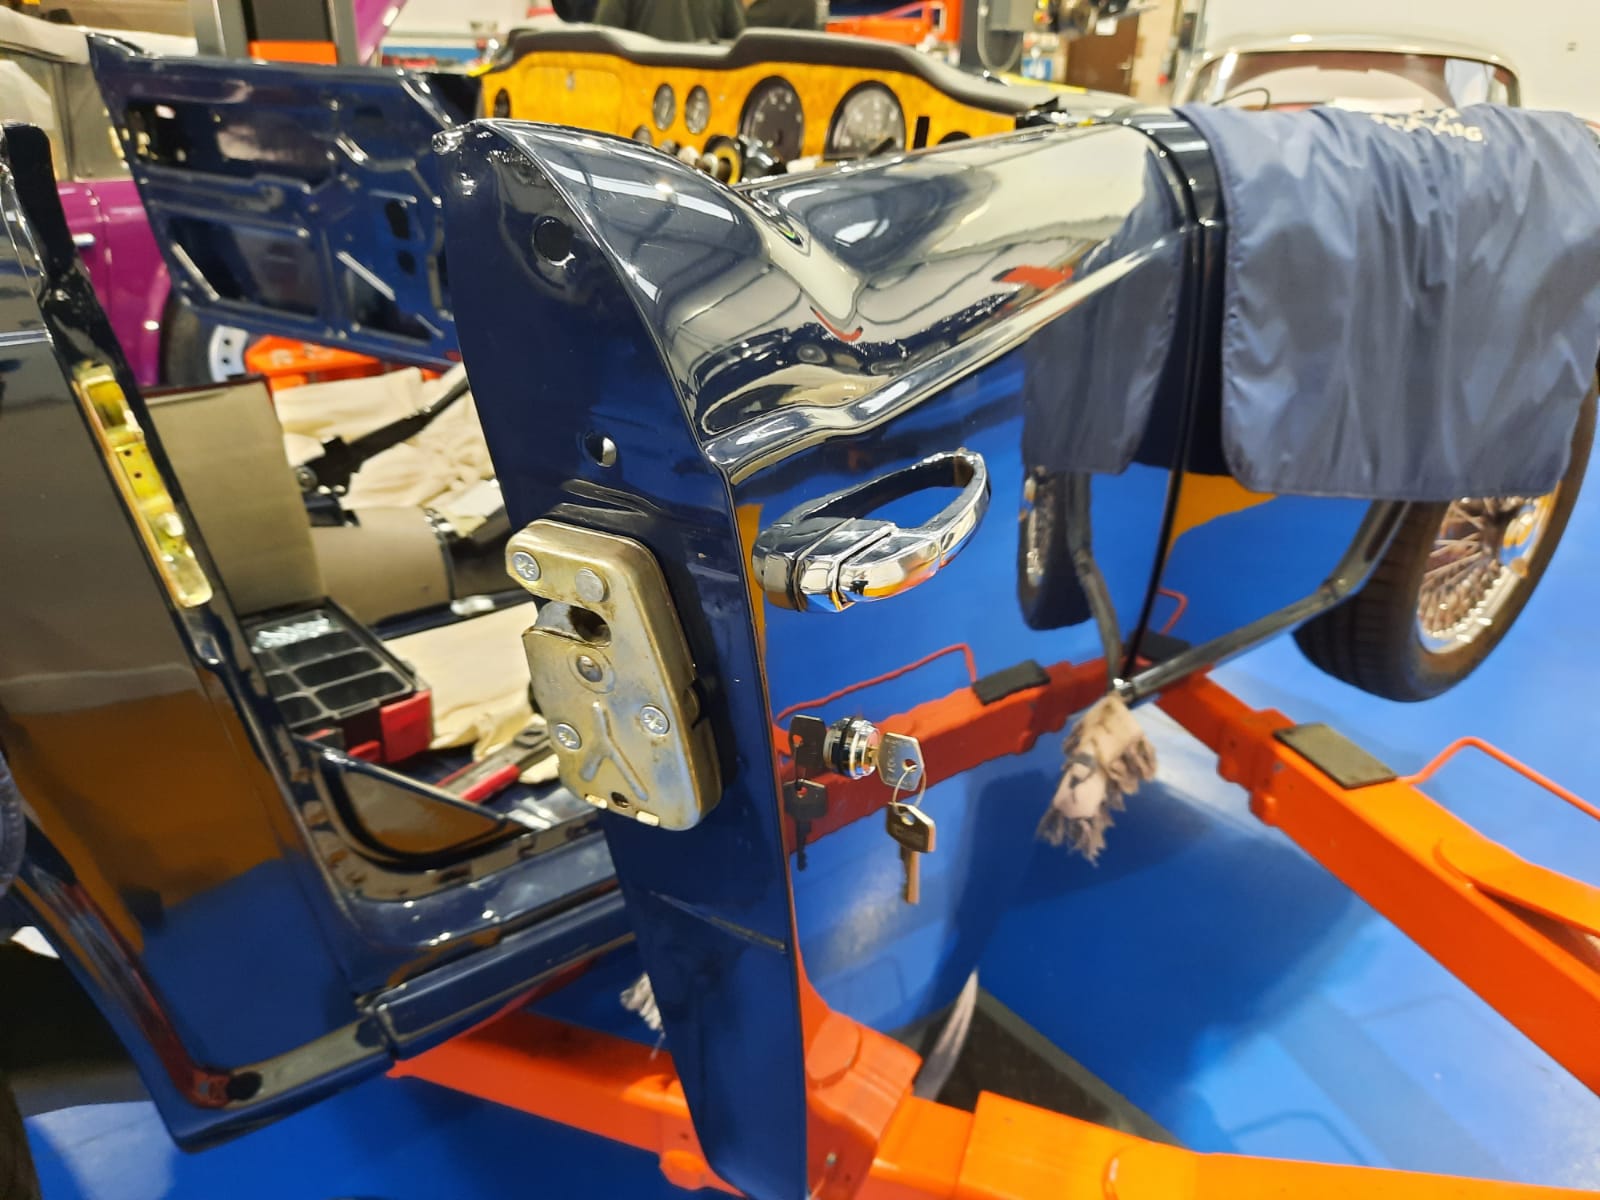
The glovebox lock, door handles and door locks have also been fitted.


“Colour is a power which directly influences the soul.” – Wassily Kandinsky
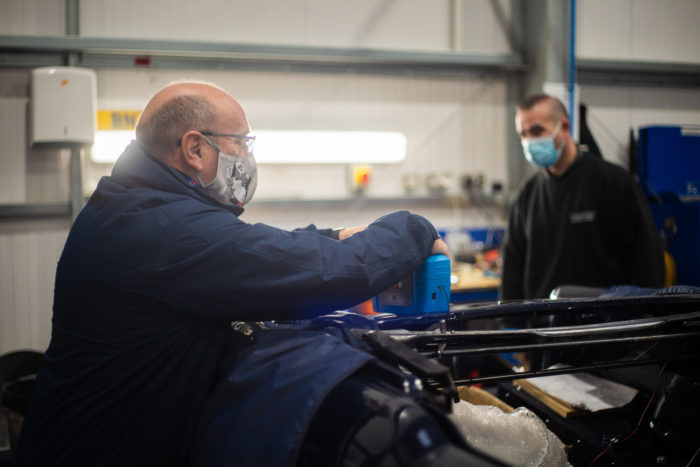
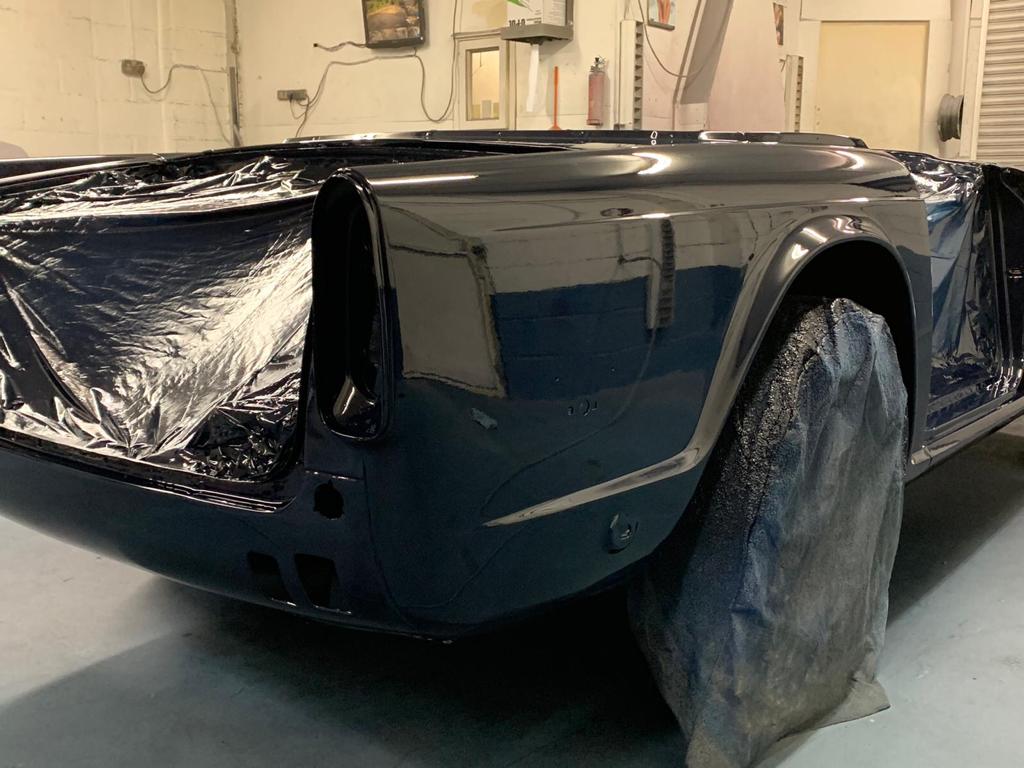
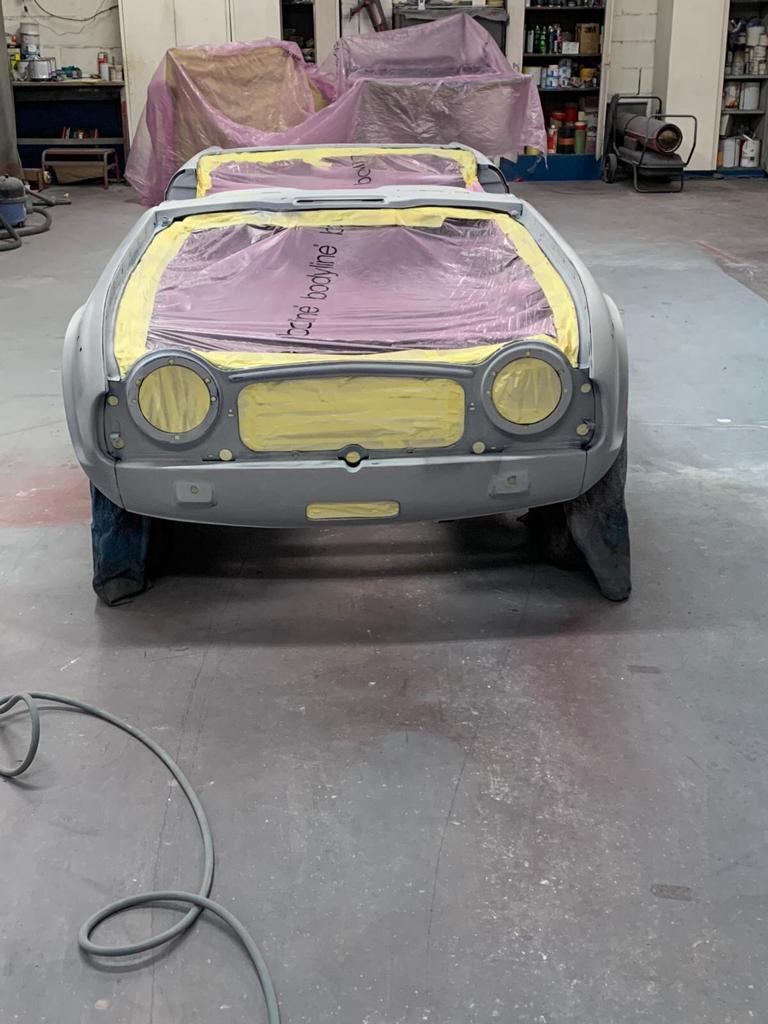
Our TR5 has been colour matched today by our friend and partner, Dean, from GB Refinish. Before Dean was able to assess the colour, one of our paint technicians had to polish part of the car so that the CME Colour Matcher can work its magic without picking up any dust, as that will affect its accuracy. We’re needing to add some paint touch-ups to the TR5 but didn’t know the exact colour as it was painted elsewhere but this is where Dean comes in!
Dean uses a nifty piece of equipment called the CME – Colour Explorer. This clever device used LED technology which asses the colour and creates unique codes for the surface that it has scanned. This scanning is done at several angles and when complete, Dean will then plug the device into his computer where it will provide the unique codes that will relate to an exact colour.
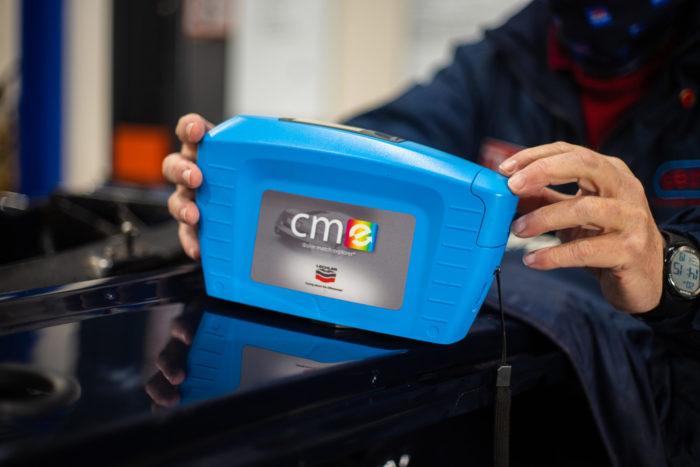
This is an incredibly useful tool when trying to colour match on classic cars that may have bespoke or ‘extinct’ colours that would otherwise be impossible to find. Dean’s expertise and equipment mean we can find the exact colour needed to ensure that each classic retains its original colour. Having Dean as a partner and contact at Bridge Classic Cars means we can provide specialist paint services.
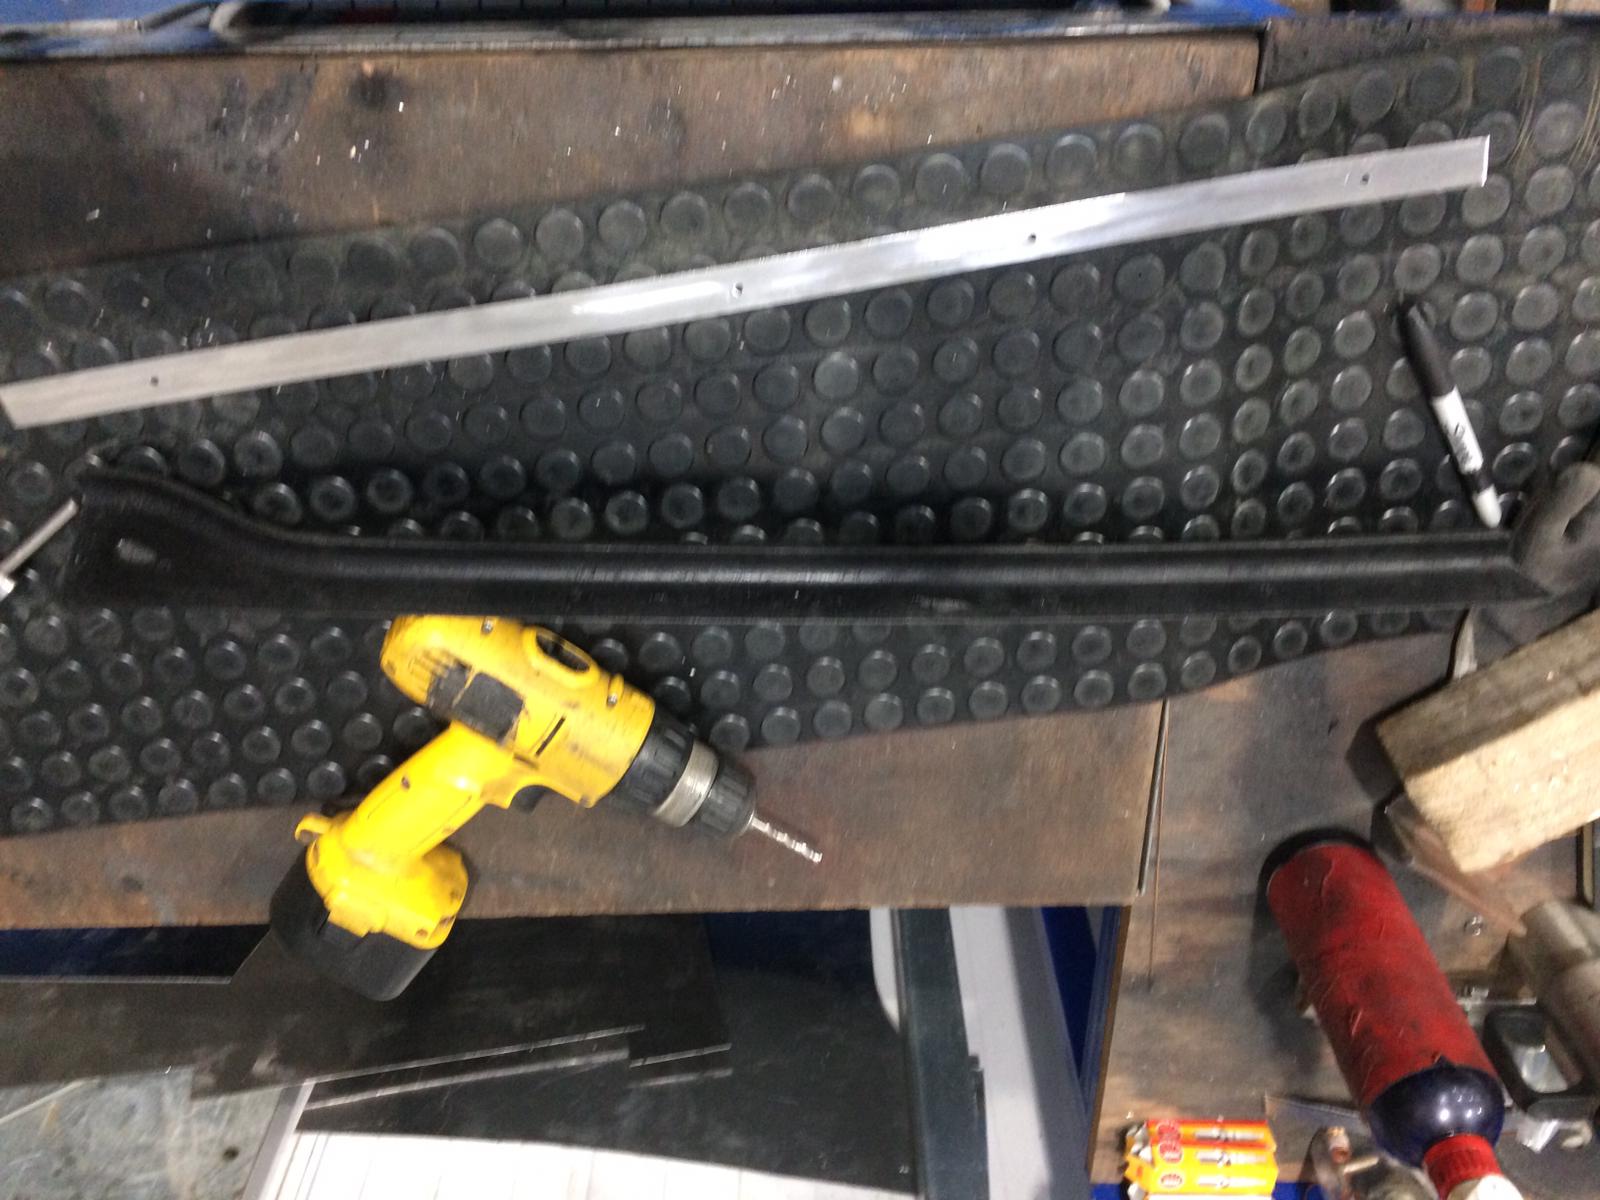
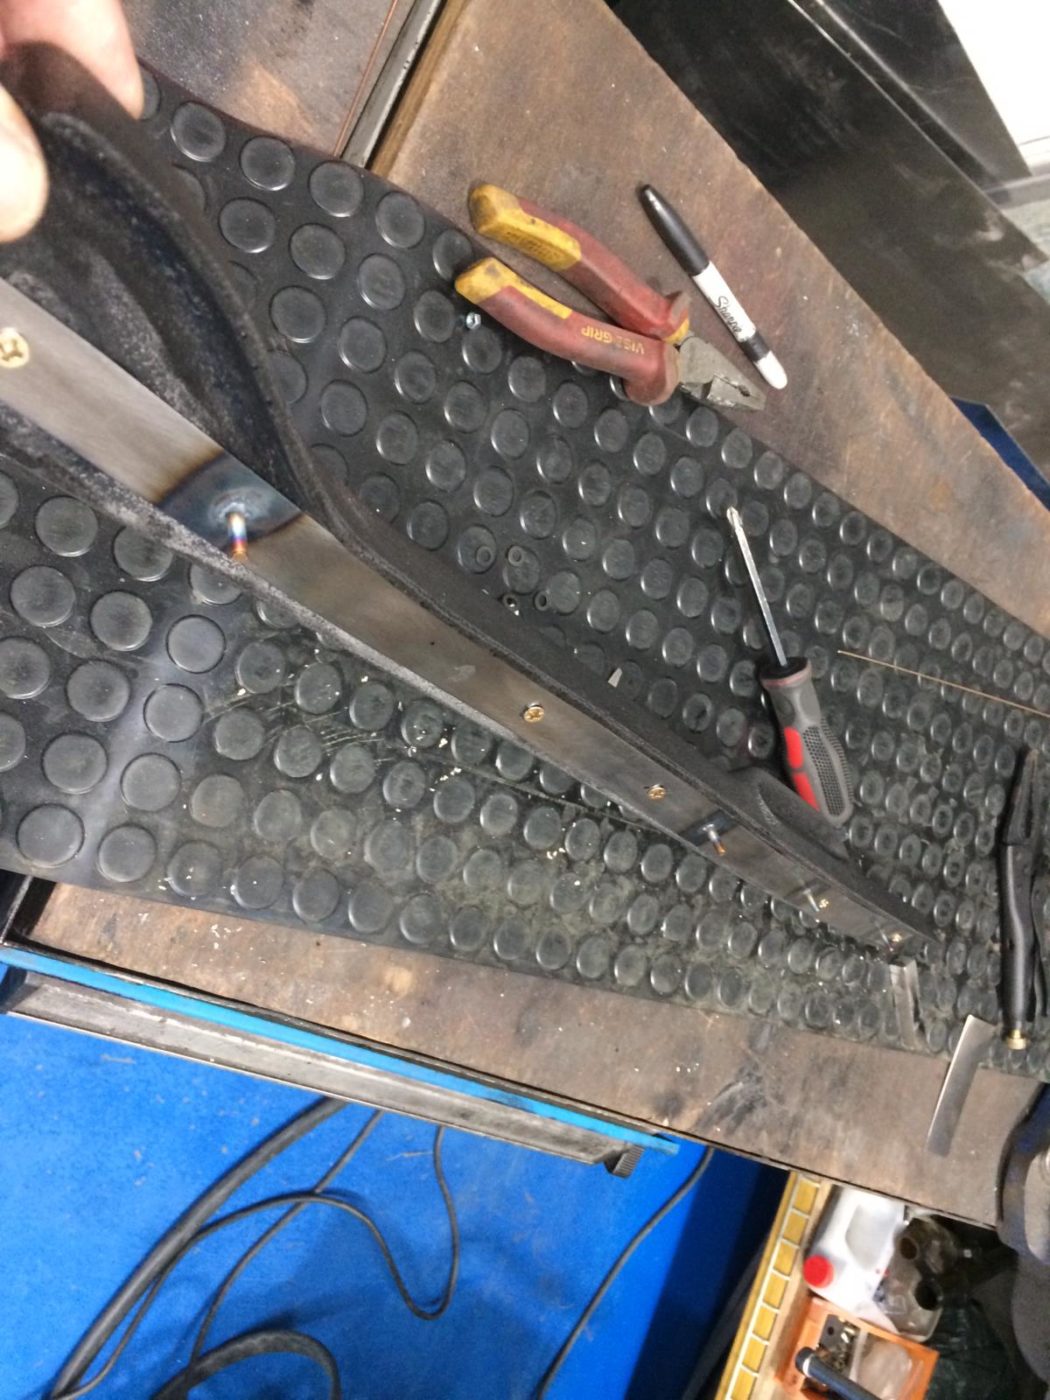
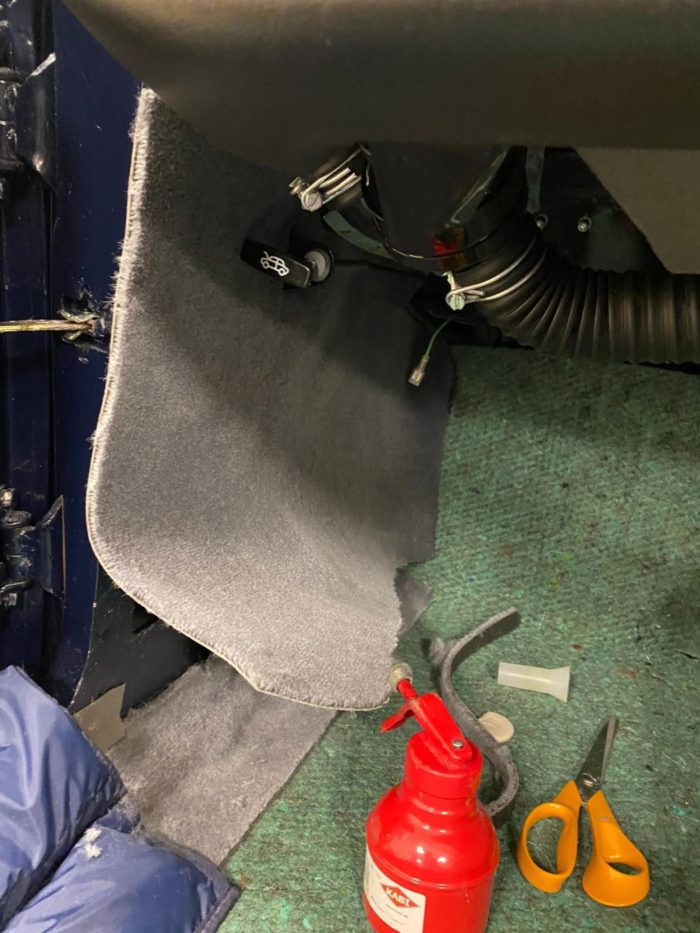
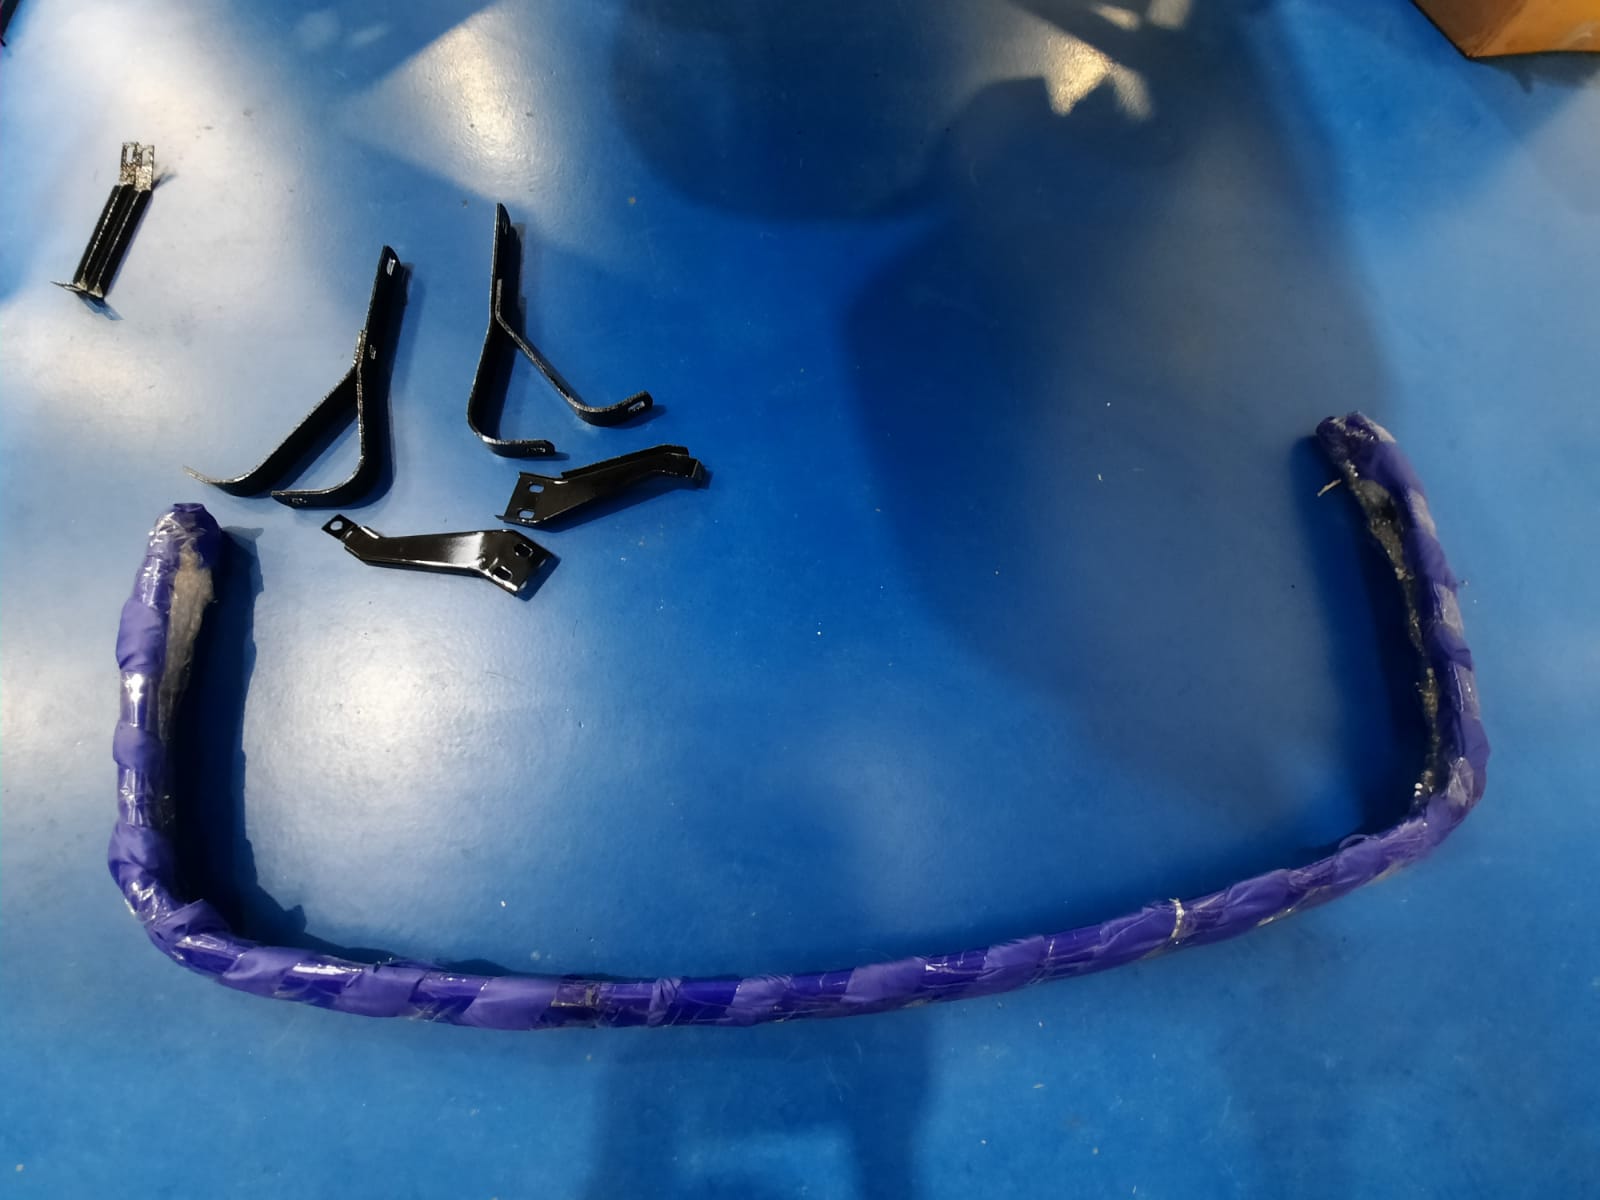
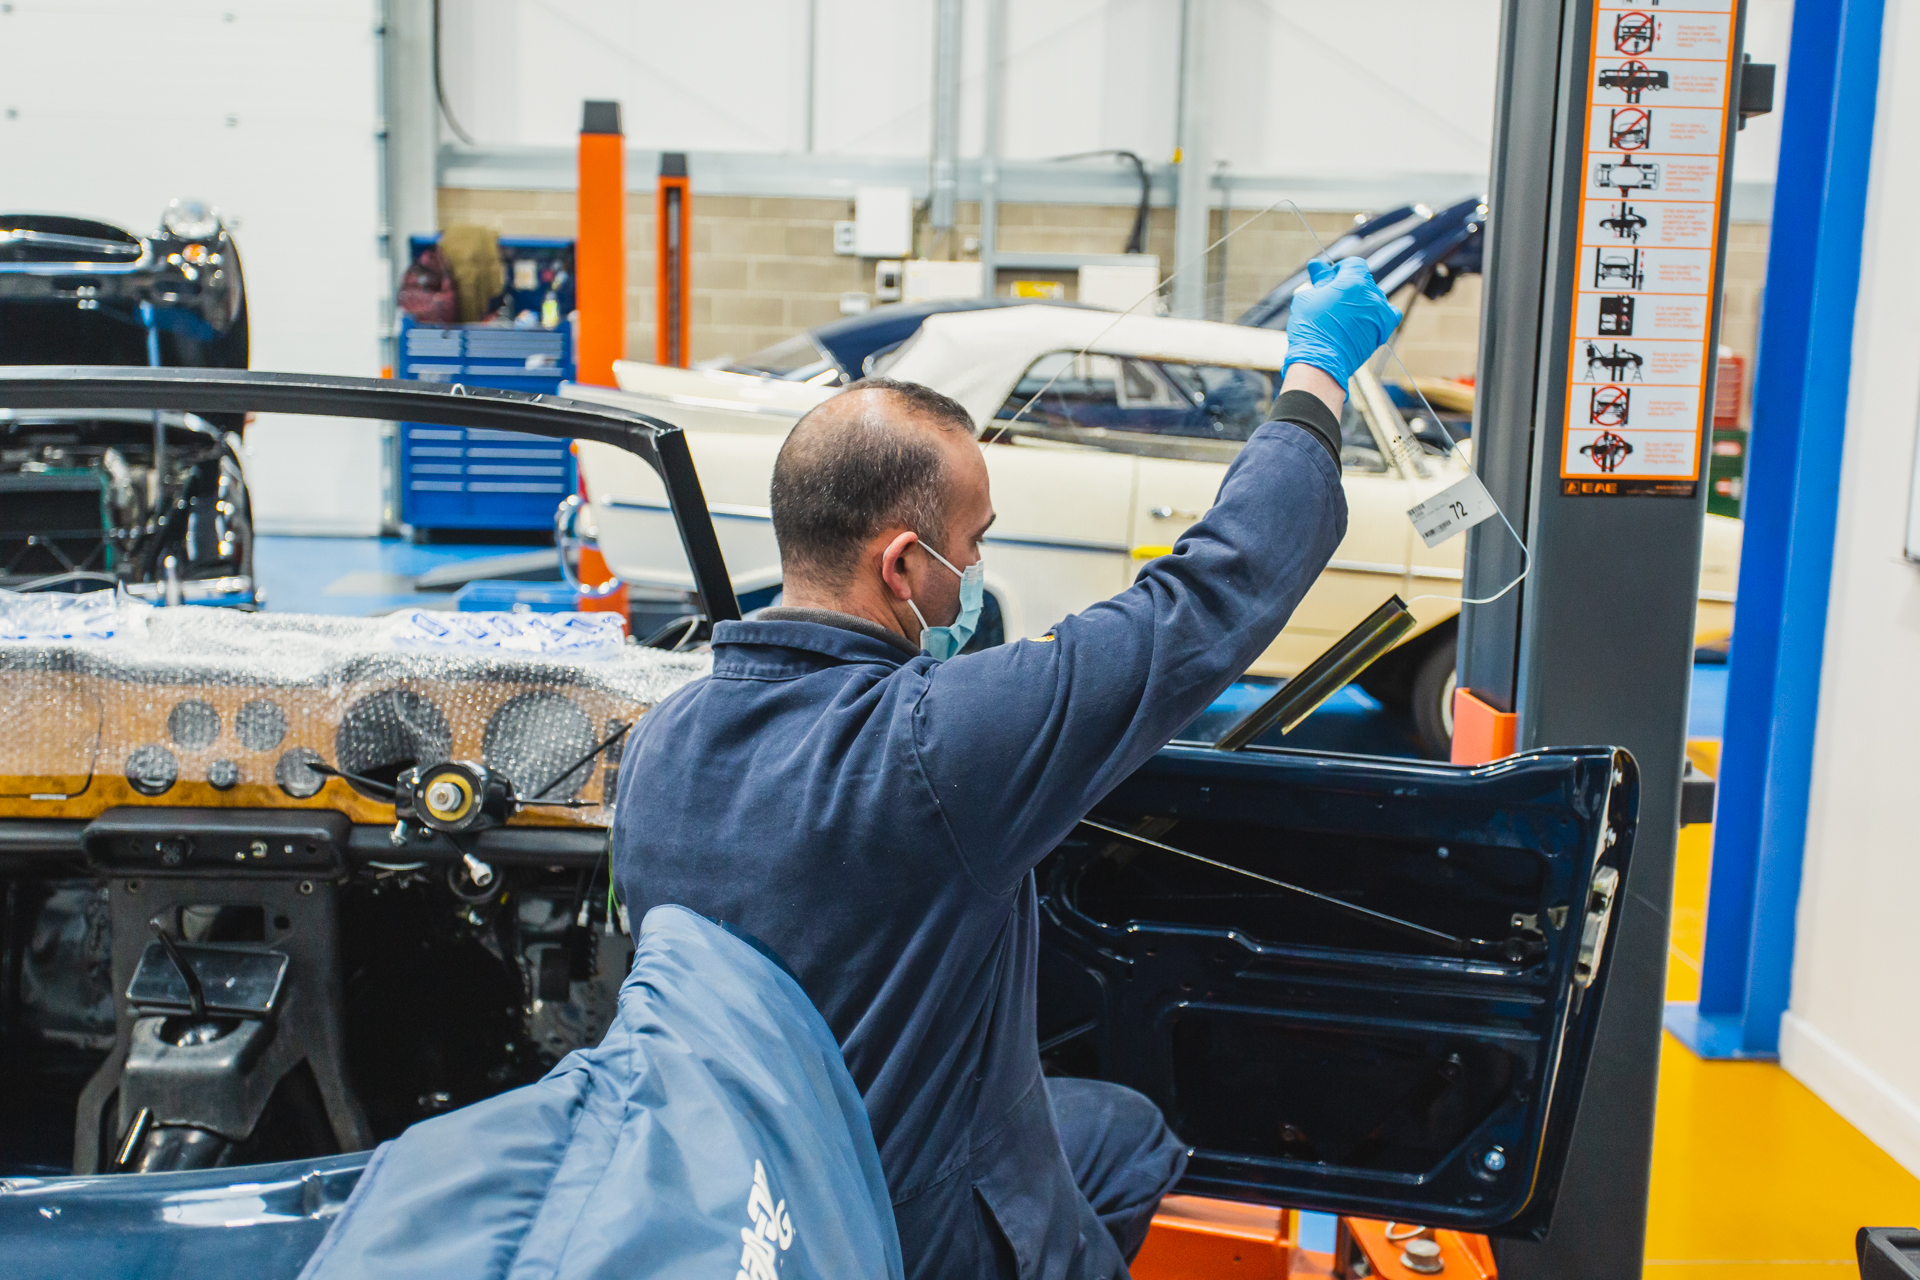
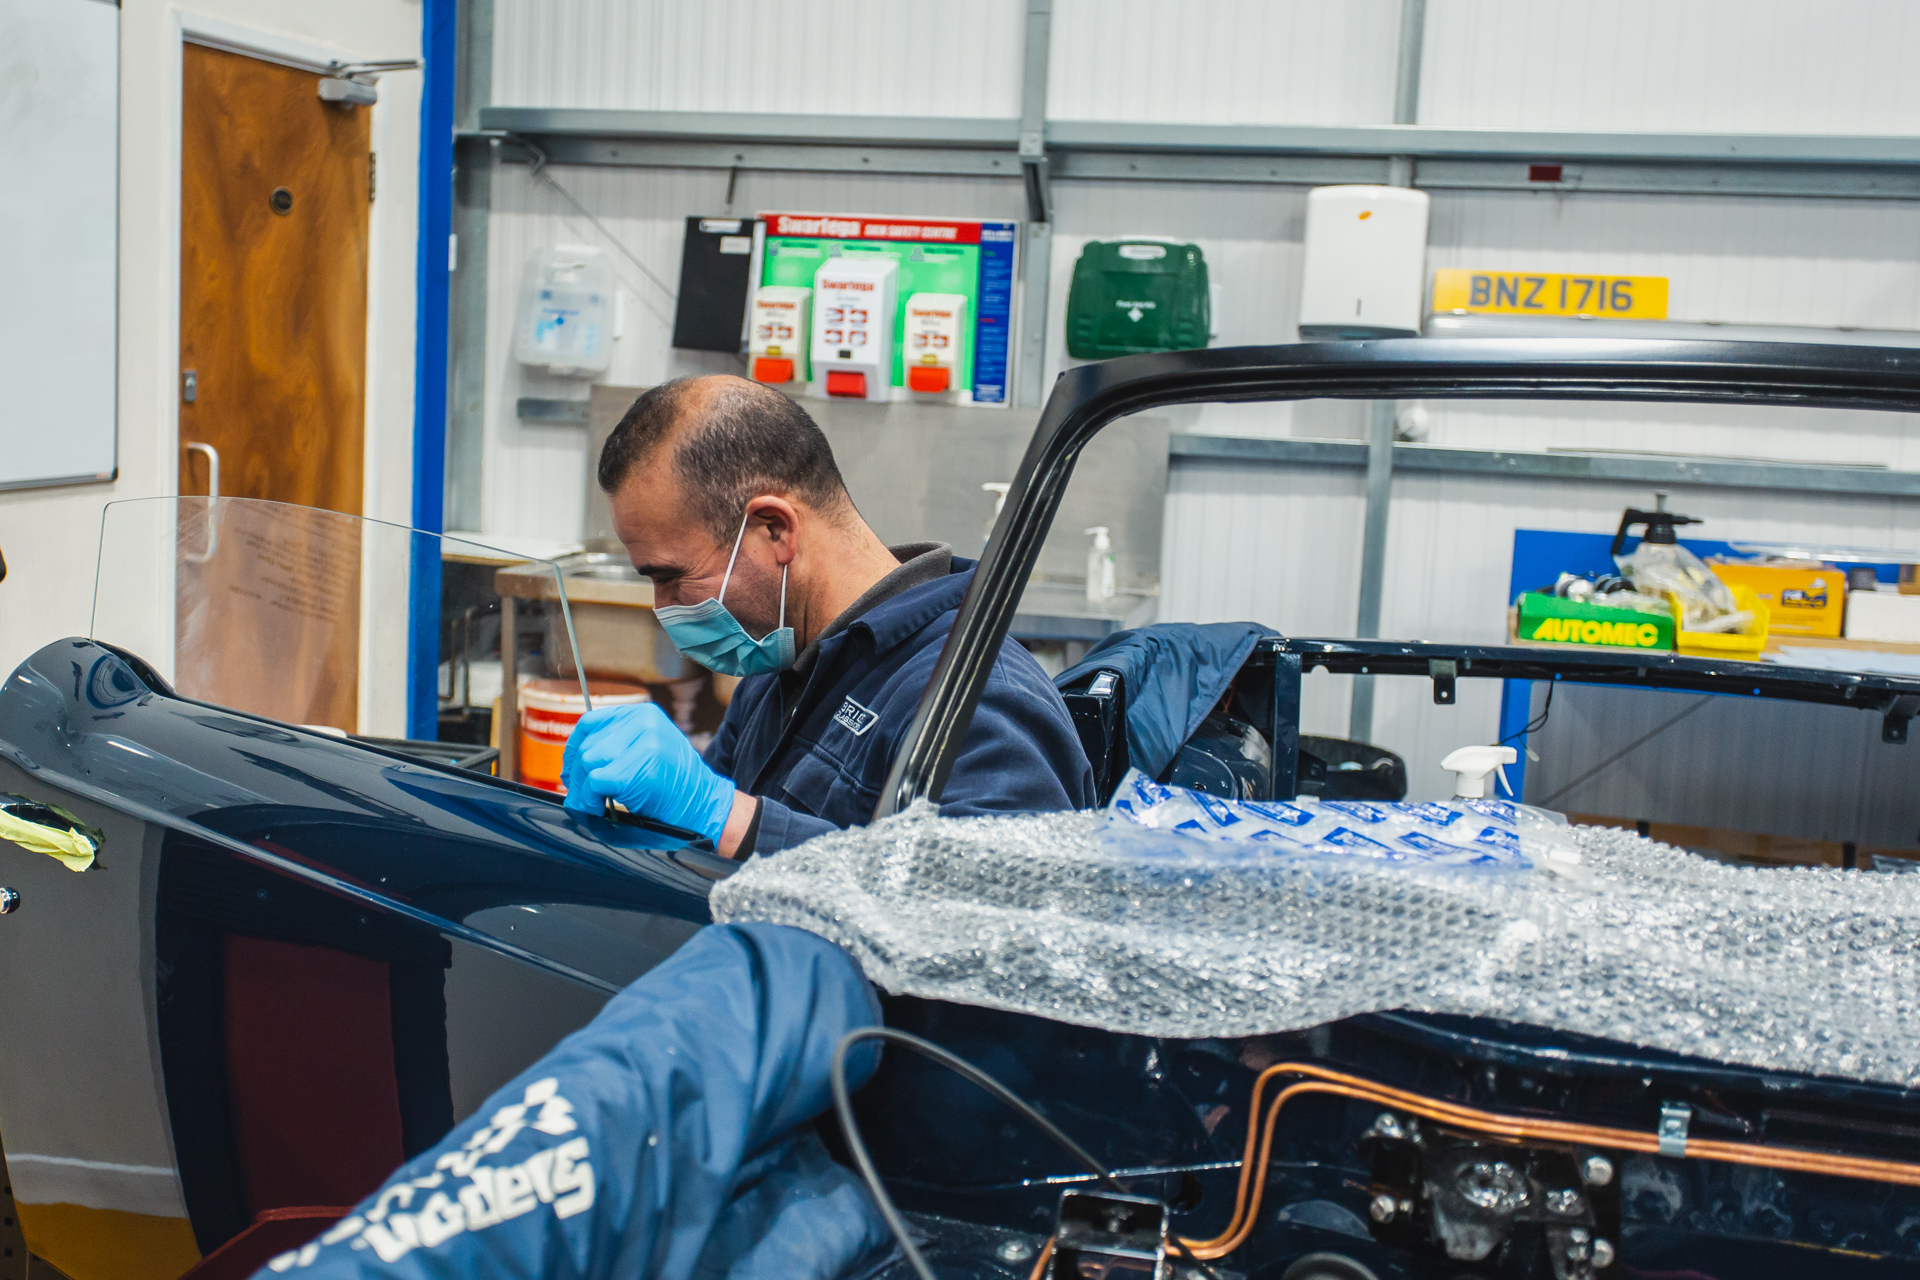
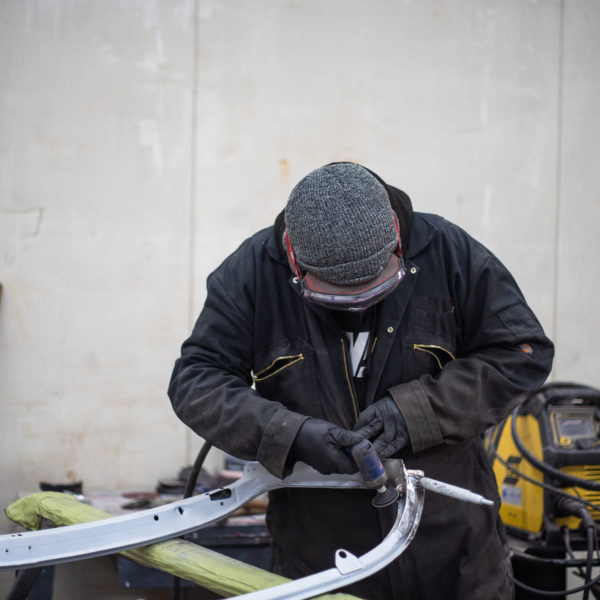
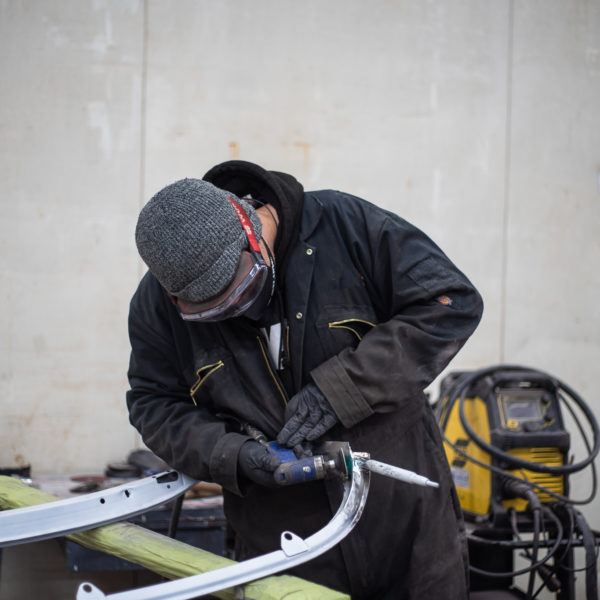
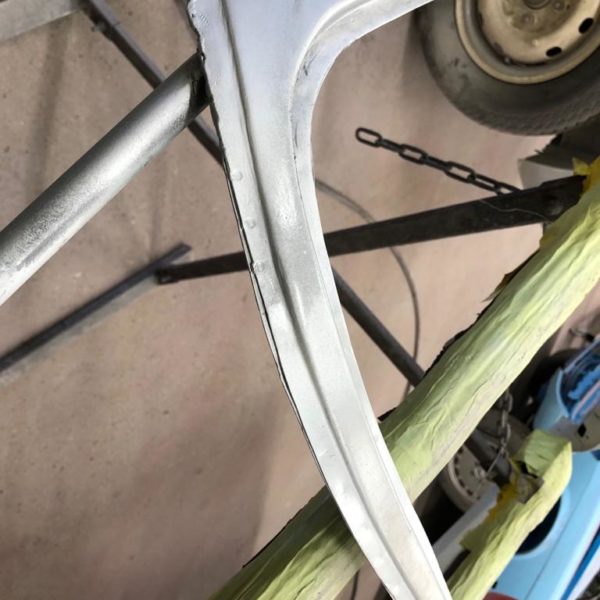
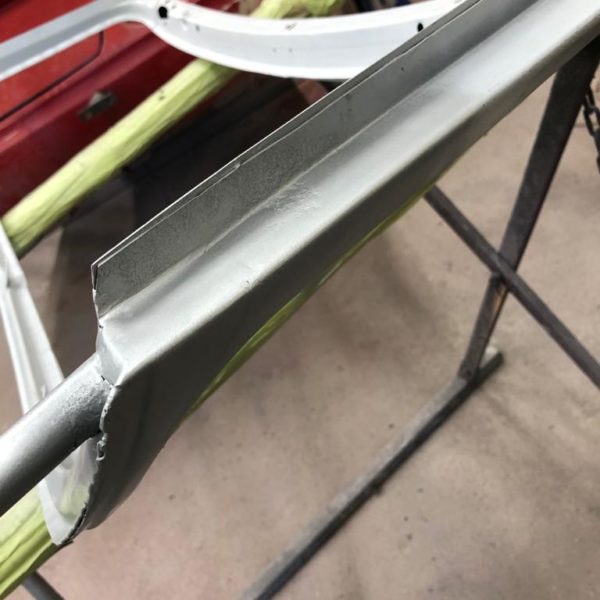
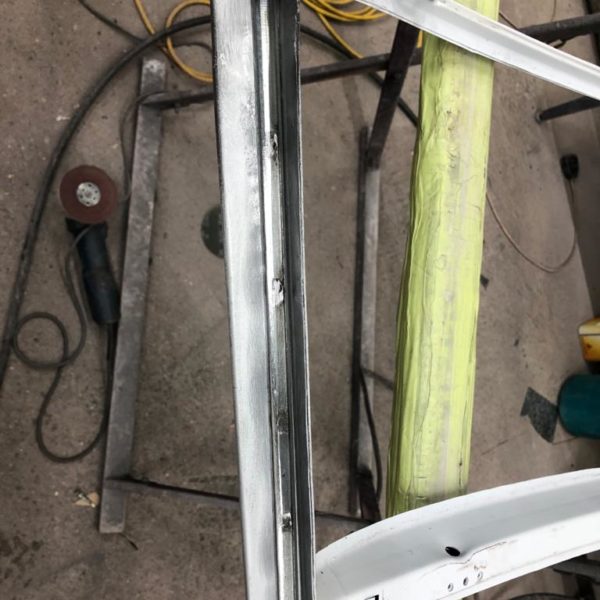
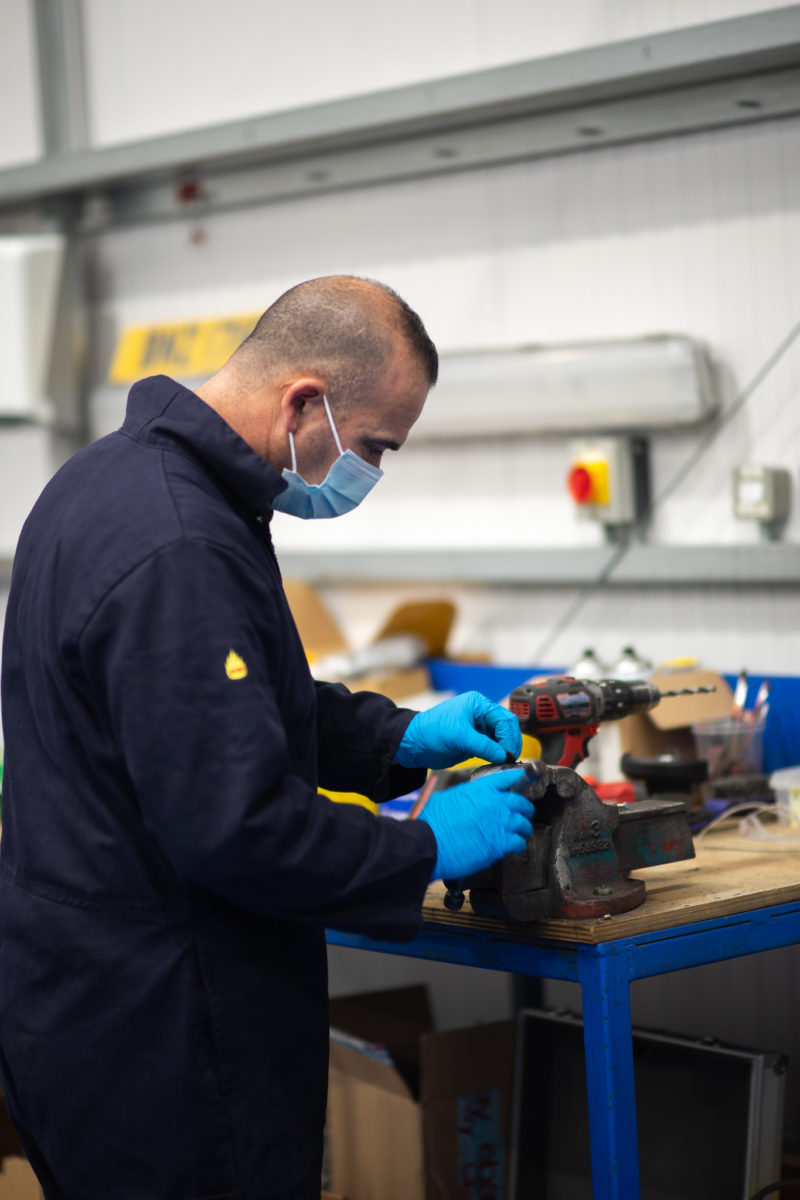
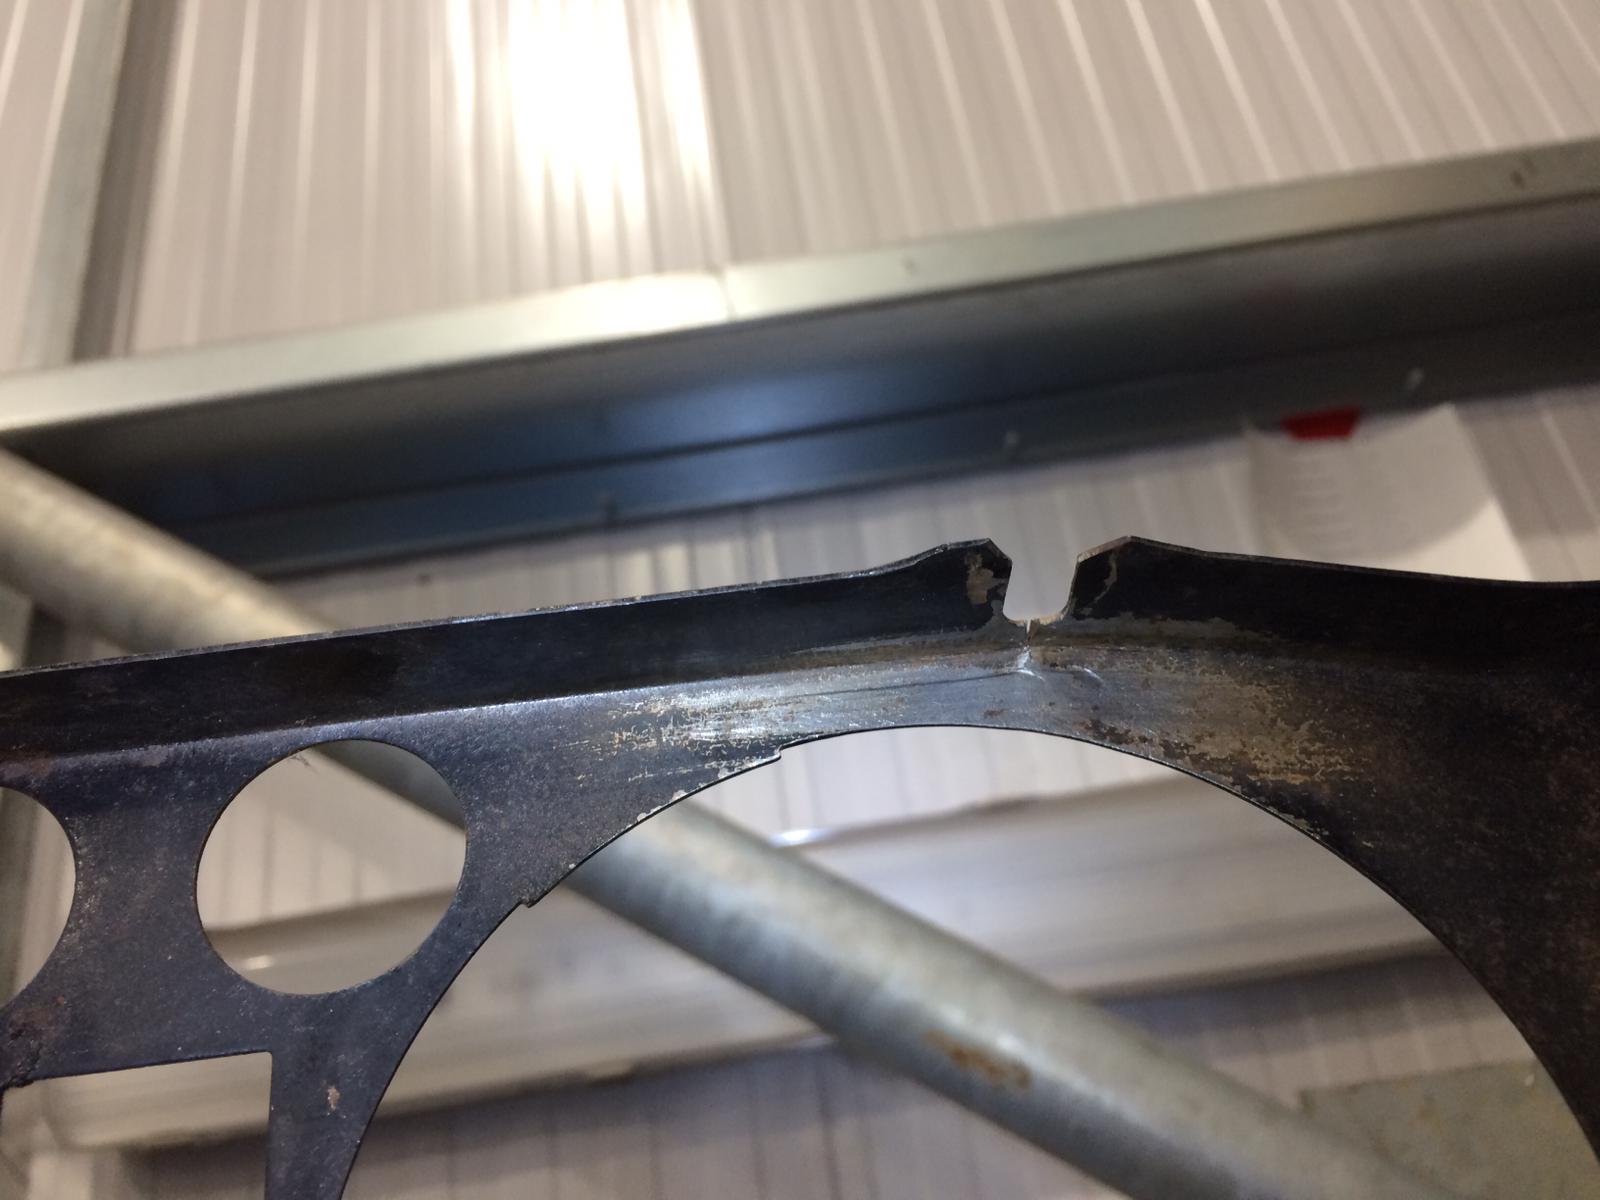
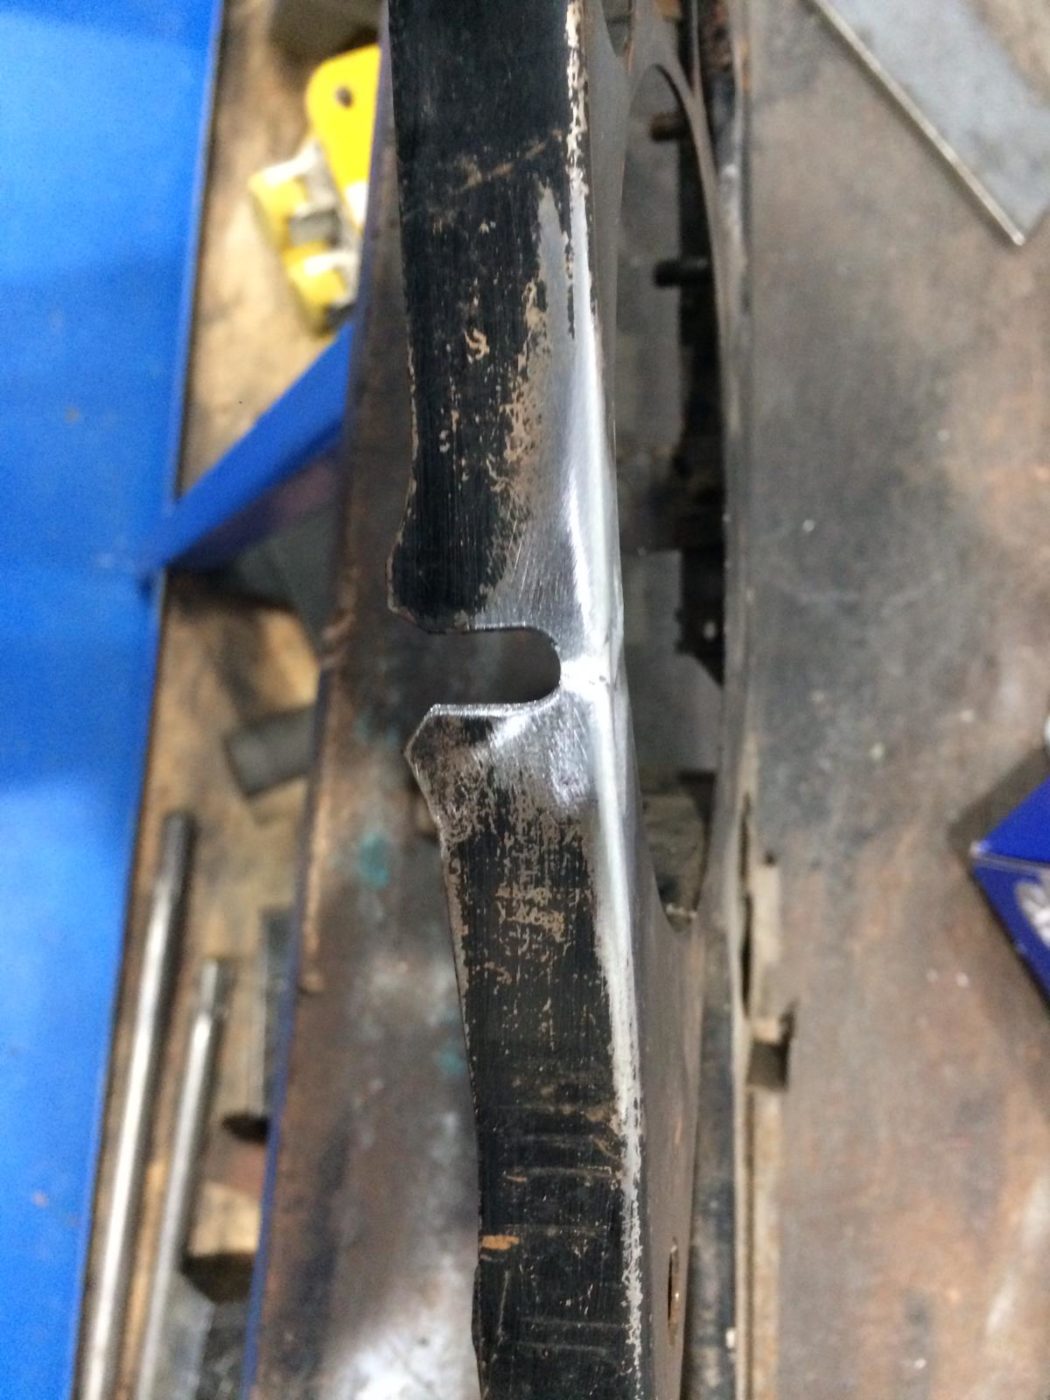
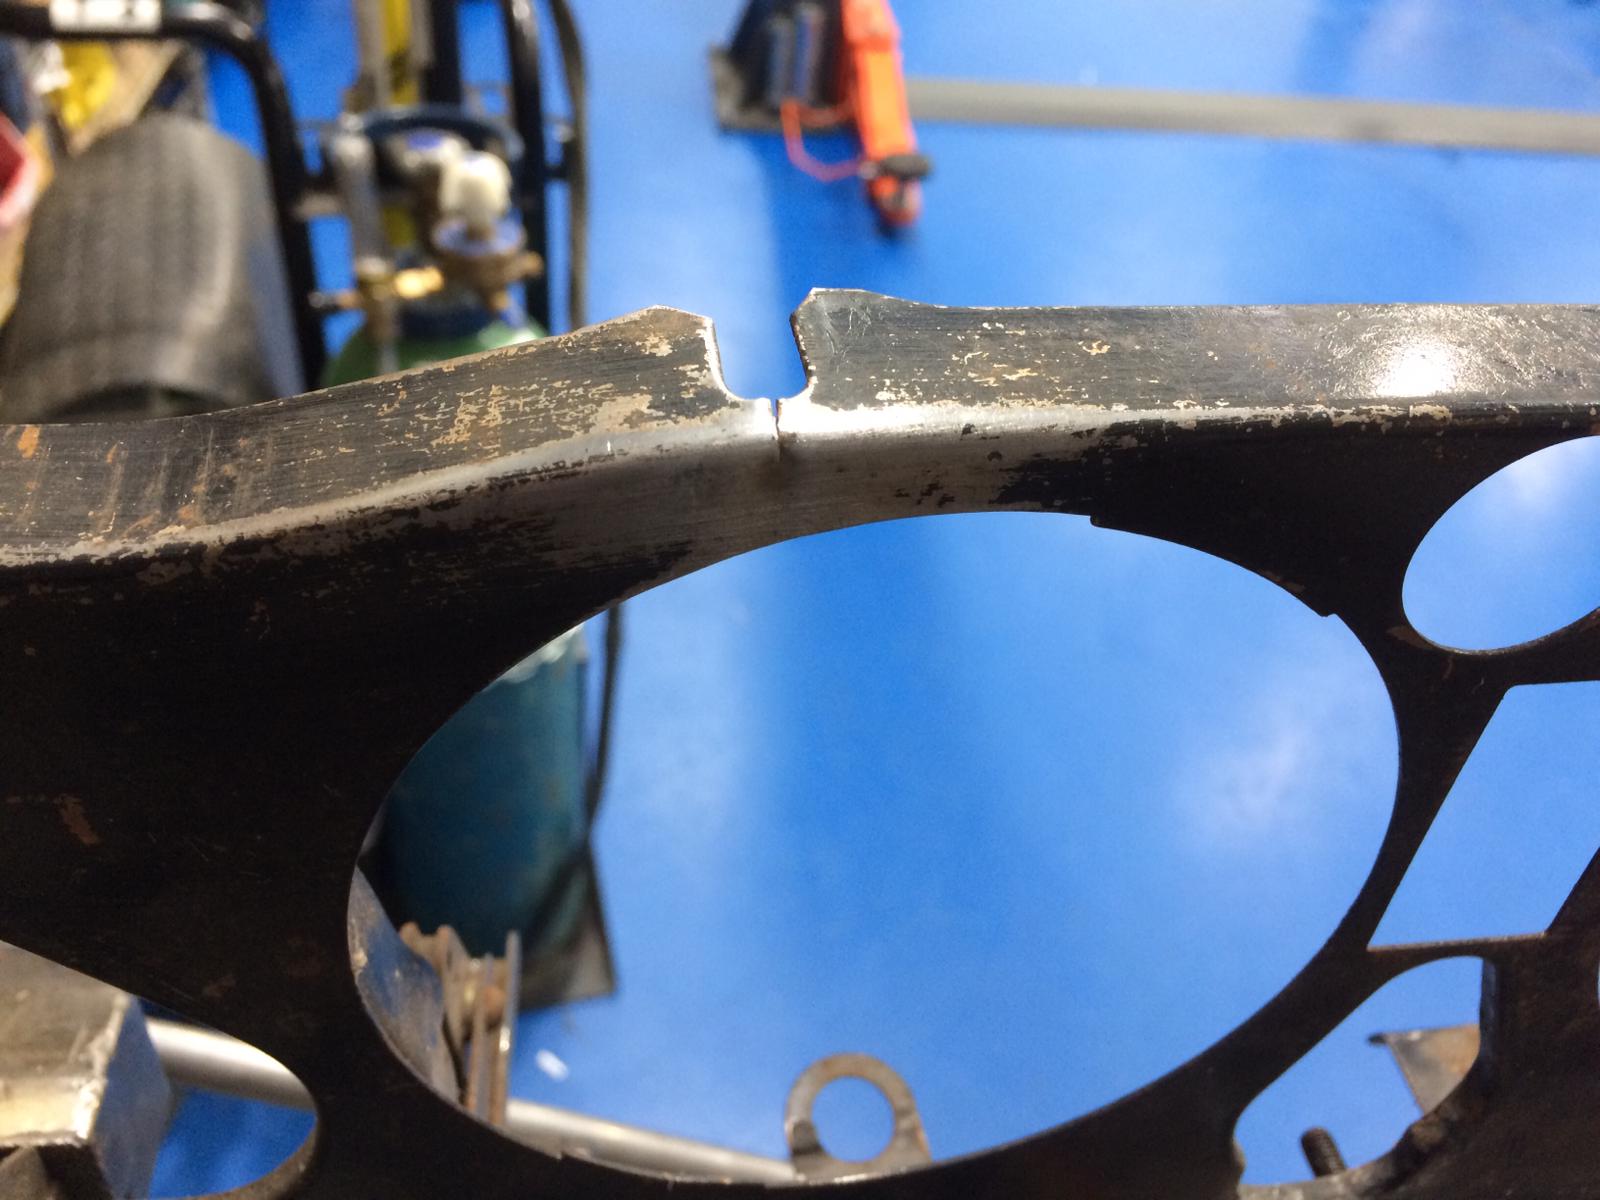
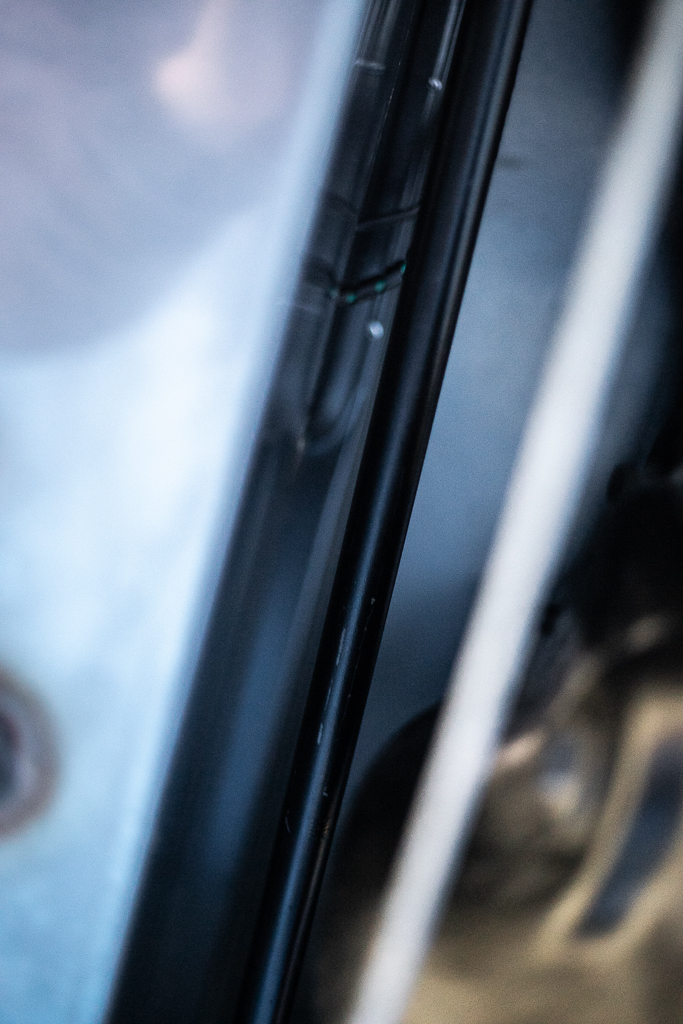
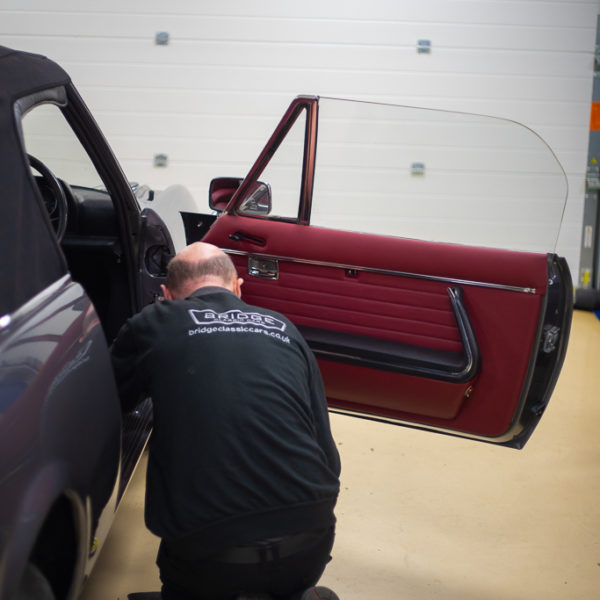
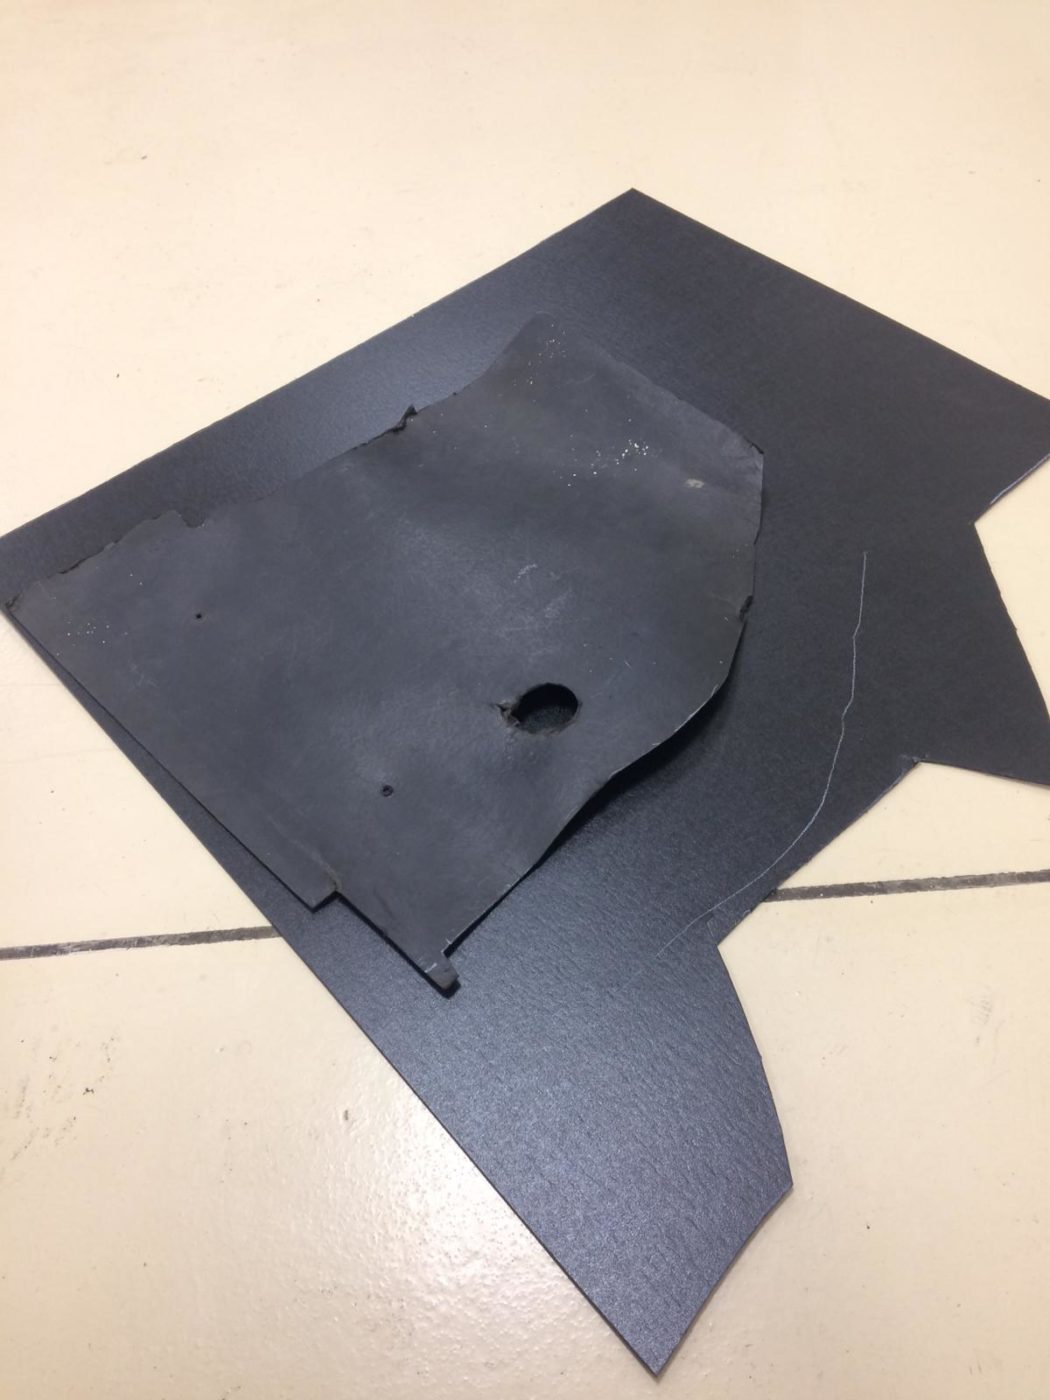
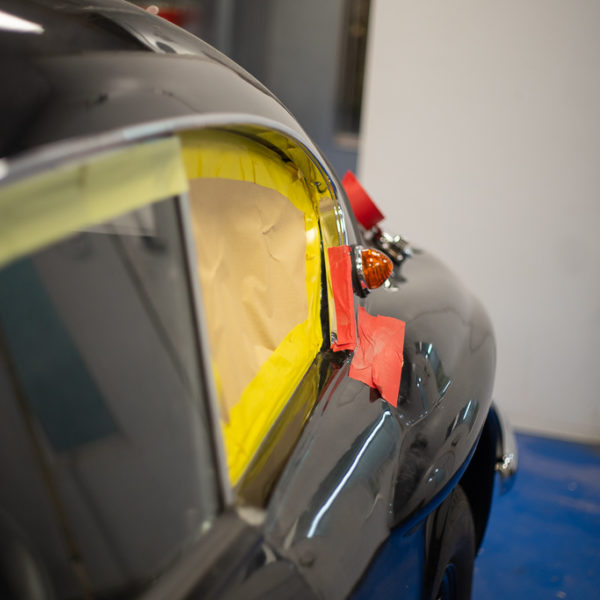
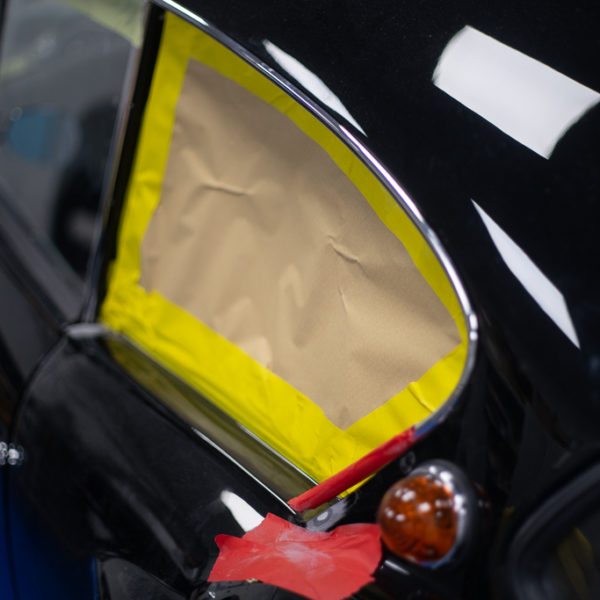
James has been working in the fabrication bay to prepare the Triumph TR5’s windscreen. The front screen surround frame has corroded in the lower right-hand corner. He did this by cutting out the old rusty metal and old fibreglass to then fabricate and repair those sections. James cut away the rusty metal and replaced sections by applying a new coat of Zinc spray in place to protect inside the frame in the future. After applying the zinc spray, James welded the replacement in place, he then grinds, cleans and spot welds it all back together. The last step is to replace the metal channel that holds the sealing rubber.
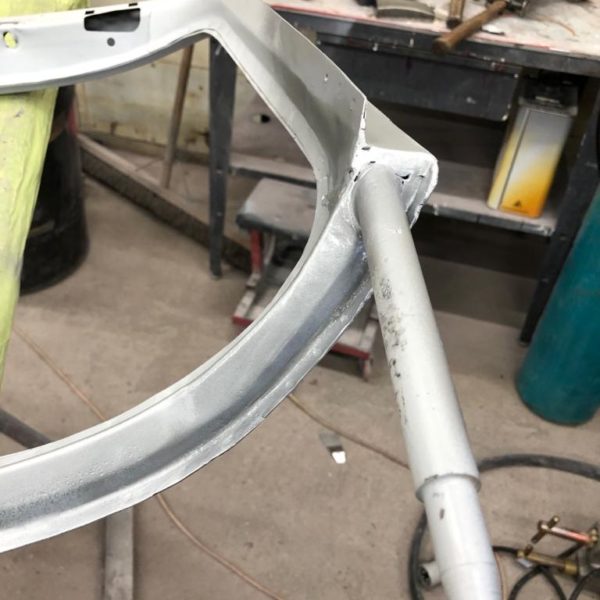
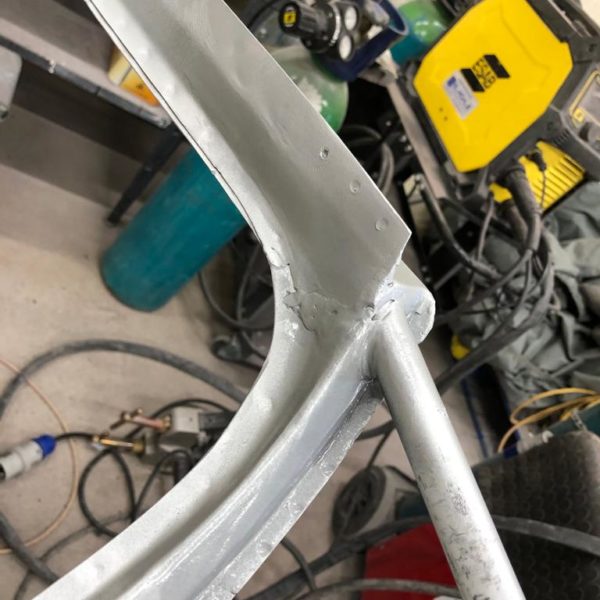
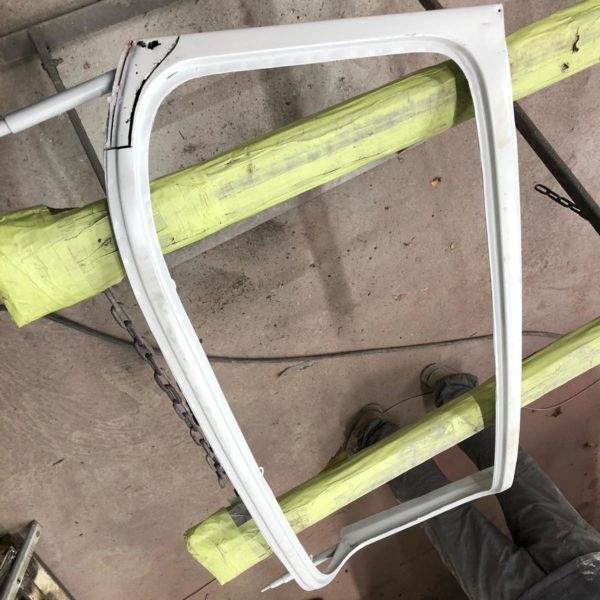
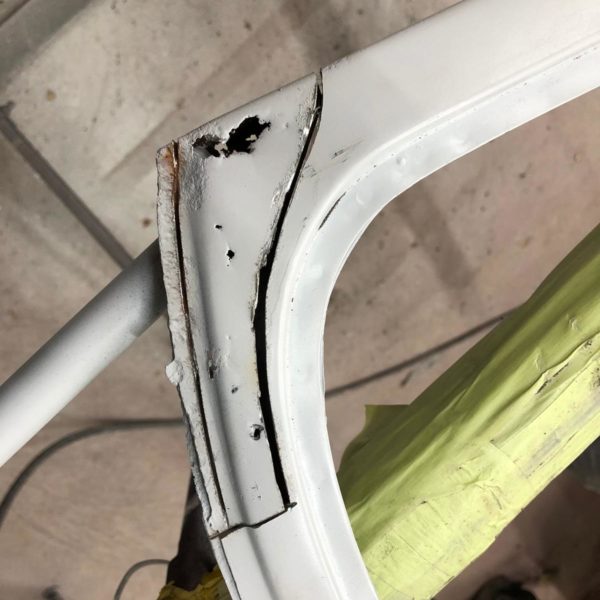
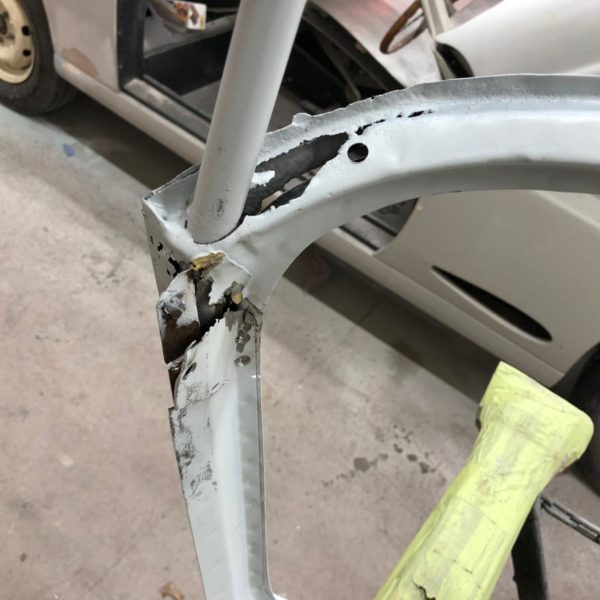
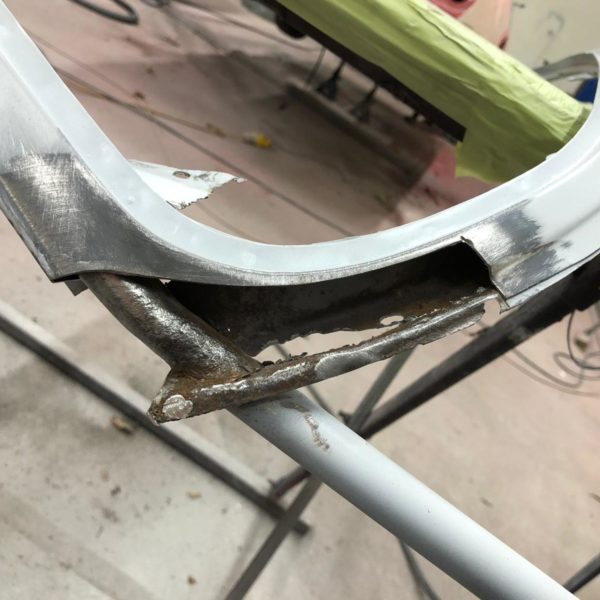
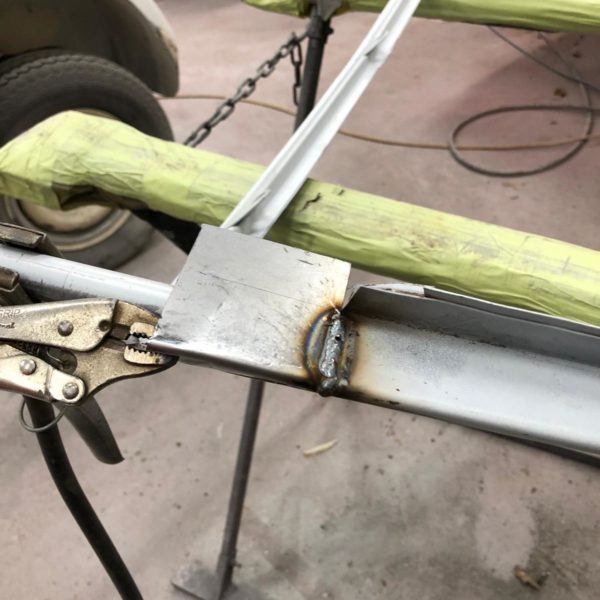
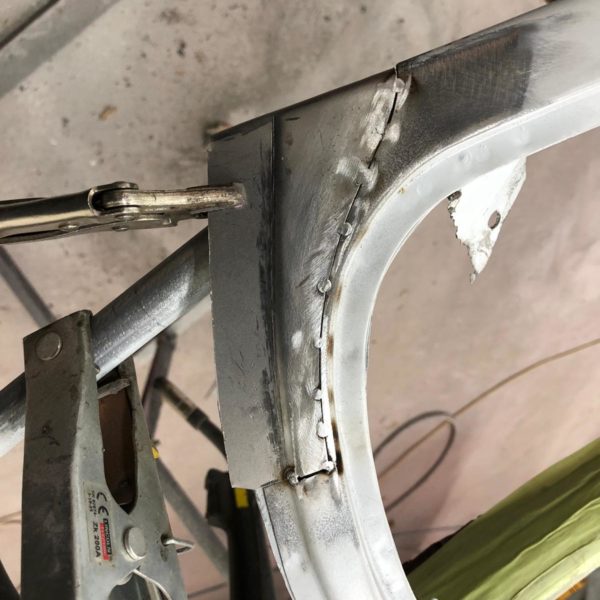
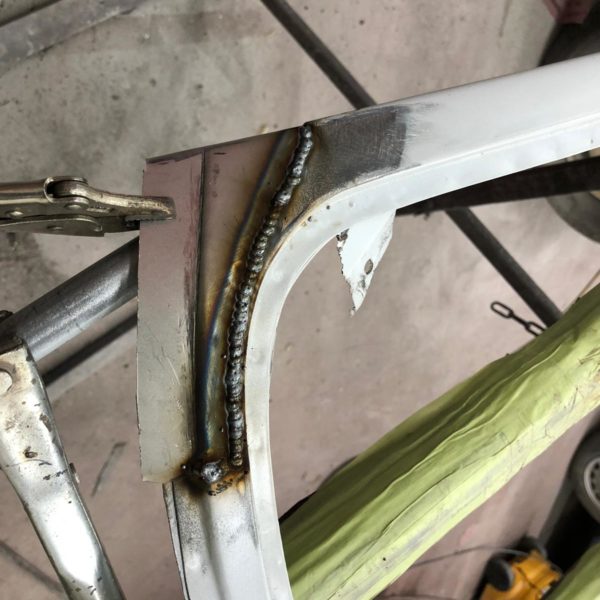
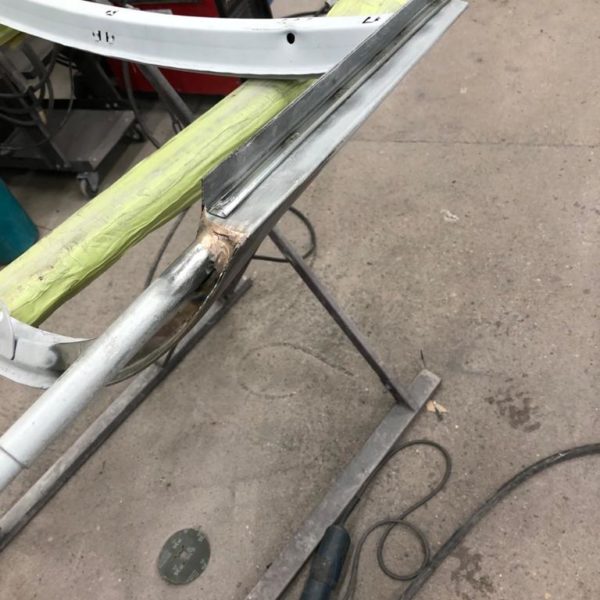

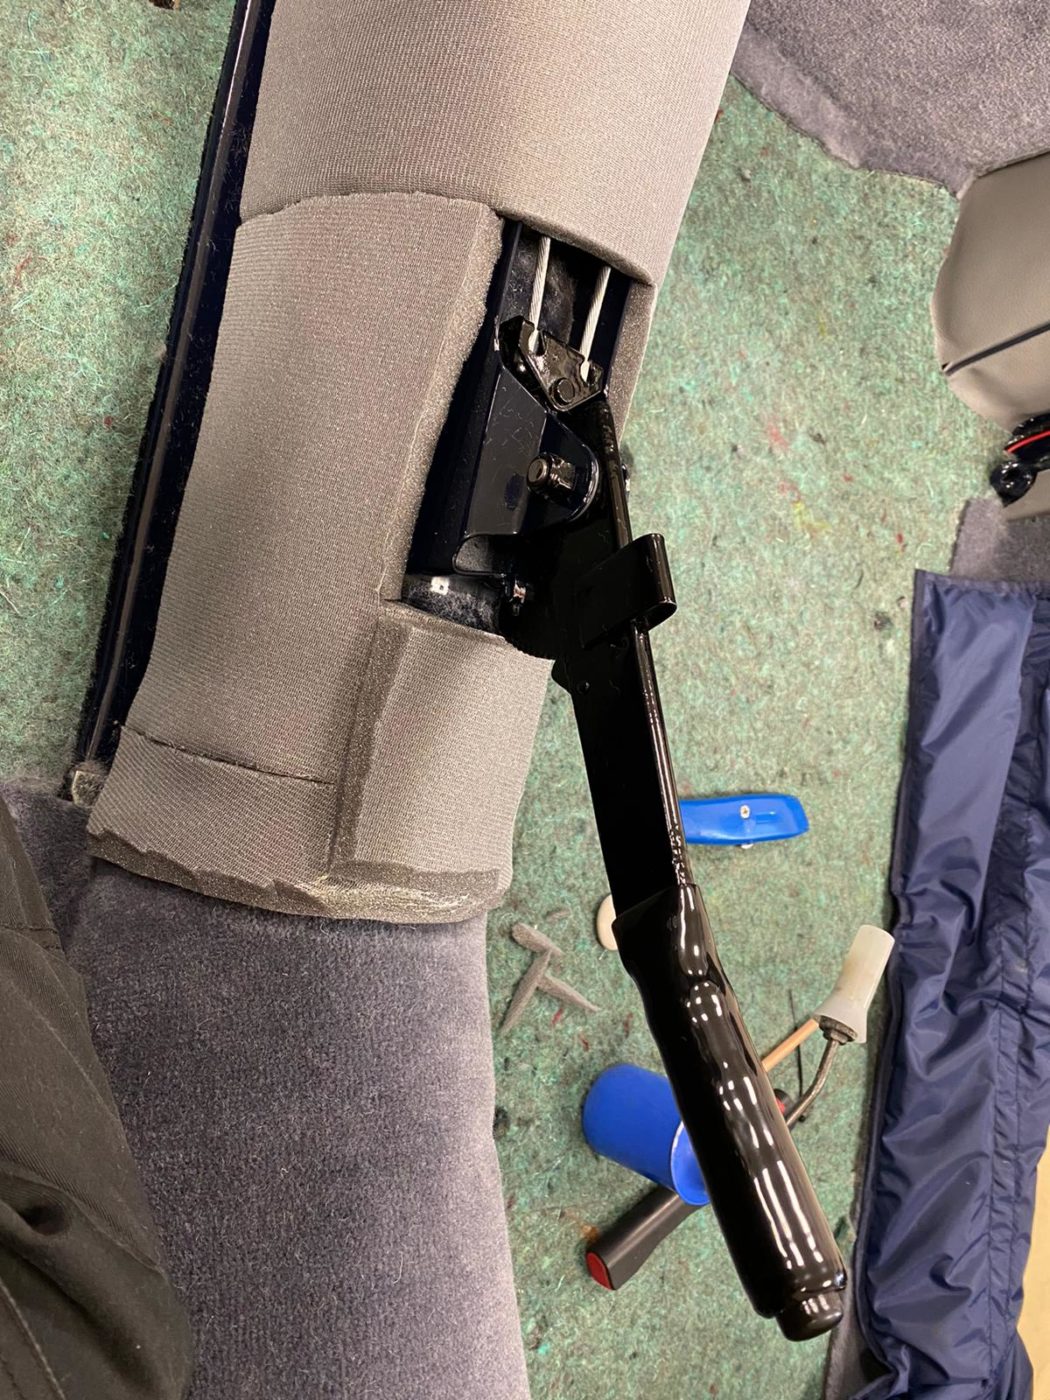
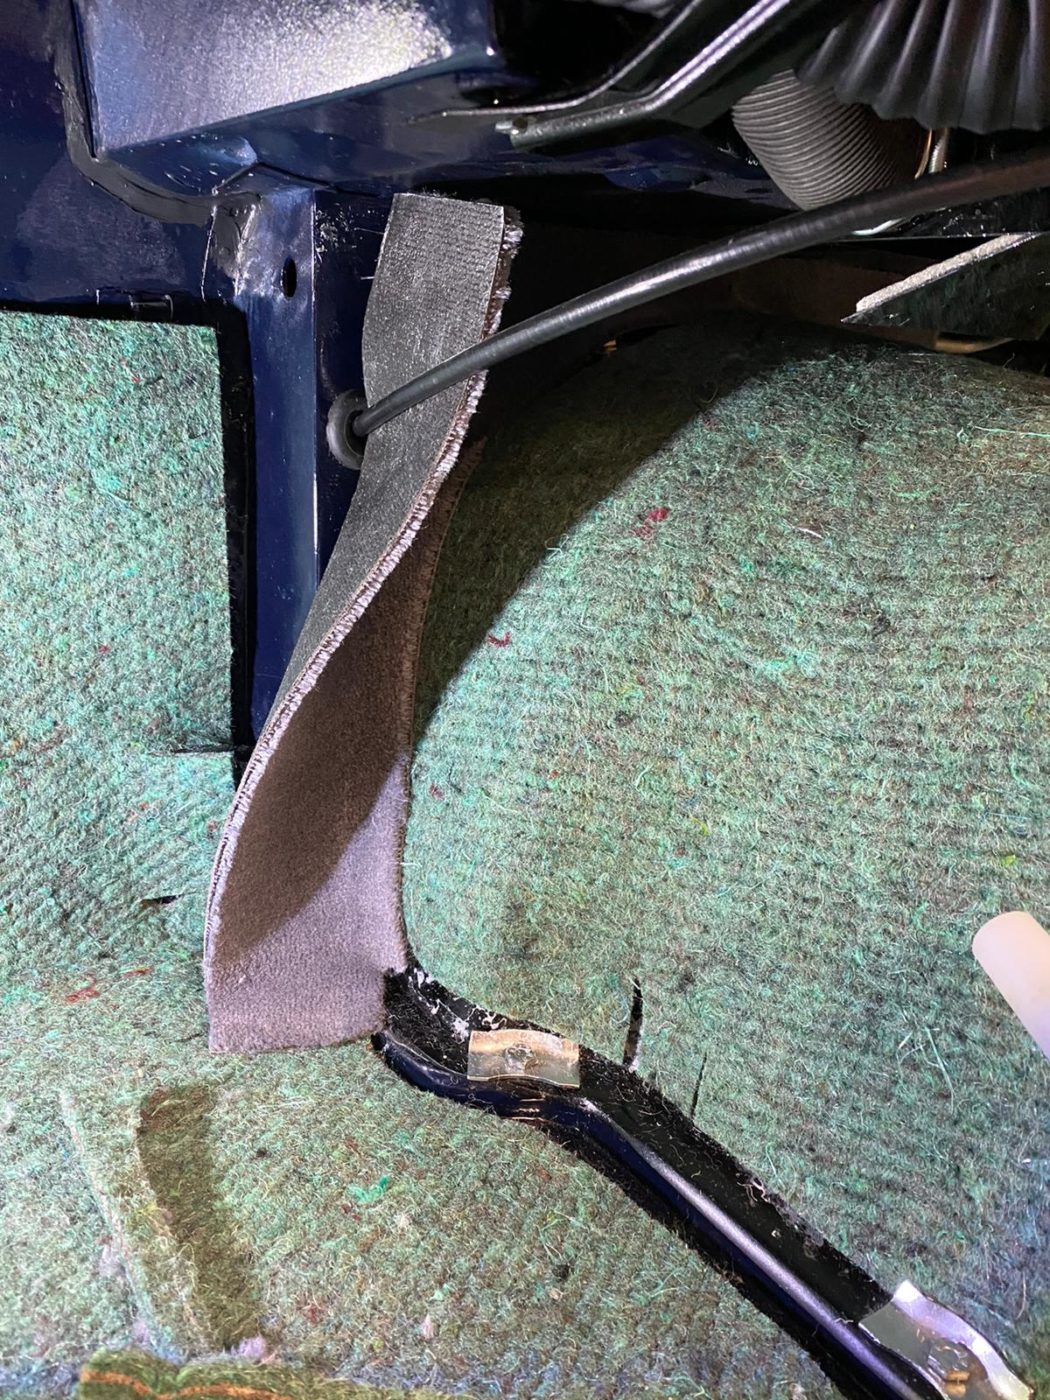
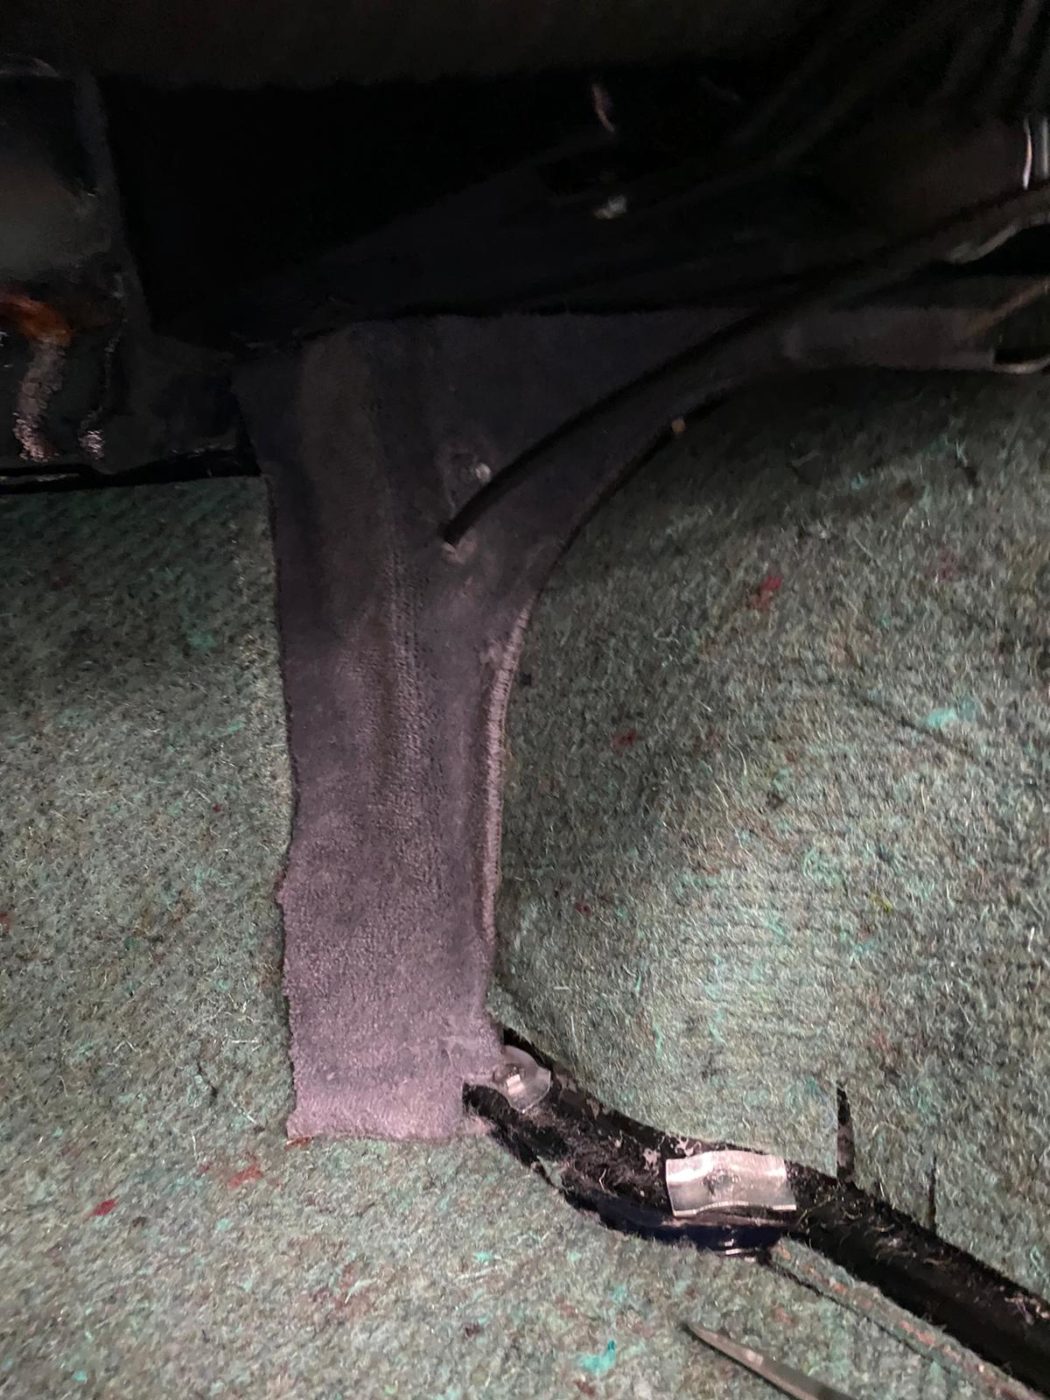
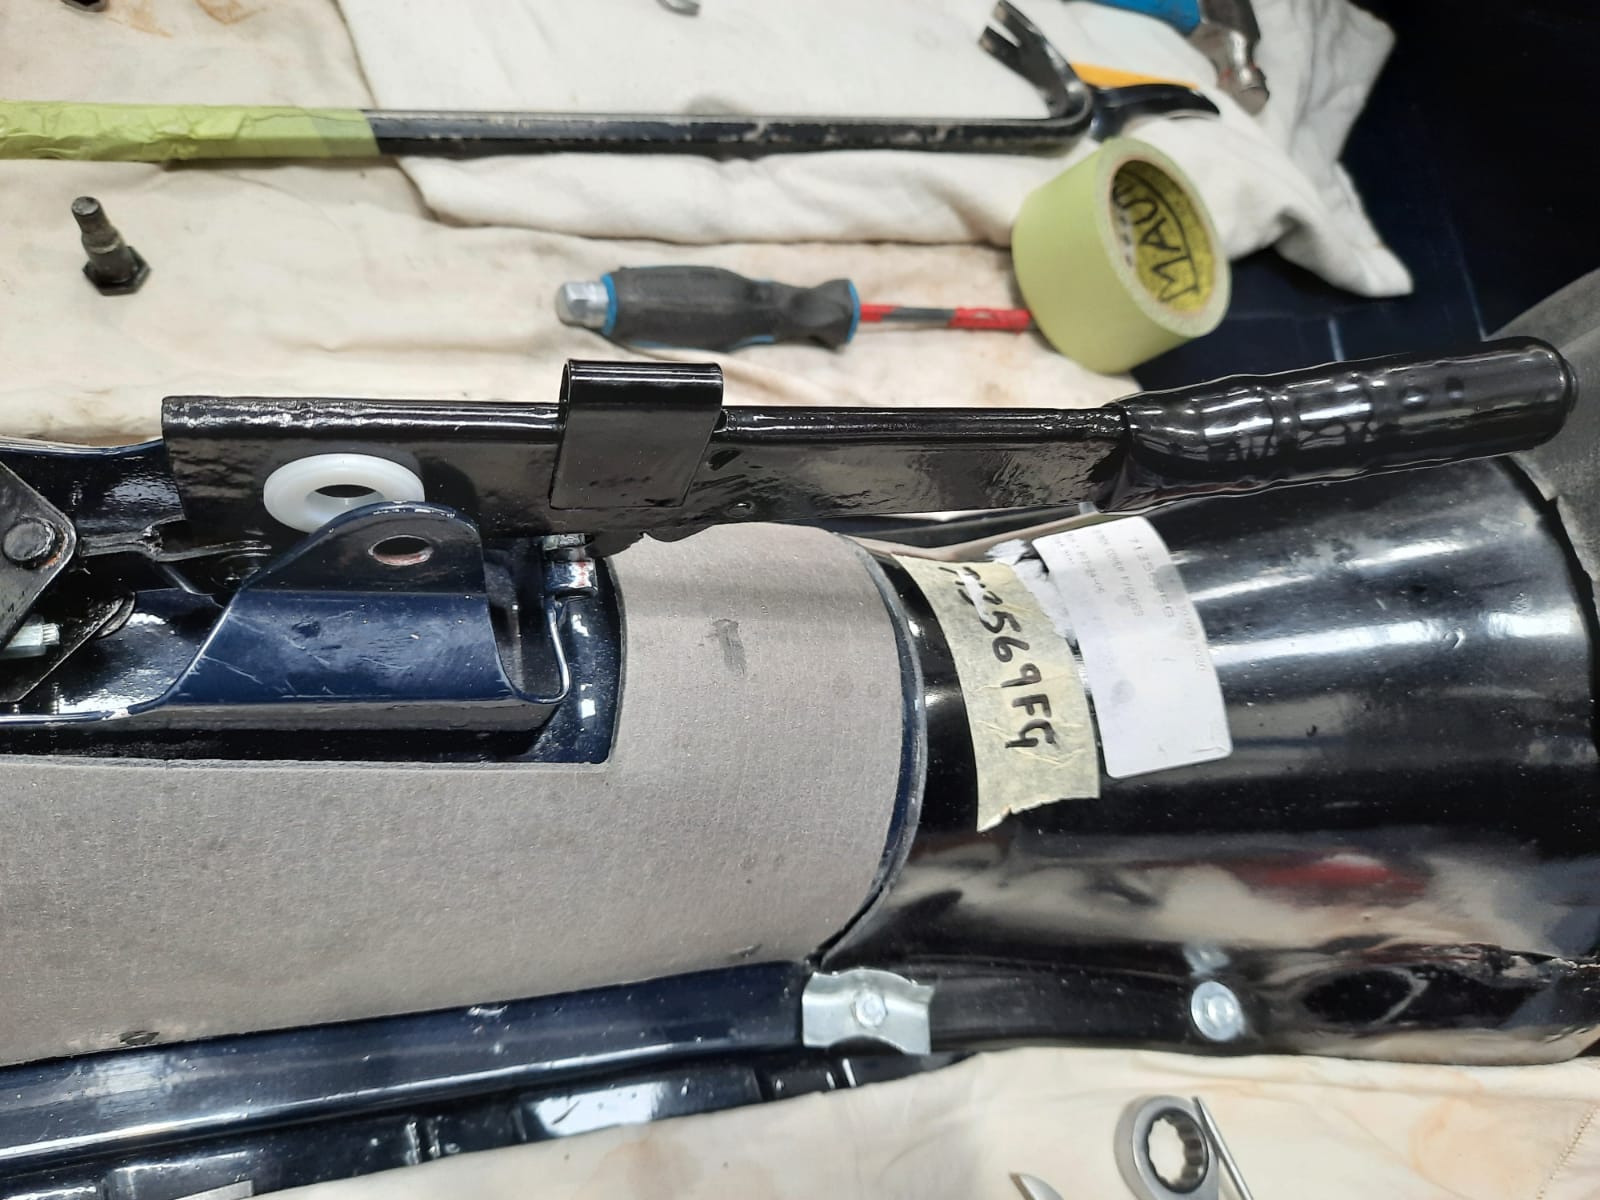
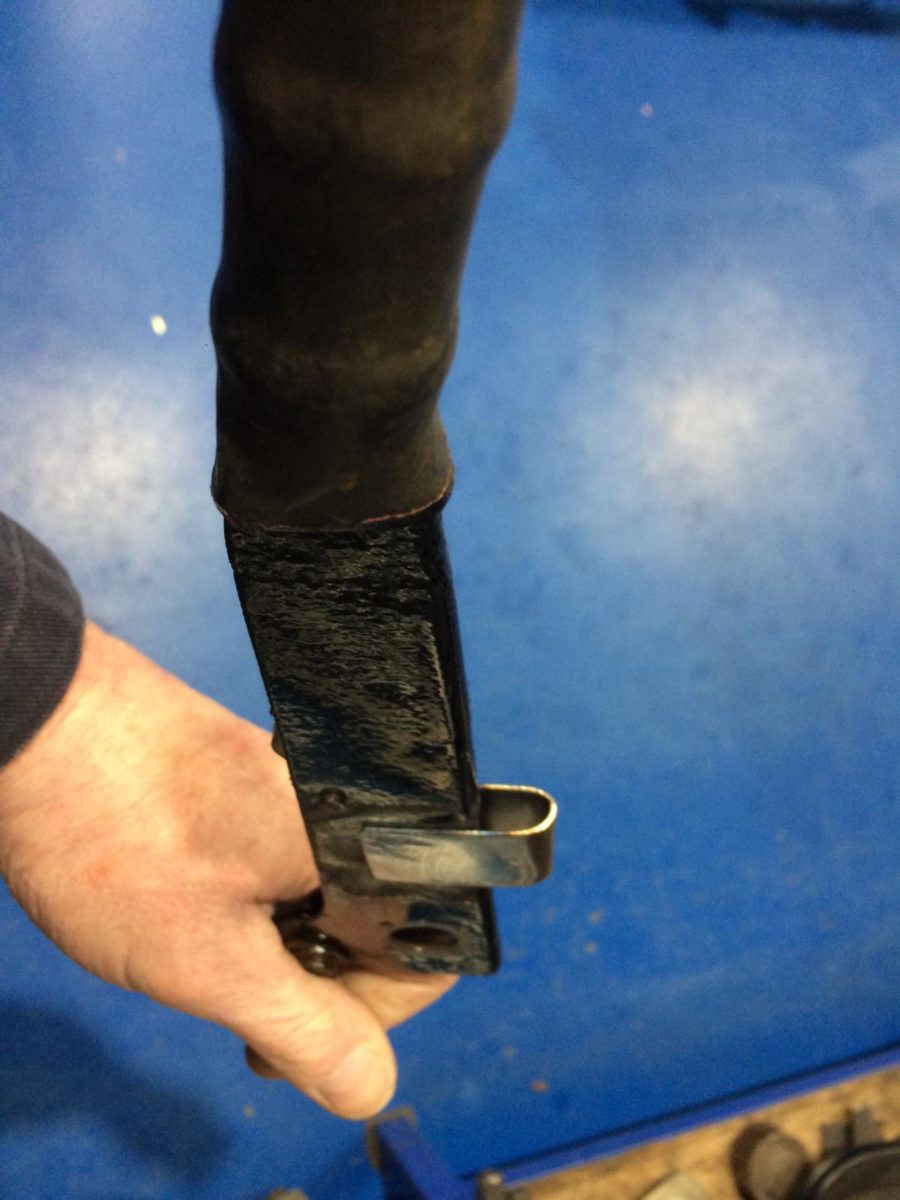
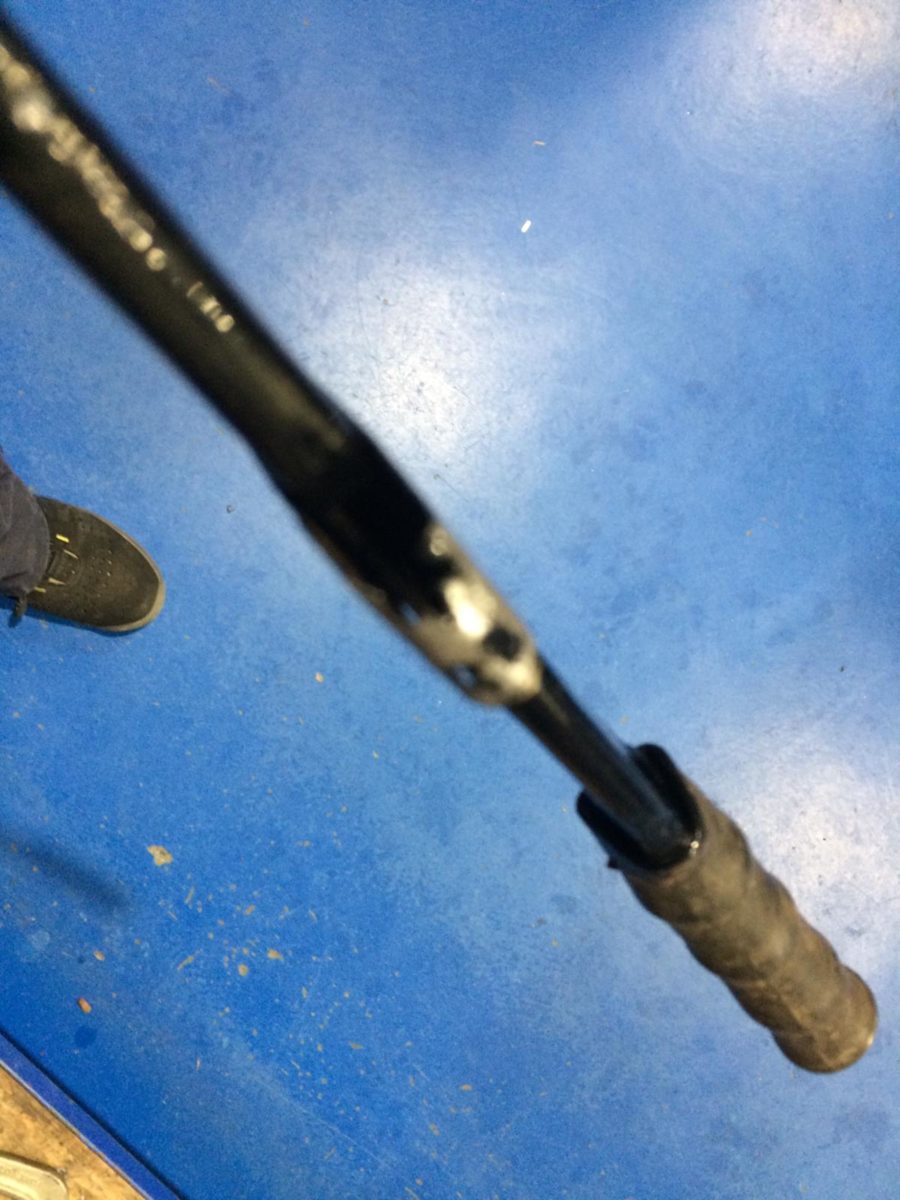
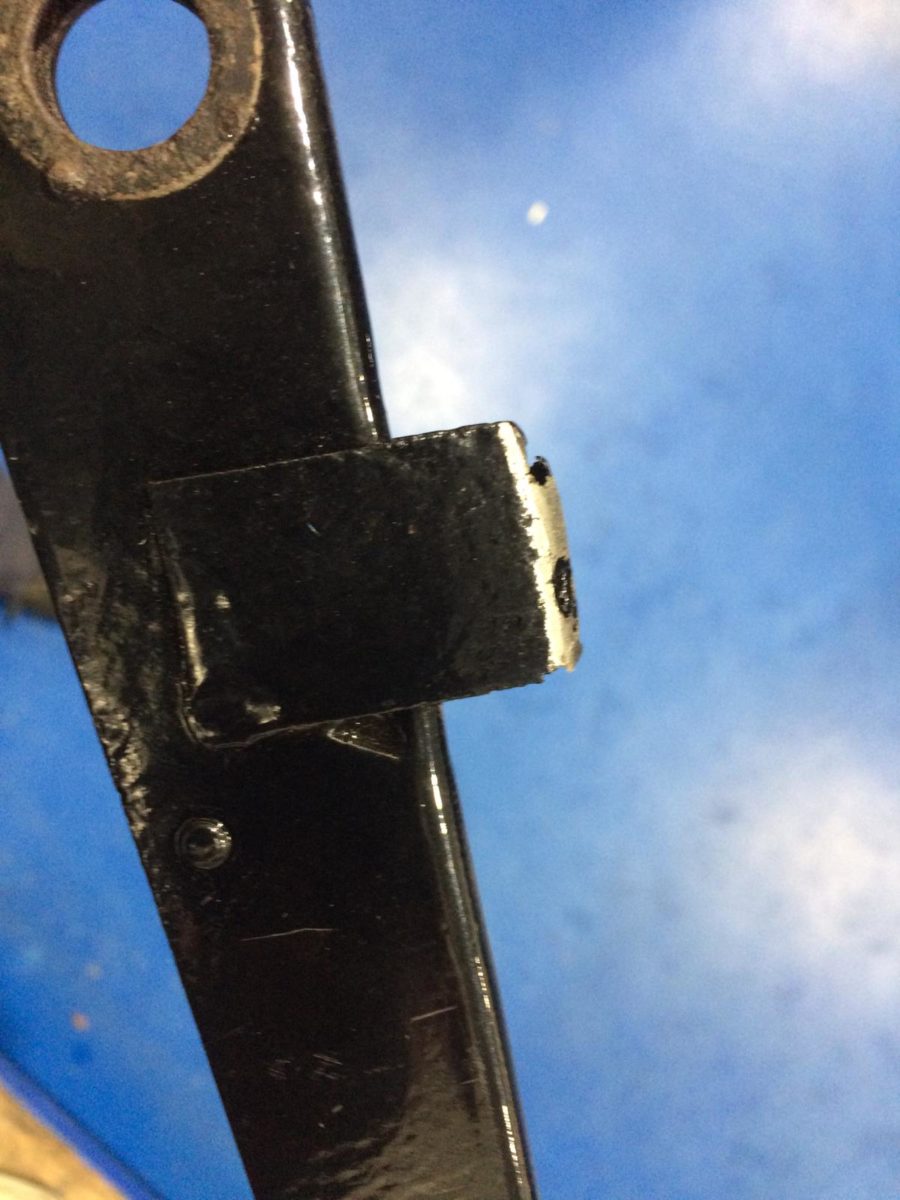
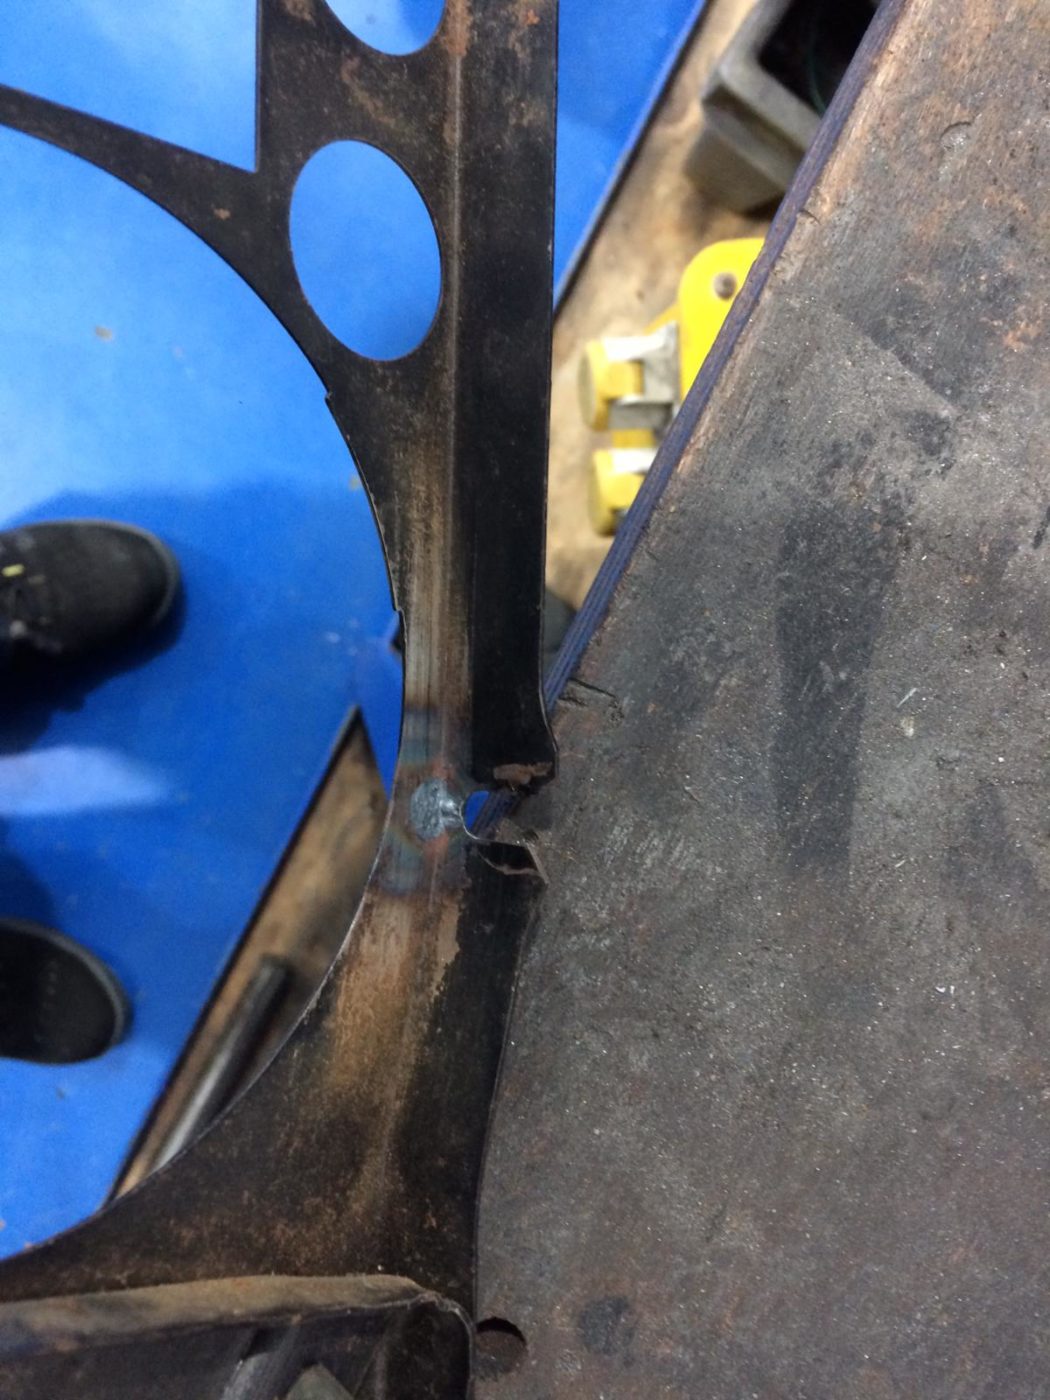
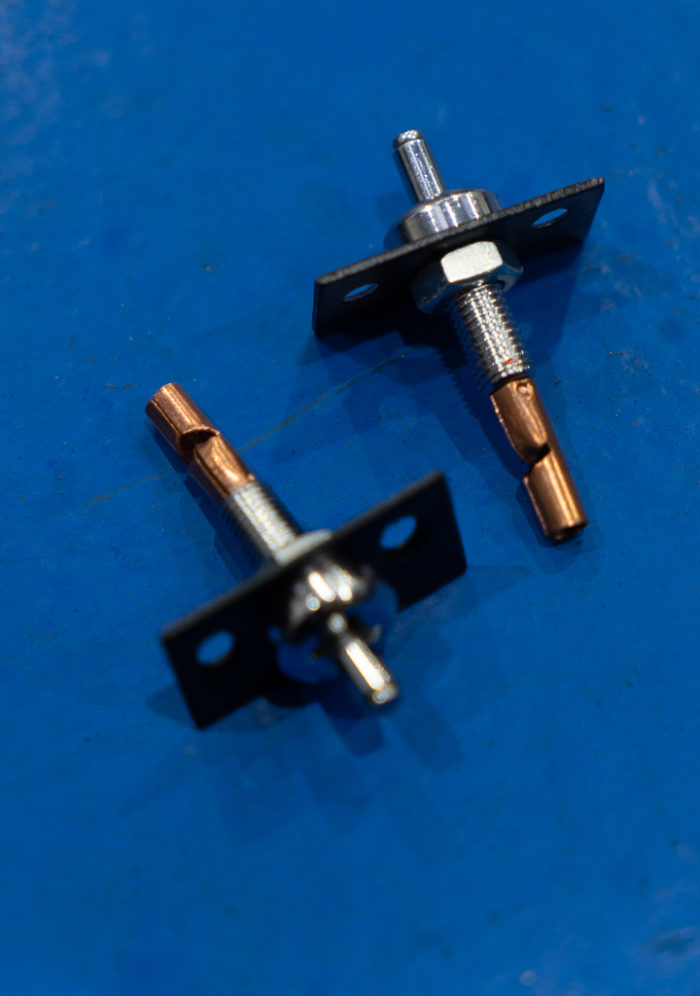
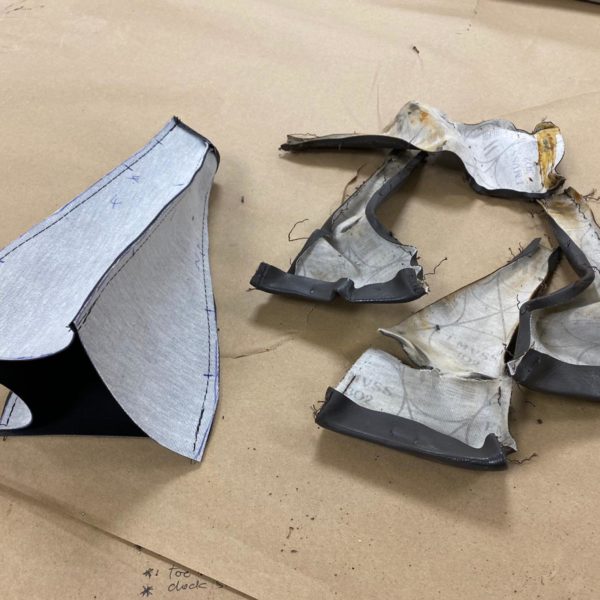
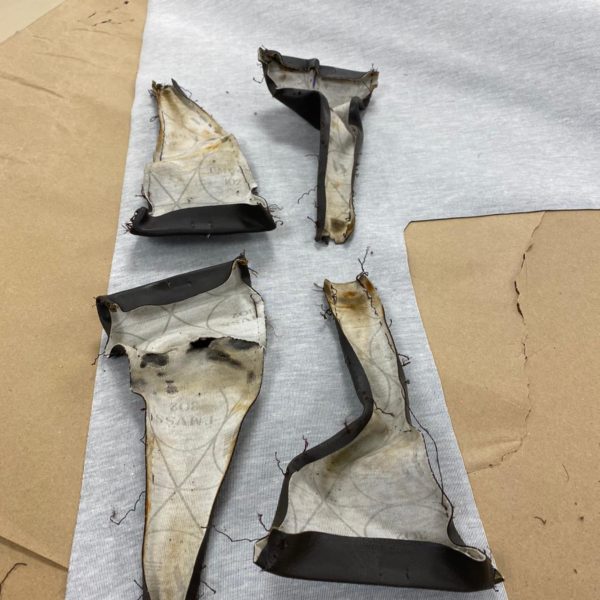
We’ve also fixed the TR5 handbrake by welding in a replacement metal component as seen in the images below.

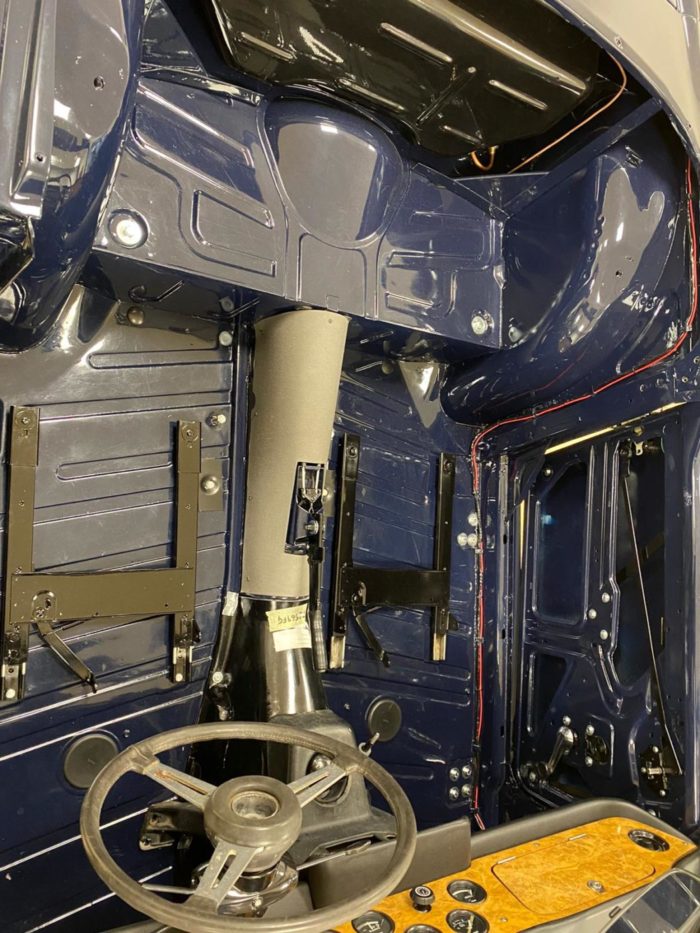
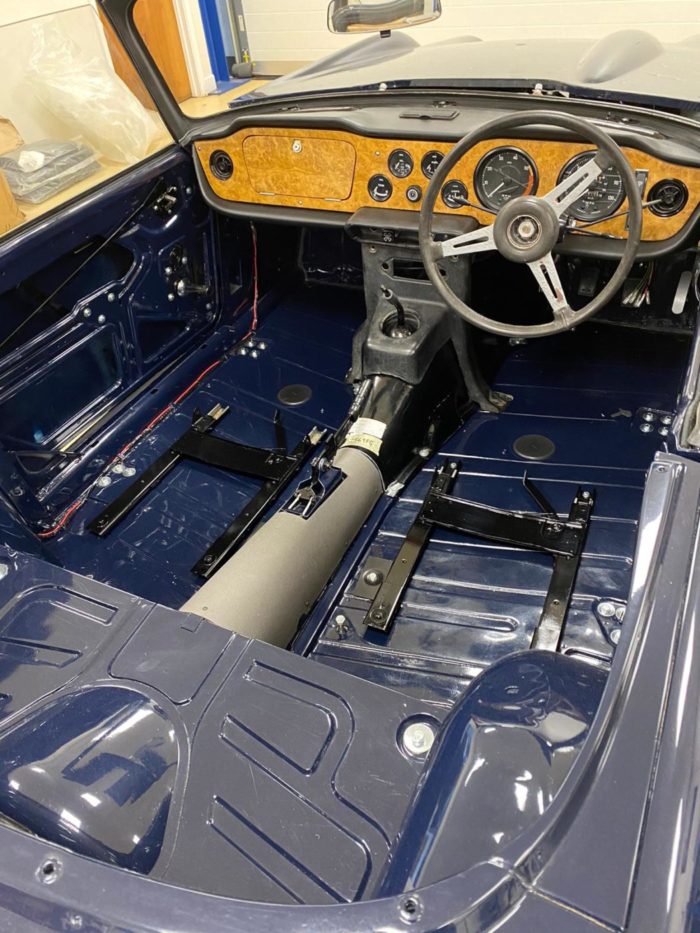
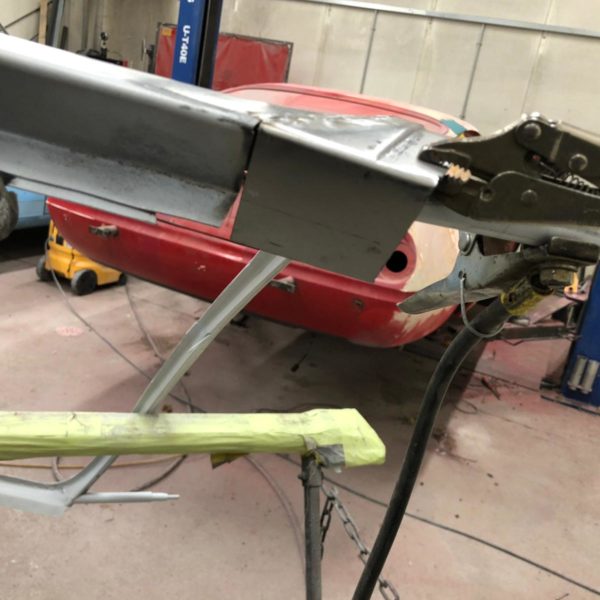
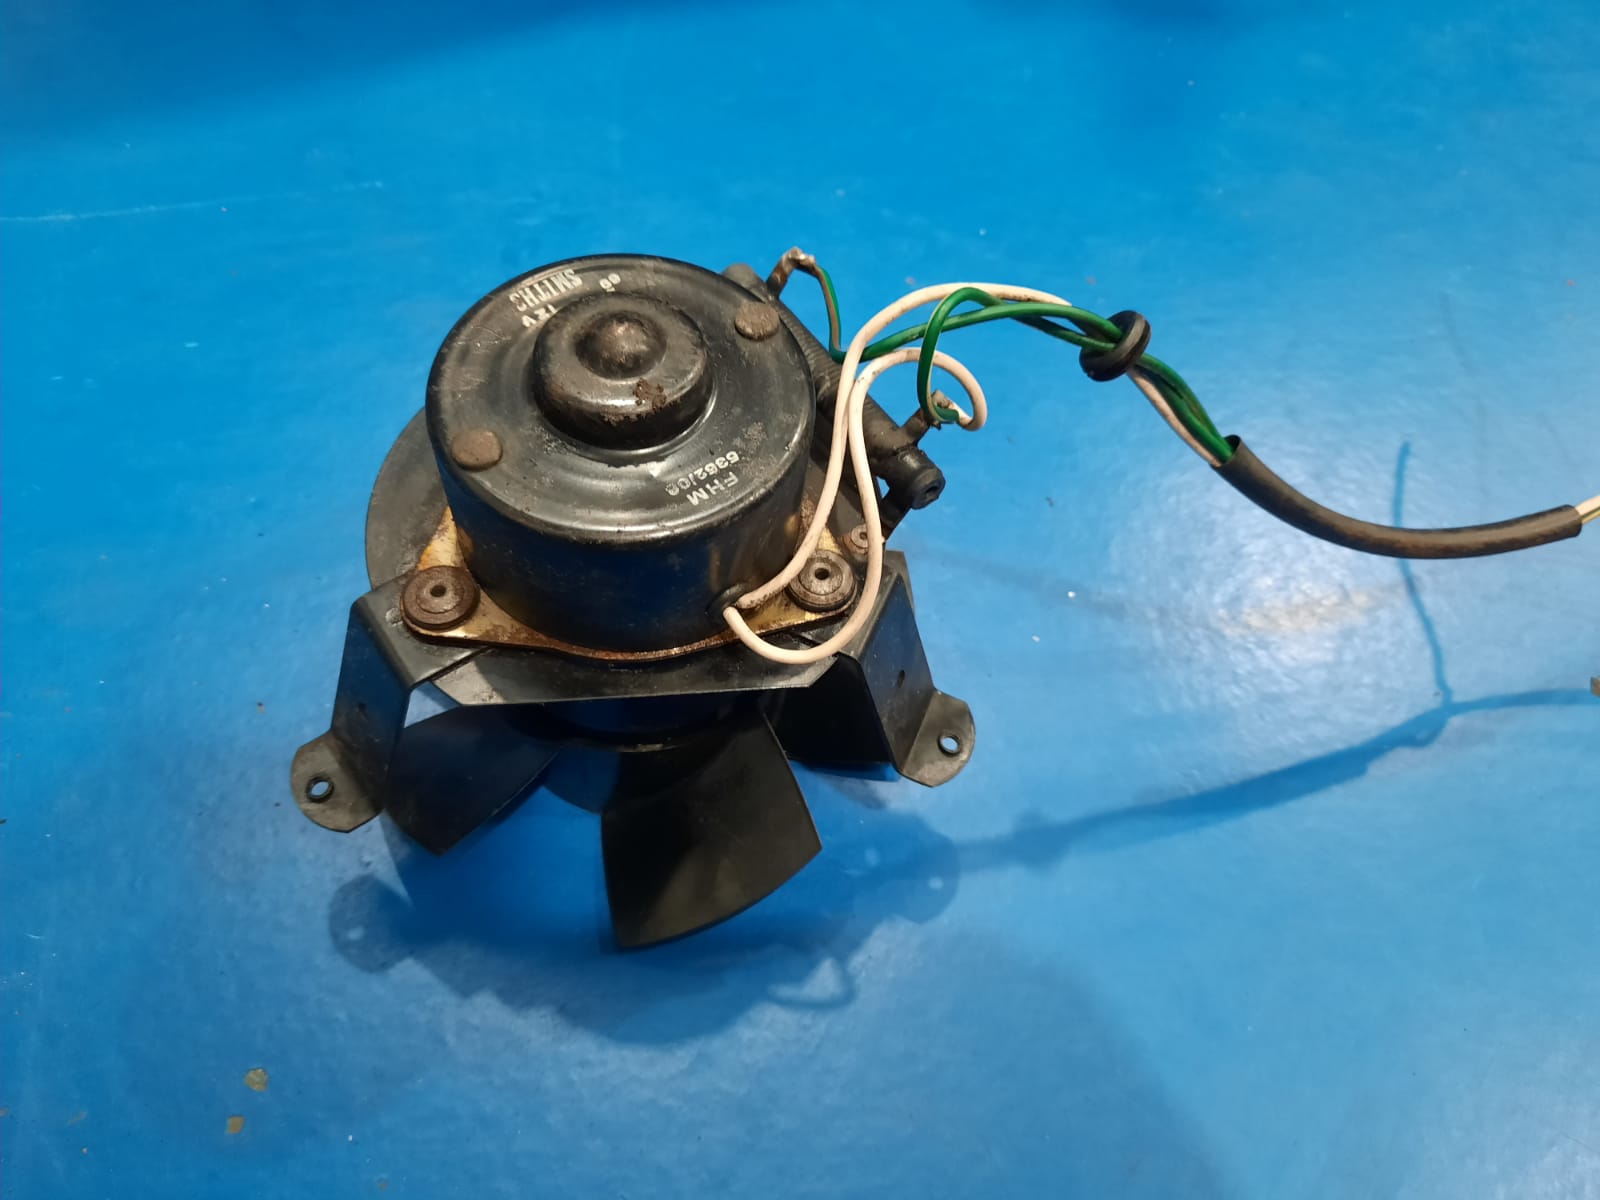
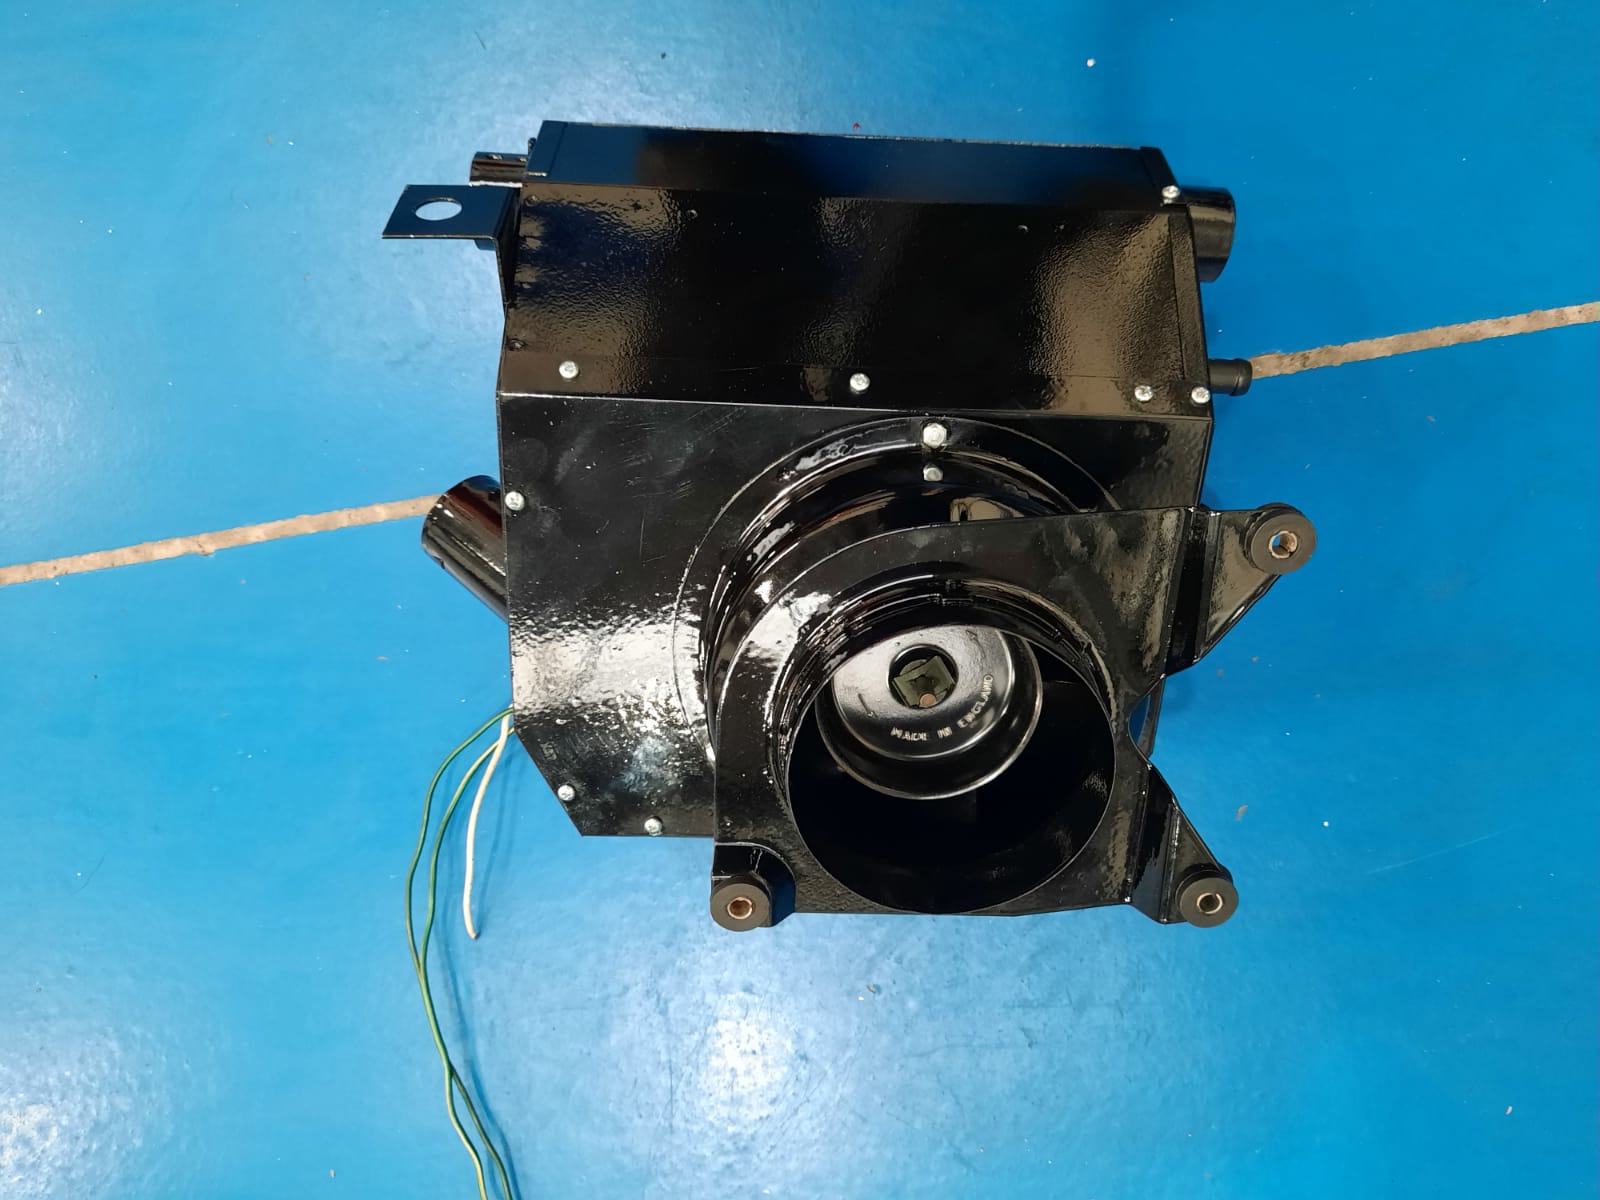
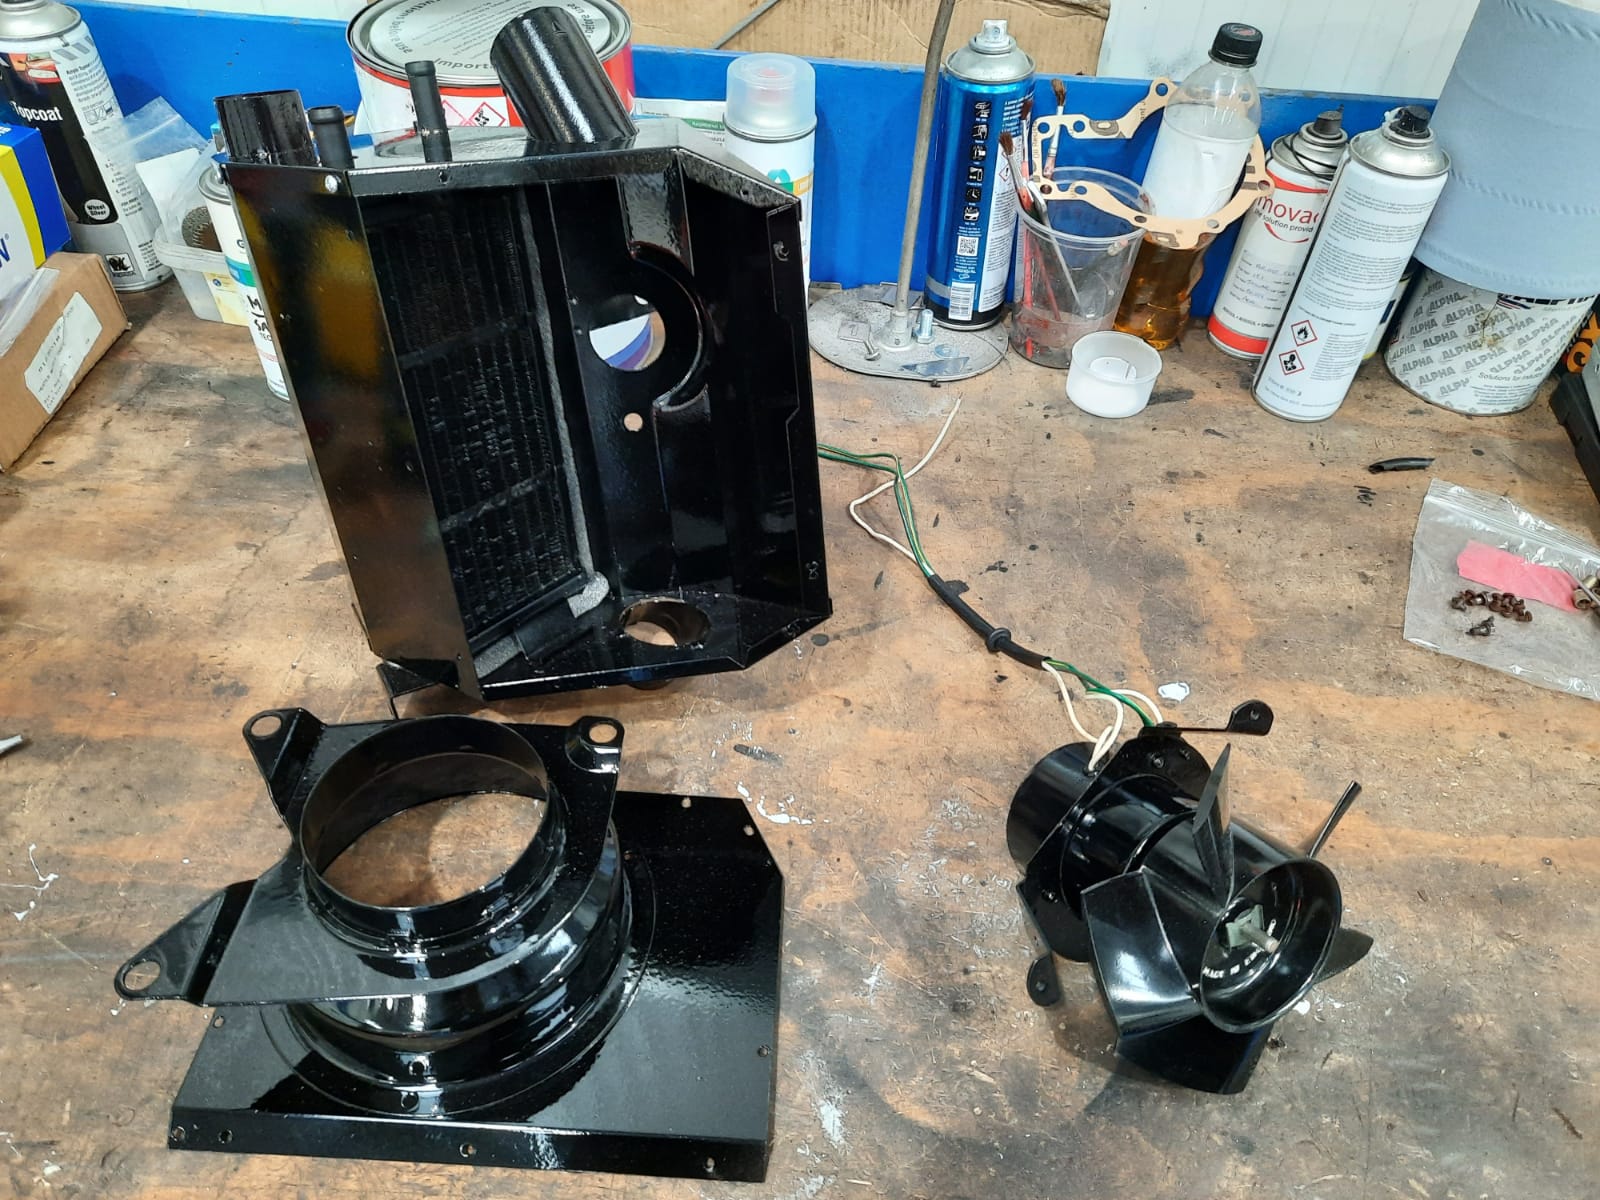
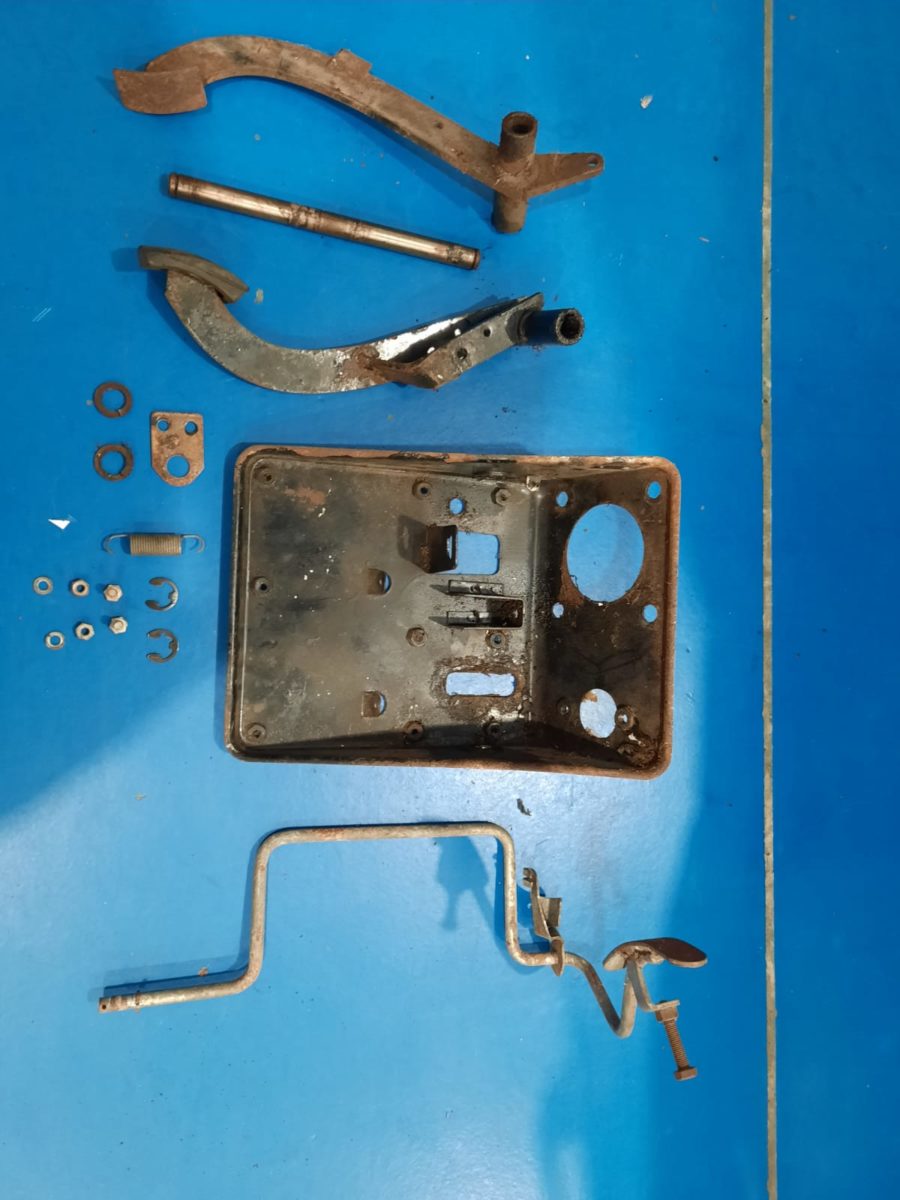
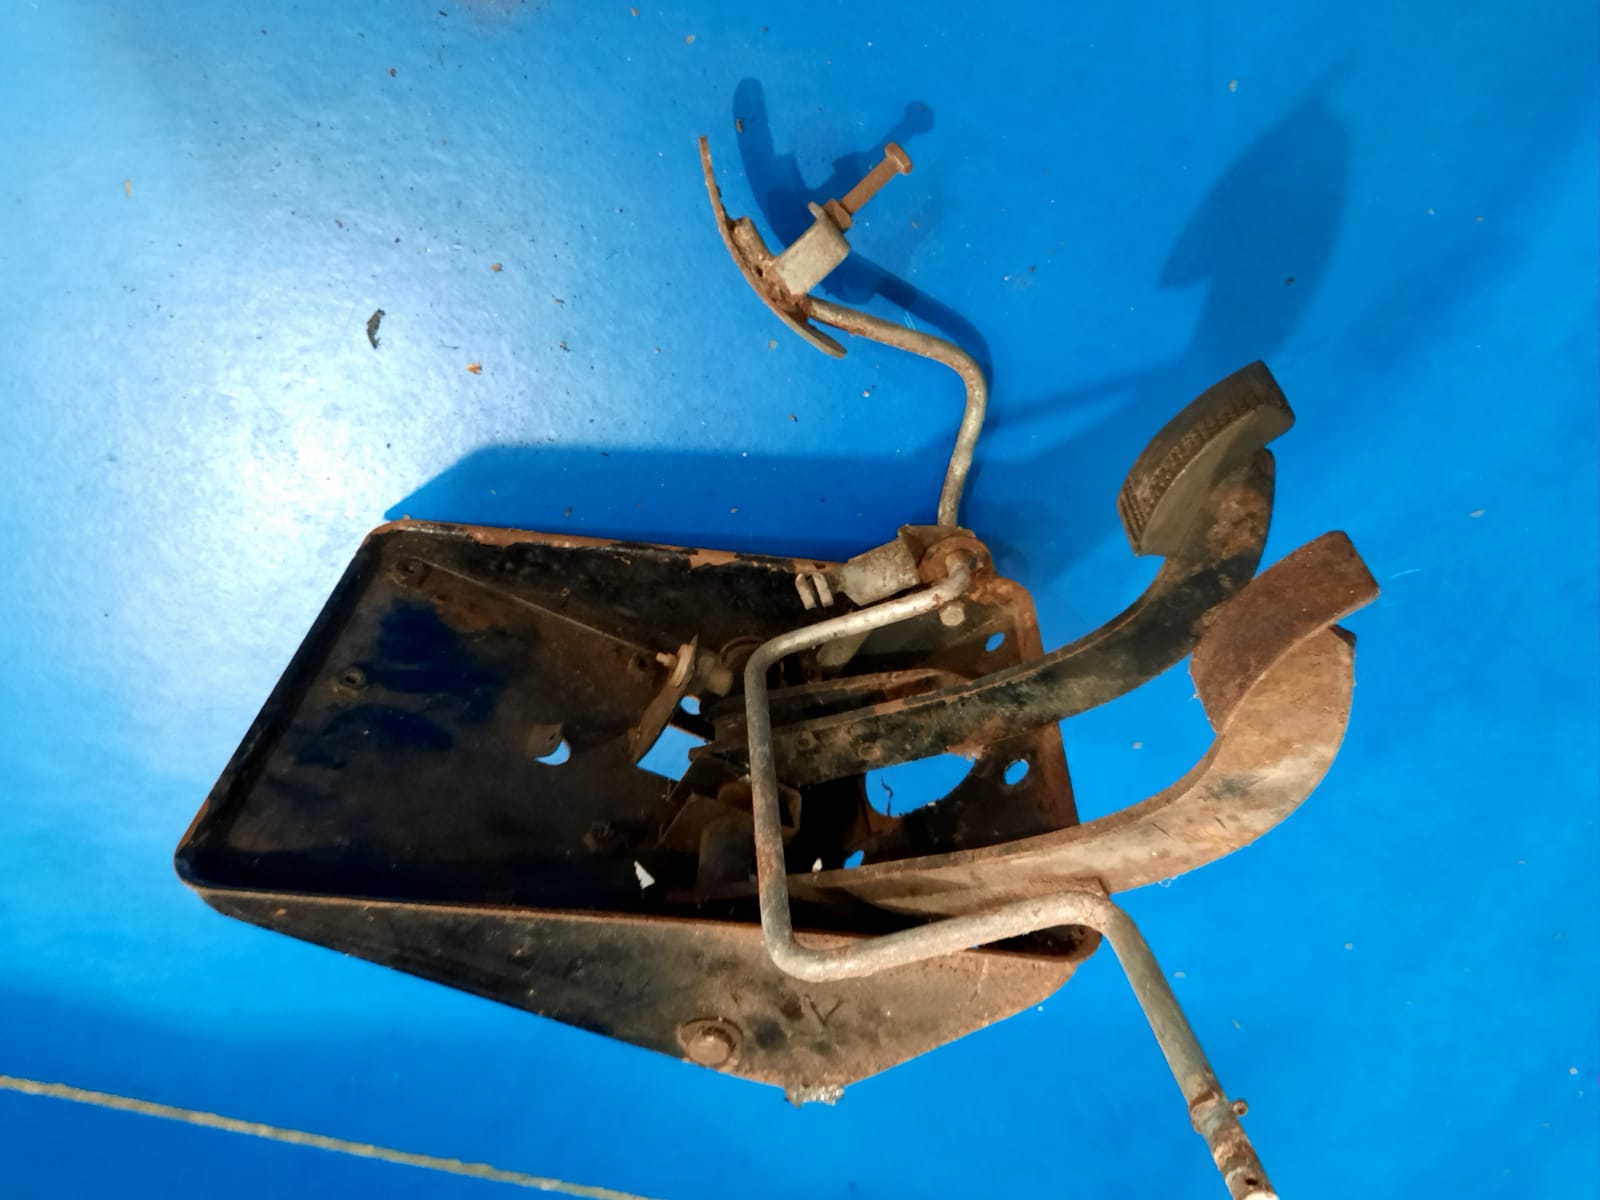
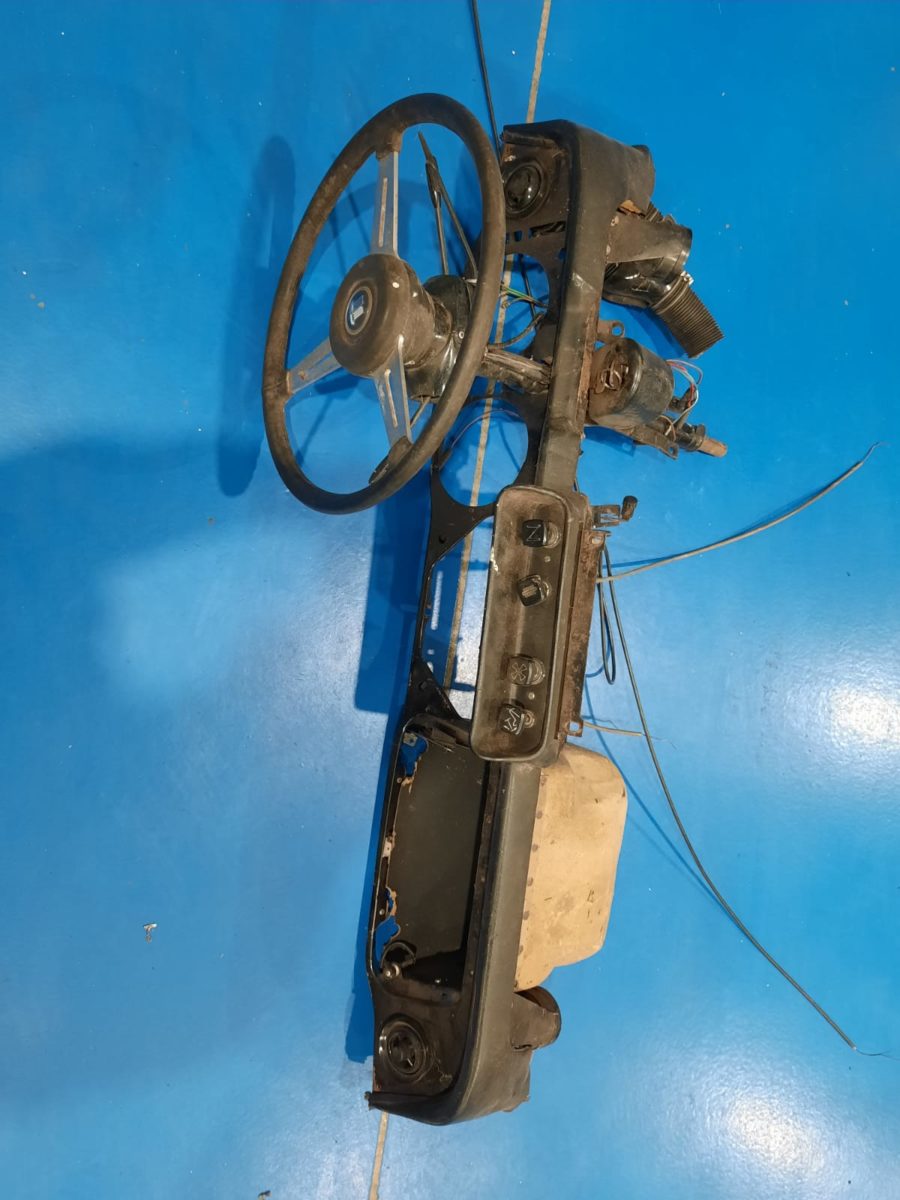
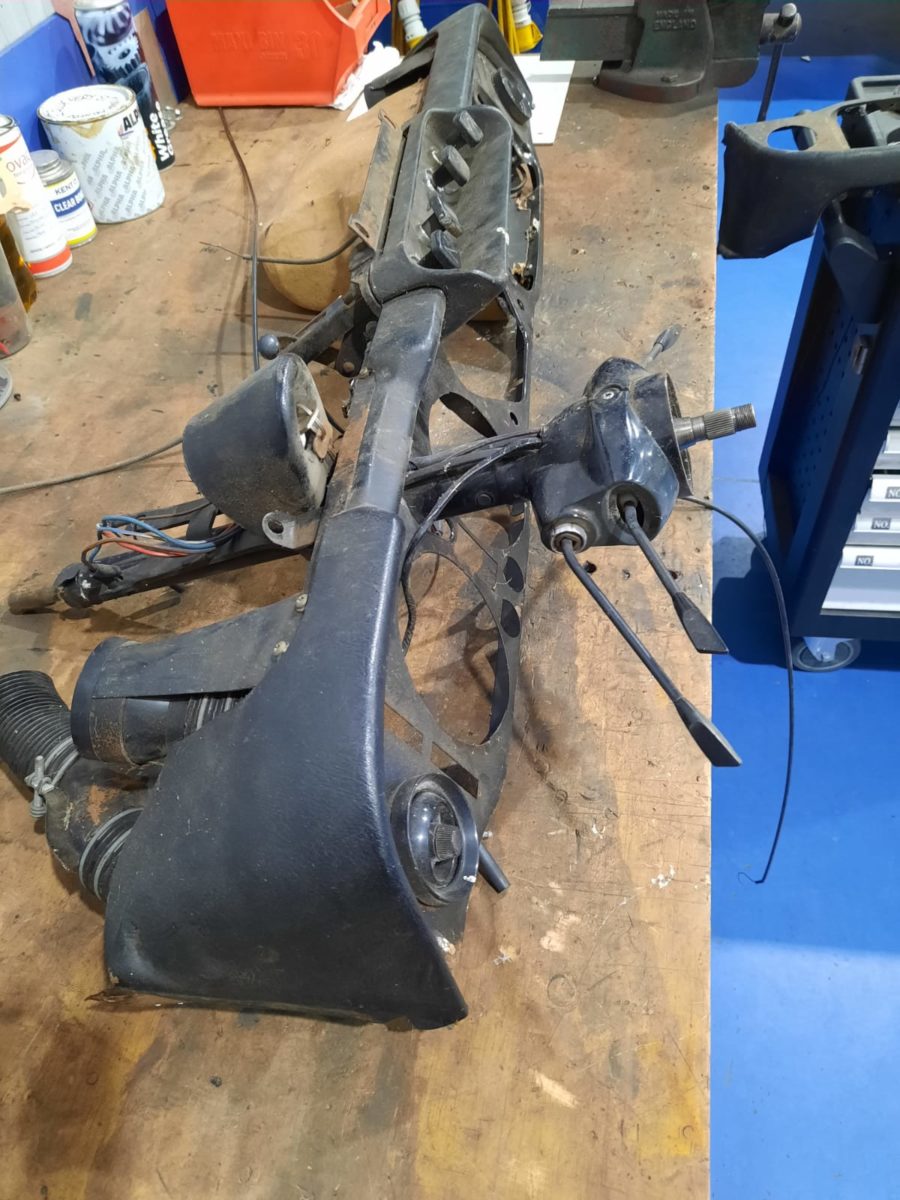
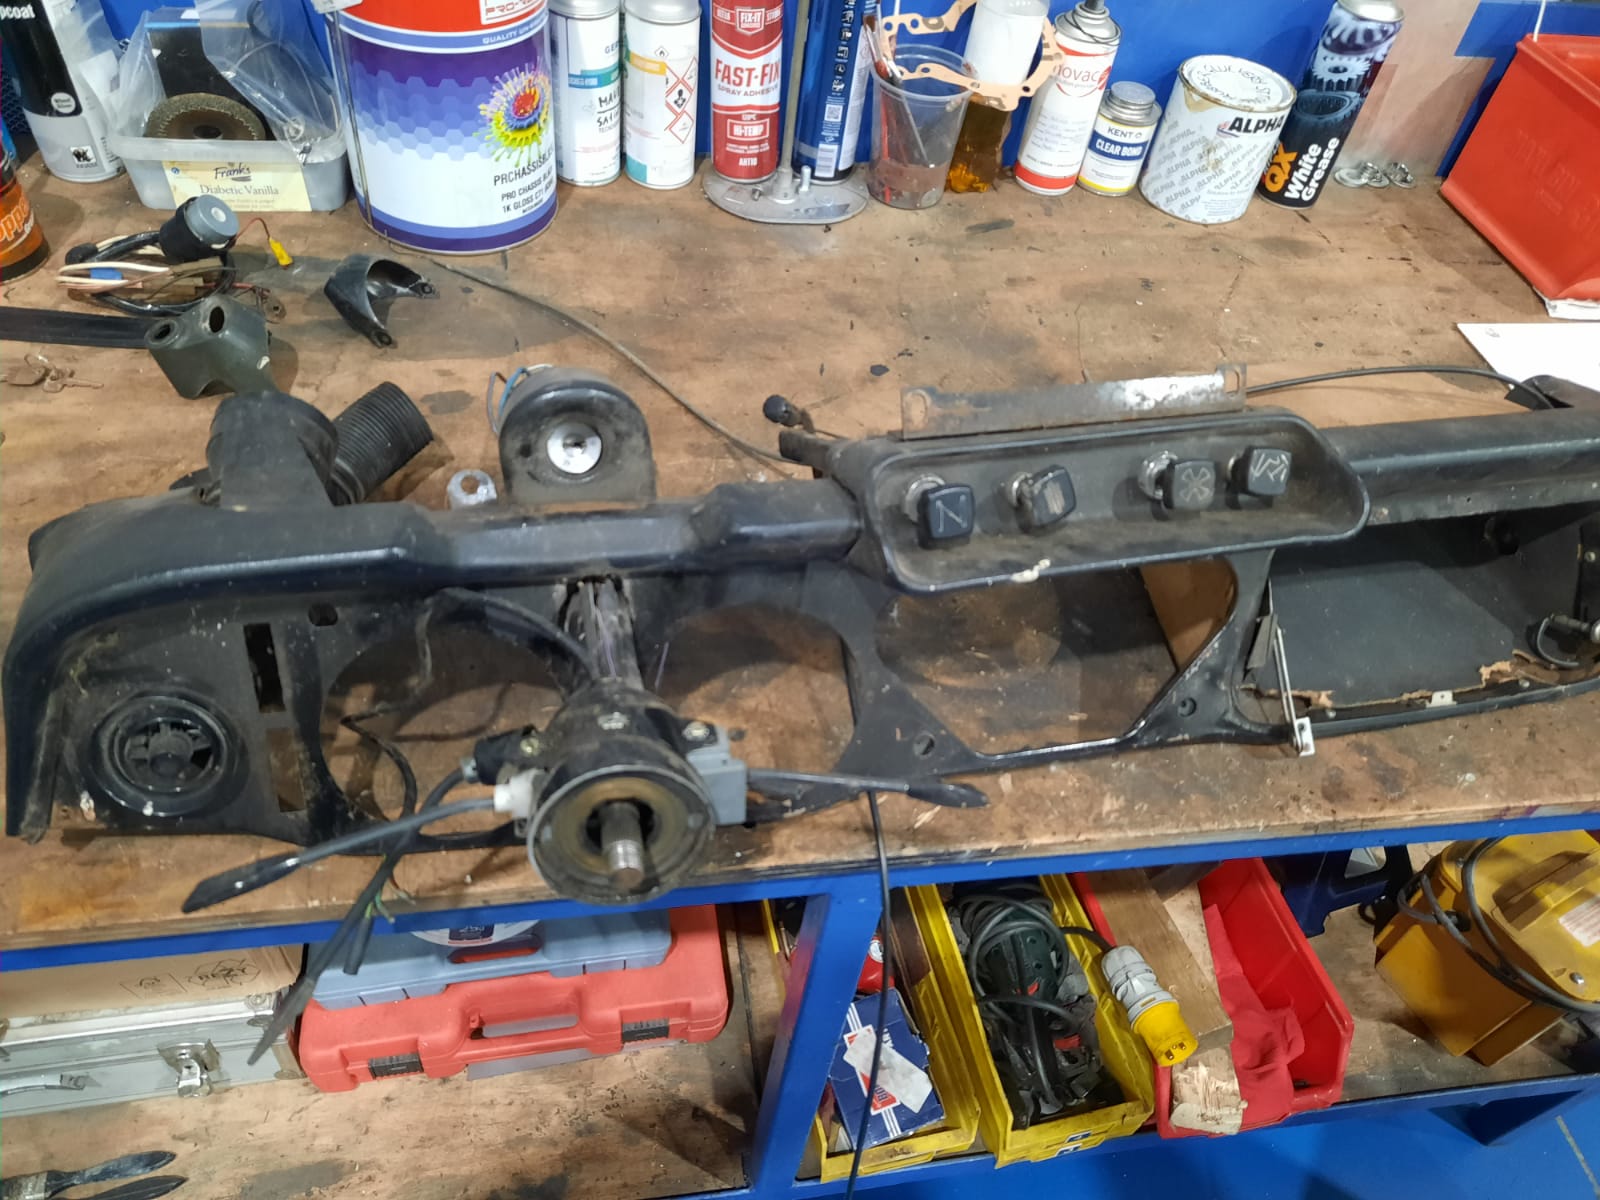
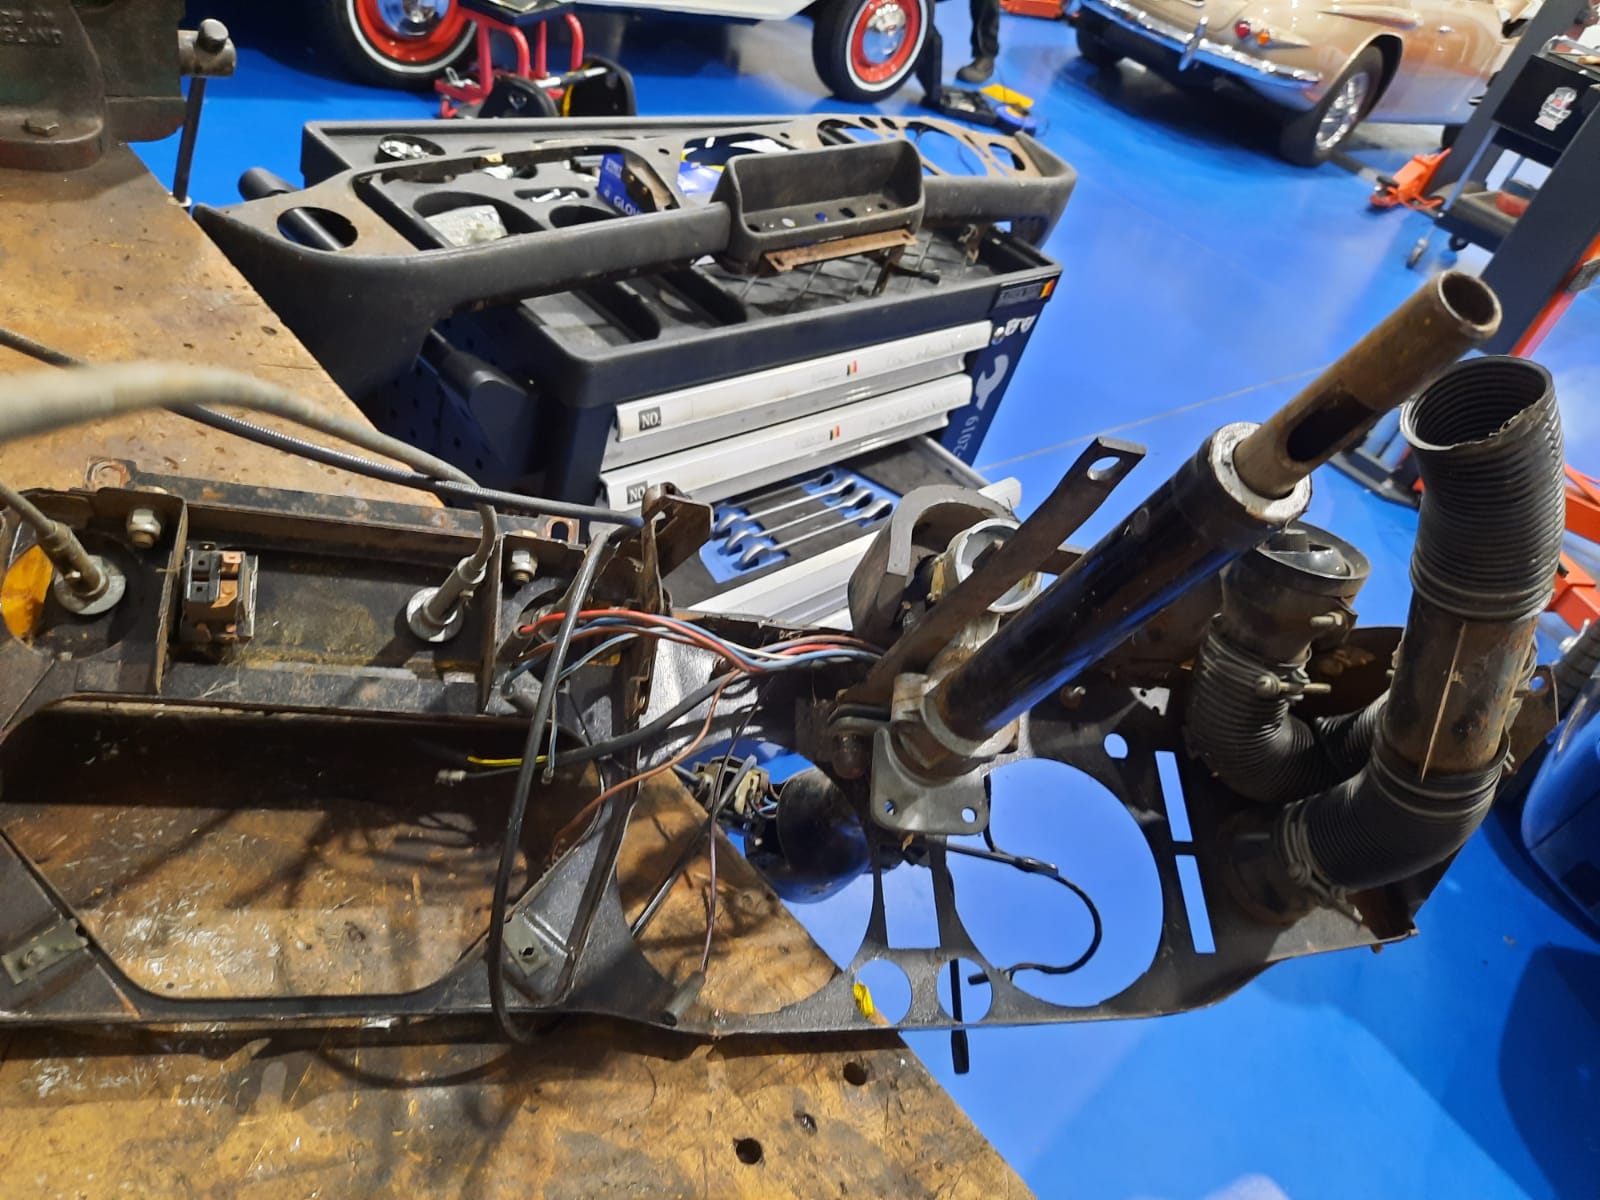
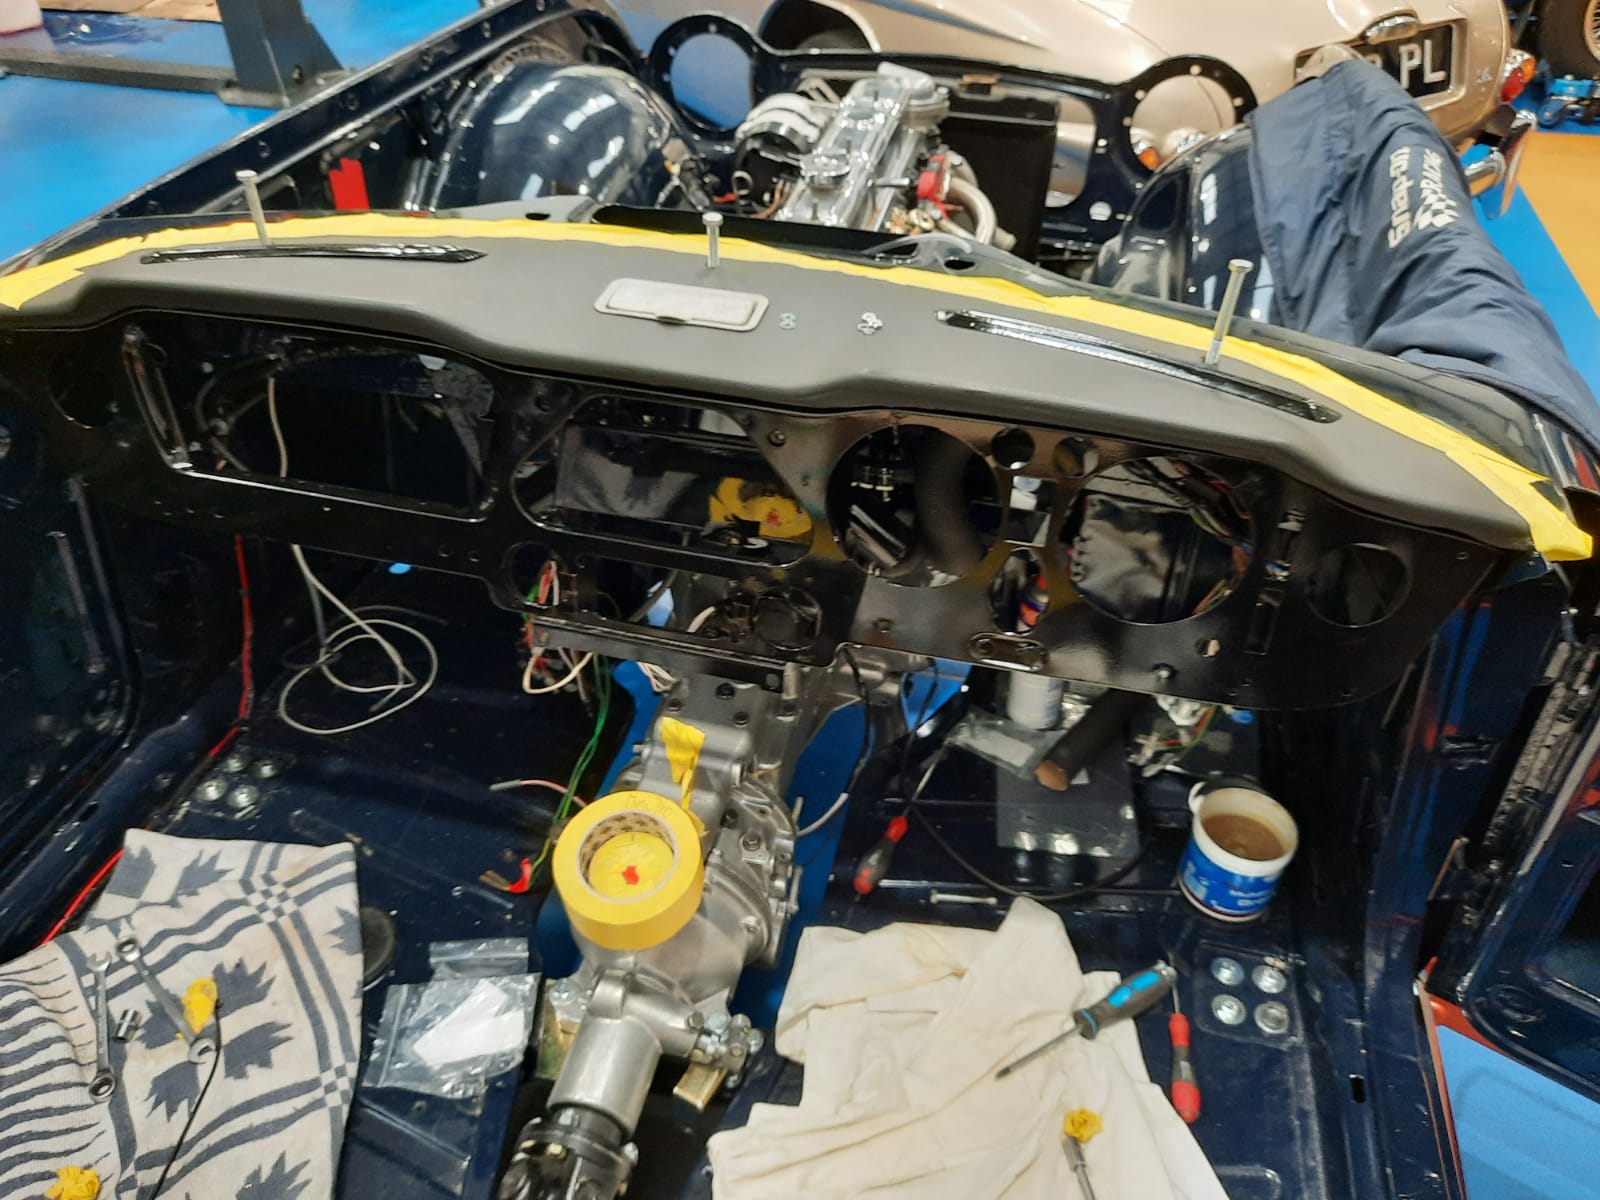
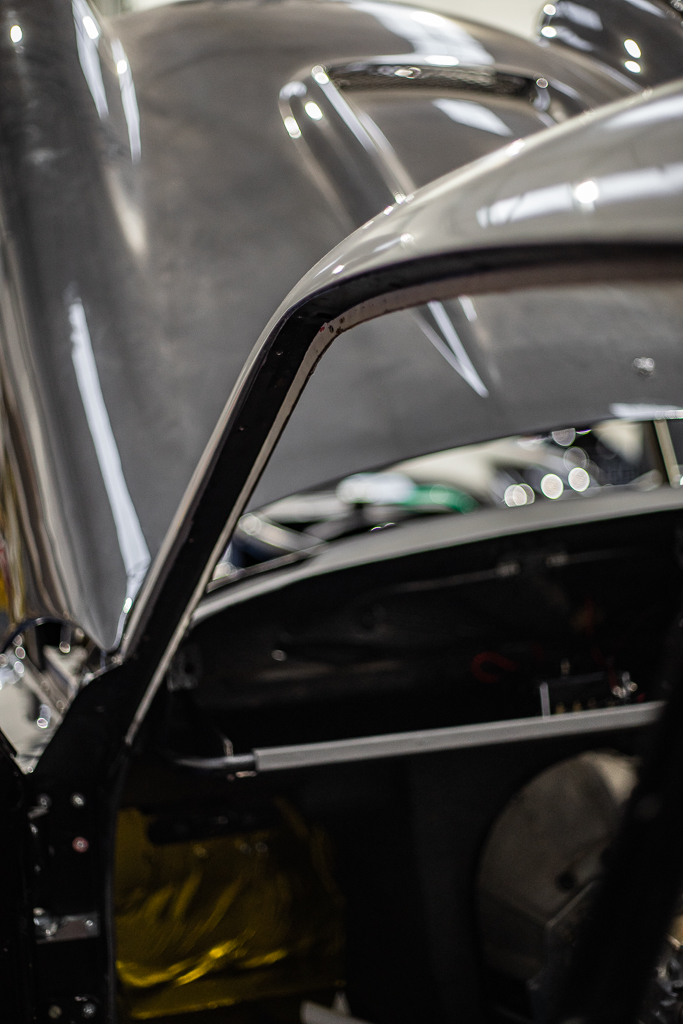
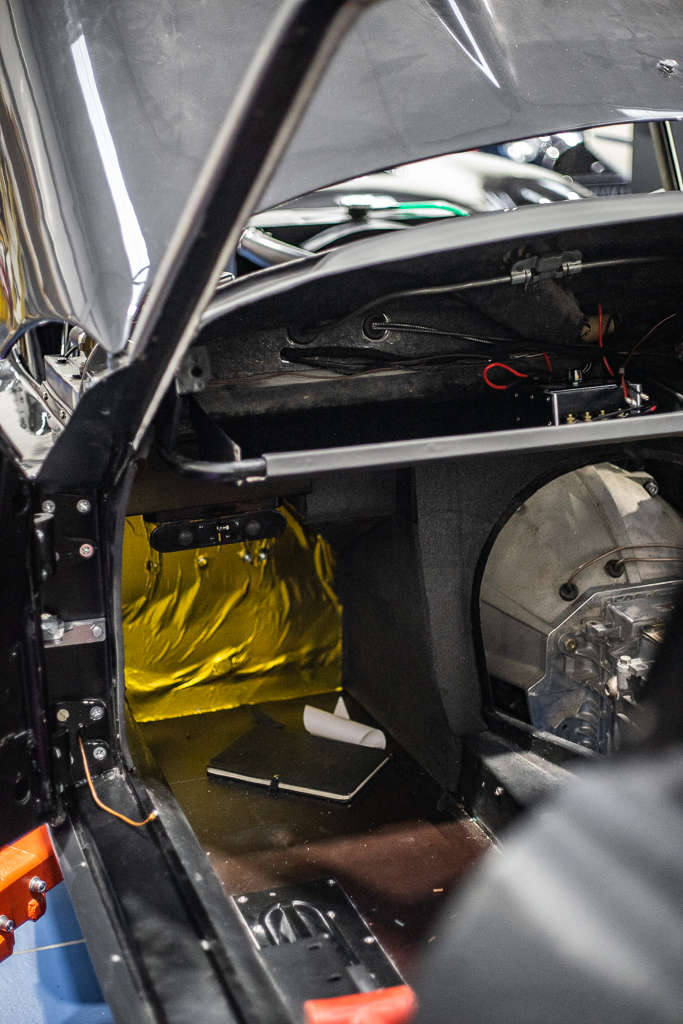
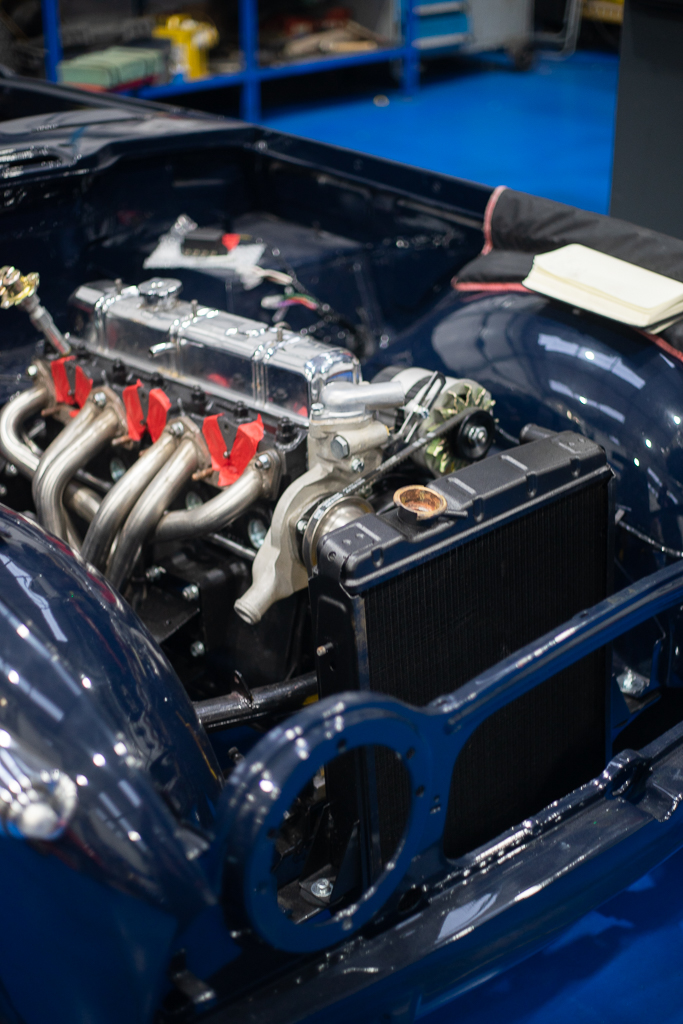
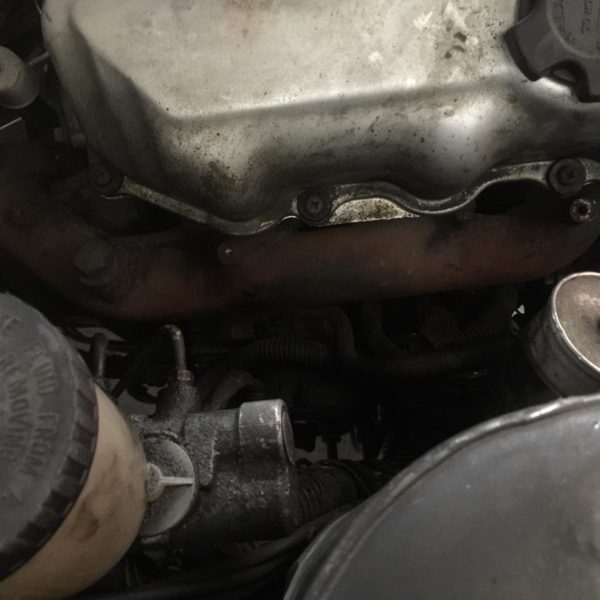
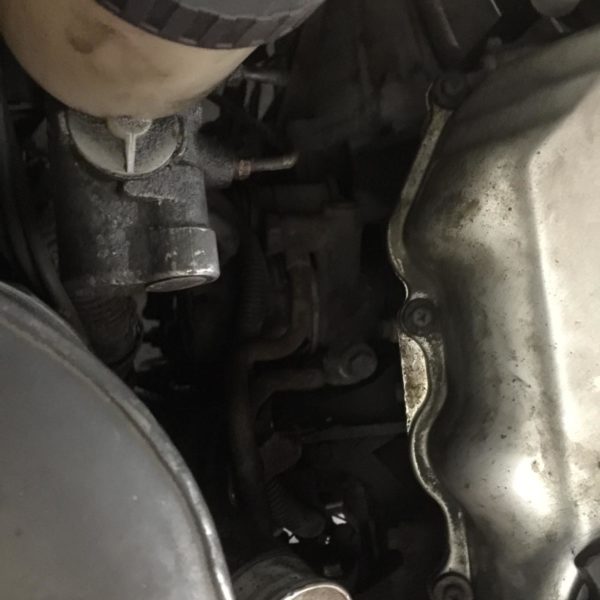
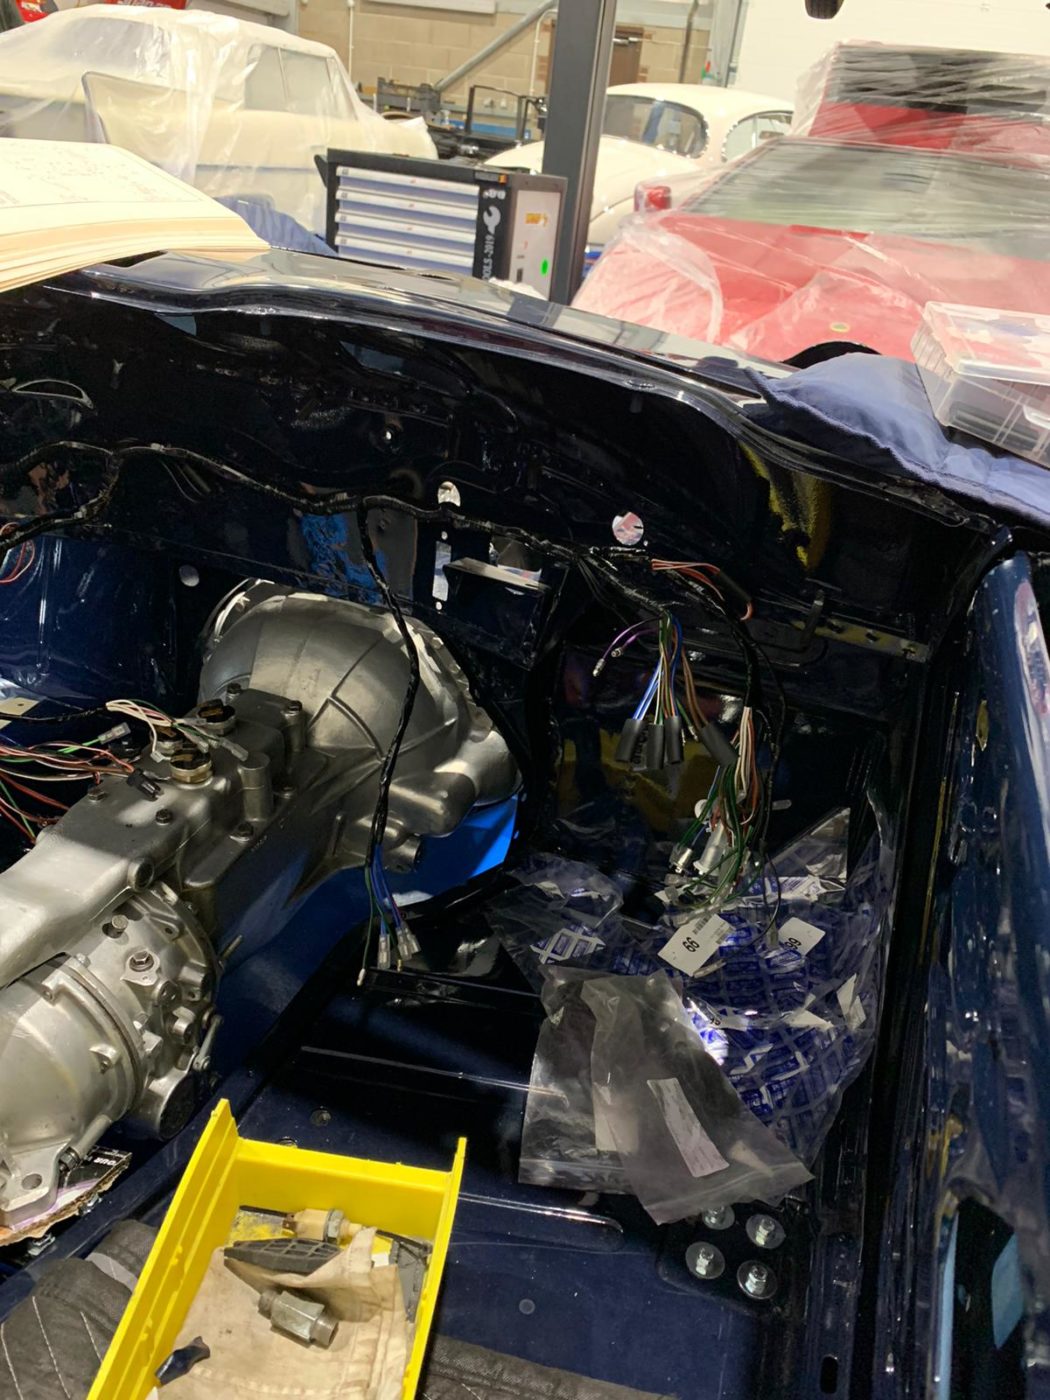
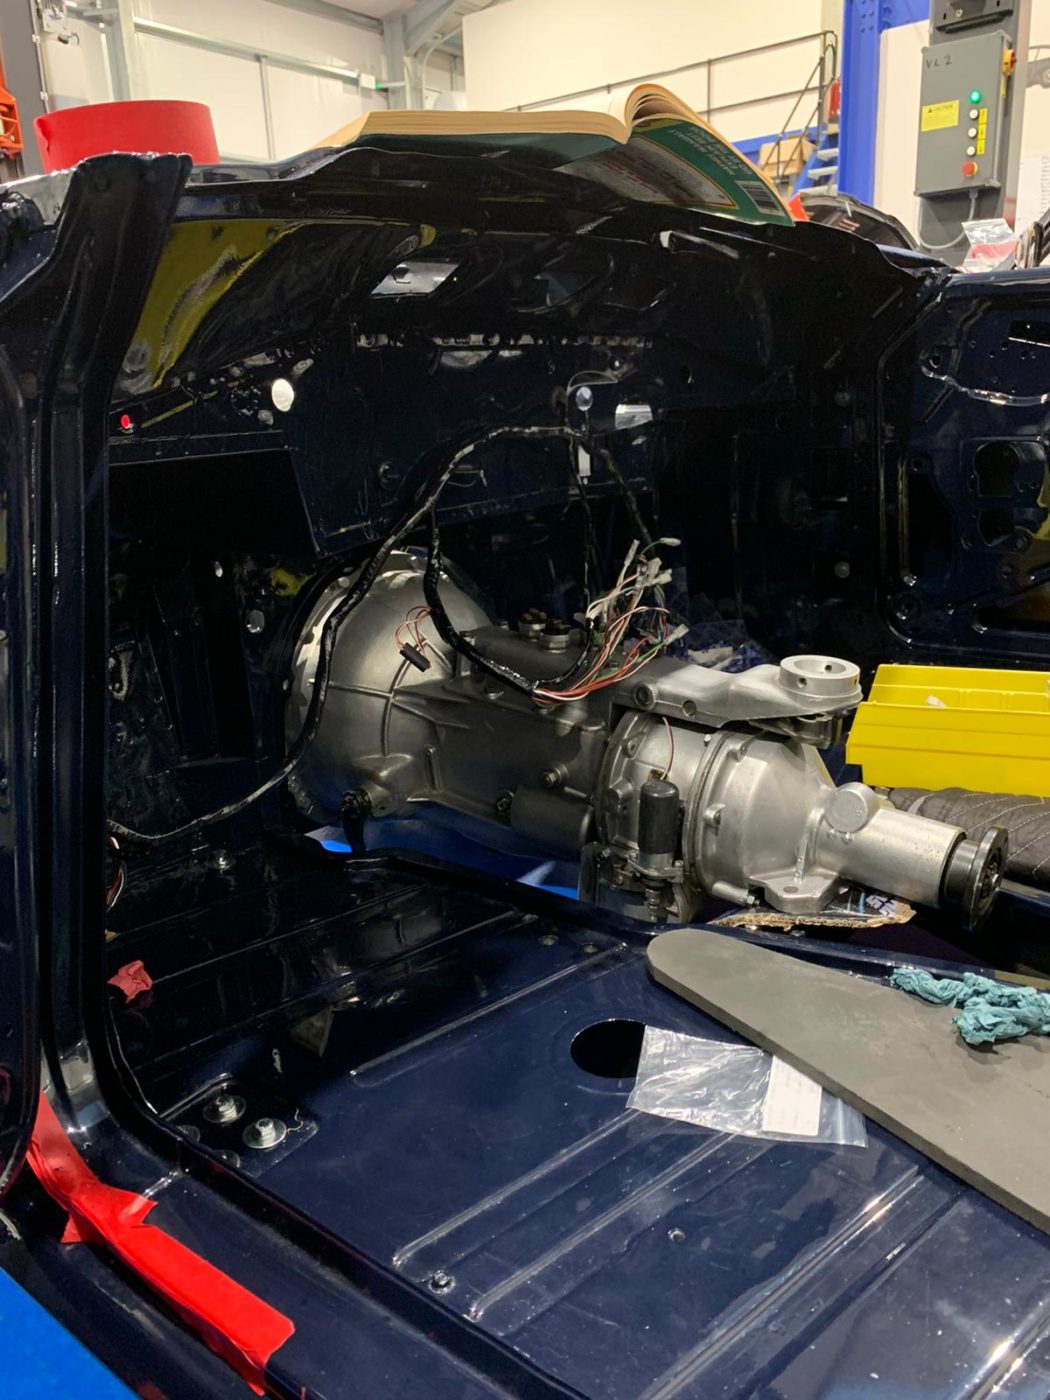
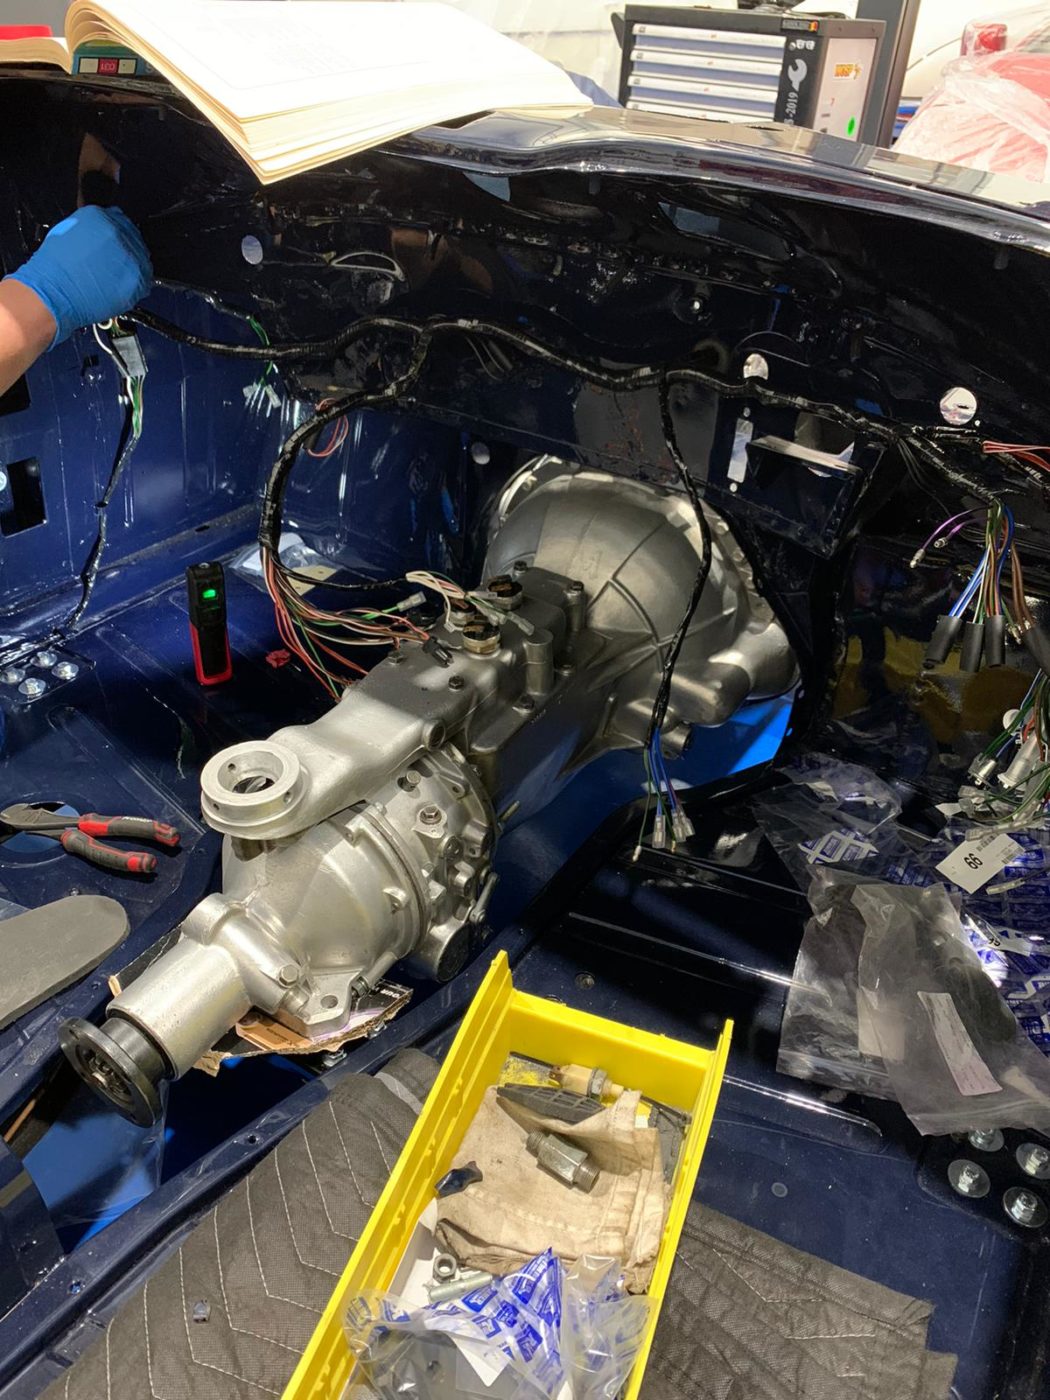
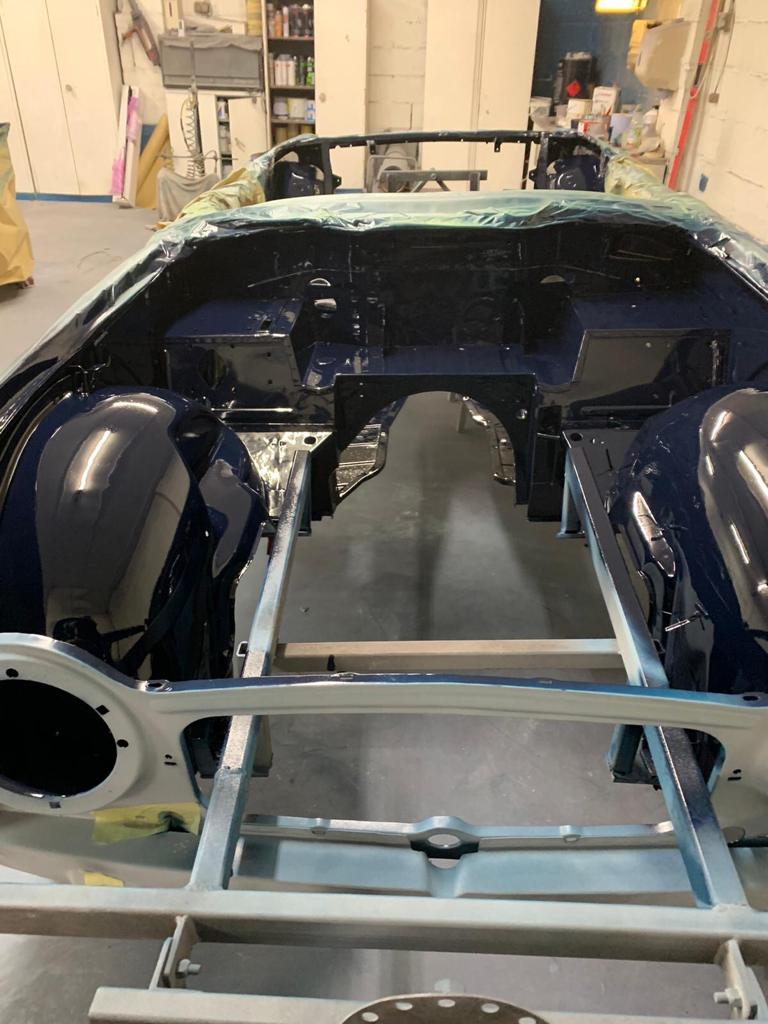
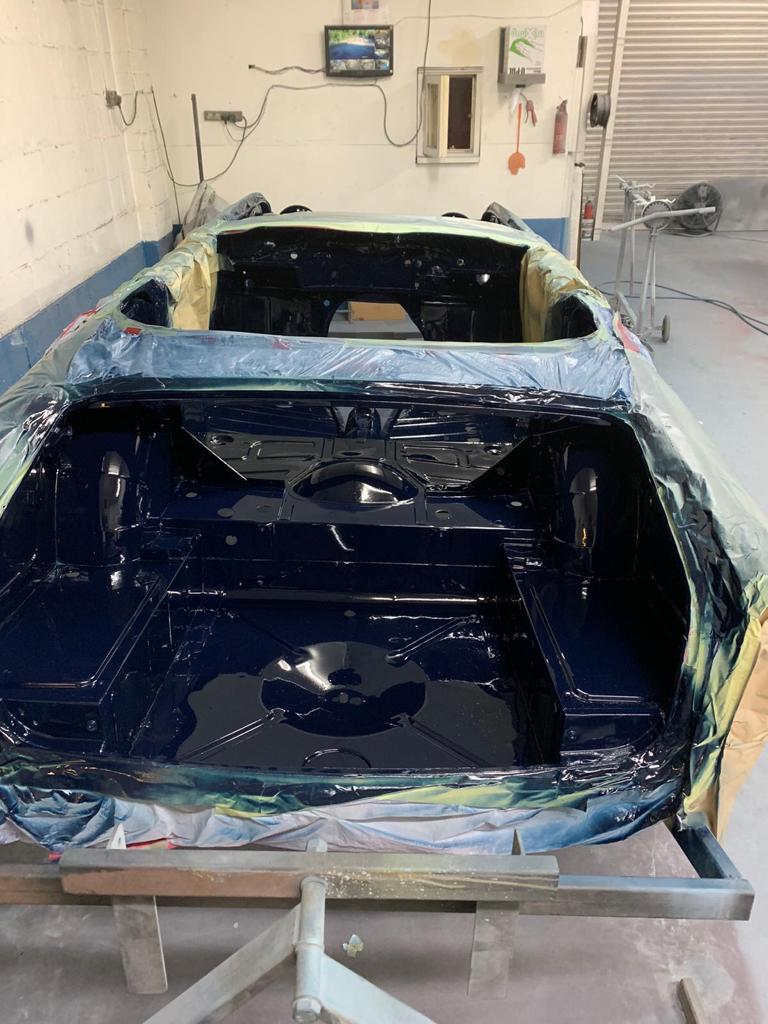
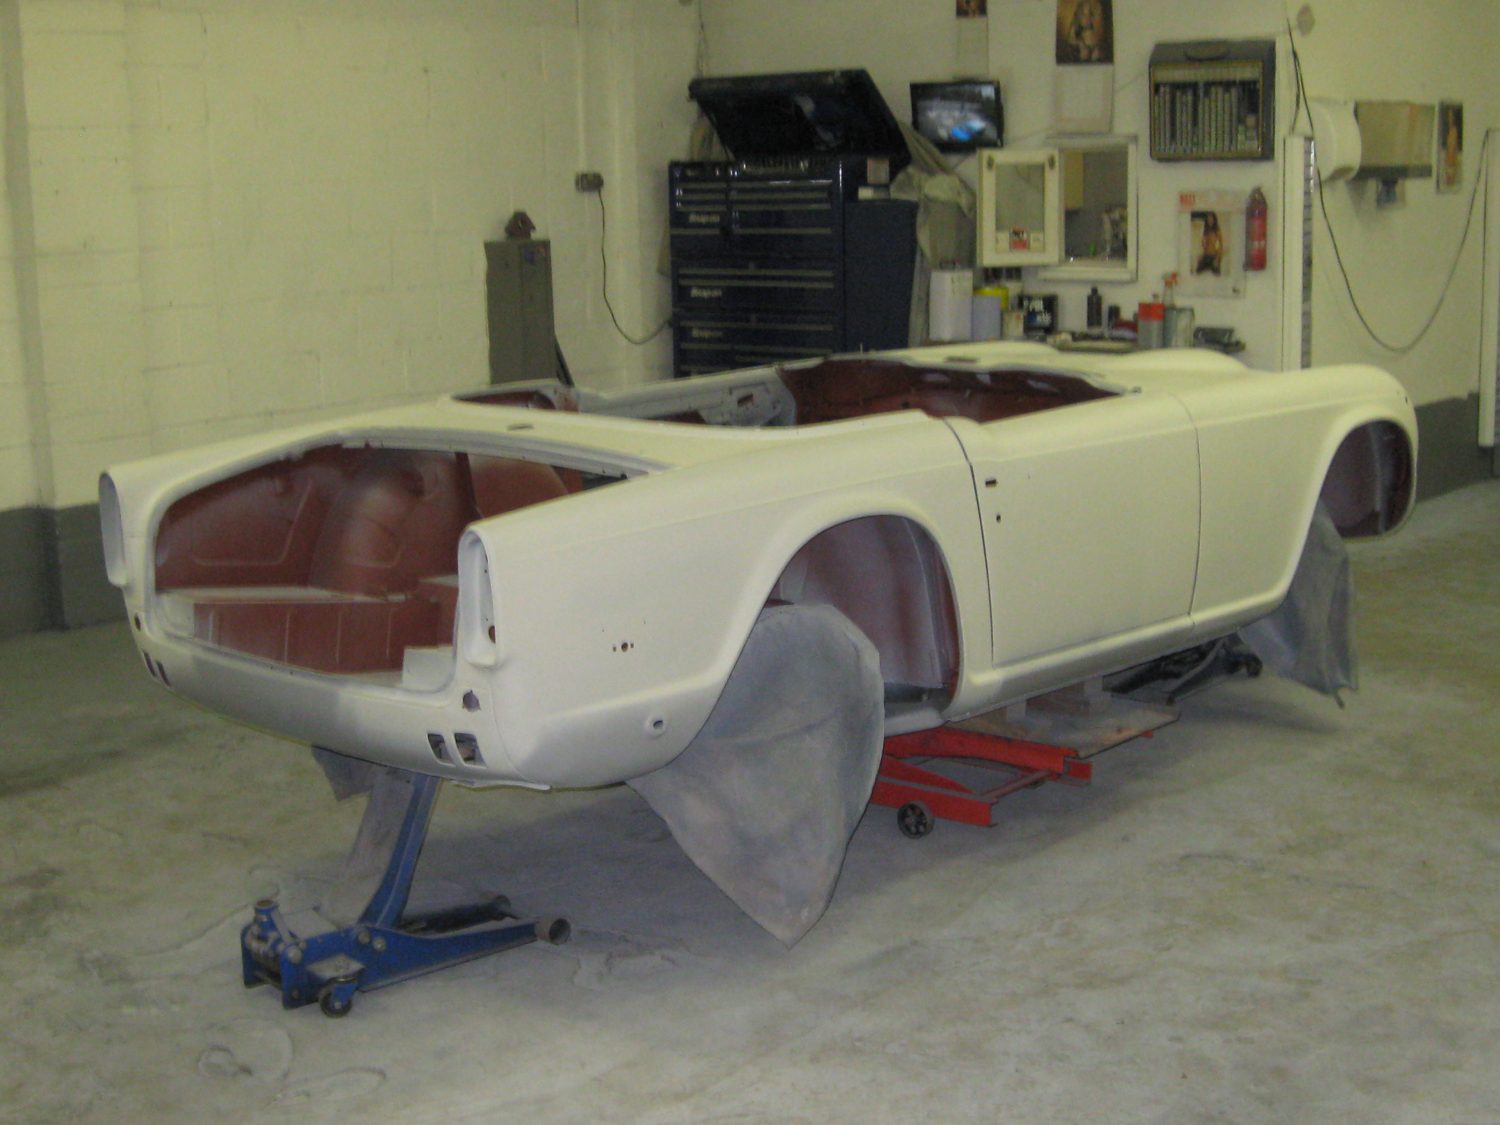
Mauro has been dedicated to the renovation of our beautiful 1968 Triumph TR5 that is slowly resembling more of a car now. With the engine now fitted in, Mauro has been diligently pouring over the engine bay to make sure everything is perfect.
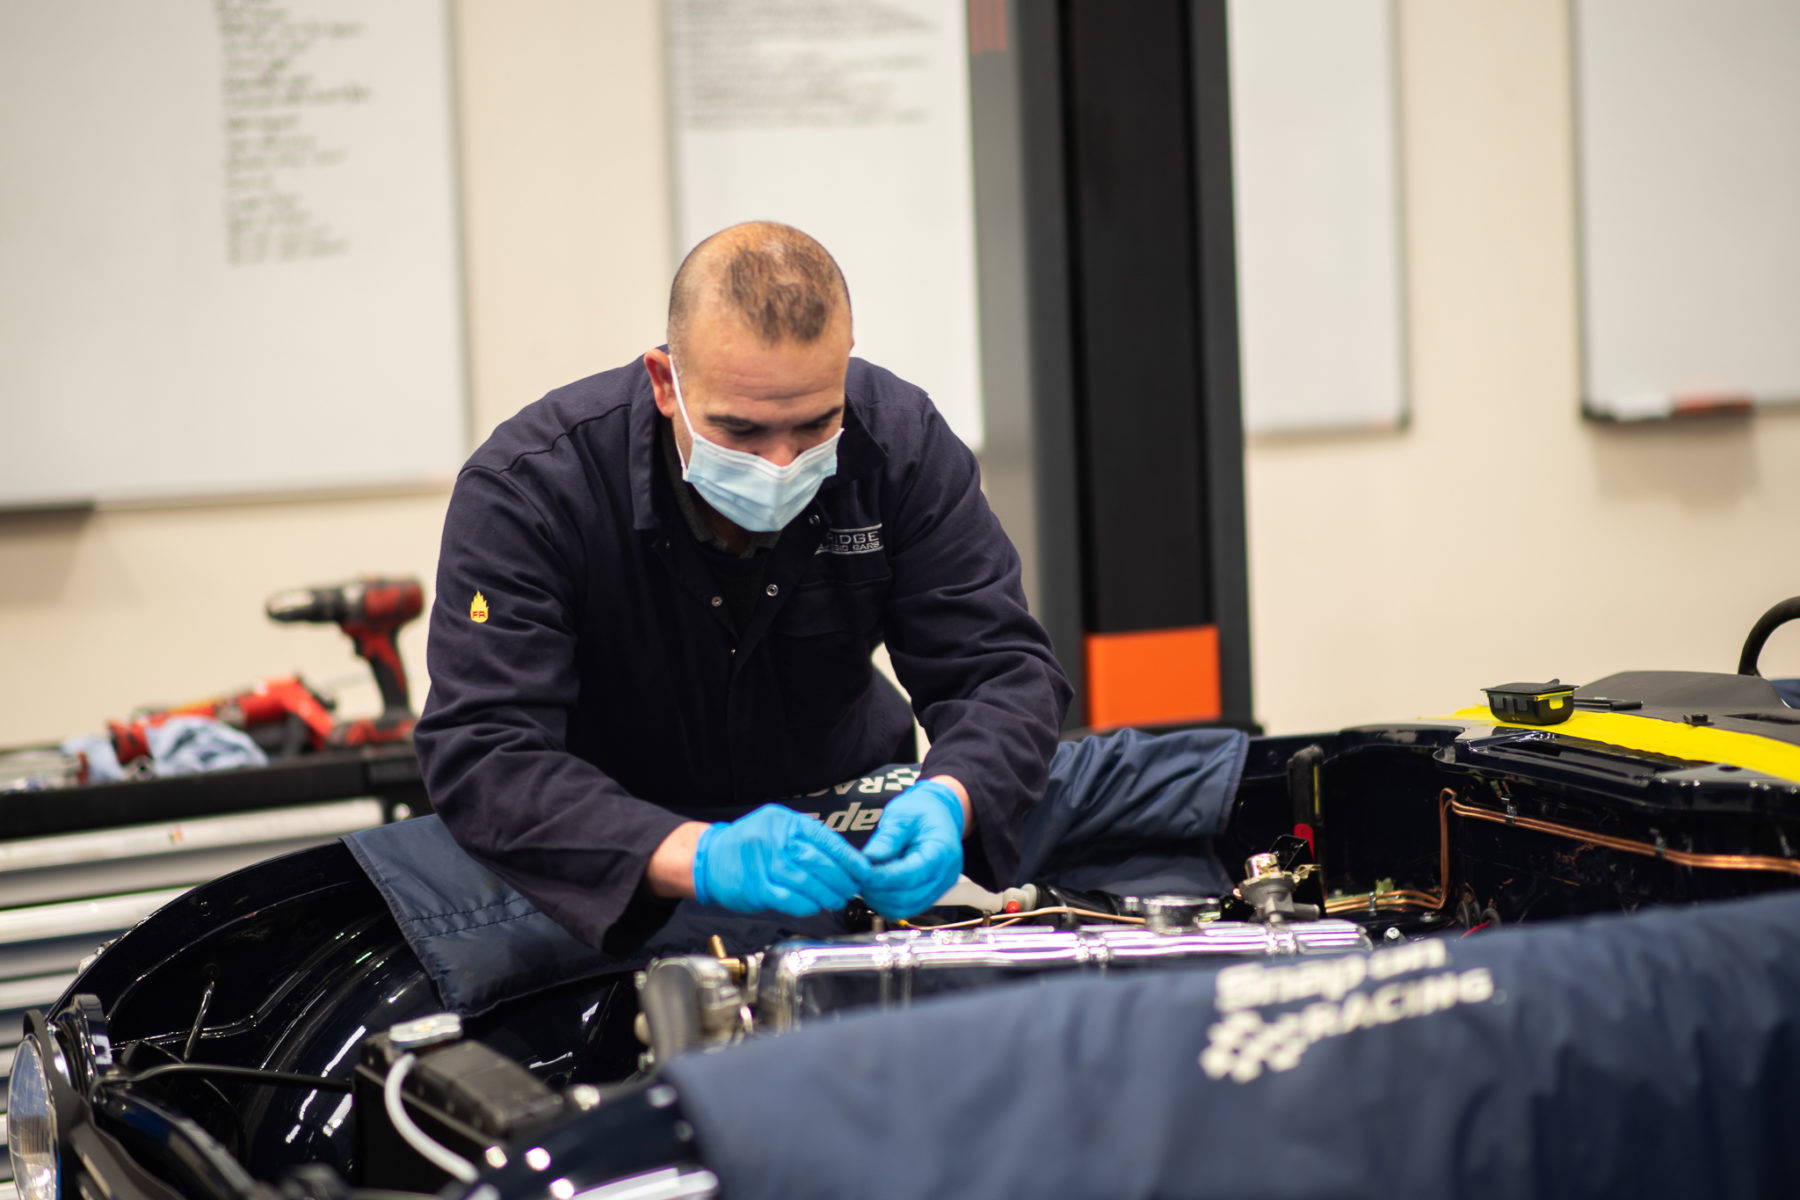

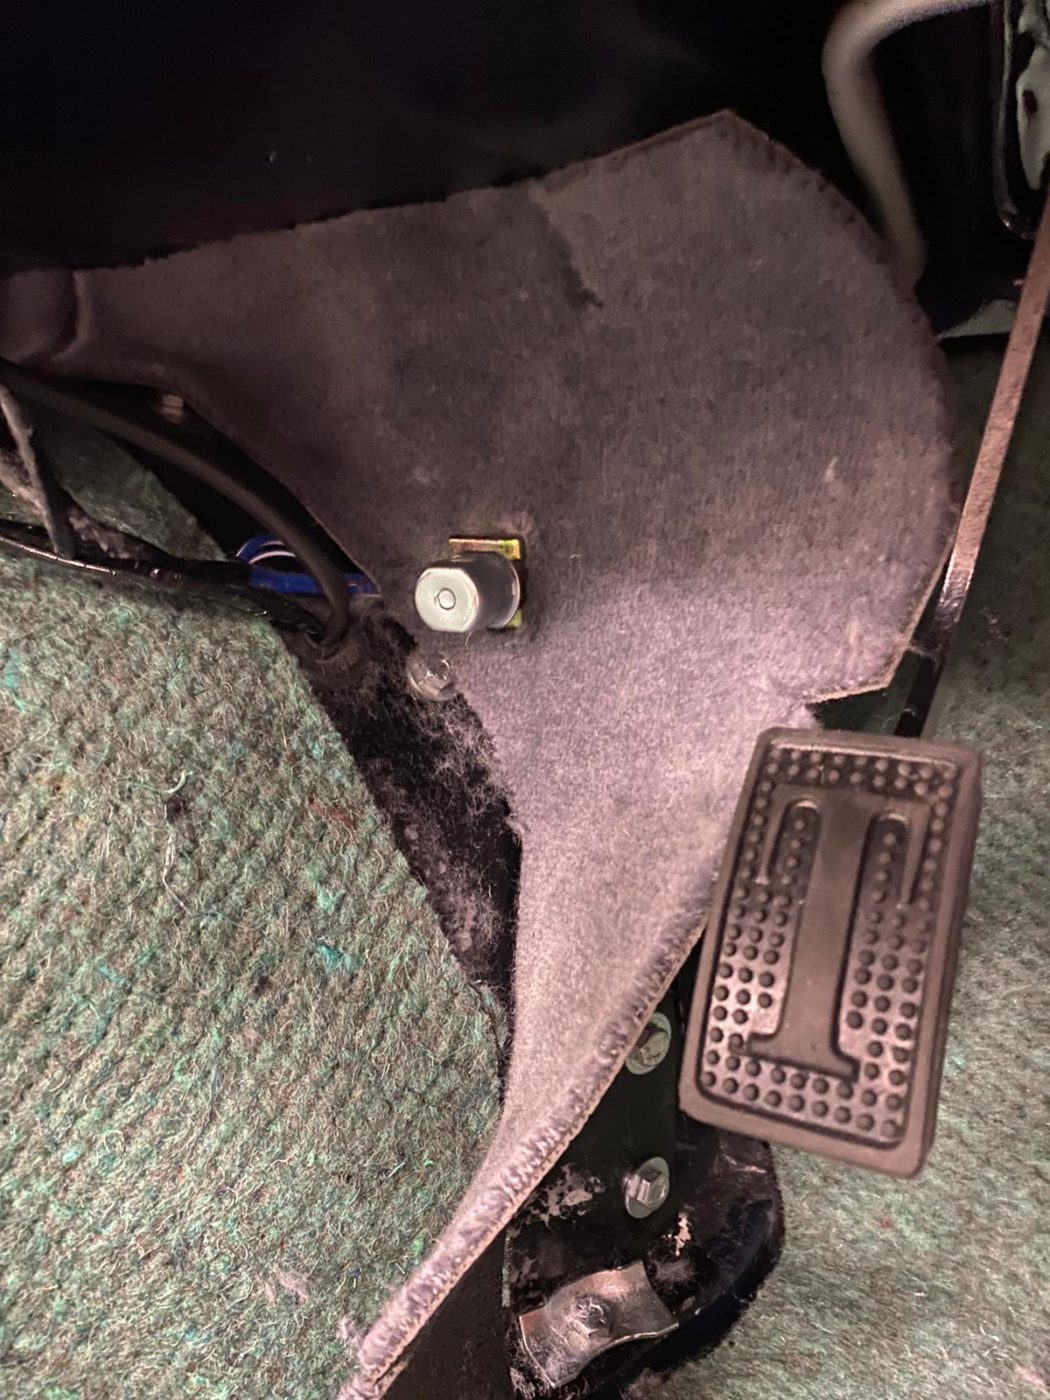
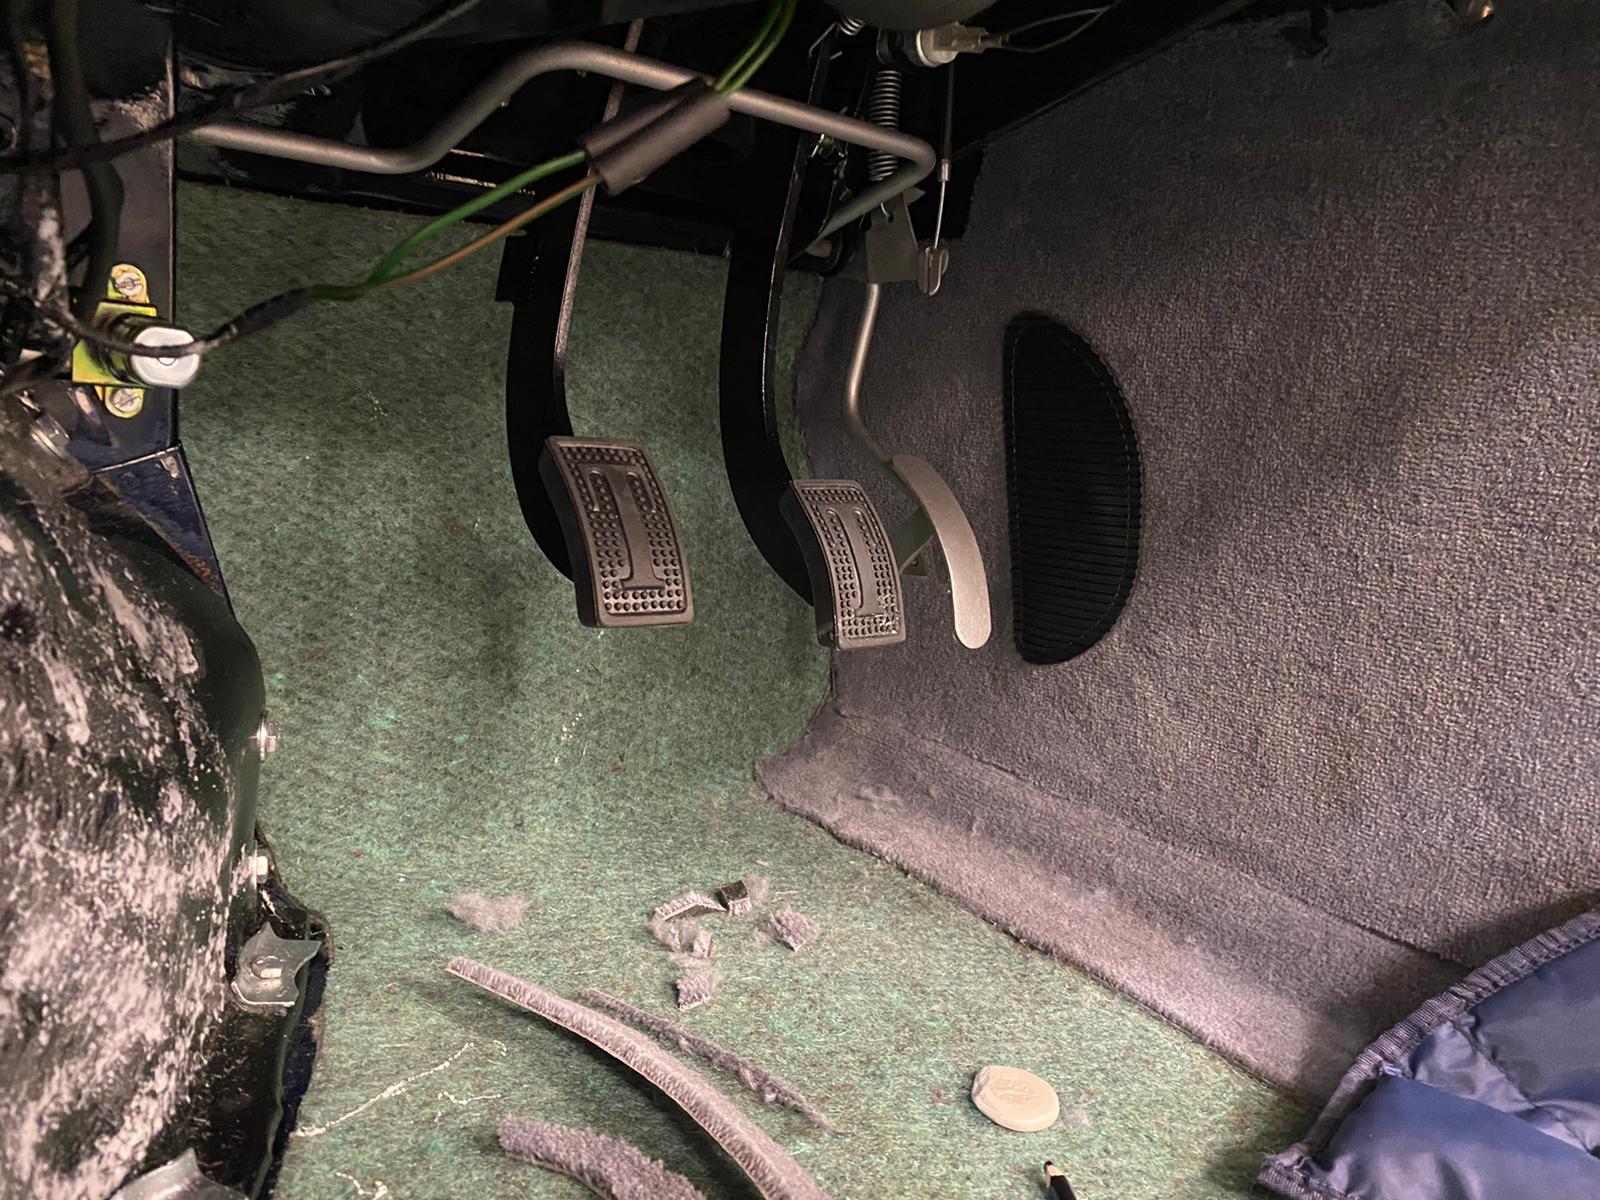
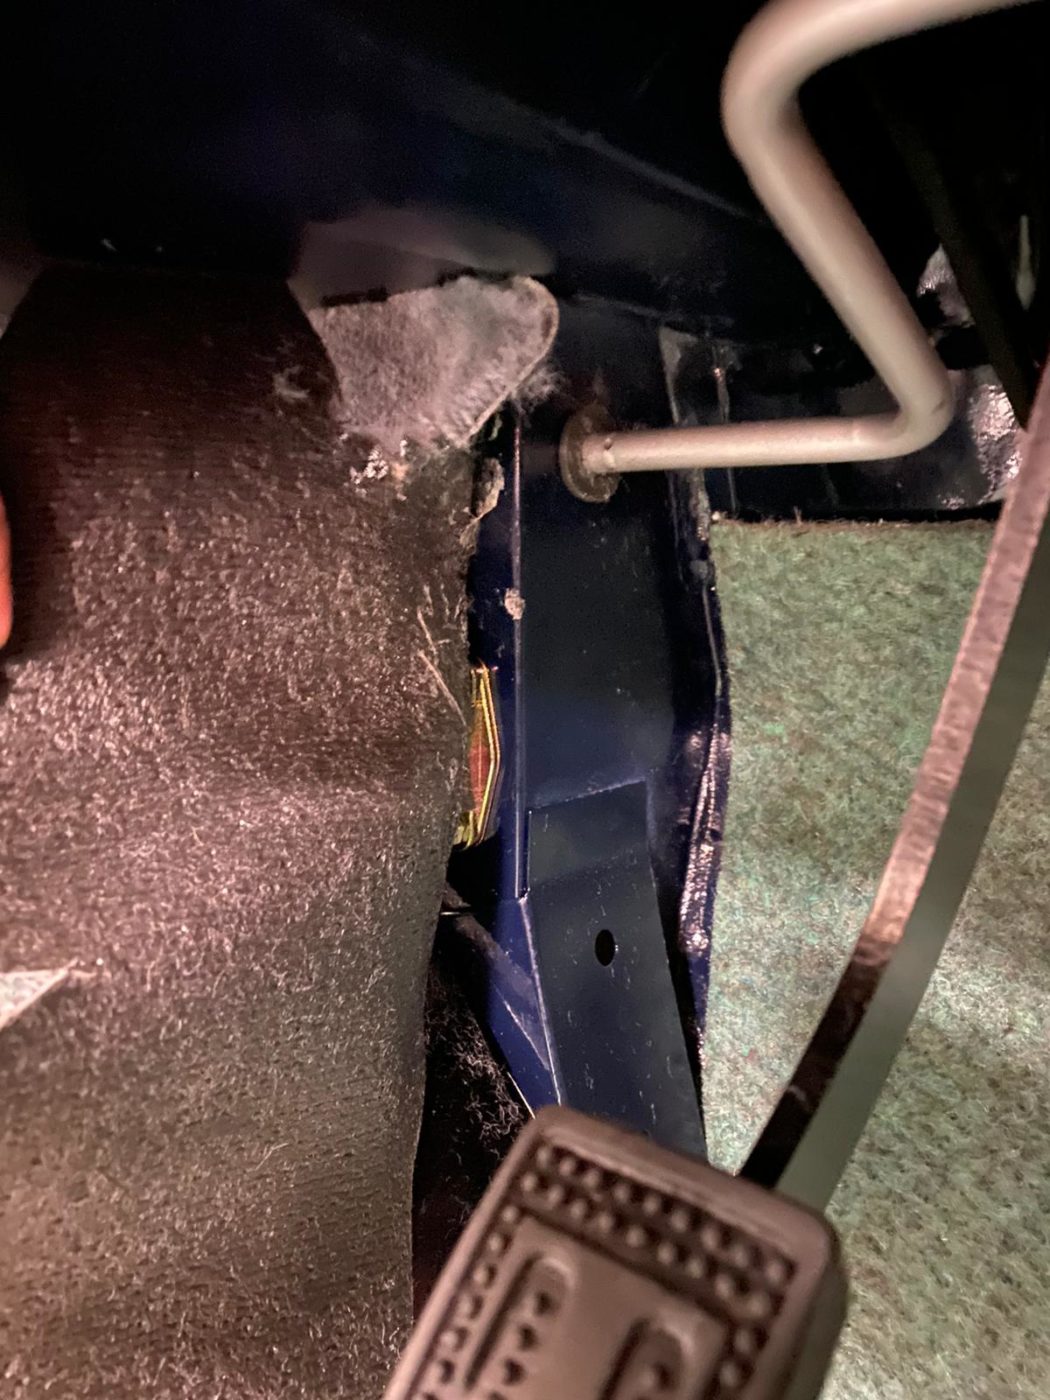
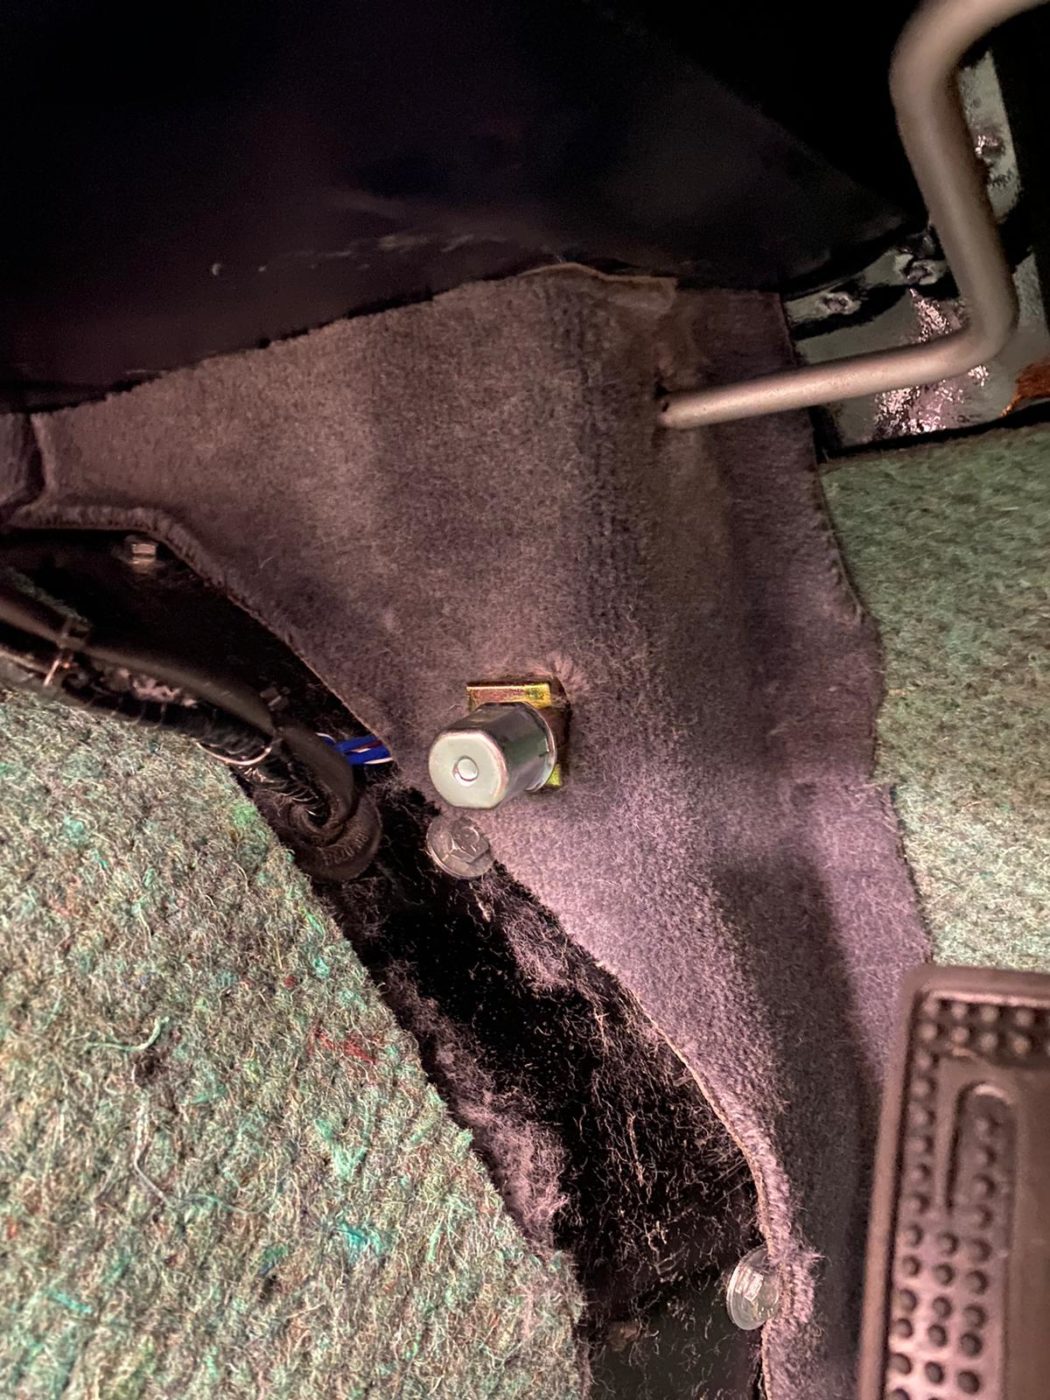
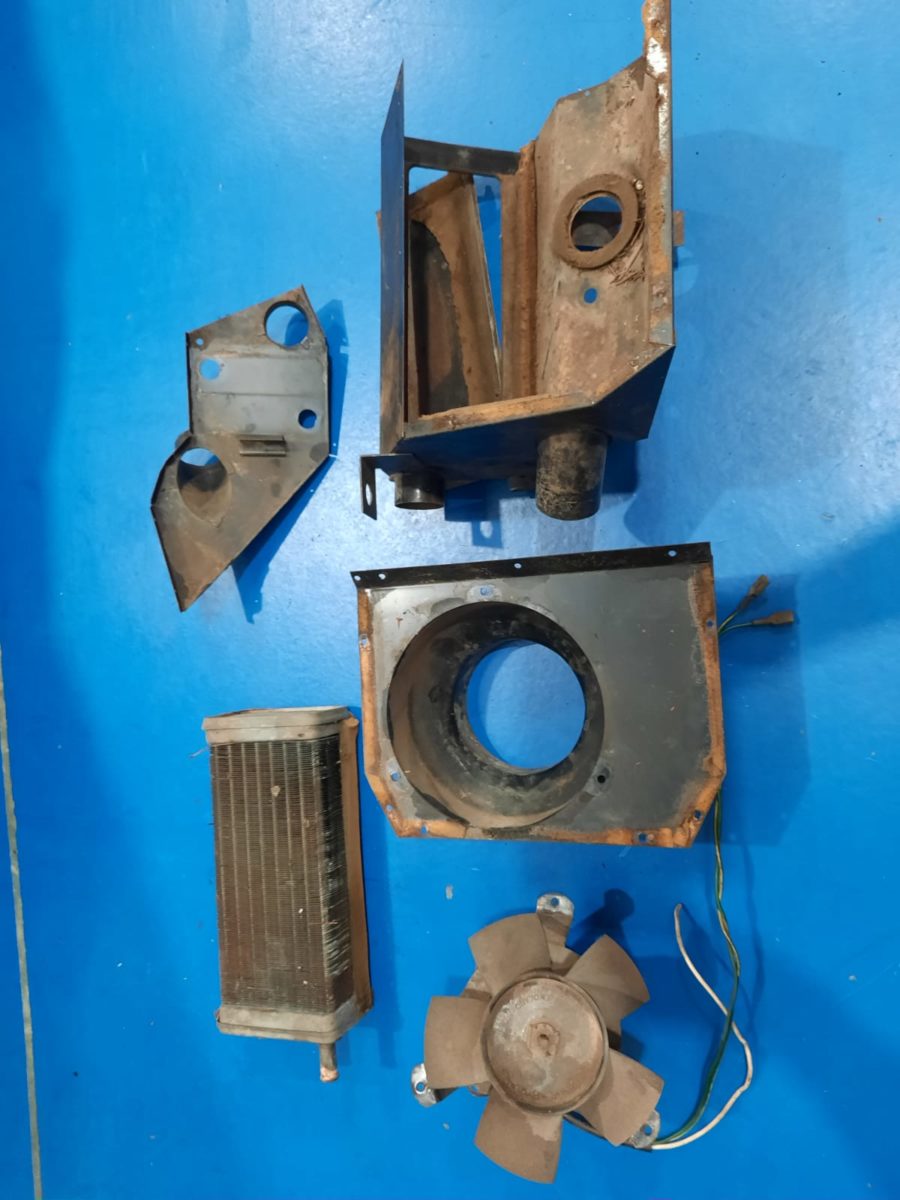
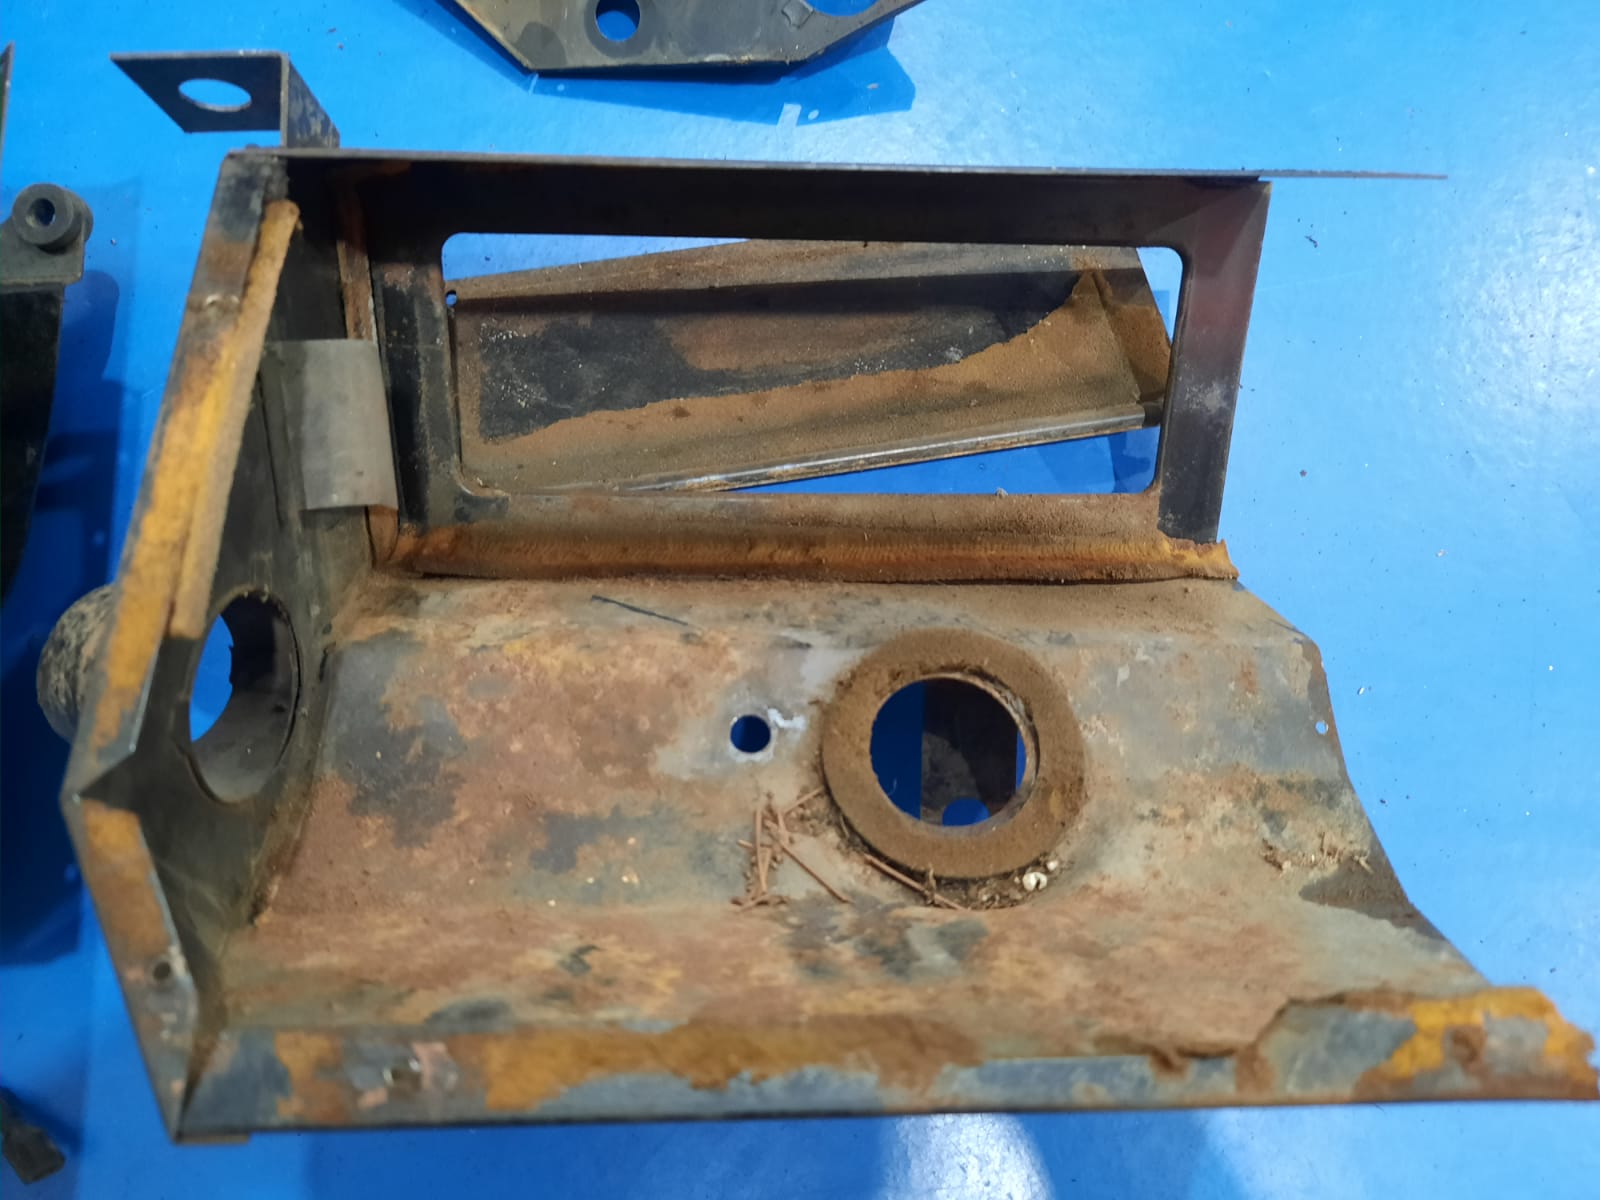
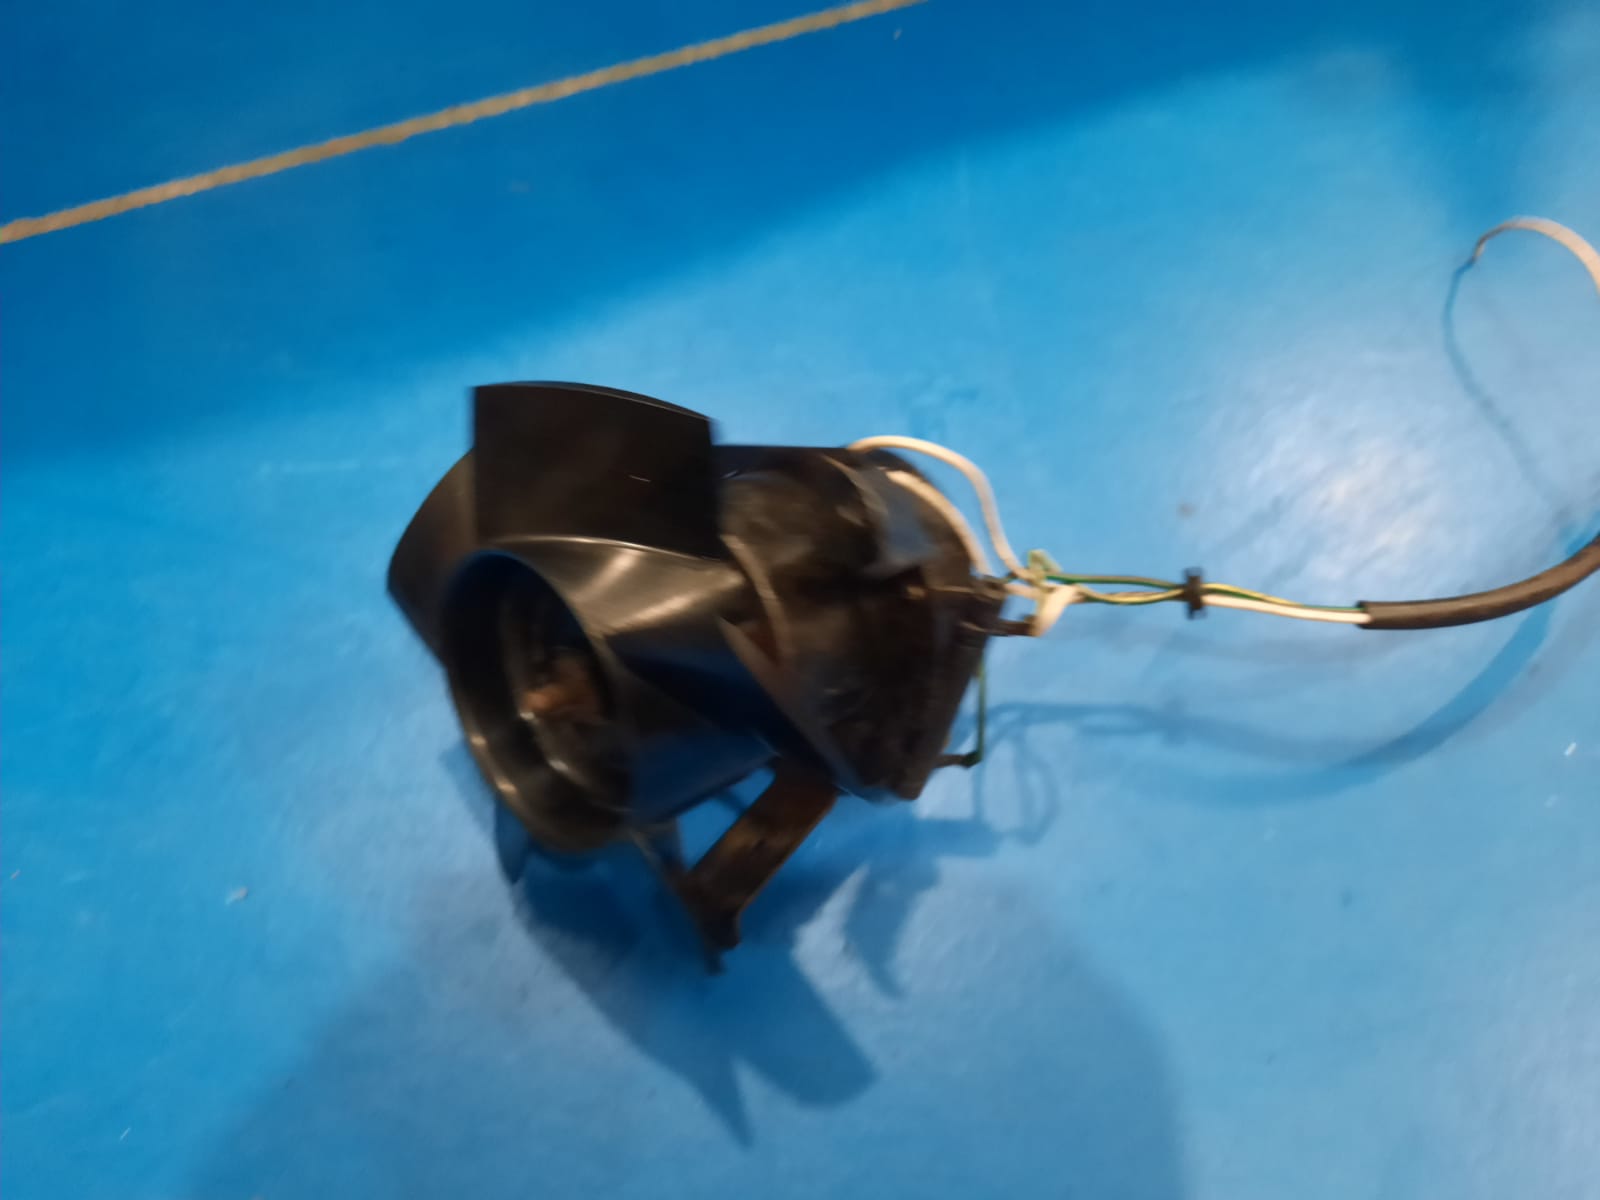
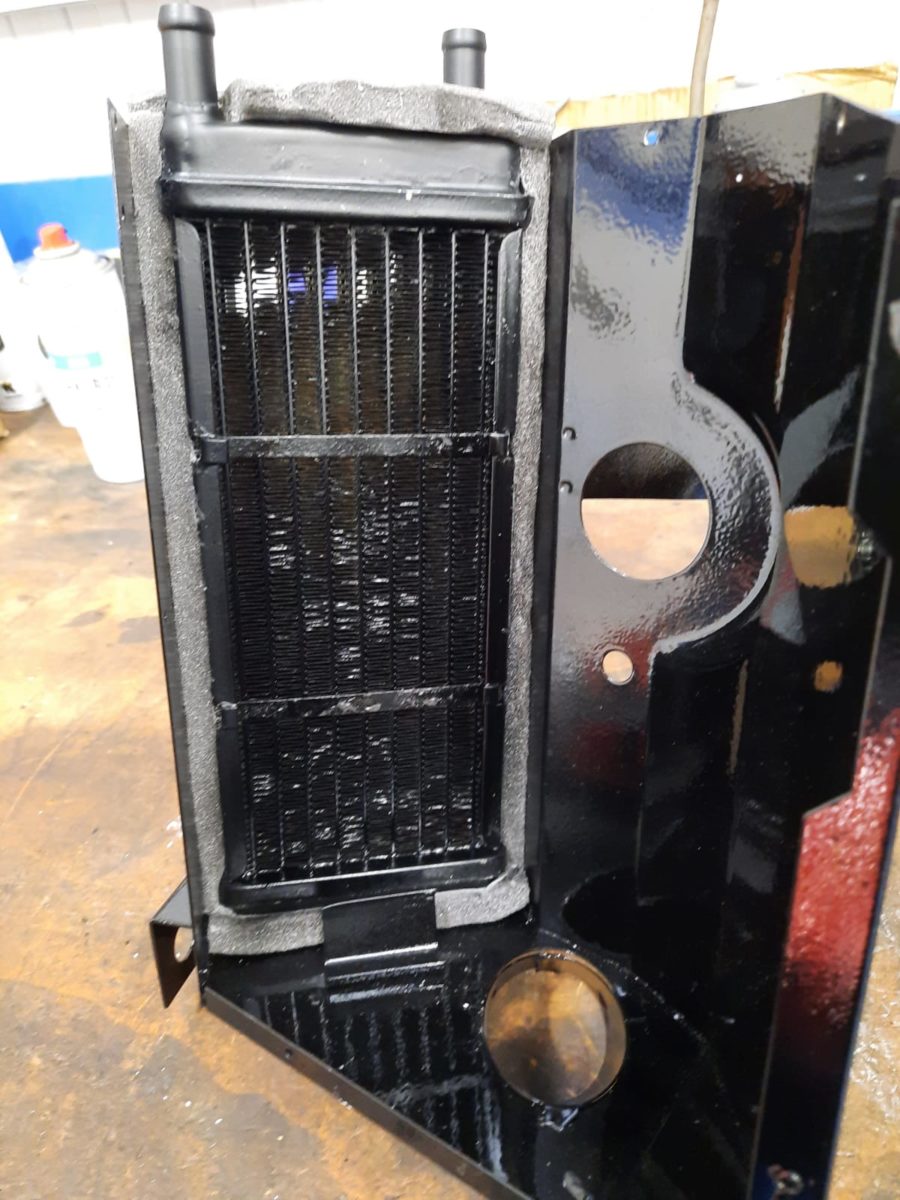
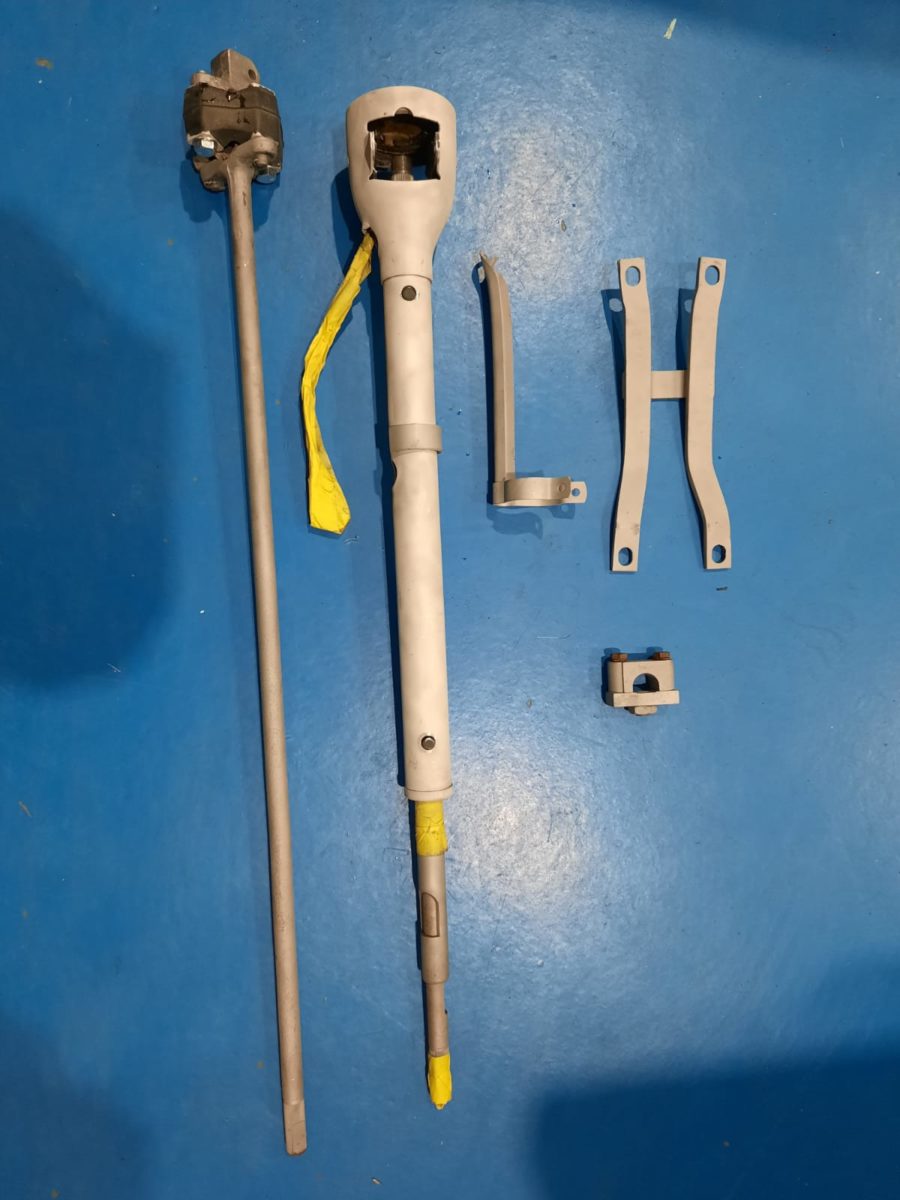
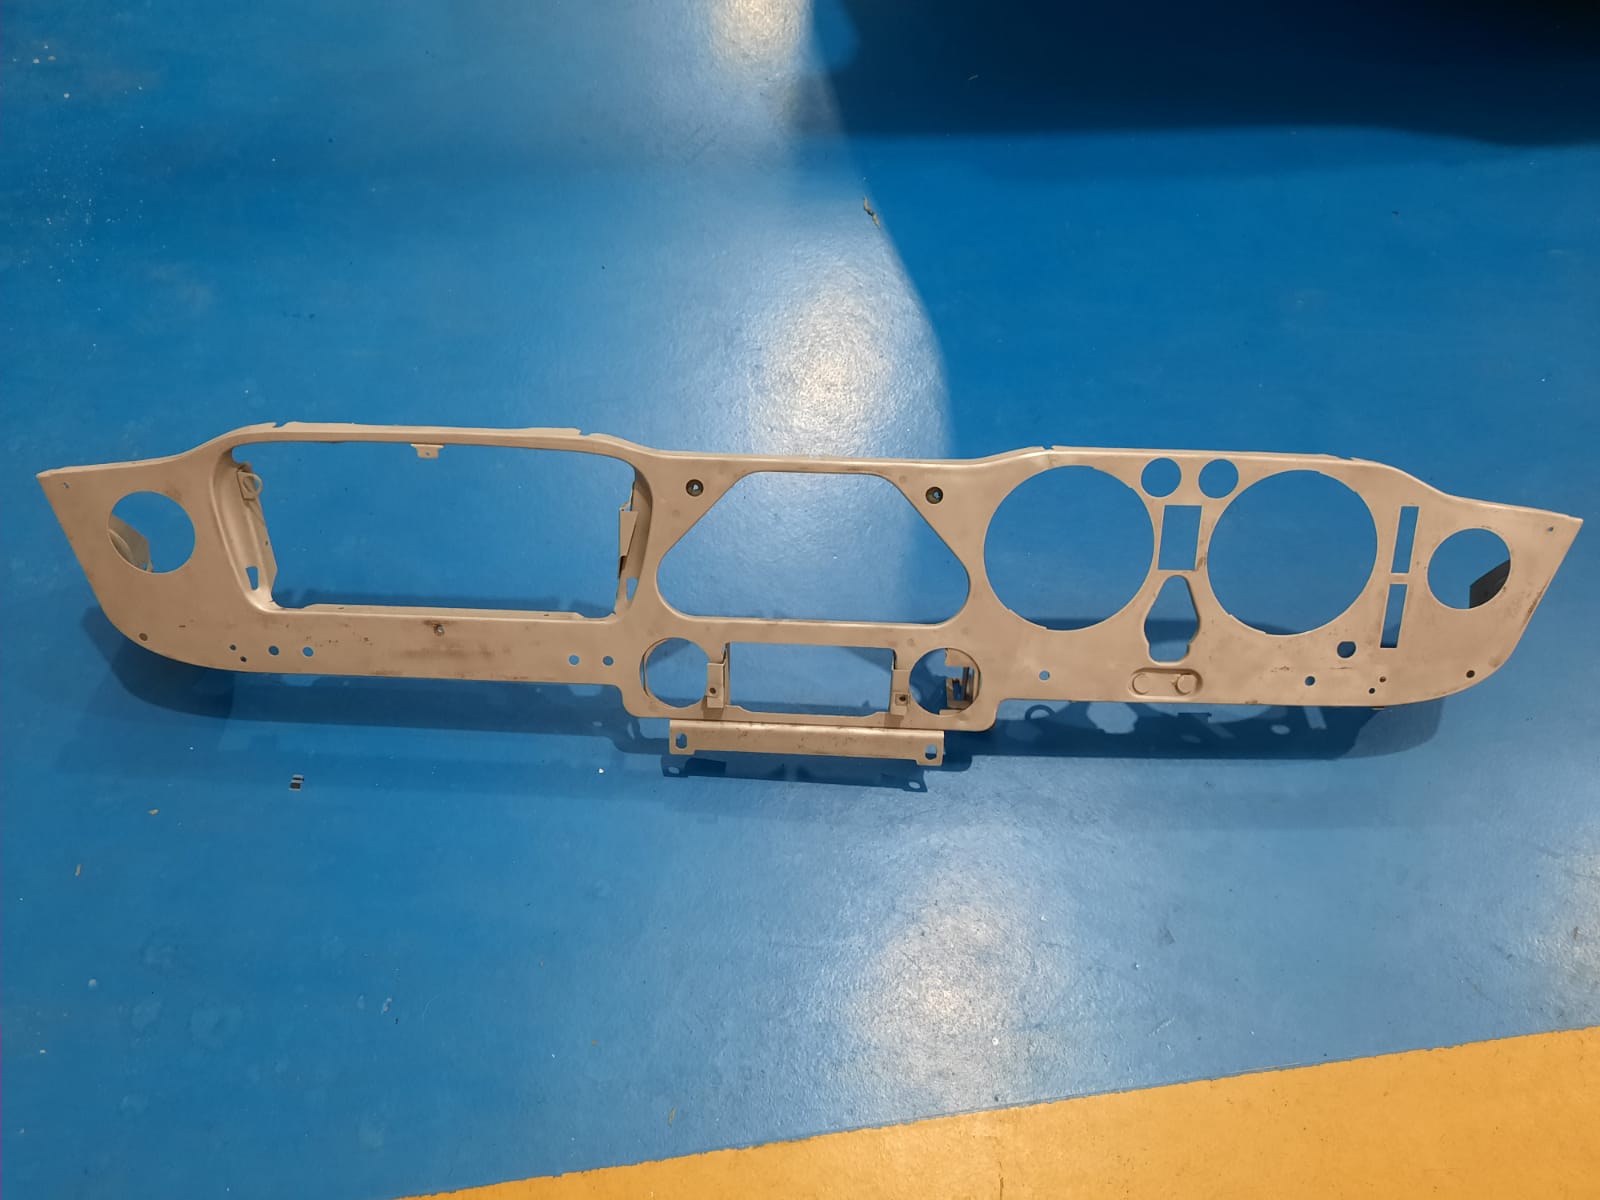
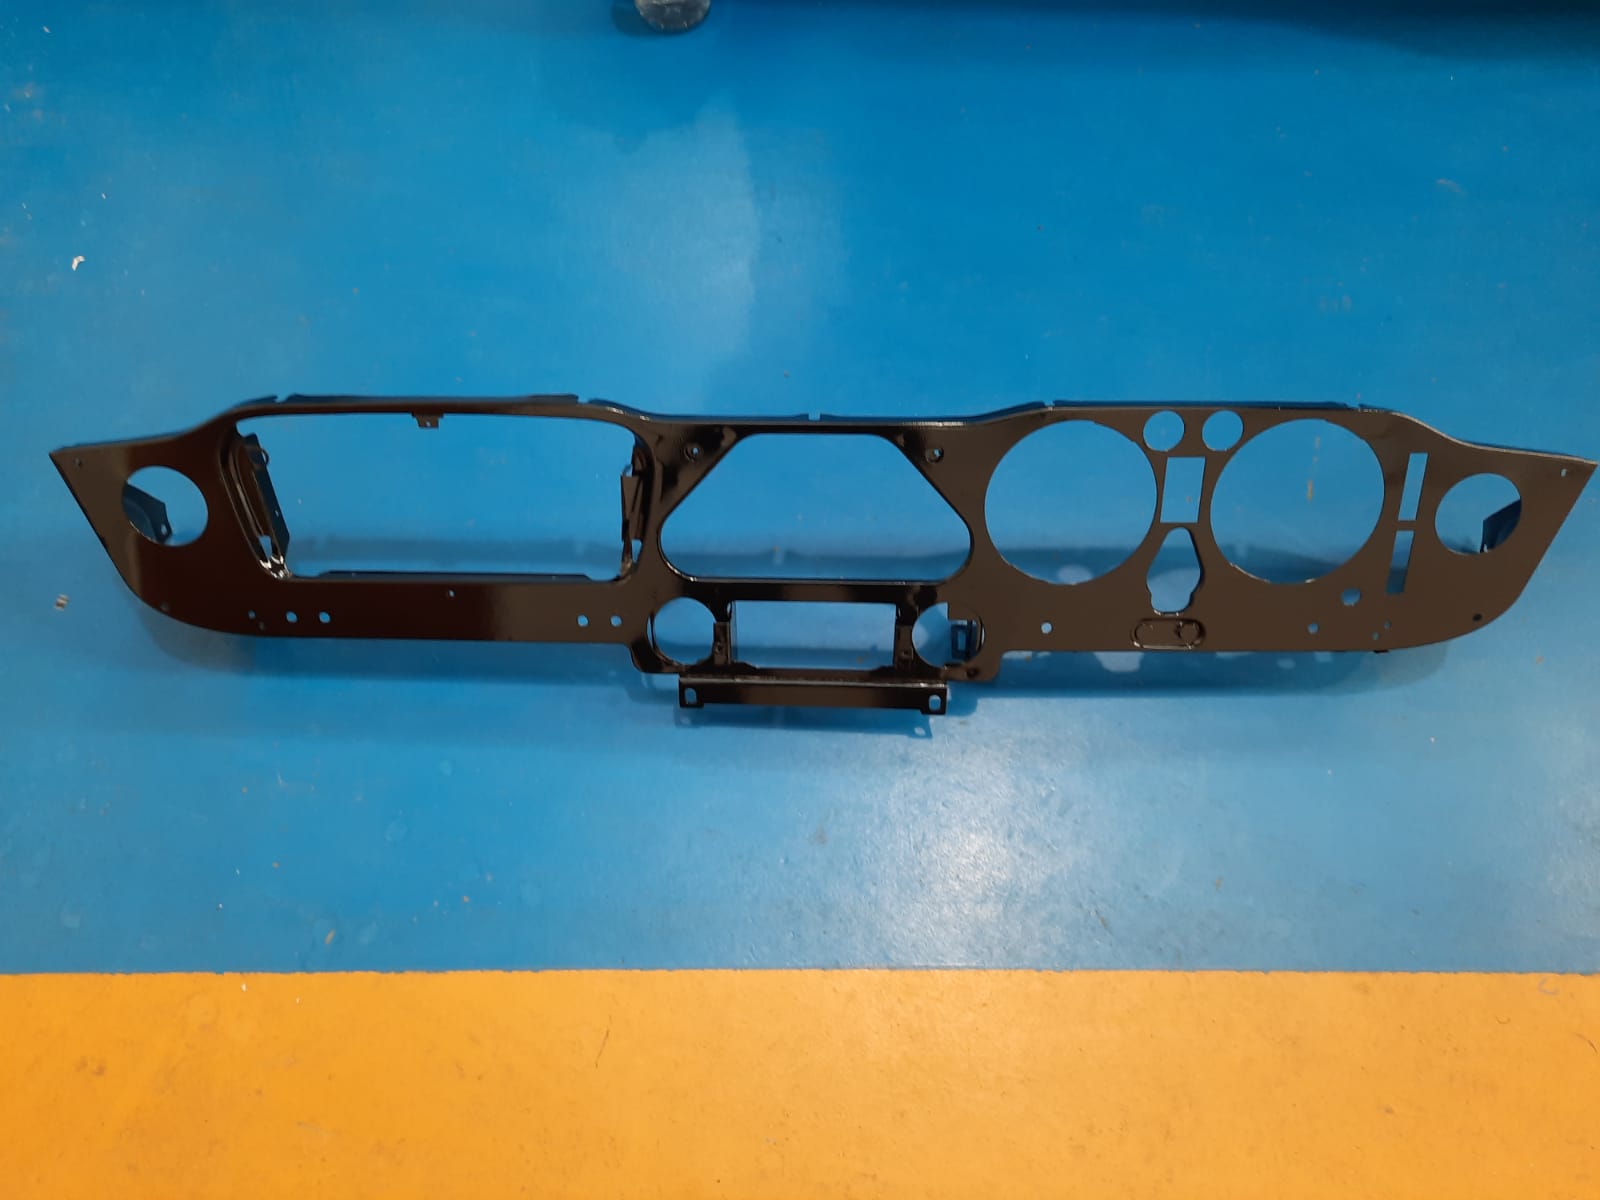
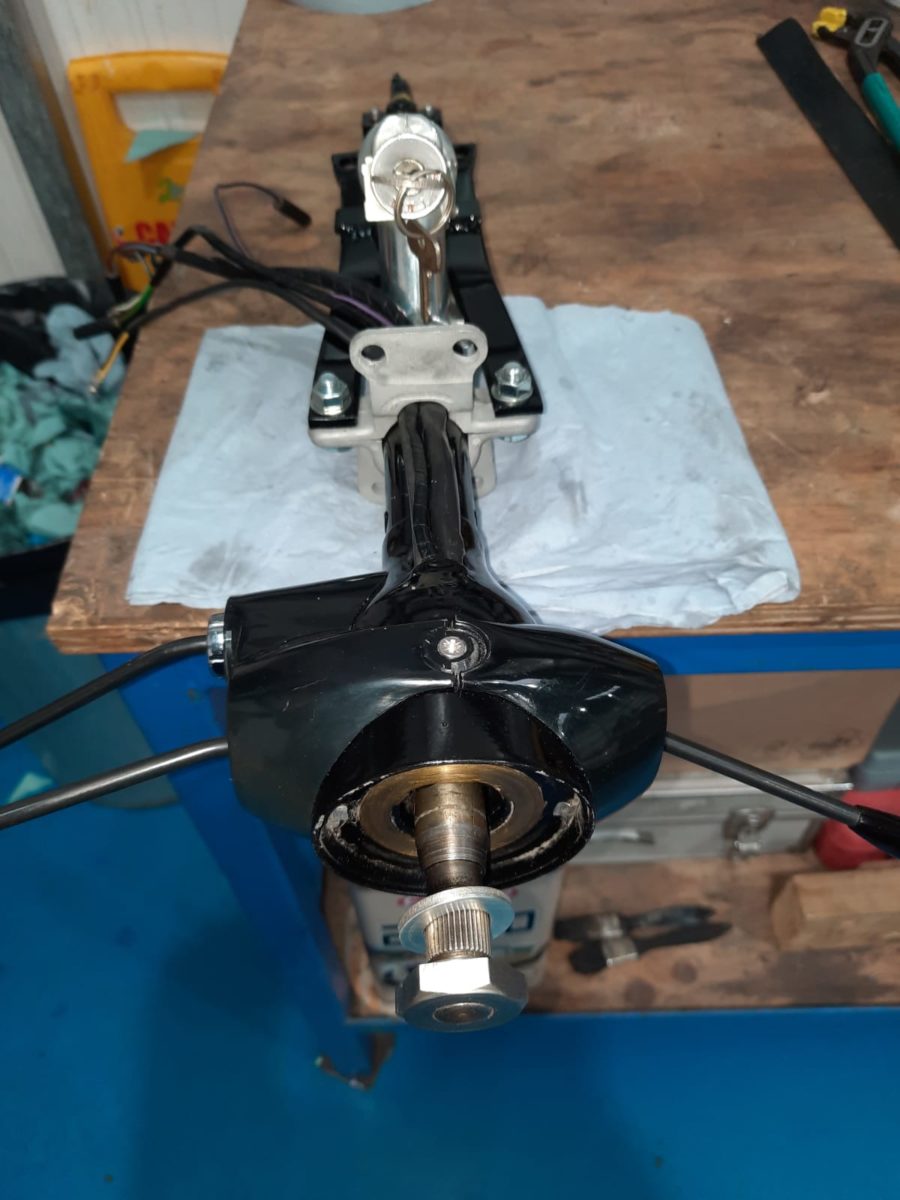
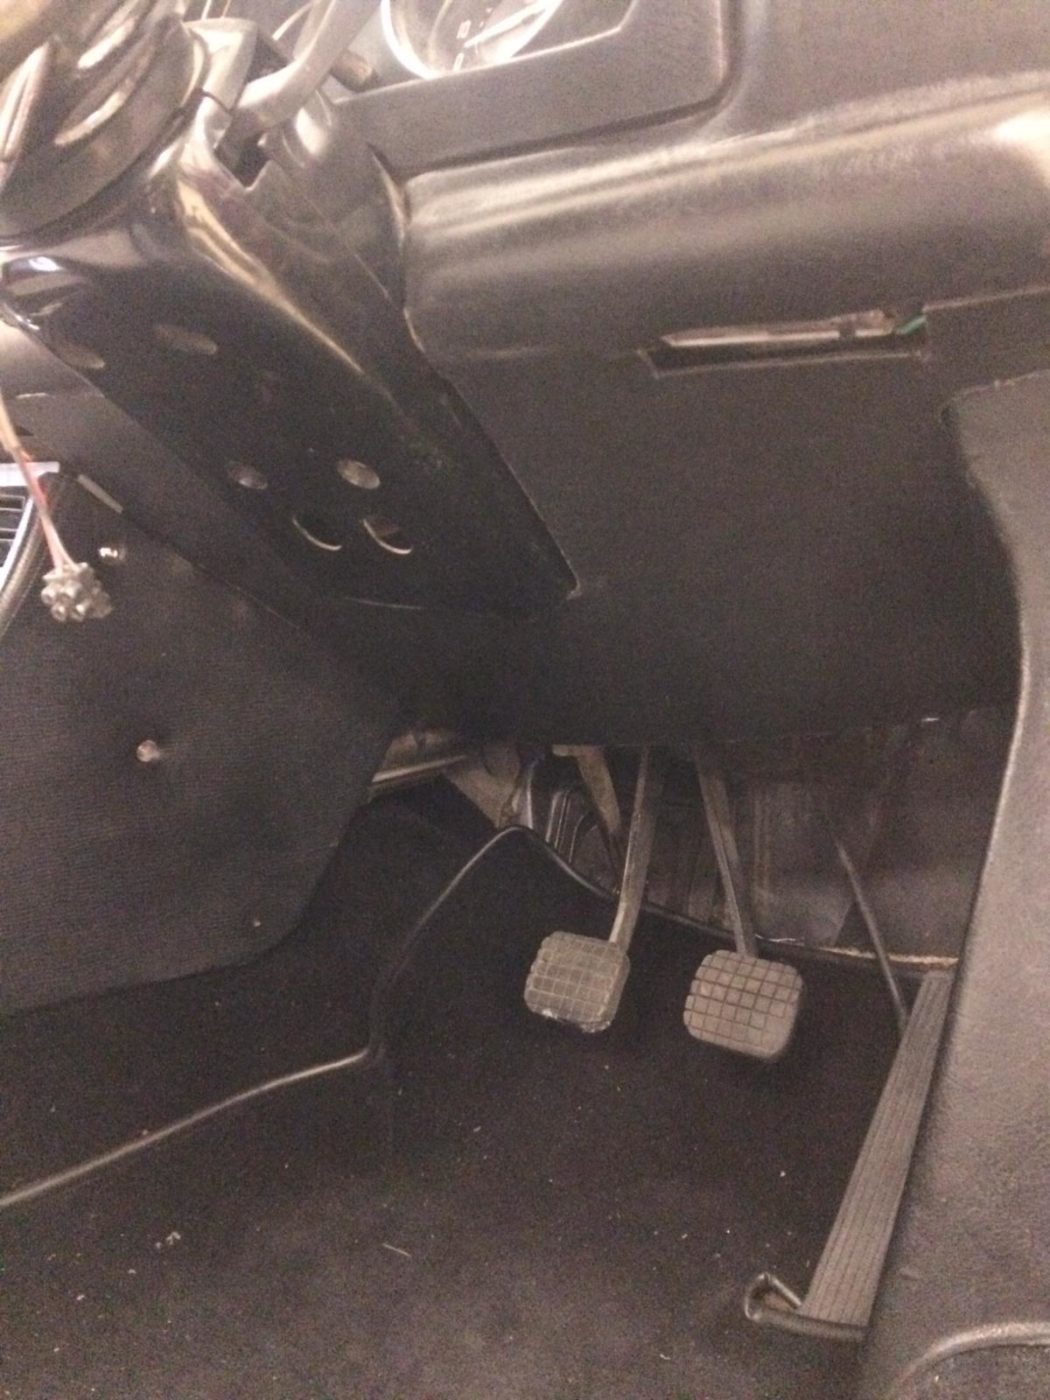
Most recently Mauro has been working on refurbishing some of the smaller elements such as the heater box which has been stripped and serviced, and then reassembled with new matrix. The pedal box has also been refurburshed along with the dashboad, steering column and pedal box.
Once all these elements have been refurbished, they’ve been fitted back into the car.


Our week has been very busy with two photoshoots at the start of the week and new projects arriving in the workshop.
Our trim shop has been fitting the frame to the TR6. This includes riveting straps to the frame bars, marking positions for fasteners around the rear of the hood and fitting those fasteners in position. The next step is to clip the front edge of the cover in place while the fasteners are riveted to the metal bar inside the hood.
Brian, one of our trim shop specialists the glued velcro to the sidebars and screwed in metal channels for the side rubbers. Once all the fasteners have been fitted, Brian could then fit the cover to the car.


Our Lotus Esprit has had a new water pipe fabricated from stainless steel to replace the old aluminium one that had rusted. This was made by hand in our workshop.


Although finish, the 1967 Jaguar E-type series 1 race car is always an ongoing project with new alterations being done frequently. This week a new door latch and release cable was fitted.
Our 1965 Triumph TR5 has had its split dashboard repaired. Refurbished by hand in our workshop, its now ready to be re-installed.
The trim shop has added wadding to the rear-seat centre section, glued the cover at front & back down and turned the fabric around the hinge at the back. The seats have also had the sides glued and pulled tight. Wadding has been added as well as extra foam to the side section of the rear seat base.
Primer has been done and its now ready for the fiberglass to be smoothed and corrected and the colour to be applied.

The Gold and Burgundy Jensen 541S had an issue with its engine which Ady, our engine specialist soon diagnosed as a cracked oil way. Oil was leaking into the water pipe. To discover the issue, Ady had to fill the oil way with water and push air through the pipe to identify the issue.
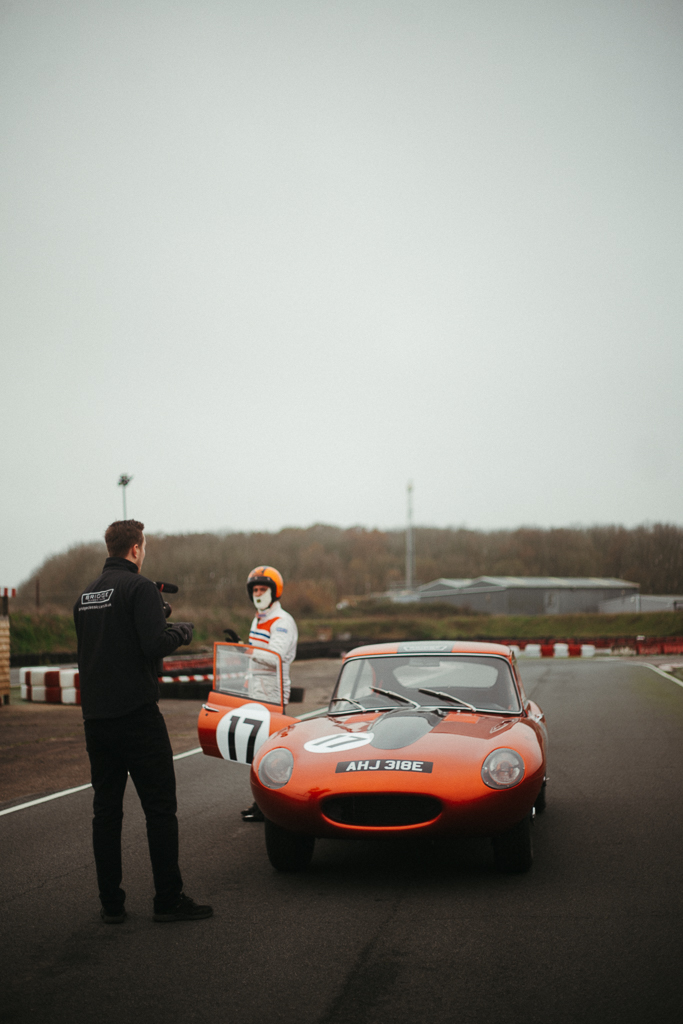
Both Monday and Tuesday were jam-packed for our marketing team with two photoshoots for our race cars, the Jaguar E-Type and the Chevron B20. We’re excited to share the results of these shoots. A big thank you to Ellough Park in Beccles for allowing us to shoot on their track and to Mark O’Connor who featured in the Jaguar E-Type photos. As an F1 test driver and stunt driver, he was the perfect person to get behind the wheel and model for the shoot!

There’s been a lot going with week already and its only Wednesday! Take a look at what’s been going on s far.
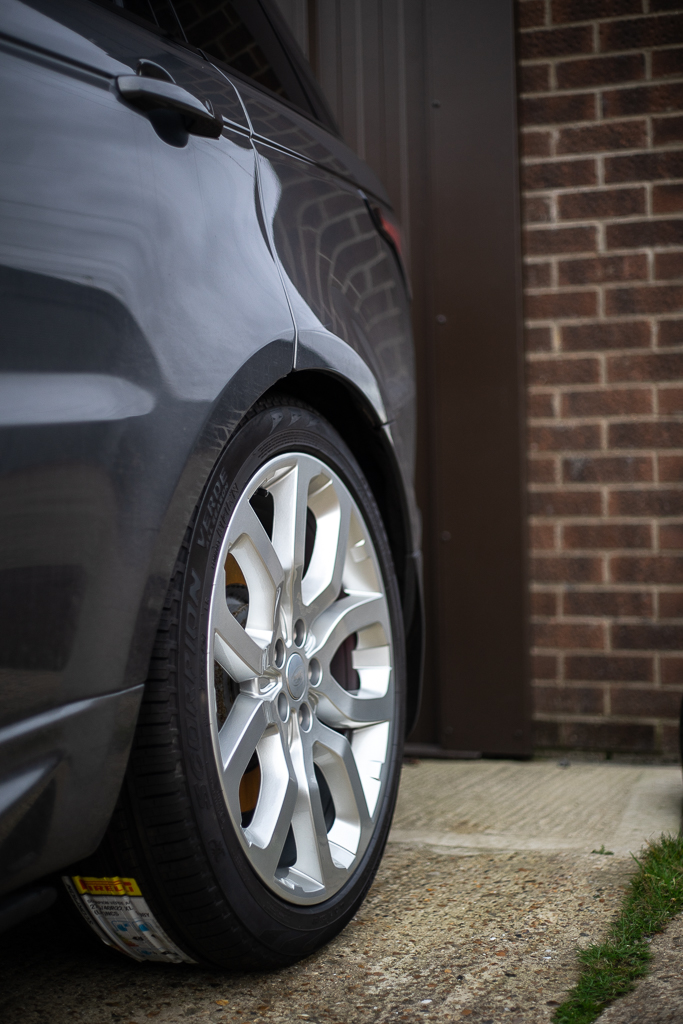
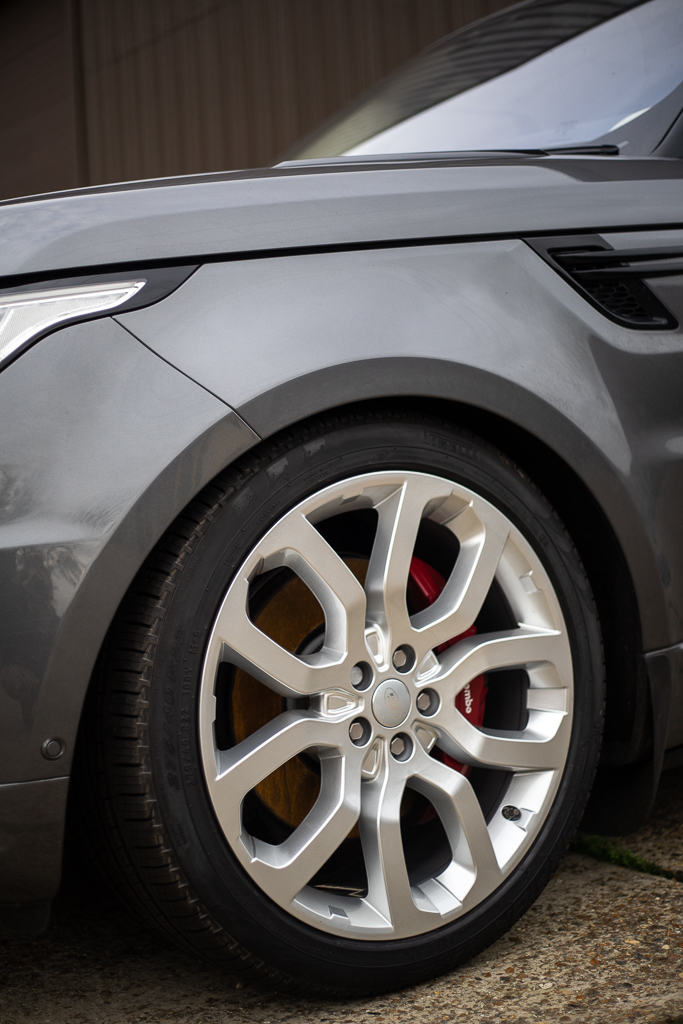
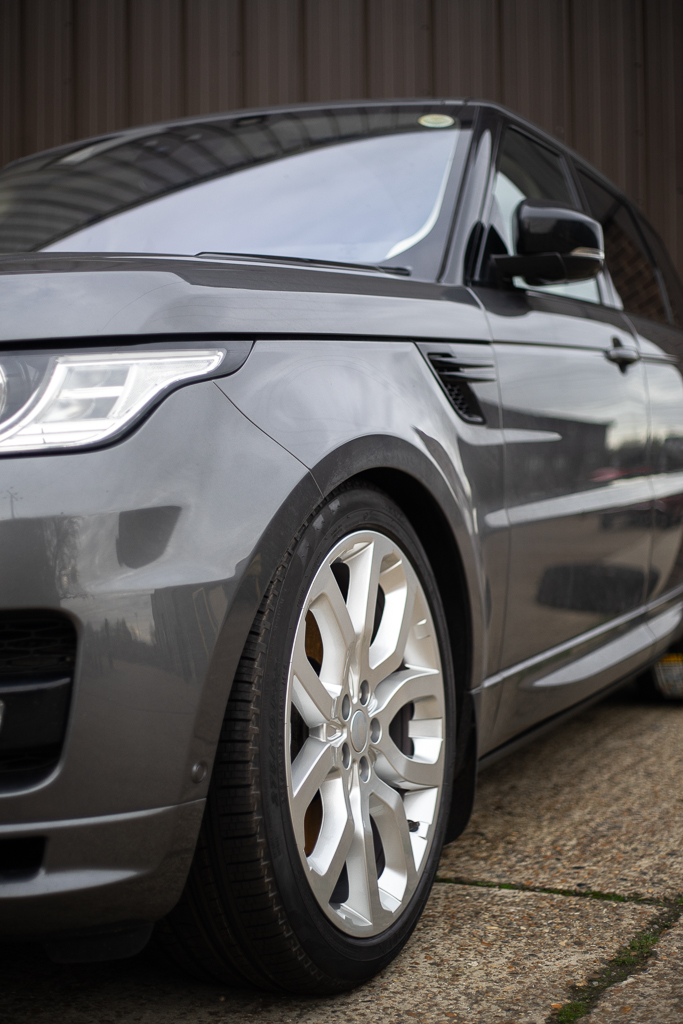
One of our directors, Gordon, had his Range Rover Sport’s tyres refurbished, ready for the cold winter months ahead. Now fully refurbished, Gordon’s Range Rover is ready to take on the elements.
As seen in our blog yesterday, the 1967 Jaguar E-Type Race Car has now been finished! This has been an incredibly exciting project that has been in progress since 2016. Over the last few days, the finishing touches have been added such as the pinstripes on the bonnet and fine-tuning the engine. The bonnet itself has also be re-installed to make sure it fits after the recent engine works.
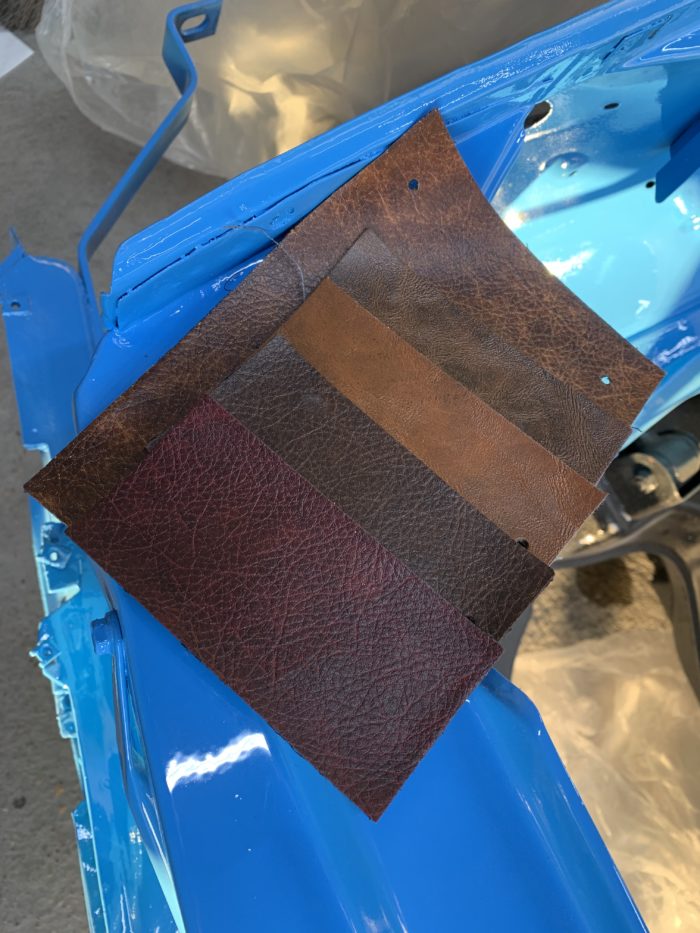
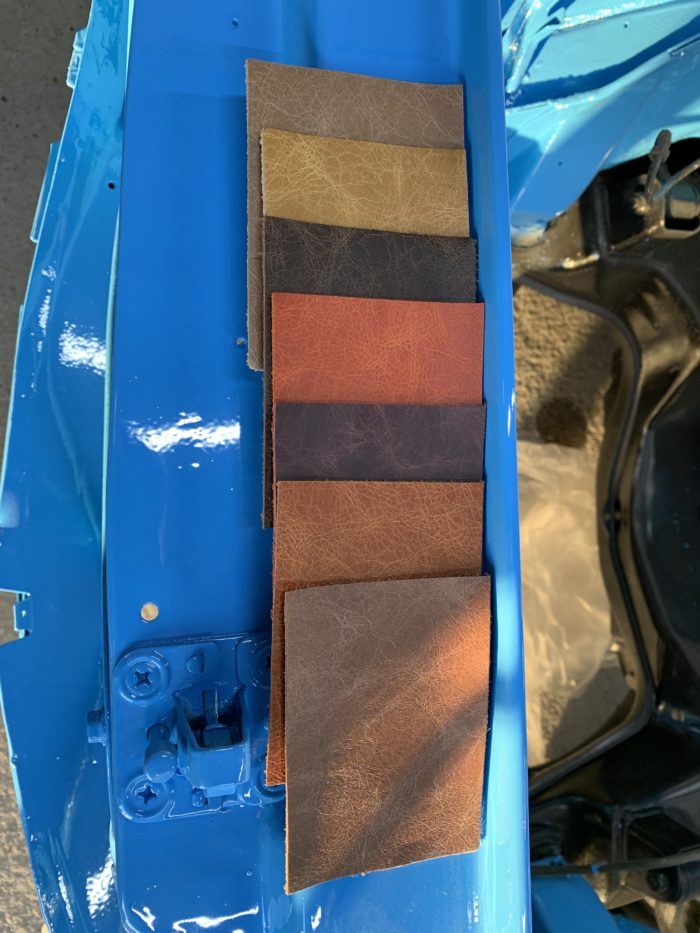
Our other director, Craig, is in the process of choosing the leather for the interior and the spray finish for the fuel tank. It’s deciding details like this that make classic cars so personal to their owners.

One of the more notable updates on the Morris Minor 1000 is the new hood. The trim shop has done a fantastic job yet again to make the perfect custom hood, allowing this Morris Minor to be more usable throughout the changing seasons. Our technician Scott has also been trying to figure out the reason for the play in its front wheels. The mystery is yet to be solved…
The front suspension has also been tightened, the curtesy light wiring is being installed and Adam is troubleshooting the electrics.
Lots of little updates for the Grey Jensen 541R such as preparing the door rim before it goes to the trim shop, stripping the bonnet ready for paint, made the curtesy light switch by hand, installed the hand brake cables and panhard rod as well as the speedo drive.

Our 1968 Triumph TR5 is awaiting its interior but it has had its heater installed!
Our blue 1973 Jaguar E-Type Series 3 is awaiting on a new steering rack, clutch slave cylinder and bumper to be fitted. The parts have been ordered so the E-Type should be looking good as new in no time!
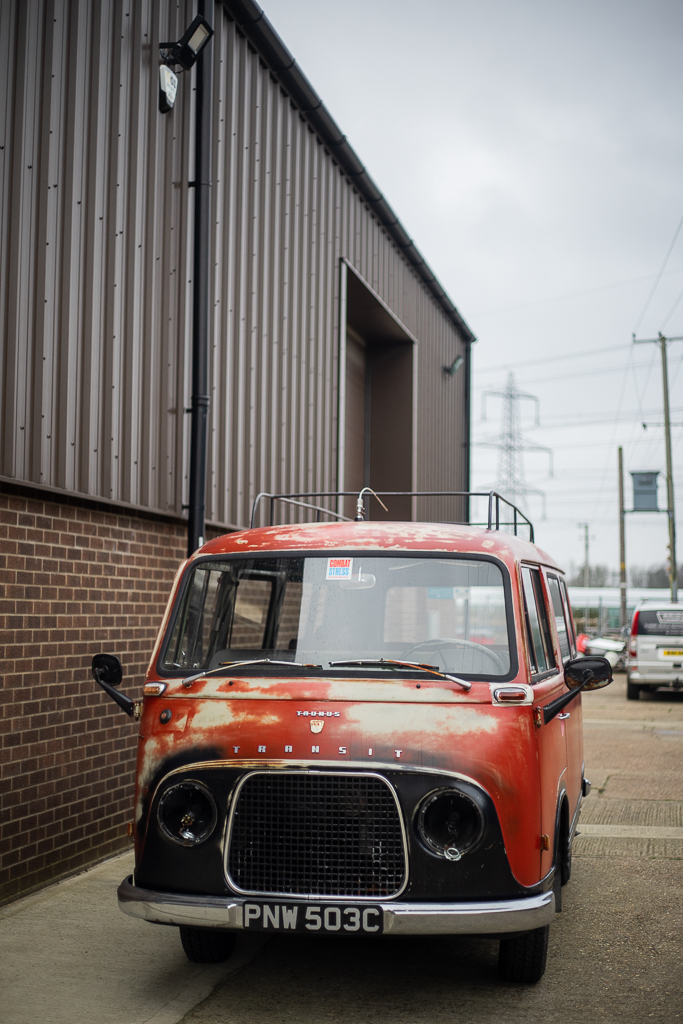
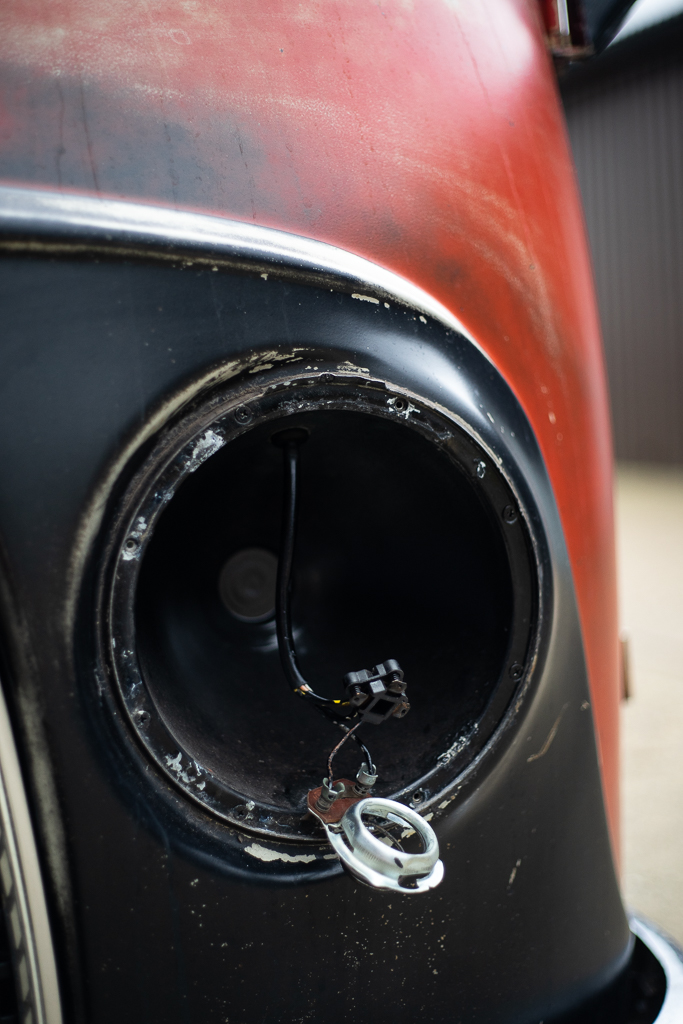
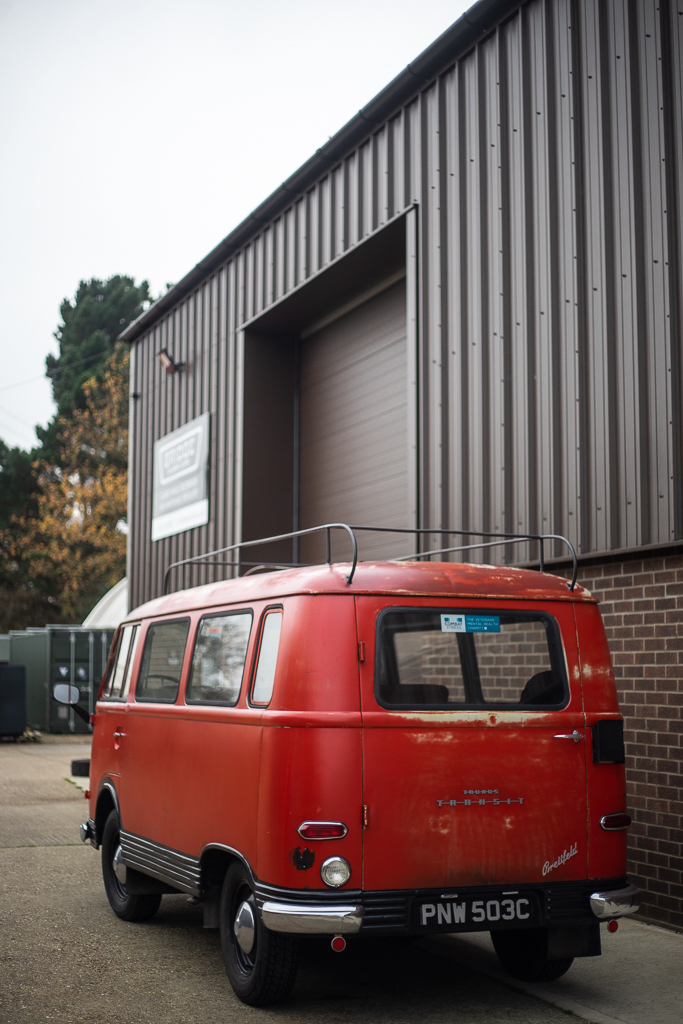
This lovely 1953 Ford Transit is almost ready to leave us now. We’re just waiting on some new 6 volt bulbs for the headlights and then it’ll be ready to go!
We’re giving the blue Jensen a general nut and bolt service. It came in to have its clutch, exhaust and breaks replaced which have been or are in the process of being fixed.
The Peony Red Jensen 542S has had its seats made up. The next step is to complete the set and install them. Our trim shop never fails to impress us with their stunning interior projects.
The Peugeot 504 has now had all its interior trim completed. The last few pieces include making and fitting the hood which had to have the leather glued to the frame once made up.


The black Jensen is visiting our paint shop for some touch-ups and corrections in the paintwork.
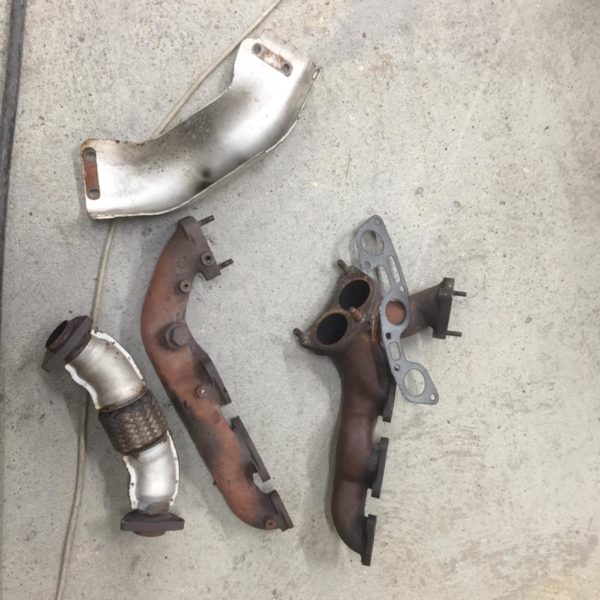
Ady our engine specialist has taken apart both exhaust manifolds on the Nissan 300ZX.
The fuel pump has been rewired, two bilge pumps are set to be added, the brakes have been bled, the grease nipples re-greased and the heater has been ordered.
A new gear stick gaiter has been made and fitted by the trim shop. Our range rover is making steady progress to be completed soon.

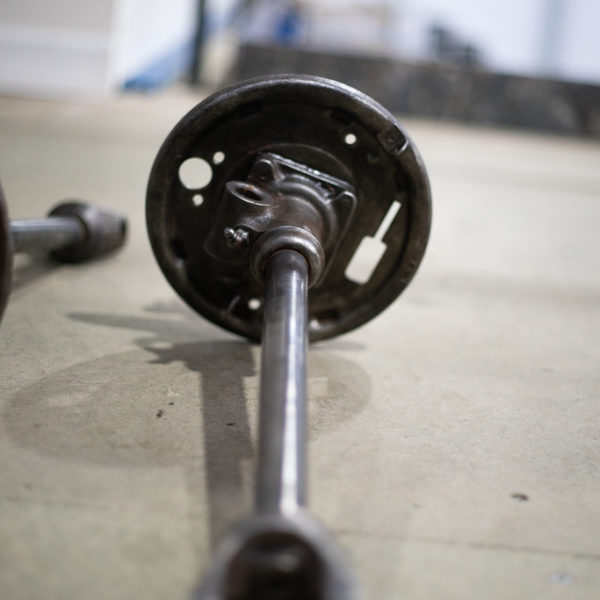
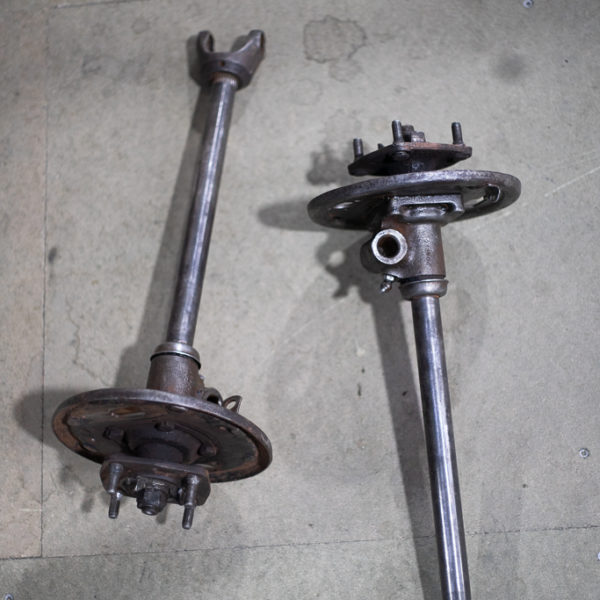
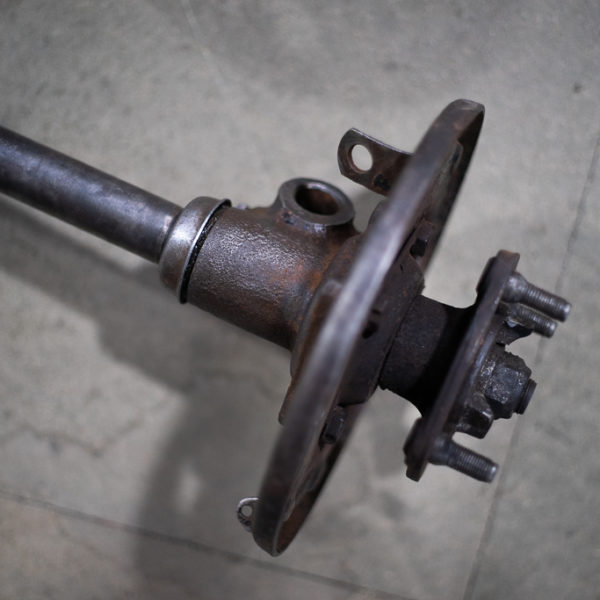
Although we don’t have the Black Spitfire back with us, we do have the task of replacing the half shafts. We’re hoping we can order in new pieces however we may need to take these apart instead and refurbish them ourselves.

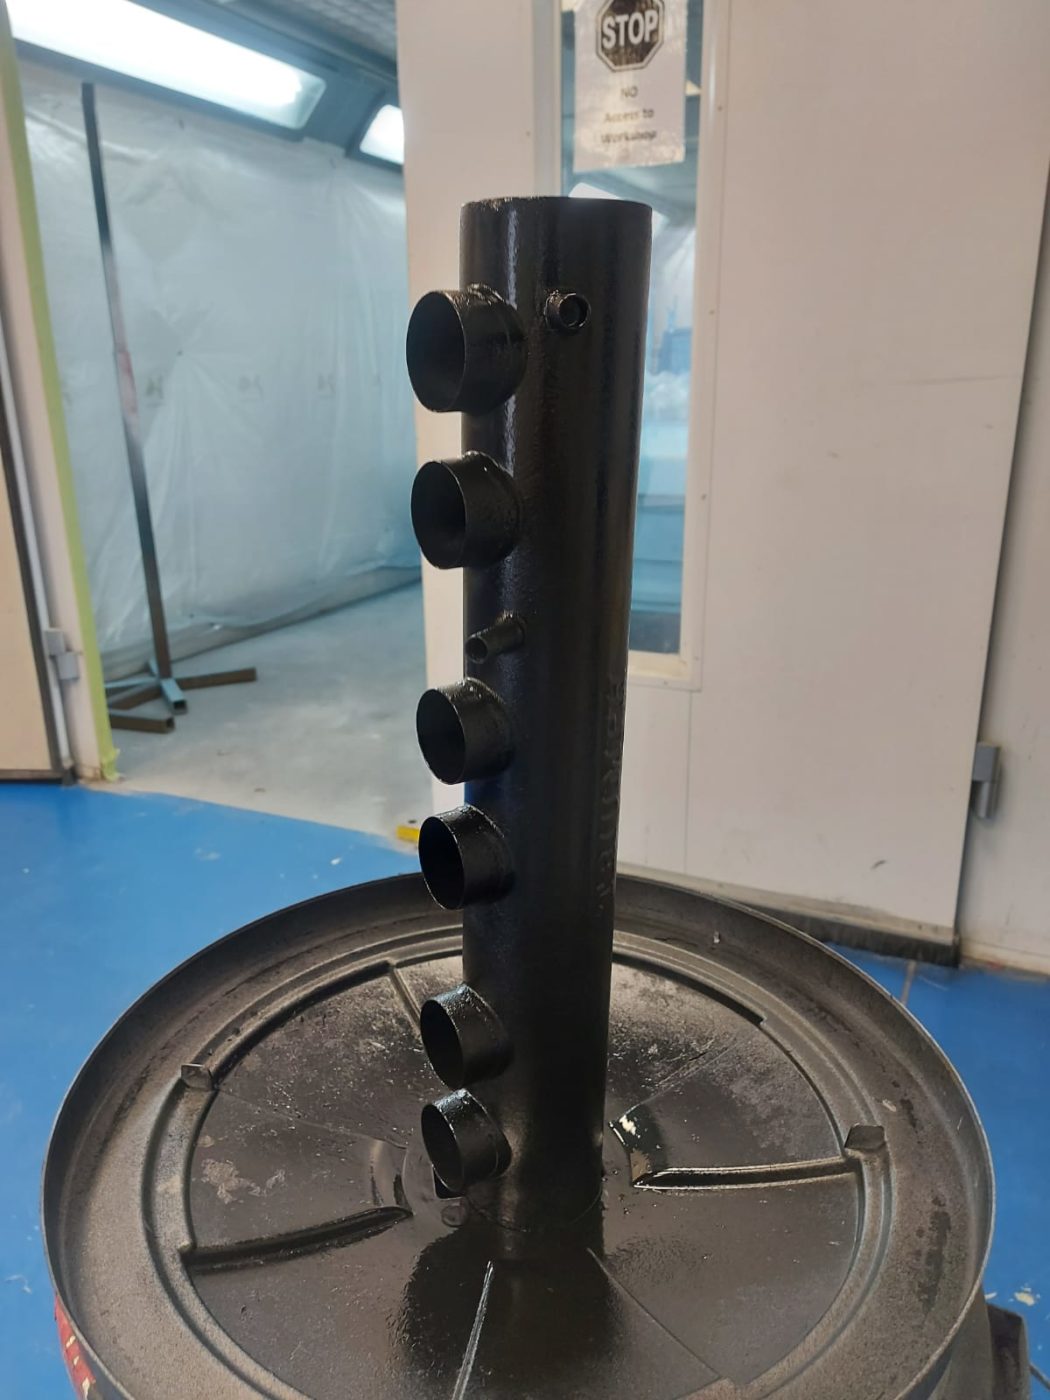
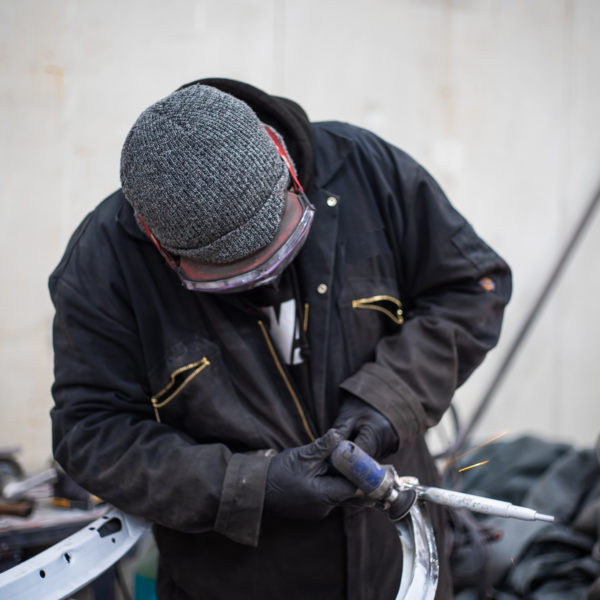
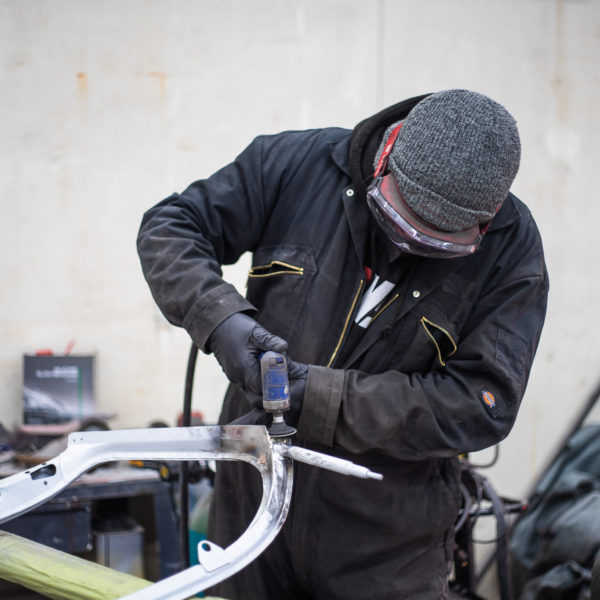
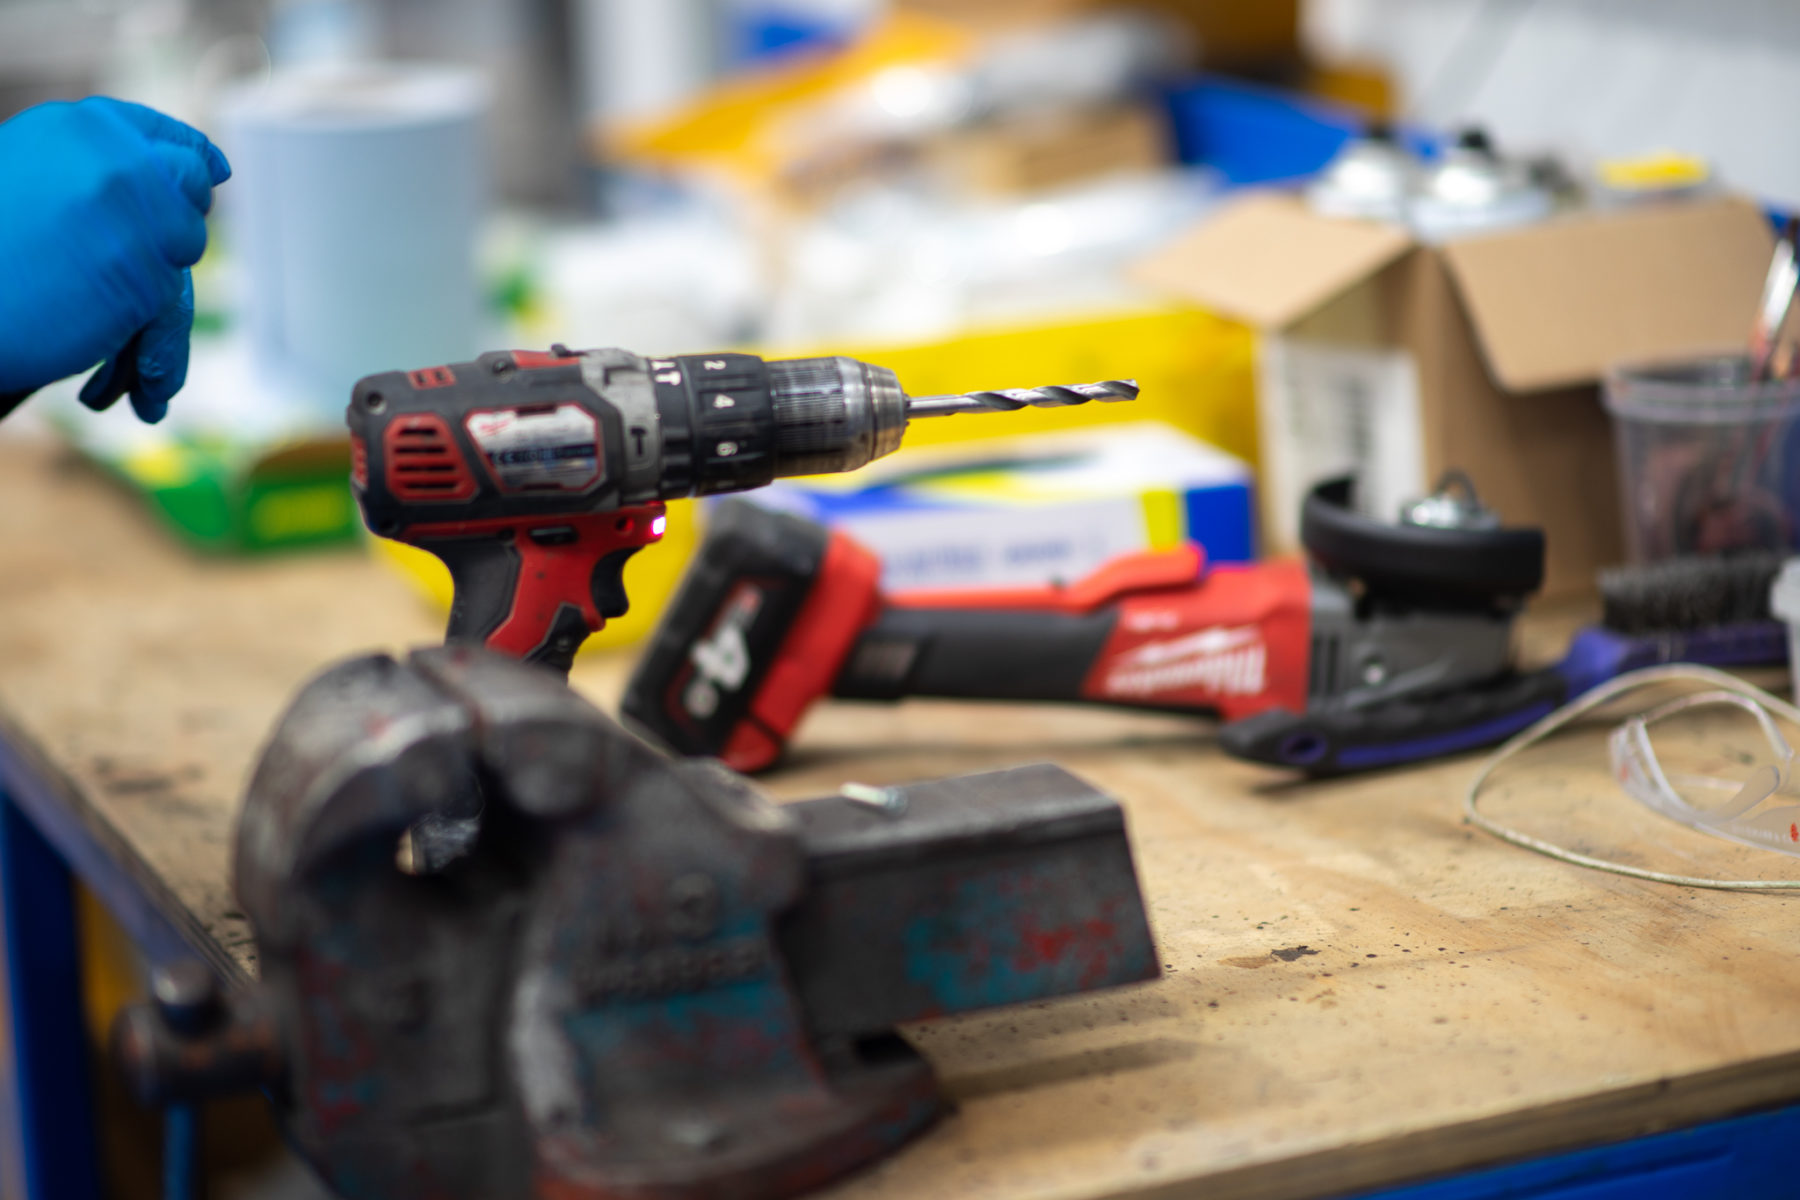
The latest step on the TR5 is that it’s air intake for the engine has received a fresh layer of VHT Crinkle heat resistant paint to ensure it lasts under the high temperatures generated inside the engine.
Restorations often look like a series of large steps but in reality are many many tiny steps just like this that go together to create the finished car. Although this air intake paint job may look small, it’s a vital step in the process of restoring someone’s beloved car.
Our highly trained technicians take pride in carefully curating each part of a vehicle to ensure everything is perfect, with no expense spared.
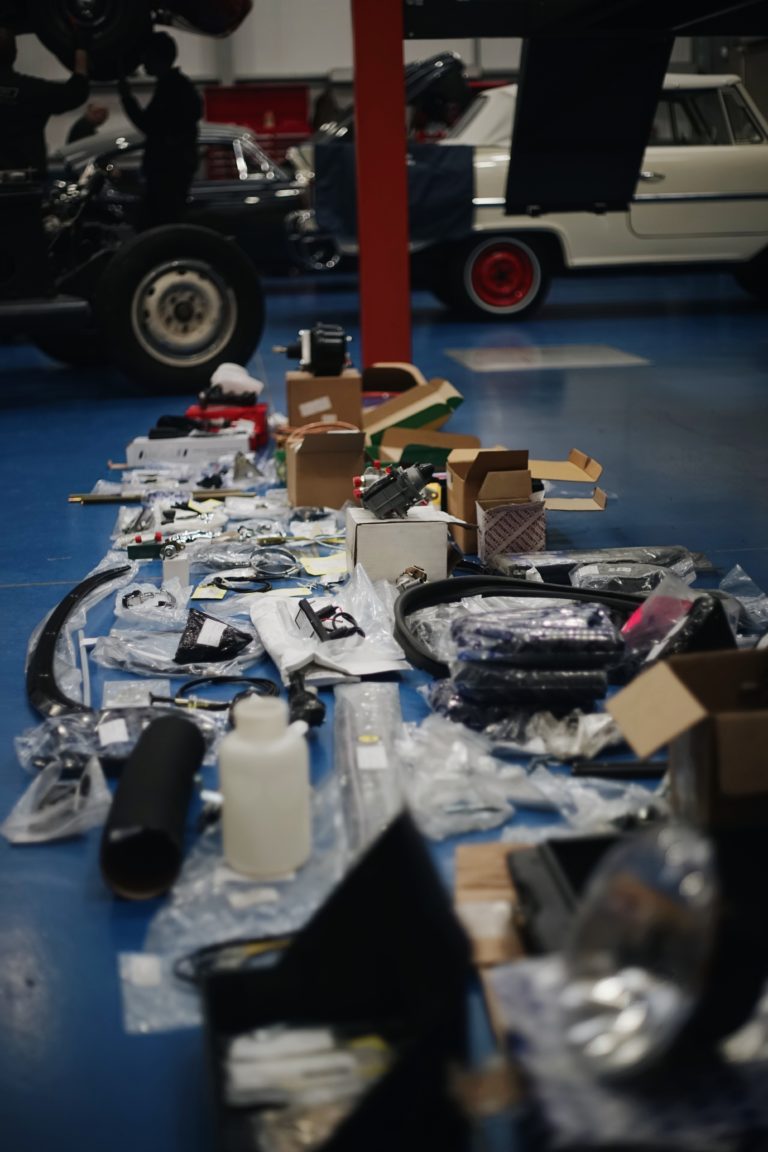
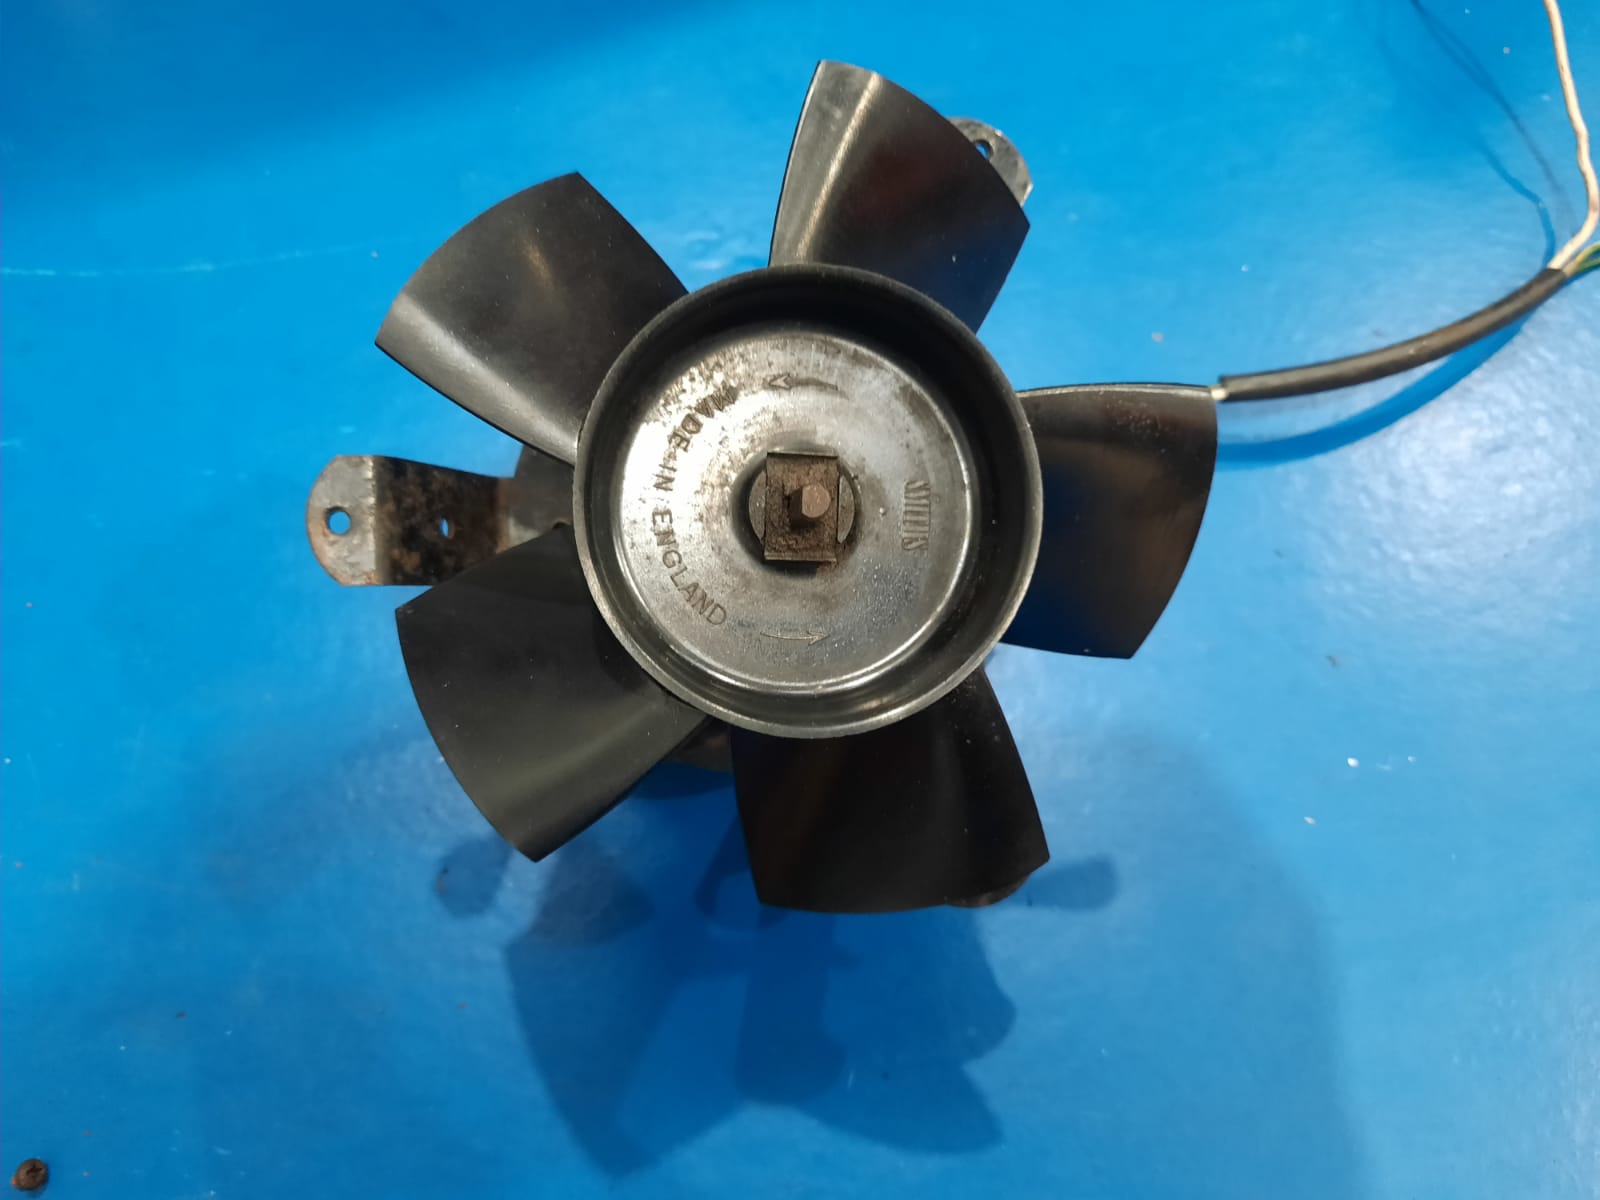
The parts for our 1968 Triumph TR5 have arrived and our technician Mauro has set them all out to assess what’s there and If anything more needs to be ordered.

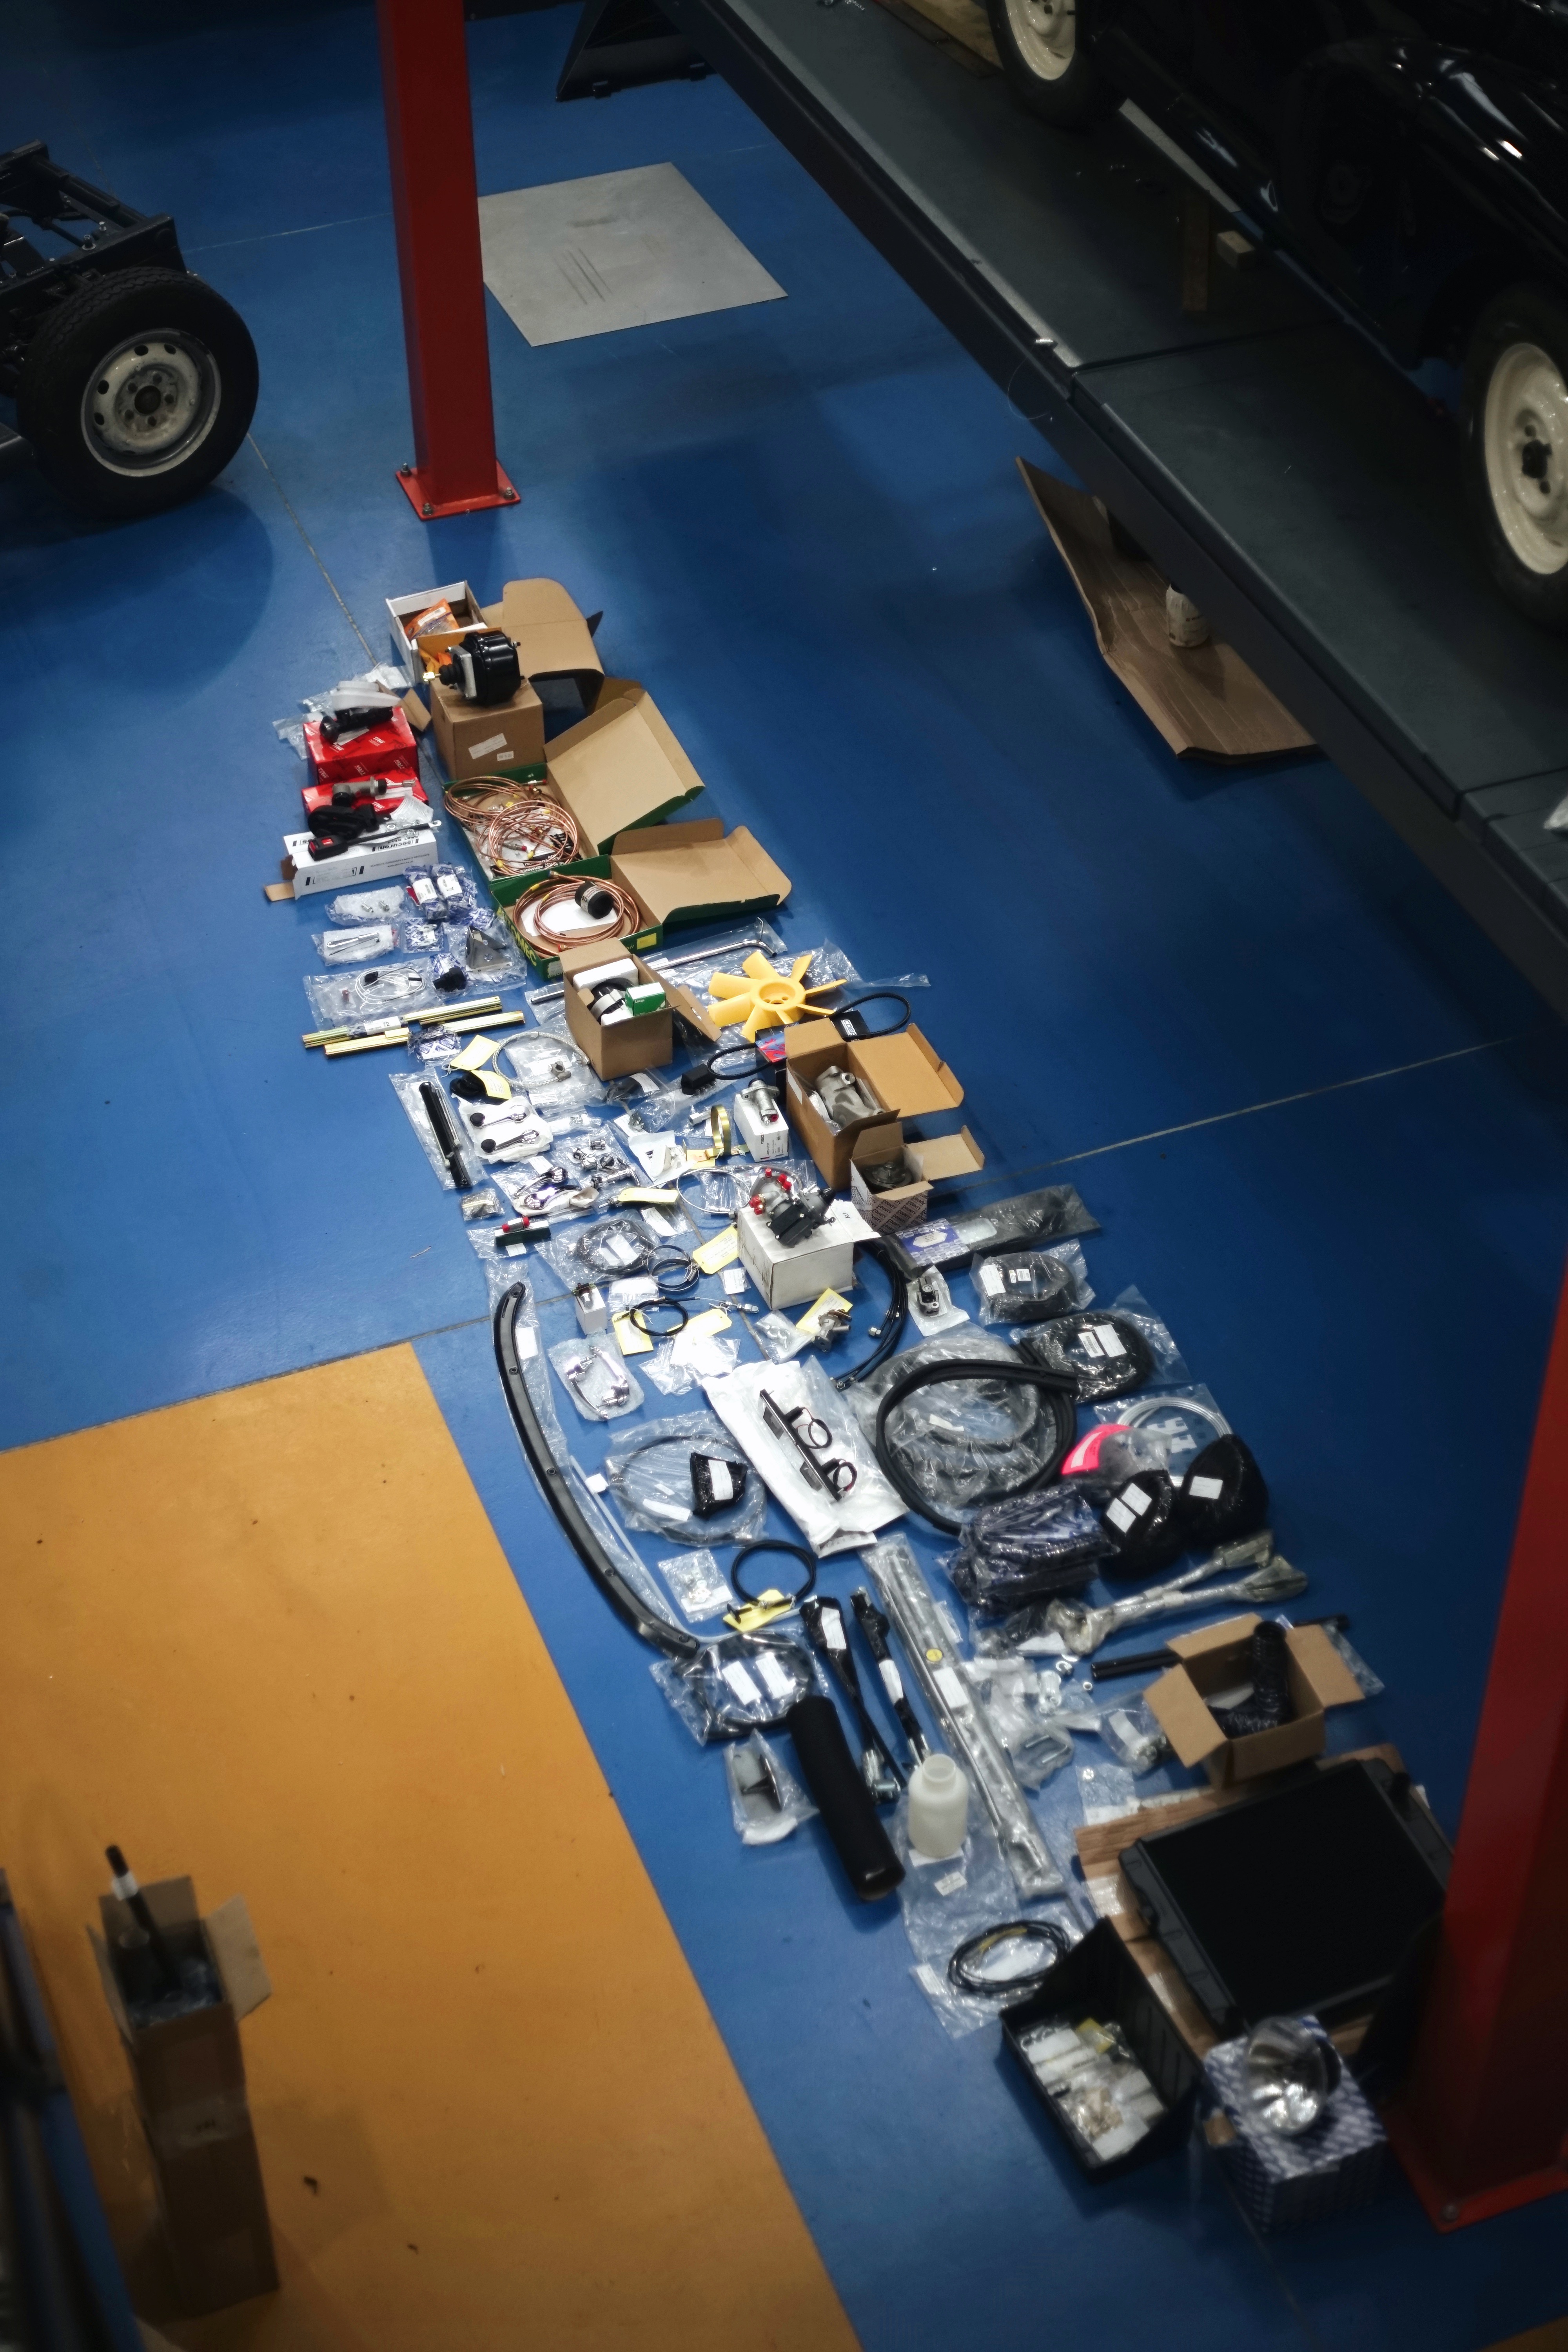
Within this pile of goodies, you can find brake parts, clutch, seat belts, chrome parts such as door handles, rubber for the windscreen, injector pump, radiator, fan, headlights, copper fuel, and brake lines as well as a huge host of other bits that will go towards making our TR5 whole again!
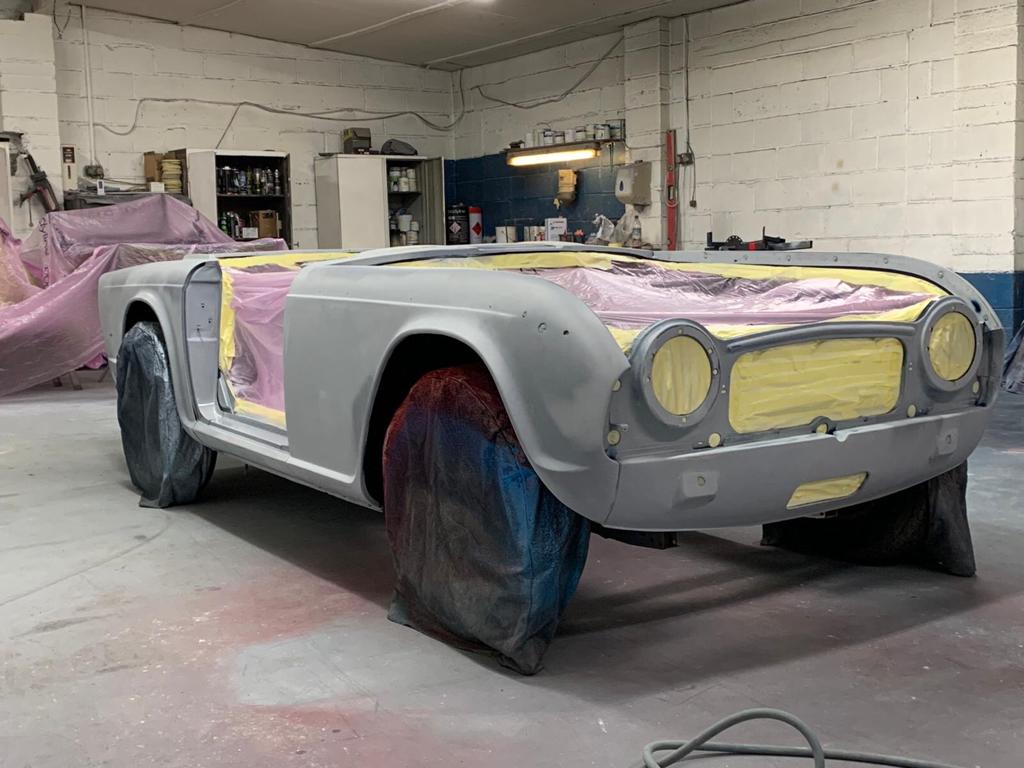
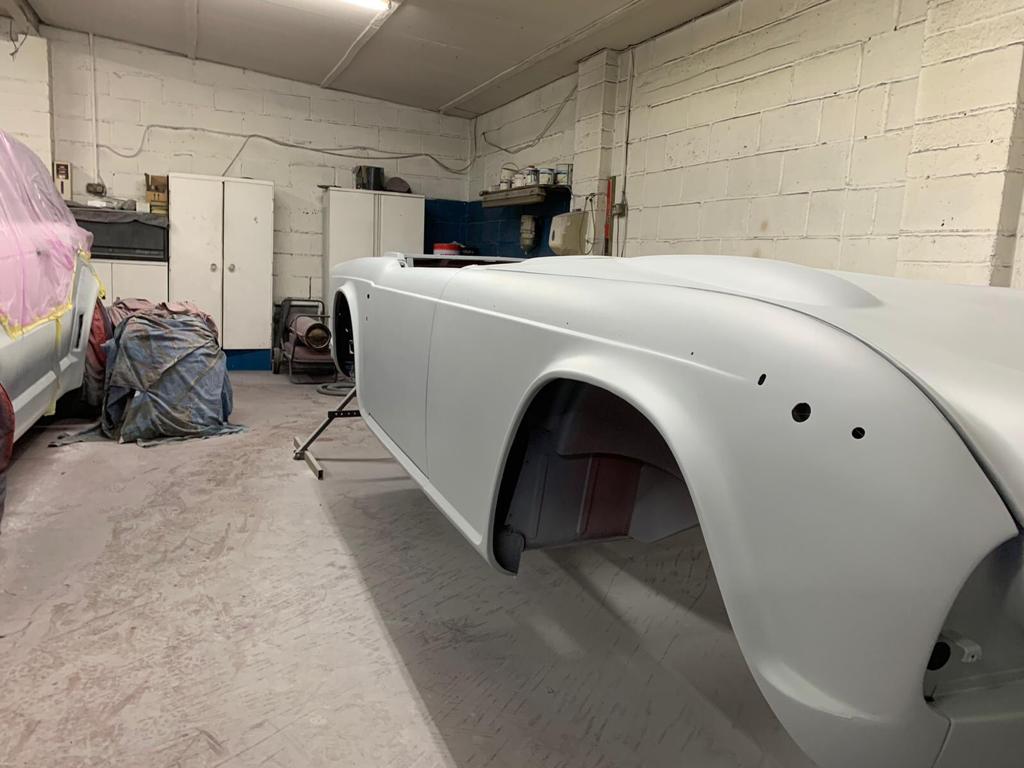
Our Triumph TR5 is set to have the full works here at Bridge Classic Cars. As a long-standing restoration project, we have some big plans for this car.
So far in its journey, it has had all the bodywork done by our classic car technician Mauro, the electrics done by Adam, and the engine work carried out by our engine specialist Ady.
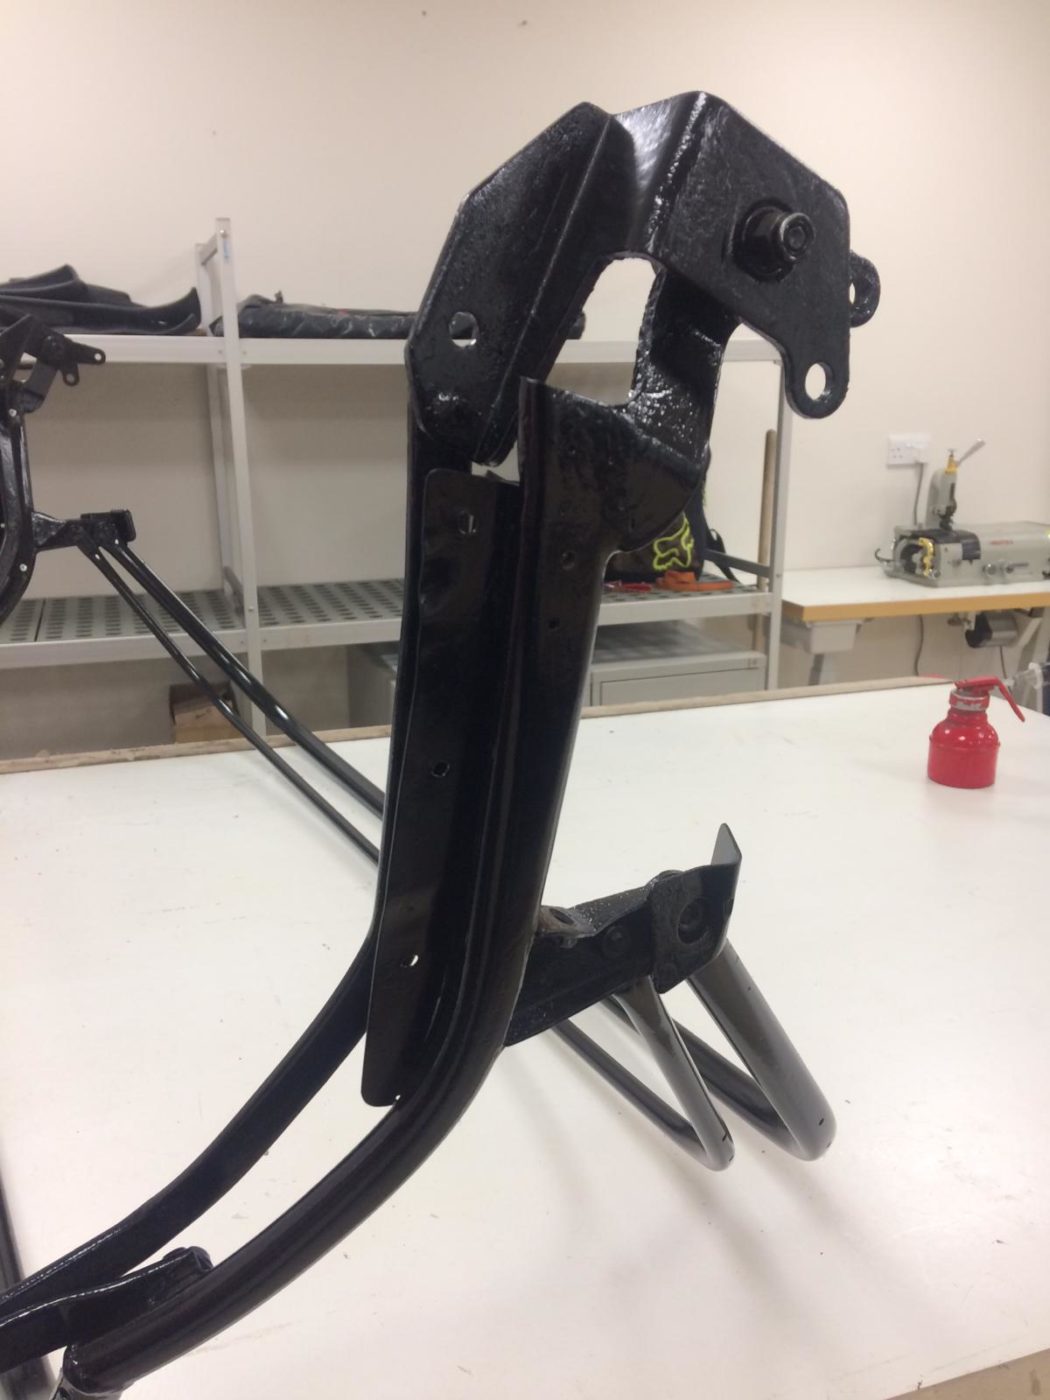
The body has been mounted to the chassis in what Mauro tells us was the most challenging part.
“You have to allow room between the chassis and the body to enable the perfect fit. It’s hard to get it all to line up perfectly.”
With the doors having been added to the body, the TR5 is starting to take shape. It’s a meticulous and time consuming process, but is a crucial stage in this car’s restoration.
Mauro has just finished up our Triumph TR6 restoration project, meaning he’s becoming quite the specialist in working with Triumphs.
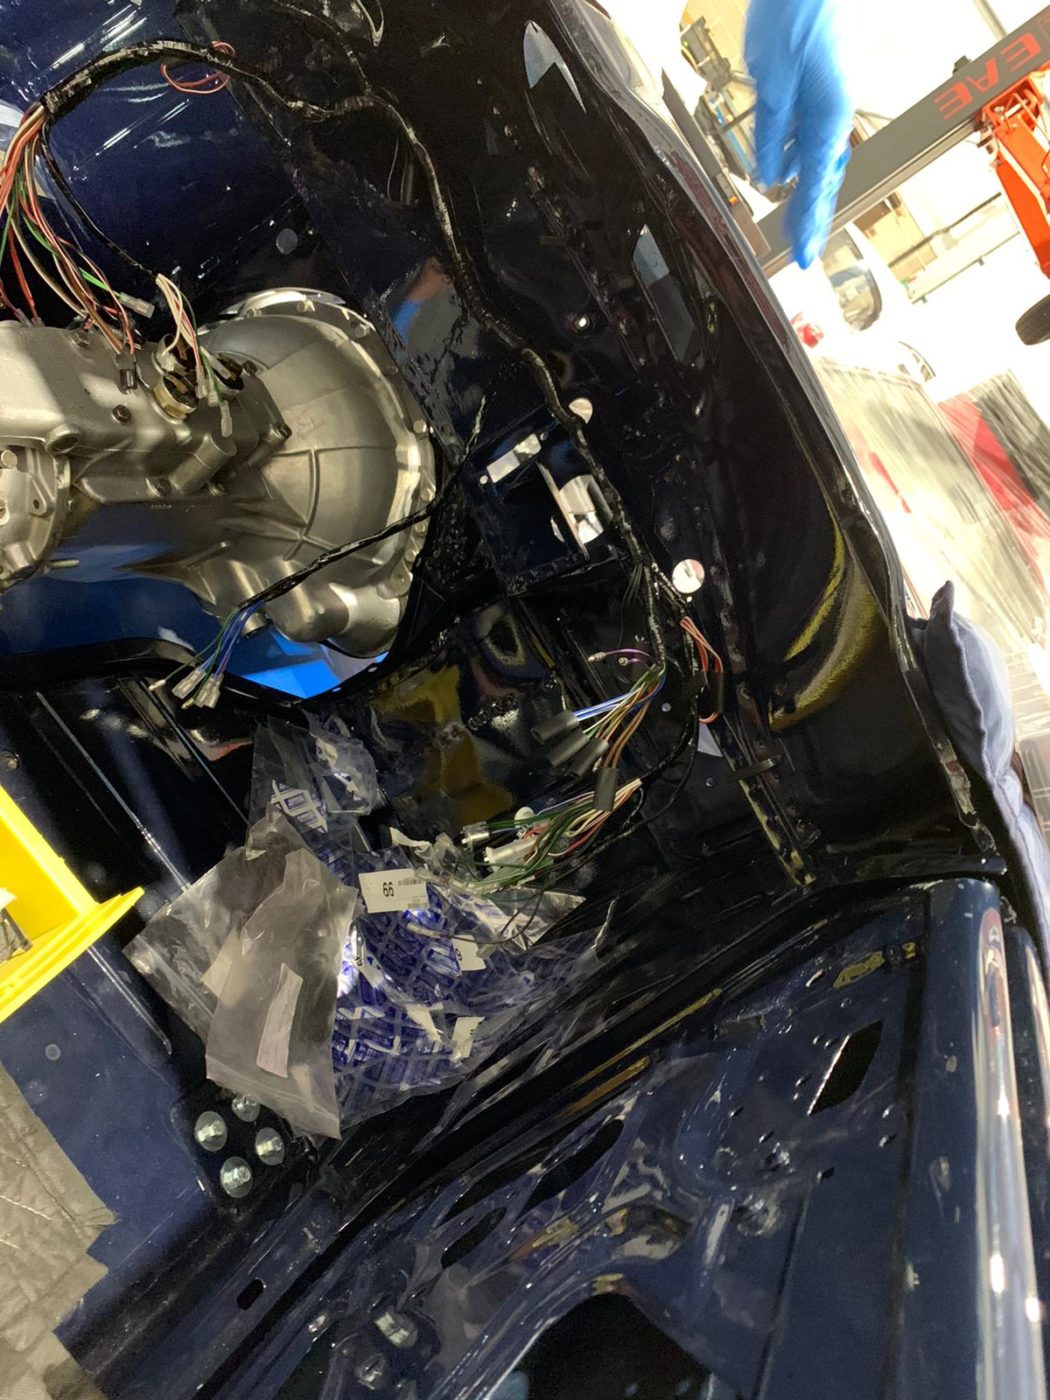
Adam has recently installed the wiring loom as well which can be seen below.
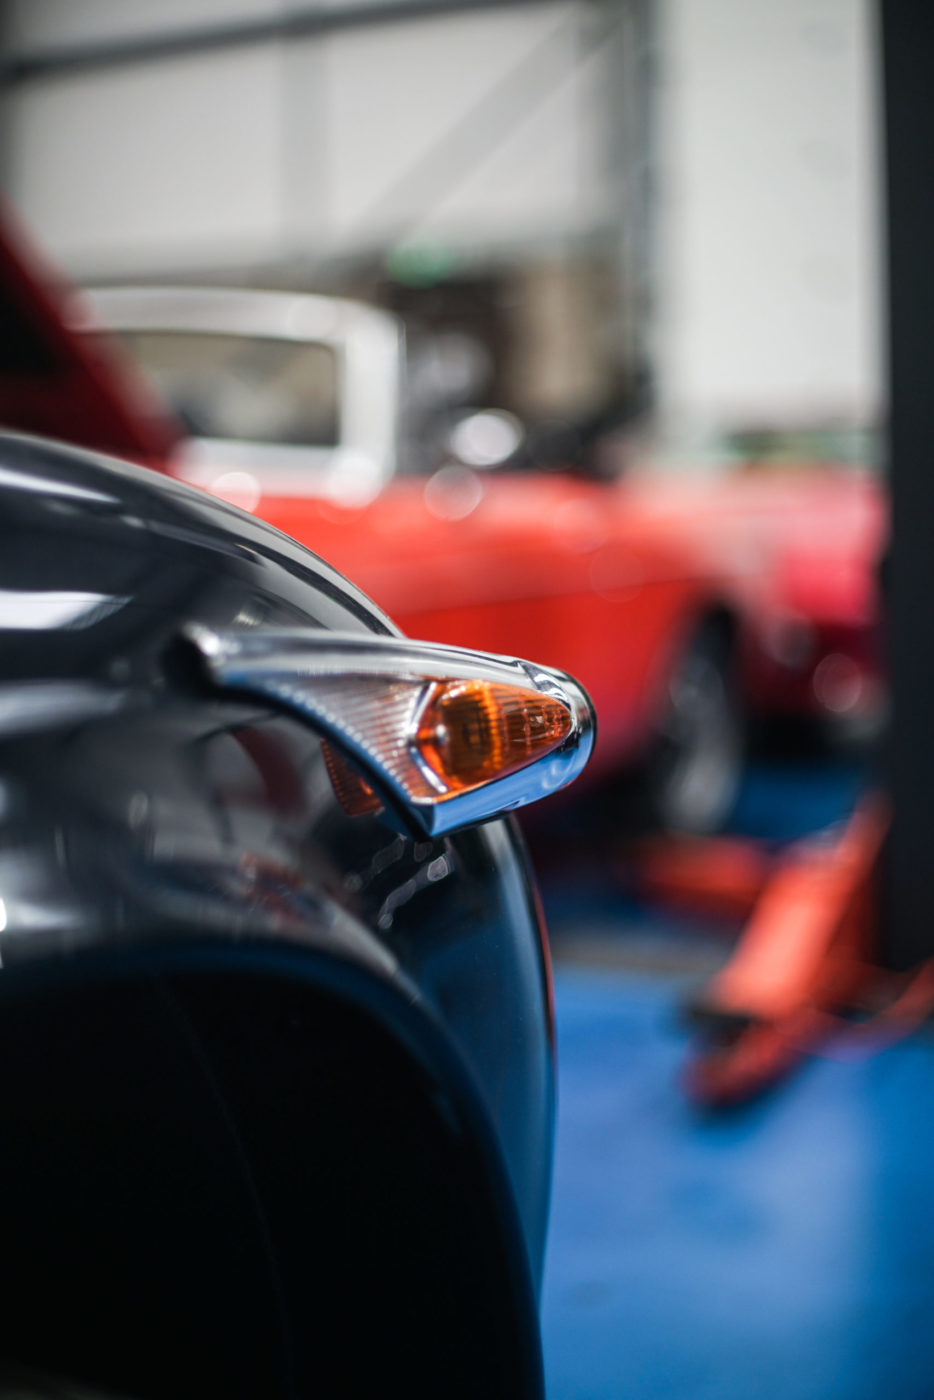
The front side lights and back side lights have also recently been fitted and are ready to be accompanied by the headlights.
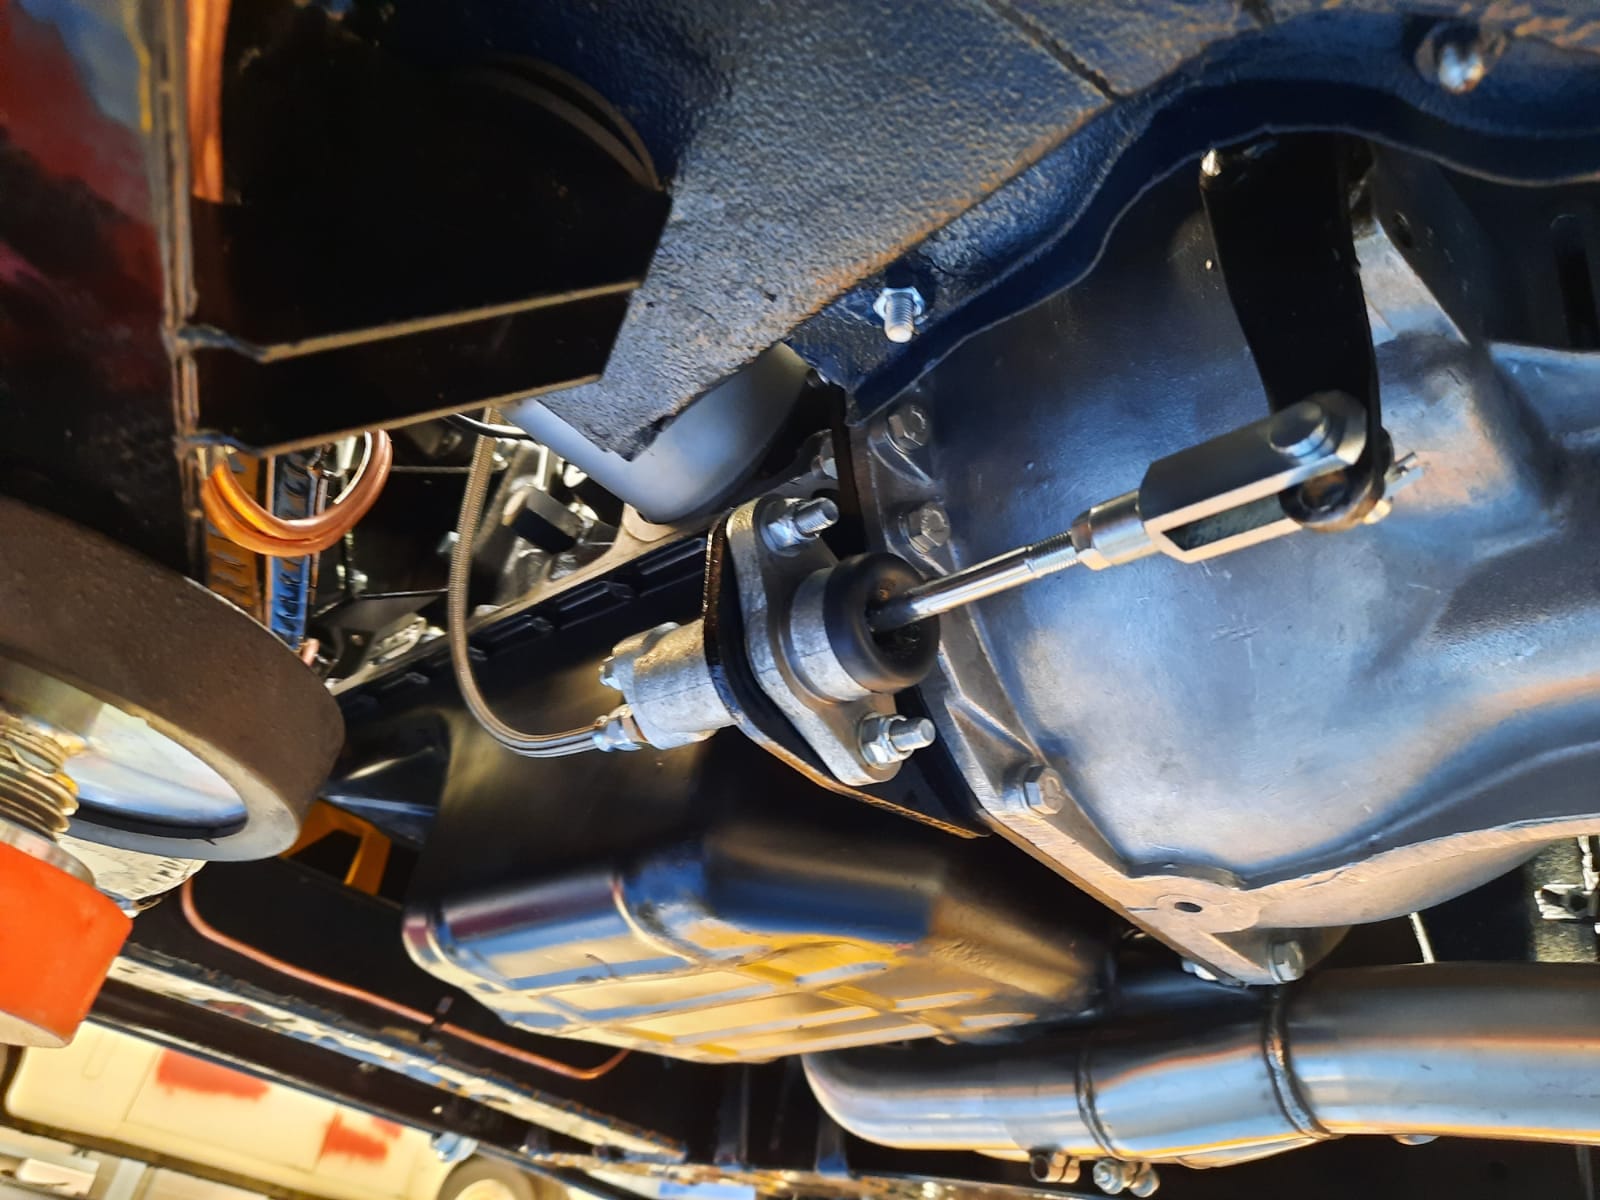
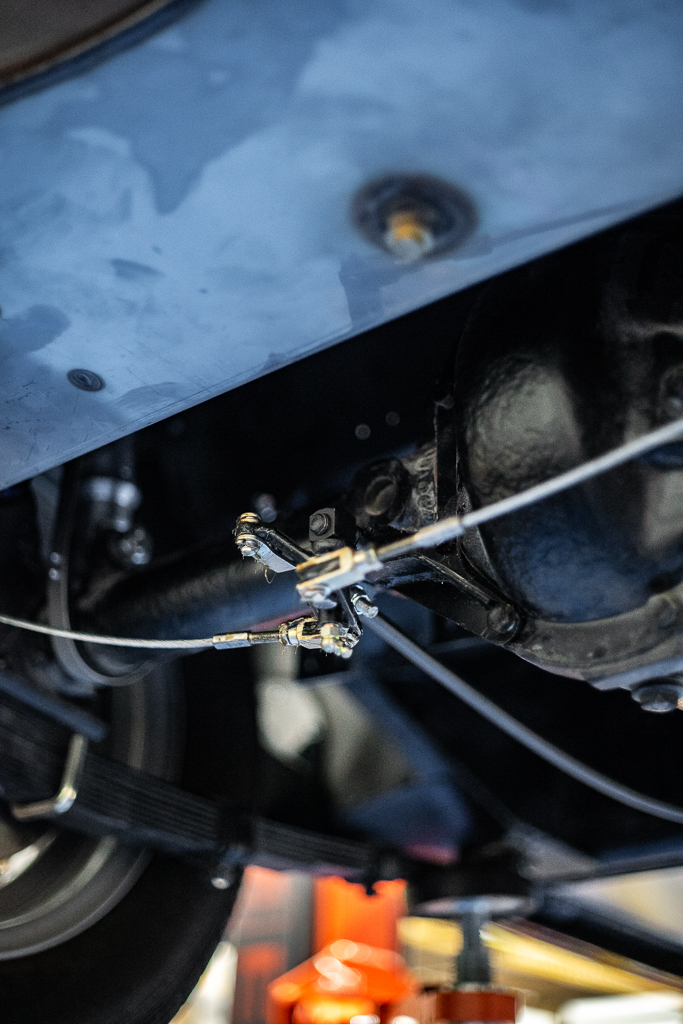
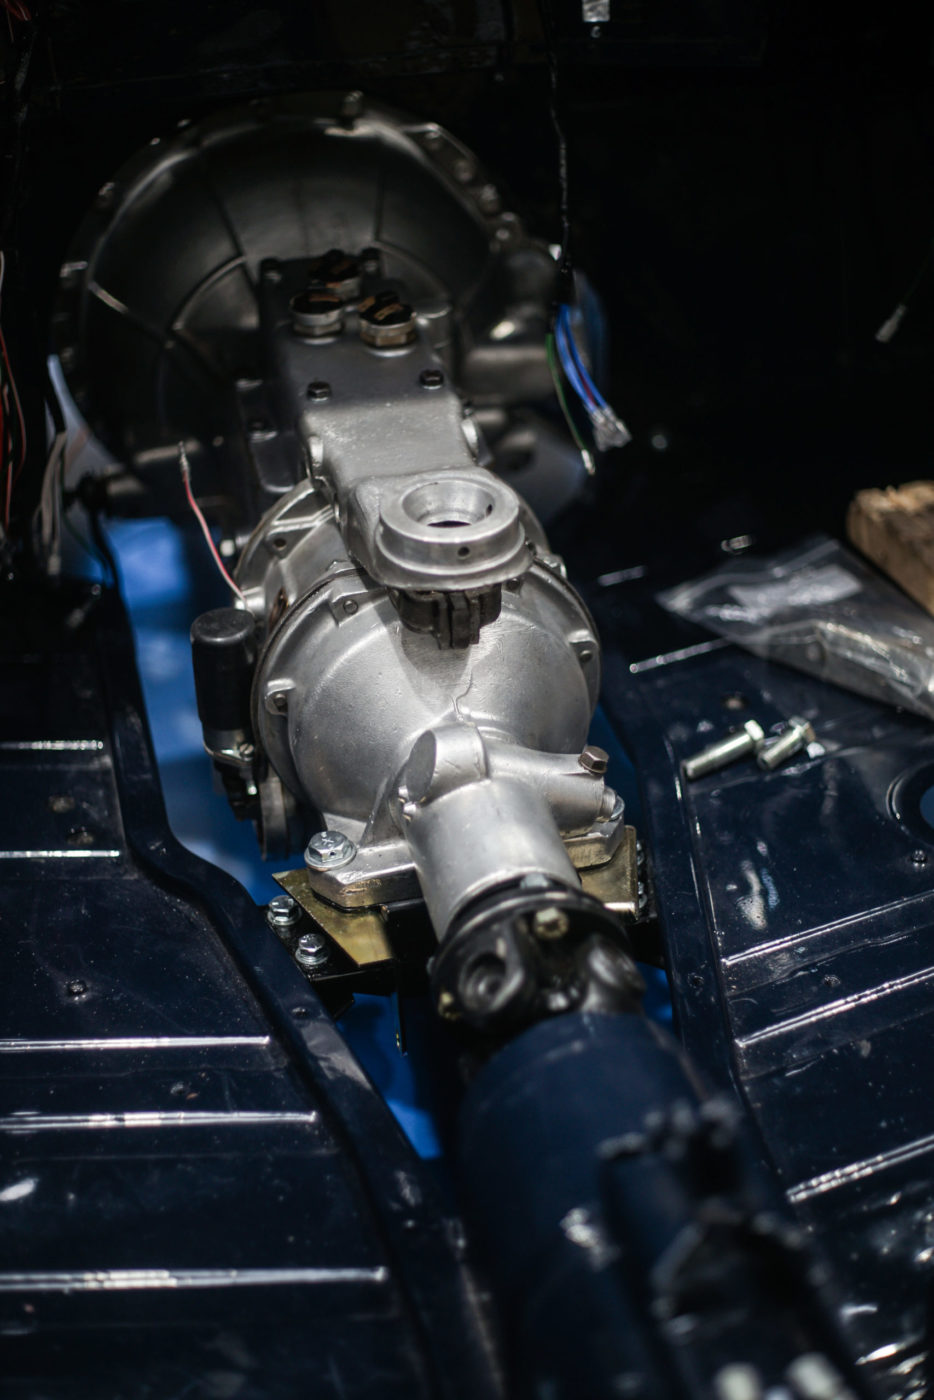
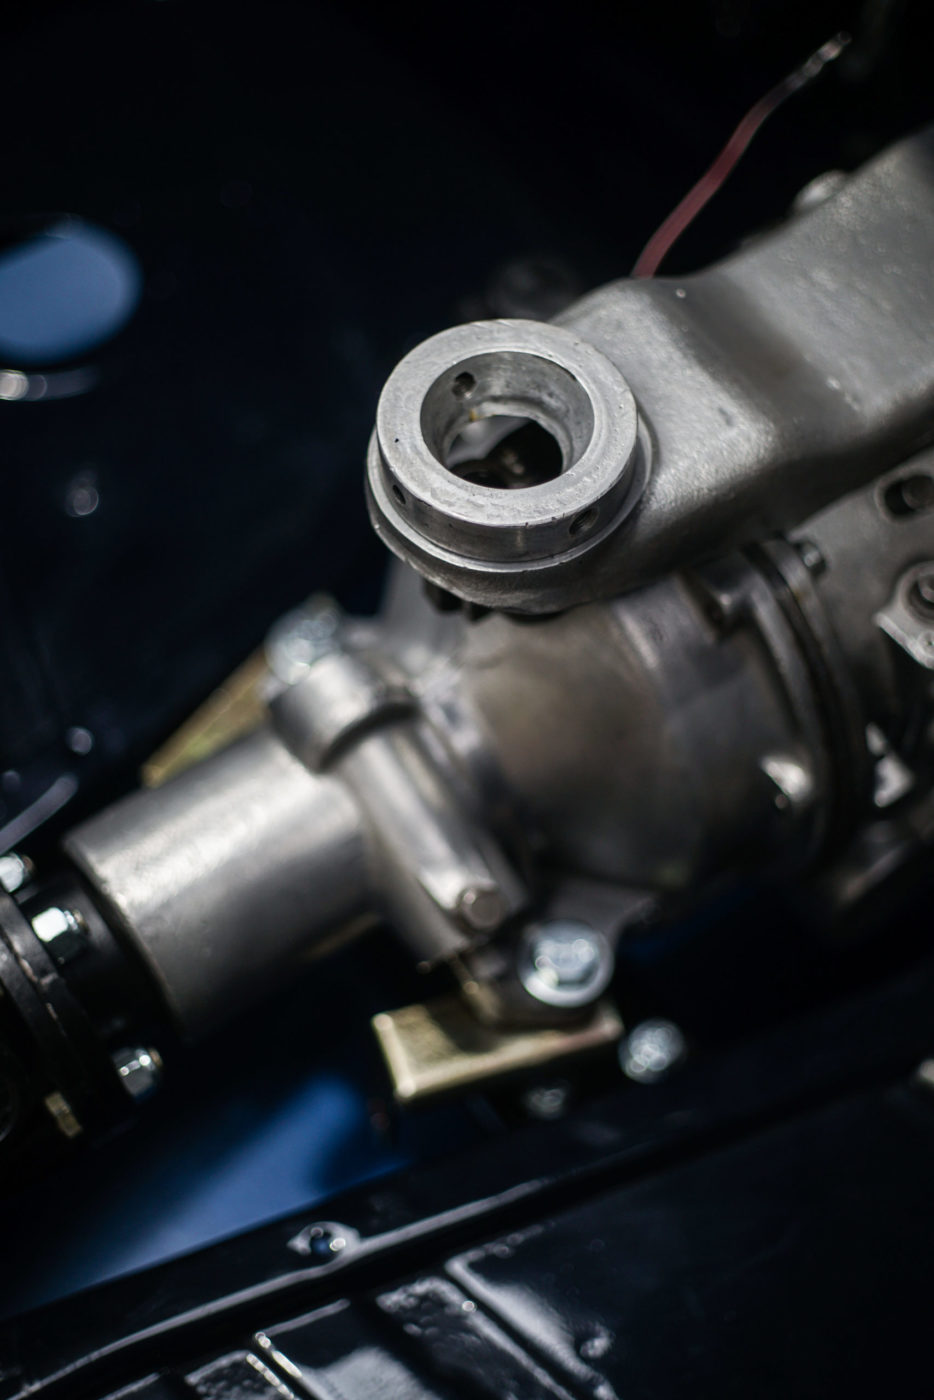
Within the body of the car, the hand brake cables, prop shaft, gearbox mounting, and fuel pump have all been fitted by classic car technician, Mauro.
Next on the agenda is to fit its headlights, engine, water pump, exhaust manifold, and fan among many other modifications.
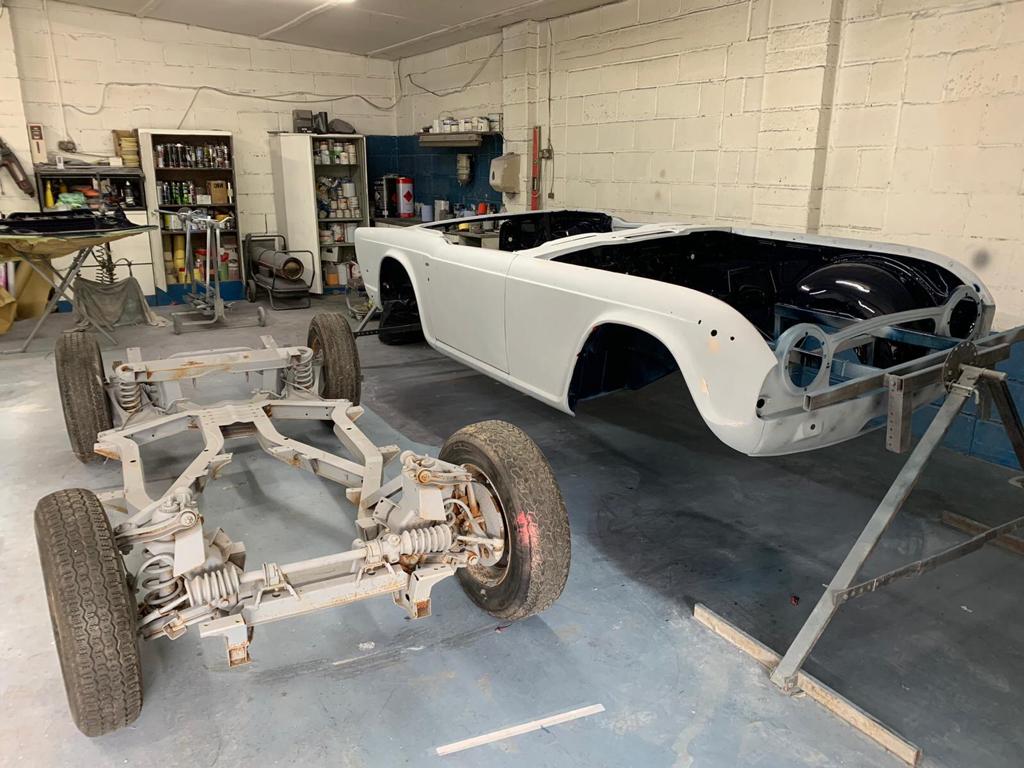
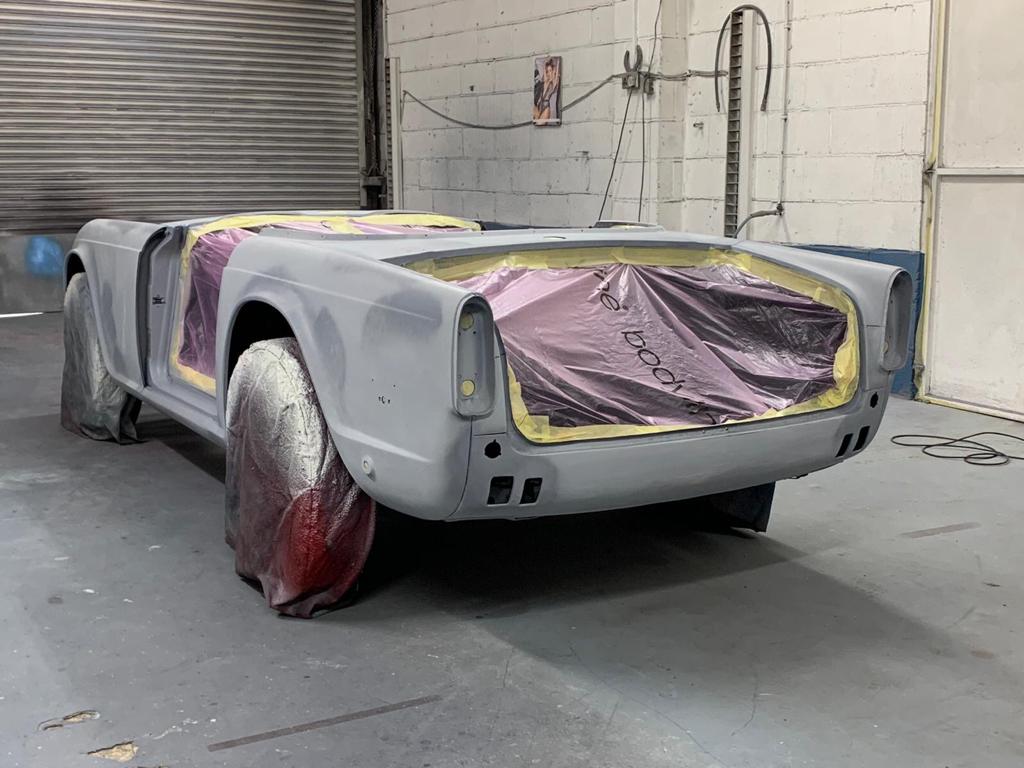
More pictures have arrived to us from the body shop that is currently working on the Triumph TR5 body shell.
The project came to us as an unfinished restoration with key components already elsewhere being worked on so we working in conjunction with other companies on this build.
As you can see from previous posts, we have built the chassis up ready so once the shell is complete and in colour we will look to take delivery and then we can continue on with the rebuild in our workshops.

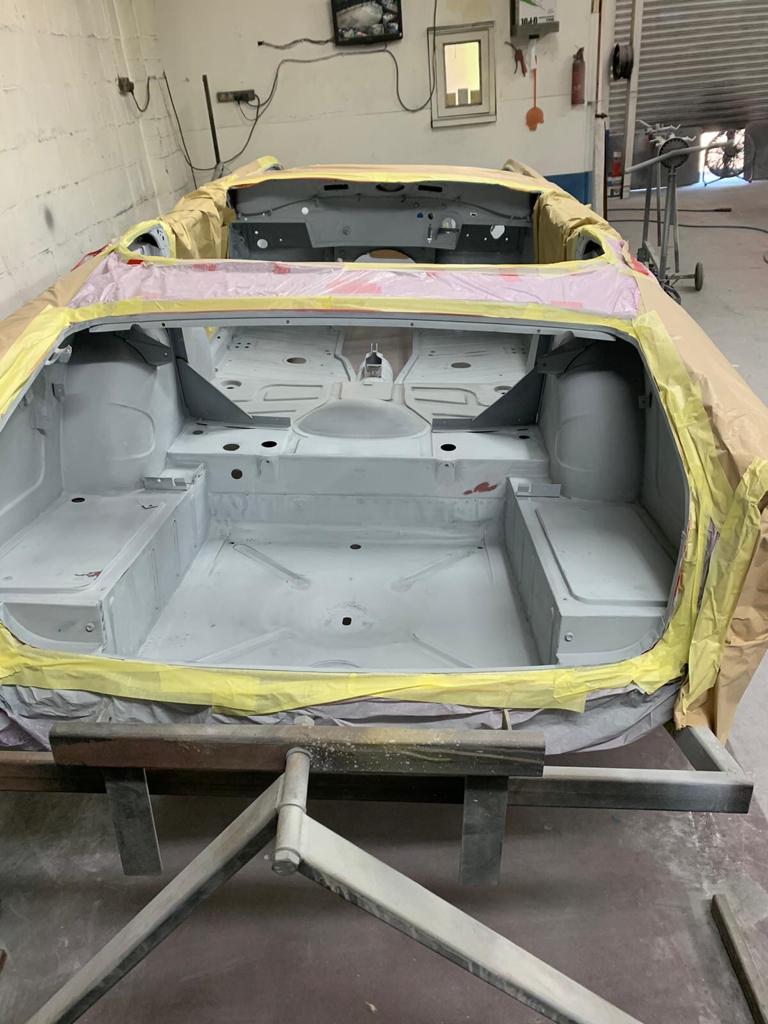
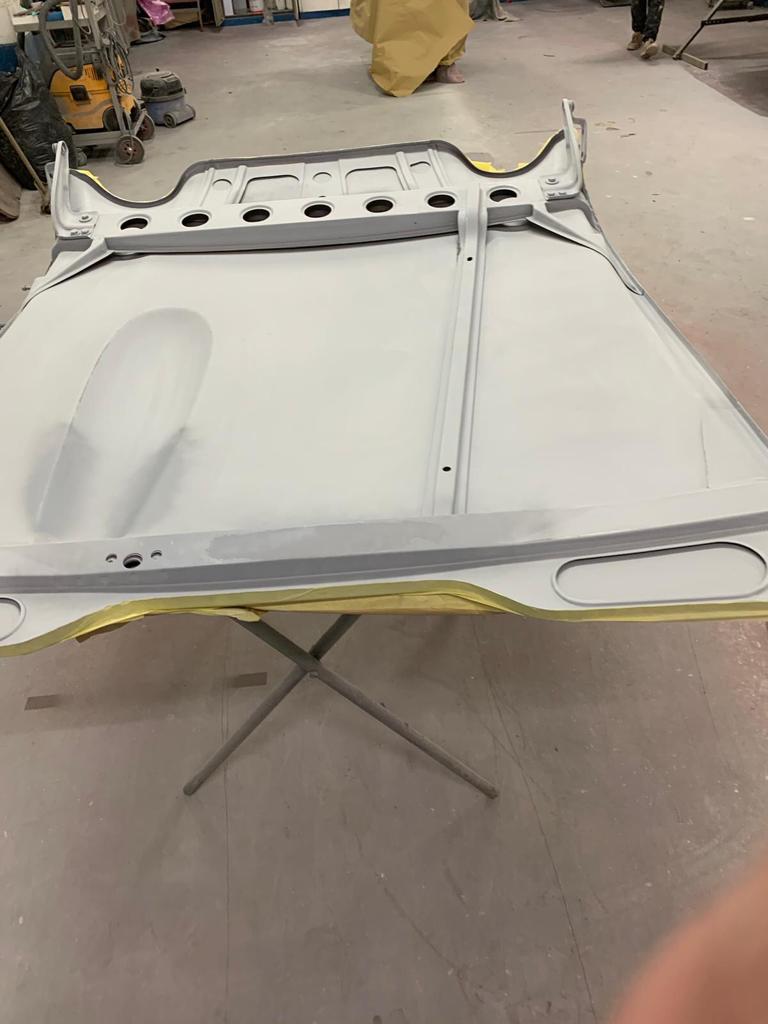
We’ve been sent some progress photos from the bodyshop preparing the TR5. Please note, this work is being carried out by another company as the restoration was already underway at the stage we were brought on-board.


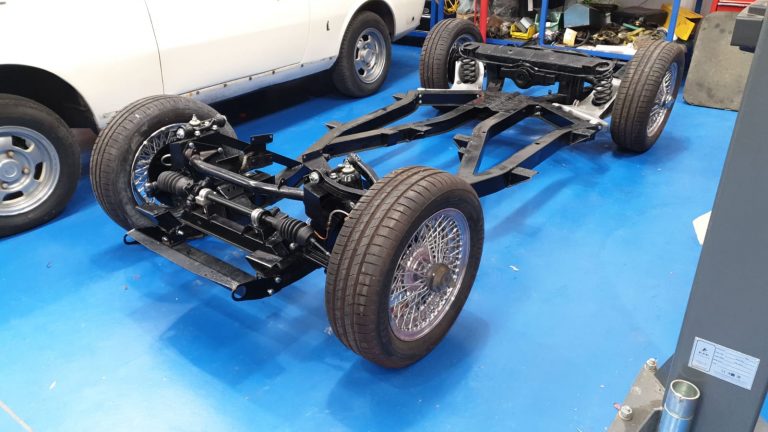
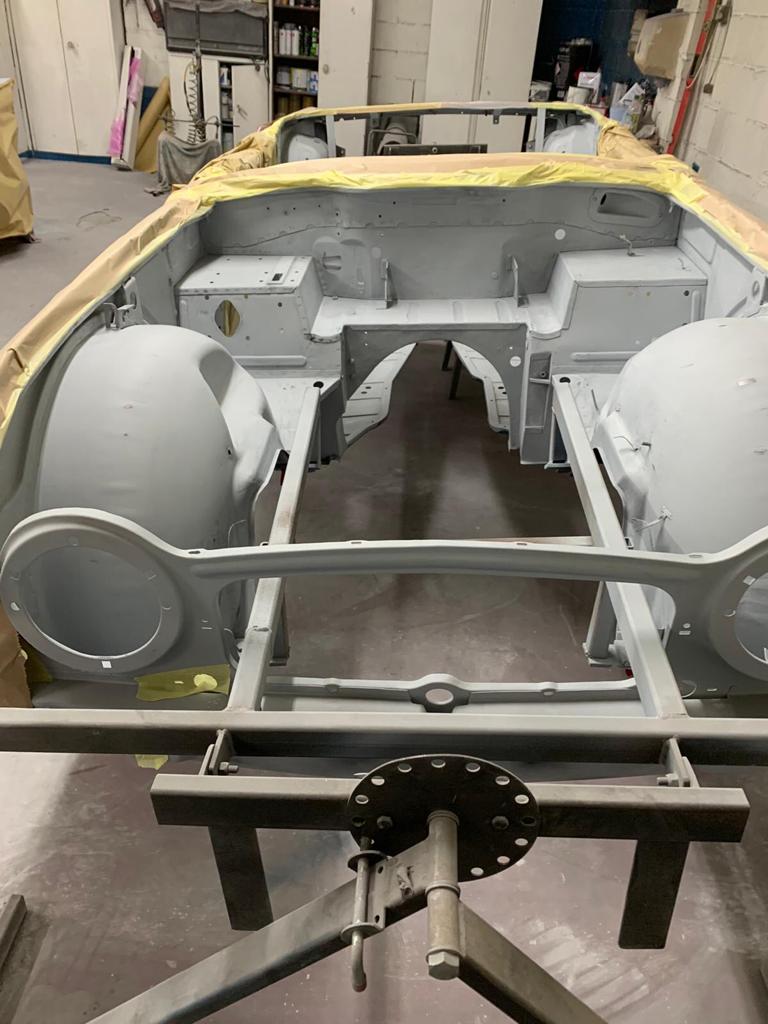
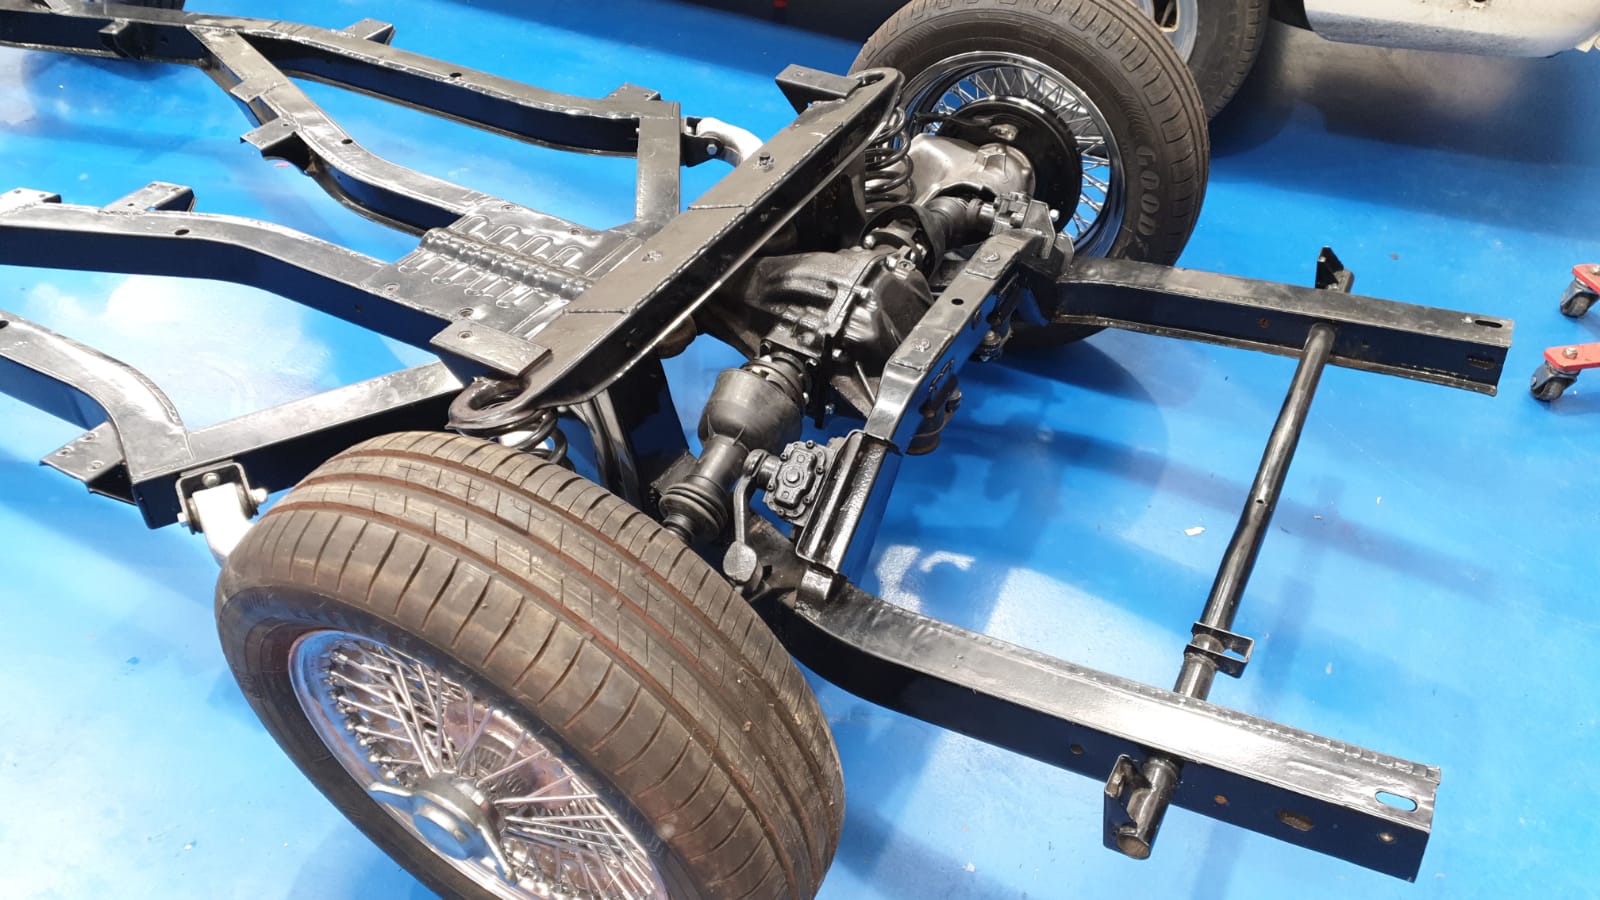
Our TR5 Restoration continues as another load of parts arrive. We’re currently waiting on the bodywork to arrive to really start making progress on this project. The chassis continues to be built up within our workshop and is now up on wheels.


Our Triumph was brought to us part way through it’s restoration. As such, the body shell is being restored elsewhere. We’ve been sent images as the body progresses and we do hope to have it with us very soon to continue with the re-build.


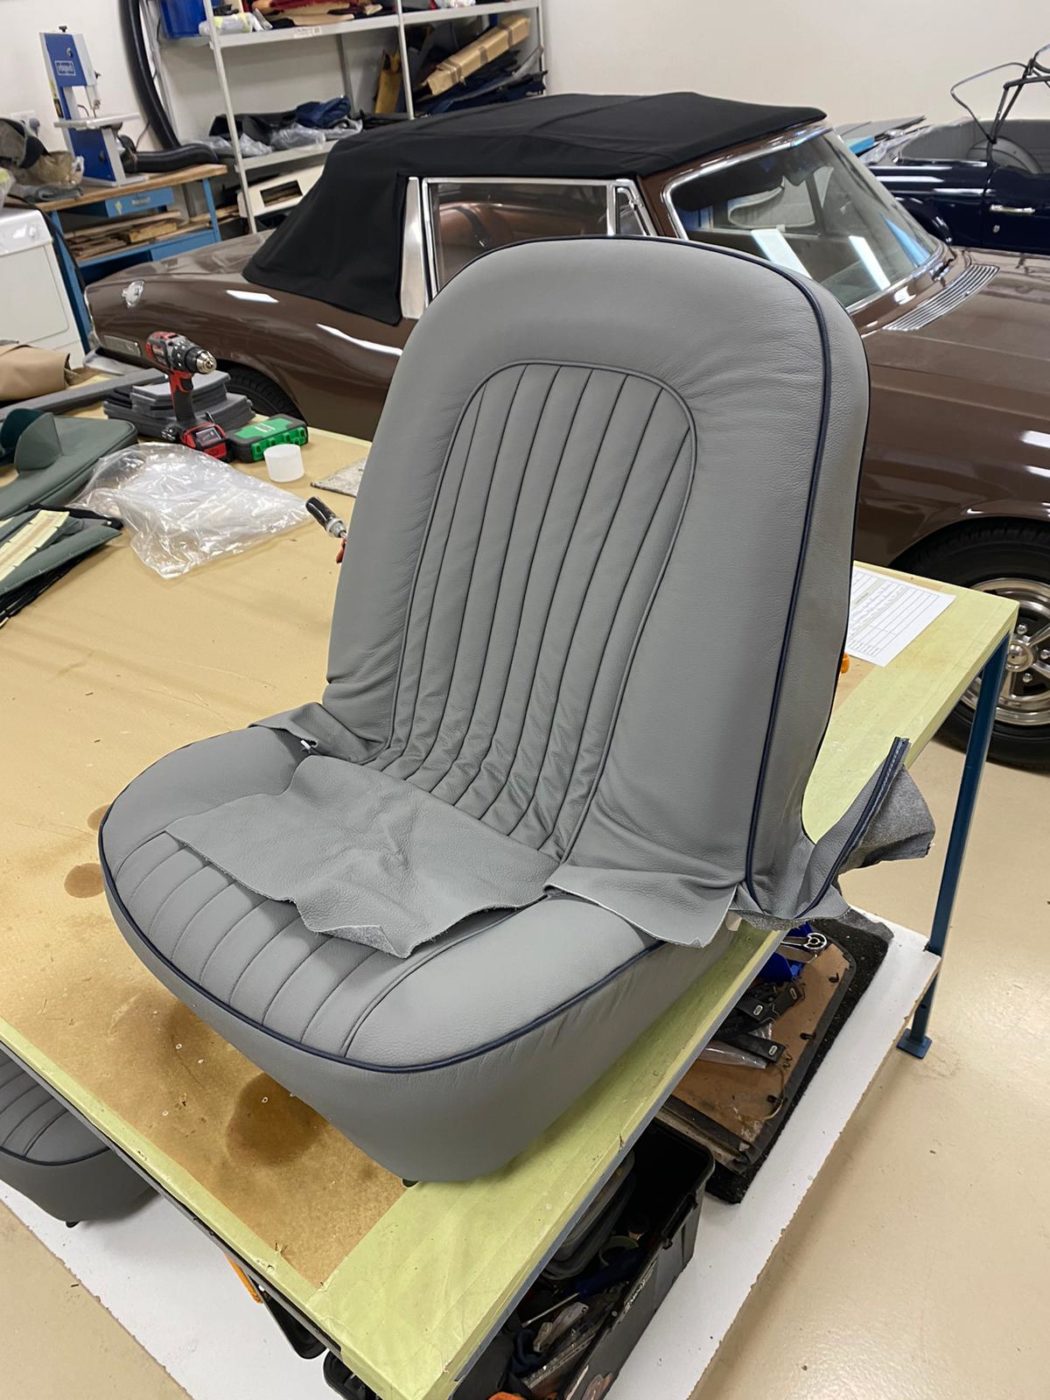
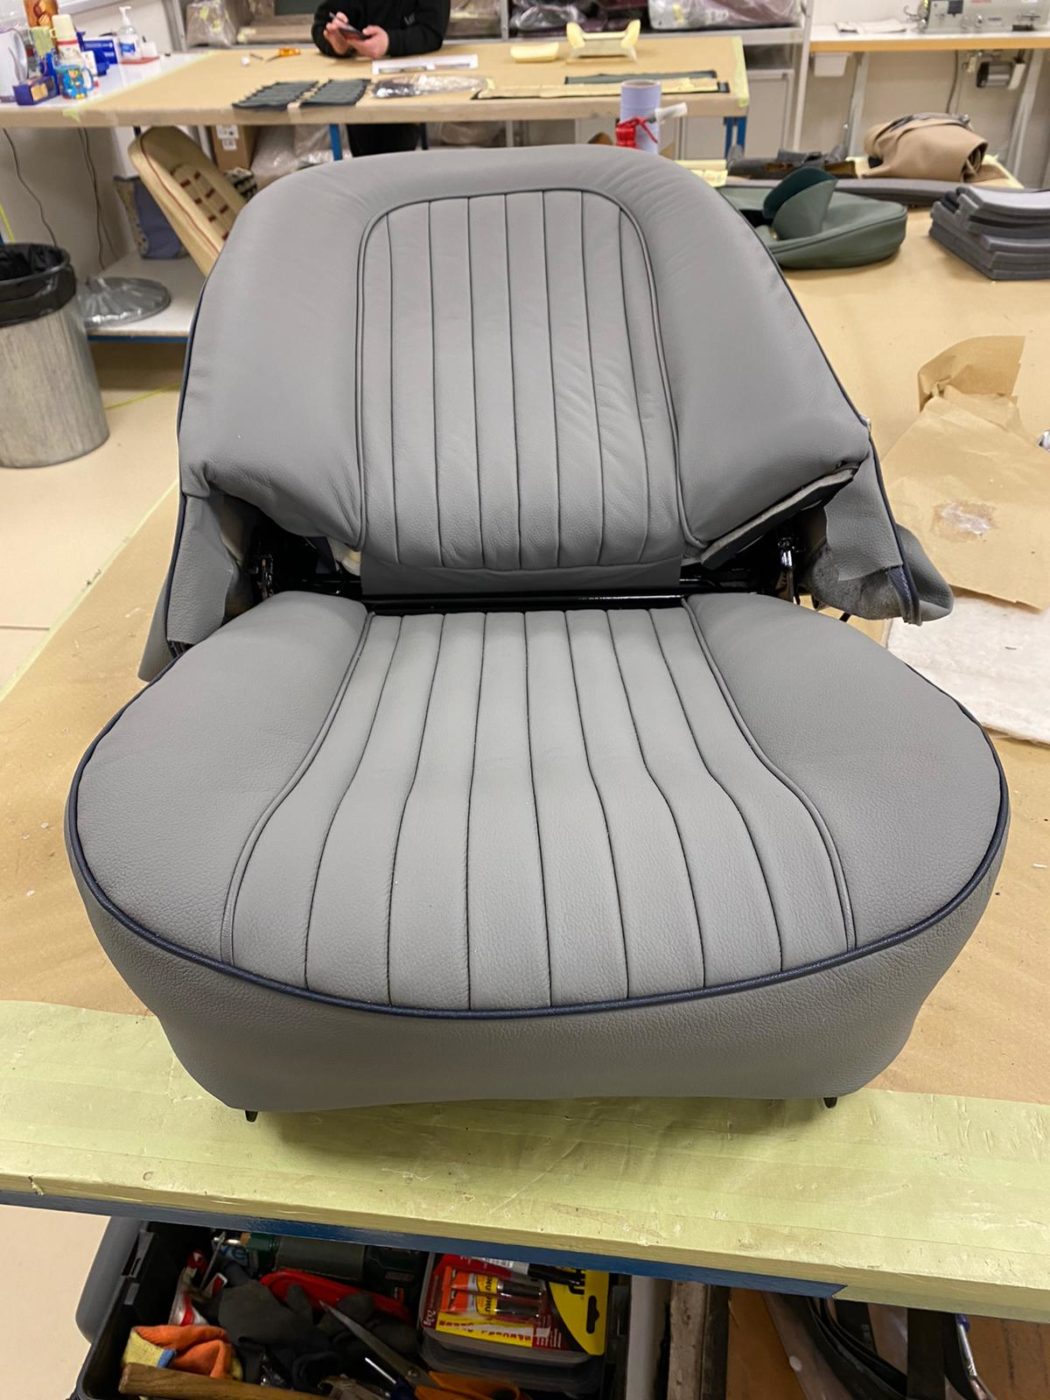
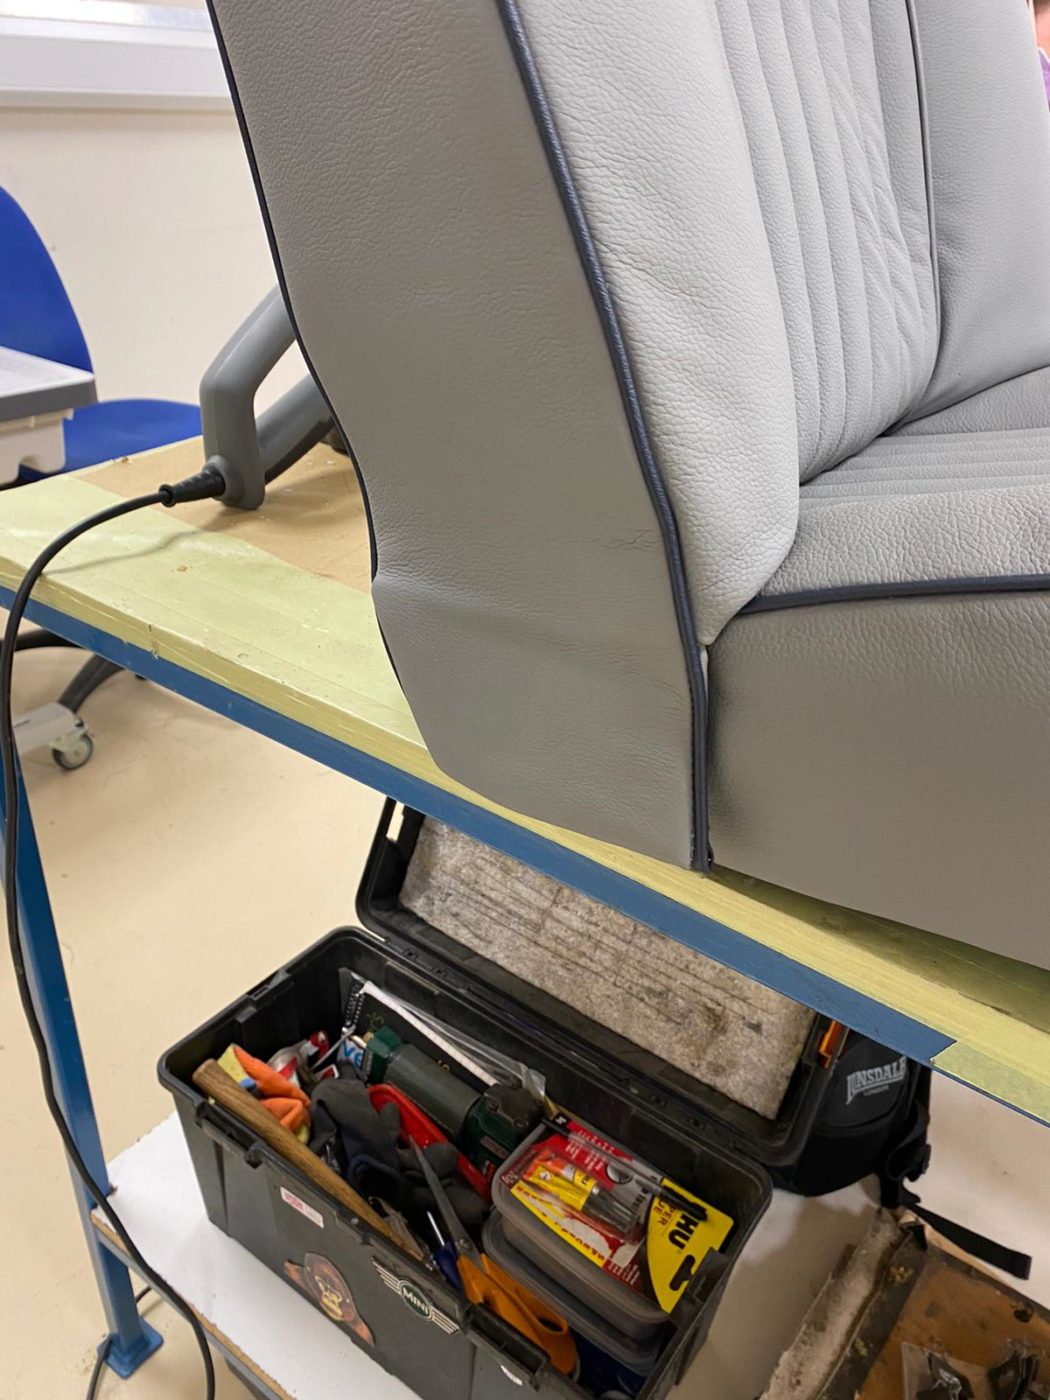
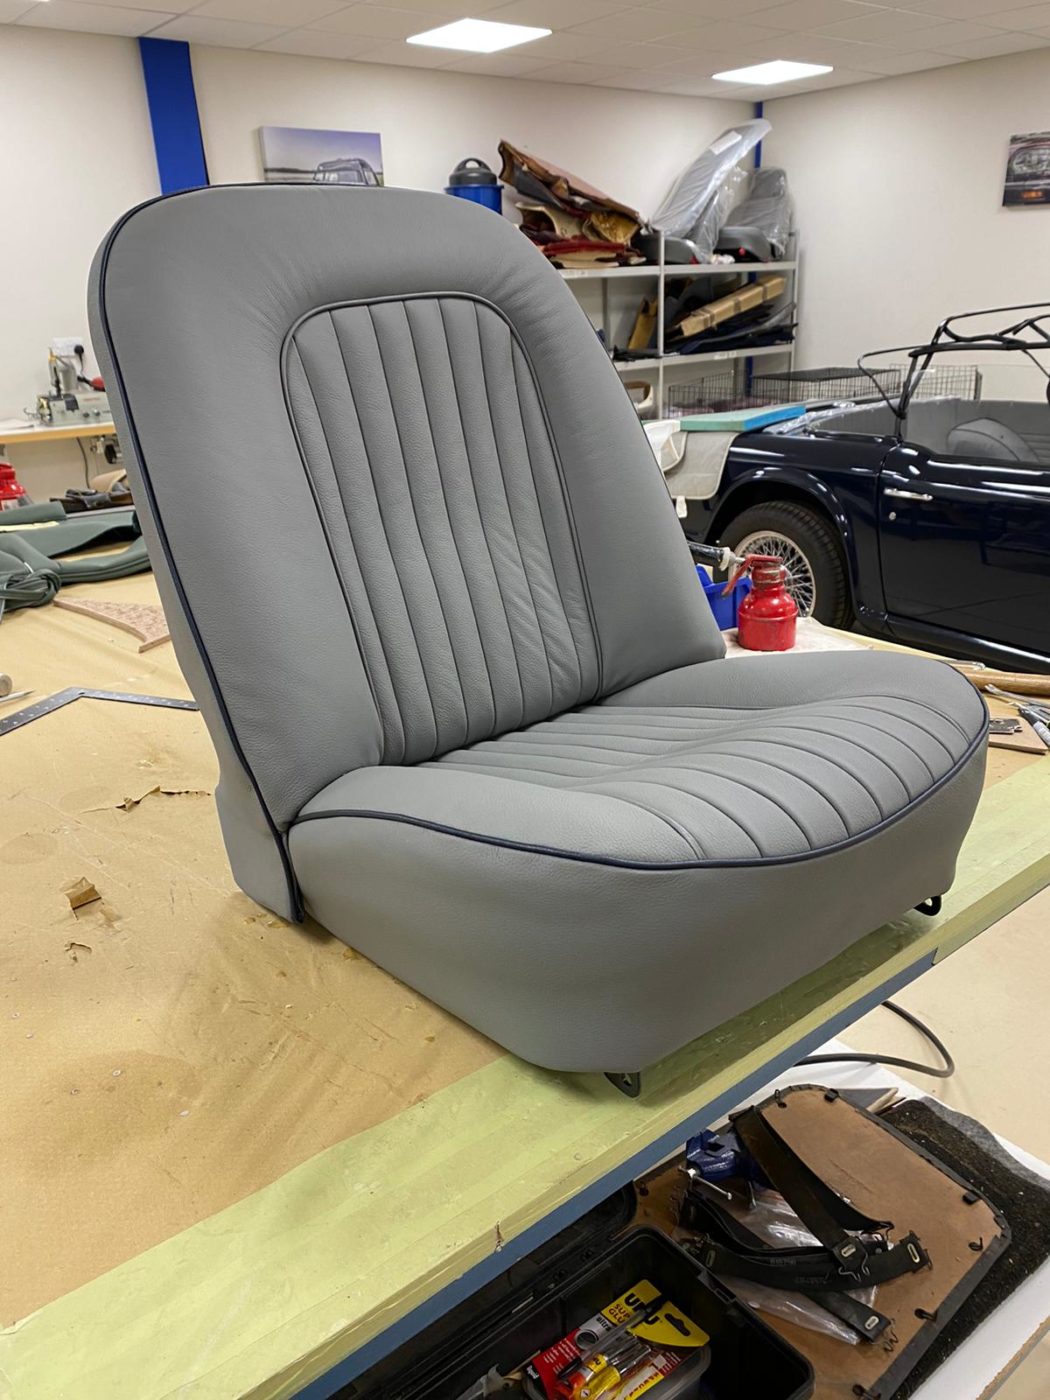
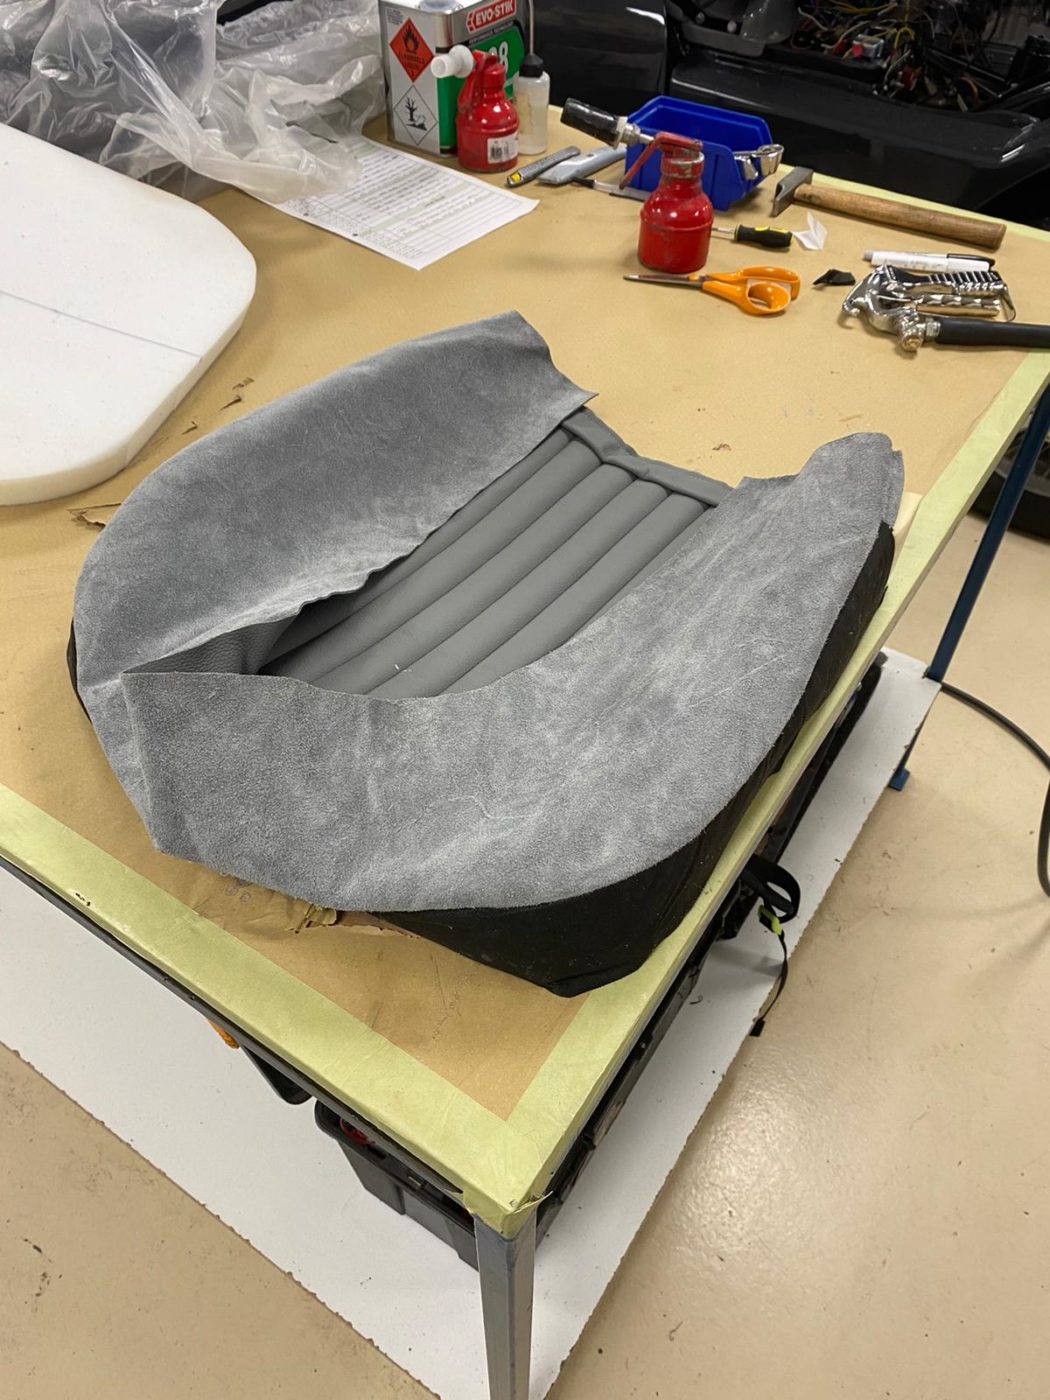
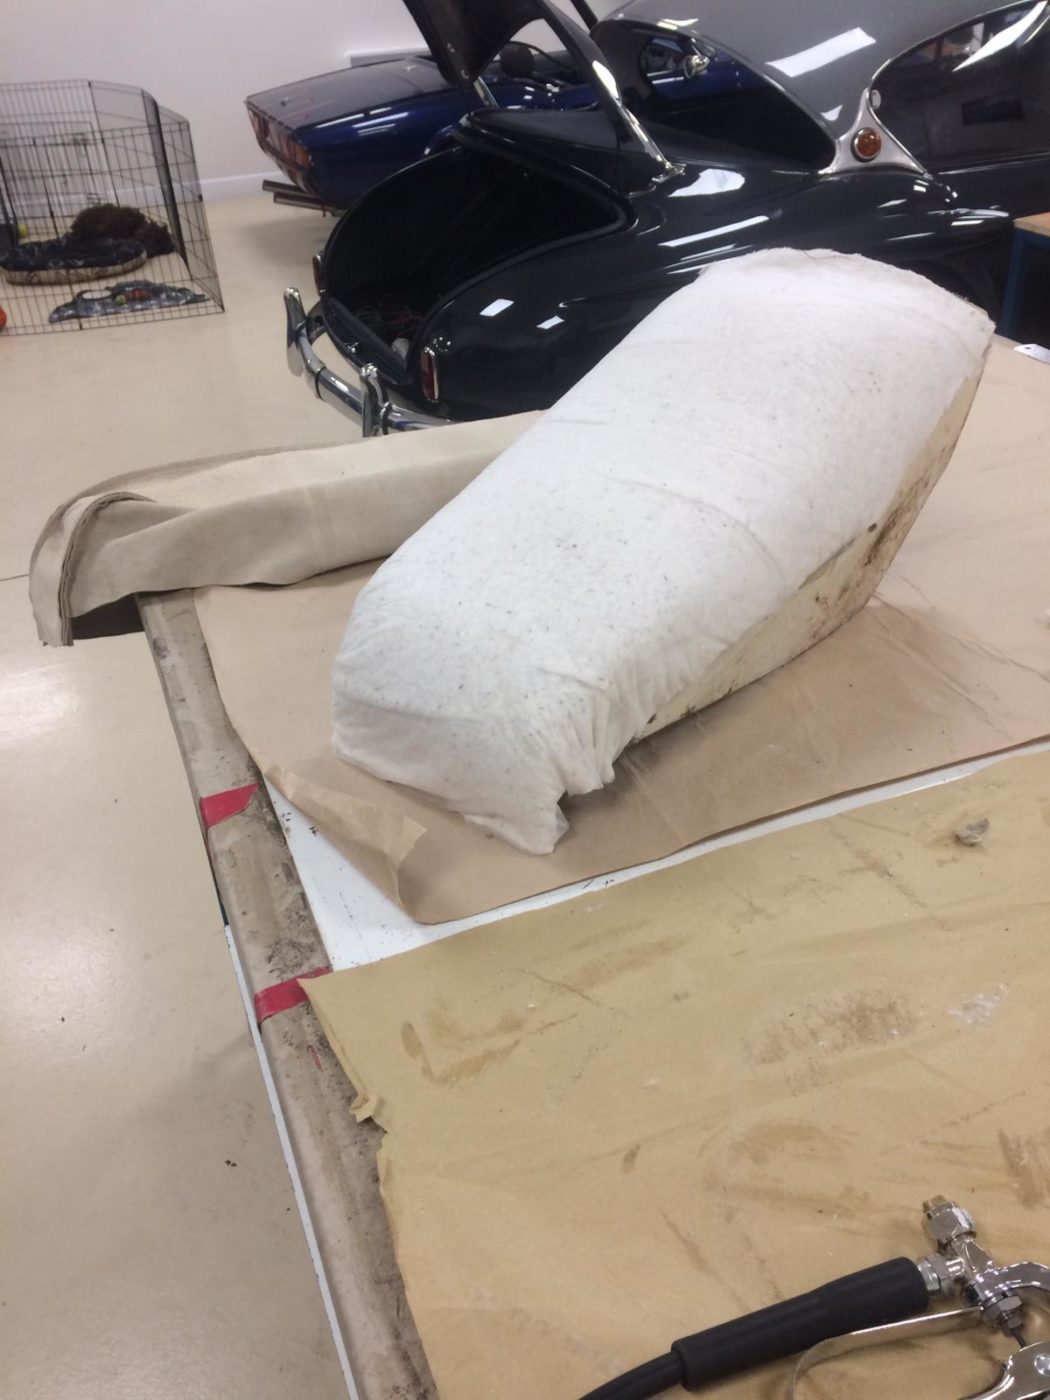
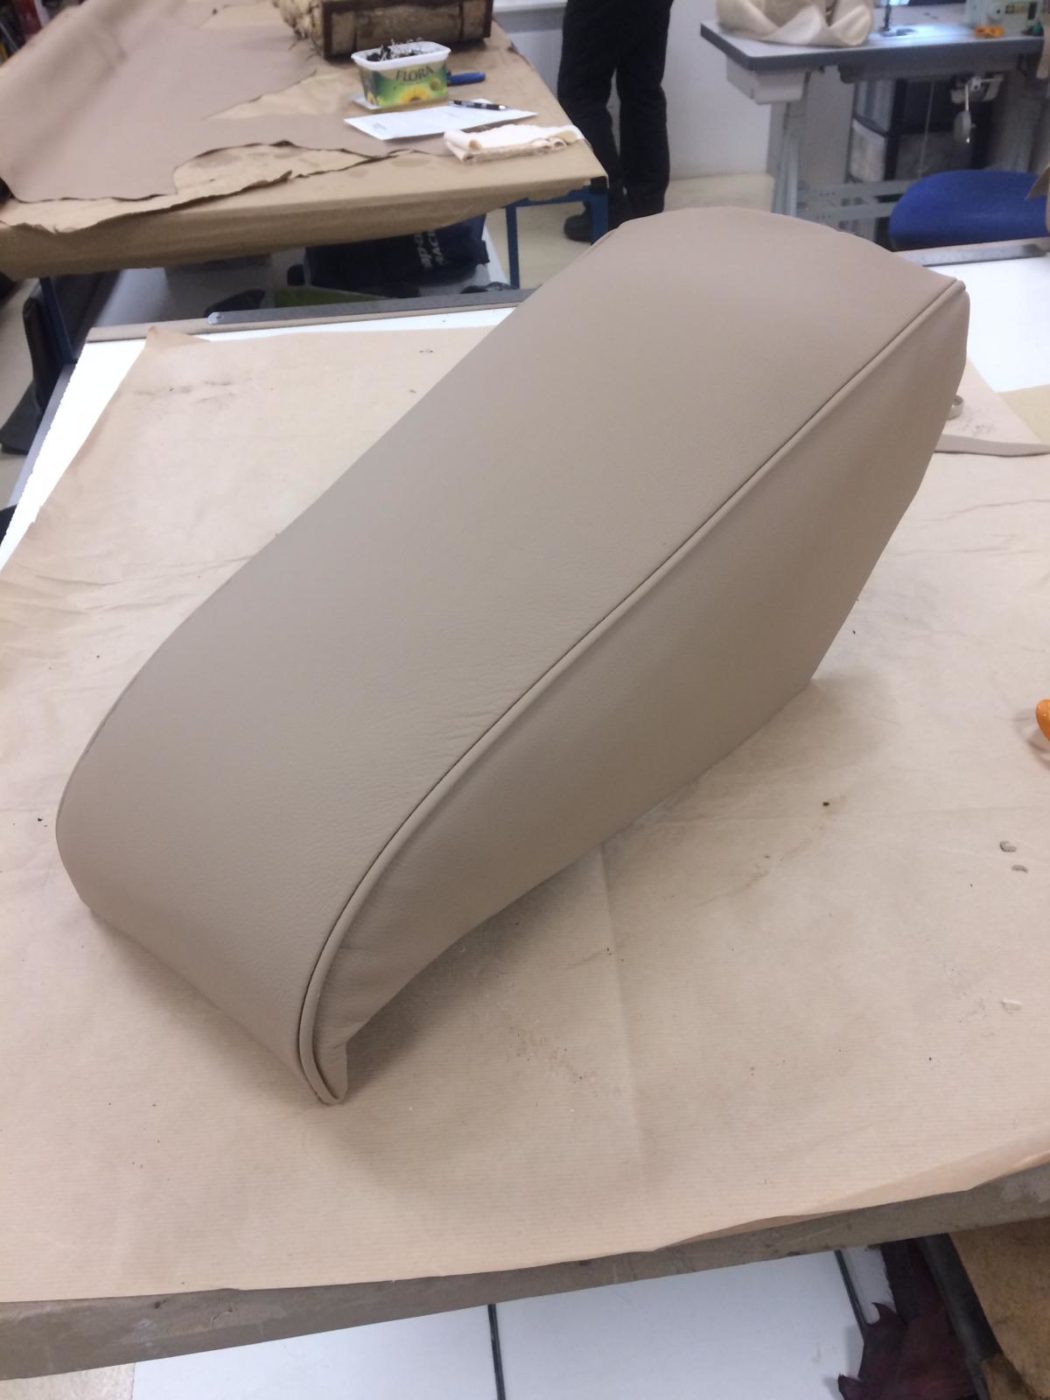
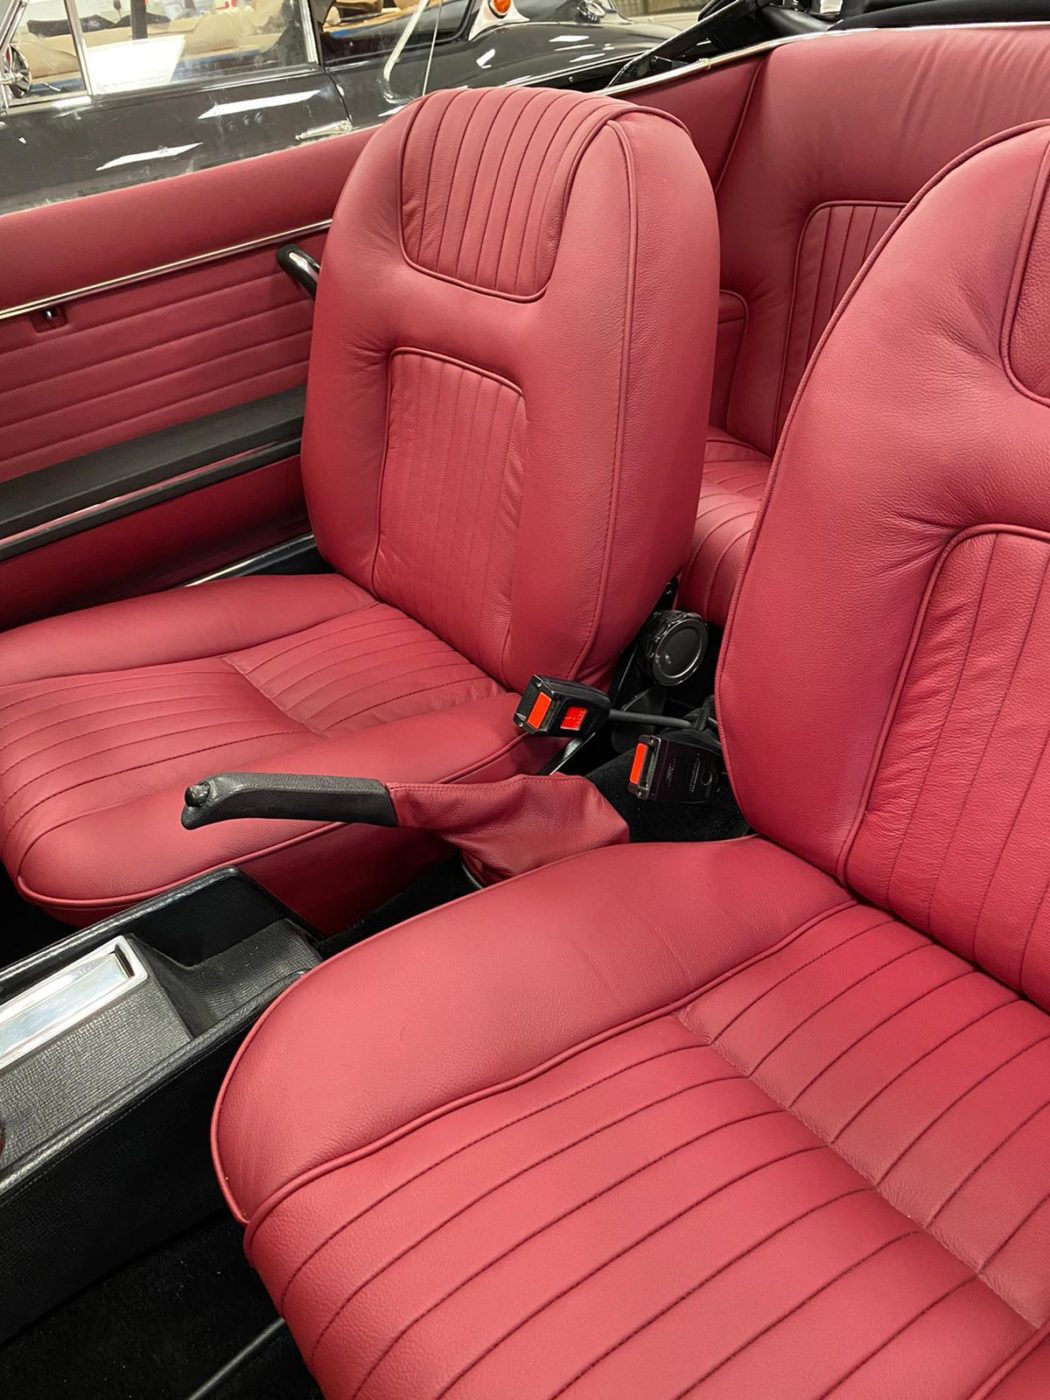
Kath has now completed restoring our Triumph TR5 seats in this lovely grey leather work. We can’t wait to see how they’ll look in the vehicle!