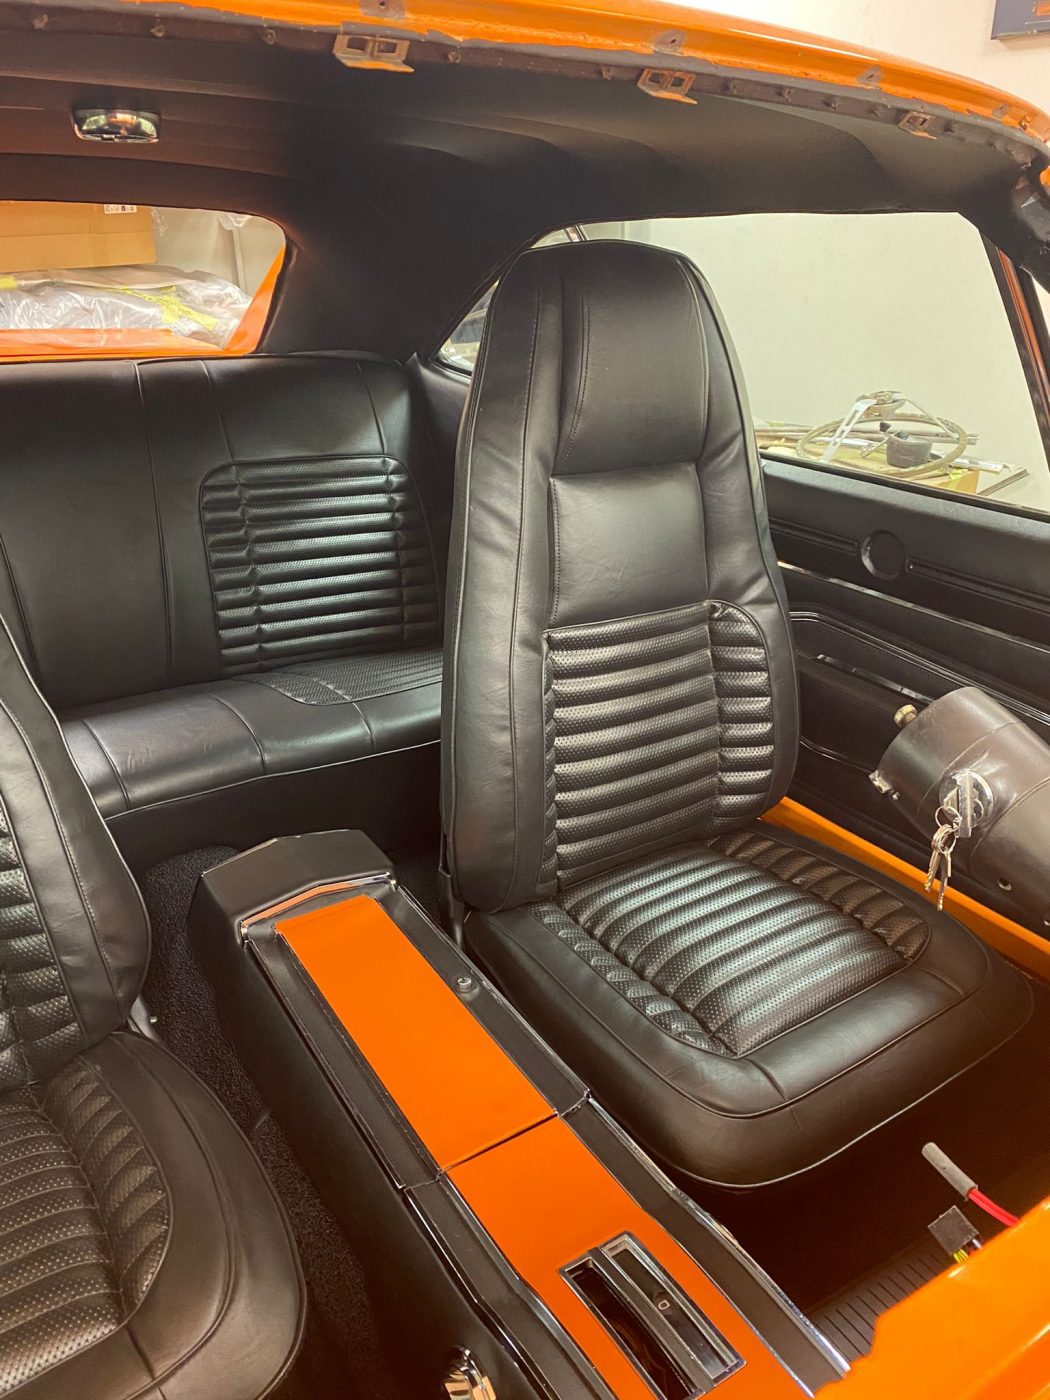
Straight and Narrow – Adjusting the Seat Runners on the 1970 Dodge Charger
Brian and the Bridge Classic Cars in-house trim experts have been working on getting the new bucket seats to sit properly in the 1970 Dodge


Brian and the Bridge Classic Cars in-house trim experts have been working on getting the new bucket seats to sit properly in the 1970 Dodge

Brian is working on the inside of the 1970 Dodge Charger that is in the Bridge Classic Cars in-house trim shop. Brian has been building

Brian, one of our in-house trim experts at Bridge Classic Cars, has been hard at work fabricating a new glovebox for the 1970 Dodge Charger.

Refinishing or recovering a steering wheel is no simple task. The right balance of tactile feel, smoothness, finish and contrast is something that only comes

We have an incredible in-house trim team here at Bridge Classic Cars. They’ve been hard at work on the interior of the 1970 Dodge Charger

Brian, our in-house trim master, has been busy working on retrimming and refitting trim pieces for the 1970 Dodge Charger that is in at Bridge
Kath and the in-house trim team at Bridge Classic Cars have been busy working on the interior of the 1970 Dodge Charger. Last time Kath
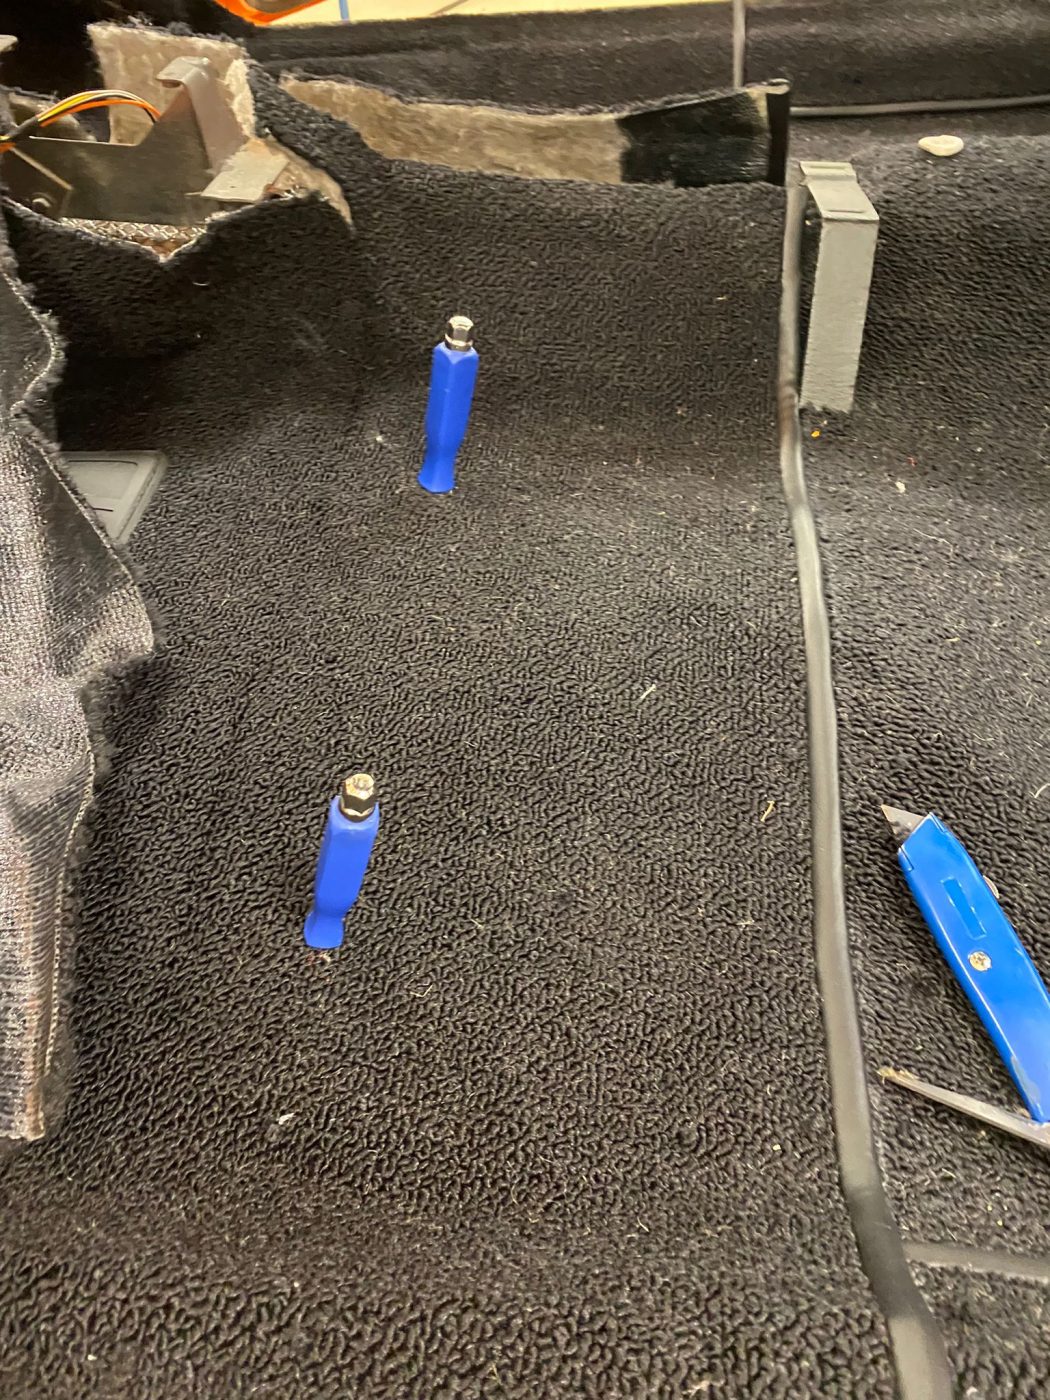
There’s been some big progress on the 1970 Dodge Charger currently in the trim shop at Bridge Classic Cars. Kath had to cut the carpet

Kath and the in-house trim team have been busy working on the insides of the 1970 Dodge Charger that’s in here at Bridge Classic Cars.

After Kath had mocked up the rear seats into the Charger, it was time to start getting the carpets into the car. However, underneath the
The in-house trim experts at Bridge Classic Cars have been hard at work. Teaming up to conquer the interior of the 1970 Dodge Charger. One

Our incredibly talented trim-shop experts have been hard at work on the 1970 Dodge Charger currently in at Bridge Classic Cars. Next on the list
Kath has been working on test fitting the carpet on the 1970 Dodge Charger in the trim shop of Bridge Classic Cars. To check the
The 1970 Dodge Charger is in the Bridge Classic Cars in-house trim shop to be fitted out with its interior. Brian, one of our in-house

Our in-house trim team at Bridge Classic Cars have been working hard to get the interior of the 1970 Dodge Charger back together. One of
Our in-house trim expert Kath has been fitting the door cards to the 1970 Dodge Charger we have in here at Bridge Classic Cars. Kath

Kath, our in-house trim expert has been hard at work finishing up the install of the headliner into the 1970 Dodge Charger we have here

It’s been an absolute treat to have one of the most iconic muscle cars of all time in the trim shop of Bridge Classic Cars.

Just arrived at Bridge Classic Cars is this gorgeous 1970 Dodge Charger for interior fit out. Expect to see more of this iconic second-generation Charger
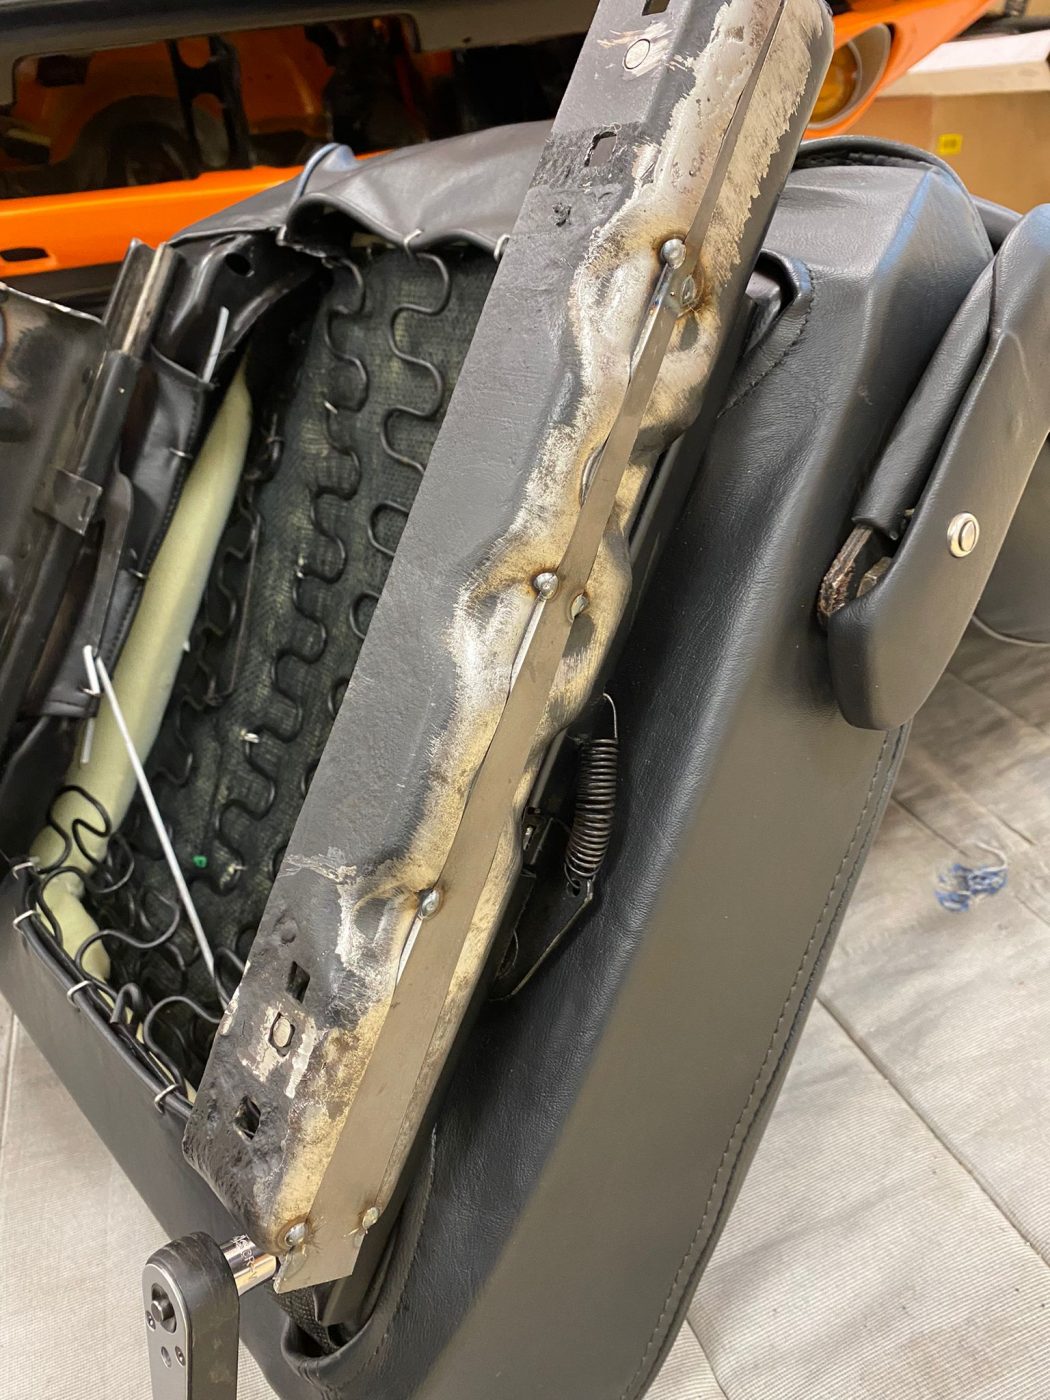
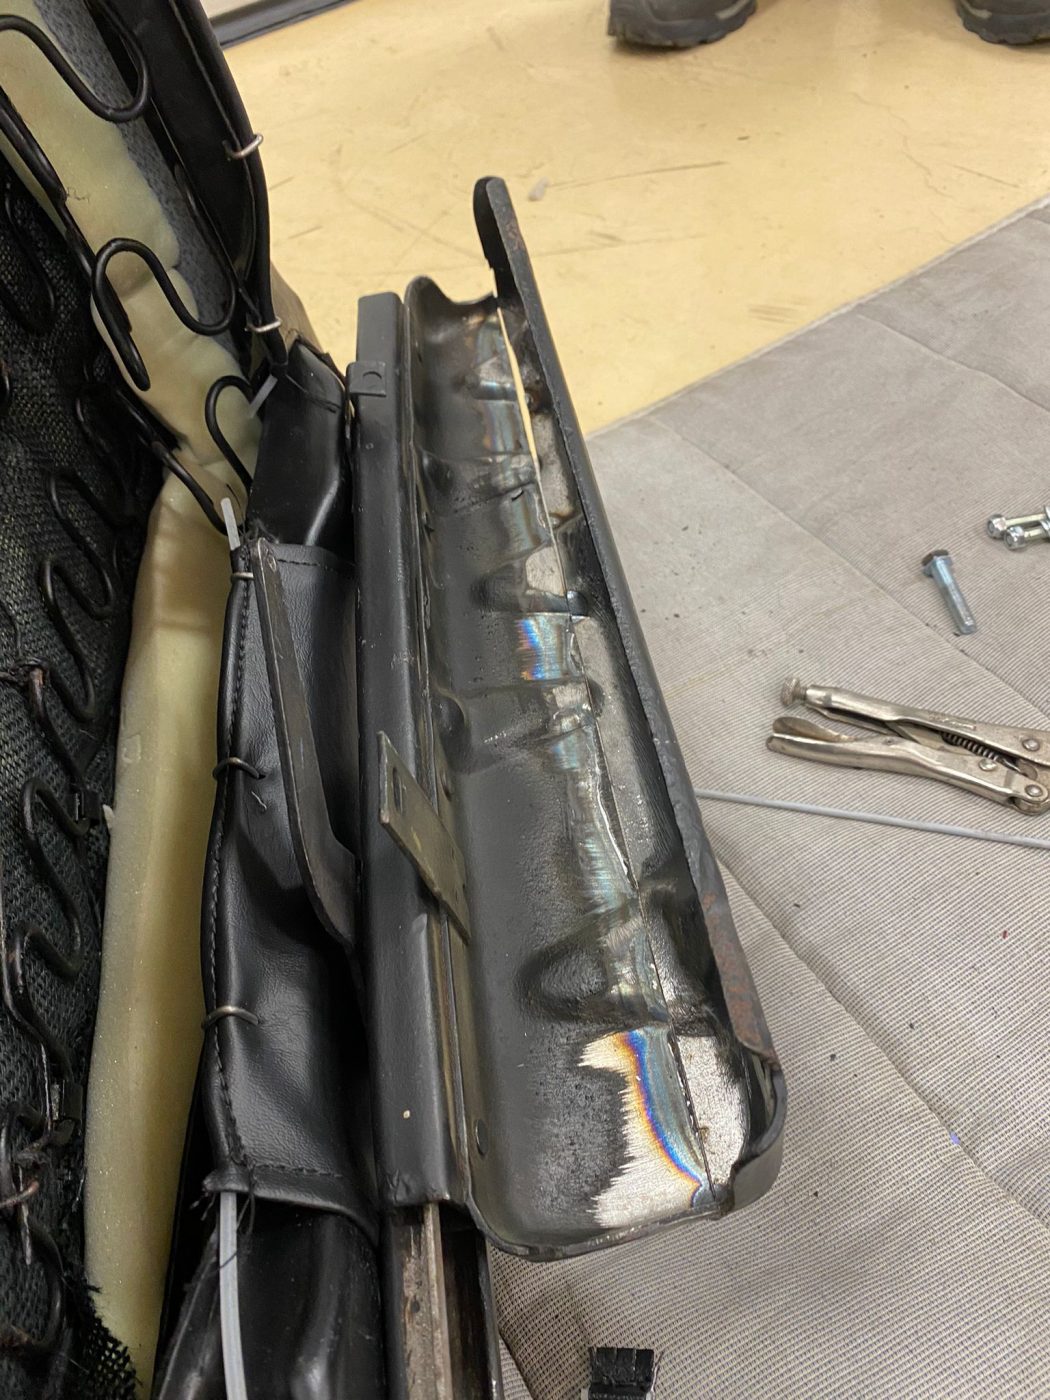
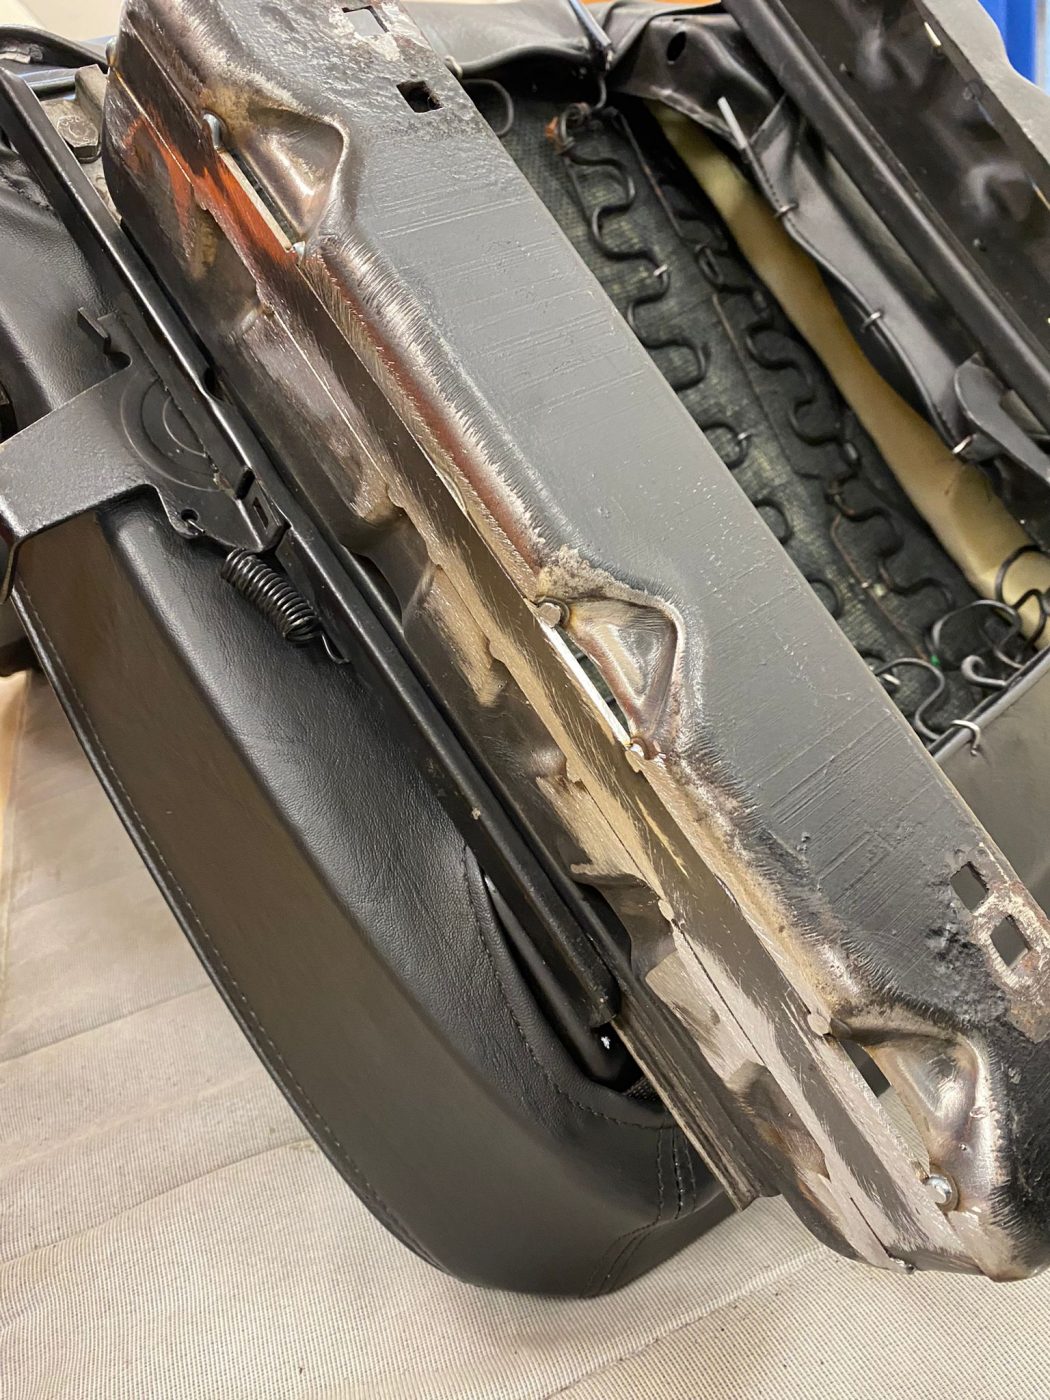
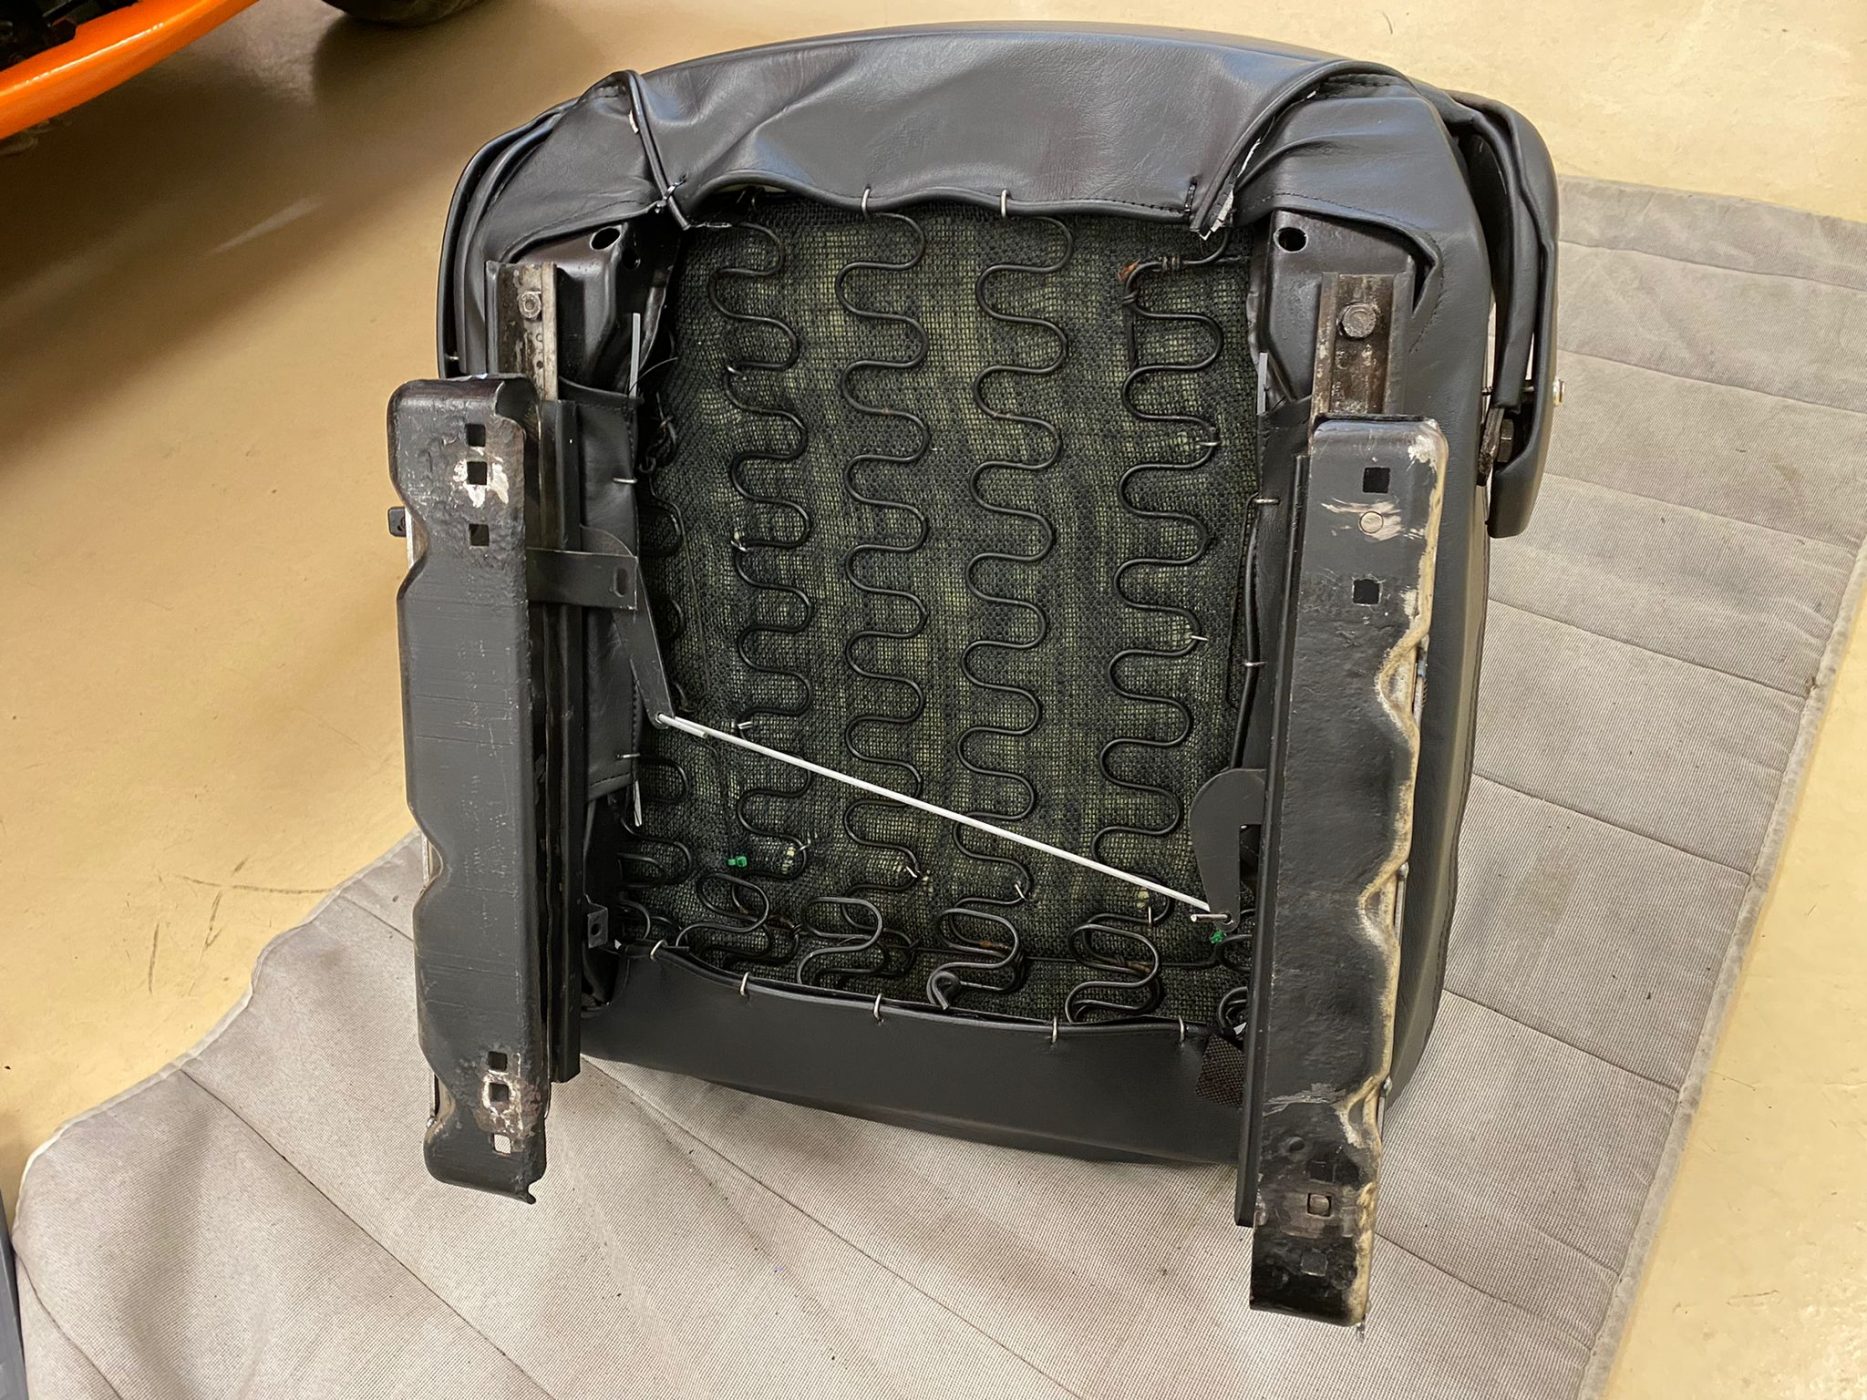

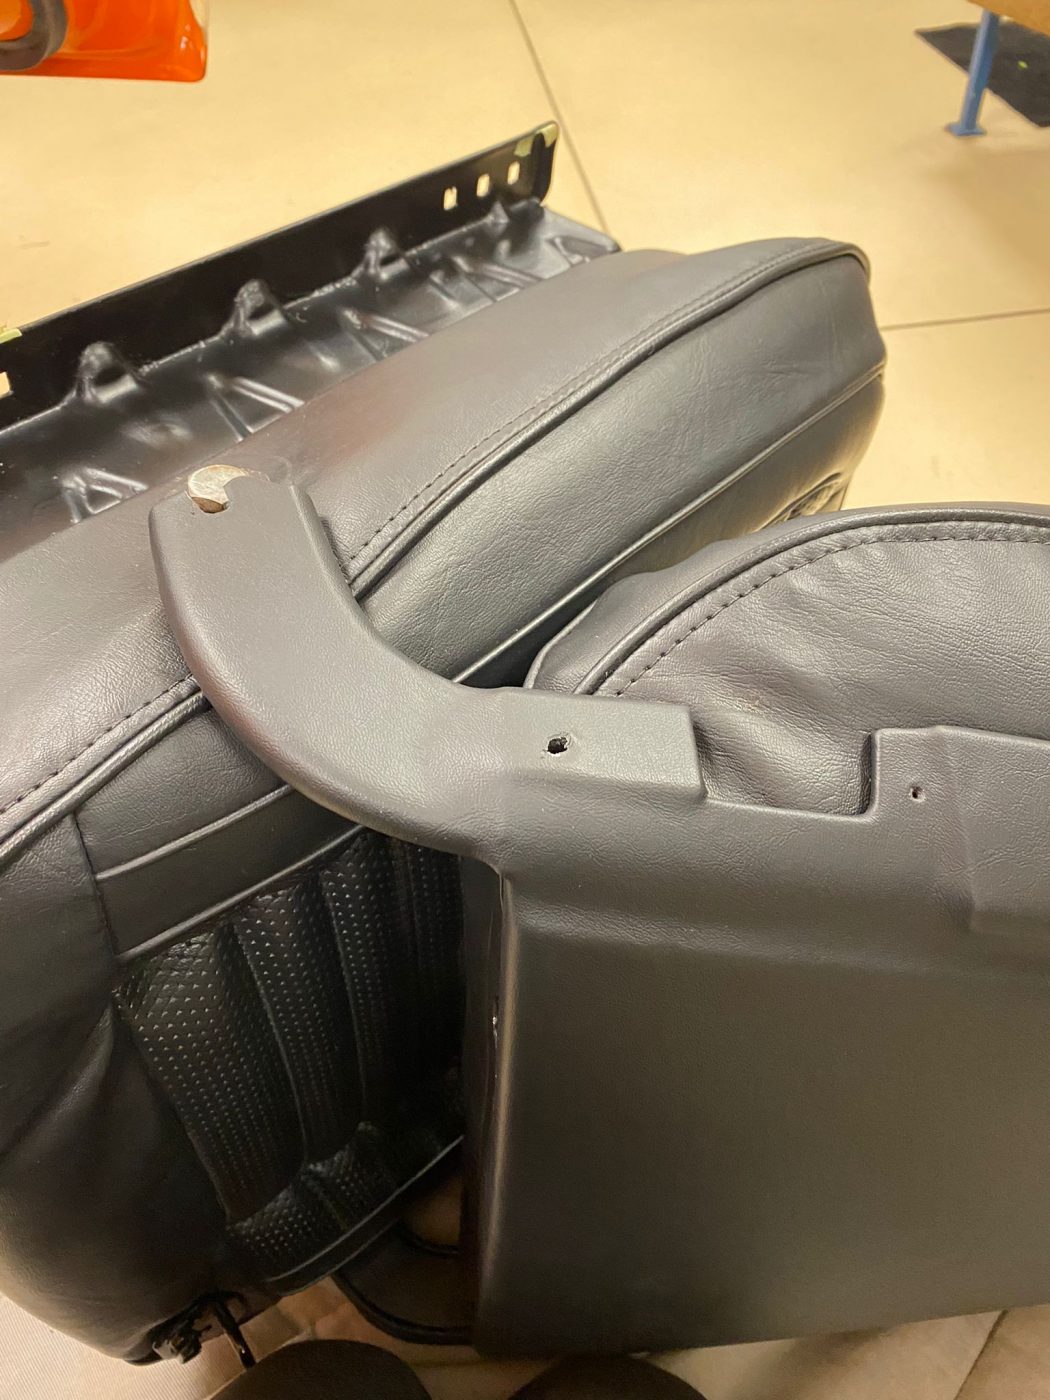
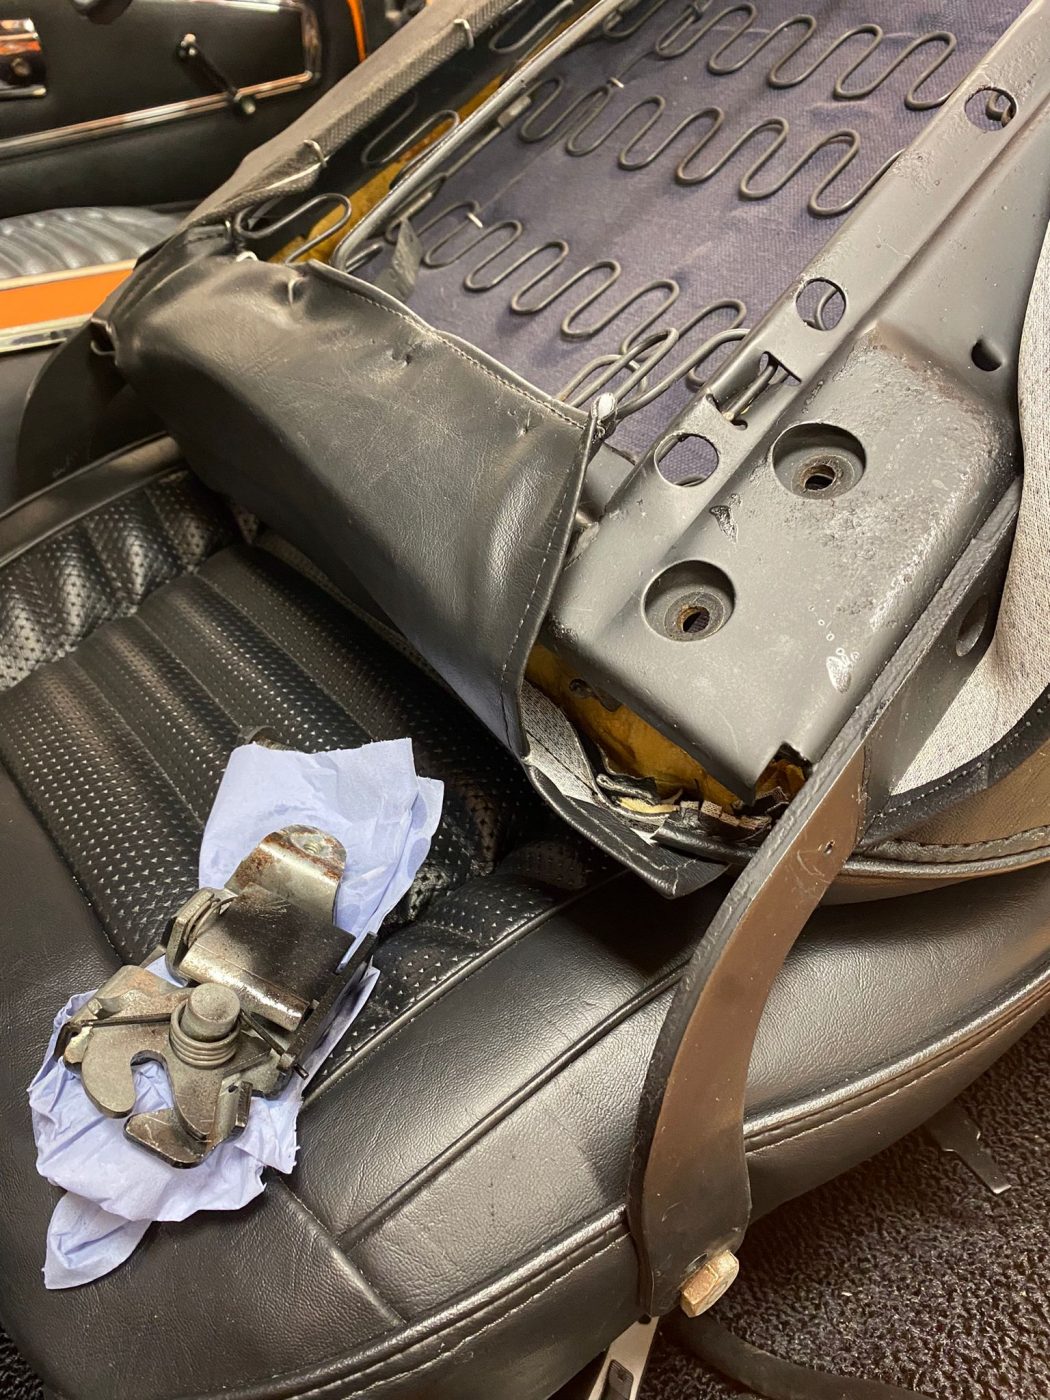
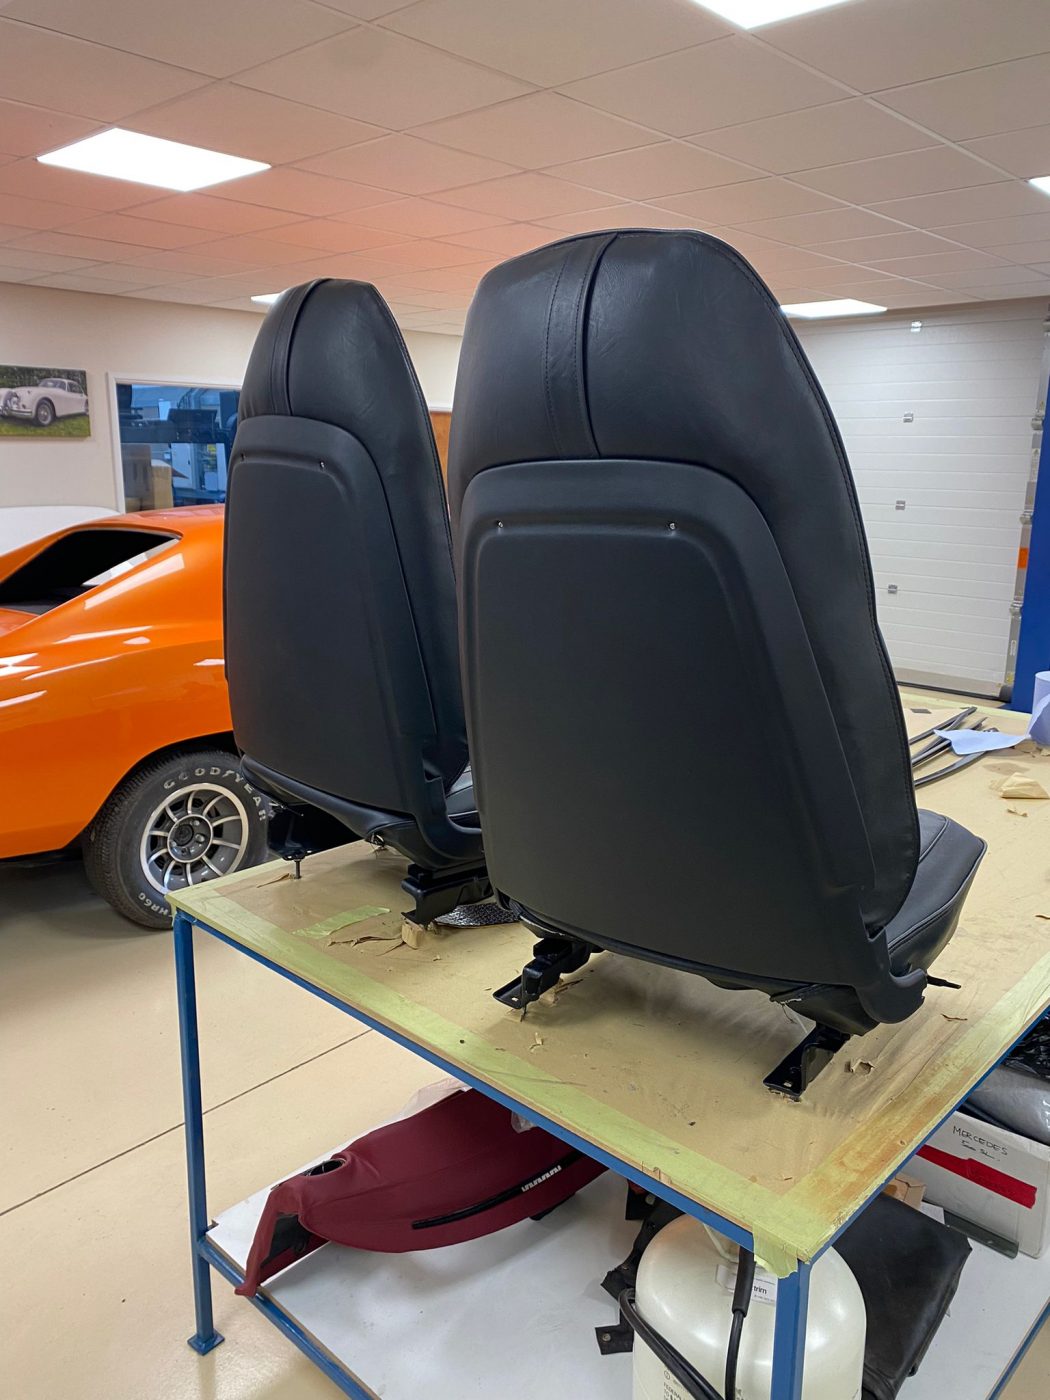
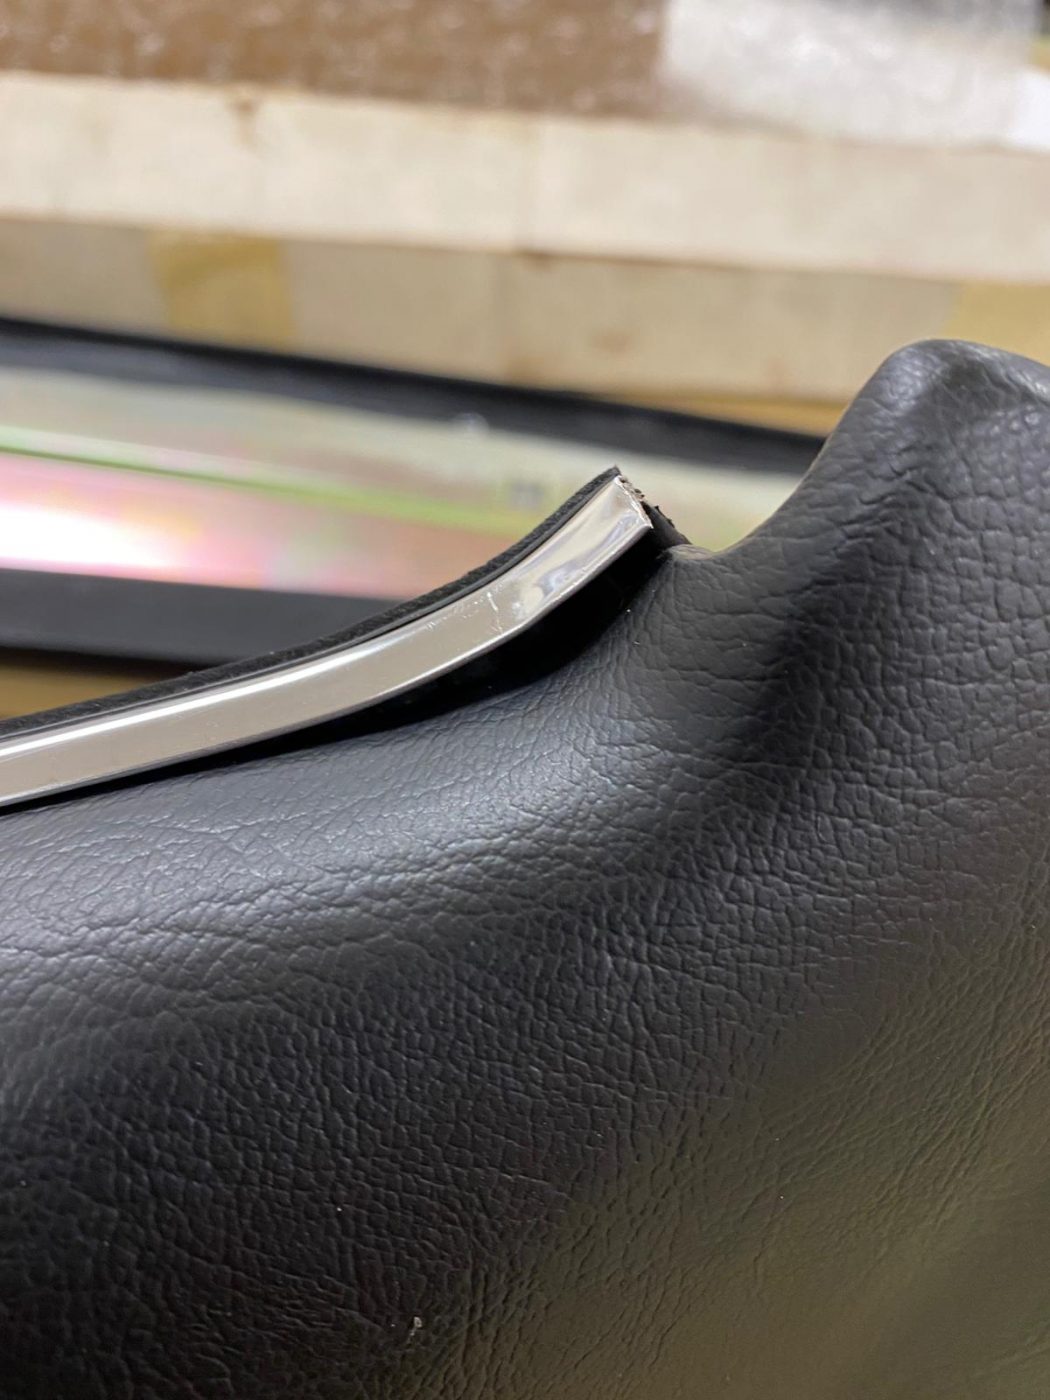
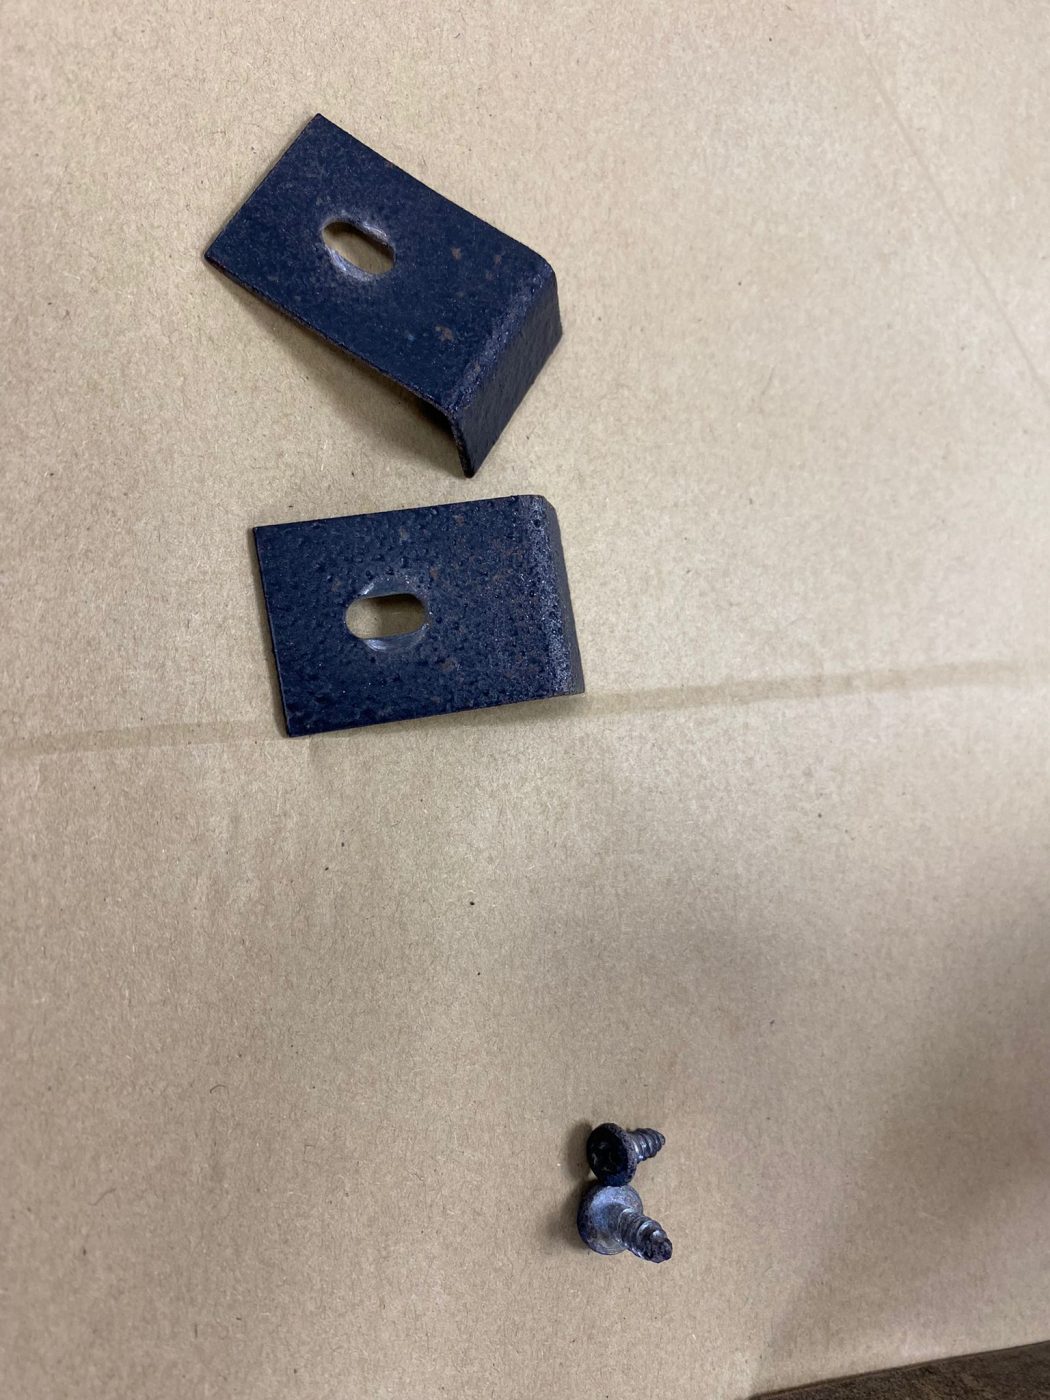
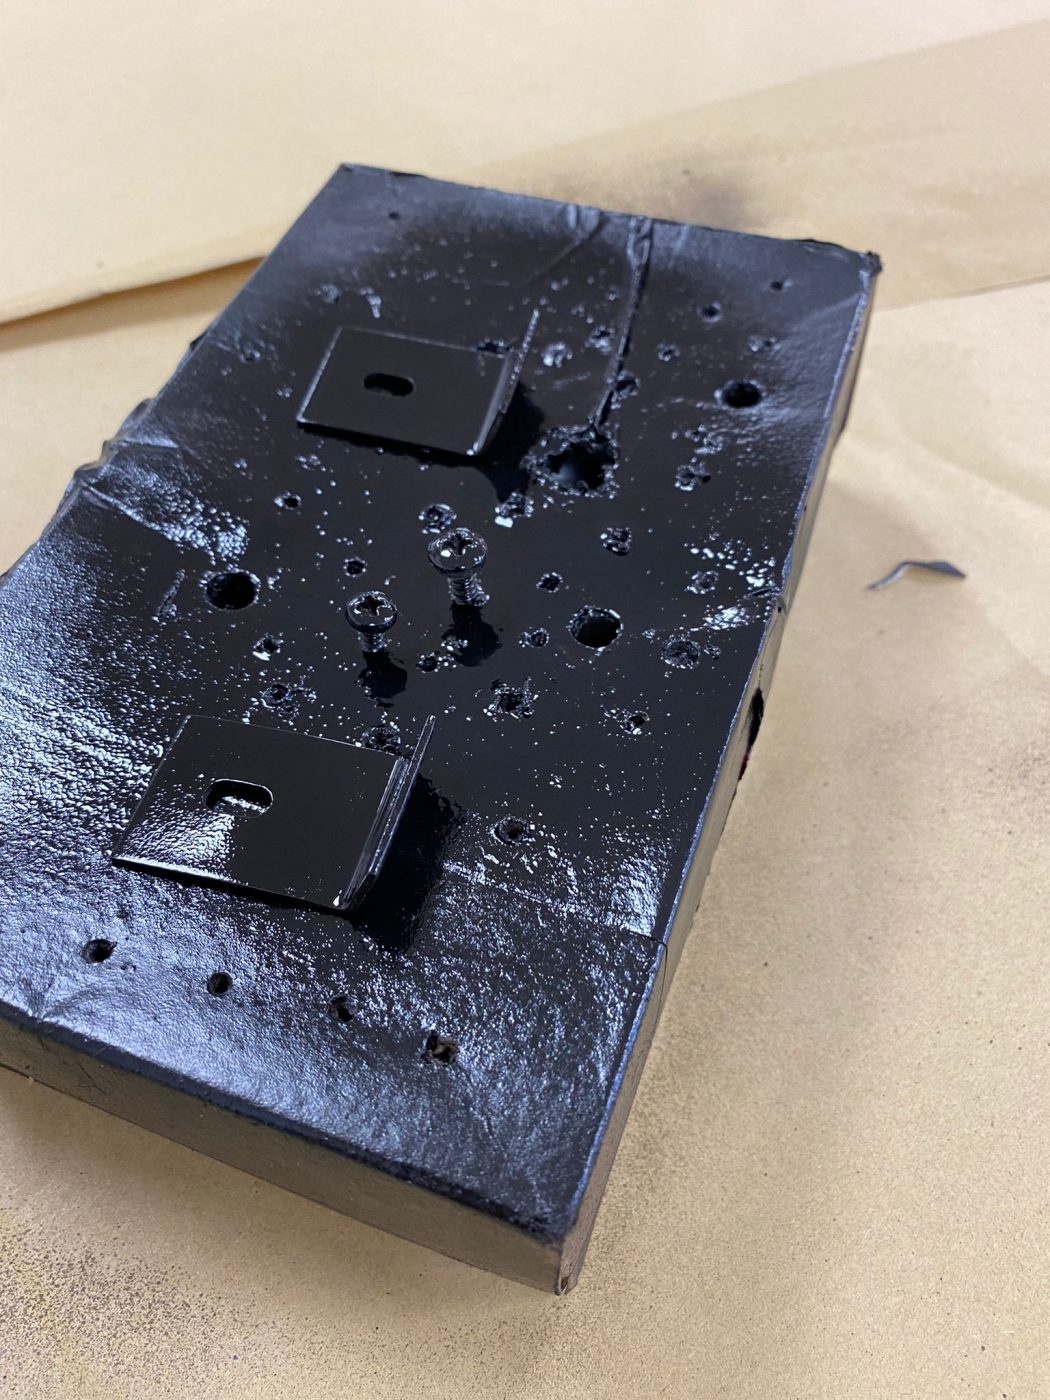
Brian and the Bridge Classic Cars in-house trim experts have been working on getting the new bucket seats to sit properly in the 1970 Dodge Charger that is in with us for interior fitting.
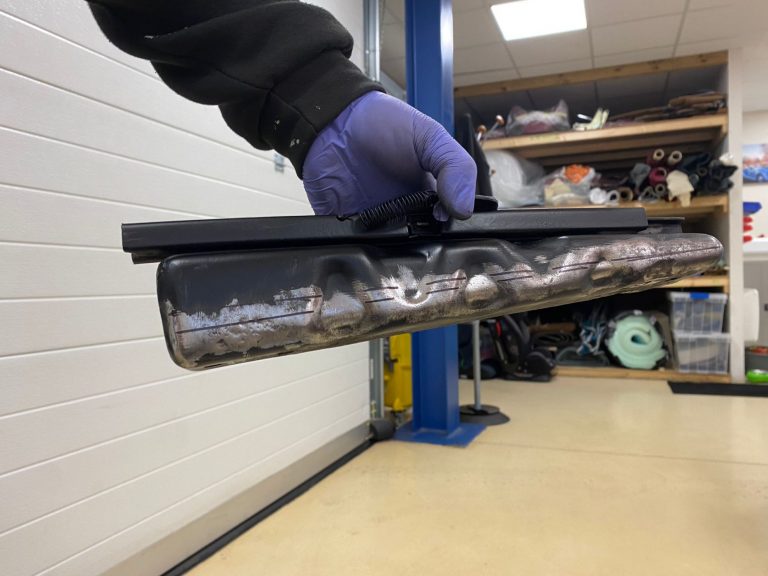
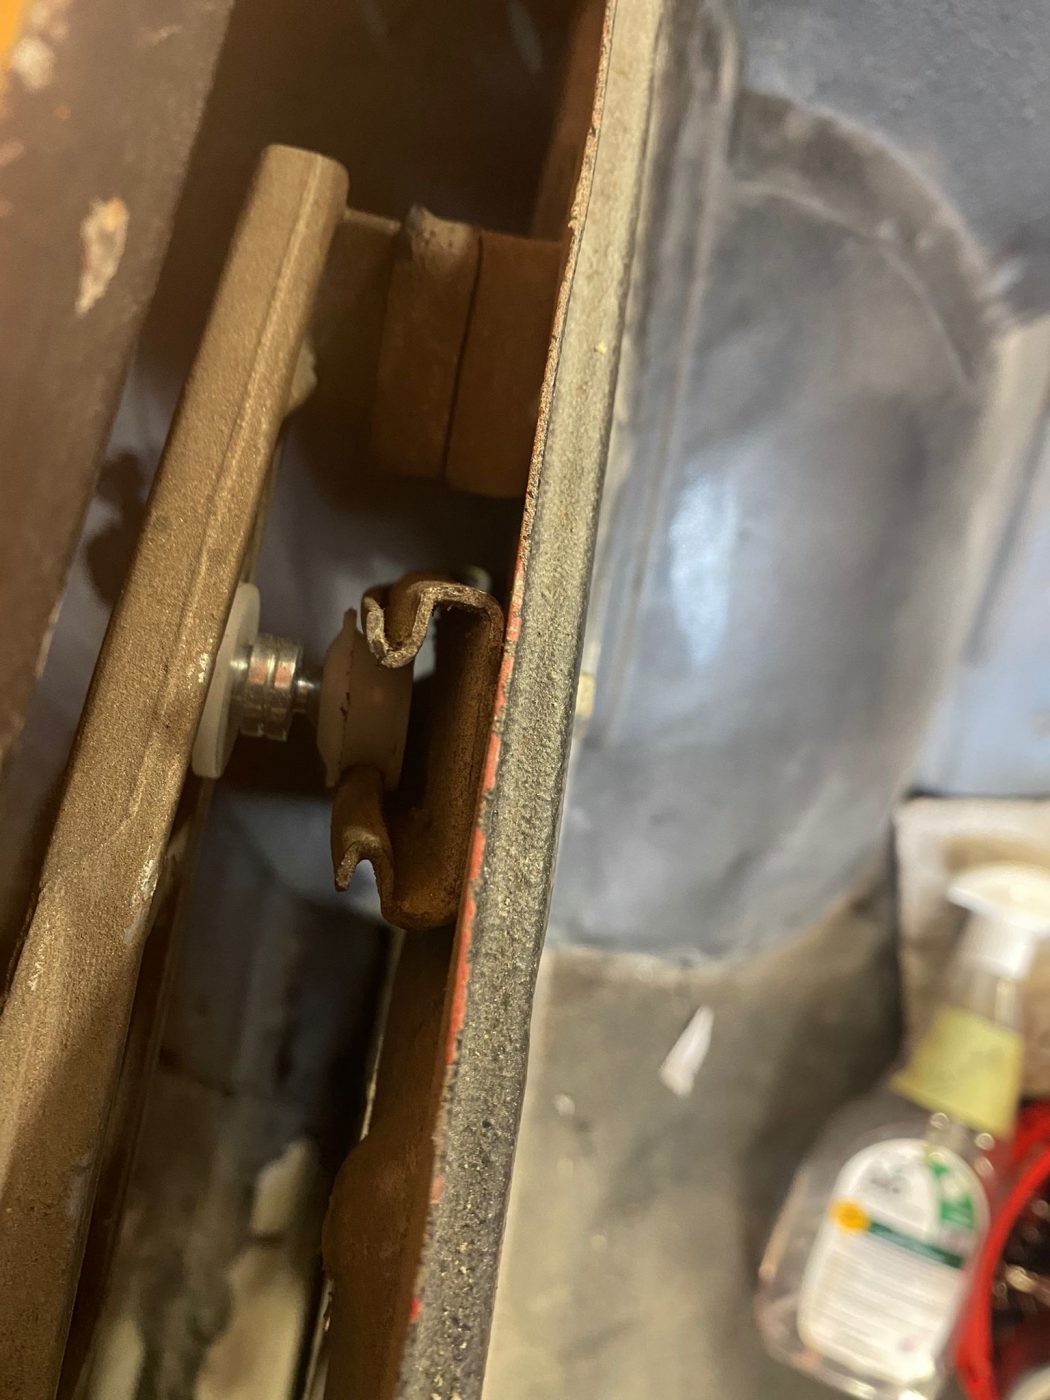
When the seats were fixed into the cabin they sat slightly at an angle. The seats are supposed to sit square in the car, which means some modifications were needed to be done to the seat rails. Thankfully, this is no problem for our incredible trim team.
Brian worked on reshaping and reforming the seat rails to fit perfectly into the car and allowed both seats to sit flat, square and evenly in the cockpit of this incredible muscle car.
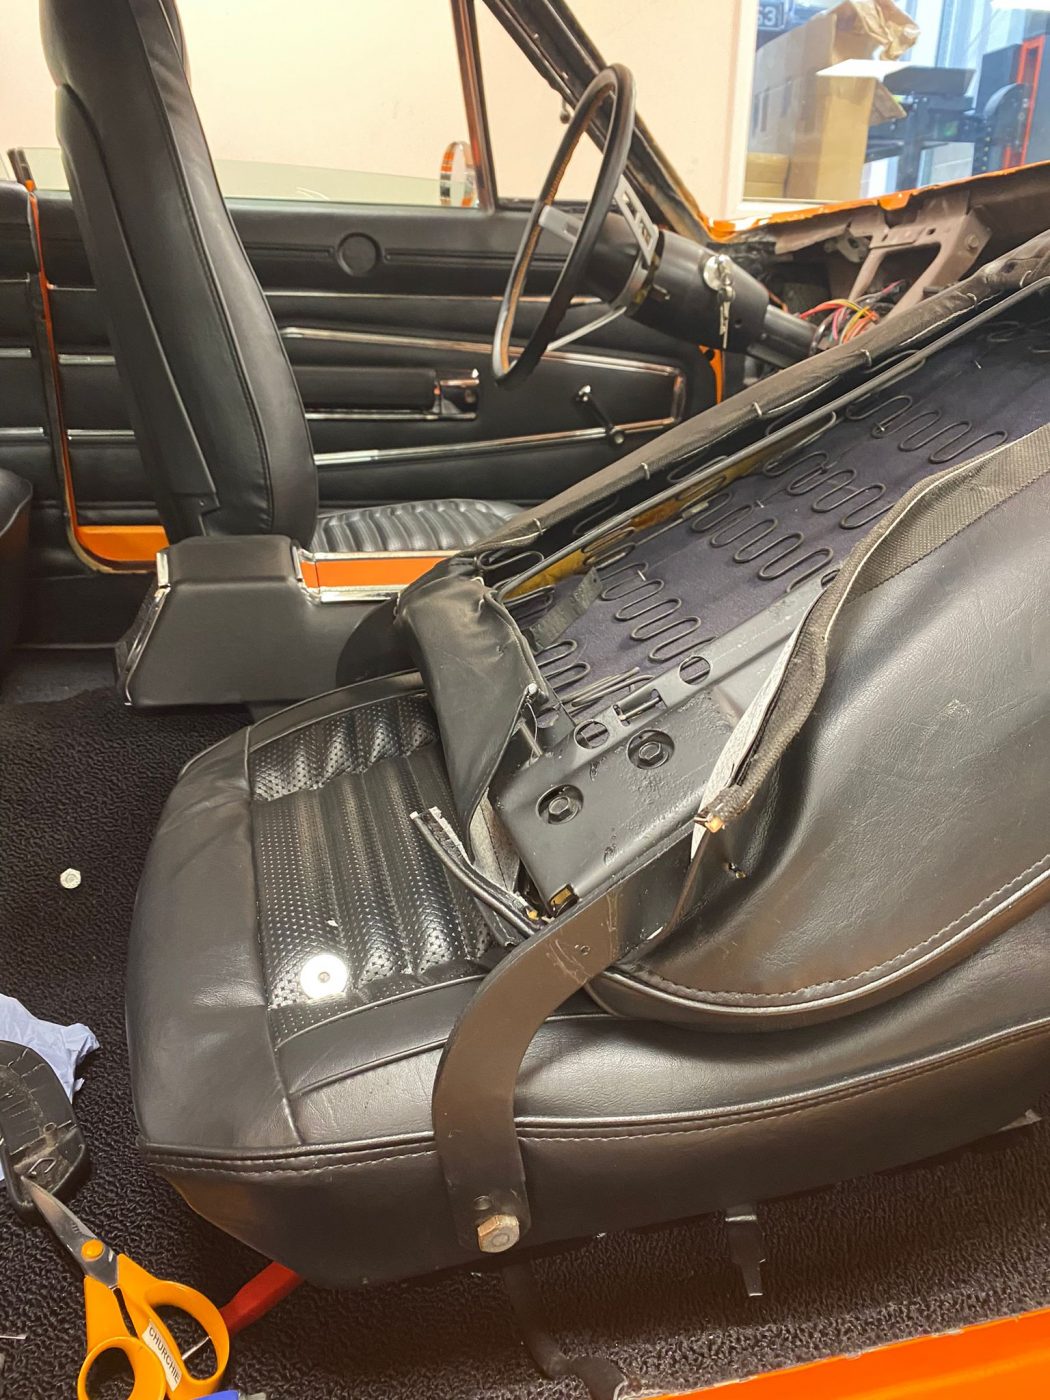

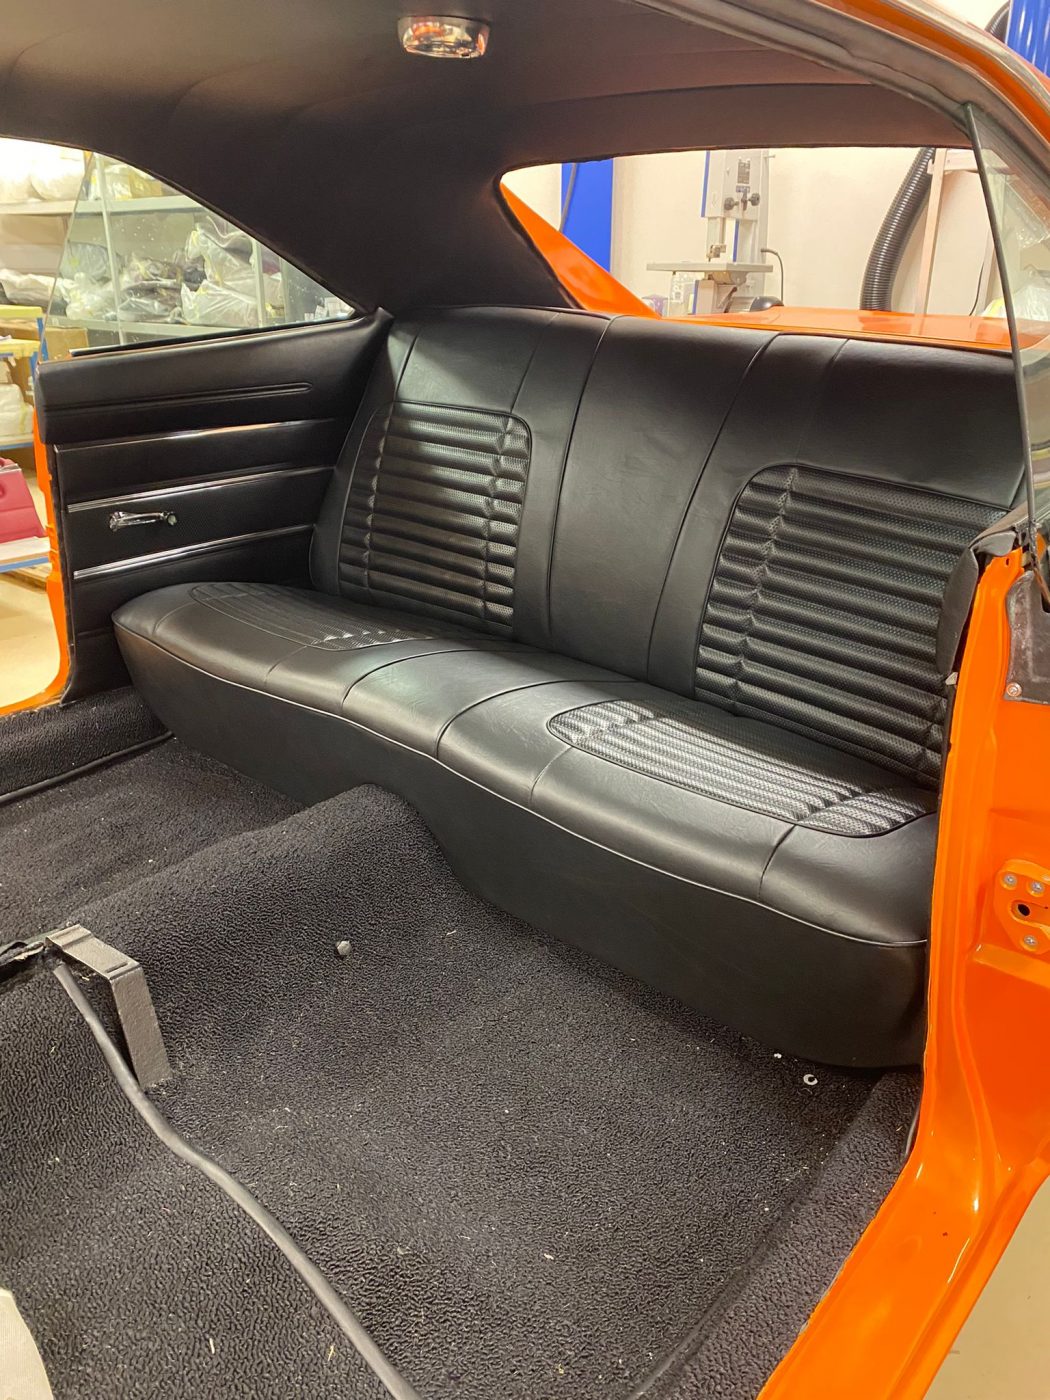
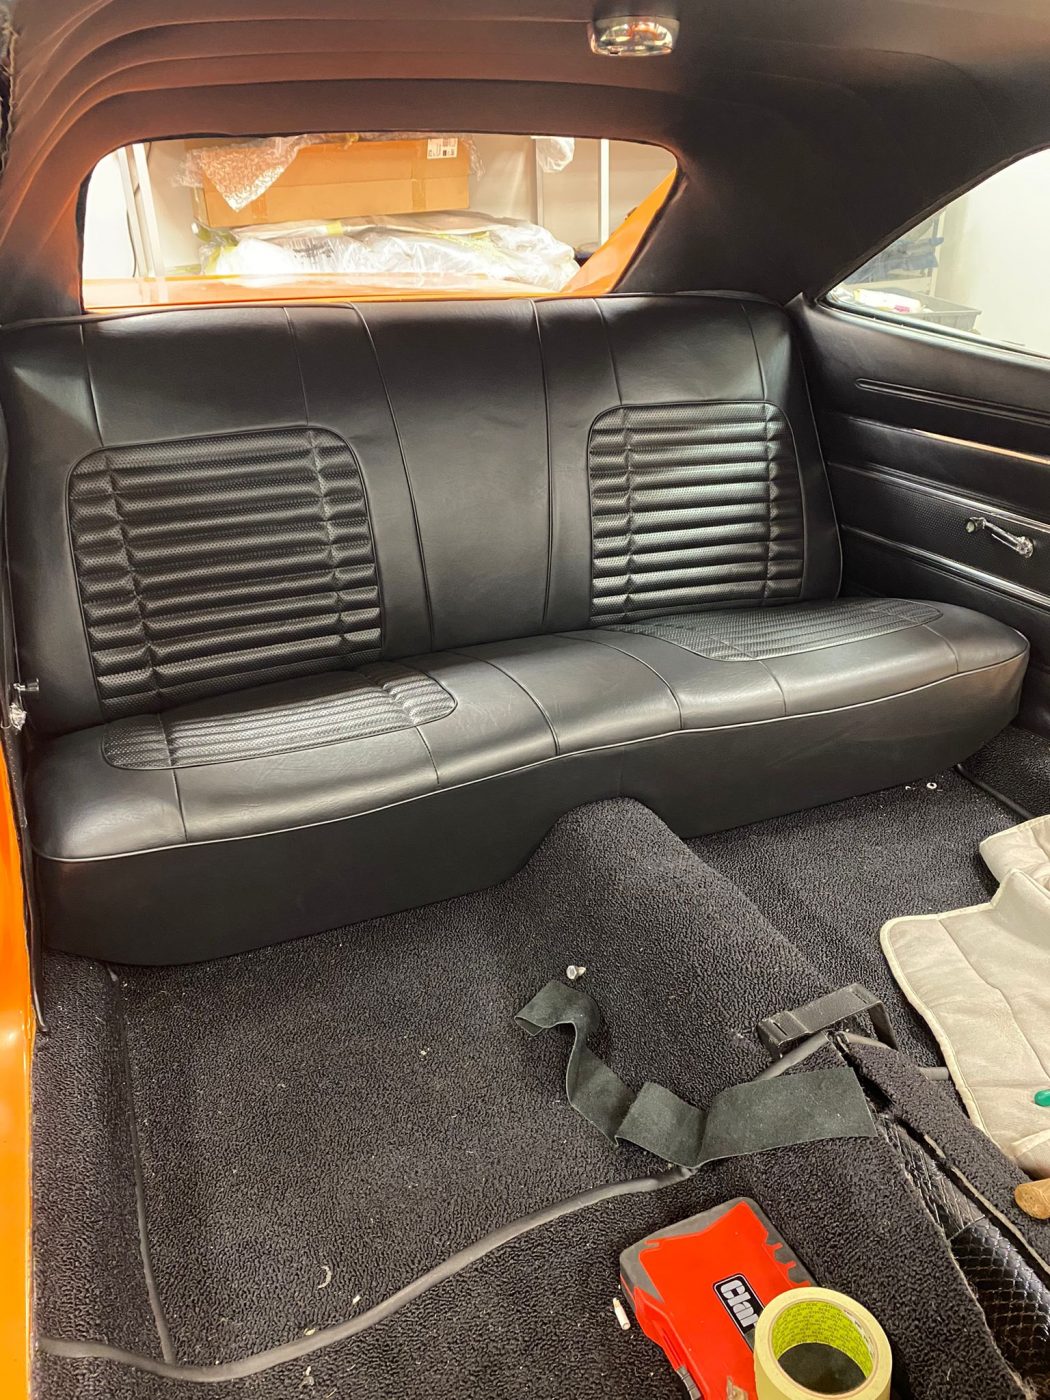

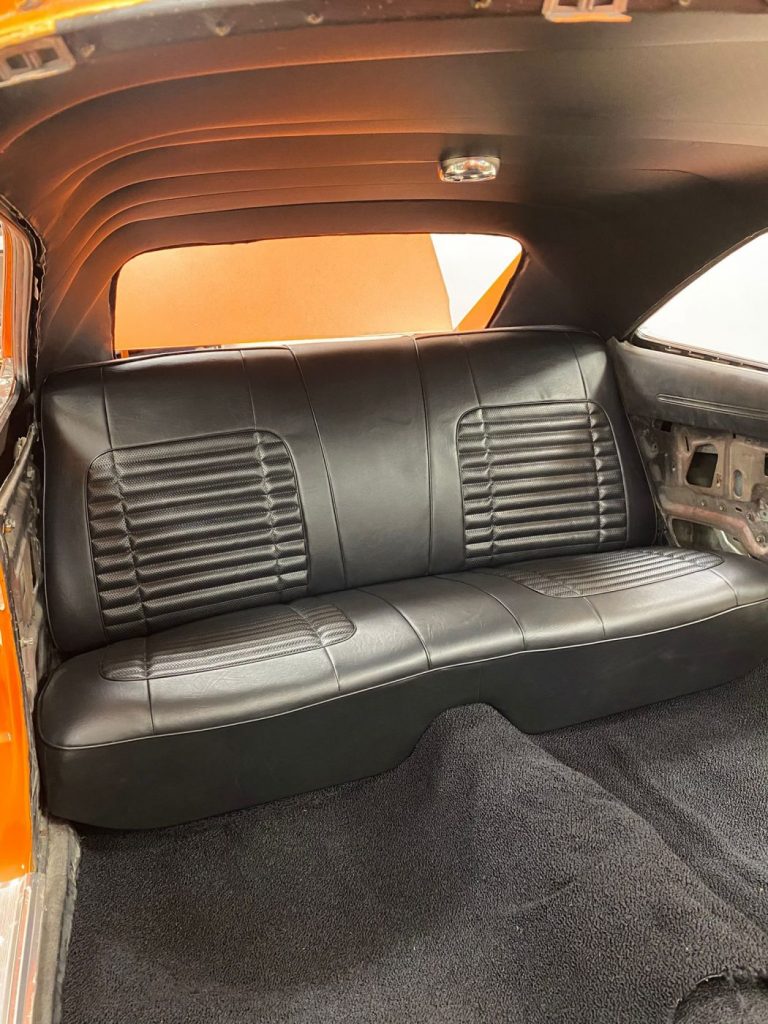
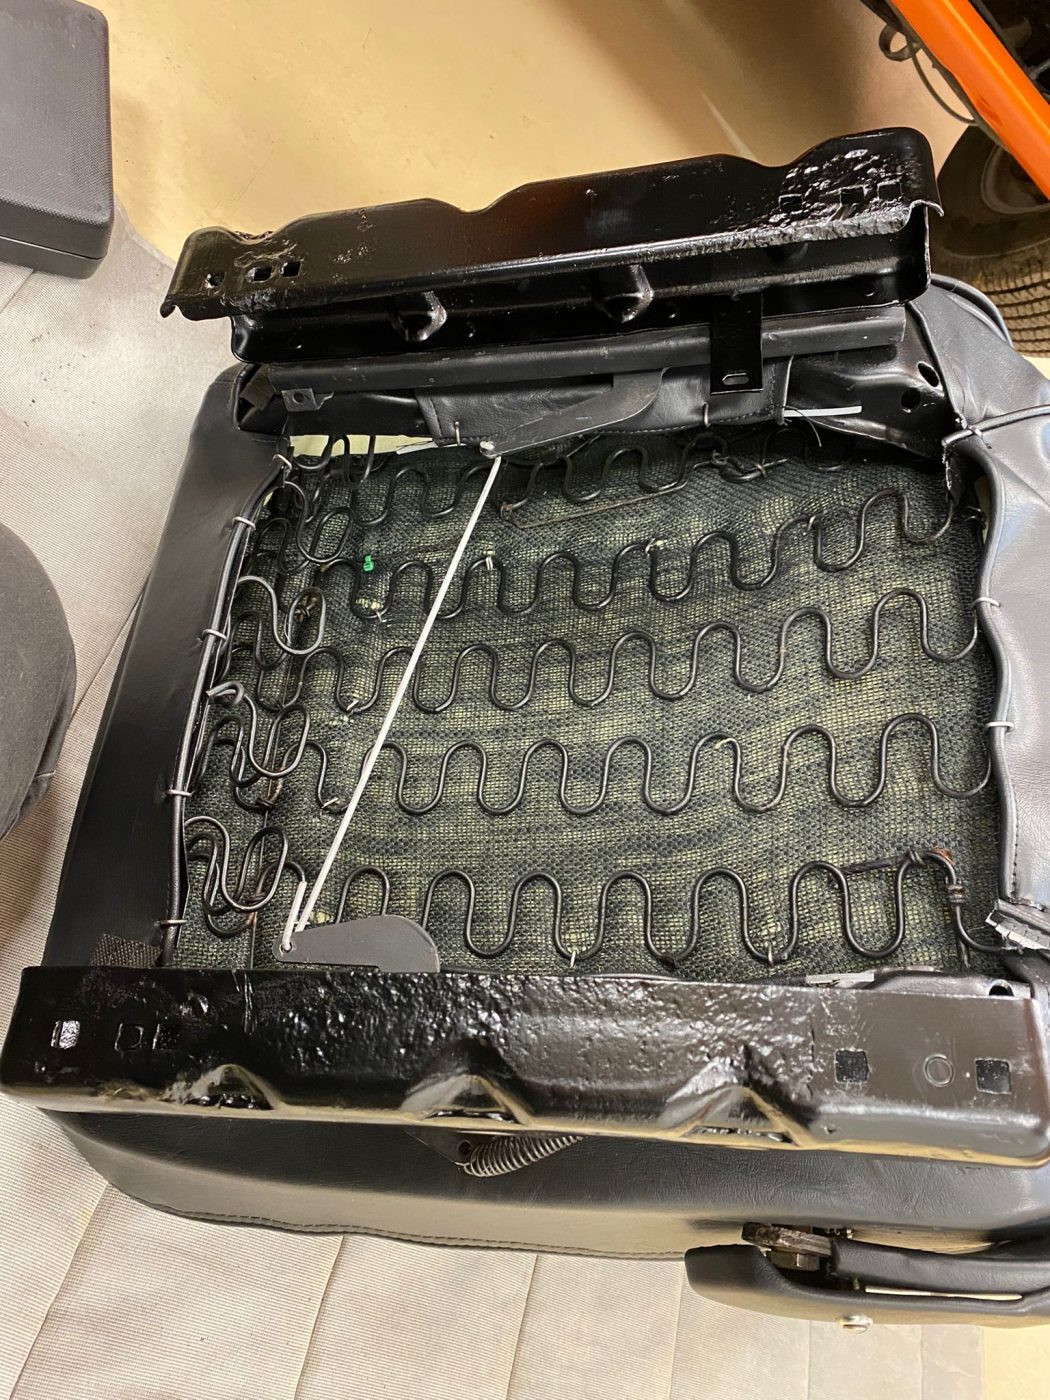
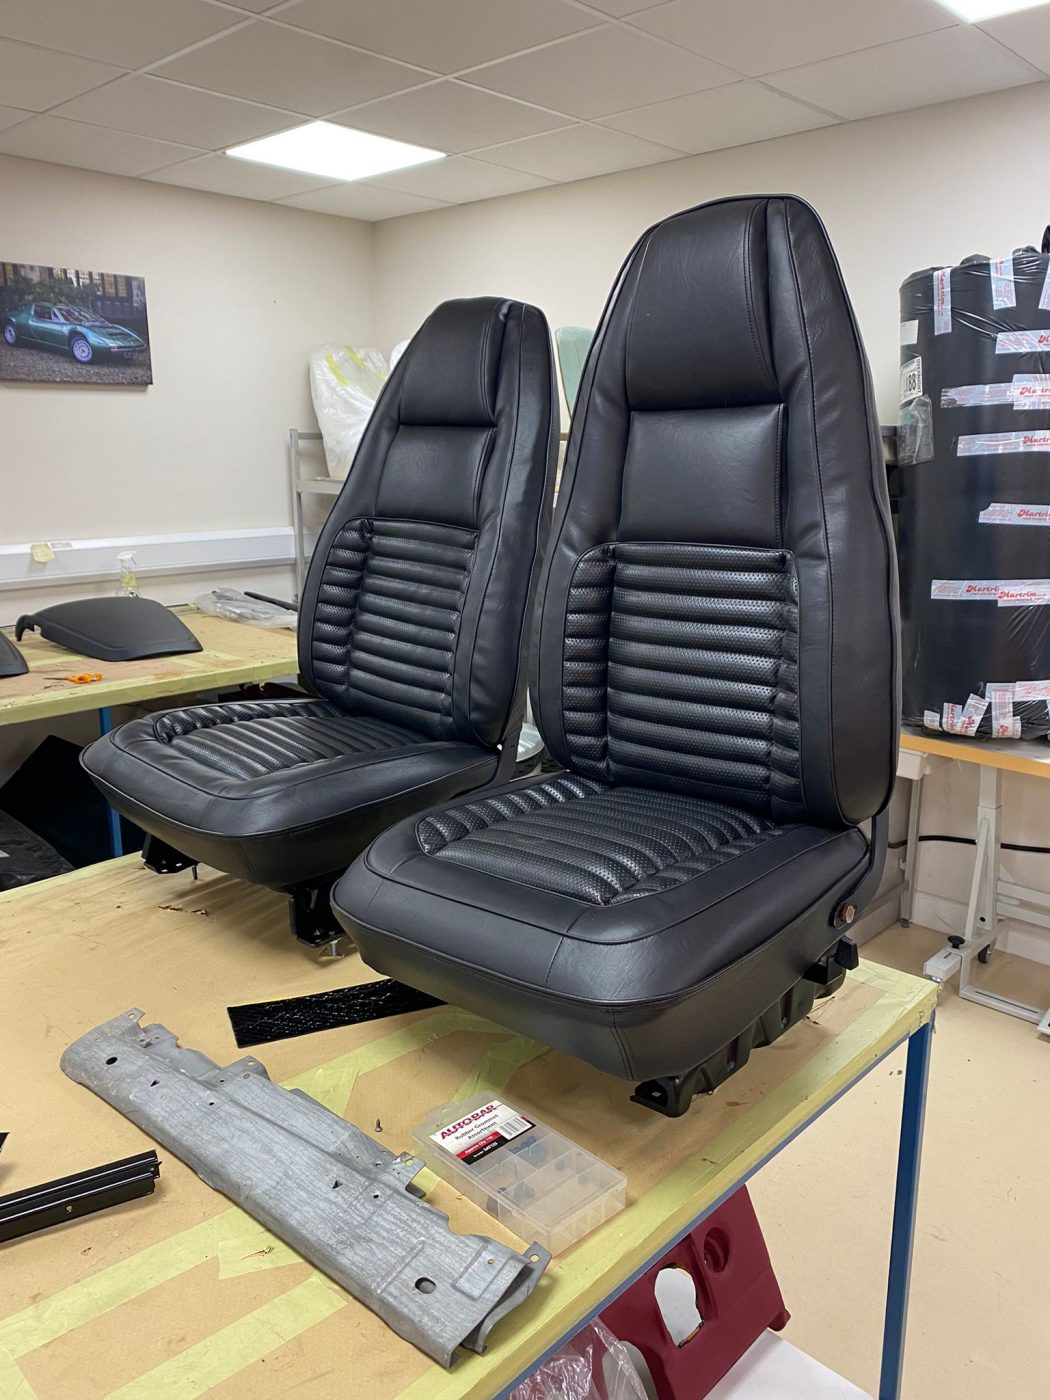
Brian is working on the inside of the 1970 Dodge Charger that is in the Bridge Classic Cars in-house trim shop.
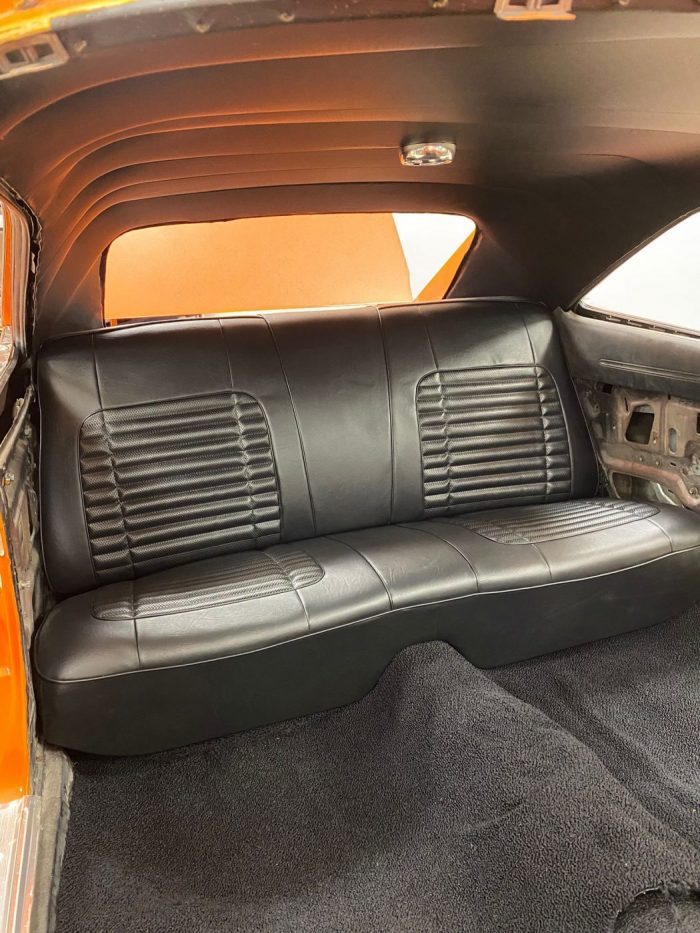
Brian has been building up the seats ready to be fitted into the car, both front and rear. Brian built up the rear seats to get into the car to begin with so that each of the other pieces can be put into place. The rear bench seat splits into two pieces so the careful placement of the covers and fixings to make sure all of the patterns lay straight and true to each other.
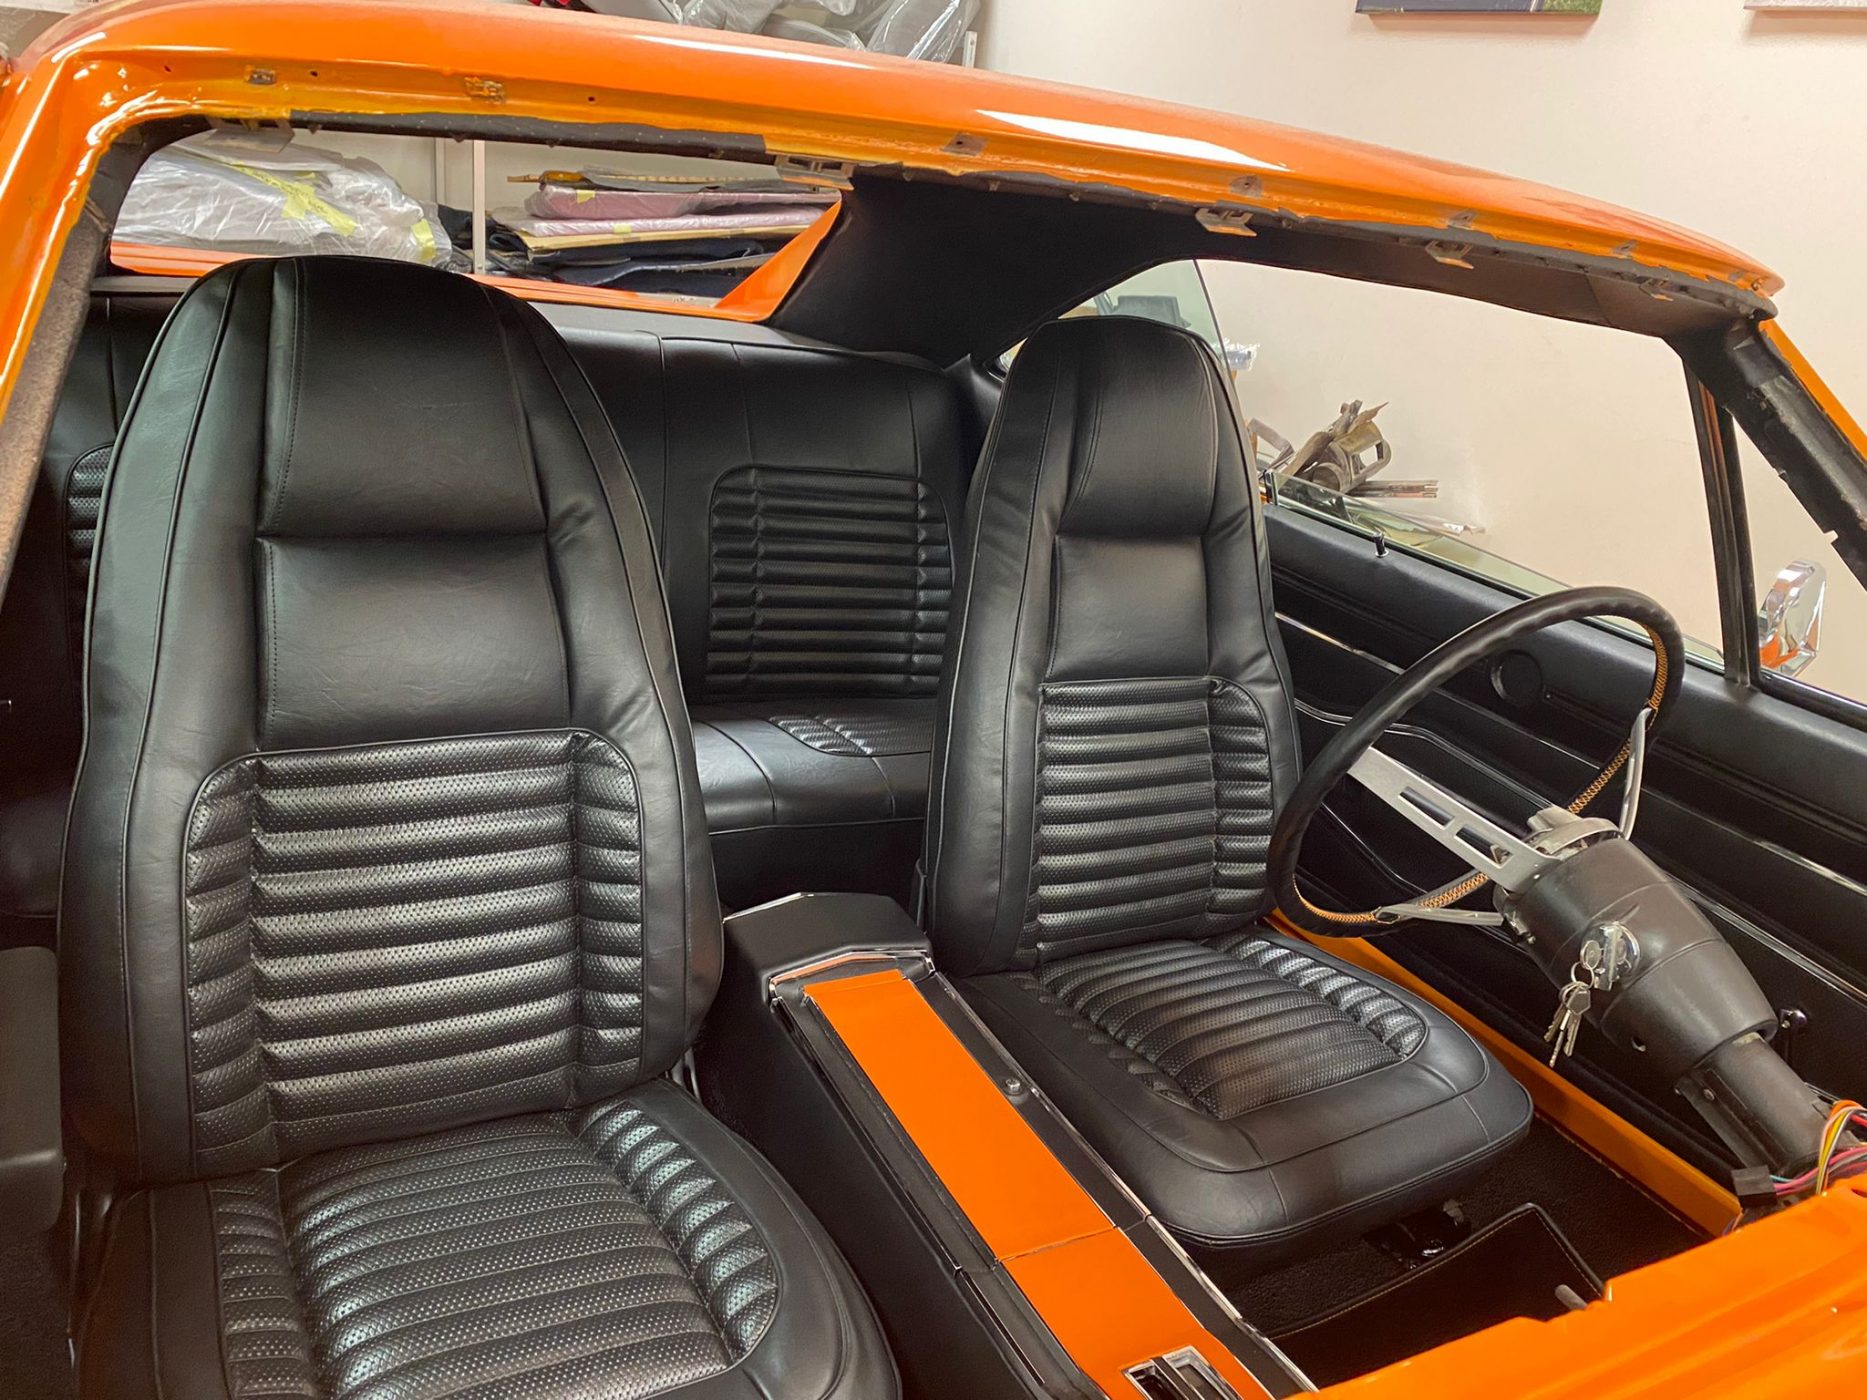
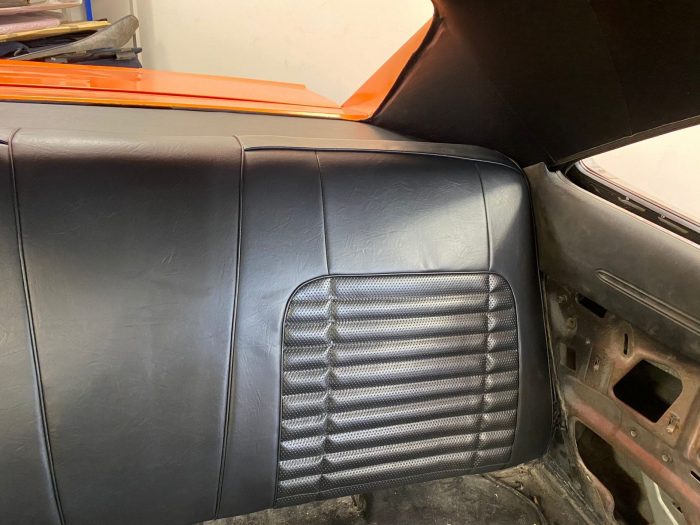
Then it was time for the front seats. All the side trims for the front seats needed to be fitted in preparation for them to be fitted into the Chargers cabin. All of these pieces were carefully fitted by Brian as to not mark or scuff any of the plastic trims. Then, once all finished and present they were put into the interior of this amazing Muscle Car.

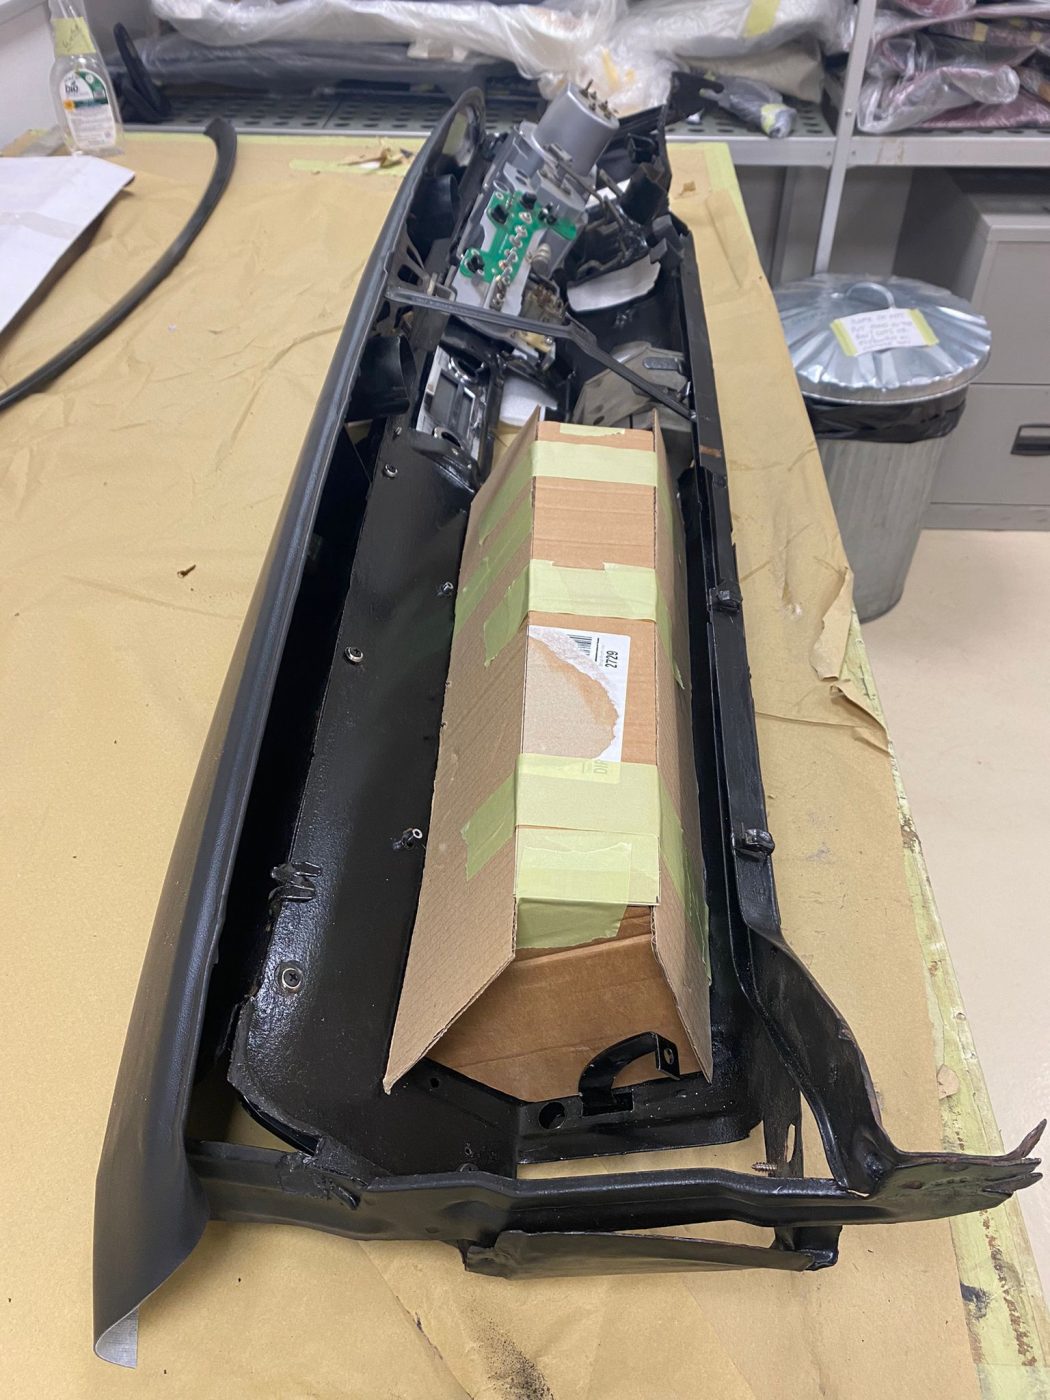
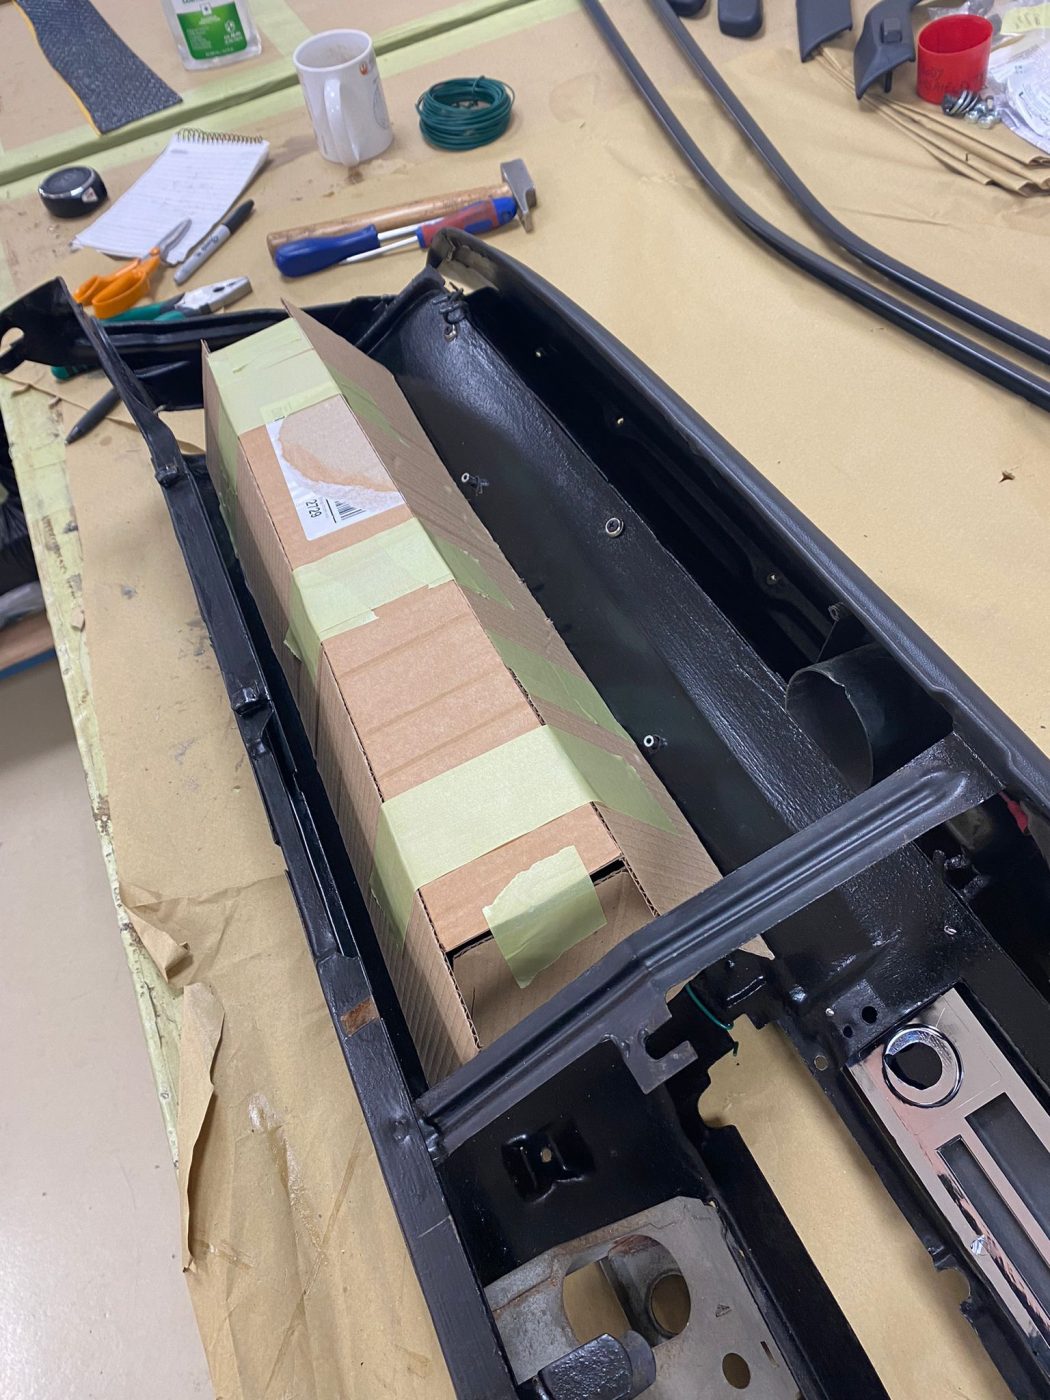
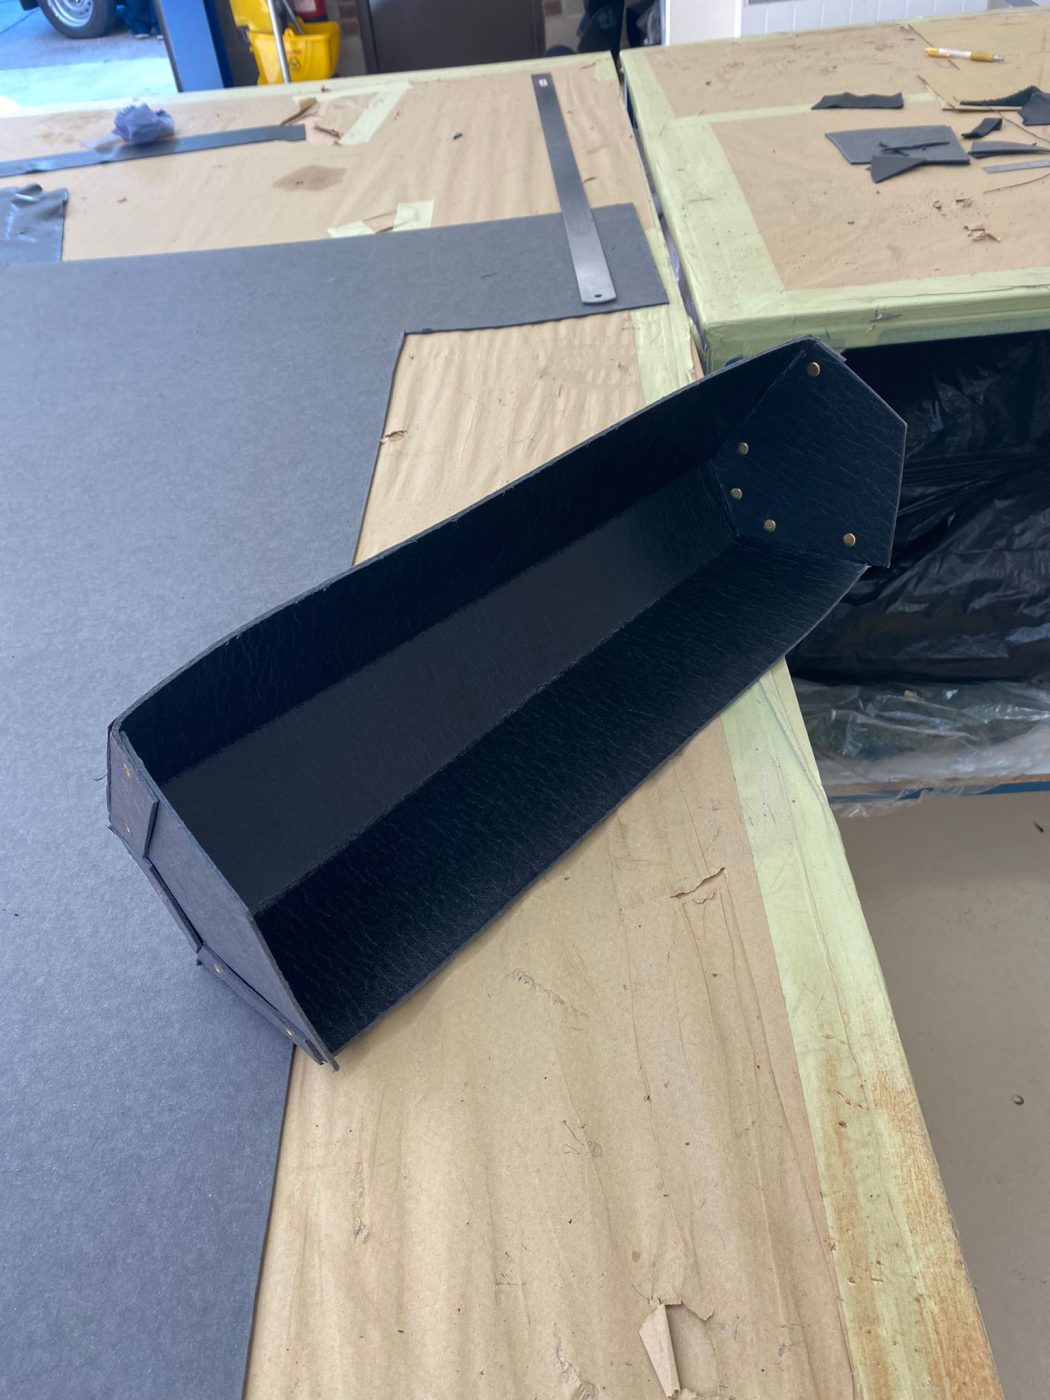
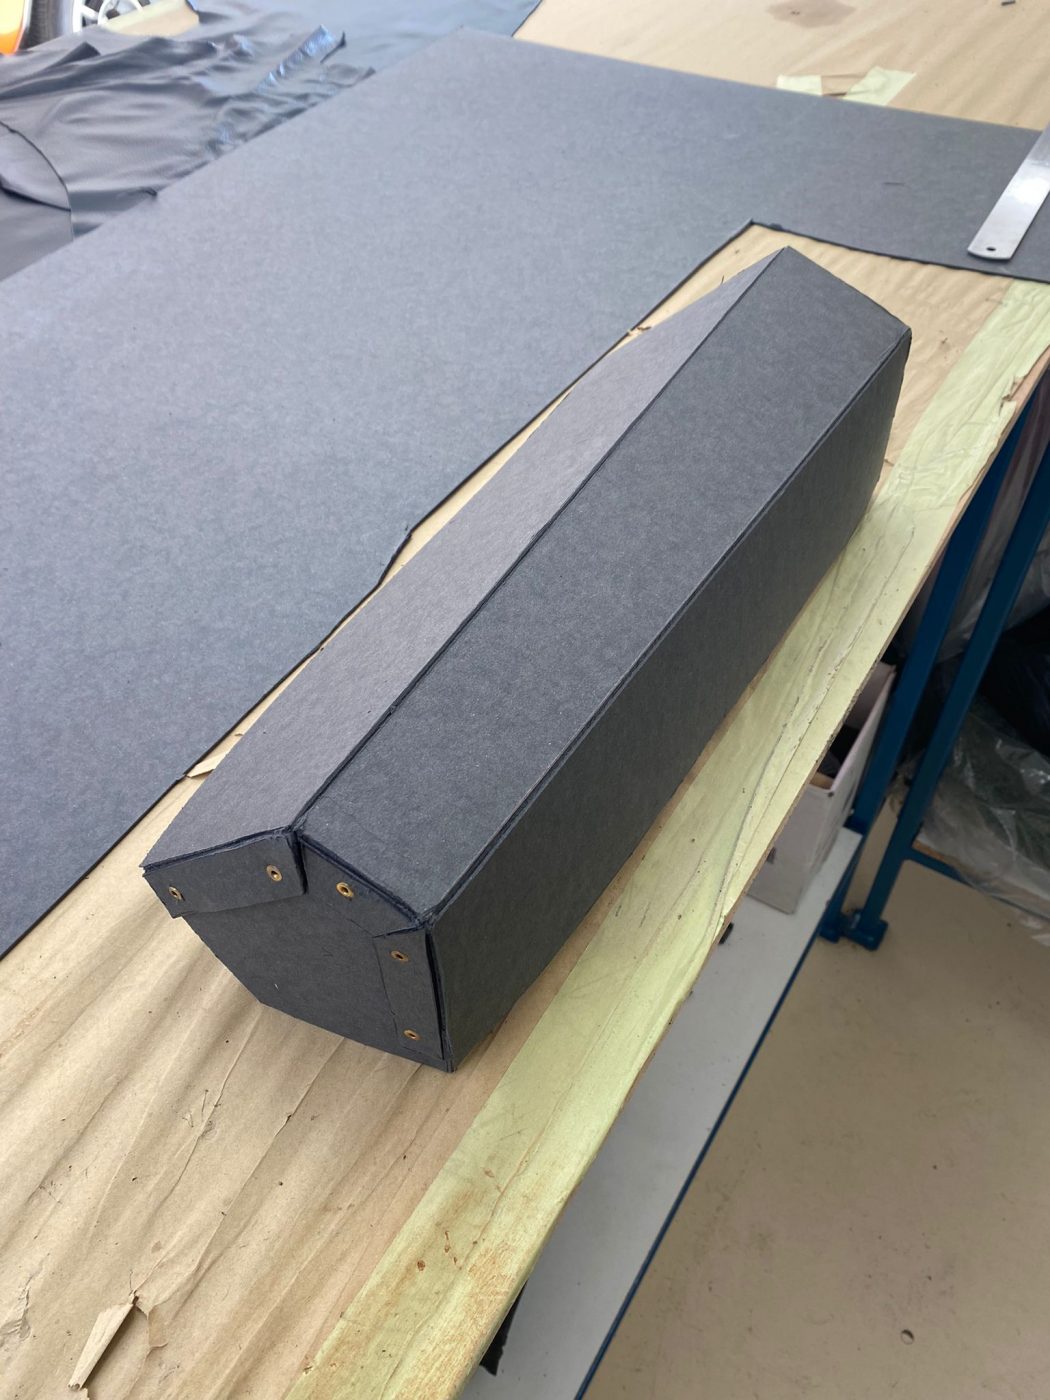
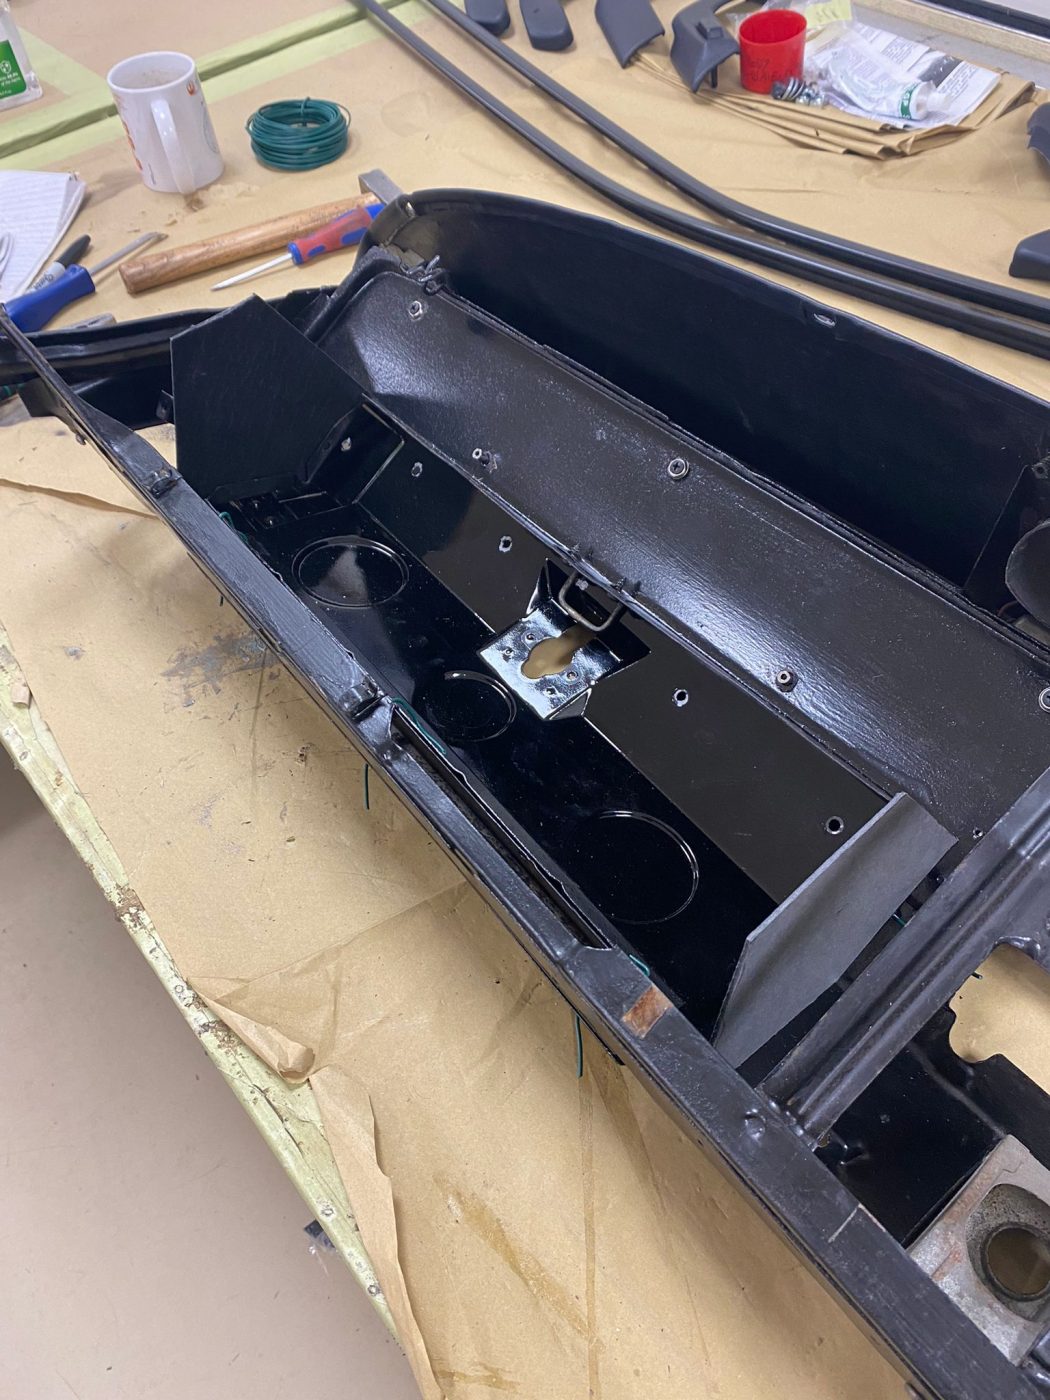
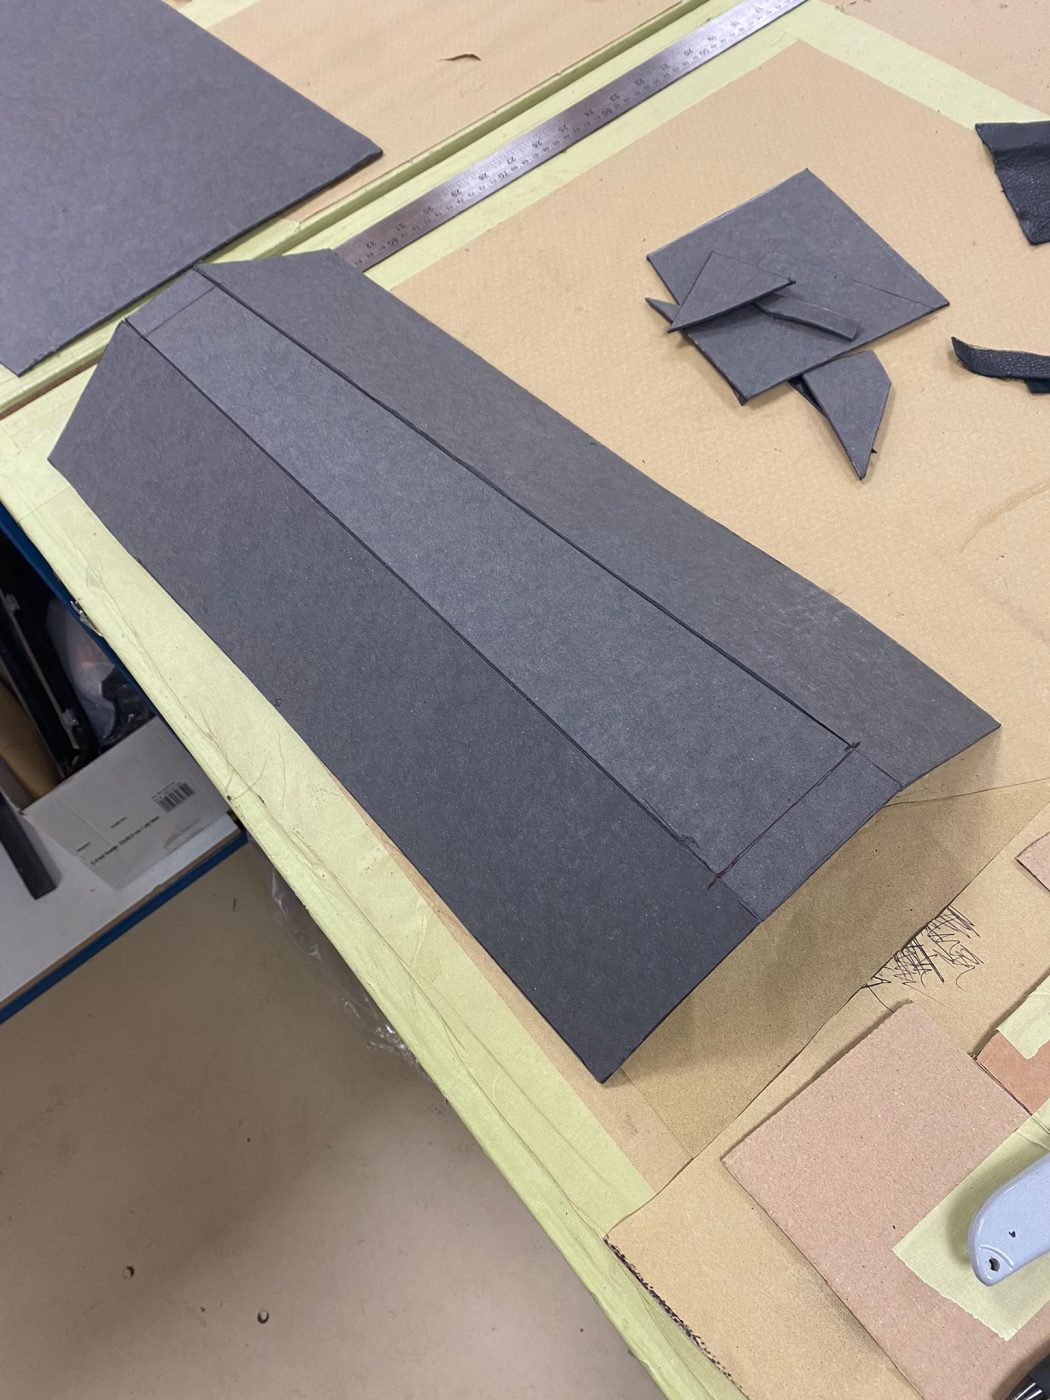
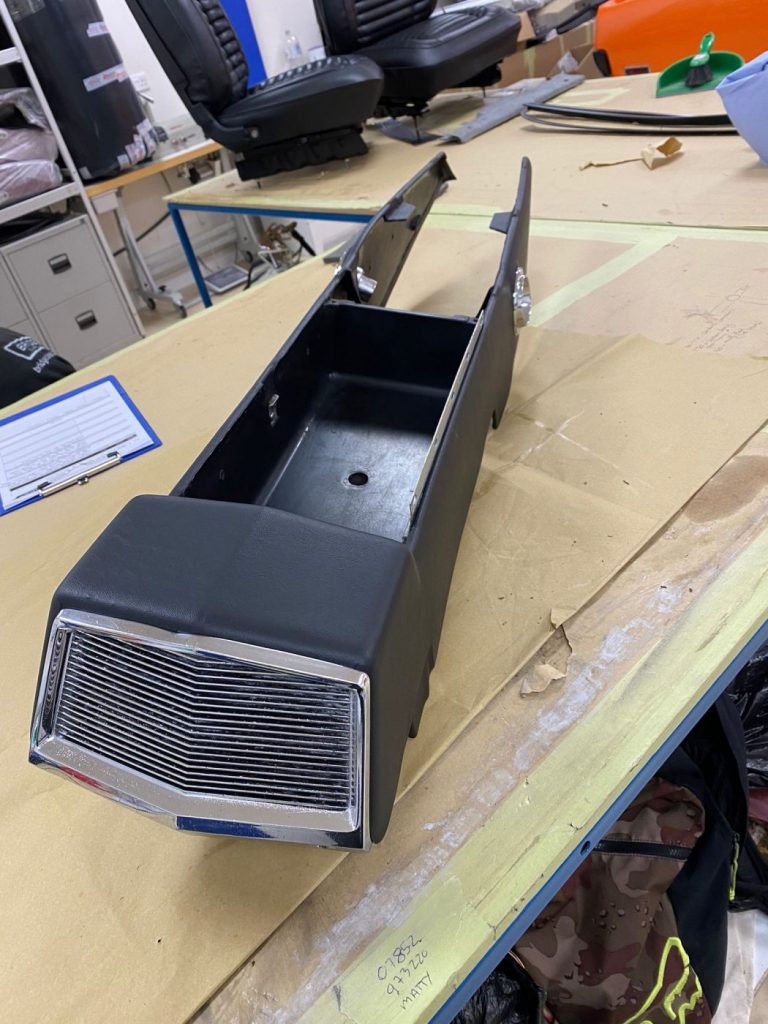
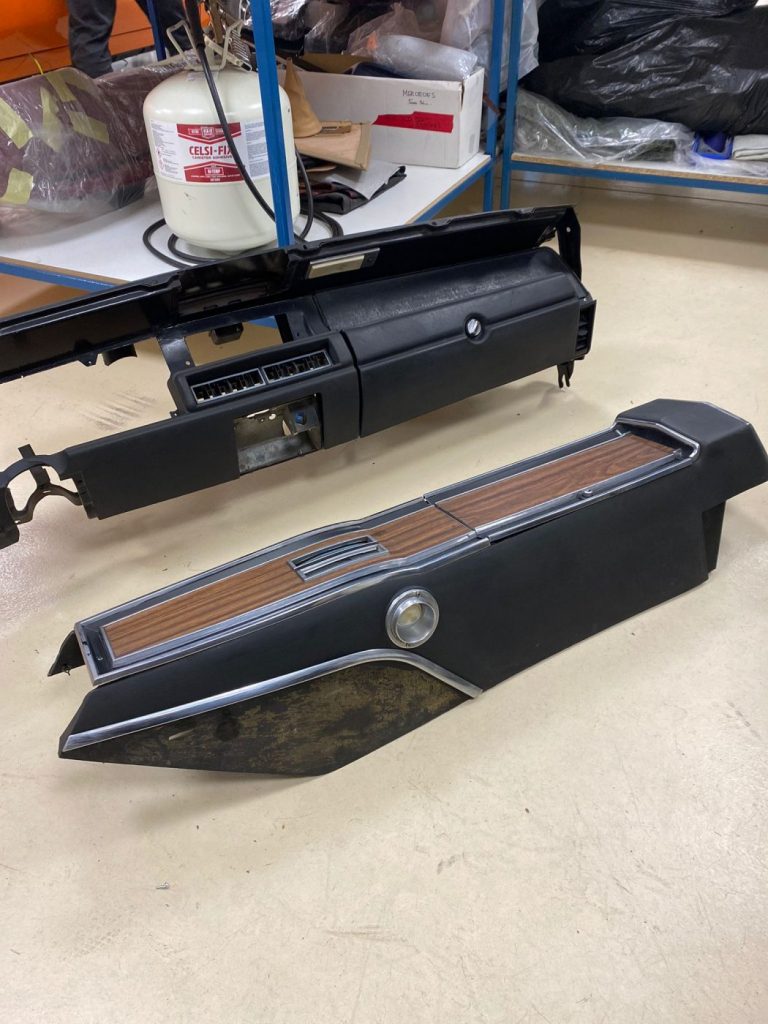
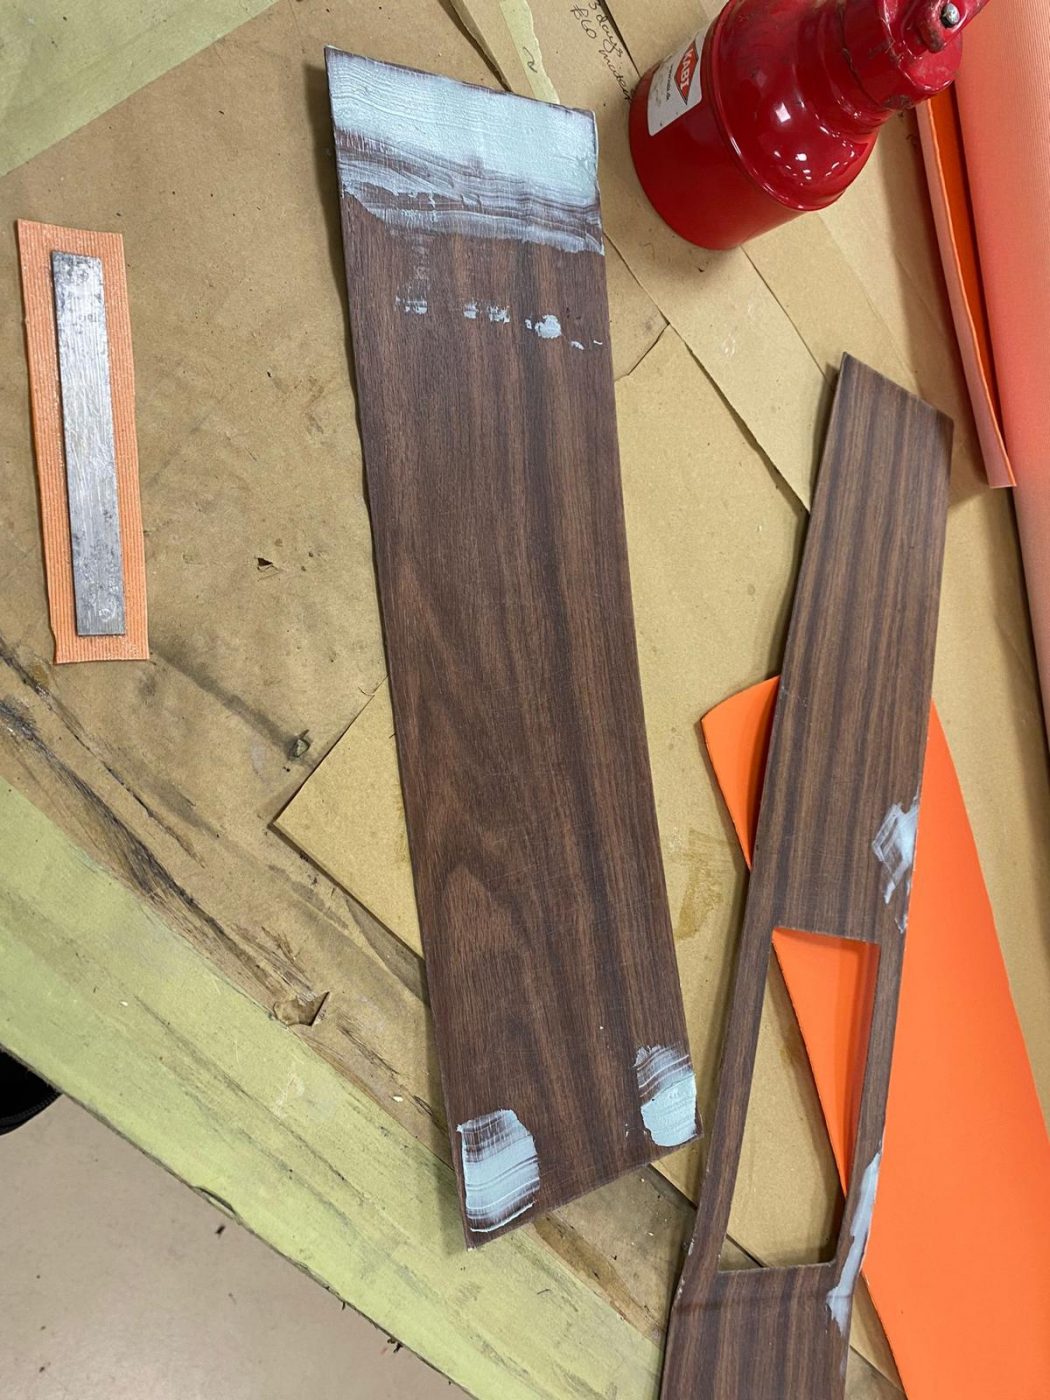
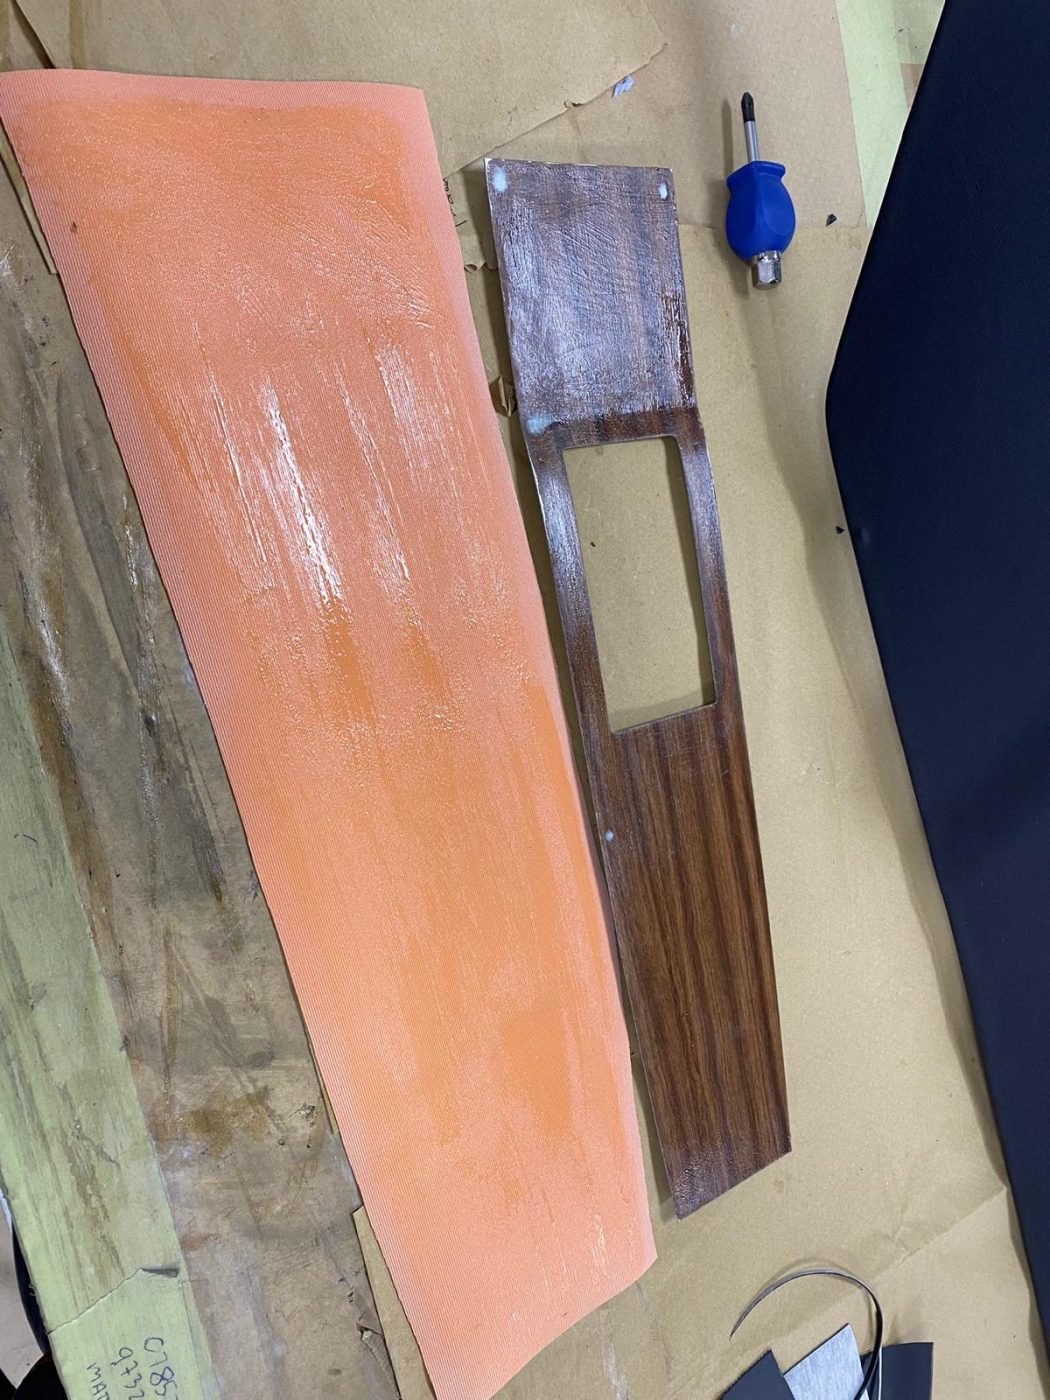
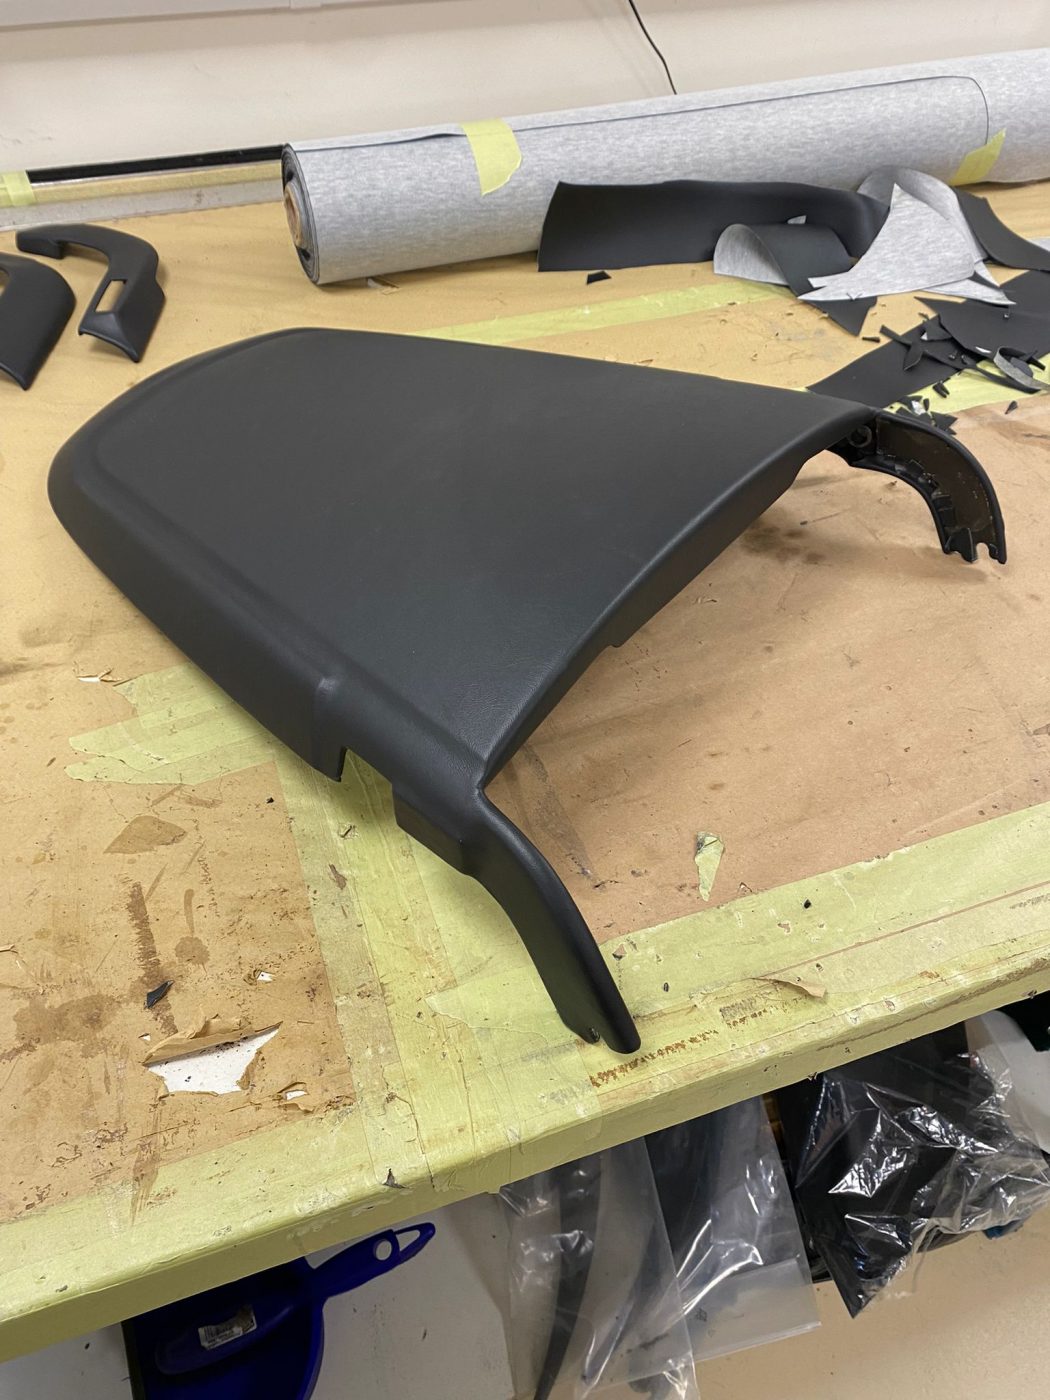
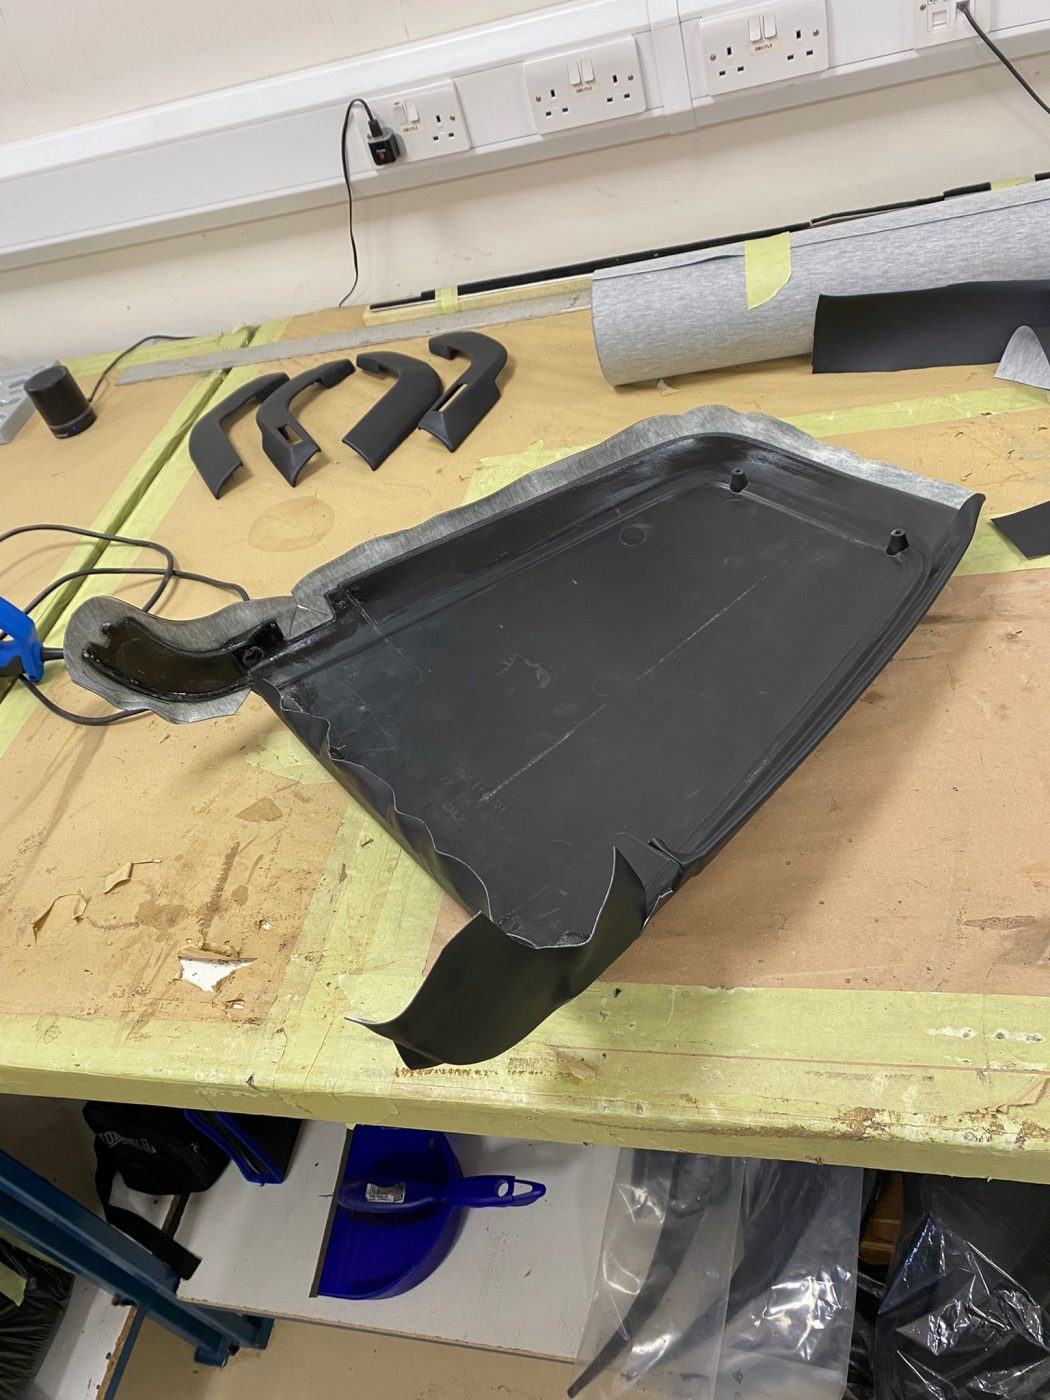
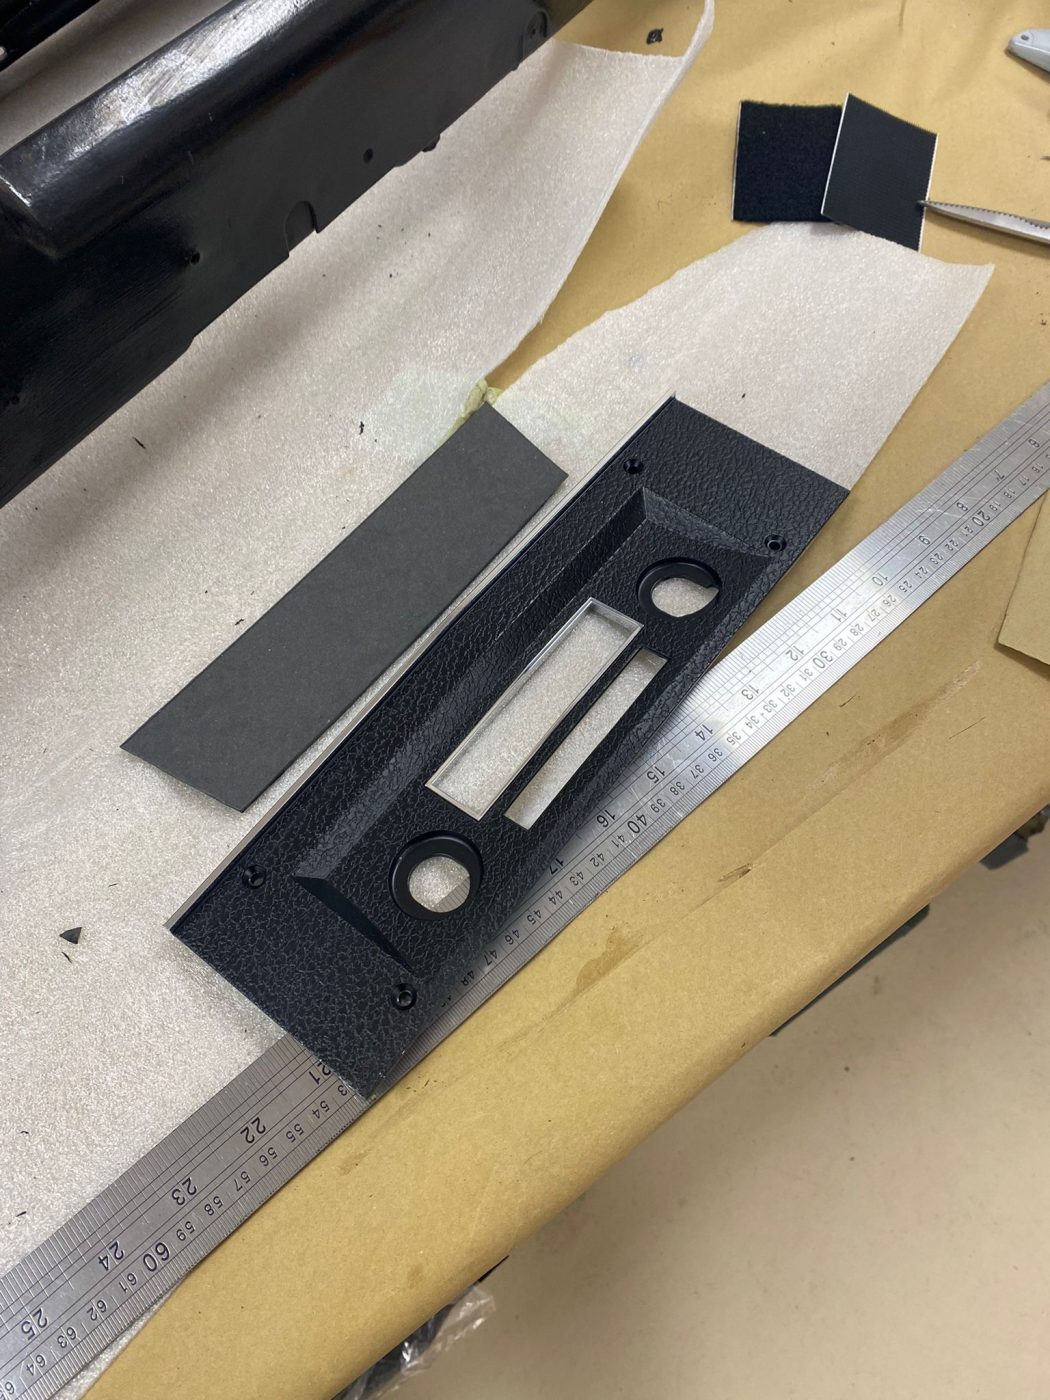
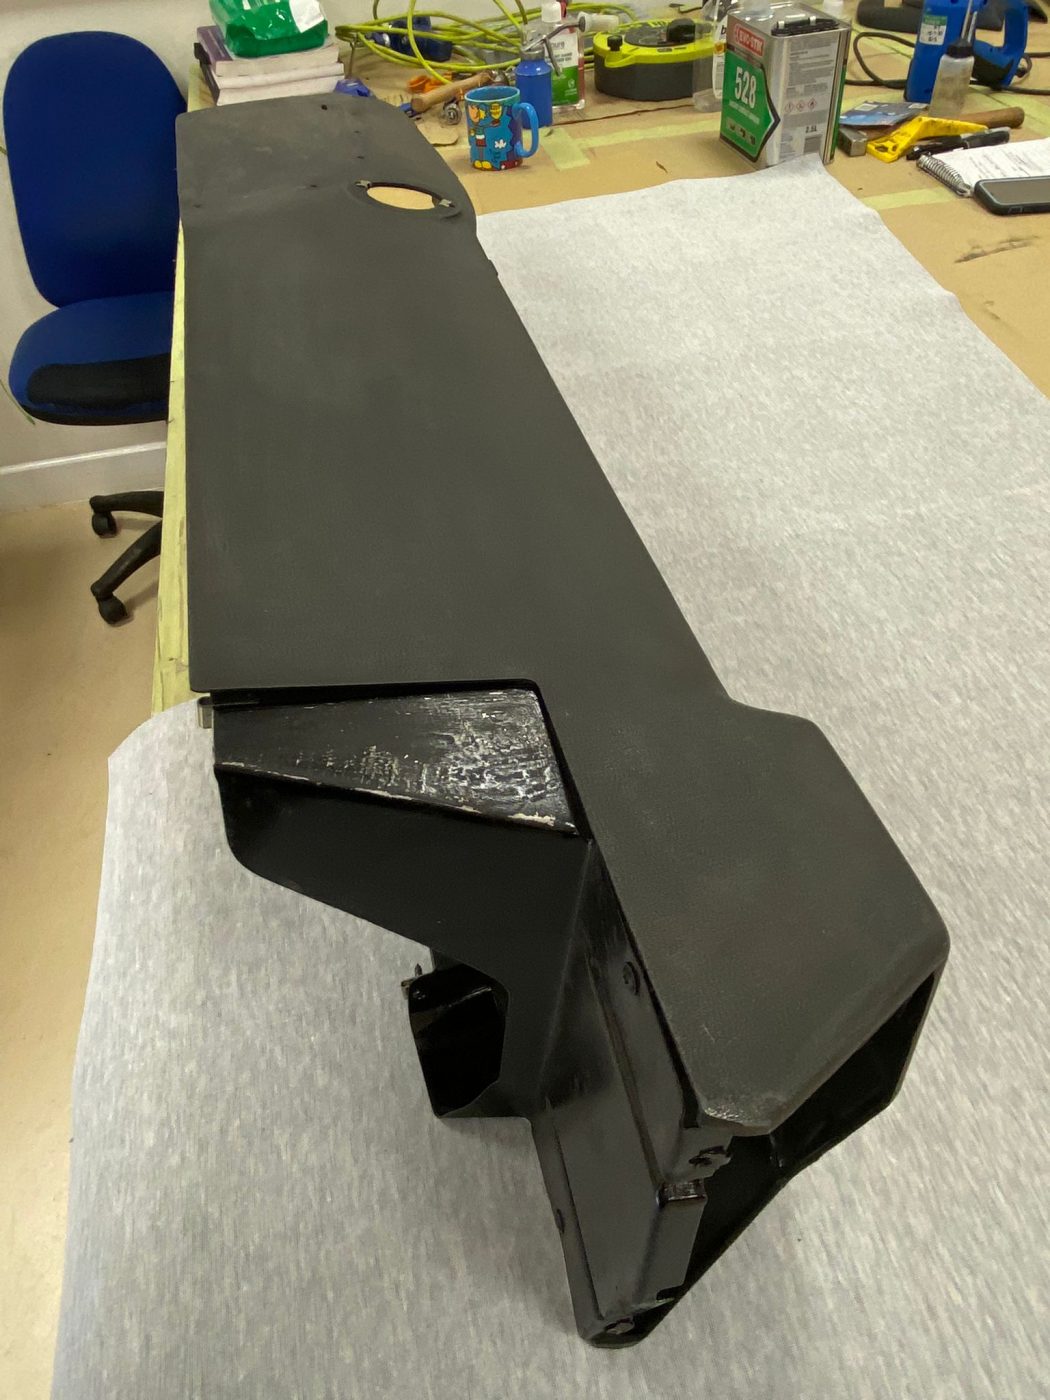
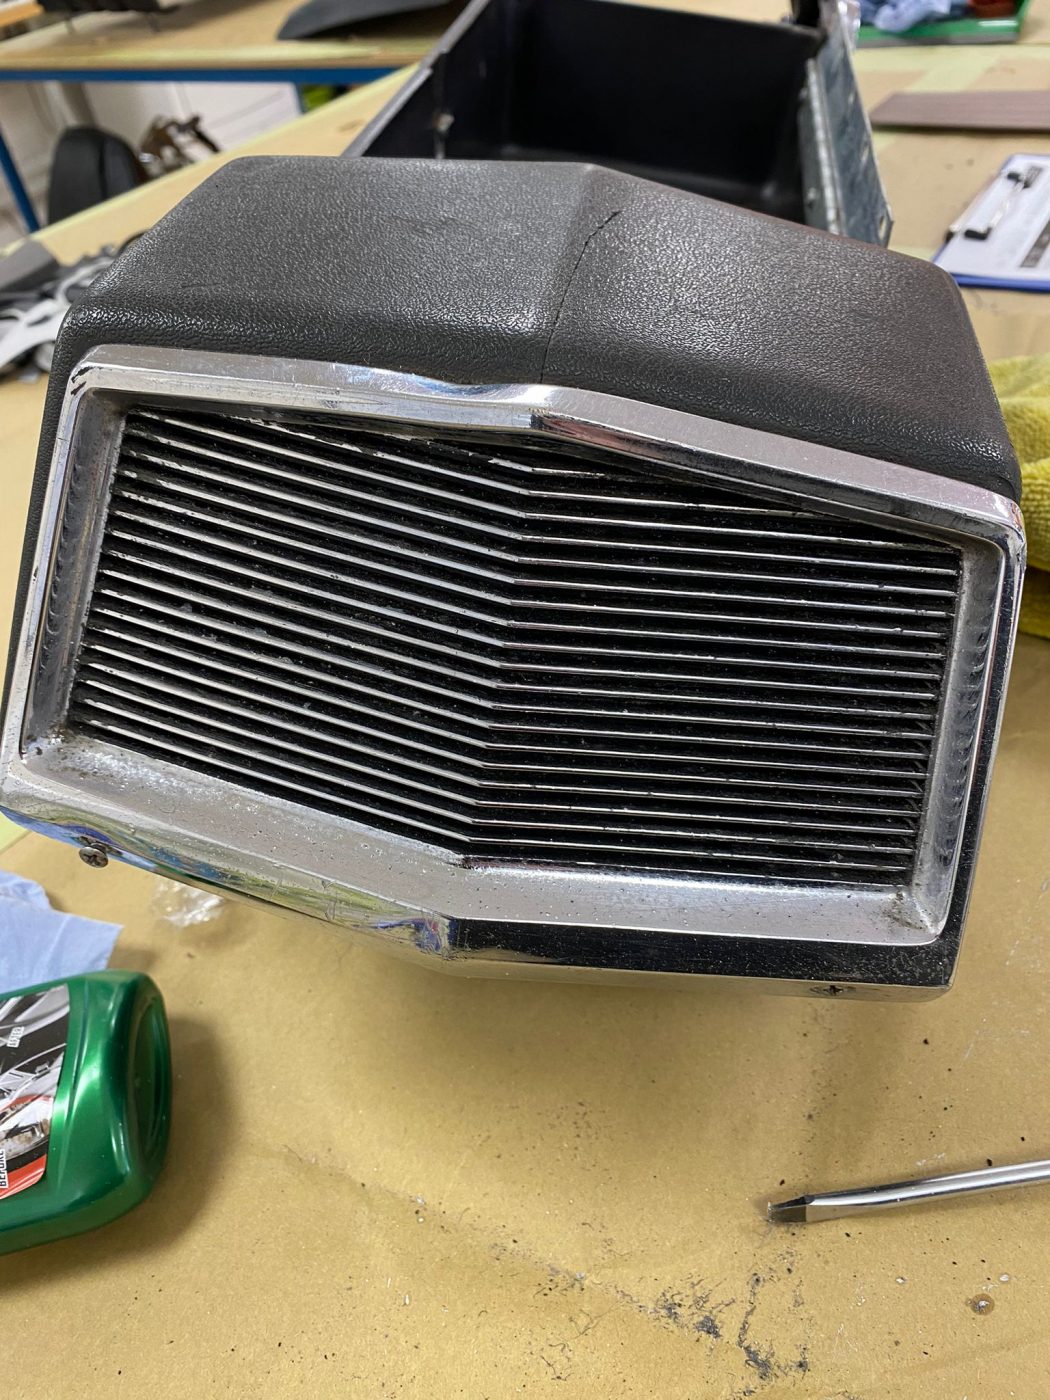
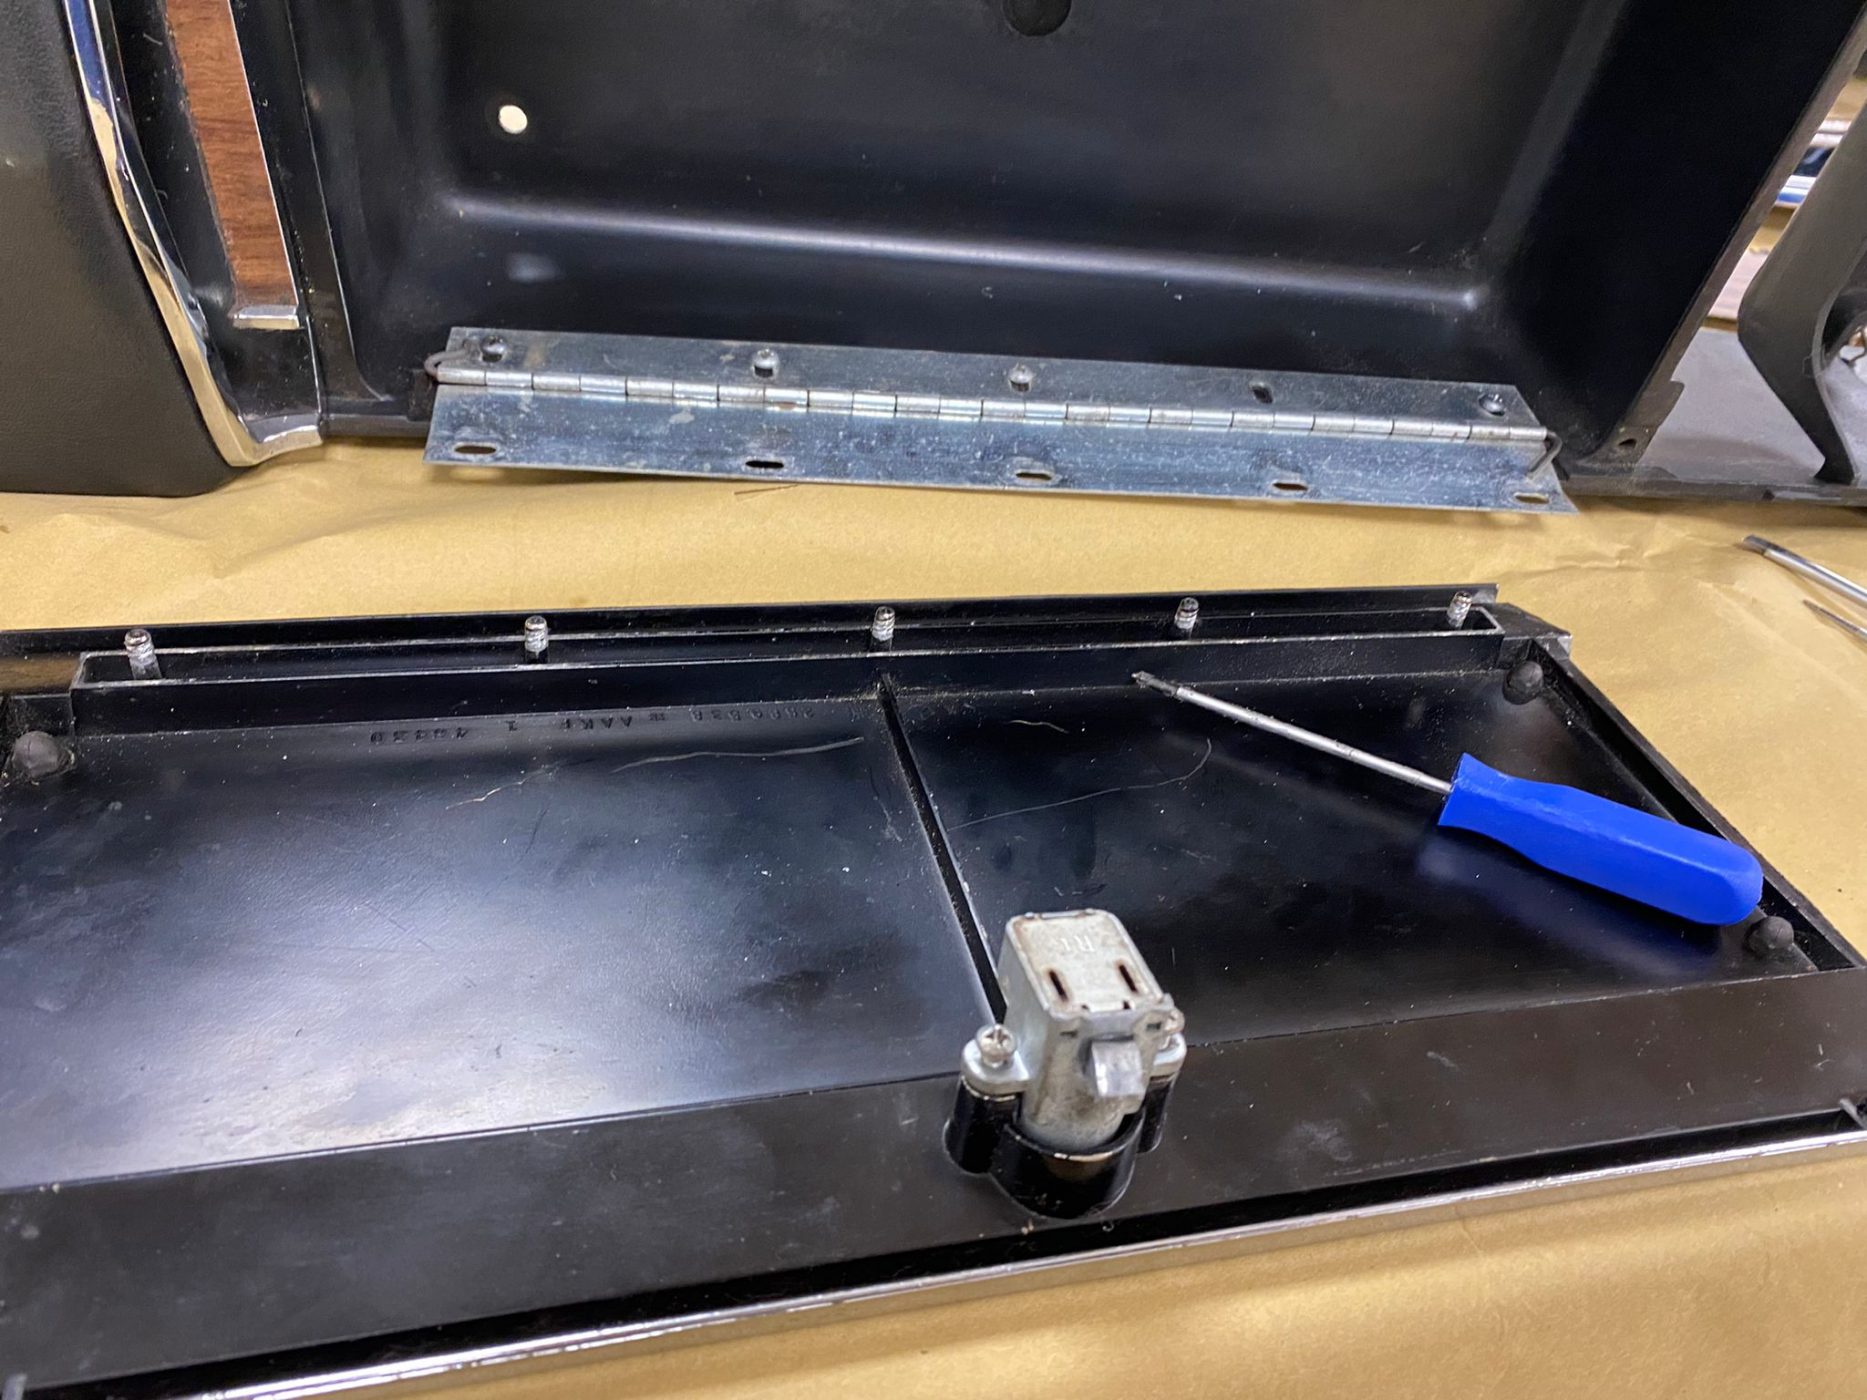
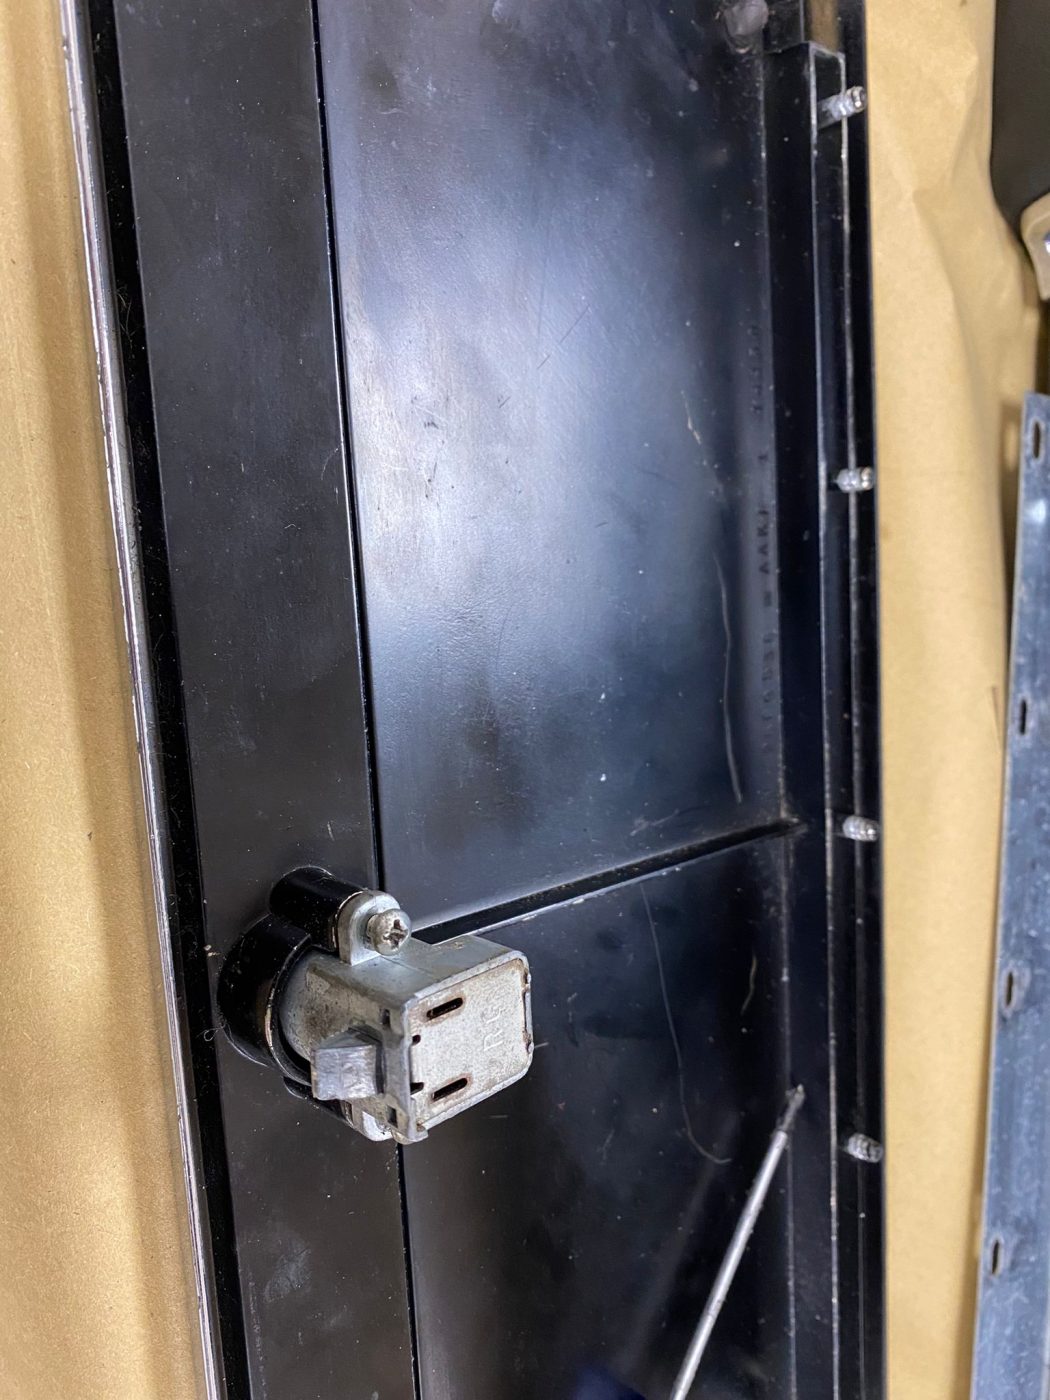
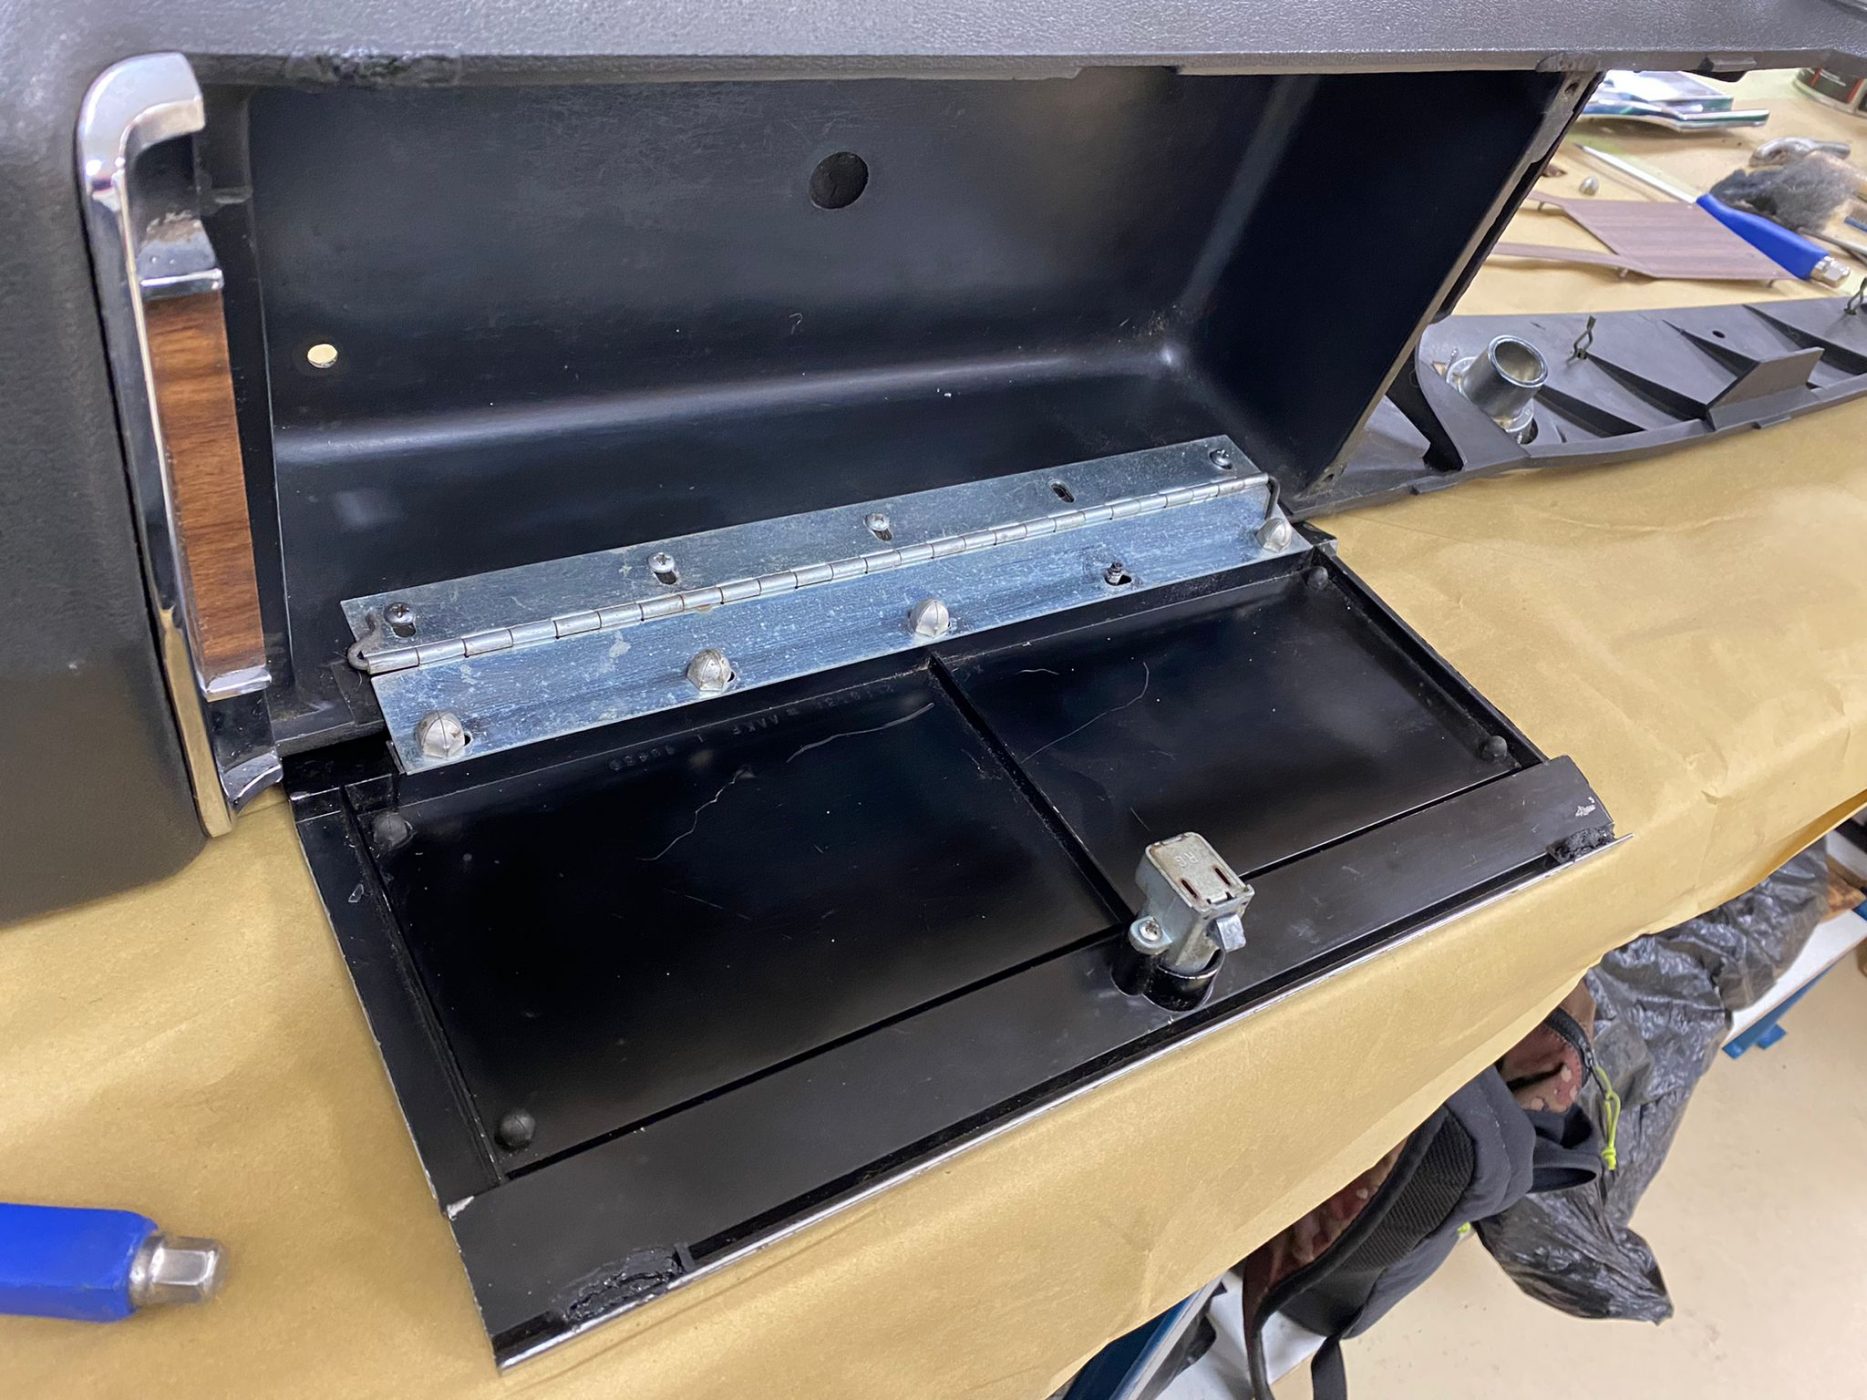
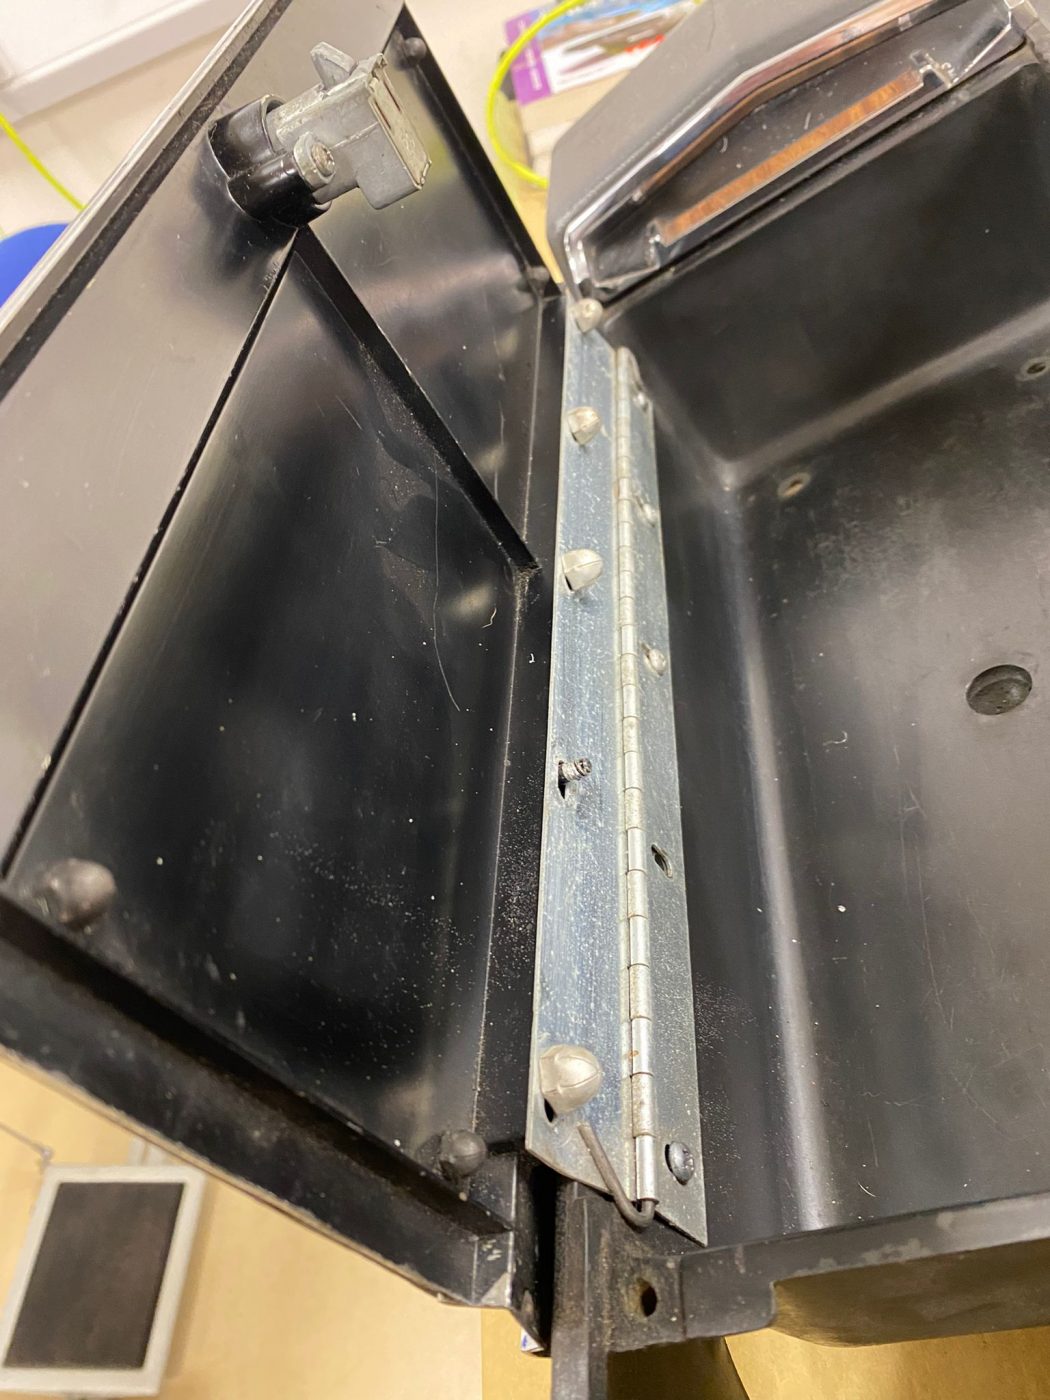
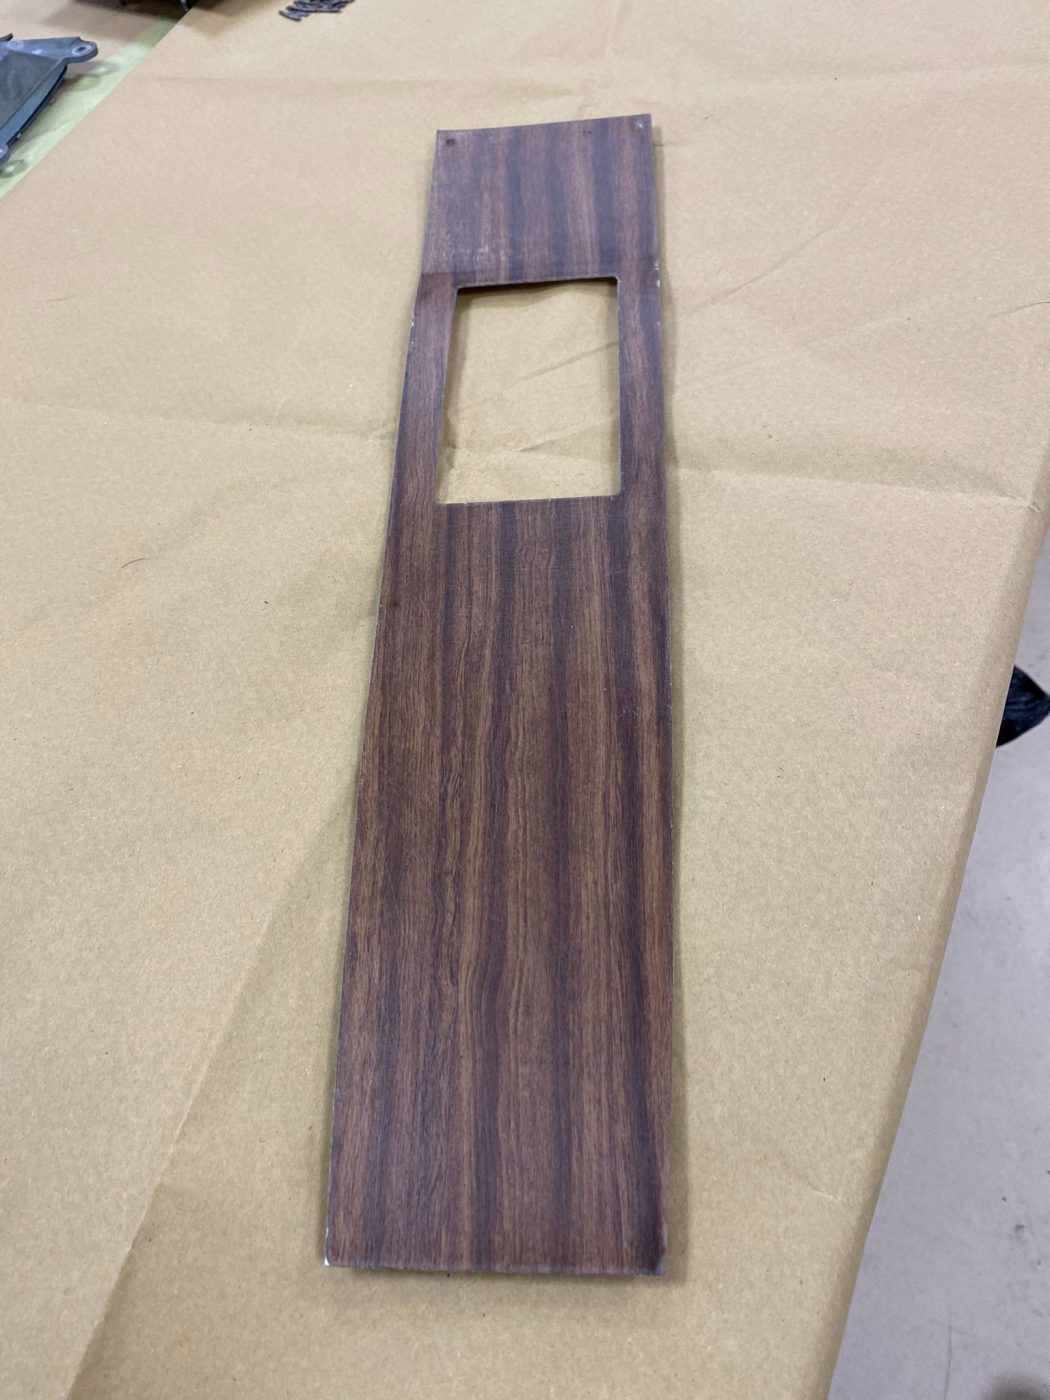
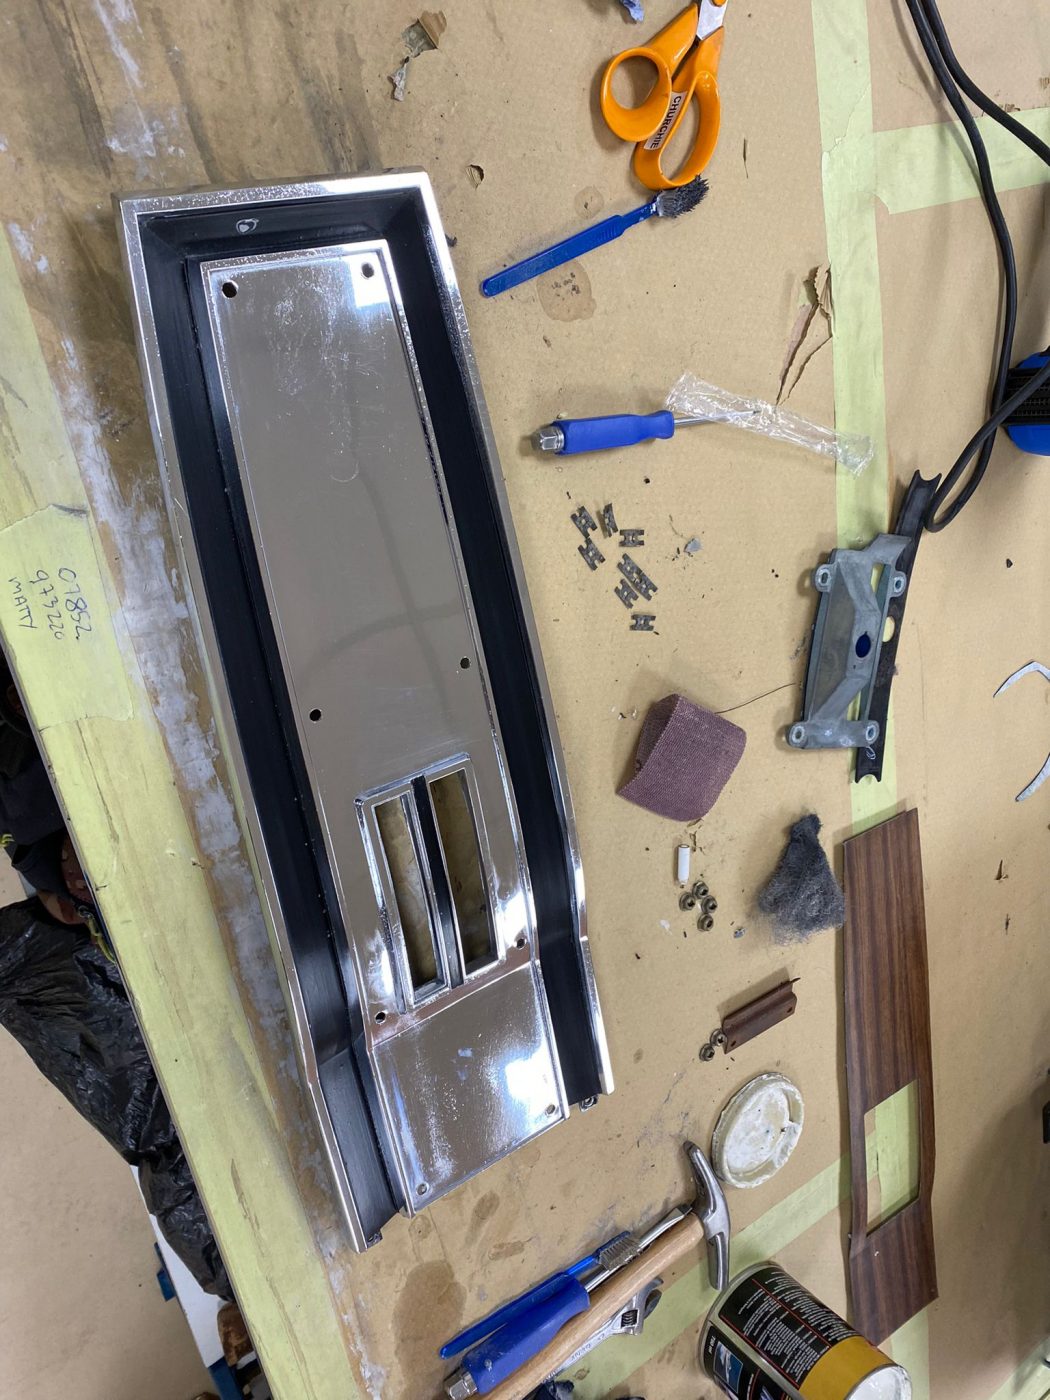
Brian, one of our in-house trim experts at Bridge Classic Cars, has been hard at work fabricating a new glovebox for the 1970 Dodge Charger.
Firstly, Brian created a mockup to use as a template and check the fitment of the piece within the dash itself. Making sure to note down all of the mounts and holes needed to secure it into place.
Then he transferred that onto felt covered hardback to make and bend the shapes needed for the glovebox. Once that was completed, it was riveted together and installed into its final position.
This, is the small but crucial touches our trim-shop are the best at.
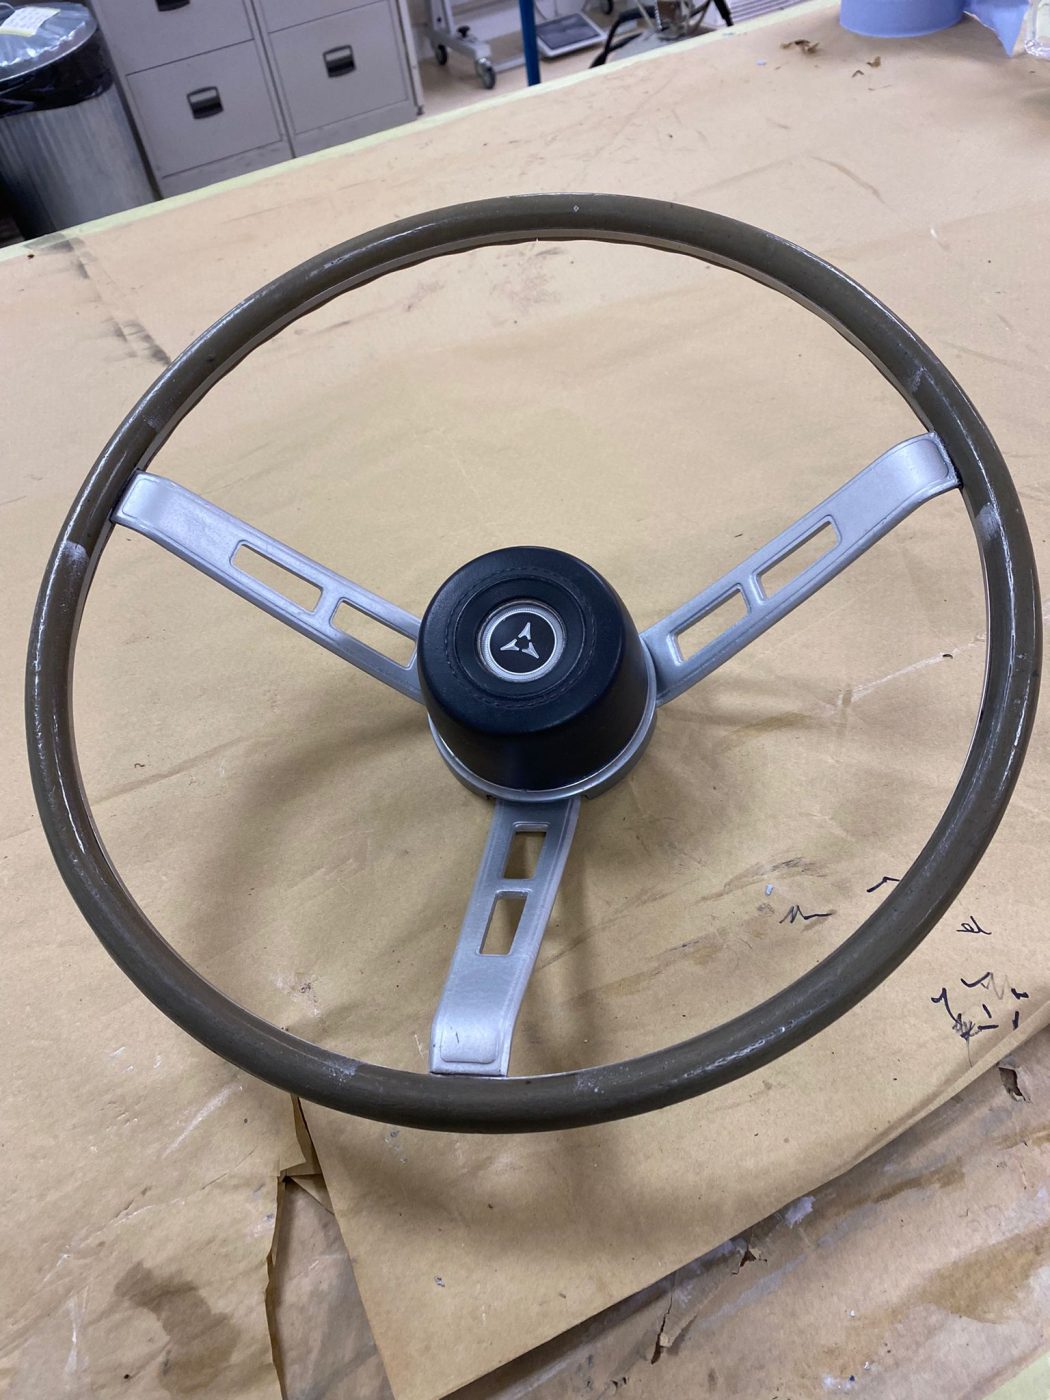
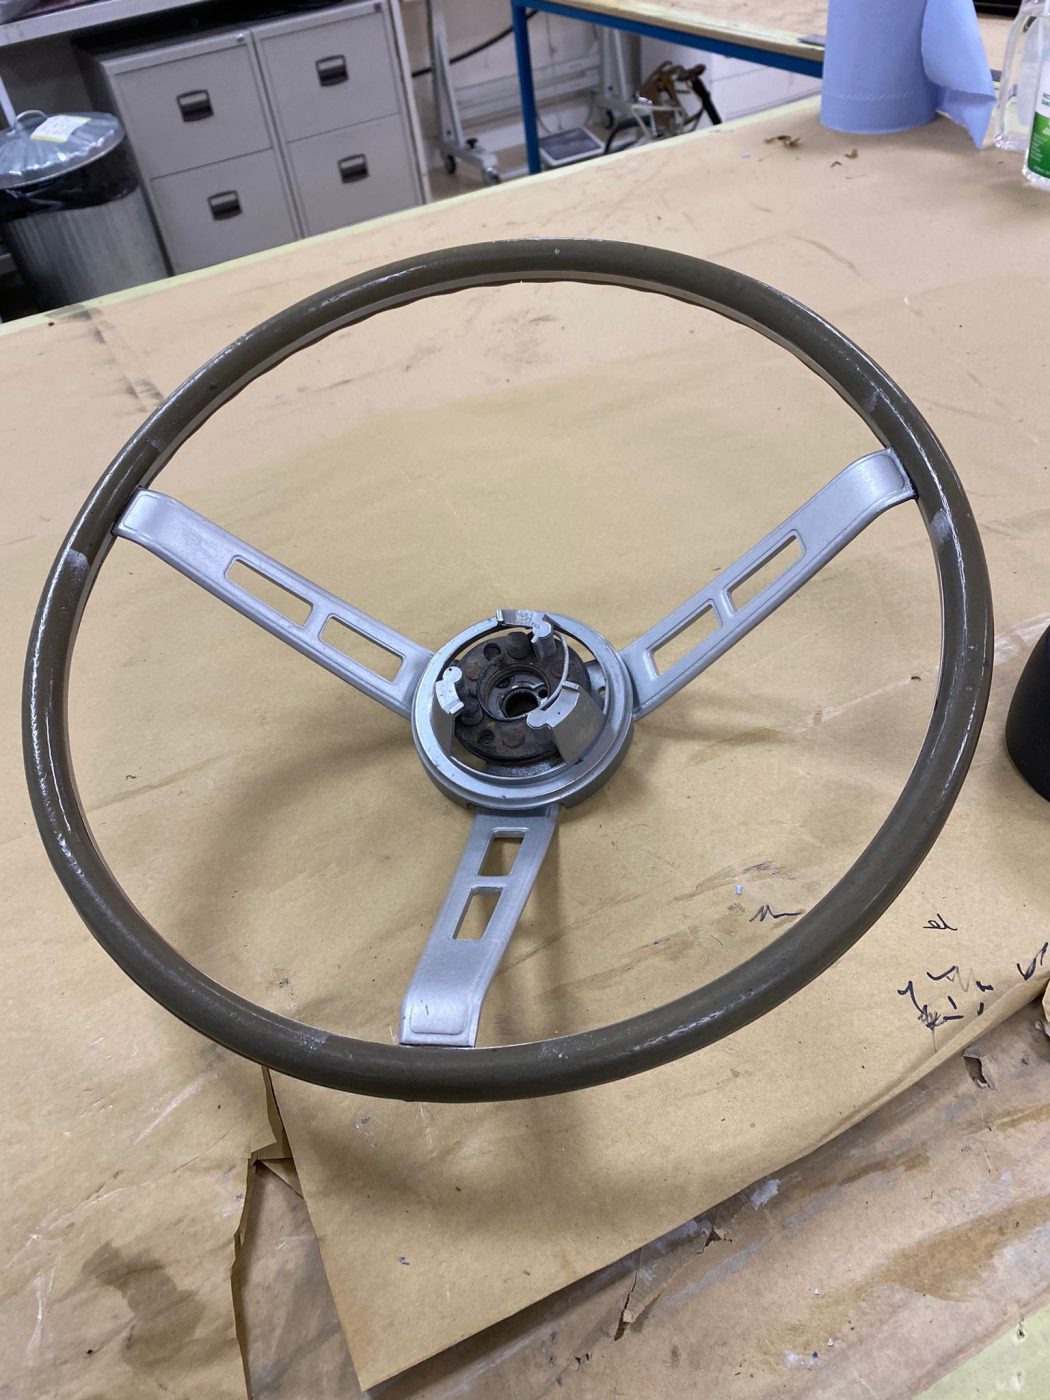
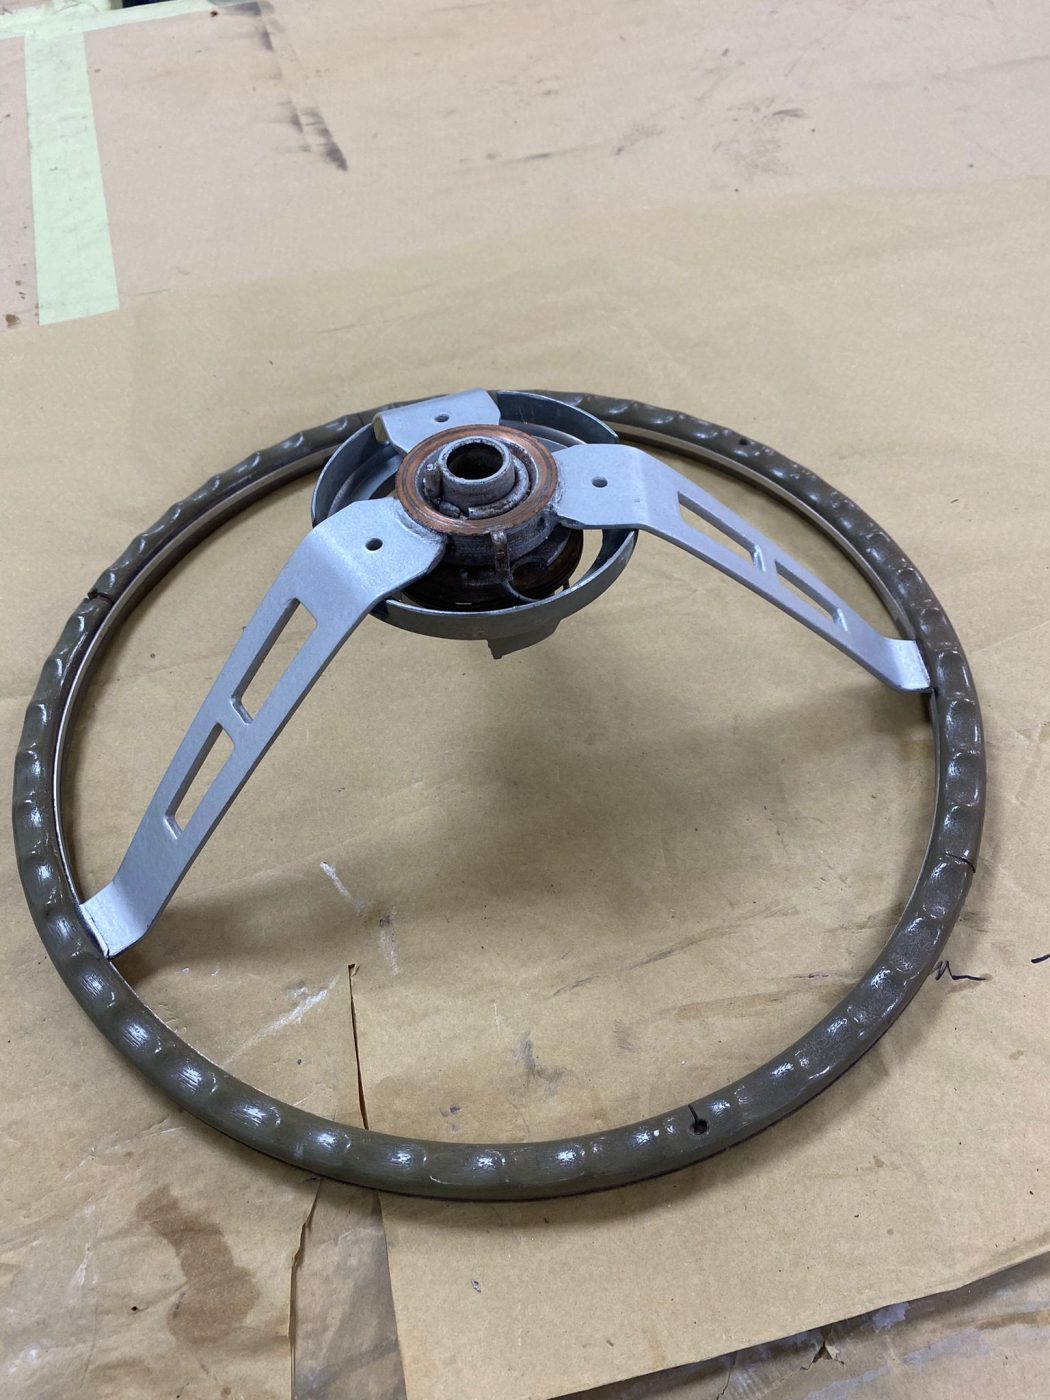


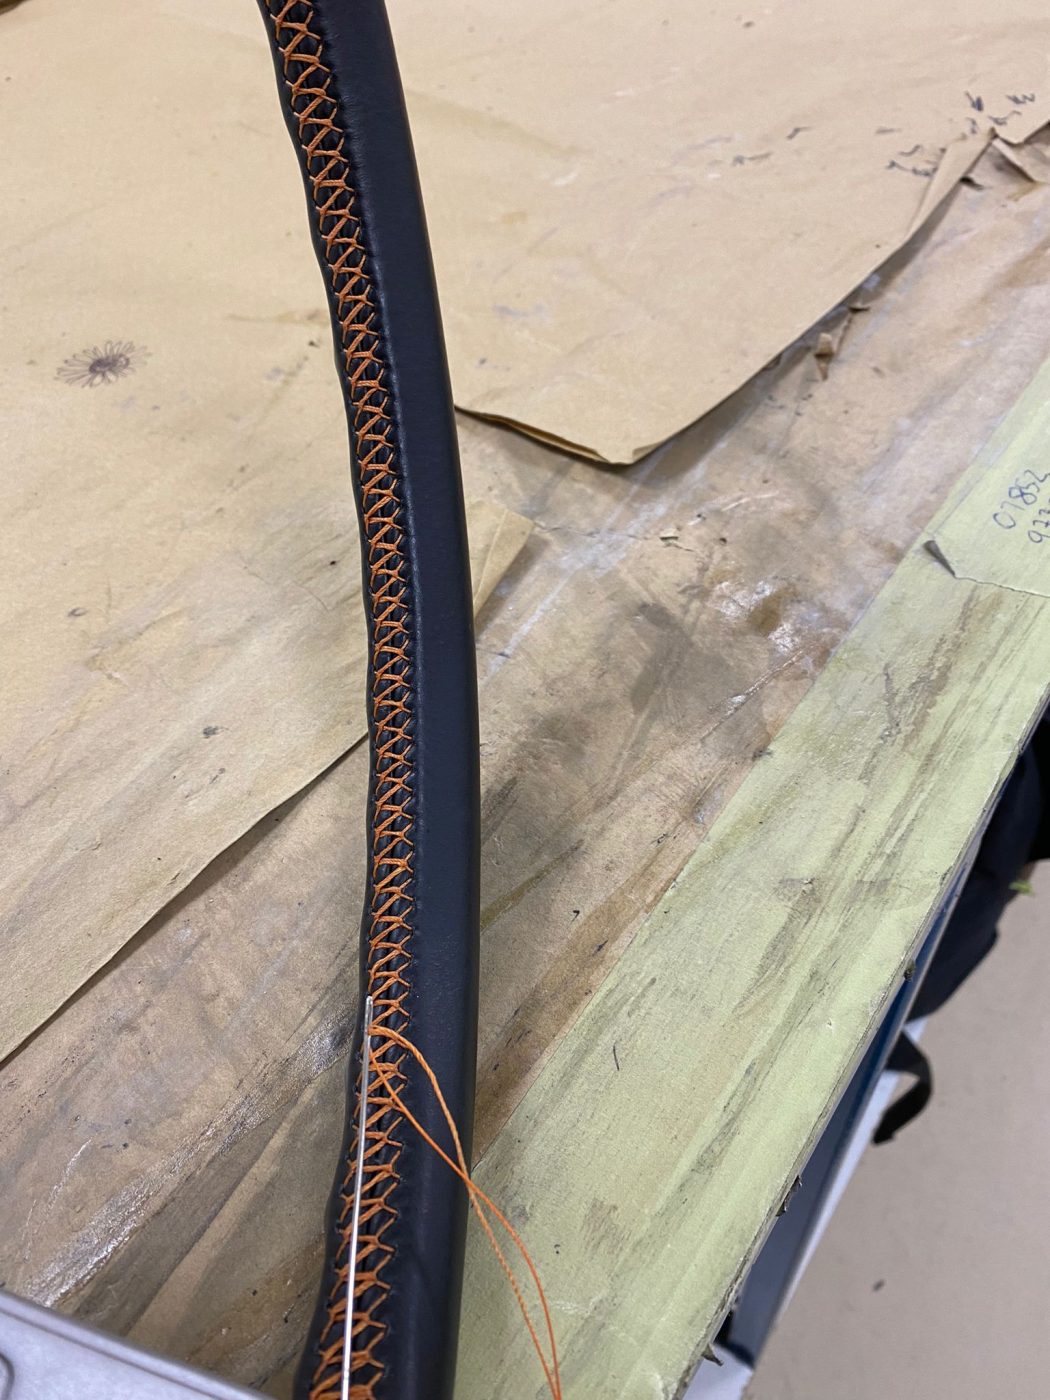
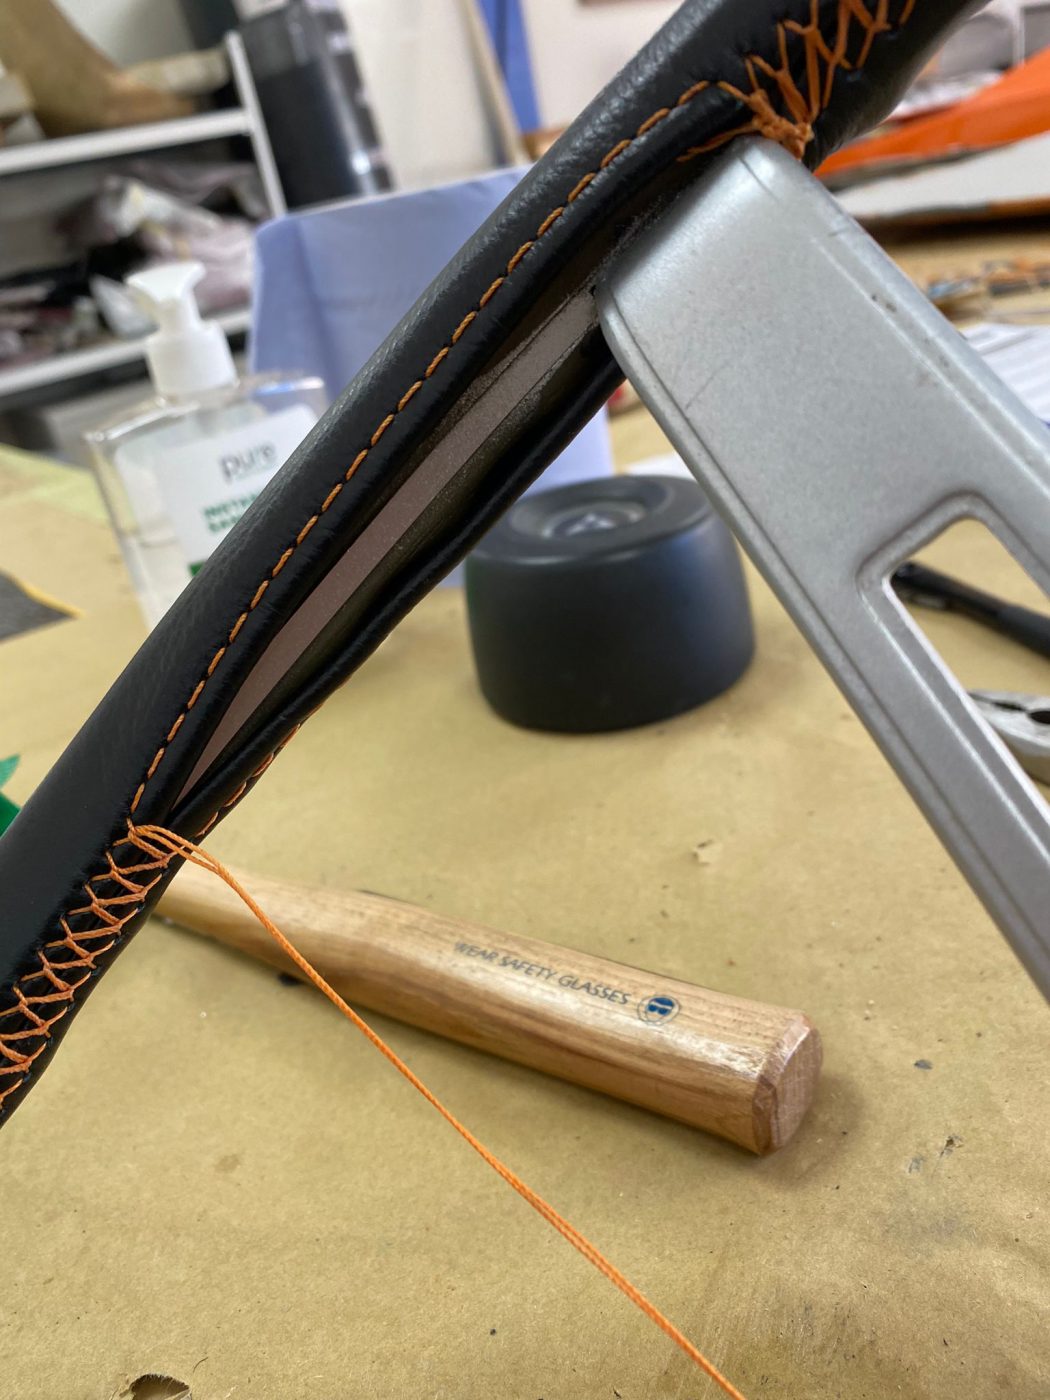
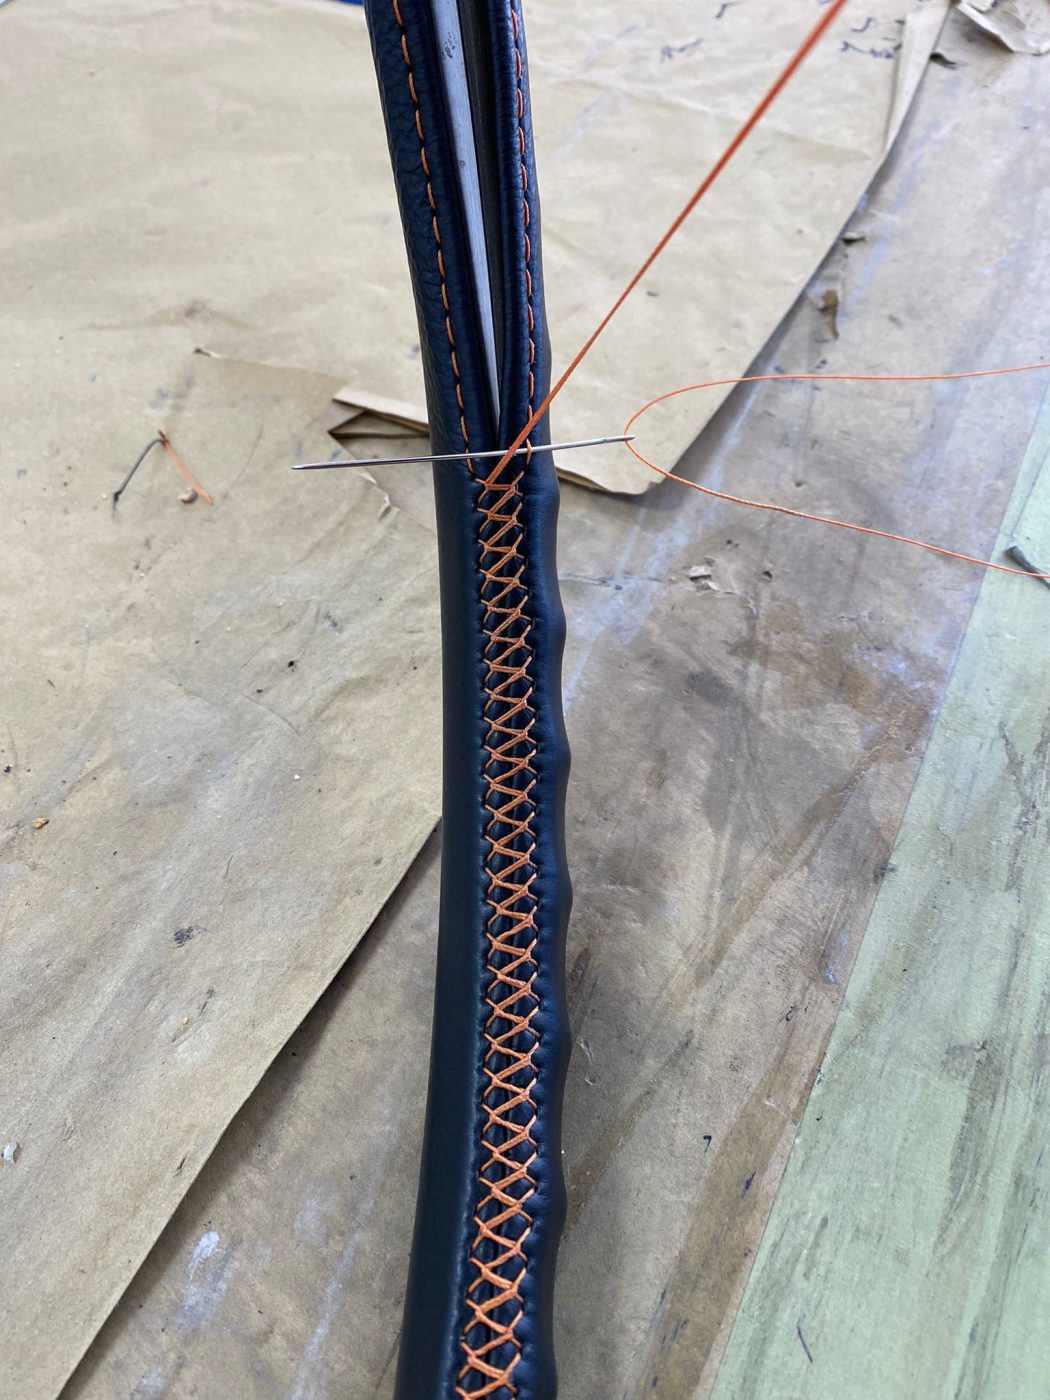
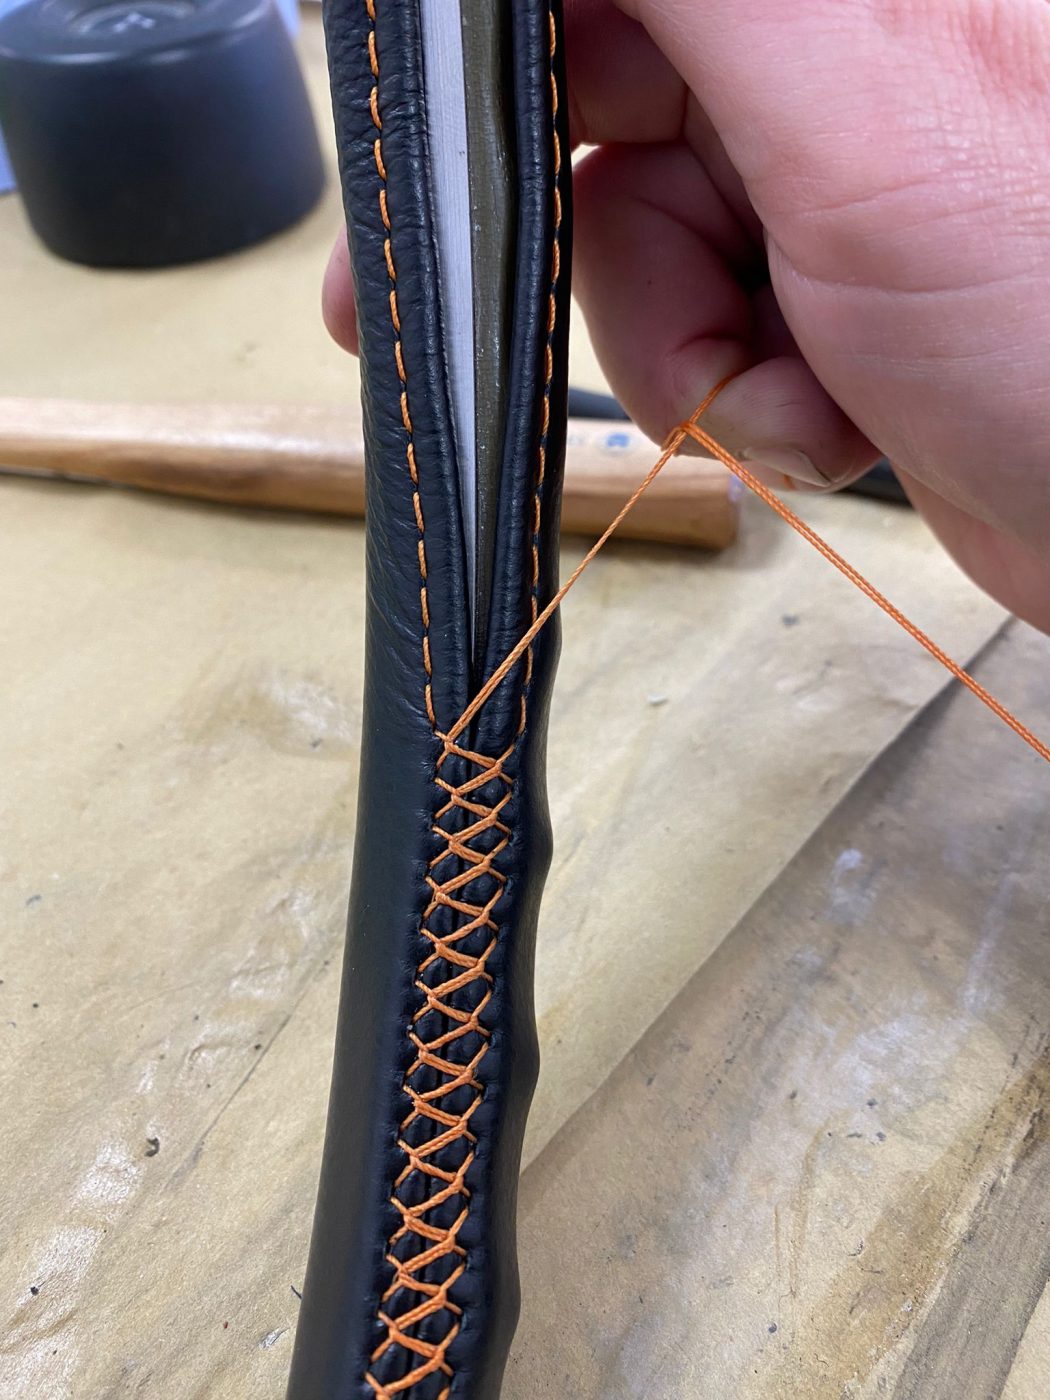
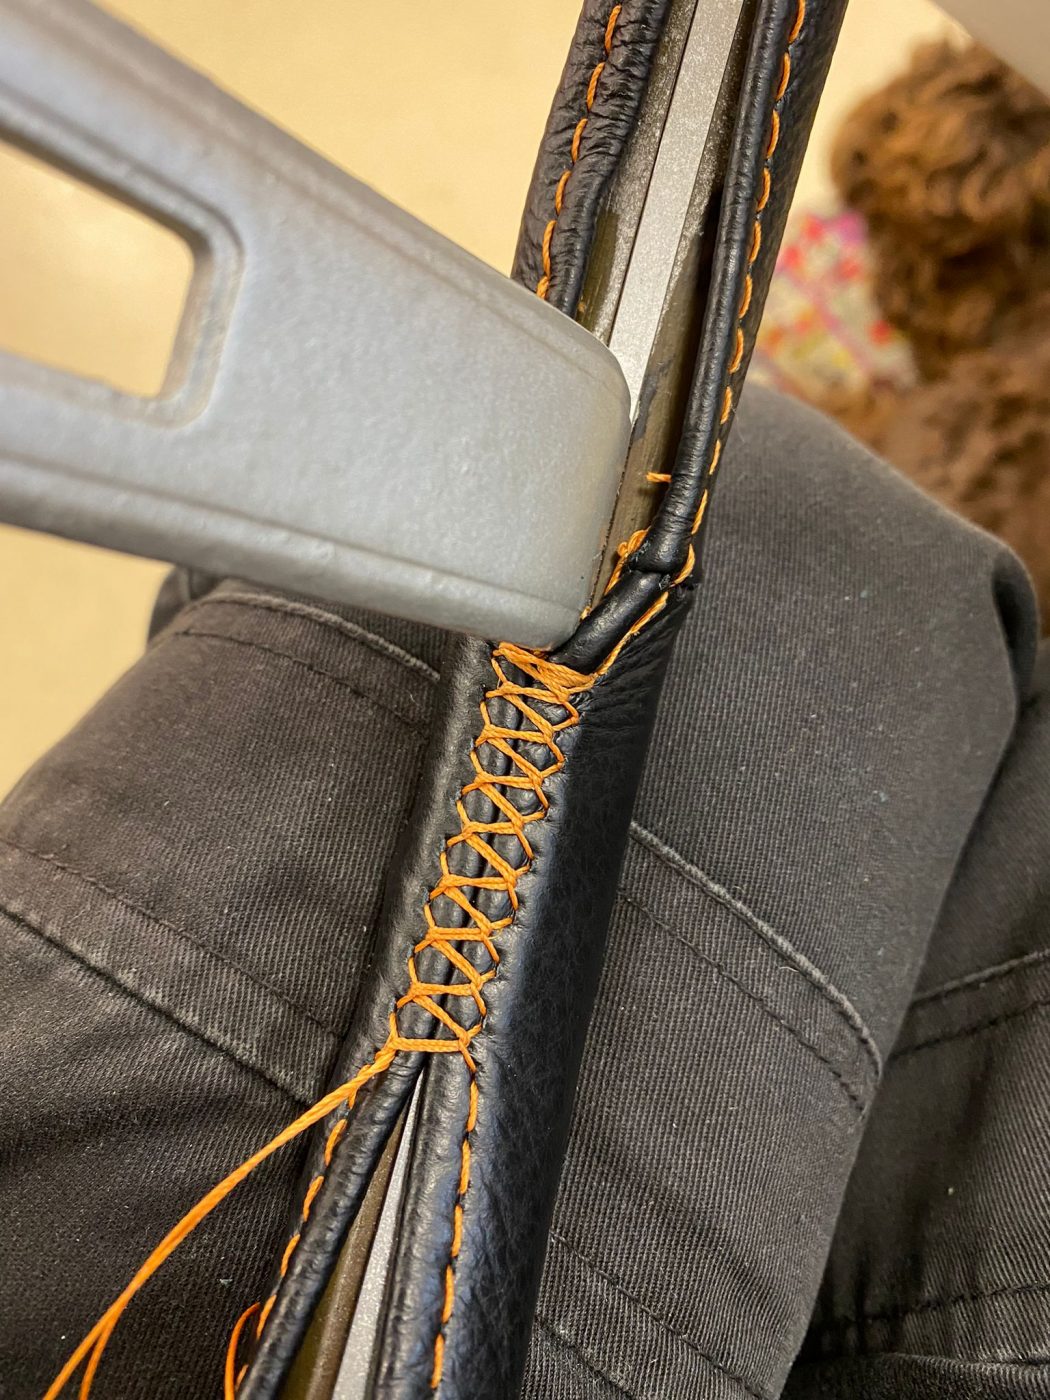
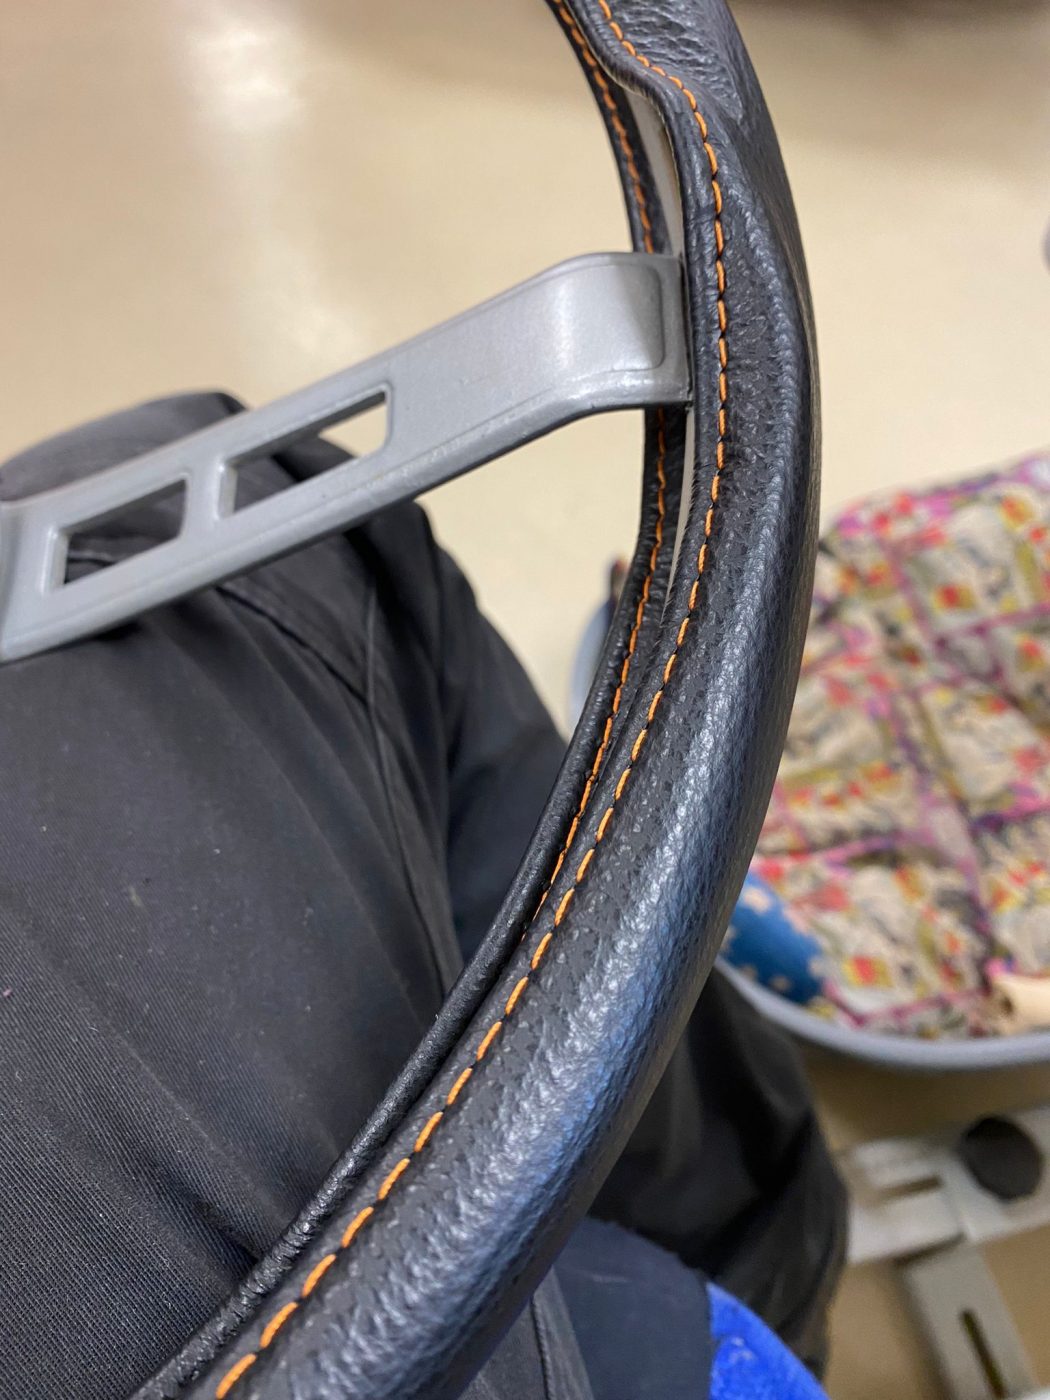
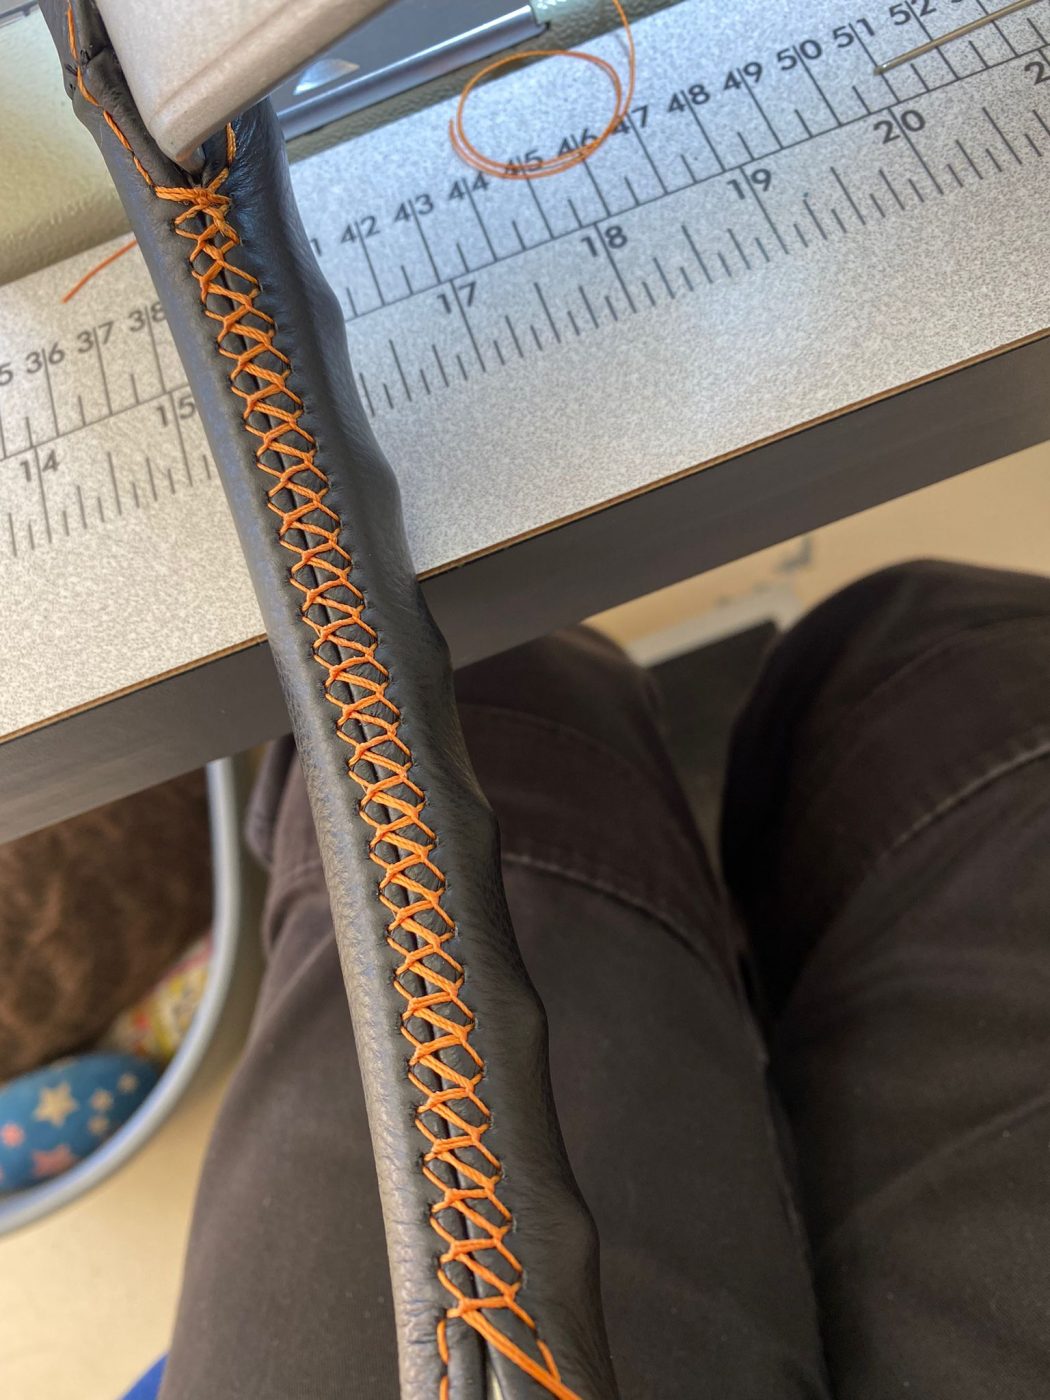
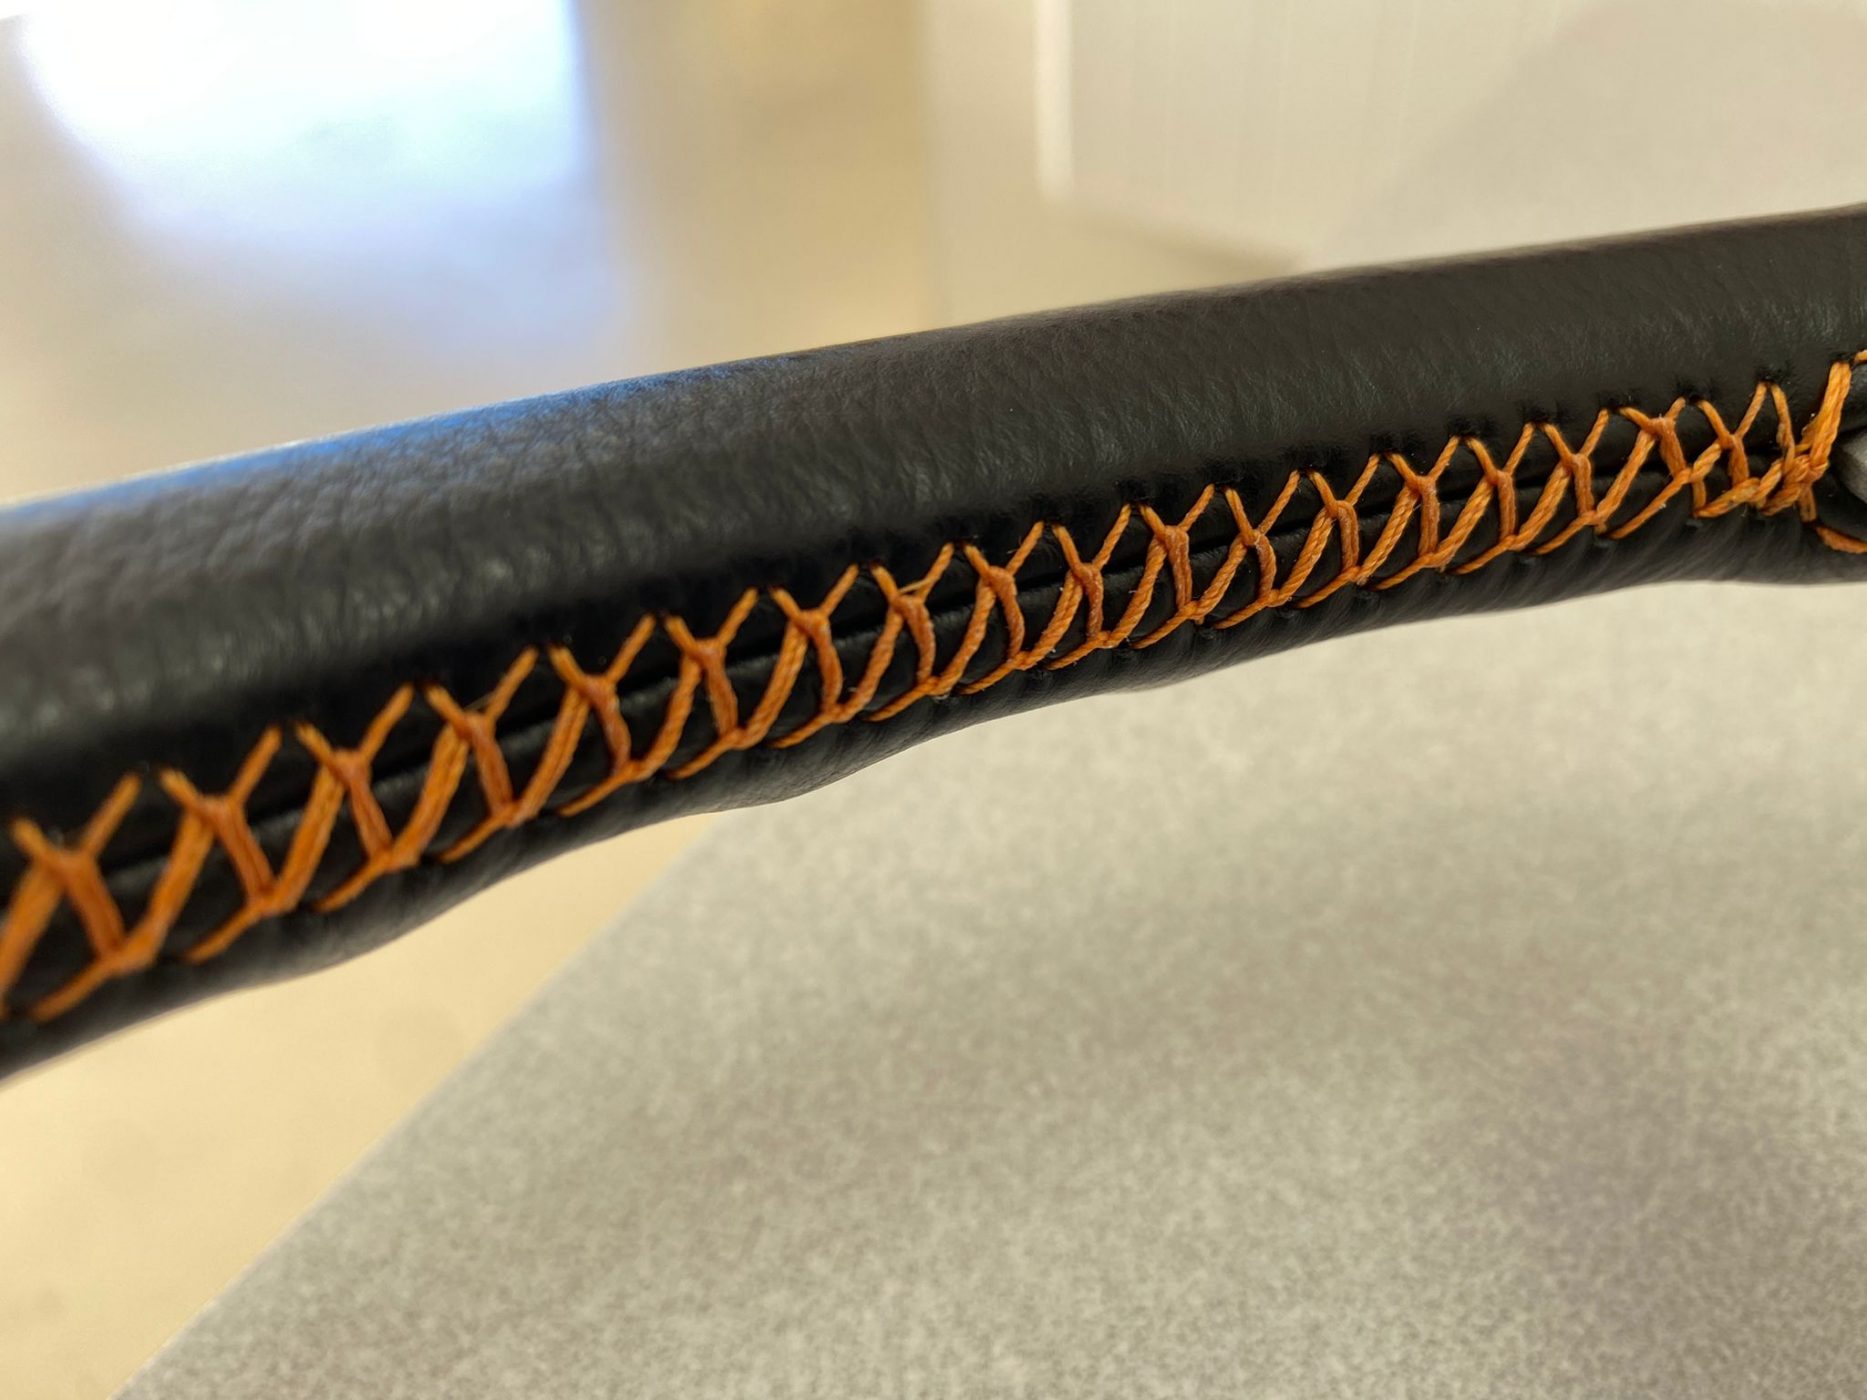
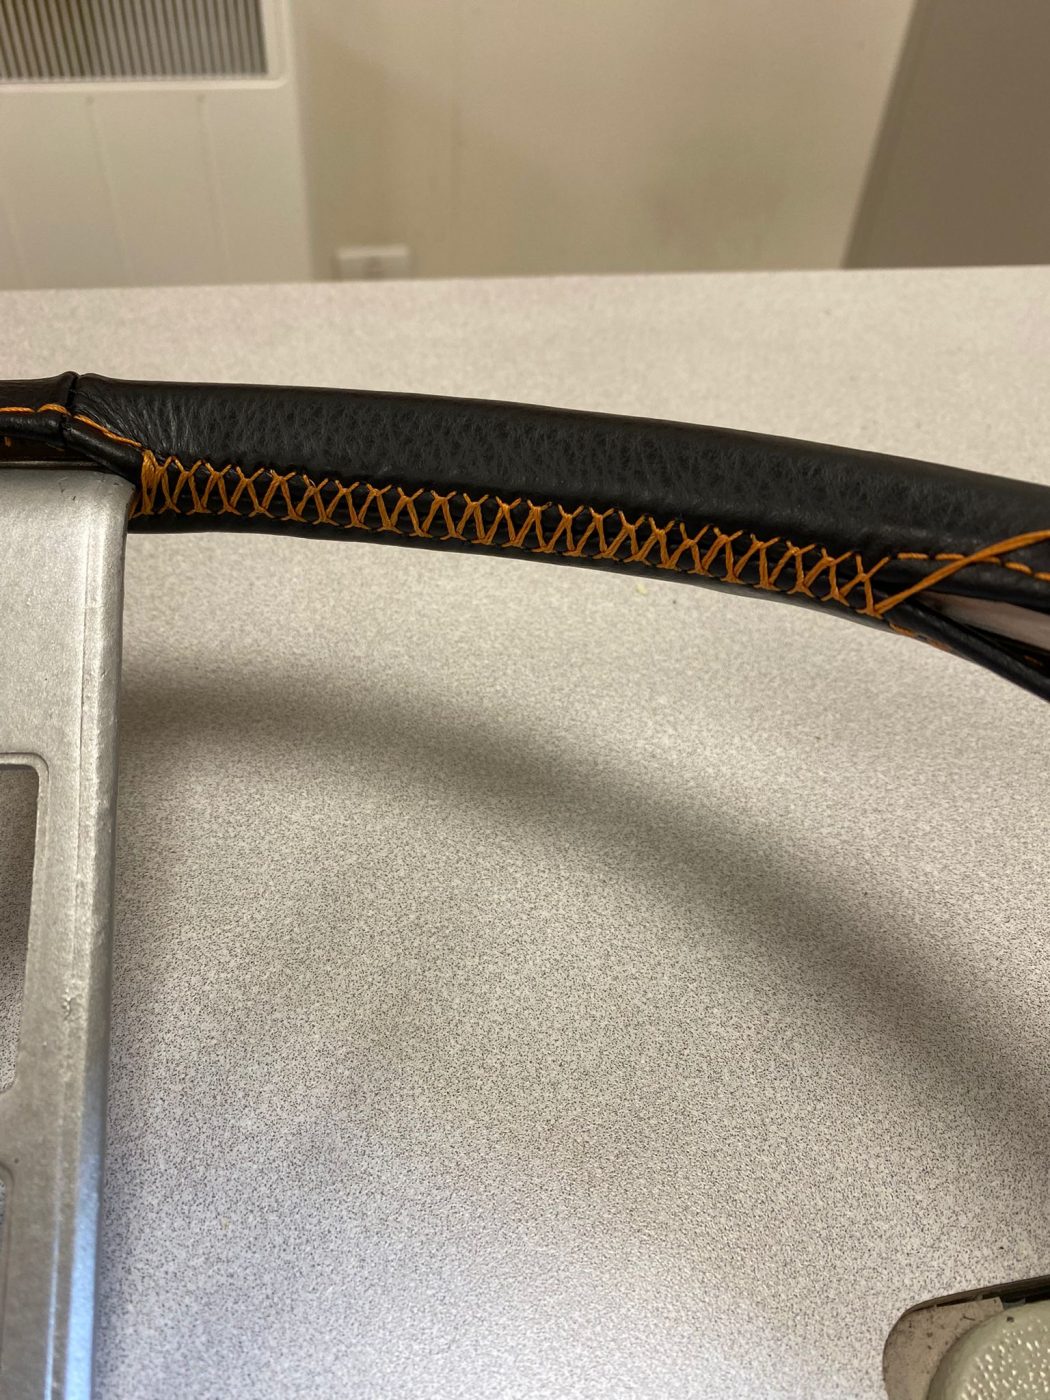
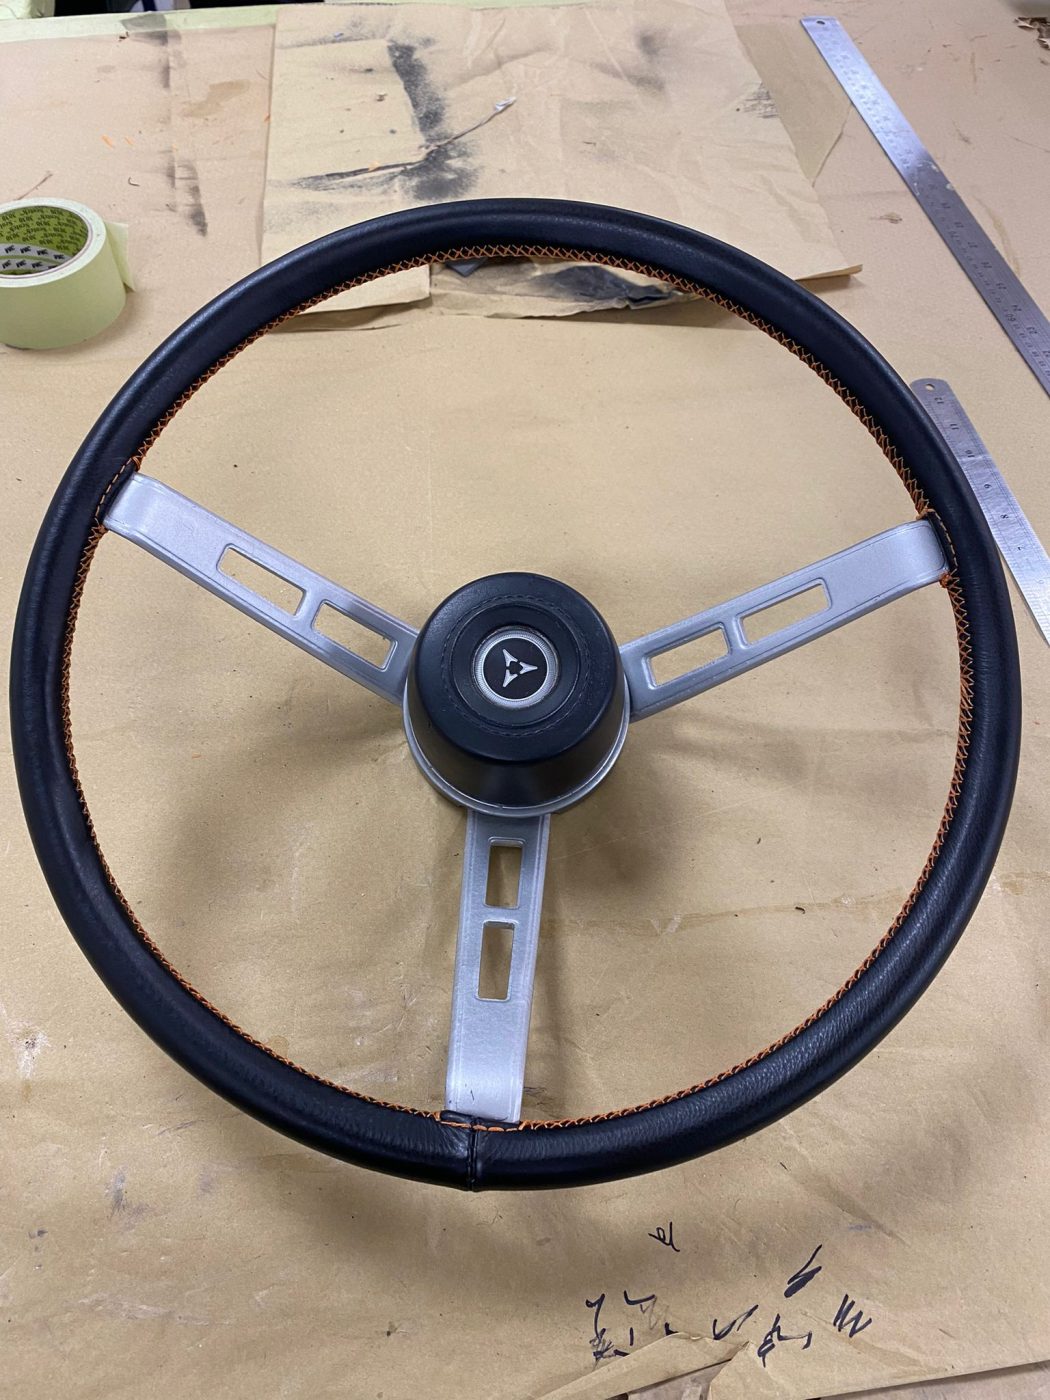

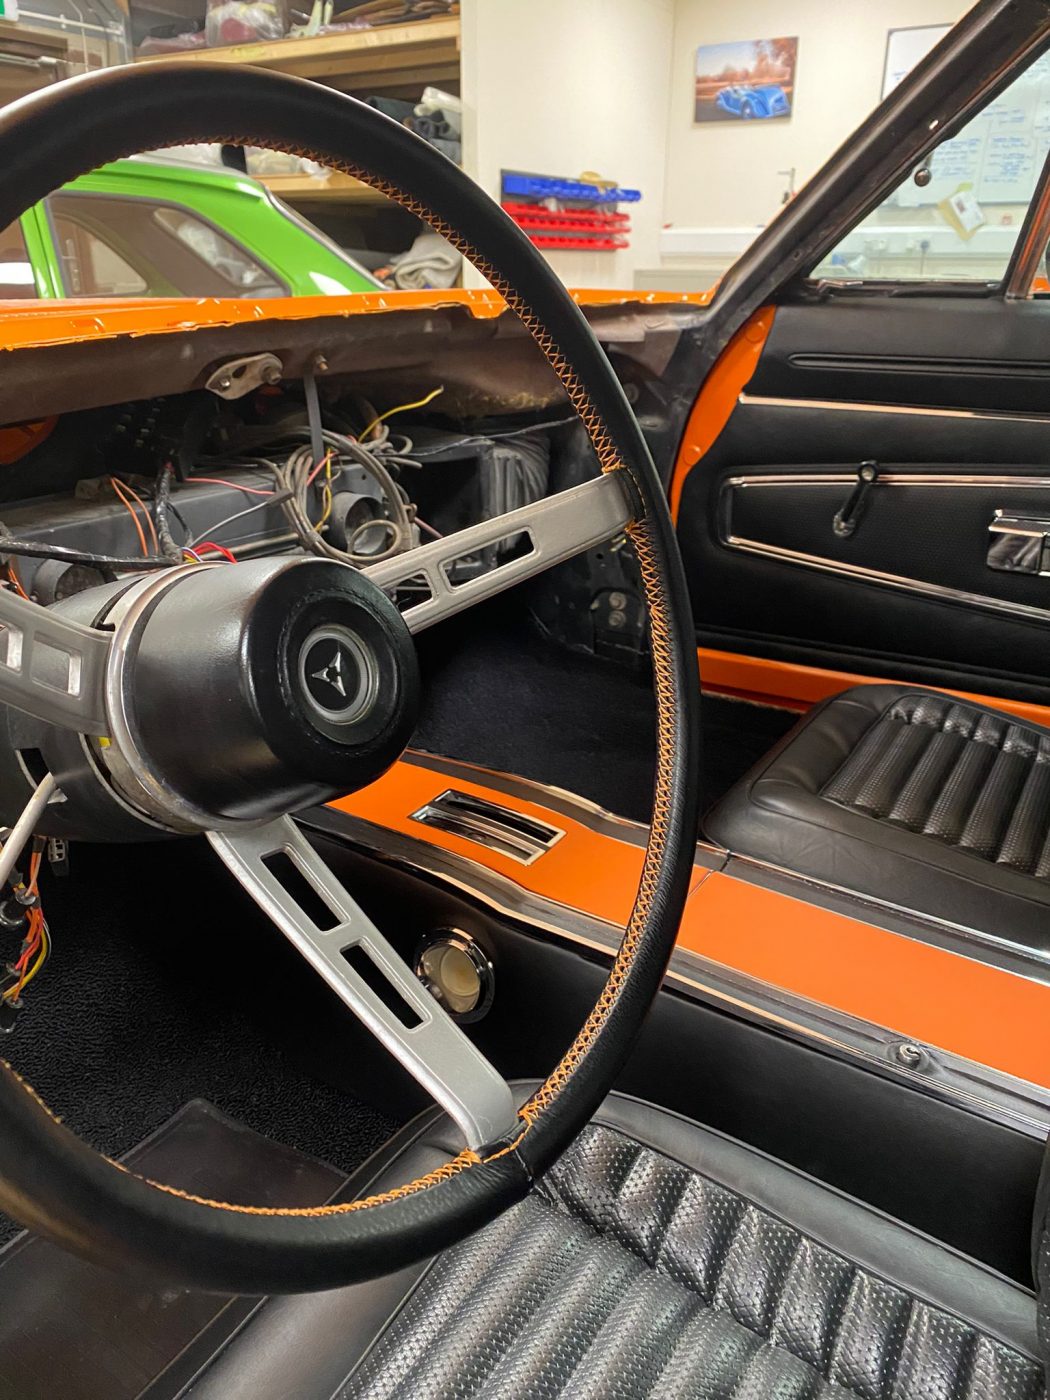
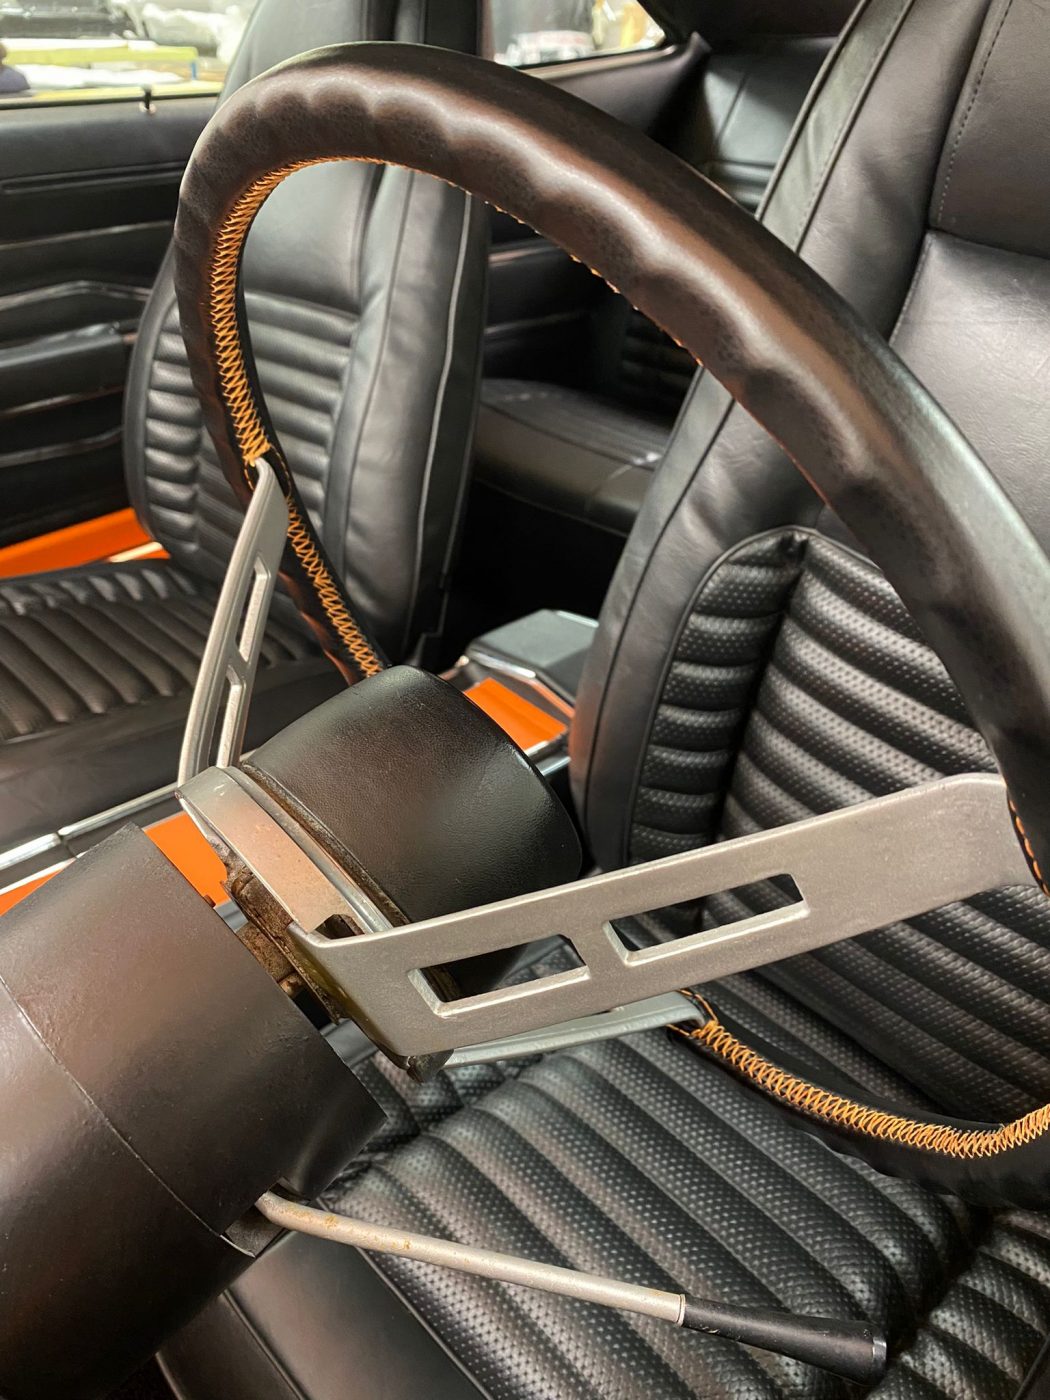
Refinishing or recovering a steering wheel is no simple task. The right balance of tactile feel, smoothness, finish and contrast is something that only comes with skills, understanding and complete knowledge of your craft. And that, is why our in-house trim experts at Bridge Classic Cars are the best.
The original wooden wheel on the 1970 Dodge Charger currently in at Bridge Classic Cars for an interior refit had seen better days. It was discoloured, the original varnish has begun to flake away. This just wouldn’t have matched the incredible black and orange theme chosen by the customer. So, Kath recovered the wheel using that colour palette to create a stunning piece for the car.
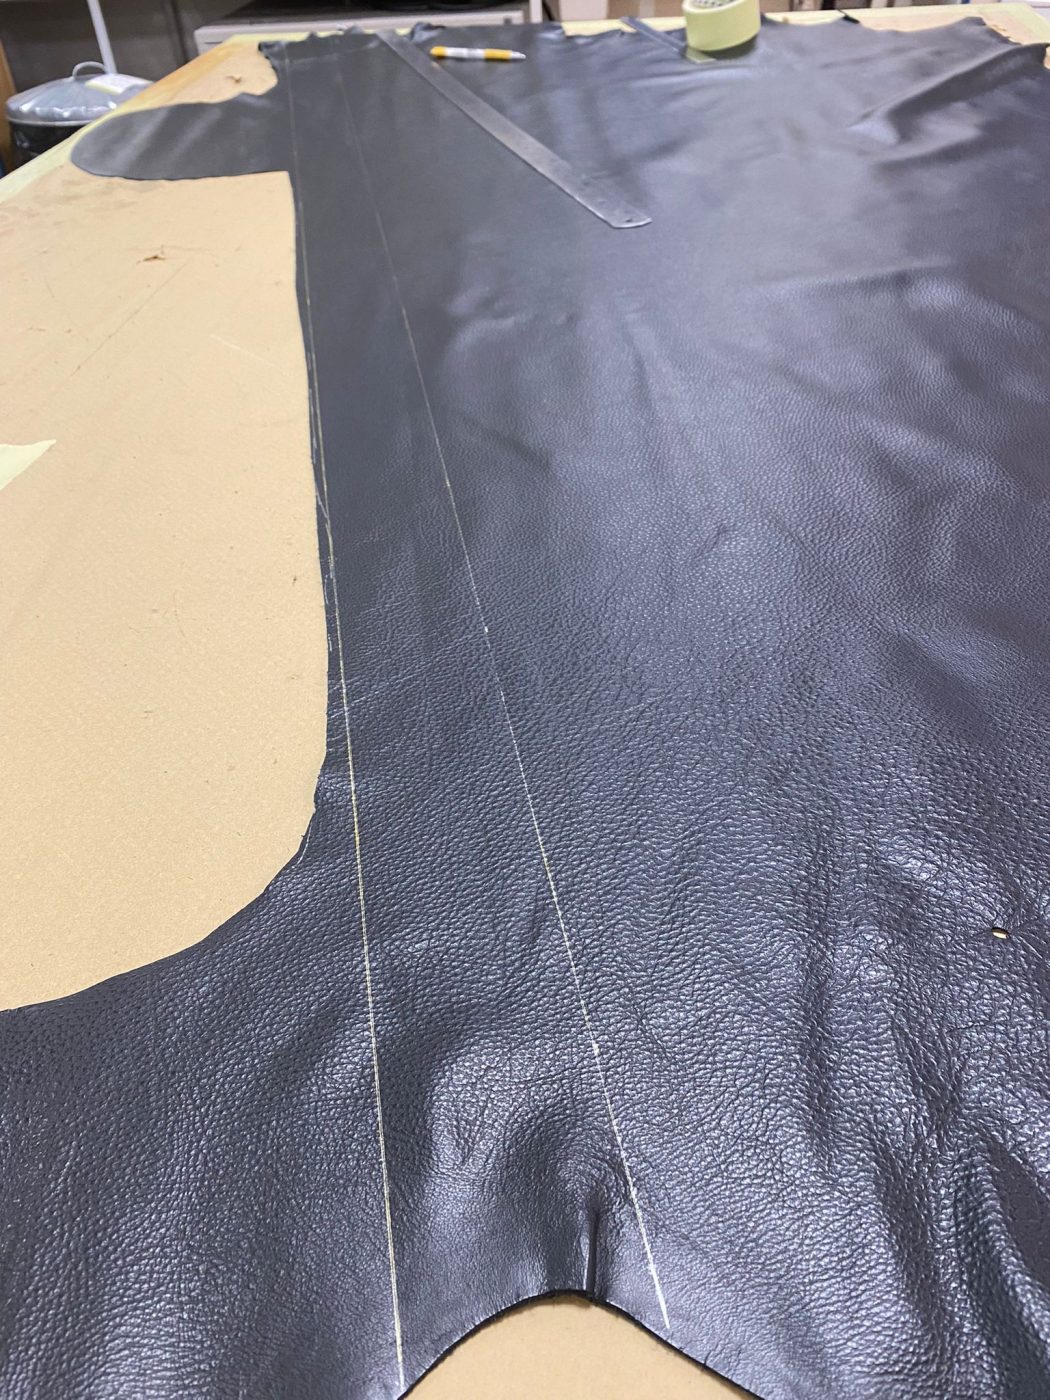
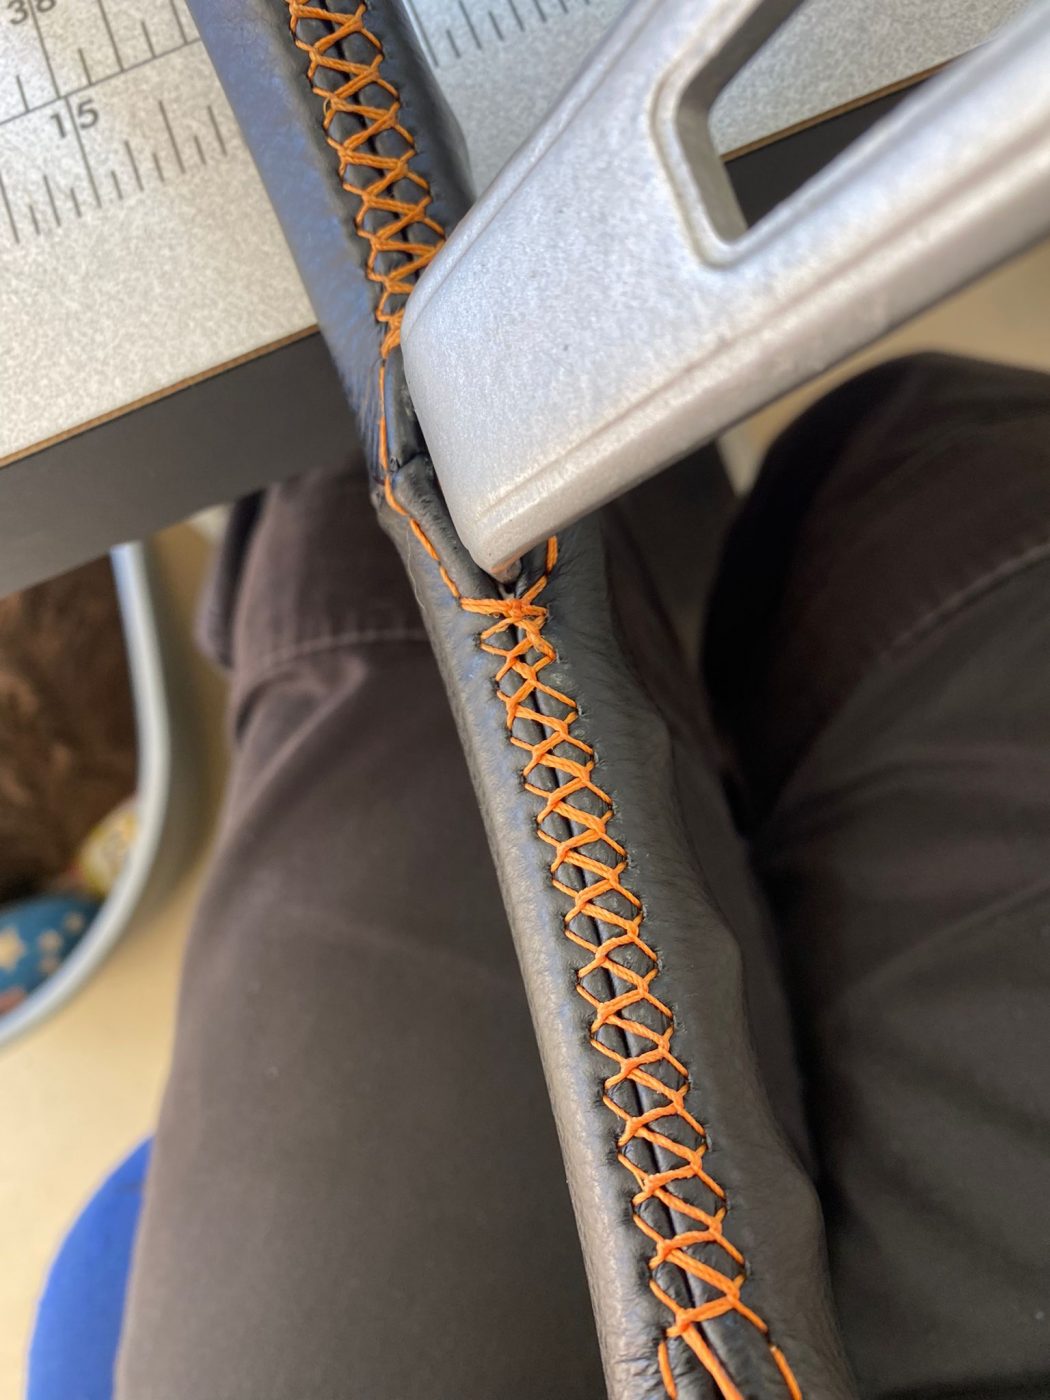
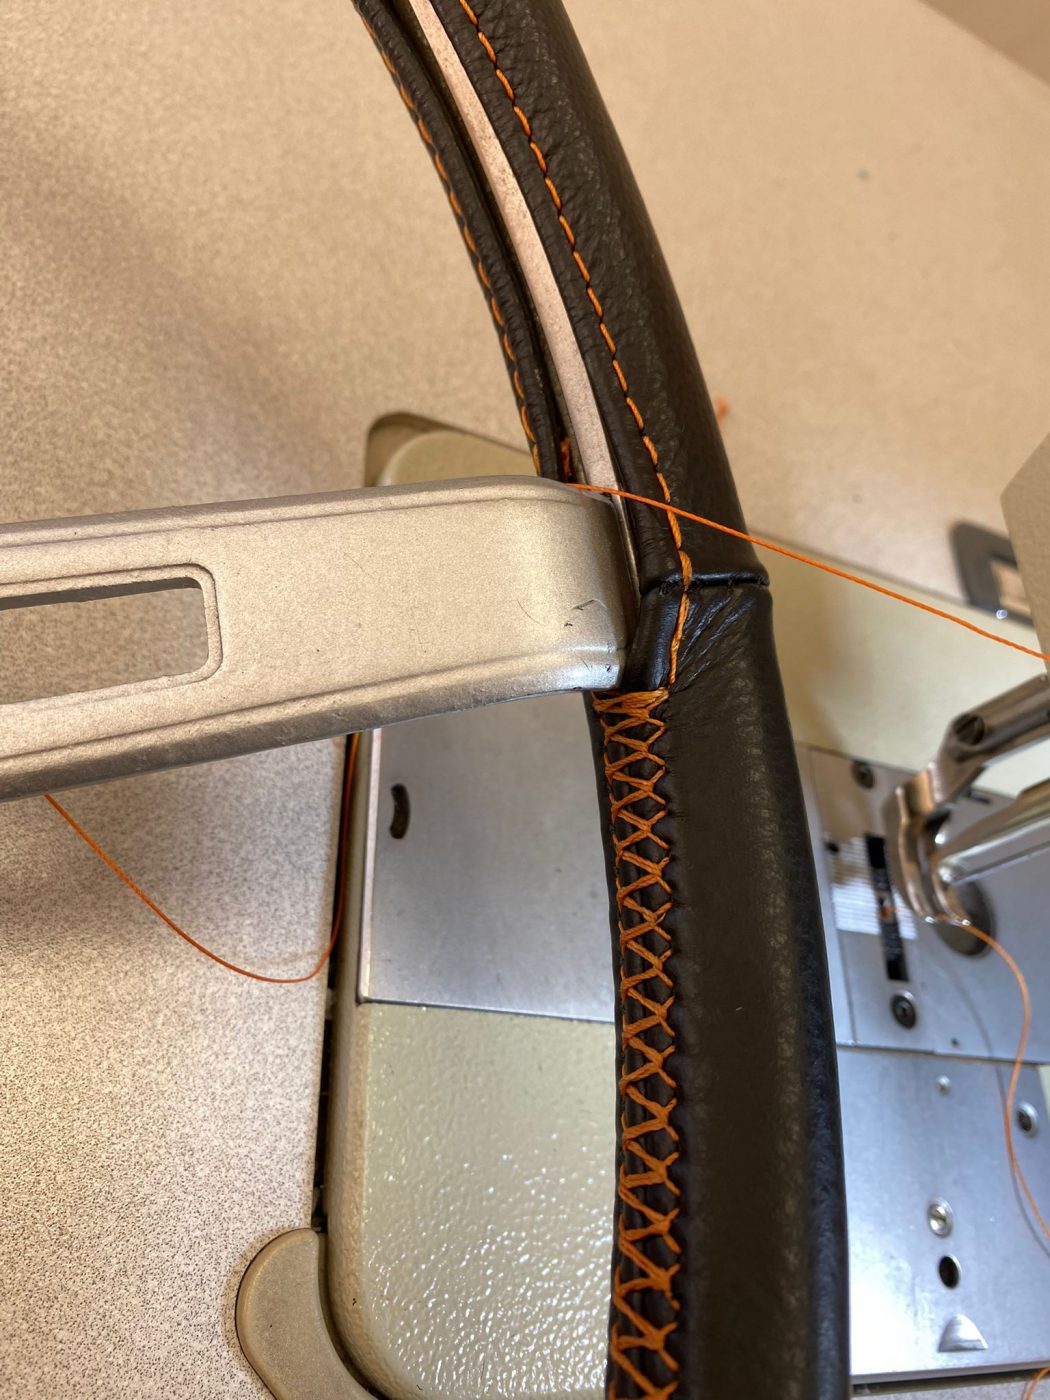
Kath chose her materials to closely match the existing materials used throughout the iconic muscle car and tie it into the custom interior. Deep black leather with vibrant orange stitching.
Kath measured out the black leather and cut it to size. Allowing a snug but not overly stretched fitment to the wooden wheel underneath. Then, after being hemmed, Kath began to stitch in the piece to envelop the large wooden steering wheel. Something like this, being so intricate and restricted, can only be done by hand and this is where the skill of a true craftsperson shines. The final fit and delicate stitchwork just fit the car, with its custom one-off feel.
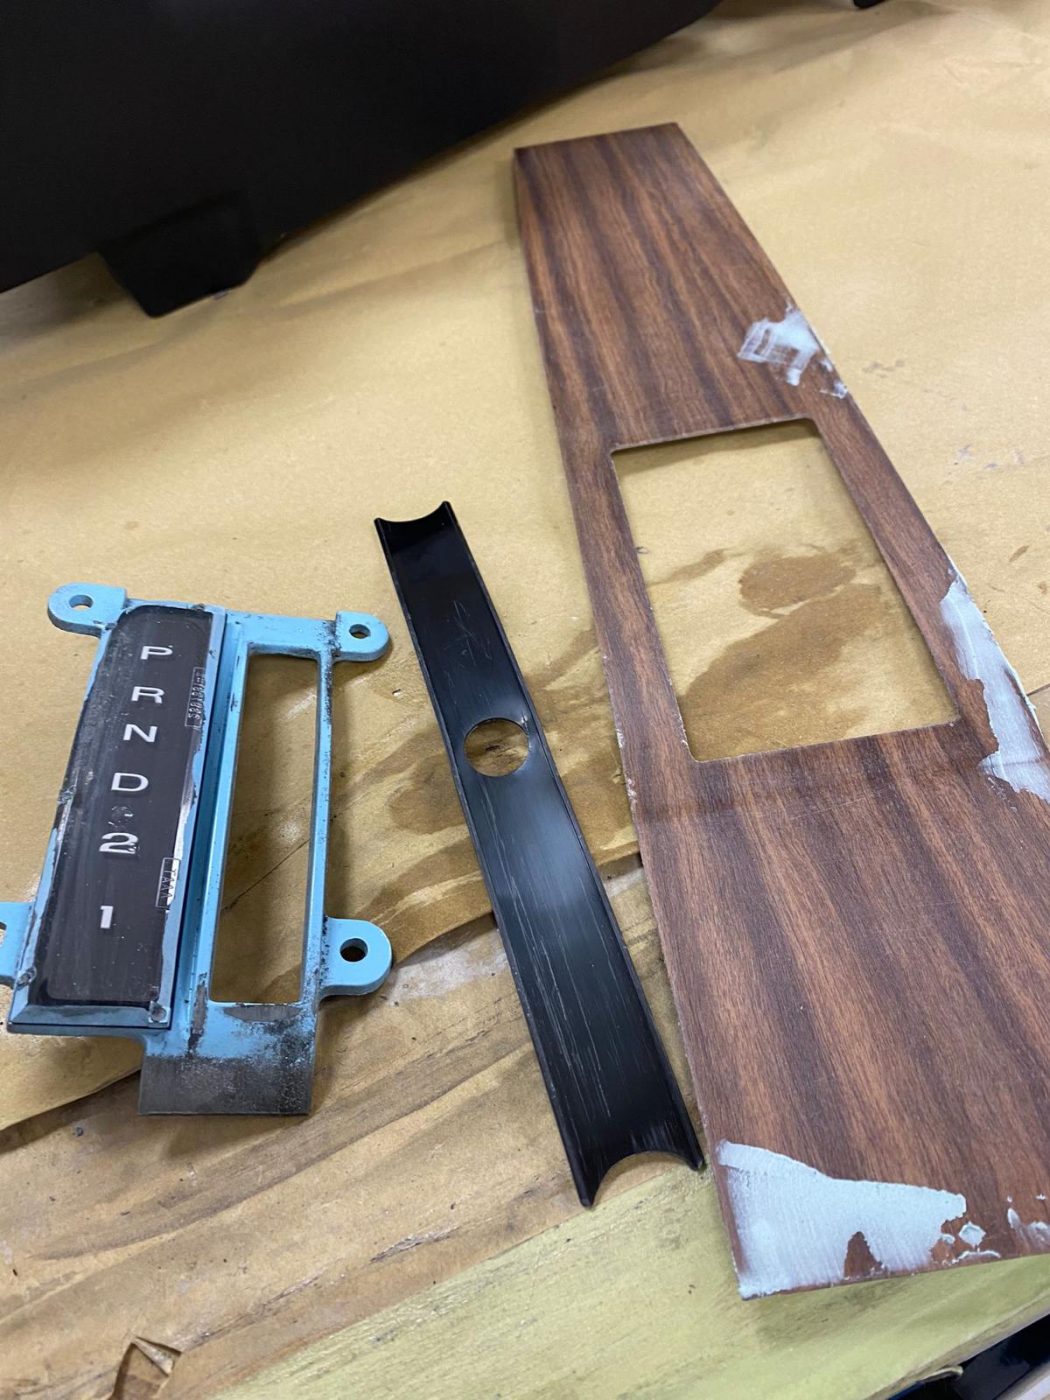
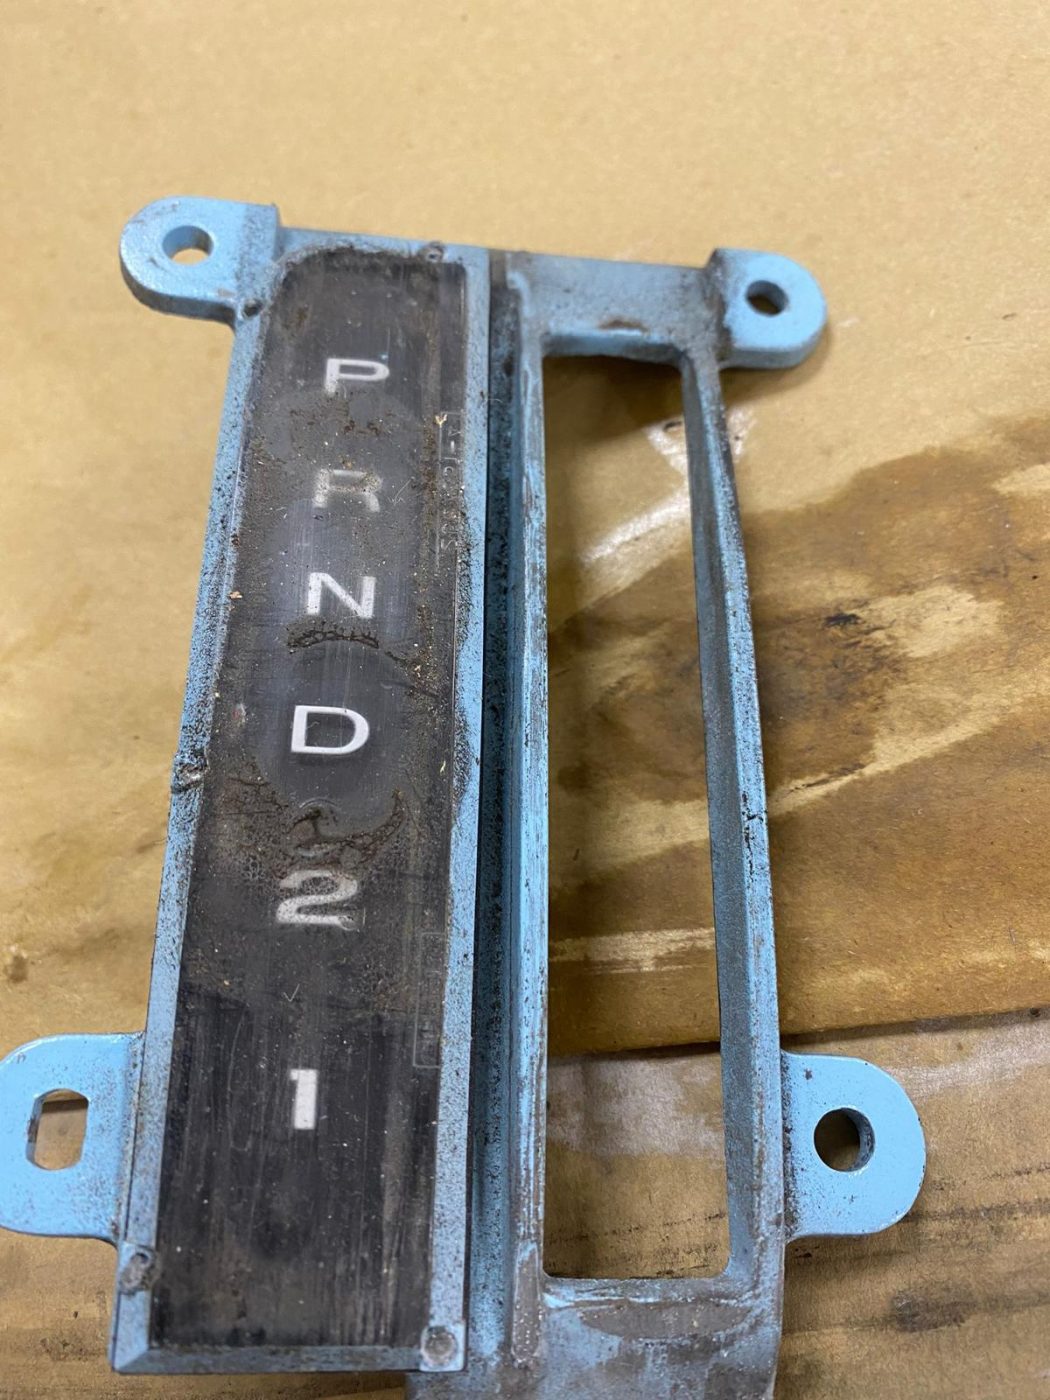
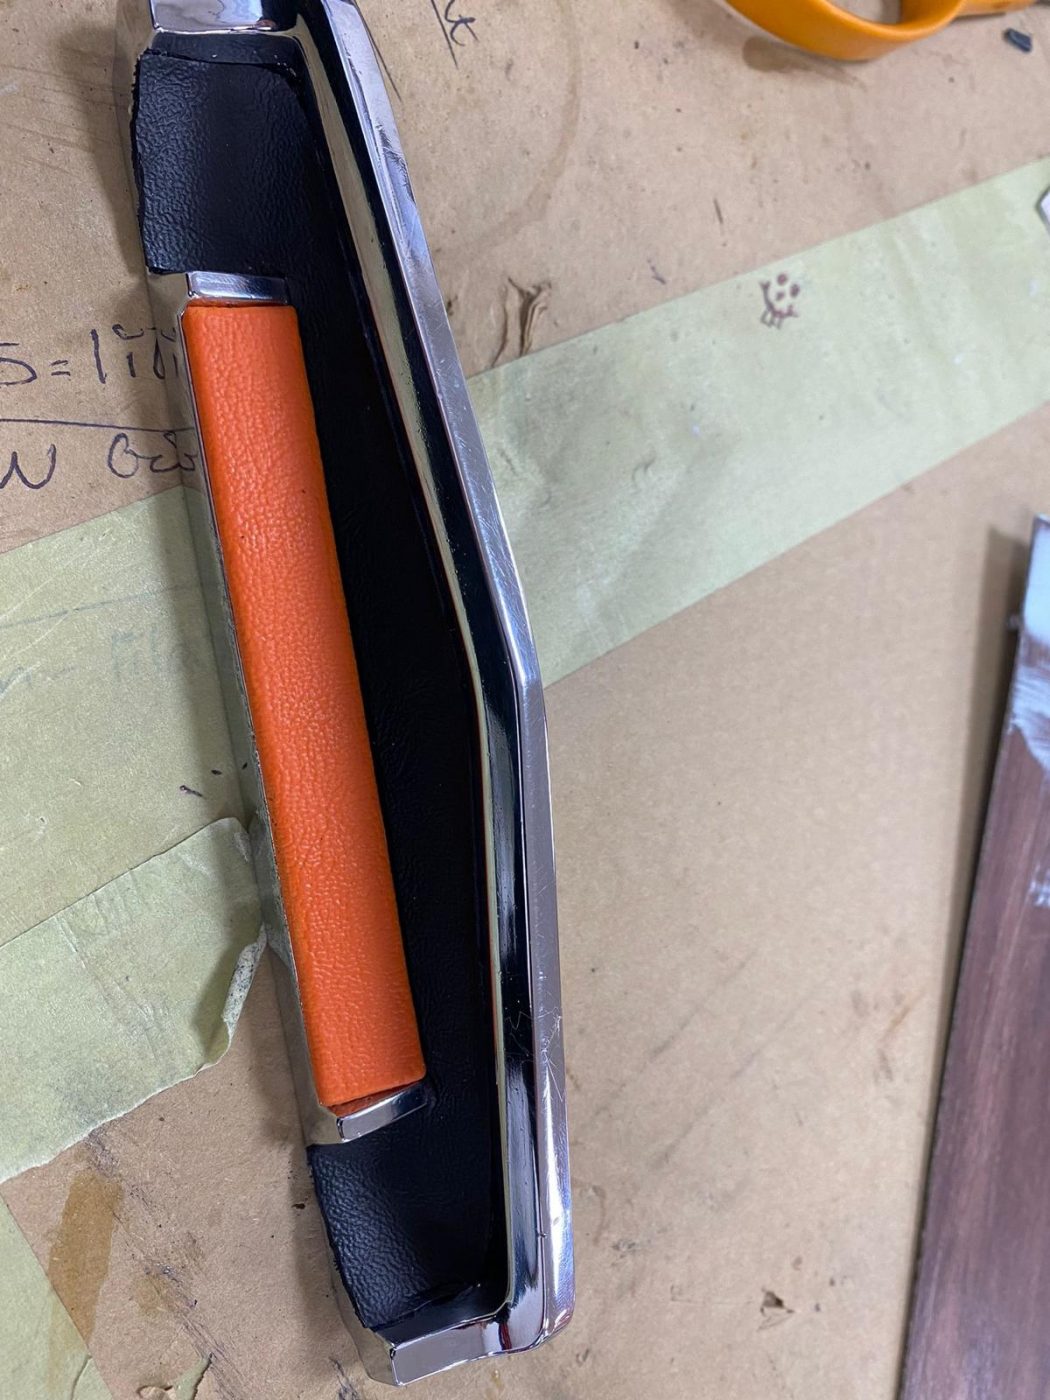
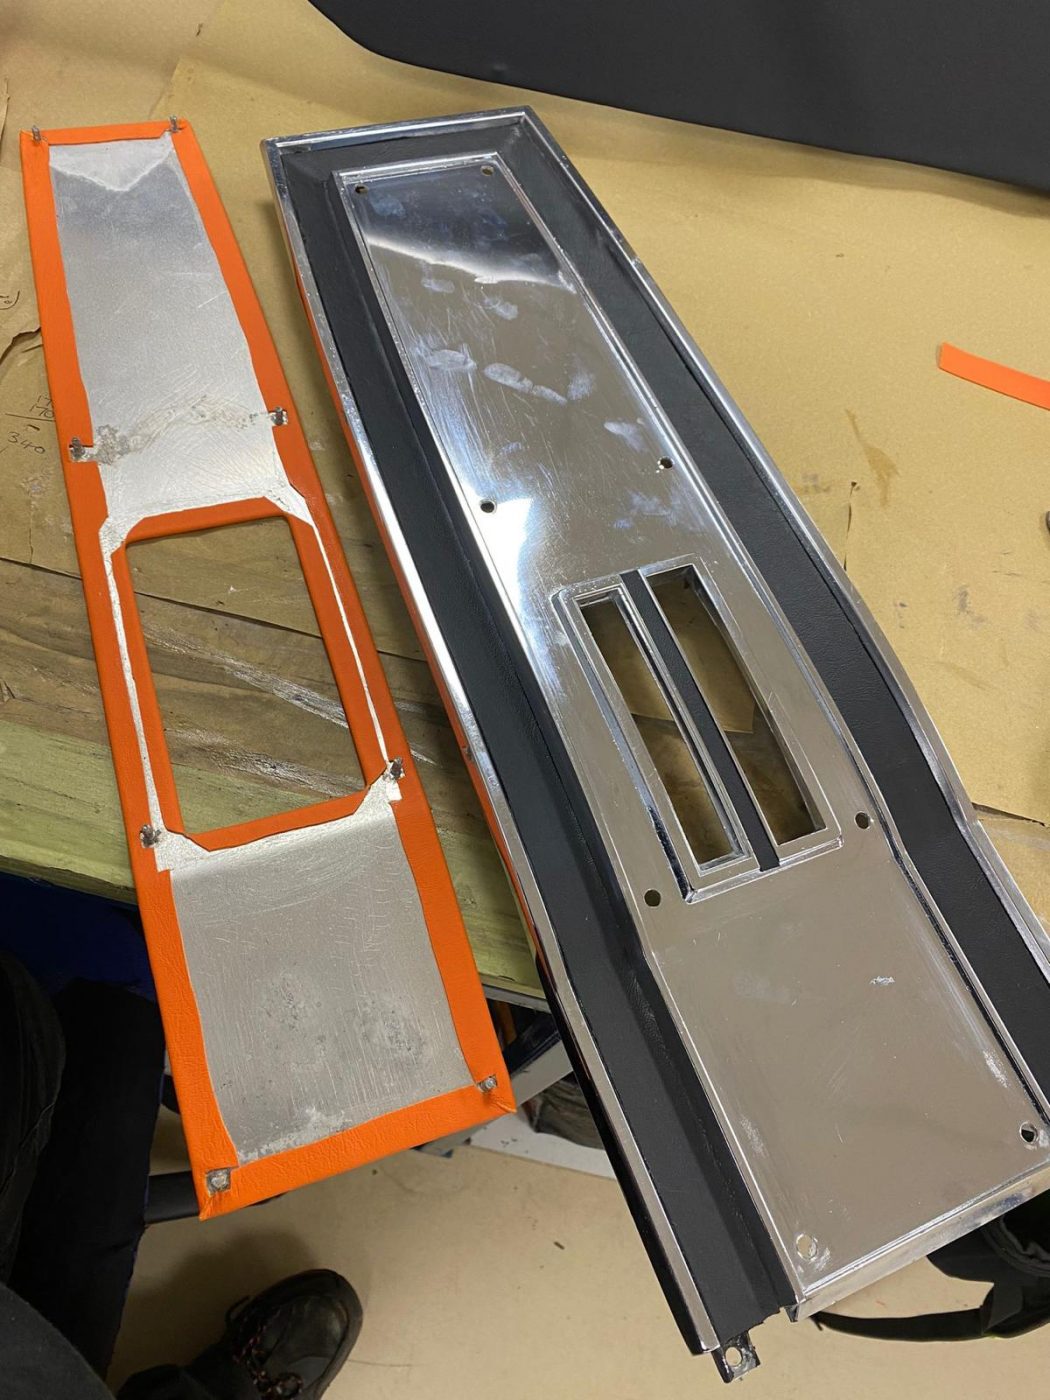
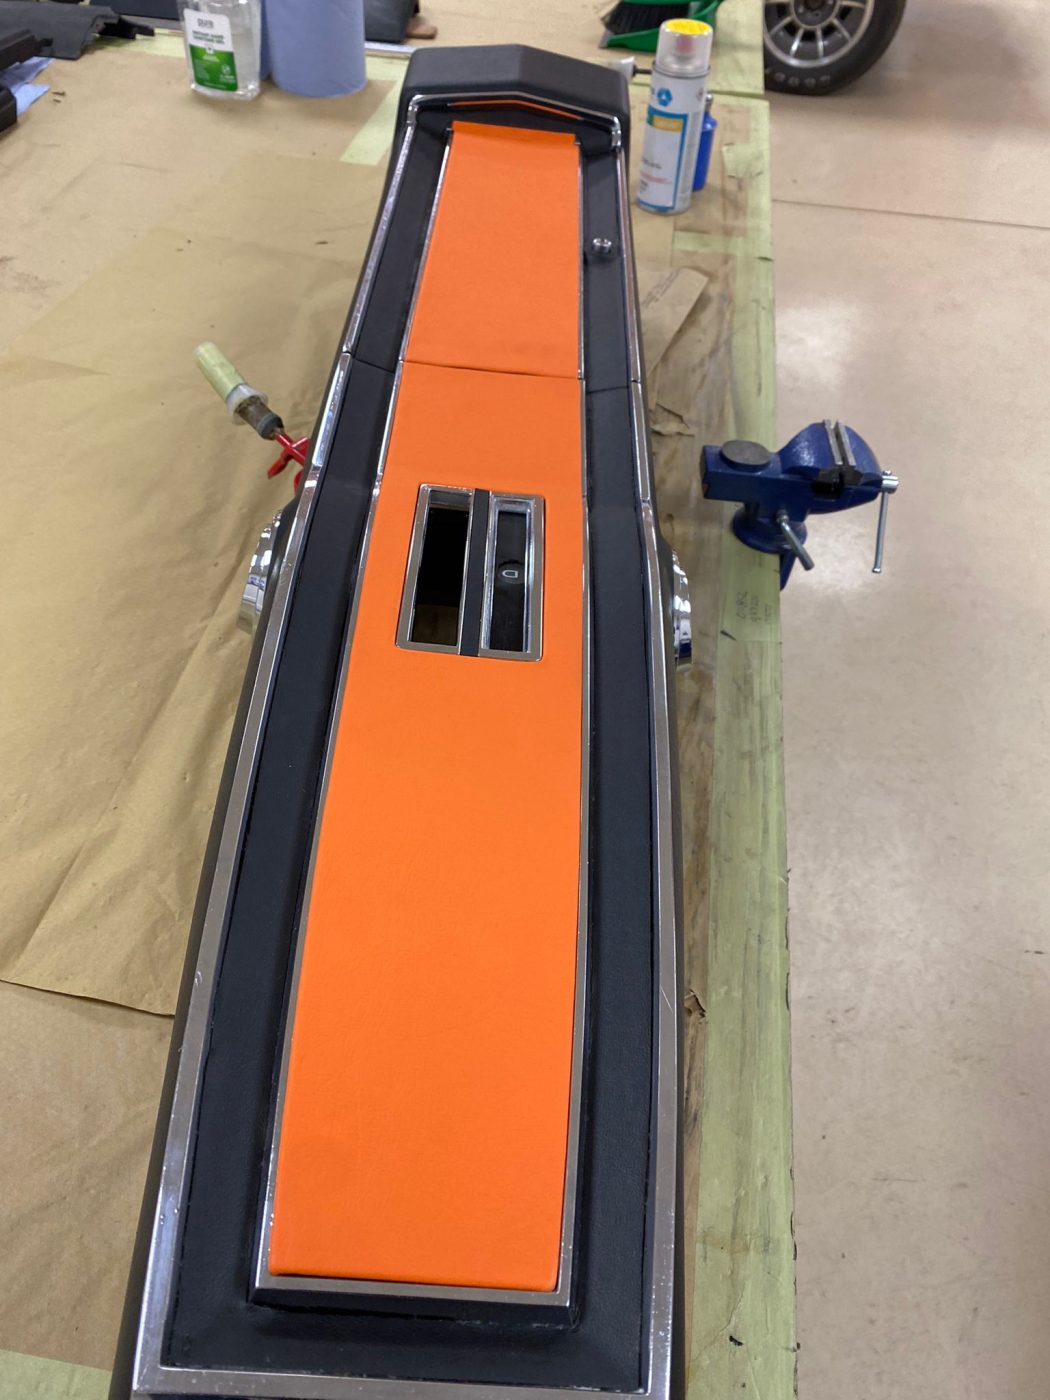
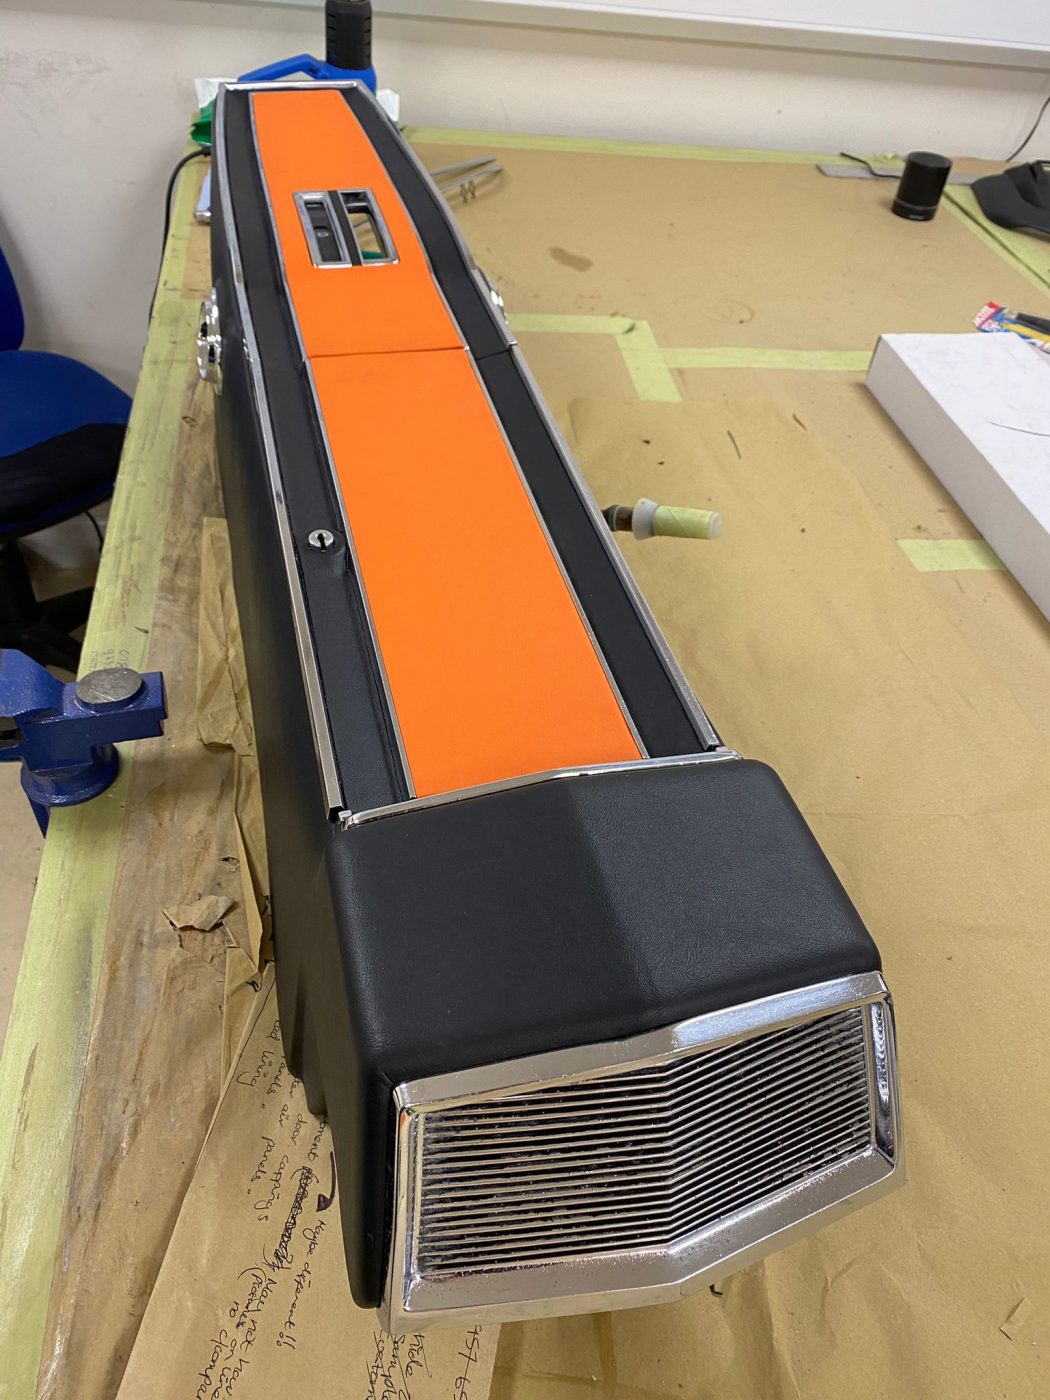
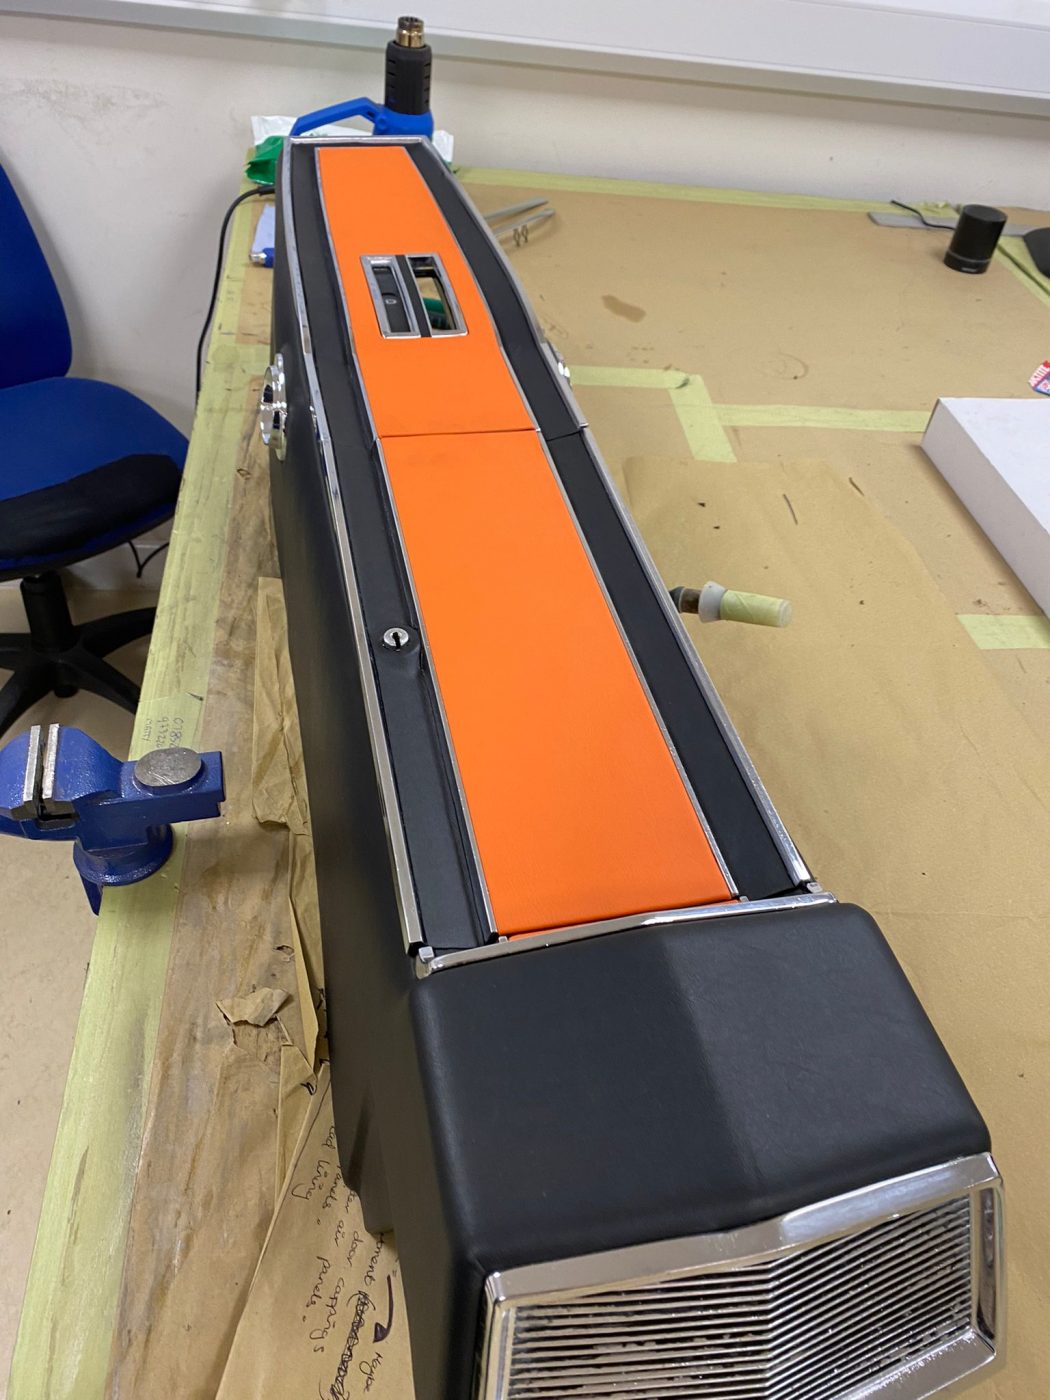
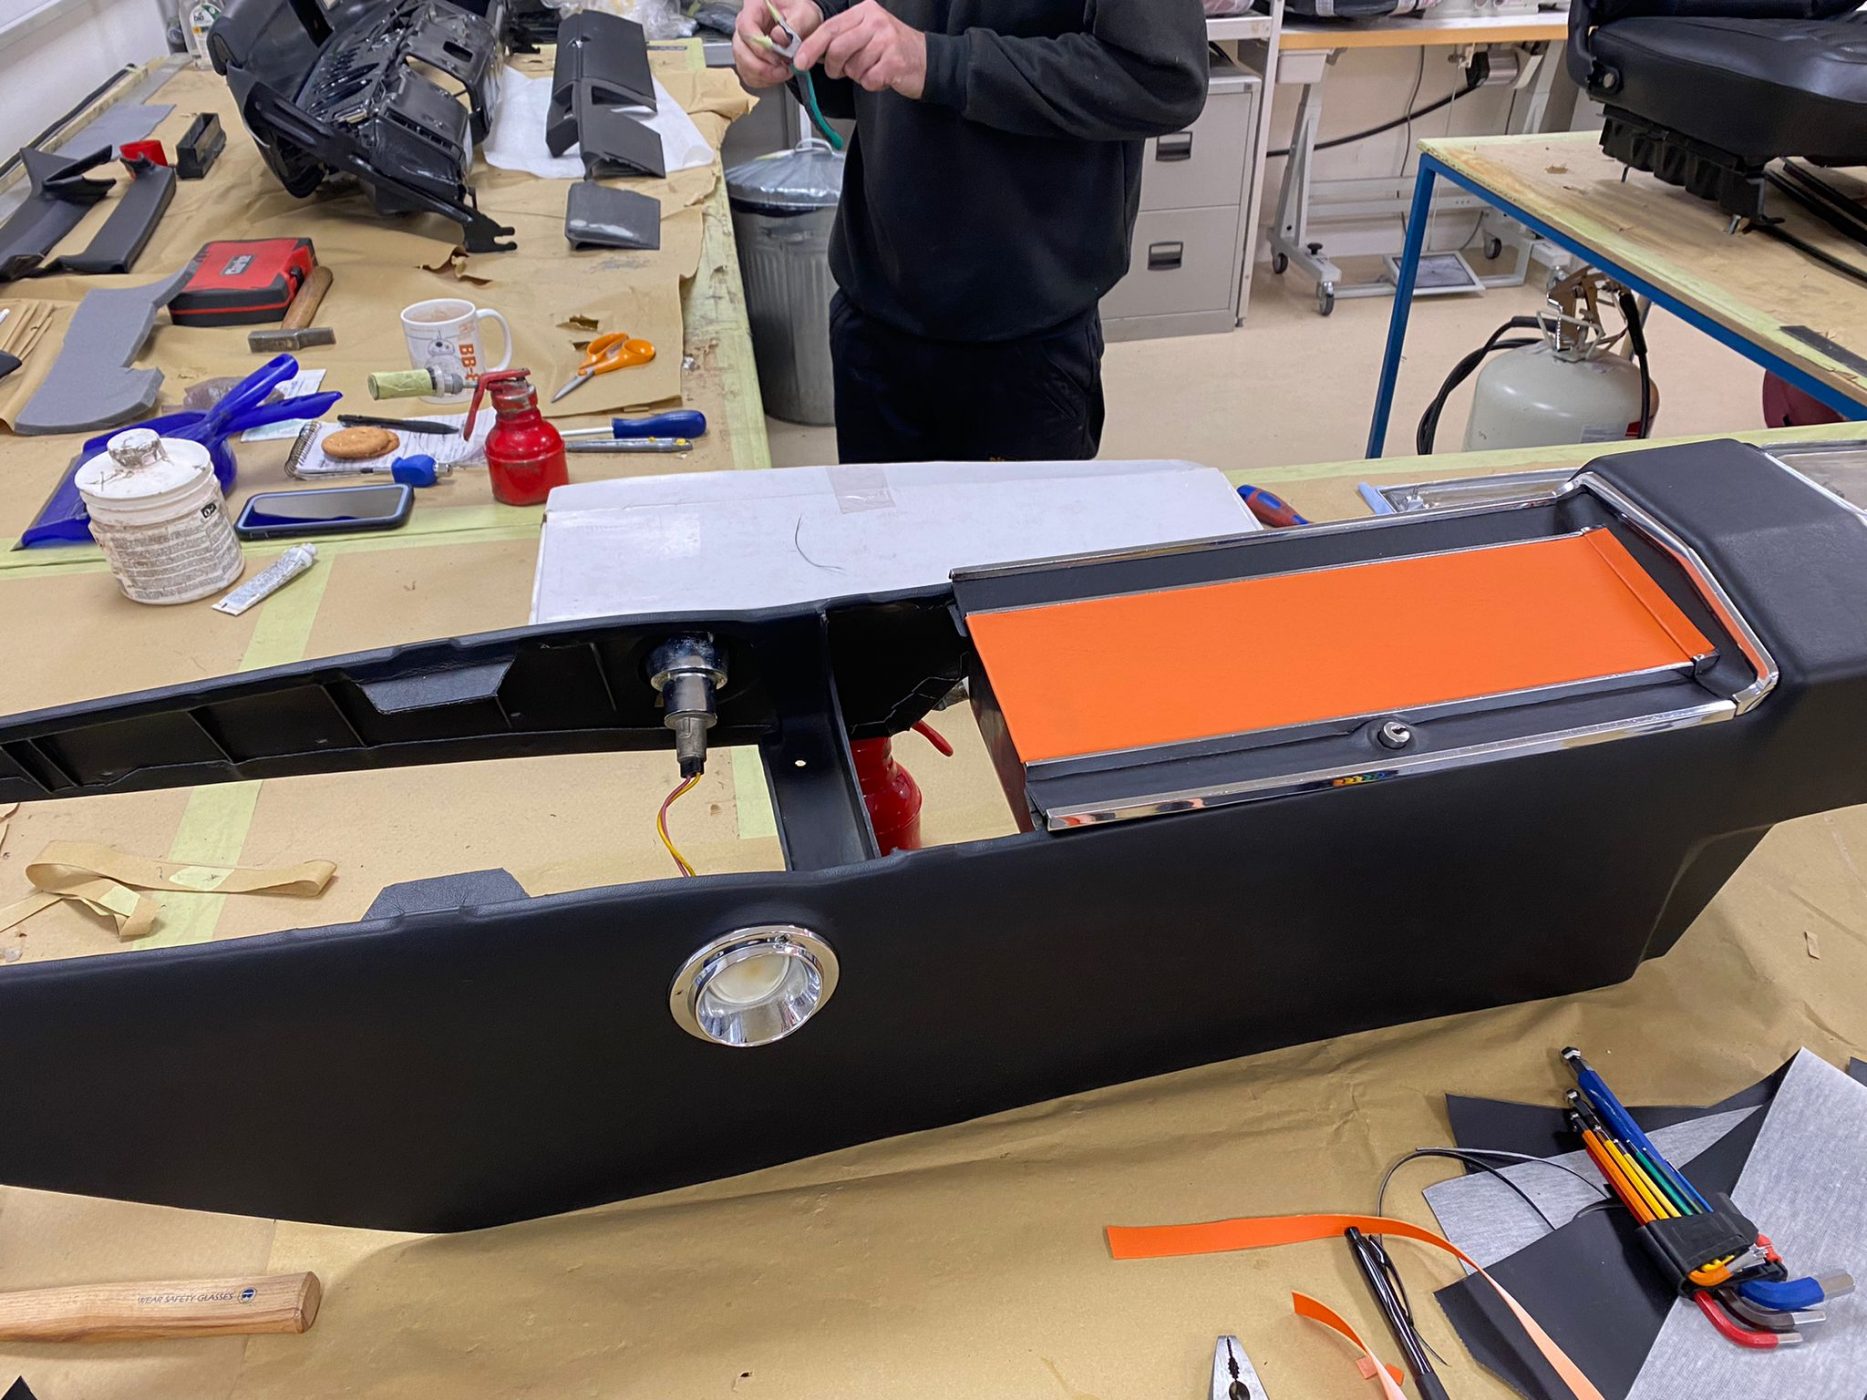
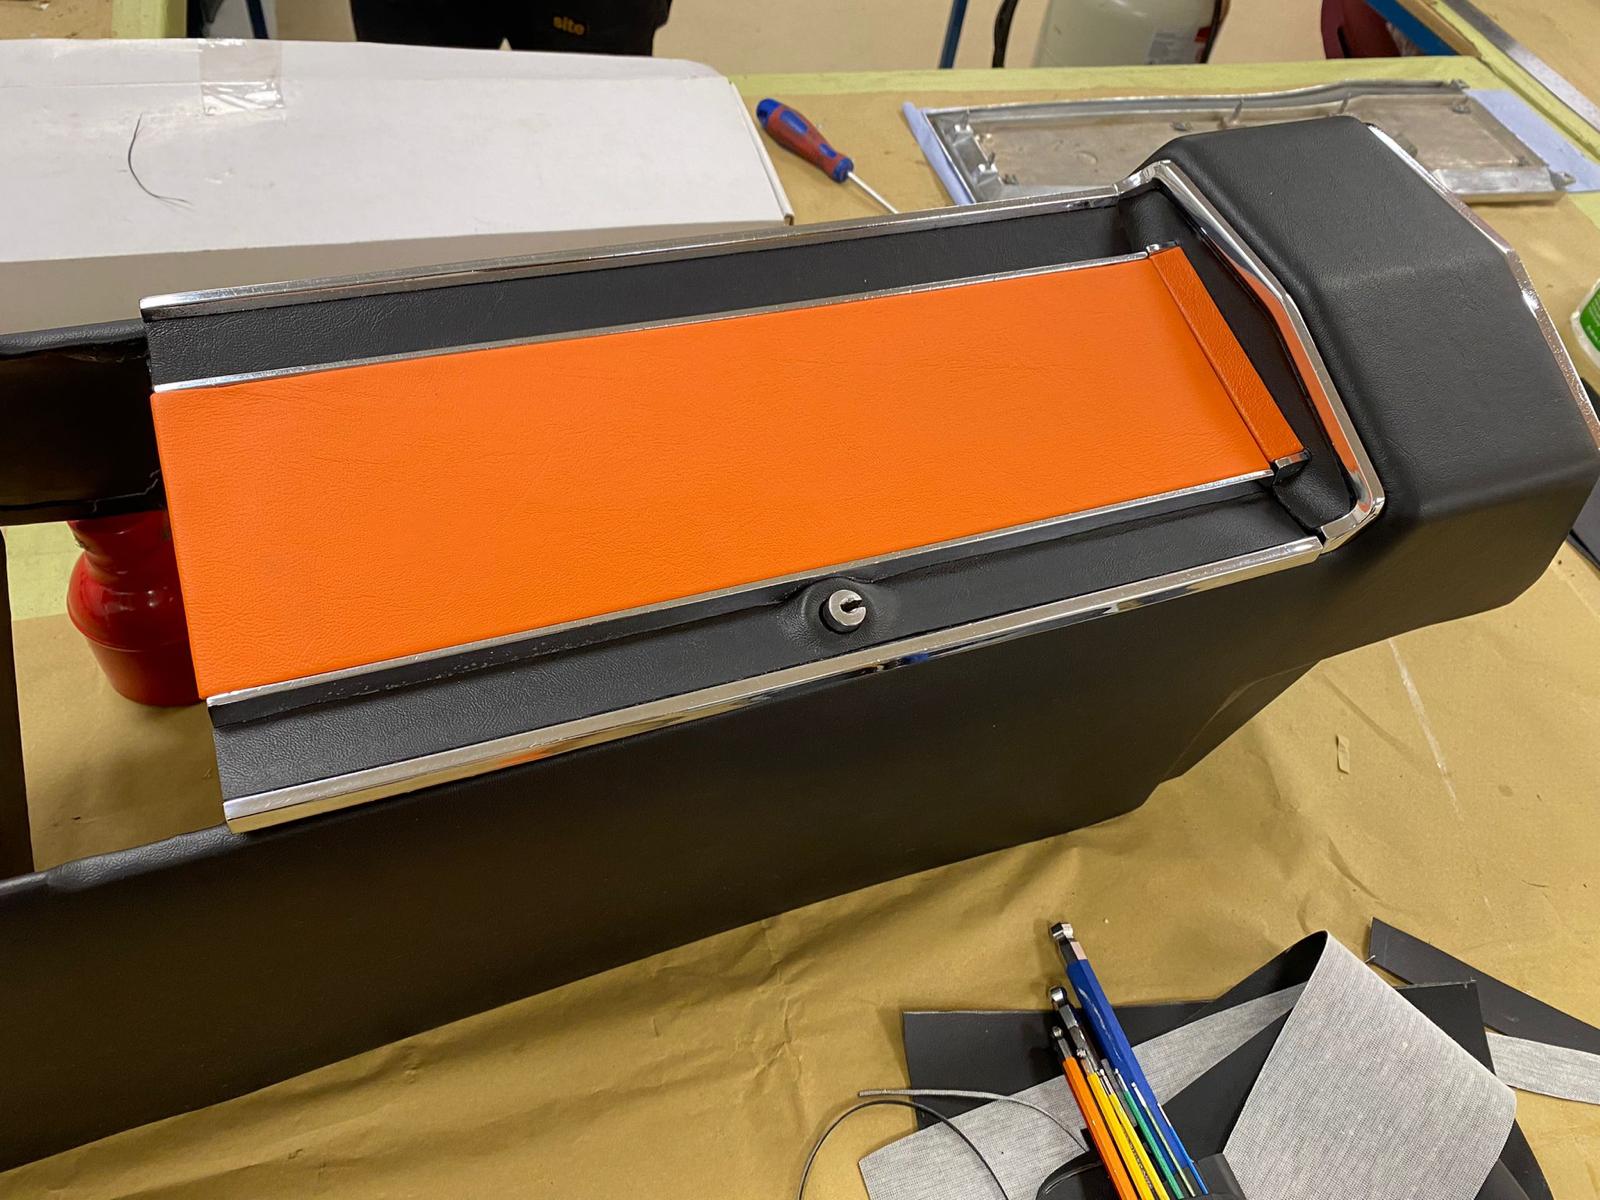
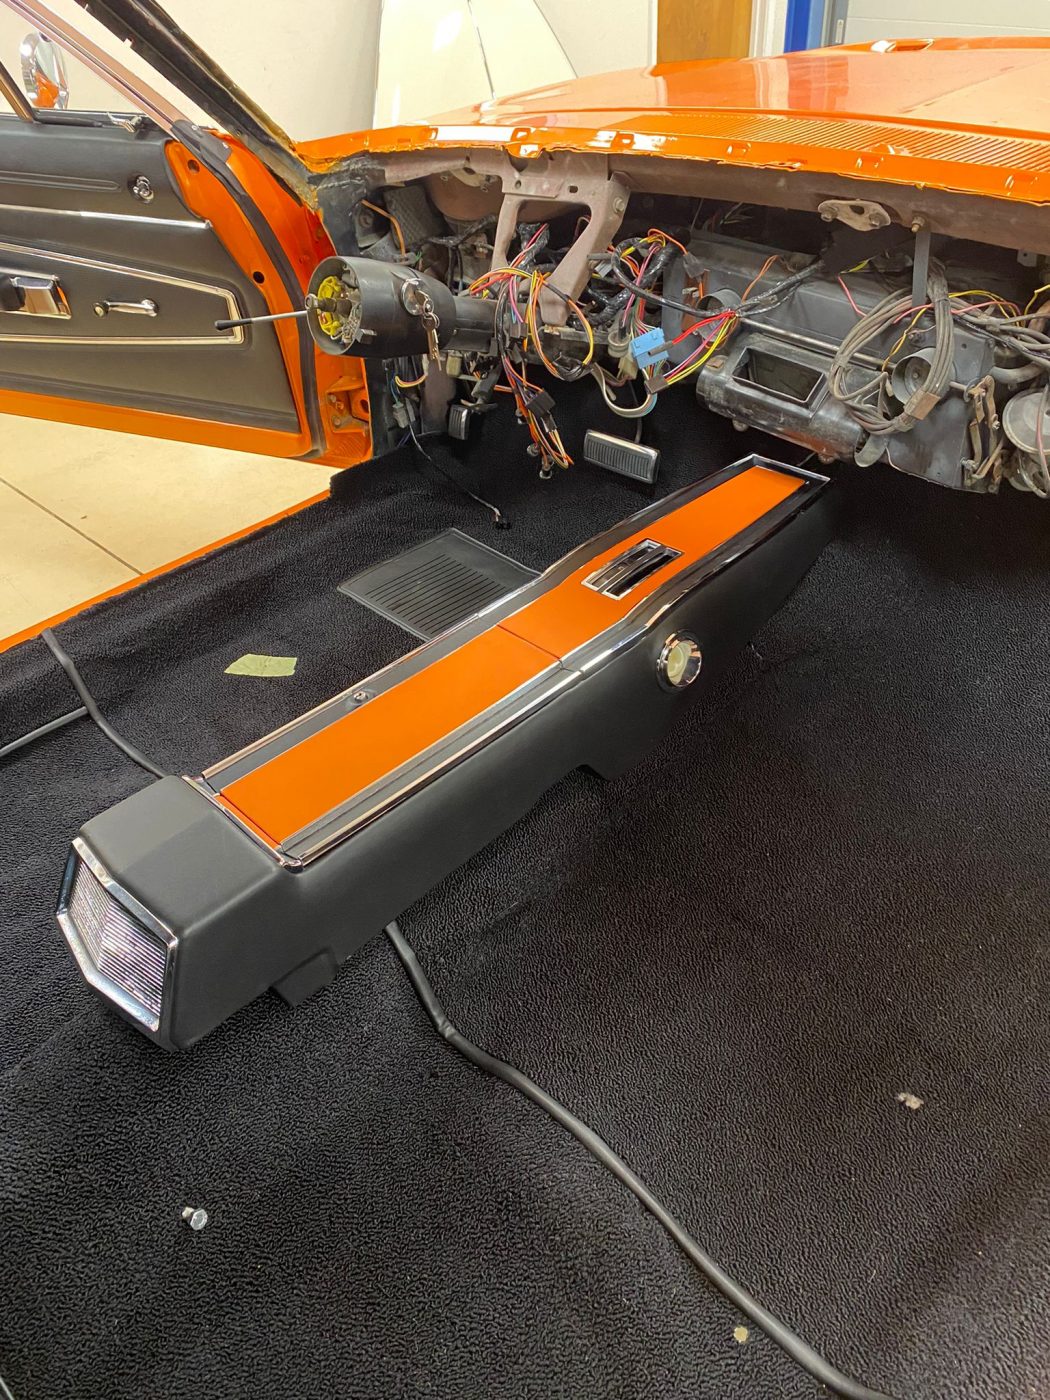
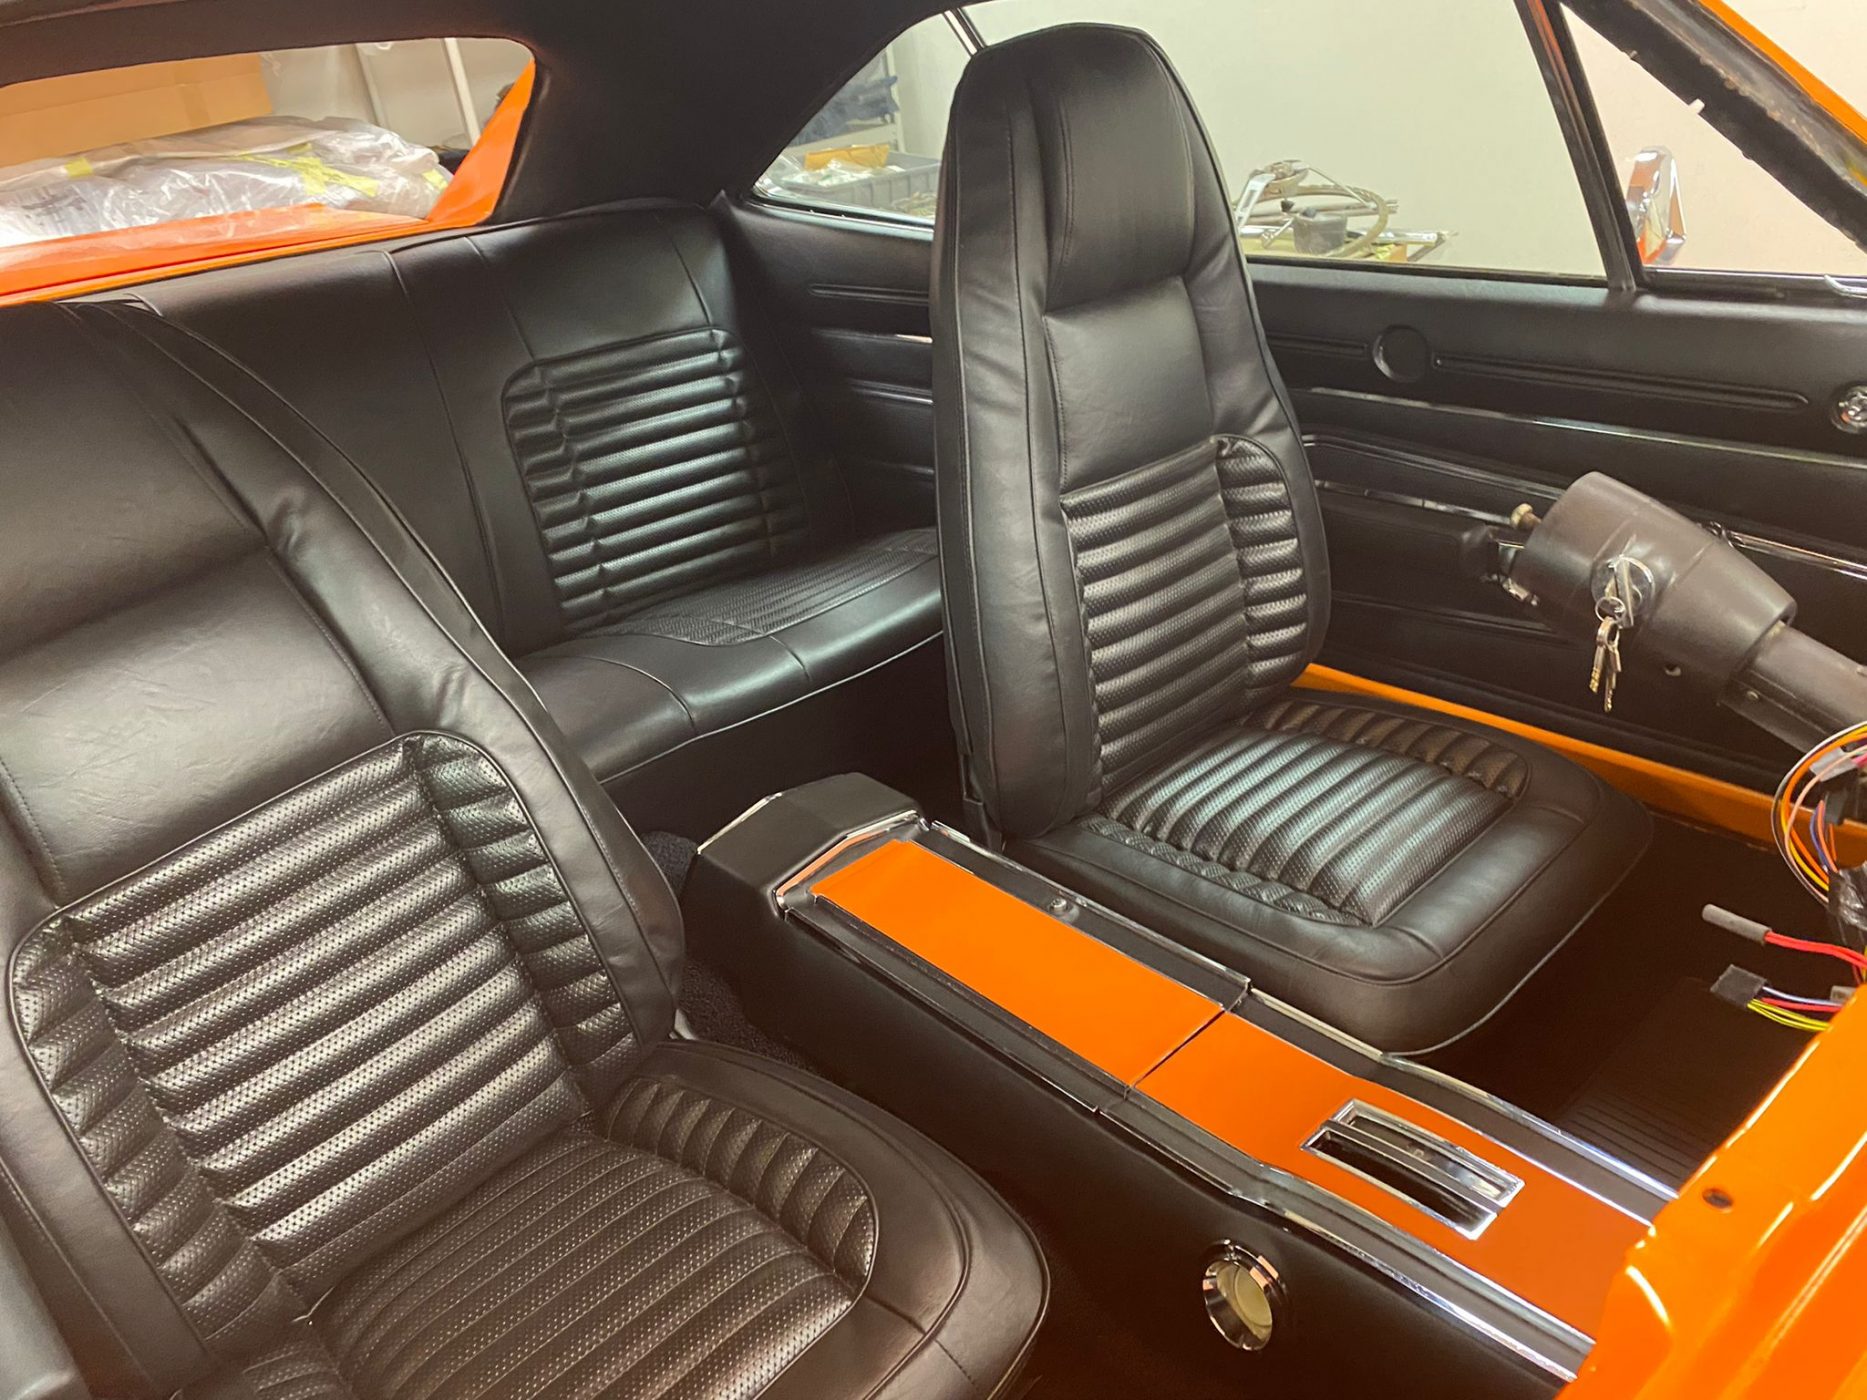
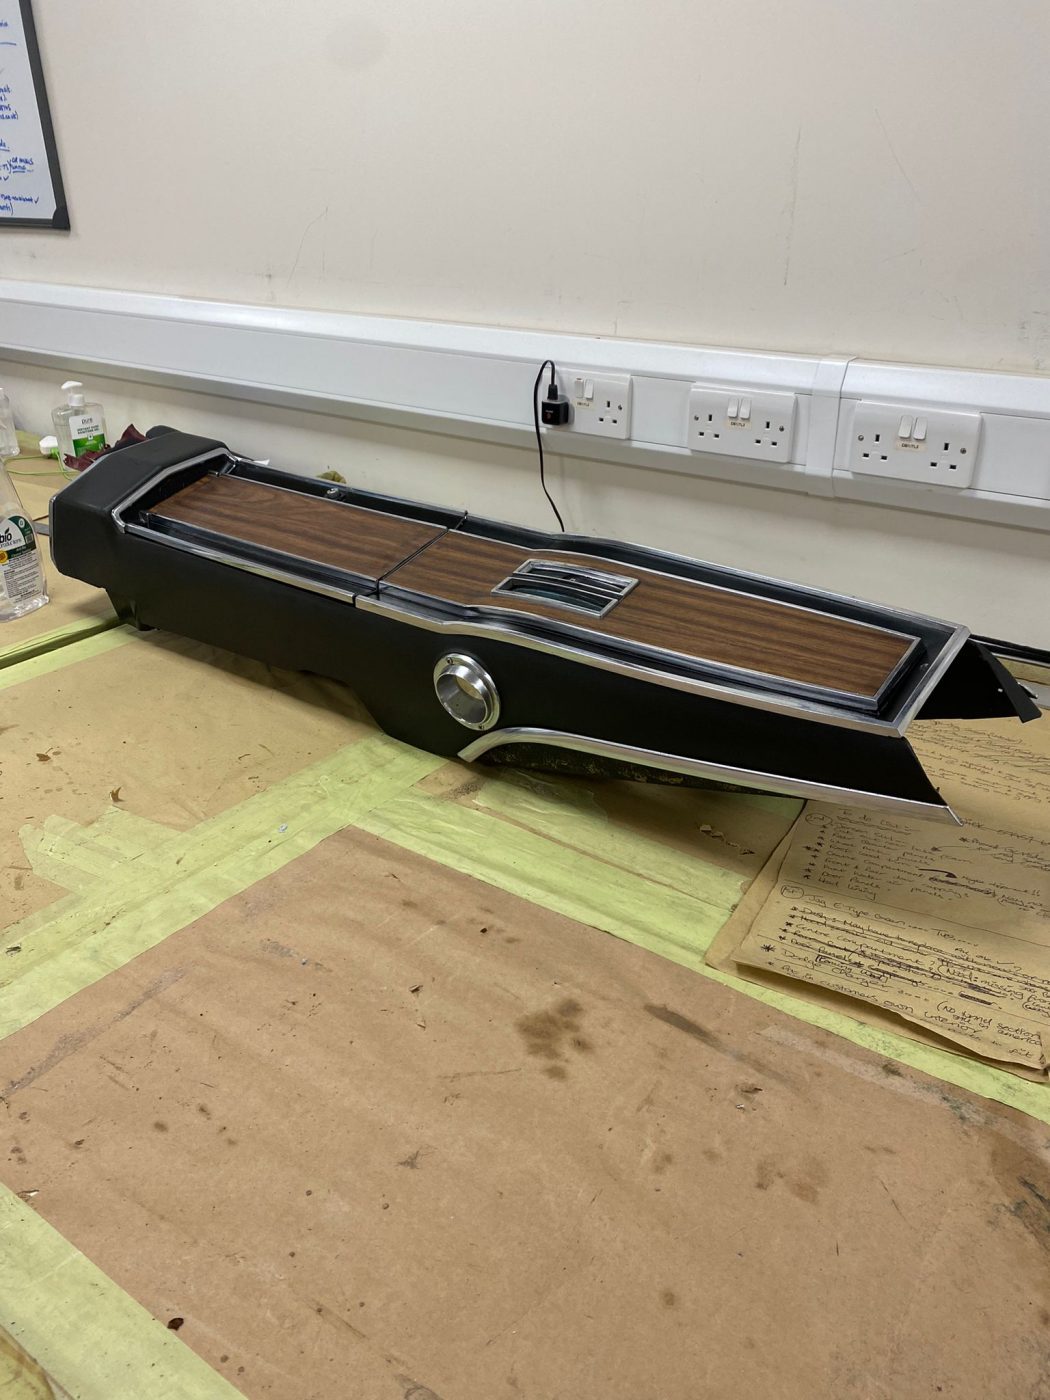
We have an incredible in-house trim team here at Bridge Classic Cars. They’ve been hard at work on the interior of the 1970 Dodge Charger that is currently in our trim shop.
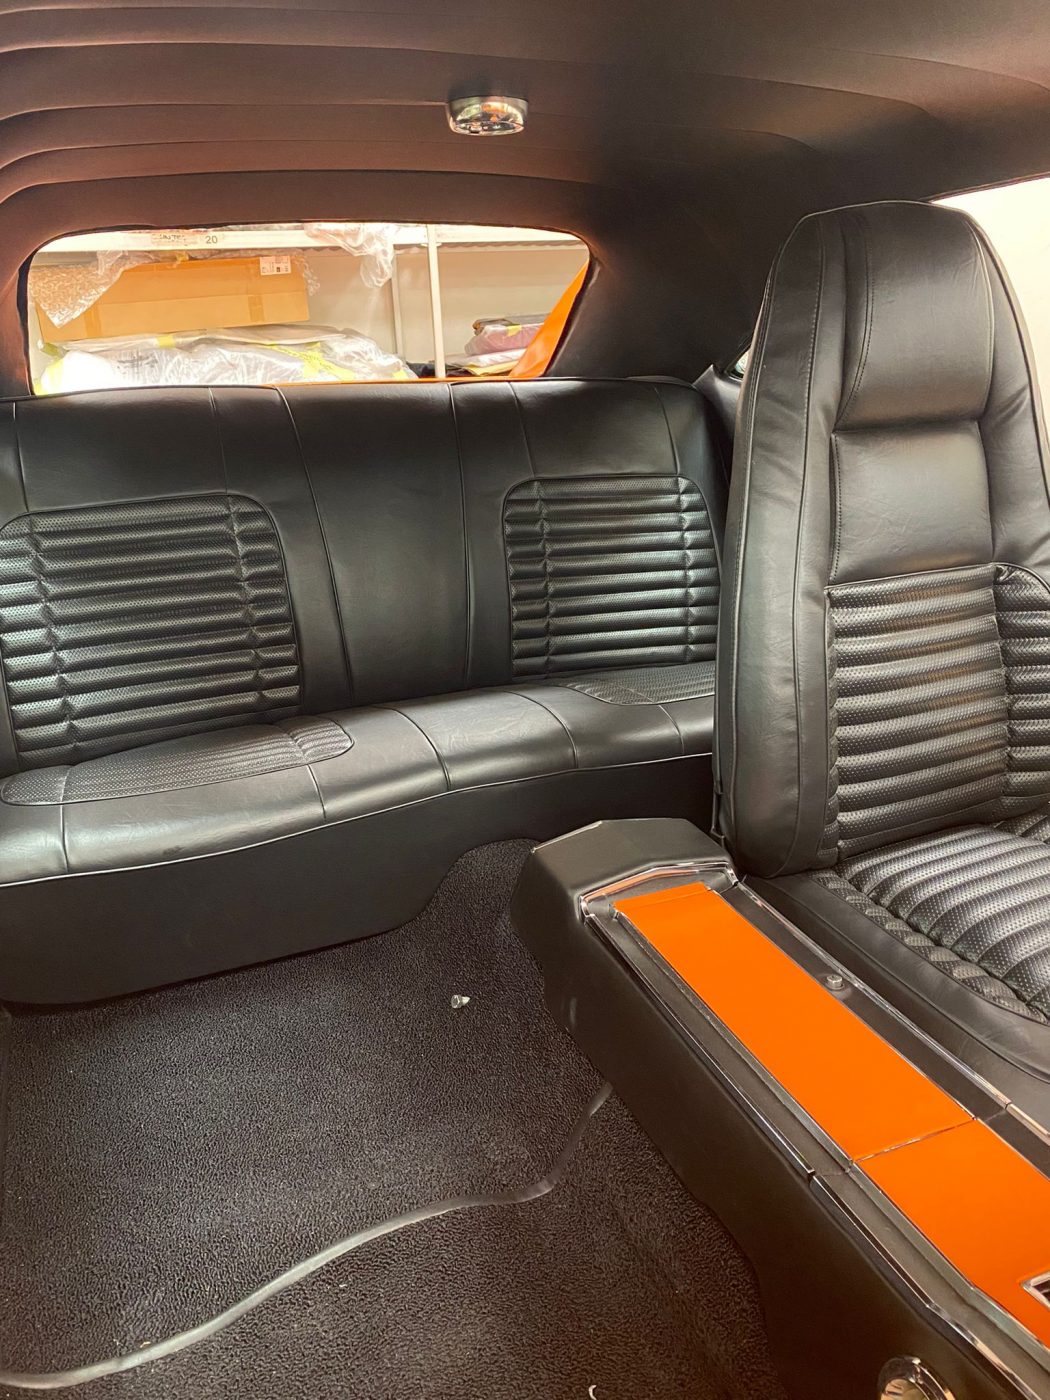
Here, you can see the work Kath has done refinishing the centre console to match the exterior of the Bright Orange Mopar. Kath carefully removed the original veneers from the piece in order to create templates for the new Orange vinyl that adorns the giant centrepiece of the interior in a wonderful contrast against the rest of the black vinyl.
After cutting out the templates, Kath began to wrap the original pieces after test fitting. Once all in place, Kath cleaned up all of the accompanying brightwork to make the Orange stand out even more. Then, once all the adhesive had correctly cured and settled into place. Kath, test fit the new centre console with the seats just placed in the car.
I think we can all agree, it looks absolutely sensational.
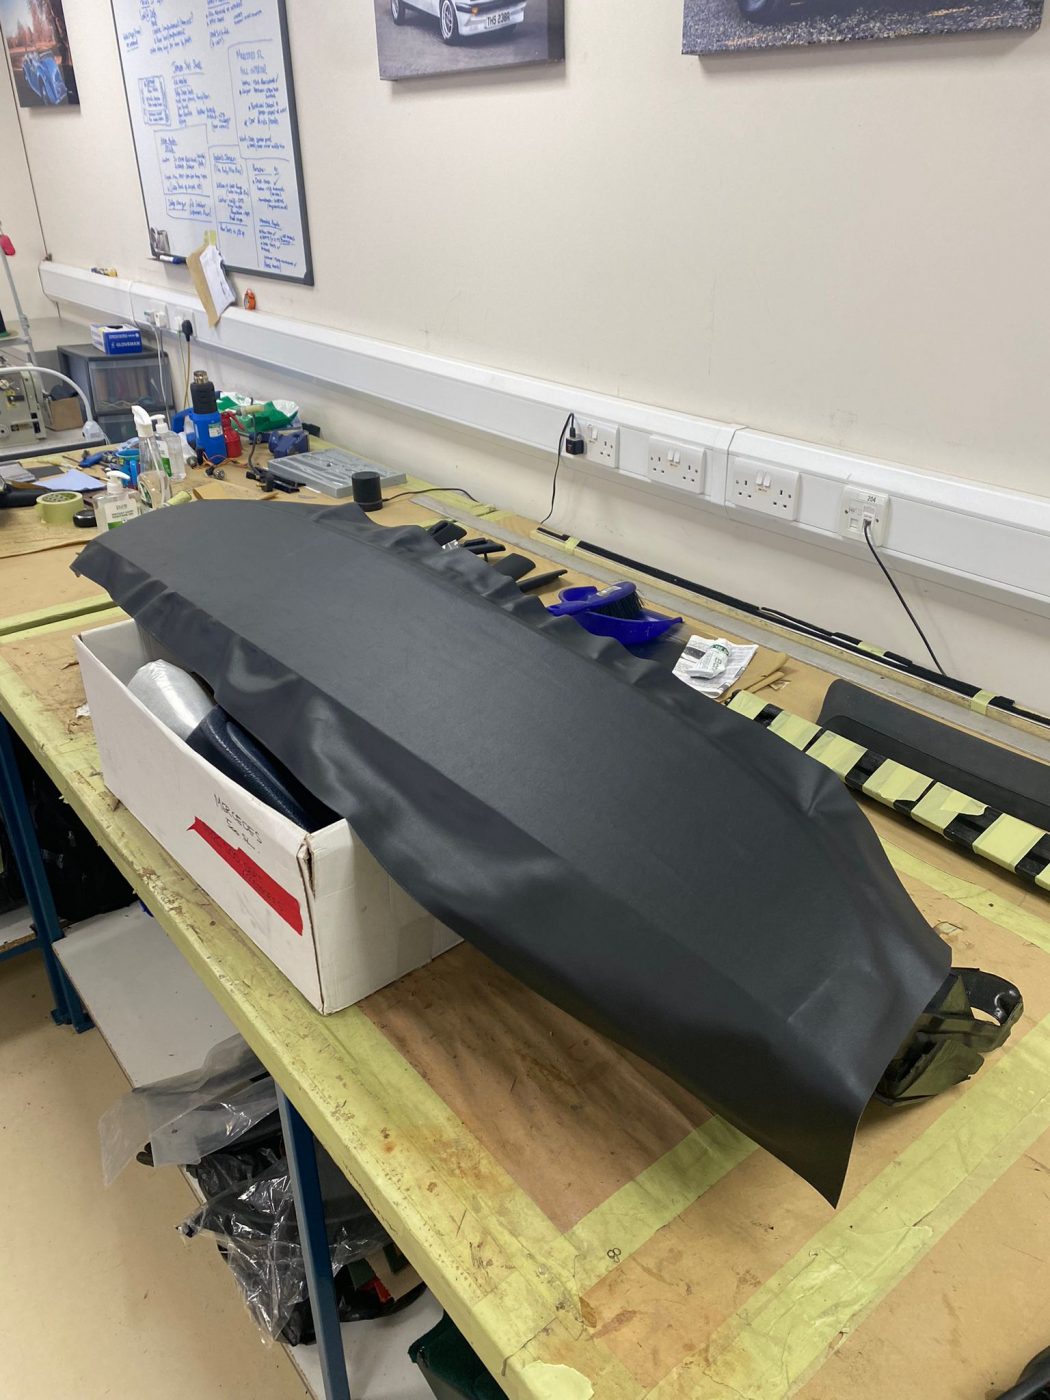

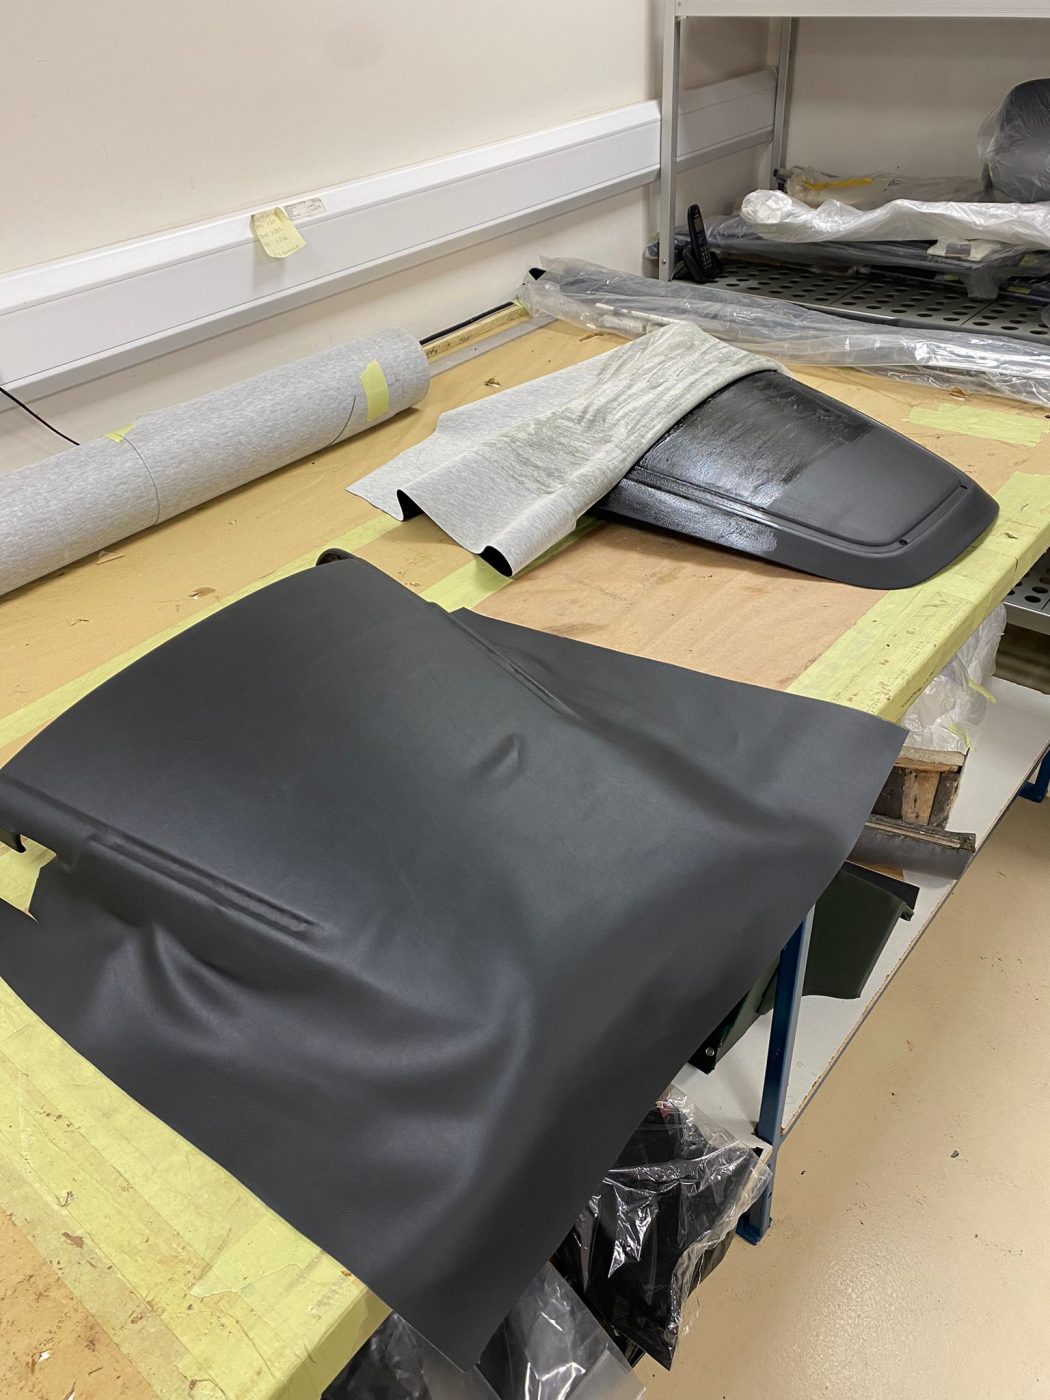
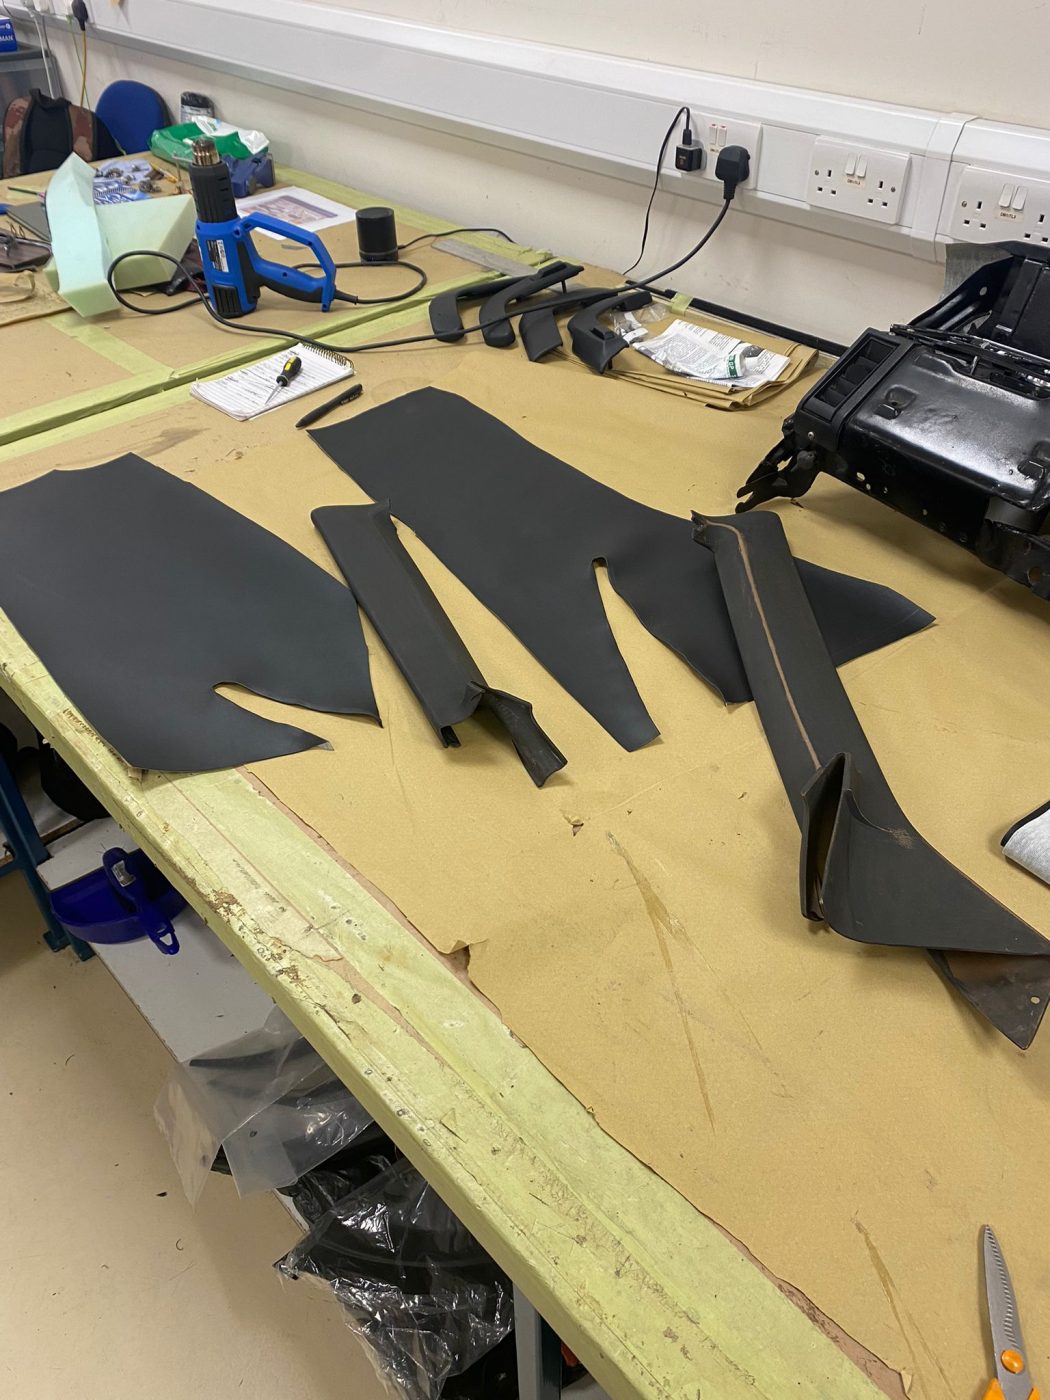

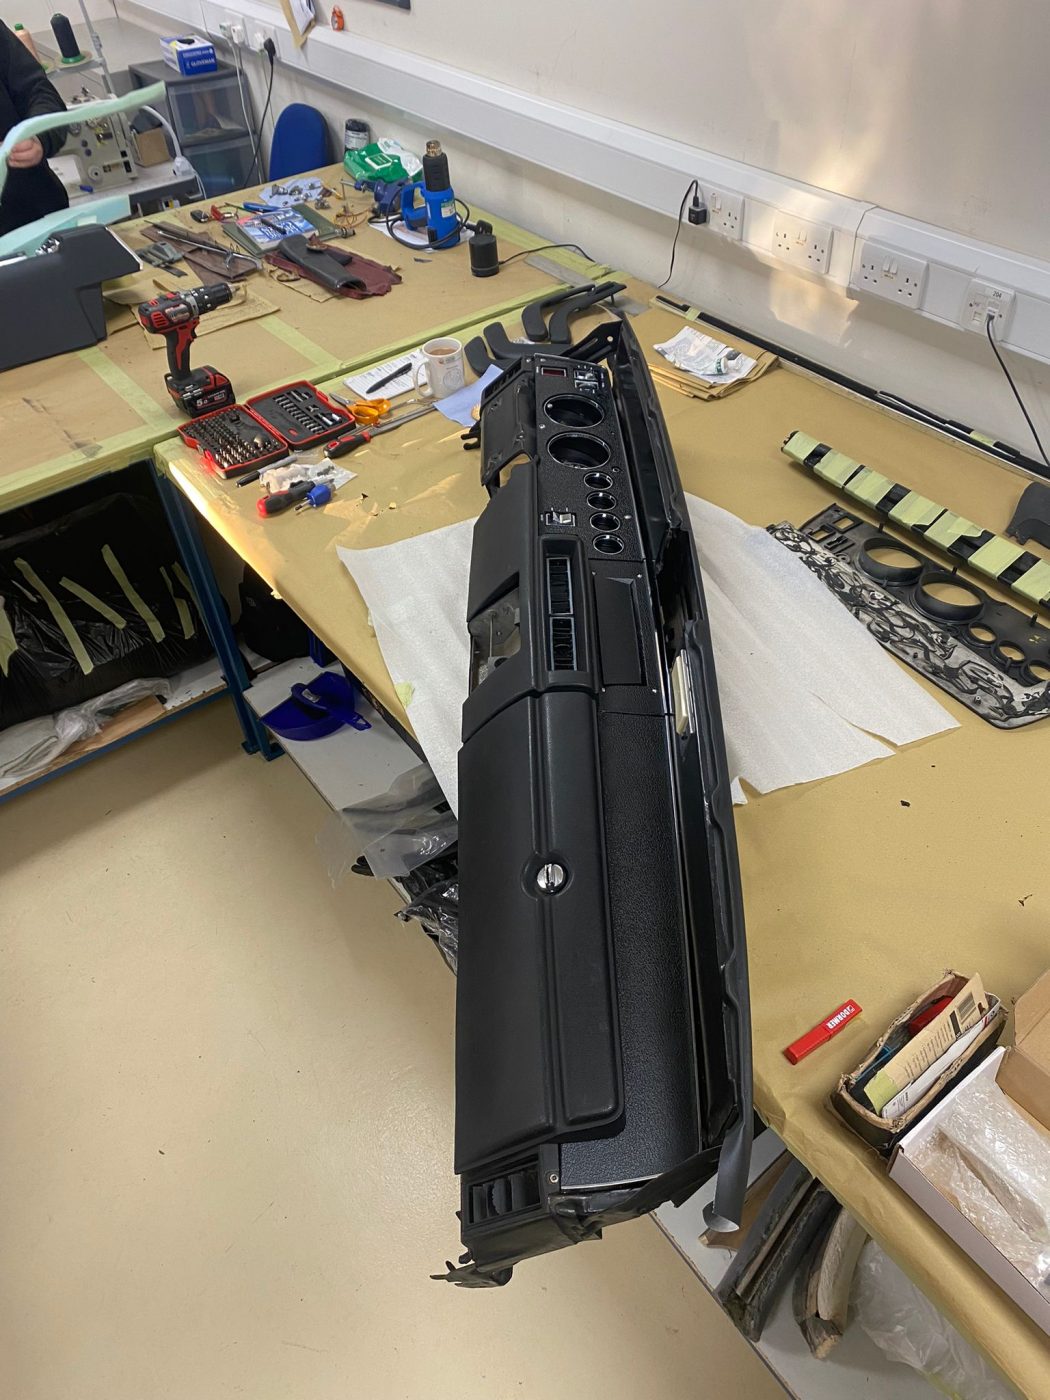
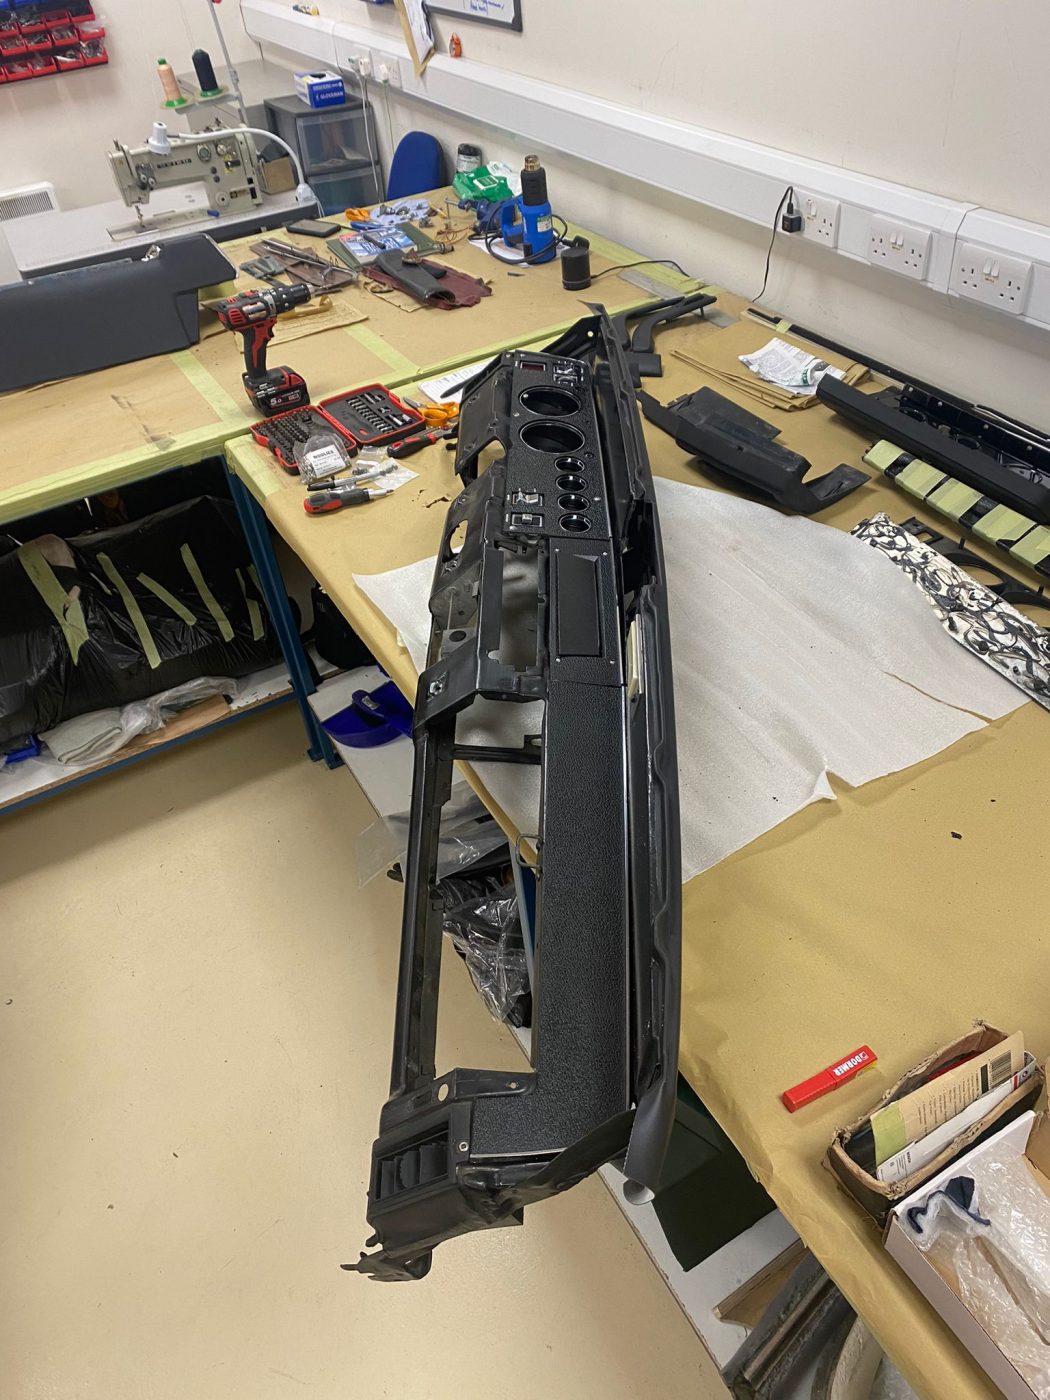
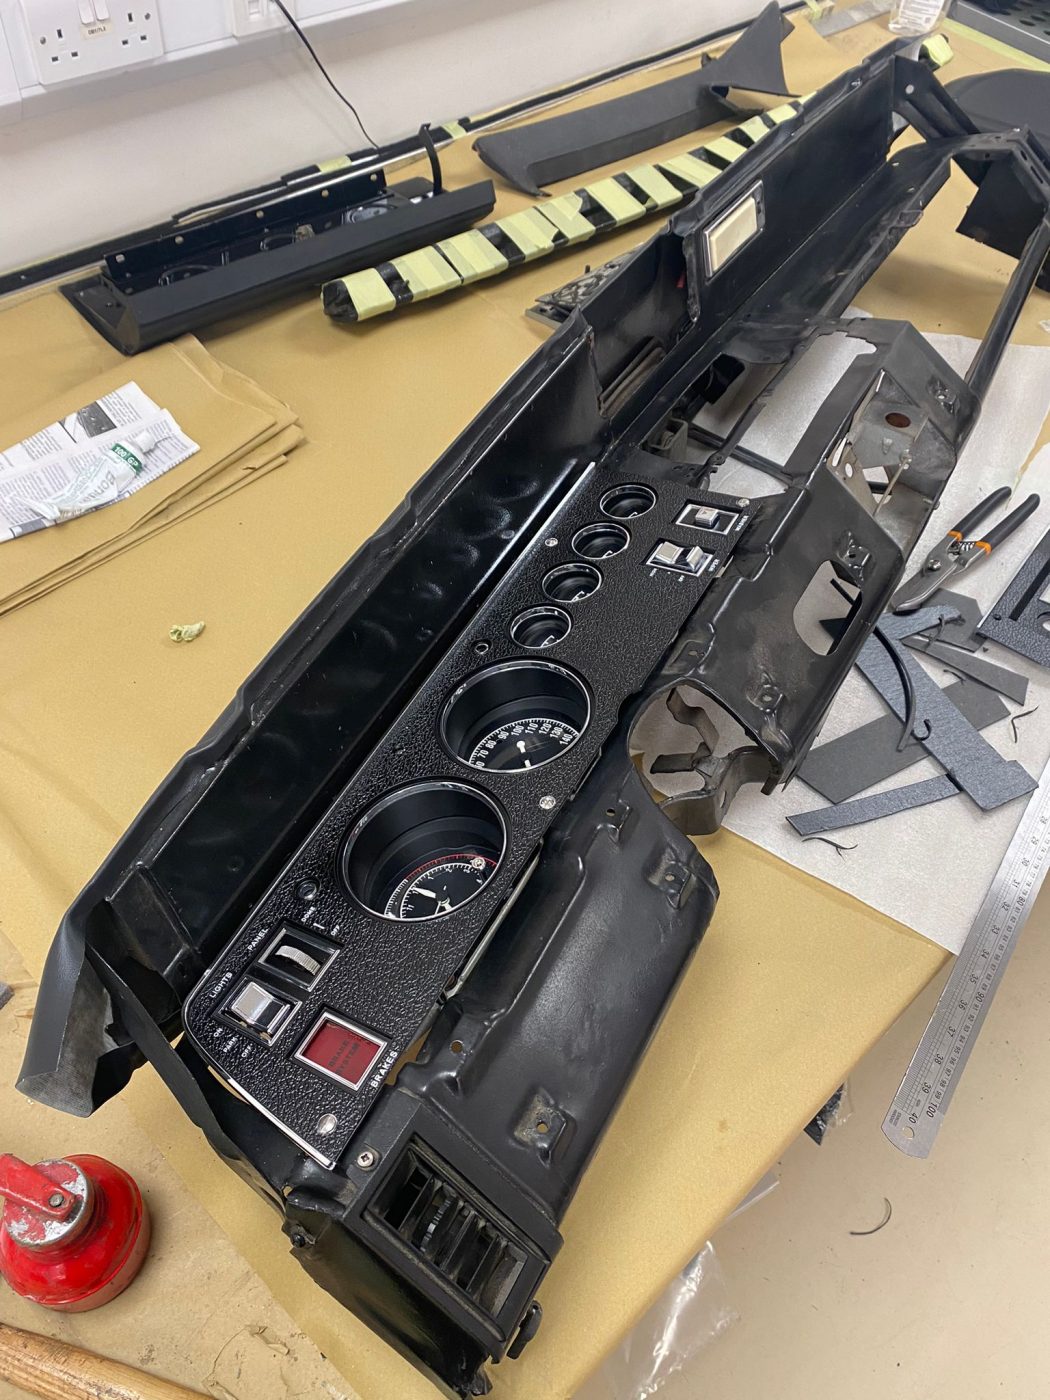
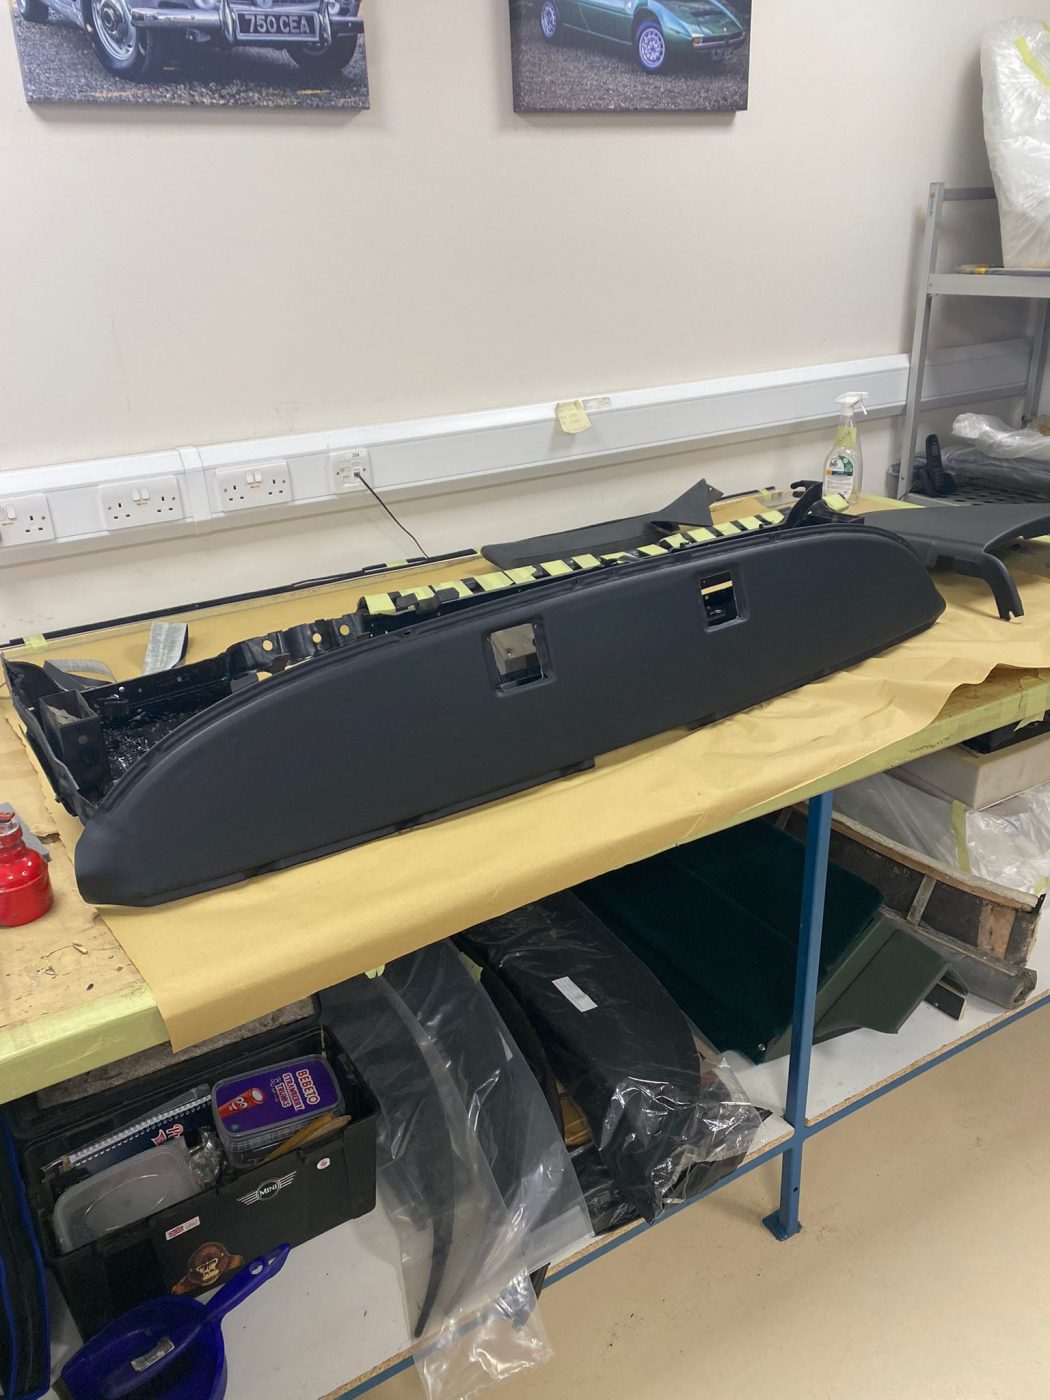
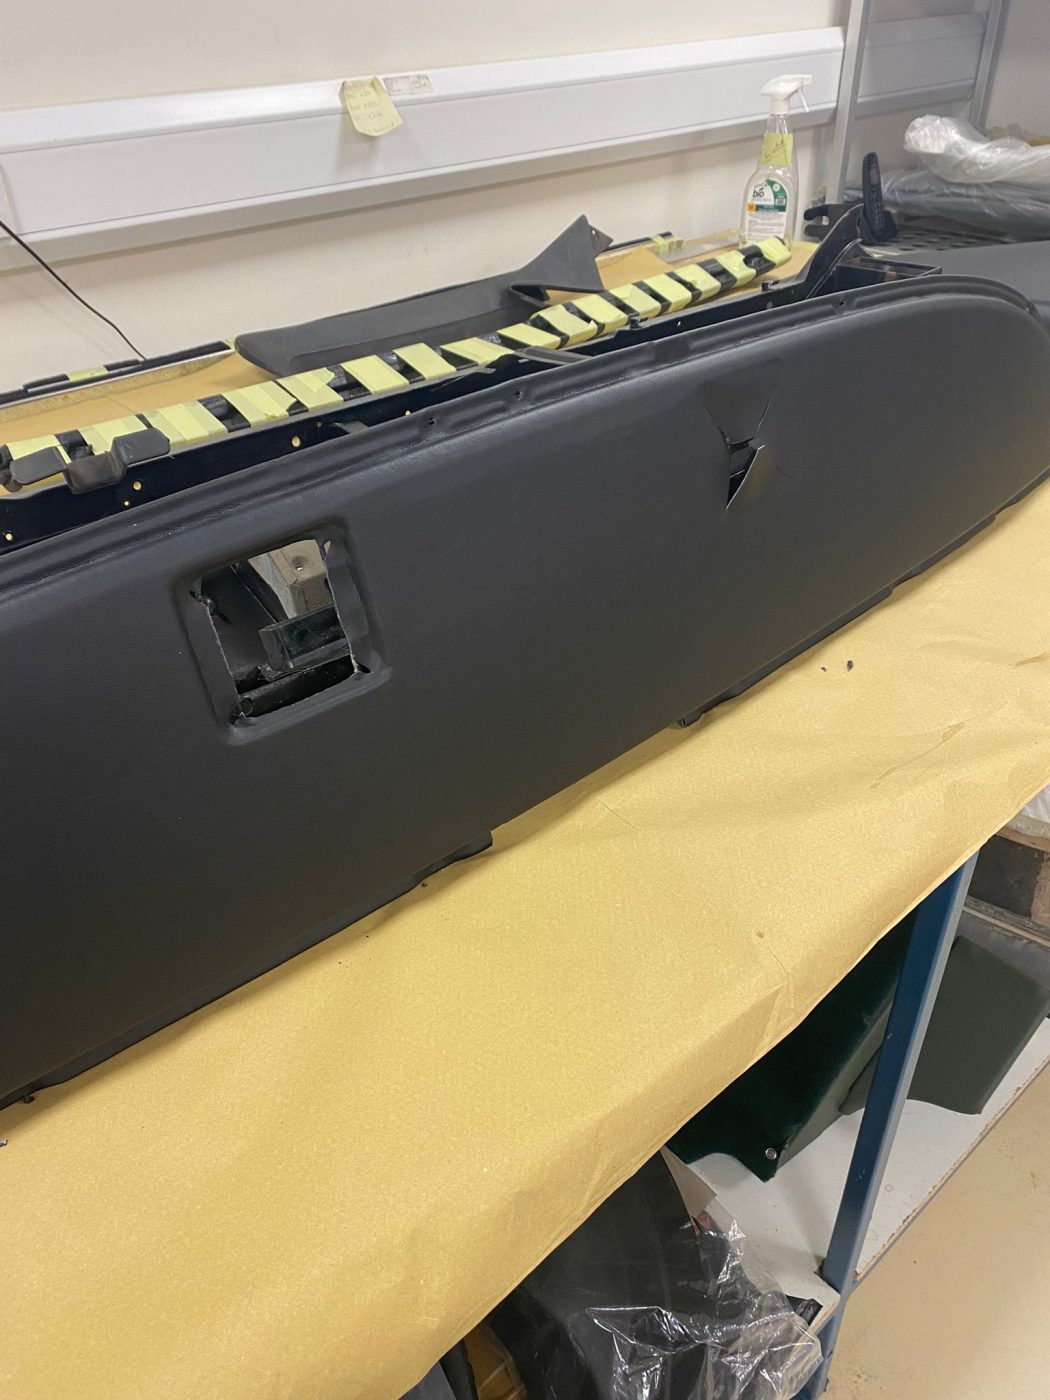
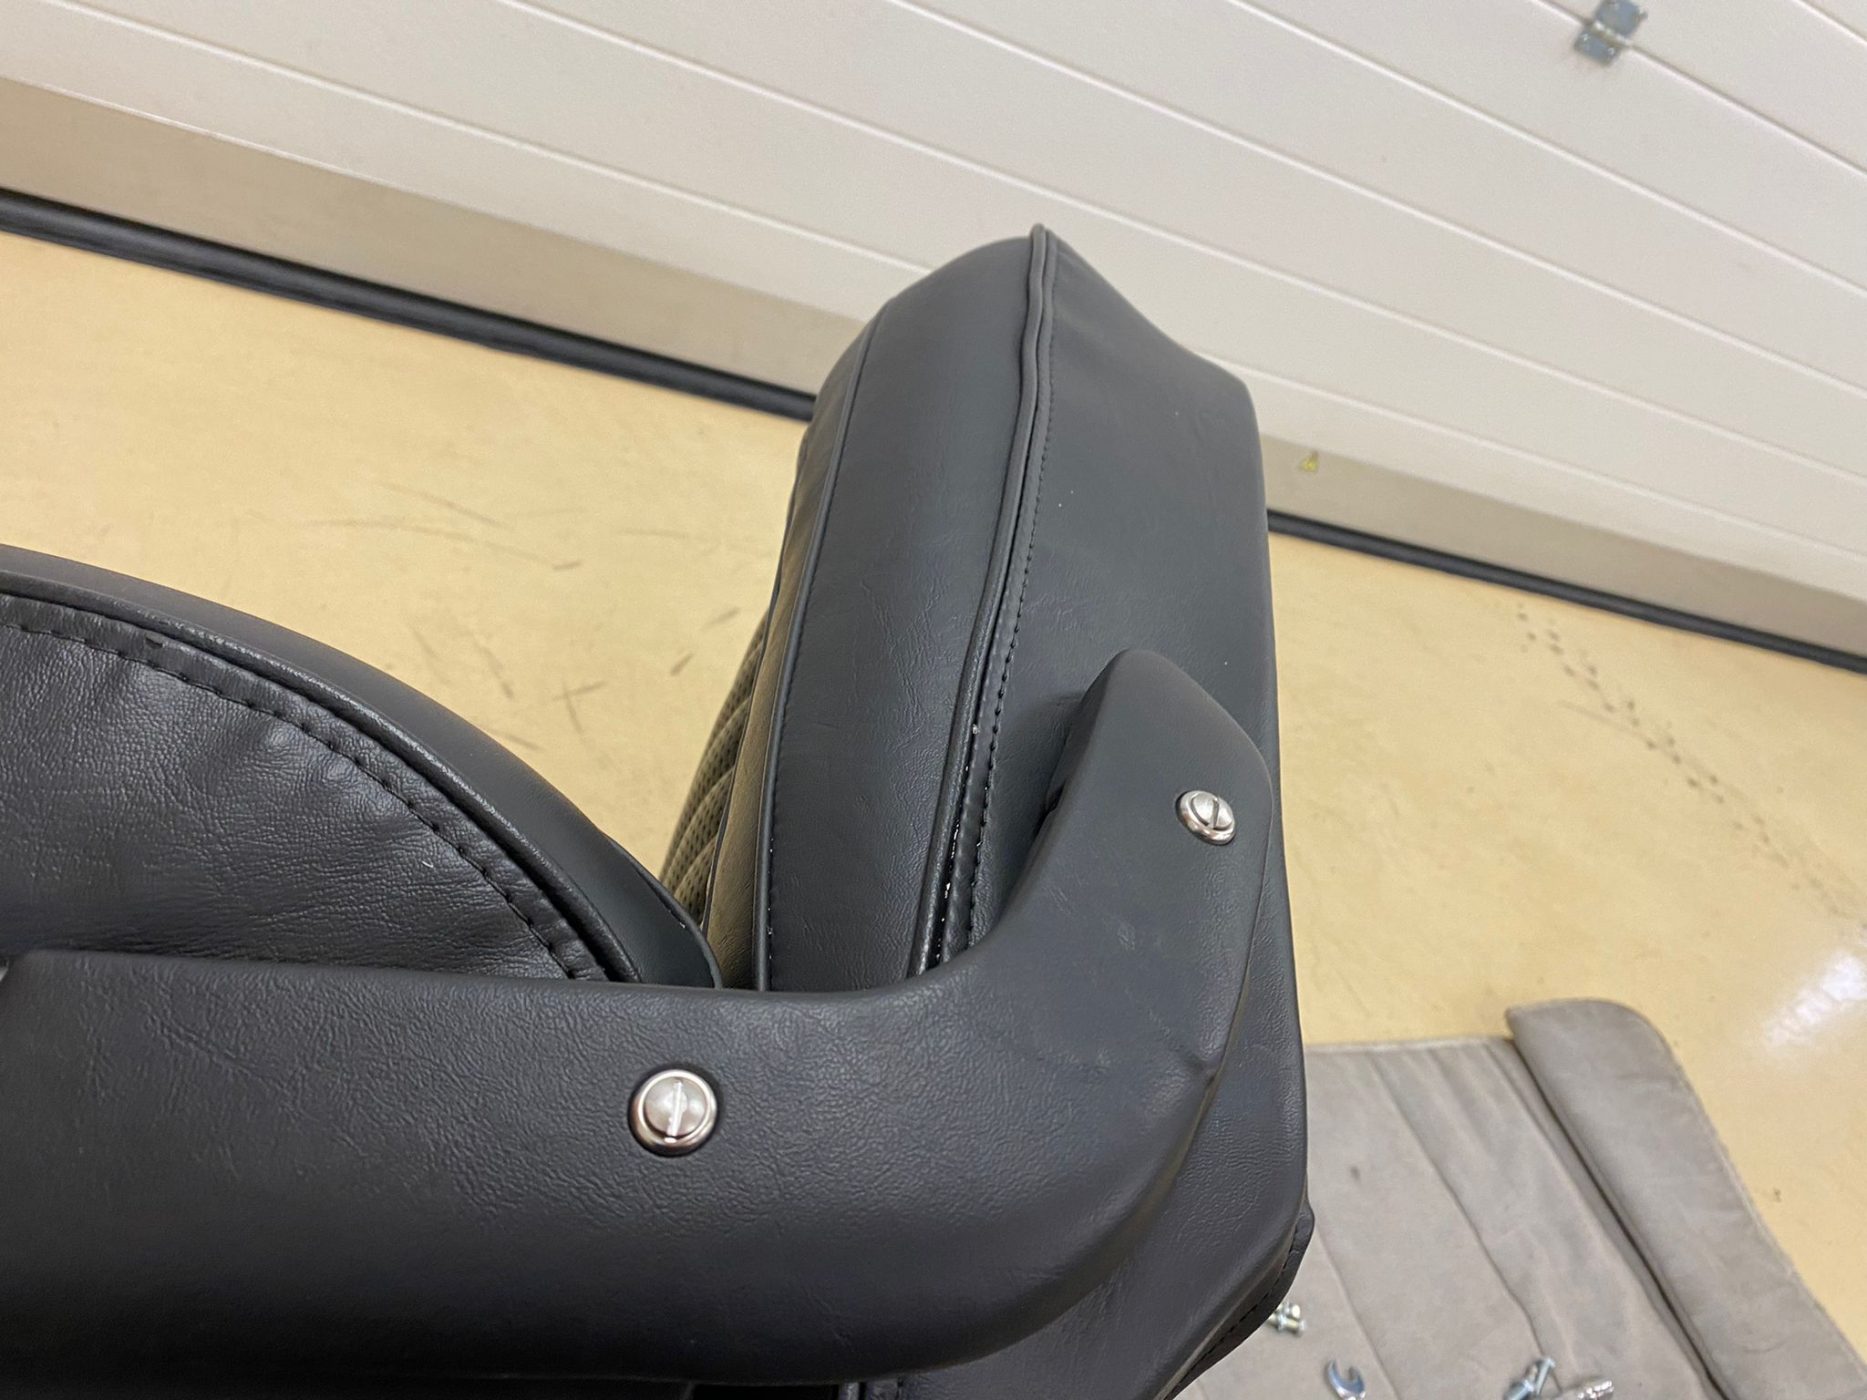
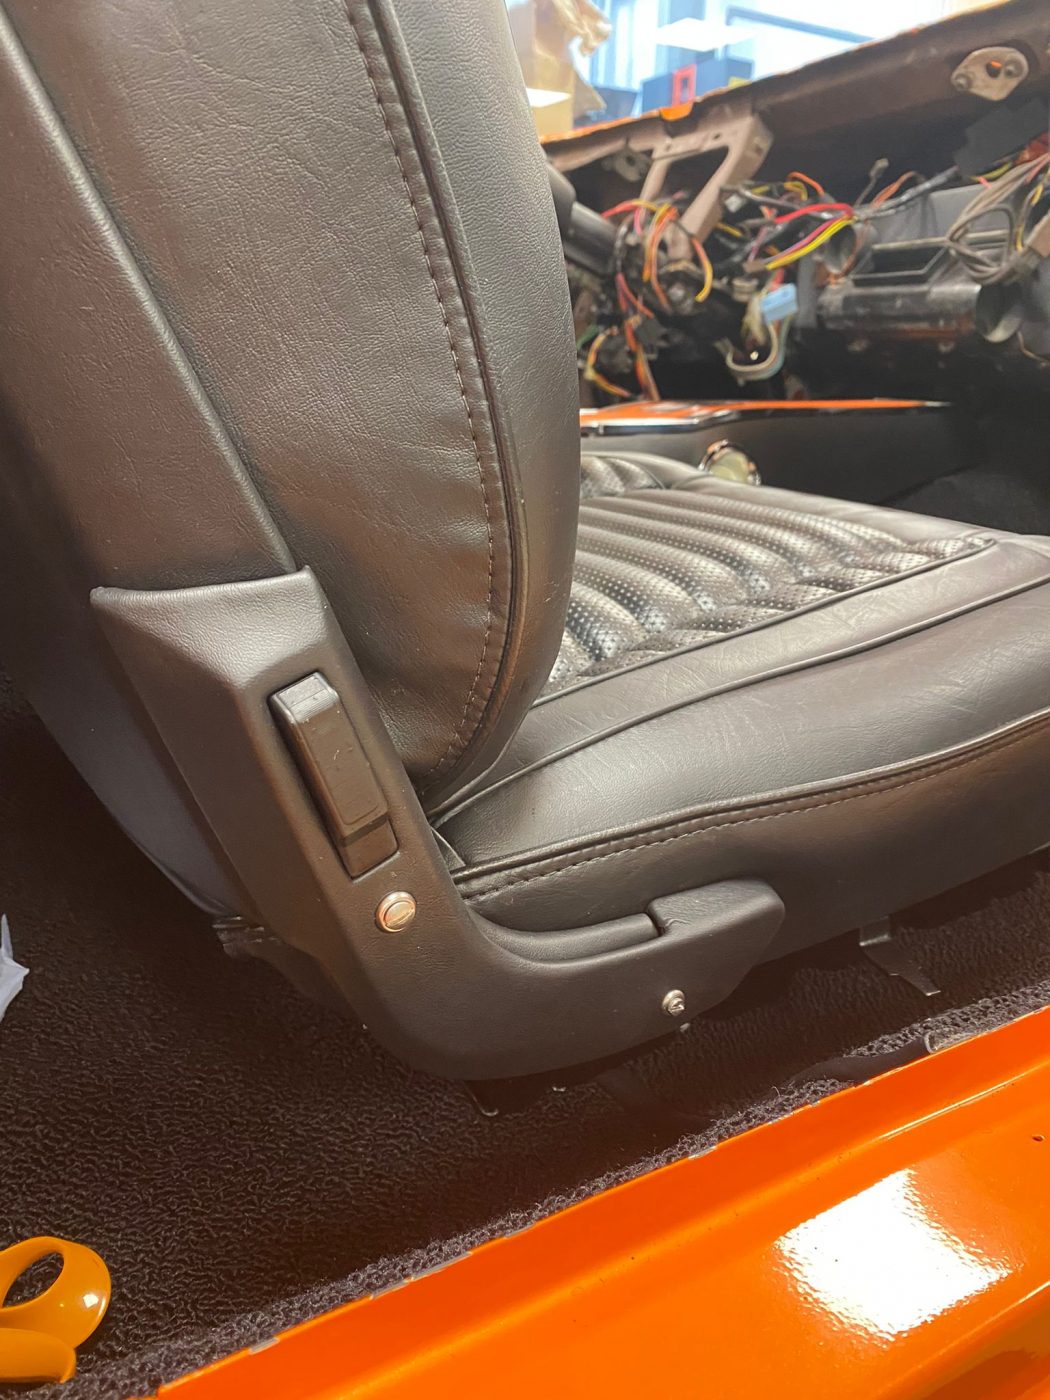
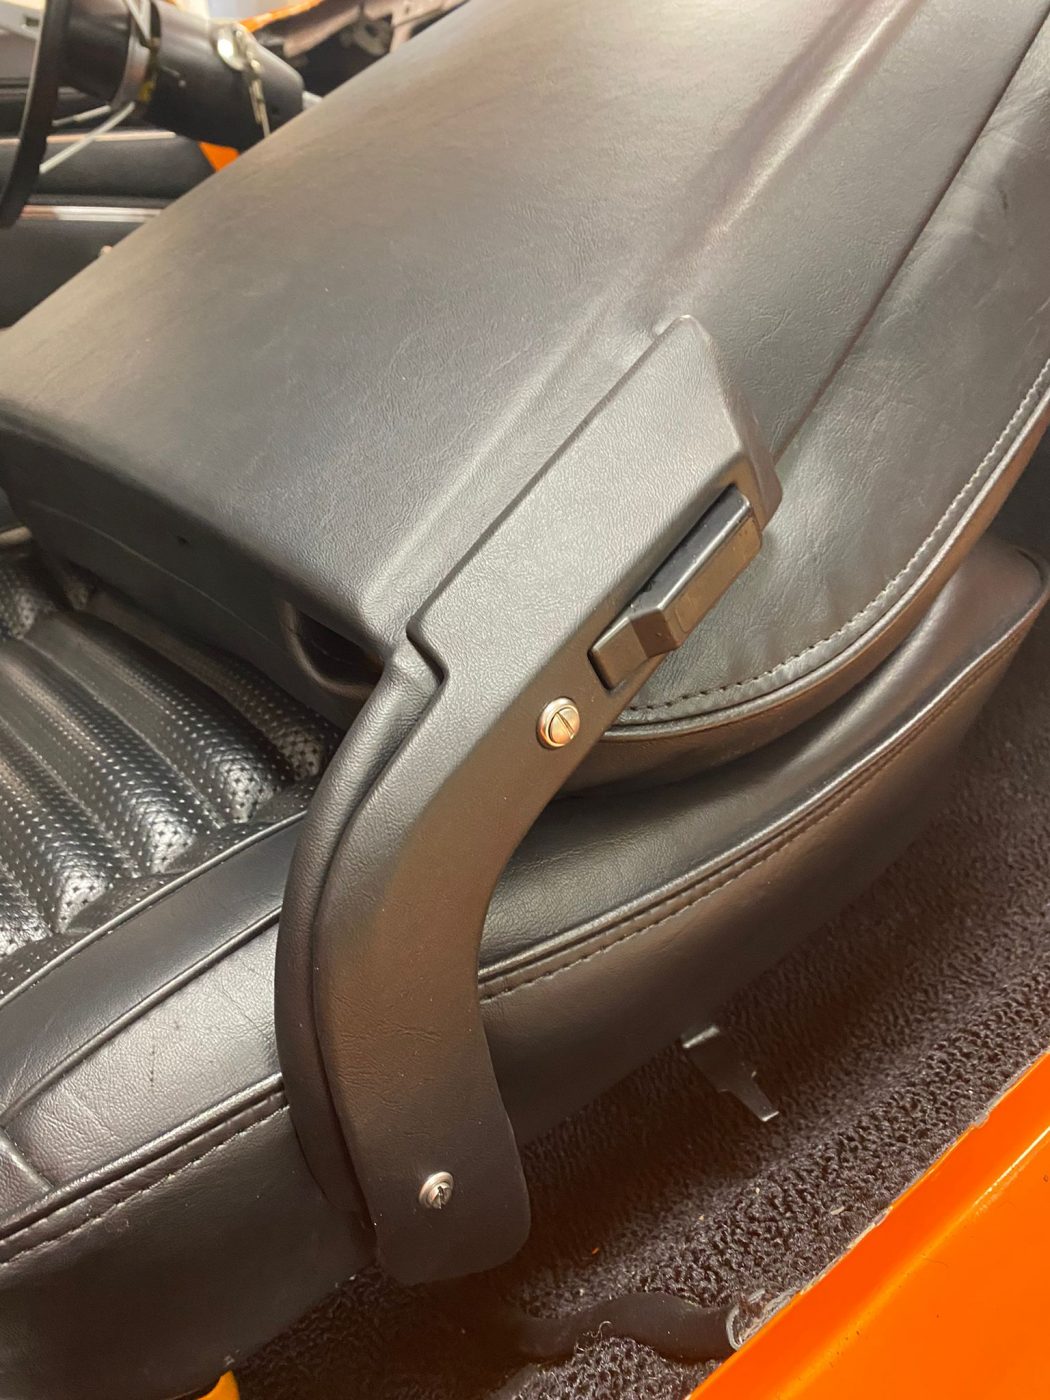
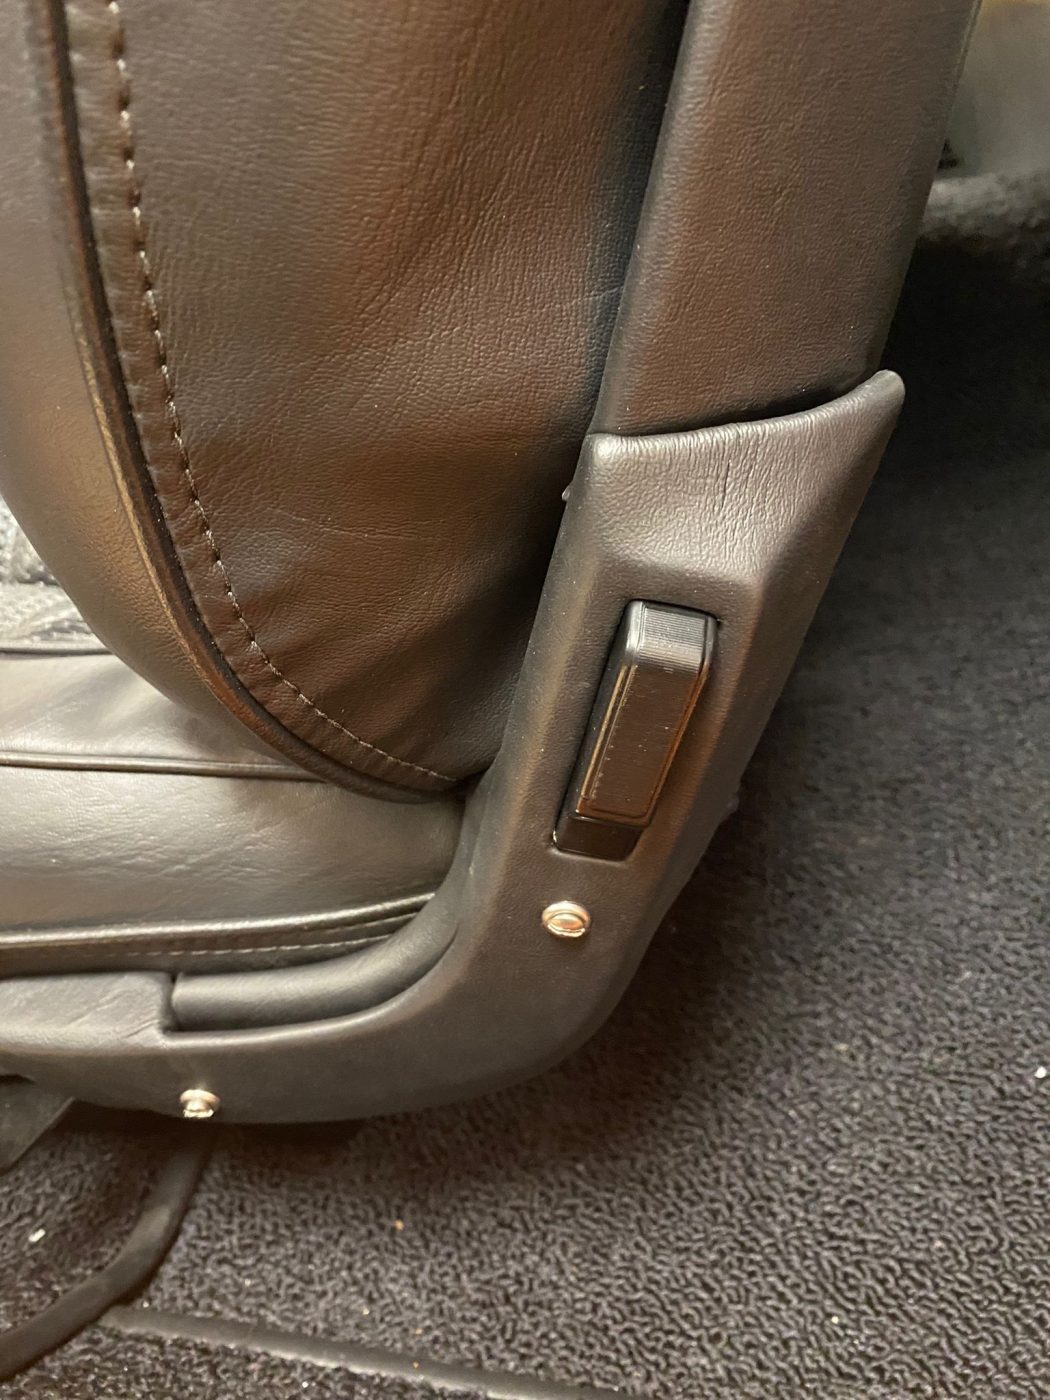
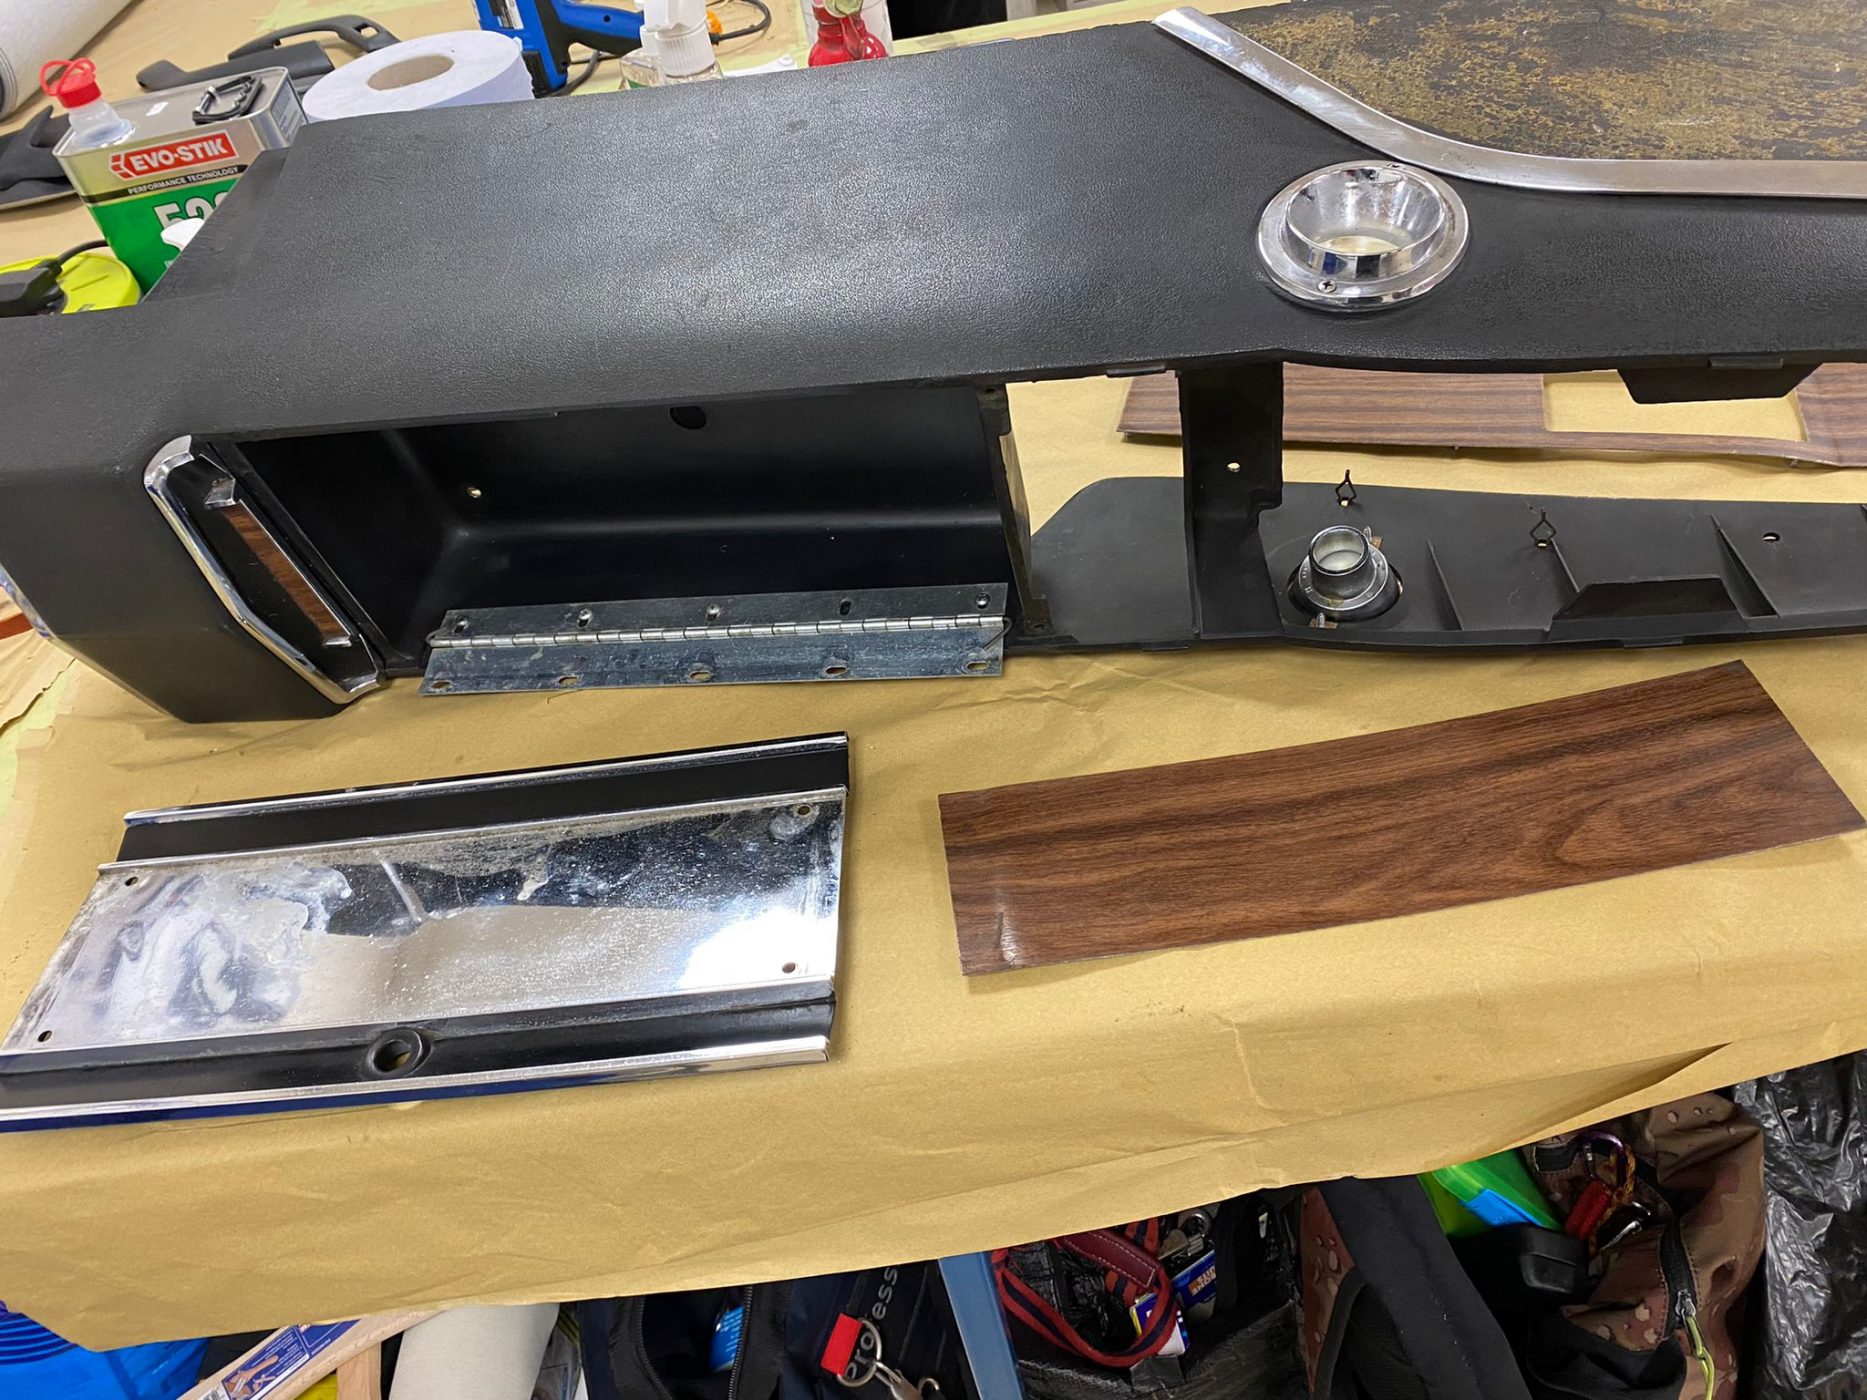
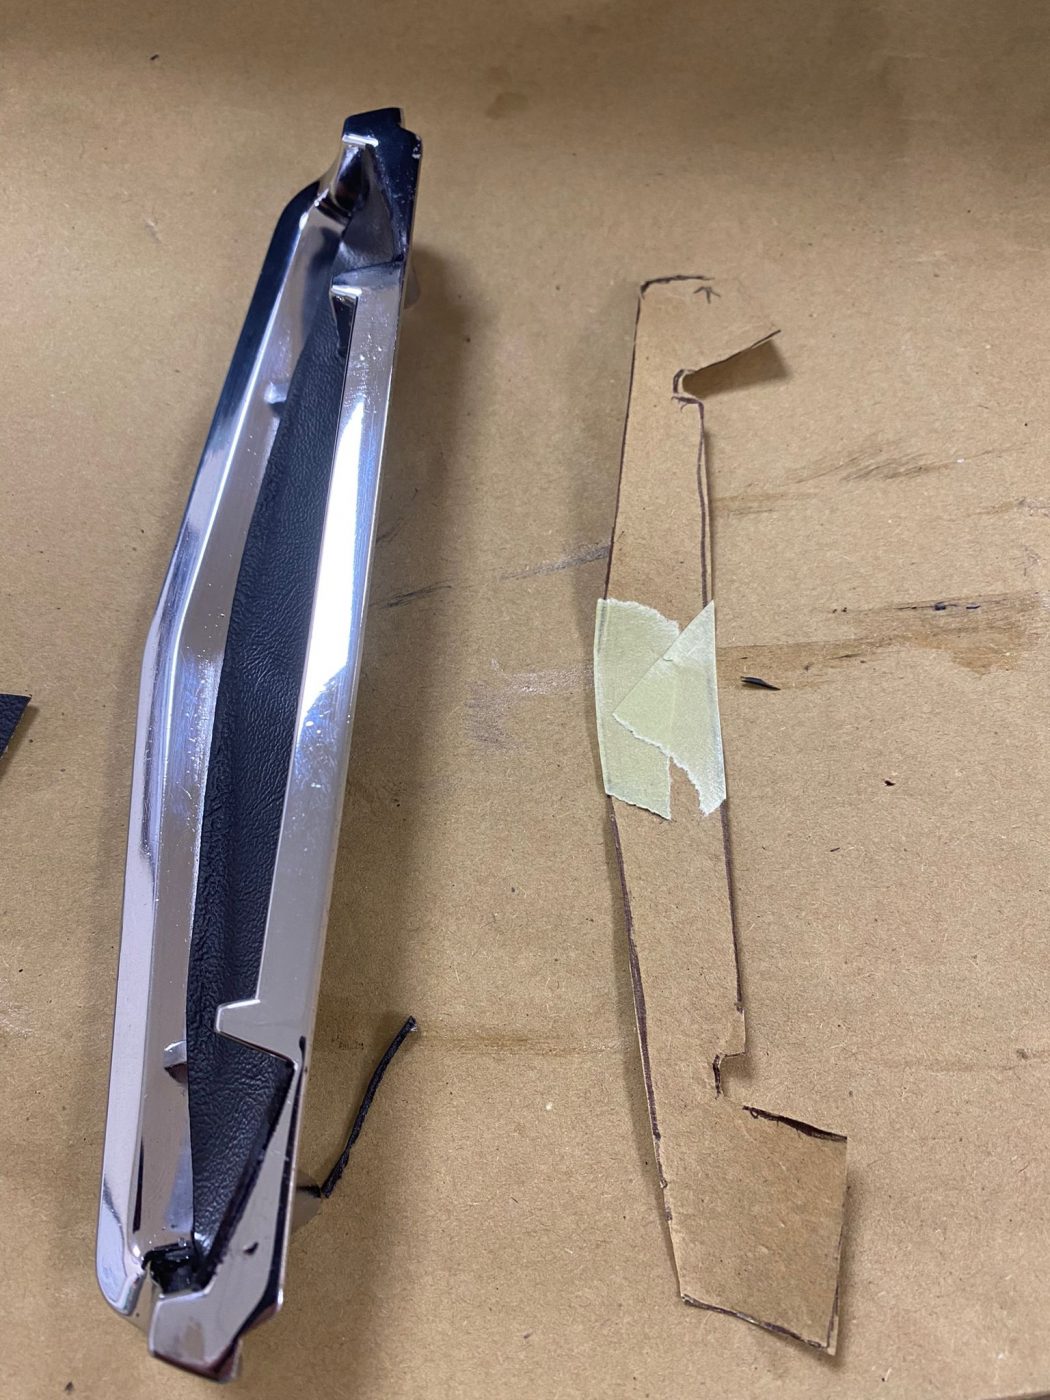
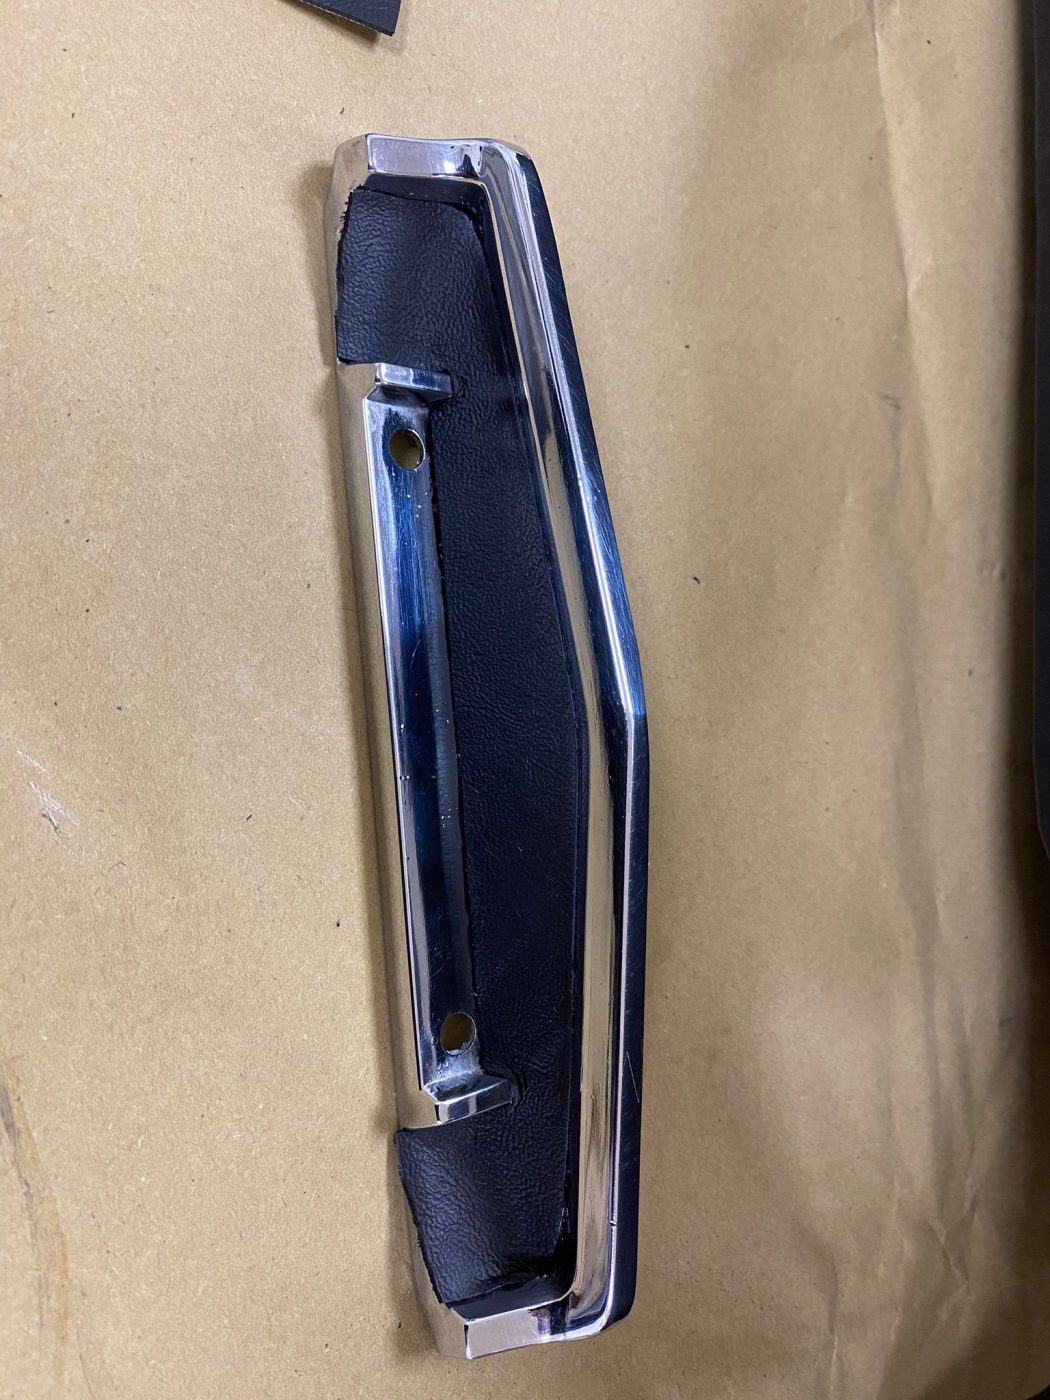
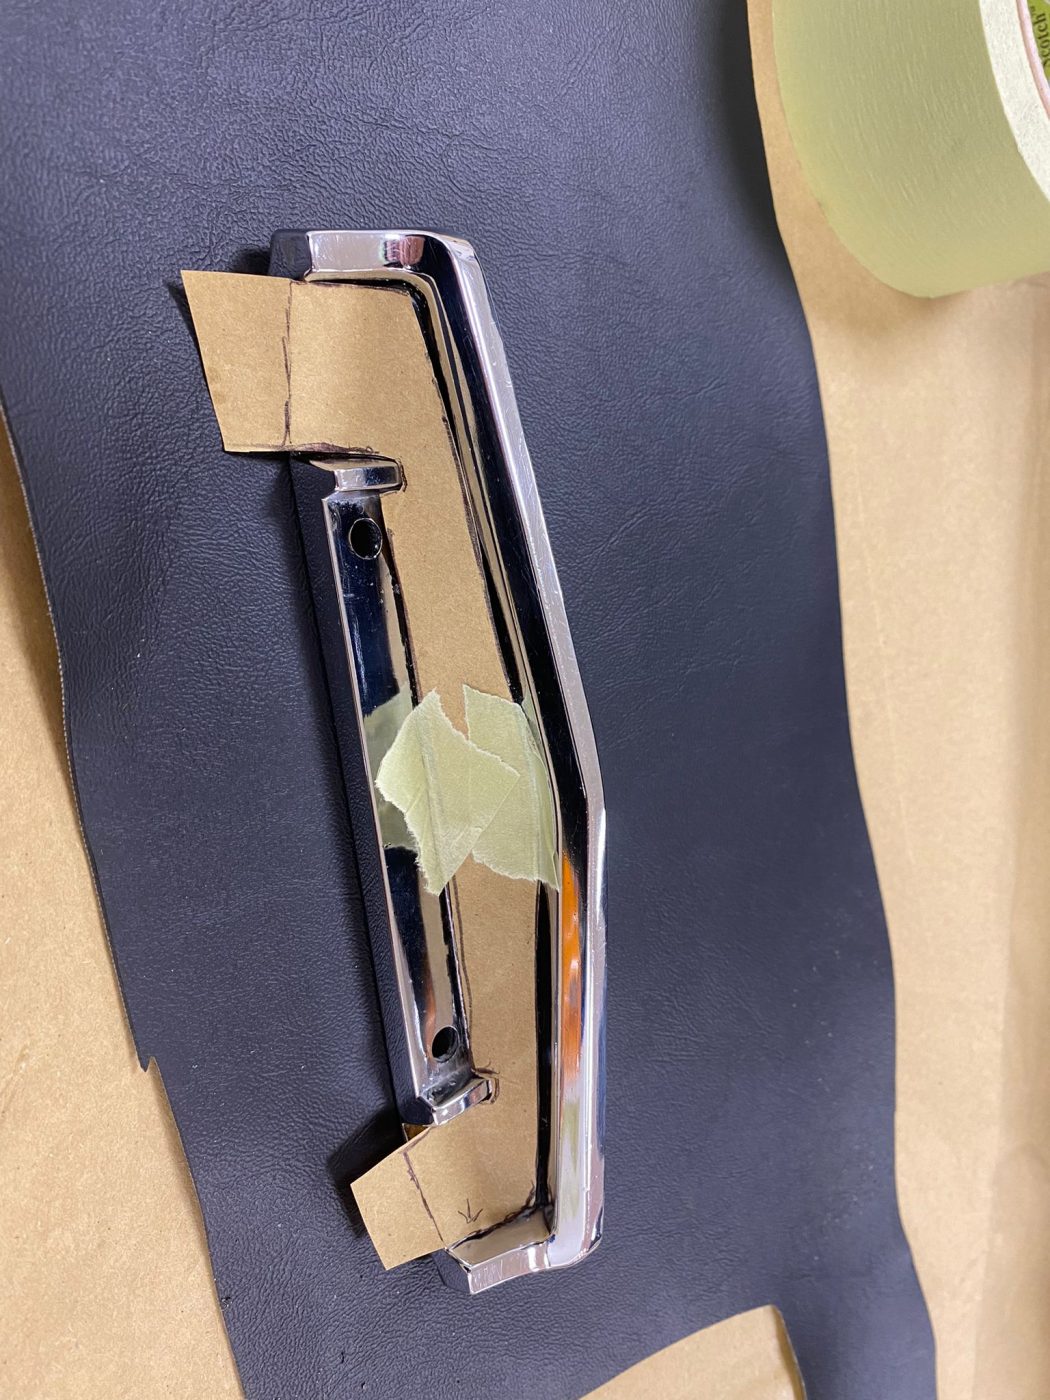
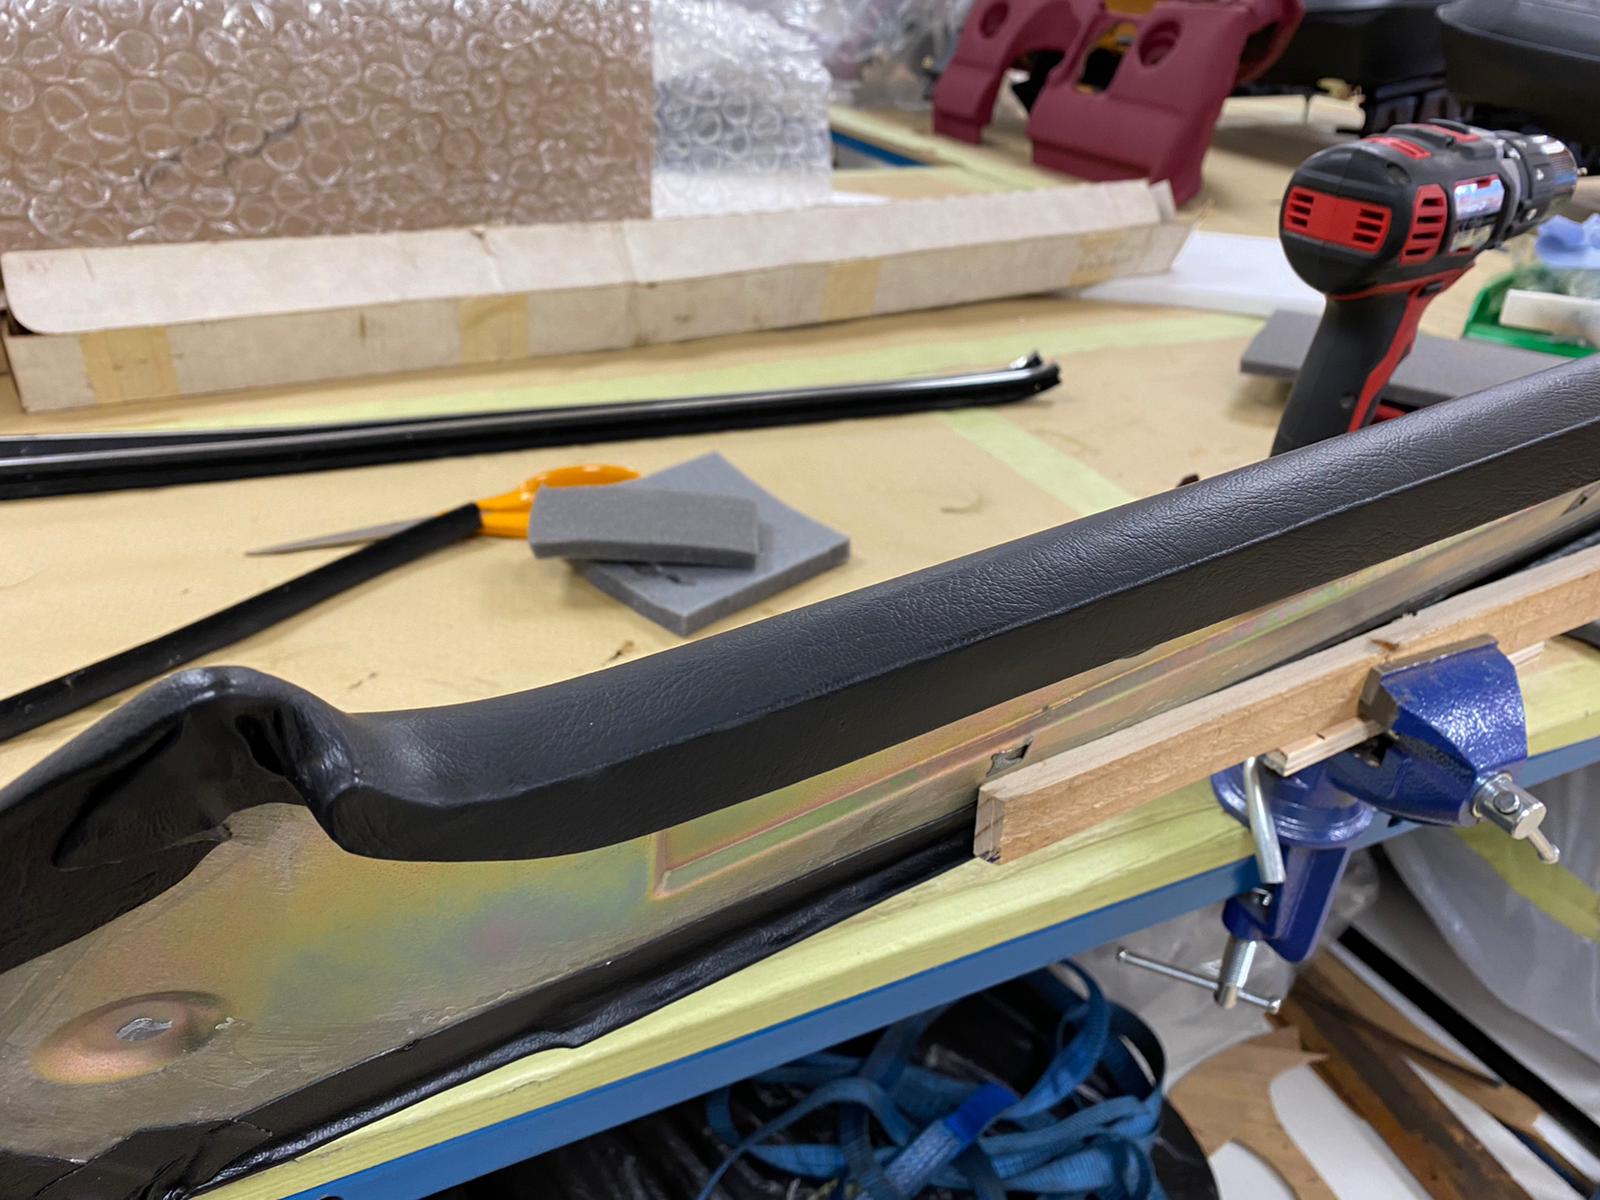
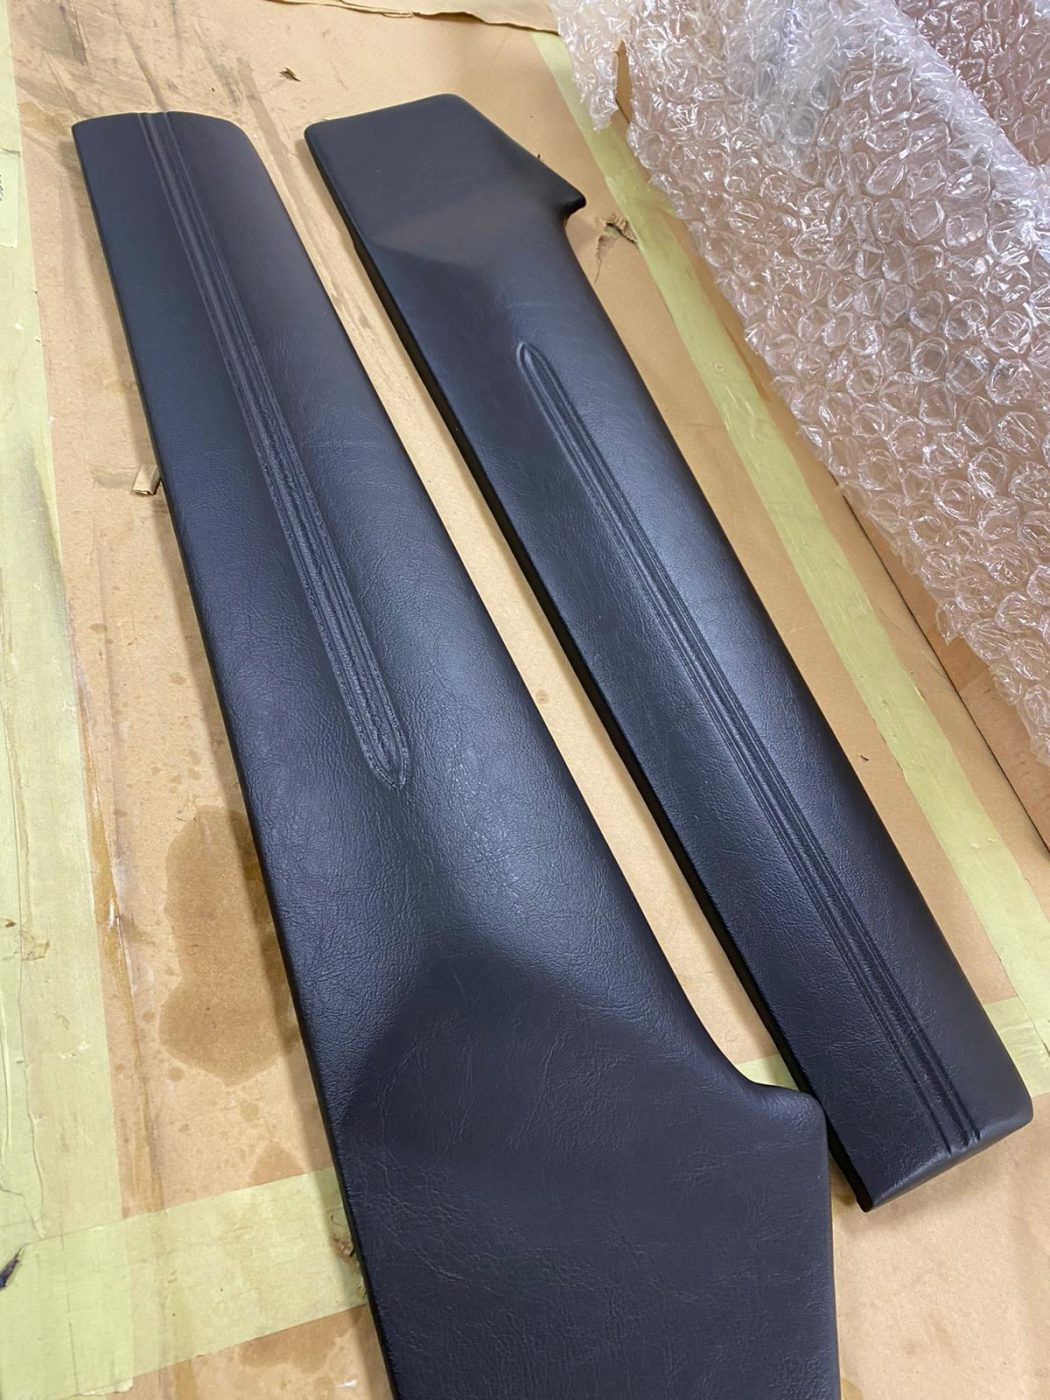
Brian, our in-house trim master, has been busy working on retrimming and refitting trim pieces for the 1970 Dodge Charger that is in at Bridge Classic Cars.
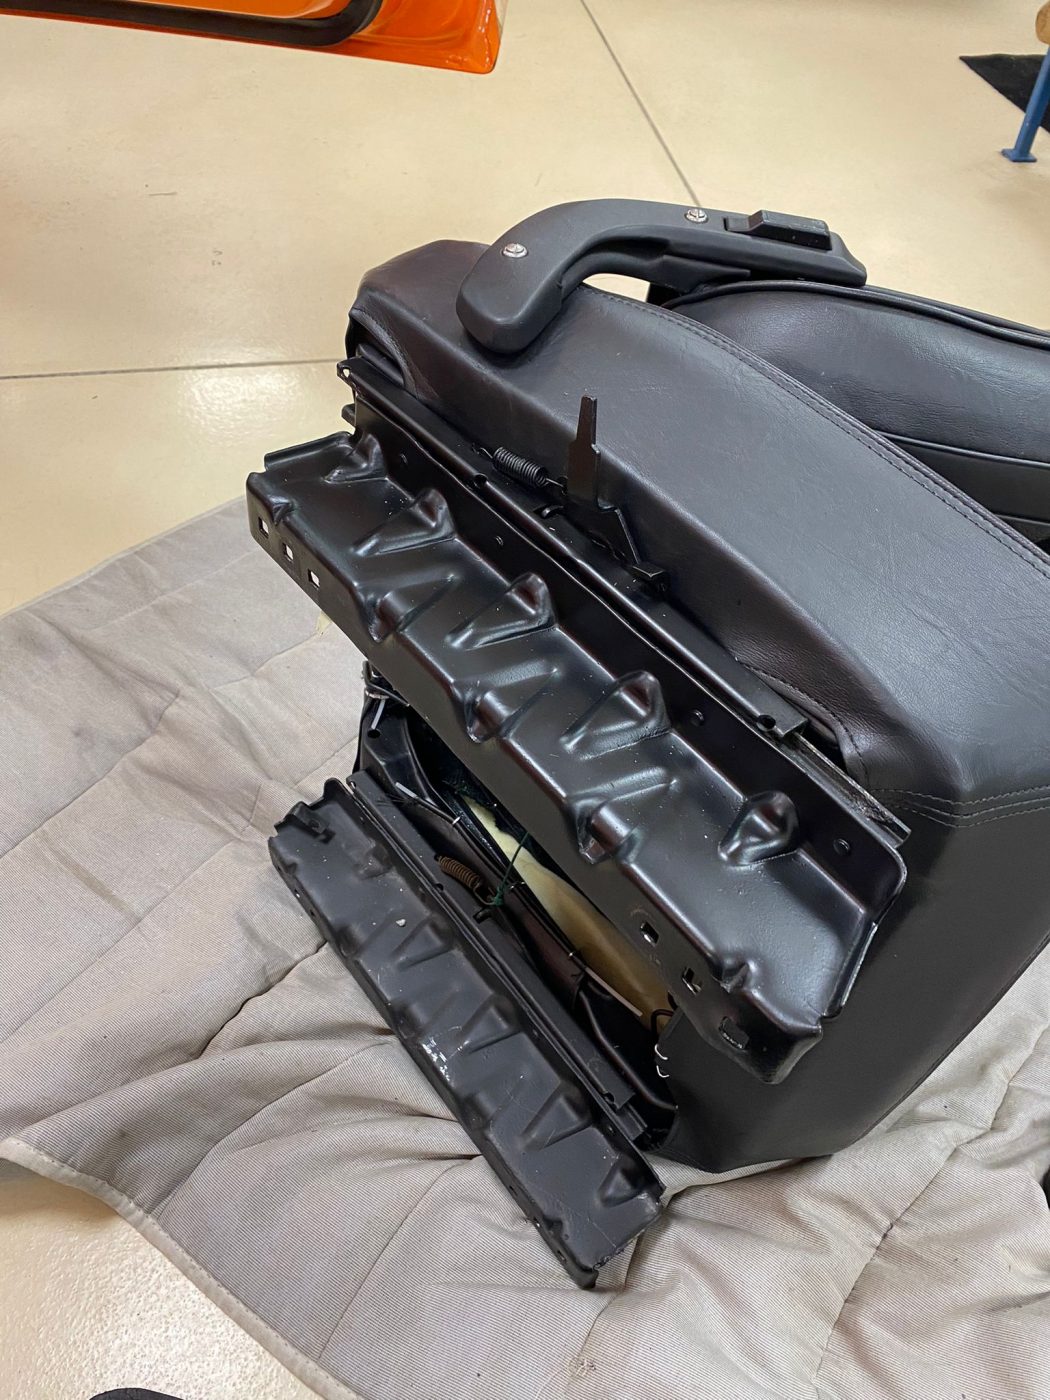
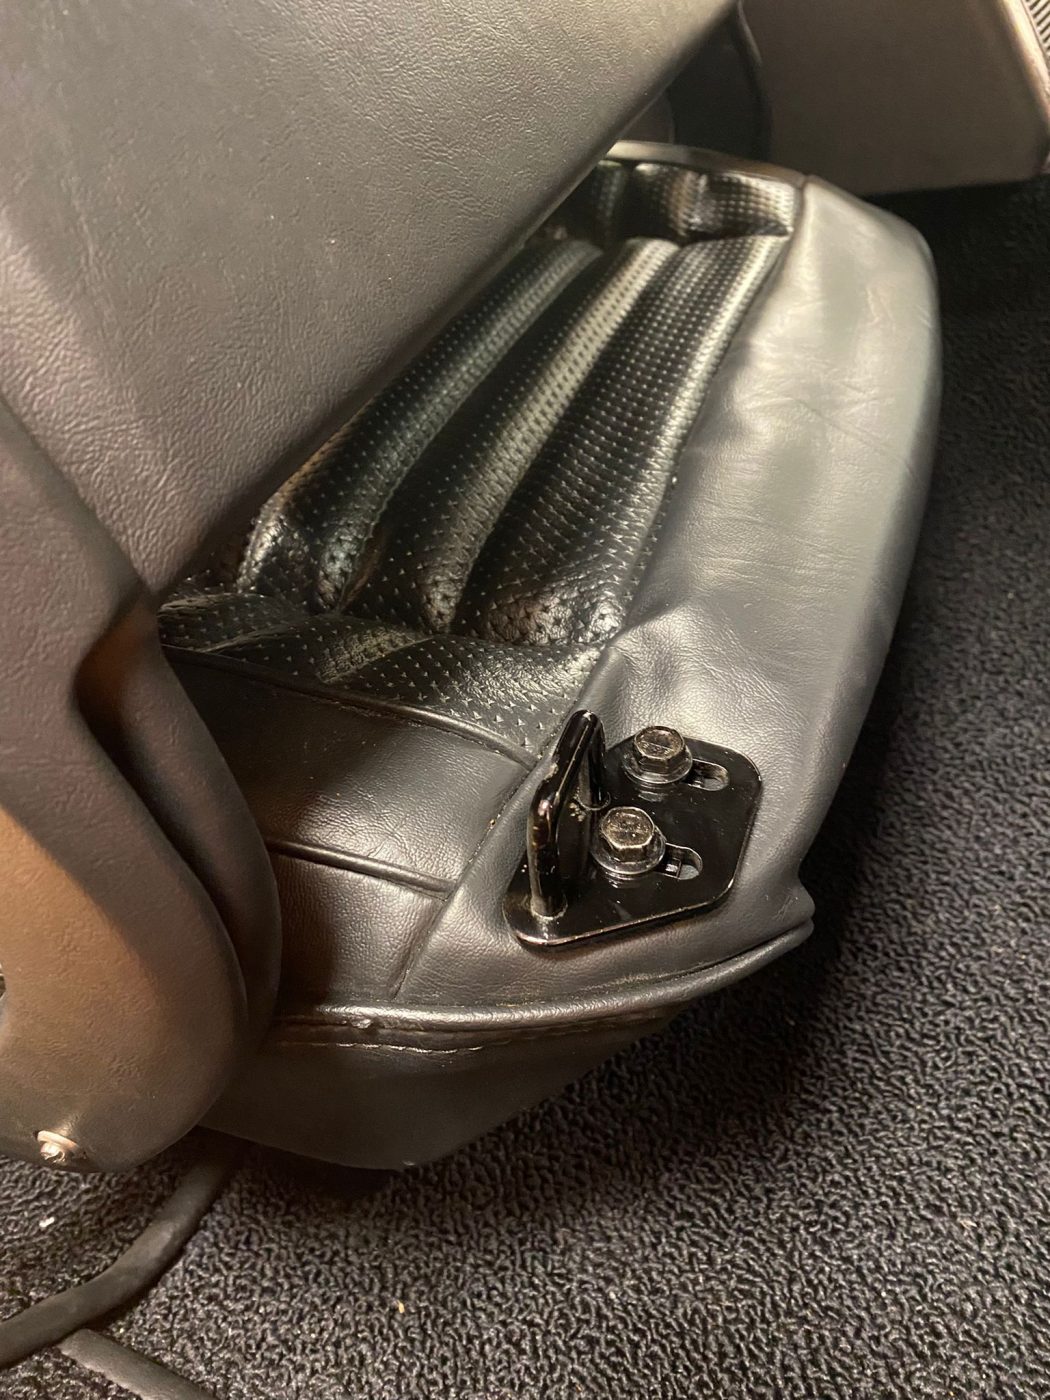
To start with, Brian began working on retrimming the seatbacks for the plush, thick black leather bucket seats. Brian created the coverings by hand trying to get the closest he possibly could to the same thickness and quality leather used on the fronts to create one uniform piece.
Along with that, Brian also worked on recovering the seat adjusters in matching black leather for the final finishing touch of the seats.
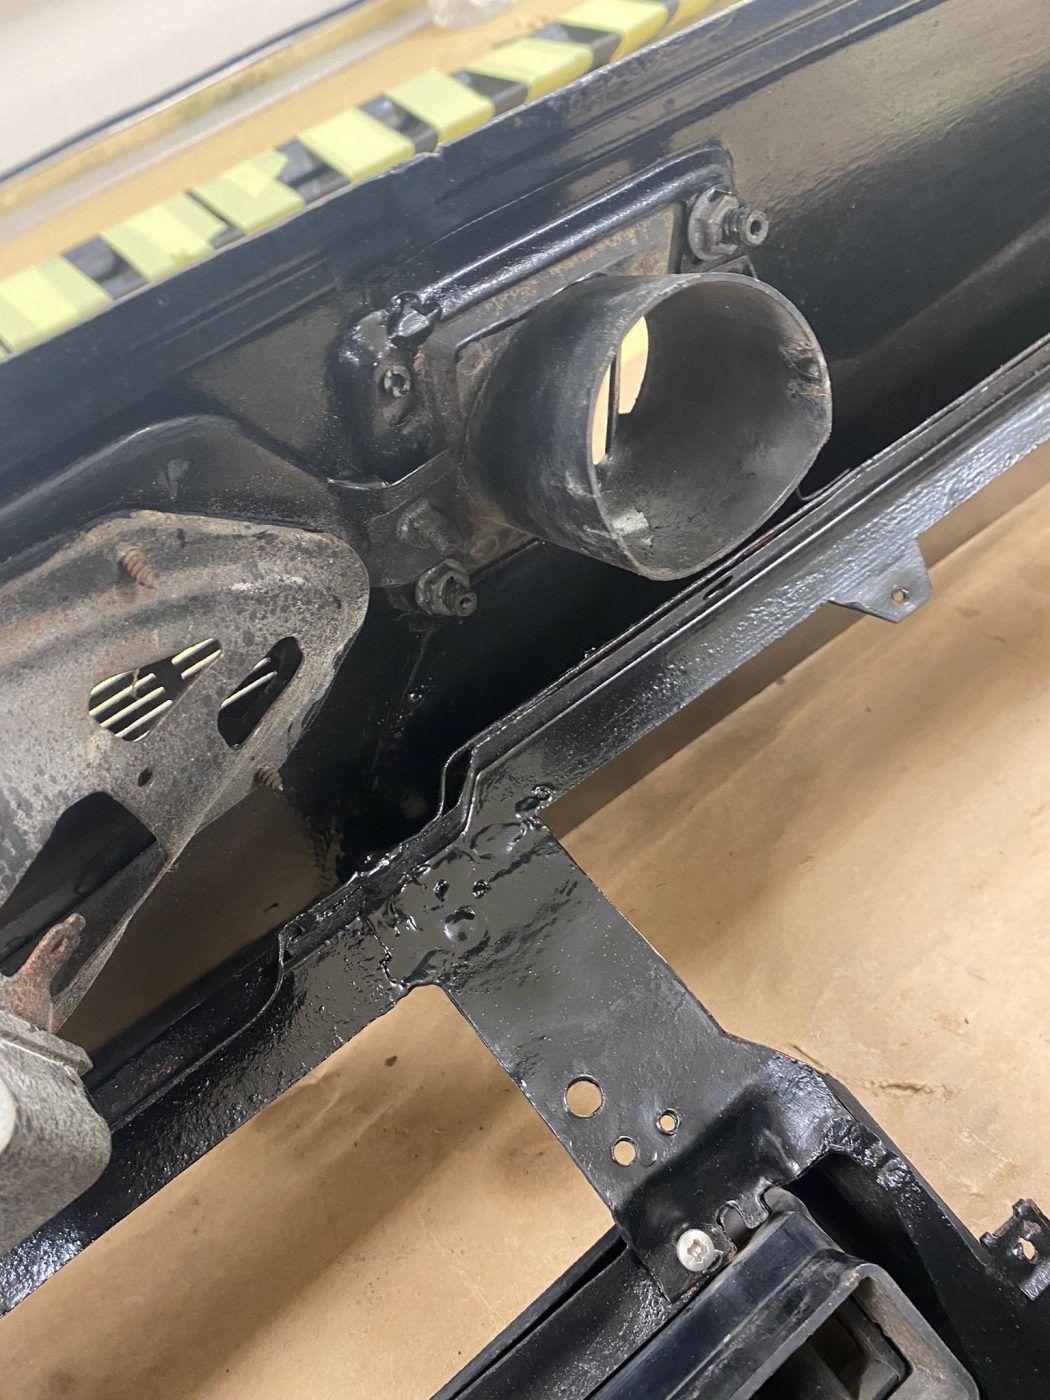
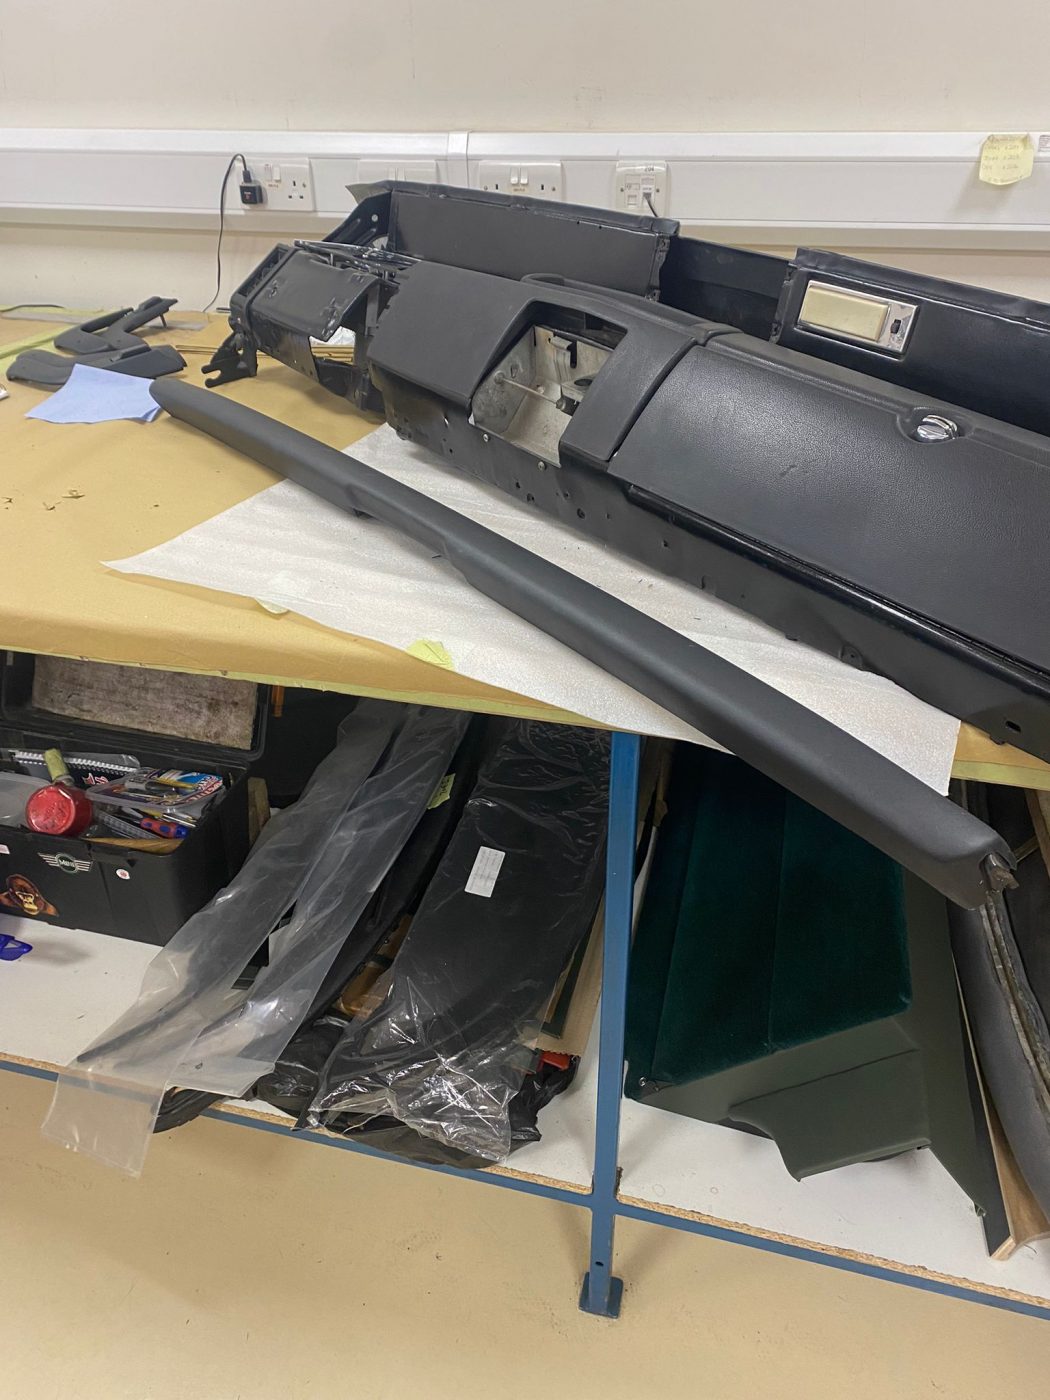
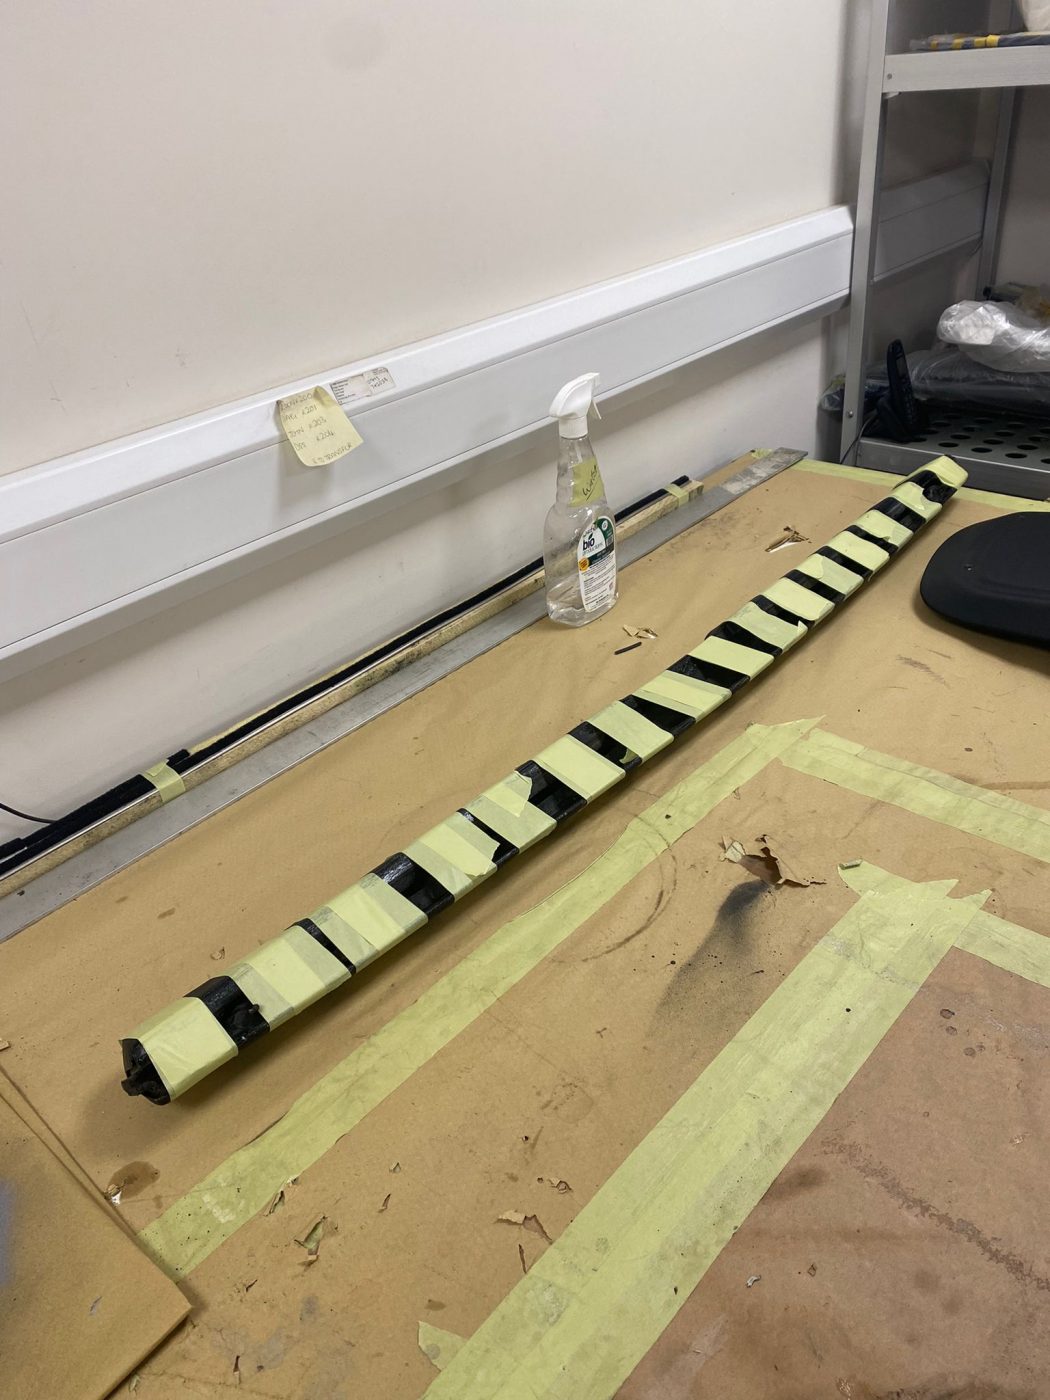
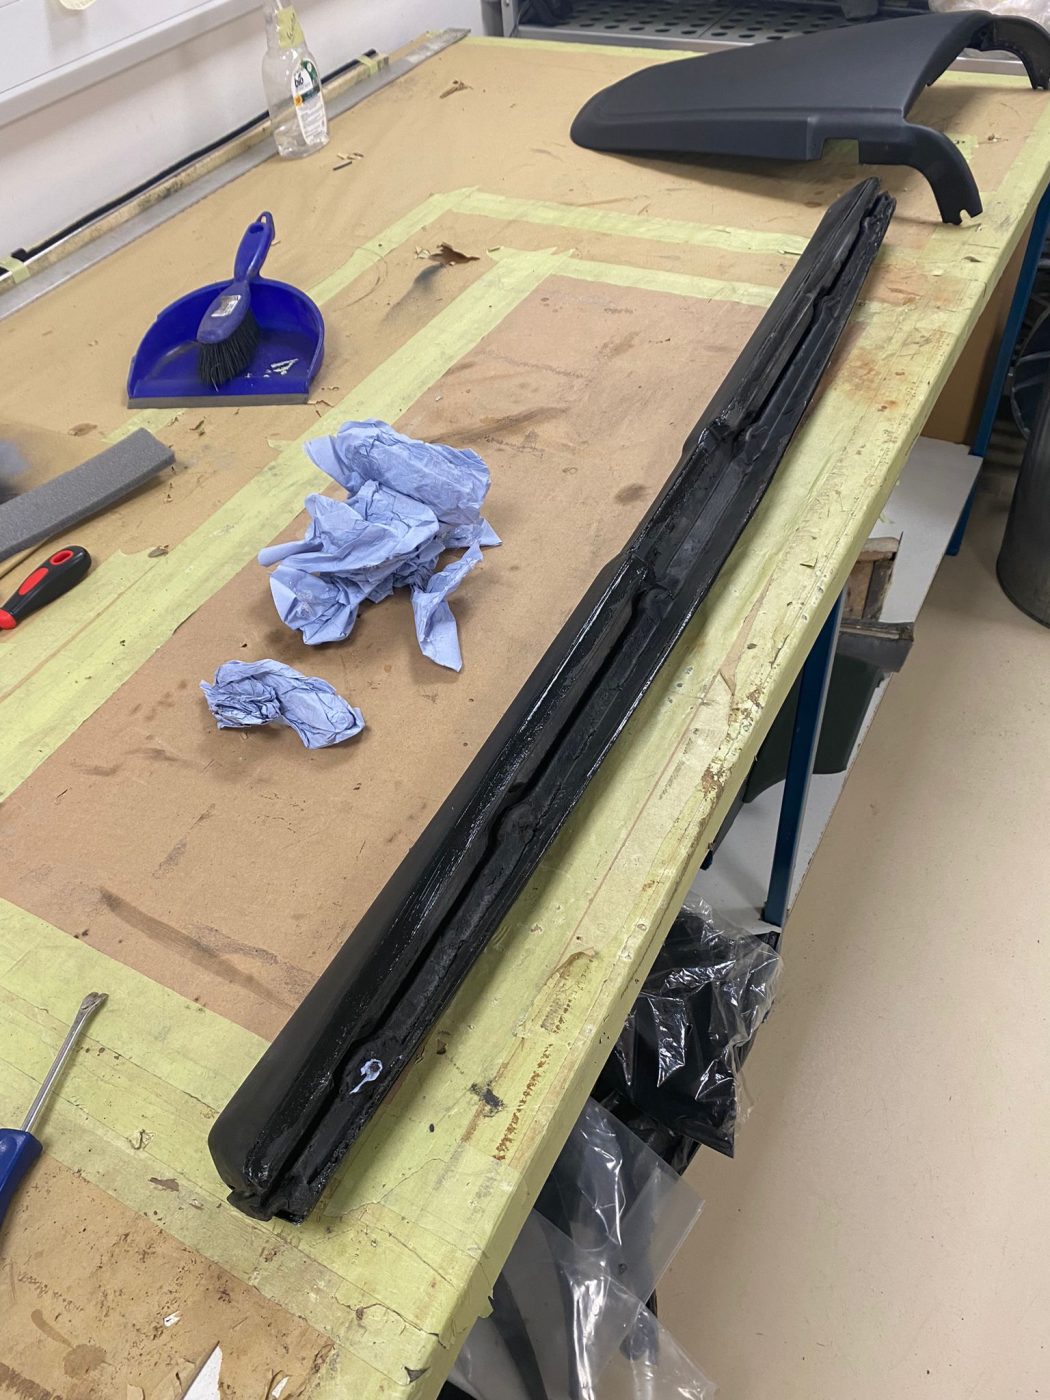
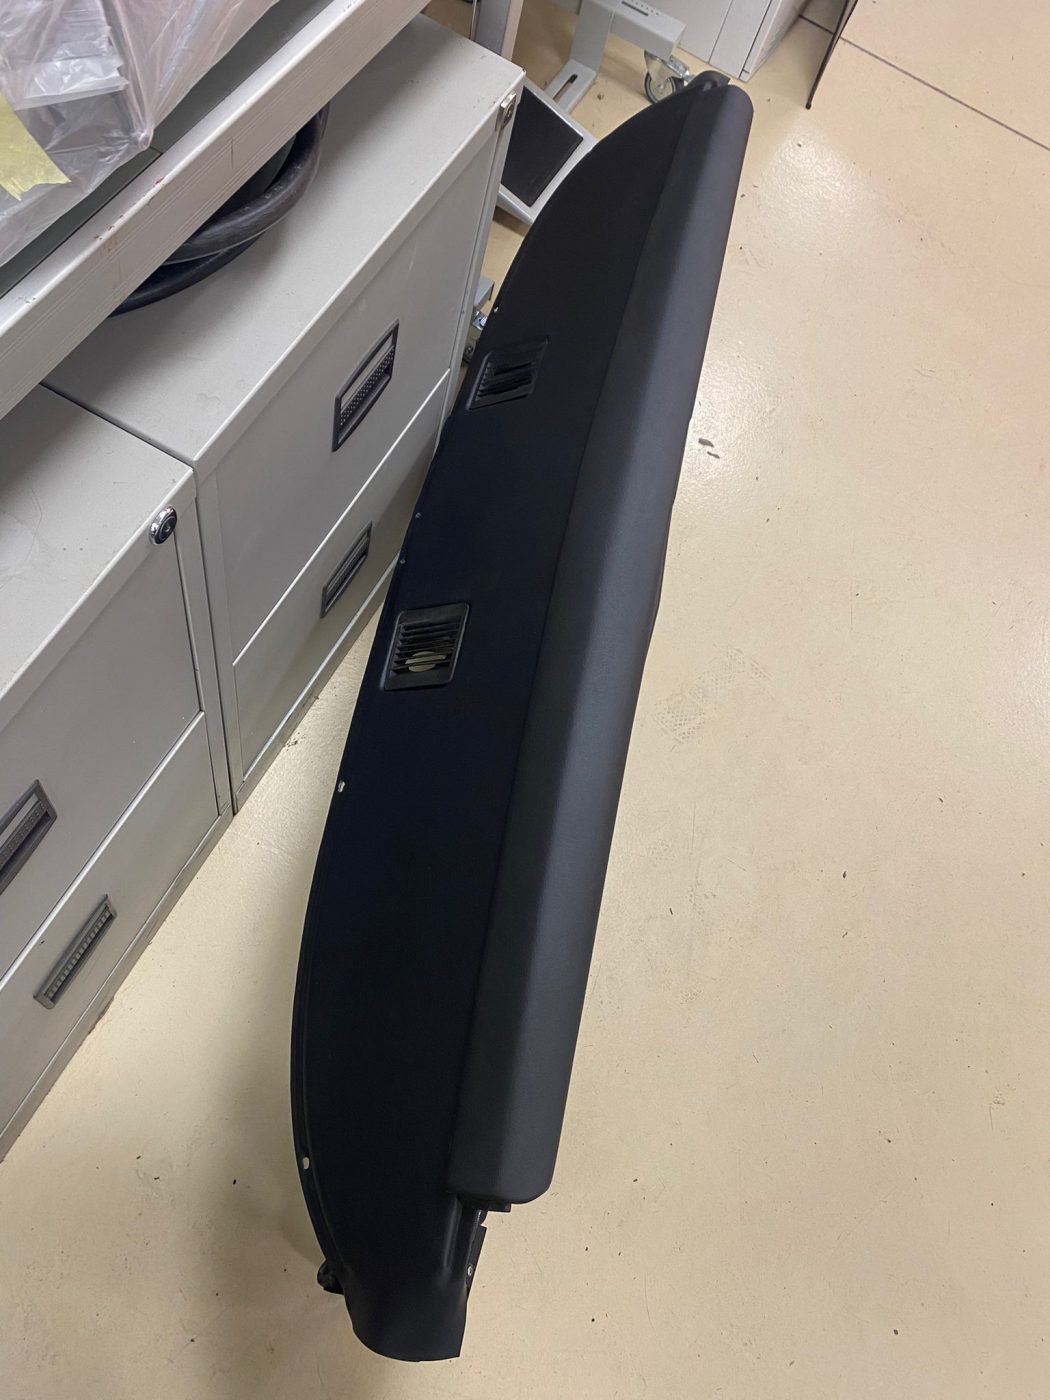
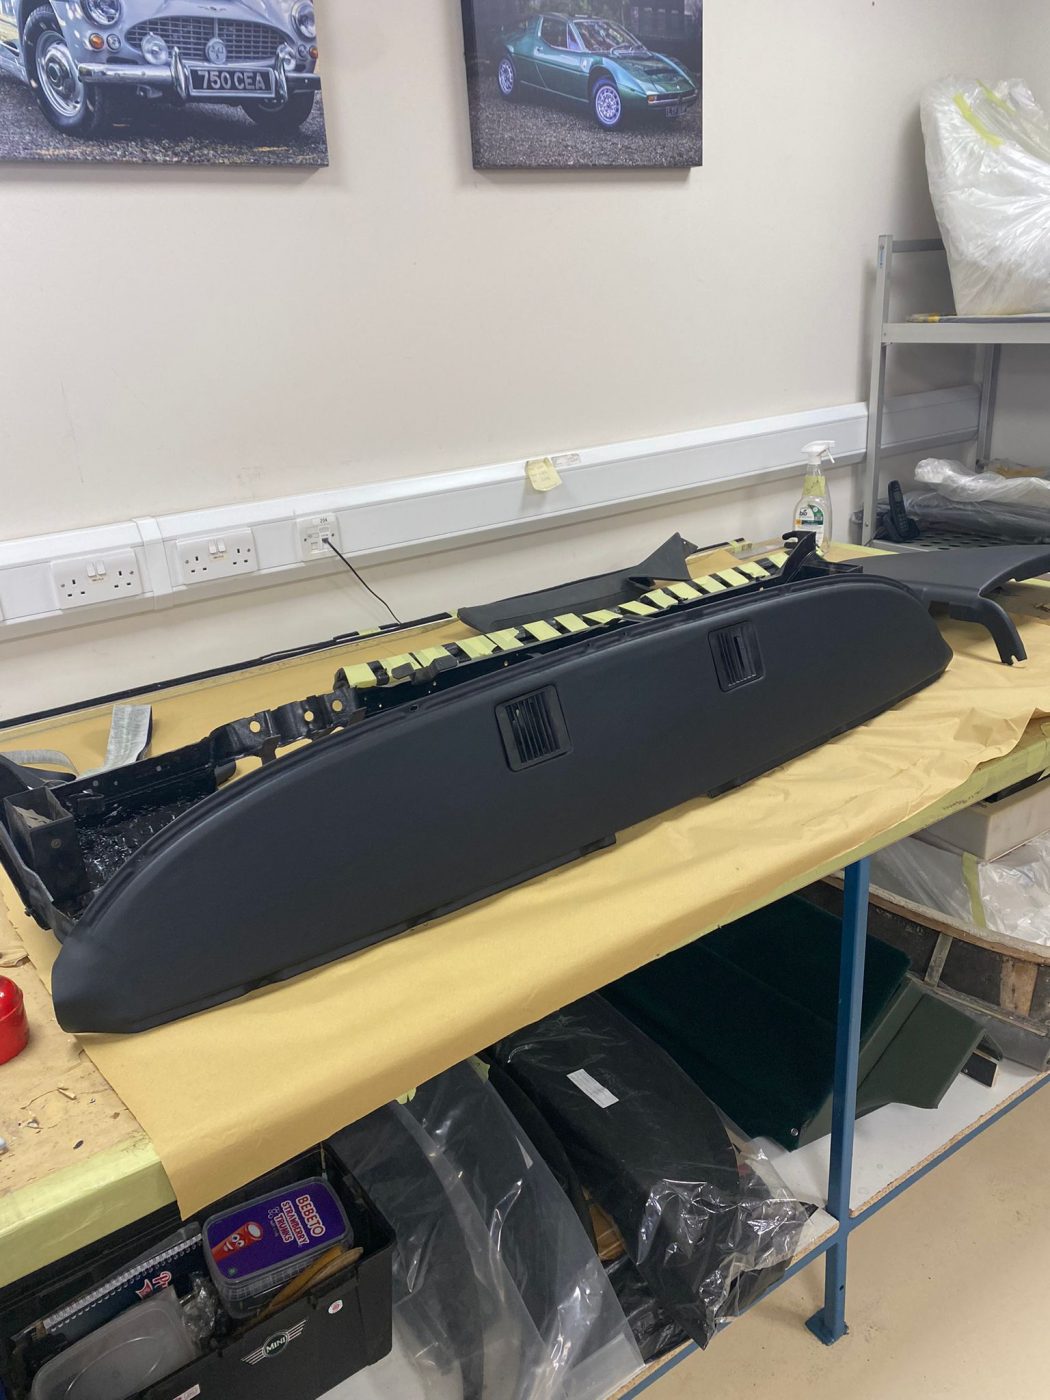
After that, Brian then turned his attention onto the dash. This along with the seats are the next step for installation into the car. The dash pad and A-pillars were hand wrapped in matching leather to create another uniform look throughout the whole car, just another little touch on this amazing Charger


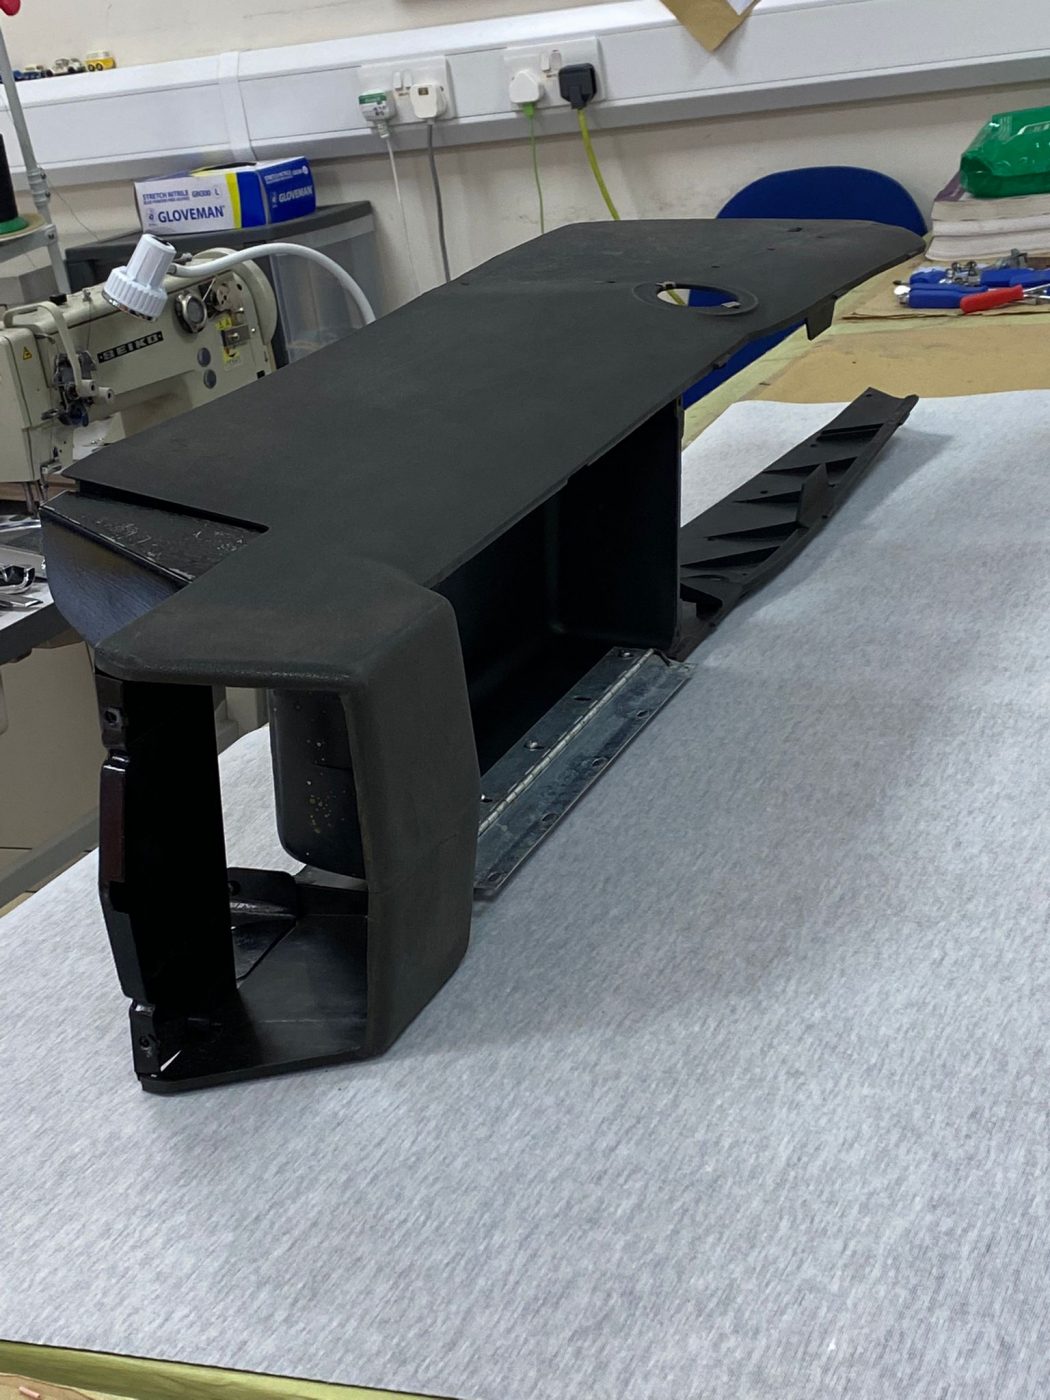

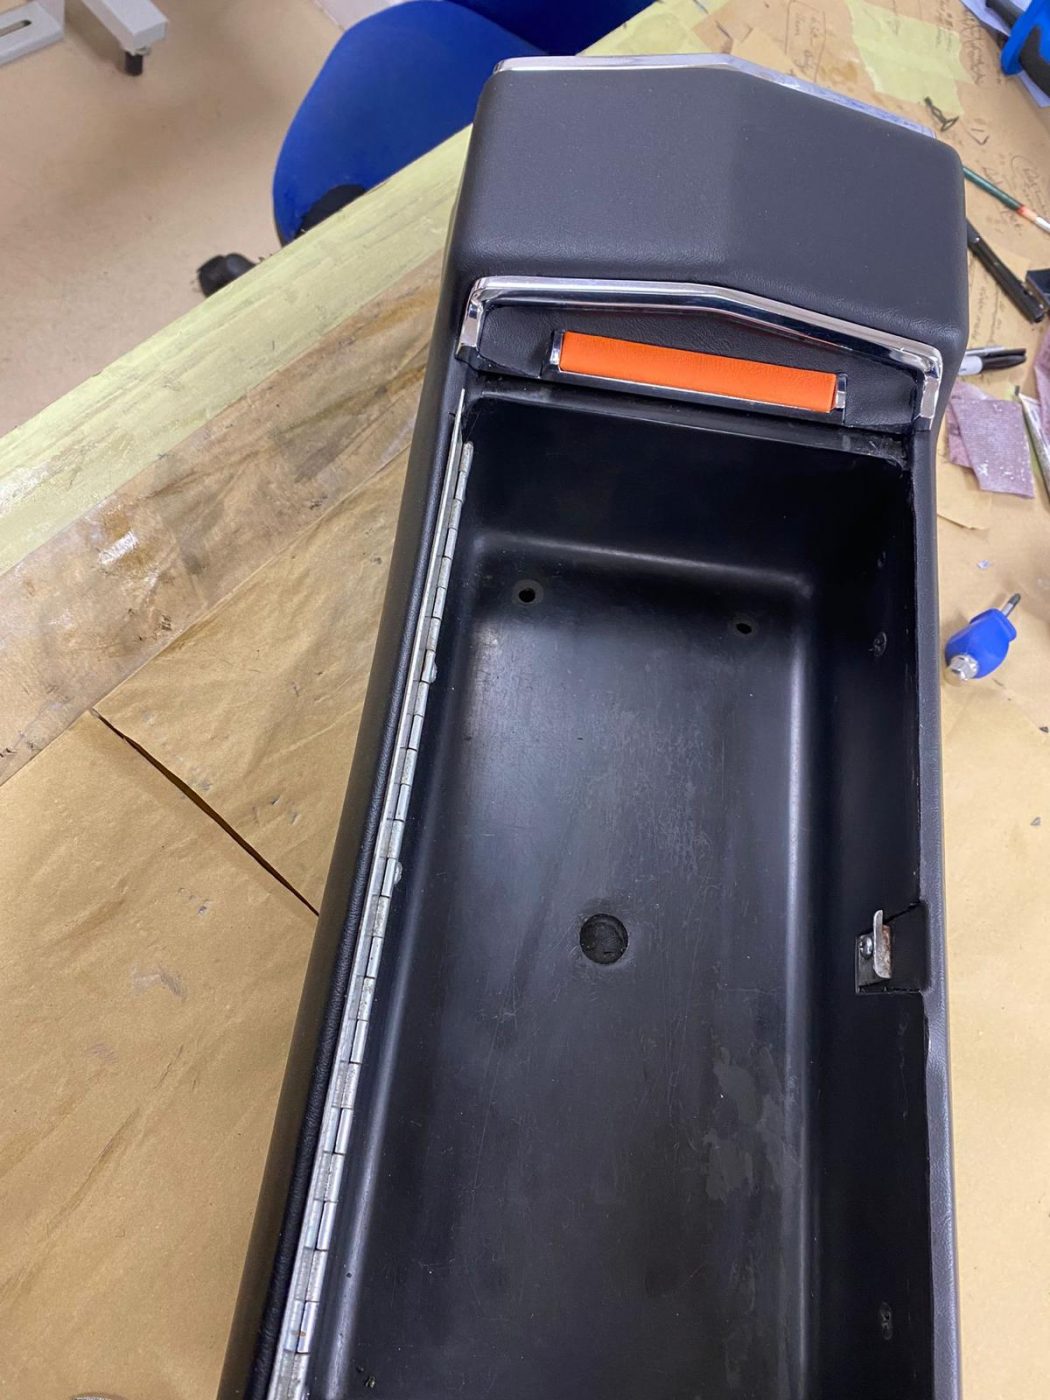
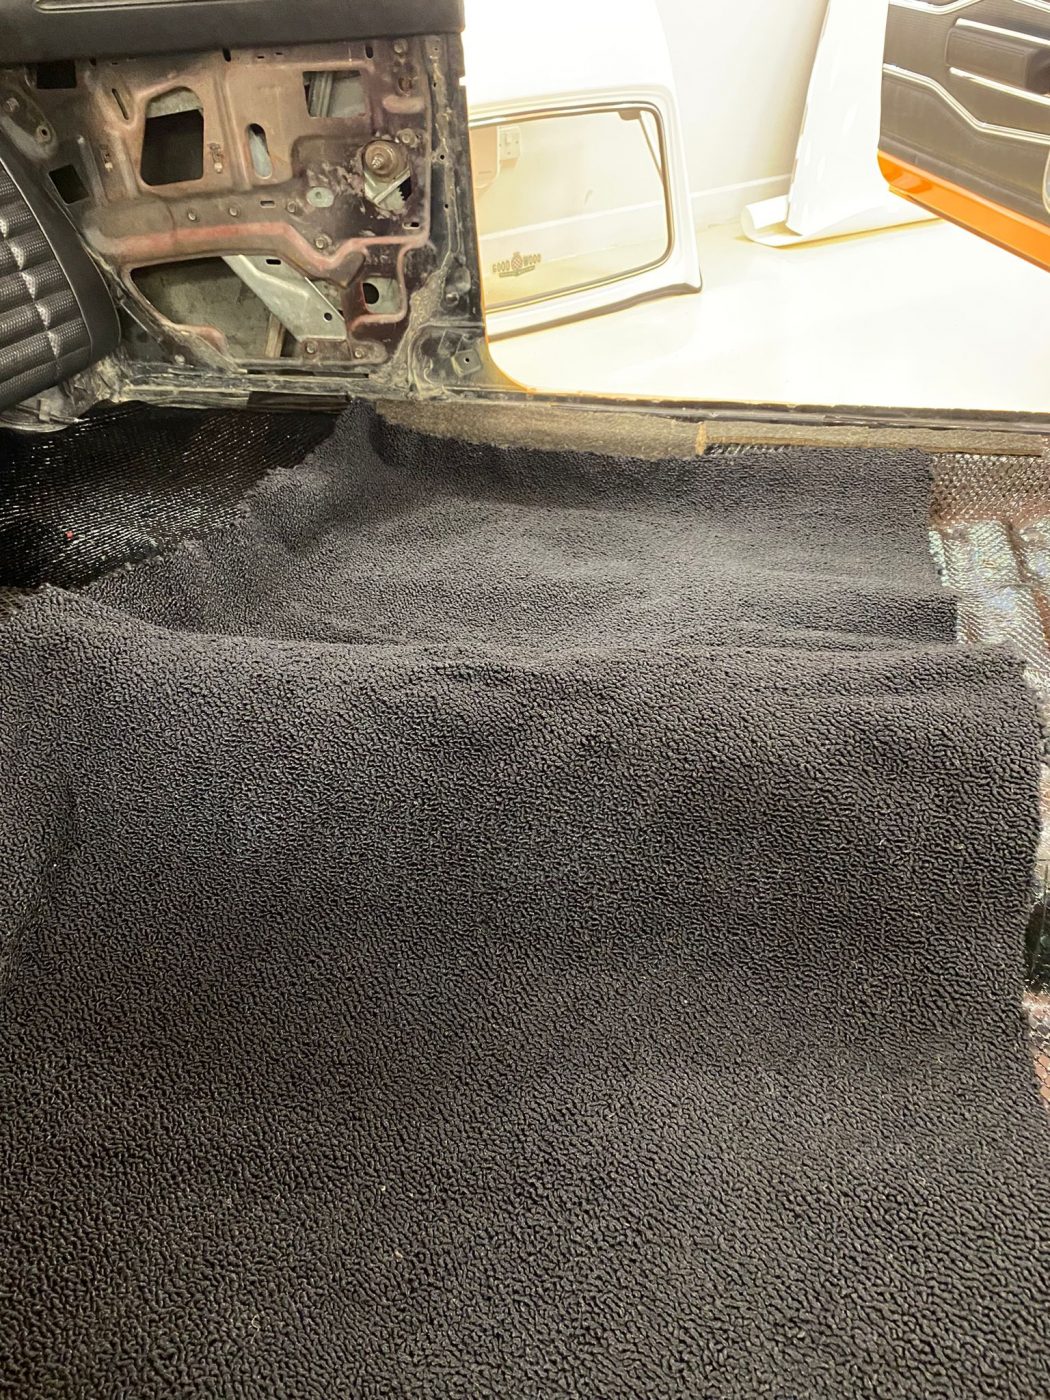
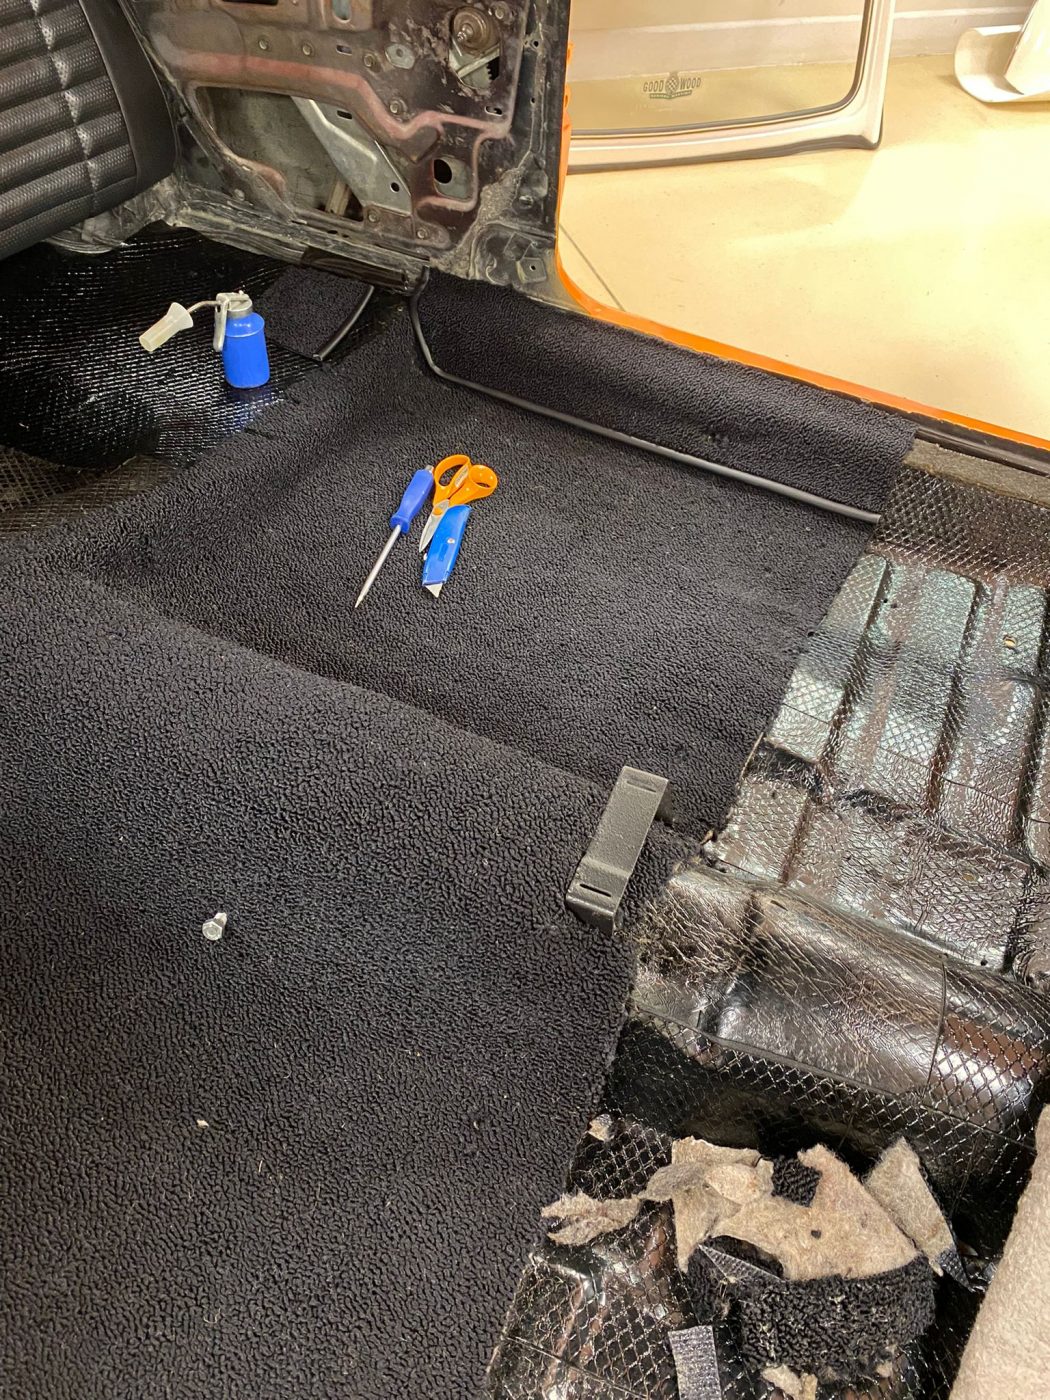
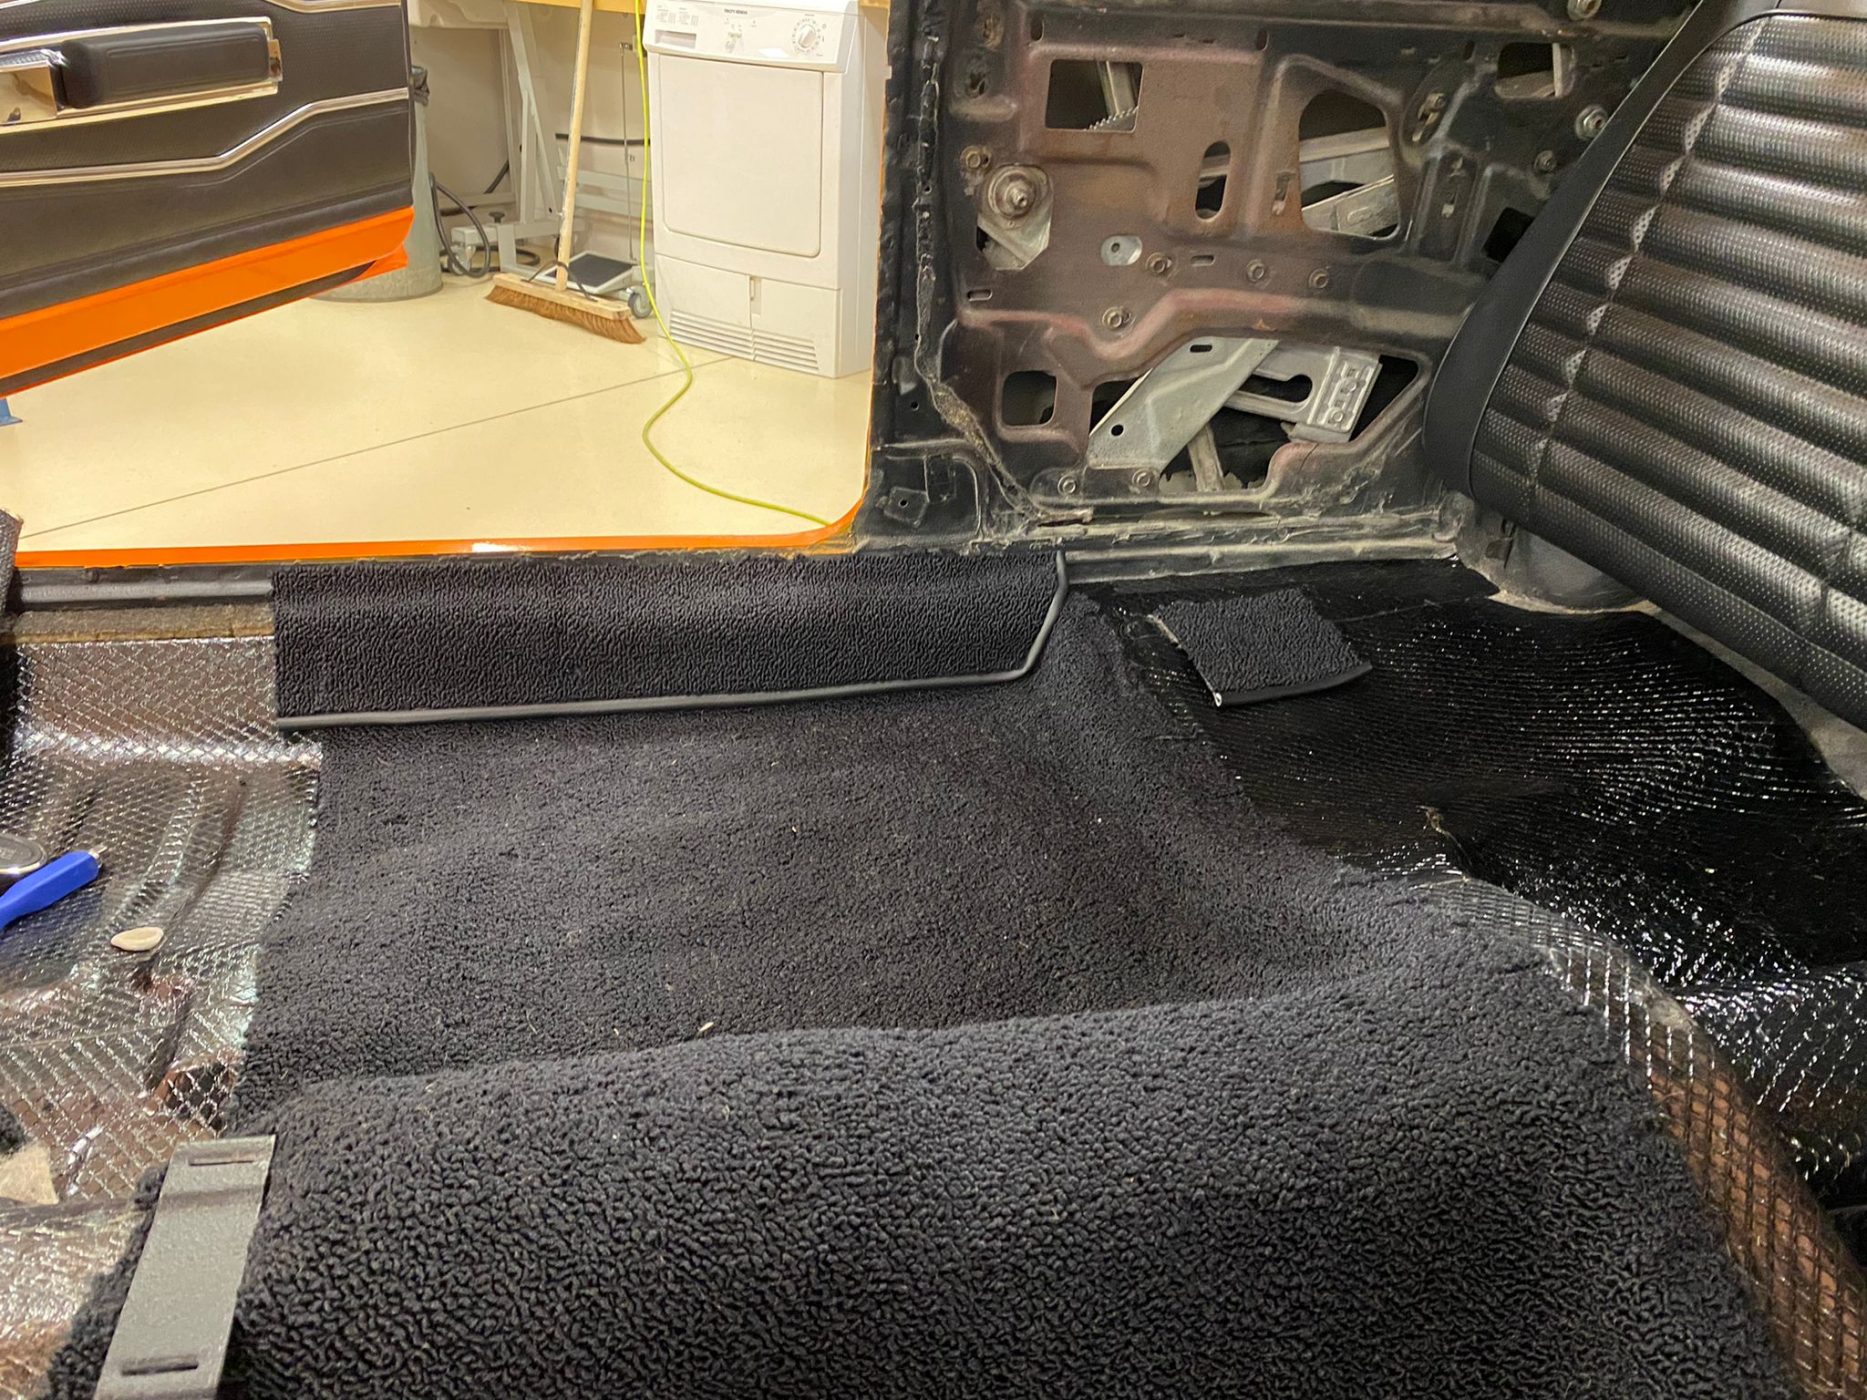
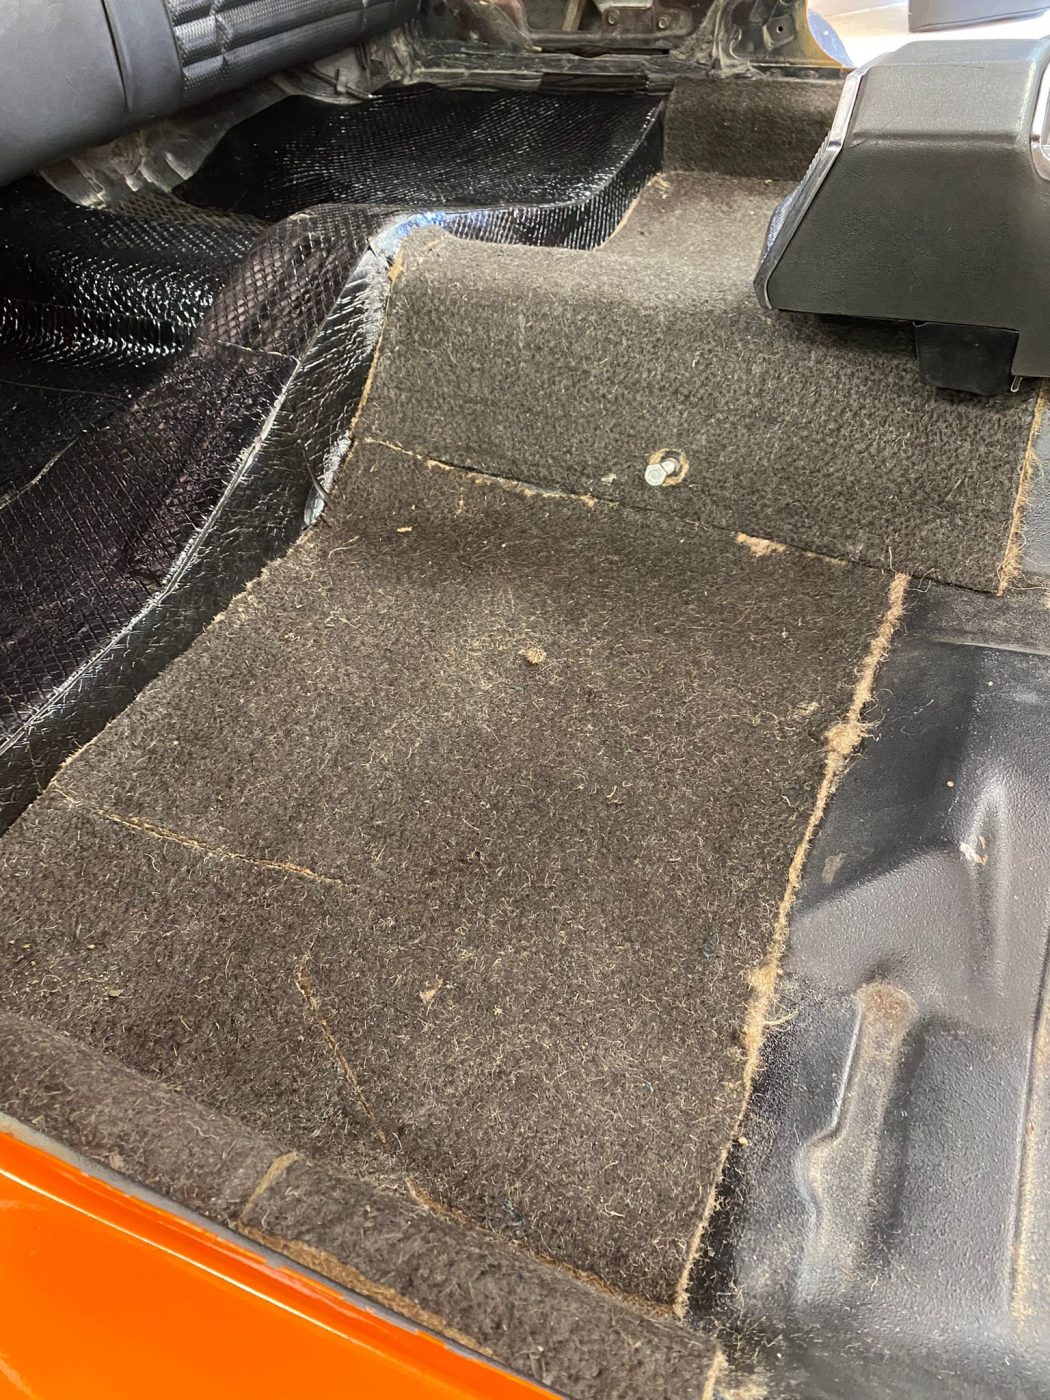
Kath and the in-house trim team at Bridge Classic Cars have been busy working on the interior of the 1970 Dodge Charger.
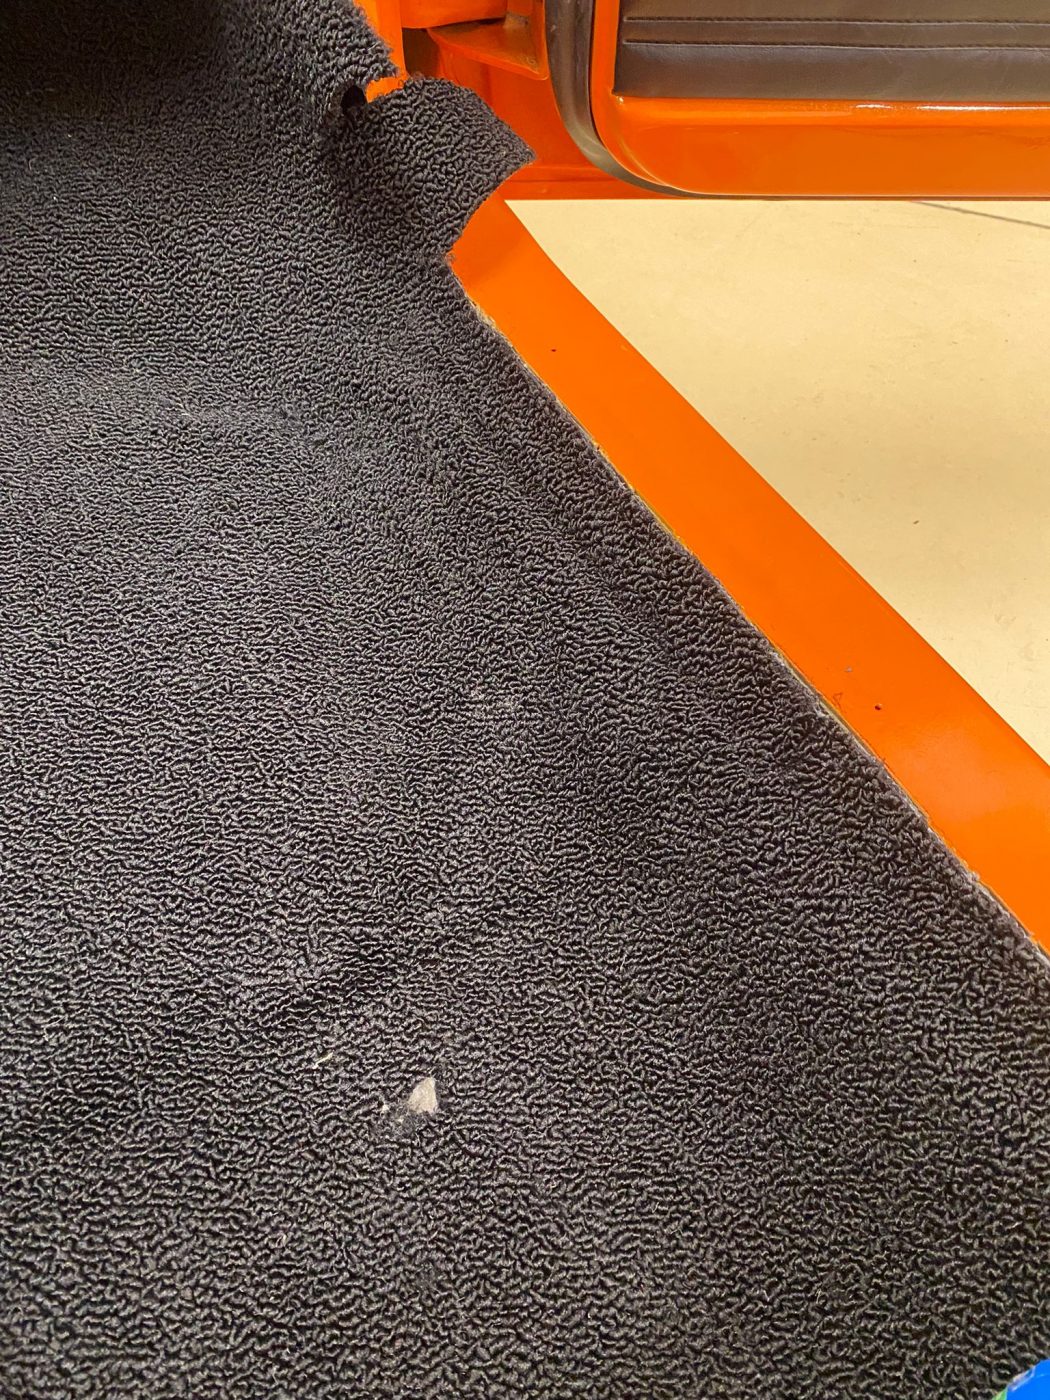
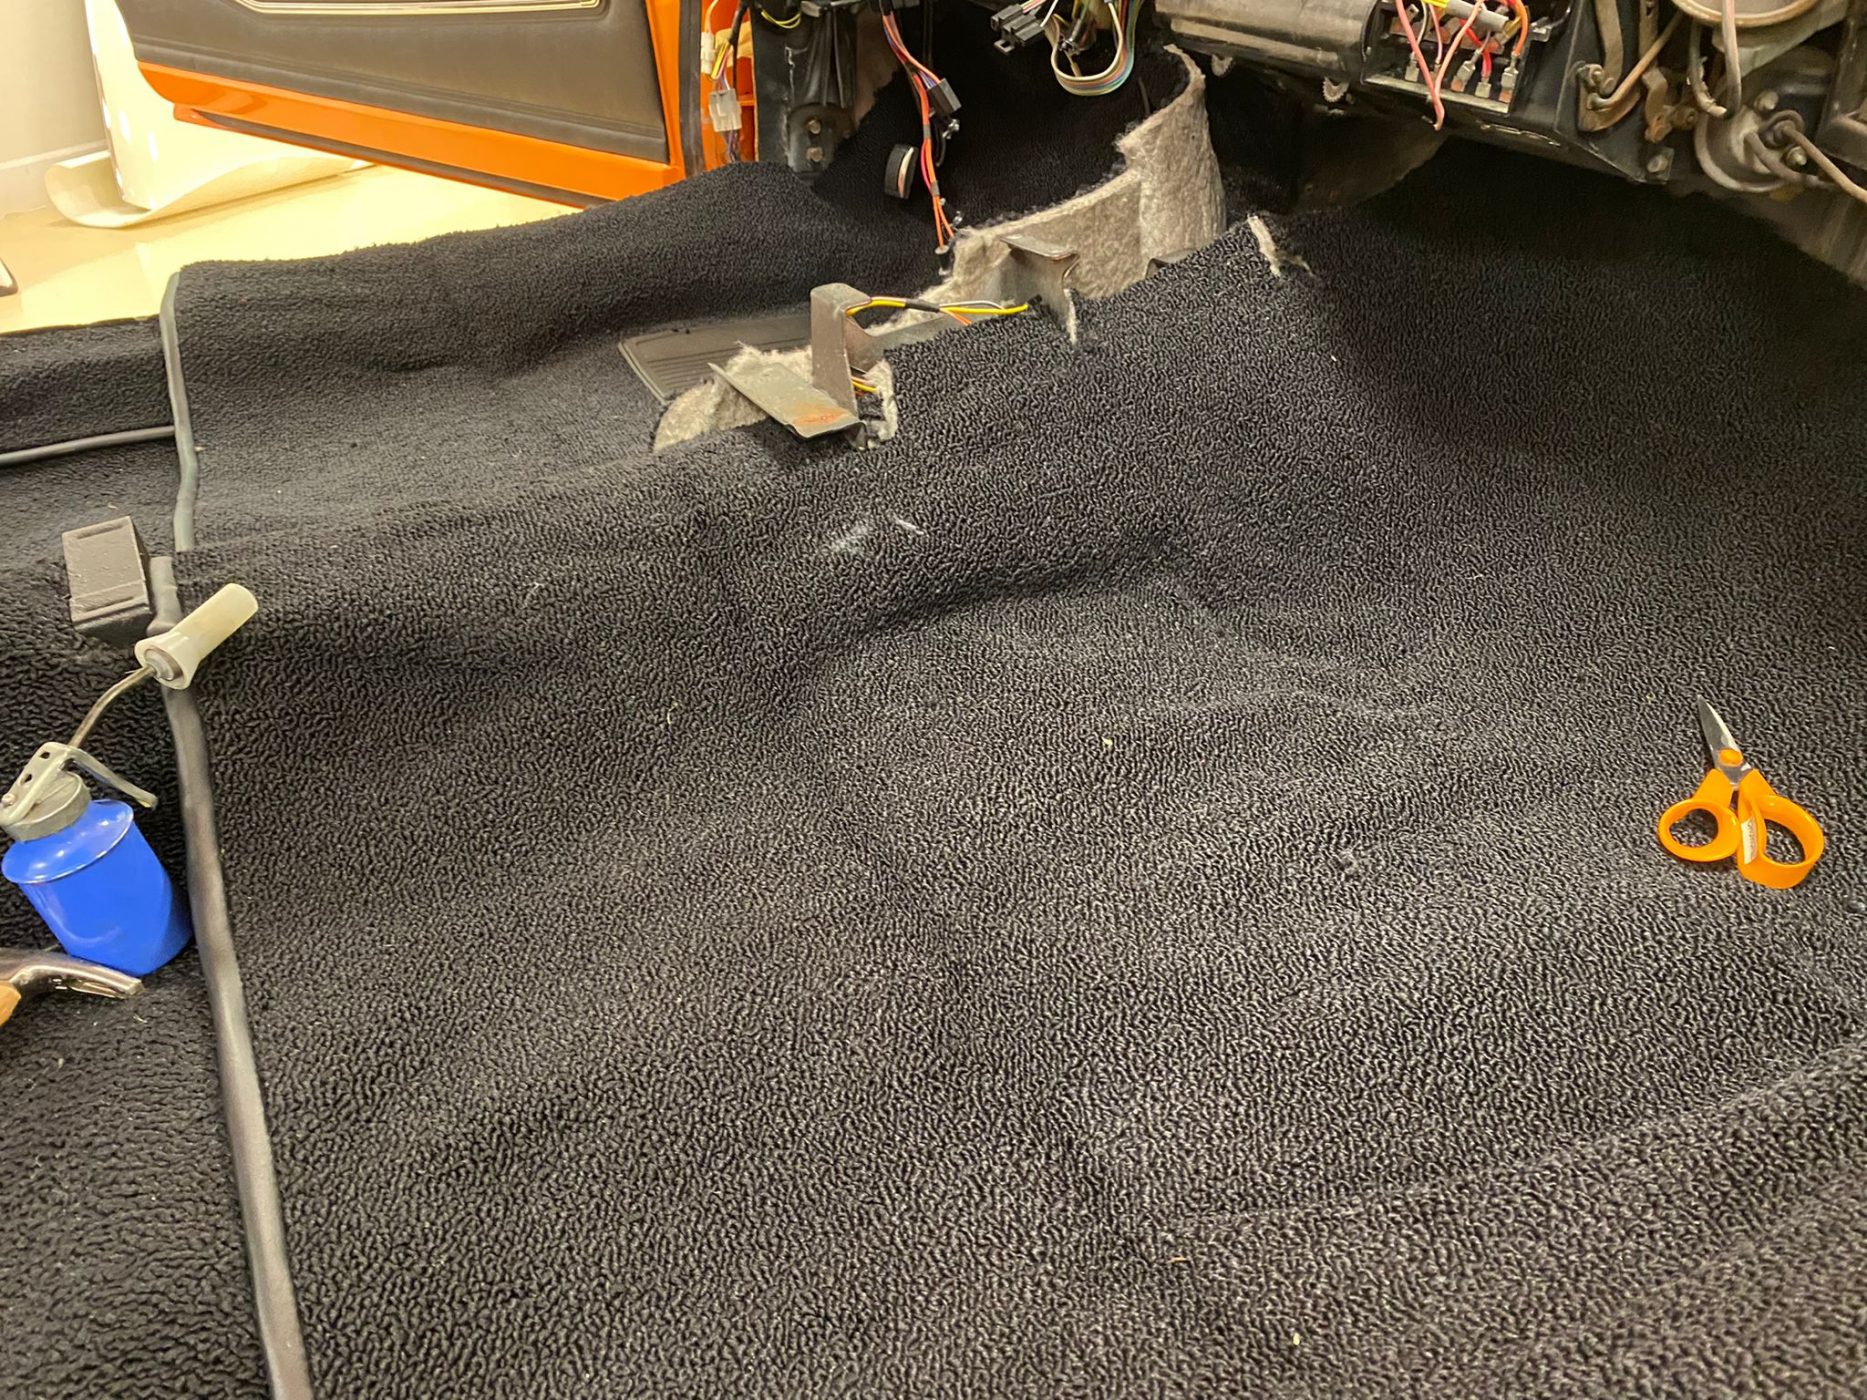
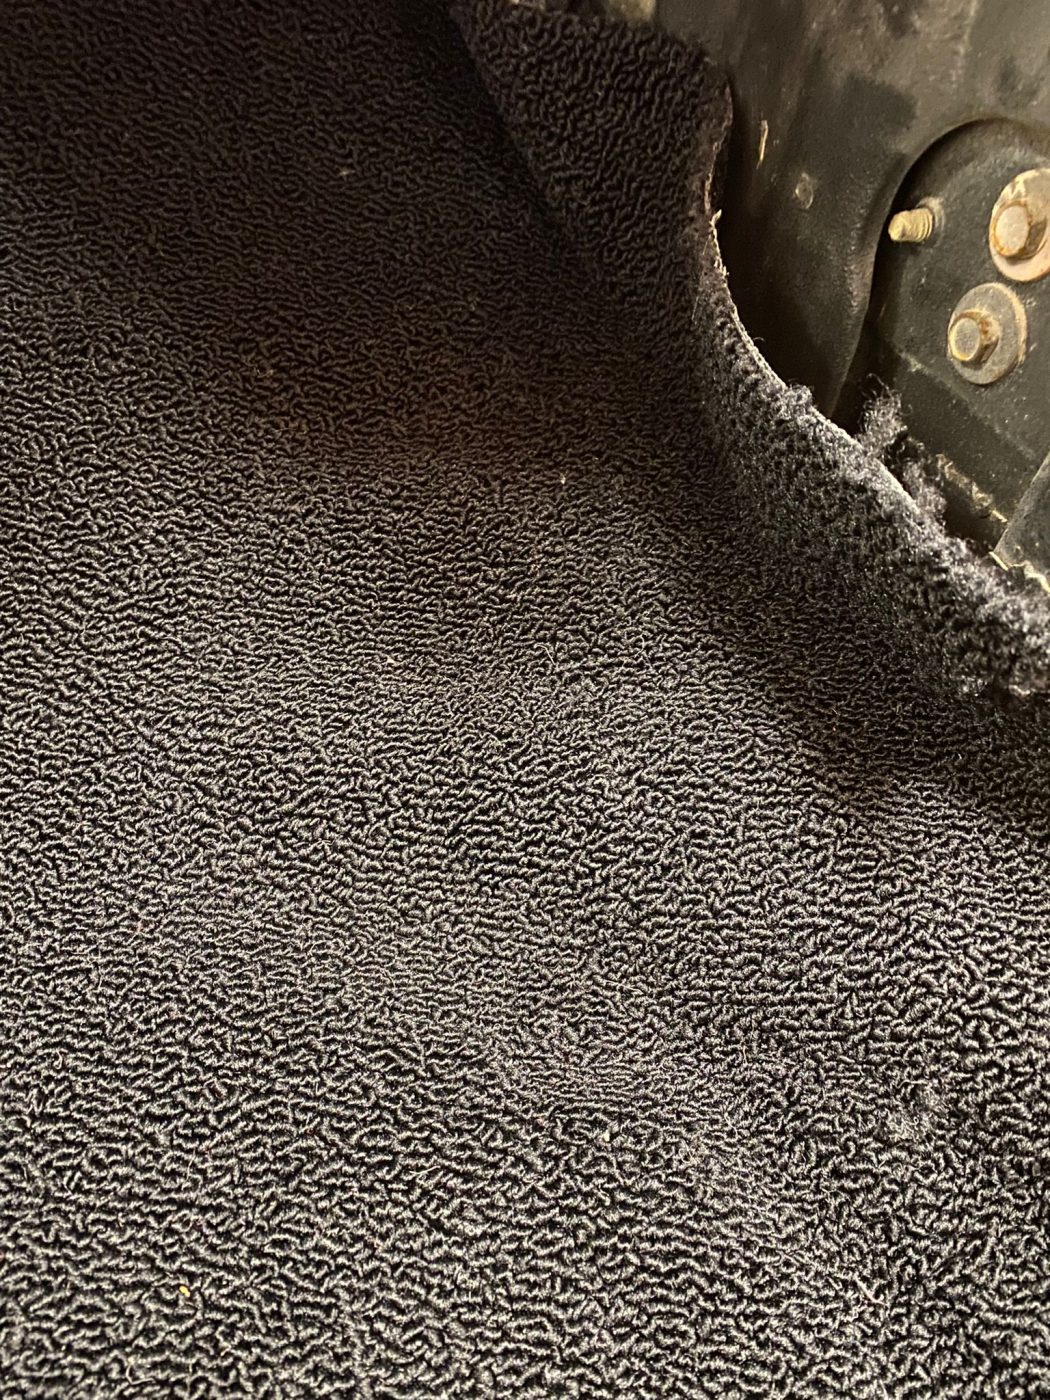
Last time Kath rebound the carpet edges after they required some trimming to ensure the best fit and finish for this iconic muscle car to look absolutely perfect. Now, those front carpets are firmly in place in the car awaiting all the other interior trim to be fit over the top of them.
Kath began to look at the centre console as the next step for the interior of the Charger. It’s a rather large piece so it’s very noticeable if it isn’t looking its best. So, Kath began to carefully dismantle the centre console in preparation for its retrim. Even the wooden veneer had to be slowly and methodically removed inch by inch to preserve it to be refurbished.
All of the panels have been removed from the centre console one by one to be evaluated and a plan worked out for each of them. Polishing the brightwork, making templates for new cutouts and then, the entire console itself was retrimmed in matching black leather.
It looks sensational. This will be the next item going back into the car once the seats (which Brian has been working on alongside Kath) are finished and ready to go in.
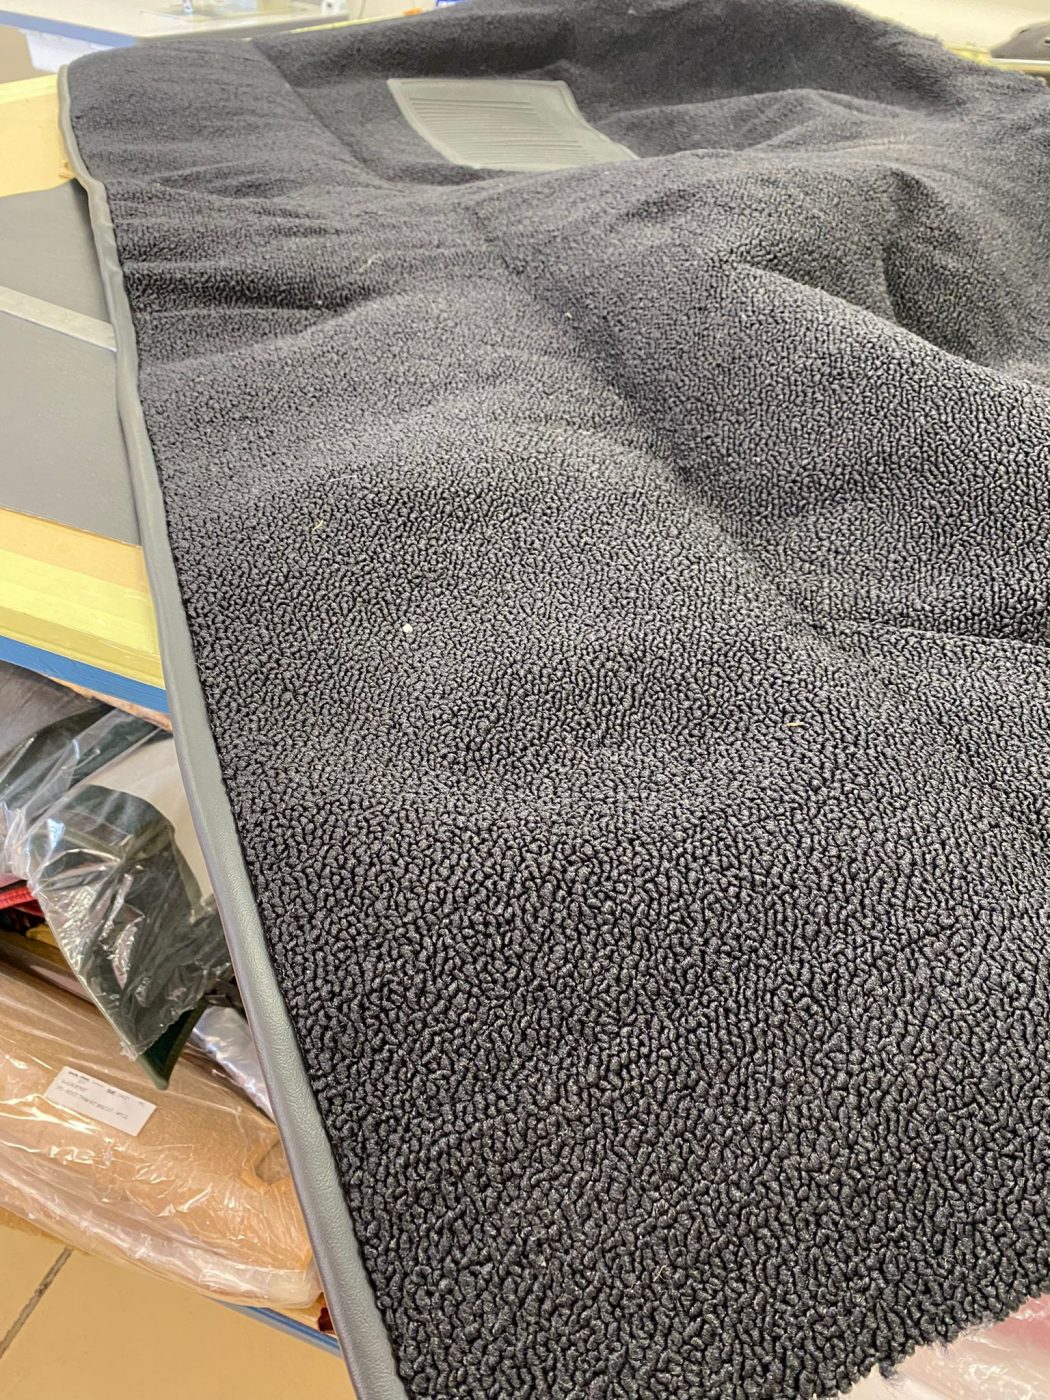
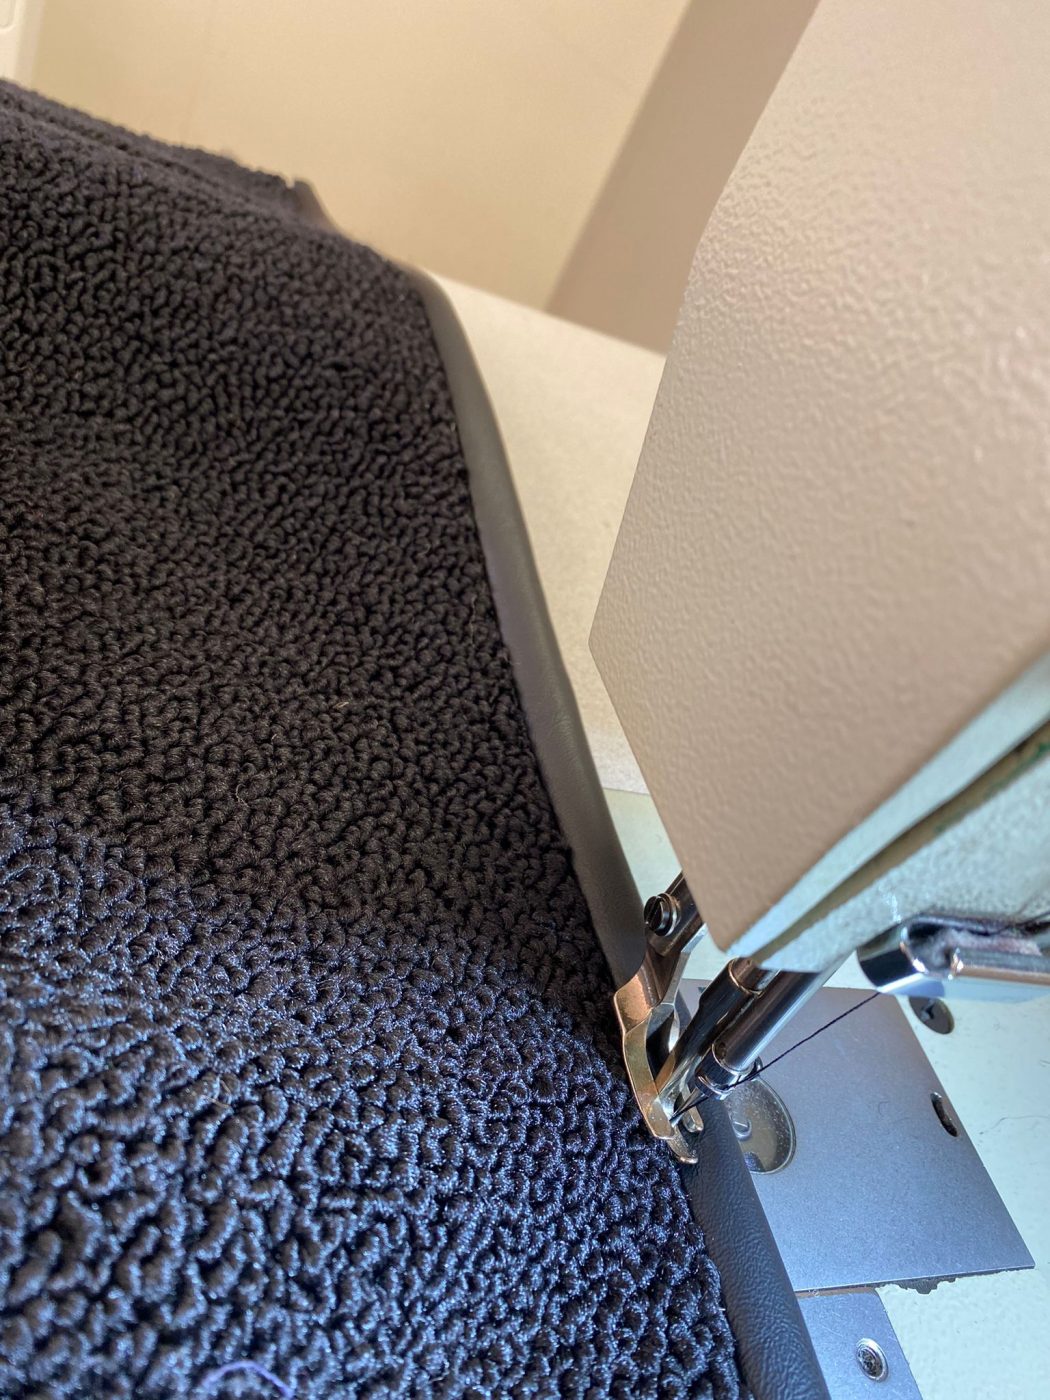
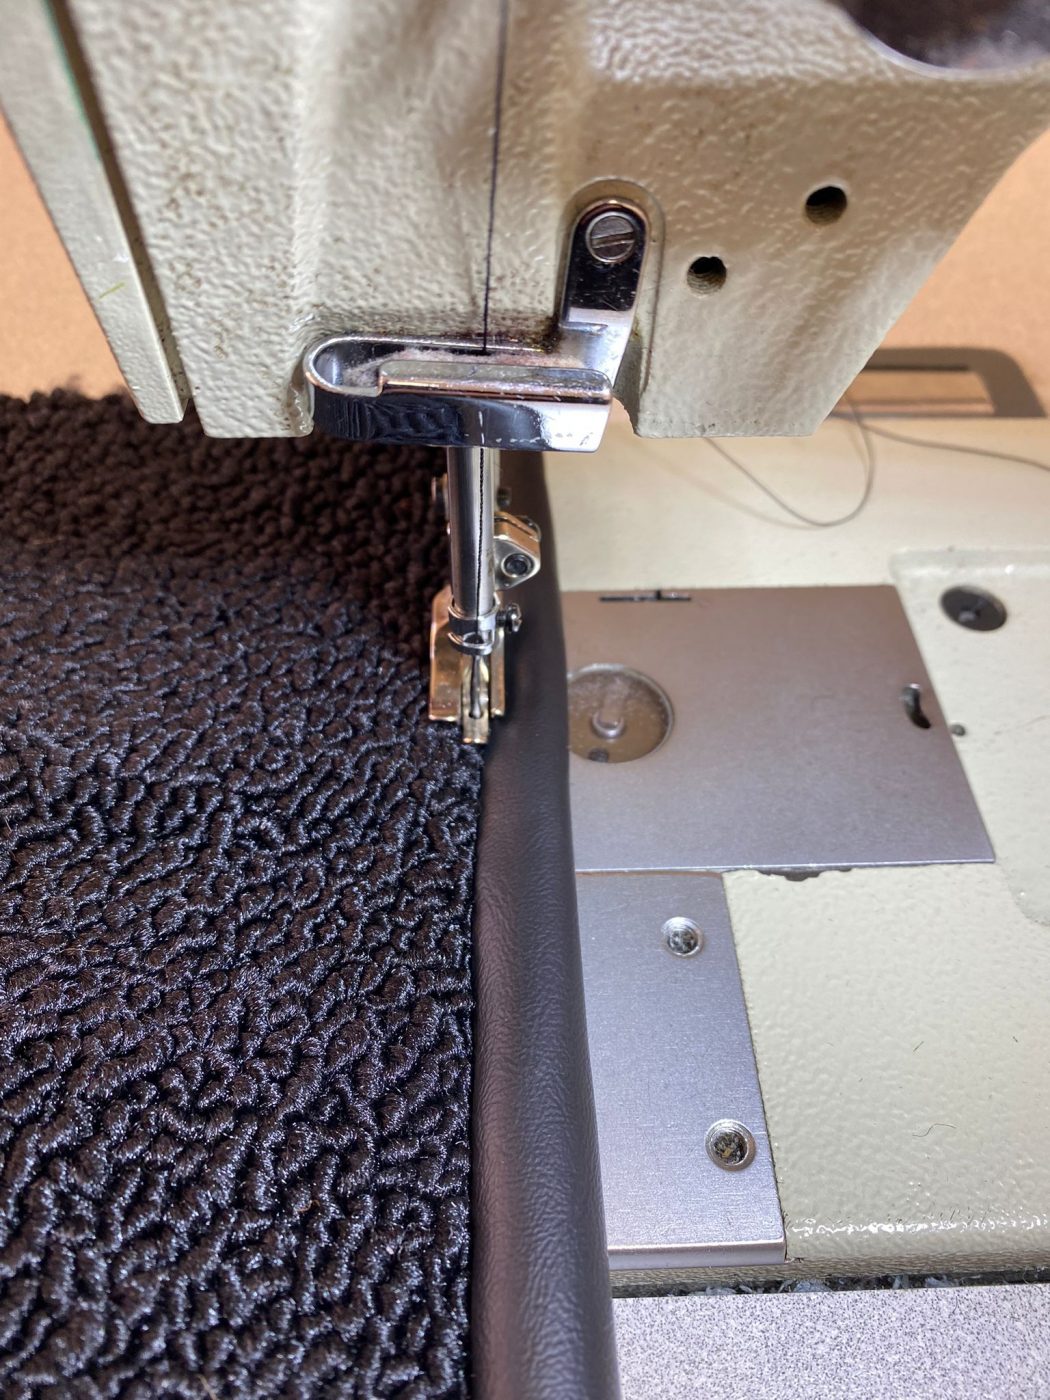
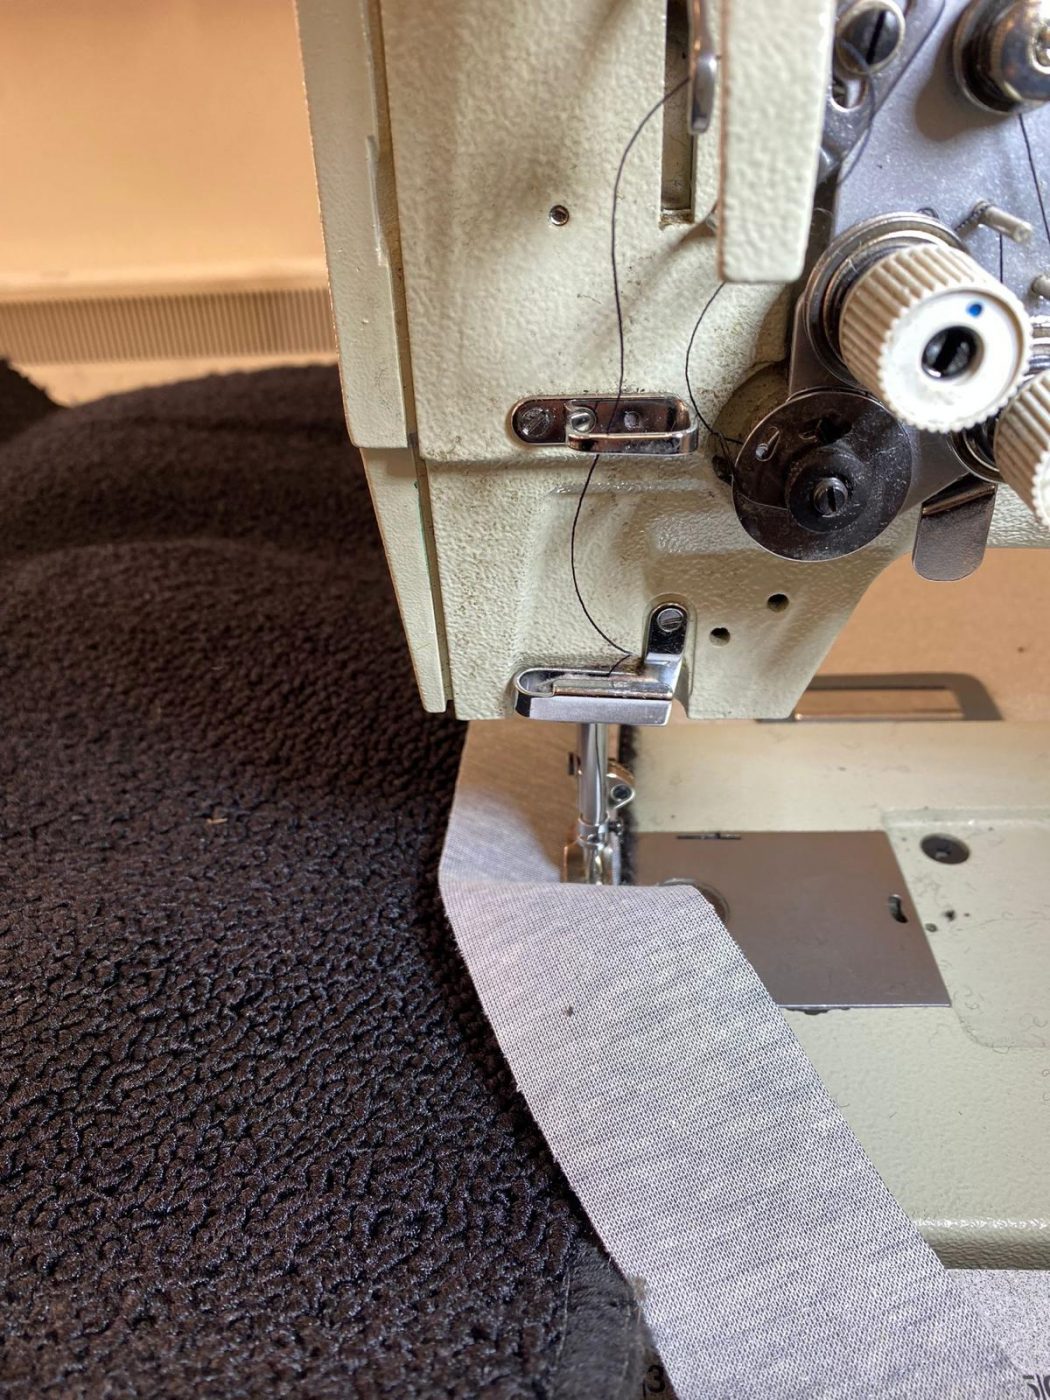
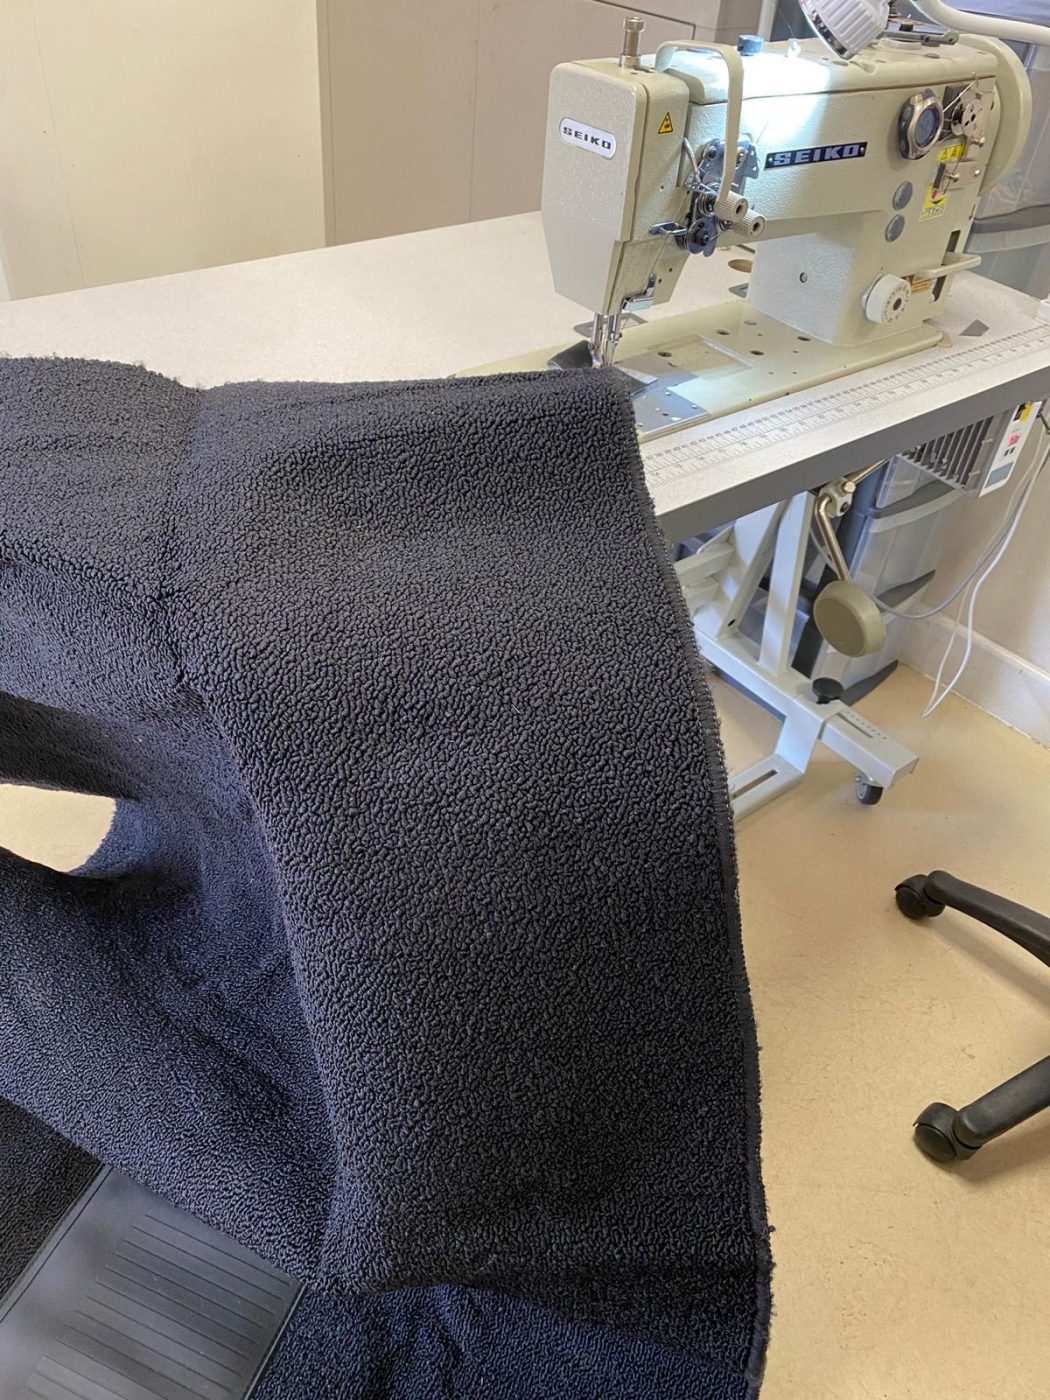
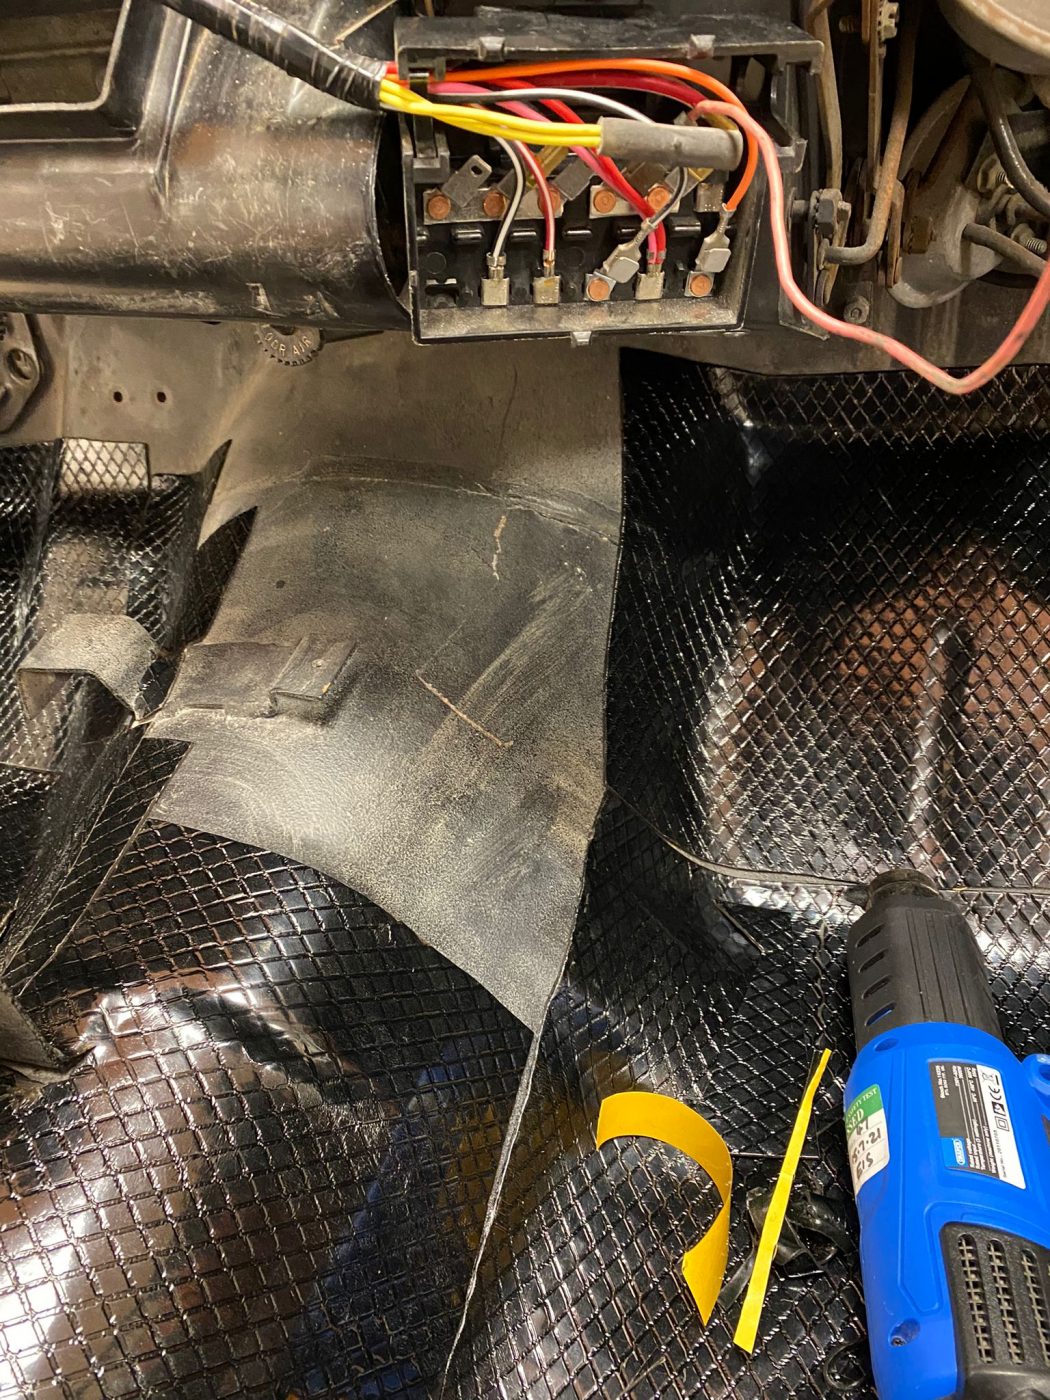
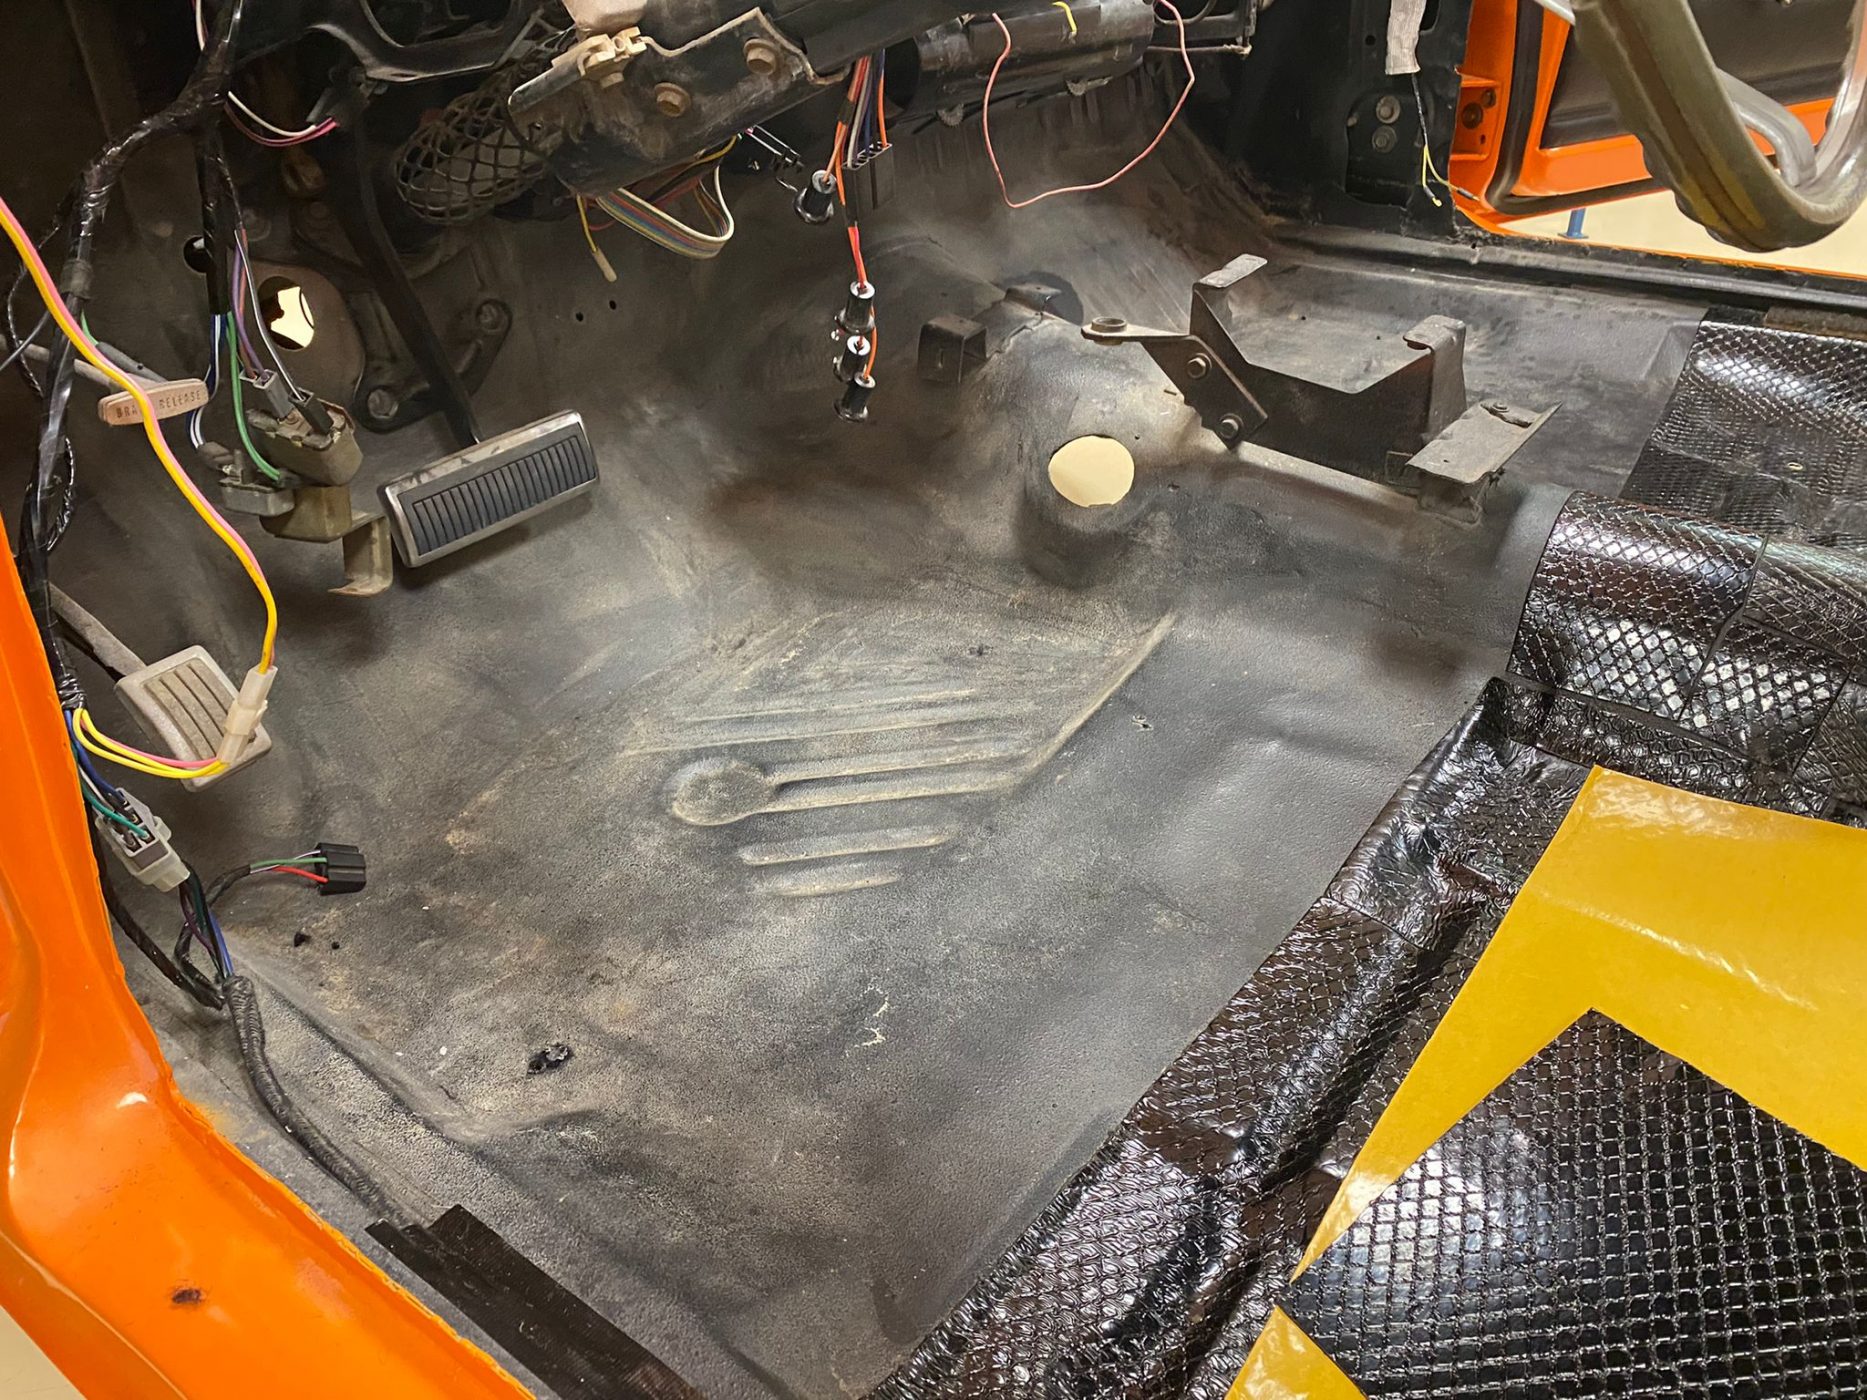
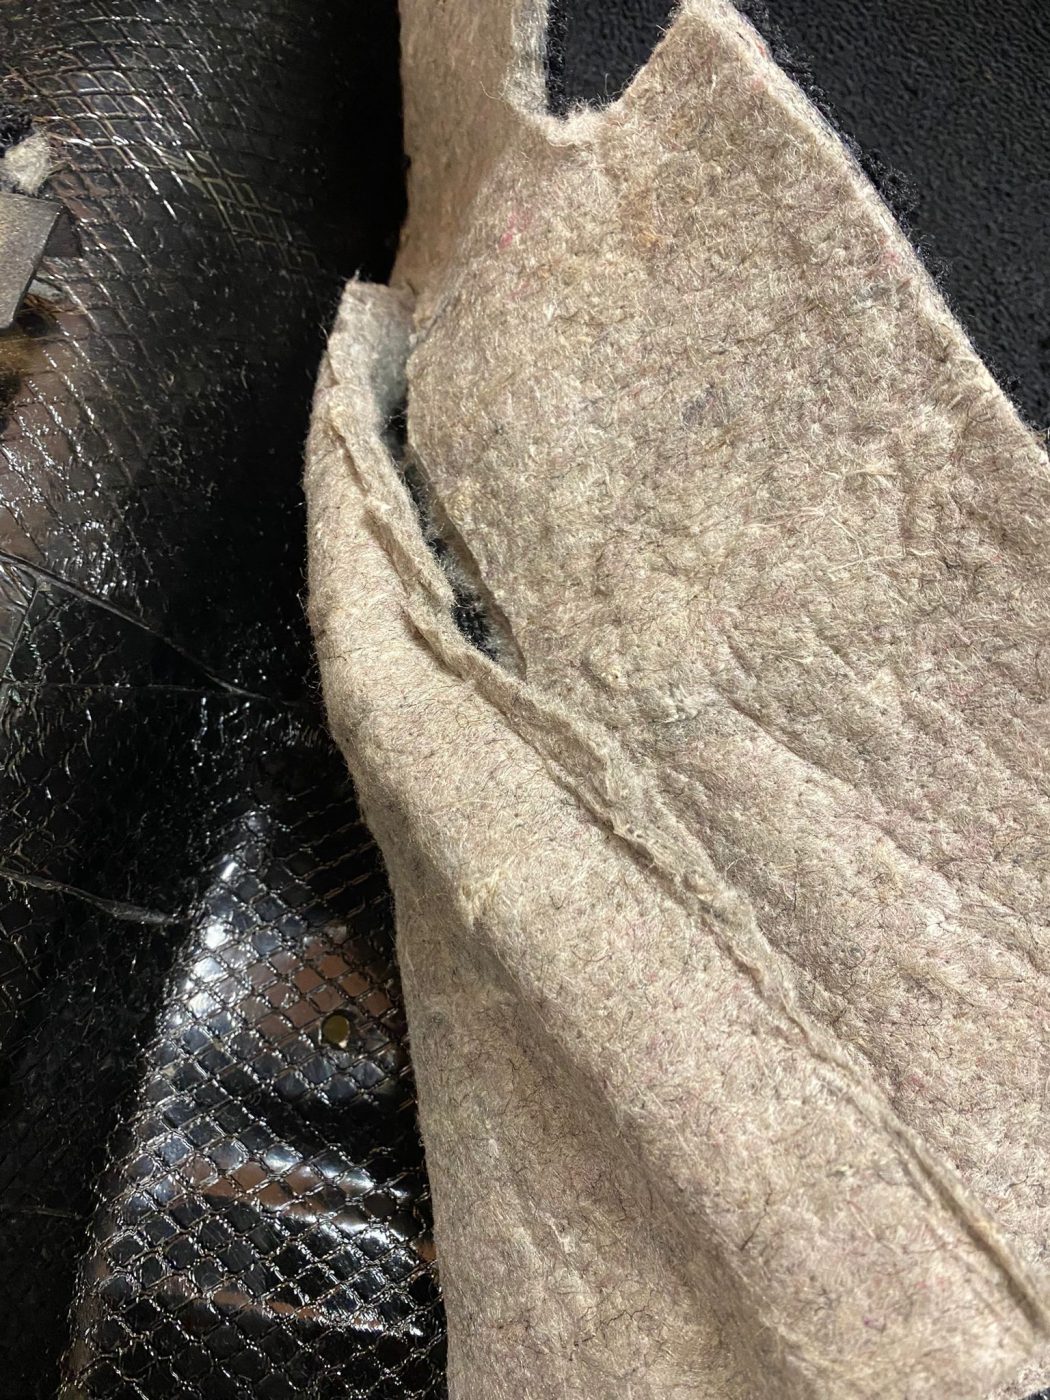
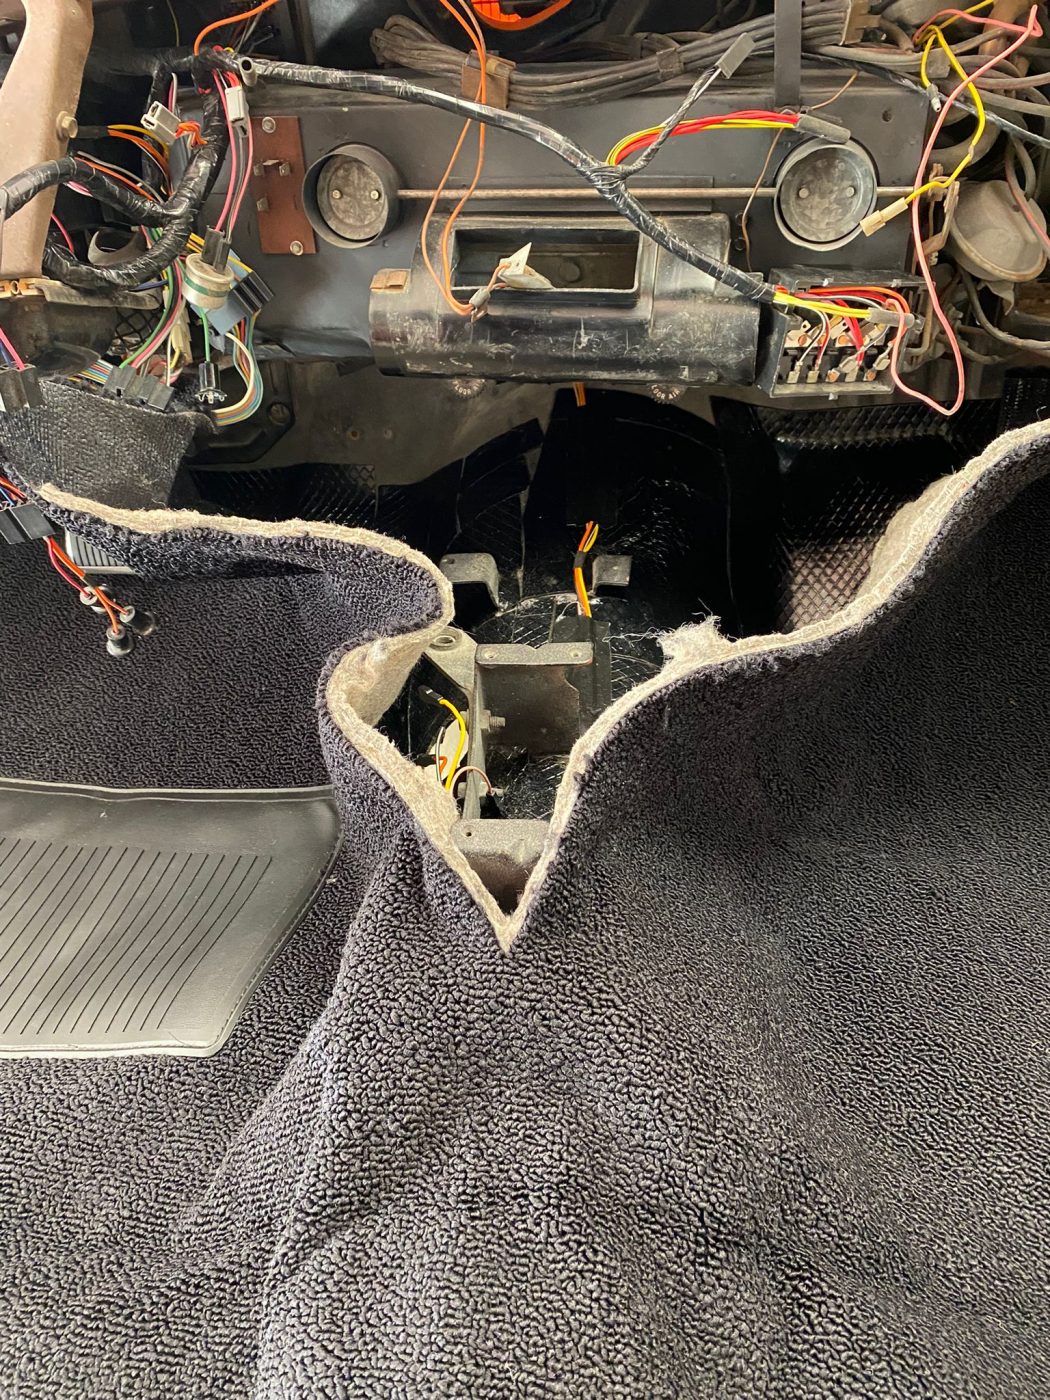

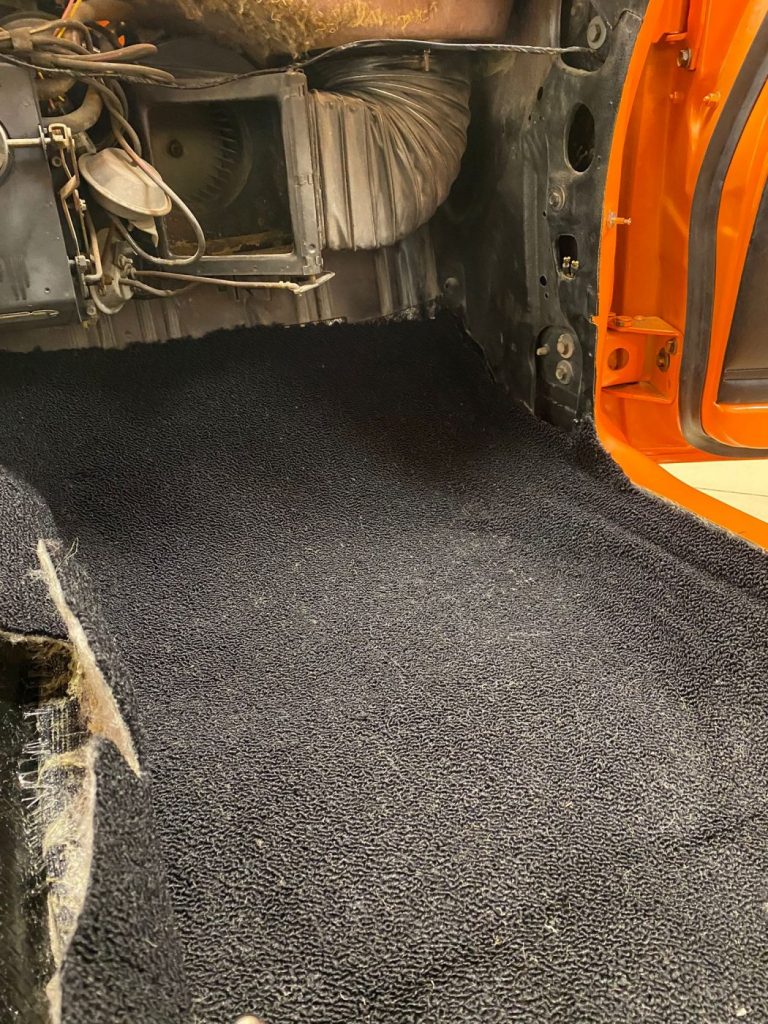
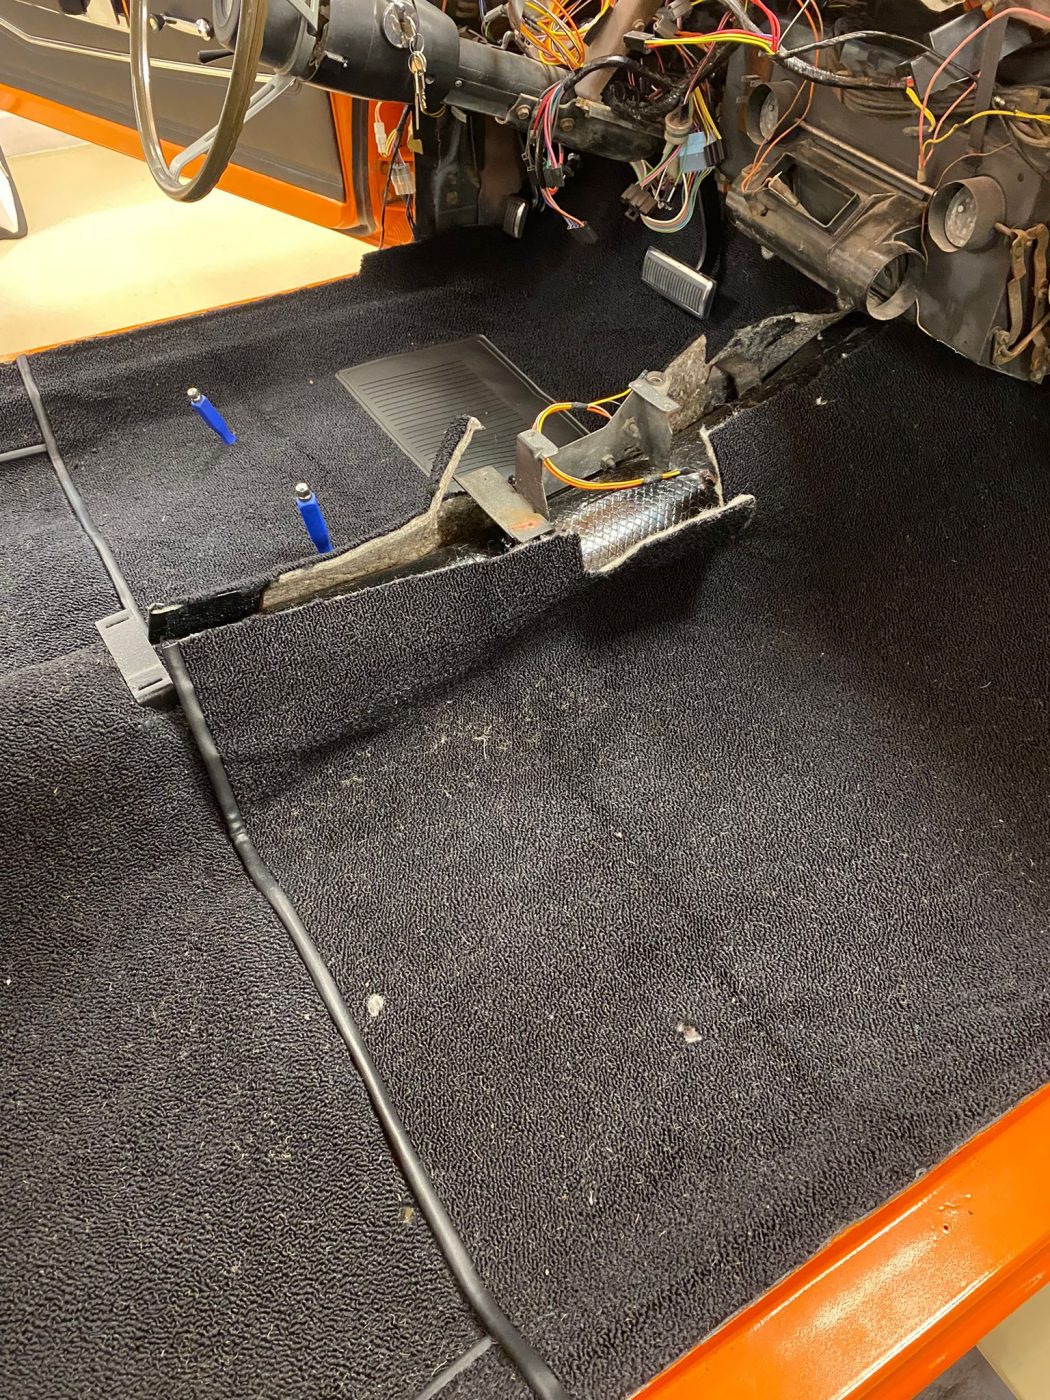
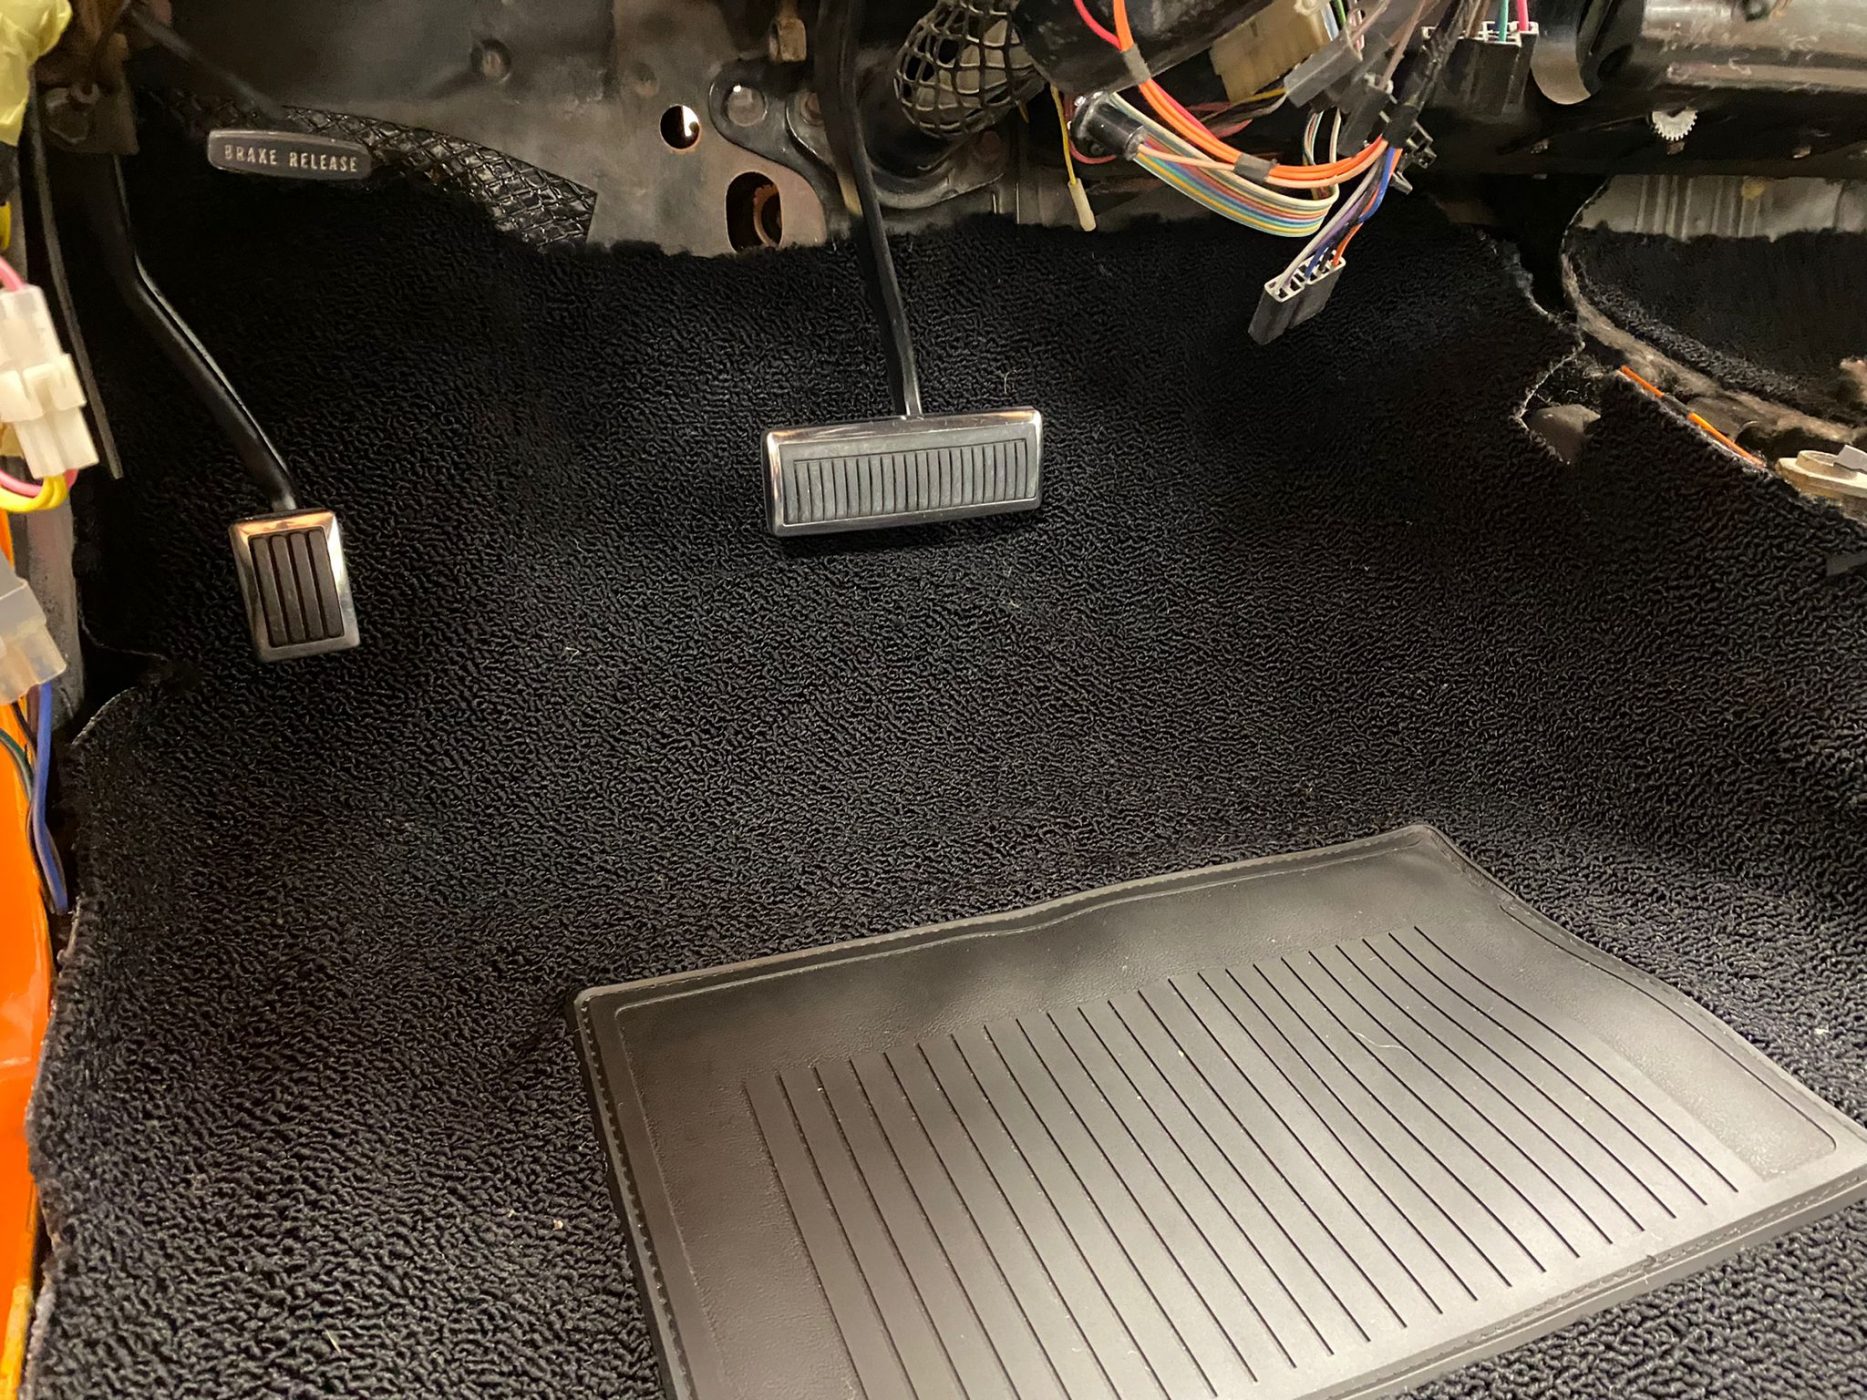
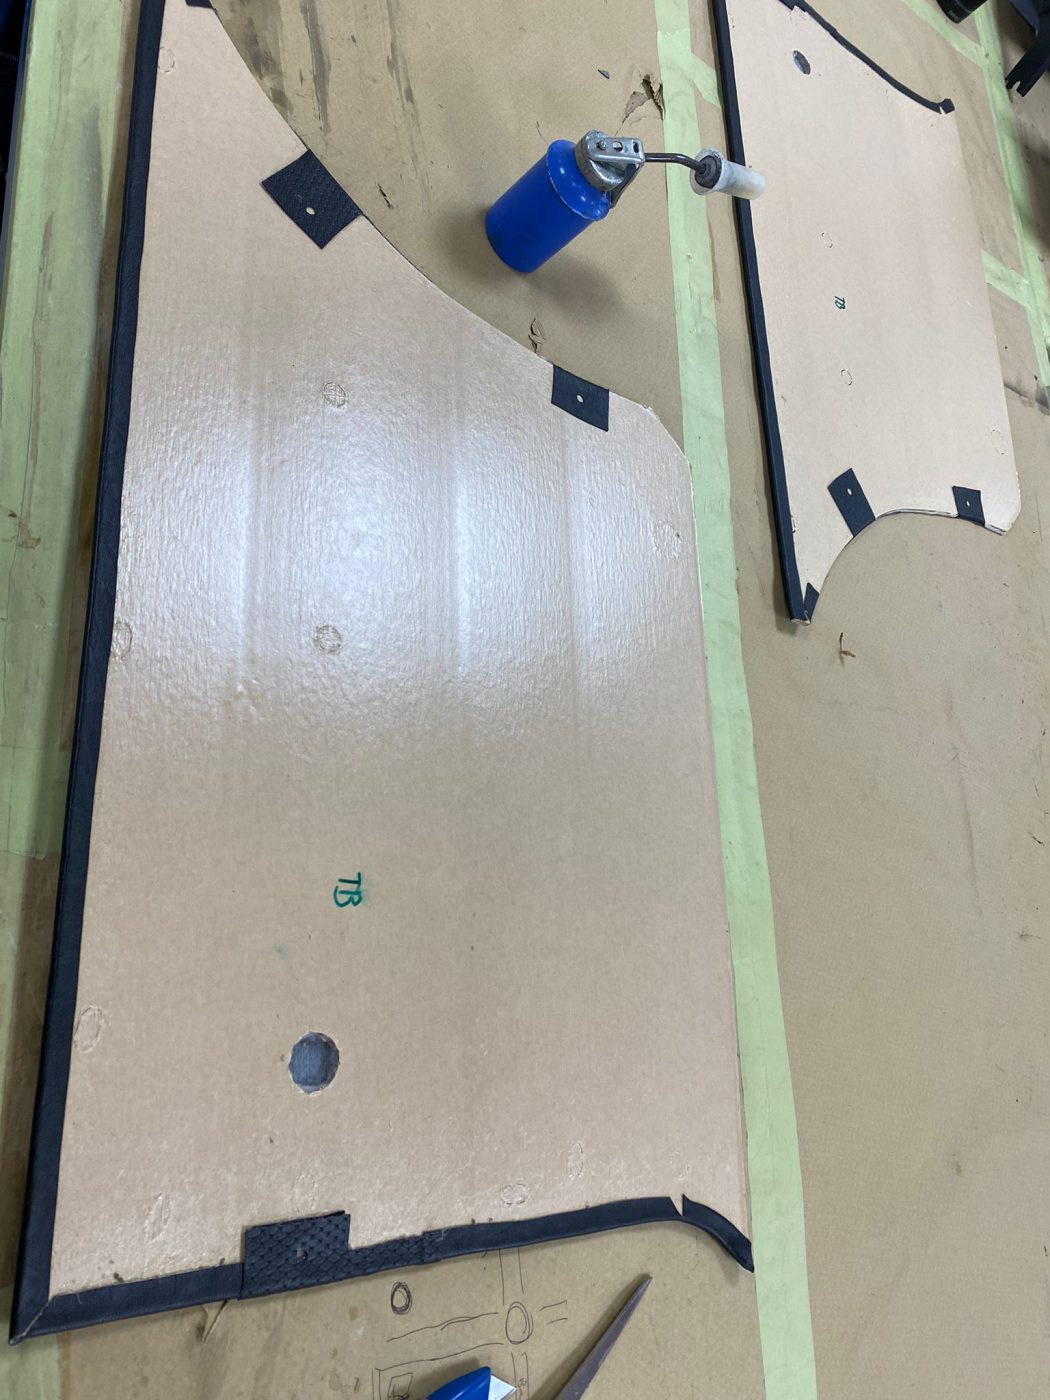
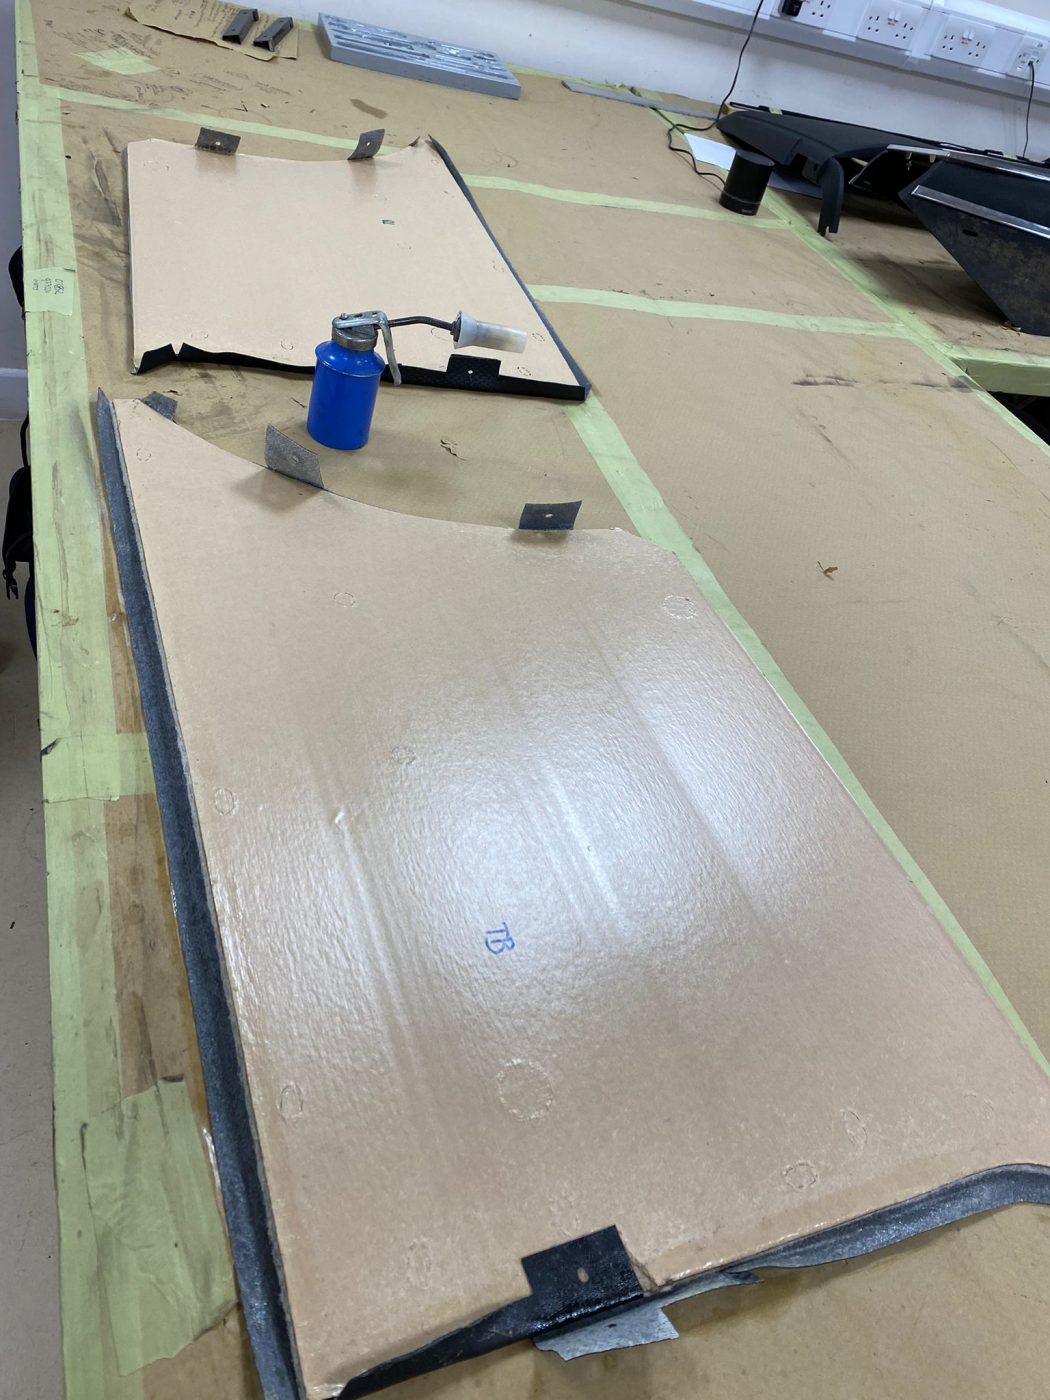
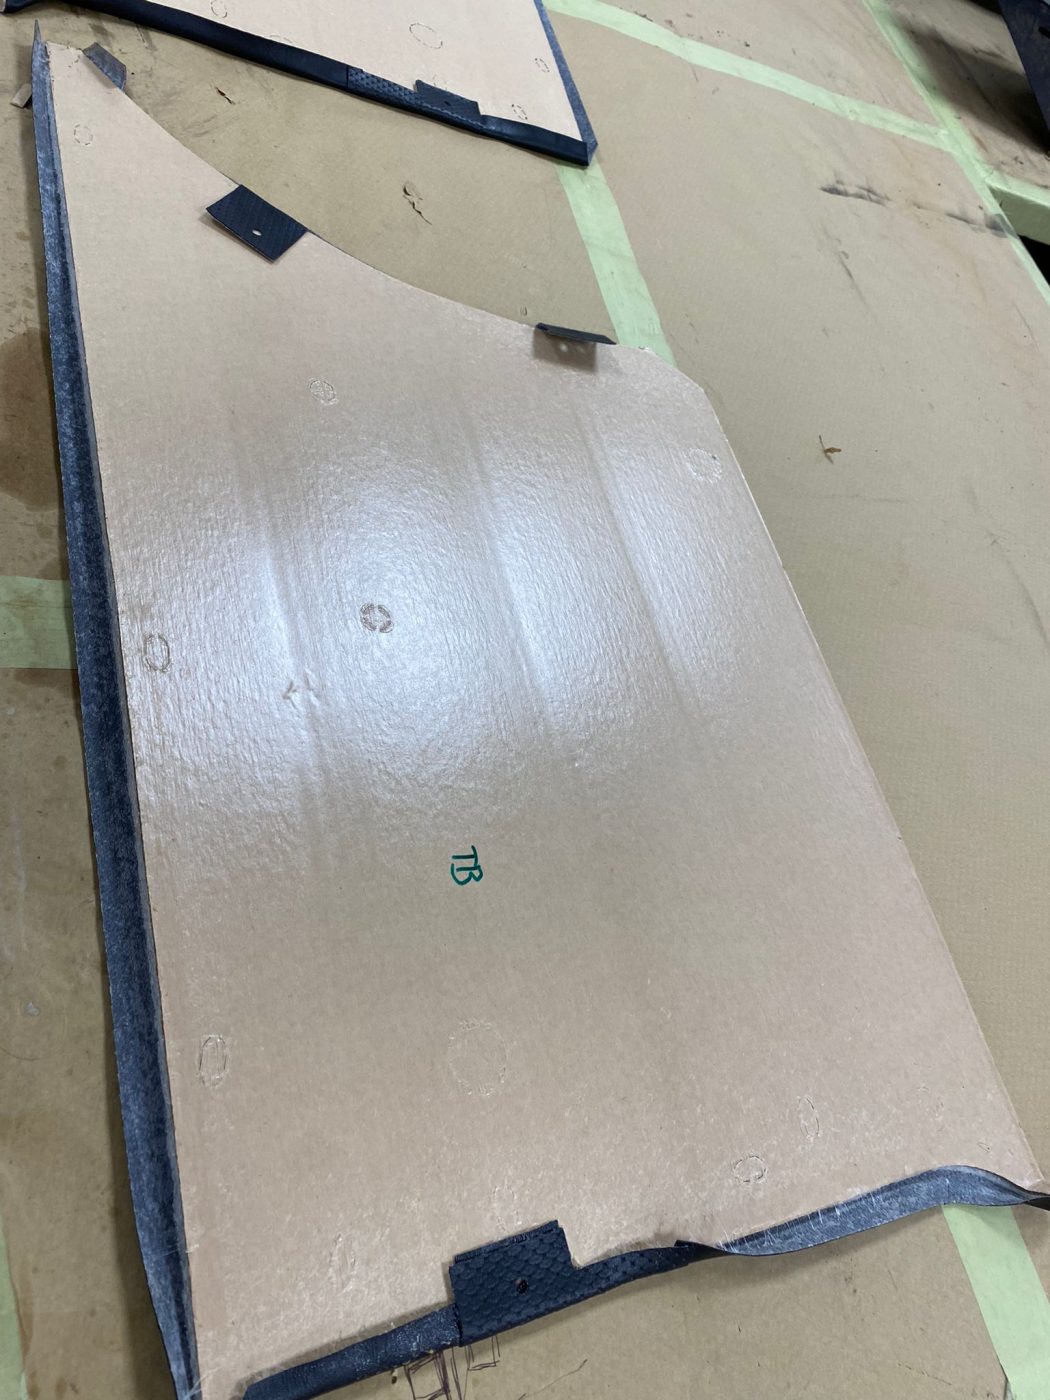
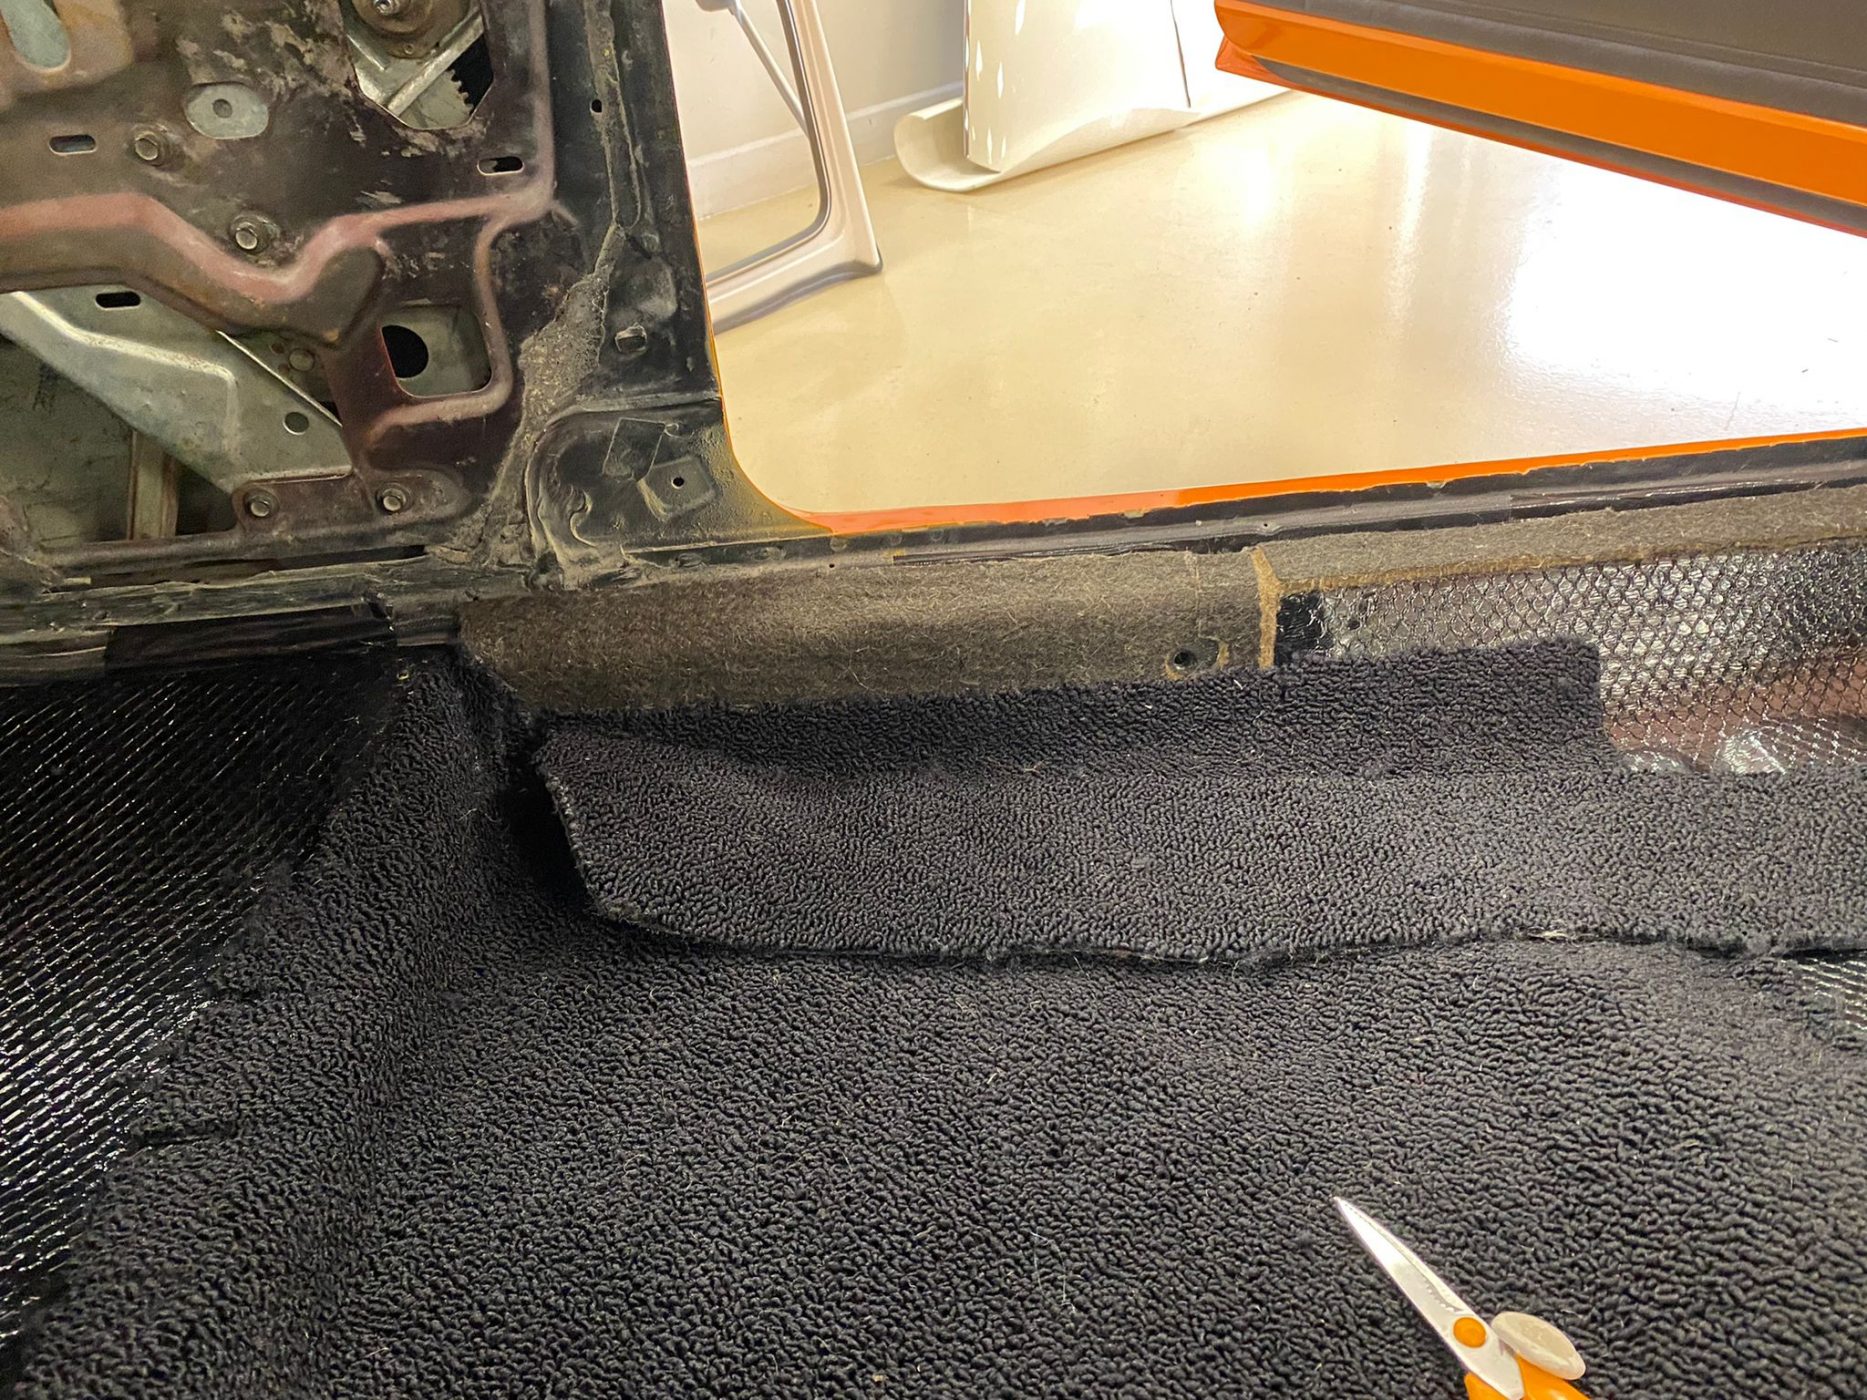
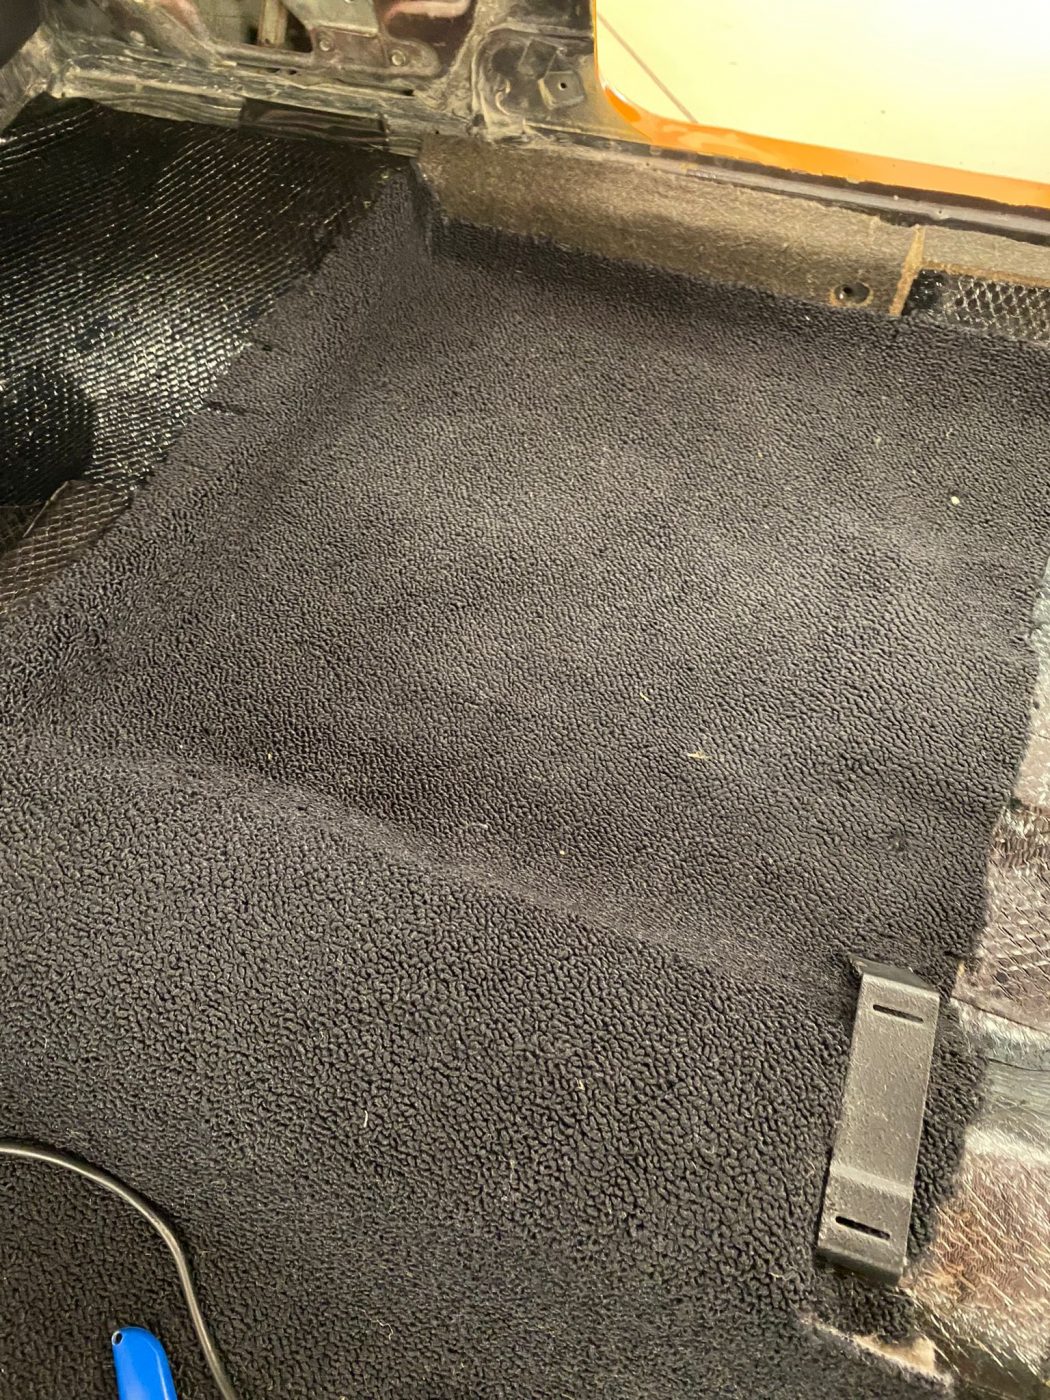
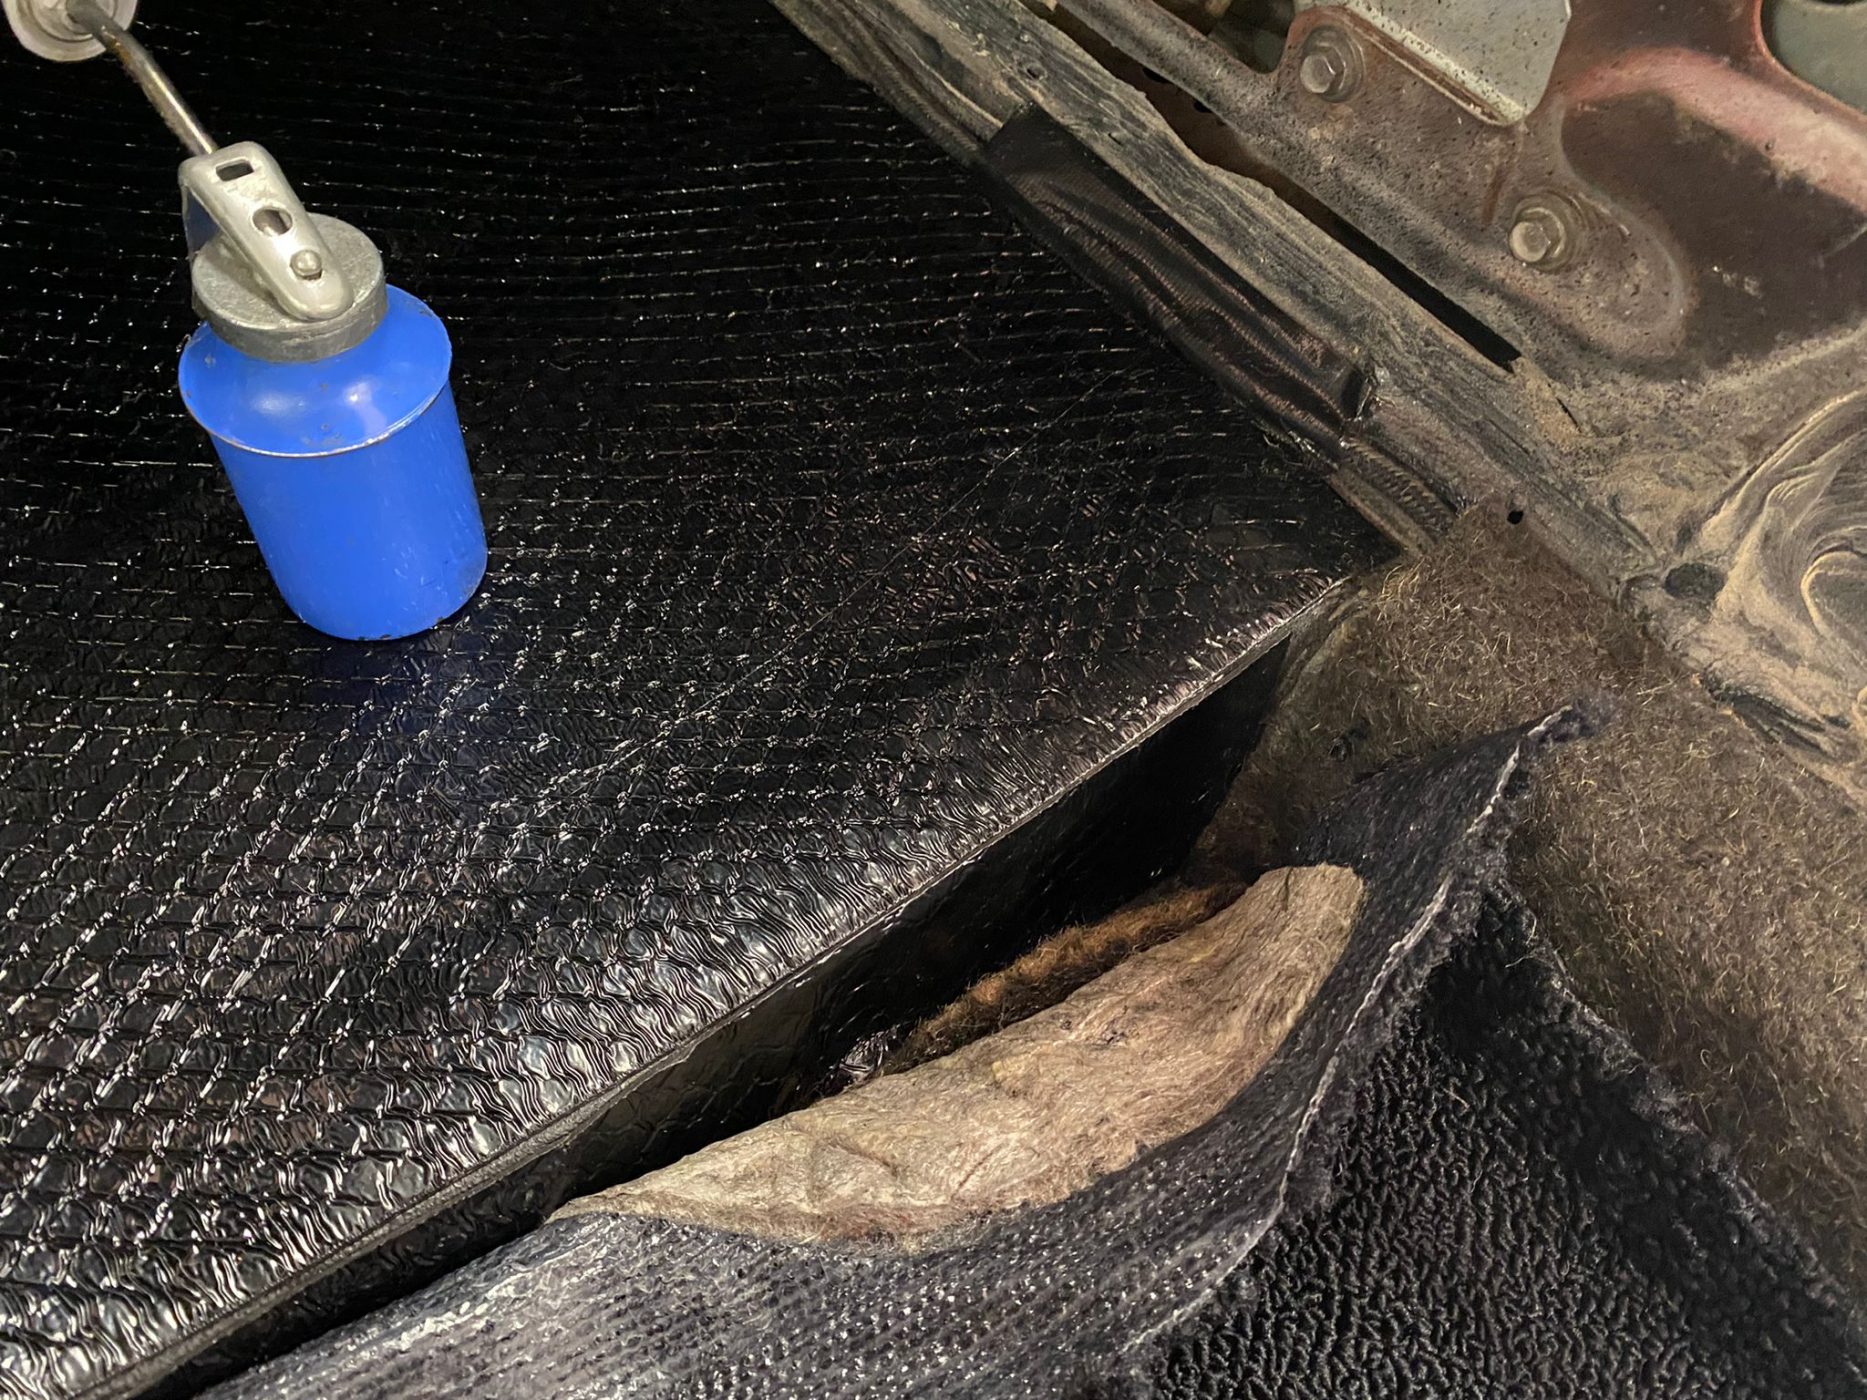
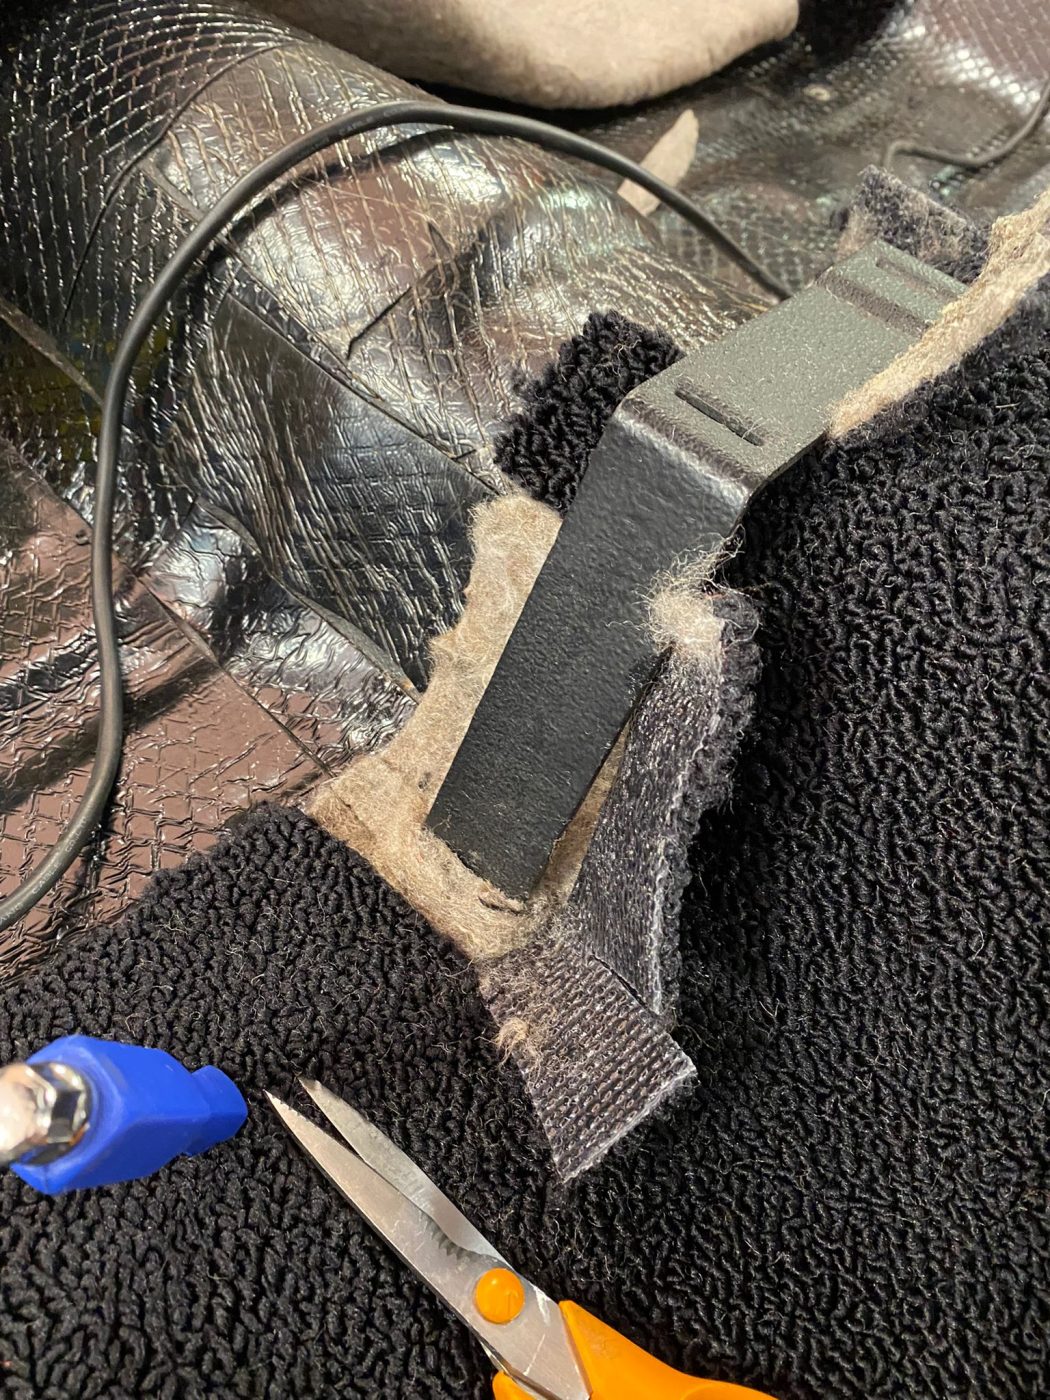
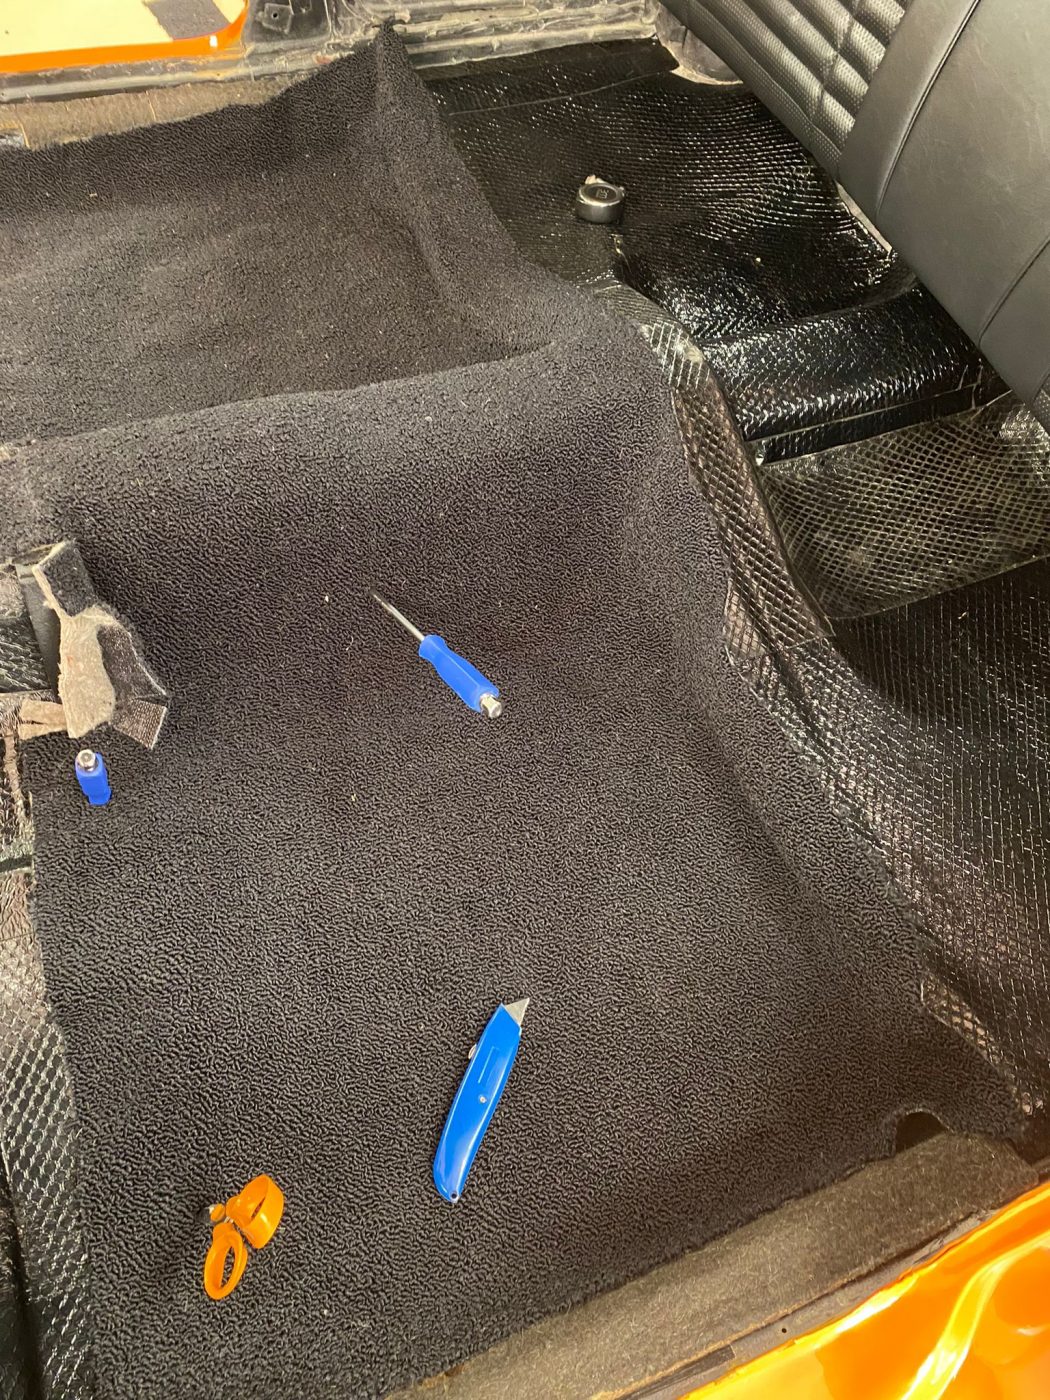
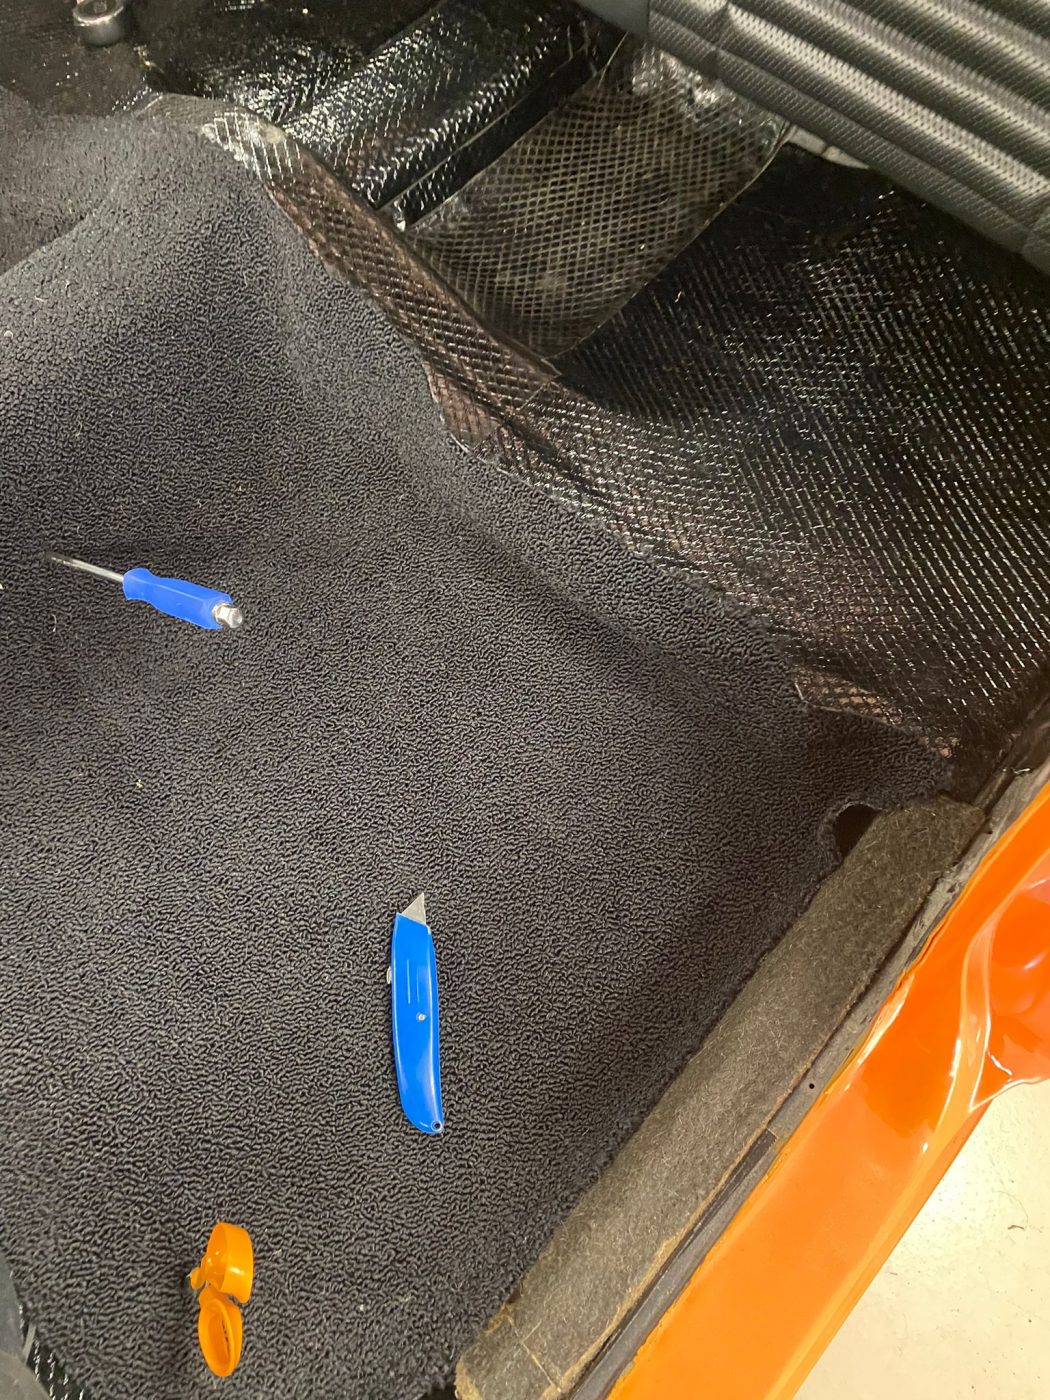
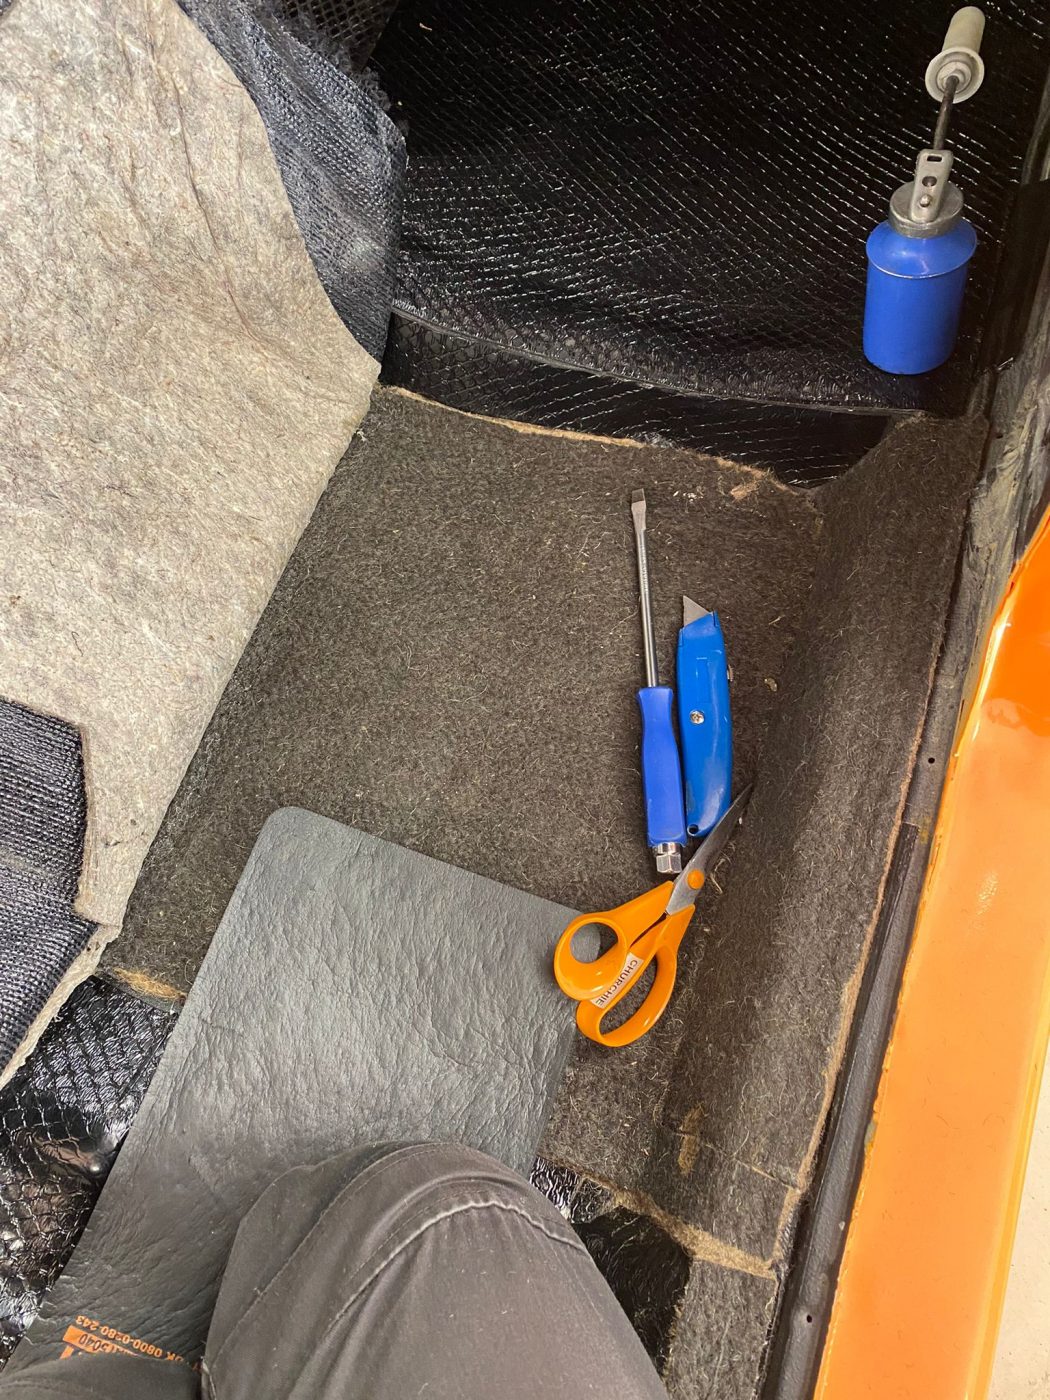
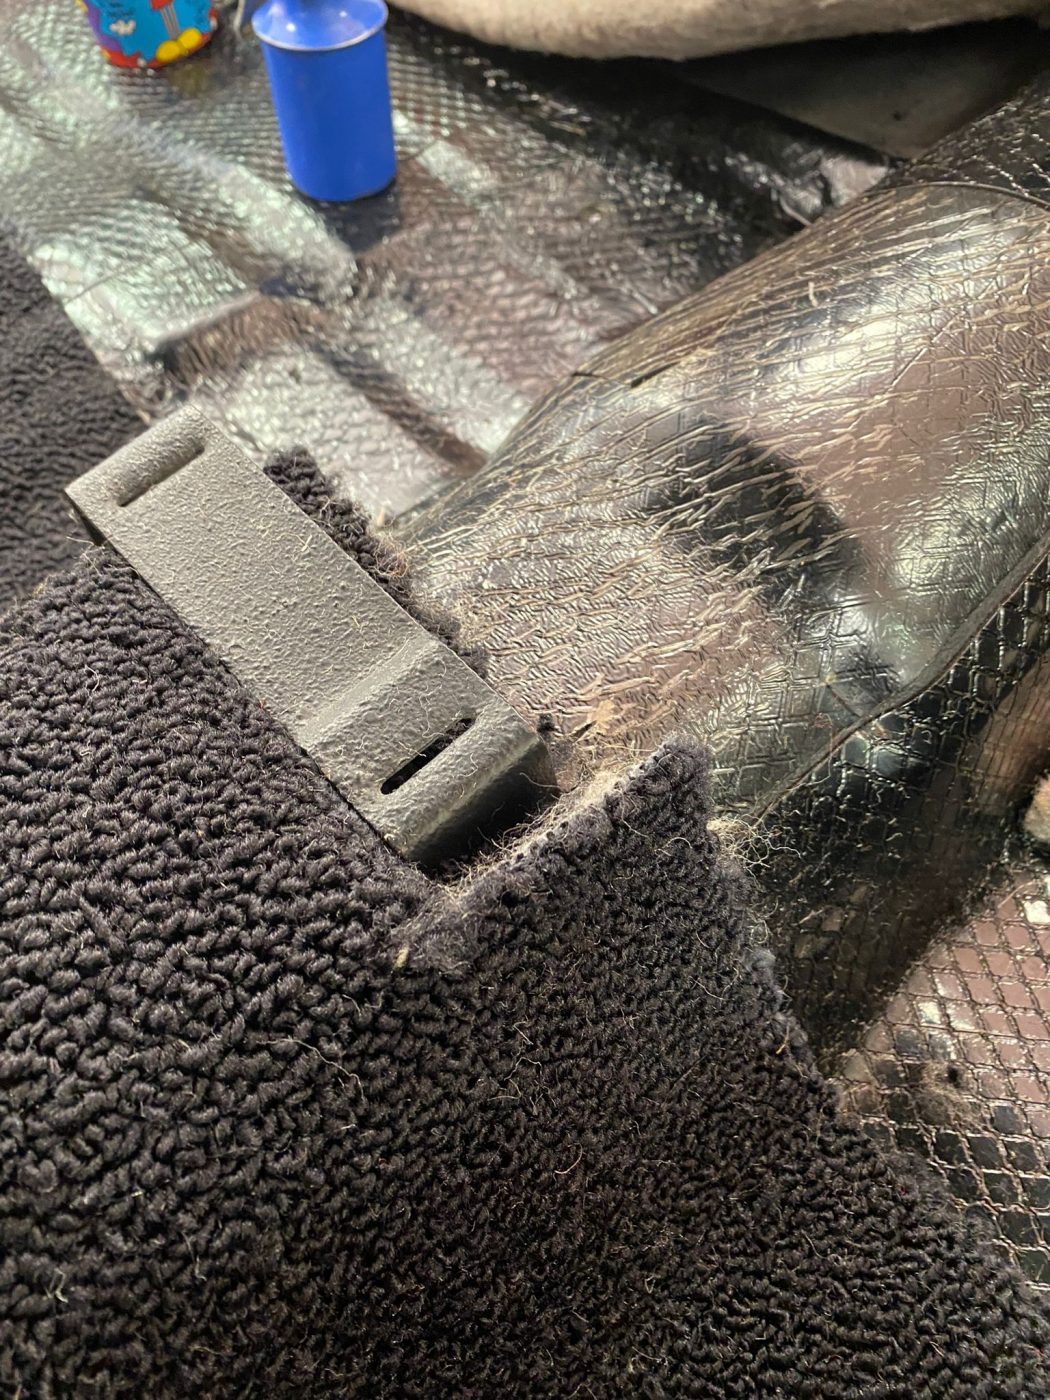
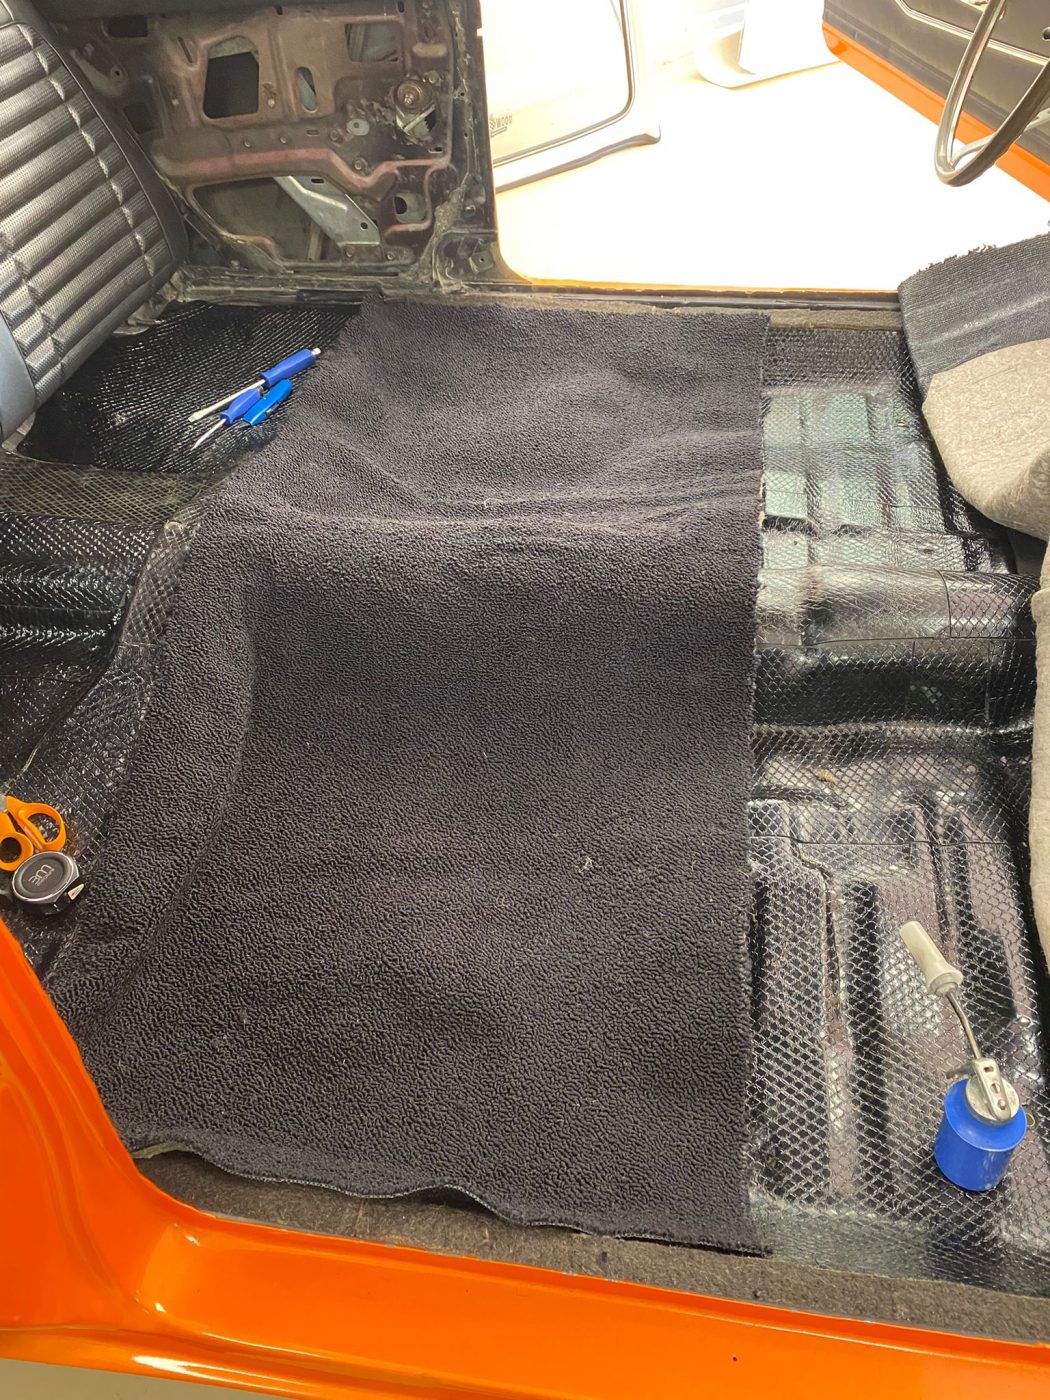
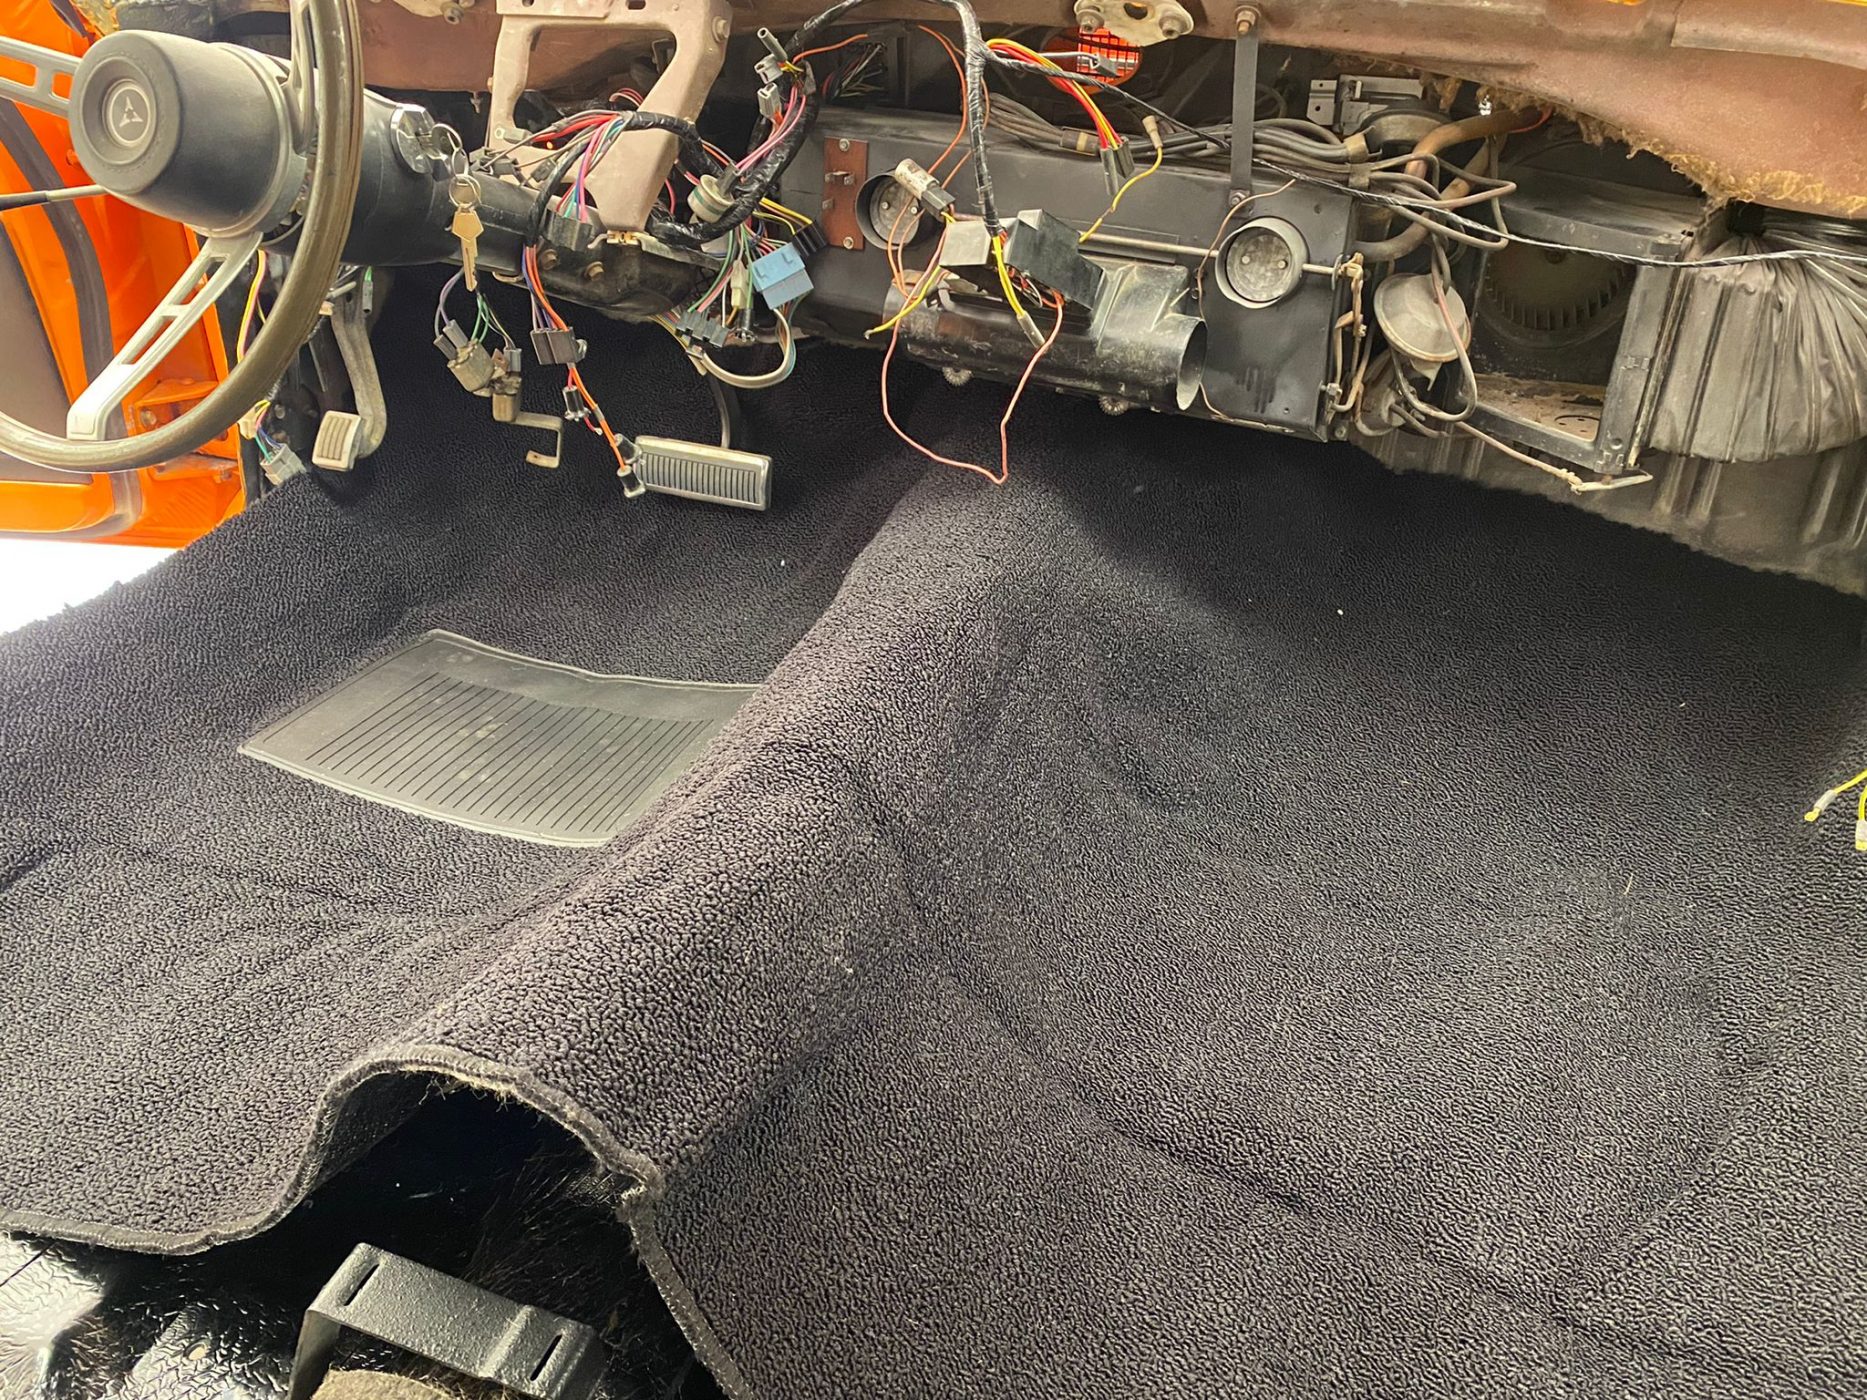
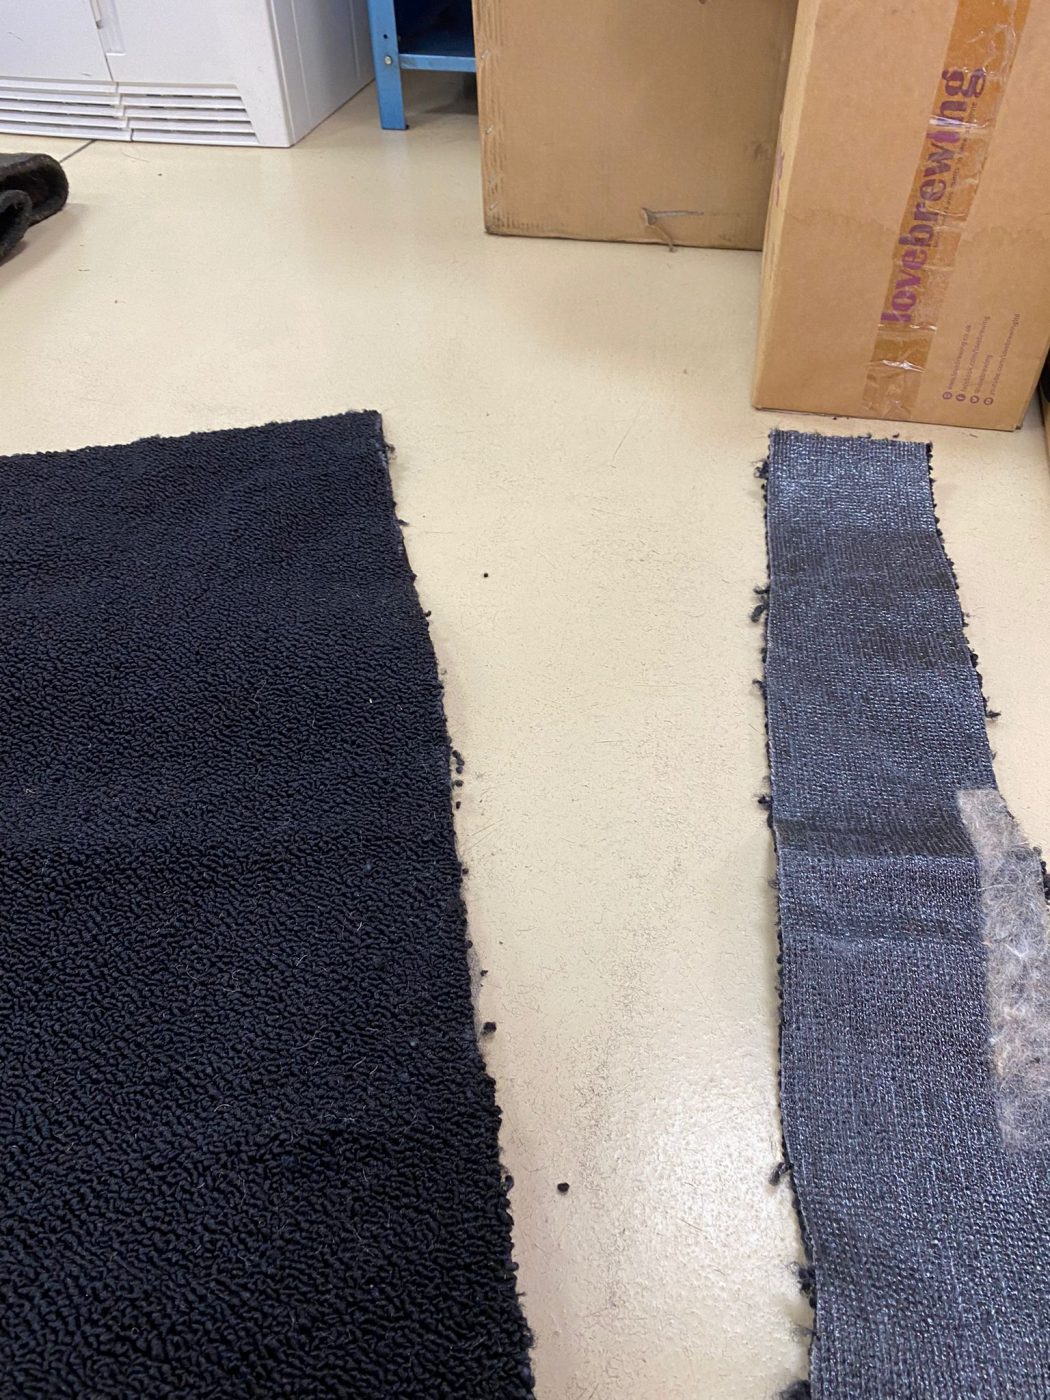
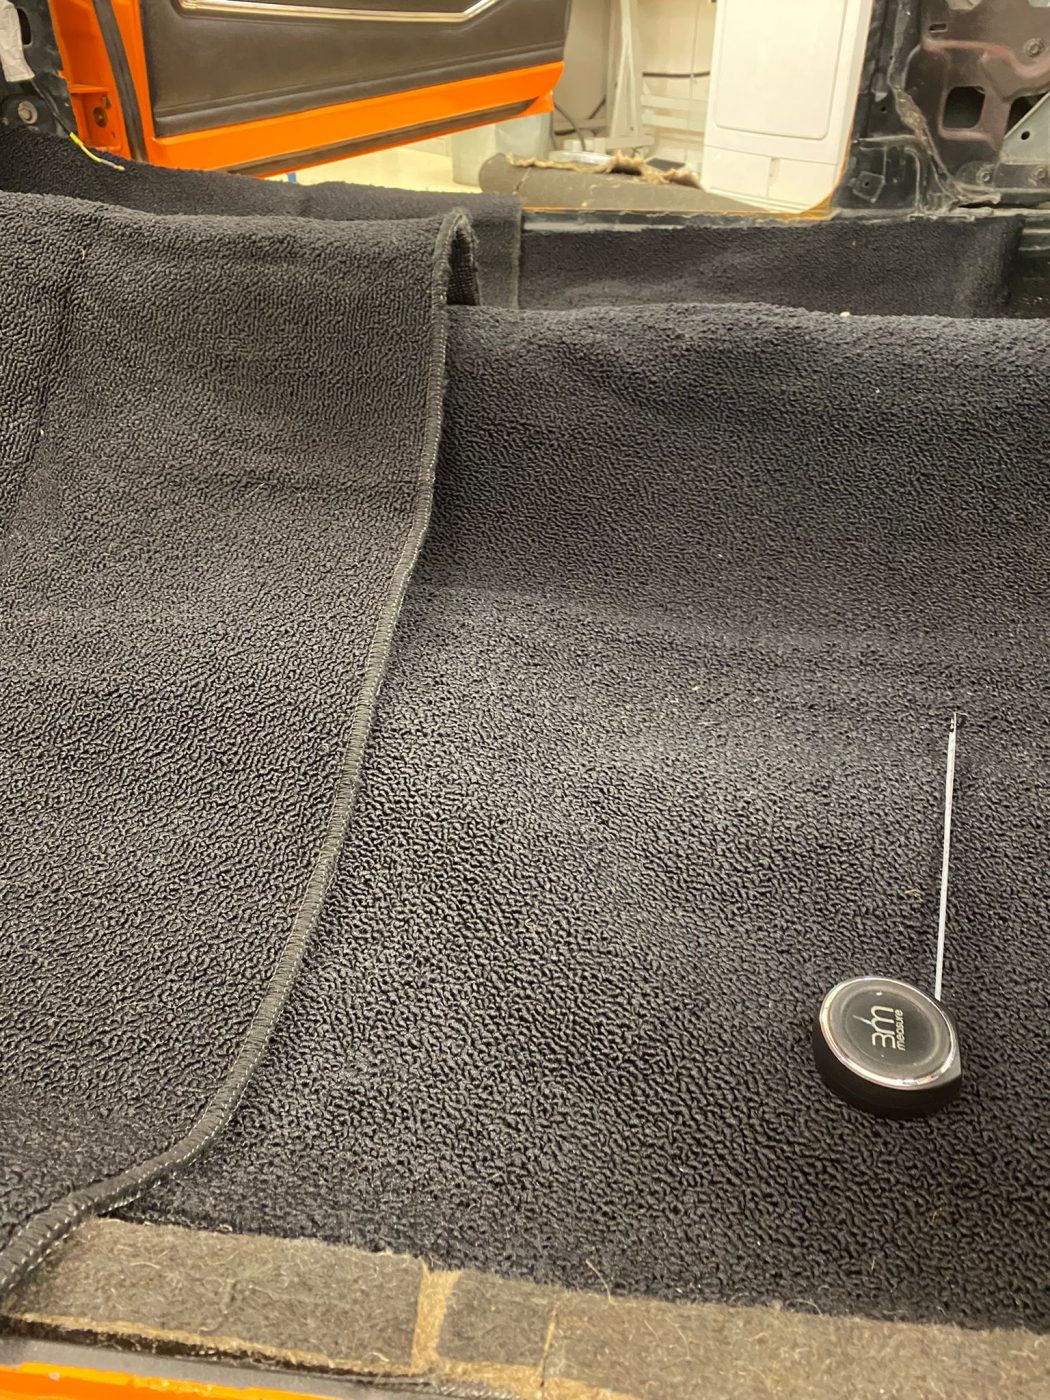
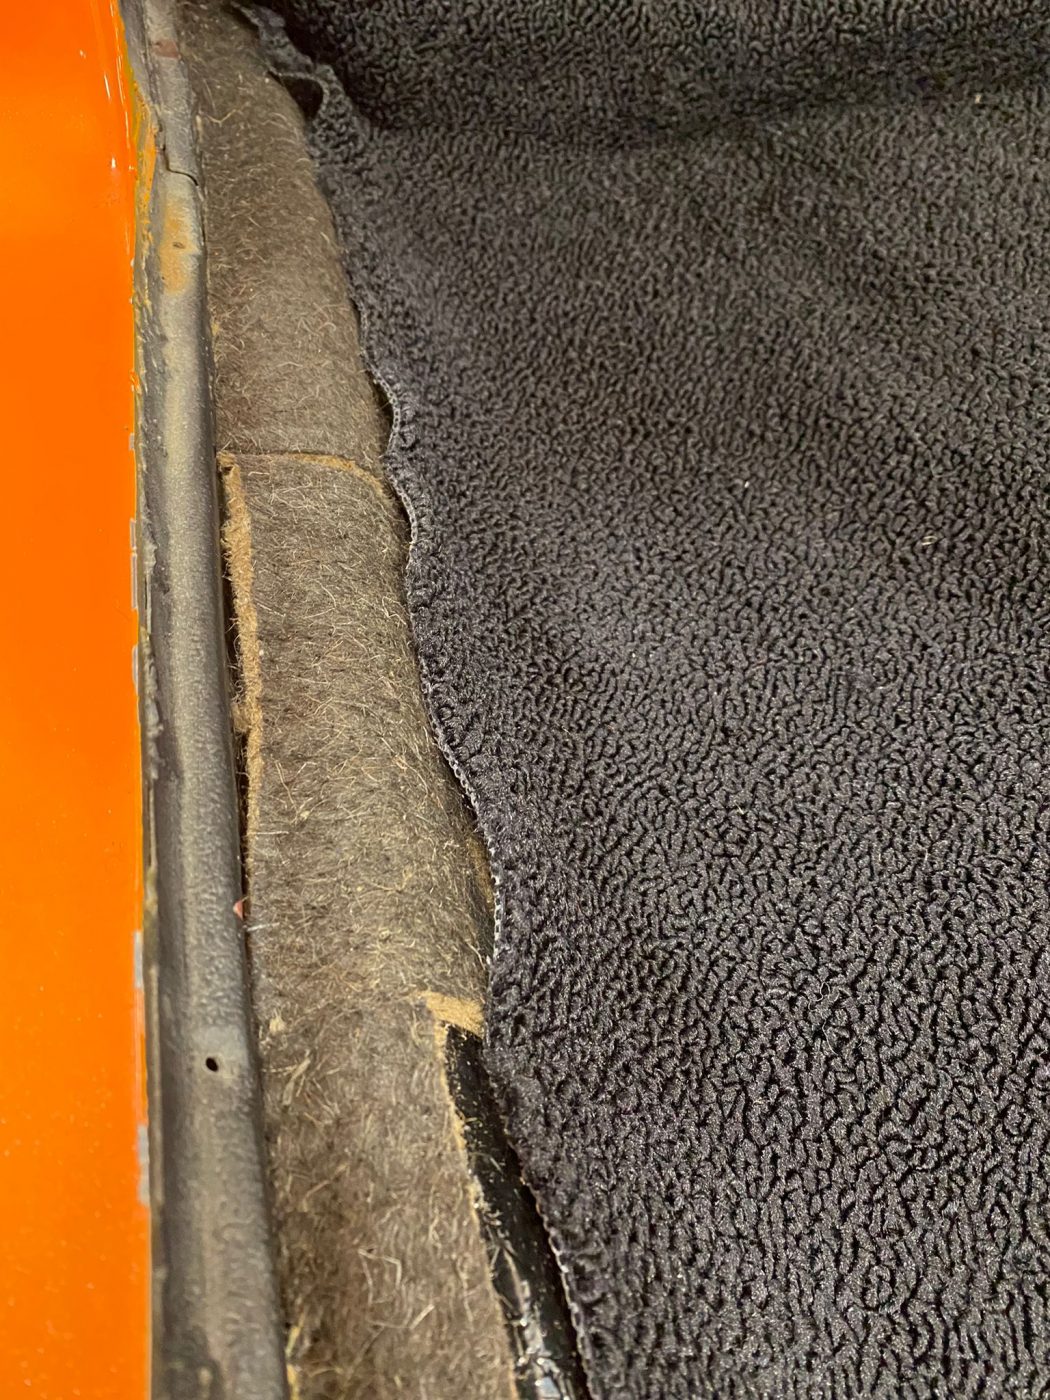
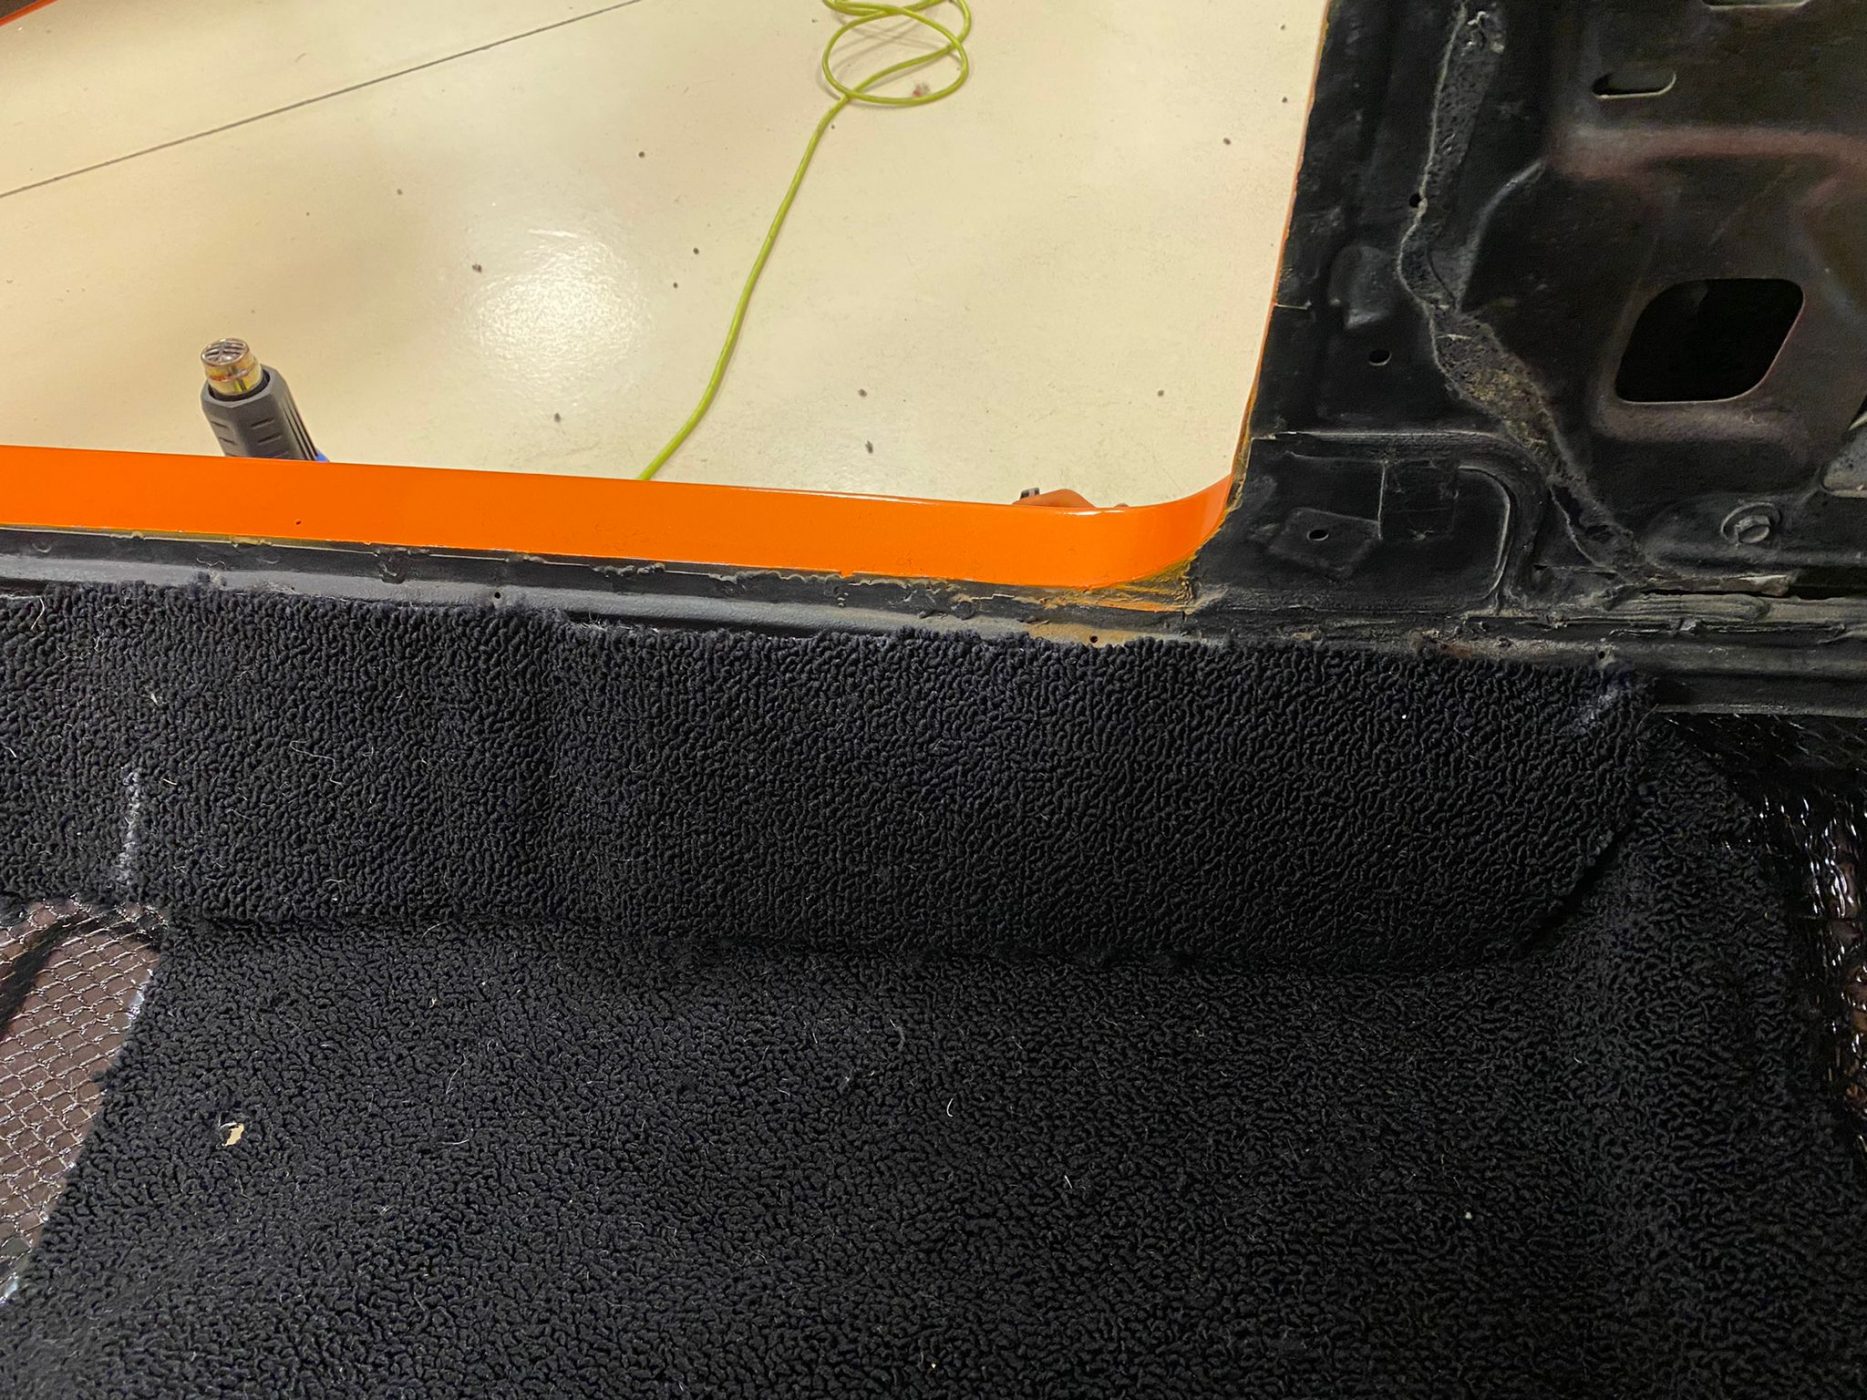
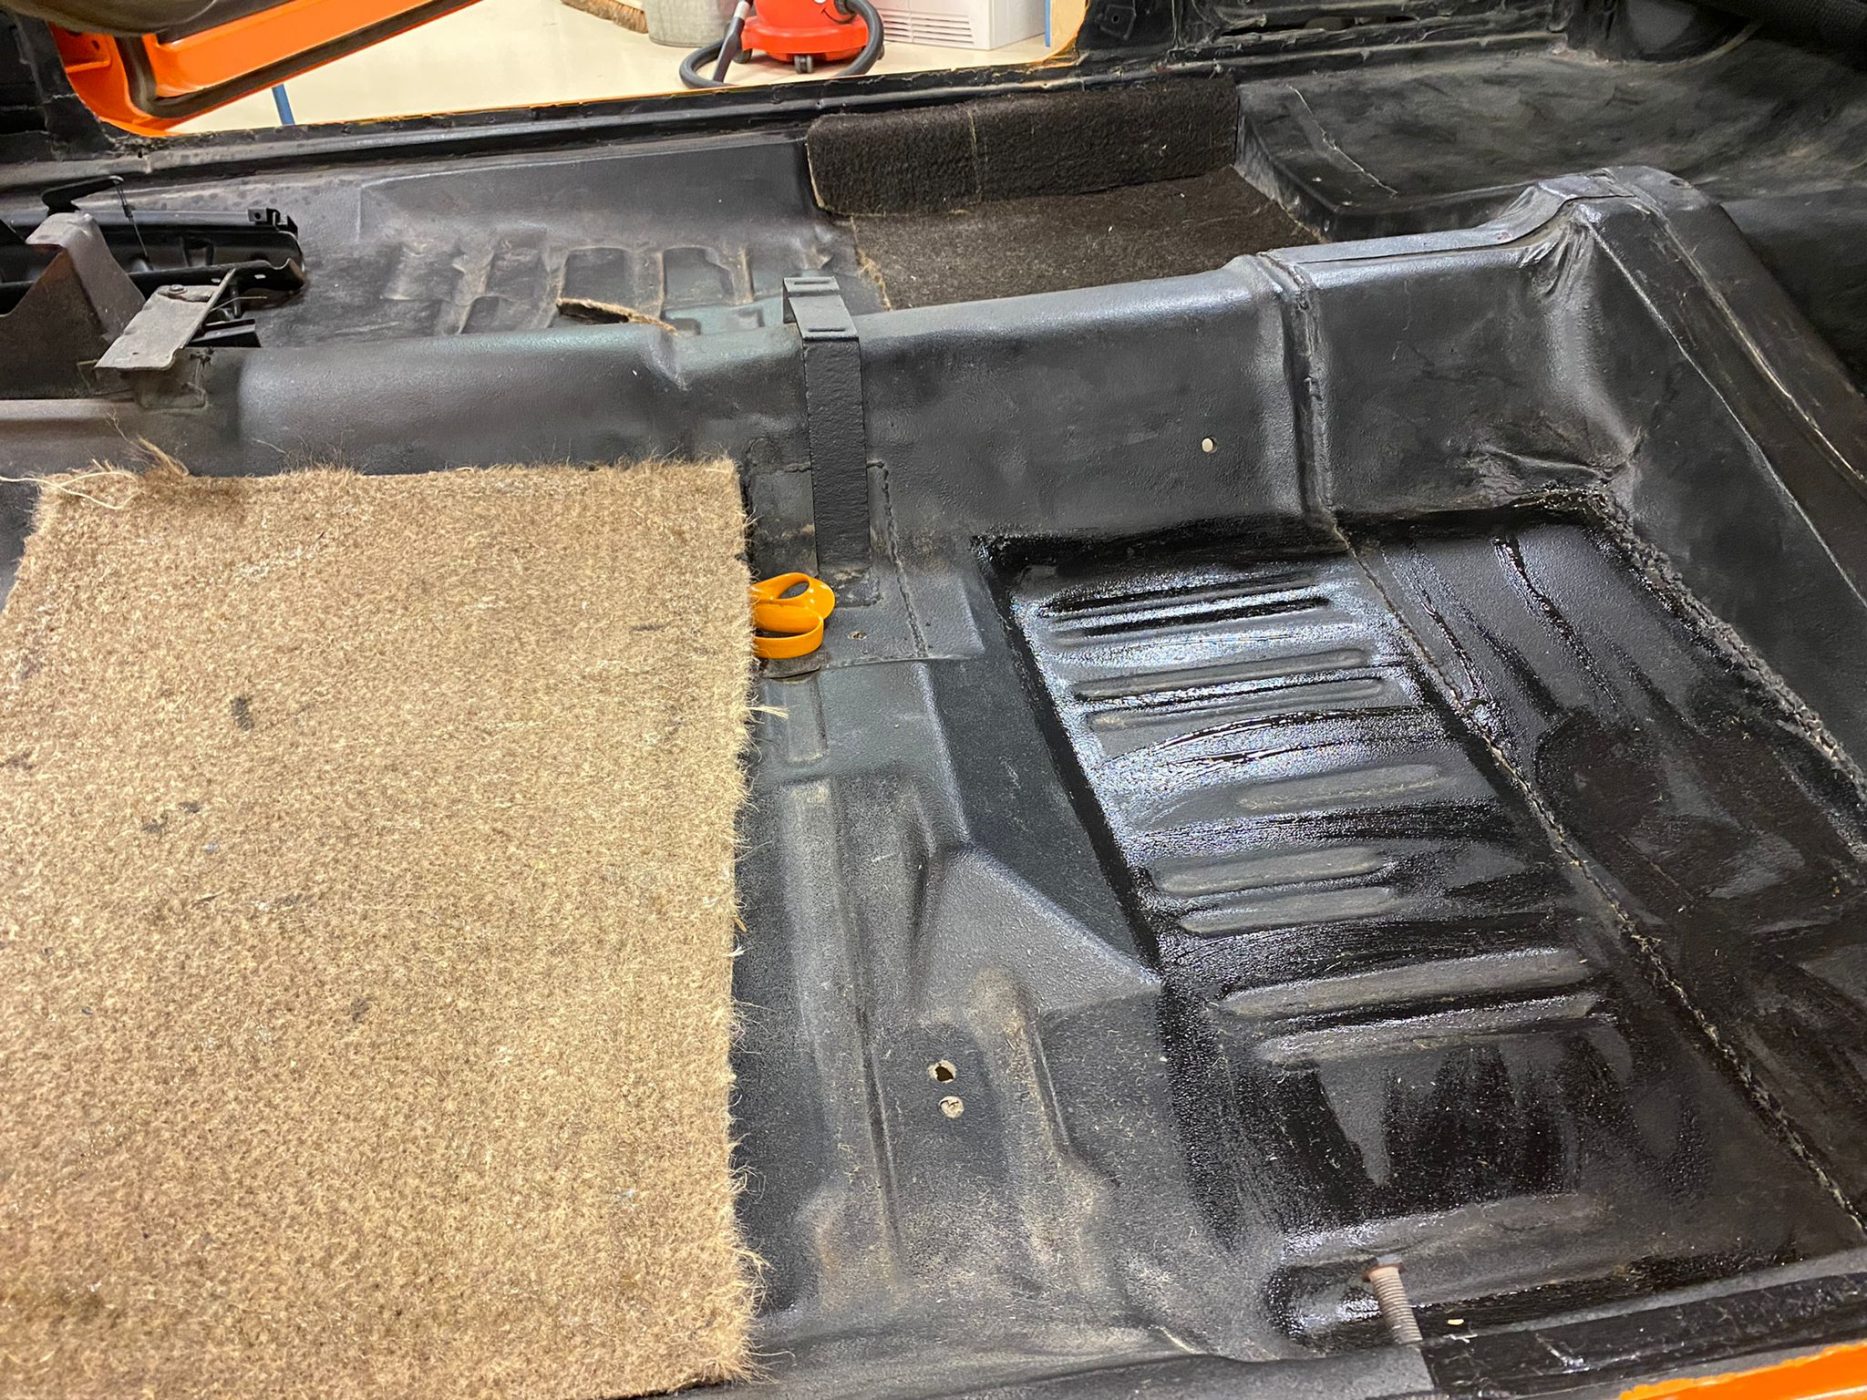
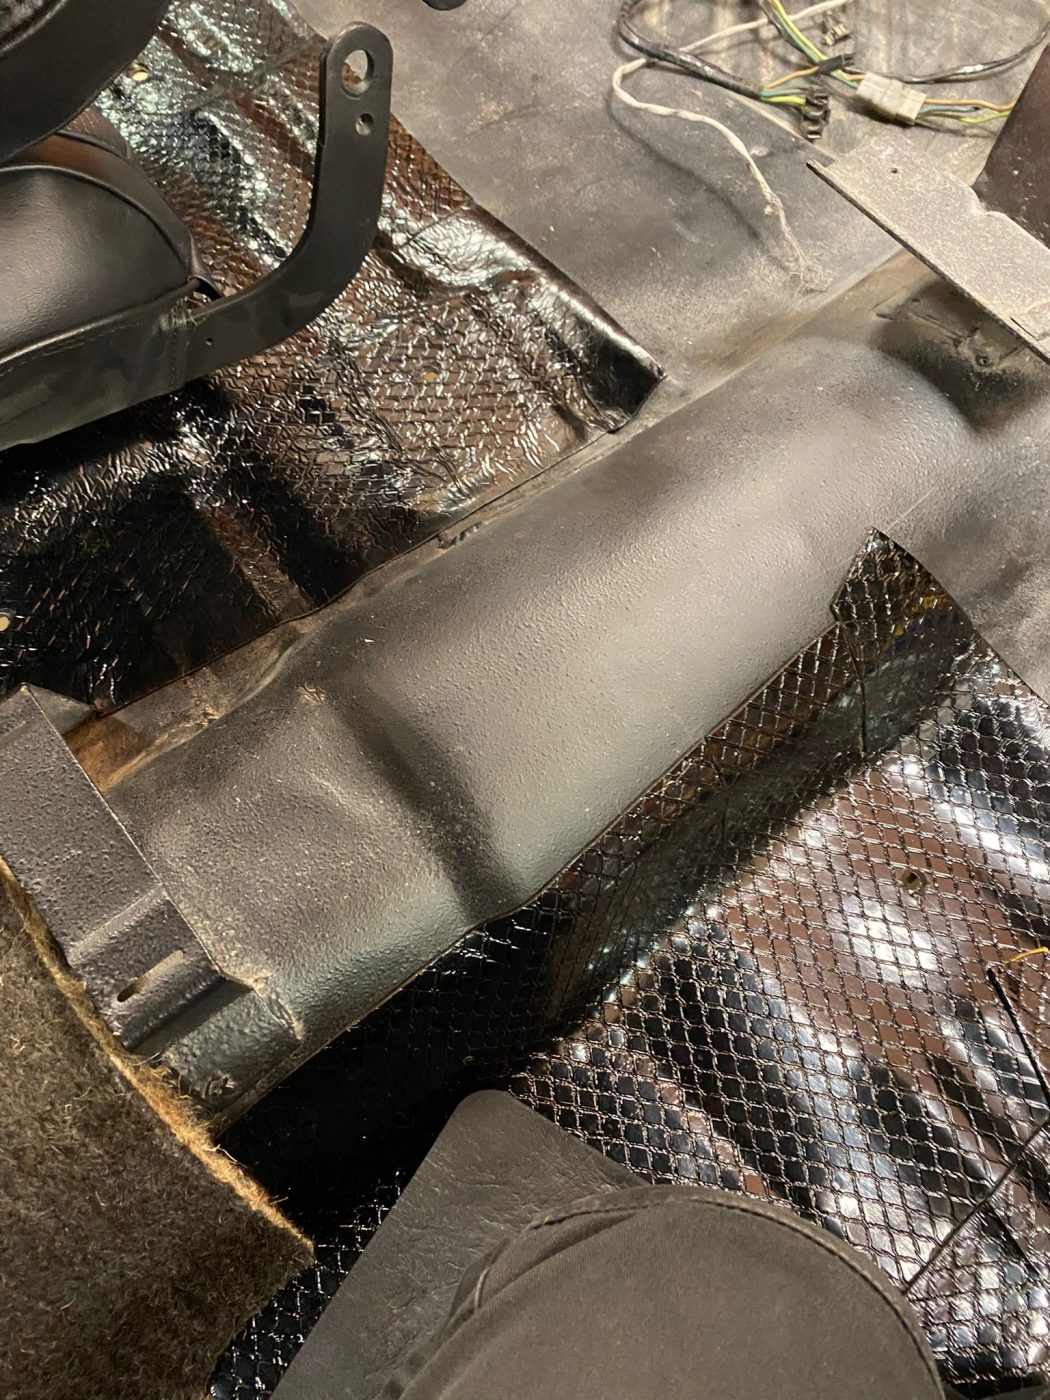
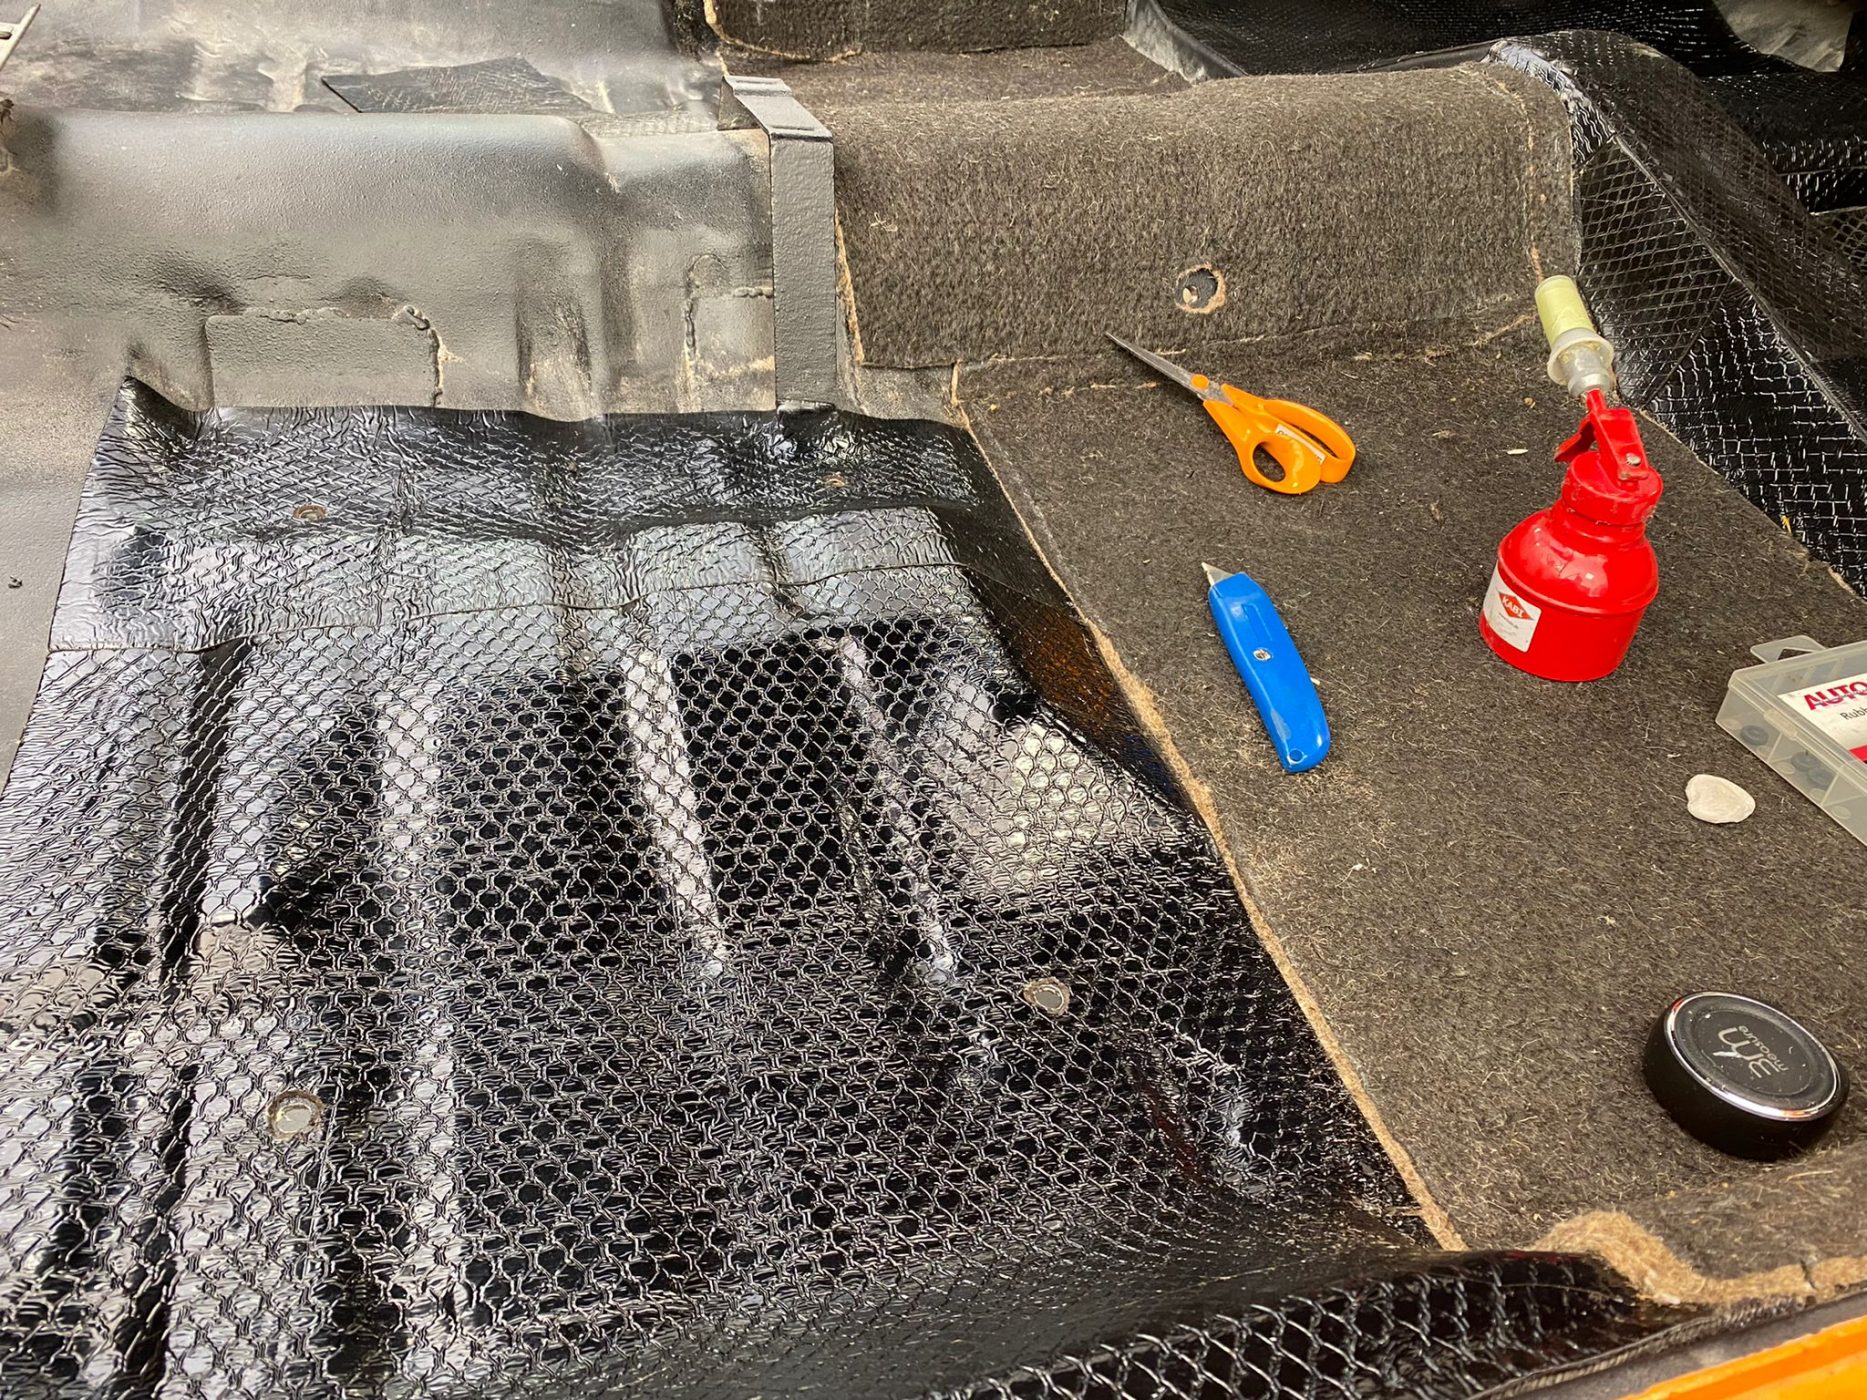
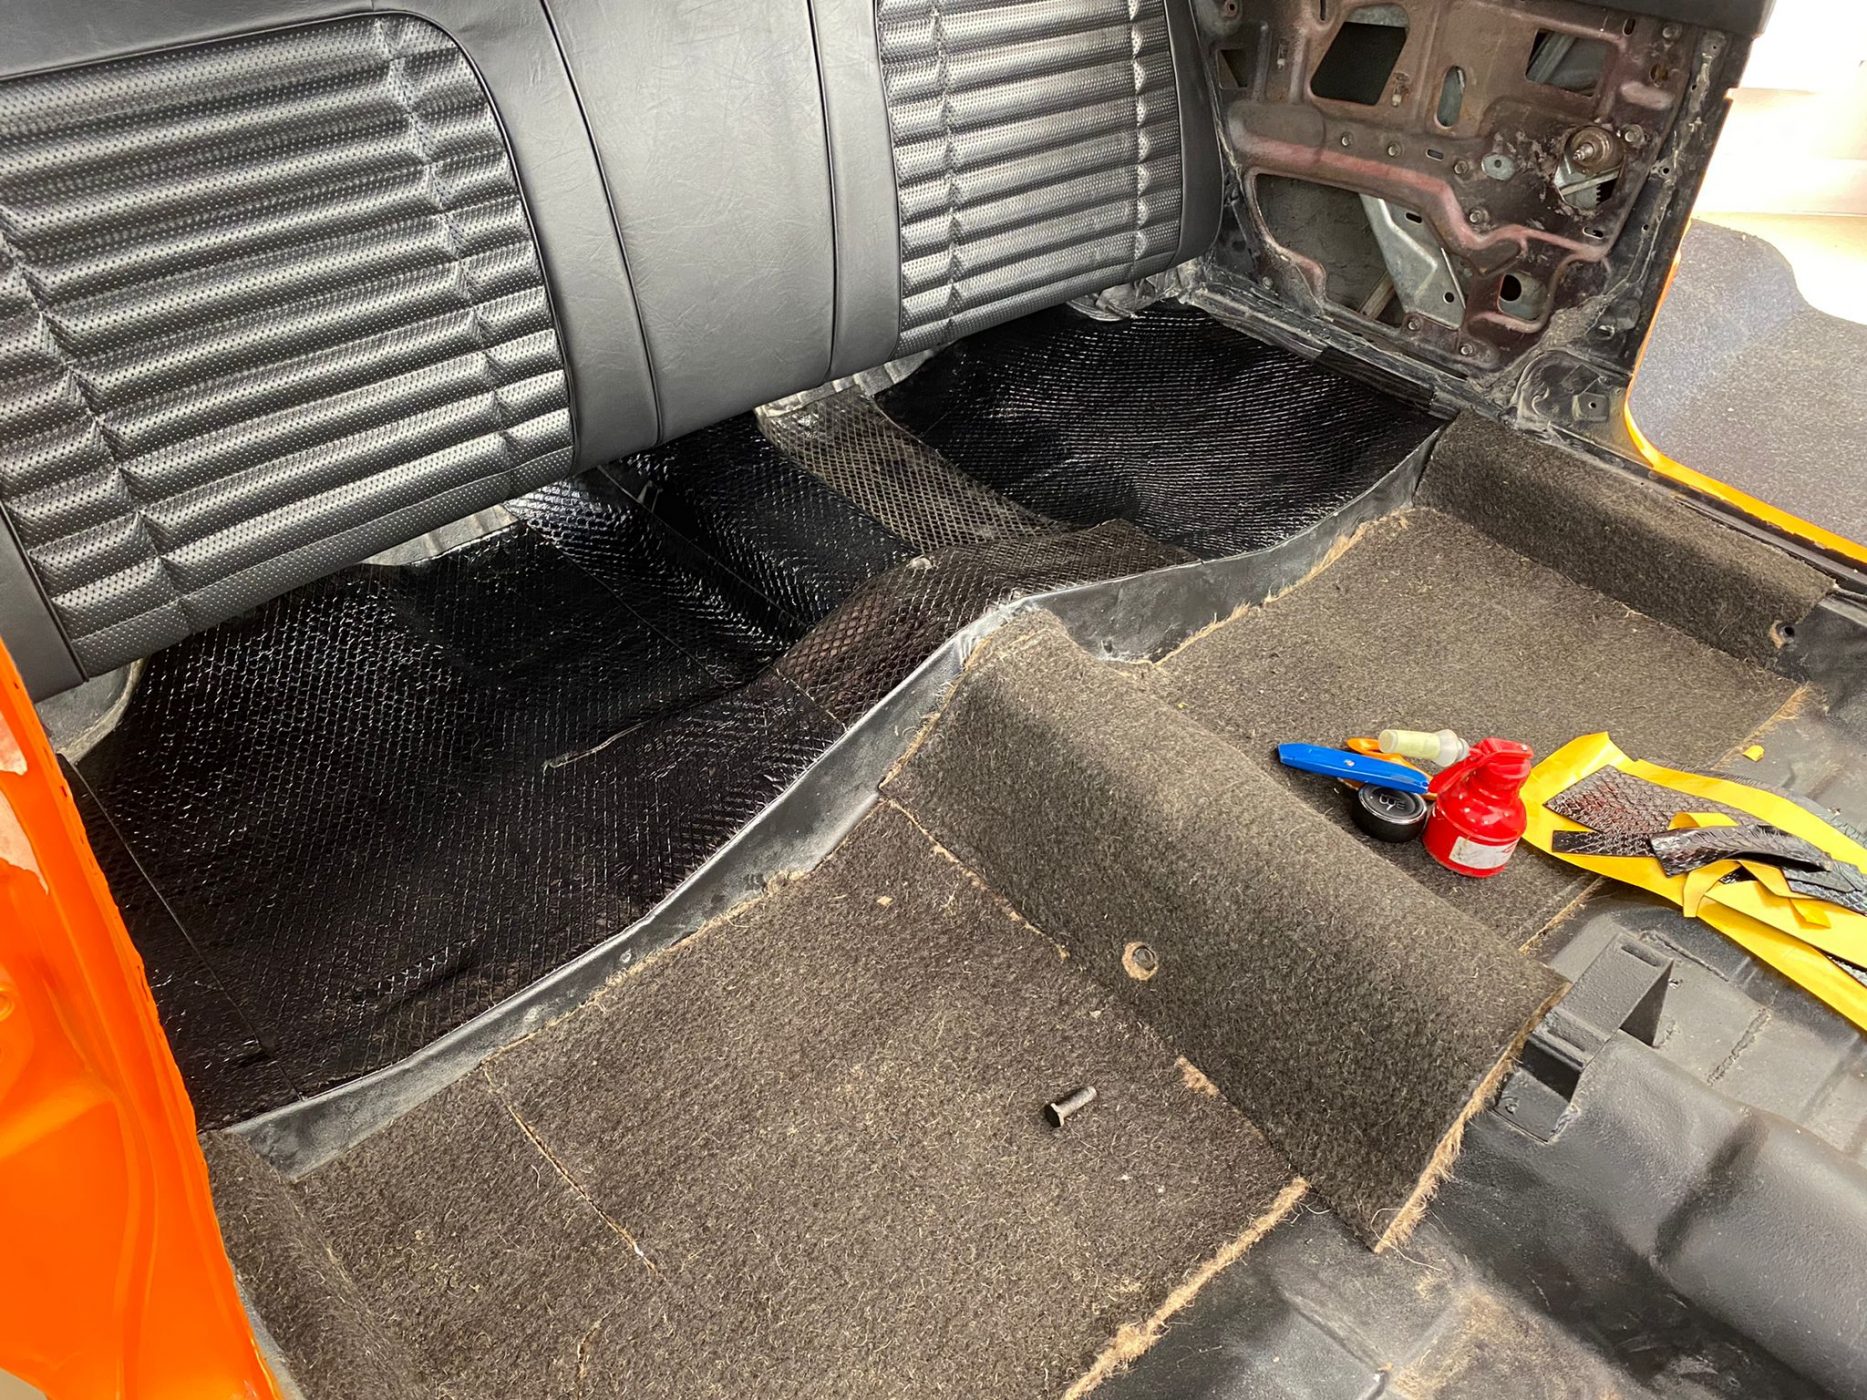
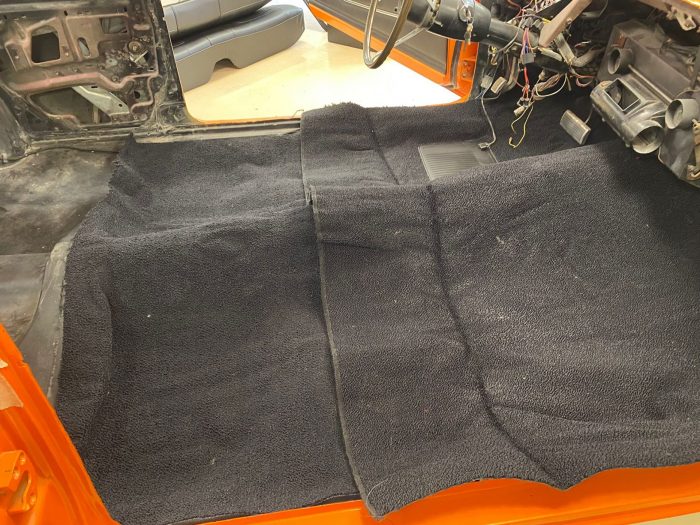
There’s been some big progress on the 1970 Dodge Charger currently in the trim shop at Bridge Classic Cars.
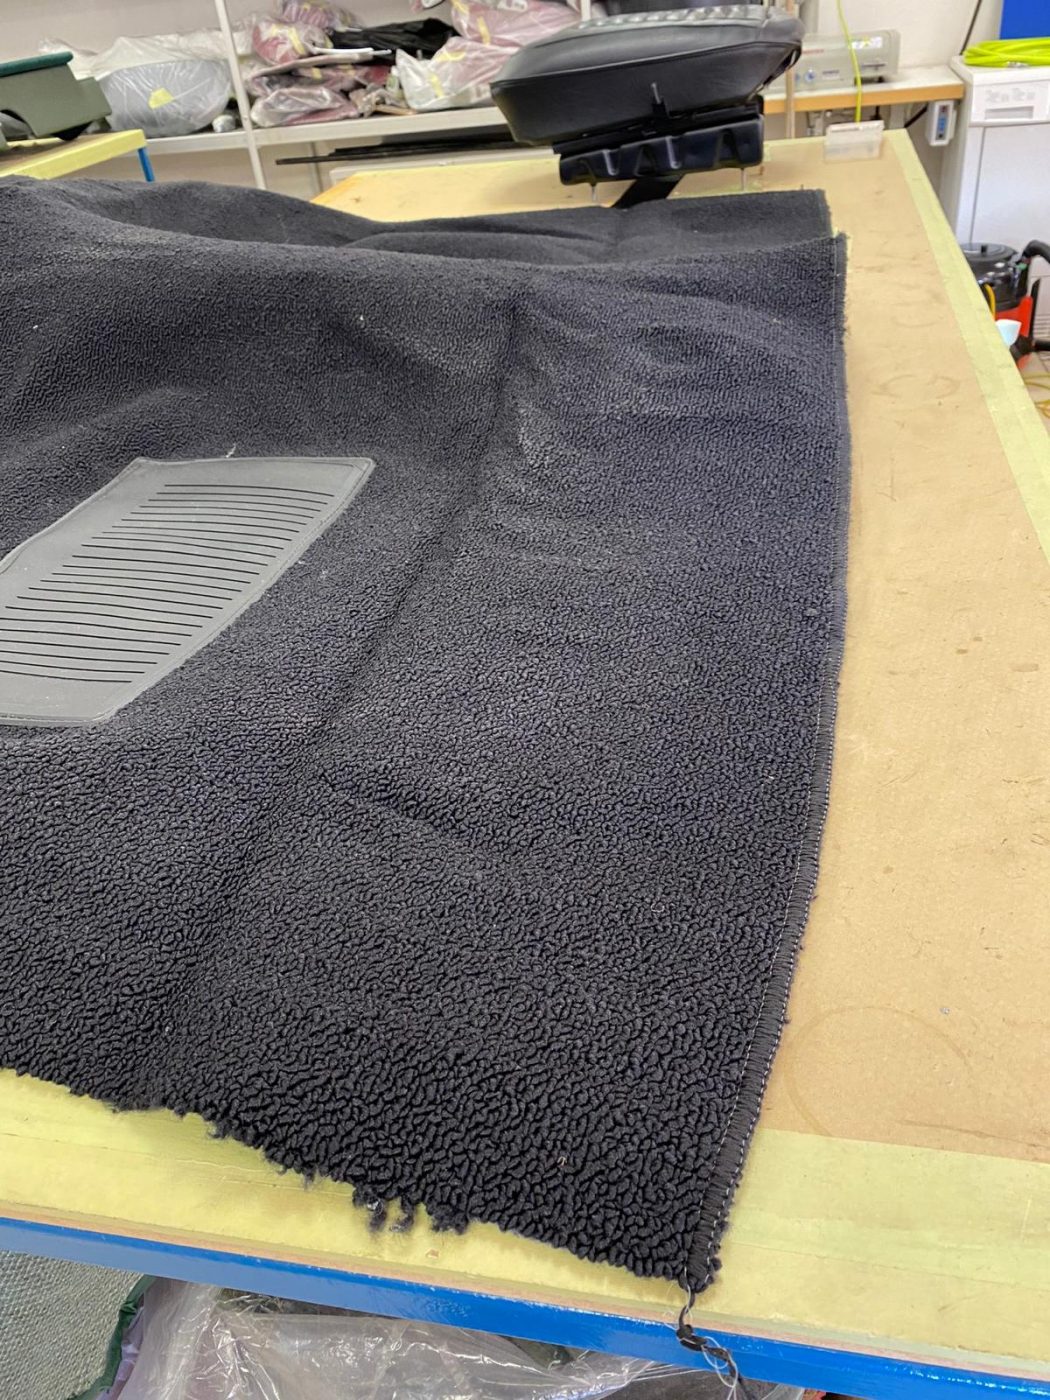
Kath had to cut the carpet to get a good fit during the test fit of the piece but rather than leave it, she has bound the edge to match the original edging fitted to the carpet set. Now with the piece ready to be fitted, it was time to get the final bits of sound deadening in place.
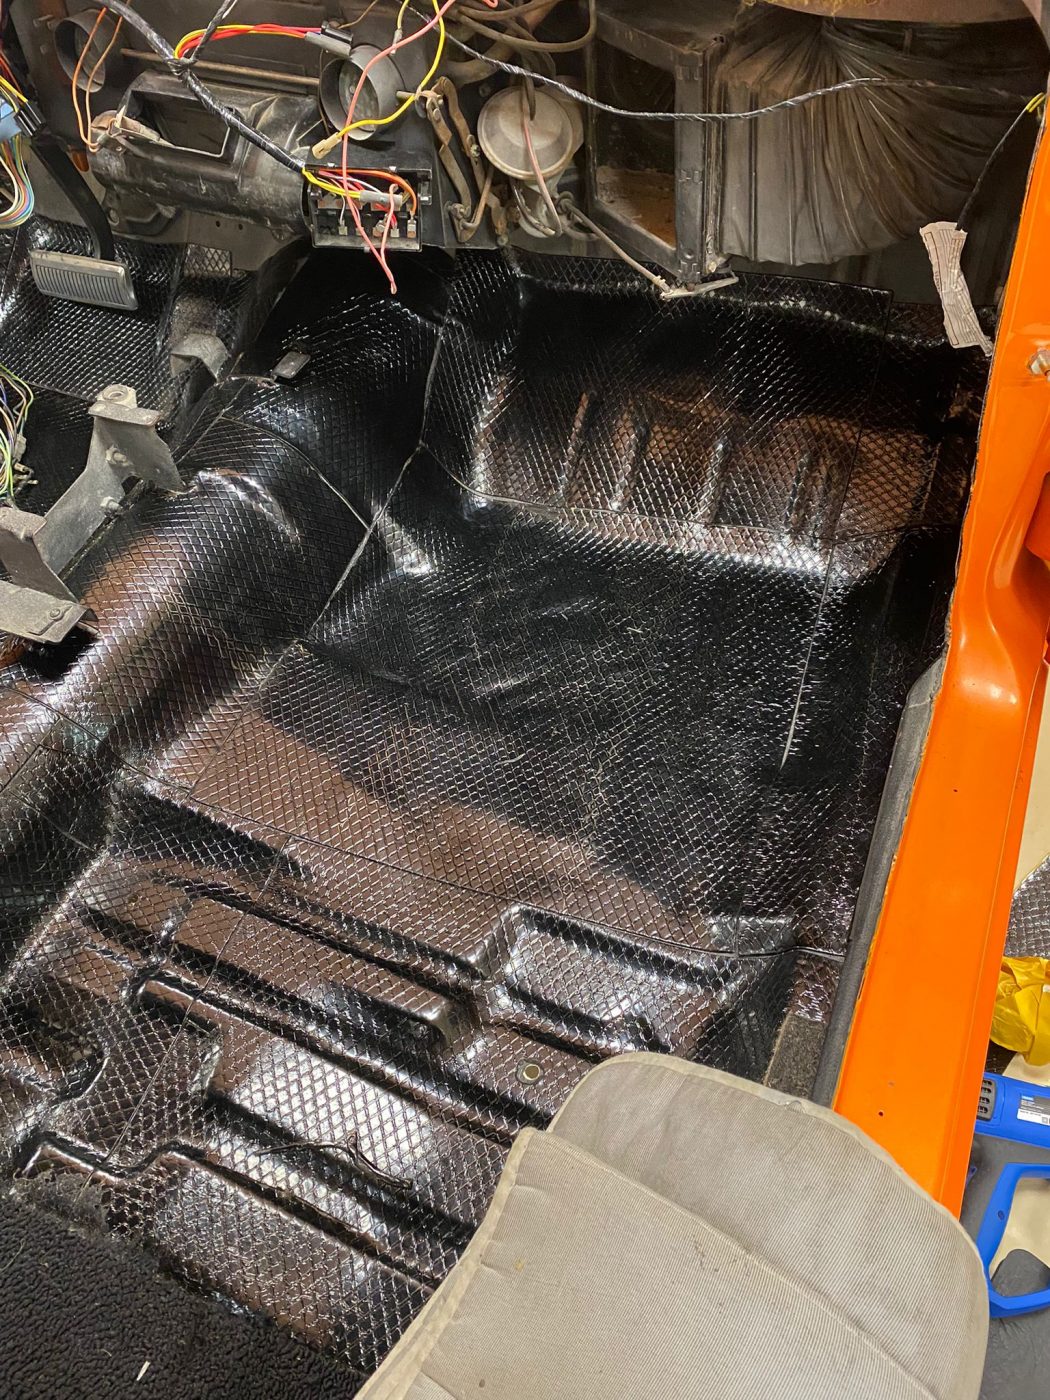
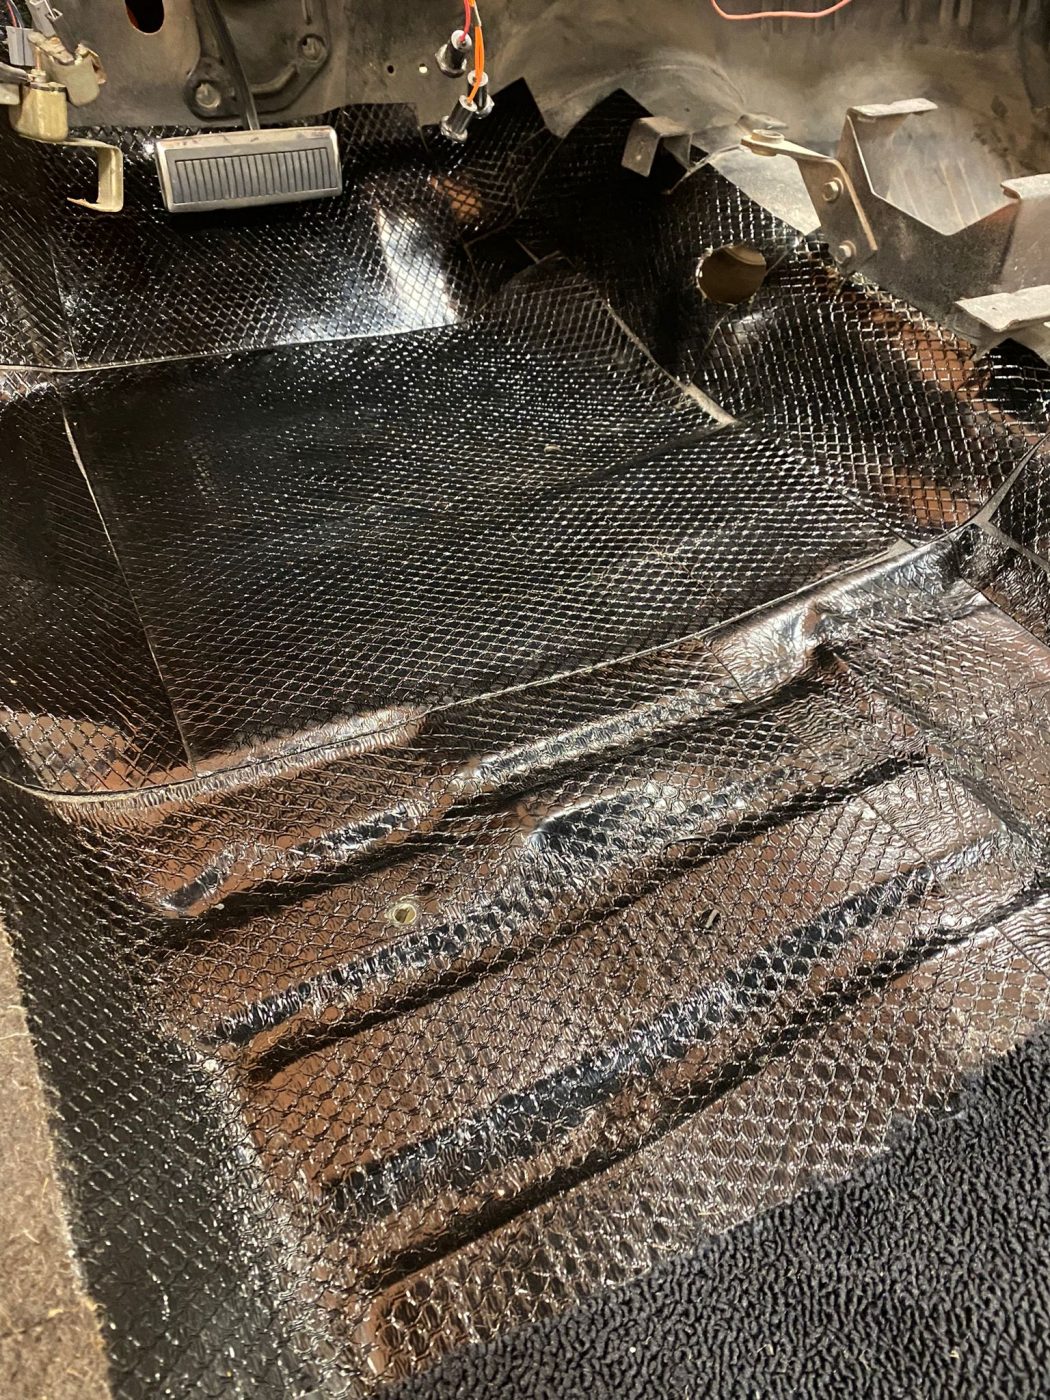
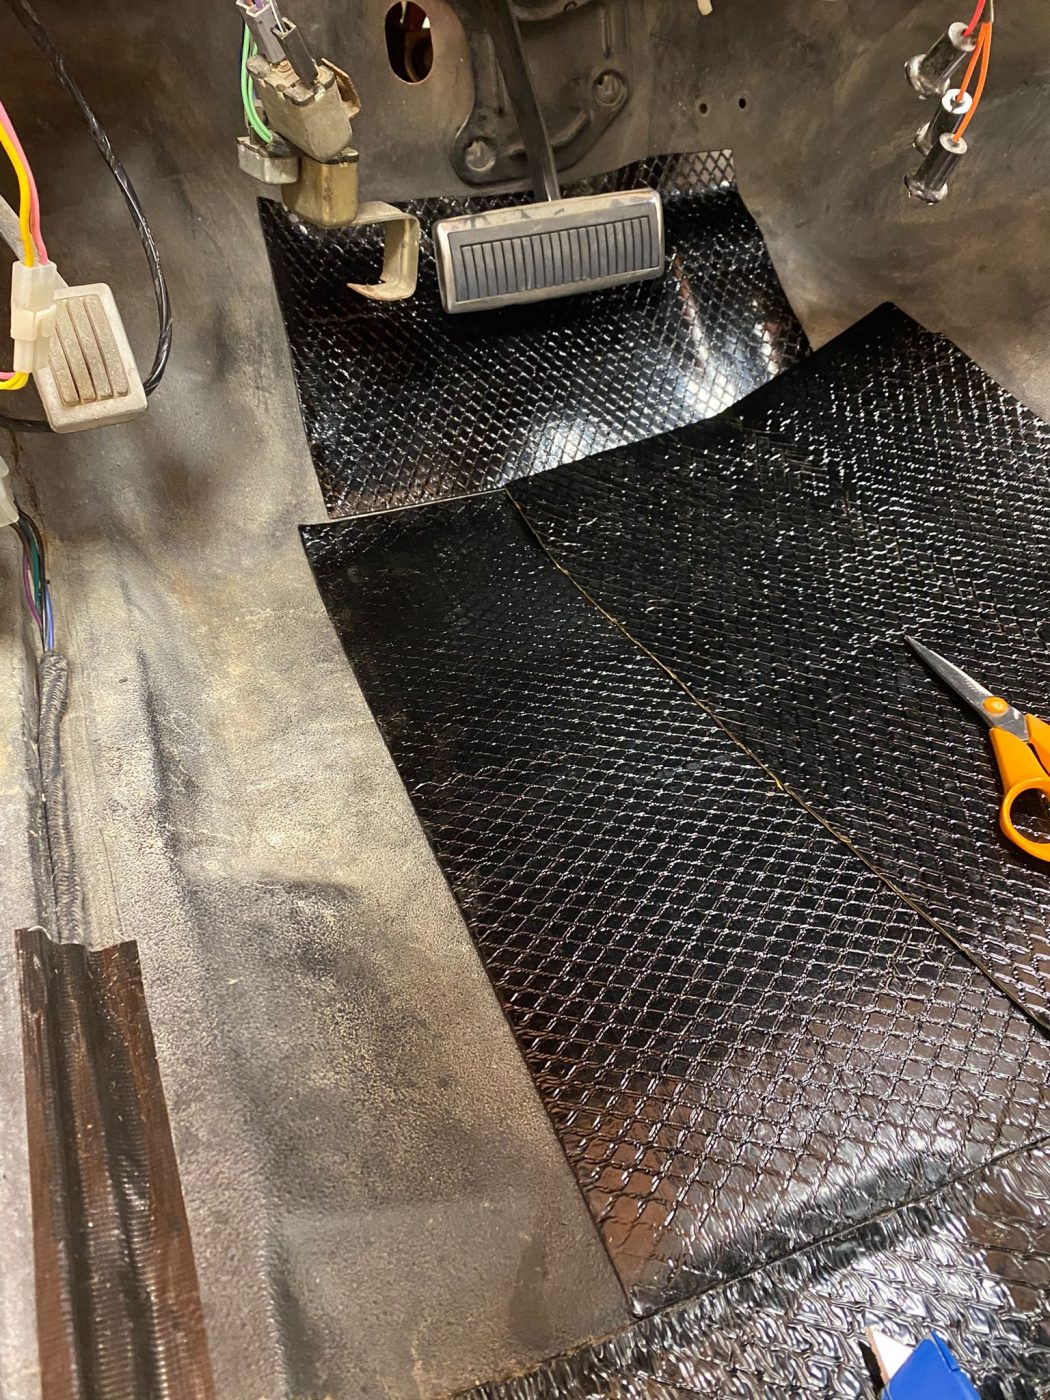
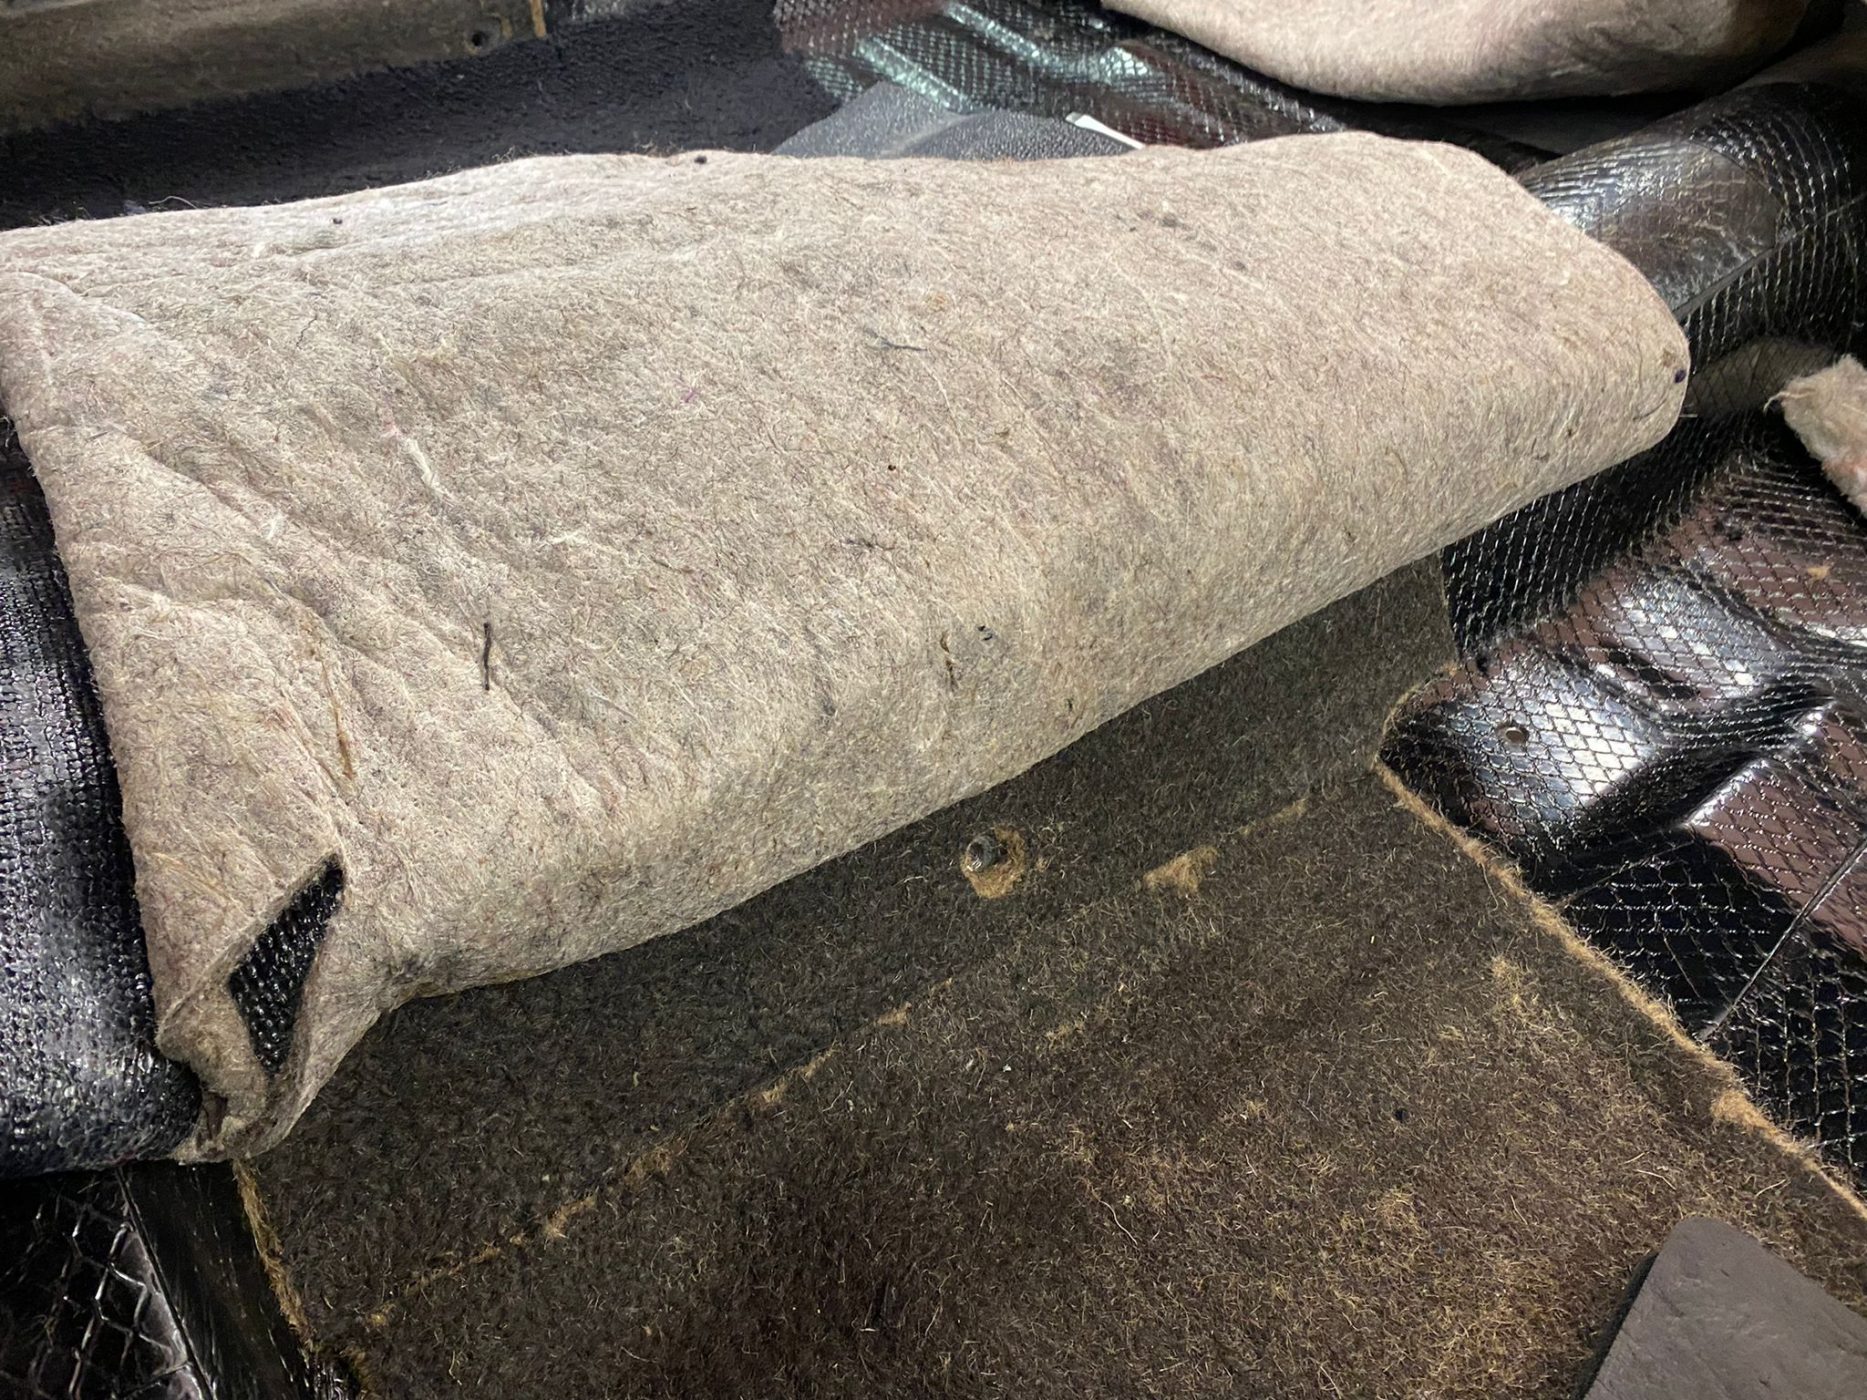
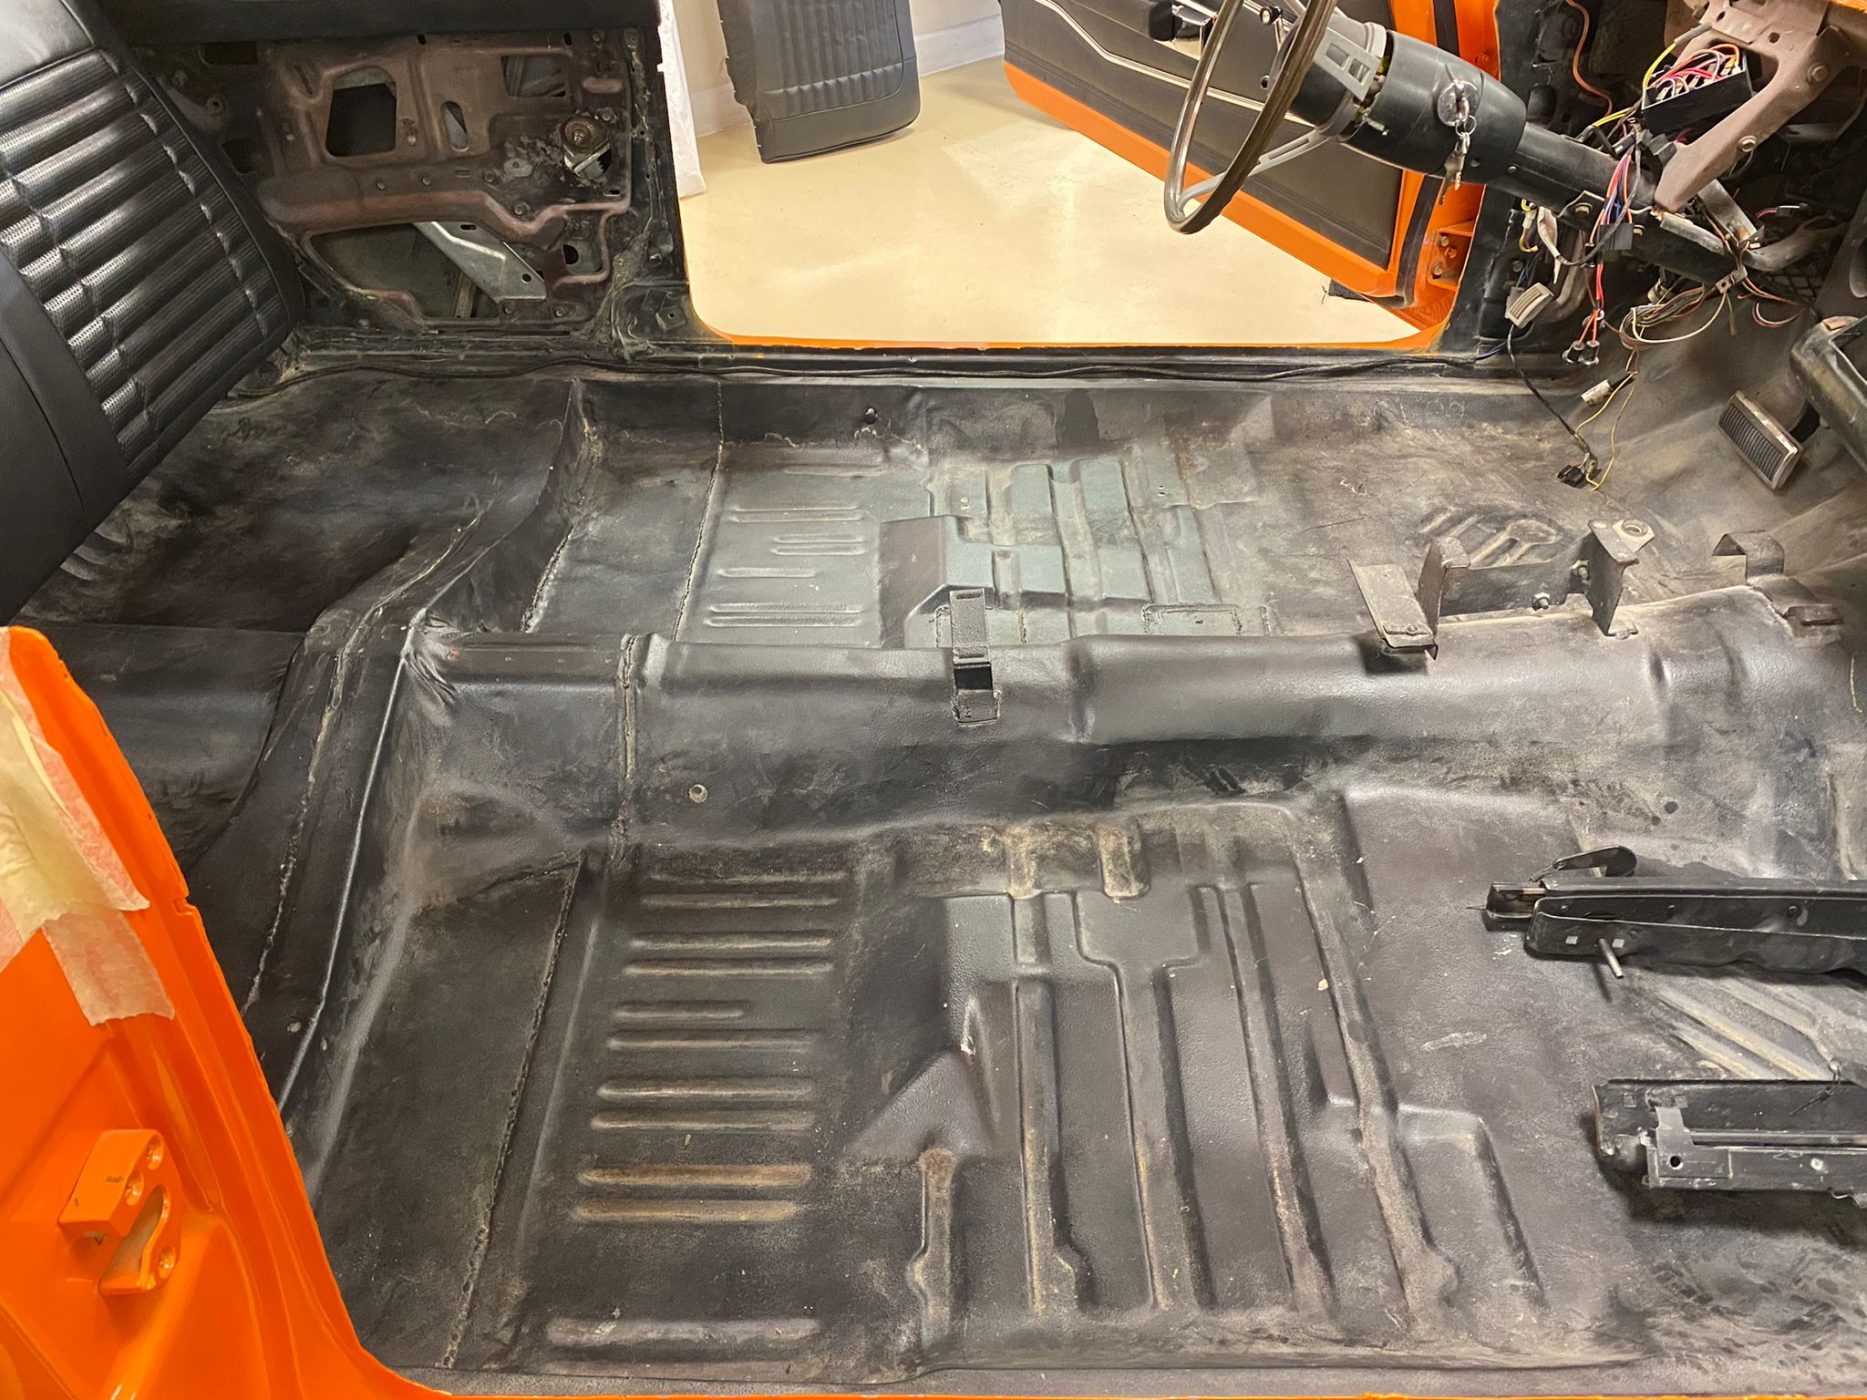
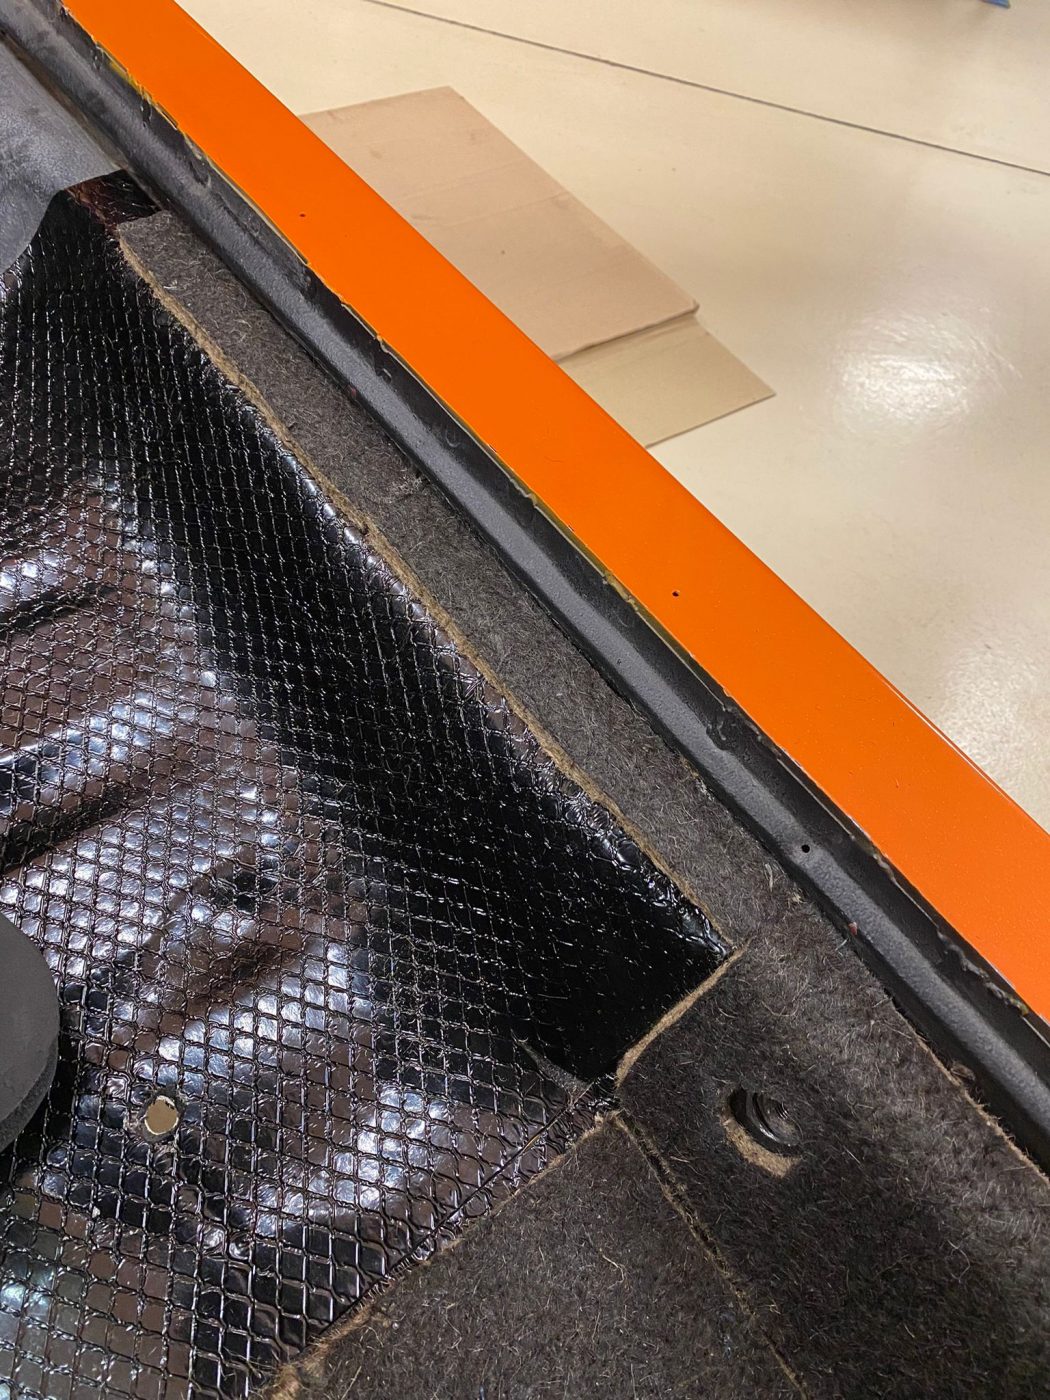
Carefully the trim shop put the new sound deadening material into place using reference photos to get them into the same placement as the original.
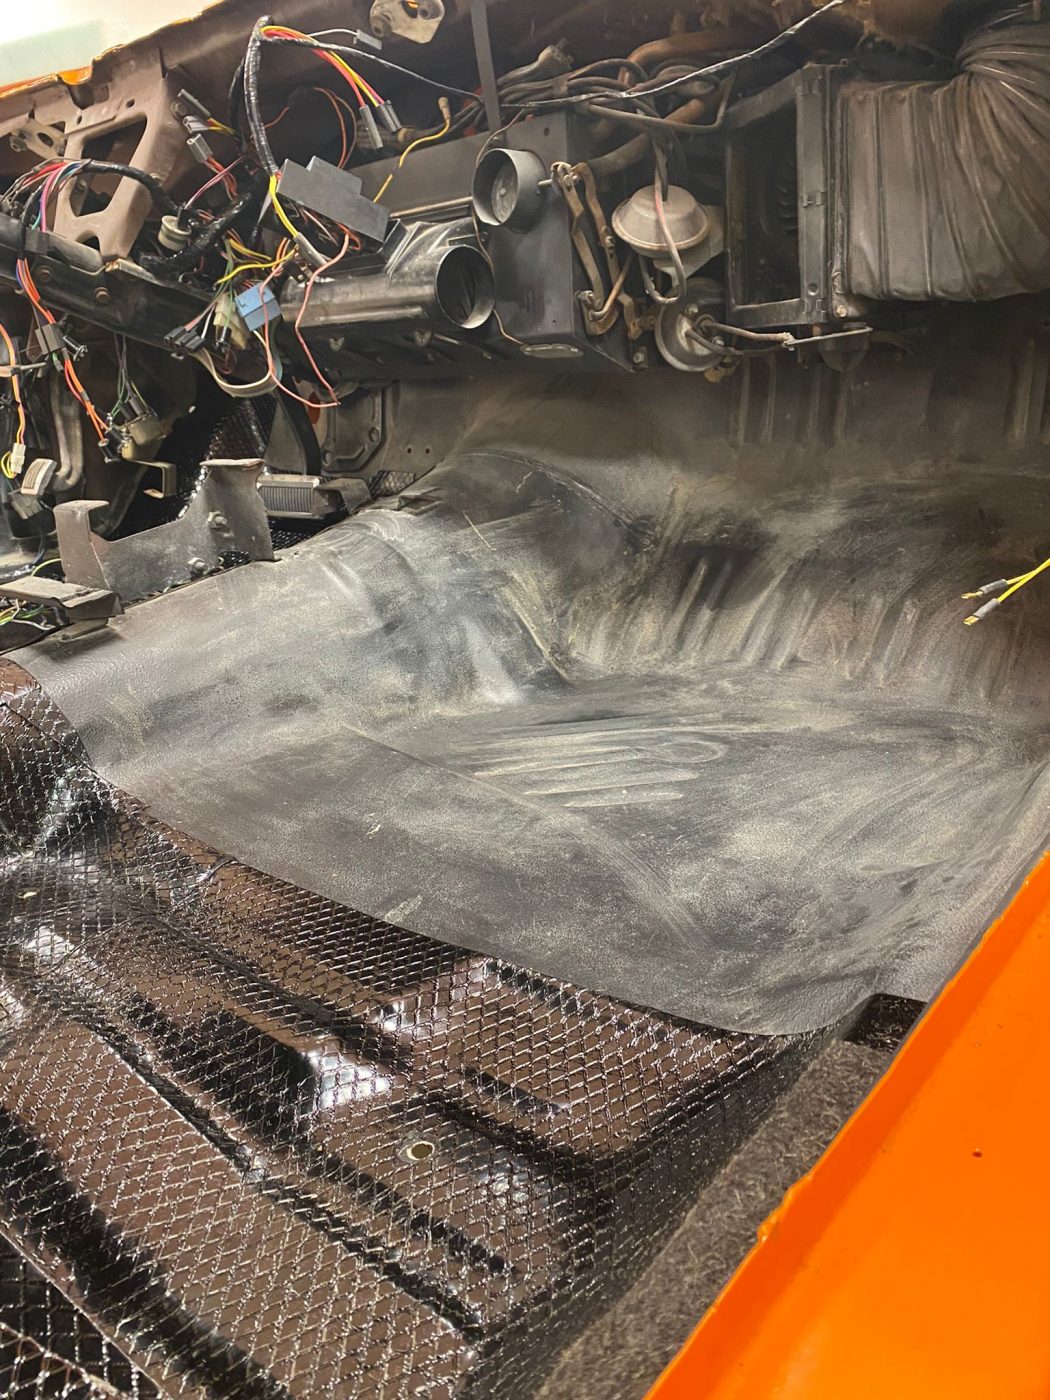
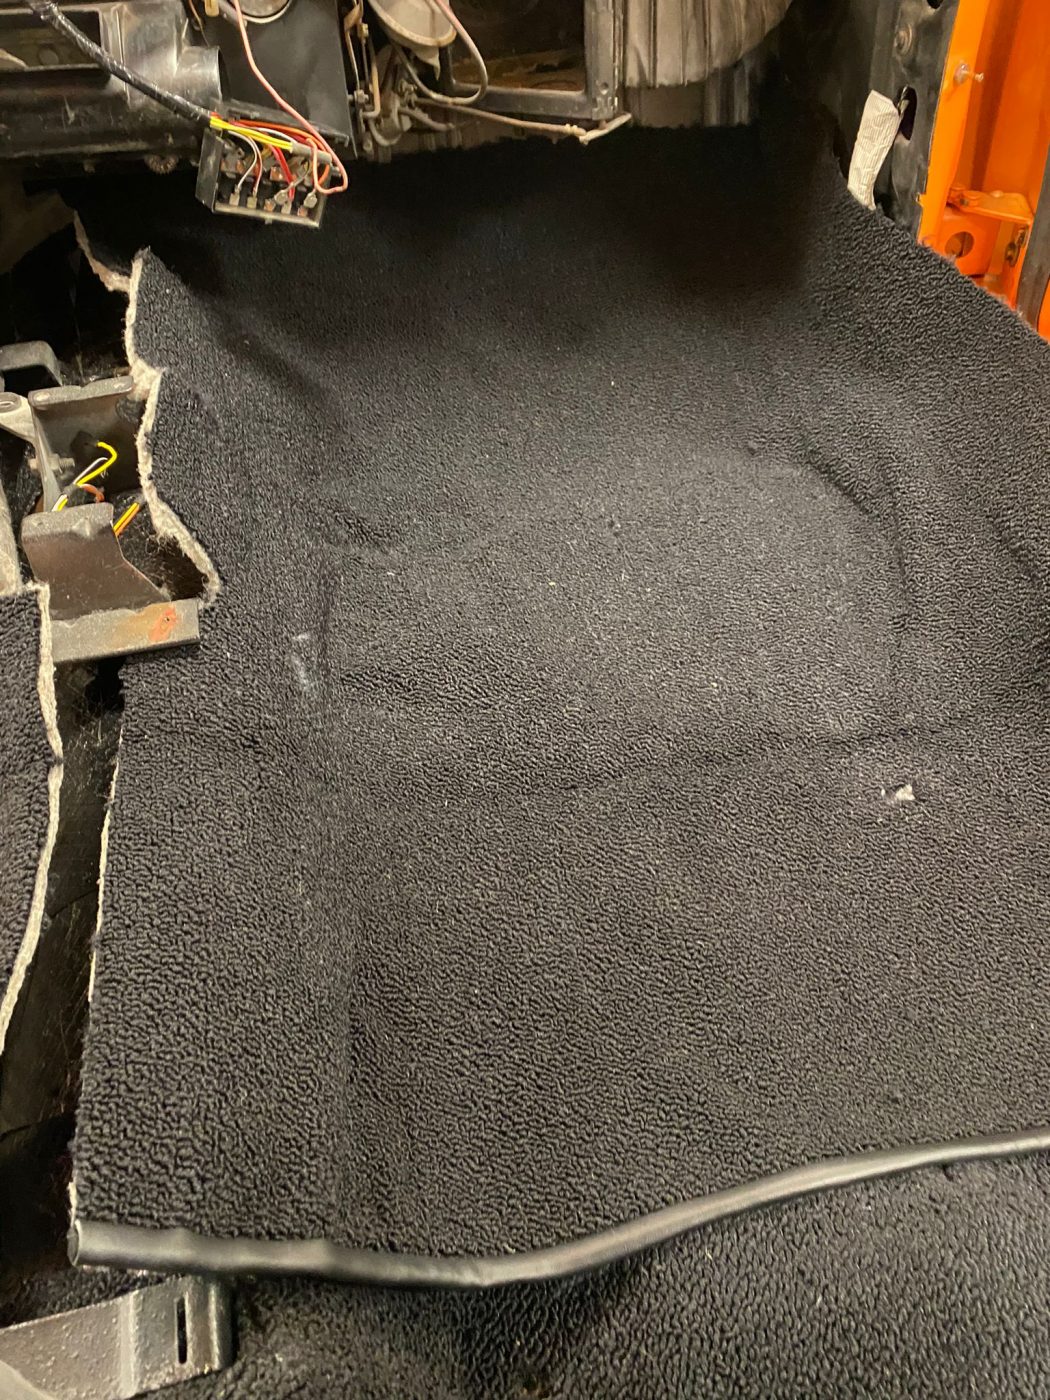
Once the sound deadening was firmly in place, Kath then began the process of laying the carpet panel into its place and securing it. Using high-spec carpeting adhesive, the carpet was laid into the Charger’s front footwell and firmly in place.
Next will be getting the trims, consoles and seats ready to go into this iconic American Muscle Car.

Kath and the in-house trim team have been busy working on the insides of the 1970 Dodge Charger that’s in here at Bridge Classic Cars.
Kath has been working on getting the rear panels ready and into the car. The weatherstrip has been riveted to the bottom of the window opening along with the chrome strips that make up the ribbing for the panel.
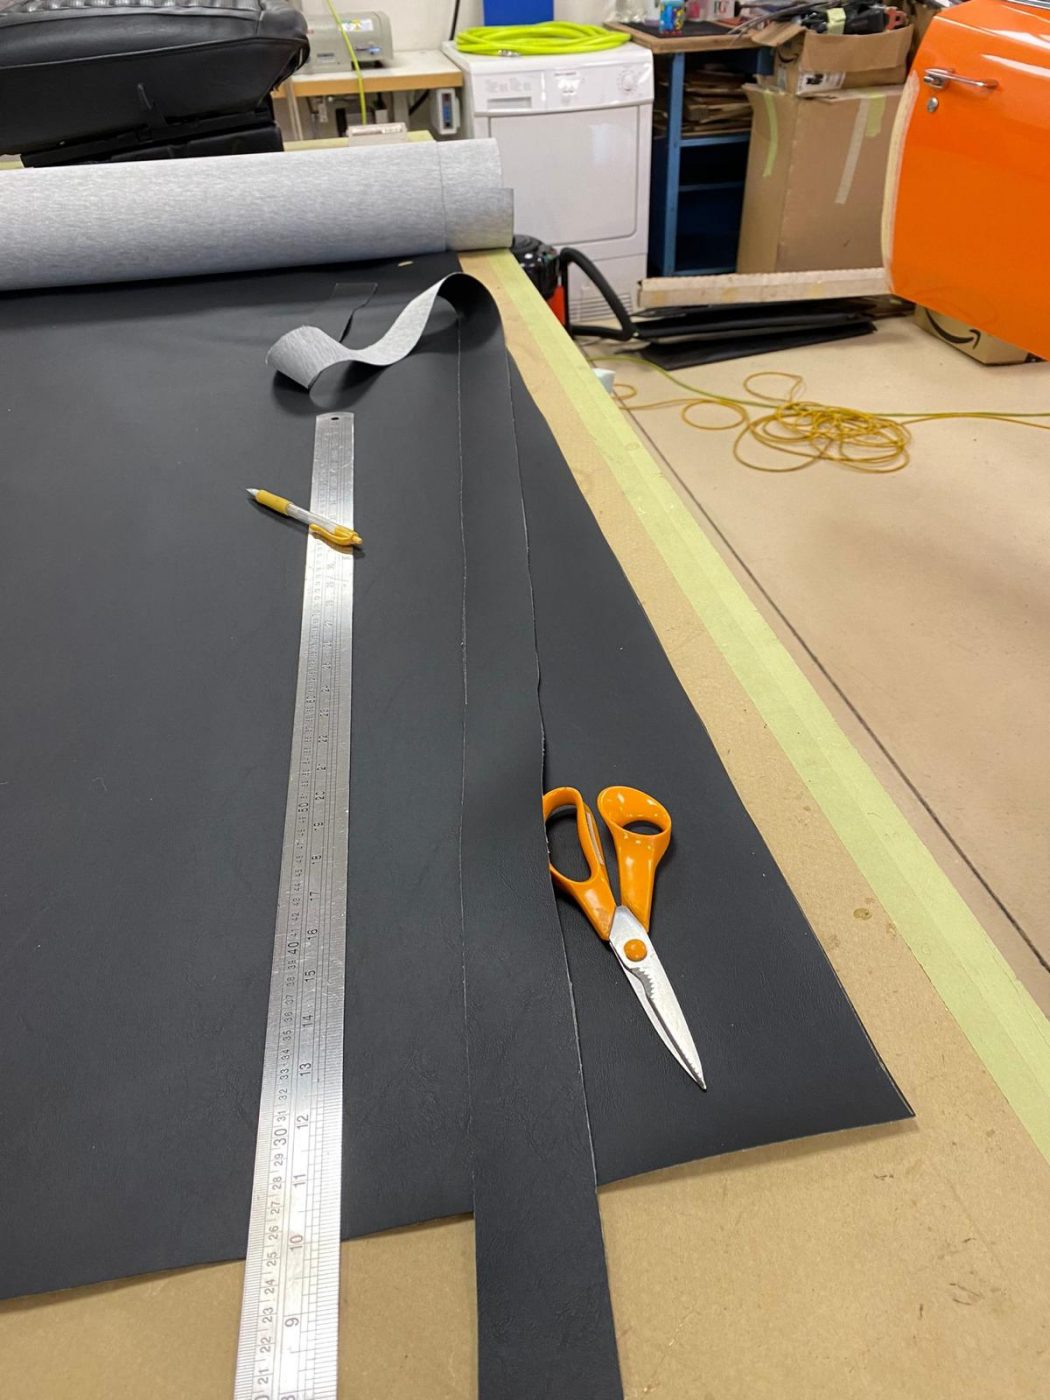
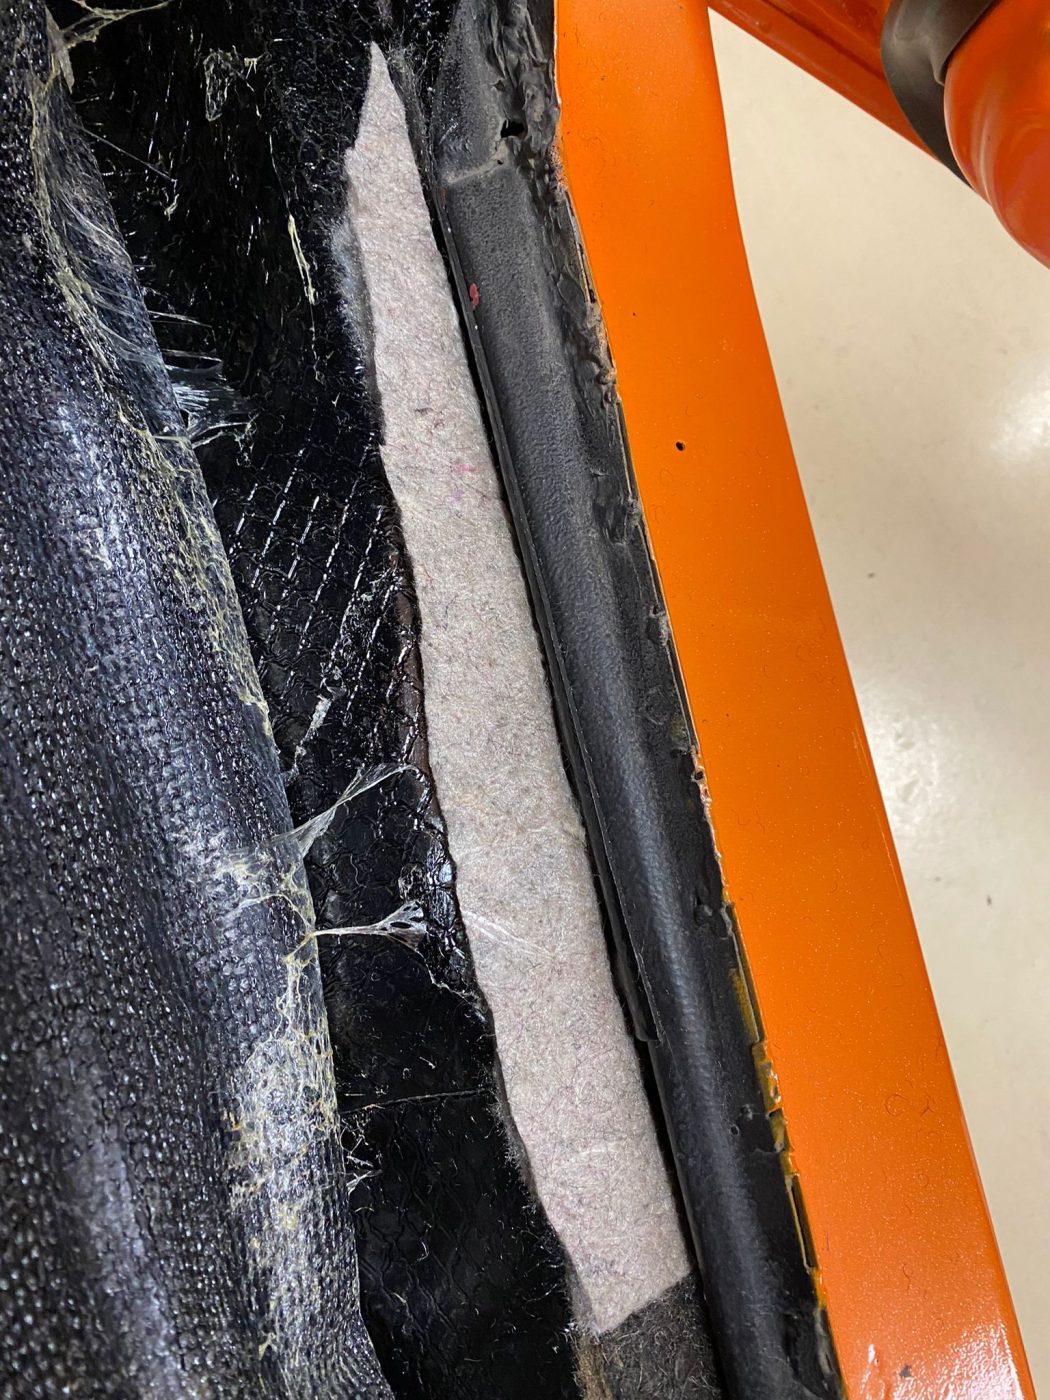
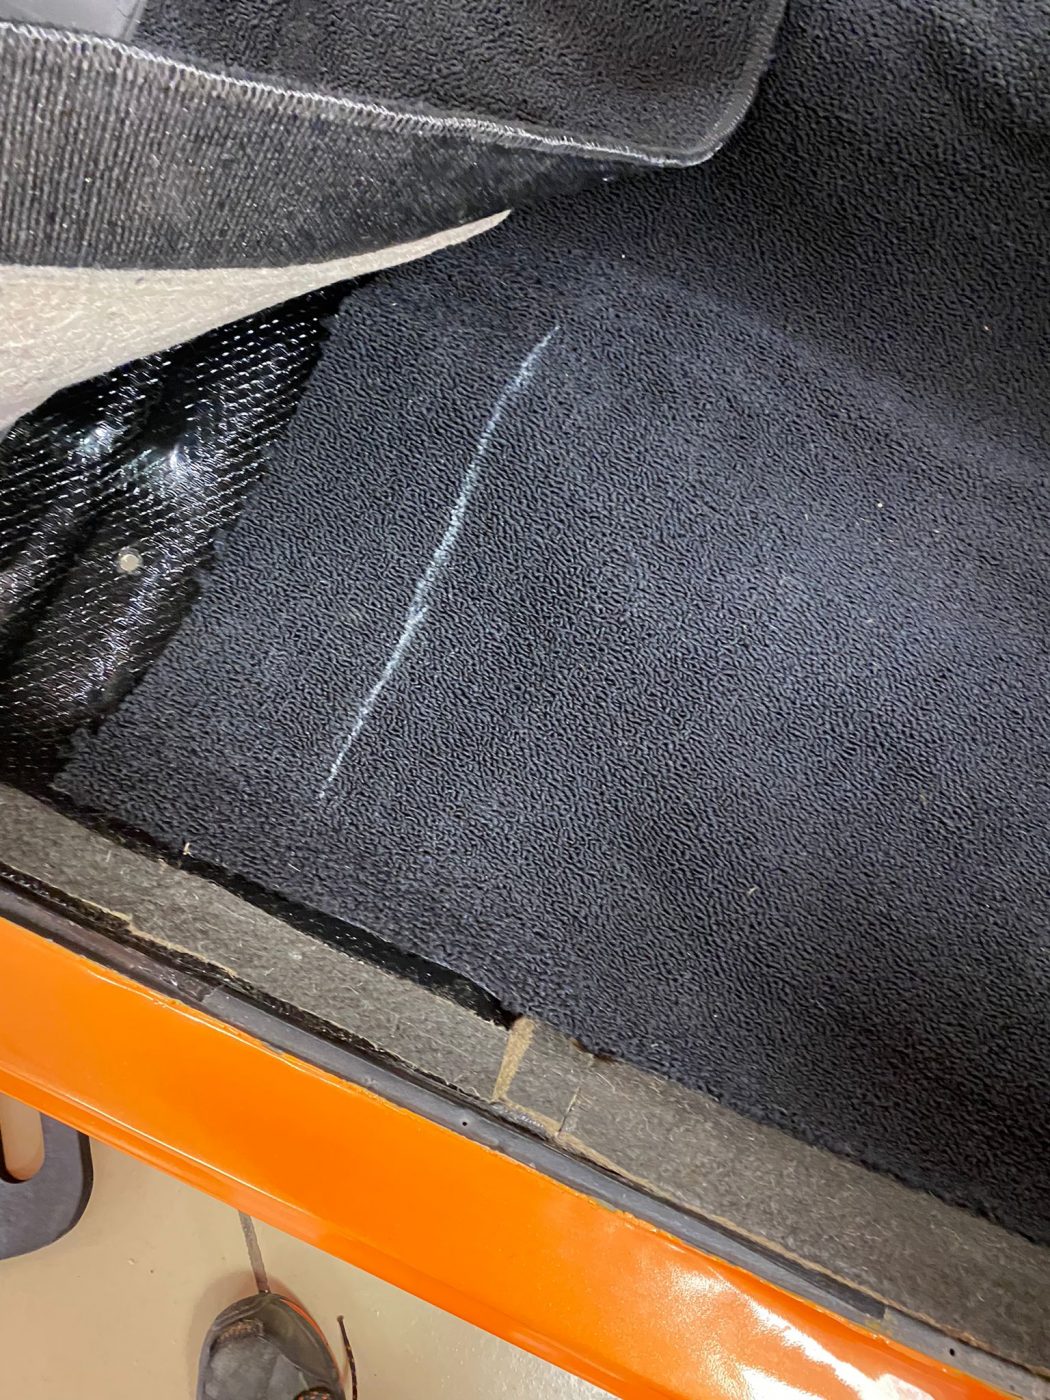
Before that, Kath and the team had tested fitted the carpet and found that in place it didn’t sit quite right. In places, the carpet was actually too long. Not a problem for the Bridge Classic Cars trim-shop! Kath simply cut the carpet and then re-edged it to fit the car perfectly (more on that in the next post)
This meant that the carpet now sat where and exactly how it should in the iconic muscle car, taking extra care and attention to make sure any brackets or holes needed for trim work were neatly and discreetly cut.
Next time, we’ll take you behind the scenes of how Kath cut and rebound the carpet for the Charger!
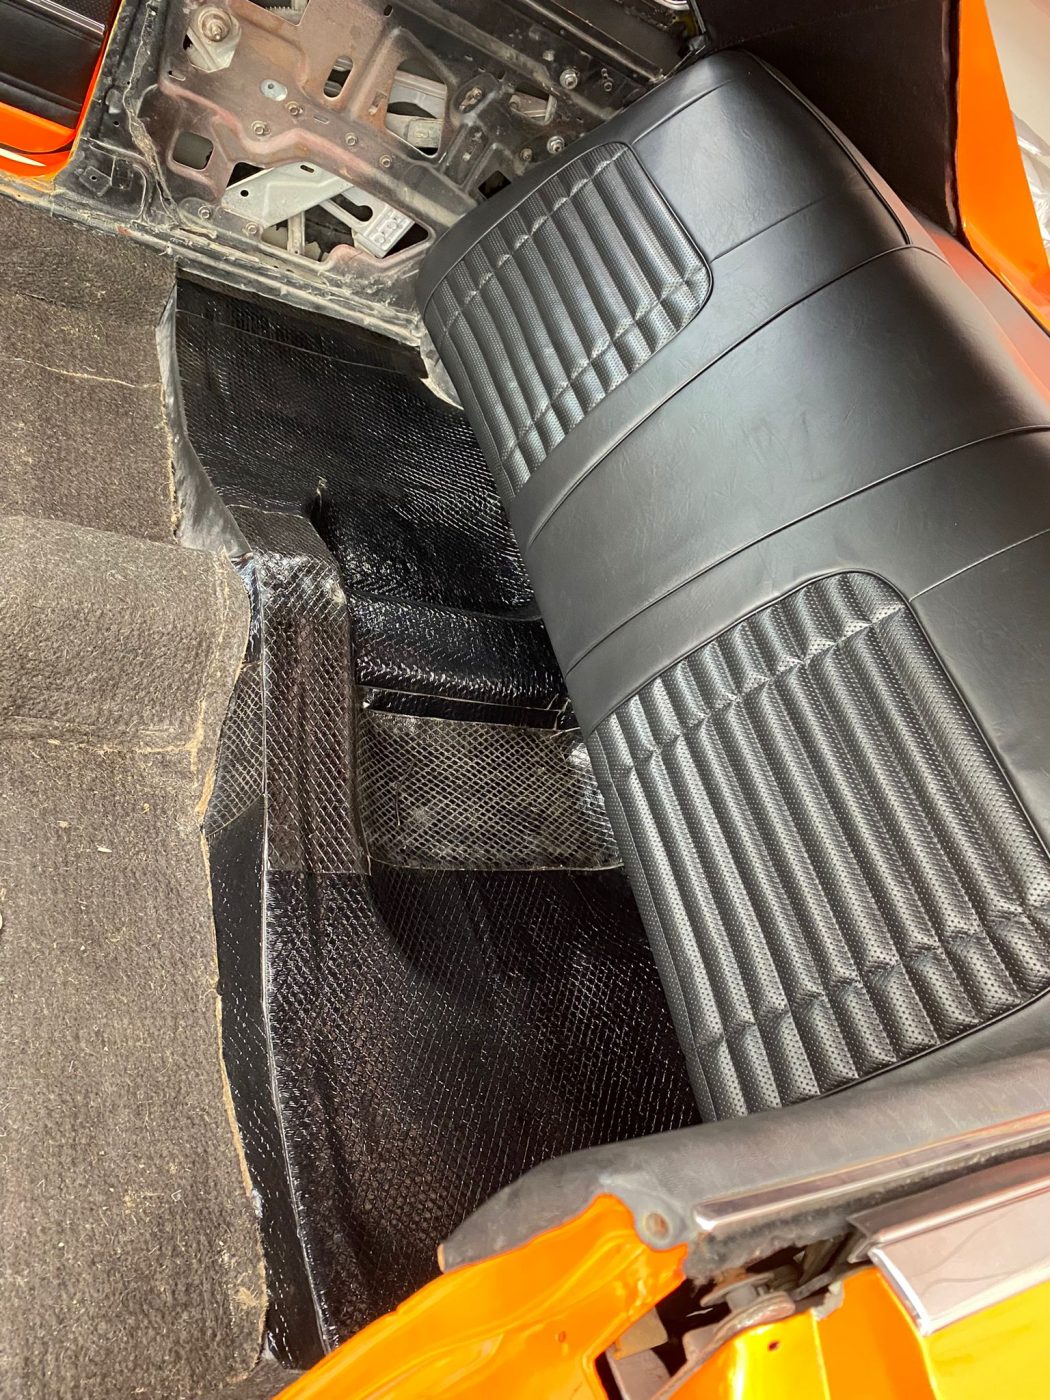
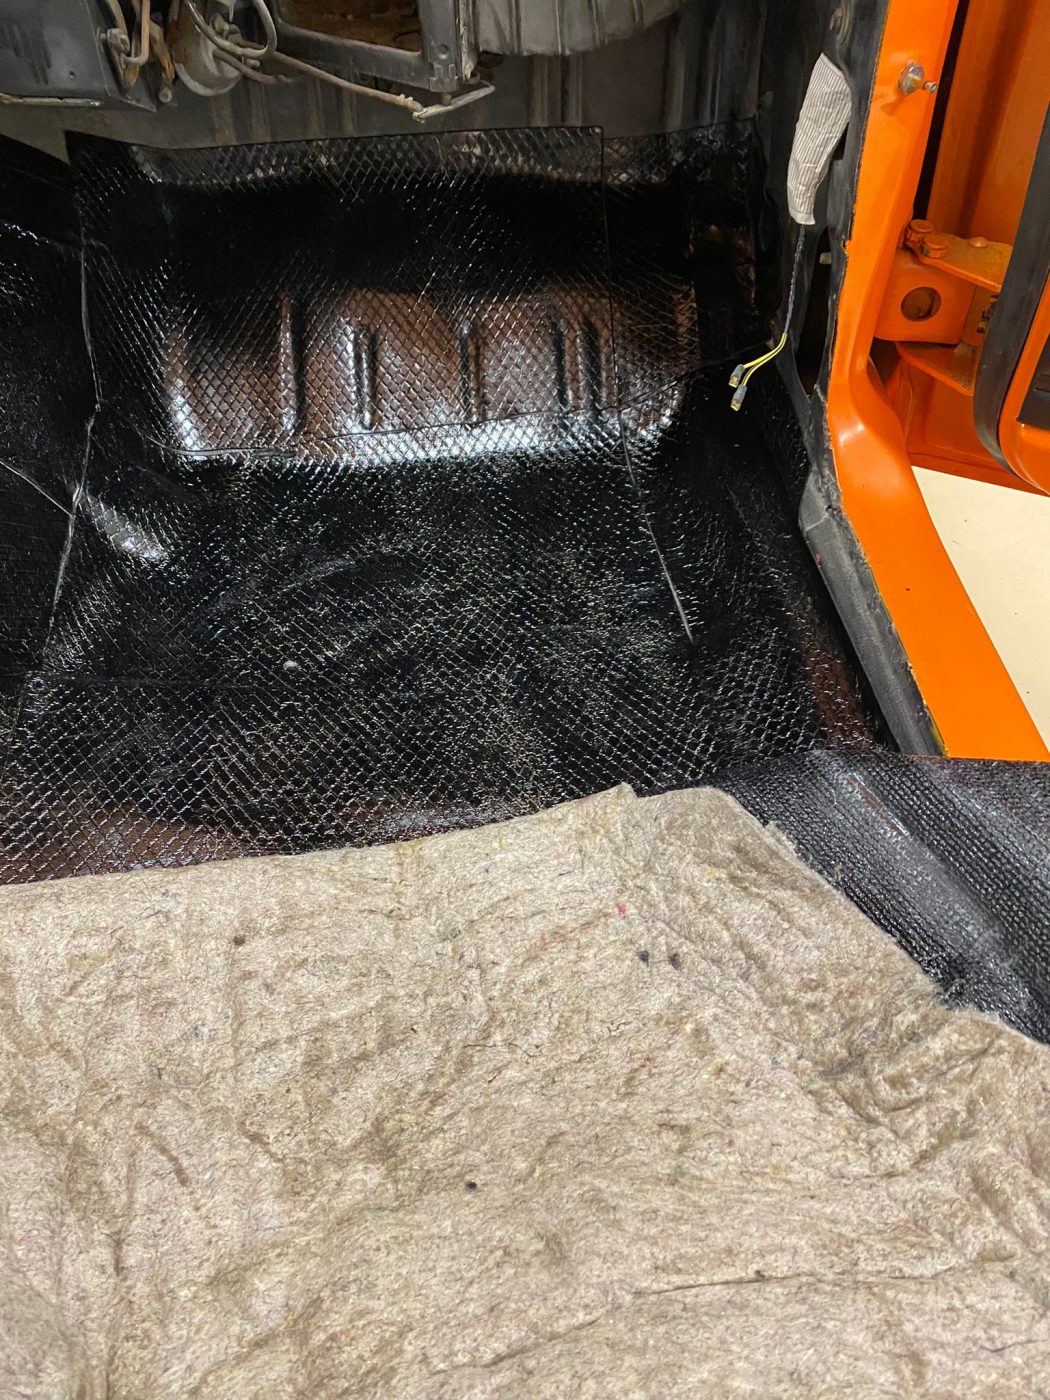
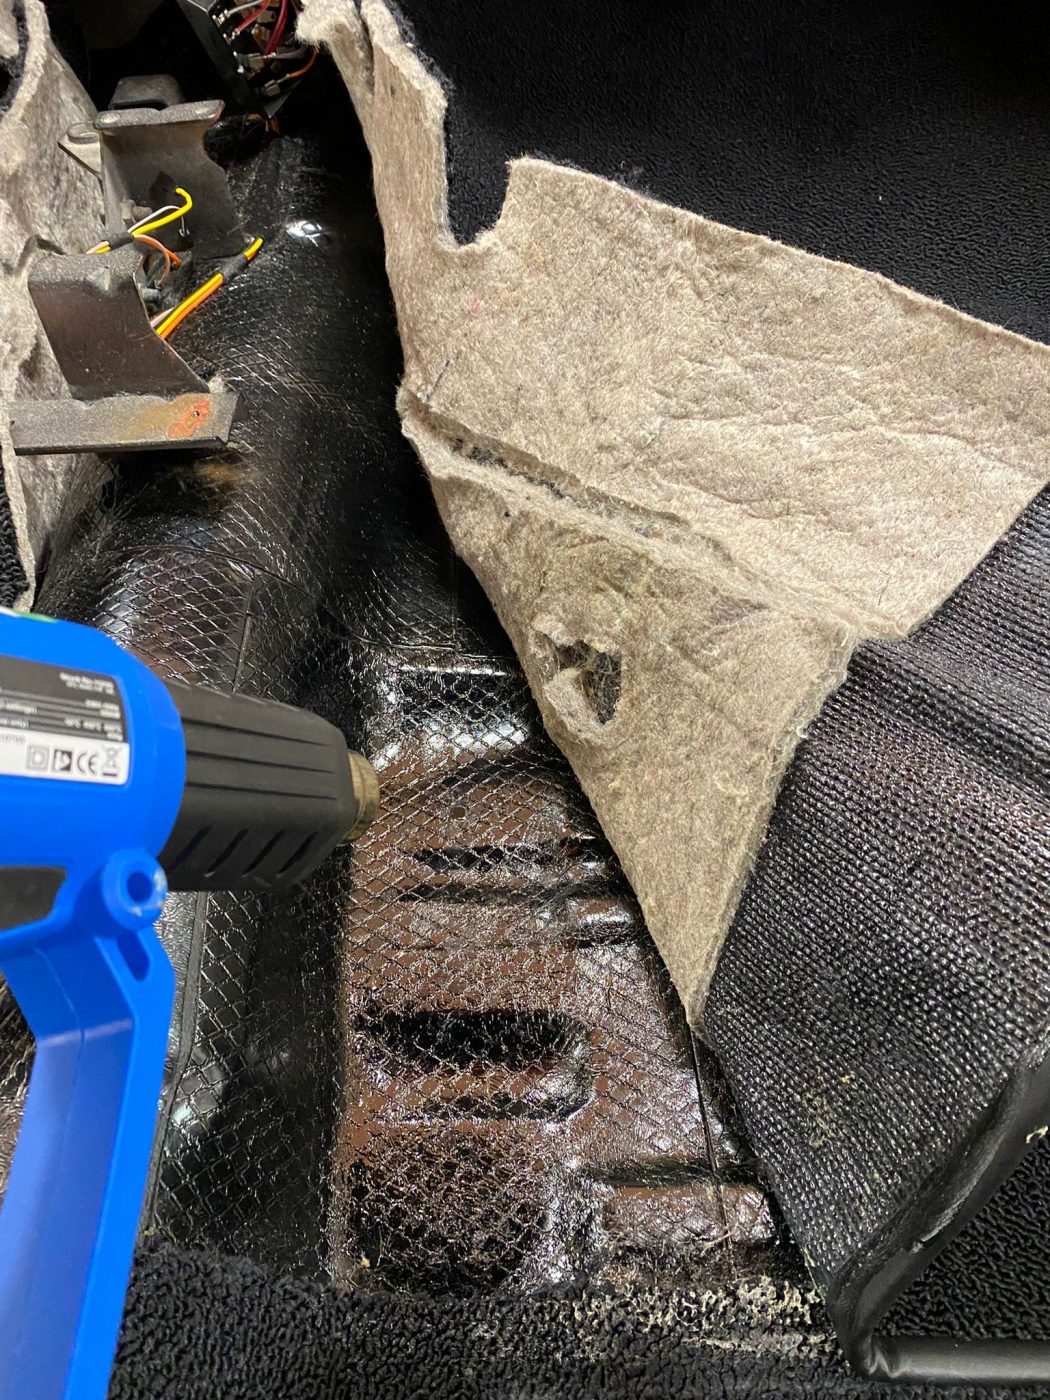
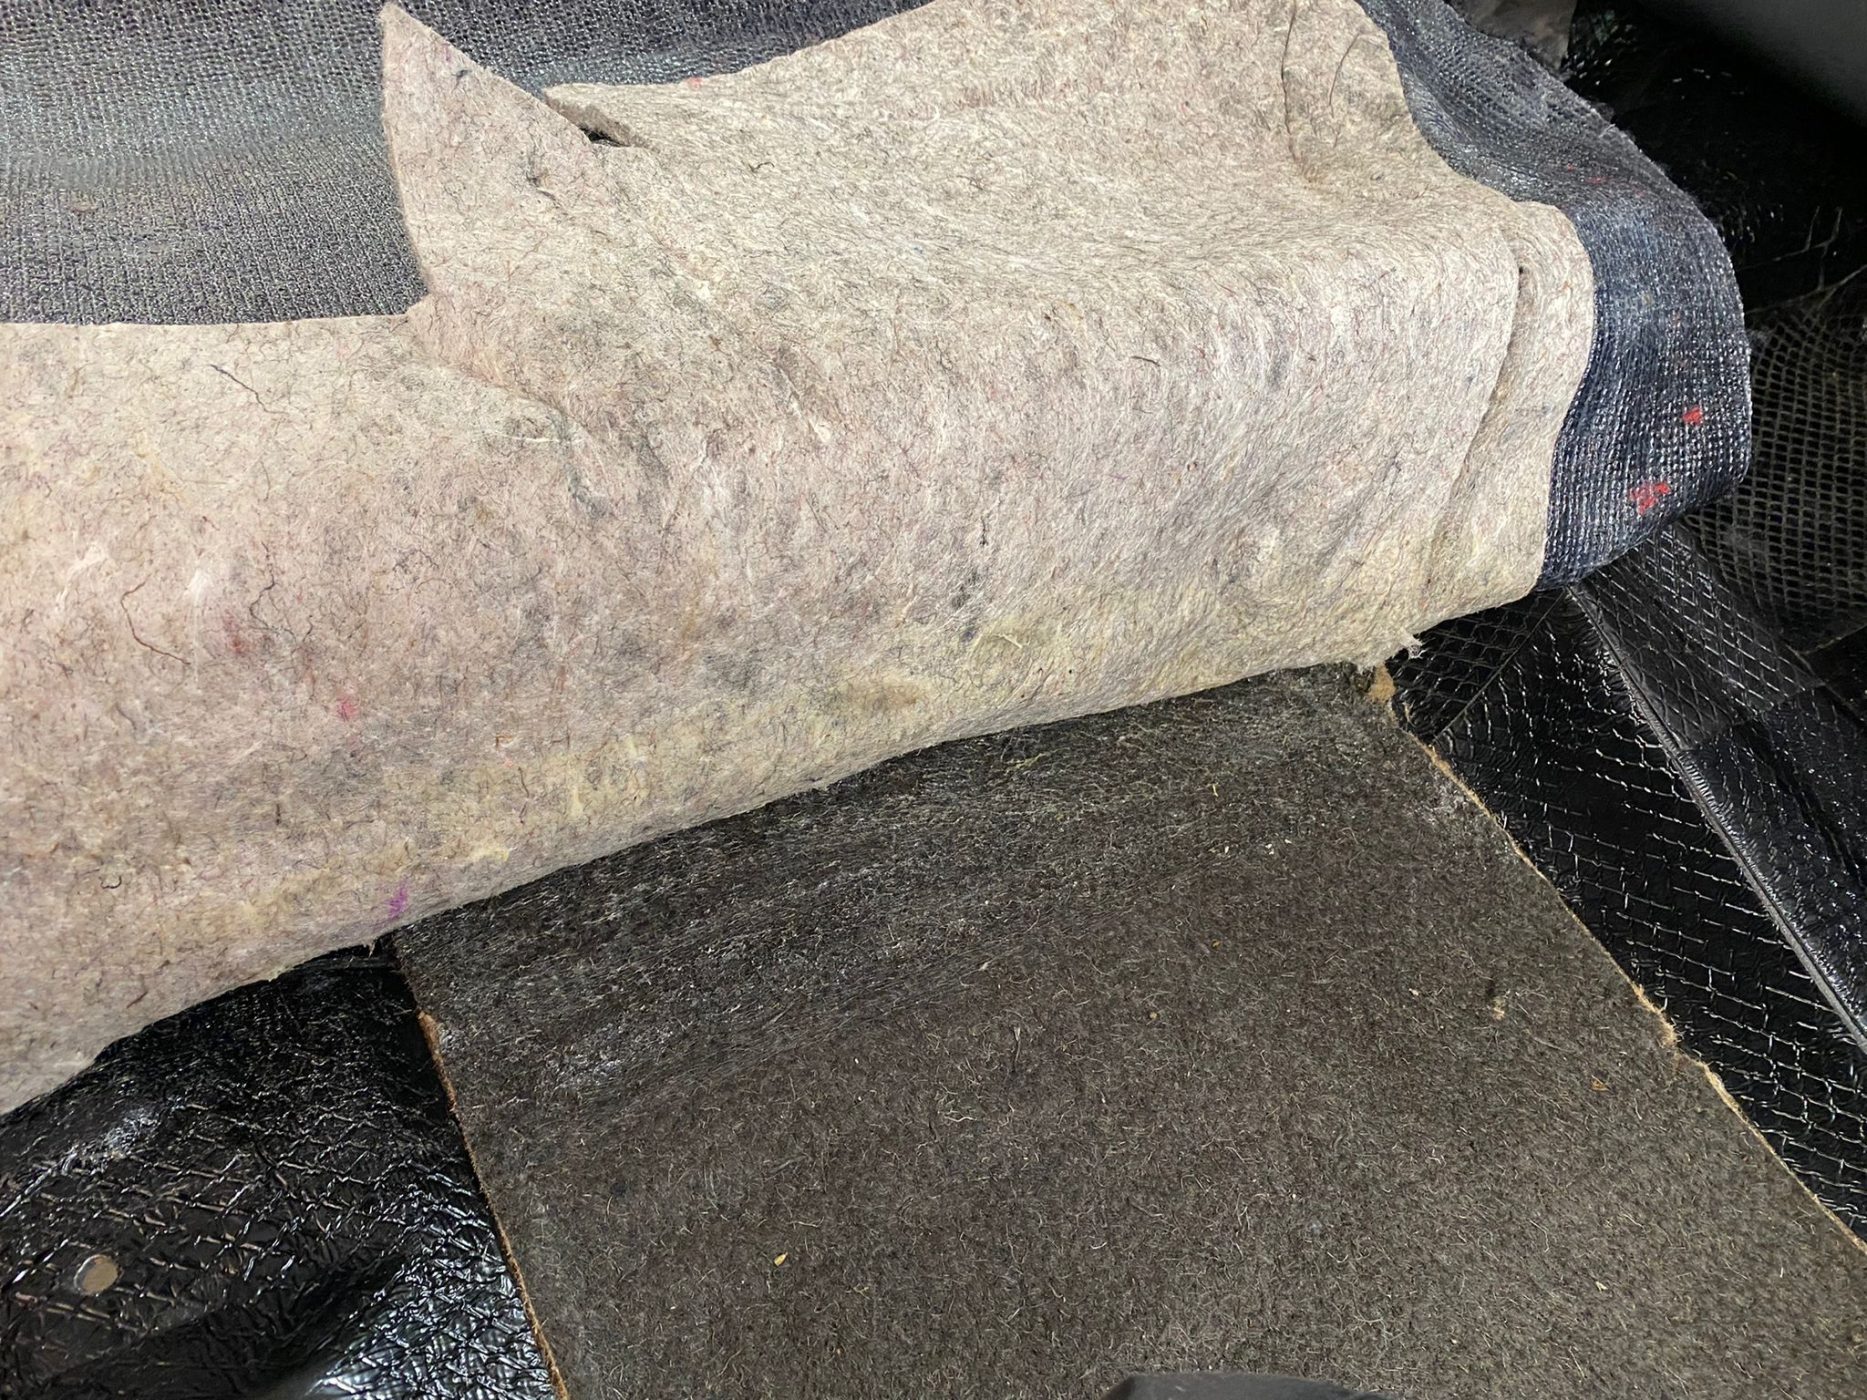
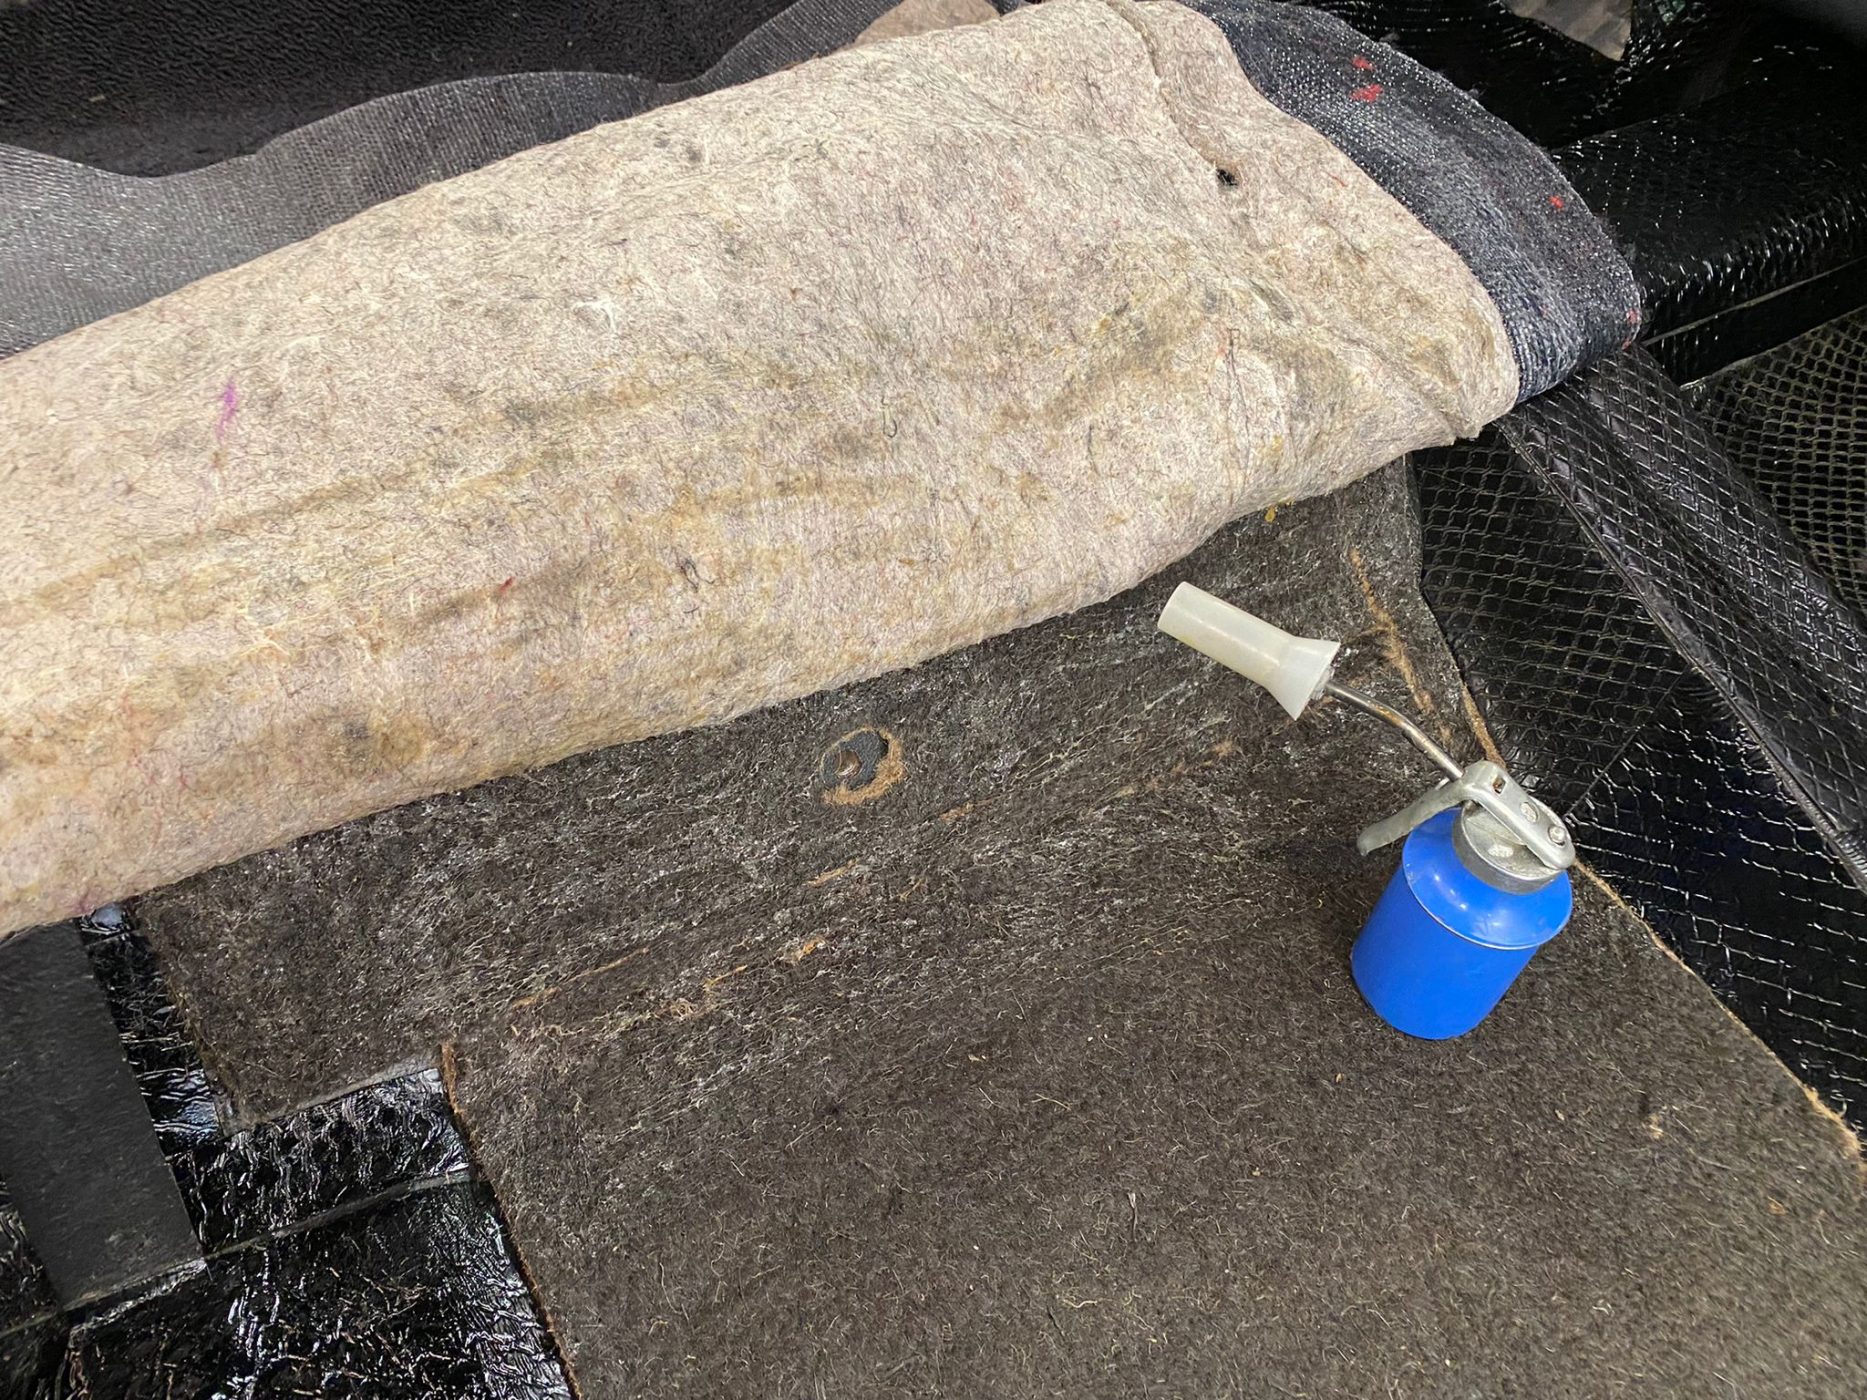
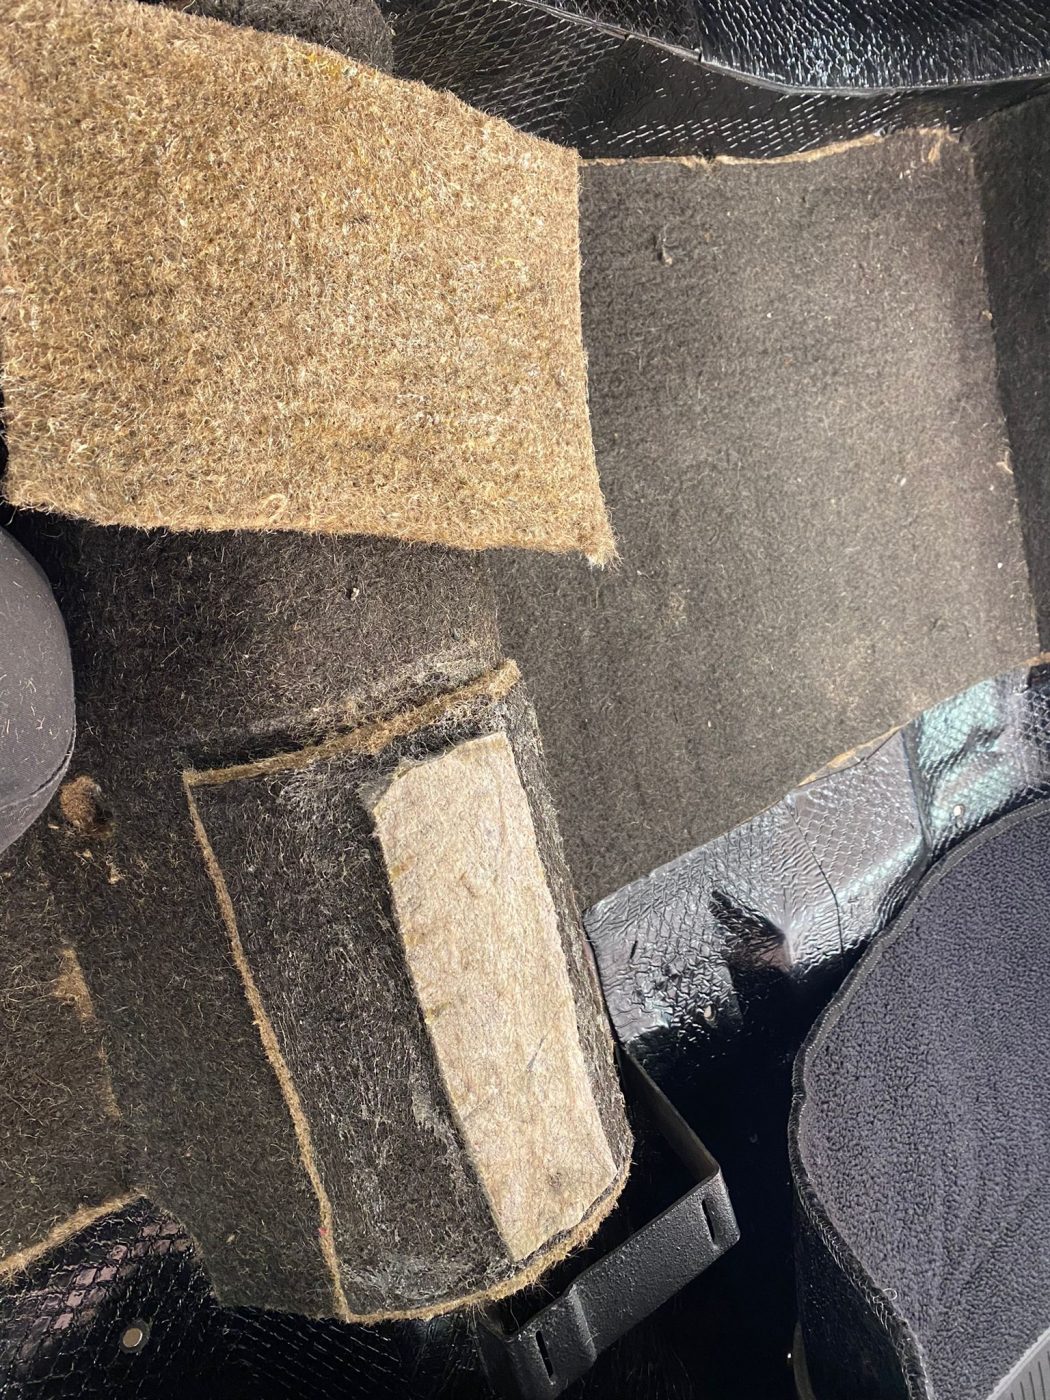
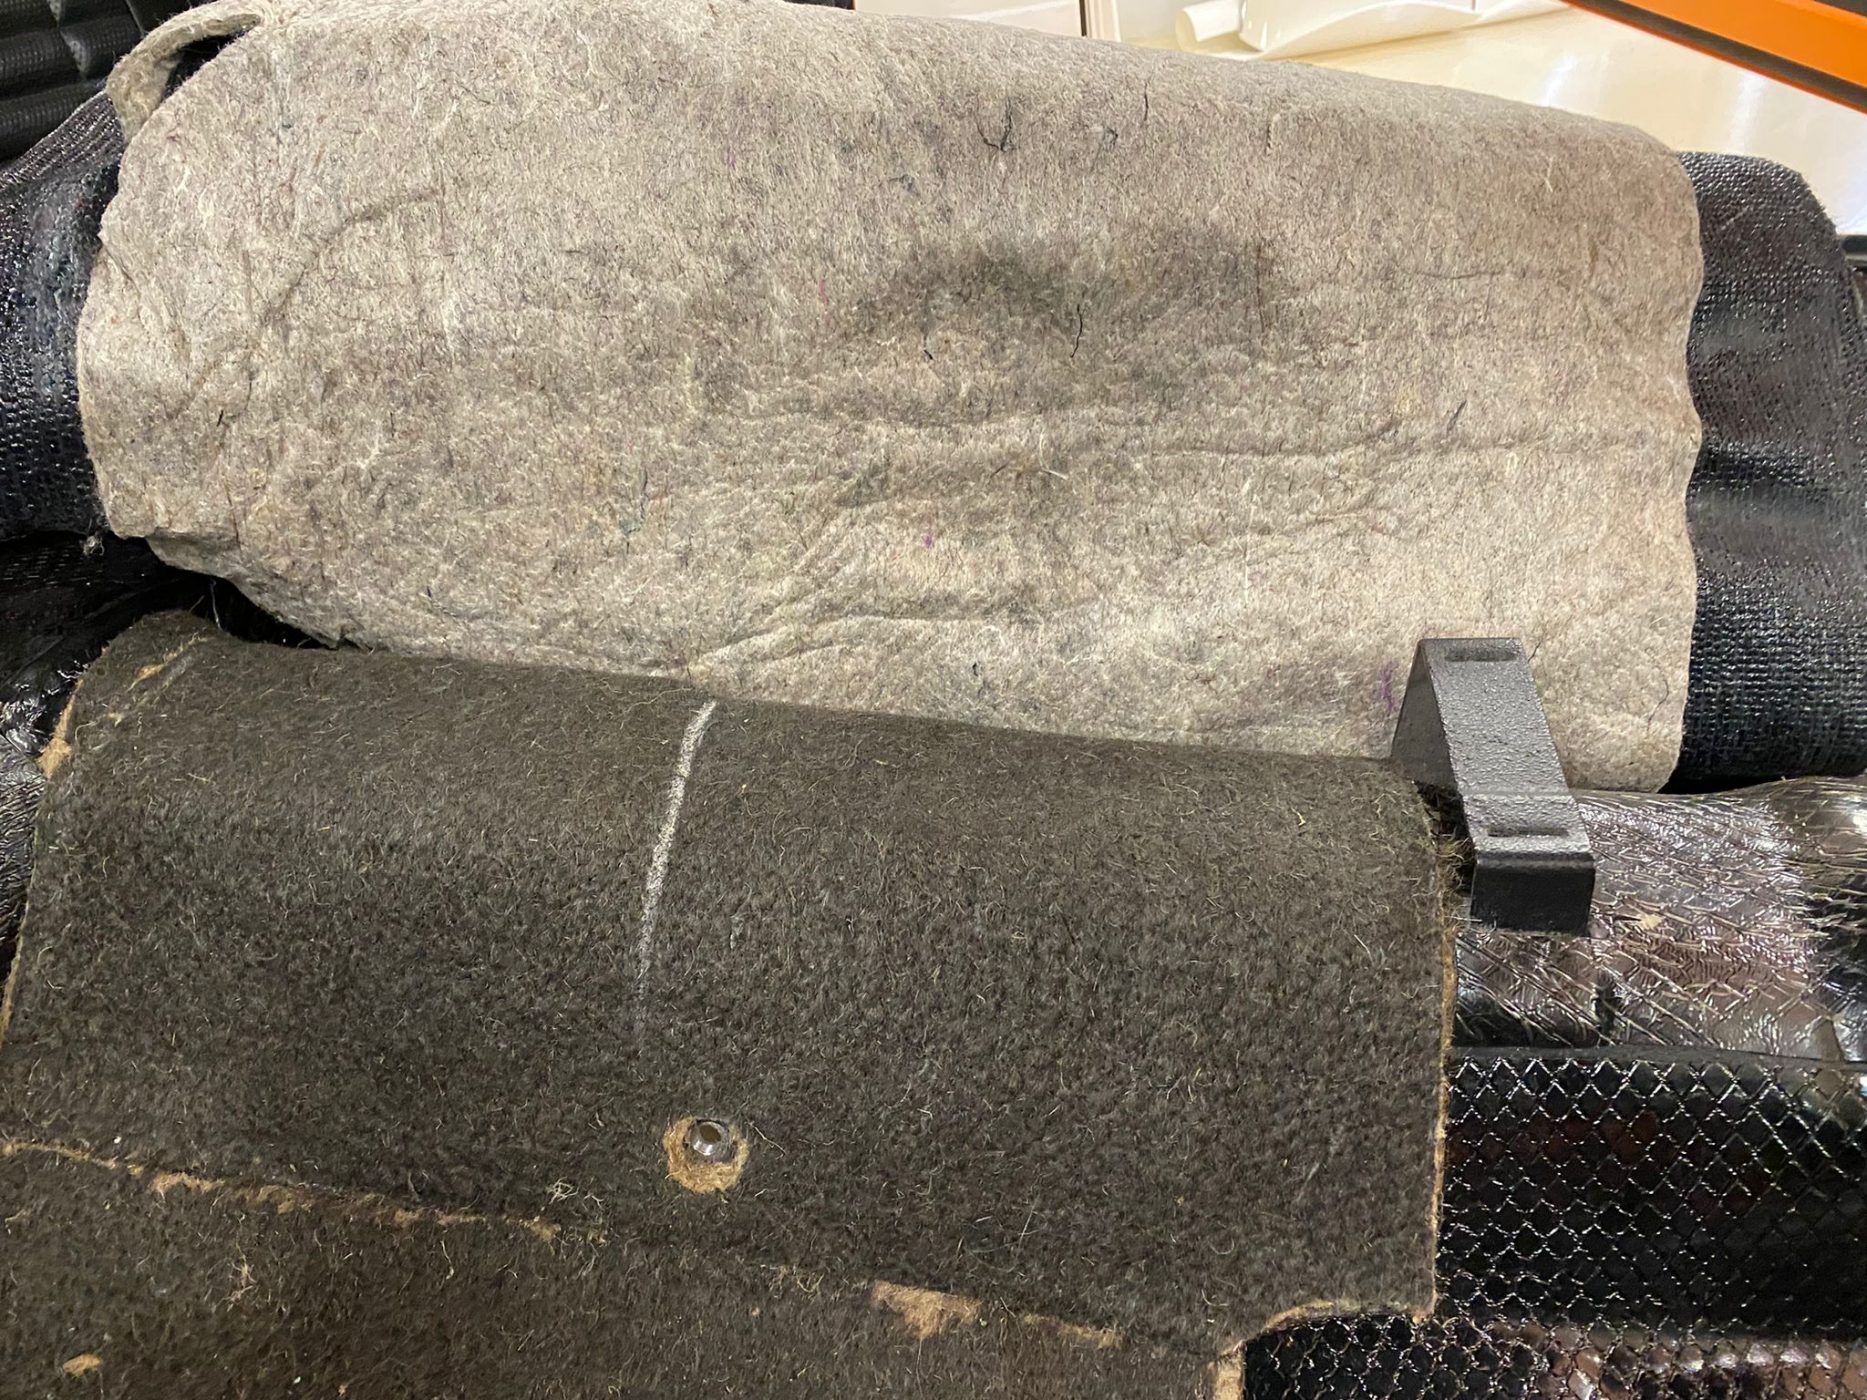
After Kath had mocked up the rear seats into the Charger, it was time to start getting the carpets into the car.
However, underneath the carpet is where to most important bit of the interior is. The sound deadening. It’s crucial in making long journeys more enjoyable just due to its job of cutting down the cabin noise.
Kath carefully laid out the material across the floors of the car to make sure each piece was just in the right place to give the best result. All of this needed to be done before fitting up the carpets, which will be happening next!

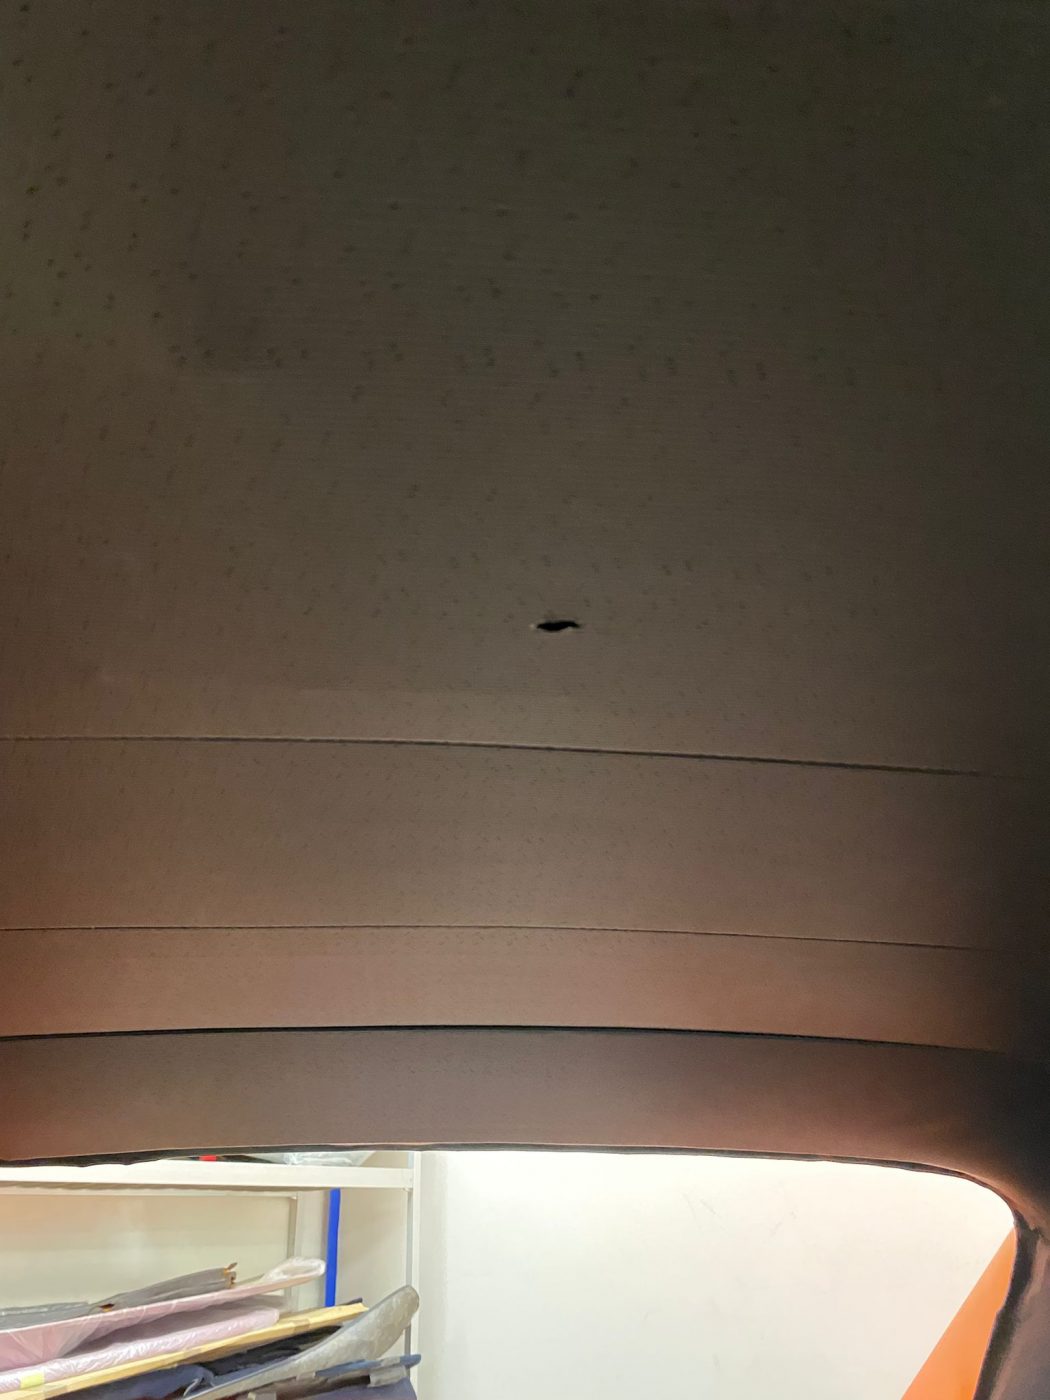
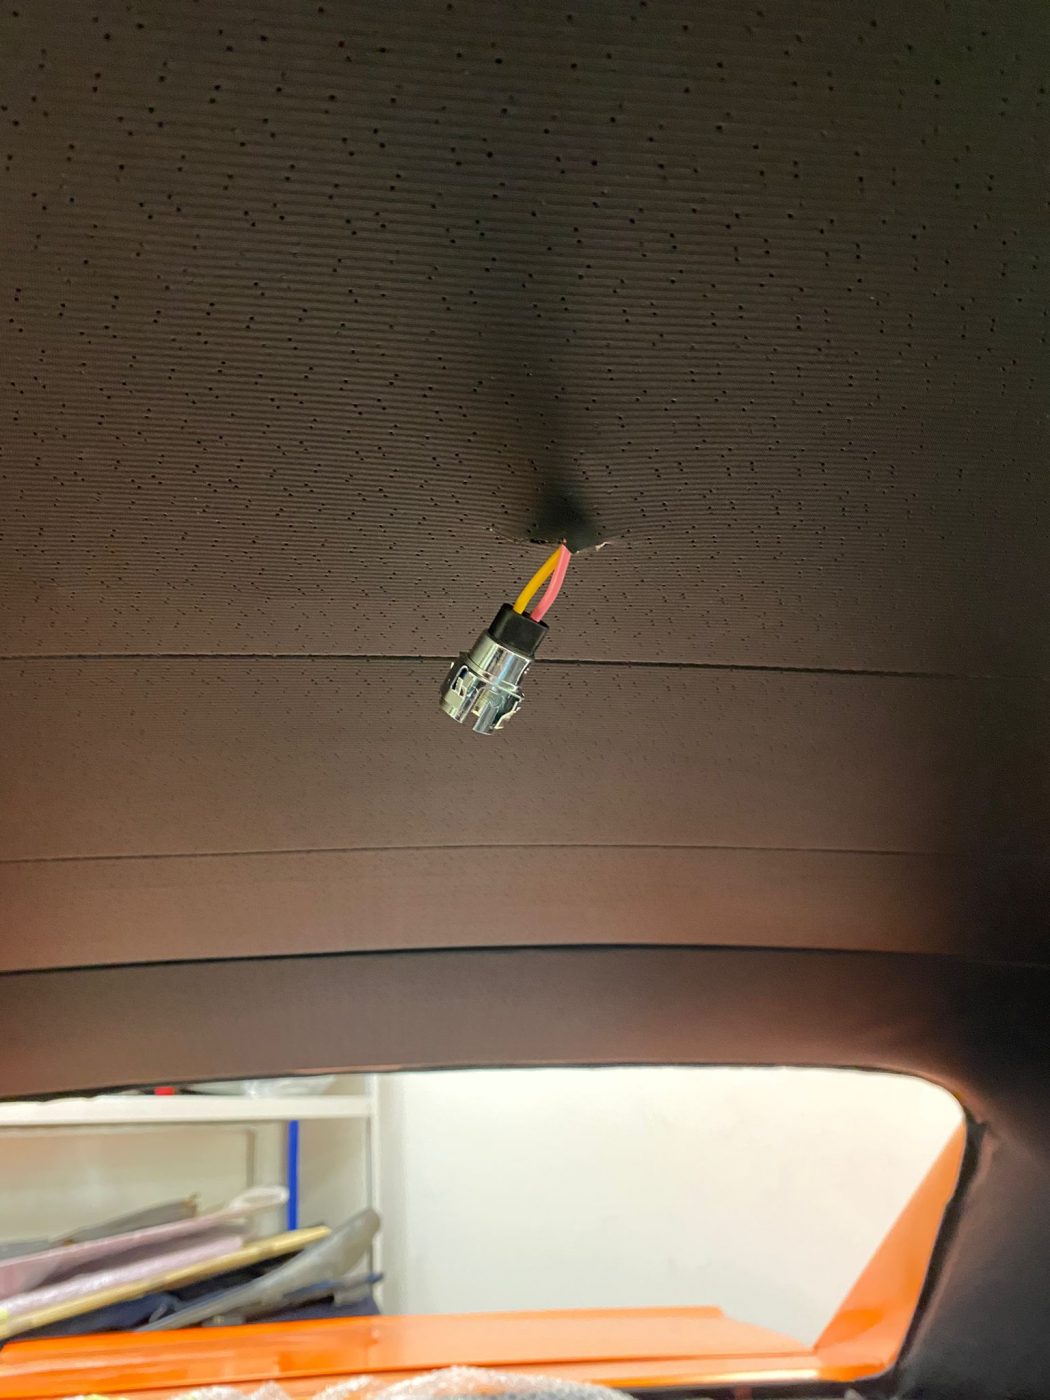
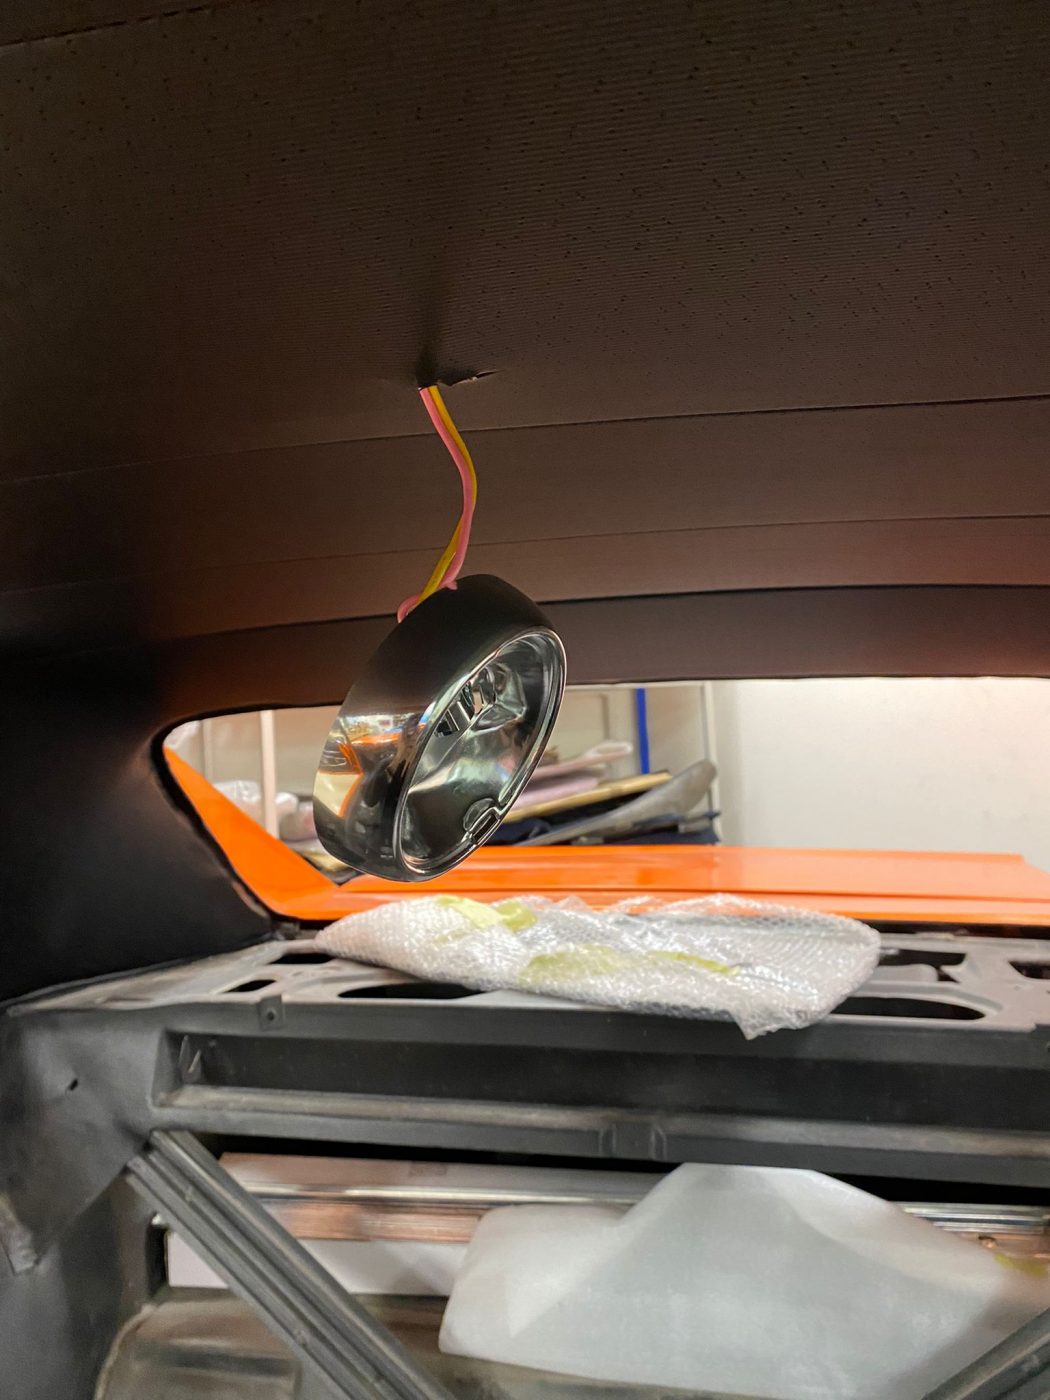
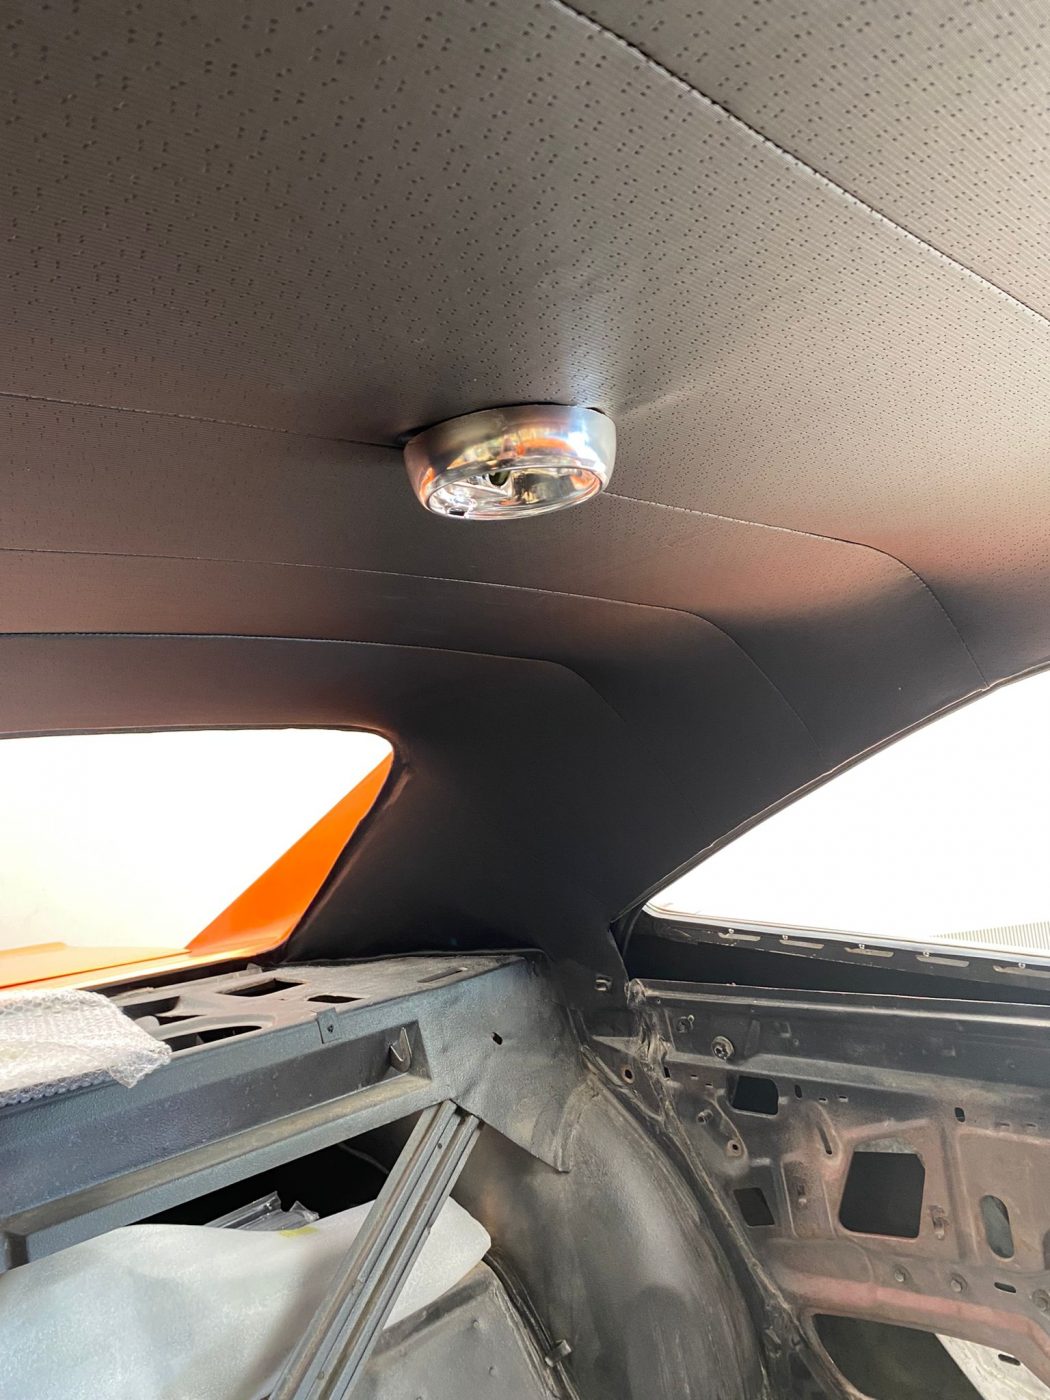
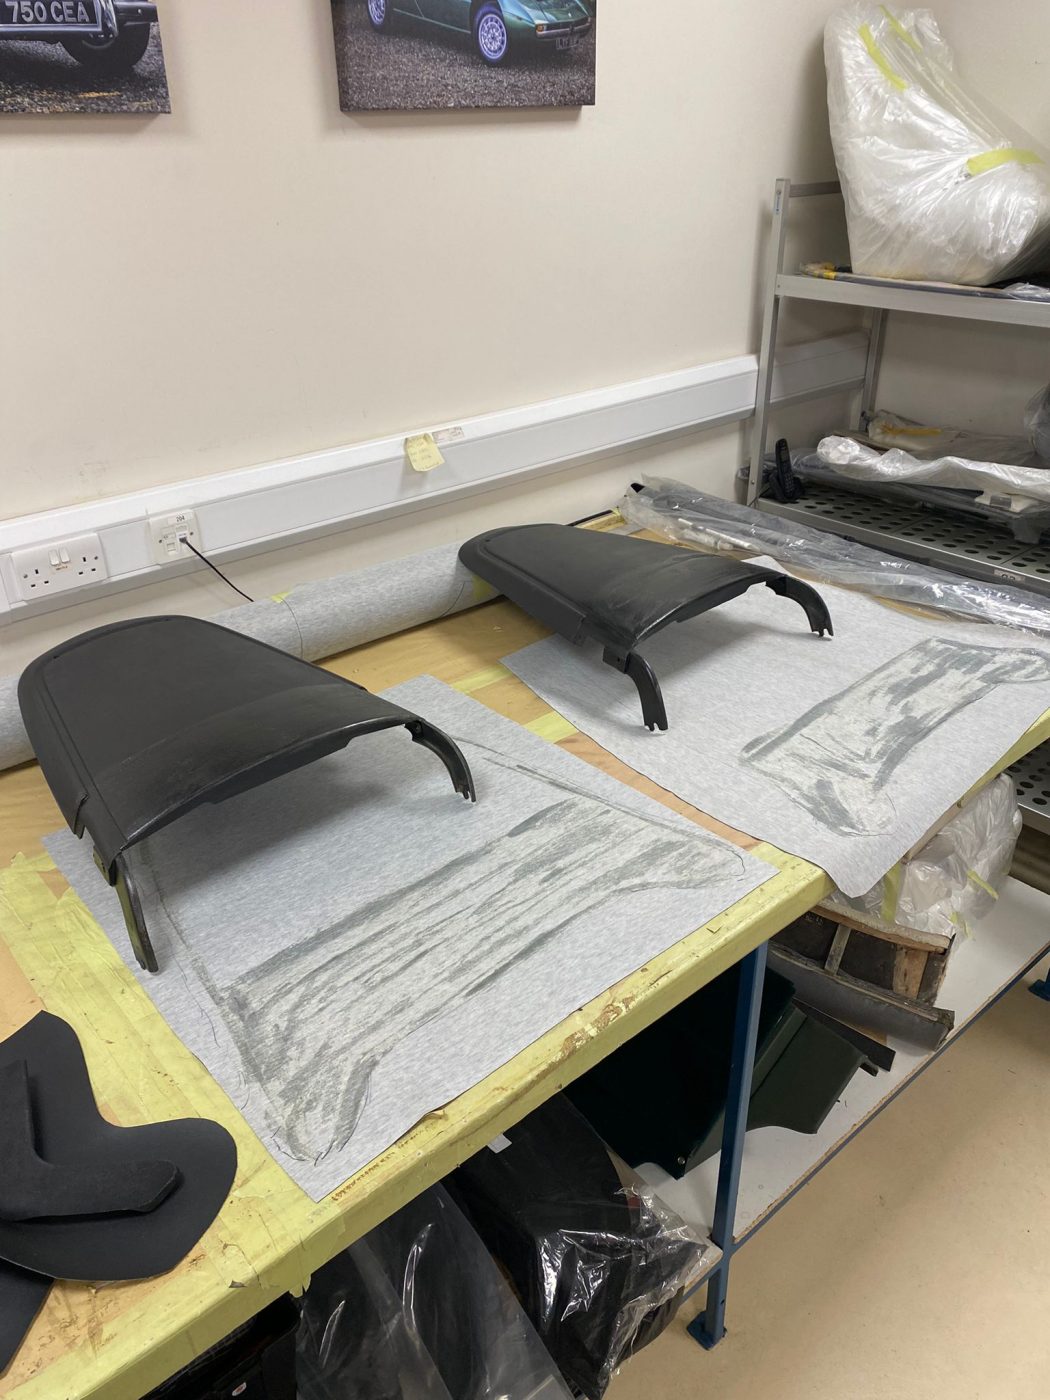
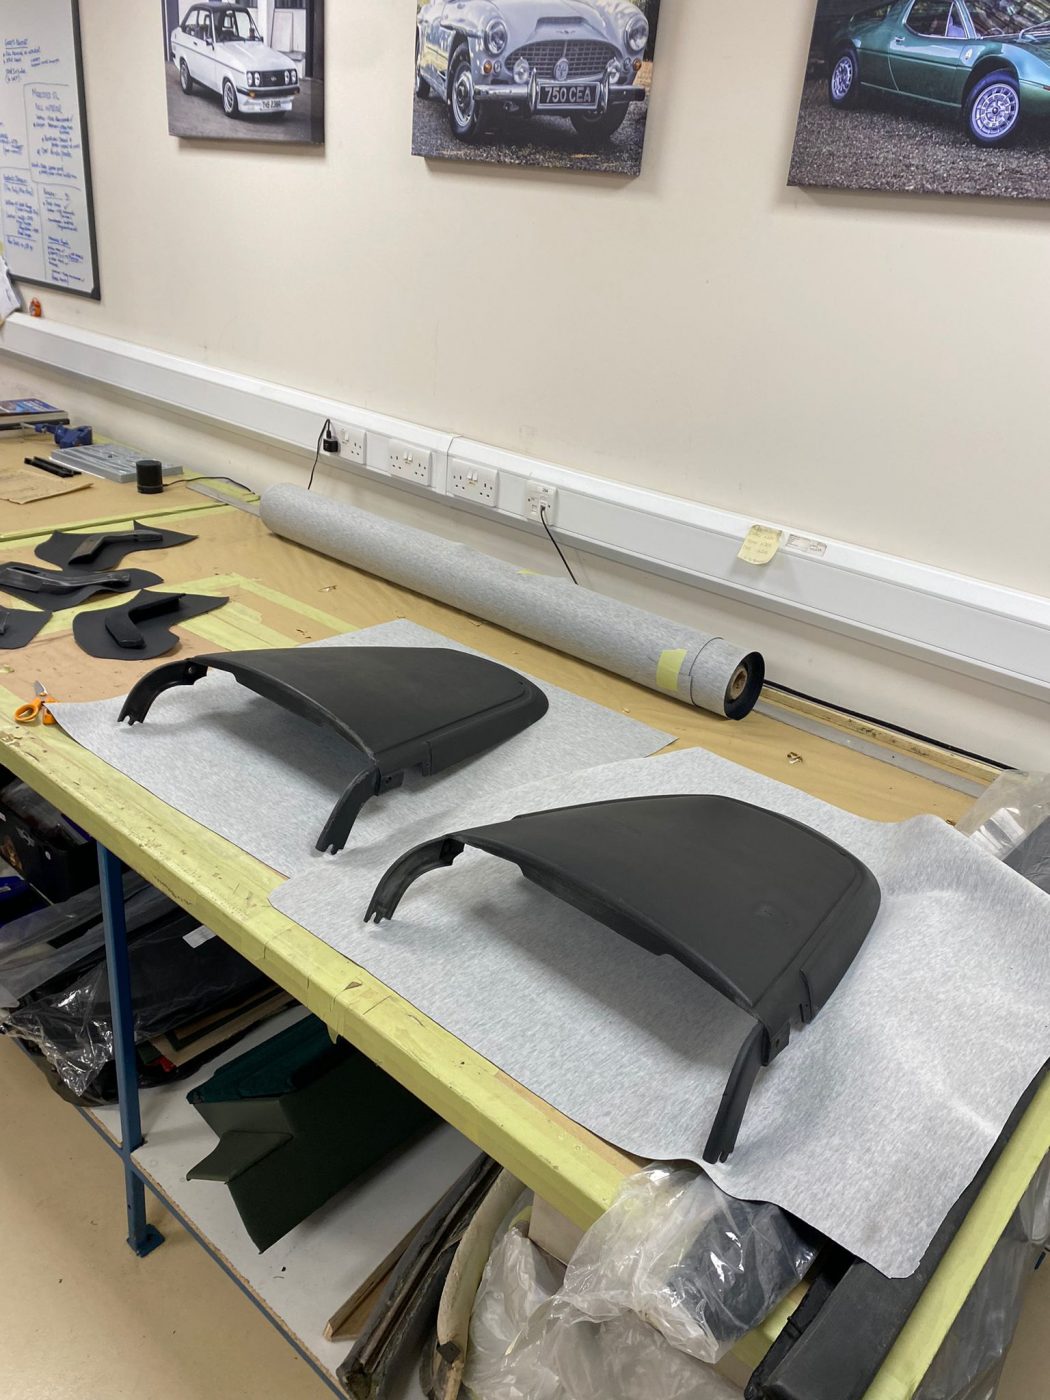
The in-house trim experts at Bridge Classic Cars have been hard at work. Teaming up to conquer the interior of the 1970 Dodge Charger.
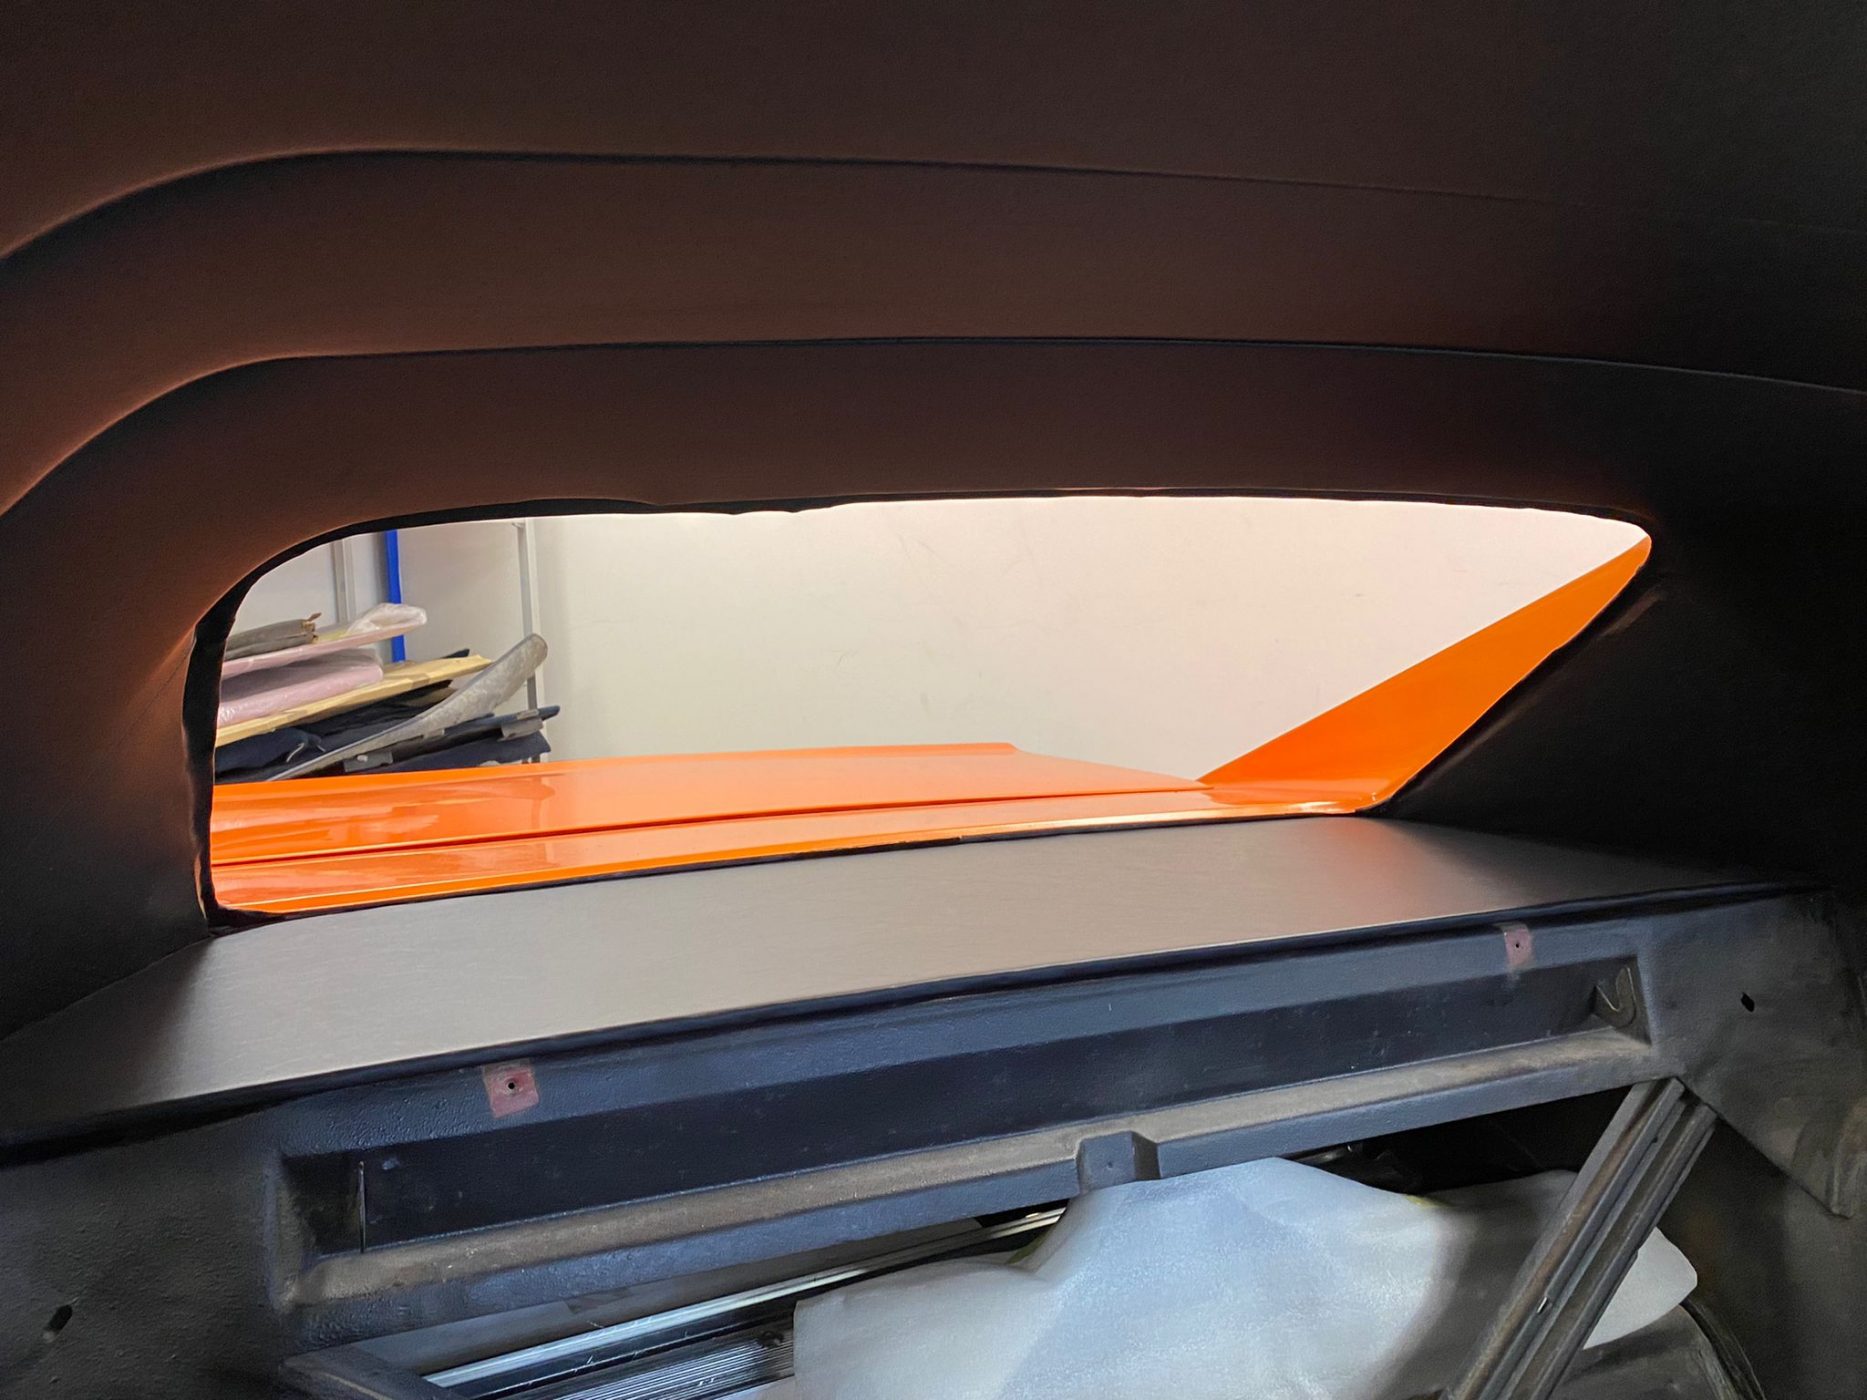
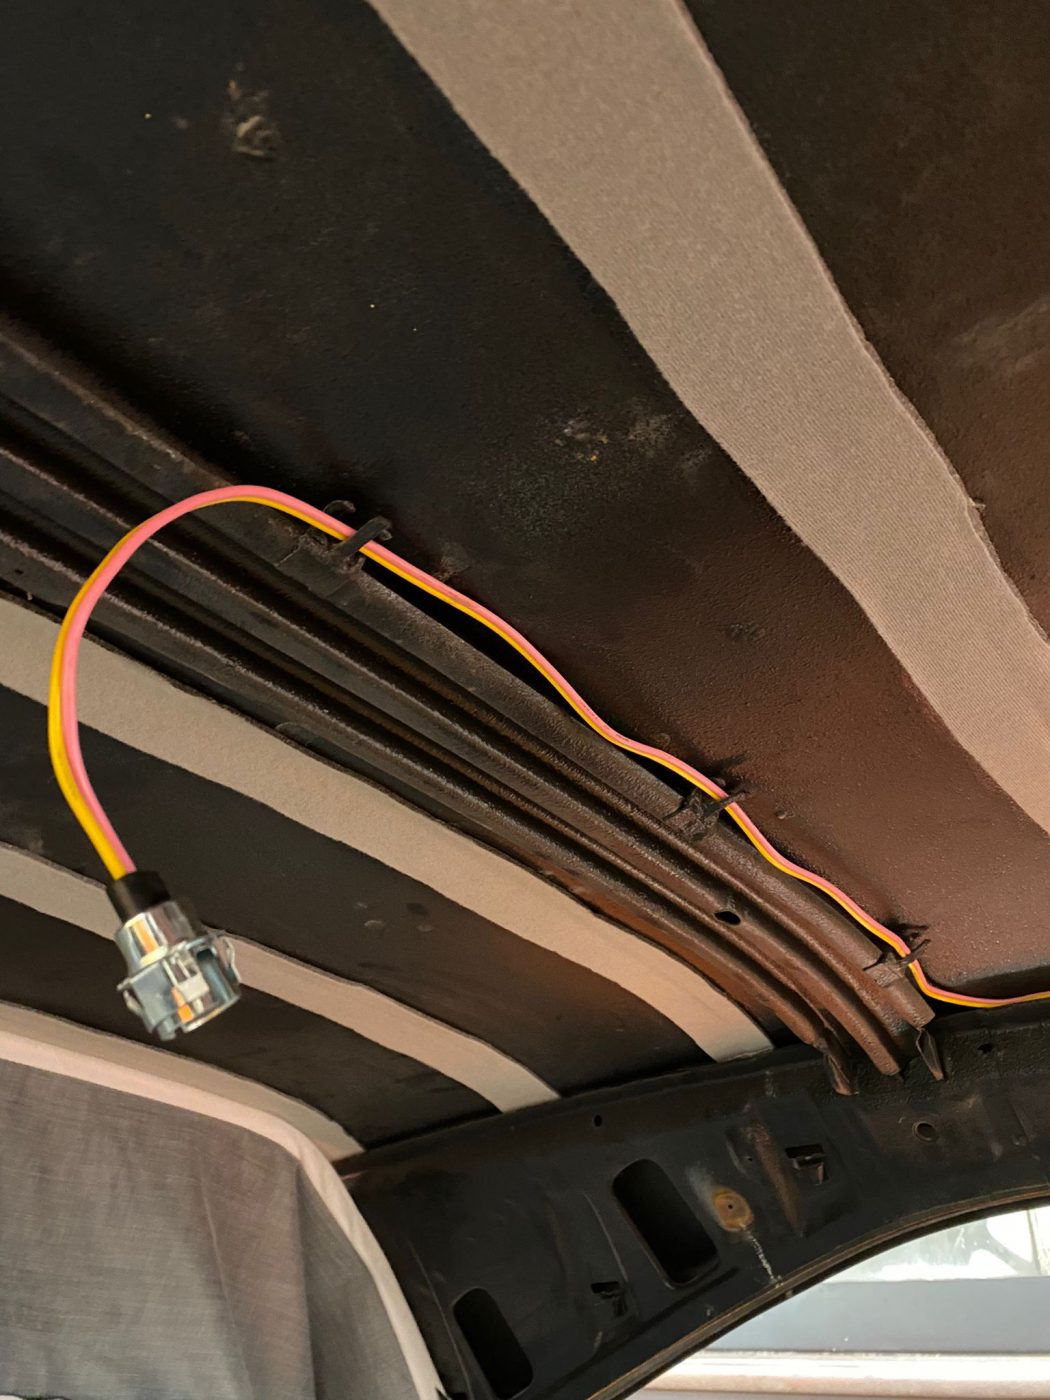
One of the jobs on the list for the interior refit was to fit the signature dome light. This involved a small hole in the brand new headliner for the wires to be passed through. Thankfully with the skill of our trim fitters, you would never know it was ever there and the outings all lined up to be able to secure the light to the roof.
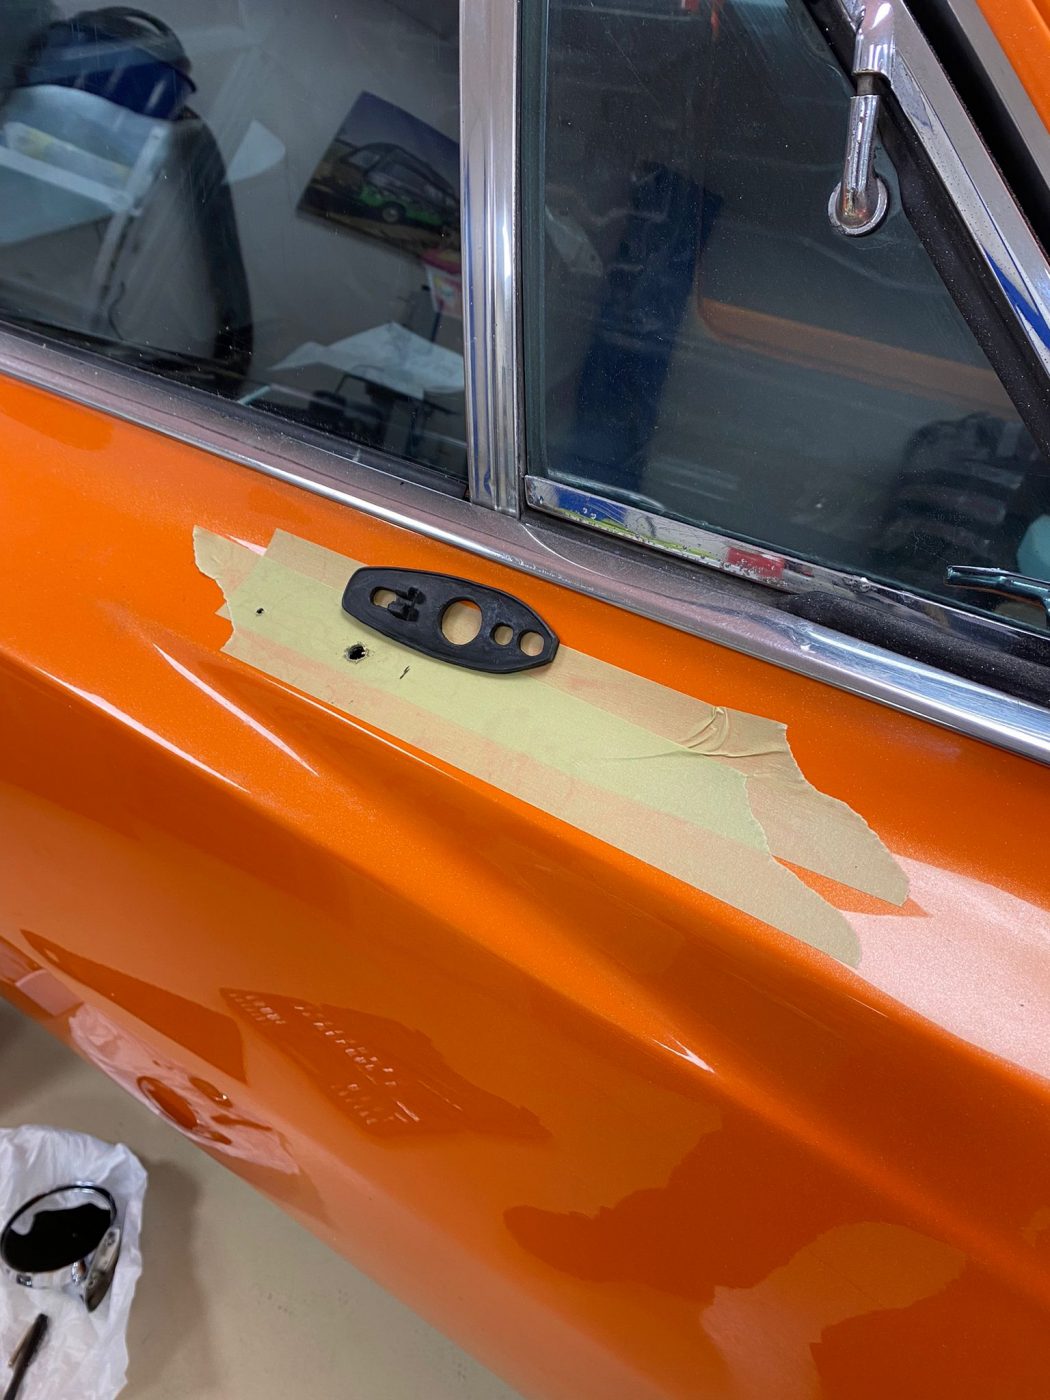
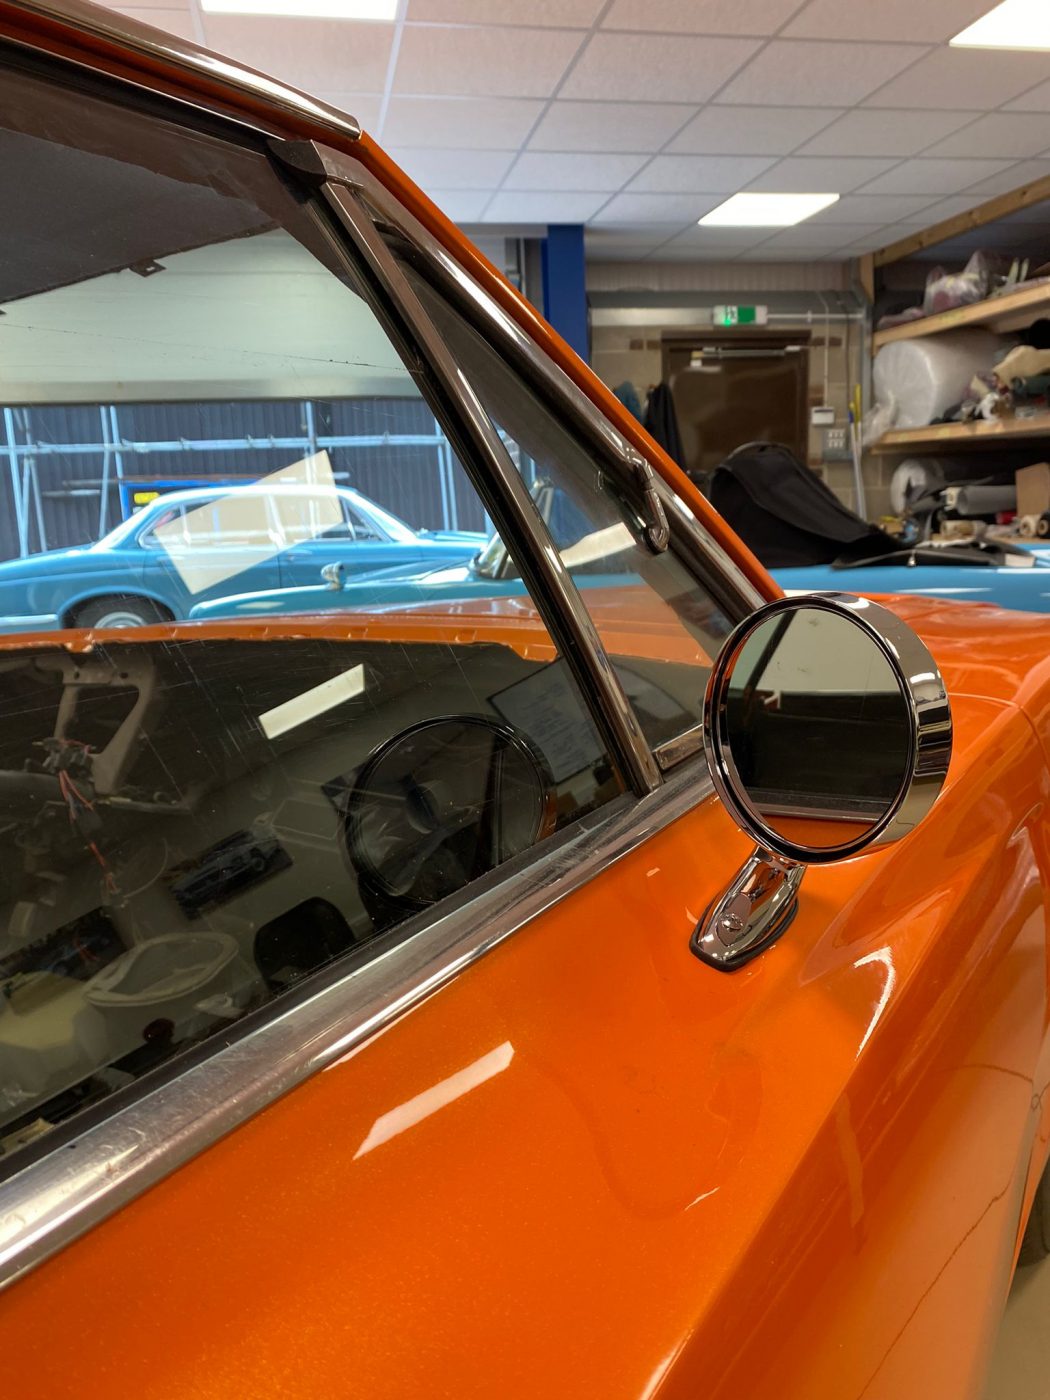
Next up, Brian began to work on getting the new rearview mirrors to the doors of the Charger. These mirrors are so iconic to the Charger that their placement is crucial. Brian, one of our in house trim experts, carefully measured up and mocked up the mirrors countless times before drilling the holes for the fixings to pass through. Once in place, the mechanisms to control the mirrors can be installed to make them fully functional.
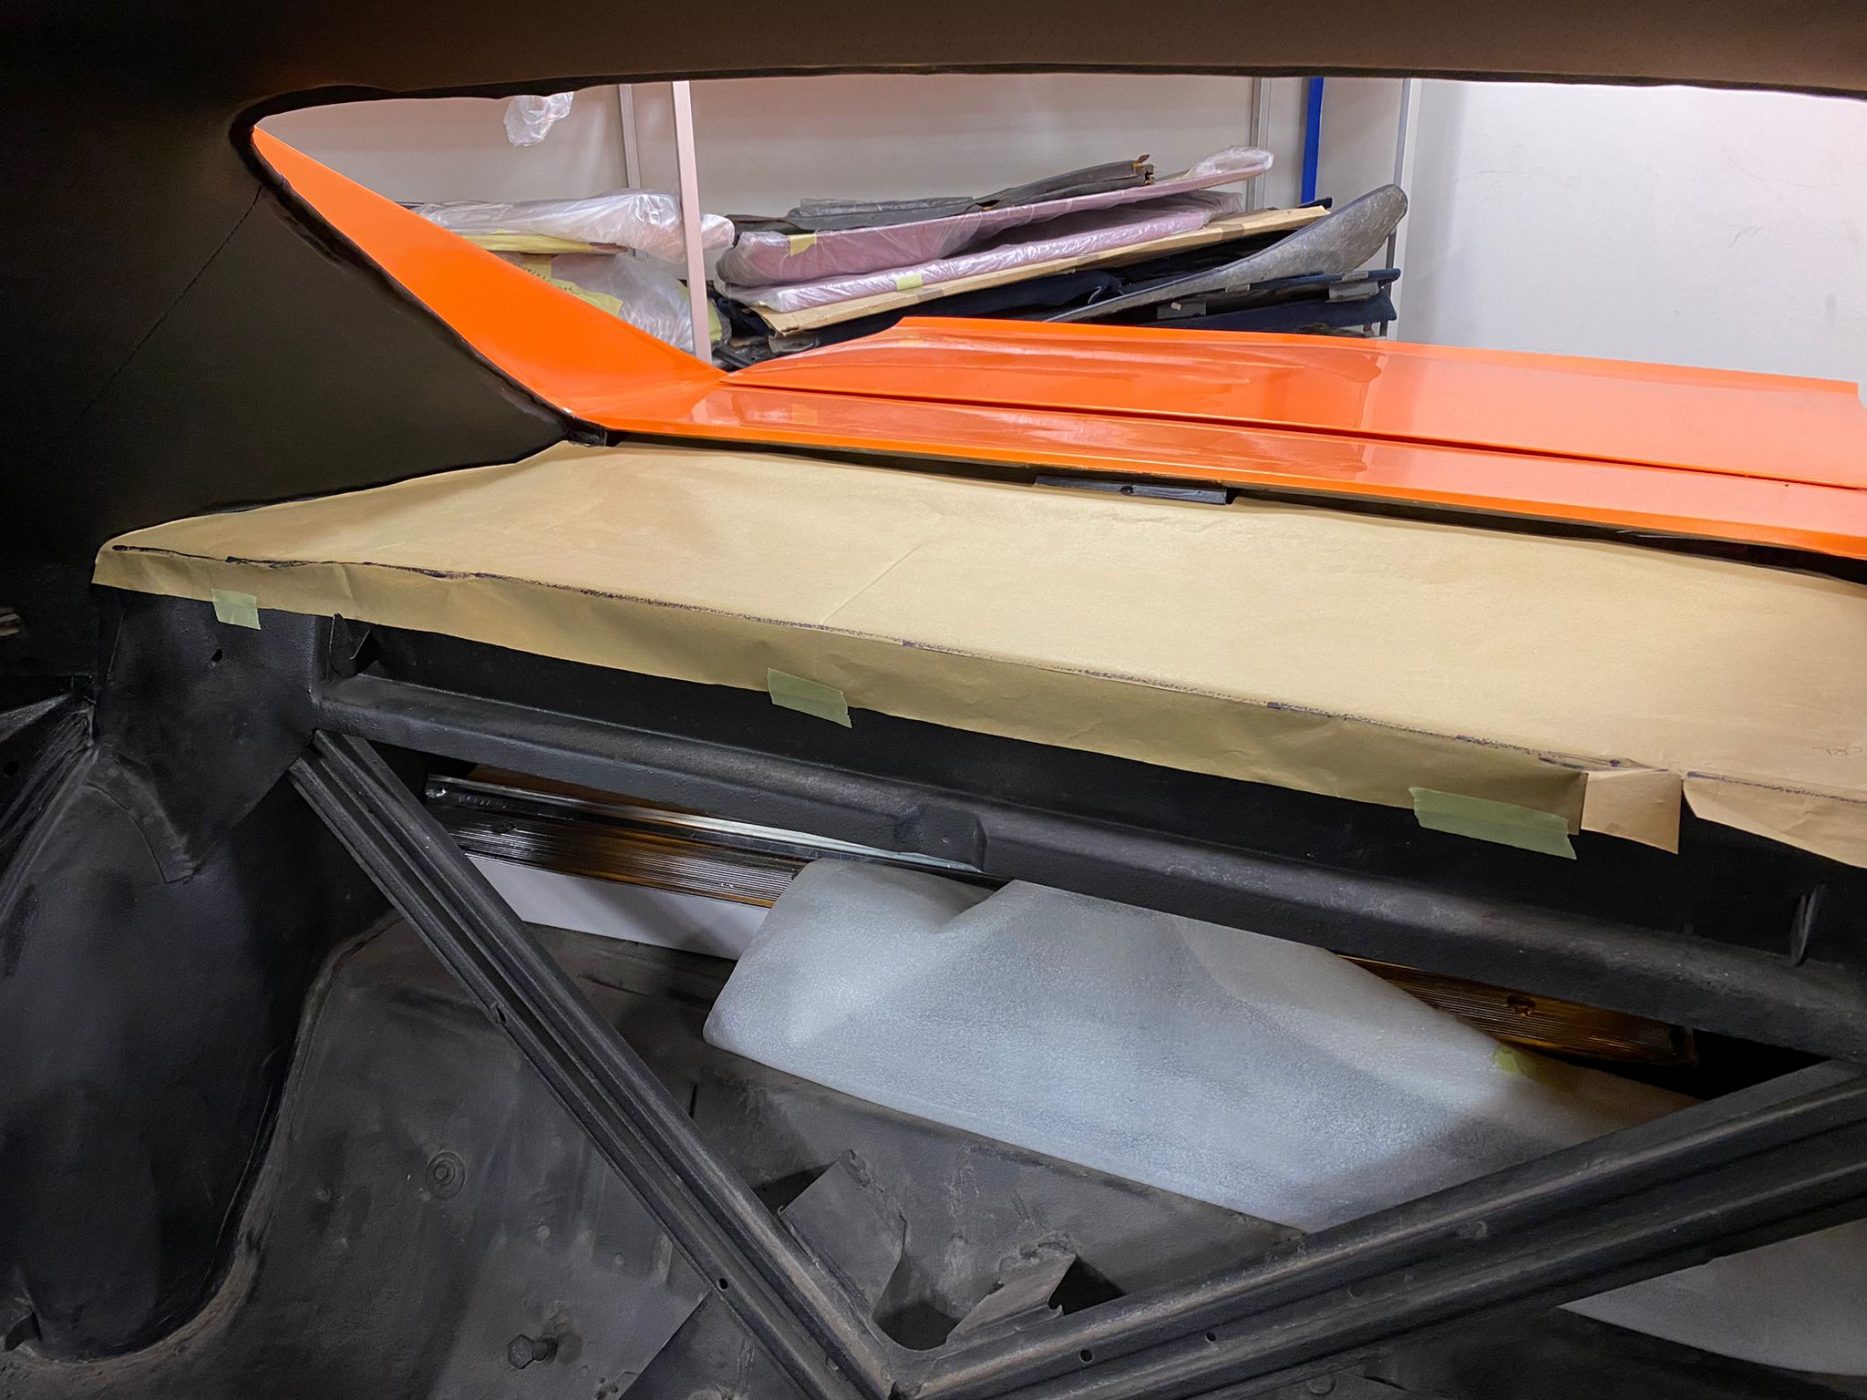
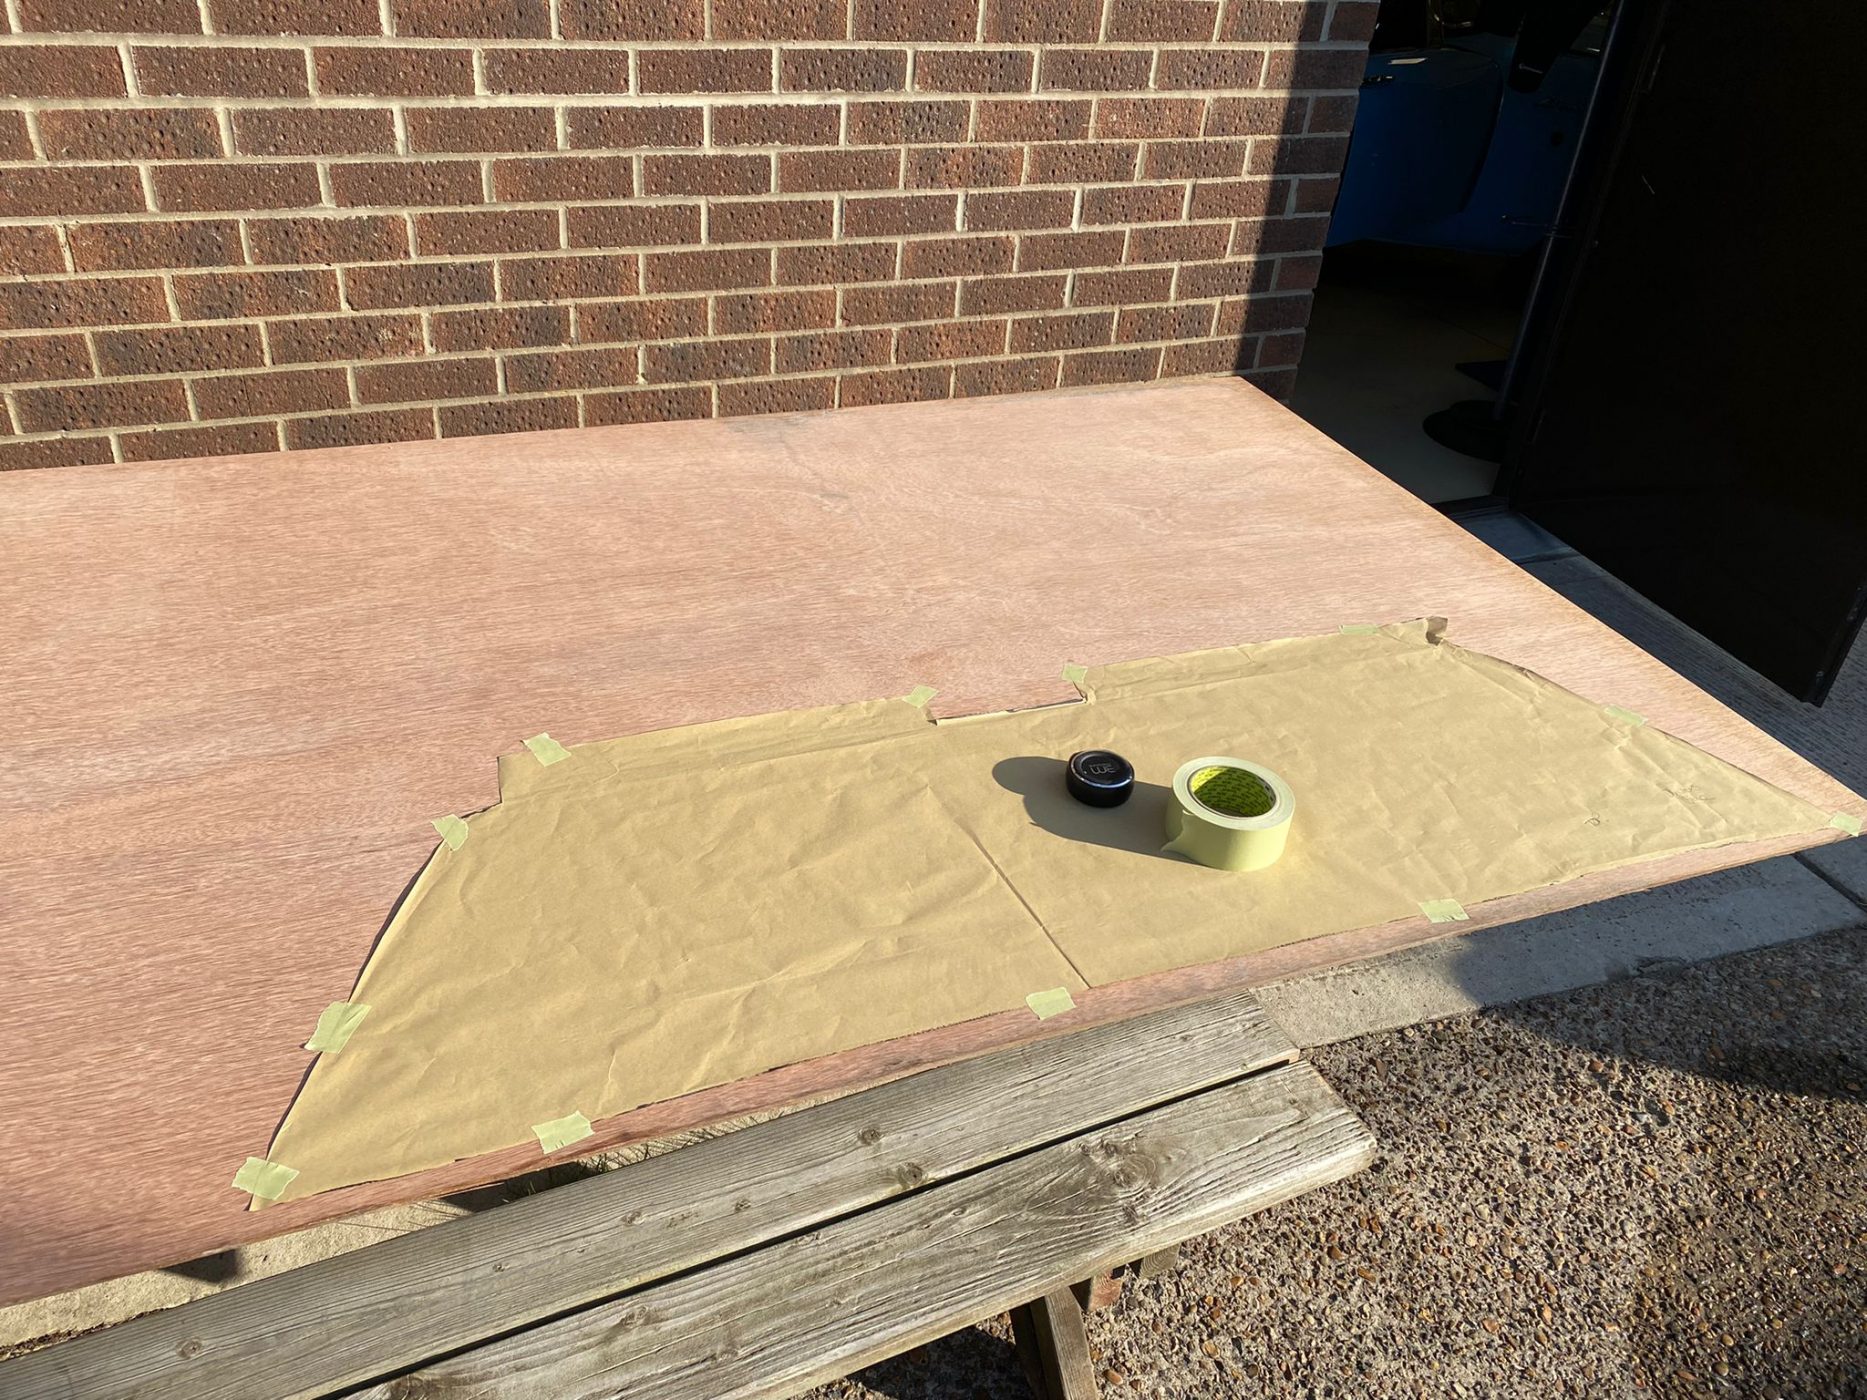
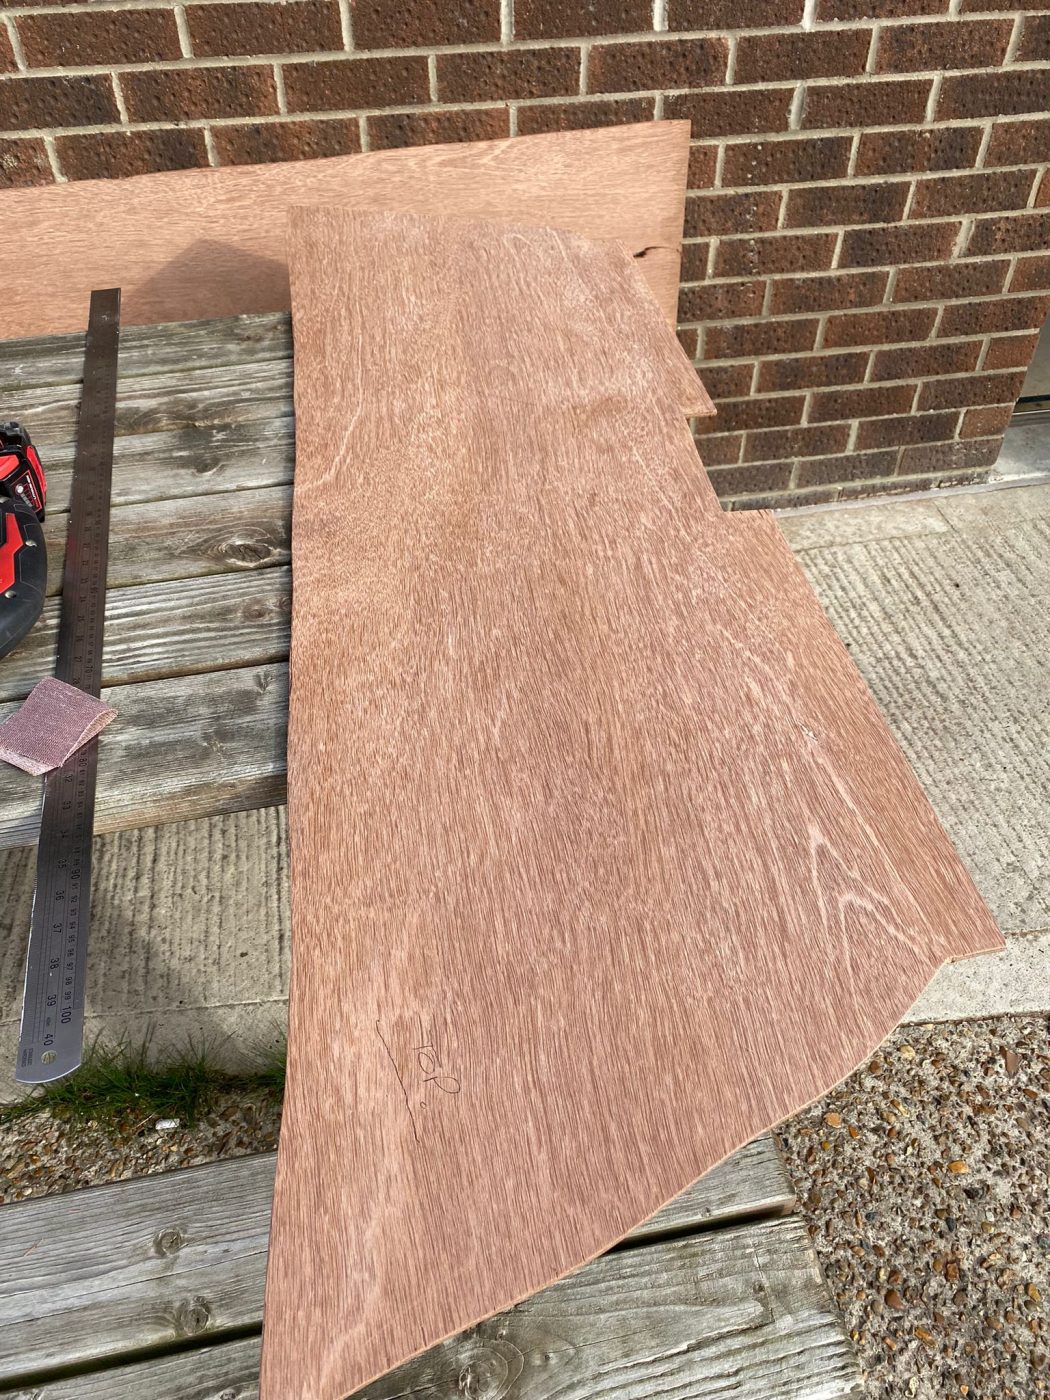
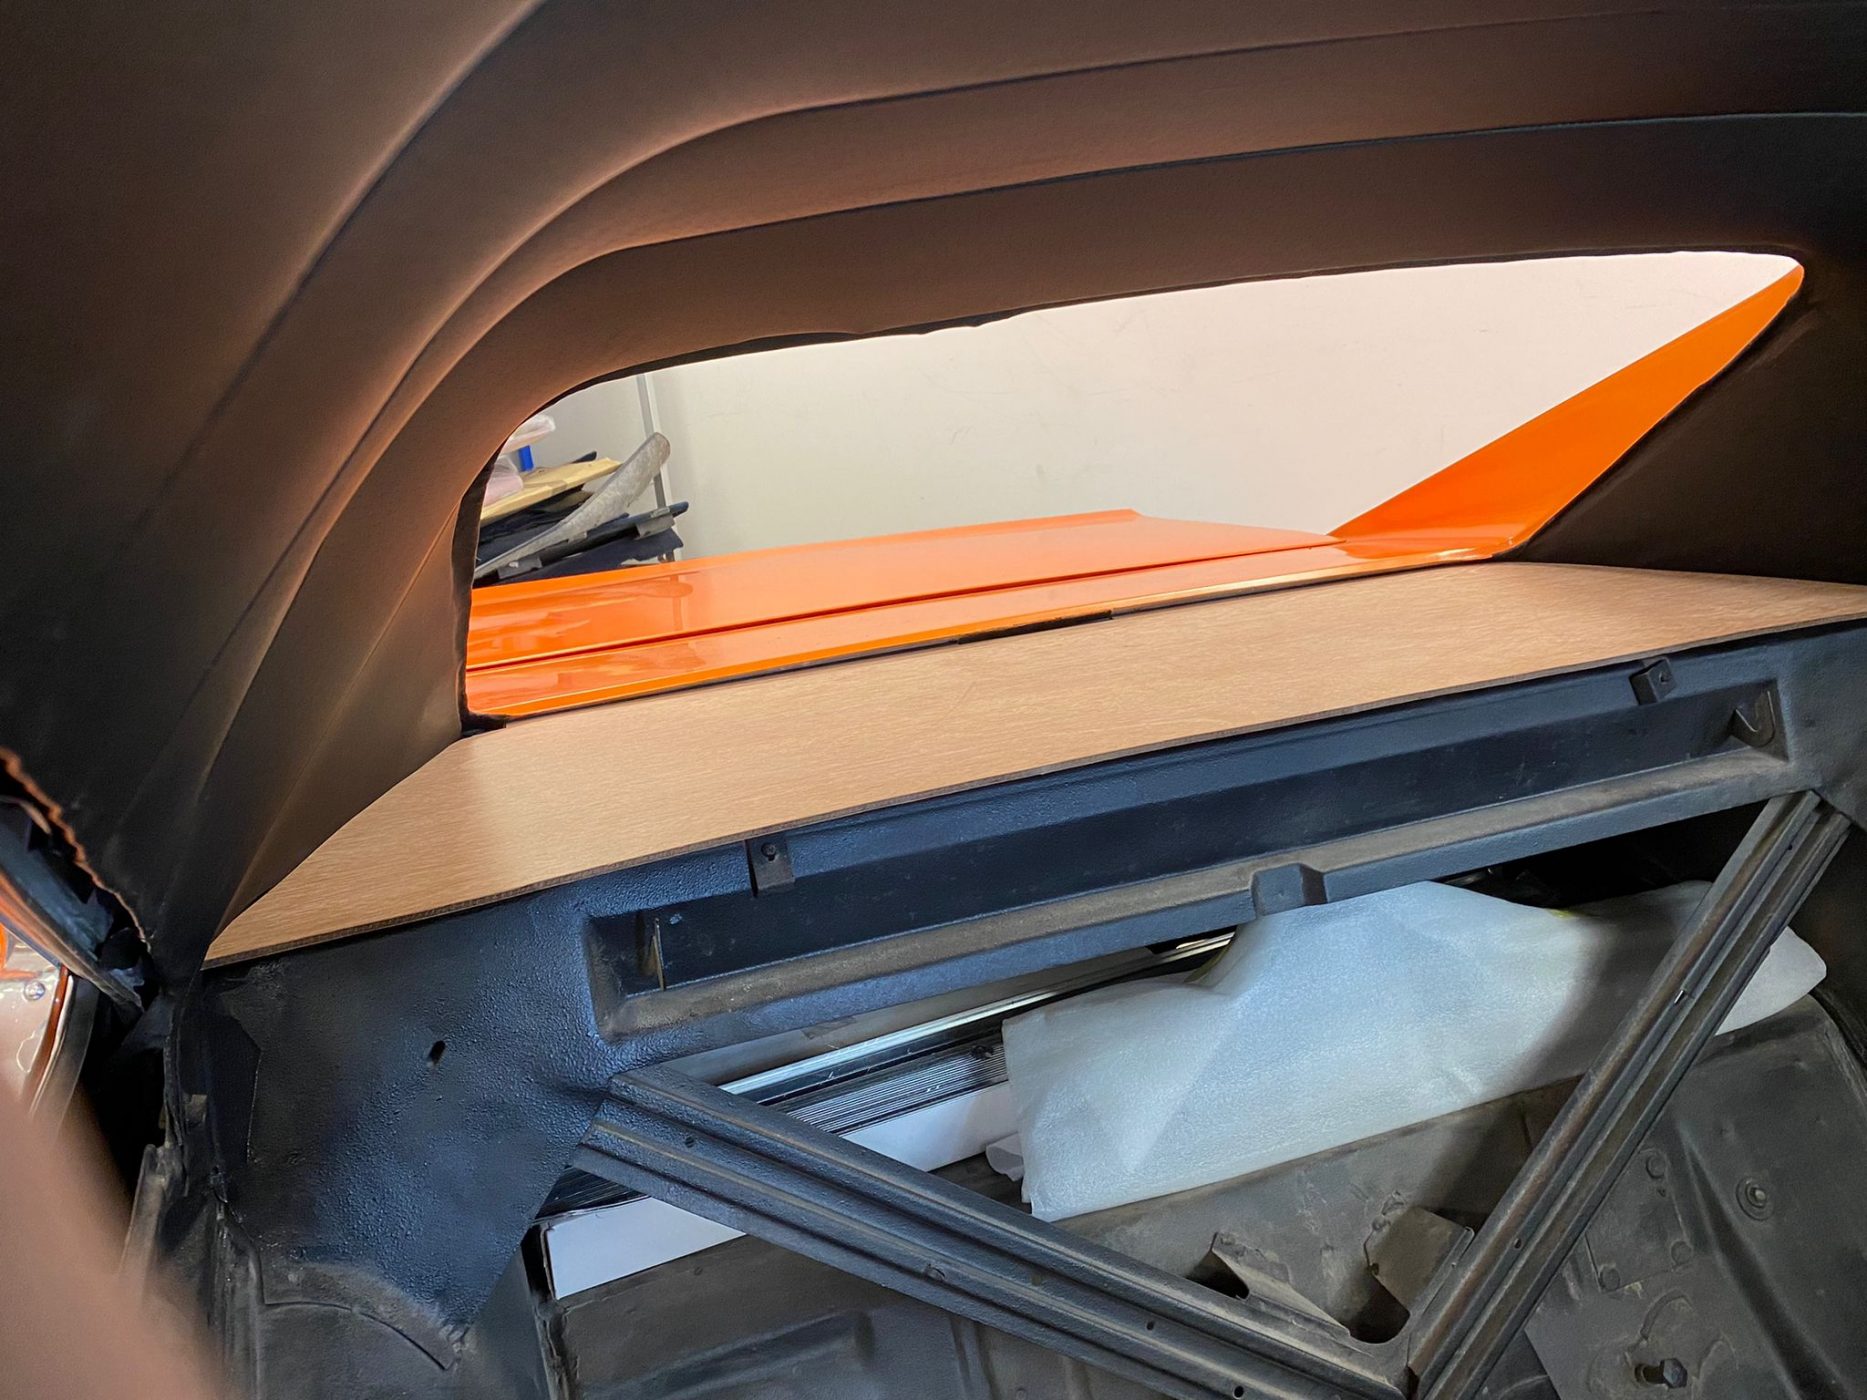
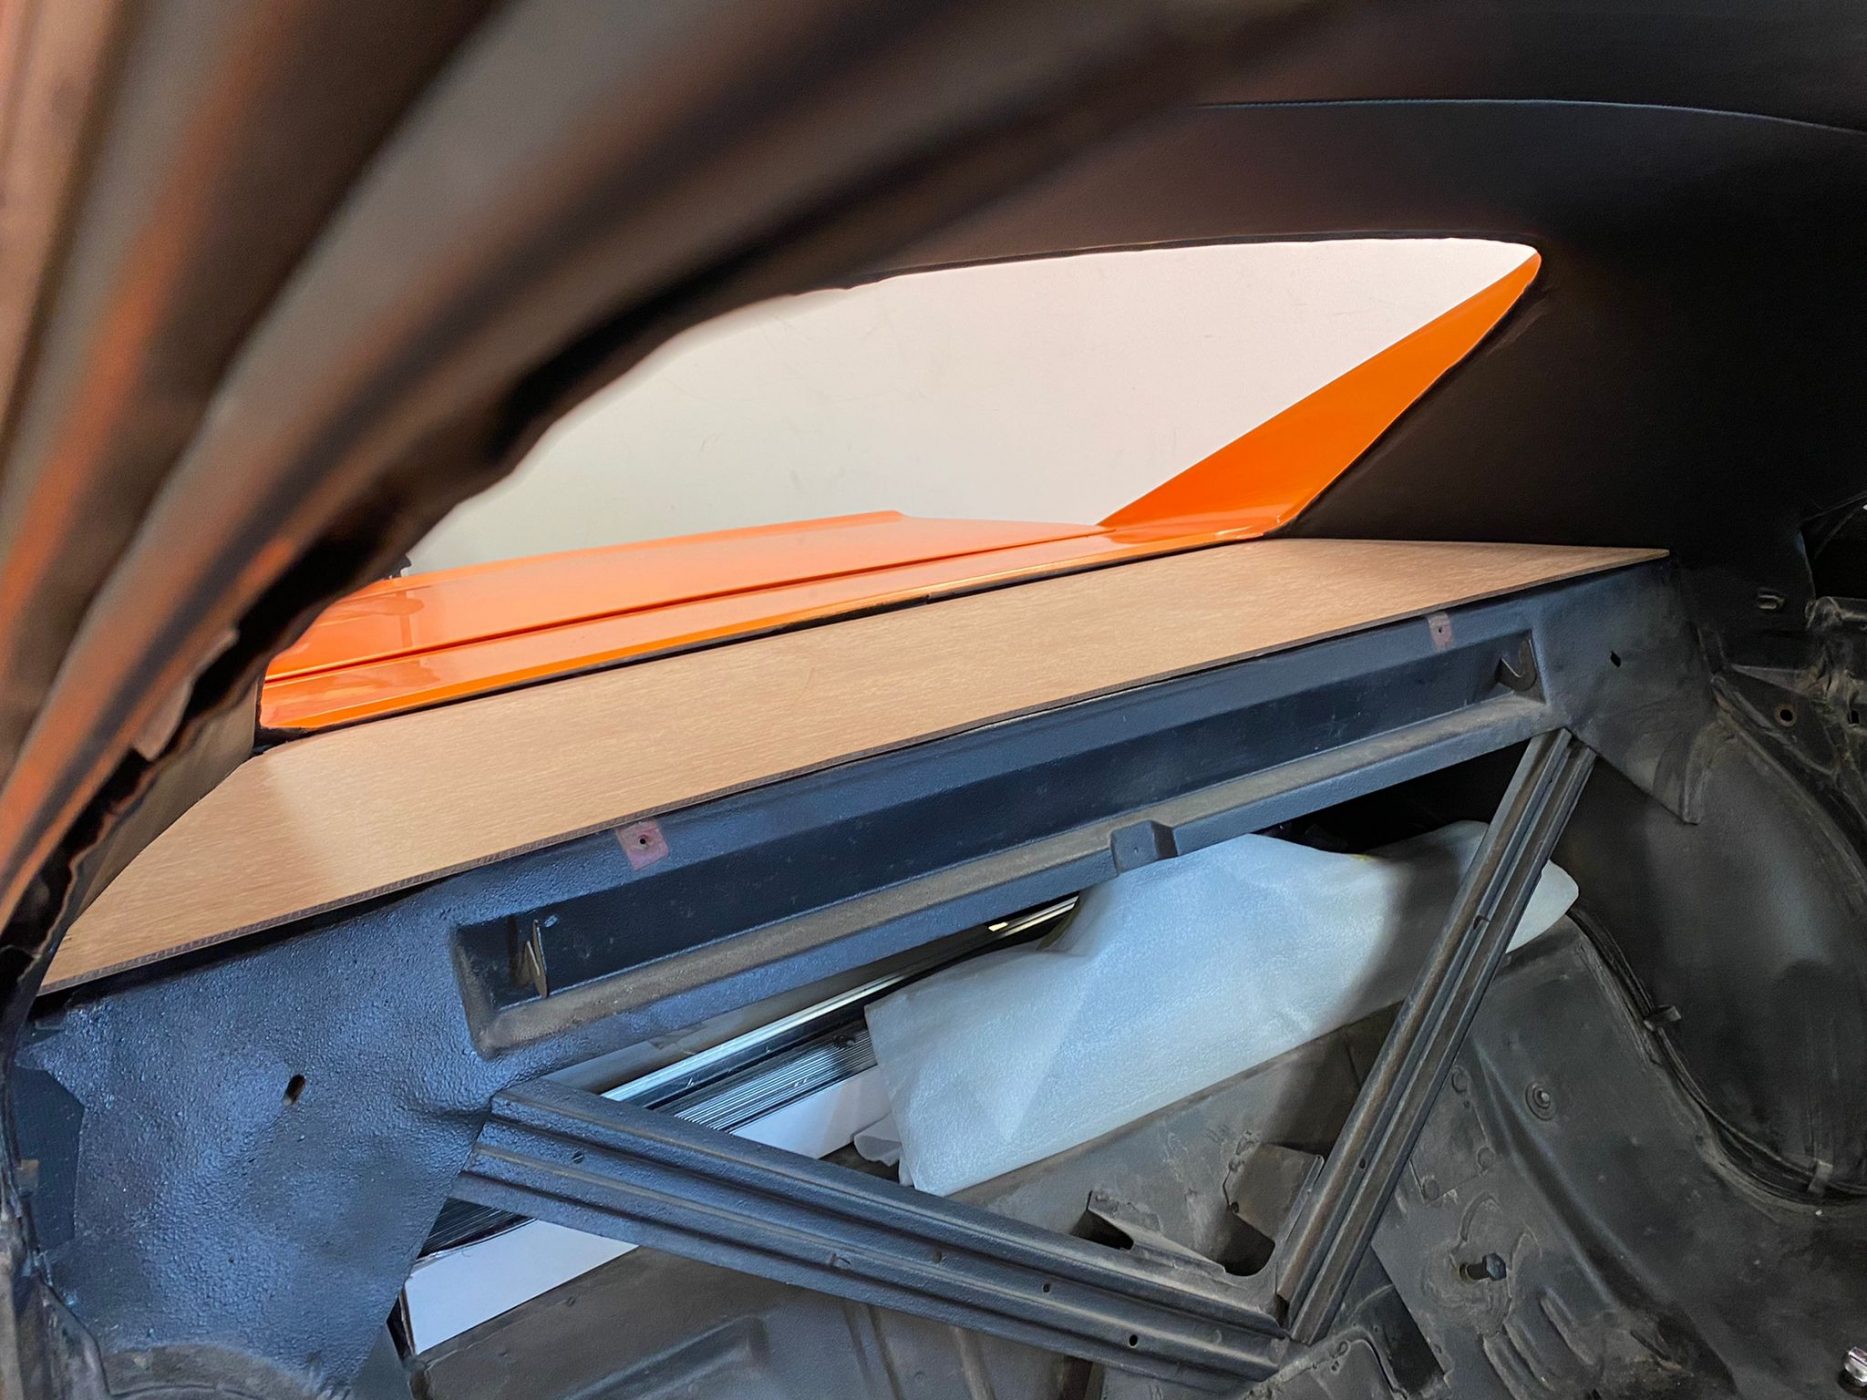
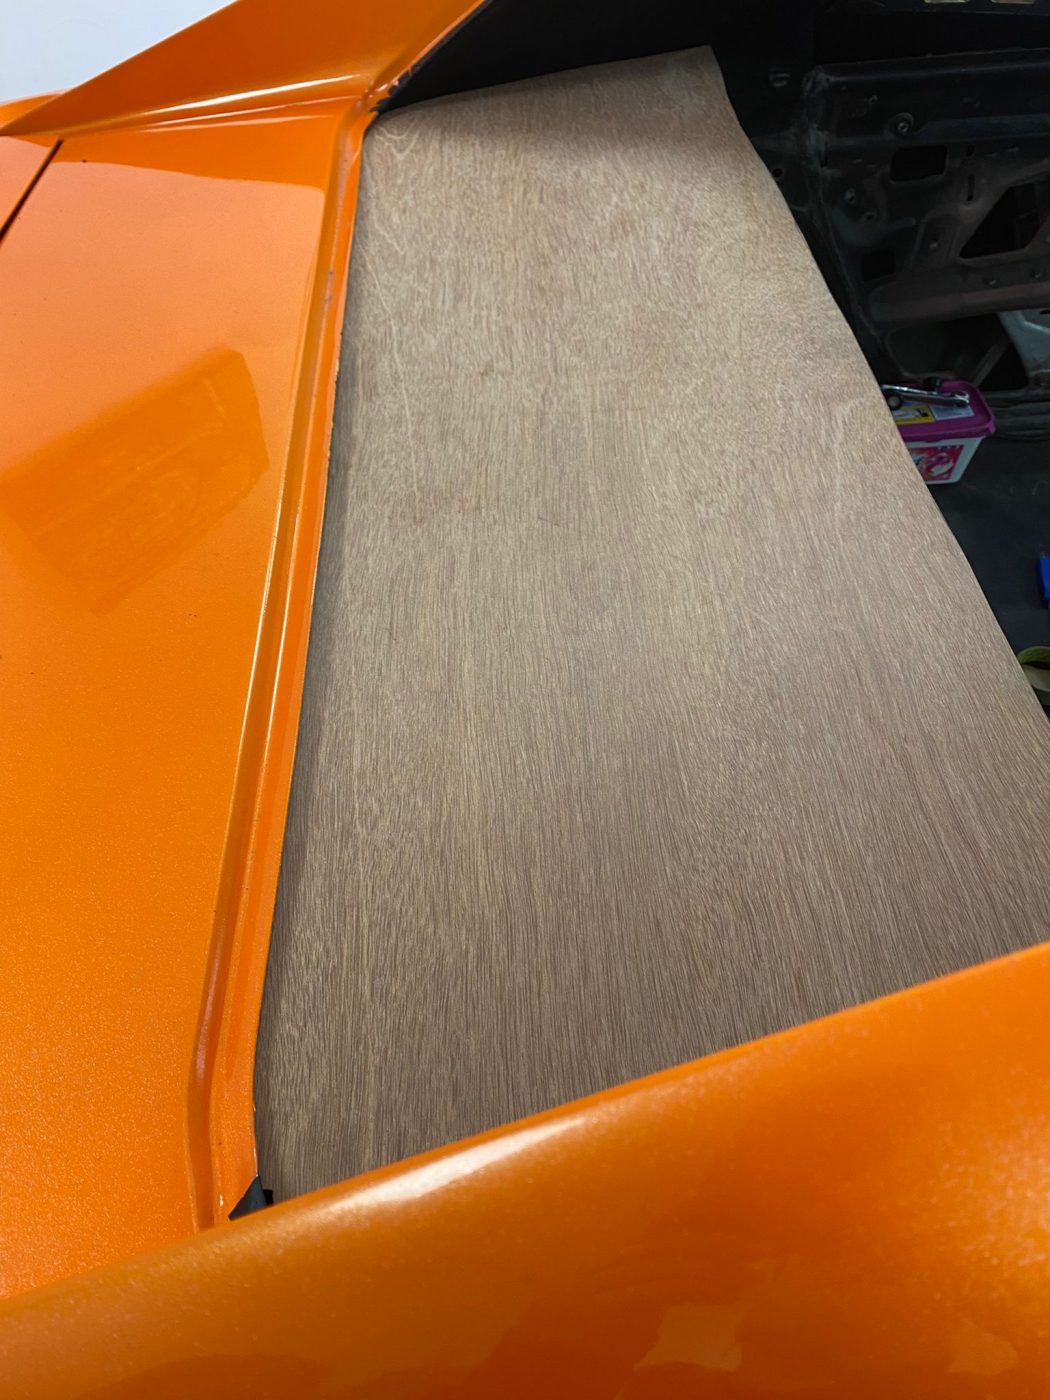

Our incredibly talented trim-shop experts have been hard at work on the 1970 Dodge Charger currently in at Bridge Classic Cars.
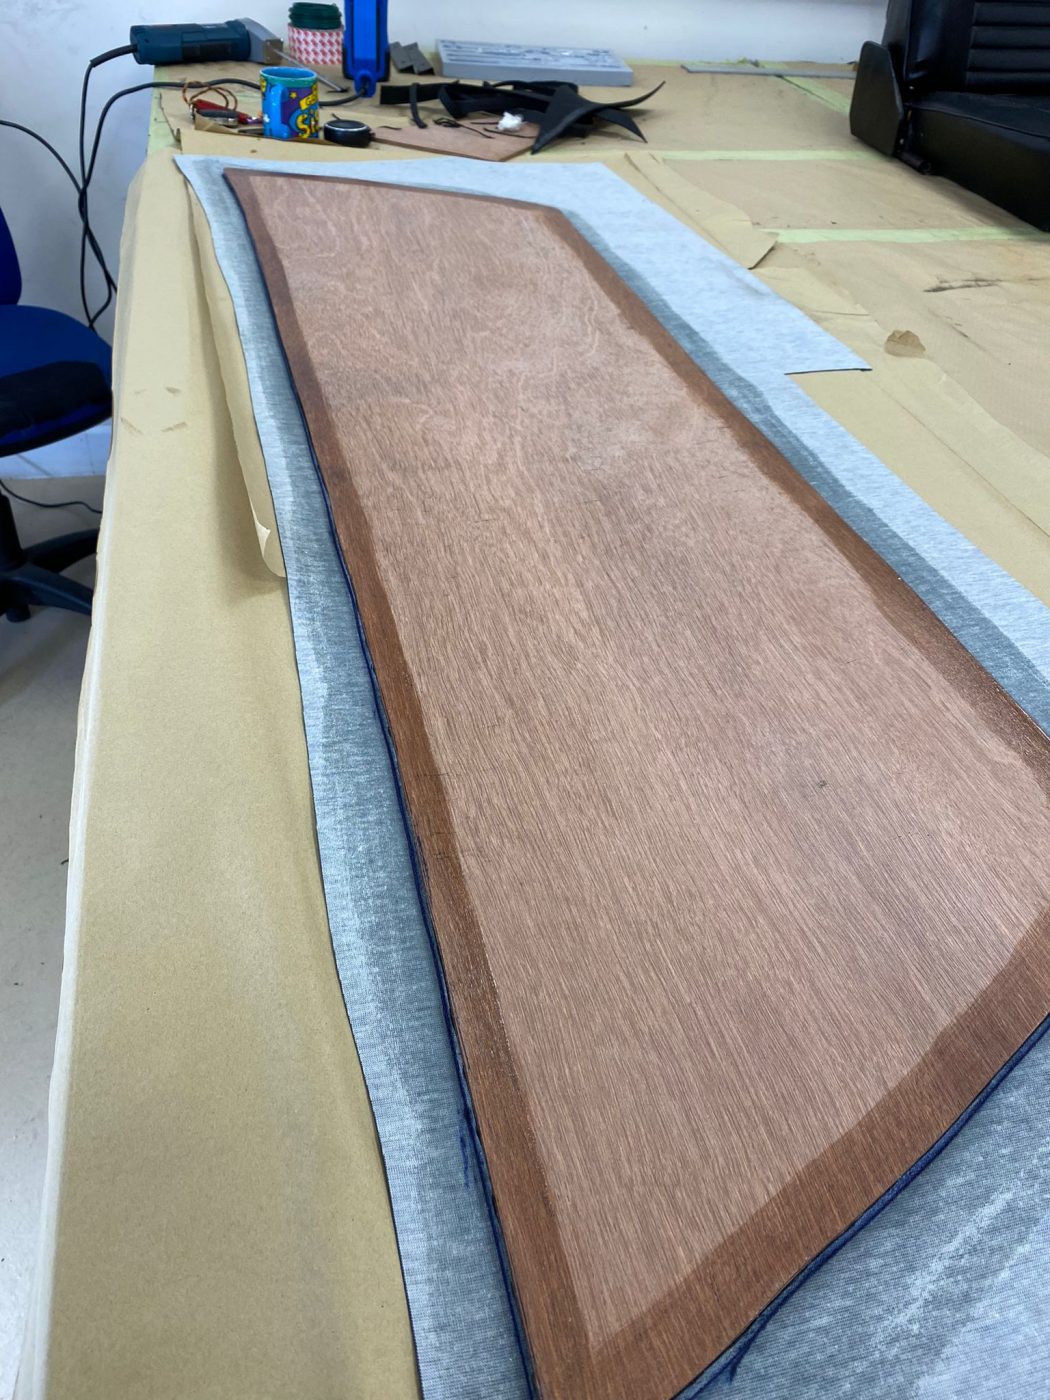
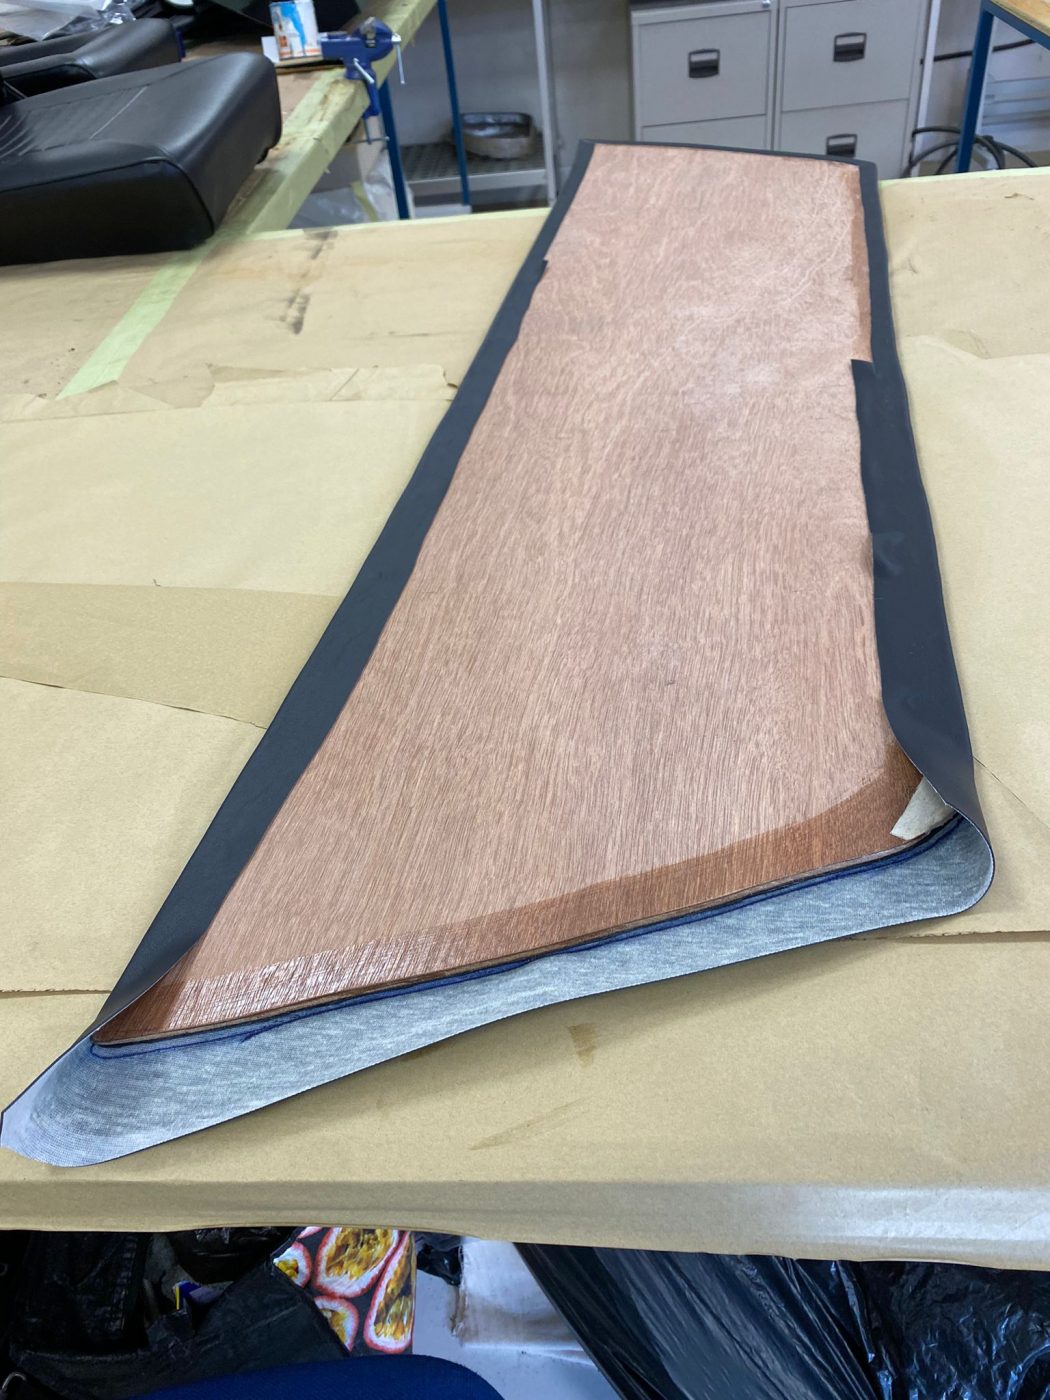
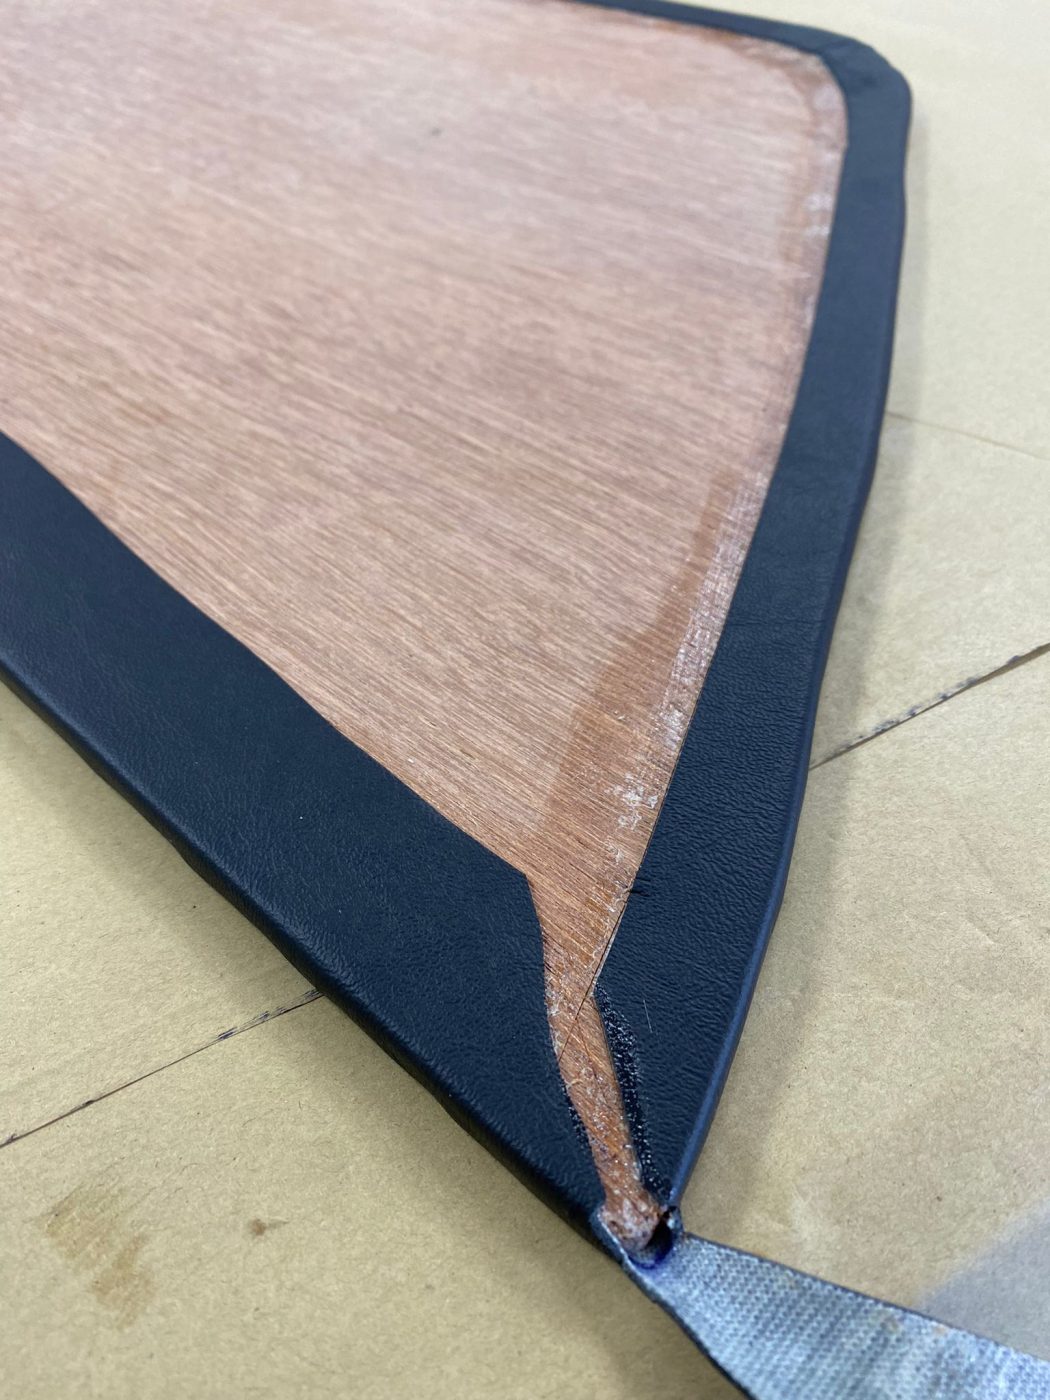
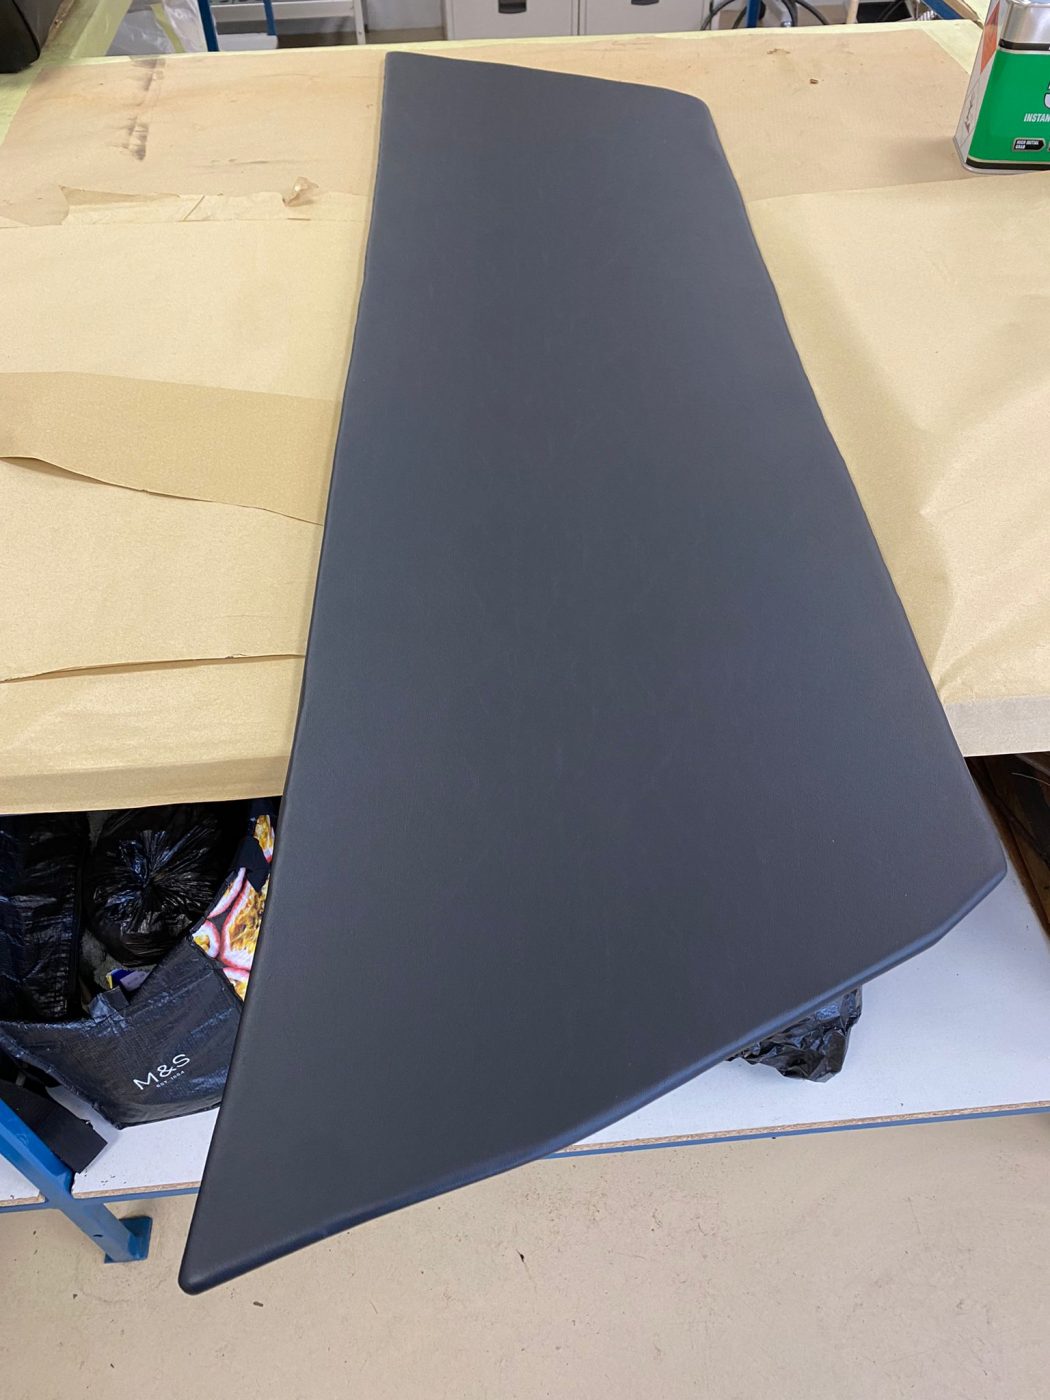
Next on the list of pieces that need to be done in order is the rear parcel shelf. For this, Kath had to make it from scratch. Creating a tight-fitting template, it was then cut from ply and covered to match the rest of the interior.
Kath even repainted the original fixings to make sure all originality could be kept and create a uniform look to the car.
After it was wrapped in matching material, the trim team fit it into the car and it looks absolutely amazing in the back of this wonderful muscle car.
Kath has been working on test fitting the carpet on the 1970 Dodge Charger in the trim shop of Bridge Classic Cars.
To check the best fit on the carpet, she has had to mock up the rear seat in place. It looks incredible! The carpet does need to be stretched and skillfully manipulated into its final place but the results so far are looking amazing.
More very soon on the 1970 Dodge Charger here at Bridge Classic Cars.

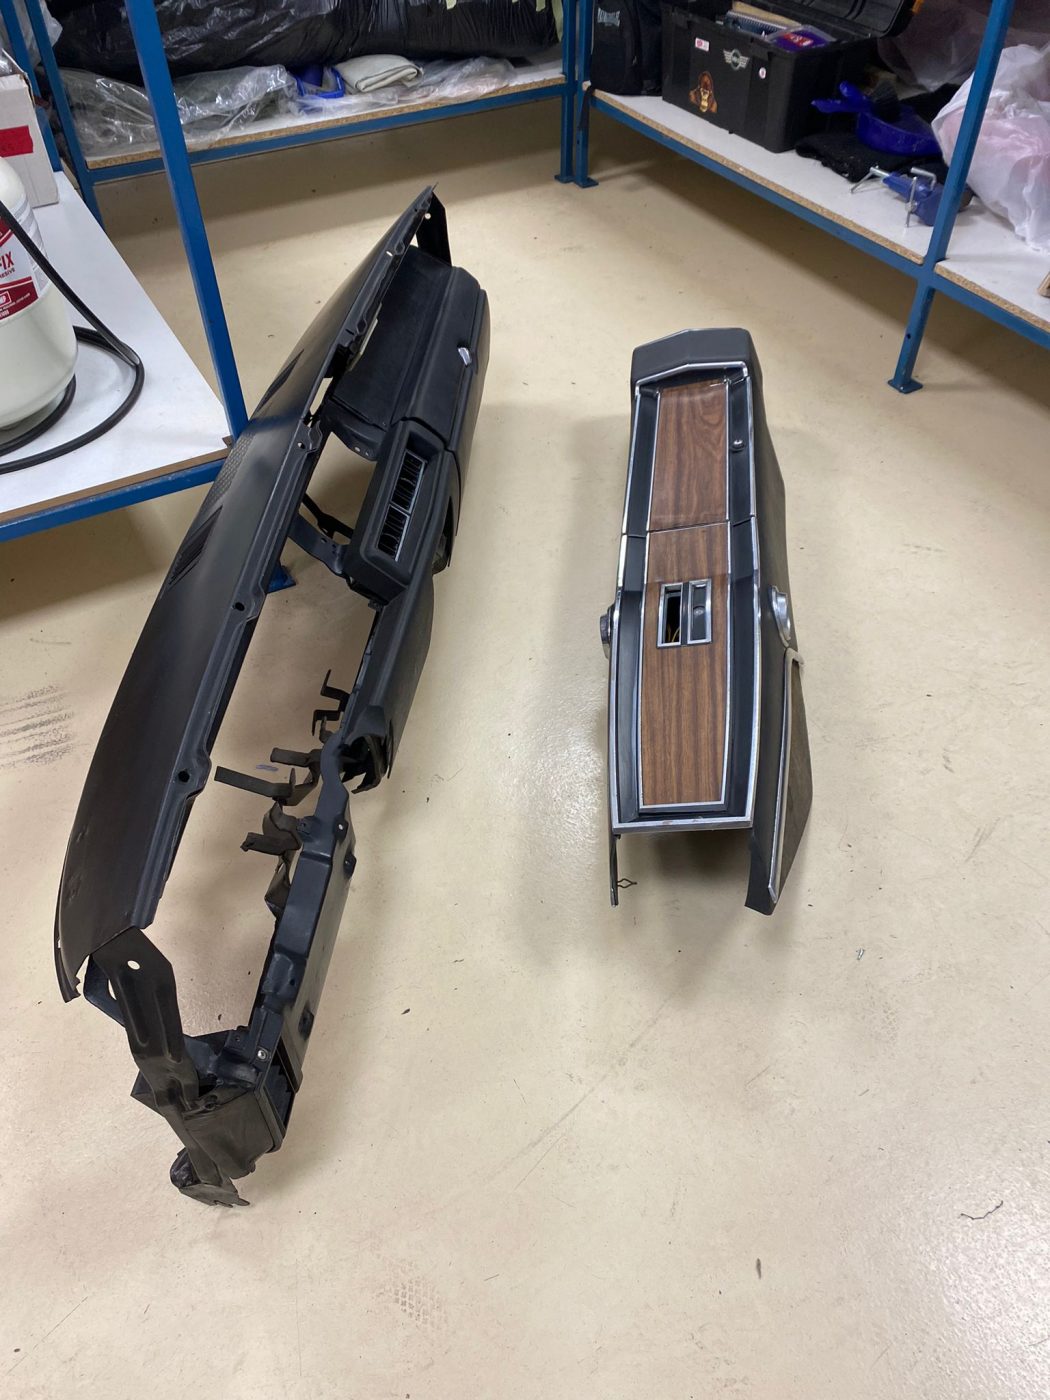

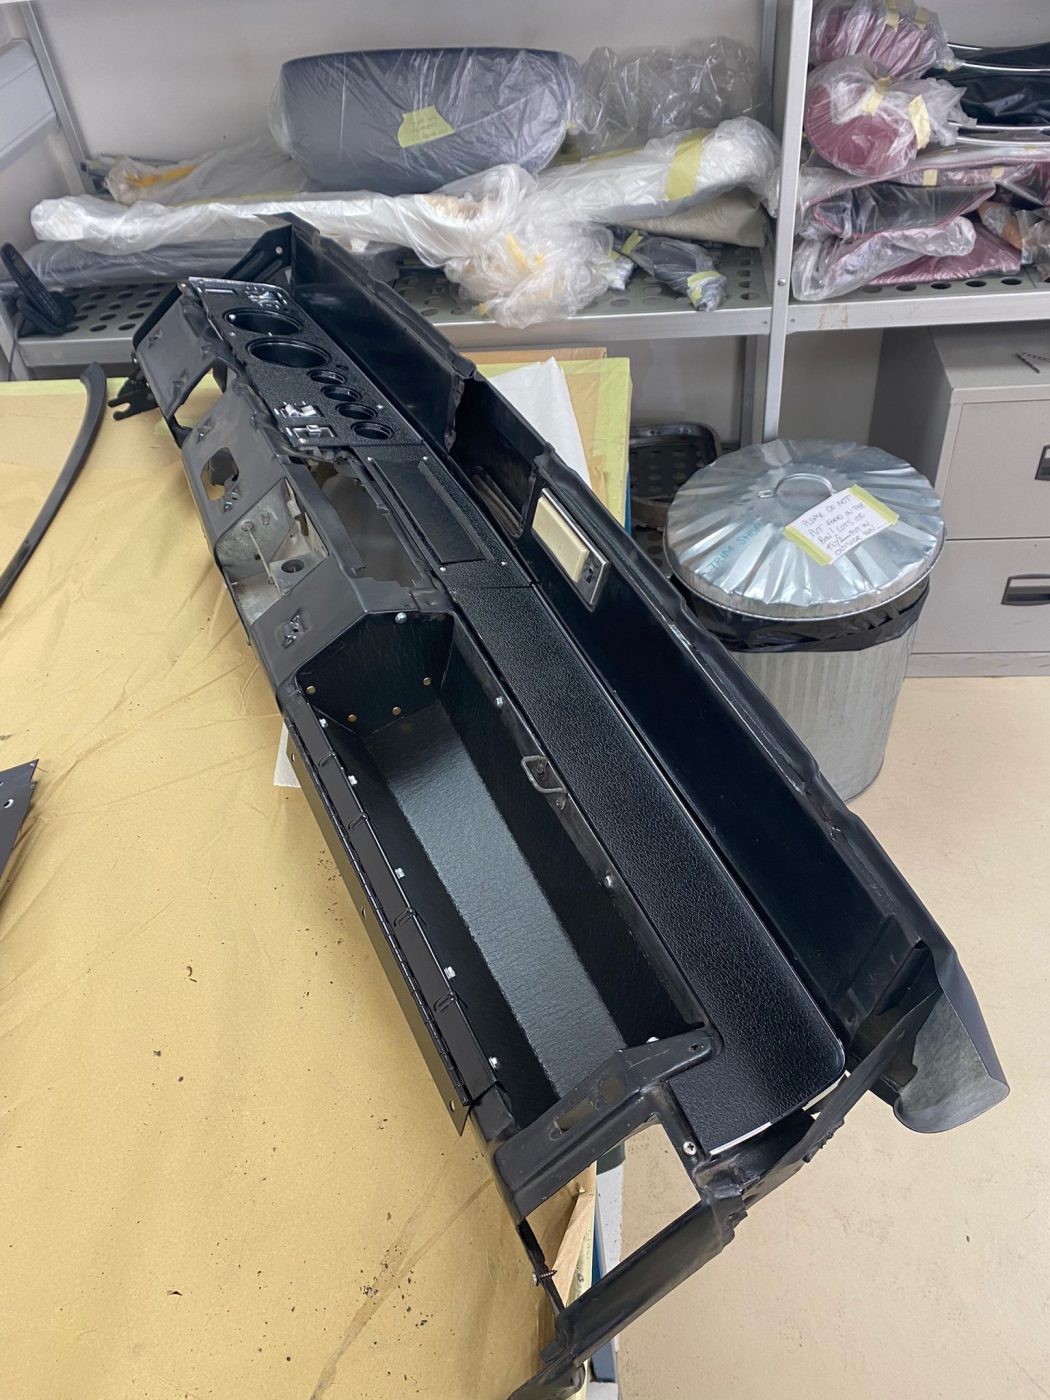
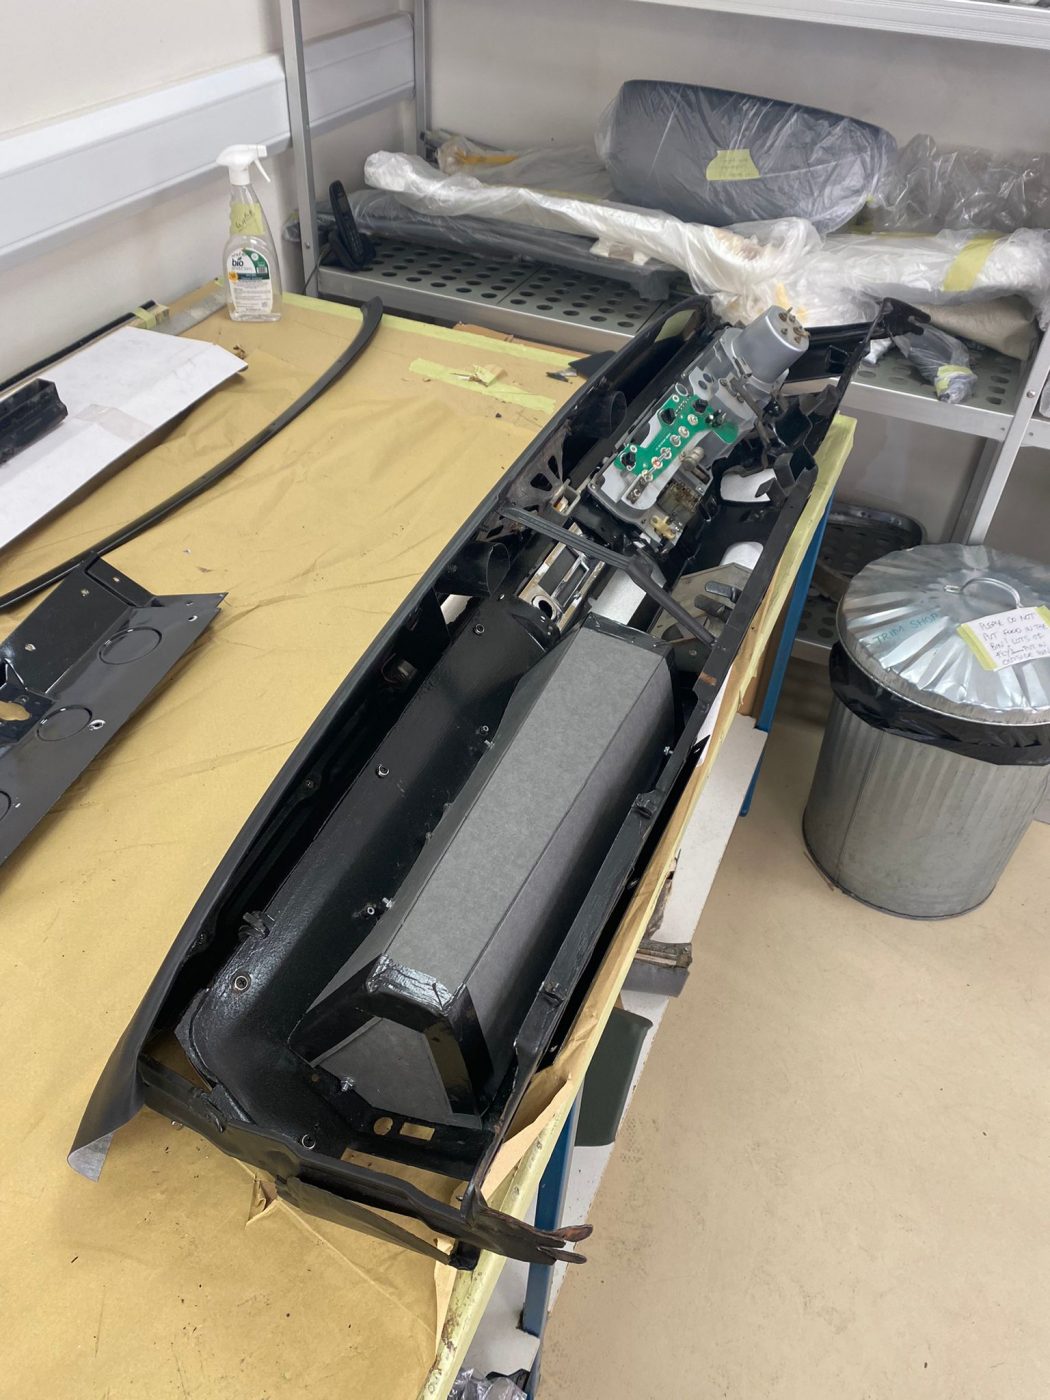
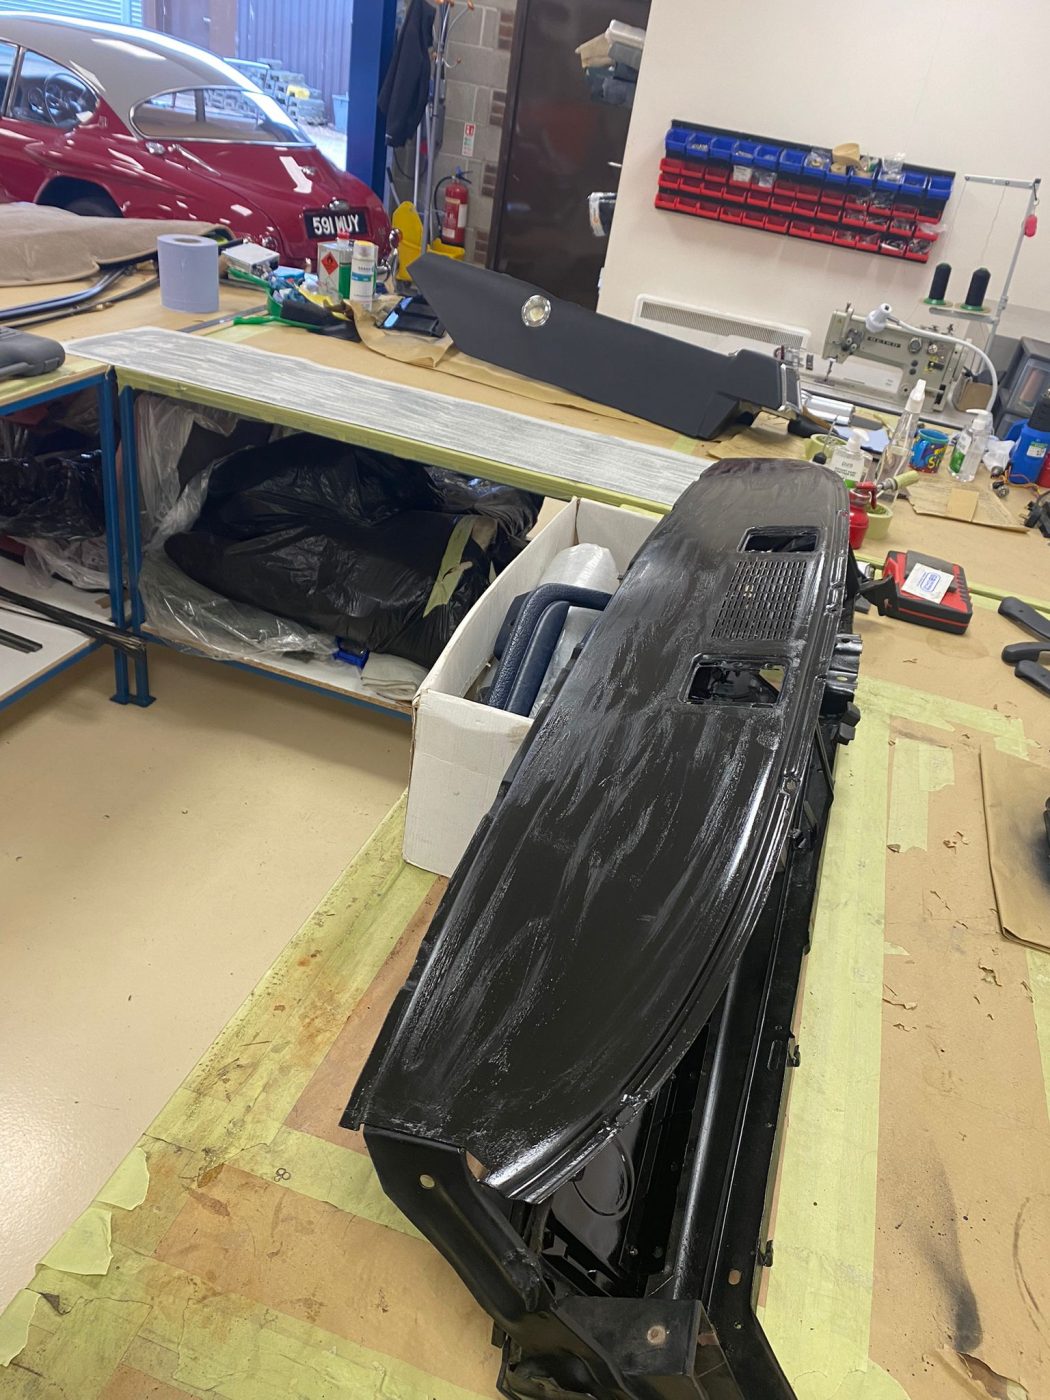
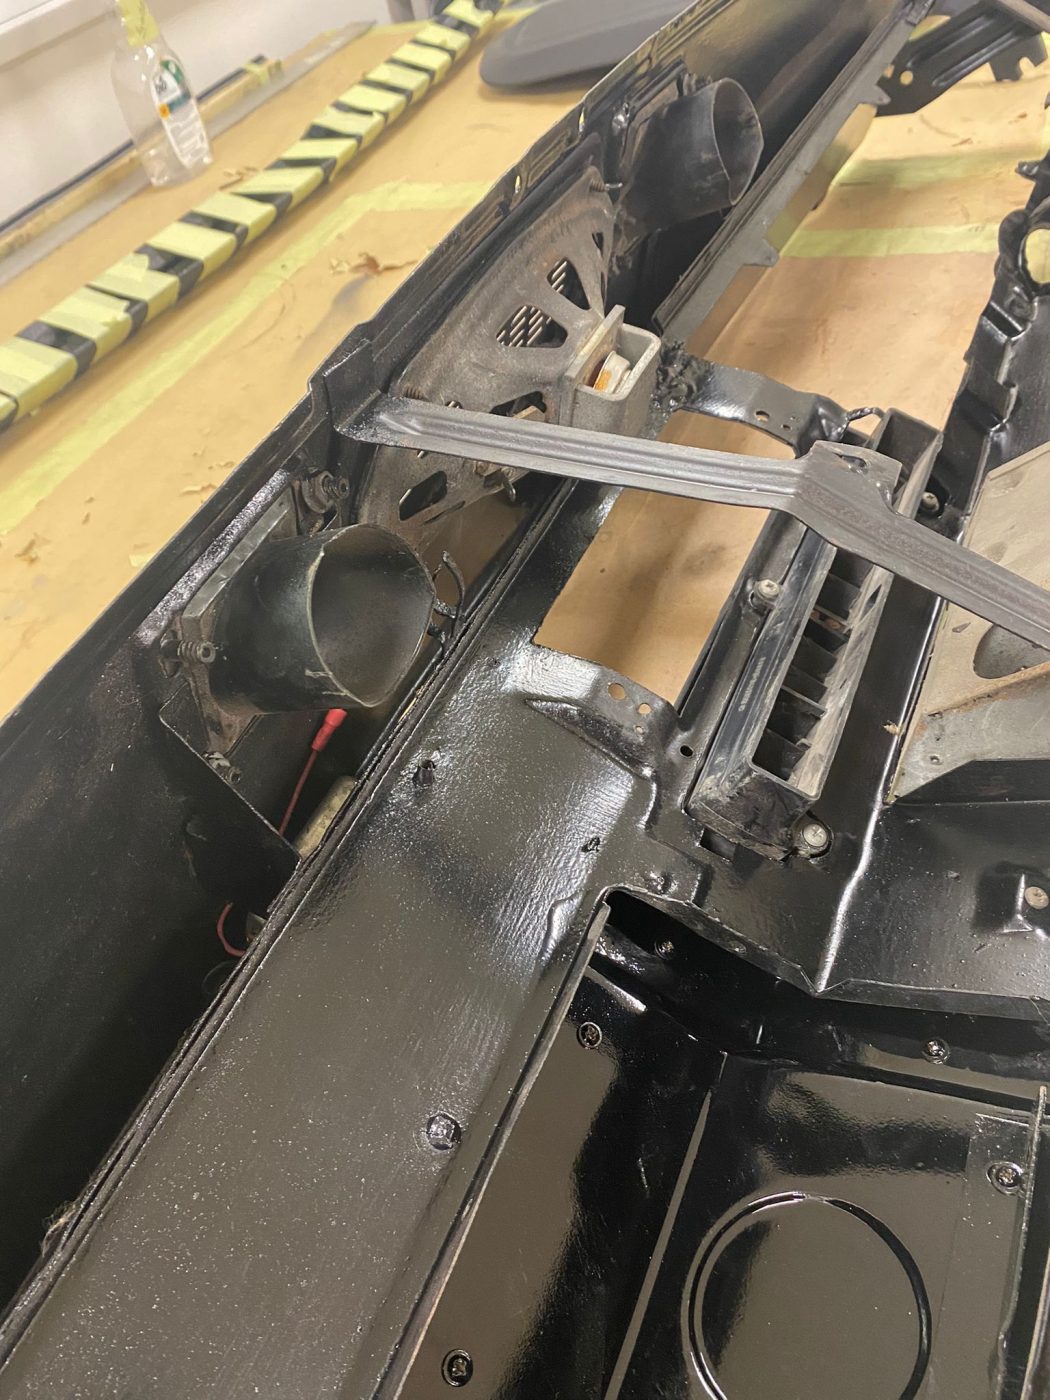
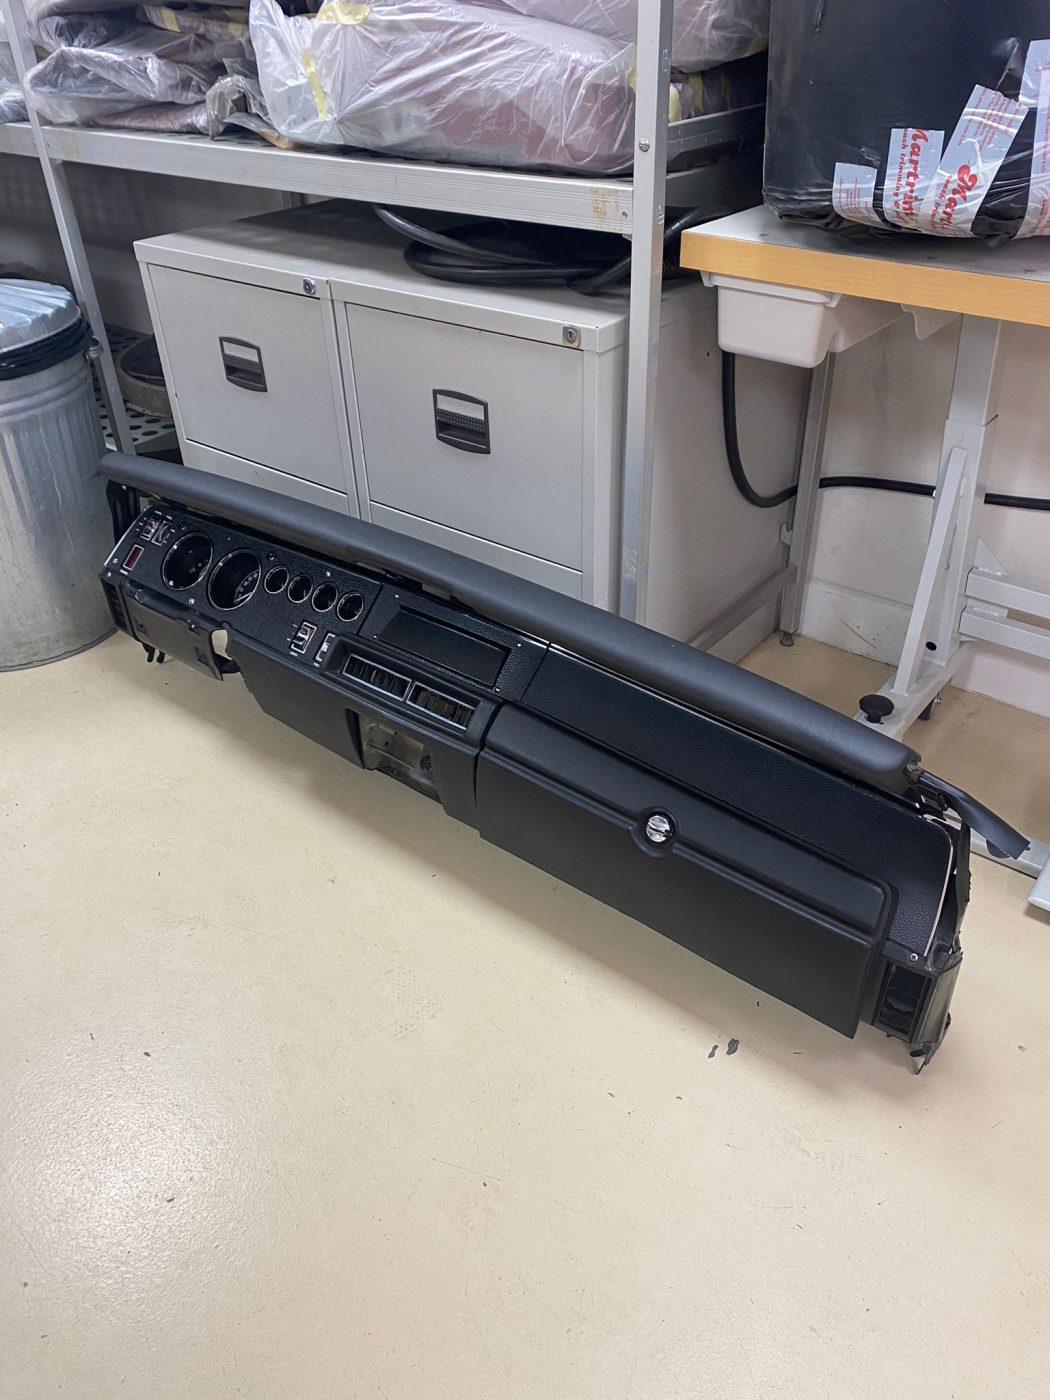
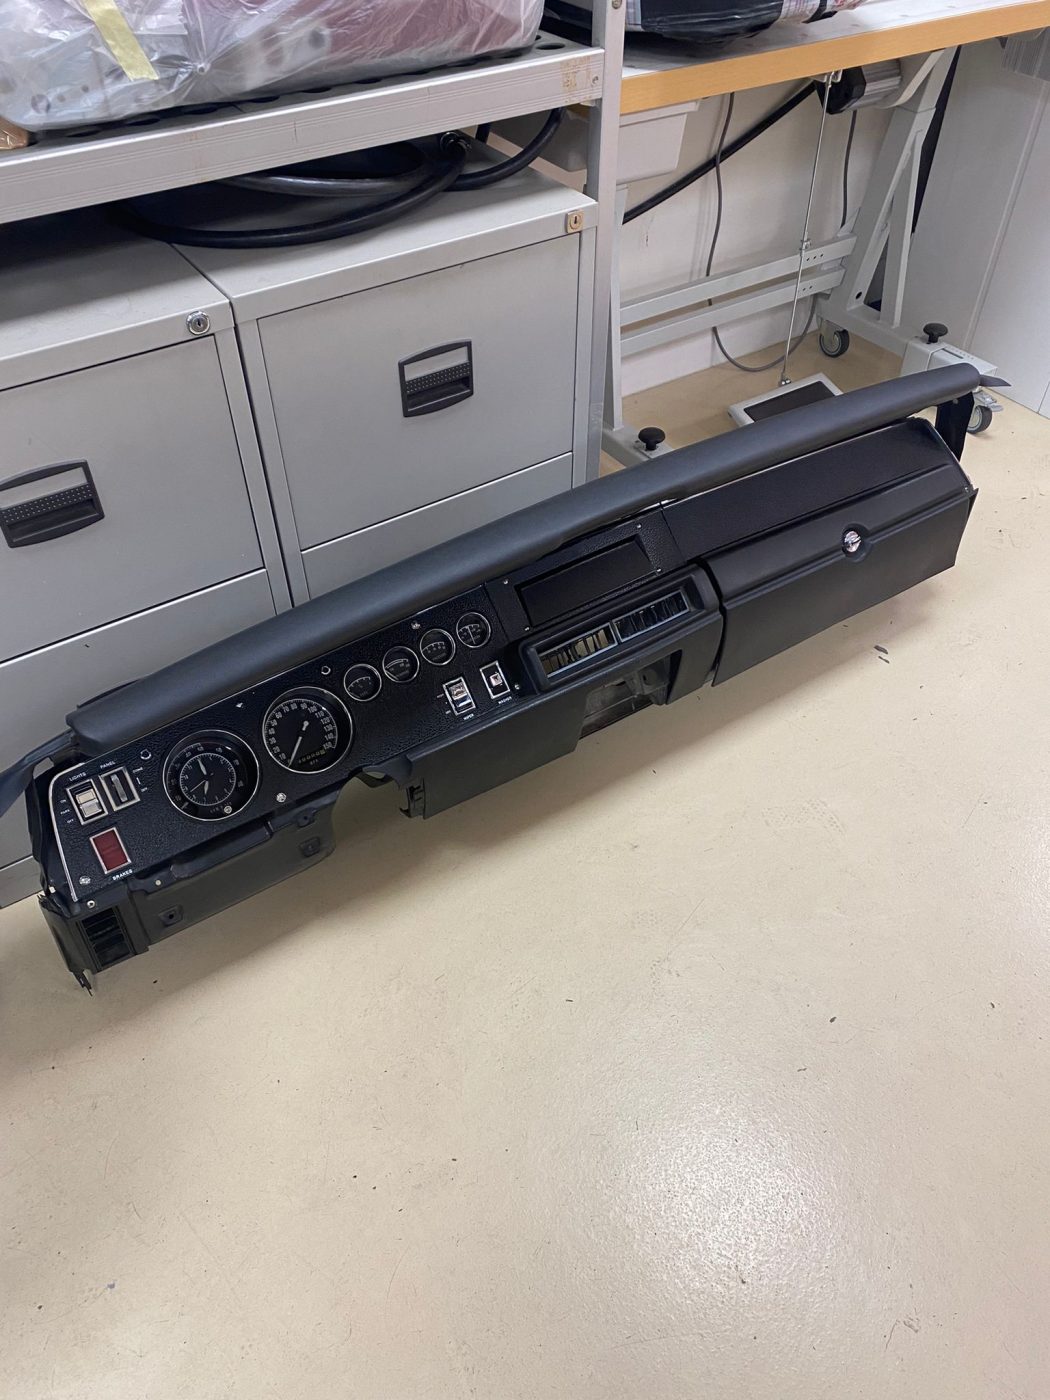
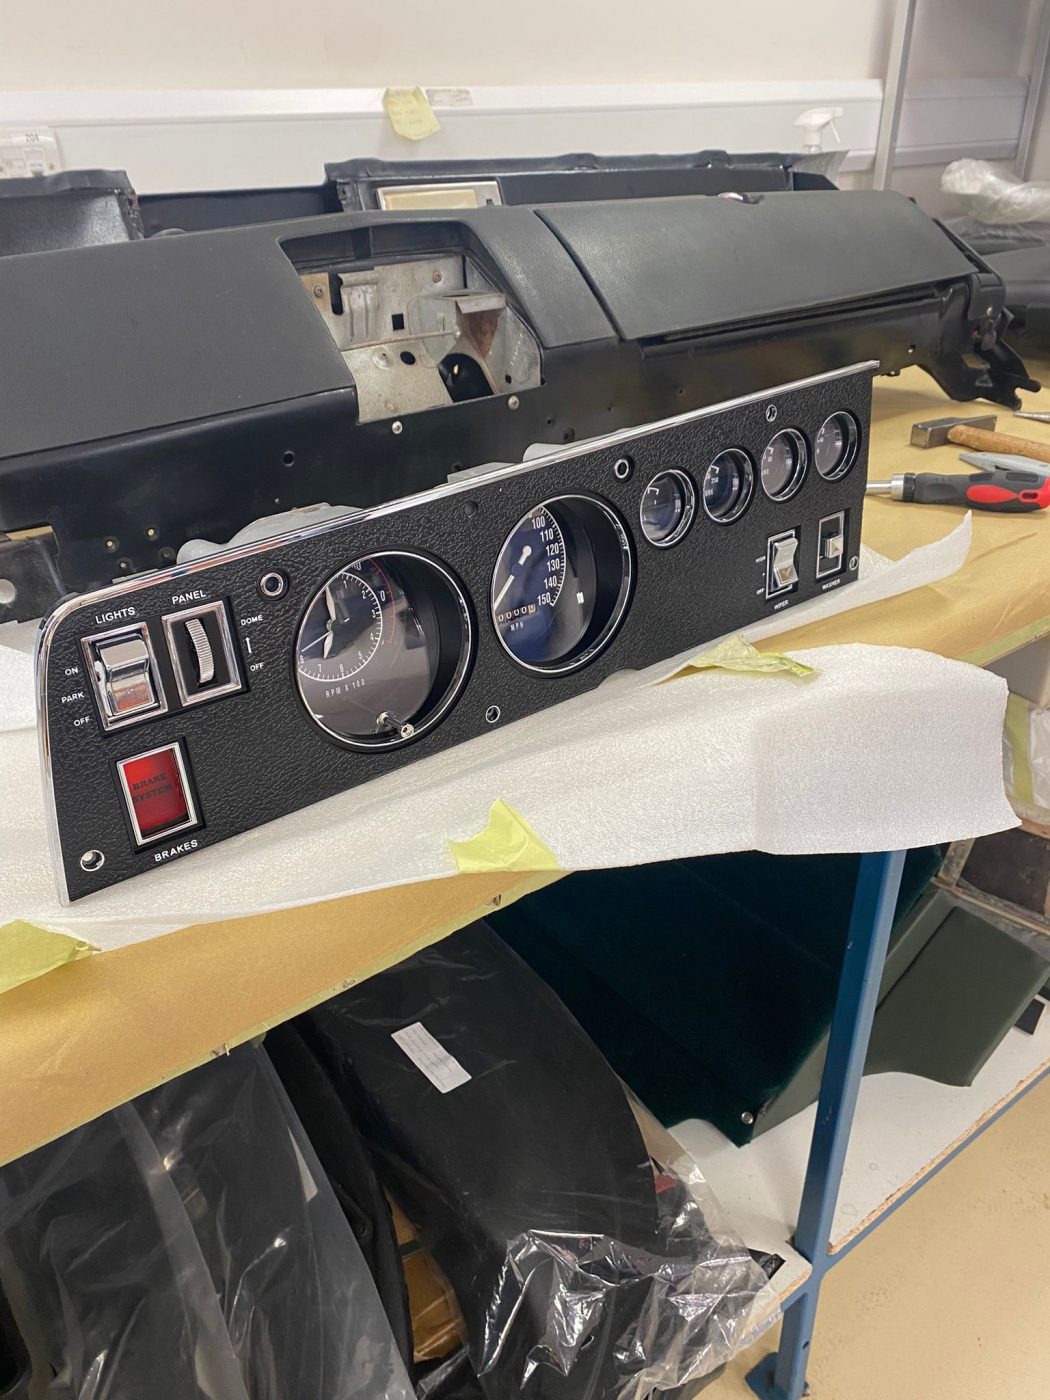
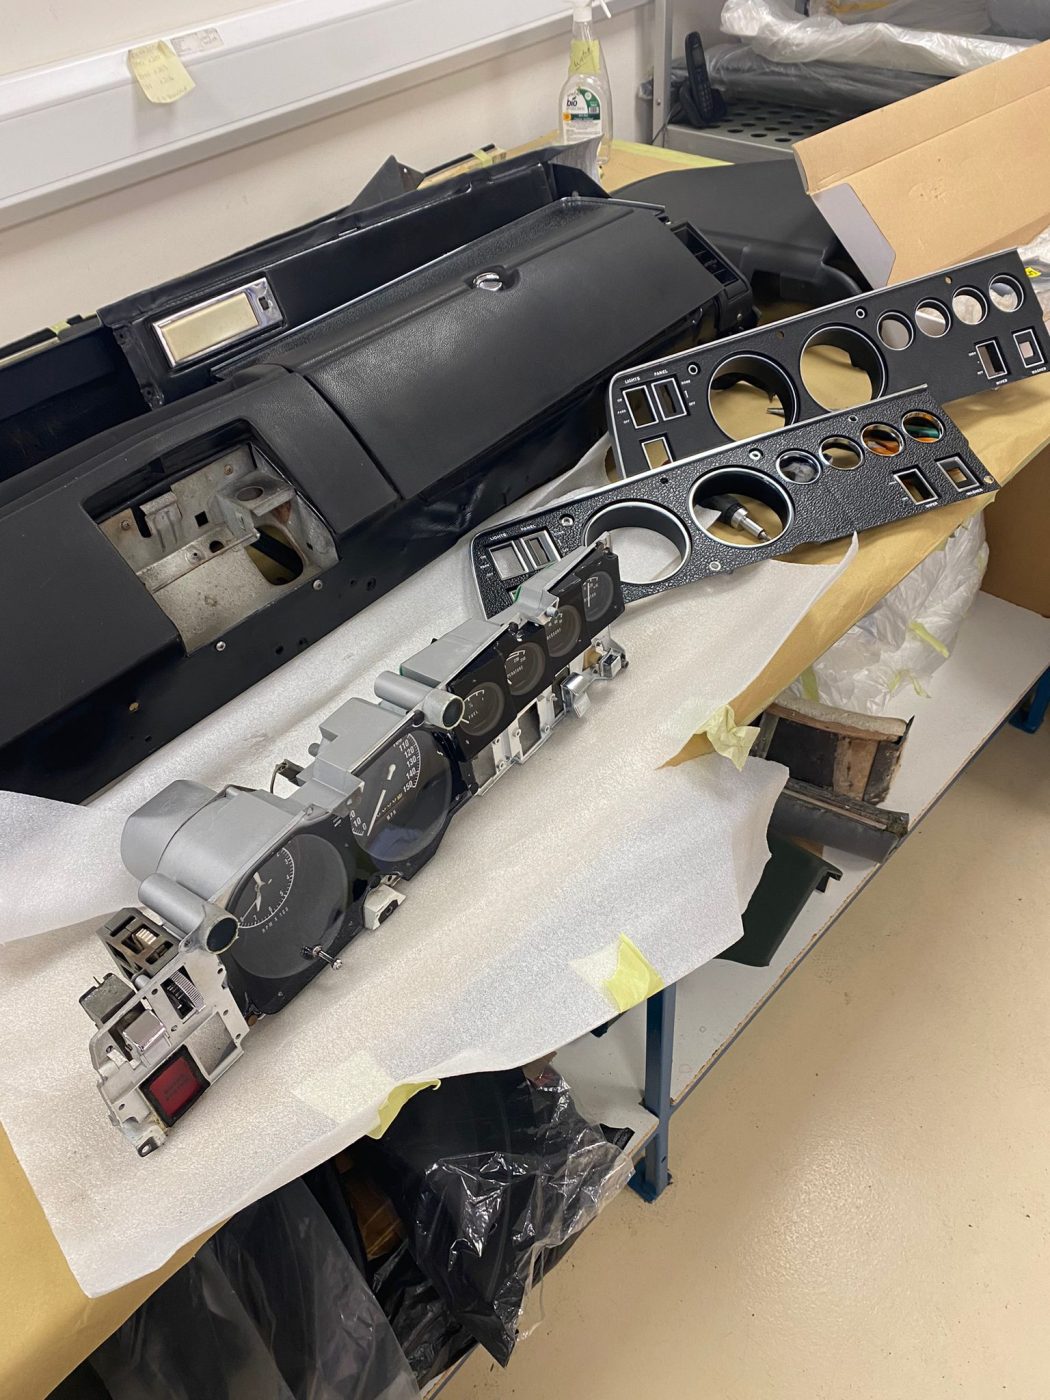
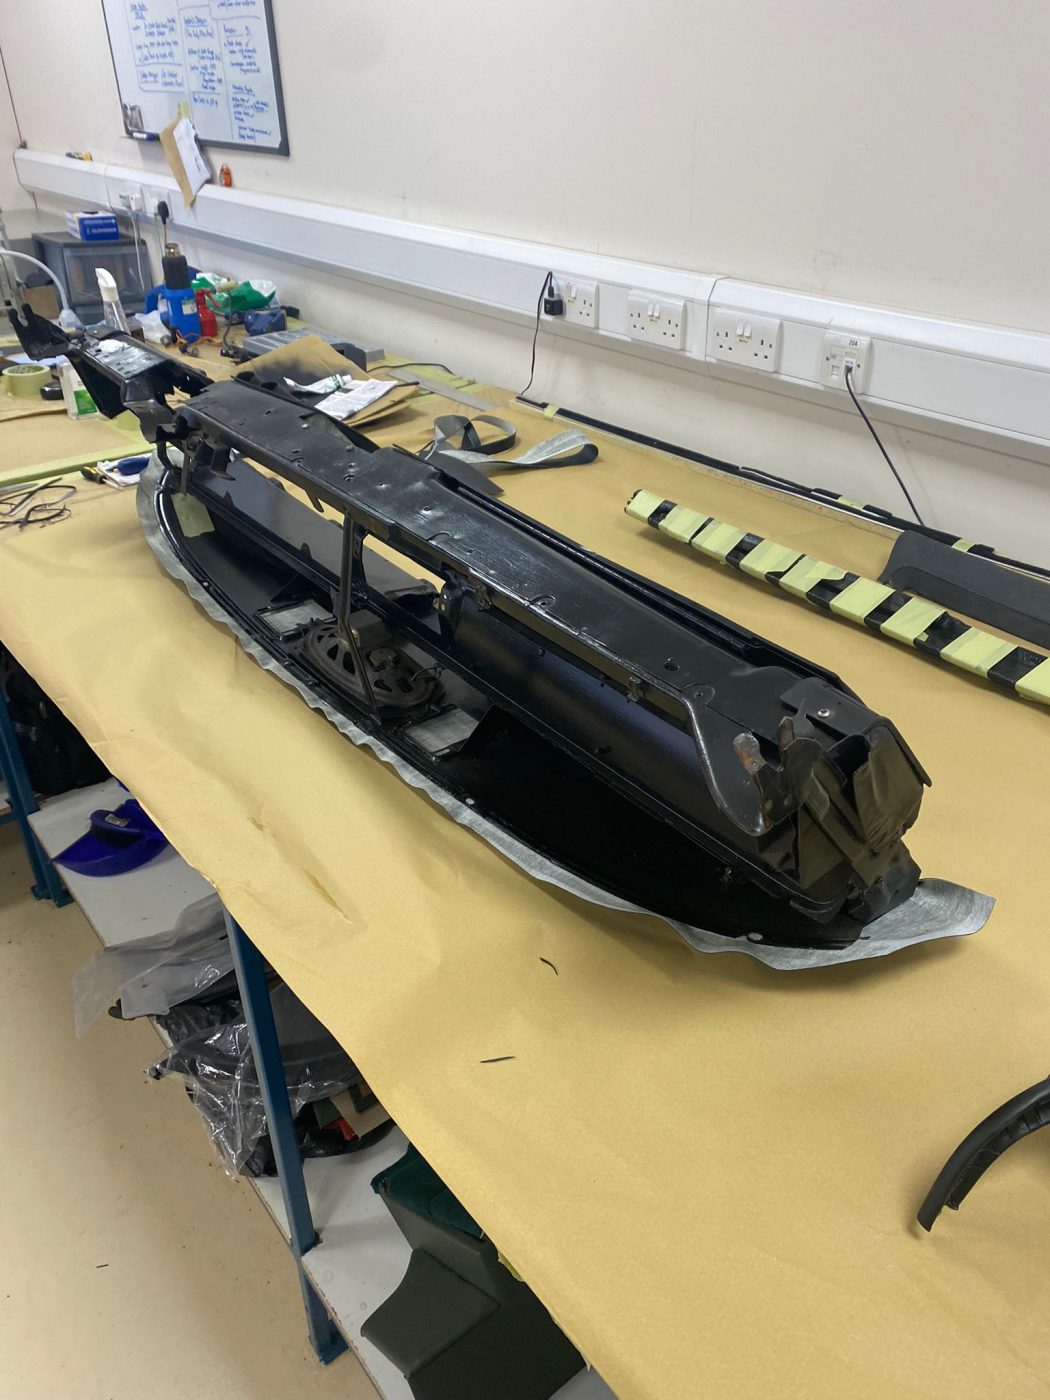
The 1970 Dodge Charger is in the Bridge Classic Cars in-house trim shop to be fitted out with its interior.
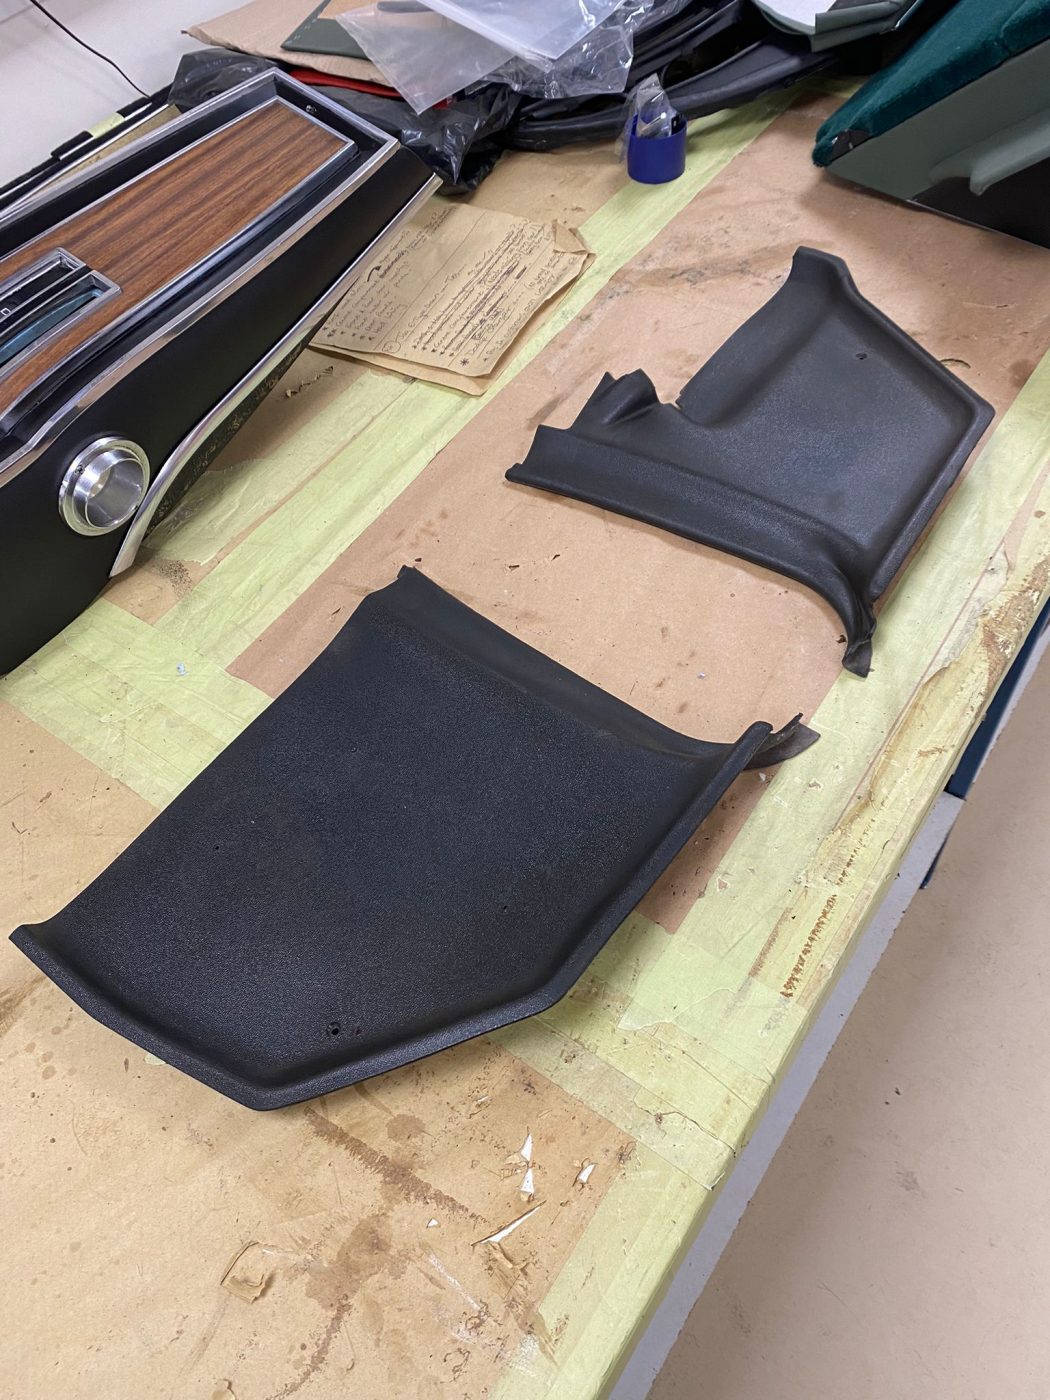
Brian, one of our in-house trim experts, has been cleaning up the Dashboard and Centre Console ready to be put into the car when that point comes. With such effort being put into the fit and finish of the pieces for the rest of the interior, Brian got to work getting the dash and console up to the same standard.
Now with these and the kick panels all up to the same standard as the rest of the car, it was time to safely store these pieces away for when the time comes to install them into the car.
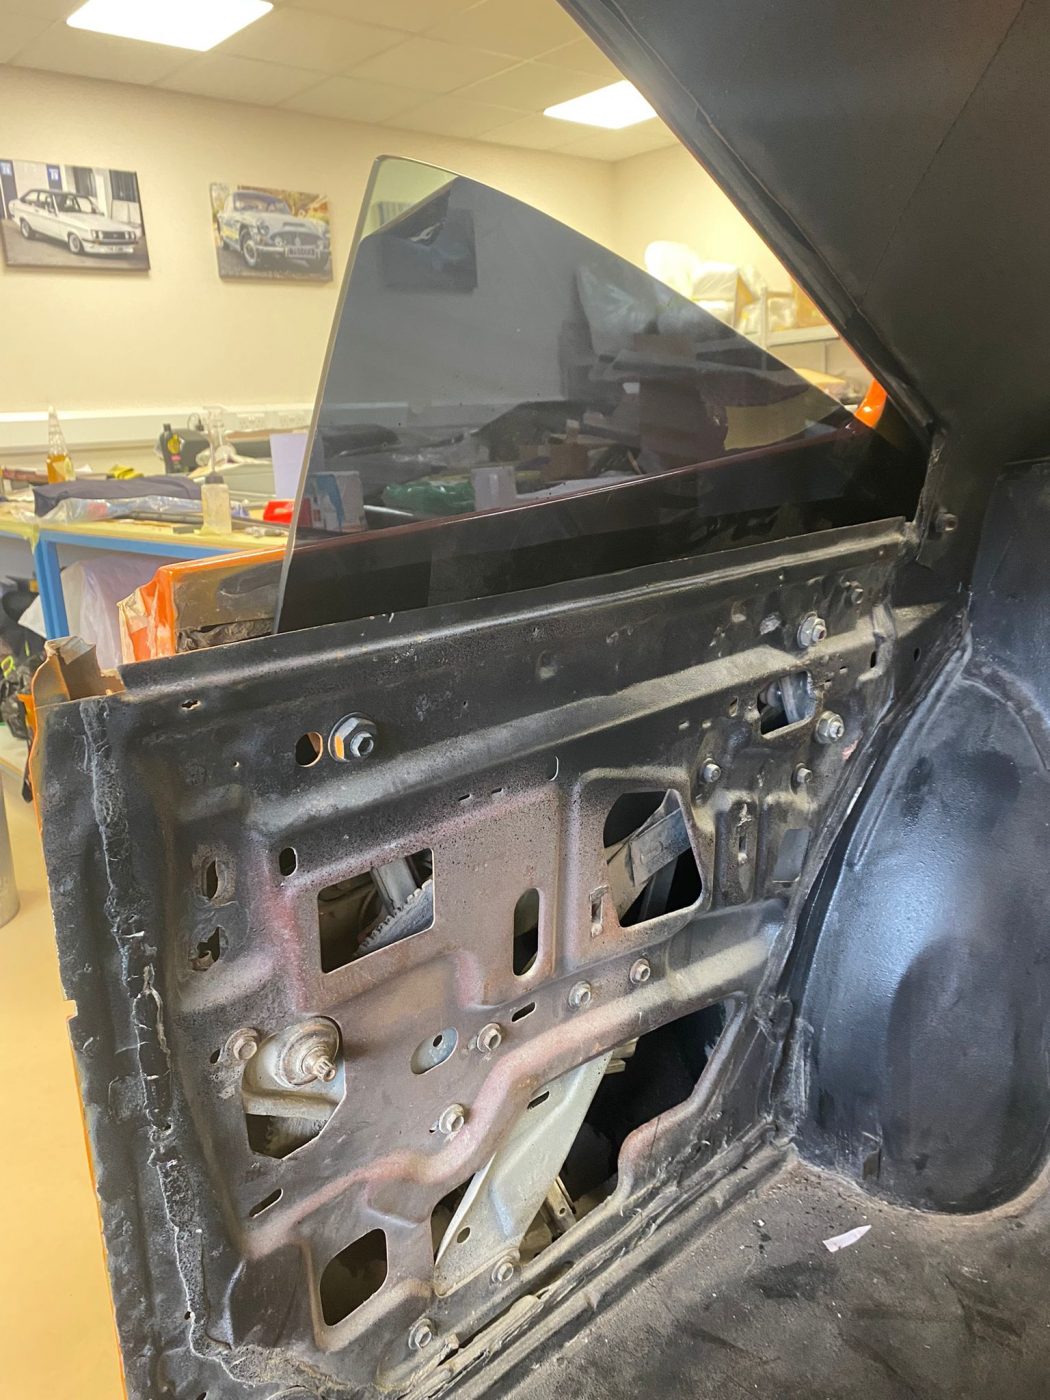
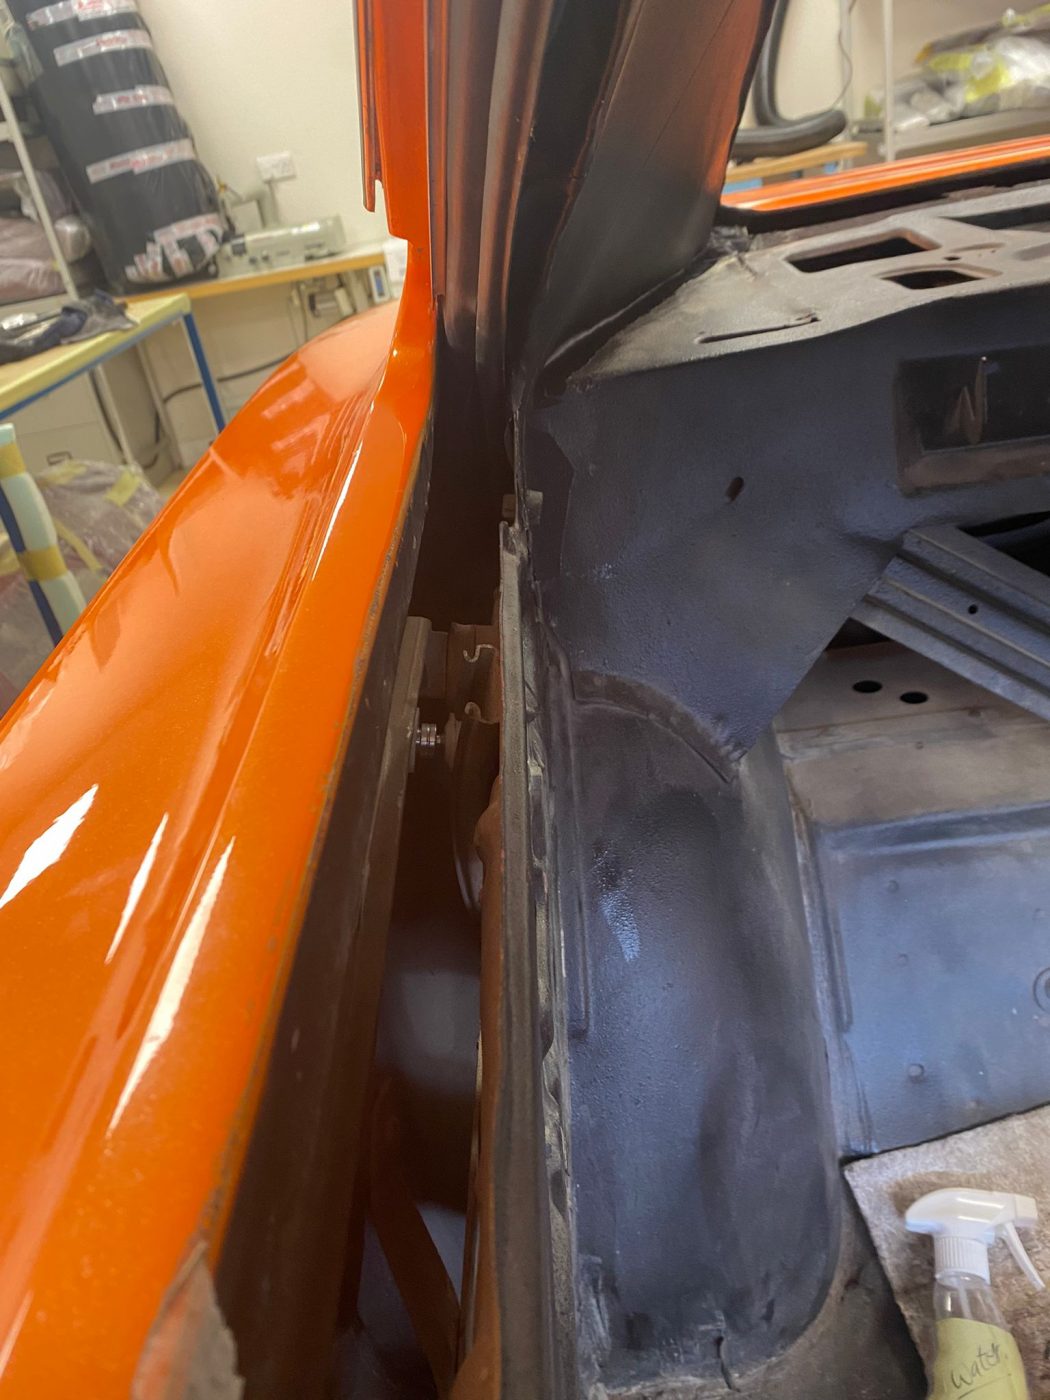
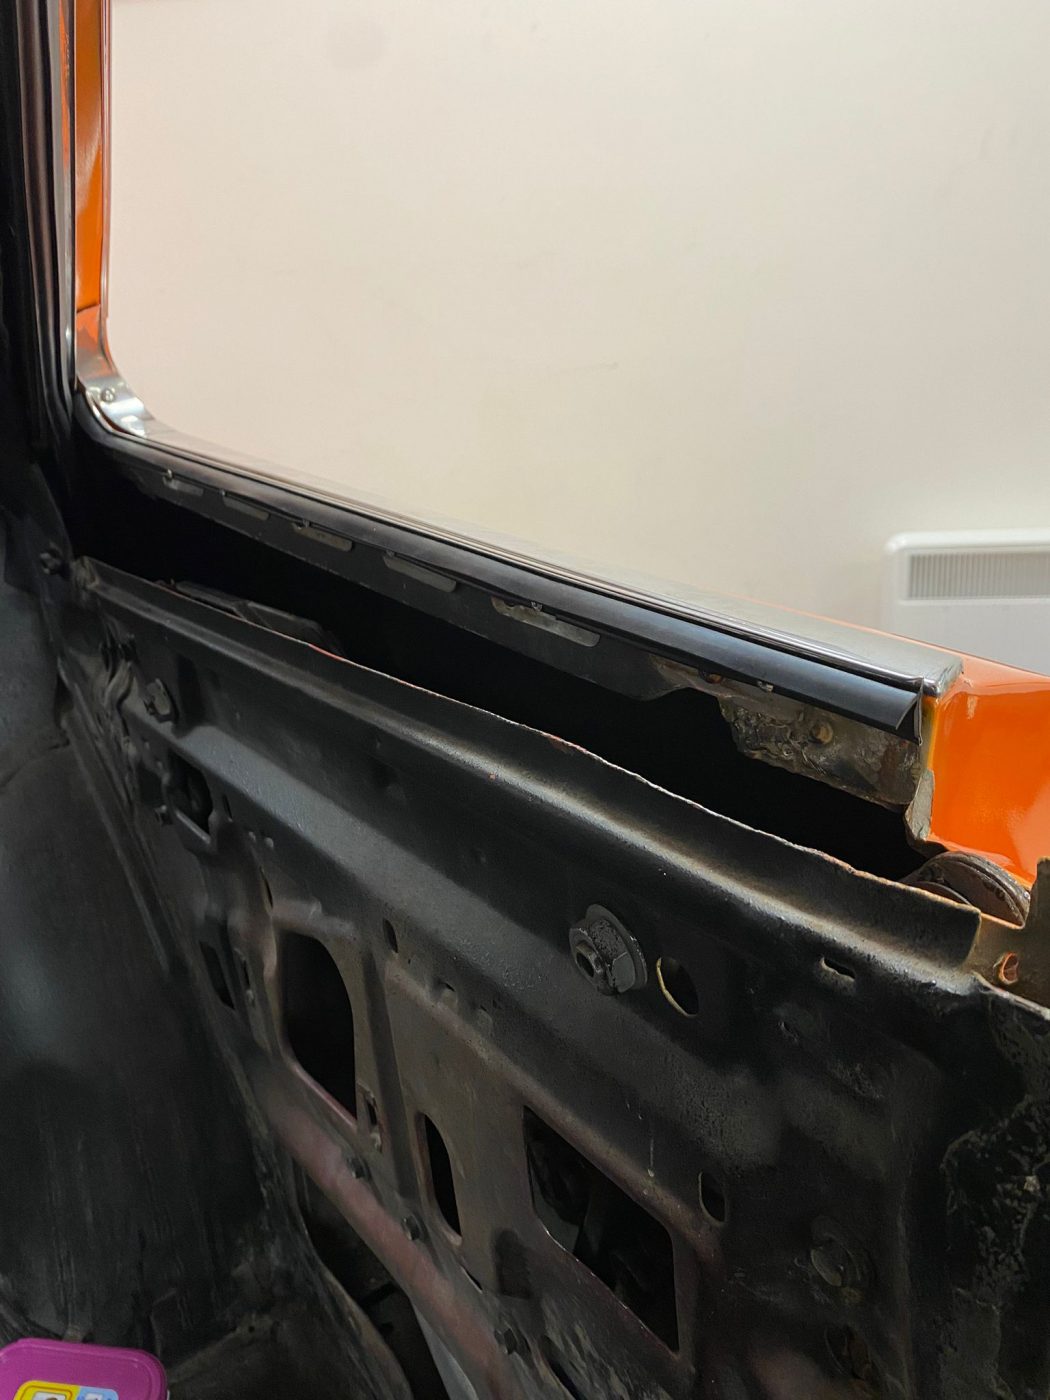
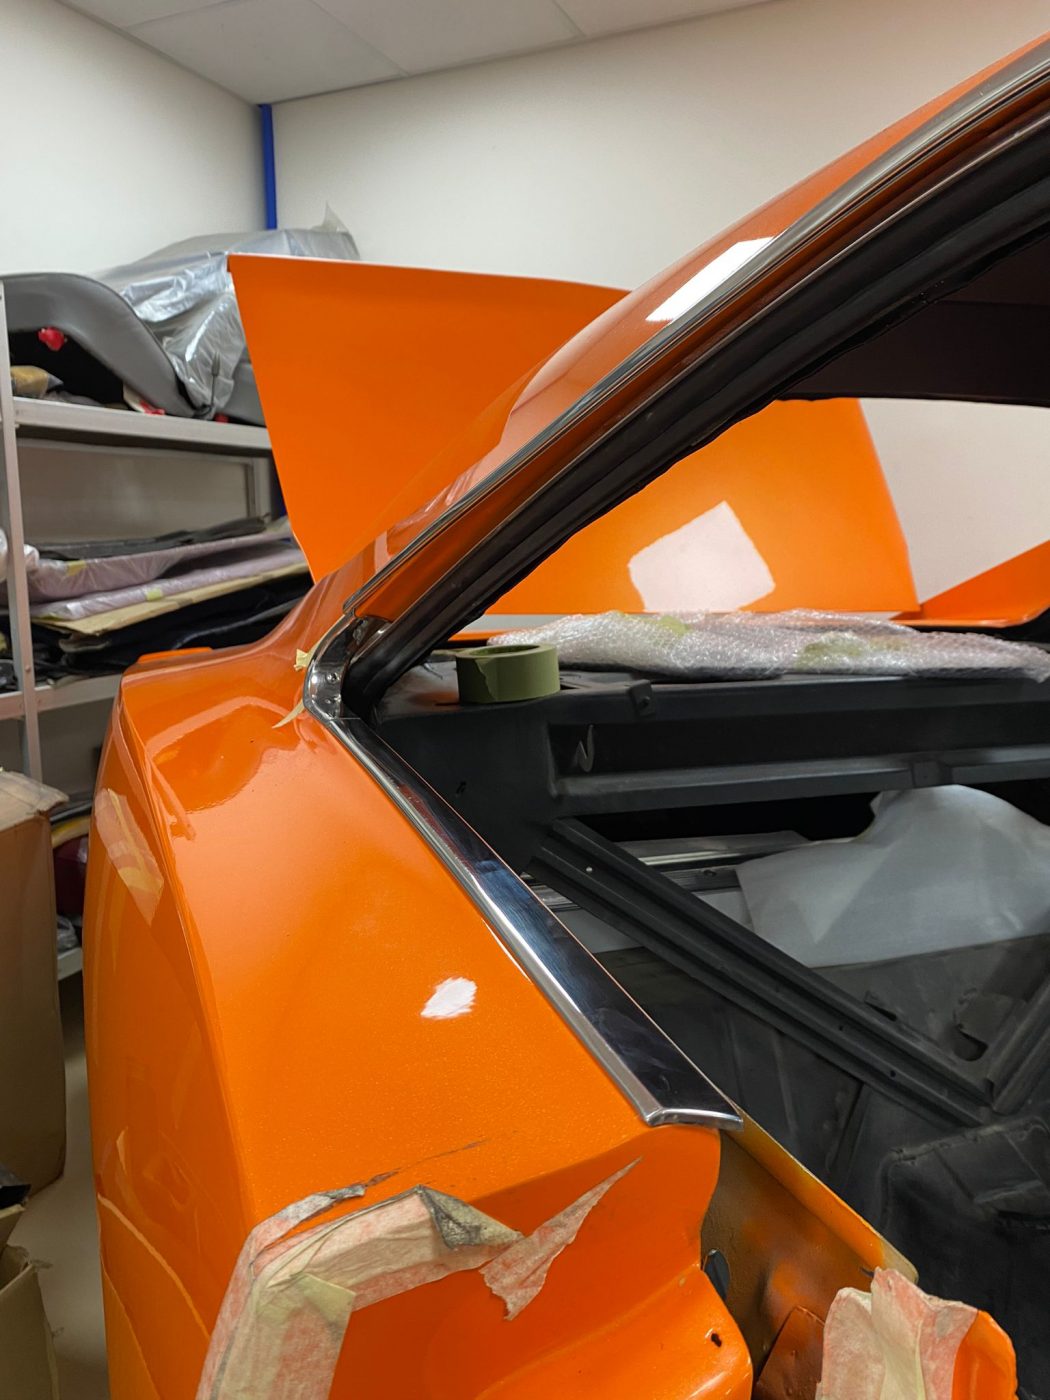
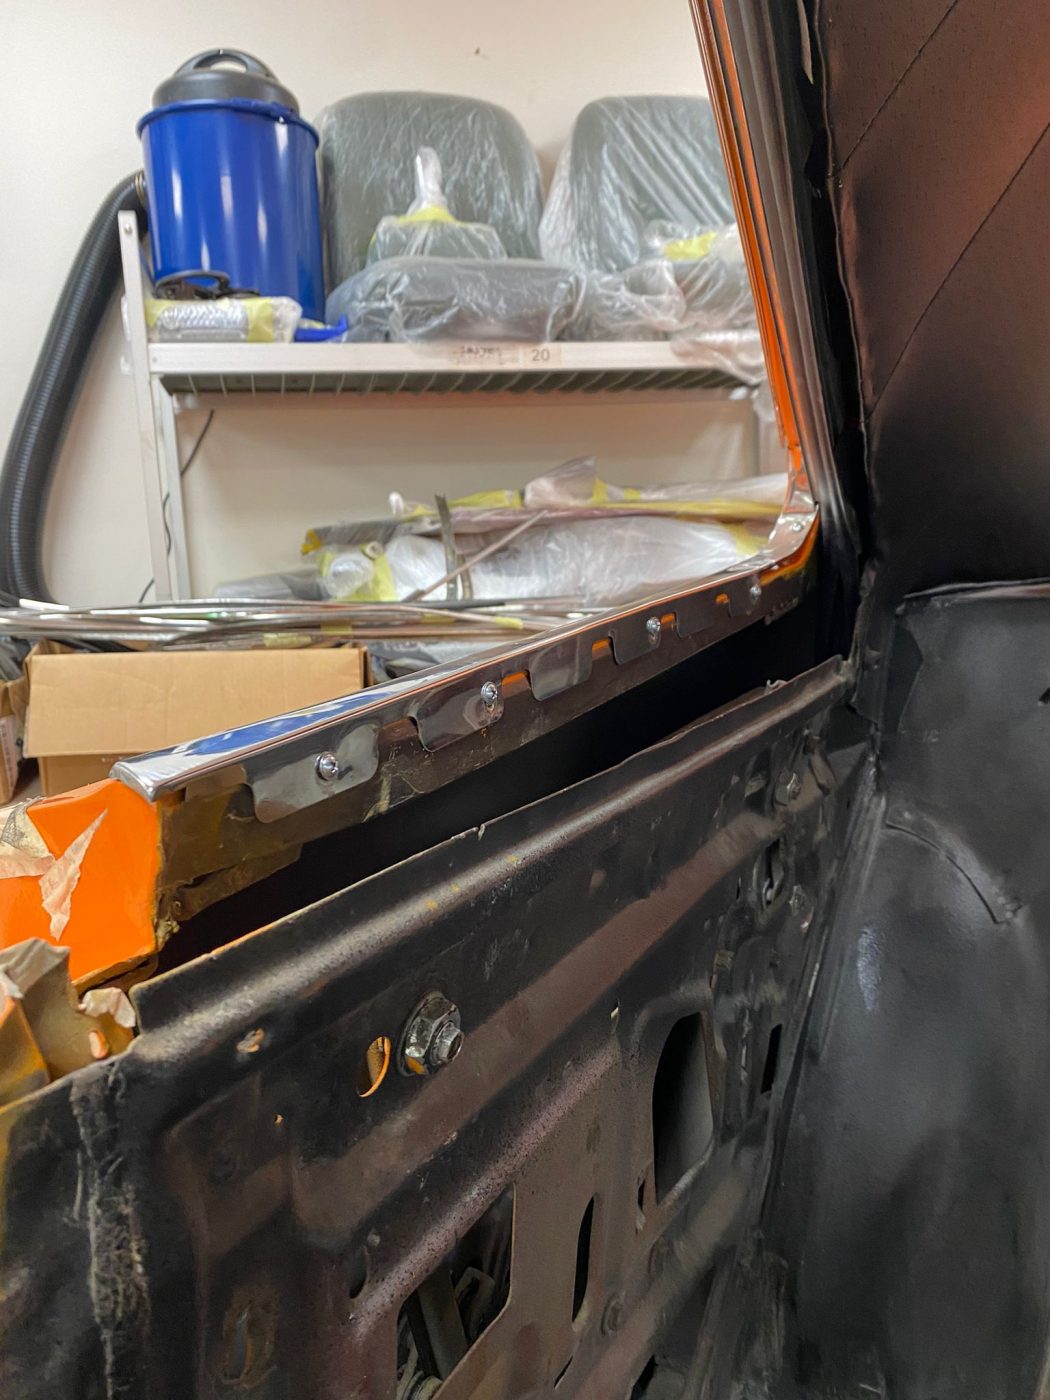
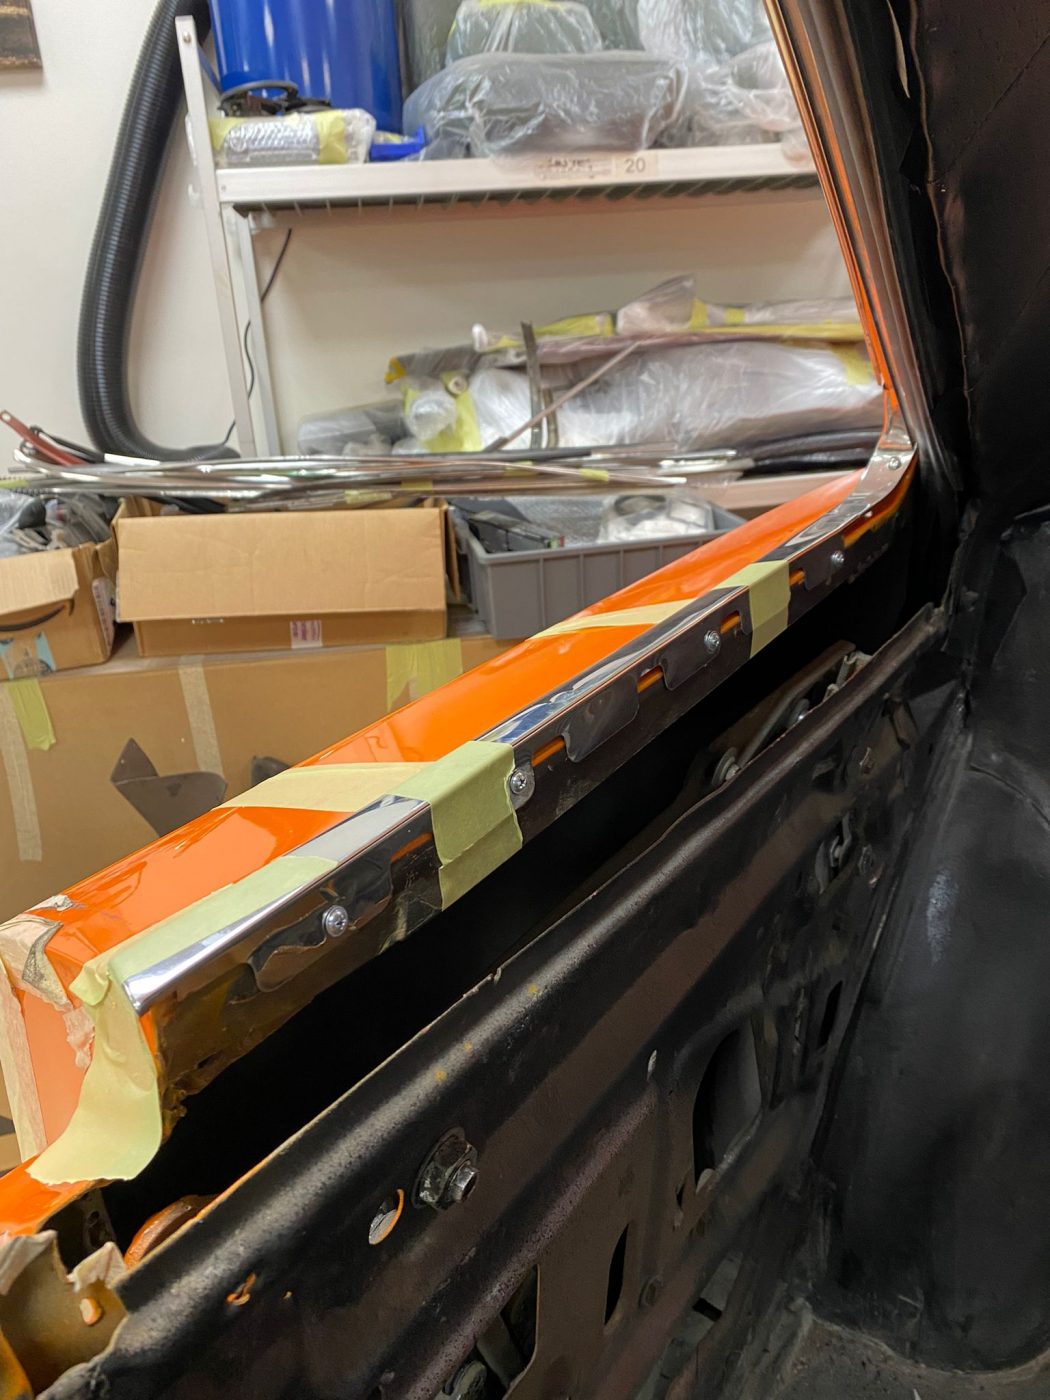
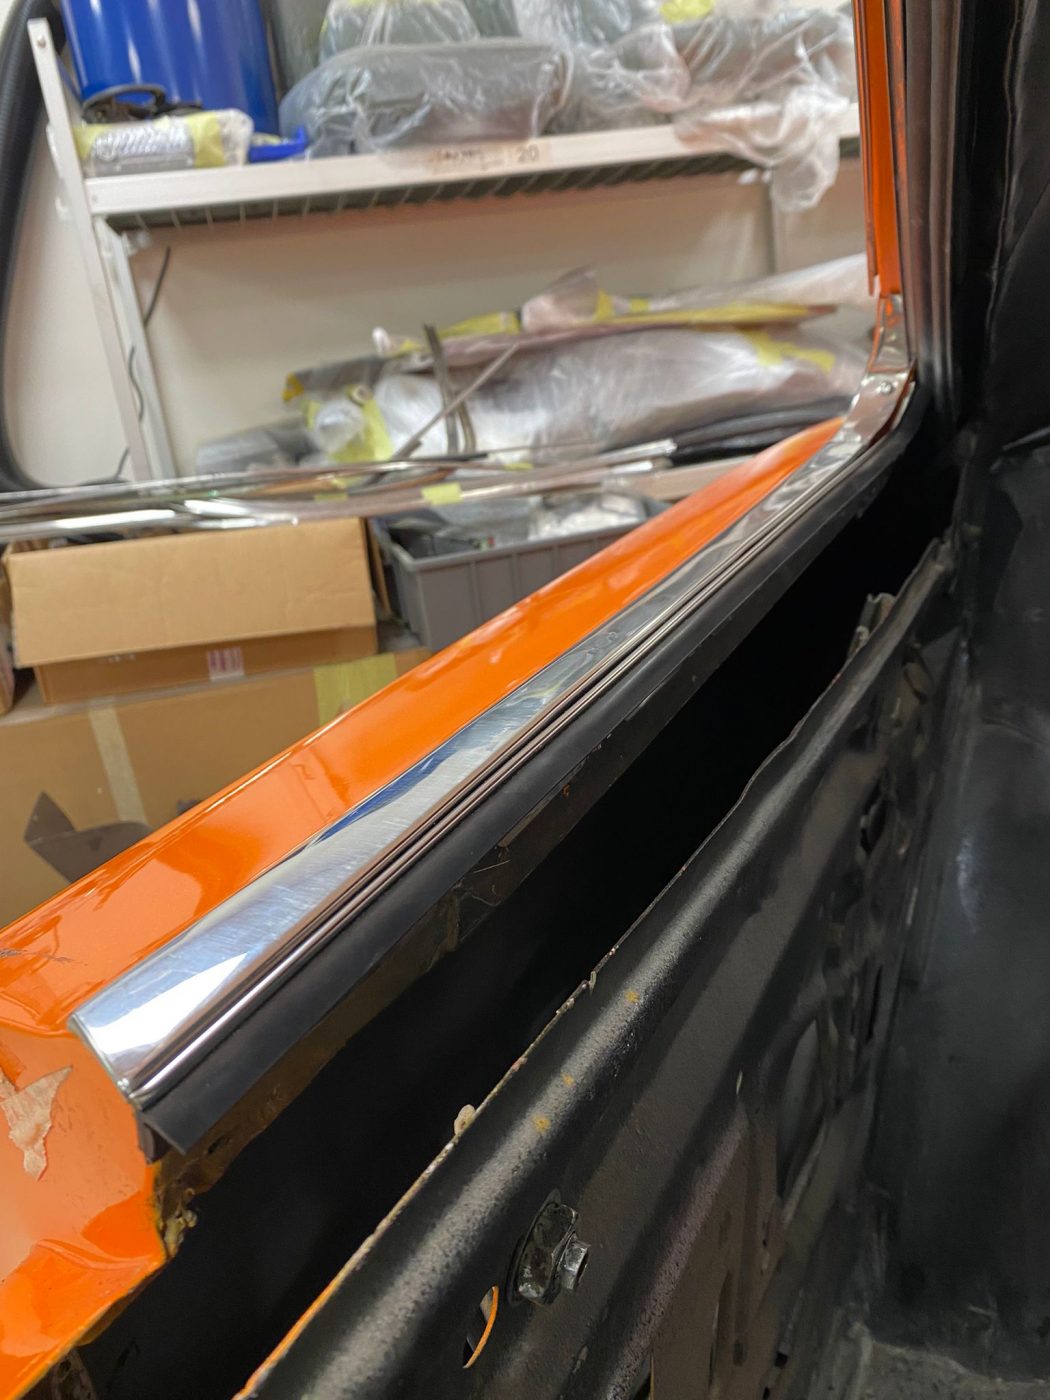
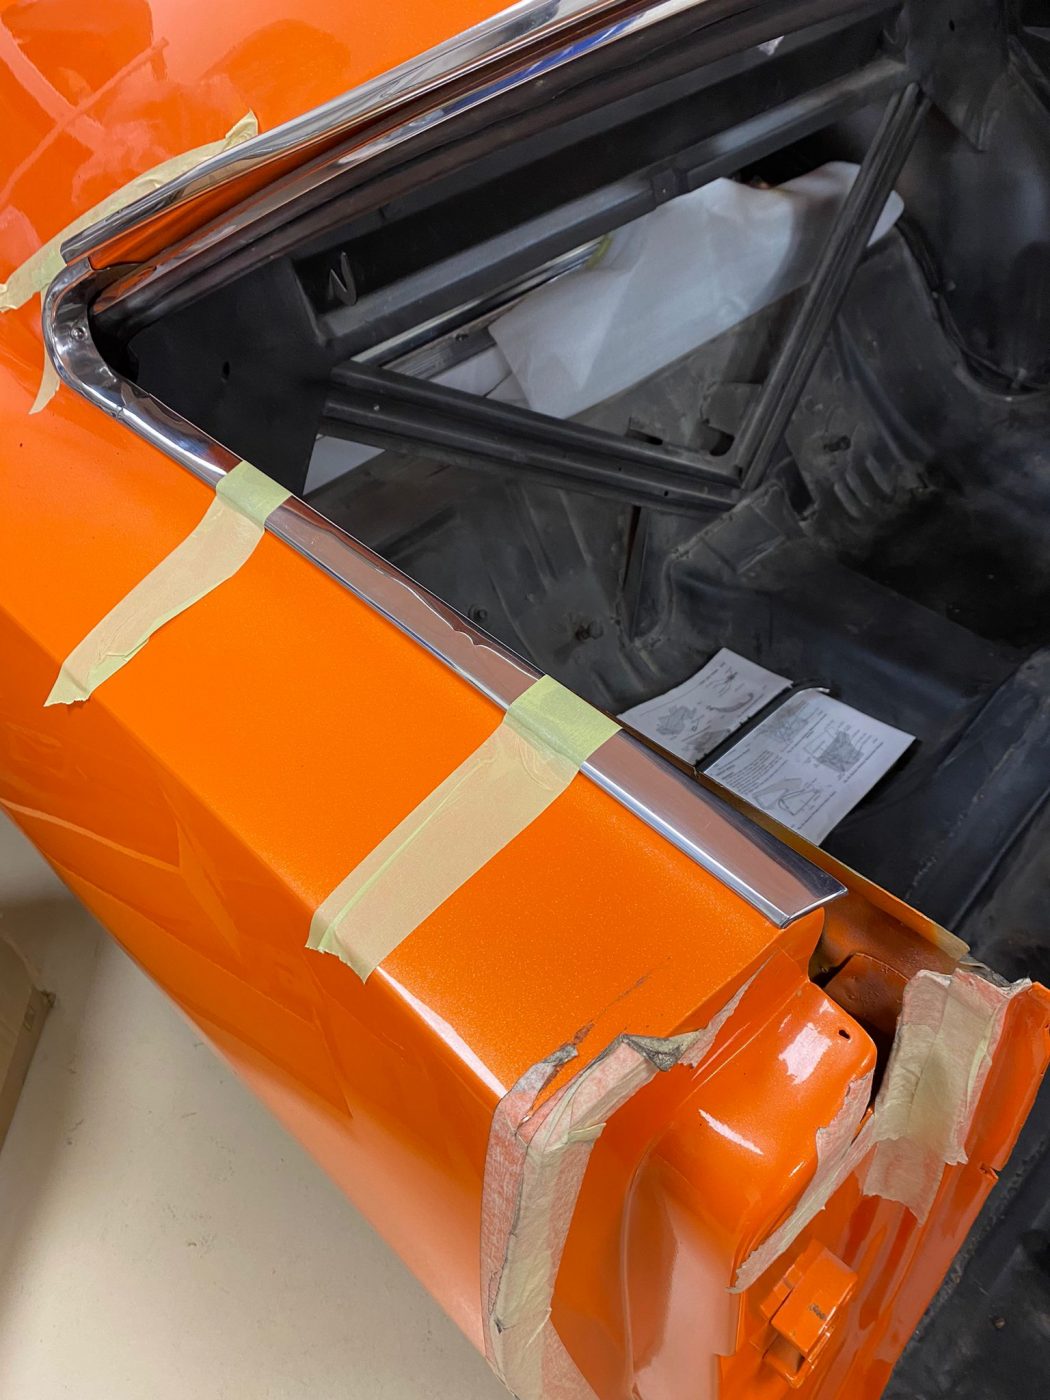
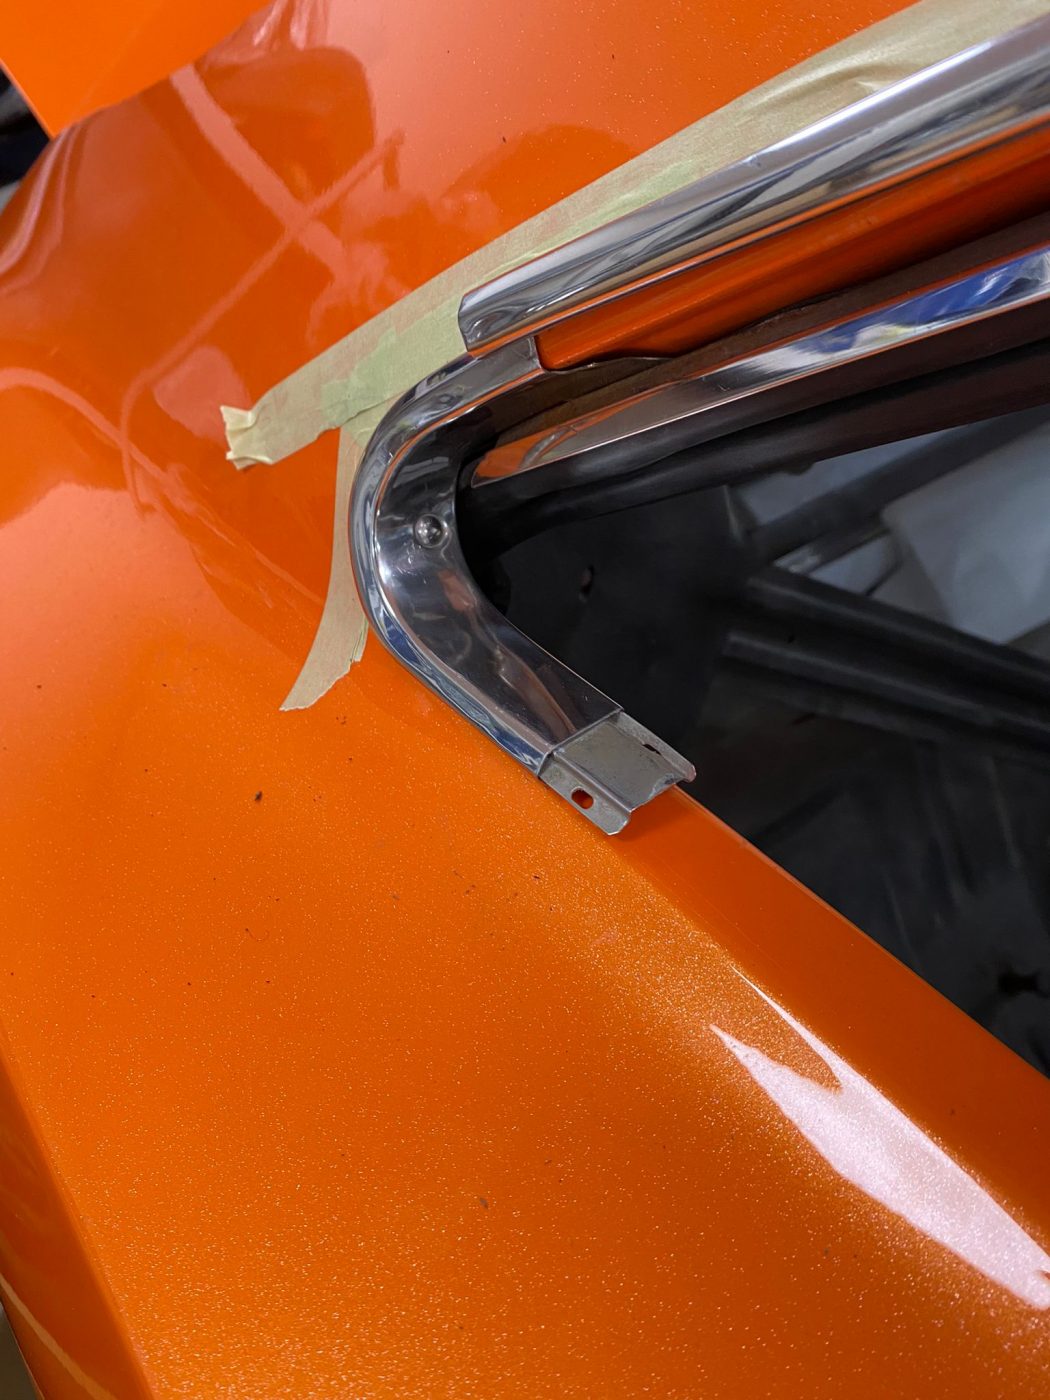
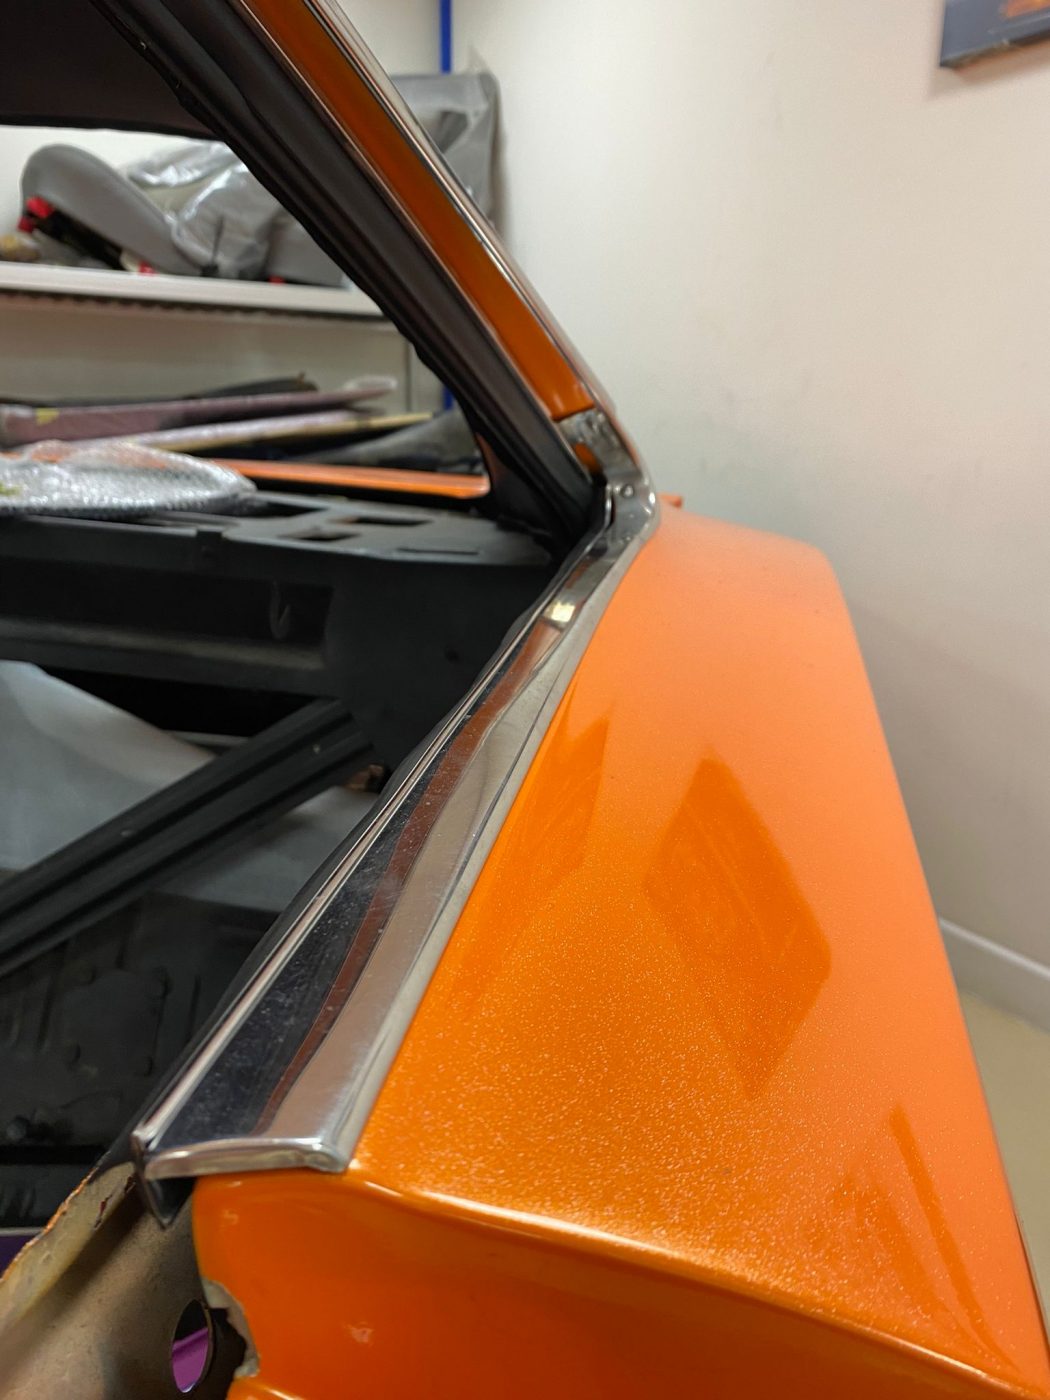
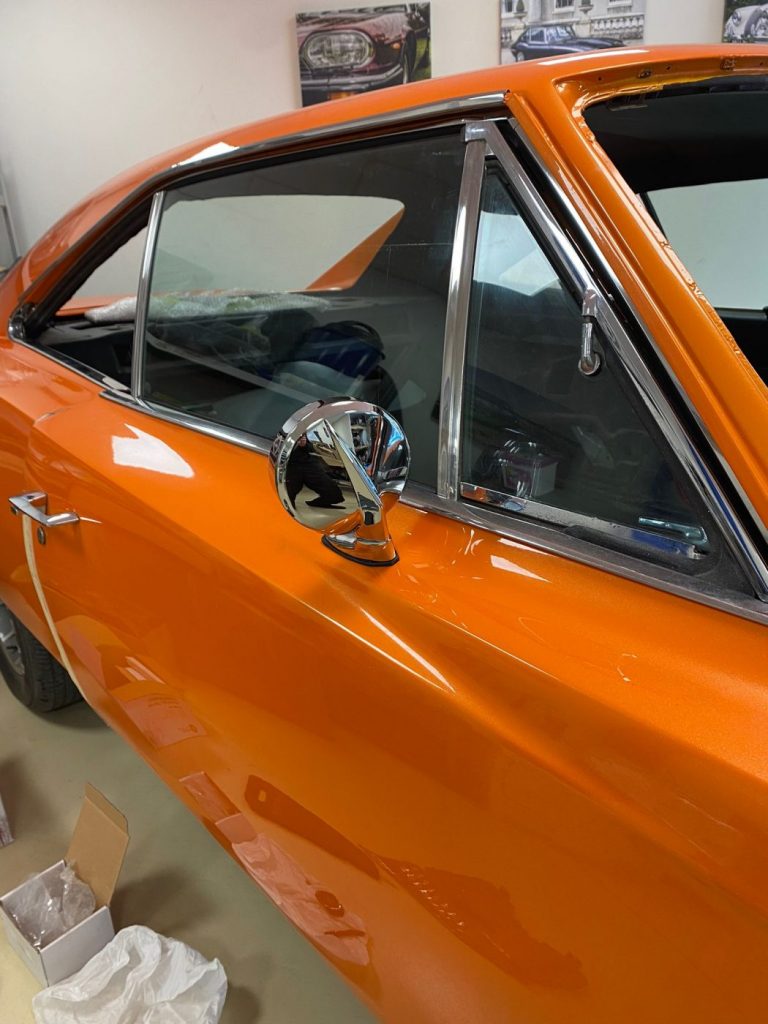
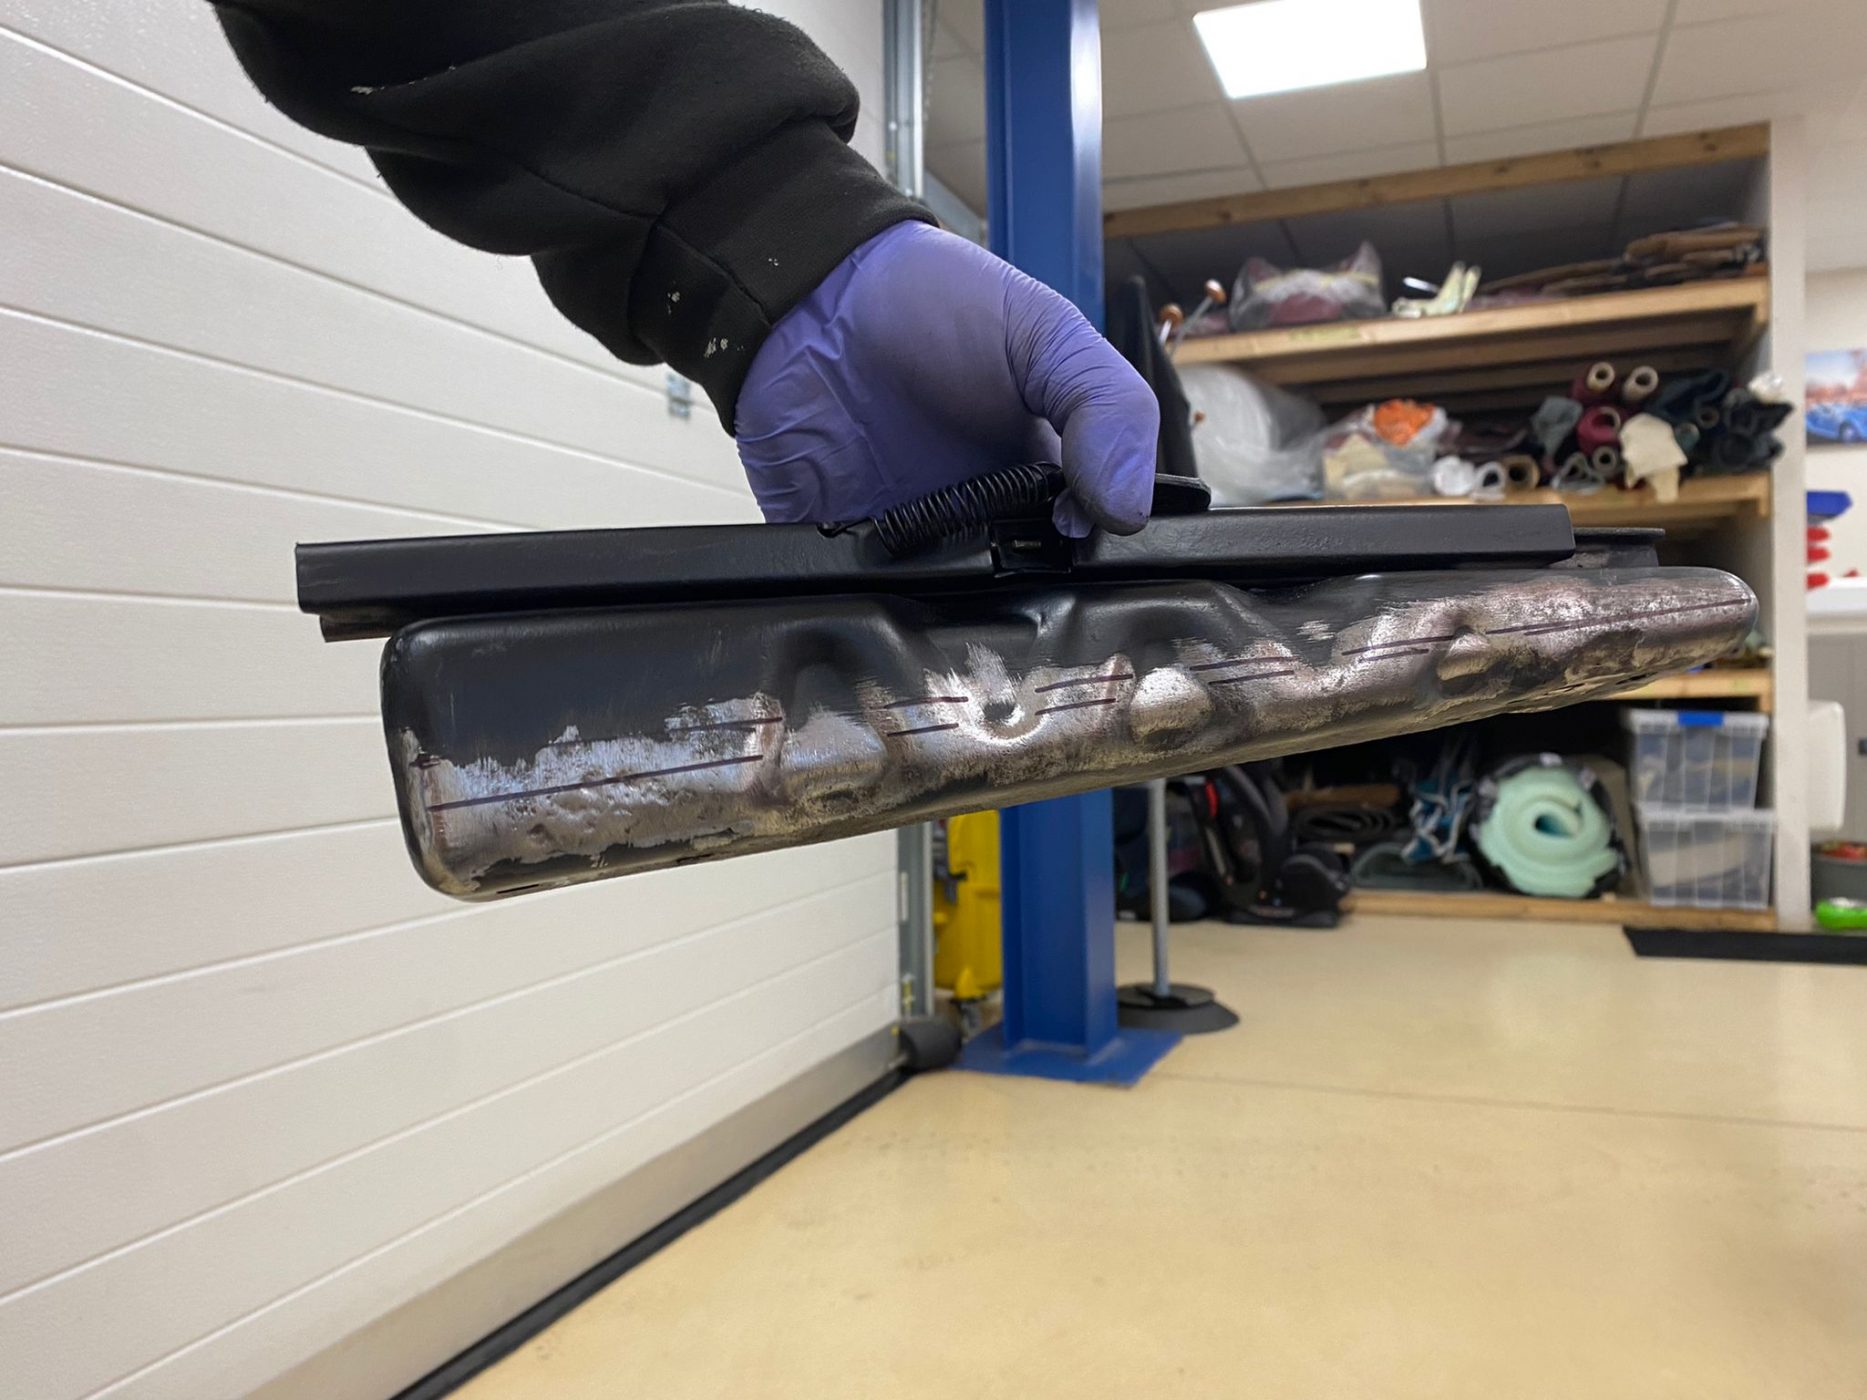
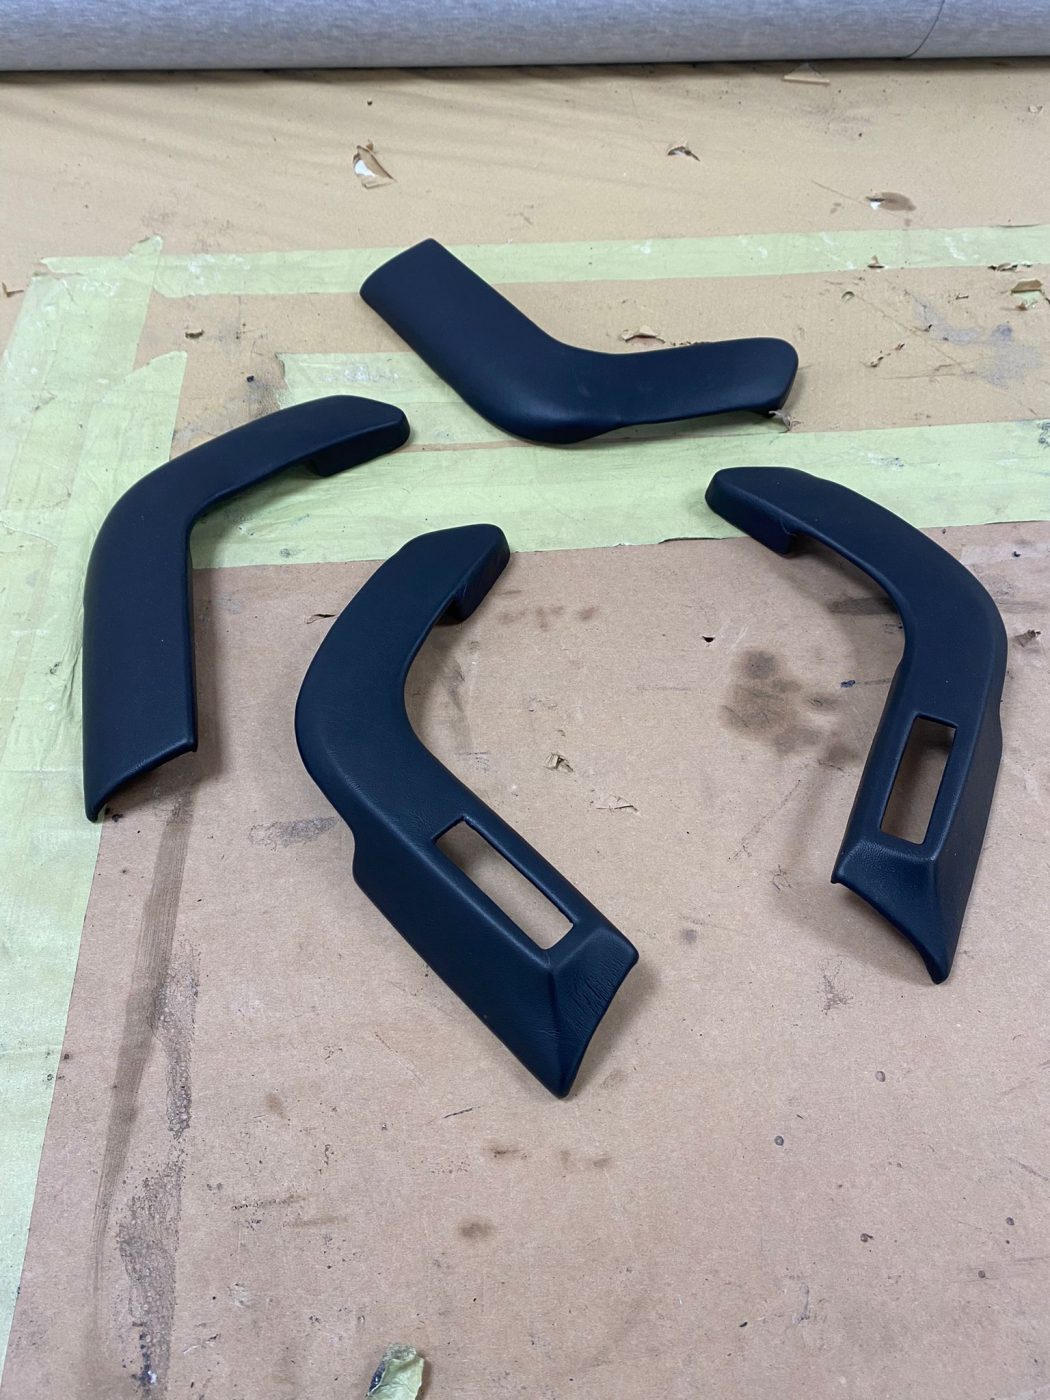
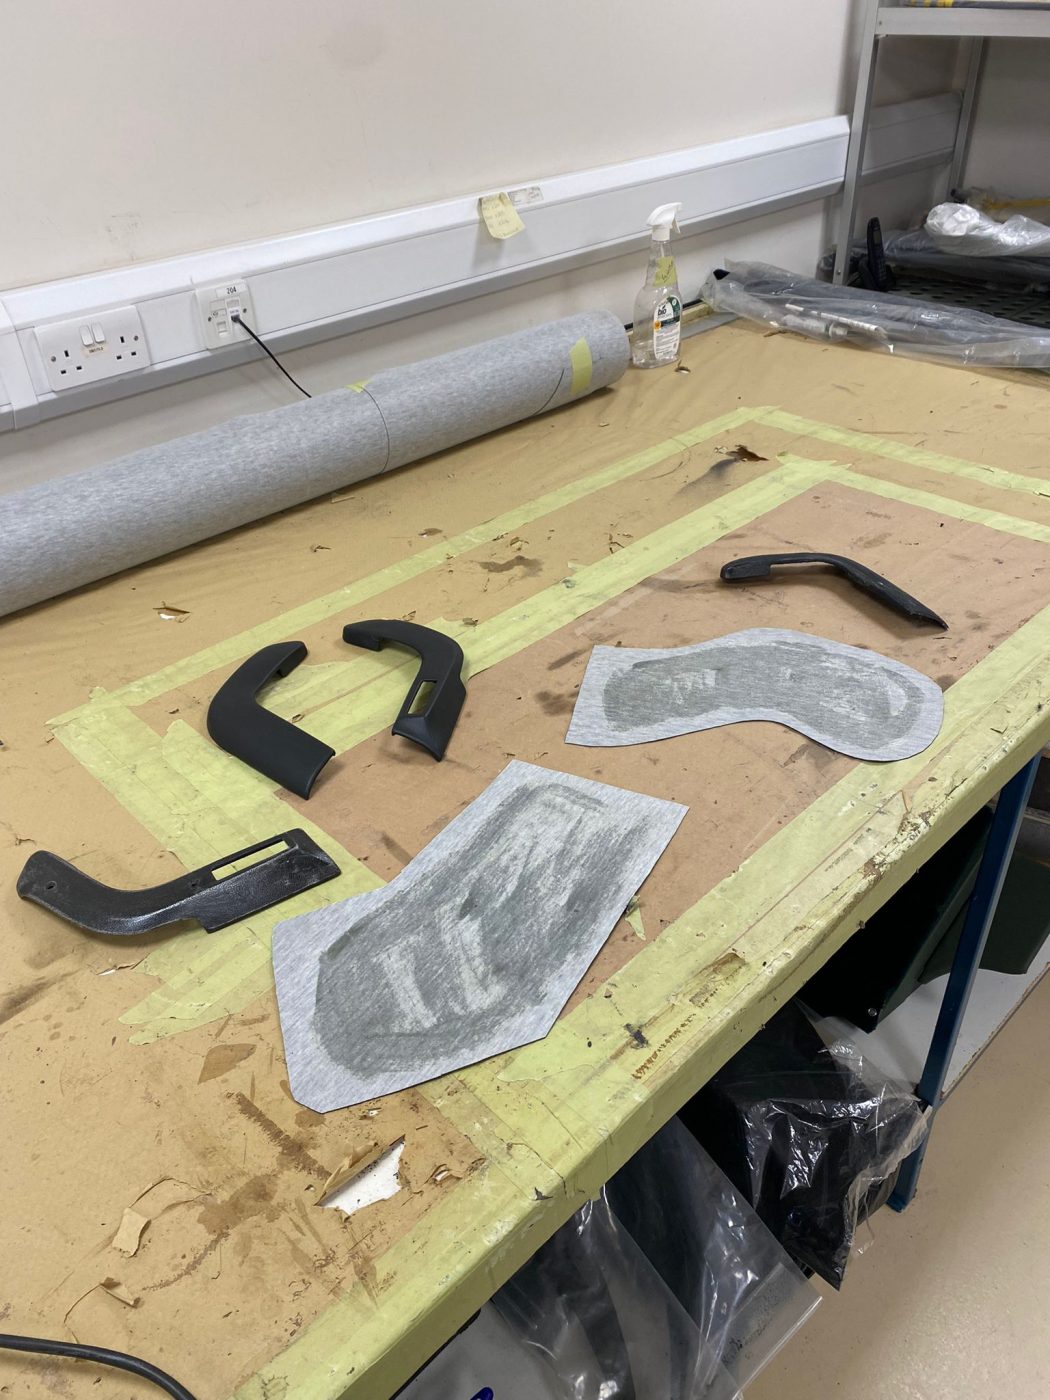
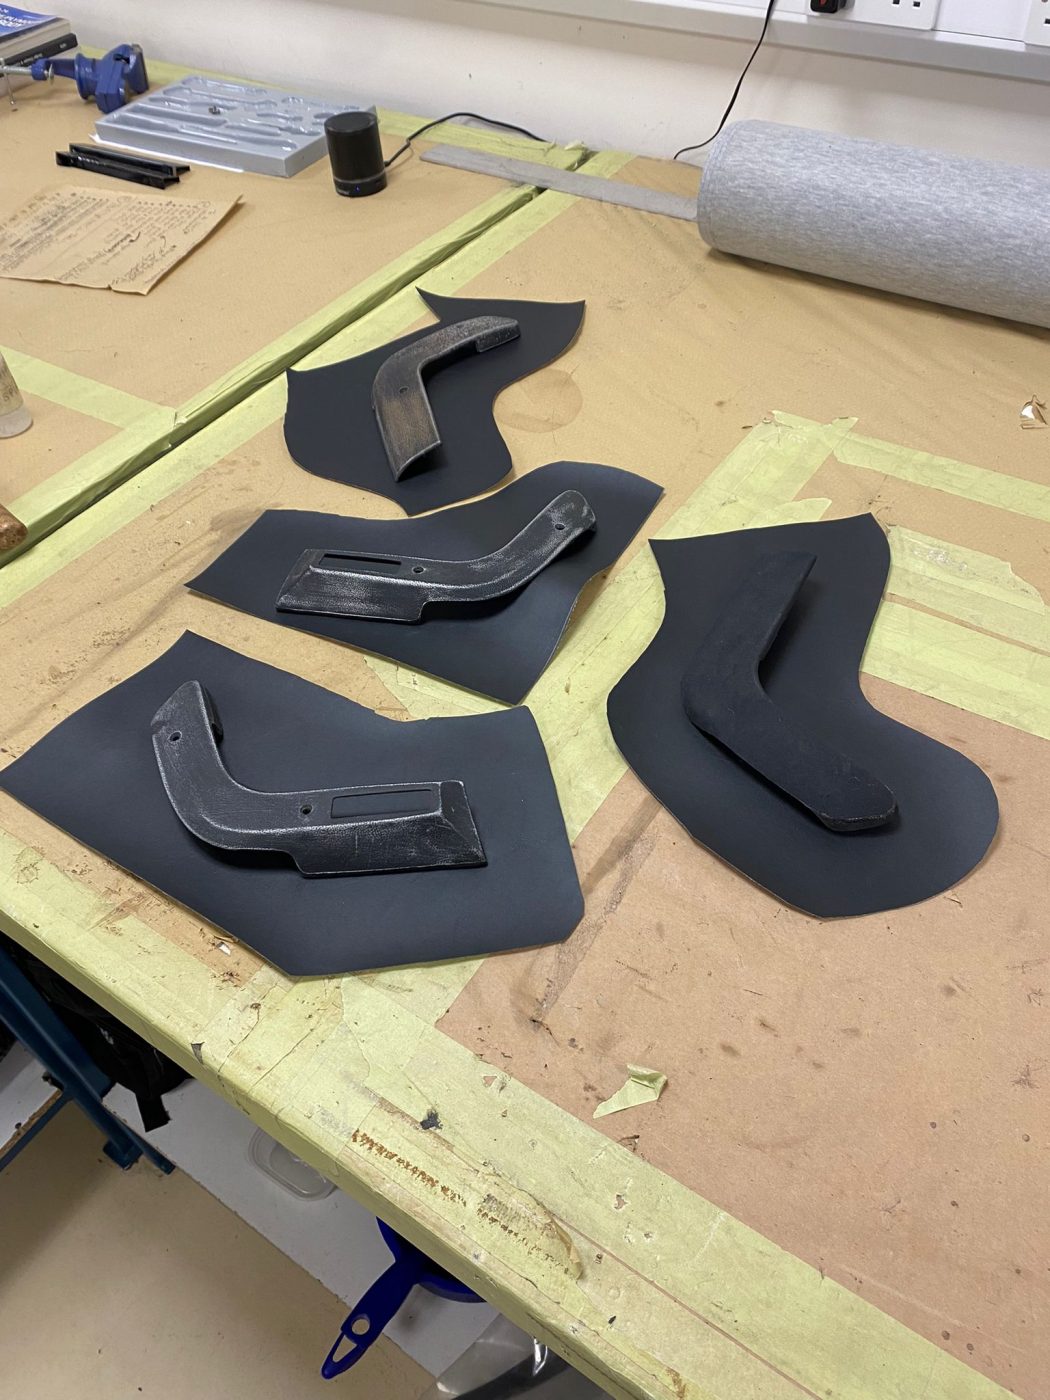
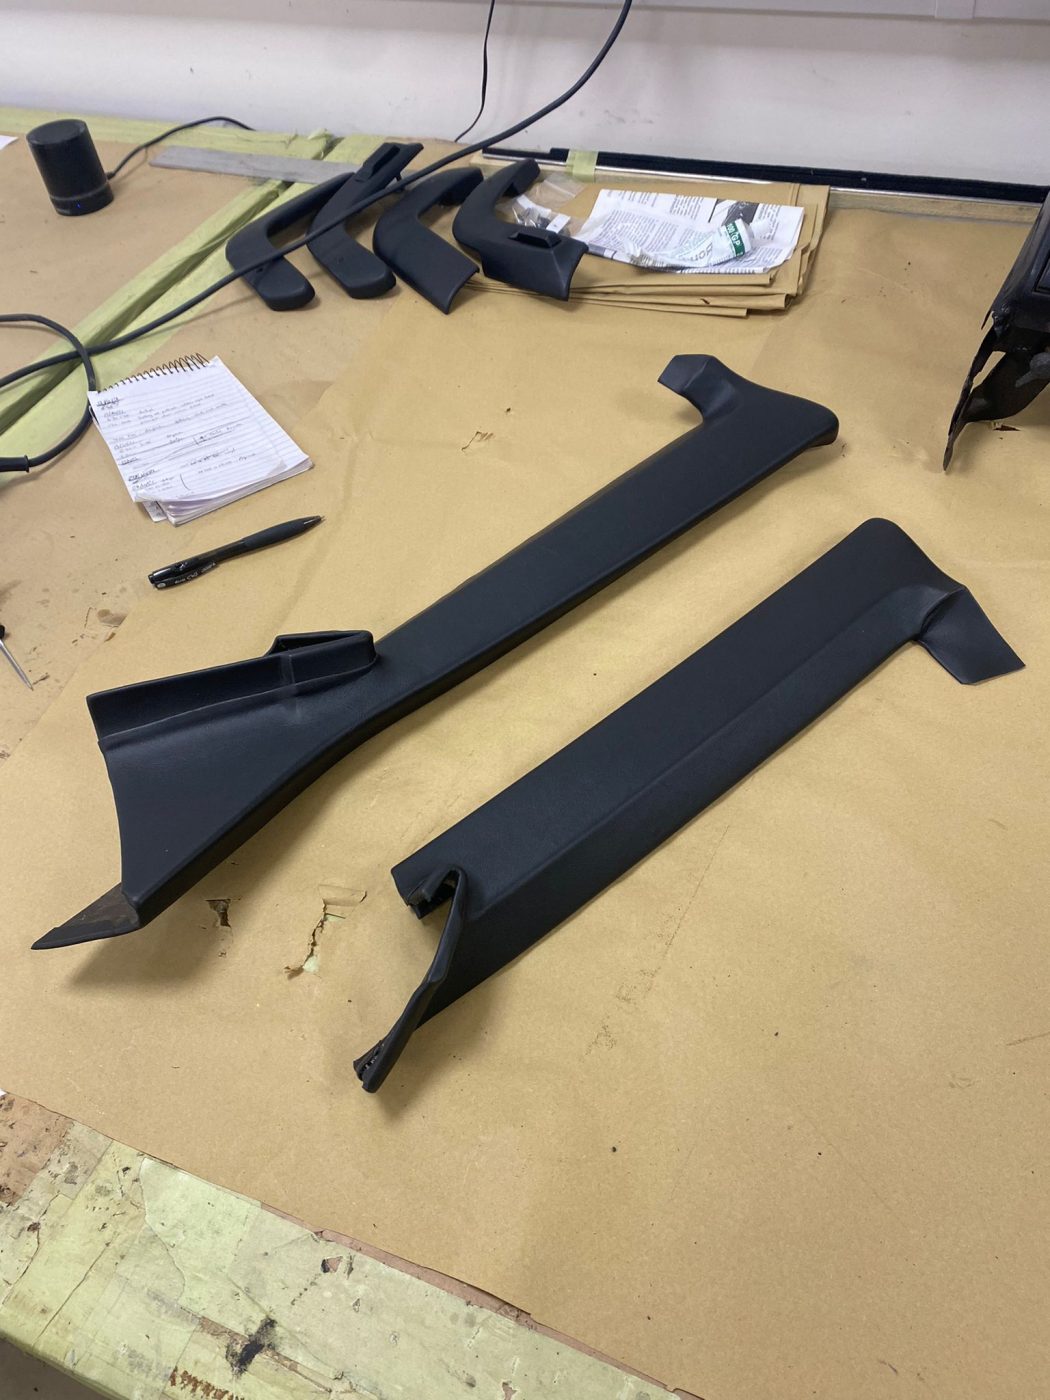
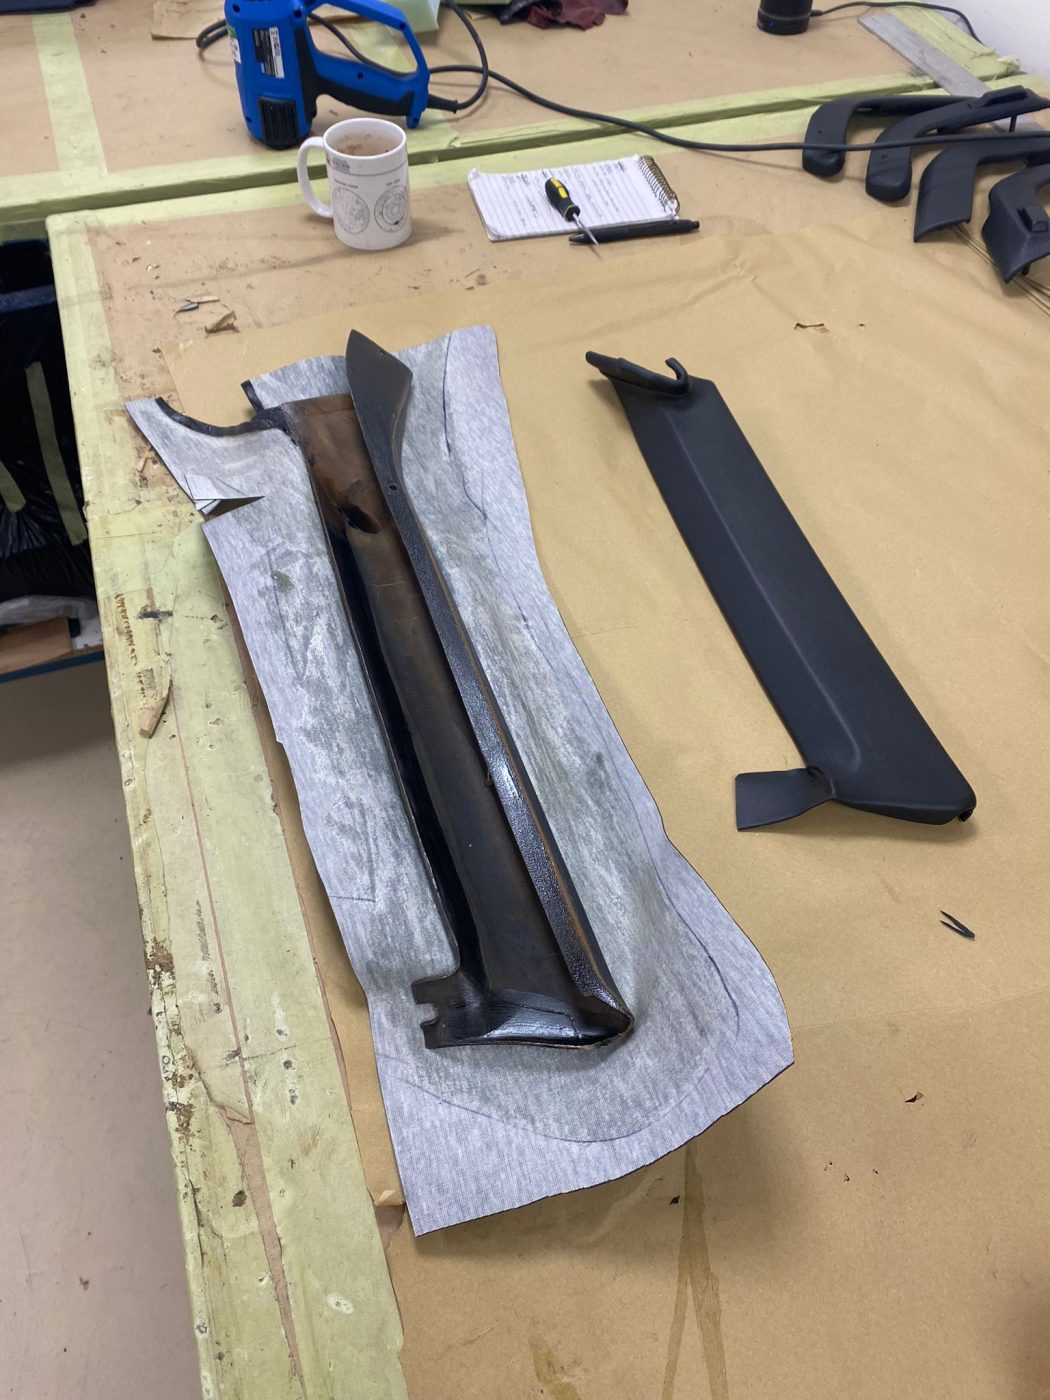
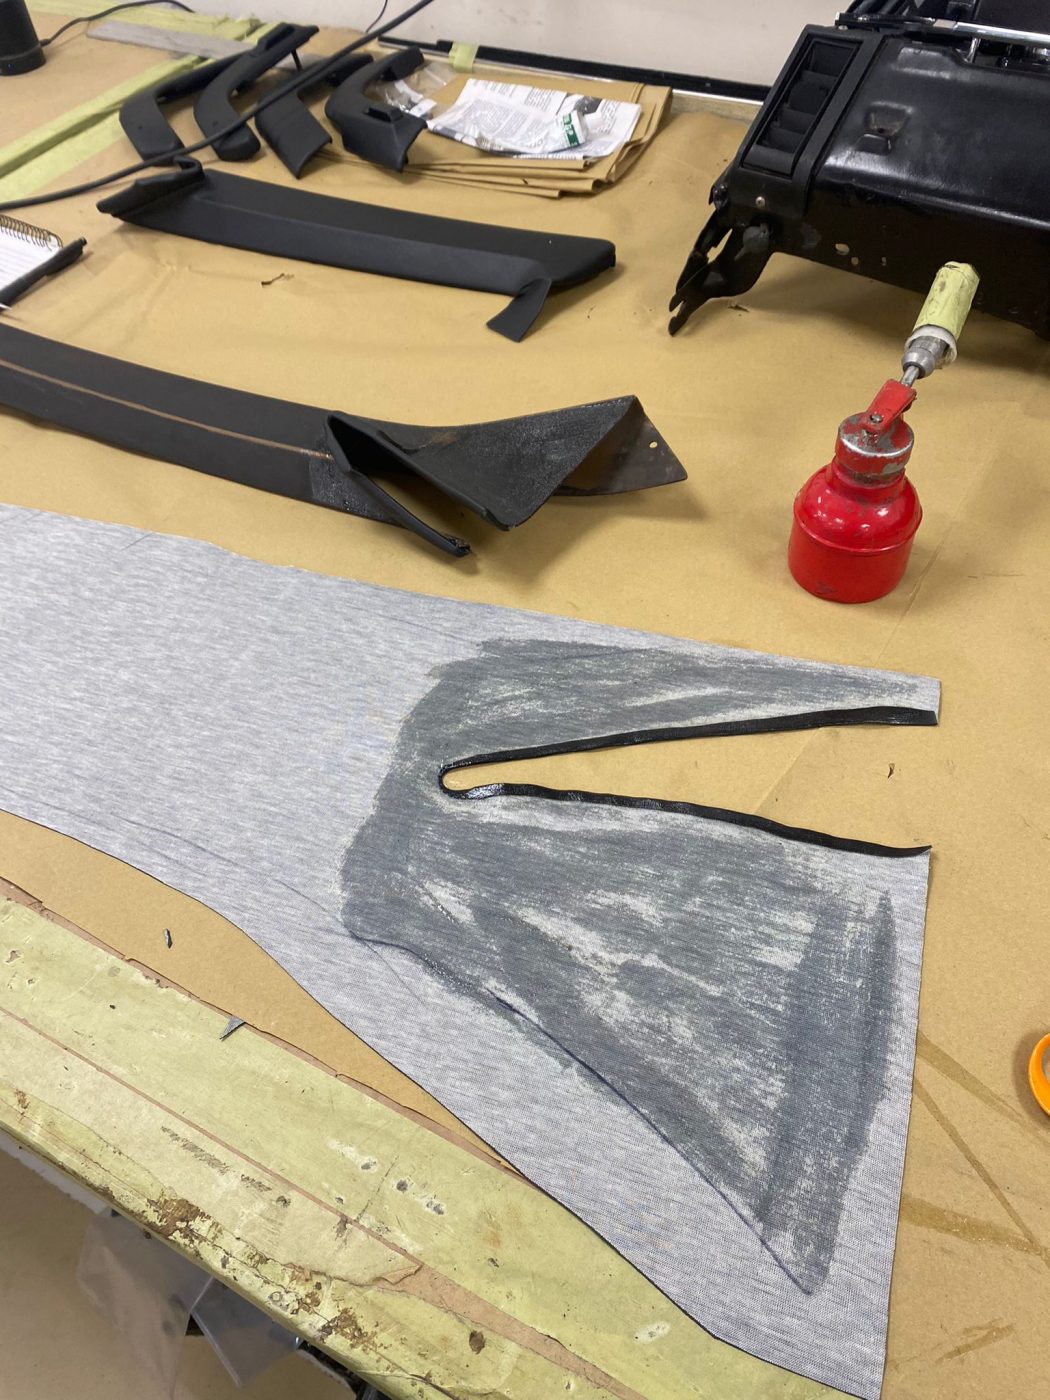
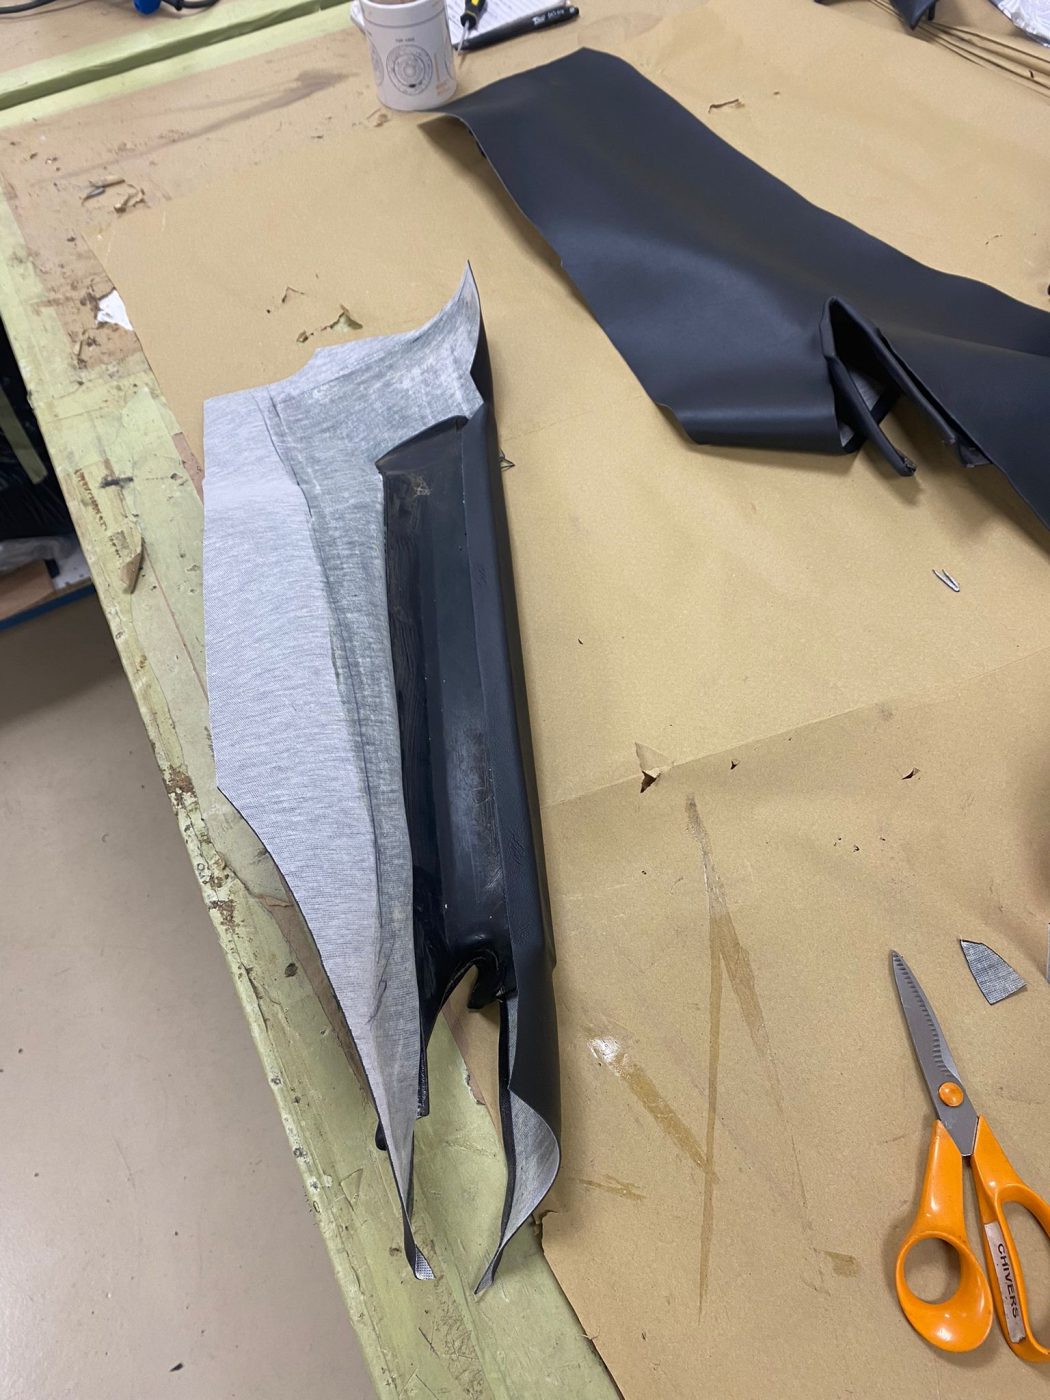
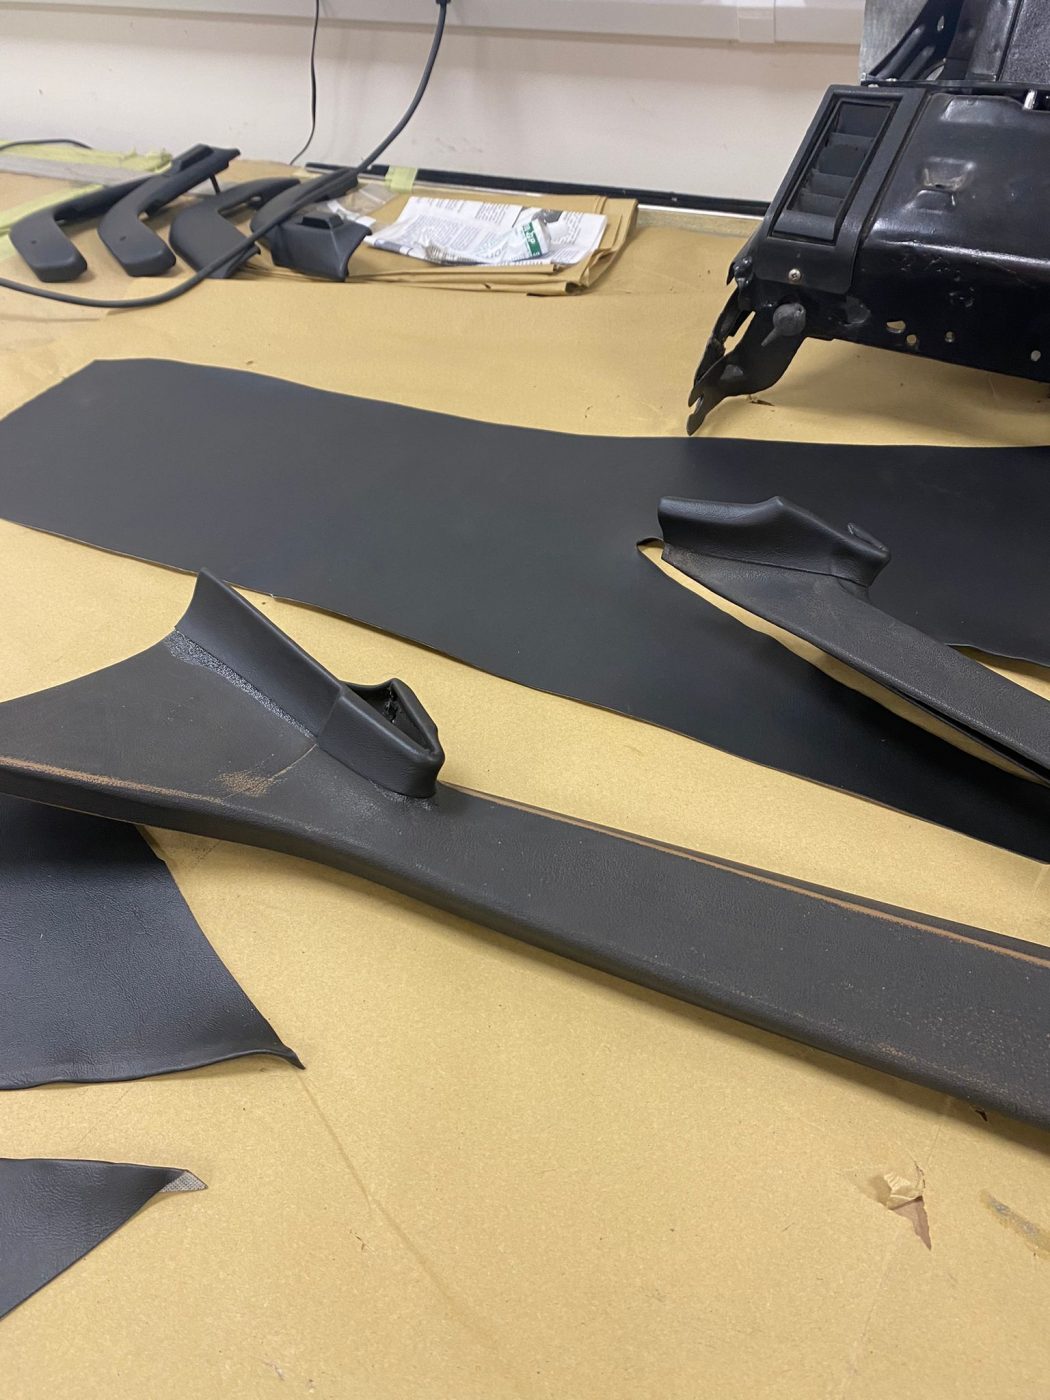
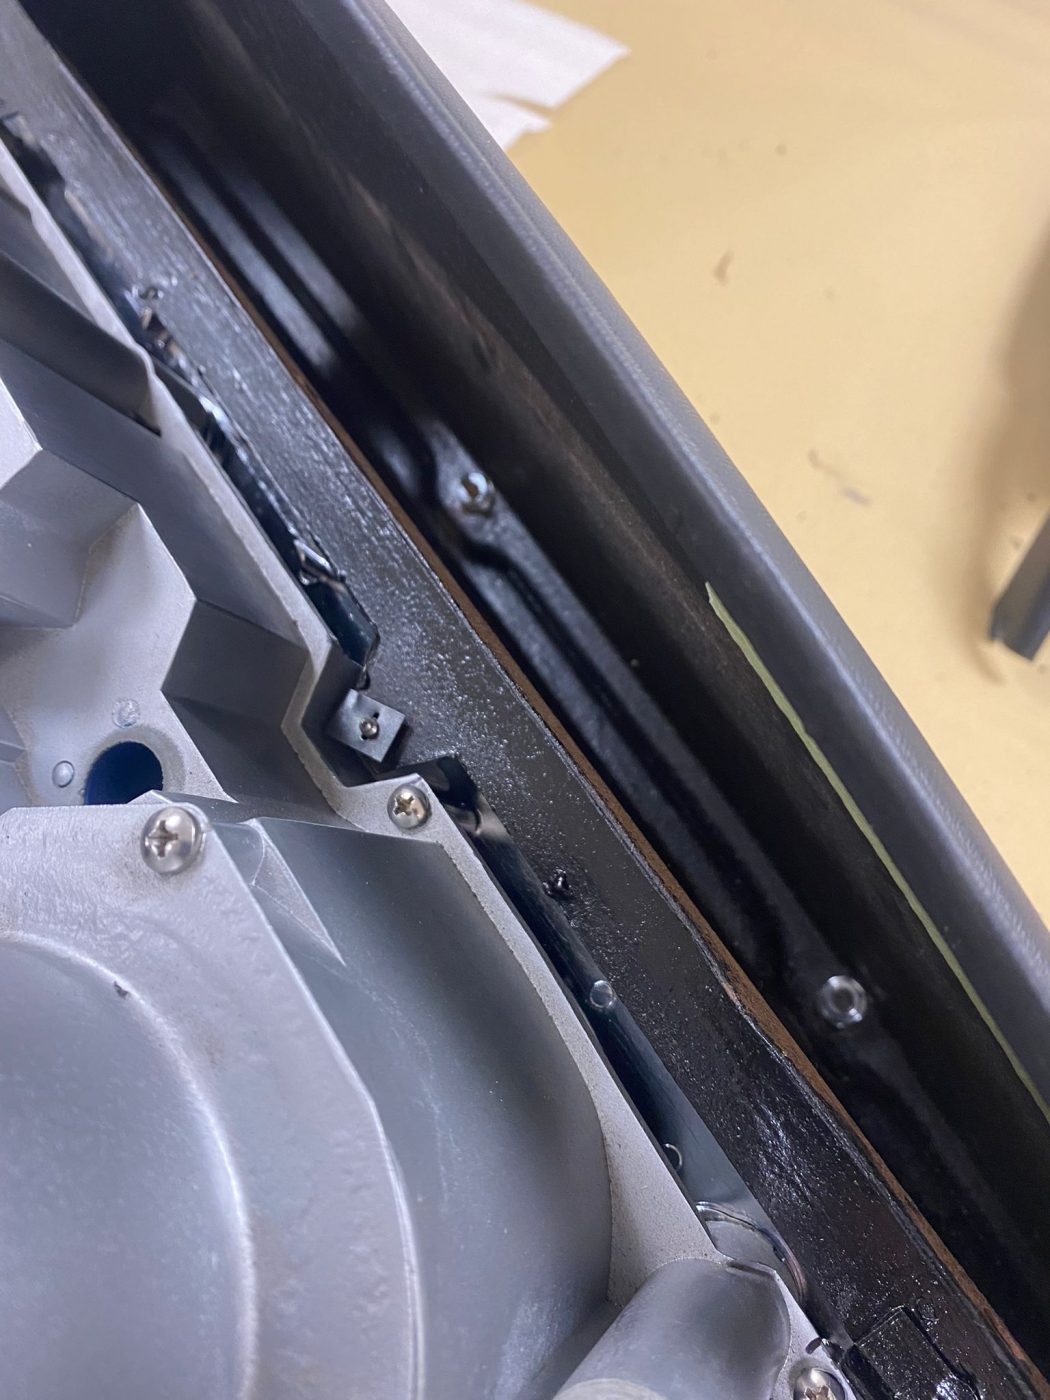
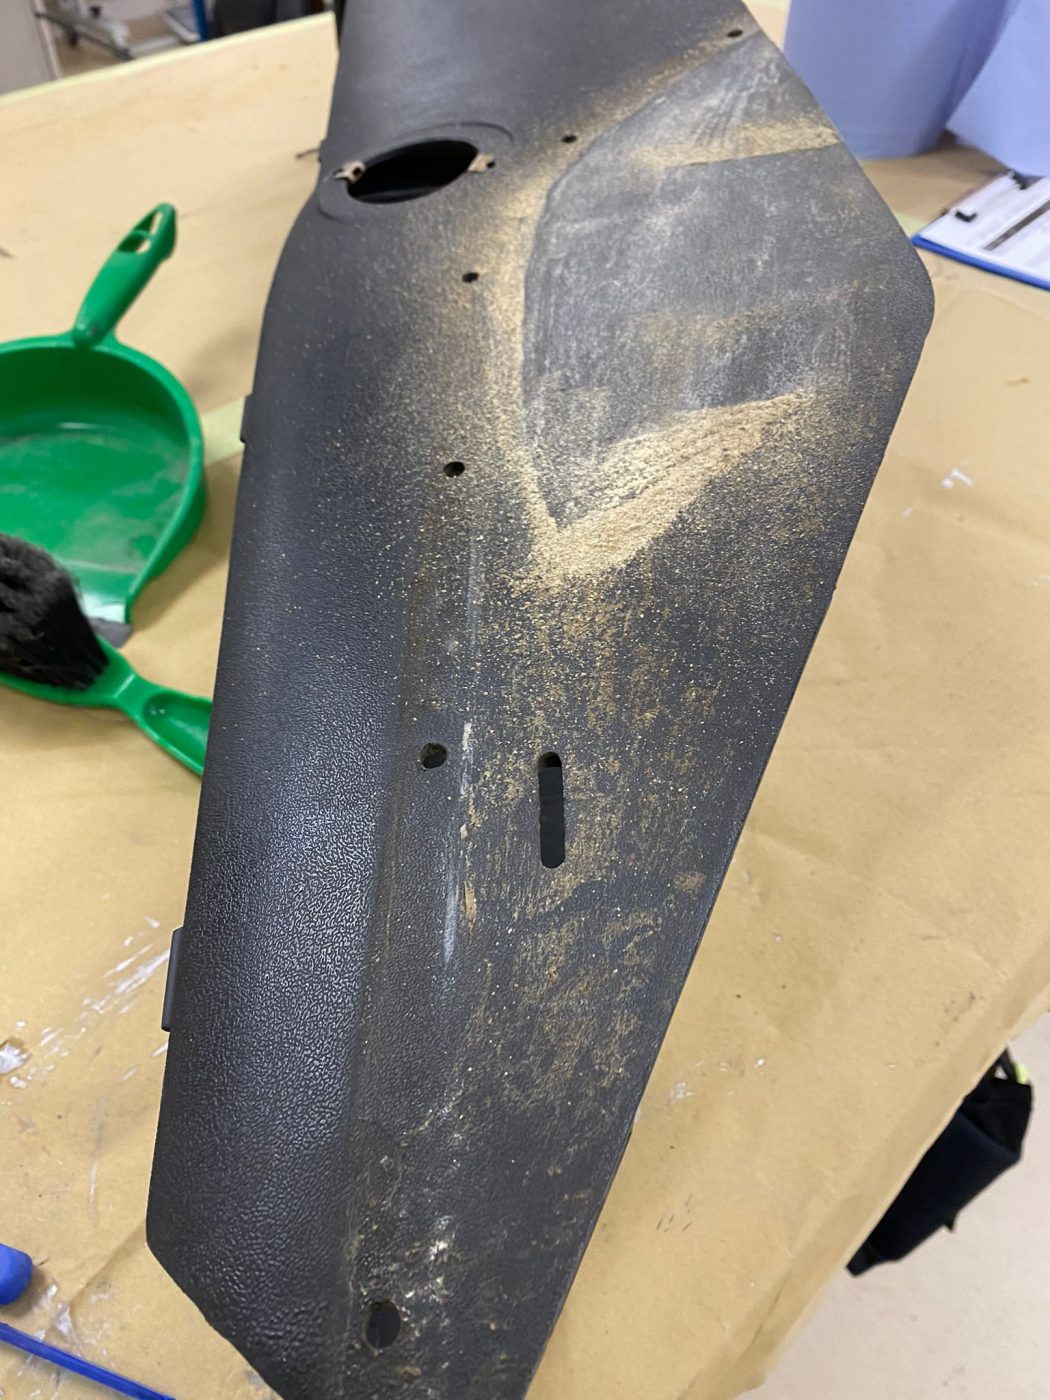
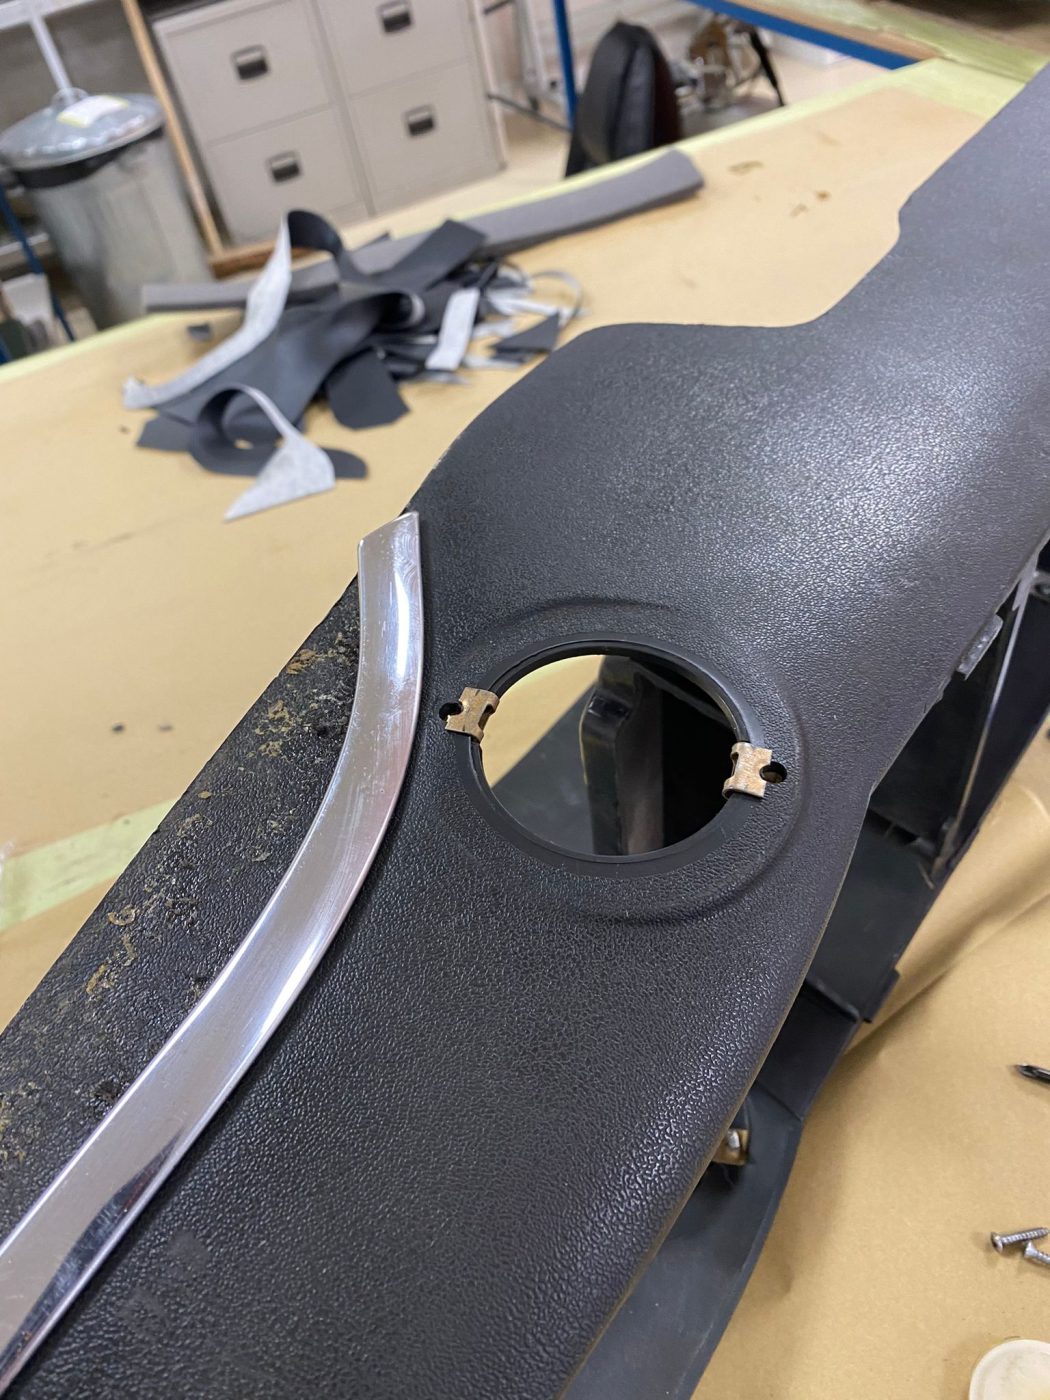
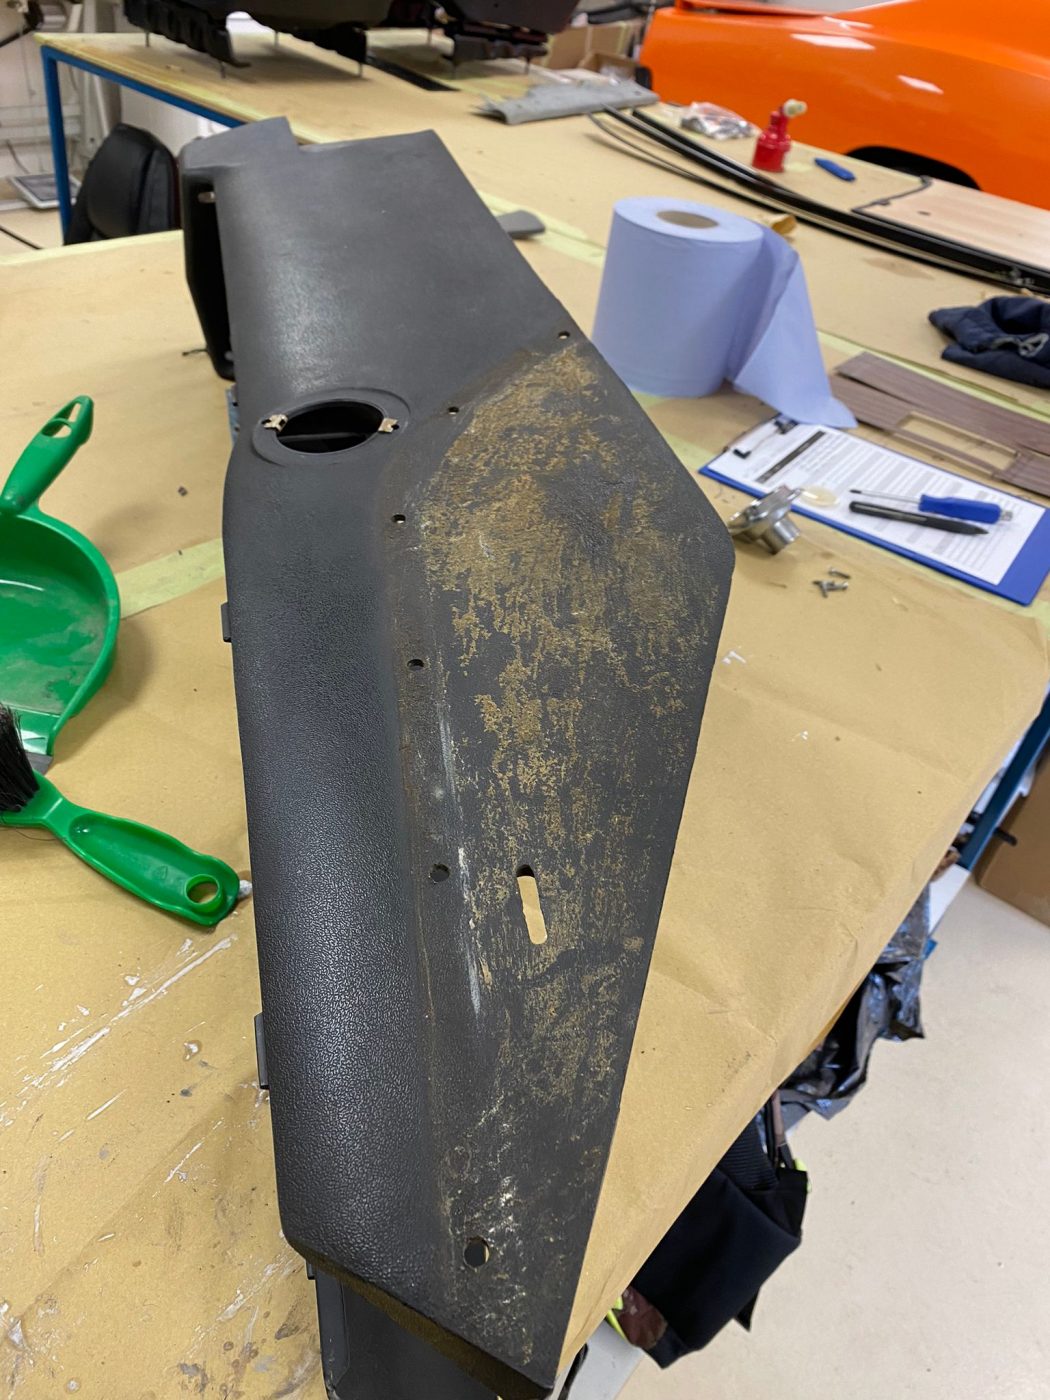
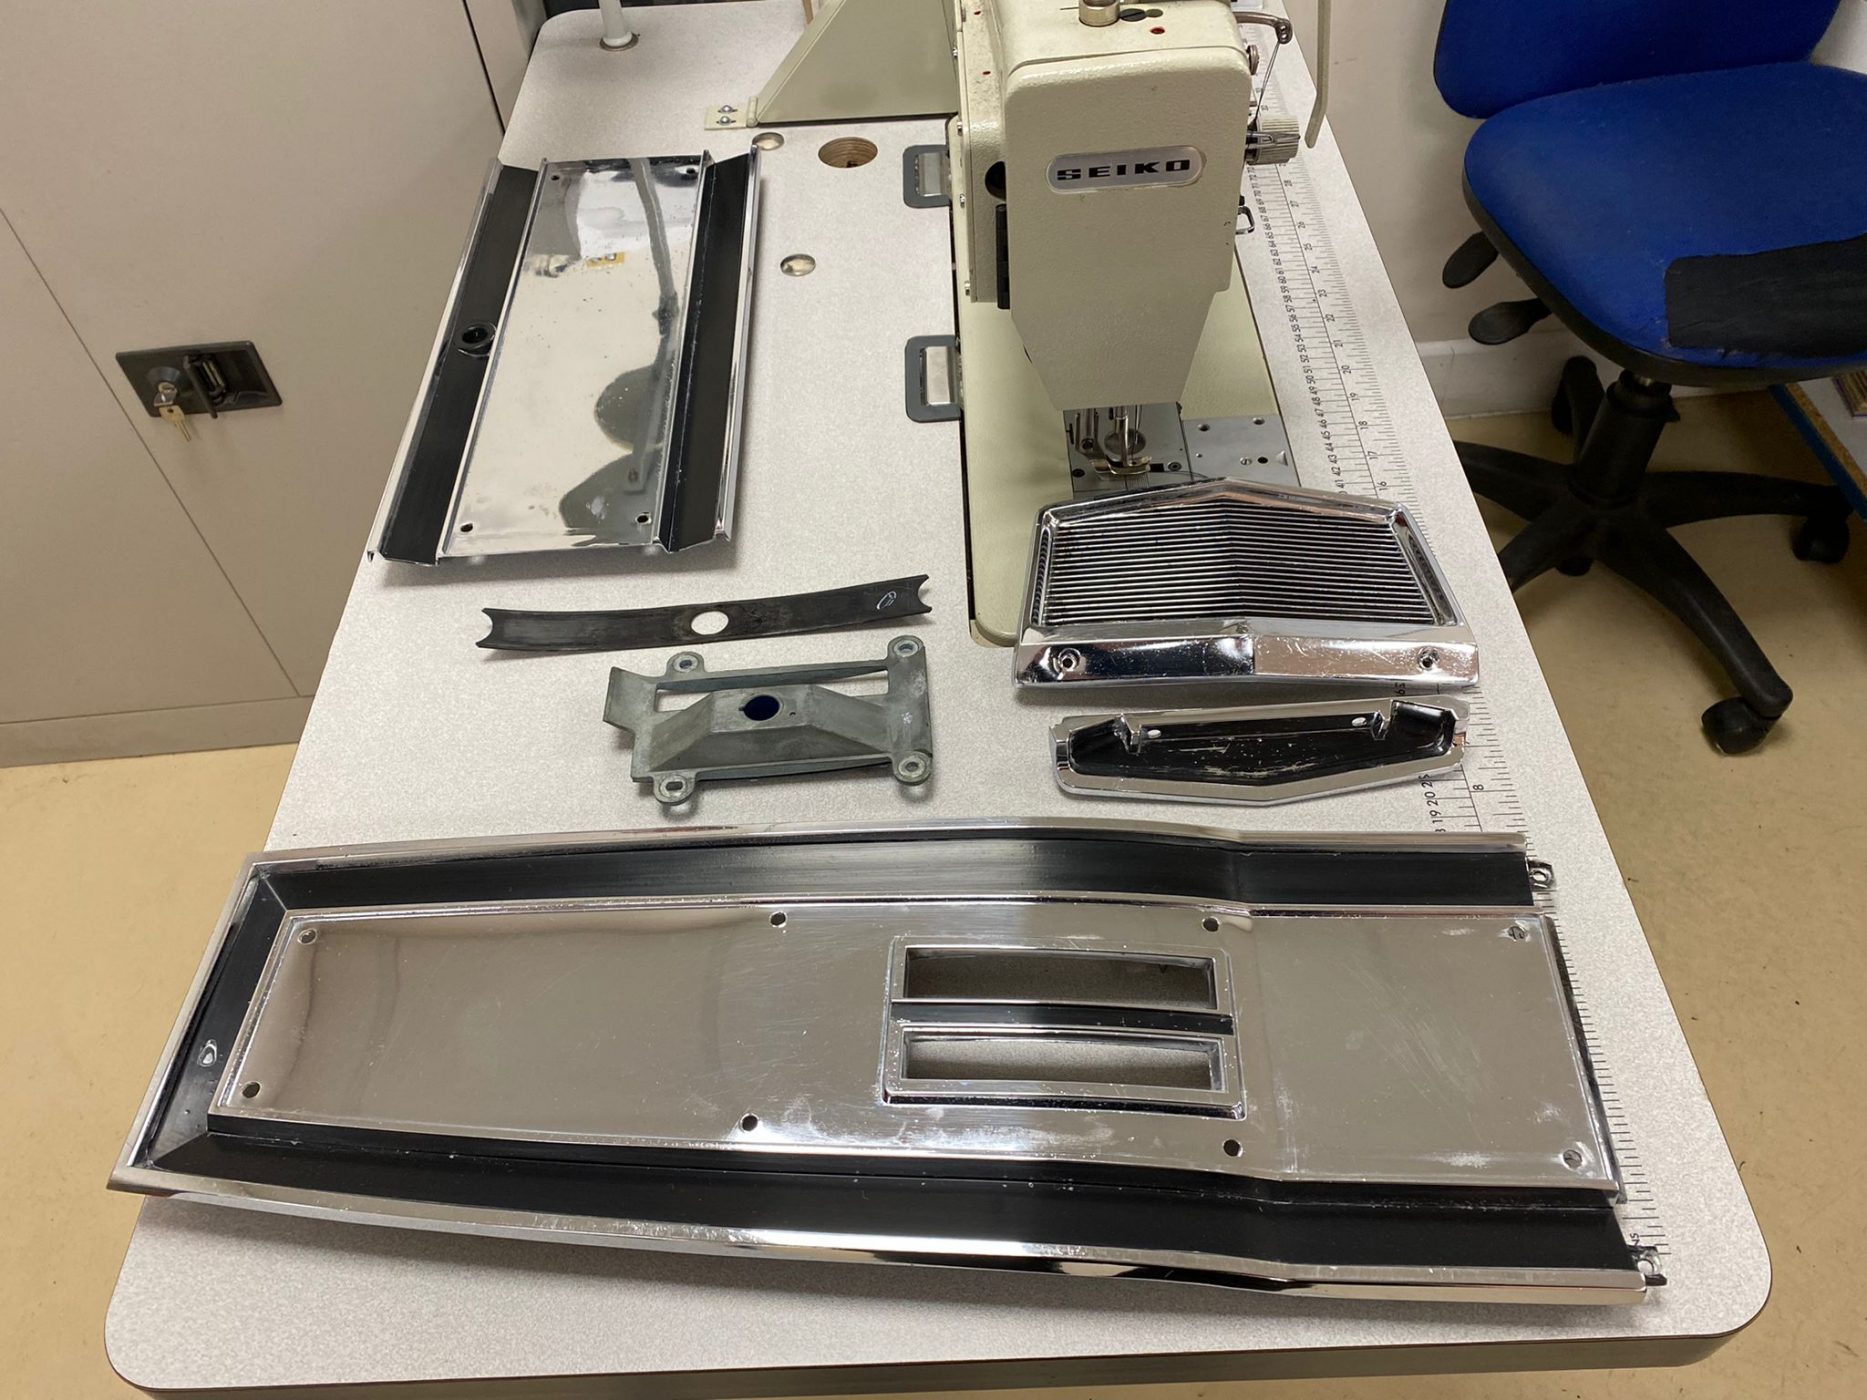
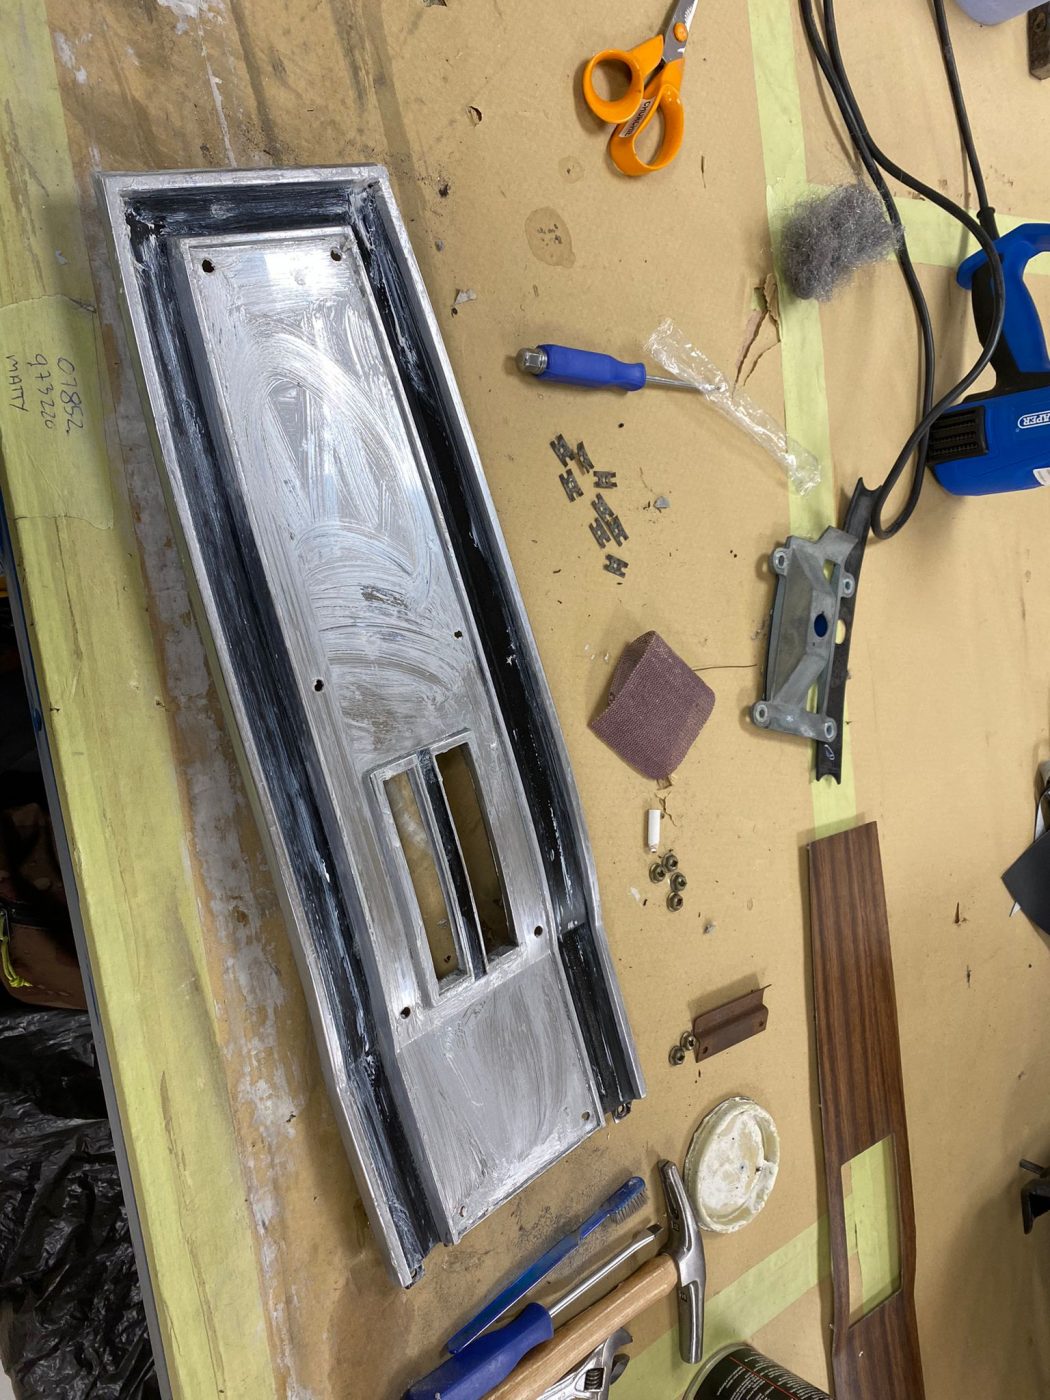
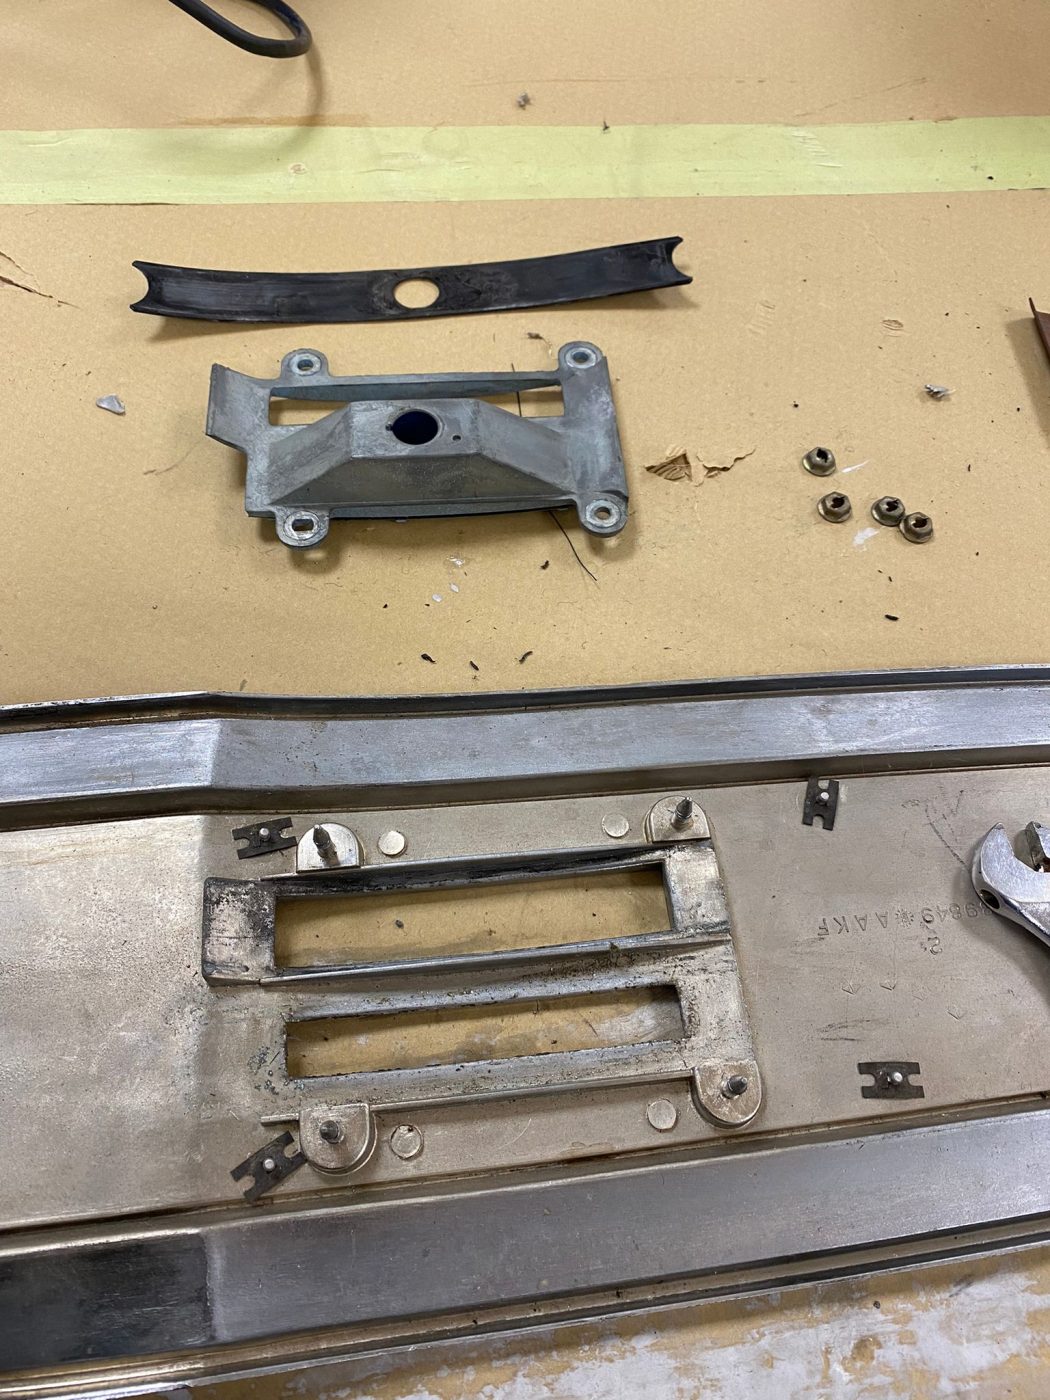
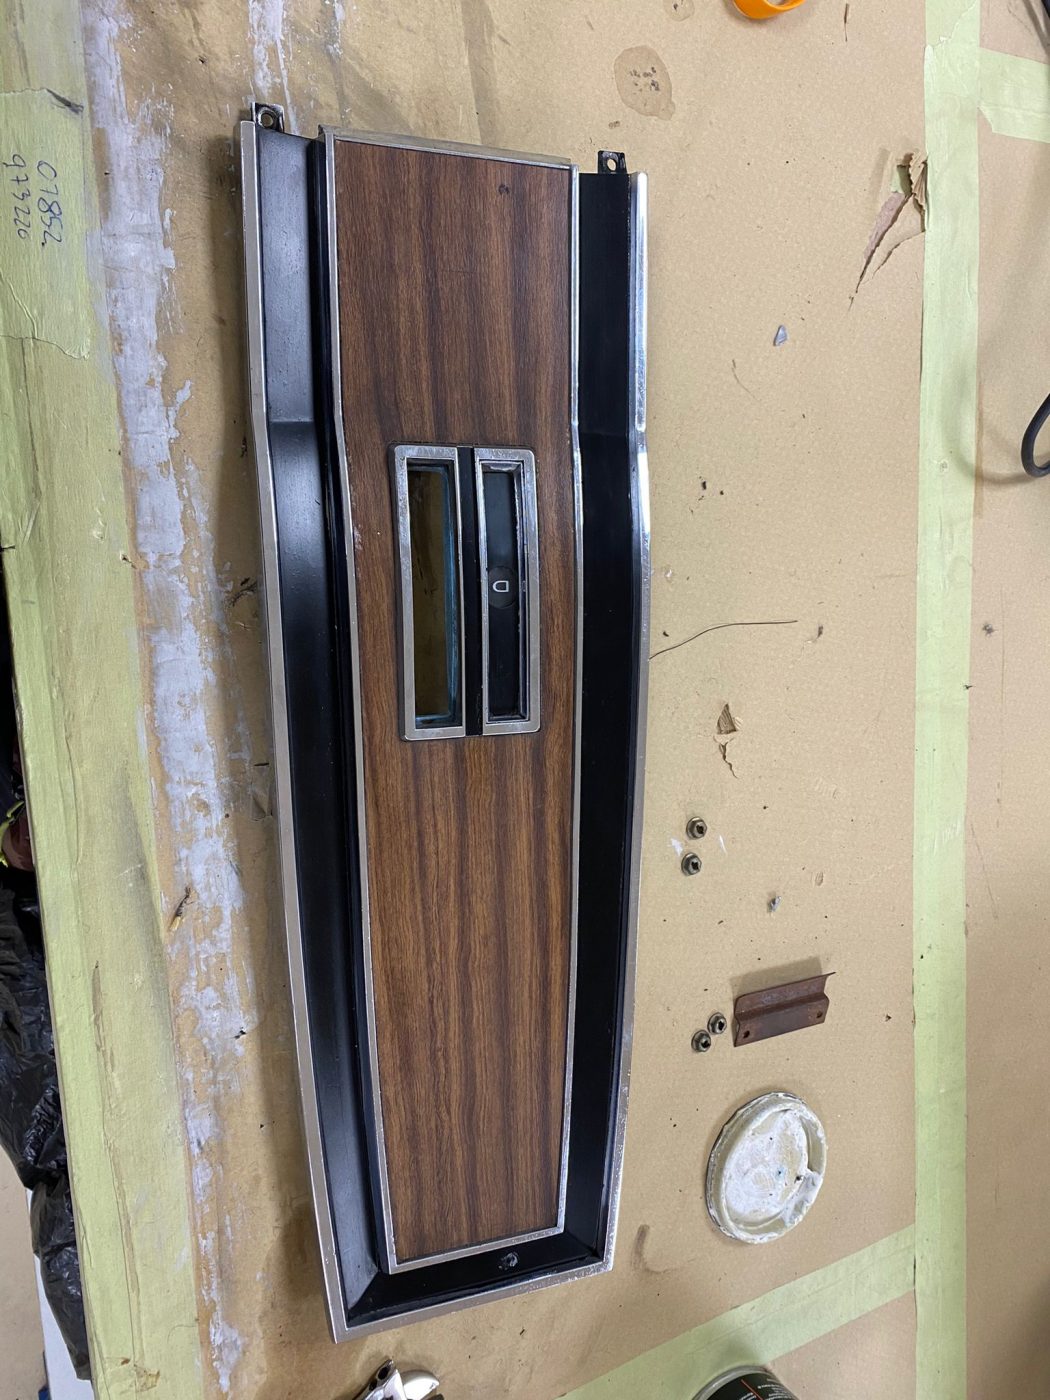
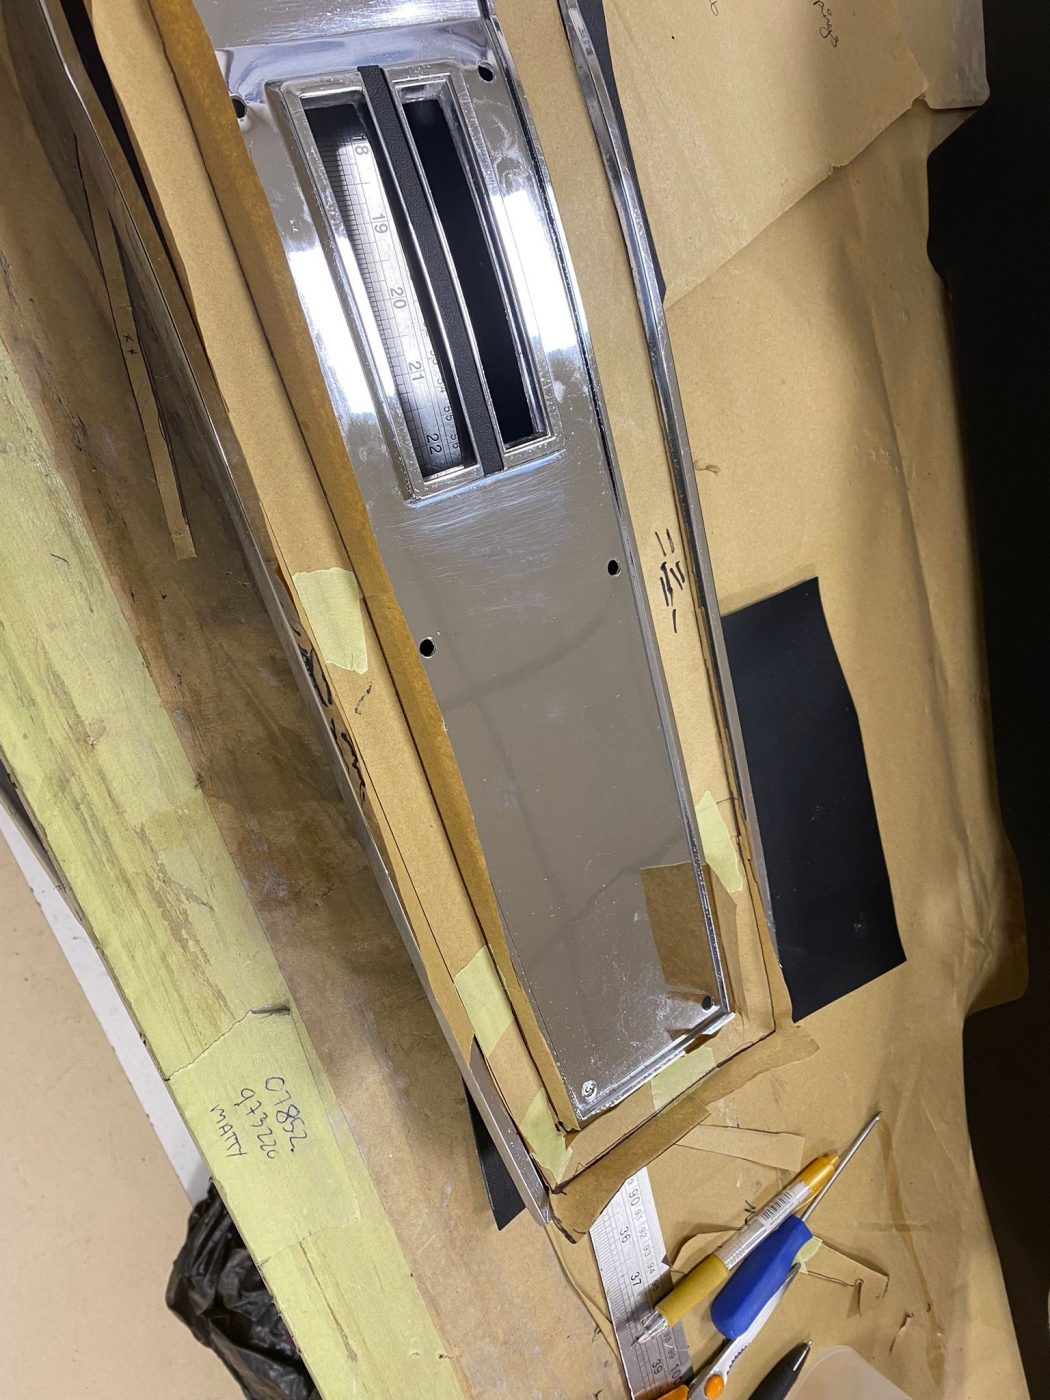
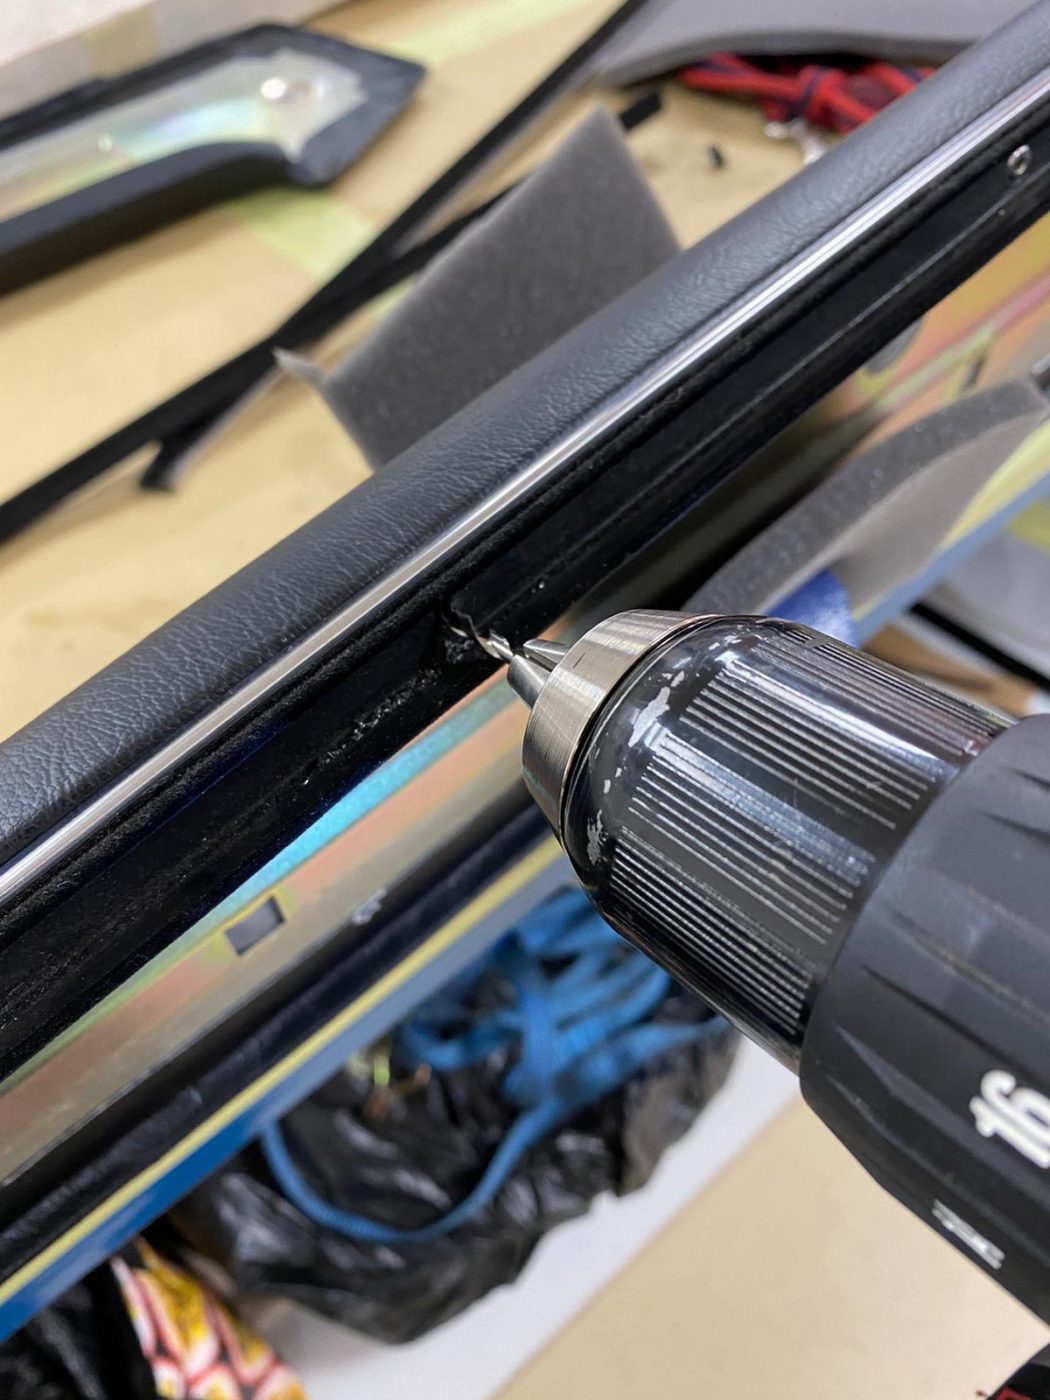
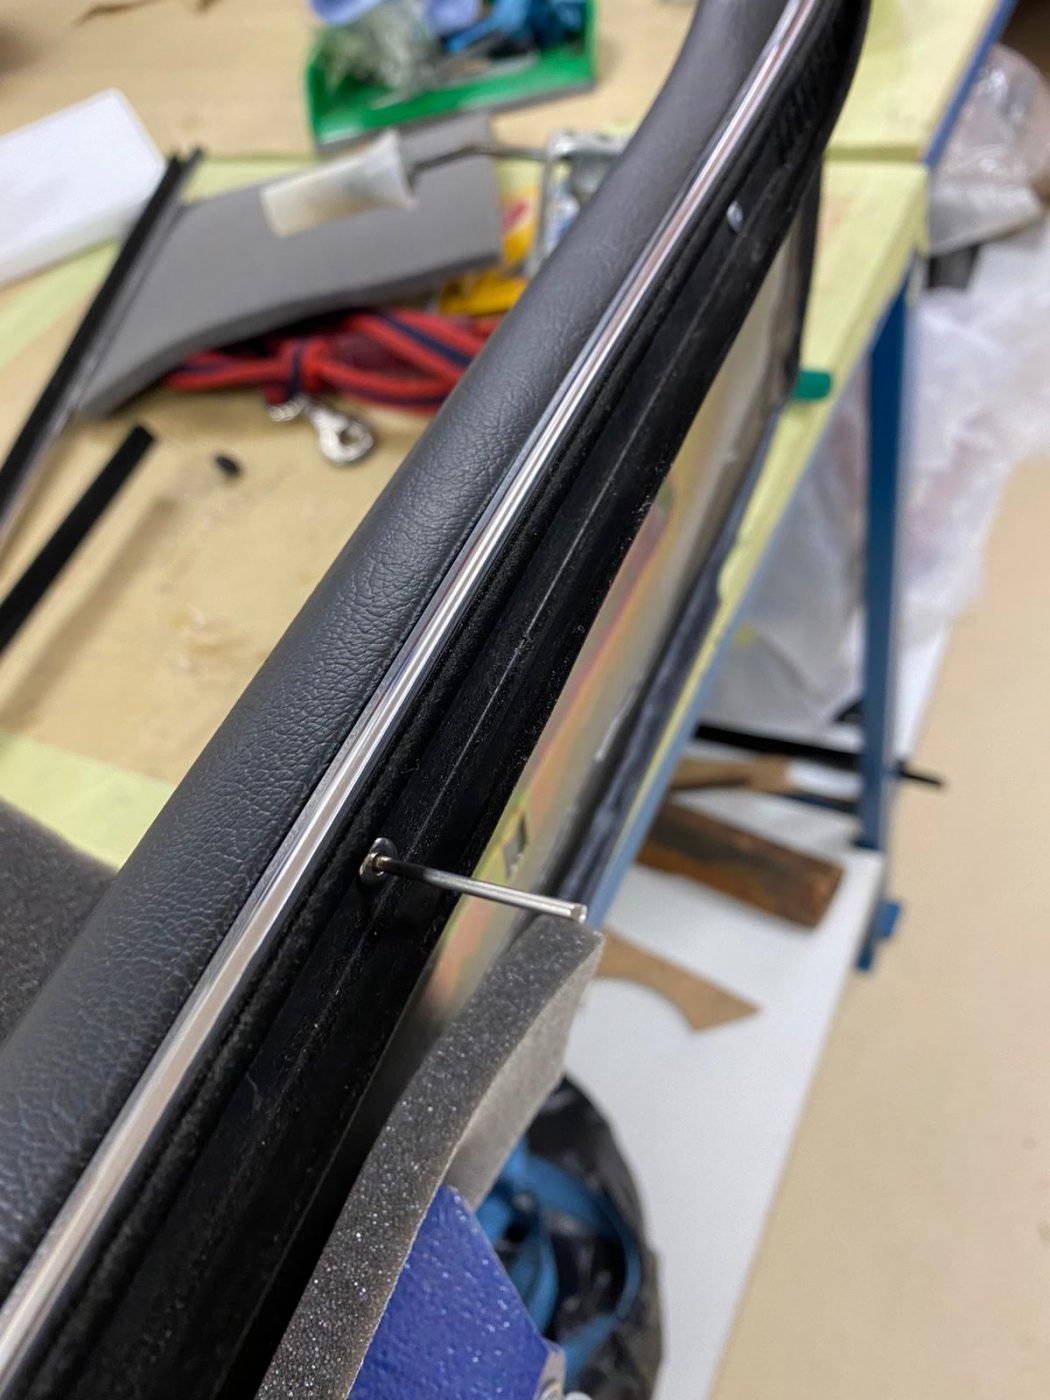
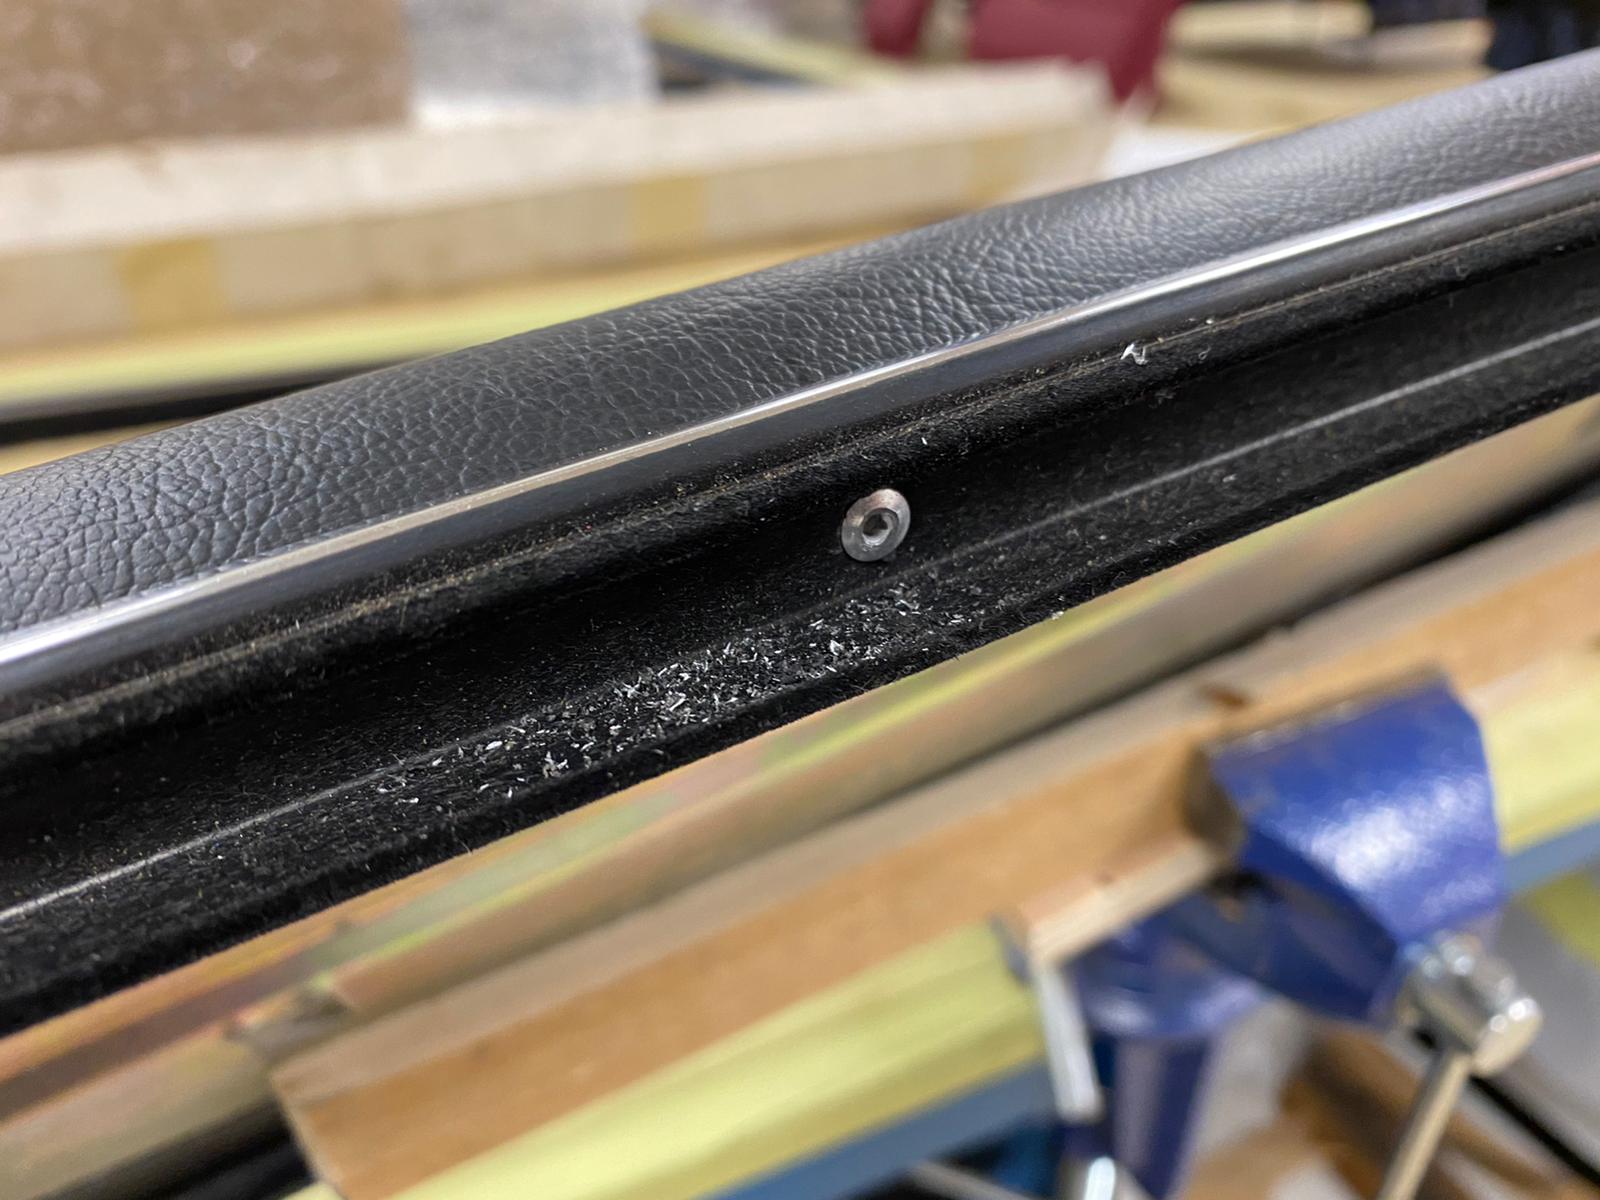
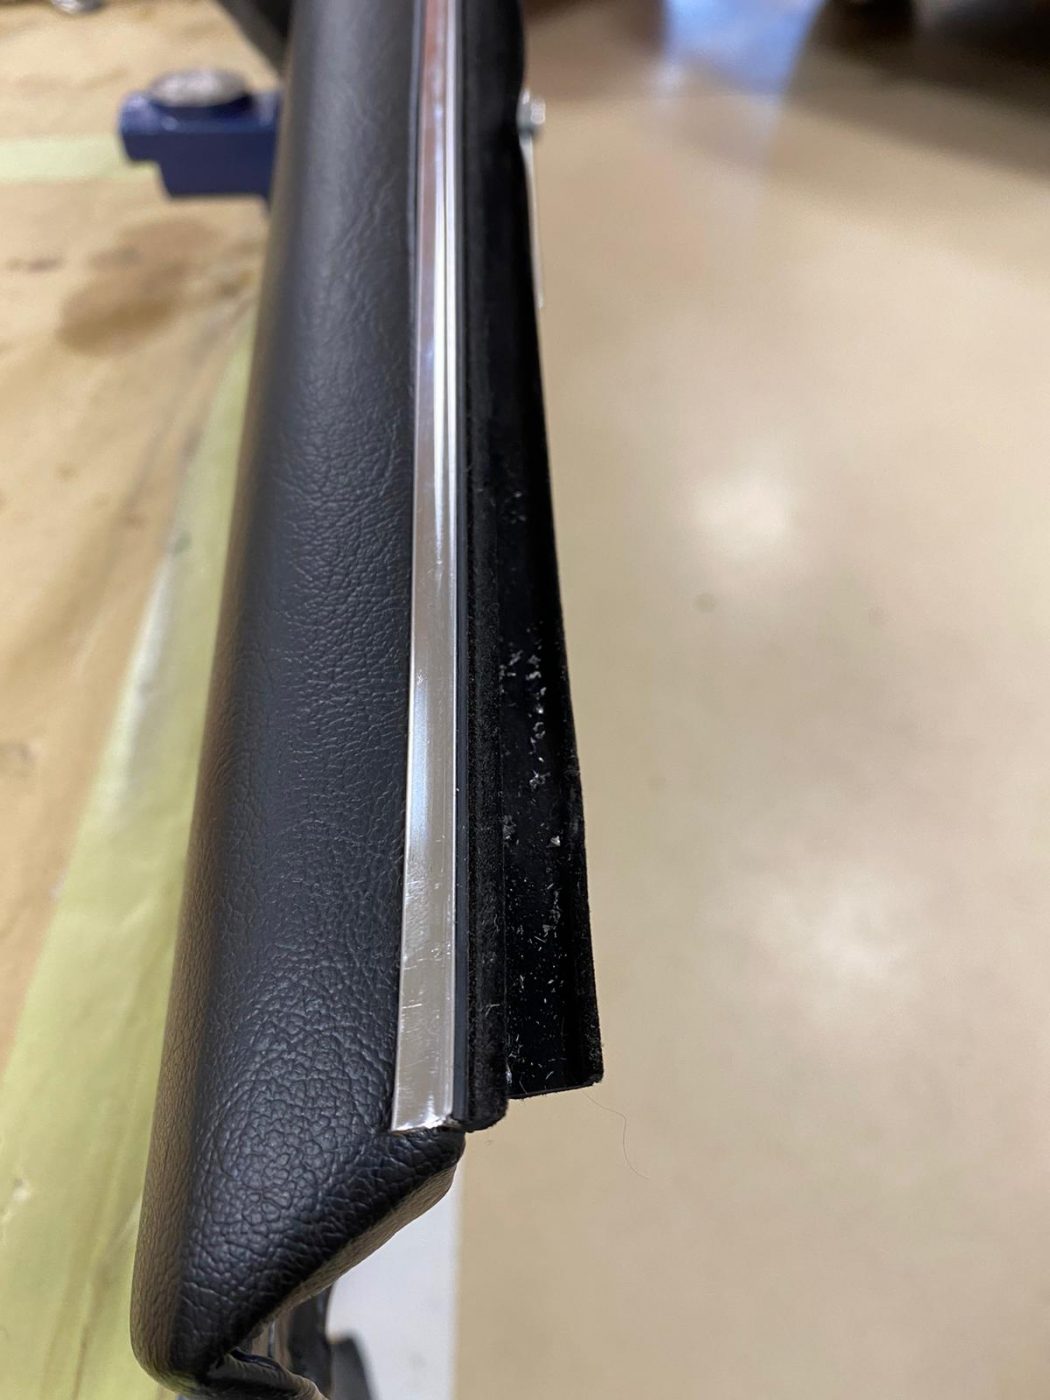
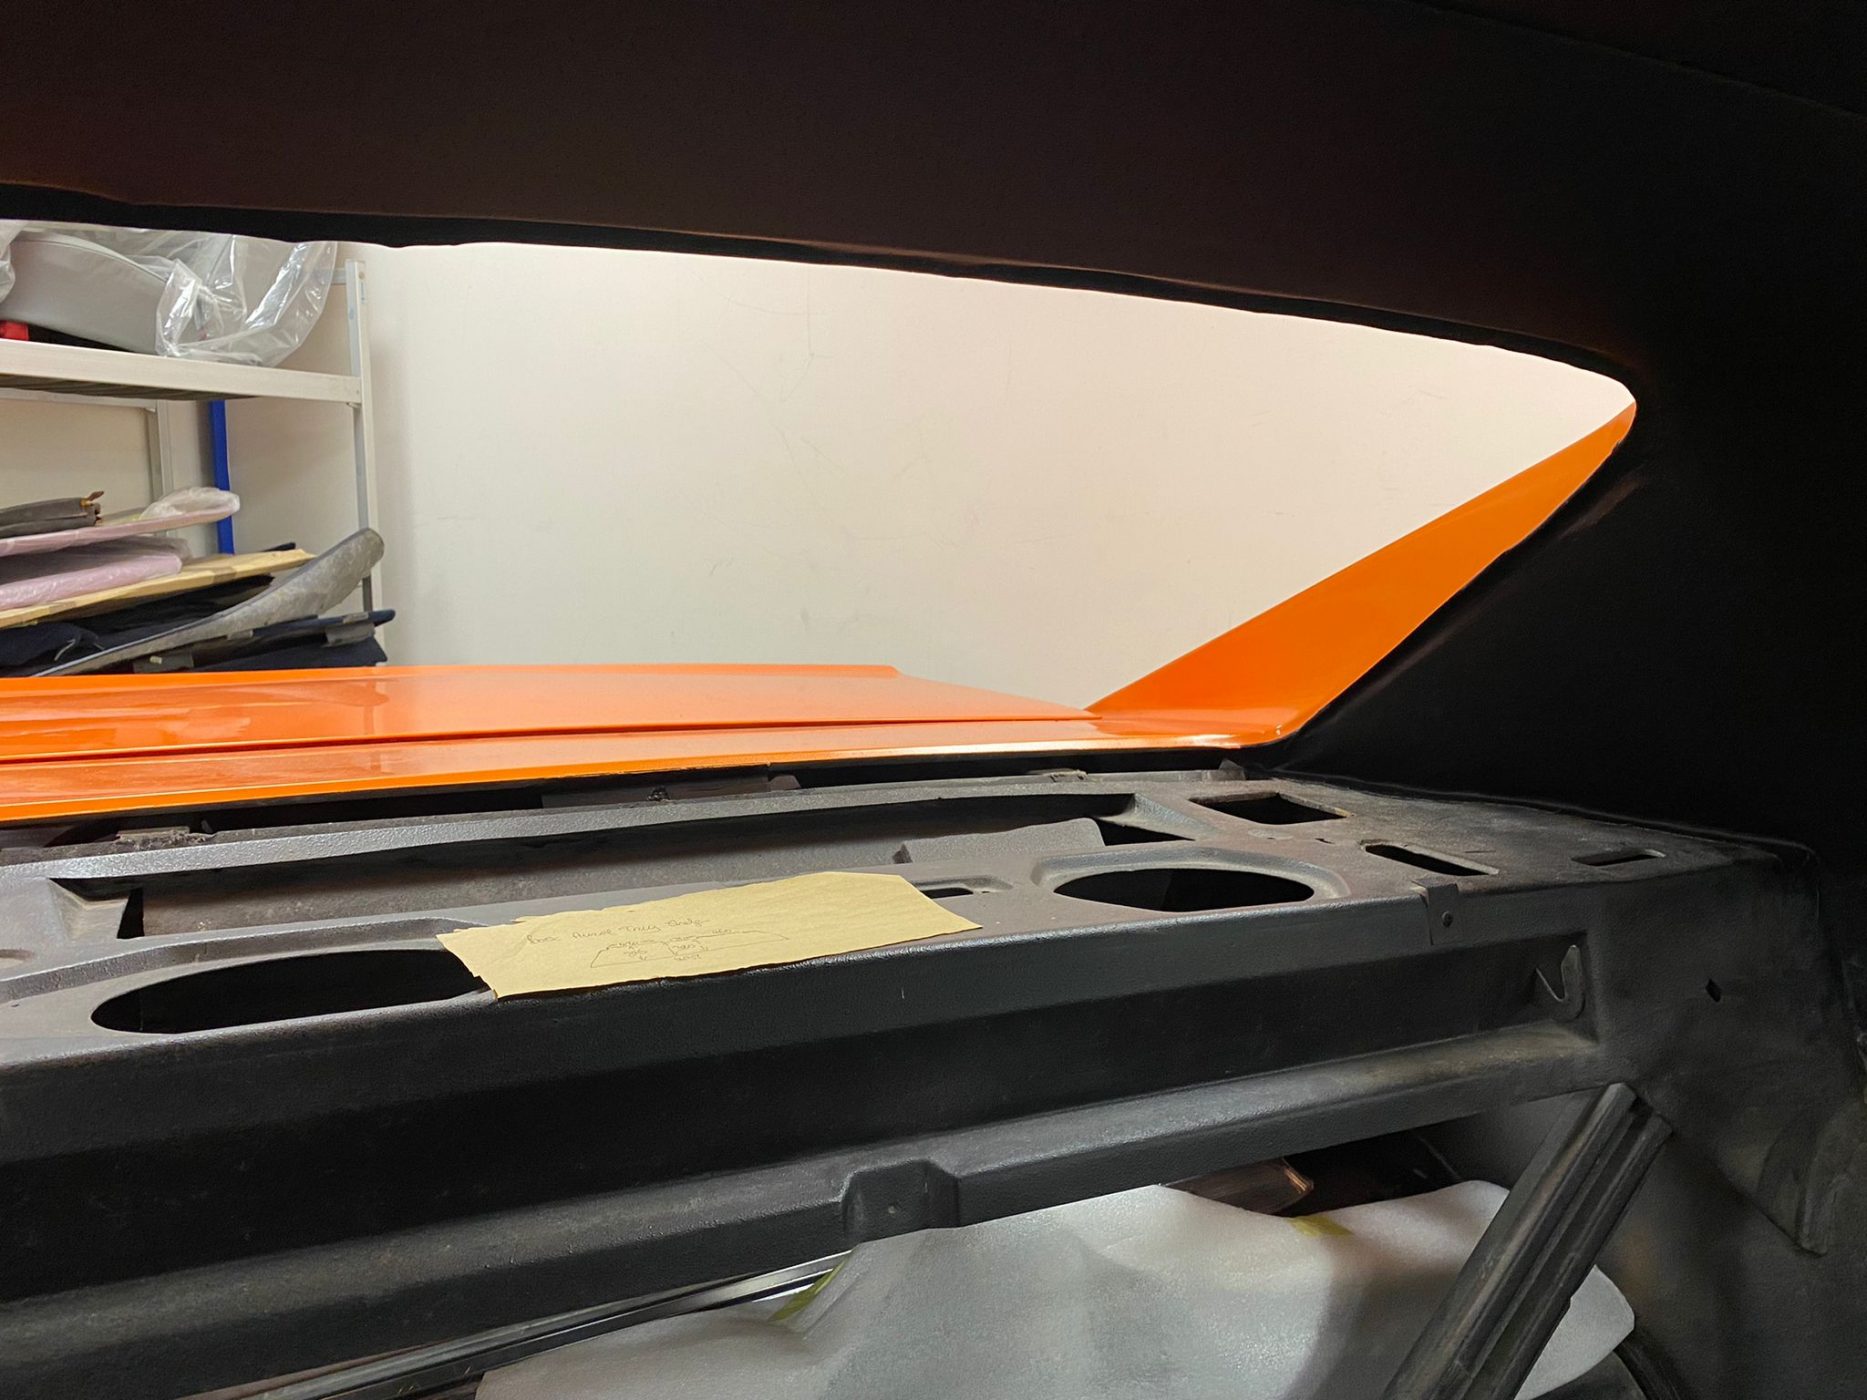
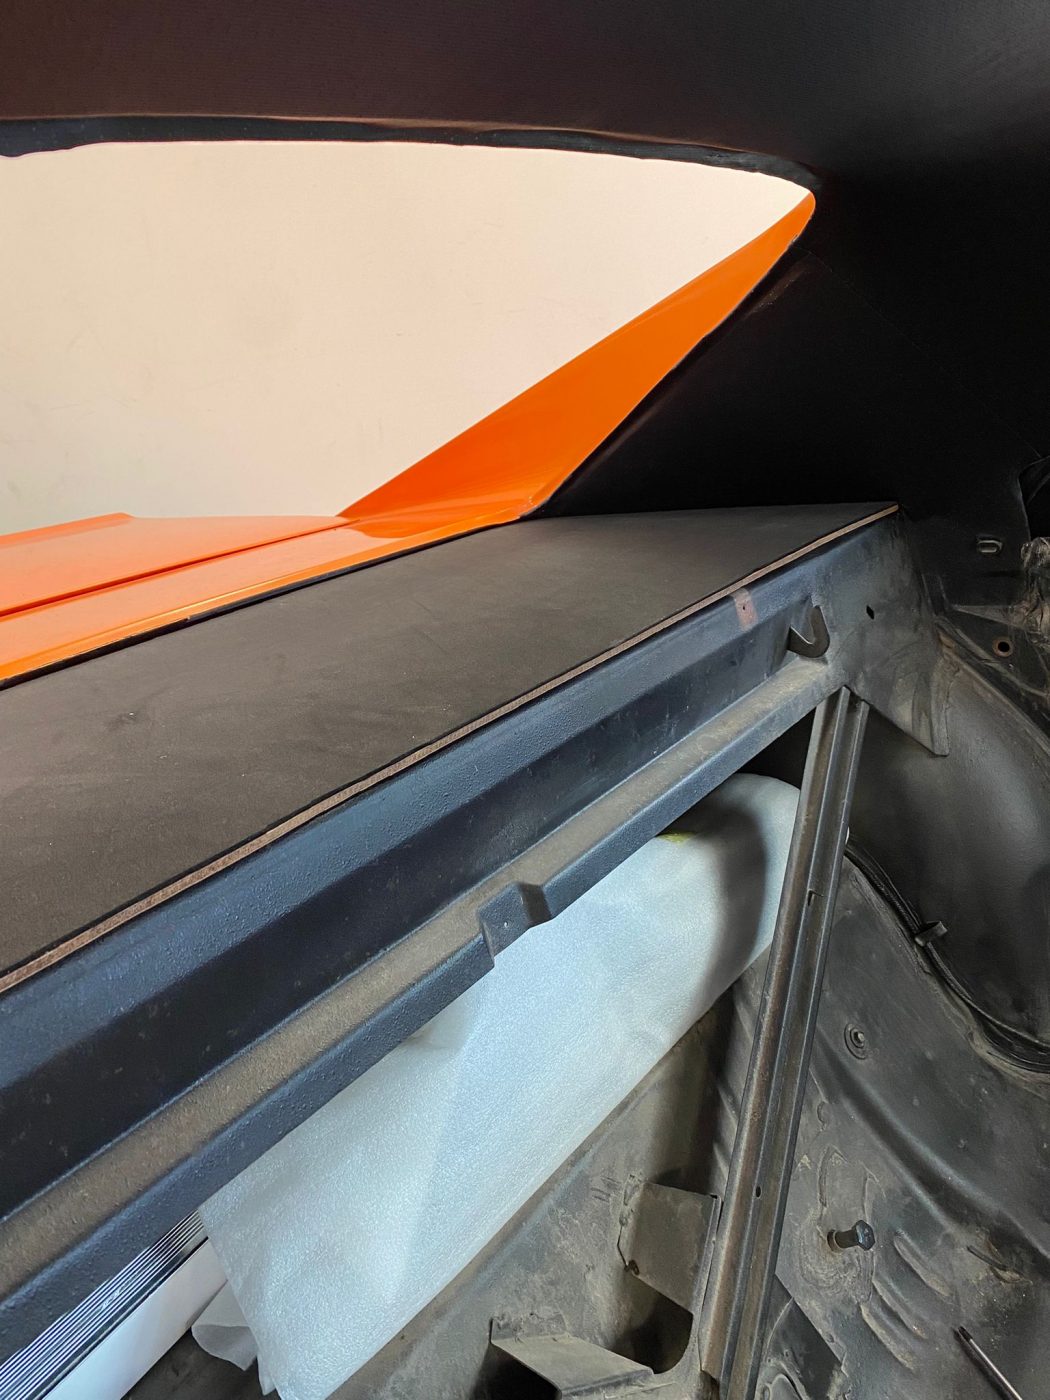
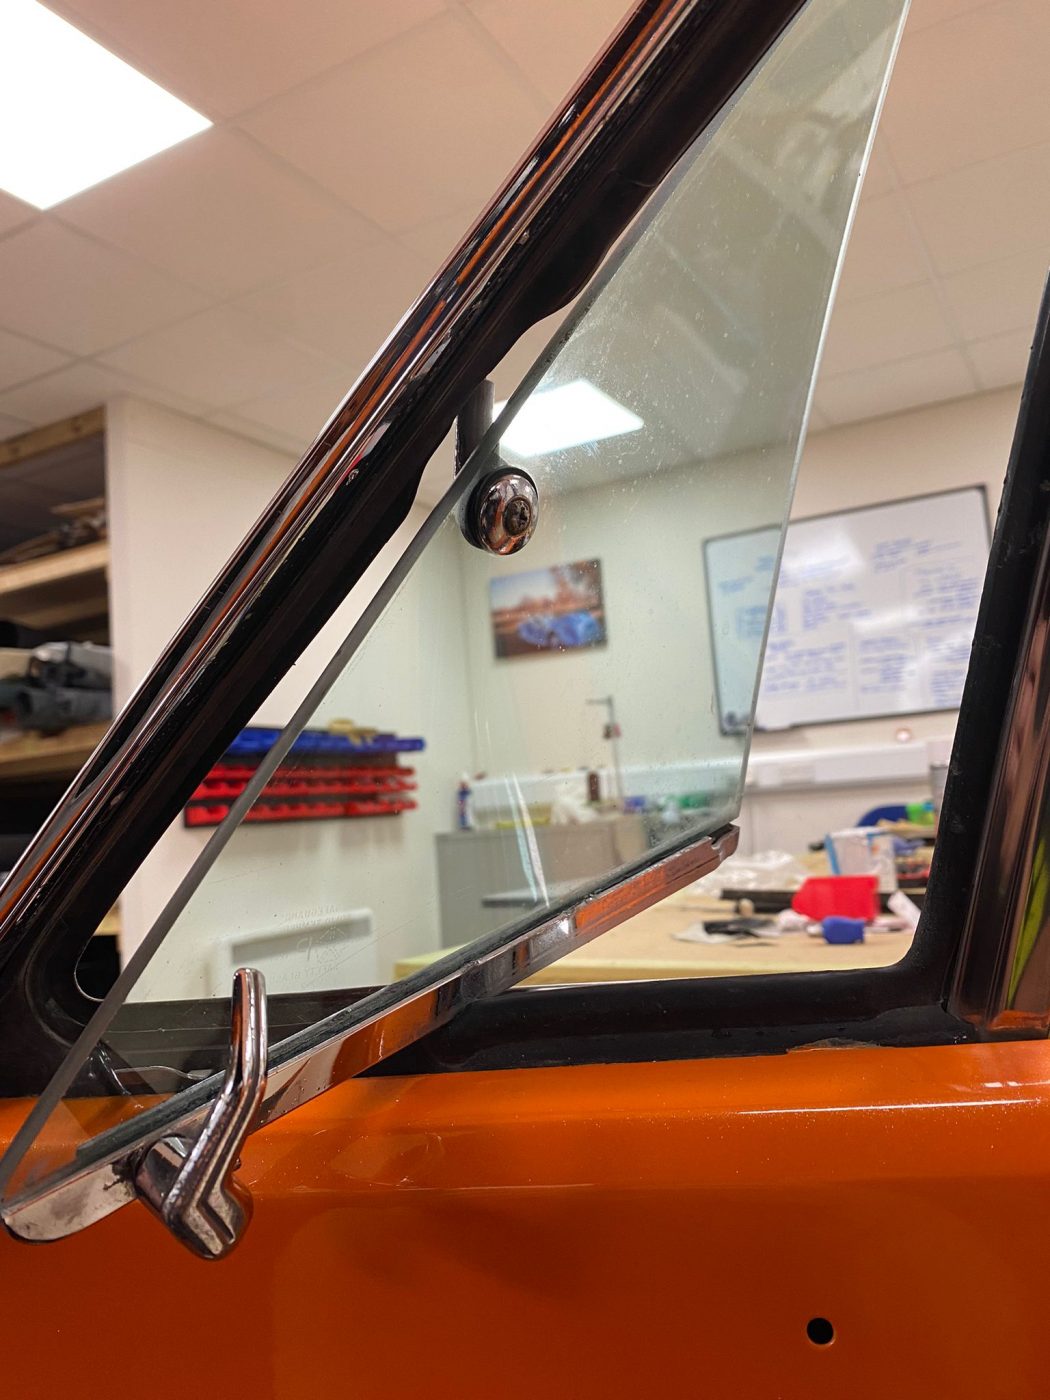
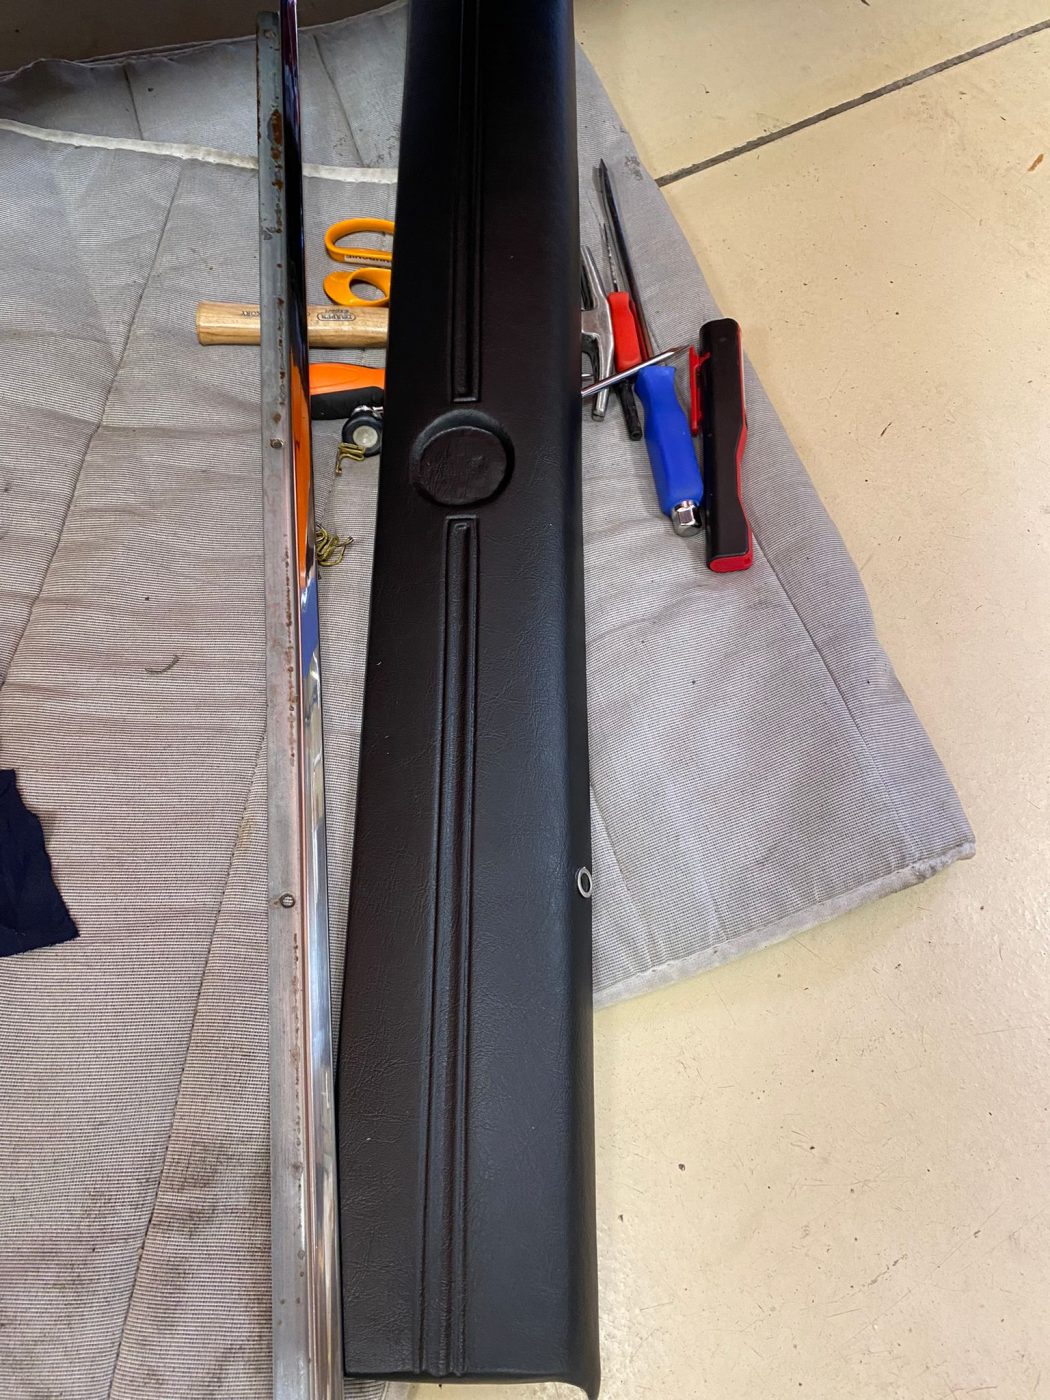
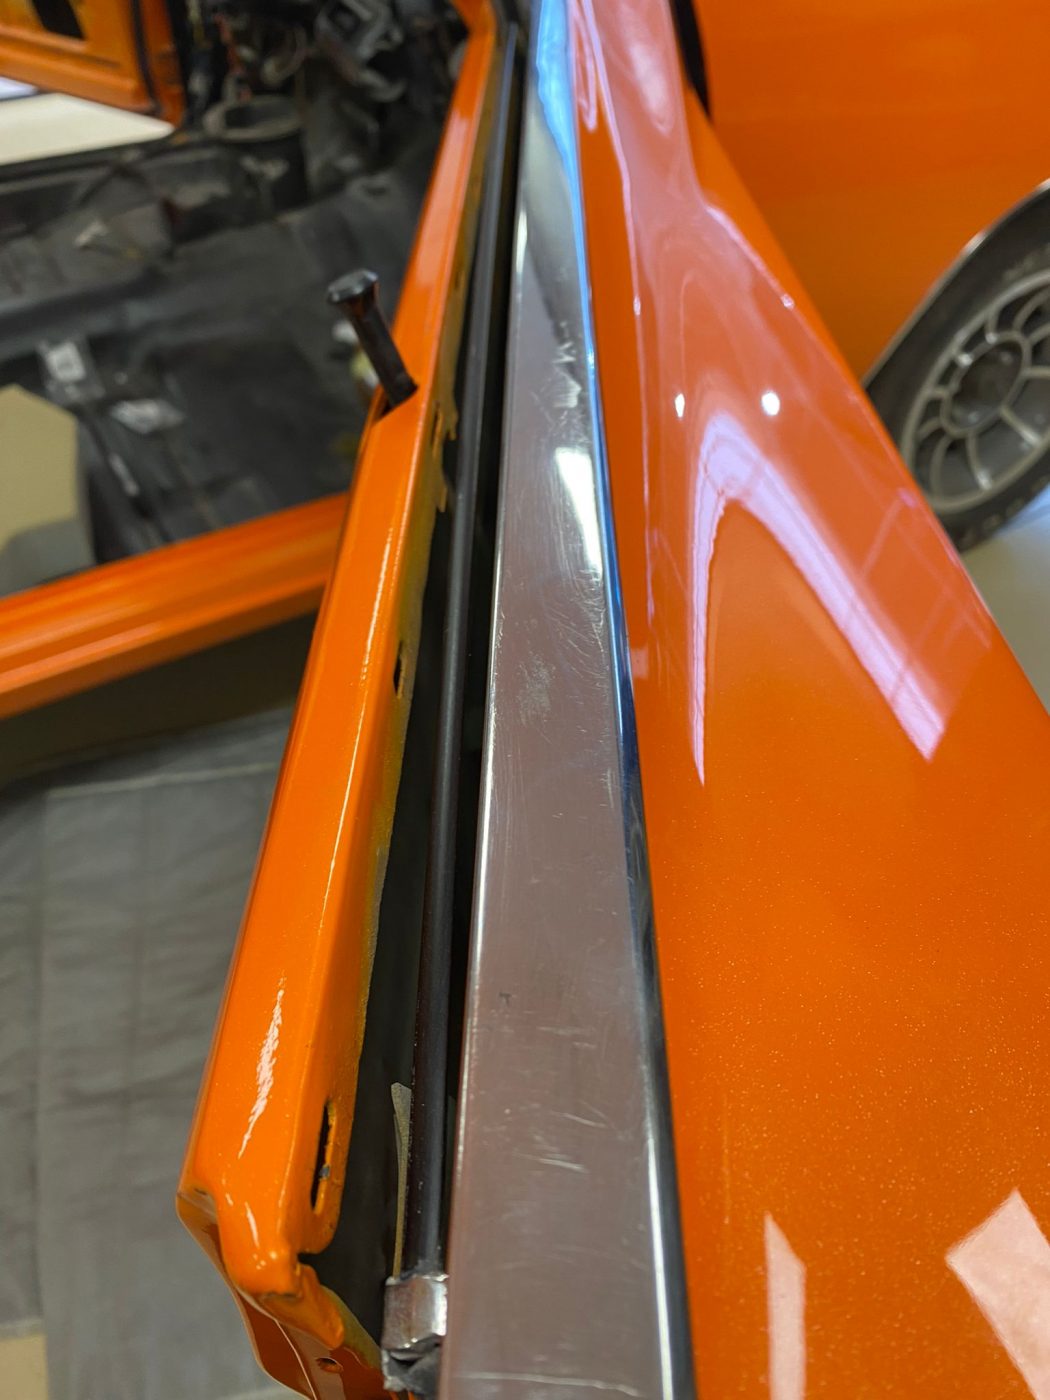
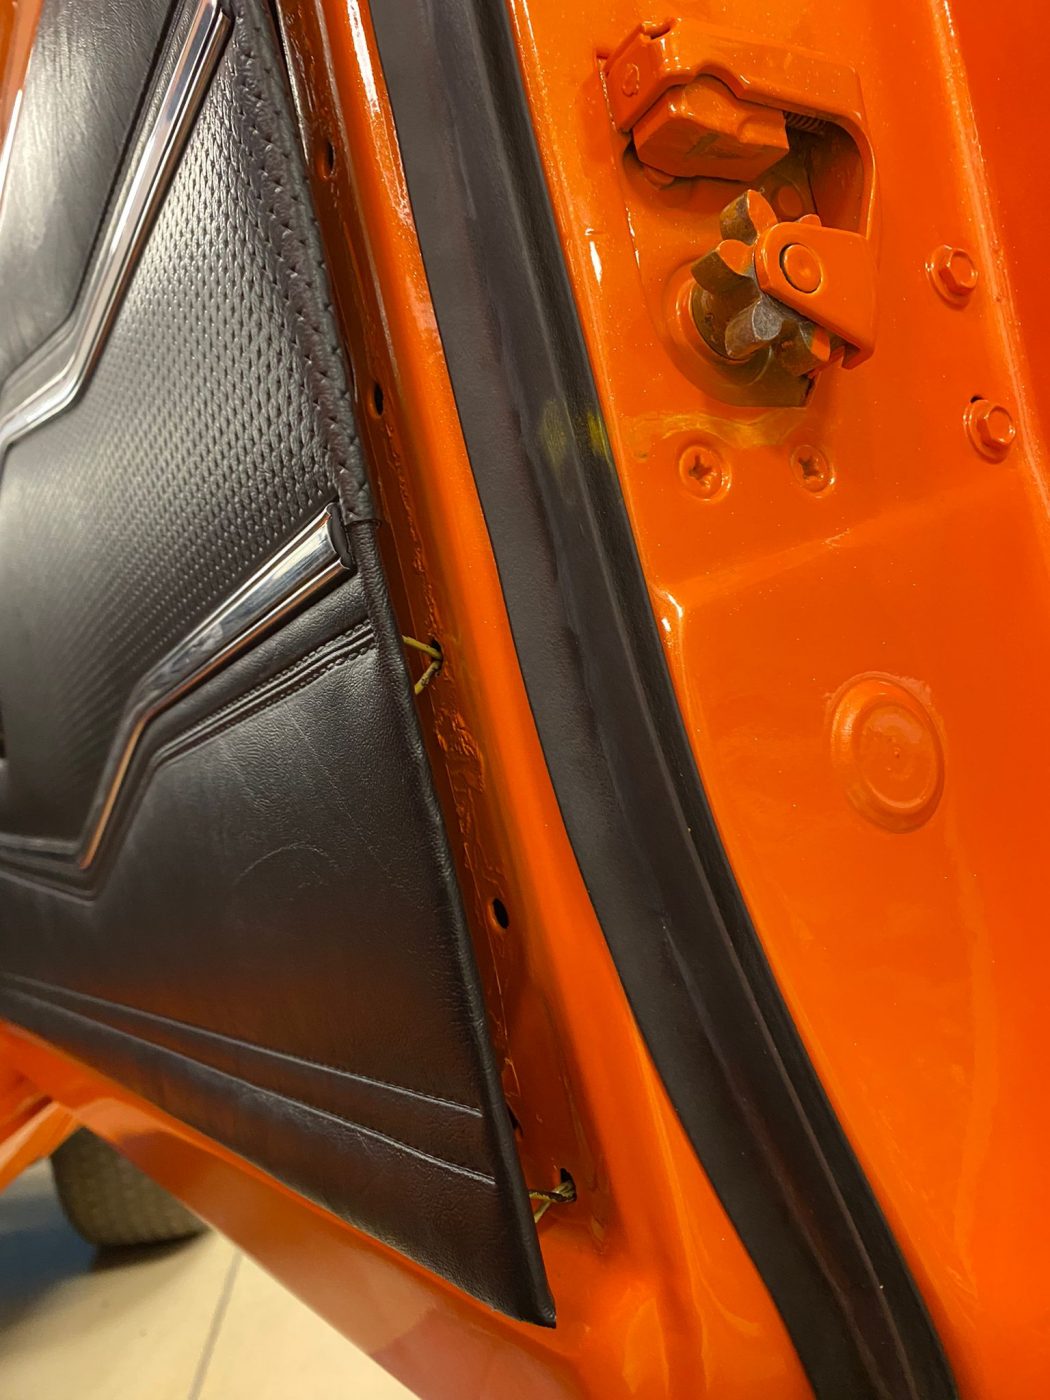
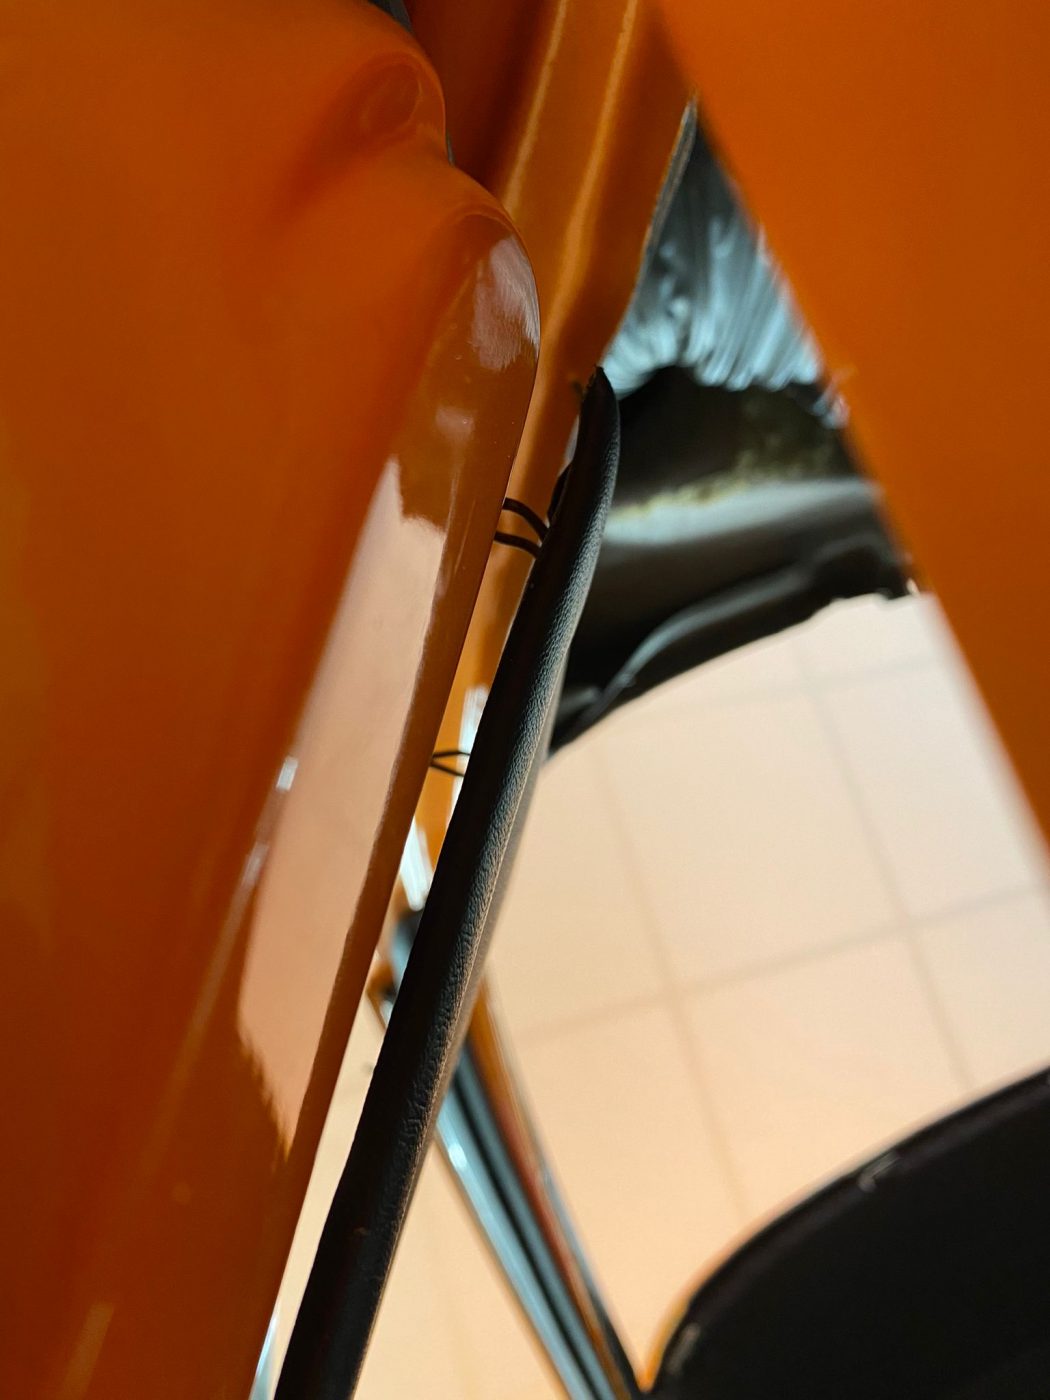
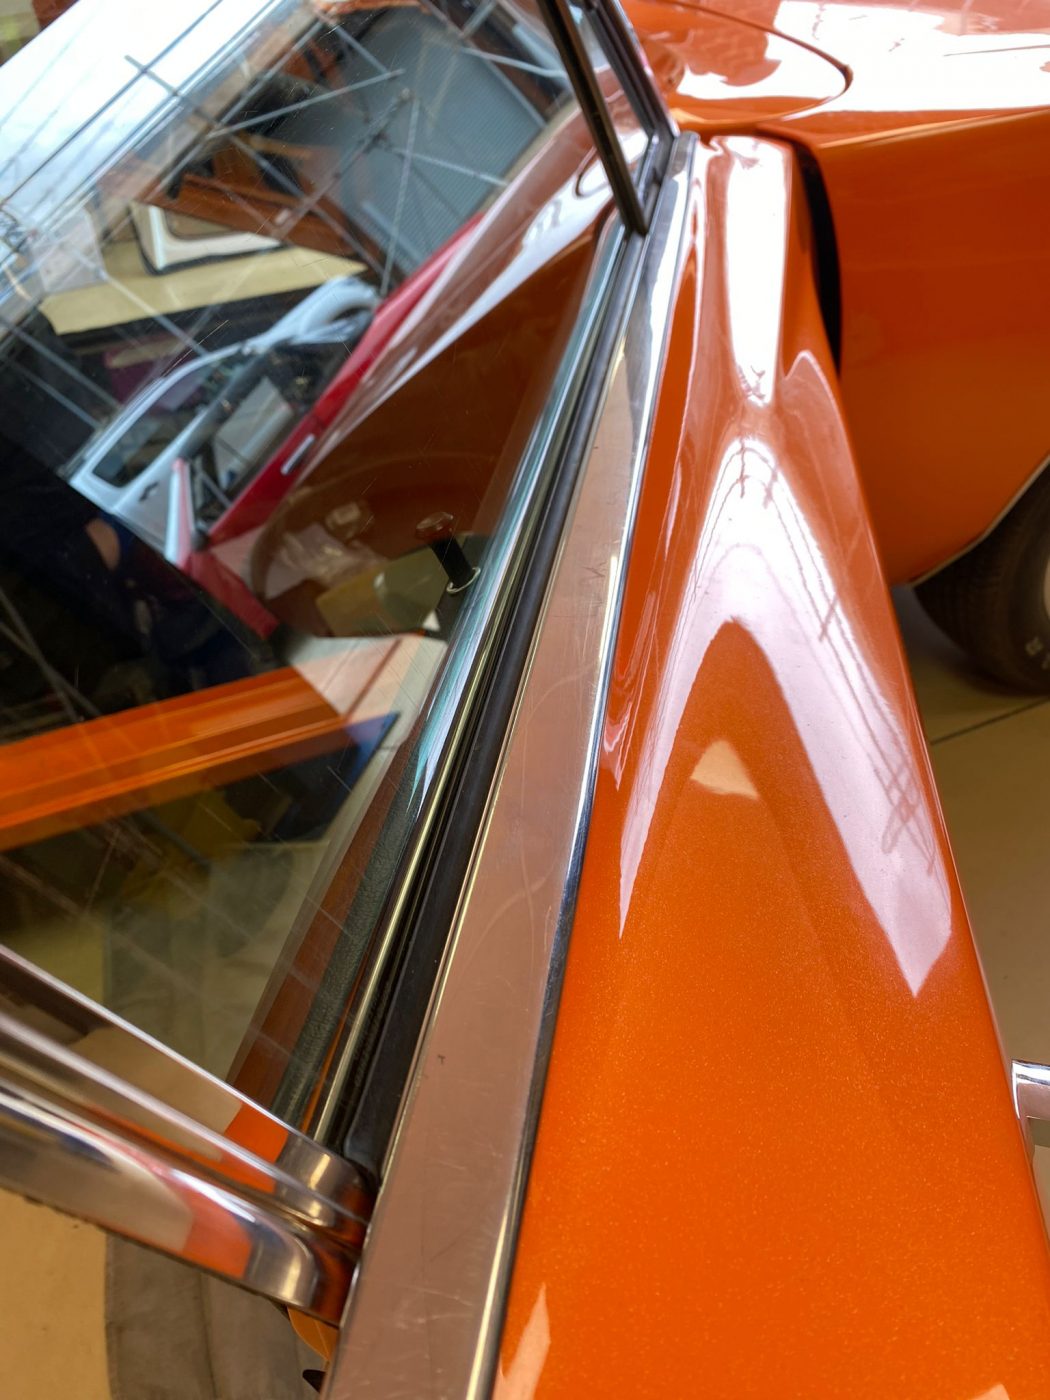
Our in-house trim team at Bridge Classic Cars have been working hard to get the interior of the 1970 Dodge Charger back together. One of the key points of the cars looks is the brightwork and the window lines.
The rear quarter windows are pillarless. They must fit up and move perfectly to the window in the door, so they give the best overall look to the car. It’s the speciality of the Bridge Classic Cars trim shop, the fit and finish which completes the look of the car.
Brian has been working on getting the rear quarter windows in the car so all the trim that accompanies it can be fitted. It’s important with these Mopars that the window components are set just right. Thankfully, everything that was needed was in the car. So, with the windows perfectly in place, Brian could now start to work on the trim.
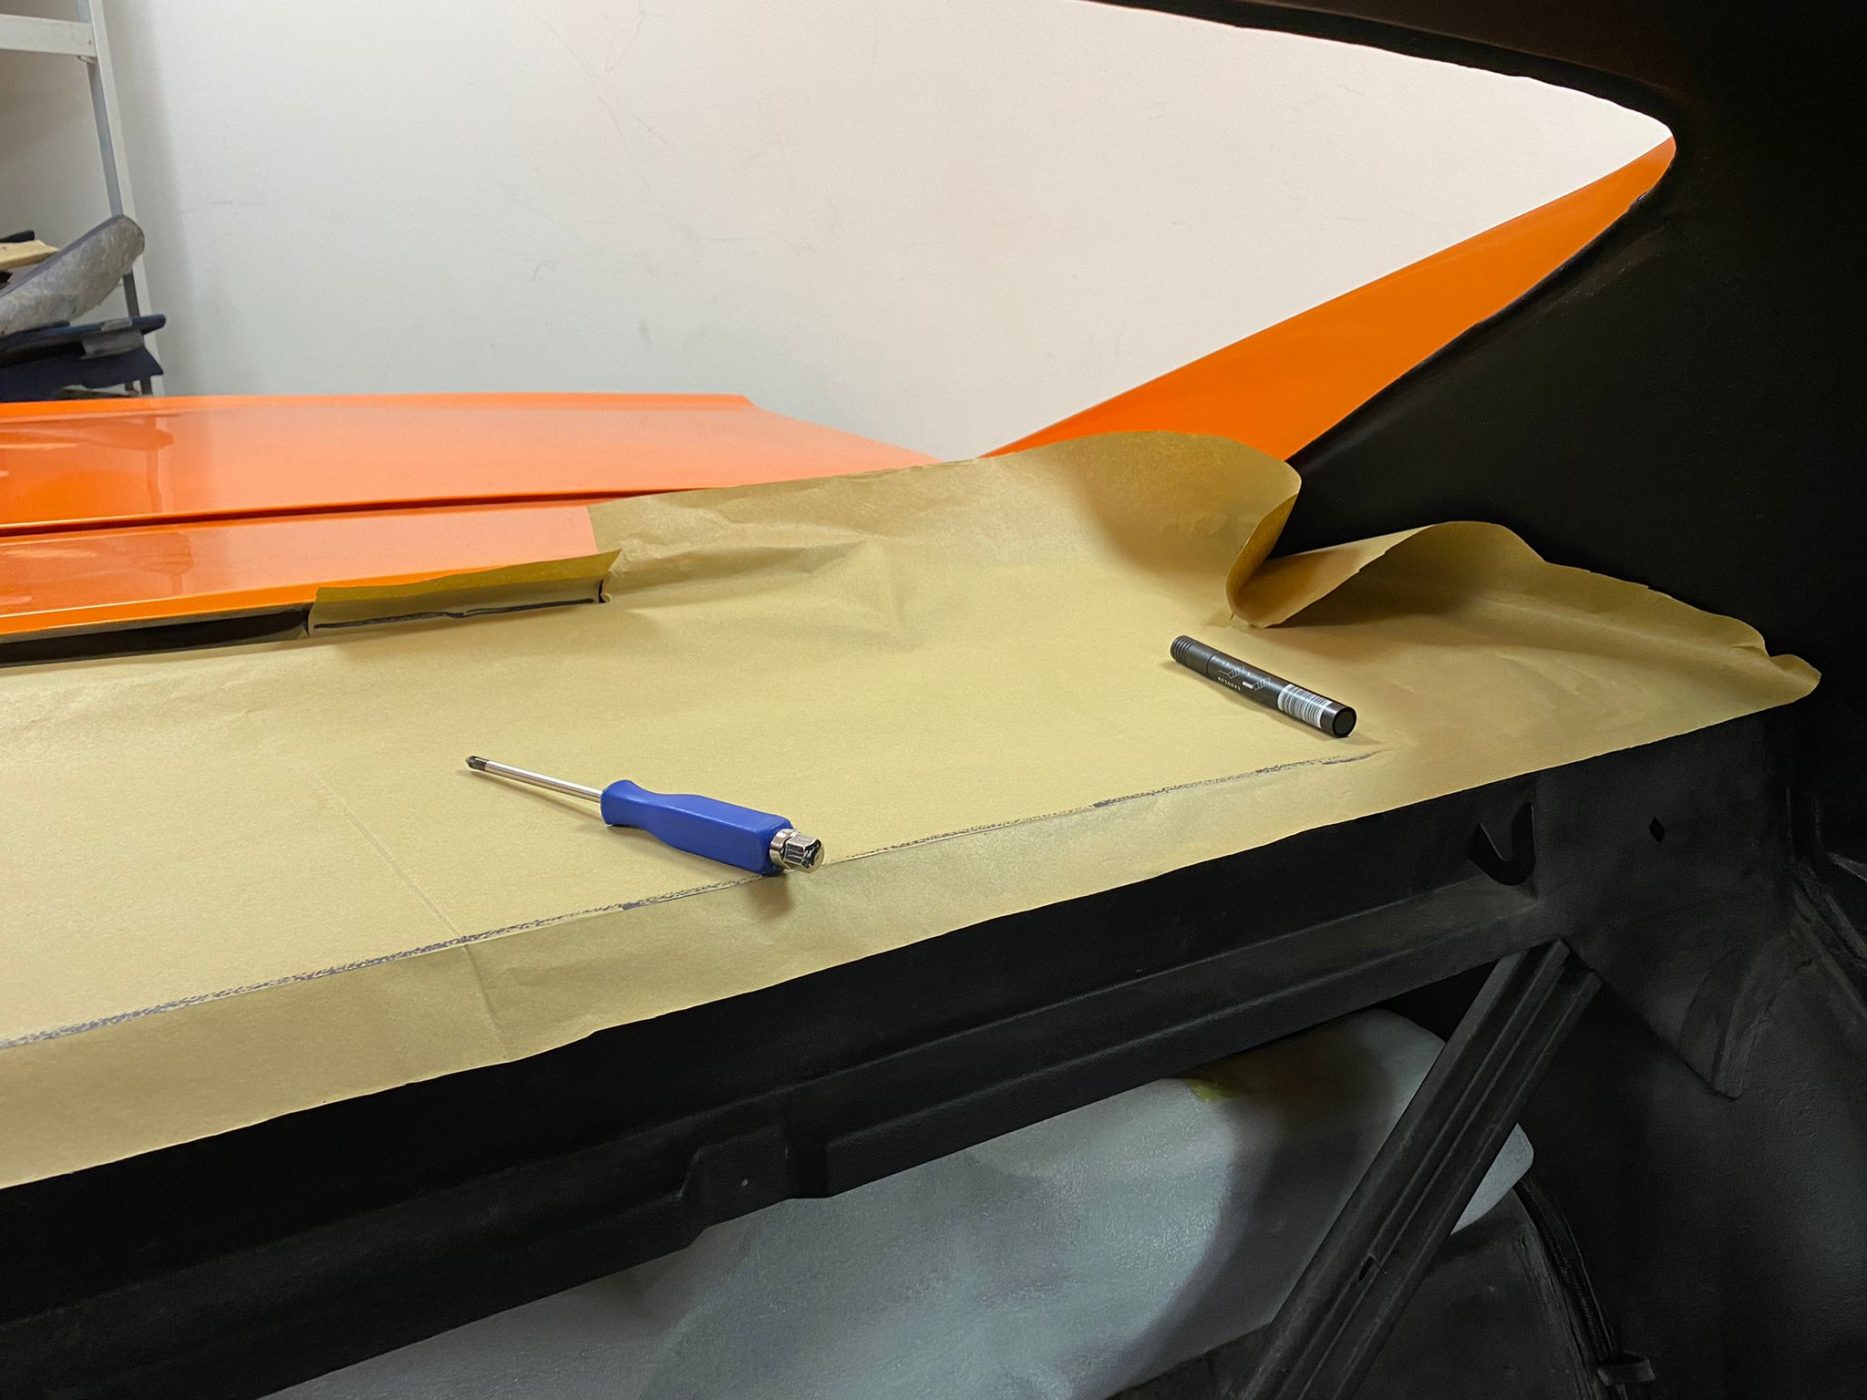
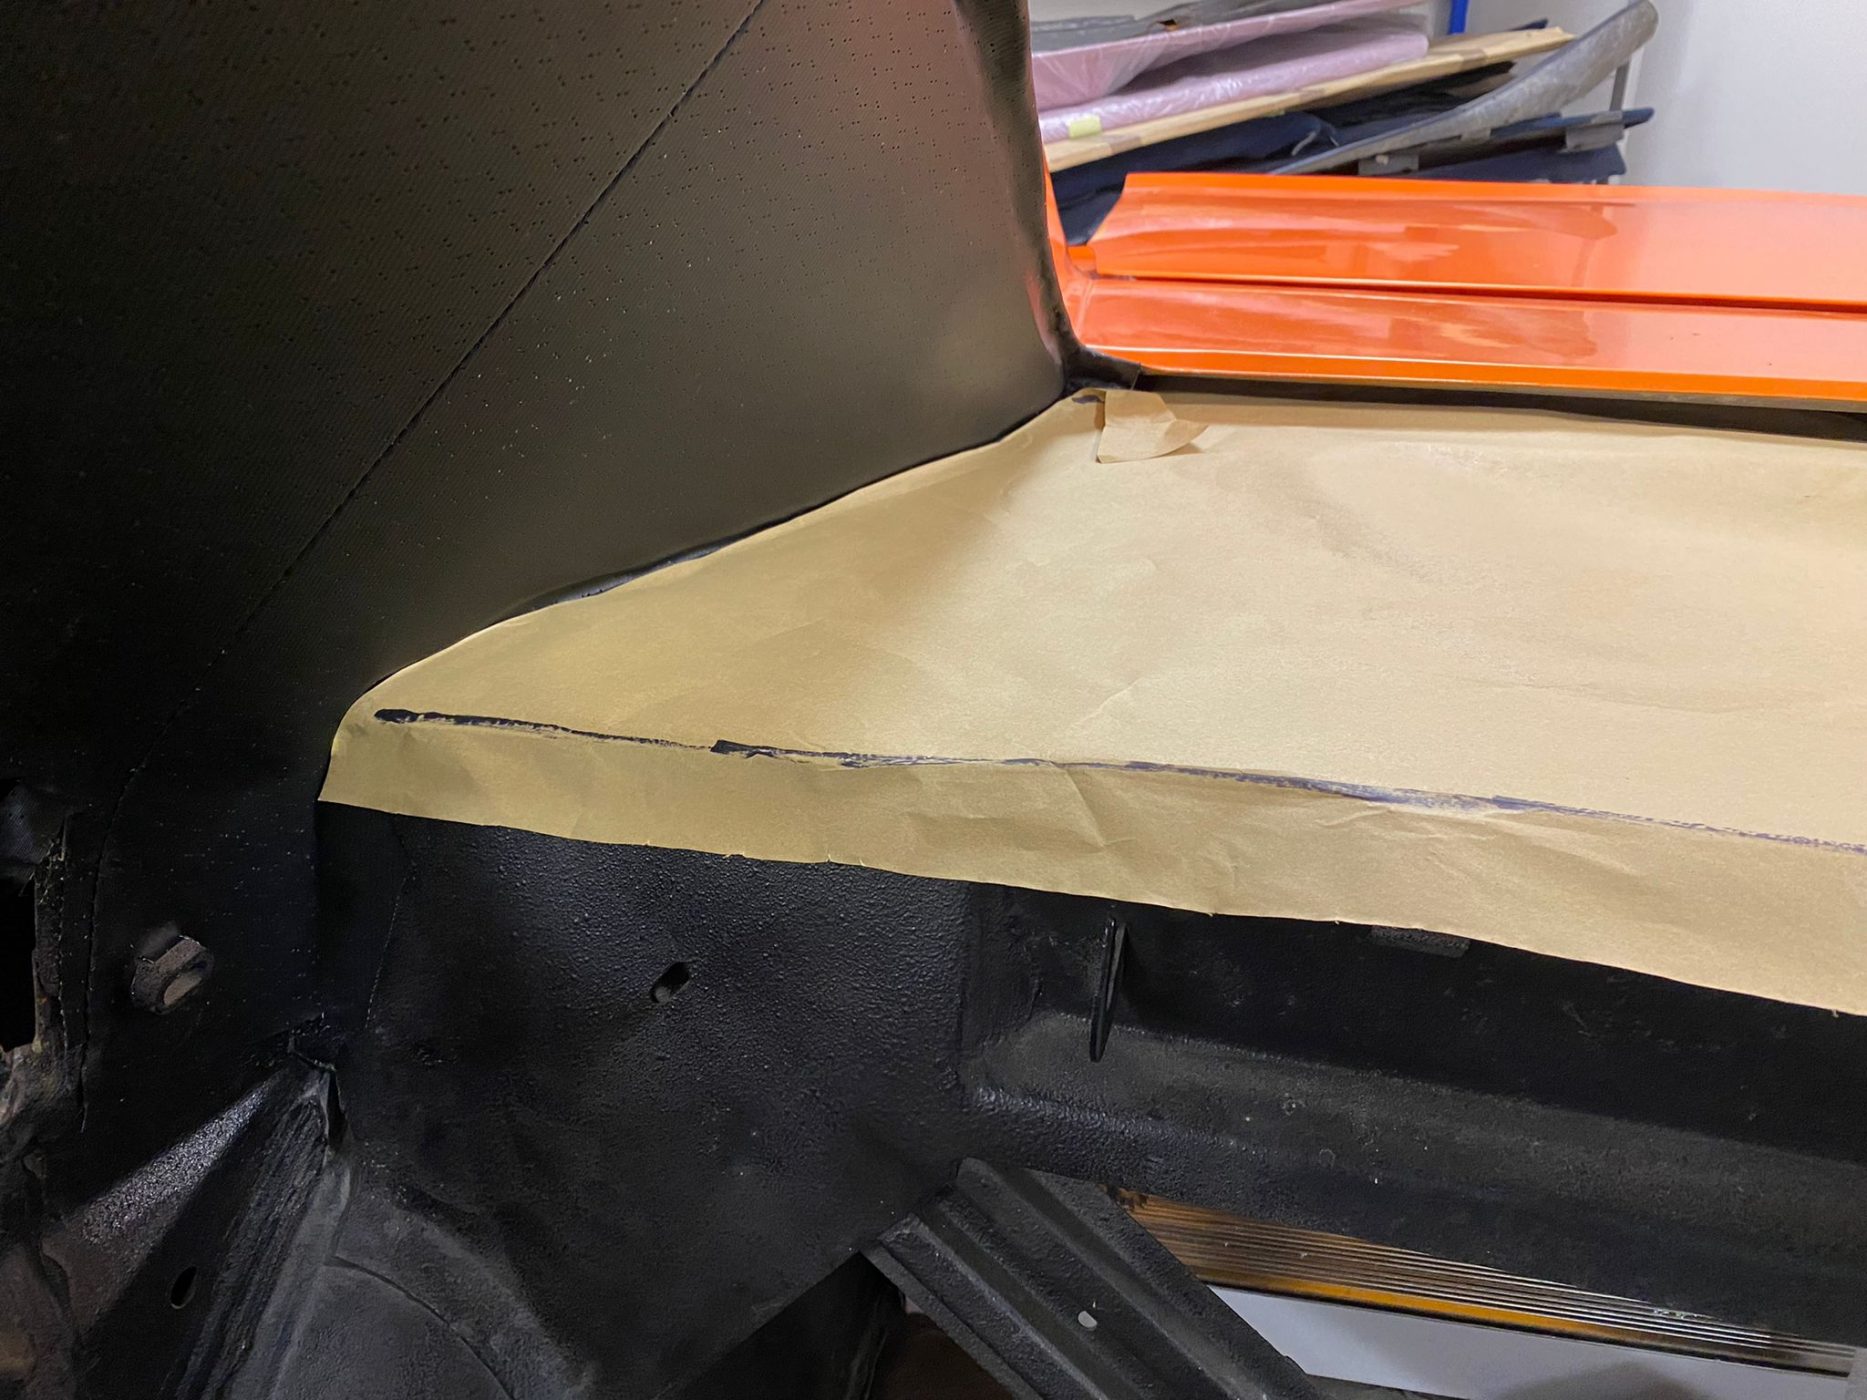
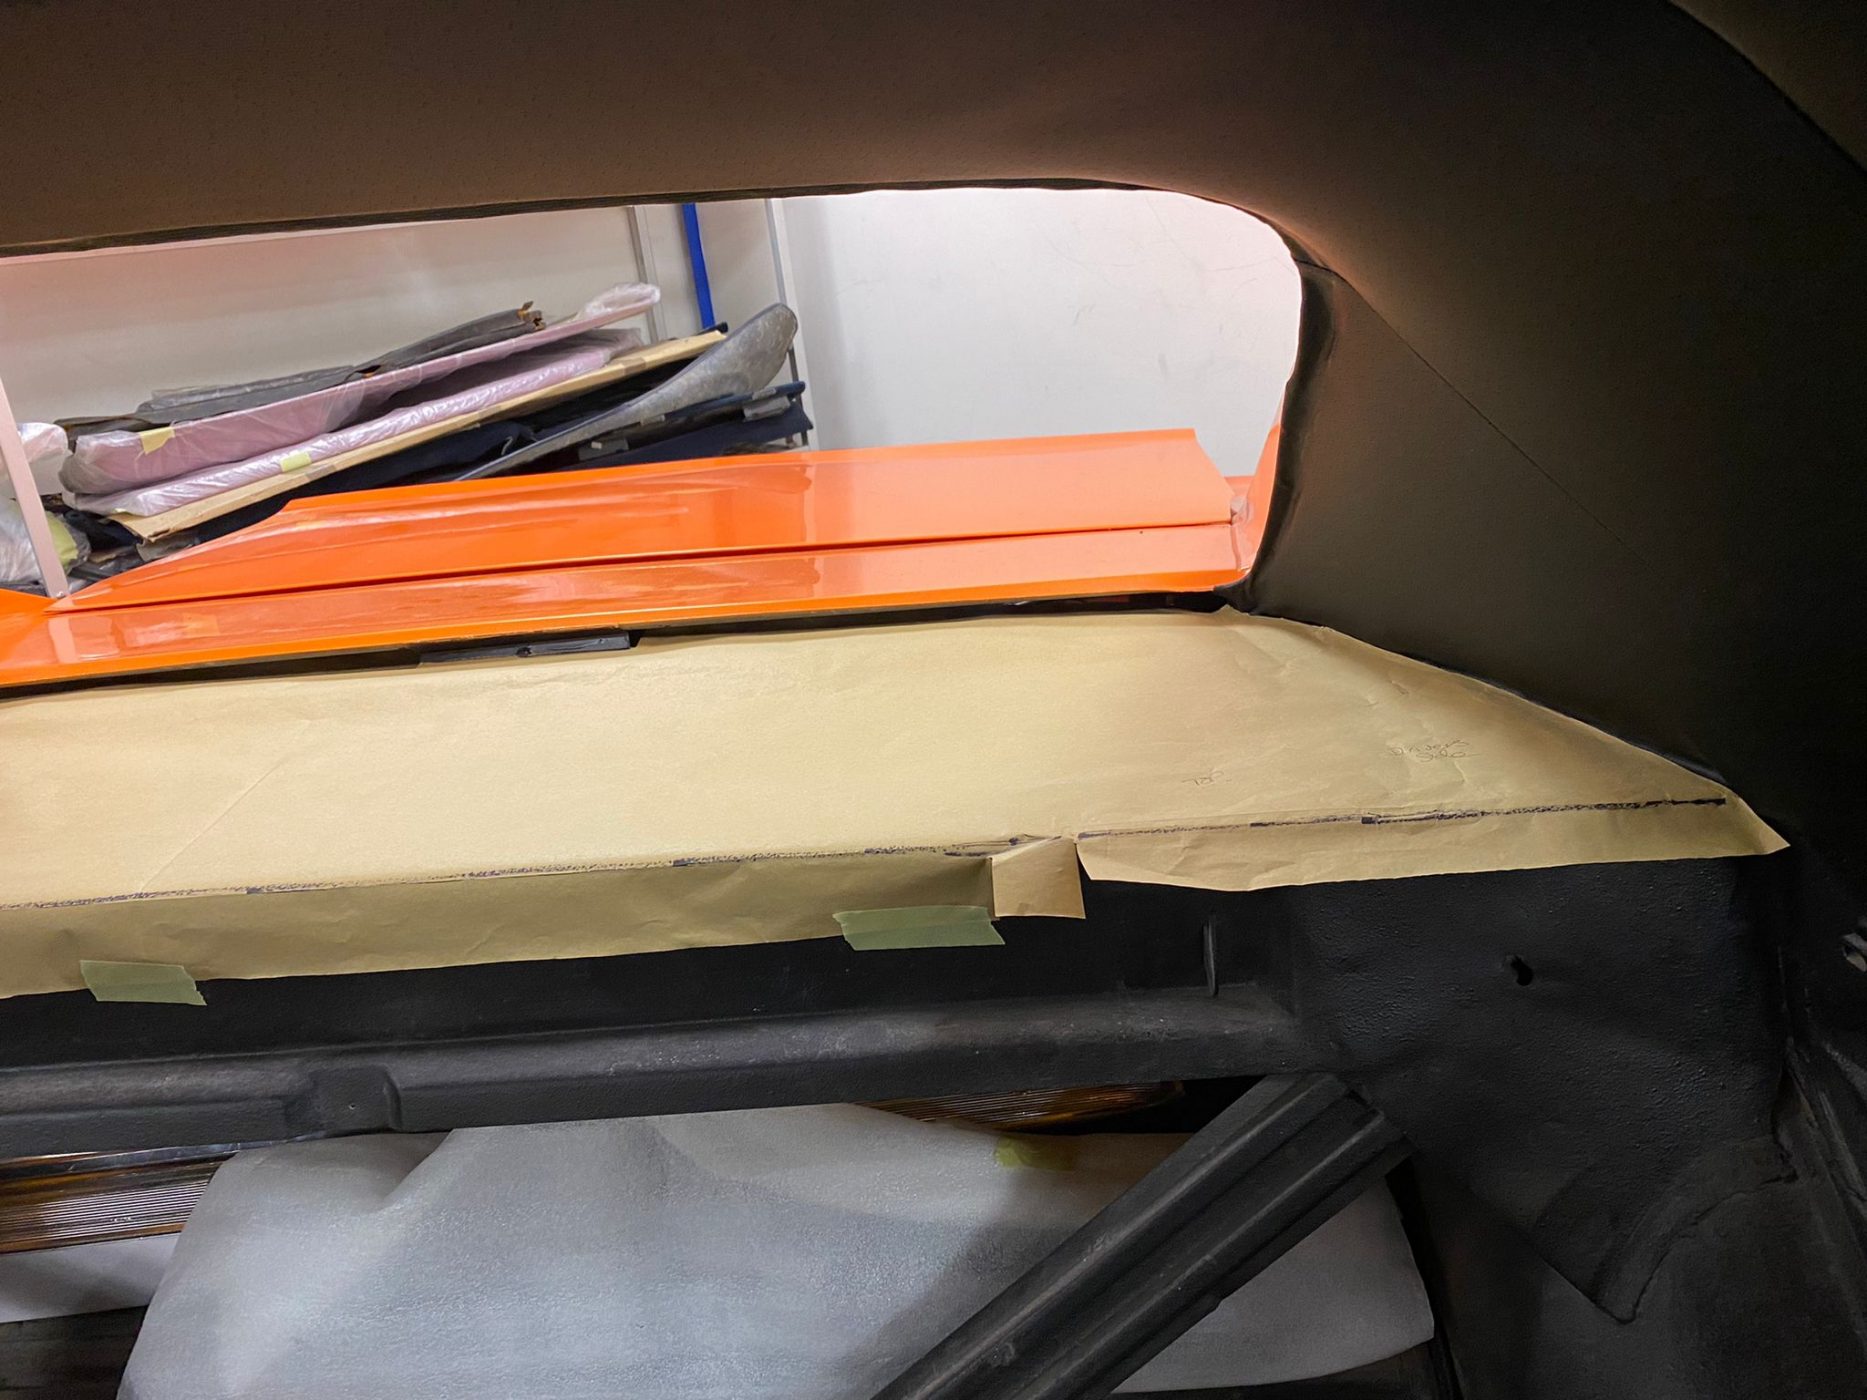
The trim pieces on the Charger come in multiple pieces which all need to be meticulously dry fit in such a way as to not damage either the pieces or the car. After test fitting, Brian then began the process of attaching them permanently onto the car.
Parts of the inner trim structure actually need riveting to the body. Then the covers are put over them to hide the hardware, this takes some time and a steady hand.
Over the course of an afternoon, Brian managed to get all the rear trims and windows in place so it’s time to move on to the next job on the list for the interior of the Charger.
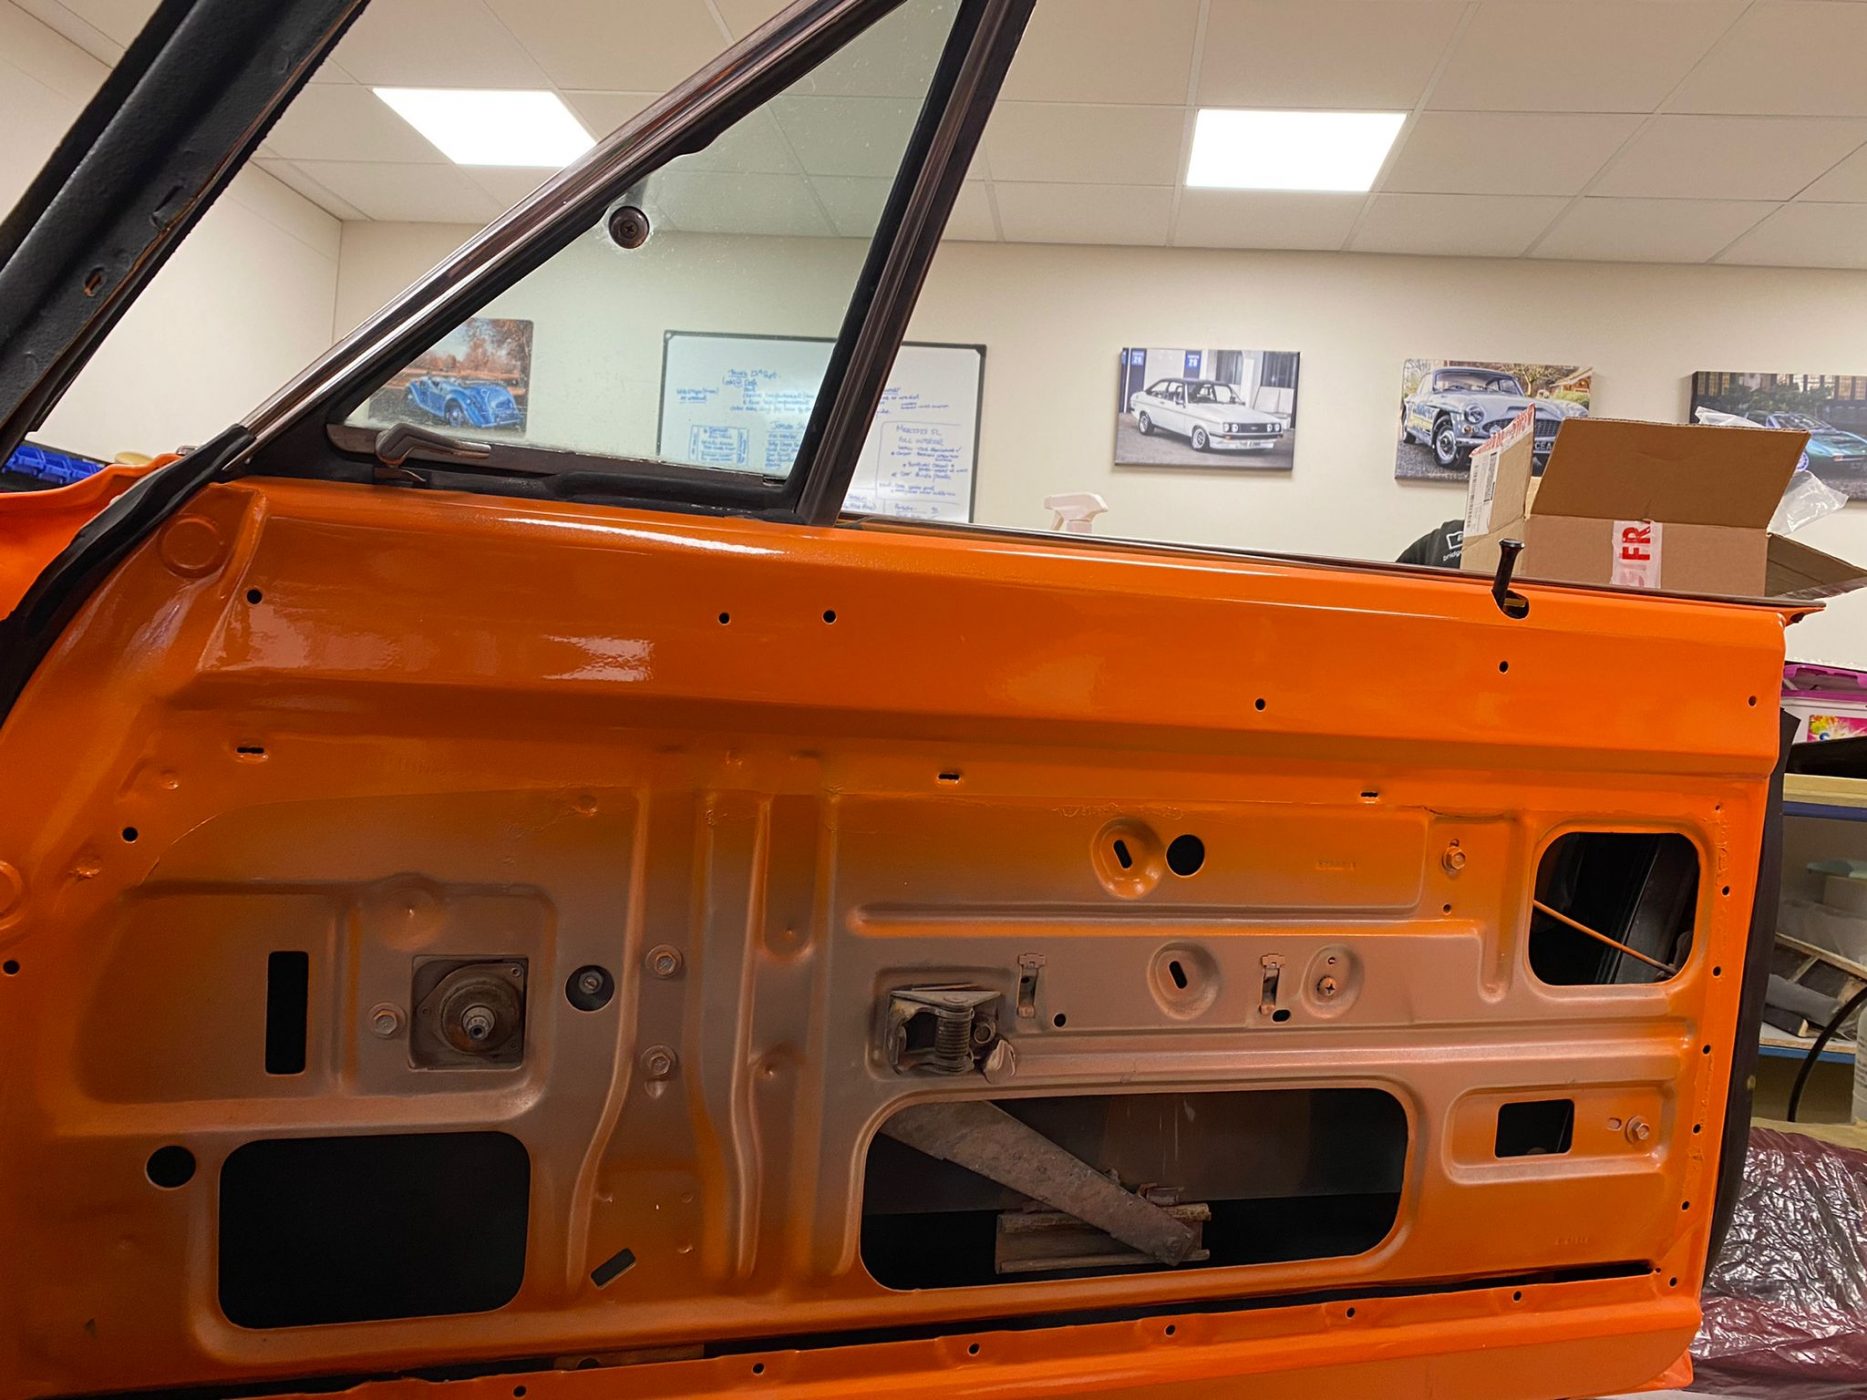
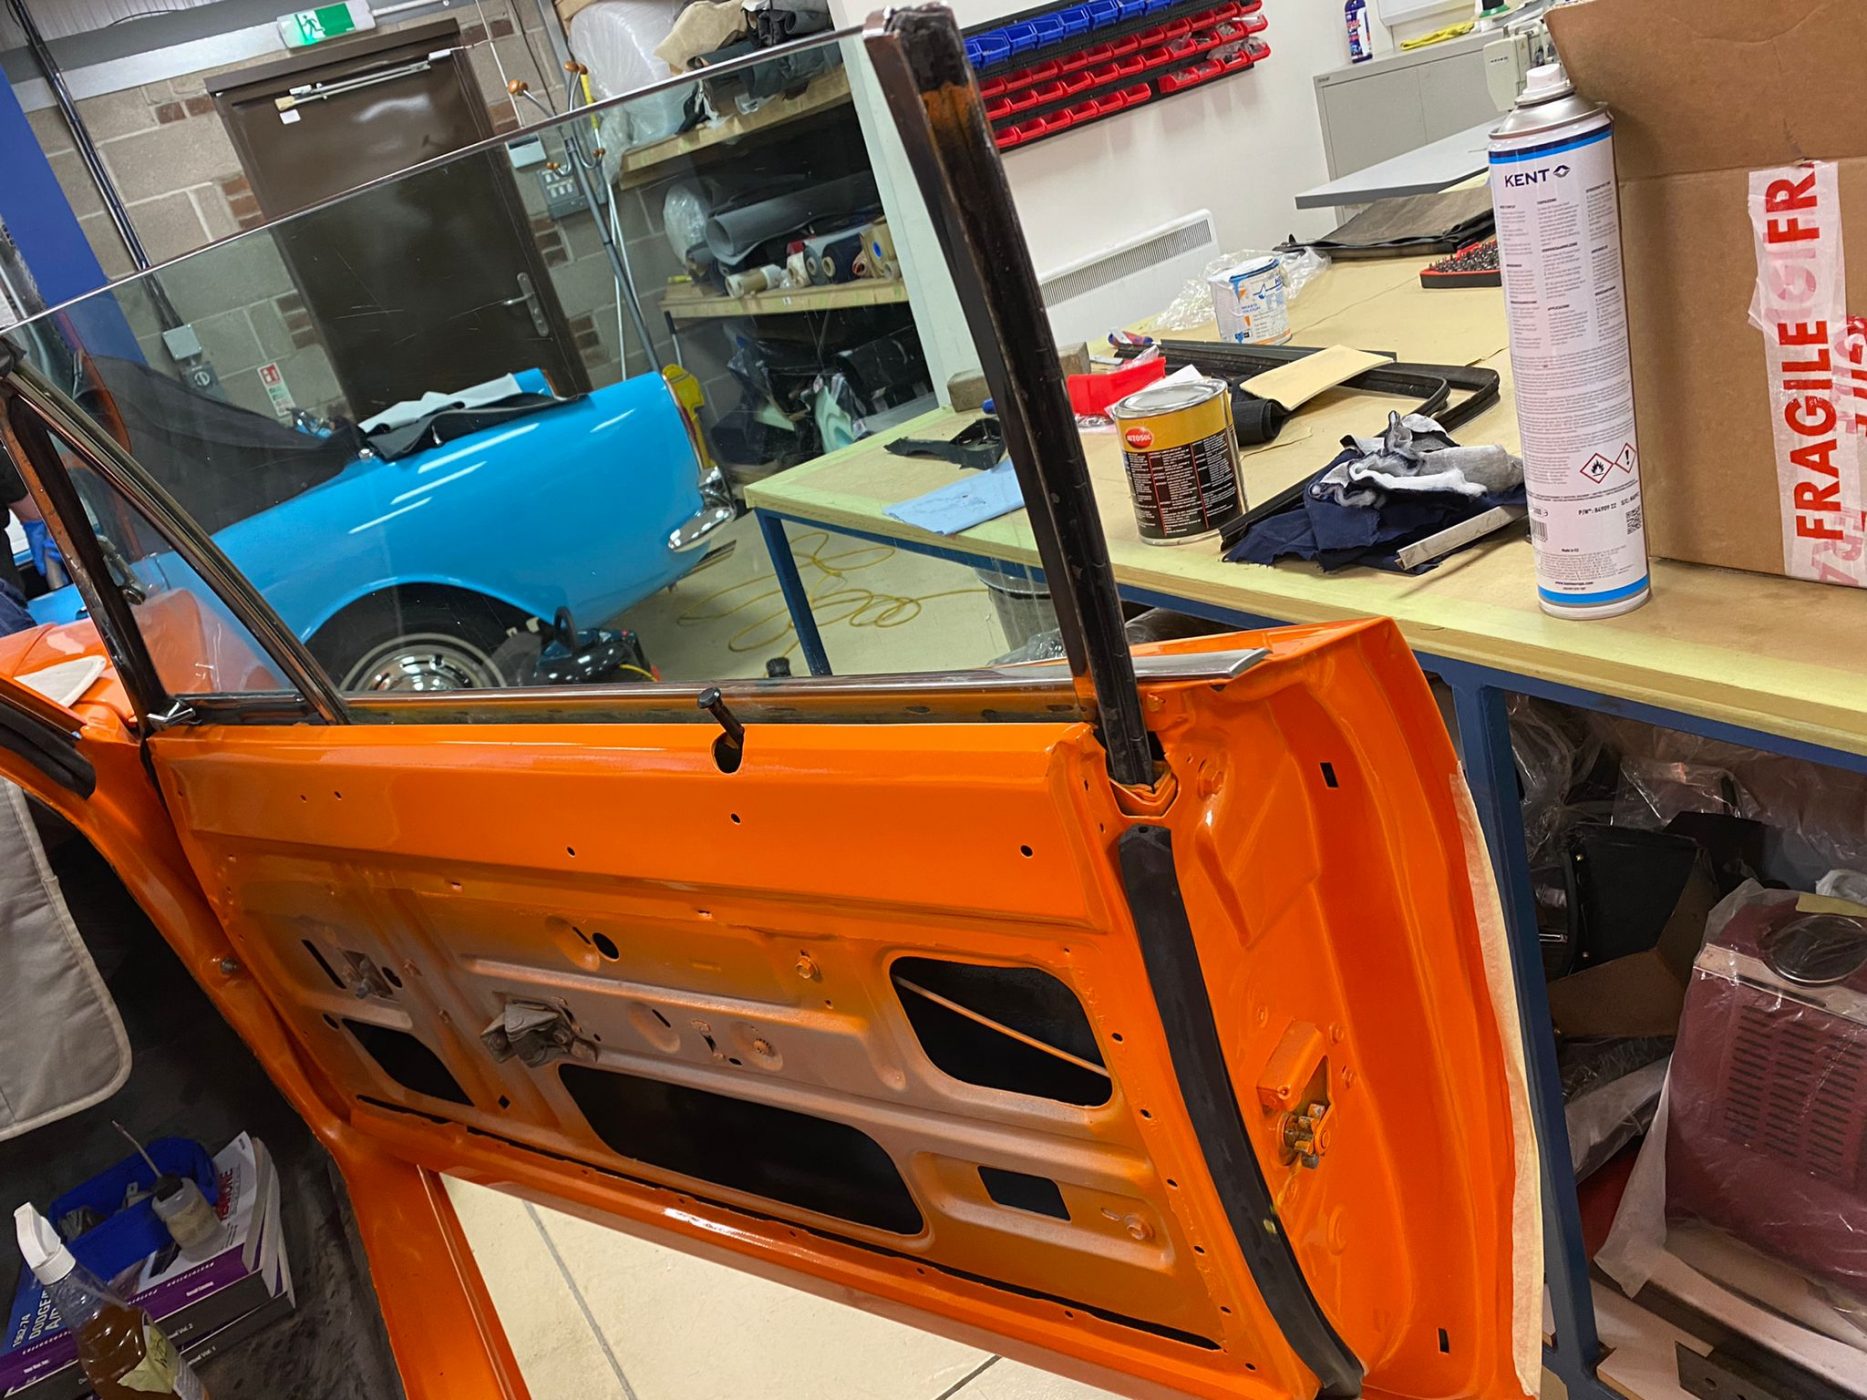
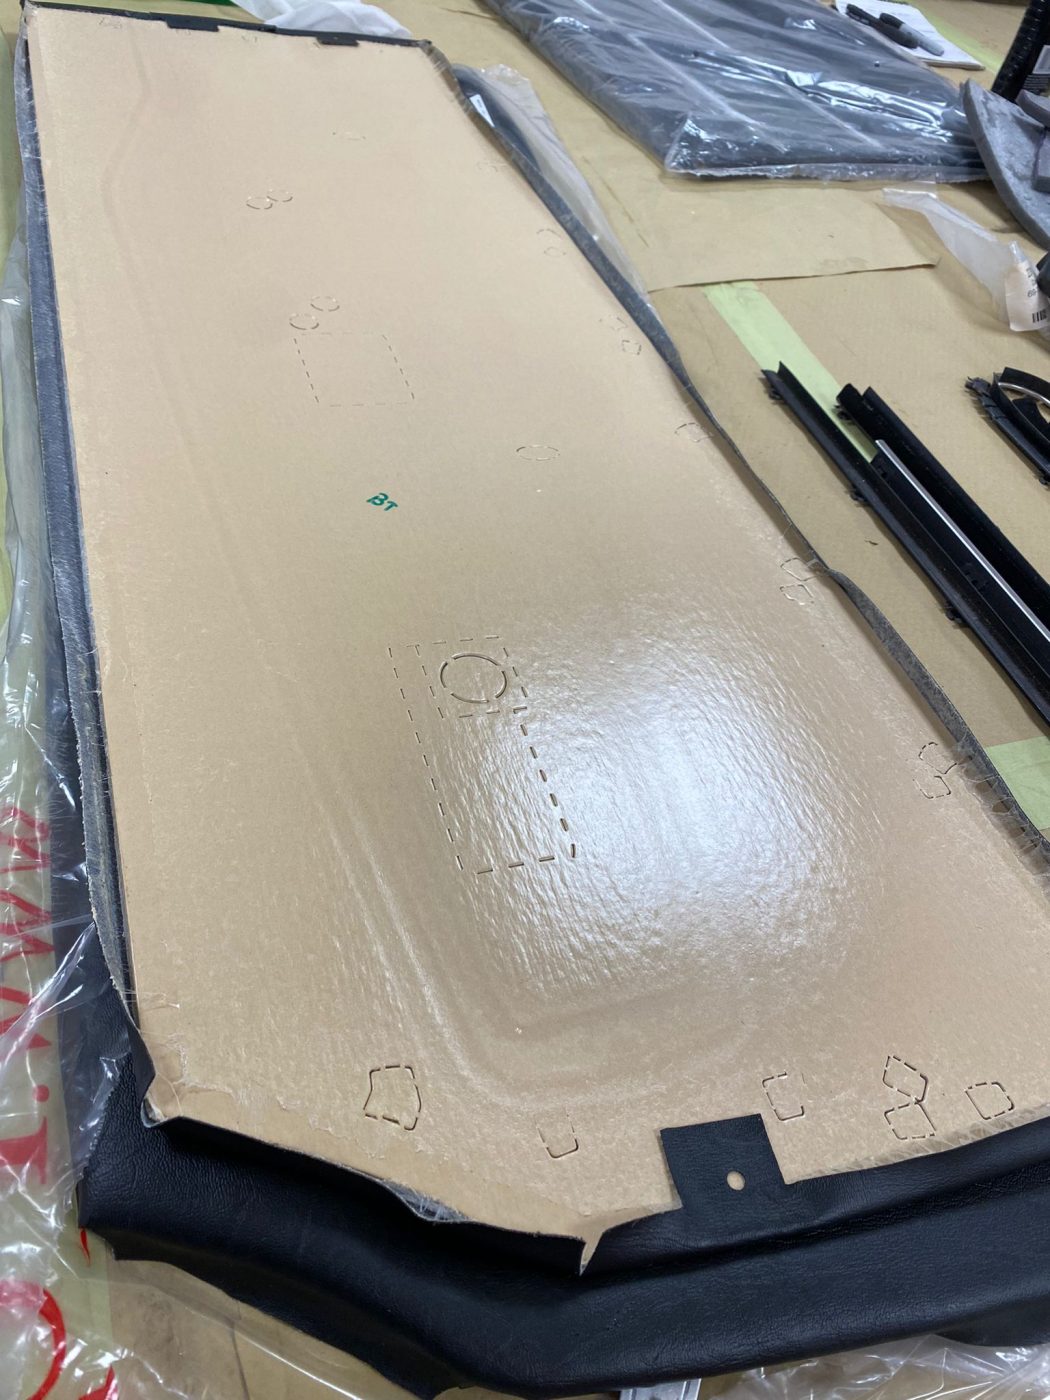
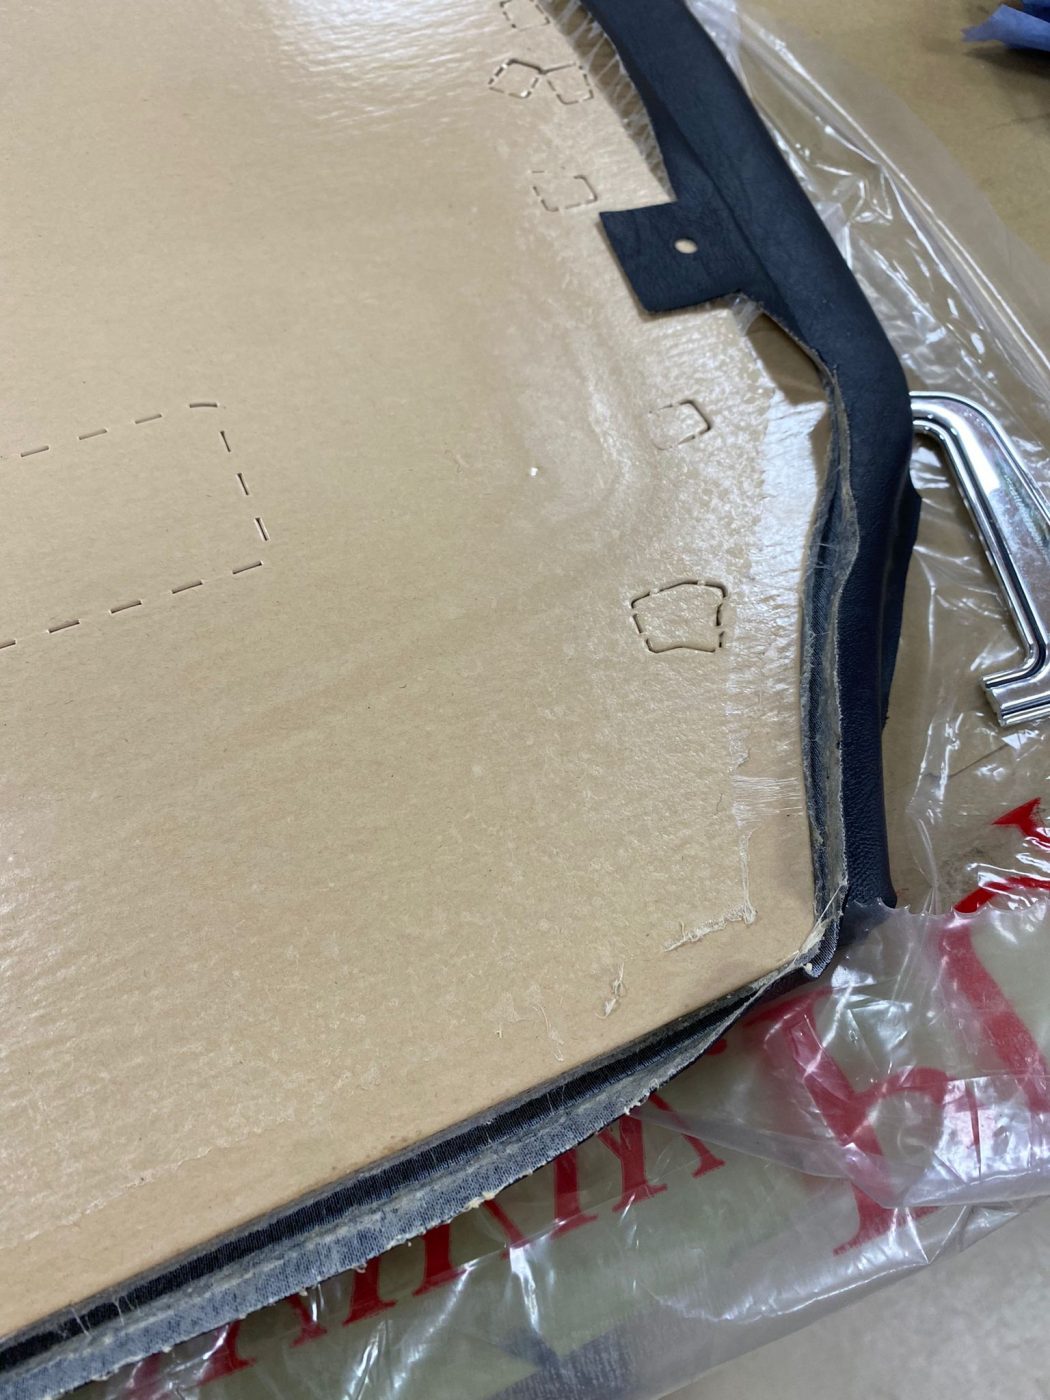
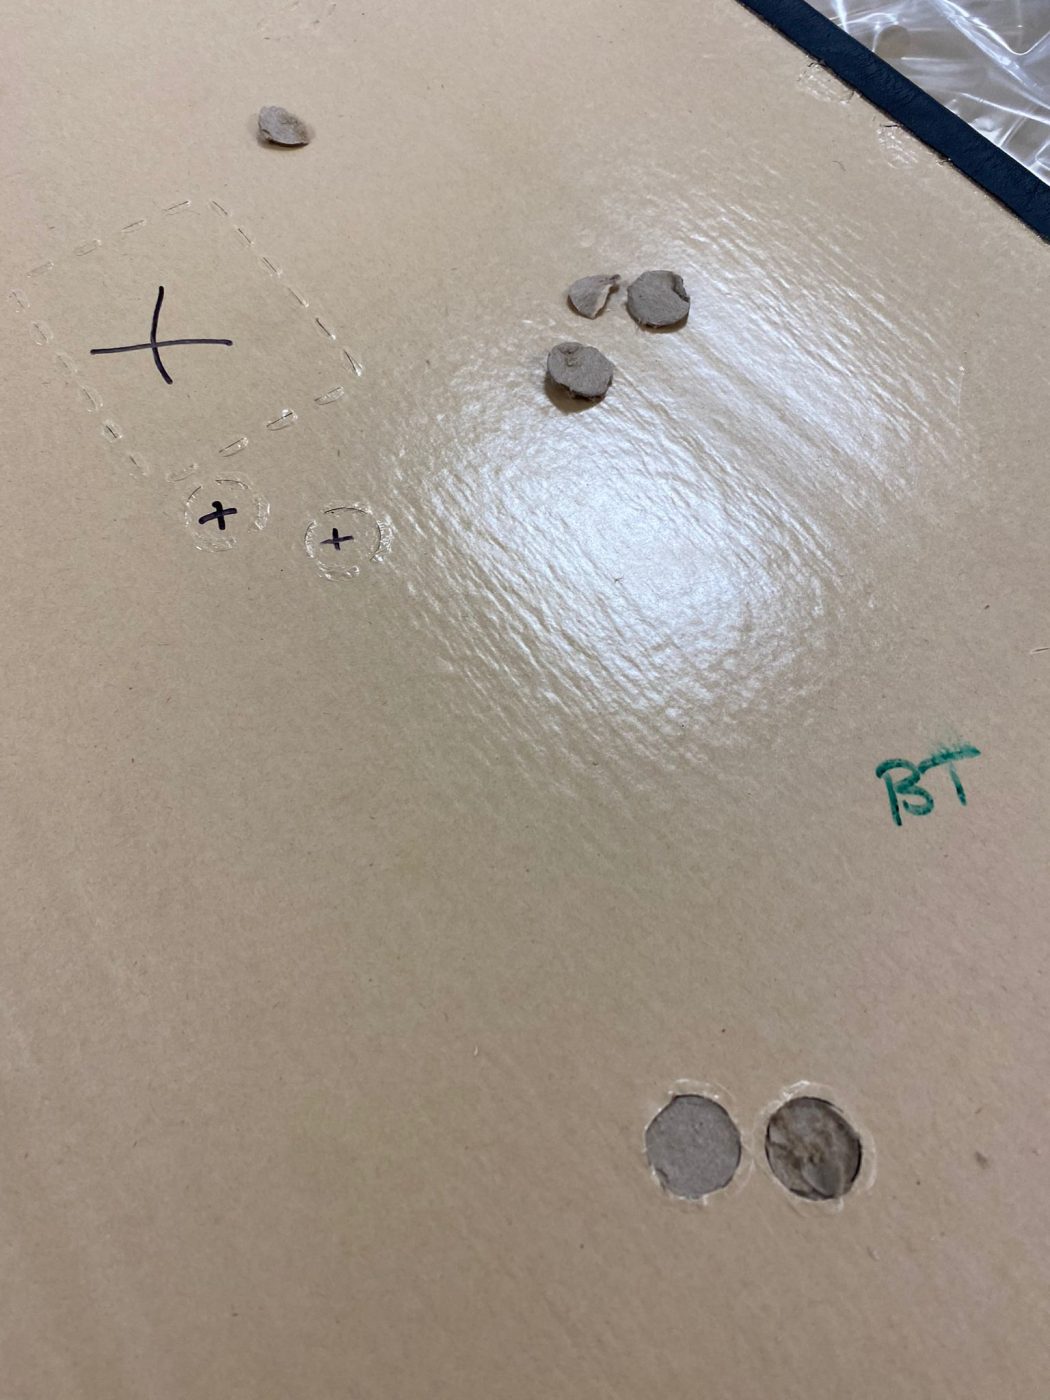
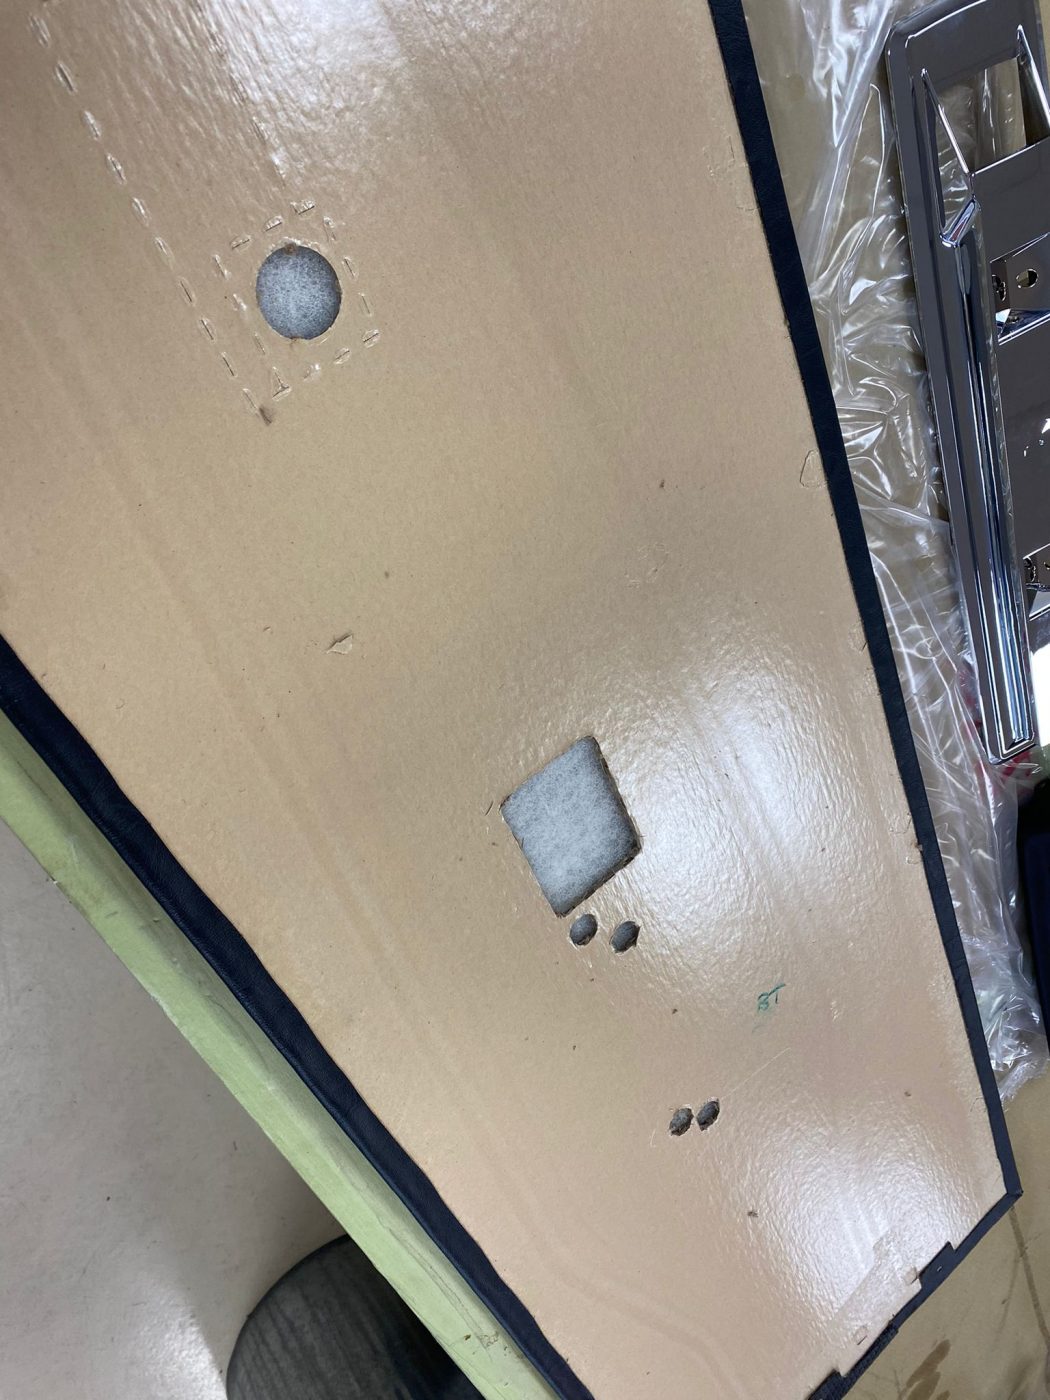
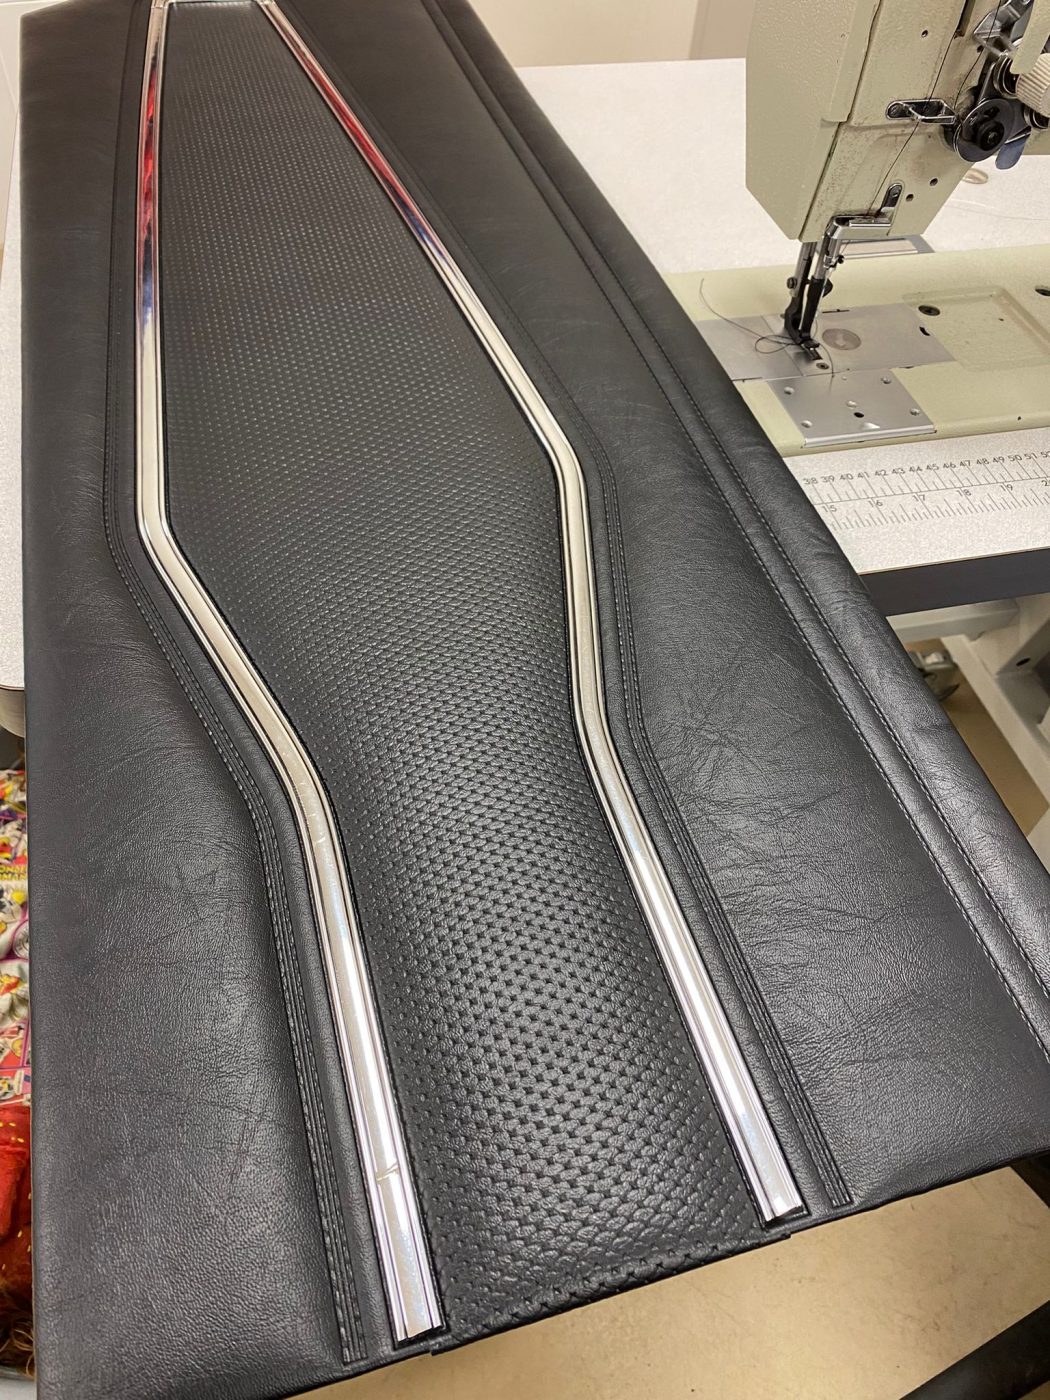
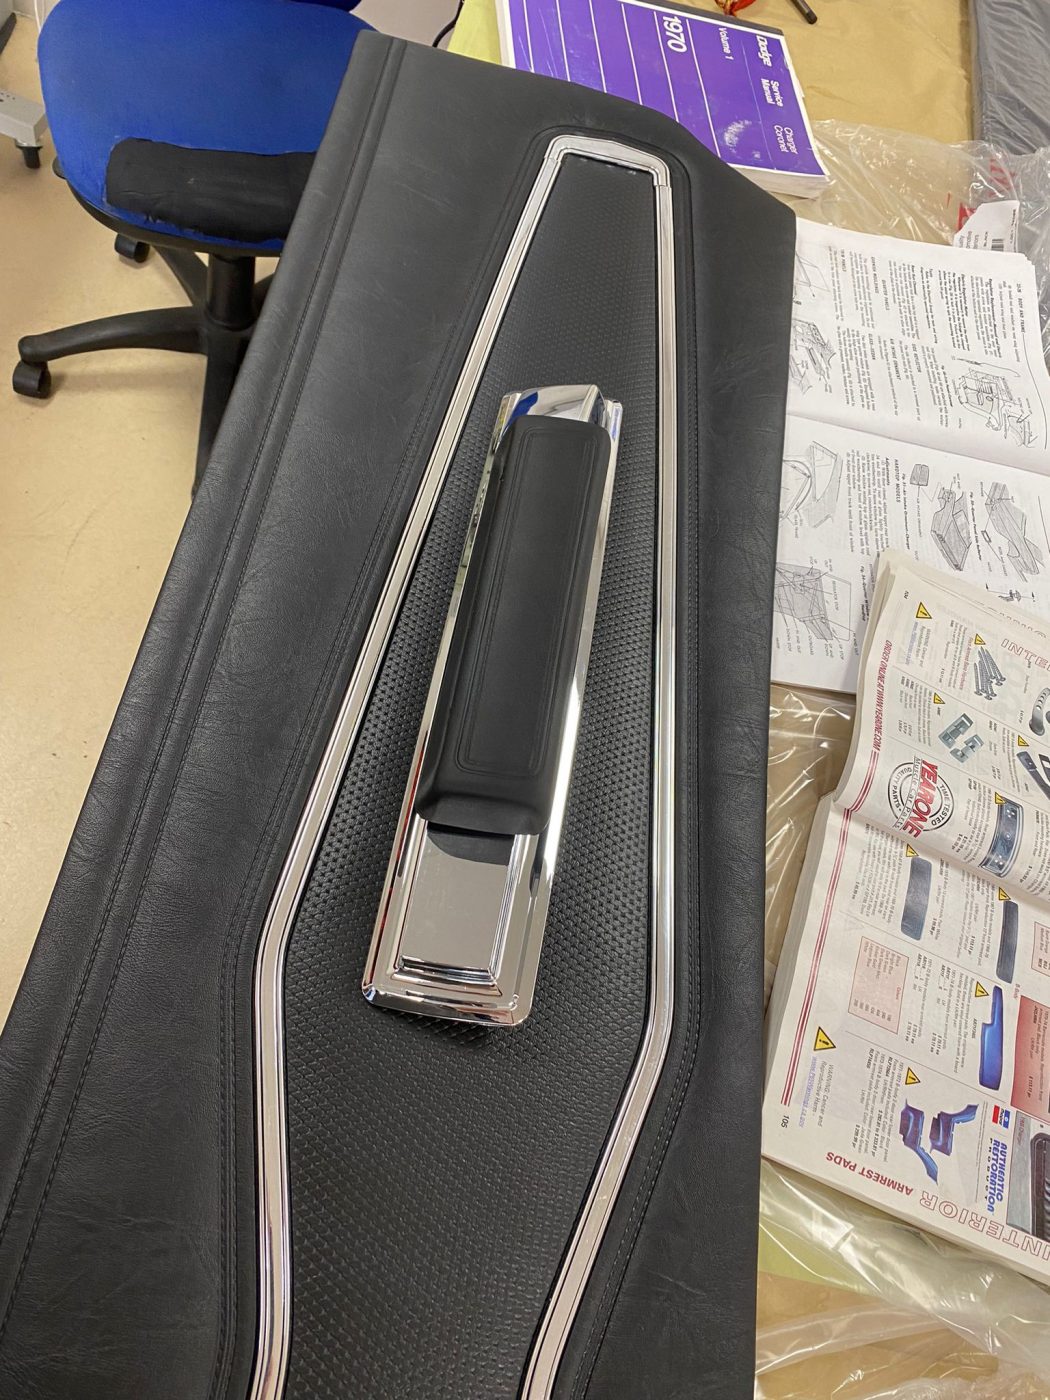
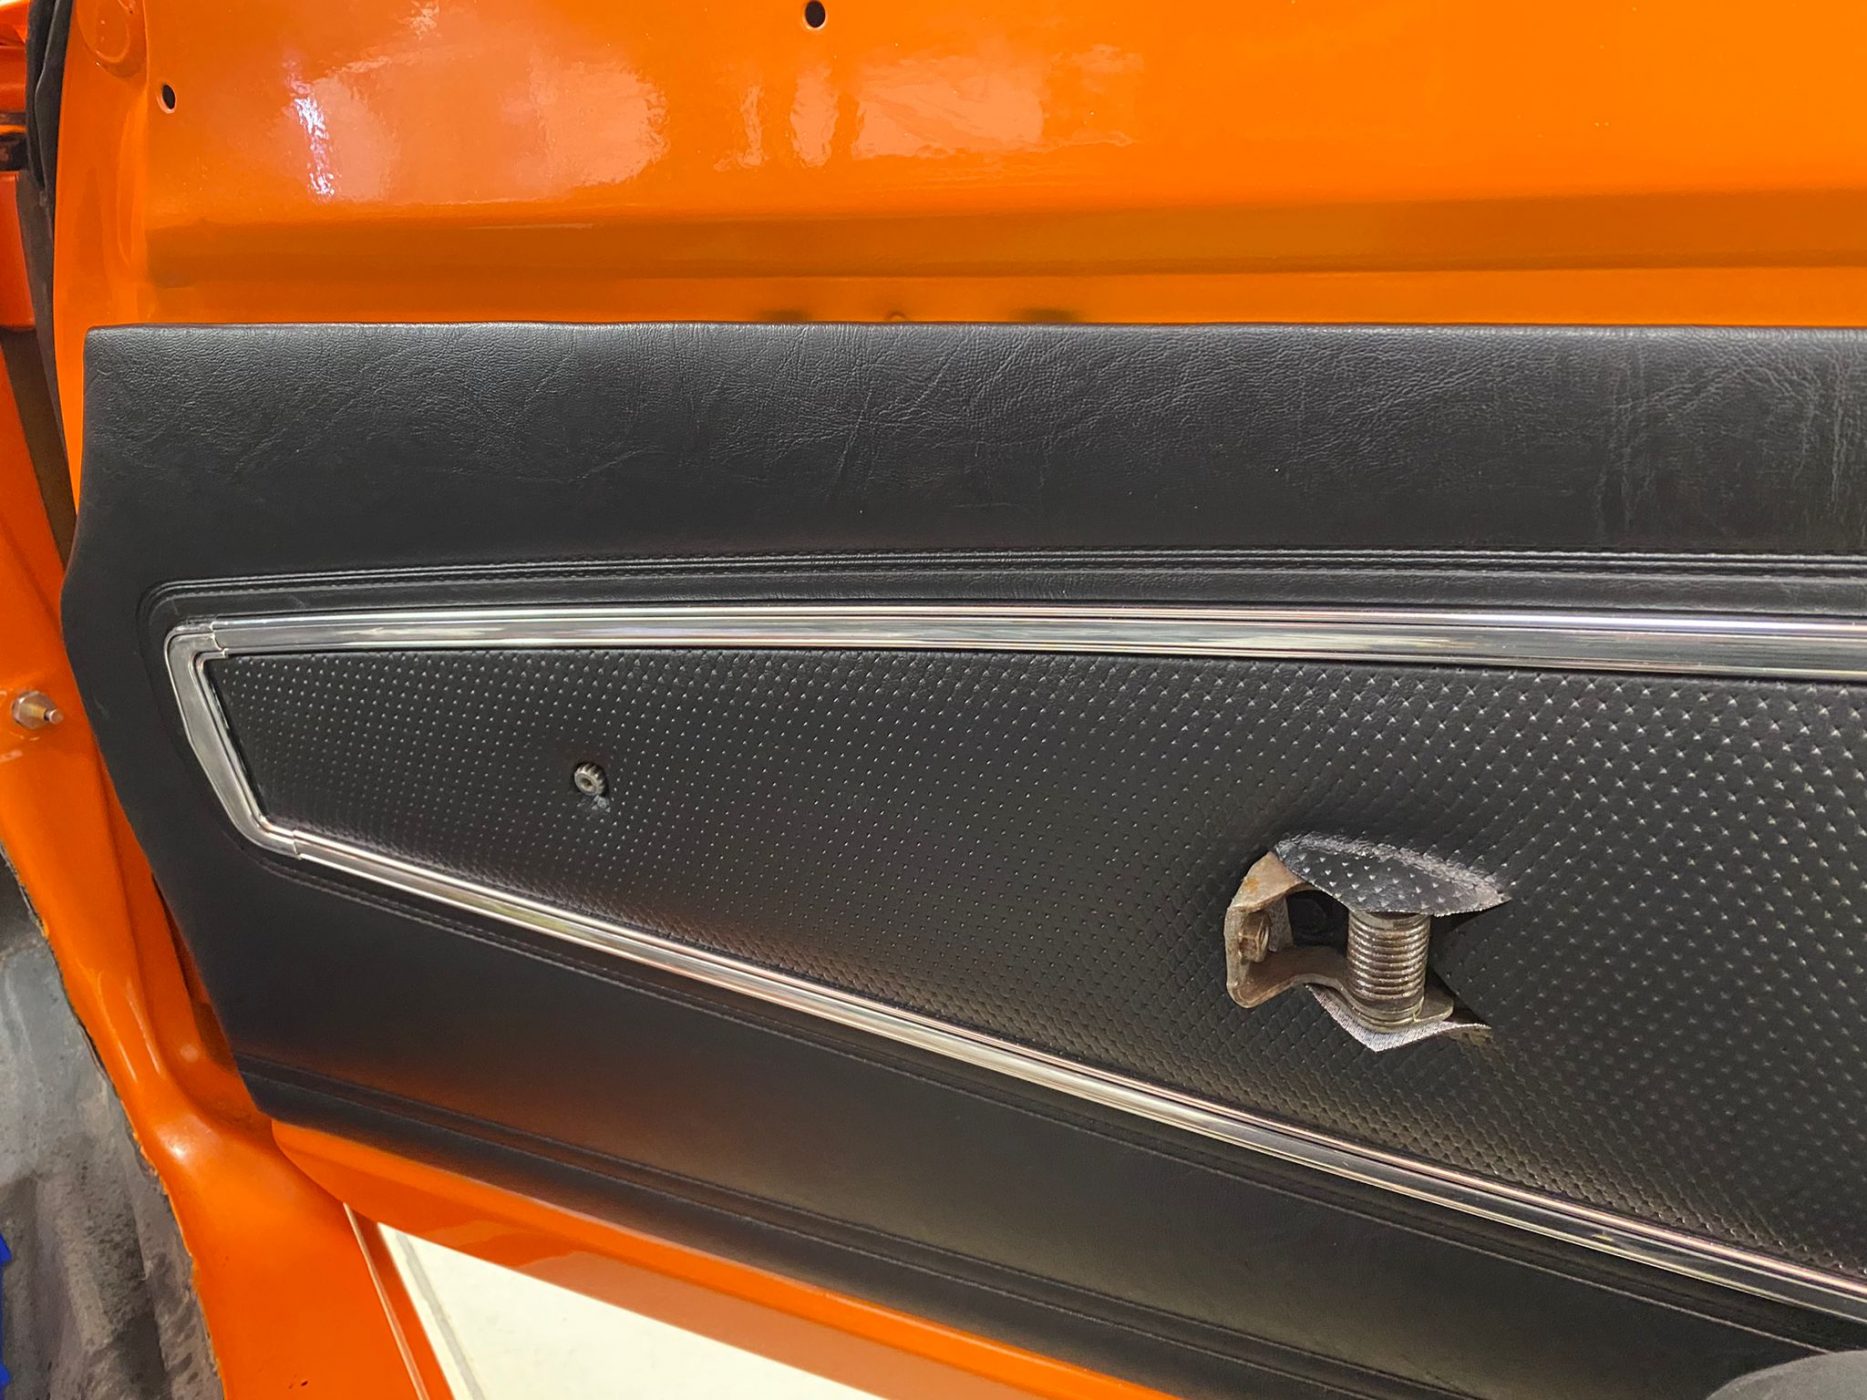
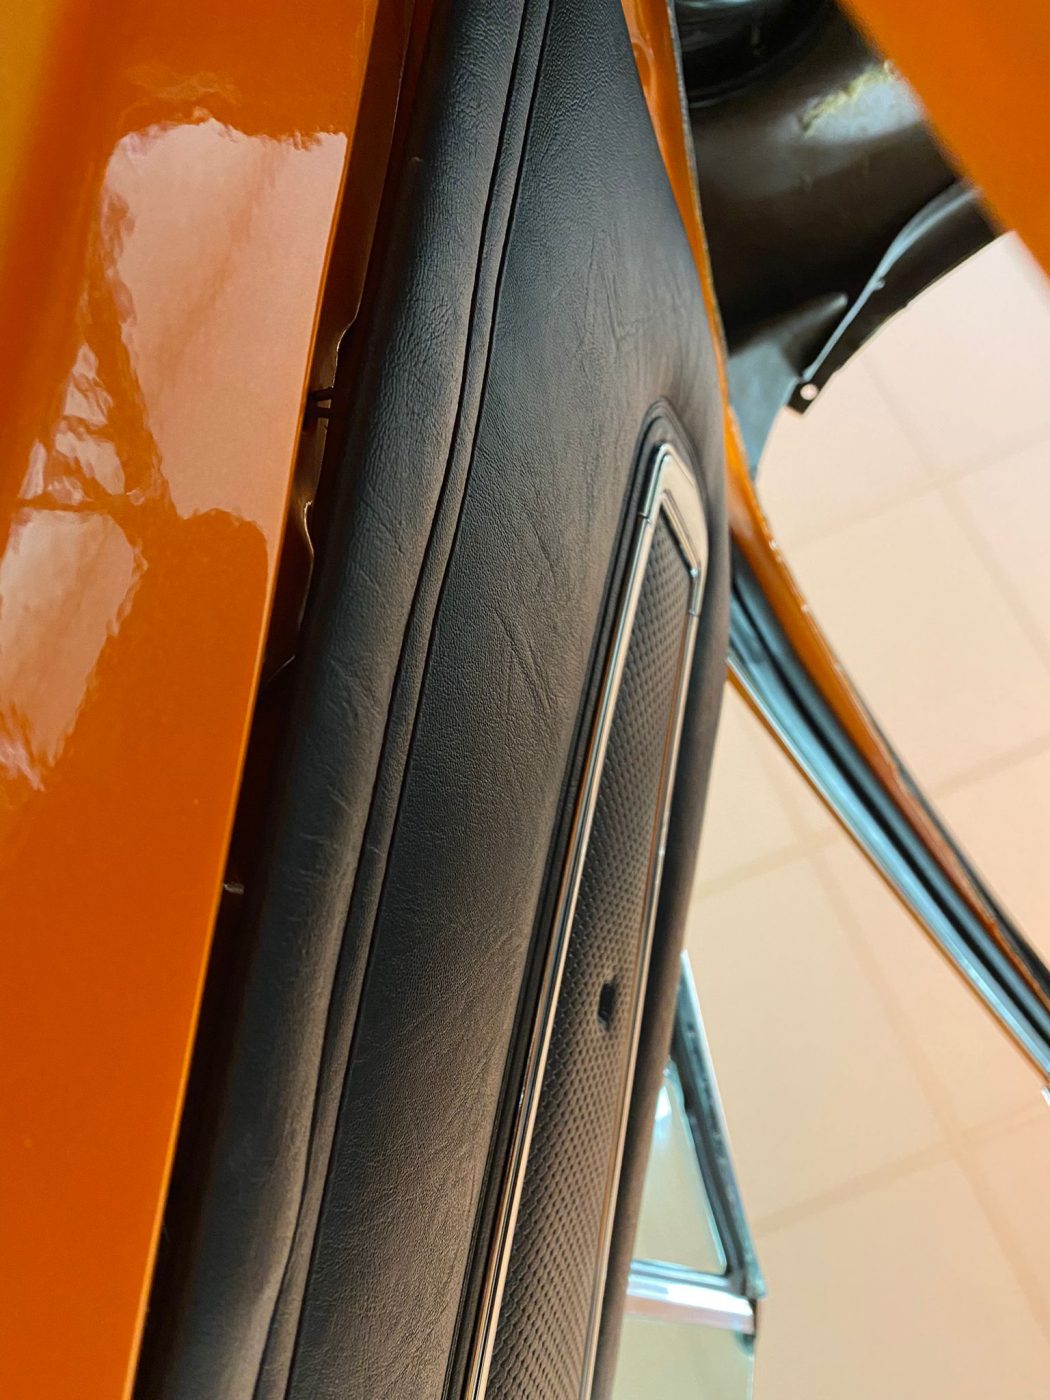
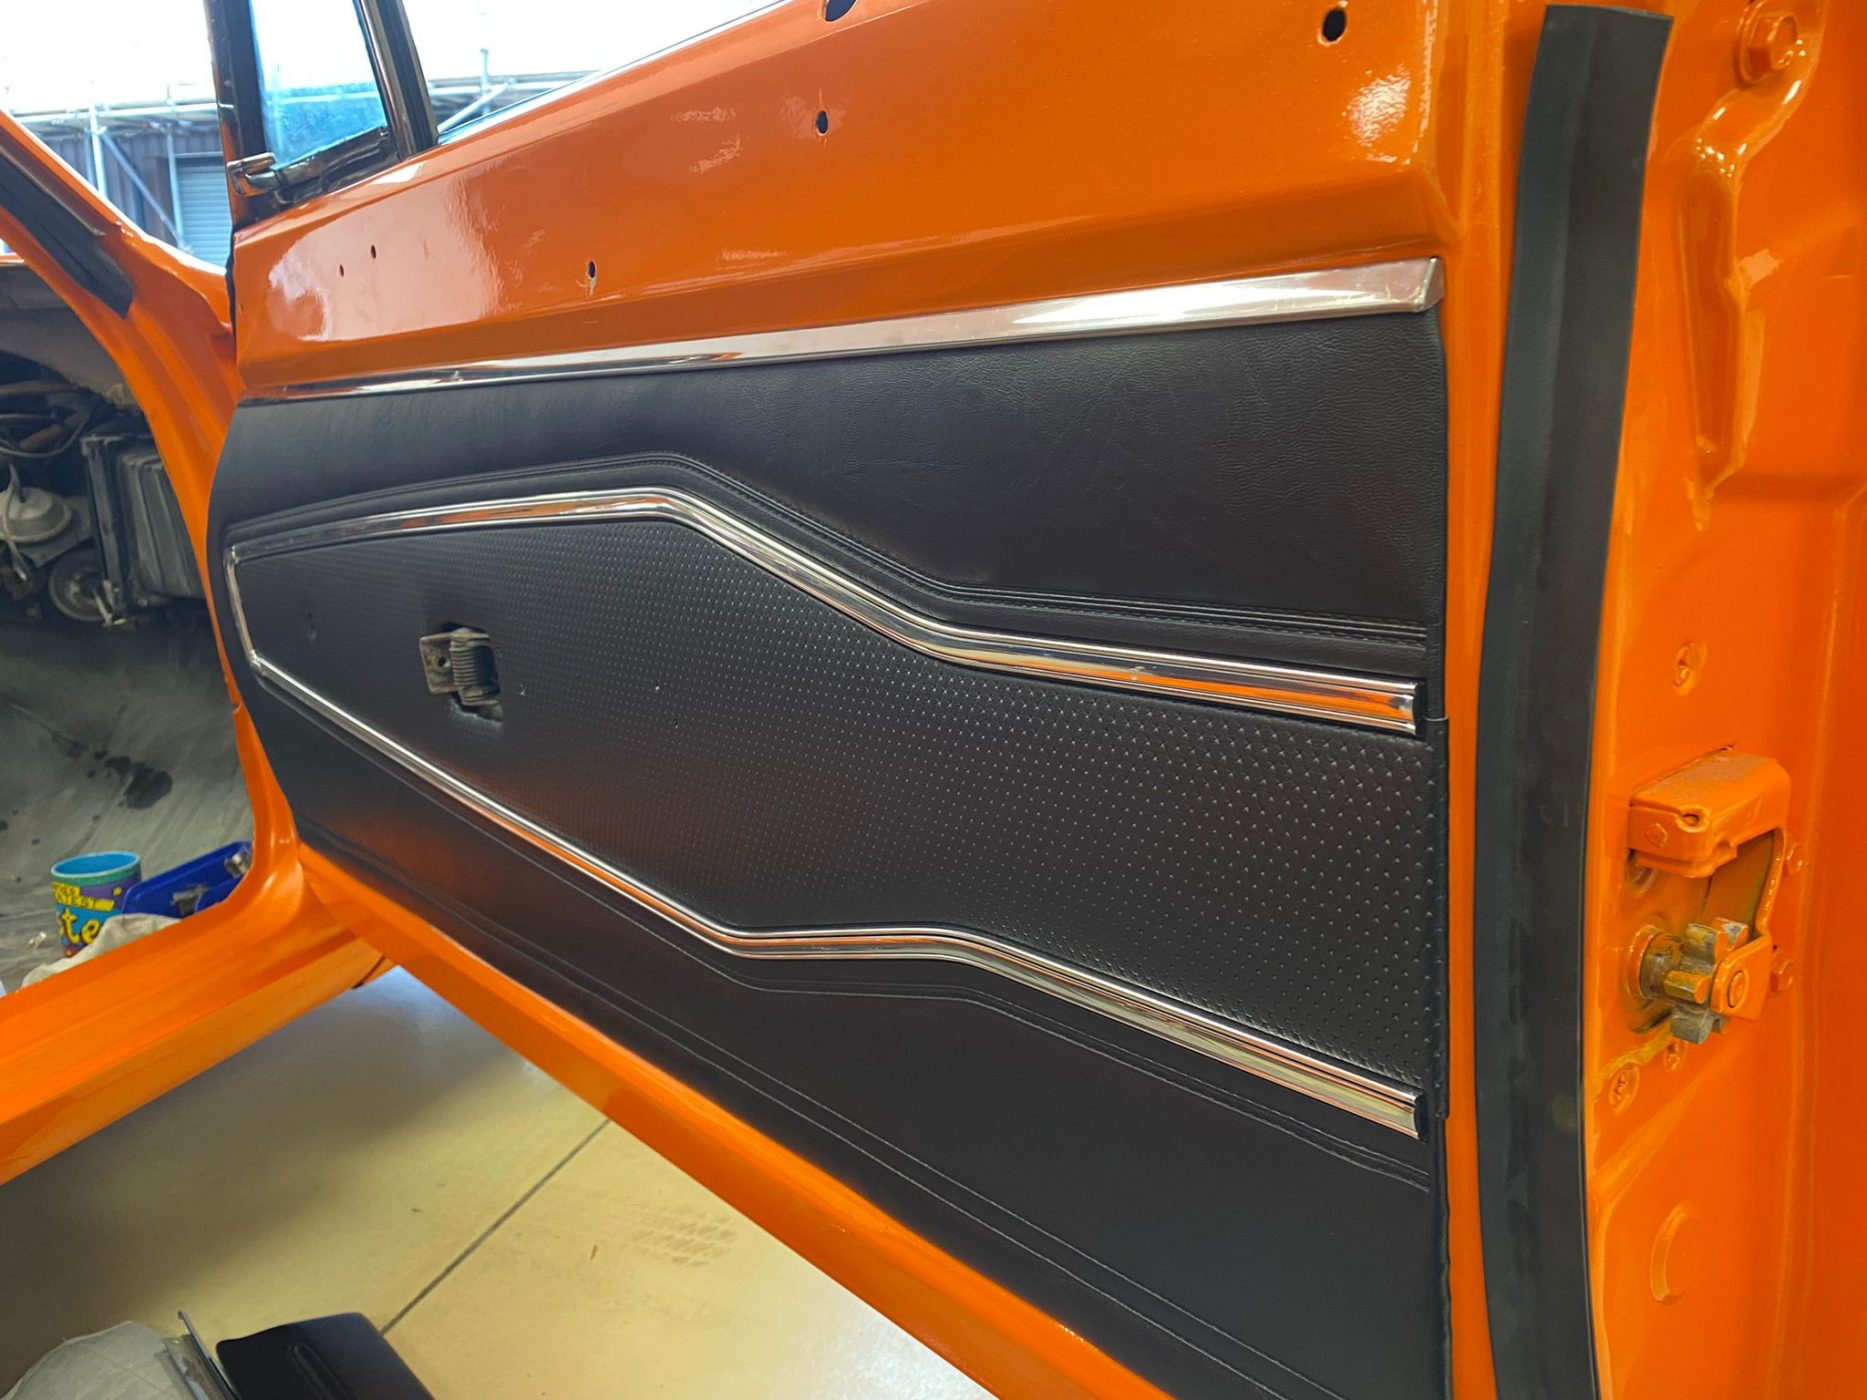
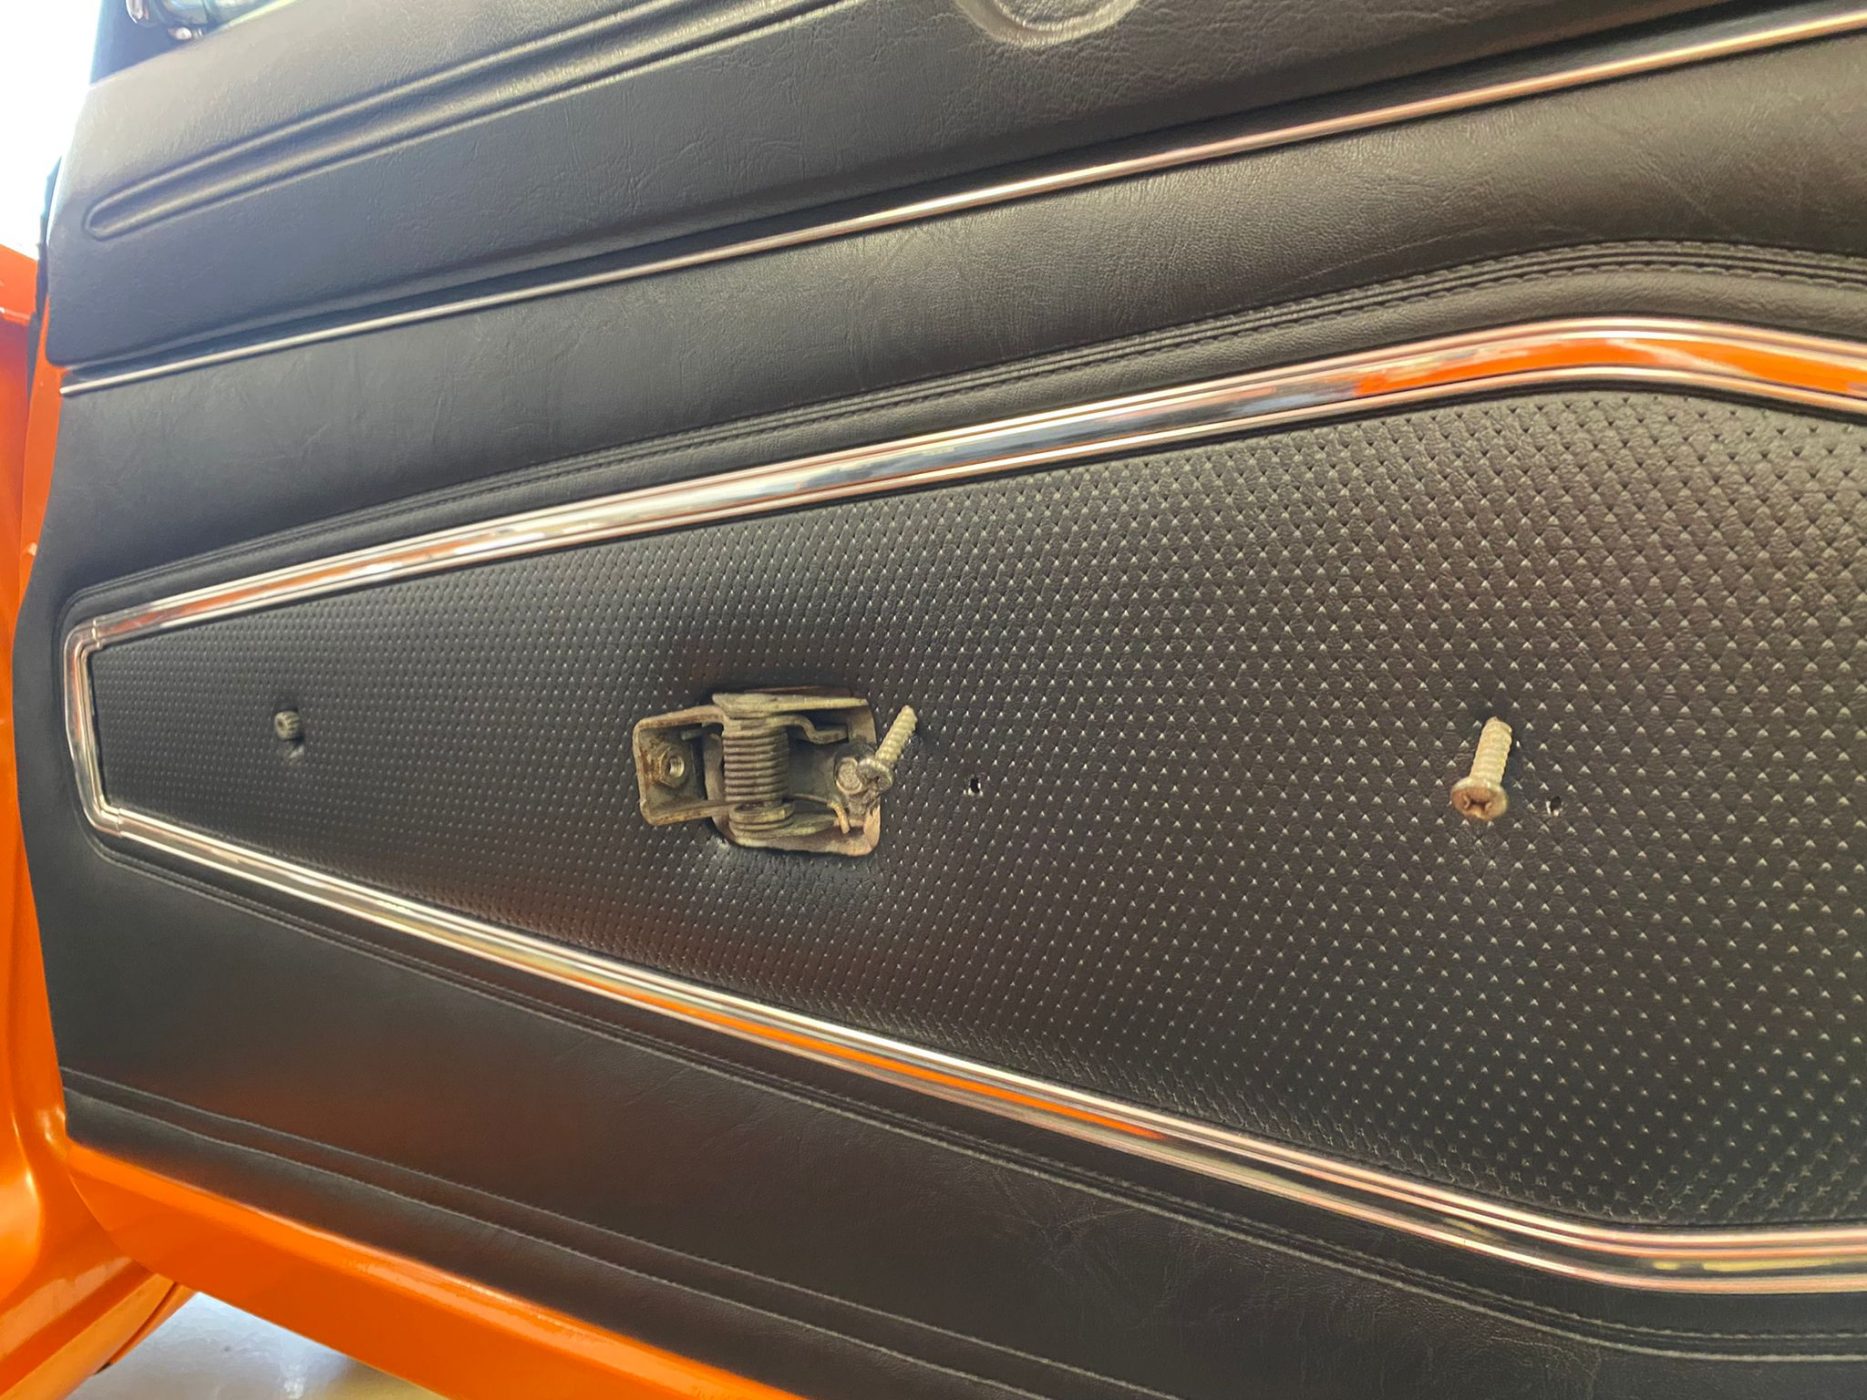

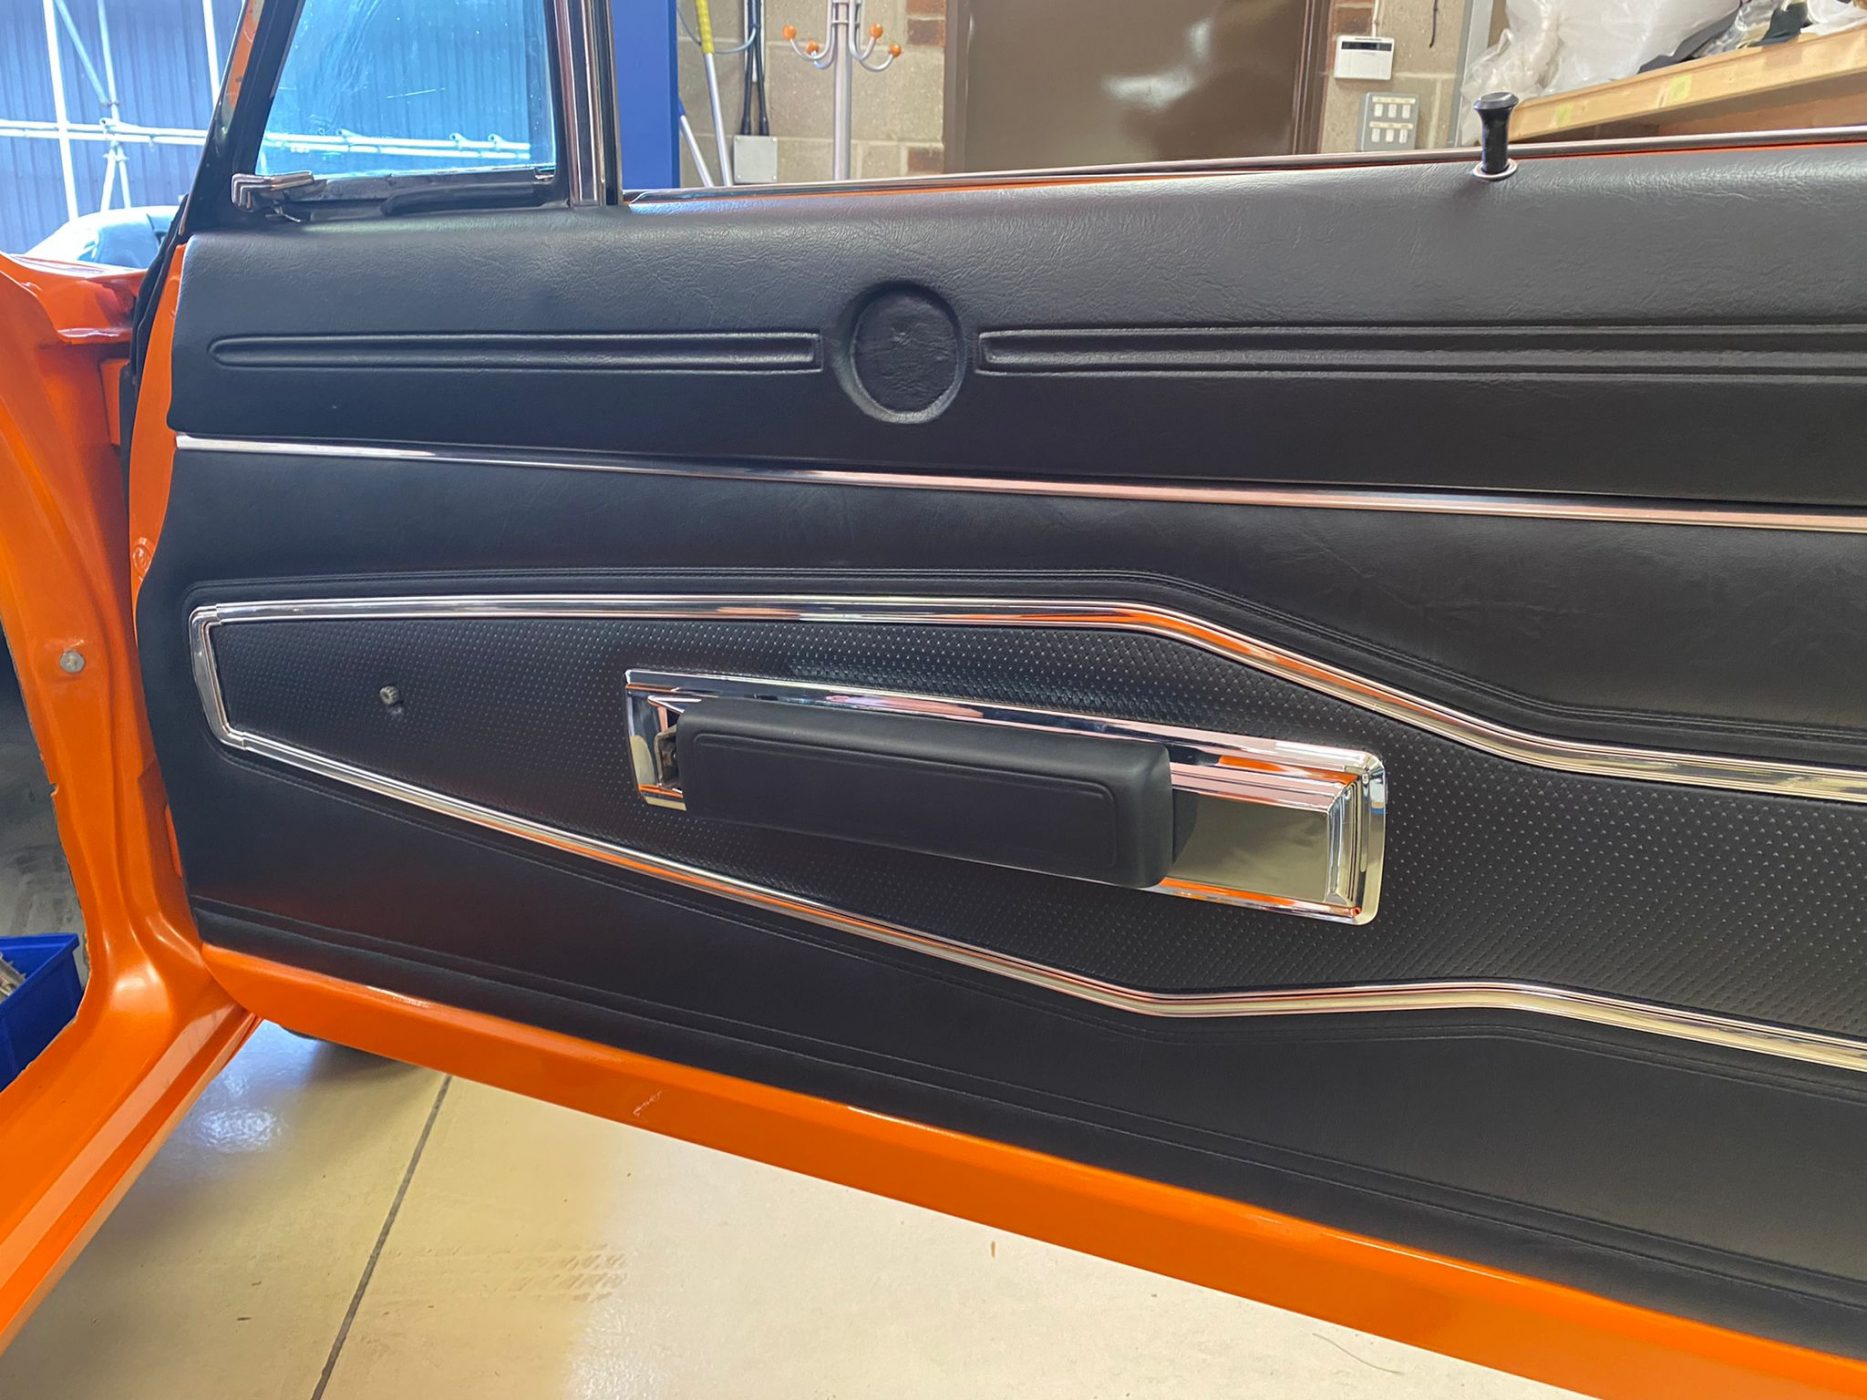
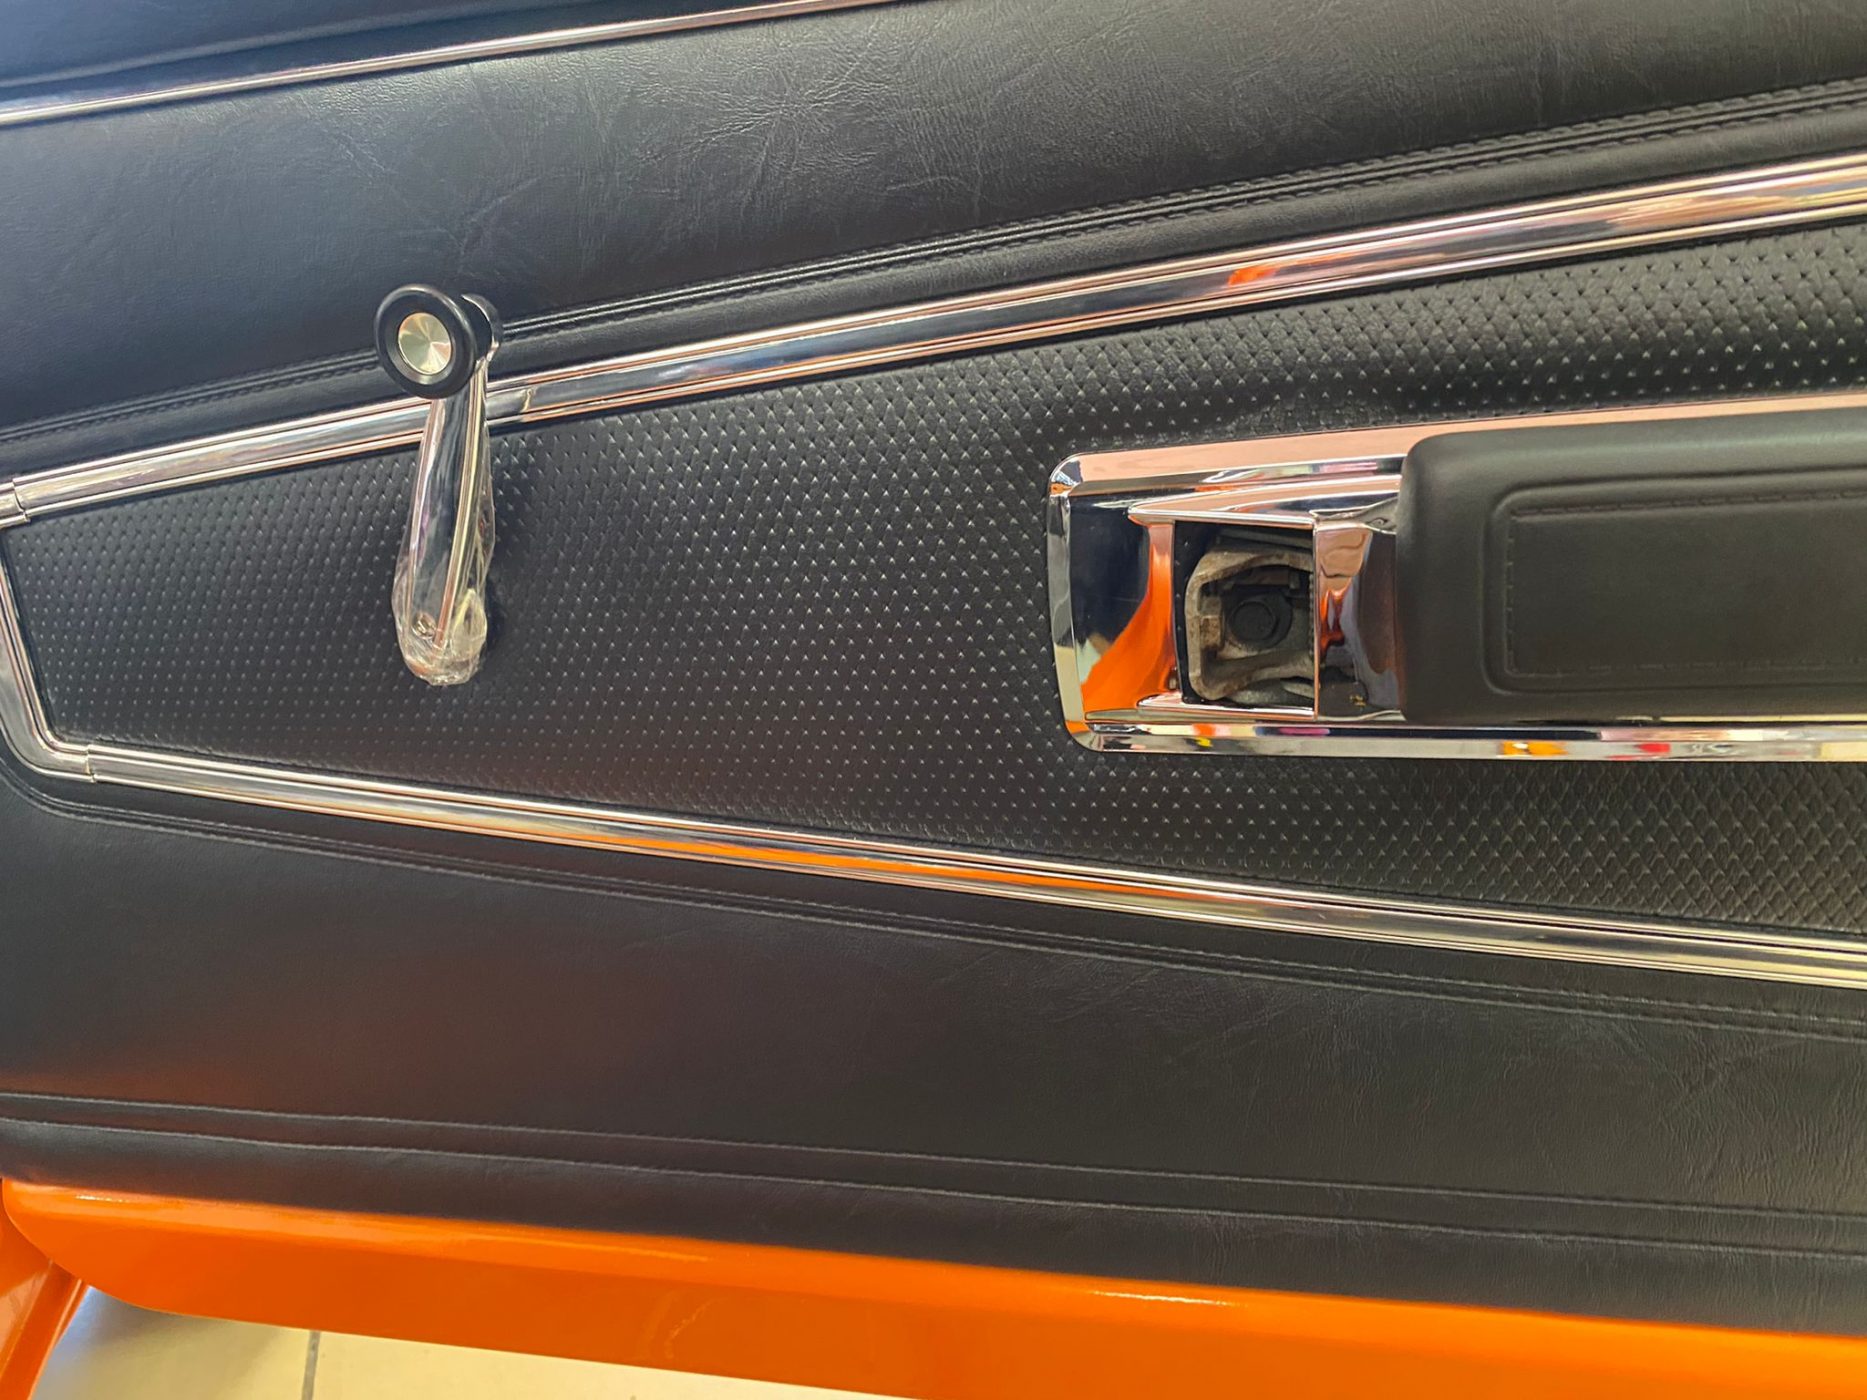

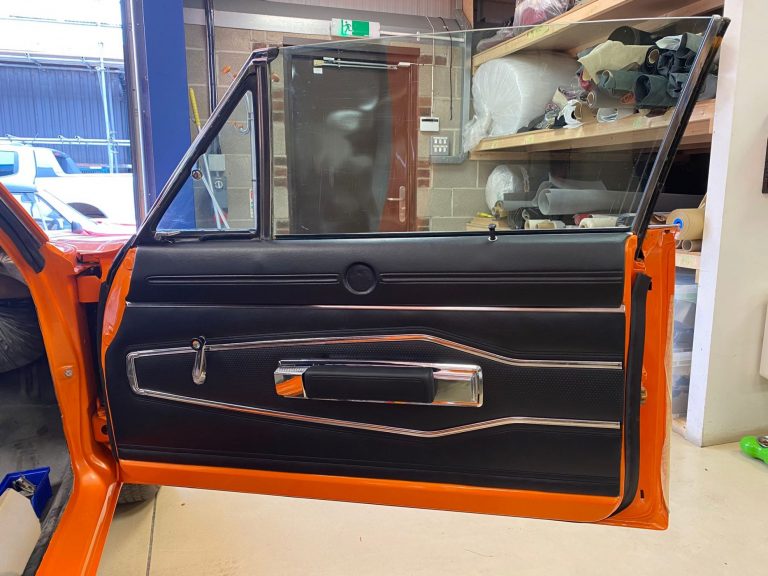
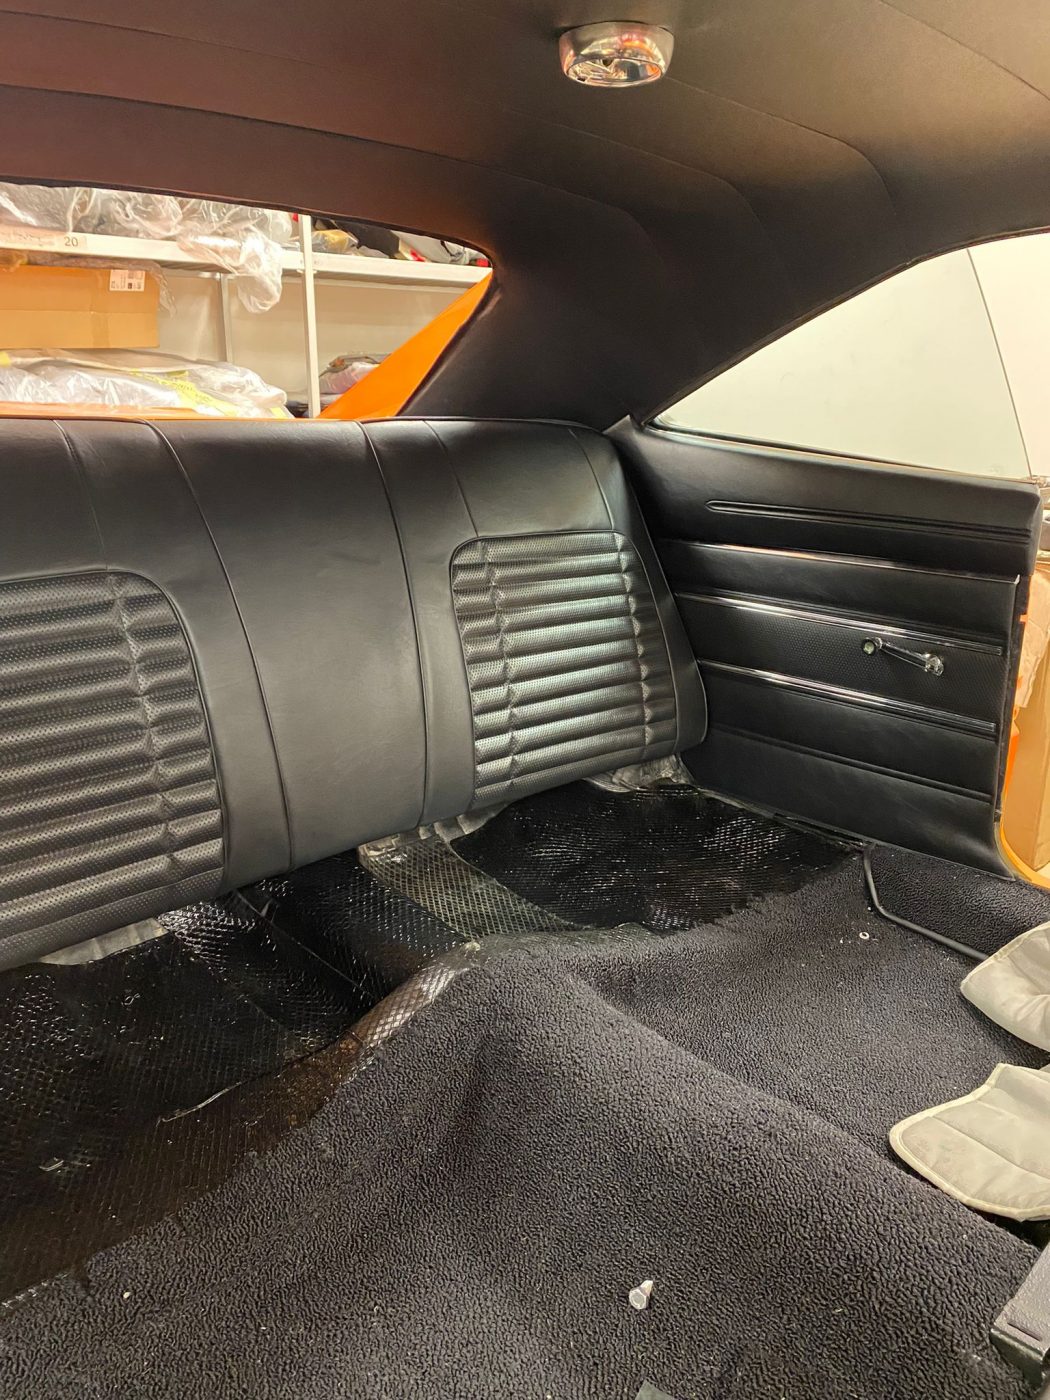
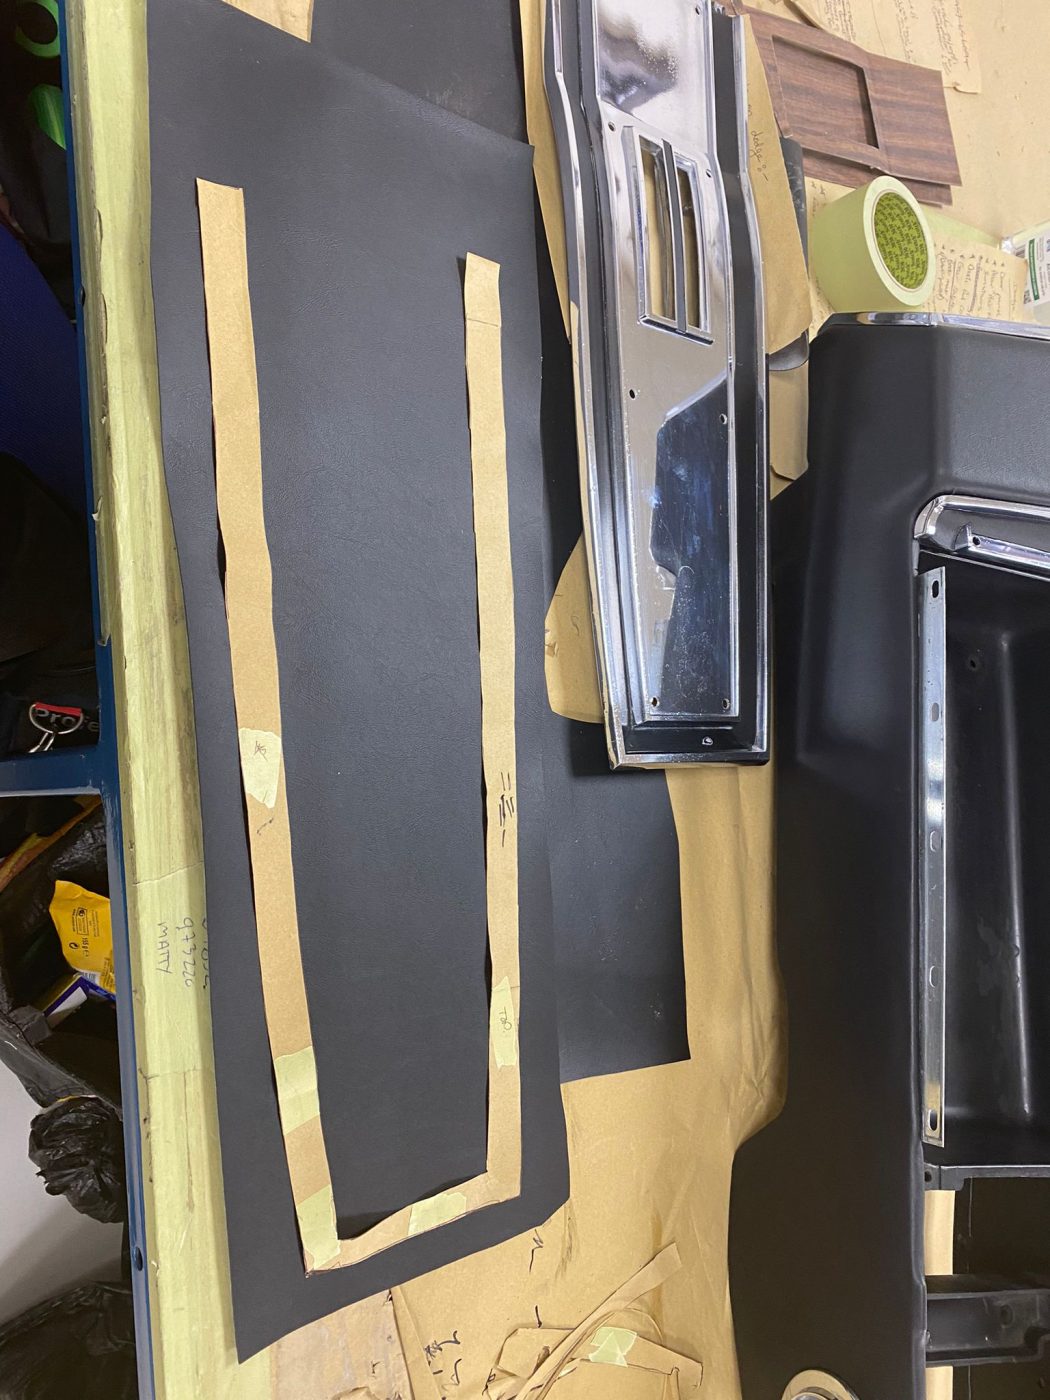
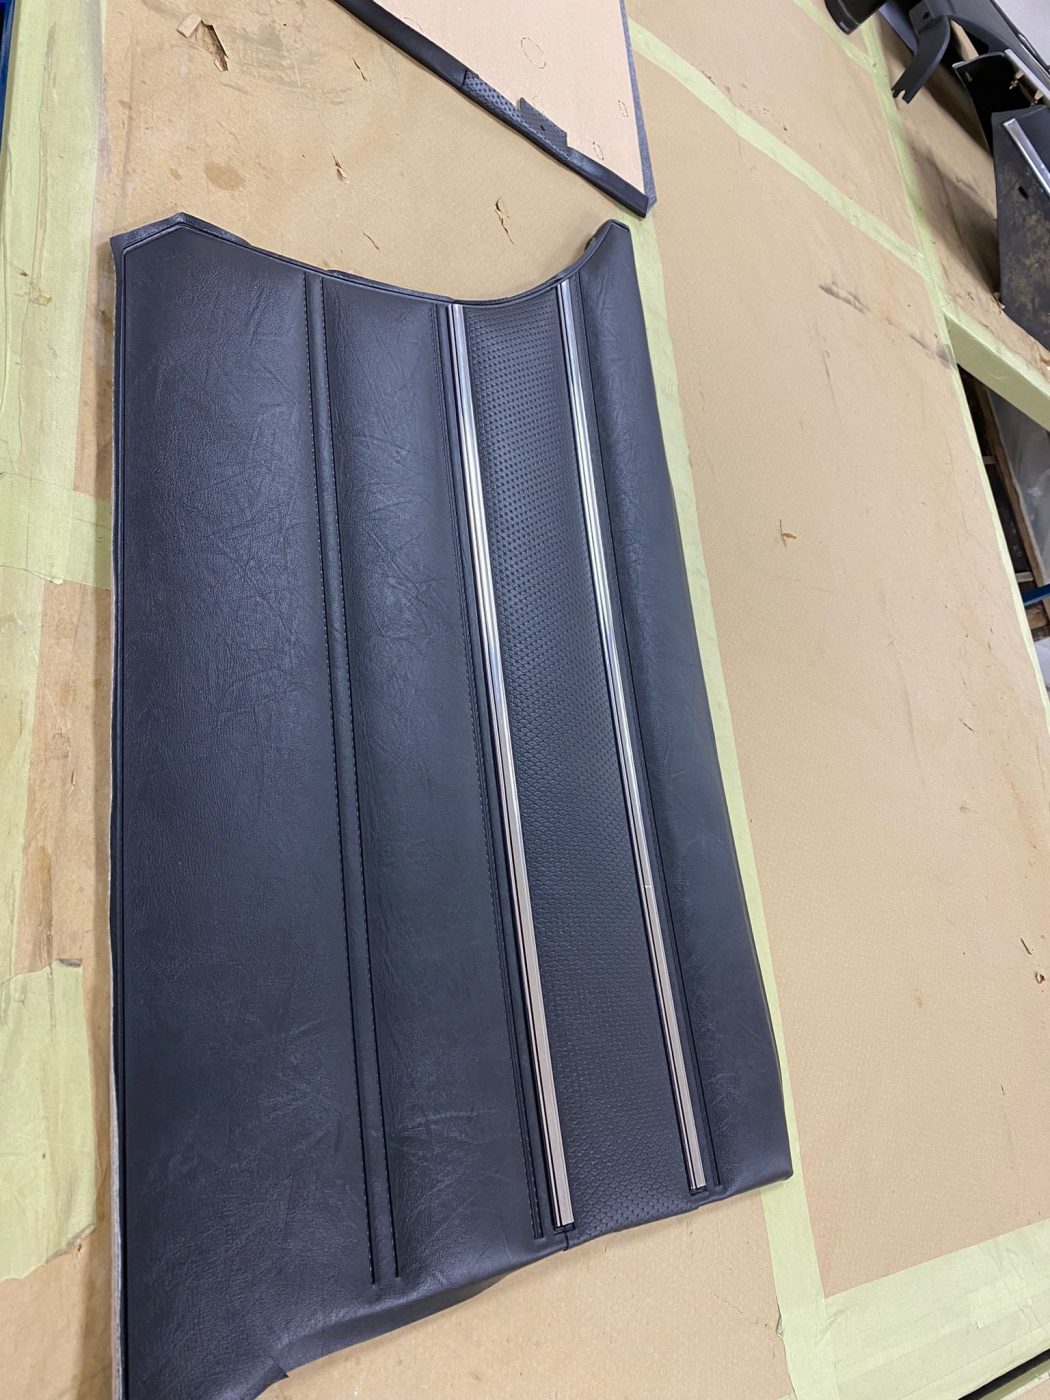
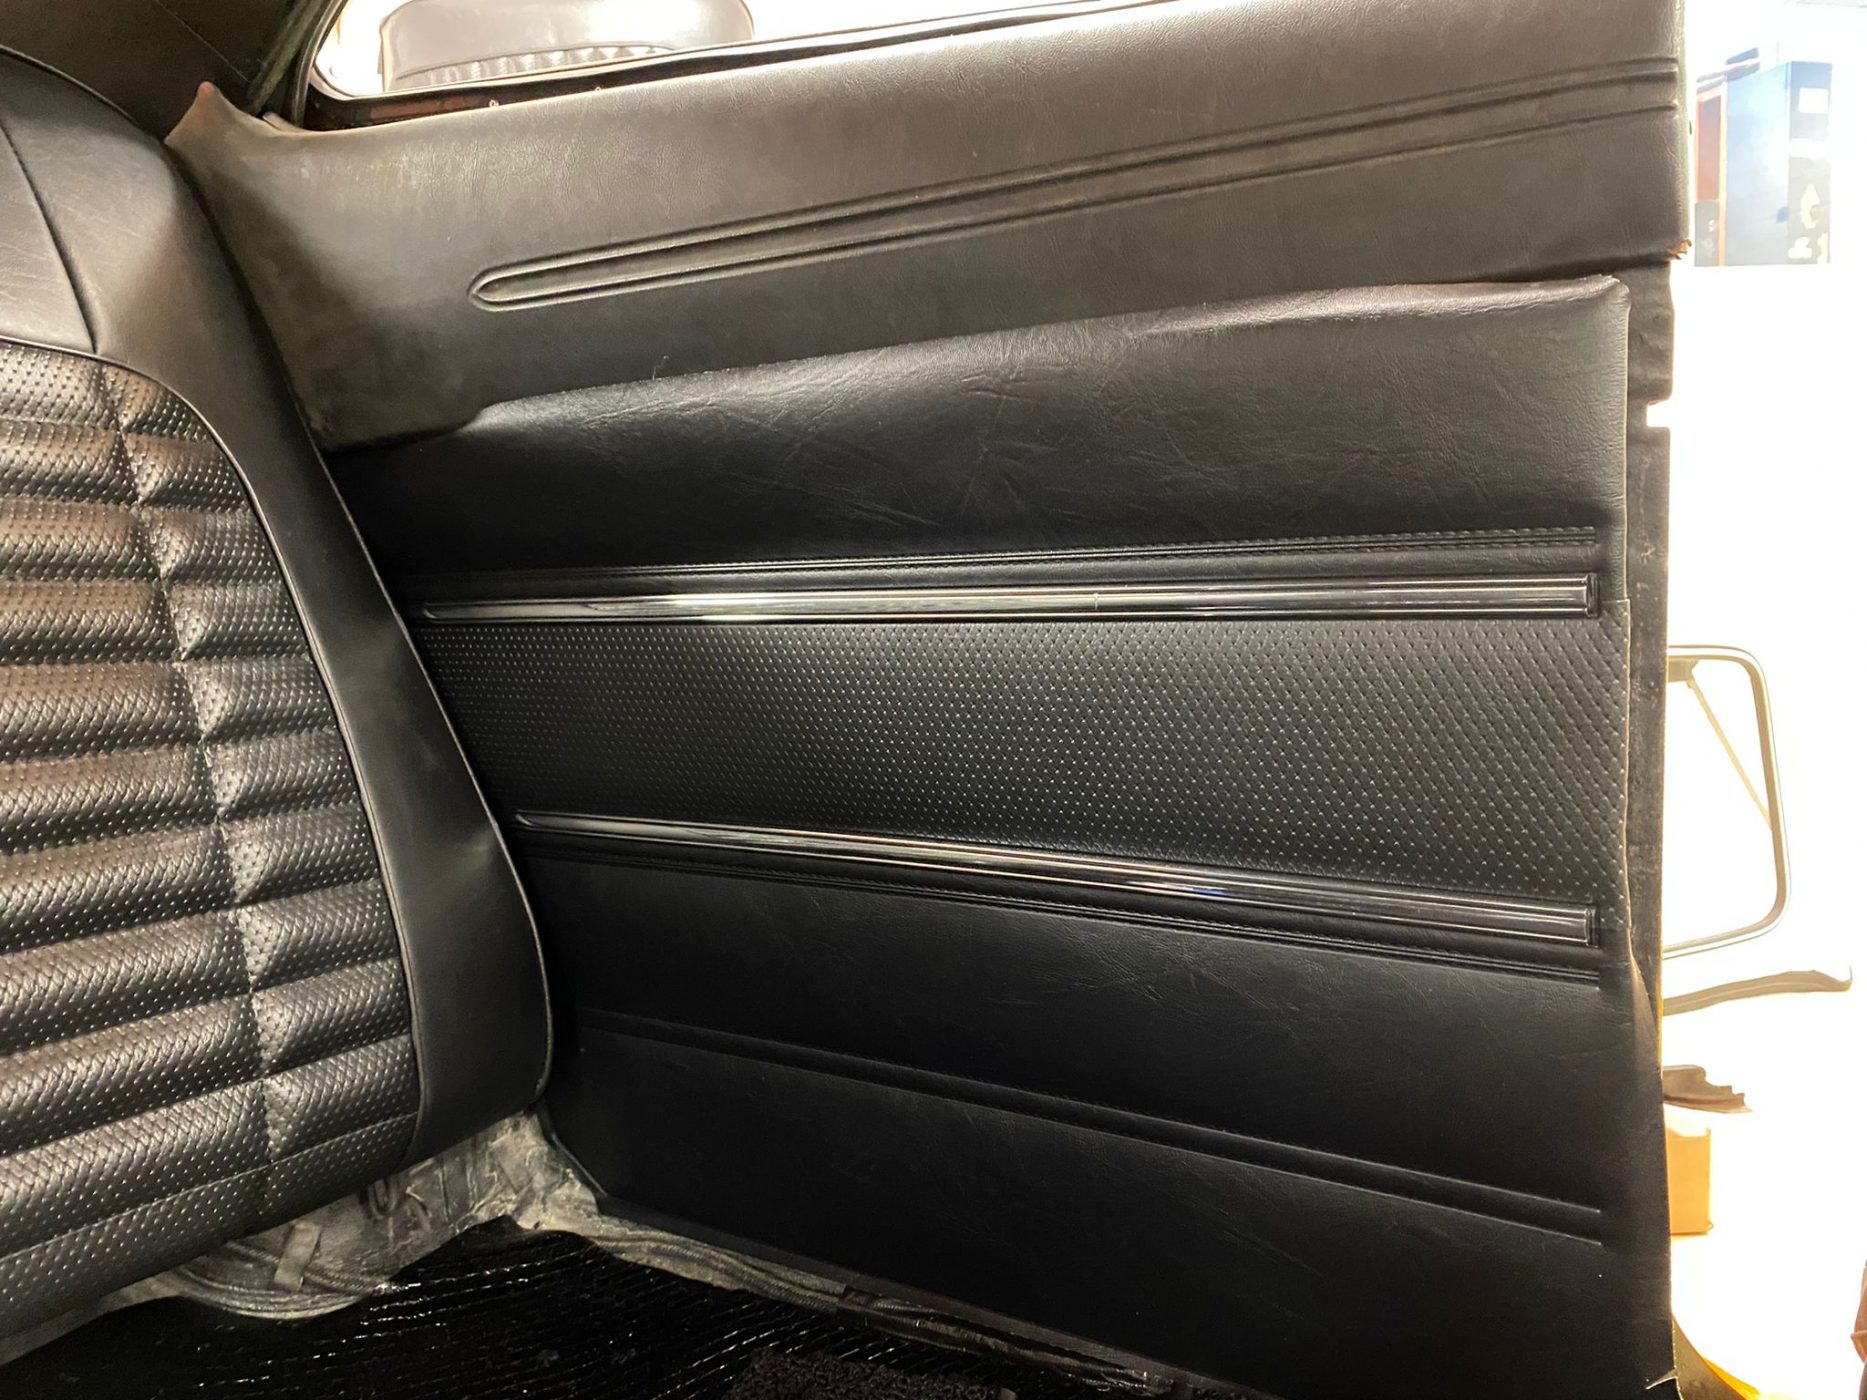
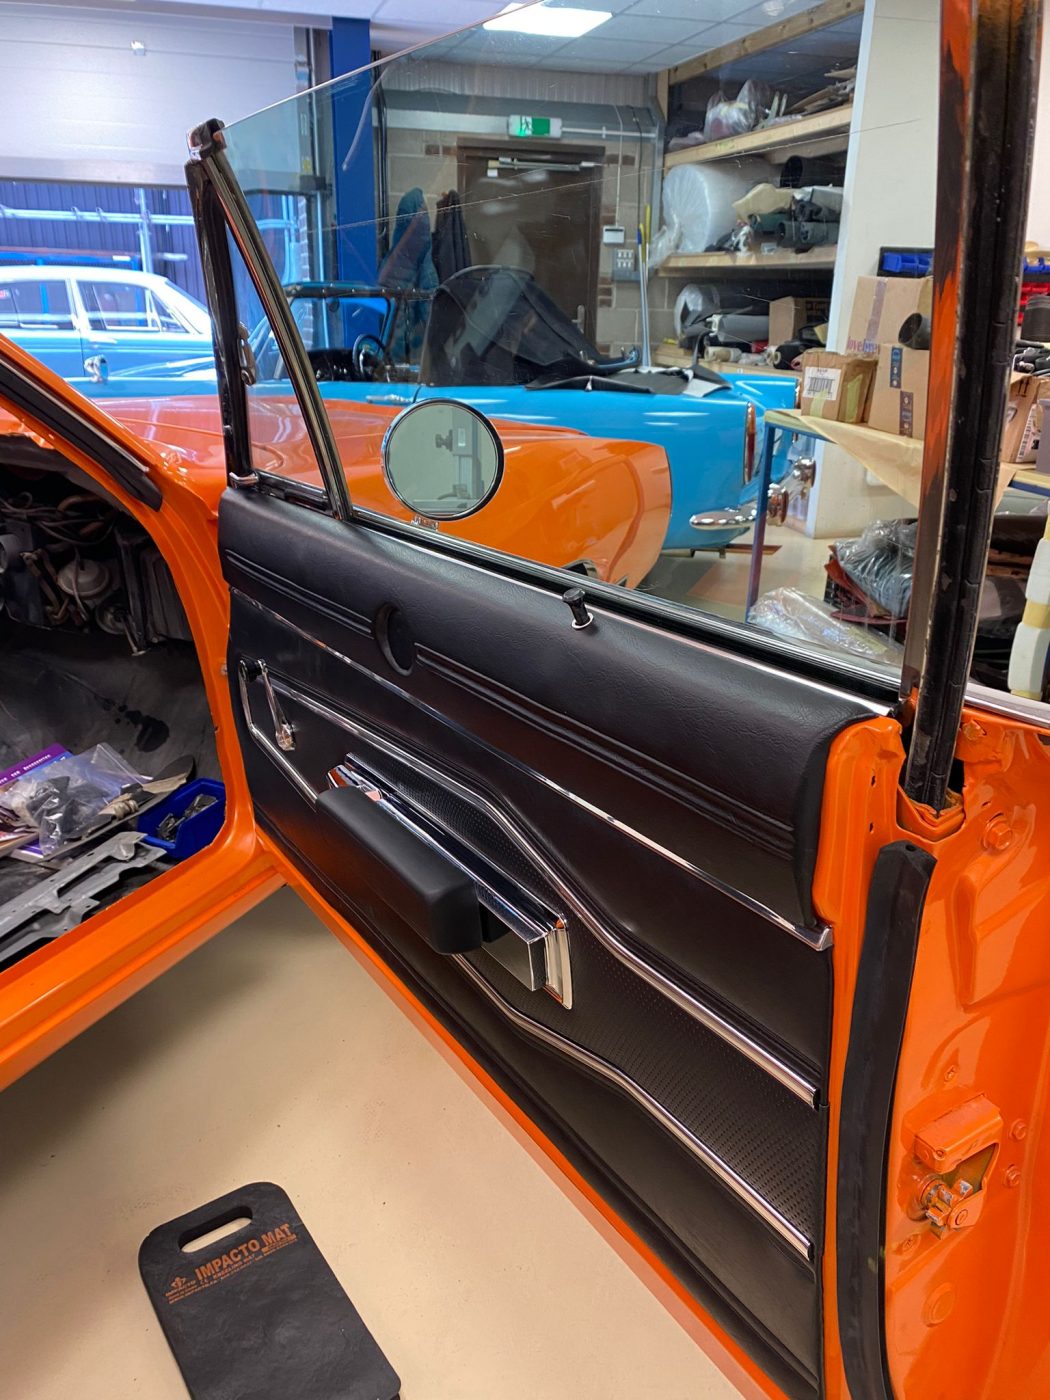
Our in-house trim expert Kath has been fitting the door cards to the 1970 Dodge Charger we have in here at Bridge Classic Cars.
Kath carefully put together the two-piece door cards which are a key feature on the interior of this glorious Mopar. Kath went through each component to check its fit and finish before anything was put on the car, painstakingly marking out any points that would need a skilled hand turned to them.
The door cards themselves needed the openings cut into them for different handles and fixings so Kath broke out the tape measure. Each of the cuts made was a case of measure 10 times and cut once as with all of our interior work. The best way to get the perfect finish is to work with the car and that’s why we have a world-class trim shop.
Piece by piece, Kath put together the parts onto the door itself with all its bright work. The clips that fix the card to the door have to be eased onto the door as to not become deformed or move out of alignment so clip by clip the door card was installed onto the car.
Work on the interior of the 1970 Dodge Charger will continue in the Bridge Classic Cars trim shop in our next update on the blog
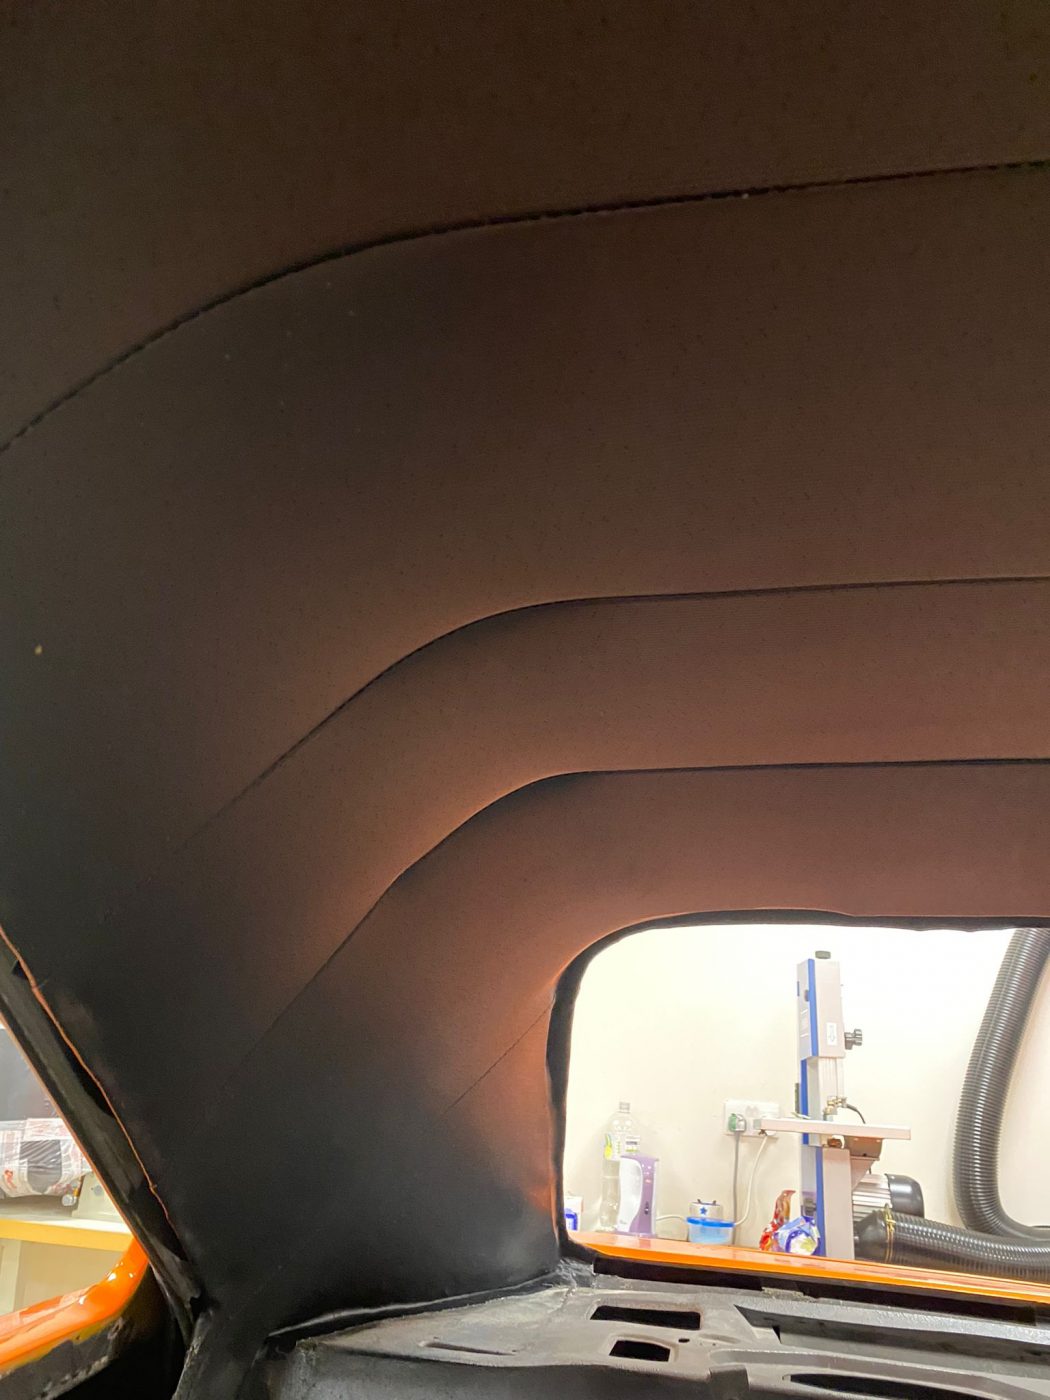
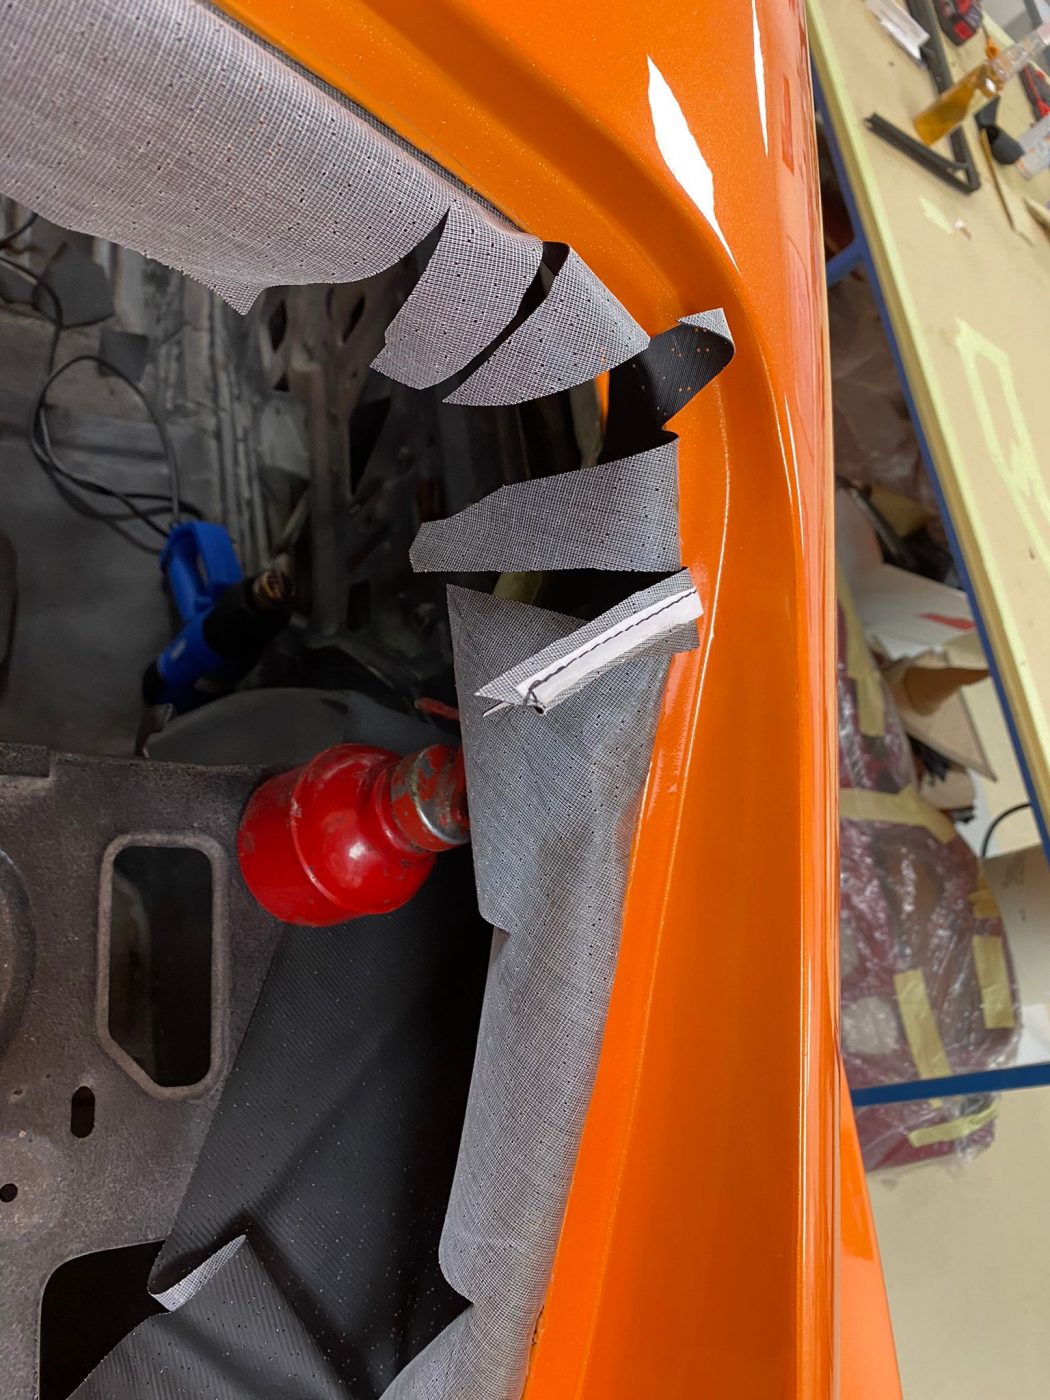
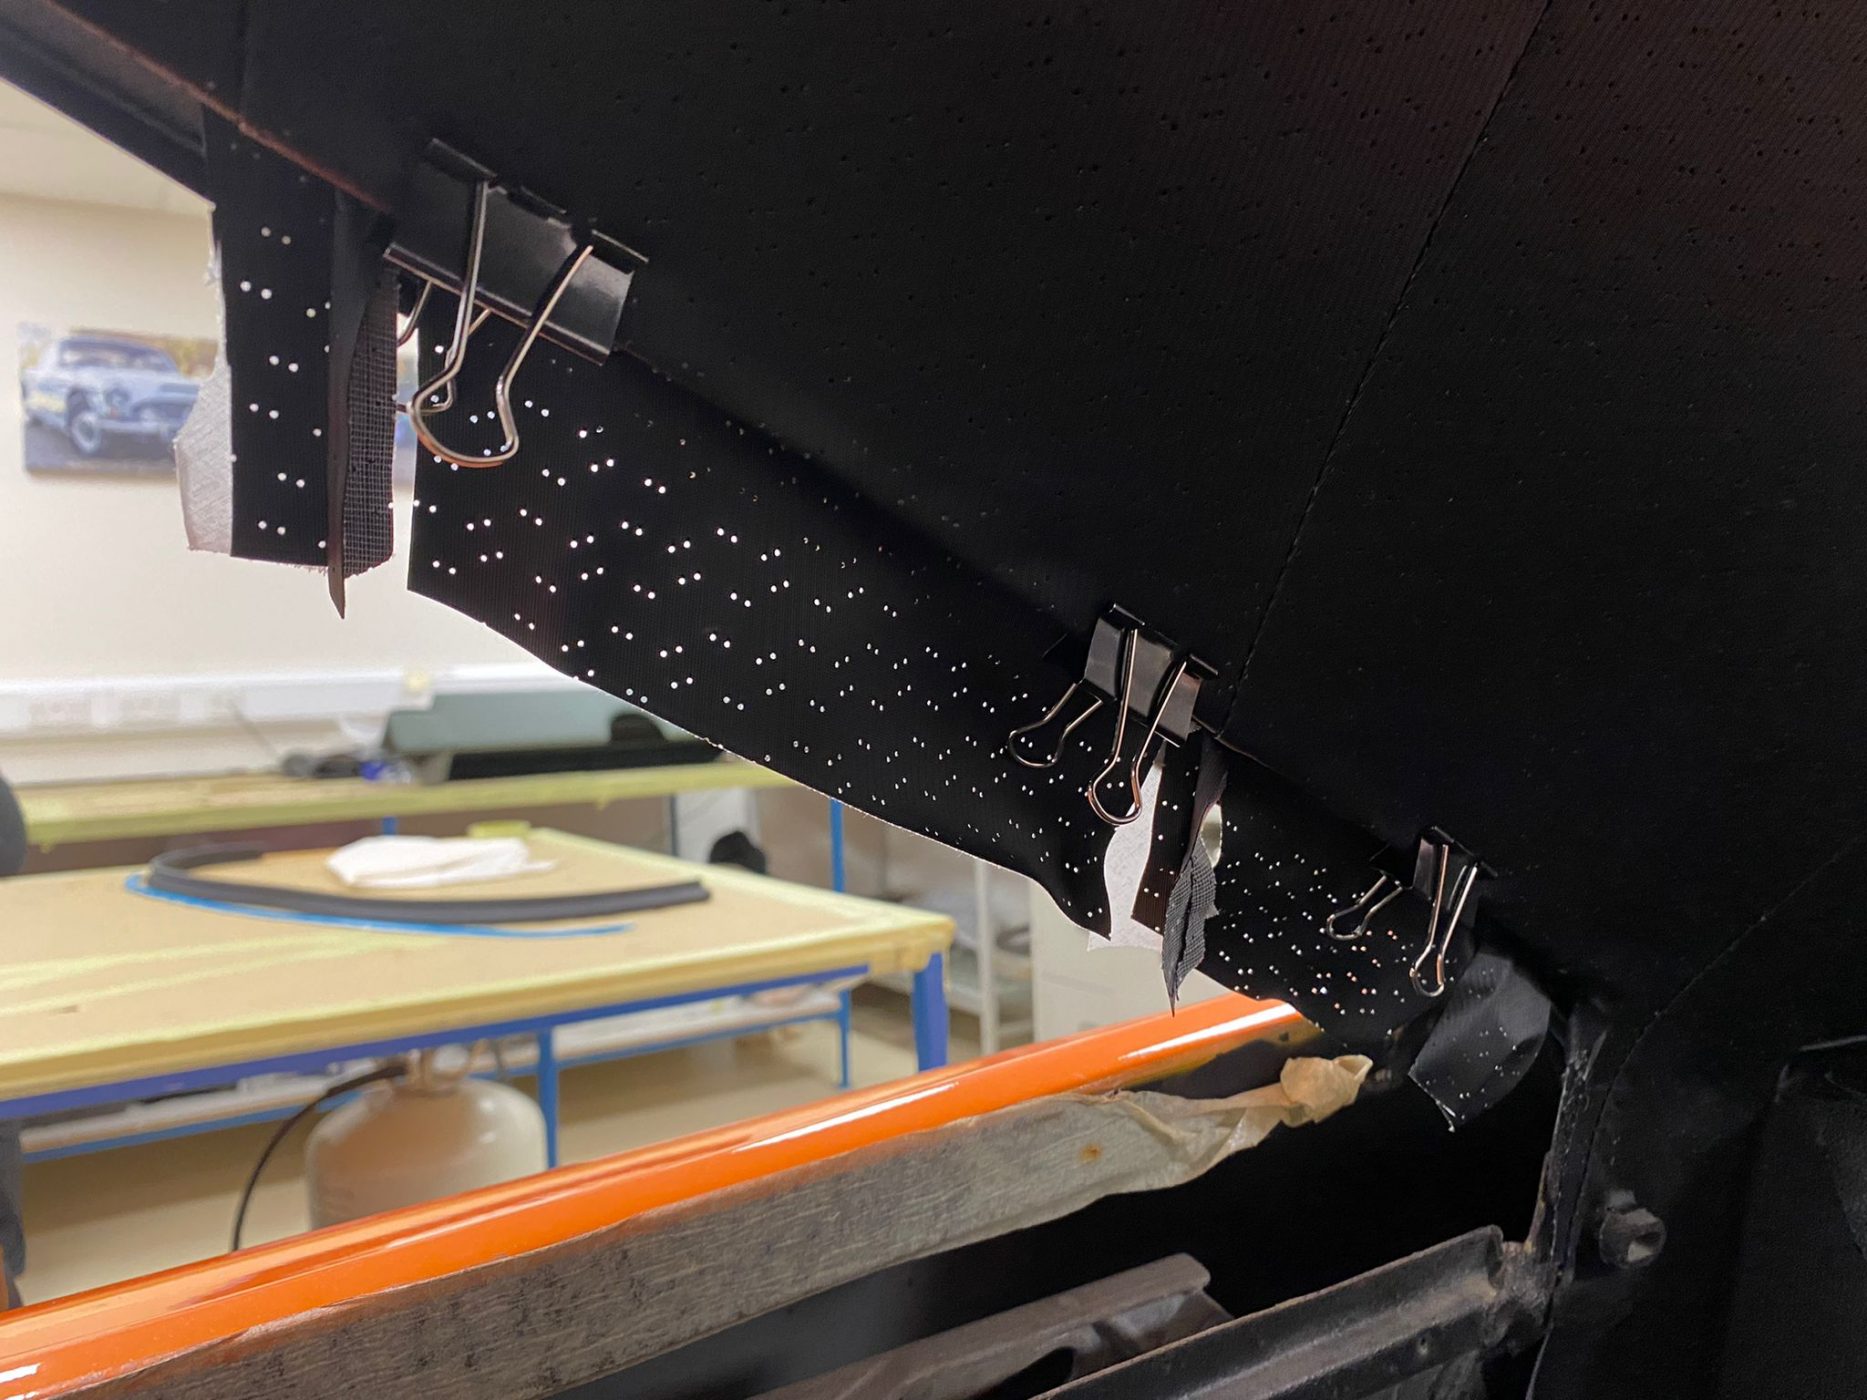
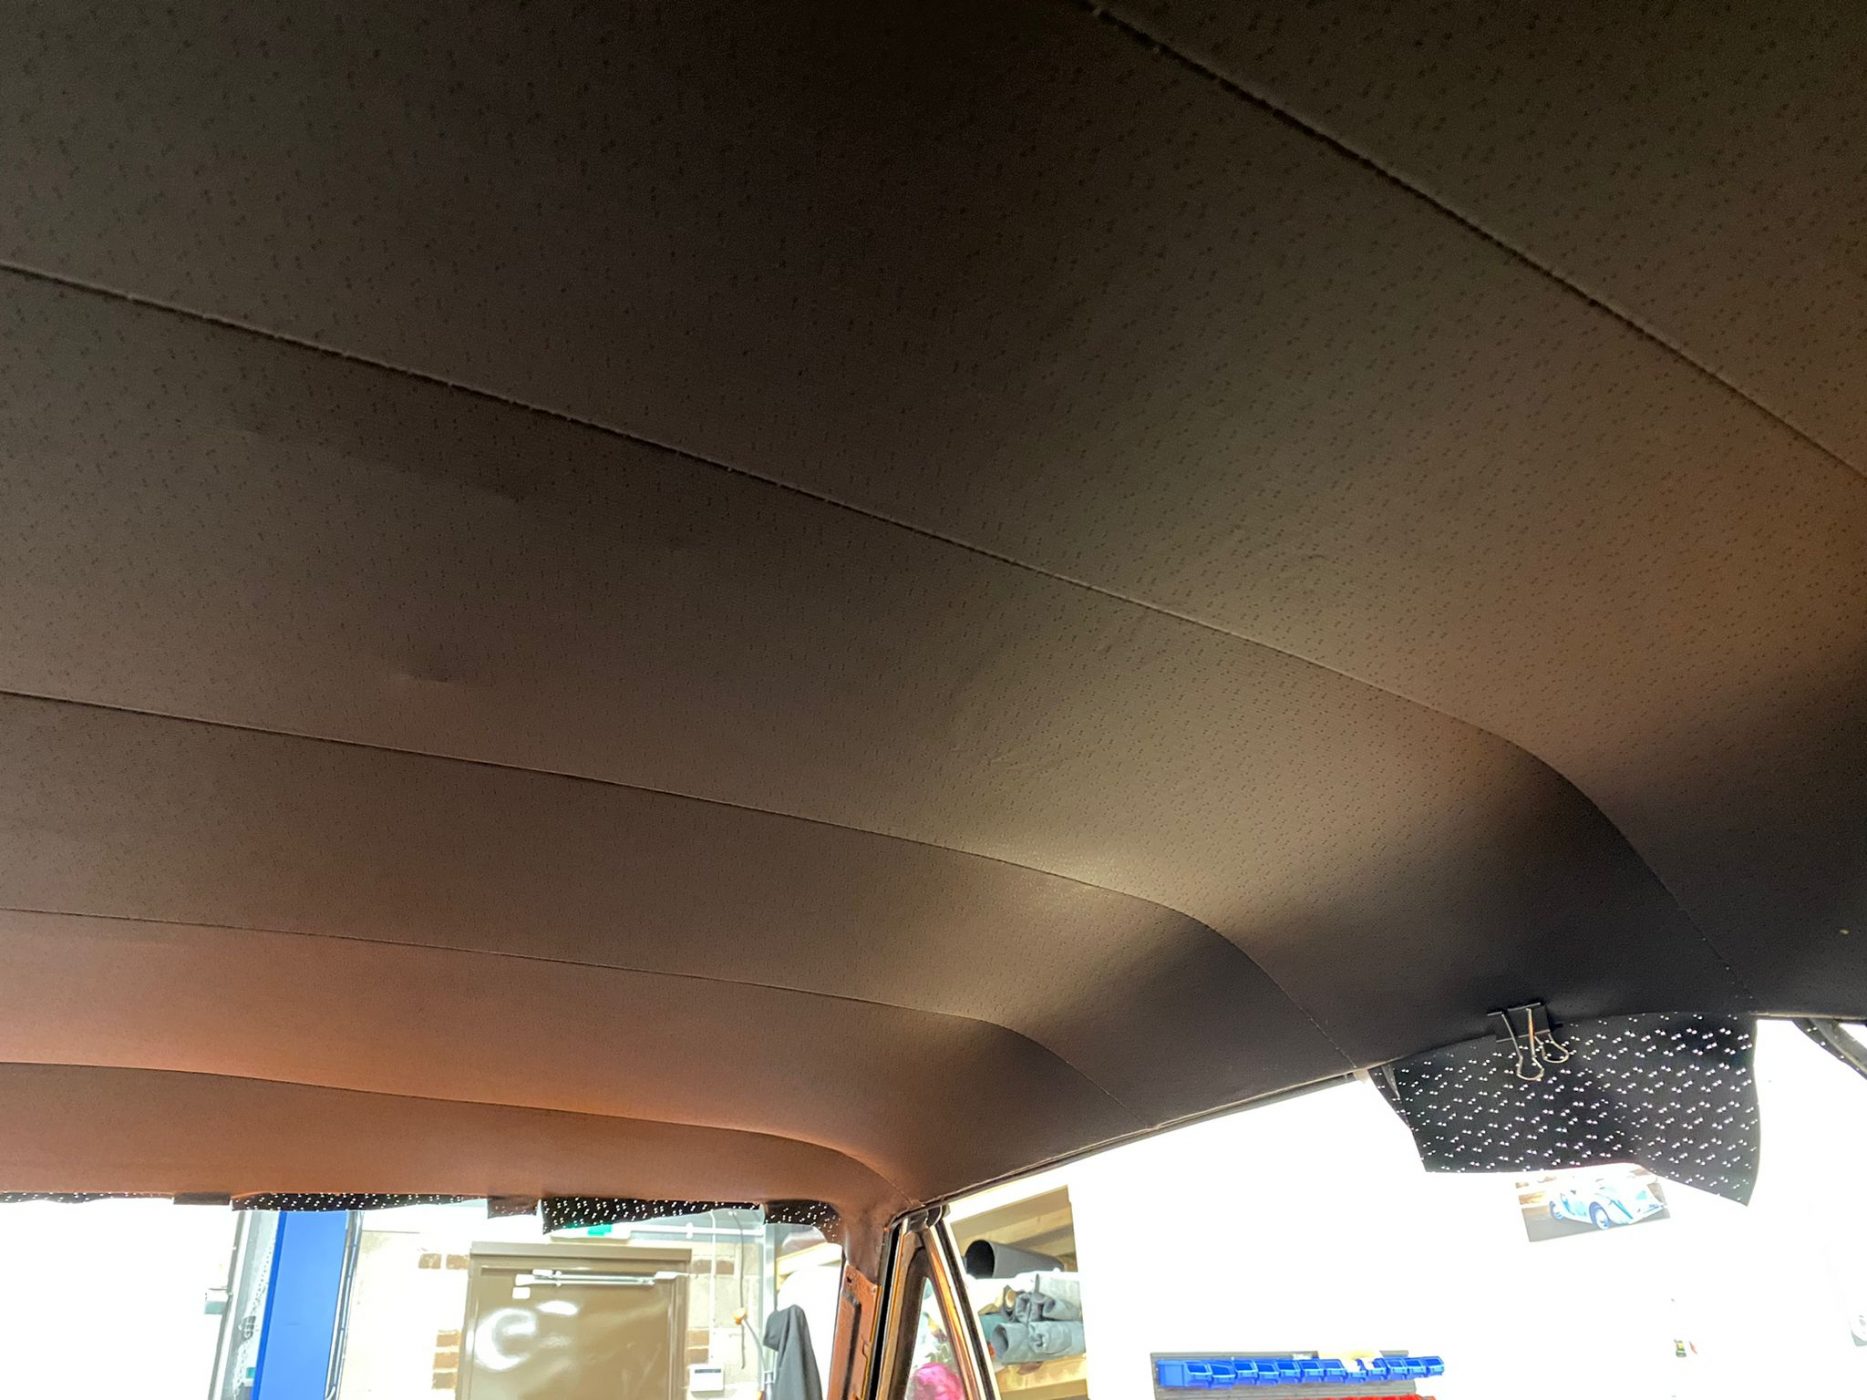
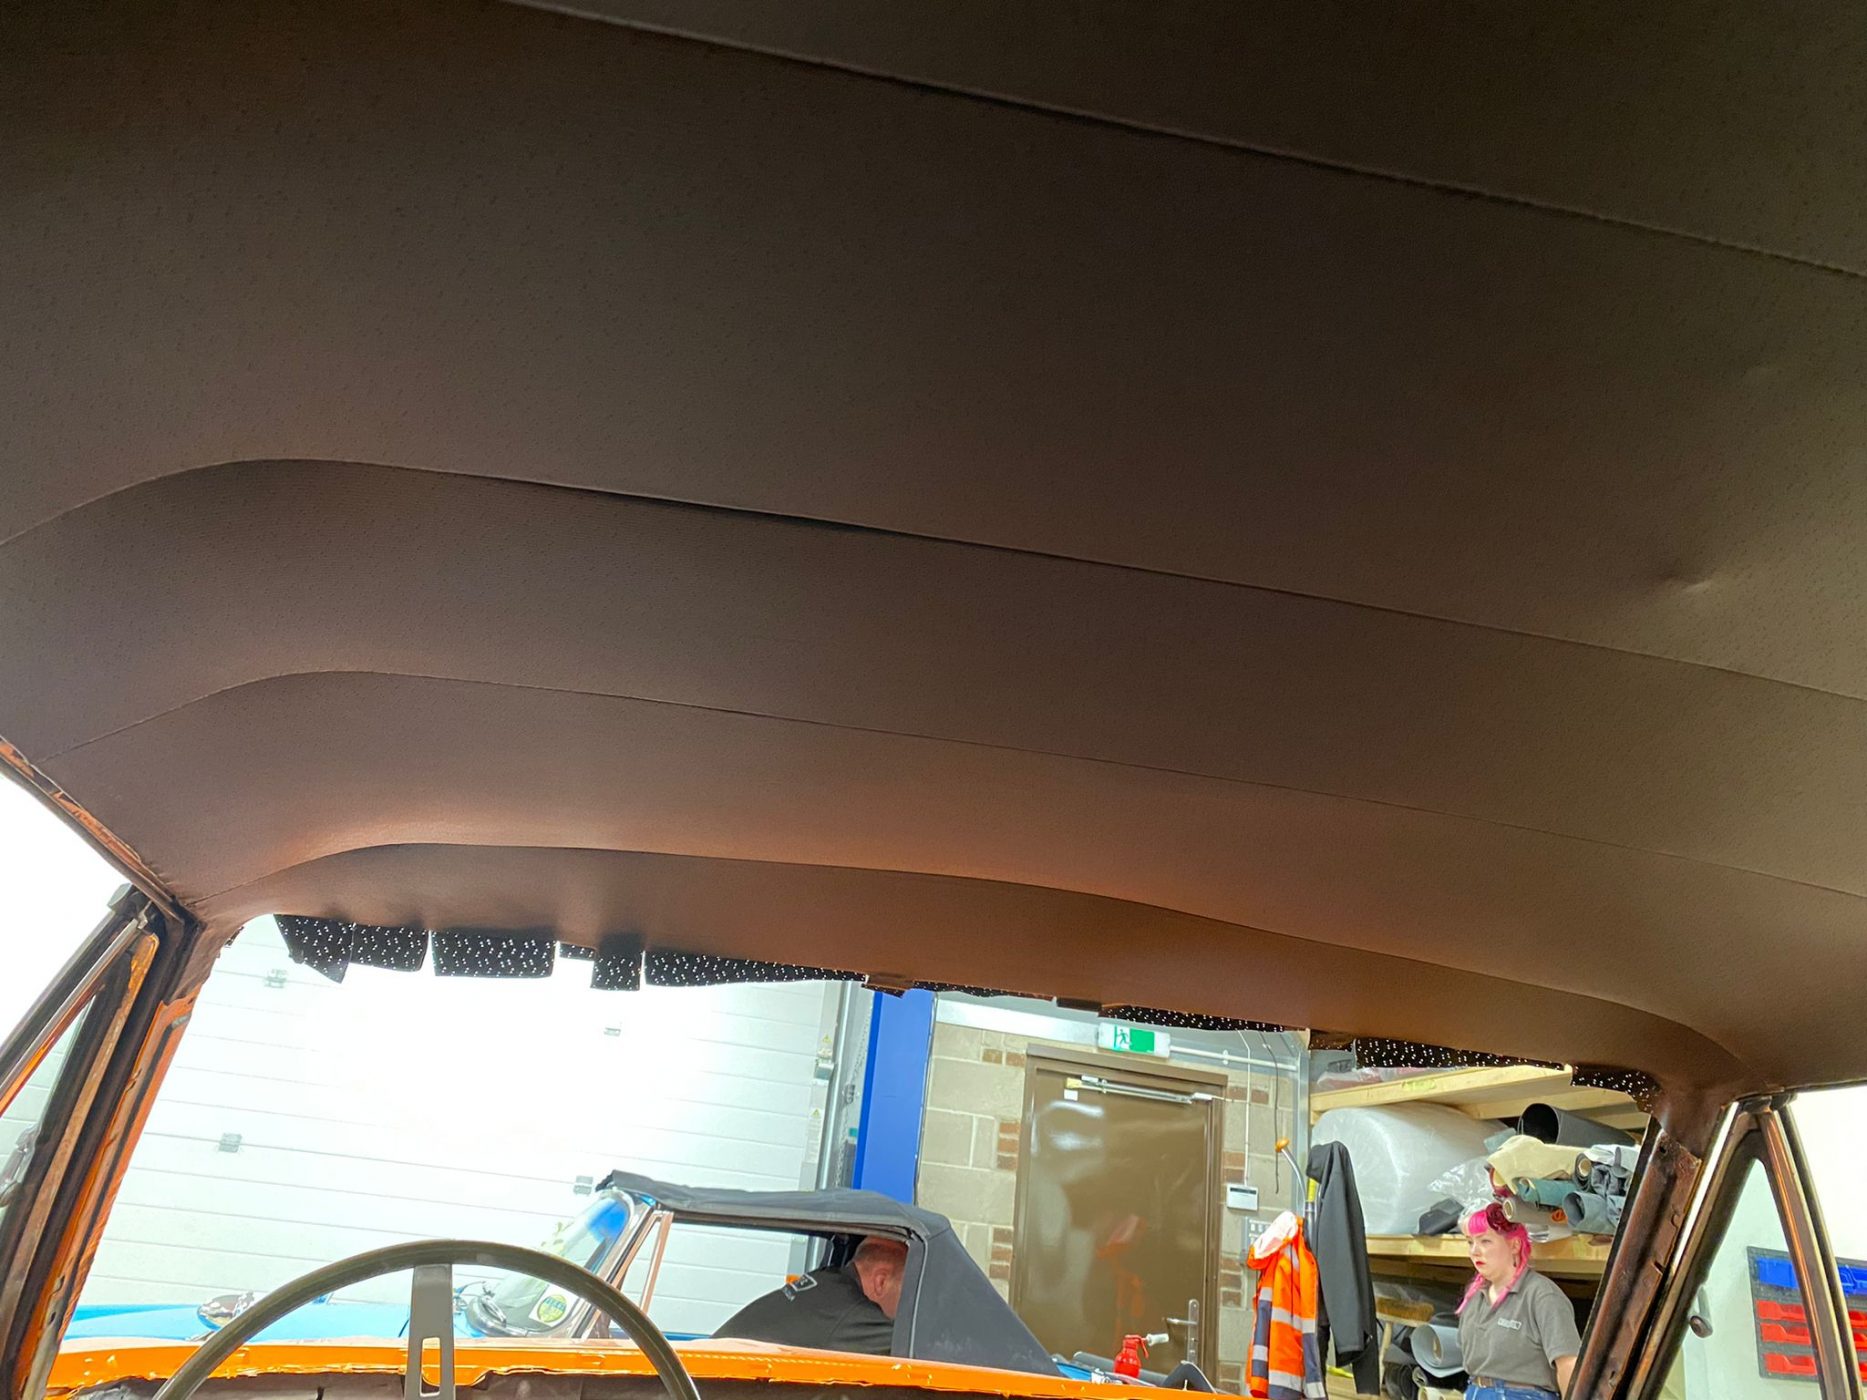
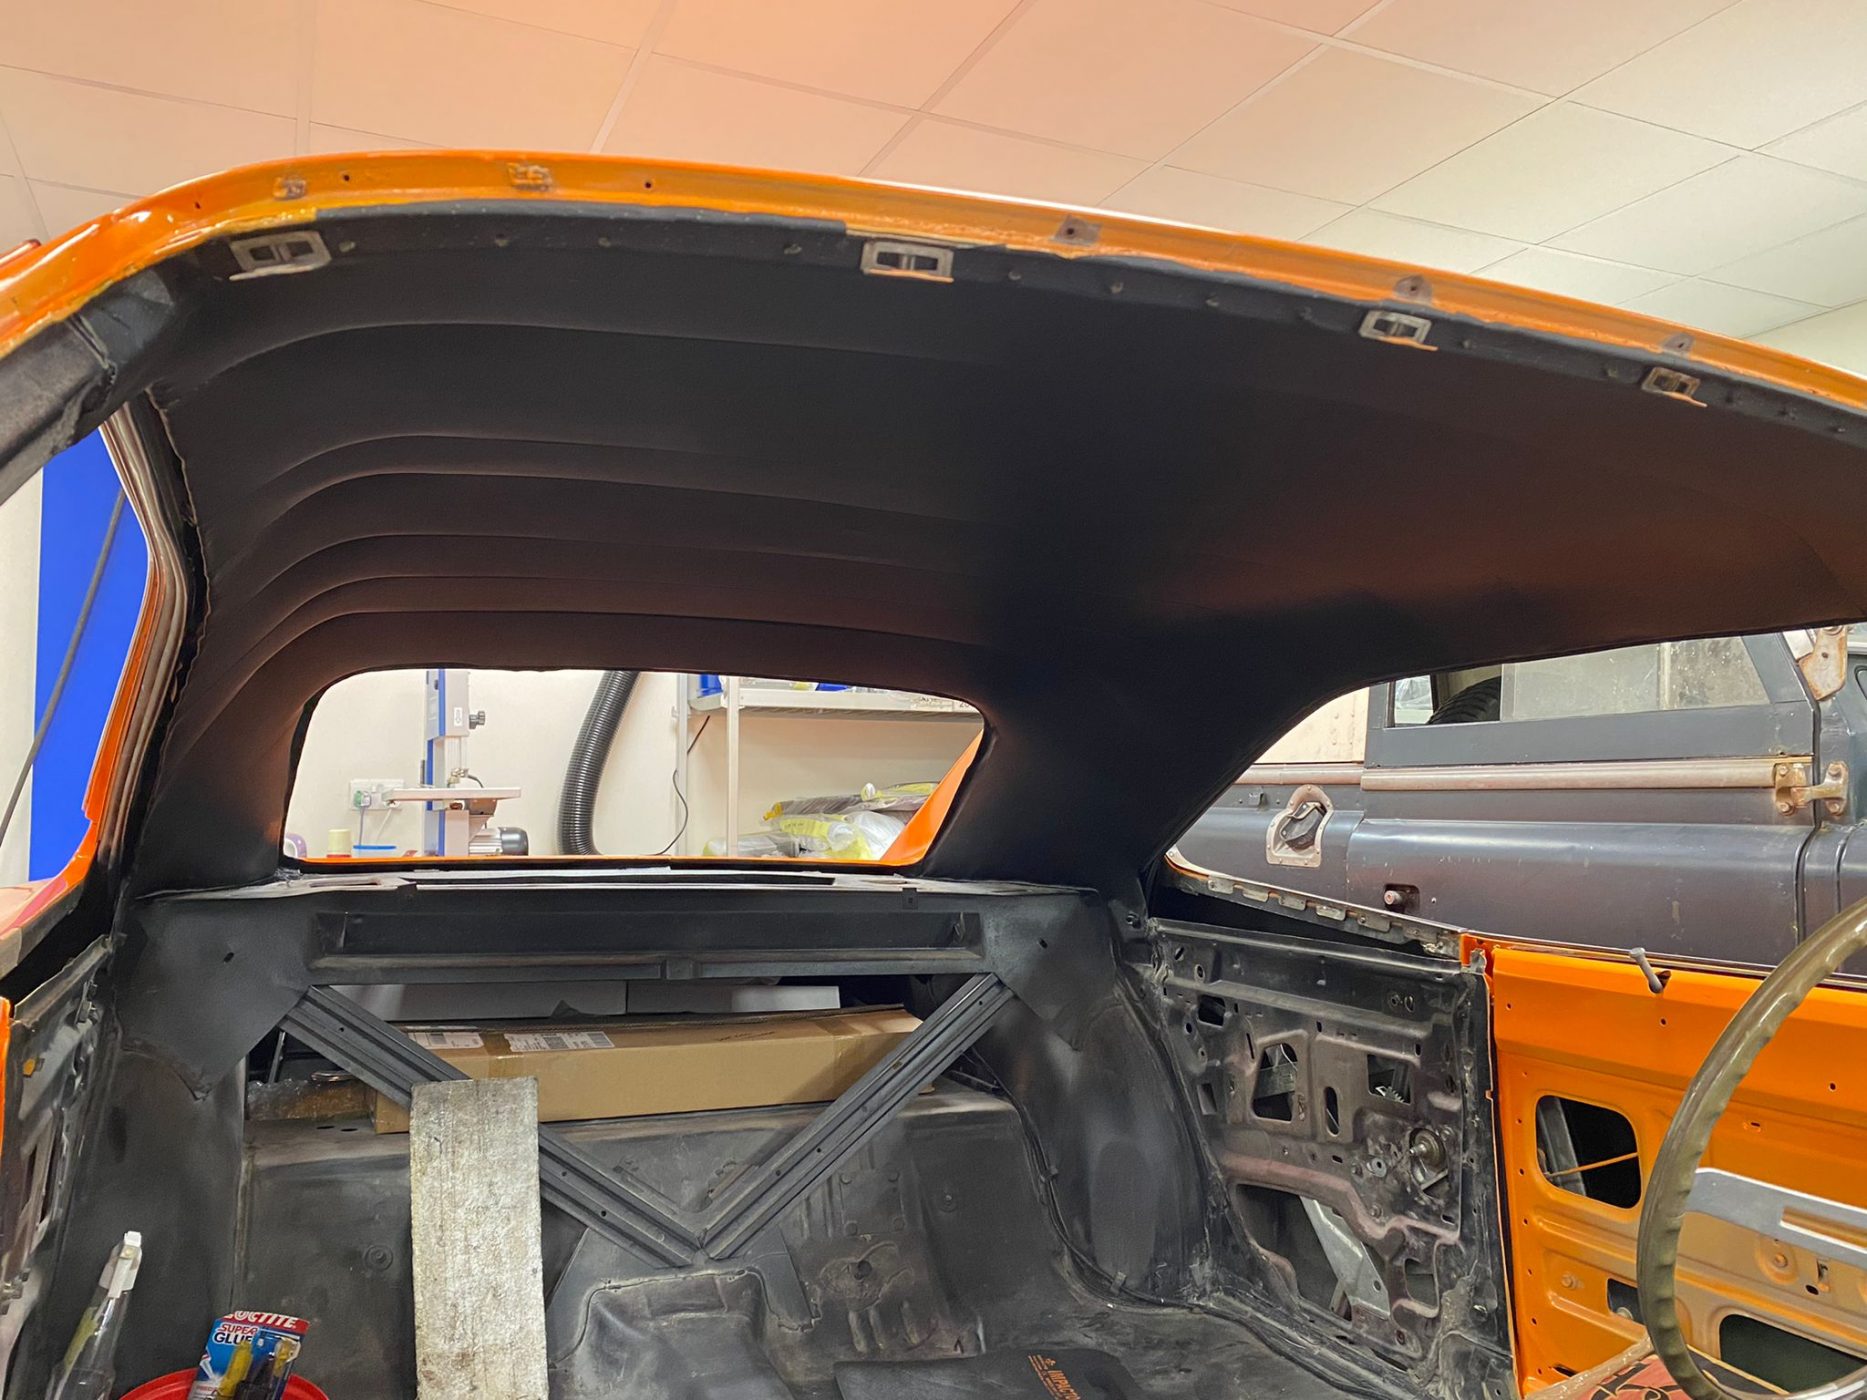
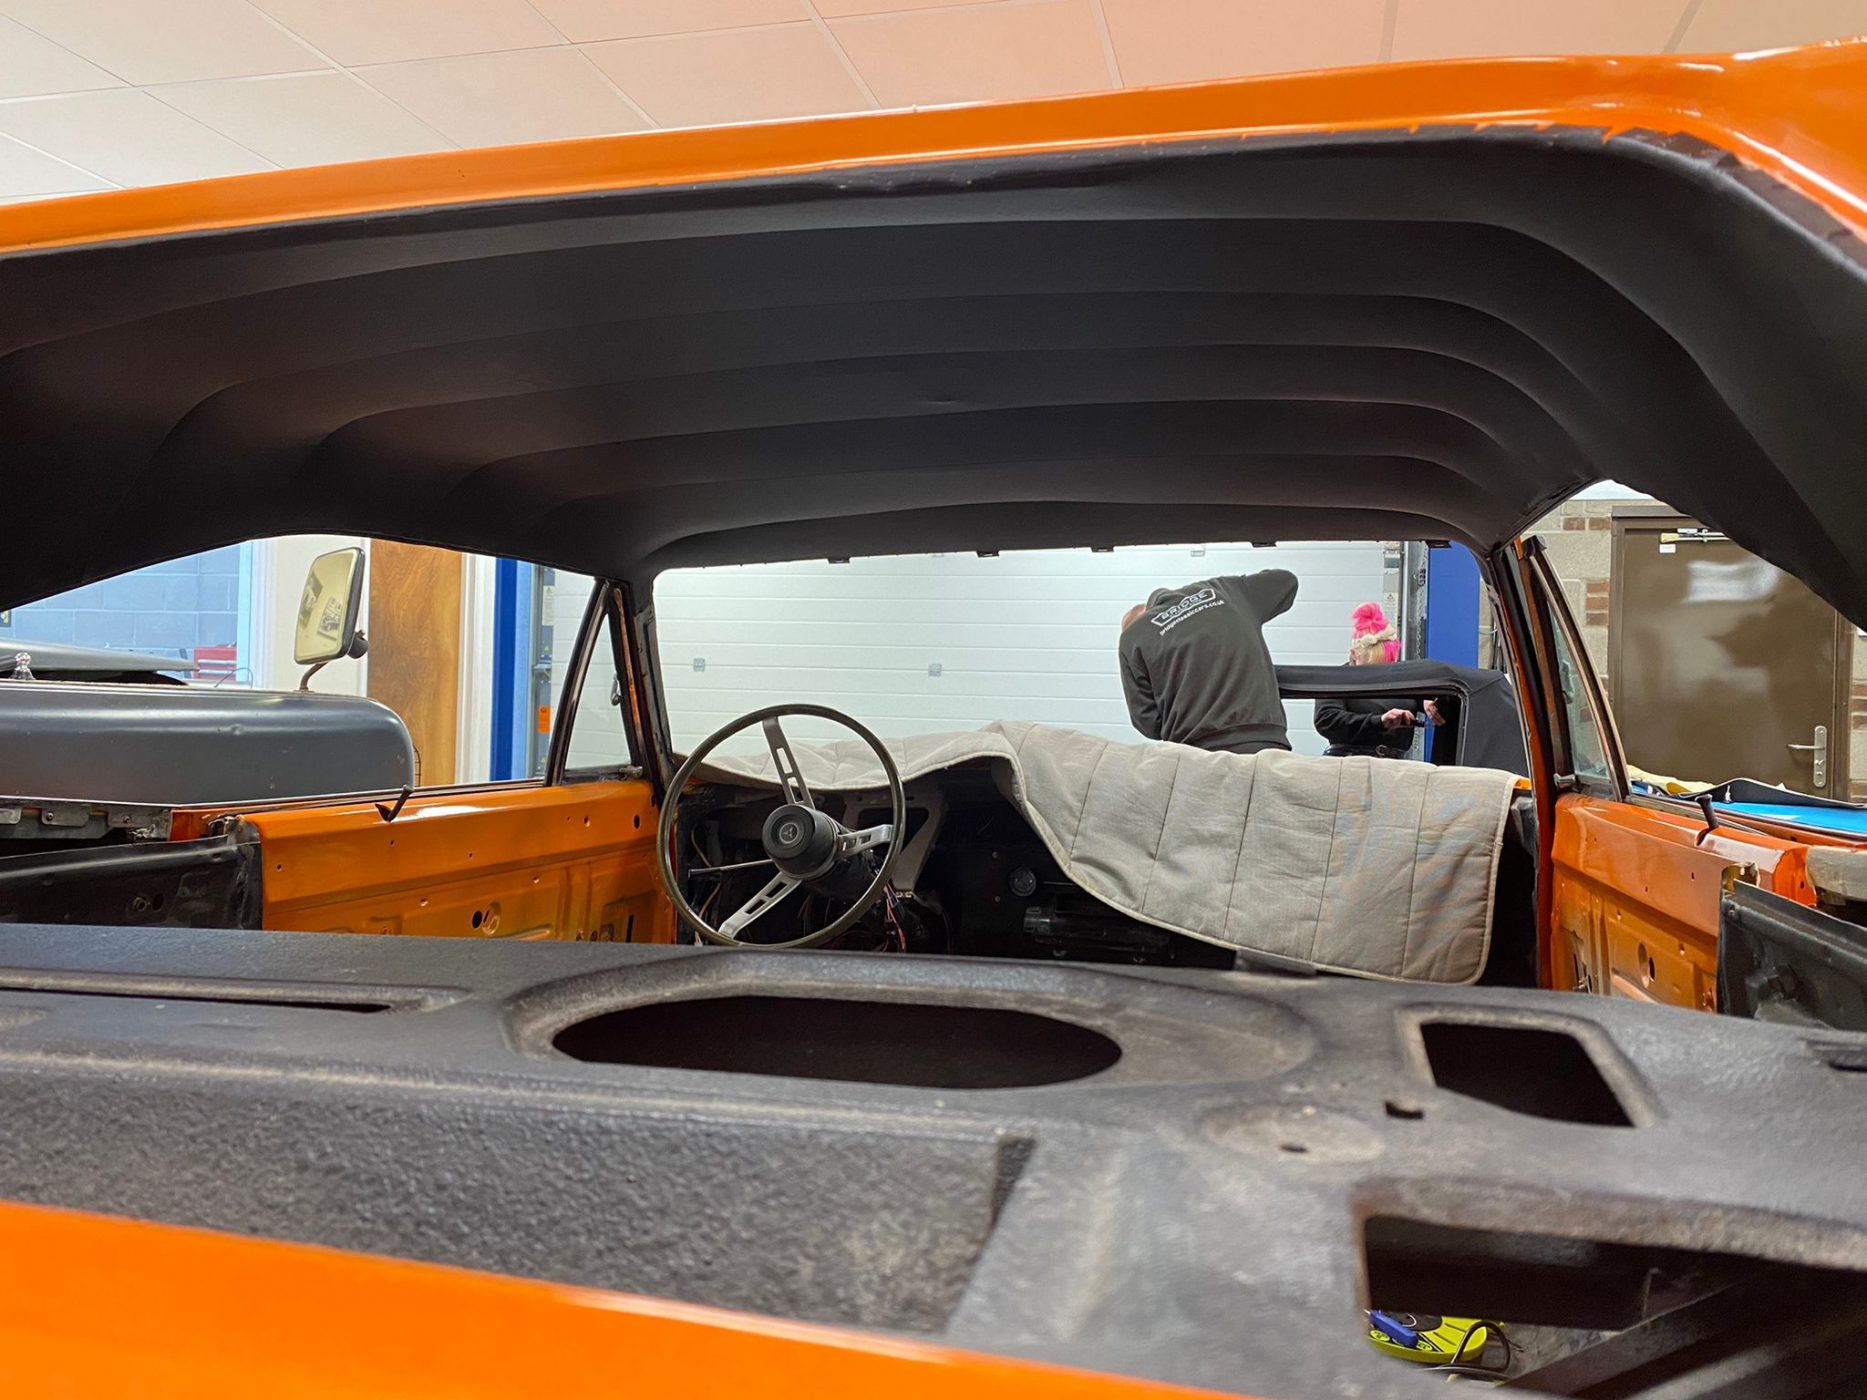

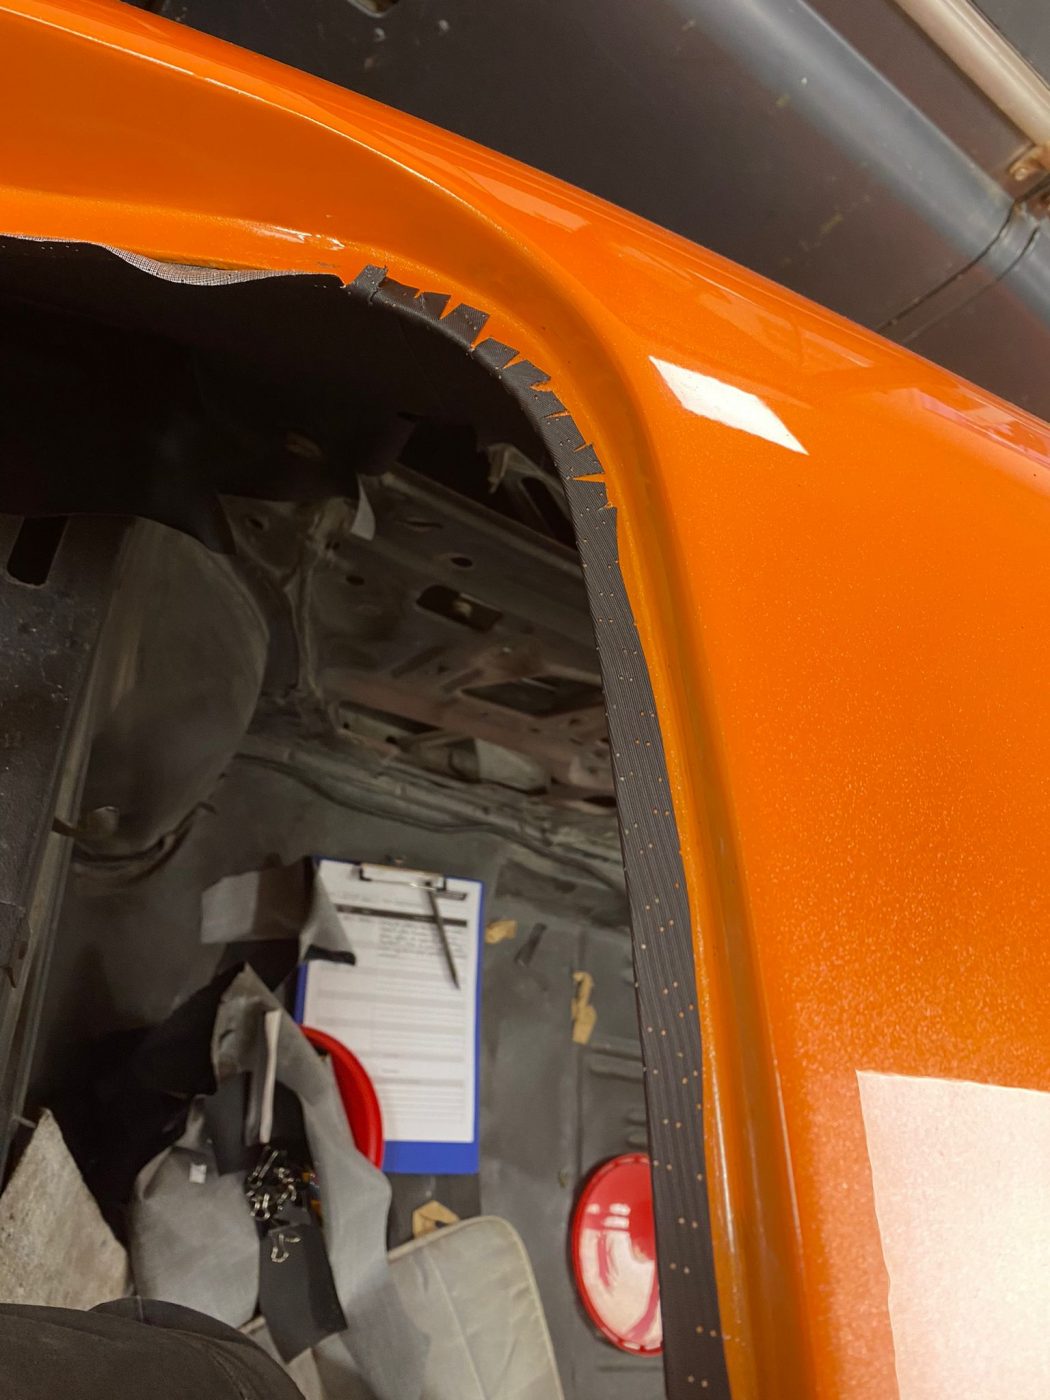
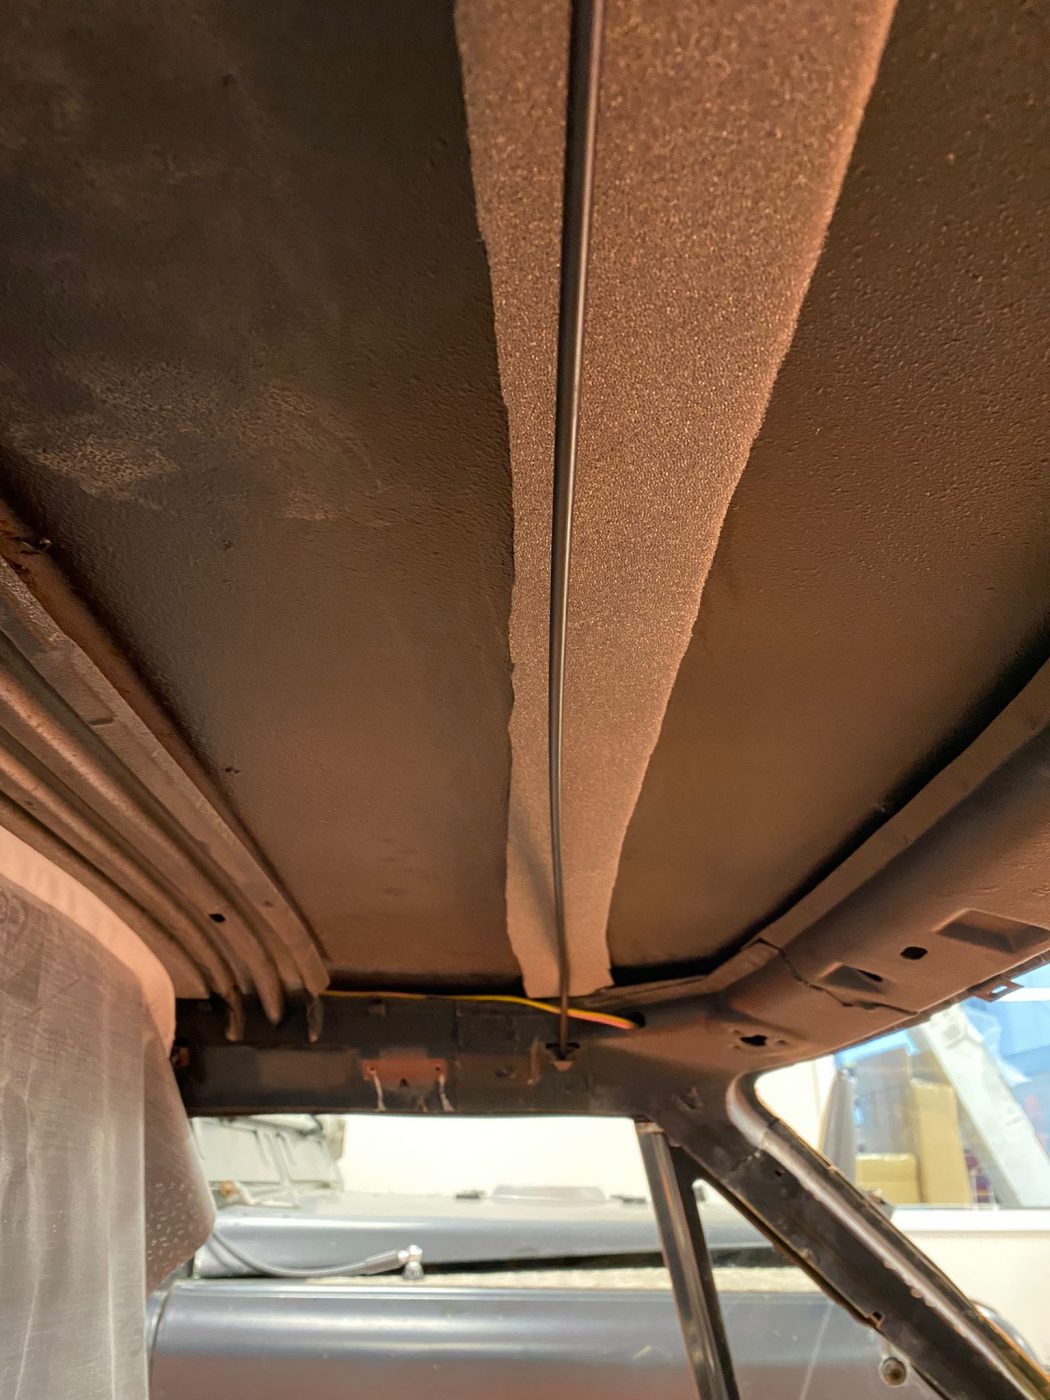
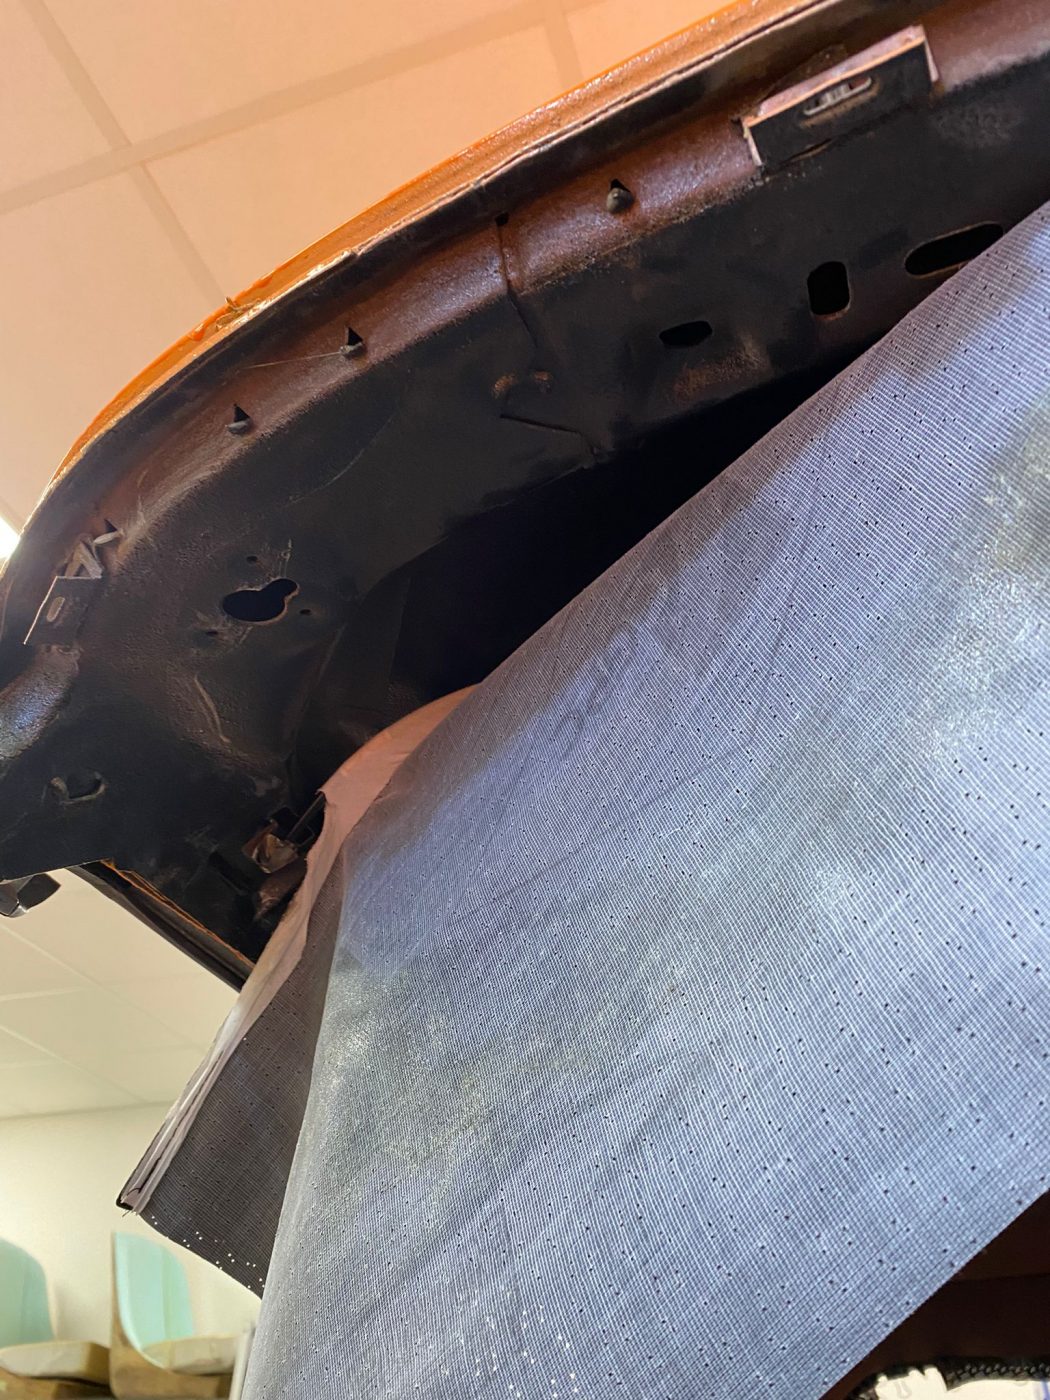
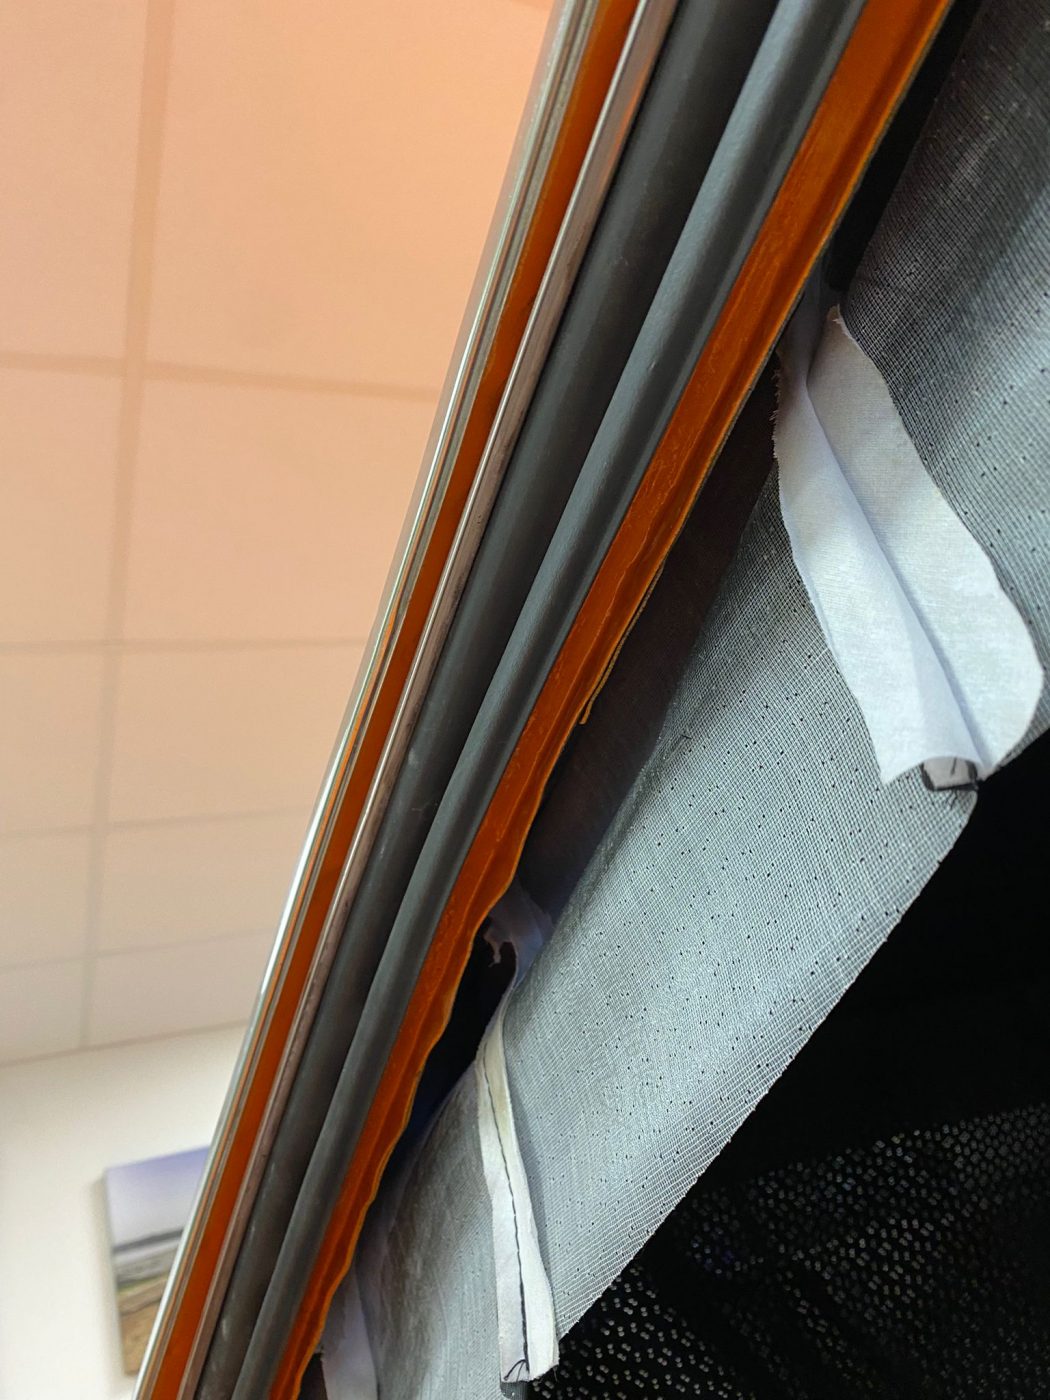
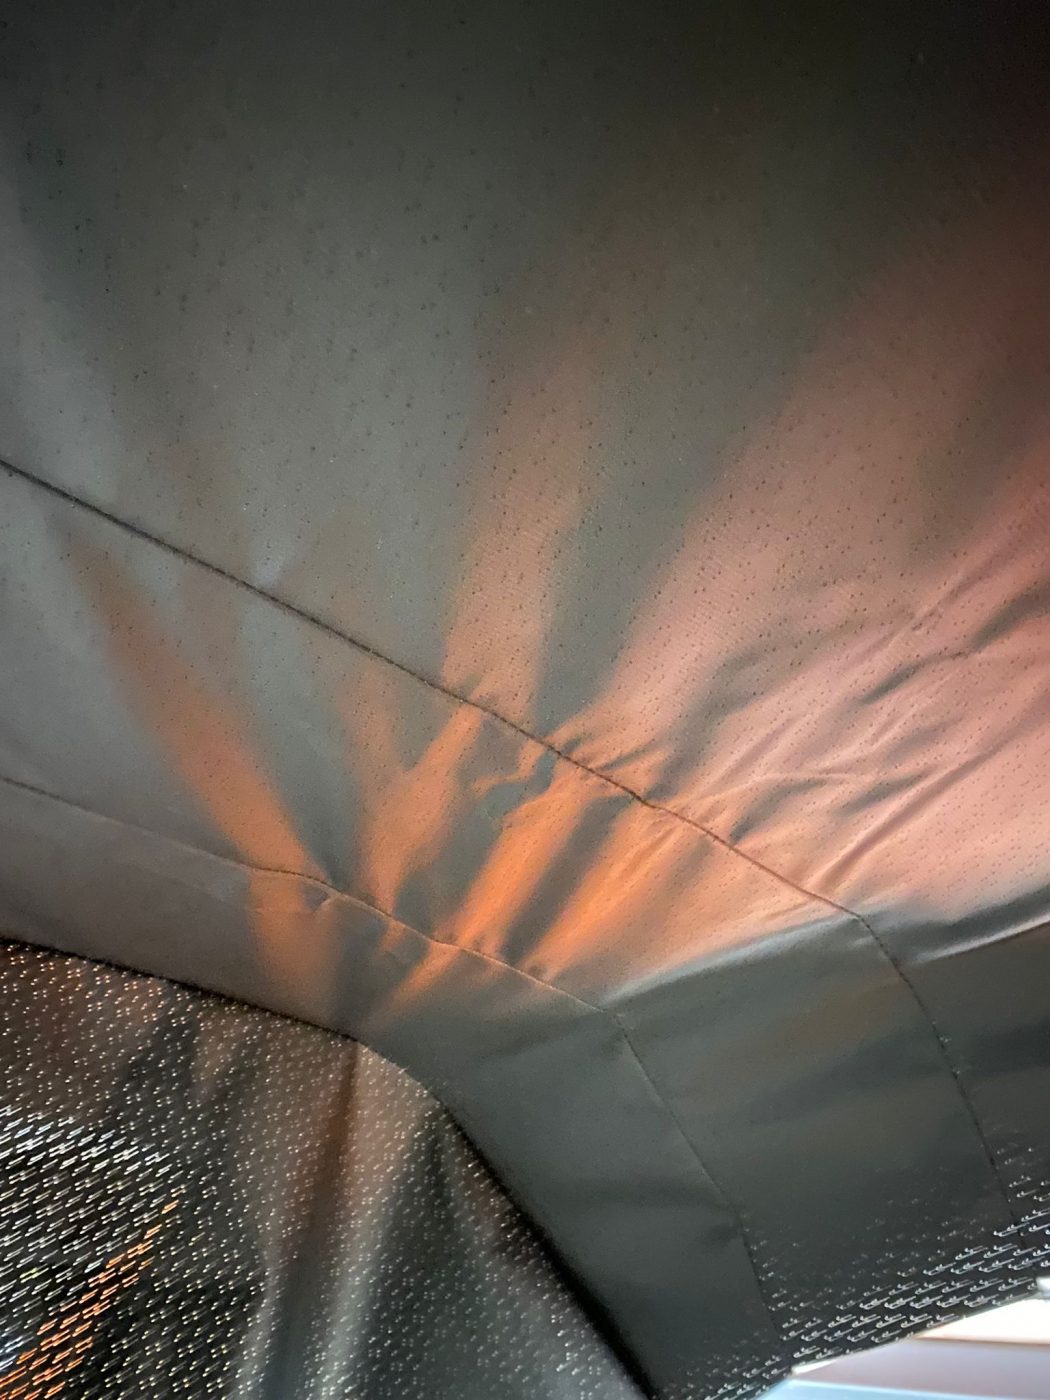
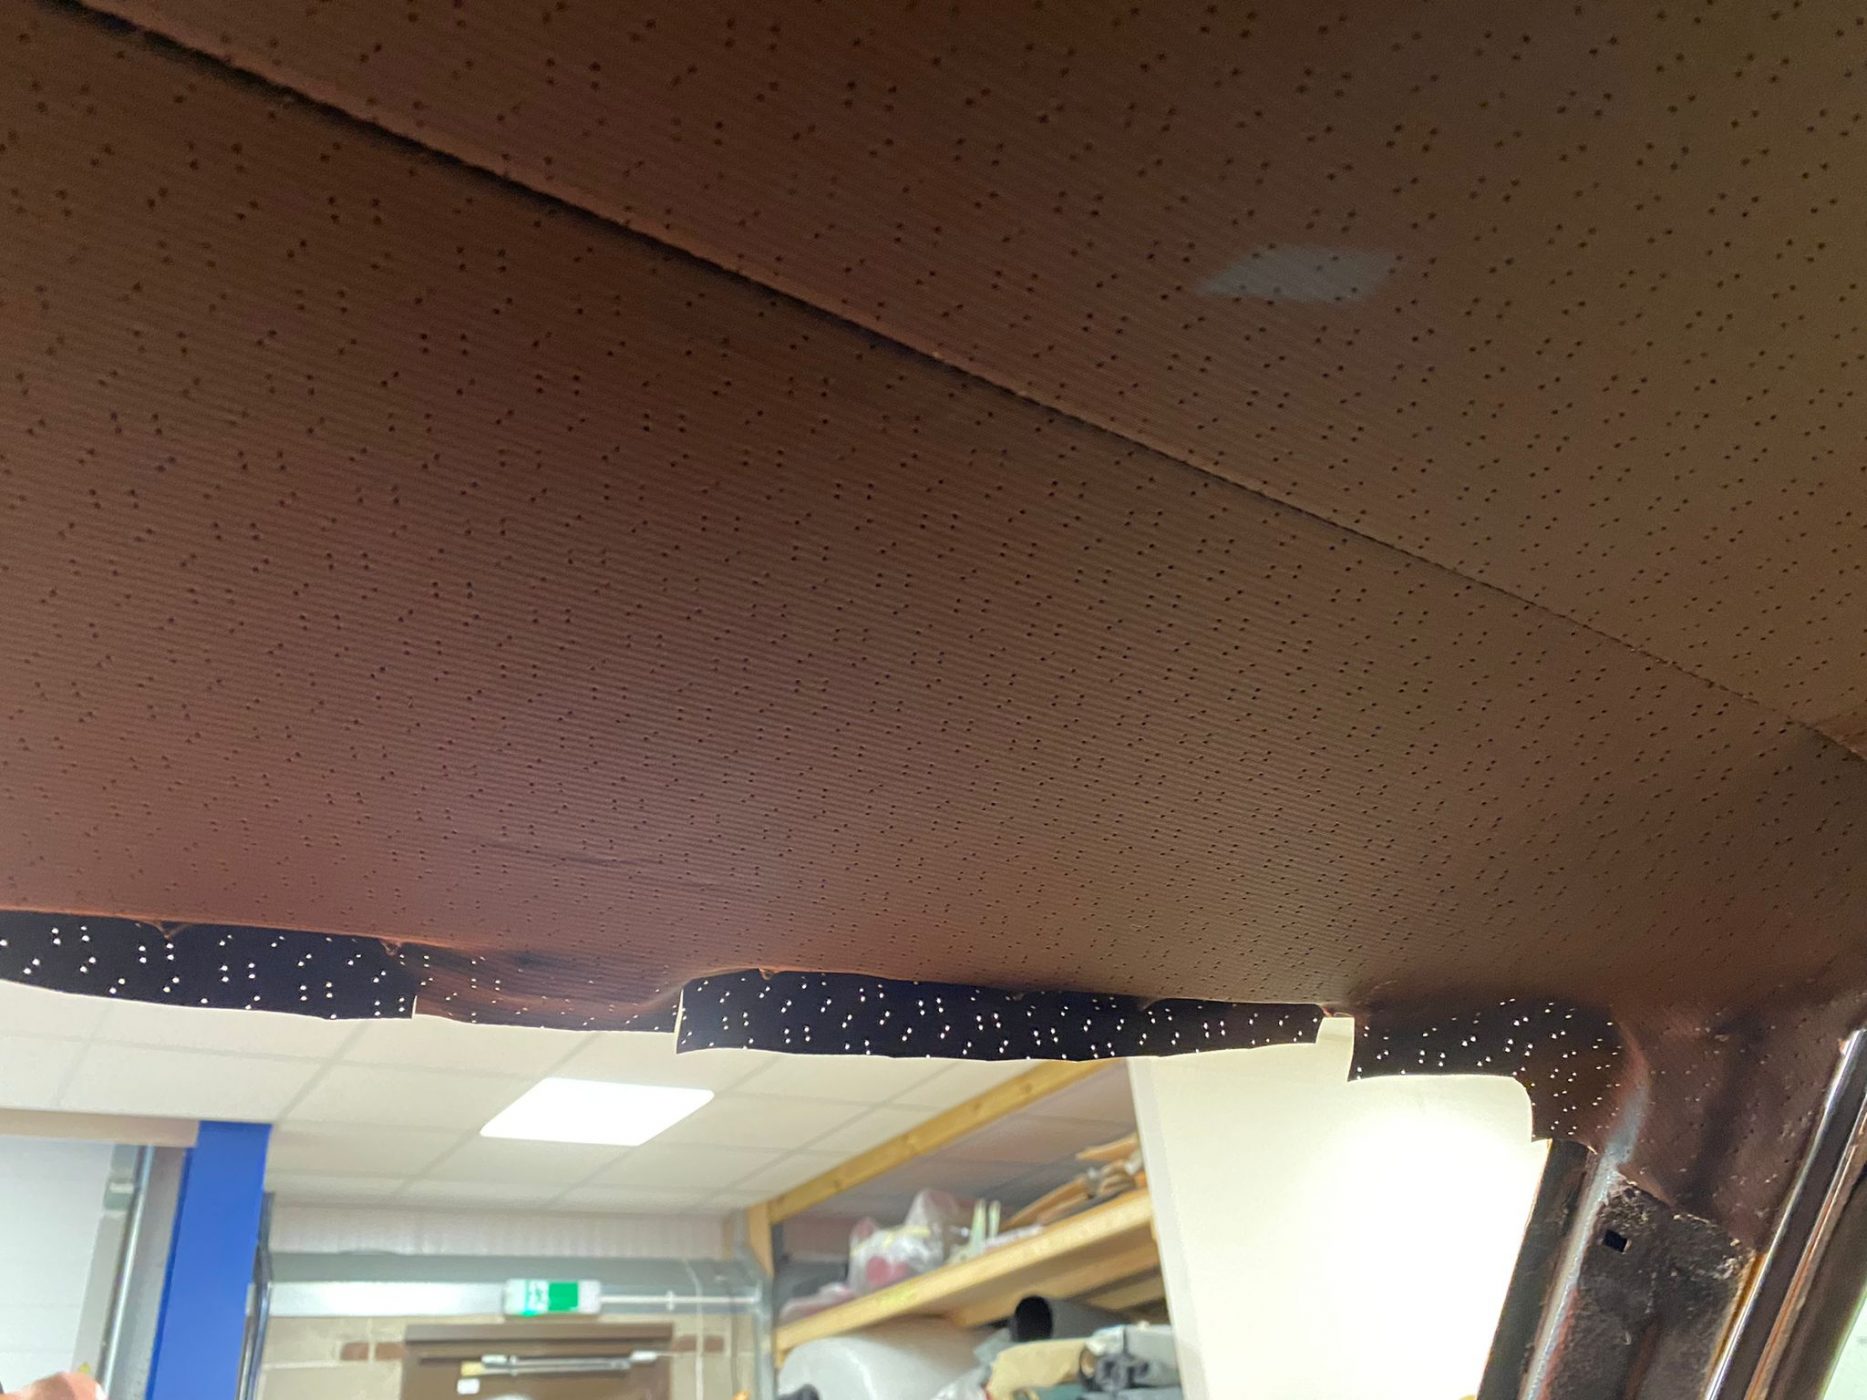
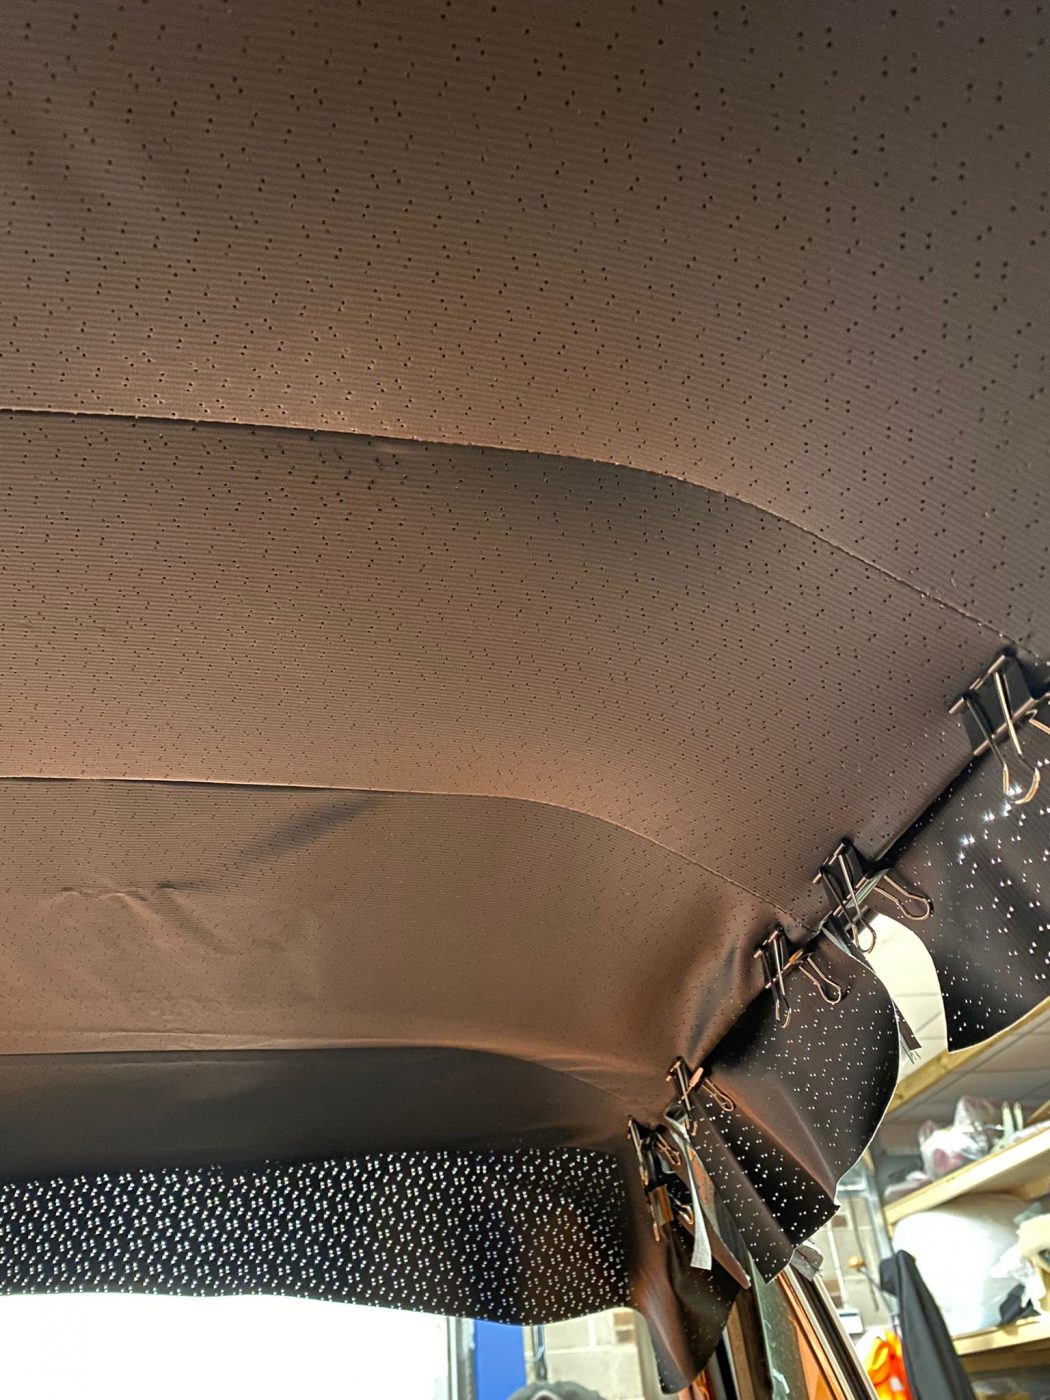
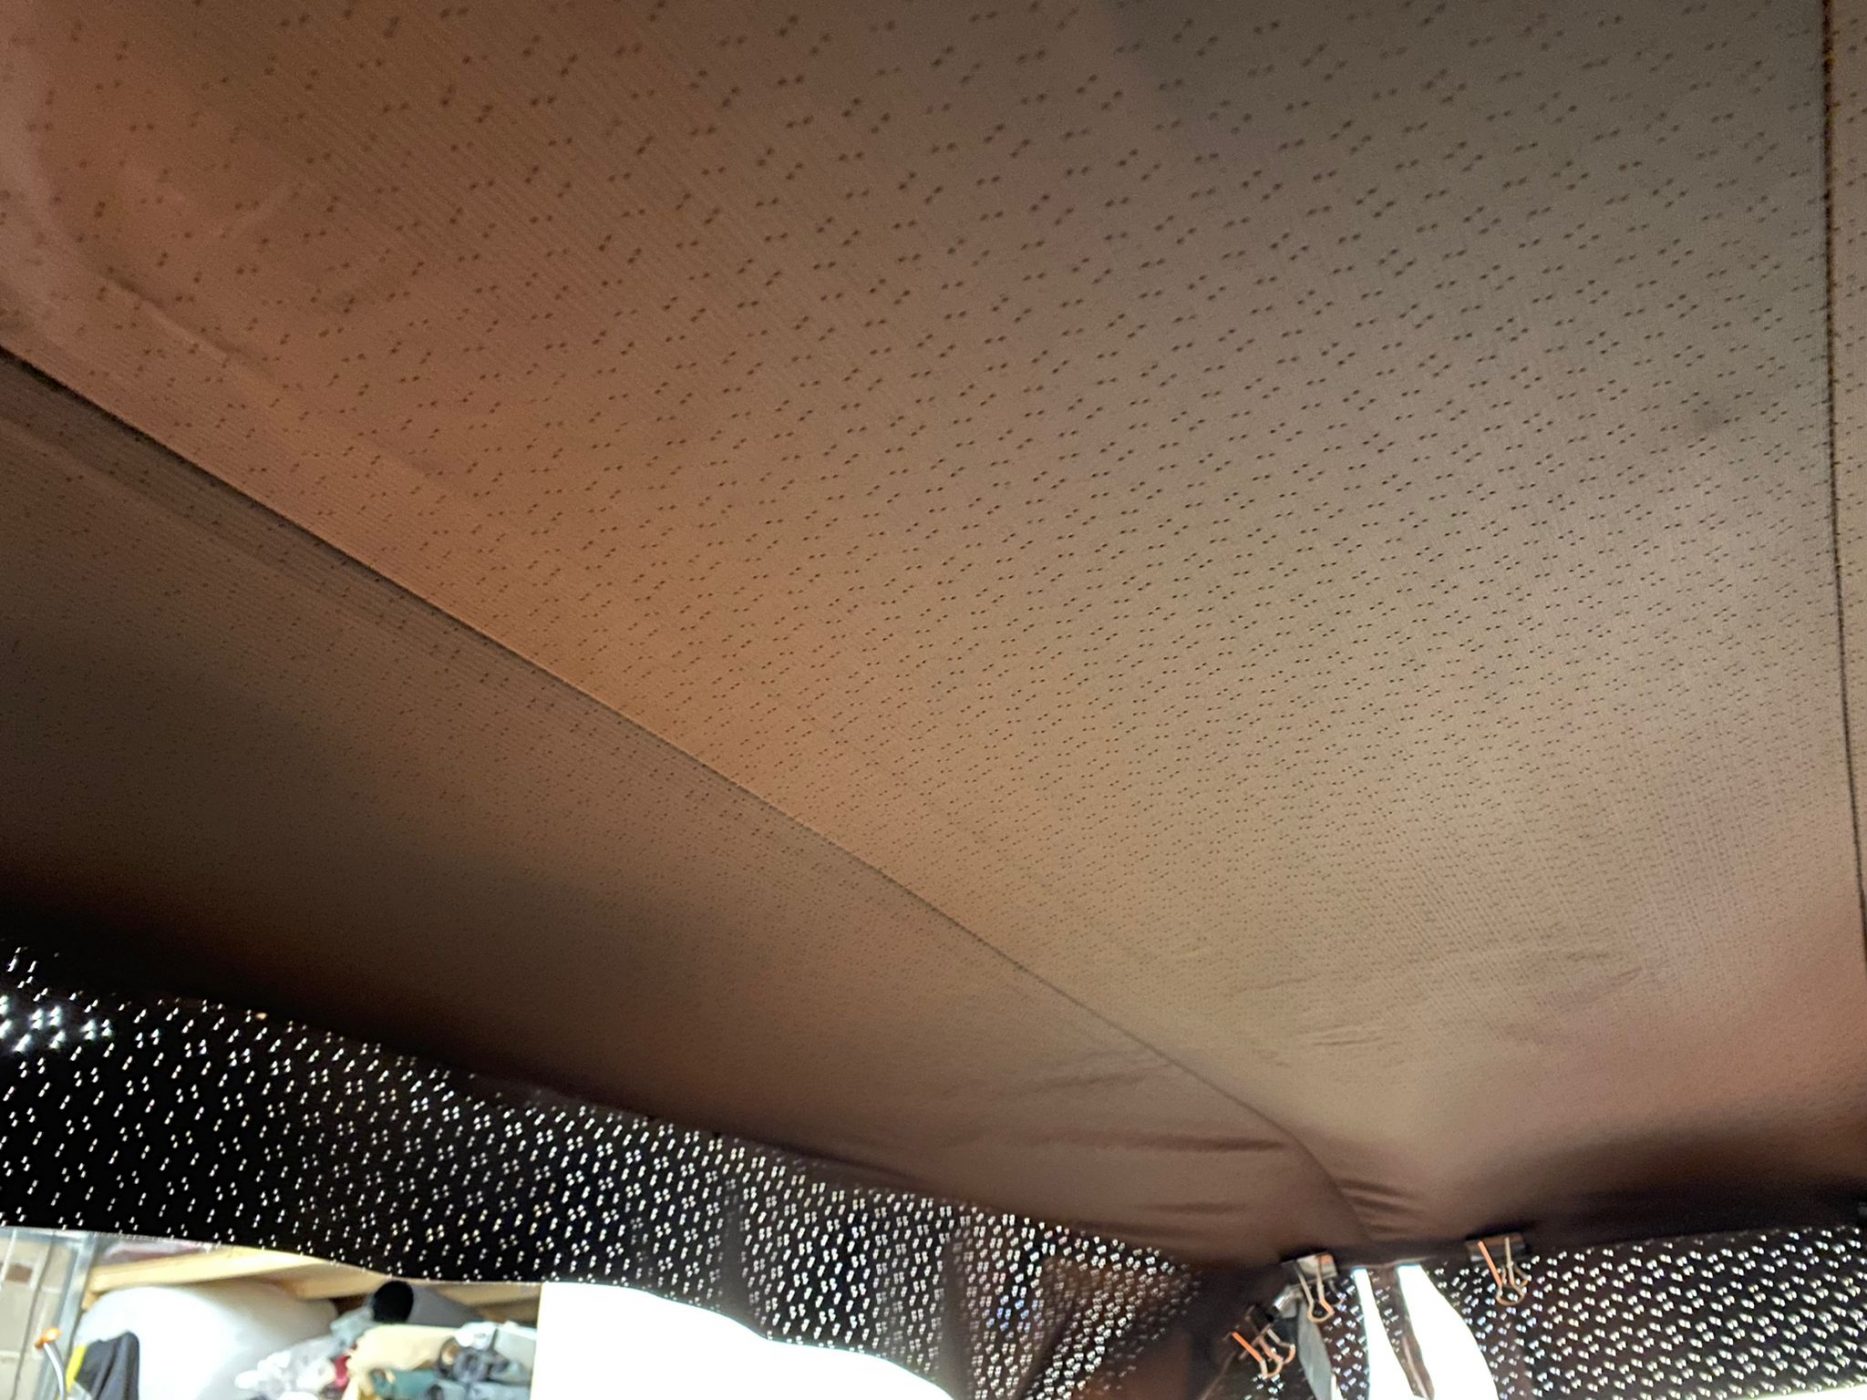
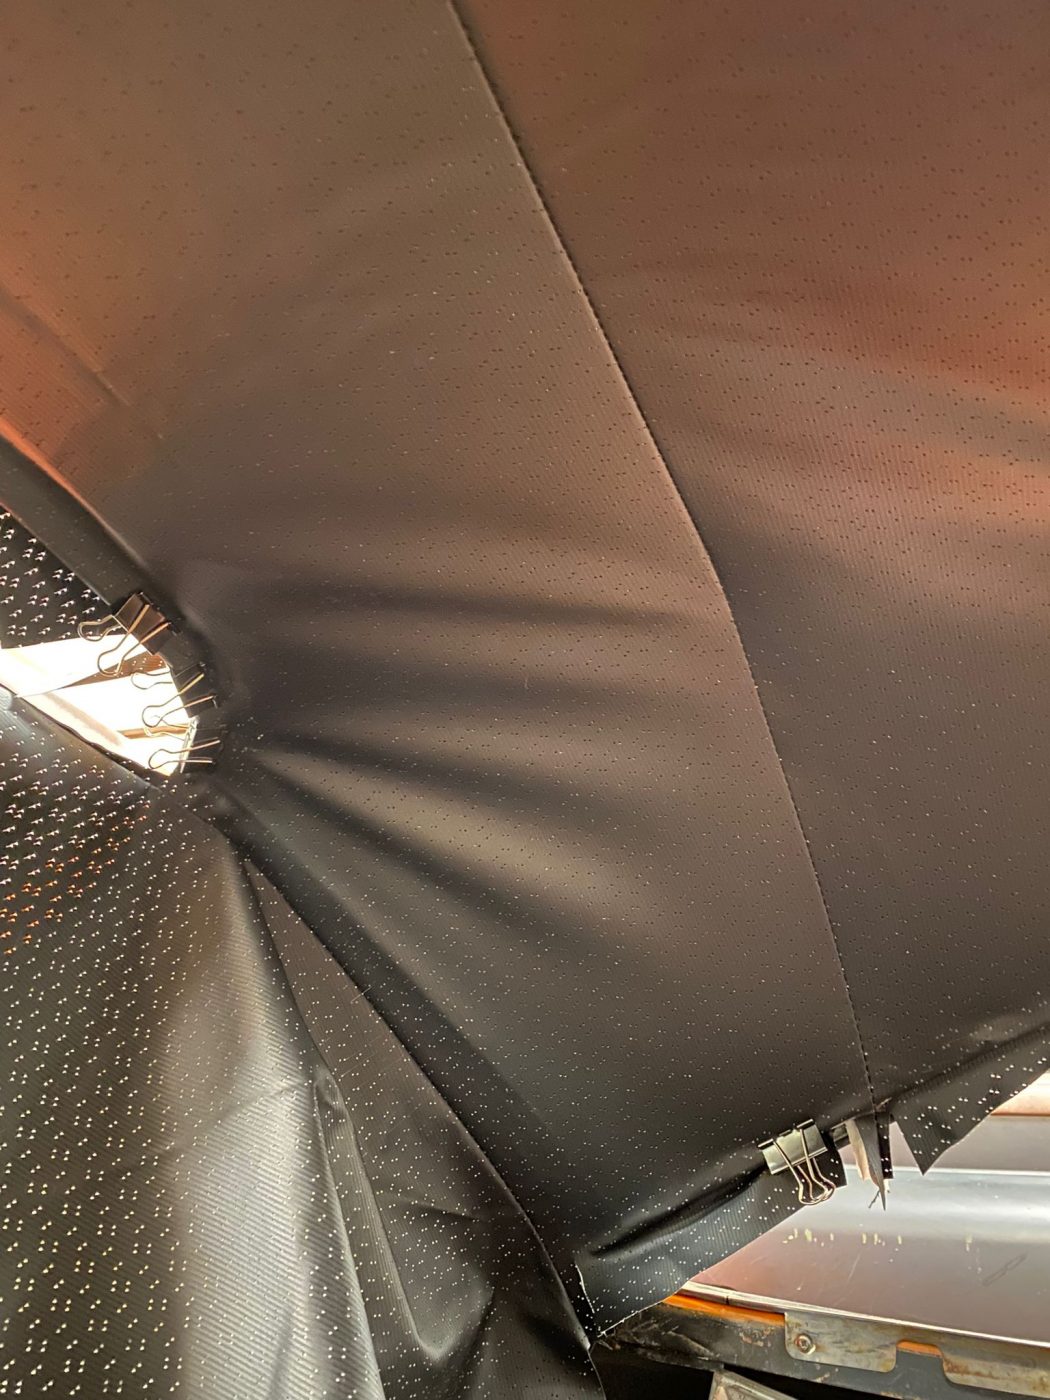
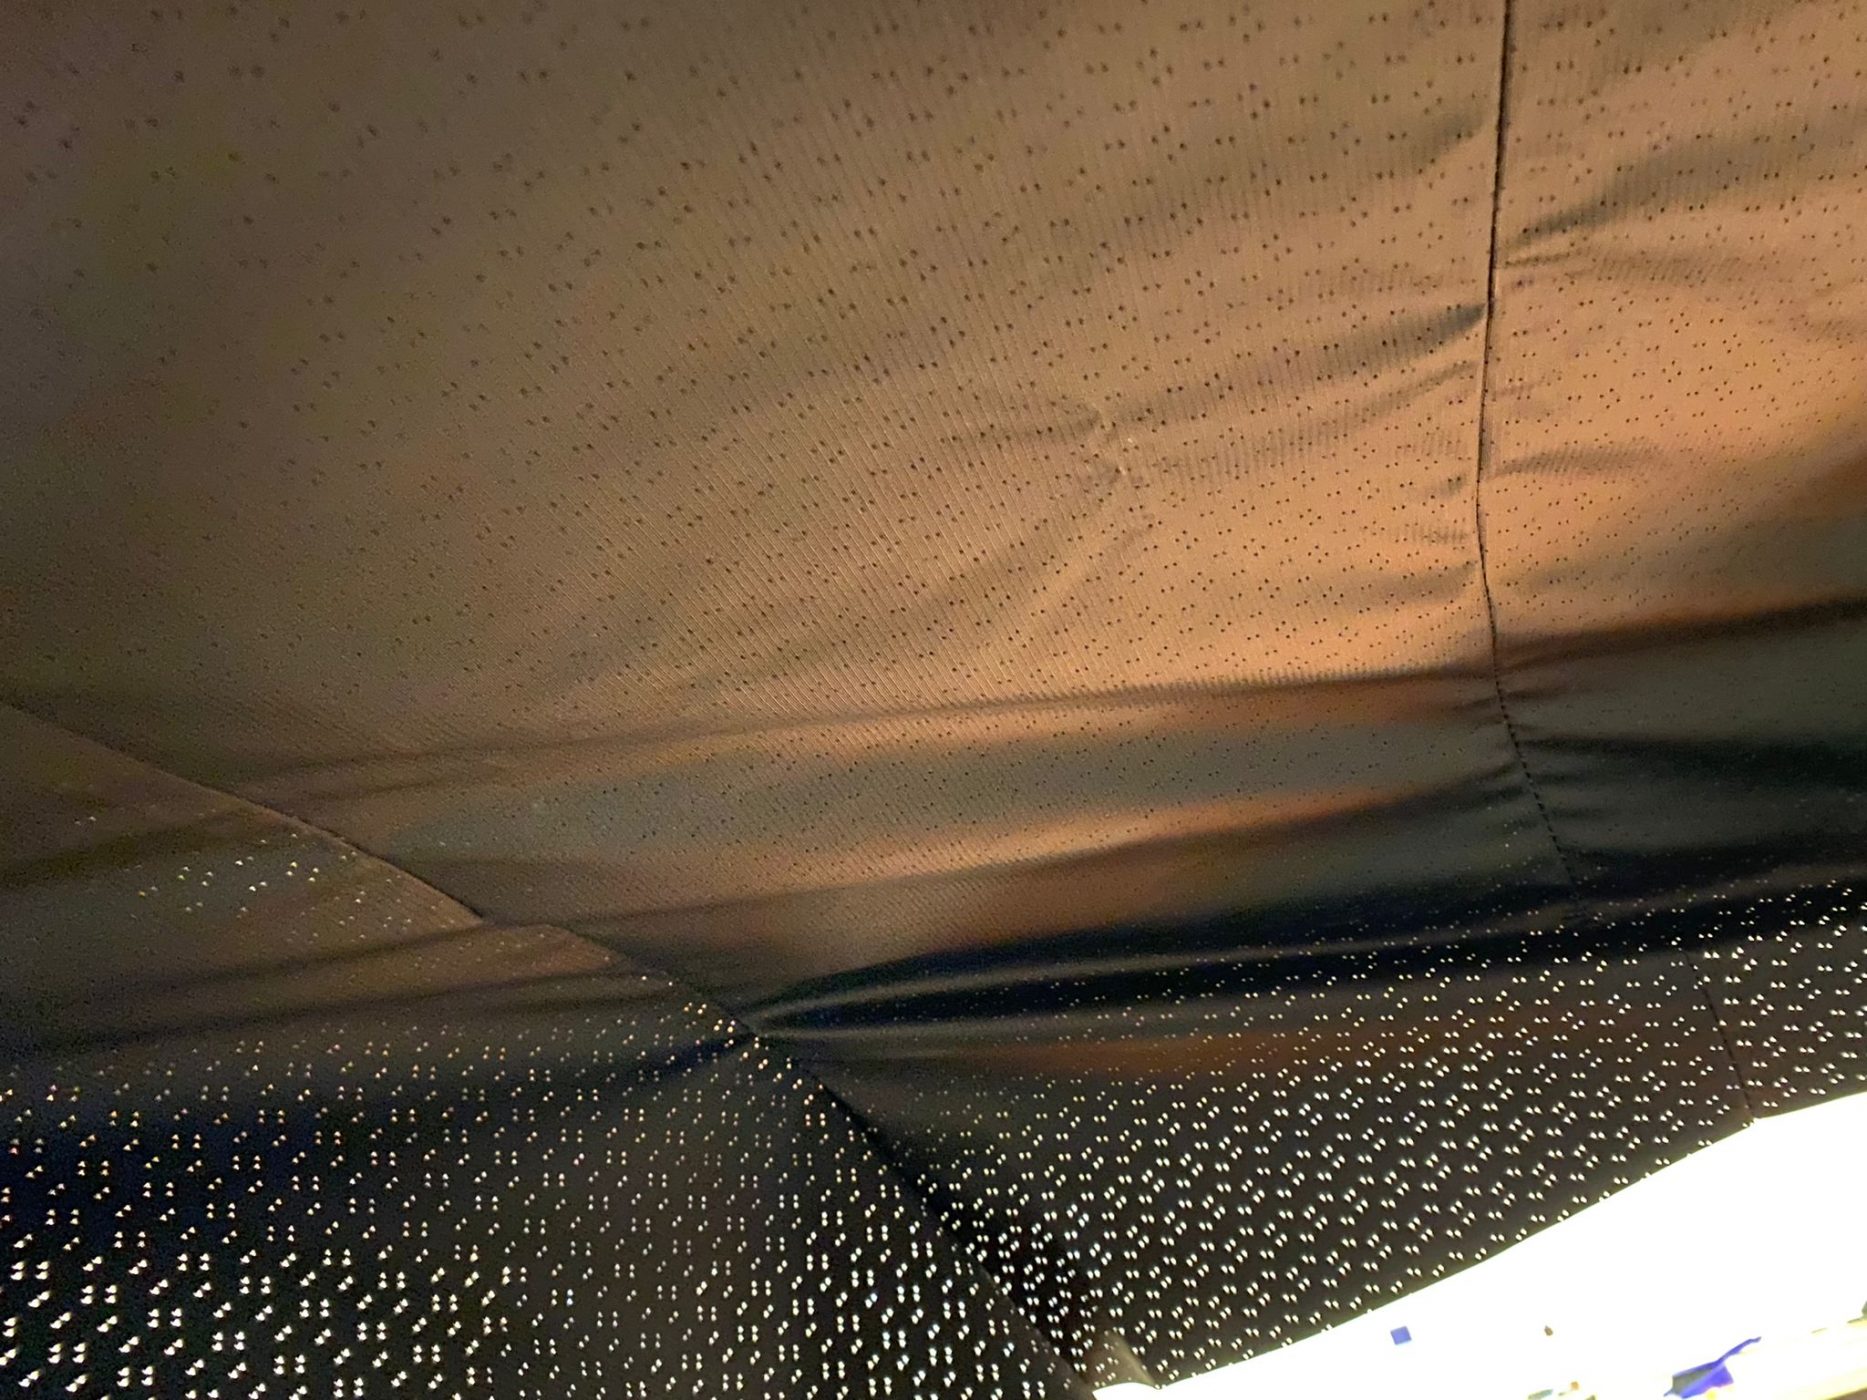
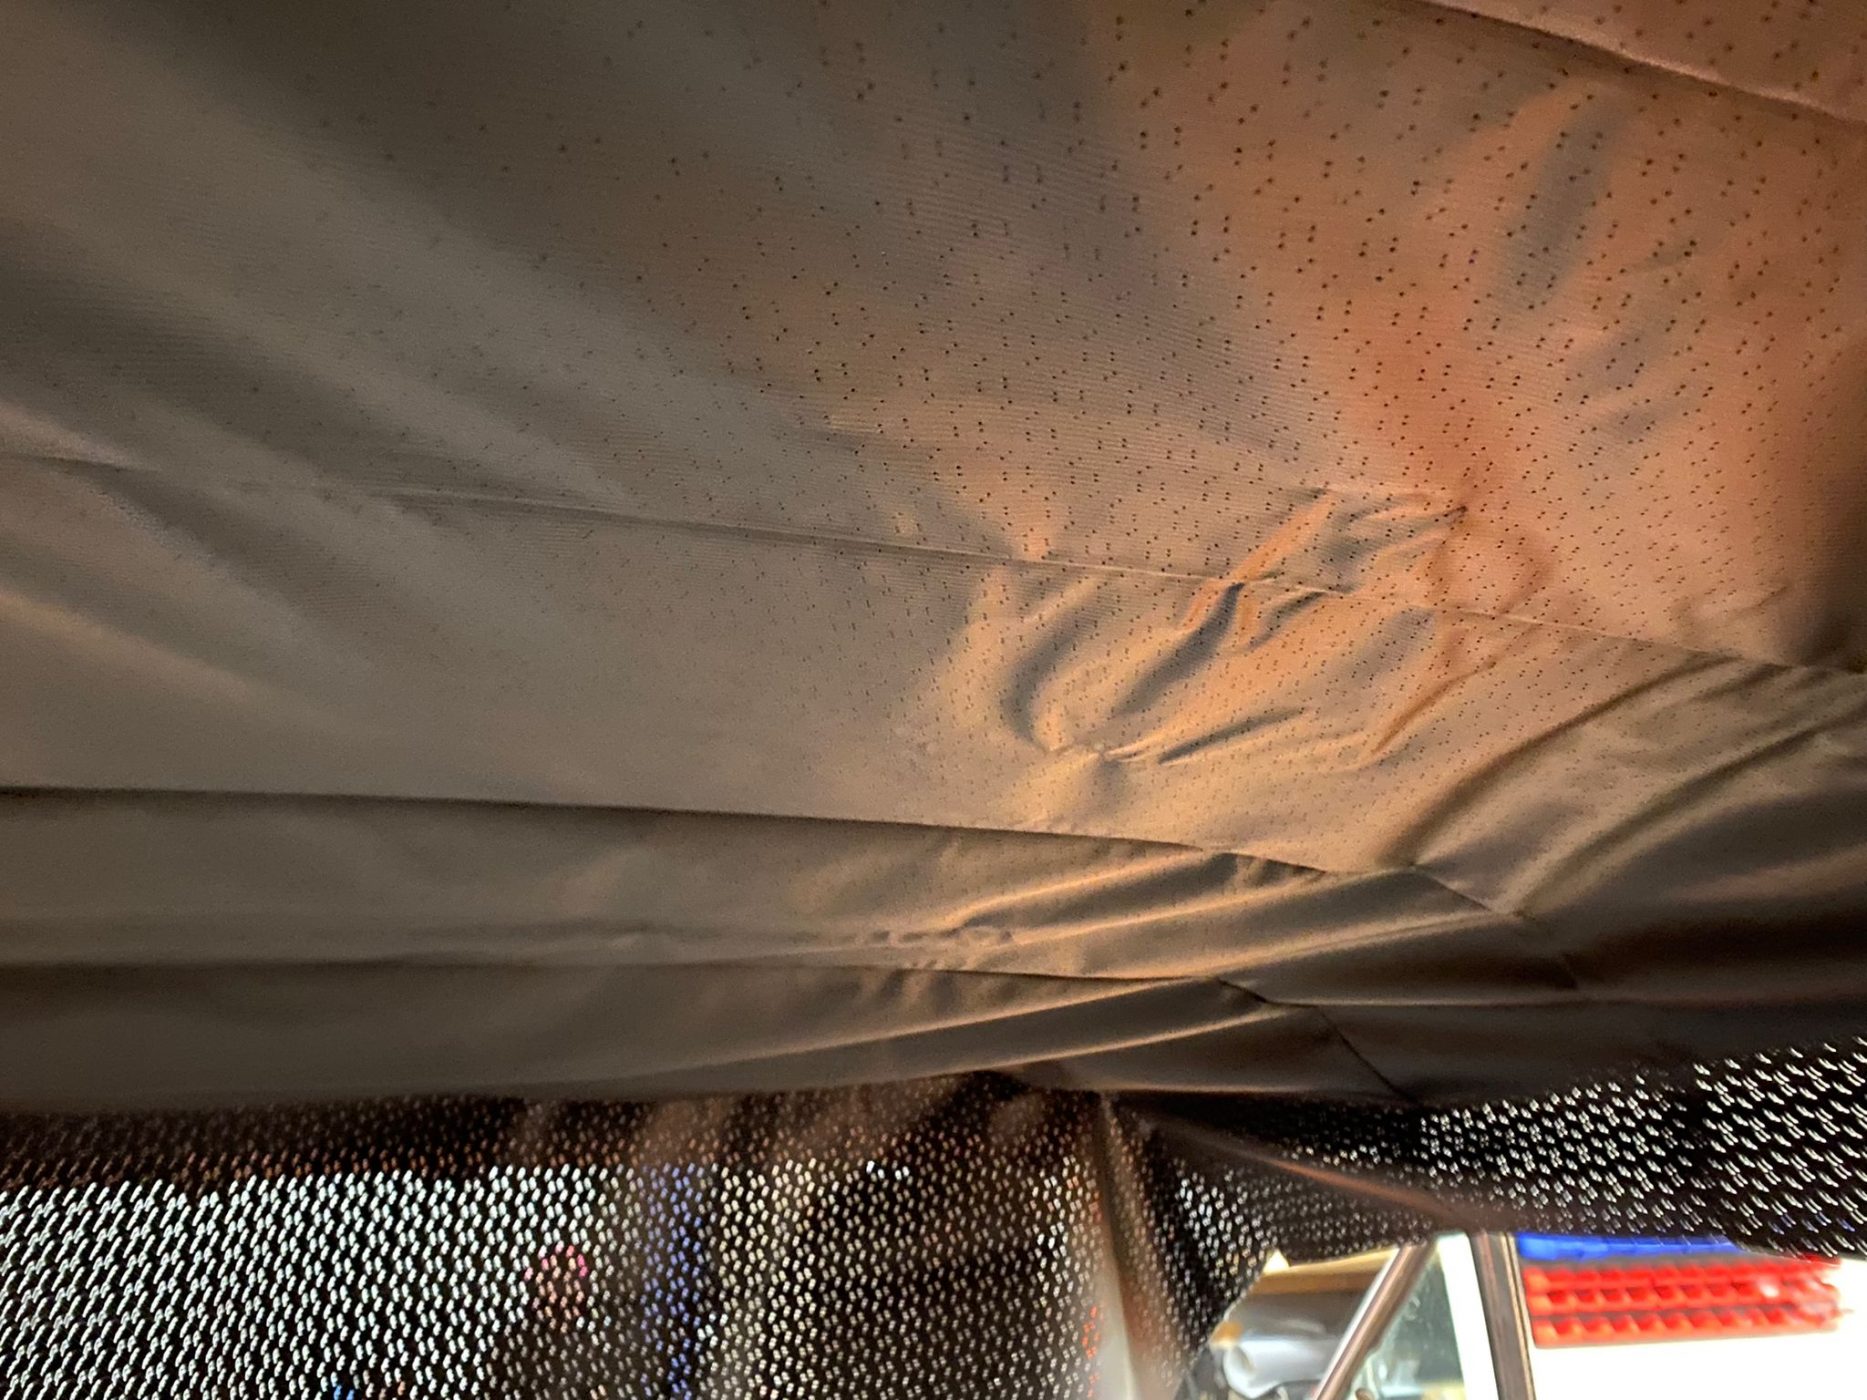
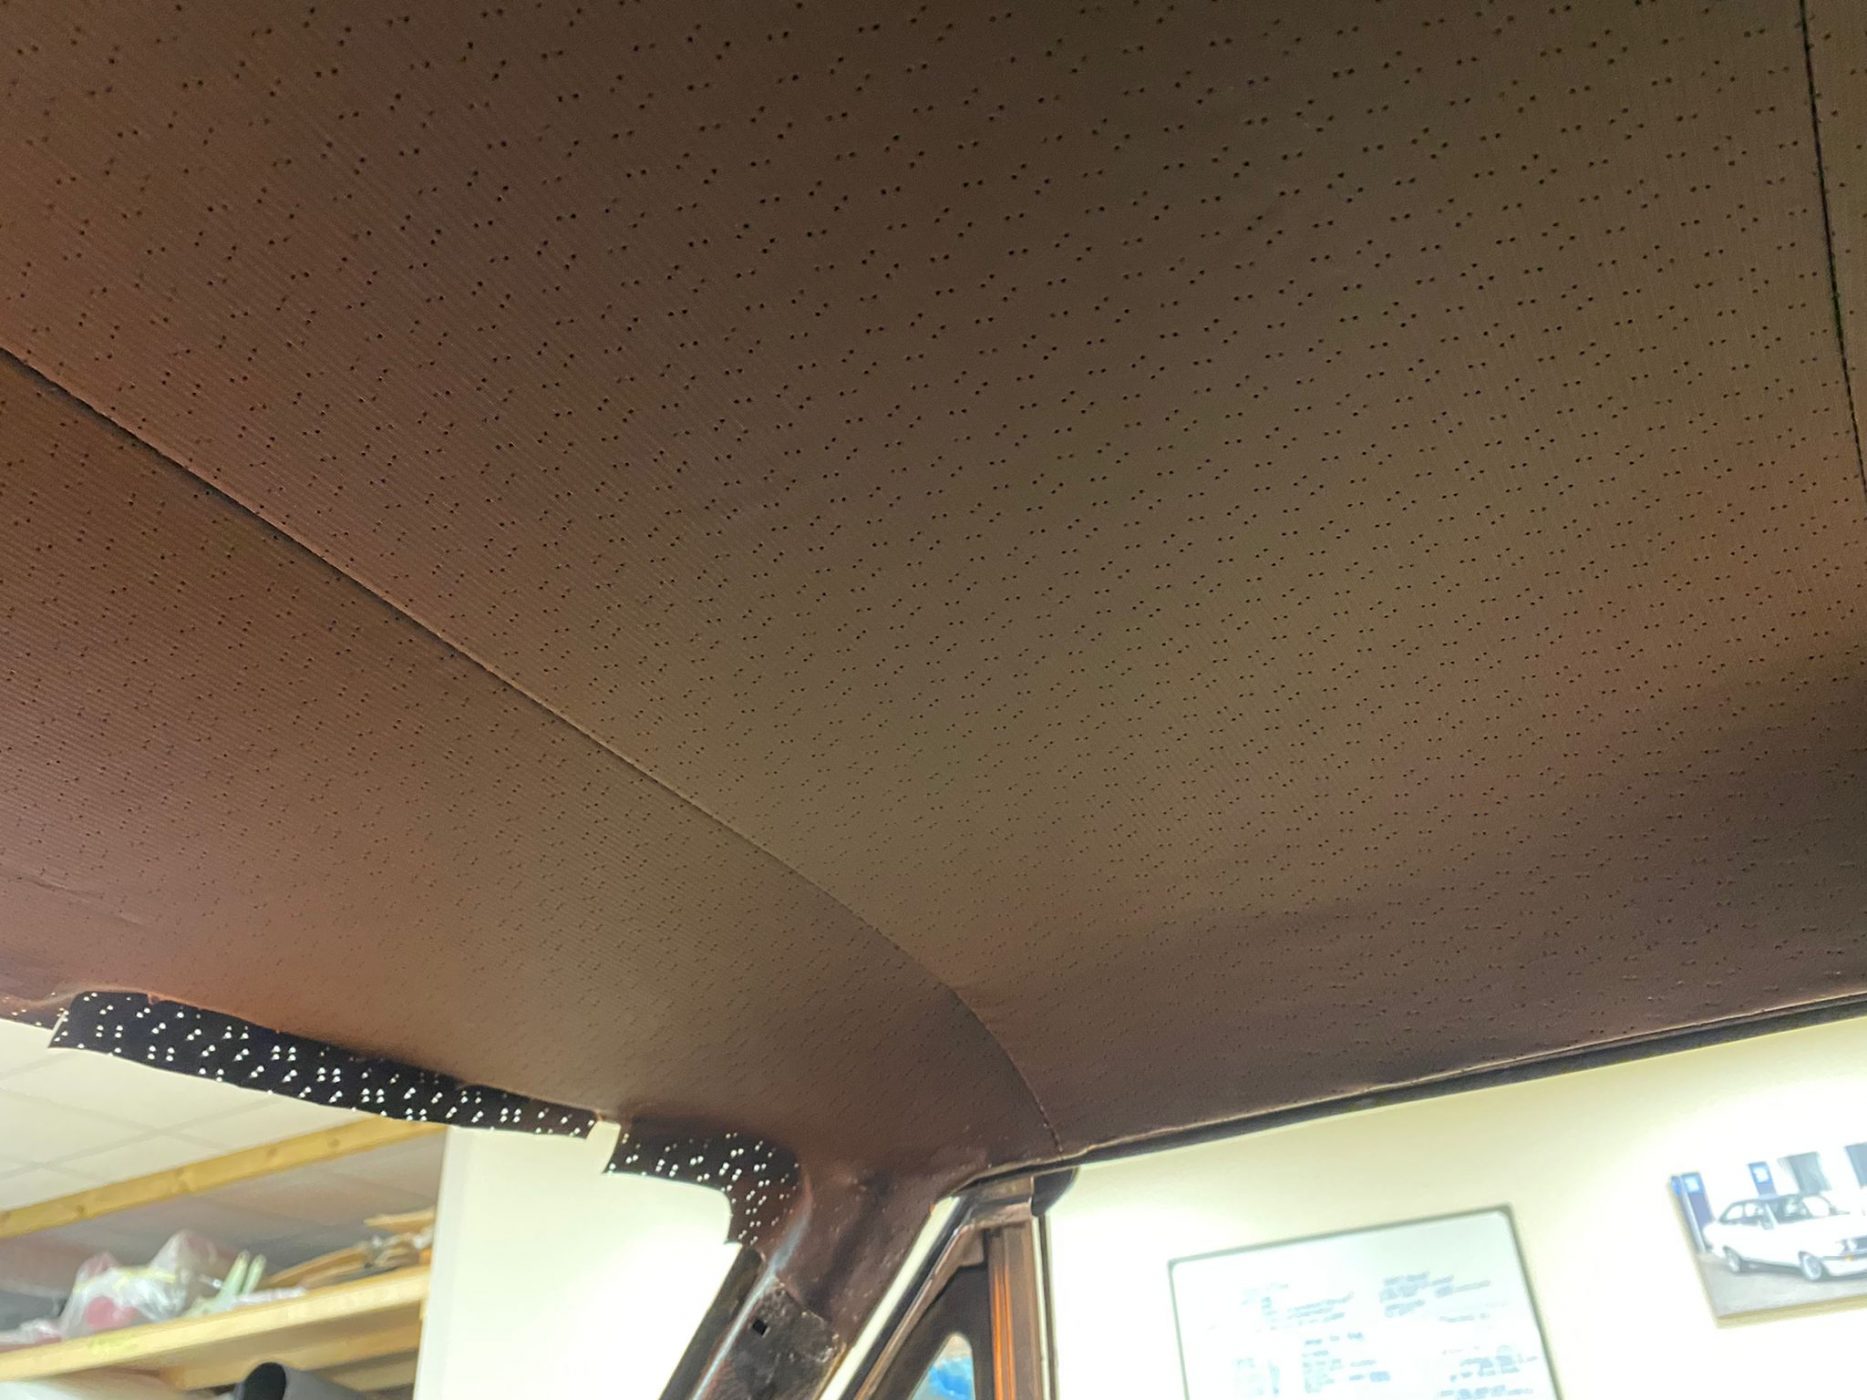
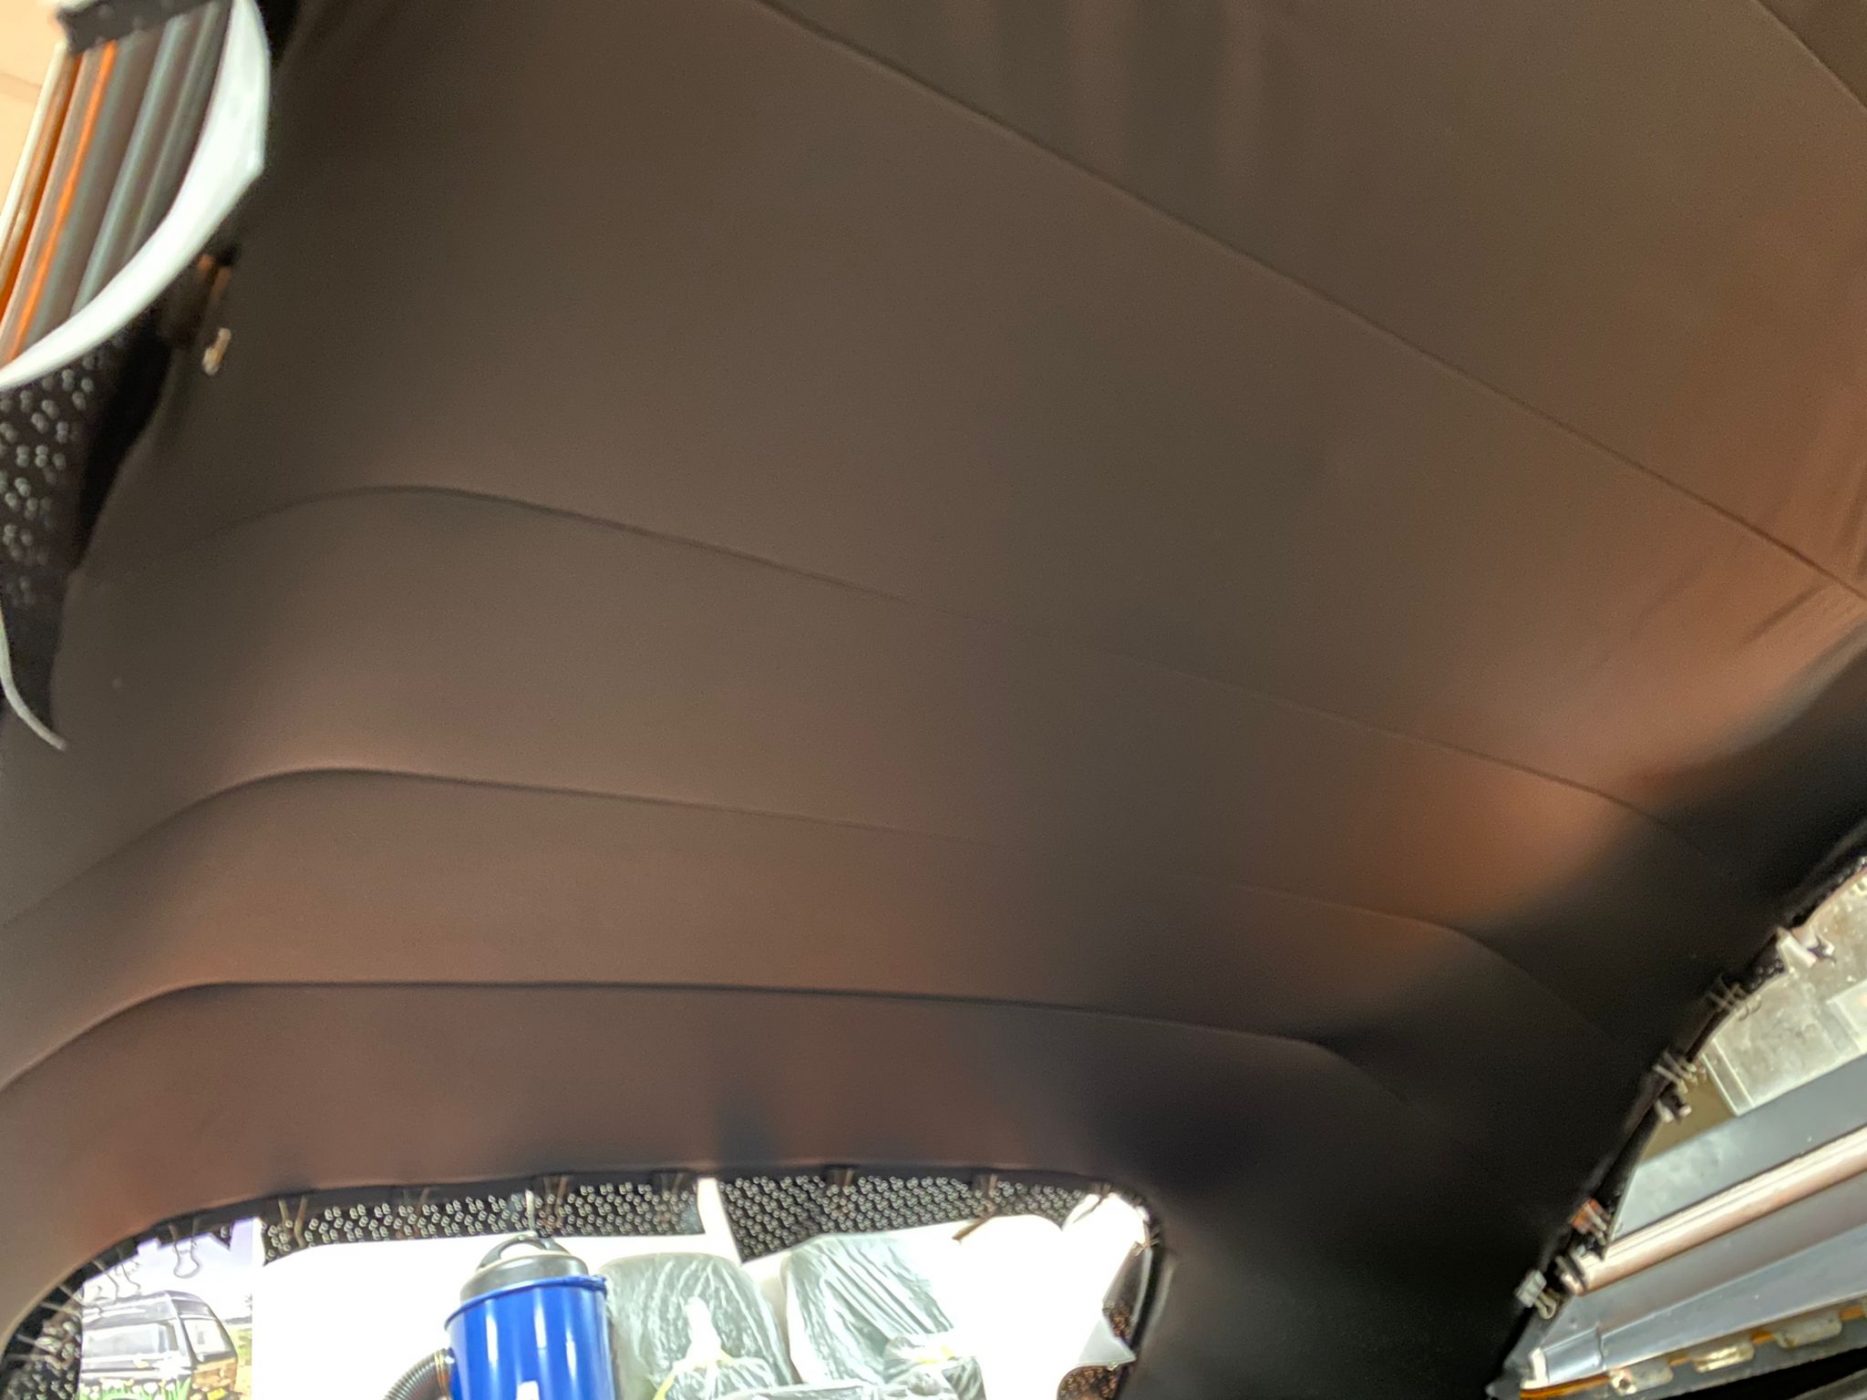
Kath, our in-house trim expert has been hard at work finishing up the install of the headliner into the 1970 Dodge Charger we have here at Bridge Classic Cars.
The headliner is such a crucial part of the interior of any car let alone a classic that its fit and finish must be as close to perfect as possible. Thankfully, that is what our in-house trim shop is known for. Kath has carefully stretched and secured the headliner into place to make sure that across the roof of this iconic muscle car, everything lines up.
The interior for this particular Charger is important as it must compliment the vibrant exterior colour scheme but also match the finish of the car. So, next up. Kath will be fitting the 2 piece door cars.


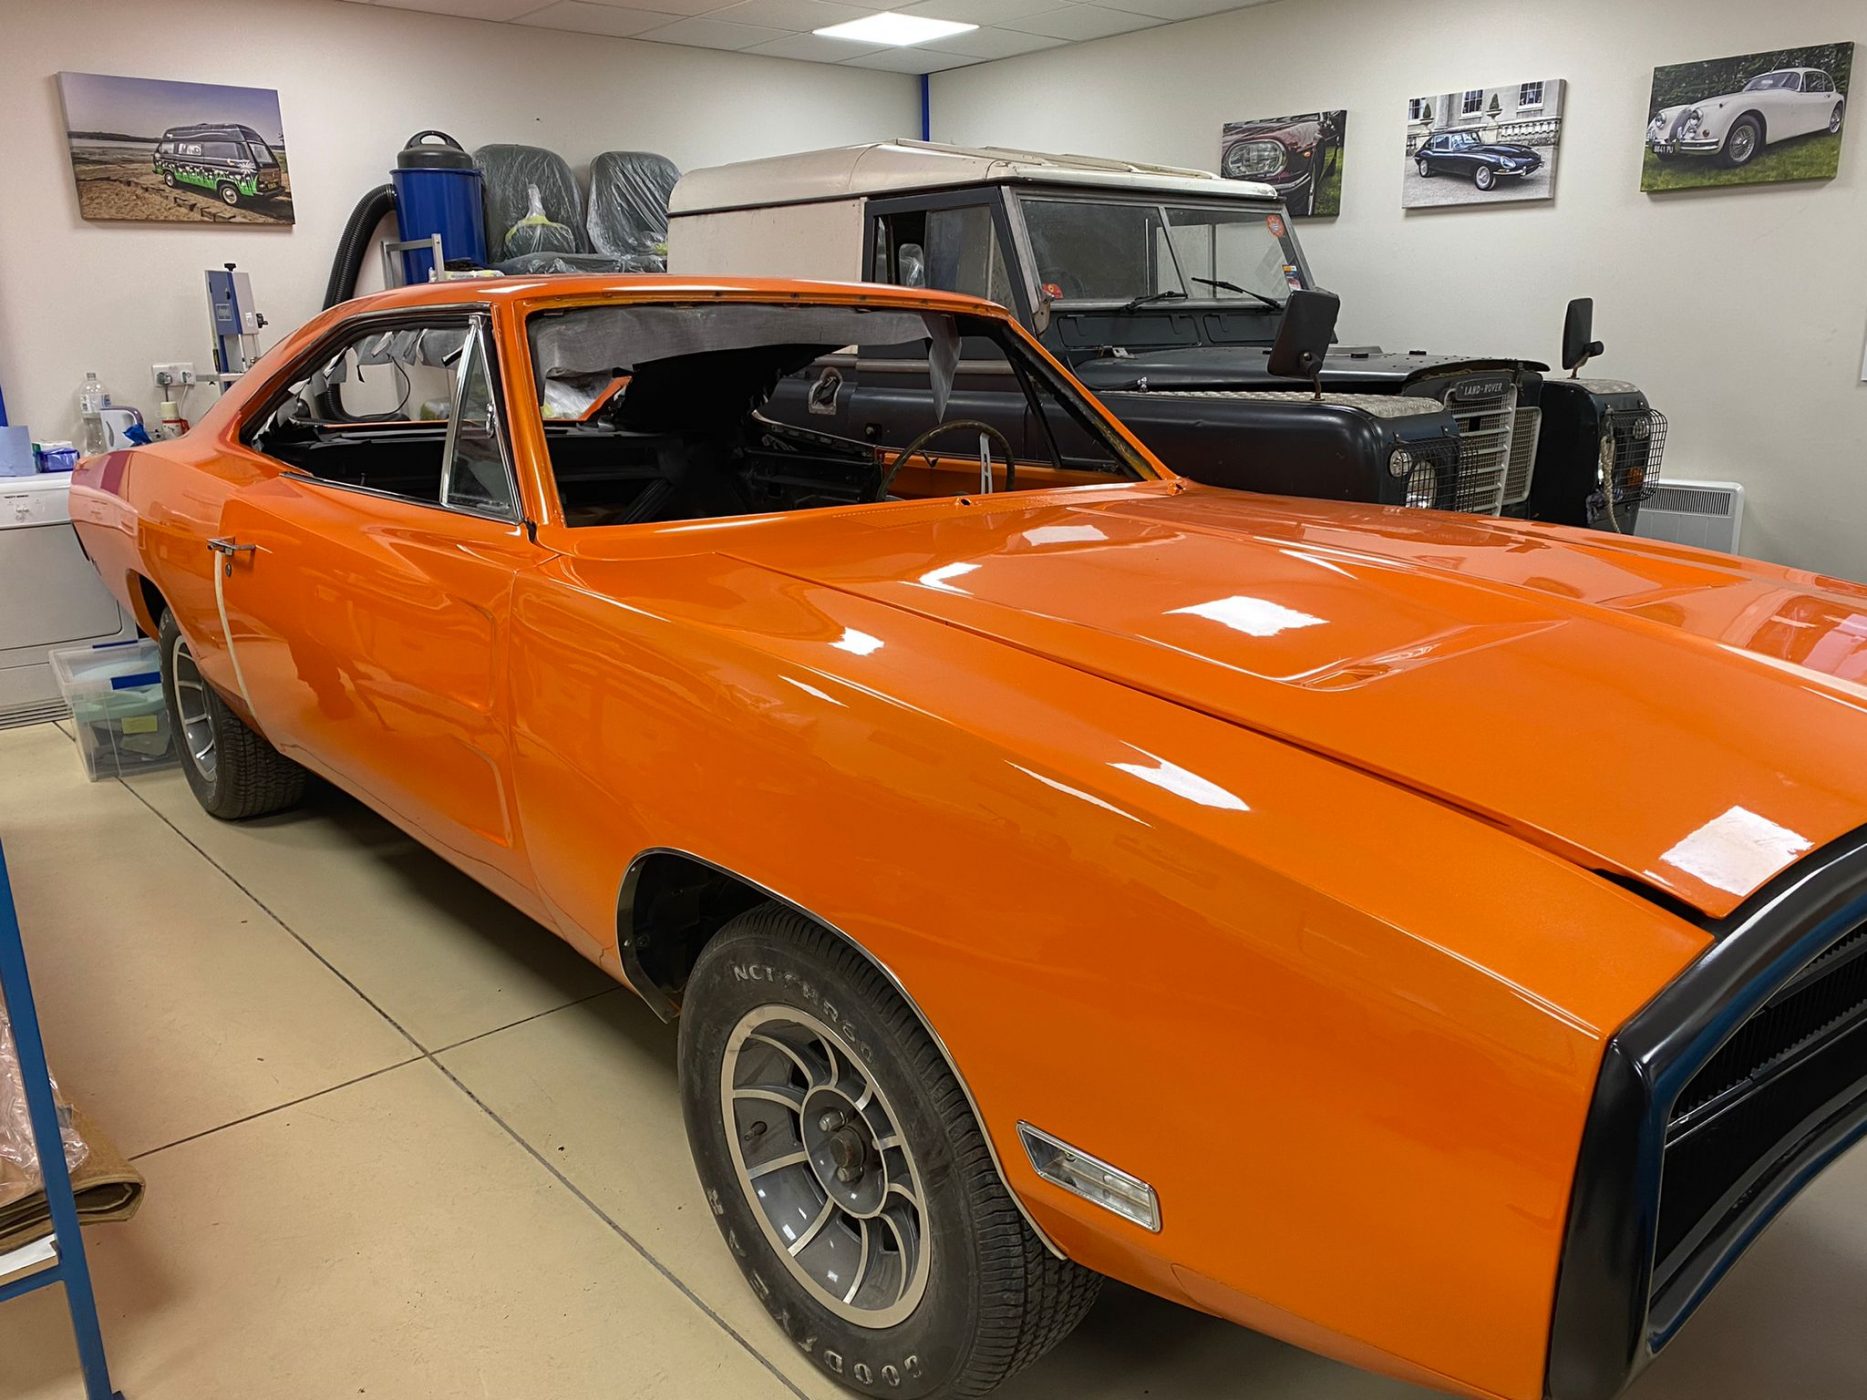
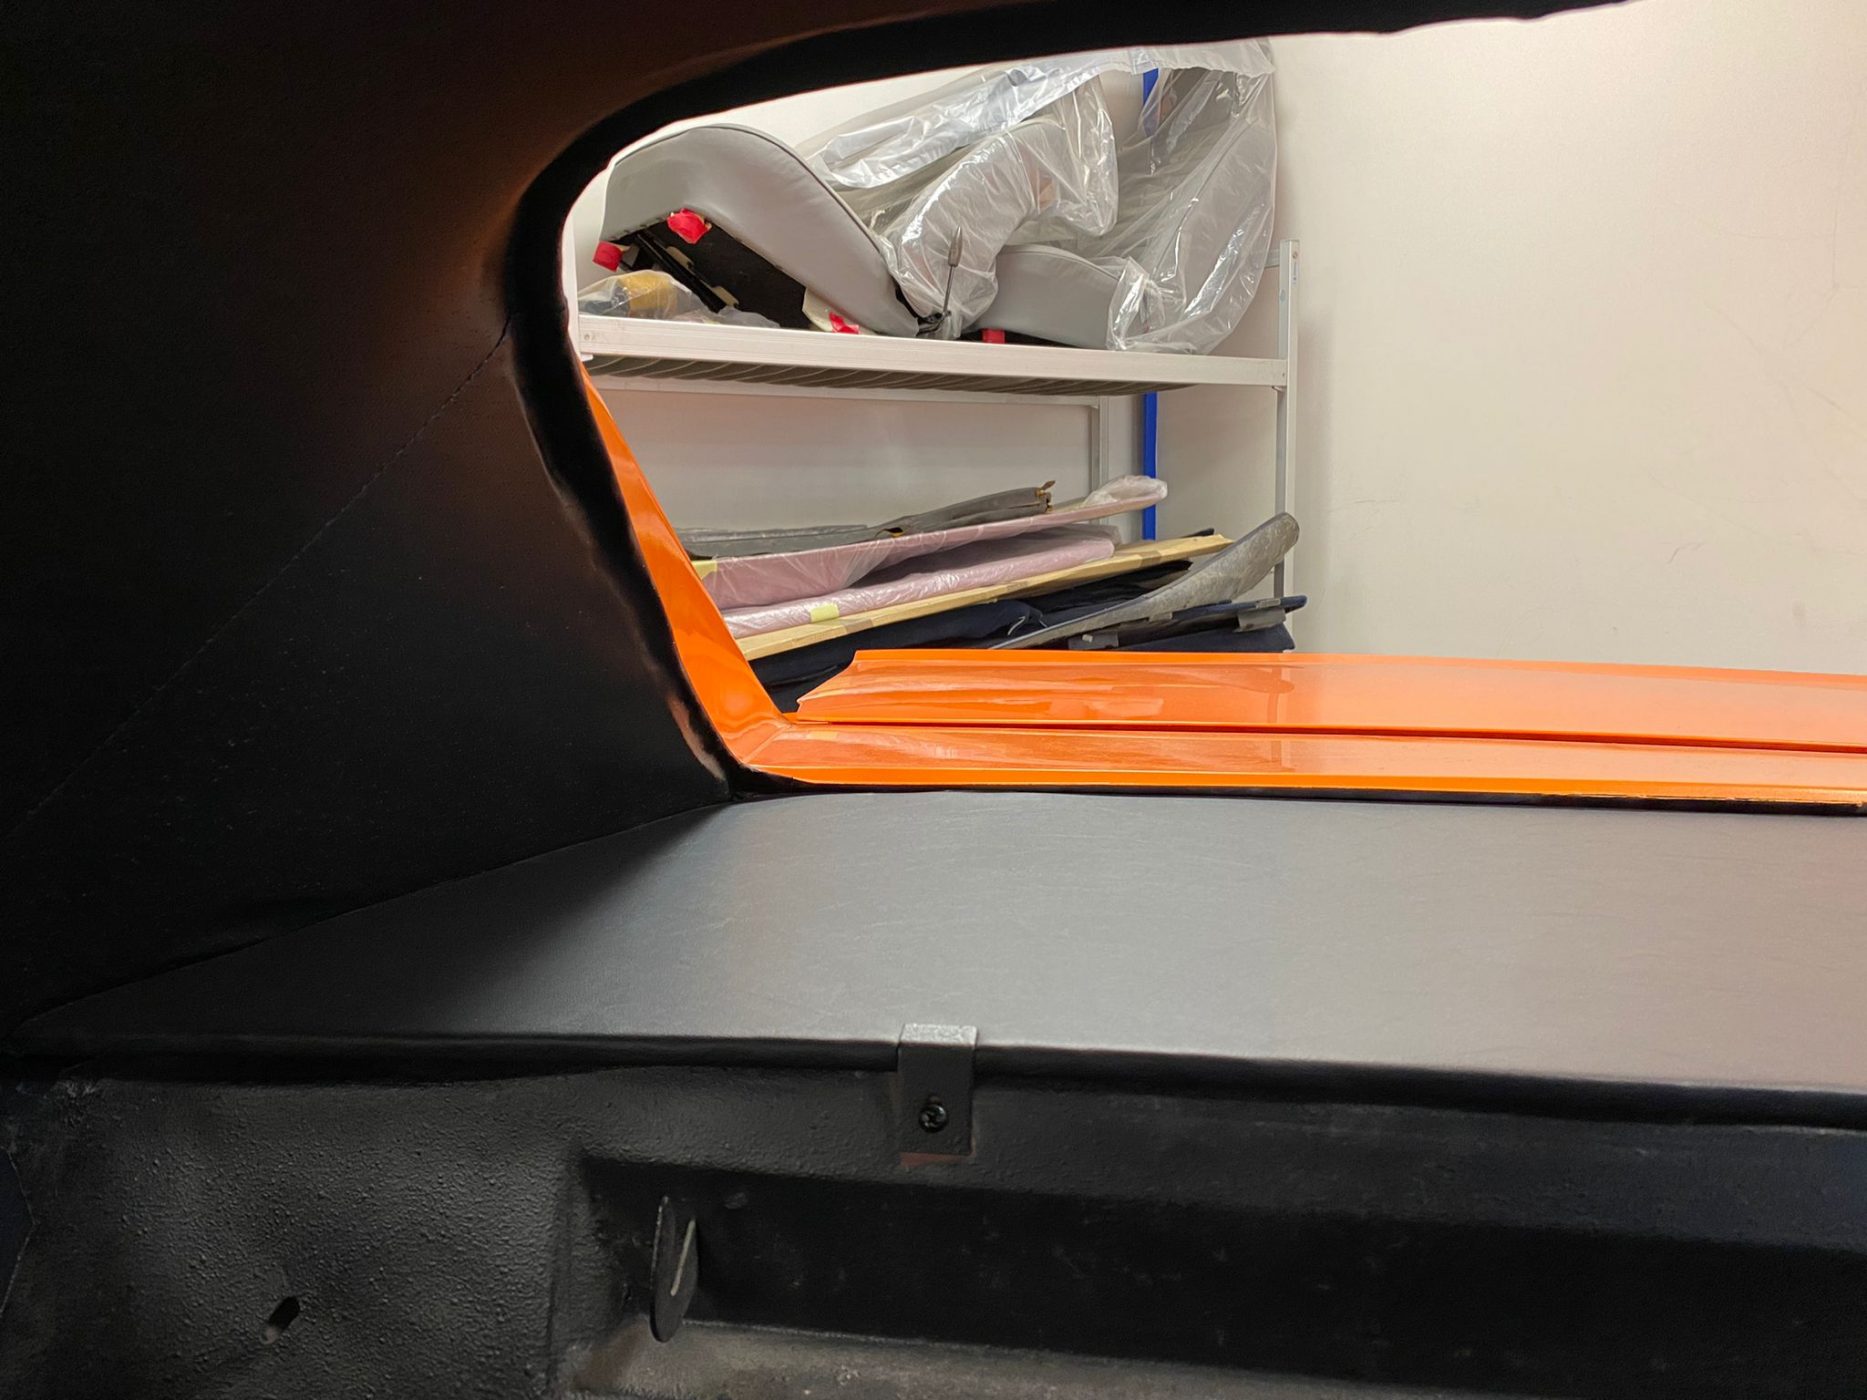
It’s been an absolute treat to have one of the most iconic muscle cars of all time in the trim shop of Bridge Classic Cars. This 1970 Dodge Charger. The 2nd generation Chargers are without a doubt, one of the best-looking muscle cars built.
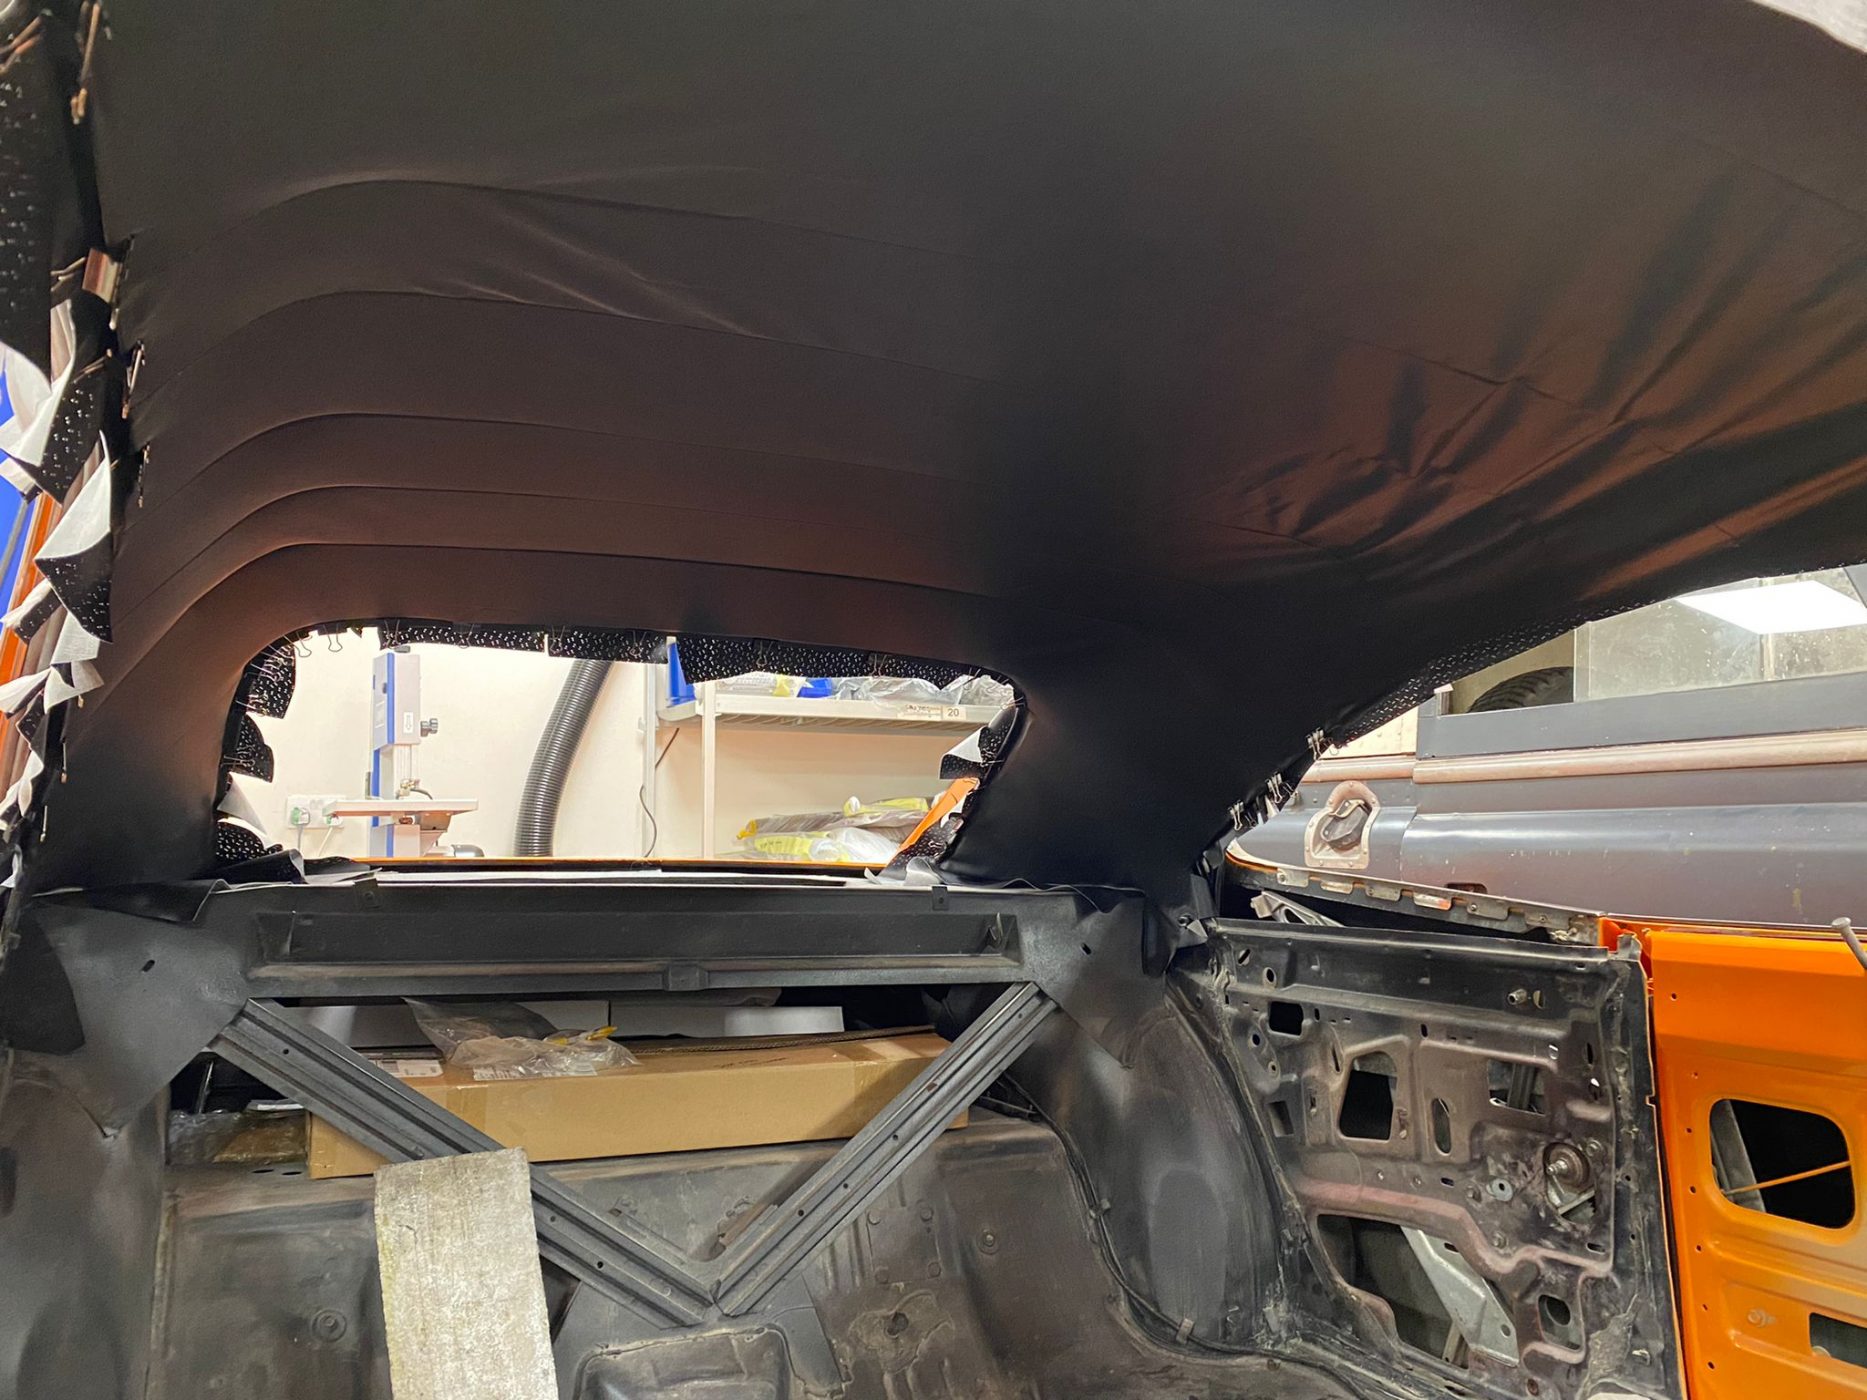
This particular 1970 Charger is in with our expert in-house trim team to be fitted out with a brand new interior. First up, Kath began to fit the headliner to the Charger. Covering such an expanse in fabric can be daunting, but for the Bridge Classic team, it’s not a problem. Working through the car methodically allowed Kath to stretch and pull the headliner into shape and give it the best finish possible.
Each of the ribs was carefully moved into its position millimetre by millimetre to ensure it was level and square. These spars allow the fabric some element of give but also when they are correctly installed, gives the best finish with no ripples or waves.
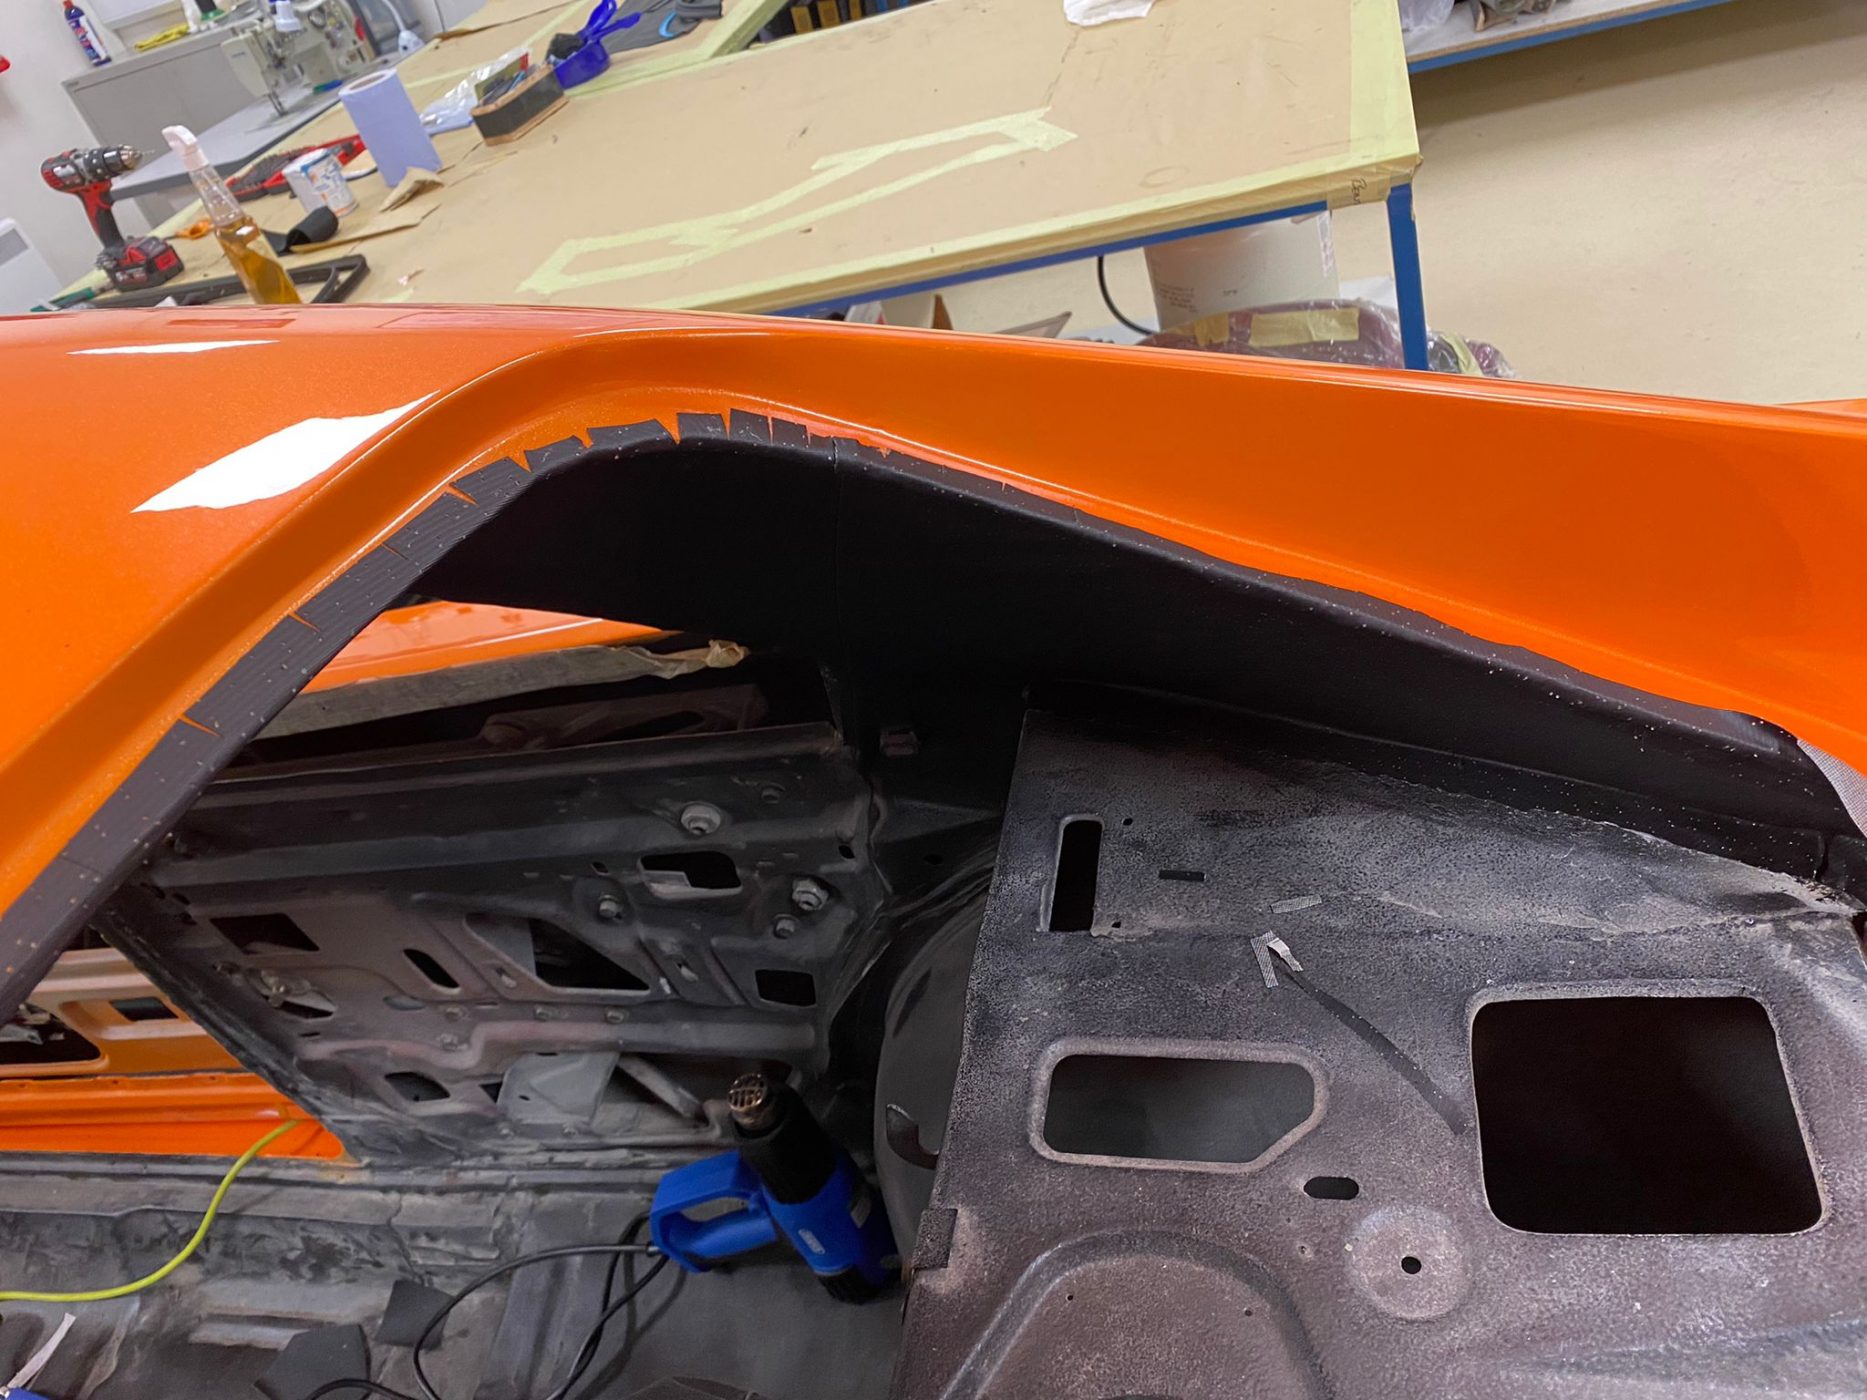
Whilst installing the headliner, Kath did note a small area of corrosion on the shell by the back window. It had been treated and wasn’t structural. In any case, we always let our clients know and suggest a course of action. At this time, it will be underneath the headliner. As said, it’s not in a structural location, it has been treated and on inspection by our body shop team, it is perfectly fine for years to come.
Updates on the rest of the interior will be up very soon so keep an eye out on the Bridge Classic Cars blog.
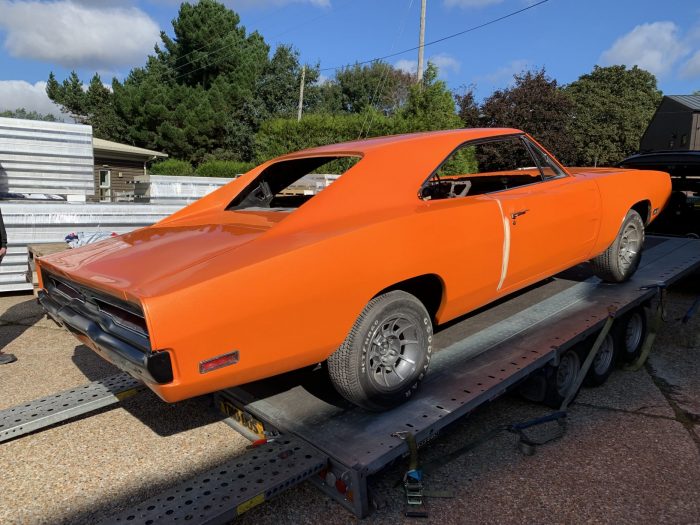
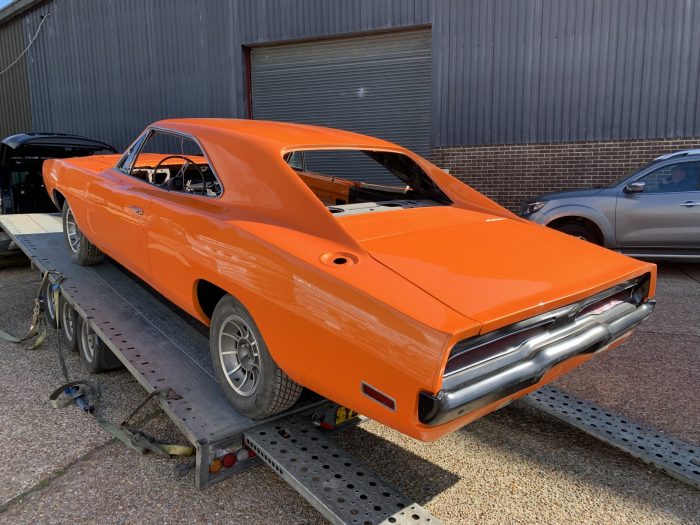
Just arrived at Bridge Classic Cars is this gorgeous 1970 Dodge Charger for interior fit out.
Expect to see more of this iconic second-generation Charger on our blog page!
